JEGS 15802 Carburetor Installation Instructions TCS5139 X 555
User Manual: TCS5139-X
Open the PDF directly: View PDF ![]() .
.
Page Count: 10
1-800-345-4545 jegs.com
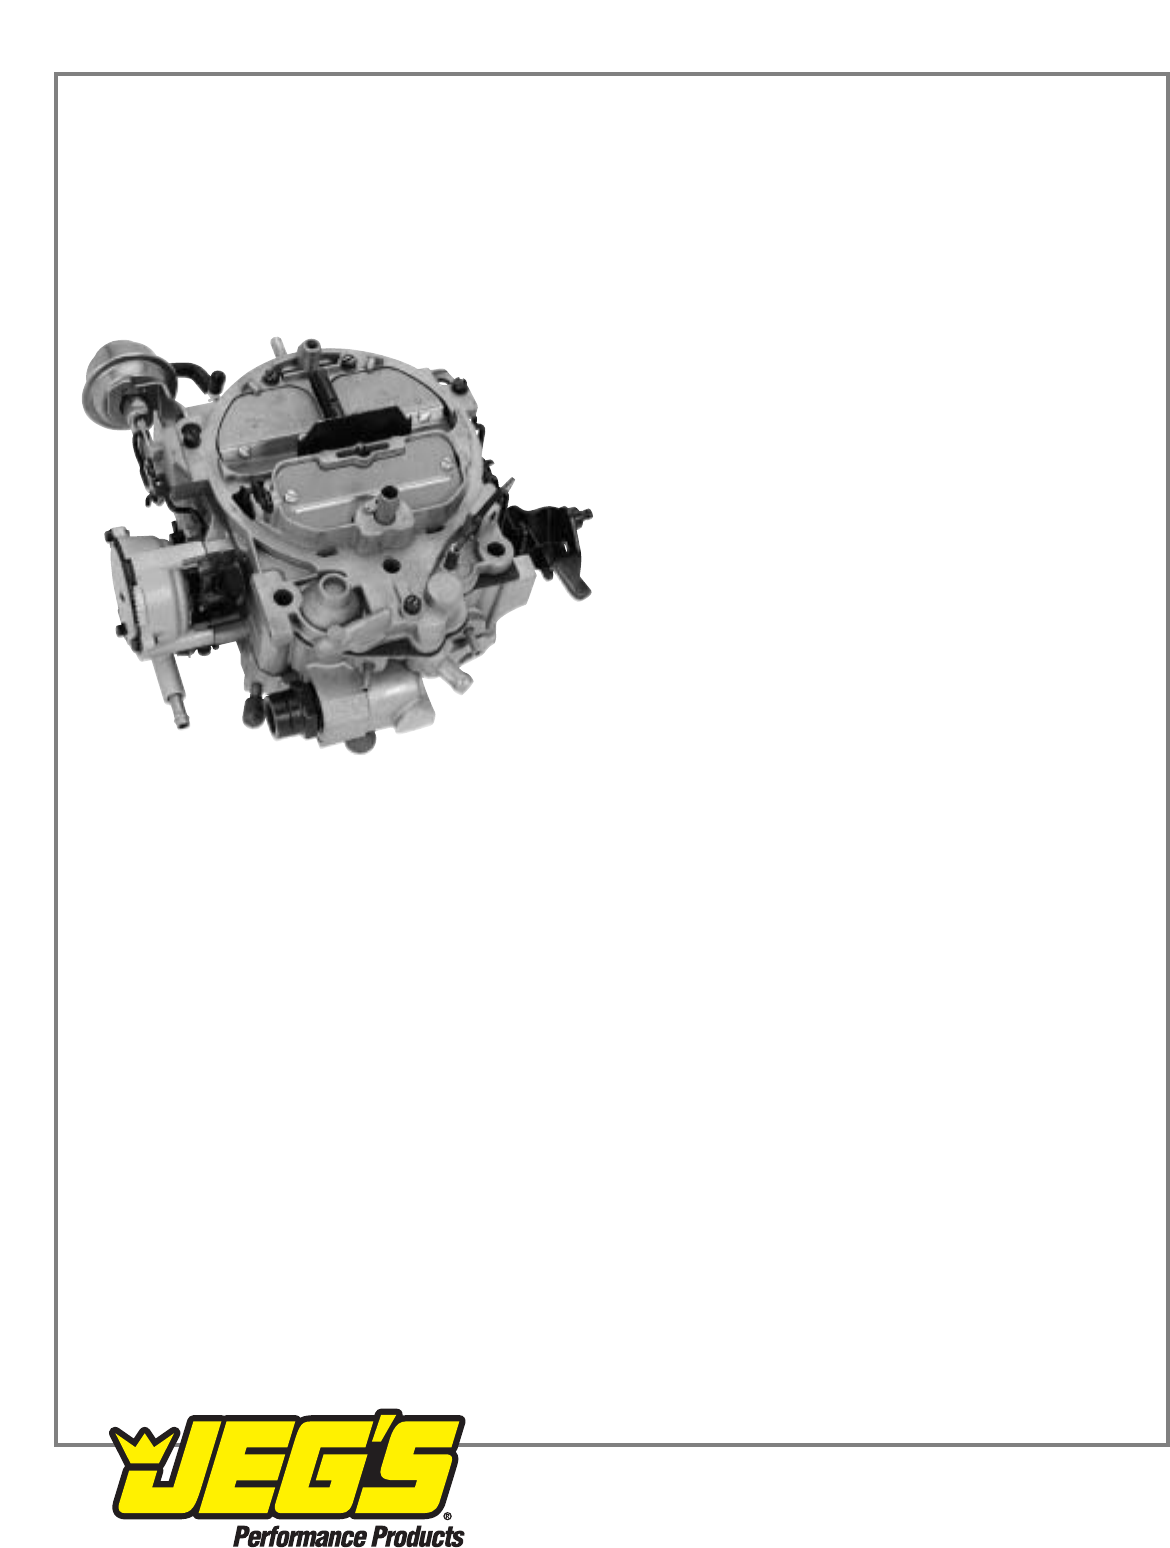
Installation Instructions for 15800-05
Remanufactured Universal Performance Quadrajet Carburetors
15800, 15801, 15805 with Electric Choke
15802, 15803 with Divorced Choke
15804 with Climatic Choke
Version 3.0, Updated 07/01/05
15804
Table of Contents
1Thank You For Your Purchase
2A Word About Universal Carburetors
2Carburetor Fuel Curve Information
3Who To Call For Information
3Before You Get Started
3A Last Piece Of Advice
3Carburetor Removal
4Before You Start The Installation Procedures
4Fuel System Purge
5Carburetor Installation
5Electric Choke Information
6Idle Adjustments
6Parts And Systems To Consider
7Tuning Guide
8Troubleshooting Guide
10 Warranty Information
Thank you for purchasing a Jeg's Performance
Remanufactured Carburetor…
All of our performance carburetors are 100%
dynamically wet flowed before final packaging to be
shipped to our many customers. We wet flow our
carburetors to satisfy our final quality control reports
and standards. We also make the final fuel flow
adjustments to insure your carburetor is within a band
of adjustment that allows you to start and run the
engine in an effort to make the absolute final
adjustments according to the specific needs of your
engine package. Because we do not control
atmospheric conditions, altitudes, or vehicle package,
this carburetor will finally rest upon, all final
adjustments such as idle RPM, idle mixture, and
throttle “snap” response made by you.

A Word about Universal Calibrated Carburetors….
With this line of performance remanufactured
carburetors, we turn all of our expertise to designing a
carburetor assembly with a specific fuel curve that can
service the needs of a wide variety of engine packages.
However, with the universal application declaration of
this design there are engine packages in which this
carburetor assembly could require tuning and re-jetting
to properly service the fuel requirements of your
particular engine assembly. You may also own an
engine package that may require the same fuel
requirement but need custom tailoring of the dynamics
of the included fuel curve.
The vehicle that your engine package resides in has a
lot to do with the fuel curve that is in place within your
performance carburetor. For example, a 4000-pound
vehicle will require different tuning than a 2000-pound
vehicle with the same engine package using the same
style of carburetor. In the case of the remanufactured
Holley 4 BBL calibrations, please see the explanations
below for jetting and power valve selections associated
with the fuel curve calibrations of our carburetors.
Off Road Labeling and Emissions Standards
This carburetor assembly is not designed nor is it
represented to operate within the emission controlled
applications past 1974. We attach a label to the outside
of our carburetor container to insure that this carburetor
assembly is not used in violation of any or all of the
Clean Air Act. If you have any questions concerning the
applicability of this carburetor to your individual
application, please call our tech line at 1-800-345-
4545.
Carburetor Fuel Curve Information
NOTE: Please read this manual completely before
attempting to re-tailor your fuel delivery curve included
inside of this carburetor assembly. All aftermarket parts
and accessories manufactured for use in a Rochester
Quadrajet Carburetor will work in your Jeg's
Remanufactured Performance Carburetor.
The fuel curve information for the 15800 is as
follows:
This fuel curve will properly service the fuel
requirements for a small block engine up to 400 cubic
inch engines. It can supply enough fuel to support
engines up to 385 H.P. and RPM levels of 6000. The
carburetor can be jetted for higher fuel requirements to
reach higher horsepower and RPM levels. The vehicle
application includes vehicles from 2500 lbs. up to 3000
lbs. A heavier or lighter vehicle may require re-
calibration. Camshafts up to 228 degrees of duration at
.050” lift and dual plane or single plane manifolds are
also compatible. These carburetors are not designed to
be used in dual carburetor applications and will require
dramatic enrichment modifications when used with
nitrous. Main Jet .076, Metering Rods: Primary 130x49,
Secondary 130x102.
The fuel curve information for the 15801 is as
follows:
This fuel curve will properly service the fuel
requirements for a big block engine up to 460 cubic
inch engines. It can supply enough fuel to support
engines up to 430 H.P. and RPM levels of 5500. The
carburetor can be jetted for higher fuel requirements to
reach higher horsepower and RPM levels. The vehicle
application includes vehicles from 3000 lbs. up to 3600
lbs. A heavier or lighter vehicle may require re-
calibration. Camshafts up to 228 degrees of duration at
.050” lift and dual plane or single plane manifolds are
also compatible. These carburetors are not designed to
be used in dual carburetor applications and will require
dramatic enrichment modifications when used with
nitrous. Main Jet .078, Metering Rods: Primary 130x49,
Secondary 130x101.
Fuel Curve Information for Part Numbers: 15802,
15803, 15804, and 15805
The fuel curve information and application notes
for the 15802 is as follows:
750CFM, 1966 through 1973 327 through 454 engines,
Chevrolet bowl entrance and linkage style, divorced
choke, compatible with EGR, Main Jet .069, Metering
Rods: Primary -36B, Secondary -DR.
The fuel curve information and application notes
for the 15803 is as follows:
750CFM, 1974 through 1978 350 through 454 engines,
Chevrolet bowl entrance and linkage style, divorced
choke, compatible with EGR, Main Jet .069, Metering
Rods: Primary -36B, Secondary -DR.
The fuel curve information and application notes
for the 15804 is as follows:
750CFM, 1975 through 1985 305 through 454 engines,
Chevrolet bowl entrance and linkage style, climatic
choke, compatible with EGR, Main Jet .073, Metering
Rods: Primary -50M, Secondary -DR.
Not for use with computer controlled vehicles.
The fuel curve information and application notes
for the 15805 is as follows:
750CFM, 1980 through 1989 305 through 350 truck
engines, Chevrolet bowl entrance and linkage style,
electric choke, compatible with EGR, Main Jet .073,
Metering Rods: Primary -50M, Secondary -DR.
Not for use with computer controlled vehicles.
2

Camshafts up to 228 degrees of duration at .050” lift
and dual or single plane manifolds are also compatible.
These carburetors are not designed to be used in dual
carburetor applications and will require dramatic
enrichment modifications when used with nitrous,
Who to Call With Your Questions
For more information please call the Jeg's tech line at
1-800-345-4545, or consult one of the many quality
books and manuals available today from your local
bookstore, or parts supplier. When calling for
assistance, please have your application information,
carburetor part number, and specific issue ready for the
technician. Having your information prepared is a big
help when interfacing with our technicians.
Before you get started
Caution: This Universal Performance Carburetor has a
fuel curve calibration associated with a mildly modified
engine. As with all universal calibrations, some
adjustments and/or tuning is required for ultimate
performance. Please read this manual in its entirety
before attempting the installation, tuning, and usage of
this carburetor.
The following precautions will reduce the chance for
mishap, property damage, vehicular damage, AND
PERSONAL INJURY. Please follow these installation
instructions and safety precautions before attempting
the installation of your Tomco Universal Performance
Carburetor.
1. Disconnect the negative terminal of the battery and
store it in such a way as to insulate it from
contacting any other metal surface until your
installation is complete.
2. Have a fire extinguisher ready at all times during
the installation procedure.
3. Do not smoke or perform this installation
procedure close to any open flame or fire source.
4. Perform this installation procedure in a well lit, and
well-ventilated area. Stay away from confined
spaces in which flammable fluids or fumes can
collect.
5. Always protect your eyes, and your person from
any and all automotive chemicals such as
gasoline, engine cleaners, etc.
6. Start this installation procedure only after the
engine and the engine compartment is cool.
7. Never attempt working on your fuel system without
the proper tools.
A Last Piece of Advice….
In so many situations related to fuel system
modification and service, the fuel-mixing device often
receives the blame for many ills that are not fuel system
related. In fact, more often than not, any number of
underhood systems when compromised create “fuel
system like” failure signals. Systems like the ignition,
valvetrain, carb spacers, and component compatibility
systems all create conditions in a primary failure
situation that also fail the carburetor's ability to function
properly. If you have modified any other underhood
system, please check to verify proper operations of
each of those systems before you install your new
carburetor. If you have modified any of these systems
and you do not know how they can or will affect the
performance of your carburetor, please call our tech
line.
If after the installation of your new Jeg's carburetor, you
find that your performance expectations are not met, or
your vehicle is running worse that it did before, please
stop and call our technicians.
Anew carburetor is the worst diagnostic tool in
your toolbox.
Carburetor Removal
Take the time to create a clean and safe working area
before attempting this removal procedure. Have some
containers ready to collect and properly store all
components and small parts during the installation of
your new carburetor. In case of trouble do not destroy
your original carburetor box. Also, do not attempt any
other modification before completing and verifying your
new carburetor is functioning properly.
Step 1…. Negative battery Cable
Disconnect the negative battery cable before any work
on the fuel system starts.
Step 2…. Vacuum Lines
Carefully disconnect all vacuum lines from your
existing carburetor and mark each line with the
included labels.
Step 3…. Throttle Linkage and Cables
Use the proper tools and remove all clips, springs,
trans kick down assemblies, and cruise control cables.
Take a picture, create a sketch, or label each
component assembly during the disassembly period to
insure that you can properly re-install each of these
components and assemblies.
Step 4…. Disconnect the choke assembly.
There are several styles of choke mechanisms in use
on vehicles. Please consult your service manual if you
have questions concerning the style of choke you are
working with and familiarize yourself with any
specialized techniques associated with the removal of
the choke.
3

Step 5…. Fuel lines.
NOTE: Before loosening any fuel line or performing
any work procedure on a fuel line, take time to
insure that your engine is cool. Validate that there
is no open flame, and the ventilation of your work
area is sufficient. Extinguish all sources of flame
and move the fire extinguisher into a ready
position that would allow easy access to it if a fire
were to break out.
5a… Place rags under the ends of all fuel lines that will
be disconnected to collect dripping and leaking fuel. Do
not allow for puddling or collection of fuel in, around, or
under the carburetor position upon or inside the intake
manifold.
5b... On applications with threaded fittings, use 2
wrenches and remove the fuel lines following proper
fuel fitting removal/tightening techniques. Please refer
to your shop manual for proper fuel line removal
techniques. When a barbed fuel line fitting has been
used, remove the fuel line clamp and disconnect the
fuel line.
Your new carburetor utilizes a threaded type inlet fitting,
therefore it requires some modifications to accept your
barbed fuel line system. NEVER use a barbed fuel
fitting in conjunction with an inverted flare inlet fitting.
5c... Remove the carburetor flange hardware, and lift
the old carburetor from the intake manifold. Once the
carburetor pad on the intake manifold is exposed and
open, please cover this opening with a rag therefore
keeping debris, and contaminants out of the inside of
your engine.
5d… With a gasket scraper and a cleaning agent,
remove all gasket material and sealant residue on the
carburetor-mounting pad of the intake manifold.
Note: Take care to insure no debris and/or small
parts fall into the intake manifold. Any foreign
materials or small parts allowed to enter the engine
can cause catastrophic engine failure.
Stuff to Look For Before Starting The Installation
Procedure Of Your Jeg's Carburetor…
You have now completed the removal procedure of
your old carburetor. Take this opportunity to double-
check the following areas of concern in preparation for
the installation of your new carburetor.
1. Check for any stripped or cross-threaded fasteners
on or around the carburetor-mounting pad of the
intake manifold.
2. Insure the carburetor-mounting pad of the intake
manifold is clean of old gasket material and
sealant residue.
3. Insure that the choke mechanism of the new
carburetor is compatible with the style of choke
mechanism currently in place on the manifold. Do
not install the carburetor if the choke mechanism
on the manifold cannot accommodate the choke
style of your new carburetor.
4. Check inside the plenum area of your intake
manifold to insure there is no debris or small parts
that could enter and damage your engine. Clean
all areas on and inside the plenum area of the
manifold before installing your new carburetor.
5. Inspect all rubber vacuum lines for signs of
cracking or old age. Replace these lines as
necessary.
6. If you are installing a new manifold at the time of
installation of your new carburetor, verify that the
linkage of the carburetor does not come in contact
with any portion of the manifold casting. Double-
check all fittings, fastener torque values, and
distributor positioning before attempting to run your
engine package.
Before You Run Your Jeg's Carburetor You Must
Purge The Fuel System To Insure A Clean Supply Of
Fuel To The Carburetor
It is very important to rid your fuel system of existing
dirt, rust and debris that has accumulated in your fuel
pump, fuel lines, and fuel delivery flow path over the
time you have been driving your vehicle. An empty fuel
bowl on a new carburetor is a prime candidate for
contamination on initial fire up once a new carburetor
has been installed. 80% of new carburetor failures are
due primarily to contamination failing some, or all of the
fuel flow (i.e. jet wells, needle and seat assy., etc.)
circuitry within the carburetor.
The reason for this condition lies in the way the fuel
pump delivers fuel to the carburetor. During normal
operation, the fuel pump diaphragm moves only
enough to keep the supply line feeding the carburetor
full. When an empty fuel line and an empty fuel bowl on
a carburetor is sensed, the fuel pump will not only
deliver high amounts of fuel at a high rate, the
diaphragm within the fuel pump also stretches more
than it has in some time. All of the contaminates stuck
to the inside of the fuel lines, and across the face of the
fuel pump diaphragm break free and head right into
that new and clean of contaminates float chamber. This
is a very undesirable situation and can cause a failure
situation with the carburetor.
Fuel System Purge Procedure
1. Reconnect your battery cable(s).
2. Disable your ignition system so that you can crank
the engine without concern of spark energy going
through the ignition system.
4

3. With a mechanical fuel pump, place the end of the
fuel line in an unbreakable container that is not
sensitive to gasoline and crank the engine for 7 to
10 seconds, or until approximately one (1) pint of
fuel has been pumped by the fuel pump into the
container. Repeat the procedure until the fuel
within the container appears to be clean.
When you have an electric fuel pump, no cranking is
required, just turning on the ignition switch should
be enough to cause the pump to come on. In
some applications, you may need to bypass the oil
pressure default switch to run the fuel pump.
4. Reconnect the ignition system and reconnect the
oil pressure default switch. Insure that all electrical
systems are connected properly.
Carburetor Installation
1. Position the included base gasket onto the intake
manifold carburetor pad. Verify a good fit, and take
care to inspect the mating of the plenum shape
and the perimeter contour of the gasket to insure
no open sections or potential vacuum leaks.
2. Install your Jeg's carburetor over the gasket and
onto the intake manifold again taking time to insure
a good match of perimeter shape of the
manifold/gasket and the carburetor base. Torque
the carburetor hold down bolts and nuts to 60 inch
pounds.
3. Reconnect the fuel line to the bowl fitting on the
front of the carburetor. It is very important to start
this fitting by hand first before attempting to use a
wrench for final tightening of the fuel line. DO NOT
use any sealant on the fuel line fitting. This fitting
uses an inverted flare to mate to the incoming fuel
line and proper seal is made only on the flare, not
with the threads of the fitting. DO NOT try to fix a
leak here by adding a sealant or by high torque
loads upon the fitting itself.
4. For those vehicles that have any form of inline fuel
filters, you must replace them at this time.
5. Reconnect all vacuum lines, and other connections
like choke linkage, choke electrical wires (if
applicable) and throttle linkage, which includes
throttle return springs at this time.
6. Verify all linkage connections by operating the
throttle linkage in it's full travel making sure that
the throttle plates move unobstructed to a full open
position.
Take care to insure there is no interference with any
portion of the intake manifold casting, or any other
components like carb spacers, etc that may take place
during the movement of the linkage. Manually operate
the linkage several times to insure that there is nothing
binding or interfering with throttle operation.
NOTE: The proper installation of a vehicles throttle
linkage is critical to the safe operation of your
vehicle. Failure to properly install your carburetor
and/or transmission kickdown linkage can result in
uncontrolled engine operation, which could cause
personal injury, property damage, or even death.
When Installing An Electric Choke On A Vehicle
That Did Not Come With One Originally…
The Rochester Quadrajet Carburetor electric choke is
a “single terminal, internal ground” style of choke cap.
This means that for your electric choke to function
properly a couple of very important procedures and
conditions must be in place to insure proper choke
operation.
If Your Vehicle Came With An Electric Choke From
The Factory…
ANY REMOVAL OF THE GROUND STRAPS FROM
THE ENGINE TO THE VEHICLE CHASSIS WILL
HINDER THE OPERATION OF THE ELECTRIC
CHOKE ON YOUR ROCHESTER QUADRAJET
FROM FUNCTIONING.
The reason for this lies in the fact that the ground
portion of the choke circuit is completed through the
housing of the carburetor through the ground strap of
the engine to the vehicle chassis. Many times an extra
ground strap is required to insure proper operation of
the electric choke when installing your carburetor onto
an aluminum intake manifold. This ground strap is
installed at one of the carburetor attachment studs and
run to the vehicle chassis or proper ground station.
If Your Vehicle Did Not Come With An Electric
Choke From The Factory…
To install the electric choke equipped carburetor onto a
vehicle that did not originally come with an electric
choke a “hot” wire (12 volts) must be run to the electric
choke cap. The source of this hot wire must be an
“engine crank only” source. This is to say that the
source of your 12 volts must only be “on” when the
ignition switch is in the engine cranking only position.
Any other source of voltage will harm the choke and
possibly cause damage to your carburetor assembly, or
your vehicle.
Before You Drive Down The Street
Every effort has been made to insure that your Jeg's
carburetor will start and run through the adjustments
that we make on the flow bench during the quality
control check of the carburetor assembly. However,
due to altitudes, and specific climatic conditions
combined with engine package configuration, some
fine-tuning adjustments may be needed.
5

Idle Adjustments
Here are the idle adjustment areas that may require
some minor tuning for proper interface within your
particular engine package.
Idle Speed Adjustment Screw is the large screw on
the linkage side of the carburetor. Although we preset
idle speed here at the factory, take care to insure that
your idle speed (RPM) is set properly for your region
and engine package. Depending on the engine
package, engine idle speeds are best kept in the range
of 750 to 1000 RPM. This adjustment must be made
with the engine hot and all other systems normalized.
Idle Mixture Adjustment Screws are the screws that
face forward on the carburetor and are installed in the
base plate. The easiest way to adjust these screws and
your idle mixture is via the lean drop method. This is
performed when the engine is warm and all other
engine systems have normalized. Through 1/8 turns of
your screwdriver, find the adjustment point in which the
idle raises to the highest point before starting to
stumble. Once the engine begins to stumble return the
idle screw to the last position. Work between the two
idle adjustment screws to insure a balanced
adjustment and a smooth idle.
Fast Idle Adjustment is also set here at the factory
and is critical to engine performance during cold start
and normalization time periods. Proper fast idle speeds
should be in the range of 1600 to 2000 RPM. This
adjustment is made by setting the fast-idle linkage on
the highest position on the linkage and starting the
engine in neutral and when warm. All adjustments
should be made in 200 RPM increments until you are
satisfied with the RPM level.
Parts and Systems to Consider…..
This section is designed to cover some basic systems
and how they cause your carburetor to not always act
the way you would like it to. Also, we will discuss how
these systems can enhance the operation of your
carburetor and therefore your engine package as a
whole.
Fuel Pressure
The desired fuel pressure setting for ultimate
performance is 4 to 6 psi flowing. Quadrajet
carburetors can operate successfully at lower
pressures, however drivability can suffer under oblique
throttle positions such as snap to wide-open throttle
positions. The Jeg's Performance quadrajet is
designed to interface with stock style fuel pumps, stock
fuel tanks, supply lines, and pressures as low as 2 psi.
Spark Timing
Spark timing is a great way to tune an engine. With
octane differences and fuel additives, spark timing can
be an effective tuning method. As your octane rating
increases, so can your total timing increase. Not only
can you adjust the total timing figure, but you can also
tailor the timing curve to fine-tune the shape of the
timing introduction for your engine package. As your air
to fuel ratio is increased or decreased timing must be
adjusted. All jetting adjustments can be accompanied
with a timing adjustment.
Ignition System
The engine system that can best be described, as a
direct dependant sub system to the carburetor is the
ignition system. Any and all upgrades to the ignition
system can only help improve the ability of the
carburetor to operate properly. Remember, the
carburetor cannot process a fuel signal until it senses a
demand signal from the engine. If the ignition system is
weak and or in dis-repair, the fuel signal will always be
compromised.
Performance Camshafts
Many times the camshaft is called the heart of the
engine. The location of the timing events as
manipulated by the manufactured specifications of the
camshaft set many operational characteristics of your
engine. In relation to the carburetor, the camshaft
controls intake manifold pressure signals that can
dramatically affect the operation of a carburetor. Large
duration, or short lobe center camshafts drastically
affect idle characteristics. With the Quadrajet, the small
primary bores are less sensitive than other carburetors
with larger primary throttle plates however, there could
be some camshaft/intake manifold combinations that
could require a bleed hole to be drilled into the primary
throttle plate of the Quadrajet.
Remember…Before performing any modifications on
your carburetor please consult the manufacturer of the
camshaft, and call our tech line to discuss your
situation and or operational conditions that lead you to
believe you need to make changes to your fuel system
because of a camshaft choice.
Compression Ratio
The carburetor does not require much tuning as a
direct result of changing compression ratio. The fuel
curve does require some tuning, primarily due to the
possible timing curve manipulation to support a
compression change. Idle mixtures sometimes need
enrichment when going to a lower compression ratio. If
the mechanical efficiency increases with a
6

compression change (and it almost always does), then
more fuel will be required as a direct result of the
engines ability to produce more power.
Intake Manifold Design
With the spread bore design, the Quadrajet manifold
can take some interesting shapes. There are many
manifolds to choose from in the marketplace today and
all may require some fuel curve adjustment especially
with the many different camshaft choices available.
Please consult your manifold manufacturer for any
advice as well as contacting our technicians. The Jeg's
performance carburetor is not designed to be used in a
multiple carburetion situation. We do not recommend
that you try to use any other than a 175 horsepower
increase with a nitrous system when used in
conjunction with the Jeg's quadrajet Carburetor.
Carburetor Spacers
Carburetor spacers are a great tuning aid especially for
spread bore carburetors. We recommend that you use
1/2” thick spacers and add or subtract them as your
engine package responds. Carburetor spacers are a
very good tuning tool when working through manifold
or cylinder-to-cylinder distribution issues.
Tuning Guide
The Quadrajet is one of the most sophisticated
carburetor designs ever produced. In the many years
that the Rochester Carburetor Company produced the
Quadrajet, several different versions were produced as
well as many subtle upgrades to each version of
Quadrajet. For these Jeg's versions we concentrate on
a non-computer controlled, 750-CFM style of
Quadrajet. For tune up information for the 15802,
15803, 15804, and 15805 please check the tune up
manuals for the years and applications of each vehicle.
15800 Carburetors
Adjustment Manual Trans Automatic Trans
Slow Curb Idle Speed in RPM 650 to 750 RPM 600 to 700 RPM
Fast Idle Speed in RPM 1500 to 1800 RPM 1500 to 1800 RPM
Float Level Setting .250” .250”
Accelerator Pump Rod Location Inner Inner
Accelerator Pump Adjustment .687” .687”
Choke Rod Setting .100” .100”
Air Valve lockout .015” .015”
Initial Timing 8 degrees 12 degrees
Max Timing 32 degrees 32 degrees
Plug Recommendations
Below 350 HP AC R44* AC R44*
350 HP to 385 HP AC R43* AC R43*
*Or equivalent in Champion, NGK, Motorcraft, Accell, Splitfire, etc.
15801 Carburetors
Adjustment Manual Trans Automatic Trans
Slow Curb Idle Speed in RPM 650 to 750 RPM 600 to 700 RPM
Fast Idle Speed in RPM 1500 to 2400 RPM 1500 to 2400 RPM
Float Level Setting .250” .250”
Accelerator Pump Rod Location Inner Inner
Accelerator Pump Adjustment .687” .687”
Choke Rod Setting .100” .100”
Air Valve lockout .015” .015”
Initial Timing 6 degrees 10 degrees
Max Timing 34 to 36 degrees 34 to 36 degrees
Plug Recommendations
Below 430 HP AC R44* AC R44*
430 HP to 470 HP AC R43* AC R43*
*Or equivalent in Champion, NGK, Motorcraft, Accell,
Splitfire, etc.
Notes…
1. Fast idle Cam second step should be close to
1500 RPM, last step should be close to 2400
RPM.
2. Disconnect vacuum advance feed line to distributor
before adjusting idle speed. Be sure to plug line to
insure no vacuum leaks.
3. Set idle in neutral with the air conditioning on (if
applicable).
4. Idle settings should be higher in speed with large
camshaft (228 or higher degrees @.050", or less
than 112 lobe centers).
Personal Tuning Guide and Notes
Use this area of the manual to keep track of your
calibration changes and tune up adjustments that
optimize your engine package.
Adjustment Description My Adjustment
Slow Curb Idle Speed in RPM
Fast Idle Speed in RPM
Float Level Setting
Accelerator Pump Rod Location
Accelerator Pump Adjustment
Choke Rod Setting
Air Valve lockout
Initial Timing
Max Timing
Plug Recommendations
Plug Choice #1
Plug Choice #2
7

Troubleshooting Guide
Troubleshooting a carburetor can be a very difficult
procedure if a methodical and simple approach is not
used. Some simple tools and the use of your senses
can make diagnosing fuel system problems a snap.
Many times the use of a liquid that is flammable to
determine vacuum leaks is used and always with poor
results. We recommend the use of propane to verify
any carburetor and/or manifold integrity issues. Call our
technicians if you have any questions when using
propane to diagnose your engine.
Choke Service
Acommon problem with high mileage quadrajets is
gum deposits on the choke linkage hindering the
movement of the choke. Remember, the choke itself
has little torque producing capacity so maintaining the
proper choke operation by checking the free movement
of the choke linkage is very important.
Rough Idle
If after all base adjustments are completed, a rough idle
exists, you will need a vacuum gauge to perform some
simple diagnostic routines. The vacuum gauge should
be used to adjust the carburetor to the highest vacuum
reading that you can adjust into the carburetor without
creating a lean condition and experiencing a lean mis-
fire (which is different than a backfire!). The larger the
plenum area of the intake manifold, and/or the larger
the camshaft duration or the narrower the lobe centers
the lower the maximum vacuum reading will be able to
be achieved during the adjustment period.
If the vacuum reading is very low, check the vacuum
hose connections and check the vacuum lines for
cracks, splits, or flexibility to insure tight and proper fit.
Also check the base gasket to insure proper alignment
and tightness of all fasteners. The ignition system
components like the cap, wires, and primary trigger
mechanism can also contribute to a rough idle. If the
engine is equipped with an EGR valve, make sure the
EGR valve is closed at an idle.
High Idle Speeds
Afew different systems on the carburetor account for
idle speeds. As discussed earlier, we wet flow each
carburetor assembly before we package the carburetor
and during that flow testing, we adjust the idle speed on
all conditions which include idle mixture, idle speed and
fast idle speed. In a previous section of this manual we
discuss how to adjust each of these sub systems.
Again, any compromise in any sub system such as the
base gasket, vacuum lines, brake booster feed line,
distributor vacuum feed line, EGR valve, or intake
manifold seal can cause the idle speed to be high or
even erratic.
Another major source of idle or engine speed trouble
can result from a mis-aligned distributor.
Backfiring and Mis-Firing
The idea that a carburetor can cause a backfire is just
not accurate. A carburetor can cause a lean mis-fire,
but never a condition in which fire comes back up and
exits through the air horn of the carburetor itself. So,
lets talk about what happens when a backfire is
detected and how to diagnose its origin.
Abackfire condition exists when one of the major
components within the ignition system has failed.
Check the integrity of the ignition system secondary
components such as the coil, coil wire, coil interface
within an HEI distributor, spark plug wires, rotor, and
distributor cap. Timing is also a critical issue with
backfiring. Check rotor positioning in relationship to
number one (1) cylinder to insure proper rotor phasing.
Afailing camshaft can cause a backfire as well as
timing chain wear or mis-alignment to the crankshaft.
Many times the advance or retard adjustments of the
camshaft are outside of the operational window for a
particular engine package.
Detecting and fixing mis-fires is more a tuning issue
than a broken or worn component situation. A mis-fire
does not have fire coming from the air horn of the
carburetor. It is a pressure wave coming from the intake
manifold, which presents a loud “popping” sound, and
a shot of raw fuel from the air horn. If a choke comes
open too soon, or is not closing the choke plate
completely, a mis-fire can happen. A low float
adjustment or too low fuel pressure can cause a mis-
fire. A plugged bowl vent, bad EGR valve, or a mis-
aligned intake manifold gasket can also all cause a
mis-fire.
Flooding
As was discussed earlier within this manual,
contamination fails 80% of all new carburetors. There
are three (3) major reasons why carburetors
experience a flooding condition. The number one
reason a carburetor will flood especially during start up
conditions is due to some form of contaminates (dirt,
charcoal, etc.) interfering with the proper operation of
the float system within the float bowl. The needle and
seat can have a form of contaminate holding the
needle off of its seat and not allowing the float to
regulate the flow of fuel. If this condition persists, the
float itself can be forced into a sticking situation and
therefore lose its ability to properly move with the flow
of fuel again, resulting in unregulated fuel levels.
The fuel line and/or carburetor can be exposed to a
higher than normal heat source. This flooding condition
brings excess fuel into the venturi area of the
8

carburetor hindering starting of the engines and
excessively rich operating conditions. Many times this
condition is called percolation not unlike the way a
coffee pot works. This condition can be caused by a
fuel line running too close to a radiator hose, header, or
exhaust manifold.
This increased temperature causes the fuel to expand
and pressurize the needle and seat attached to the
float to the point of allowing fuel past the float system
and overflowing into the venturi area of the carburetor.
This fuel eventually ends up lying as raw fuel on the
plenum floor of the intake manifold. This raw fuel
hinders start up performance and engine performance
due to overly rich mixtures.
Excessive fuel pressure can cause flooding as well.
The Jeg's carburetors are designed to work with low
fuel pressures but nothing under 2 psi or over 5 psi.
These carburetor assemblies use the long fulcrum style
of float and cannot control fuel levels at fuel pressures
above 5 psi. When fuel level control is lost, again we
experience overly rich fuel mixtures and a poor-
performing engine.
Hesitation
Hesitation is another operational condition that is
mostly associated with systems that are not adjusted
properly and not necessarily broken. Systems like the
EGR valve can cause hesitation when the EGR valve
itself is compromised in its ability to function and or if an
EGR equipped engine has had the valve removed
completely. The combustion chamber temperatures
can go up as high as 400 degrees between a non-EGR
and an EGR engine. A hesitation can be felt during
hard acceleration if some fuel curve or timing curve
adjustments do not compensate for the higher
combustion temperatures. Don't forget to double-check
the EGR valve or the block off plate for properly
torqued fasteners and gasket integrity.
Other systems that can cause a hesitation are exhaust
system restrictions including catalyst and muffler
contamination, compromised vacuum lines and
support lines like the brake booster connection. An
insufficient accelerator pump shot can be a major
contributor to a hesitation. With a Quadrajet, there are
several adjustments that can add or subtract pump
shot to overcome a hesitation or sag in acceleration.
Don't forget to verify that the timing adjustment is where
it needs to be and the timing advance curve is matched
to the fuel curve of the engine package. Like the fuel
curve, the ignition curve can be infinitely adjusted to
allow for vehicle and engine dynamics.
Hard Starting
When the engine is cold, the choke system restricts the
amount of incoming air to then enrich the air/fuel
mixture in an effort to help start the engine. Depression
of the gas pedal inside your car is enough to set the
choke to “on”. If the carburetor has an electric choke,
the minute you turn on the key, your choke goes to the
“on” position. As the vehicle warms up, the choke
mechanism pulls the choke plate to the open position
therefore allowing the entire potential air signal to enter
the carburetor. If the choke plate does not completely
close, the engine could be hard to start. In this case, a
simple adjustment on the rich side of choke operation
is required. Be careful to not over compensate, as
warm engine operation will be affected. If the choke is
adjusted to a rich position, the engine may be hard to
start when warm. Again, a simple adjustment of the
choke to the lean side of it's calibration will allow more
air to enter the engine when warm, therefore allowing
for easier starting when warm.
Many engines have vacuum advance. These engines
require that the vacuum line be connected to a “ported”
vacuum source on the carburetor. If the vacuum
advance line is connected to a “full” vacuum source,
the engine will see ignition advance settings that will
make starting difficult no matter if it is hot or cold. This
is due to a full vacuum signal over advancing the timing
during engine cranking time periods, which can make
starting difficult.
9

1-800-345-4545 jegs.com
Warranty Information
Conditions of Limited Warranty
1. Purchased carburetor must be returned to the original place of purchase within 90 (ninety)
days.
2. Purchaser must present the original sales receipt as verification of date of purchase.
3. The original sales box in which the carburetor is packaged is your warranty validation box.
This limited warranty is effective only if the warranty carburetor is returned in the Jeg's Sales
box.
Warranty Limitations
We do NOT warrant the proper application of the purchased carburetor and/or the competence of
the installer. This performance carburetor has been calibrated and adjusted as a universal
application and in many uses requires knowledge of adjustment and tuning of this carburetor to the
specific application for which the installer intends. We assume no liability and WILL NOT PAY for
LABOR, DAMAGE and/or TOWING claims arising from the installation or use of the purchased
carburetor. This limited warranty does not apply to any defects caused by negligence after
purchase, misuse, collisions or other accidents, or any unauthorized or unreasonable use
including, but not limited to, improper application and installation. This performance-calibrated
carburetor MUST NOT BE USED in any form of MARINE or AIRCRAFT application.
We neither assume nor authorize any person, agent, distributor, dealer, service facility or company
to change, modify, supplement or amend this Limited Warranty or assume for us any warranty or
liability in connection with the remanufacturing, sale, shipment or use of our products. Nor do we
authorize any other person, service facility or company to make any qualitative determination as to
the fitness of our products. Except and to the extent provided in the Limited Warranty, we make no
expressed or unexpressed warranty regarding this product.
