616 DR 5 With Disconnect Supervision
616 DR-5 with Disconnect Supervision 616 DR-5 with Disconnect Supervision
User Manual: 616 DR-5 with Disconnect Supervision Free Phone System Manuals Voice Communications 800 593-6000
Open the PDF directly: View PDF ![]() .
.
Page Count: 308 [warning: Documents this large are best viewed by clicking the View PDF Link!]

616
Compact DR5
(with Disconnect
Supervision)
Installer
Guide
Norstar and Meridian are trademarks of Northern Telecom
0 Copyright Northern Telecom 1995
PO806232 Issue01
Printed in Canada
After you have finished programming, store
your Norstar Programming Overlay in the slots
provided on the back cover.
Apres avoir termine la programmation, rangez
la grille Norstar dans les fentes prevues a cet
effet a la fin de ce guide.
Cuando haya terminado de programar, insette
en estas ranuras su Plantilla de programacion
Norstar que se encuentra en la contra tapa.
Radio Frequency Interference
‘..
:.
.c:.:;
+r:
.‘:
:; :
,,,I
.‘.
‘.‘.’ ,‘..
).,,
.:..:,‘:.. ;, ‘;
::.:....:‘:.:::,:,:.:,\:\
.’
WARNING
This equipment generates, uses, and can radiate radio
frequency energy. If not installed and used in
accordance with the instruction manual, it may cause
interference to radio communications. It has been tested
and found to comply with the limits for a Class A
computing device pursuant to Part 15 of the FCC Rules,
which are designed to provide reasonable protection
against such interference when operated in a
commercial environment. Operation of this equipment in
a residential area is likely to cause interference, in which
case the user, at his own expense, will be required to
take whatever measures may be required to correct the
interference. Each Norstar Key Telephone System is
assigned an FCC Registration Number and a Ringer
Equivalence designation. The number and designation
are printed on the Key Service Unit (KSU) label on the
front of the unit inside the door.
Registration
The Norstar Key Telephone System is registered with the FCC
based upon compliance with Part 68 of its rules. Connection of
the Norstar Key Telephone System to the nationwide
telecommunications network is made through a standard network
interface jack that you can order from your telephone company.
Jacks for this type of customer-provided equipment will not be
provided on party lines or coin lines.
._
Interconnect
Norstar Compact equipment meets all applicable requirements of
both the Canadian Department of Communications CS-03 and
US Federal Commission FCC part 68 ancl has been registered
under files DOC 3322492A and FCC AB67UJ-17156-KF-E
(key system) and AB67UJ-17338-MF-E (hybrid system).
Comp!act DR5 Installer Guide
;’
.I.\
‘.’
:: :
::.:.!j.‘::j
),‘_’
;;.:\,
.:::::j:::
<’
.‘.:.‘:,: .?‘.!\
;:
,
ii / Regulations
Ringer Equivalence Number (REN)
The FCC Registration Label, on the inside of the door on the
front of the Key Service Unit (KSU), includes the Ringer
Equivalence Number (REN). This number shows the electrical
load that your Norstar KSU requires from your telephone line. If
the KSU requires more electrical current than your telephone
company’s central office equipment can provide, your telephones
may not ring and you may have difficulty dialing telephone
numbers.
Call the telephone company to find out the total REN allowed for
your telephone line(s).
Hearing Aid Compatibility
Norstar telephones are Hearing Aid compatible, as defined in
Section 68.316 of Part 68 FCC Rules.
Electromagnetic compatibility (EMC)
Radiated emissions
Norstar Compact equipment meets all FCC part 15, class A
radiated emissions requirements.
Conducted emissions
Norstar Compact equipment meets all FCC part 15, class A
conducted emissions requirements.
,Safety
Norstar Compact equipment meets all applicable requirements of
both the Canadian Standards Association C22.2 No. 0.7 Ml 985
and US Underwriter’s Laboratory UL-1459, issue 1, and has
@en registered under files CSA LR58855-12 and
UL El 15515 88NK16650.
Compact DR5 Installer Guide
Requlations /
iii
Telephone Company Registration
It
is usually not necessary to call the telephone company with
information on the equipment before connecting the Norstar
Key
Telephone System Key Service Unit (KSU) to the telephone
network but, if the telephone company requires this information,
provide the following:
- Telephone number(s) to which the Key Service Unit (KSU)
will be connected
- FCC Registration Number
(on label affixed to KSU, inside the door)
- Ringer Equivalence Number
(on label affixed to KSU, inside the door)
- USOC Jack
RJ-21 X
- Service Order Code
(SOC)
9.0 F
- Facility Interface Code
(FlC)O2LS2
Use of a Music source
In accordance with U.S. Copyright Law, a license may be
required from the American Society of Composers, Authors and
Publishers, or similar organization if Radio or TV broadcasts are
transmitted through the Music On Hold or Background Music
features of this telecommunication system.
Northern Telecom Inc. hereby disclaims any liability arising out of
the fa‘nure to obtain such a license.
This digital apparatus does not exceed the Class A limits for
radio noise emissions from digital apparatus set out in the Radio
Interference Regulations of the Canadian Department of
Communications.
,
iv /
Regulations
Rights of the Telephone Company
If the system is determined to be causing harm to the telephone
network, the telephone company may discontinue your service
temporarily. If possible, the telephone company will notify you in
advance. If advance notice is not practical, you will be notified as
soon as possible. You will be given the opportunity to correct the
situation and you will be informed of your right to file a complaint
to the FCC. Your telephone company may make changes in its
facilities, equipment, operations or procedures that could affect
the proper functioning of your system. If it does this, you will be
notified in advance to give you the opportunity to maintain
uninterrupted telephone service.
In the event of an equipment malfunction, all repairs will be
performed by Northern Telecom Inc. or by one of its authorized
dealers.
Address of a repair facility
USA Canada
Northern Telecom Inc.
Product Service Center
640 Massman Drive
Nashville, TN
37210
Attn. RA#
Northern Telecom Canada Ltd.
150 Montreal-Toronto Blvd.
Building C, Doors 33 and 34
Lachine, Quebec
H8S lB6
.,
.,I’.’
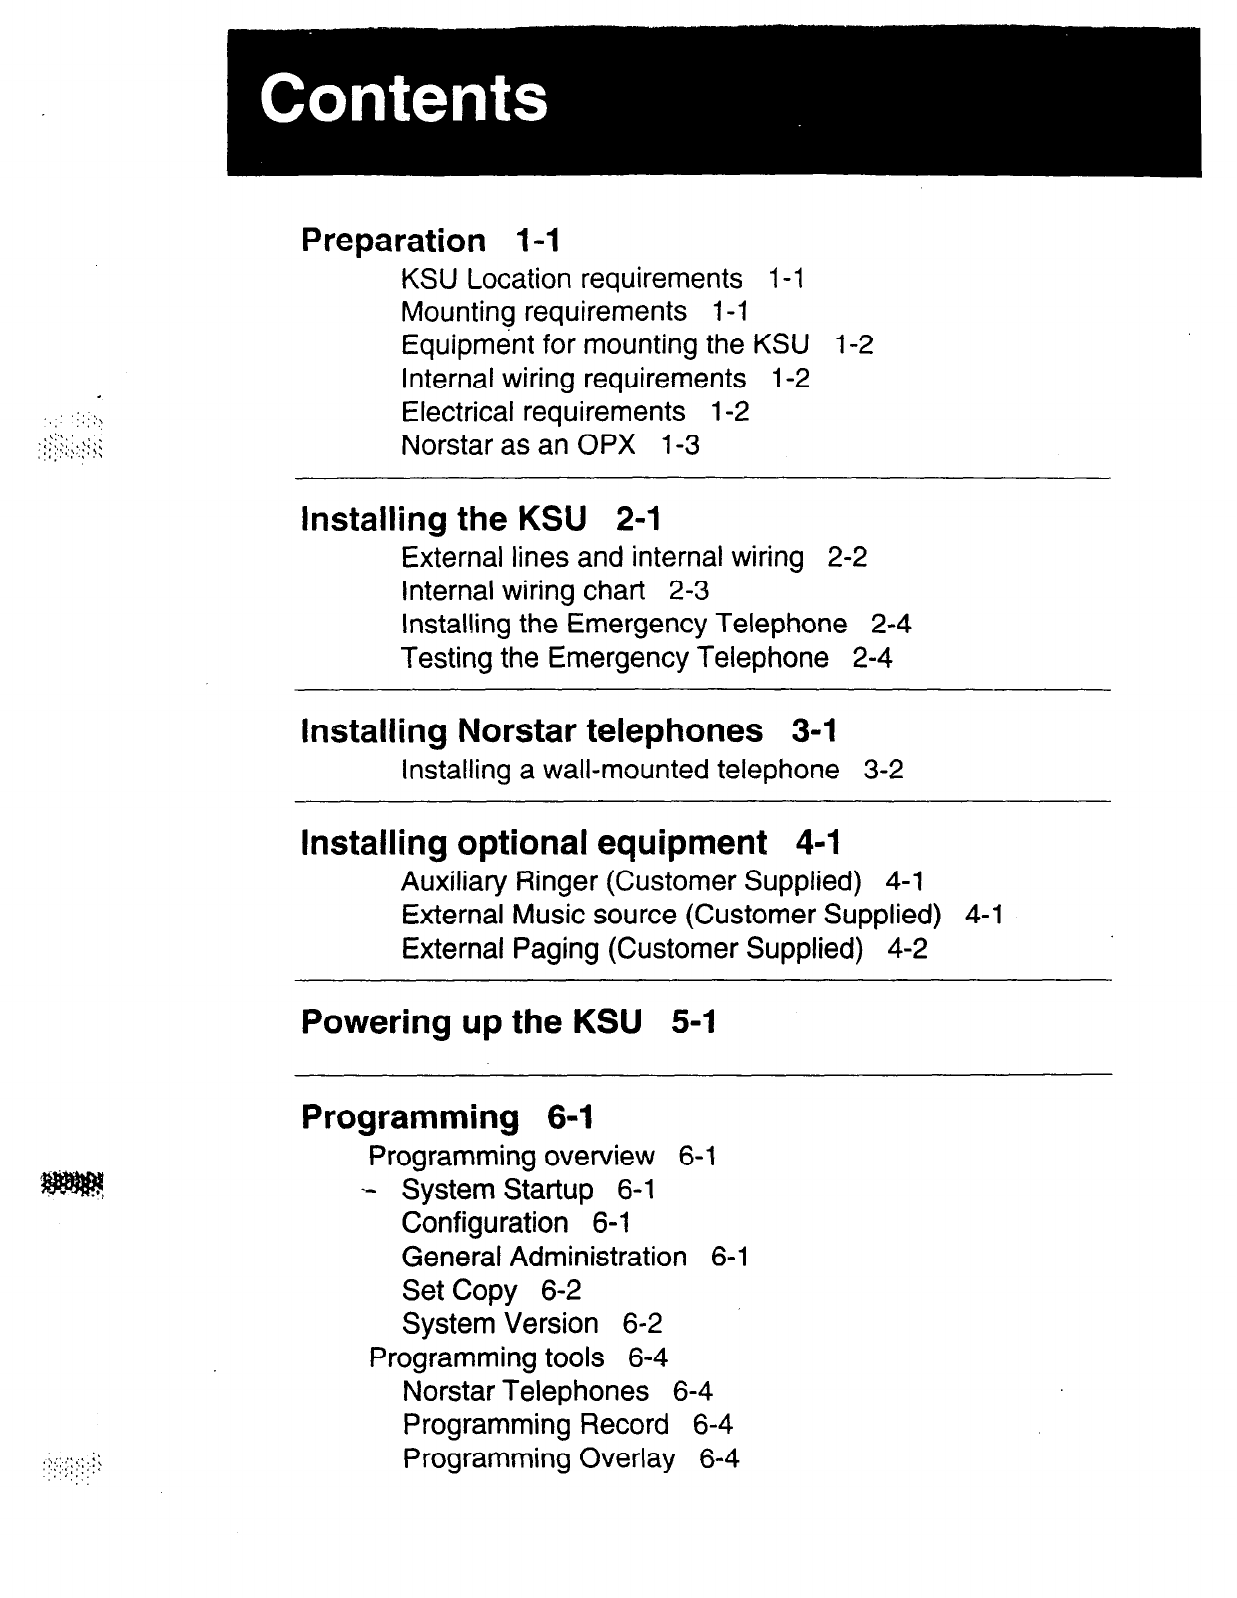
Preparation 1-I
KSU Location requirements l-l
Mounting requirements l-1
Equipment for mounting the KSU 1-2
Internal wiring requirements 1-2
Electrical requirements l-2
Norstar as an OPX 1-3
Installing the KSU 2-1
External lines and internal wiring 2-2
Internal wiring chart 2-3
Installing the Emergency Telephone 2-4
Testing the Emergency Telephone 2-4
Installing Norstar telephones 3-1
Installing a wall-mounted telephone 3-2
Installing optional equipment 4-I
Auxiliary Ringer (Customer Supplied) 4-l
External Music source (Customer Supplied) 4-1
External Paging (Customer Supplied) 4-2
Powering up the KSU 5-I
Programming 6-I
Programming overview 6-1
- System Startup 6-1
Configuration 6-1
General Administration 6-1
Set Copy 6-2
System Version 6-2
Programming tools 6-4
Norstar Telephones 6-4
Programming Record 6-4
Programming Overlay 6-4
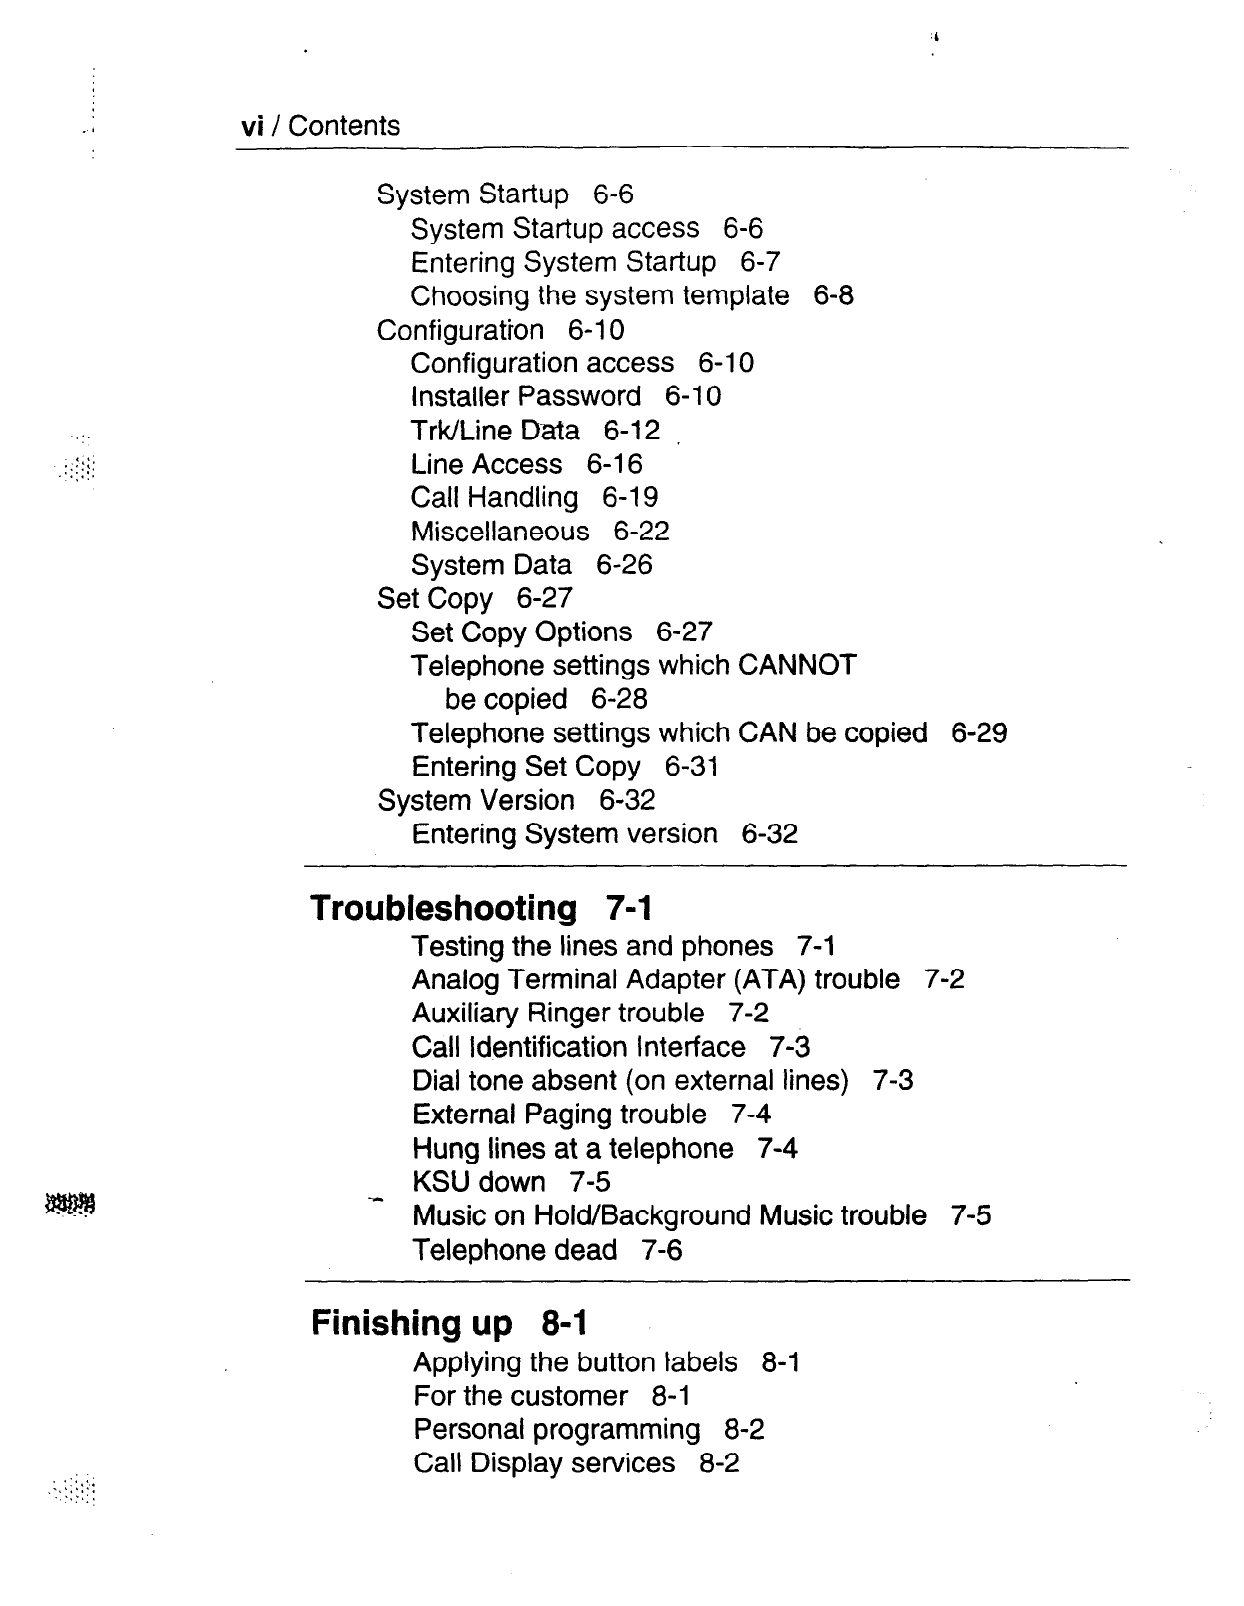
vi / Contents
System Startup 6-6
System Startup access 6-6
Entering System Startup 6-7
Choosing the system template 6-8
Configuration 6-10
Configuration access 6-l 0
Installer Password 6-10
Trk/Line Data 6-12
.
Line Access 6-l 6
Call Handling 6-19
Miscellaneous 6-22
System Data 6-26
Set Copy 6-27
Set Copy Options 6-27
Telephone settings which CANNOT
be copied 6-28
Telephone settings which CAN be copied
Entering Set Copy 6-31
System Version 6-32
Entering System version 6-32
Troubleshooting 7-1
Testing the lines and phones 7-l
Analog Terminal Adapter (ATA) trouble 7-2
Auxiliary Ringer trouble 7-2
Call identification Interface 7-3
Dial tone absent (on external lines) 7-3
External Paging trouble 7-4
Hung lines at a telephone 7-4
KSU down 7-5
Music on Hold/Background Music trouble 7-5
Telephone dead 7-6
Finishing up 8-1
Applying the button labels 8-1
For the customer 8-l
Personal programming 8-2
Call Display services 8-2
Check the location where the Norstar system KSU, the
telephones, and auxiliary equipment are to be installed.
KSU Location requirements
-
Clean, dry, and well-ventilated
- Temperature: 0°C to 50°C (32°F to 122°F)
- Humidity: 5% to 95%, non-condensing
- Location: at least 4 m (13.1 ft) from equipment such as
photocopiers, electrical motors, and other equipment that
can produce electromagnetic, radio frequency, and
electrostatic interference.
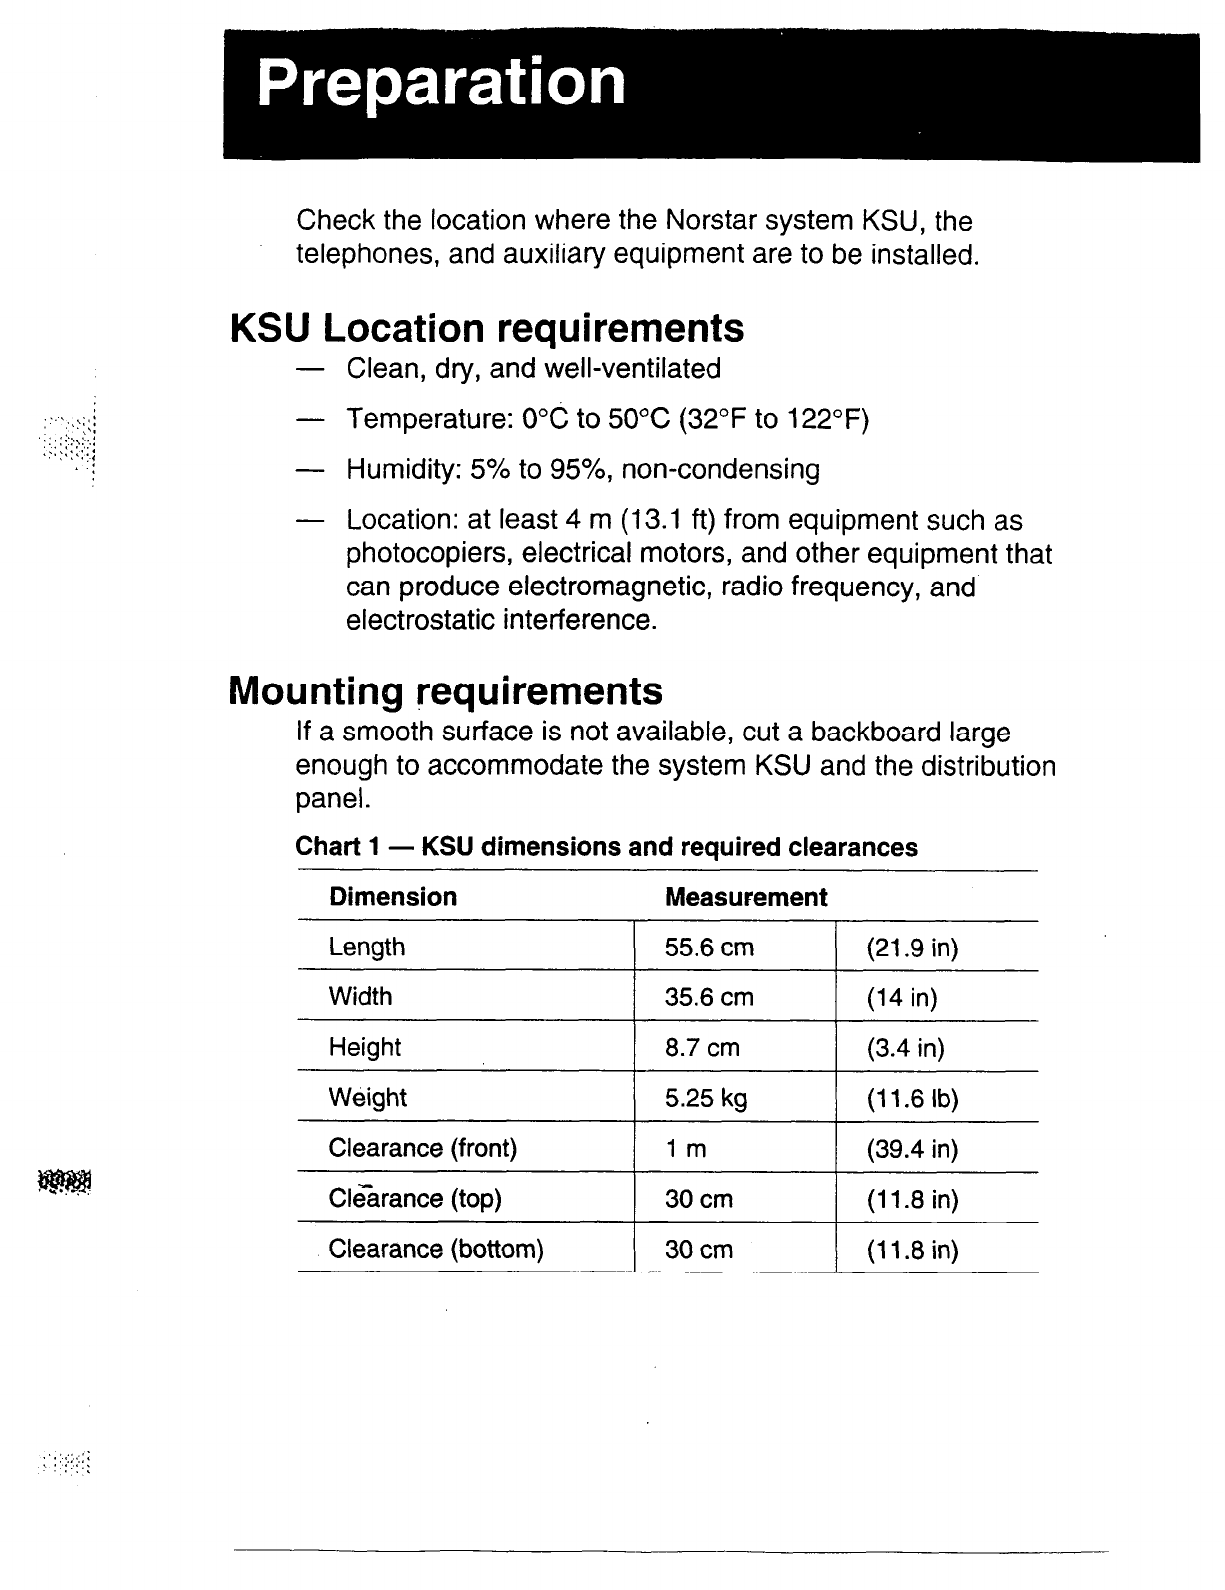
Mounting requirements
If a smooth surface is not available, cut a backboard large
enough to accommodate the system KSU and the distribution
panel.
Chart 1 - KSU dimensions and required clearances
Dimension Measurement
Length
55.6
cm / (21.9 in)
Width 35.6 cm / (14in)
Height 0.7 cm I- (3.4 in)
Weight 5.25 kg 1 (11.6Ib)
Clearance (front)
lm 1 (39.4 in)
Cl&ance (top)
30 cm / (11.8 in)
Clearance (bottom)
30 cm 1 (11.8in)
1-2 / Preparation
Equipment
for mounting the KSU
-
-
-
screwdriver, diagonal cutters, pliers, connecting tool, pencil,
level (optional)
three 5mm (#I 0) wood screws, 38 mm (1 l/2 in) long
19 mm (% in) thick wooden backboard (if necessary)
..j
:.
‘,:‘3
3q.q
Internal wiring requirements
All new or existing wiring must meet the following specifications:
-
one twisted pair per telephone
- a dc loop resistance less than 59 IR
- cable length (0.5 mm or 24 AWG) not to exceed 305 m
(1000 ft)
- use of a Norstar Station Auxiliary Power Supply (SAPS) to
extend the loop up to 790 m (2600 f-t) if the cable is longer
than 305 m (1000 f-t)
- no bridge taps
Electrical requirements
-
Non-switched outlet
- ac outlet located not more than 1.5 m (4.9 ft) from the Key
Service Unit (KSU)
- For 120V product: dedicated 110 to 12OV ac nominal,
50/60 Hz, 15 A minimum service with third wire ground
- For 220V product: dedicated 220 to 240V ac nominal,
W60 Hz, 15 A minimum service with third wire ground
- For 48V product: refer to the insert packaged with your
48V KSU for specific installation instructions
r
WARNING
The ac outlet must be equipped with a third wire ground
to avoid electromagnetic interference.
Preparation
/
1-3
Norstar as an OPX
Norstar can be used as an off-premise extension (OPX) from a
PBX. In order to support this application, the OPX lines must be
engineered not to exceed 8 dB total loop loss from the serving
central office to the demarcation point at the Norstar KSU.
,,;,,\.;.;
,::::, :
.:, .‘,,‘<:.‘:
.
:’
L!::,k..:i
.,:.“‘~!,
,!.”

l-4 / Preparation
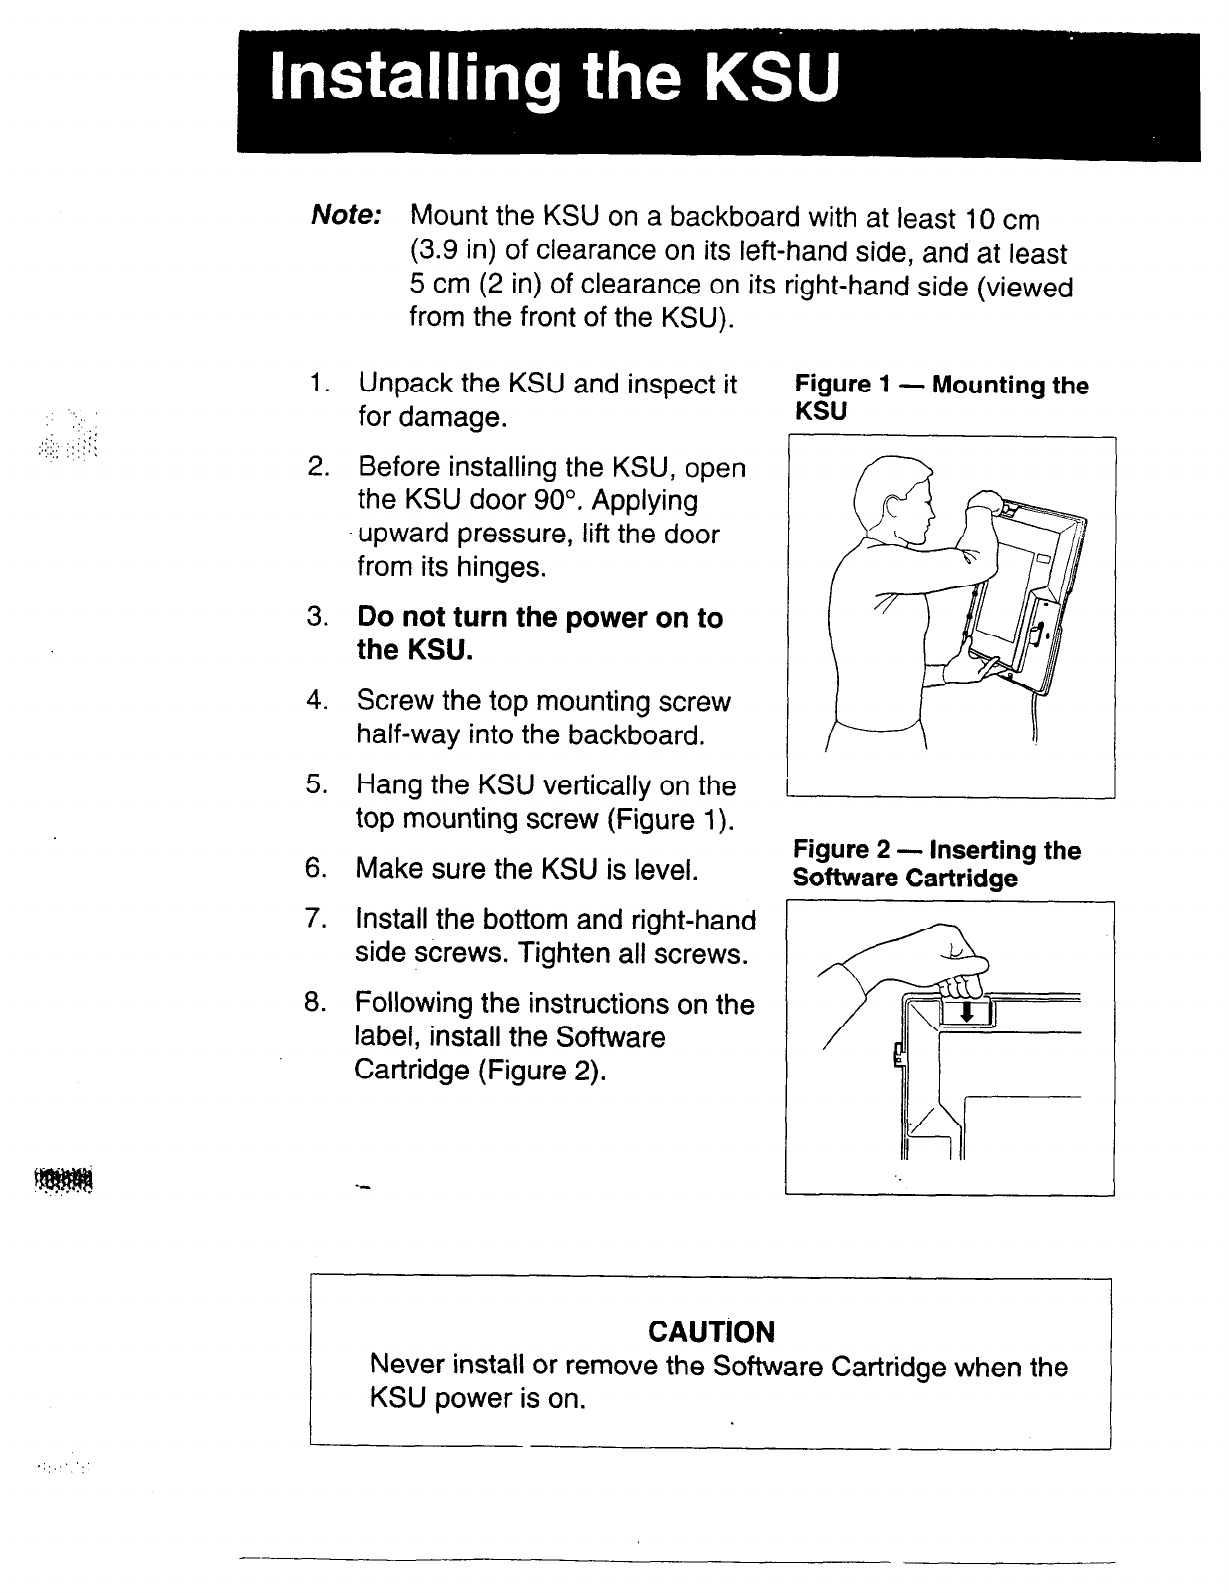
Note: Mount the KSU on a backboard with at least 10 cm
(3.9 in) of clearance on its left-hand side, and at least
5 cm (2 in) of clearance on its right-hand side (viewed
1.
2.
3.
4.
5.
6.
7.
8.
from the front of the KSU).
Unpack the KSU and inspect it
for damage.
Before installing the KSU, open
the KSU door 90”. Applying
upward pressure, lift the door
from its hinges.
Do
not turn the power on to
the KSU.
Screw the top mounting screw
half-way into the backboard.
Hang the KSU vertically on the
top mounting screw (Figure 1).
Make sure the KSU is level.
Install the bottom and right-hand
side stirews. Tighten all screws.
Following the instructions on the
label, install the Software
Cartridge (Figure 2).
Figure 1 - Mounting the
KSU
I
Figure 2 - Inserting the
Software Cartridge
CAUTION
Never install or remove the Software Cartridge when the
KSU power is on.
‘:, (’
‘1’
-
: .
1
2-2 / Installing the KSU
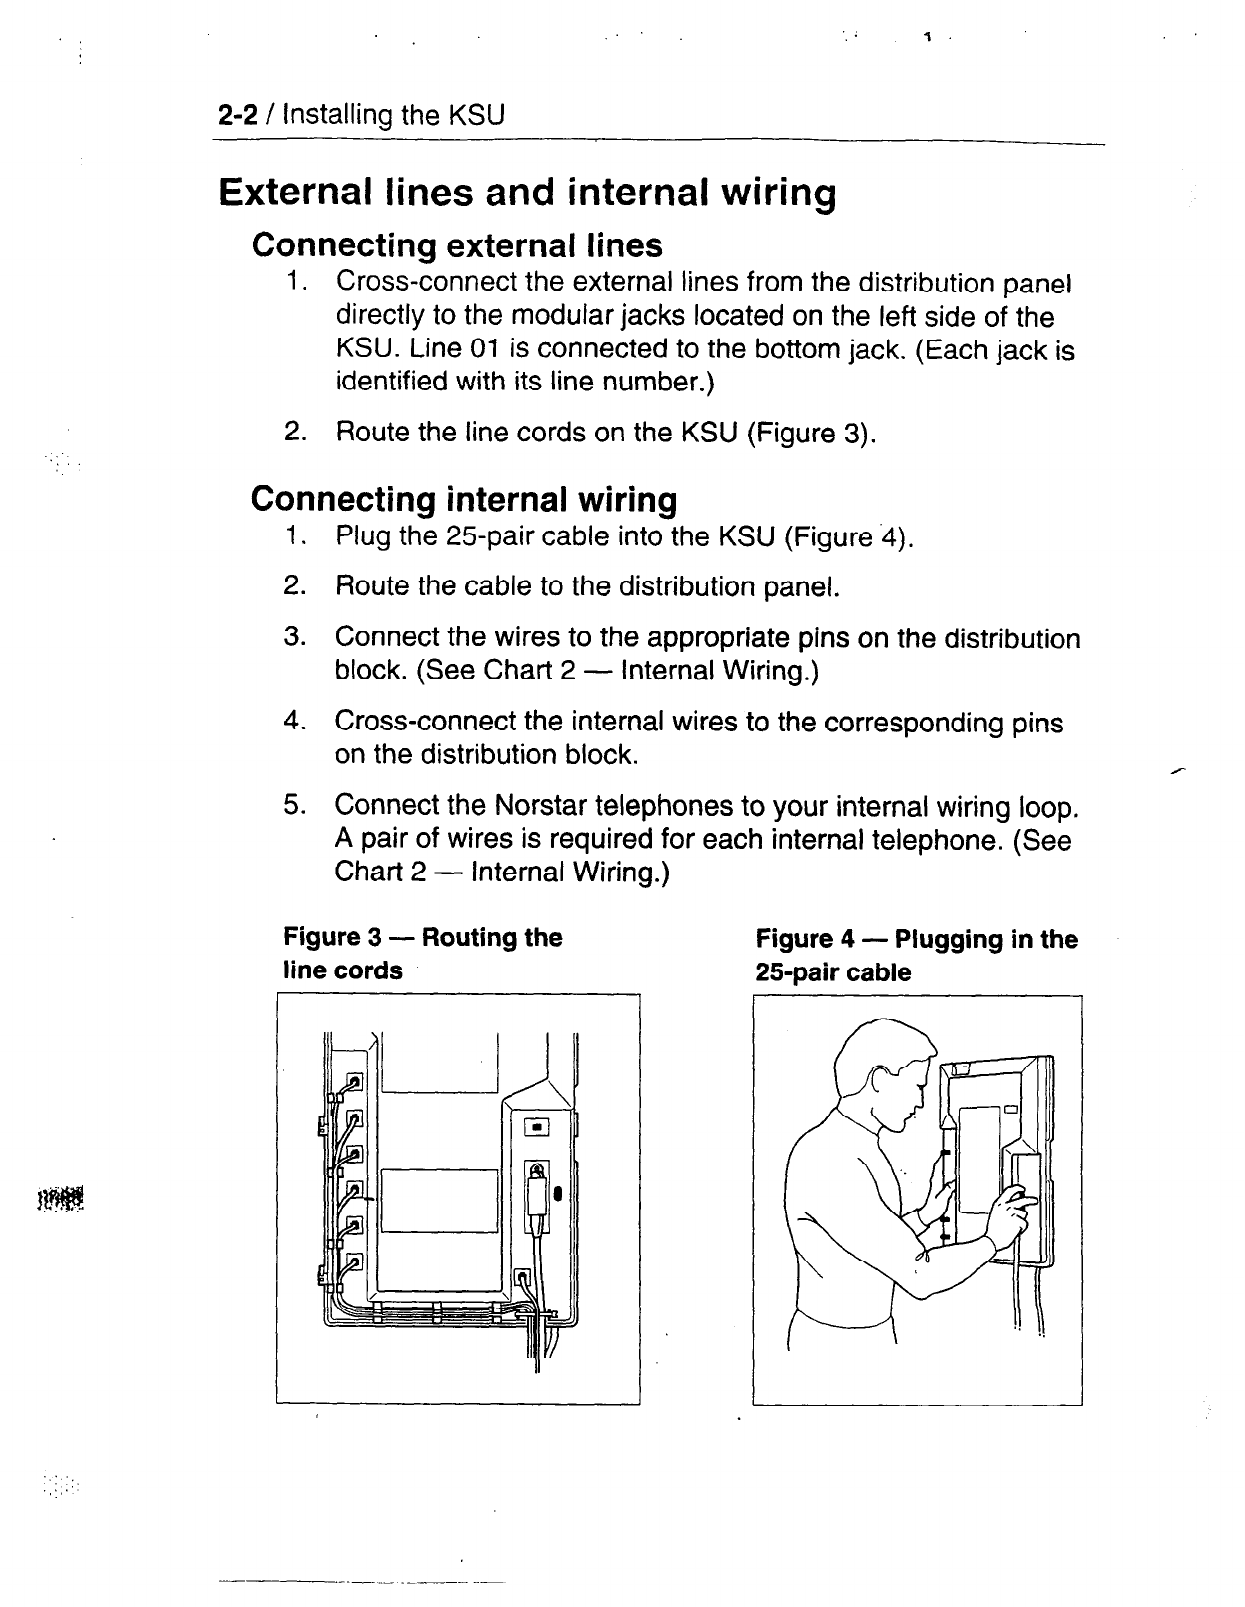
External lines and internal wiring
Connecting external lines
1. Cross-connect the external lines from the distribution panel
directly to the modular jacks located on the left side of the
KSU. Line 01 is connected to the bottom jack. (Each jack is
identified with its line number.)
2. Route the line cords on the KSU (Figure 3).
Connecting internal wiring
1.
Plug the 25pair cable into the KSU (Figure 4).
2. Route the cable to the distribution panel.
3. Connect the wires to the appropriate pins on the distribution
block. (See Chart 2 - Internal Wiring.)
4. Cross-connect the internal wires to the corresponding pins
on the distribution block. ,
5. Connect the Norstar telephones to your internal wiring loop.
A pair of wires is required for each internal telephone. (See
Chart 2 - Internal Wiring.)
Figure 3 - Routing the
line cords
Figure 4 - Plugging in the
25pair cable
Installing the KSU
/
2-3
:
;:j:;:‘::;
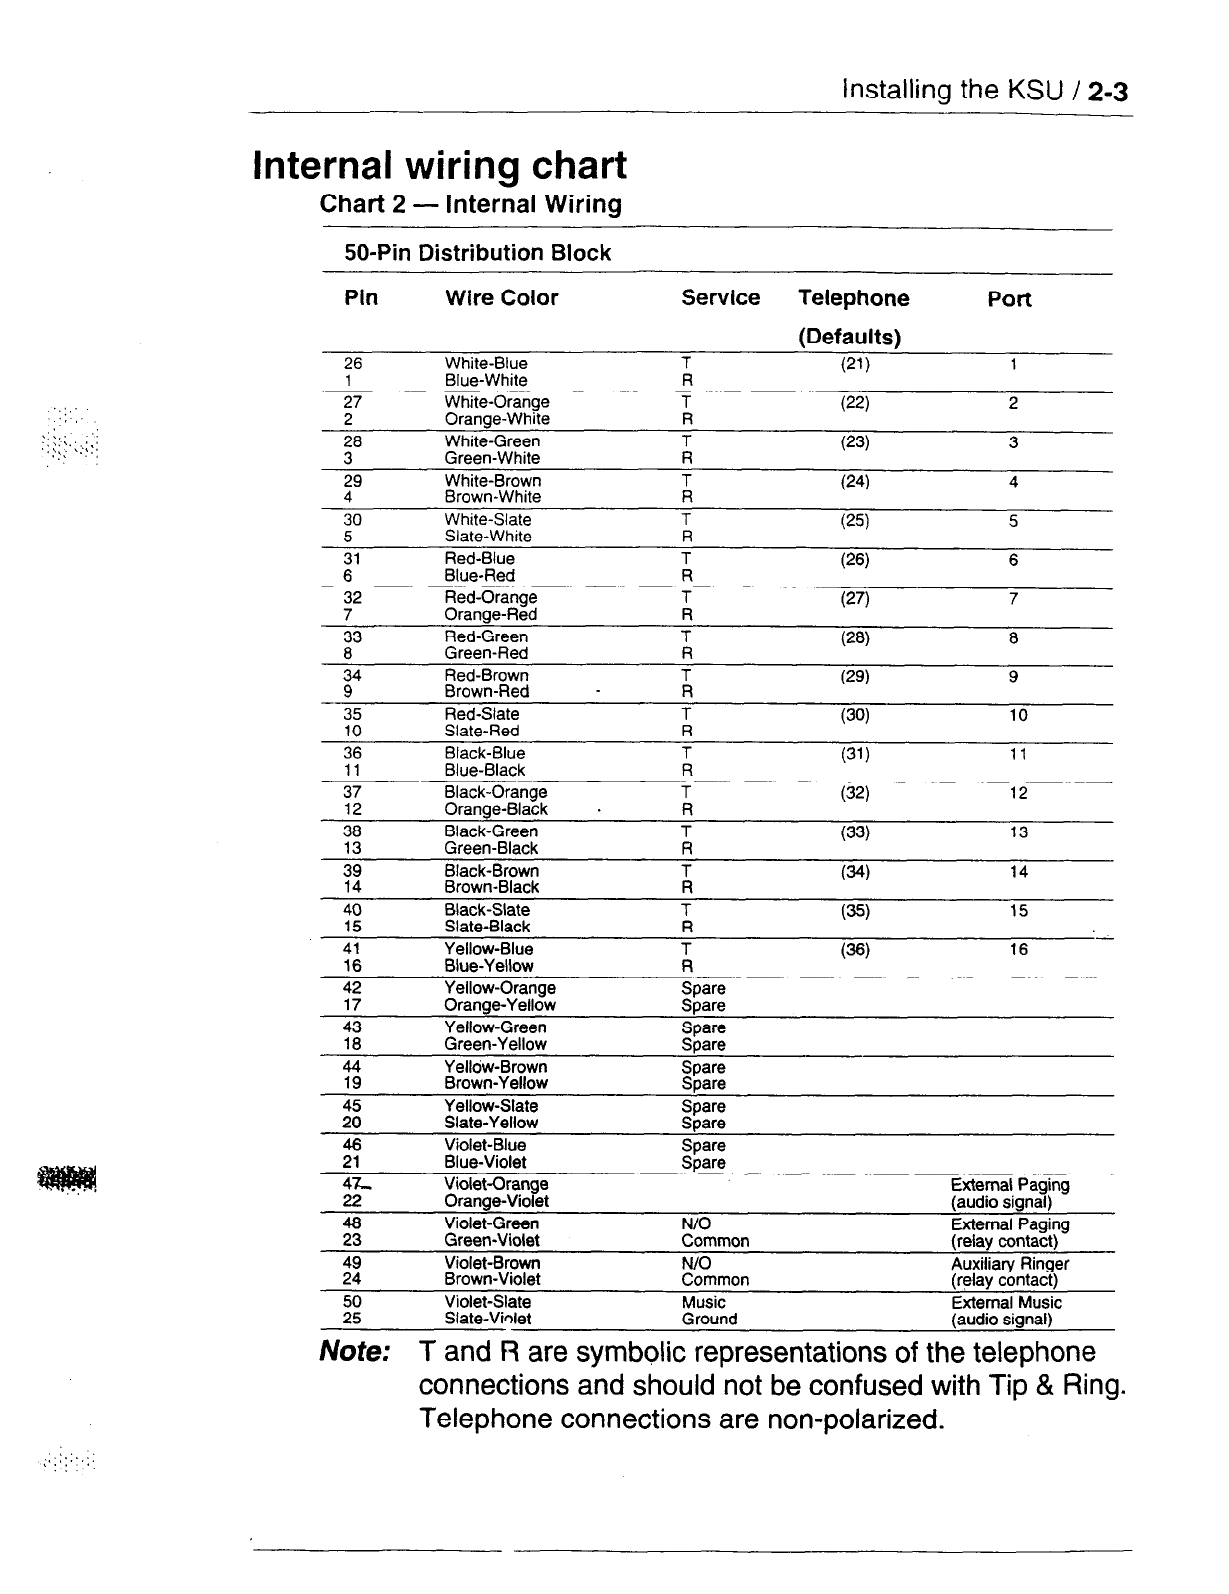
Internal wiring chart
Chart 2 - Internal Wiring
SO-Pin Distribution Block
Pin Wire Color Service Telephone Port
(Defaults)
26 White-Blue T (21)
1
1 Blue-White R
27 White-Orange T (22) 2
2 Orange-White R
28 White-Green T (23) 3
3 Green-White R
29 White-Brown T (24) 4
4 Brown-White R
30 White-Slate T
Slate-White (25) 5
5 R
31 Red-Blue T 6
6 Blue-Red (26)
R
32 Red-Orange T (27) 7
7 Orange-Red R
33 Red-Green T 8
8 Green-Red R (28)
34 Red-Brown T (29) 9
9 Brown-Red
-
R
- 35 Red-Slate T (36) 10
10 Slate-Red R
36 Black-Blue T
Blue-Black (31) 11
11 R
37 Black-Orange T (32) 12 -
12 Orange-Black
.
R
38 Black-Green T
Green-Black (33) 13
13 R
39 Black-Brown T 14
14 Brown-Black R (34)
40 Black-Slate T
15 (35) 15
Slate-Black R ‘--
41 Yellow-Blue T 16
16 Blue-Yellow R (36)
42 Yellow-Orange
17 Orange-Yellow Spare
Spare
43 Yellow-Green
18 Green-Yellow Spare
Spare
44 Yelldw-Brown
19 Brown-Yellow Spare
Spare
24; Yellow-Slate
Slate-Yellow Spare
Spare
z Violet-Blue
Blue-Violet Spare
Spare
4L
22 Violet-Orange
Orange-Violet External Paging
(audio signal)
z Violet-Green N/O
Green-Violet Common External Paging
(relay contact)
;: Violet-Brown N/O
Brown-Violet Common Auxiliary Ringer
(relay contact)
z Violet-Slate Music External Music
Slate-Vhlet Ground (audio signal)
Note:
T and R are symbolic representations of the telephone
connections and should not be confused with Tip & Ring.
Telephone connections are non-polarized.
2-4 / Installing the KSU
Installing the Emergency Telephone
An optional Emergency Telephone (ET) automatically connects
to Line 01 when the power failsor when power to the KSU is
disconnected.
/Vote: Use only a standard 500/2500 single-line telephone for
this purpose.
1. Connect the customer supplied Emergency Telephone to the
Emergency Telephone (ET) jack on the lower right hand
corner of the KSU panel.
2. Label the telephone: “Emergency Telephone Only. This
telephone functions only when ac power to the telephone
system is turned off.”
Testing the Emergency Telephone
The Emergency Telephone must be tested with the KSU power
Off.
1. Pick up the Emergency Telephone receiver.
If you hear a dial tone, both the Emergency Telephone and
Line 01 are functioning properly.
OR
If you hear no dial tone, check Line 01. Unplug the
Emergency Telephone and connect it directly to Line 01 on
the distribution block.
2. If you still do not hear a dial tone, check the line connections
and operation of the Emergency Telephone.
3. If the previous steps have been verified and there is still no
dial tone at the Emergency Telephone, replace the KSU.
4. Repeat the Emergency Telephone test.
h ._-_. .
I. _ . .
‘.
‘.
.:
I’. .,,..
.:;::,..::
m
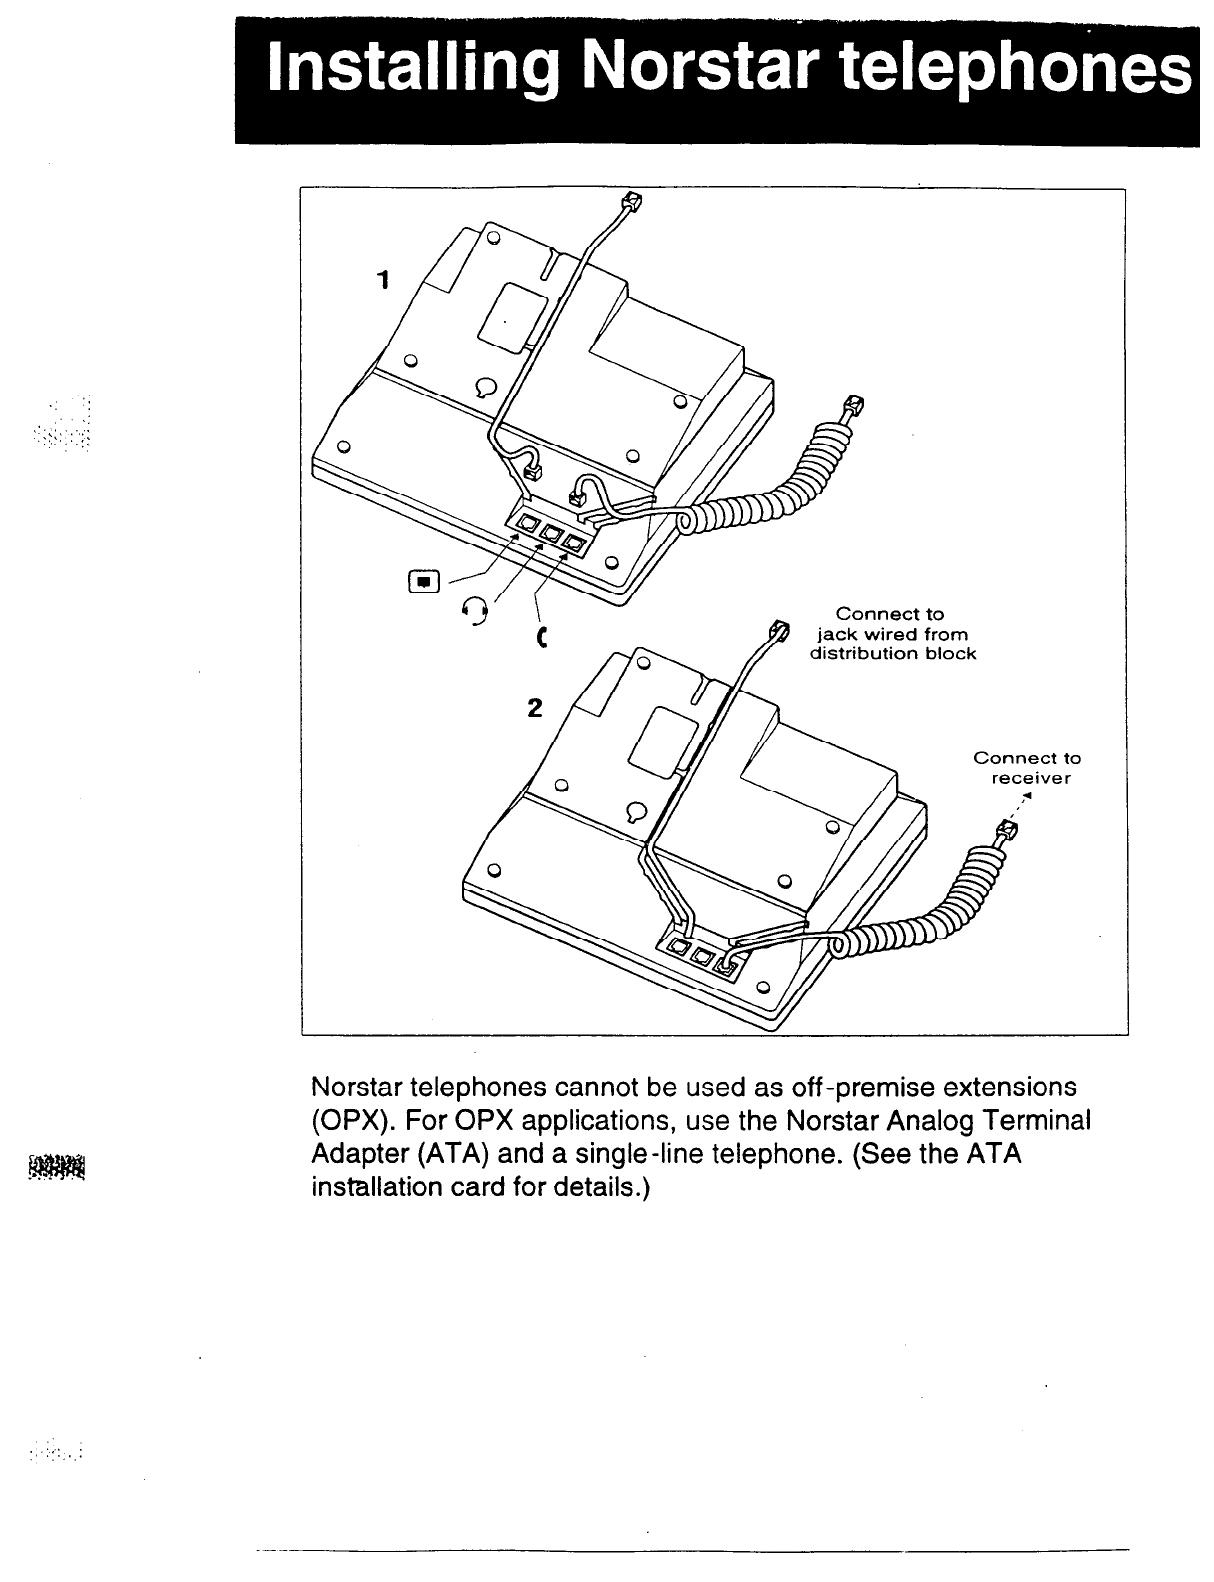
Connect to
jack wired from
distribution block
Connect to
receiver
7
Norstar telephones cannot be used as off -premise extensions
(OPX). For OPX applications, use the Norstar Analog Terminal
Adapter (ATA) and a single-line telephone. (See the ATA
installation card for details.)
.:. :
,:
,‘.., ::
c !.
‘.’ :
. :
. . ‘i . ‘.
3-2 / installing Norstar telephones
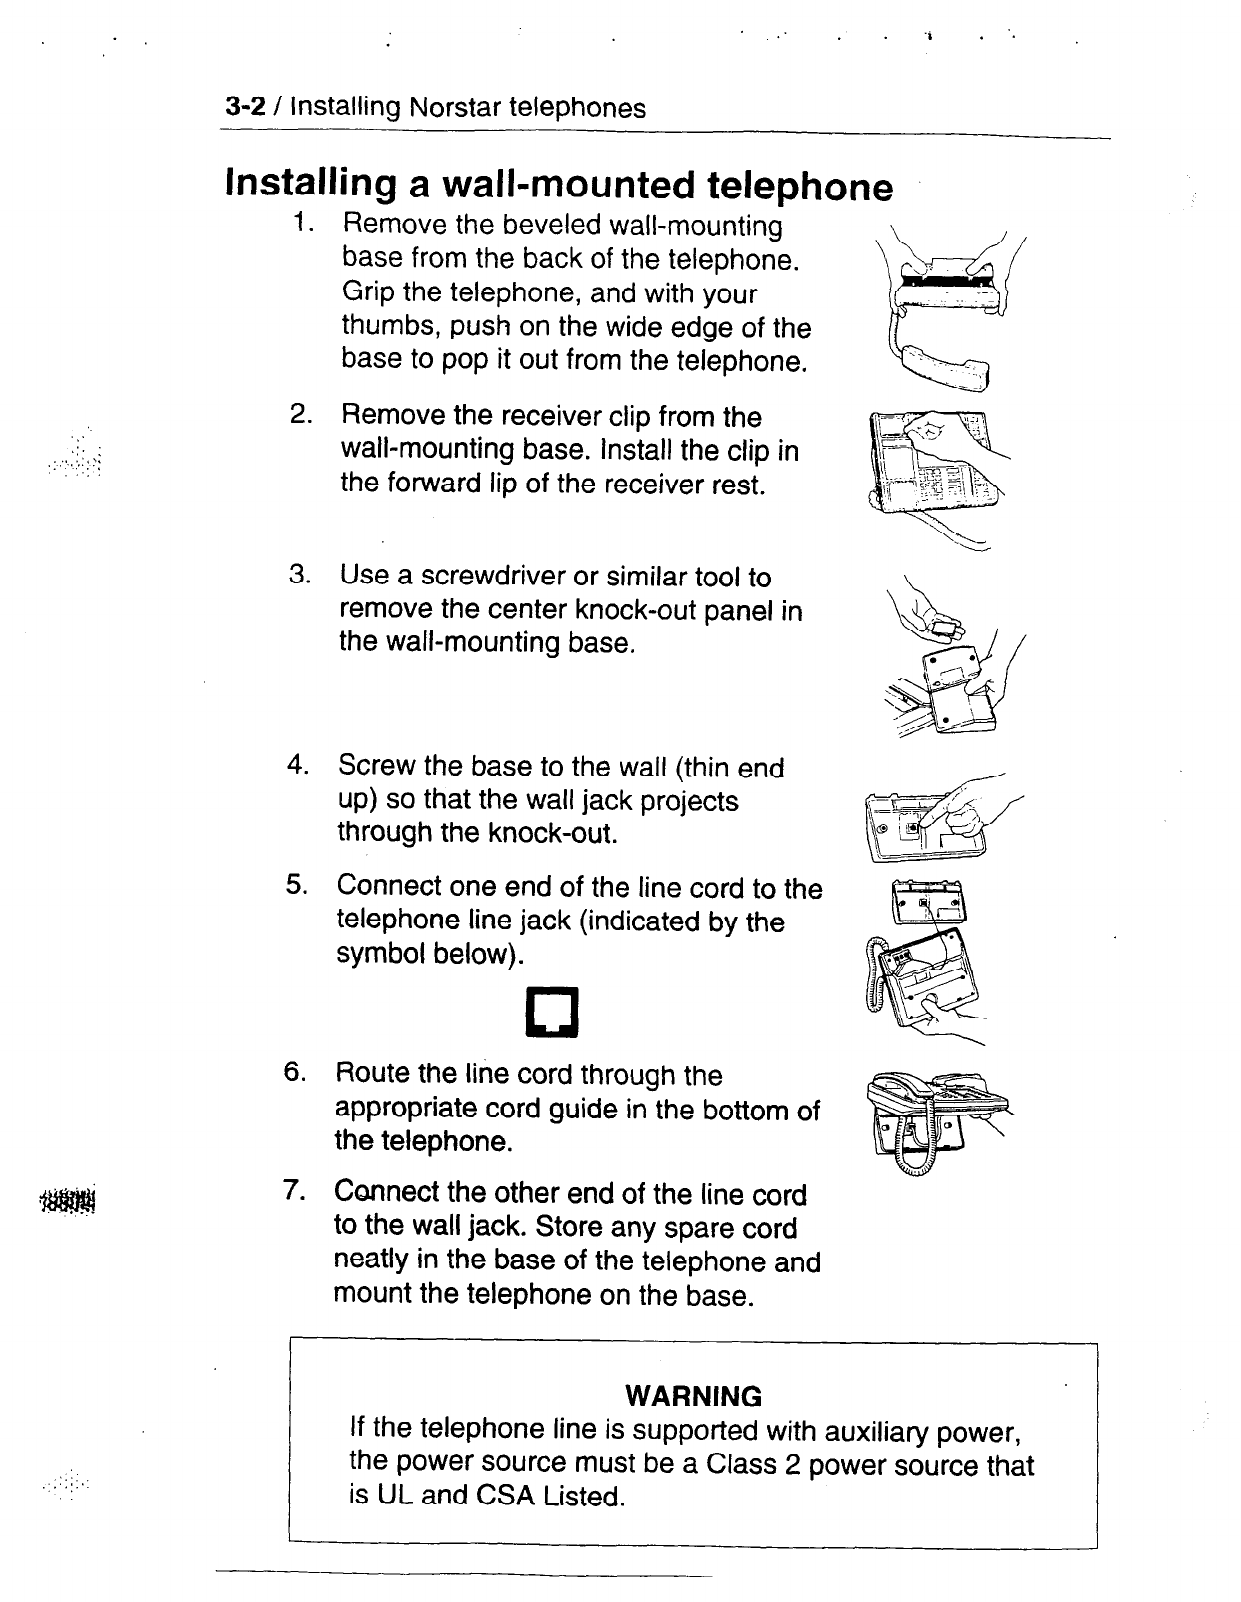
Installing a wall-mounted telephone
1.
2.
3.
4.
5.
6.
7.
Remove the beveled wall-mounting
base from the back of the telephone.
Grip the telephone, and with your
thumbs, push on the wide edge of the
base to pop it out from the telephone.
Remove the receiver clip from the
wall-mounting base. install the clip in
the forward lip of the receiver rest.
Use a screwdriver or similar tool to
remove the center knock-out panel in
the wall-mounting base.
Screw the base to the wall (thin end
up) so that the wall jack projects
through the knock-out.
Connect one end of the line cord to the
telephone line jack (indicated by the
symbol below).
Route the line cord through the
appropriate cord guide in the bottom of
the telephone.
Connect the other end of the line cord
to the wall jack. Store any spare cord
neatly in the base of the telephone and
mount the telephone on the base.
.:.:::::
WARNING
If the telephone line is supported with auxiliary power,
the power source must be a Class 2 power source that
is UL and CSA Listed.
.:,’ ;
::‘.::,,::
,::,.
Note: Optional equipment must meet with local regulatory
approval standards.
Auxiliary Ringer
(Customer Supplied)
The Norstar KSU provides a control contact to operate an
external ringer. It does not provide ring current or dc voltage. The
ringer relay contacts must not draw more than 50 mA from a 30
Vdc source.
1. Follow the manufacturer’s installation instructions.
2. Connect the Auxiliary Ringer generator to the 50-pin
distribution block as shown in Chart 2 - Internal Wiring.
External Music source
(Customer Supplied)
This equipment provides music for the Music on Hold and
Background Music features. These features must be enabled
through Configuration (see the Programming chapter in this
Guide). Refer to the Compact DR5 System Coordinator Guide
and Compact DR5 Programming Record for more information.
The music source can be any approved low-power output device
(such as a radio) with a high-impedance earphone jack. The
recommended KSU input level is 0.25 Vrms across an input
impedance of 3300 s2.
CAUTION
To avoid damage to audio equipment, ensure that the
polarity of the audio input is correct according to the
KSU internal wiring chart.
1. Connect the music source and ground to the 50-pin
distribution block as shown in Chart 2 - Internal Wiring.
2. Activate the Music on Hold or Background Music feature and
adjust the volume at the music source to a comfortable level.
.
1
4-2 / installing optional equipment
Note; Background Music volume for each telephone can also
be controlled at the telephone.
External Paging
(Customer Supplied)
The paging system uses the speakers on Norstar telephones
and can also be used with external loudspeakers provided by the
customer. The paging output from the Norstar KSU is
775mVrms across an input impedance of 600 Q.
1. Follow the manufacturer’s installation instructions.
2. Connect the paging system audio input to the 50-pin
distribution block as shown in Chart 2 - Internal Wiring.
3. Connect the paging relay (max. rating: 30 Vdc @ 50 mA) to
the 50-pin distribution block as shown in Chart 2 - Internal
Wiring.
Note: Norstar external paging does not support talk-back
paging equipment unless an external line port is used.
1. Power on the KSU by plugging in the power cord. The red
power LED on the KSU should turn on.
2. If the red LED does not turn on, verify that there is power at
the ac outlet.
OR
If there is power at the ac outlet, replace the KSU.
IVofe; Re-install the KSU door once the system is operational.
:
5-2 / Powering up the KSU
‘,
:::
I
I.;.\,:

Programming a newly installed Norstar system involves the
completion of the following programming steps:
- System Startup
- Configuration
- General Administration
Programming overview
System Startup
System Startup is performed only when the system is first
installed. System Startup allows you to select one of three
programming templates: Square, Hybrid, or PBX. Each template
initializes all of the programming data to system wide defaults.
Configuration
Allows programming of basic line and telephone characteristics.
Configuration access code:
This code and the Installer
password give access to:
Fl.
ConfiWratim
B.
General admi n
C.
set COPY
D.
System Uersicm
General Administration
Allows the customization of the system at installation and on an
ongoing basis. (See the Compact DR5 System
Coordinator
Guide
for details on Administration programming.)
Administration access code:
This code gives access to:
B.
General admin
I.’
6-2 /
Programming
Note: B. Cimwral admin is
also accessible through the
Configuration code. Administration has been
given a
unique
code and optional password so that the System
Coordinator can be allowed access to Administration
programming, while being denied access to all other
programming headings.
Set Copy
.
This feature is used to copy all of the system programming
(Configuration and Administration) from one telephone to
another. Personal programming on individual telephones can
also be copied, but system-level programming will be copied
along with it. Copy appears on the display as C. Set
COPY
and
is accessible through Configuration programming.
System Version
System Version allows you to note the version numbers of the
software in the System Processor (SP) software, residing in the
Software Cartridge. System Version appears on the display as
0. System
kr”sion
and is accessible through Configuration
programming.
Programming / 6-3
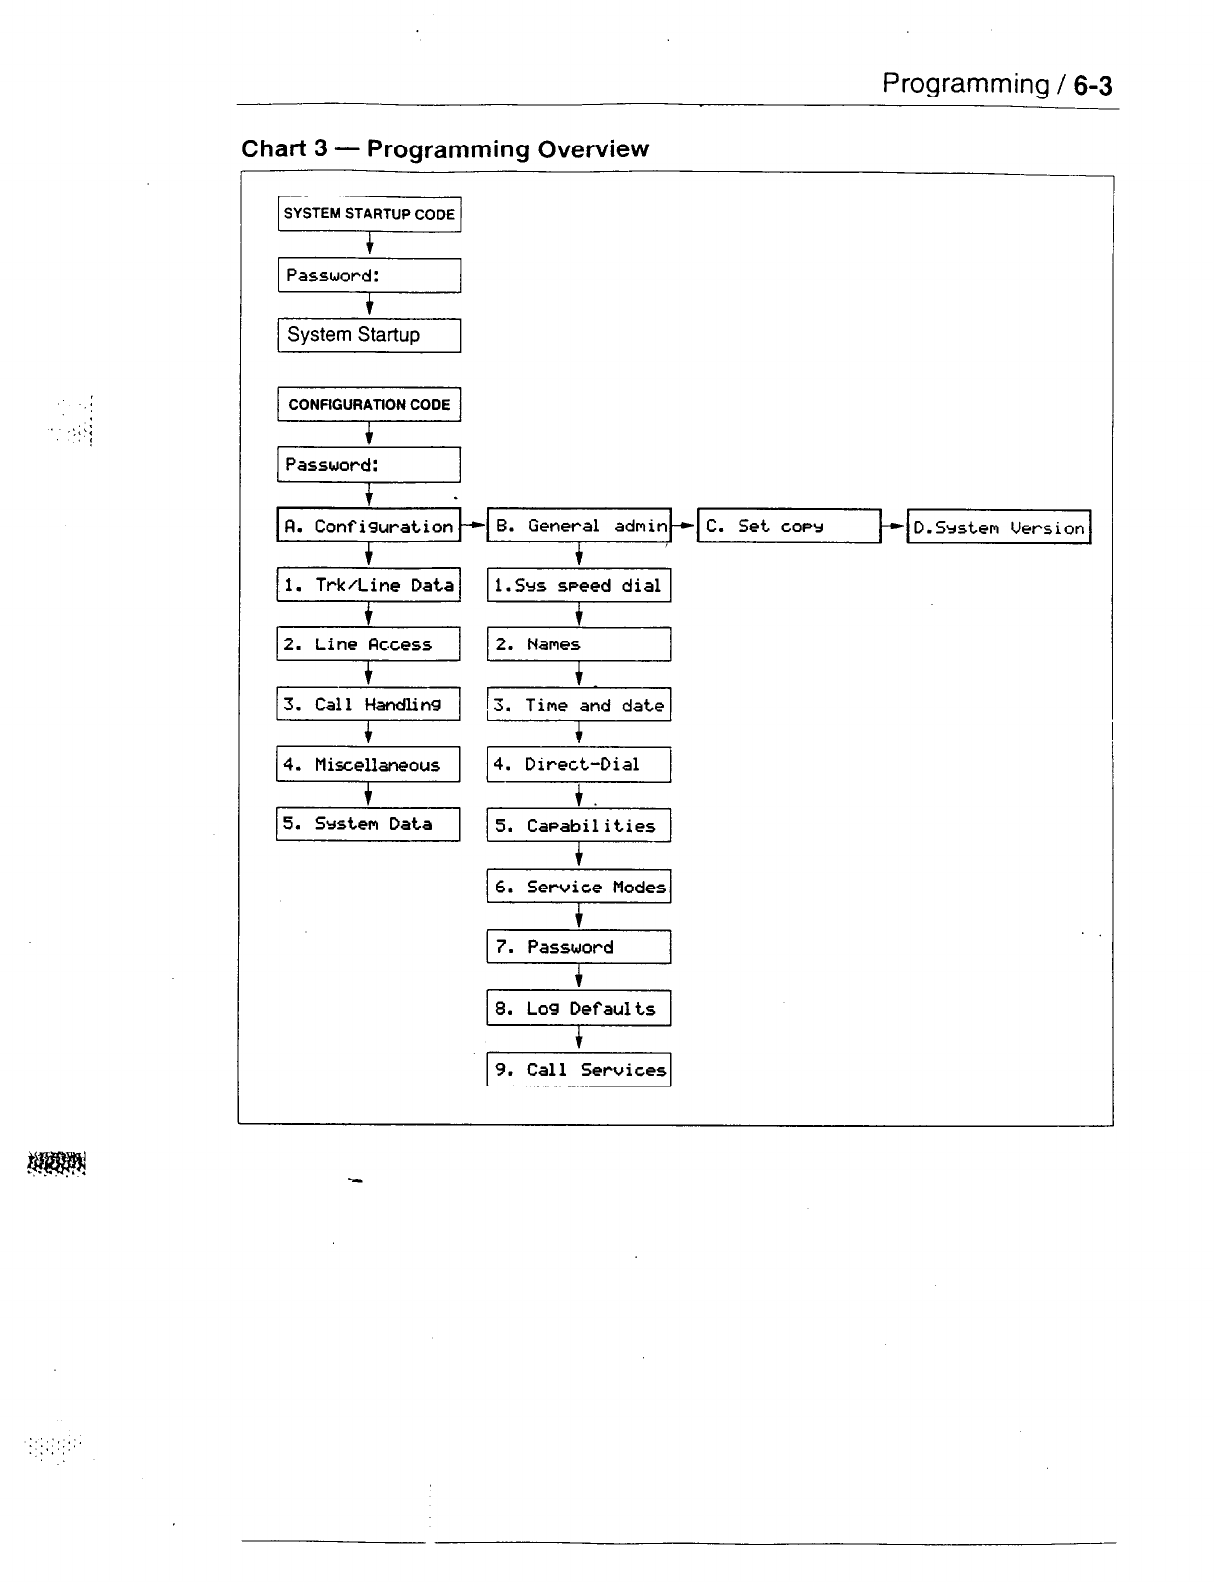
Chat-t 3 - Programming Overview
System Startup
CONFIGURATION CODE
t
Password:
t -
F1. Confi4uration B. General admin C. Set
COPY
D.Srstem Version
+
1. Trk/Line Data
2. Line Flccess
4. Miscellaneous
5. System Data
Ii.Srs syed dial1
y
,3. Time and date
t
4. Direct-Dial
t.
5. Capabilities
c
16. Servi+ce Modes1
v
18. Log yfaults
1
9.
Call Services
::
.*:::
,I::::.: .‘.\
.‘.
,‘,Y
6-4 / Programming
Programming tools
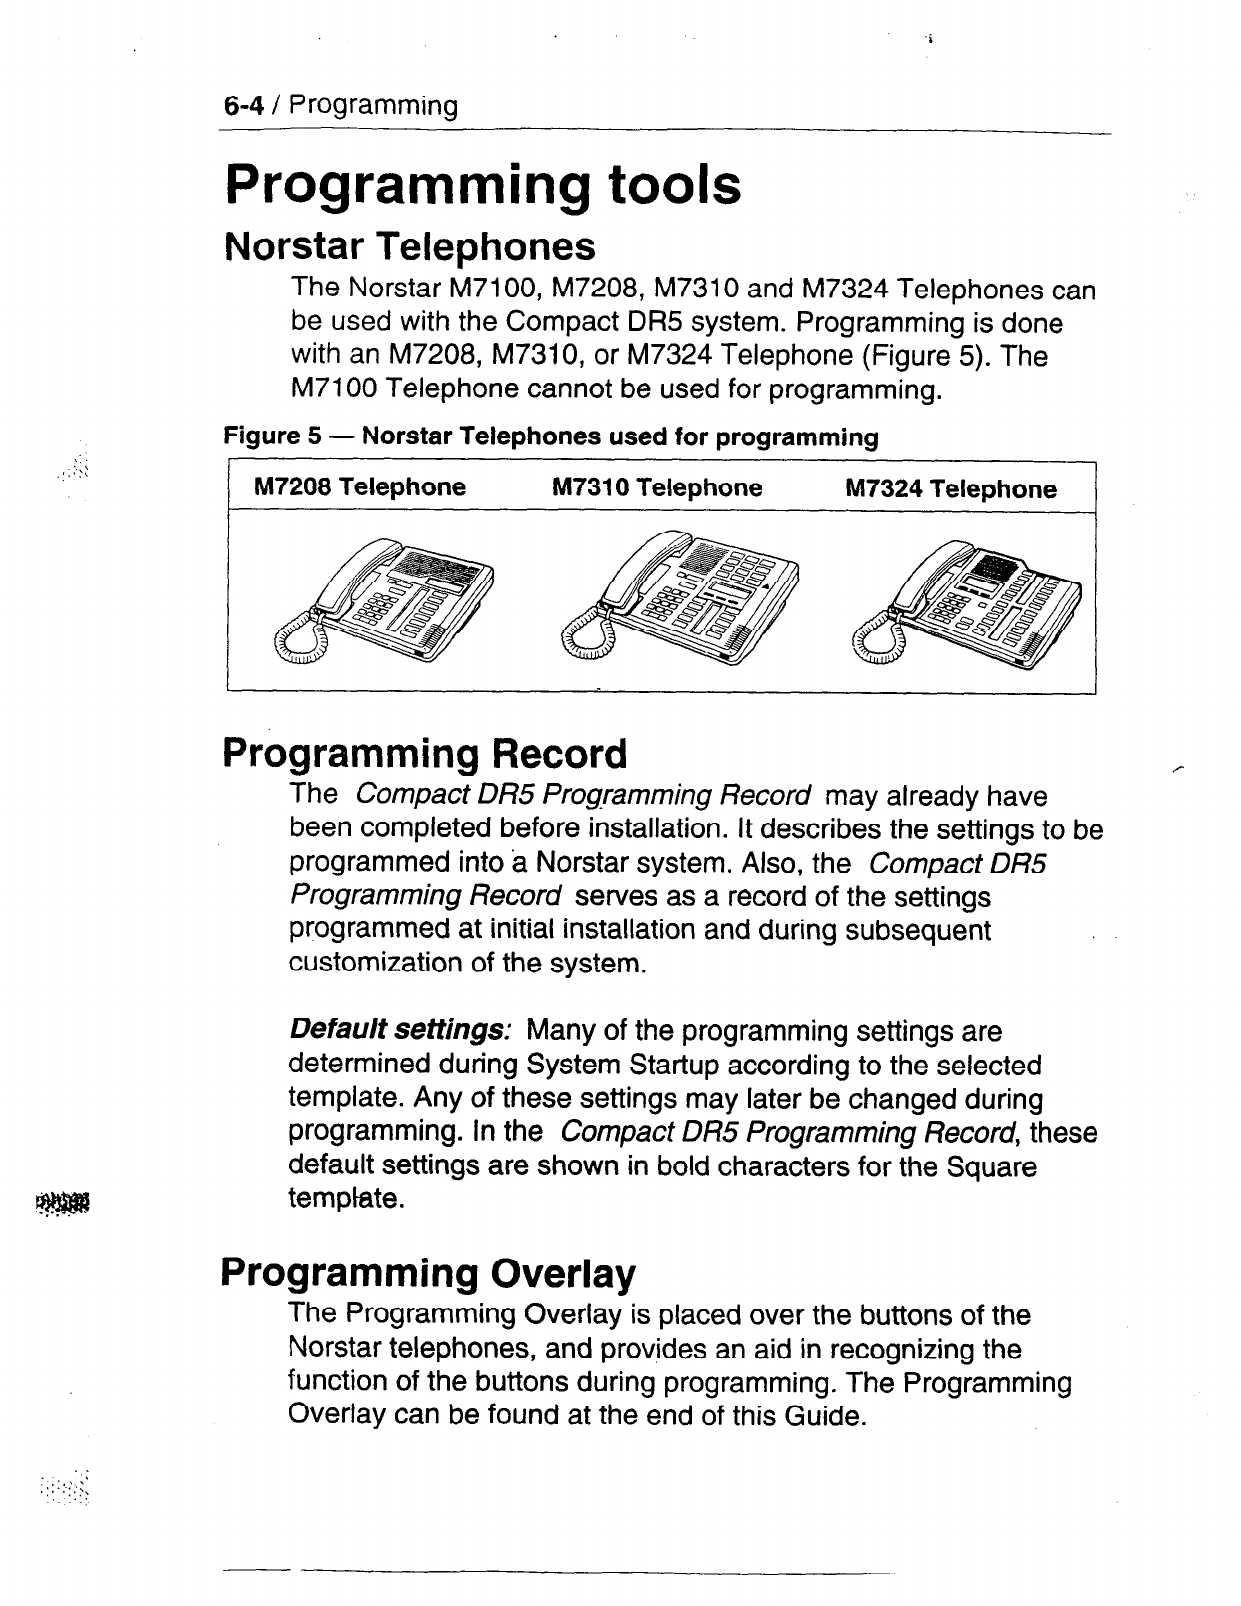
Norstar Telephones
The Norstar M7100, M7208, M7310
and M7324 Telephones can
be used with the Compact DR5 system. Programming is done
with an M7208, M7310, or M7324 Telephone (Figure 5). The
M7100 Telephone cannot be used for programming.
Figure 5 - Norstar Telephones used for programming
1 M7208 Telephone M7310 Telephone M7324 Telephone
I
Programming Record
The Compact DR5 Programming Record may already have
been completed before installation. It describes the settings to be
programmed into a Norstar system. Also, the Compact DR5
Programming Record serves as a record of the settings
programmed at initial installation and during subsequent
customization of the system.
Default settings: Many of the programming settings are
determined during System Startup according to the selected
template. Any of these settings may later be changed during
programming. In the Compact DR5 Programming Record, these
default settings are shown in bold characters for the Square
template.
Programming Overlay
The Programming Overlay is placed over the buttons of the
Norstar telephones, and provides an aid in recognizing the
function of the buttons during programming. The Programming
Overlay can be found at the end of this Guide.
::
.\!.’
(.
j : ,“.::.,‘;
Programming
/
6-5
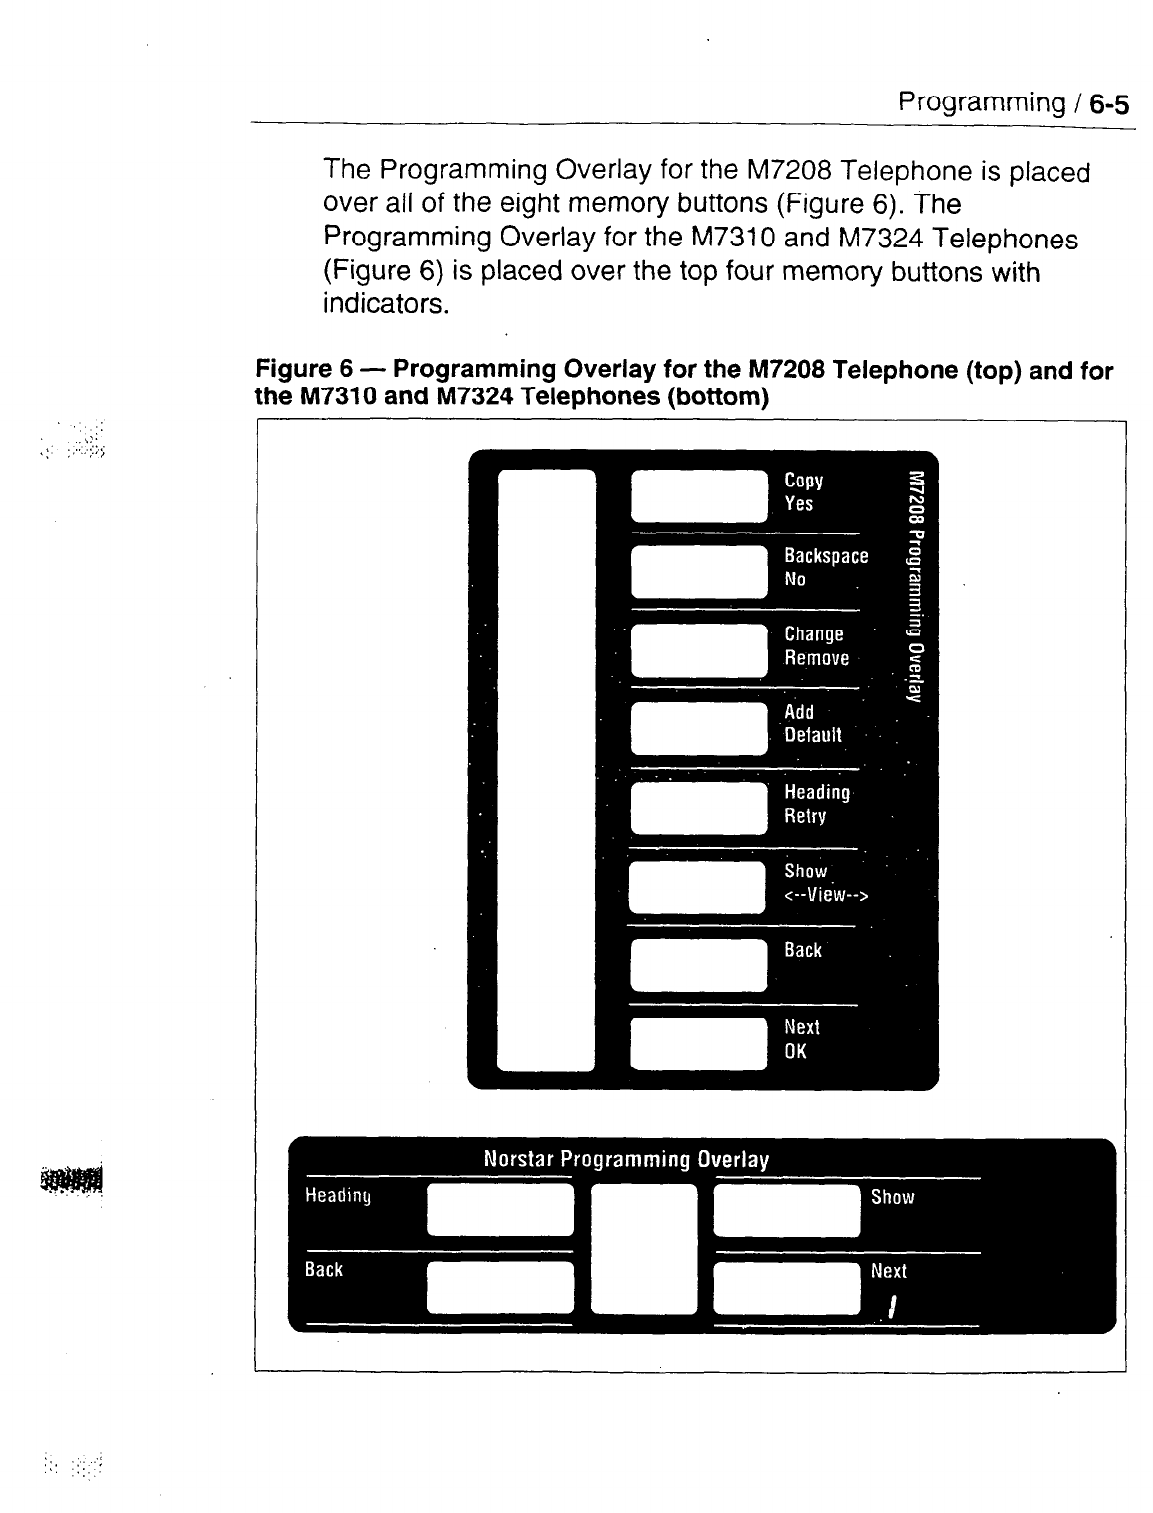
The Programming Overlay for the M7208 Telephone is placed
over all of the eight memory buttons (Figure 6). The
Programming Overlay for the M7310 and M7324 Telephones
(Figure 6) is placed over the top four memory buttons with
indicators.
Figure 6 - Programming Overlay for the M7208 Telephone (top) and for
the M7310 and M7324 Telephones (bottom)
6-6 / Programming
System Startup
Perform System Startup after the system hardware has been
installed and powered up.
CAUTION
Startup
is to be used for initial installation only, or after a
system software upgrade with a new Software
Cartridge. Do not use Startup after Norstar is in
operation; the procedure erases all system
administrative data.
All Configuration and Administration data will be retained for
at
least three days if the power fails or if the Norstar system is
powered off. After three days without power, it may be necessary
to perform System Startup again.
Note: Do
not
attempt Directory Number (DN) changes within
two minutes of System Startup (using the Change DNs
option of 5. Srstcm Data). Attempting a DN change
may disable the ports.
System Startup access
The System Startup code and a password are used only by
Installers to access System Startup.
The correct Startup code must be entered no later than
15
minute_s after the Norstar system has been powered up. A
Startup code entered at any time after the 15 minute interval
results in the message StartuP
denied.
If this occurs, re-power
the system again to prepare for the System Startup process.
Programming
/
6-7
Entering System Startup
Note: If at any time you do not wish to continue with entering
System Startup, press m.
1. Select a Norstar telephone from which to program. Place the
correct Programming Overlay over the buttons of the
telephone. A button may be used during programming when
its indicator b turns on.
2. Using the telephone dial pad, enter the System Startup code:
[Feafure~~FJ~~~[qqqj
Which is the same as:
[Feature--~ir]~~~IT]~~[iq[F--J
3. At the
Password:
prompt, enter the installer password:
(The Installer password is not shown on the display.)
The default password is (jl IF] a EJ a m which is the same
as (FJ a /FJ (FJ 0 m. You will have to use the default if this
is the first time that Configuration programming has been
accessed. If Startup must be performed on an existing
system which has already been programmed, the Installer
password might have been changed. The change should
have been recorded in the Compact BR5 Programming
Record.
4. If the password is entered correctly, the display shows
Reset
momor~?
Proceed to change the system template as
described in the next procedure.
,OR
If the Password has been entered incorrectly,
Password:
remains on the display. Press the
RETRY
display button (or
+r] on the M7208 Telephone) and re-enter the correct
password.
Note: For the security of system data, do not inform anyone
tha.t the Installer password is used for System Startup.

6-8 / Programming
Choosing the system template
System
Startup is used during initial installation to choose the
appropriate template
before starting programming. There are
three templates available:
Square: Line 01 and Line 02 are assigned to each telephone.
Hybrid: Each telephone has access to Line Pool A and is
assigned Line 01.
PBX: Each telephone has access to Line Pool A, but does
not have a line assigned.
1.
2.
3.
The display shows
Reset
PWWWY?
To continue with System
Startup and choose the system template, press VE (or
[) on the M7208 Telephone).
OR
To exit from System Startup, press
CFINCEL
(or (Rls on the
M7208 Telephone).
The display shows
Terwl ate: Square.
To accept the
Square template, go to step 3.
OR
To select another template, press
CHfJNQE (or lChange]
on
the M7208 Telephone) to select another template.
To accept the template shown and exit from System Startup,
press [jGi--]. System Startup is complete when the
default time and date appear on the telephone display.
.;‘.
,‘,“,,:,
.:,:. .
Programming / 6-9
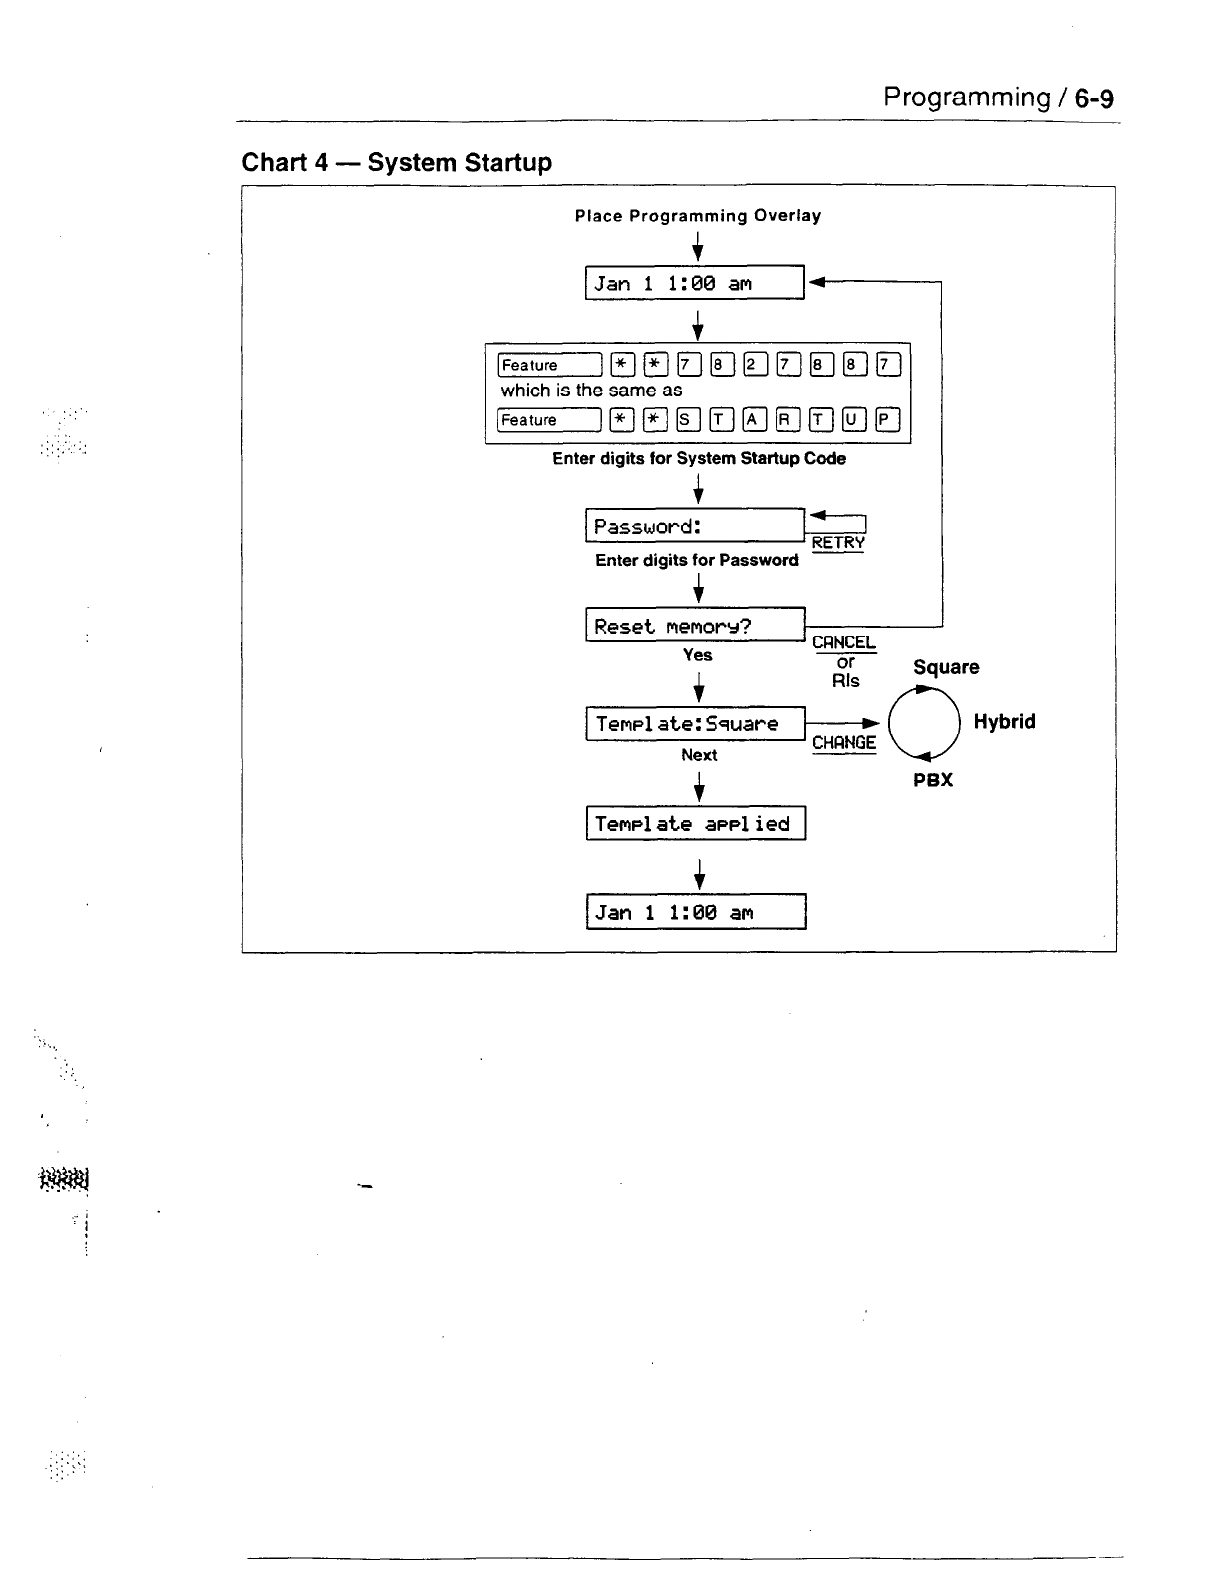
Chart System
Place Programming Overlay
+
Enter digits for System Startup Code
t
Tewl ate a~~1 ied
PBX
t
Jan 1 1:00 am
6-l 0 / Programming
Configuration
FL Configuration
programming allows you to
specify basic
system characteristics
for the customer site. Configuration is not
accessible to System Coordinators.
Configuration provides access to the following programming
sections:
1. Trunk/Line Data
2. Line Access
3. Call Handling
4. Miscellaneous
5. System Data
I
Configuration access
1.
Press [FeatureJ m a m m m a m a which is the same
as/SZGCJ~~[Ci[O~fl~.
Note: For the security of Configuration data, do not give the
’
Configuration code to anyone.
installer Password
1.
At the
Password:
prompt, enter in the existing Installer
password. The default password is a m a a m u which
is the same as a m m H n jEJ. You will have to use the
default password if this is the first time that Configuration
programming has been accessed.
2. If tf?e password is entered correctly, the display shows
Ft.
Confi%wation.
OR
If the Password has been entered incorrectly,.
Password:
remains on the display. Press RETRY (or IRetly] on the
M7208 Telephone) and re-‘enter the correct password.
Programming
/
6-11
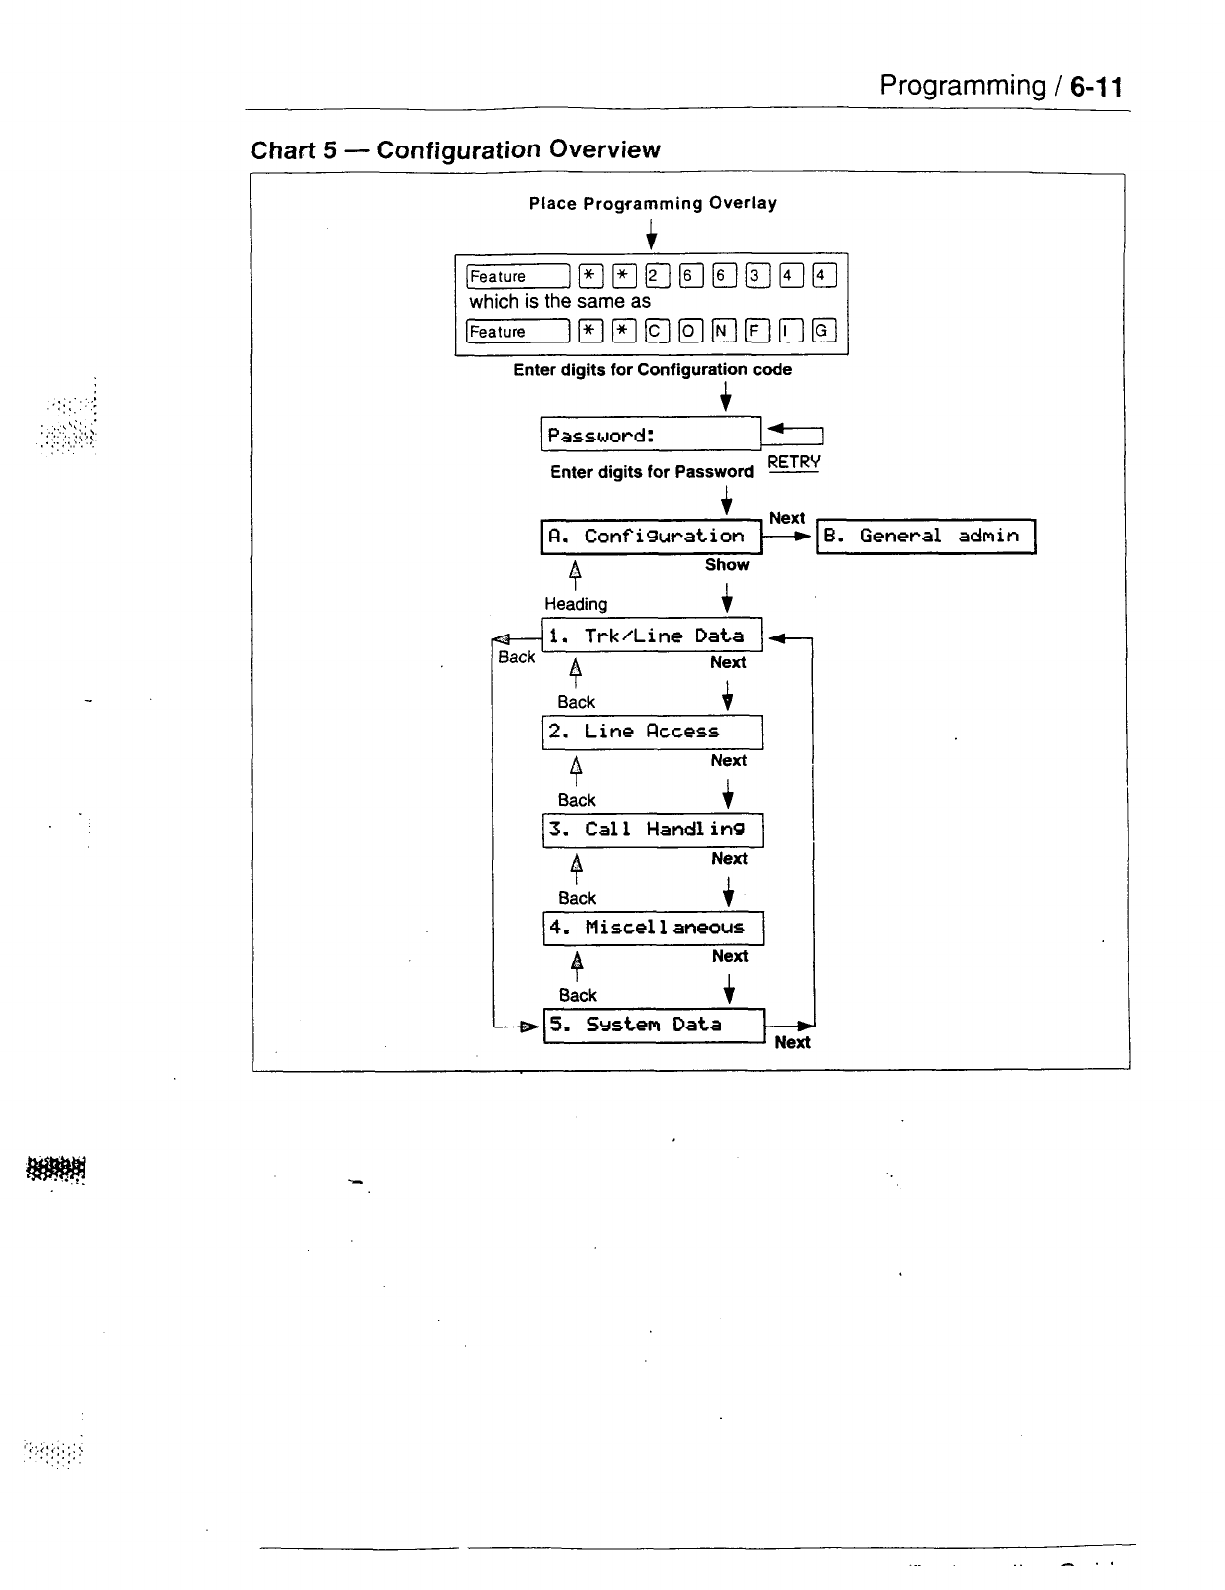
Chart 5 - Configuration Overview
Place Programming Overlay
t
Enter digits for Configuration code
+
Password:
Enter digits for Password RETRV
-
I
f
Next
FI.
Configuration -+
9
Show
Heading t
1.
Trk/Line Data
9
Next
Back 6
2. Line Flccess
4
Next
Back t
3. Cal 1 Hand1 in9
4
Next
Back t
4. Miscell aneous
4
Next
Back +
6-12 /
Programming
TrWLine Data
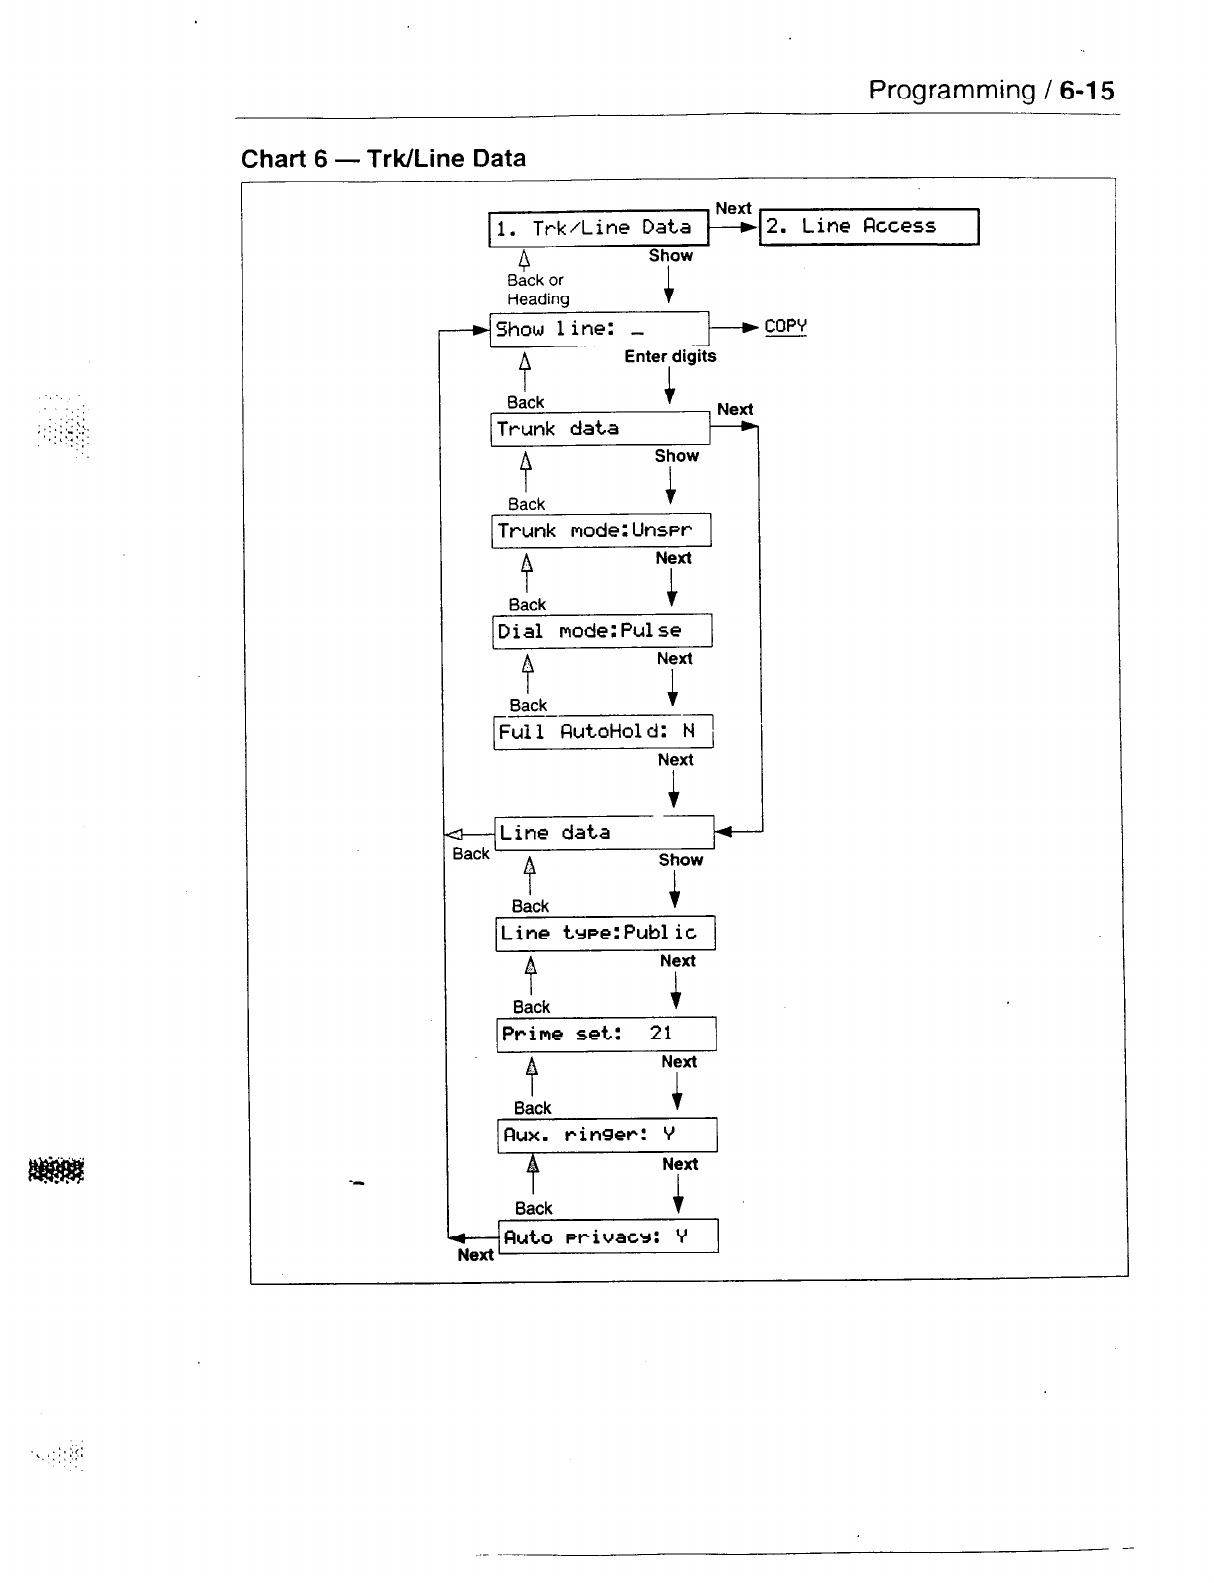
Use
1. Trk/Li ne Data
to program characteristics for each
external line.
When you are finished programming the Trk/Line Data settings
for a line, you may copy those exact settings to another line by
using the
COPV
display button (or n on the M7208
Telephone) at the
Show 1 inc: -
prompt.
Entering the line to be programmed
Enter any available line number between 01 and’06.
Trunk data
Trunk data settings apply to external lines and include Trunk
mode, Oial mode and Full Autohold.
Trunk mode
Trunk mode lets you specify one of two modes of operation for
each line: disconnect supervised or unsupervised. The possible
settings are Super or Unspr. Super turns disconnect supervision
on for the line. Unspr turns disconnect supervision off for the line.
The default is Unspr.
Disconnect Supervision, also referred to as loop supervision,
releases an external line when an Open Switch Interval (OSI) is
detected during a call on that line. This prevents the line from
remaining unavailable for other Norstar users.
You should only assign the supervised mode to CO lines that
provide an Open Switch Interval (OSI) message. The use of lines
that do not have the OSI feature available (or lines set as
unsupervised) for incoming calls, results in the inconsistent
operation of the Line Redirection feature, the ability fo disconnect
from a conference that involves two external callers, and the
ability to transfer an incoming external call to an external
number.

Programming / 6-13
- The duration of an OSI before Norstar disconnects a call
is
programmed in the Disconnect Supervision delay setting of
Miscellaneous programming.
Dial mode
A dial mode can be assigned to each line. The mode defines the
signaling that the line will use. The default mode is Pulse. The
other possible mode is Tone.
- Lines that use Dual Tone Multi Frequency (DTMF) tones,
should be set to Tone.
Full Autohold
If you select an idle line, but do not dial any digits, that line is
automatically placed on hold when you select another line. The
default setting is No, which means that the external line is not
held. The other possible setting is Yes.
Line data
Line data settings apply to external lines and include Line type,
Prime telephone, Auxiliary ringer and Auto privacy.
Line type
A type can be assigned to each line. The type defines how the
line is to be used in relation to other lines in the system. The
default type is Public. Other possible types are Private, Pool A,
Pool B and Pool C.
- If you define a line as Public, the line can be accessed by
more than one telephone.
-
If you define a line as Private, the line can only be assigned
to one telephone and the Prime Telephone for that line.
- If you assign a line to a Line Pool, that line can be available
to any telephone that is assigned access to that Line Pool.
- If a line is assigned to one of the three Line Pools, but the
line is not assigned to any telephone, that line can only be
used for making outgoing calls.
6-14 /
Programming
- If a line is assigned to one of the three Line Pools, you must
remember that there are still two more programming settings
that must be assigned before a Line Pool can be used:
l
You must assign Line
Pool Access to telephones in Line
Access.
l
You must assign Line Pool access codes in
Miscellaneous programming.
Prime telephone
The Prime telephone provides backup answering for the selected
line. The default Prime telephone has the internal number 21.
Other possible settings are any allowable internal numbers, or
None.
- Each line can only have one Prime telephone.
- Any Prime telephone can be assigned to provide backup
answering for more than one external line. All of these lines
do not necessarily have to appear on a line button with an
indicator; however, monitoring lines is made easier if there is
a iine button for every external line.
Auxiliary ringer
An auxiliary ringer can be enabled or disabled for calls coming in
on the line. The default setting is Yes, which means that the
ringer will ring. The other possible setting is No.
Auto privacy
Select Yes (the default) to prevent other users who have access
to a line on their telephone from using that line while a call is
already-in progress on the line. Select No, to allow a user to
select a line in use at another telephone, and join an established
call.
Programming
I
6-15
Chart 6 - TrWLine Data
1. Trk/Line Data 2. Line Flccess
I
0
Show
Back or
Heading 4
Show line: _
COPY
Enter digits
4
Show
Back i
Trunk mode:UnsPr
4
Next
Back c
Dial mode:Pulse
4
Next
Back J
--
Full QutoHold: fl,
Next
i
Line data
P
Show
Back i
Line
trPe:Public
P
Next
Back i
Prime set: 21
Next
Back c
+, . :
Next
Back !
Fluto priuacr: Y
-
6-16 / Programming
,:,;.
y.;\.
,‘.‘,:..‘.I
_
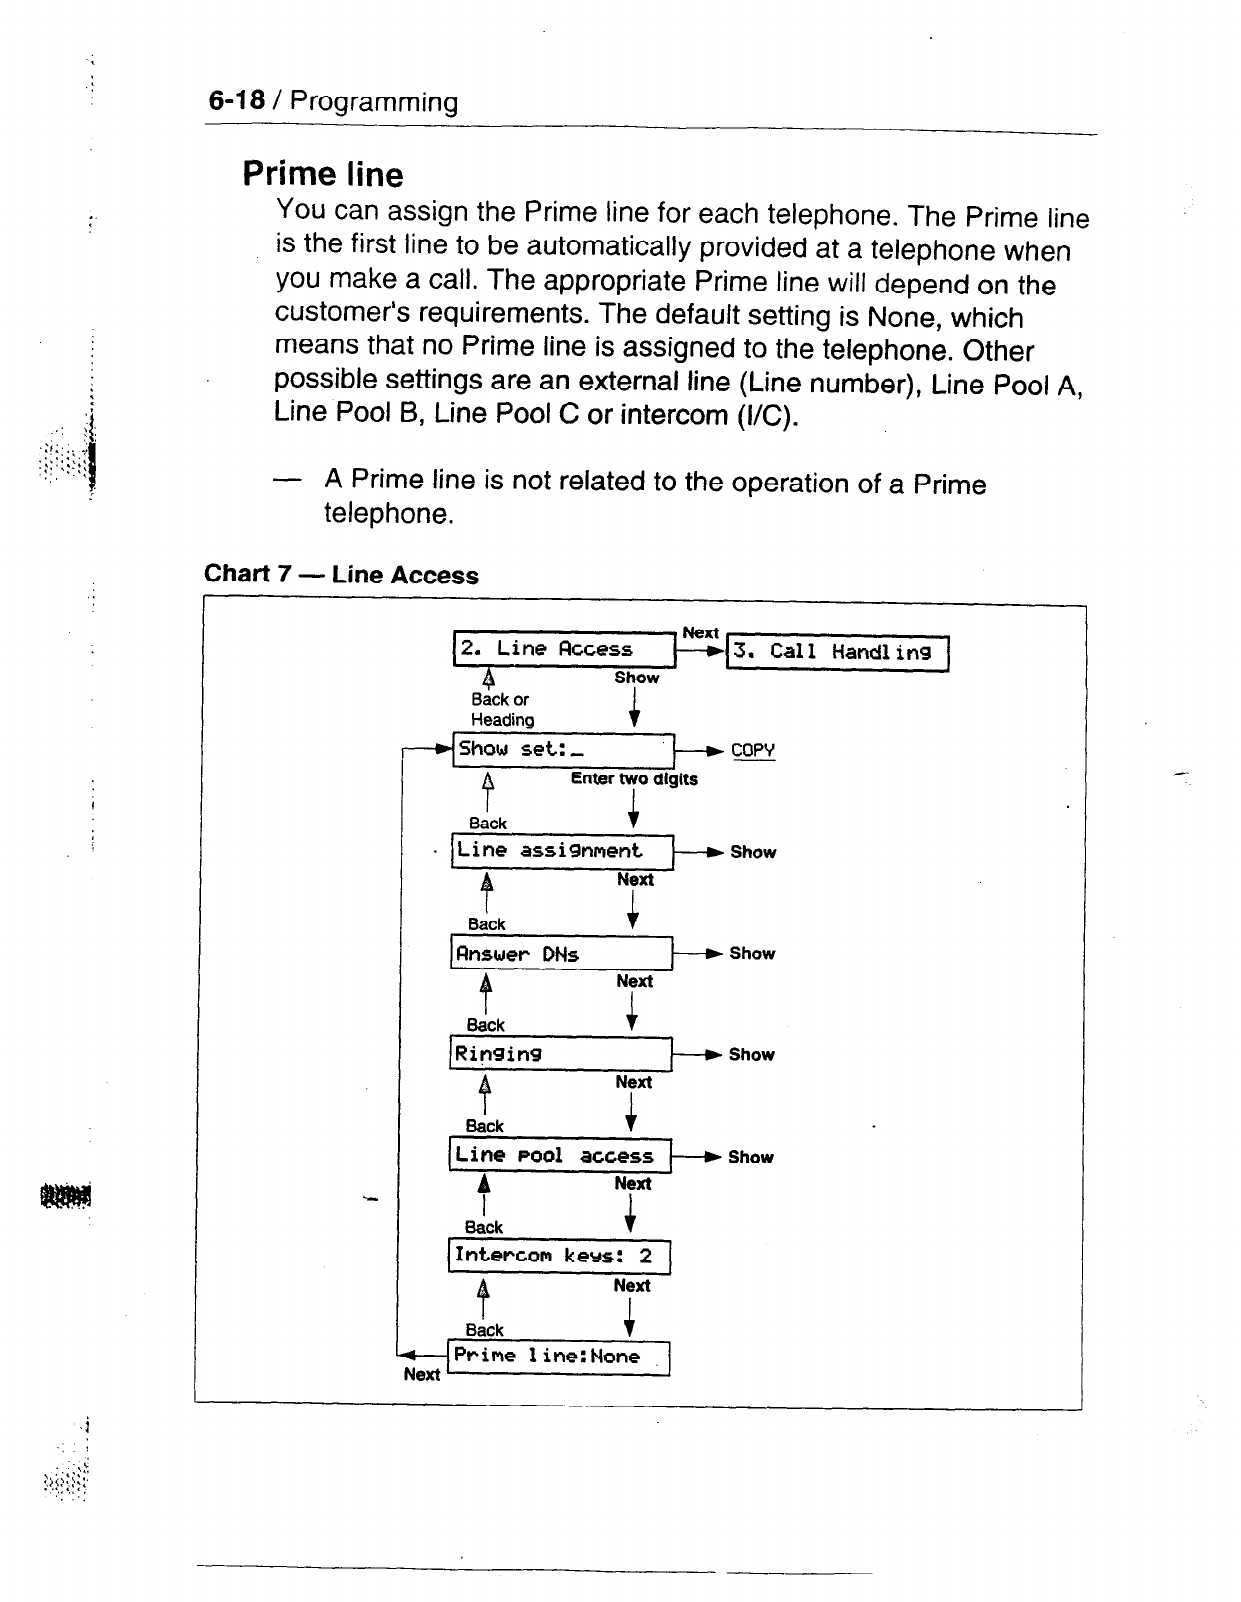
Line Access
Use
2. Line ~CCC.-S
to program characteristics for each
telephone.
These characteristics establish which lines the
telephone may use.
When you are finished programming the Line Access settings for
a telephone, you may copy those settings to another telephone
by using the
COPV
display button (or [J on the M7208
Telephone) at the
Show set: _
prompt.
Entering the telephone to be programmed
Enter any available DN. Default DNs range from 21 to 36. DNs
can be later changed to a new number in 5. System Data of
Configuration programming.
Note: Settings are automatically applied for the Analog
Terminal Adapter (ATA) if installed. See the
ATA Installation Guide for the defaults.
Line assignment
Add or remove lines to assign one or more lines to each
telephone. The default line assignments to each telephone are
Line 01 and Line 02.
- A Private line can only be assigned to one telephone. (It is
also automatically assigned to the Prime Telephone for that
line.)
- If you assigned the PBX template in System Startup, a Line
Pool is assigned to the telephone instead of external lines.
You_ can add lines if you wish. This would allow the
telephone to ring for incoming external calls.
- If a line is assigned to a Line Pool, but is not assigned to any
telephone, that line can only be used to make outgoing calls.
:.:
Programming / 6-l 7
Answer DNs
Up to four buttons on a telephone can be programmed for
answering calls to the DNs of other telephones. The default is No
Answer DNs.
Ringing
For each line and Answer DN assigned to a telephone, you can
determine whether incoming calls will ring at the telephone.
Possible settings are Ring and No Ring. The default setting is
Ring.
Line pool access
You can determine which Line Pool each telephone has access
to. Possible settings are Yes and No. The default setting is No
for each of the three line pools, which means no telephone has
default access to Line pools.
- Assigning a Line Pool to a telephone saves on the number of
buttons required for external lines on the telephone.
Intercom buttons
You can determine the number of Intercom buttons on the
telephone. Possible settings are 0, 1,
or
2. The default setting
is 2.
- A minimum of two Intercom buttons are required for
conferencing with two other Norstar telephones in the same
system..
-
A minimum of one Intercom button is required if internal calls
are to be made or received from the telephone or Line Pools
--_ are to be accessed from the telephone.
6-l 8 / Programming
Prime line
You
can assign the Prime line for each telephone. The Prime line
is the first line to be automatically provided at a telephone when
you make a call. The appropriate Prime line will depend on the
customer’s requirements. The default setting is None, which
means that no Prime line is assigned to the telephone. Other
possible settings are an external line (Line number), Line Pool A,
Line Pool B, Line Pool C or intercom (I/C).
- A Prime line is not related to the operation of a Prime
telephone.
Chart 7 - Line Access
~~%~S. Call Handling 1
Backor
Heading
COW
I
Enter two digits
I
. Line assignment
Next
I
Show
B&k
t
Back
f
Sack
Next
4
Next
Show
Show
Show
S&k
[Intercom keys: 2
1
Next
’
Programming / 6-19
Call Handling
::j:::. .::
,,,
Use 3. Cal 1 Hand1
in9
paraf?IeterS to
program
system-wide
characteristics for certain call features. These characteristics are
not associated in programming with any particular line or
telephone.
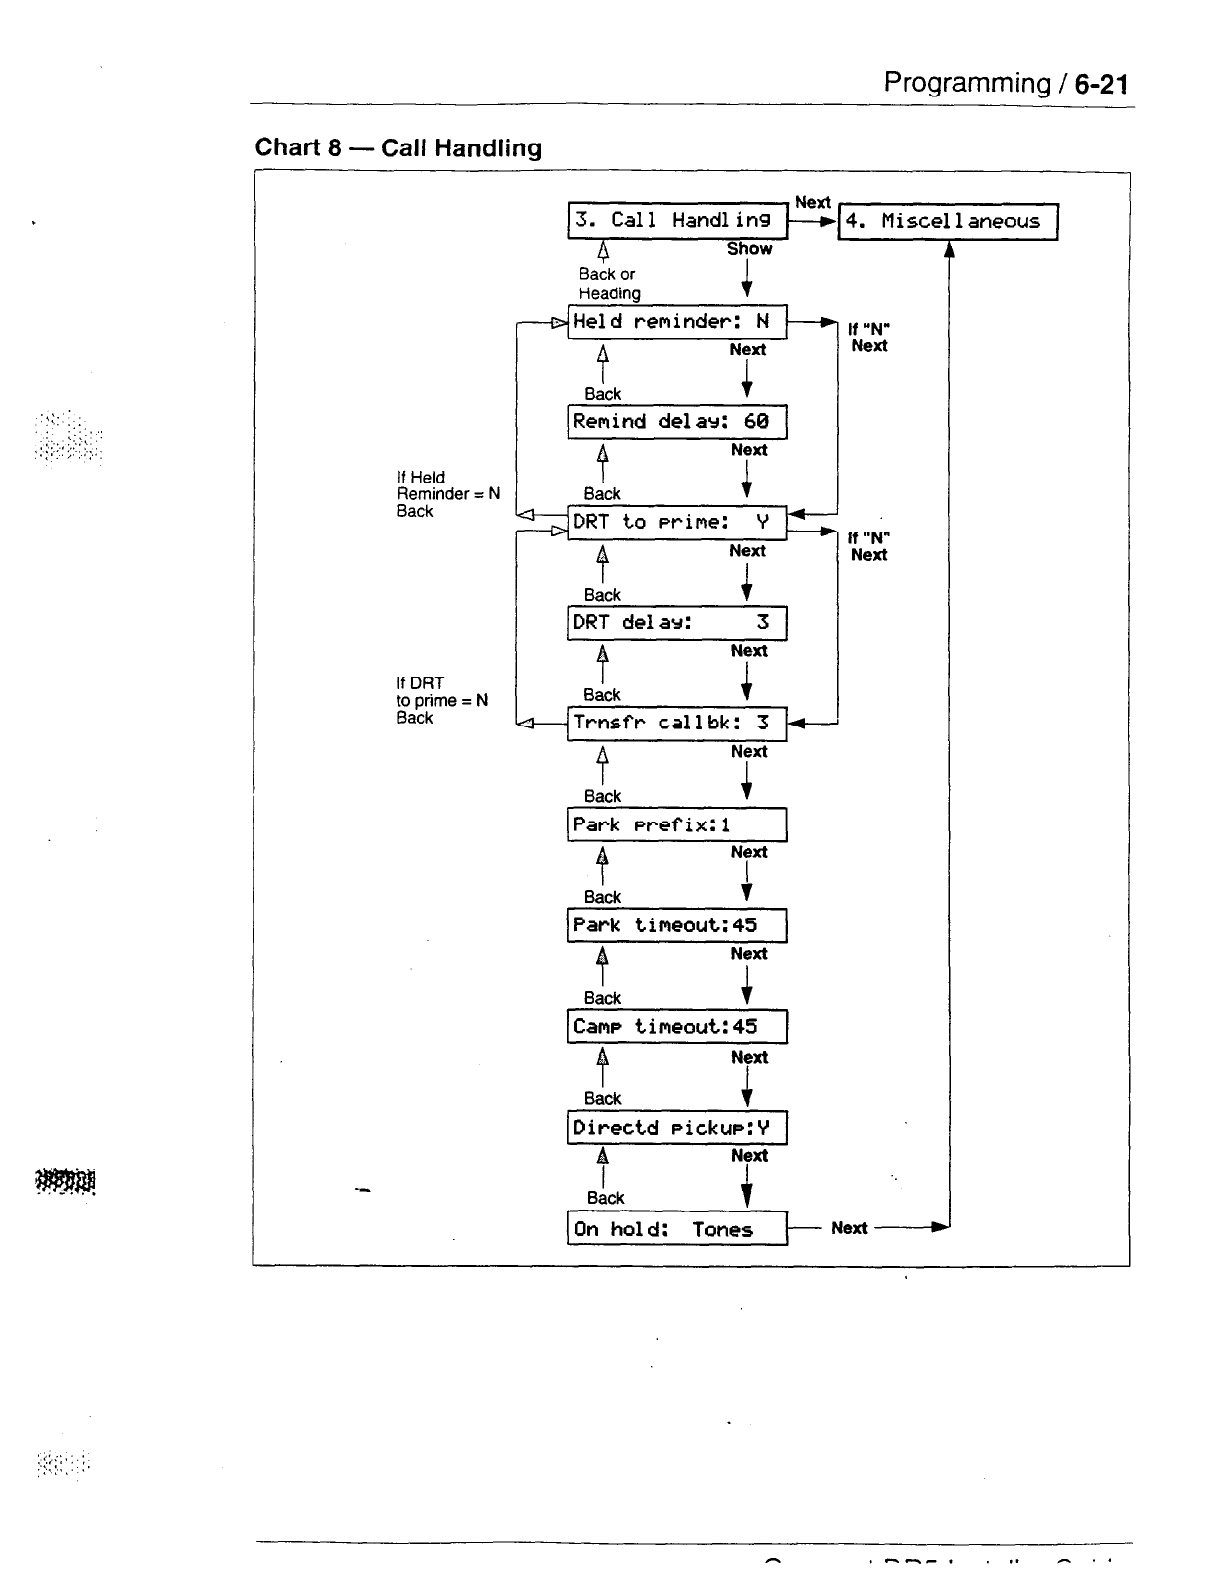
Held reminder
Choose if the Held Line Reminder feature is to be active for all
external lines. Possible settings are Yes and No. The default
setting is No. If Yes, the programming menu takes you to the
Remind delay setting.
Remind delay
Assign the delay (in seconds) before the Held Line Reminder
feature begins at the telephone which has put an external line on
hold. Possible delays are 30, 60, 90, 120, 150 and 180 seconds.
The default delay is 60 seconds.
- This setting does not appear if Held Line Reminder is not
active.
DRT to prime
Choose if the Delayed Ring Transfer to Prime telephone feature
is to be active for all external lines associated with the Prime
telephone. Possible settings are Yes and No. The default setting
is Yes. If Yes, the programming menu takes you to the DRT
delay setting.
- Ensure that you have an operational Prime telephone.
- This setting applies only to external lines with an assigned
- Prime telephone.
DRT delay
Assign the delay (number of rings) before an unanswered
external call is redirected to the Prime telephone. Possible
delays are 1, 2, 3, 4, 6 or IO rings. The default delay is 3 rings.
- To estimate the delay time in seconds, multiply the number
of rings by six.
- This setting does not appear if DRT to prime is not active.
6-20 / Programming
Transfer callback
Choose the delay (number of
rings) before a transferred
external
call will callback to the originating telephone.
The possible delay
is
3, 4, 5, 6, or
12
rings. The default delay is 3 rings.
- To
estimate the delay time in
seconds, multiply the number
of rings by six.
Park prefix
Park prefix assigns a one digit code to retrieve a parked call. Any
valid digit from 0 to 9, or None, can be assigned. The default Call
Park prefix is 1. The Call Park prefix cannot be the same as the
first digit of an internal DN, the first digit of a Line Pool access
code, the Direct-Dial digit, or the External Line access code.
Park timeout
Assign the number of seconds before a parked external call will
callback to the originating telephone. The possible timeout is 30,
45, 60, 90, 120, 150, 180, 300, or 600 seconds. The default
timeout is 45 seconds.
Camp timeout
Assign the length of delay before a camped call is returned to the
telephone which camped the call. The possible timeout is 30,45,
60, 90, 120, 150, or 180 seconds. The default timeout is
45 seconds.
Directed pickup
Select Yes (the default) to allow any telephone within the system
to answer calls by specifying the ringing telephone’s number
(unlike call Pickup Group which only allows pickup of calls within
a specified group of telephones). The other possible setting is
No.
On hold
Choose what a caller will hear on an external line when the
line
has been put on hold. Possible settings are Tones, Music, or
Silence. The default setting is Tones.
- A customer supplied music source must be connected in
Programming / 6-21
.
,‘i;::::,;
;::.:.x,.
,’
Chart 8 - Call Handling
Back or
If Held
Reminder = N
Back
f
Next
Back
Remind delay: 68
f
Next
Back +
DRT
to Prime: V
P
Next
If “N”
Next
If “N”
Next
Back
DRT delay: 3
Next
If DRT
tgo,Pc;me = N Back
Trnsfr call
bk: 3
f
Next
Back +
Park wefix:l
t
Next
Back
!
Park timeout:45
f
Next
Back
Camp timeout:45
Next
Back +
Directd Pickup:V
Next
f
'_
Back
Next D
6-22 / Programming
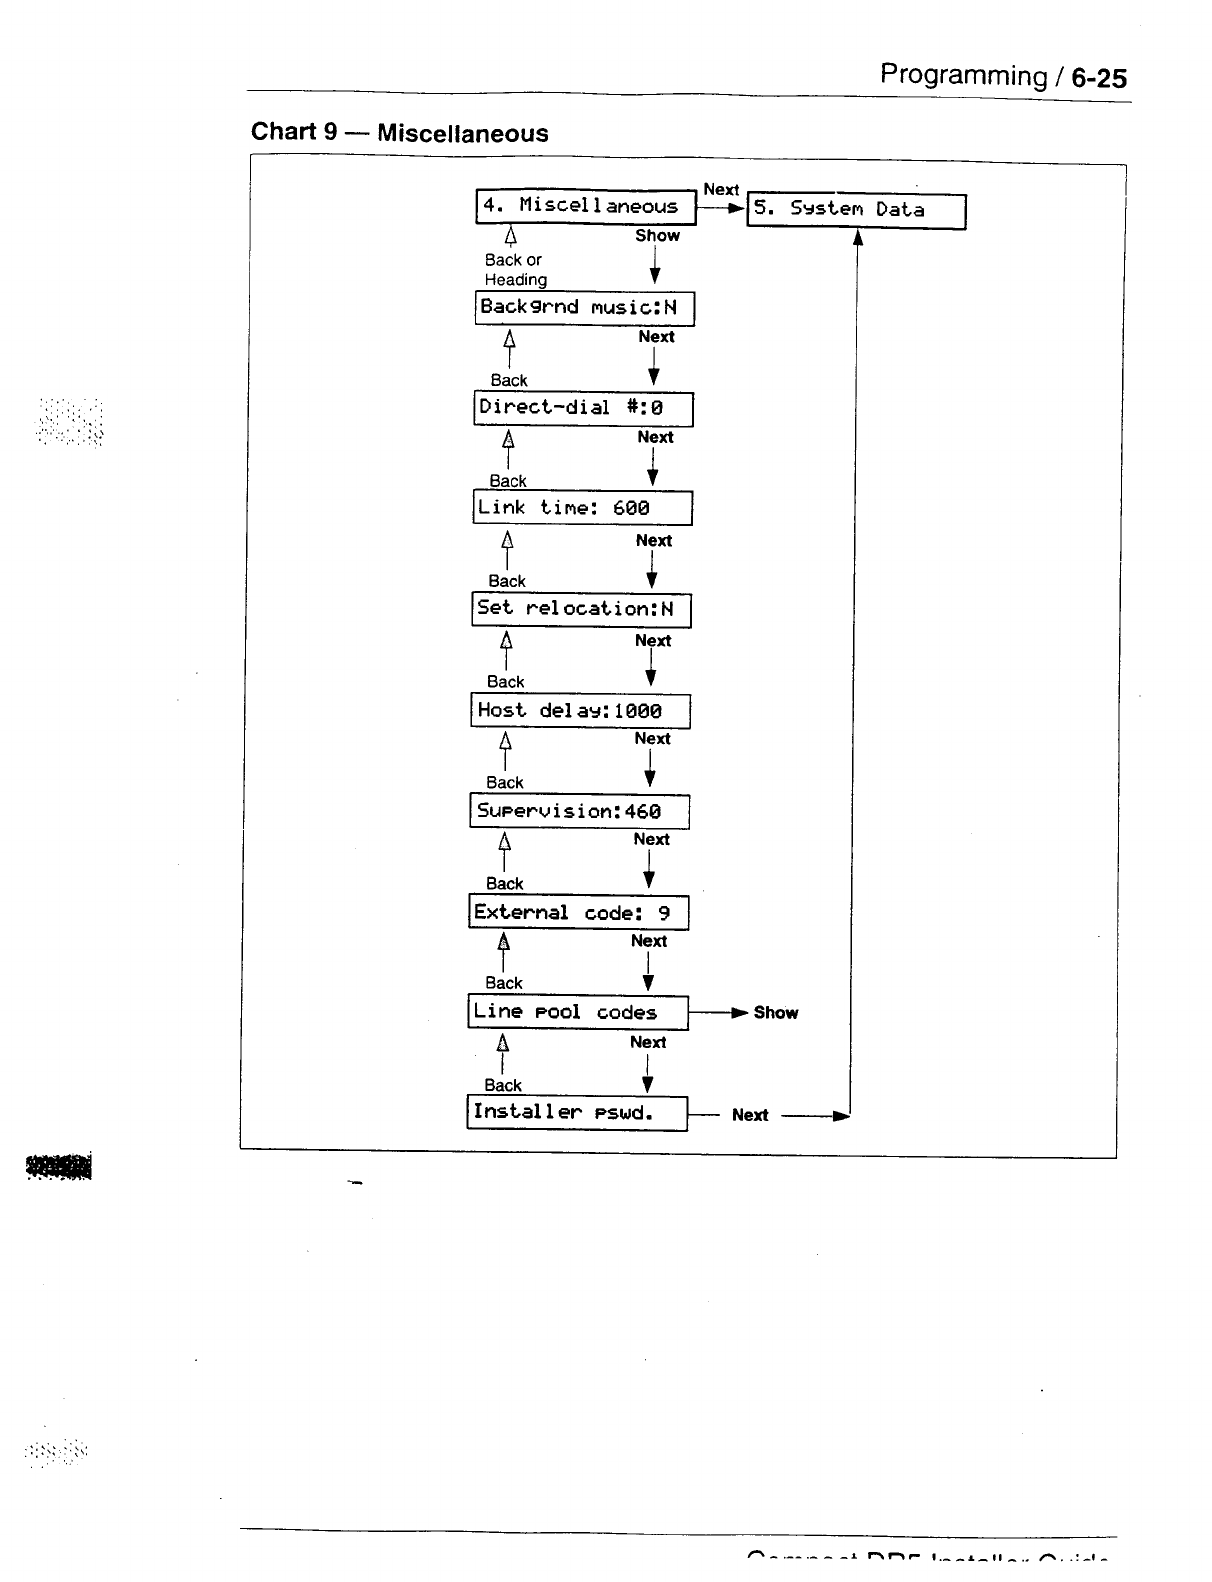
Miscellaneous
Use
4. Hi 3x11
dt-teous
settings to program various system-
wide characteristics.
These characteristics are not associated in
programming with any particular
line or telephone.
Background Music
Choose if the Background music feature is to be available with
the Norstar system. Possible settings are Yes and No. The
default setting is No.
- If this feature is enabled, ensure that an external music
source has been connected to the KSU. (This music source
is also used for the Music on Hold feature.)
Direct-Dial digit
Choose the digit you dial in order to get the Direct-Dial
Telephone to ring. The possible settings are any valid digit from
0 to 9, or None. The default setting is the digit zero. The
Direct-Dial, digit cannot be the same as the first digit of an
internal DN, the first digit of a Line Pool access code, the
External Line access code, or the Call Park prefix.
Link time
Assign the Link time (in milliseconds). Possible times are 100,
200, 300,400, 500, 600, 700, 800, 900, 1000 milliseconds. The
default Link time is 600 milliseconds.
- The Link time depends on the requirements of the host PBX,
Centrex, or other switching system that must be accessed by
Norstar.
- Link is another name for Recall or Flash.
._
Telephone relocation
Choose if the Set Relocation feature is to be active, Possible
settings are Yes and No. The default setting is No.
- It is advisable to turn Set Relocation on after the telephone
installation and progra.mming has been done. This provides
you with more flexibility in testing equipment. If this feature is
disabled, and a telephone is moved, that telephone’s internal
number and Administration data remain with the physical
port.
Programming / 6-23
- If new telephones are being installed at the same time that
other telephones are being relocated, you should
perform
the following
procedure to ensure that
Set
Relocation occurs:
1.
Select Yes
to turn on Set Relocation.
2,
Unplug the telephone that is to be relocated.
3.
Plug the telephone into its new location.
4. Plug a new telephone into the old location of the
telephone that was moved.
Host delay
Host delay programs the delay in milliseconds between the
selection of an outgoing line and the moment that Norstar sends
dialed digits or codes on that line. Possible delays are 200, 400,
600,800,1000,1200,1400,1600,1800 or 2000 milliseconds.
The default is 1000 milliseconds.
Disconnect Supervision delay
Disconnect Supervision delay allows you to specify the duration
of an Open Switch Interval (03) before the Disconnect (or loop)
Supervision feature disconnects a call on a supervised external
line. Possible settings are 60, 100, 260, 460, or 600 milliseconds.
The default is 460.
- Disconnect Supervision is assigned to each line with the
Trunk mode setting in the Trunk data section of
Configuration programming.
External code
The External code allows an M7100 Telephone or an ATA to
access external lines. Any valid digit from 0 to 9, or none, can be
as&gned. The default is 9. The External Line access code
cannot be the same as the Call Park prefix, the Direct-Dial digit,
the first digit of a Line Pool access code, or the first digit of an
internal DN.
6-24 / Programming
Line pool codes
Line Pool access
codes are used to specify the line pool
you
wish to use for making an outgoing external call. Assign Line
Pool access codes for each of the three possible Line Pools. The
possible settings are a one to four digit number or None. The
default setting is none.
-
A Line Pool access code cannot start with the first digit of an
internal DN, the Direct-Dial digit, or the Call Park prefix.
A Line Pool access code takes precedence over the External
Line access code if there is a conflict.
Line Pool access codes starting with the same number must
be the same length.
Ensure that the System Coordinator knows the codes.
Installer password
_
This allows you to change the Installer password for access to
Configuration programming. The possible setting is any
combination of one to six digits. The default Installer password is
-
-
-
The default password is required to first gain access to
Configuration programming. However, it is advisable to
change that password to a new one.
Remember to record the new Installer password in the
Compact DR5 Programming Record.
It is easier to remember the password if the digits spell a
word.
6-26 / Programming
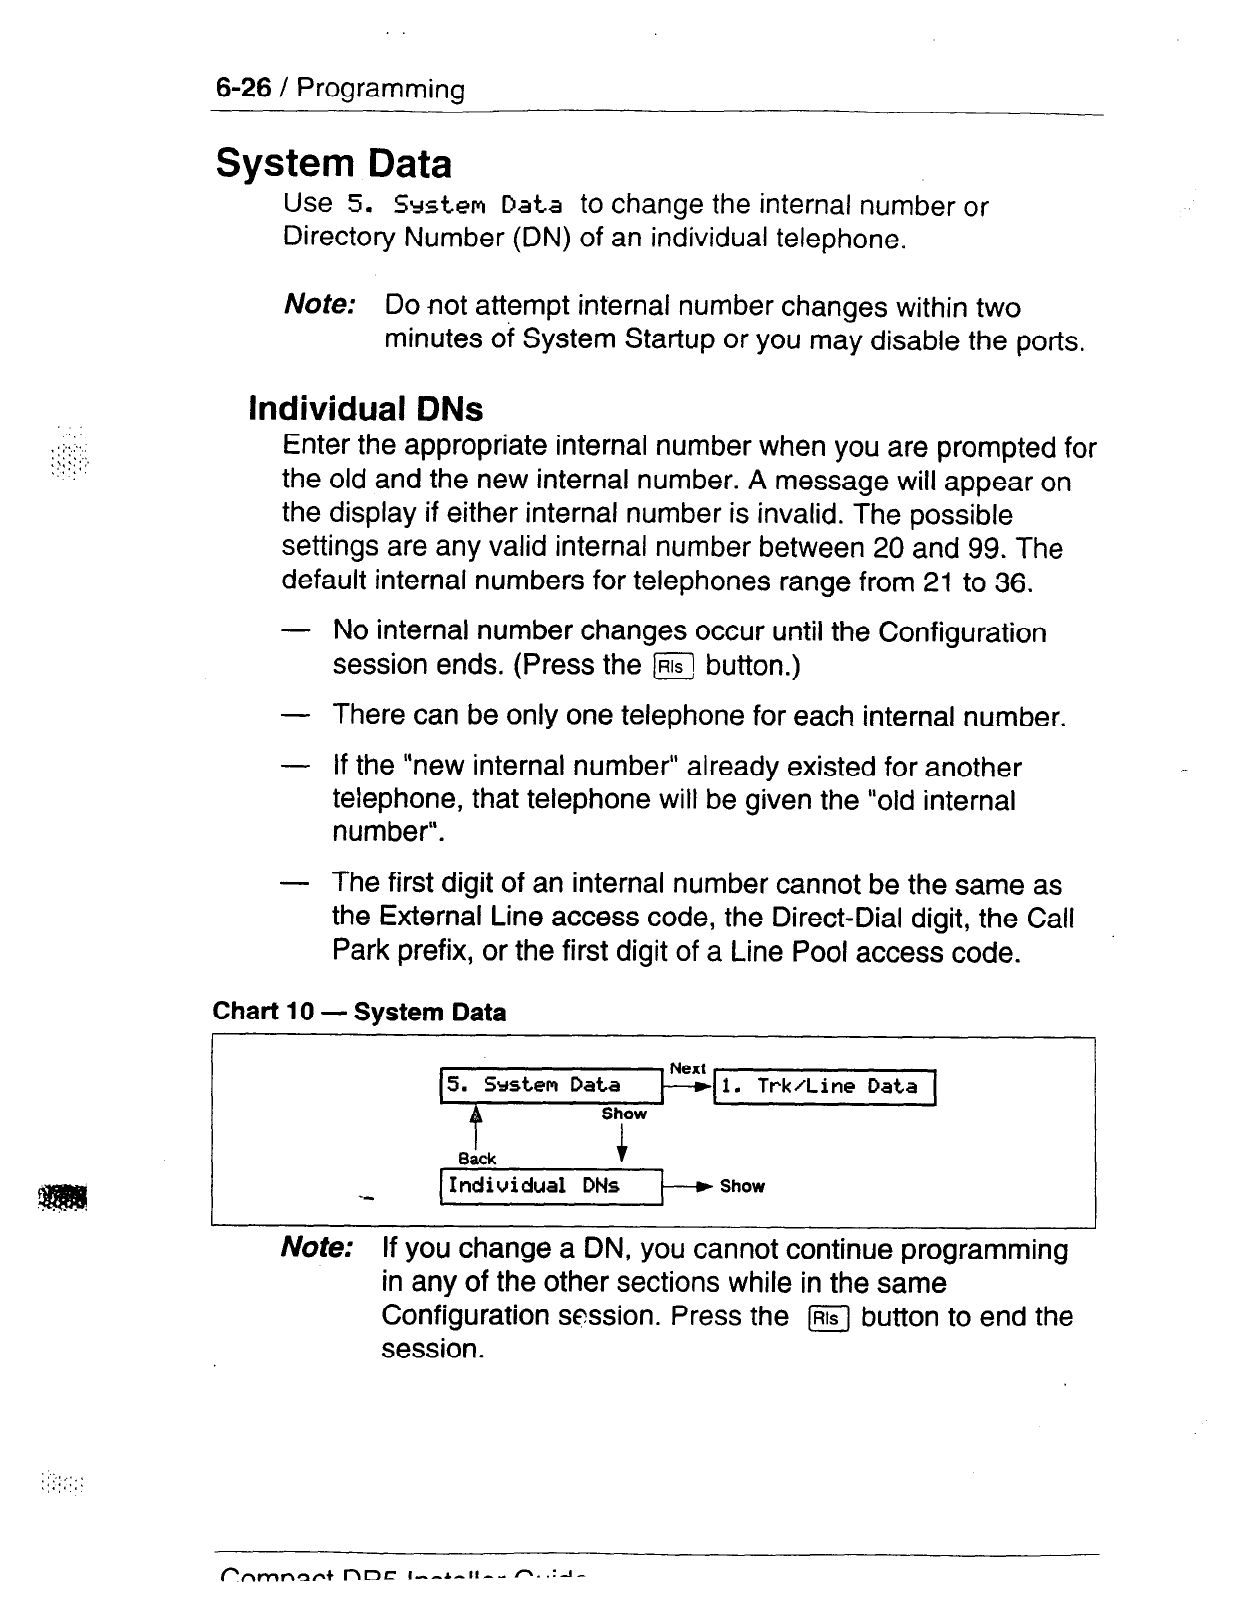
System Data
Use 5. System Data to change the internal number or
Directory Number (DN) of an individual telephone.
Note: Do not attempt internal number changes within two
minutes of System Startup or you may disable the ports.
Individual DNs
Enter the appropriate internal number when you are prompted for
the old and the new internal number. A message will appear on
the display if either internal number is invalid. The possible
settings are any valid internal number between 20 and 99. The
default internal numbers for telephones range from 21 to 36.
- No internal number changes occur until the Configuration
session ends. (Press the $iJ button.)
- There can be only one telephone for each internal number.
- If the “new internal number” already existed for another
telephone, that telephone will be given the “old internal
number”.
- The first digit of an internal number cannot be the same as
the External Line access code, the Direct-Dial digit, the Call
Park prefix, or the first digit of a Line Pool access code.
Chart
10
- System Data
Note: If you change a DN, you cannot continue programming
in any of the other sections while in the same
Configuration session. Press the m button to end the
session.
.,.::.:, ,* .,
.I~,. .
<‘,,::. .::*,:t
i::::.:, ..,:.: .\:..
!:::‘:,j:,!:‘:::‘:‘ >
.‘.
::
Programming / 6-27
Set
Copy
Set
Use C. Set,
COPY
for copying programmed data
from
one
telephone
to another. YOU can copy System
data only or you can
copy both
System data and Personal programming (User data).
System data is programmed in Configuration and Administration.
Personal programming is performed by the user at the individual
telephone, and allows the telephone to be customized according
to the user’s requirements.
Copy Options
Cwr:SVSTEM data
When this message appears on the display, you can choose to
copy System data pertaining specifically to telephones.
COFY:
SVSTEM+USER
/
When this message appears on the display, you can choose to
copy System data and Personal programming. Both telephones
must be the same model and connected to the system before
this option can be used.
/Vafe: Do not confuse C. Set
COPY
with the COPV display
button (or 1copyJ on the M7208 Telephone), which is
for selective copying of specific groups of
one telephone or external line to another.
settings from
I ~ :.
.: :
:,j;i
6-28 / Programming
Telephone settings which
CANNOT
be copied
System settings in Configuration programming
1.
-
-
5.
-
Trk4 ine Data
Private
line appearances
Prime telephone designation for a line
System Data
Directory Number (DN)
System settings in Administration programming
2.
-
4.
-
6.
-
-
-
9.
-
-
Names
Telephone name
Direct-Dial
Direct-Dial telephone designation
Service Modes
Extra-Dial telephone designation
Control telephone designation for a line
Service mode Ringing telephone designation for a line
Cal 1 Services
Auto Call Info telephone designation for a line
Log space
Personal programming
-
-
-
-
-
-
-
Autobump
Autolog options
Contrast Adjustment
Dialing modes (Automatic Dial, Pre-Dial, Standard Dial)
Log password
Ring Type
Ring Volume

Programming / 6-29
;,.:\: :.
1:;:
:.‘~:
:
Telephone settings which CAN be copied
Listed below are the telephone related settings which can be
copied to a destination telephone, overriding any previous
programming.
System settings in Configuration programming
2. Line Recess
-
Line assignment
-
Answer DNs
-
Ringing line preference
-
Line pool access
-
Number of Intercom buttons
-
Prime line designation
System settings in Administration programming
5.
-
-
-
-
-
-
-
-
-
-
-
-
-
-
Capabil ities
Set Filter
Line/set filters
Set Lock
Full handsfree
Auto handsf ree
Handsfree answerback
Pickup group
Paging
Page zone
Auxiliary ringer
Direct-Dial
Forward on busy
Forward on no answer
Forward no answer delay
-
Cnmnart
nRF;
lnctnbr G~~ifie
6-30 / Programming
-
-
9.
-
-
-
Allow redirect
Redirect ring
Receive tones
Hotline
Priority call
Cal 1 Set-vi
02s
Logging set designation
Show external Voice Message
First display
Personal programming
If desired, the following Personal settings can be copied along
with the System data:
- Programmable button assignments (Internal Autodial,
External Autodial, and feature access)
- Language choice
- Personal Speed Dial entries
‘.’ .,
:, ..,
Compact OR5
Installer Gr
tide
4
,::.; ,y; I,..;..:
,.,I ”
*
,:;;::;<.
/
,‘..‘..‘:\
,(.
Programming / 6-31
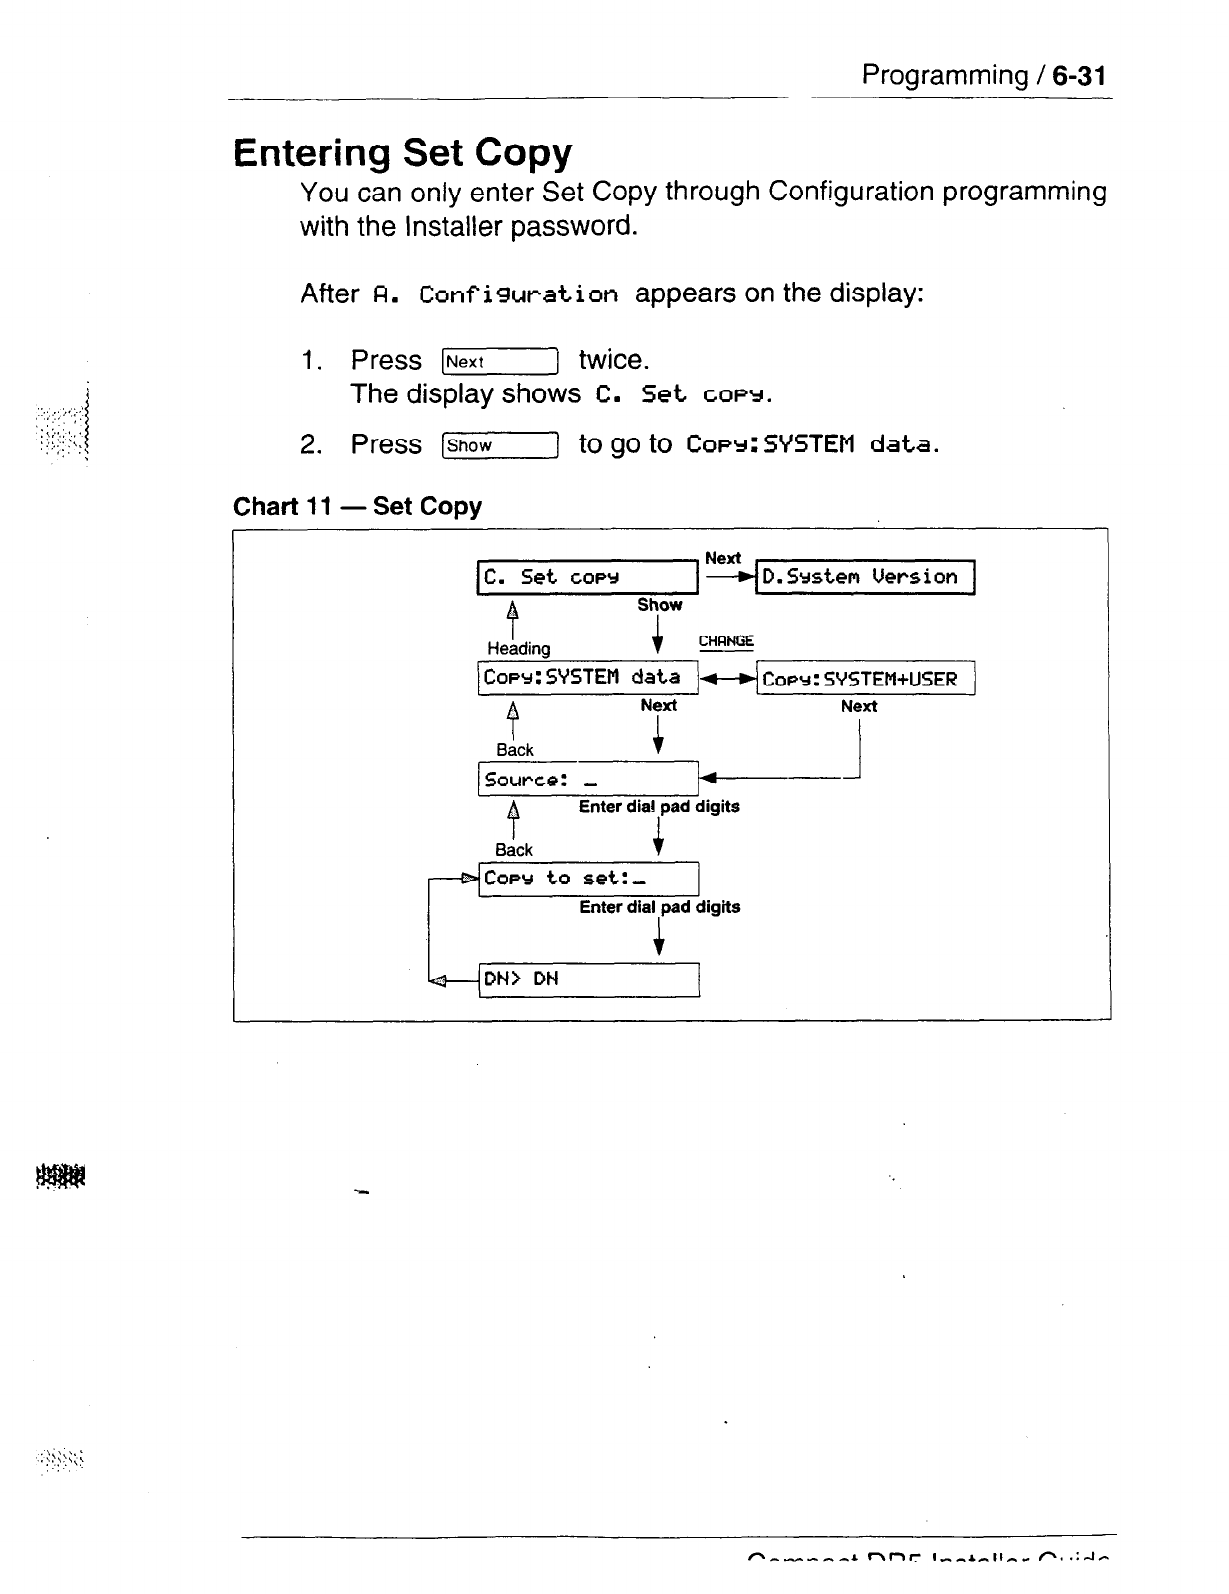
Entering Set Copy
You can only enter Set Copy through Configuration programming
with the Installer password.
After FI. Conf
iguratim
appears on the display:
1. Press lNexf] twice.
The display shows C. Set COPY.
2.
Press [Show-] to go to COPY:SVSTEM data.
Chart 11 - Set Copy
c.
Set.
COPY
D.Srstem Version
4
Show
Heading 4
CHFlNGE
COPY:SVSTEM
data C~PY:SVSTEM+USER
B
Next Next
Back c
Source: -
P
Enter dial pad digits
Back i
COPY
to set: _
Enter dial pad digits
DN> DN
.:
:;
1.y.:: ‘.
. . ,
6-32 / Programming
System Version
System Processor (SP) version numbers can be used to
determine whether you have the latest software release, and to
trace a software fault if one occurs. For instance:
- SP version numbers can indicate a Software Cartridge
incompatibility.
- SP and telephone version numbers can indicate a telephone
version incompatibility.
- SP and functional terminal version numbers, can indicate a
functional terminal incompatibility.
Entering System version
You can only enter System Version through Configuration
programming with the Installer password.
After FL Canf
iguration
appears on the display:
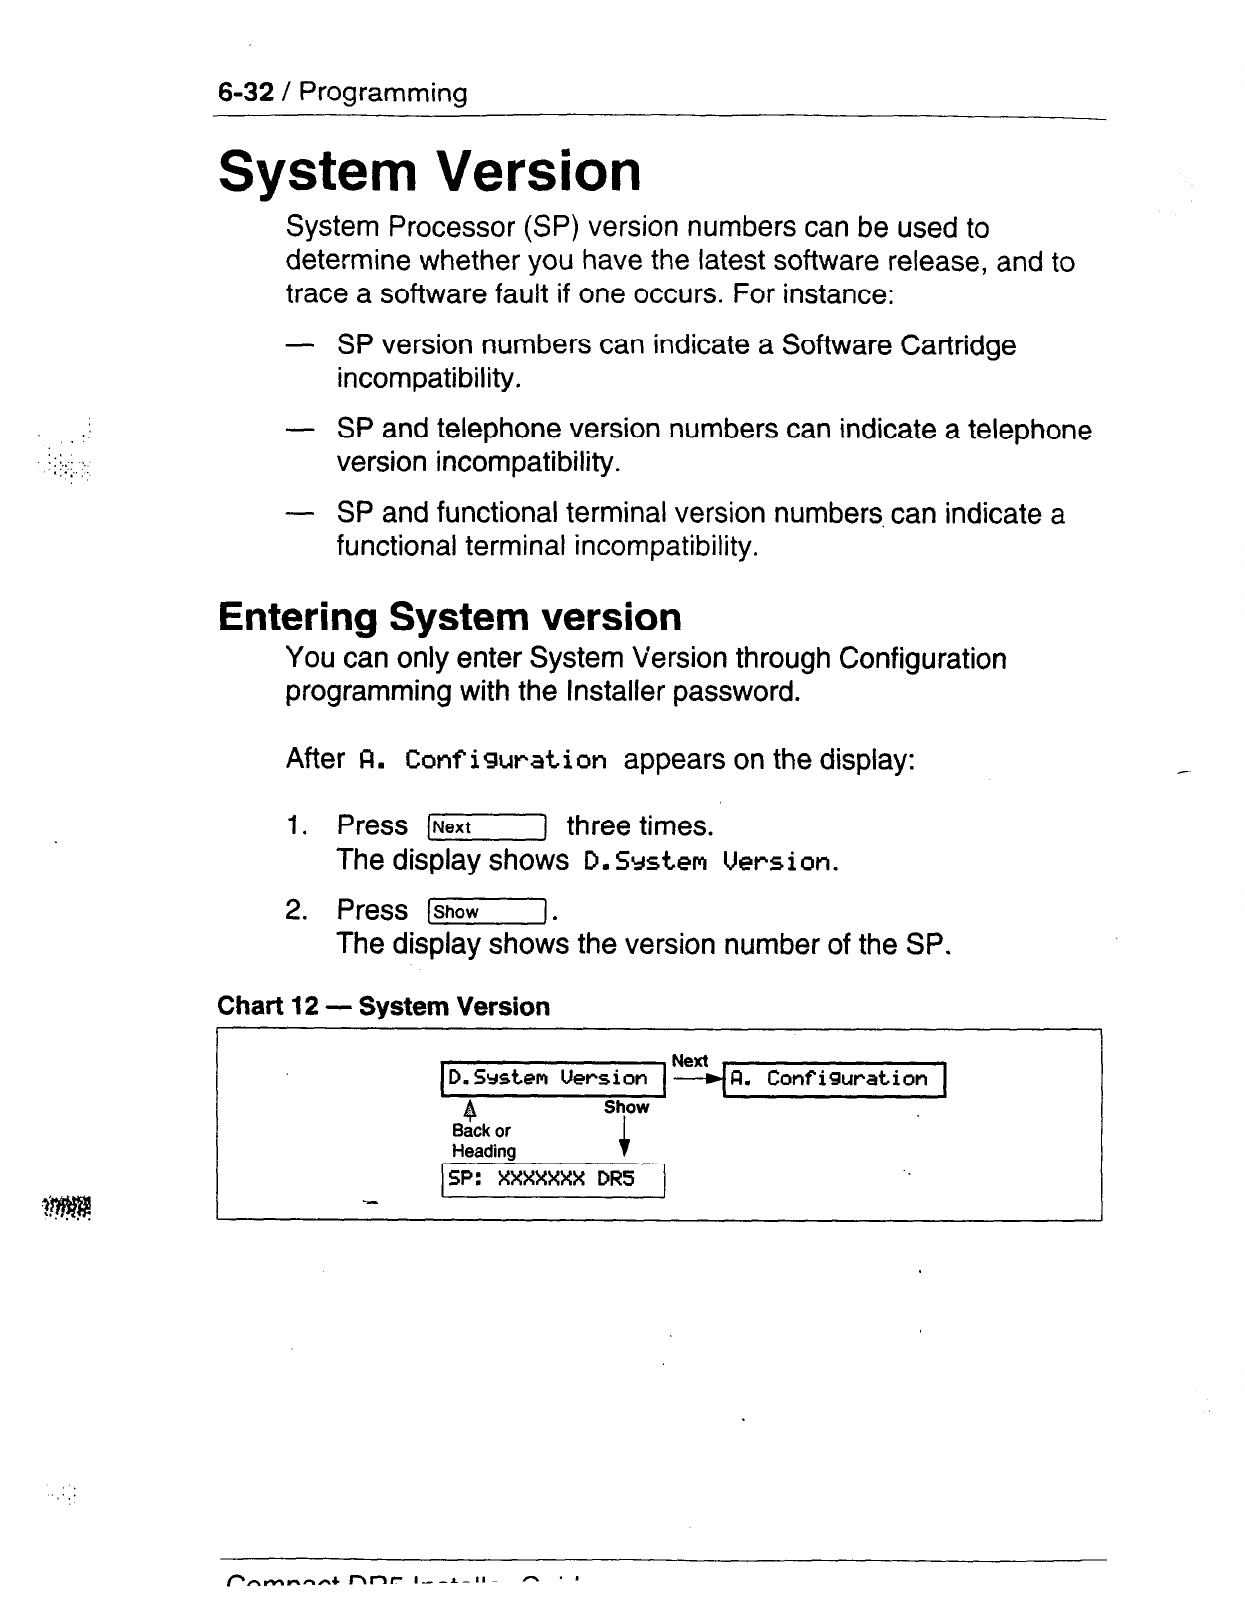
1. Press lNexf_] three times.
The display shows D. System
Version.
2. Press [I.
The display shows the version number of the SP.
Chart 12 - System Version
D.Srstem Uersion
&or
Show
Heading +
SP: XXXXXXX
DR5
FI. Configuration
. .
.,:,:
Testing the lines and telephones
1.
Check all external lines by selecting each line in turn at one
of the telephones and verifying the dial tone. If you do not
get dial tone, plug a single-line telephone directly into the
external line at the distribution panel. If you still do not get
dial tone, check all your wiring or contact your telephone
company.
2. Check all internal connections by calling each Norstar
telephone from another Norstar telephone.
3. Check the quality and clarity of all connections. Check for
crackling, static, hums, or any other unusual noise.
4. If there are any problems, refer to other procedures in this
chapter.
5. Verify the visual indicators:
- Select a line or Intercom button. The b indicator beside
that button should appear.
- Press [Feature] F] m.
The display should show Button
Imuirr
followed by
Press a button.
Press the @ button to exit from this feature.
7-2 / Troubleshooting
Analog Terminal Adapter (ATA) trouble
1.
Check the single-line telephone connection by using an
installer’s test telephone.
2. Check the connections to the jack.
3. Check the connections to the ATA.
4. Disconnect the ATA and replace it with a working Norstar
telephone. If the telephone works properly, this verifies that
the KSU is working properly.
5. Verify that programming has been done as described in the
Norstar Analog Terminal Adapter Installation Card.
6.
If the trouble seems to be in the KSU, double check all wiring
and programming options. If this does not help, refer to the
KSU down
section of Troubleshooting.
fl
This unrt must be powered from a Class 2 power source
Auxiliary Ringer trouble
1.
2.
3.
4.
5.
If the Auxiliary Ringer is used for Service Modes, ensure that
Service Modes is activated from the Control Telephone.
Check the wiring between the Auxiliary Ringer generator and
the ringing device. (See Chart 2 - Internal Wiring.)
Check the wiring between the Auxiliary Ringer and the
distribution panel.
Check the Auxiliary Ringer contact operation with an
ohmmeter across the pins.
Check that the Auxiliary Ringer is programmed to ring for
any of the following programmable settings:
.::.
y:
..,.:;
y ‘:;;‘.‘:
:..:.
”
Troubleshooting / 7-3
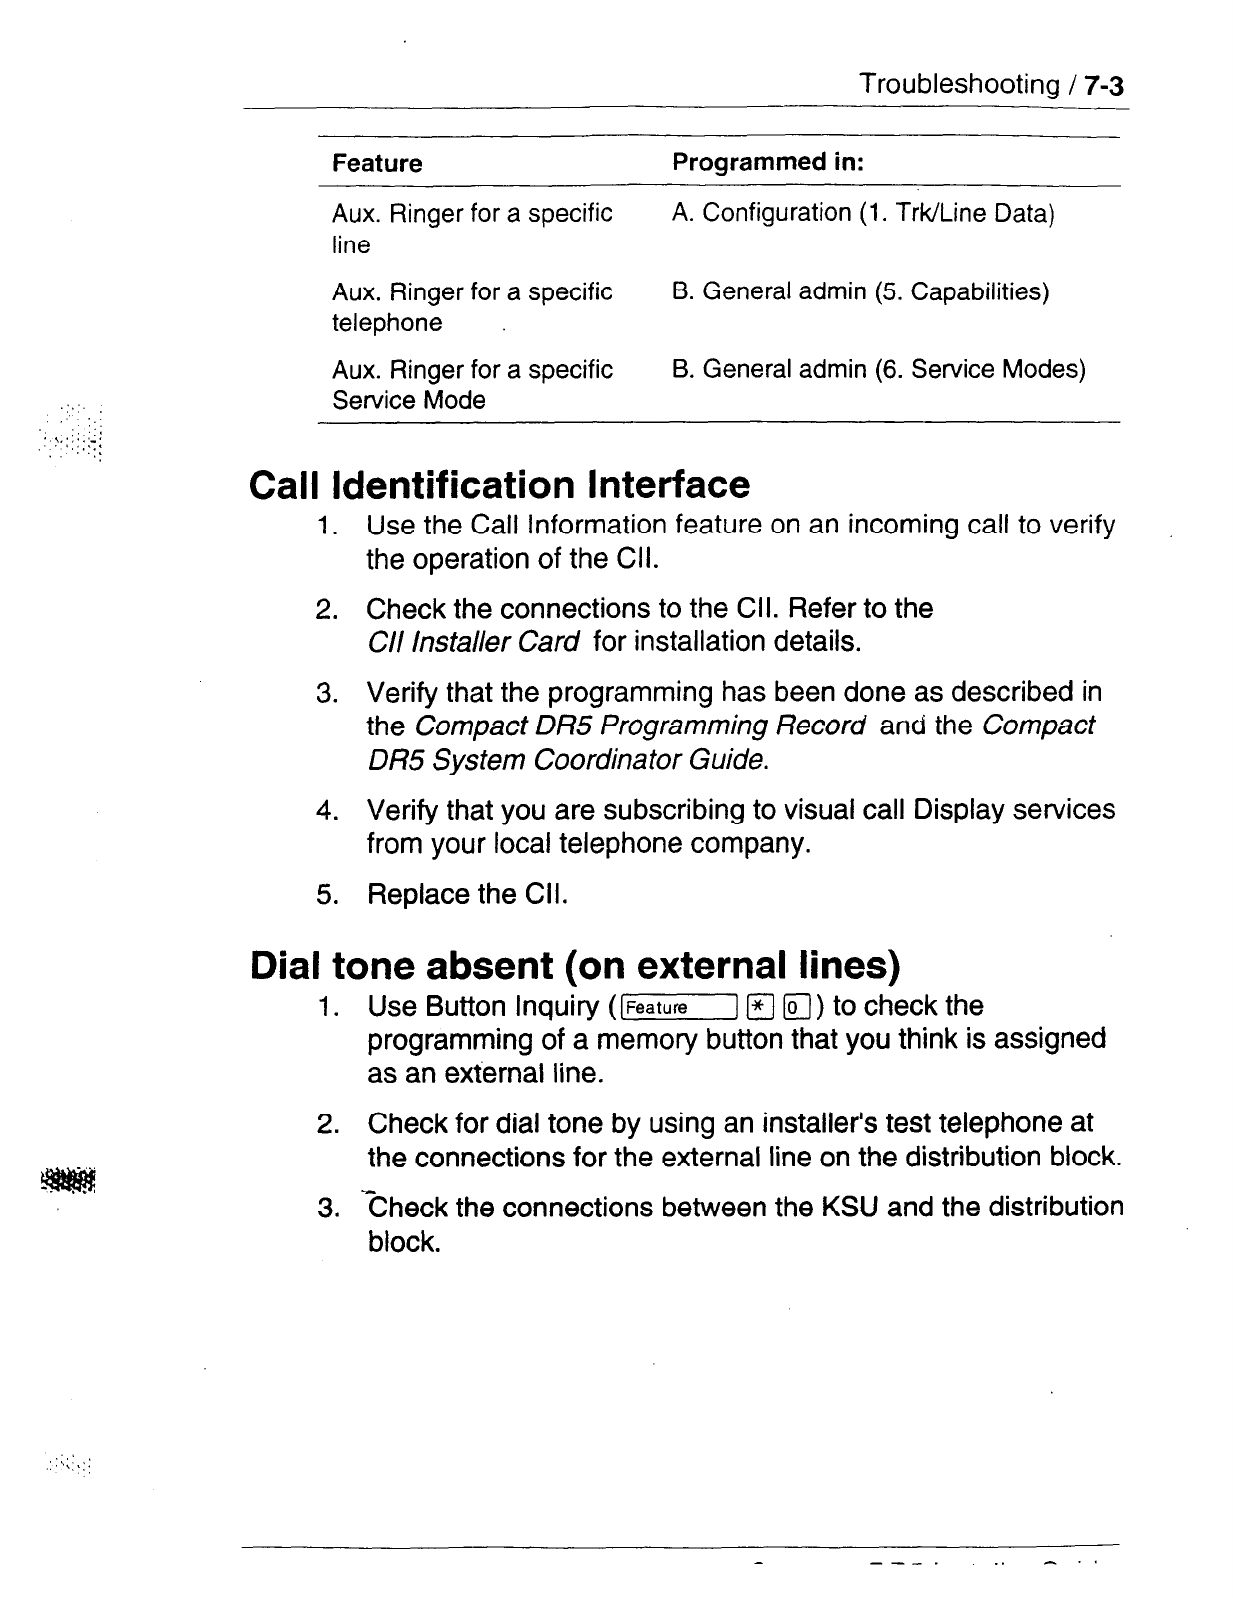
Feature Programmed in:
Aux. Ringer for a specific
line
A. Configuration (1. T&/Line Data)
Aux. Ringer for a specific
telephone
B. General admin (5. Capabilities)
Aux. Ringer for a specific
Service Mode
B. General admin (6. Service Modes)
Call Identification Interface
1.
2.
3.
4.
5.
Use the Call Information feature on an incoming call to verify
the operation of the CII.
Check the connections to the CII. Refer to the
C/I installer Card for installation details.
Verify that the programming has been done as described in
the
Compact DR5 Programming Record
and the
Compact
DR5 System Coordinator Guide.
Verify that you are subscribing to visual call Display services
from your local telephone company.
Replace the Cll.
Dial tone absent (on external lines)
1.
Use Button Inquiry
([Feature] a a)
to check the
programming of a memory button that you think is assigned
as an external line.
2. Check for dial tone by using an installer’s test telephone at
the connections for the external line on the distribution block.
3. %heck the connections between the KSU and the distribution
block.
‘,’
.::\\:<:.
--_. . .
A..
::._
.:
1.
7-4 / Troubleshooting
External Paging trouble
1.
2.
3.
4.
Ensure that you are using
the proper feature code
([_] m a).
Check the wiring
between the 50-pin connector
and the
paging amplifier.
Check the wiring between the connections.
(See Chart 2 - Internal Wiring.)
Check that the paging equipment is operational and that the
output from the Norstar KSU is
775
mVrms across 600 Q.
Hung lines at a telephone
Line indicators that have been solid for a long time are the only
visible indication that lines are hung.
A line that has been redirected using Line Redirection may,
under some circumstances, remain busy after a call is over. If
this happens, the outgoing line for the redirection also remains
busy. You can clear this kind of hung line only at the telephone
that
was used to redirect the line.
1. Select Button Inquiry
([Feature] H m)
at
the telephone that
was used to redirect the line.
2. Press the button of the redirected line.
3. Press SHOW or a.
4.
Press DROP or m.
Both the redirected line and the outgoing line for the redirection
should now be cleared.

Troubleshooting / 7-5
__~~
KSU down
1. Check that the ac power cord is properly connected.
2. Check that the Software Cartridge is firmly seated in its slot.
CAUTION
Do not install or remove the Software Cartridge when
KSU power is on.
3. If ac power is present and the LED indicator on the KSU is
off, replace the KSU.
Music on Hold/Background Music trouble
1.
2.
Ensure that the volume control
([Feature]
q
m m)
is turned
up and you are using the Background Music feature code
([Feature] pg R).
Check the applicable Configuration programming settings to
ensure that the feature is enabled:
Programmed in:
Music on Hold
3.
Call handling
Background Music 4. Miscellaneous
3.
4.
5.
Check the wiring between the music source and the 50-pin
connector.
Check the polarity of the connections between the music
source and the distribution block.
-Ensure that the music source is turned on, is operational,
and has the volume control properly adjusted.
::
:.:>)
,+::::::::
.‘,
e_ __ _ -
_I
h-r ,
~_#_11_
m
‘-I-
7-6 / Troubleshooting
Telephone dead
1.
Check for dial tone.
2.
3.
4.
5.
6.
Check the receiver cord connection.
Check the display. If the display is unreadable, ensure that
the display contrast adjustment
([Feature) m a)
is
appropriate.
Check the internal wiring at both the modular jack and the
distribution block.
Check the internal line.
If the problem persists, replace the telephone with a known
working Norstar telephone.
/Vote: An internal line should have between 15 and 20 Vdc
across the Tip and Ring when the telephone is
disconnected.
_
If you are required to continue programming, refer to the
Compact OR5 System Coordinator Guide.
If you are not required to continue programming, give the System
Coordinator the
Compact OR5 Programming Record.
Applying the button labels
If you perform all of the programming for a system, apply the
appropriate button labels on the telephones. Before you apply
button labels, activate the Button Inquiry feature
([Feature] F] a) to avoid activating features as you put the
labels onto the buttons.
For the customer
Remember to leave the following items at the installation site:
For the System Coordinator
-
Compact DR5 System Coordinator Guide
(with the
Programming Overlays)
- Compact OR5 Programming Record
-
Optional equipment User Cards (for example, the BLF and
ATA)
- Spare button labels and button caps
- Telephone User Cards (for the M7100, M7208, M7310, and
M7324 as required)
- Compact DR5 Telephone Feature cards
- -Compact DR5 Prime Telephone card
In the KSU pocket
-
Compact OR5 installer Guide
(with the Programming
Overlays)
- Optional equipment Installation Cards (for example, the BLF
and ATA)
8-2 / Finishing up
Personal programming
information on telephone feature programming and operation
can be found in the Compacf DR5 System Coordinator Guide.
Call Display services
Your Norstar system can access information contained in Call
Display services offered by your public telephone company, and
uses that information to provide additional messaging tools to the
Norstar user.
Note: You can access Call Display information only if you
subscribe to the services, and if you have Call
Identification Interface hardware installed. Contact your
Customer Service representative for more information.
Call Display information may be shown on your telephone
display when a call is alerting, identifying the caller to you.
Specific telephones are programmed to receive this information
in Administration programming. For more information see the
Call Information section in the Programming chapter of the
Compact DR5 System Coordinator Guide.
_


Welcome to Norstar 1-I
System Coordinator’s role l-l
Assisting your co-workers l-2
Your Customer Service representative l-2
Call Display services 1-3
Call Display Information l-3
Call Log l-6
Message Waiting I-1 1
Programming 2-1
How to do programming 2-l
Planning 2-l
Programming tools 2-3
Using the Overlay 2-4
The Norstar display buttons 2-6
Programming details 2-7
Administration overview 2-9
Administration headings 2-9
Entering Administration 2-11
Exiting Administration 2-l 1
Moving through Administration 2-12
System Speed Dial 2-13
Names 2-I 7
Time and date 2-20
Direct-Dial 2-23
Capabilities 2-24
Dialing Filters 2-24
Telephone (Set) abilities 2-28
_ Line abilities 2-34
Class of Service (COS) passwords 2-34
Service Modes 2-37
Password 2-41
Log Defaults 2-42
Call Services 2-43
Auto Call Info 2-43
Telephone (Set) Services 2-44
Voice Message Center telephone numbers 2-45
Voice Message Center lines 2-45
ii /
Contents
Copying settings 2-46
Line programming 2-46
Telephone programming 2-46
Capabilities programming 2-46
Programming reminders 2-47
Norstar telephones 2-48
Prime telephone 2-49
Page zones 2-49
Line Pools 2-49
Miscellaneous programming 2-49
Control telephones 2-49
Service Modes 2-50
Call Pickup Groups 2-51
System Speed Dial 2-52
Telephone features 3-1
Using Norstar features 3-2
Answering the telephone 3-6
What line indicators mean 3-8
Rings you may hear 3-8
Prime telephone displays 3-11
Autodial 3-13
Call Forward 3-16
Call Information 3-19
Call Log 3-21
Call Park 3-31
Call Pickup 3-33
Call Queuing 3-36
Camp-On 3-37
Conference 3-39
GOS Password 3-44
Customizing your telephone 3-45
Dialing 3-52
Do Not Disturb 3-58
Feature programming 3-59
Group Listen 3-62
Handsfree/Mute 3-63
Hold 3-65
Host System Signaling 3-67
Host system signaling codes 3-67
‘
Contents /
iii
Line Pools 3-70
Line Redirection 3-72
Long Tones 3-77
Messages 3-78
Norstar Telephones 3-84
Buttons 3-84
Headset 3-86
Hearing aid compatibility
Wall mounting 3-87
Page 3-88
Priority Call 3-90
Service Modes 3-92
Special Telephones 3-94
Speed Dial 3-97
System features 3-100
Time features 3-105
Transfer 3-106
Voice Call 3-l 11
3-87
User cards 4-l
Glossary 5-1
Index 6-I

iv / Contents
In addition to basic telephone service, your Norstar digital key
system has many extra features that will greatly improve your
off ice communications.
Please take the time to read this Guide. It will help you to learn
the various tasks which a System Coordinator should perform.
This guide also serves as a reference when you assist
co-workers to become familiar with Norstar features.
When a telephone system is first installed, it takes a bit of time to
settle into using new equipment. Norstar minimizes this
orientation by providing straightforward features and simple
instructions.
System Coordinator’s role
The System Coordinator piays an important role in customizing
Norstar to suit the organization and updating information as the
office grows and changes.
Norstar can be customized at three levels:
Personal programming
Personal programming is done by individual telephone users
who wish to personalize their Norstar telephones by
programming features and telephone numbers onto specific
memory buttons.
Administration programming
Administration programming is done by the System Coordinator,
whenyou want to change various system-wide settings, as well
as some specific settings for each line or telephone.
Configuration programming
Configuration programming is usually done for you by the
Installer or Customer Service representative when Norstar is
being installed. Specific system-wide parameters are set up in
Configuration.

1-2 / Welcome to Norstar
:
,“,: ::
‘i :‘:y
Assisting your co-workers
It
is human nature to ask someone how to do something rather
than read a user guide. The System Coordinator may be asked
to demonstrate to co-workers how to select and use Norstar
features. To help you prepare for that possibility:
- Familiarize yourself with the procedures for using Norstar
features. Examine the components of your Norstar system,
identifying the buttons on the different types of Norstar
telephones. Read the Telephone User Cards chapter of this
Guide for more information on each telephone.
- Familiarize yourself with the various programming reminders
provided at the end of the Programming chapter of this
Guide. Distribute copies of these reminders to your
co-workers after filling in information such as Call Pickup
group numbers and members.
It is important for everyone in the office to know that you are the
System Coordinator and to know when you are available for
consultation. You may wish to schedule sessions for small
groups or provide individual assistance to co-workers for
programming features on their Norstar telephones.
Your Customer Service representative
Ask your Customer Service representative for the service
department’s telephone number, and write it down. If you have
problems with your Norstar equipment, telephone your Customer
Service representative. If you have problems with programming
or using any of the features, first read the appropriate section of
this Guide and try again before calling your Customer Service
represehtative.
Call Display services / l-3
Call Display services
Some public telephone companies offer Call Display services
which provide information about an incoming call. The caller’s
name, telephone number and in some cases, long distance
indication, can be shown on a telephone with a display. Your
Norstar OR5 system uses this information so that you can:
-
view incoming call information as tiell as the Norstar line
name that receives the call,
- keep a log of incoming call information and,
-
view an integrated display that appears when you have
received a message from either an internal Norstar user or a
Voice Mail message from an external caller.
Note: You can access Call Display information only if you
subscribe to the services offered by your public
telephone company, and if you have the appropriate
hardware installed. Contact your Customer Service
representative for more information.
Call Display Information
Call Display information may be shown on your telephone
display when you answer an incoming call. In addition to the
caller’s name, telephone number and long distance indicator, if
available, your Norstar system can display the name of the line
that received the call.
In the-case where several users share a line, only one telephone
can be designated to automatically receive Call Display
information
when a call is alerting on that line. If the call is
transferred or camped to another telephone, the Call Display
information is automatically available to that telephone.
If a line is not administered to automatically deliver Call Display
information to a telephone, the user can invoke the Call
Information feature (see Telephone features chapter) or answer
the call to view the information.
. .
l-4 / Call Display services
Depending on your requirements, Call Display information
presents several convenient options.
- When a caller is identified before the call is answered, you
can answer using a personal greeting. You can also prepare
yourself prior to answering the call by retrieving any relevant
documents, or otherwise orienting yourself to the expected
discussion.
- The Long Distance indicator alerts you that an incoming call
is long distance and may therefore have higher priority.
- If you are unable to immediately attend to an incoming call,
you can use the calling information to make a quick note.
- You can shorten the interruption time of a call from a
recognized person. For instance, you can quickly answer the
call and let the party know that you are busy but will return
the call soon.
- A telephone can be programmed to first view either the
caller’s name or number or line name. For example, an
attendant might wish to see the calling number and area
code first in order to transfer the call according to sales
region. The salesperson’s telephone could display the
caller’s name first so they can answer with a personal
greeting.
‘,’
:::*::
,
Call Display services /
l-5
- Call Display information allows you to answer calls on a
priority basis. For example:
l
If several calls are alerting at
your telephone at
the same
time, you can request information about the calls to
decide which one may be more important.
l
If you are already on a call, information about a second
call starting to alert at your telephone can help you to
decide whether to answer the second call or remain
connected to the first call.
l
If you are in a meeting, the information.associated with
an incoming call can help you determine if the call is
important enough to interrupt the meeting.
l
If you have several calls on hold and wish to identify the
callers, you can view the Call Display information
associated with each of the calls to help you determine
which one you will respond to first.
Programming tips
In order for the designated telephone to automatically receive
Call Display information, it must be programmed to ring for
incoming calls on that line.
Before programming Call Display information you may wish to
consider the following:
- which individual would benefit the most from automatically
receiving Call Display information on an alerting line?
- how are calls routed and what information is the most
important
to know before a call is answered? For instance,
if
certain lines are private to individuals, an attendant might
wish to first view the line name to determine who the
incoming call is for.
1-6 /
Call Display services
Call
Log
The Norstar Call Log feature uses incoming Call Display
information to make a record of call details for follow-up. Call
Log
also records several other useful
facts such as
the time and date
of the log entry, the number of repeated calls by the same caller
and which telephone answered the call if it was subsequently
rerouted and handled by someone else in the Norstar system.
When the volume of incoming calls exceeds the ability of
employees to handle all calls, or when staff are unavailable to
answer calls, Call Log provides a convenient means of capturing
information about missed calls.
When connected to a call that has Call Display information, the
Logit feature of Call Log can be used to provide a quick and
accurate means of recording the caller’s information for future
use (see the Telephone Features chapter for more information).
Programming tips
Call Log space can be assigned to individual telephones
according to how much space you wish to allocate to each user.
In order to maximize the value of Call Logs and avoid confusion
for the end user and their customers, it is important to consider
the following when configuring Call Log:
- Application of Call Log
Does the user want to return customer calls, track the
numbers of calls unanswered, keep a record of most
commonly called numbers, etc.?
- Who is most interested in logging
calls
on a particular line?
For instance, dentists working in a clinic may have an
individual line assigned to them but prefer that the
receptionist handle all of the calls logged on their line.
Call Display services / l-7
We strongly recommend that you limit the number of users
logging calls for the same line, as this would be confusing. For
example, if two users are logging calls for the same line, they do
not know who the call was originally intended for, nor are both
Call Logs updated when one of the users returns a customer’s
call. Potentially a customer could be called back twice.
There are few situations where the same call needs to be logged
at more than one set.
Recommended configuration 1
All lines appear at the Attendant Position. Incoming calls are first
answered on the Attendant’s set and then transferred to the
required destination.
The Attendant wants to track all calls unanswered on the system,
during working hours and after hours. All users want to capture in
their Call Log, any calls which they did not answer at their set
and be able to return those calls from the log.
The Attendant Position logs
NO me
answered on all lines and
the users log calls
Unanswered br m.
In this configuration the
users will log calls transferred to them via intercom (I/C) from the
attendant or another user, even though the administration setting
is
(Lowing set: N).
Thus the entries in their Call Log are
specifically meant for them.
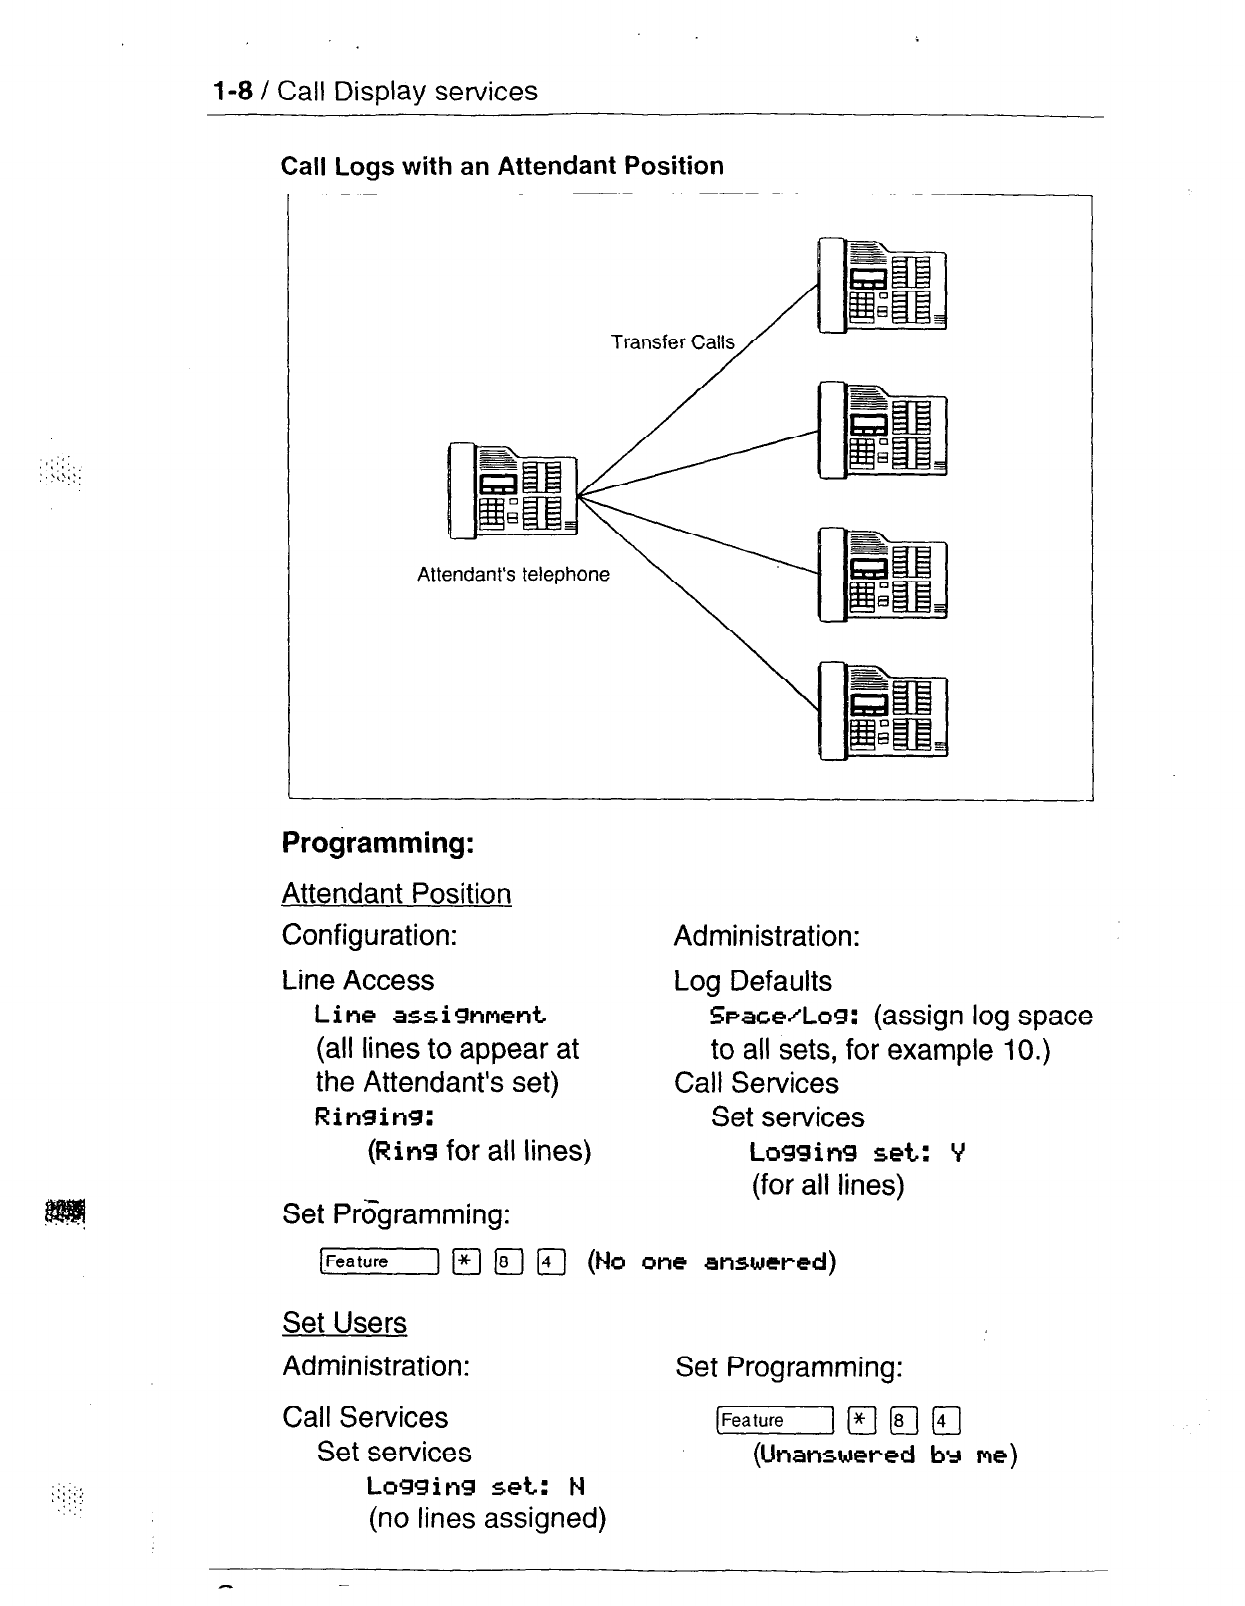
,;,:,
:
1 j ; : 1:
:,
I-8 / Call Display services
Call Logs with an Attendant Position
Transfer
Programming:
Attendant Position
Configuration:
Line Access
Administration:
Log Defaults
Line assi9nmcnt SpacefLog:
(assign log space
(all lines to appear at to all sets, for example 10.)
the Attendant’s set) Call Services
Ringing:
Set services
(Ring
for all lines)
Logging set: V
Set PrGgramming:
@z---]~~
Set Users
Administration:
Call Services
Set services
(for all lines)
Set Programming:
[Feature]mm(-TJ
(Unanswm-ed by me)
Logging set: N
(no lines assigned)
_
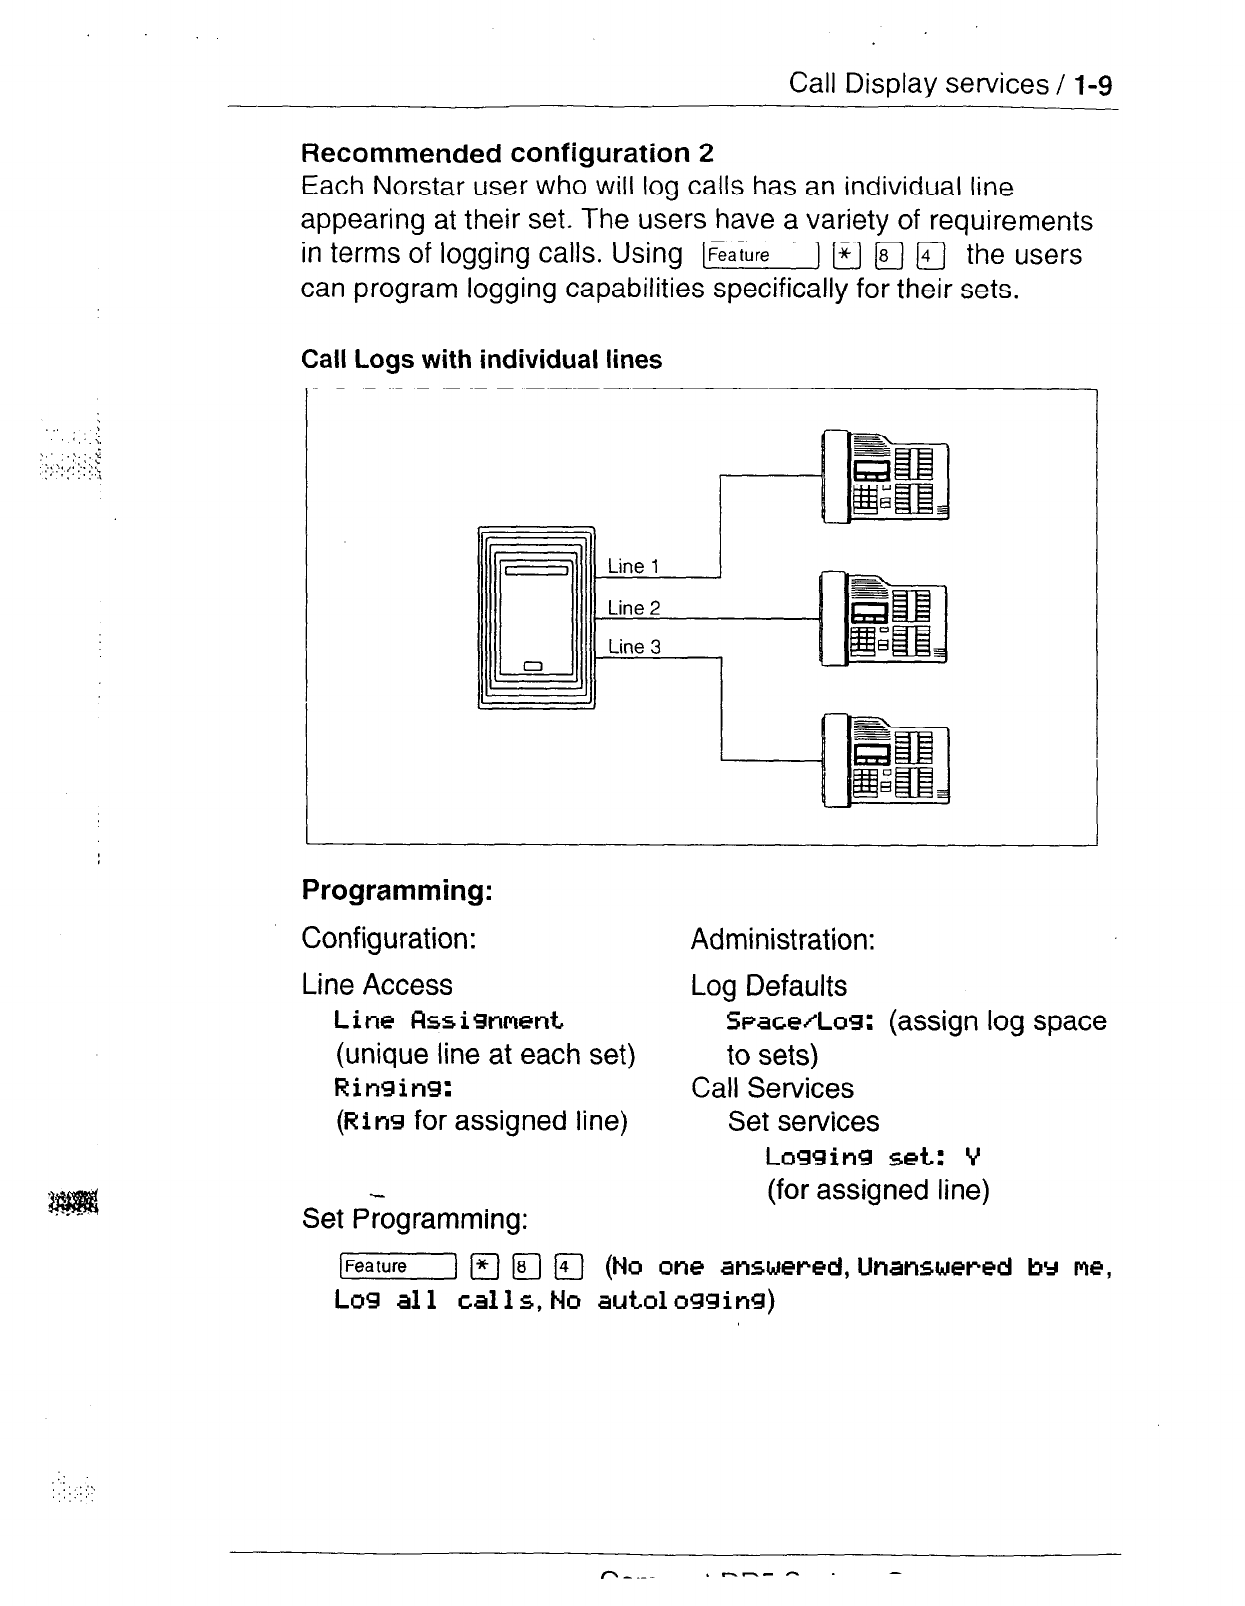
Call Display services /
l-9
Recommended configuration 2
Each Norstar user who will log calls has an individual line
appearing at their set. The users have a variety of requirements
in terms of logging calls. Using [r) m /YJ m the users
can program logging capabilities specifically for their sets.
Call Logs with individual lines
I
Programming:
Configuration:
Line Access
Line lksi9nment
(unique line at each set)
Ringing:
(Ring
for assigned line)
Set Programming:
Administration:
Log Defaults
Space/Los:
(assign log space
to sets)
Call Services
Set services
Logging set: V
(for assigned line)
lFeafure]mma
(N
o one answcred,Unanswered by rye,
Log al 1 call
5,
NO
auto1 egging)
;:
,,.;.:.‘\
‘,,,.A.
r\-._. .
m-m - . -
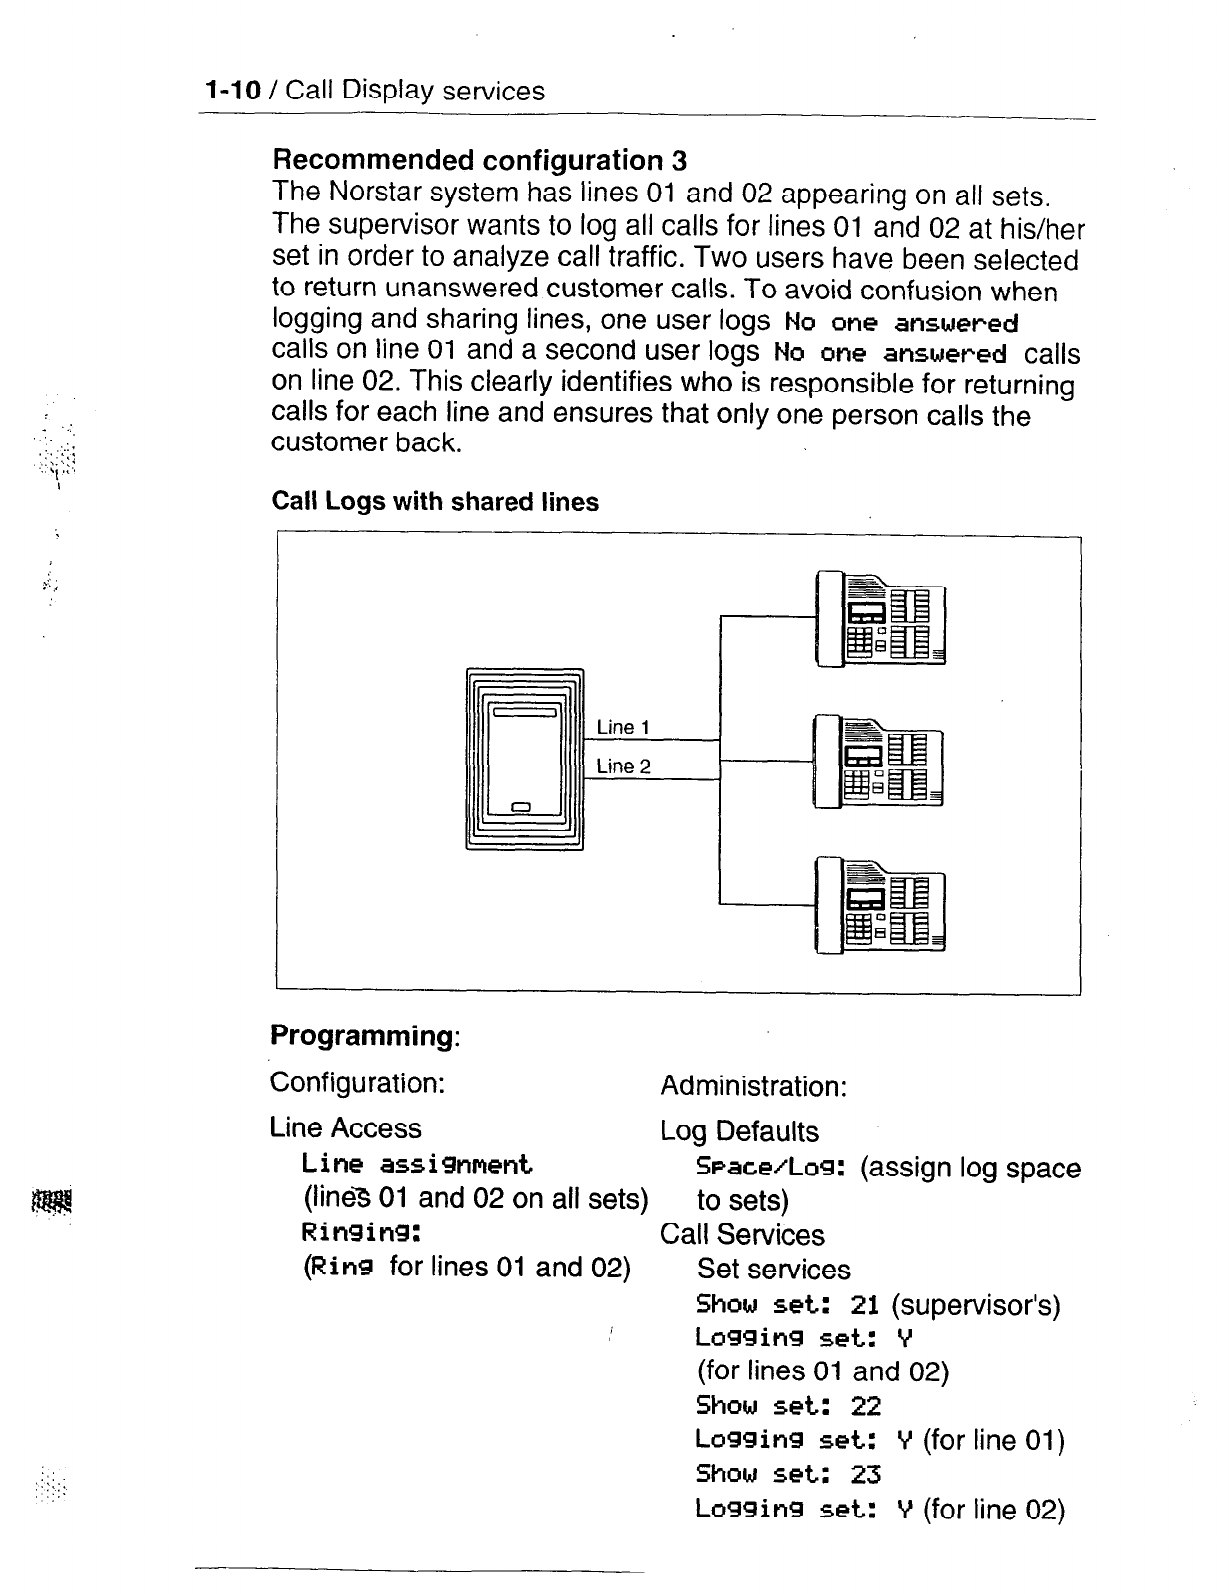
l-10 /
Call Display services
Recommended configuration 3
The Not-star system has lines 01 and 02 appearing on all sets.
The supervisor wants to log all calls for lines 01 and 02 at his/her
set in order to analyze call traffic. Two users have been selected
to return unanswered customer calls. To avoid confusion when
logging and sharing lines, one user logs
No W-IEF answered
calls on line 01 and a second user logs No 0~
answered
calls
on line 02. This clearly identifies who is responsible for returning
calls for each line and ensures that only one person calls the
customer back.
Call Logs with shared lines
Dl
Line 1
Line 2
0
Programming:
Configuration: Administration:
Line Access Log Defaults
Line assimment SPacclLog:
(assign log space
(line3 01 and 02 on all sets) to sets)
Rinsing:
Call Services
(Ring
for lines 01 and 02) Set services
Show set: 21
(supervisor’s)
I
Logging set: V
(for lines 01 and 02)
Show set: 22
Loggin set: V
(for line 01)
Show set: 23
Logging
set: Y
(for line 02)

Call Display services / l-1 1
Set programming:
::I::: ,.
;,?::
I.‘.’
Set21 [Fealure] m a m (LOS
all calls>
Set 22
and 23 (-1
q
a
q
(NO OIW
answered >
Note:
For more information, see the Call Log Feature Card.
This card is available in a separately orderable Call
Display Key Cap Kit. Please contact
your
Customer
Service representative.
Message Waiting
Norstar Message Waiting allows you to send and receive internal
messages as well as maintain a record of your messages. If you
have subscribed to Voice Mail Messaging (provided by your
public telephone company), and visual message waiting
indication is available, Message Waiting also informs you if you
have messages at your Voice Message Center and allows you
to:
-
receive a visual indication that you have messages waiting,
- call your Voice Message Center to hear your messages and,
- clear the message waiting indication from your display.
Programming tips
In order for a telephone to use this feature, it must have a line
appearance and Message Waiting must be activated for that line
by your public telephone company.
It is possible for two or more telephones to share a line
appearance. You must determine if one, some or all of the users
sharing a line will receive Message Waiting notification. If it is a
sub-group, such as a sales team within a company, it may be
appropriate to share the feature providing that the users have an
agreed upon procedure for retrieving and deleting messages.
For further information on Call Information, Call Log and
Messages, see the Telephone features chapter. Programming
actions are described in further detail in the Programming
chapter.
l-l 2 /
Call Display services
_
The system comes programmed with default settings that may be
sufficient initially. Administration programming is performed by
the System Coordinator, and lets you change settings that
probably have to be updated regularly because of staff turnover
or new business contacts. You can also assign some features to
individual lines and telephones. This provides you with real
flexibility in making your telephones work together.
This chapter contains detailed procedures for programming
System Speed Dial codes, Names for lines and telephones, and
Time and Date information. If you are new to Administration
programming, you may want to get comfortable with these three
procedures before attempting other procedures.
Personal programming does not follow the same procedures as
Administration programming. Personal programming allows you
to assign a particular function to some of the keys, and is unique
to each telephone. For more information on Personal
programming, see the Feature programming description in the
Telephone features chapter.
Hbw to do programming
The system is programmed using an M7208, M7310 or M7324
Telephone. Use the buttons on the telephone to program a
setting or to request a specific programming action.
Norstar guides you step-by-step on the telephone display while
you enter programming, select and change what you want, and
exit programming.
-_
Planning
Only one Norstar telephone can access Administration
programming at a time. While programming a telephone, you
cannot use it to make or receive calls. While you are
programming, other users of the Norstar system may use their
telephones, but cannot program any memory keys.

2-2 / Programming
Determine programming requirements
Read about the available programming settings in this chapter,
then determine how your co-workers would like the features
programmed.
Get the following information:
-
-
-
-
-
-
-
-
-
-
the numbers of the installed lines,
the internal telephone numbers of installed Norstar
telephones,
the telephone numbers to be programmed into System
Speed Dial,
the names for lines and telephones,
the lines and internal numbers that are subject to Line
abilities and Set abilities programming,
the required Filters,
the Set Abilities to be assigned to individual telephones,
how the system should be programmed to optimize the
Service Modes feature,
whether a new Administration password is required, and
whether Class of Service passwords are required.
Programming / 2-3
;
:.:
.’
,.::.
,‘.
.,’ :. .
I y
‘:I:,., I.
Programming tools
A
Norstar telephone
System programming can be performed on an M7208, M7310 or
M7324 Telephone.
The Norstar Programming Overlay
The Norstar Programming Overlay is a paper cutout that labels
telephone buttons used during programming. This makes it
easier for you to recognize the button that you want.
The Norstar Programming
Overlay
for
the M7208 Telephone is
placed over all of the eight memory buttons. The Programming
Overlay for the M7310 and M7324 Telephones is placed over the
top four memory buttons with indicators. The Norstar
Programming Overlays are provided at the end of this Guide.
The Compact QR5 Programming Record
The Compact DR5 Programming Record provides a convenient
way to record what you have programmed. It also helps you to
plan your programming. Settings are grouped according to their
function.
Pages from the Record may be photocopied as necessary for
programming many telephones or lines.
The Norstar Telephone User Cards
Each Norstar telephone has a Norstar Telephone User Card that
lists the most commonly used features.
The Compact DR5 Telephone Feature Card
The Compact DR5 Telephone Feature Card lists the features that
can be accessed with the [FZiLK-J button.
r\_.__.- _
_I
m-r A’ _I_ _~ -
I.. _.I
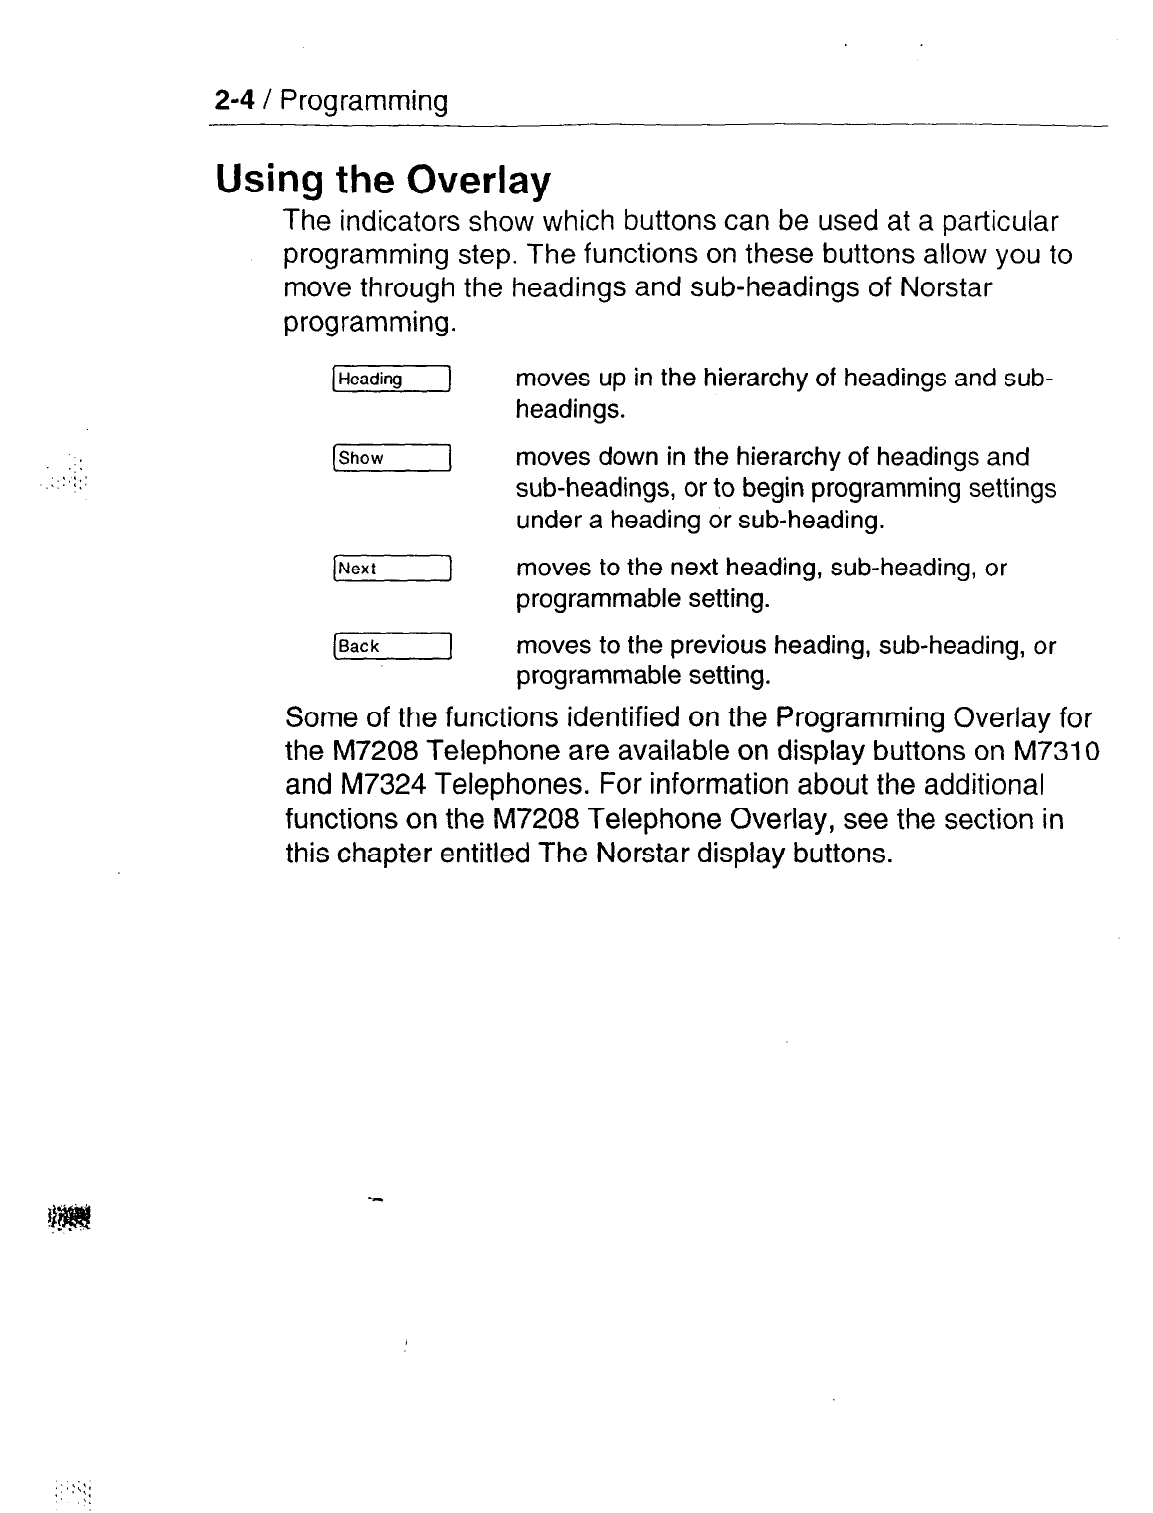
2-4 / Programming
Using the Overlay
The indicators show which buttons can be used at a particular
programming step. The functions on these buttons allow you to
move through the headings and sub-headings of Norstar
programming.
[Heading]
moves up in the hierarchy of headings and sub-
headings.
(Show] moves down in the hierarchy of headings and
sub-headings, or to begin programming settings
under a heading or sub-heading.
[NextGT--] moves to the next heading, sub-heading, or
programmable setting.
(Back] moves to the previous heading, sub-heading, or
programmable setting.
Some of the functions identified on the Programming Overlay for
the M7208 Telephone are available on display buttons on M7310
and M7324 Telephones. For information about the additional
functions on the M7208 Telephone Overlay, see the section in
this chapter entitled The Norstar display buttons.
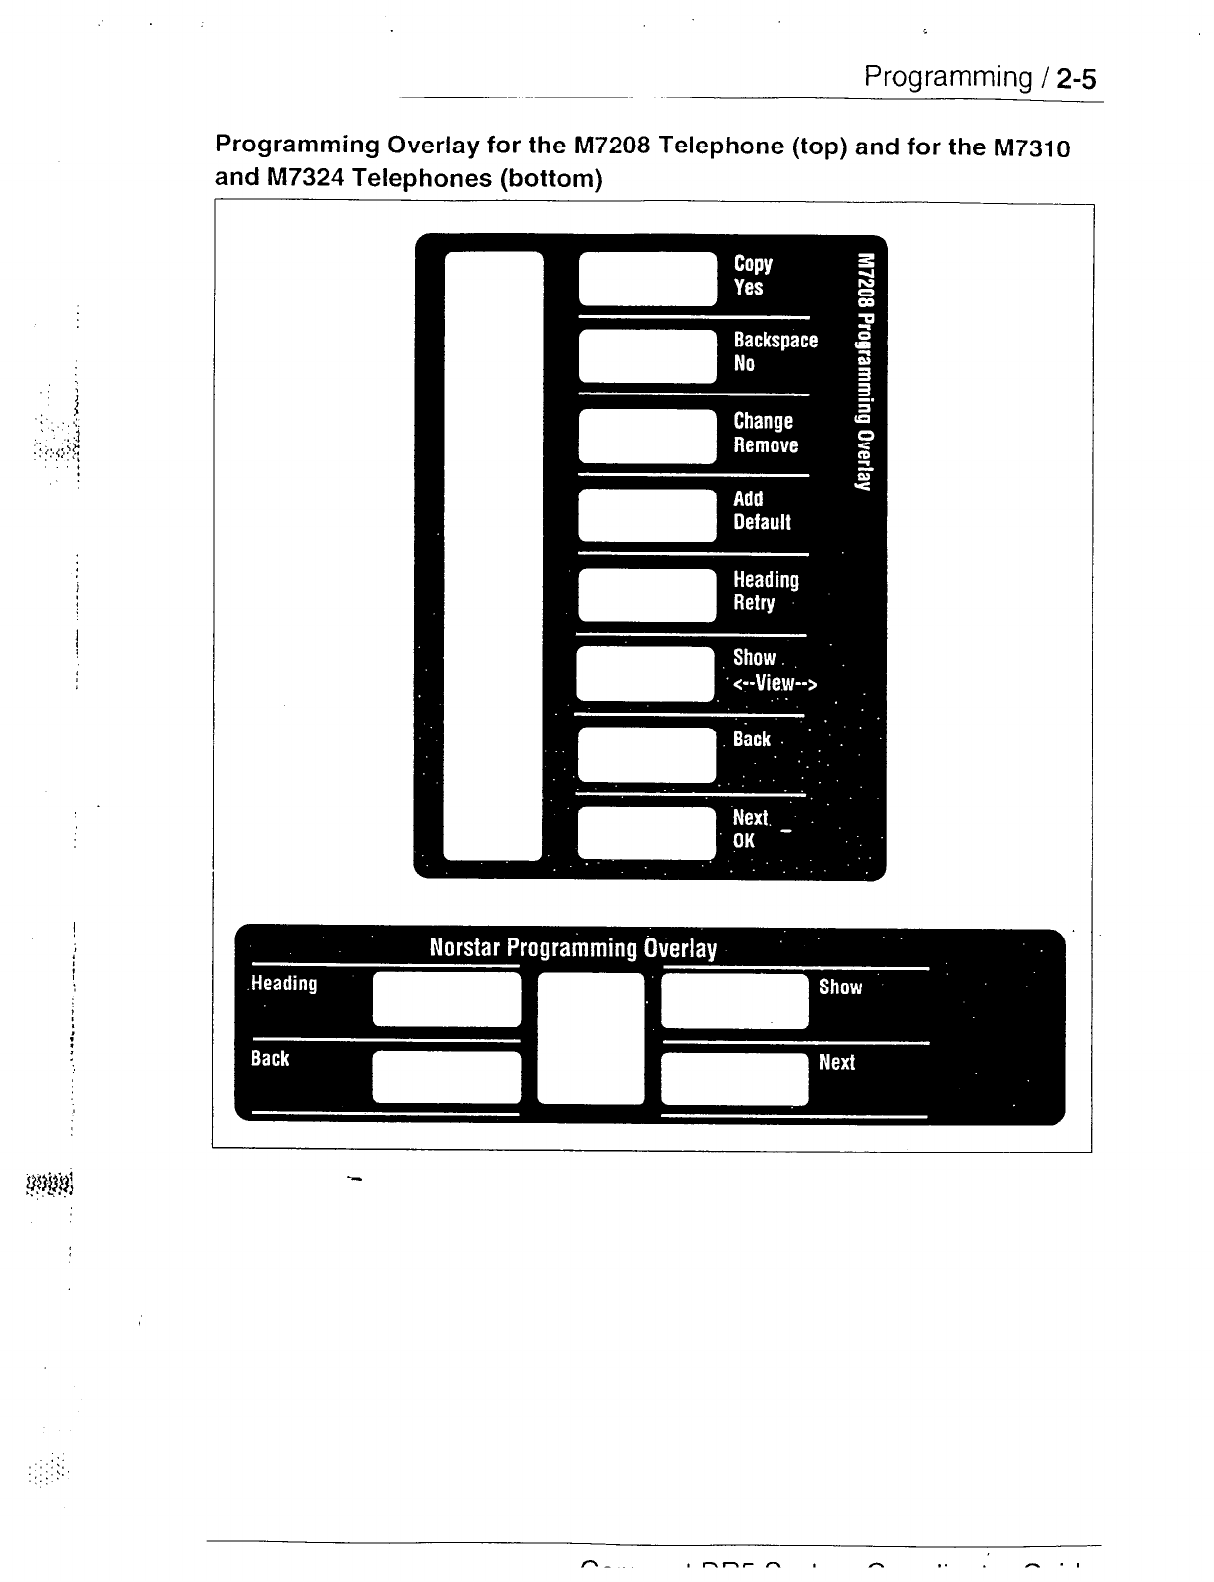
:
*
:
,
Programming
/
2-5
Programming Overlay for the M7208 Telephone (top) and for the M7310
and M7324 Telephones (bottom)
;;:::
::;j:!”
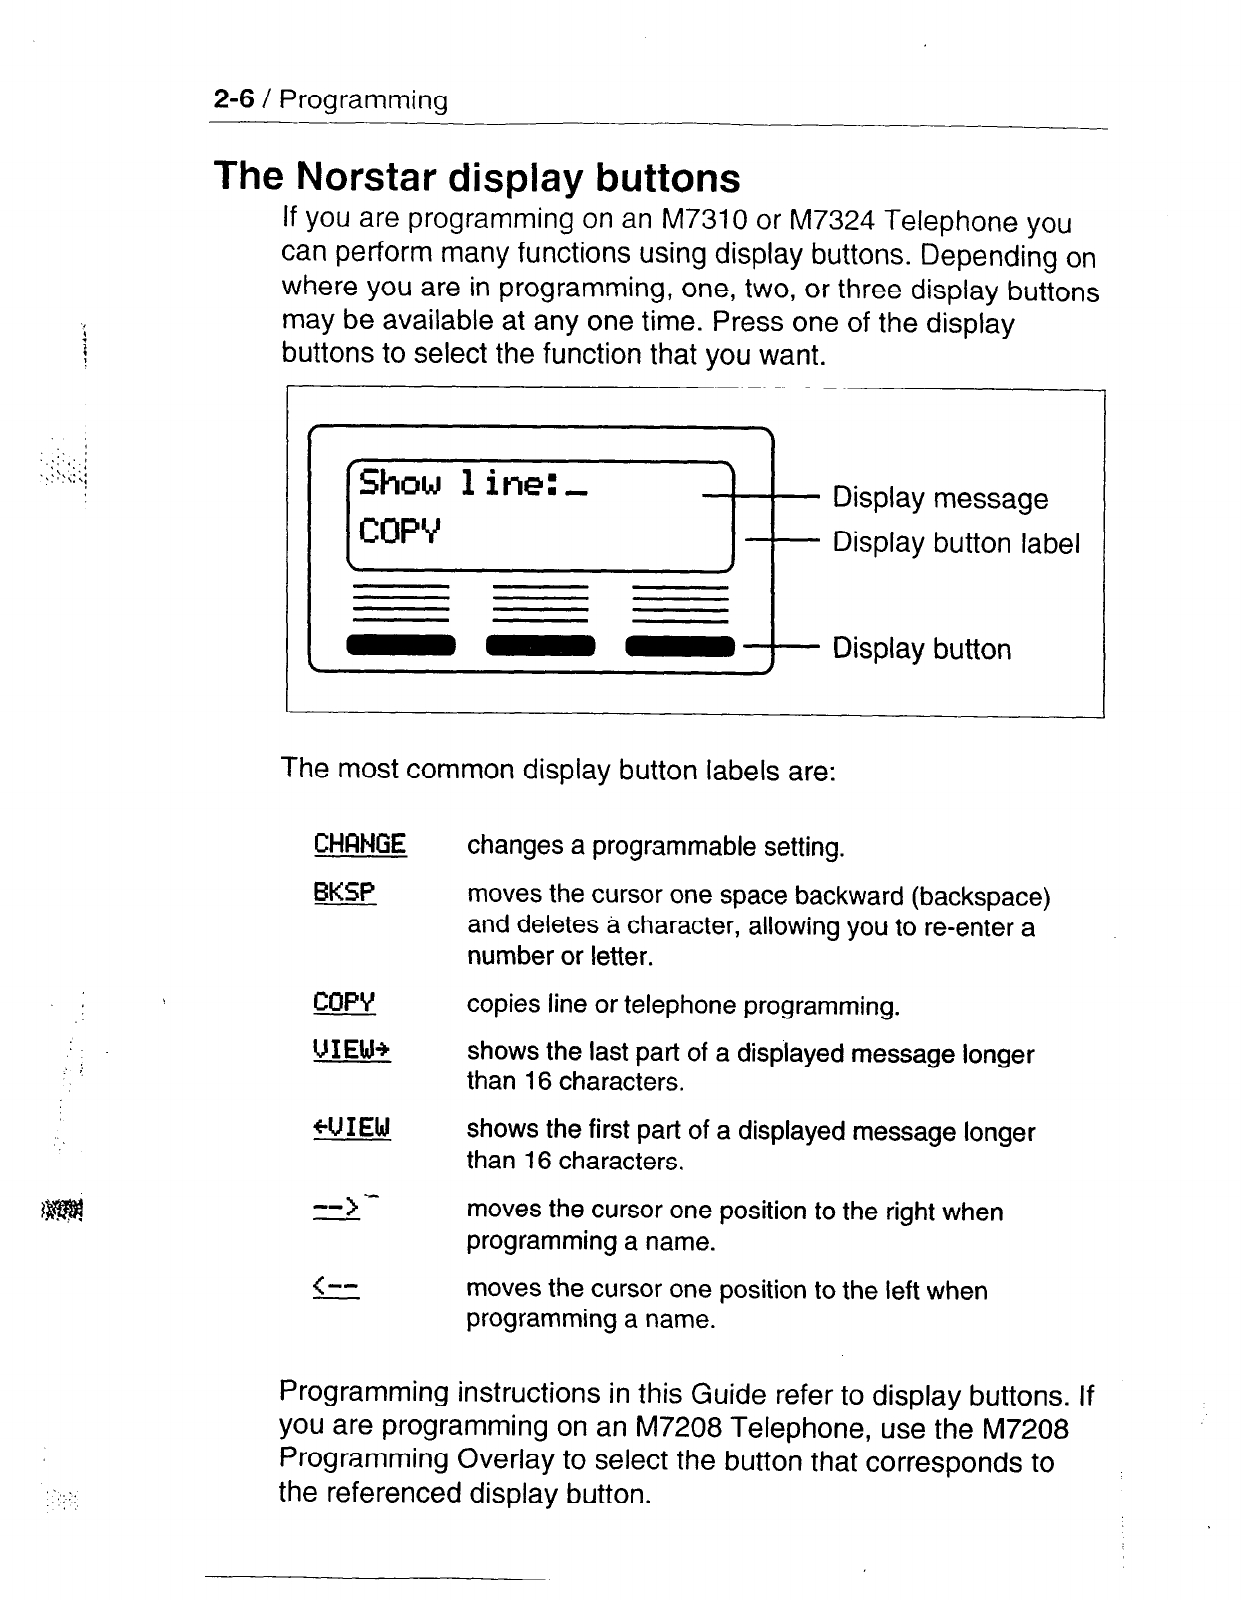
2-6 / Programming
The Norstar display buttons
If you are
programming on an M7310 or M7324 Telephone you
can perform many functions using display buttons. Depending on
where you are
in programming, one, two, or three display buttons
may
be available at any one time.
Press one of the display
buttons to select the function that you want.
\
/
Display message
Display button labe
‘I
[ 0 0 Of- Display button
The most common display button labels are:
CHQNGE
BKSP
COPY
VIEW+
+'..JIEW
(
mm
changes a programmable setting.
moves the cursor one space backward (backspace)
and deletes a character, allowing you to re-enter a
number or letter.
copies line or telephone programming.
shows the last part of a displayed message longer
than
16
characters.
shows the first part of a displayed message longer
than
16
characters.
moves the cursor one position to the right when
programming a name.
moves the cursor one position to the left when
programming a name.
Programming instructions
in this Guide refer to display buttons. If
you are programming on an M7208 Telephone, use the M7208
Programming Overlay to select the button that corresponds to
the referenced display button.
Programming / 2-7
Programming details
Entering numbers
Numbers are entered from the Norstar telephone dial pad. The
BKSP
display button may be used to edit the number.
Line numbers must always be entered as a two-digit number with
a leading zero. Internal telephone numbers, also referred to as
Directory Numbers (DNs), are always two-digits long.
Viewing long telephone numbers
External telephone numbers can be up to 24 digits, but the
telephone display is only 16 character spaces long. If you wish to
see a previously programmed number that is longer than 16
digits, you must do the following:
Begin, for example, with
123456789812345....
The display shows only the first 15 digits. The three dots (...) at
the end of the display indicate that more digits remain to be
displayed for the external number.
1. To see the remaining digits, press
MEW+.
2.
To see the first 15 digits again, press
*VIEW.
-__ - -
.::.
.;
: : .
:y::,,
..:::... ,
F$#!
2-8 / Programming
Entering names
Letters and numbers can be entered as pat-t of a name for
various settings. The method of entering a name is always the
same.
Begin with a setting that prompts you to enter a name. The
display shows a cursor
( _ )
to indicate where you can enter the
next character. To enter a name:
1. Press the button on the dial pad with the printed letter or
number that you want.
Each time that you press the button, a new’character is
shown on the display. For example, the button for the
number 3 has the letters 0, E, and F, where:
D is shown after the first press
E is shown after the second press
F is shown after the third press
3 is shown after the fourth press
D is shown again after the fifth press.
(Letters are always shown in upper case.)
2. When the character that you want is displayed,
press --> or m to move the cursor to the next character
position.
OR
If you want to correct a character entered by mistake,
press (-- or a until the cursor is positioned beneath the
character that you want to correct.
OR
If you want to move the cursor back and delete a character,
press BKSP.
3. Rgpeat steps 1 and 2 for the remaining characters.
Administration overview / 2-9
:
.‘,*:I
.: ::.:.,
Administration overview
Administration programming lets you change settings for the
entire Norstar system, as well as settings for individual
telephones and external lines.
Pre-programmed default settings may initially be sufficient for
your needs. You can use Administration programming to
customize your Norstar system by changing these default
settings. In this section, default options are shown in
bold
type.
The defaults correspond to those assigned during Norstar
installation. The option you see while programming may be
different if that setting has been changed. If the display shows a
line number or internal number during programming, an example
is shown in the Administration procedures.
Administration headings
Headings and sub-headings in Administration programming help
you to keep track of where you are. An example of a heading is
1.
Srs
speed dial
for programming System Speed Dial. When
you program a System Speed Dial number,
Displ ar digits
is
displayed as a sub-heading.
. ---- . . - . .
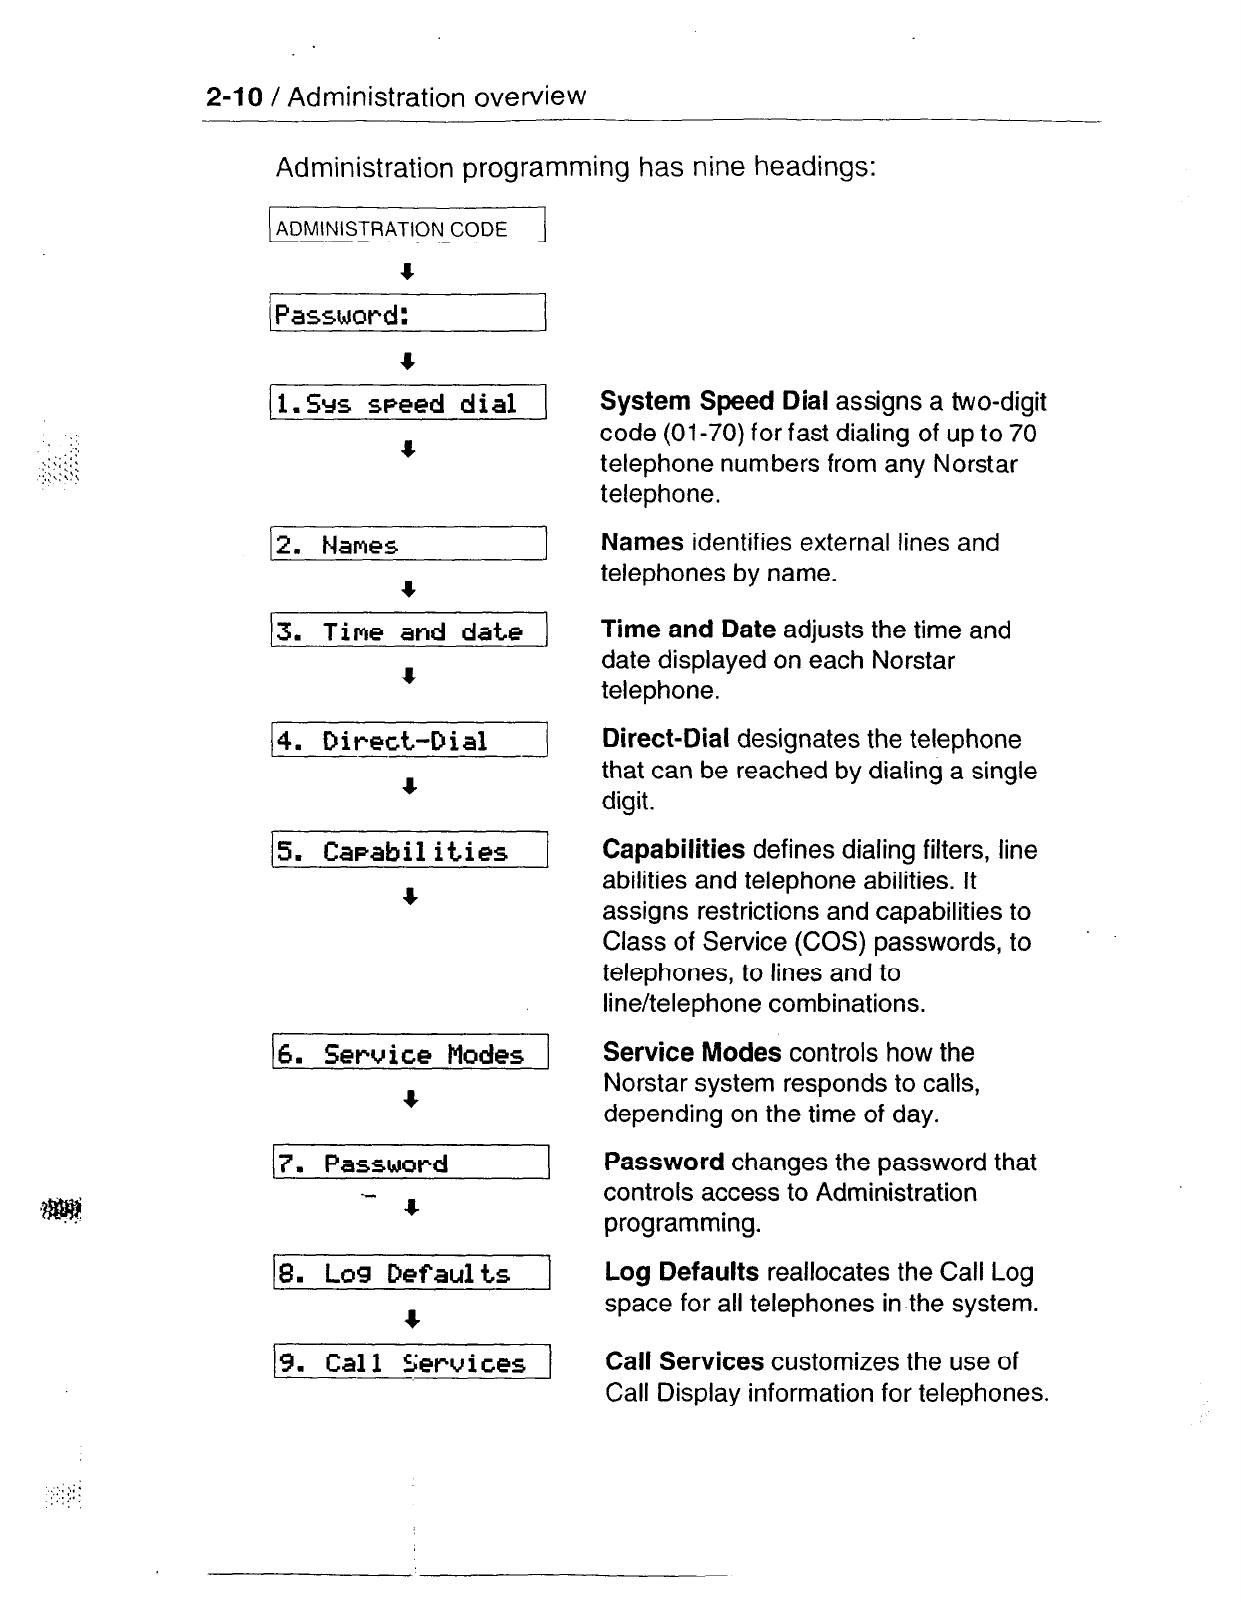
2-10 /
Administration overview
Administration programming has nine headings:
ADMINISTRATION CODE
4
I
(Password:
4
1
12. Names
4
I
13. Time and date
]
+
(4. Direct-Dial J
-
c
15. CaPabil ities
+
18. Log
Defaults
c
19. Call
I;cruices
J
System Speed Dial
assigns a two-digit
code (01-70) for fast dialing of up to 70
telephone numbers from any Norstar
telephone.
Names
identifies external lines and
telephones by name.
Time and Date
adjusts the time and
date displayed on each Norstar
telephone.
Direct-Dial
designates the telephone
that can be reached by dialing a single
digit.
Capabilities
defines dialing filters, line
abilities and telephone abilities. It
assigns restrictions and capabilities to
Class of Service (COS) passwords, to
telephones, to lines and to
line/telephone combinations.
Service Modes
controls how the
Norstar system responds to calls,
depending on the time of day.
Password
changes the password that
controls access to Administration
programming.
Log Defaults
reallocates the Call Log
space for all telephones in the system.
Call Services
customizes the use of
Call Display information for telephones.
Administration overview / 2-l 1
Entering Administration
When your system is first installed, there is a default password
stored in the Norstar system. Your Customer Service
representative may change or clear the default password after
installation. You are not prompted to enter a password as you
enter Administration for the first time if your Customer Service
representative has cleared the default password.
1. Release all calls on your telephone.
2. Enter the Administration access code:
(FeatuleI(qI+~~(z-j~~
which is the same as
3. If the display changes to
Password:
,
enter the
Administration password that is recorded on the
Compact DR5 Programming Record. (The password is not
shown on the display as you enter it.)
If the password is correct,
the display shows
l.Srs speed dial
,
and three triangular indicators b are
shown on the vertical display.
OR
If the password is incorrect,
the display does not change.
Check the password. Press
RETRY
and re-enter the
password.
4. Place the Norstar Programming Overlayover the buttons.
See the Password section in this chapter for information on how
to program your own password after entering Administration.
Exiting-Administration
Norstar stores your changes automatically as soon as you alter
any settings; you do not need to “save” your changes.
1. Press ml.
The display briefly shows
End of session.
-
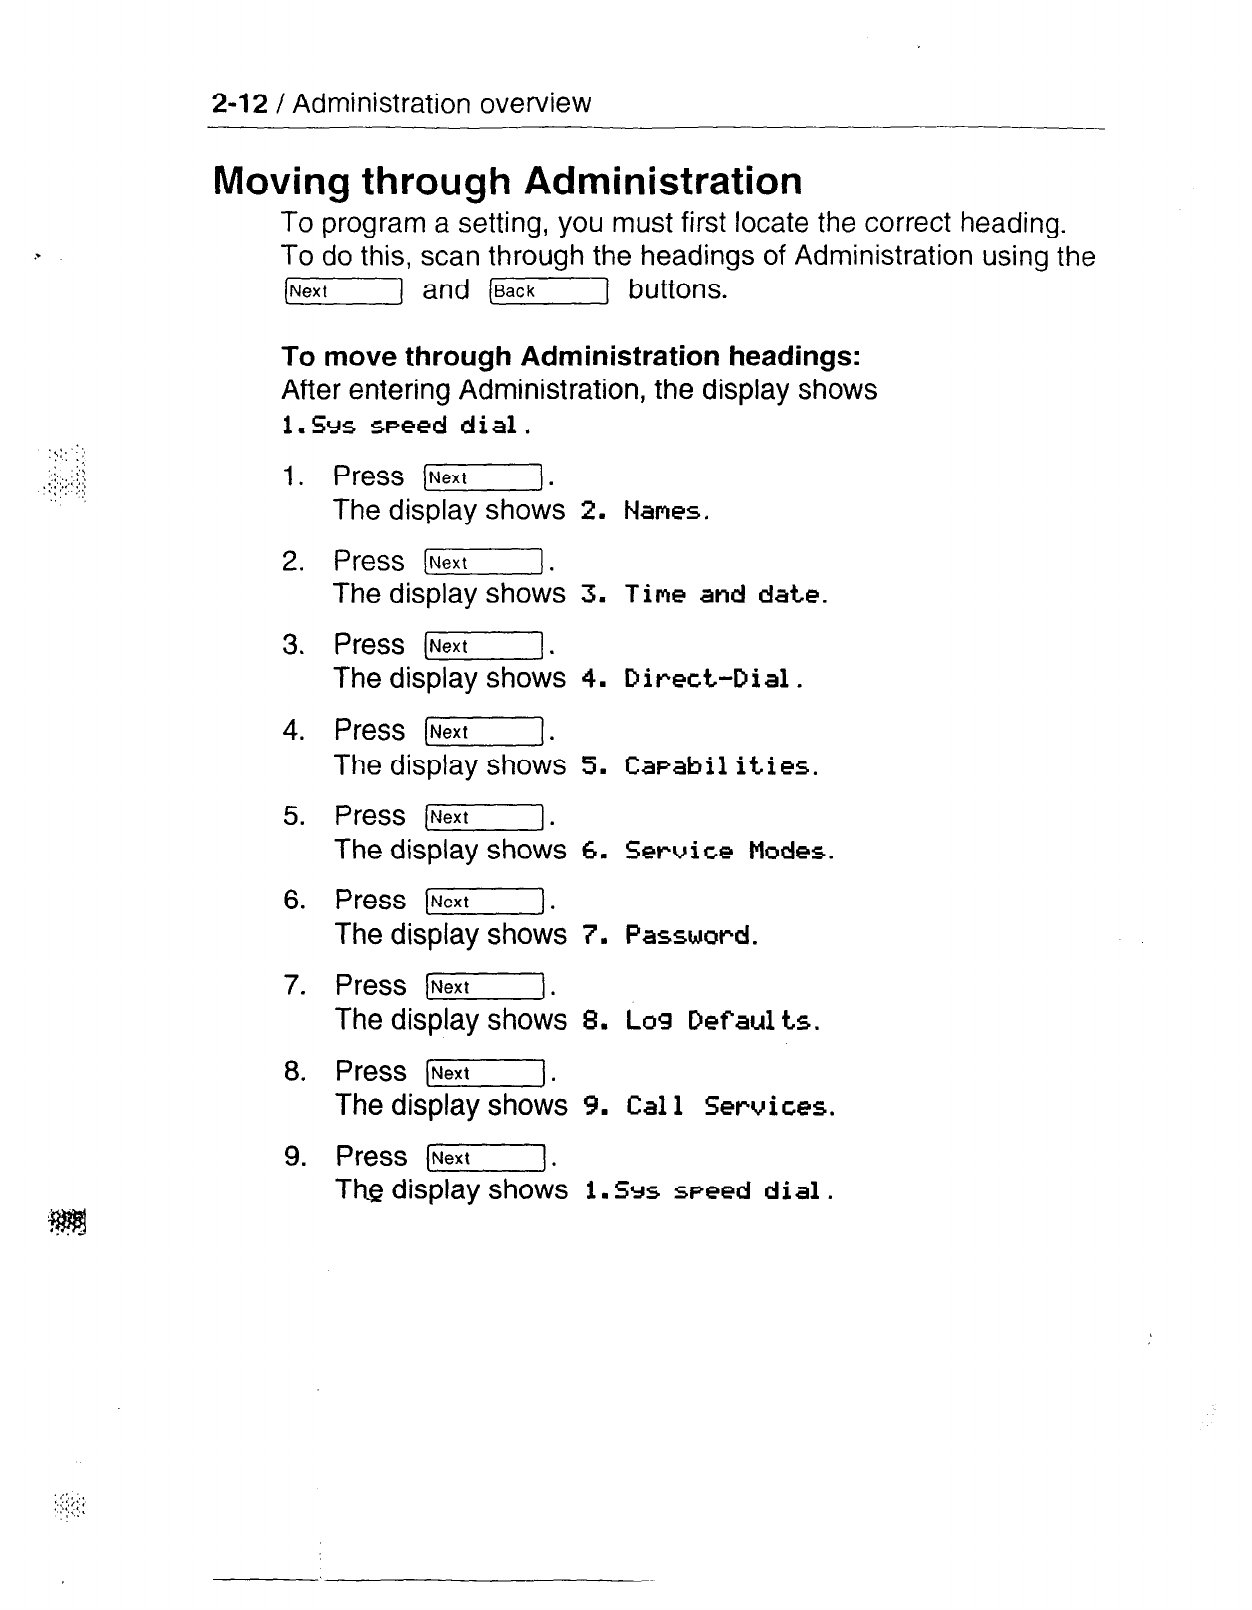
2-l 2 /
Administration overview -
Moving through Administration
To program a setting, you must first locate the correct heading.
To do this, scan through the headings of Administration using the
[r] and (eack] buttons.
To move through Administration headings:
After entering Administration, the display shows
1.5~
speed dial.
1.
2.
3.
4.
5.
6.
7.
8.
9.
Press (1.
The display shows 2. Names.
Press (Next].
The display shows
3. Time and date.
Press [Next].
The display shows
4.
Direct-Dial.
Press (Next].
The display shows 5.
CaPabil ities.
Press (].
The display shows
Press [J.
The display shows
Press [J.
The display shows
Press (J.
The display shows
Press [I.
Th_e display shows
6. Seruice Modes.
7. Password.
8. Lo9 Defaults.
9. Call Services.
1.5~~ speed dial.
.,.
‘, :. i ; :
’
,:j.:.
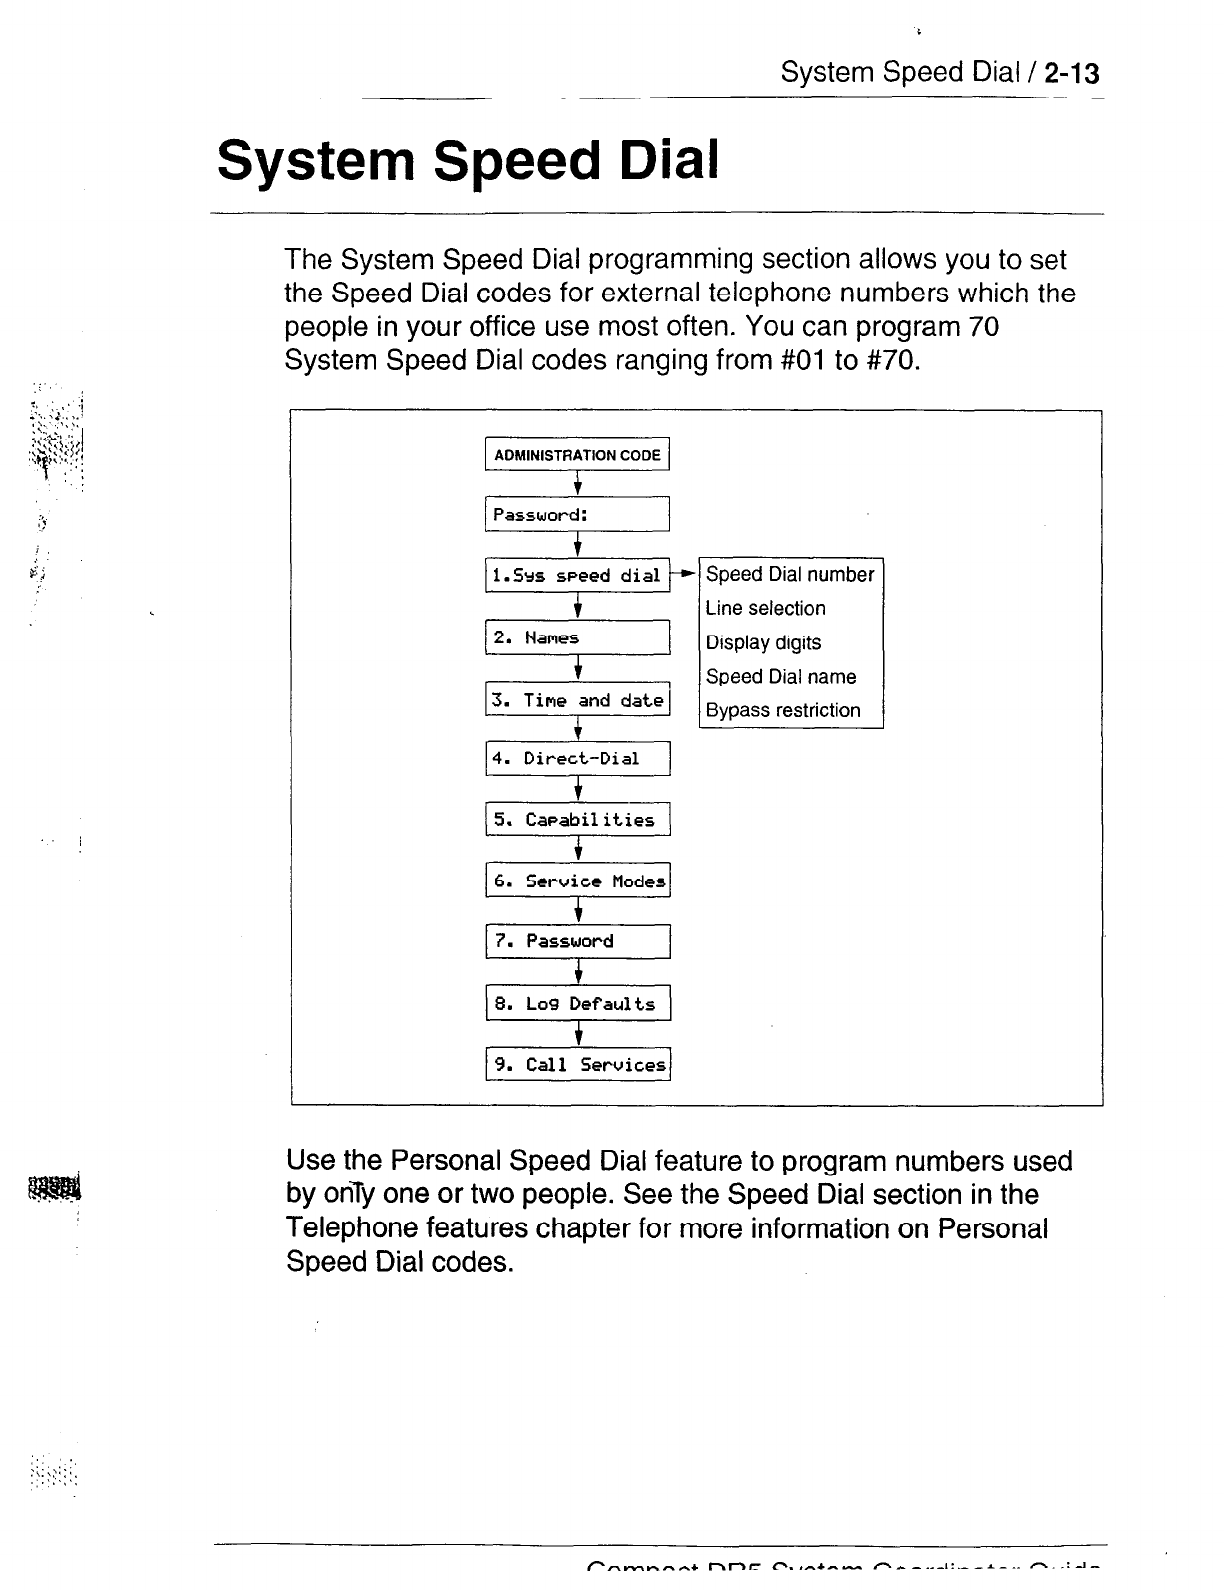
System Speed Dial /
2-13
System Speed Dial
The System Speed Dial programming section allows you to set
the Speed Dial codes for external telephone numbers which the
people in your office use most often. You can program 70
System Speed Dial codes ranging from #Ol to #70.
14. Direct-Dial
1
;“.‘““;“““,
6. Service
Modes
I
7. Password
I
‘“.‘“‘,
9. Call Services
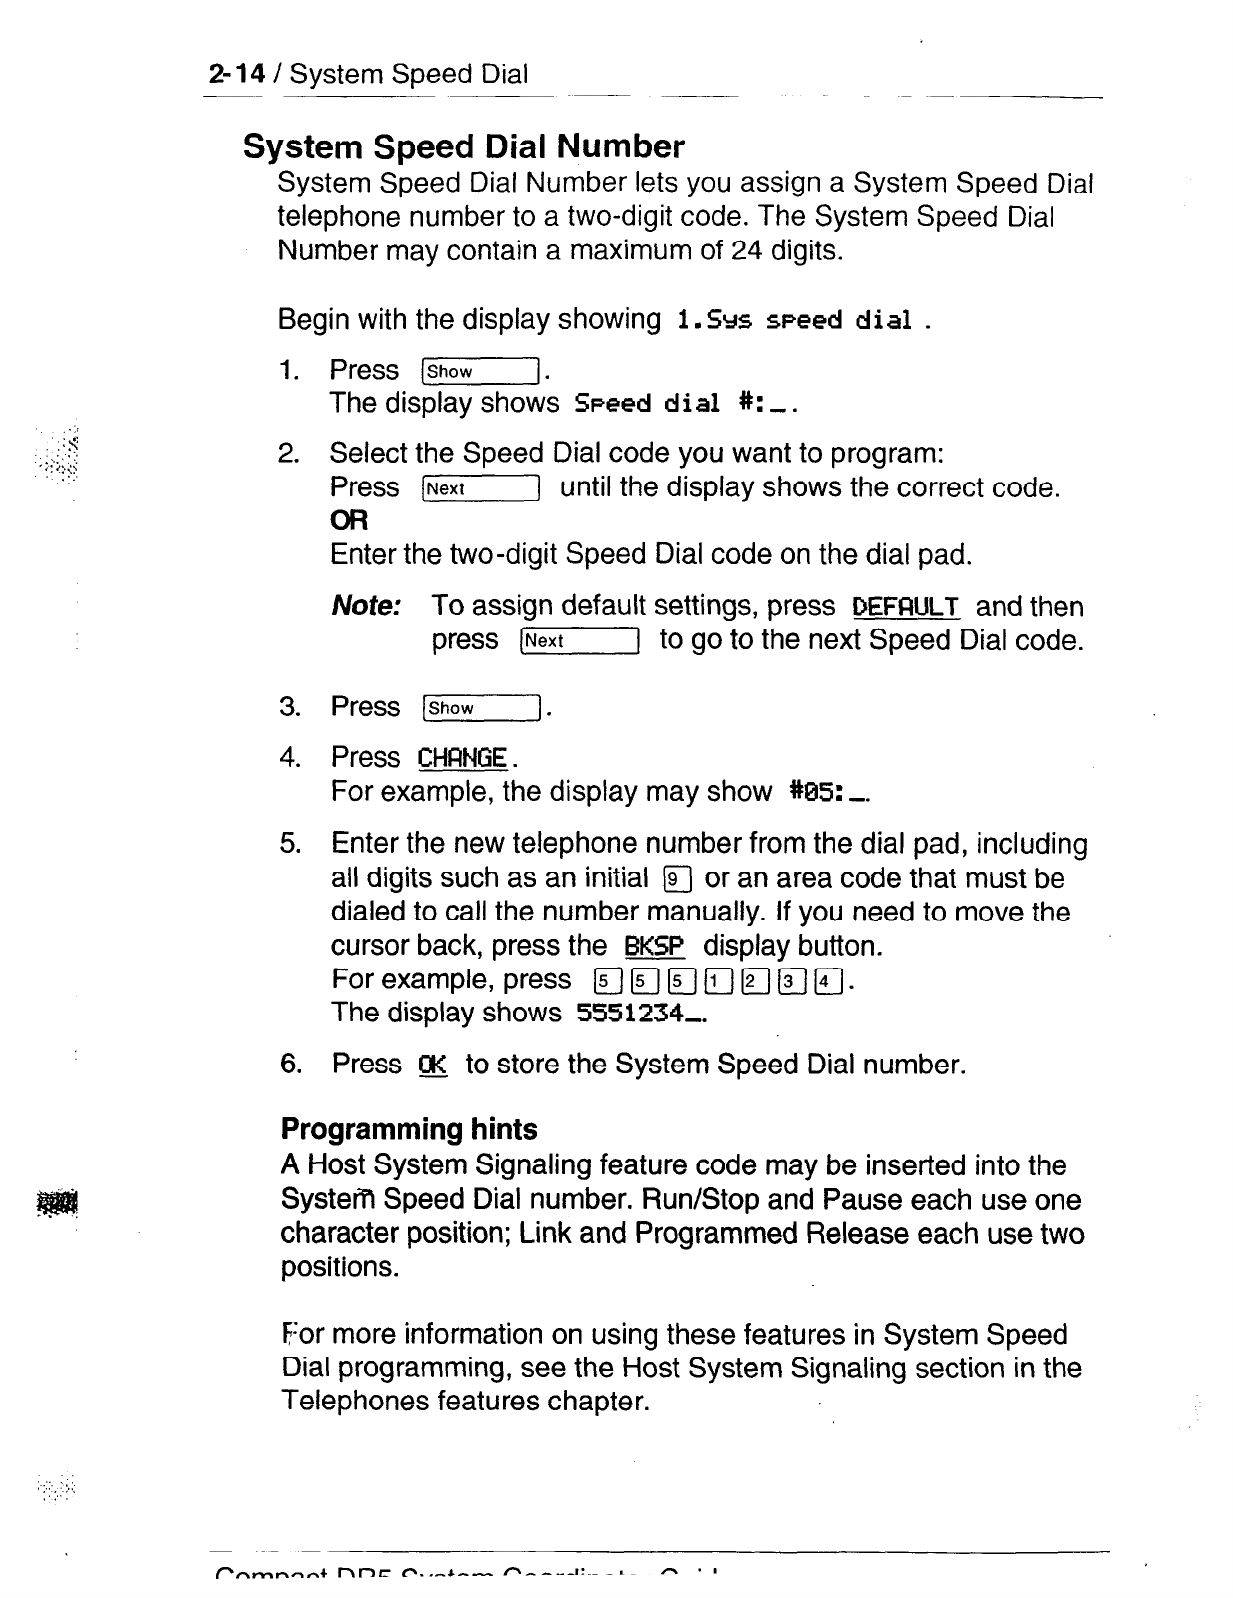
2-14 /
System
Speed Dial
1:: ::,:,
:.:
System Speed Dial Number
System Speed Dial Number lets you assign a System Speed
Dial
telephone number to a two-digit code. The System Speed Dial
Number may contain a maximum of 24 digits.
Begin with the display showing
1. Srs speed dial
.
1.
2.
Press [show].
The display shows
Speed dial #: -.
Select the Speed Dial code you want to program:
Press (Next] until the display shows the correct code.
OR
3.
4.
Enter the two-digit Speed Dial code on the dial pad.
Note: To assign default settings, press DEFWLT and then
press [G--j to go to the next Speed Dial code.
Press
[j .
Press
CHFrNGE
.
For example, the display may show #85: -.
5. Enter the new telephone number from the dial pad, including
all digits such as an initial u or an area code that must be
dialed to call the number manually. If you need to move the
cursor back, press the BKSP display button
For example, press m bJ F] r] k-1 F] [?-I.
The display shows
5551234,.
6. Press E to store the System Speed Dial number.
Programming hints
A Host System Signaling feature code may be inserted into the
System Speed Dial number. Run/Stop and Pause each use one
character position; Link and Programmed Release each use two
positions.
For more information on using these features in System Speed
Dial programming, see the Host System Signaling section in the
Telephones features chapter.
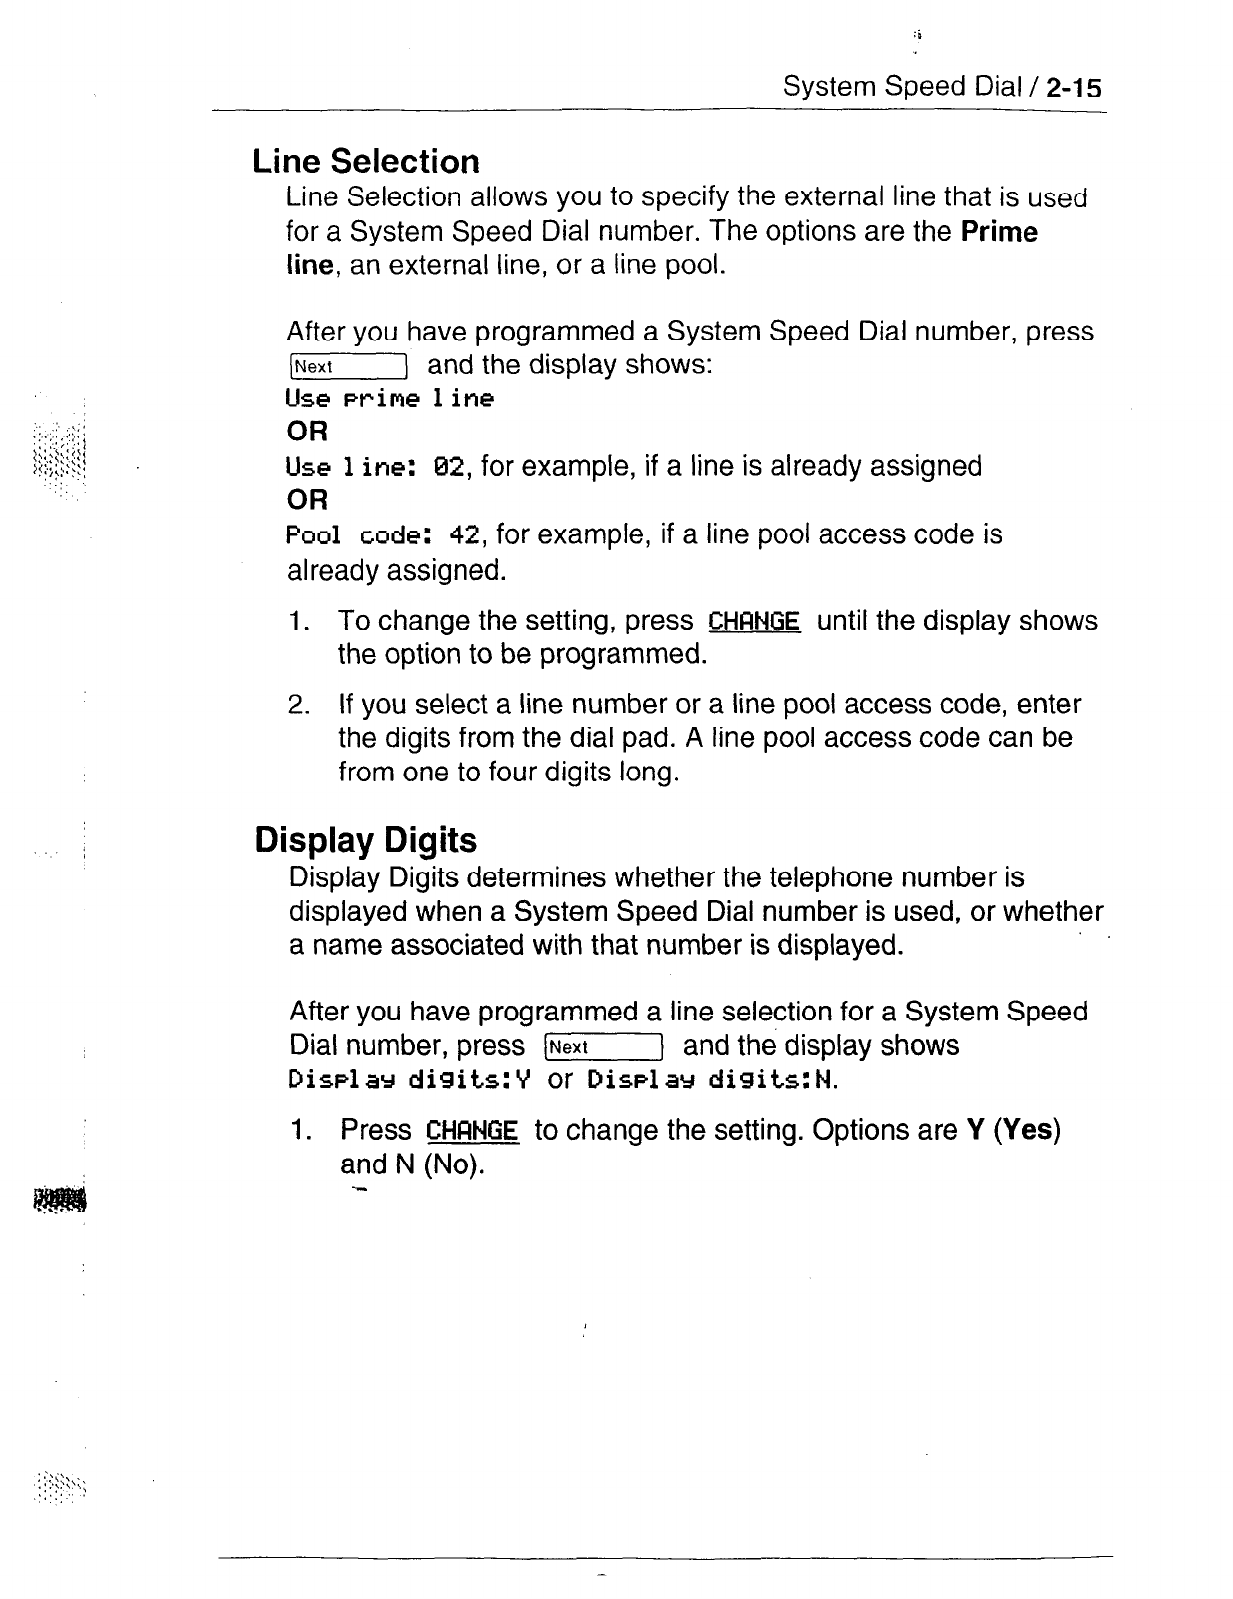
:i
System Speed Dial / 2-15
Line Selection
Line Selection allows you to specify the external line that is
used
for a System Speed Dial number. The options are the
Prime
line,
an external line, or a line pool.
After you have programmed a System Speed Dial number, press
[Next] and the display shows:
Use
Prime 1 in9
OR
Use
1 ine: 82,
for example, if a line is already assigned
OR
Pool code: 42,
for example, if a line pool access code is
al ready assigned.
1. To change the setting, press
CHANGE
until the display shows
the option to be programmed.
2.
If you select a line number or a line pool access code, enter
the digits from the dial pad. A line pool access code can be
from one to four digits long.
Display Digits
Display Digits determines whether the telephone number is
displayed when a System Speed Dial number is used, or whether
a name associated with that number is displayed.
After you have programmed a line selection for a System Speed
Dial number, press [] and the display shows
Displ ar digits: V
or
Displ ar digits: N.
1. Press
CHANGE
to change the setting. Options are Y (Yes)
and N (No).
:::p\
.:
.T:\?\;
.I,:::.:
: ,~
.‘:
:::::‘::..
.‘<!‘..,. :
2-16 /
System Speed Dial
System Speed Dial Name
System Speed Dial Name allows you to assign a name to the
stored System Speed Dial number. When the Display Digits
setting is “No”, the programmed name is shown on the Norstar
display when the System Speed Dial feature is used.
The name can be up to 16 characters long. The default name is
the System Speed Dial number; for example, 5s
Spd
Dial 82
for System Speed Dial code 02.
After programming Display digits to N, press [Next]
display shows
Name.
1.
Press (Show].
The display shows the assigned or default name.
2. Press
CHFINGE.
and the
3. Enter the first character of the name by pressing the
appropriate dial pad button one, two, three, or four times.
4. To move the cursor to the next position, press --> or m.
Continue entering characters. For more information, see the
Entering names heading in the Programming details section
of this chapter.
Programming hints
You
can program System Speed Dial Name only if Display Digits
is set to No.
Bypass Restrictions
Bypass Restrictions allows the System Speed Dial number to
bypassany restrictions in applied Dialing filters. Dialing filters are
programmed in the Capabilities section of Administration
programming.
After programming the System Speed Dial Name, press
[Next] and the display shows Bypass rest? n:
N
or
Brass re5t.r’ n: Y.
1. Press
CHQNQE
to change the setting. Options are N (No),
and Y (Yes).
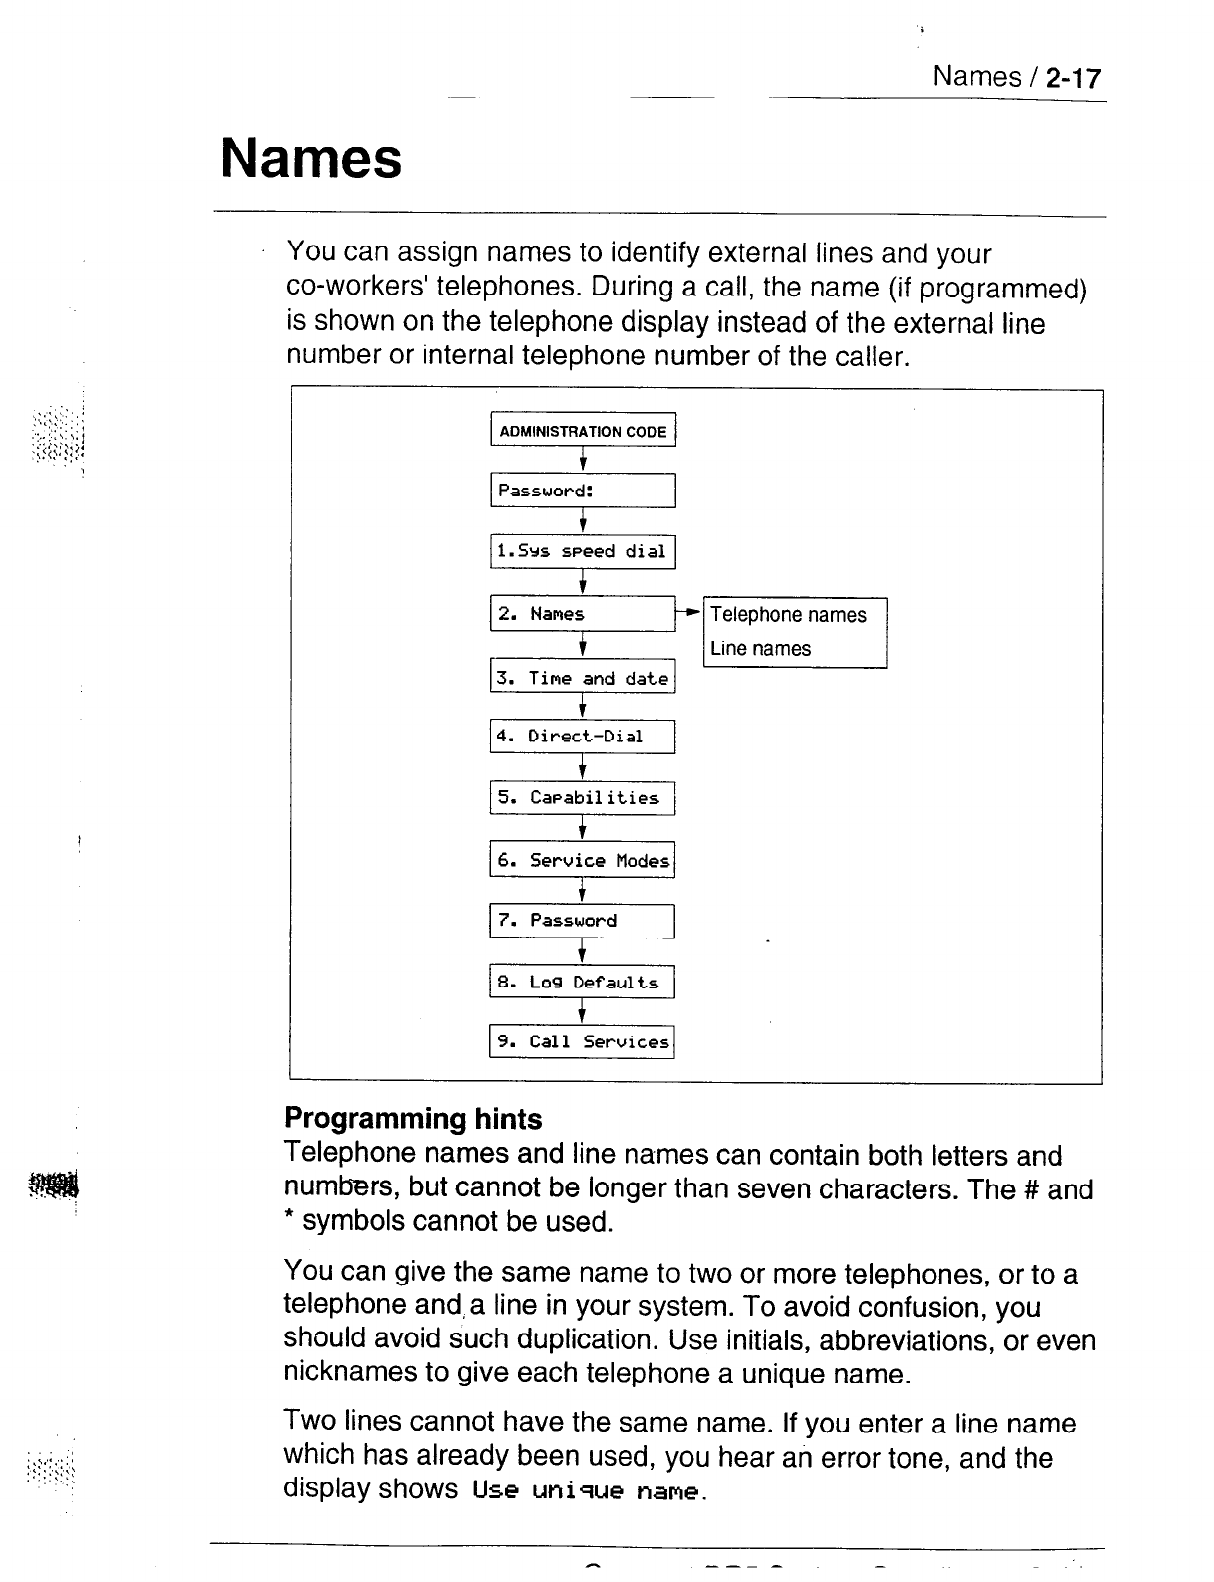
Names / 2-17
j : \
:’ :, ; :, i ;
,,:y:\:,:
‘.
Names
You can assign names to identify external lines and your
co-workers’ telephones. During a call, the name (if programmed)
is shown on the telephone display instead of the external line
number or internal telephone number of the caller.
9.
Call Services
numbers, but cannot be longer than seven characters. The # and
* symbols cannot be used.
You can give the same name to two or more telephones, or to a
telephone and,a line in your system. To avoid confusion, you
should avoid such duplication. Use initials, abbreviations, or even
nicknames to give each telephone a unique name.
Two lines cannot have the same name. If you enter a line name
which has already been used, you hear an error tone, and the
display shows US
unique nap.
--_ - -
2-18 / Names
Telephone Names
Personalize your office communication by assigning names to
the telephones
in the Norstar system. A telephone’s default name
is its internal number, for example,
27.
Begin with the display showing
1.5~s
speed dial.
1.
2.
3.
4.
5.
6.
Press [Next].
The display shows
2.
Names.
Press (Show] twice.
The display shows
Show set: _.
Enter the two-digit internal number of the telephone.
OR
Press (Next] for the name of the telephone with the first
internal number.
Press
CHANGE.
The name is removed from the display, and a cursor is
shown.
Enter the first character of the name by pressing the
appropriate dial pad button one, two, three, or four times.
To move the cursor to the next position, press --> or [;;1.
Continue entering characters. For more information, see the
Entering names heading in the Programming details section
of this chapter.
Programming hints
If Automatic Telephone Relocation is turned on, the name and
internal number of a telephone are saved if the telephone is
moved--within your system.
._ /
Names / 2-l 9
Line Names
Line Names allows YOU to assign a name to an external line. The
default name is the line number, for example, Line 02.
Begin with the display showing 1.
SE.
speed
dial
.
1.
2.
3.
4.
5.
6. Press Ct-MNQE.
The name is removed from the display, and a cursor is
shown.
7.
8.
Press (Nexf].
The display shows
Press (-1.
The display shows
Press [Next].
The display shows
Press [Show].
The display shows
2. Names.
S& names.
Line nam5.
Show 1 it-e: _.
Enter the two-digit line number from the dial pad.
OR
Press (j to program the name of line 01.
Enter the first character of the name by pressing the
appropriate dial pad button one, two, three, or four times.
To move the cursor to the next position, press --> or @.
Continue entering characters. For more information, see the
Entering names heading in the Programming details section
of this chapter.
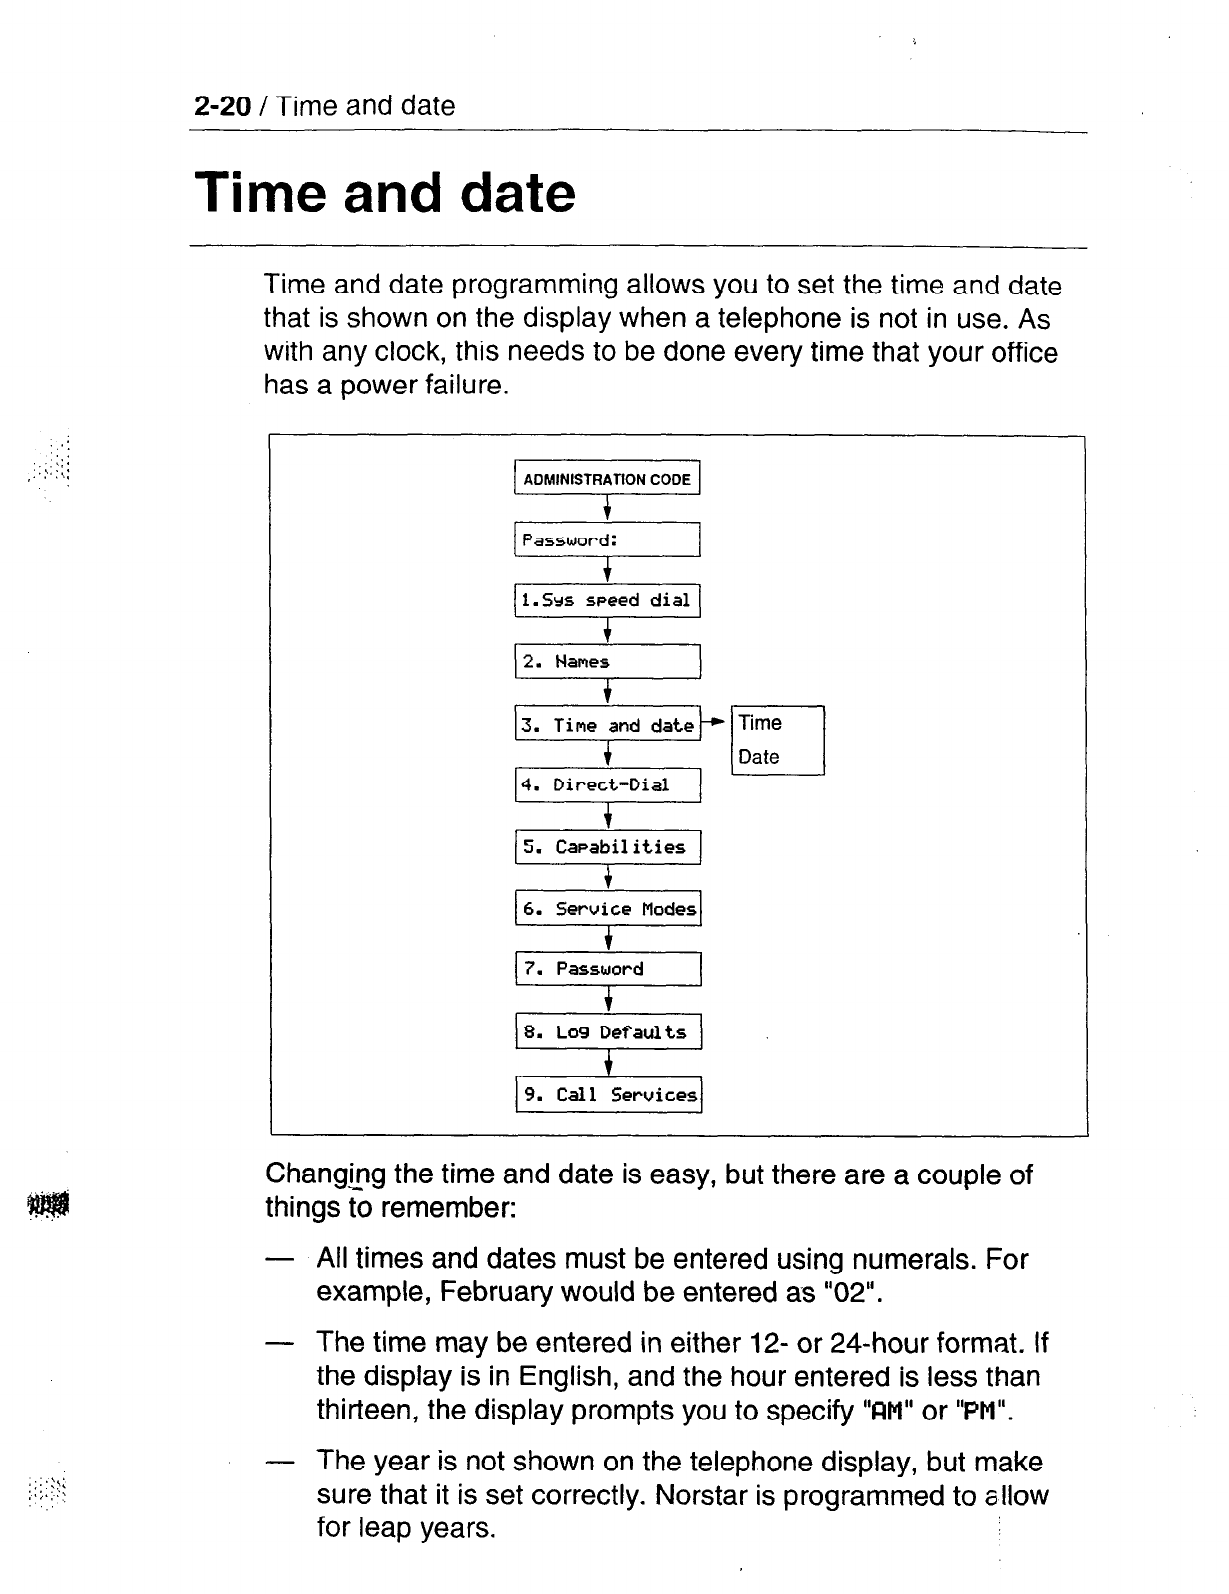
:
‘.
‘.’
::,;::;:
:
2-20 / Time and date
Time and date
Time and date programming allows you to set the time and date
that is shown on the display when a telephone is not in use. As
with any clock, this needs to be done every time that your office
has a power failure.
Time
Date
1
Chang@g the time and date is easy, but there are a couple of
things to remember:
- All times and dates must be entered using numerals. For
example, February would be entered as “02”.
- The time may be entered in either 12- or 24-hour format. If
the display is in English, and the hour entered is less than
thirteen, the display prompts you to specify VIM” or
“PM”.
-
The year is not shown on the telephone display, but make
sure that it is set correctly. Norstar is programmed to allow
for leap years.

:i
Time and date / 2-21
-
English language displays always show the time in 12-hour
format, while the alternate language displays always use the
24-hour format.
Setting the time
Begin with the display showing
1.5~ speed dial.
;
,
i
‘.,.
;:. ‘~
:: ,x;:
y
:,: ,: ‘y \’
: ,y.,:. .
$
: :
1.
Press [Next] twice.
The display shows 3.
Time and date.
2.
Press 7).
The display shows the time, for example,
Time l:@@.
3.
Press
CHANGE.
The display shows the hour, for example,
Hour: Bl.
4. Set the hour.
a. Press CHRNQE.
b.
A cursor replaces the number on the display.
Enter the hour using the dial pad.
For example, press m m.
C.
Press [-I.
The. display shows the minutes, for example,
Minutes: 88.
I
5. Set the minutes.
a.
b.
C ._
Press CHFrNQE.
A cursor replaces the number on the display.
Enter the minutes using the dial pad.
For example, press 0
q
.
Press
[NeYfJ .
If the hour entered in step 4 is less than thirteen, the
display shows
CllM .
6. To switch the message to
PM ,
press CHANGE.
To switch it back to
RM ,
press CHRNQE again.
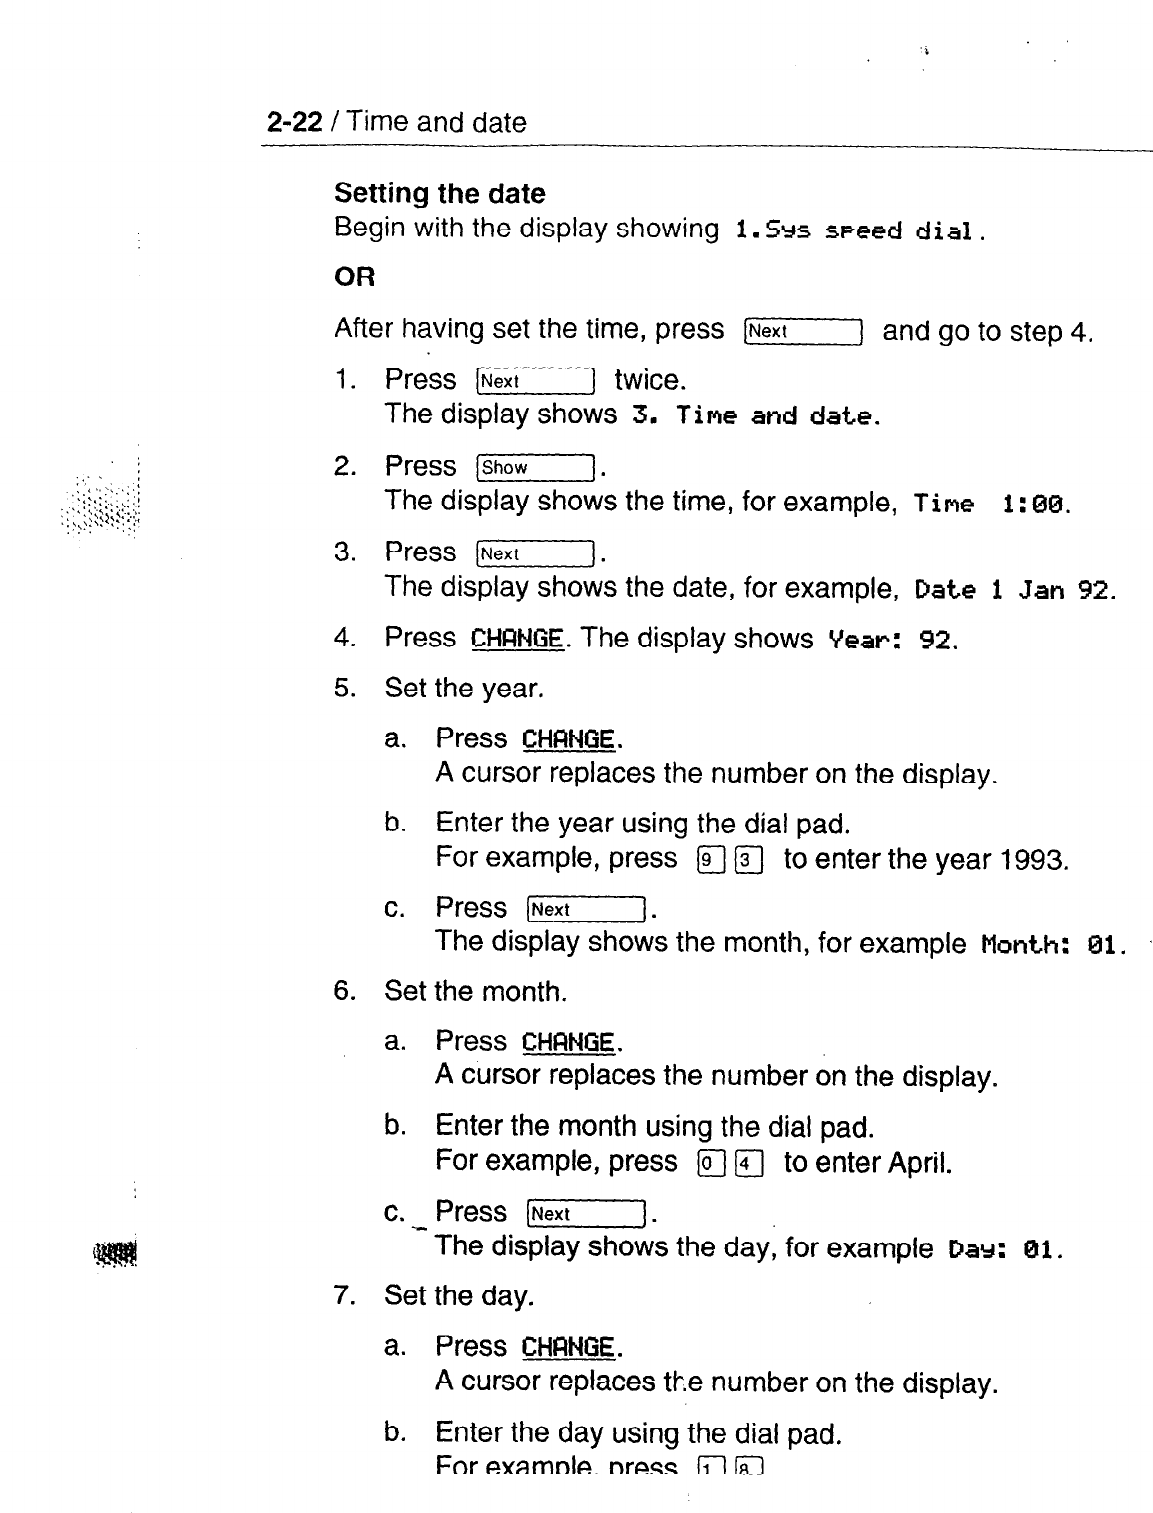
2-22 / Time and date
Setting the date
Begin with the display showing
1.5~ speed dial.
OR
After having set the time, press [J and go to step 4.
1. Press [] twice.
The display shows 3.
Time and date.
2. Press (Show].
The display shows the time, for example,
Time 1:
88.
3. Press [text]
.
The display shows the date, for example,
Date 1 Jan 92.
4.
5.
Press CHQNQE. The display shows
Vear: 92.
Set the year.
a. Press CHANGE.
A cursor replaces the number on the display.
b. Enter the year using the dial pad.
For example, press m a to enter the year 1993.
c. Press [Next].
The display shows the month, for example
Month: 01.
6. Set the month.
a. Press
CHQNQE.
A cursor replaces the number on the display.
b. Enter the month using the dial pad.
For example, press a a to enter April.
c. _ Press [NGY--].
The display shows the day, for example
Dav: 01.
7. Set the day.
a. Press CHRNQE.
A cursor replaces the number on the display.
b. Enter the day using the dial pad.
For example, press u 0.
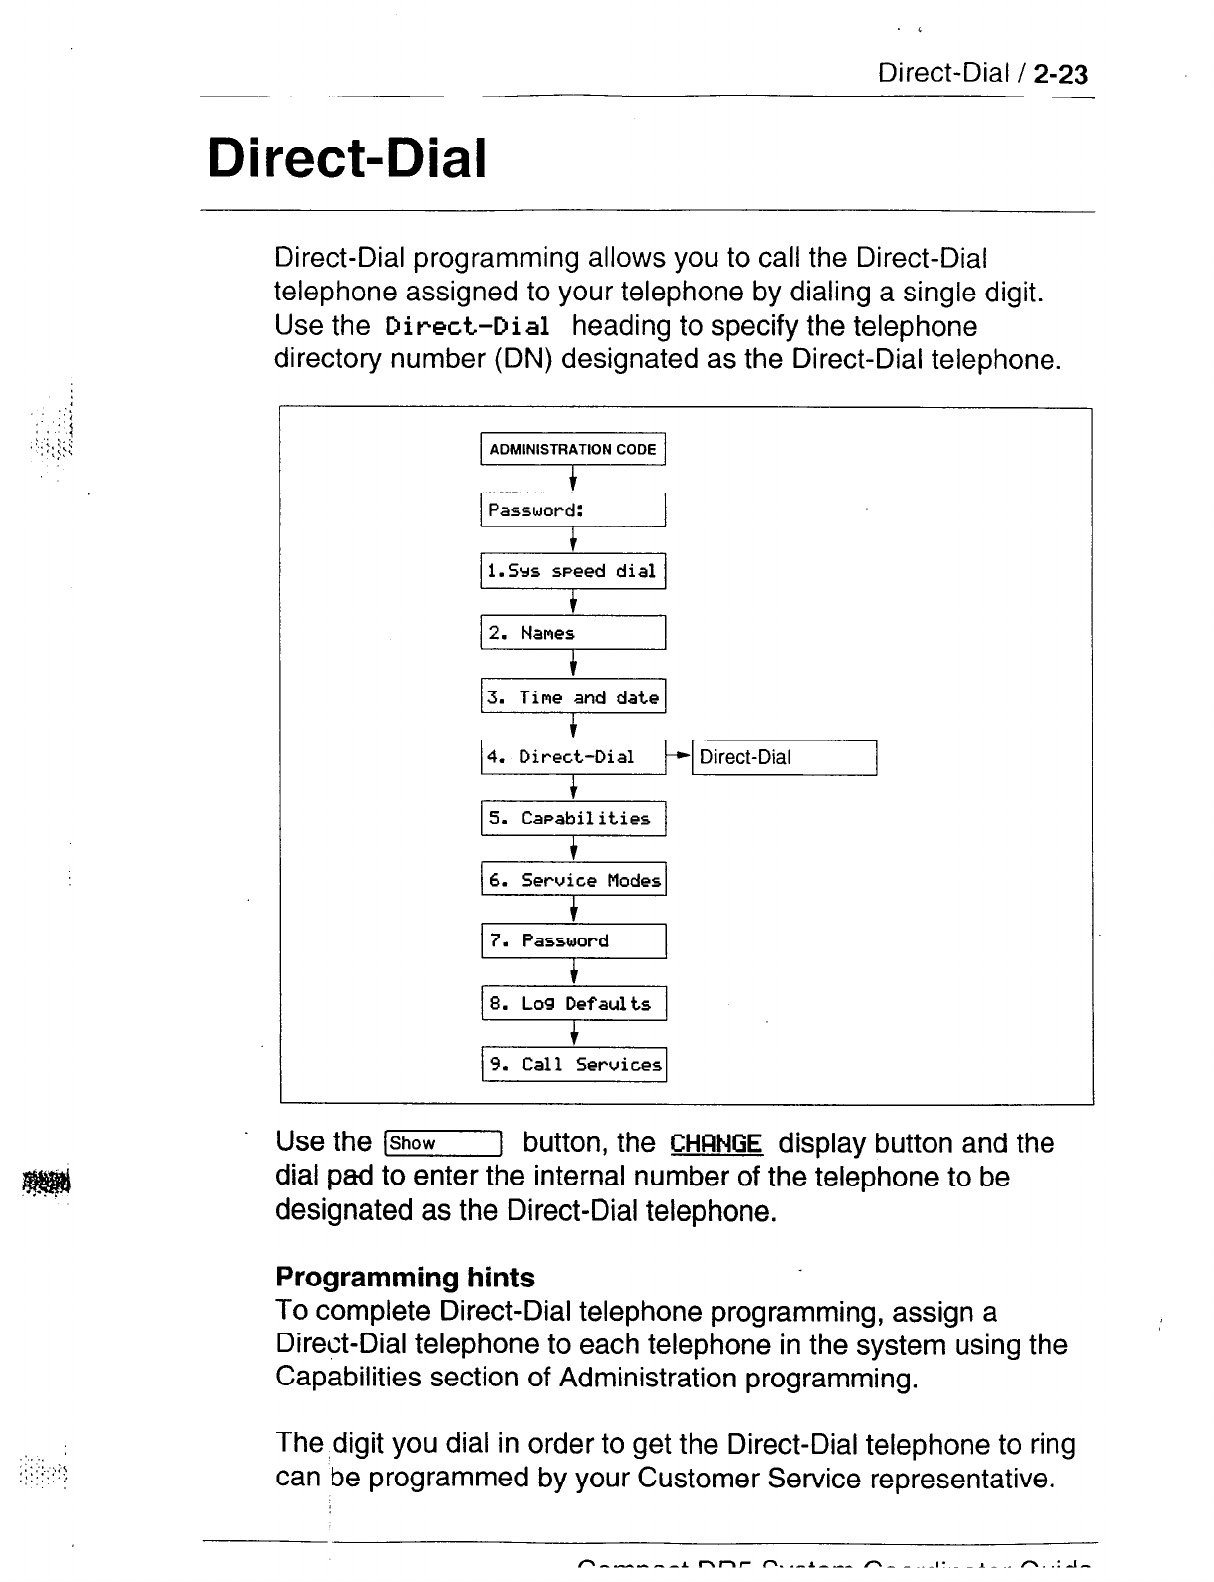
Direct-Dial / 2-23
Direct-Dial
Direct-Dial programming allows you to call the Direct-Dial
telephone assigned to your telephone by dialing a single digit.
Use the
Direct-Dial
heading to specify the telephone
directory number (DN) designated as the Direct-Dial telephone.
T/+1 Direct-Dial
9. Call Services
Use the (Show] button, the
CHFiNQE
display button and the
dial pad to enter the internal number of the telephone to be
designated as the Direct-Dial telephone.
Programming hints
To complete Direct-Dial telephone programming, assign a
Direct-Dial telephone to each telephone in the system using the
Capabilities section of Administration programming.
The,digit you dial in order to get the Direct-Dial telephone to ring
can
be
programmed by your Customer Service representative.
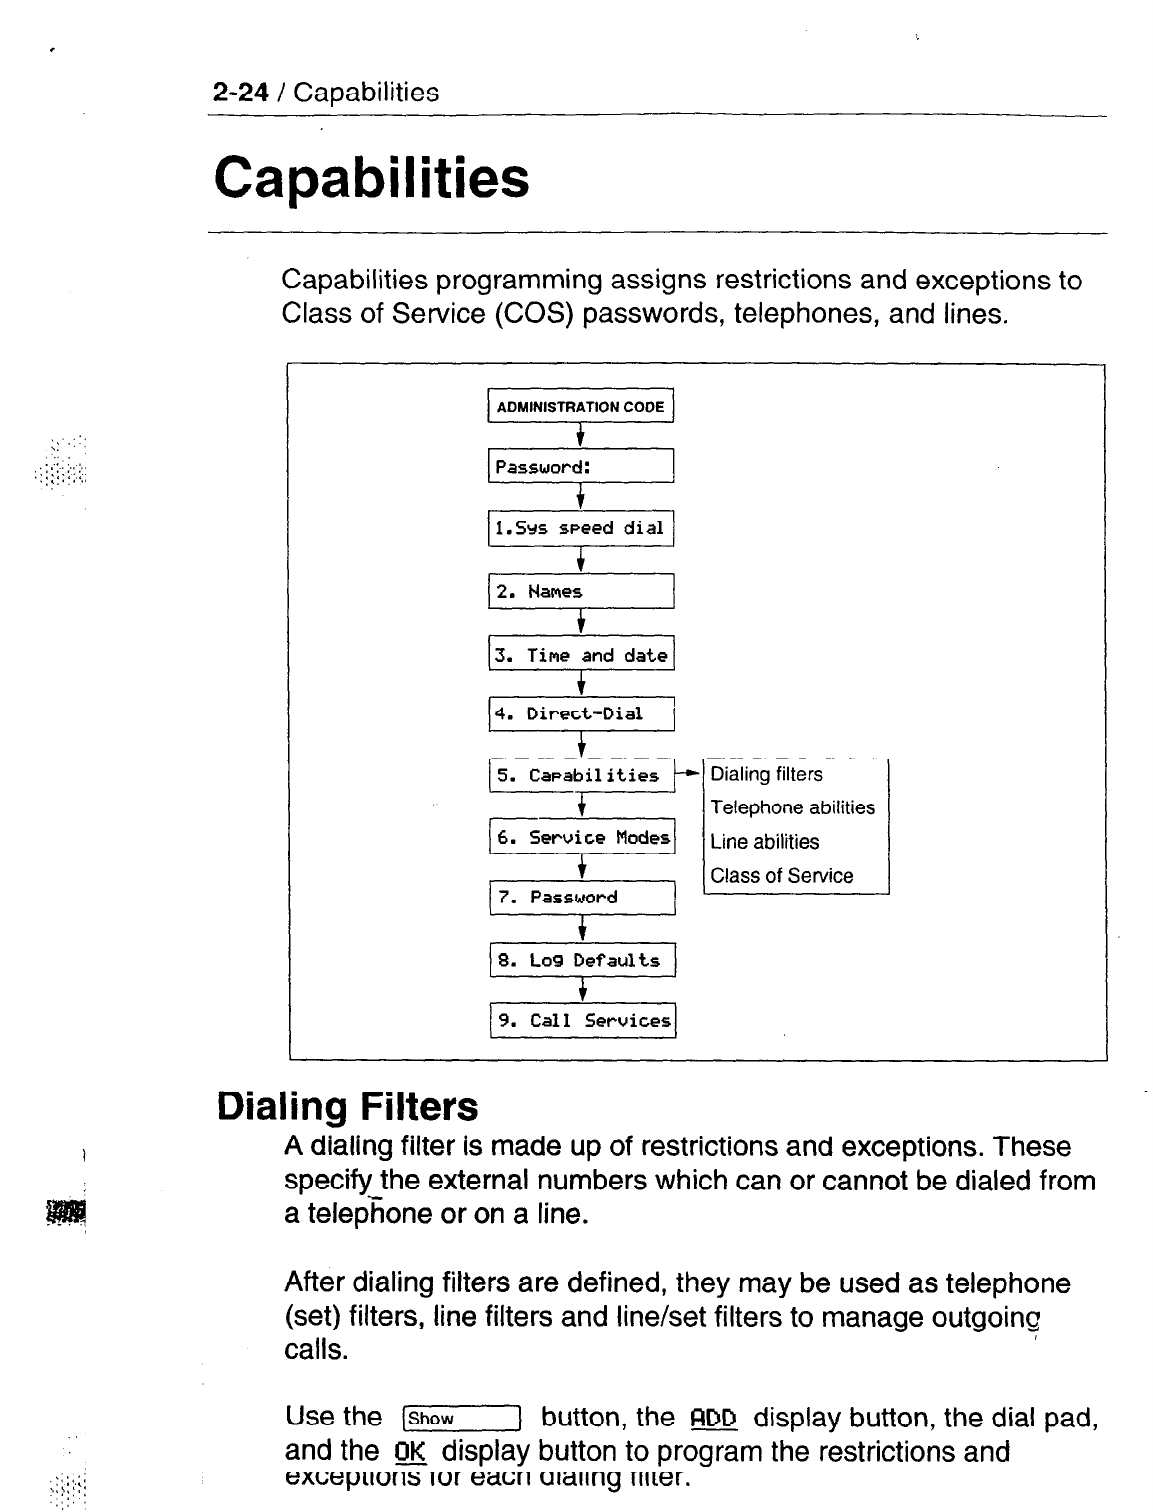
2-24 / Capabilities
Capabilities
;:
‘.
‘.:
;*. ‘.,
‘,,
::*<..‘,‘L
.:,:,:.‘.,
Capabilities programming assigns restrictions and exceptions to
Class of Service (COS) passwords, telephones, and lines.
7. Password
9. Call Seruices
Dialing Filters
A dialing filter is made up of restrictions and exceptions. These
specify the external numbers which can or cannot be dialed from
a telepKone or on a line.
After dialing filters are defined, they may be used as telephone
(set) filters, line filters and line/set filters to manage outgoing
calls.
Use the [Show] button, the m display button, the dial pad,
and the m display button to program the restrictions and
exceptions for each dialing filter.
Cadabilities /
2-25
Use the [r] button, the m display button, the dial pad,
and the B display button to program the restrictions and
exceptions for each dialing filter.
Press the m display button to enter a
l
wild card character that
represents any digit in a sequence of numbers.
For example
You
may need filters for three different types of users:
- Managers may require unrestricted dialing.
- Secretaries may need to be limited to calling the West coast
office on line 03 only.
- Clerks may need to be limited to calling specific area codes
and the West coast office.
Dialing filters are most commonly used to prevent unauthorized
long-distance calls, without restricting local calls. Dialing filters
restrict the numbers that an internal user can dial on external
lines.
If a line/set filter has been defined for the line selected at the
user’s telephone, it overrides any line filters or telephone filters
which might otherwise apply.
If no line/set filters have been defined, dialed digits are filtered
through (and may be rejected by either of) the telephone filter (if
defined) and the line filter (if defined).
Comeact DR5
Svstem Coordinator Guide
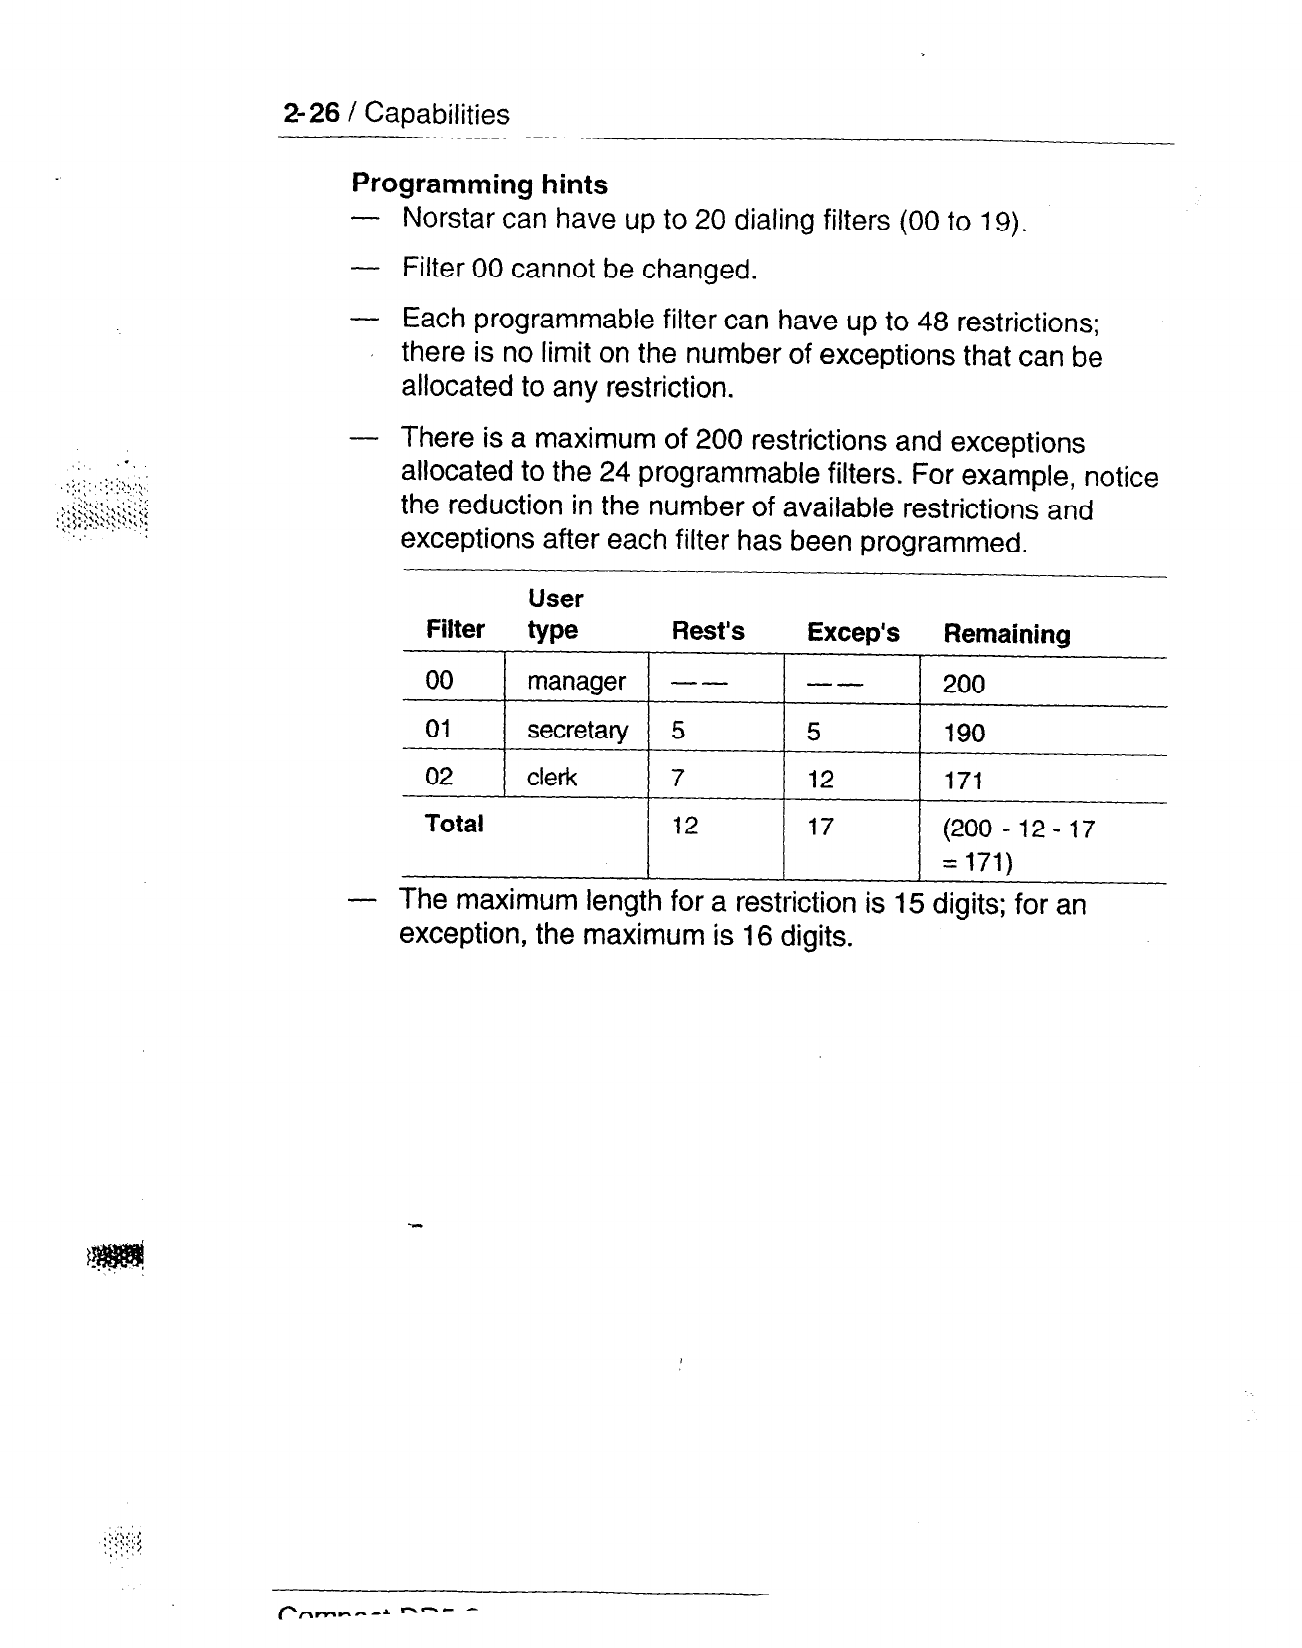
2-26 / Capabilities
Programming hints
-
Norstar can have up to
20
dialing filters (00 to 19).
- Filter 00 cannot be changed.
- Each programmable filter can have up to
48
restrictions;
there is no limit on the number of exceptions that can be
allocated to any restriction.
- There is a maximum of 200 restrictions and exceptions
allocated to the 24 programmable filters. For example, notice
the reduction in the number of available restrictions and
exceptions after each filter has been programmed.
User
Filter type Rest’s Excep’s Remaining
00
I manager
1 -- 1 -- l
200
I I I
I
I
I
I
01
secretary 5 5
190
02 clerk 7 12 171
Total
1
12 1 17 1 (200-12-17
I I
I =171)
- The maximum length for a restriction is 15 digits; for an
exception, the maximum is 16 digits.
Capabilities / 2- 27
- The
l
is a “wild card” character that stands for any digit.
- You can use an asterisk * in a sequence of numbers in either
a restriction or an exception. This character is often used as
part of feature codes for other systems or for features
provided by your central office.
Note: If you are using an earlier version of KSU software,
the asterisk * is used as the “wild card”.
- When restricting the dialing of a central office feature code,
do not forget to create separate restrictions for the codes
used for DTMF and pulse lines. For example, *67 and 1167.
- Do not string together a central office feature code and a
dialing sequence that you want to restrict. Create a separate
restriction for each.
- You can use COPY and the dial pad to copy restrictions and
overrides from one dialing filter to another.
- Any restriction or exception can be used in any number of
filters. Each time it is used, it counts as one entry. For
example, if restriction 411 exists in filters 01, 02 and 03 it
uses up three of the 200 entries available.
- Removing a restriction also removes the exceptions
associated with it, and changes the identifying number of the
remaining restrictions. For example, removal of restriction 01
renumbers restrictions 01 to 48 as 01 to 47.
Note: The removal of a restriction from one dialing filter
has no effect on the contents of other filters into
which the restriction was copied.
- Y&I cannot delete a filter. Removing the restrictions
programmed on a filter makes it an unrestricted filter but the
filter is not removed.
Comnsct l-IF45 Svstem fhnrdinatr~br CI iifiP
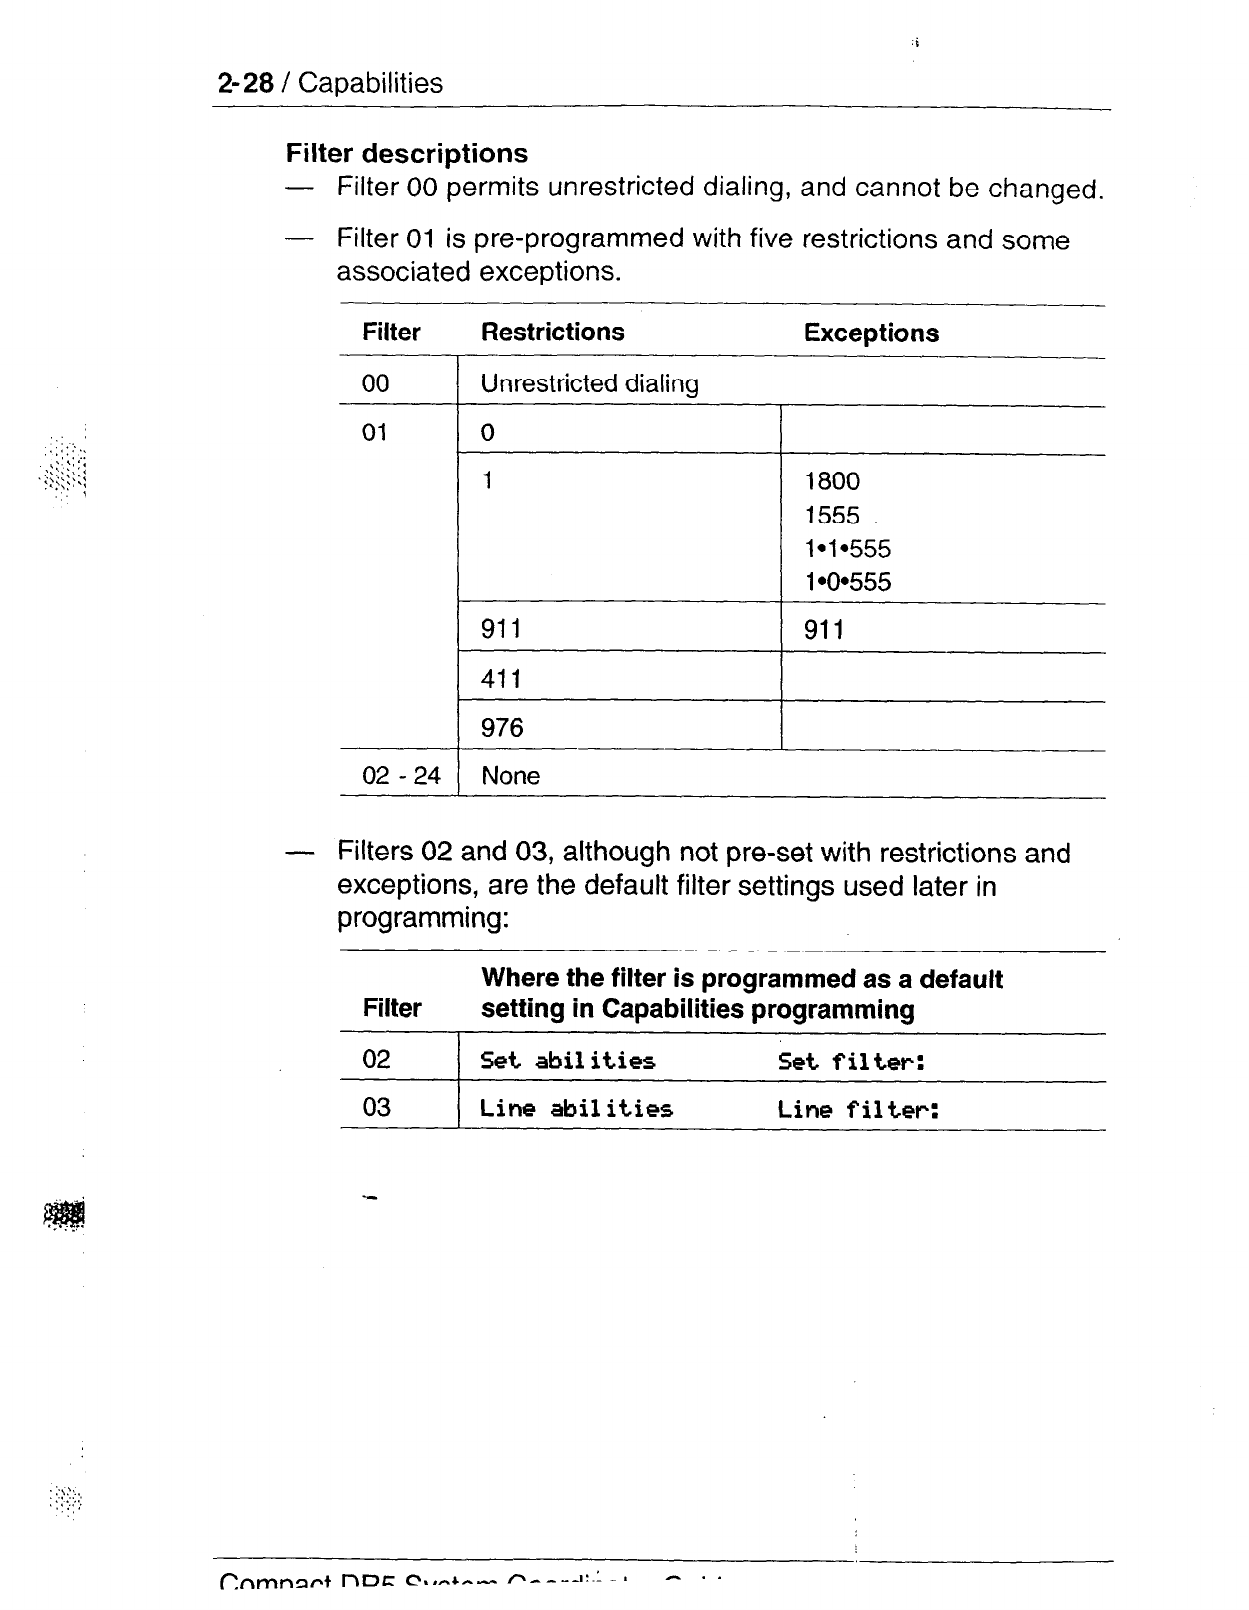
2-28 / Capabilities
Filter descriptions
-
Filter
00
permits unrestricted dialing,
- Filter 01 is pre-programmed with five
associated exceptions.
and cannot be changed.
restrictions and some
Filter Restrictions Exceptions
00
01
02 - 24
Unrestricted dialing
I
1800
976
None
I-
Filters 02 and 03, although not pre-set with restrictions and
exceptions, are the default filter settings used later in
programming:
Filter
02
03
Where the filter is programmed as a default
setting in Capabilities programming
Set
abil ities Set filter:
Line abilities Line f il tw:
fhmn3d nDc c..A~,l- P_ -__I:.: _ .
_ . .
Cababilities / 2-29
Telephone (Set) abilities
Telephone (Set) abilities programming assigns dialing filters and
specific settings to telephones. Telephone abilities include:
Telephone (set) filters Direct-Dial telephone
Line/telephone filters Call Forward On Busy
Telephone Administration Lock Call Forward No Answer
Full Handsfree Forward No Answer delay
Automatic Handsfree Allow redirect
Handsfree Answerback Redirect ring
Call Pickup Group Receive tones
Paging
Page Zone
Auxiliary Ringer
Telephone (Set)
A Telephone filter
Hotline
Priority Call
filter
is a collection of restrictions and exceptions
defined in Dialing filters. These filters are applied to telephones
through Set filter programming.
Use the (Show) button, the CHQNCjE display button and the
dial pad to enter the number of the Dialing filter to be assigned as
the Telephone filter.
Filter 02
is the default set filter.
Line/telephone (Line/set) filter
A Line/telephone filter is applied to the appearance of a line at a
specific telephone. This type of filter replaces any Line or
Telephone filters which might otherwise apply.
Line/set filters control the numbers that may be dialed on specific
external lines from specific telephones.
For example, a Line/set filter.can permit a call to a specific
long-distance number on line 03 from a specific telephone, but
no other long-distance numbers, and on no other line.
Compact DR5 Svstem Coordinator Guide

2-30 / Capabilities
Use the [JZGY-]
button, the CHRNGE display button and the
dial pad to enter the number
of the Dialing filter
to
be
assigned as
the Line/telephone filter.
Programming hints
-
A maximum of 255 Line/telephone dialing filters may be
applied to lines at telephones across the entire system.
Telephone Administration Lock (Set Lock)
Telephone Administration
Lock limits the types of features that
may be used or programmed at a telephone. Use the CHANGE
display button to select one of the three options:
None,
Partial
and Full.
None
allows you to access any feature on your telephone.
Partial
prevents:
l
programming Autodial buttons
l
l
programming Personal Speed
Dial numbers
l
programming feature buttons
l
0 moving line buttons
l
l
changing the display
language a
changing Dialing
Modes
(Automatic Dial,
Pre -Dial, and
Standard Dial)
using
Voice Call Deny
using Administration
programming
saving a number with Saved
Number Redial
Full,
in addition to the restrictions outlined for Partial lock,
prevents:
l
changing Background
Music
l
using Call Forward all calls
l
chaiiging Privacy
l
using Send Message
l
changing Do Not Disturb
l
using Trunk Answer
l
using Ring Again
l
activating Service Modes
Capabilities / 2-31
Full Handsfree
Full Handsfree allows you to make or receive calls without
picking up the receiver, and allows a headset to be used with the
Norstar telephone. Use the
CHANGE
display button to select the
setting: N (No) or Y (Yes).
Programming hints
A [HanMdusdree] button is automatically assigned to a telephone that
is programmed with Full Handsfree. Full Handsfree is always
disabled for an M7100 Telephone.
Automatic Handsfree
Automatic Handsfree activates the Handsfree microphone and
speaker when you make or receive calls by pressing a line
button. Use the
CHANGE
display button to select the setting:
N (No) or Y (Yes).
Programming hints
You can program Automatic Handsfree only if the telephone has
Full Handsfree set to Yes.
Handsfree Answerback
Handsfree Answerback allows you to answer a Voice Call without
lifting the receiver. Use the CHFSNGE display button to select the
setting: Y (Yes) or N (No).
Programming hints
Handsfree Answerback is always disabled for an M7100
Telephone.
Call Pickup (Group)
Eachtelephone can be assigned to two of up to four Call Pickup
groups. Members of a Call Pickup group can answer any calls
ringing at a telephone in the group. Use the CHRNQE display
button to select the setting: NO,
1,
2, 3, or 4.
Programming hints
You
cannot pick up a call that is on a Private line, or a call that is
ringing only the Auxiliary Ringer.
Comoact DR5
Svstem
Cocdinat,‘v GI lick
2-32 / Capabilities
Paging
This setting determines whether a telephone has access to the
Page feature. Use the CHFrNGE display button to select the
setting: Y (Yes) or N (No).
Page zone
Each telephone can be assigned to one of three zones for
receiving Page messages. A zone is any selection of Norstar
telephones you want to group together, regardless of location.
Use the I=HFINGE display button to select the setting:
1,
2, 3,
or NO.
Programming hints
The Page zone setting
set to No.
Auxiliary Ringer
has no effect if the telephone has Paging
This setting causes the Auxiliary Ringer (if installed) to ring when
the telephone rings. An Auxiliary Ringer is important in noisy
environments where a Norstar telephone might otherwise not be
heard. Use the CHANGE display button to select the setting:
N (No) or Y (Yes).
Direct -Dial telephone
A telephone can be assigned to call the Direct-Dial telephone
when you dial a single digit. Use the
CHANGE
display button to
select the setting:
Set1
or None.
Programming hints
Any number of telephones can be assigned to call a particular
Direct-Dial telephone.
The digit you dial in order to get the Direct-Dial telephone to ring
can be programmed by your Customer Service representative.
Call Forward On Busy
Call Forward On Busy redirects an incoming call to another
telephone on your Norstar system when you are busy on a call,
or when you have Do Not Disturb activated at your telephone.
Pnrnr\ot5+ nnc m. ._*_-_ r\_ _ I.
_ A . _
Capabilities / 2-33
Use the (Show] button, the CHANGE display button, and the
dial pad to program the internal number of the telephone that
your calls are to be directed to.
Programming hints
Line Redirection takes precedence over Call Forward On Busy.
Call Forward No Answer
Call Forward No Answer lets you redirect an incoming call to
another telephone on your Norstar system when the call is not
answered at your telephone.
Use the (Show1 button, the CHFrNCiE display button, and the
dial pad to program the internal number of the telephone that
your calls are to be directed to.
Programming hints
Line Redirection takes precedence over Call Forward No
Answer.
Forward No Answer delay
If you assign another telephone to receive your calls, you can
also assign the number of times that the incoming call rings
before the call is forwarded. To estimate the delay time in
seconds, multiply the number of rings by six. Use the CHFINGE
display button to select the setting: 2, 3, 4, 6, or IO rings.
Allow redirect
Allow redirect enables you to identify whether a telephone is
allowed access to the Line Redirection feature. Use the CHFINC~E
display button to select the setting: Y (Yes) or N (No).
See tf%e explanation of Line Redirection in the Telephone
features chapter for more information on redirecting lines.
Programming hints
The Allow redirect setting has no effect if Disconnect Supervision
is unavailable or was not enabled by your Customer Service
representative. See the System features section of the
Telephone features chapter for more information on Disconnect
Supervision.
Compact DR5 System Coordinator Guide
2-34 / Capabilities
Redirect ring
The Redirect ring setting causes
a telephone to ring briefly (a
200 millisecond burst) when a call is redirected on one of its
lines. Each telephone with a ringing appearance of that line also
rings briefly for the redirected call if the Redirect ring setting for
them is ‘Y’ (the default). Use the CHCSNGE display button to select
the setting:
Y (Yes)
or N (No).
A user enters the Line Redirection feature code to redirect calls.
See the explanation of Line Redirection in the Telephone
Features chapter for more information on redirecting lines.
Programming hints
The Redirect ring setting has no effect if Disconnect Supervision
is unavailable or was not enabled by your Customer Service
representative. See the System features section of the
Telephone features chapter for more information on Disconnect
Supervision.
Receive tones
The Receive tones setting allows the system to accept and relay
tones to the internal lines. Tones are required if you want to
connect an answering machine or a fax on an internal line. Use
the CHFINQE display button to select the setting:
N (No)
or Y
(Yes).
Hotline
Hotline automatically calls a pre-assigned number when you lift
the receiver or press 1-1 at your telephone. Hotline has
three options:
None,
internal
(Int.rnl ),
and external
(ExLrnl
).
Intern@
assigns an internal number.
External
assigns an external number. If you select an external
number, you can also select the line on which the call is made:
the Prime line, an external line, or a line pool. You will have to
specify the Line Pool Access code for a line pool.
Use the
CHRNQE
display button to select the Hotline setting. If
you select
Intrnl
, use the [Show] button, the CHt7NQE
display button, and the dial pad to program the internal number
of the telephone that liotline calls are to be directed to.
:;
Capabilities / 2-35
If you select
Exb--11 ,
use the (Show-1 button, the
CHFINGE
display button, and the dial pad to program the external
telephone number that Hotline calls are to be directed to, and
to
program the line Hotline calls are to be made on.
Programming hints
The telephone should be labeled to inform anyone using it that
Hotline is active.
A telephone’s Prime line, line pool access codes, and access to a
line
pool can be programmed by
your Customer Service
representative.
Priority Call
This feature lets you call from your Nor-star telephone and
interrupt calls or override Do Not Disturb on another Norstar
telephone. Use the
CHANGE display button to select the setting:
N (No) or Y (Yes).
Programming hints
Apply this feature only to telephones from which such
interruptions can be justified.
Line abilities
Line abilities programming assigns dialing filters to lines.
Line filter
A Line filter is a collection of restrictions and exceptions defined
in a Dialing filter, and applied to an outgoing line. A Line filter on
i
an outgoing line may be used to limit the capabilities of that line
to can_-y calls made to specific area codes or destinations.
Use the
CHFINGE
display button, and the dial pad to program,the
Line filter.
Filter 03
is the default Line filter.
Class of Service (COS) passwords
:;,;;:;
,:.:::::::
:.).‘,‘.:.
Class of Service (COS) passwords permit controlled access to a
system’s resources. Class of Service programming defines
passwords, their associated dialing filters and user filters.
Cnmnart
ni2E chrrrtrrm r\_-___I.
. _ . .
2-36 / Capabilities
A Class of Service can be associated with a telephone, a line
or
a COS password. It determines the dialing capabilities that apply
to internal telephones and any lines used for external calls.
Users have a Class of Service associated with their telephones,
in the sense that there are dialing filters associated with
telephones, as well as line pool assignments. Use of a COS
password affects only the telephone’s dialing capabilities.
The ability to change the COS internally means that someone
using another person’s telephone can temporarily change the
restrictions that would normally be applied.
Password security
-
Class of Service passwords for a system should be
determined randomly, and should be changed on a regular
basis.
- System users should memorize their COS passwords
instead of writing them down.
- Employees’ COS passwords should be deleted when they
leave the company.
Programming hints
-
A system can have a maximum of 20 six-digit COS
passwords (00 to 19).
- You can copy the data from one COS password to another
COS password using the
COPY
display button in the same
way that telephone and line data can be copied.
- C_OS passwords must be unique.
Programming COS passwords
Use the [show] button, the
CHFlNQE
display button, and the
dial pad to program the six-digit sequences for each password.
Use the BKSP display button ,‘to edit digit sequences you have
entered.
i.$‘:‘:
::
,::..:.,’
C&bilities / 2-37
User filter
The COS User filter replaces the telephone (set) filter or the
line/set filter that would otherwise apply to a specific call.
Use the [] button, the CHANGE display button, and the
dial pad to program the two-digit User filter. The default setting
(Defl t.),
means that any other filters in place (telephone (set)
filter or line/set filter) still apply.
Line filter
The COS Line filter replaces the line filter that would otherwise
apply to a specific call.
Use the CHANGE display button, and the dial pad to program the
two-digit Line filter. The default setting
(Defl t),
means that any
Line filter already programmed still applies.
Compact DR5 Svstem Coordinator Guide
2-38 /
Service Modes
You can assign a Control telephone to more than one external
line, but a line cannot be assigned to
more than
one Control
telephone.
Only one Service Mode applies at any one time to all external
lines controlled by a given Control telephone.
The default Control telephone for all lines is
21.
Service Modes
The three Service Modes are programmed in the same way.
Service Mode Name
The Service Mode Name identifies the active Service Mode, and
is shown on the display of the Control telephone when the
Service Mode is turned on.
Use the [j button, the CHFINGE display button, and the
dial pad to program the Service Mode name. For information on
entering names, see the information in this chapter entitled
Entering names.
Programming hints
The default names of the three possible Service Modes are only
suggestions, and may be changed to any other name.
A Service Mode name can be one to seven characters.
Service Mode setting
The Service Mode setting controls how the Service Mode is
turned-on and off. Use the CHRNQE display button to select the
setting:
Manual,
Automatic, or Off.
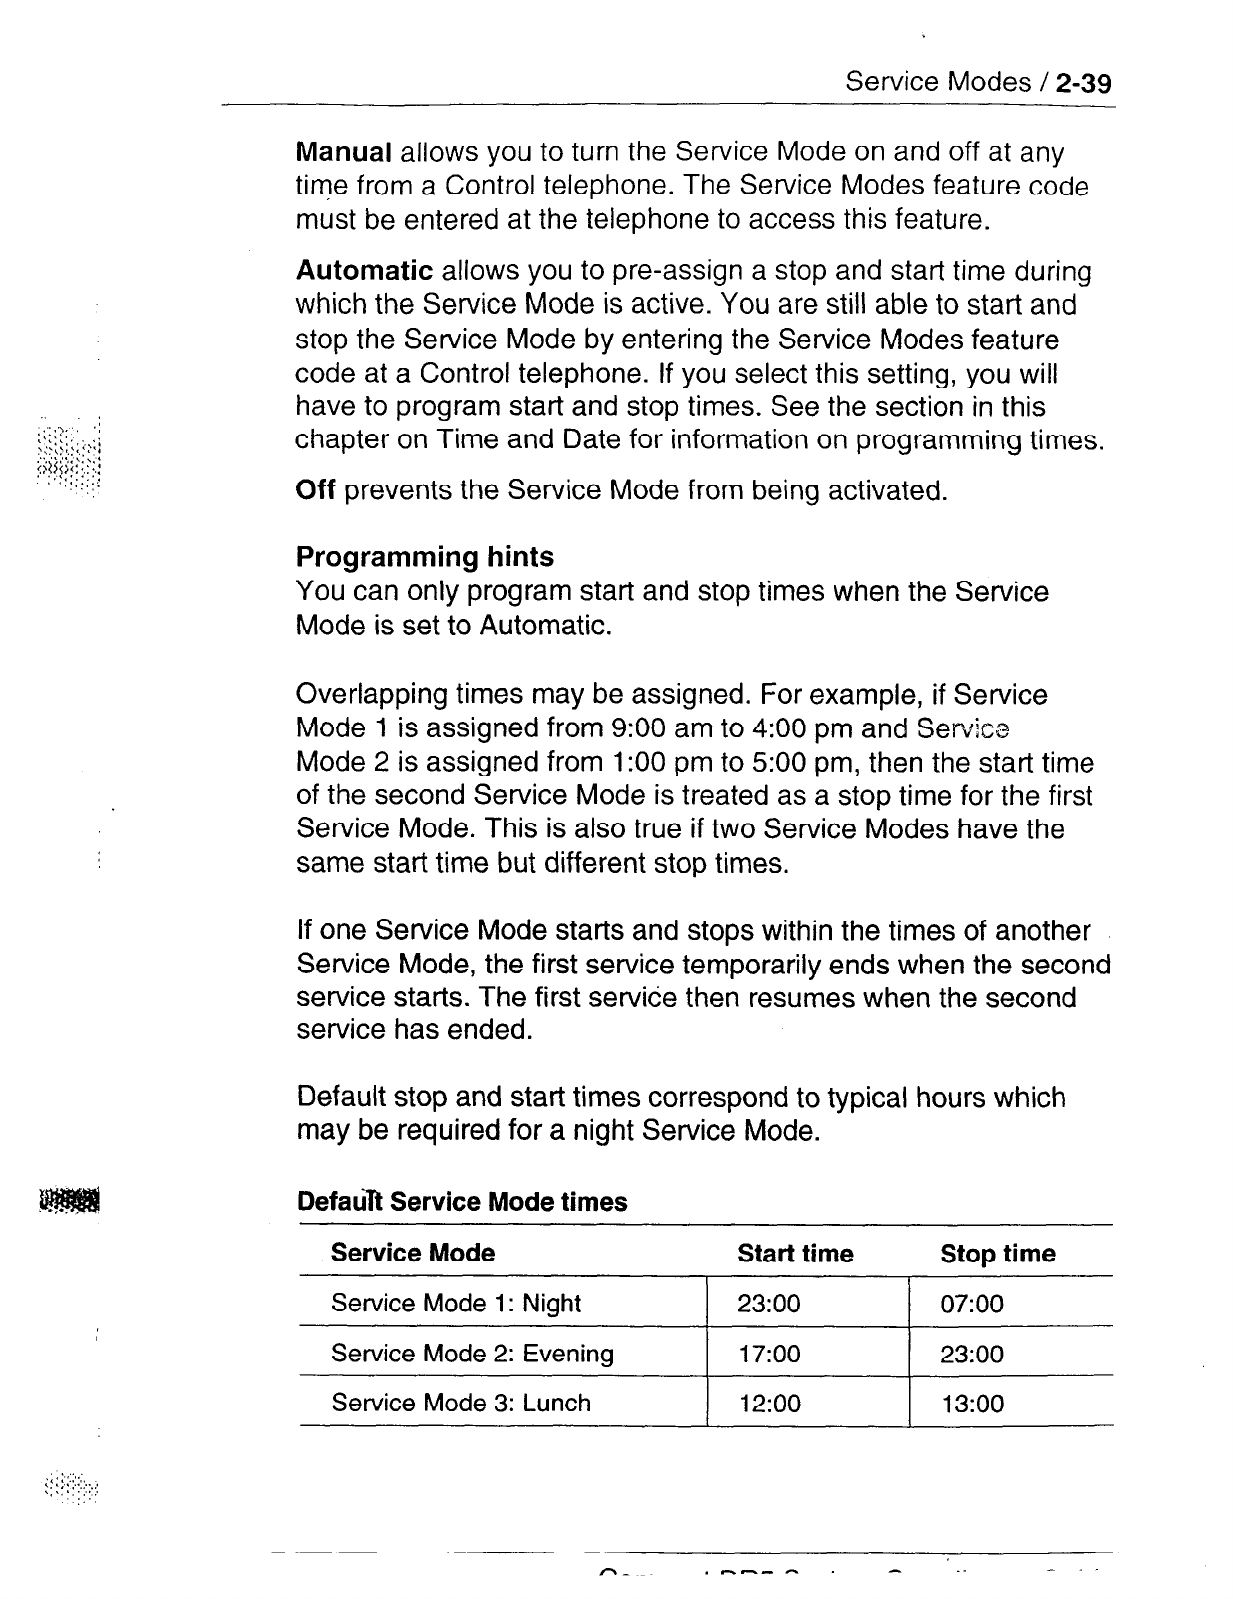
,.;.,;
;: ,;
.‘...“.. ,
‘.’ :
Service Modes / 2-39
Manual
allows you to turn the Service Mode on and off at any
time from a Control telephone. The Service Modes feature code
must be entered at the telephone to access this feature.
Automatic
allows you to pre-assign a stop and start time during
which the Service Mode is active. You are still able to start and
stop the Service Mode by entering the Service
Modes feature
code at a Control telephone. If you select this setting, you will
have to program start and stop times. See the section in this
chapter on Time and Date for information on programming times.
Off
prevents the Service Mode from being activated.
Programming hints
You
can only program start and stop times when the Service
Mode is set to Automatic.
Overlapping times may be assigned. For example, if Service
Mode 1 is assigned from 9:00 am to 4:00 pm and Service
Mode 2 is assigned from 1:OO pm to 500 pm, then the start time
of the second Service Mode is treated as a stop time for the first
Service Mode. This is also true if two Service Modes have the
same start time but different stop times.
If one Service Mode starts and stops within the times of another
Service Mode, the first service temporarily ends when the second
service starts. The first service then resumes when the second
service has ended.
Default stop and start times correspond to typical hours which
may be required for a night Service Mode.
Defaun Service Mode times
Service Mode Start time
Service Mode 1: Night 23:00
Stop time
07:oo
Service Mode 2: Evening
I
17:oo 23:00
Service Mode 3: Lunch 12:oo 13:oo
r\_
.A_^_ . . .
2-40 / Service Modes
Trunk Answer
Trunk Answer allows you to answer, from any telephone, an
external call which is ringing at another telephone in your office.
This is useful if the other telephones have not been assigned the
same lines as the telephone you are using to answer the call.
You can change the Trunk Answer setting only if the Service
Mode is set to Manual or Automatic.
Use the CHANGE display button to select the setting: Y (Yes) or
N (No).
Extra-Dial telephone
A telephone normally in service as a Direct-Dial telephone, can
be programmed in Service Modes to allow internal calls to the
Direct-Dial telephone to also ring at the Extra-Dial telephone.
Use the
CHANGE
display button and the dial pad to enter the
internal telephone number of the Extra-Dial telephone.
Programming hints
The Extra-Dial telephone provides the option of assigning one
more Direct-Dial telephone in the Norstar system for each
operational Service Mode.
Ringing telephones (sets)
You can assign additional telephones to ring for incoming calls
on each external line. Use the [Show] button, the m
display button and the dial pad to enter the internal telephone
numbers of the Ringing telephones for each line.
Programming hints
The default ringing telephone is 21. This means that all lines ring
at telephone 21, when Service Modes are activated. Ringing
telephones can be assigned to more than one Service Mode.
Auxiliary ringer
You can indicate whether the Auxiliary Ringer (if installed) also
rings when a Service Mode is activated. Use the
CHANGE
display
button to select the setting: Y (Yes) or N (No).
-
Password / 2-41
Password
The Administration password allows access to Administration
programming. This prevents unauthorized or unintentional
changes to settings. To ensure security, distribute the password
only to selected personnel, record your password in the
Compact DR5 Programming Record, and change the password
periodically.
The password is a one to six-digit number. The default
Administration password is a (6-l w [rj m which is the same as
EHKIHBIS.
Use the [) button, the
CHANGE
display button and the
dial pad to enter the new Administration password. Use the OK
display button to accept the programmed password.
Programming hints
The password is easier to remember if the digits correspond to
the letters in a word.
If you forget the Administration password, you are not able to
access Administration programming. Call your Customer Service
representative to assign a new Administration password.
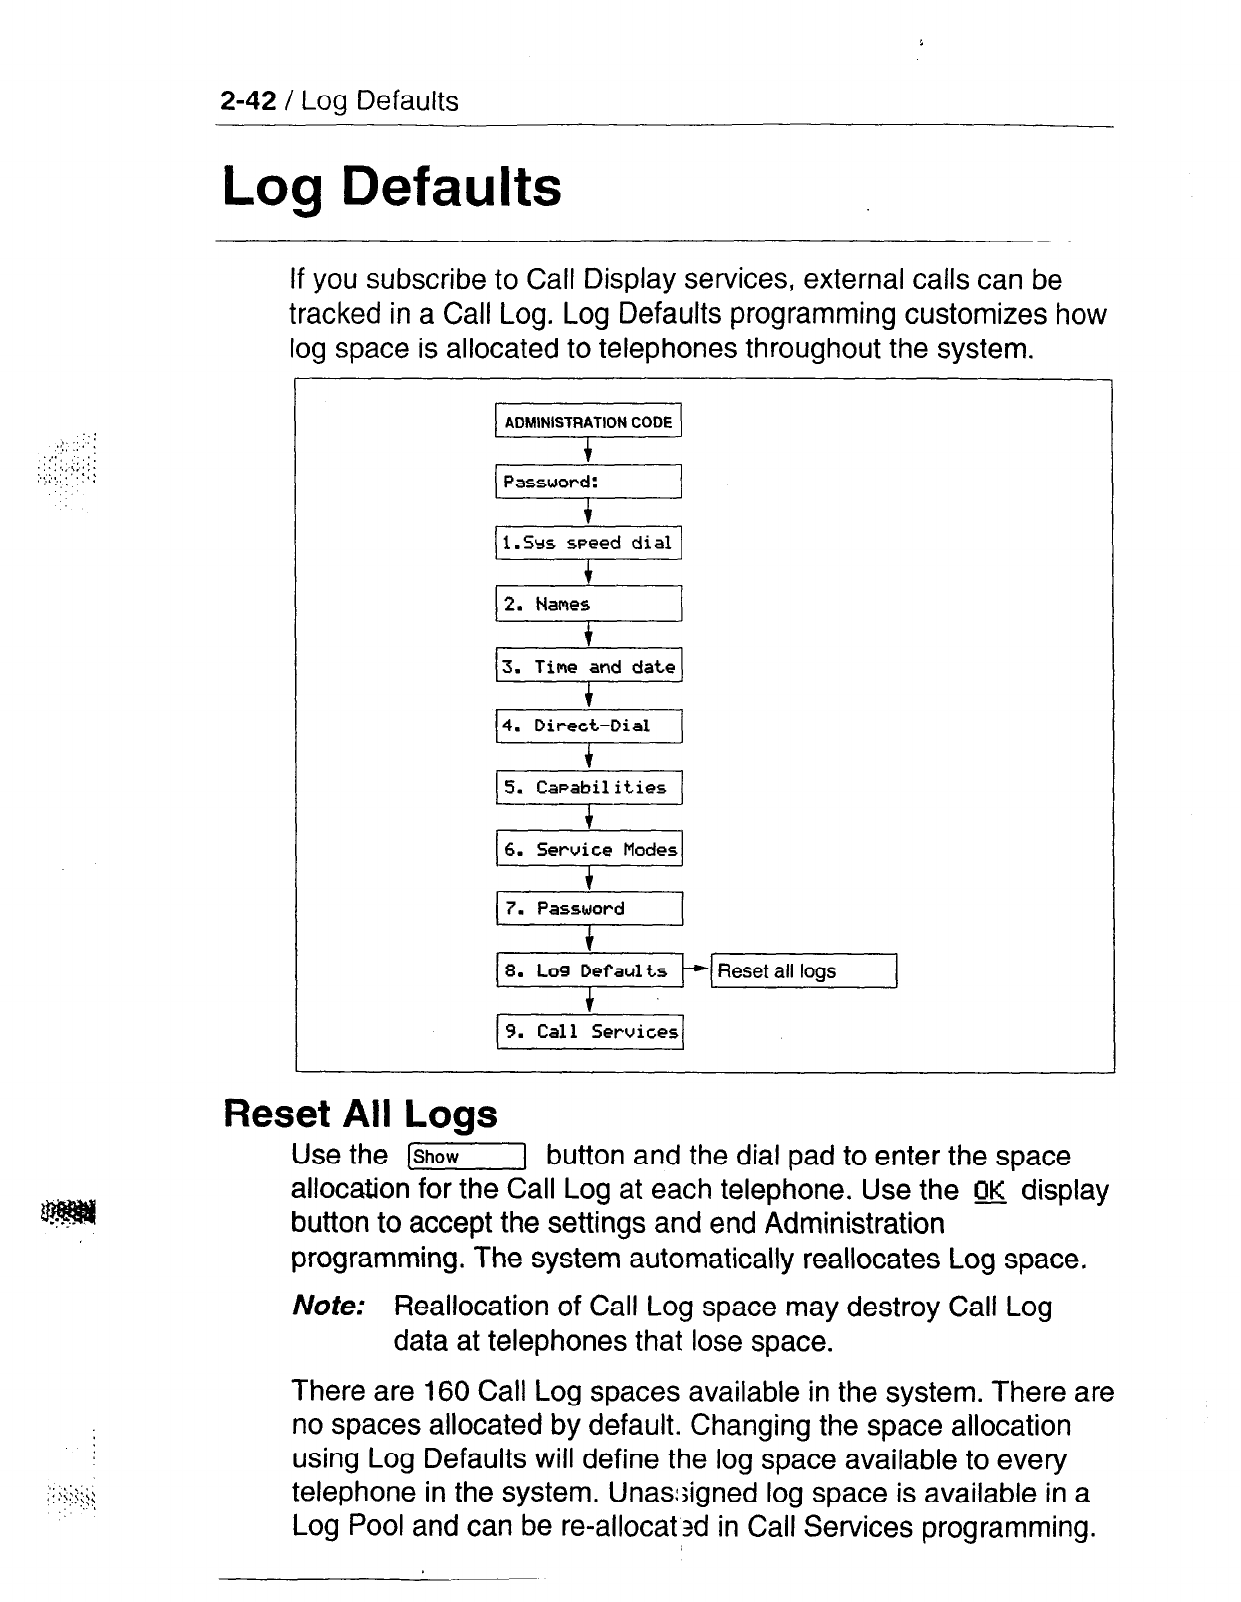
2-42 /
Log Defaults
Log Defaults
If you subscribe to Call Display services, external calls can be
tracked in a Call Log. Log Defaults programming customizes how
log space is allocated to telephones throughout the system.
2. Names
I
c
3.
Time and date
6. Service
Modes
9. Call Services
Reset
All
Logs
Use the (5iG-l button and the dial pad to enter the space
allocation for the Call Log at each telephone. Use the QK display
button to accept the settings and end Administration
programming. The system automatically reallocates Log space.
Note: Reallocation of Call Log space may destroy Call Log
data at telephones that lose space.
There are 160 Call Log spaces available in the system. There are
no spaces allocated by default. Changing the space allocation
using Log Defaults will define the log space available to every
telephone in the system. UnasAgned log space is available in a
Log Pool and can be re-allocat 3d in Call Services programming.
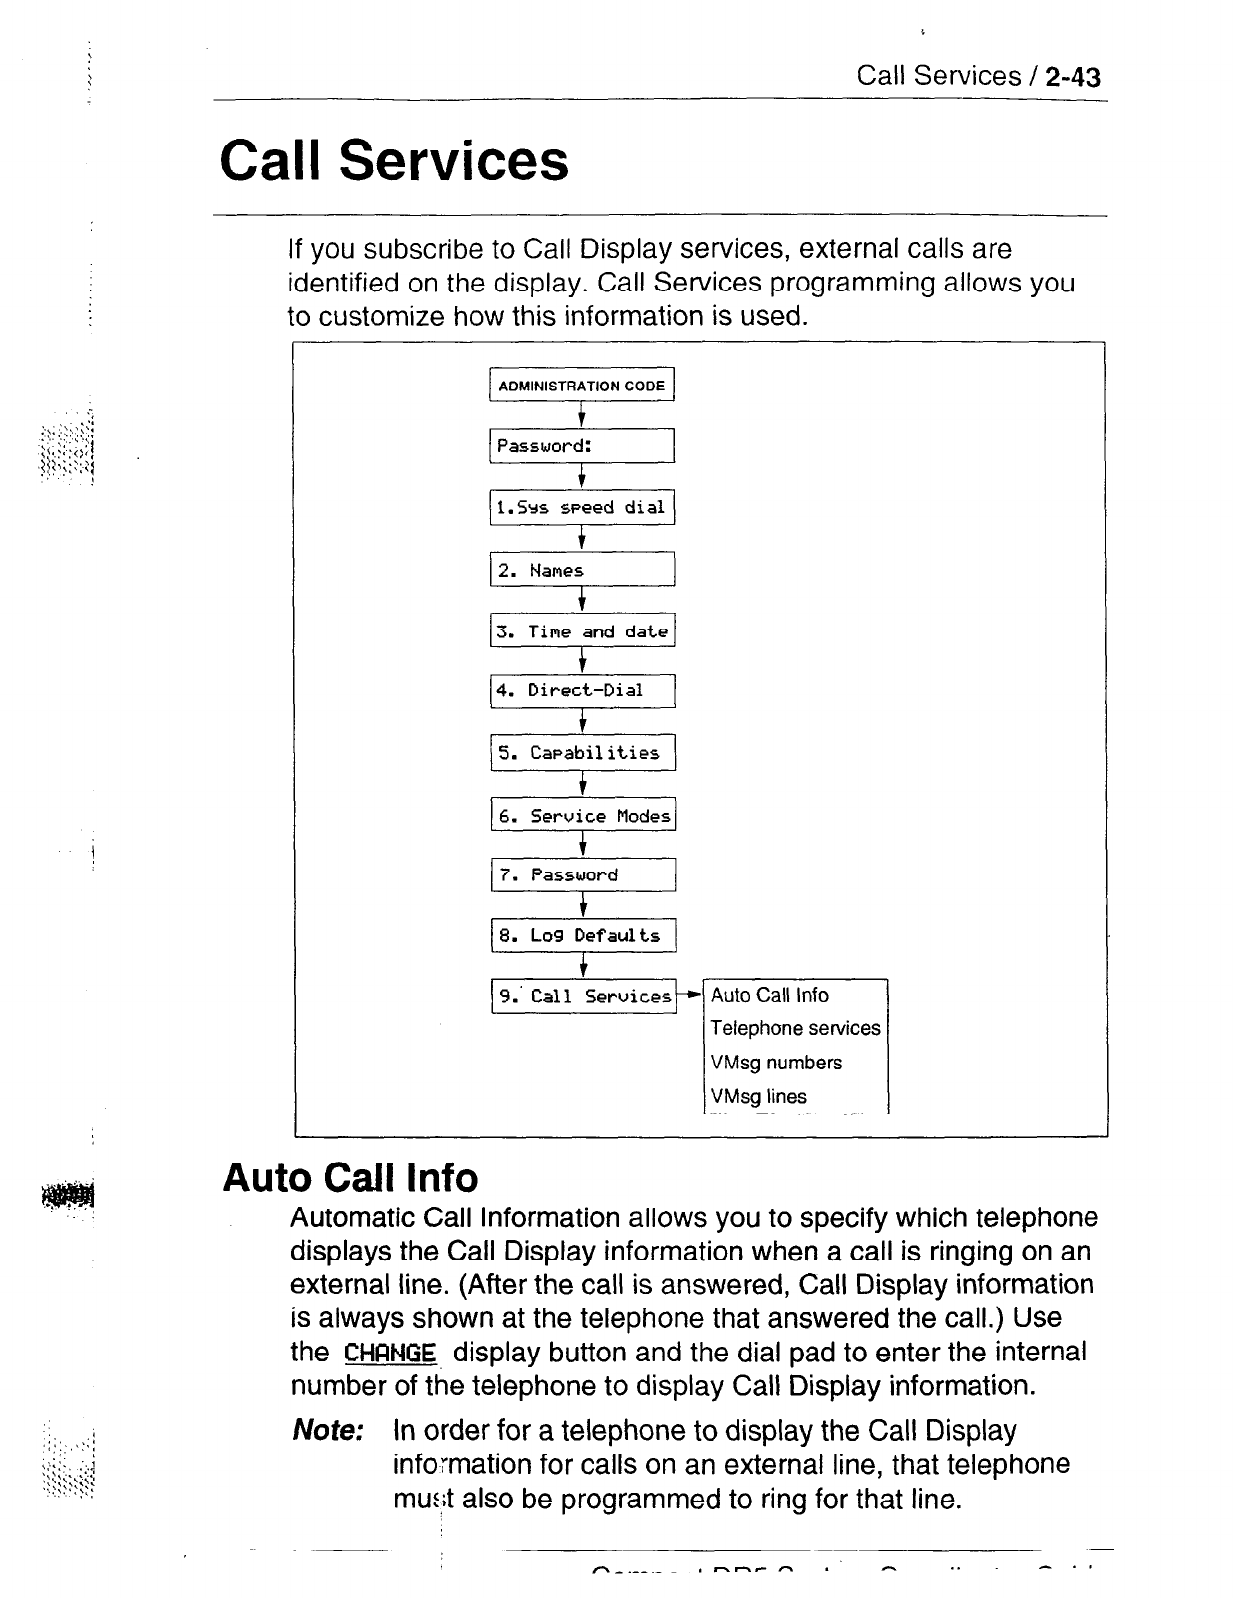
Call Services / 2-43
Call Services
If you subscribe to Call Display services, external calls are
identified on the display. Call Services programming allows you
to customize how this information is used.
Password:
1
c
li.Srs speed dial1
14. Dire:-Dial
1
(5. Capabilities
piFz+iq
7. Password
18. Lo9 raults (
9.' Call
Telephone services
VMsg lines
Auto Call Info
Automatic Call Information allows you to specify which telephone
displays the Call Display information when a call is ringing on an
external line. (After the call is answered, Call Display information
is always shown at the telephone that answered the call.) Use
the CHFlNGE display button and the dial pad to enter the internal
number of the telephone to display Call Display information.
Note; In order for a telephone to display the Call Display
information for calls on an external line, that telephone
mu? also be programmed to ring for that line.
n_.__._
I
hh.- n . h . .
2-44 /
Call Services
Telephone (Set) Services
Telephone Services programming allows you to customize how
Call Display information is
used at each telephone.
AutologlShow Voice Message
Logging telephone (set)
Logging telephone allows you to specify the telephone that
automatically logs Call Display information for calls on an
external line. The line must appear on that telephone but it does
not have to be a ringing line. Use the CHFINGE display button to
select the setting: N (No) or Y (Yes).
Show External Voice Message
If you subscribe to a Voice Message service, you can access that
service through your Norstar system. Show External Voice
Message controls the display of the External Voice Message
Waiting indication for each line at each telephone. The telephone
must have an appearance of that line. Use the CHANGE display
button to select the setting: N (No) or Y (Yes).
Log Space
Log Space changes the number of items that can be stored in
the Call Log for each telephone. Use the (Show] button, the
fJDJ
display button and the REMOVE display button to redistribute
the log space. There is no log space assigned by default.
Programming hints
Space must be available in the Log Pool before any space can
be added to a current Call Log space.
System-wide allocation of space is performed from Log Defaults
programming. If you are performing extensive changes, it may be
appropriate to use the Log Defaults programming mechanism
instead.
Log Password
Log Password allows you to clear any Call Log password
programmed with the Call Log feature. Use the CHANGE display
button to clear the password programmed by the user. The
setting is
None
until the user programs a password.
Call Services / 2-45
First Display
Depending on the services you subscribe to, Call Display
information may contain up to three parts; the name of the caller,
the number of the caller, and the name of the line in your Norstar
system that the call is on. Use the CHANGE display button to
select the setting to be shown first for each telephone:
Name,
Number or Line.
Programming hints
The Call information feature is used to display and scroll through
all of the Call Display Information: the caller name, number and
line number. See the Telephone features chapter for more
information.
You
may see
Unknown nary
or
Unknown number
on the
display if the information is not available from your telephone
company. You may see
Priuate name
or
Private number
on
the display if the caller blocks that information.
Voice Message Center telephone numbers
If you subscribe to a Voice Message service, you can access that
service through your Norstar system. This setting specifies the
external telephone number that is automatically dialed by the
Message feature to retrieve voice messages. Use the I=HRNQE
display button and the dial pad to enter the external telephone
number for each Voice Message Center.
Programming hints
The display does not show that external messages are waiting
unless the Show External Voice Message prompt is set to Yes.
Five Voice Message Center numbers can be programmed, but
most systems require only one.
Voice Message Center lines
If you subscribe to a Voice Message service, you can specify
which Voice Message Center is used for each external line that
can receive Message Waiting Indication. Use the CHANGE
display button to select the setting:
1,
2, 3, 4, 5,
or N (None).
2-46 / Copying settings
Copying settings
Programmed settings for lines, telephones, and certain
Capabilities can be copied to other lines or telephones. If many
lines or telephones require the same settings, program one line
or telephone, and then copy those settings.
Line programming
Line programming can be copied for Line abilities in the
Capabilities section of Administration programming, and Ringing
telephones in the Service Modes section of Administration
programming.
Use the
COPY
display button and the dial pad to identify the
source and destination of the copied information.
Telephone programming
Norstar telephone programming can be copied for Set Abilities in
the Capabilities section of Administration programming.
Use the
CQPV
display button and the dial pad to identify the
source and destination of the copied information.
Capabilities programming
In addition to Line abilities and Set abilities, Norstar Capabilities
programming can be copied for:
- Dialing filters
- COS passwords
Use the
COPV
display button and the dial pad to identify the
source and destination of the copied information.
::-::;;,,,,; ;
.:
,‘:‘+‘:
.‘,
Programming reminders / 2-47
Programming reminders
The Programming reminders are a record of programmable
settings which Norstar users may need to know on a day-to-day
basis.
Fill out whatever sections are programmed and must be known.
Not all of the programmable features may be required
information.
Programmed settings can be determined from a review of the
Compact DR5 Programming Record.
Photocopy and distribute the Programming reminders to each
desk that has a Norstar telephone, or post them on the wall next
to the telephone.
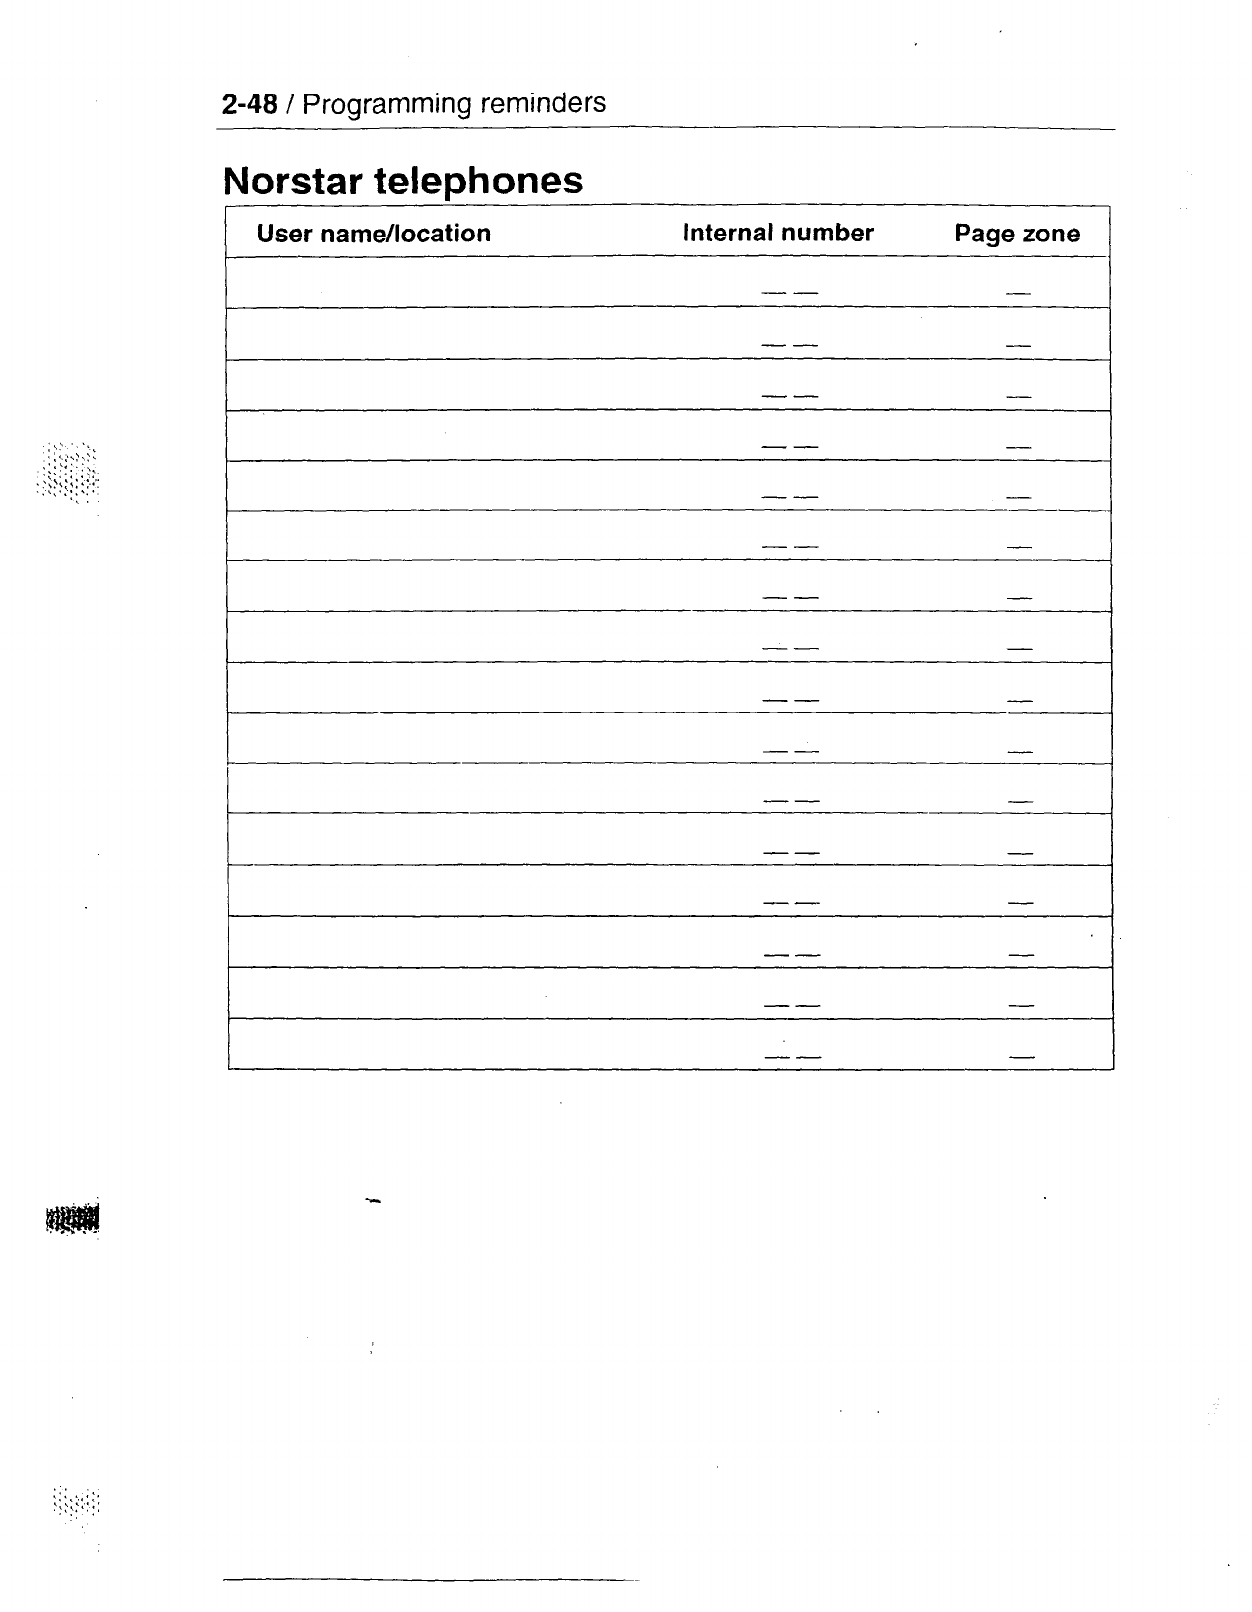
2-48 / Programming reminders
Norstar telephones
User name/location Internal number Page zone
-- -
-- -
-- -
-- - -
-- -
-- -
-- -
I -- -
t
-- -
I -- -
-- -
-- -
I -- -
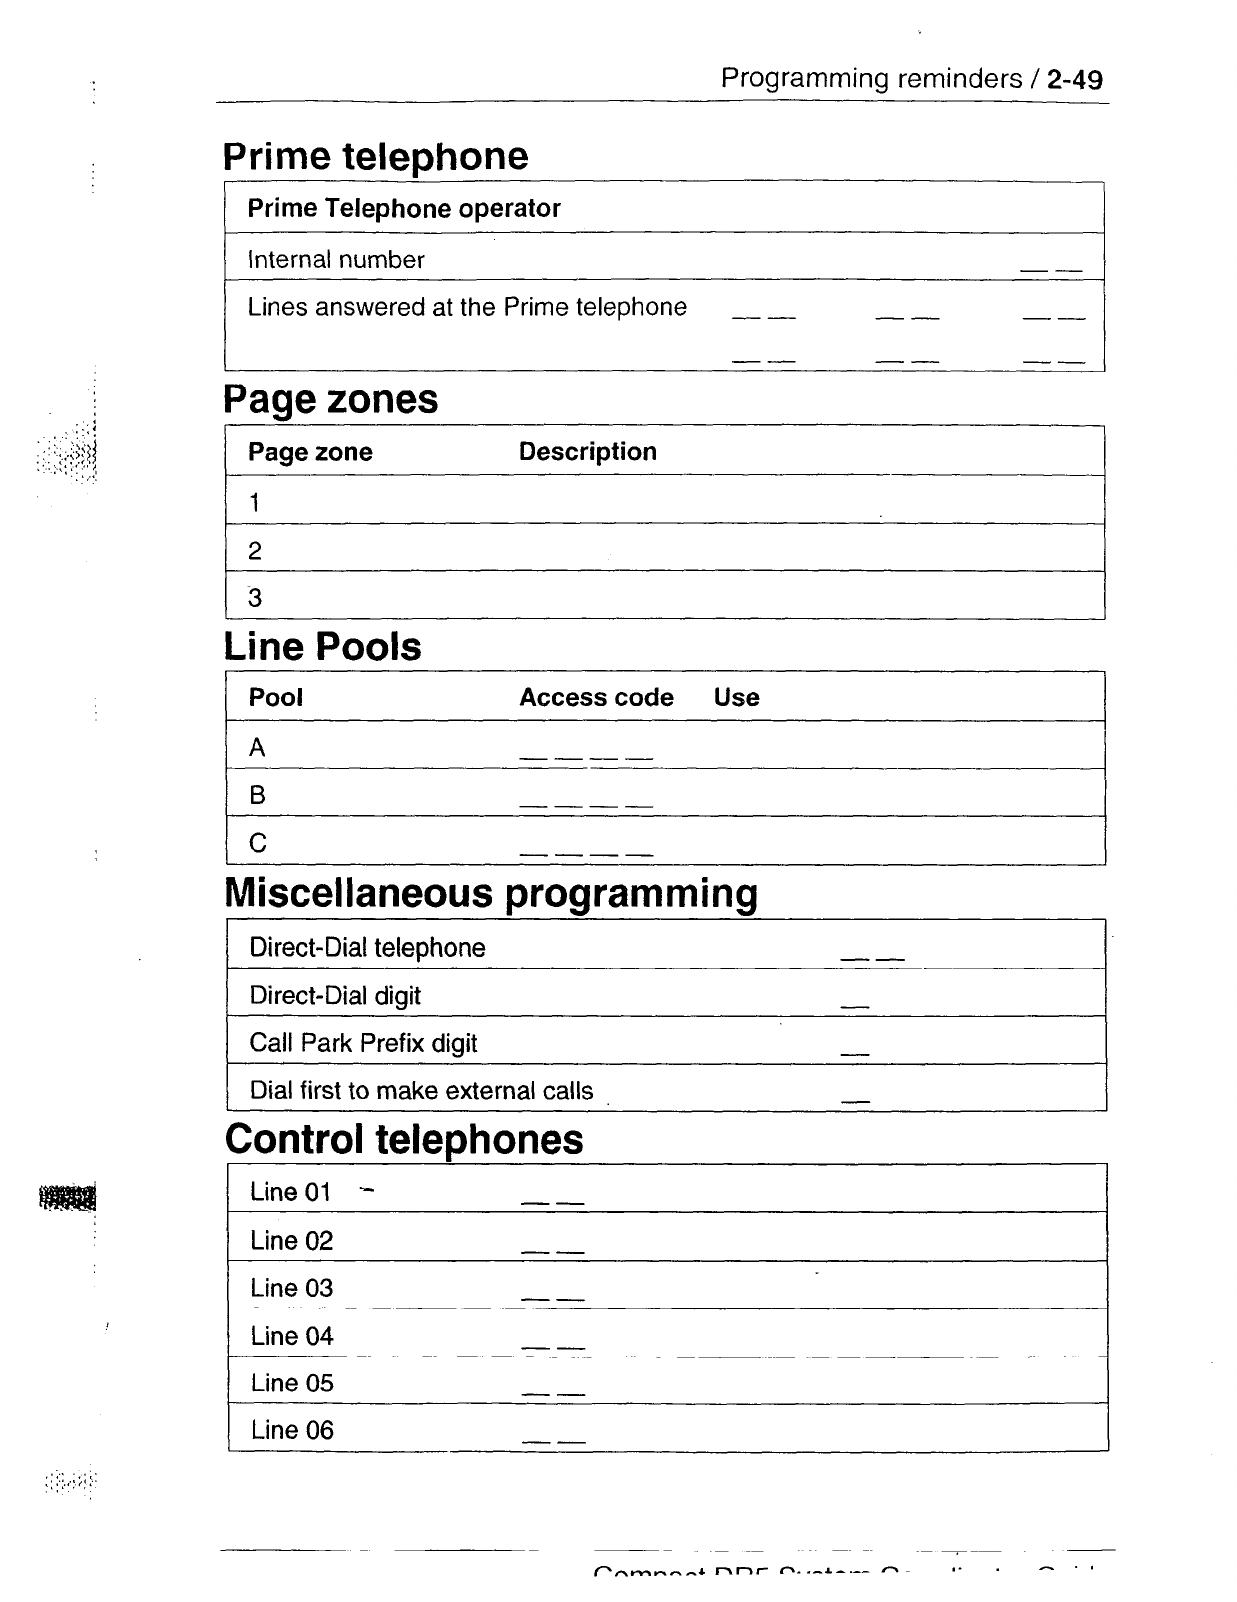
Programming reminders / 2-49
Prime telephone
Prime Telephone operator
Internal number --
Lines answered at the Prime telephone
-- -- --
Page zones
Page zone Description
1
2
3
Line Pools
I
Pool Access code Use
k-----z ------I
C ----
Miscellaneous programming
Direct-Dial telephone --
Direct-Dial digit
Call Park Prefix digit
Dial first to make external calls
-
Control telephones
I
Line 01 -
I
I
Line 02
Line 03
Line 04 --
1 Line 05
l
1 Line 06
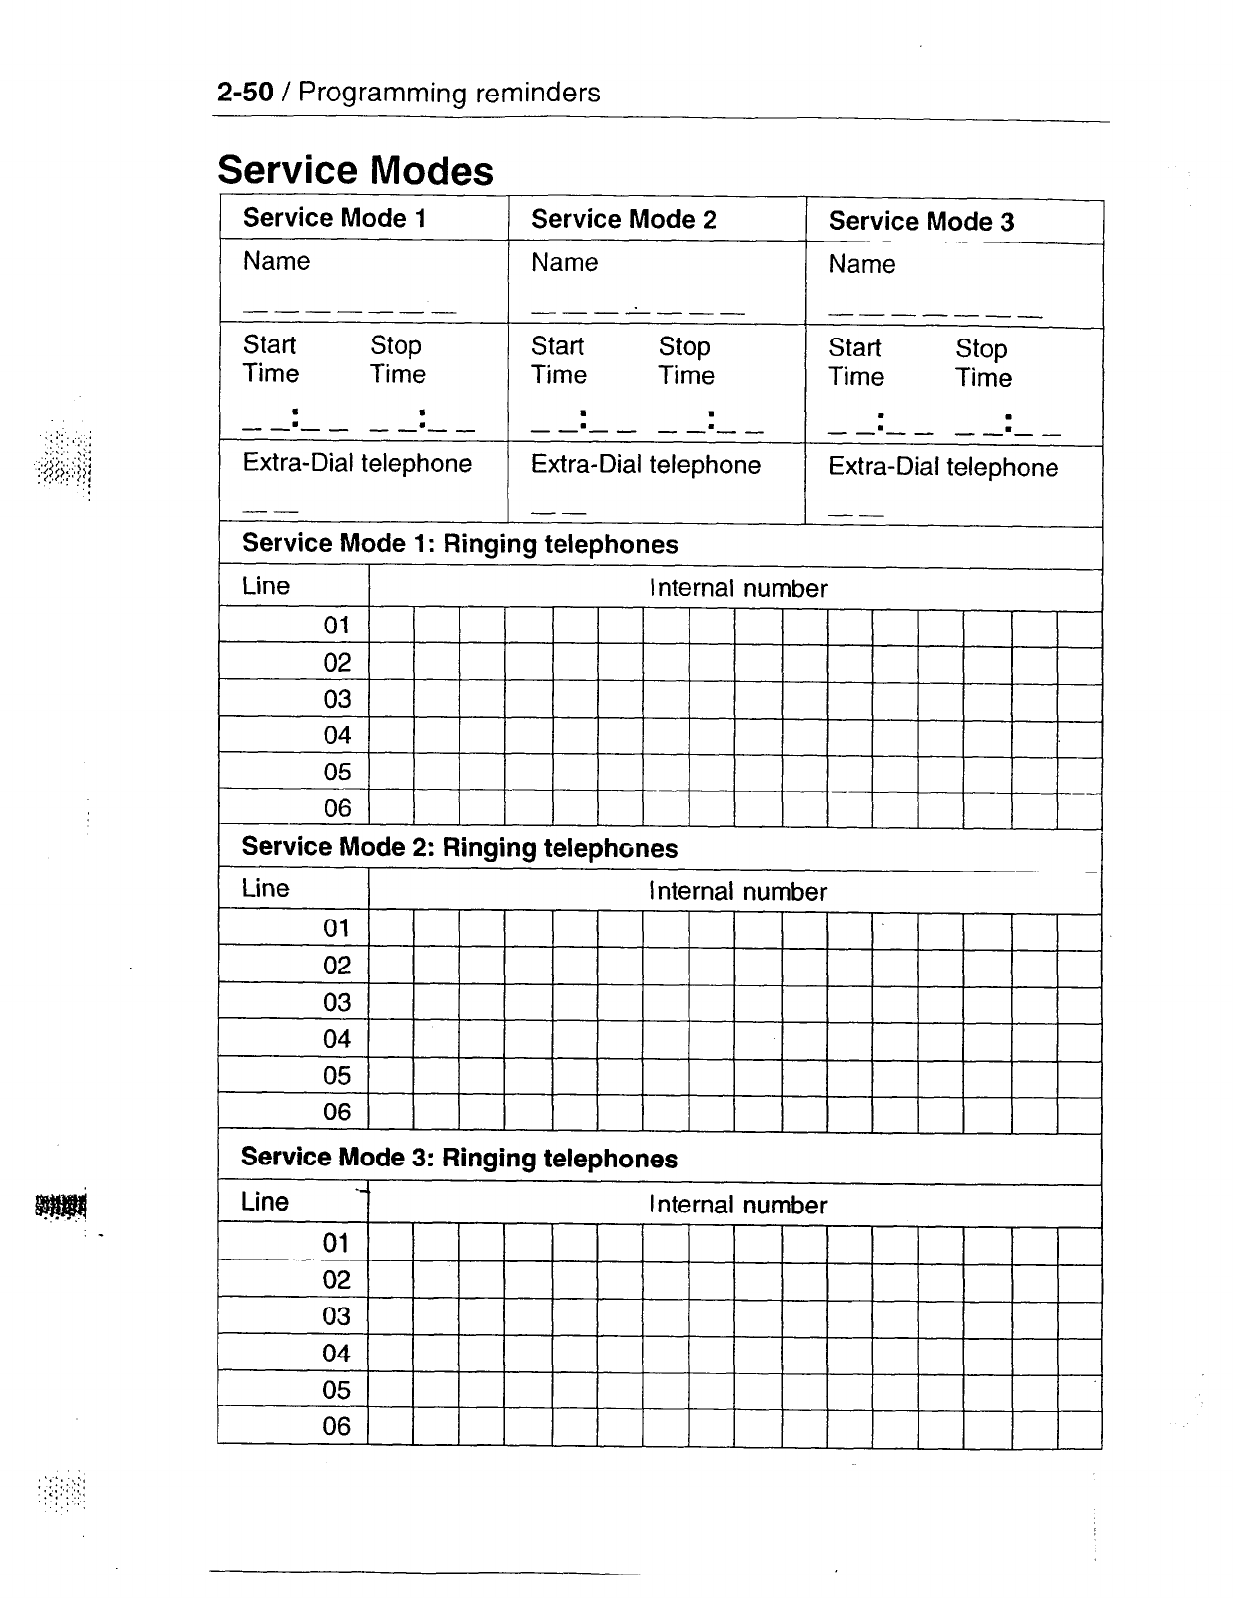
2-50 / Programming reminders
Service Modes
I
s
ervice Mode 1
Name
Extra-Dial telephone
--
Service Mode 2 Service Mode 3
Name Name
---A-__ -----__
Start stop Start stop
Time Time Time Time
. . m .
- --- - - -=- _ .
d-v- --=___
Extra-Dial telephone Extra-Dial telephone
-- --
Service Mode 1: Ringing telephones
Line Internal number
011 I I I
02
03
04
05 -
06
Service Mode 2: Ringing telephones
( Line
I
Internal number
04
05
06
1 Service Mode 3: Ringing telephones
Internal number
04
05
06
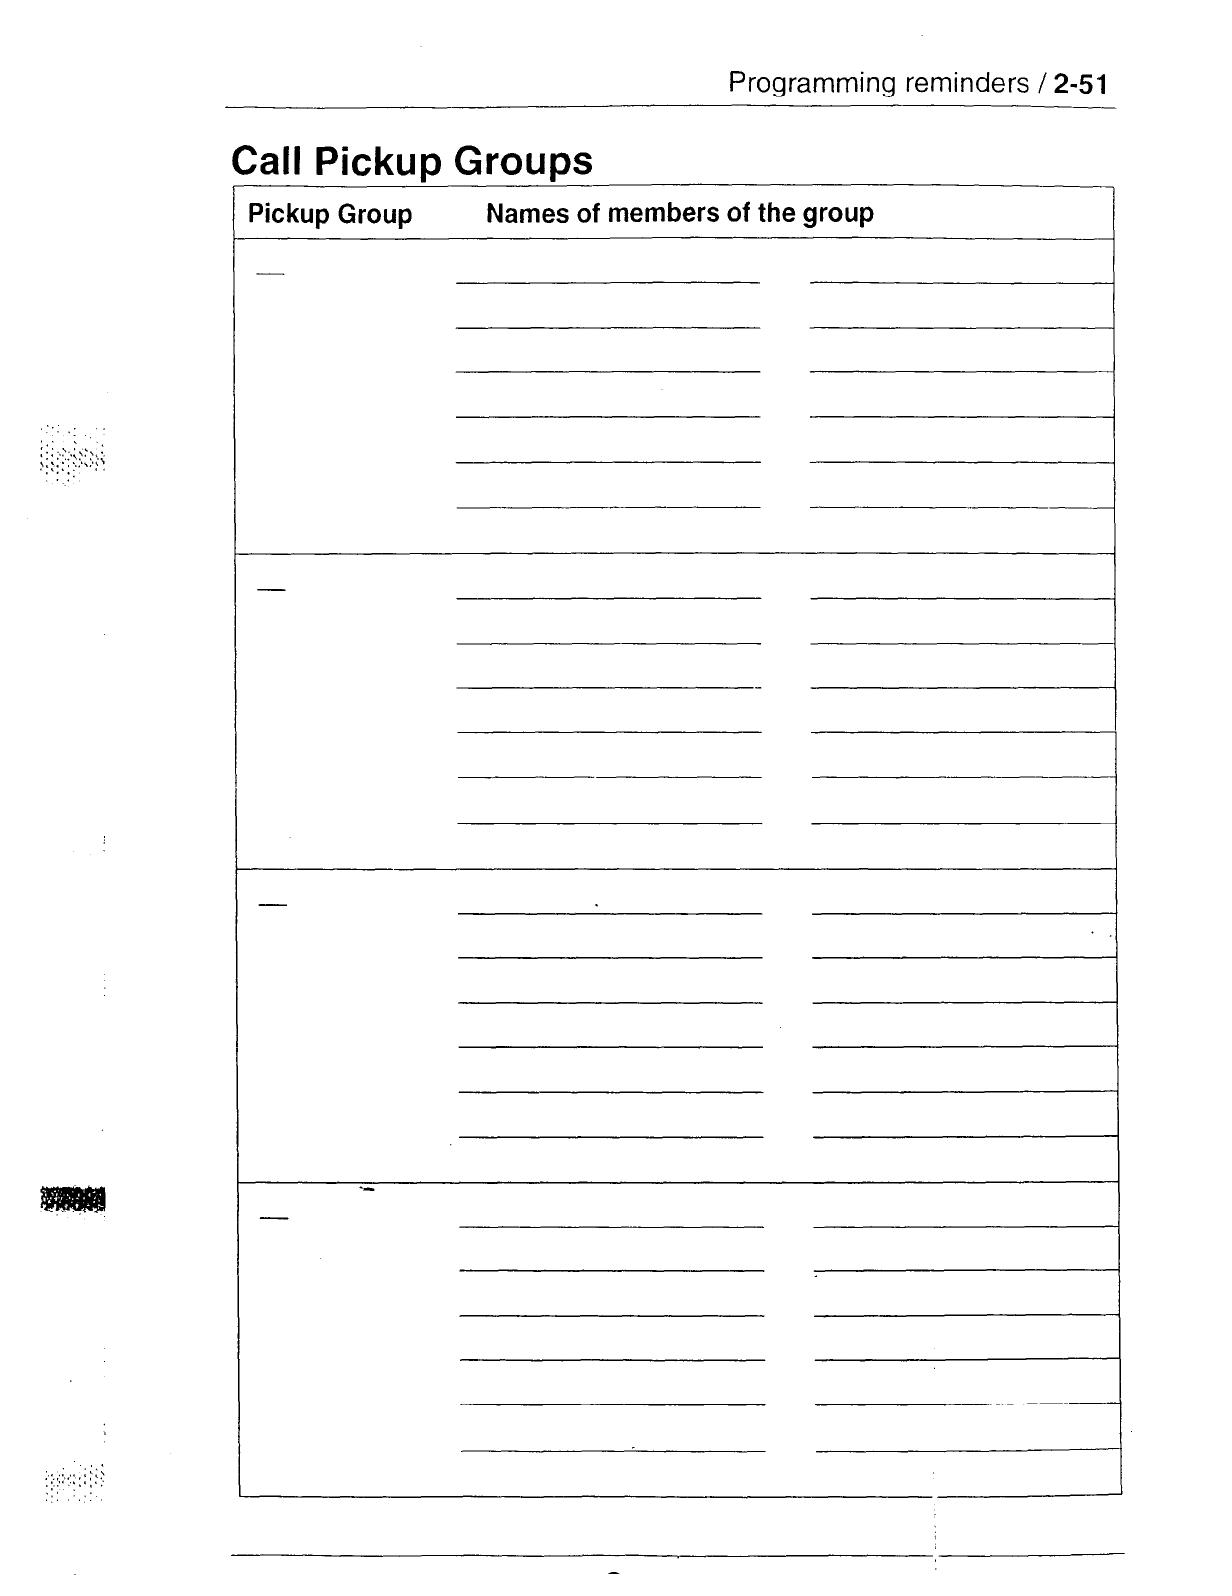
Programming reminders / 2-51
Call Pickup Groups
I
Pickup Group Names of members of the group
-
I
i
-
-
-
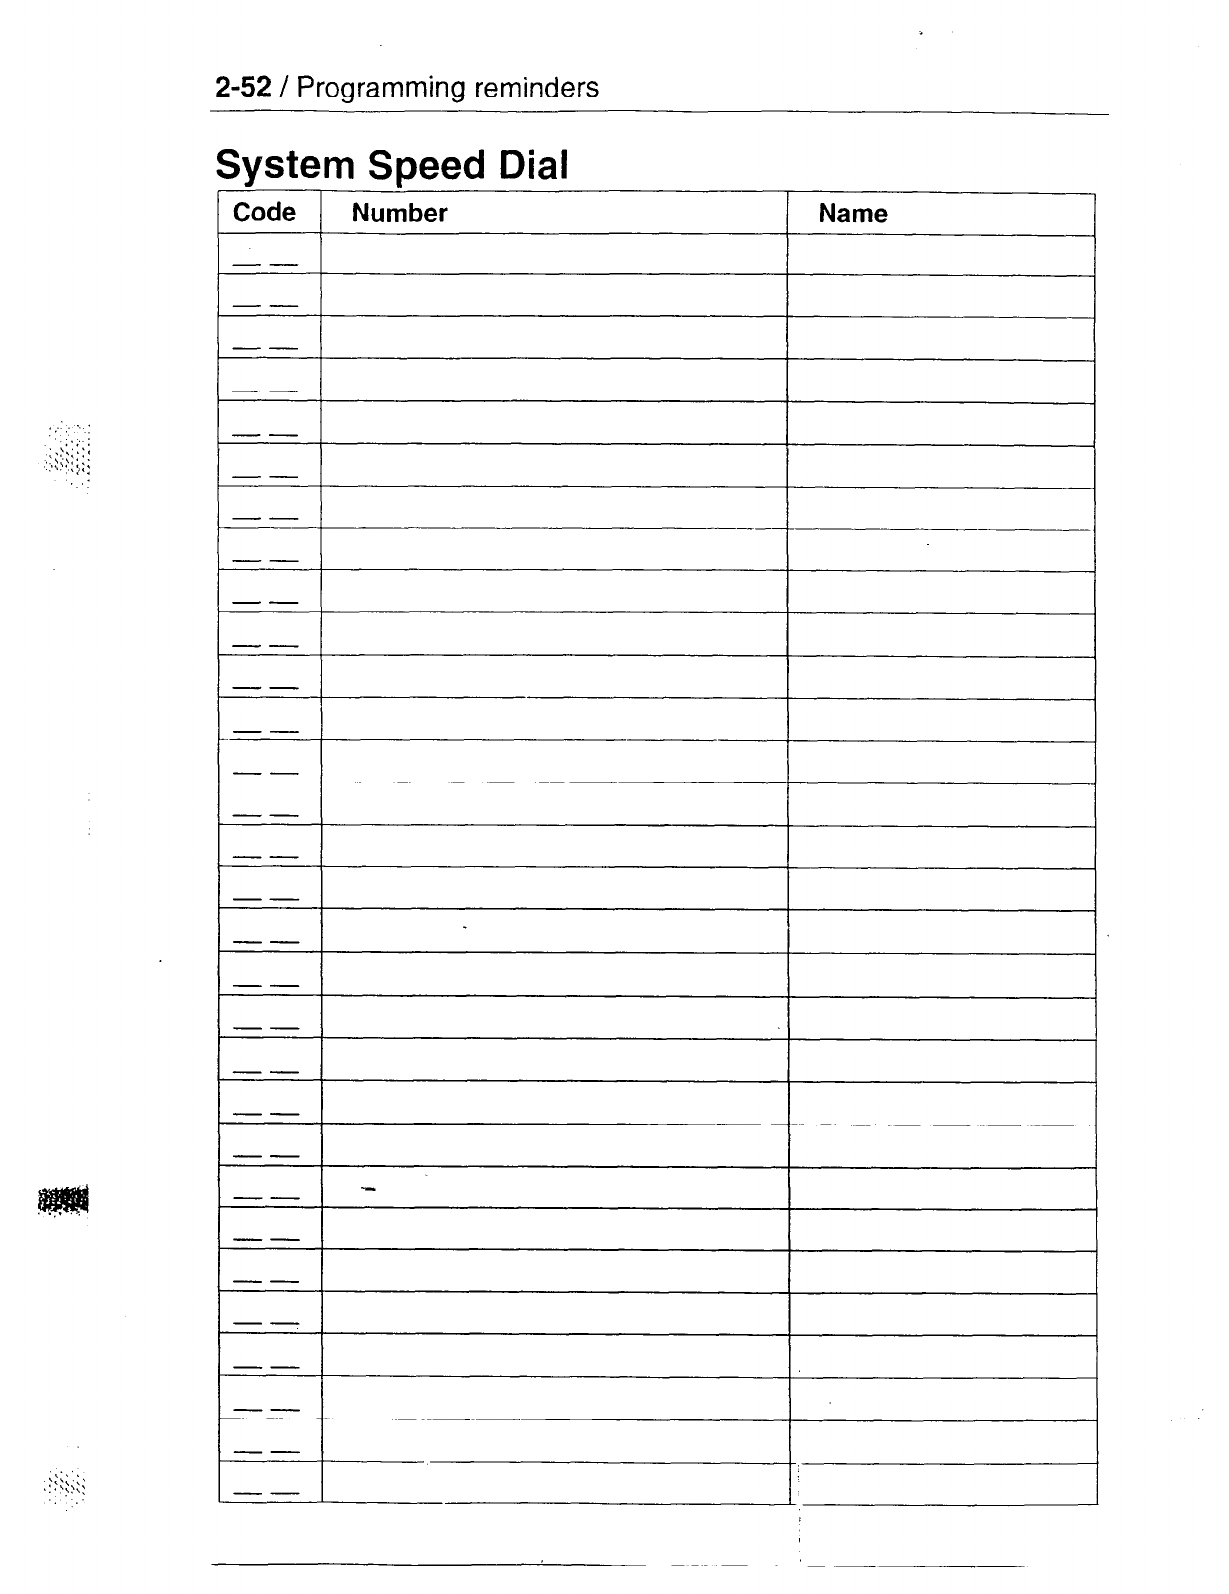
2-52 / Programming reminders
System Speed Dial
Code Number Name
--
--
--
--
--
--
-- --
--
--
--
--
--
--
--
--
--
--
--
--
--
--
--
--
--
--
_-
--
--
--
--
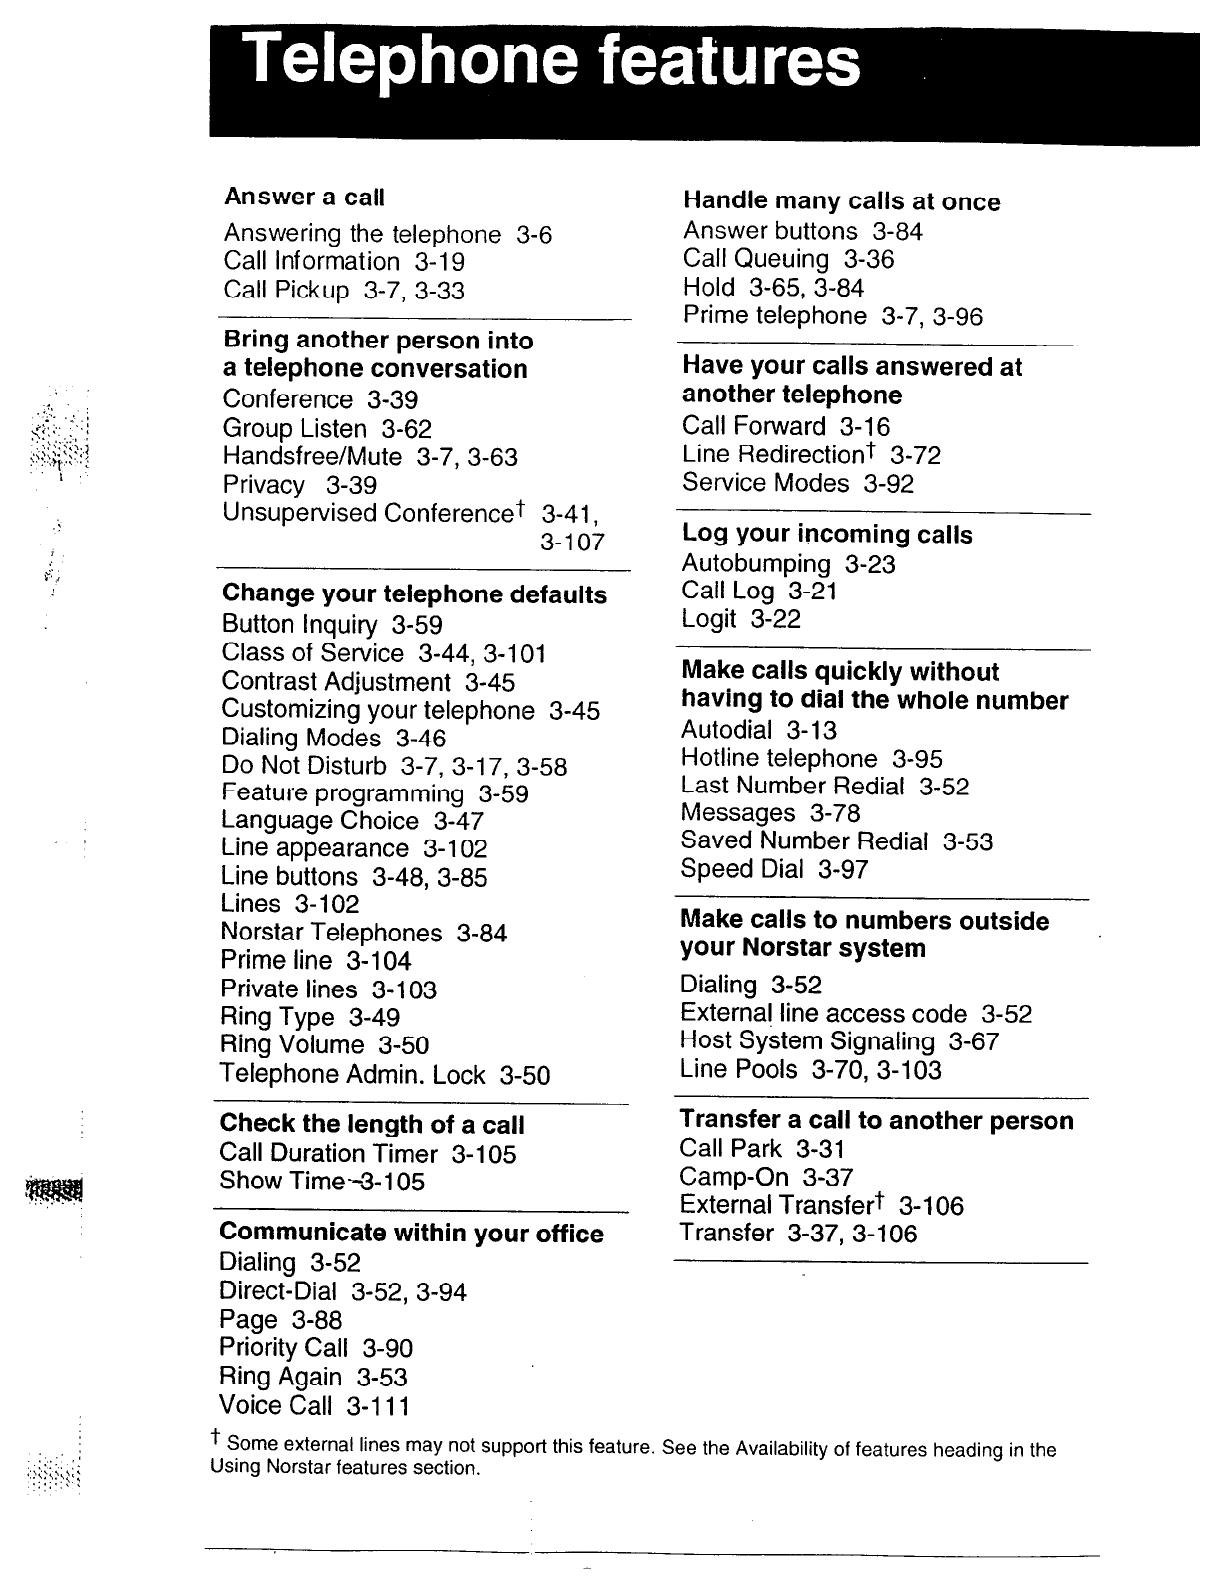
Answer a call
Answering the telephone 3-6
Call Information 3-l 9
Call Pickup 3-7, 3-33
Bring another person into
a telephone conversation
Conference 3-39
Group Listen 3-62
Handsfree/Mute 3-7, 3-63
Privacy 3-39
‘!
Unsupervised Conferencet 3-41,
3-l 07
P
.,
Change your telephone defaults
Button Inquiry 3-59
Class of Service 3-44, 3-101
Contrast Adjustment 3-45
Customizing your telephone 3-45
Dialing Modes 3-46
Do Not Disturb 3-7, 3-17, 3-58
Feature programming 3-59
Language Choice 3-47
I
Line 3-l 02 appearance
Line buttons 3-48, 3-85
Lines 3- 102
Norstar Telephones 3-84
Prime line 3-104
Private lines 3-103
Ring Type 3-49
Ring Volume 3-50
Telephone Admin. Lock 3-50
Check the length of a call
Call Duration Timer 3-l 05
Show Time-3-l 05
Communicate within your office
Dialing 3-52
Direct-Dial 3-52, 3-94
Page 3-88
Priority Call 3-90
Ring Again 3-53
Voice Call 3-l 11
Handle many calls at once
Answer buttons 3-84
Call Queuing 3-36
Hold 3-65, 3-84
Prime telephone 3-7, 3-96
Have your calls answered at
another telephone
Call Forward 3-16
Line Redirection? 3-72
Service Modes 3-92
Log your incoming calls
Autobumping 3-23
Call Log 3-21
Logit 3-22
Make calls quickly without
having to dial the whole number
Autodial 3- 13
Hotline telephone 3-95
Last Number Redial 3-52
Messages 3-78
Saved Number Redial 3-53
Speed Dial 3-97
Make calls to numbers outside
your Norstar system
Dialing 3-52
Externa! line access code 3-52
Host System Signaling 3-67
Line Pools 3-70, 3-l 03
Transfer a call to another person
Call Park 3-31
Camp-On 3-37
External Transfer? 3-l 06
Transfer 3-37, 3-l 06
t Some external lines may not support this feature. See the Availability of features heading in the
Using Norstar features section.
3-2 / Using Norstar features
Using Norstar features
To use a Norstar feature, enter the feature code and watch your
telephone display for instructions. Different displays come up at
different times, depending on how you invoke the feature and the
choices you make while using the feature. If you want more
information about a display, look it up in the Displays section of
each feature listing.
I Availability of features
Some features work only in certain circumstances. For example,
Disconnect Supervision must be available and assigned to a line
on your telephone to allow you access to the following features:
- Line Redirection of an external call to an external number
- Unsupervised Conference between two external calls
- Transfer between two external calls
Disconnect Supervision is available when an Open Switch
Interval (OSI) message is provided on a line by the public
telephone system.
If Disconnect Supervision is available, your Customer Service
representative assigns Disconnect Supervision to lines in
Configuration programming. When Disconnect Supervision is
assigned to a line, the Norstar system monitors the length of the
OSI on that line to determine when an external caller hangs up.
This allows the system to release the line for other uses.
The &tes section of each feature listing contains information
concerning any restrictions affecting the availability of the
feature.
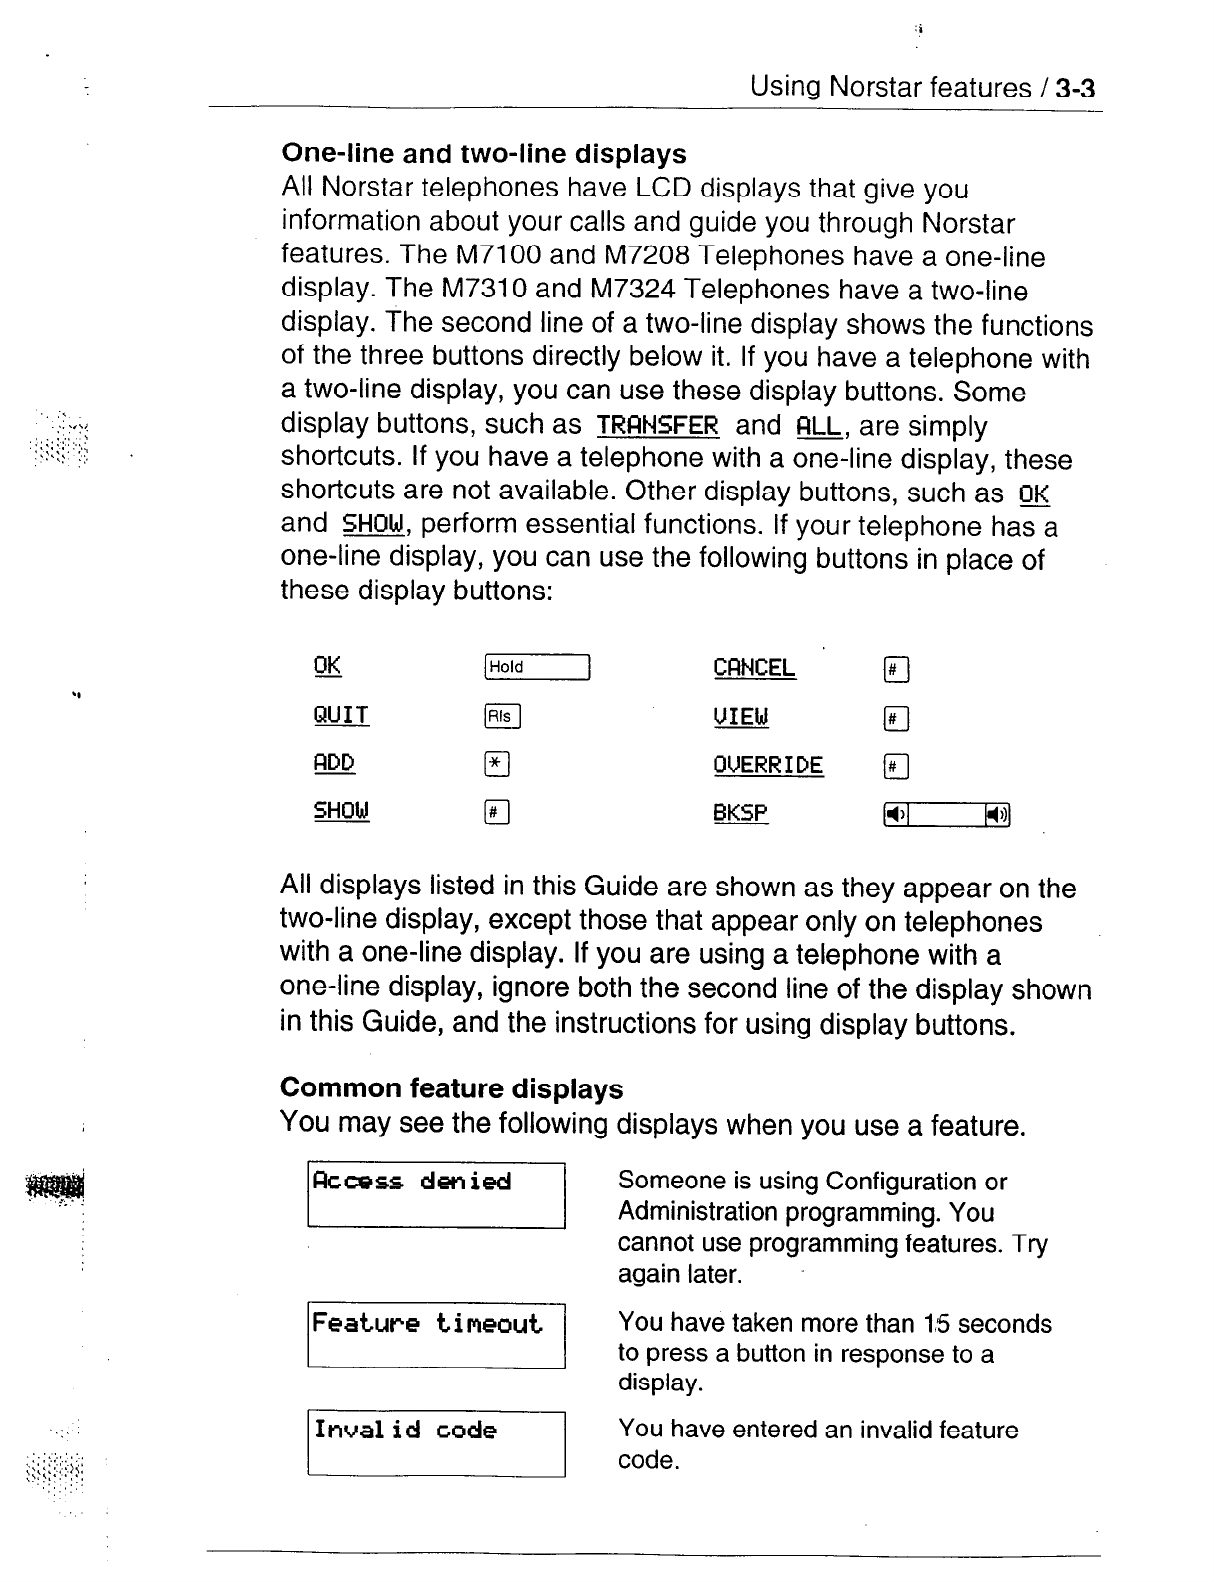
:i
Using Norstar features / 3-3
One-line and two-line displays
All Norstar telephones have LCD displays that give you
information about your calls and guide you through Norstar
features. The M7100 and M7208 Telephones have a one-line
display. The M7310 and M7324 Telephones have a two-line
display. The second line of a two-line display shows the functions
of the three buttons directly below it. If you have a telephone with
a two-line display, you can use these display buttons. Some
display buttons, such as
TRANSFER
and w, are simply
shortcuts. If you have a telephone with a one-line display, these
shortcuts are not available. Other display buttons, such as m
and
SHOW,
perform essential functions. If your telephone has a
one-line display, you can use the following buttons in place of
these display buttons:
OK
[Hold
1
CRNCEL
El
G!UIT p-J VIEW Ia
All displays listed in this Guide are shown as they appear on the
two-line display, except those that appear only on telephones
with a one-line display. If you are using a telephone with a
one-line display, ignore both the second line of the display shown
in this Guide, and the instructions for using display buttons.
Common feature displays
You
may see the following displays when you use a feature.
r
Someone is using Configuration or
Administration programming. You
cannot use programming features. Try
again later.
lFeature
tiwout
1 You
have taken more than 15 seconds
to press a button in response to a
display.
lInva1 id code -1 You
have entered an invalid feature
code.
3-4 / Using Norstar features
You have tried to use a feature that is
not available in the present set-up of
your Norstar system.
You cannot use the feature you have
chosen because your telephone is
locked. See Telephone Administration
Lock in Customizing your telephone.
Dialing and answering the telephone
Many
Norstar features require you to dial telephone numbers.
The displays associated with dialing are listed ii7 the Dialing
section. If you see a display that is not listed with the feature you
are using, look for it in the Dialing section. All the displays that
appear when you are receiving a call are listed in the Answering
the telephone section.
One button access
You
can
program most Norstar feature codes onto telephone
memory buttons so that you can use the feature by pressing a
single button. See the procedures in the Feature programming
section.
Whenever the instructions tell you to enter a feature code, you
can do so either by pressing the buttons shown in the feature
description or by pressing a memory button on which the feature
code has been programmed. You can also enter a telephone
number by pressing an Autodial button, rather than entering it
manually.
Canceling a feature
SomeTeatures change the way your telephone works. To make
your telephone work normally again you must cancel the feature.
To cancel a feature, press (Feature], then i7J and the feature
code. For example, to cancel Call Fonrvard, which you activate by
pressing [Feature] a, press [Fea] a a.
If a feature code is programmed onto a memory button, you may
be able to cancel the feature by pressing the memory button
while the feature is active.
Using Norstar features / 3-5
If you change your mind in the middle of using a feature, you can
back out by pressing [Fea(ure] or [Rls]. Be
aware that pressing
@ disconnects any active call.
M7100 Telephone
Because the M7100 Telephone does not have any line buttons it
sometimes works slightly differently from other Norstar
telephones. Where other telephones may require you to select a
line button to answer a call, on the M7100 Telephone you simply
pick up the receiver. Where other telephones require you to
select a line button to take a call off hold, you press [HOld] on
the M7100 Telephone. The M7100 Telephone cannot have a
1-1 button. You will find special instructions for the M7100
Telephone in some feature descriptions.
3-6 / Answering the telephone
Answering the telephone
Answering
Your Norstar telephone can receive many different types of
calls.
Your telephone’s display tells you what type of call you are
receiving. The usual way to answer a call is to pick up the
receiver, but there are several other possible methods,
depending on how your system is set up and the type of call that
is ringing.
Callback
When you direct a call you have answered to another telephone,
the system monitors the call to make sure someone answers it. If
no one answers a call within a programmable length of time, the
system directs it back to you. Callback generates a variety of
displays. Most occur after a programmable delay and are listed
in
this section. Some occur immediately, if the telephone to which
you are directing a call is out of service or otherwise unavailable.
These are listed with the descriptions of the features in which
they occur.
Delayed Ring Transfer DRT)
If no one answers a call within a programmable length of time,
the system transfers the call to the Prime telephone.
Call Display information
If you have subscribed to Call Display services from your local
telephone company, one line of information about an external
caller-is displayed after you answer. If your telephone has been
programmed to receive Call Display information automatically,
that information is shown before you answer. If your telephone
has not been programmed to receive Call Display information
automatically, you can use the Call Information feature
((Feature] T;ila a)
to view the information before you answer.
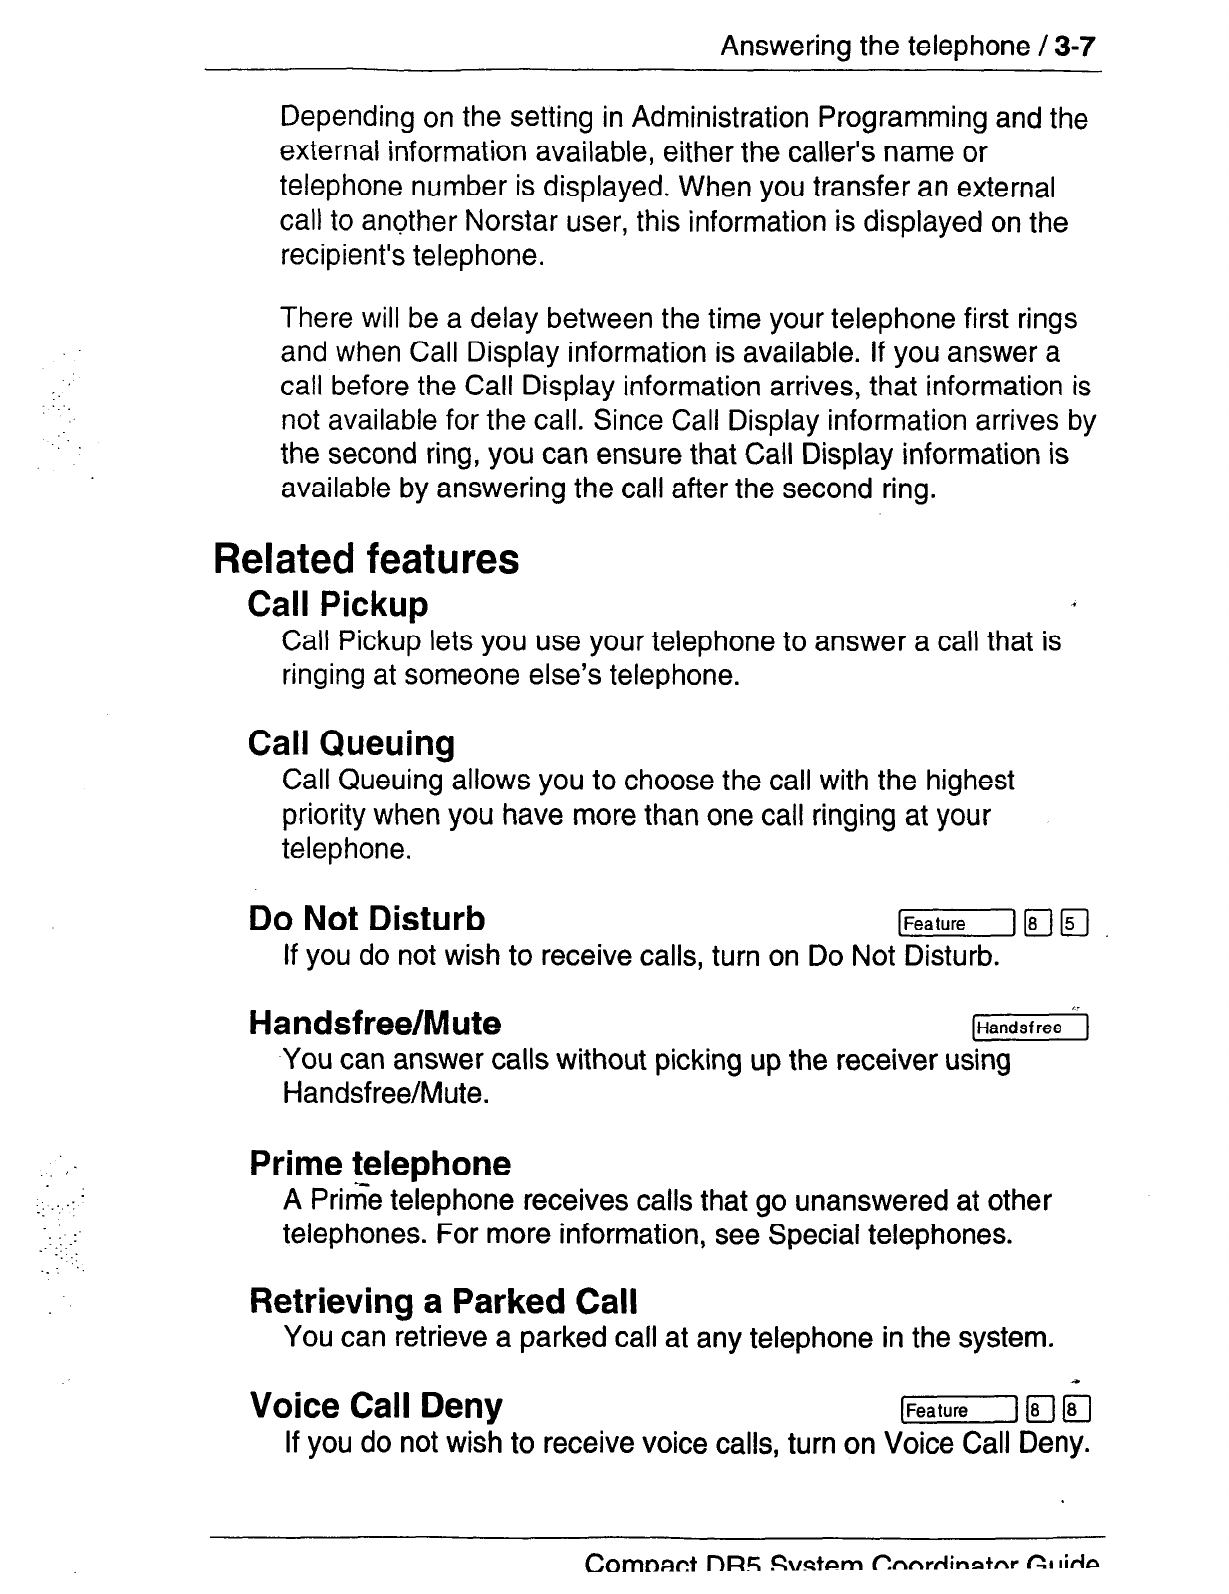
Answering the telephone / 3-7
: .
1: .‘.
:
:.: :
: _: :
:
__ -.
‘.
Depending on the setting in Administration Programming and the
external information available, either the caller’s name or
telephone number is displayed. When you transfer an external
call to another Norstar user, this information is displayed on the
recipient’s telephone.
There will be a delay between the time your telephone first rings
and when Call Display information is available. If you answer a
call before the Call Display information arrives, that information is
not available for the call. Since Call Display information arrives by
the second ring, you can ensure that Call Display information is
available by answering the call after the second ring.
Related features
Call Pickup
.
Call Pickup lets you use your telephone to answer a call that is
ringing at someone else’s telephone.
Call Queuing
Call Queuing allows you to choose the call with the highest
priority when you have more than one call ringing at your
telephone.
Do Not Disturb [GF-J~~
If you do not wish to receive calls, turn on Do Not Disturb.
Handsfree/Mute [Handsfree]
You can answer calls without picking up the receiver using
Handsfree/Mute.
Prime telephone
A Prir6e telephone receives calls that go unanswered at other
telephones. For more information, see Special telephones.
Retrieving a Parked Call
You can retrieve a parked call at any telephone in the system.
Voice Call Deny Ifeaturel/q~
If you do not wish to receive voice calls, turn on Voice Call Deny.
Comnmt l3RF; Svstem Cnntdinatnr CI lid
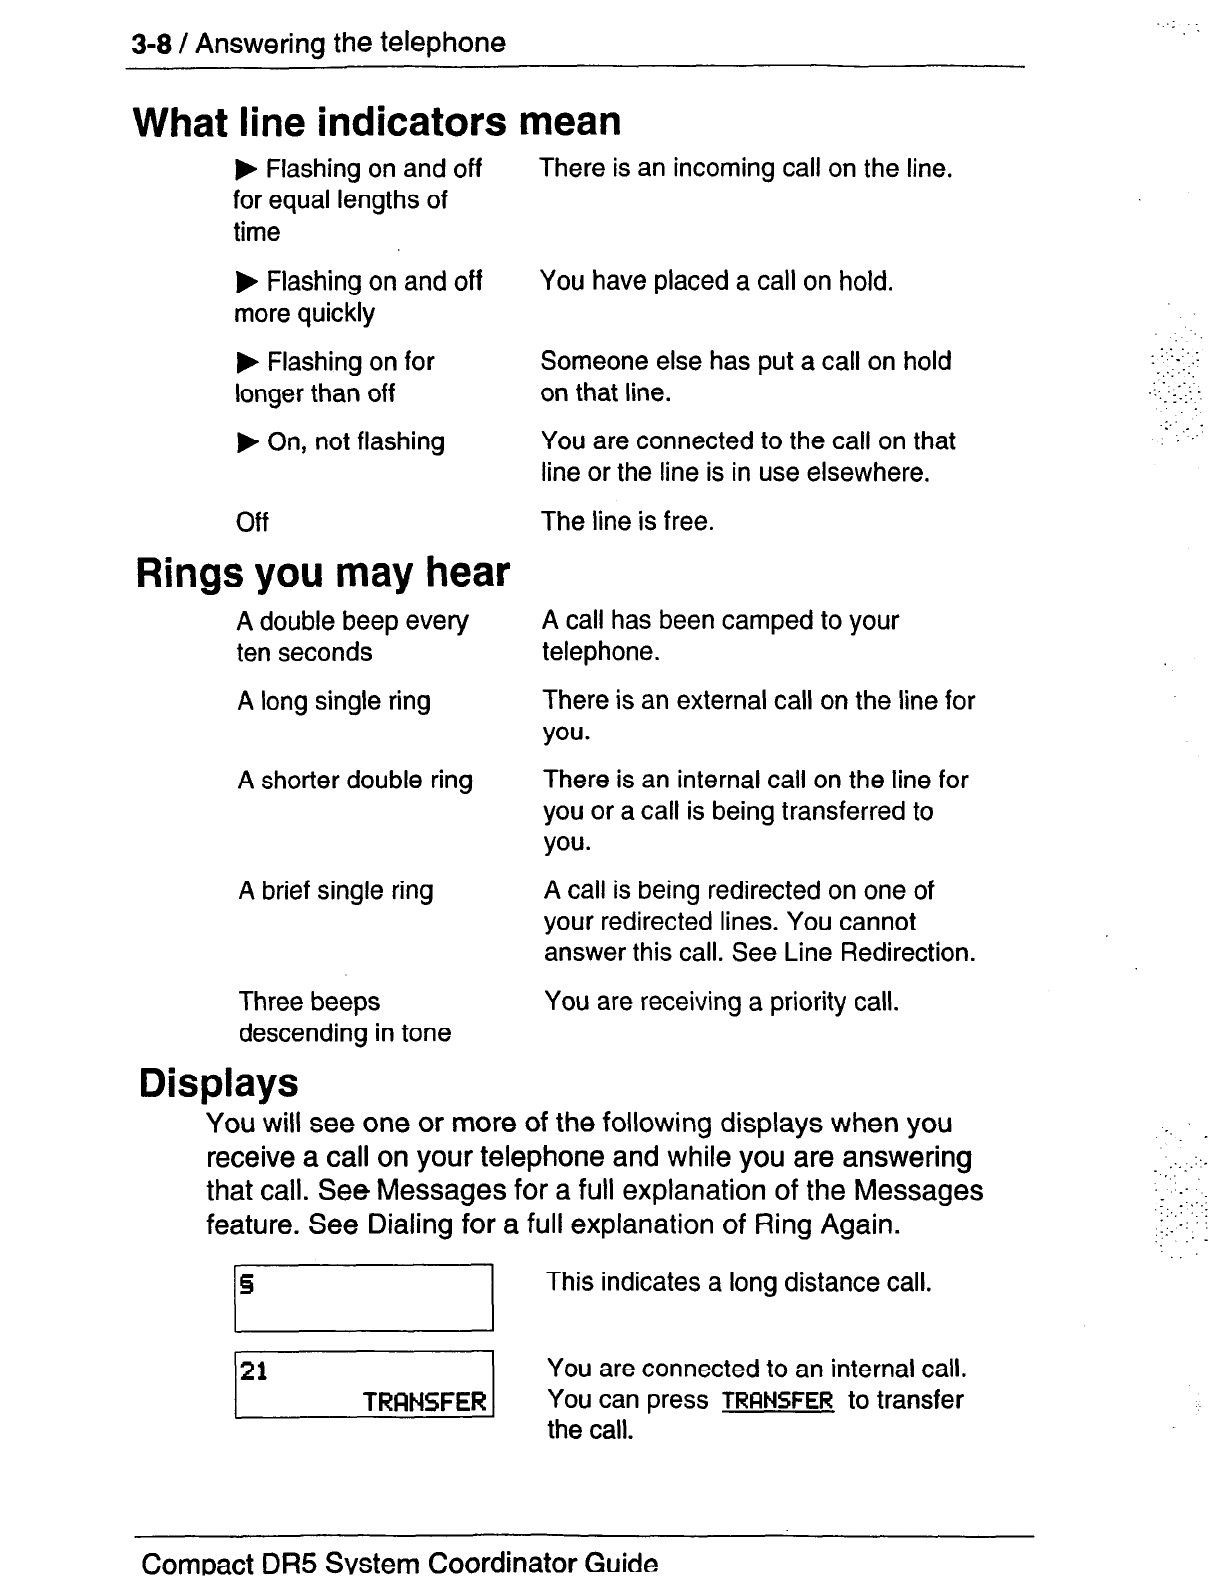
3-8 / Answering the telephone
What line indicators mean
b Flashing on and off
for equal lengths of
time
b Flashing on and off
more quickly
b Flashing on for
longer than off
b On, not flashing
Off
Rings you may hear
You are connected to the call on that
line or the line is in use elsewhere.
The line is free.
A double beep every A call has been camped to your
ten seconds telephone.
A long single ring
A shorter double ring
A brief single ring
Three beeps
descending in tone
Displays
There is an incoming call on the line.
You have placed a call on hold.
Someone else has put a call on hold
on that line.
There is an external call on the line for
you.
There is an internal call on the line for
you or a call is being transferred to
you.
A call is being redirected on one of
your redirected lines. You cannot
answer this call. See Line Redirection.
You are receiving a priority call.
..
. . .._
: .:: ,,:
.,.I :__
‘. :
.I, .:_:: .
._
‘.
.
_::
: .
.’
You will see one or more of the following displays when you
receive a call on
your
telephone and while you are answering
that call. See Messages for a full explanation of the Messages
feature. See Dialing for a full explanation of Ring Again.
This indicates a long distance call.
You are connected to an internal call.
You can press
TRFINSFER
to transfer
the call.
_ :._.
:._
,. _. __:
._‘.’ -. :
1.1.
‘_ : -
ComrJact DR5 Svstem Coordinator
Guide
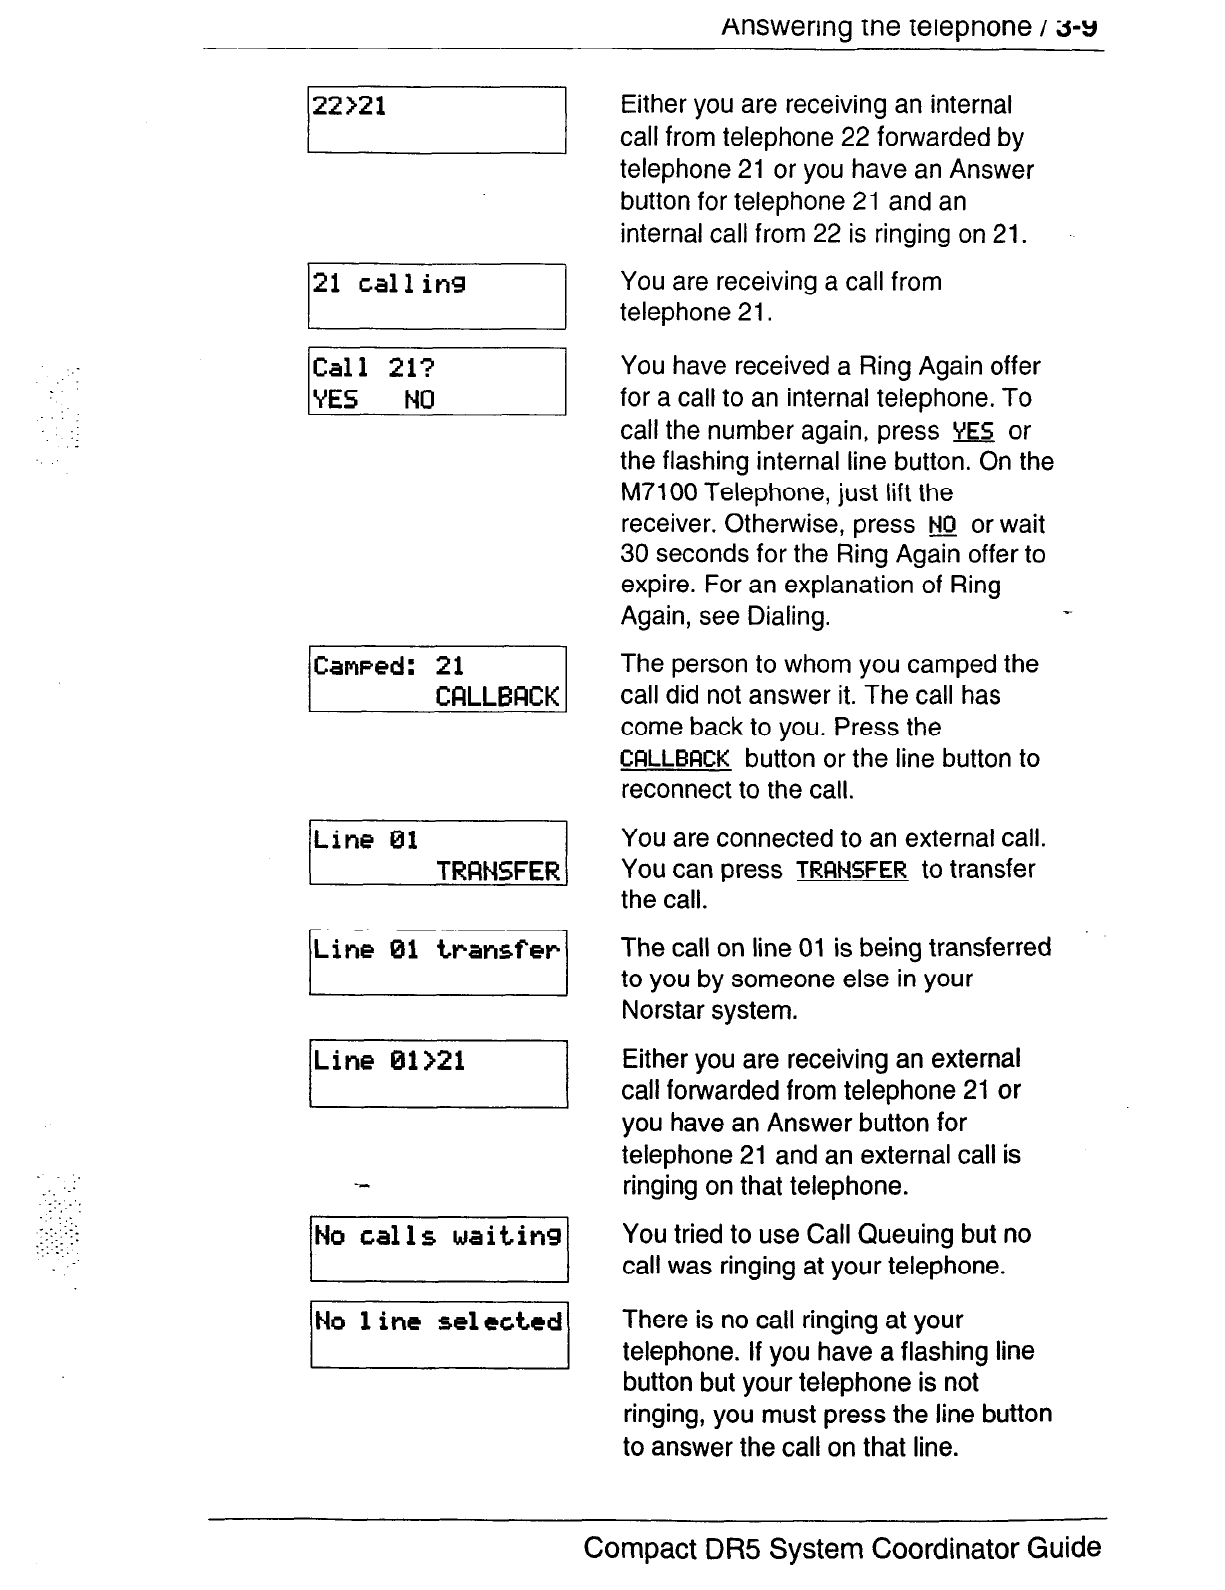
Answenng rne Ieiepnone
/ 3-y
122)21
:-
I;;:’ 2;;
/
___
‘..
_-. :,
:.
.:
-::.:_
1:. ._:
: : :
ILine
01
TRMFERI
Line 01 transfer
Line 01>21
1
Either you are receiving an internal
call from telephone 22 forwarded by
telephone 21 or you have an Answer
button for telephone 21 and an
internal call from 22 is ringing on 21.
You are receiving a call from
telephone 21.
You have received a Ring Again offer
for a call to an internal telephone. To
call the number again, press m or
the flashing internal line button. On the
M7100 Telephone, just lift the
receiver. Otherwise, press m or wait
30 seconds for the Ring Again offer to
expire. For an explanation of Ring
Again, see Dialing.
The person to whom you camped the
call did not answer it. The call has
come back to you. Press the
CFLLLBFrCK button or the line button to
reconnect to the call.
You are connected to an external call.
You can press
TRIWSFER
to transfer
the call.
The call on line 01 is being transferred
to you by someone else in your
Norstar system.
Either you are receiving an external
call forwarded from telephone 21 or
you have an Answer button for
telephone 21 and an external call is
ringing on that telephone.
You tried to use Call Queuing but no
call was ringing at your telephone.
There is no call ringing at your
telephone. If you have a flashing line
button but your telephone is not
ringing, you must press the
line button
to answer the call on that line.
Compact DR5 System Coordinator Guide
3-l 0 /
Answering the telephone
Release a call
The telephone to which you have
directed a call is not in service or is
otherwise unavailable. The call is
returned to your telephone.
Nobody answered the call you parked.
The call has come back to you.
You have used the Call Queuing
feature without picking up the receiver
and Auto Handsfree has not been
assigned to your telephone. You must
use the receiver or [Sj to
answer a ringing call.
You are receiving a Priority Call. If you
are on another call, inform the person
you are speaking to that the call is
about to be put on hold. Press the
flashing line indicator of the Priority
Call or wait till the call connects
automatically (in eight seconds).
The Priority Call goes through when
you hear the next beep.
Your active call is placed on Exclusive
Hold. It will be reconnected
automatically when the priority call
ends unless you transfer the priority
call. If you transfer the priority call, you
must press the line button of your
original call to reconnect. (For the
M7100 Telephone, you must hang up
the receiver to complete the transfer
and then pick up the receiver and
press [Hold] to reconnect.)
To reject a Priority Call, use DND
((-I[81 [5])
or press
BLOCK.
You have no free line buttons on
which to receive a call. Release one of
your current calls and try again to
answer the incoming call.
_:_
‘: .
:-
..I.
.:_ :
-.:, I’:.:
,:-
.:. .
.1 :..
. -:_
_‘. -‘_. :
. .
Answering the telephone / 3-11
You have received a Ring Again offer
for a line pool. To use the line pool,
press m or the flashing internal line
button. On the M7100 Telephone, just
lift the receiver. Otherwise, press w
or wait 30 seconds for the Ring Again
offer to expire. For an explanation of
Ring Again, see Dialing.
:. . .
‘: . .
:
:.
_:
Prime telephone displays
If yours is a Prime telephone, you may see the following displays:
‘_
:
._ _: ,.:.
:: . . :
: I_,_
:: : .
.:. _-
_-: : :
DRT
F==-l
I
Line 01 to Prime
The person at telephone 23 has
routed an external call to you using Do
Not Disturb while the call was ringing.
The system has routed an external
call to you from a telephone placed in
Do Not Disturb to prevent calls from
ringing.
Nobody answered this call on line 01,
so
the system routed it to you.
Karen has held a call for too long, so
the system has routed it to you.
Someone has camped, parked or
transferred a call on line 01, but no
one has answered it. Press the +
CQLLBFlCK
button or the line button to
connect to the call.
There is no telephone that can receive
a call on line 01,
so
the system has
routed it to you.
Compact DR5 System Coordinator Guide
3-12 /
Answering the telephone
Notes
There are three indications of an incoming call: ringing, a line
button flashing, and a message on the display. You will not
necessarily receive all three indications for any particular call.
You may have a line that has been set up not to ring at your
telephone. If so, you will see only a flashing line button. If
someone makes a voice call to you, you will hear a beep
followed by their voice. There are many possible combinations,
depending on how your system is set up. See Lines in the
System features section for more information on the use of lines.
There are many ways to answer a call. Many of them depend on
settings in Administration programming. Depending on various
settings and the type of call you are receiving, you may be able
to answer a call by: picking up the receiver, picking up the
receiver and pressing a line button, pressing (Handsfree), pressing
[Handsfree] and pressing a line button, pressing a line button, or
simply speaking.
If you receive a Priority Call and your telephone has no free
internal line buttons, you cannot transfer the call or do anything
else with it, except release it.
-_
. .
.:::::.
:
.:I:.::.
: ::.
‘,.
._ .:
.:.-_,:..
.‘::.
: ,_
On M7100 Telephones, you may answer a second call by
pressing [Hold]. Your active call is put on hold and you are
connected to the waiting call. You can have no more than two
calls at a time.
_-.
:
1.
I
,. ,::
::.
fiuiuuial 1 3- 13
Autodial
-.
‘_
1..
.::
:
.::. .:
_._:
. :..
_’
You can program memory buttons for one-touch dialing of
internal or external telephone numbers.
External Autodial
1.
2.
3.
4.
5.
Press [Feature] [r] rj
.
Select the button you want to program. This is not necessary
for the M7100 Telephone.
If you want this autodialer to use a particular line or line pool,
select that line or line pool button. On the M7100 Telephone,
you can only select a line pool button.
Enter the number.
Press w or (Hold].
Internal Autodial
1.
Press /GiF-]I+]~.
2. Select the button you want to program. This is not necessary
for the M7100 Telephone.
3. Enter the number.
Displays
You will see some of the following displays while programmings-
an Autodial button. See Dialing for displays that may occur while
using an Autodial button.
F,,,,,,
Continue to enter digits until the
number is complete.
Press BKSP or
*[-I to erase an incorrect
digit. Press OK or [HO’dj when
you are finished.
The memory allotted to Autodial
numbers in your Norstar system is full.
Compact DR5 System Coordinator Guide
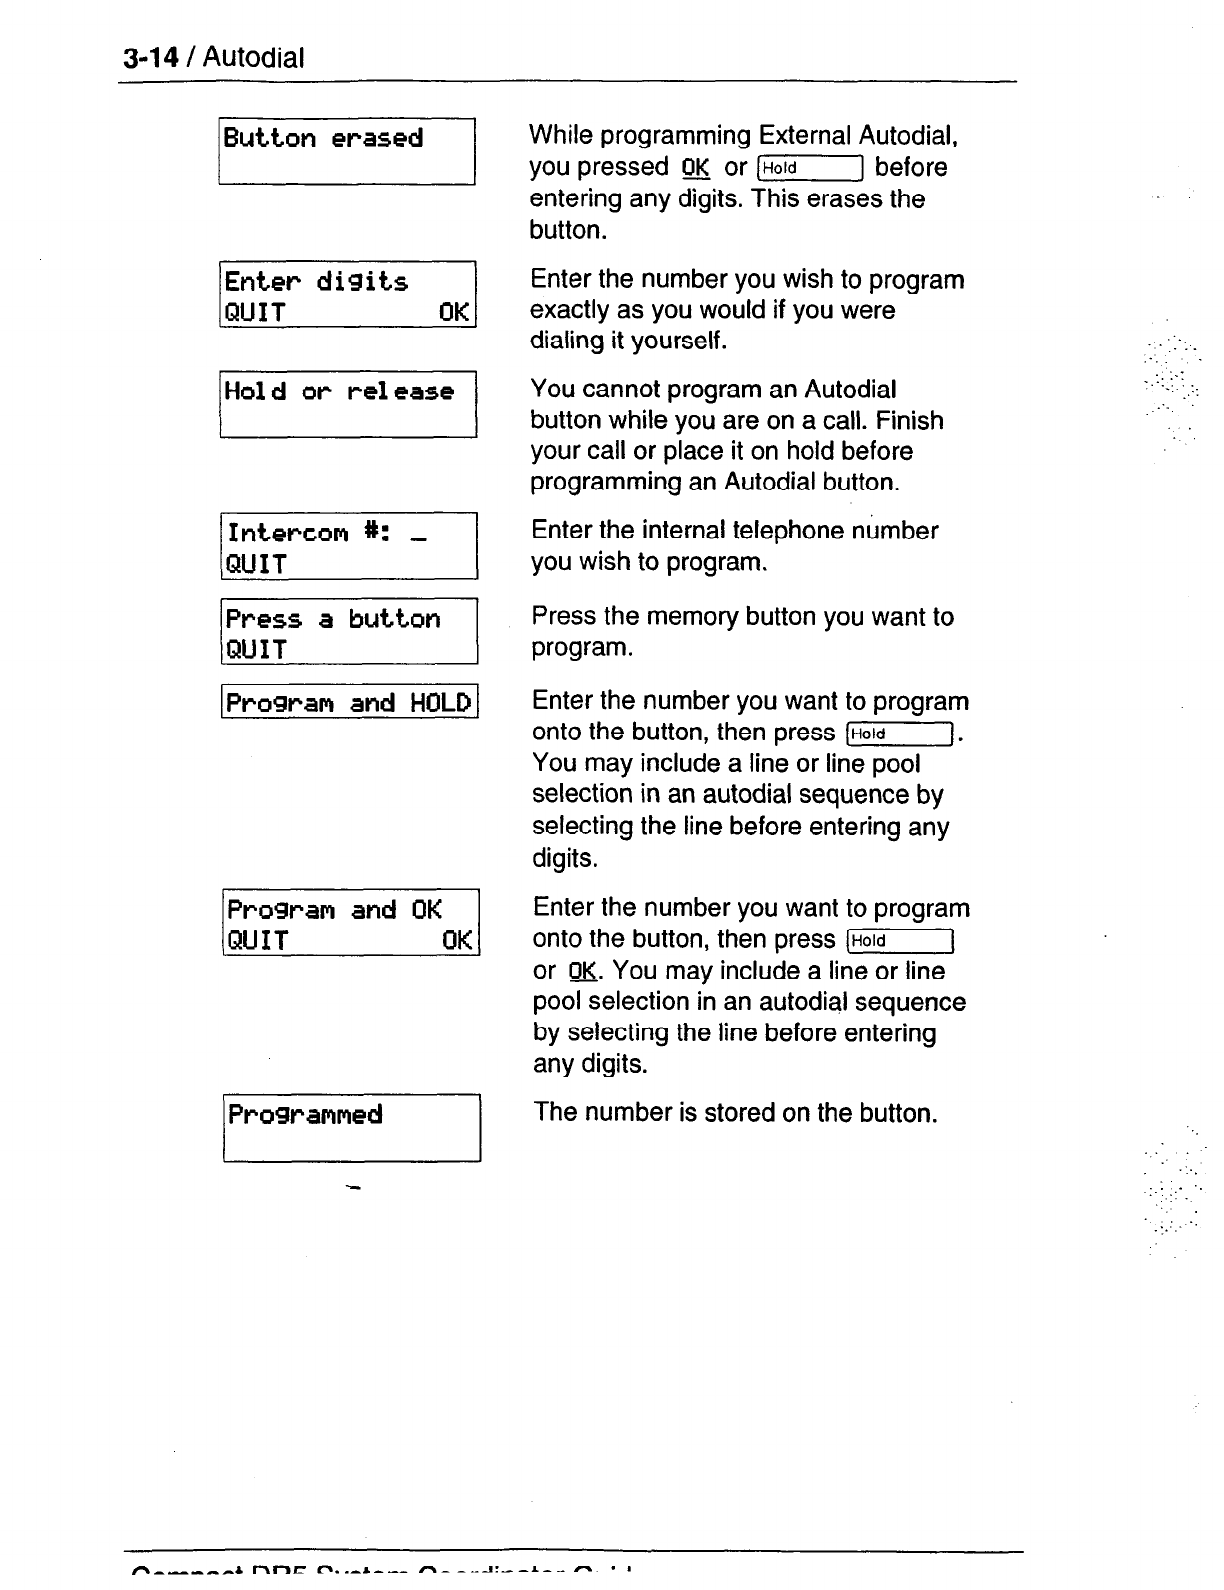
3-l 4 /
Autodial
IButton erased
1
IProgram
and
HOLD 1
Programmed
While programming External Autodial,
you pressed m or [r] before
entering any digits. This erases the
button.
Enter the number you wish to program
exactly as you would if you were
dialing it yourself.
You cannot program an Autodial
button while you are on a call. Finish
your call or place it on hold before
programming an Autodial button.
Enter the internal telephone number
you wish to program.
Press the memory button you want to
program.
Enter the number you want to program
onto the button, then press (Hold].
You may include a line or line pool
selection in an autodial sequence by
selecting the line before entering any
digits.
Enter the number you want to program
onto the button, then press (71
or OK. You may include a line or line
pool selection in an autodial sequence
by selecting the line before entering
any digits.
__,:‘..
. . .
:_. -
.
-.::_:-: ._
: _:_
The number is stored on the button.
:
: .:..
.:_
..
..
:._:_-
:.
n__,,,a nnc o.._A-__ A__._A:_-A-_ e
. a
Autodial / 3-15
-.,.
:
Notes
If the power to your Norstar system is off for more than three
days, Autodial numbers may be lost from the memory.
Autodial numbers must be programmed onto memory buttons.
They can not be programmed onto external or internal line
buttons, the Handsfree/Mute button, or Answer buttons.
You can program Host System Signaling codes as part of a
number on an External Autodial button. See Host System
Signaling.
If you do not include a line selection in an autodialer, the call will
use your Prime line, if you have one. If you select a line before
pressing the Autodial button, any line selection programmed onto
the button will be ignored.
You can copy the telephone number from a Last Number Redial
button or Saved Number Redial button onto an Autodial button.
Simply enter the Last Number Redial feature code or Saved
Number Redial feature code when the Autodial feature asks you
to enter a number.
You can use the Button Inquiry feature to check the numbers
programmed on your autodial buttons.
:.
: -.:.
-_
‘_
.::.
:. :.
:
_,
3-16 /
Call Forward
Call Forward
[GZZ-J
(T-J
Forward your calls
You can have all your calls forwarded to another telephone in the
Norstar system.
1. Press (Feature] m.
.::’
2. Enter the number of the internal telephone to which you want
your calls forwarded.
Forwarding remains in effect until you enter the Cancel Call
Forward feature code.
Cancel Call Forward
You can start to receive calls again.
(Feature)(T-J(-g
1. Press [-]1;;7 m.
Call Forward on Busy
Call Forward on Busy redirects calls to another telephone when
you are busy with a call. The System Coordinator sets up Call
Forward on Busy in Administration programming.
Call Forward (No Answer)
Call Forward (No Answer) forwards unanswered calls to another
telephone. The System Coordinator sets up Call Forward (No
Answer) in Administration programming.
Call Forward Override
You can call someone and ask them to stop forwarding their calls
to you. -
1. Dial that person’s number and ask them to cancel call
forwarding. Your call will ring at that person’stelephone even
though they are forwarding their calls.
.;-
::
Related features
Do Not Disturb (~1~~
You can use the Do Not Disturb feature to forward your calls to
the Prime telephone.
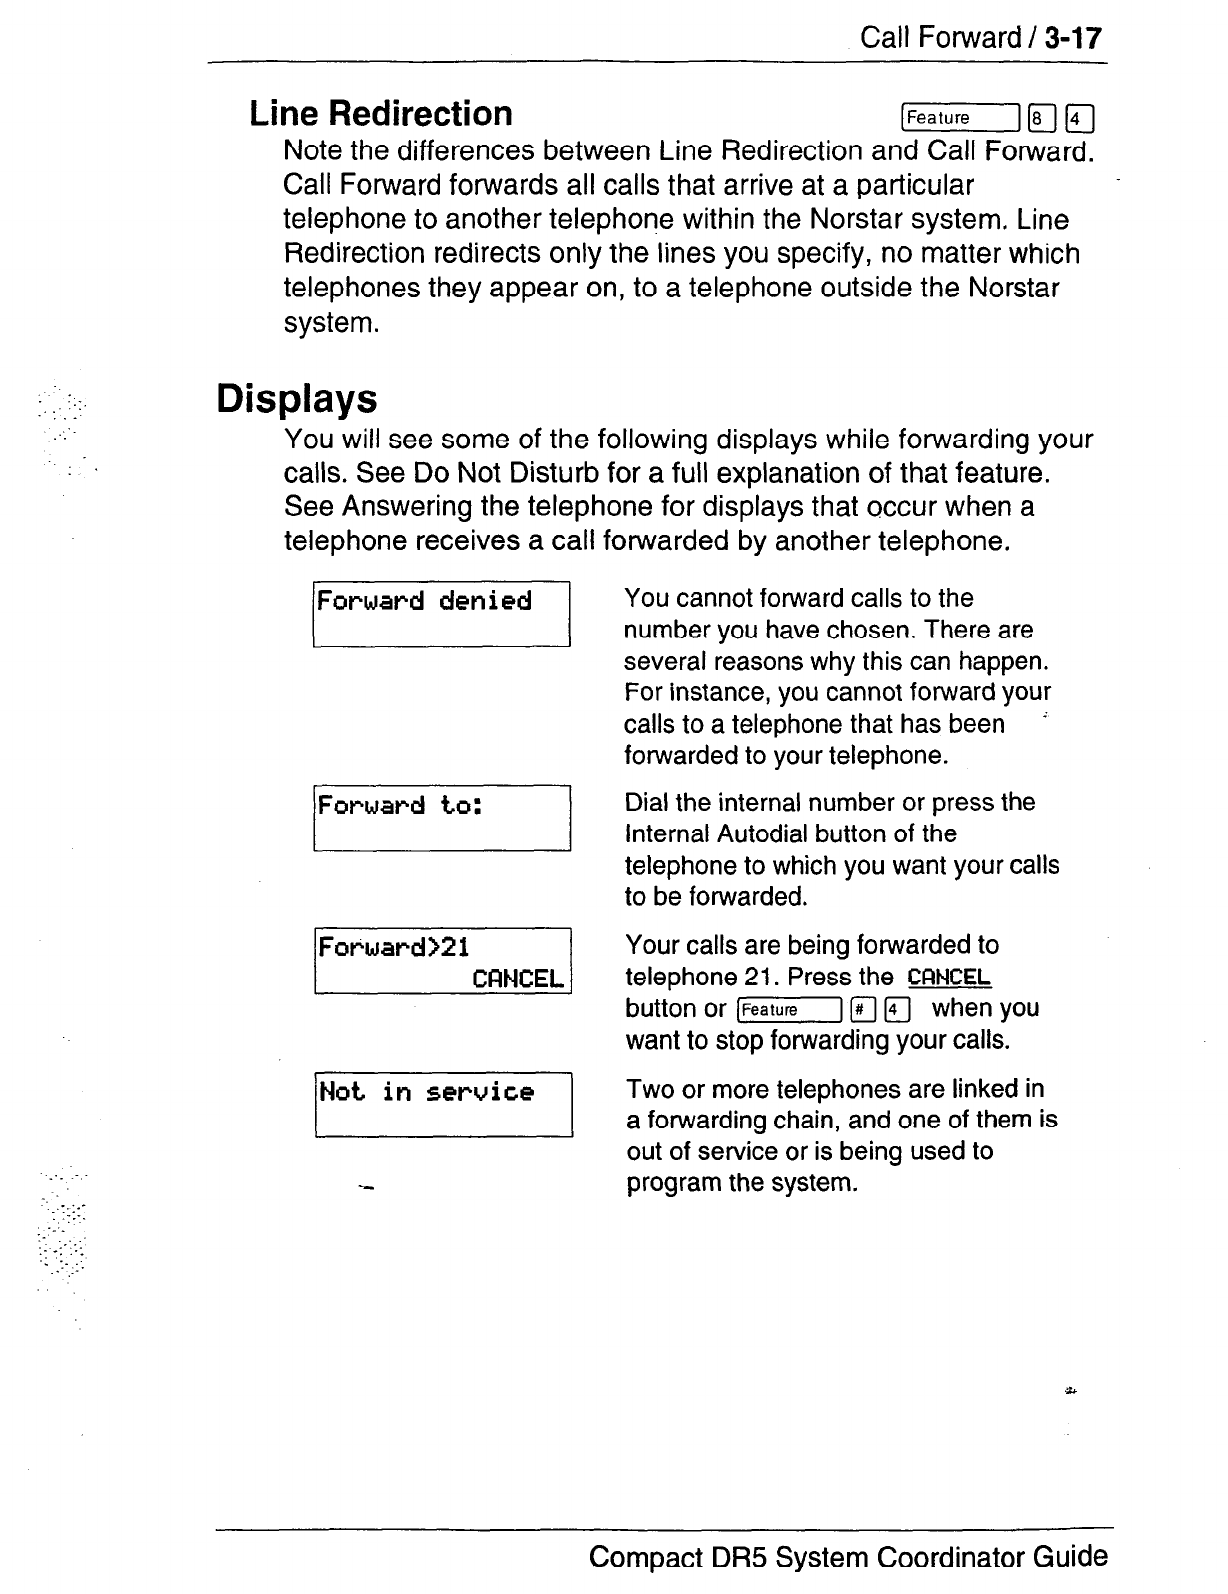
Call Forward / 3-17
Line Redirection [-Giz--118]a
Note the differences between Line Redirection and Call Forward.
Call Forward forwards all calls that arrive at a particular
telephone to another telephone within the Norstar system, Line
Redirection redirects only the lines you specify, no matter which
telephones they appear on, to a telephone outside the Norstar
system.
Displays
.:
‘.
: .
You will see some of the following displays while forwarding your
calls. See Do Not Disturb for a full explanation of that feature.
See Answering the telephone
for displays that occur
when a
telephone receives a call forwarded by another telephone.
-.
__.::.-
_-_
-_._
I-. ._. ::
::_: ,._
-; -_ :
_: ._.
:
/Forward denied
1
Forward to:
L
I
You cannot forward calls to the
number you have chosen. There are
several reasons why this can happen.
For instance, you cannot forward your
calls to a telephone that has been
’
forwarded to your telephone.
Dial the internal number or press the
Internal Autodial button of the
telephone to which you want your calls
to be forwarded.
Your calls are being forwarded to
telephone 21. Press the CANCEL
button or [Raturej @lpj when you
want to stop forwarding your calls.
Two or more telephones are linked in
a forwarding chain, and one of them is
out of service or is being used to
program the system.
Y
Compact DR5 System Coordinator Guide
3 18 / Call Forward
Notes
When a call is forwarded, it does not ring but its line indicator still
flashes on your telephone. You can answer the call by pressing
the button next to the flashing indicator.
If the telephone to which you forwarded your calls does not have
the same external lines as your telephone, the forwarded calls
appear on internal line buttons.
Telephones that have Call Forward on Busy active can still
receive Priority calls.
Call Forward on Busy does not forward camped calls.
When Call Forward is active, all calls go to the Call Forward
destination, regardless of the Call Forward on Busy and Call
Forward no Answer settings.
Calls that are redirected by Line Redirection are not affected by
any of the Call Forward features.
: ___
. .
:_:I: f,
::.:.- ...
..‘i_ .,:’
: .
::- -1.
-_ ._
‘.. . .
_:. -:
-. --
Compact DR5 System Coordinator Guide
CalI lntormatlon
/
3-19
Call Information
”
1.
:.
Call Information allows you to display information about incoming
calls. This information is more detailed than the Call Display
information you automatically receive. See the Answering the
telephone section in this chapter for details. For external calls,
you can display the caller’s name, telephone number, and the
line name. For an internal call, you can display the name of the
caller and their internal number. You can obtain information
about ringing, answered, or held calls.
Note; Names and numbers for external callers are displayed
only if you have subscribed to Call Display services from
your local telephone company.
Display Call Information before or after answering
1.
2.
To
To find out who is calling or to obtain information about your
current call, press [Fealure] m m m_
If the call is an internal call, the caller’s name and the internal
number are displayed.
OR
If the call is an external call, incoming call information may be
available.
obtain more information about an external call:
For a one-line display, press a repeatedly to display more
information about the call.
OR
For a two-line display, continue to press
MEW
to display
more information about the call.
_;. .,:.
..:
:
1.:
..-
_’
: _;::_:
‘._
::I..
Compact DR5 System Coordinator Guide
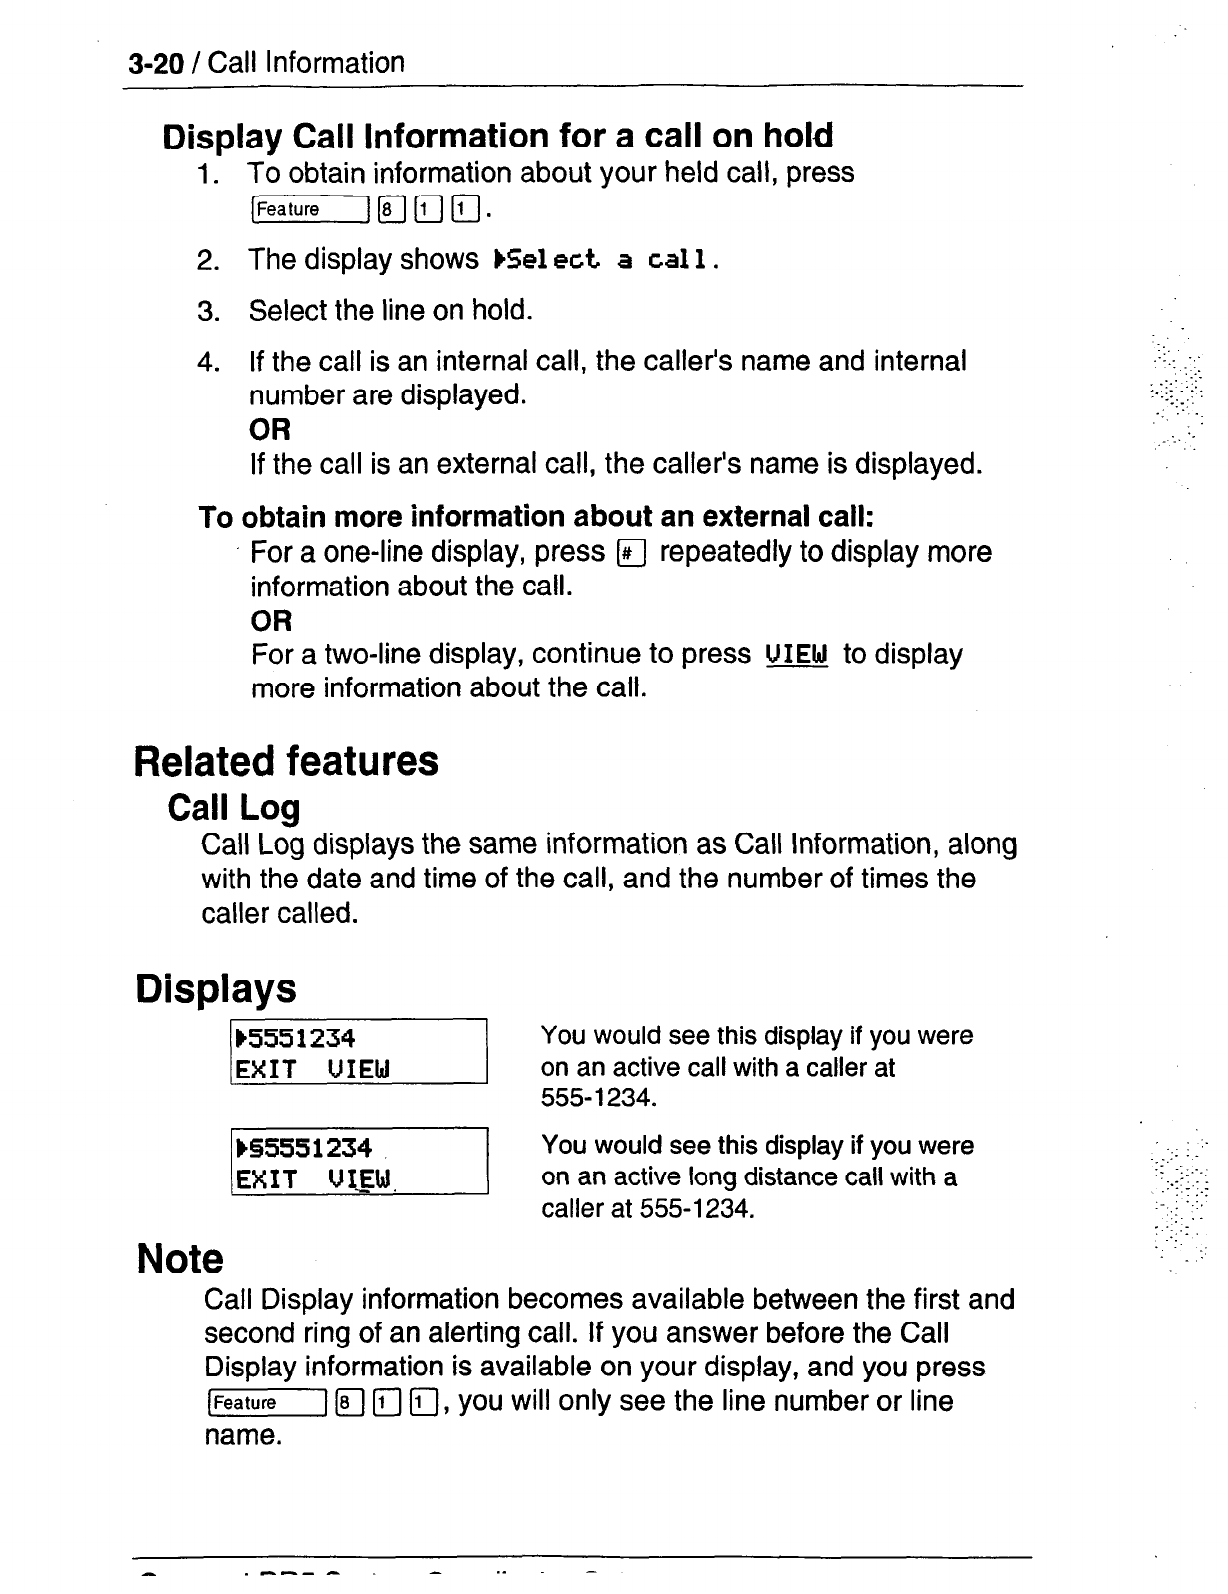
3-20 / Call Information
Display Call Information for a call on hold
1.
2.
3.
4.
To
To obtain information about your held call, press
[-Imall.
The display shows
Eel ect
a
call.
Select the line on hold.
If the call
is
an internal call, the caller’s name and internal
number are displayed.
OR
If the call is an external call, the caller’s name is displayed.
obtain more information about an external call:
For a one-line display, press a repeatedly to display more
information about the call.
OR
For a two-line display, continue to press
VIEW
to display
more information about the call.
Related features
Call Log
Call Log displays the same information as Call Information, along
with the date and time of the call, and the number of times the
caller called.
Displays
-1 You
would see this display if you were
on an active call with a caller at
555- 1234.
You would see this display if you were
on an active long distance call with a
caller at 555-l 234.
Note
Call Display information becomes available between the first and
second ring of an alerting call. If you answer before the Call
Display information is available on your display, and you press
[Feature] Fl m m, you will only see the line number or line
:.
:
:__.
Y.
.: . .
‘_._
.I.’ _.:
:...- : :
.-::_:.
. : .
._
name.
.-s-e . .
Call Log /
3-21
Call
Log
.:
.:.:;::
.‘.
:::‘y!:::.
Call Log creates a list of records of incoming external calls. The
log could contain the following information for each call:
- sequence number in the Call Log,
- name and number of caller,
- indication if call was long distance,
- indication if call was answered (and identification of who
answered it),
- time and date of the call,
- number of repeated calls from the same source, and
- name of the line that the call came in on.
Call Log has many benefits. For example, you may find it helpful
to
:
-
-
-
-
-
keep track of abandoned or unanswered calls,
call back a customer who was unable to reach anyone,
track patterns for your callers (for example volume of calls
and geographical location of calls),
record caller information quickly and accurately, and
build a personal telephone directory from log items.
/Vote.= Names and numbers for external callers are displayed
only if you have subscribed to Call Display services from
-
your local telephone company.
Pa-_-
_I
--I- r\
a . .

,,.,
‘.‘.,
:.:.:<:::.
3-22 / Call Log
Choose Logging Options [Feature)~~~
You
can select the type of calls
that will be stored in your Call
Log.
1.
2.
3.
4.
5.
6.
Press (Feature] R (FJ T;il.
If the
default has not changed, the display shows
NO me
answered. If you
want to log calls that were not
answered, press w or [%G--”
OR
Press
NEXT
or m to display
the next selection.
The display shows
Unanswered IN me.
If you want to log
calls that were unanswered at your telephone but answered
elsewhere in the system, press E or [-I.
OR
Press
NEXT or m
to display the next selection.
The display shows
Los al 1 call s.
If you want to log all
calls, answered and not answered at
your telephone, press
#&or [Feature].
OR
Press
NEXT
or m to display the next selection.
The display shows
No
auto1 mging.
If you
do not want
information to be automatically logged, press m or
(Feature]
.
OR
Press
NEXT
or m to return to the first selection.
To exit, press MI.
Use Logit (manually log a call) (Feature](FJ(TJ(FJ
If yourcalls are not automatically logged, Logit lets you manually
log call information when you are connected to an external call.
Being able to store information for your current call can be helpful
in many situations. For example, you may want to:
- record a caller’s information without using paper and pencil,
- record only selected calls that you personally choose, as
opposed to using Call Log automatically, and
- quickly record caller information before a caller hangs up.
Call Log / 3-23
To manually log an external call:
1. Press (Feature] [F\ 1;7 a.
OR
Press a memory key programmed with this feature code.
(See the Feature programming section in this chapter.)
;:, .:,
.:y”:‘:’
;:
(
Use Autobumping [Feature]HIrl(FJ
Since your log has a set number of entries that it can hold,
Autobumping is a feature that lets you tell Norstar what to do
when your log becomes full. When Autobumping is on, a new log
entry causes the first entry to be deleted. If Autobumping is off,
your Norstar system will not log new calls when your log is full.
1. To turn Autobumping on, press [Feature] [q 1;7 m.
OR
To turn Autobumping off, press [Feature) 1;;7 @J r;7 r;7.
Enter Call Log [KG--j~[i-jj
You can enter your Call Log to view stored information. The Log
may display special characters. These are described in detail in
the description of Displays, later in this section. To view your log:
2. The display shows the number of previously read items (Old)
and the number of new, unread items (New) in the log.
3. To view old items, press QL.& or a.
OR
To view new items, press w or m.
OR
To return to the item being viewed when you last exited the
log, press RESUME or m.
3-24 / Call Log
Navigate within Call Log
You can navigate within your Call Log to view a particular log
entry. You can also scroll within an entry itself.
1. To scroll through an entry, press MORE or I-1 X=
OR
To view the next entry, press NEXT or m.
OR
To go back to the previous entry, press a.
2. To exit, press ml.
Erase Log Items
It
is necessary to routinely erase read log items to make space
for new items in your log.
1. Navigate to the item you want to erase.
2. Press
ERIE
or (Hold].
3. To exit, press (Rls.
If you accidentally erase an item, you can undo the erasure.
1. Immediately after accidentally erasing an item, press
UNDO
or [Hold].
2. To exit, press ml.
Call Log / 3-25
Call from Call Log
You may find it helpful to place calls from within your Call Log.
Each stored caller number may vary according to the information
associated with that particular call. If the caller number involves a
Centrex or PBX system, the first few digits may need to be
“trimmed” to make the caller number dialable. If the number that
you want to call is long distance or uses line pool access, digits
may need to be added to the beginning of the number.
Place a call
1.
Navigate to the log item for the number that you want to dial.
2. Display the number and edit it if necessary to make it
dialable (the instructions for adding or trimming digits follow).
3. Press, an external line or line pool button.
4. Lift the receiver. This is not necessary if Handsfree is
programmed at your telephone.
5. The displayed number is dialed.
Trim a number involving Centrex or PBX
To trim the caller number:
1.
Press
TRIM
or ti[+l I+)], once for every digit that you
want to remove.
Add digits for long distance or line pool access
1.
Add digits to the number by pressing the appropriate dial pad
digits, just as you would do to dial.
2.
To remove digits you have added, press BKSP or
* (+I (1011, once for every digit that you want to remove.
Pr\m-,a+
r\lTc I?..-A-.-_ n I. . h . I
3-26 /
Call Log
Optional Password
You have the option of accessing your Call Log through a
password. If you forget your password, there is a facility in
Administration programming to clear it (and then you could enter
a new password from your telephone).
Assign a password to your Call Log
1.
Press 1-1 F] r] fl. The displays shows
New Passwrd: _.
2.
Enter your four-digit password. The display shows
Repeat New: -.
3. Re-enter your four-digit password. The display shows
Password changed,
which confirms that your password has
been assigned.
Using your Password to enter Call’Log
1.
Press I-1 m [rl m to enter Call Log.
2. If you have programmed a password,
Password: -
appears.
3. Enter your four-digit password.
Change your password
1.
2.
3.
4.
Press [Feature] m m a. The display shows
01 d Paswrd: -.
Enter your old password. The display shows
New passwrd: -.
Enter your new four-digit password. The displays shows
Repeat New: -.
Re-enter your password. The display shows
Password changed,
which confirms that your password has
been changed.
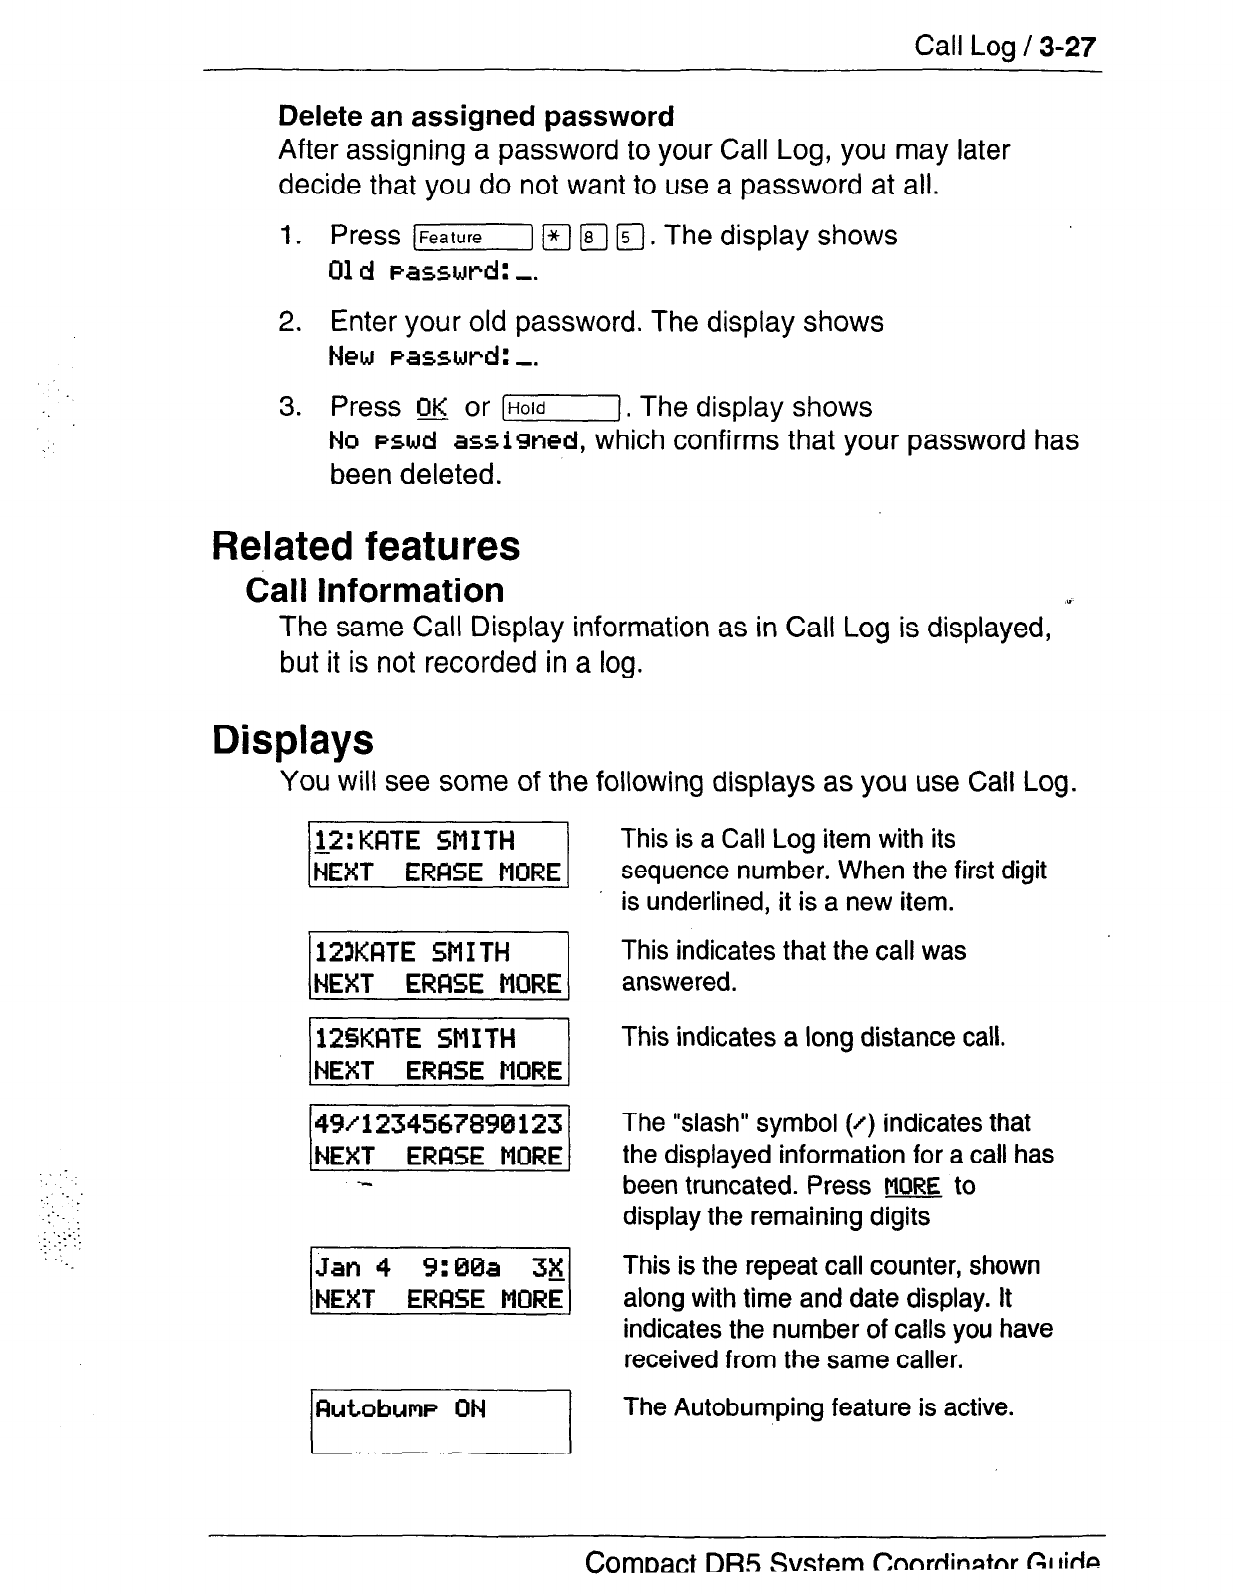
Call Log / 3-27
Delete an assigned password
After assigning a password to your Call Log, you may later
decide that you do not want to use a password at all.
1. Press (-1 F] jFj m. The display shows
01 d Passwrd: -.
2. Enter your old password. The display shows
New Passwrd: -.
3.
Press m or [HOldI. The display shows
No pswd
assigned, which confirms that your password has
been deleted.
Related features
Call Information
”
The same Call Display information as in Call Log is displayed,
but it is not recorded in a log.
Displays
You will see some of the following displays as you use Call Log.
Qutobuw ON
This is a Call Log item with its
sequence number. When the first digit
is underlined, it is a new item.
This indicates that the call was
answered.
This indicates a long distance call.
The “slash” symbol (f) indicates that
the displayed information for a call has
been truncated. Press
MORE
to
display the remaining digits
This is the repeat call counter, shown
along with time and date display. It
indicates the number of calls you have
received from the same caller.
The Autobumping feature is active.
CornPact DR5
Svstem
Cnndinatnr CI lida
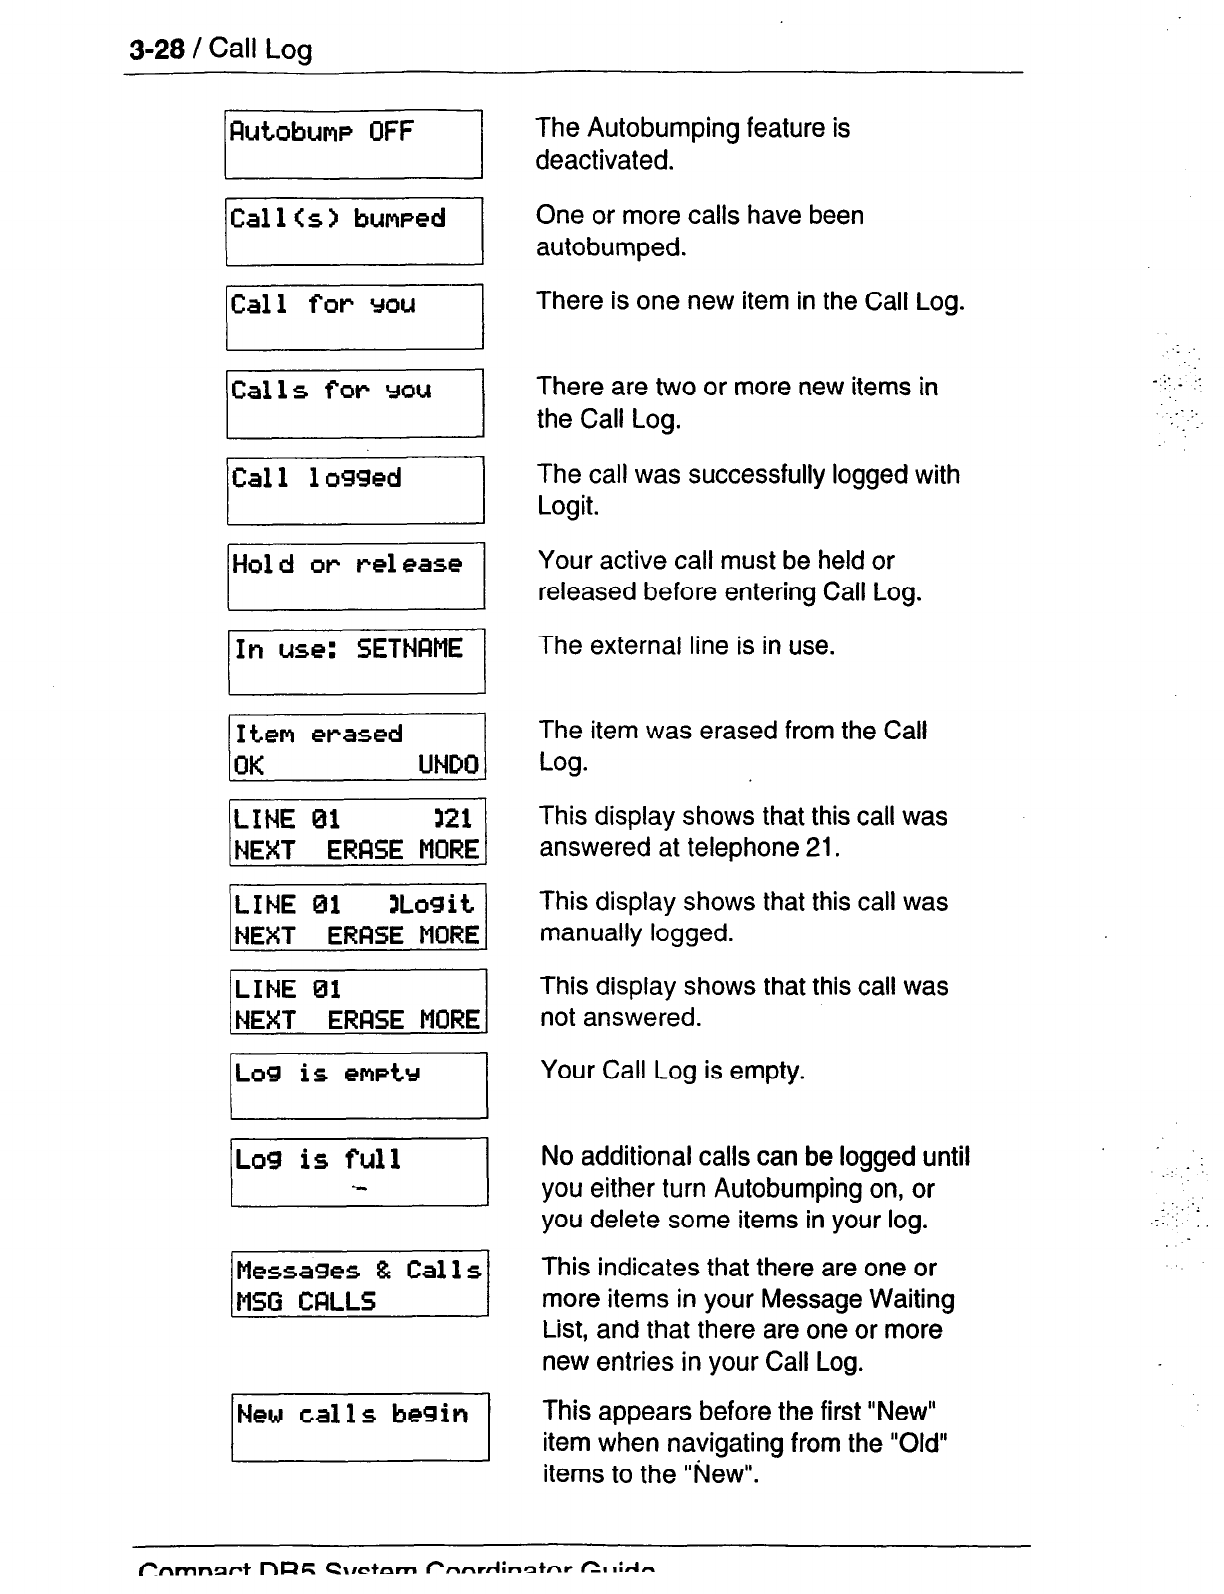
3-28 / Call Log
Cal
1
(5
> bumped
lCall
/Calls1
Hold or release
IIn use:
SETNRME
1
lLos
The Autobumping feature is
deactivated.
One or more calls have been
autobumped.
There is one new item in the Call Log.
There are two or more new items in
the Call Log.
The call was successfully logged with
Logit.
Your active call must be held or
released before entering Call Log.
The external line is in use.
The item was erased from the Call
Log.
This display shows that this call was
answered at telephone 21.
This display shows that this call was
manually logged.
This display shows that this call was
not answered.
Your Call Log is empty.
No additional calls can be logged until
you either turn Autobumping on, or
you delete some items in your log.
This indicates that there are one or
more items in your Message Waiting
List, and that there are one or more
new entries in your Call Log.
This appears before the first “New”
item when navigating from the “Old”
items to the “Mew”.
_ :.
_ _ ::
_.
1.
: ._
.’
_
__’ :,
_.
,_ . .
:. ,.
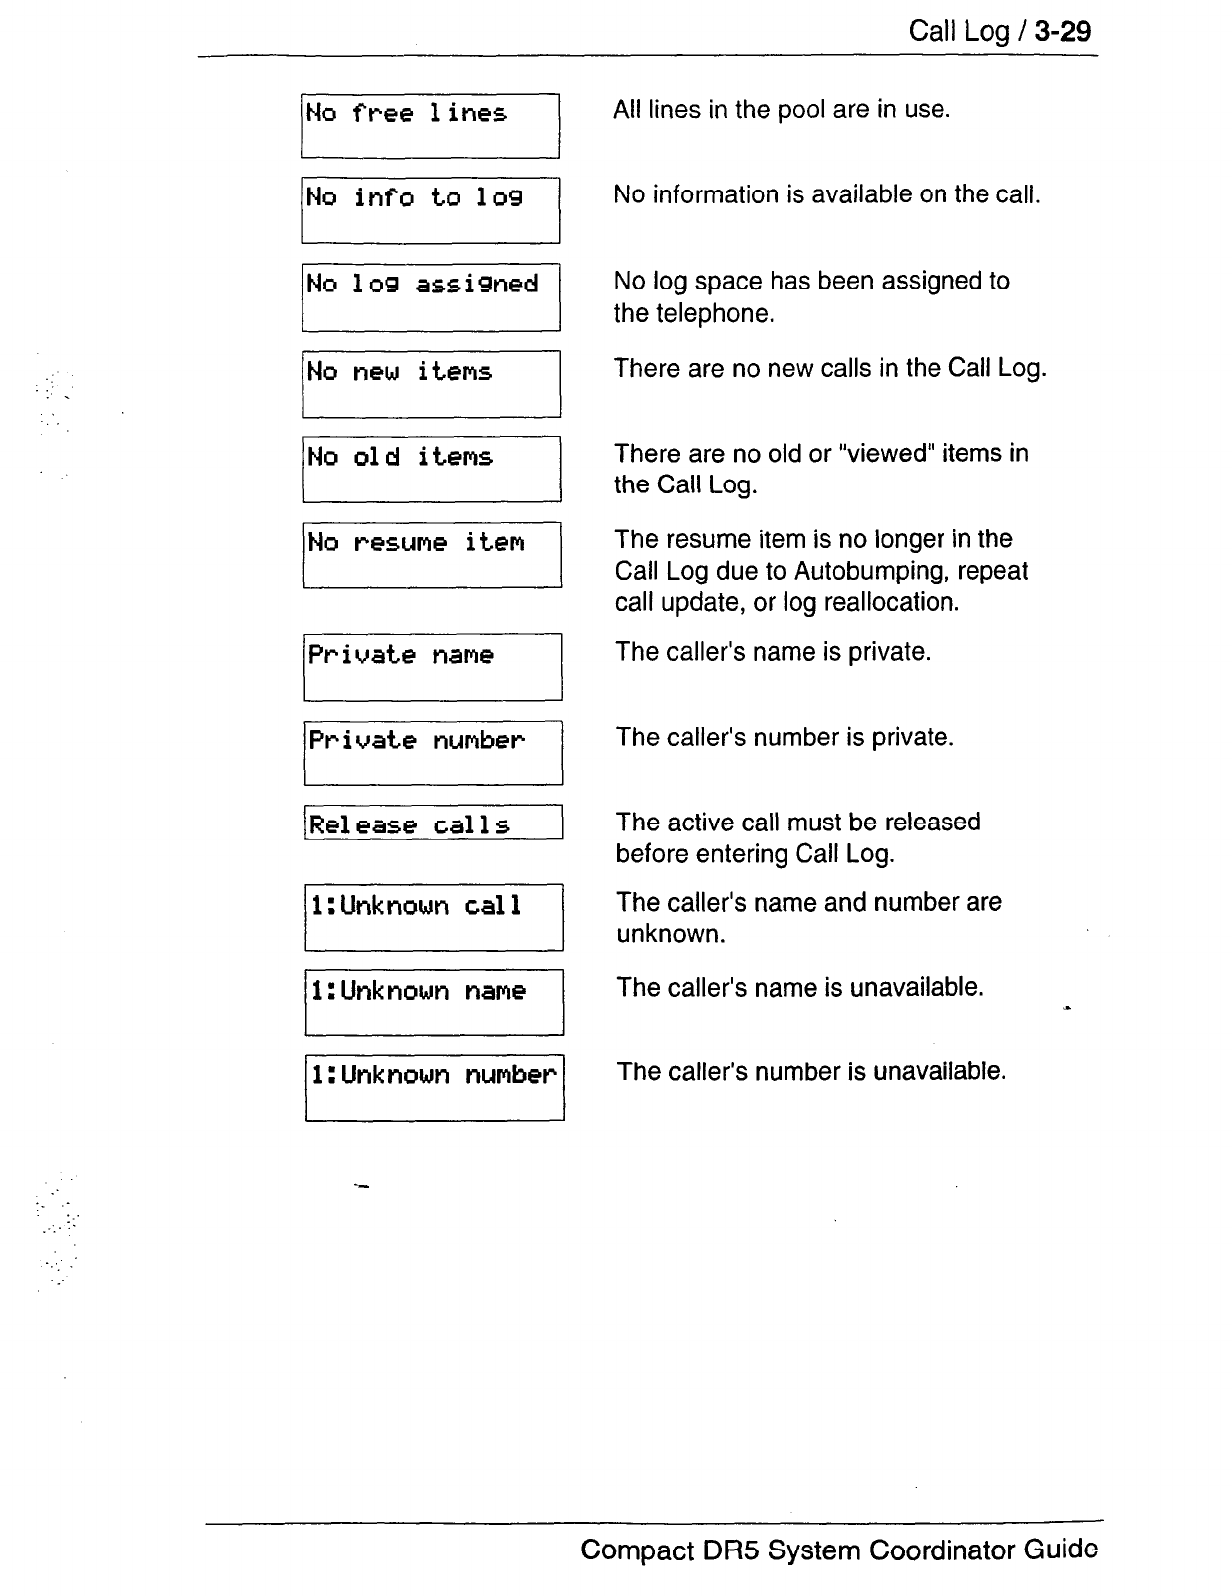
Call Log / 3-29
All lines in the pool are in use.
:
1: .
No
new
itms
._ :
::’
.;
/No
Private t-me
Private
number
Rel case calls
I : Unknown call
I : Unknswn number
No information is available on the call.
No log space has been assigned to
the telephone.
There are no new calls in the Call Log.
There are no old or “viewed” items
in
the Call
Log.
The resume item is no longer in the
Call Log due to Autobumping, repeat
call update, or log reallocation.
The caller’s name is private.
The caller’s number is private.
The active call must be released
before entering Call Log.
The caller’s name and number are
unknown.
The caller’s name is unavailable.
T he caller’s number is unavailable.
Compact DR5 System
Coordinator Guide
3-30 / Call Log
Notes
You may want to use the punch-out overlay, which is provided in
the Call Log Feature Card. This card is available in a separately
orderable Call Display Key Cap Kit. Please contact your
Customer Service representative.
The default log size is zero items. This size can be changed in
Administration programming.
‘.
:. .’
: :.::
:.
;.._::.
.:
The long distance indicator may not be shown in the log,
depending on the Call Display services provided by your local
telephone company.
For tips on programming Call Logs, see the Call Display services
section in the Welcome to Norstar chapter.
.A___ . . . . A..
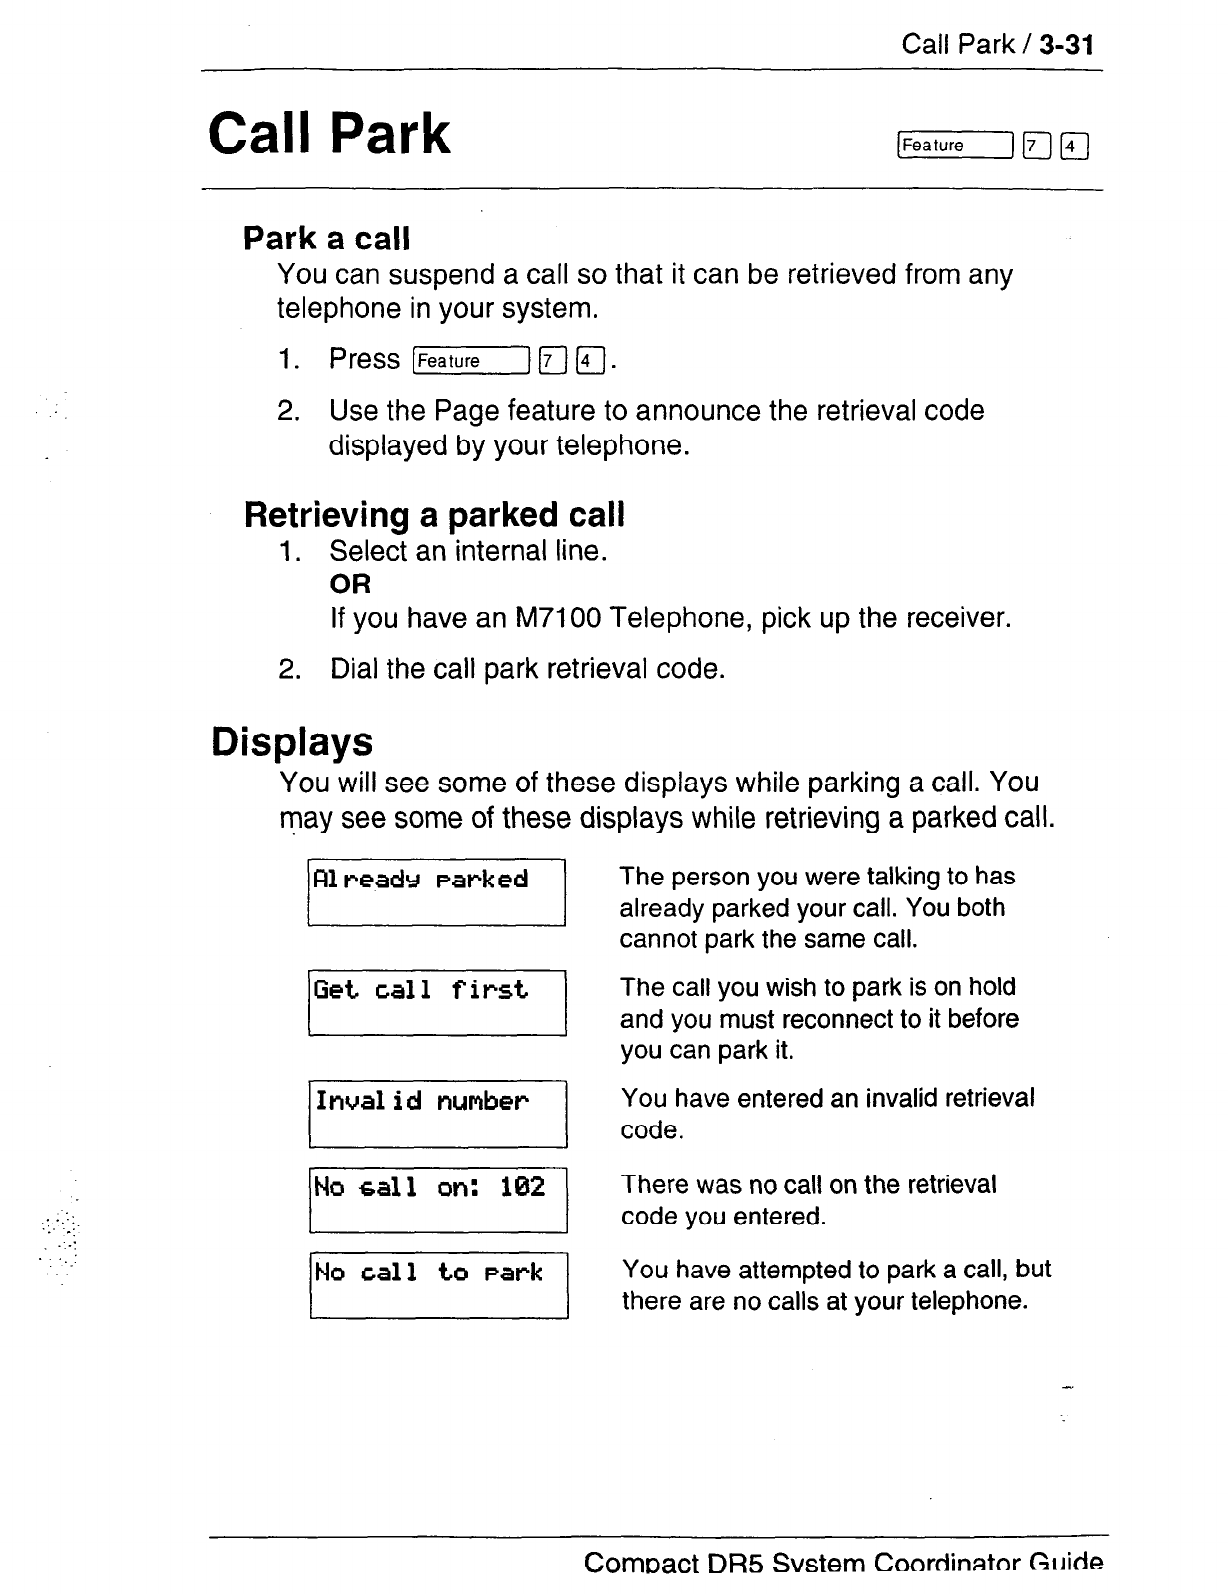
Call Park / 3-31
Call Park
,. ..::
.:_ ._:
-:-:
‘_ :
Park a call
You can suspend a call so that it can be retrieved from any
telephone in your system.
1. Press [Feature)mm.
2. Use the Page feature to announce the retrieval code
displayed by your telephone.
Retrieving a parked call
1.
Select an internal line.
OR
If you have an M7100 Telephone, pick up the receiver.
2. Dial the call park retrieval code.
Displays
You will see some of these displays while parking a call. You
may see some of these displays while retrieving a parked call.
Rl
ready Parked
jGet call first
1
/Invalid
number
1
No call to park
The person you were talking to has
already parked your call. You both
cannot park the same call.
The call you wish to park is on hold
and you must reconnect to it before
you can park it.
You have entered an invalid retrieval
code.
There was no call on the retrieval
code you entered.
You have attempted to park a call, but
there are no calls at your telephone.
Compact
DR5
Svstem
Coordirwtnr GIli&
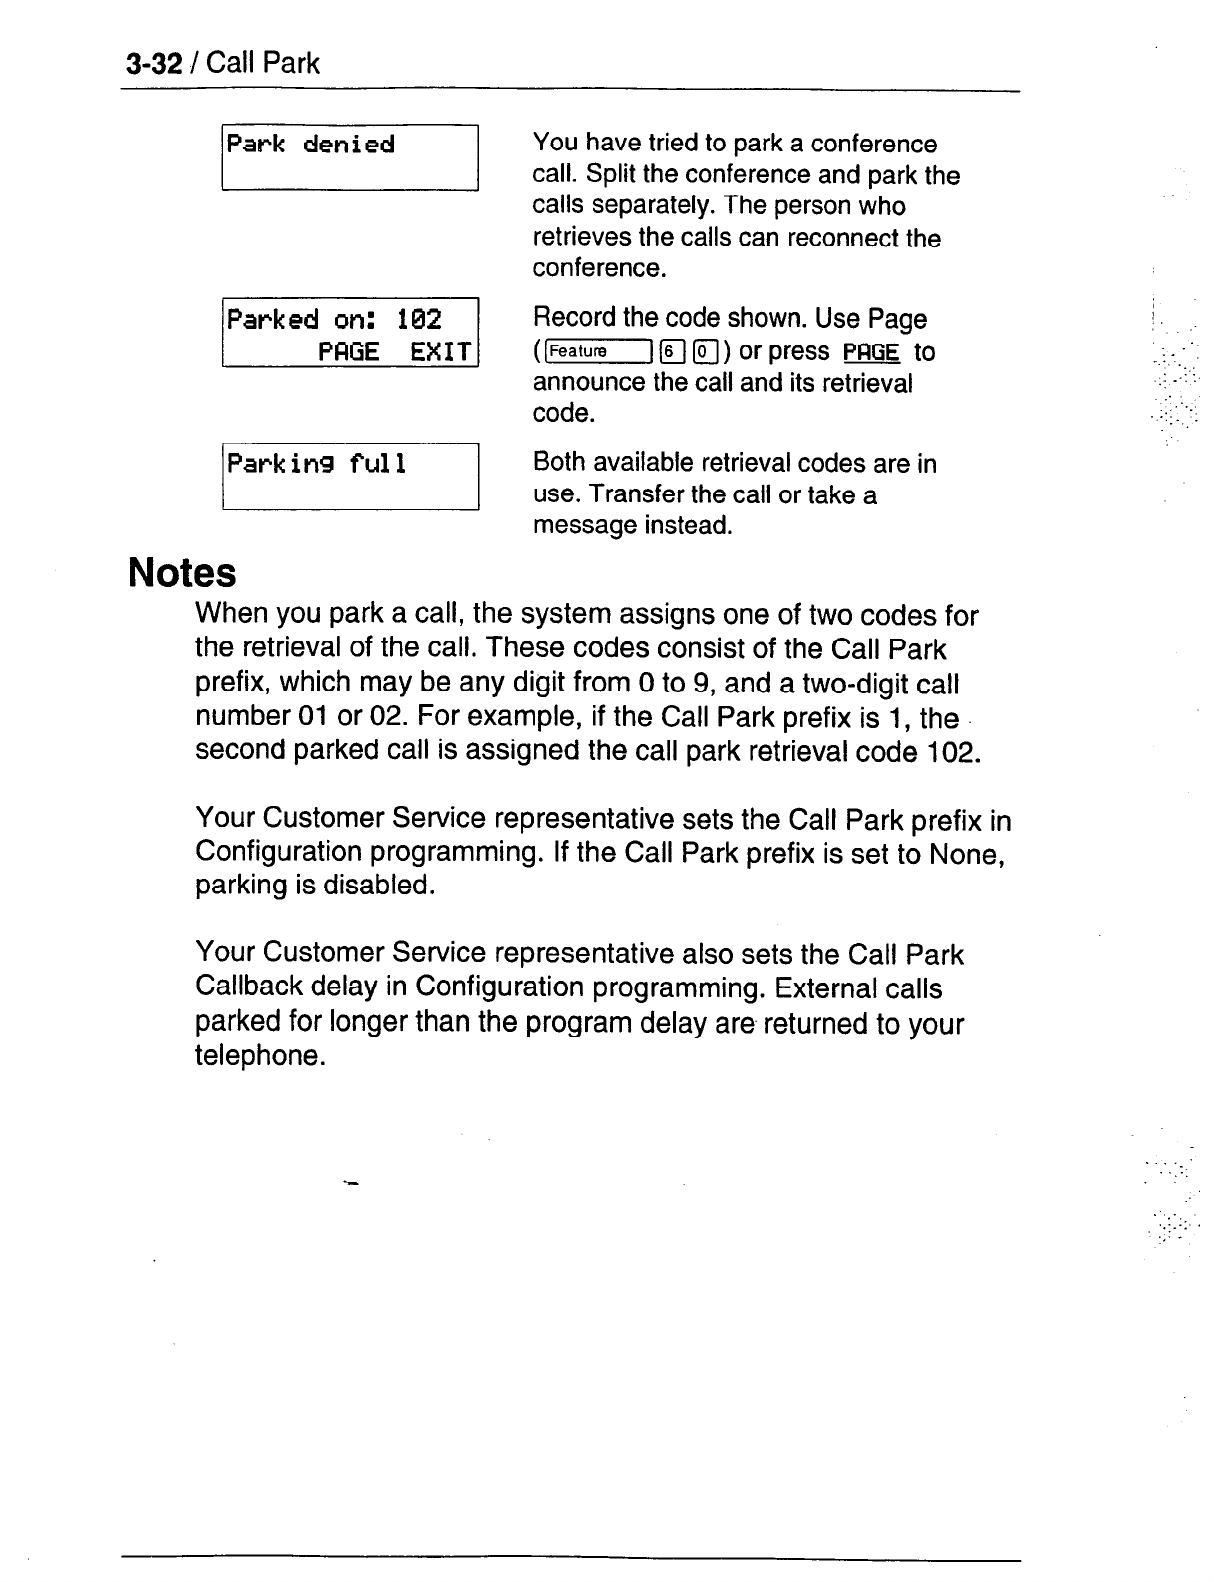
3-32 / Call Park
You have tried to park a conference
call. Split the conference and park the
calls separately. The person who
retrieves the calls can reconnect the
conference.
-1 Record
the code shown. Use Page
((Feature] F] WI)
or
press
PFIGE
to
announce the call and its retrieval
code.
Both available retrieval codes are in
use. Transfer the call or take a
message instead.
Notes
When you park a call, the system assigns one of two codes
for
the retrieval of the call. These codes consist of the Call Park
prefix, which may be any digit from 0 to 9, and a two-digit call
number 01 or 02. For example, if the Call Park prefix is 1, the
second parked call is assigned the call park retrieval code
102.
Your Customer Service representative sets the Call Park prefix in
Configuration programming. If the Call Park prefix is set to None,
parking is disabled.
i.
. .
::
-::.
..’
.;_ :: :.
-‘,L,
..’ ..
. ..-_
Your Customer Service representative also sets the Call Park
Callback delay in Configuration programming. External calls
parked for longer than the program delay are returned to your
telephone.
.,::
..::::.
.;: .
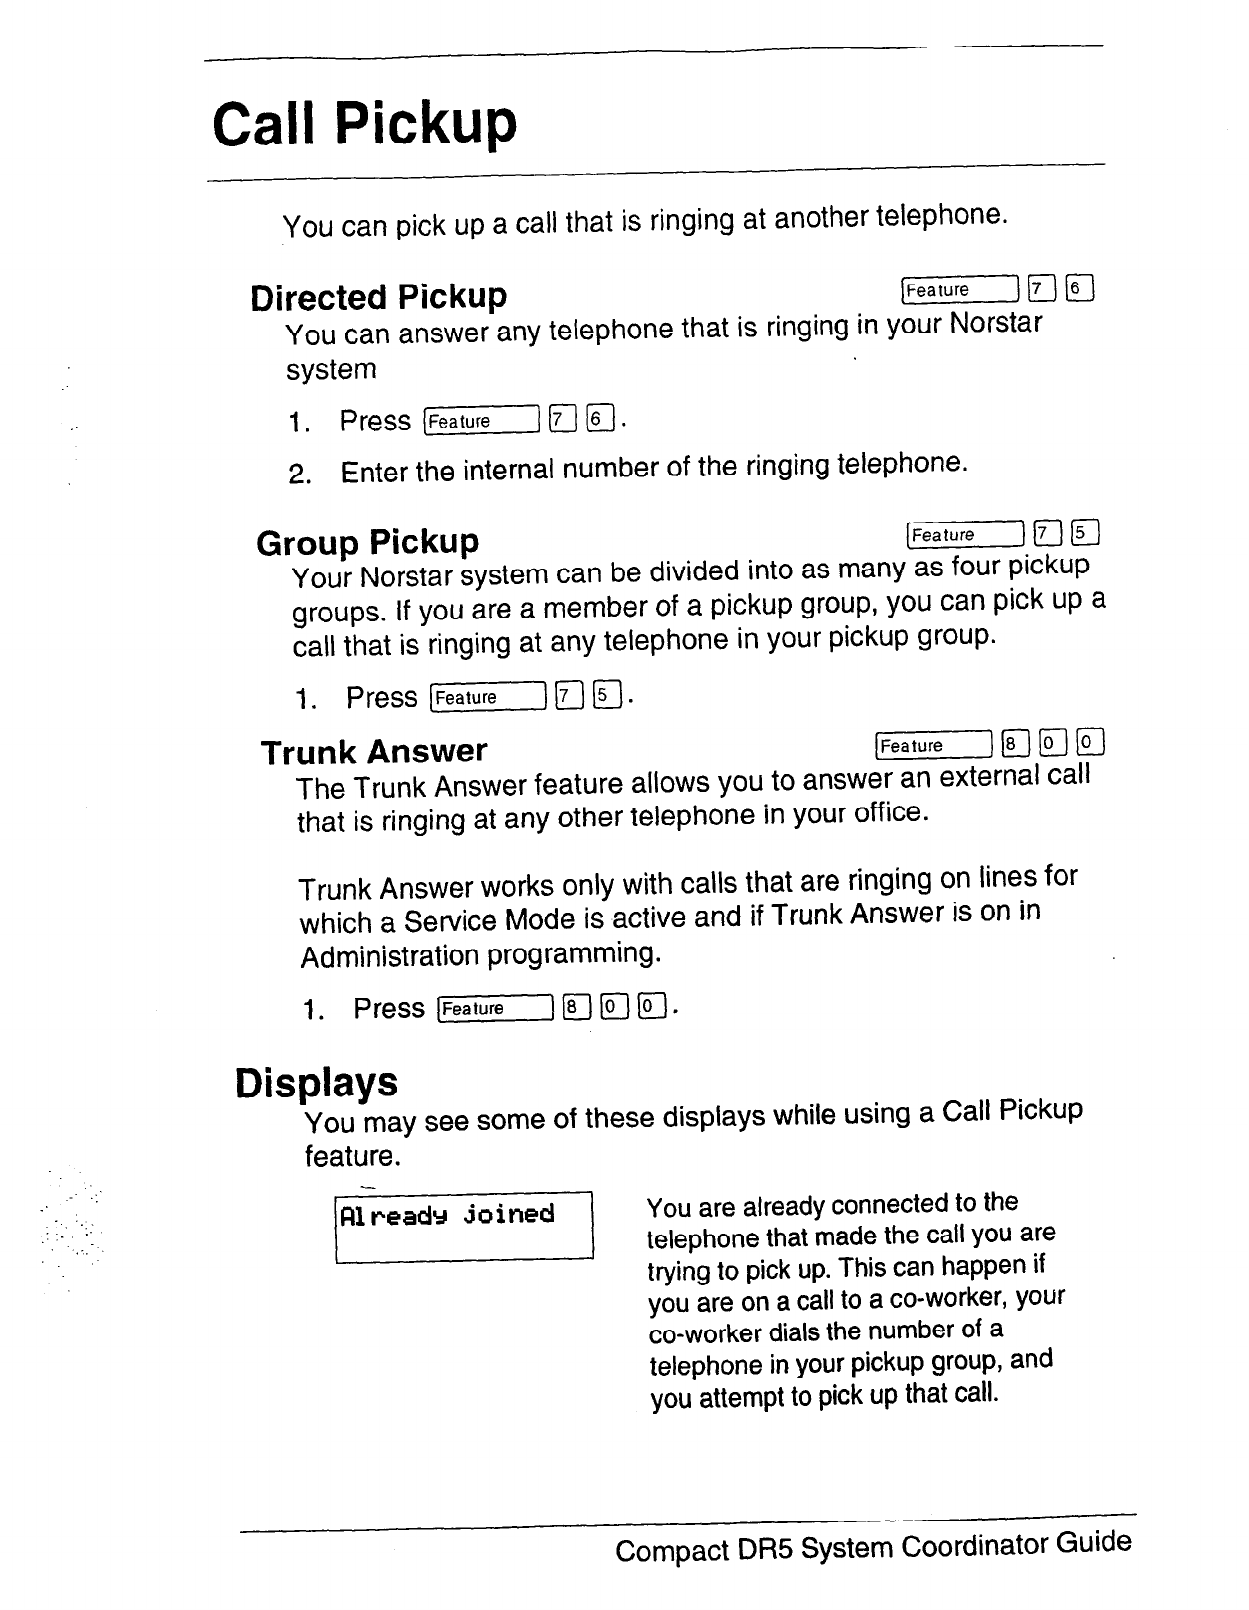
Call Pickup
:
_’
. . ‘_
1.
.,.;.
You can pick up a call that is ringing at another telephone.
Directed Pickup IFeature] (7) a
You can answer any telephone that is ringing in your Norstar
system
1. Press (Fea(urelflFj.
2. Enter the internal number of the ringing telephone.
Group Pickup [Feature\ 1-7-j g--)
Your Norstar system can be divided into as many as four pickup
groups. If you are a member of a pickup group, you can pick up a
call that is ringing at any telephone in your pickup group.
1. Press lFeafurejr]D.
Trunk Answer [r]a)fCJ
The Trunk Answer feature allows
you
to
answer an external call
that
is
ringing at any other telephone in your office.
Trunk Answer works only with calls that are ringing on lines for
which a Service Mode is active and if Trunk Answer is on in
Administration programming.
1. Press [Featurejama.
Displays
You may see some of these displays while using a Call Pickup
feature.
You are already connected to the
telephone that made the call you are
trying to pick up. This can happen if
you are on a call to a co-worker, your
co-worker dials the number of a
telephone in your pickup group, and
you attempt to pick up that call.
Compact DR5 System Coordinator Guide
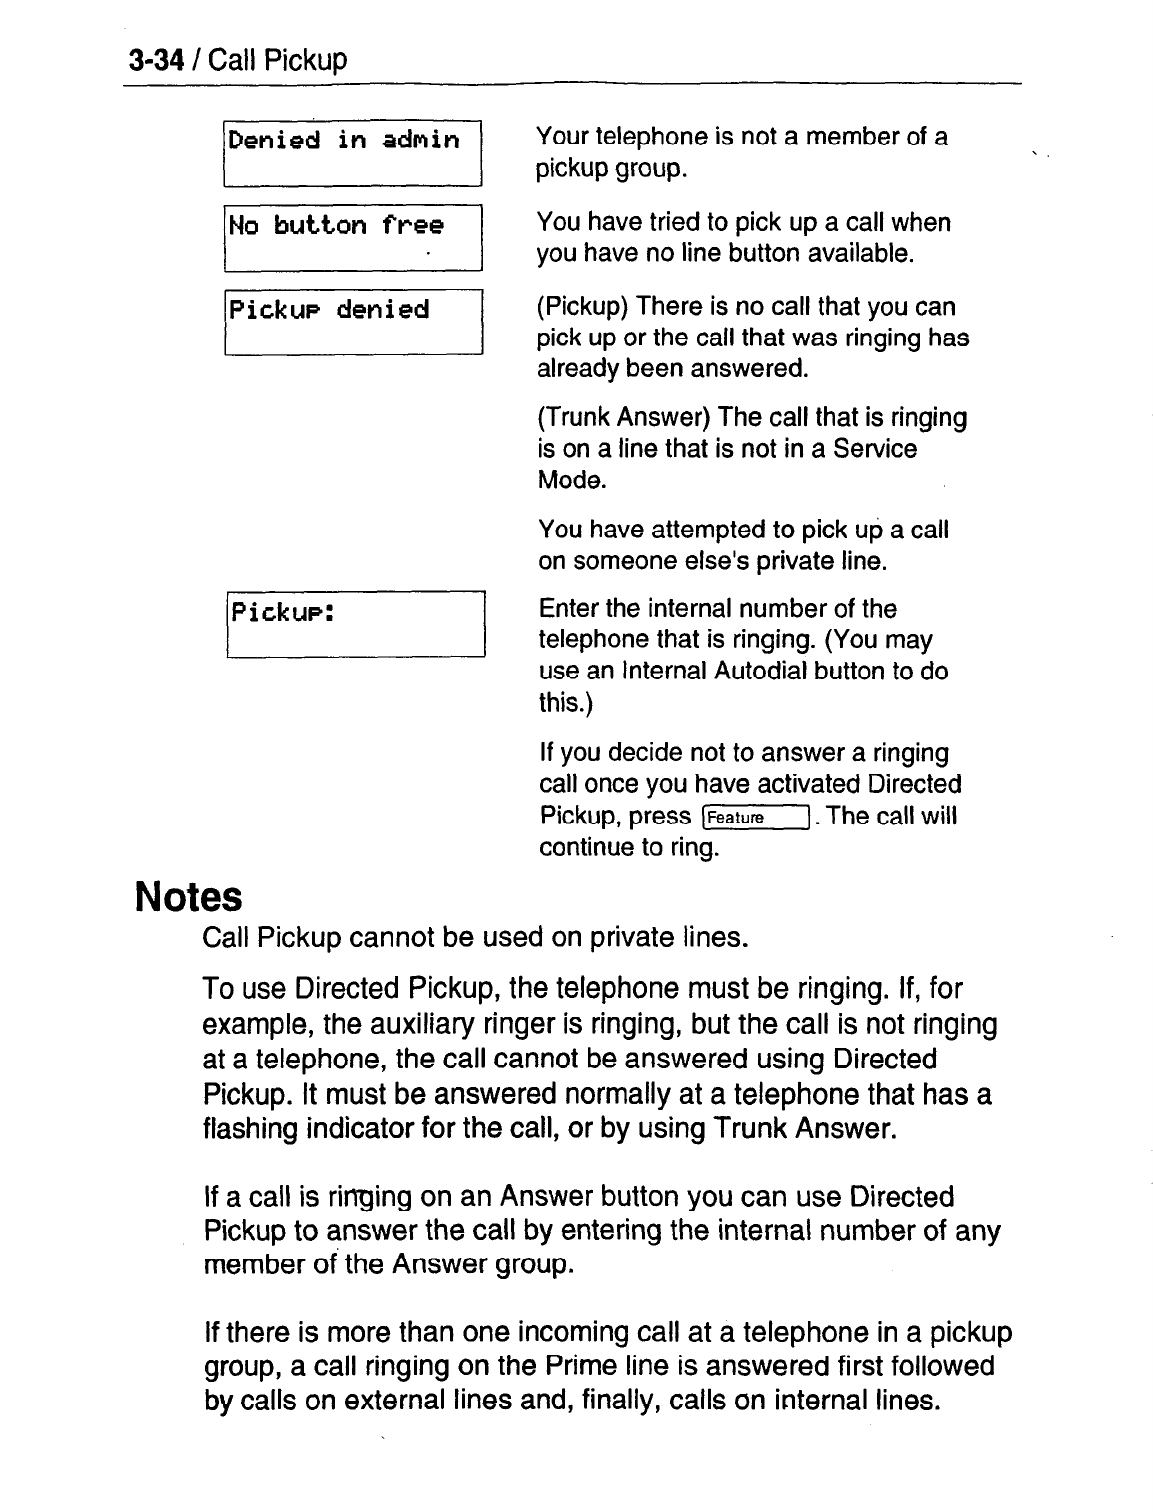
3-34 / Call Pickup
Your telephone is not a member of a
You have tried to pick up a call when
you have no line button available.
IPickup denied
(Pickup) There is no call that you can
pick up or the call that was ringing has
already been answered.
(Trunk Answer) The call that is ringing
is on a line that is not
in a Service
Mode.
You have attempted to pick up a call
on someone else’s private line.
__I
Enter the internal number of the
telephone that is ringing. (You may
use an Internal Autodial button to do
this.)
If you decide not to answer a ringing
call once you have activated Directed
Pickup, press 1-J. The call will
continue to ring.
Notes
Call
Pickup
cannot be used on private lines.
To use Directed Pickup, the telephone must be ringing. If, for
example, the auxiliary ringer is ringing, but the call is not ringing
at a telephone, the call cannot be answered using Directed
Pickup. It must be answered normally at a telephone that has a
flashing indicator for the call, or by using Trunk Answer.
If a call is ringing on an Answer button you can use Directed
Pickup to answer the call by entering the internal number of any
member of the Answer group.
If there is more than one incoming call at a telephone in a pickup
group, a call ringing on the Prime line is answered first followed
by calls on external lines and, finally, calls on internal lines.
Call Pickup / 3-35
:.:.. :
.
.:..
:_
._.. :
.:.:’
‘..”
. . :
If there is more than one incoming call on lines in a Service
Mode, the Trunk Answer feature picks up the external call that
has been ringing the longest.
The System Coordinator can assign telephones to one of four
pickup groups in Administration programming.
Compact DR5 System Coordinator Guide
3-36 / Call
Queuing
Call Queuing
[Feature][8][O
When you have more than one call ringing at your telephone, you
can choose the call that has the highest priority.
1. Press [rImma.
2.
The system connects you to the call that has the highest
priority.
Notes
Call Queuing answers external incoming calls before callback
calls, and answers callback calls before camped calls.
Call Queuing can be programmed onto a memory button.
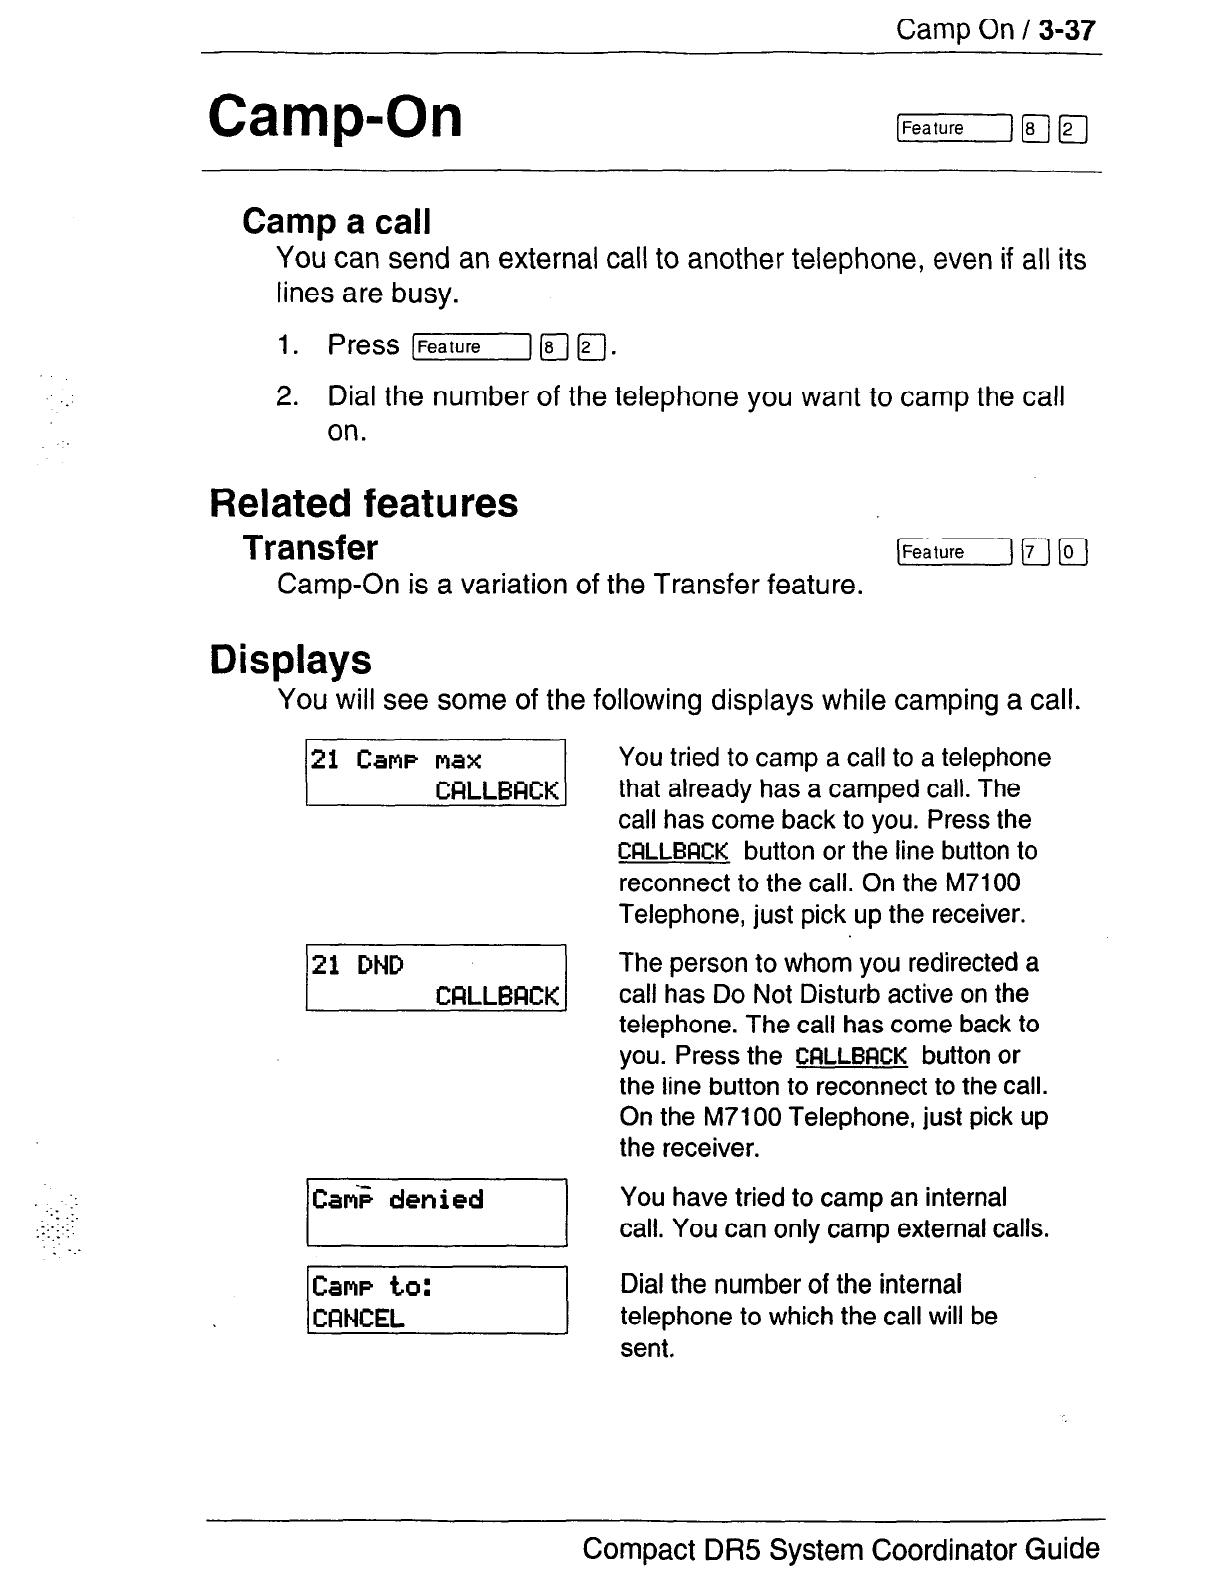
Camp On
/
3-37
Camp-On
1:
..-
:.,:
1::
:I: :.’
:
. .:
Camp a call
You
can send an external call to another telephone, even if all its
lines are busy.
1.
Press [r)(irla.
2. Dial the number of the telephone you want to camp the call
on.
Related features
Transfer [FeafuTeIaa
Camp-On is a variation of the Transfer feature.
Displays
You will see some of the following displays while camping a call.
I J
You tried to camp a call to a telephone
that already has a camped call. The
call has come back
to you. Press the
CQLLBRCK
button or the line button to
reconnect to the call. On the M7100
Telephone, just pick up the receiver.
The person
to whom you redirected a
call has Do Not Disturb active on the
telephone. The call has come back to
you. Press the
CFILLBFICK
button or
the line button to reconnect to the call.
On the M7100 Telephone, just pick up
the receiver.
You have tried to camp an internal
call. You can only camp external calls.
Dial the number of the internal
telephone to which the call will be
sent.
Compact
DR5 System
Coordinator
Guide
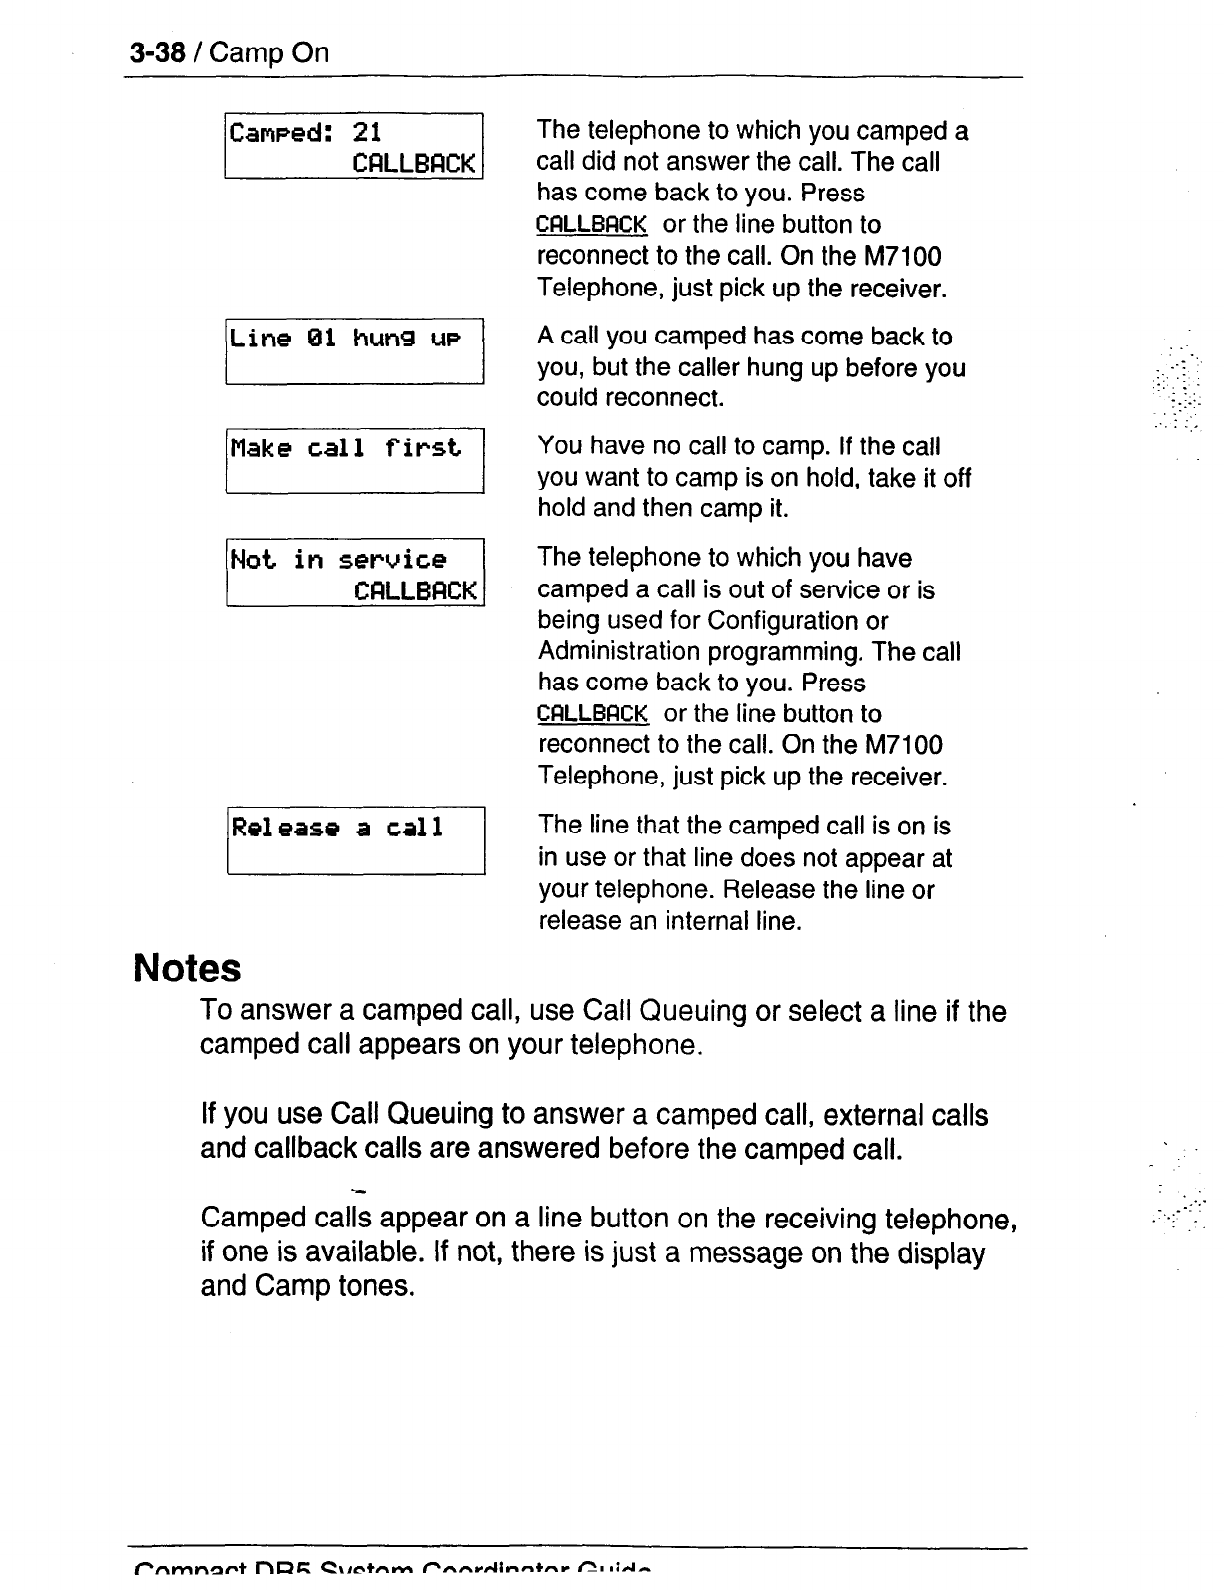
3-38 / Camp On
Make
call fit-d
The telephone to which you camped a
call did not answer the call. The call
has come back to you.
Press
CRLLBFICK
or the line button to
reconnect to the call.
On the
M7100
Telephone, just pick up the receiver.
A call you camped has come back to
you, but the caller hung up before you
could reconnect.
: -.
.-:
:.. :
.::._ ; . .
- .-_.
__ .-
:. : ::.
You have no call to camp. If the call
you want to camp is on hold, take it off
hold and then camp it.
The telephone to which you have
camped a call is out of service or is
being used for Configuration or
Administration programming. The call
has come back to you. Press
CRLLBRCK
or the line button to
reconnect to the call. On the M7100
Telephone, just pick up the receiver.
The line that the camped call is on is
in use or that line does not appear at
your
telephone. Release the line or
release an internal line.
Notes
To answer a camped call, use Call Queuing or select a line if the
camped call appears on your telephone.
If you use Call Queuing to answer a camped call, external calls
and callback calls are answered before the camped call.
_
Camped calls appear on a line button on the receiving telephone,
if one is available. If not, there is just a message on the display
and Camp tones.
. .
-_..-
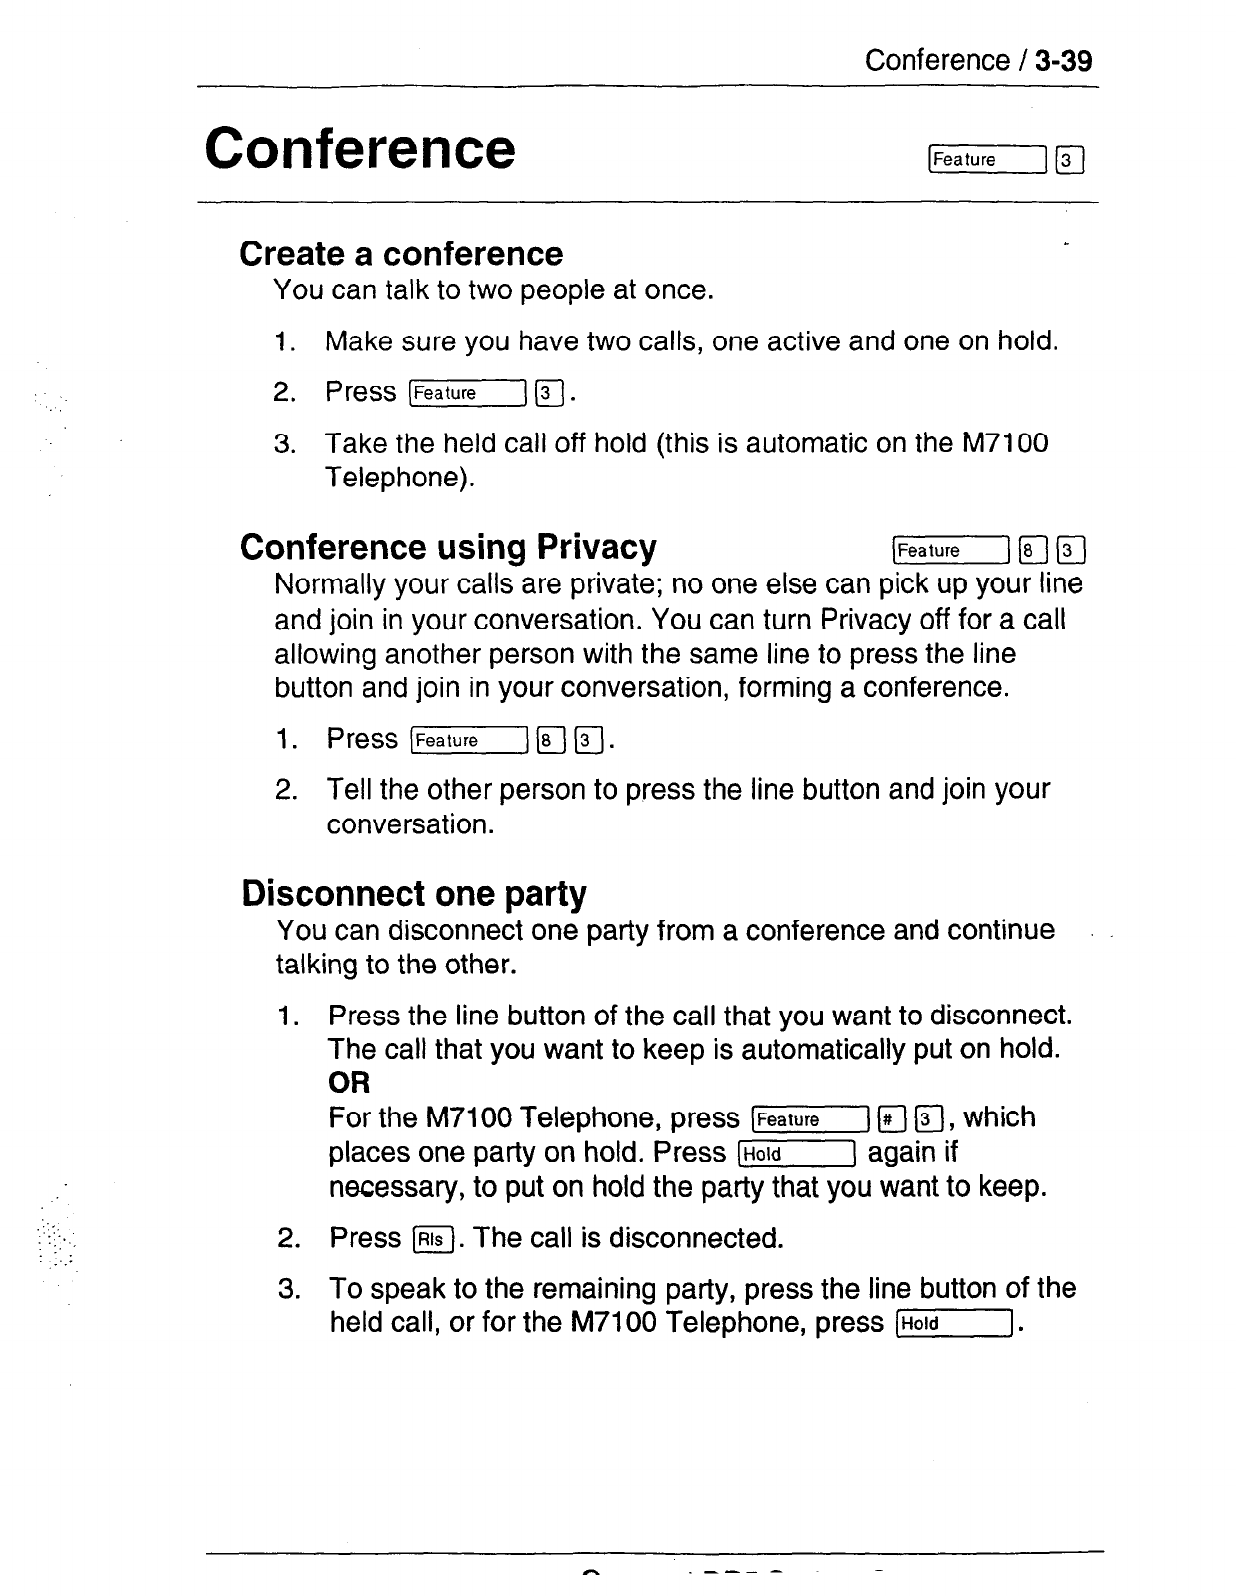
Conference / 3-39
.\:.:.
.;..,
:..
:_-
Conference
Create a conference
You can talk to two people at once.
1. Make sure you have two calls, one active and one on hold.
2. Press (Feature( F].
3. Take the held call off hold (this is automatic on the M7100
Telephone).
Conference using Privacy
Normally your calls are private; no one else can pick up your line
and join in your conversation. You can turn Privacy off for a call
allowing another person with the same line to press the line
button and join in your conversation, forming a conference.
2. Tell the other person to press the line button and join your
conversation.
Disconnect one party
You can disconnect one party from a conference and continue
talking to the other.
1.
2.
3.
Press the line button of the call that you want to disconnect.
The call that you want to keep is automatically put on hold.
OF?
For the M7100 Telephone, press [EGl r;;3 a, which
places one party on hold. Press (Hold] again if
necessary, to put on hold the party that you want to keep.
Press [Rls. The call is disconnected.
To speak to the remaining party, press the line button of the
held call, or for the M7100 Telephone, press [Hold].

3-40 / Conference
Independently hold two calls
For all Norstar telephones except the M7100 Telephone, you can
put the two people on hold independently so that they cannot talk
to each other.
1. Press the line button of one person. The other person is
automatically put on hold.
2. Press [Hold]. The second person is put on hold.
You can re-establish the conference.
1. Take one call off hold.
2 Press (Feature! p].
3. Take the other call off hold.
Put a conference on hold
You can put a conference on hold, allowing the other two people
to continue speaking to each other.
1. Press (Hold]. The indicators beside the held line buttons
flash, or for the M7100 Telephone, the display shows
CWI~. on
hold.
You can reconnect to the conference.
1. Press either of the held line buttons, or for the M7100
Telephone, press [Hold]
II You
are reconnected.
Split a conference
You can talk with one person while the other person is on hold.
1. Press the line button of the person you want to speak to. The
other person is automatically put on hold.
OR
For the M7100 Telephone, press [Feature] Fl fl, which
puts the first party on hold. Press [j again if
necessary to switch parties.
You can reestablish the conference.
1. Press [Feature] lq.
2. Take the held call off hold. This is not necessary for the
M7100 Telephone.
.__ :
: :
,:-
,.I:.
.:
: .
;.:. .,.
‘_.__
:
-_:-.
‘_.... _,
1.. .:
._-_a _ . . . -

Conference / 3-41
Related feature
Unsupervised Conference
[Feature1nm
You can permanently disconnect yourself from the conference
and leave the other two people talking by pressing
((Feature] 171 (TJ. However, if both of the-other people are
outside the system, there are some restrictions: at least one of
the outside callers must have called you and that call must be on
..-. a disconnect supervised line.
Displays
You will see some of these displays while using the Conference
feature.
3 iw4-ics mlr
I
jLine
01
::RmI
_:.,-
:.-_:.:.
.::::
::_
:-
.y.-__
:.
.:-.
._
Make
calls first
You are trying to add a fourth party to
your conference call, or to join two
conferences together. Release one
call from the conference before adding
another, or keep the two conferences
separate.
Privacy control cannot be used on
internal or conference calls.
You have put a conference call on
hold.
You have tried to make a conference
call, but your system is already
handling its maximum number of
conference calls.
You are on a conference with the two
lines or telephones shown. You can
drop out of the conference and leave
the other two parties connected
(Unsupervised Conference) by
pressing
TRFINSFER
or entering the
Transfer feature code.
You have tried to set up a conference
call, without having made the calls that
are to be connected. Make both calls
first.
Compact DR5 System Coordinator Guide
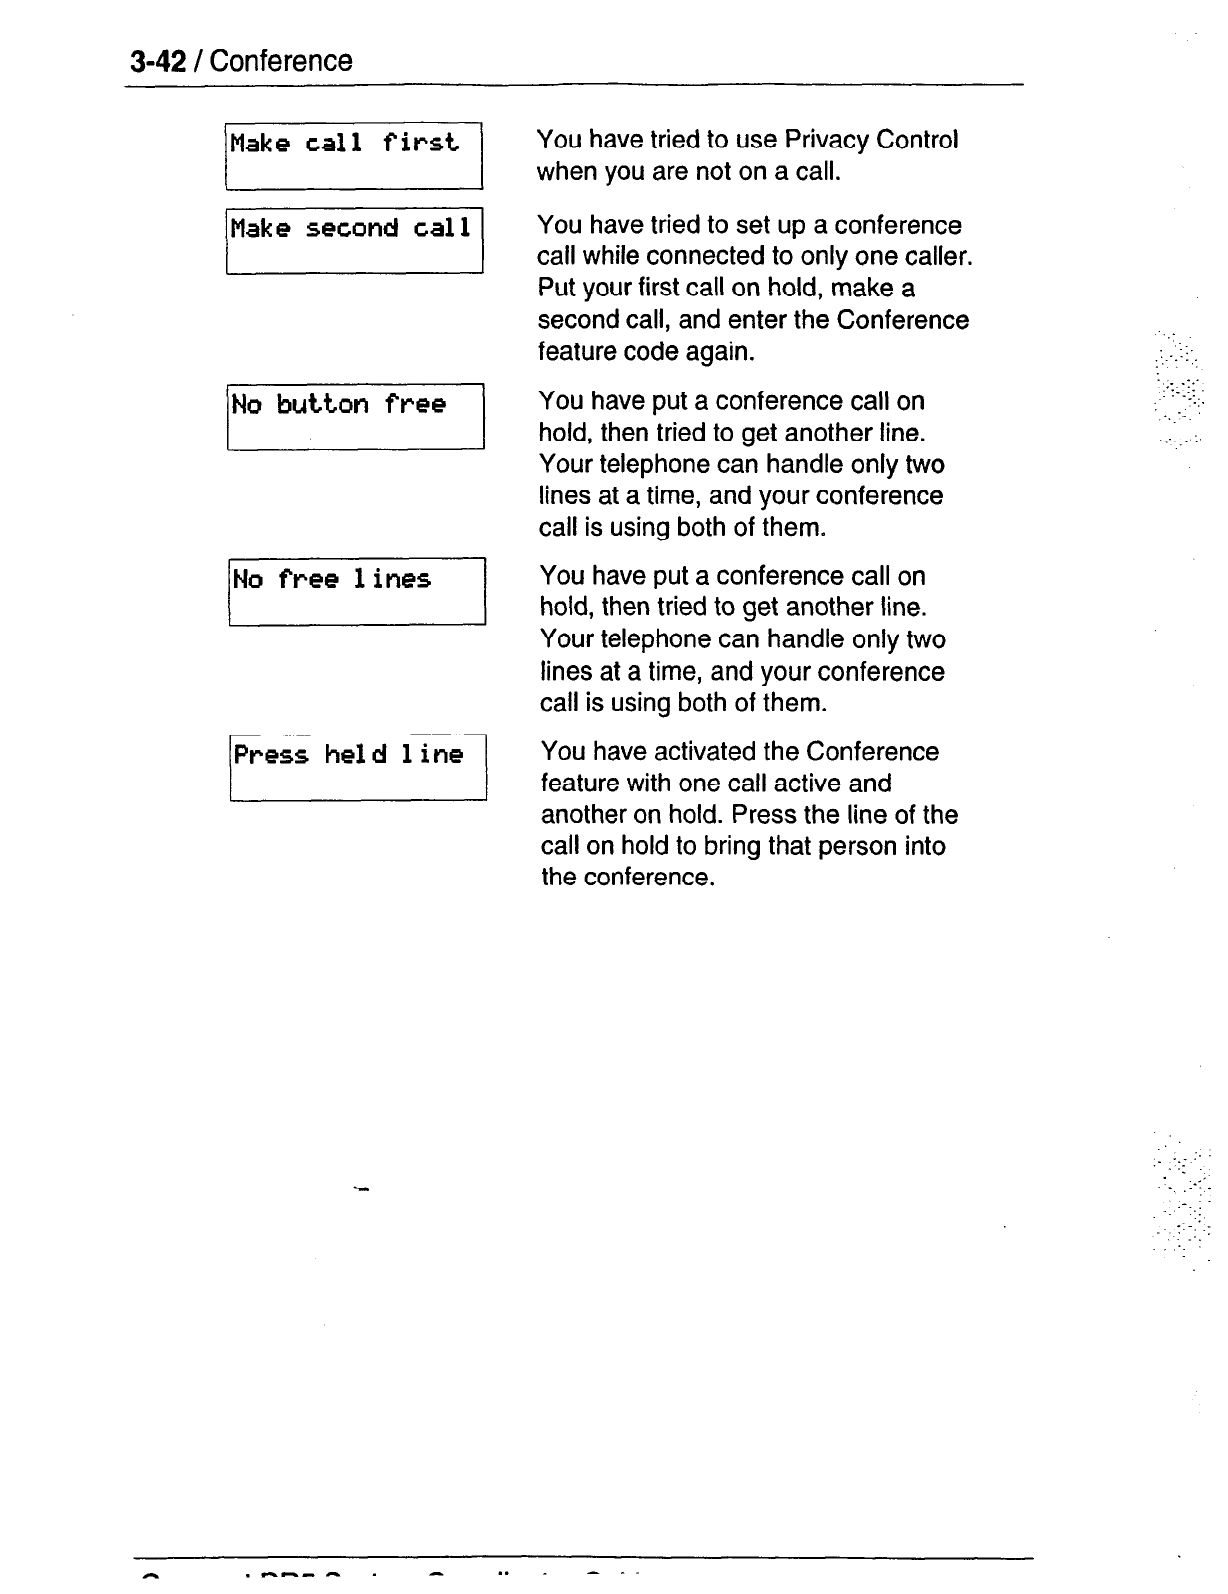
3-42 / Conference
IMake
call first
1
I
I
IMake second
call
1
/Press]
You have tried to use Privacy Control
when you are not on a call.
You have tried to set up a conference
call while connected to only one caller.
Put your first call on hold, make a
second call, and enter the Conference
feature code again.
You have put a conference call on
hold, then tried to get another line.
Your telephone can handle only two
lines at a time, and
your
conference
call is using both of them.
You have put a conference call on
hold, then tried to get another line.
Your telephone can handle only two
lines at a time, and your conference
call is using both of them.
You have activated the Conference
feature with one call active and
another on hold. Press the line of the
call on hold to bring that person into
the conference.
.._.
‘.
,,-.
-:.’
.‘_-_:..:
: ‘,
.._--.
.:,
‘_
__ -’
::-
. ,-
._~I
.- :-.
_-.
:.:
‘.
A
.---a - . . _ -_-
Conference / 3-43
_-.
-:
: :. :
:.::. :
::-_-
_I
::.I.
:..
..I
._’
Notes
Only the person who established the conference can process the
conference in any of the ways just described.
The Conference feature supports only three people.
If you are using an M7100 Telephone:
- Your conference is connected as soon as you enter the
Conference feature code. There is no need to take the
second call off hold.
- To split a conference, press 7]1;;7 m. Then, press
IHold] to change from one caller to the other.
- You cannot independently hold two calls.
- You cannot join an existing two-party call to establish a
Privacy conference although you can use the Privacy feature
for calls at your telephone.
You cannot split a conference that was set up using Privacy.
When a third person joins a conversation on a line that has
Privacy turned off, the call becomes a conference. All the rules
applicable to a conference apply except that there is only
one-line in use, instead of the normal two.
In certain situations, you may experience lower volume levels
when using the Conference feature with two external calls.
Compact DR5 System Coordinator Guide
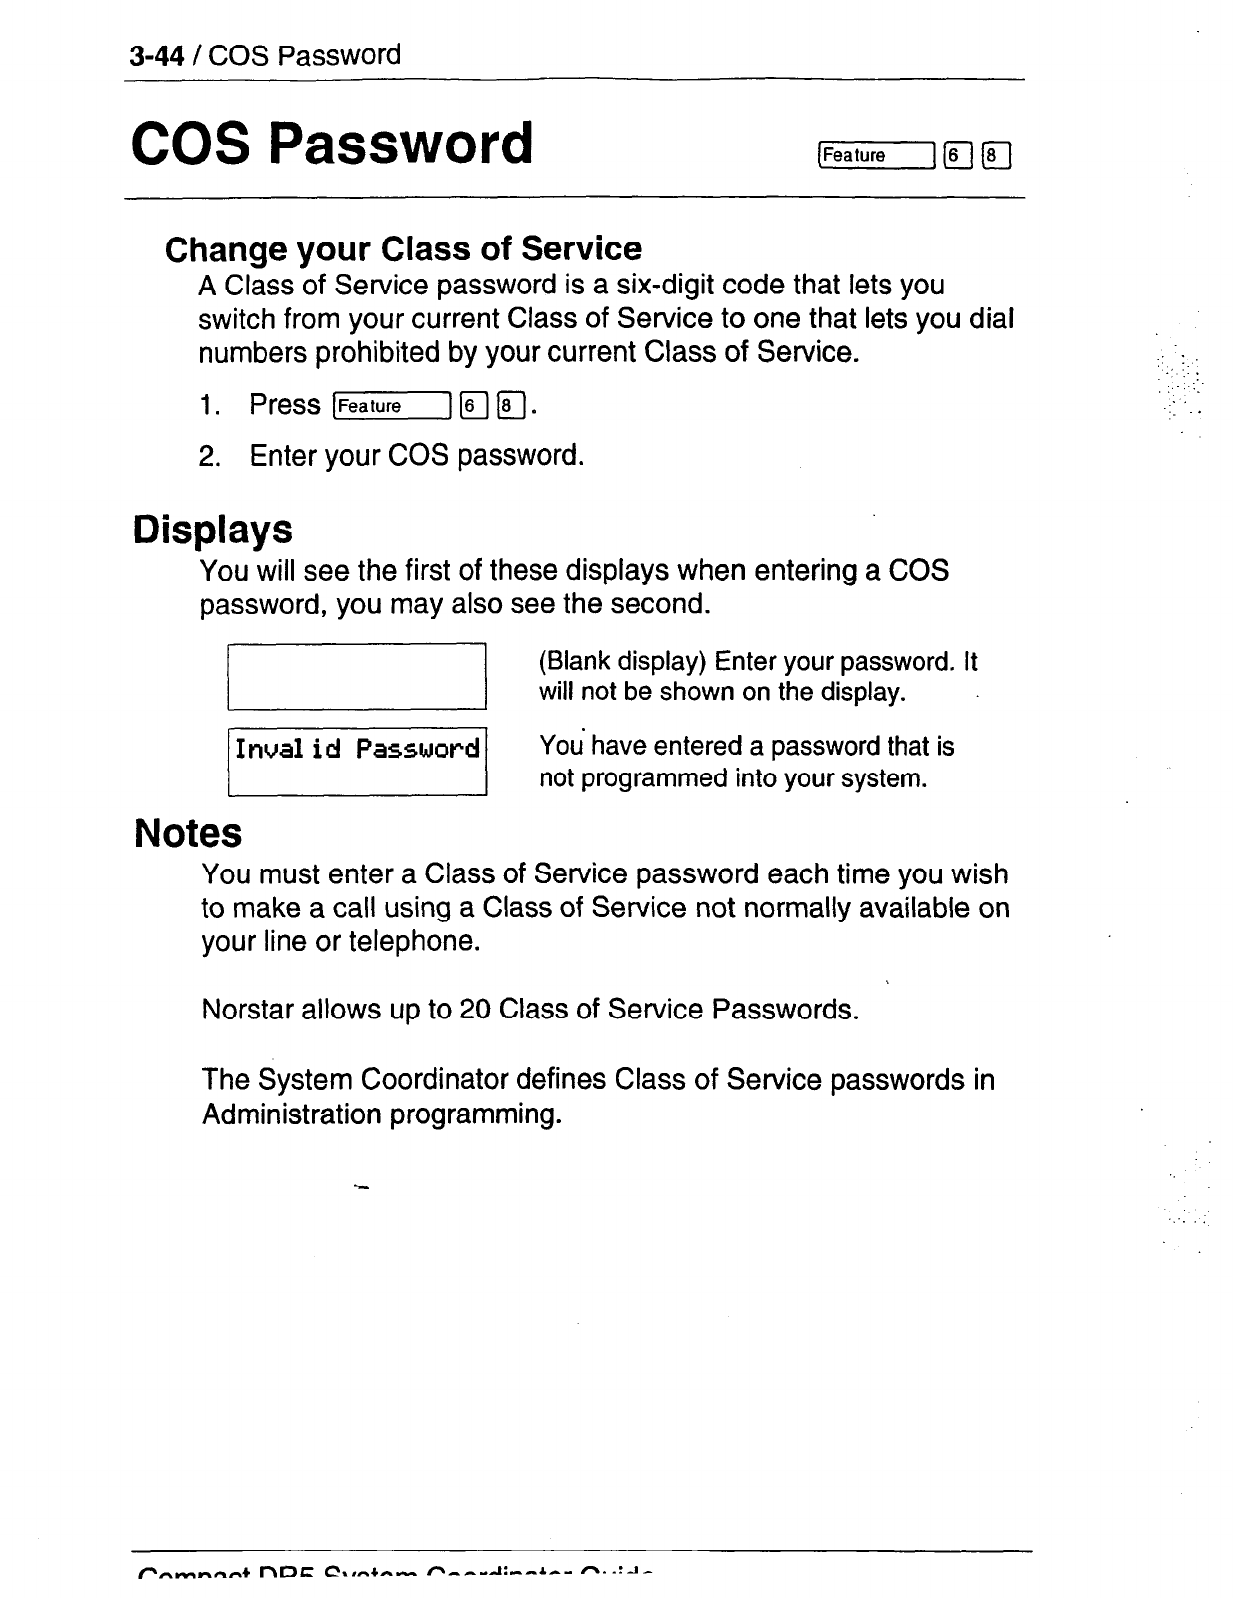
3-44 / COS Password
COS Password
(Feature1
[-ir]
(g
Change your Class of Service
A Class of Service password is a six-digit code that lets you
switch from your current Class of Service to one that lets you dial
numbers prohibited by your current Class of Service.
1. Press lFeafulelF]Q
2. Enter your COS password.
Displays
You
will see the first of these displays when entering a COS
password, you may also see the second.
(Blank display) Enter
your password. It
will not be shown on the display.
[Password/ You’
have
entered a password that is
not programmed into your system.
Notes
You
must enter a Class of Service password each time you wish
to make a call using a Class of Service not normally available on
your line or telephone.
Norstar allows up to 20 Class of Service Passwords.
The System Coordinator defines Class of Service passwords in
Administration programming.
: .
_’ ::
.:
:::.
:
_:
::
Customizing your telephone
/
3-45
Customizing your telephone
You can change the way a telephone works in several ways.
Some of the following features are assigned to telephones in
Administration programming. You can turn other features on and
off at individual telephones.
Automatic Handsfree
Automatic Handsfree lets you make or answer a call without
having to pick up the receiver or press the lHandsfree] button. The
telephone’s internal microphone and speaker turn on
automatically when you make or answer a call.
The System Coordinator assigns Automatic Handsfree capability
to a telephone in Administration programming. Full Handsfree
capability must be assigned to a telephone before Automatic
Handsfree capability can be assigned to it. This is also done in
Administration programming.
This feature is not available on M7100 Telephones.
contrast Adjustment [Featule][+lpJ
You can set the contrast level of your telephone display.
1. Press IFeature] m a.
2. Choose the contrast level you like best. The number of
contrast levels available varies from one Norstar telephone to
another.
This is the display you will see in Contrast adjustment.
Press a number for the contrast level
1
you want or press
Up
or DOWN. Press
[r]
or E to set the new
I
contrast level.
Compact DR5 System Coordinator Guide
3-46 / Customizing
your
telephone
Dialing Modes (FGGr-pJ~~
You
can set the dialing mode of your telephone.
1. Press (Featurela(81fl.
2.
Choose the dialing mode you want.
Norstar supports three dialing modes: Standard Dial, Automatic
Dial, and Pre-Dial. All three modes support on-hook dialing.
(On-hook dialing means dialing a call without picking up the
receiver.) The special features of the Automatic and Pre-Dial
modes are available only when you dial on-hook.
:
_’ .-.
::::
:
::
,‘.:‘.
The Dialing Modes feature code cannot be programmed onto a
memory button.
Standard Dial
In Standard Dial mode, you make a call by selecting a line and
dialing the number. If you have a Prime line, it is selected
automatically when you lift the receiver or press [Handsfree).
Standard Dial does not support on-hook dialing on an M7100
Telephone. If you have an M7100 Telephone, use the Automatic
Dial or Pre-Dial mode for on-hook dialing.
Automatic Dial
If you have a Prime line assigned to your telephone, Automatic
Dial allows you to dial a number without selecting a line. Your
Prime line is selected as soon as you start dialing a number.
Automatic Dial does not work if your Prime line is in use.
Telephones connected to an Analog Terminal Adapter (ATA)
cannot use Automatic Dialing.
Pre-Dial
Pre-Dial allows you to enter a telephone number, check it, then
change it before actually making the call. The call is not dialed
until you select a line or line pool, or pick up the receiver.
. .‘_ :
:.
_. ‘.
You can pre-dial both external and internal numbers. You must,
however, select the correct type of line (external or internal) for
the type of number you have entered.
Customizing your telephone / 3-47
:
._‘_
1
I.
:..I:.
.’
:
.:: __
If
all
the lines on your telephone are busy, you will not be able to
enter a telephone number.
If your telephone starts ringing while you are pre-dialing a
number, you can stop the ringing by turning on Do Not Disturb
([Feature] r;;7 [5).
This does not affect numbers you are
entering.
This is the display you will see when selecting a Dial mode.
IX;;dard dial oK]
The current dial mode is shown.
Press
m or
NEXT until the dial mode you
want appears. Press (Hold] or OK
to select the displayed dial mode. If
Automatic Dial is not available it is
because you have no Prime line.
Language Choice
English (FeatureJ(q(FJ-TJ(TJ
You can select English as the language of your telephone
display.
1. Press [FeatureIRflmjiJ.
Alternate Language (Feature](q(FJ(-qp-J
You
can select the alternate language as the language of your
telephone display.
Each Norstar system supports English and one alternate
language. Norstar systems are available with either French or
Spanish as the alternate language. Button caps are available in
both alternate languages.
You can select either English or the alternate language at each
telephone. When your system is first installed, all telephones will
use English.
Compact DR5 System Coordinator Guide
3-48 / Customizing your telephone
You can program a memory button for one-touch switching
between languages. Program l-1 m r;l w a onto the
button. Pressing the button will switch you back and forth
between English and the alternate language.
[&GGl [q IF] r/ F] cannot be programmed onto a memory
button.
One of the following displays will appear when you enter a
language choice feature code.
/EnI
Fre”ch.
Telephone display messages will be in
Telephone display messages will be in
Telephone display messages will be in
p-zm7-j
English.
Move Line buttons
(EG-=]I,[i-J)n
You can move external lines to different buttons on your
telephone. You can use this feature to arrange your lines in the
way that makes the most sense to you.
1. Press [mm1+1[8.
2. Press the button you want to move the line from.
3. Press the button you want to move the line to.
You will see some of these displays while moving lines.
You have tried to move a line to a
button that cannot be used as a line
button, such as a Handsfree/Mute
button, or an Answer button.
Press the button of the line you want
to move. Press
QUIT
or [Feature]
when you have finished moving lines,
:
._. -_
:.
::
-:: :‘,
‘.
Press the button you want to move the
line to. Neither of the buttons is
erased. The lines, or the line and
feature, simply switch places.
wsromizlng your telepnone
/
s-43
IPrsss
a
1 ine The button you are trying to move is
not a line button. If you are trying to
switch a line and a feature, move the
line to the feature button and not vice
versa.
Pulse/Tone Dialing
Each external line is set to either pulse or tone dialing. Pulse
dialing is the traditional method of dialing used by rotary dial or
push button single-line telephones. Tone dialing allows
telephones to communicate with other devices such as
answering machines. Tone dialing is required to access the
features that PBX systems may offer.
Your Customer Service representative sets your lines to pulse or
tone dialing in Configuration programming.
To switch from pulse to tone dialing El
If your external lines are programmed for pulse dialing, you can
switch your telephone temporarily to tone dialing.
1.
Press a while on an active line. Once you hang up, your
telephone returns to pulse dialing.
Ring Type (Feature] F] m
You can choose one of four distinctive rings for your telephone.
This makes it easier to identify your telephone in an open office.
1. Press (Feature]Ba.
2. Choose the ring type you want.
.
. ._ _
Compact DR5 System Coordinator Guide
3-50 I Customizing your telephone
This is the display you will see when choosing a ring type.
Press 0,
I2], 13, a
or
NEXT. You
hear the selected
ring
for two
seconds. Repeat until you hear
the
ring you prefer, then press IHold]
or OK.
Ring Volume [FeatureJfqTJc-J
You can
set the volume at which
your telephone rings.
1. Press [r] m
q
T(57. The telephone will ring.
2. Press (-1 to adjust the volume.
This is the display you will see while setting Ring Volume.
Press either side of the volume bar
(1-l)
to adjust the volume.
Related features
Autodial [Feature]~~l/lfeature]~@-j
You can
program
your telephone’s memory buttons to dial
frequently used numbers with the Autodial feature.
Feature programming [FeatureJ~~
You
can program feature codes onto your telephone’s memory
buttons using the Feature programming feature.
Speed Dial programming [Feature)fqj-TJ
You can program Personal
Speed Dial numbers
onto Speed Dial
codes 71 to94 using the Personal Speed Dial programming
feature.
, -m-m . . . _
LJU31VI
1
IlLll iy
yuul
1GlqJl
IUI It:
I
3-a I
-
_..
._‘. :
-. :
:,:-_.
.:
.,.I
::..-:
:::
:
. .
. . . . . :
,..
:;
-:
x-
Notes
Telephone Administration Lock is a system feature that is related
to customizing your telephone. The System Coordinator assigns
Administration Lock to each telephone in Administration
programming.
Telephone Administration Lock limits the ways in which you can
customize your telephone. There are three types of Telephone
Administration Lock: Full, Partial, and None.
Full Administration Lock lets you change the contrast of your
telephone’s display, your Ring Type, your Ring Volume, use
Button Inquiry, and control the volume of your speaker.
Partial Administration Lock allows you to forward your calls, turn
on Do Not Disturb and Service Modes, and use the Background
Music, Send Message, Ring Again, Privacy, and Trunk Answer
features.
None (No Administration Lock) allows you to access all features
that are programmed for your telephone.
Telephone Administration Lock does not affect call handling
features.
Compact DR5 System Coordinator Guide
3-52 / Dialing
Dialing
One of the most important features of your telephone system is
the ability to dial telephone numbers. Many features require you
to dial telephone numbers. The displays associated with dialing
are listed here.
Direct-Dial
You can dial a Direct-Dial telephone with a single digit. The
Direct-Dial telephone is usually in a central location, such as a
receptionist’s or secretary’s desk. It is usually a Prime telephone
with a Central Answering Position (CAP) module.
. .
1.1 . .
: _.
-:: -_
. .
.1 .
._
_-_’
:
:
Your Customer Service representative assigns the Direct-Dial
digit in Configuration programming.
External line access code
The external line access code is the number you dial to get an
external line. You will need to use an external line access code if
your Prime line is an internal line. The code will connect you to a
line pool through your internal line.
If your Prime line is an external line, or if you select an external
line on your telephone, you will not need an external line access
code. You will always need an external line access code on an
M7100 Telephone.
Your Customer Service representative assigns the external line
._
access code in Configuration programming.
_ _‘. ‘-
Last Number Redial i-1 pj
You can redial the last external number you dialed.
1. Press [Feature] m.
Dialing / 3-53
,
:. ::
1:.- -.:
.:.,.
:.
_‘_I
:.:.:
-:_ :
Ring Again [KG---J a
If you can’t get through to someone on your Norstar system
because their telephone is busy or there is no answer, you can
have the Norstar system tell you when they hang up or next use
their phone.
1.
Press [Feature] 12 before you hang up.
You can also use Ring Again to tell you when a busy line pool
becomes available.
Using Ring Again cancels any previous Ring Again requests at
your telephone.
Cancel Ring Again
You can
cancel a ring
Again feature code.
[GiiT-jI#JI1_)
again request by entering the Cancel Ring
Saved Number Redial pzz--#q1;7
You can save the number of the external call you are on
(providing you dialed the call) so that you can call it again later.
1. Press [-_I m c;7 while you are still on the call.
You can dial a saved number.
I, Press [Feature1 a m when you are not on a call.
Related features
Autodial pzE---]~~/[Feature]W~
The autodial feature lets you program telephone numbers onto
memory buttons for one-touch dialing.
Dialing modes pG-----]~~[2
Norstar supports three different methods of dialing. They are
described in the Customizing your telephone section under the
heading Dialing Modes.
Line Pools
Line pools give you access to many external lines.
Comoact
DR5 Svstem Cnnrriin~tnr Glde
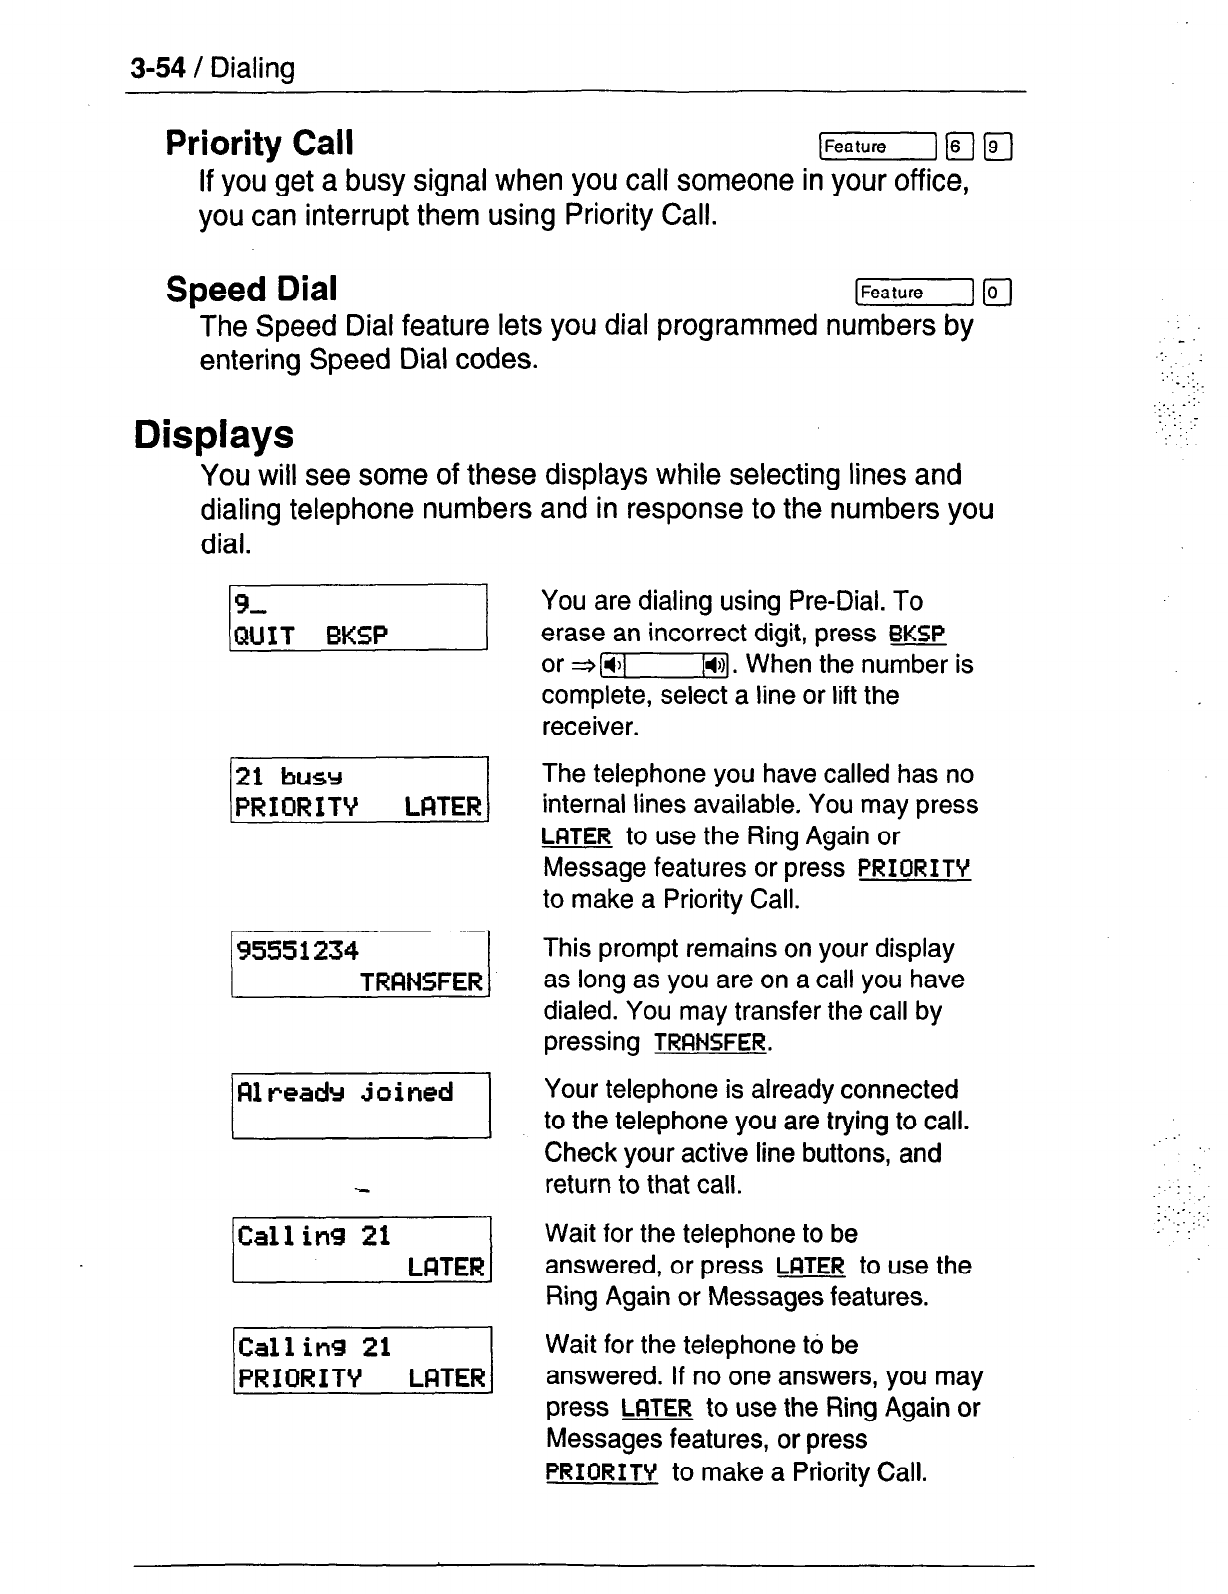
3-54 / Dialing
Priority Call
]Feature]p-jj
If you get a busy signal when you call someone in your office,
you can interrupt them using Priority Call.
Speed Dial [Feature] a
The Speed Dial feature lets you dial programmed numbers by
entering Speed Dial codes.
Displays
You will see some of these displays while selecting lines and
dialing telephone numbers and in response to the numbers you
dial.
-1
You are dialing using Pre-Dial. To
erase an incorrect digit, press
BKSP
or *[@-lS]. When the number is
complete, select a line or lift the
receiver.
The telephone you have called has no
internal lines available. You may press
LFlTER
to use the Ring Again or
Message features or press
PRIORITV
to make a Priority Call.
This prompt remains on your display
as long as you are on a call you have
dialed. You may transfer the call by
pressing
TRFINSFER.
Your telephone is already connected
to the telephone you are trying to call.
Check your active line buttons, and
return to that call.
Wait for the telephone to be
answered, or press
LOITER to
use the
Ring Again or Messages features.
Wait for the telephone to be
answered. If no one answers, you may
press
LFITER
to use the Ring Again or
Messages features, or press
PRIORITV to make a Priority Call.
_
:. :
:
:
_.:I...
:.
.:: ::.
. .:.
., ._ .y
:
.
_, ..
:., .*.
‘_
:‘:
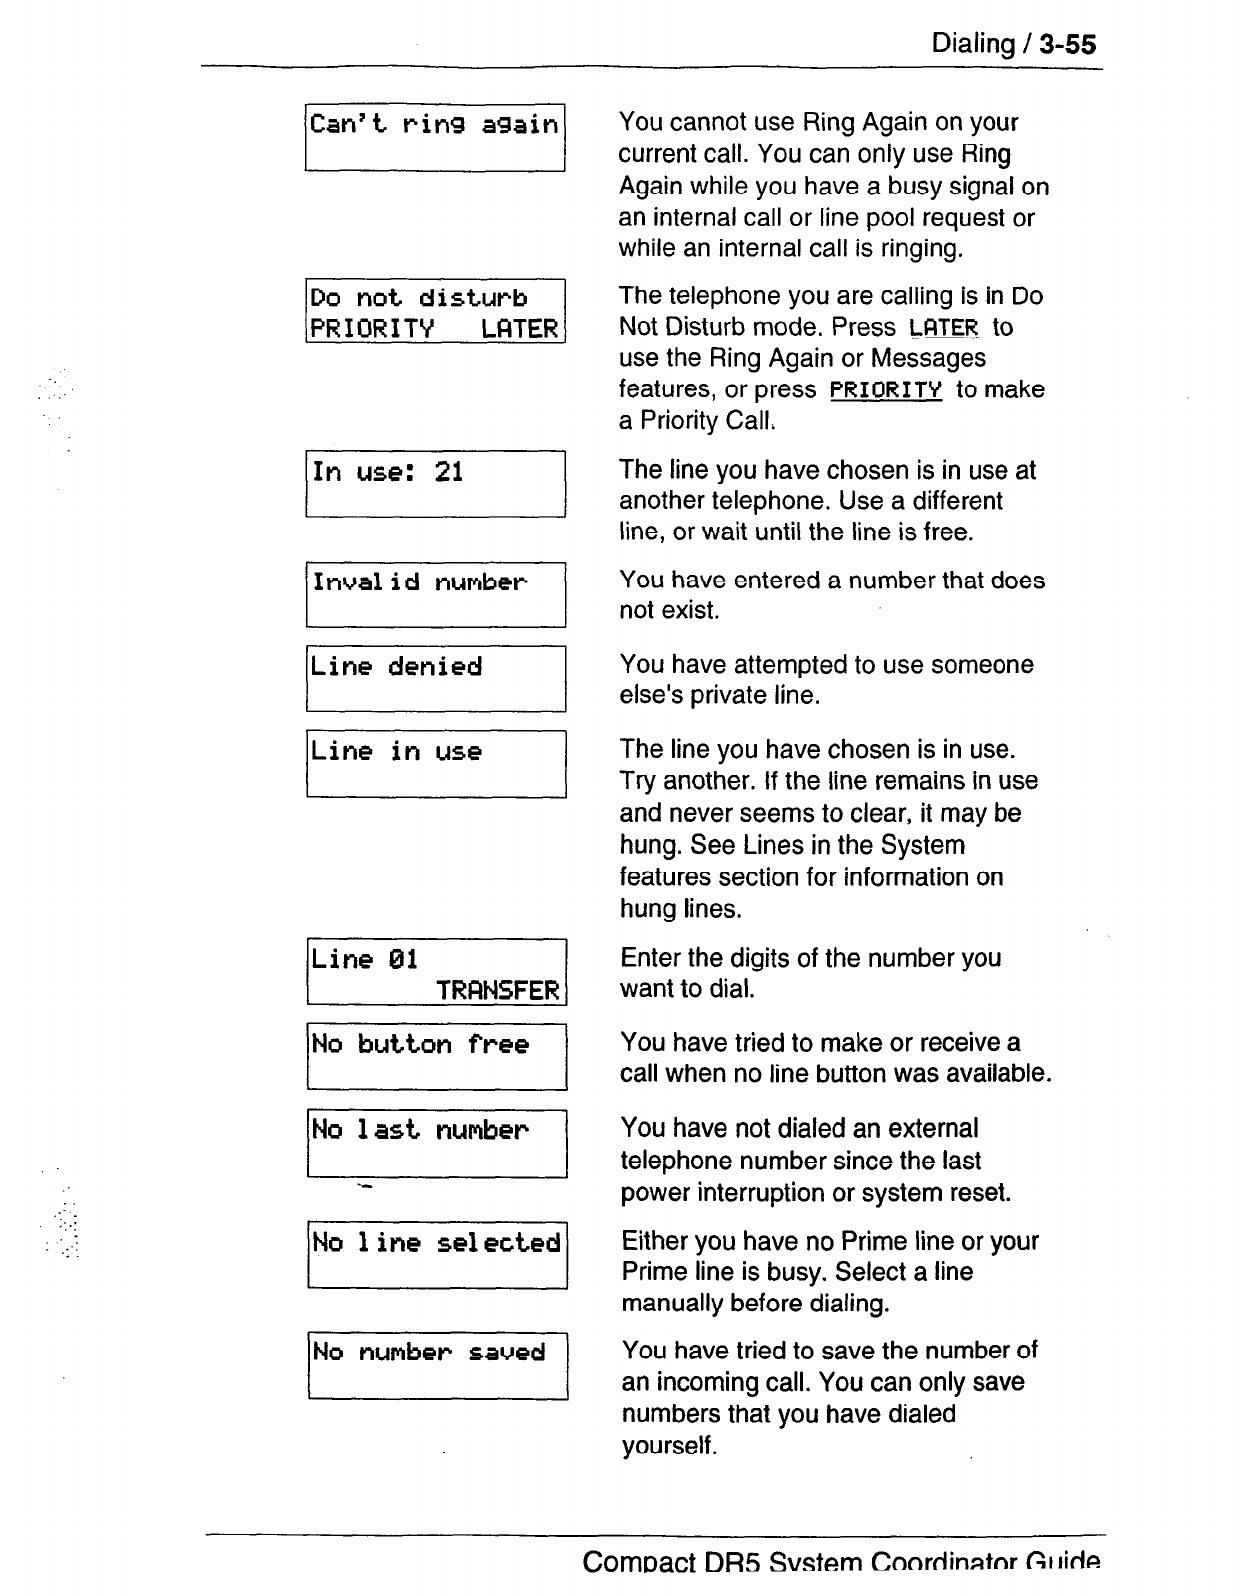
Dialing / 3-55
...
:..:
,’ :
: ::
. .
(Can’t
ring
again1
In use: 21
Inval id
number
Line denied
Line in use
lLin=
01
TRRNSFERI
I
No
button free
I
I
I
No last number
I
I
No
1 ine se1 ected
No number saved
I I
You cannot use Ring Again on your
current call. You can only use Ring
Again while you have a busy signal on
an internal call or line pool request or
while an internal call is ringing.
The telephone you are calling is in Do
Not Disturb mode. Press
LPlTER
to
use the Ring Again or Messages
features, or press
PRIORITV
to make
a Priority Calf
The line you have chosen is in use at
another telephone. Use a different
line, or wait until the line is free.
You have entered a number that does
not exist.
You have attempted to use someone
else’s private line.
The line you have chosen is in use.
Try another. If the line remains in use
and never seems to clear, it may be
hung. See Lines in the System
features section for information on
hung lines.
Enter the digits of the number you
want to dial.
You have tried to make or receive a
call when no line button was available.
You have not dialed an external
telephone number
since
the last
power interruption or system reset.
Either you have no Prime line or your
Prime line is busy. Select a line
manually before dialing.
You have tried to save the number of
an incoming call. You can only save
numbers that you have dialed
yourself.
CornPact
DR5
Svstem Conrdinatnr Gt h-ie
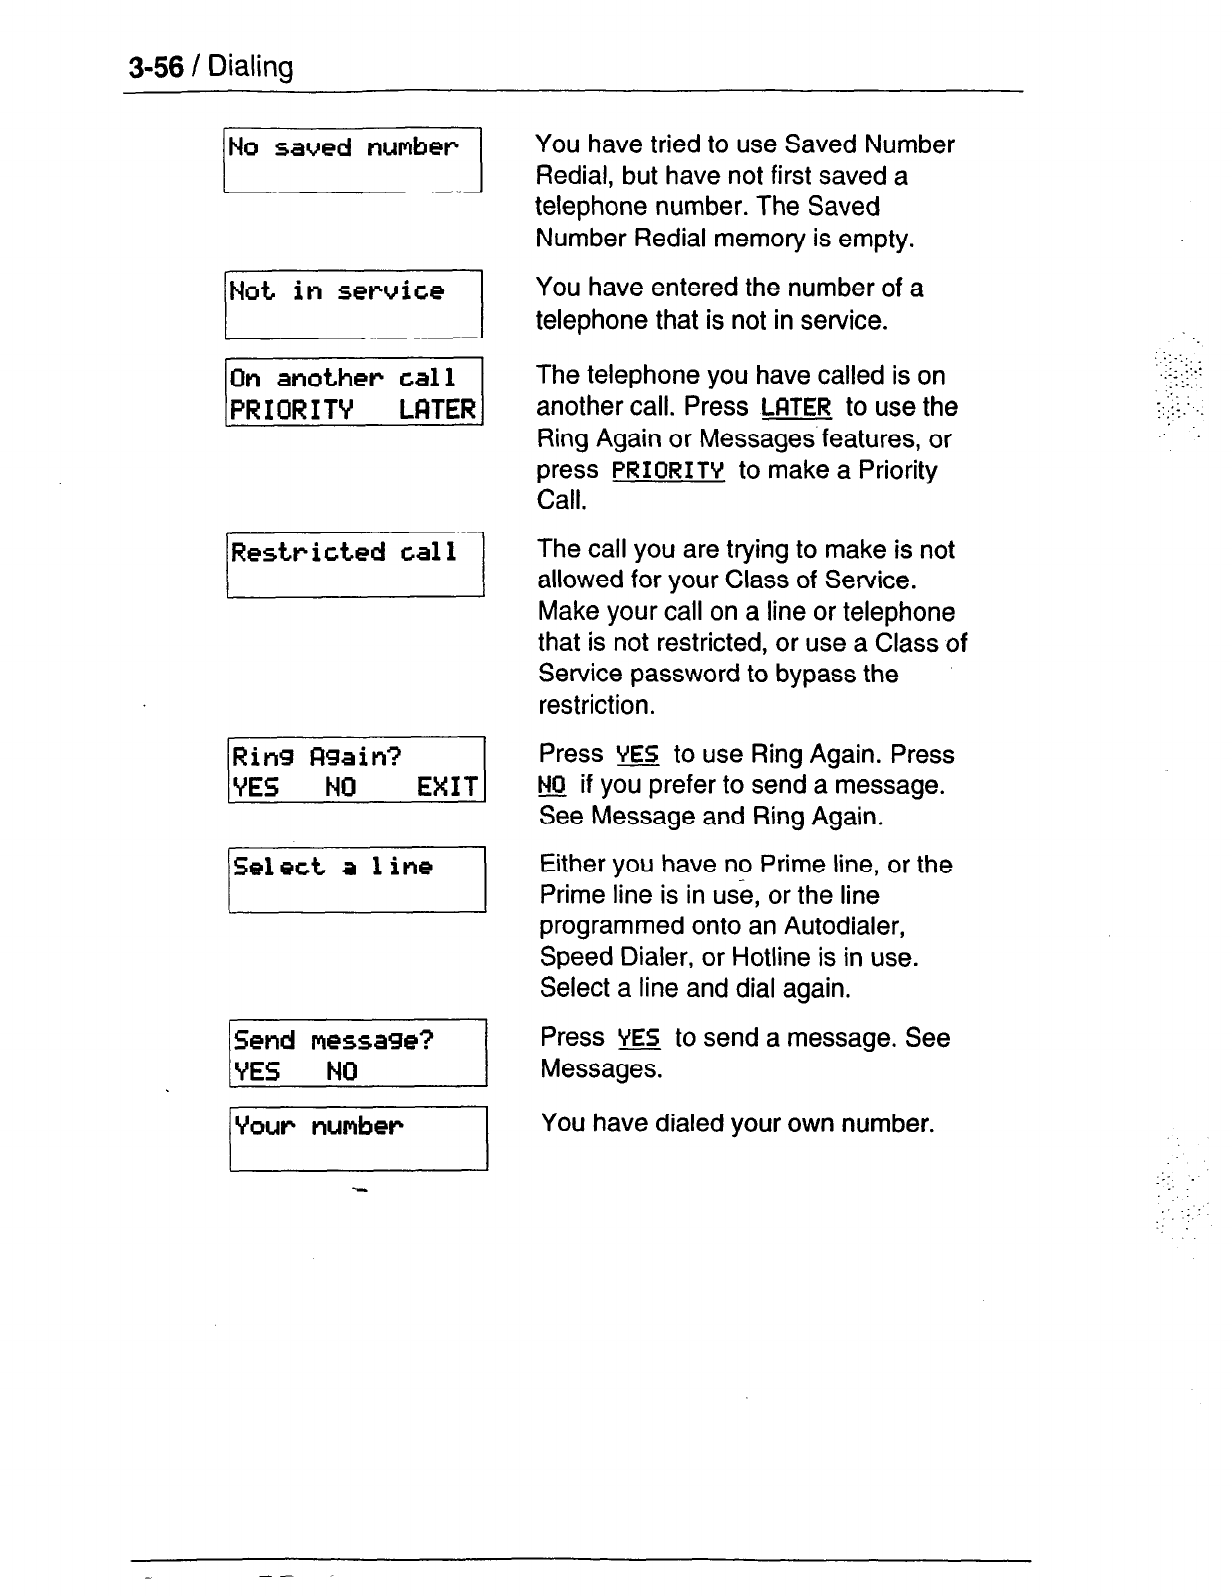
3-56 / Dialing
INO saved number
1
I
I
/Notin
/Select\
Vow number
You have tried to use Saved Number
Redial, but have not first saved a
telephone number. The Saved
Number Redial memory is empty.
You have entered the number of a
telephone that is not in service.
The telephone you have called is on
another call. Press LRTER to use the
Ring Again or Messages’features, or
press
PRIORITV to
make a Priority
Call.
The call you are trying to make is not
allowed for your Class of Service.
Make your call on a line or telephone
that is not restricted, or use a Class of
Service password to bypass the
restriction.
Press VE to use Ring Again. Press
m if you prefer to send a message.
See Message and Ring Again.
Either you have no Prime line, or the
Prime line is in us&, or the line
programmed onto an Autodialer,
Speed Dialer, or Hotline is in use.
Select a line and dial again.
Press E to send a message. See
Messages.
You have dialed your own number.
--
_
_:_
: :.
: -:
ulalrf
ly /
3-3 /
,: :
Notes
The maximum number of digits that Last Number Redial or
Saved Number Redial records is 24.
You can copy the telephone number from a Last Number Redial
or Saved Number Redial button onto an Autodial button. Simply
enter the Last Number Redial or Saved Number Redial feature
code when the Autodial feature asks you to enter a number.
Each telephone can save only one number at a time with Saved
Number Redial, not one number for each line.
Compact DR5 System Coordinator Guide
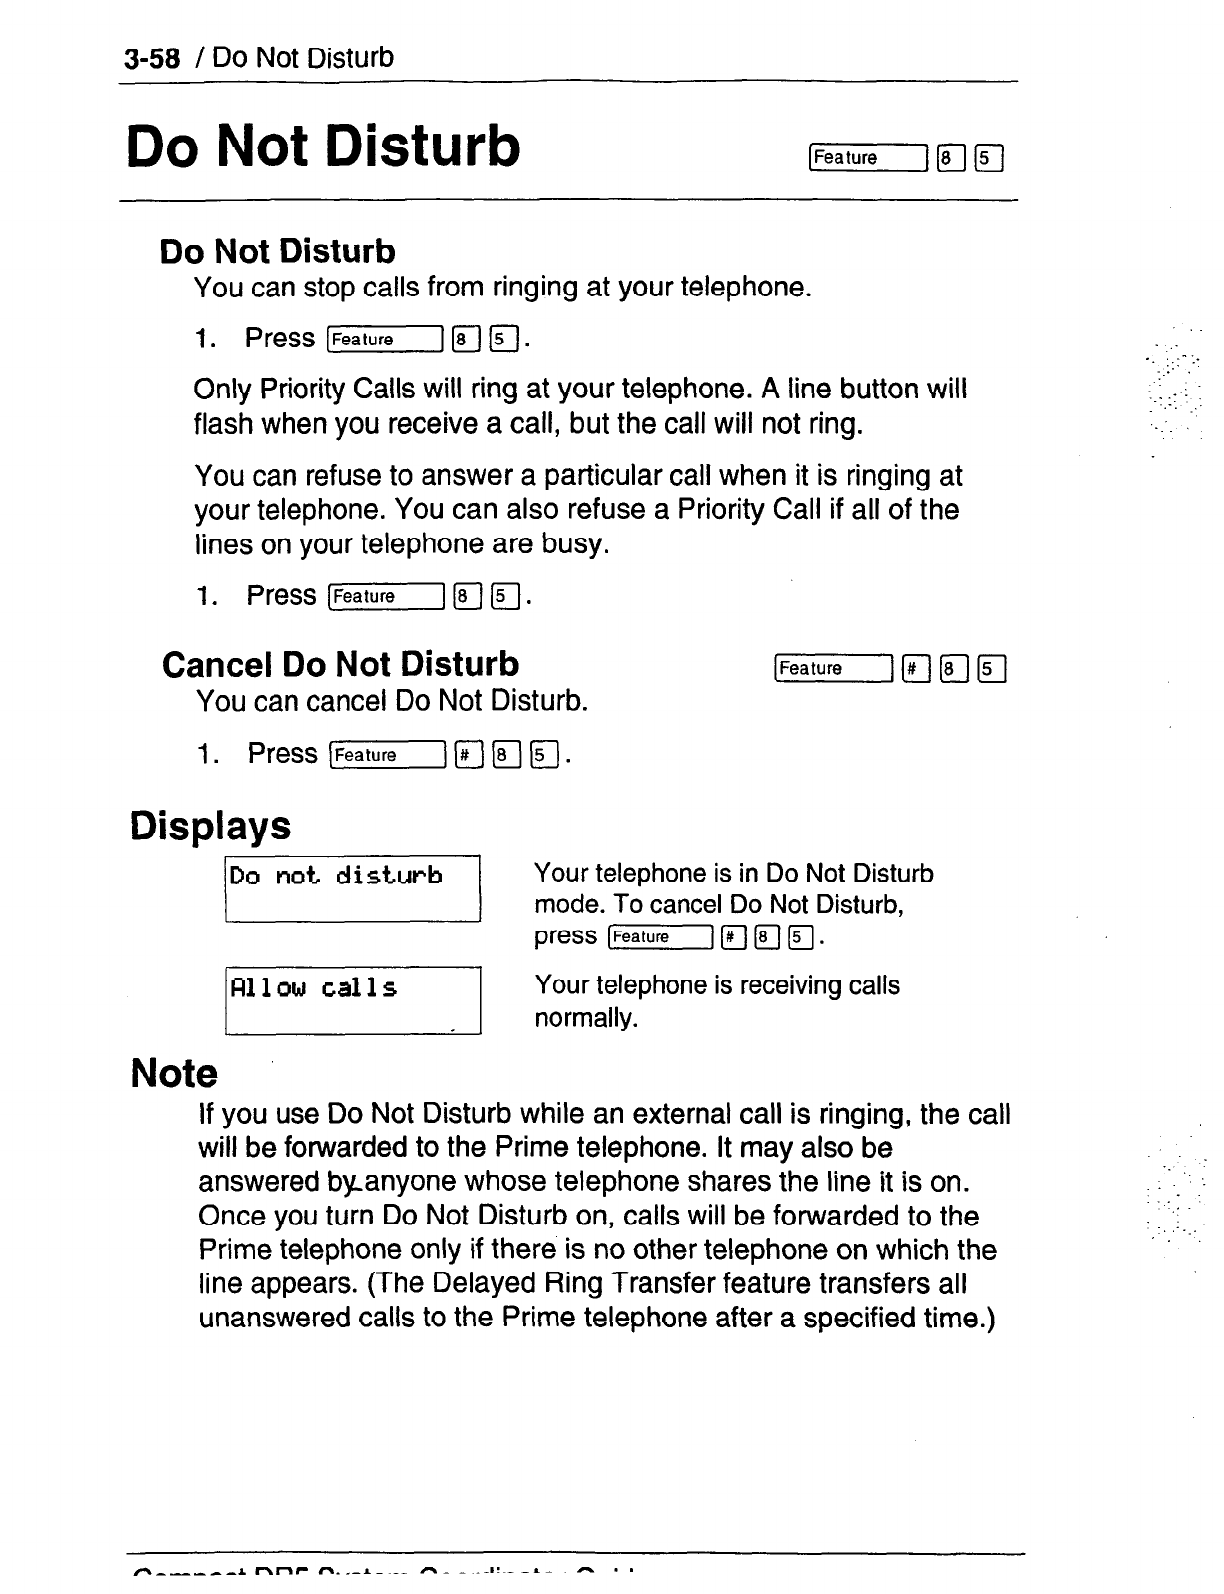
3-58 / DO Not Disturb
Do Not Disturb
Do Not Disturb
You
can stop calls from ringing at your telephone.
1. Press [Fealurel\Ja.
Only Priority Calls will ring at your telephone. A line button will
flash when you receive a call, but the call will not ring.
You can refuse to answer a particular call when it is ringing at
your telephone. You can also refuse a Priority Call if all of the
lines on your telephone are busy.
1. Press (Fealure] F]
q
.
Cancel Do Not Disturb
You can cancel Do Not Disturb.
Displays
/Do not disturb
1
Your telephone is
in
Do Not Disturb
mode. To cancel Do Not Disturb,
press [Feature] [#I (81151.
Your telephone is receiving calls
Note
If you use Do Not Disturb while an external call is ringing, the call
will be forwarded to the Prime telephone. It may also be
answered byanyone whose telephone shares the line it is on.
Once you turn Do Not Disturb on, calls will be forwarded to the
Prime telephone only if there is no other telephone on which the
line appears. (The Delayed Ring Transfer feature transfers all
unanswered calls to the Prime telephone after a specified time.)
: ,_
._ _-:_
.I_
._.
_’
I.1 .:
‘_-_ _.:
.._‘_
._
.
.__- :
:
-. :._.
‘.
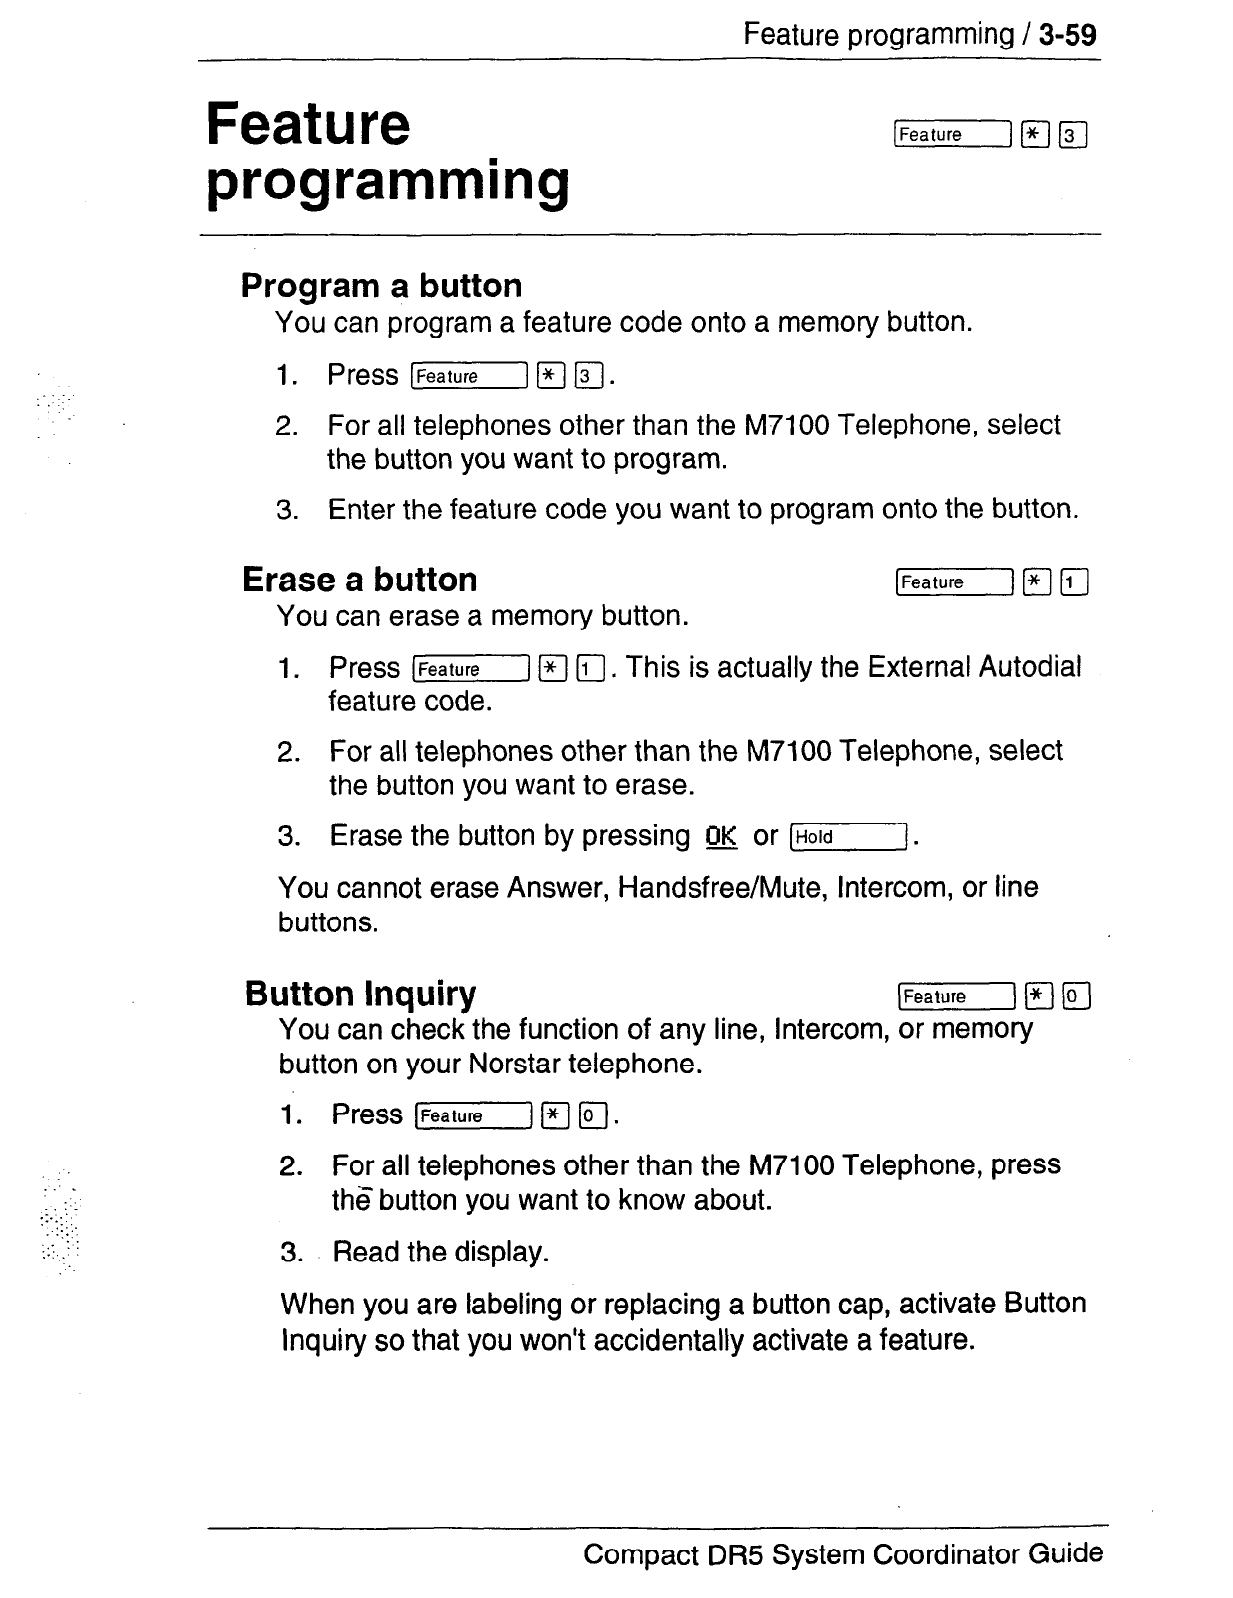
Feature programming / 3-59
..: .
:,1
I:...’
._::,;.:.
. :
::
.-:.
Feature
programming
Program a button
You
can program a feature code onto a memory button.
1. Press [Fealure]m13].
2. For all telephones other than the M7100 Telephone, select
the button you want to program.
3. Enter the feature code you want to program onto the button.
Erase a button
You can erase a memory button.
[Feature] [.w f-Y-/
1.
Press TJ R r;l. This is actually the External Autodial
feature code.
2. For all telephones other than the M7100 Telephone, select
the button you want to erase.
3. Erase the button by pressing w or [HOldI.
You cannot erase Answer, Handsfree/Mute, Intercom, or line
buttons.
Button Inquiry
You can check the function of any line, Intercom, or memory
button on your Norstar telephone.
1. Press IFeature] R a.
2. For all telephones other than the M7100 Telephone, press
the button you want to know about.
3. Read the display.
When you are labeling or replacing a button cap, activate Button
Inquiry so that you won’t accidentally activate a feature.
Compact DR5 System Coordinator Guide
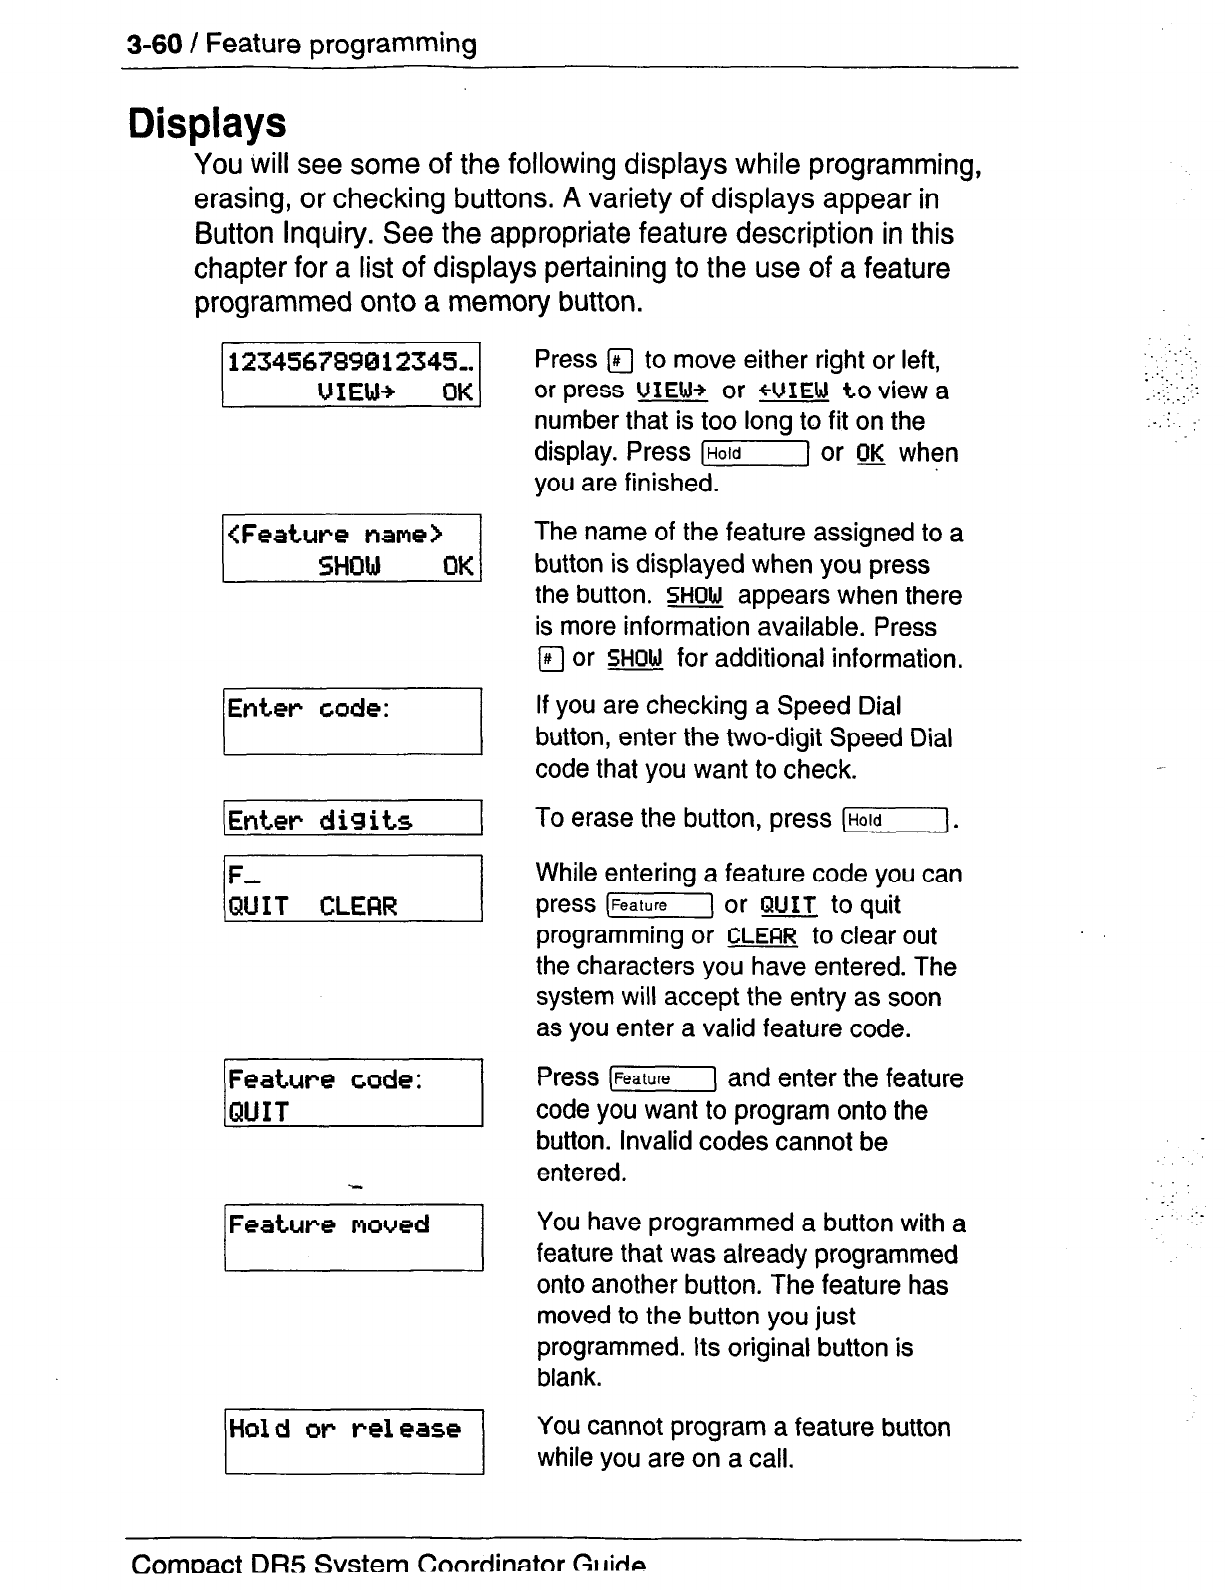
3-60 I Feature programming
Displays
You will see some of the following displays while programming,
erasing, or checking buttons.
A
variety of displays appear in
Button Inquiry. See the appropriate feature description in this
chapter for a list of displays pertaining to the use of a feature
programmed onto a memory button.
<Feature name>
SHOW QK
Enter code:
(Enter digits
=I
., .::-
..
::: -.
:.. :_
_-::,.._:,:~
.-.:.
Press a to move either right or left,
or press
UIEW+
or
+UIEW
to view a
number that is too long to fit on the
display. Press [Hold] or OK when
you are finished.
The name of the feature assigned to a
button is displayed when you press
the button.
SHOW
appears when there
is more information available. Press
F;rl or
SHOW
for additional information.
If you are checking a Speed Dial
button, enter the two-digit Speed Dial
code that you want to check.
To erase the button, press (Hold].
While entering a feature code you can
press (-1 or
QUIT
to quit
programming or
CLEAR to
clear out
the characters you have entered. The
system will accept the entry as soon
as you enter a valid feature code.
Press 1~1 and enter the feature
code you want to program onto the
button. Invalid codes cannot be
entered.
You have programmed a button with a
feature that was already programmed
onto another button. The feature has
moved to the button you just
programmed. Its original button is
blank.
__
:_
You cannot program a feature button
while you are on a call.
ComDact DR5 Svstem
Cnnrdinatnr
C=tkia
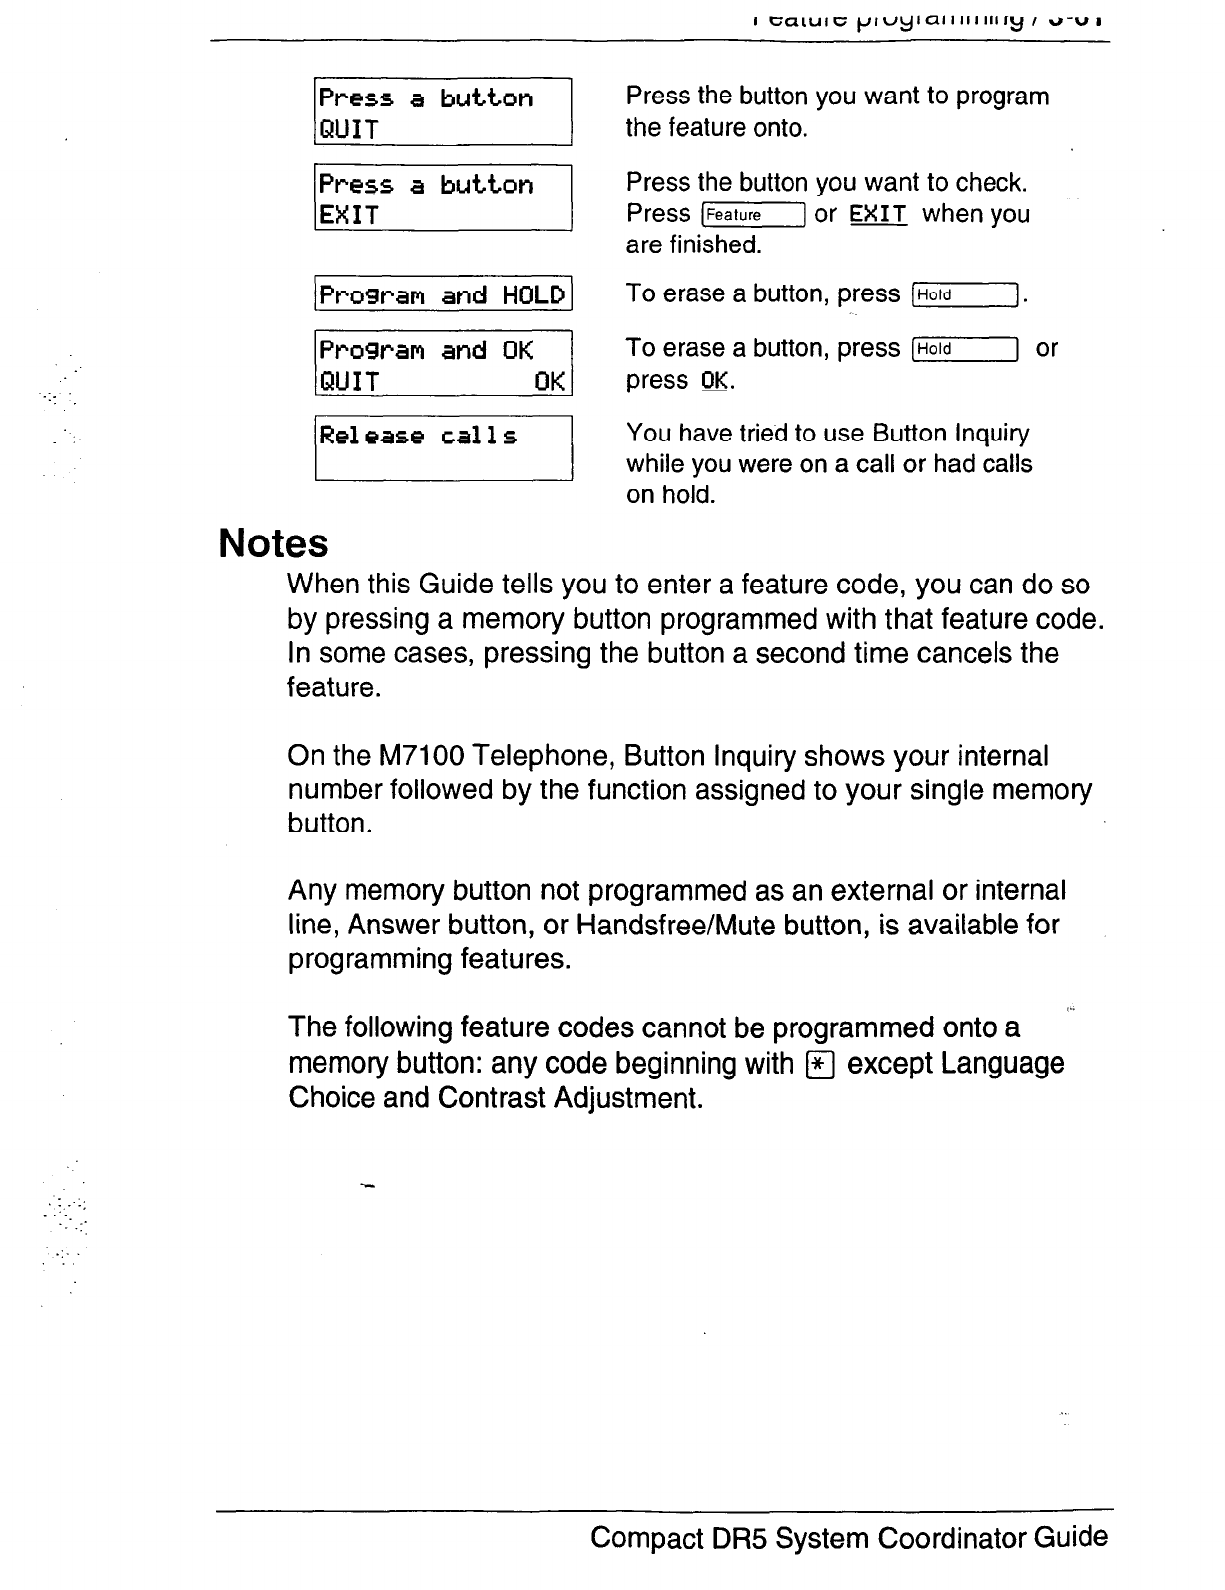
.:.
)Pt-opt-am and HOLD1
Press the button you want to program
the feature onto.
Press the button you want to check.
Press I-1 or
EXIT
when you
are finished.
To erase a button, press (Hold].
To erase a button, press (-1
or
press OK.
/Release
You have tried to use Button Inquiry
while you were on a call or had calls
on hold.
Notes
When this Guide tells you to enter a feature code, you can do so
by pressing a memory button programmed with that feature code.
In some cases, pressing the button a second time cancels the
feature.
On the M7100 Telephone, Button Inquiry shows your internal
number followed by the function assigned to
your single memory
button.
Any memory button not programmed as an external or internal
line, Answer button, or Handsfree/Mute button, is available for
programming features.
The following feature codes cannot be programmed onto a
memory button: any code beginning with
q
except Language
Choice and Contrast Adjustment.
.: , .-:,
. :._
.:.
Compact DR5 System Coordinator Guide
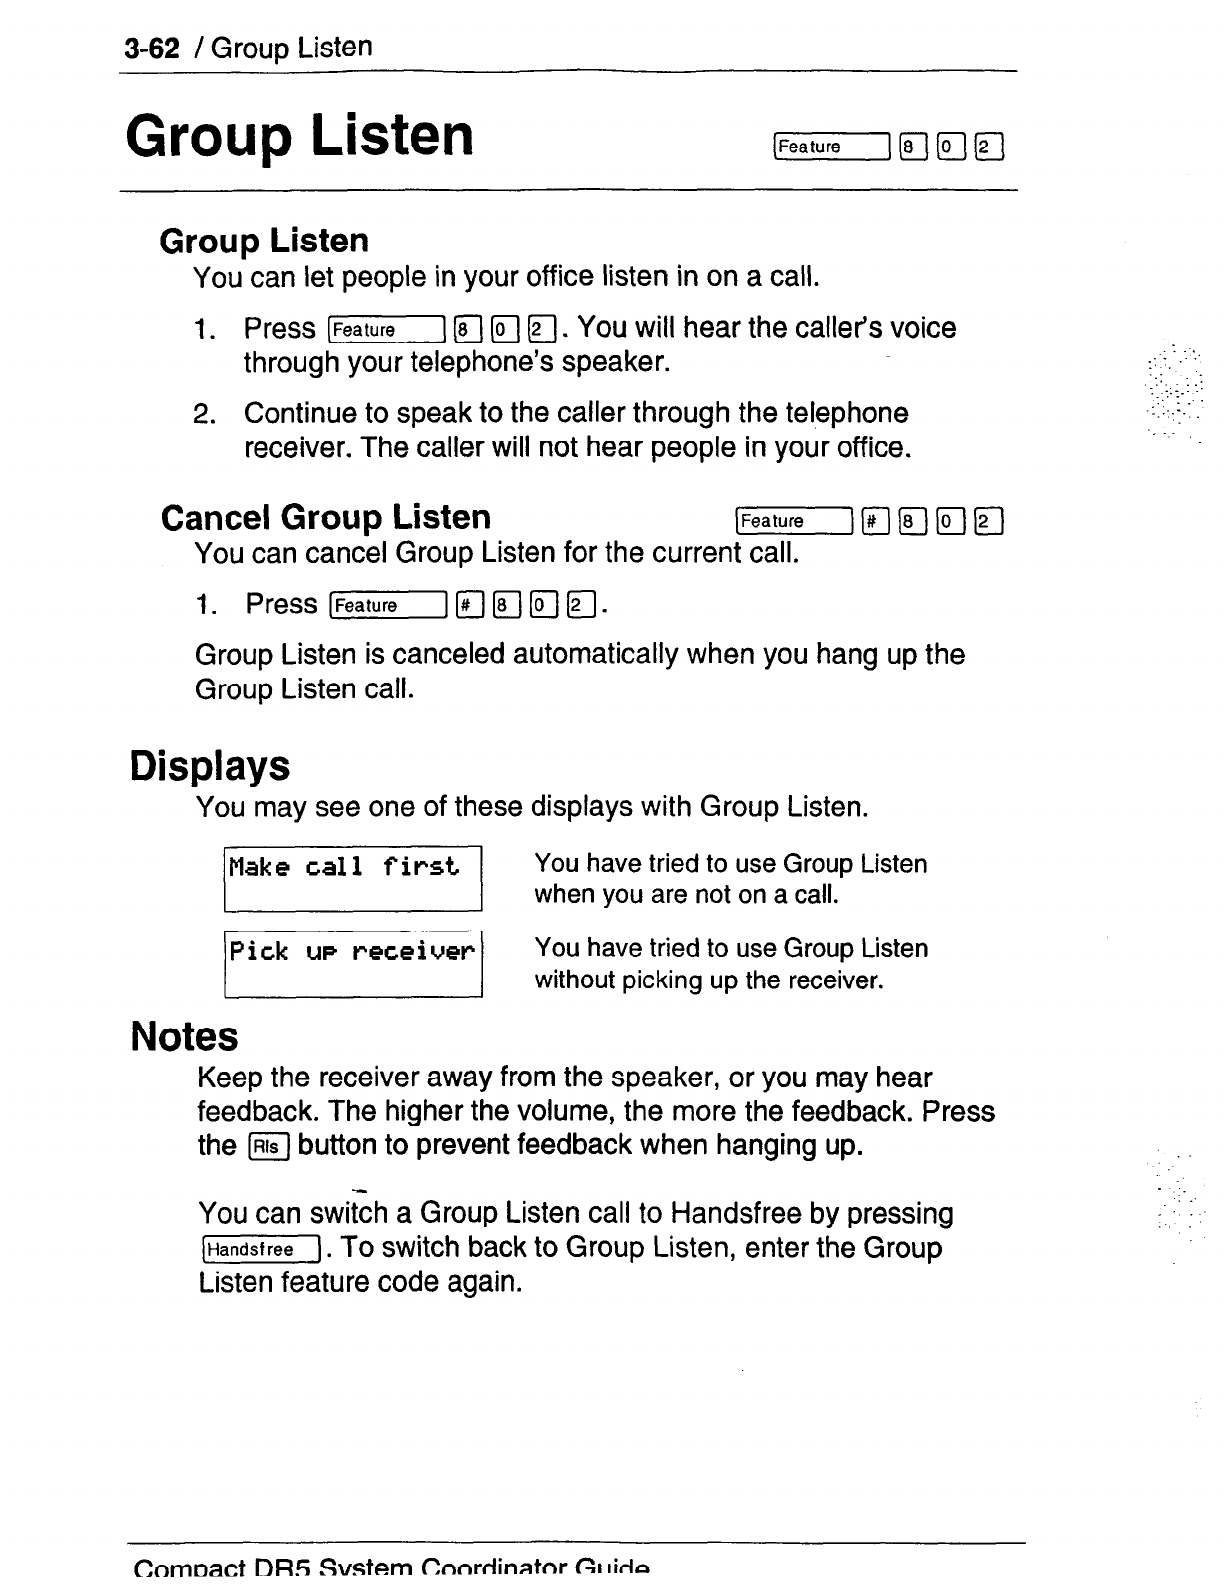
3-62 / Group Listen
Group Listen
Group Listen
You
can
let people in your office listen in on a call.
I. Press (Feature] (ZJ IT] u. You will hear the caller’s voice
through your telephone’s speaker.
2. Continue to speak to the caller through the telephone
receiver. The caller will not hear people in your office.
Cancel Group Listen [Feature] @-I r;;7 i-6-j F]
You can cancel Group Listen for the current call.
1. Press r-1 T;i7 [cl (;;1 a.
Group Listen is canceled automatically when you hang up the
Group Listen call.
Displays
You may see one of these displays with Group Listen.
/Make
call first
( You have tried to use Group Listen
when you are not on a call.
You have tried to use Group Listen
without picking up the receiver.
Notes
Keep the receiver away from the speaker, or you may hear
feedback. The higher the volume, the more the feedback. Press
the m button to prevent feedback when hanging up.
You can switch a Group Listen call to Handsfree by pressing
(Handsfree). To switch back to Group Listen, enter the Group
Listen feature code again.
. -_
_’
_..
.I’
Cnmoact DR5
Svstem Cnnrfiin~tnr GI
kin
Handsfree/Mute / 3-63
. .
. ,
.,
: .:
.‘.I
. . ._I.: .
.-: ,.
: __
: -:
Han&free/Mute
Make calls without lifting the receiver
You can make calls without lifting the receiver. However, you
must have a Prime line assigned to your telephone.
1. Press lHandsfree]. The telephone’s internal microphone and
speaker are automatically turned on.
2. Dial your call.
3. Speak normally.
Answer calls without lifting the receiver
You can answer calls without lifting the receiver.
1. When your telephone rings, press (Handsfree). The
telephone’s internal microphone and speaker are
automatically turned on if you have a Prime line assigned to
your telephone.
2. Speak normally.
Mute Handsfree
You can switch off the telephone microphone so that you can
speak privately to someone in your office while you are on a
handsf ree call.
.I. Press [iGZG7]. The microphone is turned off.
You can turn the microphone back on again and continue your
handsf ree call.
1.
Pr%s lHandsfree].
RegulaF call to Handsfree
You can turn any regular call into a handsfree call.
1. Press (-1 and hang up the receiver.
Comoact
DR5 Svstem
Canrdinatnr GI de


Hold
[Hold]
Put a call on hold
You can temporarily suspend a call.
1. Press [I.
When a call is on hold, its indicator flashes on all telephones that
have access to the line. The call can be retrieved from any of
these
telephones.
Retrieve a held call
You can connect to a call on hold.
1. Press the flashing line button of the held call.
Automatic Hold
You can switch from one call to another.
1. Press the line button of the caller you want to speak to. Your
current caller is put on hold automatically.
Listen on Hold
If you have been put on hold, you can hang up the receiver while
you wait for the other person to return.
1.
2.
3.
4.
Press [j.
Hang up the receiver.
Press the line button of the call. (For the M7100 Telephone
press [Hold] ). You may hear indications from the far end
that you are on hold (for example, tones or music).
When the person you were talking to returns you will hear
them through your telephone speaker. Lift the receiver and
talk.
Compact DR5 System Coordinator Guide
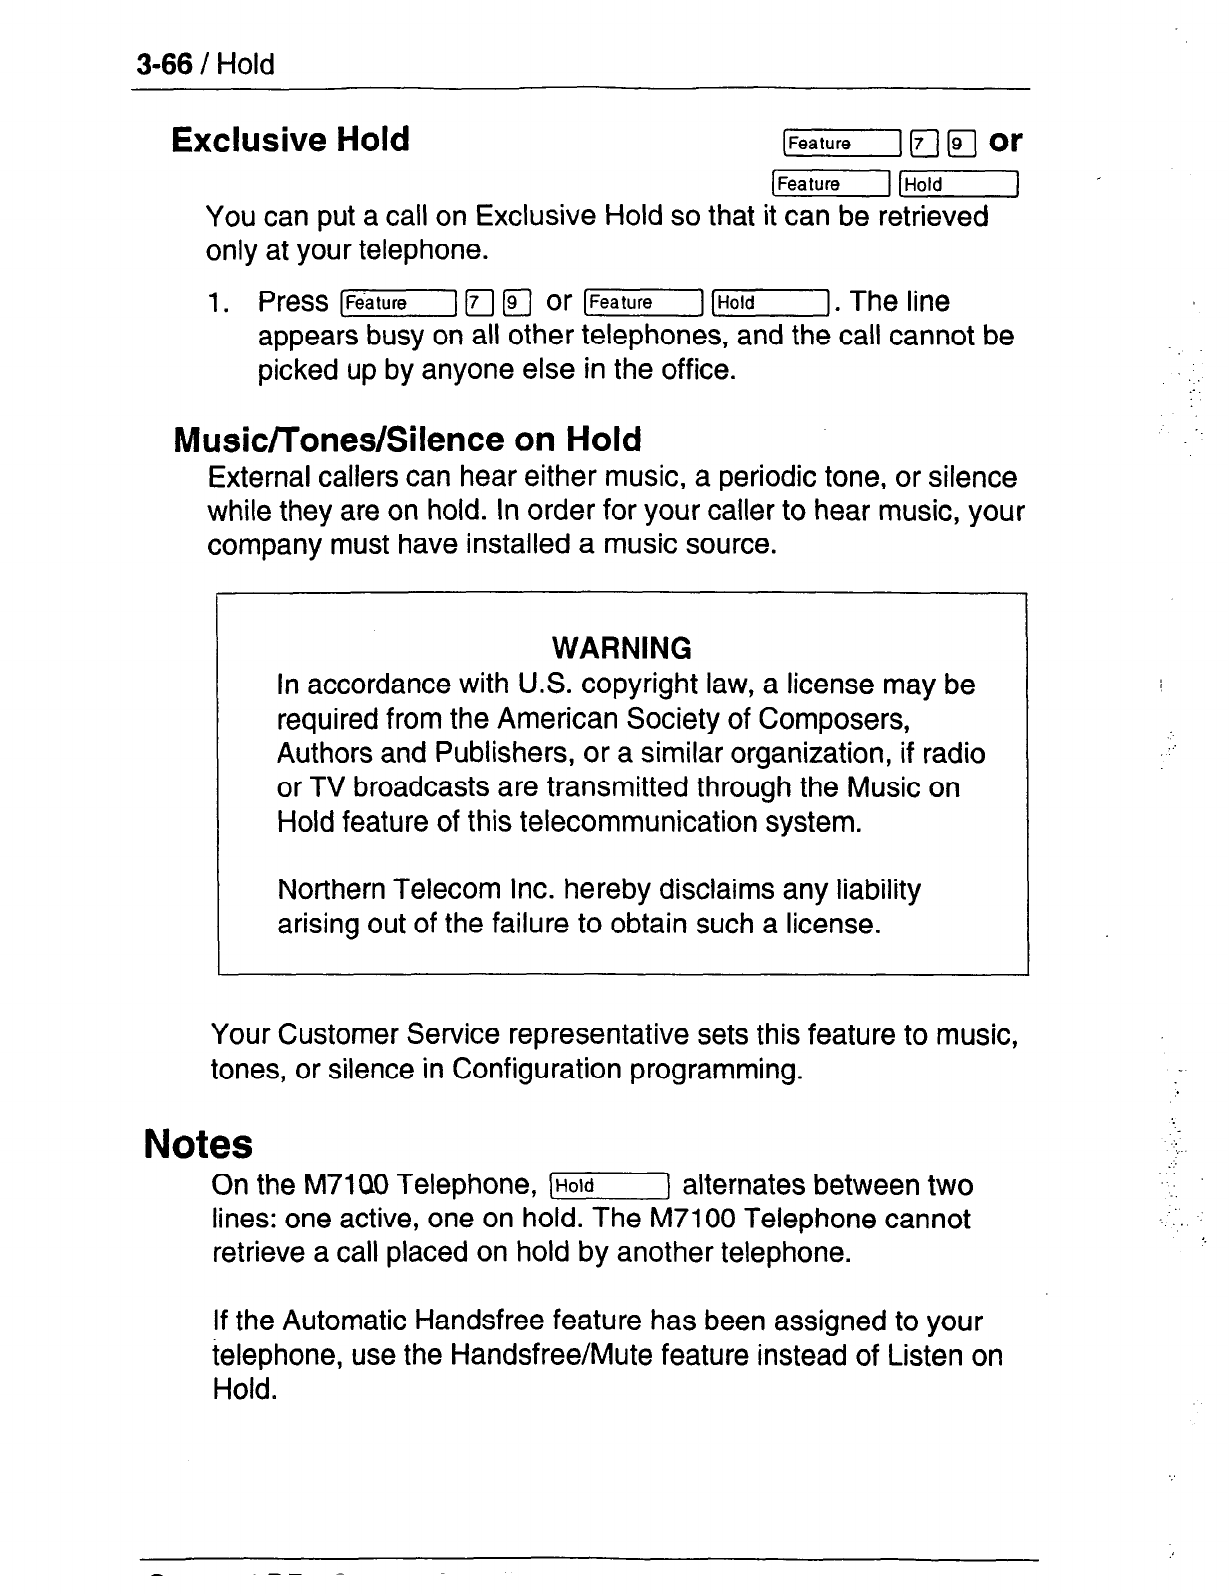
3-66 / Hold
Exclusive Hold
You
can put a call on Exclusive Hold so that it can be retrieved
only at your telephone.
1. Press L-1
q
m or [Feature] r]. The line
appears busy on all other telephones, and the call cannot be
picked up by anyone else in the office.
Music/Tones/Silence on Hold
External callers can hear either music, a periodic tone, or silence
while they are on hold. In order for your caller to hear music, your
company must have installed a music source.
WARNING
In accordance with U.S. copyright law, a license may be
required from the American Society of Composers,
Authors and Publishers, or a similar organization, if radio
or TV broadcasts are transmitted through the Music on
Hold feature of this telecommunication system.
Northern Telecom Inc. hereby disclaims any liability
arising out of the failure to obtain such a license.
Your Customer Service representative sets this feature to music,
tones, or silence in Configuration programming.
Notes
On the M71QO Telephone, )] alternates between two
lines: one active, one on hold. The M7100 Telephone cannot
retrieve a call placed on hold by another telephone.
:.
:
:
If the Automatic Handsfree feature has been assigned to your
telephone, use the Handsfree/Mute feature instead of Listen on
Hold.
- -- -
nub1
3ystt3
I I
31y1
lcilll iy
I 3’01
-..‘:I
.“..:‘,
.’ .
Host System Signaling
You can access Host systems, such as Private Branch
Exchanges (PBX) from Norstar by using Host System Signaling
features (also known as End-to-End Signaling). These features
either send a special signal to the host system or allow you to
program delays required by host systems onto External Autodial
buttons or Speed Dial codes.
Host system signaling codes
Link (Feature1 r;7 [-q
If your Norstar system is connected to a Private Branch
Exchange (PBX), you can use a Link signal to access special
features.
The Link signal can also be included as part of a longer stored
sequence on an External Autodial button or in a Speed Dial
code. The Link symbol (EE) uses two of the 24 spaces in a dialing
sequence.
Pause [EZG-11Lj[8
The Pause feature enters a 1.5 second delay in a dialing
sequence on an external line. This is often required for signaling
remote devices, such as answering machines, or when reaching
through to PBX features or Host systems.
You can obtain a Pause with one button press if you program the
feature code onto a memory button. More than one Pause can
be programmed onto an External Autodial button.
The Pause symbol (8) uses one of the 24 spaces in a dialing
sequence.
For Pulse Dialing, B inserts a 1.5 second pause into the dialing
sequence.
Compact DR5 System Coordinator Guide
368 / Host System Signaling
Programmed Release
The Programmed Release feature performs the function of the
m button in a programmed dialing sequence. When the system
encounters a Programmed Release at the end of a programmed
dialing sequence, it hangs up the call after the numbers are
dialed. The Programmed Release symbol (813) takes up two of
the 24 spaces in a programmed dialing sequence.
Run/Stop inserts a break point into a sequence of dialed
numbers or characters used for automatic dialing. This may be
necessary when you are connecting to a PBX or similar Host
system.
For example, you may call a company with an automated
attendant that instructs you to dial the internal number you need,
You can program the company number, a Run/Stop, then the
internal number on one External Autodial button. Press the
autodialer once to dial the company number. When you hear the
automated attendant, press the autodialer again to dial the
internal number.
The Run/Stop symbol (S) uses one of the 24 spaces in an
External Autodial or Speed Dial sequence.
llUs;L 3yslelll 3lYl lalllly
I a-o=1
Displays
You may see this display while entering Host System Signaling
codes.
You
have
entered
a code that can only
be used in a programmed Autodial or
Speed
Dial sequence, not on a call
you dial directly. Programmed
Release and Run/Stop are for use in
programmed dialing sequences only.
Note
If your external telephone lines are programmed for Pulse dialing,
you can temporarily switch to Tone dialing by pressing m after
selecting the line. Tone dialing lets your Norstar telephone
communicate with devices and services that respond to tone
signals, such as automatic switchboards, and fax or answering
machines.
_:.;:.::-
‘_
:
-. ::::
.._. :
:.-
Compact DR5 System Coordinator Guide
3-70 / Line Pools
Line Pools
Use a line pool
A line pool is a group of external lines that can be shared by
many telephones. You can use a line in a line pool to make an
external call.
1.
If
you
have a free internal line, dial a line pool access code
on an internal line. (You do not need the Line Pool feature
code.)
OR
If you have no free internal line, press [GZTl Fl fl and
then a line pool access code.
Everyone
in the office should have a list of the line pool access
codes for the line pools their telephones can use. See the
Programming reminders section in the Programming chapter.
Displays
You may see some of the following displays while using a line
pool. For displays associated with dialing telephone numbers,
see the Dialing section.
1
Code:
IDenied in admin
1
Inual id code
/Line
No button free
Enter a line pool access code.
Access to the line pool you requested
is denied in Configuration
programming.
You have entered an invalid line pool
access code.
The line chosen by the system for
your line pool request became active
before connecting with your call. Retry
the line pool request.
There is no free button on which the
line pool line can appear.
.:..,:.::
. ..,.
:.:,_:
.I ,: .:
_-
‘_
:.
:
:.
.: . .
:.
..:
,I’
. :;
.I :.
_ _
Line Pools /
3-71
You have tried to access your line
pool, but there are no lines in the line
pool or all the lines are busy. Use Ring
Again or call again later.
Notes
You do not
usually
need to enter the Line Pool feature code to
use a line
pool. Simply dial the line
pool access code on an
internal line. If you have no free internal lines, you will need to
use the feature code to get a line pool. You will also need it to
program access to a specific line pool onto a memory button.
You can program a button to access a line pool by programming
the Line Pool feature code and a line pool access code onto a
memory button in Feature programming ((Feature) F] m). When
all the lines in a line pool
are busy, the indicator for
the Line
Pool
button turns on. The indicator turns off when a line
becomes
available.
Your Norstar system can have three line pools, and a telephone
can be programmed to access any number of them.
You can use a line pool only to make external calls.
If no lines are available in the line pool, you can use Ring Again
at the busy tone. You will be notified when a line in the line pool
becomes available. See Ring Again.
Your Customer Service representative gives telephones access
to line pools in Configuration programming. Each line pool is
assigned a line pool access code in Configuration programming.
:
:_., :.
.,.‘.f.
-
‘.
. . ,-
. .
Comnact DR5 System Coordinator Guide
3-72 / Line Redirection
Line Redirection
Redirect a line
Line Redirection lets you send your external calls to a telephone
outside the office. You may choose to redirect all your external
lines or only some of them.
1. Press (GZl(8] m.
2. Select the outgoing line to be used for redirected calls.
3. Enter the number to which calls will be redirected and press
04 or (HoldI.
4. Select the lines to be redirected and press OK or (T6iT-J.
Cancel Line Redirection
You can cancel Line Redirection.
1. Press [Feature11#_)[8)14.
2. Select the lines for which redirection is to be canceled and
press w or r].
Related features
Call forward L-1 0
Note the differences between Line Redirection and Call Forward.
Call Fomard forwards all calls that arrive at a particular
telephone to another telephone within the Norstar system. Line
Redirection redirects only the lines you specify, no matter which
telephones they appear on, to a telephone outside the Norstar
system. Line Redirection takes precedence over Call Forward.
::_:_I __
.-. .:-:
:; ::r.-.
.+:
I_-_-.-,
Y._
..::-_ .<.:
.‘_
__ : ..
_.._
._
‘.T.
:-1:.:,.x
._ I:.:
:.
-.: :. .:
:~_:..i.
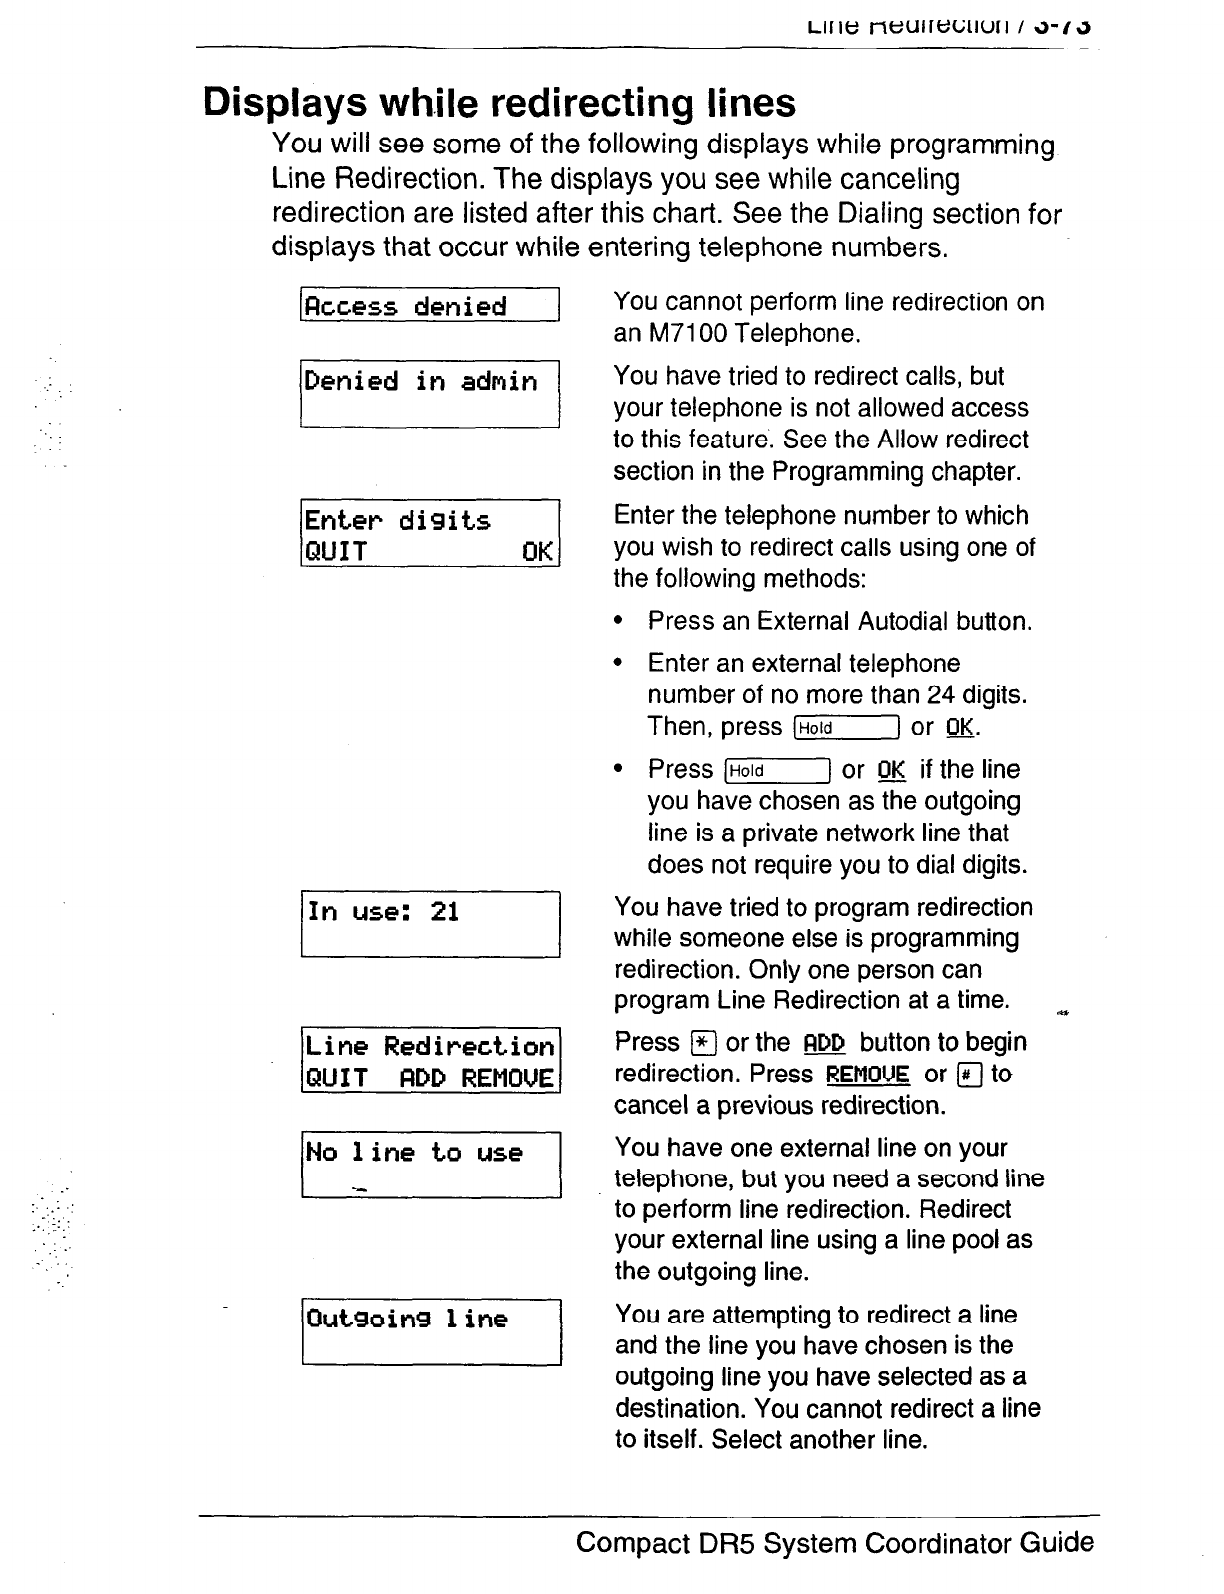
Displays wh.ile redirecting lines
You
will see some of the following displays while programming
Line Redirection. The displays you see while canceling
redirection are listed after this char-t. See the Dialing section
for
displays that
occur while entering telephone numbers.
~FICCOSS
denied
,:
penied in admin
/
:
1. .,: :
-:.. _-
:..,:-:
.:
~ . . .
OutSoin9 1 ins
You cannot perform line redirection on
an M7100 Telephone.
You have tried to redirect calls, but
your telephone is not allowed access
to this feature.. See the Allow redirect
section in the Programming chapter.
Enter the telephone number to which
you wish to redirect calls using one of
the following methods:
l
Press an External Autodial button.
l
Enter an external telephone
number of no more than 24 digits.
Then, press [i] or OK.
l
Press IHOld] or w if the line
you have chosen as the outgoing
line is a private network line that
does not require you to dial digits.
You have tried to program redirection
while someone else is programming
redirection. Only one person can
program Line Redirection at a time. ~
Press m or the m button to begin
redirection. Press
REMOUE
or @ to
cancel a previous redirection.
You have one external line on your
telephone, but you need a second line
to perform line redirection. Redirect
your external line using a line pool as
the outgoing line.
You are attempting to redirect a line
and the line you have chosen is the
outgoing line you have selected as a
destination. You cannot redirect a line
to itself. Select another line.
Compact DR5 System
Coordinator
Guide
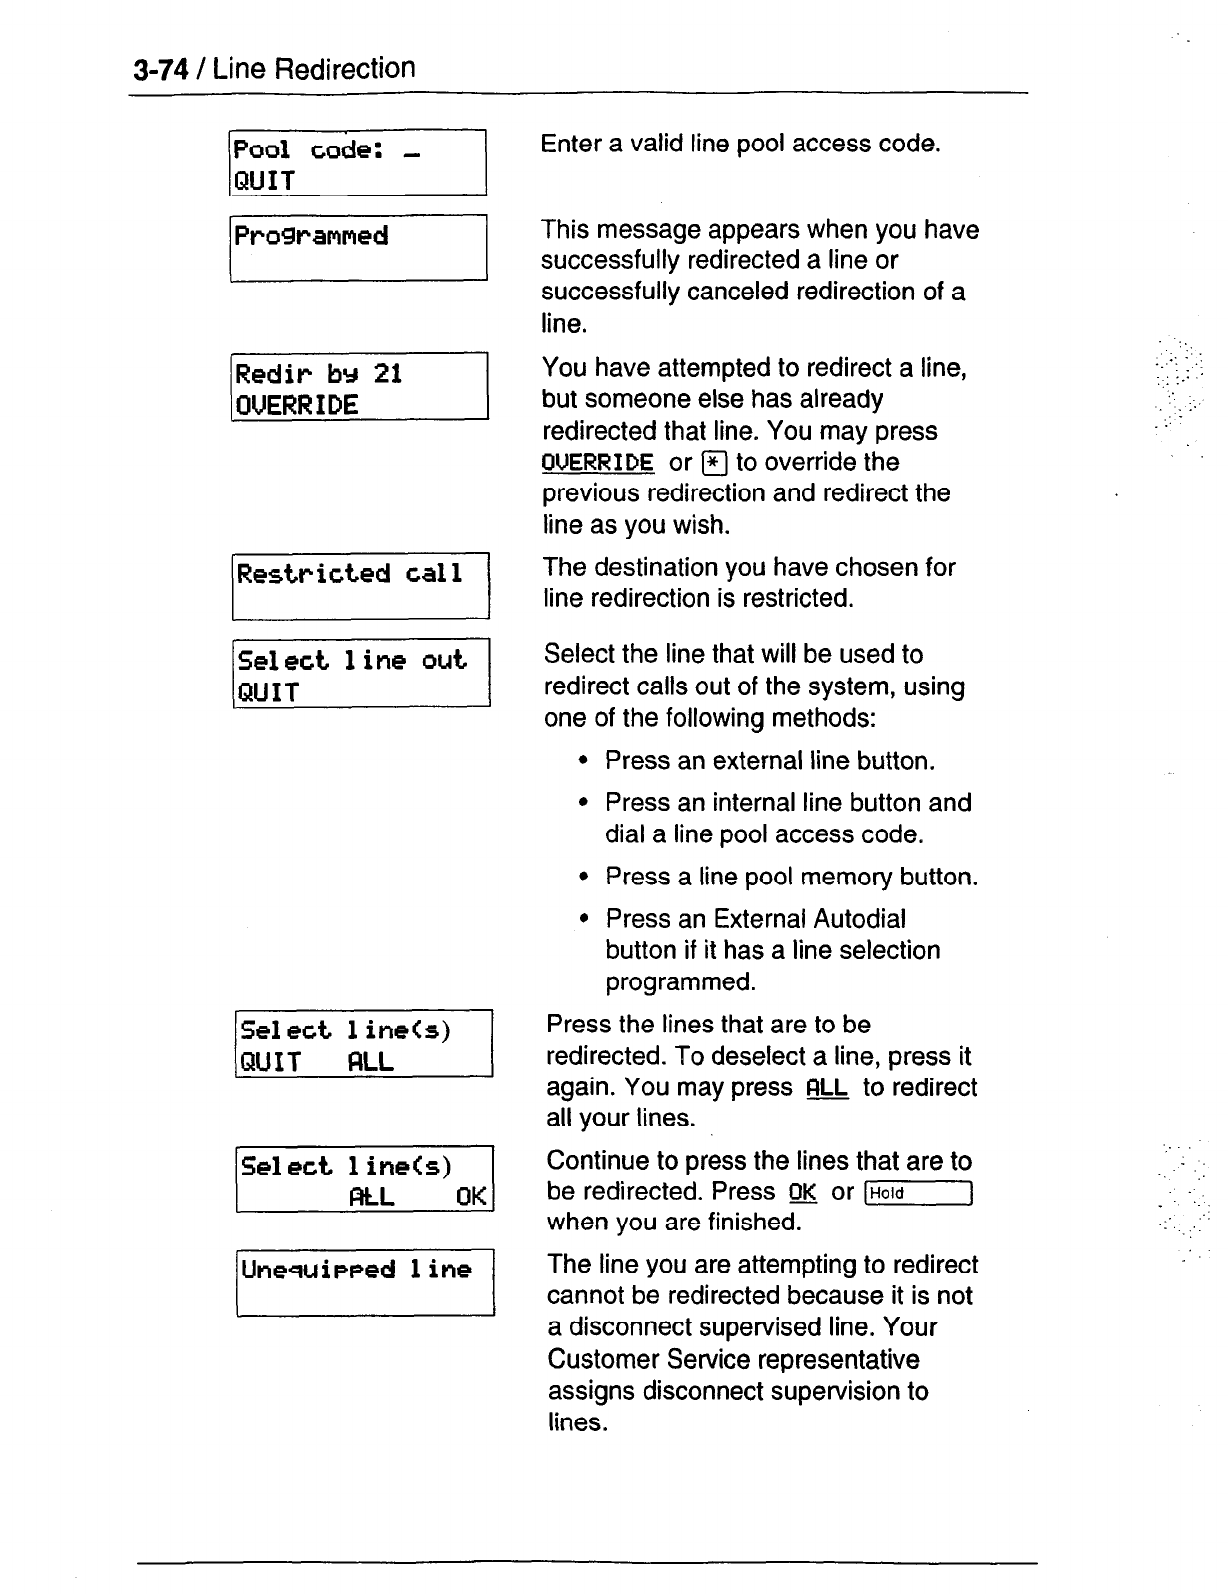
3-74 / Line
Redirection
Enter a valid line pool access code.
IRedir by 21
1
[QUERRIDE
1
Unequiwed 1 ine
1
I
This message appears when you have
successfully redirected a line or
successfully canceled redirection of a
line.
You have attempted to redirect a line,
but someone else has already
redirected that line. You may press
OUERRIDE
or @ to override the
previous redirection and redirect the
line as you wish.
The destination you have chosen for
line redirection is restricted.
Select the line that will be used to
redirect calls out of the system, using
one of the following methods:
Press an external line button.
Press an internal line button and
dial a line pool access code.
Press a line pool memory button.
Press an External Autodial
button if it has a line selection
programmed.
Press the lines that are to be
redirected. To deselect a line, press it
again. You may press u to redirect
all your lines.
Continue to press the lines that are to
be redirected. Press QK or [HOld]
when you are finished.
The line you are attempting to redirect
cannot be redirected because it is not
a disconnect supervised line. Your
Customer Service representative
assigns disconnect supervision to
lines.
:
:
;. : :
-: : _:.
:.:
:.‘
:.
._ _ :.
: -
. :

Line Redirection / 3-75
Displays while canceling redirection
You
will see the
following displays while canceling Line
Redirection.
This line is redirected by someone
else. Press
OVERRIDE
or m to cancel
redirection of the line.
Press the lines that are no longer to
be redirected. The
lines light up as
you
press th’em. Once you cancel
redirection for a line you cannot
restore it by pressing the line again.
You may press Q& to cancel
redirection for all your lines.
Continue to press the lines that are no
longer to be redirected. Press !I& or
(Hold] when you are finished.
Notes
The Line Redirection feature is not available on the
M7100
Telephone.
You can answer the telephofle if it rings while you are in the
middle of programming Line Redirection, but none of the Norstar
call handling features will be available until the feature times out:
If you need to use a Norstar feature to process the call, you must
quit Line Redirection programming by pressing the [KG--]
button. Do
not press m or you will disconnect the call you
are trying to process.
While you are programming Line Redirection you will only receive
an indication of calls that actually ring at your telephone.
The system does not check that the number you give for line
redirection is a valid one. If you redirect to an invalid number,
redirection will fail. Using an External Autodialer to enter the
redirection number helps avoid this possibility. An External
Autodialer used for line redirection must have a specific line I*
programmed onto it.
3-76 / Line Redirection
If you use the fi& button to redirect all your lines, it is important
that you wait until all the lines on your telephone light up before
pressing (Hold-1 or QK. If you press (Hold] or m before
all the lines light up, those lines not lit will not be redirected.
Be aware of the consequences of redirecting your lines. If you
redirect your line to your home, for instance, and someone calls
you from home, they will get a busy signal when the system tries
to call the telephone they are using. Companies with offices in
different time zones should avoid situations in which the lines
from the eastern office are redirected to the west and those from
the west are redirected to the east. This could result in a costly
long distance redirection loop.
The system can be set up so that redirected calls give a brief ring
on telephones in the Norstar system as they are redirected.
These calls cannot be answered within the system until you
cancel redirection.
The line chosen for redirecting calls on other lines can still be
used normally when it is not busy on a redirected call. To avoid
redirection failing because the chosen line is in use, choose a
line pool with several lines in it.
When redirecting an external call to an external number, note the
following restriction: the incoming call must be on a disconnect
supervised line.
:,.
_’
:: .:::
.y.
-1:
:.
: .,_
.I:-.
:
In certain situations, callers may experience lower volume levels
when you use Line Redirection.
__-
,.-: ._
:
:-
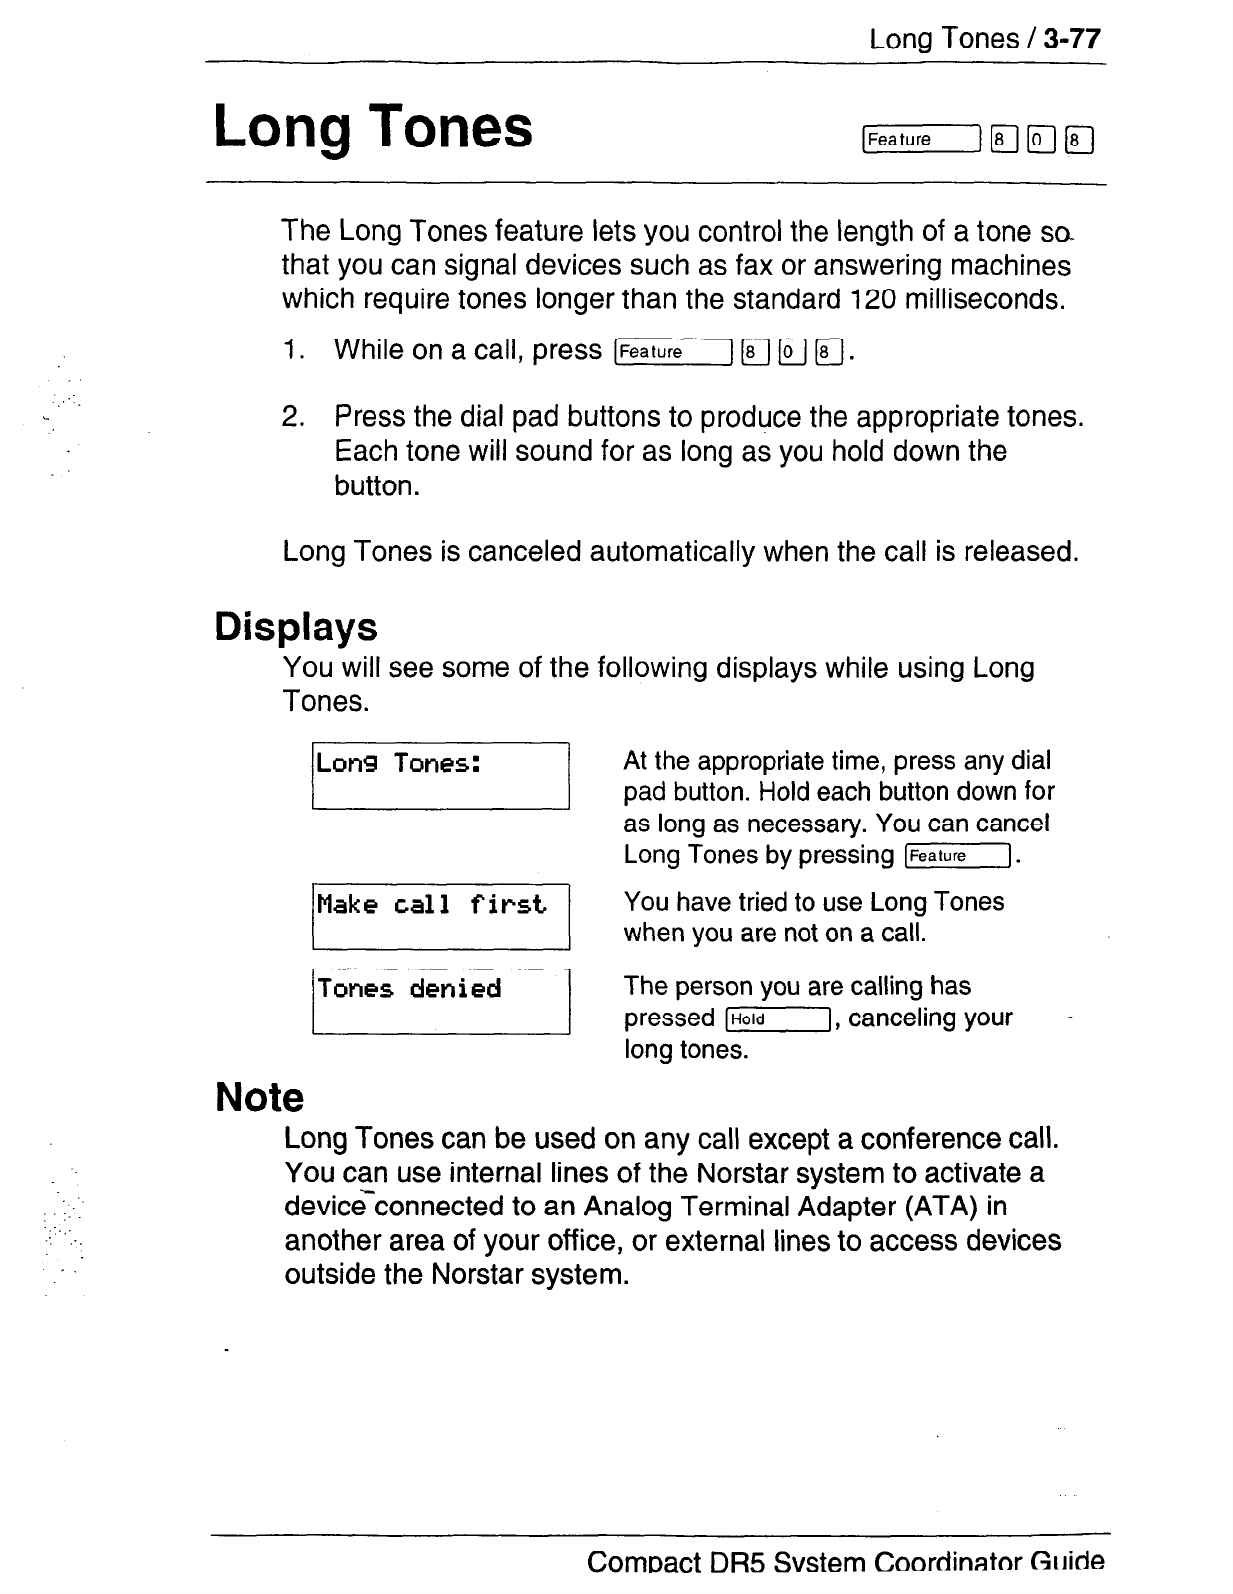
Long Tones / 3-77
:-
1.
__
.’
:_
Long Tones
[Featule)~[ij7@
The Long Tones feature lets you control the length of a tone so
that you can signal devices such as fax or answering machines
which require tones longer than the standard 120 milliseconds.
1. While on a call, press [%iCl F] IF] r].
2. Press the dial pad buttons to produce the appropriate tones.
Each tone will sound for as long as you hold down the
button.
Long Tones is canceled automatically when the call is released.
Displays
You will see some of the following displays while using Long
Tones.
At the appropriate time, press any dial
pad button. Hold each button down for
as long as necessary. You can cancel
Long Tones by pressing 1-1.
/Make
call first.
1 You
have tried to use Long Tones
when you are not on a call.
The person you are calling has
pressed IHOld], canceling your
-
long tones.
Note
Long Tones can be used on any call except a conference call.
You can use internal lines of the Norstar system to activate a
devic<connected to an Analog Terminal Adapter (ATA) in
another area of your office, or external lines to access devices
outside the Norstar system.
Compact
DR5
Svstem
Coordinatm
Gtlide
3-78 I Messages
Messages
The Messages feature allows you to send a message to another
Norstar user, and lets you know if you have any messages
waiting. As well, the Messages feature uses a Message Waiting
List to keep a record of your internal messages and your
(external) voice mail messages, if the service is provided by
your
telephone company. From your Message Waiting, List, you can:
- view your messages,
- call back the internal caller who left a message,
-
erase an internal message,
- call your Voice Message Center that left a message(s), and,
- clear a message sent by your Voice Message Center (the
message still remains at the Center until it is erased there).
Send a message [Fealure~~
*
You can leave a message on the display of another telephone in
your Norstar system.
1. Press [-J m.
2. A one-line display shows Message to:
OR
A two-line display shows
Message 1 ist.
Press RDD to
display
Message to:
3. Enter the internal number that is to receive your message.
Your recipient’s display identifies that the message has
arrived. -
.
.._’
: .:
Show your sent messages [Feature) 0
On a telephone with a two-line display, you can show and scan
the messages you have sent.
1. Press [Featurej n. The display shows Message
2.
Press SHOW to display your first sent message.
1 ist.
Messages / 3-79
‘.
._
:.
-: ..:
_:.
::
..I:
Cancel a sent message [~~[iilfi-j
You
can cancel a message that you have sent to someone.
1. Press (Feature] c;;1 n. The display shows
Cancel for:
2. Enter the internal number for the message that you want to
cancel.
Notification of message(s)
If another user in your Norstar system or your Voice Message
Center has sent you a message, your display reads
Message for YOU
or
Messages for
YOU.
If you also have
items in your Call Log, your display reads
Messages &
Call s.
Enter your Message Waiting List [Feature] [z-j jq
To enter your Message Waiting List:
1. Press [r) fl a. The display shows the first item.
Navigate through your Message Waiting List
To navigate forward through your list, press
NEXT
or m. To
navigate backward, press
q
.
Call from your Message Waiting List
From your Message Waiting List, you can call the person (or your.
Voice Message Center) who sent the message. First, you may
want to view your messages and decide if you want to reply to
them.
1. Press [Feature] a m. The display shows the first message.
2. Press
NEXT
or m to scroll through the list of messages.
3. TQcall a particular number, press
WILL
or
q
.
The
telephone number that is dialed to access your Voice
Message Center is programmed in Administration
programming. This telephone number is dialed automatically
when you press
CRLL
or a.
If you wish to use a line other than the programmed line, exit
from the Message Waiting List and dial the Voice Message
Center telephone number using normal dialing methods.
. --- - -
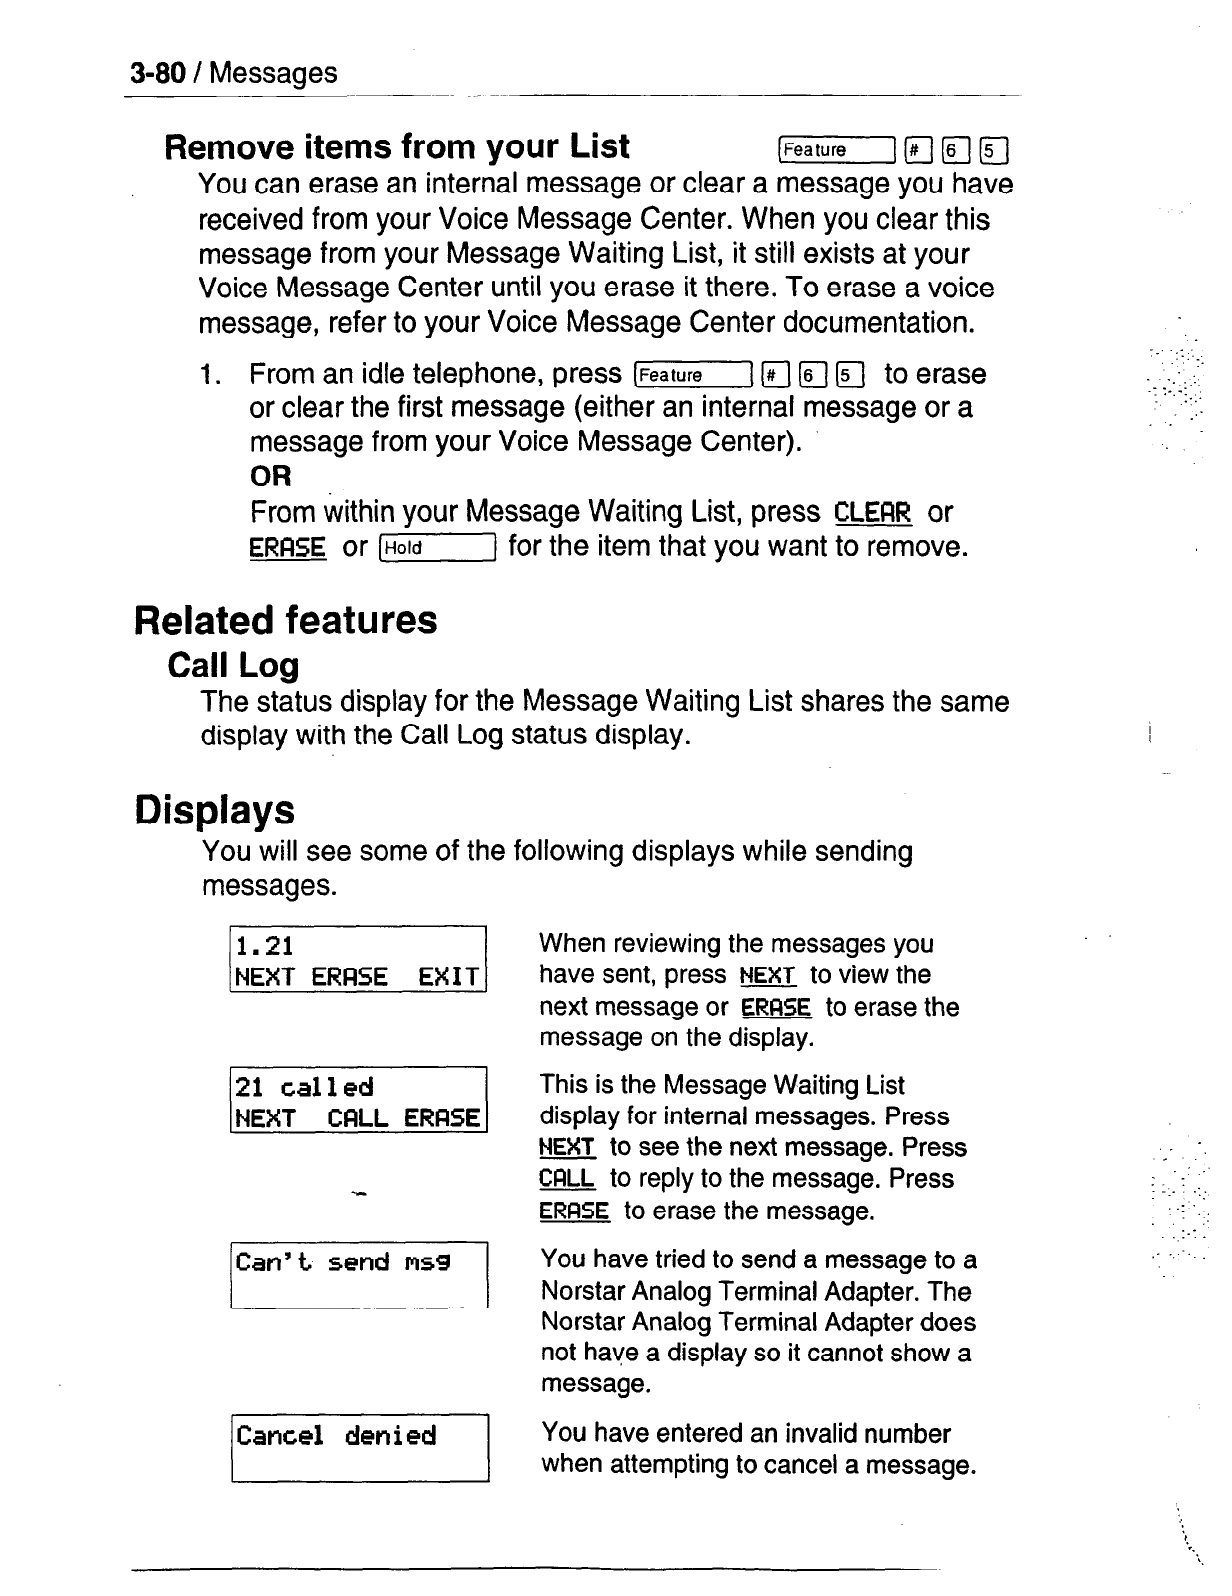
3-80 /
Messages
Remove items from your List (Feature] (q (FJ (FJ
You can erase an internal message or clear a message you have
received from your Voice Message Center. When you clear this
message from your Message Waiting List, it still exists at your
Voice Message Center until you erase it there. To erase a voice
message, refer to your Voice Message Center documentation.
1.
From an idle telephone, press (Feature] a @ a to erase
or clear the first message (either an internal message or a
message from your Voice Message Center).
OR
From within your Message Waiting List, press
CLEAR
or
ERRSE
or [j for the item that you want to remove.
Related features
Call Log
The status display for the Message Waiting List shares the same
display with the Call Log status display.
Displays
You will see some of the following displays while sending
messages.
Can’t
send msg
/Cancel]
When reviewing the messages you
have sent, press
NEXT
to view the
next message or
ERFlSE to
erase the
message on the display.
This is the Message Waiting List
display for internal messages. Press
NEXT
to see the next message. Press
WILL
to reply to the message. Press
ERFiSE
to erase the message.
You have tried to send a message to a
Norstar Analog Terminal Adapter. The
Norstar Analog Terminal Adapter does
not have a display so it cannot show a
message.
You have entered an invalid number
when attempting to cancel a message.
-: .:
::_.
.:.
_y :::;-
:.:
:.
_ :
_’
. :
.:
-_.y
..:-.
; . . -..
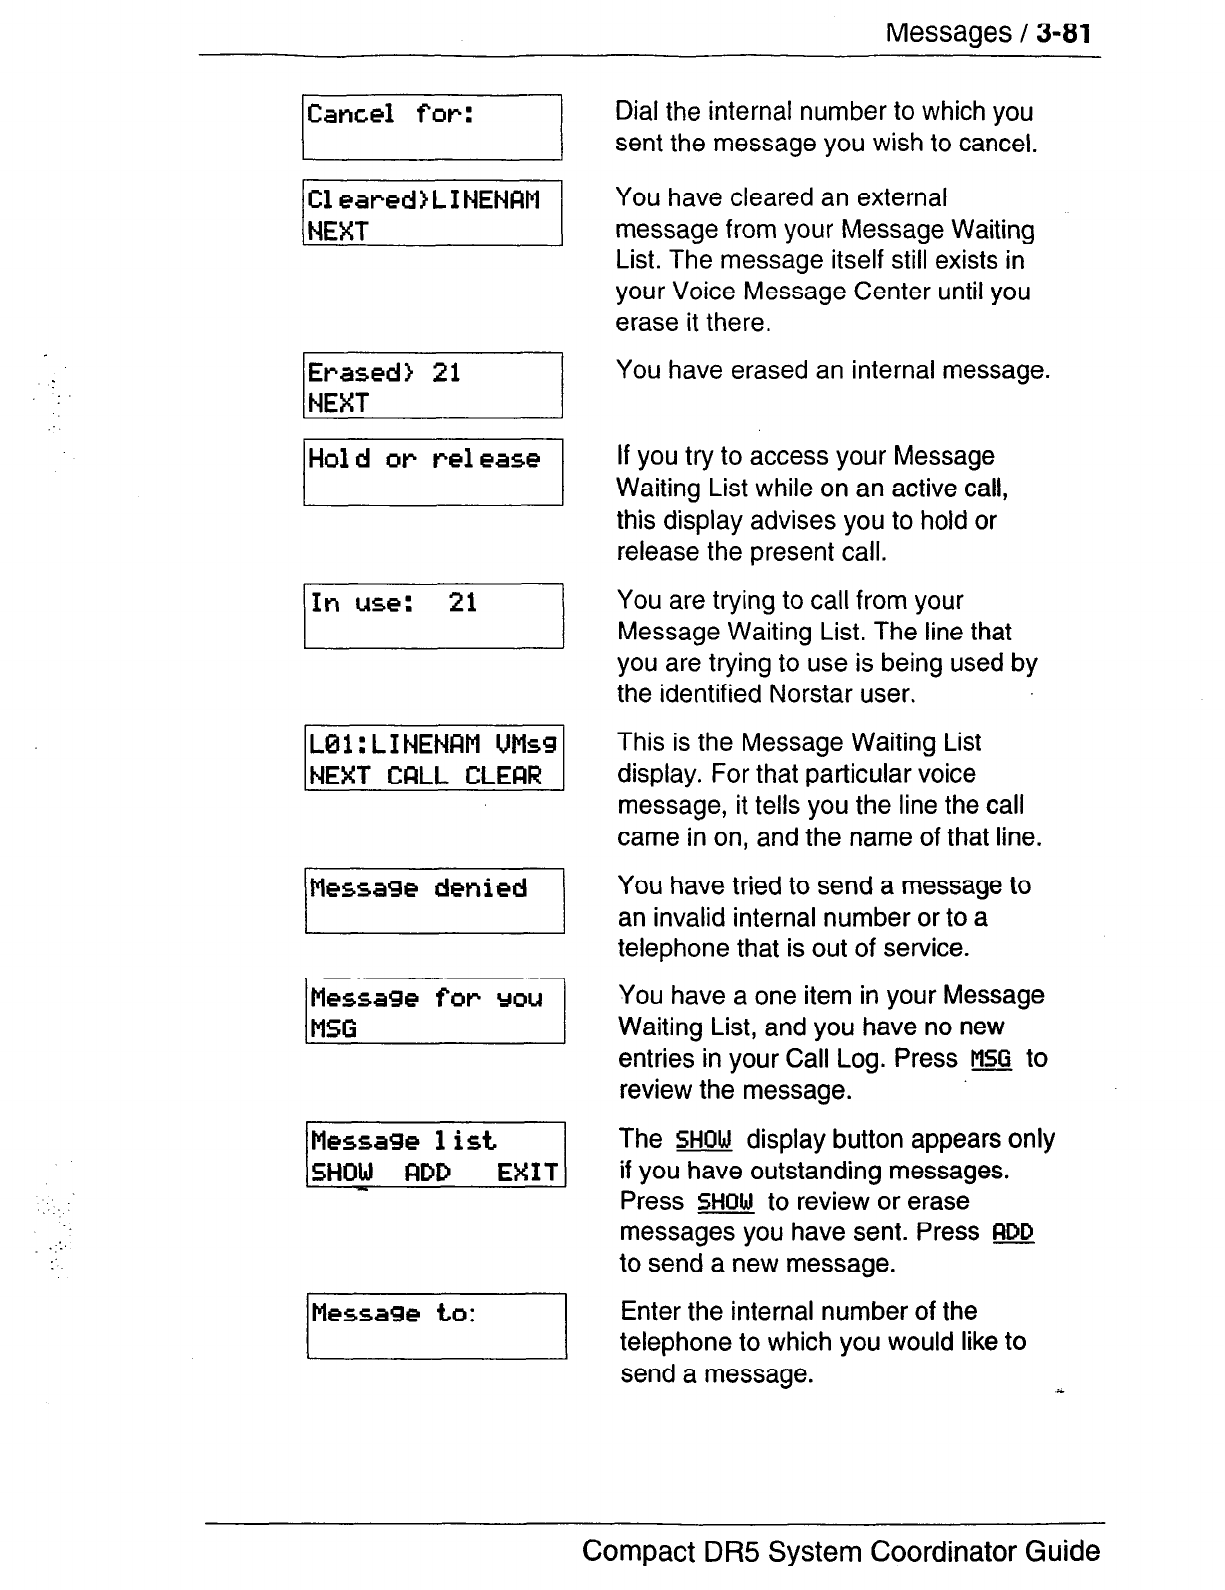
Messages
/
3-81
lCancel
/;;;;red>LINENRM
j
Message to:
Dial the internal number to which you
sent the message you wish to cancel.
You have cleared an external
message from your Message Waiting
List. The message itself still exists in
your Voice Message Center until you
erase it there.
You have erased an internal message.
If you try to access your Message
Waiting List while on an active call,
this display advises you to hold or
release the present call.
You are trying to call from your
Message Waiting List. The line that
you are trying to use is being used by
the identified Norstar user.
This is the Message Waiting List
display. For that particular voice
message, it tells you the line the call
came in on, and the name of that line.
You have tried to send a message to
an invalid internal number or to a
telephone that is out of service.
You have a one item in your Message
Waiting List, and you have no new
entries in your Call Log. Press ll!SJ to
review the message.
The
SHOW
display button appears only
if you have outstanding messages.
Press
SHOW
to review or erase
messages you have sent. Press m
to send a new message.
Enter the internal number of the
telephone to which you would like to
send a message. .x
Compact DR5 System Coordinator Guide
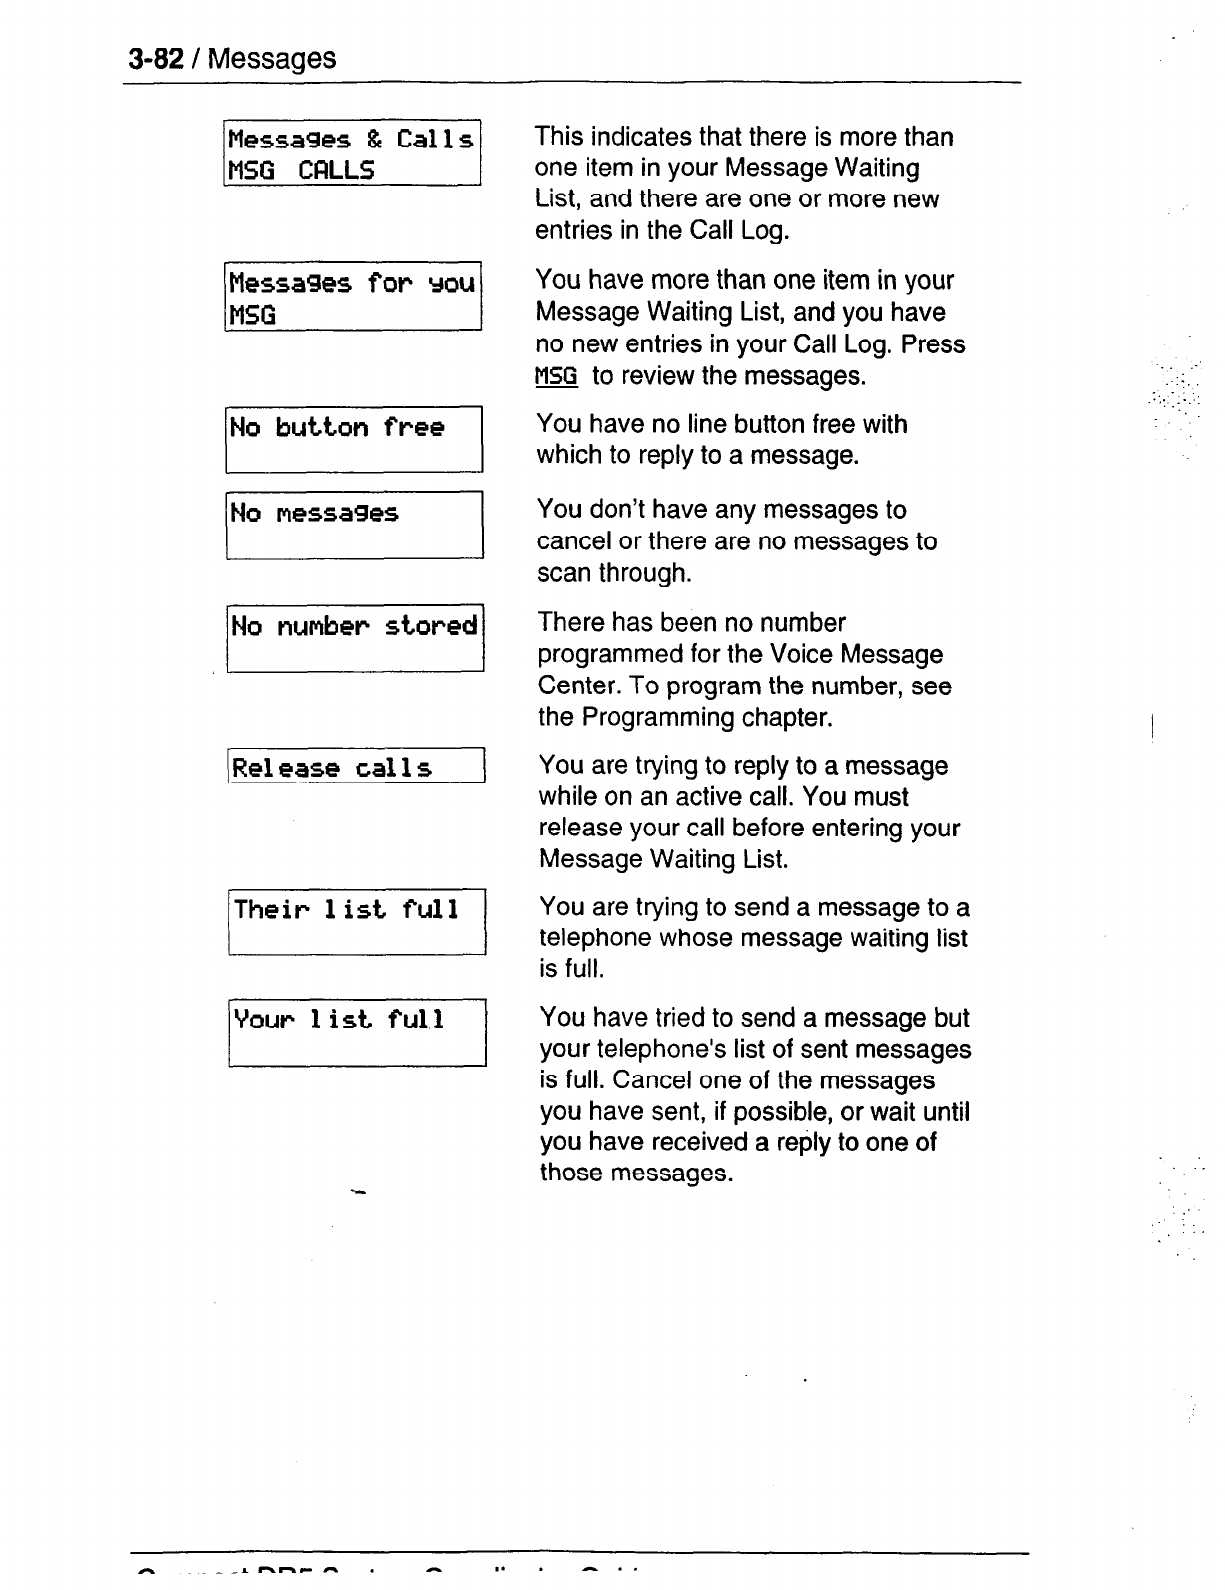
3-82 I
Messages
No
messages
[No number stored/
[Rel +ase call
s
(Their1
VcxJr
1
ist
full
I I
This indicates that there is more than
one item in your Message Waiting
List, and there are one or more new
entries in the Call Log.
You have more than one item in your
Message Waiting List, and you have
no new entries in your Call Log. Press
m to review the messages.
You have no line button free with
which to reply to a message.
You don’t have any messages to
cancel or there are no messages to
scan through.
There has been no number
programmed for the Voice Message
Center. To program the number, see
the Programming chapter.
You are trying to reply to a message
while on an active call. You must
release your call before entering your
Message Waiting List.
You are trying to send a message to a
telephone whose message waiting list
is full.
You
have tried to send a message but
your telephone’s list of sent messages
is full. Cancel one of the messages
you have sent, if possible, or wait until
you have received
a
reply to one of
those messages.
:’
::y.
:, .,
:.. ::
.__
_’
: ::
h h-CA .
I.. A..
Messages / 3-83
.:_ _-
Notes
You can send up to four messages to different telephones,
including your Voice Message Center. If your telephone is a
Direct-Dial telephone, you can send up to 30 messages.
You can receive up to four messages from different telephones,
including your Voice Message Center. The single message from
your Voice Message Center may pertain to several voice
messages.
Any message can be canceled either by the person who sent it
or by the person who received it.
If your reply to a message is forwarded or is answered at another
telephone using the Call Pickup feature, the message remains on
your telephone until you cancel it or successfully contact the
telephone that sent the message.
-:
.:
‘_ .
:.
Compact DR5 Svstem Coordinator Guide
3-84 / Norstar Telephones
Norstar Telephones
This section covers the basic features of your Norstar telephone
and optional equipment that may be attached to it.
Buttons
Feature button [_] j$;;:
You use the Feature button to invoke Norstar features. See the
Using Norstar features section.
Hold button [-I
You use the Hold button to put calls on hold. See the Hold
section. It is also used in place of the QIJ display button on
telephones with one-line displays.
Memory buttons
Memory buttons are the buttons with indicators on the M7208,
M7310, and M7324 Telephones, and the dual buttons without
indicators on the M7310 Telephone. There is also a single
memory button, without an indicator, on the M7100 Telephone.
Memory buttons can be used as any of the following buttons,
except that lines and Answer buttons must appear on buttons
with indicators.
Answer buttons
You
can use an Answer button to monitor calls on another
person’s telephone. All calls to the monitored telephone appear
on the Answer button. Such calls may also ring at the telephone
with the Answer button, depending on how the system is
configured. Answer buttons are most useful for a secretary who
monitors incoming calls for one or several managers.
If more than one call is ringing at the manager’s telephone, the
first call appears on the secretary’s Answer button. Any
subsequent calls appear on Intercom buttons if they are
available.
:
.-
_‘_
‘_
.’
Norstar Telephones / 3-85
_..I.-
‘_’ -.
.:.- ._
:::.
::.:
::
More than one secretary may have an Answer button for a single
manager. This allows two or more secretaries to handle calls for
a busy manager.
Similarly, one person can handle calls for up to four other people,
using separate Answer buttons for each person.
A secretary’s telephone should have a memory button with an
indicator programmed as the Internal Autodial button for the
manager’s telephone. This allows the secretary to call the
manager and to deal efficiently with incoming calls.
You cannot make calls using Answer buttons.
Answer buttons are set up by your Customer Service
representative.
Autodial buttons
Autodial buttons let you dial numbers by pressing a single button.
See the Autodial section.
Line buttons
You
have one line button for each line assigned to your
telephone. You press the line button to select the line you want to
answer or use to make a call. Having several line buttons allows
you immediate access to more than one line so you can handle
and monitor calls easily. The M7100 Telephone does not have
_
line buttons and can have a maximum of two lines. You can
switch between its two lines, one active and one on hold, by
pressing [HOldI.
Line buttons are set up by your Customer Service representative.
Programmed Feature Buttons
Programmed feature buttons allow you to invoke Norstar features
by pressing a single button. See the Feature programming
section.
Compact DR5 Svstem Coordinator Guide
3-86 / Norstar Telephones
Release button @
Pressing m ends a call. You do not have to put the receiver
down. @ also ends feature programming.
While you are on a call, do not press (Rls to end a feature you
are using (such as Show Message). If you do, you will disconnect
the call. Use [Feature] instead. .:.
‘, : _:-,.
.-:..
:: ‘_
Volume bar [q----pq 1..
..y..
The volume bar controls the volume of the receiver, telephone
-.
.:
ring, Handsfree speaker, headset and background music. Press
either end of the volume bar (1-J) to adjust the volume.
Headset
A headset lets you keep both hands free while you are on a call
without others overhearing your telephone conversations.
If you plug a headset into your telephone while you are on a call,
your telephone’s microphone and speaker (or your receiver if you
are on a regular call) are turned off and your headset microphone
and earpiece are turned on.
You must have the Handsfree/Mute feature assigned to your
telephone if you wish to use a headset.
While you are using the headset, the receiver and the switch in
the telephone cradle do not work.
A headset cannot be used on an M7100 Telephone.
:. __
Using a headset
\
While on a call using the headset, press (Handsfree] to turn your
headset on and off.
To answer a call, press (Handsfree).
.:
To adjust the volume, press the appropriate side of the volume
bar
([ej [do]).

Norstar Telephones / 3-87
To change to a Handsfree call while you are on a call using your
headset, unplug your headset. Your telephone’s microphone and
speaker turn on and the call becomes a Handsfree call. (It is a
good idea to put the call on hold while you do this.)
.
You may see this prompt when you try to use a headset.
INeed Handsfree 1 You
are attempting to use a headset,
but Handsfree/Mute is not
programmed for your telephone. If you
are not using a headset, you have
accidentally plugged your telephone
receiver into the headset jack on the
bottom of the telephone.
Hearing aid compatibility
The receivers on all Norstar telephones are compatible with
hearing aids as defined in the FCC rules, Part 68, section
68.316.
Note: Not all hearing aids are optimized for use with a
telephone.
..:_
_,.;
_’ : _.
,_‘i
:
Wall mounting
Most Norstar telephones can be mounted on a wall. Contact
your’
Customer Service representative if you wish to have any
telephones in your system wall-mounted.
3-88 I Page
Page
IFeature
1 u w
Make a page announcement
You can make announcements over the Norstar system.
1. Press (FeatureJam.
2. Choose a page type.
3. If necessary, choose a zone.
‘. :
‘::-: :
:__
..:
4. Make your announcement.
5. Press HI.
Page types are
:
El
through the telephone speakers (Internal Page)
H through an external speaker (External Page)
Kl both Internal and External (Combined Page)
Paging shortcuts
Instead of entering the Page feature code followed by the page
type, you can enter the following shortcut codes.
internal [Feature1 (S]
q
and zone (0 to 3)
External [FeatureI IS 12 (code 2 has no zones)
Combined [Feature] [I 13 and zone (0 to 3)
Related.features
Voice Call (Feature]fTJFJ
You
can
make an announcement to one person by placing
a
voice call to their telephone.
:-:
: :..
Displays
You will see some of these displays while making a Page
announcement.
~Oenied in admin
/
Your telephone has not
been
programmed to allow paging.
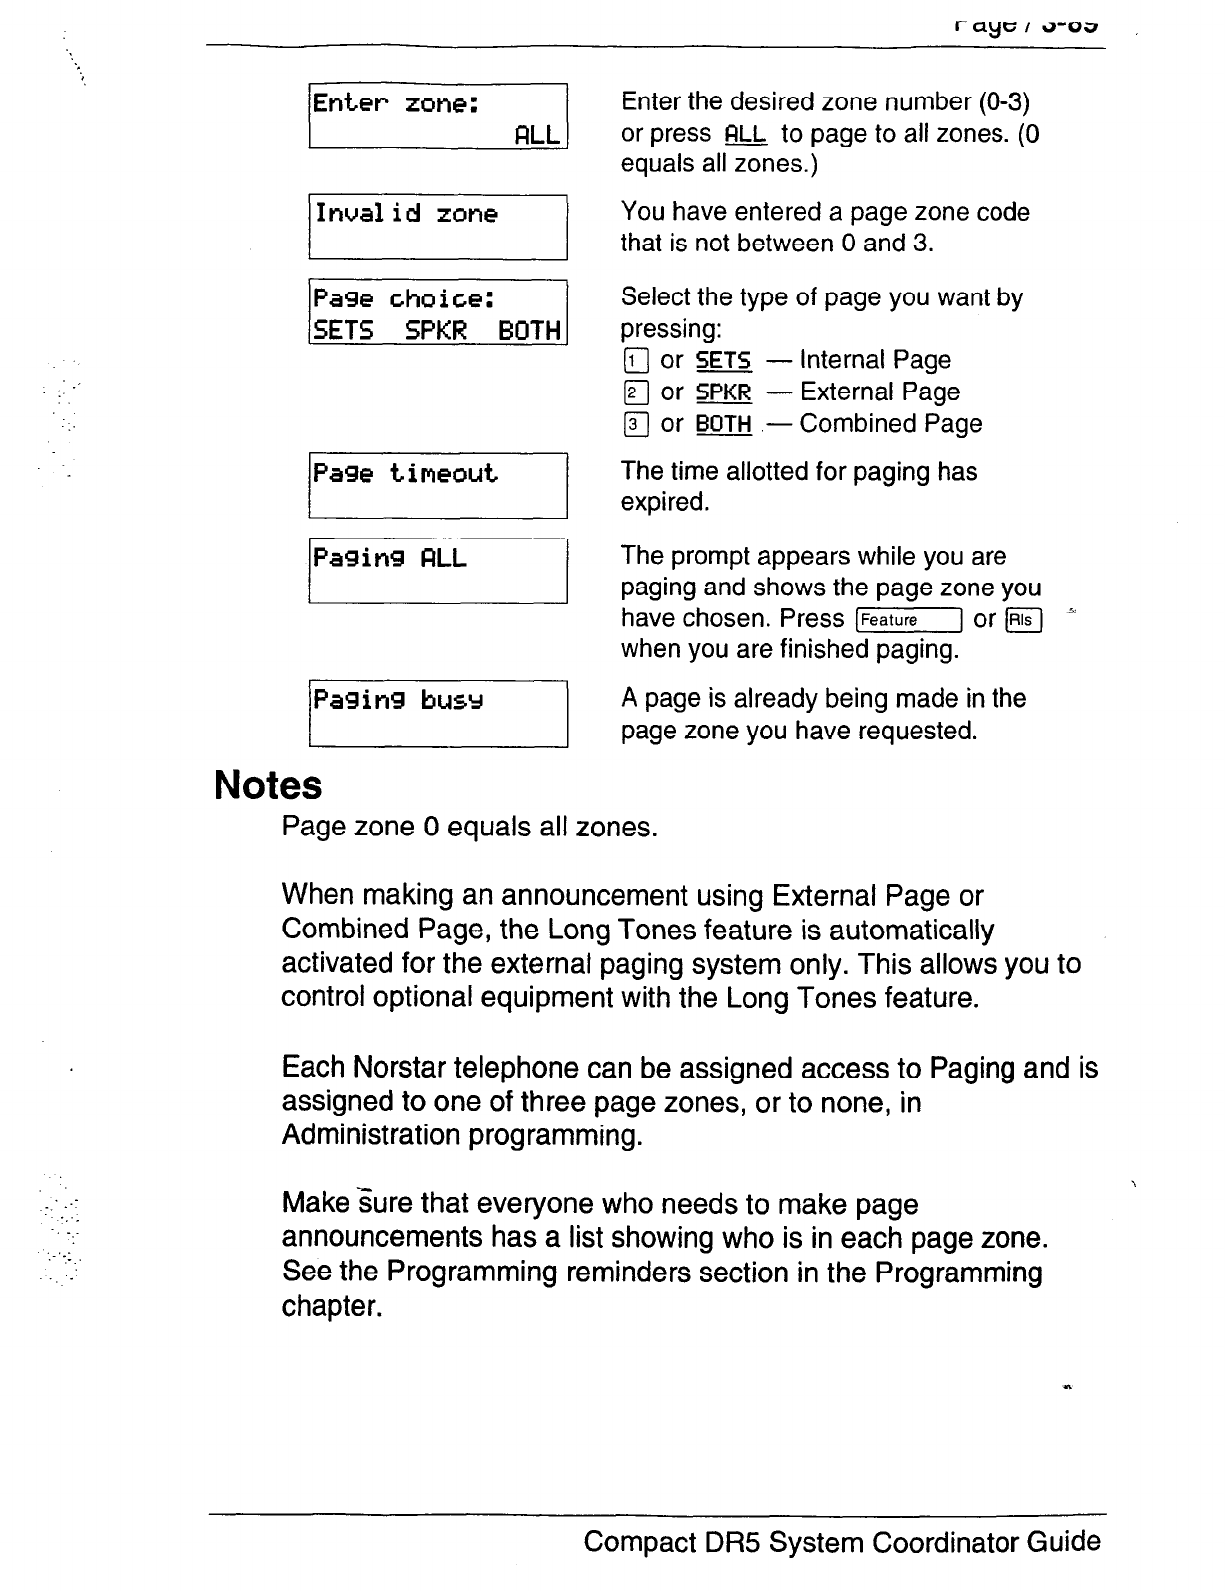
r
aye; i
d-f23
pi&x--J
Inval id zme
t
I
/Pasins
baging
Notes
Enter the desired zone number (O-3)
or press r7l-J to page to all zones. (0
equals all zones.)
You have entered a page zone code
that is not between 0 and 3.
Select the type of page you want by
pressing:
a or
SETS -
Internal Page
q
or
SPKR -
External Page
a or
BOTH .-Combined
Page
The time allotted for paging has
expired.
The prompt appears while you are
paging and shows the page zone you
have chosen. Press [Feature\ or m -5.
when you are finished paging.
A page is already being made in the
page zone you have requested.
Page zone 0 equals all zones.
When making an announcement using External Page or
Combined Page, the Long Tones feature is automatically
activated for the external paging system only. This allows you to
control optional equipment with the Long Tones feature.
Each Norstar telephone can be assigned access to Paging and is
assigned to one of three page zones, or to none, in
Administration programming.
Make sure that everyone who needs to make page
announcements has a list showing who is in each page zone.
See the Programming reminders section in the Programming
chapter.
n
Compact DR5 System
Coordinator
Guide
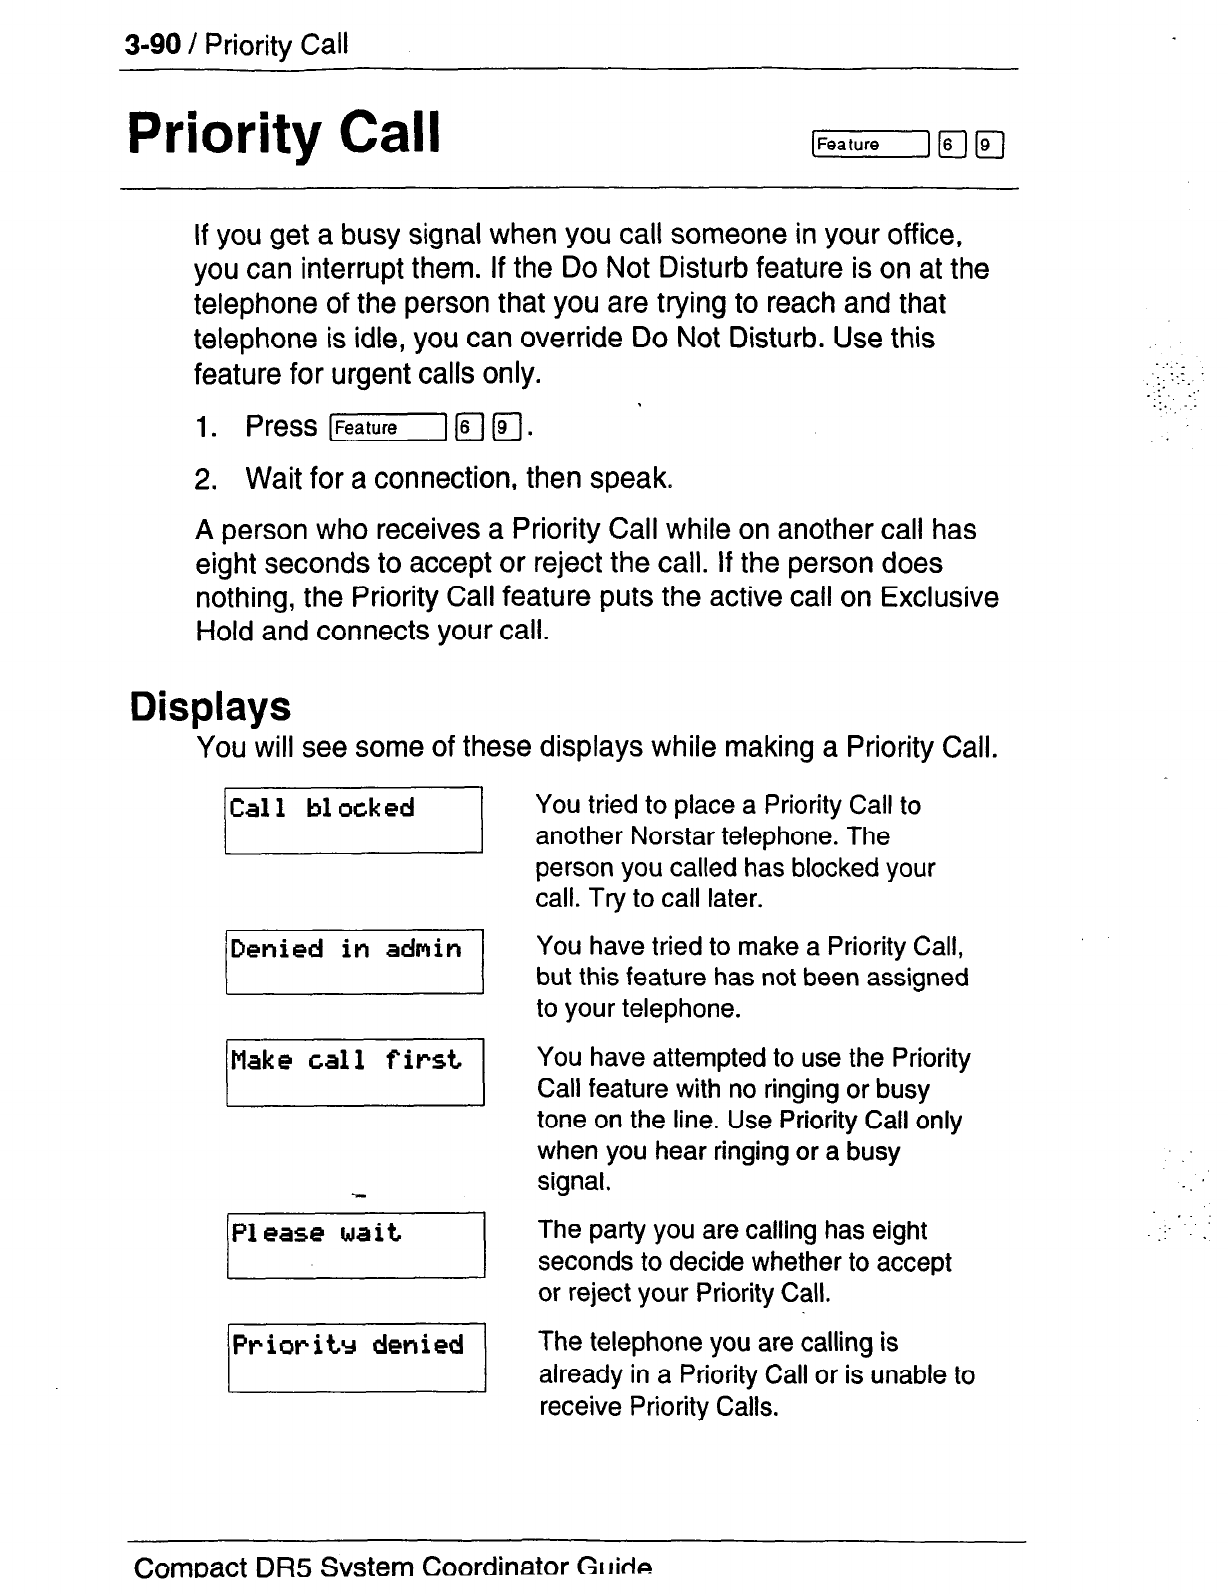
3-90 / Priority Call
Priority Call
If
you
get a
busy signal when you call someone in your office,
you
can interrupt them. If the Do Not Disturb feature is on at the
telephone of the person that you are trying to reach and that
telephone is idle, you can override Do Not Disturb. Use this
feature for urgent calls only.
2. Wait for a connection, then speak.
A
person who receives a Priority Call while on another call has
eight seconds to accept or reject the call. If the person does
nothing, the Priority Call feature puts the active call on Exclusive
Hold and connects your call.
Displays
You
will see some of these displays while making a Priority Call.
Cal 1 bl
ocked
(Denied in admin
1
Make call first
I I
(Please wait
I
You tried to place a Priority Call to
another Norstar telephone. The
person you called has blocked your
call. Try to call later.
You have tried to make a Priority Call,
but this feature has not been assigned
to your telephone.
You have attempted to use the Priority
Call feature with no ringing or busy
tone on the line. Use Priority Call only
when you hear ringing or a busy
signal.
The party you are calling has eight
seconds to decide whether to accept
or reject your Priority Call.
The telephone you are calling is
already in a Priority Call or is unable to
receive Priority Calls.
.::_
.__
::-
‘_._
..:‘.
:’
: ,. -.
,.
1.
_. . .
Comoact
DR5 Svstem Coordinator
Gtlih
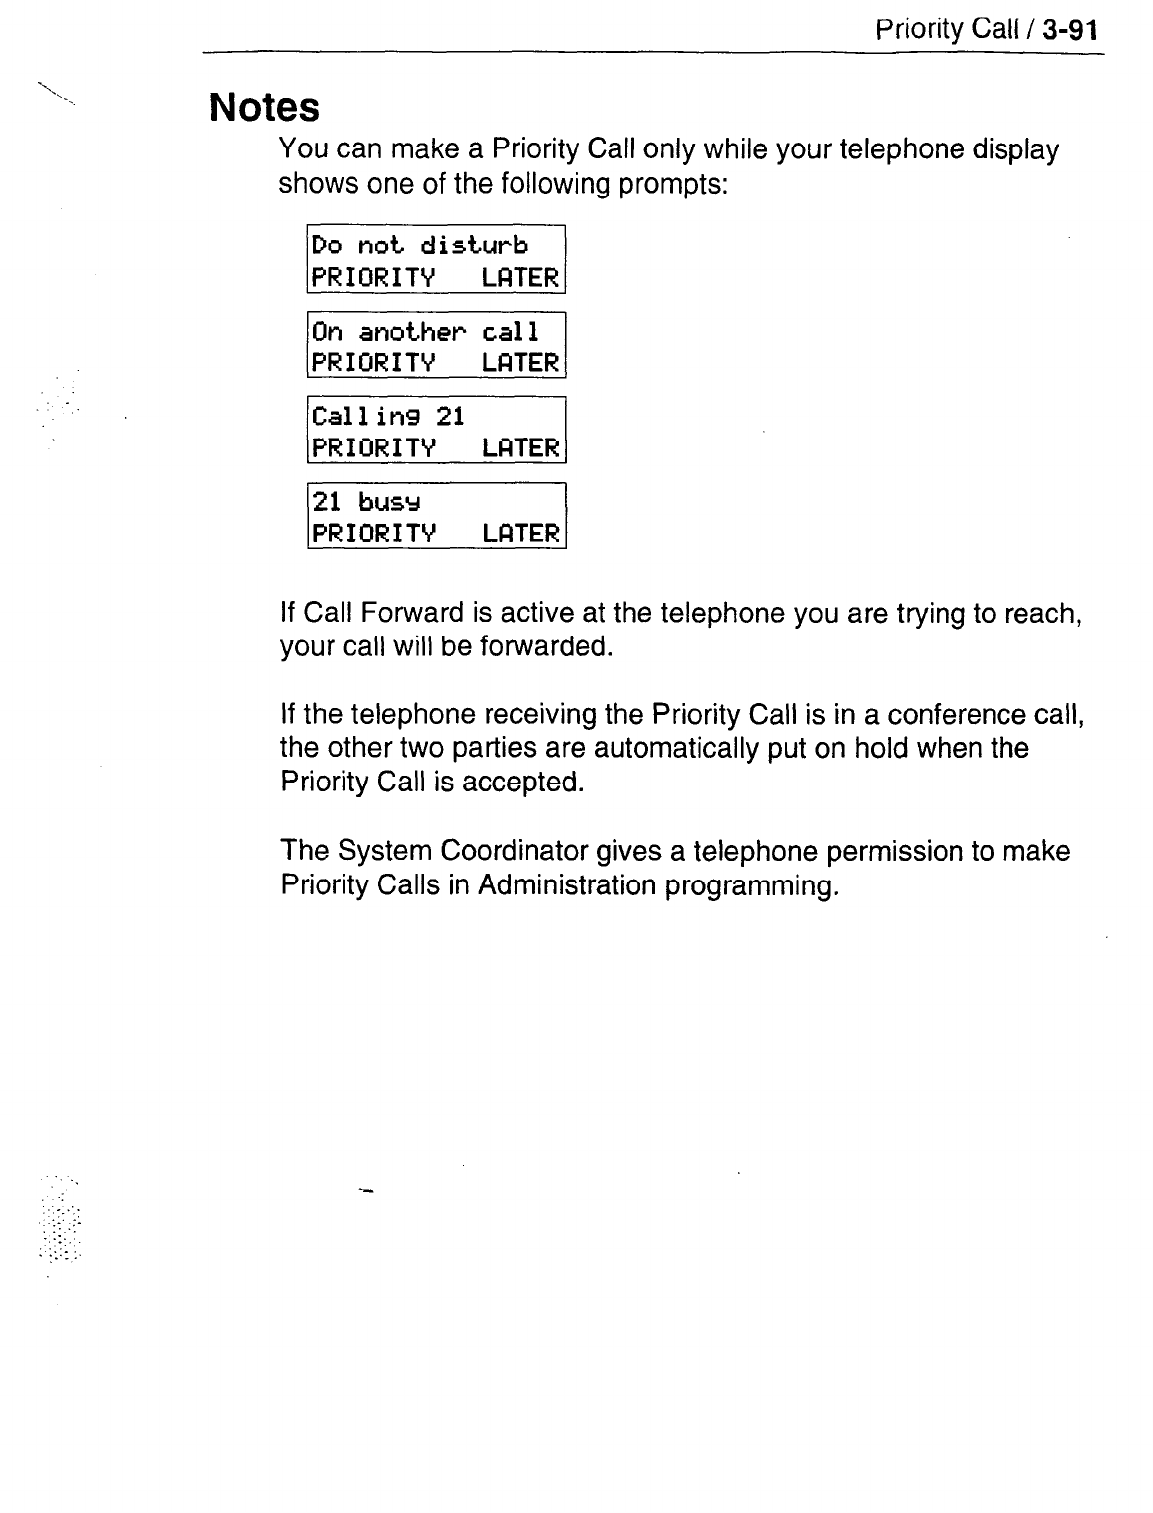
Priority Call / 3-91
-Y.
. . . .
:
‘.
:: -.
1. ::
.,.I. :
: i::: :.
Notes
You can make a Priority Call only while your telephone display
shows one of the following prompts:
If Call Forward is active at the telephone you are trying to reach,
your call will be forwarded.
If the telephone receiving the Priority Call is in a conference call,
the other two parties are automatically put on hold when the
Priority Call is accepted.
The System Coordinator gives a telephone permission to make
Priority Calls in Administration programming.
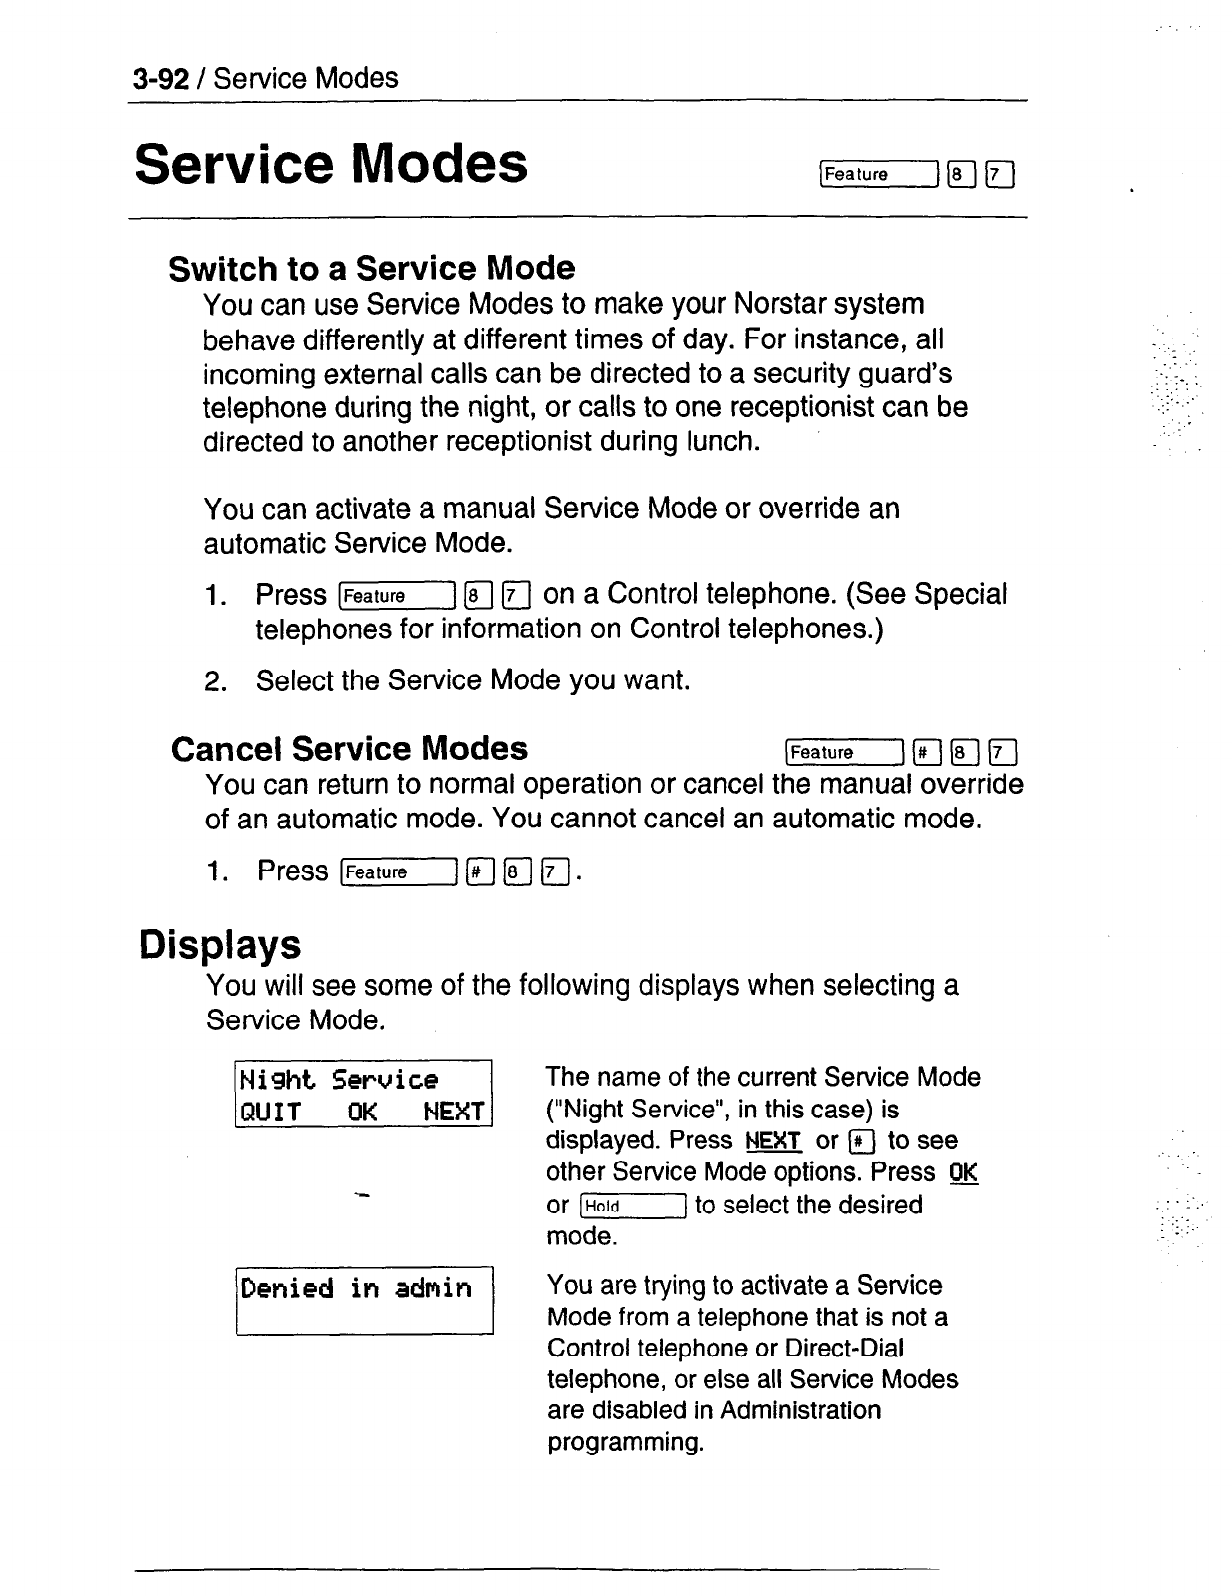
:-.
3-92 / Service Modes
Service Modes
Switch to a Service Mode
You
can use Service Modes to make your Norstar system
behave differently at different times of day. For instance, all
incoming external calls can be directed to a security guard’s
telephone during the night, or calls to one receptionist can be
directed to another receptionist during lunch.
You can activate a manual Service Mode or override an
automatic Service Mode.
1.
Press (-1 a 0 on a Control telephone. (See Special
telephones for information on Control telephones.)
2.
Select the Service Mode you want.
Cancel Service Modes fFzx--l~~~
You can
return to normal operation or cancel the manual override
of an automatic mode. You cannot cancel an automatic mode.
1.
Press [Feature] a [T] m.
Displays
You
will see some of the following displays when selecting a
Service Mode.
The name of the current Service Mode
(“Night Service”, in this case) is
displayed. Press
NEXT
or a to see
other Service Mode options. Press w
or [J to select the desired
mode.
IDenied in admin
/
You are trying to activate a Service
Mode from a telephone that is not a
Control telephone or Direct-Dial
telephone, or else all Service Modes
are disabled in Administration
programming.
‘_ .,.
. . . _
1:
-_ .
:,:.
‘. .,
.::
_:.
..:
:
‘_‘_
:
‘:_ :..
3t31VIc;t: IvIuue:s
I
d-=13
Notes
A Service Mode allows you to change which lines ring at which
telephone, to activate or deactivate the auxiliary ringer for certain
lines, and to have calls to the Direct-Dial telephone ring at the
Extra-Dial telephone. Service Modes can be programmed to
begin automatically at certain times or they can be turned on and
off at the Control telephone. Service Modes are set up in
Administration programming.
Automatic Service Modes are indicated by an asterisk (*) before
the name of the Service Mode on the display. You can neither
manually activate nor cancel automatic Service Modes, although
you can override them with manual modes,
The Control telephone can override automatic Service Modes at
any time by entering the Service Modes feature code
([Feature] [F’] n), and selecting a different Service Mode; this
override will remain in effect until it is canceled by means of
rj
q
m fl. Note that if you selected a Service Mode
with an asterisk (*), the next automatic Service Mode will come
into effect at the programmed time.
Direct-Dial calls to a Direct-Dial telephone will ring at the
Extra-Dial telephone (designated in Administration programming)
only when the Service Modes feature code ((-1 fFJ m) is
entered at that Direct-Dial telephone. Note that only the
Extra-Dial telephone will be activated, not the actual Service
Mode (unless that Direct-Dial telephone is also a Control
‘telephone).
Norstar provides three Service Modes named “Night”, “Evening”,
and “L>nch”. You can change these names to suit yourself. In
addition, there is normal service when no Service Modes are
active.
Compact DR5 System Coordinator Guide
3-94 / Special Telephones
Special Telephones
You can assign several special functions to the telephones in
your Norstar system. Except where noted, you do not need
special hardware. A special function is assigned to a telephone
either by your Customer Service representative in Configuration
programming or by the System Coordinator in Administration
programming.
::-:
I’
.-
I_ ::.
::. .:
..._.
..‘:-.
-1
:
Control telephone
The Control telephone lets you place the external lines for which
it has responsibility into and out of Service Modes. See Service
Modes.
Direct-Dial telephone
You can dial a Direct-Dial telephone with a single digit. The
Direct-Dial telephone is usually in a central location, such as a
.
receptionist’s or secretary’s desk. It is usually a Prime telephone
with a CAP module.
There may be none or one Direct-Dial telephone in your system.
Each telephone in the system can be assigned to the Direct-Dial
telephone. There is a single Direct-Dial digit for the whole system
that lets each assigned telephone call the Direct-Dial telephone.
Each Norstar Direct-Dial telephone can send up to 30 messages
and each can invoke Service Modes to activate the Extra-Dial
telephone. (It cannot activate the entire Service Mode unless it is
also the Control telephone.)
Your Customer Service representative programs the Direct-Dial
digit in Configuration programming. The Direct-Dial telephone is
identified and assigned to telephones in Administration
programming.
..’
I
_.’
Comoact DR5 Svstem Coordinator
GIh-Ita

Special
I
elephones
/ 3-95
.
: . .
1.
‘_
._‘_ .
:
:
.s
.
.._I_
Emergency telephone
The Emergency telephone is a single-line telephone (not a
Norstar telephone) that functions independently of the Norstar
system. You can use the Emergency telephone when your
Norstar system is not working.
Emergency Transfer/Power Failure Cut-through provides basic
telephone service on external line 01 through an Emergency
telephone if the power fails or if a system error occurs.
The Emergency telephone is usually located near the Key
Service Unit (KSU). Each KSU can support two Emergency
telephones, and each Trunk Module can support one additional
Emergency telephone.
Extra-Dial telephone
In Service Modes, a second telephone can be assigned to ring
on calls made to the Direct-Dial telephone. There may be one
Extra-Dial telephone for the Direct-Dial telephone, and it may be
a different telephone in each Service Mode.
Hotline telephone
You can call a programmed internal or external telephone
number simply by picking up the receiver of the Hotline telephone
(or by pressing IHandsfreej).
A Hotline telephone can be set up to dial an operator or an.
emergency number. You should put a notice by the Hotline
telephone to let people know which number will be dialed when
they lift the receiver.
If the Hotline telephone is set up to dial an external number using
the Prime line, there must be an external Prime line assigned to
the telephone. If not, the Hotline call will fail.
The System Coordinator sets up the Hotline telephone, the
telephone number it dials, and the line on which that number is
dialed, in Administration programming.
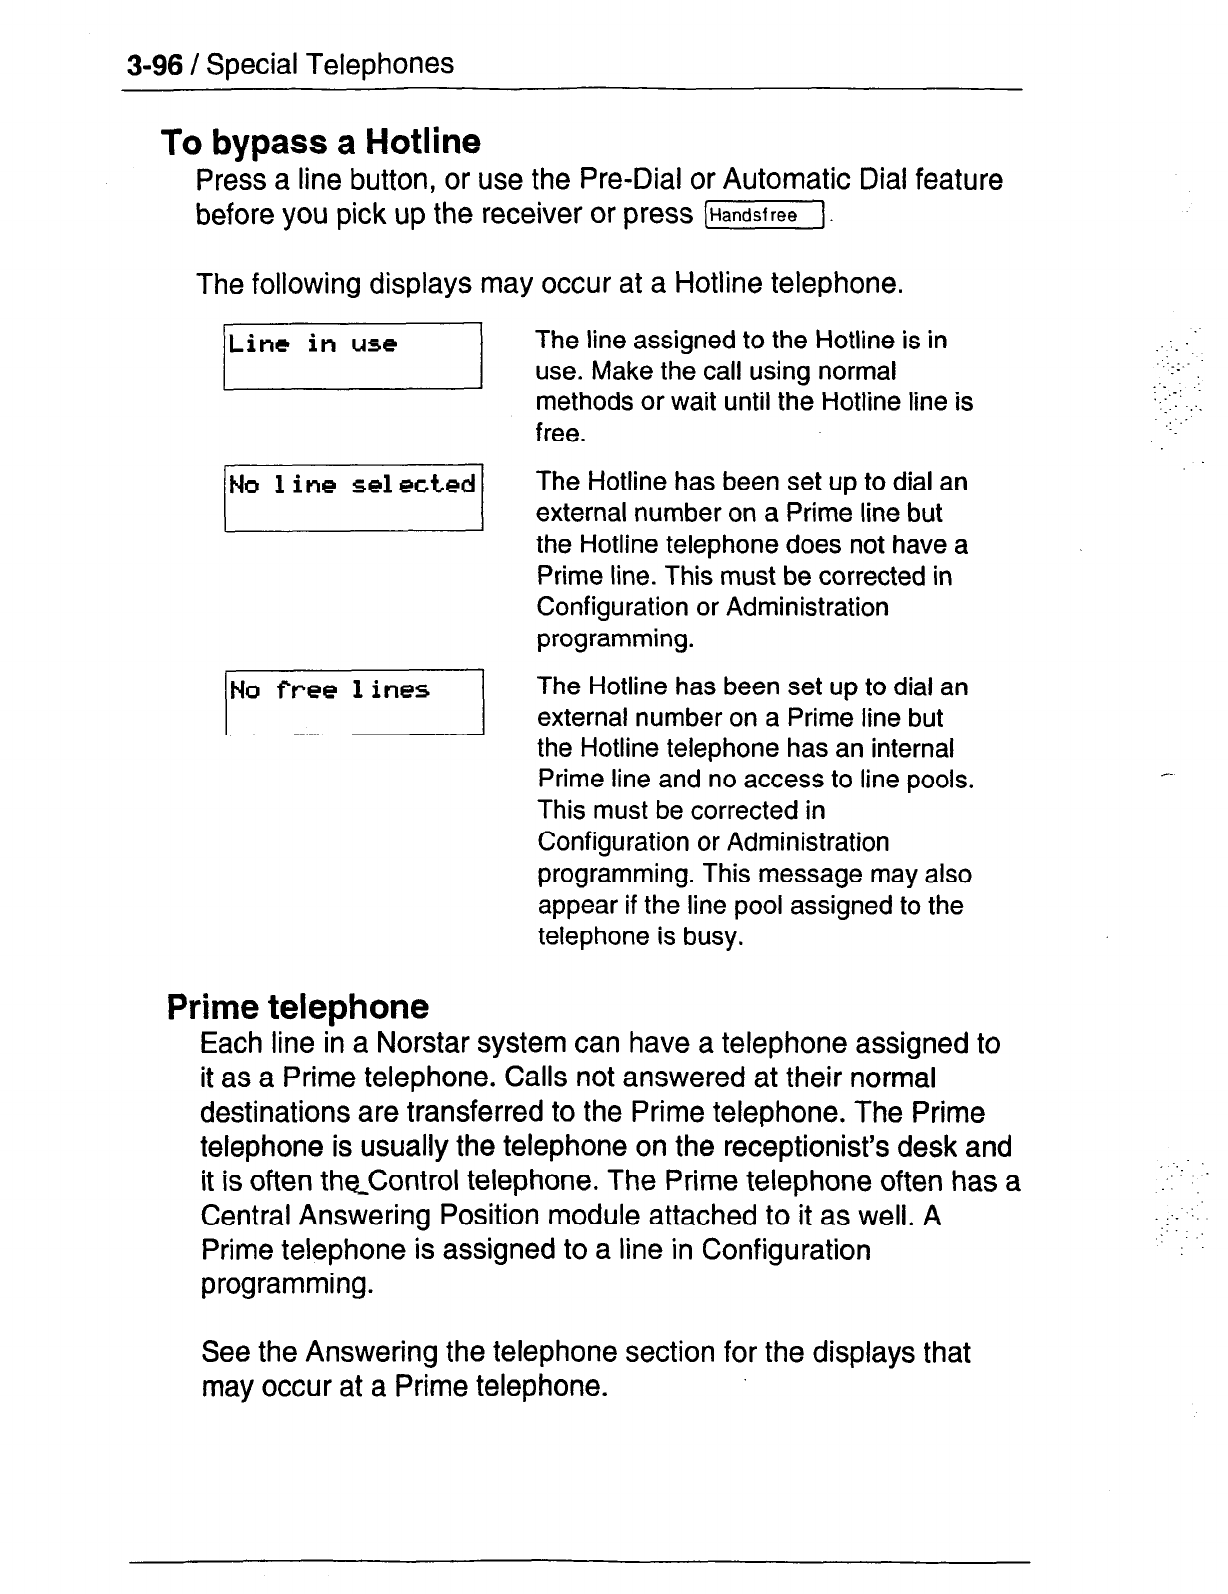
3-96 / Special Telephones
To bypass a Hotline
Press a line button, or use the Pre-Dial or Automatic Dial feature
before you pick up the receiver or press (Handsfree].
The following displays may occur at a Hotline telephone.
Line in use
The line assigned to the Hotline is in
use. Make the call using normal
methods or wait until the Hotline line is
free.
The Hotline has been set up to dial an
external number on a Prime line but
the Hotline telephone does not have a
Prime line. This must be corrected in
Configuration or Administration
programming.
The Hotline has been set up to dial an
external number on a Prime line but
the Hotline telephone has an internal
Prime line and no access to line pools.
This must be corrected in
Configuration or Administration
programming. This message may also
appear if the line pool assigned to the
telephone is busy.
Prime telephone
Each line in a Norstar system can have a telephone assigned to
it as a Prime telephone. Calls not answered at their normal
destinations are transferred to the Prime telephone. The Prime
telephone is usually the telephone on the receptionist’s desk and
it is often the_Control telephone. The Prime telephone often has a
Central Answering Position module attached to it as well. A
Prime telephone is assigned to a line in Configuration
programming.
_’ .
,: :_-
_‘_ ._
:,..-:
;-:
:. :.
See the Answering the telephone section for the displays that
may occur at a Prime telephone.
;.
_’
. . .:.
..:; :
.,. -.
.: -::
-:
I~.:’
::
_
S,peed Dial
Make a Speed Dial call
You can quickly dial external telephone numbers that have been
programmed
onto Speed Dial codes.
1.
Press (Feature@J.
2. Enter the appropriate two-digit Speed Dial code.
Norstar supports two types of Speed Dial codes, Personal and
System. System Speed Dial codes are from 01 to 70. The
System Coordinator can assign numbers to System Speed Dial
codes for the entire system in Administration programming.
Personal Speed Dial codes are from 71 to 94 and may have
different numbers assigned to them on each telephone. Users
can program their own Personal Speed Dial numbers.
Program Personal Speed Dial [@F-y m FJ
You can add or change a Personal Speed Dial number on your
telephone.
1.
2.
3.
4.
5.
Enter the code that you want to associate with a telephone
number.
If you want to include a line selection for this number, select
the line or line pool button. For the M7100 Telephone, you
can select a line pool button only.
Enter the number you want to program.
PI&S QK or r].
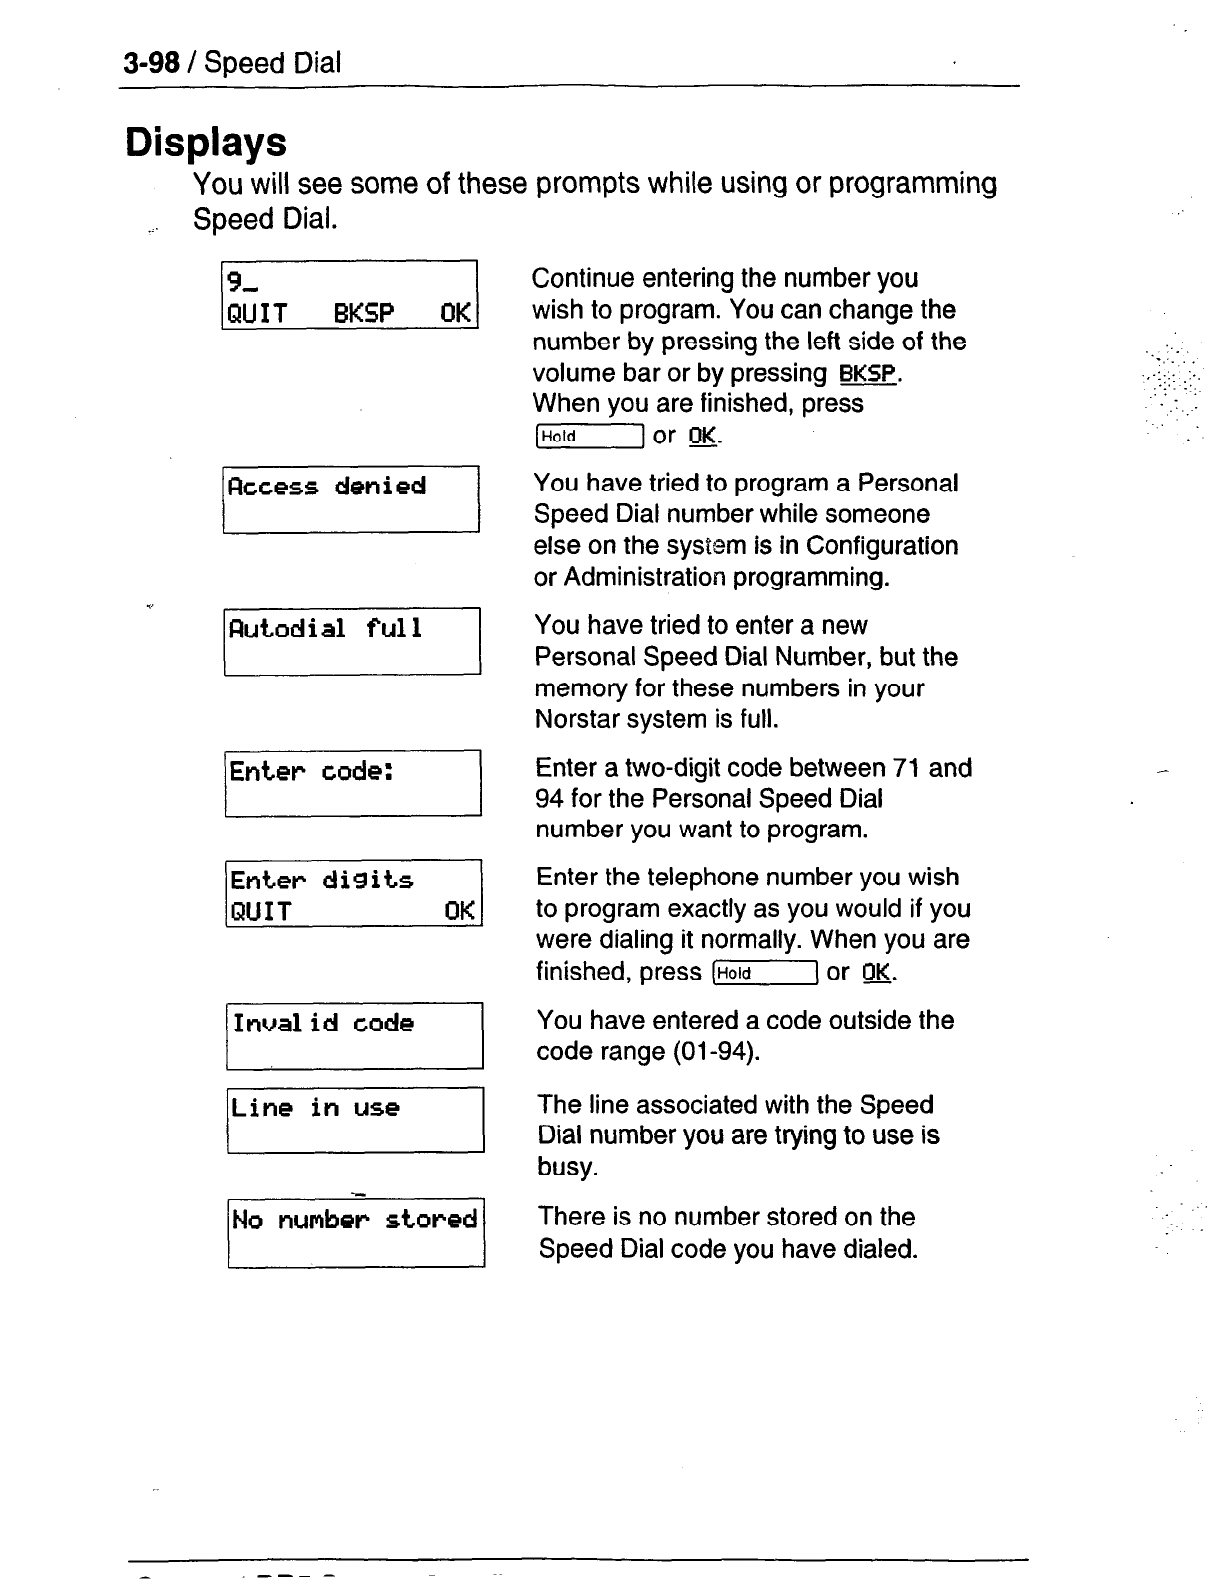
3-98 /
Speed Dial
Displays
You will see some of these prompts while using or programming
.: Speed Dial.
Enter
/Inualidl
I
1
I
Line in u50
Continue entering the number you
wish to program. You can change the
number by pressing the left side of the
volume bar or by pressing
BKSP.
When you are finished, press
[Hold]
or OK.
.
You have tried to program a Personal
Speed Dial number while someone
else on the system is in Configuration
or Administration programming.
You have tried to enter a new
Personal Speed Dial Number, but the
memory for these numbers in your
Norstar system is full.
Enter a two-digit code between 71 and
94 for the Personal Speed Dial
number you want to program.
Enter the telephone number you wish
to program exactly as you would if you
were dialing it normally. When you are
finished, press (Hold1 or 04.
You have entered a code outside the
code range (01-94).
The line associated with the Speed
Dial number you are trying to use is
busy.
There is no number stored on the
Speed Dial code you have dialed.
1..
.._,. .
..-:.:: ,:.,
::..
-1:.
‘..
. :._.
.
--_ -
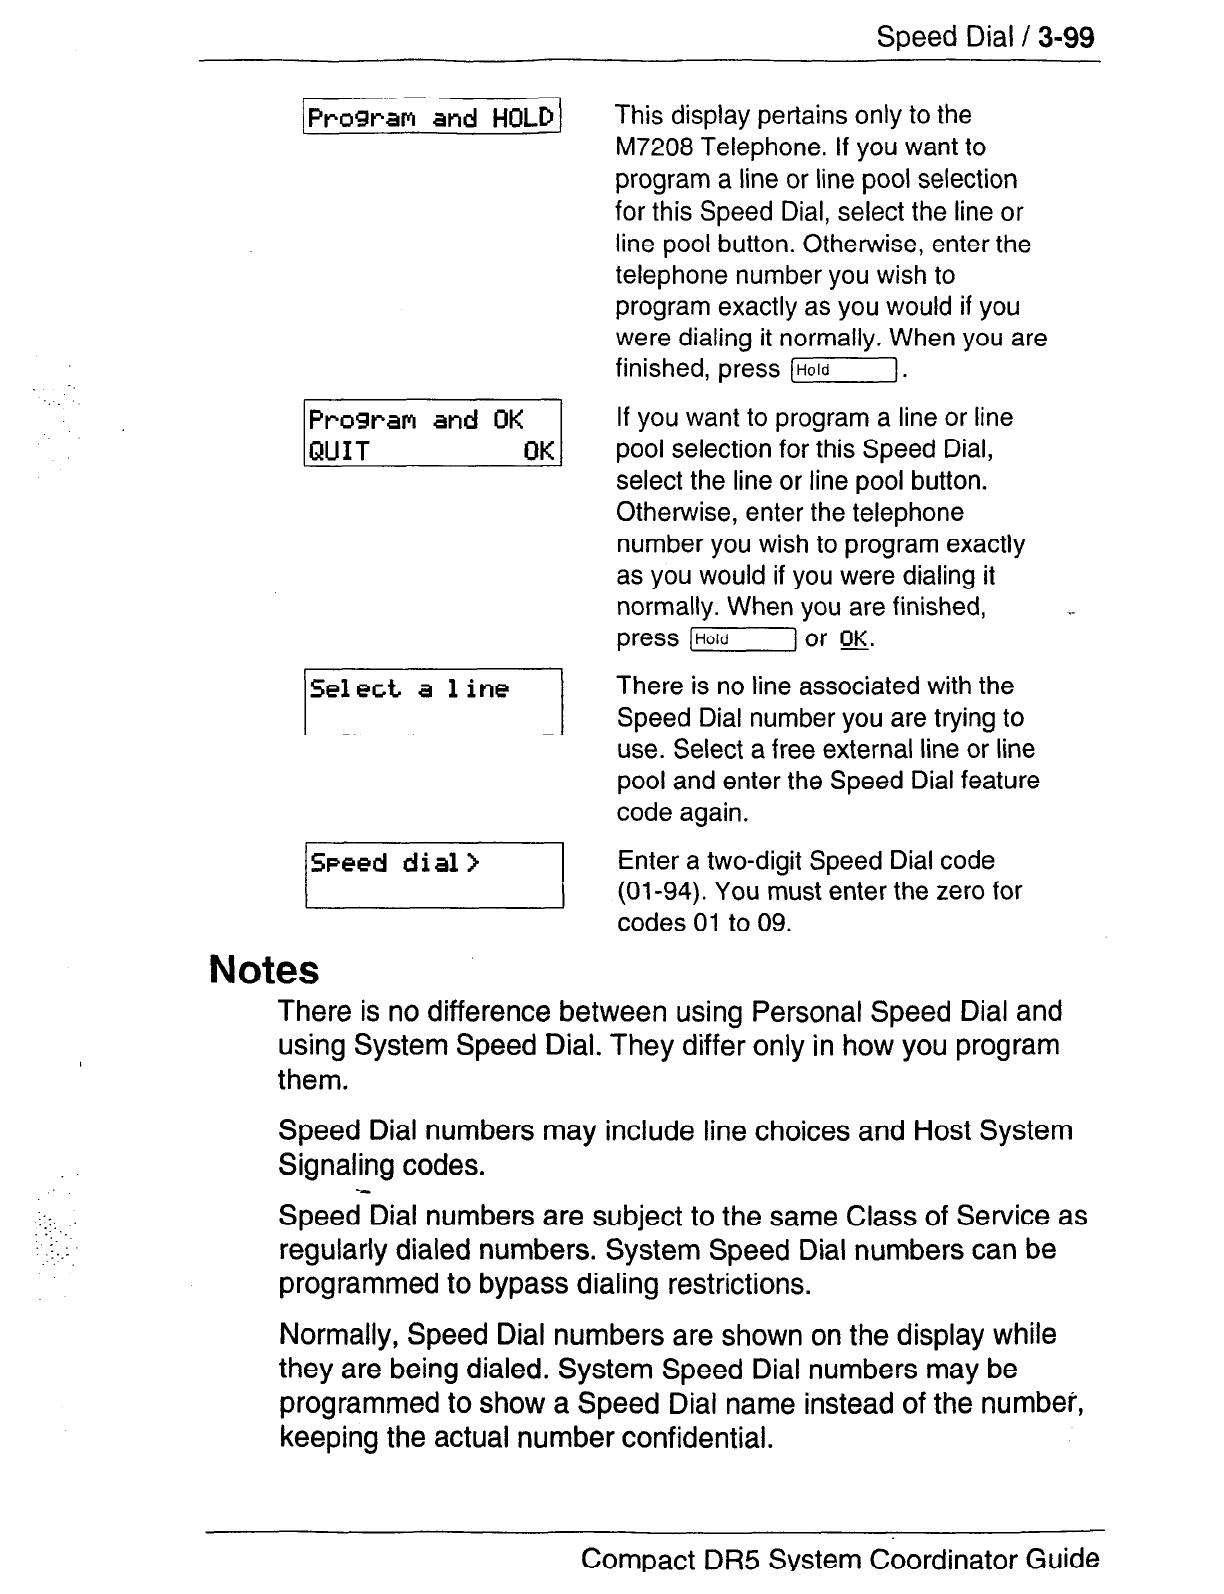
Speed Dial / 3-99
:._
‘.‘.
: ._
:-
.I..:
/Prosram and HOLD/
This display pertains only to the
M7208 Telephone. If you want to
program a line or line pool selection
for this Speed Dial, select the line or
line pool button. Otherwise, enter the
telephone number you wish to
program exactly as you would if you
were dialing it normally. When you are
finished, press [HOldj.
p&lGiq
If you want to program a line or line
pool selection for this Speed Dial,
select the line or line pool button.
Otherwise, enter the telephone
number you wish to program exactly
as you would if you were dialing it
normally. When you are finished,
.-
press IHOld/ or OK.
lSel4~t a 1 im
There is no line associated with the
Speed Dial number you are trying to
use. Select a free external line or line
pool and enter the Speed Dial feature
code again.
/SPeed
Enter a two-digit
Speed Dial code
(01-94). You
must enter the zero for
codes 01 to 09.
Notes
There is no difference between using
using System Speed Dial. They differ
them.
Speed Dial numbers may include line
Signaling codes.
Personal Speed Dial and
only in how you program
choices and Host System
Speed Dial numbers are subject to the same Class of Service as
regularly dialed numbers. System Speed Dial numbers can be
programmed to bypass dialing restrictions.
Normally, Speed Dial numbers are shown on the display while
they are being dialed. System Speed Dial numbers may be
programmed to show a Speed Dial name instead of the number,
keeping the actual number confidential.
Compact
DR5
System Coordinator Guide
3400 / System features
System features
The following system features are available for the entire Norstar
system,
with the exception of Disconnect Supervision.
The
availability of Disconnect Supervision is dependent on the
presence of an Open Switch Interval (03) message.
Accidental Disconnect Protection
If you accidentally drop the receiver back into the telephone
cradle while answering a call, you can quickly retrieve the call.
1. Pick up the receiver again or press lHandsfreej. You are
connected to your call.
Automatic telephone relocation
If Automatic telephone relocation is enabled, you can move your
telephone from one Norstar jack to another without it losing any
of its custom programming. Your Customer Service
representative enables Automatic telephone relocation in
Configuration programming.
Background Music
You can listen to music through your telephone speaker.
1. Press [Featurelam.
WARNING
In accordance with U.S. copyright law, a license may be
required from the American Society of Composers,
Authors and Publishers or a similar organization if radio
or TV broadcasts are transmitted through the
Background Music feature of this telecommunication
system.
Northern Telecom Inc. hereby disclaims any liability
arising out of the failure to obtain such a license.
:. .;
. . . . .:
._
:::i. - :::
.. ._
::
:
._
.,’
:
3ysrem features
/ 31 I u I
.., ::’
:.. . .
:.,_
The music stops automatically if you make or answer a call.
Your Customer Service representative makes this feature
available to all telephones in Configuration programming. You will
need to supply a music source, such as a radio, attached to your
KSU.
Cancel Background Music
You can cancel Background Music.
1. Press lFeafule]~~~.
Class of Service
The Class of Service for a call consists of all the Norstar features
and lines available to you for that call. This is determined by the
features assigned to the telephone in Administration
programming, including all Dialing Filters.
Users who need to dial numbers not permitted by the Class of
Service of the line or telephone that they are using, can switch to
a different Class of Service by entering a Class of Service
Password.
Internal numbers
Each telephone in the Norstar system has its own internal
number. The length of internal numbers in your system is 2 digits.
Your Customer Service representative assigns internal numbers
in Configuration programming. W.
To find out your internal number, use the Button Inquiry feature
([r] m u)
on an internal line button. On the M7100
Telephone, Button Inquiry shows your internal number followed
by the--function assigned to your single memory button.
_-. ._
::i::
._
.: ..-
Compact DR5 System Coordinator Guide
3-102 /
System features
Lines
The following features and characteristics are associated with the
use of lines.
Disconnect Supervision
Disconnect Supervision is available when an Open Switch
Interval (03) message is provided on a line by the public
telephone system.
. ::...
,--. :. .::
.: :
:.
1, .:
.:I:. _-,
...I _.
If Disconnect Supervision is available, your Customer Service
representative assigns Disconnect Supervision to lines in
Configuration programming. When Disconnect Supervision is
assigned to a line, the Norstar system monitors the length of the
OSI on that line to determine when an external caller hangs up.
This allows the system to release the line for other uses.
You can determine if a line is disconnect supervised by referring
to the
Compact DR5 Programming Record.
Line appearance
Any of the lines in your system may appear at any of your
telephones. Your Customer Service representative assigns lines
to telephones in Configuration programming.
Usually, only the lines that are appropriate for a particular person
appear at that person’s telephone. When a line is assigned to a
telephone it is automatically given a line button on that
telephone, if a button is available. The M7100 Telephone has no
line buttons for its lines.
Normally, yoke cannot answer a call that is ringing on a line that
does not appear on your telephone. To pick up such a call, use
Call Pickup, Call Park, or Transfer.
: :
: ::,
_-
_.’
: A_ ,:
:_
_. ::
Hung lines
A line that has been redirected using Line Redirection may
remain busy after a call is over. If this happens, the outgoing line
for the redirection will also remain
busy.
These are hung lines
and you must clear them.
System features / 3-103
.._ ._
.’
:..: :::;
:I...::
.:’ :
A line indicator that has been solid for a long time is the only real
indication that a line is hung. However, the solid line indicator
may also indicate a genuine call in progress. Make reasonably
sure that the line is indeed hung before clearing it or you may cut
off a real conversation.
You can clear a hung line only at the telephone that was used to
redirect the line.
1. Press (Feature] a /FJ at the telephone that was used to
redirect the line.
2. Press the button of the redirected line.
3. Press
SHOW
or
q
.
4. Press
DROP
or m. The hung line is cleared.
Clearing the redirected line clears the outgoing line for the
redirection as well.
Line Pools
A line pool allows each telephone access to external lines from a
group (or “pool”) of external lines. You can access such lines by
pressing an Intercom button and entering a line pool access
code, by entering the feature code and entering a line pool
access code, or by pressing a memory button programmed with
the line pool feature code and a line pool access code.
Your Customer Service representative gives telephones access
to Line Pools and assigns line pool access codes in
Configuration programming.
Private
lines
A Private line is exclusive to a particular telephone. Calls that are
put on hold or left unanswered on a Private line cannot be picked
up at any telephone except the Prime telephone.
Your Customer Service representative assigns private lines in
Configuration programming.
Comoact
DR.5 Svstem
Cnnrdinatnr Gllidn
3-104 /
System features
Prime line
Your
telephone can be programmed to select an internal or
external line or a line pool automatically whenever you lift the
receiver or press lHandsfree]. This is your Prime line.
Your Customer Service representative assigns your prime line in
Configuration programming.
Ringing Line Preference
Each telephone in the Norstar system can be programmed by
your Customer Service representative to ring or remain silent for
incoming calls on any external lines that appear on the
telephone.
,
For example, a telephone may have buttons assigned for lines
01 to 03, but have only lines 01 and 02 programmed to ring. An
incoming call on any of the three lines causes
a
line button
indicator to flash, and the telephone can be used to answer the
call. This is especially useful for people who monitor other
telephone lines, but want only their own lines to actually ring.
If a telephone has an external line as
a
Prime line, that line is
usually made to ring.
System Speed Dial
Speed Dial codes 01 to 70 are the same for the entire system.
See the Speed Dial section for details.
: ;..
.::
1.1
_’
_.
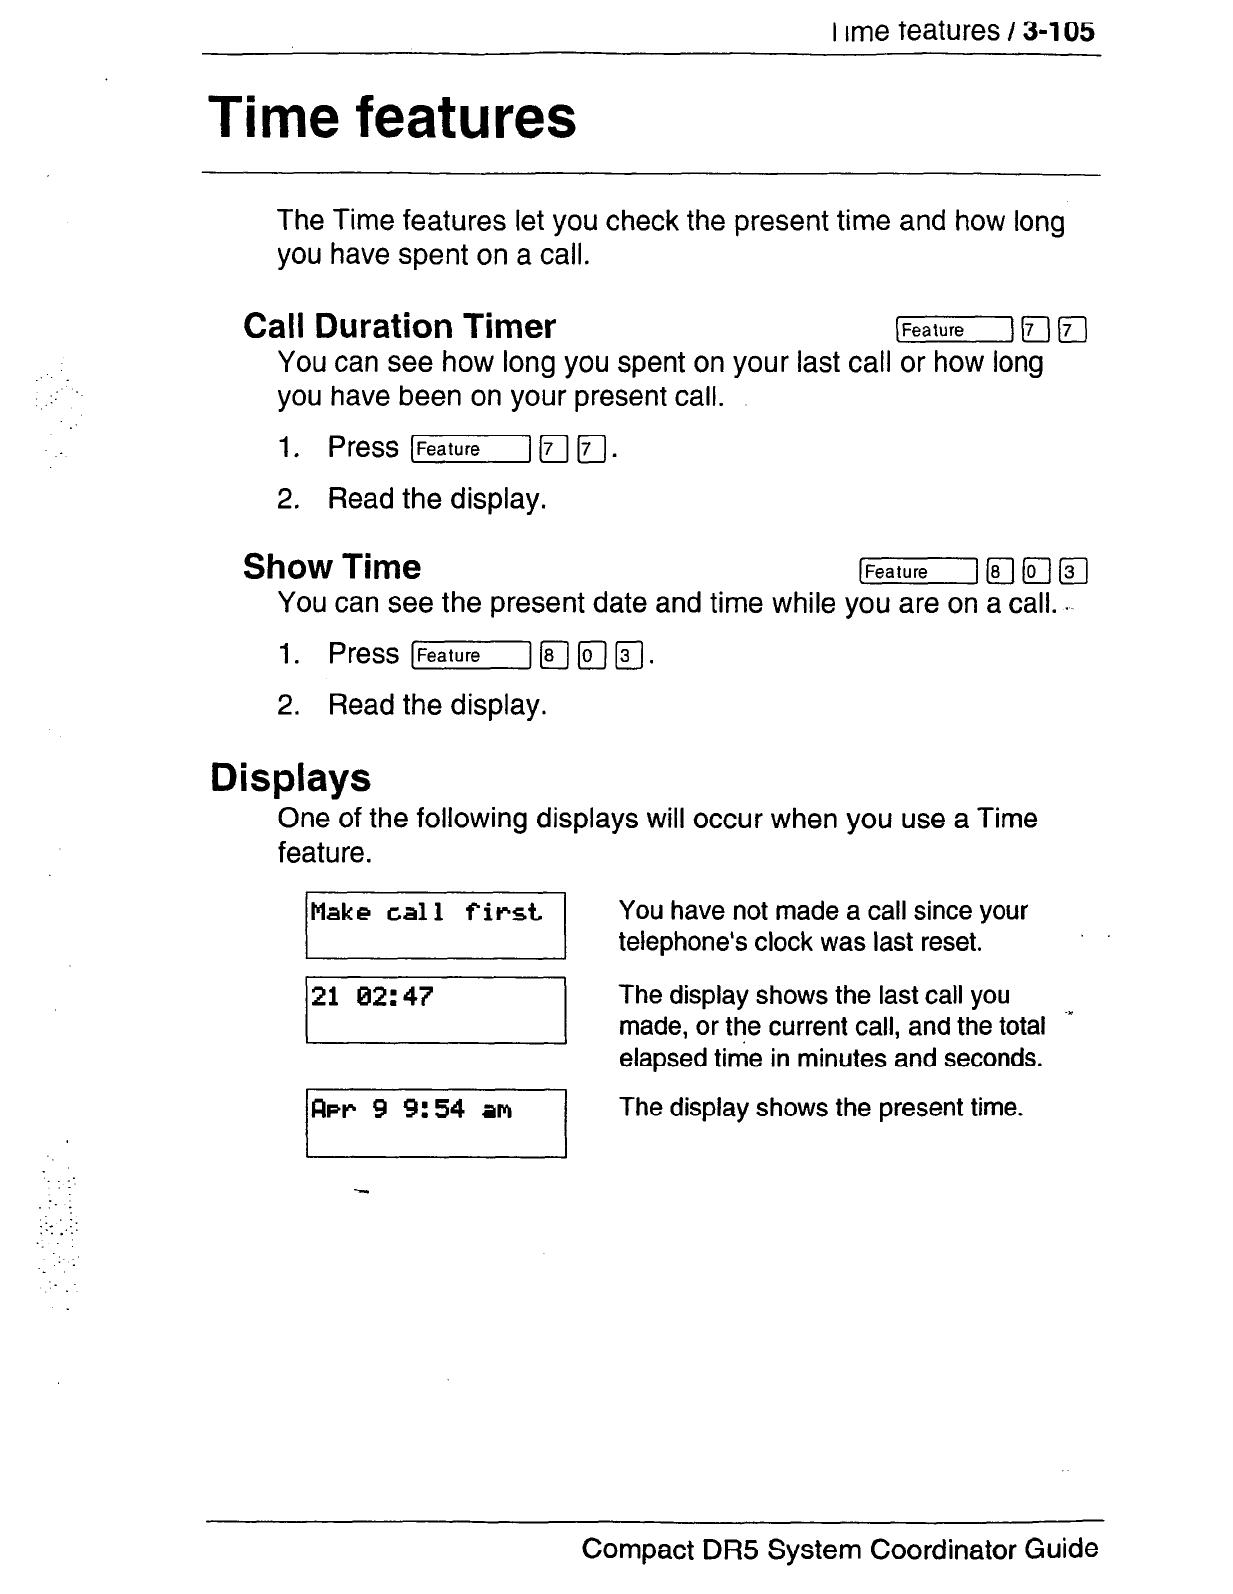
I
rme
teatures
/
3-l 05
Time features
:
:,:.-
The Time features let you check the present time and how long
you have spent on a call.
Call Duration Timer [Feature! p-j r;l
You
can see how long you spent on your last call or how long
you have been on your present call.
1. Press [Feature] fl m.
2. Read the display.
Show Time [Feature] jg [6--J (g
You
can see the present date and time while you are on a call.
.
1.
Press [Feature]aaa.
2. Read the display.
Displays
One of the following displays will occur when you use a Time
feature.
IMake
call first
1 You have not made a call since your
telephone’s clock was last reset.
/21
The display shows the last call you
-’
made, or the current call, and the total
elapsed time in minutes and seconds.
RP~ 9 9:54
alul The display shows the present time.
I I
:_
Compact DR5 System Coordinator Guide
3-106 / Transfer
Transfer
Transfer a call
You can transfer a call to a telephone in your Norstar system or
external to Norstar.
1. Make a call, answer a call or take a call off hold.
2. Press [-I 157 m or
TRFtNSFER
(or lTransferj if
._ ,:-
::.- ._
; .
:I.;
. :
.:
programmed).
3. To transfer within the Norstar system: dial an internal
telephone number or press an Internal Autodial button.
OR
To transfer external to Norstar: press a line button and dial
the number of the person to whom you want to transfer the
call, or press an External Autodial ‘button.
4. Announce the call after the called party answers and
complete the transfer as follows.
OR
If you do not want to announce the call, complete the transfer
as follows.
5. Press m or
JOIN ,
or a programmed Call Queuing button if
you wish to answer another call.
6. The call is immediately transferred.
Note: When transferring an external call to an external number,
note the following restrictions: at least one of the external
calls must have been an incoming call, and that call must
be on a disconnect supervised line.
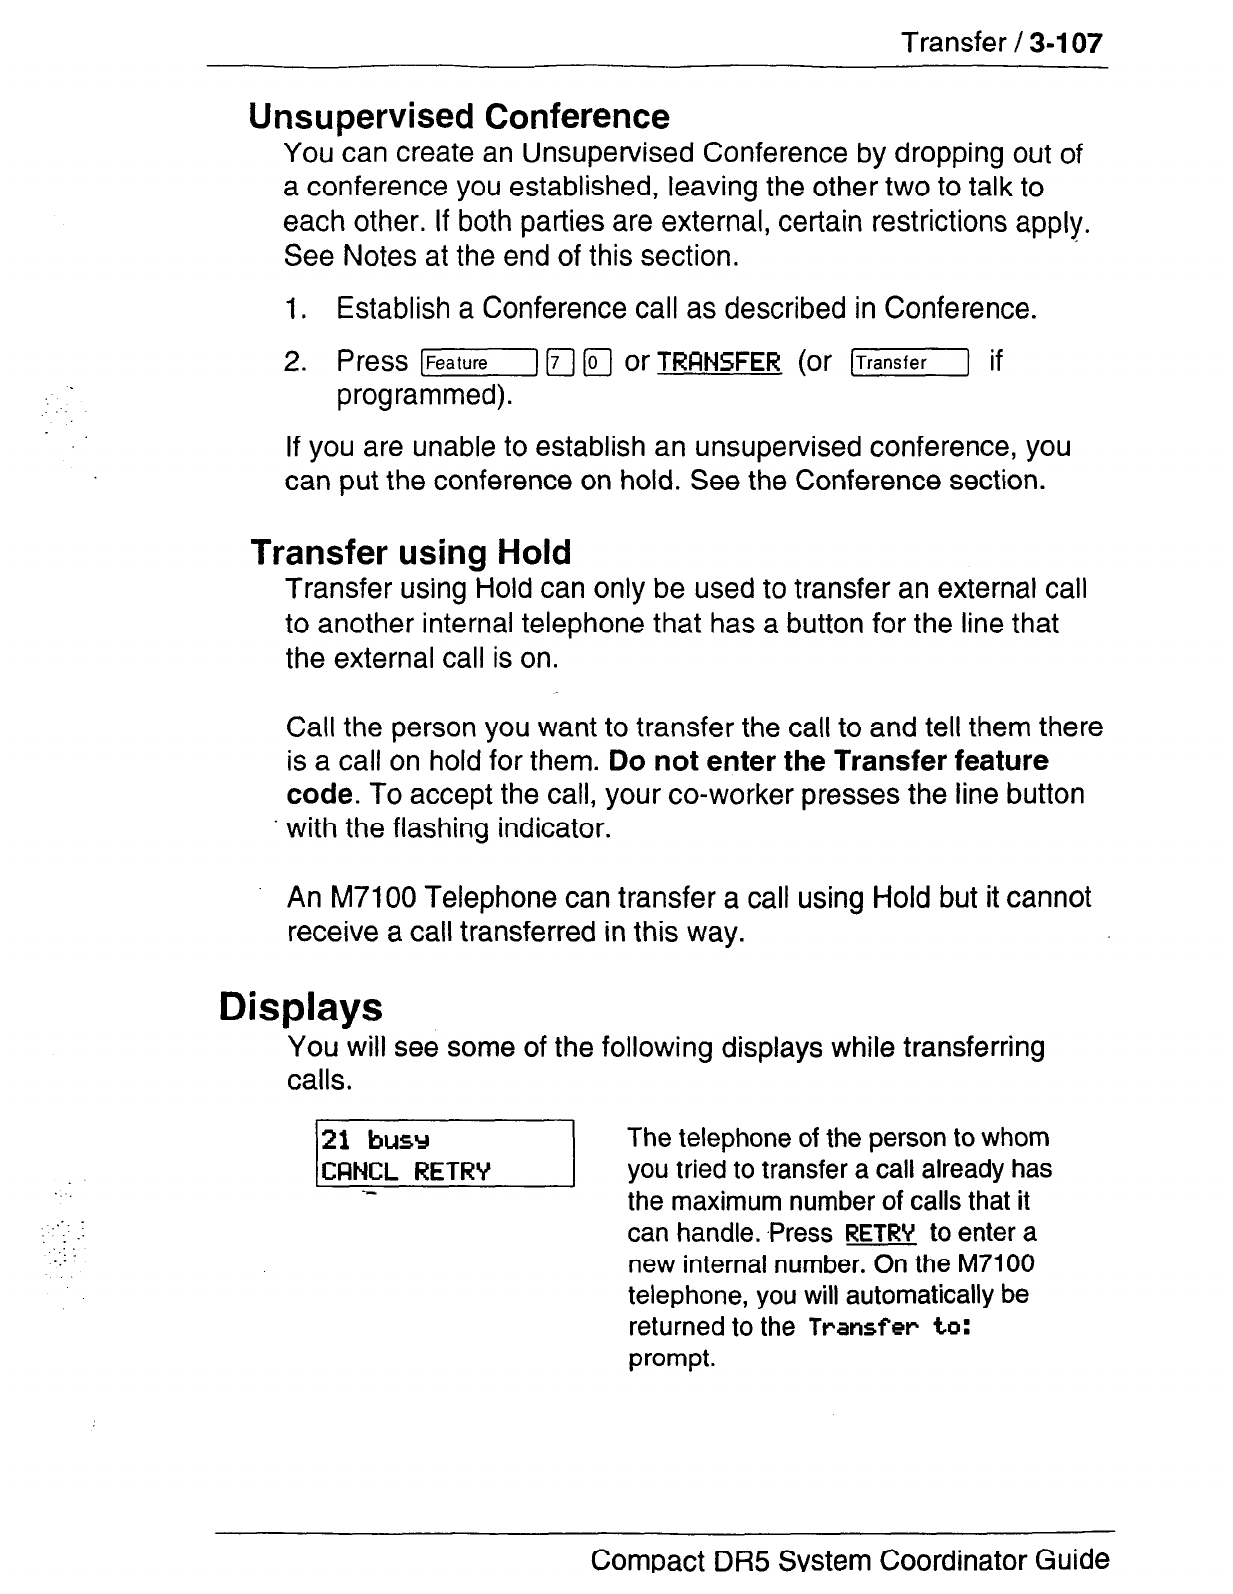
Transfer / 3-107
,:. :
:
._ :
..-
Unsupervised Conference
You
can create an Unsupervised Conference by dropping out of
a conference you established, leaving the other two to talk to
each other. If both parties are external, certain restrictions apply.
See Notes at the end of this section.
1. Establish a Conference call as described in Conference.
2. Press [-I m a
or
TRFlNSFER
(or [Transfer] if
programmed).
If you are unable to establish an unsupervised conference, you
can put the conference on hold. See the Conference section.
Transfer using Hold
Transfer using Hold can only be used to transfer an external call
to another internal telephone that has a button for the line that
the external call is on.
Call the person you want to transfer the call to and tell them there
is a call on hold for them.
Do not enter the Transfer feature
code.
To accept the call, your co-worker presses the line button
.
with the flashing indicator.
An M7100 Telephone can transfer a call using Hold but it cannot
receive a call transferred in this way.
Displays
You will see some of the following displays while transferring
calls.
121
busy
The telephone of the person to whom
ICRNCL RETRV you tried to transfer a call already has
the maximum number of calls that it
can handle. .Press RETRV to enter a
new internal number. On the M7100
telephone, you will automatically be
returned to the Transf~
to:
prompt.
Compact DR5 Svstem Coordinator Guide
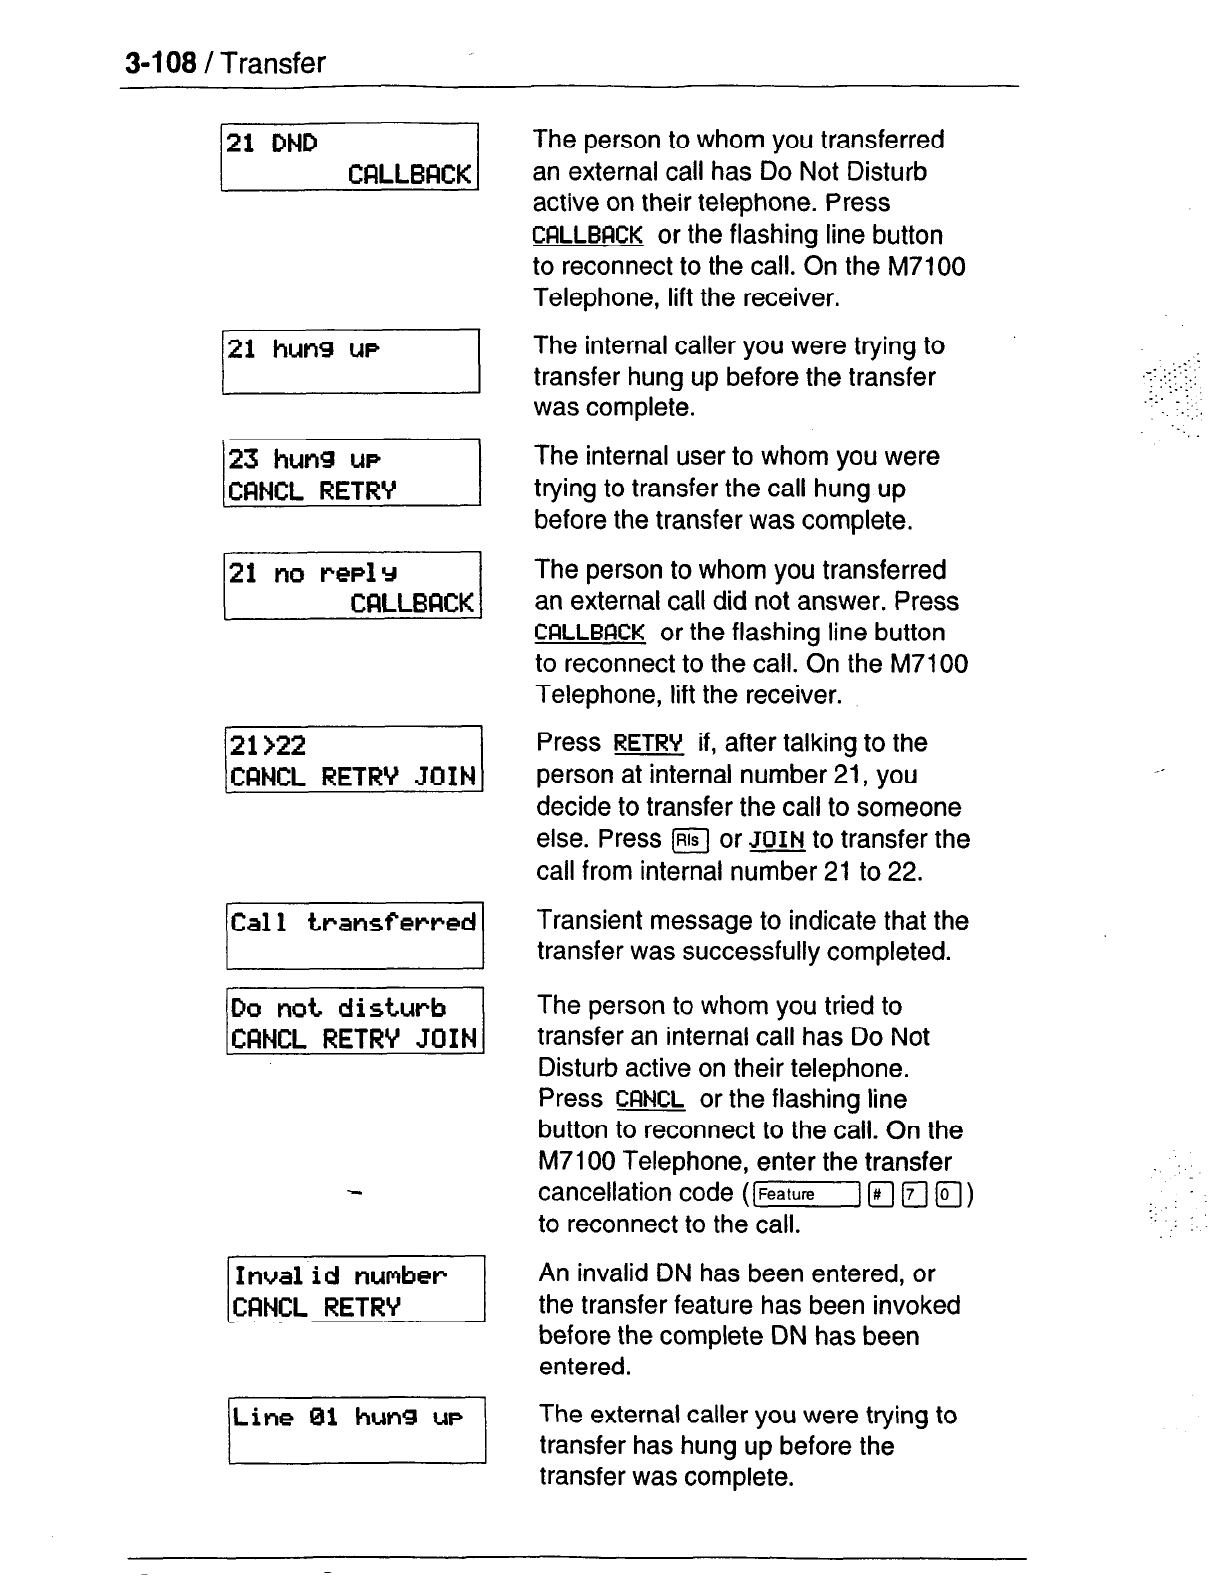
3-108 /
Transfer
j2l
lzlND
CRLLBRCK/
The person to whom you transferred
an external call has Do Not Disturb
active on their telephone. Press
CFSLLBClCK
or the flashing line button
to reconnect to the call. On the M7100
Telephone, lift the receiver.
j21hunsup
j21l
/tall1
Do not disturb
CFSNCL RETRY
JOIN
The internal caller you were trying to
transfer hung up before the transfer
was complete.
The internal user to whom you were
trying to transfer the call hung up
before the transfer was complete.
The person to whom you transferred
an external call did not answer. Press
CRLLBGCK
or the flashing line button
to reconnect to the call. On the M7100
Telephone, lift the receiver.
Press
RETRY
if, after talking to the
person at internal number 21, you
decide to transfer the call to someone
else. Press &J or
JOIN
to transfer the
call from internal number 21 to 22.
Transient message to indicate that the
transfer was successfully completed.
The person to whom you tried to
transfer an internal call has Do Not
Disturb active on their telephone.
Press
CRNCL
or the flashing line
button to reconnect to the call. On the
M7100 Telephone, enter the transfer
cancellation code
([Feature1 [T] 171
(TJ
)
to reconnect to the call.
An invalid DN has been entered, or
the transfer feature has been invoked
before the complete DN has been
entered.
hung UP
The external caller you were trying to
transfer has hung up before the
transfer was complete.
..I -
_- .::
:,: ..I
:;.:.
.I:. _ y
. . ..:,..
.-.,
..-’
._ .:
_’
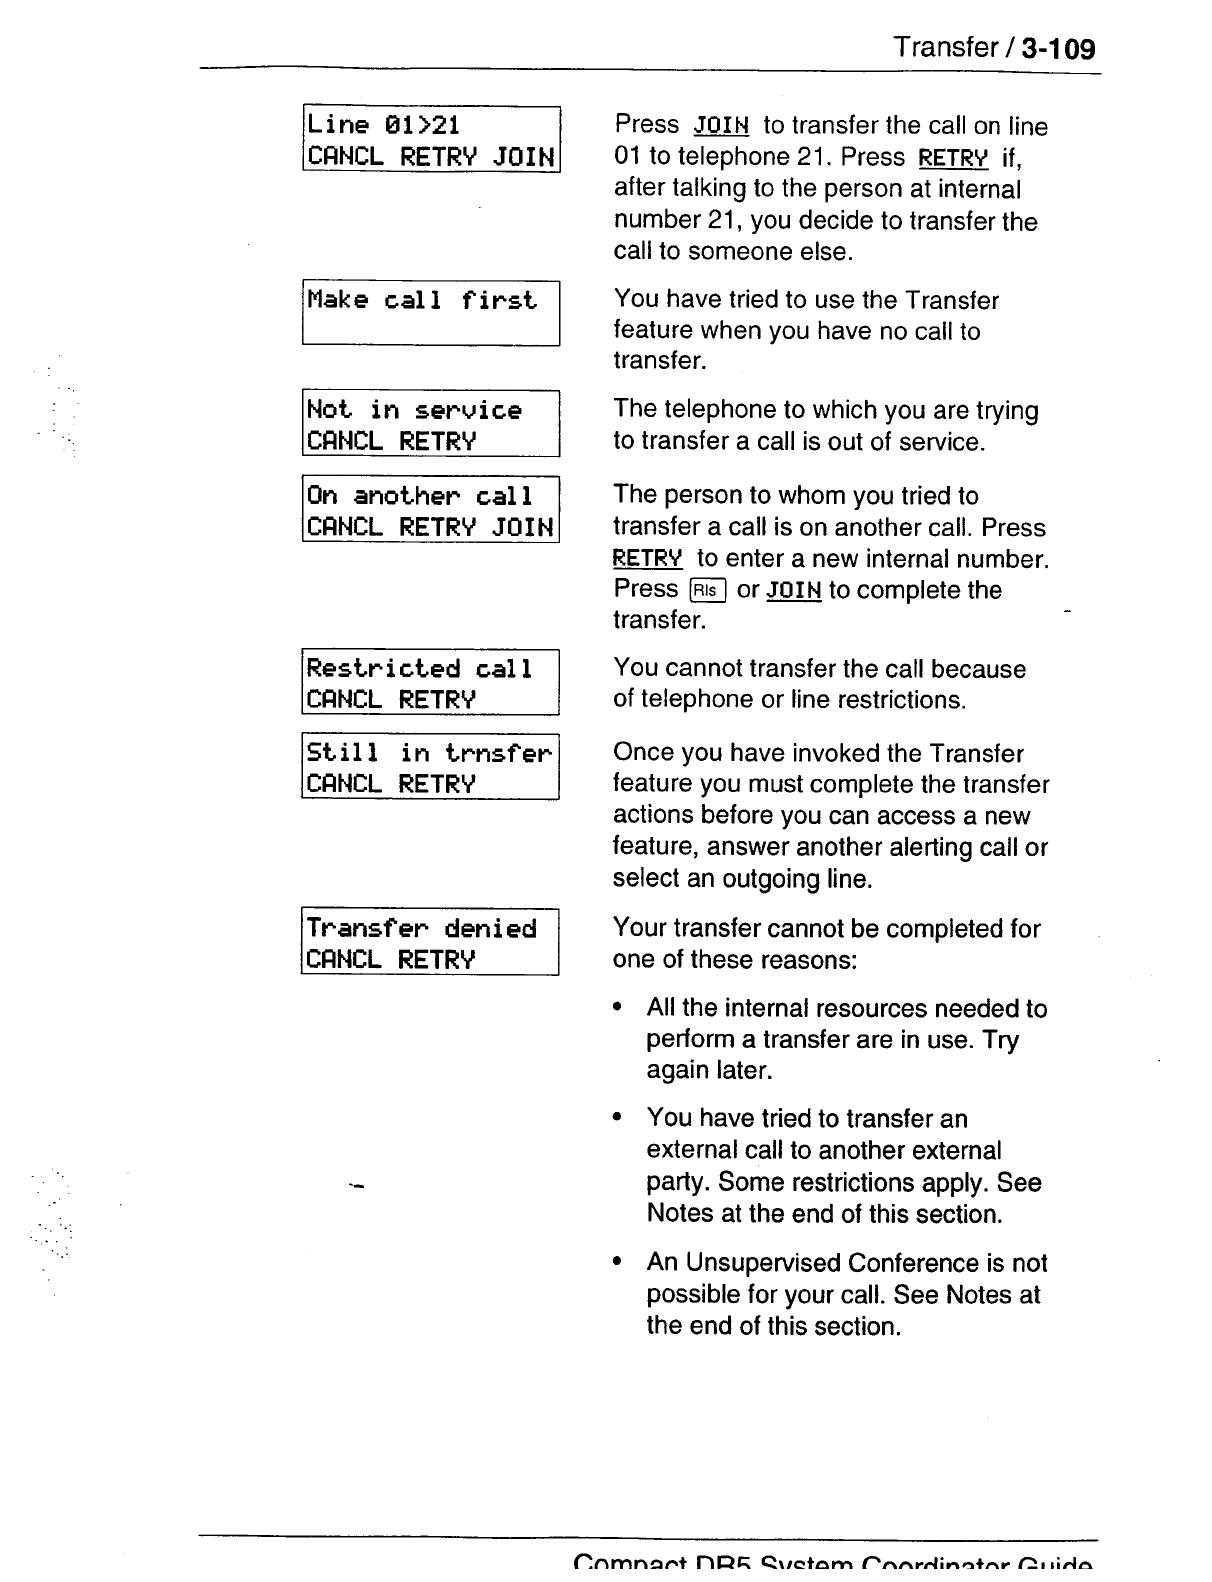
3-112 /
Voice Call
Displays
You will see some of these displays while making a Voice Call.
Dial voice call
I
No
voice
call
lUoice
Notes
Dial the internai number or press the
internal Autodial button of the person
to whom you want to speak.
The telephone receiving the call
cannot accept Voice Calls for one of
the following reasons: it is active or
ringing with another call; it is in Call
Forward mode; it is in Do Not Disturb
mode; it has Voice Call Deny turned
on; it is not a Norstar telephone.
Your call proceeds automatically as a
regular ringing call.
The line is open for you to speak.
Once you have answered a Voice Call, you can put it on hold,
transfer it, or otherwise treat it as a normal call.
When you have Handsfree Answerback assigned to your
telephone, and you are using an on-hook Dialing Mode, the
microphone and speaker are both activated for external calls.
The System Coordinator assigns Handsfree Answerback to
a
telephone in Administration programming. You can not assign
Handsfree Answerback capability to the M7100 Telephone.
If you do not-have Handsfree Answerback assigned to your
telephone, you can answer a Voice Call by picking up the
receiver.
‘.
This chapter includes reproductions of the Compact DR5
Telephone Feature Card, the Compact DR5 Prime Telephone
User Card and the Norstar Telephone User Cards. To best
assist your co-workers, you should familiarize yourself with
general Norstar feature operation and with the specific operation
of each Norstar telephone model.
..-
.:..: :
_._. :.
,.....
‘.
.
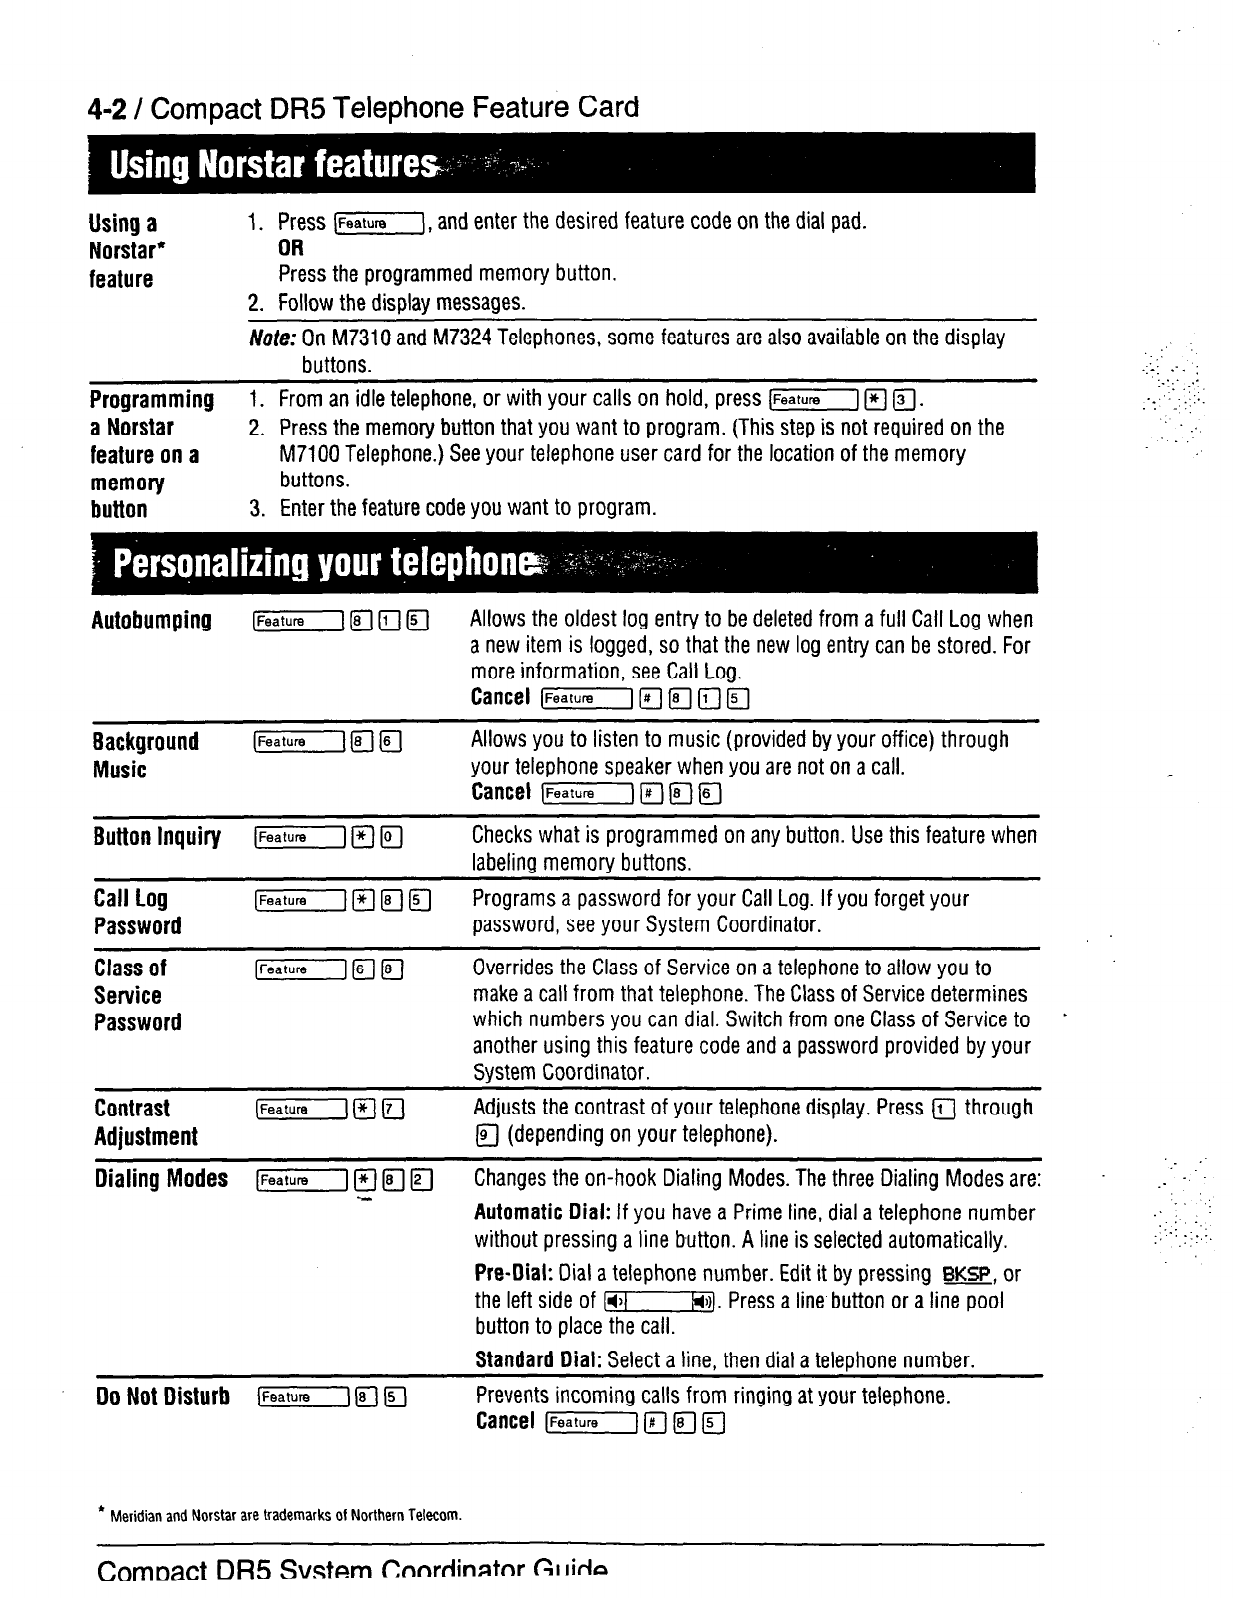
4-2 / Compact OR5 Telephone Feature Card
Using a
1.
Press (Feature), and enter the desired feature code on the dial pad.
Norstar* OR
feature
Press the programmed memory button.
2. Follow the display messages.
We: On M7310 and M7324 Telephones, some features are also available on the display
buttons.
..,:
.:L:
: .
:
1.’
:. ::
Programming
1. From an idle telephone, or with your calls on hold, press (Feature1 m I?].
. .,
__.‘. .;:._
..:
a Norstar
2. Press the memory button that you want to program. (This step is not required on the ‘.
_’
feature on
a
M7100 Telephone.) See your telephone user card for the location of the memory
memory
buttons.
button 3.
Enter the feature code you want to program.
Autobumping (Feature/ rl rl ITI
Allows the oldest log entry to be deleted from a full Call Log when
a new item is logged, so that the new log entry can be stored. For
more information, see Call Log.
Cancel [Feature] 0 a a /TJ
8ackground
Music
Allows you to listen to music (provided by your office) through
your telephone speaker when you are not on a call.
Cancel IFeature) T;r7 Q a
Button Inquiry (-1 Fl F]
Checks what is programmed on any button. Use this feature when
labeling memory buttons.
Call Log
Password
Class of
Service
Password
[Feature] R
q
Q
Programs a password for your Call Log. If you forget your
password, see your System Coordinator.
[TGzz--J m IT-]
Overrides the Class of Service on a telephone to allow you to
make a call from that telephone. The Class of Service determines
which numbers you can dial. Switch from one Class of Service to
*
another using this feature code and a password provided by your
System Coordinator.
Contrast (Fealurej R a
Adjusts the contrast of your telephone display. Press 0 through
Adjustment a
(depending on your telephone).
Dialing Modes [m F-J
q
FJ
Changes the on-hook Dialing Modes. The three Dialing Modes are:
_... - -‘I
Automatic Dial:
If you have a Prime line, dial a telephone number
:
: .: I,
without pressing a line button. A line is selected automatically.
Pre-Dial:
Dial a telephone number. Edit it by pressing 83, or
the left side of r-1. Press a line button or a line pool
button to place the call.
._._
1: .-:::.
:.
Standard Dial:
Select a line, then dial a telephone number.
Do Not Disturb (-1 Fj fl
Prevents incoming calls from ringing at your telephone.
Cancel (Feature1 Fl rl F]
’
Meridian and Norstar are trademarks of Northern Telecom.
Comnact DR5 Svstem
Cnnrdinntnr Gi~irlta
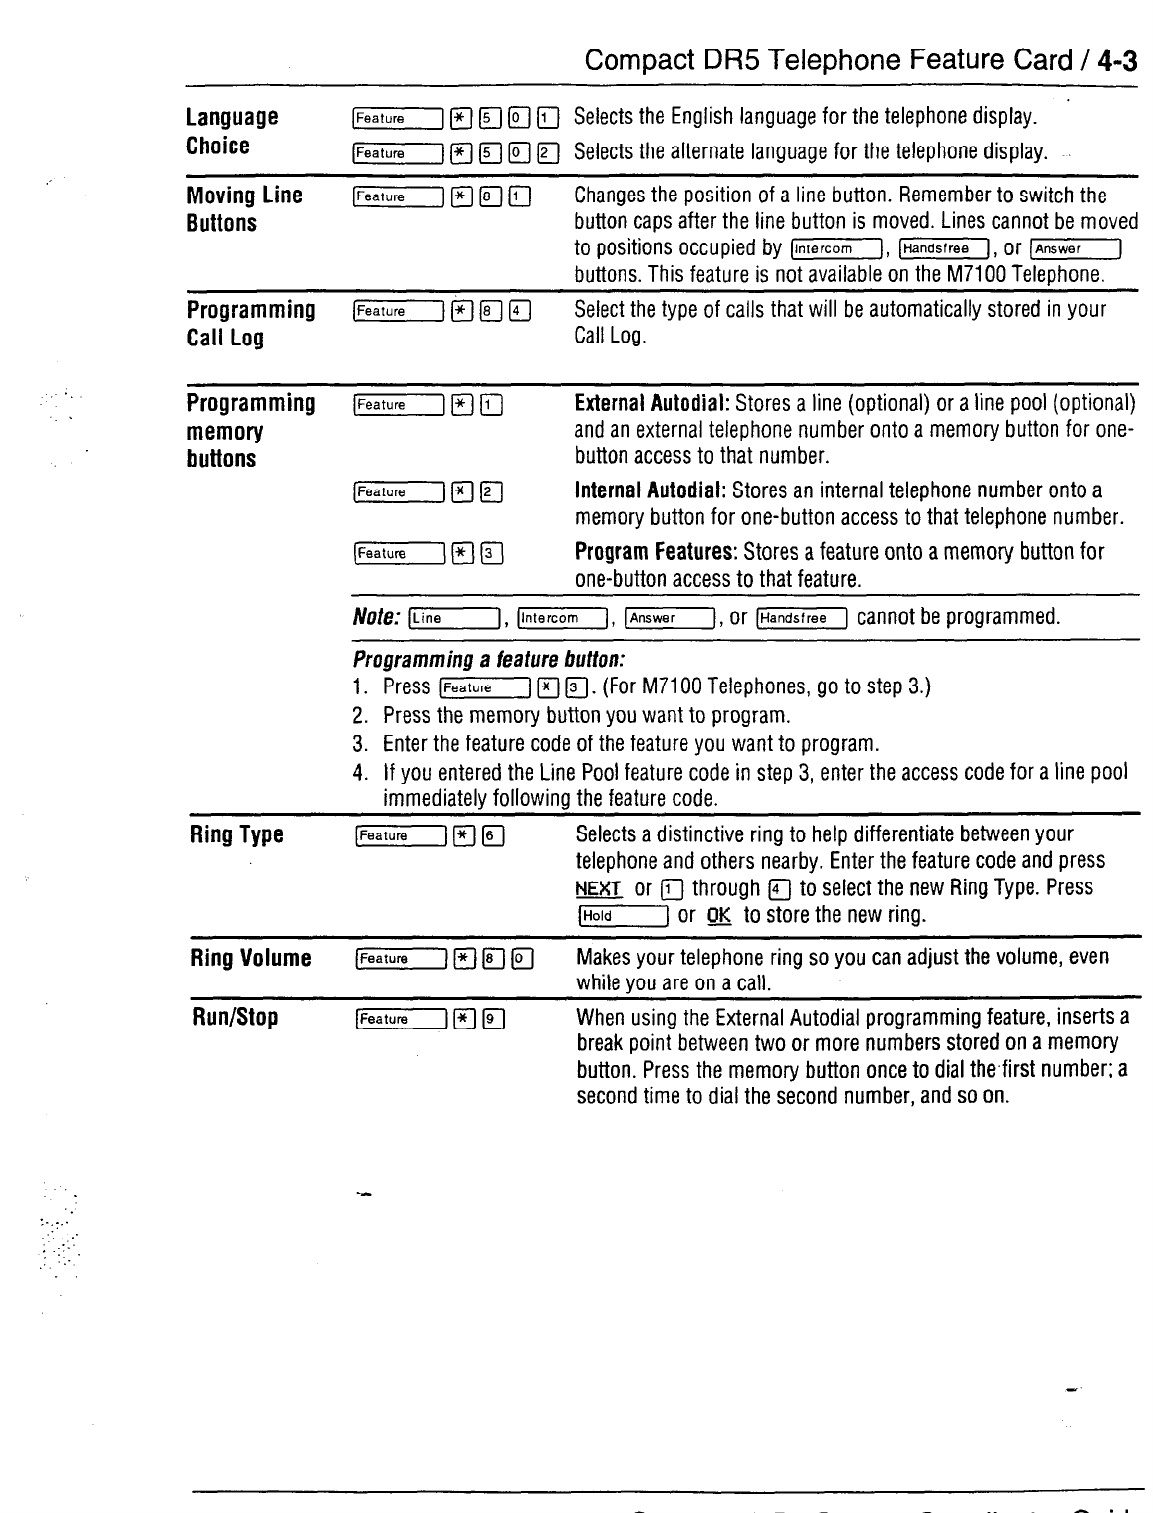
Compact DR5 Telephone Feature Card / 4-3
Language [Feature/ Fl Fi (YJ ji-1
Selects the English language for the telephone display.
Choice 1-1 Fl FI F/ (5-J
Selects the alternate language for the telephone display.
Moving Line [GiGYlmm(i-]
Changes the position of a line button. Remember to switch the
Buttons
button caps after the line button is moved. Lines cannot be moved
to positions occupied by [Intercom], [Handsfree], or (Answer]
buttons. This feature is not available on the M7100 Telephone.
Programming (Feature1 Fj C;rl F/
Select the type of calls that will be automatically stored in your
Call Log
Call Log.
Programming (Feature1 m m External Autodial:
Stores a line (optional) or a line pool (optional)
memory
and an external telephone number onto a memory button for one-
buttons
button access to that number.
[FeatureIflm
Internal Autodial:
Stores an internal telephone number onto a
memory button for one-button access to that telephone number.
[-In113
Program Features:
Stores a feature onto a memory button for
one-button access to that feature.
NO!&?: [I, 71, 71, or ~@GZGYI cannot be programmed.
Programming a feature fwffon:
1. Press 1-l Fi F]. (For M7100 Telephones, go to step 3.)
2. Press the memory button you want to program.
3. Enter the feature code of the feature you want to program.
4. If you entered the Line Pool feature code in step 3, enter the access code for a line pool
immediately following the feature code.
Ring Type [-I(qFJ
Selects a distinctive ring to help differentiate between your
telephone and others nearby. Enter the feature code and press
NEXT or a through m to select the new Ring Type. Press
1-1 or m to store the new ring.
Ring Volume I]FeatureJI+J(FJFJ
Makes your telephone ring so you can adjust the volume, even
while you are on a call.
Run/Stop
(-1~~
When using the External Autodial programming feature, inserts a
break point between two or more numbers stored on a memory
button. Press the memory button once to dial the.first number; a
second time to dial the second number, and so on.
I..::
: :.
. .::.._
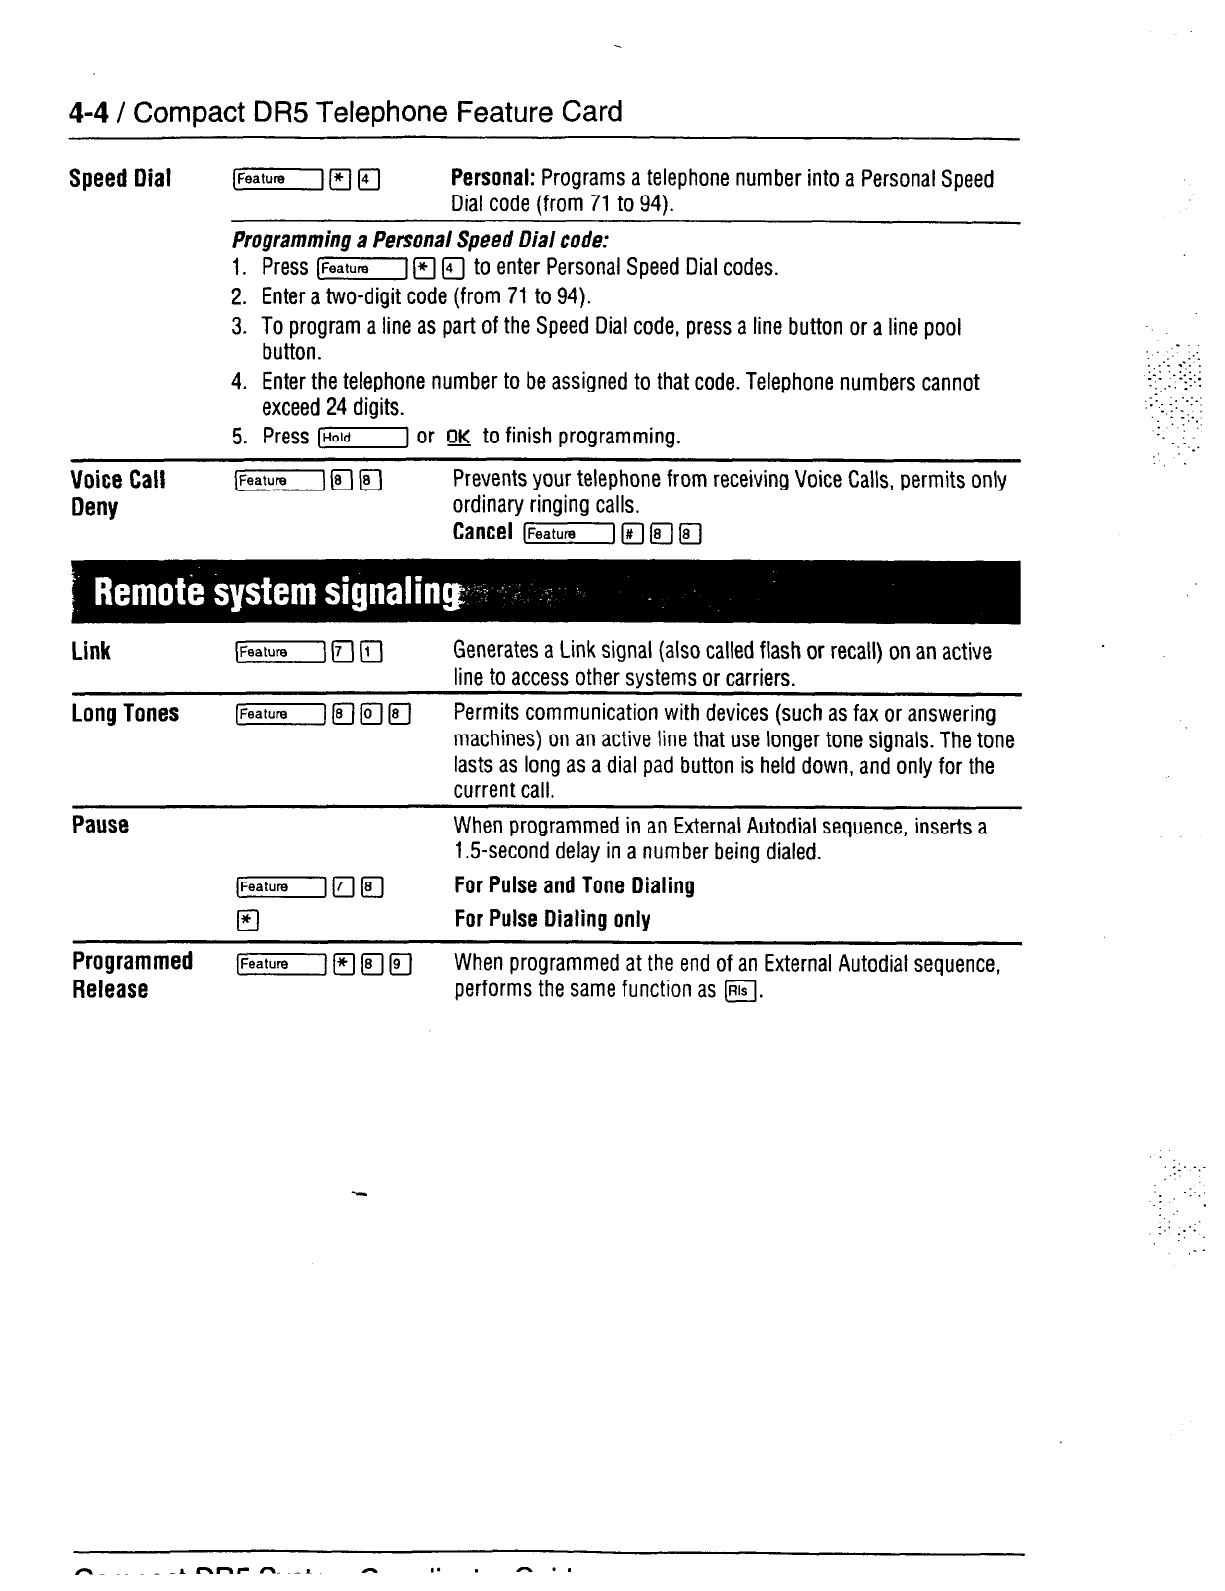
4-4 / Compact DR5 Telephone Feature Card
Speed Dial (Feature)/q-q Personal:
Programs a telephone number into a Personal Speed
Dial code (from 71 to 94).
Programming a Personal Speed Dial code:
1.
2.
3.
4.
5.
Press (Feature1 Ff (al-to enter Personal Speed Dial codes.
Enter a two-digit code (from 71 to 94).
To program a line as part of the Speed Dial code, press a line button or a line pool
button.
Enter the telephone number to be assigned to that code. Telephone numbers cannot
exceed 24 digits.
Press [I or OK to finish programming.
Voice Call
Deny [fea\ure)ma
Prevents your telephone from receiving Voice Calls, permits only
ordinary ringing calls.
Cancel (Feature] Is;7 IT] @J
Link
Long Tones
iFeature/ Fj f7-J
Generates a Link signal (also called flash or recall) on an active
line to access other systems or carriers.
1Featurejm[iTIfl
Permits communication with devices (such as fax or answering
machines) on an active line that use longer tone signals. The tone
lasts as long as a dial pad button is held down, and only for the
current call.
Pause
When programmed in an External Autodial sequence, inserts a
1.5-second delay in a number being dialed.
[FeatureIn
For Pulse and Tone Dialing
El For Pulse Dialing only
;reqiEmed [FeatureI Fj m IT;7
When programmed at the end of an External Autodial sequence,
performs the same function as m.
-.
: ::
: :_ .-_
::I ‘.I ::.;
._ _.. ::.
:
:;.: :I“:.:
._
1..
. ::.
._ :
:-. _;
,:-
: -:
. .
_.
.’ .
1.’
..’
::
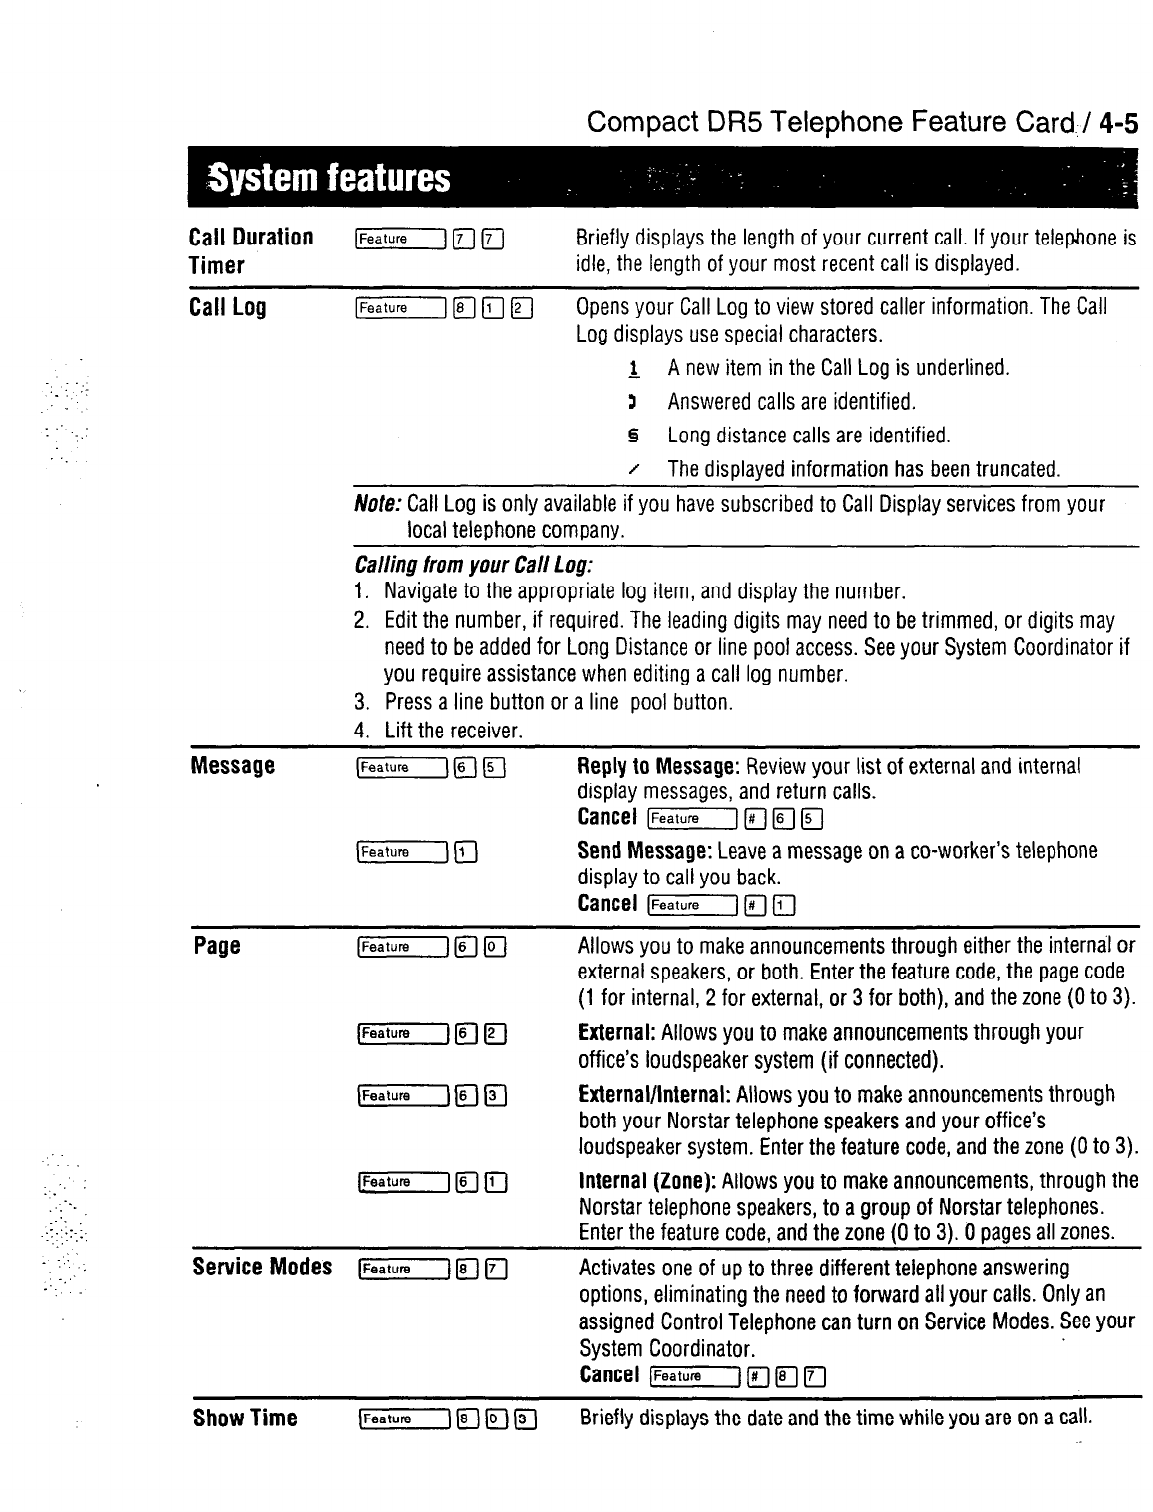
Compact DR5 Telephone Feature Card,! 4-5
Call Duration
Timer
Briefly displays the length of your current call. If your telephone is
idle, the length of your most recent call is displayed.
. .
..: ,:
_:
Call Log [Feature] @-I Ii-j IF/
Opens your Call Log to view stored caller information. The Call
Log displays use special characters.
& A new item in the Call Log is underlined.
3 Answered calls are identified.
§ Long distance calls are identified.
1 The displayed information has been truncated.
We: Call Log is only available if you have subscribed to Call Display services from your
local telephone company.
Callintj from your Calf
Log:
1. Navigate to the appropriate log item, and display the number.
2. Edit the number, if required. The leading digits may need to be trimmed, or digits may
need to be added for Long Distance or line pool access. See your System Coordinator if
you require assistance when editing a call log number.
3. Press a line button or a line pool button.
4. Lift the receiver.
Message Reply to Message:
Review your list of external and internal
display messages, and return calls.
Cancel [&G-J pi Fj Fj
Send
Message:
Leave a message on a co-worker’s telephone
display to call you back.
Cancel [ZZF-J I;r3
q
1:.
‘.
:. .-.
_:_
. .,._:
.::._.,_:
‘_’
. y,:.
. .
_,:
-‘..
Page [Featurejpllo
Allows you to make announcements through either the internal or
external speakers, or both. Enter the feature code, the page code
(1 for internal, 2 for external, or 3 for both), and the zone (0 to 3).
[_f/FjV External: Allows you to make announcements through your
office’s loudspeaker system (if connected).
[KiF-&g_) External/Internal: Allows you to make announcements through
both your Norstar telephone speakers and your office’s
loudspeaker system. Enter the feature code, and the zone (0 to 3).
L_ffFj11J
Internal (Zone):
Allows you to make announcements, through the
Norstar telephone speakers, to a group of Norstar telephones.
Enter the feature code, and the zone (0 to 3). 0 pages all zones.
Service
Modes (Feature) F] r;-7
Activates one of up to three different telephone answering
options, eliminating the need to forward all your calls. Only an
assigned Control Telephone can turn on Service Modes. See your
System Coordinator.
Cancel I-1 [;;7 m
q
Show Time lFeature))8)(Om
Briefly displays the date and the time while you are on a call.

4-6 / Compact DR5 Telephone Feature Card
Call Forward
Sends your calls to another telephone in your Norstar system.
Cancel (Feature! IT] m
Camp-On:
Re-routes a call to another telephone even if all its lines
are busv.
Call
Information (Feature1fl~~
Briefly displays the name, number and line name of a ringing or
held call. Press m or VIEW repeatedly to cycle through the
three disolavs of information.
/Vote: Names and numbers for external callers are displayed only if you have subscribed to
Call Display services from your local telephone company.
Automatically puts a call on hold so that it can be retrieved from
any telephone in your Norstar system. The display shows a
retrieval code, X01 or X02. The retrieval code is made up of a
programmable Call Park prefix (0 to 9) followed by a call number
(01 or 02).
Call
Park Retrieval:
Answers a parked call from any telephone in
your Norstar system by pressing [intercom] and entering the
retrieval code. On the M7100 Telephone, enter just the retrieval
code.
Conference [Feature pl
Setting up a three person call:
1. Make or answer the first call.
2. Put the first call on hold.
3. Make or answer the second call.
4. Press 1-1 FJ (or press (jZEE+ if programmed).
5. Press the line button of the first held call. (This step is not required on the M7100
Telephone.)
6. Press m to end the conference.
Sp/itting a
conference:To speak privately to one of the callers, or to drop one call and stay
connected to another, or to hold both parties as separate calls, you must first split the
conference.
1. Press the line button for one of the calls. The other call is put on hold. To re-establish
the conference, press [Feature\ F).
_
Removing yourself iom the conference temporarily:
1. Press 71; the other two callers can still speak to each other.
Removing yourself from the conference permanently (Unsupervised Conference t):
1. Press 1-I IFJ
q
(or [Transfer1 if programmed). The other two parties remain
connected.
Do
Not Disturb [m fl a
Blocks alerting calls at your telephone. Also blocks a Priority Call
when all lines on your telephone are in use.
.-.
Exclusive Hold (Feature li7 m or
Temporarily suspends an external call and prevents other
[Feature1 rJ telephones from picking it up.
Exclusive Hold Retrieval:
Press [L’ne) of the held call.
(Press [Hold] on the M7100 Telephone.)
f Some external lines may not support this feature. See your System Coordinator for more information.
.‘_‘. .:
:y.:. ;:i:
:
:_:;::::_:_
:-.::_
‘_‘.
-..-
-’
::- ; _ .
,_. . .
__: ._
;m-_ _.
: _-
-_._
y_:_‘:_’
._r: -.
::
1:.
: ._
: . :-., :;
.
-_‘. _-.
Cnmnad
nR.5
_S\lctam ~nndinntnr CI tir(n
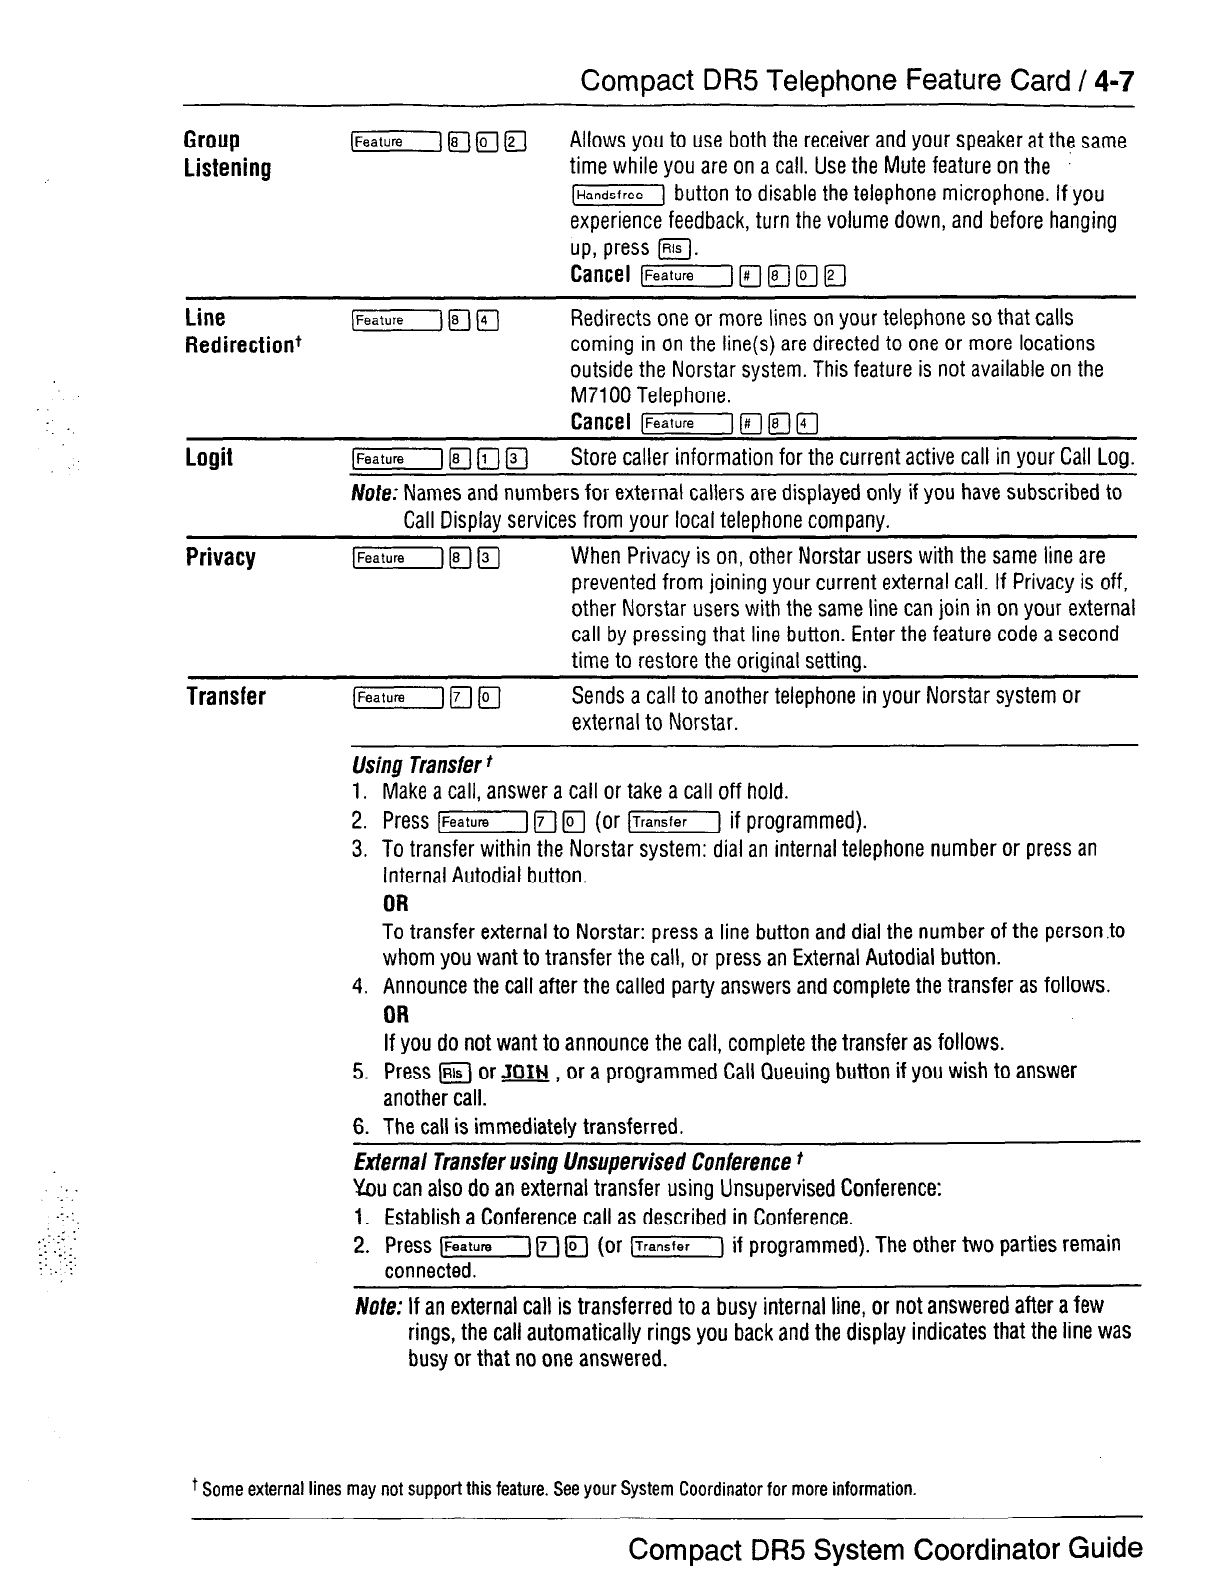
Compact
DR5 Telephone Feature Card / 4-7
Group
Listening
(Feature]I;rlmm
Allows you to use both the receiver and your speaker at the same
time while you are on a call. Use the Mute feature on the
[Handsfree
button to disable the telephone microphone. If you
experience feedback, turn the volume down, and before hanging
up, press [Rls.
Cancel [FeatureI 1;;7 a D l?J
Line
Redirection+
Logit
Privacy
[-FGKqqm
Redirects one or more lines on your telephone so that calls
coming
in
on the line(s) are directed to one or more locations
outside the Norstar system. This feature is not available on the
M7100 Telephone.
Cancel [FeatureI r;;7 [7J m
(Fearurel F-J a @
Store caller information for the current active call in your Call Log.
Note: Names and numbers for external callers are displayed only if you have subscribed to
Call Display services from your local telephone company.
[Feature) m Fj
When Privacy is on, other Norstar users with the same line are
prevented from joining your current external call. If Privacy is off,
other Norstar users with the same line can join in on your external
call by pressing that line button. Enter the feature code a second
time to restore the oriainal settina.
Transfer (Feature1 Fl /q
Sends a call to another telephone in your Norstar system or
external to Norstar.
Using Transfer
+
1.
2.
3.
Make a call, answer a call or take a call off hold.
PrCSs [-I r] rj
(or [Transferj
if progrmmxl).
To transfer within the Norstar system: dial an internal telephone number or press an
internal Autodial button.
OR
4.
To transfer external to Norstar: press a line button and dial the number of the person.to
whom you want to transfer the call, or press an External Autodial button.
Announce the call after the called party answers and complete the transfer as follows.
OR
5. If you do not want to announce the call, complete the transfer as follows.
Press m or JOIN, or a programmed Call Queuing button if you wish to answer
another call.
6. The call is immediately transferred.
. .
.
_I..:
_ .
.:I.:-
1. :;
1: r.:.
:.
‘:’
External Transier using Unsupervised Conference
+
You
can also do an external transfer using Unsupervised Conference:
1. Establish a Conference call as described in Conference.
2. Press Ifeatun, Fl FJ (or iTransfer) if programmed). The other two parties remain
connected.
Note: If an external call is transferred to a busy internal line, or not answered after a few
rings, the call automatically rings you back and the display indicates that the line was
busy or that no one answered.
t
Some external
lines may not support
this feature. See your System Coordinator for more information.
Compact DR5 System Coordinator Guide
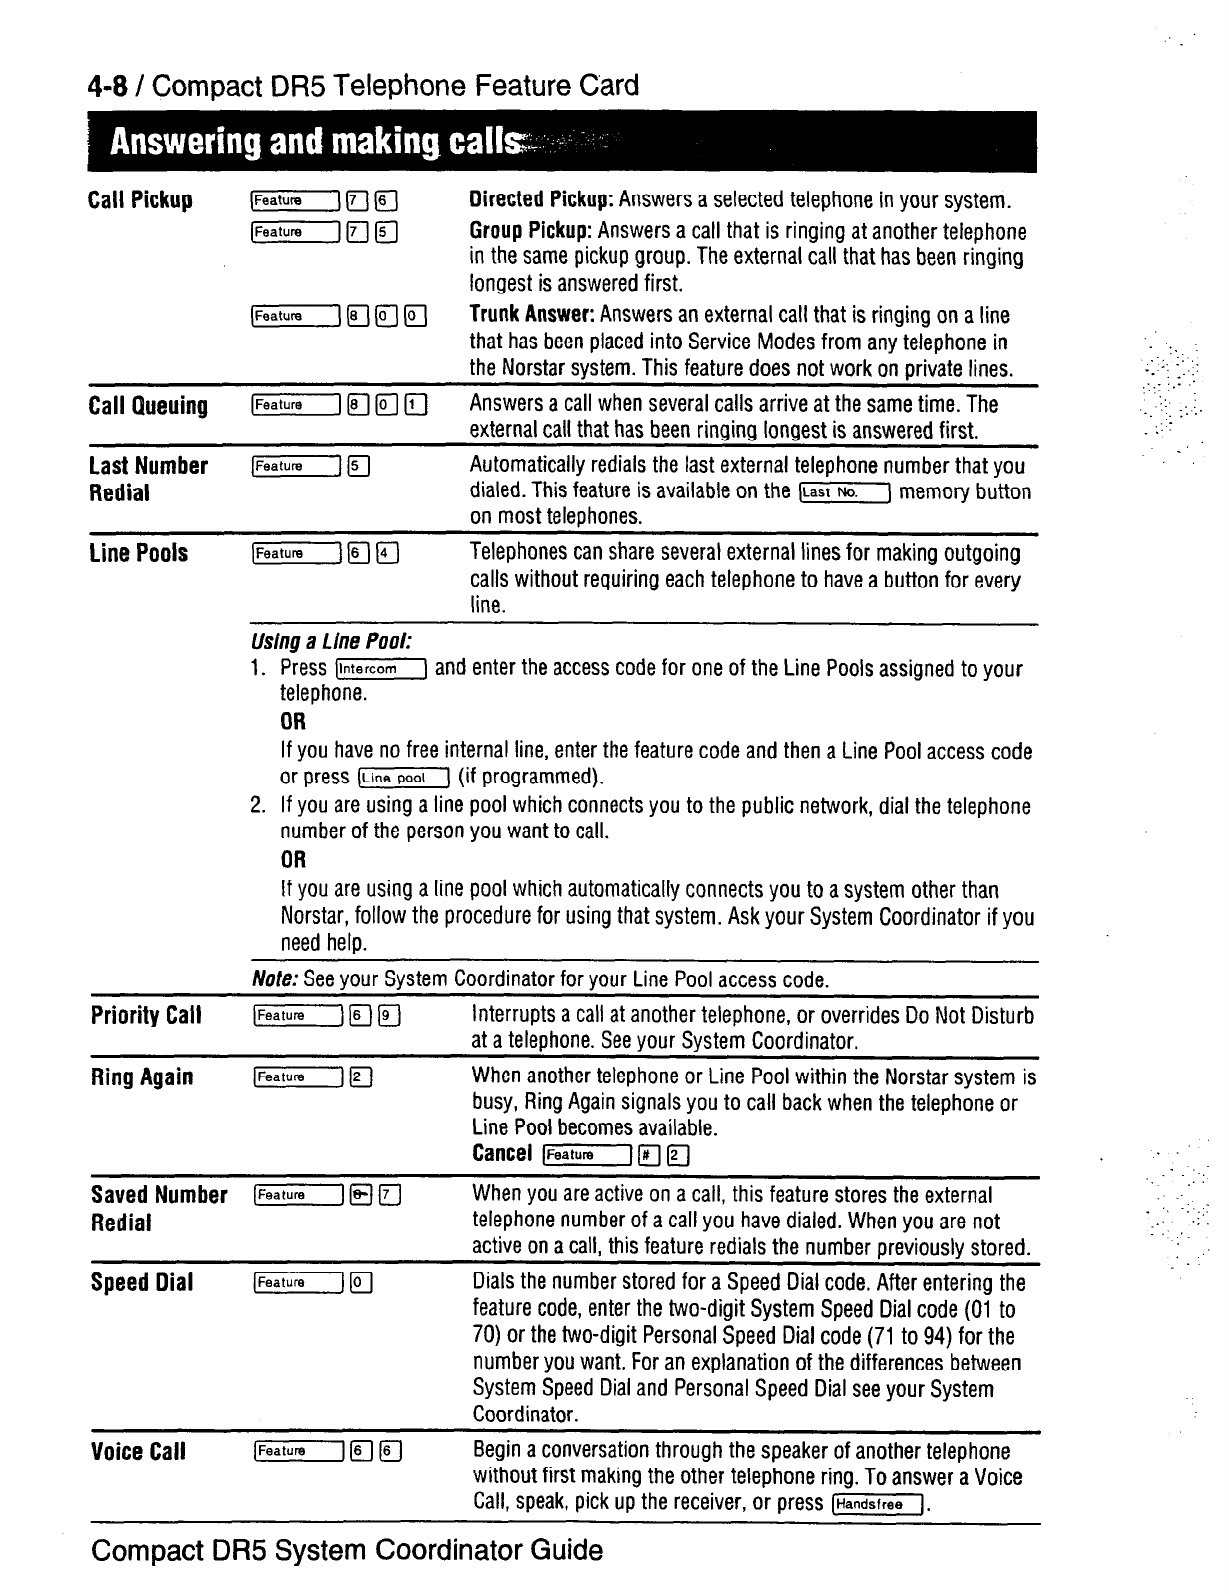
4-8 / Compact DR5 Telephone Feature Card
Call Pickup (Feature(m@ Directed Pickup:
Answers a selected telephone in your system.
[EzKlfY-jfFJ
Group Pickup:
Answers a call that is ringing at another telephone
in the same pickup group. The external call that has been ringing
longest is answered first.
(Feature\ ri I;;? w
Trunk Answer:
Answers an external call that is ringing on a line
that has been placed into Service Modes from any telephone in
the Norstar svstem. This feature does not work on orivate lines.
CalI Queuing
$th$mber
1EEiG-l I;rl@ m Answers a call when several calls arrive at the same time. The
external call that has been ringing longest is answered first.
[Feature Fl
Automatically redials the last external telephone number that you
dialed. This feature is available on the [last] memory button
on most telephones.
line Pools
Telephones can share several external lines for making outgoing
calls without requiring each telephone to have a button for every
line.
Using a Line Pool:
1. Press Ilntercom) and enter the access code for one of the Line Pools assigned to your
telephone.
OR
If you have no free internal line, enter the feature code and then a Line Pool access code
or press (Line] (if programmed).
2. If you are using a line pool which connects you to the public network, dial the telephone
number of the person you want to call.
OR
If you are using a line pool which automatically connects you to a system other than
Norstar, follow the procedure for using that system. Ask your System Coordinator if you
need helo.
1.
:.
11..
‘:
-. _::
:::: :.- .’
.__ 1:.:.
_
.’
Nofe: See your System Coordinator for your Line Pool access code.
Priority Call lFeature) j-q jq
Interrupts a call at another telephone, or overrides Do Not Disturb
at a telephone. See your System Coordinator.
Ring Again j-1 m
When another telephone or Line Pool within the Norstar system is
busy, Ring Again signals you to call back when the telephone or
Line Pool becomes available.
Cancel [FeatureI T;il (Fl
.
. .
Saved Number (Feature 6fJ El
When you are active on a call, this feature stores the external
:
Redial
telephone number of a call you have dialed. When you are not
_ ‘,
:’ :
active on a call, this feature redials the number previously stored.
Speed Dial [m Fl
Dials the number stored for a Speed Dial code. After entering the
feature code, enter the two-digit System Speed Dial code (01 to
70) or the two-digit Personal Speed Dial code (71 to 94) for the
number you want. For an explanation of the differences between
System Speed Dial and Personal Speed Dial see your System
Coordinator.
Voice Call
Begin a conversation through the speaker of another telephone
without first making the other telephone ring. To answer a Voice
Call, speak, pick up the receiver, or press L-1.
Compact DR5 System Coordinator Guide
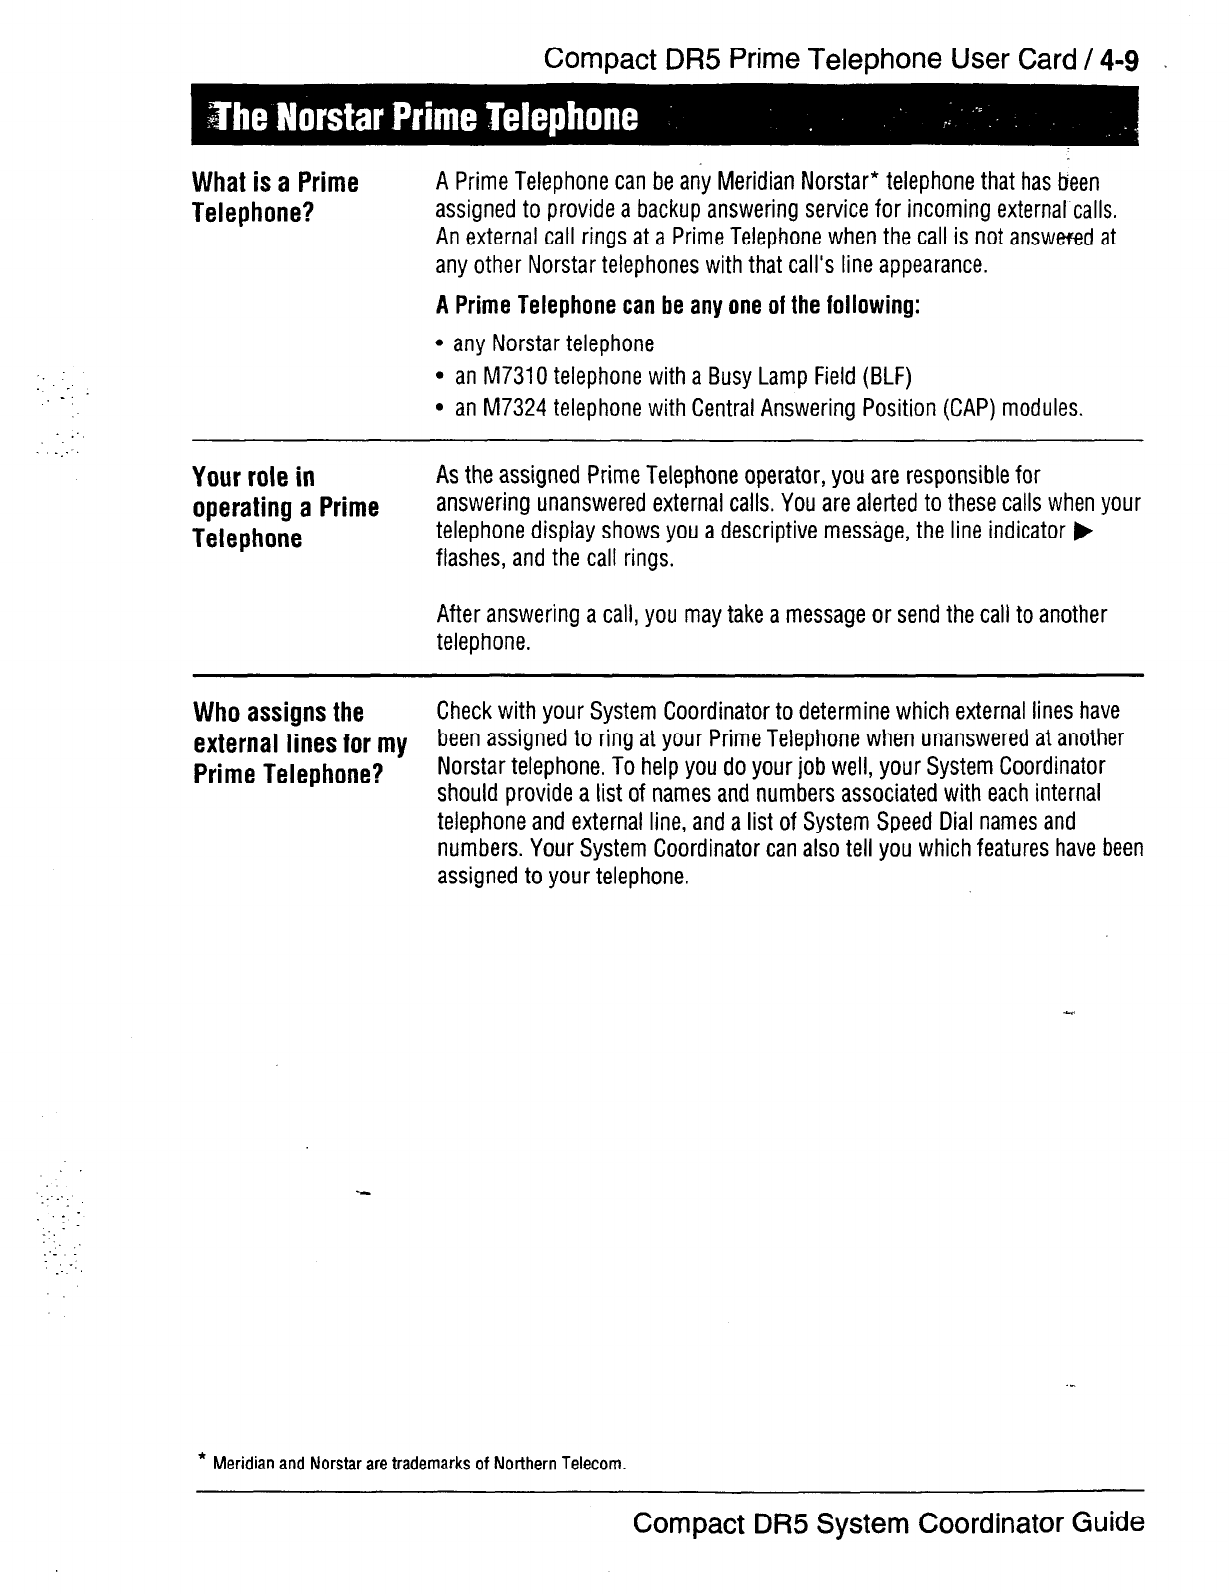
Compact DR5
Prime Telephone User Card / 4-9
.
What is a Prime
Telephone?
A Prime Telephone can be any Meridian Norstar* telephone that has been
assigned to provide a backup answering service for incoming external calls.
An external call rings at a Prime Telephone when the call is not answered at
any other Norstar telephones with that call’s line appearance.
‘_
-.
:
__..
A Prime Telephone can be any one of the following:
l
any Norstar telephone
l
an M7310 telephone with a Busy Lamp Field (BLF)
Your role in
operating a Prime
Telephone
l
an M7324 telephone with Central Answering Position (CAP) modules.
As the assigned Prime Telephone operator, you are responsible for
answering unanswered external calls. You are alerted to these calls when your
telephone display shows you a descriptive message, the line indicator b
flashes, and the call rings.
After answering a call, you may take a message or send the call to another
telephone.
Who assigns the
Check with your System Coordinator to determine which external lines have
external lines for my
been assigned to ring at your Prime Telephone when unanswered at another
Prime Telephone?
Norstar telephone. To help you do your job well, your System Coordinator
should provide a list of names and numbers associated with each internal
telephone and external line, and a list of System Speed Dial names and
numbers. Your System Coordinator can also tell you which features have been
assigned to your telephone.
* Meridian and Norstar are trademarks of Northern Telecom.
Compact DR5 System Coordinator Guide
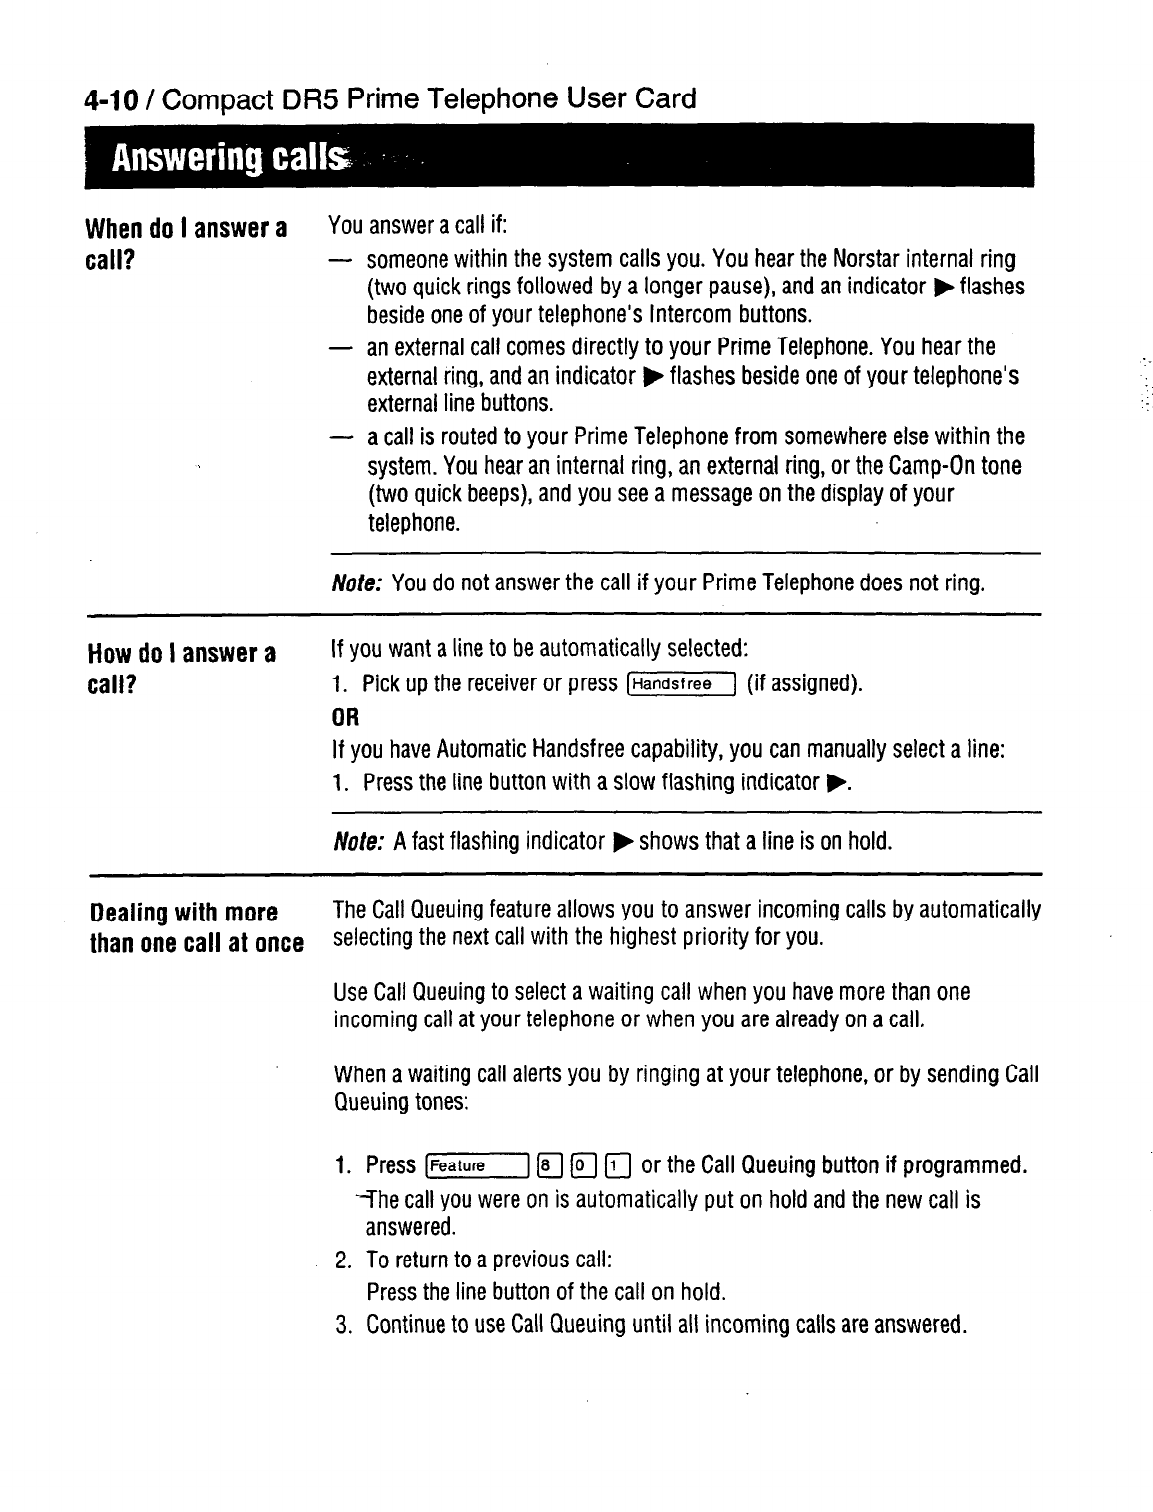
4-10 / Compact
DR5
Prime Telephone User Card
When do
I
answer
a You
answer a call if:
call? -
-
-
someone within the system calls you. You hear the Norstar internal ring
(two quick rings followed by a longer pause), and an indicator b flashes
beside one of your telephone’s Intercom buttons.
an external call comes directly to your Prime Telephone. You hear the
external ring, and an indicator F flashes beside one of your telephone’s
external line buttons.
a call is routed to your Prime Telephone from somewhere else within the
system. You hear an internal ring, an external ring, or the Camp-On tone
(two quick beeps), and you see a message on the display of your
telephone.
Me: You do not answer the call if your Prime Telephone does not ring.
How do
I
answer a
call?
If you want a line to be automatically selected:
1. Pick up the receiver or press (Handsfree] (if assigned).
OR
If you have Automatic Handsfree capability, you can manually select a line:
1.
Press the line button with a slow flashing indicator . .
Note: A fast flashing indicator p shows that
a
line is on hold.
:
I:..
.:
,_
Dealing
with more
The Call Queuing feature allows you to answer incoming calls by automatically
than one call at once
selecting the next call with the highest priority for you.
Use Call Queuing to select a waiting call when you have more than one
incoming call at your telephone or when you are already on a call.
When a waiting call alerts you by ringing at your telephone, or by sending Call
Queuing tones:
1. Press [Feature] Is] @I [r] or the Call Queuing button if programmed.
“The call you were on is automatically put on hold and the new call is
2.
3.
answered.
To return to a previous call:
Press the line button of the call on hold.
Continue to use Call Queuing until all incoming calls are answered.
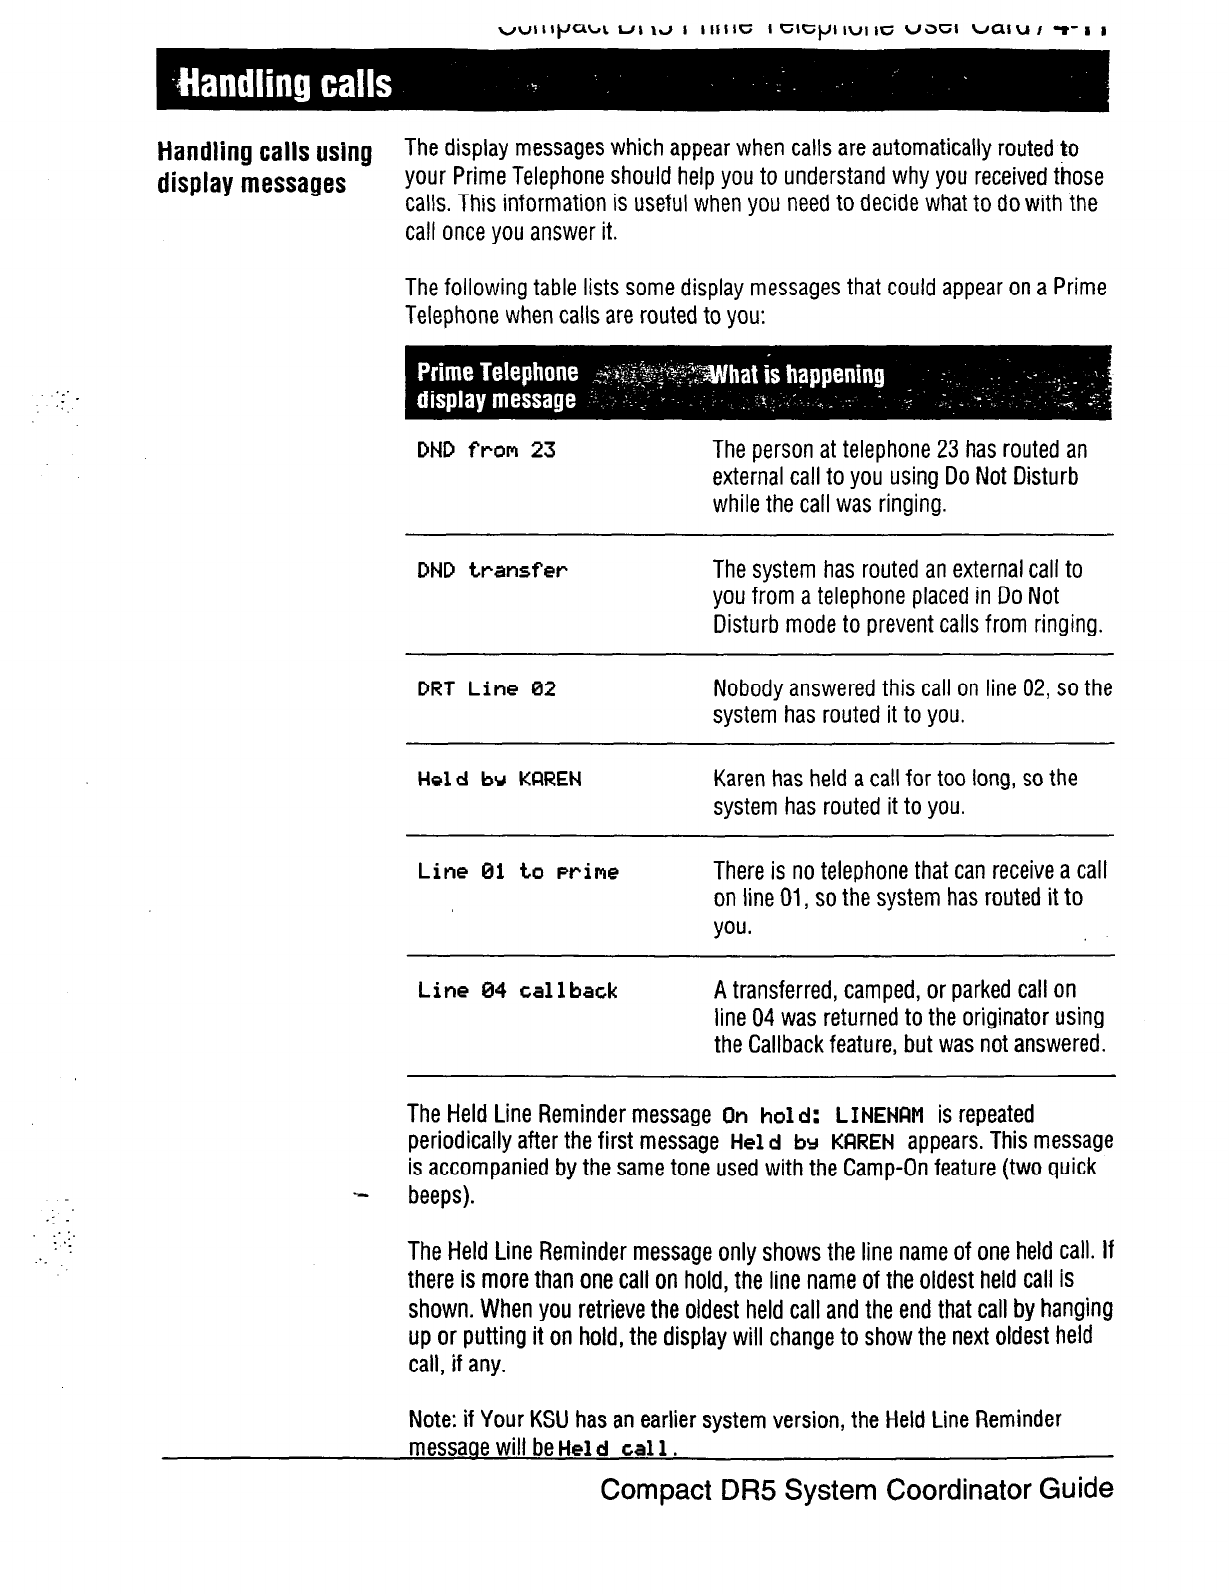
Handling calls using
The display messages which appear when calls are automatically routed,to
display messages
your Prime Telephone should help you to understand why you received those
calls. This information is useful when you need to decide what to do with the
call once you answer it.
The following table lists some display messages that could appear on a Prime
Telephone when calls are routed to you:
DND from 23
The person at telephone 23 has routed an
external call to you using Do Not Disturb
while the call was ringing.
DND transfer
The system has routed an external call to
you from a telephone placed in Do Not
Disturb mode to prevent calls from ringing.
DRT
Line 02
Nobody answered this call on line 02, so the
system has routed it to you.
Held br KFlREN
Karen has held a call for too long, so the
system has routed it to you.
Line 01 to Prime
There is no telephone that can receive a call
on line 01,
so
the system has routed it to
you.
Line 04 call back
A transferred, camped, or parked call on
line 04 was returned to the originator using
the Callback feature, but was not answered.
The Held Line Reminder message
On
ho1 d: LINENF~M
is repeated
periodically after the first message
He1
d by KRREN
appears. This message
is accompanied by the same tone used with the Camp-On feature (two quick
beeps).
The Held Line Reminder message only shows the line name of one held call. If
there is more than one call on hold, the line name of the oldest held call is
shown. When you retrieve the oldest held call and the end that call by hanging
up or putting it on hold, the display will change to show the next oldest held
call, if any.
Note: if Your KSU has an earlier system version, the Held Line Reminder
messaae will be H+l
d
~a1 1.
Compact DR5 System Coordinator Guide
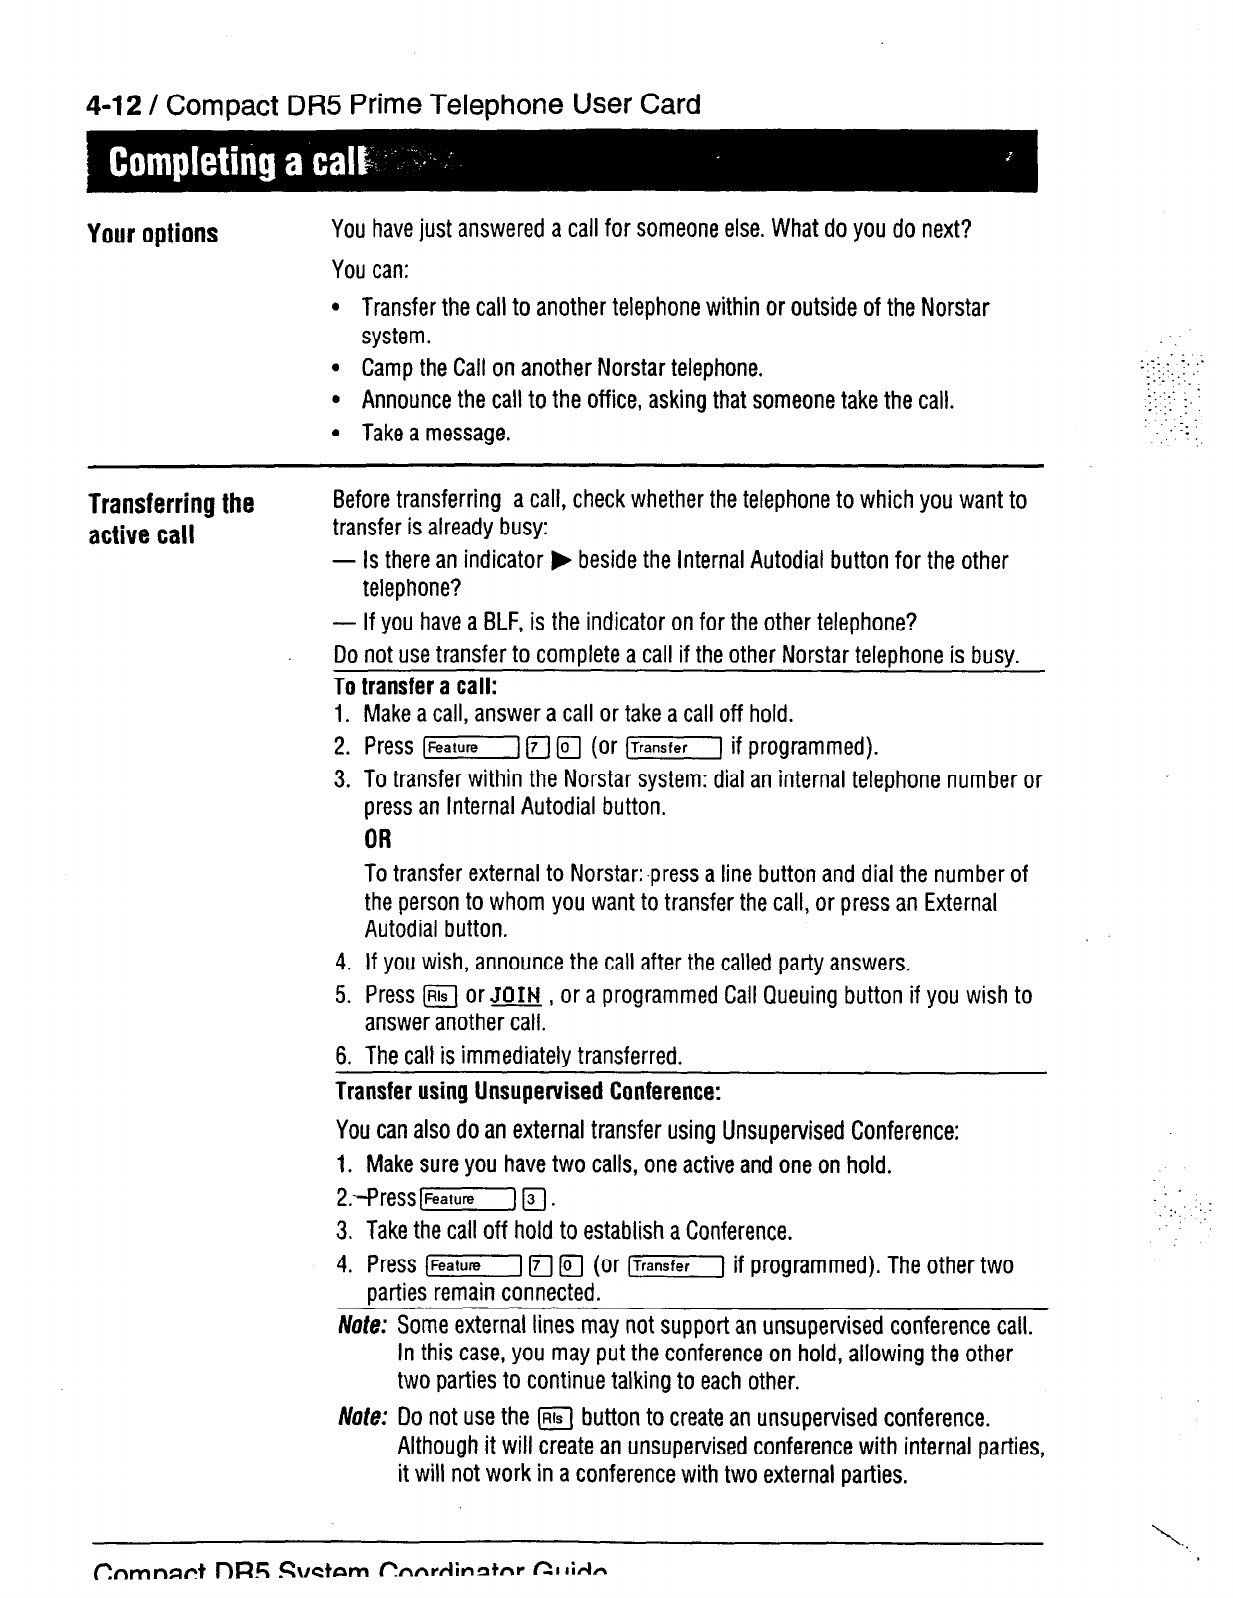
4-12 /
Compact
DR5
Prime Telephone User Card
Your options
You have just answered a call for someone else. What do you do next?
You can:
l
Transfer the call to another telephone within or outside of the Norstar
system.
l
Camp the Call on another Norstar telephone.
l
Announce the call to the office, asking that someone take the call.
l
Take a message.
:..:
: ;. .:
:_,__
1:. :: ..
::.I.: ‘:
: :,
1:.
.-: :
Transferring the
active call
Before transferring a call, check whether the telephone to which you want to
transfer is already busy:
- Is there an indicator b beside the Internal Autodial button for the other
telephone?
- If you have a BLF, is the indicator on for the other telephone?
Do not use transfer to complete a call if the other Norstar telephone is busy.
To transfer a call:
1. Make a call, answer a call or take a call off hold.
2. Press f-1 171 Ir;l (or (Transfer) if programmed).
3. To transfer within the Norstar system: dial an internal telephone number or
press an Internal Autodial button.
OR
To transfer external to Norstar:.press a line button and dial the number of
the person to whom you want to transfer the call, or press an External
Autodial button.
4. If you wish, announce the call after the called party answers.
5. Press @
Or
JOIN ,
or a programmed Call Queuing button if you wish to
answer another call.
6. The call is immediately transferred.
Transfer using Unsupervised Conference:
You can also do an external transfer using Unsupervised Conference:
1. Make sure you have two calls, one active and one on hold.
2.-Press[~l F].
3. Take the call off hold to establish a Conference.
4. Press jFGiGFl PI FJ (or (Transfer1 if programmed). The other two
parties remain connected.
Nofe: Some external lines may not support an unsupervised conference call.
In this case, you may put the conference on hold, allowing the other
two parties to continue talking to each other.
Note: Do not use the lKJ button to create an unsupervised conference.
Although it will create an unsupervised conference with internal parties,
it will not work in a conference with two external parties.
1..
Compact DR5 Prime Telephone User Card / 4-13
..’
-:
Camping the call
If the Norstar telephone you want to transfer the call to is busy on another
call, you may want to camp the call on that telephone. The person receiving
the camped call will hear Camp-On tones (two quick beeps).
1. Press 1-1 F] m or the Camp-On button (if programmed).
2. Dial the internal number of the other telephone or press its Internal
Autodial button if programmed.
Announcing the
active call
You are trying to send calls you have answered to co-workers who are not at
their telephones. Using the Page feature, you can announce the calls over the
Norstar telephones, an external loudspeaker, or both. A co-worker hearing an
announcement can answer the call from the nearest Norstar telephone.
If you want your co-worker to take the call from a specific Norstar
telephone:
1.
Place the call on hold.
2. Using the Page feature, announce the call and the location of the telephone
to which you will transfer the call.
3. Transfer the call to the appropriate Norstar telephone.
OR
Camp the call on the appropriate Norstar telephone.
If you
want your co-worker to take
the
call on a
specific line:
1. Place the call on hold.
2. Use the Page feature to announce the call and its line number.
Your co-worker can now go to the nearest Norstar telephone that has that
line, select the line, and lift the receiver.
lf you want your co-worker to take the call from any Norstar telephone:
1.
Use the Call Park feature to place the call on hold. Your telephone shows a
three-digit Call Park Retrieval code on the display.
2. Use the Page feature to announce the call and the Call Park Retrieval code.
Your co-worker can now retrieve the call from any other Norstar telephone
by lifting the receiver or by pressing the I-1 button and then
dialing the three-digit code.
Note:
Remember that callback (the call is routed back to your Prime
Telephone) occurs if your transferred, parked, or camped call goes
unanswered.
Compact DR5 System Coordinator Guide
4-14 /
Compact DR5 Prime Telephone User Card
Informing your
co-workers about
their calls
Use the Send Message feature to notify co-workers that they should call you
for information.
Display messages show you if the person you are trying to call is on another
line, does not reply, or has turned on Do Not Disturb. In each case, you can
use the Ring Again feature.
The Ring Again feature is a method of ensuring that you immediately know
when there is a change in the use of the other telephone. You can then try
again to place a call.
Working with other
features
Some of the many special features which Norstar provides may be particularly
useful to you. Some of these features, however, are only available if assigned
during Configuration or Administration programming. Speak to your System
Coordinator to determine which features you can use, and to obtain details on
how to use them.
Answer Button: You
can immediately answer and monitor another Norstar
telephone, for example, your managers’.
Automatic Handsfree:
If programmed, you can use the Handsfree
microphone and speaker for all your calls.
Call Pickup Directed:
Anyone in the office can answer a call ringing at any
other Norstar telephone by dialing that telephone’s internal number.
Call Pickup Group:
Any member of a specified group can answer an external
or internal call ringing at another telephone within that specified group.
Direct-Dial Telephone:
If your Prime Telephone is administered as
a
Direct-
Dial telephone, anyone assigned to
your
Direct Dial telephone can quickly
contact you by dialing an assigned single-digit number.
Hotline:
A Norstar telephone may be programmed to automatically dial your
Prime Telephone when its receiver is lifted.
Page Zone:
If you do not want to disturb the entire office with an
announcement, you can direct the page to a choice of smaller areas.
Priority Call:
If you have answered an urgent call for someone who is busy
on-another line, you can interrupt the person with this feature.
*
.-_ -
:
_:
.:_ :
. ::‘.:
CornPact DR5 Svstem
Coordinator
Guide
Compact DR5 Prime Telephone
User Card
14-15
1:
5. :
‘.
.::.
. .
: :.:y..
:
1. 1
‘. ._ ::
Some
unique
situations
If an external call comes to you, and you do not have a button representing
the line the call is on, the indicator b for that call will appear next to any
available Intercom button on your telephone.
If your Prime Telephone receives a callback call, you will hear the Norstar ring
instead of the External ring.
The Held Line Reminder or the Delayed Ring Transfer feature is not available
unless assigned during Configuration programming.
If you are using all of your external line buttons and Intercom buttons, you
can still receive a camped call (you will hear two quick beeps).
If your Prime Telephone is an M7324 telephone, you can monitor the busy/not
busy status of other Norstar telephones. Check for the presence or absence
of indicators F beside the Internal Autodial buttons for other telephones.
Where to get help
To learn more about Norstar and its features, the System Coordinator can
provide you with the following Norstar documents:
The Norstar Telephone User Cards show you how to:
- make an external call
- make an internal call
- put a call on hold
- use (Handsf]
- program memory buttons.
The Compact DR5 Telephone feature Card lists the feature codes and
describes the features.
The Norstar Busy Lamp Field (5Lf) User Card describes how to use the Busy
Lamp Field.
The Norstar Central Answering Position (CAP) User Card describes how
to
use Central Answering Position modules.
Compact DR5 System Coordinator Guide
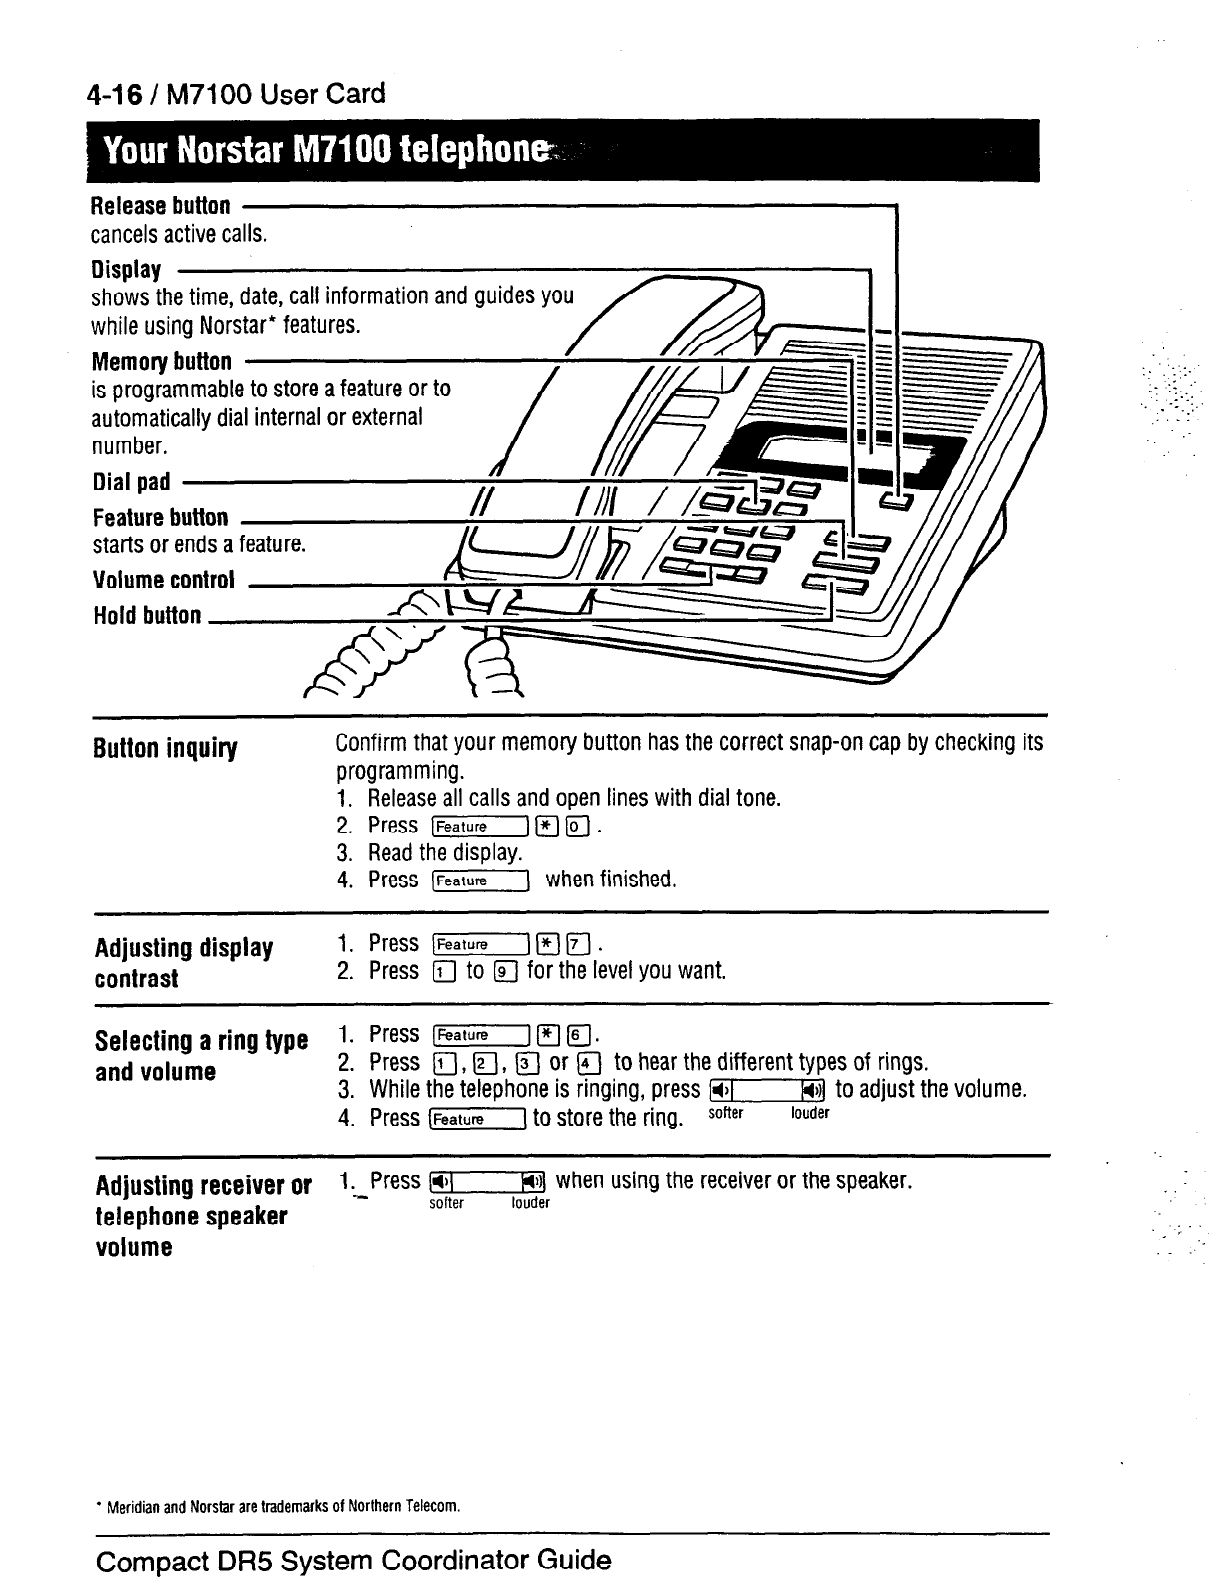
4-16 / M7100 User
Card
Release button
cancels active calls.
Display
shows the time, date, call information and guides you
while using Norstar* features.
Memory button
is programmable to store a feature or to
automatically dial internal or external
number.
Dial
pad
Feature button
starts or ends a feature.
Volume control
Hold button
Button inquiry
Confirm that your memory button has the correct snap-on cap by checking its
programming.
1. Release all calls and open lines with dial tone.
2. Press (Feature) 171 IF]
.
3. Read the display.
4. Press (Feature) when finished.
Adjusting display 1.
Press (-1 Fj (7J.
contrast
2. Press (TJ to ITJ for the level you want.
Selecting a ring type
1. Press [Feature (71 Fj.
and volume
2. Press
(TJ ,
a, a
or F-J to hear the different types of rings.
3. While the telephone is ringing, press I-1 to adjust the volume.
4. Press (Feature( to store the ring. sorter
louder
Adjusting receiver or 1,Press 14 HI)
when using the receiver or the speaker.
telephone speaker
softer louder
volume
1..
:. .::-
.::.
‘. . -:...,..
: -
_ ;: .:
‘_
* Meridian and Norstar are trademarks of Northern Telecom.
Compact DR5 System Coordinator Guide
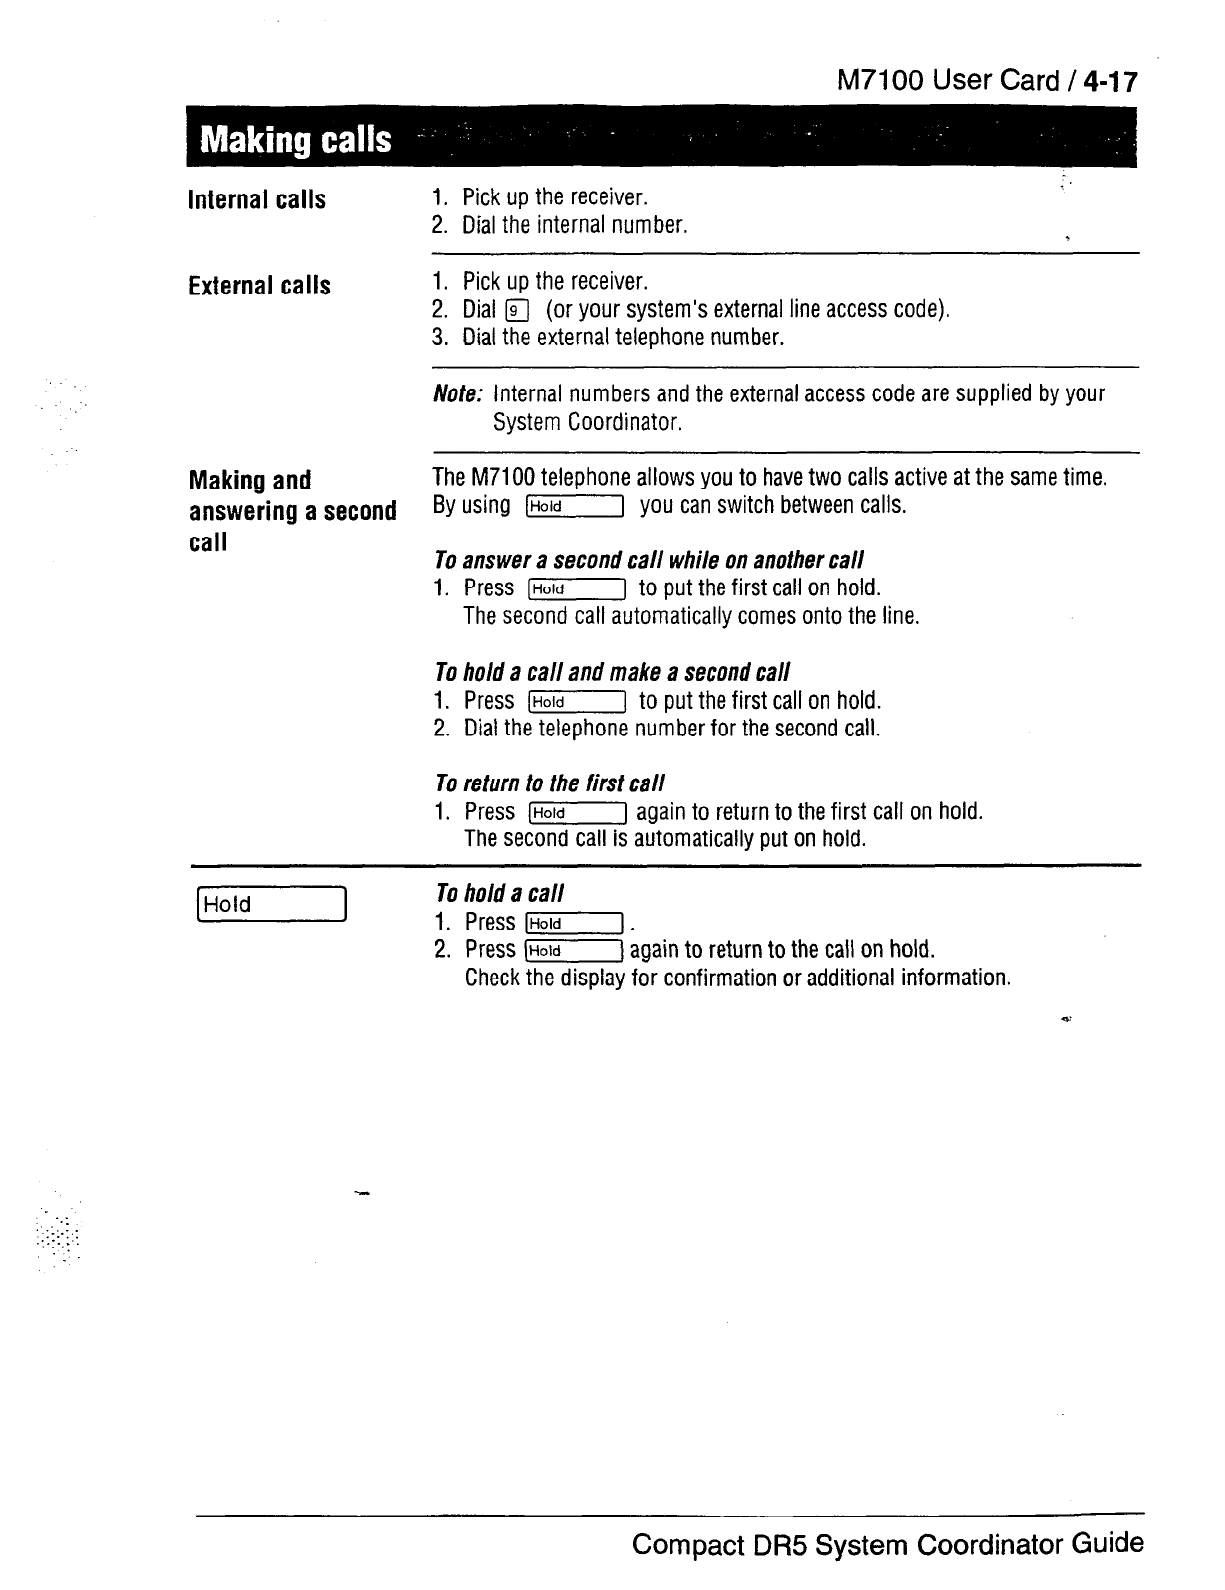
M7100 User Card / 4-17
Internal calls
External calls
Making and
answering a second
call
1. Pick up the receiver.
2. Dial the internal number.
1. Pick up the receiver.
2. Dial a (or your system’s external line access code).
3. Dial the external telephone number.
/Vote: Internal numbers and the external access code are supplied by your
System Coordinator.
The M7100 telephone allows you to have two calls active at the same time.
By using [Hold] you can switch between calls.
To answer a second call while on another call
1. Press [J to put the first call on hold.
The second call automatically comes onto the line.
To hold a call and make a second call
1. Press (Hold] to put the first call on hold.
2. Dial the telephone number for the second call.
To return to the first call
1. Press [HOld] again to return to the first call on hold.
The second call is automatically put on hold.
[HOldI
To hold a call
1. Press [Hold].
2. Press IHold) again to return to the call on hold.
Check the display for confirmation or additional information.
.:
:1:.;.:
:
..:..:.
.
Compact DR5
System Coordinator
Guide

4-18 / M7100 User Card
About the
memory button
The memory button can store a
telephone number or feature
code to give you one touch
dialing or feature activation. You
can change the memory button
by programming it with a new
number or feature code.
- Memory button
Rememibec Press (Feature F[ lFj to check the memory button.
Programming
memory buttons
External autodial
1.
2.
3.
4.
5.
If you are on a call or an open line with dial tone, press (-1
0rlEiCJ.
Press [FZGFl Fl r;7.
Dial the external number.
Press [r] to store the number.
Label your new button.
Internal autodial
1. If you are on a call or an open line with dial tone, press [Hold1
arm.
2. Press (Feature1 ITI m.
3. Dial the internal number.
4. Label your new button.
Features
1. If you are on a call or an open line with dial tone, press [Hold]
2. Press [Feature] Fj r;7
.
3. Press (Feature) and the feature code.
4._Label your new button.
Erasing memory buttons
1. If you are on a call or an open line with dial tone, press I-1 or m.
2. Press (Feature/RF].
3. Press [HO’dI to erase the button.
:..‘_“...::.
..:,, . . . .
1:. :;_:
:-. _.:.
I: -: ,.._ -.
_:. :::
_: :
Cnmnad nR_5 .S\lctnm (Inr\rr(in~tnr CI iirld
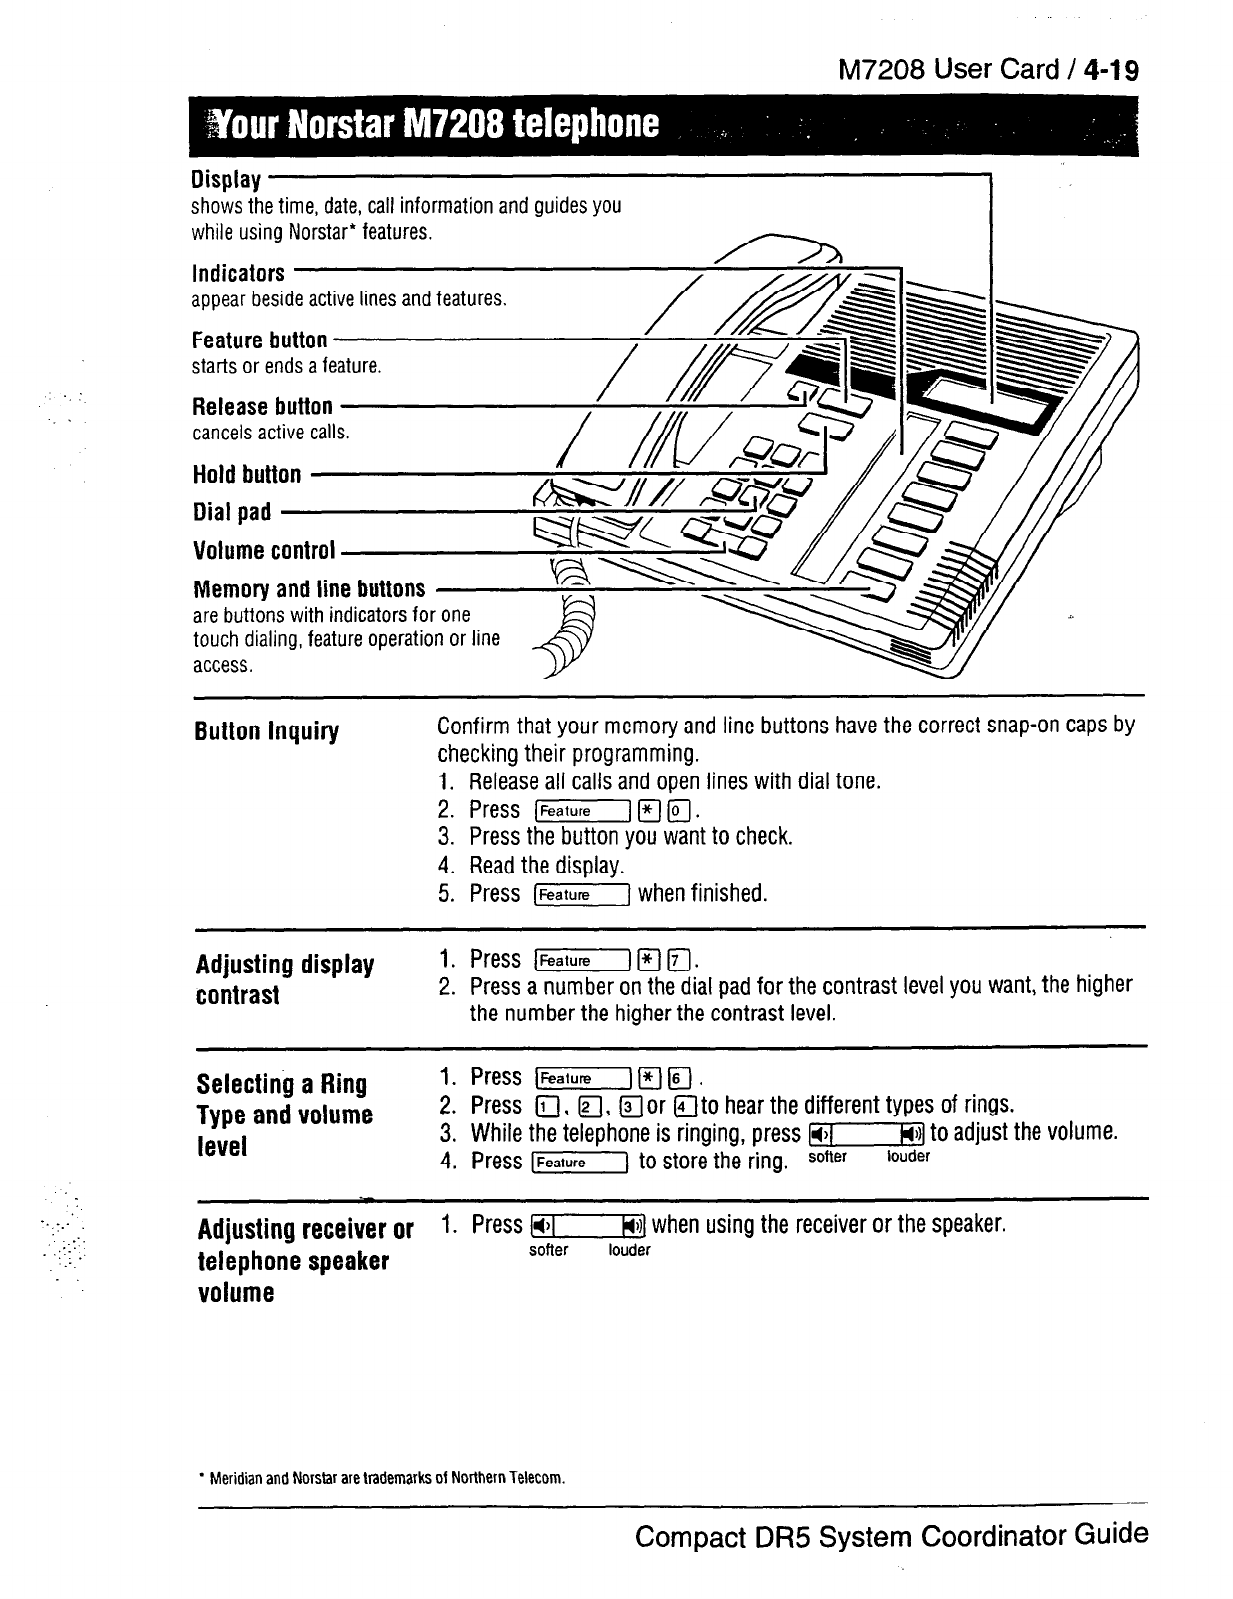
M7208 User Card / 4-l 9
‘.
-. .::
._:_
.::
‘, ‘... :
:.
Display
shows the time, date, call information and guides you
while using Norstar* features.
appear beside active lines and features.
starts or ends a feature.
cancels active calls.
Dial pad
Volume control
Memory and line buttons
are buttons with indicators for one
touch dialing, feature operation or line
access.
Button Inquiry
Confirm that your memory and line buttons have the correct snap-on caps by
checking their programming.
1.
2.
3.
4.
5.
Release all calls and open lines with dial tone.
Press [r] F] IT].
Press the button you want to check.
Read the display.
Press [iGET-] when finished.
Adjusting display
contrast
1. Press lFeafurej1+1~1.
2. Press a number on the dial pad for the contrast level you want, the higher
the number the higher the contrast level.
Selecting a Ring
Type and volume
level
1.
Press L-1 F-1 T;i7.
2. Press 0,
m, IFJ
or @J to hear the different types of rings.
3.
While the telephone is ringing, press [lit,,] to adjust the volume.
4. Press [Feature) to store the ring. saner
louder
Adjusting receiver or
1.
Press I.-$ when using the receiver or the speaker.
telephone speaker
softer louder
volume
* Meridian and Norstar are trademarks of Northern Telecom.
Compact DR5 System Coordinator Guide

4-20 / M7208 User Card
About line buttons
Norstar systems can have different types of line buttons. Match the line
buttons on your telephone with the ones below for instructions on how to use
them.
[lntercomj
Internal calls using Intercom buttons External calls using numbered Line
l
[LineJ ;:
Pick up the receiver.
If b appears beside an Intercom
button, then dial.
OR
Press an Intercom button without
., then dial.
buttons -
1. Pick up the receiver.
2. When b appears beside a
numbered Line button, then dial.
OR
Press a numbered Line button
without ., then dial.
.l.
‘.
.: _’
1.1.
:-. 1:::
_‘...I ,‘,
,: .;::.
.:
. . ‘.Y_ :
:,I...; 1.
: .._.:::
14321
I
Note:
Internal numbers are supplied by your System Coordinator.
Internal calls using extension
buttons
1. Pick up the receiver.
2. When b appears beside an
extension button, then dial.
External calls using extension
buttons
1. Pick up the receiver.
2. When b appears beside the
extension button, dial t5-J
(or your system’s external line
access code) and the number.
. .
[r]
Holding Calls
1. Press [Hold]
.
The bflashes beside the line on hold.
2. Press the line button with
the
flashing b to return to the call.
Check the display for confirmation or additional information.
Automatic hold
Calls are put on hold automatically when you switch from one line to another,
1-j
This button operates the telephone’s built-in microphone and speaker in place
of the receiver. Your System Coordinator can program Handsfree to your
telephone.
/Waking calls
1. JresstHandsfj instead of picking up the receiver.
Switching between Handsfree and handset
1. PresslHandsfj and replace the handset to switch to Handsfree.
2. Pick up the receiver to switch back.
Using Mute
1. PresslHandsfj to turn the microphone OFF.
2. PressIHandsfl again to turn the microphone ON.
:. :
_’
..,I ,._ _.
:
I.::
.,:.:.
1:
: -.
-
._.
Dialing without
lifting the handset
1. Pressaline button without ., then dial your call.
2. When answered, pick up the receiver, or press lHandsfree1
.
3. If the call is not answered, or the line is busy, press m.
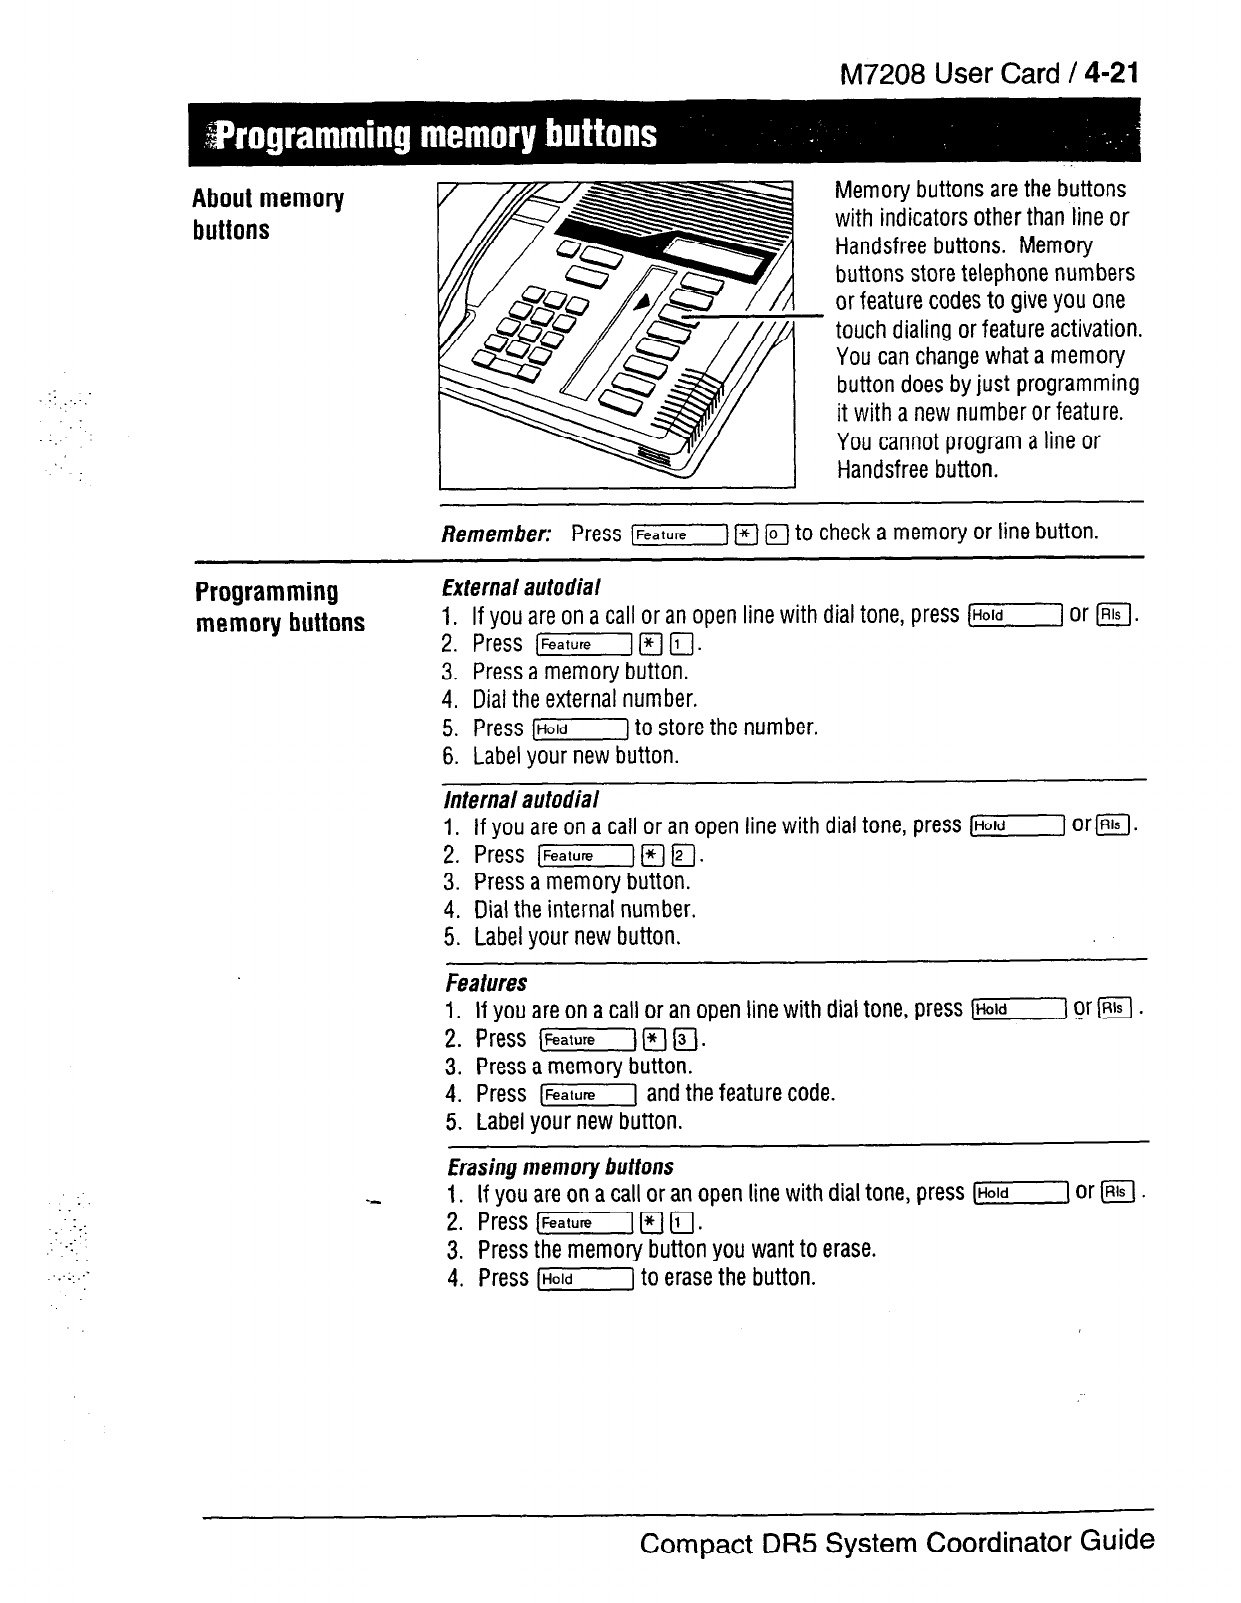
M7208 User Card / 4-21
About memory
buttons
.-
_y _.__.
.
.:
2:
‘:
::.:. _-
Memory buttons are the buttons
with indicators other than line or
Handsfree buttons. Memory
buttons store telephone numbers
or feature codes to give you one
touch dialing or feature activation.
You can change what a memory
button does by just programming
it with a new number or feature.
You cannot program a line or
Handsfree button.
Remembec Press (Feature] m m to check a memory or line button.
Programming
memory buttons
External autodial
1. If you are on a call or an open line with dial tone, press (r] or m.
2. Press [FeatureI IF/ 171.
3. Press a memory button.
4. Dial the external number,
5. Press (Hold] to store the number.
6. Label your new button.
Infernal aufodial
1.
If you are on a call or an open line with dial tone, press /HoldI arm.
2. Press [Feature) Fl[;;1.
3. Press a memory button.
4. Dial the internal number.
5. Label your new button.
Features
1.
If you are on a call or an open line with dial tone, press IHold1 or m
.
2. Press (Feature) F] Tj7.
3. Press a memory button.
4. Press [k-j and the feature code.
5. Label your new button.
Erasing
memory buftons
1.
If you are on a call or an open line with dial tone, press [Hold] or @l.
2. Press l-1 [zj 0.
3. Press the memory button you want to erase.
4. Press 171 to erase the button.
Compact
DR5
System Coordinator Guide
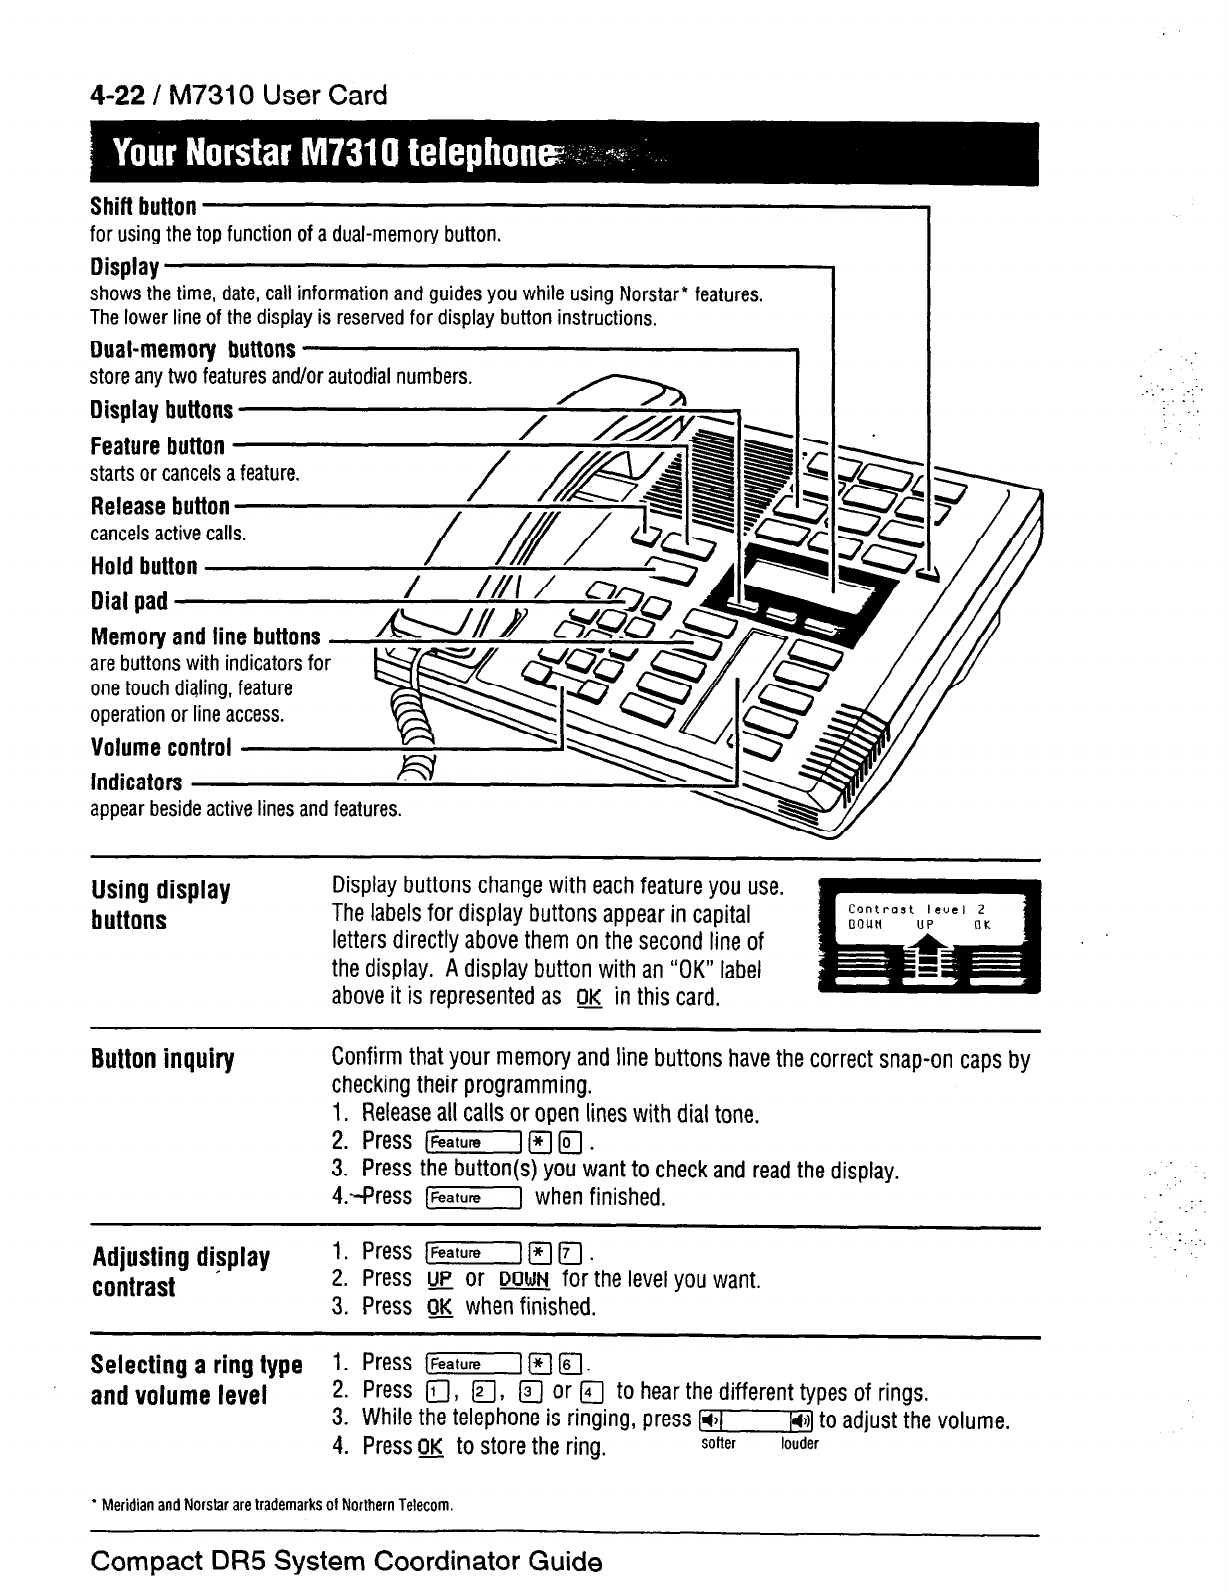
4-22 / M7310 User Card
Shift button
for using the top function of a dual-memory button.
Display
I I
shows the time, date, call information and guides you while using Norstar* features.
The lower line of the display is reserved for display button instructions.
Dual-memory buttons
store any two features and/or autodial numbers.
Memory and
line buttons
are buttons with indicators for
one touch dialing, feature
appear beside active lines and features.
Using display
buttons
Display
buttons change with each feature you use.
The
labels for display buttons appear in capital
letters directly above them on the second line of
the display. A display button with an “OK” label
above it is represented as r~& in this card.
. .
._:. ..:-.
Button inquiry
Confirm that your memory and line buttons have the correct snap-on caps by
checking their programming.
1. Release all calls or open lines with dial tone.
2. Press (Feature 17 r;;l
.
3. Press the button(s) you want to check and read the display.
4.--Press [Feature] when finished.
:’
Adjusting display
contrast
1. Press [Feature] F] Fj
.
2.
Press Up or
DOWN
for the level you want.
3. Press OK when finished.
Selecting a ring type
1. Press [m Fl F/.
and volume level
2. Press a,
m, @
or /TJ to hear the different types of rings.
3. While the telephone is ringing, press [jj to adjust the volume.
4. Press OCI to store the ring.
Softer louder
: . .._
* Meridian and Norstar are trademarks of Northern Tetecom.
Compact
DR5 System Coordinator Guide
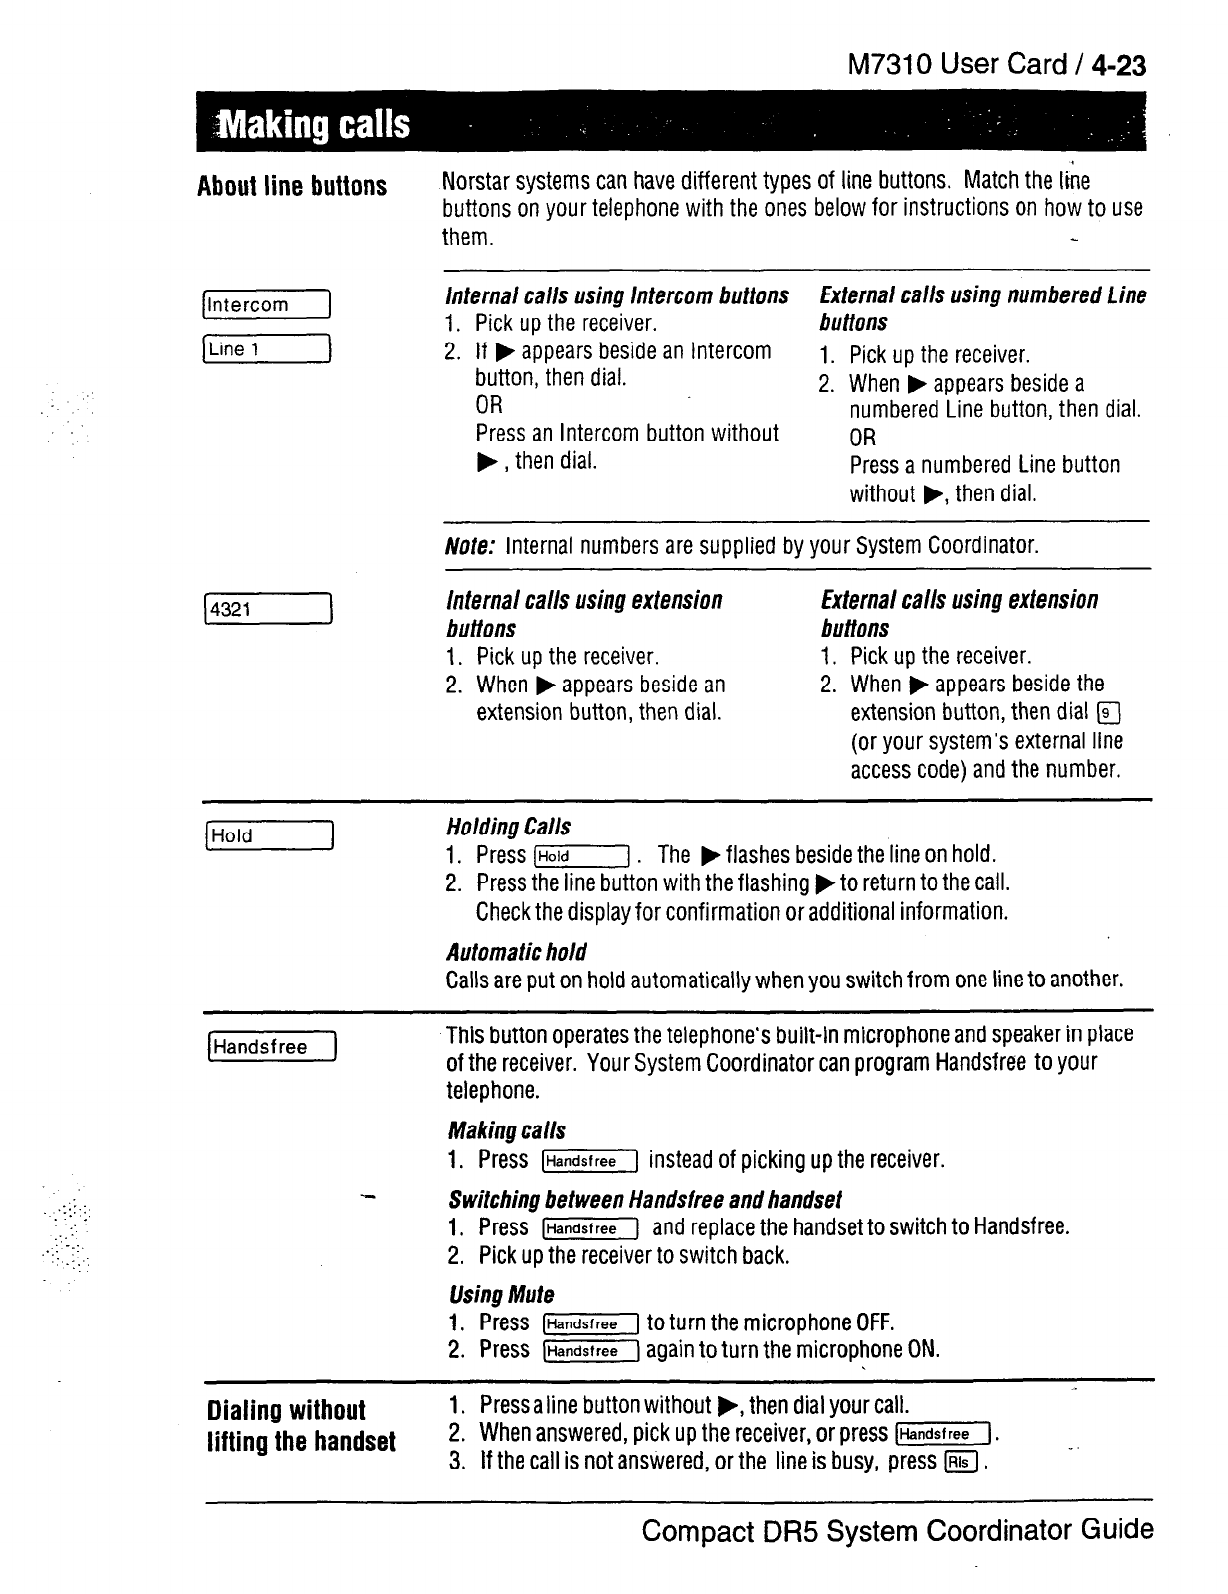
M7310
User Card /
4-23
About line buttons
Norstar systems can have different types of line buttons. Match the line
buttons on your telephone with the ones below for instructions on how to use
them.
(Intercom]
[Liner\
internal calls using Intercom buttons External calls using numbered Line
1.
Pick up the receiver.
buff ons
2.
If b appears beside an Intercom 1. Pick up the receiver.
button, then dial.
OR 2. When F appears beside a
numbered Line button, then dial.
Press an Intercom button without
b
,
then dial. OR
Press a numbered Line button
without ., then dial.
Note:
Internal numbers are supplied by your System Coordinator.
143211
internal calls using extension
buttons
1.
Pick up the receiver.
2. When F appears beside an
extension button, then dial.
External calls using extension
buttons
1. Pick up the receiver.
2. When F appears beside the
extension button, then dial m
(or your system’s external line
access code) and the number.
[Hold]
Holding Calls
1. Press (Hold]
.
The b flashes beside the line on hold.
2. Press the line button with
the
flashing b to return to the call.
Check the display for confirmation or additional information.
Automatic hold
Calls are put on hold automatically when you switch from one line to another.
.
:
._:::
. :
_’
::
.‘___,
,.:.
:
.I :
_y
This button operates the telephone’s built-in microphone and speaker in place
of the receiver. Your System Coordinator can program Handsfree to your
telephone.
Making ca
fls
1.
Press IHandsfreej instead of picking up the receiver.
Switching between Handsfree and handset
1. Press lHandsfree) and replace the handset to switch to Handsfree.
2. Pick up the receiver to switch back.
Using Mute
1. Press [Handsfree] to turn the microphone OFF.
2. Press [j) again to turn the microphone ON.
Dialing without
lifting the handset
1. Press a line button without ., then dial your call.
2. When answered, pick up the receiver, or press [Handsfree].
3. If the call is not answered, or the line is busy, press m.
-.
Compact
DR5
System Coordinator Guide
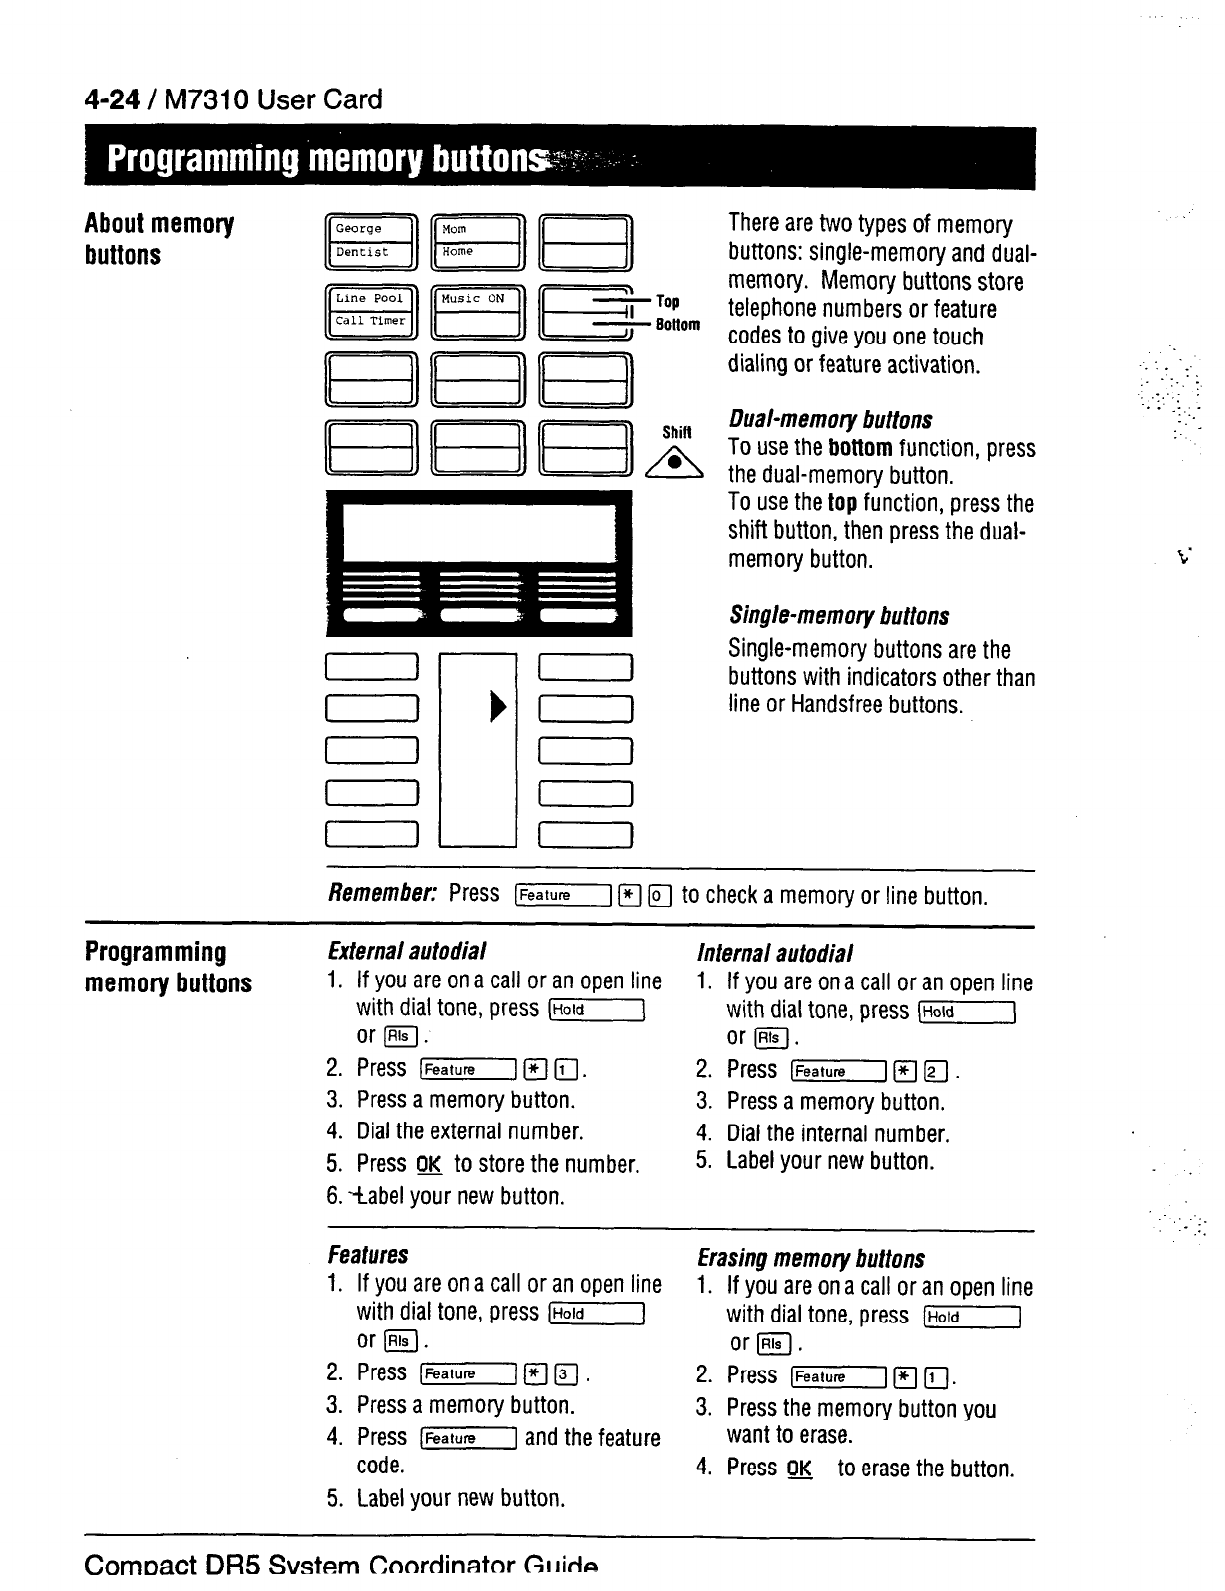
4-24 / M7310 User Card
About memory
buttons
I I
l
1
Shill
There are two types of memory
buttons: single-memory and dual-
memory. Memory buttons store
telephone numbers or feature
codes to give you one touch
dialing or feature activation.
Dual-memory buttons
To use the bottom function, press
the dual-memory button.
To use the
top
function, press the
shift button, then press the dual-
memory button.
._
-.:.
_.
,. .:_;:
: __ .:_ -:
-.
:: .: .
:..
-_
:-
t‘
Single-memory buttons
Single-memory buttons are the
buttons with indicators other than
line or Handsfree buttons.
Remember:
Press [Feature] 171 @J to check a memory or line button.
Programming
memory buttons
External autodial
1.
If you are on a call or an open line
with dial tone, press (Hold]
or ml.
2. Press ]FZFl F] (il.
3. Press a memory button.
4. Dial the external number.
5. Press g& to store the number.
6. --Label your new button.
Internal autodial
1. If you are on a call or an open line
with dial tone, press (Hold]
or FJ.
2. Press rm ]q ]F]
.
3. Press a memory button.
4. Dial the internal number.
5. Label your new button.
-
.- :.
features Erasing memory buttons
1. If you are on a call or an open line 1. If you are on a call or an open line
with dial tone, press [J with dial tone, press ]]
or [Rls. or @.
2. Press [-]I+ lFJ.
3. Press a memory button.
4. Press [Feature] and the feature
code.
2. Press [m ]rl r;-l.
3. Press the memory button you
want to erase.
4. Press 0~ to erase the button.
5. Label your new button.
ComDact DR5
Svstem C:nclrdinatnr GrriT1p
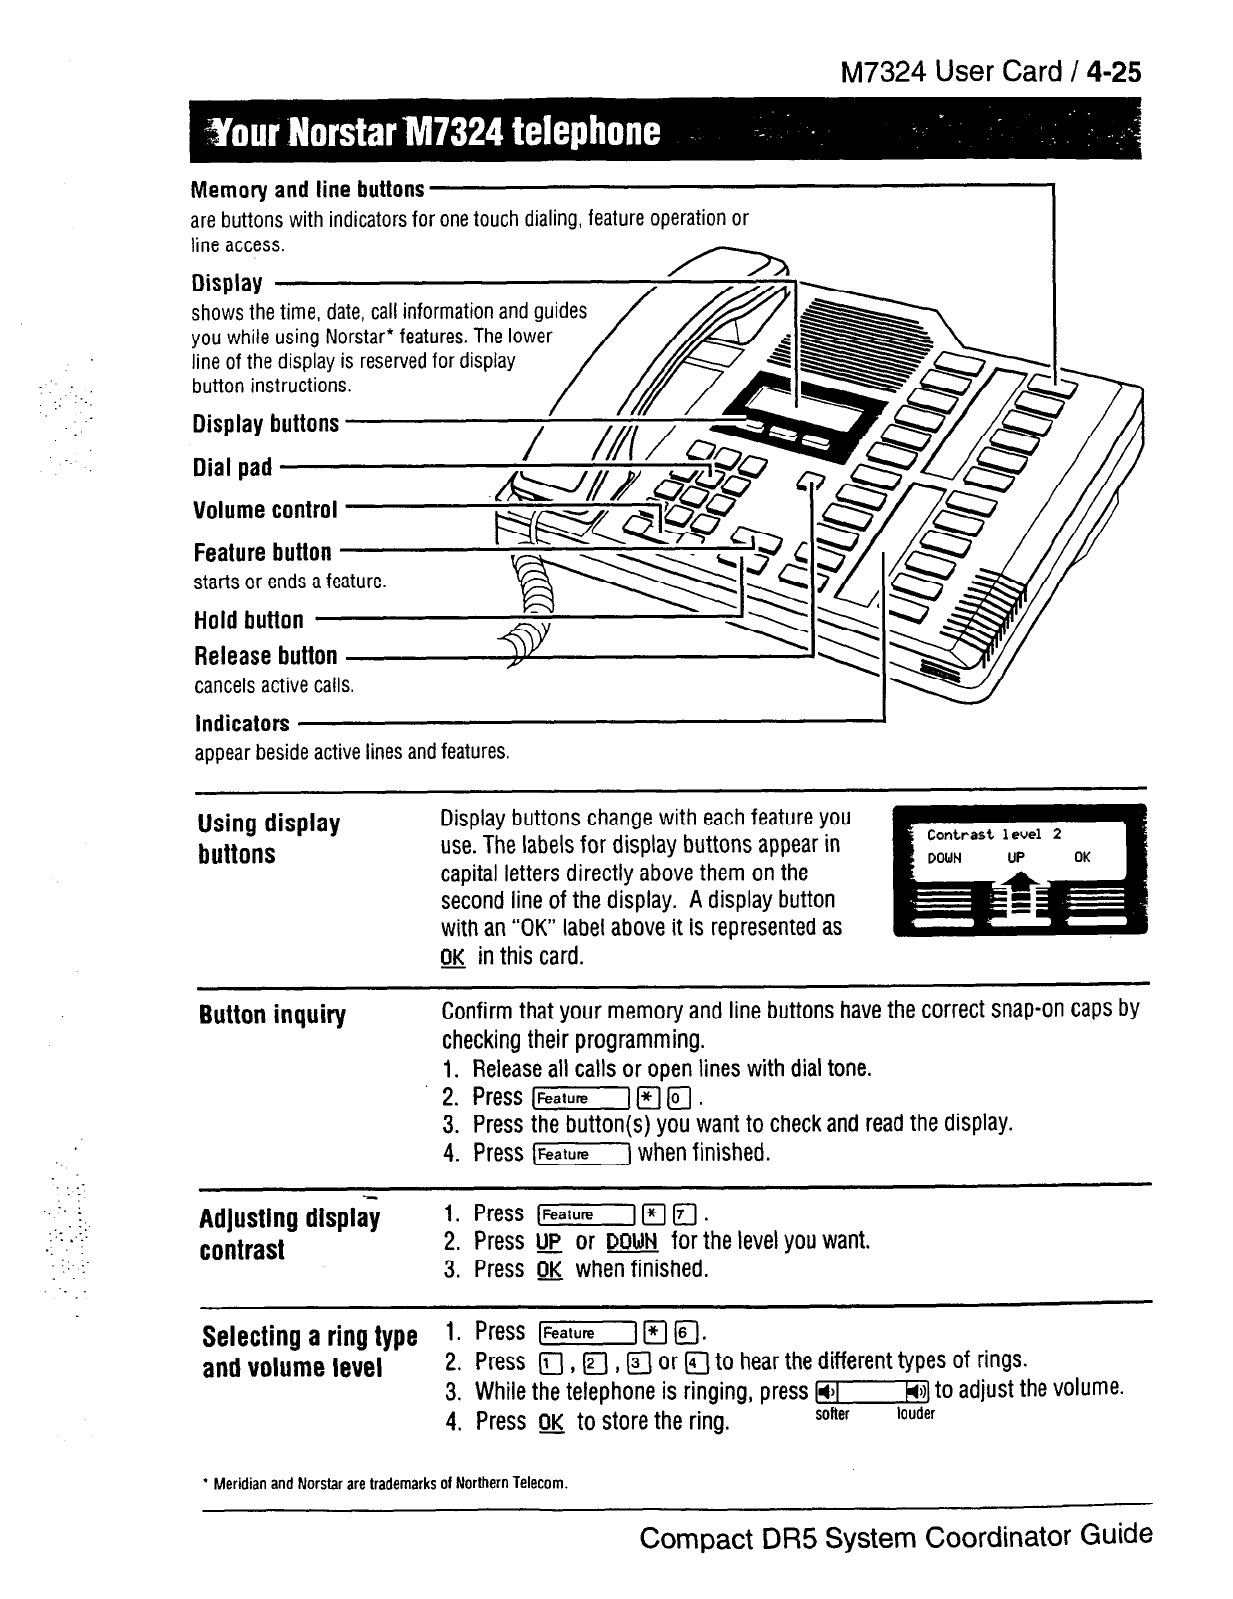
M7324 User Card
/
4-25
Memory and line buttons
are buttons with indicators for one touch dialing, feature operation or
line access.
Display
shows the time, date, call information and
guides
you while using Norstar* features. The lower
line of the display is reserved for display
button instructions.
Display buttons
Dial pad
Volume control
Feature button
appear beside active lines and features.
Using display
buttons
Display
buttons change with each feature you
use. The labels for display buttons appear in
capital letters directly above them on the
second line of the display. A display button
with an “OK” label above it is represented as
OK in this card.
:
:. :
‘. :
::_. :,
. ::
. . :
:
.: :-
Button inquiry
Adjusting displa;
contrast
Confirm that your memory and line buttons have the correct snap-on caps by
checking their programming.
1.
Release all calls
or open lines with dial tone.
2. Press /FeatureI 171 r]
.
3. Press the button(s) you want to check and read the display.
4. Press (Feature] when finished.
1. Press (Feature] Fl F-j
.
2.
Press up or
DOWN
for the level you want.
3. Press m when finished.
Selecting a ring type
1.
Press (Feature/ Fj a.
and volume level 2.
Press a
, a , a
or FJ to hear the different types of rings.
3. While the telephone is ringing, press 1-1 to adjust the volume.
4. Press N to store the ring.
soner louder
l
Meridian and Norsfar are trademarks of Northern Telecom.
Compact
DR5 System Coordinator
Guide

4-26 / M7324 User Card
About line buttons
Norstar systems can have different types of line buttons. Match the line
buttons on your telephone with the ones below for instructions on how to use
them.
[K&G--J
[Liner]
lntefnal
calls using hfefcom buttons External calls using num6ered Line
.’ _:-
1. Pick up the receiver.
buttons ::
,.
: ..,
2.
If k appears beside an Intercom 1. Pick up the receiver. ,: .:. :: _-
button, then dial. 2. When F appears beside a _’
,_ :_
1. ;::;:
.:
OR
., .:,
:
Press an Intercom button without
b,
then dial.
numbered Line button, then dial.
OR
Press a numbered Line button
without F, then dial.
/Vote: Internal numbers are supplied by your system coordinator.
143211
internal calls using extension
buttons
1.
Pick up the receiver.
2. When F appears beside an
extension button, then dial.
External calls using extension
buttons
1. Pick up the receiver.
2. When F appears beside the
extension button, then dial a (or
your system’s external line access
code) and the number.
[Hold 1
Holding Calls
I ,
1. Press [HO’d]. The Fflashes beside the line on hold.
2. Press the line button with the flashing w to return to the call.
Check the display for confirmation or additional information.
Automatic hold
Calls are put on hold automatically when you switch from one line to another.
This button operates the telephone’s built-in microphone and speaker in place
of the receiver. Your System Coordinator can program Handsfree to your
telephone.
Making calls
l.-Press ]Handsfree] instead of picking up the receiver.
Switching between Handsfree and handset
1. Press
[~andsfreej
and replace the handset to switch to Handsfree.
2. Pick up the receiver to switch back.
Using Mute
1.
Press ]m] to turn the microphone OFF.
2. Press [Handsfree] again to turn the microphone ON.
._
..::
-;.
.\::- -_
,
Dialing without
lifting the handset
1, Press
a
line button without F, then dial your call.
2. When answered, pick up the receiver, or press [iandsfree].
3. If the call is not answered, or the line is busy, press @.
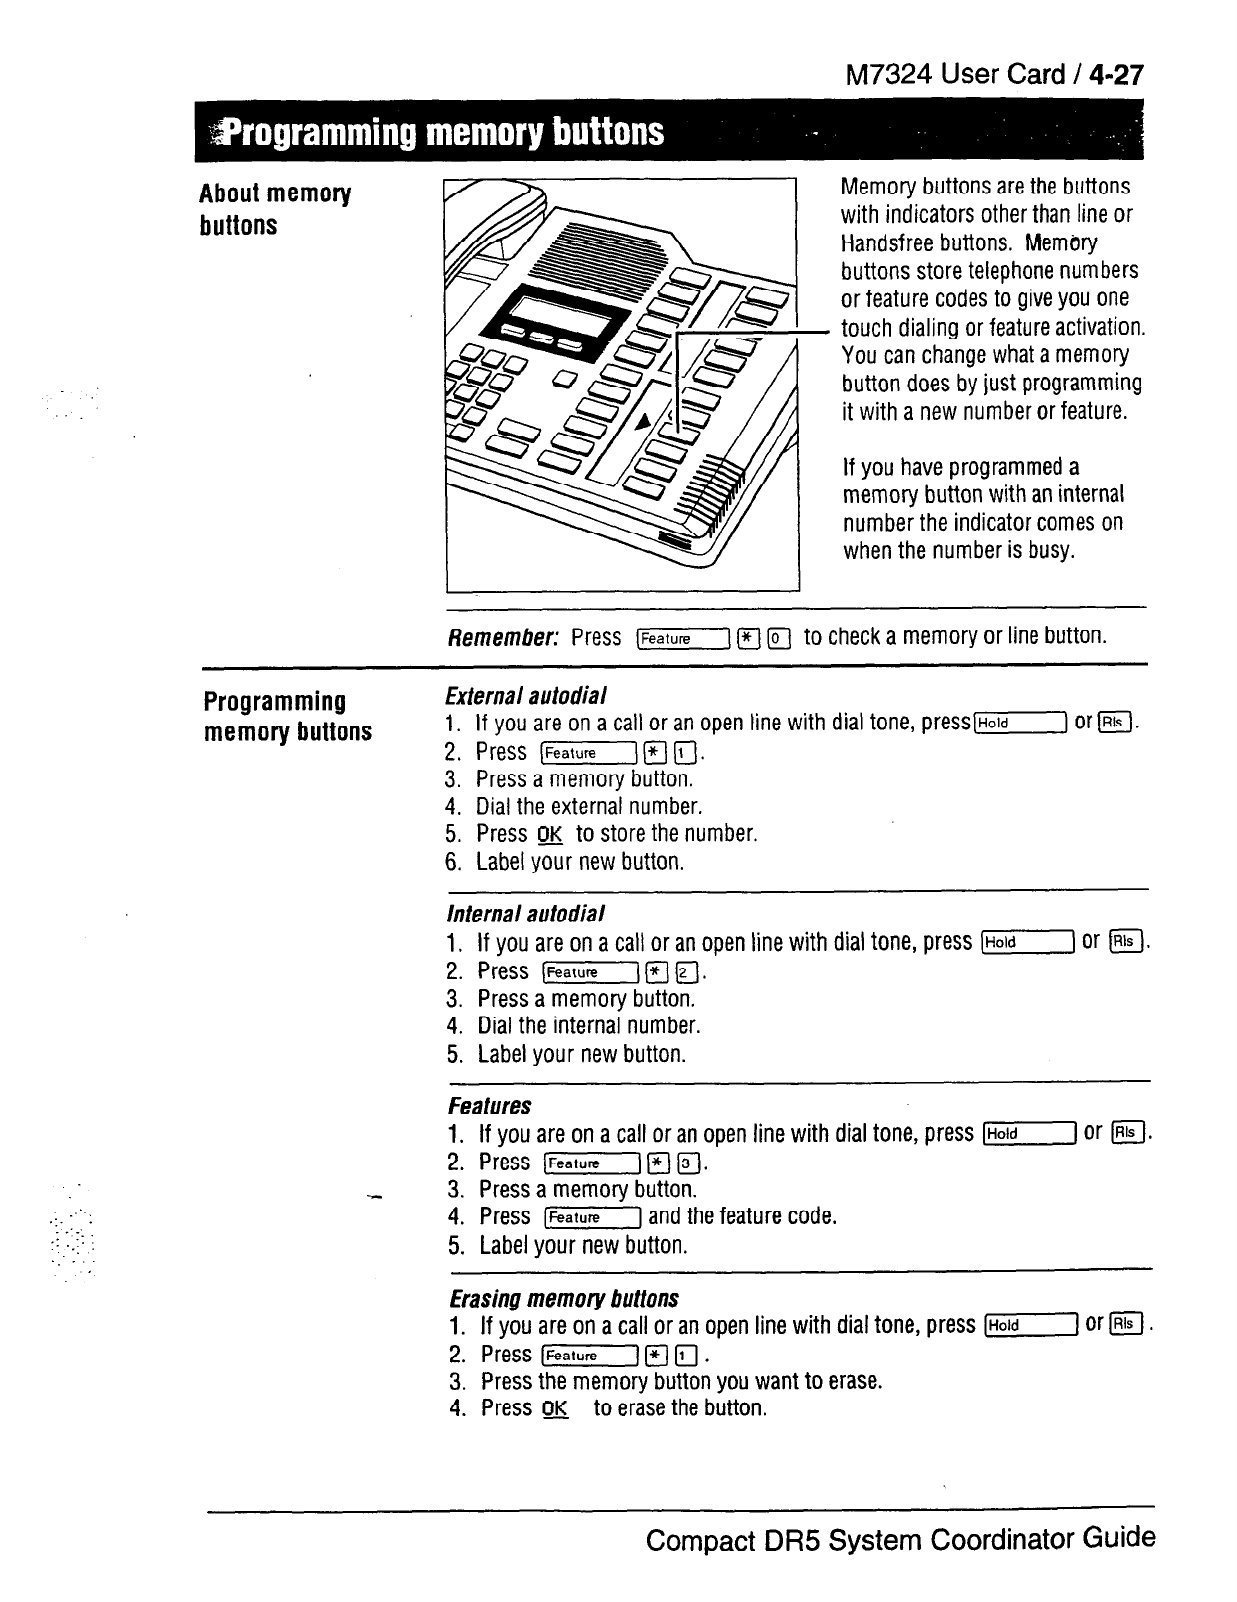
‘..
:
.’ .
: :_.
y: :_:: :
._ ...
M7324 User Card / 4-27
About memory
buttons
Memory buttons are the buttons
with indicators other than line or
Handsfree buttons. Memory
buttons store telephone numbers
or feature codes to give you one
touch dialing or feature activation.
You can change what a memory
button does by just programming
it with a new number or feature.
If you have programmed a
memory button with an internal
number the indicator comes on
when the number is busy.
Remember: Press (Feature\ Fj m to check a memory or line button.
Programming
~
External autodial
memory buttons 1:
3.
4.
5.
6.
If you are on a call or an open line with dial tone, press(Hold) or ml.
Press (Feature) I?( Ii-J.
Press a memory button.
Dial the external number.
Press m to store the number.
Label your new button.
Internal autodial
1. If you are on a call or an open line with dial tone, press (7) or f@.
2. Press (Feature1 F] (FJ.
3. Press a memory button.
4. Dial the internal number.
5. Label your new button.
Features
1.
If you are on a call or an open line with dial tone, press (7) Or ml.
2. Press (Feature) F( F].
3. Press a memory button.
4. Press [Feature] and the feature code.
5. Label your new button.
Erasing memory buttons
1. If you are on a call or an open line with dial tone,
press 171 Or @.
2. Press [Feature) Ft r;l
.
3. Press the memory button you want to erase.
4. Press 04 to erase the button.
Compact DR5 System Coordinator Guide
4-28 / M7324 User Card
‘....‘,
.‘I._..’
11.:;. ..,
:;.:
_-y
-: . .
1. ..:.
._
.::
‘:
. : -
5-2 / Glossary
Autobumping:
A setting that
determines what the system
does with new Call Log items
when your Call Log is full. When
Autobumping is on, a new log
entry causes the oldest entry to
be deleted. If Autobumping is
off, your Norstar system does
not log calls when your log is
full.
Autodial button:
A memory
button that, if programmed,
provides one-touch dialing of
external or internal numbers.
Automatic Dial:
A feature that
allows you to dial without having
to pick up the receiver or select
a line. You must have a Prime
line to use Automatic Dial.
Automatic Handsfree:
A
feature that automatically
activates Handsfree operation
when you make or answer a
call. Automatic Handsfree is
assigned in Administration
programming.
Automatic Hold:
A feature that
automatically places an active
call on hold when you select
another line. Automatic Hold is
programmed by your Customer
Service representatiye.
Automatic Privacy: See
Privacy.
Automatic Telephone
Relocation:
A feature that lets a
telephone retain its personal
and system programming when
it is plugged into a different
Norstar modular jack. Automatic
telephone relocation is enabled
by your Customer Service
representative.
Auxiliary ringer:
A separate
external telephone ringer or bell
that can be programmed to ring
when a line or a telephone
rings. An auxiliary ringer may be
programmed to ring only when
the system is in a particular
Service Mode. Programming of
an auxiliary ringer is done in
Administration programming
after the feature has been
enabled by your Customer
Service representative.
B
Background Music:
A feature
that lets you hear music from
the speaker of your Norstar
telephone. It is available only if
a music source has been
attached to the KSU and the
feature has been enabled by
your Customer Service
representative.
:: :
‘.
_
I..
: .:-.
-.
‘_
._
. . :
-,
h_.--- _
-*h-a- * .
A
I. _ -..
tilossary
/ a-;~
.’
;
._
-
_-
...
-1 .:
._.
:
:>_:
.._;.
Busy Lamp Field (BLF):
A
device with a liquid crystal
display (LCD) panel of
indicators that shows the status
of up to 24 telephones in the
Norstar system. The BLF shows
a telephone as busy if it is
active on a call, has Do Not
Disturb turned on, or is being
used for programming. The BLF
attaches to the M7310
Telephone.
Button caps:
Interchangeable
plastic caps that fit over the
buttons of Norstar telephones.
They are used to indicate the
features programmed onto each
programmable memory button.
Button caps are either
pre-printed or have clear
windows that allow you to label
the buttons.
Button Inquiry:
A feature that
allows you to check the function
of each programmable button
on your Norstar telephone.
Compact DR5 System Coordinator Guide
Bypass Restrictions:
A setting
that allows you to override any
Call Restrictions applied to
specific System Speed Dial
numbers. Bypass Restrictions
can be turned on in
Administration programming.
C
Call Forward:
A feature that
forwards all the calls arriving at
your telephone to another
telephone in
your Norstar
system.
To have
calls forwarded
outside
the system, use Line
Redirection.
Call Forward No Answer:
A
feature that forwards all calls
arriving at your telephone to
another designated telephone in
your Norstar system after a
. .
specific number of rings. Call
Forward No Answer is assigned
in Administration programming.
Call Forward On Busy:
A
feature that forwards all calls at
your telephone to another
designated telephone if your
telephone is busy. This feature
is assigned in Administration
programming.
Call Forward Override:
‘-
A feature that allows you to call
someone and ask them to stop
forwarding their calls to you.
Call Information:
A feature that
allows you to display
information about incoming
calls. For external calls, you can
display the caller’s name,
telephone number and the line
name. For an internal call, you
can display the name of the
caller and their internal number.
You can obtain information
about ringing, answered, or held
calls.
5-4 / Glossary
Call Log: A
feature that
accesses a record of incoming
calls. The log could contain the
following information for each
call: sequence number in the
Call Log, name and number of
caller, long distance indication,
indication if the call was
answered, time and date of the
call, number of repeated calls
from the same source, and
name of the line that the call
came in on. See Autobumping,
Enter Call Log, Logit, and
Logging Options for further
information.
Call Park:
A feature that allows
you to place a call on hold so
that someone can retrieve it
from any telephone in the
Norstar system by selecting an
internal line and entering a
retrieval code. The retrieval
code appears on the display of
your telephone when you park
the call. You can park up to two
calls on the system at one time.
Call Park Callback: See
Callback.
Call Park prefix:
The first digit
of the retrieval code of a parked
call. The default Call Park prefix
digit is “1 ‘I. It may beset to
none, in which case Call Park is
disabled. Call Park prefix is
assigned by your Customer
Service representative.
Call Pickup Directed:
A feature
that lets you answer a call
ringing at any Norstar telephone
by entering the internal number
of that telephone before taking
the call. Call Pickup Directed is
activated by your Customer
Service representative.
Call Pickup group: See
Pickup
group.
Call Queuing:
A feature that
allows you to answer calls in
order of priority if you have
several calls waiting at your
telephone. Priority is given to
external incoming calls, followed
by callback and camped calls.
Callback:
A feature that returns
parked, camped or transferred
calls to your telephone if they
are not answered at another
telephone. How long the system
will wait before Callback occurs
is set by your Customer Service
representative.
Camp-On:
A feature that lets
you re-route a call to a
telephone even if all the lines on
that telephone are busy. To
answer a camped call, use Call
Queuing or select a line if the
camped call appears on your
telephone. Priority is given to
queued external incoming calls
over camped calls.
Camp timeout:
The length of a
delay before a camped call is
returned to the telephone that
camped the call. This delay is
set by your Customer Service
representative.
__
:
..I.,.
._.
‘,.
.,:.:.
tirossary 1 3-3
.
‘:.
._;::: :
_. .-
._:
‘;
: _..
. :.
Capabilities:
A section heading
in Administration programming,
that covers the dialing filters, set
abilities, and line abilities that
can be assigned to Norstar
lines, telephones, or Class of
Service passwords.
.: ‘.
. . . .
Central Answering Position
(CAP) module:
A CAP module
is connected to an M7324
Telephone and provides 48
additional buttons which can be
used as Autodial buttons or
Feature buttons.
Class of Service (COS):
A set of Norstar features and
lines available to the user for a
call. The Class of Service for a
call is determined by the Dialing
Filters assigned to the
telephone in Administration
programming. The Class of
Service for a call can be
changed by entering a six-digit
Class of Service password.
Class of Service and Class of
Service passwords are
assigned in Administration
programming.
Class of Service password:
A
six-digit code that lets you
switch from your current Class
of Service to one that lets you
dial numbers-prohibited by your
current Class of Service.
Conference:
A feature that
allows you to establish a
three-person call at your
Norstar telephone.
Conference using Privacy:
A
feature that allows you to turn
Privacy off for a call allowing
another person with the same
line to press the line button and
join in your conversation,
forming a conference. Normally
your calls are private; no one
else can pick up your line and
join in.
Contrast Adjustment:
A
feature that allows you to set
the contrast level of your
telephone display.
Control telephone:
A
telephone that can place the
lines for which it has
responsibility in or out of a
Service Mode. A telephone is
programmed as a Control
telephone and has lines
assigned to it in Administration
programming.
COS: See Class of Service.
Cursor:
A short horizontal line
that appears on the Norstar
telephone display to indicate
that characters can be entered
._
using the dial pad.
D
Data Communications
Interface:
A Norstar device that
lets you attach an W-232 data
device to your Norstar system.
Compact
DR5 System Coordinator
Guide
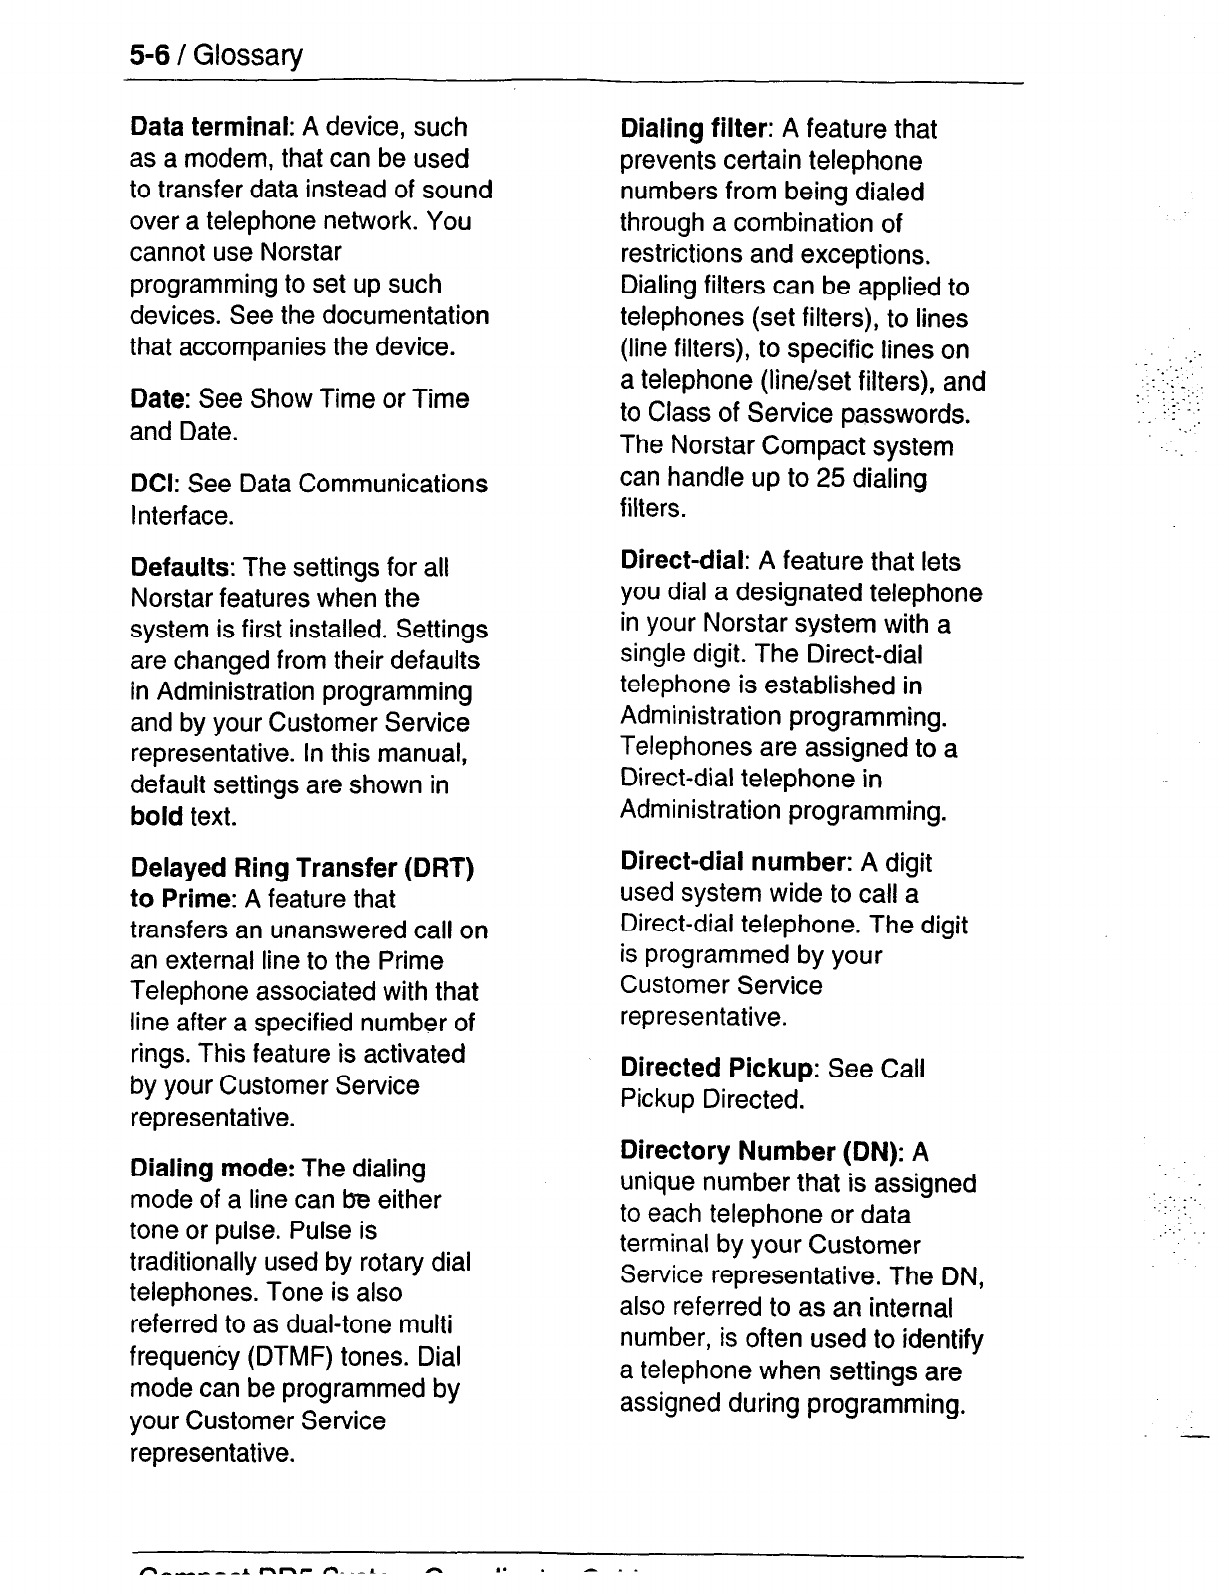
5-6 /
Glossary
Data terminal:
A
device,
such
as a modem, that can be used
to transfer data instead of sound
over a telephone network. You
cannot use Norstar
programming to set up such
devices. See the documentation
that accompanies the device.
Date: See
Show Time or Time
and Date.
DCI: See
Data Communications
Interface.
Defaults:
The settings for all
Norstar features when the
system is first installed. Settings
are changed from their defaults
in Administration programming
and by your Customer Service
representative. In this manual,
default settings are shown in
bold
text.
Delayed Ring Transfer (DRT)
to Prime:
A feature that
transfers an unanswered call on
an external line to the Prime
Telephone associated with that
line after a specified number of
rings. This feature is activated
by your Customer Service
representative.
Dialing mode:
The dialing
mode of a line can be either
tone or pulse. Pulse is
traditionally used by rotary dial
telephones. Tone is also
referred to as dual-tone multi
frequeni=y (DTMF) tones. Dial
mode can be programmed by
your Customer Service
representative.
Dialing filter:
A feature that
prevents certain telephone
numbers from being dialed
through a combination of
restrictions and exceptions.
Dialing filters can be applied to
telephones (set filters), to lines
(line filters), to specific lines on
a telephone (line/set filters), and
to Class of Service passwords.
The Norstar Compact system
can handle up to 25 dialing
filters.
Direct-dial: A
feature that lets
you dial a designated telephone
in your Norstar system with a
single digit. The Direct-dial
telephone is established in
Administration programming.
Telephones are assigned to a
Direct-dial telephone in
Administration programming.
Direct-dial number: A
digit
used system wide to call a
Direct-dial telephone. The digit
is programmed by
your
Customer Service
representative.
Directed Pickup: See
Call
Pickup Directed.
Directory Number (DN): A
unique number that is assigned
to each telephone or data
terminal by your Customer
Service representative. The DN,
also referred to as an internal
number, is often used to identify
a telephone when settings are
assigned during programming.
‘_
._ -. ..
. .
:’
‘_Y ..; _
._ .,:
;:y: : :
-. .
(.
. . .
. .
_‘_
.,I .:
,_-: .,
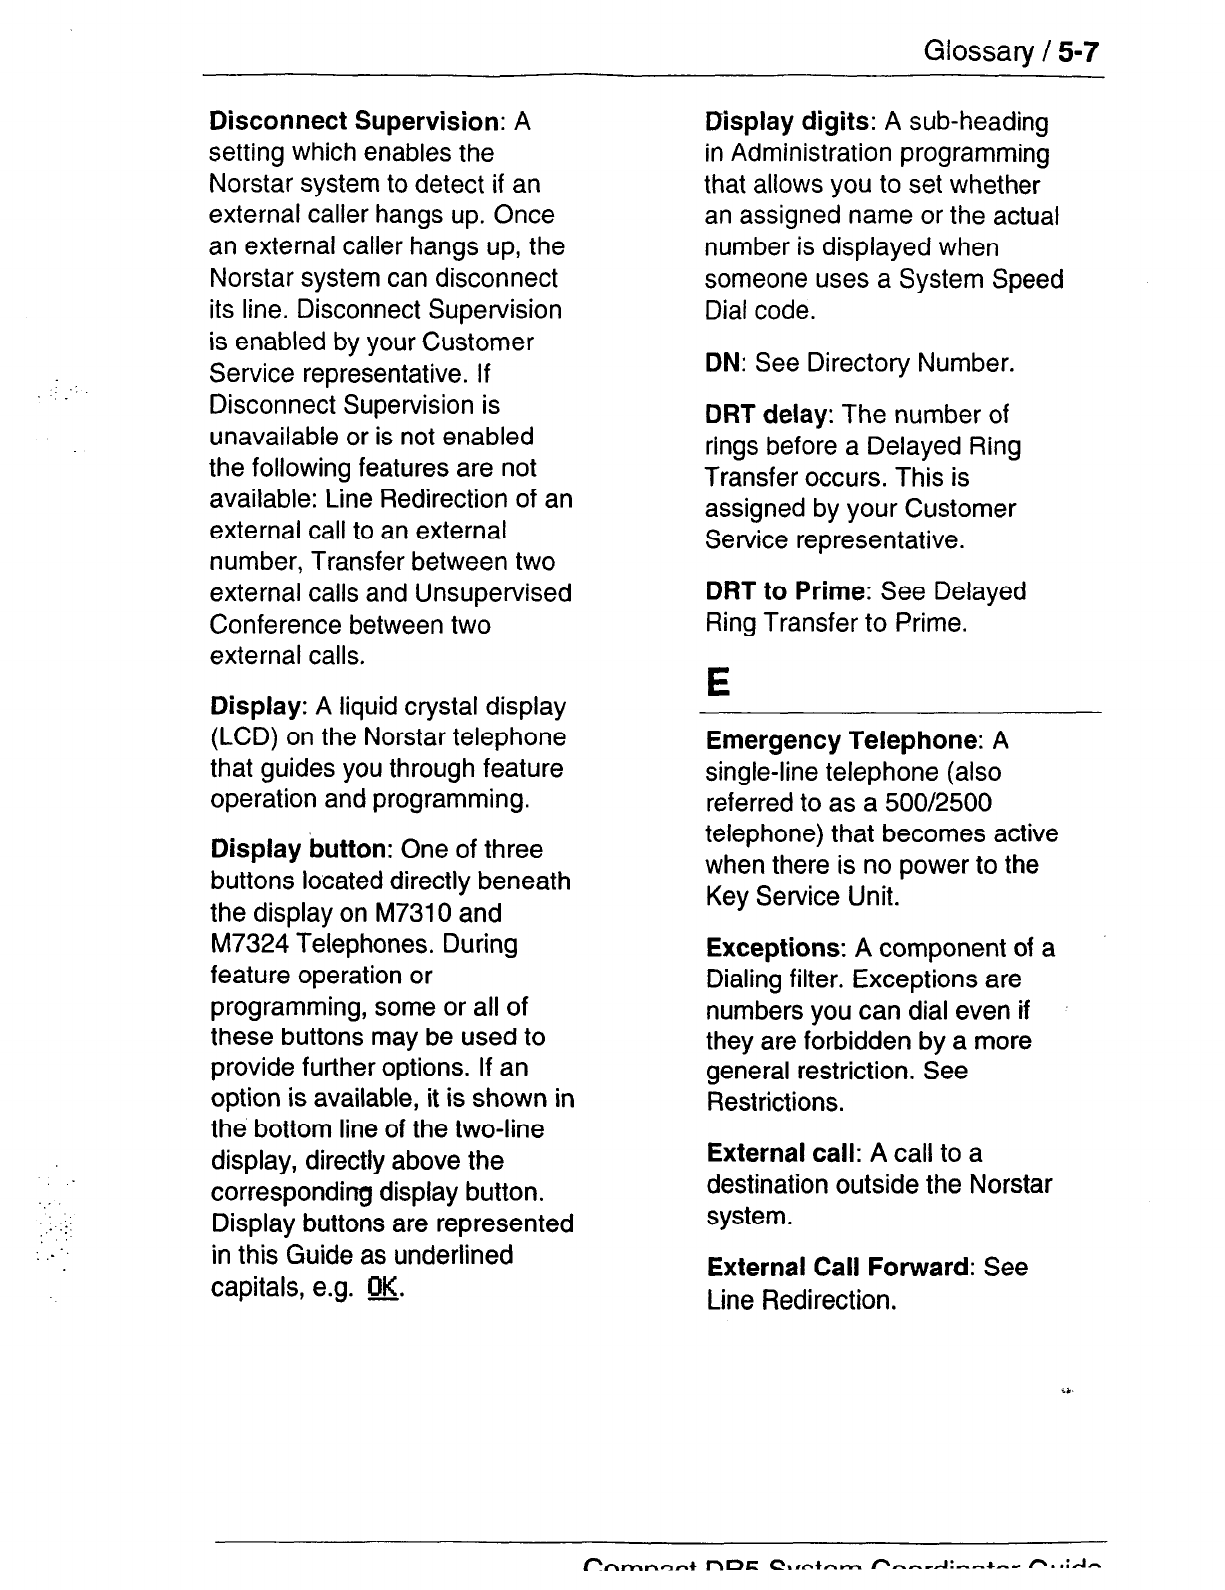
Glossary /
5-7
:
._..
Disconnect Supervision:
A
setting which enables the
Norstar system to detect if an
external caller hangs up. Once
an external caller hangs up, the
Norstar system can disconnect
its line. Disconnect Supervision
is enabled by your Customer
Service representative. If
Disconnect Supervision is
unavailable or is not enabled
the following features are not
available: Line Redirection of an
external call to an external
number, Transfer between two
external calls and Unsupervised
Conference between two
external calls.
Display:
A liquid crystal display
(LCD) on the Norstar telephone
that guides you through feature
operation and programming.
,: .:
Display button:
One of three
buttons located directly beneath
the display on M7310 and
M7324 Telephones. During
feature operation or
programming, some or all of
these buttons may be used to
provide further options. If an
option is available, it is shown in
the bottom line of the two-line
display, directly above the
corresponding display button.
Display buttons are represented
in this Guide as underlined
capitals, e.g. OK.
Display digits:
A sub-heading
in Administration programming
that allows you to set whether
an assigned name or the actual
number is displayed when
someone uses a System Speed
Dial code.
DN: See
Directory Number.
DRT delay:
The number of
rings before a Delayed Ring
Transfer occurs. This is
assigned by your Customer
Service representative.
DRT to Prime: See
Delayed
Ring Transfer to Prime.
E
Emergency Telephone:
A
single-line telephone (also
referred to as a 500/2500
telephone) that becomes active
when there is no power to the
Key Service Unit.
Exceptions:
A component of a
Dialing filter. Exceptions are
numbers you can dial even if
they are forbidden by a more
general restriction. See
Restrictions.
External call:
A call to a
destination outside the Norstar
system.
External Call Forward: See
Line Redirection.
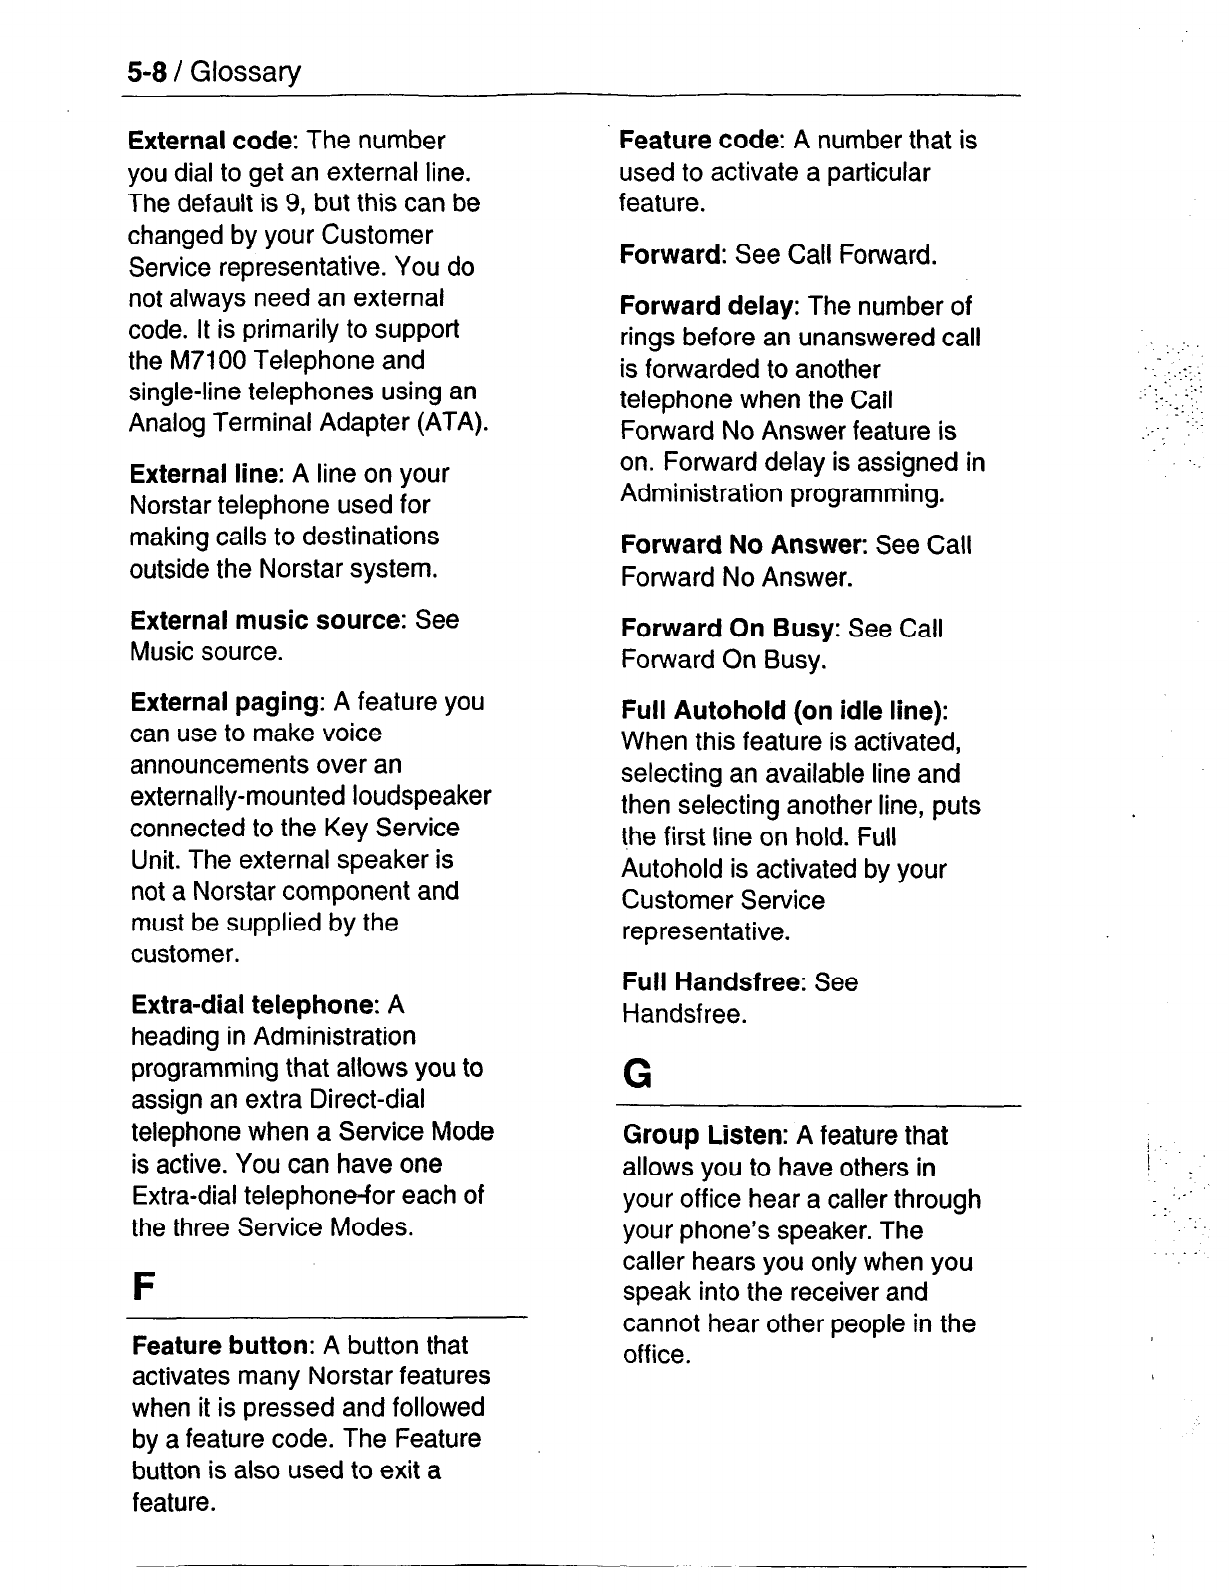
5-8 / Glossary
External code:
The number
you dial to get an external line.
The default is 9, but this can be
changed by your Customer
Service representative. You do
not always need an external
code. it is primarily to support
the M7100 Telephone and
single-line telephones using an
Analog Terminal Adapter (ATA).
Feature code:
A number that is
used to activate a particular
feature.
Forward: See
Call Fonrvard.
External line:
A line on your
Norstar telephone used for
making calls to destinations
outside the Norstar system.
Forward delay:
The number of
rings before an unanswered call
is forwarded to another
telephone when the Call
Forward No Answer feature is
on. Forward delay is assigned in
Administration programming.
Forward No Answer: See
Call
Forward No Answer.
External music source: See
Music source.
Forward On Busy: See
Call
Forward On Busy.
External paging:
A feature you
can use to make voice
announcements over an
externally-mounted loudspeaker
connected to the Key Service
Unit. The external speaker is
not a Norstar component and
must be supplied by the
customer.
Full Autohold (on idle line):
When this feature is activated,
selecting an available line and
then selecting another line, puts
the first line on hold. Full
Autohoid is activated by your
Customer Service
representative.
Extra-dial telephone:
A
heading in Administration
programming that allows you to
assign an extra Direct-dial
telephone
when a
Service Mode
is active. You can have one
Extra-dial telephone-for each of
the three Service Modes.
Full Handsfree: See
Handsfree.
G
F
Feature button:
A button that
activates many Norstar features
when it is pressed and followed
by a feature code. The Feature
button is also used to exit a
feature.
Group Listen:
A feature that
allows you to have others in
your office hear a caller through
your phone’s speaker. The
caller hears you only when you
speak into the receiver and
cannot hear other people in the
office.
-.
: :
..-.:
::
.:
-_I.:
. .
1.. -.
._‘I._
_.
_-.
_:-_.
._
/ ‘. .I
.,:
.: .’
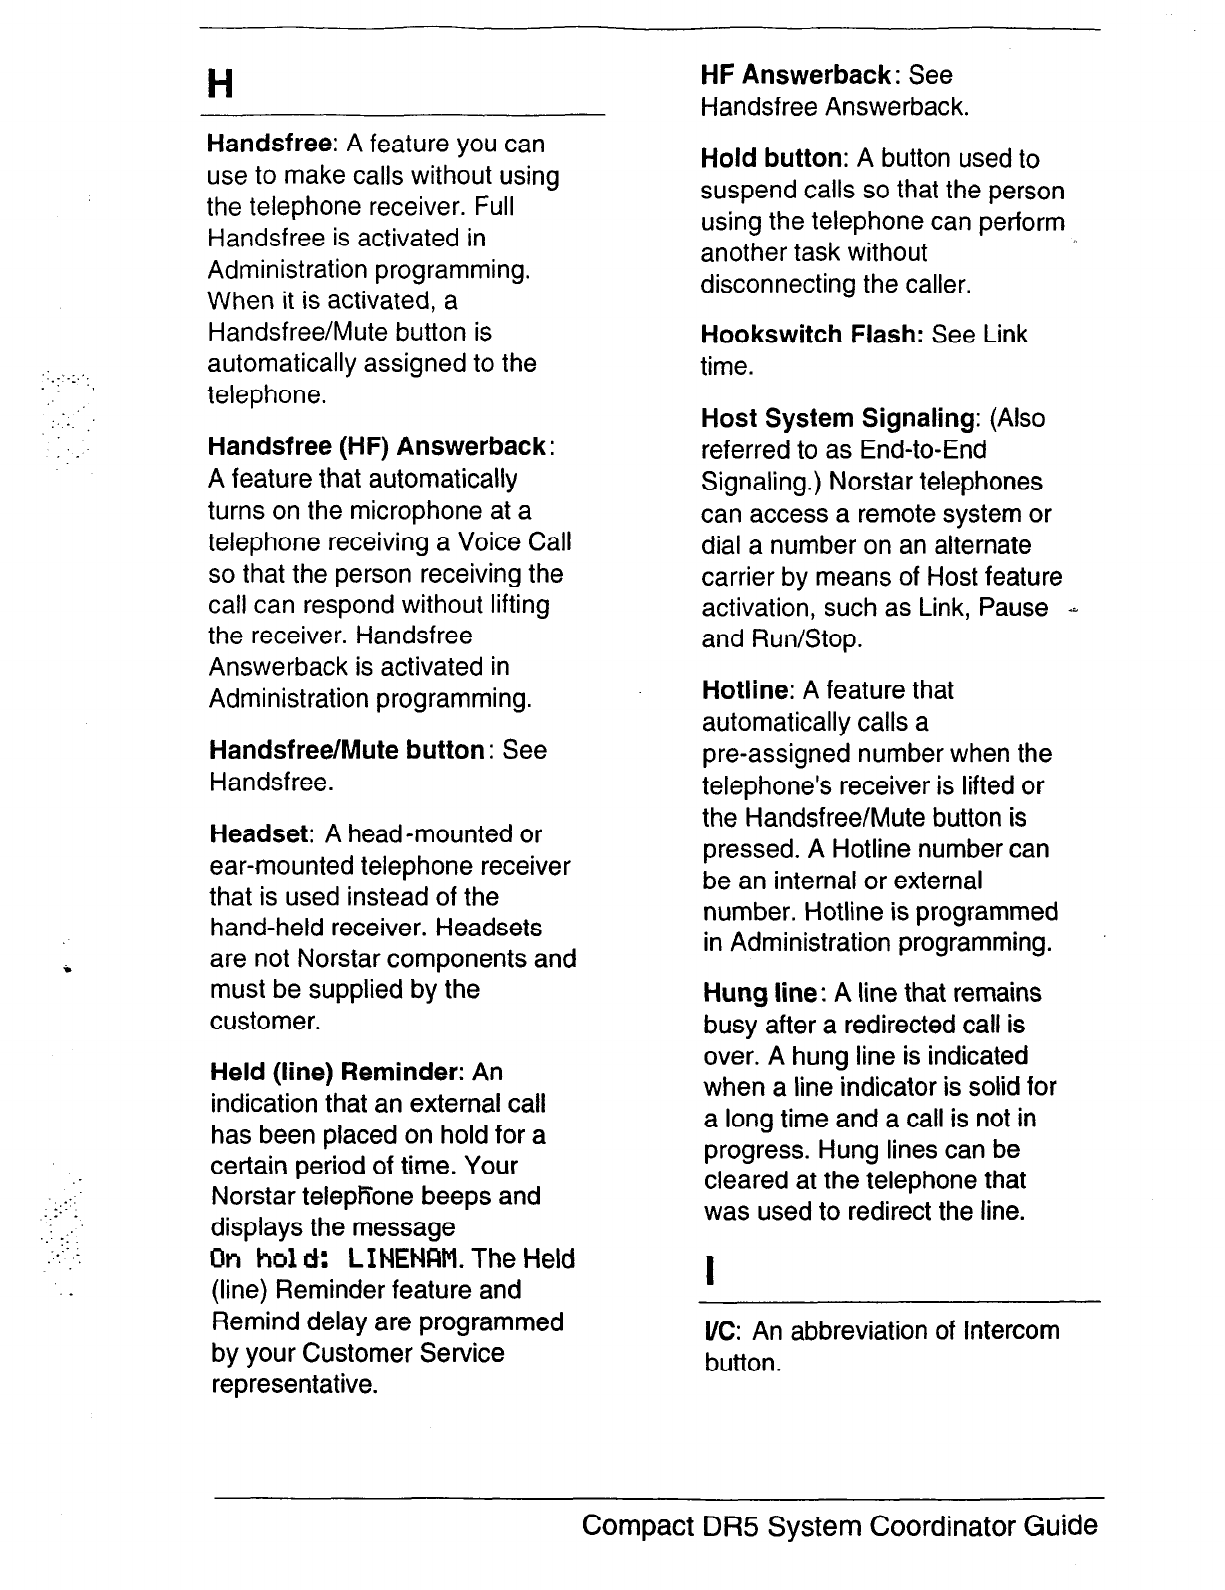
H
Handsfree:
A feature you can
use to make calls without using
the telephone receiver. Full
Handsfree is activated in
Administration programming.
When it is activated, a
Handsfree/Mute button is
: :_;:.
.‘.:
‘,
: .’
automatically assigned to the
telephone.
I.._
,
::
Handsf ree (HF) Answerback
:
A feature that automatically
turns on the microphone at a
telephone receiving a Voice Call
so that the person receiving the
call can respond without lifting
the receiver. Handsfree
Answerback is activated in
Administration programming.
Handsf ree/Mute button
: See
Handsfree.
Headset:
A head-mounted or
ear-mounted telephone receiver
that is used instead of the
hand-held receiver. Headsets
are not Norstar components and
must be supplied by the
customer.
:
,:.
._:--
.
._: :I’_
.__.
. 1
_
Held (line) Reminder:
An
indication that an external call
has been placed on hold for a
certain period of time. Your
Norstar telepfione beeps and
displays the message
On
ho1 ~4:
LINENFIM.
The
Held
(line) Reminder feature and
Remind delay are programmed
by your Customer Service
representative.
HF Answerback: See
Handsfree Answerback.
Hold button:
A button used to
suspend calls so that the person
using the telephone can perform
another task without
disconnecting the caller.
Hookswitch Flash: See
Link
time.
Host System Signaling:
(Also
referred to as End-to-End
Signaling.) Norstar telephones
can access a remote system or
dial a number on an alternate
carrier by means of Host feature
activation, such as Link, Pause 4
and Run/Stop.
Hotline:
A feature that
automatically calls a
pre-assigned number when the
telephone’s receiver is lifted or
the Handsfree/Mute button is
pressed. A Hotline number can
be an internal or external
number. Hotline is programmed
in Administration programming.
Hung line:
A line that remains
busy after a redirected call is
over. A hung line is indicated
when a line indicator is solid for
a long time and a call is not in
progress. Hung lines can be
cleared at the telephone that
was used to redirect the line.
I
l/C: An abbreviation of Intercom
button.
Compact DR5 System Coordinator Guide
510 /
Glossary
Installer:
A person who installs
the Norstar equipment, and
performs System Startup and
certain programming actions.
The Installer or the System
Coordinator can program
Administration settings.
Intercom button:
A button that
provides access to internal lines
used for calls within a Norstar
system and access to external
lines through a Line Pool or
external code. A telephone may
be assigned zero, one or two
Intercom buttons. This is done
by the Customer Service
representative.
Intercom keys: See
Intercom
button.
Internal line:
A line on your
telephone dedicated to making
calls to destinations inside your
Norstar system. An internal line
may still connect you with an
external caller if you use it to
access a line pool or to pick up
a call using Norstar call
handling features such as Call
Park or Call Pickup Directed.
lntkxnal number:
A number
(also referred to as a Directory
Number or DN) that identifies a
Norstar telephone or device.
Internal user:
A person using a
Norstar telephone within a
Norstar system.
K
Key Service Unit (KSU):
The
central hardware component in
the Norstar system. The KSU
has its own processor and
memory, and provides a
physical point of connection for
the various types of devices and
telephones used in Norstar. The
KSU supports 16 Norstar
telephones and 6 external lines.
;.
.;.
:
. . . .__’
._
.,:-...L’
..:.:.I.
.
., _ .:-
..‘..
: ::’
-.
L
Line:
The complete path of a
voice or data connection
between one telephone (or
other device) and another.
Line abilities:
The heading in
Administration programming
under which you assign Line
filters to lines.
:
Line filter: See
Dialing filter.
Line names:
The sub-heading
in Administration programming
that allows you to assign names
to external lines.
Line number:
A 2-digit number
that identifies an external line.
Line Pool: A
group of lines
used for making external calls.
Line Pools provide an efficient
way of giving a telephone
access to external lines without
taking up many line buttons. A
line is assigned to be a member
of a Line Pool by your Customer
Service representative.
i :. ;::
! .
:
. -;;
I
Compact OR5 System Coordinator
Guide
Glossary /
5-I 1
:._, ._
_.:. :
::,.
‘: _...::
:I’_
Line Pool access code:
A
number that gains access to a
specific Line Pool if you are a
member of that Line Pool. Line
Pool access codes are assigned
by your Customer Service
representative.
Line Redirection:
A feature
that allows you to redirect all
external calls on an incoming
line to a destination outside the
Norstar system. Once a line is
redirected it cannot be
answered within the Norstar
system. The system may be set
up to give a brief ring when a
call comes in on a redirected
line. Line Redirection must be
assigned to your telephone in
Administration programming.
When redirecting an external
call to an external number, the
incoming call must be on a
disconnect supervised line. See
Allow Redirect, Call Forward,
Disconnect Supervision and
Redirect Ring.
Link time:
A specific time delay
that allows access to PBX
features through a Norstar
system. Link time is also
referred to as a “Hookswitch
Flash” or “Recall”. Link time is
assigned byyour Customer
Service representative.
Logging Options:
A feature
that allows you to select the
type of calls that are stored in
your Call Log. You can choose
to log calls that were not
answered by anyone within the
system, to log calls that were
unanswered at this telephone
but answered elsewhere in the
system, to log all calls answered
and not answered at this
telephone, or to not have calls
automatically logged.
Logit:
A feature that allows you
to manually log call information
when you are connected to a
~
call.
Long Tones:
A feature that lets
you control the length of a tone
so that you can signal devices
such as fax or answering
machines which require tones
longer than the standard 120
milliseconds.
M
M7100 Telephone:
A telephone
that has a one-line display and *’
one programmable memory
button without an indicator.
M7208
Telephone:
A telephone
that has a one-line display and
eight programmable memory
buttons with indicators.
Compact DR5 System Coordinator Guide
5-12 /
Glossary
M7310 Telephone:
A
telephone
that has a two-line display, 3
display buttons, IO
programmable memory buttons
with indicators, and 12
dual-memory programmable
buttons without indicators. An
M7310 Telephone can be
equipped with a Busy Lamp
Field.
M7324
Telephone:
A telephone
with a two-line display, 3 display
buttons, and 24 programmable
memory buttons with indicators.
An M7324 Telephone can be
equipped with a CAP module.
M7900 Telephone:
A telephone
with a touch-screen display that
replaces the display and
memory buttons of other
Norstar telephones. It provides
simplified access to Norstar
Features and an interface to
computer driven applications.
Memory buttons:
The buttons
that can be programmed to dial
frequently used features or
numbers automatically. See
M7100, M7208, M7310, M7324
and M7900 Telephone entries
for their exact
memory button
configurations.
Message:
A featurethat allows
you to indicate to another
internal user that you would like
them to call you.
Music source:
A radio or other
source of music that can be
connected to the Key Service
Unit to provide music for the
Music on Hold and Background
Music features. A music source
is not part of the Norstar system
and must be supplied by the
customer.
N
Names:
A feature that allows
you to assign names to System
Speed Dial numbers, external
lines, telephones, and Service
Modes in Administration
programming. You can use up
to sixteen characters to name
a
System Speed Dial number,
and seven characters to name a
telephone, line, or Service
Mode. If a Name has not been
assigned, the line number or DN
appears on the display instead
of a Name.
Night Service: See
Service
Modes.
Norstar Programming
Overlay:
A paper template that
is placed over the buttons of the
Norstar telephones during
programming. The overlay for
the M7310 and M7324
Telephones is placed over the
top four memory buttons with
indicators. The overlay for the
M7208 Telephone is placed
over all of the eight memory
buttons. The overlay labels
indicate the special function that
each of the buttons takes on
during programming.
‘.
: :
:
_.:;.._:.:.
.-.:.
wossary
I 3- I 3
0
:
:
:_.
:.
On hold:
A setting that controls
whether external callers hear
music, periodic tones, or silence
when they are placed on hold.
This setting is programmed by
your Customer Service
representative.
Open Switch Interval (OSI):
A
public telephone system feature
that indicates when an external
line is open. Norstar monitors
the length of the OSI to detect
when an external caller hangs
up. OSI must be provided by the
public telephone system in
order for Disconnect
Supervision to function. See
Disconnect Supervision.
Overlay: See
Norstar
Programming Overlay.
P.
:
I ::::
. :
._ .:-._
-.
Page:
A feature you can use to
make announcements over the
Norstar system. You can
choose Internal Page
(announce over the telephone
speakers), External Page
(announce over an
externally-mounted,
customer-supplied
loudspeaker)T or both Internal
and External Page.
Page Zone:
An area in the
office that receives internal
Page announcements
independently of the rest of the
office. Each Page Zone is
identified by a number.
Telephones are assigned to
Page Zones in Administration
programming.
Park prefix: See
Call Park
prefix.
Park timeout:
A delay before
an unanswered parked call
returns to the telephone that
parked it. Park timeout is set by
your Customer Service
+
representative. See Call Park.
Password:
A specific sequence
of digits that you enter to gain
access to Norstar programming
or to override dialing
restrictions. Passwords are also
required for System Startup and
Administration programming.
See Class of Service password.
Pause:
A system feature that
allows you to set a 1 &second
delay in a dialing sequence ‘i-
programmed on an External
Autodial.
Personal Speed Dial:
A
two-digit code (71-94) that can
be programmed to dial external
telephone numbers. Personal
Speed Dial numbers are
programmed for each
telephone, and can be used
only at the telephone on which
they are programmed.
Compact
DR5
System
Coordinator
Guide
5-14 / Glossary
Pickup group:
A group of
telephones. A telephone can be
placed into one of four Call
Pickup groups. A call ringing at
a telephone within a Pickup
group can be picked up at any
other telephone within the same
Pickup group. A telephone is
assigned to a Pickup group in
Administration programming.
Pool: See
Line Pool.
Pre-dial:
A feature that allows
you to enter a number and
check it on your telephone
display before it is actually
dialed. If the number is
incorrect, you can edit it. The
number is dialed only when you
pick up the receiver or select a
line.
Prime line:
A line on your
telephone that is automatically
selected when you lift the
receiver, press the
Handsfree/Mute button or use
an external dialing feature. A
Prime line is assigned to a
telephone by your Customer
Service representative.
Prime telephone (Prime set):
A telephone that provides
backup answering fer incoming
calls on external lines. The
Prime telephone for a line will
ring for any unanswered calls
on that line. A Prime telephone
is assigned to a line by your
Customer Service
representative.
Priority Call:
A feature you can
use to interrupt calls or override
Do Not Disturb on another
Norstar telephone. This feature
is enabled for a telephone in
Administration programming.
Privacy:
A feature that
determines whether a Norstar
user may select a line in use at
another telephone and join an
established call. Privacy is set
by your Customer Service
representative, but can be
turned on and off by users
during individual calls.
Private line: See
Private to.
Private network:
A telephone
network consisting of owned or
leased telephone lines used to
connect different offices of an
organization independently of
the public network.
Private to:
A line assigned to
one telephone as a Private line
by your Customer Service
representative. The line cannot
appear on any other telephone,
except the Prime telephone for
that line. Private lines cannot be
placed into Line Pools.
Programming:
A series of
procedures that set the way the
Norstar system works.
Programming includes
system-wide settings and
individual telephone and line
settings.
Programming Overlay: See
Norstar Programming Overlay.
::
-: :
,.,:: :.:::
: . ...:..
.::. -_ 1::.
.
::
‘.
‘.
_.
‘.
uIu33al y
I
x
id
Programming reminder:
A
Restrictions:
A component of a
chart on which you can record Dialing filter. Restrictions are
some commonly-used settings numbers you cannot dial when
to distribute to all Norstar that Dialing filter is in effect. See
telephone users. Exceptions.
_: :
. .
:
1
Public line:
An external line
that can be assigned to any
telephone and to many
telephones. A line is assigned
as Public by your Customer
Service representative.
Ringing:
A programming
function done by your Customer
Service representative that
assigns a line to ring or not ring
at a telephone. If a line has
been assigned as “No ring”, an
incoming call is shown only by a
flashing indicator.
:
Public network:
The regular
telephone network that
connects most homes and
businesses.
R
Recall:
See Link time.
Receiver:
The handset of a
telephone.
Redirect ring:
A setting in
Administration programming
that allows you to
set
whether a
line that has been redirected
using Line Redirection gives a
short ring on those telephones
on which the line has a ringing
appearance.
:
:.
-_ _.
:.
:.:_ .. ._
:
:__
_:.I: .
Remind delay:
A feature that
causes a telephone to beep and
display the message
On
ho1 d:
UNENRM when a
call has been on hold for a
programmable period of time.
This period is the Remind delay,
and is programmed by your
Customer Service
representative.
Ringing Telephone (Ringing
Set):
A telephone that has been
assigned to ring
when a line has,
been placed into a Service
Mode. The Ringing Telephone
is assigned in Administration
programming.
Rls button:
A button that ends
a call in the same way that
hanging up the receiver does. It
may also be used to end
Startup, Administration
programming, Configuration
programming and feature
operations.
Run/Stop:
A character that
creates a breakpoint in a
programmed external dialing
sequence. When you press a
programmed key, the system
dials the number up to the
Run/Stop. When you press it
again, the system dials the
digits following the Run/Stop.
Compact
DR5
System Coordinator Guide
5-16 /
Glossary
S
SAPS: See
Station Auxiliary
Power Supply.
Selective Line Redirection:
See
Line Redirection.
Service Modes:
A feature that
provides special ringing and
telephone access after normal
office hours, or when there are
few people available to answer
calls. Certain features become
active when one or more lines
are placed into a Service Mode.
Service Modes settings are
assigned in Administration
programming.
Set:
A telephone.
Set ability:
A sub-heading in
Administration programming
under which set filters, line/set
filters, and a variety of system
features are assigned to
individual telephones.
Set Copy:
A programming
section that allows your
Customer Service
representative to copy
programmable settings from
one telephone to another of the
same type. Set Copy provides
two options: duplicating System
Data and User Data, or
duplicating System Data only.
Set Copy does not provide the
same copy capability as the
COPY display button, which is
more selective of the settings
that can be duplicated.
Set filter: See
Dialing filter.
Set Names:
A sub-heading in
Administration programming
that allows you to assign Names
of up to seven characters to
telephones.
Set Relocation: See
Automatic
Telephone Relocation.
Shift button:
A small triangular
button beside the dual-memory
buttons on the upper half of the
M7310 Telephone. Press the
shift button to store or access
features on the top half of the
dual-memory buttons.
Show Time:
A feature that
allows you to see the current
date and time on the Norstar
telephone display while you are
on a call.
Software Cartridge:
A
replaceable cartridge containing
the Norstar features. The
Software Cartridge is inserted
into the Key Service Unit.
Station Auxiliary Power
Supply (SAPS):
A device which
provides power to a Norstar
telephone that is connected
more than 305 m (1000 ft) and
less than 760 m (2500 ft) from
the Key Service Unit, or to a
CAP module.
Supervised line:
A line for
which disconnect supervision is
enabled. If an external caller
hangs up, the Norstar system
detects the disconnection and
hangs up its line also. See
Disconnect Supervision.
_: ‘. ‘_’
.:.
:
: _ . .
_:.
Glossary
/ 5-I
7
System Coordinator:
A person
responsible for customizing the
Norstar system through
Administration programming
and for helping co-workers use
the Norstar system.
System Data:
An option in Set
Copy programming. System
‘_ ‘.
Data refers to the system
. . settings that apply to all
telephones and lines. System
Data consists of the
programmable settings from
Administration programming
and also includes the settings
programmed by your Customer
Service representative.
System Speed Dial Code:
A
two-digit code (01 to 70) that
can be programmed to dial a
telephone number up to 24
digits long. System Speed Dial
codes are programmed for the
entire Norstar system in
Administration programming.
System Speed Dial Name:
A
sub-heading in Administration
programming under which you
can assign a name to a System
Speed Dial number.
: .::
-
:: _’
.
:
1. :.
.__‘.
System Speed Dial:
A heading
in Administration programming
under
which
you
can assign up
to 70 numbers as System
Speed Dial numbers.
System Startup:
A procedure
that initializes the system
programming to defaults. When
a Norstar system is first installed
and powered up, System
Startup must be performed
before any programming can be
done.
T
TCM line (Time Compression
Multiplexing line):
A two-wire
digital station loop joining the
cross-connect at the Key
Service Unit to a telephone.
Telephone lock (Set lock):
A
feature that allows you to limit
the number of features that may
be used or programmed at a
telephone. Full telephone lock
allows very few changes or
features, Partial telephone lock
allows some changes and
features, and No telephone lock
allows any change to be made
and any feature to be used.
Telephone lock is assigned in
Administration programming. ~
Time and Date:
A display
description. The current time
and date appear on the display
of idle Norstar telephones.
The
time and date can be changed
in Administration programming.
Compact DR5 System Coordinator Guide
5-18 / Glossary
Transfer:
A feature that lets you
send a call to another telephone
in your Nor-star system or
external to Norstar. You can
also create an Unsupervised
Conference to do an external
transfer. When transferring an
external call to an external
number, at least one of the calls
must have been an incoming
call, and that call must be on a
disconnect supervised line. See
Unsupervised Conference and
Disconnect Supervision.
Transfer Callback:
A feature
that returns a transferred call if it
is not answered after a specific
number of rings. The number of
rings is programmed by your
Customer Service
representative. Transfer
Callback does not apply to calls
transferred externally.
Trunk:
A physical connection
between the Norstar system
and the outside world using
either the public telephone
system or a private network.
Trunk Answer:
A feature you
can use to answer a call on any
line that has an active Service
Mode, even if that line does not
appear on your telephone.
Trunk Answer is activated in
Administration programming.
U
Unsupervised Conference: A
conference that you have
dropped out of leaving the other
two parties connected. When
both other parties are external
to Norstar, at least one of the
outside callers must have called
you, and that call must be on a
disconnect supervised line. See
Disconnect Supervision.
Unsupervised line:
A line for
which disconnect supervision is
disabled. If an external caller
hangs up, the Norstar system
does not detect the
disconnection and does not
hang up its line. See Disconnect
Supervision.
User Filter: See
Dialing filter.
V
Voice Call:
A feature you can
use to make an announcement
or begin a conversation through
the speaker of another
telephone in the Norstar
system. The telephone you call
does not ring. Instead, the
person you call hears a beep
and then your voice. Their
telephone beeps periodically to
remind them that their
microphone is on.
: :
-: :
.
..’
. . .
:,
_:‘_::
_;-. ;
_- :
::
.:.;i:_
_:_ :: ::
._.
A
Access Code
External line 3-52
RXSSS
denied
Conference 3-41
Speed Dial 3-98
Accidental Disconnect
Protection 3-I 00
Administration
Dialing filters 2-24
Direct-Dial 2 -23
entering 2-11
exiting 2-I
1
headings 2 -9
moving through 2-12
Names 2-17
overview 2 -9
Programming reminders 2-48
Service Modes 2-38
Administration programming
1-l
Allow redirect
programming 2-33
FU ready bined
Dialing 3 -54
IX
ready
Parked
Call Park 3-31
Answer button 3-34,384
Answerback (see Handsfree
Answerback)
Autobumping
feature description 3 -23
Autodial
buttons 3-85
feature description 3-13
Host System Signaling 3-15
losing data after power failure
3-15
Rhodial full
Autodial 3-l 3
Speed Dial 3-98
Automatic Call Information 2 -44
Automatic Dial 3-46
Automatic Handsfree 3-45
programming 2-31
Automatic telephone relocation
3-l 00
Auxiliary Ringer
programming 2-32
Service Modes 2-41
B
a‘
Background Music 3-100
Button
Answer 3 -84
Autodial 3-85
erasing programming 3-59
Feature 3 -84
Hold 3-84
indicators 3-8
Line 3-85
Memory 3-84
Programmed feature 3-85
~
Release 3-86
Volume 3-86
Button
erased
Autodial 3-l 4
Button Inquiry
feature description 3-59
62/index
C
Call Display information l-3, 3-6
Call Display services l-3
Call Duration Timer 3-l 05
Call Forward
feature description 3 -16
No Answer 2-33, 3-l 6
On Busy 2-32,3-16
Override 3 -16
Call Identification 2-43, 2 -44,
2-45
Call Information
before or after answering 3-19
feature description 3-I 9
for a call on hold 3-20
Call Log 1-6
add digits to a number 3-25
call from 3-25
choose logging options 3-22
entering 3-23
erase log items 3-24
feature description 3-21
navigating within 3-24
optional password 3 -26
space 2-42
trim a number 3-25
Call Park 3-7
feature description 3-31
Call Pickup 3-7
assigning groups 3-35
feature description 3-33
priority of alerting calls 3-34
Call Pickup (group)
programming 2-30
Call Queuing 3-7
feature description 3-36
queuing priorities 3-36
Callback 36
Calls
incoming indicators 3 -12
Camp -On
answering camped call 3-38
feature description 3 -37
ringing 3-8
Camp
denied
Camp -On 3-37
Can’t. ring again
Dialing 3-55
Can’t. send msg
Message 3 -80
Cancel
feature 3-4
Cancel den ied
Message 3-80
Cancel for
Message 3 -81
Capabilities
Dialing filters 2-24
Line filter 2-37
User filter 2-37
Class of Service 3-101
Class of Service password (see
COS Password)
Conference
disconnect one party 3-39
feature description 3 -39
independently hold two calls
3-40
on M7100 telephone 3-43
put on hold 3-40
split 3-40
Transferring 3-41
Unsupervised 3-41
with Privacy 3-39
Cot-if~~nce
busy
Conference 3-41
Configuration programming
l-1
Contrast Adjustment 3-45
Control telephone 3-94
assigning to lines 2-38
COPY
._’
:.
1
_. . .:.:.
.
._ : ..:
._ :
::
‘.
-
._ ._-..,
:
1.
Cnmnact DRFi
SvstQm Cnnrdinstnr CI aida
._..:
.._ .
_.:::..
-,
., . ..:,
-.
:: : ,.,
;
._.
Capabilities programming
2-47
line programming 2 -47
telephone programming 2-47
COS Line filter (see Line filter)
COS Password 2-35
changing 3-44
copying data 2-36
feature description 3-44
Line filter 2-37
number of 2-36
User filter 2-37
Customizing Norstar 2 -9
Customizing the telephone
Automatic Handsfree 3-45
Contrast Adjustment 3-45
Dialing Modes 3-46
Language 3-47
moving line buttons 3-48
Pulse/Tone dialing 3-49
Ring Type 3-49
Ring Volume 3-50
Telephone Administration
Lock 3-51
D
Defaults
Dialing filters 2-28
Delayed Ring Transfer 3-6
Denied in admin
Line Redirection 3-73
Service Modes 3-92
Dial-O telephone (see Direct -Dial
telephone)
Dialing
Direct-Dial 3 -52
Pulse or Tone 3-49
unrestricted 2 -28
Dialing filters
defaults 2-28
deleting 2-27
number of 2-26
Dialing Modes
Automatic 3 -46
Pre -Dial 3-46
Standard 3 -46
Direct-Dial telephone 3-94
Directed Pickup’
feature description 3-33
Directory Numbers 3-101
*.
Disconnect Protection (see
Accidental Disconnect
Protection)
Disconnect Supervision 3-2,
3-102
Display
one -line 3-3
Prime telephone 3-l 1
two -line 3-3
DND (see Do Not Disturb)
Do Not Disturb 3-7, 3-16
feature description 3-58
E
Emergency calls
Priority Call 3-90
Emergency telephone 3-95
Enter
code
Speed Dial 3-98
Enter zone
Page 3-89
Compact DR5 System Coordinator Guide
&4 / Index
Exceptions
in a Dialing filter 2-28
removing 2-27
Exclusive Hold
feature description 3 -66
Extension numbers (see
Directory Numbers)
External Autodial 3 -13
External call
ringing 3-8
External line
Line/telephone filter 2-29
External line access code 3-52
Extra-Dial telephone 3 -95
additional Direct -Dial 2 -40
F
Feature
availability 3-2
canceling 3 4
overview 3 -2
restrictions 2 -30
Feature button 3-84
programmed 3-85
Feature programming 3-59
Filter
Line 2-35
Line with COS 2-37
Line/telephone 2 -29
Telephone 2-29
User 2-37
Forward den i ad_
Call Forward 3-l 7
Forwarding (see Call Forward)
Call Forward No Answer 2-33
Call Forward On Busy 2-32
Full Handsfree
programming 2-31
G
Get
call first
Call Park 3-31
Group Listen
feature description 3-62
Group Pickup
feature description 3 -33
H
Handsfree
Automatic 2 -31
etiquette 3-64
Full Handsfree 2-31
Handsfree Answerback 2 -31
Handsfree/Mute 3-7
feature description 3 -63
Headset
answering a call 3-86
Full Handsfree 2-31
operating 3-86
Hold
feature description 3 -65
Listen on Hold 3-65
Music, Tones or Silence 3-66
on M7100 telephone 3-66
Hold button 3-84
Hold or release
feature programming 3-60
Host System Signaling 3-67
Link 3-67
Pause 3 -67
Programmed Release 3-68
Run/Stop 3-68
Timed Release 3-68
Hotline
programming 2-34
Hotline telephone 3-95
Hung lines
releasing 3 -102
I”::.-
. . . . :-,: _,
‘. .‘_Z.
1. _
_._ ,. -1.
:_.___ . -. .:
.: ,._-.
:.
:
. . .
..I
:.
-: . __
Comoact DR5
Svstam Cnnrdinntnr CI
IiAn
index / &5
I
Indicators 3 -12
Internal Autodial 3-13
Internal call
ringing 3-8
Internal numbers (see Directory
Numbers)
Inval id zone
Page 3-89
L
Language choice 3-47
Last Number Redial
feature description 3-52
Line
appearance 3-l 02
Hung 3-102
indicators on telephones 3-8
moving line buttons 3-48
Names 2-19
Prime 3-104
Private 3-l 03
Ringing preference 3-l 04
supervision 3 -102
Line Abilities
Line filter 2 -35
Line button 3-85
Line filter
(COS) defaults 2-37
(COS) programming 2-37
defaults 2-35
programming 2-35
Line in use
Hotline 3-96
Line Pool 3-103
feature description 3-70
Hotline 2-34
Ring Again 3-71
System Speed Dial 2-15
Line Redirection 3 -17
Allow redirect 2-33
Call Forward No Answer 2-33
Call Forward On Busy 2-33
feature availability 3-2
feature description 3-72
Redirect ring 2-34
Line/telephone filter
number of 2-30
Link
feature description 3-67
Listen on Hold 3-65
Logit
feature description 3-22
Long Tones
feature description 3-77
M
M7100 telephone
Conferencing 3 -43
Hold 3-66
no display buttons 3-3
selecting lines 3-5
M7208 telephone
no display buttons 33
Make call fir&
Camp -On 3-38
Make
calls first
Conference 3-41
Memory button 3-84
erasing 3-59
programming 3-59
Message denied
Message 3 -81
Message Waiting I-l 1
Message Waiting List
calling from 3-79
Compact DR5 System Coordinator Guide
&6 / Index
Messages
feature description 3-78
Message Waiting List 3-79
Voice Message Center 3-83
Music on Hold 3-66
N
Names
entering letters 2-8
for lines
2-19
for telephones 2 -18
length 2 -17
moving telephones 2-l 7
programming 2-l 7
System Speed Dial 2-16
valid characters 2-l 7
Need Handsfree
Headset 3 -87
Night Service
Service Modes 3-92
No
button free
Dialing 3 -55
Message 3 -82
No
calls waiting
answering the telephone 3-9
No
last number
Last Number Redial 3-55
No
1 ine selected
answering the telephone 3-9
Dialing 3 -55
’
Hotline 3-96
No
1 inc to use_
Line Redirection 3 -73
No
number saved
Saved Number Redial3-55
No
saved number
Saved Number Redial3-56
No
voice call
Voice Call 3-l 12
Not
in service
Camp -On 3-38
Numbers
entering 2-7
viewing 2 -7
0
On-hook dialing 3-46
Open Switch Interval (see OSI)
OSI 3-2, 3-l 02
Outsoins 1 ine
Line Redirection 3-73
P
Page
feature description 3 -88
selecting a zone 3-88
Page
timeout
Page 3 -89
Page zone
programming 2-32
Paging
programming 2-32
zones 2-32
Paging
busr
Page 3-89
Park denied
Call Park 3-32
Park ins full
Call Park 3-32
Password
Administration 2 -42
Class of Service (COS) 3-44
Pause
feature description 3 -67
Personal programming l-l
Personal Speed Dial 3-97
Pick UP receiver
Call Queuing 3-10
Pickup (see Call Pickup)
Pickup denied
Call Pickup 3-34
:-
-’
.--’ :
:- 1: .:.
,.,. ::_: _.
:
‘:::
. : .-
.-: I:.,:
Pool code
Line Redirection 3 -74
Pre -Dial 3-46
Prime line 3-l 04
Hotline 2-33
Prime telephone 3-7, 3-96
Priority Call
feature description 3-90
. .
ringing 3-8
:..
Priority denied
_-
. :
(l,’ .’
Priority Call 3-90
Privacy
creating a Conference 3-39
Private line 3-103
Call Pickup 2-31, 3-34
Program and
HOLD
feature programming 3-61
Programmed Release
feature description 3-68
Programming
Allow redirect 2-33
Automatic Handsfree 2 -31
Auxiliary Ringer 2-32
Call Forward No Answer 2-33
Call Forward On Busy 2-32
Call Pickup (group) 2-31
Capabilities 2-24
COS Line filter 2-37
features 3-59
Full Handsfree 2-31
Handsfree Answerback 2 -31
Hotline 2-34
Names 2=17
Page zone 2-32
:-:_:_:::
-1.
Paging 2-32
_:y.
preparing for 2-2
purpose 2-1
Redirect ring 2-34
reminders 2 -48
Service Mode name 2-39
Service Modes 2-38
Telephone filter 2-28
tools 2-3
Trunk Answer 2-40
using display buttons 26
Programming Overlay 2 -3
Programming Record 2-3
Pulse dialing 3-49
R
Receive tones 2-34
Rcdir br
Line Redirection 3 -74
Redirect ring
programming 2-34
ringing 3-8
Release a call
answering the telephone 3-I 0
Release button 3-86
Restricted call
Dialing 3 -56
Line Redirection 3 -74
Restrictions
bypassing 2-16
in a Dialing filter 2-28
number of 2-26
removing 2-26
Ring Again
feature description 3-53
Ring Type 3-49
Ring Volume 3-50
Ringing
changing the type 3-49
changing the volume 3-50
Line preference 3-104
Service Modes 2-41
Run/Stop
feature description 3-68
Compact DR5 System Coordinator Guide
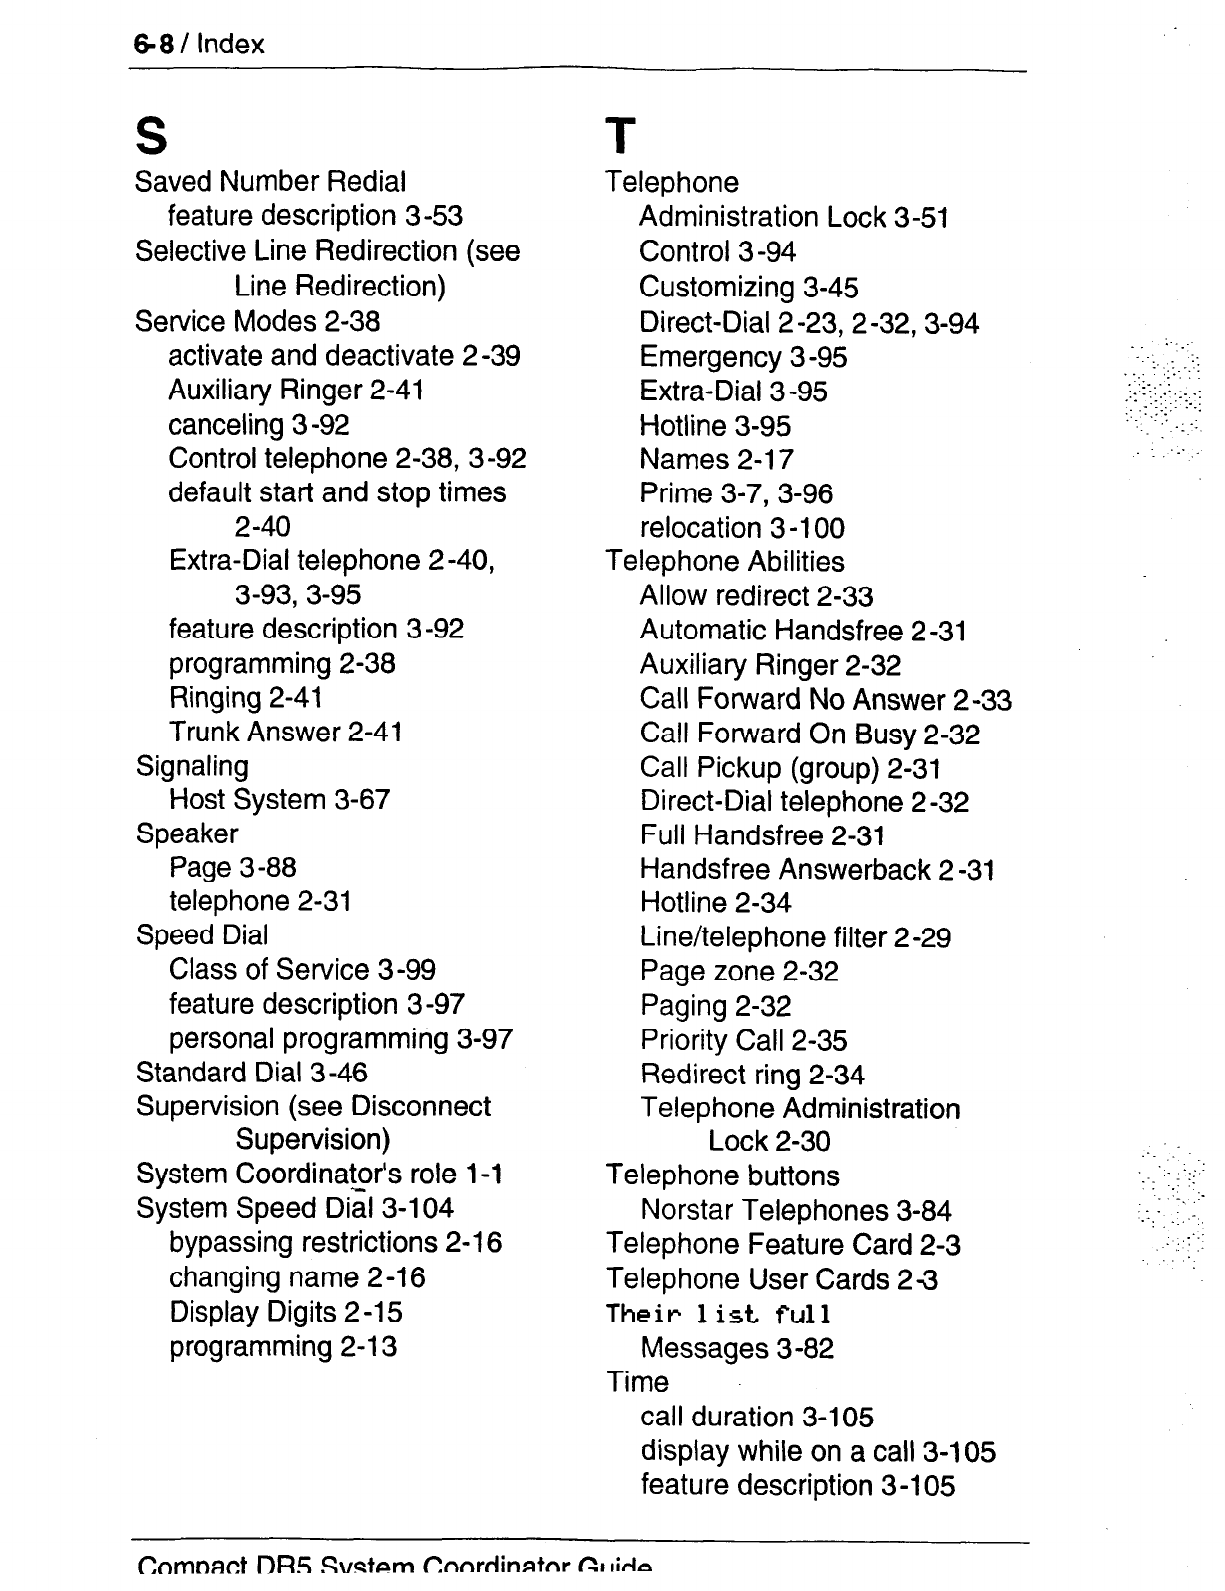
68 / Index
S
Saved Number Redial
feature description 3 -53
Selective Line Redirection (see
Line Redirection)
Service Modes 2-38
activate and deactivate 2-39
Auxiliary Ringer 2-41
canceling 3 -92
Control telephone 2-38, 3-92
default start and stop times
2-40
Extra-Dial telephone 2 -40,
3-93, 3-95
feature description 3 -92
programming 2-38
Ringing 2-41
Trunk Answer 2-41
Signaling
Host System 3-67
Speaker
Page 3-88
telephone 2-31
Speed Dial
Class of Service 3-99
feature description 3-97
personal programming 3-97
Standard Dial 3-46
Supervision (see Disconnect
Supervision)
System Coordina@-‘s role l-1
System Speed Dial 3-l 04
bypassing restrictions 2-16
changing name 2-16
Display Digits 2-15
programming 2-l 3
T
Telephone
Administration Lock 3-51
Control 3 -94
Customizing 3-45
Direct-Dial 2-23, 2-32,3-94
Emergency 3-95
Extra-Dial 3 -95
Hotline 3-95
Names 2-l 7
Prime 3-7, 3-96
relocation 3 -100
Telephone Abilities
Allow redirect 2-33
Automatic Handsfree 2 -31
Auxiliary Ringer 2-32
Call Forward No Answer 2-33
Call Forward On Busy 2-32
Call Pickup (group) 2-31
Direct-Dial telephone 2 -32
Full Handsfree 2-31
Handsfree Answerback 2 -31
Hotline 2-34
Line/telephone filter 2-29
Page zone 2-32
Paging 2-32
Priority Call 2-35
Redirect ring 2-34
Telephone Administration
Lock 2-30
Telephone buttons
Norstar Telephones 3-84
Telephone Feature Card 2-3
Telephone User Cards 23
Their 1 ist full
Messages 3 -82
Time
call duration 3-105
display while on a call 3-l 05
feature description 3-105
:. : :
1 ..: :-
:__ ,:-
:._
. . :
: _;:
,::
Cnmnact DR.5
.Svatfam rlnnrdinntnr CI
lirln
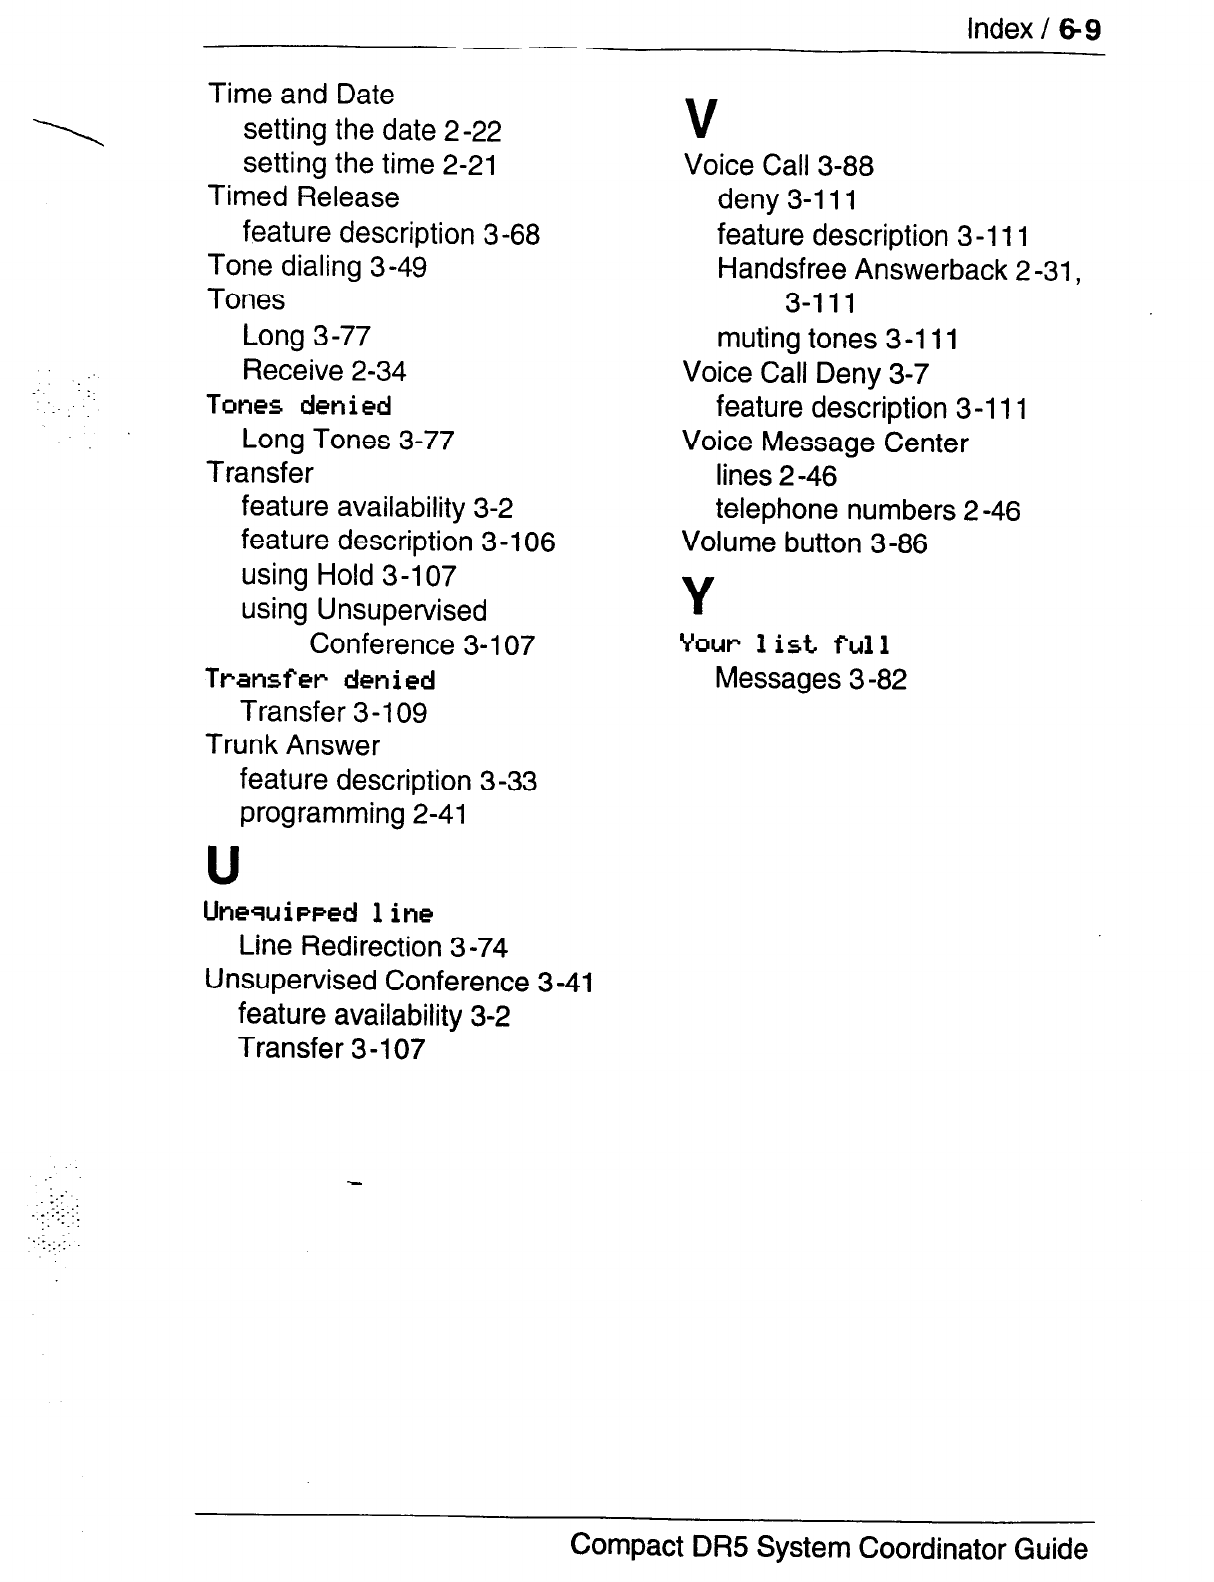
Index / 69
:
:
Time and Date
setting the date 2-22
setting the time 2-21
Timed Release
feature description 3-68
Tone dialing 3-49
Tones
Long 3-77
Receive 2-34
Tones
denied
Long Tones 3-77
Transfer
feature availability 3-2
feature description 3-106
using Hold 3-I 07
using Unsupervised
Conference 3-I 07
Transfer
denied
Transfer 3-l 09
Trunk Answer
feature description 3-33
programming 2-41
U
Uncquiwed 1 im
Line Redirection 3 -74
Unsupervised Conference 3-41
feature availability 3-2
Transfer 3-I 07
:.::‘
.,::::.::
1. -:.
. :
_:::
V
Voice Call 3-88
deny 3-l 11
feature description 3-l 11
Handsfree Answerback 2 -31,
3-l 11
muting tones 3-l 11
Voice Call Deny 3-7
feature description 3-l 11
Voice Message Center
lines 2-46
telephone numbers 2 -46
Volume button 3-86
Y
Vow 1 ist full
Messages 3 -82
Compact DR5 System Coordinator Guide
_‘l. :
: .
: _, . . ._ :
.
.‘.
:.
:. ._
Compact DR5 System Coordinator Guide

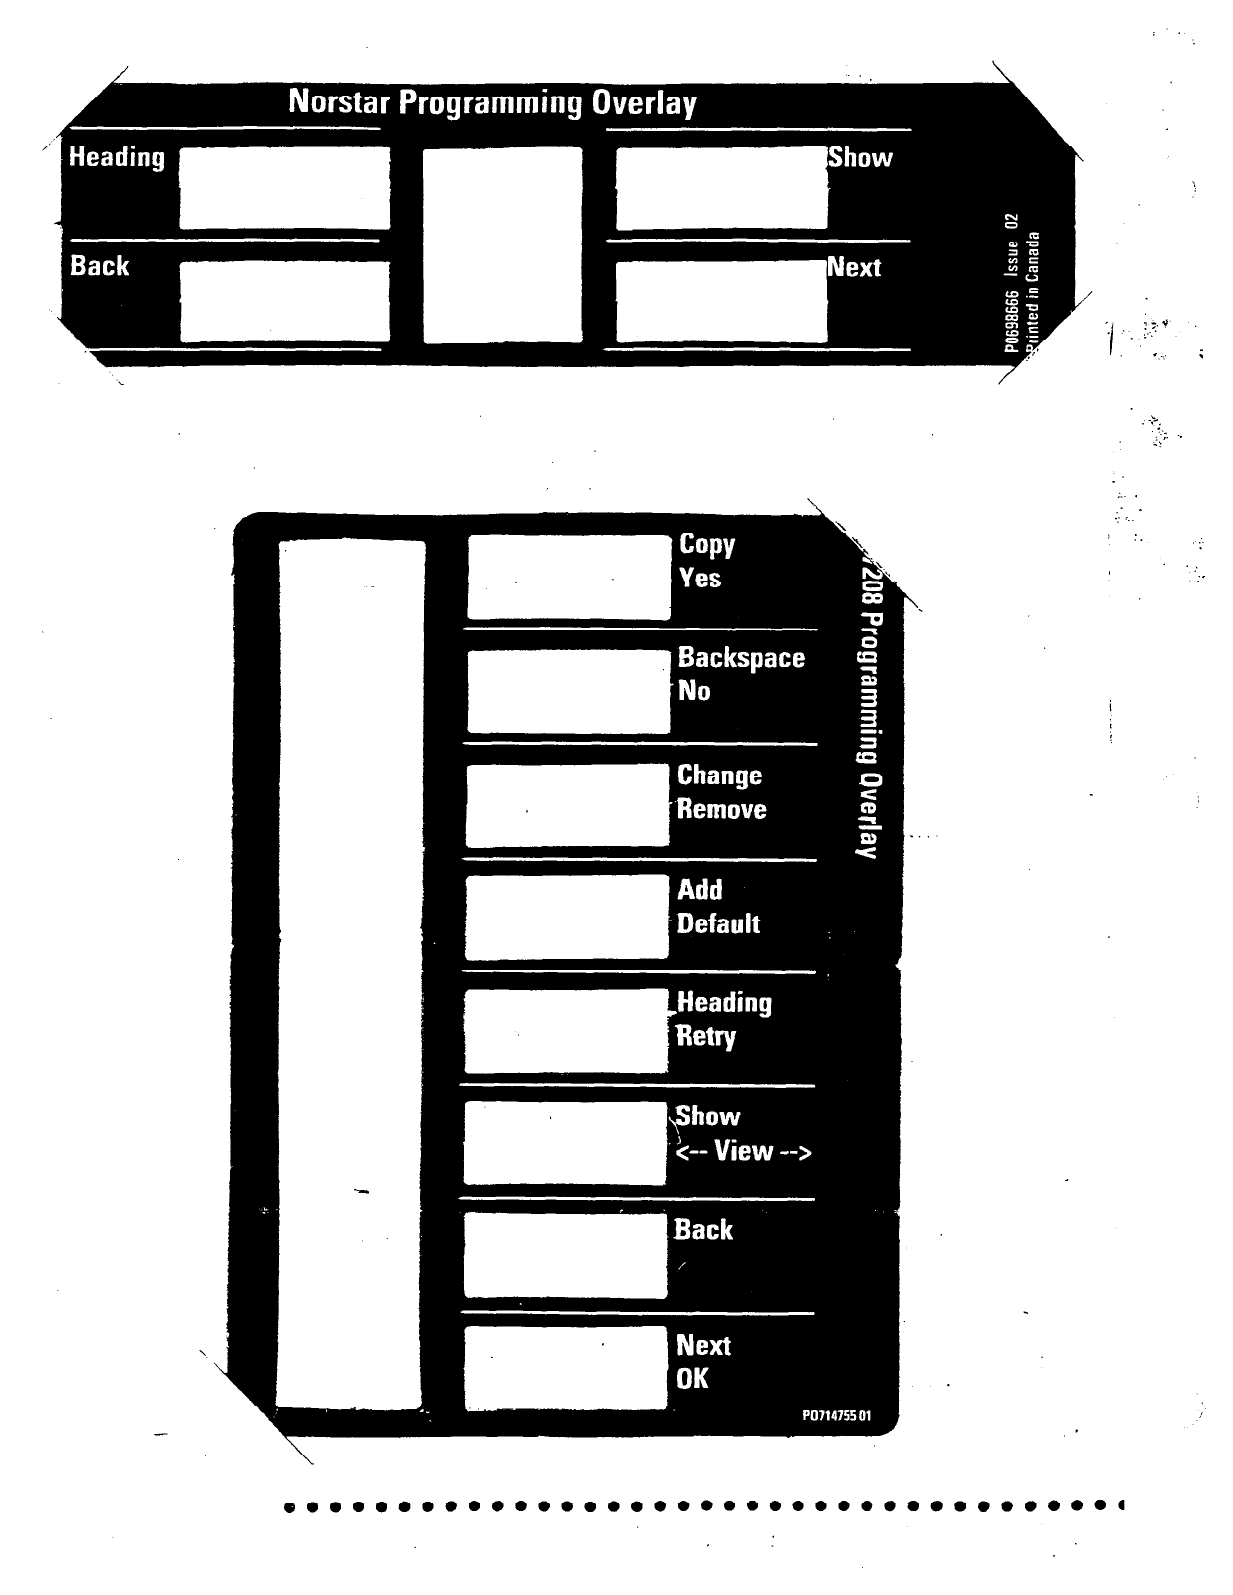
: :.
v
:-:-
. .
L. .
.
cc :..
:
I .,