Manual Cover.tif Altair Clone Operator's
User Manual: Altair Clone Operator's Manual
Open the PDF directly: View PDF ![]() .
.
Page Count: 36
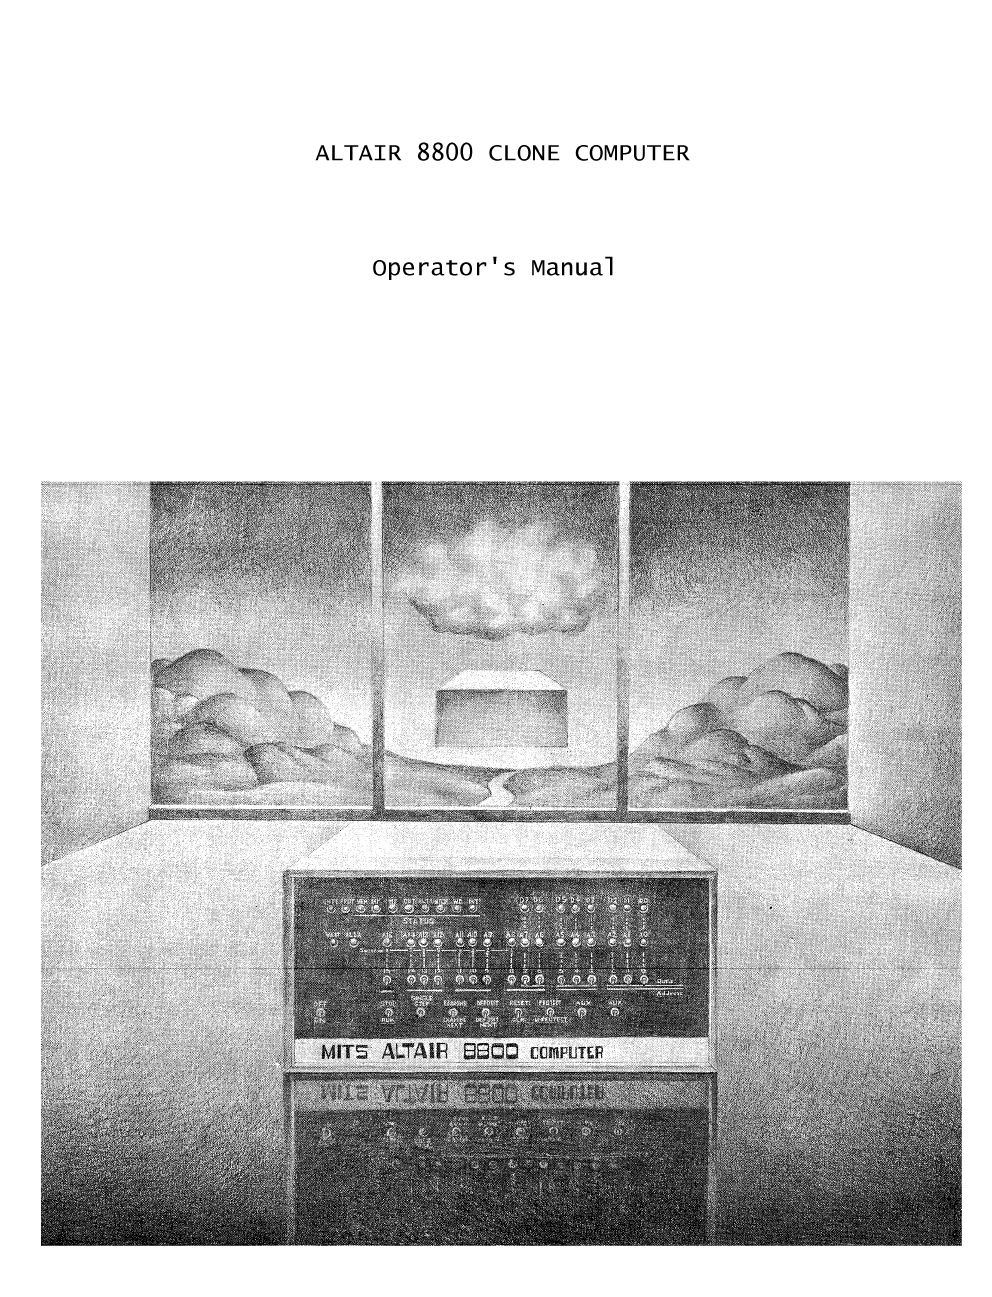

ALTAIR 8800 CLONE COMPUTER
OPERATOR’S MANUAL
Version 2.1, April 2017
TABLE OF CONTENTS
INTRODUCTION ............................................................... 1
PART 1 – ALTAIR 8800 CLONE HARDWARE SPECIFICATIONS ......................... 2
PART 2 – CONFIGURATION MONITOR ............................................. 4
A. Floppy Disk Menu ....................................................... 4
B. PROM Menu .............................................................. 6
C. Serial Port Menu ....................................................... 7
D. Load .BIN or .HEX File ................................................. 9
E. Administration Menu .................................................... 9
PART 3 – TERMINAL EMULATOR ................................................ 14
A. Overview .............................................................. 14
B. TeraTerm Terminal Emulator ............................................ 14
C. Installing TeraTerm ................................................... 14
D. Configuring TeraTerm .................................................. 14
E. Using TeraTerm ........................................................ 15
PART 4 – ALTAIR 8800 DEMONSTRATIONS ....................................... 16
A. Kill-the-Bit Front Panel Game ......................................... 16
B. Loading and Using 4K BASIC from Paper Tape ............................ 18
C. Loading and Using 8K BASIC from Cassette .............................. 21
D. Loading and Using Disk BASIC from Floppy Disk......................... 25
E. Loading and Using Altair DOS .......................................... 27
F. Loading and Using CP/M ................................................ 30
G. Loading and Using Timesharing BASIC ................................... 32

- 1 -
INTRODUCTION
The original Altair 8800 is the best computing platform available for reliv-
ing the birth of the personal computing revolution. You will find your new
Altair Clone to be the next best thing!
For most users, the Altair computing environment of today is, out of neces-
sity, slightly different than the computing environment of the mid 1970s.
However, once familiar with these differences, you can follow right along
with Altair owners of the 1970s – even using original Altair documentation
and software - to experience first-hand the thrill of using these early per-
sonal computers.
NEXT STEPS
The best way to proceed from here is up to you!
If you want as real an Altair experience as possible, first, understand the
hardware configuration of your Altair 8800 (Part 1, “Altair 8800 Clone Hard-
ware Specifications”), second, learn how to modify that configuration if
needed (Part 2, “Configuration Monitor”), then proceed from there using orig-
inal Altair documentation and software.
Original documents and supporting software are under the Support link on the
AltairClone.com website. It is recommended that you download the full Clone
support package by clicking on the Support Package link, then extracting all
files to your disk. Start your research by looking at the “Altair 8800 Opera-
tor’s Manual.” Keep in mind that all the manuals contain a mistake or two (or
more!) and may send you down the wrong path at times – that’s part of the
fun!
If you want some help along the way, the Altair Experience link on the Al-
tairClone.com website provides a great list of topics and tutorials you may
want to work through on your Altair Clone.
If you want to quickly set up a few popular Altair demonstrations, Part 4,
“Altair 8800 Demonstrations” gives step-by-step instructions for the follow-
ing activities:
• Kill-the-Bit front panel game
• Loading and using 4K BASIC from paper tape
• Loading and using 8K BASIC from cassette
• Loading and using Disk BASIC from floppy disk
• Loading and using Altair DOS
• Loading and using CP/M
• Loading and using Timesharing BASIC

- 2 -
PART 1 – ALTAIR 8800 CLONE HARDWARE SPECIFICATIONS
A. RAM
64K of RAM with memory protect in 256 byte pages. If any PROMs are loaded and
enabled, the overlaid RAM is replaced by PROM in 256 byte increments.
B. PROM
Eight “sockets” of up to 2K each provide for up to 16K of PROM. Loaded and
enabled PROMs overlay and replace RAM in 256 byte increments. A feature pre-
sent in the 8800b Turn-Key computer to disable PROM (in order to re-enable
RAM) can be turned on if desired. See “Administration Menu” in Part 2, “Con-
figuration Monitor” for more information.
C. Serial Ports
Two serial ports are wired to DB-25 connectors on the rear of the computer.
The port types can be configured to match original Altair hardware as shown
below. The optional Audio Cassette Interface adds the third serial port. The
first row illustrates the default configuration.
Serial Port 1
(Top Connector)
Serial Port 2
(Bottom Connector)
Serial Port 3
(from Cassette Intf)
First port from 88-2SIO
board at I/O address oc-
tal 20/21
88-SIO port at I/O ad-
dress 6/7 (the Altair
cassette serial port)
First port from a second
88-2SIO board at I/O ad-
dress octal 24/25
88-SIO port at I/O ad-
dress 0/1
Second port from 88-2SIO
board at I/O address oc-
tal 22/23
88-SIO port at I/O ad-
dress 6/7 (the Altair
cassette serial port)
The serial ports are wired as follows:
Pin Signal
2
3
4
5
7
XMT from Terminal (out) to Clone (in)
RCV to Terminal (in) from Clone (out)
RTS from Terminal (out) to Clone (CTS in)
CTS to Terminal (in) from Clone (RTS out)
Signal Ground
By default, pin 4 RTS (which becomes CTS inside the Clone) is always asserted
inside the Clone and therefore does not need to be connected on the DB-25 if
active handshaking is not used. RTS is not present or used on Port 3.
By default, pin 5 CTS (which is driven from RTS inside the Clone) is always
asserted in case an asserted handshake signal is required by the peripheral
device. CTS is not present or used on Port 3.
The ACIA on the 88-2SIO board supports programmed hardware handshaking. If
your applications requires this feature, the ACIA’s handshake lines can be
configured to be fully active. See “Set CTS, RTS Usage” in the “Serial Port
Menu” section of Part 2, “Configuration Monitor” for more information.
D. Line Printer Port
The Altair Clone implements the Altair 88-LPC (Okidata) and 88-C700 (Cent-
ronics) line printer interface boards. In the Altair Clone, data sent to ei-
ther of these printer boards is transmitted out serial port 2, which in turn,
can be connected to a terminal emulator window to view printer output, or

- 3 -
connected directly to a serial printer. Normal serial port functions of port
2 still work when routing printer output through the port. For example, se-
rial port 2 can be used as the cassette interface to load and save programs
and also for line printer output.
See “Line Printer Controller” in the “Administration Menu” section of Part 2,
“Configuration Monitor” for more information.
E. Floppy Drives
The Altair Clone provides three floppy “drives” that duplicate the function-
ality of the original Altair 8 inch floppy drives or the Altair Minidisk 5.25
inch drive. Floppy storage is implemented using non-volatile RAM inside the
Altair Clone. Since physical floppy disks and drives are not present, “in-
serting” a floppy disk is done by uploading a floppy image from a PC to the
Clone. Conversely, a floppy image on the Clone can be saved back to a PC for
archiving.
Once uploaded to the Clone, floppy disk content is non-volatile and further
data exchange with a PC is not required to use the floppy drives. Floppy
disks can be swapped between the three drives (to put a different disk into
drive zero to boot, for example) without having to connect to a PC. The “Con-
figuration Monitor” makes floppy disk handling simple. See “Floppy Disk Menu”
in Part 2, “Configuration Monitor” for more information.
F. Interrupts and the 88-VI/RTC Board
Interrupts in the Altair 8800 Clone can be generated by the serial ports
(2SIO and/or SIO), the floppy disk controller ("sector true" interrupt at the
start of each sector), the real-time clock present on the 88-VI/RTC board,
and by the 88-C700 Centronics printer interface.
The 88-VI/RTC Vectored Interrupt/Real-Time Clock board prioritizes interrupts
to the 8080 processor from the vectored interrupt lines (VI0-VI7) on the Al-
tair bus. The board can also provide 60hz real-time clock interrupts. While
not widely used for most commercial software, the VI/RTC board is required by
MITS Time-Sharing BASIC for the Altair.
If the 88-VI/RTC board is not enabled, then the default interrupt structure
of the Altair (PINT with RST7) is used. In this case, all devices can be tied
into the PINT line at the same time as the emulated devices all drive the
PINT line with open collector outputs. As with the original hardware, all
boards (other than the 88-VI/RTC) ignore the 8080 interrupt acknowledge cy-
cle, so the 8080 processor sees a RST7 instruction on the bus (all data bits
high) during the interrupt acknowledge cycle.
Connection of device interrupt outputs to the desired vectored interrupt line
on the Altair bus (VI0-VI07) is done in the “Interrupt Vector Assignments”
menu of the “Administration Menu.” See these menus in Part 2, “Configuration
Monitor” for more information.
G. Changing Hardware Configuration
If an original Altair owner needed to install a new serial I/O card, install
or remove a PROM, or change a baud rate jumper, the owner opened the computer
and made the required modifications inside the computer. In the Altair 8800
Clone, these hardware configuration changes are made using menu options in
the “Configuration Monitor.” See Part 2, “Configuration Monitor” for more in-
formation.

- 4 -
PART 2 – CONFIGURATION MONITOR
The Configuration Monitor is used to manage the physical and virtual hardware
in the Altair 8800 Clone. The monitor is a simple menu driven program built
into the Clone. Communication with the operator is always via serial port 1
at 9600 baud, 8N1.
To enter the Configuration Monitor, raise and hold the STOP/RUN switch in the
STOP position, then raise the left AUX switch. The main menu is displayed:
=== Configuration Monitor 1.91 ===
1) Floppies
2) PROMs
3) Serial Ports
4) Load .BIN
5) Load .HEX
6) Admin
x) Exit to Altair
IMPORTANT: Exiting the Configuration Monitor and returning to normal Altair
operation should always be performed by backing out of sub-menus to the main
menu shown above, then choosing the “Exit to Altair” menu option.
A. Floppy Disk Menu
The floppy disk menu is used to insert, remove and manage floppy disks. Flop-
py disks are byte for byte images of actual Altair floppy disks and are ini-
tially uploaded to the Clone from a PC. Floppy disk content is stored in non-
volatile RAM inside the Clone and once uploaded, is always available.
When the floppy disk option is selected from the main menu, the content of
each drive is shown. The drive numbers listed are the same drive numbers used
with real Altair drives.
=== 8 Inch Floppy Drive Content ===
Drive 0: CP/M 2.2
Drive 1: Disk BASIC Games
Drive 2: Altair DOS
Drive to Update (x to exit):
When a drive number is selected, the following menu is displayed:
=== Floppy Drive Menu ===
1) Change Drive Number
2) Load Floppy from PC
3) Save Floppy to PC
4) Change Description
x) Exit Menu
1. Change Drive Number
The “Change Drive Number” option is used to change which drive a floppy disk
is in. This is typically used to put a different disk into drive zero for
booting. The selected disk is swapped with the disk presently in the destina-
tion drive number.
2. Load Floppy from PC
The “Load Floppy from PC” option is used to load new content into a drive.
The floppy disk image is uploaded from a PC using the XMODEM protocol (origi-

- 5 -
nal XMODEM with 128 byte blocks and checksum). Compatible disk images files
typically have a “.dsk” extension and are 330K or 75K in size (8 inch, mini-
disk respectively).
The floppy image transfer is done at a higher baud rate to reduce the trans-
fer time. The default transfer rate is 115,200 baud. This rate can be changed
using the “Floppy Drive Settings” option in the “Admin” menu. An option to
transfer the file over the second serial port instead of the default console
port is also available in this menu.
Upon selecting the load floppy option, the monitor confirms the operation and
prompts for a description of the new disk. The PC baud rate should then be
set to 115,200 baud after which the XMODEM send operation can be initiated on
the PC. If using TeraTerm, a convenient shortcut is pressing CTRL-1 to set
the baud rate to 115,200 baud. The new baud rate can be seen in the TeraTerm
title bar.
When the transfer completes, the user is prompted to return the PC baud rate
to 9600 baud. If using TeraTerm, a convenient shortcut is pressing CTRL-9 to
return the baud rate to 9600 baud. The new baud rate can be seen in the Ter-
aTerm title bar. This sequence is shown below:
=== Load Floppy from PC ===
This will over-write "Altair DOS." Are you sure (y/n)? y
Floppy description: New Disk
Step 1: Set console baud rate to 115.2K
Step 2: Start XMODEM file SEND after setting the new baud rate...
(XMODEM transfer occurs here...)
Return console to 9600 baud, then RETURN:
If the XMODEM transfer must be aborted, first stop the transfer from the PC
end, then abort the Clone’s reception by raising and releasing the left AUX
switch.
3. Save Floppy to PC
This menu option is used to write a floppy disk image back to a PC for ar-
chiving. The floppy disk image is downloaded to the PC using the XMODEM pro-
tocol (original XMODEM with 128 byte blocks and checksum). The floppy image
transfer is done at a higher baud rate to reduce the transfer time. The de-
fault transfer rate is 115,200 baud. This rate can be changed using the
“Floppy Drive Settings” option in the “Admin” menu. An option to transfer the
file over the second serial port instead of the default console port is also
available in this menu.
Upon selecting the save floppy option, the monitor confirms the operation and
prompts for the baud rate change. The PC baud rate should be set to 115,200
baud after which the XMODEM receive operation can be initiated on the PC. If
using TeraTerm, a convenient shortcut is pressing CTRL-1 to set the baud rate
to 115,200 baud. The new baud rate can be seen in the TeraTerm title bar.
When the transfer completes, the user is prompted to return the PC baud rate
to 9600 baud. If using TeraTerm, a convenient shortcut is pressing CTRL-9 to
return the baud rate to 9600 baud. The new baud rate can be seen in the Ter-
aTerm title bar. This sequence is shown below:

- 6 -
Save content of "Altair DOS" to the PC. Are you sure (y/n)? y
Step 1: Set console baud rate to 115.2K
Step 2: Start XMODEM file RECEIVE after setting the new baud rate...
(XMODEM transfer occurs here...)
Return console to 9600 baud, then RETURN:
If the XMODEM transfer must be aborted, first abort the Clone transmission by
raising and releasing the left AUX switch, then stop the receive operation on
the PC end.
4. Change Floppy Description
Use this menu option to change the description of a drive’s content. This can
also be used to eject a floppy you’re no longer using by changing the de-
scription to “Scratch Disk” (or any similar description) to indicate the
drive is free to use. From the Altair’s perspective, a floppy disk is still
present in the drive, just consider it a blank or scratch disk.
-------------------------------------------
B. PROM Menu
The PROM menu is used to insert and remove PROMs. Eight slots are provided
for PROM content. Each slot is up to 2K bytes in length. PROM content is up-
loaded from a PC in binary (.bin) or Intel Hex (.hex) format. Once uploaded,
PROM content is non-volatile. PROM content can also be disabled without actu-
ally removing the PROM so that it can later be re-enabled without having to
re-upload the content from a PC.
When the PROM Menu option is chosen from the main menu, the current content
of each PROM slot is displayed as shown below:
=== PROM Information Table ===
Num State Addr Length Description
--- --- ---- ------ -------------------
1 ON FF00 0100 Disk Boot Loader
2 ON FE00 0100 Multi-Boot Loader
3 ON FD00 0100 Turn-Key Monitor
4 OFF 0000 0000
5 OFF 0000 0000
6 OFF 0000 0000
7 OFF 0000 0000
8 OFF 0000 0000
PROM to Update (x to exit):
To load or change the content of a PROM slot, enter the slot number. The fol-
lowing menu is displayed:
=== PROM Menu ===
1) Load New Content
2) Change Description
3) Change Load Address
4) Enable PROM
5) Disable PROM
6) Remove PROM
x) Exit Menu

- 7 -
1. Load New PROM Content
The “Load New Content” option is used to load new content into a PROM slot.
The PROM data can be uploaded as a binary or Intel hex format file. If a bi-
nary format is chosen, the load address must be specified (up to four hex
digits). The example below shows loading PROM content from an Intel hex file.
File transfer can be aborted by pressing CTRL-C or raising the left AUX
switch.
=== Load New Prom Content ===
Enter PROM Address in hex (RETURN for .HEX file):
Send .hex file now...
(initiate simple send file operation from the PC – not XMODEM)
2. Change Description, Change Load Address, etc.
Options 2 – 6 are fairly self explanatory. Note: The “Change Load Address”
option does NOT magically relocate already assembled code. This option is
used if you accidentally typed in the wrong address when initially loading a
binary PROM file.
-------------------------------------------
C. Serial Port Menu
The serial ports on the Altair Clone can be configured in a variety of ways
to match the requirements of the software to be run. By default, port 1 is a
2SIO port (Motorola ACIA) at octal address 020/021. Serial port 2 defaults to
an SIO port at address 006/007 (the cassette interface port). If you pur-
chased an assembled Clone, serial port 1 is the upper DB-25 on the rear panel
and serial port 2 is the lower connector. If using the optional Audio Cas-
sette Interface, you’ll probably want to configure Port 3 to be the cassette
I/O port (SIO at 006/007, 300 baud, 8N1) instead of Port 2.
When the Serial Port Menu option is chosen from the main menu, the current
serial port settings are displayed as shown below (Note: The port settings
shown are also the default settings).
=== Serial Port Settings ===
Port Type I/O Rate Other
---- ---- ------- ---- --------
1 2SIO 020,021 9600
2 SIO 006,007 9600 8N1
3 2SIO 024,025 9600
Port to Change (x to Exit):
After entering the serial port number to change, this menu is displayed:
=== Serial Port Menu ===
1) Port Type
2) Baud Rate
3) CTS, RTS Usage
4) Word Length, Parity, Stop Bits
x) Exit Menu

- 8 -
1. Change Port Type
The “Port Type” option is used to specify the type of Altair serial port as-
signed to a physical serial port on the Altair Clone. The following options
are displayed:
=== Serial Port Type ===
1) 88-SIO
2) 88-2SIO
x) Exit Menu
The SIO port type duplicates operation of the original 88-SIO boards with the
status word modification in place. These are the most common versions of the
SIO board and are referred to as “not Rev 0” or “Rev 1” in Altair manuals.
Serial port 1 is at address 0/1 and serial ports 2 and 3 are at address 6/7
(matches the SIO port used with the Altair cassette interface).
The 2SIO option duplicates operation of the 88-2SIO boards which use the Mo-
torola ACIA as the UART. Serial port 1 is at octal address 020/021, port 2 is
at octal address 022/023, and port 3 is at octal address 024/025.
2. Set Baud Rate
Self explanatory.
3. Set CTS, RTS Usage
This option only affects a serial port configured as a 2SIO port. The ACIA on
the 2SIO board allows use of handshake lines CTS and RTS. On a real 88-2SIO
board, if the user did not want these signals to affect operation, they could
be tied active or inactive as needed. This menu option allows configuration
of how CTS and RTS are used.
If CTS is set to “Always Asserted,” CTS is permanently asserted “true” going
into the ACIA. If RTS is set to “Always Asserted,” RTS is permanently as-
serted “true” going out of the DB-25 serial port connector. When either sig-
nal is set to “Used,” the signal passes from/to the serial port to the ACIA
as expected.
=== CTS, RTS Usage (2SIO Only) ===
1) CTS, RTS Always Asserted
2) Only RTS Used
3) Only CTS Used
4) CTS, RTS Both Used
x) Exit Menu
4. Set Word Length, Parity, Stop Bits
This option only affects a serial port configured as an SIO port. To config-
ure word length, parity and stop bits on a real 88-SIO board, jumper wires
were used. This menu option allows configuration of these same jumper set-
tings. When this menu option is selected, the following menu is displayed:

- 9 -
Word Length, Parity, Stop Bits (SIO Only)
1) 7E2
2) 7O2
3) 7E1
4) 7O1
5) 8N2
6) 8N1
7) 8E1
8) 8O1
x) Exit this Menu
D. Load .BIN or .HEX File
These options provide a method to directly load a program or data into Altair
memory. Files are sent using simple 8-bit transfer (not XMODEM). If a binary
file is sent, the load address (up to four hex digits) must be specified.
The example below shows loading memory from a binary file. File transfer can
be aborted by pressing CTRL-C or raising the left AUX switch.
Enter load address in hex: 0
Send .bin file now...
(initiate simple send file operation from the PC – not XMODEM)
-------------------------------------------
E. Administration Menu
When “Admin” is selected from the main menu, the administration menu is dis-
played:
=== Administration Menu ===
1) Interrupt Vectors
2) Line Printer Controller
3) Turnkey Module
4) Floppy Drive Settings
5) Single-Step "Down" Options
6) Restore Defaults
7) Update Firmware
x) Exit Menu
1. Interrupt Vector Assignments
The 88-VI/RTC Vectored Interrupt/Real-Time Clock board in the Altair Clone is
used to prioritize interrupts to the 8080 processor from the vectored inter-
rupt lines on the Altair bus (VI0-VI7). In a real Altair, a device’s inter-
rupt output is connected to the desired vector line using a jumper. This menu
allows specification of that connection.
When this menu option is selected, the present vector assignments for inter-
rupt sources in the Clone are displayed:

- 10 -
=== 88-VI/RTC Vectored Interrupt Assignments ===
Device Vector
------------- ---
1) Floppy Drives 0
2) Serial Port 1 2
3) Serial Port 2 2
3) Serial Port 3 3
4) Real-Time Clk 1
Device Number to Update (x to exit):
After specifying the device number to update, the user can choose a new in-
terrupt vector number (0-7) for the device. VI0 is the highest interrupt pri-
ority, VI7 is the lowest priority. For the Real-Time Clock only, a “D” for
“Disabled” can be entered as a vector number. This disables interrupts from
the RTC even if 8080 software enables them. Changing a Serial Port’s setting
affects whatever device is assigned to the port, e.g., 88-2SIO, 88-SIO, and
for Serial Port 2, the 88-C700 Centronics printer interface.
2. Line Printer Controller
Data sent to the 88-LPC (Okidata) or 88-C700 (Centronics) printer interface
can be routed through serial port 2, which in turn, can be connected to a
terminal emulator window to view printer output, or connected directly to a
serial printer.
Normal serial port functions of port 2 still work when routing printer data
through the serial port. For example, serial port 2 can be used as the cas-
sette interface to load and save programs and to also see line printer out-
put. One exception is that the serial port device (88-2SIO or 88-SIO) and the
Centronics printer device cannot both use interrupts at the same time. This
means, for example, when running Timesharing BASIC, you can't use serial port
2 as both a 2SIO user terminal port and the Centronics printer port at the
same time.
=== Line Printer Selection ===
Current setting: 88-LPC (Okidata)
1) 88-LPC (Okidata)
2) 88-C700 (Centronics)
3) Disable Line Printer
x) Exit Menu
3. Turnkey Module
The Altair Turnkey board can be installed or removed with this menu. The
Turnkey Module provides auto-start to a specified address (typically in ROM)
on power up or following a front panel reset.
The Turnkey Module also allows the 1K of ROM at 0xFC00 to 0xFFFF to overlay
RAM. ROM is enabled at power up and on reset. The ROM is disabled and RAM en-
abled upon execution of an IN instruction from 0xFE or 0xFF. Since 0xFF is
the sense switch port, booting from disk automatically enables all 64K of RAM
because the boot loader PROM (while executing from RAM) does an IN operation
from the sense switch port. Note that the Altair Multi-Boot Loader PROM (MBL)
fails to run properly with the Turnkey Module installed since this PROM reads
the sense switch port while executing from PROM, effectively killing itself.

- 11 -
=== Turnkey Module ===
Current setting: Disabled
1) Enable Turnkey
2) Autostart Address: FF00
x) Exit Menu
4. Floppy Drive Settings
This menu is used to configure the floppy drive type (8 inch or minidisk),
the drive performance (actual speed or faster), and the baud rate and serial
port used for disk image transfer.
=== Floppy Drive Settings ===
1) Drive Type
2) Drive Performance
3) Baud Rate for Transfer
4) Serial Port for Transfer
x) Exit Menu
4.1 Drive Type
This option is used to select between the Altair 8 inch floppy or the Altair
Minidisk. All three drives are affected. After switching drive type, be sure
to upload disk images appropriate for the drive type selected.
=== Floppy Drive Type ===
Current setting: 8 Inch
1) 8 Inch
2) Minidisk
x) Exit Menu
4.2 Drive Performance
The Altair Clone accurately duplicates the timing of the original Altair
Floppy disk drive. While authentic, the slow speed can be frustrating after a
while! This menu allows choosing between maximum speed or real speed. Actual
speed is the default setting.
=== Floppy Performance ===
Current setting: Actual Speed
1) Actual Speed
2) Maximum Speed
x) Exit Menu
4.3 Baud Rate for Floppy Load/Save
When transferring floppy data from/to the PC (see “Floppy Disk Menu”), a
higher baud rate is used to speed up the transfer process. The default trans-
fer rate is 115.2K baud. This menu allows selection of a different rate. Suc-
cessful operation at 230.4K and 460.8K baud varies greatly based on the se-
rial to USB adapter, adapter driver version, operating system, etc.

- 12 -
=== Floppy Load/Save Baud Rate ===
Current rate is 115.2K
1) 9600
2) 19.2K
3) 38.4K
4) 57.6K
5) 76.8K
6) 115.2K (recommended)
7) 230.4K
8) 460.8K
9) Exit Menu
4.4 Serial Port for Floppy Load/Save
The default port used for file transfer is the monitor console port (serial
port 1). Optionally, serial port 2 can be used for file transfer. This allows
a vintage terminal to remain on serial port 1 while using a PC or other com-
puter for disk image transfer on serial port 2.
=== Serial Port for Floppy Load/Save ===
Currently using port 1
1) Use Port 1
2) Use Port 2
x) Exit Menu
5. Single Step “Down” Options
Single step on the 8800 is performed by raising the Single-Step switch.
Pressing down on the Single-Step switch does nothing. In the 8800b computer,
however, pressing and holding the Single-Step switch in the down position au-
to-stepped at a rate determined by jumpers on the front panel board. This
menu option allows the user to choose similar features for Clone’s Single-
Steps switch. The default setting is for this feature to be disabled.
=== Single-Step "Down" Options ===
Current setting: Disabled
1) Disabled
2) Single-Step
3) 1 per sec
4) 2 per sec
5) 4 per sec
6) 8 per sec
x) Exit Menu
8. Restore Defaults
Use the “Restore Defaults” menu option to restore all options and content to
their original values.
=== Restore Defaults ===
This operation will erase all floppy and PROM content
and set all parameters to their defaults values.
Restore defaults (y/n)?

- 13 -
9. Update Firmware
The “Update Firmware” menu option is used to install a firmware update into
the Altair 8800 Clone. See also the “Cold-Start Update Procedure.”
=== Update Firmware ===
This operation updates the Altair 8800 Clone firmware.
Do not perform this operation unless you have been instructed
to perform the update.
Continue (y/n)?
Cold Start Firmware Update
If the Altair Clone is unresponsive, the firmware can be restored without us-
ing the Configuration Monitor. Terminal emulator settings for a cold start
update are the same as for the Configuration Monitor (9600 baud, 8N1). With
power off, raise and hold the left AUX switch in the up position, then turn
on power while continuing to hold AUX in the up position. After about two se-
conds, you will see the “Update Firmware” prompt shown above. The AUX switch
can then be released. Follow the prompts to complete the software update pro-
cess.

- 14 -
PART 3 – TERMINAL EMULATOR
A. Overview
A terminal emulator running on a PC is a convenient way to duplicate the
functionality of a teletype, paper tape reader/punch, CRT terminal, cassette
interface, capture printer output, etc. To provide these capabilities and
other useful functions, a terminal emulator with the following capabilities
is recommended:
• 8-bit transmission of text files (e.g., paper tape reader).
• 8-bit reception of text files (e.g., paper tape punch).
• Per character and/or per line delays when transmitting a text file.
• Terminal emulation should include an 8-bit mode in which the 8th bit is
ignored (assumed by 4K and 8K BASIC). Note, if the emulator supports a
7-bit plus parity mode in which the received parity is ignored, this
will also work.
• Support for original XMODEM (checksum) file send and receive.
B. TeraTerm Terminal Emulator
On the Windows platform The TeraTerm emulator meets all of the requirements
listed above. TeraTerm is now an Open Source project maintained at:
http://ttssh2.sourceforge.jp/index.html.en
The version of TeraTerm maintained at the link above is much newer than the
version found at the “TeraTerm Home Page.” The latter is not recommended.
C. Installing TeraTerm
Installation files for TeraTerm are available on the AltairClone.com website
under the Support link. The installation files are also included in the All
Manuals and Software as a .zip file link.
Follow these steps to install TeraTerm:
1) Extract all files from the downloaded .zip file.
2) Install TeraTerm by running the file teraterm-4.77.exe
Note: On the "Select Components" installation page, you can de-select
all optional components.
3) Copy the files "keyboard.cnf", "baud115k.ttl" and "baud9600.ttl" to the
program folder in which TeraTerm was installed.
4) Copy the file "teraterm.ini" file to the "My Documents" folder.
D. Configuring TeraTerm
When TeraTerm is launched, it loads its configuration from the "teraterm.ini"
file it finds in the "My Documents" folder. Step 4 above put a sample con-
figuration file in the “My Documents” folder. The first time TeraTerm is
started, you will probably have to select a different COM port under "Setup-
>Serial Port." After choosing the proper COM port, save the configuration by
choosing "Setup->Save setup" and over-writing the "termaterm.ini" file in the
"My Documents" folder.

- 15 -
E. Using TeraTerm
The most commonly used menu options are:
File->Send File Sends a file over the serial port with no protocol
(e.g., paper tape or cassette, or non-XMODEM “Send File” operations
in the Configuration Monitor). Be sure the "Binary" checkbox at the
bottom of the file dialog box is checked.
File->Log... Receives a file over the serial port with no protocol
(e.g., paper tape or cassette). Be sure the "Binary" checkbox at the
bottom of the file dialog box is checked. When the file log operation
is started, a new taskbar tile appears (TeraTerm:Log). When file re-
ception is complete, click on the log taskbar tile and then click the
“Close” button to complete the file receive operation.
File->Transfer->Xmodem Used to send and receive files using the XMODEM
protocol. The Configuration Monitor uses XMODEM transfers to exchange
floppy disk content with the Clone. Also, the CP/M utilities “PCGET”
and “PCPUT” use the XMODEM protocol to transfer files between the Al-
tair and a PC.
Setup->Serial Port... Used to change baud rate, bits, parity, delay per
character and line, etc.
The following keyboard macros are enabled if step 3 was done correctly during
installation:
CTRL-1 changes to 115,200 baud (for transferring floppy content)
CTRL-9 changes to 9,600 baud (default baud rate)
Note: The current baud rate is visible in the title bar of the TeraTerm win-
dow.

- 16 -
PART 4 – ALTAIR 8800 DEMONSTRATIONS
This section contains step-by-step instructions for several popular Altair
demonstrations. These demonstrations assume you have downloaded the support
package from the AltairClone.com website: Click on the Support link at the
top of any page, then click on the All Manuals and Software as a .zip file
link. Extract all files from the zip file to your computer.
These demonstrations just scratch the surface of what can be done and learned
with your Altair 8800 Clone. Be sure to dig through the documentation and
software provided in the downloaded support package – you will find a wealth
of useful manuals and software. Keep in mind that some of the software is
“hidden” on Altair floppy disk images that can be seen only after the floppy
is loaded on to the Altair. This includes files on Altair BASIC disks, the
Altair DOS disk and on CP/M disks.
A. Kill-the-Bit Front Panel Game
Kill the Bit was one of the first games for the Altair. It runs on the front
panel of the Altair and does not require connection to an external teletype
or terminal. Following is the assembly language listing of the program:
;
; Kill the Bit game by Dean McDaniel, May 15, 1975
;
; Object: Kill the rotating bit. If you miss the lit bit,
; another bit turns on leaving two bits to destroy. Quickly
; toggle the switch, don't leave the switch in the up
; position. Before starting, make sure all the switches
; are in the down position.
0000 org 0
0000 210000 lxi h,0 ;initialize counter
0003 1680 mvi d,080h ;set up initial display bit
0005 010E00 lxi b,0eh ;higher value = faster
0008 1A beg: ldax d ;display bit pattern on
0009 1A ldax d ;...upper 8 address lights
000A 1A ldax d
000B 1A ldax d
000C 09 dad b ;increment display counter
000D D20800 jnc beg
0010 DBFF in 0ffh ;input data from sense switches
0012 AA xra d ;exclusive or with A
0013 0F rrc ;rotate display right one bit
0014 57 mov d,a ;move data to display reg
0015 C30800 jmp beg ;repeat sequence
0018 end
To run the program, it must first be entered into the Altair’s memory using
the front panel switches. The front panel switches are grouped such that data
entry from an octal dump is easiest. Following is a dump of each byte of the
program in octal:
- 17 -
Addr Data
---- ----
Addr Data
---- ----
Addr Data
---- ----
000 041
001 000
002 000
003 026
004 200
005 001
006 016
007 000
010 032
011 032
012 032
013 032
014 011
015 322
016 010
017 000
020 333
021 377
022 252
023 017
024 127
025 303
026 010
027 000
Follow these steps to enter the program:
1) Turn the power switch on.
2) Raise and hold the STOP switch in the STOP position, then raise and re-
lease the RESET switch. Finally, release the STOP switch. This performs
a hard reset on the computer and sets all address lights to zero.
3) Put the first data byte in switches 7 through 0, then raise DEPOSIT.
4) Put the data for the next address in switches 7 through 0, then depress
DEPOSIT NEXT.
5) Repeat step 4 until all bytes have been entered.
6) Raise and release RESET to force all address lights back to zero.
7) Verify the data shown on lights D7 through D0 matches the data byte for
the current address. If the value is correct, go to step 9, otherwise
go to step 8.
8) Put the correct value in switches 7 through 0, then raise DEPOSIT.
9) Depress EXAMINE NEXT
10) Repeat steps 7 through 9 to validate entry of the entire program.
Once the program is entered, you’re ready to play Kill the Bit! Read the in-
structions in the program listing above, then follow the steps below to run
the game.
1) Set all address switches to zero.
2) Raise EXAMINE (or raise RESET) to set all address lights (and the 8080
program counter) to zero.
3) Depress RUN to run the program.
To start the game over, raise and release RESET. To change the rate at which
the light moves, change the byte at address 6 from 016 to a different value.
Higher values move the light faster, lower values move the light slower.

- 18 -
B. Loading and Using 4K BASIC from Paper Tape
In this demonstration, we will load 4K BASIC Version 3.2 from paper tape. In
the mid-1970’s, a teletype connected to single serial port on the Altair
would have served as both the console and paper tape reader. We will dupli-
cate this configuration using a terminal emulator on a PC as both the console
and paper tape reader.
Computer Configuration
For this exercise, serial port #1 on the Altair Clone (the upper DB-25
connector) should be configured as a 2SIO port at octal I/O address 20/21.
This is a standard Altair configuration. This is also the default Altair
Clone configuration. You can confirm or change the Clone’s serial port
configuration if needed. See “Serial Port Menu” in Part 2, “Configuration
Monitor” of this manual.
The default baud rate for the serial port on the Clone is 9600 baud. While
this is much faster than the 110 baud at which a real teletype operates,
we recommend using 9600 baud for this demonstration. Buffering in the PC’s
serial port drivers and issues with some USB-to-Serial adapters can make
operation at 110 and 300 baud problematic.
Terminal Emulator Configuration
The TeraTerm terminal emulator is used to duplicate the functionality of a
teletype. Confirm serial settings of 9600 baud, 8 bits, no parity, one
stop bit (8N1) in the “Setup->Serial Port” menu in TeraTerm. Also confirm
that the “Transmit Delay” fields are both set to zero.
To load 4K BASIC, we must first enter a small program via the front panel
called a “bootstrap loader.” The job of the bootstrap loader is to receive a
second loader from paper tape called the “checksum loader.” The checksum
loader is at the beginning of the BASIC paper tape. Once the checksum loader
has been read into memory, the checksum loader then reads in BASIC from the
remainder of the paper tape.
The code for the bootstrap loader is provided by Altair in the BASIC manual.
Different versions of the bootstrap loader are required based on the version
of BASIC and the type of interface card being used. For this demonstration,
we need the bootstrap loader for the 88-2SIO serial board and for 4K BASIC
Version 3.2. Following is the bootstrap loader code for this combination of
BASIC and serial port type:
Addr Data
---- ----
Addr Data
---- ----
Addr Data
---- ----
Addr Data
---- ----
000 076
001 003
002 323
003 020
004 076
005 025
006 323
007 020
010 041
011 256
012 017
013 061
014 032
015 000
016 333
017 020
020 017
021 320
022 333
023 021
024 275
025 310
026 055
027 167
030 300
031 351
032 013
033 000
Follow these steps to enter the bootstrap loader:
1) Turn the power switch on.
2) Raise and hold the STOP switch in the STOP position, then raise and re-
lease the RESET switch. Finally, release the STOP switch. This performs
a hard reset on the computer and sets all address lights to zero.
3) Put the first data byte in switches 7 through 0, then raise DEPOSIT.
- 19 -
4) Put the data for the next address in switches 7 through 0, then depress
DEPOSIT NEXT.
5) Repeat step 4 until all bytes have been entered.
6) Raise and release RESET to force all address lights back to zero.
7) Verify the data shown on lights D7 through D0 matches the data byte for
the current address. If the value is correct, go to step 9, otherwise
go to step 8.
8) Put the correct value in switches 7 through 0, then raise DEPOSIT.
9) Depress EXAMINE NEXT
10) Repeat steps 7 through 9 to validate entry of the entire program.
Once the bootstrap loader is entered and verified, we’re almost ready to load
the BASIC paper tape. But first, we must set the run address to zero and then
set the front panel sense switches to tell the checksum loader and BASIC the
type of serial port that is in use:
1) Set all address switches to zero.
2) Raise EXAMINE to set all address lights (and the 8080 program counter)
to zero.
3) Raise A11 and A10 to the up position. This tells the checksum loader
and BASIC that you are using a 2SIO serial board with one stop bit to
load BASIC and to use as your console.
Now we’re finally ready to actually load BASIC!
1) Depress RUN to run the bootstrap loader. If the loader was entered cor-
rectly, address lights A12, and A4-A0 should be on.
2) Transmit the paper tape image by using the “File->Send File” menu op-
tion in TeraTerm. Browse to and select the file “4K Basic Ver 3-2.tap”
which is located in the “Paper Tape and Cassette” folder inside the
“BASIC” folder. Be sure the “binary” checkbox at the bottom of the send
file dialog is checked when sending a paper tape file.
3) Loading BASIC will only take about five seconds at 9600 baud (instead
of seven minutes at 110 baud!). Once loaded, BASIC initializes and
prompts the user for memory size. The prompt may look a bit garbled as
shown:
MEMORY SIZã?
This occurs because 4K BASIC uses bit 7 to store additional informa-
tion. However, because teletypes ignored bit 7, this did not cause a
problem. We can duplicate this effect in TeraTerm by choosing “Setup-
>Serial Port” and setting the “Data” field to 7 bits, and setting the
“Parity” field to “Space.” (Note: These settings must be returned to
8N1 if you need to start over and send the paper tape file once again).
4) Turn on “Caps Lock” on the keyboard.
5) In response to the “MEMORY SIZE” prompt, key in 20000 and press return.
(You can simply press RETURN and let BASIC determine memory size as
long as you have a PROM installed. Otherwise, BASIC will loop forever
and clobber itself while it looks for the end of RAM!).
6) In response to the “TERMINAL WIDTH” prompt, press RETURN.
7) In response to the “WANT SIN?” prompt, key in “Y” and press return.

- 20 -
At this point, 4K BASIC is up and running! You can type an immediate command
like “PRINT 2+2” and press RETURN. BASIC will display the answer, 4. You can
also type in a program and run it. Note that in these early versions of BA-
SIC, the underscore character “_” is used as the delete key. The underscore
does not cause a visible delete or backspace. The underscore character is
echoed, but it’s up to you to figure out how many characters you have deleted
as you type underscores. Here is a simple program you can key in and “RUN”:
10 FOR I=1 TO 20
20 PRINT “LOOP”;I
30 NEXT I
Loading a BASIC Program from Paper Tape
4K BASIC does not have any sort of “load” command, instead, programs are
“typed” in by transmitting a paper tape which contains a listing of the pro-
gram. At 110 baud, BASIC can keep up with reception of the program. However,
at higher baud rates, BASIC needs a delay after each line is received so that
it can process and store the line of code before more data comes in. For a
fast paper tape reader, consecutive nulls (binary zeros) were often punched
after each line to provide this delay. The nulls were missed while BASIC pro-
cessed a line of code, then when receiving again, BASIC ignored the nulls un-
til valid data at the start of the next line was received.
Rather than inserting nulls after each line in the program source files, Ter-
aTerm can be configured to delay after each line of code to accomplish the
same effect. Go to the “Setup->Serial Port” menu in TeraTerm and enter “300”
in the “msec/line” field. This provides a 0.3 second delay after each line to
give BASIC time to process the line of code.
A number of BASIC programs compatible with 4K BASIC are present in the folder
“BASIC\BASIC programs\4K BASIC.” Follow these steps to try the programs:
1) Type “NEW” followed by RETURN to clear program memory.
2) Use the “File->Send File” menu option in TeraTerm to browse to and
transmit the BASIC program you want to load.
3) The program will display on the screen as BASIC reads it in. The file
transmit dialog box will close before the PC actually finishes trans-
mitting the program. This is normal.
4) Once the program is loaded, type “RUN” followed by RETURN to execute
the program.
5) Repeat steps 1-5 to try another program.
When you are finished, use the TeraTerm “Setup->Serial Port” menu to restore
8N1 and to set the transmit delay back to zero. This helps avoid problems and
confusion with the next exercise you may try!
More Information
Be sure to look at the 1975 BASIC manual (Altair Manuals\BASIC Manual 75.pdf)
for more information about 4K BASIC.

- 21 -
C. Loading and Using 8K BASIC from Cassette
In this demonstration, we will load 8K BASIC Version 4.0 from a cassette tape
file. The 88-ACR cassette interface for the Altair consisted of an audio mod-
ulator/demodulator board that connected to a standard cassette recorder and
to an 88-SIO serial interface board. The SIO board provided the data inter-
face with the Altair bus. The digital content present on the cassette tape
for loading BASIC was the same data and format as used on paper tape.
In this exercise, we will not use the cassette player and tape itself, but
instead send the data contained on the cassette through the same SIO board
and port addresses as used by the 88-ACR cassette interface (the Altair won’t
know the difference!) A separate serial port is used to connect to the opera-
tor’s terminal.
Note: If you have the optional Audio Cassette Interface for the Altair Clone,
this same demonstration is present in the Cassette Interface User’s Manual
using a real cassette and tape player!
Computer Configuration
Serial port 1 on the Altair Clone (the upper DB-25 connector) should be
configured as a 2SIO serial port at octal I/O address 20/21. This port
serves as the operator’s terminal. This is a standard Altair configura-
tion. This is also the default Altair Clone configuration for port 1.
The cassette data comes in on serial port 2 (the lower DB-25 connector)
which should be configured as an SIO board at octal I/O address 6/7. This
is the standard cassette configuration in the Altair. This is also the de-
fault Altair Clone configuration for port 2.
You can confirm or change the Clone’s serial port configuration if needed.
See “Serial Port Menu” in Part 2, “Configuration Monitor” of this manual.
The default baud rate for the cassette SIO port on the Clone is 9600 baud.
While this is much faster than the 300 baud at which the real cassette in-
terface operated, we recommend using 9600 baud for this demonstration.
Buffering in the PC’s serial port drivers and issues with some USB-to-
Serial adapters can make operation at 300 baud problematic.
Terminal Emulator Configuration
The TeraTerm terminal emulator is used to duplicate the functionality of
both the operator’s console and the cassette player. First, start an in-
stance of TeraTerm to use as the operator’s console. Then, start a second
instance of TeraTerm to use as the cassette player. You’ll probably re-
ceive a “Cannot Open Serial Port” error when you open the second TeraTerm
window. In the second window, go to the “Setup->Serial Port” menu and
choose the COM port that serial port 2 from the Clone (the cassette inter-
face) is connected to.
In the console TeraTerm window, choose “Setup->Serial Port” and set the
“Data” field to 7 bits, the “Parity” field to “Space” and verify the baud
rate is 9600. Also confirm that the “Transmit Delay” fields are both set
to zero.
In the cassette TeraTerm window, confirm serial settings of 9600 baud, 8
bits, no parity and one stop bit. Also confirm that the “Transmit Delay”
fields are both set to zero.
To load 8K BASIC, we must first enter a small program via the front panel
called a “bootstrap loader.” The job of the bootstrap loader is to receive a
second loader from the tape called the “checksum loader.” The checksum loader
is at the beginning of the BASIC tape. Once the checksum loader has been read
- 22 -
into memory, the checksum loader then reads in BASIC from the remainder of
the cassette tape.
The code for the bootstrap loader is provided by Altair in the BASIC manual.
Different versions of the bootstrap loader are required based on the version
of BASIC and the type of interface card being used to load BASIC. For this
demonstration, we need the bootstrap loader for the 88-ACR cassette interface
and for 8K BASIC Version 4.0. Following is the bootstrap loader code for this
combination of BASIC and serial port type:
Addr Data
---- ----
Addr Data
---- ----
Addr Data
---- ----
000 041
001 302
002 037
003 061
004 022
005 000
006 333
007 006
010 017
011 330
012 333
013 007
014 275
015 310
016 055
017 167
020 300
021 351
022 003
023 000
Follow these steps to enter the bootstrap loader:
1) Turn the power switch on.
2) Raise and hold the STOP switch in the STOP position, then raise and re-
lease the RESET switch. Finally, release the STOP switch. This performs
a hard reset on the computer and sets all address lights to zero.
3) Put the first data byte in switches 7 through 0, then raise DEPOSIT.
4) Put the data for the next address in switches 7 through 0, then depress
DEPOSIT NEXT.
5) Repeat step 4 until all bytes have been entered.
6) Raise and release RESET to force all address lights back to zero.
7) Verify the data shown on lights D7 through D0 matches the data byte for
the current address. If the value is correct, go to step 9, otherwise
go to step 8.
8) Put the correct value in switches 7 through 0, then raise DEPOSIT.
9) Depress EXAMINE NEXT
10) Repeat steps 7 through 9 to validate entry of the entire program.
Once the bootstrap loader is entered and verified, we’re almost ready to load
BASIC. But first, we must set the run address to zero and then set the front
panel sense switches to tell the checksum loader and BASIC the type of serial
ports in use for the console device and for the load device:
1) Set all address switches to zero.
2) Raise EXAMINE to set all address lights (and the 8080 program counter)
to zero.
3) Raise A12 to the up position. This tells the checksum loader and BASIC
that a 2SIO serial board with one stop bit is the console interface.
4) Raise A9 and A8 to the up position. This tells the checksum loader that
the cassette interface is being used to load BASIC.
Now we’re finally ready to actually load BASIC!

- 23 -
1) Depress RUN to run the bootstrap loader. If the loader was entered cor-
rectly, address lights A10-A9, and A4-A0 should be on.
2) Use the “File->Send File” menu option in the cassette TeraTerm window
to transmit the cassette tape image to the Altair. Browse to and select
the file “8K Basic Ver 4-0.tap” which is located in the “Paper Tape and
Cassette” folder inside the “BASIC” folder. Be sure the “binary” check-
box at the bottom of the send file dialog is checked.
3) Loading BASIC will only take about eight seconds at 9600 baud (instead
of about four minutes at 300 baud!). Once loaded, BASIC initializes and
prompts the user for memory size.
4) Turn on “Caps Lock” on the keyboard.
5) In response to the “MEMORY SIZE” prompt, press RETURN to let BASIC de-
termine the amount of RAM present.
6) In response to the “TERMINAL WIDTH” prompt, press RETURN.
7) In response to the “WANT SIN?” prompt, key in “Y” and press return.
At this point, 8K BASIC is up and running! You can type an immediate command
like “PRINT 2+2” and press RETURN. BASIC will display the answer, 4. You can
also type in a program and run it. Note that in these early versions of BA-
SIC, the underscore character “_” is used as the delete key. The underscore
does not cause a visible delete or backspace. The underscore character is
echoed, but it’s up to you to figure out how many characters you have deleted
as you type underscores. Here is a simple program you can key in and “RUN”:
10 FOR I=1 TO 20
20 PRINT “LOOP”;I
30 NEXT I
Loading a BASIC Program from Cassette Tape
In 8K BASIC, the “CLOAD” and “CSAVE” commands can be used to load and save
programs from cassette. The CSAVE command writes an image of the program as
it exists in RAM to the tape. Since the program in RAM is already pre-
processed and encoded to run, this format loads and saves more quickly than a
printable listing of the program. However, this means the CLOAD command can-
not be used to load a program in printable (ASCII) format – only programs
previously saved with a CSAVE command. Also, since “Extended BASIC” encodes
programs differently in memory than 8K BASIC, files saved to cassette are not
compatible between these two versions of BASIC.
The file “BASIC\BASIC Programs\8K BASIC\cassetteDemo.tap" is an image of a
cassette tape created by saving programs from 8K BASIC using the CSAVE com-
mand. The tape contains two BASIC games, hangman and lunar lander.
To load the hangman program type: CLOAD "H"
or...
To load the lunar lander program type: CLOAD "L"
After typing the desired load command and pressing return, use the “File-
>Send File" menu option in the cassette TeraTerm window to send the file
"cassetteDemo.tap" to the Altair. BASIC scans the data coming in from the
cassette looking for the one character file name specified in the CLOAD com-
mand ("H" or "L"), then loads that program.
You’ll find that even at 9600 baud, the CLOAD command can keep up without re-
quiring transmit delays in the file transfer. Since the program was saved to

- 24 -
tape as a RAM image of the program, BASIC does not have to encode the program
as it is received. Pretty impressive speed for an old computer and software!
Saving a BASIC Program to Cassette Tape
Programs can be added to an existing tape file, or written to a new file as
follows:
1) Use the "File->Log..." menu option in the cassette TeraTerm window to
specify a file to write as the cassette tape. Check the "Binary" check-
box. Check the "Append" check box if you want to add to an existing
cassette tape. Click "Save" to start the file save process.
2) Type CSAVE "x" in BASIC where x is a one character "file name" that is
different than any other file name on the tape.
3) After the CSAVE operation completes and BASIC displays "OK," click on
the TeraTerm:Log icon on the Windows taskbar to display the TeraTerm
Log dialog box. Choose "Close" to finish the file save operation.
Loading a BASIC Program through the Console
The majority of BASIC programs you’ll find are not in 8K compatible cassette
format, but instead, are provided as a simple ASCII listing of the program.
The same technique used to load programs through the console serial port in
4K BASIC can be used to load these programs into 8K BASIC. For more informa-
tion on why the following steps work, see “Loading a BASIC Program from Paper
Tape” in the 4K BASIC demonstration.
Choose the “Setup->Serial Port” menu option in the console TeraTerm window
and enter “300” in the “msec/line” field. This provides a 0.3 second delay
after each line to give BASIC time to process the line of code. (You may have
to increase the delay to 500 msec/line to load larger programs since the line
encoding process gets slower as the program size increases.)
Program files compatible with 8K BASIC are present in the “4K BASIC,” “8K BA-
SIC” and the “Games (Creative Comp)” folders inside the ““BASIC\BASIC pro-
grams” folder. Note, most of the programs in the Games folder will work in 8K
BASIC, but not all of them. The 72 character line length limit in 8K BASIC is
typically the culprit. Follow these steps to try the programs:
1) Type “NEW” followed by RETURN to clear program memory.
2) Use the “File->Send File” menu option in TeraTerm to browse to and
transmit the BASIC program you want to load.
3) The program will display on the screen as BASIC reads it in. The file
transmit dialog box will close before the PC actually finishes trans-
mitting the program. This is normal.
4) Once the program is loaded, type “RUN” followed by RETURN to execute
the program.
5) Repeat steps 1-5 to try another program.
When you are finished, use the TeraTerm “Setup->Serial Port” menu to restore
8N1 and to set the transmit delay back to zero. This helps avoid problems and
confusion with the next exercise you may try!
More Information
Be sure to look at the 1977 BASIC manual (Altair Manuals\BASIC Manual 77.pdf)
for more information about 8K BASIC.

- 25 -
D. Loading and Using Disk BASIC from Floppy Disk
In this demonstration, we will boot and use Altair Disk BASIC version 5 (spe-
cifically version 300-5-F).
Computer Configuration
Serial port 1 on the Altair Clone (the upper DB-25 connector) should be
configured as a 2SIO serial port at octal I/O address 20/21. This port
serves as the operator’s terminal. This is a standard Altair configura-
tion. This is also the default Altair Clone configuration for port 1. You
can confirm or change the Clone’s serial port configuration if needed. See
“Serial Port Menu” in Part 2, “Configuration Monitor” of this manual.
To boot a floppy disk, the “Disk Boot Loader” (DBL) PROM was typically in-
stalled in the Altair. Refer to the “PROM Menu” section in Part 2, “Con-
figuration Monitor” to see if this PROM is already installed in the Clone.
If not, follow the instructions to “Load New PROM Content” and install the
.hex file “ROMS\DBL.HEX” into one of the empty PROM slots.
Follow the “Insert Floppy” instructions in the “Floppy Disk Menu” section
of Part 2, “Configuration Monitor” to insert the floppy image “BA-
SIC\Floppy Disk\Games on 300-5-F.dsk”. Either load the floppy directly
into drive 0, or use the “Change Drive Assignment” menu option after up-
loading to assign the floppy to drive 0. Once you have uploaded the flop-
py, you do not need to repeat this step unless you over-write the floppy
with other content.
Follow these steps to boot Altair BASIC from floppy disk:
1) Turn the power switch on.
2) Raise and hold the STOP switch in the STOP position, then raise and re-
lease the RESET switch. Finally, release the STOP switch. This performs
a hard reset on the computer and sets all address lights to zero.
3) Set switches A15-A8 to the up position (one) and switches A7-A0 to the
down position (zero). This represents the start address of the Disk
Boot Loader (177400 octal or FF00 hex).
4) Raise the EXAMINE switch to load this address into the processor.
5) Set switches A15-A13 to the down position. This leaves the first four
switches (A15-A12) set to 0001. This tells BASIC the console terminal
is connected to a 2SIO board with one stop bit.
6) Depress the RUN switch to boot the Altair from the BASIC floppy.
7) In response to the “MEMORY SIZE” prompt, press RETURN to let BASIC de-
termine the amount of RAM present.
8) In response to the “LINEPRINTER” prompt, key in “O” (capital letter
“oh”) and press RETURN.
9) In response to “HIGHEST DISK NUMBER” key in “2” and press RETURN.
10) In response to “HOW MANY FILES” key in “4” and press RETURN.
11) In response to “HOW MANY RANDOM FILES” key in “4” and press RETURN.
At this point, Disk BASIC is up and running! You can type an immediate com-
mand like “PRINT 2+2” and press RETURN. BASIC will display the answer, 4. In
this version of BASIC, the backspace key performs the normal “destructive
backspace” to which you are accustomed.

- 26 -
Loading a BASIC Program from Disk
Before a floppy disk can be used with BASIC, it must be mounted. Type “MOUNT
0” to tell BASIC to mount the floppy that is in drive zero. After the command
completes (it may take ten or more seconds to complete), type “FILES” to list
the files present on the disk.
You can load a program with the “LOAD” command, or load and run a program
with the “RUN” command. The file name specified for either command must be
contained in quotes and is case-sensitive. For example, to load the StarTrek
game, type the following:
LOAD “STARTREK”
and press RETURN. After the program loads, you can type “LIST” to look at the
program or “RUN” to execute the program.
Loading a BASIC Program through the Console
You can also load a BASIC program through the console in the same manner as
detailed in the 4K BASIC and 8K BASIC demonstrations. This allows you to load
new programs from a PC and then save the program to the floppy disk.
The “SAVE” command writes a program in memory to the floppy disk. For exam-
ple, to save a program in memory to the file name “NEWPROG,” type the follow-
ing:
SAVE “NEWPROG”
and press RETURN to write the program to the floppy disk.
If you have modified a floppy with new content and you want to archive the
floppy to your PC, follow the “Save Floppy Content to PC” instructions in the
“Floppy Disk Menu” section of Part 2, “Configuration Monitor” to write the
floppy image to a file on your PC.
More Information
Be sure to look at the 1977 BASIC manual (Altair Manuals\BASIC Manual 77.pdf)
for more information about all versions of Altair BASIC.

- 27 -
E. Loading and Using Altair DOS
In this demonstration, we will boot and use Altair DOS version 1.0. Announced
in 1975, but not delivered until 1977, Altair DOS was never widely adopted.
By the time it was released, the much easier to use and more flexible CP/M
operating system was rapidly gaining popularity.
Computer Configuration
Serial port 1 on the Altair Clone (the upper DB-25 connector) should be
configured as a 2SIO serial port at octal I/O address 20/21. This port
serves as the operator’s terminal. This is a standard Altair configura-
tion. This is also the default Altair Clone configuration for port 1. You
can confirm or change the Clone’s serial port configuration if needed. See
“Serial Port Menu” in Part 2, “Configuration Monitor” of this manual.
To boot a floppy disk, the “Disk Boot Loader” (DBL) PROM was typically in-
stalled in the Altair. Refer to the “PROM Menu” section in Part 2, “Con-
figuration Monitor” to see if this PROM is already installed in the Clone.
If not, follow the instructions to “Load New PROM Content” and install the
.hex file “ROMS\DBL.HEX” into one of the empty PROM slots.
Follow the “Insert Floppy” instructions in the “Floppy Disk Menu” section
of Part 2, “Configuration Monitor” to insert the floppy image “Altair DOS
(with FORTRAN)\AltairDOS.dsk”. Either insert the floppy directly into
drive 0, or use the “Change Drive Assignment” menu option after uploading
to assign the floppy to drive 0. Once uploaded, you do not need to repeat
this step unless you over-write the floppy with other content.
Follow these steps to boot Altair DOS from floppy disk:
1) Turn the power switch on.
2) Raise and hold the STOP switch in the STOP position, then raise and re-
lease the RESET switch. Finally, release the STOP switch. This performs
a hard reset on the computer and sets all address lights to zero.
3) Set switches A15-A8 to the up position (one) and switches A7-A0 to the
down position (zero). This represents the start address of the Disk
Boot Loader (177400 octal or FF00 hex).
4) Raise the EXAMINE switch to load this address into the processor.
5) Set switches A15-A13 to the down position. This leaves the first four
switches (A15-A12) set to 0001. This tells Altair DOS the console ter-
minal is connected to a 2SIO board with one stop bit.
6) Depress the RUN switch to boot from the Altair DOS floppy.
7) Turn on “Caps Lock” on the keyboard.
8) In response to the “MEMORY SIZE” prompt, press RETURN to let Altair DOS
determine the amount of RAM present.
9) In response to the “INTERRUPTS” prompt, key in “Y” (must be capital
“Y”) and press RETURN.
10) In response to “HIGHEST DISK NUMBER” key in “2” and press RETURN.
11) In response to “HOW MANY FILES” key in “4” and press RETURN.
12) In response to “HOW MANY RANDOM FILES” key in “4” and press RETURN.
At this point, Altair DOS is up and running! The DOS prompt is a period. All
commands must be in upper case. When backspace is typed to correct an error,
Altair DOS echoes each character as it is deleted.

- 28 -
Before the content of the floppy disk can be used, the disk must be mounted.
Type “MNT 0” to mount the floppy on drive 0. When the command completes
(could take ten or more seconds), type “DIR 0” at the prompt to see a direc-
tory of files on the disk.
Running a Program from Disk
Files starting with “#” are executable files. To run an executable file, sim-
ply type the filename without the leading “#” and press RETURN. For example,
the program “#PRIME” computes and displays prime numbers between 1 and 200.
To run the program, type “PRIME” and press RETURN.
Editing a Source File
Files staring with “&” are typically source files. To view or edit a source
file, run the editor by typing “EDIT filename” where filename is the name of
the source file without the leading “&”. For example, to edit the source file
for PRIME (&PRIME), type “EDIT PRIME 0” and press return. The trailing zero
is the drive number the file is on. If you forget to specify the drive num-
ber, you will be prompted to enter the drive number on a separate line.
The editor’s prompt is an asterisk (“*”). To view a file’s full content, type
“P” (for Print) and press RETURN. To exit the editor without saving changes,
type “Q” and press RETURN. To exit and save changes, type “E” followed by RE-
TURN. Refer to the Altair DOS user’s manual for more information about using
the editor (see “More Information,” below).
Assembling and Linking an Assembly Language Program
The file “&ECHO” is the source file for an assembly language program that
echoes typed characters back to the screen through serial port 2 (not the
main console port). You can view the source file by typing “EDIT ECHO 0” and
then pressing “P” at the editor’s prompt as detailed above for “PRIME.”
To assemble the program, type “ASM” and press RETURN. When prompted for the
file name, type “ECHO 0” (without the leading “&”) and press RETURN. The as-
sembler runs, then prompts if you want to assemble another program. Type “N”
and press return.
The assembler outputs a relocatable object file that must be run through the
linker before it can be executed. Object files are identified by a leading
“*”. Type “LINK” followed by RETURN to run the linker. The linker’s prompt is
an asterisk (“*”). At the prompt, type “L ECHO 0” to load the relocatable ob-
ject file for ECHO into memory. The default load address is octal 24000. Type
“E” at the next prompt to exit the linker.
At this point, the ECHO program is in memory at octal address 24000. Immedi-
ately use the “SAV” command to write the program from memory into an executa-
ble file:
1) Type “SAV ECHO 0” and press RETURN.
2) At the “ENTER LOW ADDRESS” prompt, type 24000 and press RETURN.
3) At the “ENTER HIGH ADDRESS” prompt, type 24100 and press RETURN.
4) At the “ENTER START ADDRESS” prompt, type 24000 and press RETURN.
The SAV command creates the executable file “#ECHO”. To use the ECHO program,
you’ll need to start a second instance of TeraTerm connected to serial port 2
on the Altair Clone. See the 8K BASIC demonstration for how to setup serial
port 2 for the cassette – the steps required to use the ECHO program are the
same.

- 29 -
To run the program, type “ECHO” followed by RETURN on the main console.
Switch to the second TeraTerm window and begin typing. Everything typed will
be echoed. To exit the program, return to the console window and type CTRL-C.
Compiling and Linking a FORTRAN Program
Microsoft’s FORTRAN compiler (F80), macro assembler (M80) and linker (L80)
are present on the Altair DOS disk. Note that these programs do not use the
leading character file naming convention that Altair DOS does, so when a
source file name is specified, the leading “&” must be included as part of
the file name. Similarly, these programs do not precede object file names
with an “*”, but instead, concatenate “REL” to the end of the file name.
To compile the PRIME program, type “F80” to start the FORTRAN compiler. At
the “*” prompt, type “PRIME=&PRIME” and press RETURN to compile the program
(note the leading “&” must be specified for the source file). When the prompt
returns, type CTRL-C to exit the compiler. The object file name output by the
compiler consists of the first five characters of the specified object file
name (“PRIME”) concatenated with the “REL” extension at the end (“PRIMEREL”).
To link the PRIME program, type “L80” to start the linker. At the “*” prompt,
type the object file name, “PRIME” followed by RETURN to load the object
file. (The “REL” extension is assumed if not specified.) When the prompt re-
turns, type “/E” and RETURN to link the object file with the FORTRAN librar-
ies, load the executable into memory, and exit to Altair DOS. This step may
take a while.
At this point, the PRIME program is in memory and must be saved to a file to
create the executable program. Immediately use the “SAV” command to write the
program from memory into an executable file. You will need to reference ad-
dress information displayed by the linker after the “/E” command completed.
1) Type “SAV PRIME 0” and press RETURN.
2) At the “ENTER LOW ADDRESS” prompt, type the first number next to the
word “Data”. In this case, type 17100 and press RETURN
3) At the “ENTER HIGH ADDRESS” prompt, type the second number in the group
of three numbers in brackets (e.g., [017177 034654 28]). In this case,
type 34654 and press RETURN.
4) At the “ENTER START ADDRESS” prompt, type the first number in the group
of three numbers in brackets. In this case, type 17177 and press RE-
TURN.
The SAV command creates the executable file “#PRIME”. To run the program,
simply type “PRIME” at the DOS prompt and press RETURN.
More Information
Be sure to look at the Altair DOS manual (Altair Manuals\Altair DOS User's
Manual.pdf) for more information about using Altair DOS.

- 30 -
F. Loading and Using CP/M
In this demonstration, we will boot and demonstrate a few commands running
CP/M version 2.2 for the Altair.
Computer Configuration
Serial port 1 on the Altair Clone (the upper DB-25 connector) should be
configured as a 2SIO serial port at octal I/O address 20/21. This port
serves as the operator’s terminal. This is a standard Altair configura-
tion. This is also the default Altair Clone configuration for port 1. You
can confirm or change the Clone’s serial port configuration if needed. See
“Serial Port Menu” in Part 2, “Configuration Monitor” of this manual.
To boot a floppy disk, the “Disk Boot Loader” (DBL) PROM was typically in-
stalled in the Altair. Refer to the “PROM Menu” section in Part 2, “Con-
figuration Monitor” to see if this PROM is already installed in the Clone.
If not, follow the instructions to “Load New PROM Content” and install the
.hex file “ROMS\DBL.HEX” into one of the empty PROM slots.
Follow the “Insert Floppy” instructions in the “Floppy Disk Menu” section
of Part 2, “Configuration Monitor” to insert the floppy image “CPM
2.2\cpm56k.dsk”. Either insert the floppy directly into drive 0, or use
the “Change Drive Assignment” menu option after uploading to assign the
floppy to drive 0. Once uploaded, you do not need to repeat this step
unless you over-write the floppy with other content.
Follow these steps to boot CP/M 2.2 from floppy disk:
1) Turn the power switch on.
2) Raise and hold the STOP switch in the STOP position, then raise and re-
lease the RESET switch. Finally, release the STOP switch. This performs
a hard reset on the computer and sets all address lights to zero.
3) Set switches A15-A8 to the up position (one) and switches A7-A0 to the
down position (zero). This represents the start address of the Disk
Boot Loader (177400 octal or FF00 hex).
4) Raise the EXAMINE switch to load this address into the processor.
5) Depress the RUN switch to boot the Altair from the BASIC floppy.
CP/M displays a welcome message and then displays the command prompt (“A>”).
Commands and file names are not case sensitive. The backspace key performs
the normal “destructive backspace” to which you are accustomed.
To see a directory of files on the disk, type “DIR” followed by RETURN. Files
with an extension of “COM” are executable programs. To run a program, simply
type its name (without the “COM” extension) at the command prompt. For exam-
ple, type “LS” and RETURN to run the program “LS.COM”. This program displays
a directory listing in sorted order and includes file size information.
To view the contents of a source or other printable file, use the “TYPE” com-
mand followed by the file name to display. For example, key in “TYPE
MITSCNVT.TXT” to display the content of the file MITSCNVT.TXT. Use CTRL-S to
successively pause and resume display of screen output. The program “VIEW”
also displays file content but pauses after each screen of content. The pro-
gram “DUMP” can be used to display the content of non-printable files.
The “ERA” command is used to erase a file. The “REN” command is used to re-
name a file. For example, to rename the file “TEST.DAT” to “NAMES.DAT”, type
“REN NAMES.DAT=TEST.DAT” at the command prompt. The program “PIP” (Peripheral

- 31 -
Interchange Program) allows copying of files on the same disk, between disks,
between devices, between devices and disks, etc.
The program “SURVEY” displays information about the system including memory
usage, I/O port usage and disk space. The program “WM” (Word Master) is an
easy to use full-screen text editor. The program “LADDER” is a precursor to
games like “Super-Mario.”
The program “MBASIC” is Microsoft BASIC-80 Version 5.21. ASM and MAC are as-
semblers from Digital Research, Inc. (the author of CP/M). M80 and L80 are
Microsoft’s 8080 assembler and linker.
Assembling and Running Programs
The CP/M disk used in this demonstration has very little free space available
for program development. You can create a more useful development disk by de-
leting the files that aren’t required. For example, here is a directory list-
ing of a disk tailored to use the ASM and MAC assemblers. This disk leaves
204K bytes available for program development.
A>LS
Name Ext Bytes Name Ext Bytes Name Ext Bytes Name Ext Bytes
ASM COM 8K | LS COM 4K | PIP COM 8K | WM COM 12K
DDT COM 6K | MAC COM 12K | STAT COM 6K | WM HLP 4K
DUMP COM 2K | NSWP COM 12K | SUBMIT COM 4K | XSUB COM 2K
FORMAT COM 2K | PCGET COM 2K | SURVEY COM 2K
LOAD COM 2K | PCPUT COM 2K | VIEW COM 2K
18 File(s), occupying 92K of 296K total capacity
46 directory entries and 204K bytes remain on A:
A>
The programs PCGET and PCPUT make it easy to transfer files from a PC into
CP/M (PCGET) and from CP/M to a PC (PCPUT). For example, you might start with
a program source file found on the internet, then use a Windows program like
“notepad” to edit the file. When ready to assemble the program, use PCGET on
the Altair to move the source file from the PC to the Altair, then assemble
the program using ASM. Repeat the edit and transfer cycle until the program
works as required. PCPUT can then be used, for example, to save the program
listing and/or executable file back to the PC.
You can archive an image of the floppy you’ve created back to your PC if de-
sired. See “Save Floppy Content to PC” in the “Floppy Disk Menu” section of
Part 2, “Configuration Monitor”
More Information
These examples just begin to scratch the surface of the huge collection of
CP/M software that is available. Large repositories of CP/M software are
available on the internet. For further reading, start with the CP/M manual
(“CPM 22 Manual.pdf”) in the “Altair Manuals” directory.

- 32 -
G. Loading and Using Timesharing BASIC
In this demonstration, we will boot and use Altair Timesharing BASIC Ver 1.1.
Computer Configuration
The two serial ports on the back of the Clone can service two user termi-
nals for Timesharing BASIC. Both serial ports must be configured as 2SIO
ports. You can confirm or change the serial port configuration as needed.
See “Serial Port Menu” in Part 2, “Configuration Monitor” of this manual.
If you have the optional Cassette Interface for the Clone, it adds a third
serial port on the rear panel so you can try three simultaneous users!
To boot a floppy disk, the “Disk Boot Loader” (DBL) PROM was typically in-
stalled in the Altair. Refer to the “PROM Menu” section in Part 2, “Con-
figuration Monitor” to see if this PROM is already installed in the Clone.
If not, follow the instructions to “Load New PROM Content” and install the
.hex file “ROMS\DBL.HEX” into one of the empty PROM slots.
Follow the “Insert Floppy” instructions in the “Floppy Disk Menu” section
of Part 2, “Configuration Monitor” to insert the floppy image file “BA-
SIC\Floppy Disk\Timesharing BASIC\TS BASIC 1-1.dsk”. Either load the
floppy directly into drive 0, or use the “Change Drive Assignment” menu
option after uploading to assign the floppy to drive 0. Once you have up-
loaded the floppy, you do not need to repeat this step unless you over-
write the floppy with other content.
Terminal Emulator Configuration
The TeraTerm terminal emulator is used to duplicate the functionality of
two user terminals. First, start an instance of TeraTerm to use as the op-
erator’s console and terminal #1, then start a second instance of TeraTerm
to use as terminal #2. You’ll probably receive a “Cannot Open Serial Port”
error when you open the second TeraTerm window. In the second window, go
to the “Setup->Serial Port” menu and choose the COM port that second se-
rial port from the Clone is connected to.
In the terminal #1 TeraTerm window, choose “Setup->Serial Port” and set
the “Data” field to 7 bits and the “Parity” field to “Space.” This step is
not critical, but it prevents garbage characters from displaying at the
end of each line during initialization. These garbage characters occur for
the same reasons detailed in the 4K BASIC demonstration.
Follow these steps to boot Altair Timesharing BASIC from floppy disk:
1) Turn the power switch on.
2) Raise and hold the STOP switch in the STOP position, then raise and re-
lease the RESET switch. Finally, release the STOP switch. This performs
a hard reset on the computer and sets all address lights to zero.
3) Set switches A15-A8 to the up position (one) and switches A7-A0 to the
down position (zero). This represents the start address of the Disk
Boot Loader (177400 octal or FF00 hex).
4) Raise the EXAMINE switch to load this address into the processor.
5) Set switches A15-A13, and A11-A9 to the down position. This leaves the
first four switches (A15-A12) and the second four switches (A11-A8)
each set to 0001. This tells BASIC the console terminal is connected to
a 2SIO board with one stop bit.
6) Depress the RUN switch to boot the Altair from the BASIC floppy.
Immediately upon booting, Timesharing BASIC displays version information and
then prompts for configuration. You’ll want to turn on “Caps Lock” on the

- 33 -
keyboard. Also, to delete characters, the BACK SPACE button on the keyboard
does not work as expected, instead, use the DELETE key to the right of the
ENTER key. As a character is deleted, BASIC echoes a “\” followed by the
character(s) deleted for each subsequent delete press.
In response the “Reconfigure (Y, N, L)?” prompt, type “L” for “List” and
press return. This displays the current interrupt assignments. You’ll notice
the disk is at level 0 (highest priority) and the 60hz real-time clock inter-
rupt is at level 1 (the next highest priority). Interrupt levels 2 through 5
each have two serial port devices assigned to them. For example, the values
16 and 18 at level 2 are the I/O address of the two terminals assigned to in-
terrupt level 2. These are the same I/O addresses of the two serial ports
used in the Altair Clone.
The “Reconfigure (Y, N, L)?” prompt is displayed again. This time, type “N”
and press return to continue with initialization.
1) In response to the “MEMORY SIZE” prompt, press RETURN to let BASIC de-
termine the amount of RAM present.
2) In response to the “NUMBER OF USERS” prompt, type 2 and press RETURN.
3) In response to “TERMINAL ADDRESS” type in “16” and press RETURN.
4) In response to “REGION SIZE” TYPE in “18K” and press RETURN.
5) In response to “TERMINAL ADDRESS” type in “18” and press RETURN.
6) In response to “REGION SIZE” TYPE in “18K” and press RETURN.
7) In response to the “MOUNT PASSWORD” prompt, key in “PASSWORD” and press
RETURN. The password can be any string up to eight characters in length
and is required to mount or dismount a disk.
At this point, Timesharing BASIC displays version information once again, but
this time, on both user terminals. You can type an immediate command like
“PRINT 2+2” and press RETURN on either terminal window and BASIC will display
the answer.
Loading a BASIC Program from Disk
Before a floppy disk can be used with BASIC, it must be mounted. Type “MOUNT
0” on either terminal to tell BASIC to mount the floppy that is in drive ze-
ro. BASIC will ask for the “MOUNT PASSWORD.” Respond with the password pro-
vided in step 7, above. After the command completes (it may take ten or more
seconds to complete), type “FILES” to list the files present on the disk.
You can load a program with the “LOAD” command, or load and run a program
with the “RUN” command. The file name specified for either command must be
contained in quotes and is case-sensitive. For example, to load the StarTrek
game, type the following:
LOAD “STARTREK”
and press RETURN. After the program loads, you can type “LIST” to look at the
program or “RUN” to execute the program. Go ahead and repeat the load process
on the second terminal while the first terminal continues to list or run the
program. Now you’ve got two users independently using BASIC at the same time
on an Altair 8800!
Loading a BASIC Program through the Terminal Serial Port
You can also load a BASIC program through a terminal port in the same manner
as done in the 4K BASIC and 8K BASIC demonstrations. This allows you to load

- 34 -
new programs from a PC and then save the program to the floppy disk. However,
Timesharing BASIC cannot keep up with as fast a serial transfer rate as other
versions of BASIC. Choose the “Setup->Serial Port” menu option in either Ter-
aTerm window and enter “10” in the “msec/char” field and “300” in the
“msec/line” field. This slows the character transfer rate to about 100 char-
acters per second and provides a 0.3 second delay after each line to give BA-
SIC time to process the line of code. Even at this slower rate, it is impor-
tant that there is no activity on the second user terminal while downloading
a program in this manner. Increase the msec/char field to 20 if you experi-
ence load problems.
A number of BASIC programs are present in the folders found in the “BA-
SIC\BASIC programs” folder. Follow these steps to try the programs:
1) Type “NEW” followed by RETURN to clear program memory.
2) Use the “File->Send File” menu option in TeraTerm to browse to and
transmit the BASIC program you want to load.
3) The program will display on the screen as BASIC reads it in. The file
transmit dialog box will close before the PC actually finishes trans-
mitting the program. This is normal.
Once a program is in memory, you can save the program to floppy disk using
the “SAVE” command. For example, to save a program in memory to the file name
“NEWPROG,” type the following:
SAVE “NEWPROG”
and press RETURN to write the program to the floppy disk.
If you have modified a floppy with new content and you want to archive the
floppy to your PC, follow the “Save Floppy Content to PC” instructions in the
“Floppy Disk Menu” section of Part 2, “Configuration Monitor” to write the
floppy image to a file on your PC.
More Information
Be sure to look at the Timesharing BASIC manual (Altair Manuals\Timesharing
BASIC 1.0.pdf) for more information.
