Apple Media Toolkit
User Manual: Apple MediaToolkit
Open the PDF directly: View PDF ![]() .
.
Page Count: 122 [warning: Documents this large are best viewed by clicking the View PDF Link!]

Getting Started
With Apple Media Tool
K Apple Computer, Inc.
©


vii
Getting Started With Apple Media Tool
Who should read this guide
Preface

What’s covered in this guide
m
m
m
What’s not covered in this guide
m
m
viii Preface

For more information
mApple Media Tool Reference Guide
mApple Media Tool Addendum
m
m
m
mMultimedia Demystified: A Guide to the World of Multimedia from Apple
Computer, Inc.
mQuickTime: The Official Guide for Macintosh Users,
ix
Preface

1
About Apple Media Tool
m
m
m
m
m
1Introduction to Apple Media Tool

Benefits of Apple Media Tool
Anyone can be a multimedia designer
An easy-to-learn and easy-to-use graphical user interface
A powerful multimedia authoring environment
m
m
m
m
m
2Chapter 1

Workgroup support
AppleScript support
Components of Apple Media Tool projects
m
m
m
m
m
m
m
3
Introduction to Apple Media Tool

Media
Projects
Screens
Maps
4Chapter 1

Objects
Events
5
Introduction to Apple Media Tool

Actions
Fundamental elements of the Apple Media Tool user interface
m
m
m
m
m
m
m
6Chapter 1
Tool palette
m
m
m
m
m
m
Map window
7
Introduction to Apple Media Tool
Display window
Browser miniwindow
8Chapter 1
Media miniwindow
Info miniwindow
9
Introduction to Apple Media Tool
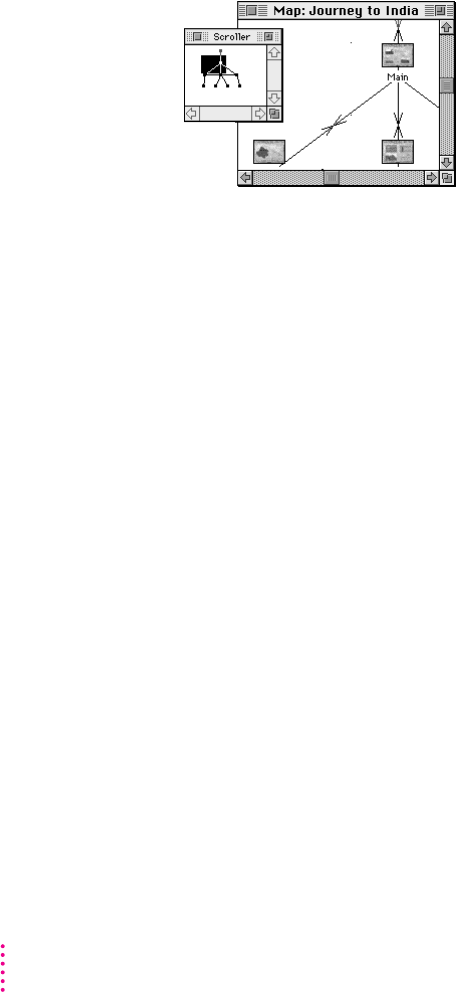
Scroller miniwindow
Apple Media Tool Programming Environment
Project enhancement
m
m
m
m
10 Chapter 1

Extension of Apple Media Tool
The multimedia authoring process
m
m
m
11
Introduction to Apple Media Tool

Multimedia producers Media creators Programmers
Plan the product X X X
Assemble the media X
Create the project X
Enhance the project X
Compile the project X X
Test the title X X
Distribute the title X
Plan the product
m
m
m
m
m
Assemble the media
12 Chapter 1

Apple Media Tool Reference
Create the project
m
m
m
m
m
m
Enhance the project
Compile the project into a title
13
Introduction to Apple Media Tool

Test the title
Distribute the title
m
m
m
14 Chapter 1

15
Hardware requirements
Hardware requirements for using Apple Media Tool
m
m
m
m
2Installing Apple Media Tool

Hardware requirements for playing Mac OS–based titles
m
m
m
Hardware requirements for playing Microsoft Windows–based titles
m
m
m
m
Software requirements
Software requirements for using Apple Media Tool
16 Chapter 2

Software requirements for playing Mac OS–based titles
m
m
m
Software requirements for playing Microsoft Windows–based titles
m
m
m
What’s included with Apple Media Tool
Apple Media
To ol 2. 0
Apple Media Tool software
m
m
m
17
Installing Apple Media Tool

m
m
System software
m
m
m
m
m
m
18 Chapter 2
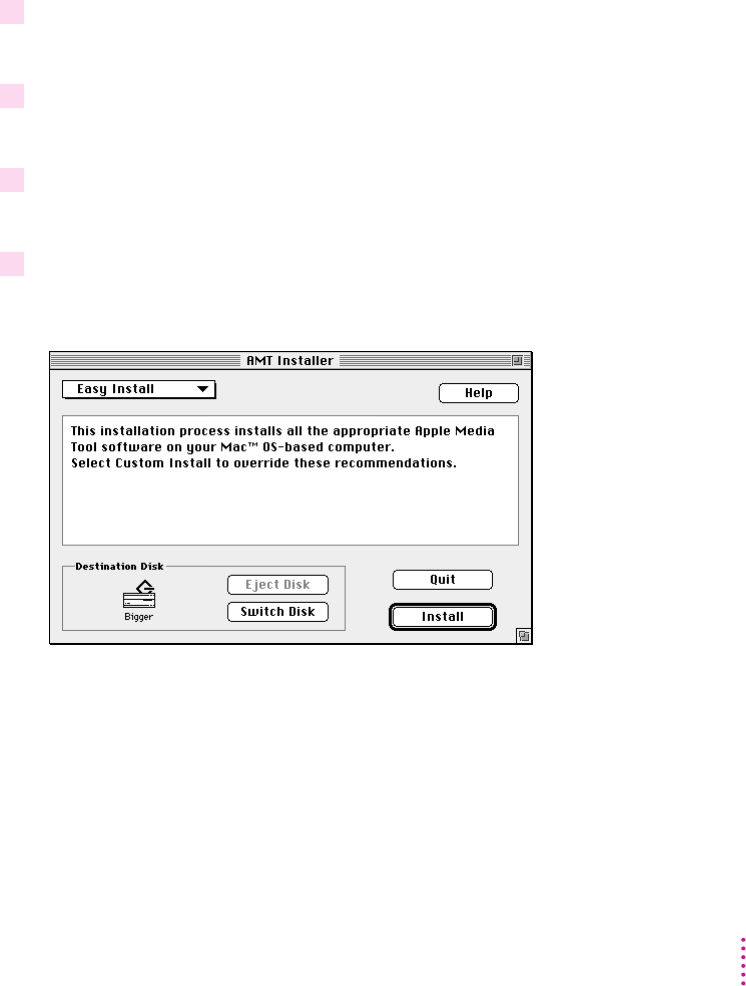
Installing Apple Media Tool software
Installing all appropriate Apple Media Tool software
1 Insert the
Apple Media Tool 2.0
disc into your CD-ROM drive.
Apple Media Tool 2.0
2 Double-click the
Apple Media Tool 2.0
disc icon.
3 Double-click the Installer application program icon.
4 Click Continue.
19
Installing Apple Media Tool

5 Click Install.
6 Click Restart.
Custom installing Apple Media Tool, AppleScript, or QuickTime
software
1 Insert the
Apple Media Tool 2.0
disc into your CD-ROM drive.
Apple Media Tool 2.0
2 Double-click the
Apple Media Tool 2.0
disc icon.
3 Double-click the Installer application program icon.
20 Chapter 2
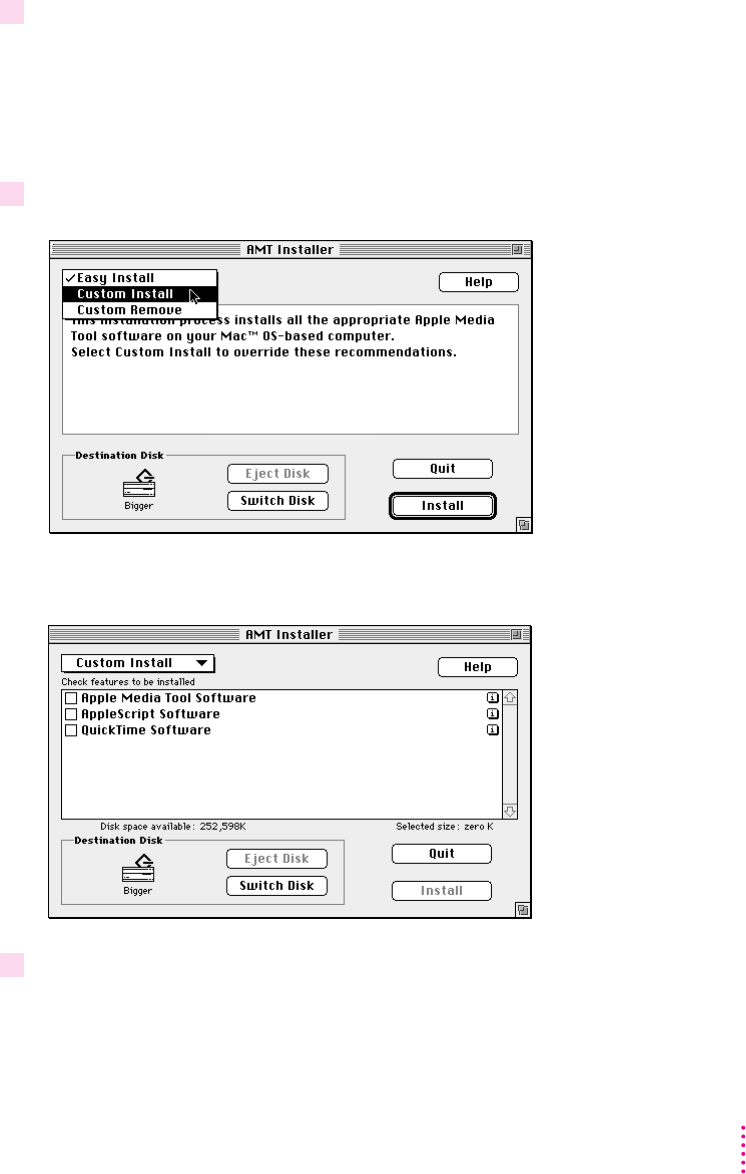
4 Click Continue.
5 From the pop-up menu at the upper left of the dialog box, choose Custom Install.
6 Click any of the Apple Media Tool, AppleScript, or QuickTime checkboxes to select them.
21
Installing Apple Media Tool

7 Click Install.
8 Click Restart.
Swapping the minimal engine and the standard engine
1 If you have not already done so, install Apple Media Tool following the instructions
presented earlier in this chapter.
2 Quit Apple Media Tool if it is open.
3 Double-click the Apple Media Tool 2.0 folder icon.
4 Double-click the second Apple Media Tool folder icon.
22 Chapter 2

5 Drag the AMT Standard Engine icon to the AMT Standard Engine Folder.
6 Double-click the AMT Minimal Engine Folder icon.
7 Drag the AMT Minimal Engine icon to the Apple Media Tool folder that contains the Apple
Media Tool application program.
1 Double-click the Runtime Maker folder icon.
2 Drag the Codes folder icon to the Standard Codes Folder.
3 Double-click the Minimal Codes Folder icon.
4 Drag the icon for this Codes folder to the Runtime Maker folder.
23
Installing Apple Media Tool

25
m
m
m
m
m
m
3Building a Sample Project

About the sample project
Apple Media Tool 2.0
26 Chapter 3
Intro screen
27
Building a Sample Project
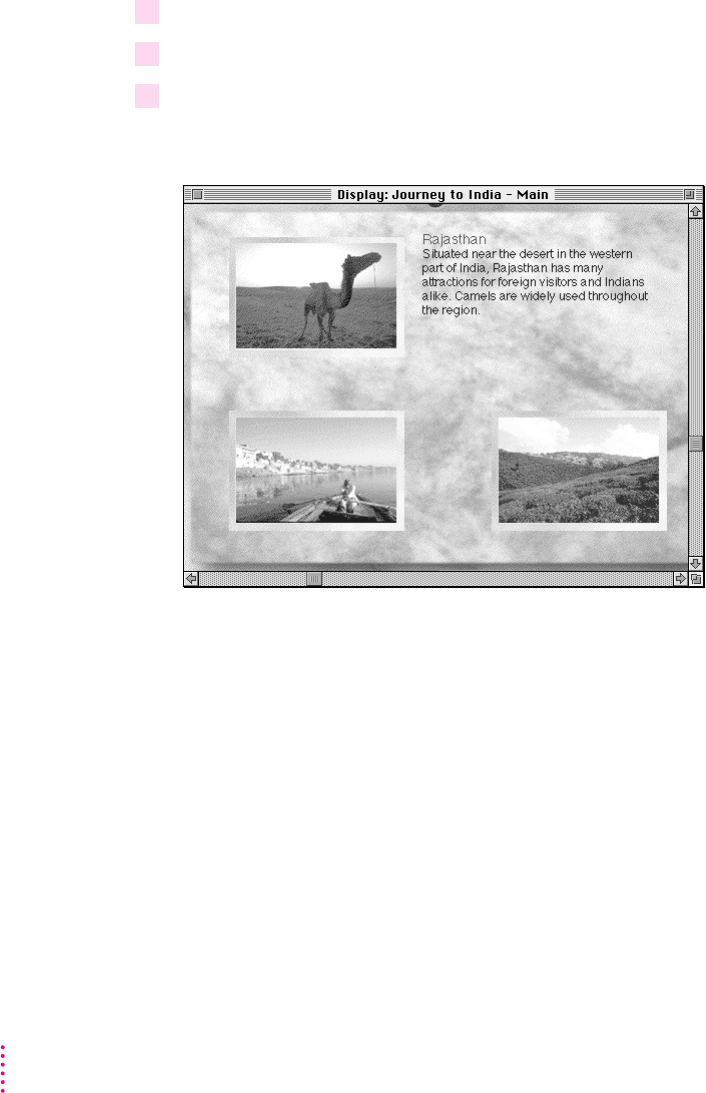
Main screen
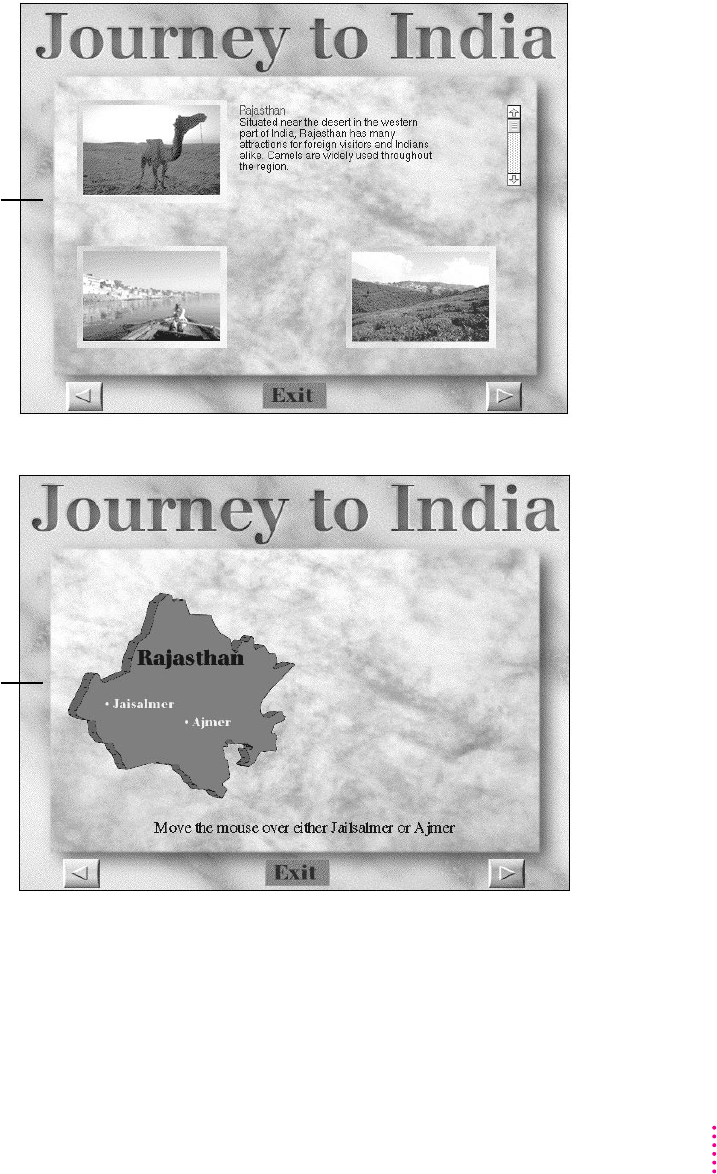
Rajasthan screen
28 Chapter 3
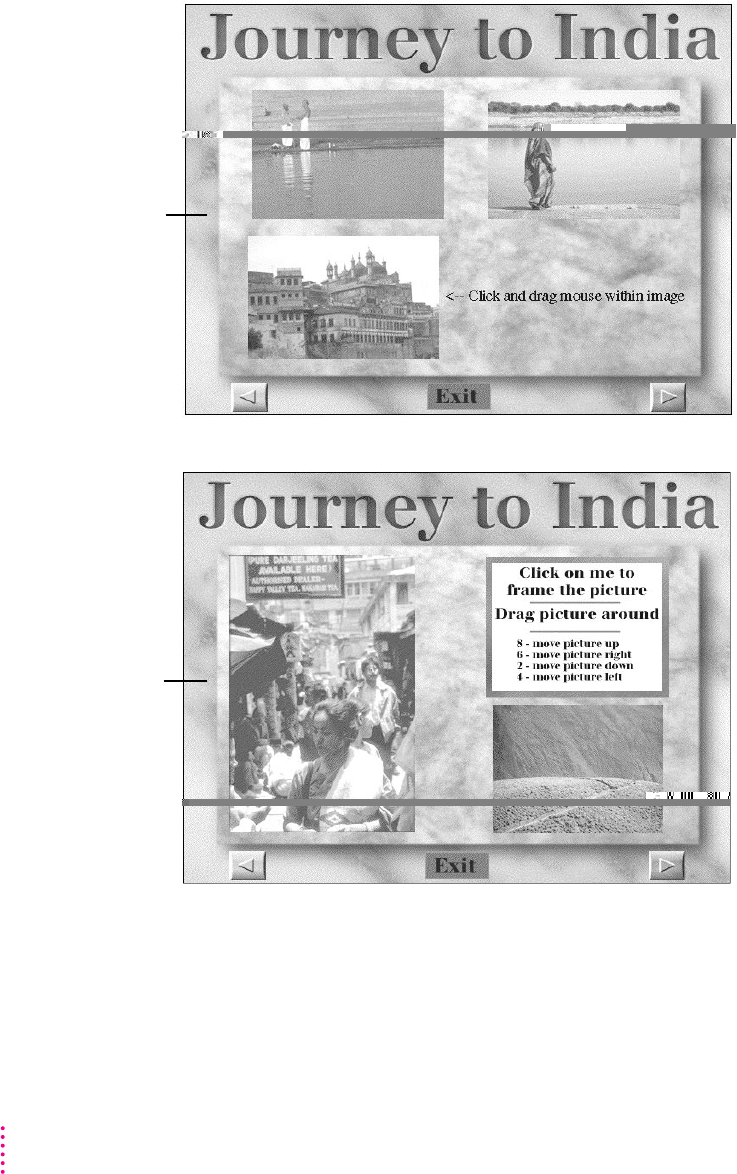
Varanasi screen
Darjeeling screen

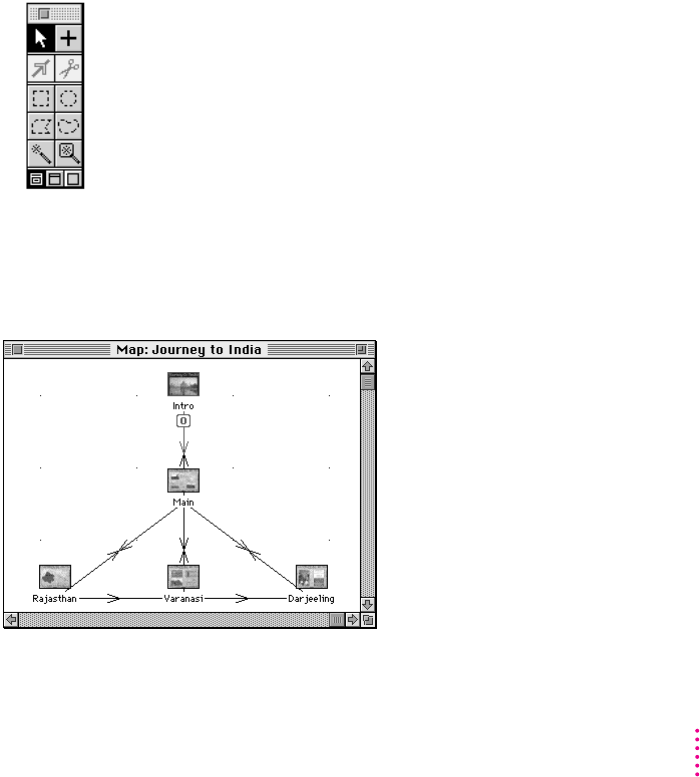
Starting a new project and designing a map
Opening a new project
m
Double-click the Apple Media Tool application icon on the desktop.
Creating screens
1 Double-click the Creation tool in the Tool palette.
Note:
Shortcut:
x
29
Building a Sample Project
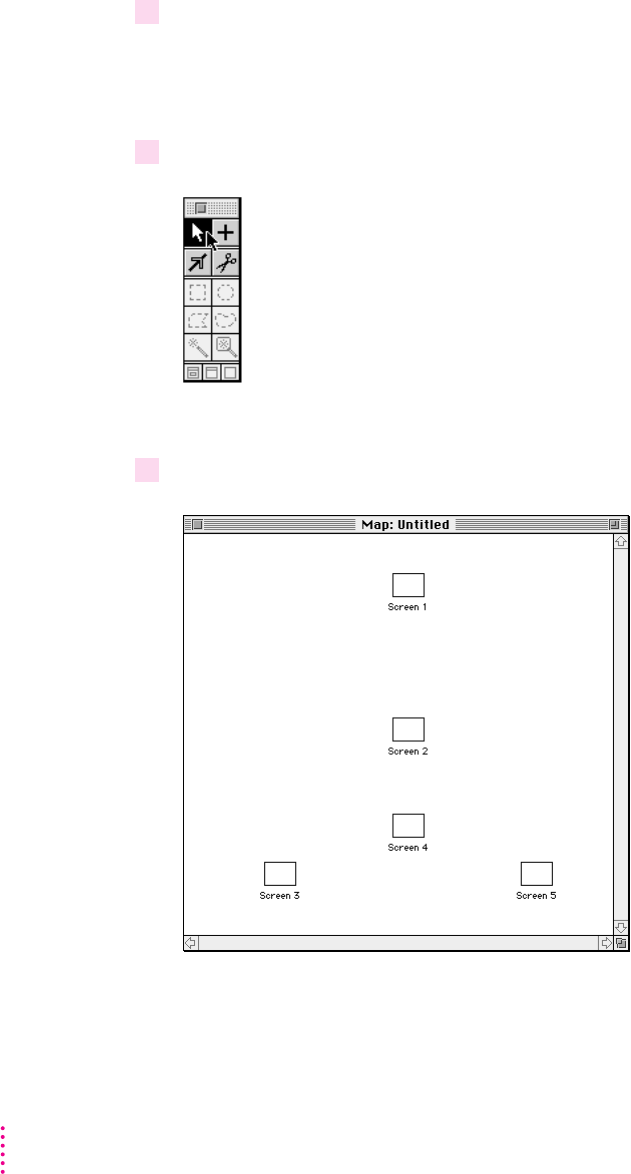
2 Create five screens by clicking five different locations inside the Map window.
3 Click the Selection tool in the Tool palette.
4 Drag the screens in the Map window to reposition them as shown.
30 Chapter 3
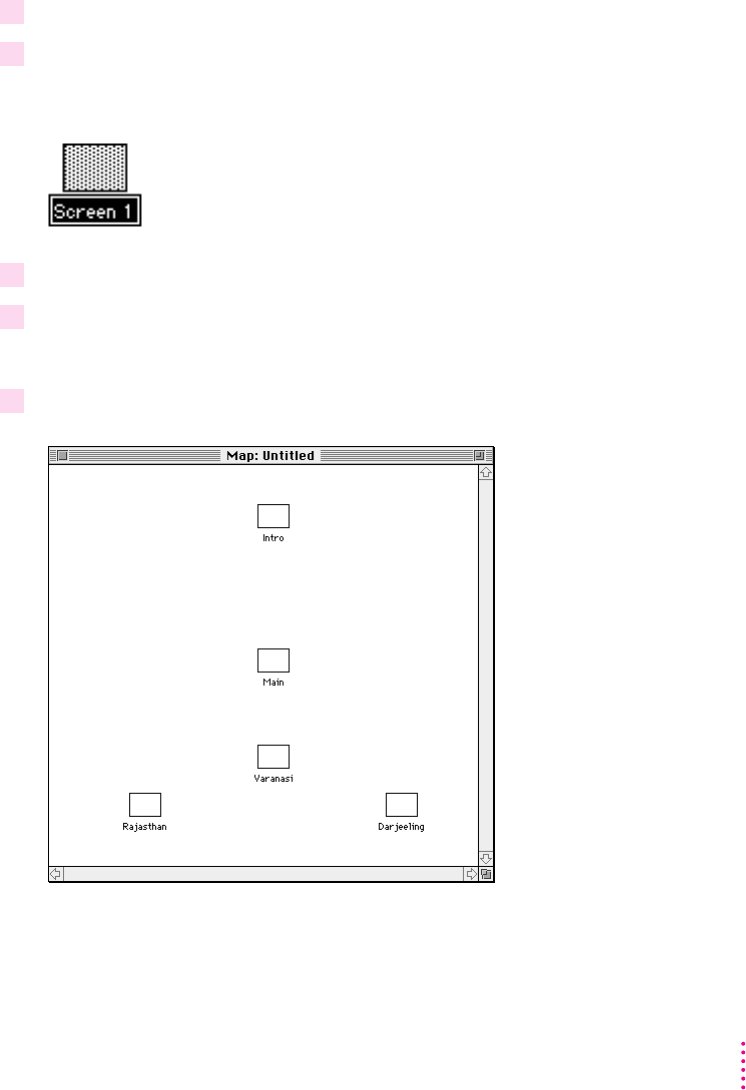
Naming screens
1 Click the Selection tool in the Tool palette.
2 Click the name box of Screen 1.
3 Type Intro.
4 Press Enter.
5 Change the names of the other screens as shown.
31
Building a Sample Project
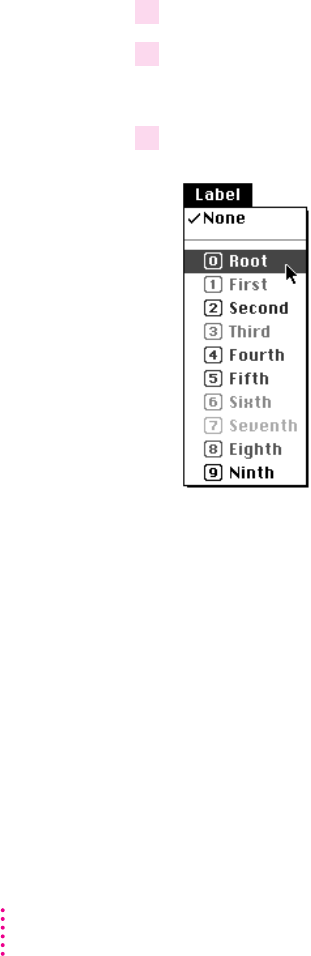
Labeling screens
Note:
1 Click the Selection tool in the Tool palette.
2 Click the Intro screen in the Map window.
3 Choose Root from the Label menu.
32 Chapter 3
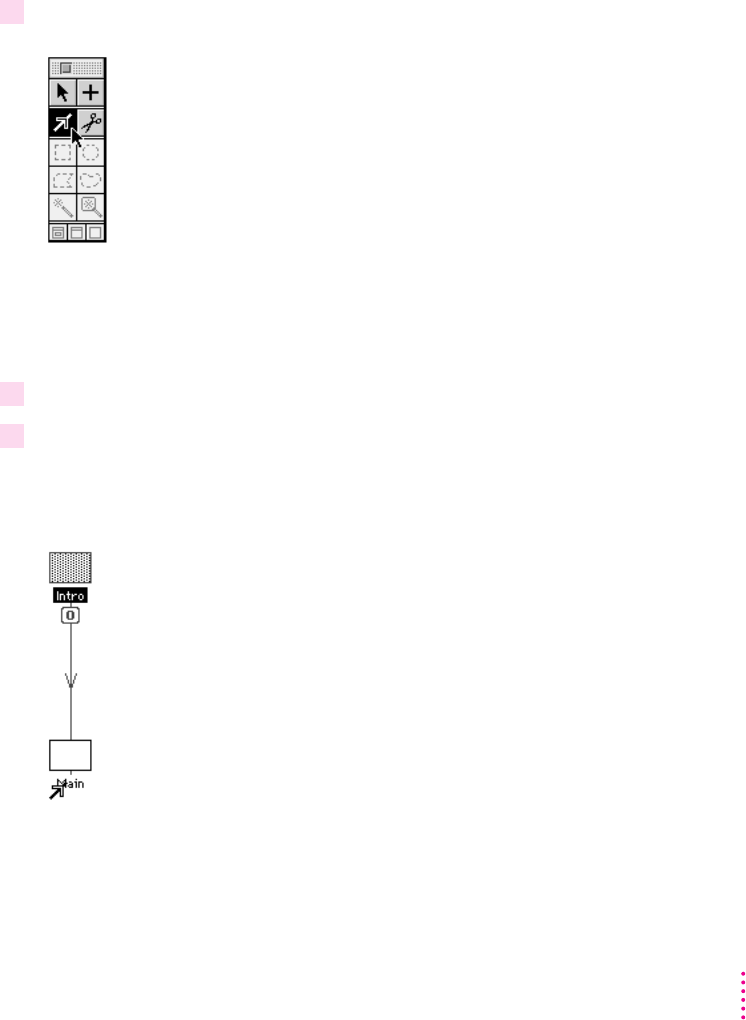
Connecting screens
1 Double-click the Connection tool in the Tool palette.
Shortcut:
2 Place the pointer over the name field of the Intro screen.
3 Drag from the Intro Screen to the name field of the Main screen.
33
Building a Sample Project
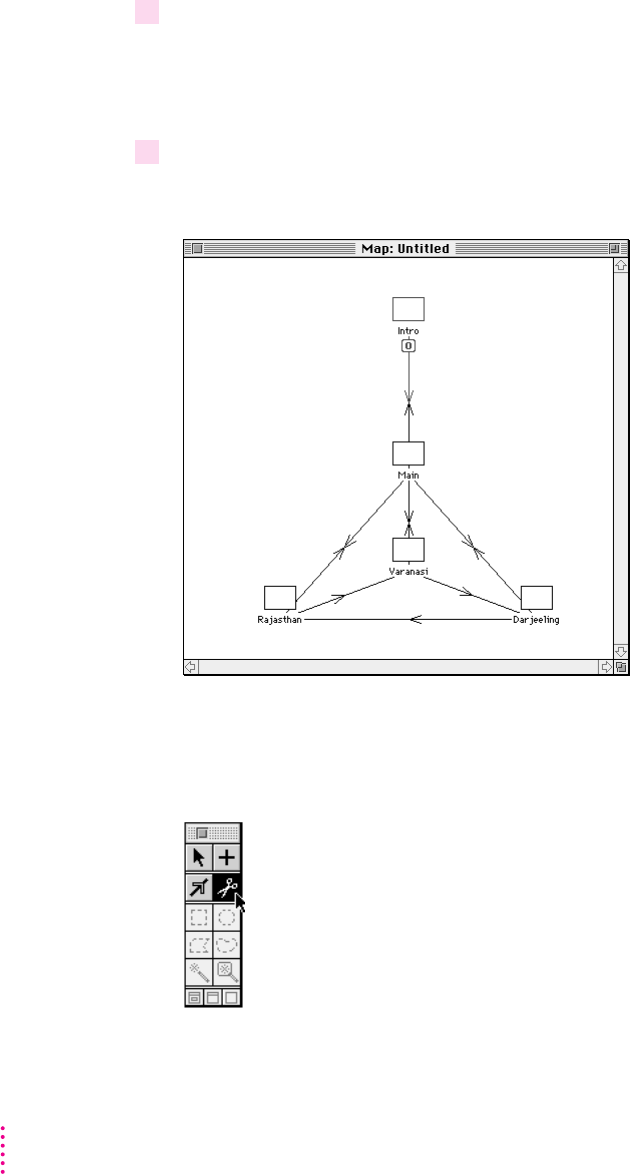
4 Using the same technique, add a second connection from the Main screen back to the
Intro screen.
5 Connect the other screens as shown.
Shortcut:
x
34 Chapter 3

Naming and saving your project
1 Choose Save from the File menu.
2 Click New.
3 Type TUTORIAL.
4 Click Create.
5 Type Journey to India.
6 Click Save.
Adding media to a project
35
Building a Sample Project
Apple Media Tool 2.0
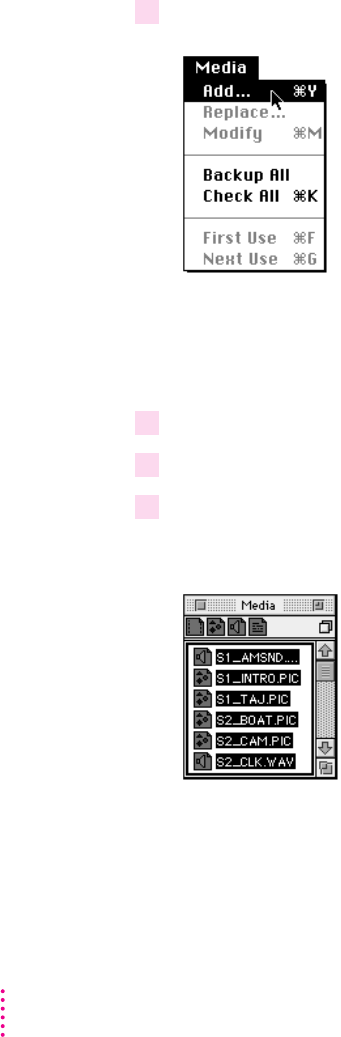
1 Choose Add from the Media menu.
Shortcut:
2 Locate the MEDIA folder on the
Apple Media Tool 2.0
disc.
3 Click the Add All Media In This Folder checkbox.
4 Click Add.
Note:
36 Chapter 3
Adding objects and interactivity to the Intro screen
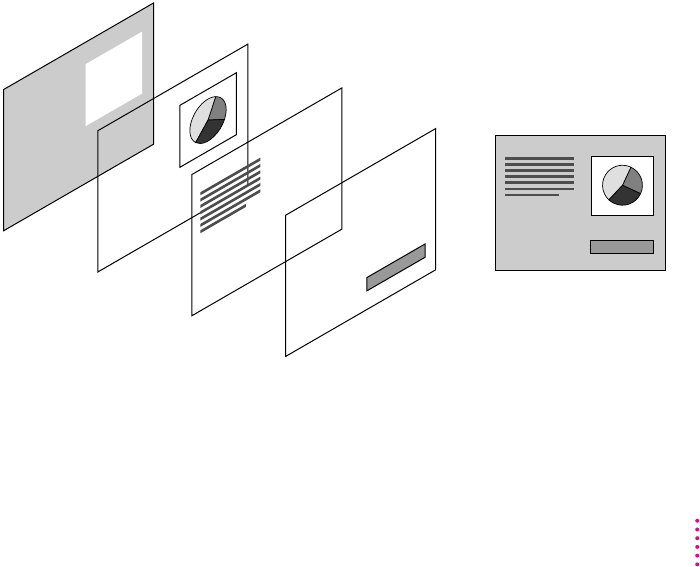
Adding objects to the Intro screen
Object 1
Background
picture Object 2
Picture Object 3
Text Object 4
Picture Complete
37
Building a Sample Project
m
m
m
Creating the object BlackBackground
1 Click the Selection tool in the Tool palette.
2 Click the Intro screen.
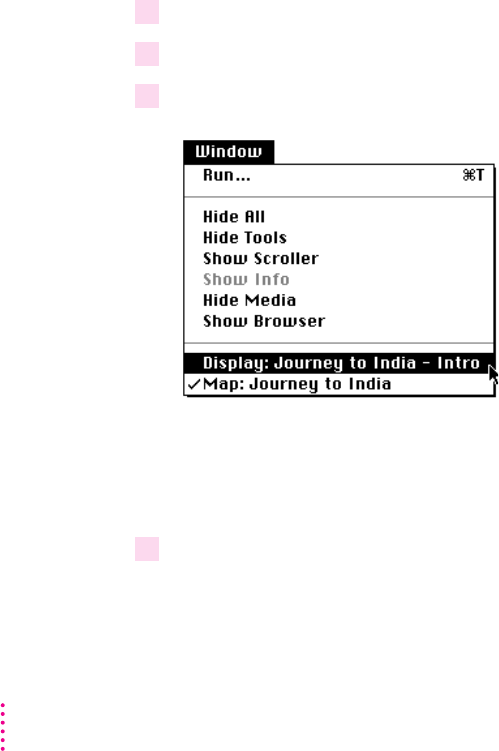
3 Choose Display: Journey to India - Intro from the Window menu.
Shortcut:
4 Click the Creation tool in the Tool palette.
38 Chapter 3
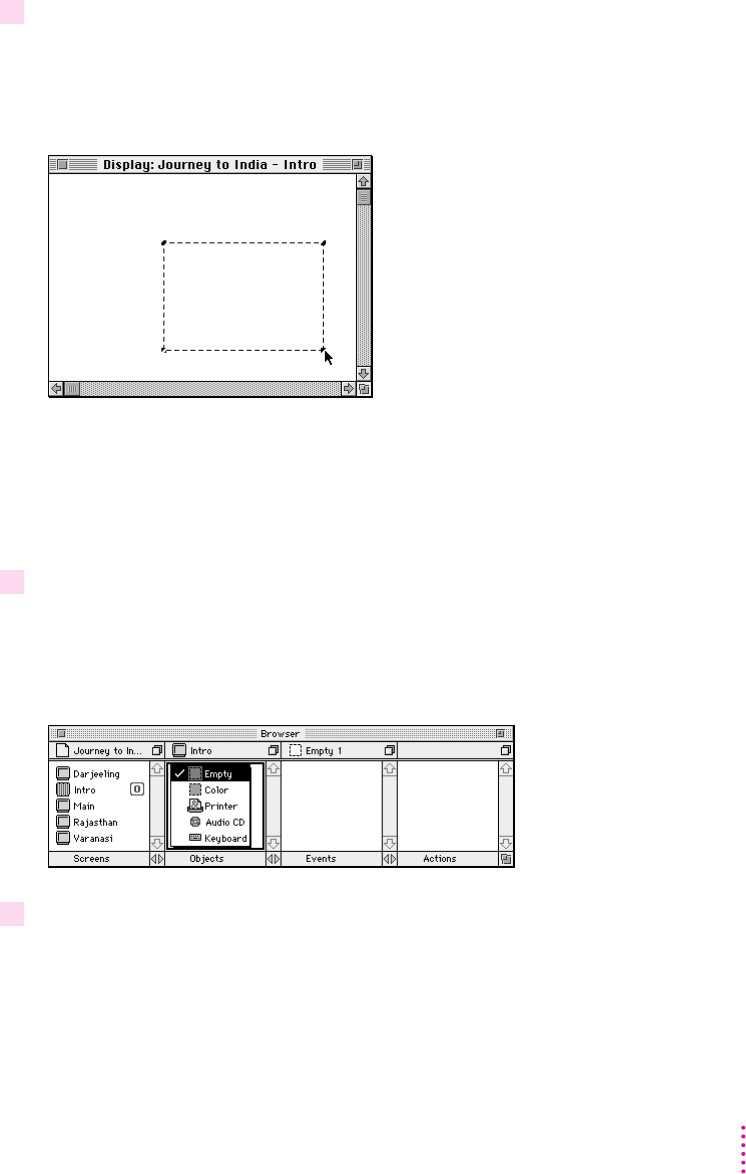
5 Drag diagonally from the middle of the Display window.
IMPORTANT
6 Press and hold down the mouse button over the object Empty 1 in the Browser
miniwindow.
7 Choose Color.
39
Building a Sample Project
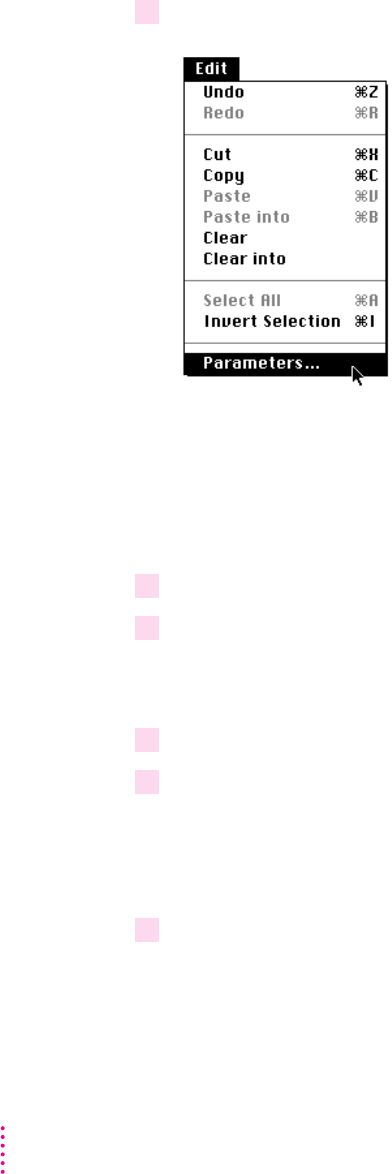
8 Choose Parameters from the Edit menu.
9 Type BlackBackground in the Name field.
10 Type 0 in both the X and Y coordinate fields.
11 Type 640 in the Width field and 480 in the Height field.
12 Type 300 in the Duration field.
Note:
13 Click OK.
40 Chapter 3

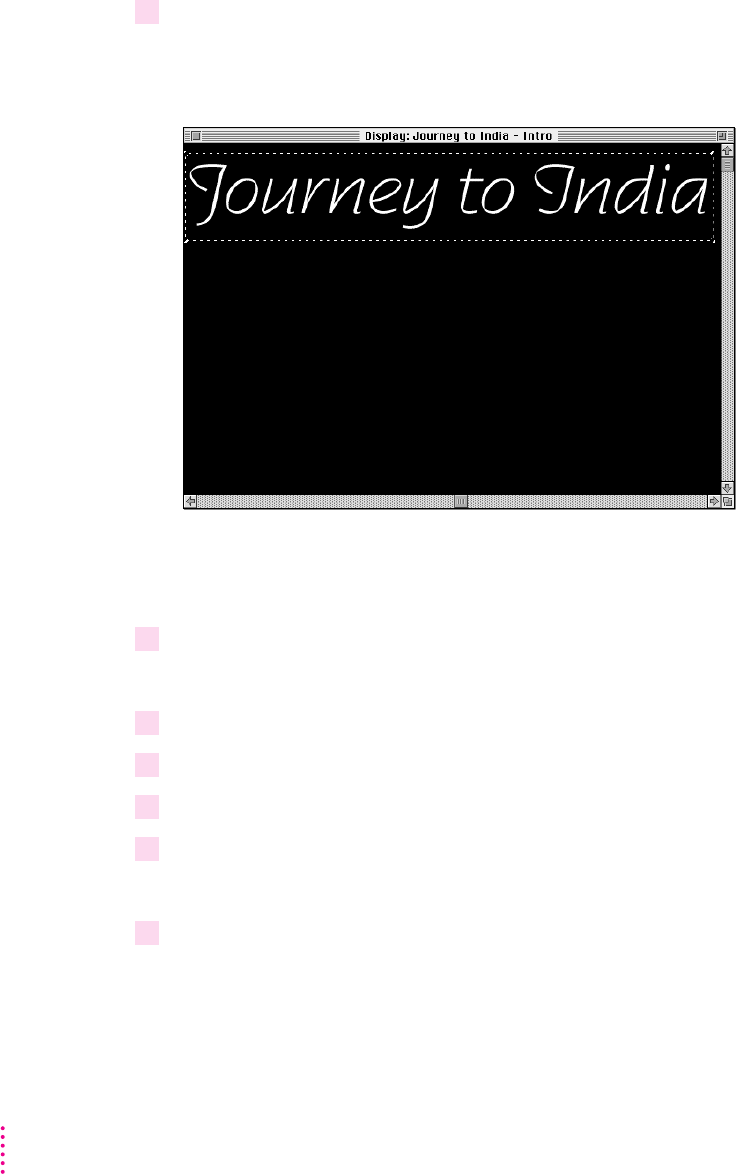
Creating the object TitleName
1 Drag the media item S1_INTRO.PIC from the Media miniwindow to the Display window.
Note:
2 Choose Parameters from the Edit menu.
Shortcut:
3 Type TitleName in the Name field.
4 Type 17 in the X coordinate field and type 10 in the Y coordinate field.
5 Click the Shown checkbox.
41
Building a Sample Project
6 Click OK.
Creating the object TajMahal
1 Drag the media item S1_TAJ.PIC from the Media miniwindow to the Display window.
2 Choose Parameters from the Edit menu.
3 Type TajMahal in the Name field.
4 Type 46 in the X coordinate field and 103 in the Y coordinate field.
5 Click the Shown checkbox.
6 Click OK.
42 Chapter 3

7 Choose Close from the File menu.
8 Choose Save from the File menu.
Adding interactivity to the Intro screen
target,
command
43
Building a Sample Project

link
destination
effect
44 Chapter 3
Adding interactivity to object BlackBackground
1 Click the object BlackBackground in the Objects pane of the Browser miniwindow.
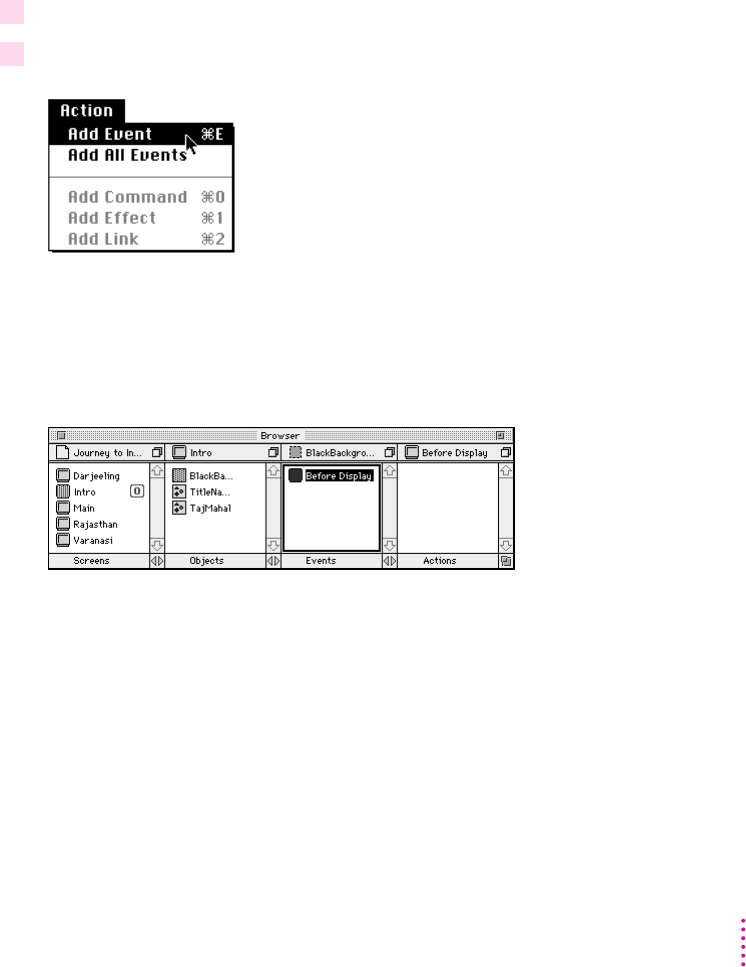
2 Choose Add Event from the Action menu.
45
Building a Sample Project

3 Press Before Display.
4 Choose After Display.
5 Choose Add Command from the Action menu.
46 Chapter 3

Note:
Shortcut:
6 Press Enable Itself.
7 Choose Start.
8 Choose Add Command from the Action menu.
47
Building a Sample Project
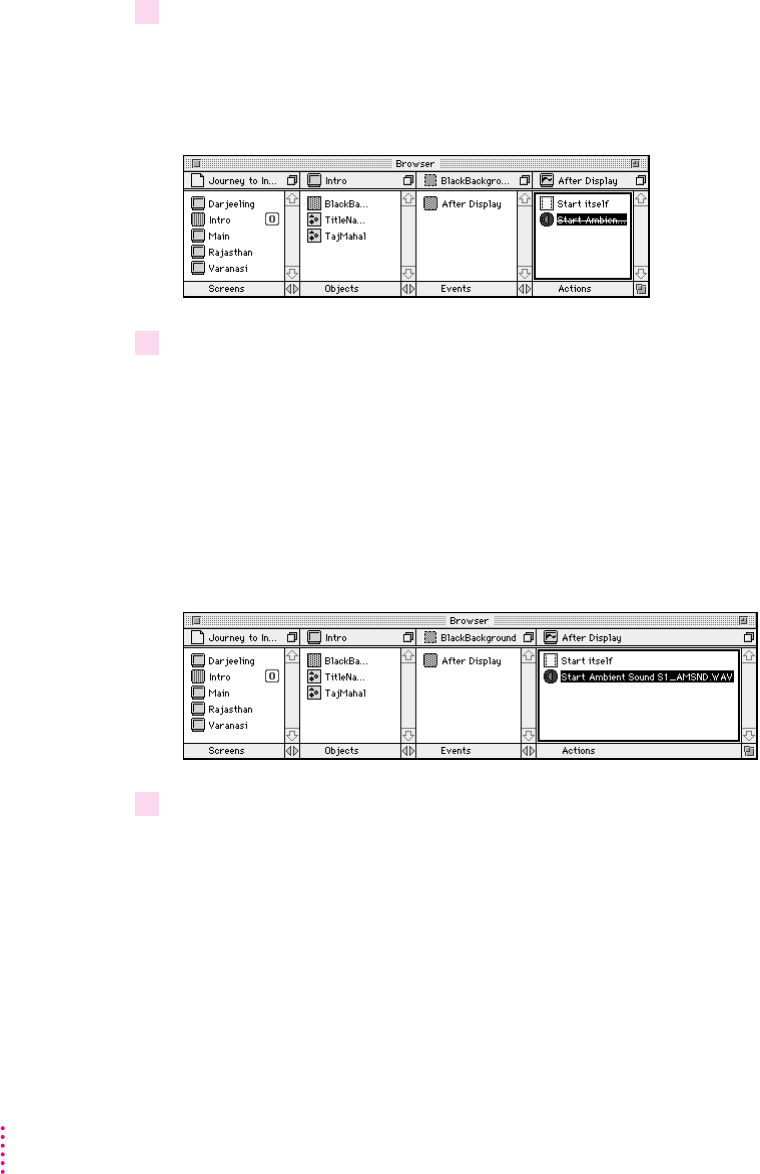
9 Replace the Enable command with the Start Ambient Sound command.
10 Drag the media item S1_AMSND.WAV from the Media miniwindow to Start Ambient
Sound in the Actions pane of the Browser miniwindow.
11 Choose Add Event from the Action menu.
48 Chapter 3

12 Replace Before Display with the Finished event.
13 Choose Add Effect from the Action menu.
Shortcut:
14 Press No Effect 30.
49
Building a Sample Project
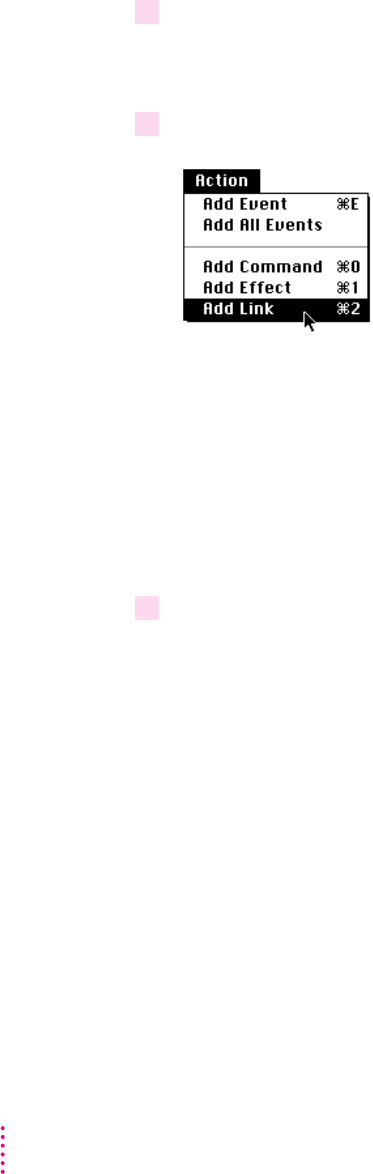
15 Choose Wipe Top.
16 Choose Add Link from the Action menu.
Shortcut: x
17 Drag the Main screen from the Screens pane of the Browser miniwindow to Go To Itself
in the Actions pane of the Browser miniwindow.
Shortcut:
50 Chapter 3

51
Adding interactivity to object TitleName
1 Click the object TitleName in the Objects pane of the Browser miniwindow.
2 Choose Add Event from the Action menu.
3 Replace Before Display with After Display.
4 Choose Add Command from the Action menu.
5 Replace the Enable command with the Show command.
6 Choose Add Effect from the Action menu.
7 Replace No Effect with the Wipe Left effect.
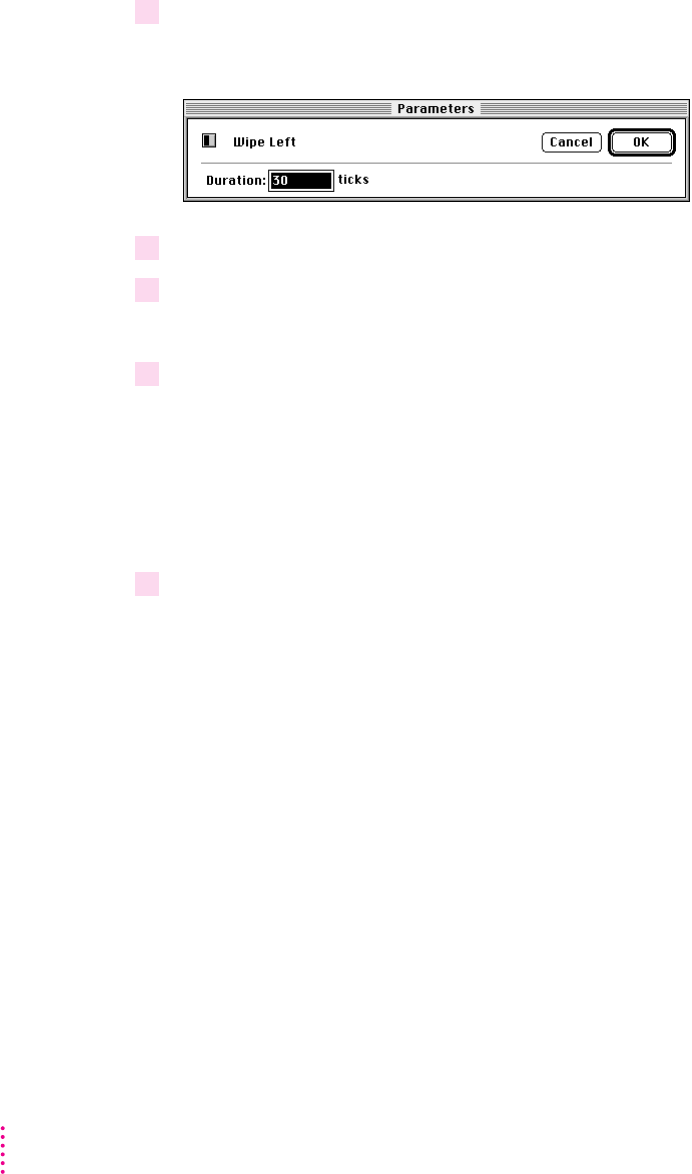
8 Choose Parameters from the Edit menu.
9 Type 40 in the Duration field.
10 Click OK.
11 Choose Add Command from the Action menu.
12 Replace the Enable command with the Refresh command.
Adding interactivity to object TajMahal
52 Chapter 3

1 Click the object TajMahal in the Objects pane of the Browser miniwindow.
2 Choose Add Event from the Action menu.
3 Replace Before Display with After Display.
4 Choose Add Command from the Action menu.
5 Replace the Enable command with the Show command.
6 Choose Add Effect from the Action menu.
7 Replace No Effect with the Iris Open effect.
Using the Run command to preview the Intro screen
53
Building a Sample Project
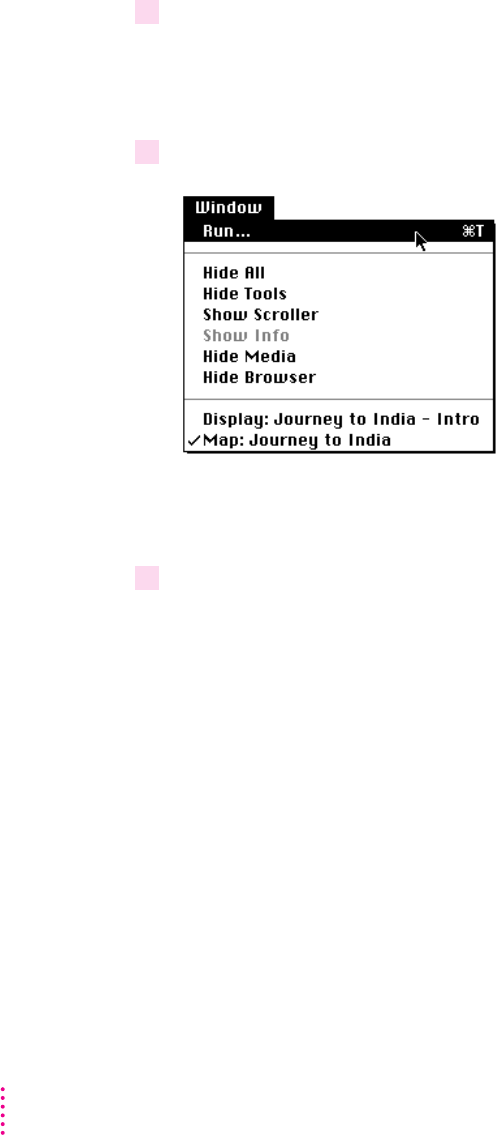
1 Click the Intro screen in the Screens pane of the Browser miniwindow.
2 Choose Run from the Window menu.
Shortcut: x
3 Press
x
-period.
Adding objects and interactivity to the Main screen
54 Chapter 3

Adding objects to the Main screen
m
BackgroundPicture
m
ClickSound
m
ExitButton
m
ScrollingText
m
PictureFrame
m
CamelPicture
m
LandscapePicture
m
BoatPicture
55
Building a Sample Project

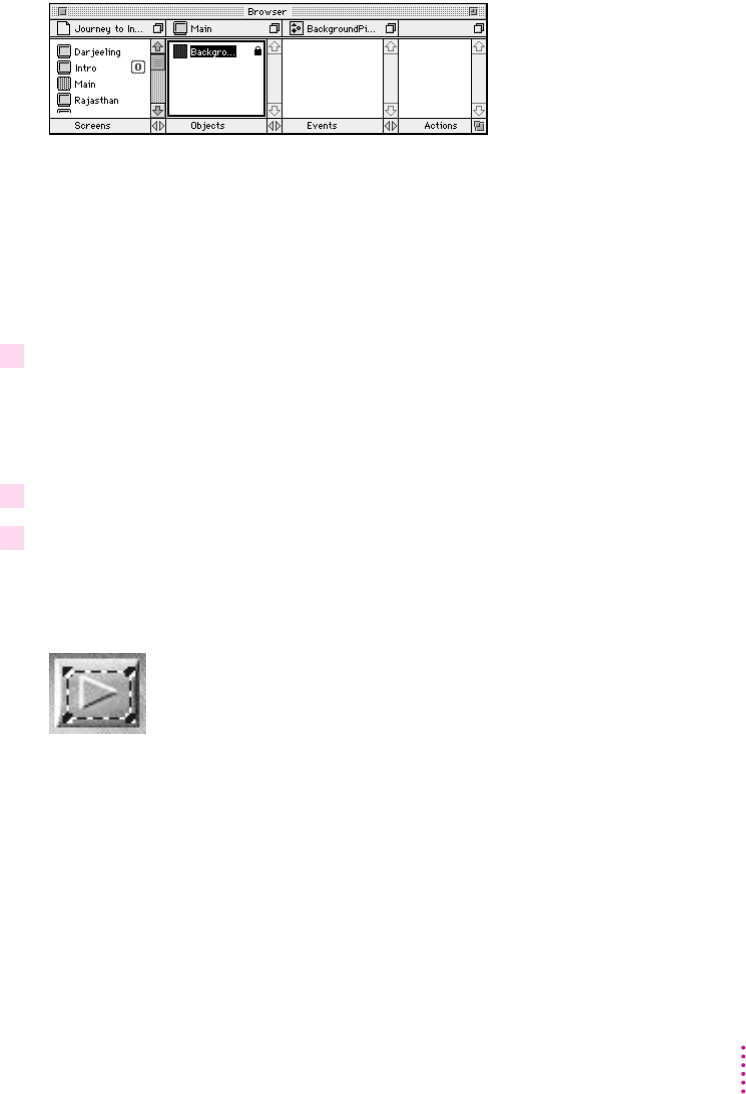
Creating the object BackgroundPicture
1 Double-click the Main screen in the Map window.
2 Drag the media item S2_MSRN.PIC from the Media miniwindow to the Display window.
3 Choose Parameters from the Edit menu.
4 Type BackgroundPicture in the Name field.
5 Click the Enabled checkbox.
6 Click OK.
7 Choose Lock from the Object menu.
56 Chapter 3
Tip:
Creating the object ClickSound
1 Drag the media item S2_CLK.WAV from the Media miniwindow to the Display window.
2 Change the name of object S2_CLK.WAV to ClickSound.
3 Drag the object ClickSound in the Display window to the button picture in the lower-right
corner of the Display window.
57
Building a Sample Project
Creating the object ExitButton

3 Choose Text Scroller.
4 Double-click the object S2_RTF.TXT in the Objects pane of the Browser miniwindow.
5 Type ScrollingText in the Name field.
6 Type 270 in the X coordinate field and 105 in the Y coordinate field.
7 Type 305 in the Width field and 110 in the Height field.
Shortcut:
8 Click the Background checkbox.
9 Click OK.
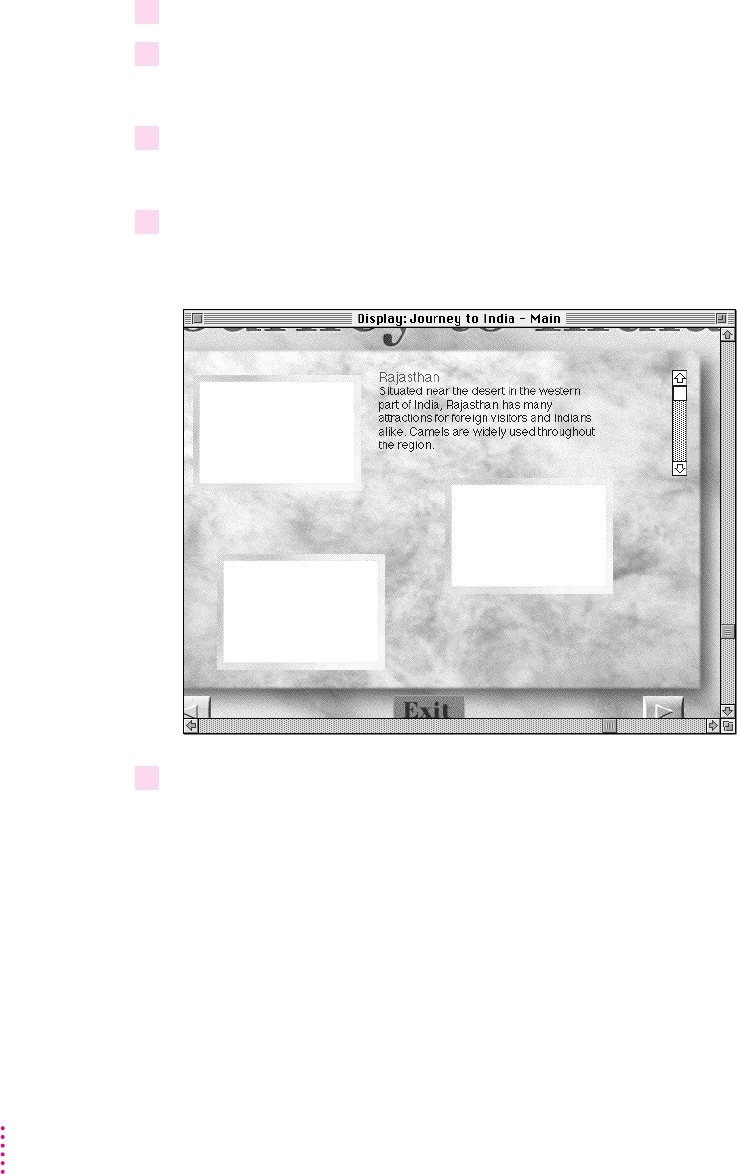
Creating three PictureFrame objects
IMPORTANT
1 Drag the media item S2_FRM.PIC from the Media miniwindow to the Display window.
2 Double-click the object S2_FRM.PIC in the Objects pane of the Browser miniwindow.
3 Type PictureFrame in the Name field.
4 Type 77 in the X coordinate field and 110 in the Y coordinate field.
5 Click OK.
59
Building a Sample Project
6 Choose Copy from the Edit menu.
7 Choose Paste from the Edit menu.
8 Choose Paste from the Edit menu again.
9 Move the top two copies of PictureFrame as shown.
10 Select the original object PictureFrame and the bottom-left copy by holding down the
Shift key and clicking each object.
60 Chapter 3

11 Choose Align from the Object menu.
12 Make the choices shown in the dialog box.
61
Building a Sample Project
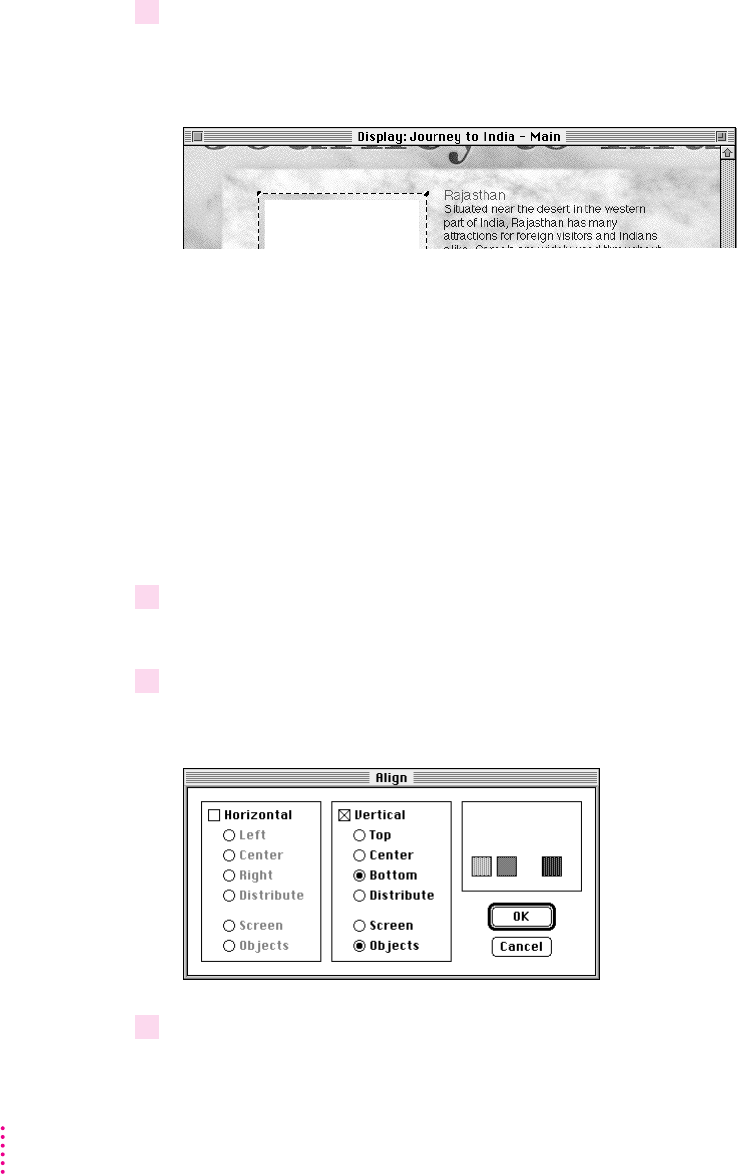
13 Click OK.
14 Select the bottom-left copy of object PictureFrame and the copy to its right.
15 Choose Align from the Object menu.
16 Make the choices shown in the dialog box.
62 Chapter 3
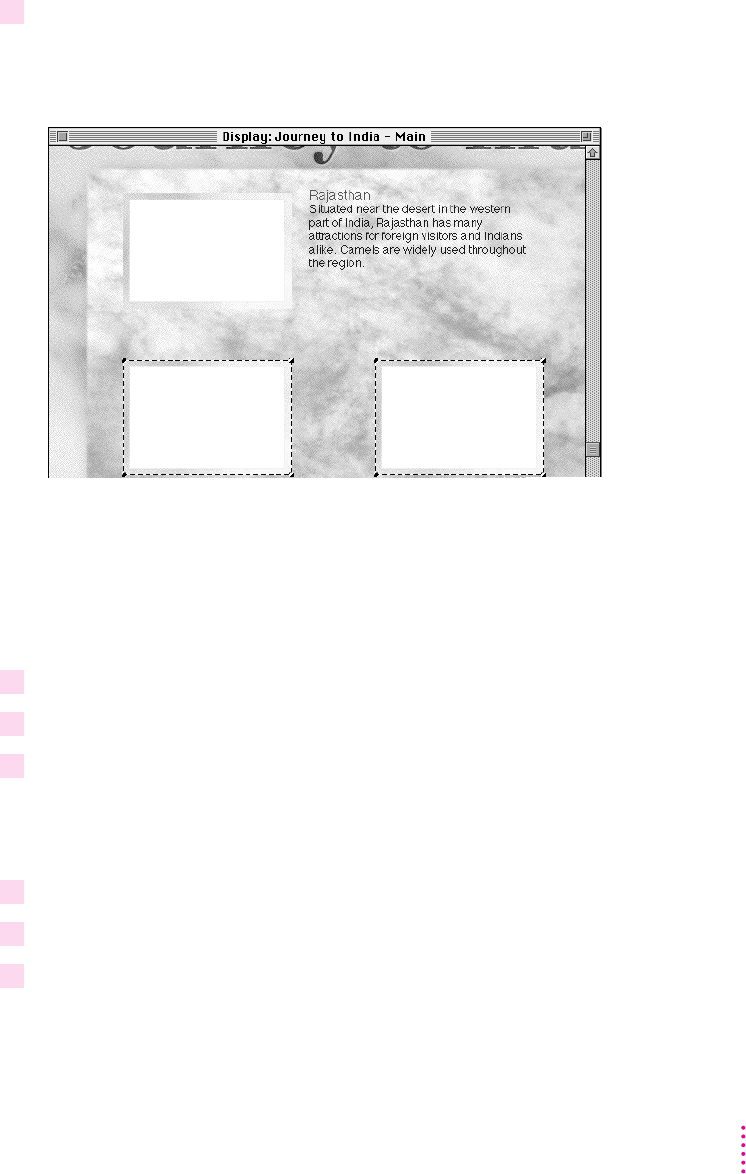
17 Click OK.
Creating the object CamelPicture
1 Drag the media item S2_CAM.PIC from the Media miniwindow to the Display window.
2 Center this object over the object PictureFrame at the top left.
3 Change the name of object S2_CAM.PIC to CamelPicture.
Creating the object LandscapePicture
1 Drag the media item S2_DAR.PIC from the Media miniwindow to the Display window.
2 Center this object over the object PictureFrame at the bottom right.
3 Change the name of object S2_DAR.PIC to LandscapePicture.
63
Building a Sample Project
Creating the object BoatPicture
1 Drag the media item S2_BOAT.PIC from the Media miniwindow to the Display window.
2 Center this object over the object PictureFrame at the bottom left.
3 Change the name of object S2_BOAT.PIC to BoatPicture.
Adding interactivity to the Main screen
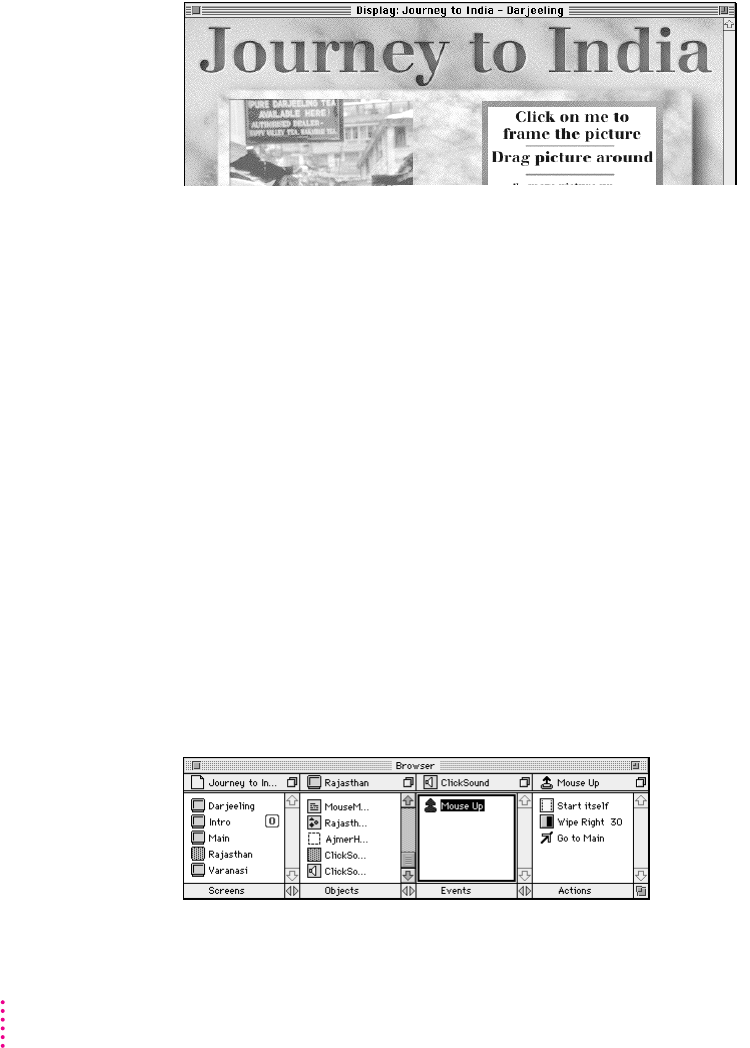
Adding interactivity to object ClickSound
64 Chapter 3

1 Add the Mouse Up event to the object ClickSound.
2 Add the Start command to the Mouse Up event.
3 Add Wipe Top 30 to the Mouse Up event.
4 Add Go To Rajasthan to the Mouse Up event.
5 Click the object ClickSound in the Display window.
6 Choose Copy from the Edit menu.
7 Choose Paste from the Edit menu.
Tip:
8 Change Go To Rajasthan to Go To Intro for the copy of object ClickSound.
65
Building a Sample Project

9 Hold down the Shift key and drag the copy of object ClickSound over the button picture
in the lower-left corner of the Display window.
10 In the Objects pane of the Browser miniwindow, drag the copy of the object ClickSound
upward until the horizontal line that appears is between the objects ExitButton and
ScrollingText.
Note:
Adding interactivity to object ExitButton
1 Add the Mouse Up event to the object ExitButton.
2 Add the Quit link to the Mouse Up event.
66 Chapter 3
Adding interactivity to object ScrollingText
Note:
hot text
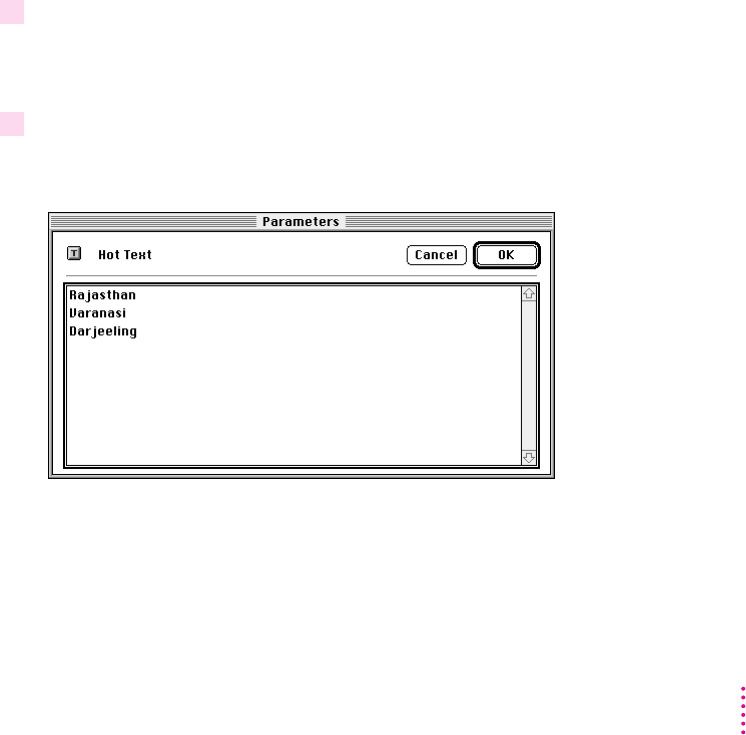
1 Add the Hot Text event to the object ScrollingText.
2 Double-click the Hot Text event.
67
Building a Sample Project

3 Click Rajasthan.
4 Click OK.
5 Add Start ClickSound to Hot Text Rajasthan.
6 Add Wipe Top 30 to Hot Text Rajasthan.
7 Add Go To Rajasthan to Hot Text Rajasthan.
8 Click Hot Text Rajasthan.
9 Choose Copy from the Edit menu.
10 Choose Paste from the Edit menu.
11 Choose Paste from the Edit menu once more.
12 Change the first copy of Hot Text Rajasthan to Hot Text Varanasi.
13 Change the second copy of Hot Text Rajasthan to Hot Text Darjeeling.
14 Change Go To Rajasthan to Go To Varanasi for Hot Text Varanasi.
68 Chapter 3

15 Change Go To Rajasthan to Go To Darjeeling for Hot Text Darjeeling.
Adding interactivity to object CamelPicture

1 Click the object CamelPicture in the Objects pane of the Browser miniwindow.
2 Click Mouse Up in the Events pane of the Browser miniwindow.
3 Choose Copy from the Edit menu.
4 Click the object LandscapePicture in the Objects pane of the Browser miniwindow.
5 Choose Paste from the Edit menu.
6 Change Go To Rajasthan to Go To Darjeeling.
Adding interactivity to object BoatPicture
1 Click the object CamelPicture in the Objects pane of the Browser miniwindow.
2 Click Mouse Up in the Events pane of the Browser miniwindow.
3 Choose Copy from the Edit menu.
4 Click the object BoatPicture in the Objects pane of the Browser miniwindow.
5 Choose Paste from the Edit menu.
6 Change Go To Rajasthan to Go To Varanasi.
70 Chapter 3

71
Building a Sample Project
Adding objects and interactivity to the Rajasthan screen
Adding objects to the Rajasthan screen
m
BackgroundPicture
m
ClickSound
m
ExitButton
m
MouseMoveInstruction
m
AjmerMovie
m
JaisalmerPicture
m
RajasthanMap

m
AjmerHotRegion
Creating the objects BackgroundPicture, ClickSound, ExitButton, and ClickSound
1 Click the Main screen in the Screens pane of the Browser miniwindow.
2 Hold down the Shift key and click the objects BackgroundPicture, ClickSound,
ExitButton, and ClickSound in the Objects pane of the Browser miniwindow.
3 Drag the selected objects to Rajasthan in the Screens pane of the Browser miniwindow.
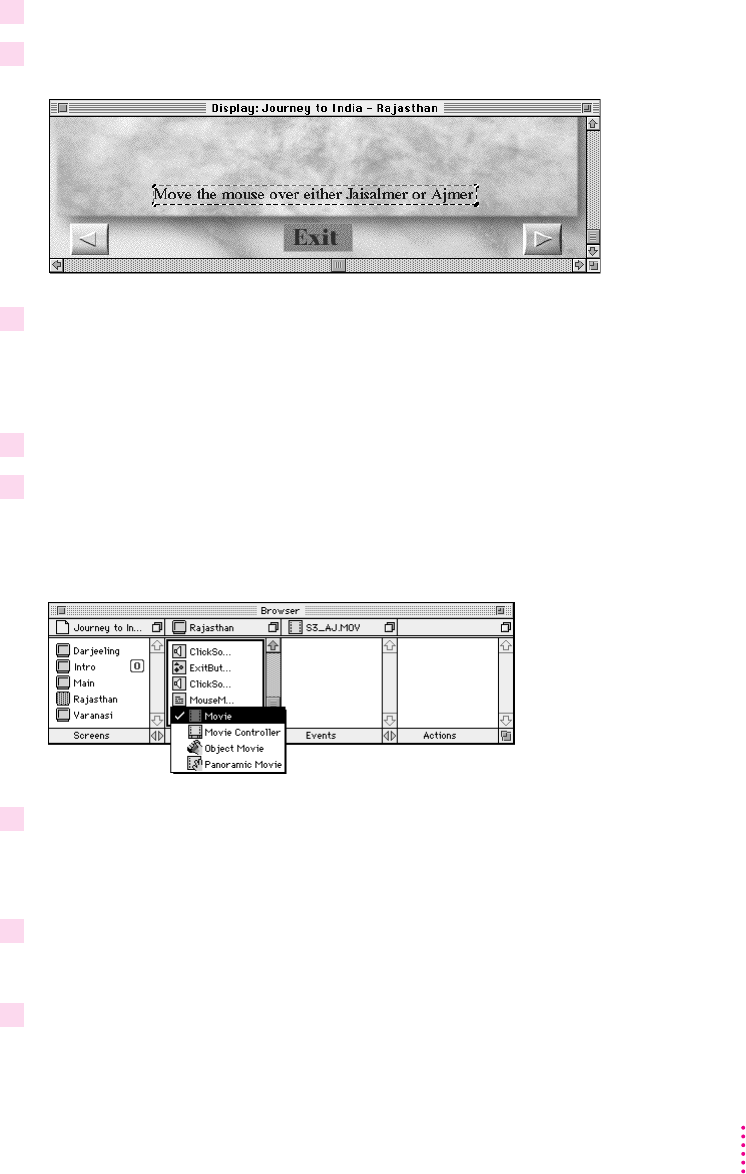
Creating the object MouseMoveInstruction
1 Double-click the Rajasthan screen in the Map window.
2 Drag the media item S3_OVER.TXT from the Media miniwindow to the Display window.
72 Chapter 3
3 Using the corner handles, resize the object S3_OVER.TXT to make it the size shown.
4 Reposition the object S3_OVER.TXT as shown.
5 Change the name of object S3_OVER.TXT to MouseMoveInstruction.
Creating the object AjmerMovie
1 Drag the media item S3_AJ.MOV from the Media miniwindow to the Display window.
2 Press the object S3_AJ.MOV in the Objects pane of the Browser miniwindow.
3 Choose Movie Controller.
4 Double-click the object S3_AJ.MOV in the Objects pane of the Browser miniwindow.
5 Type AjmerMovie in the Name field.
73
Building a Sample Project

6 Type 327 in the X coordinate field and 116 in the Y coordinate field.
7 Click the Shown checkbox.
8 Click OK.
Creating the object JaisalmerPicture
1 Drag the media item S3_JAL.PIC from the Media miniwindow to the Display window.
2 Choose Hide Media from the Object menu.
74 Chapter 3

3 Reposition the object S3_JAL.PIC as shown.
4 Choose Show Media from the Object menu.
5 Double-click the object S3_JAL.PIC in the Objects pane of the Browser miniwindow.
6 Type JaisalmerPicture in the Name field.
7 Click the Shown checkbox.
8 Click OK.
Creating the object RajasthanMap
1 Drag the media item S3_RMAP.PIC from the Media miniwindow to the Display window.
75
Building a Sample Project
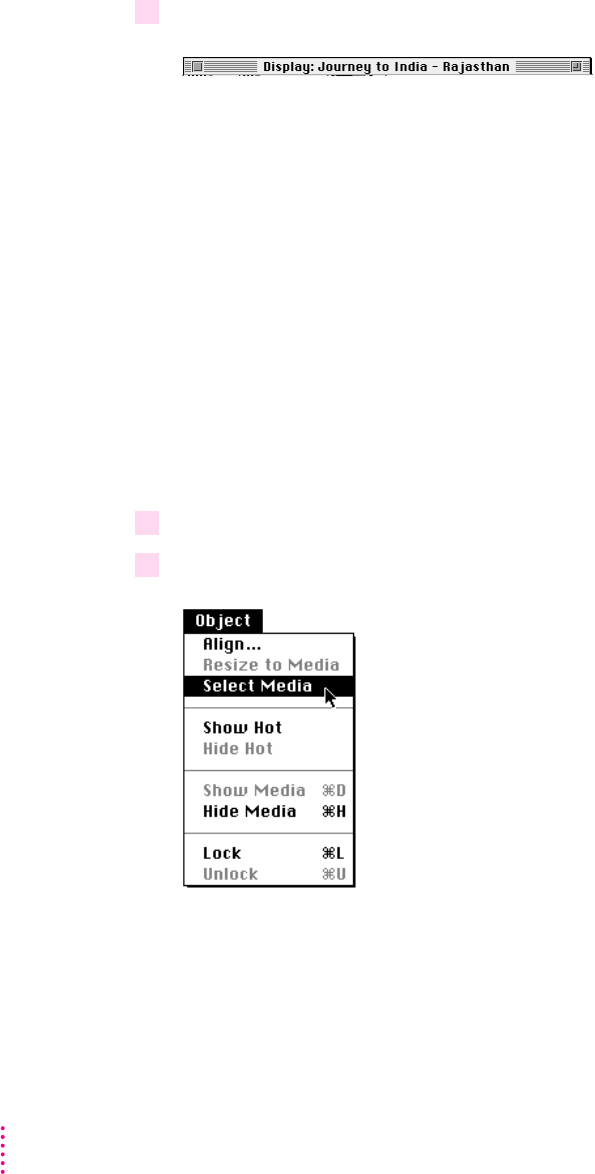
2 Reposition the object S3_RMAP.PIC as shown.
3 Change the name of object S3_RMAP.PIC to RajasthanMap.
4 Choose Select Media from the Object menu.
76 Chapter 3
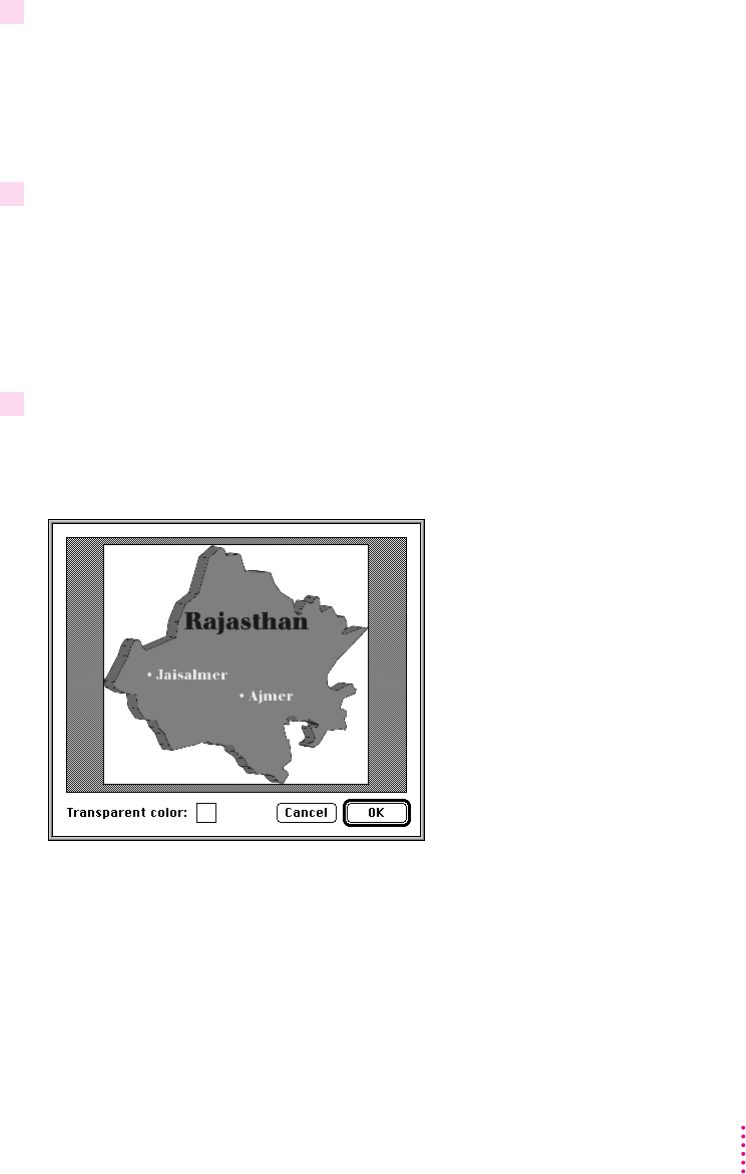
5 Double-click the media item S3_RMAP.PIC in the Media miniwindow.
6 Click the Transparent checkbox.
7 Click Color.
77
Building a Sample Project

8 Place the pointer over the middle of the map.
9 Click the map.
10 Click the white area outside the map.
11 Click OK.
12 Click OK.
13 Click the Rectangle Hot Region tool in the Tool palette.
78 Chapter 3


14 Place the pointer slightly above and to the left of the word Jaisalmer on the object
RajasthanMap, and drag diagonally across the word Jaisalmer.
Note:
Creating the object AjmerHotRegion
80 Chapter 3

1 Click the Creation tool in the Tool palette.
2 Place the pointer slightly above and to the left of the word Ajmer on the object
RajasthanMap, and drag diagonally across the word.
3 Choose Parameters from the Edit menu.
4 Type AjmerHotRegion in the Name field.
5 Click OK.
Adding interactivity to the Rajasthan screen
Adding interactivity to the lower-right object ClickSound
81
Building a Sample Project

1 Change Wipe Top 30 to Wipe Left 30.
2 Change Go To Rajasthan to Go To Varanasi.
Adding interactivity to the lower-left object ClickSound
1 Change Wipe Top 30 to Wipe Right 30.
2 Change Go To Intro to Go To Main.
Adding interactivity to object RajasthanMap
1 Add the Mouse Enter event to the object RajasthanMap.
2 Add Hide AjmerMovie to the Mouse Enter event.
3 Add Show JaisalmerPicture to the Mouse Enter event.
82 Chapter 3

4 Add Iris Open 30 to the Mouse Enter event.
Adding interactivity to object AjmerHotRegion
1 Add the Mouse Enter event to the object AjmerHotRegion.
2 Add Hide JaisalmerPicture to the Mouse Enter event.
3 Add Show AjmerMovie to the Mouse Enter event.
4 Add Iris Open 30 to the Mouse Enter event.
83
Building a Sample Project

Adding objects and interactivity to the Varanasi screen
Adding objects to the Varanasi screen
m
BackgroundPicture
m
ClickSound
m
ExitButton
m
WomanNearRiver
m
PeopleNearRiver
m
MouseDownInstruction
m
BuildingsPicture
m
ClickDragInstruction
84 Chapter 3

Creating the objects BackgroundPicture, ClickSound, ExitButton, and ClickSound
1 Click the Rajasthan screen in the Screens pane of the Browser miniwindow.
2 Hold down the Shift key and click the objects BackgroundPicture, ClickSound,
ExitButton, and ClickSound in the Objects pane of the Browser miniwindow .
3 Drag the selected objects to Varanasi in the Screens pane of the Browser miniwindow.
Creating the object WomanNearRiver
m
Create an object that uses the media item S4_RIV.PIC, rename the object
WomanNearRiver, and reposition it as shown.
85
Building a Sample Project

Creating the object PeopleNearRiver
1 Create an object that uses the media item S4_RIV2.PIC, rename the object
PeopleNearRiver, and reposition it as shown.
2 Choose Parameters from the Edit menu.
3 Click the Shown checkbox.
86 Chapter 3
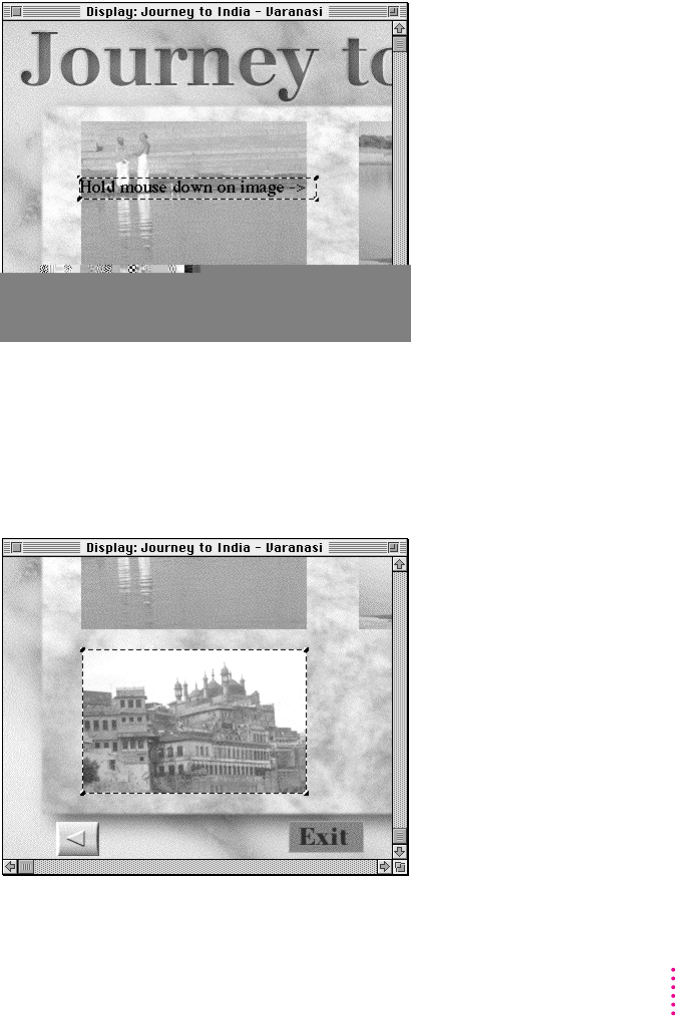
Creating the object MouseDownInstruction
m
Create an object that uses the media item S4_MDWN.TXT, rename the object
MouseDownInstruction, and reposition and resize it as shown.
Creating the object BuildingsPicture
m
Create an object that uses the media item S4_VAR.PIC, rename the object
BuildingsPicture, and reposition and resize it as shown.
87
Building a Sample Project
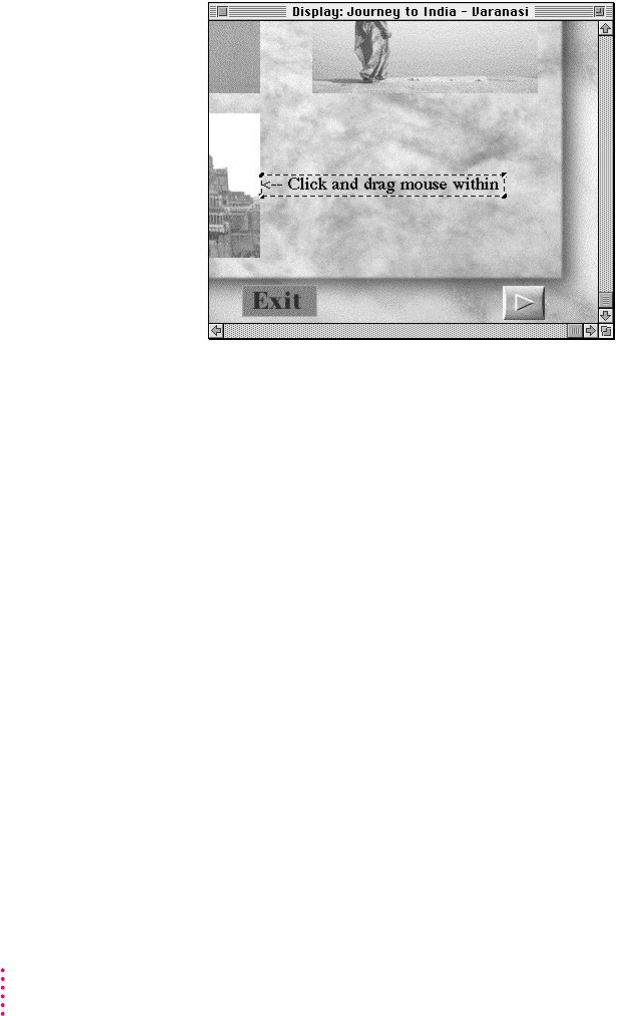
Creating the object ClickDragInstruction
m
Create an object that uses the media item S4_MIN.TXT, rename the object
ClickDragInstruction, and reposition and resize it as shown.
Adding interactivity to the Varanasi screen
Adding interactivity to the lower-right object ClickSound
m
Change Go To Varanasi to Go To Darjeeling.
88 Chapter 3

Adding interactivity to object WomanNearRiver
1 Add the Mouse Down event to the object WomanNearRiver.
2 Add Show
◊
Hide Itself to the Mouse Down event.
◊
◊
3 Add Show
◊
Hide PeopleNearRiver to the Mouse Down event.
4 Add Show
◊
Hide MouseDownInstruction to the Mouse Down event.
5 Add Wipe Right 30 to the Mouse Down event.
6 Click the Mouse Down event.
7 Choose Copy from the Edit menu.
8 Choose Paste from the Edit menu.
9 Replace Mouse Down with Mouse Up.
◊
10 Change Wipe Right 30 to Wipe Left 30.
89
Building a Sample Project

Adding interactivity to object BuildingsPicture
1 Add the Mouse Moved event to the object BuildingsPicture.
2 Add Scroll Itself to the Mouse Moved event.
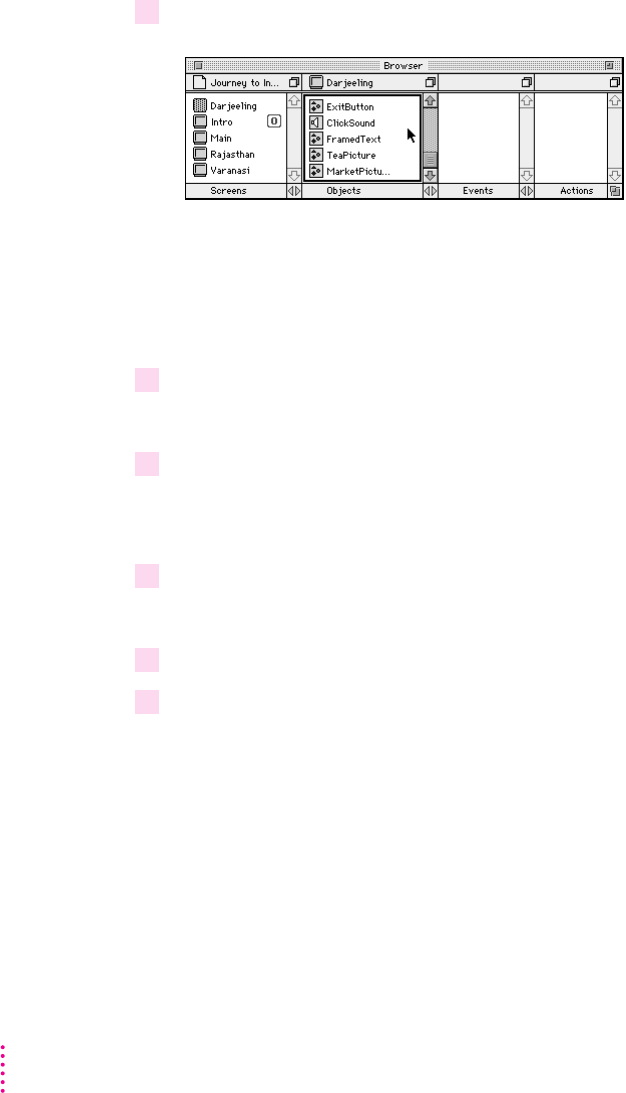
Adding objects and interactivity to the Darjeeling screen
Adding objects to the Darjeeling screen
m
BackgroundPicture
m
ClickSound
m
ExitButton
m
FramedText
90 Chapter 3

91
Building a Sample Project
m
TeaPicture
m
MarketPicture
m
TeaKeyboard
Creating the objects BackgroundPicture, ClickSound, ExitButton, and ClickSound
1 Click the Rajasthan screen in the Screens pane of the Browser miniwindow.
2 Hold down the Shift key and click the objects BackgroundPicture, ClickSound,
ExitButton, and ClickSound in the Objects pane of the Browser miniwindow.
3 Drag the selected objects to Darjeeling in the Screens pane of the Browser miniwindow.
Creating the object FramedText
m
Create an object that uses the media item S5_FRM.PIC, rename the object
FramedText, and reposition its X coordinate to 354 and its Y coordinate to 98.

Creating the object TeaPicture
m
Create an object that uses the media item S5_TEA.PIC, rename the object TeaPicture,
and reposition it as shown.
92 Chapter 3

Creating the object MarketPicture
1 Create an object that uses the media item S5_MRKT.PIC, rename the object
MarketPicture, and reposition it as shown.
2 Choose Parameters from the Edit menu.
3 Click the Enabled checkbox.
93
Building a Sample Project
Creating the object TeaKeyboard
1 Double-click the empty area of the Objects pane of the Browser miniwindow.
Note:
2 Press the object Empty 8 in the Browser miniwindow.
3 Choose Keyboard.
4 Double-click the object Keyboard 8 in the Objects pane of the Browser miniwindow.
5 Type TeaKeyboard in the Name field.
6 Type 0 in both the Width and Height fields.
Note:
94 Chapter 3

7 Click OK.
Adding interactivity to the Darjeeling screen
Adding interactivity to the lower-right object ClickSound
m
Change Go To Varanasi to Go To Rajasthan.
Adding interactivity to object FramedText
1 Add the Mouse Up event to the object FramedText.
2 Add the Move To command to the Mouse Up event.
95
Building a Sample Project
3 Drag the object TeaPicture in the Objects pane to Move To Itself 0 0 in the Actions pane
of the Browser miniwindow.
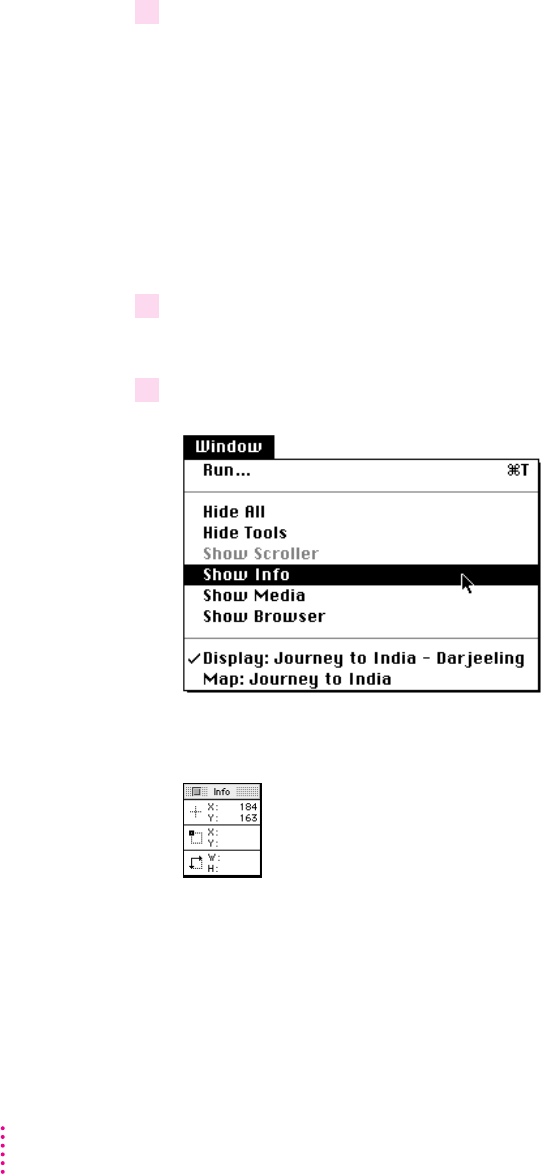
4 Click the Display window.
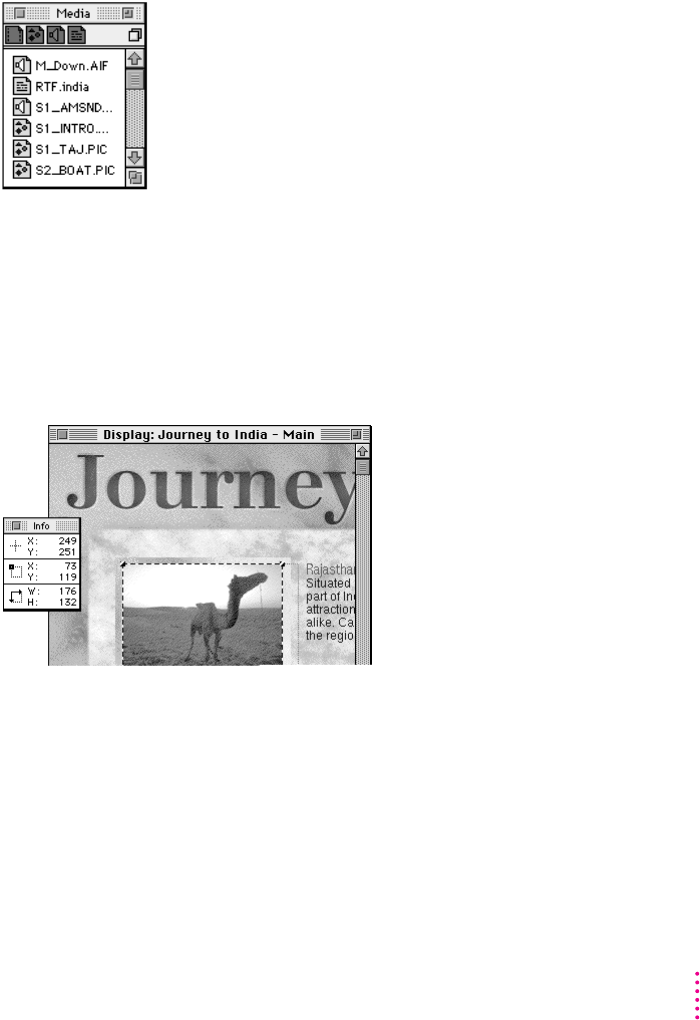
5 Choose Show Info from the Window menu.
96 Chapter 3

6 Move the pointer to the inner top-left corner of the frame presented by object
FramedText.
7 Double-click Move To TeaPicture 0 0.
8 Type 361 in the X coordinate field and 105 in the Y coordinate field.
9 Click OK.
Adding interactivity to object TeaPicture
1 Add the Mouse Moved event to the object TeaPicture.
2 Add Drag Itself to the Mouse Moved event.
Adding interactivity to object TeaKeyboard
97
Building a Sample Project
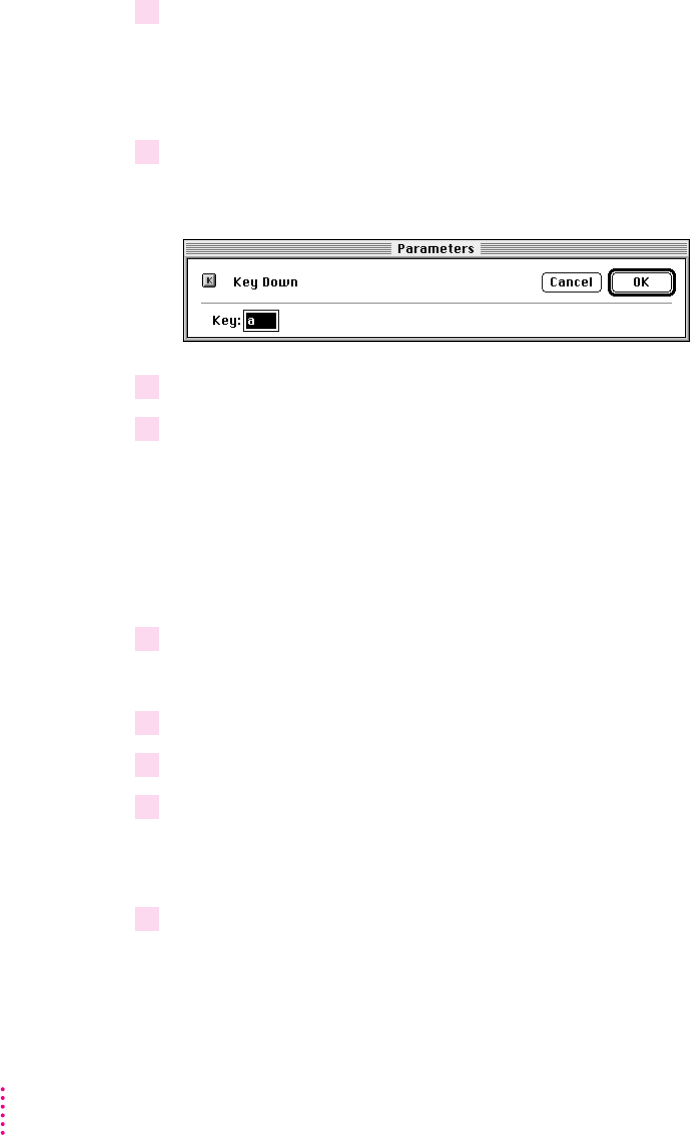
1 Add the Key Down event to the object TeaKeyboard.
a
2 Double-click Key Down a.
3 Type 8.
4 Click OK.
5 Add Move By TeaPicture 0–5 to Key Down 8.
6 Click Key Down 8.
7 Choose Copy from the Edit menu.
8 Choose Paste from the Edit menu.
9 Change the copy of Key Down 8 to Key Down 6.
98 Chapter 3

10 Change Move By TeaPicture 0–5 to Move By TeaPicture 5 0 for Key Down 6.
11 Click Key Down 8.
12 Choose Copy from the Edit menu.
13 Choose Paste from the Edit menu.
14 Change the copy of Key Down 8 to Key Down 2.
15 Change Move By TeaPicture 0–5 to Move By TeaPicture 0 5 for Key Down 2.
16 Click Key Down 8.
17 Choose Copy from the Edit menu.
18 Choose Paste from the Edit menu.
19 Change the copy of Key Down 8 to Key Down 4.
20 Change Move By TeaPicture 0–5 to Move By TeaPicture -5 0 for Key Down 4.
Compiling a project using Runtime Maker
99
Building a Sample Project
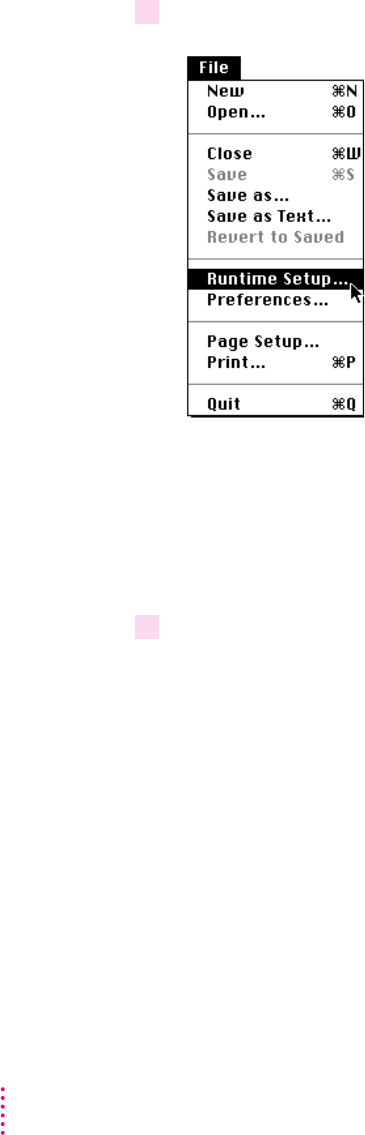
1 Choose Runtime Setup from the File menu.
Tip:
2 Make the choices in the dialog box as shown.
100 Chapter 3
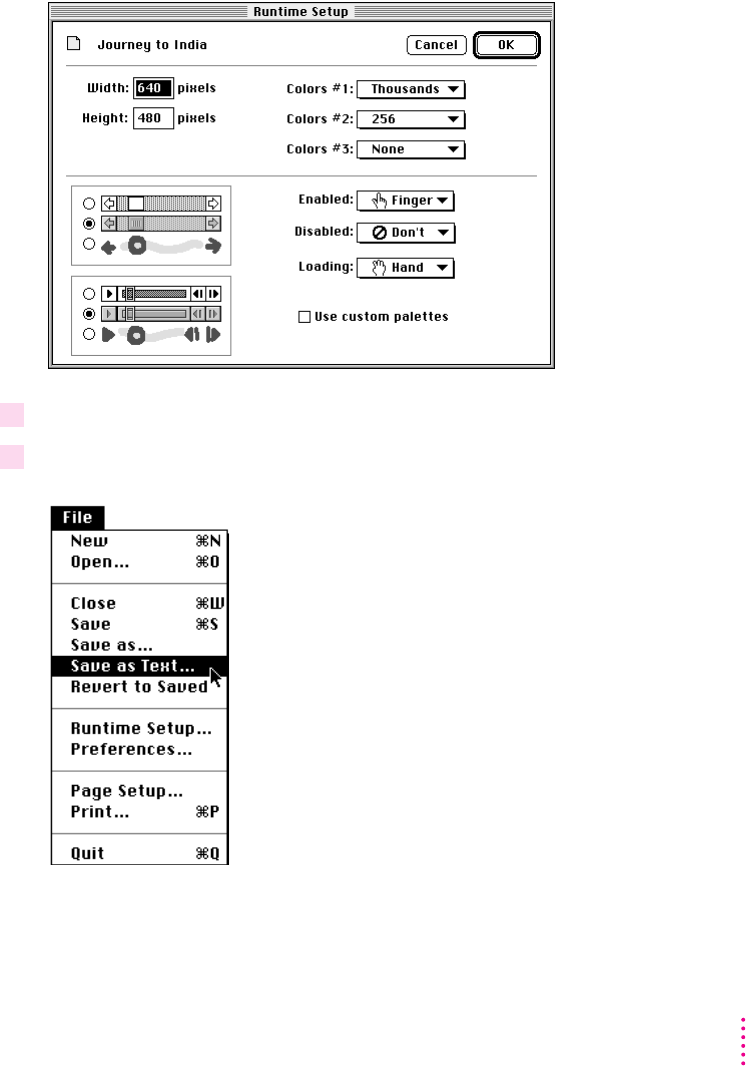
101
Building a Sample Project
3 Click OK.
4 Choose Save as Text from the File menu.


Apple Computer, Inc.
1 Infinite Loop
Cupertino, California 95014-2084
408.996.1010
U95602-009A
Printed in U.S.A.
