Badge Guide
User Manual:
Open the PDF directly: View PDF ![]() .
.
Page Count: 7

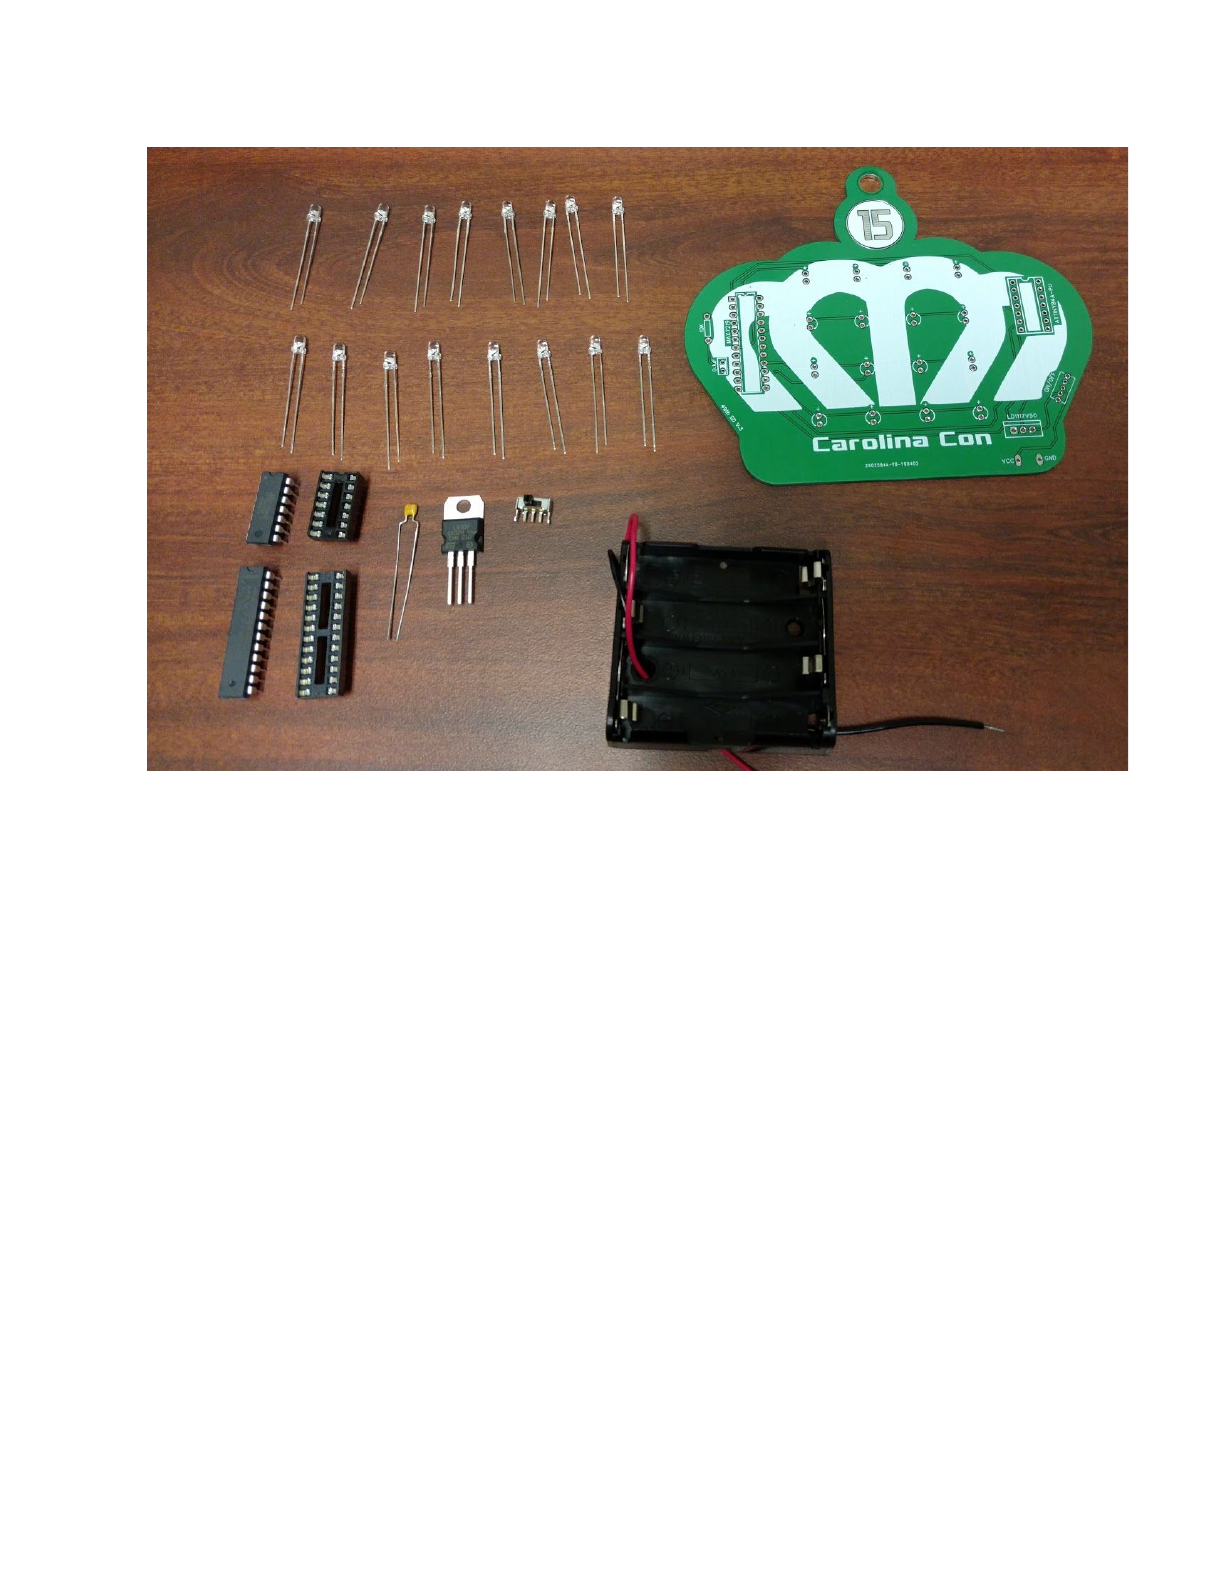
Each anti static bag should include:
●1 Crown Shaped PCB
●16 Clear Blue LEDs
●1 Battery Pack for 4 AAA Batteries
●1 Power Switch
●1 5V Voltage Regulator (The thing with 3 metal prongs)
●1 0.1uf Capacitor (Yellow thing)
●1 10K Resistor (not pictured, our bad)
●1 7 Pin Socket
●1 12 Pin Socket
●1 ATTINY84 (The brain)
●1 MAX7219 (The bigger looking black chip)
*if your bag is missing parts tell a staff member and we
will scavenge for more parts
2
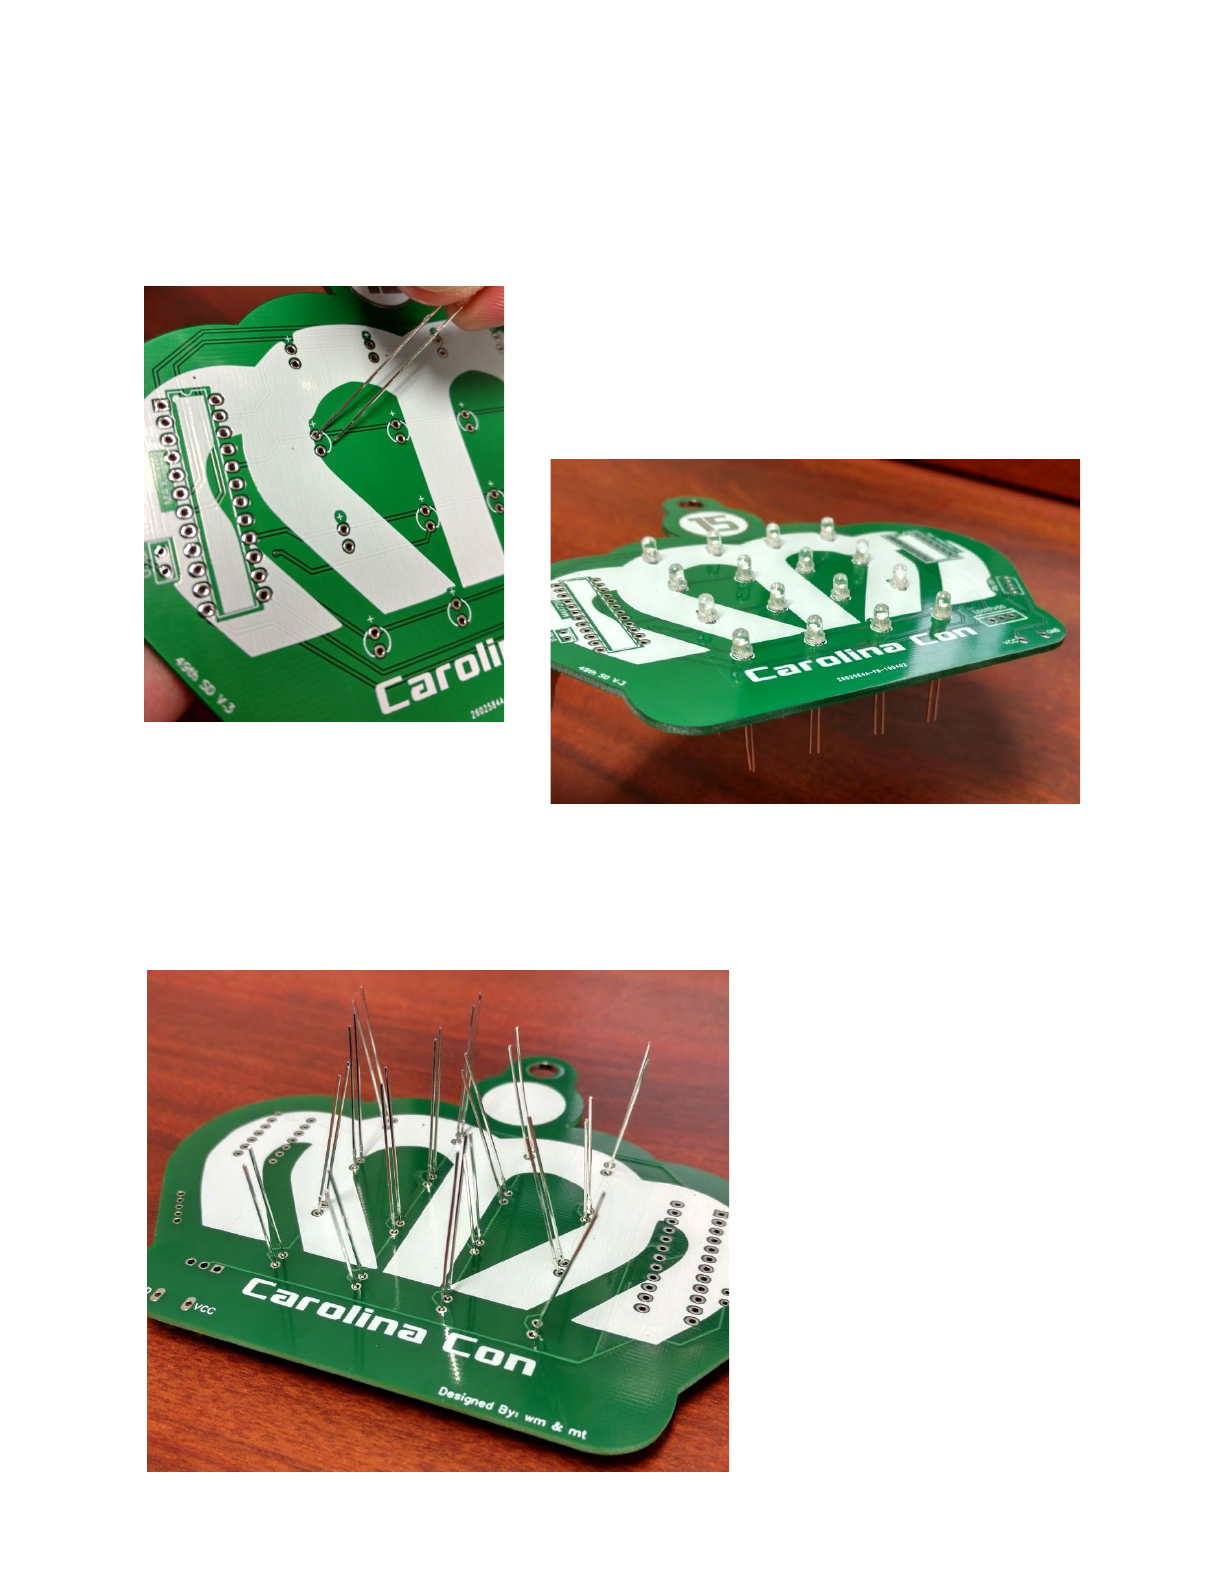
I recommend soldering the parts in this order. If you don’t
know how to solder shout “I don’t know how to solder!” and
someone will help you.
Insert the 16 LEDs into the front
of the PCB. Ensure the longer
lead goes into the hole with the
“+” label.
Once the LEDs are in place carefully flip the PCB upside
down so that the leads are sticking up.
Now that the PCB is
upside down you may
solder the LEDs to
the PCB. Try and
keep the leads as
straight in the air
as possible.
3
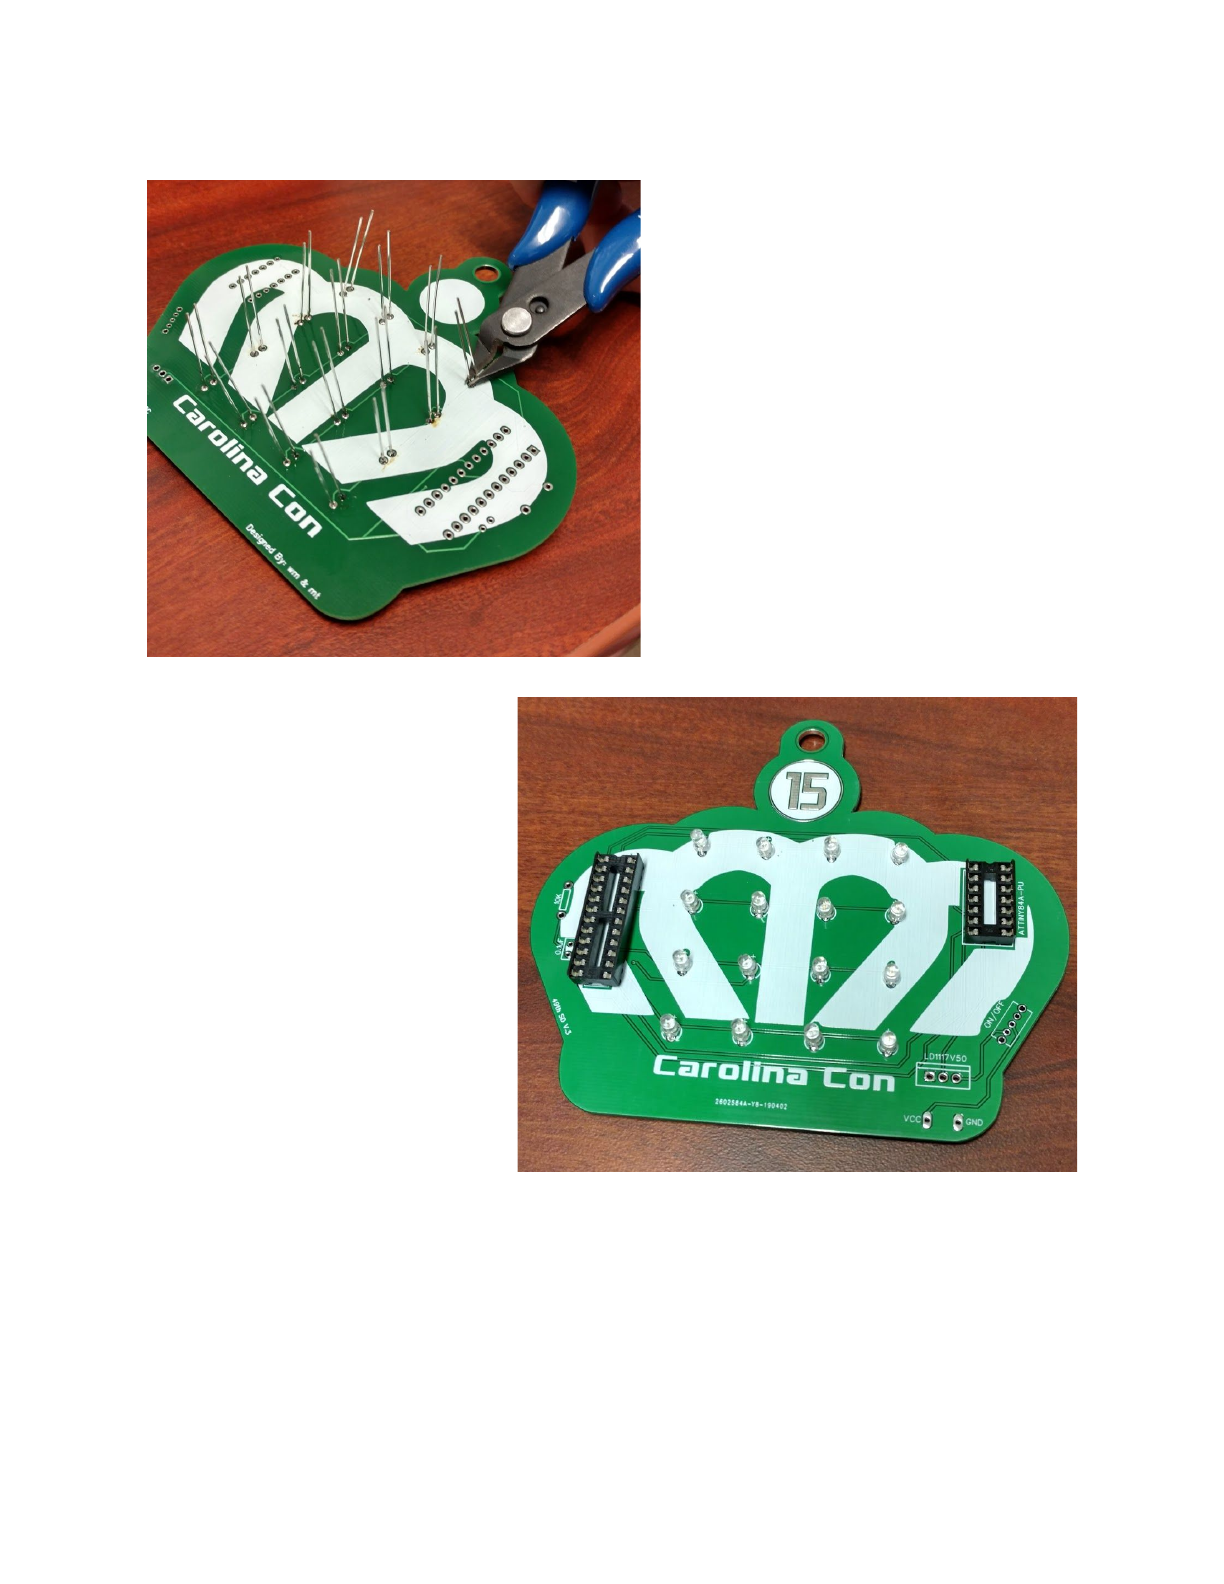
Clip off the LED leads
with clippers.
Solder the 2 IC
sockets next by
applying solder to
the pins on the
backside.
4
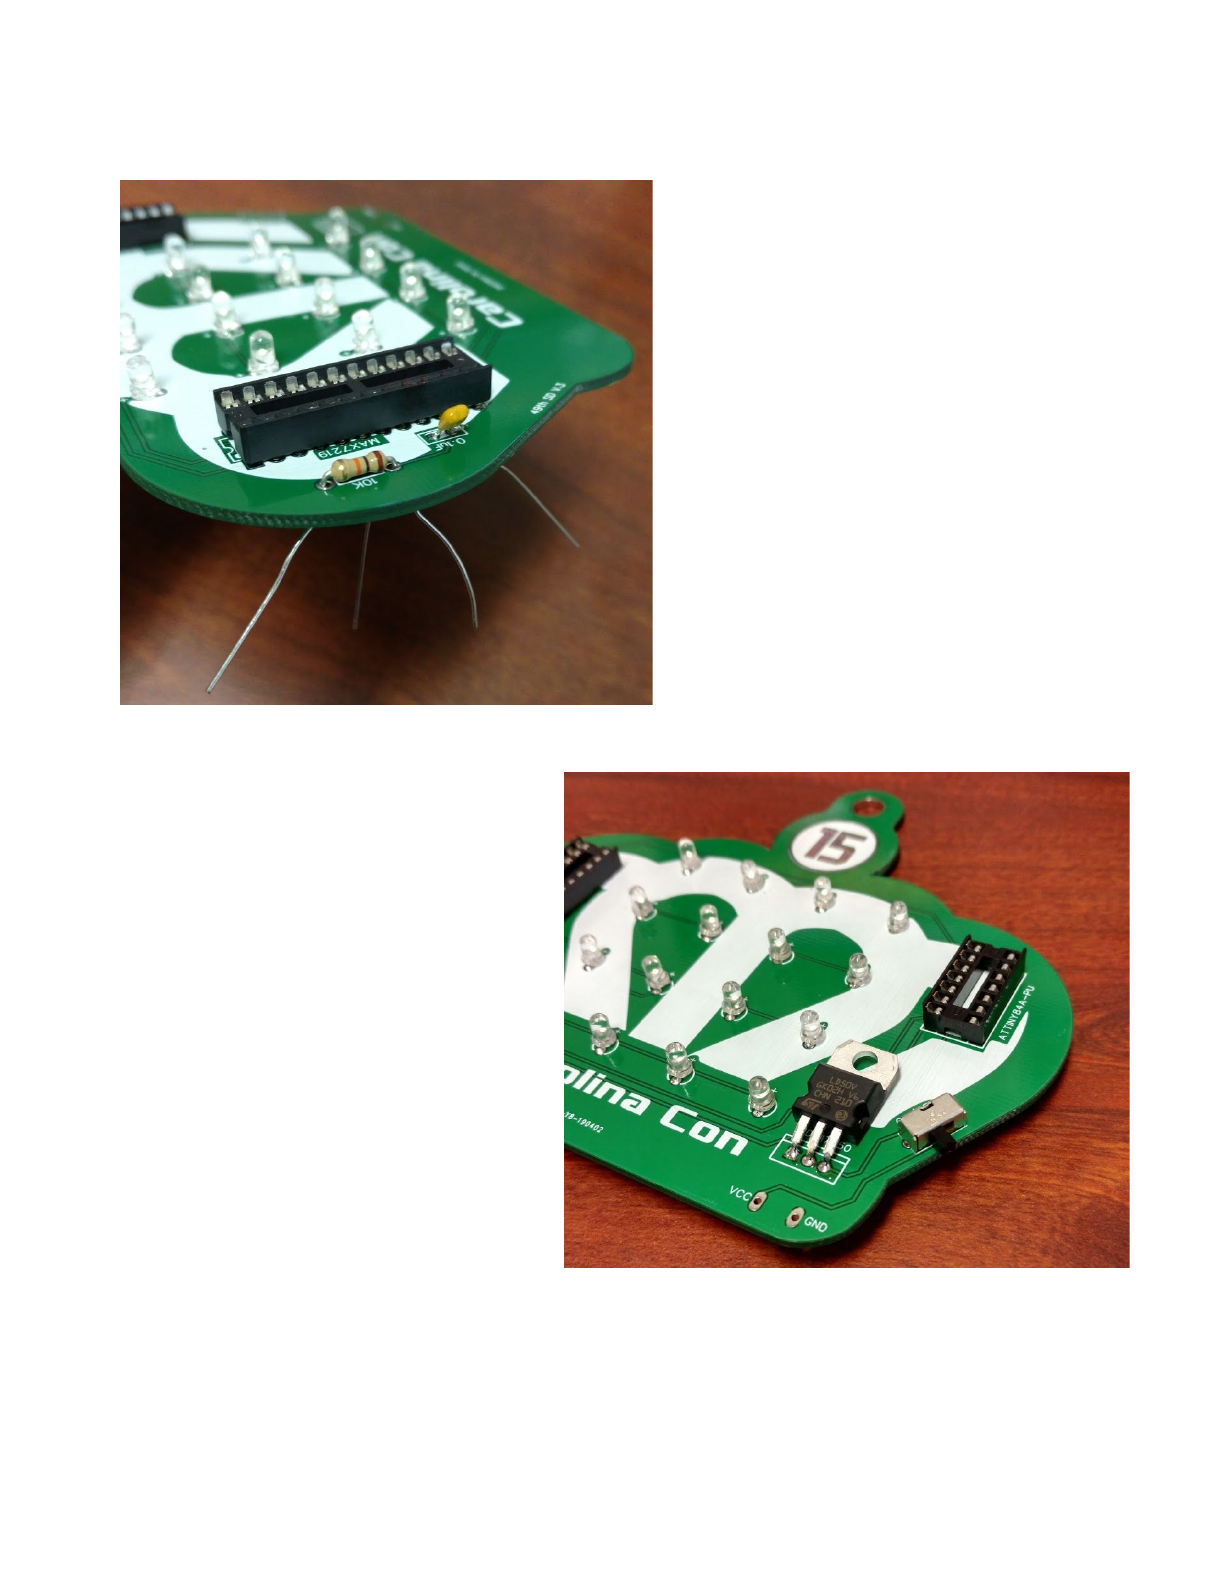
Place the 10K Resistor
and 0.1uf Capacitor in
their respective
locations. You may need
to pull the capacitor
through the hole with
pliers. Apply solder to
the backside of the PCB.
Place the 5V regulator
in the PCB holes as far
as it will go then bend
it flat onto the PCB.
It doesn’t need to be
super close. Apply
solder to the 5V
regulator on the top of
the PCB.
Press the Power Switch
onto the PCB. Ensure
the black plastic is
hanging off of the PCB.
Solder it in place by
applying solder to the back of the PCB.
5
Flip the PCB over and cut off
any remaining leads. Get a
strip of double sided tape
from the roll and apply it
like shown in the picture.
Honestly, it doesn’t stick
very well. Feel free to use
duck tape it if we have that
onsite.
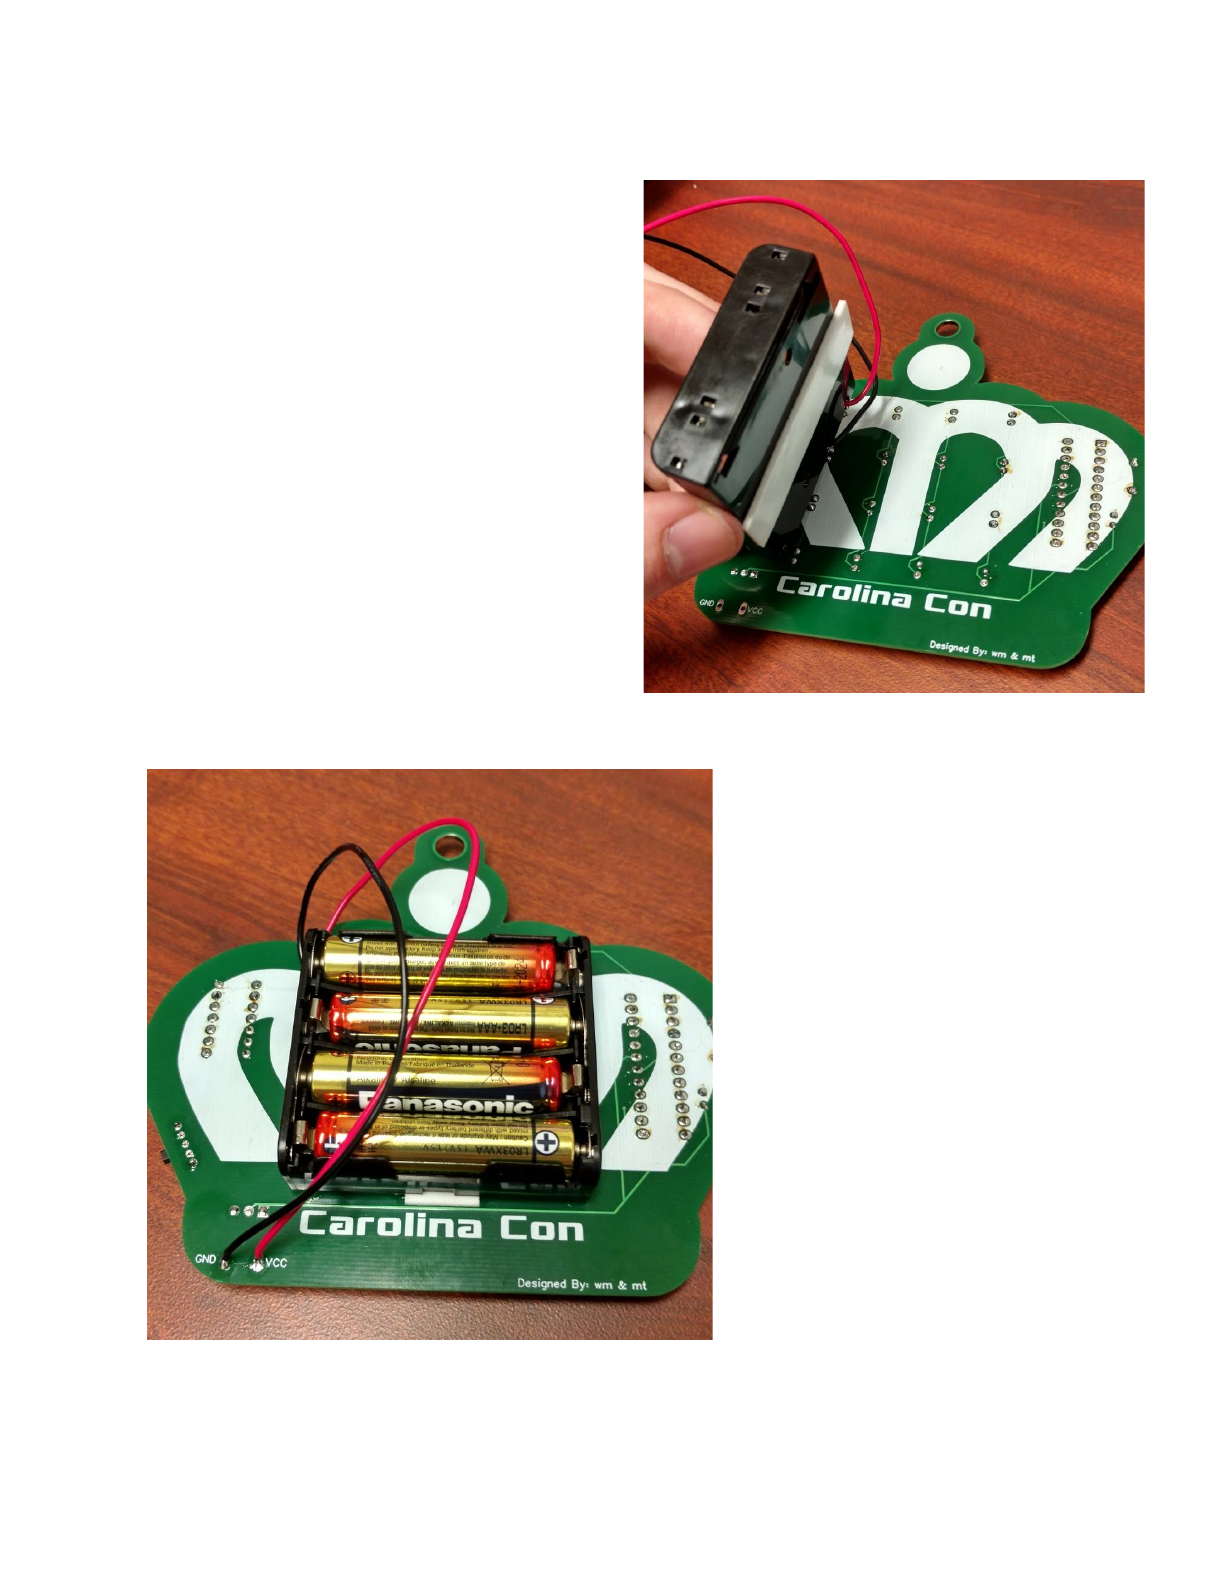
Once the battery pack
is in place ask one
of the staff members
for 4 AAA batteries
and place them in the
pack.
Solder the red wire
from the battery pack
to the pad labeled
“VCC” and the black
wire to the pad
labeled “GND”.
6
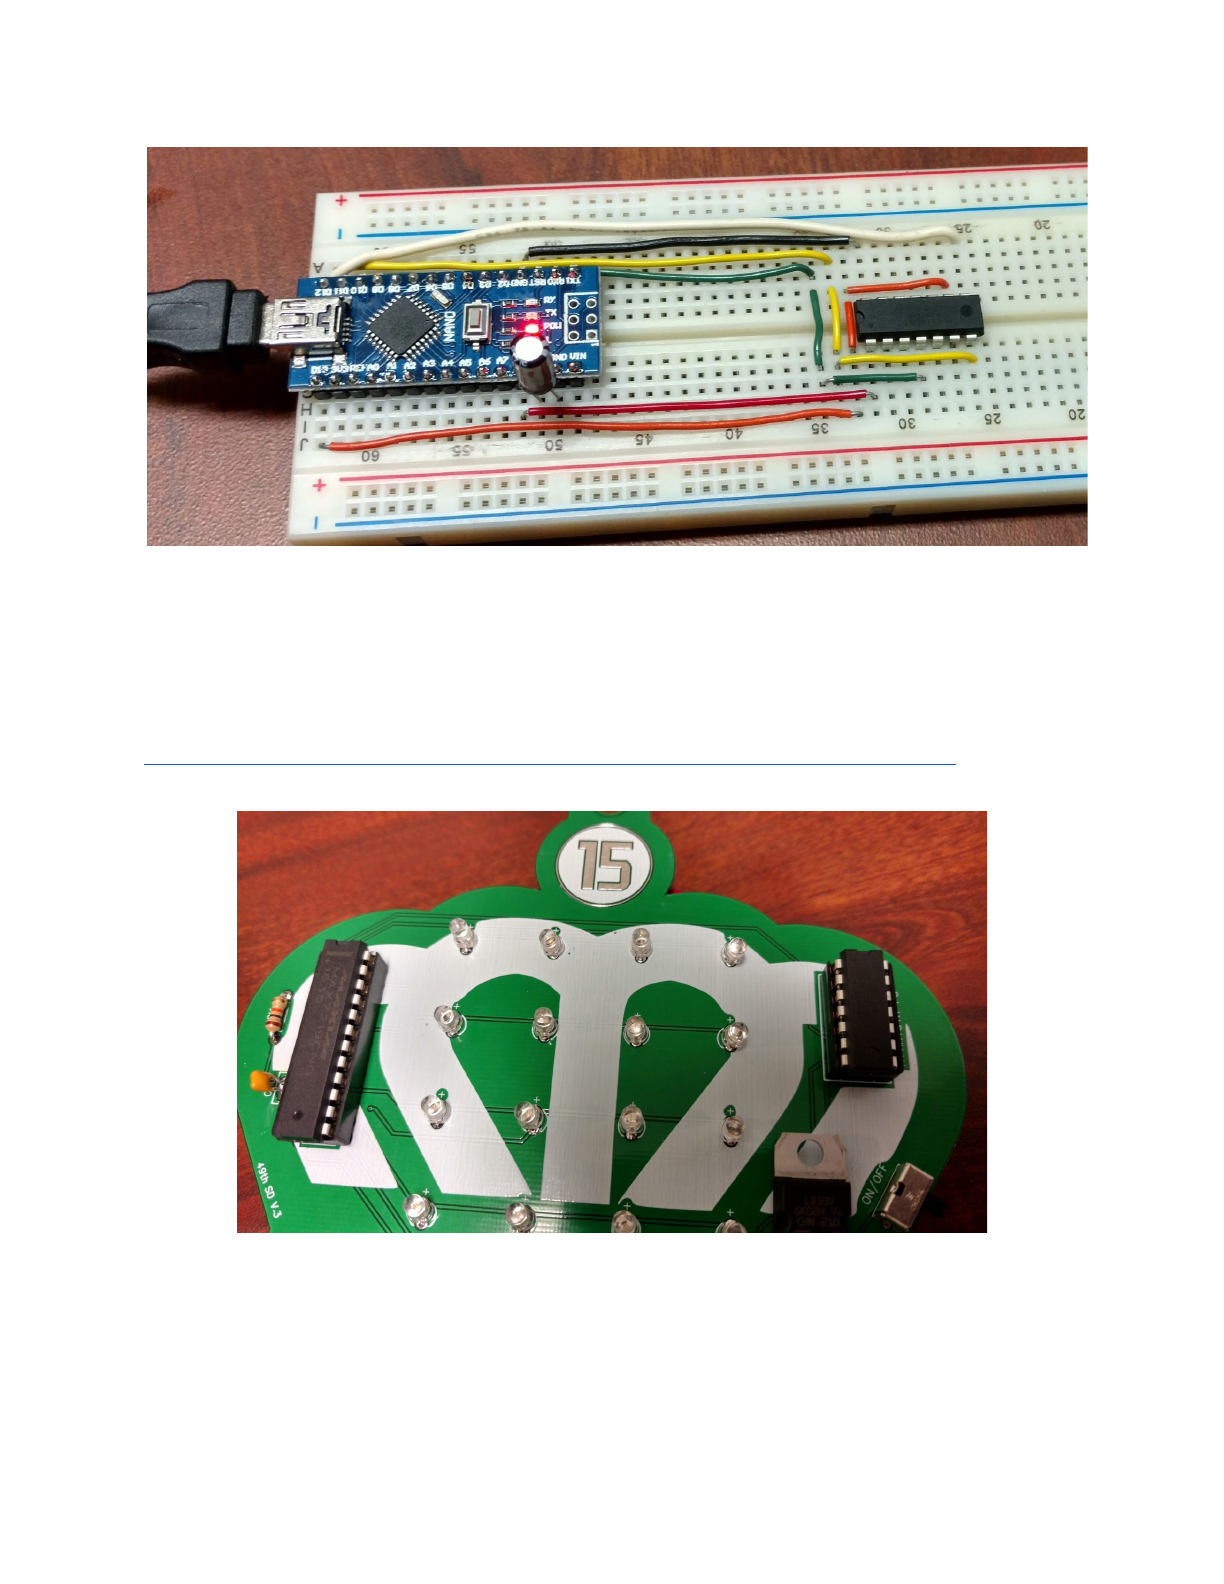
Take the ATTINY84 (the smaller black chip) to a staff member
to have it programmed for you. If you want to check out the
code on github for yourself you can to clone the repo here.
https://github.com/49thSecurityDivision/CC-15-Badges
Place the ATTINY84 into its socket and the MAX7219 into its
socket. Ensure the round notch is facing upwards
Congratulations! The badge is finished!
7
