Blueprint User Guide
Blueprint_User_Guide
Blueprint_User_Guide
Blueprint_User_Guide
Blueprint_User_Guide
Blueprint_User_Guide
User Manual:
Open the PDF directly: View PDF ![]() .
.
Page Count: 44
Task 1: Update the Homepage
There are two sub-parts to this task: a) changing the hero banner image,
and b) editing the key highlights in the hero banner.
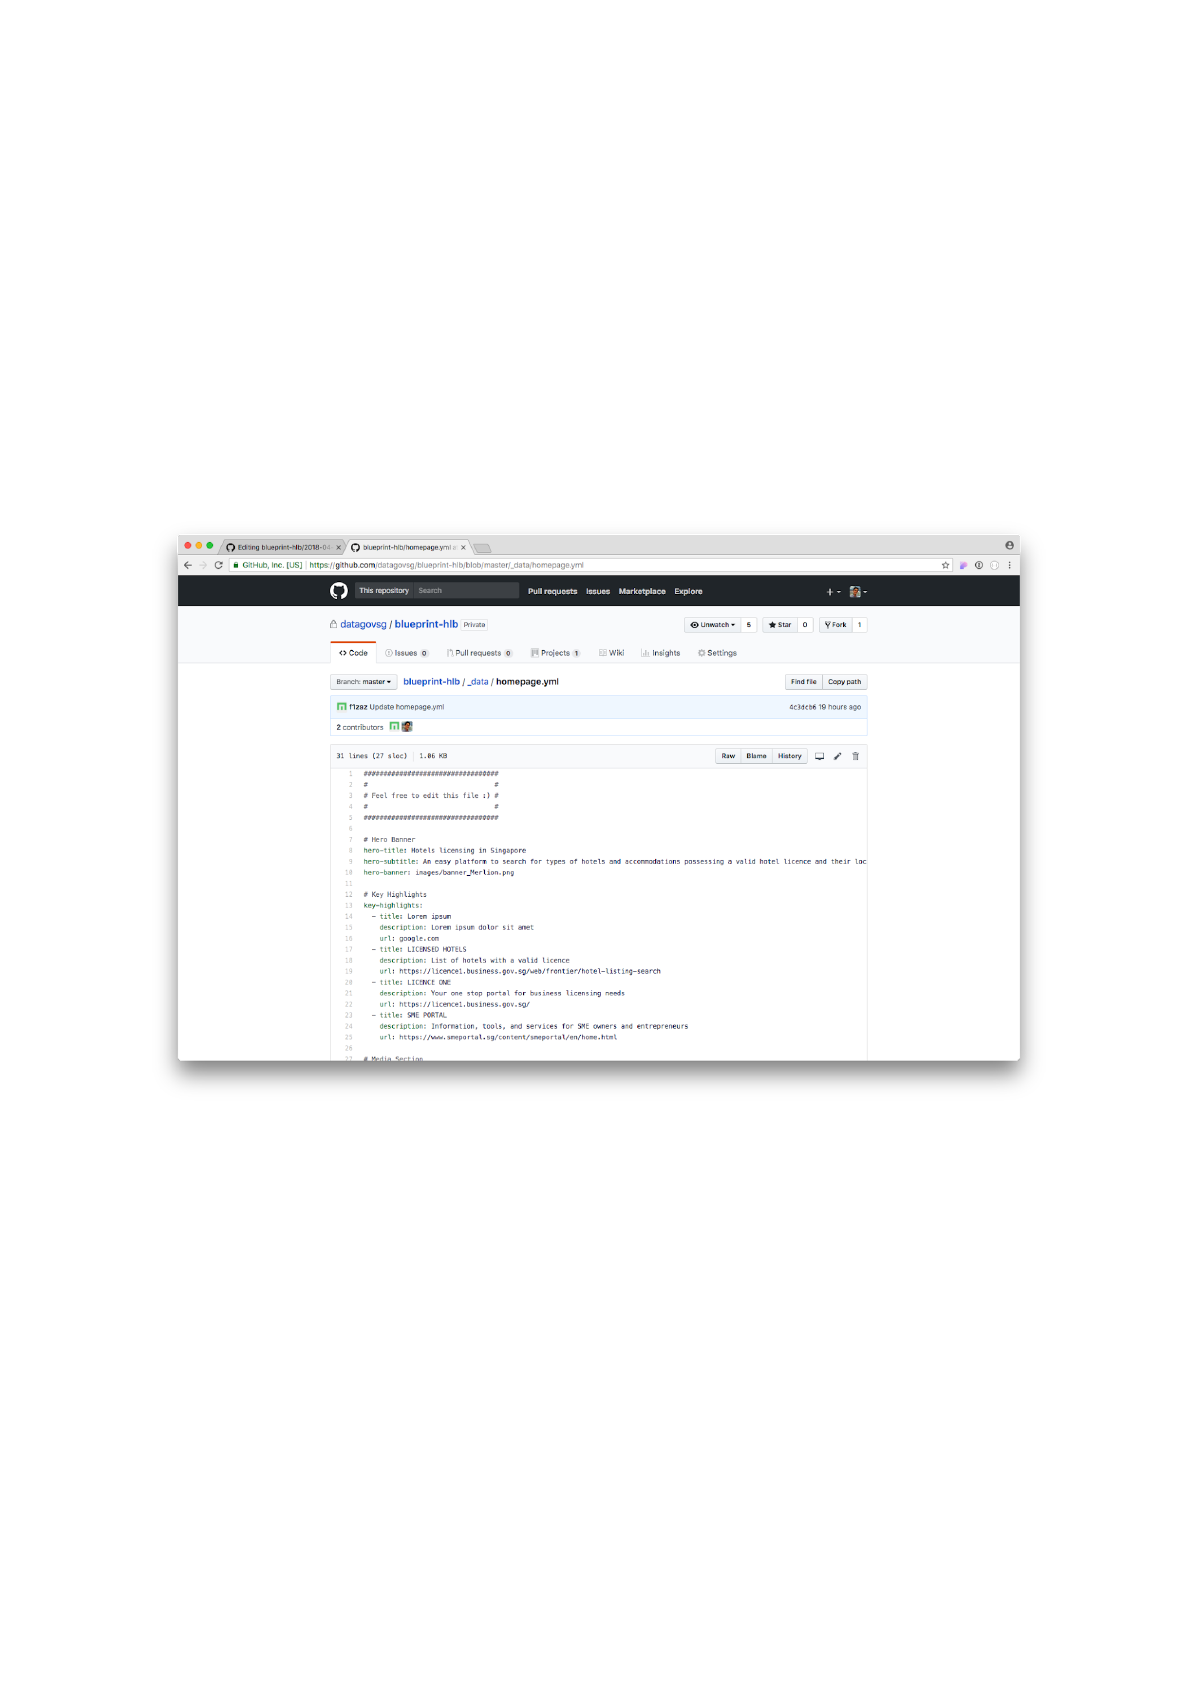
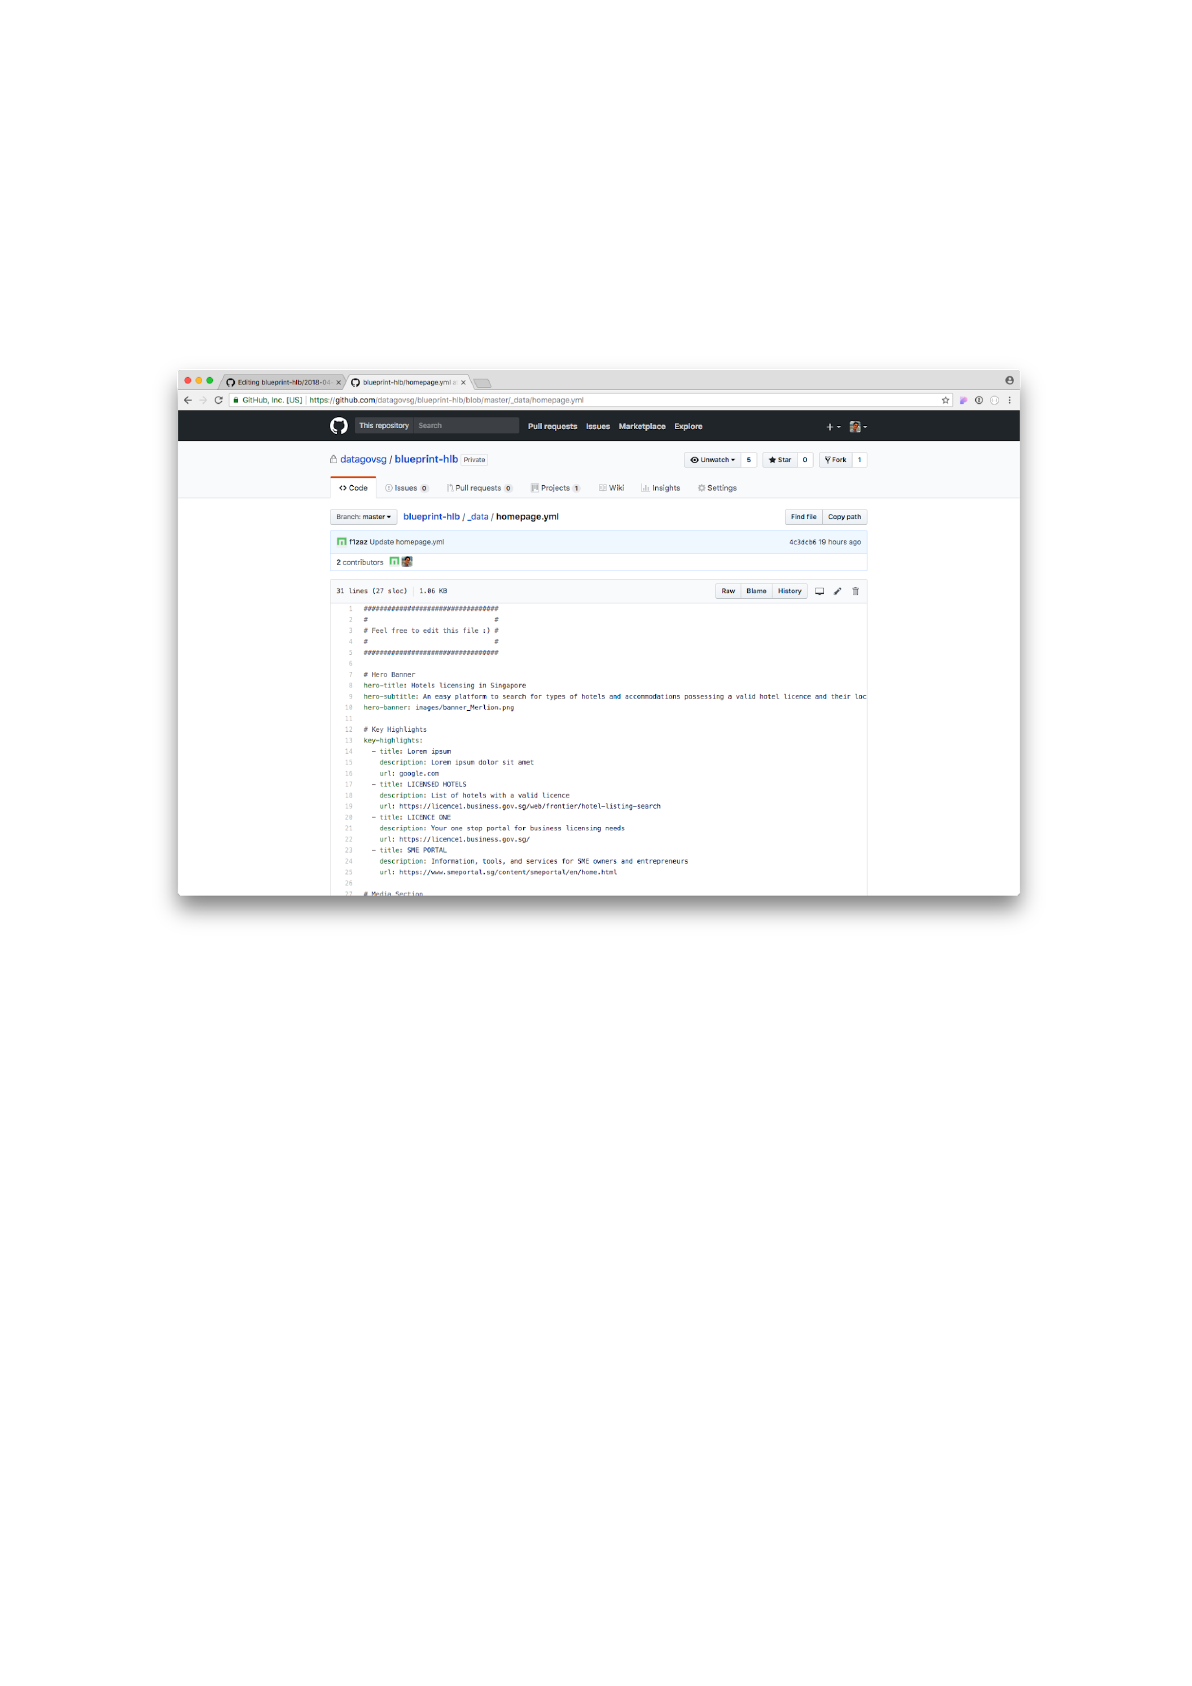
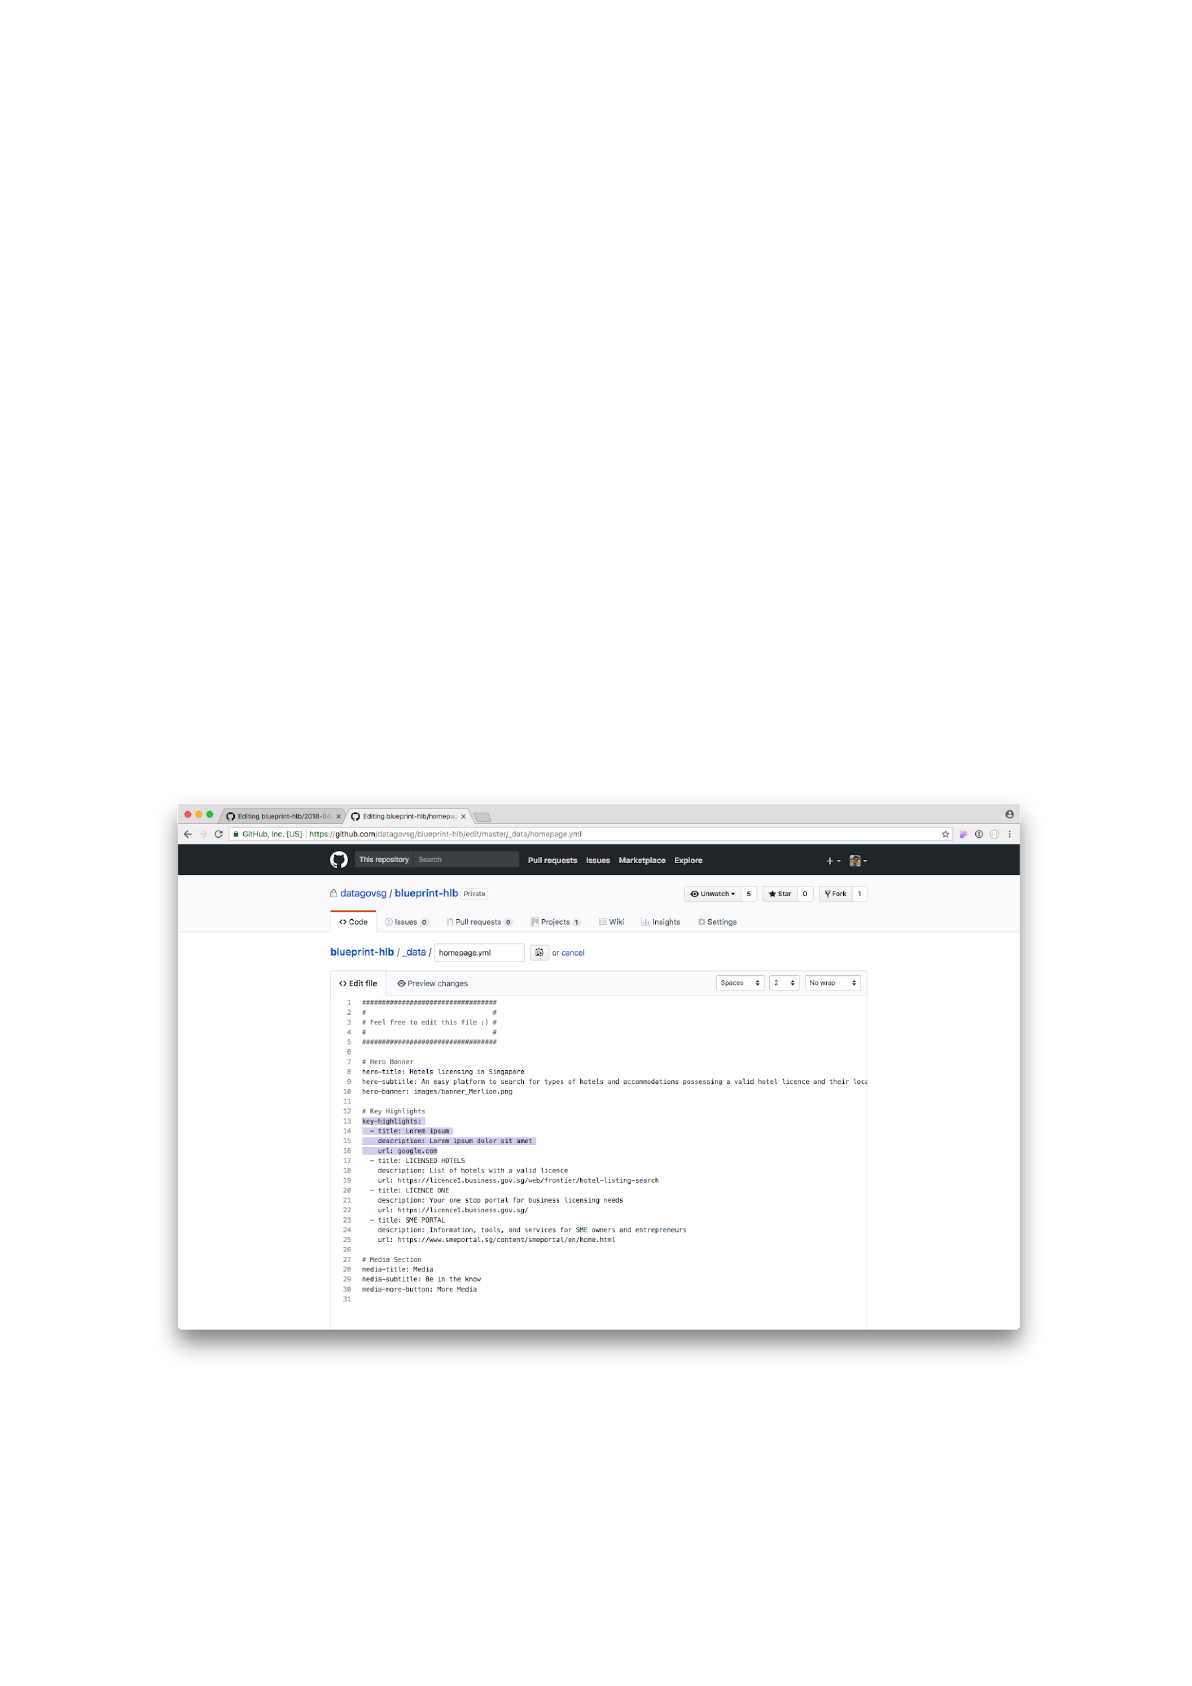
The Homepage is controlled by a single YAML (.yml) file. The file is in
the _data folder and is called homepage.yml.
The YAML file tells the website generator what information to display on
the homepage. It looks something like this.
Task 1a: Change the Hero Banner Image
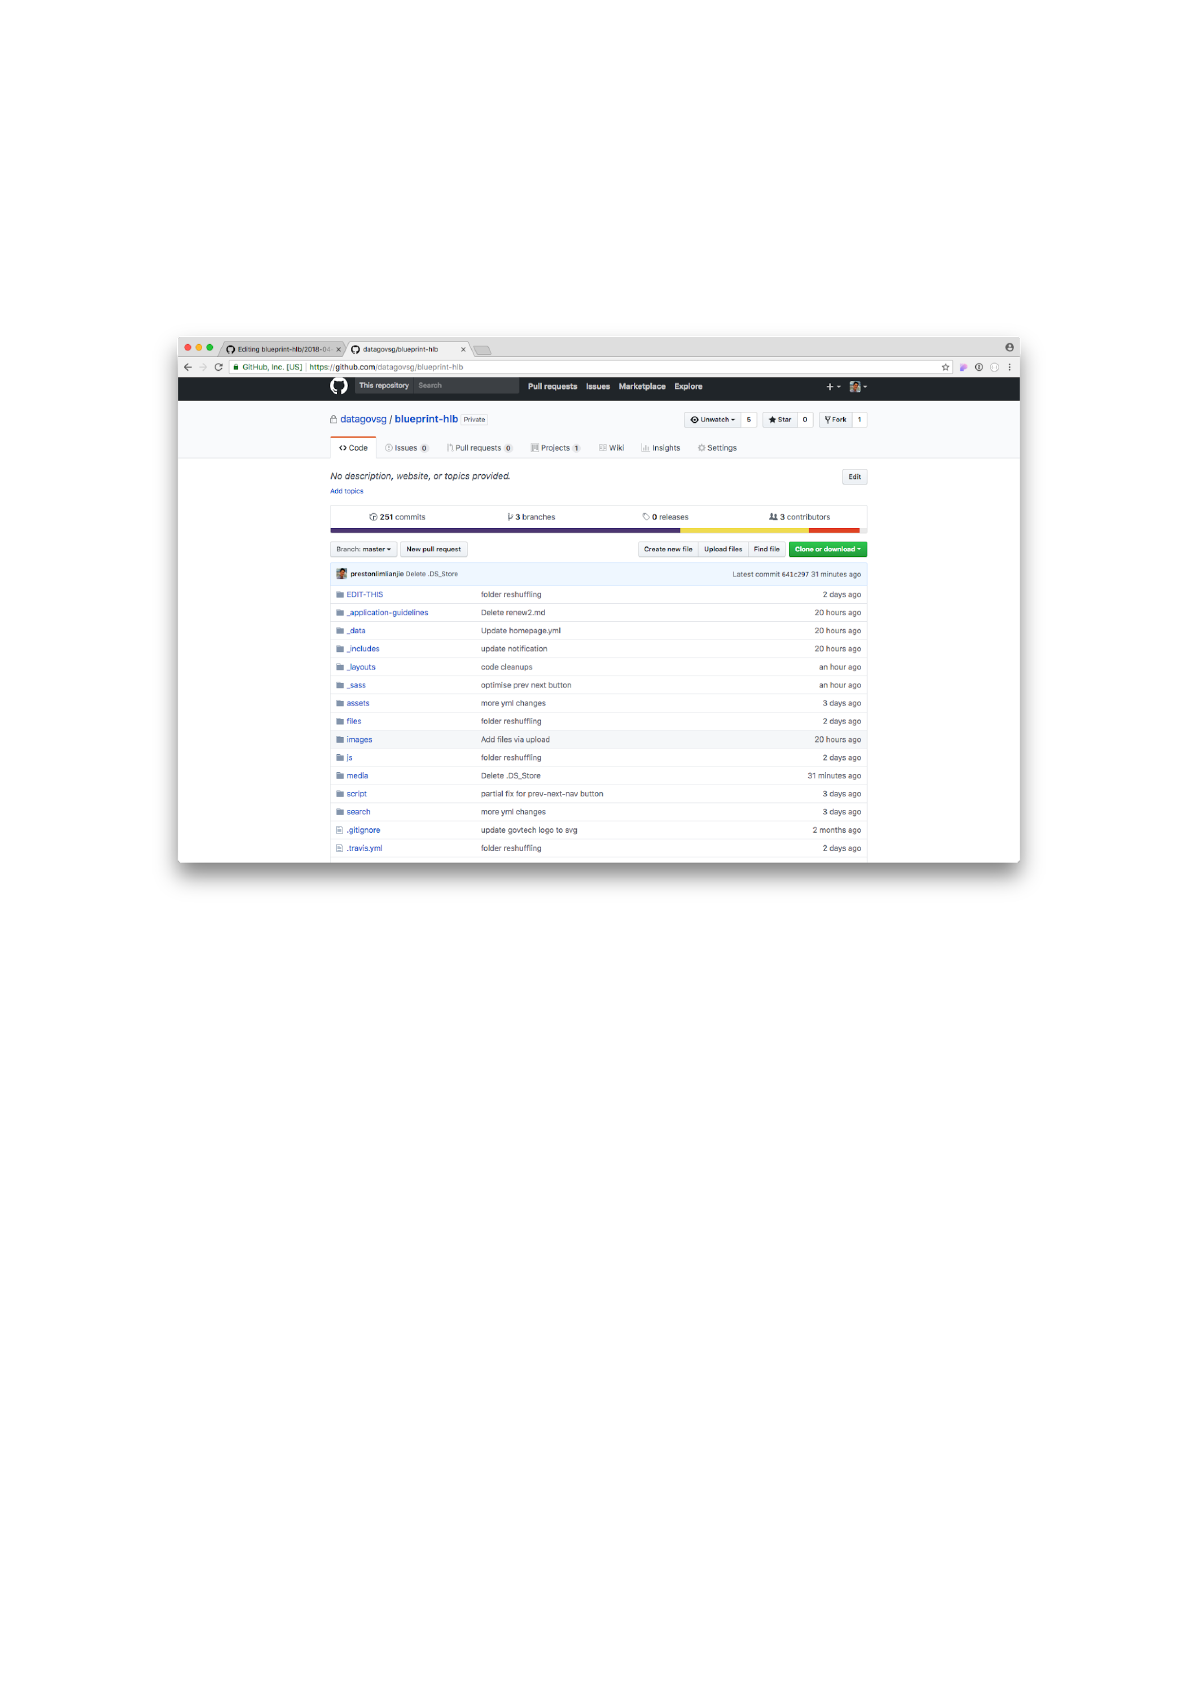
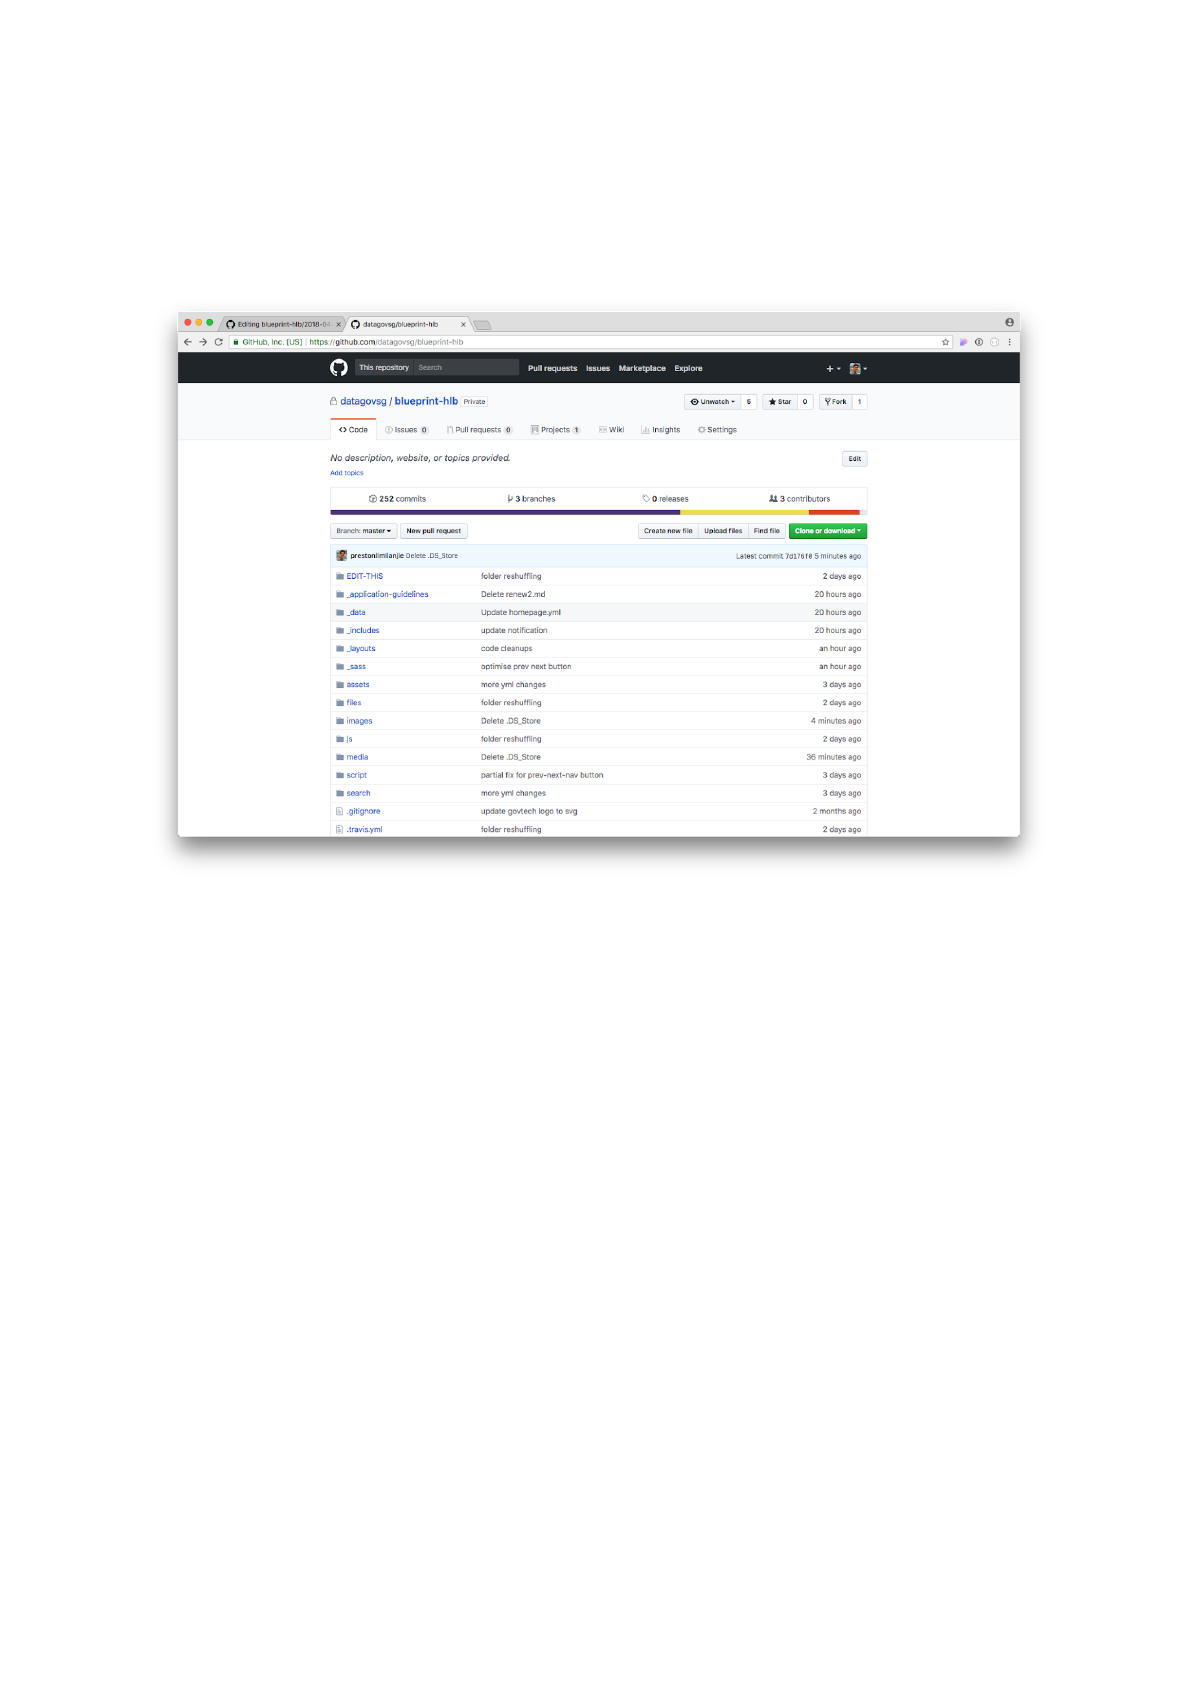
Step 1: Click on the images
folder.
Main directory of the website repository
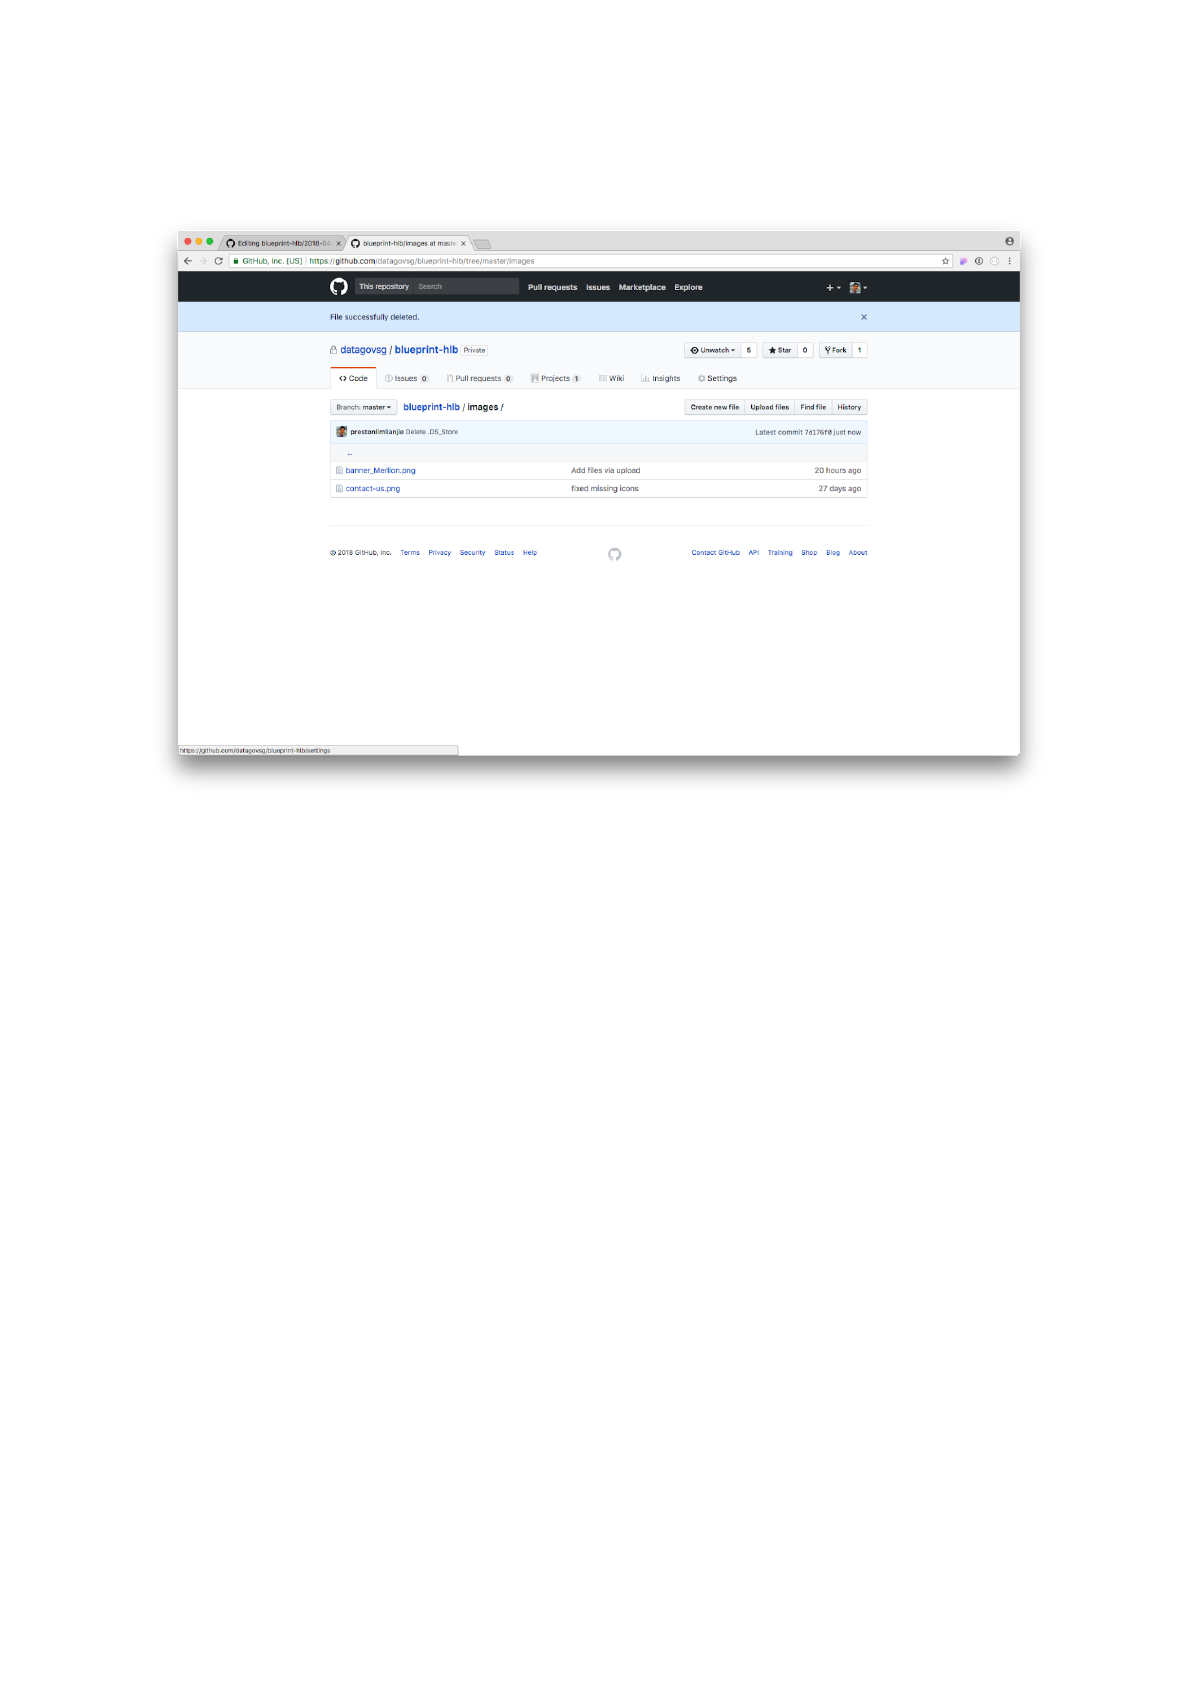
Step 2: Click on the Upload files
button.
The images folder contains all the images used in the website.
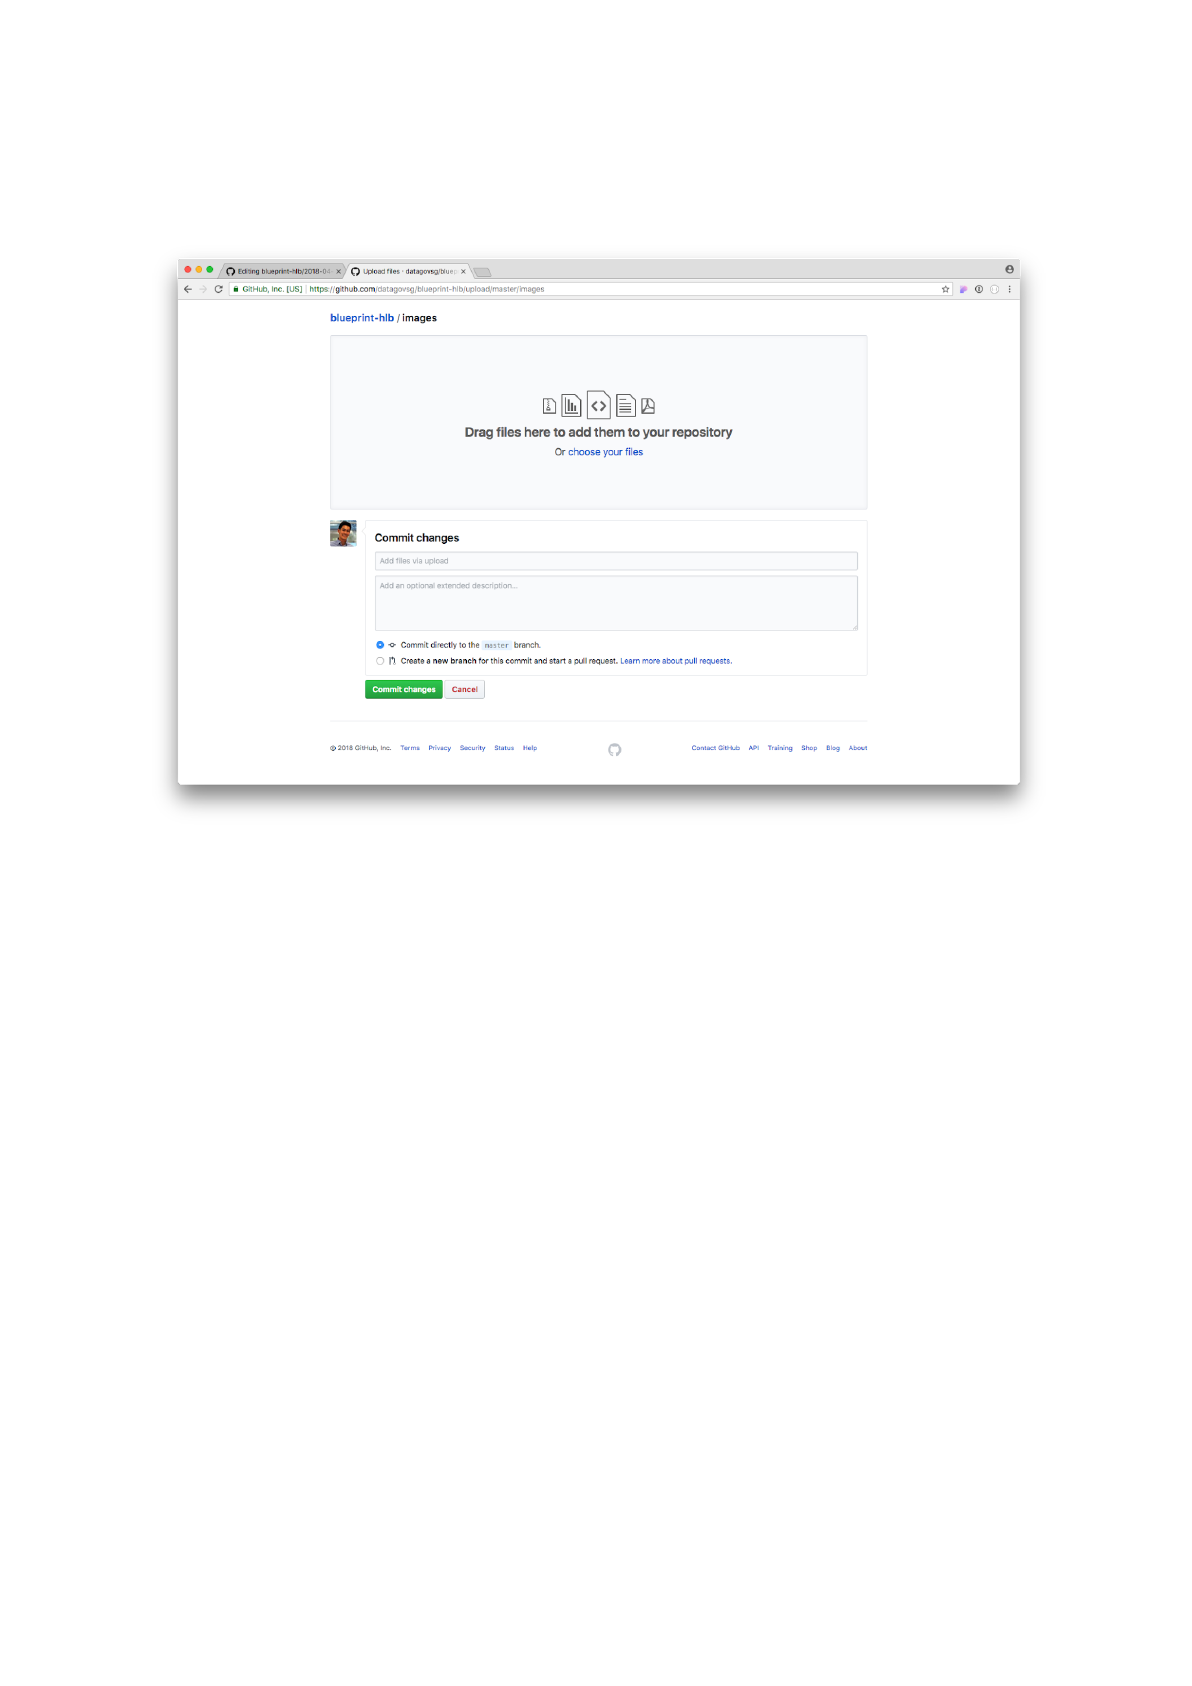
Step 3: Upload the banner_GardenBay.png. Click on the Commit
changes button to save the file.
Upload and save the image file.
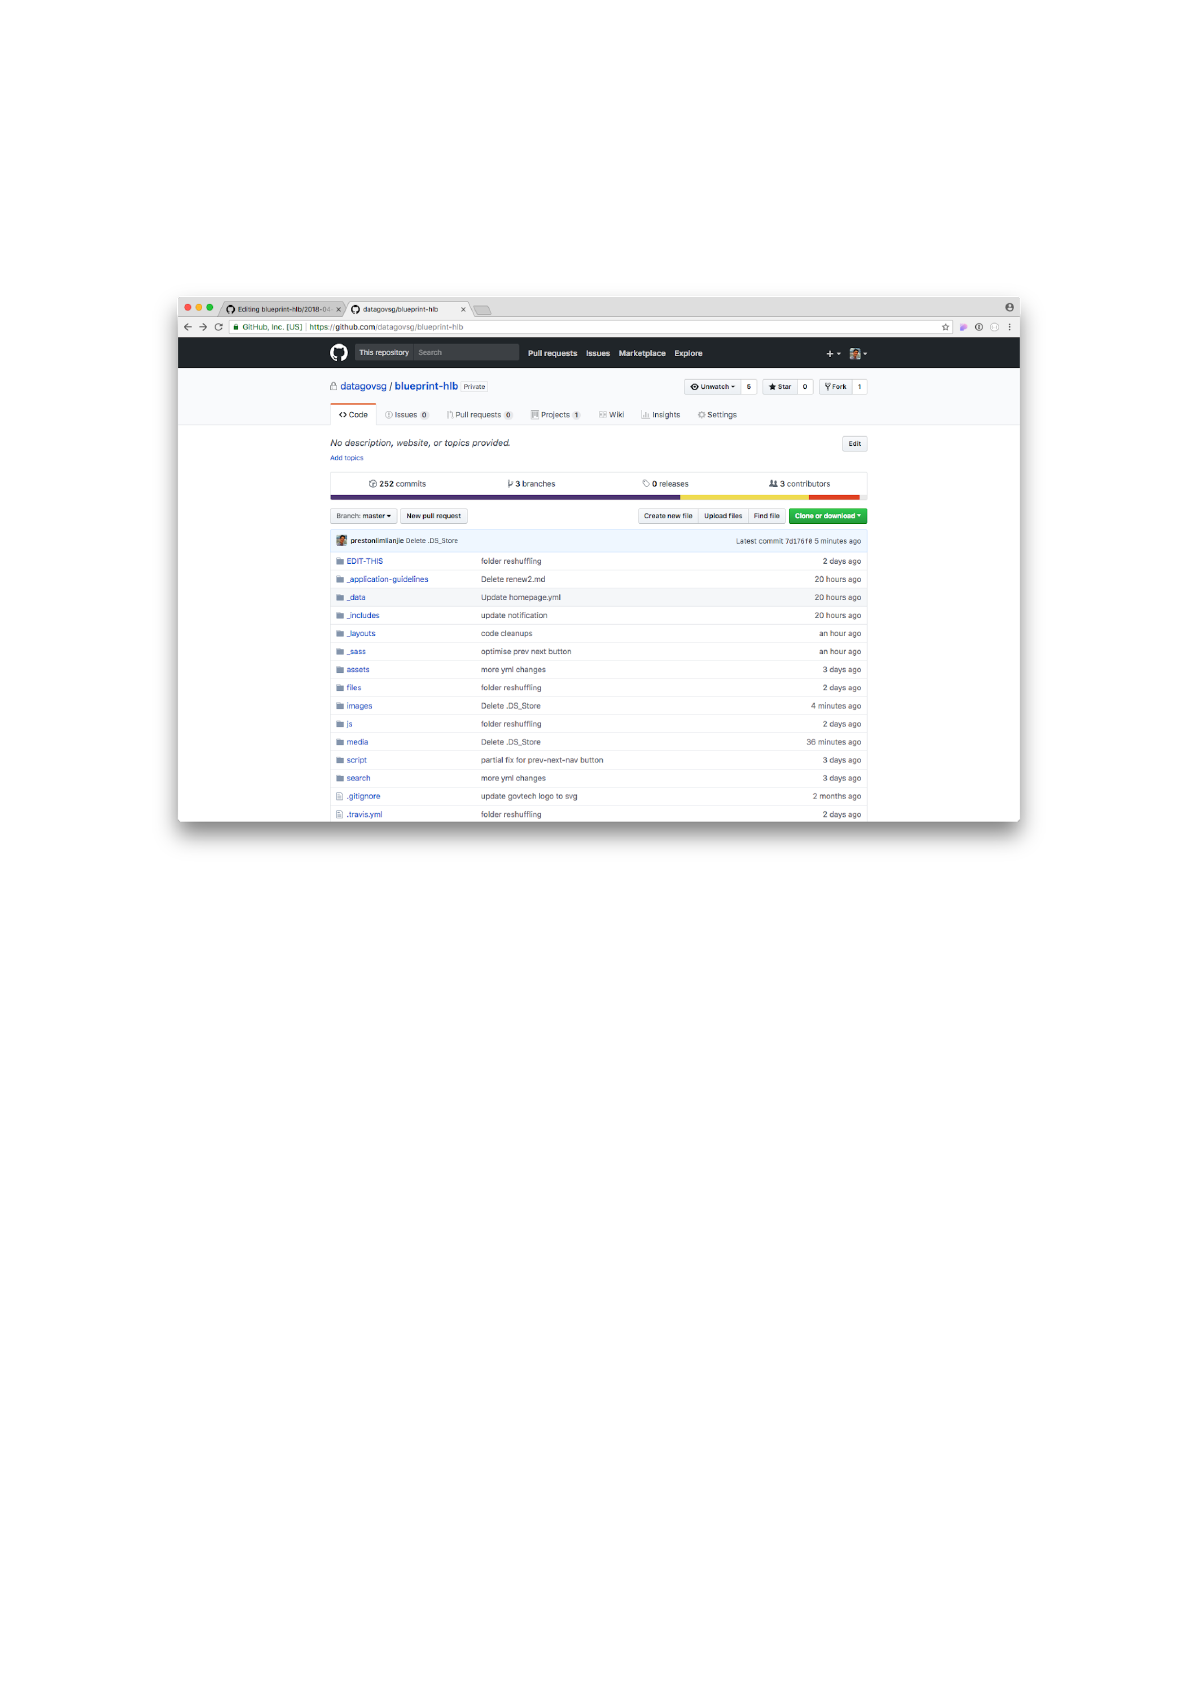
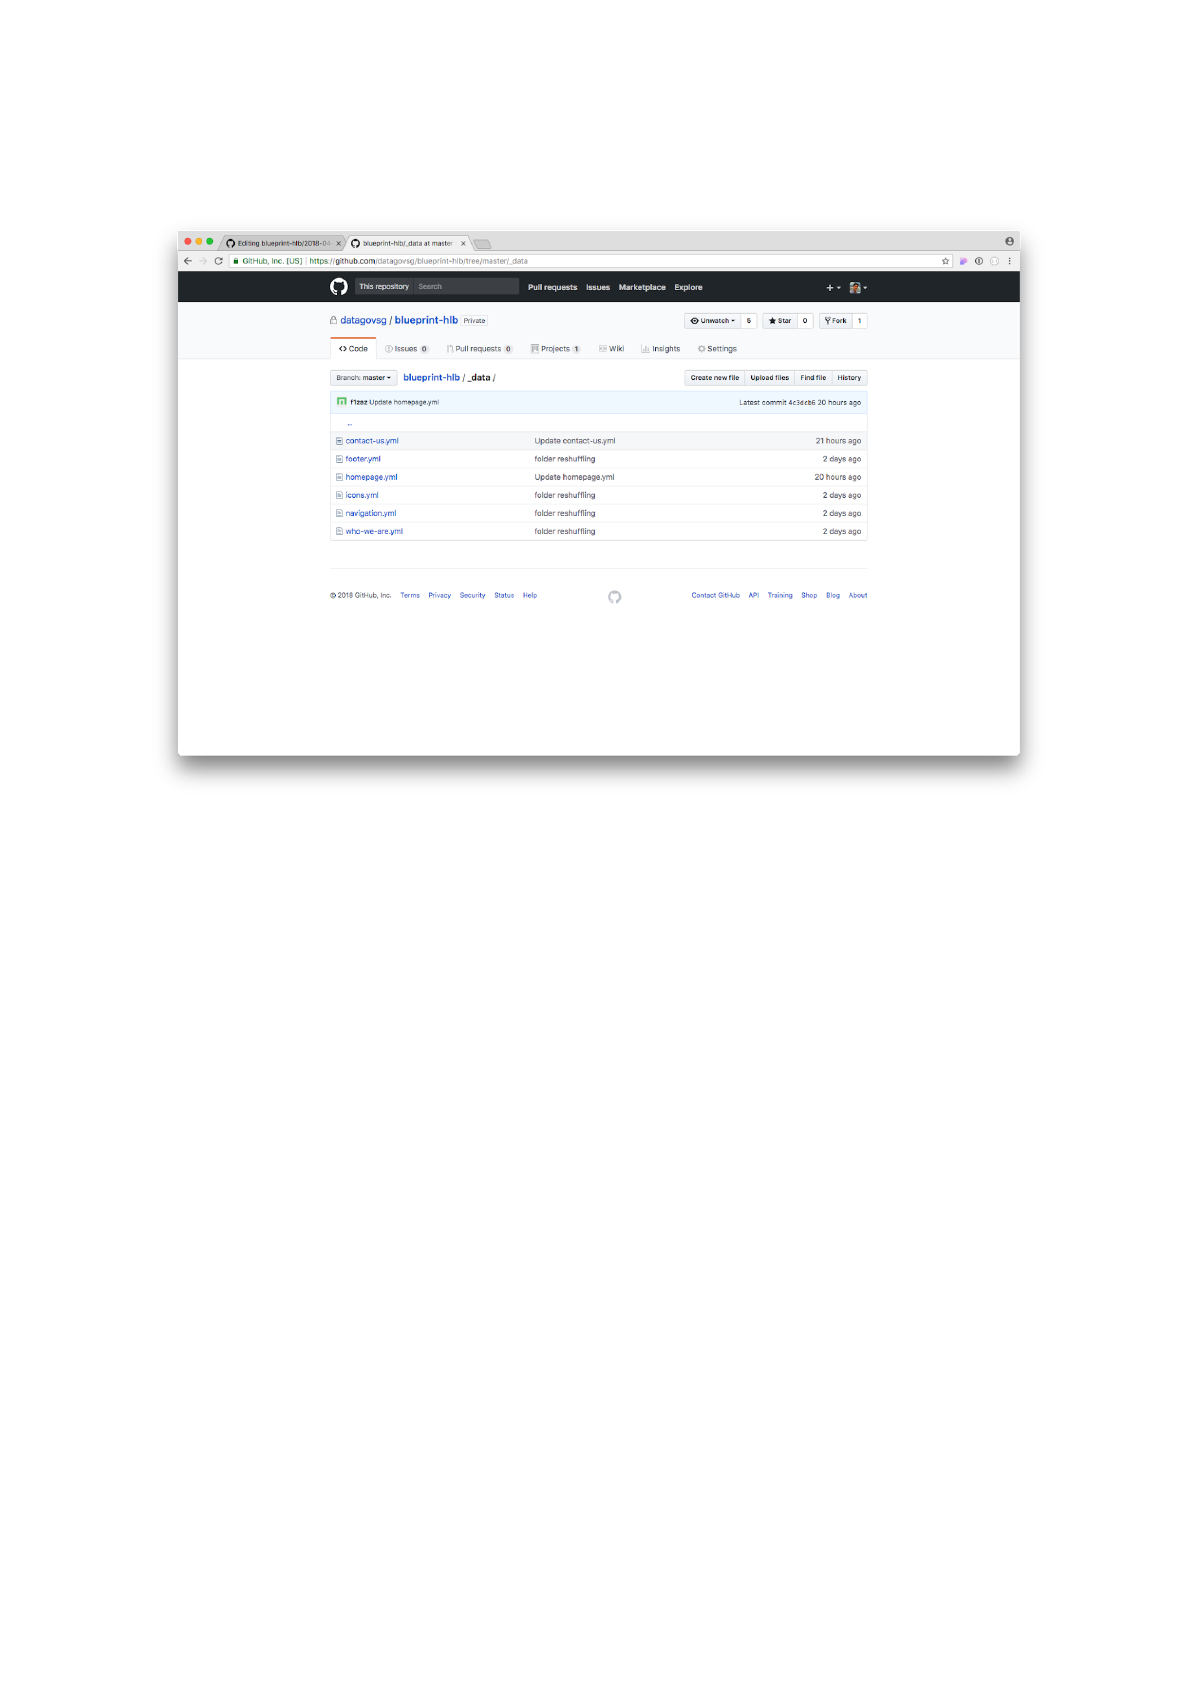
Step 4: Go back to the main directory of the repository. Click on the
_data folder.
Go to the _data folder

Step 5: Click on the homepage.yml file.
Click on homepage.yml
Step 6: We want to change the hero-banner image URL to the one that
we just uploaded. Hero-banner tells the website generator where to
find the hero banner image.
Click on the edit (pencil icon) button.
Click on homepage.yml
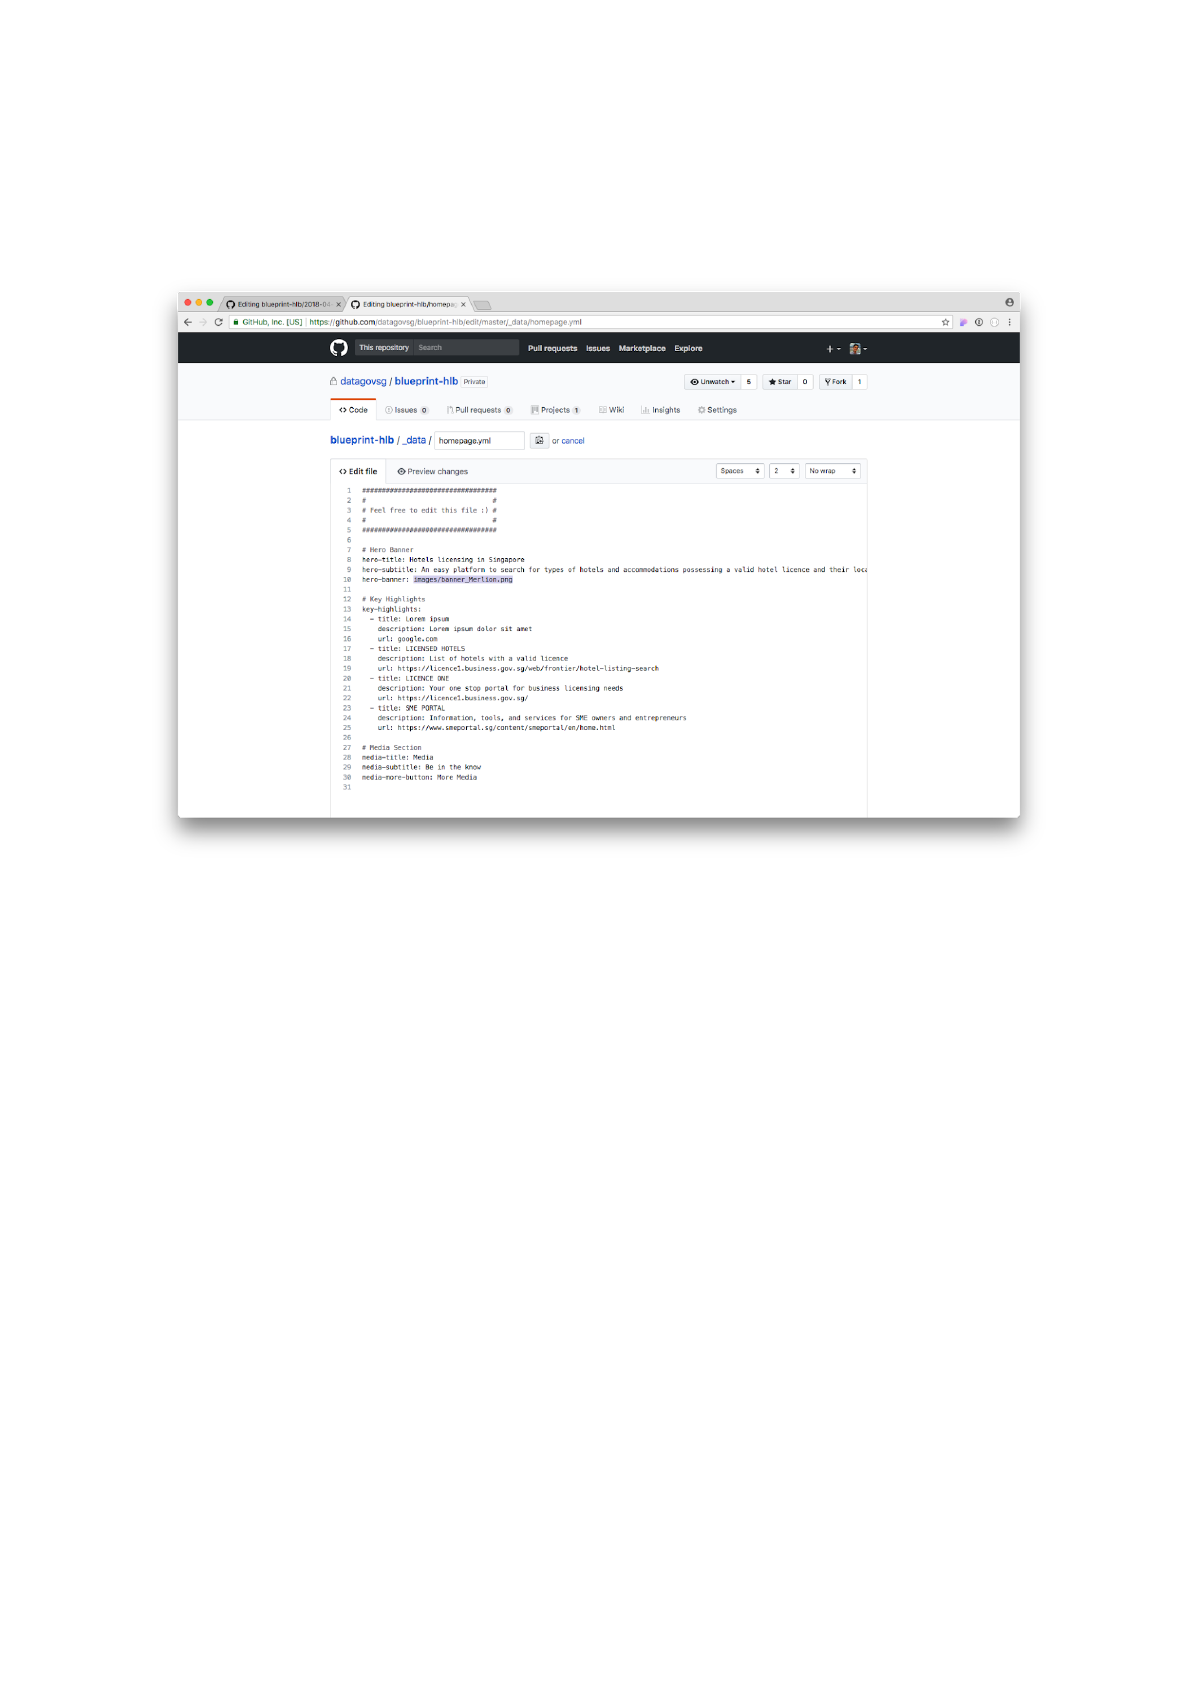
Step 7: Replace the hero-banner URL with
images/banner_GardenBay.png.
Replace the hero-banner URL
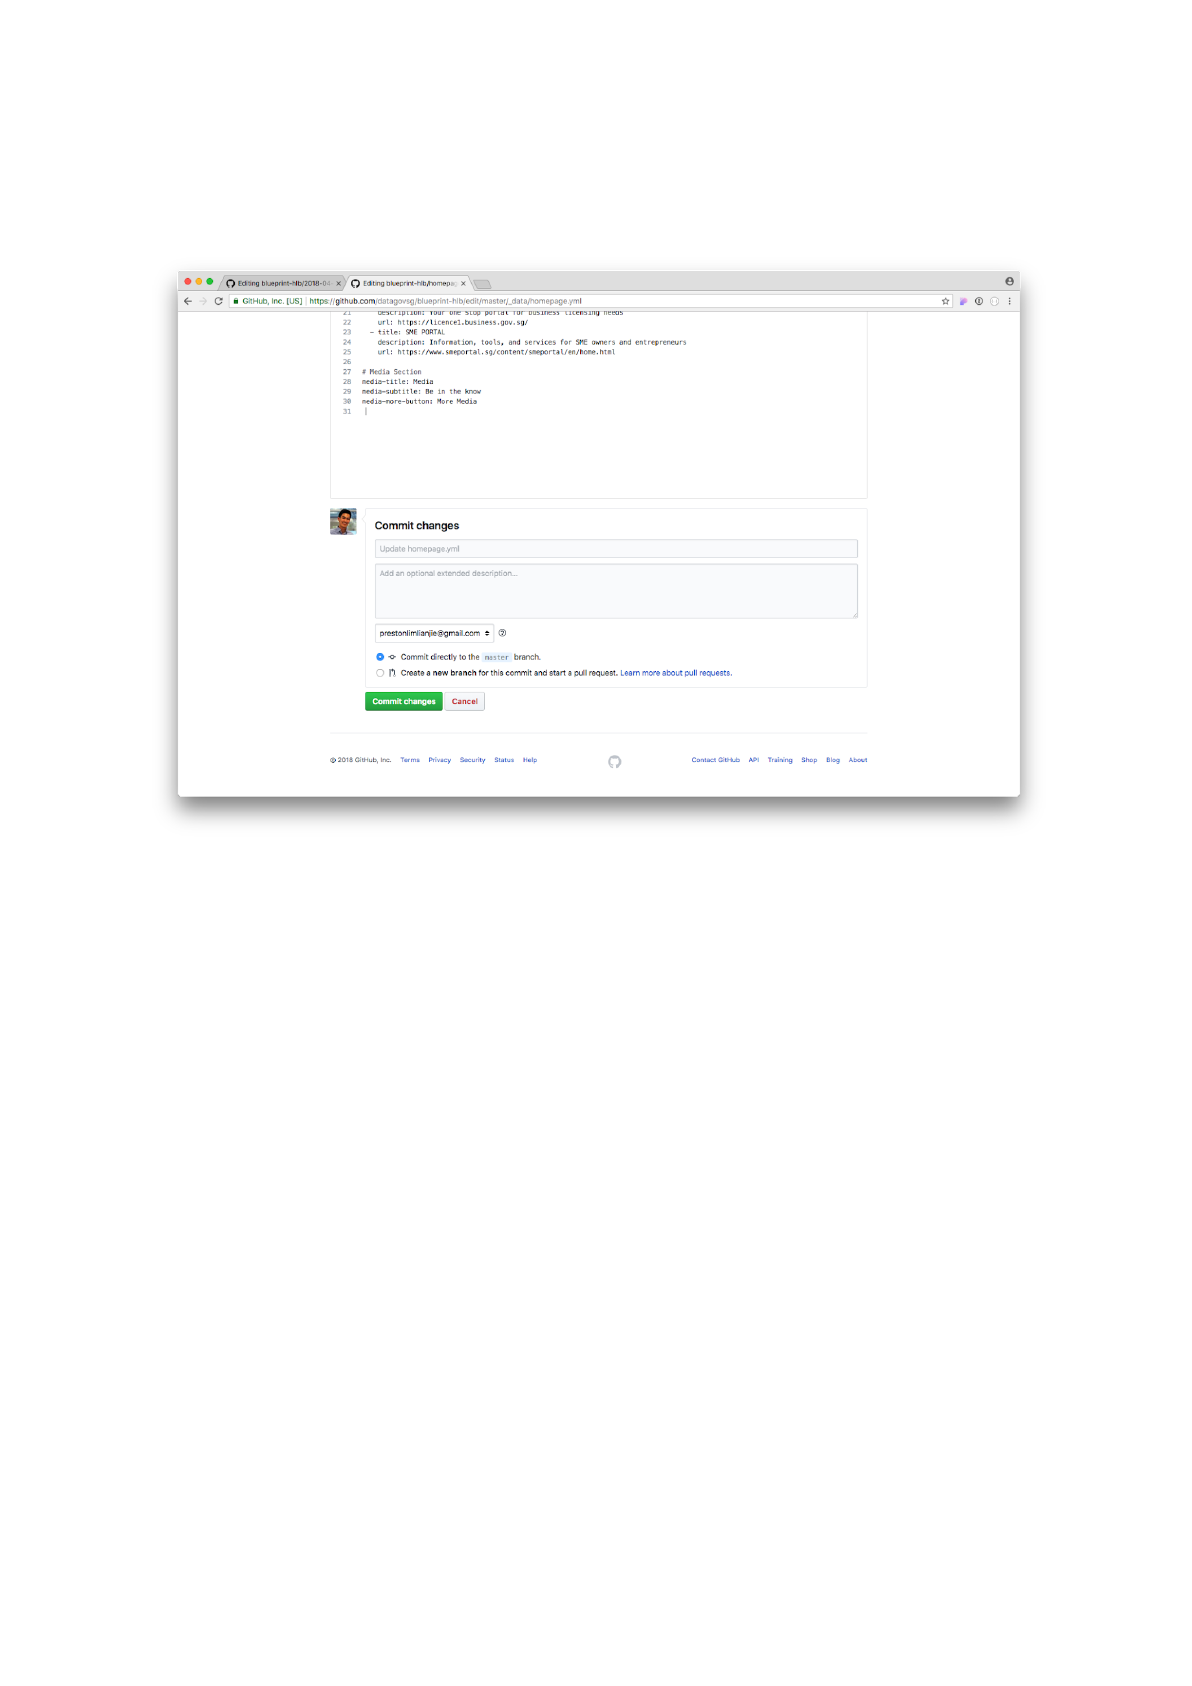
Step 8: Click on the Commit changes button to save the file. The image
change should be reflected on the website in a minute or so.
And we’re done!
Task 1b: Edit a Key Highlight
Step 1: Go back to editing the _data/homepage.yml file. Replace the
first key highlight section with:
title: TEMPLATES AND FORMS
description: Downloadable templates and forms
url: /media/forms-&-templates/
The title is the title of the key highlight. It is case insensitive.
The description is the description of the highlight. It is also case
insensitive.
The url is the URL that the user will be re-directed to when they click on
the key highlight button. For
external
links, we need to the use the
absolute URL (e.g. if you wanted to redirect your user to google.com,
you need to use https://google.com)
Replace the key highlight section
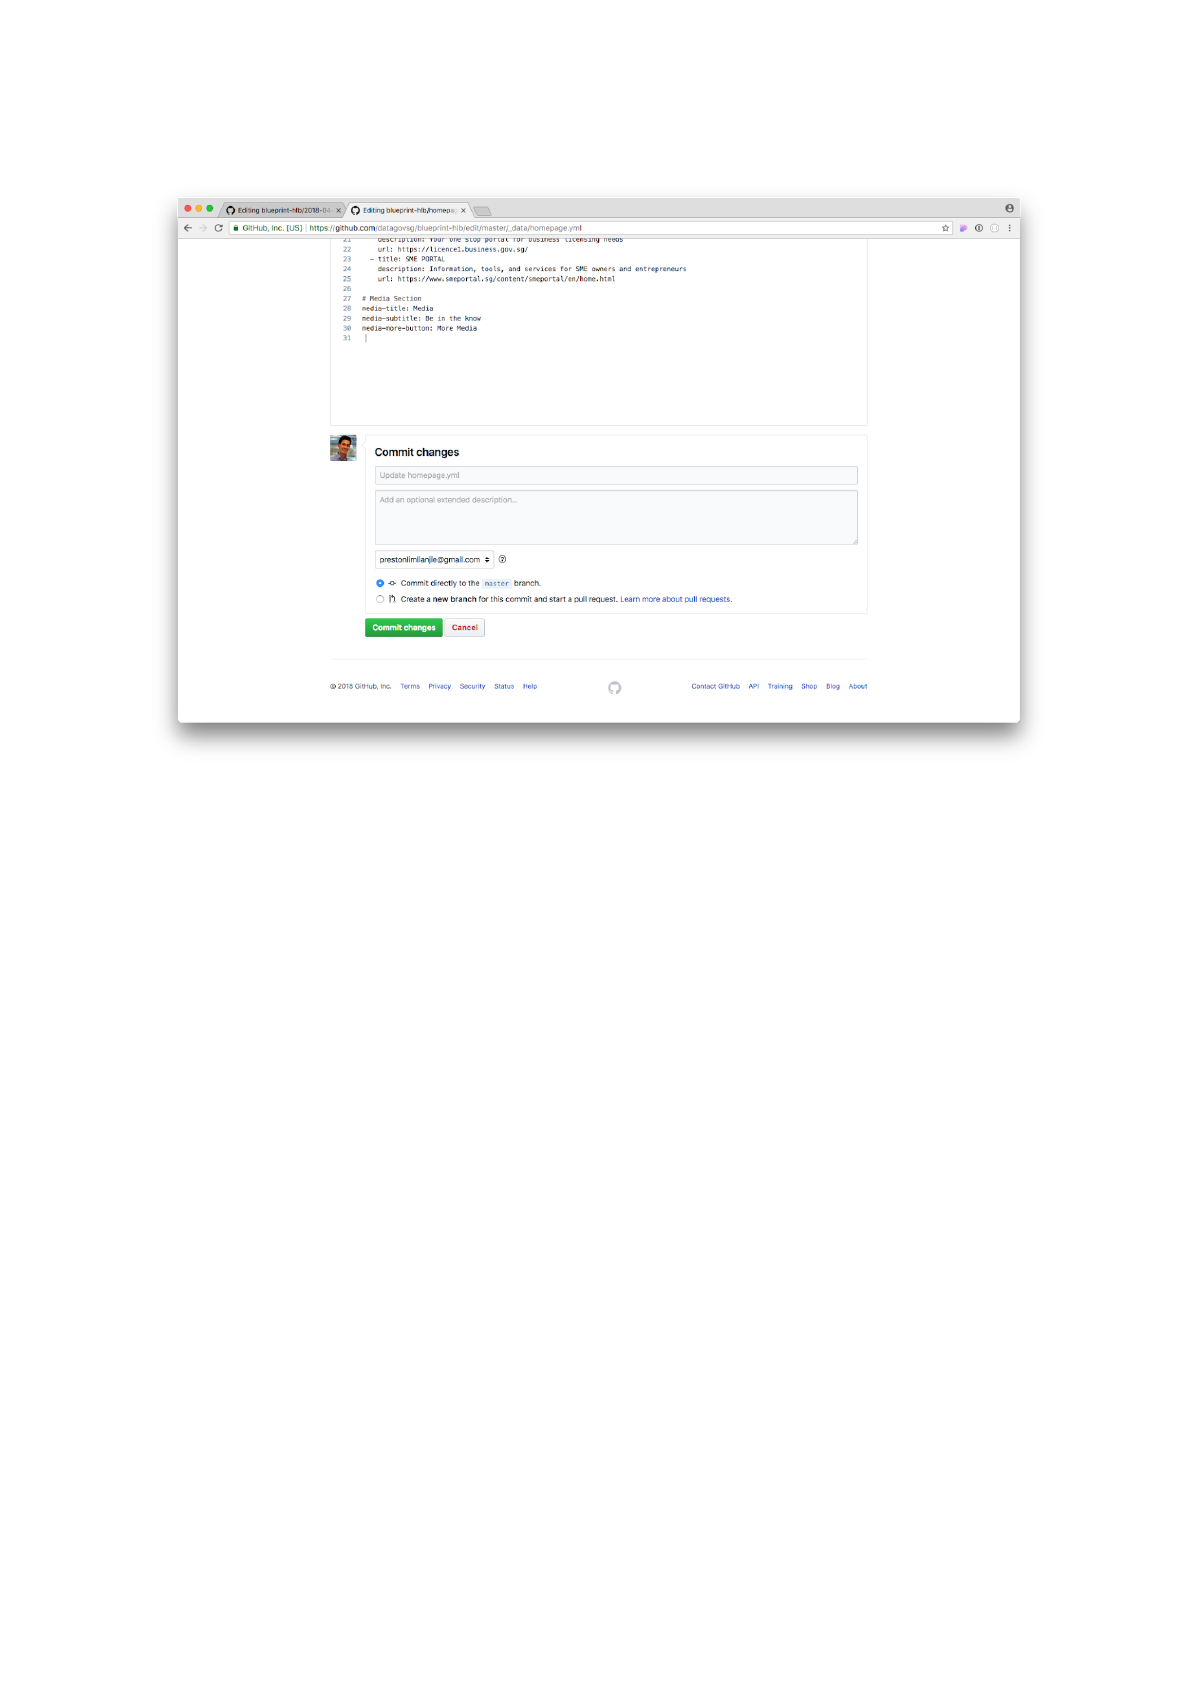
Step 2: Scroll down and click on the Commit changes button to save the
file. The change should be reflected on the website in a minute or so.
And we’re done!
Application Guideline Files
Short detour: Understanding Application Guideline Markdown Files
This section explains what a markdown file is, and specifically what has
to go into an Application Guideline markdown file. Please skip this if
you are familiar with both of these concepts.
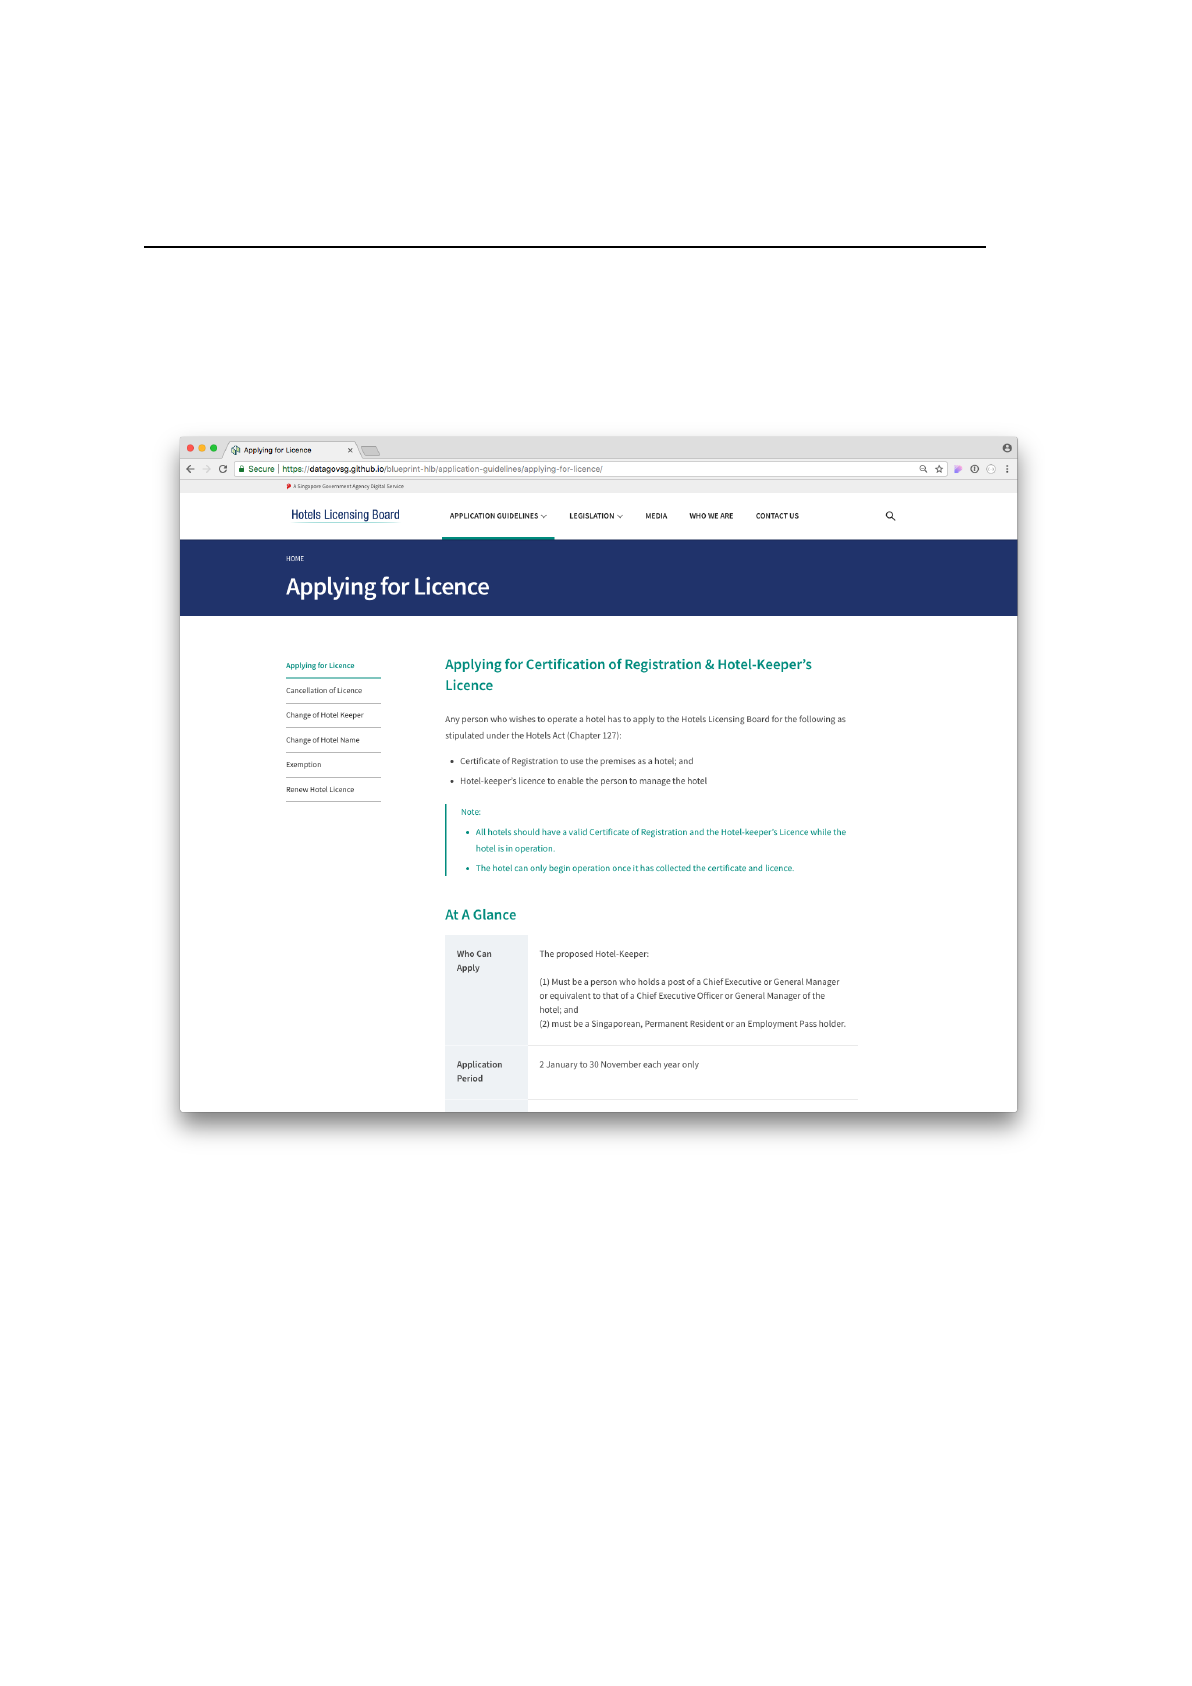
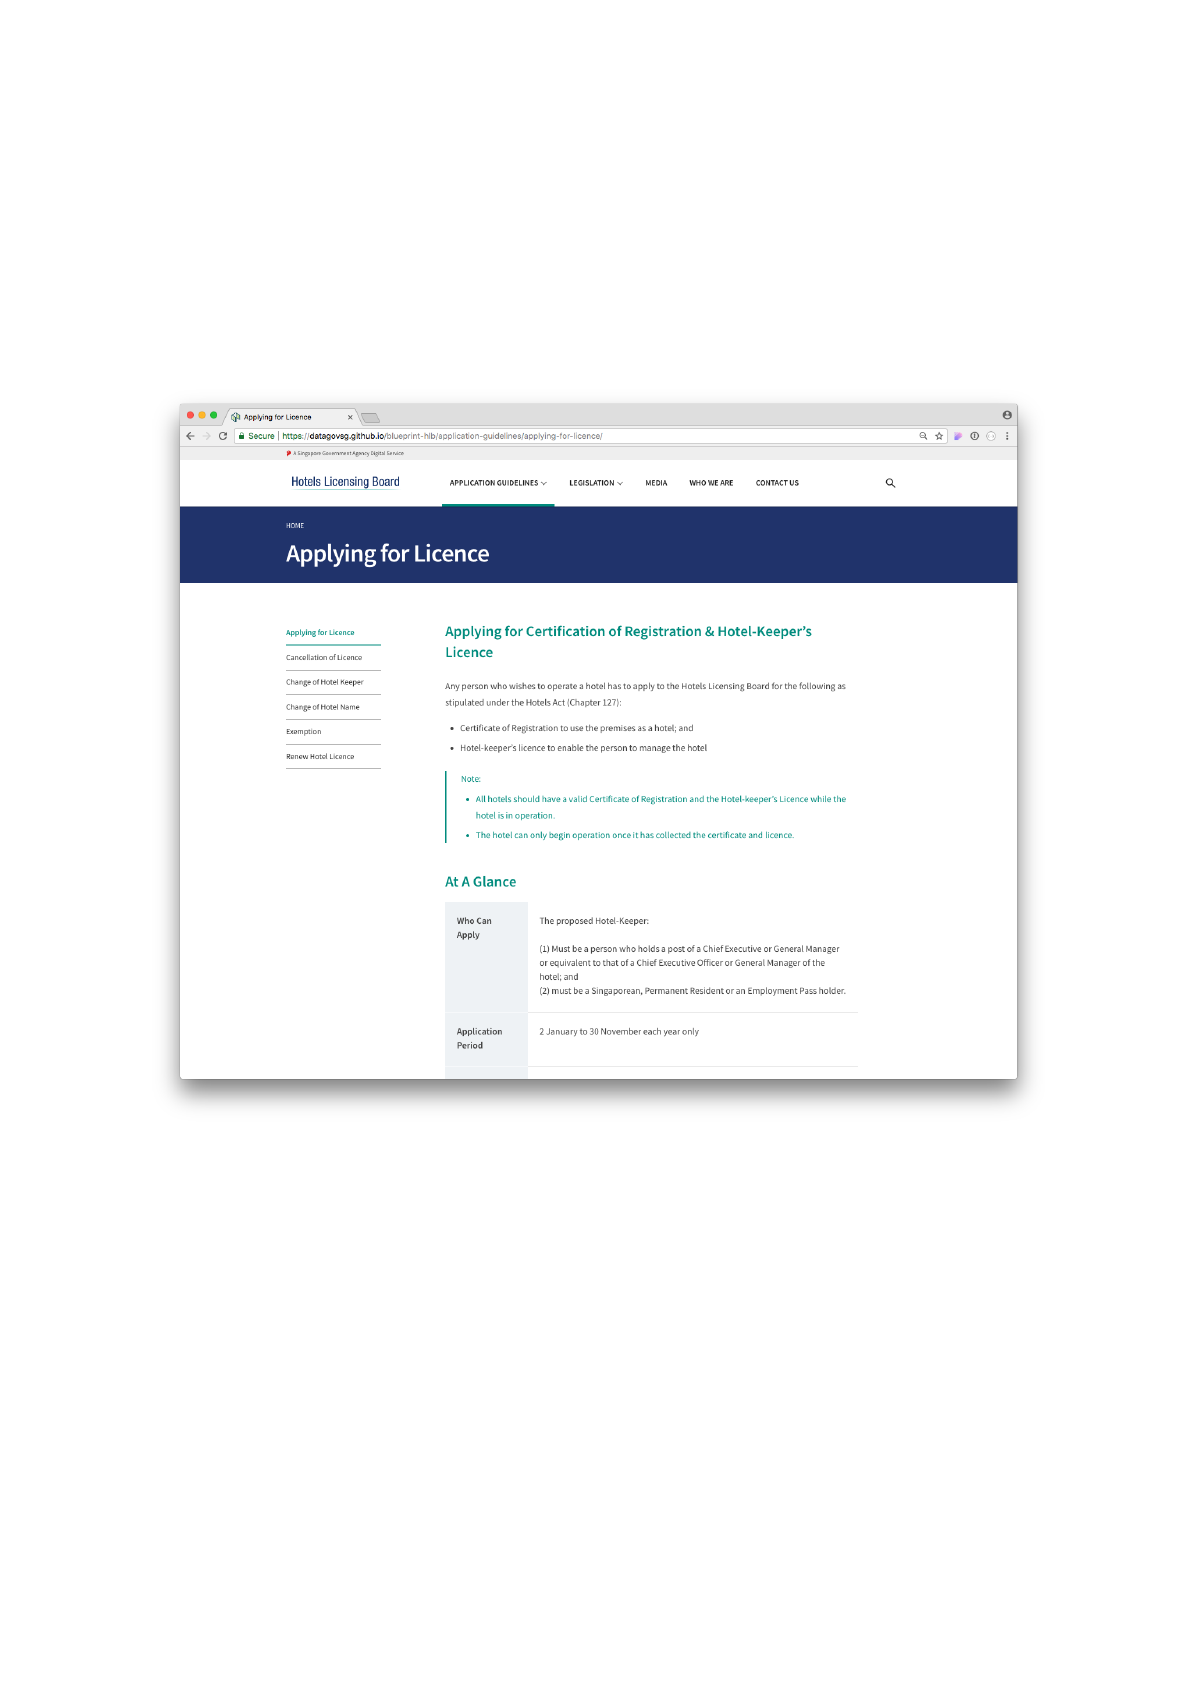
Sample application guideline on the Blueprint website
Before we create a new application guideline similar to the one above,
let us take a look at how an application guideline markdown file looks
like. Let’s click on the applying-for-licence.md file.
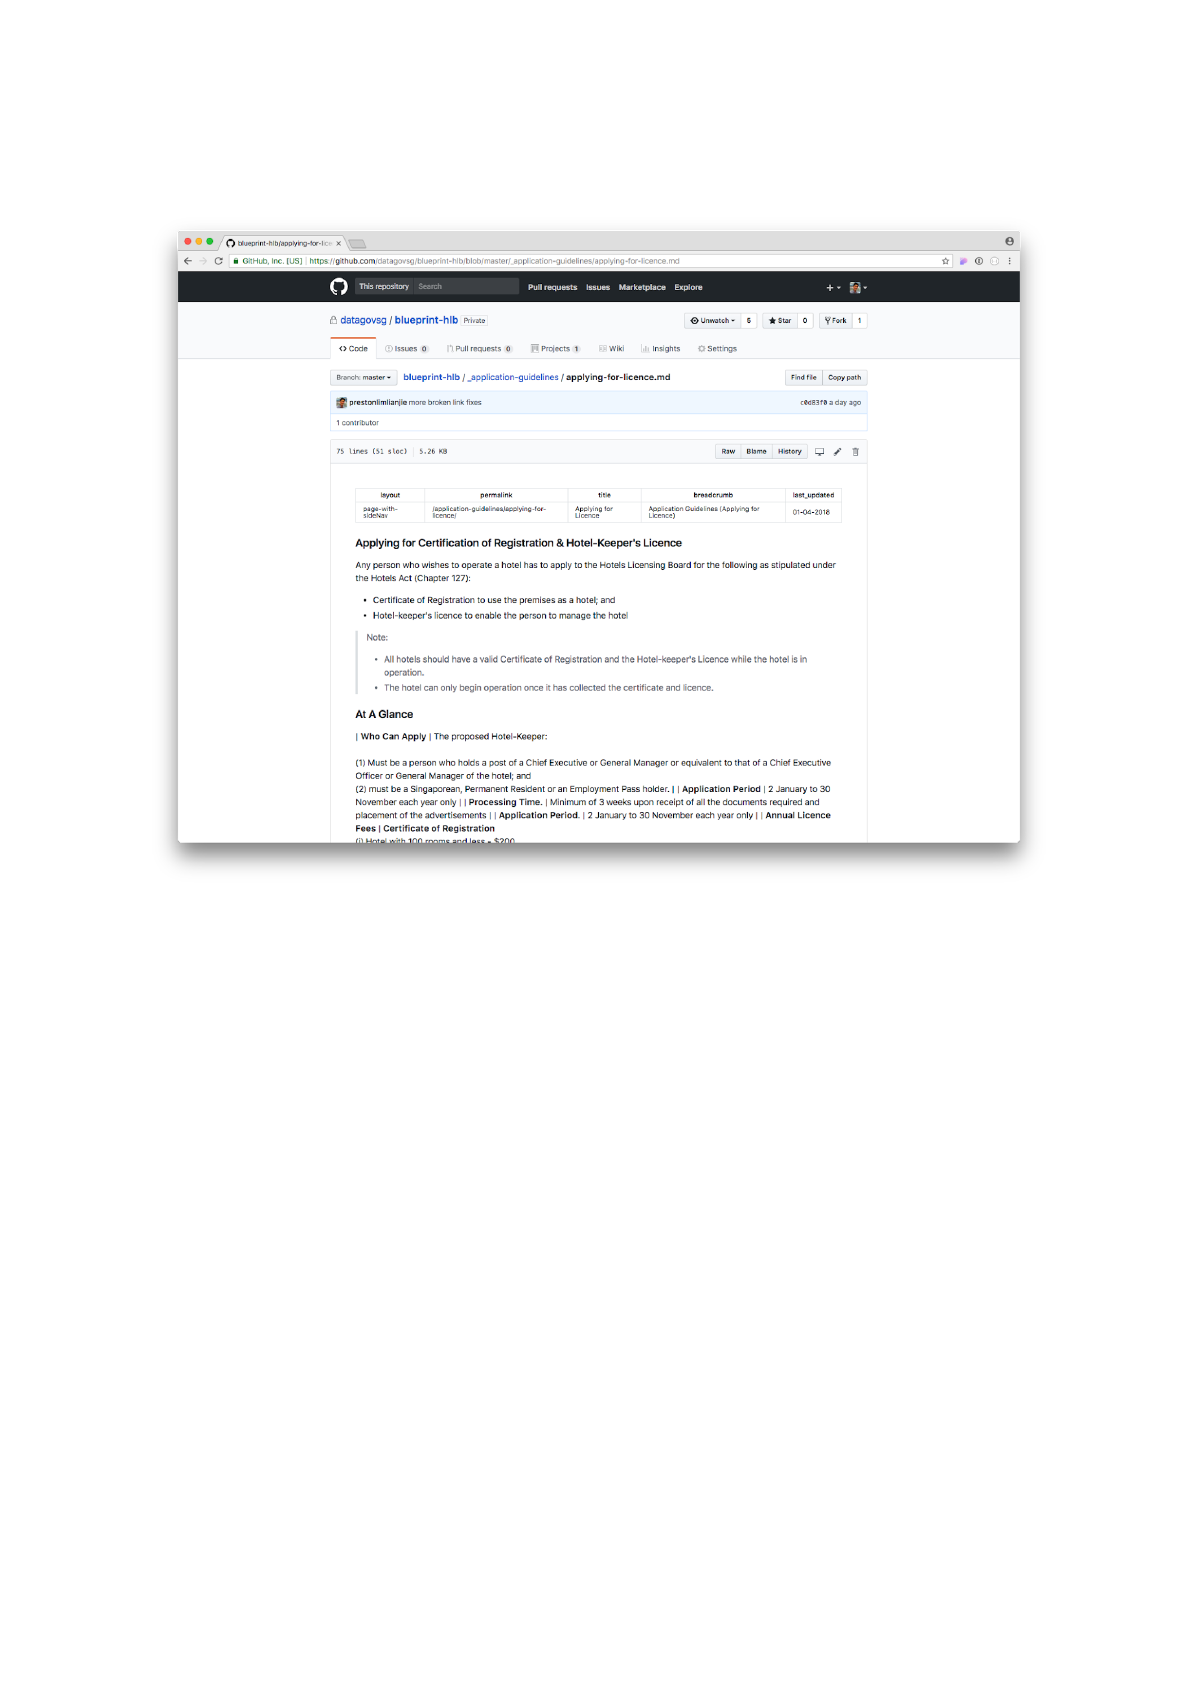
You should see a preview screen similar to the one shown below.
Application guideline preview screen
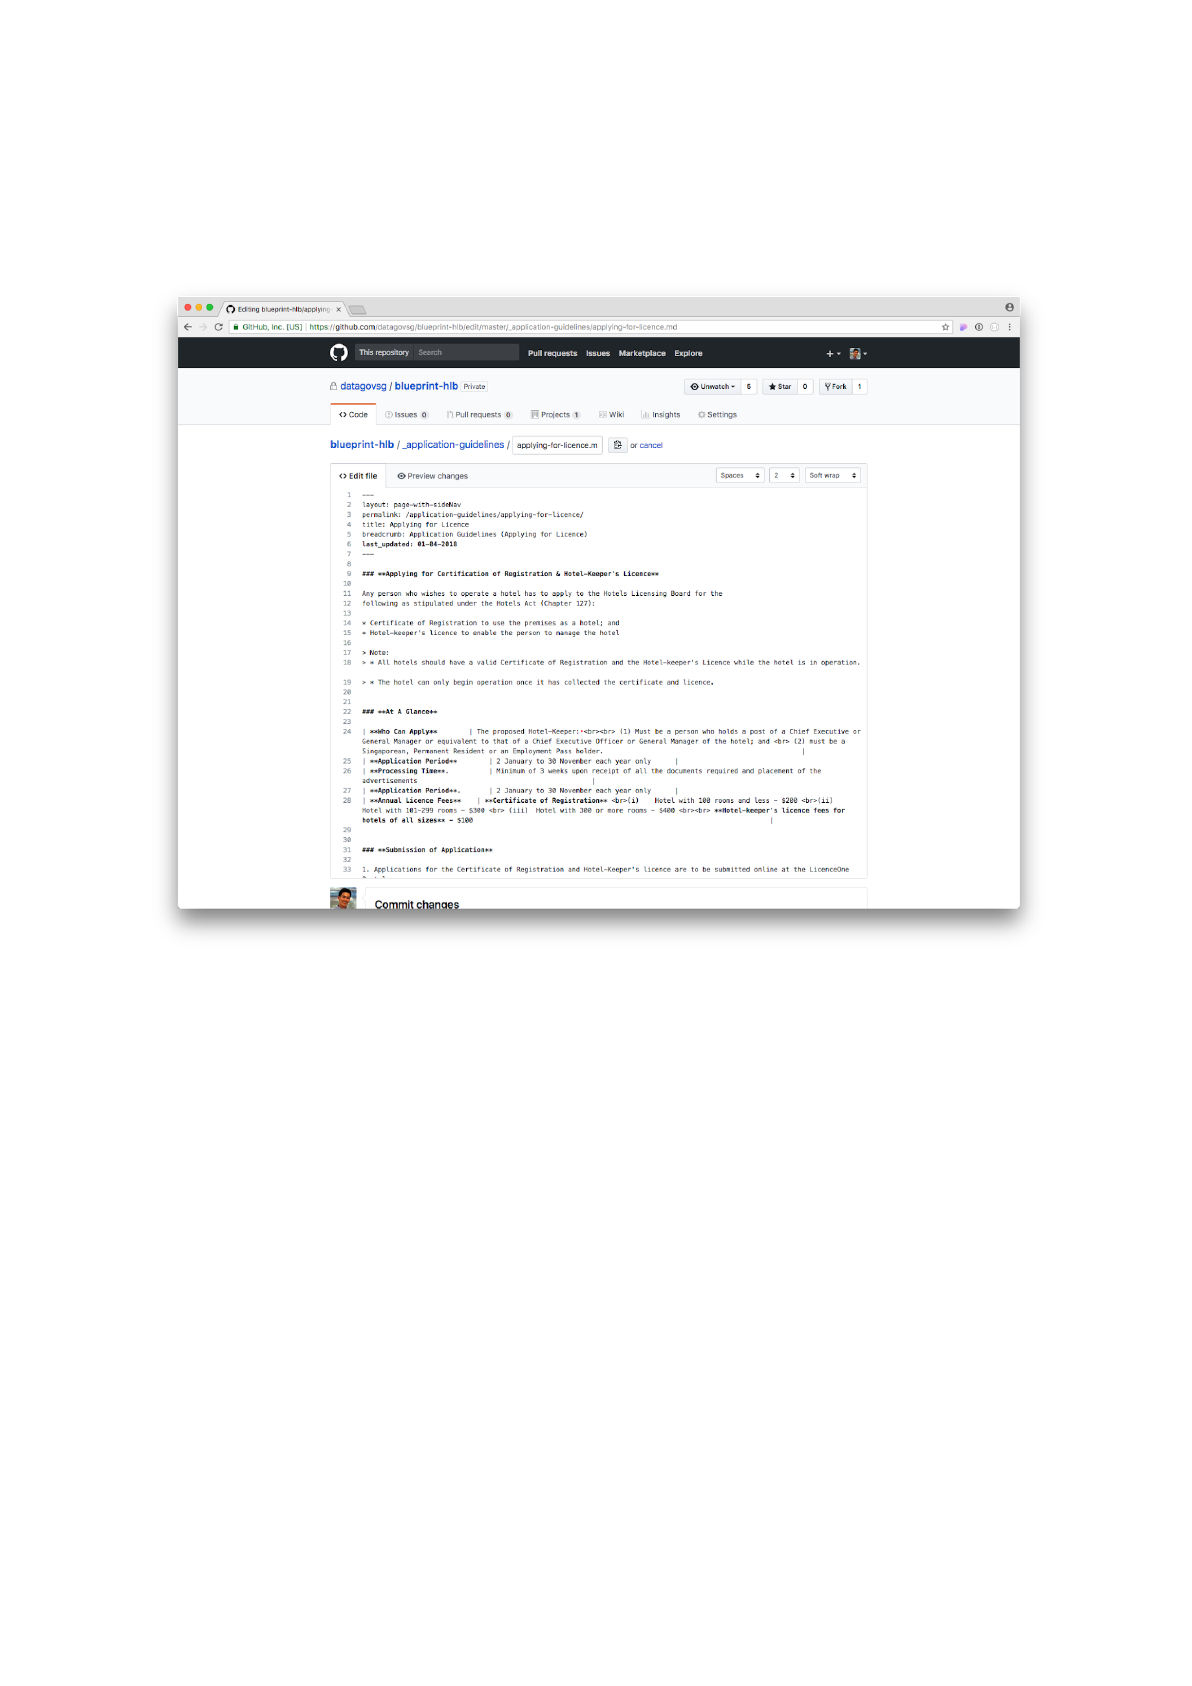
Click on the edit icon (the pencil icon) at the right of the page (next to
Raw, Blame, and History). You should see a raw markdown file similar to
that shown below.
Raw application guideline markdown file
There are two main components to every markdown file: (1) header and
(2) content.
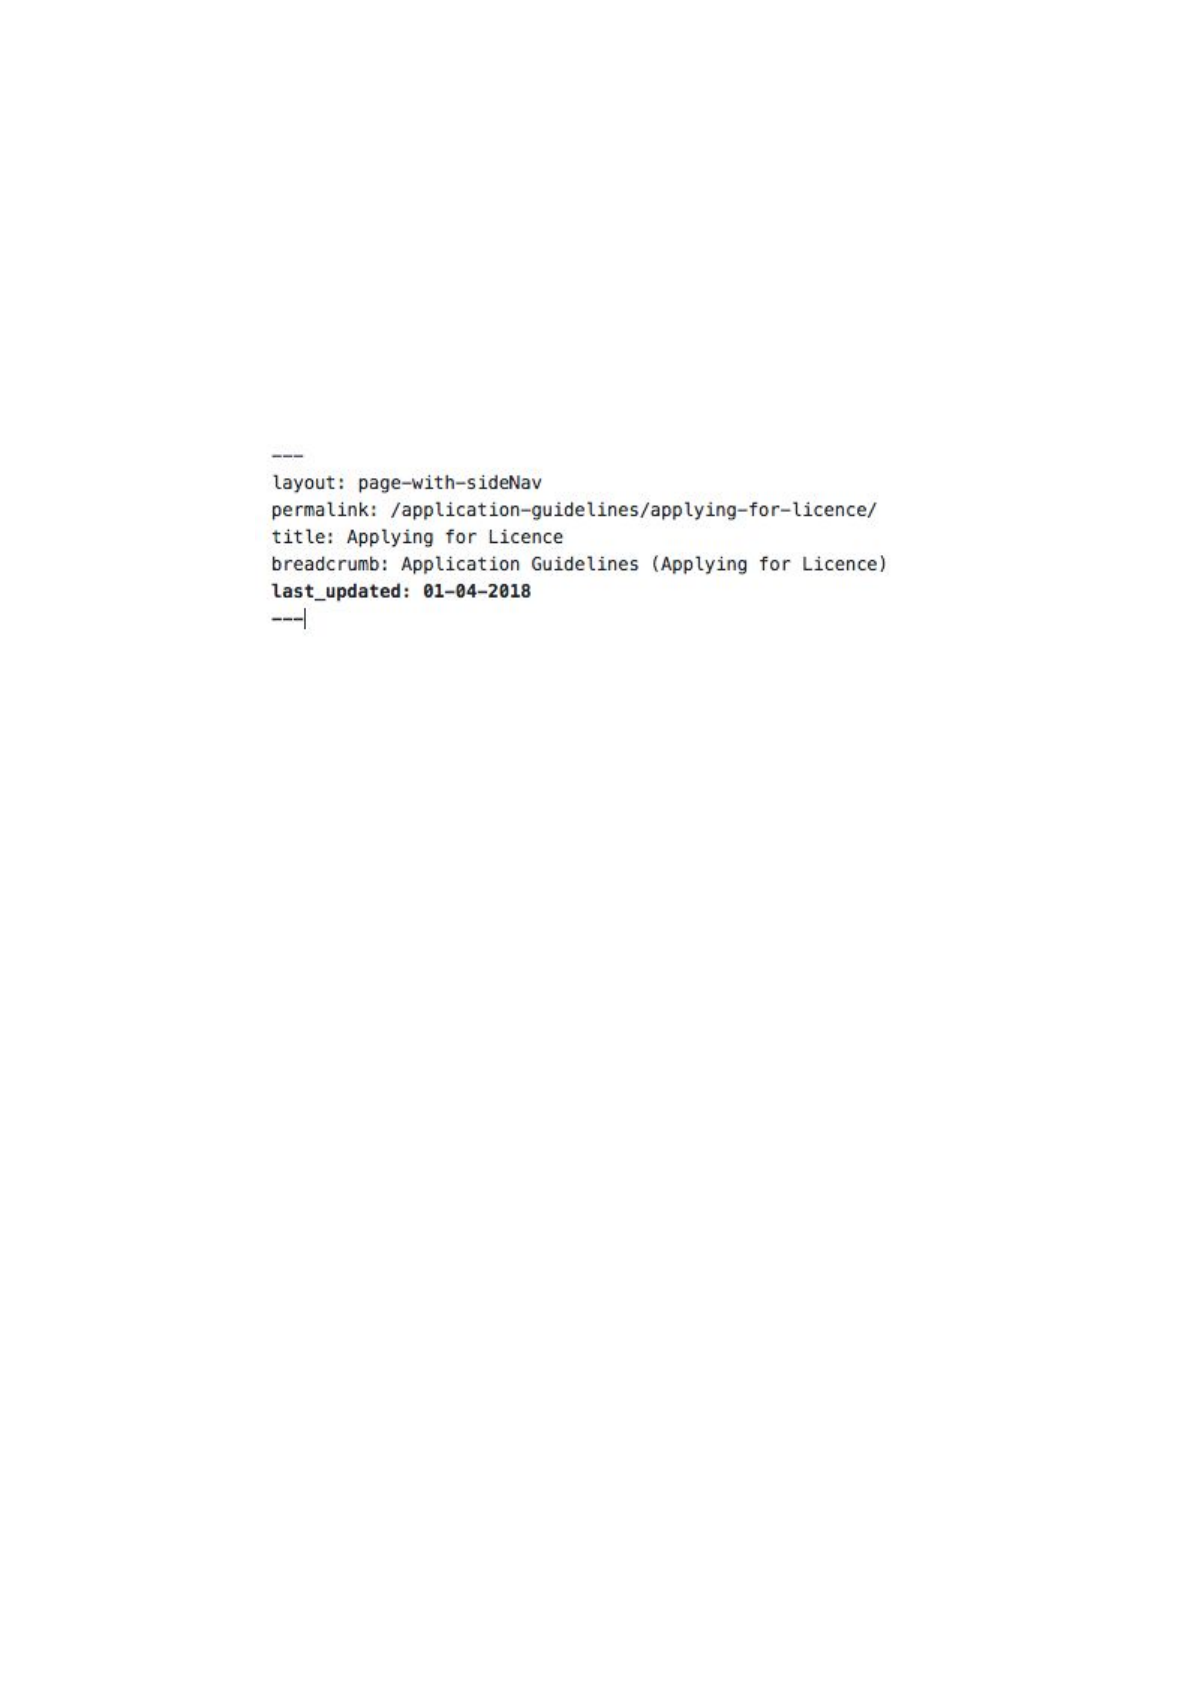
The header (also known as YAML front-matter) is the component
enclosed between two triple dashes ‘---’. The header contains important
metadata about the page; it tells the website generator what this page’s
title, URL, and updated date is.
Sample markdown header
The crucial components of the application guidelines header are:
- layout
o
Always leave it as
page-with-sideNav
. What this does is tell the
website generator to create a side navigation bar for users to navigate
to other application guidelines.
▪layout: page-with-sideNav
-
permalink
o
This is the website URL. It should be as follows
▪permalink: /application-guidelines/<page-title>/
oThe title of your page has to be in lower case and must not contain
special characters (i.e. only alpha-numeric and no whitespace).
o
For example, if I wanted the page to be
Applying for Licence
. My
page title would be
applying-for-licence
, and my resulting permalink
would be:
▪permalink: /application-guidelines/applying-for-licence/
-
title
o
This is the title of the page. It can contain special characters and is
case-insensitive.
oFor example, if I wanted the page to be
Applying for Licence
. My
page title would be
Applying for Licence.
▪title: Applying for Licence
-
breadcrumb
o
This is the breadcrumb to tell your users where they are on the
website. It can contain special characters and is case-insensitive.
o
For example, if I wanted the user to know that they were on the
Applying for Licence
page, my breadcrumb would be
Application
Guidelines (Applying for Licence)
▪breadcrumb: Application Guidelines (Applying for Licence)
-
last-updated

o
This tells your users when this page was last updated. It follows the
format
DD-MM-YYYY
.
▪last_updated: 01-04-2018
The content is the actual meaty bit of the page. It is written in the
markdown language – a simple to read format. The purpose of the
markdown language is to help you write website content without having
to delve into icky HTML.
Sample markdown content
For more on markdown styling, please refer to our markdown styling
guide.
Task 2: Create a new Application Guideline
Application guideline files are markdown (.md) files that are found in the
_application-guidelines folder.
In this task, we will create a new Application Guideline.
Sample application guideline on the Blueprint website
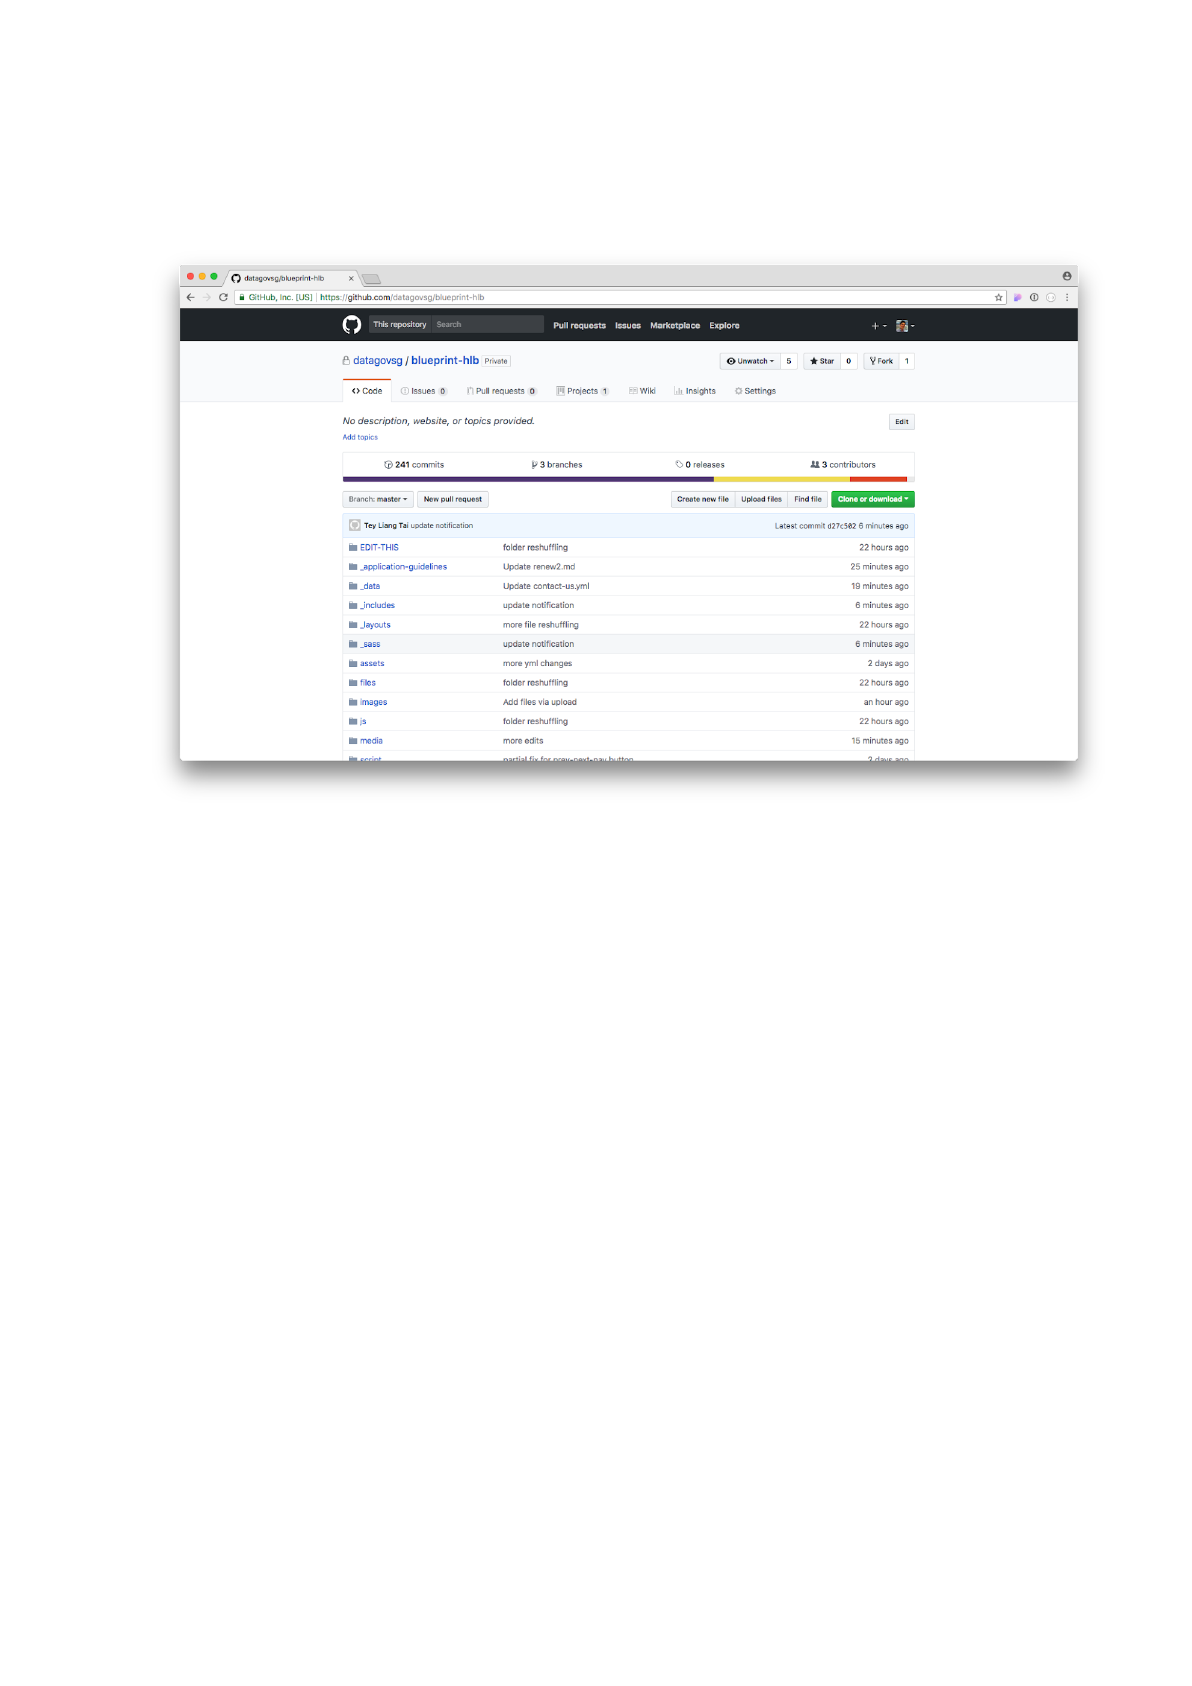
Step 1: Click on the _application-guidelines
folder.
A view of the main repository
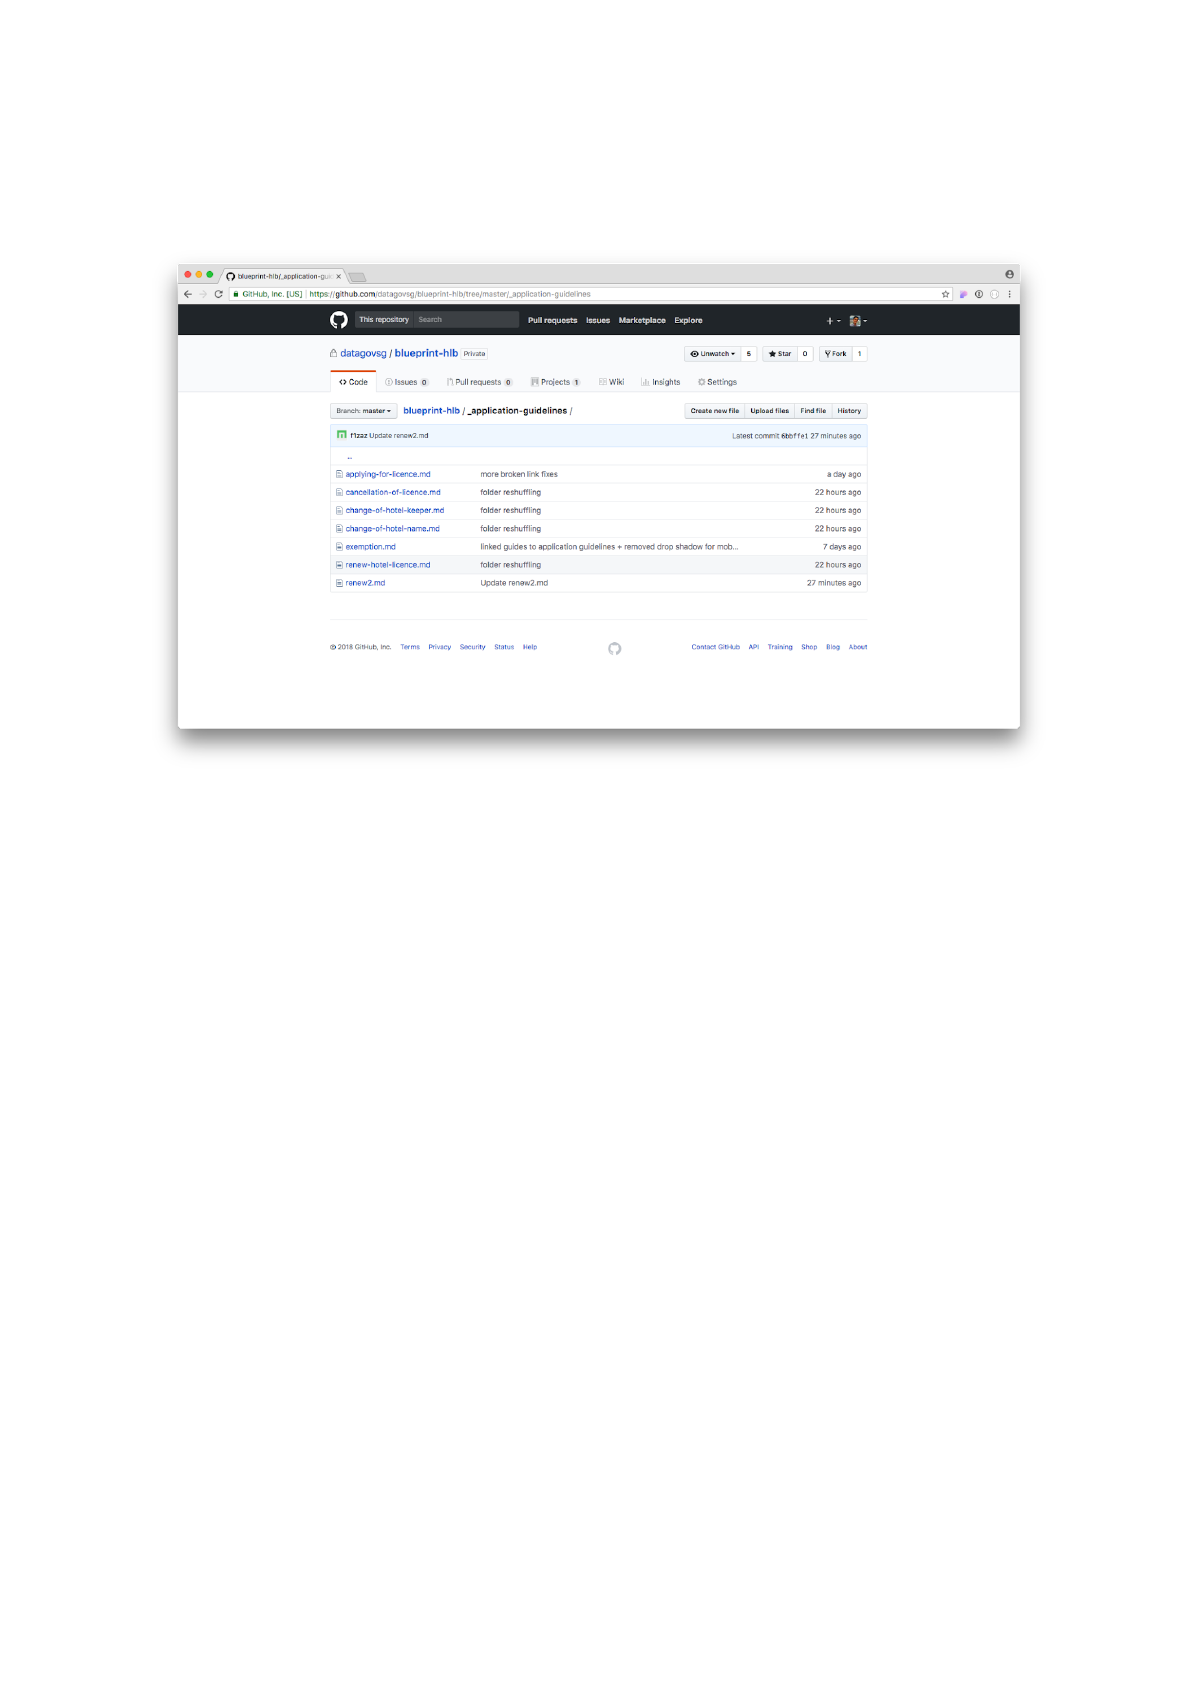
Within the _application-guidelines folder, there are several application
guideline markdown files.
Markdown files in the _application-guidelines folder
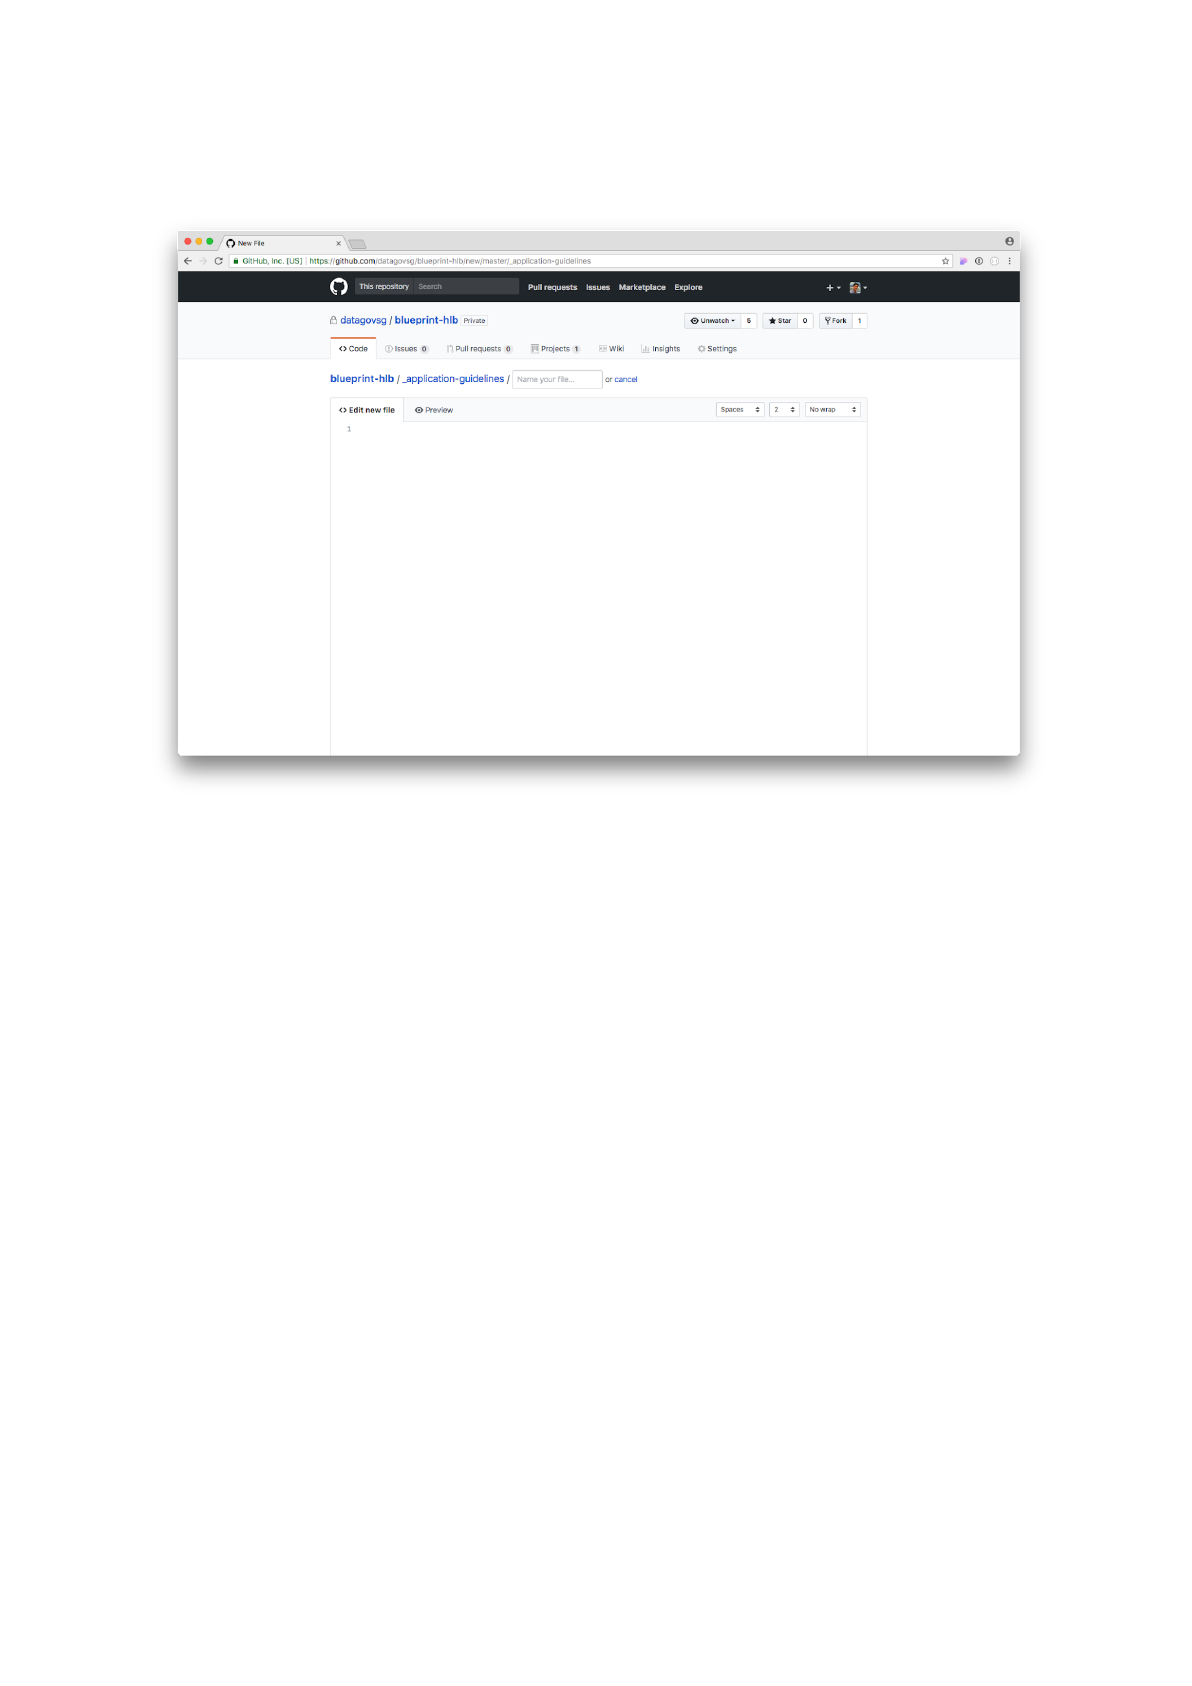
Step 2: Click on the Create new file
button.
Empty new file
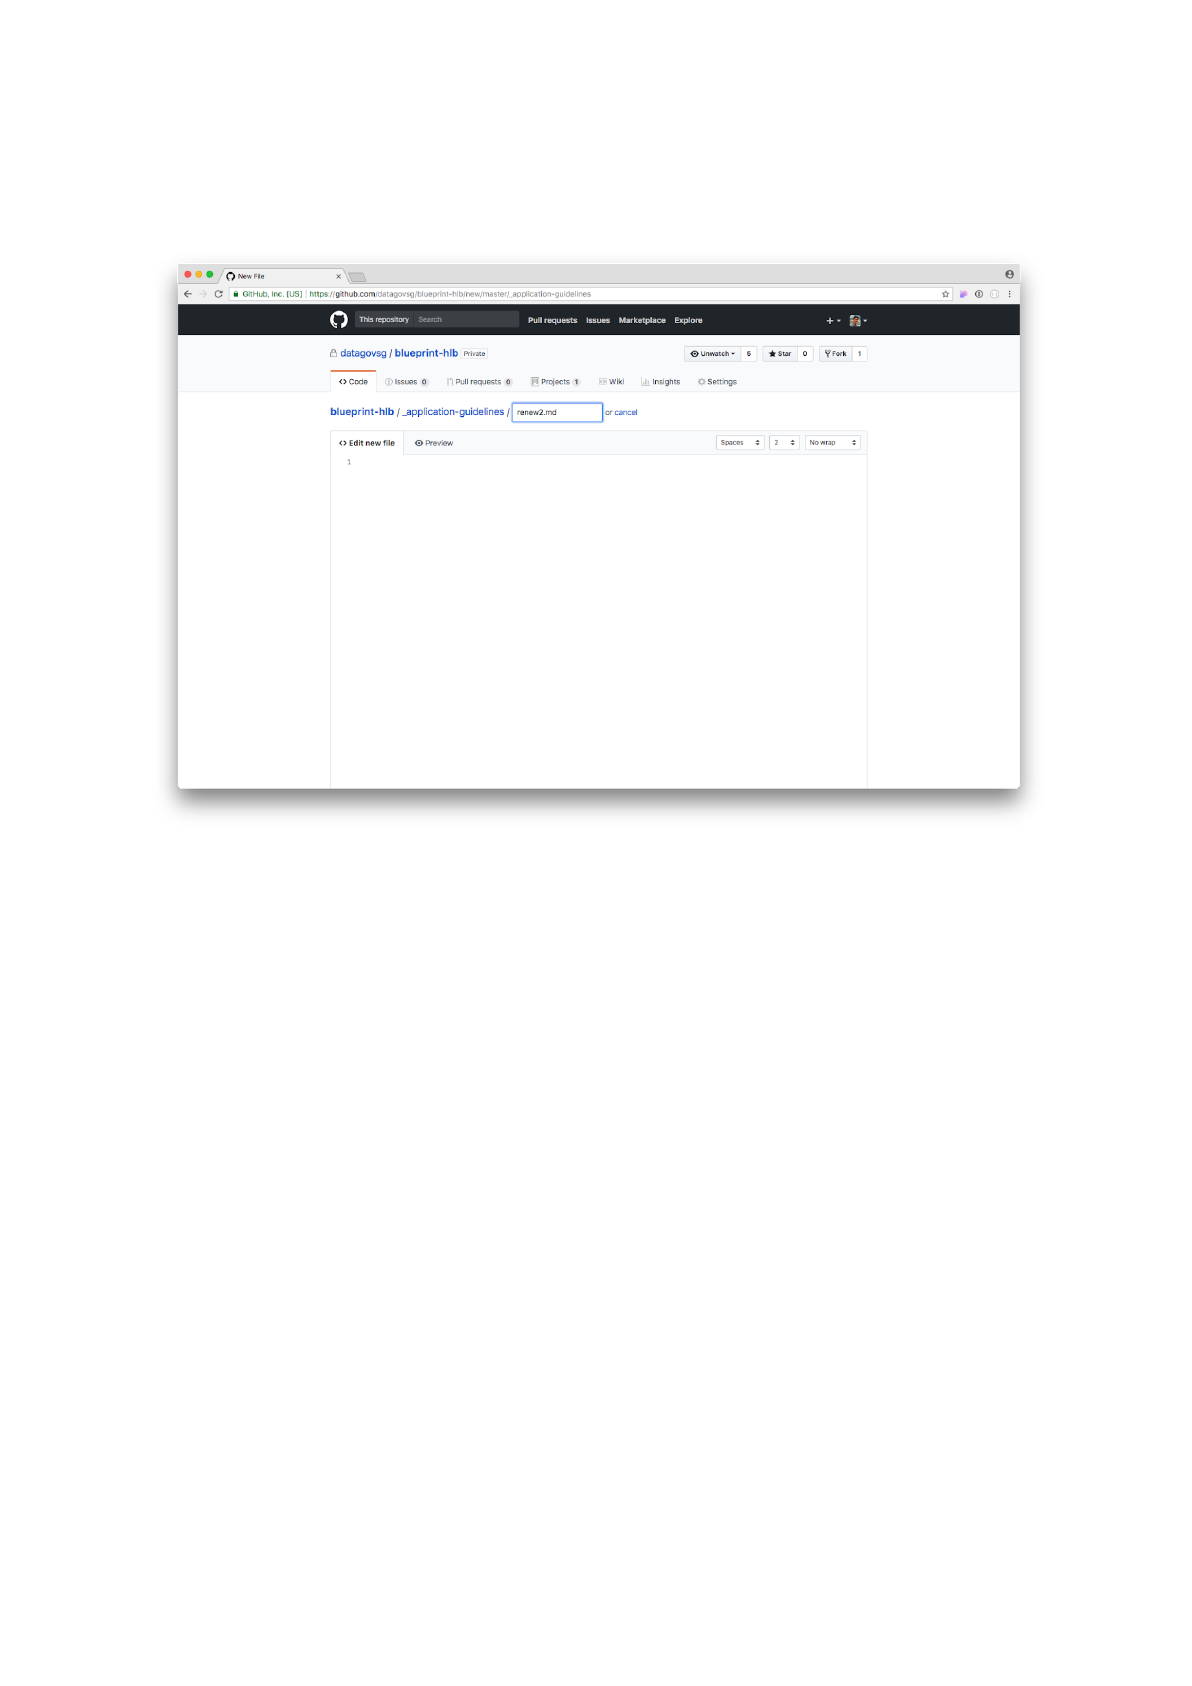
Step 3: Give your new markdown file a name, for example, renew2.md
.
Do this by typing into the
Name your file
input box at the top.
Hurrah, you named your file!
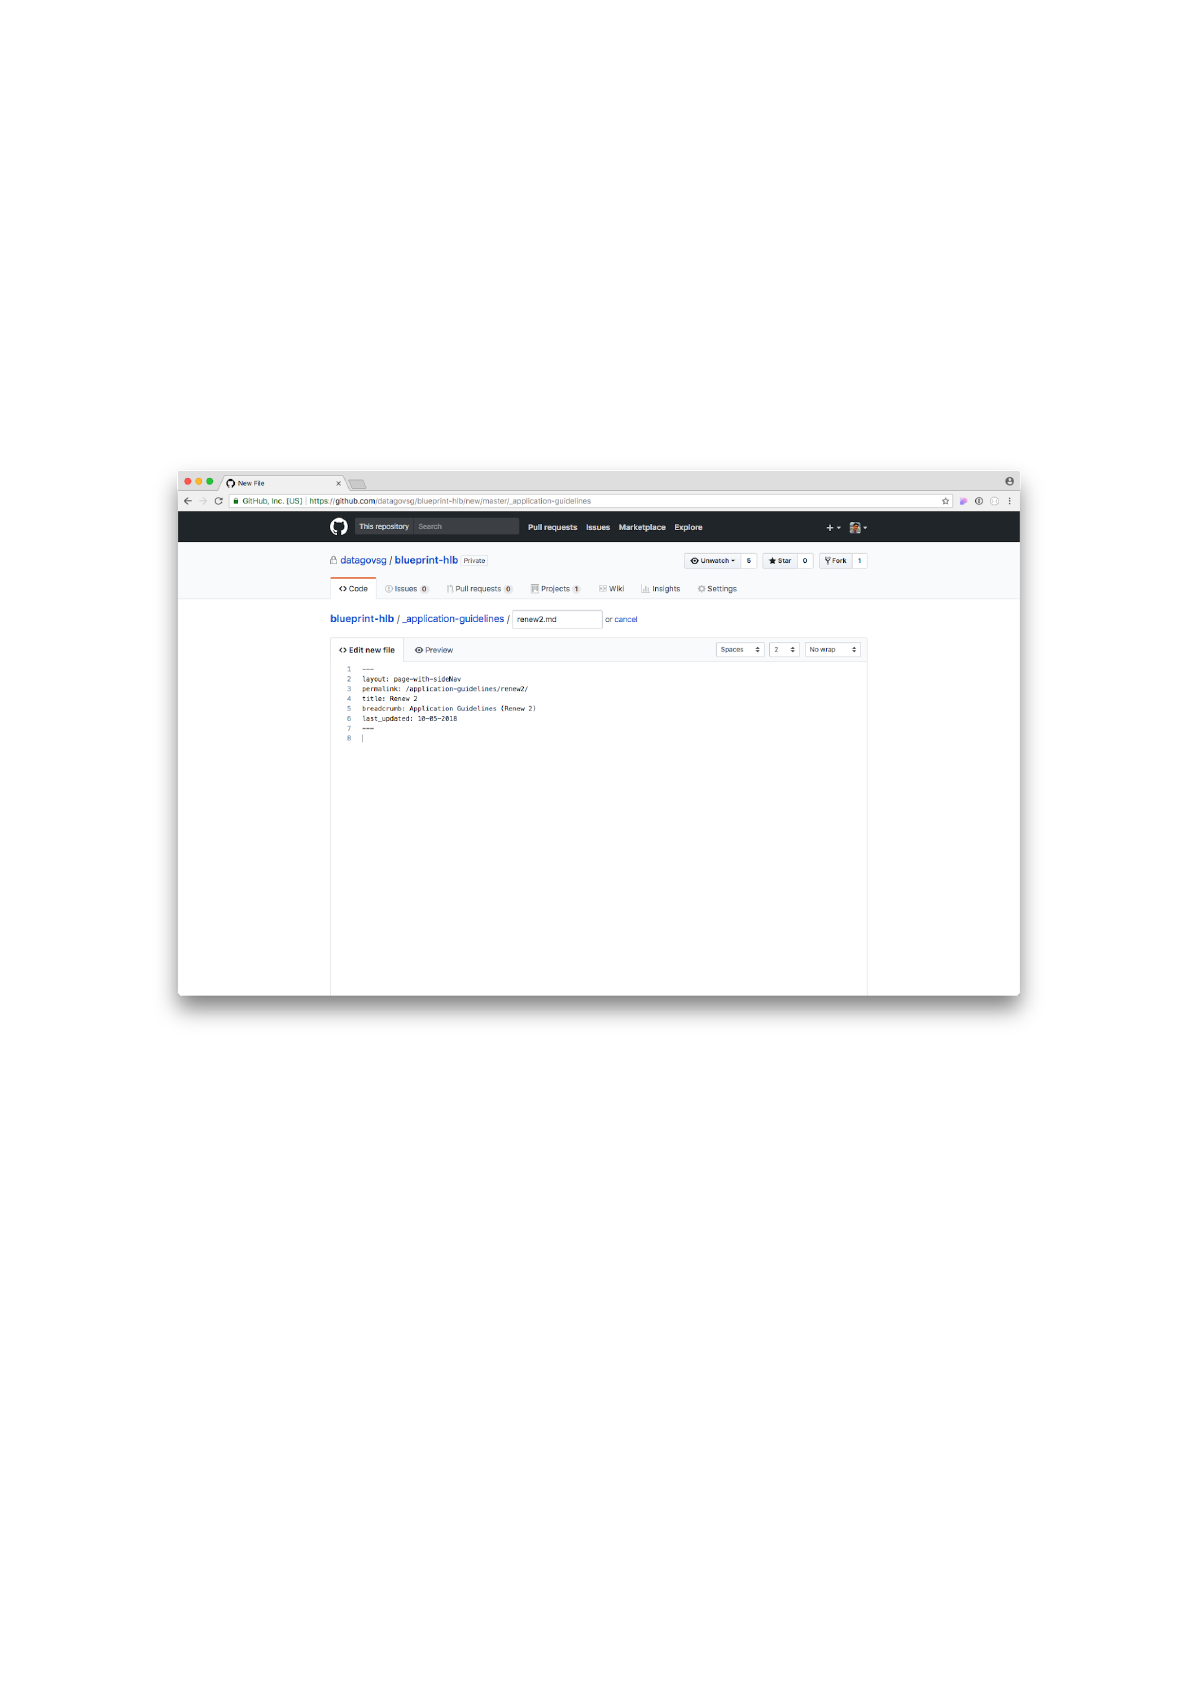
Step 4: Create your header for the markdown file. For example:
---
layout: page-with-sideNav
permalink: /application-guidelines/renew2/
title: Renew 2
breadcrumb: Application Guidelines (Renew 2)
last_updated: 10-05-2018
---
Header added to markdown file
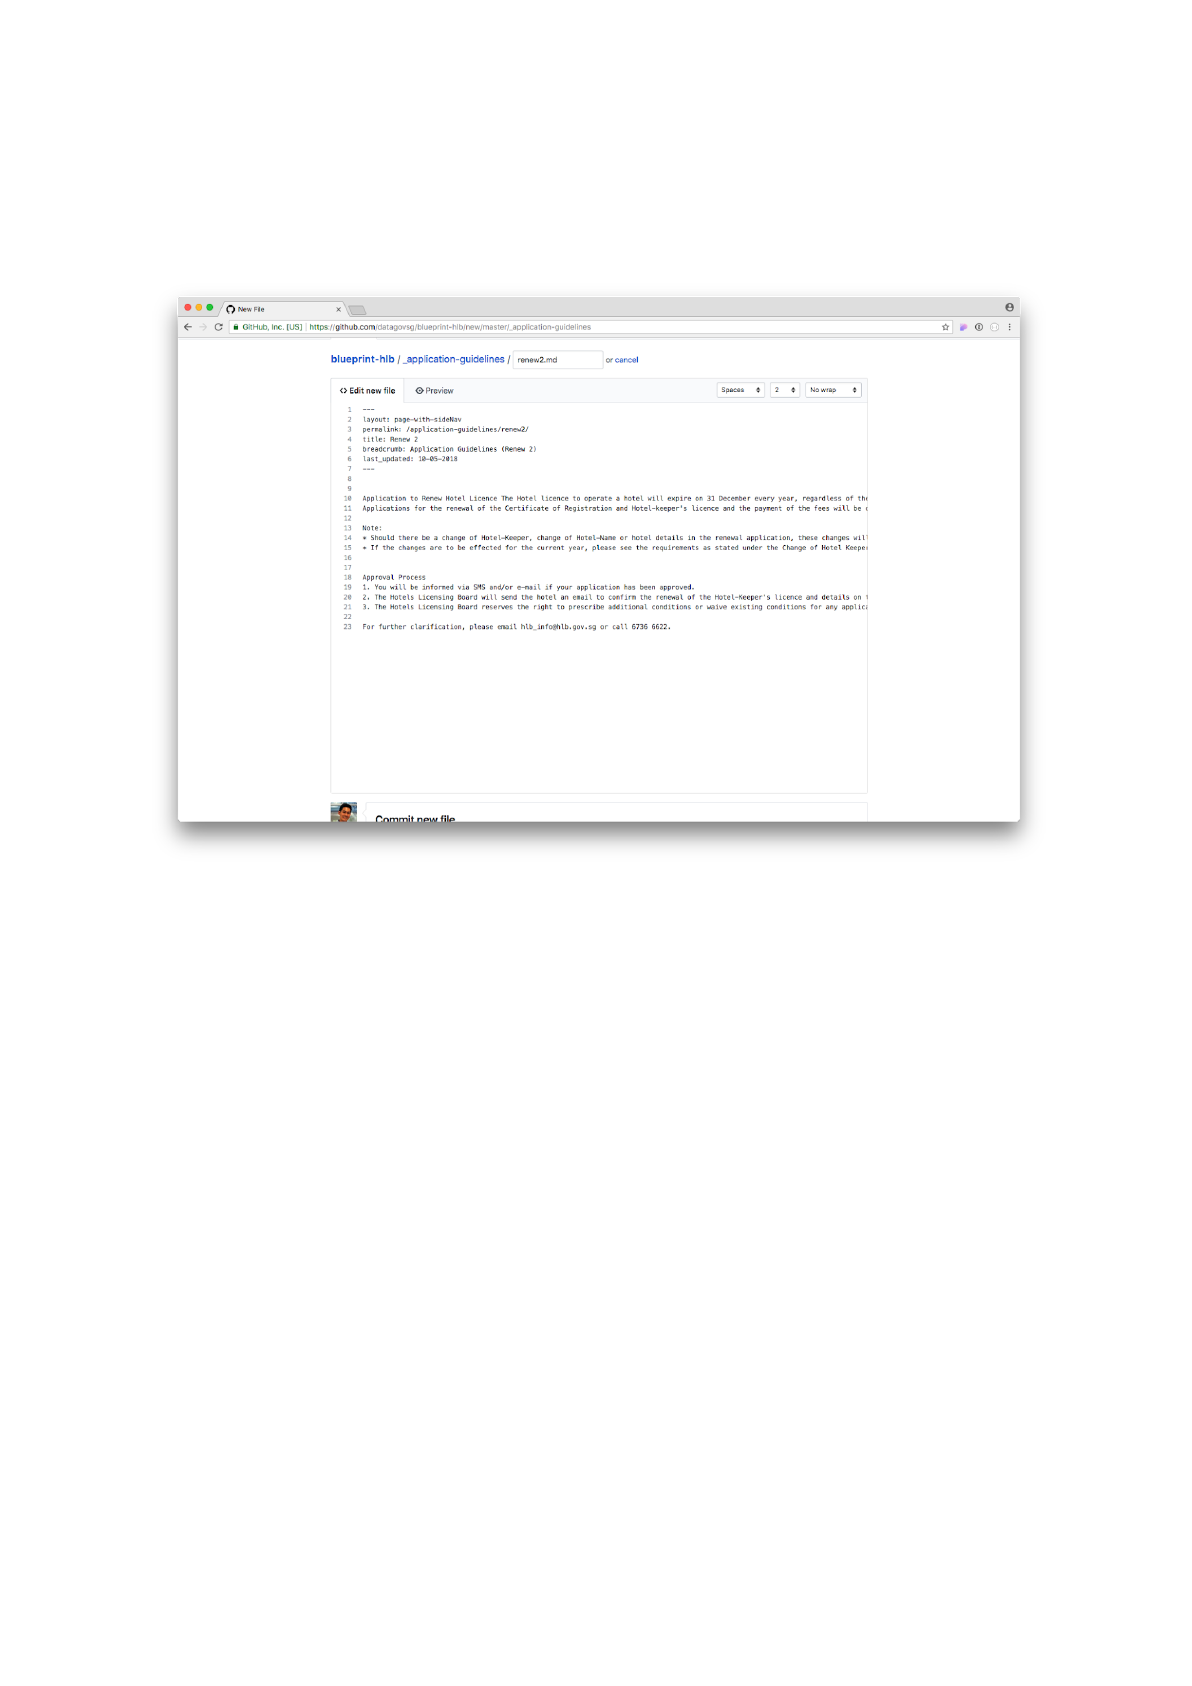
Step 5a: Add your content. You should realize that the content
becomes unformatted in the GitHub editor. We will have to add the
markdown styles in the next step.
Content added to markdown file
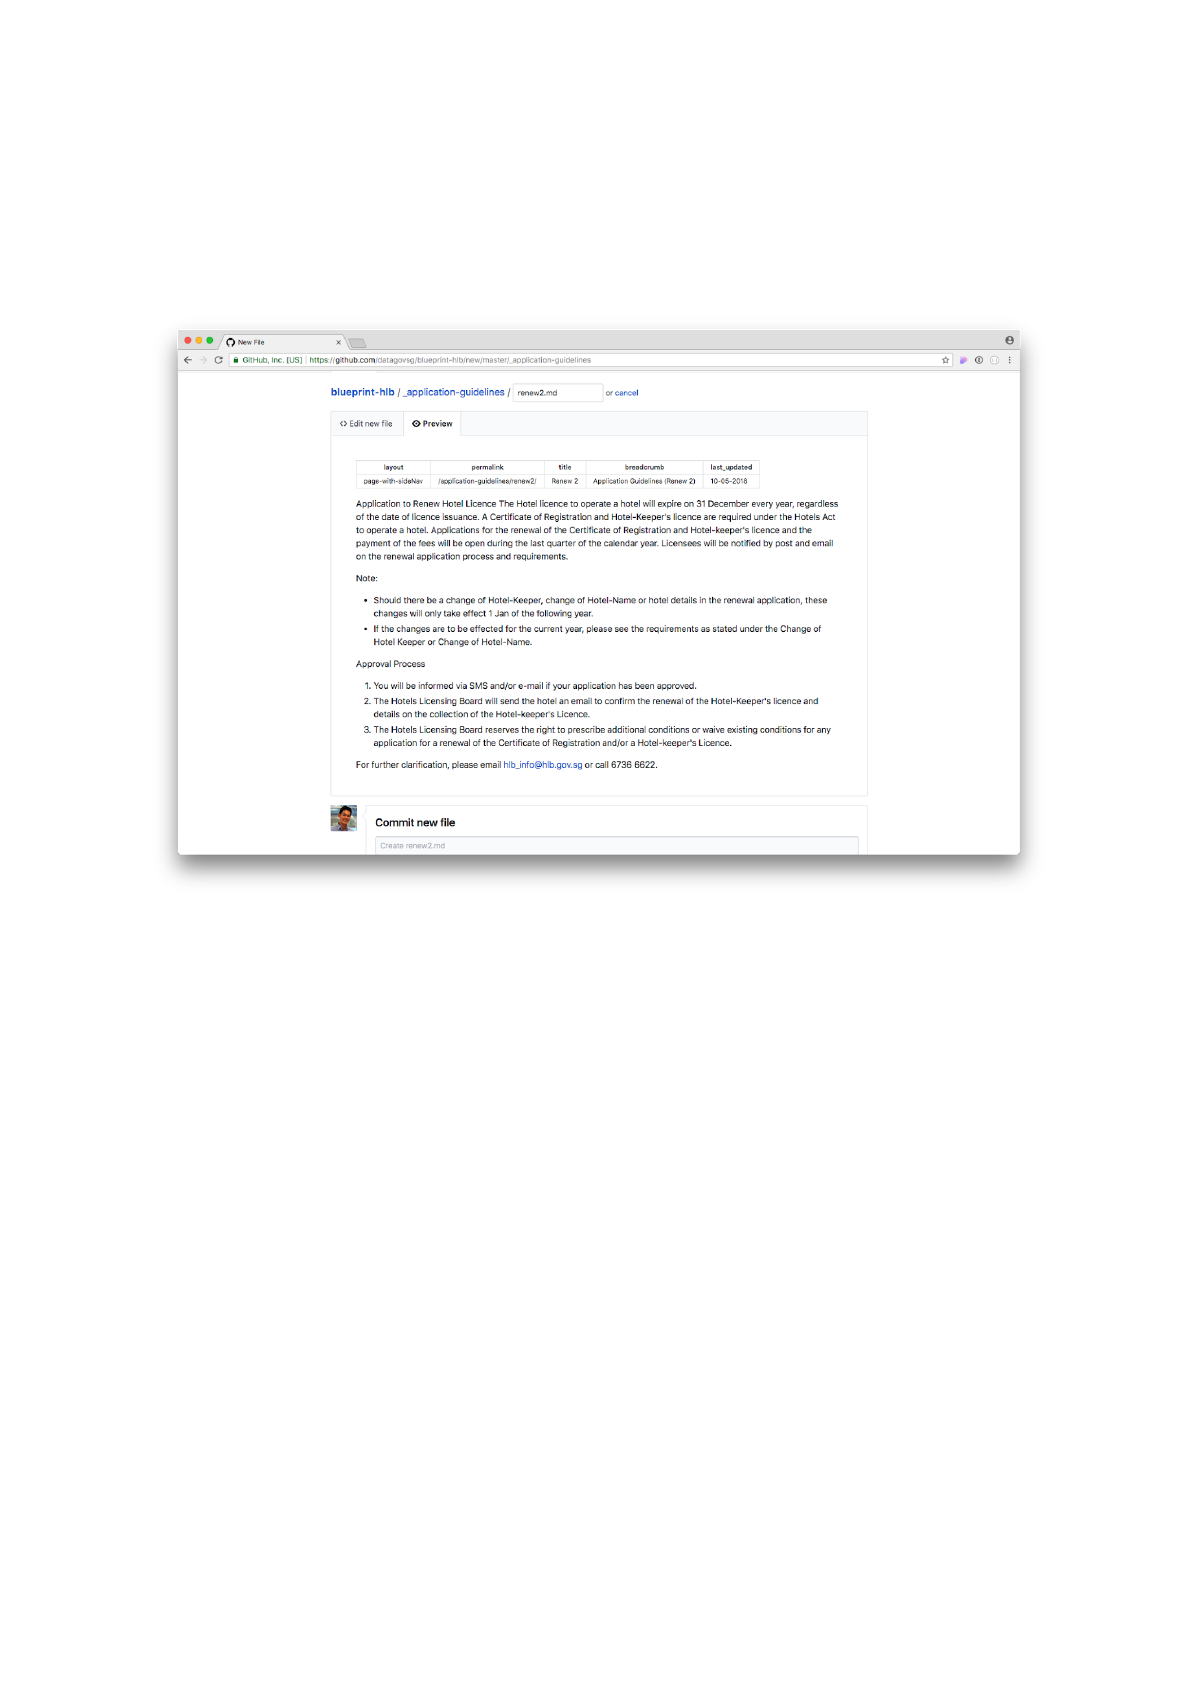
Step 5b: Click on the Preview button. This shows you a preview of how
your markdown will likely look when it is rendered – though it is not an
entirely accurate representation of the page.
Preview of markdown file
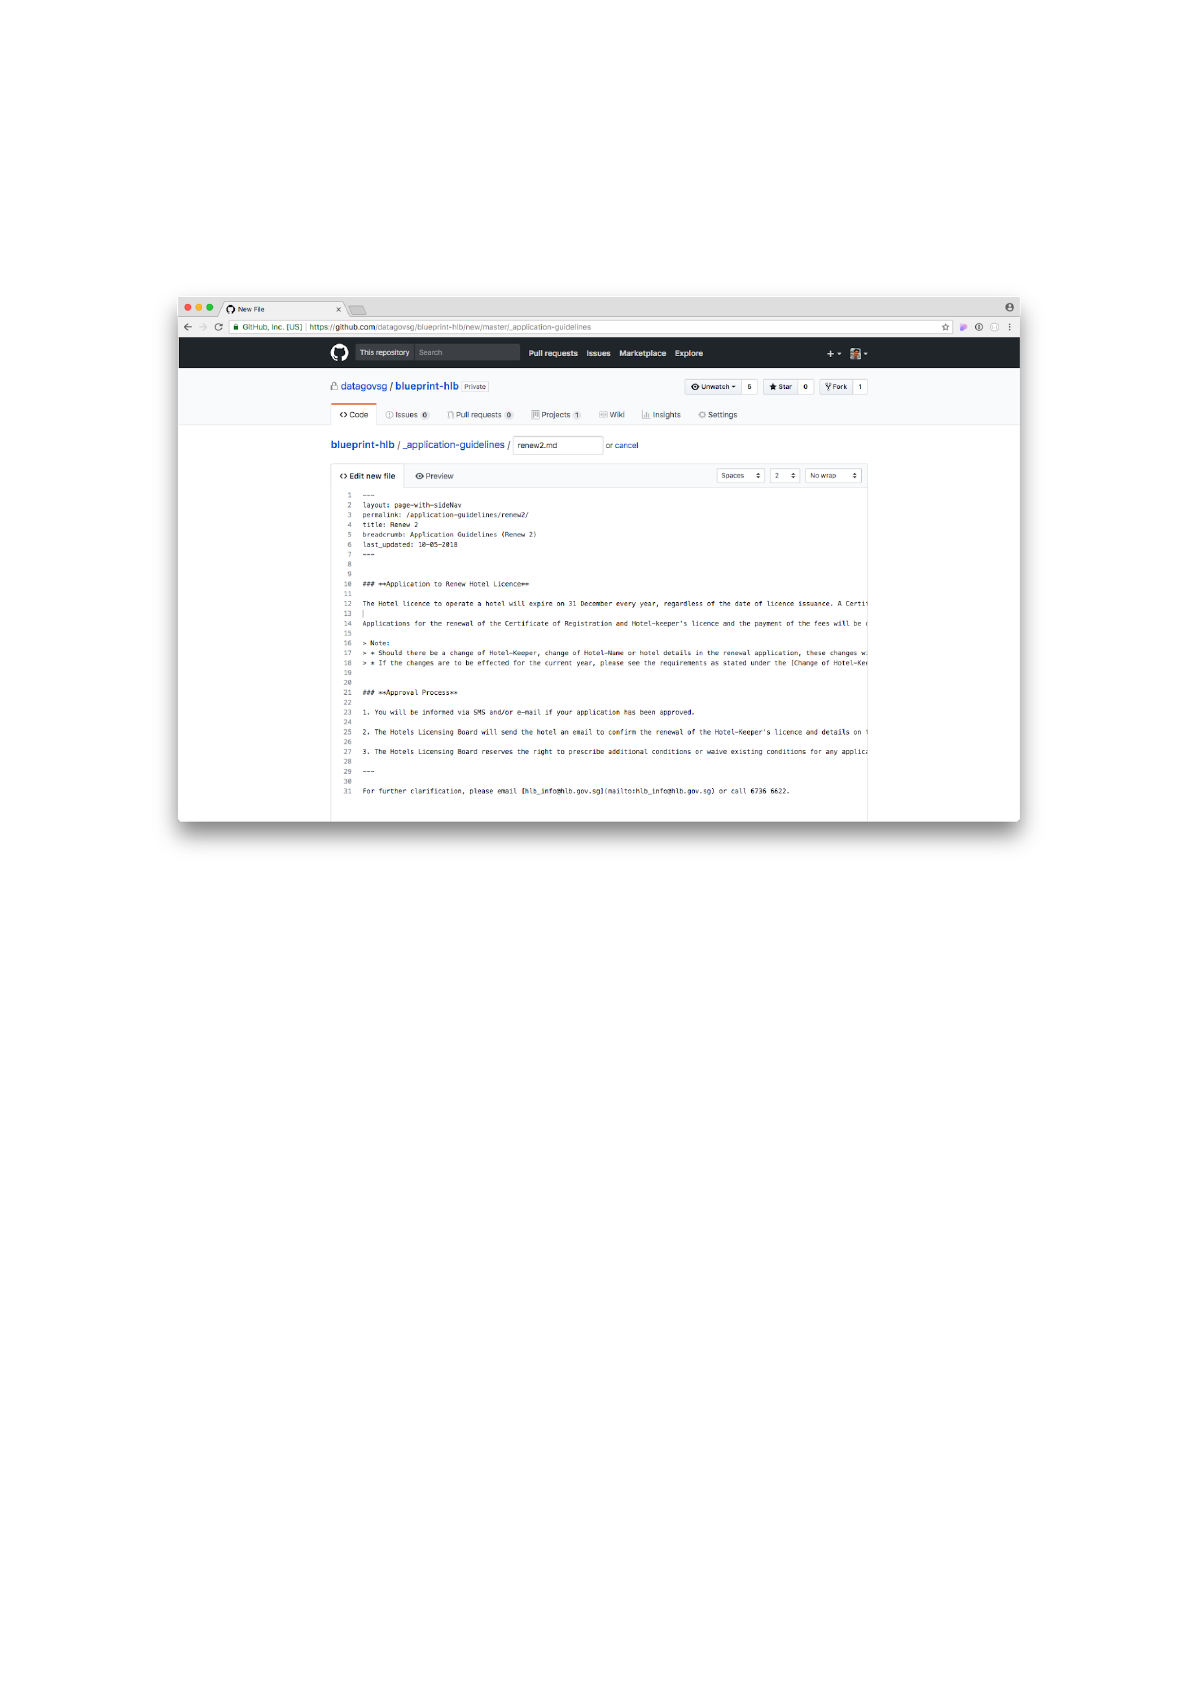
Step 6a: Click on the Edit new file button to return to the editor. Add
the relevant GitHub markdown styling.
Markdown content with styling
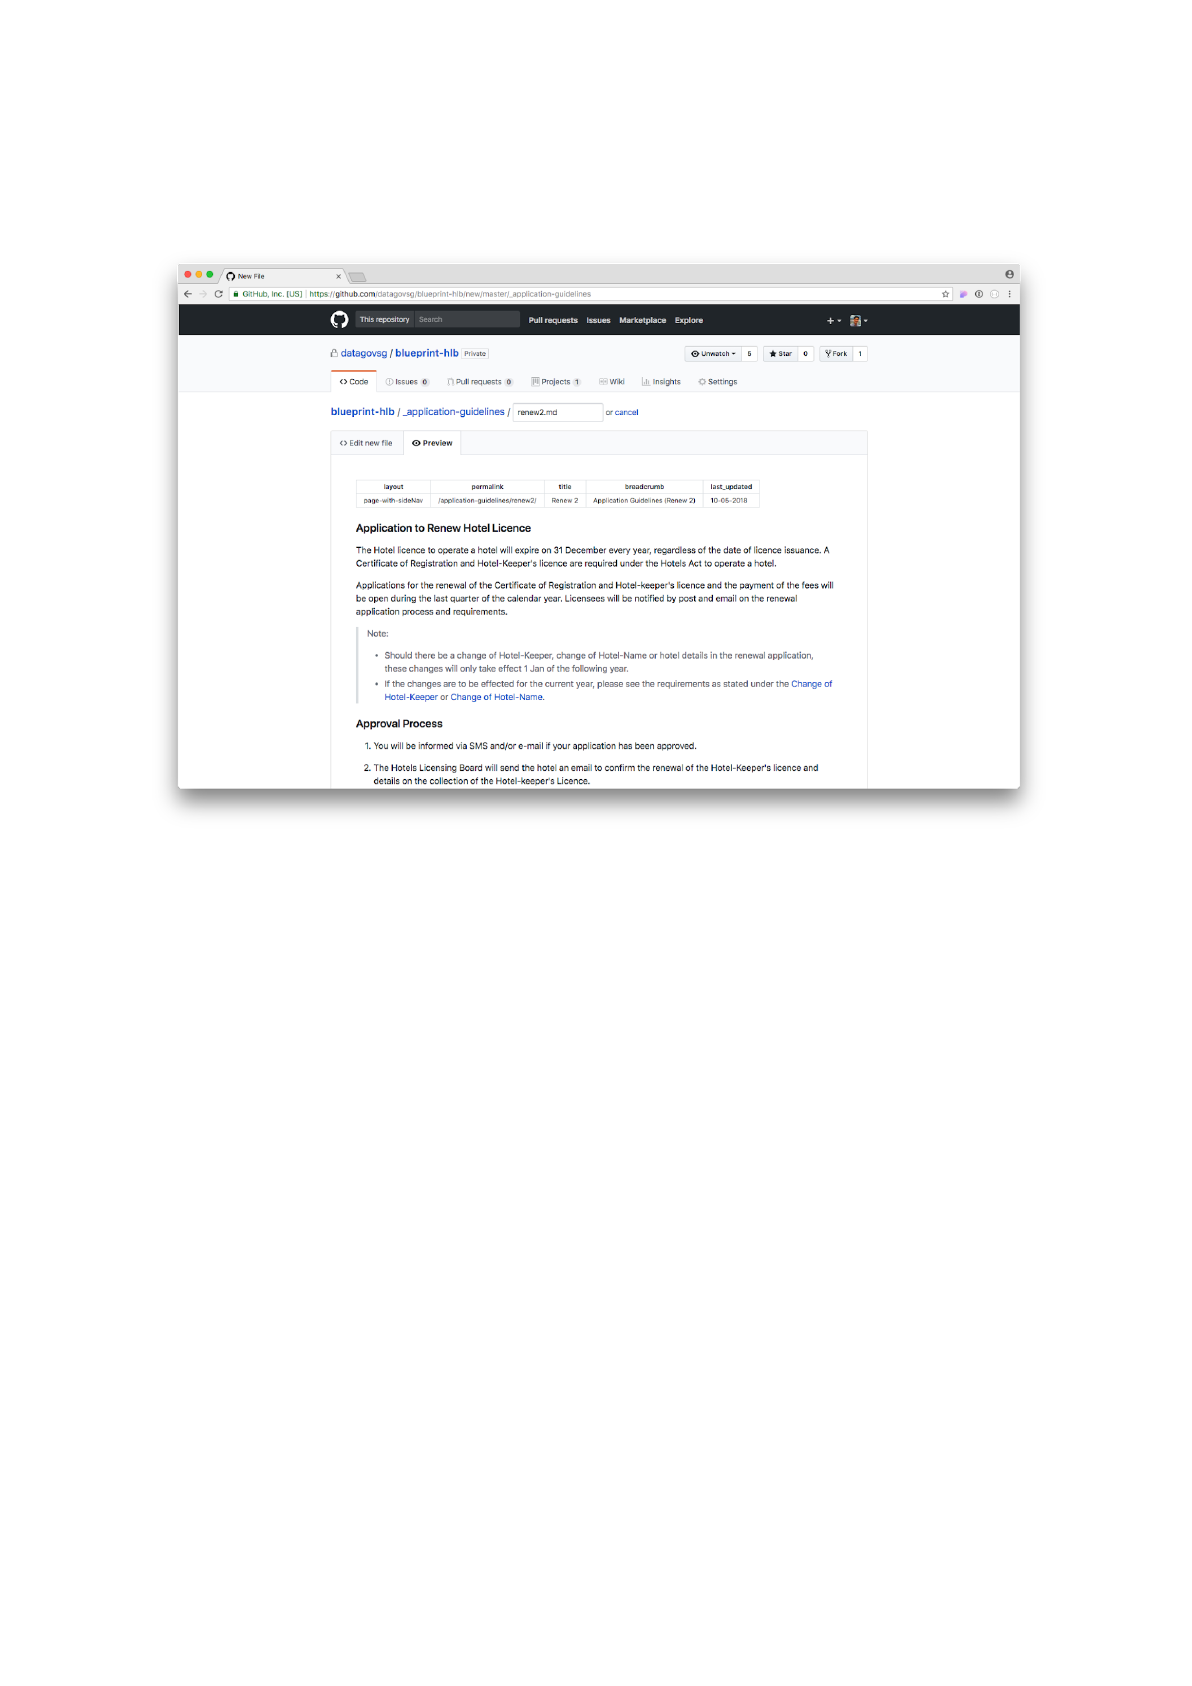
Step 6b: Click on the Preview button to check out the rendered page.
This is close to how the website will look.
Preview of styled markdown file
Step 7: Scroll down to the bottom of the page. Leave an optional
commit message (explaining why you did what you did) and click on the
Commit button to save.
GitHub pages will then generate your website. It can take up to 1-2
minutes for the new version of the website to become live.
Task 3: Create a new Media post (Forms & Templates)
The Media section is a collection of markdown posts. These posts can
either be: (1) files (e.g. PDF or Word Doc) or (2) articles (a website page
containing words and images).
In this task, we will create a new Media post containing a .doc file.
Each Media post is a markdown file and contains a header and content,
similar to that of the Application Guidelines. However, there is a slight
difference in the header syntax – we will go into detail below.
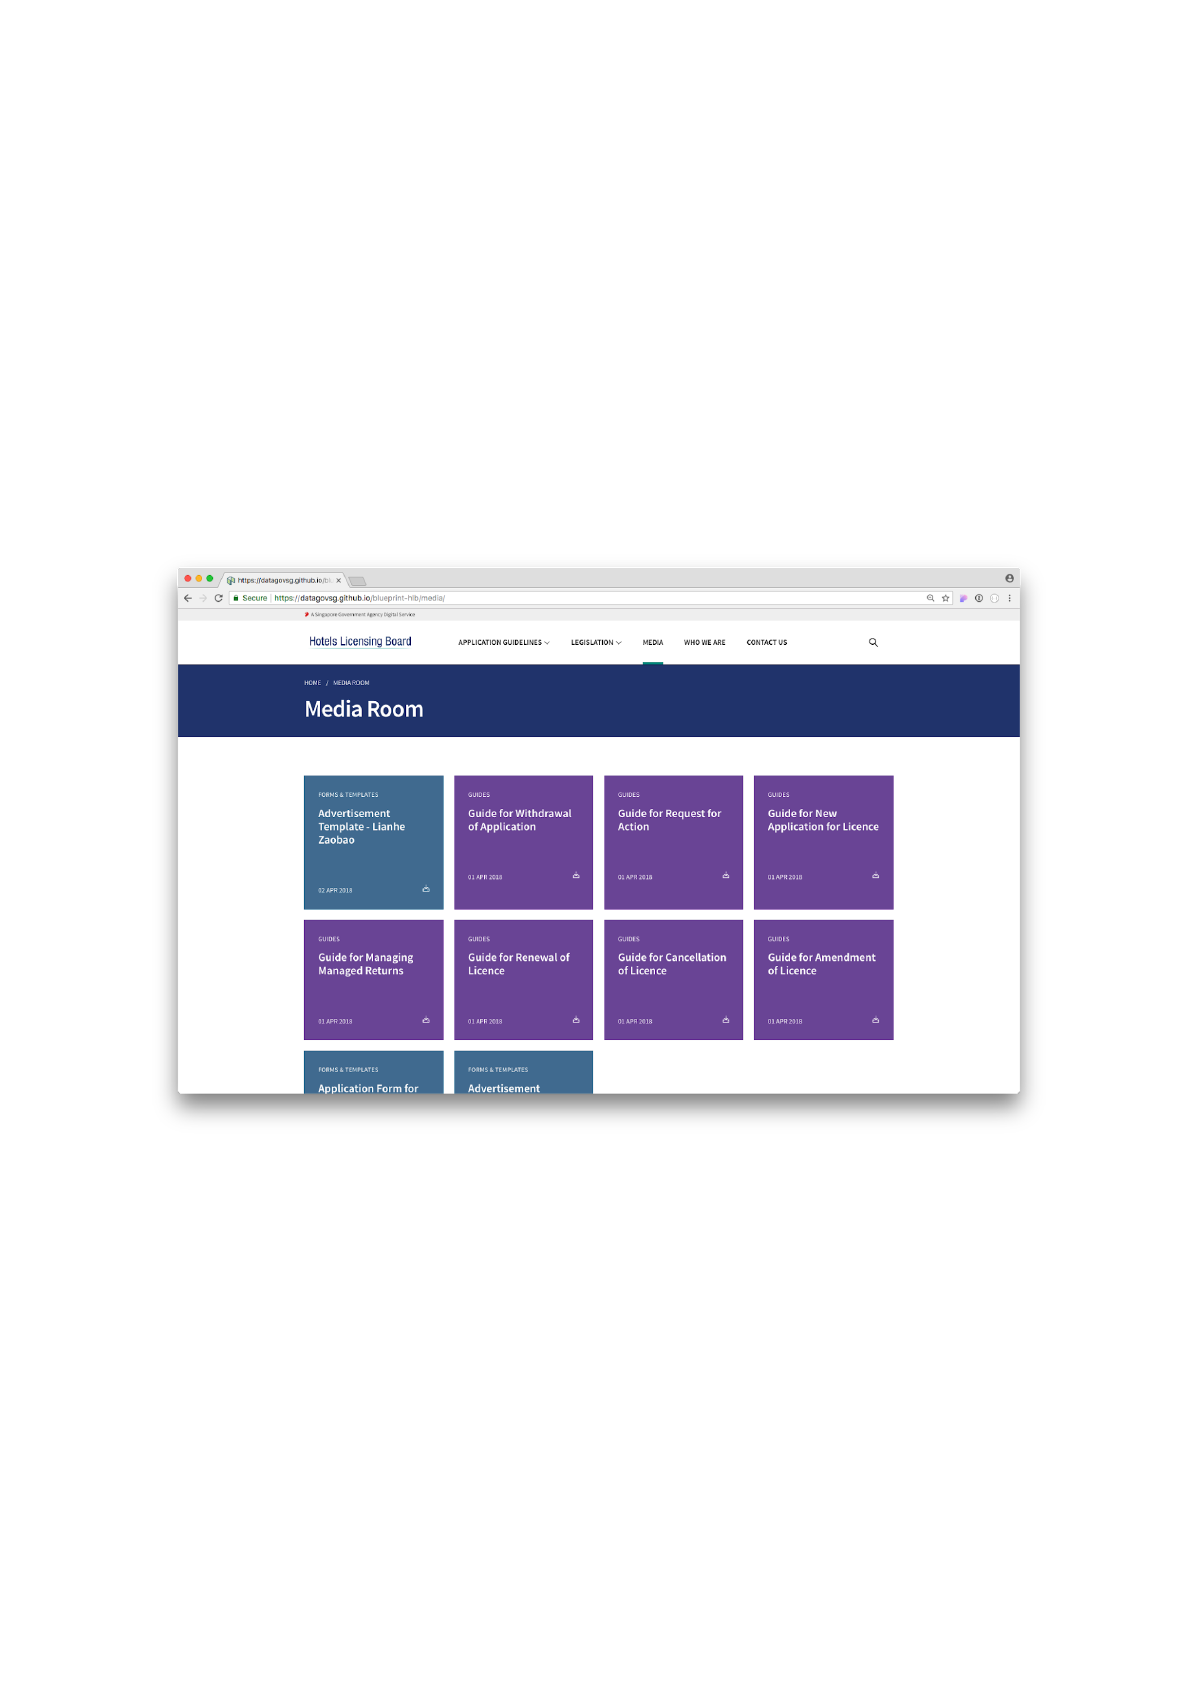
Media page containing all the posts on the website

Step 1: Click on the media folder.
The media folder contains all the relevant media files
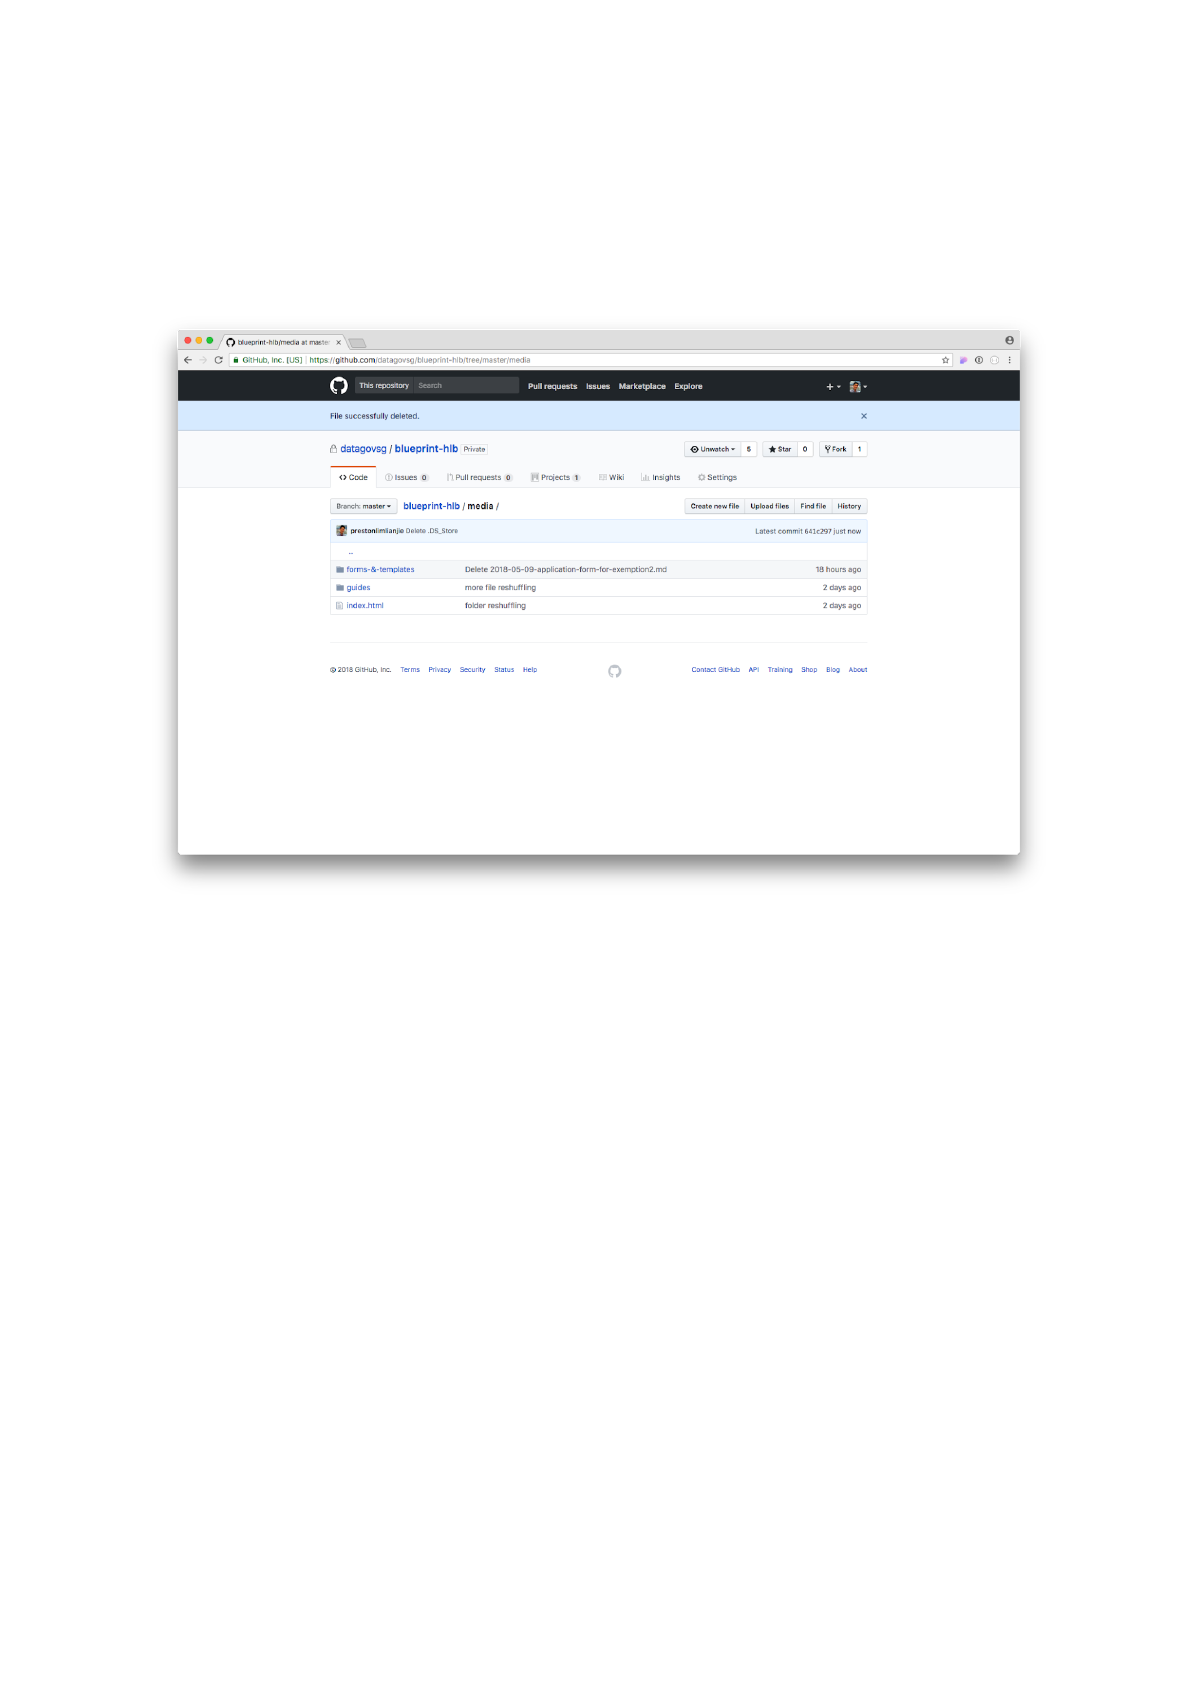
Step 2: You should see two folders: forms-&-templates and guides.
These are the two categories of media files present on this website.
Click on the forms-&-templates folder.
There are two categories of media posts for this particular website
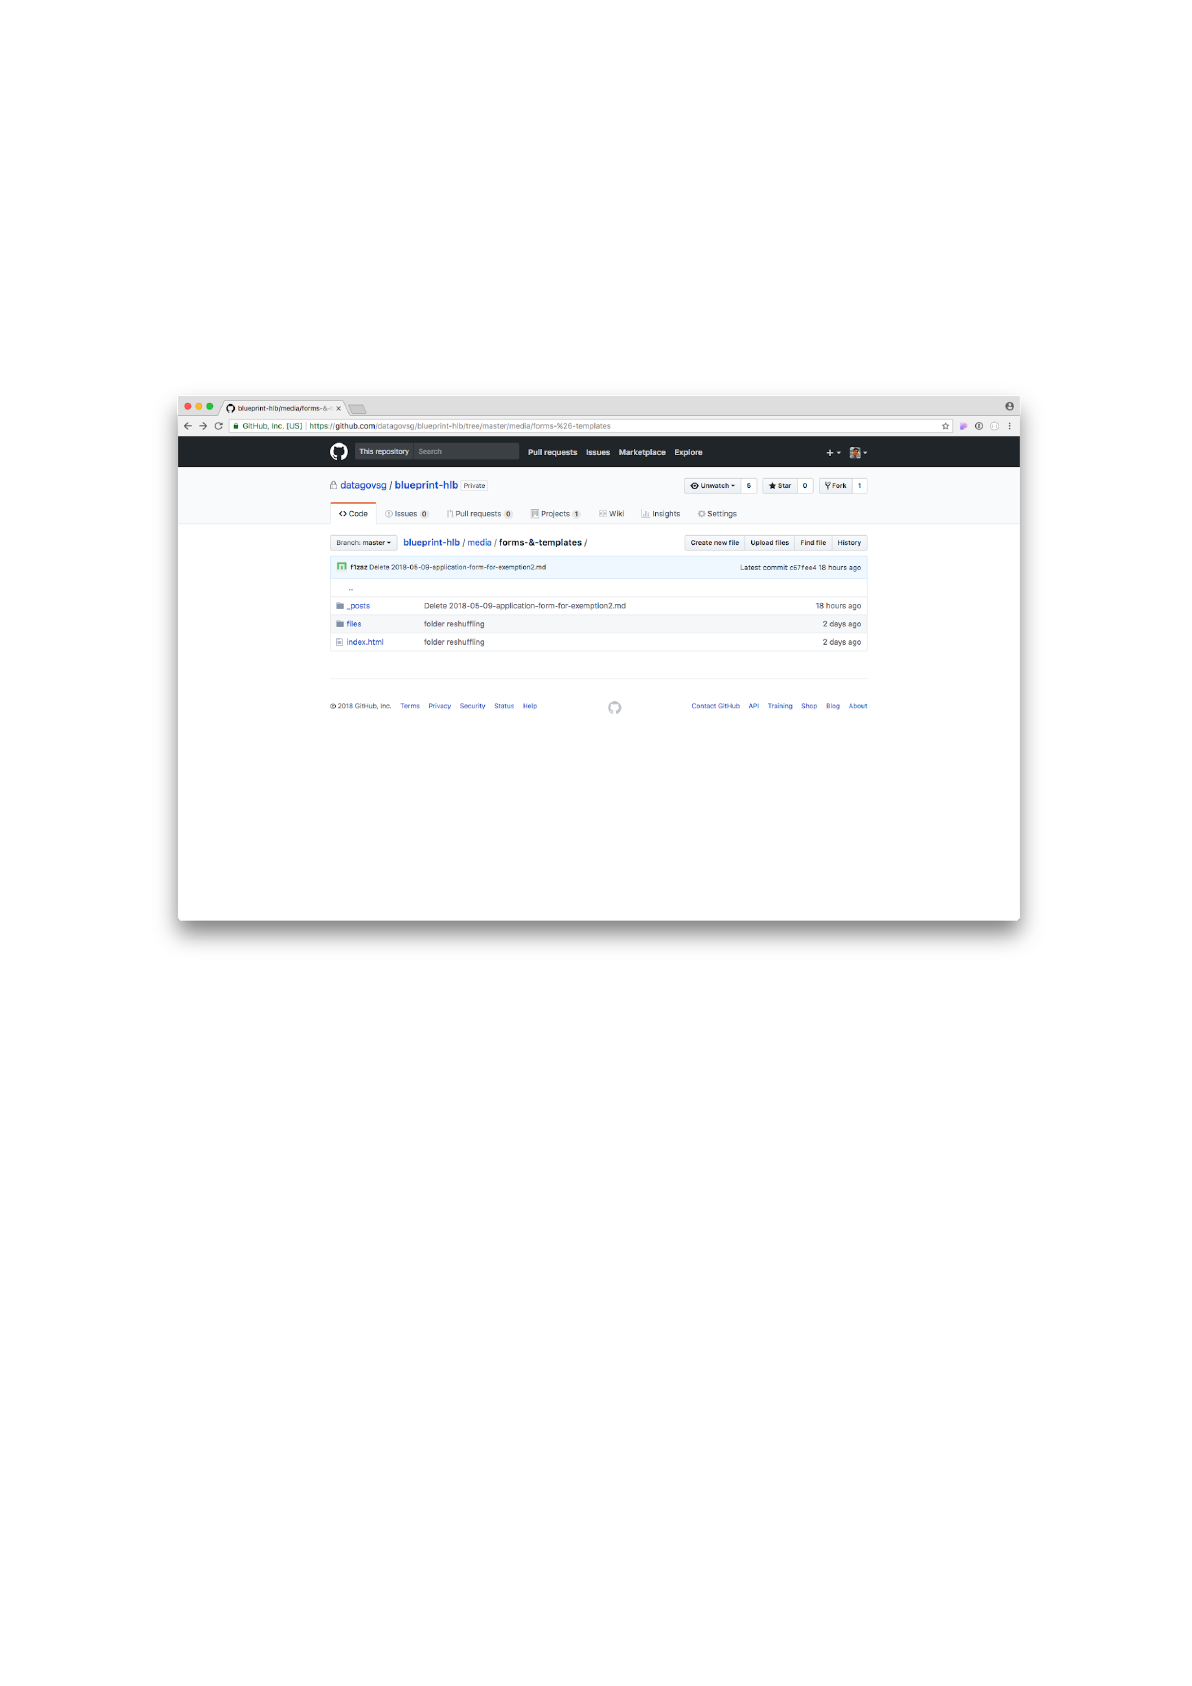
Step 3: At this point we see two folders: _posts and files. The _posts
folder contains the markdown files denoting each post, while the files
folder contains the actual files that the posts refer to.
What we need to first do is to upload the file onto the website. Click on
the files folder.
Click on the files folder
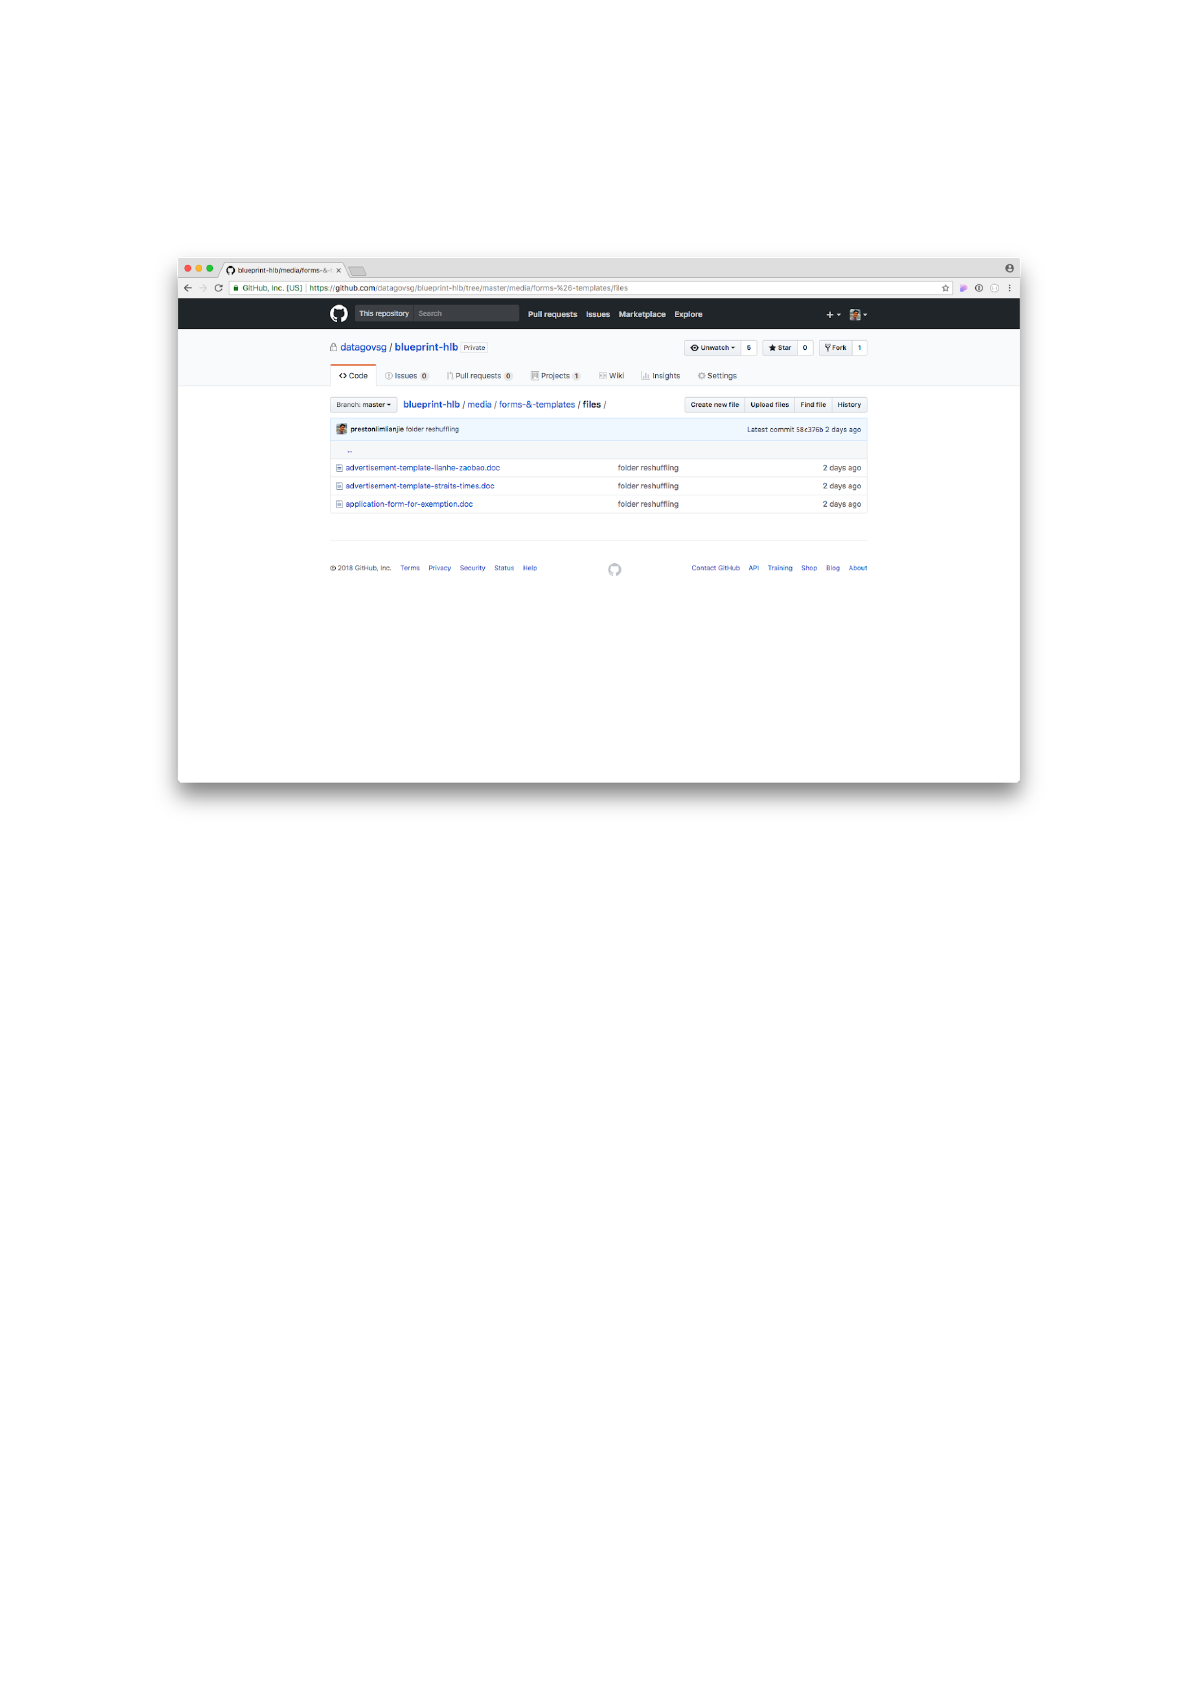
Step 4: Click on the Upload files button.
The files folder for forms-&-templates

Step 5: Upload the application-form-for-exemption2.doc file and click
on the Commit changes button to save the file.
Upload and save your .doc file
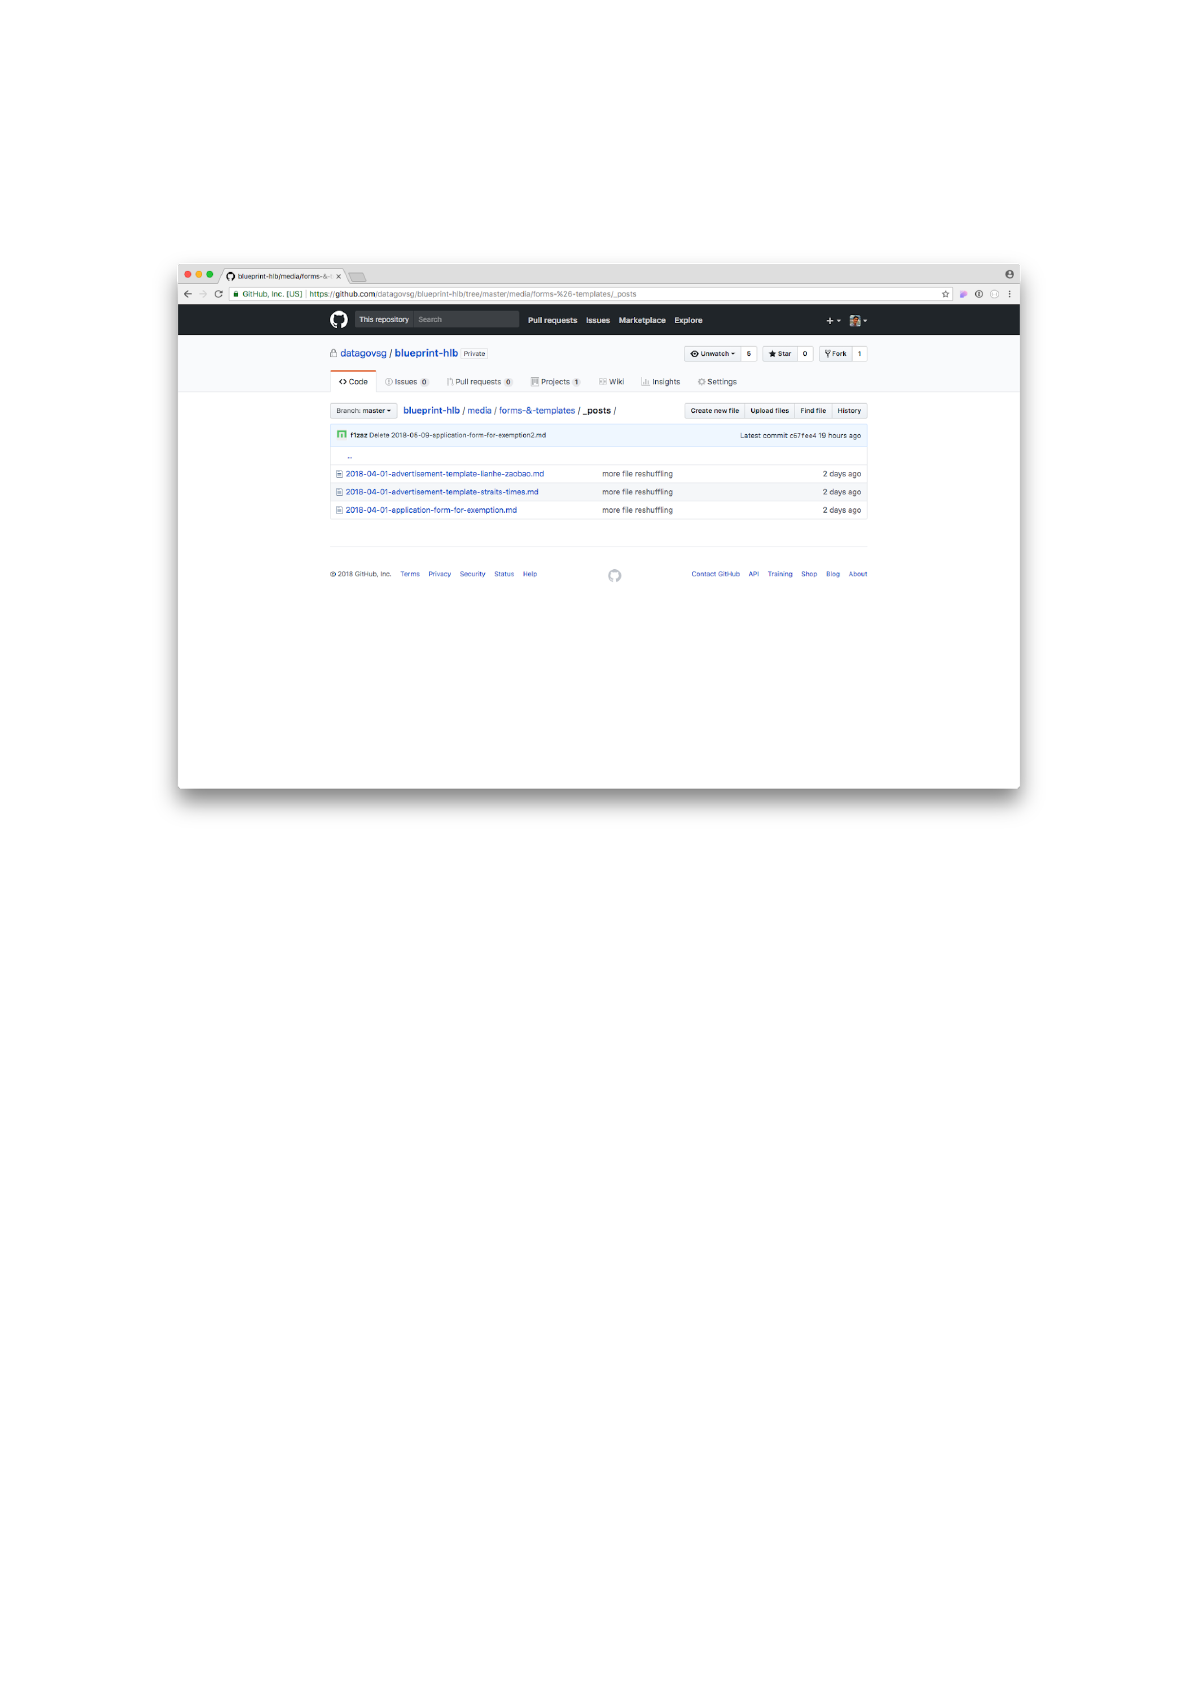
Step 6: Now go to the _posts folder that we saw previously. Click on
Create new file.
The _posts folder contains the post markdown files
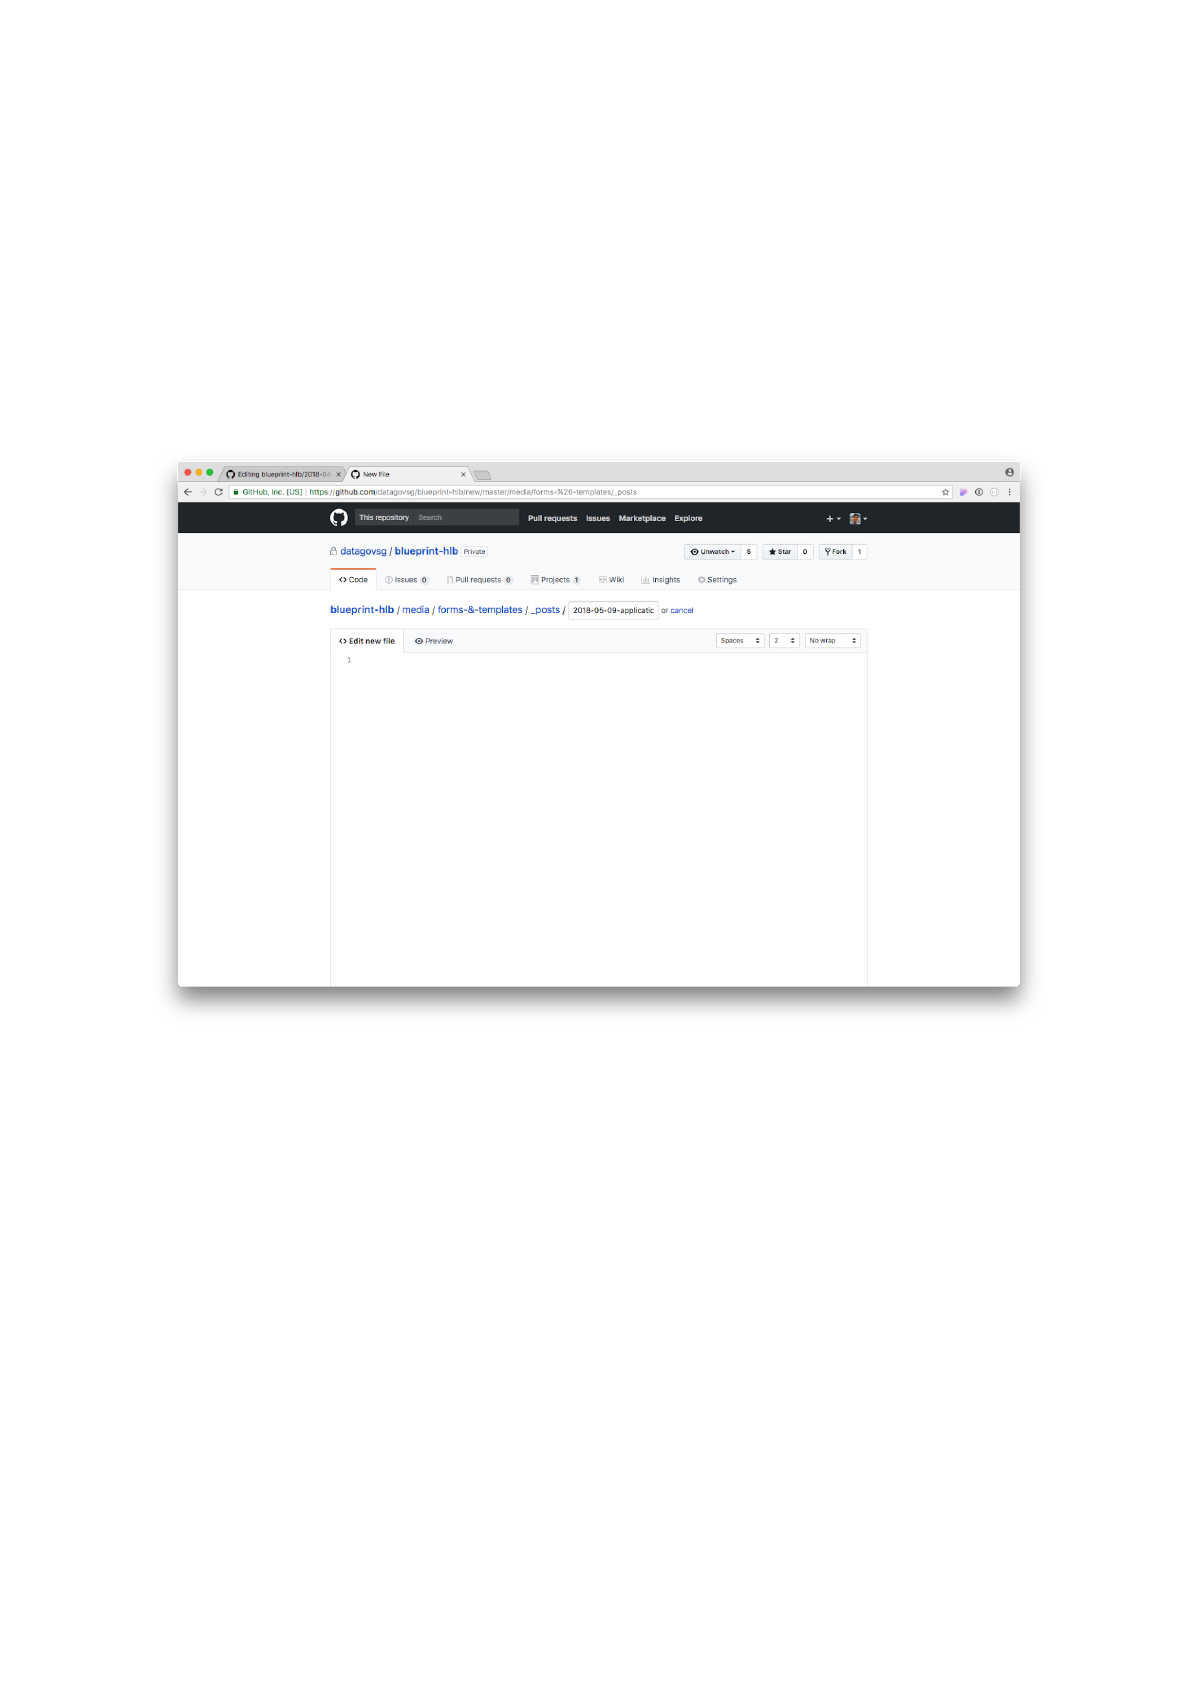
Step 7: Give your markdown file the following name:
2018-05-09-application-form-for-exemption2.md.
The Media post file naming convention is as follows:
YYYY-MM-DD-your-file-name.md
.
There must be no special characters (including whitespace) and the
words must be in lower case.
Give your file a name – pay attention to the Media post naming convention!
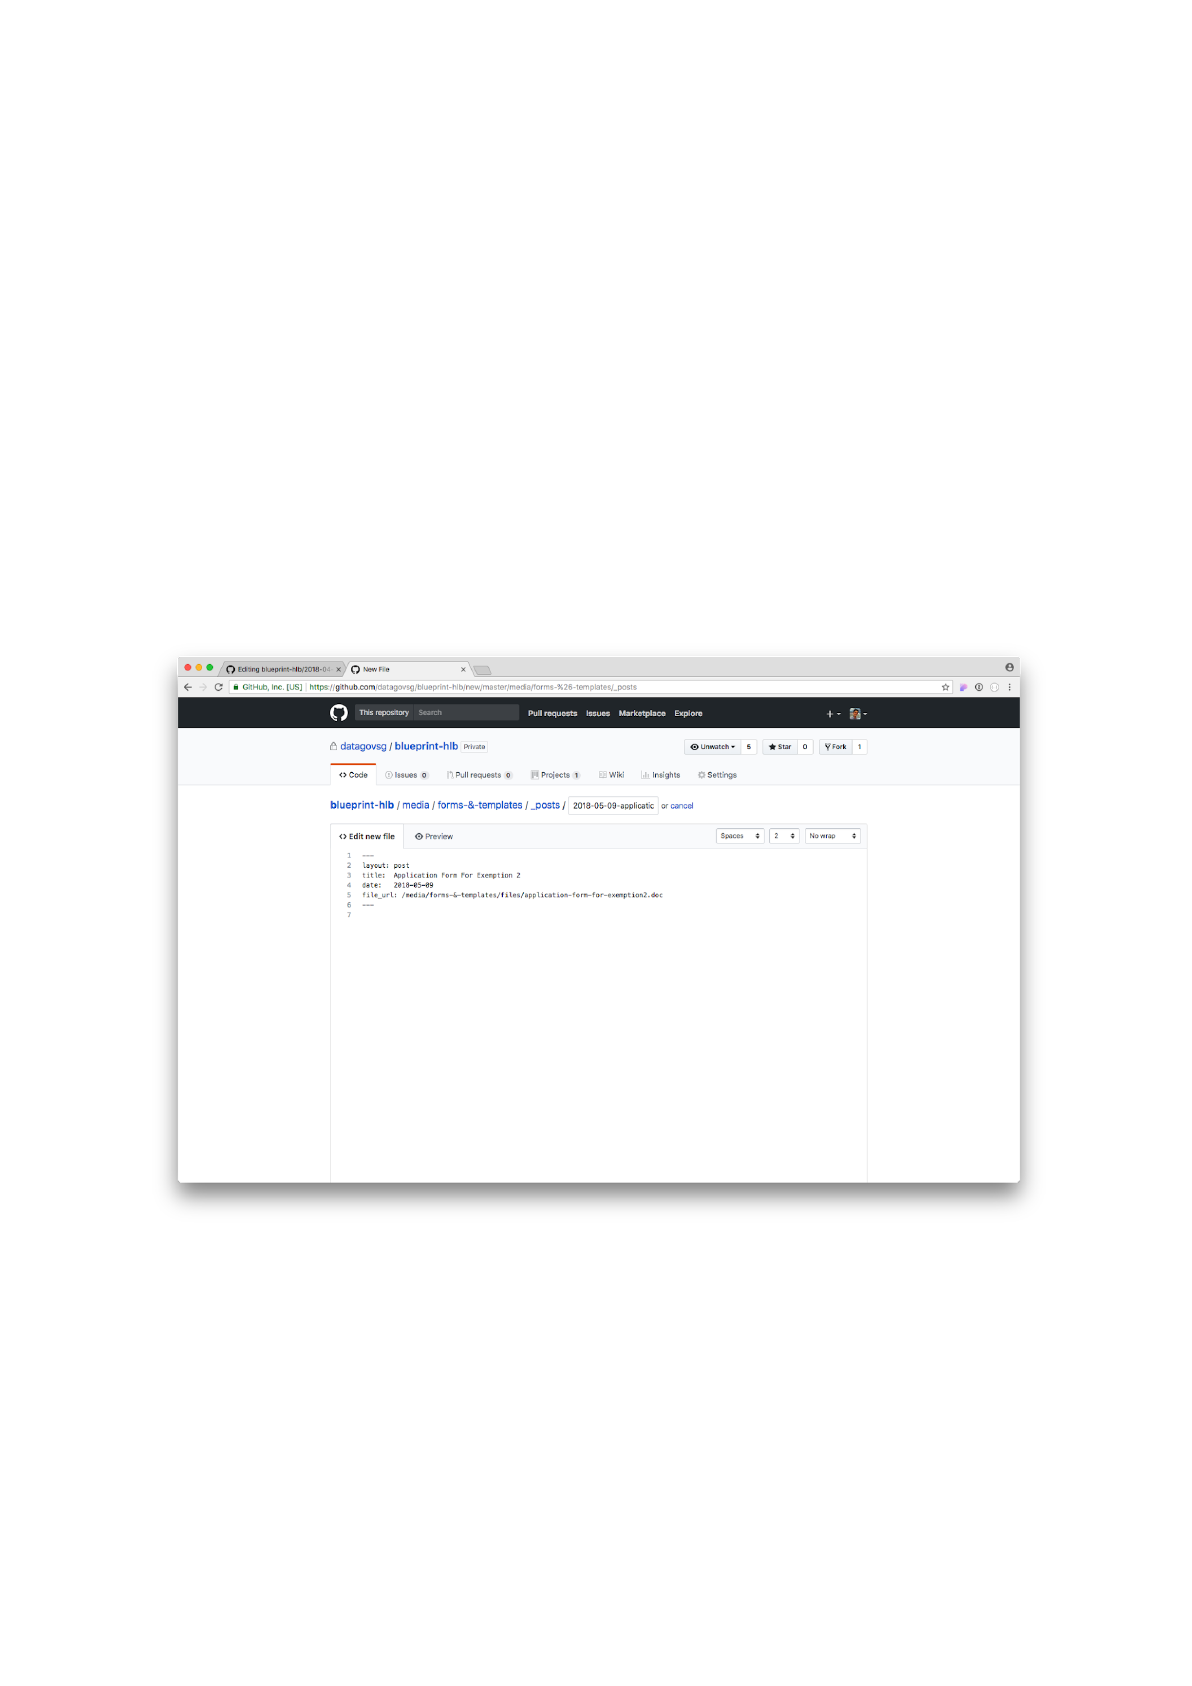
Step 8: Type in the following header.
---
layout: post
title: Application Form For Exemption 2
date: 2018-05-09
file_url: /media/forms-&-templates/files/application-form-for-exemption2.doc
---
The layout tells the website generator what the page should look like (in
this case, it should look like a post).
The title – as the name suggests – is the title of the post. It is case
insensitive.
The date is the date of upload; it follows the format:
YYYY-MM-DD
The file_url is the folder where we had previously uploaded our file.
Type in the header
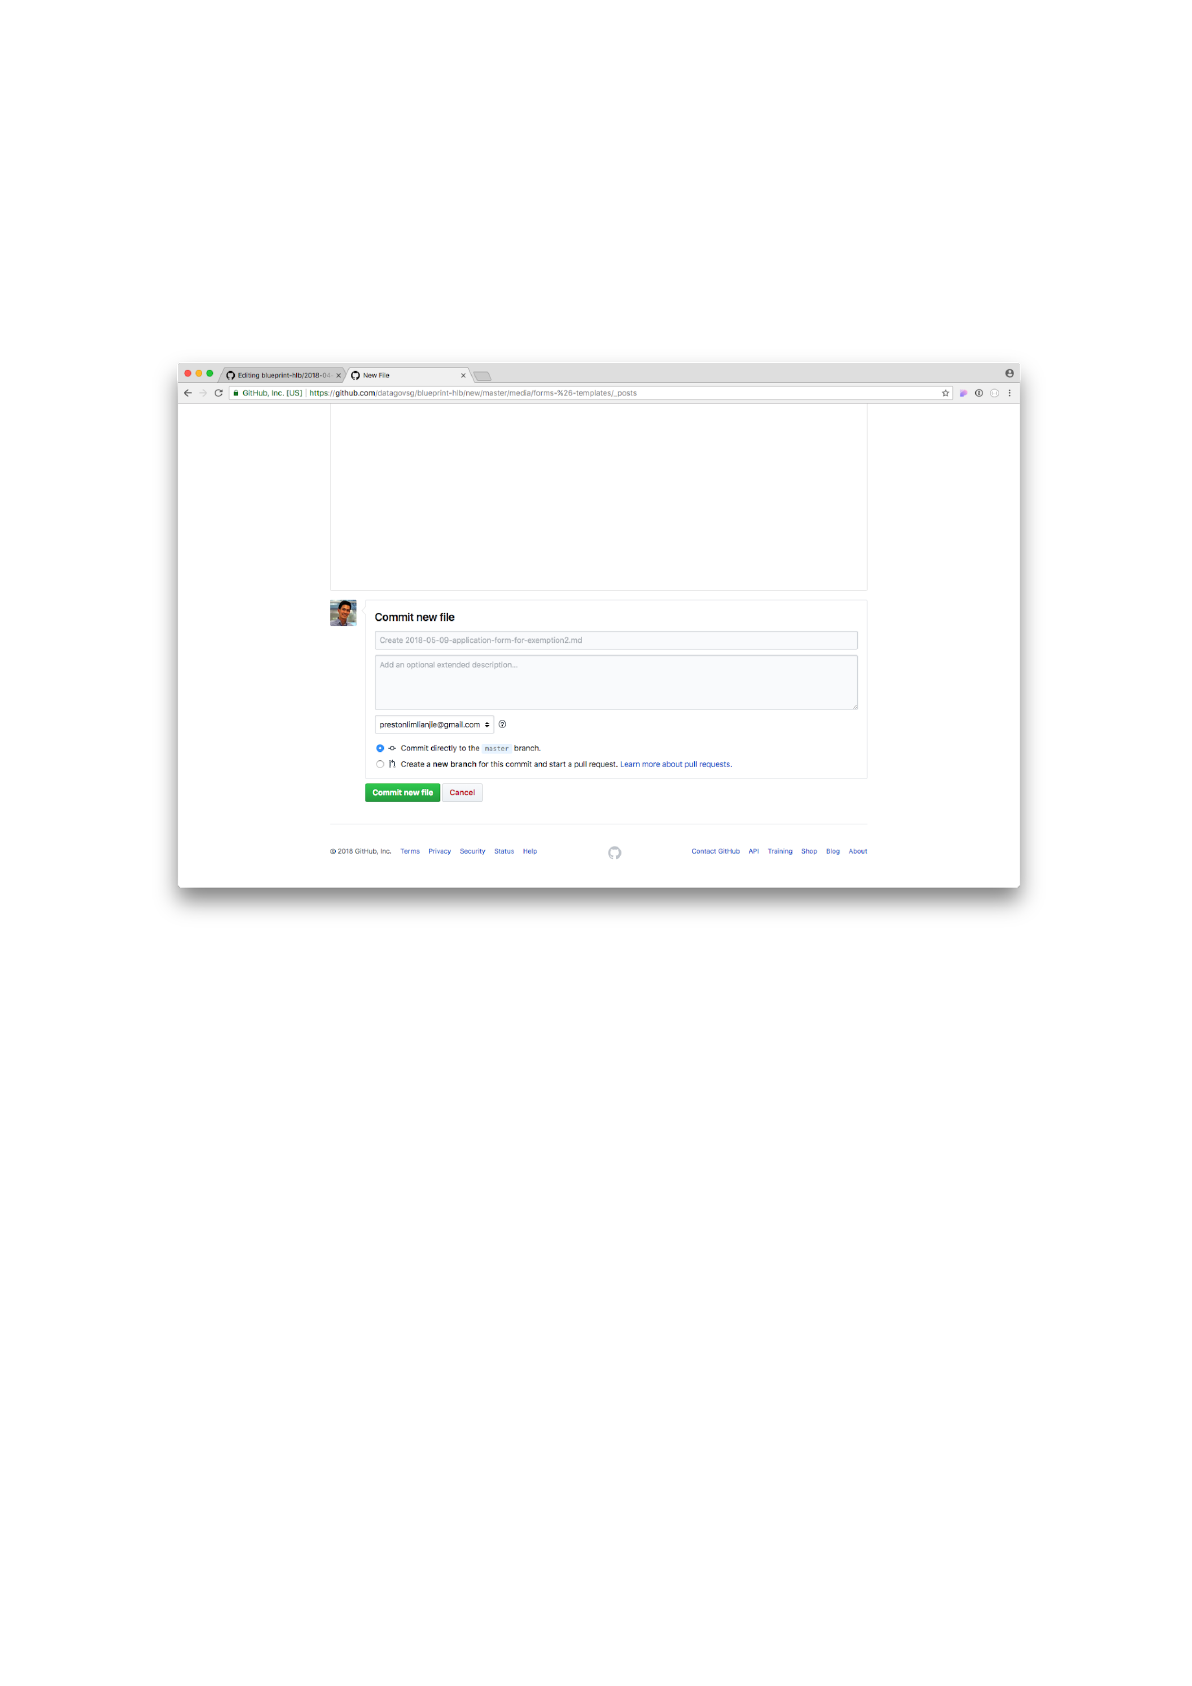
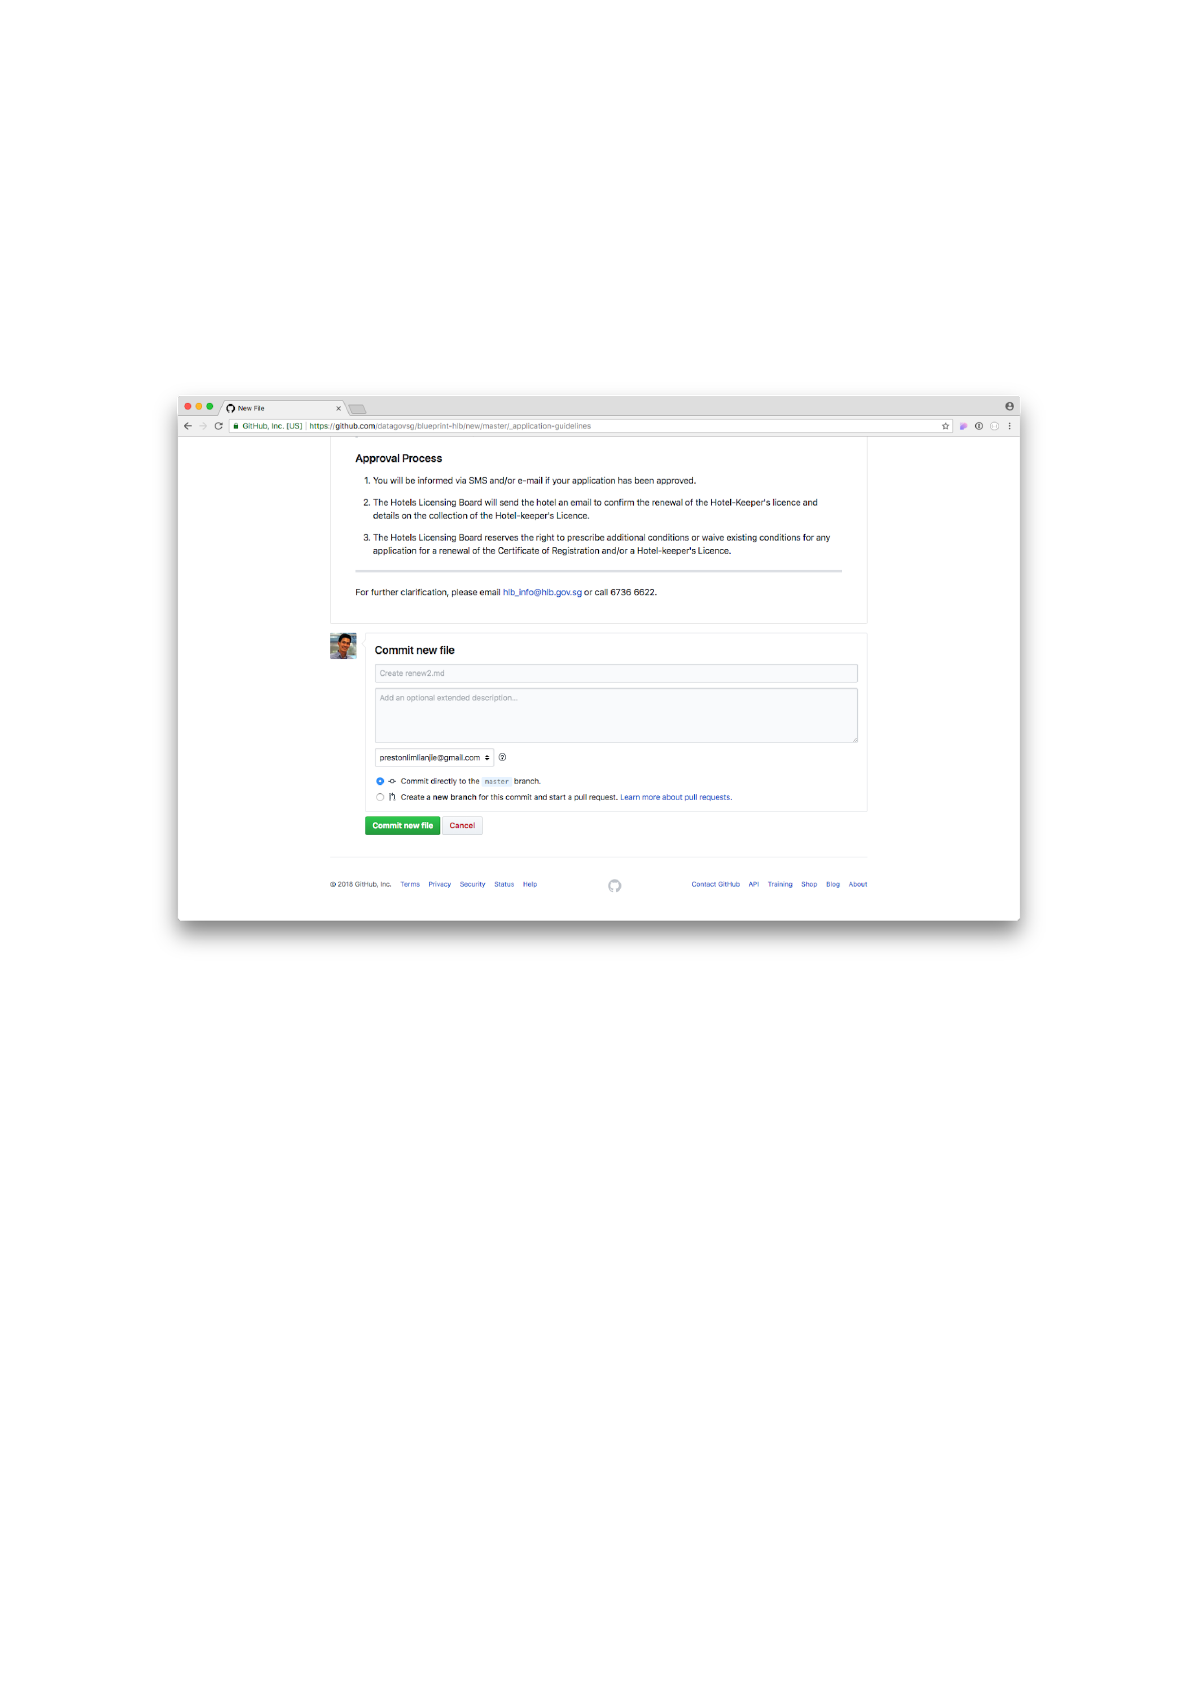
Step 9: Unlike the Application Guideline markdown, the Media post that
contain files don’t need to have content. Our work is done!
Scroll down and click on the Commit new file button to save your post.
You should be able to see the new file on the website in a minute or so!
Click on Commit new file to save your file.
Task 4: Edit the Contact Us Information
Step 1: Click on the _data folder.
Go to the _data folder
Step 2: Click on the contact-us.yml file.
Click on the contact-us.yml file
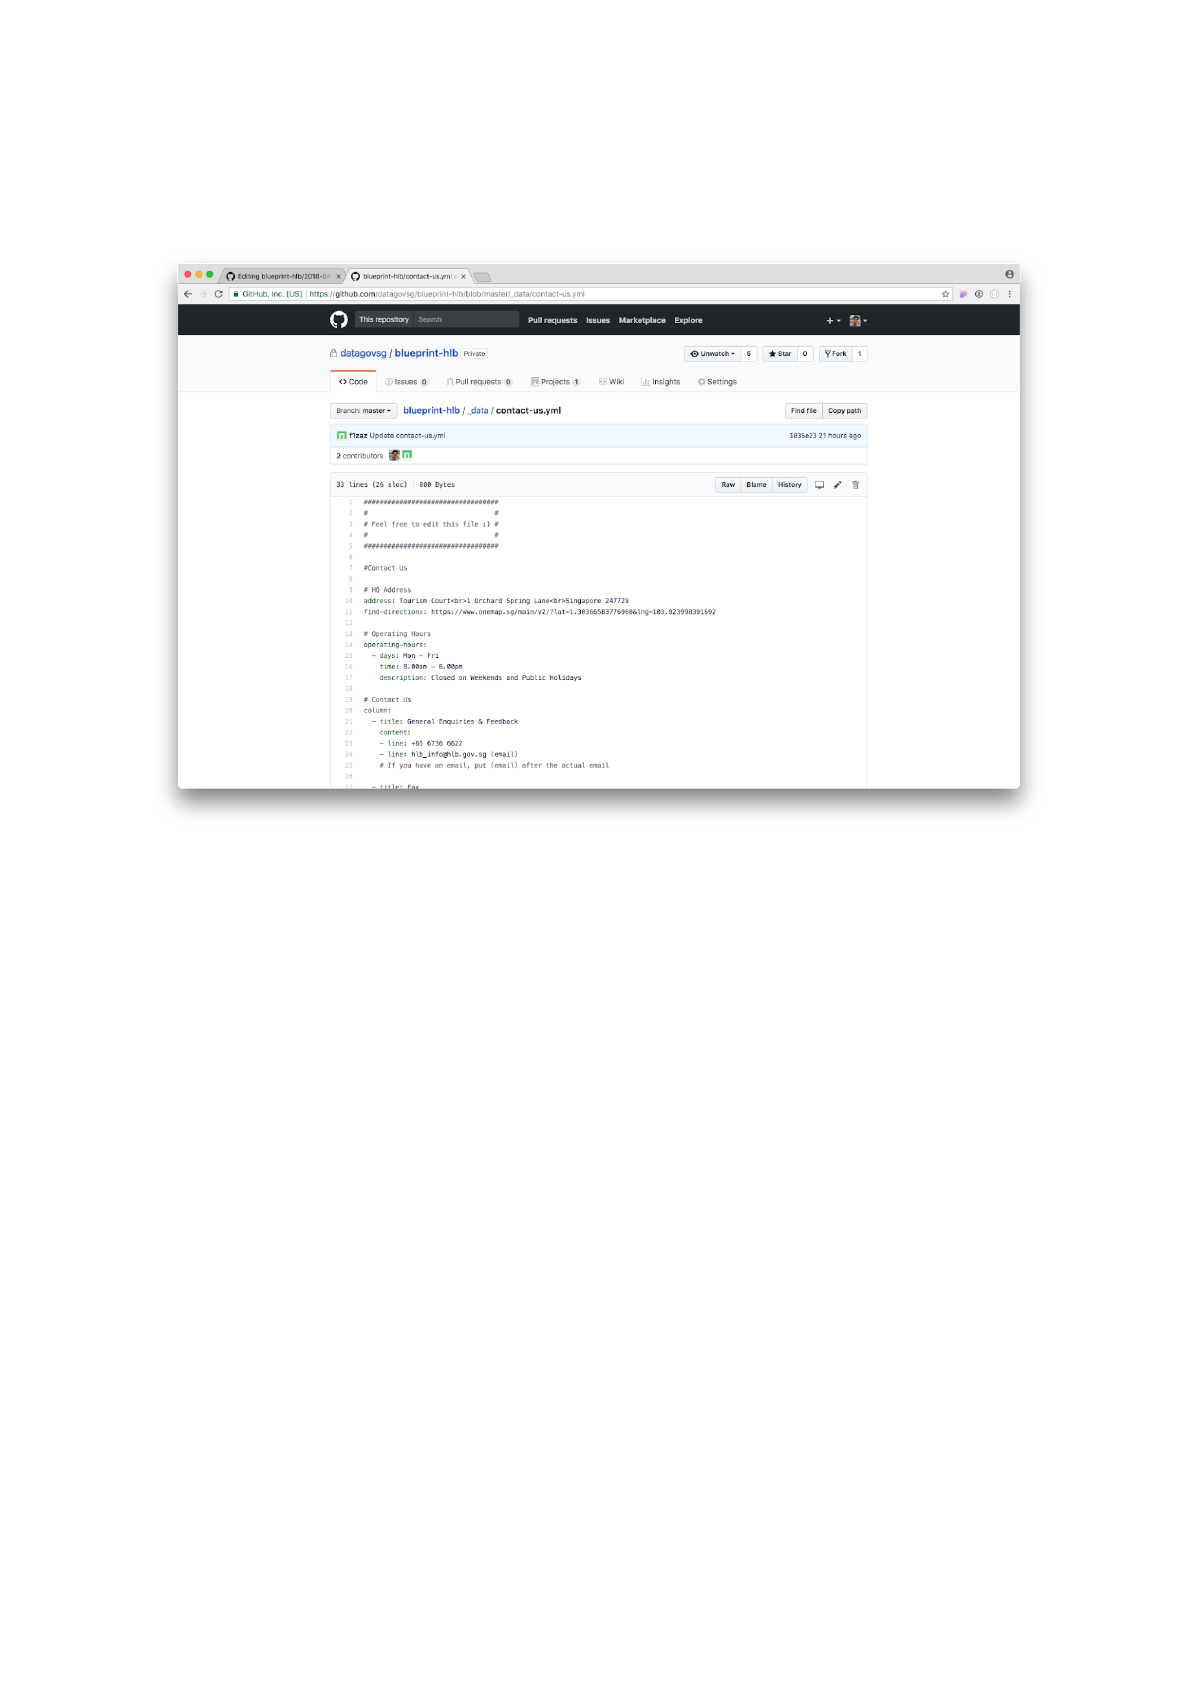
Step 3: We should now see a preview screen for the contact-us.yml file.
Click on the edit (pencil icon) button.
Click on the edit button
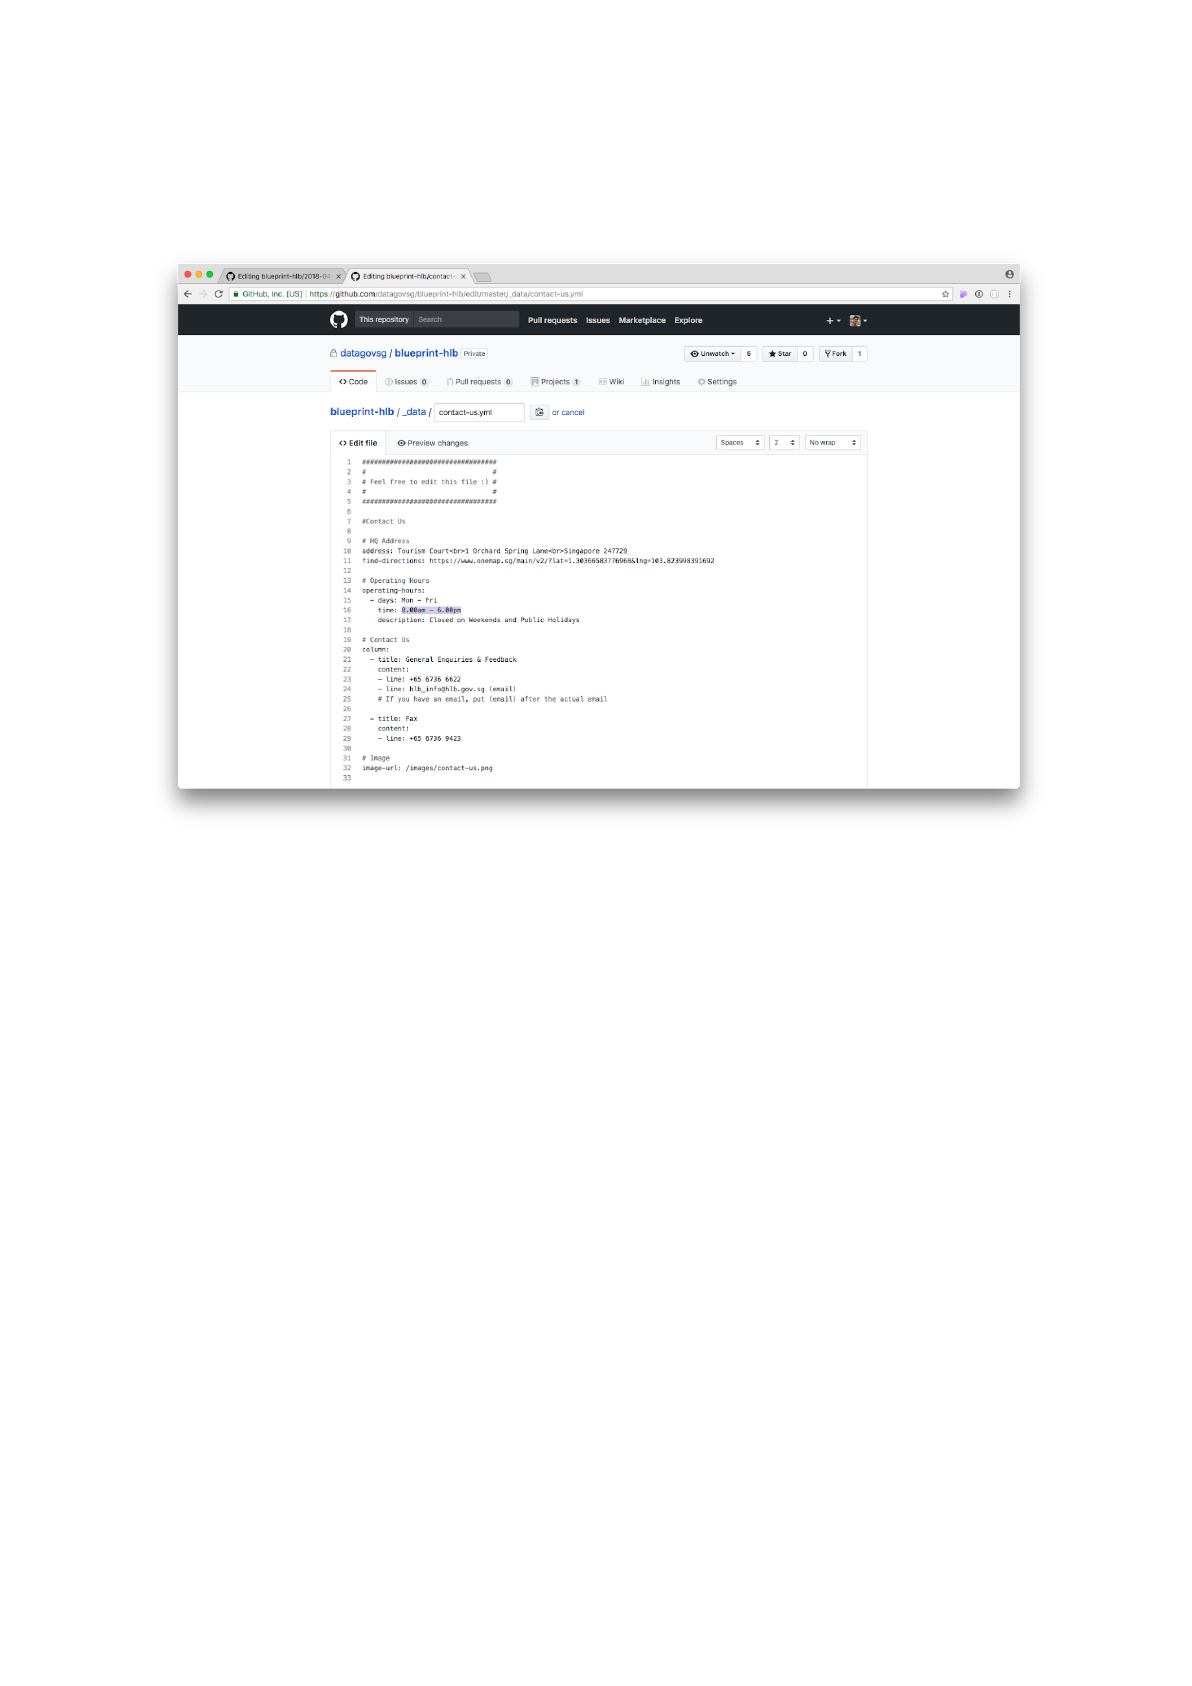
Step 4: Replace the time of the operating-hours for Mon-Fri with:
8.30am – 6.00pm
Replace the operating hours

Step 5: Scroll down and click on the Commit changes button to save.
The change should be reflected on the website in a minute or so.
We’re done!

Cheat Sheet
Why Markdown and YAML?
Traditionally, in order to edit a website, one had to write in pure HTML.
This is challenging for website administrators who had limited
experience with HTML as it is not immediately readable or intuitive to
non-experienced users.
Our team decided to go with Markdown (.md) – more human readable
syntax – so as to empower non-technical website administrators.
While Markdown is appropriate for writing long segments of text, it
alone does not allow users to edit small details of the website (e.g.
change the hero-banner image) without diving into the HTML.
We therefore chose to supplement the Markdown syntax with YAML
(.yml) – yet another human readable syntax.
What can I edit?
_application-guidelines
Contains the Application Guidelines
media
Contains the media-related files, e.g. Forms and Templates and Guides
EDIT-THIS
Contains the rest of the markdown files, e.g. Privacy Statement, Terms
of Use, Who We Are, Contact Us
_data
Contains the YAML files to make fine tweaks to the website.
Images
Contains the images used in the website.
How should I go about editing my website?
The best practice is to always look for the Markdown file first. The
Markdown file tells the website generator what to do.

Sometimes, if the edits are to be made to the YAML file that is related
to the Markdown file, the Markdown file will contain instructions on
where this YAML file is.
For example, if I wanted to edit the Who We Are page on the website. I
would go into the EDIT-THIS/who-we-are/who-we-are.md file. I could
make changes to the paragraphs of text there. However, if I wanted to
change the names of the board members, I would – as instructed by the
Markdown file – have to go to the YAML file to do so
(_data/who-we-are.yml).
