Browser Print User Guide
software-browser-print-user-guide-en-us
software-browser-print-user-guide-en-us
Browser%20Print%20User%20Guide
Browser%20Print%20User%20Guide
software-browser-print-user-guide-en-us
User Manual:
Open the PDF directly: View PDF ![]() .
.
Page Count: 17

Browser Print User Guide

Overview
Zebra Browser Print is a set of scripts and an end-user application that allows web pages to
communicate with Zebra Printers. The application lets a web page communicate to Zebra devices
accessible to the client computer.
Currently, Zebra Browser Print supports Macintosh OS X Yosemite and above, as well as Windows 7
and 10. Google Chrome, Internet Explorer, and Apple Safari browsers are supported. It can
communicate to Zebra printers connected via USB and Network. For a more complete list of
supported features, see the Supported Features.
This document outlines the basics for installing and using Browser Print:
Features
Installation (Windows)
Installation (Macintosh)
Running Browser Print
Restarting or Starting Browser Print
Using the Sample Demo
Printing an Image
Integration
Uninstalling (Windows)
Uninstalling (Macintosh)
Incompatibilities
Appendix – Supported Features
Features
Allows web page to communicate with Zebra Printers directly through the client computer’s
connection.
Auto-discovers USB and network connected Zebra Printers.
Allows two-way communication to devices.
Has ability to set a default Printer for the end-user application, independent of the default printer
used by the operating system.
Has ability to print a PNG, JPG or Bitmap image using its URL.
Installation
1. If you currently have a version of Browser Print or Zebra Web Driver installed, use the instructions
for Windows Uninstallation (Windows) or Uninstallation (mac OS X) to uninstall it.
2. Please read the section on Incompatibilities for issues installing or running this program.
3. There are separate installers for mac OS x and Windows, follow the Windows instructions below
or the Macintosh instructions here .
Installation (Windows)
1. Run the installer executable “ZebraBrowserPrintSetup-1.2.X.exe”.
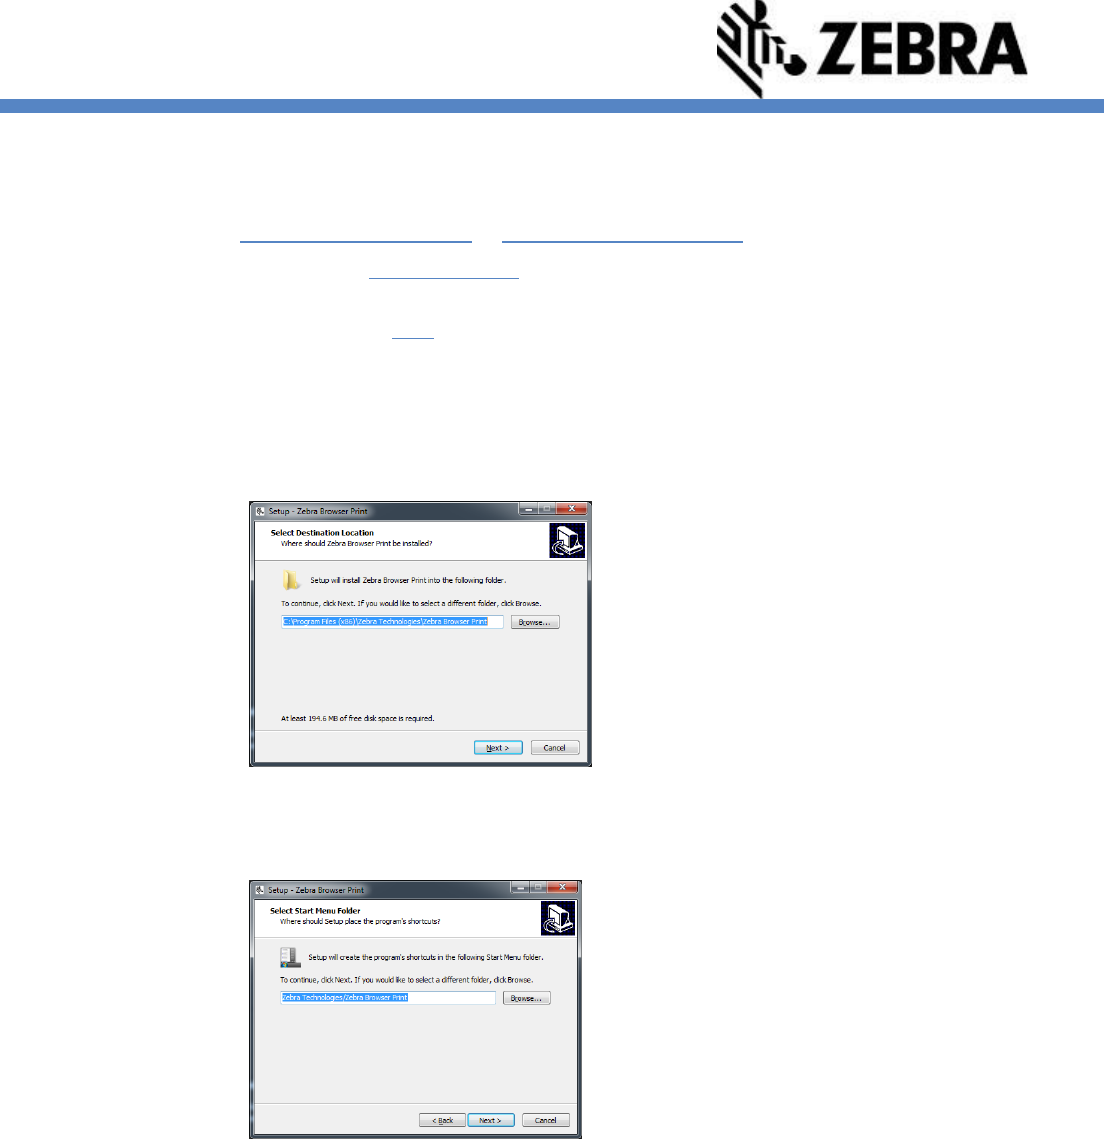
2. Select where you would like to save the Browser Print files and click “Next”.
3. Select where you would like to run the program from and click “Next”.
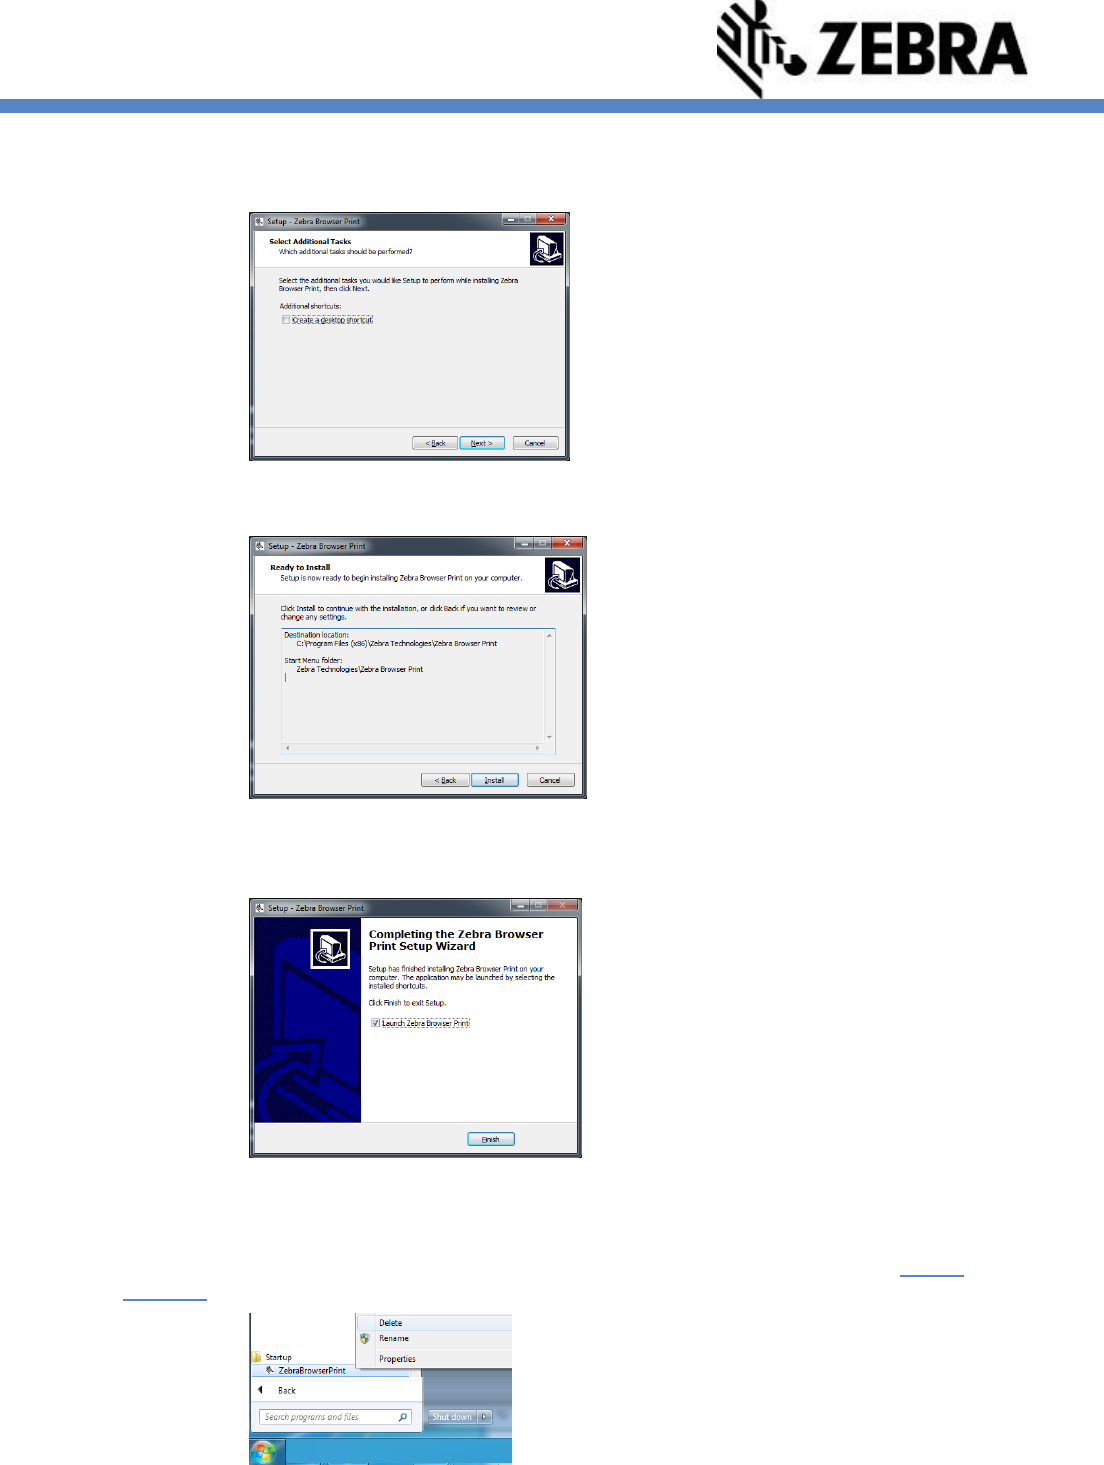
4. Decide if you want to have a desktop icon for Browser Print and click “Next”.
5. Click “Install”.
6. Check the box to launch Zebra Browser Print and click “Finish”. If you do not check the box,
Zebra Browser Print will be launched the next time you restart your computer.
7. Note: The Windows installer adds a shortcut to the “startup” menu automatically. This feature will
ensure that Browser Print runs when the computer is restarted. You can remove this feature by
right-clicking on the shortcut in the startup menu. Browser Print will only work when started
manually without the entry in “startup”.
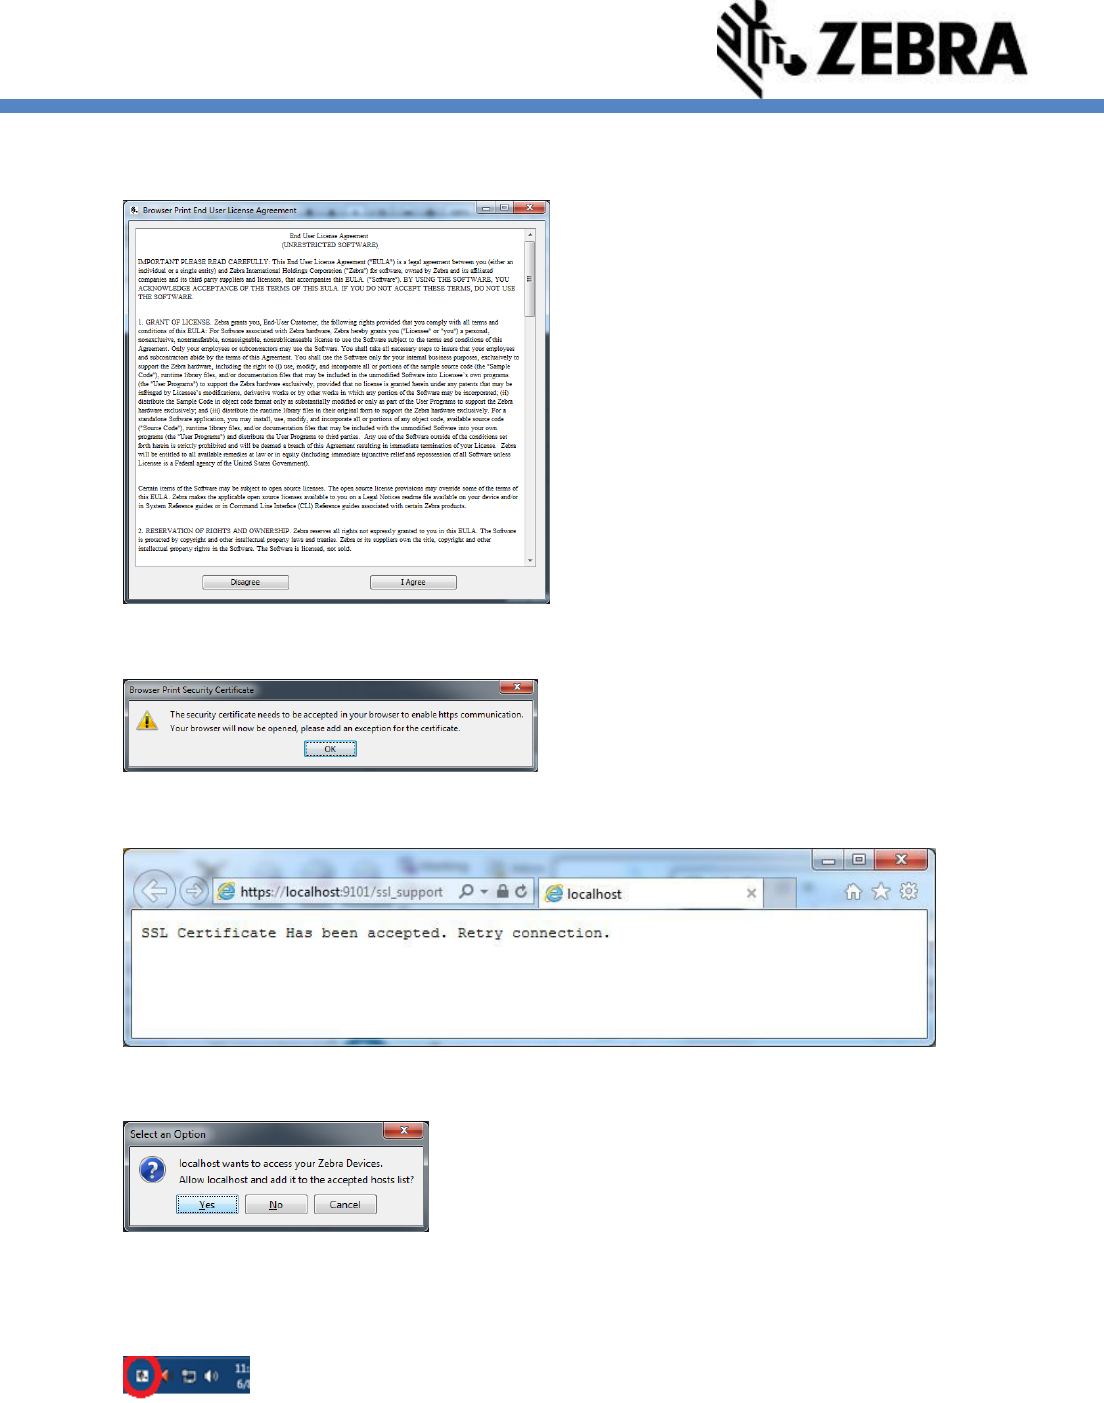
8. When the program runs for the first time, the End User License Agreement will pop-up. Select “I
Agree”.
9. A pop-up about communicating with a web browser will appear. Click “OK”.
10. In a web browser, it displays that the SSL Certificate has been accepted.
11. A pop-up will appear requesting access to any connected Zebra devices. Select Yes.
12. A Zebra logo icon will also appear in your system tray this indicates that Zebra Browser Print is
running.

Installation (Macintosh)
1. For Macintosh OS X: Drag the Zebra Browser Print installation into the Applications folder:
2. Click the “Applications” shortcut to open the “applications folder, then double-click the Browser
Print Application:
3. When started for the first time, the End User License Agreement will pop-up. Select “I Agree”.
4. A pop-up about communicating with a web browser will appear, and the certificate display in the
web browser. Click “OK”.
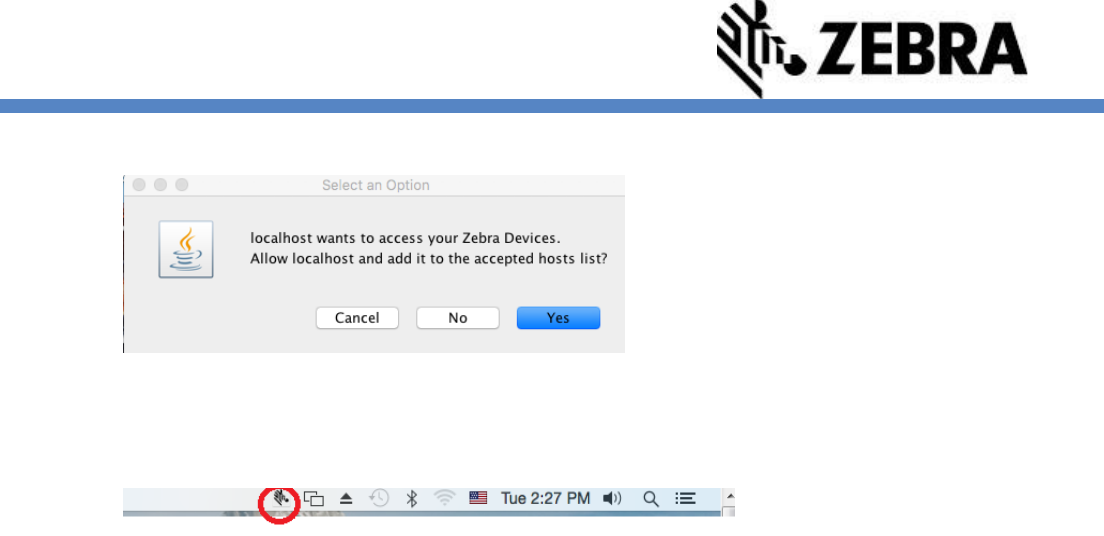
5. A pop-up will appear requesting access to any connected Zebra devices. Select Yes.
6. A Zebra logo icon will appear in your system tray this indicates that Zebra Browser Print is
running.
Running BrowserPrint
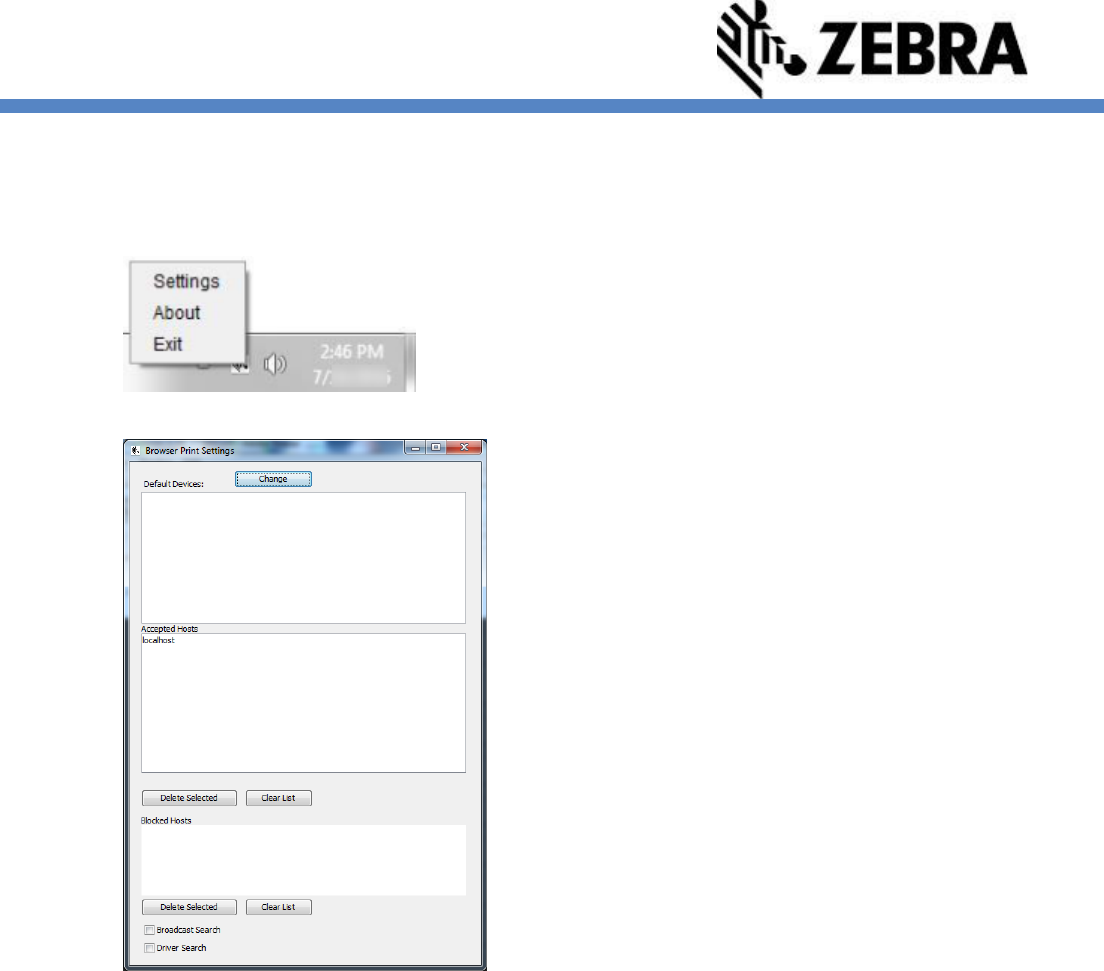
1. Right-click (WIN) or Click (OS X) on the Zebra log icon and select Settings. Browser Print’s
settings will open.
a. Default Devices: Lists the default device set for this user. This is different than the default
printer set by the operating system. This can be changed once set via the “Change”
button or via script.
b. Accepted Hosts: Lists web addresses that the user has allowed access to their devices.
These can be removed using this screen.
c. Blocked Hosts: Lists web addresses that the user has blocked access to their devices.
These can be removed using this screen.
d. Broadcast Search: Selection box allows Zebra Browser Print to find and print on network
connected Zebra Printers.
e. Driver Search: Not supported in this release.
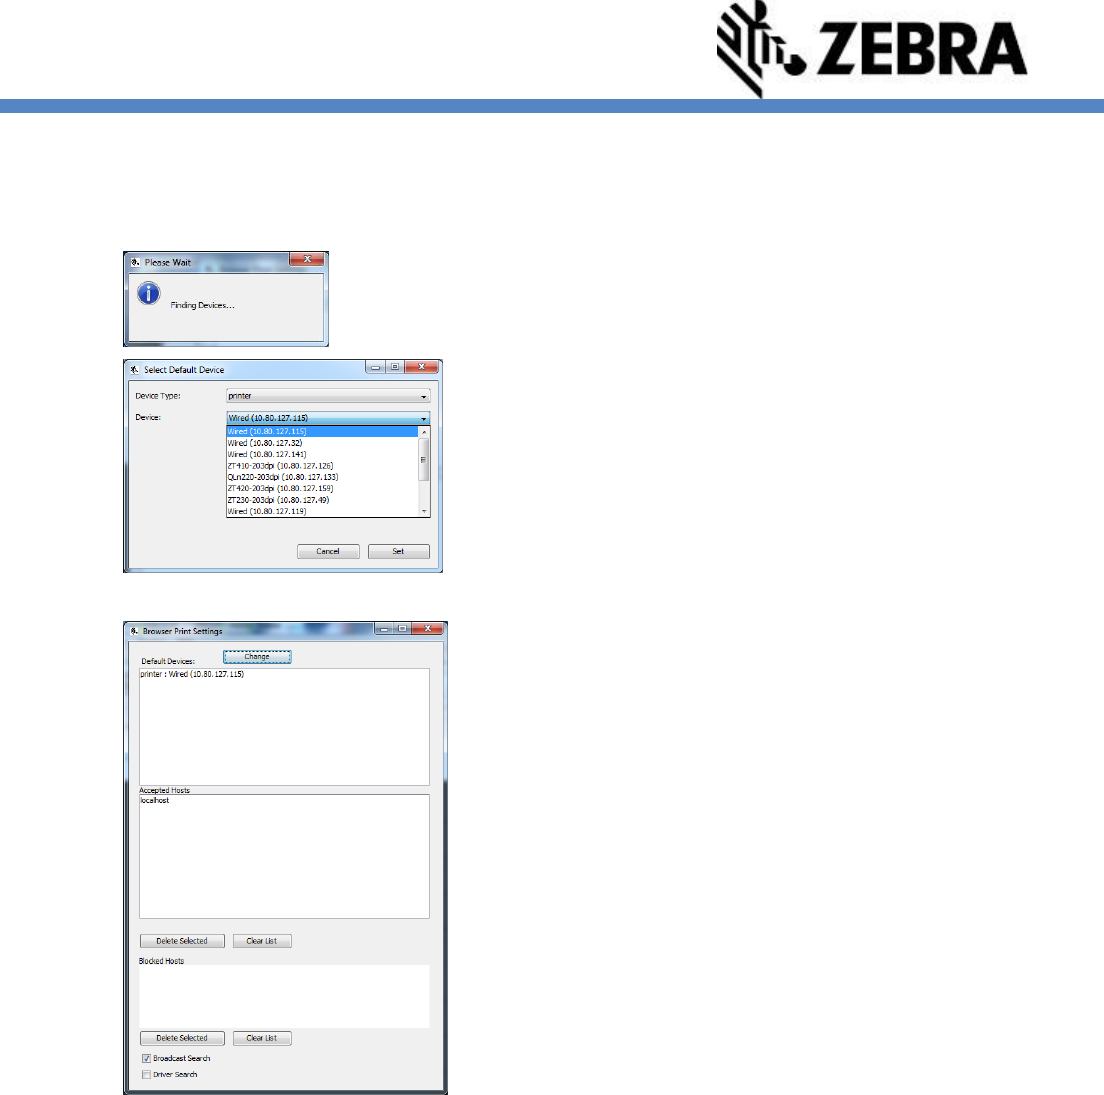
3. To set or change the default printer, click the “Change” button. A pop-up will appear with a
dropdown of all discoverable devices (finding network connected Zebra printers may take a few
moments).
4. Select the device you would like to print to by default and click “Set”.
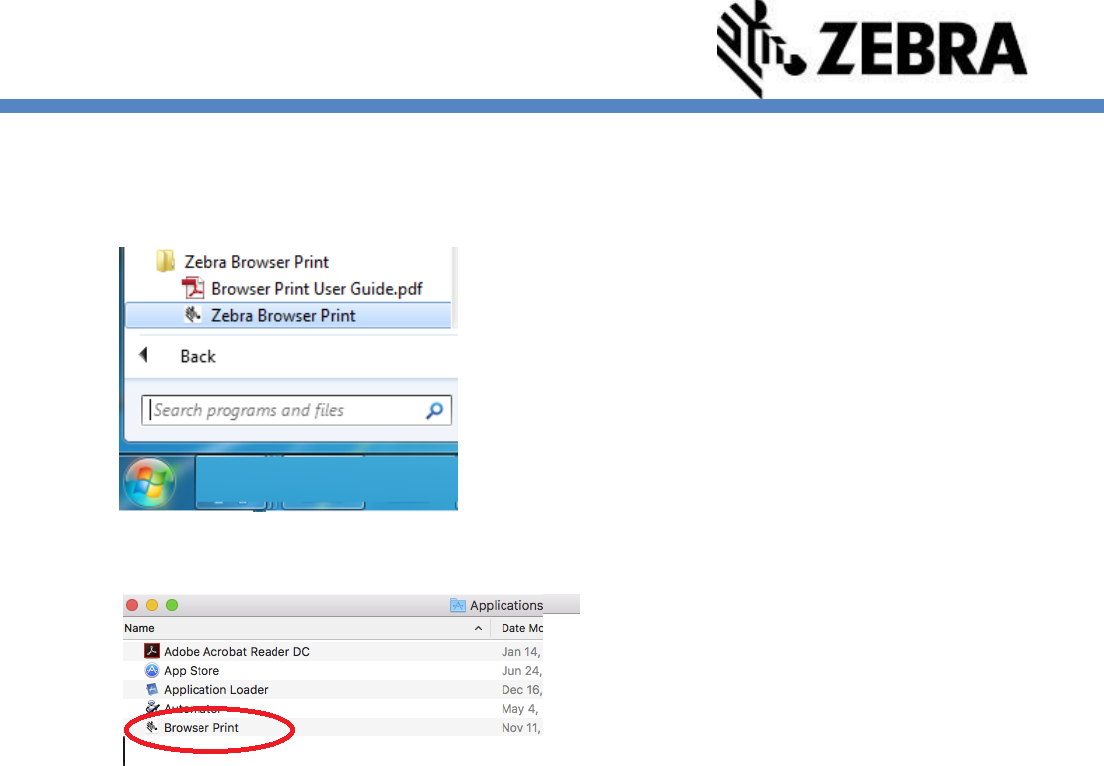
(Re)Starting BrowserPrint
For Windows:
Start Menu Programs -> Zebra Technologies -> Zebra Browser Print
For Macintosh:
Use Finder to go to “applications” Double-Click” “Browser Print”
Using the Sample Demo
1. Connect your Zebra printer using one of the following methods and set the default printer.
a. Direct connect using a USB cable.
b. Network Connection and by selecting “Broadcast Search” on the settings screen.
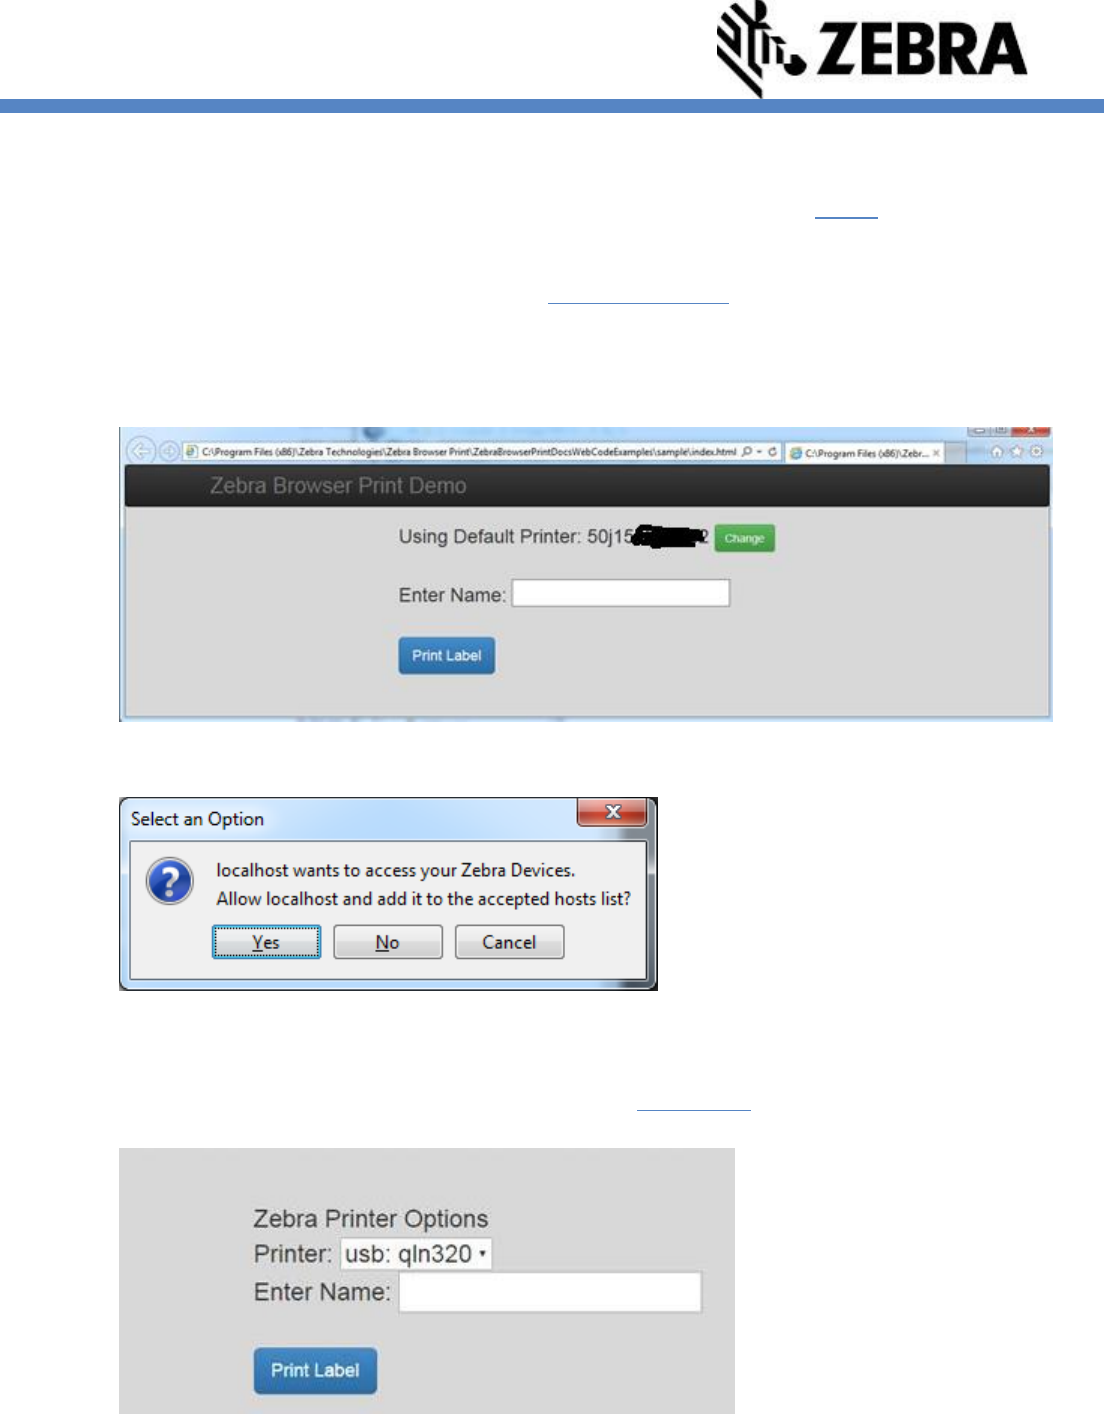
2. In the “sample” (typically located: “C:\Program Files (x86)\Zebra Technologies\Zebra Browser
Print\ZebraBrowserPrintDocsWebCodeExamples\sample” in Windows) folder, open the
index.html file. This will open a page in a web browser.
3. The website may ask permission to access your system’s printers. Select “Yes” to give it access.
4. The website will then be added to the list of Accepted Hosts in Browser Print.
5. If you have selected a default printer in the Browser Print settings, the website will have it listed. If
you have not, the printer will be undefined. If the printer is undefined, click Change and select the
printer you would like from the drop down menu.
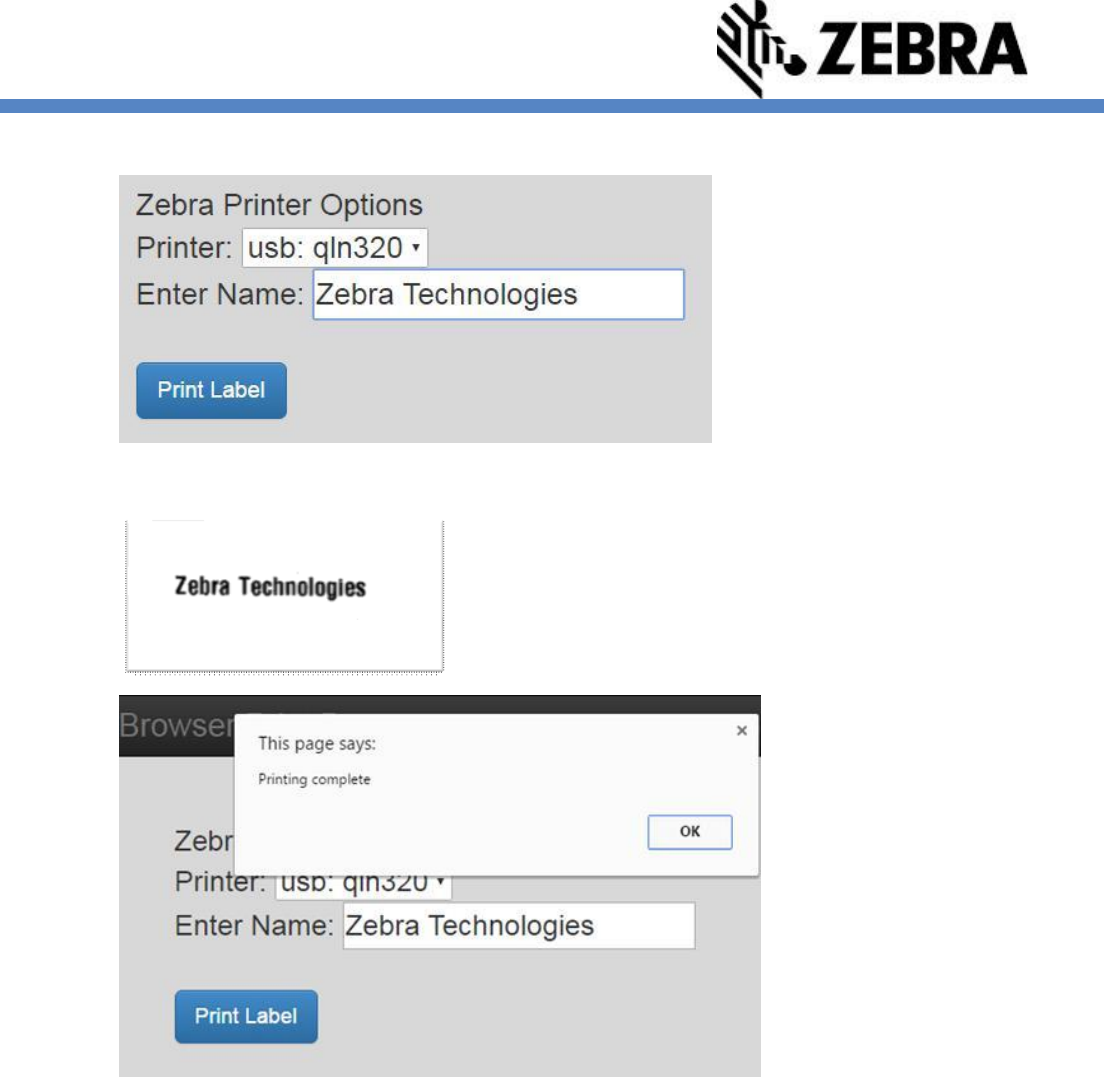
6. On the demo page, enter a name in the appropriate field and click “Print Label”.
7. The printer should print a label with the name you entered.
Printing an image
1. This demonstration requires IIS, Apache or another web-server implementation. The default
printer must be set for this demonstration. The following example uses Microsoft IIS server
installed on the local computer.
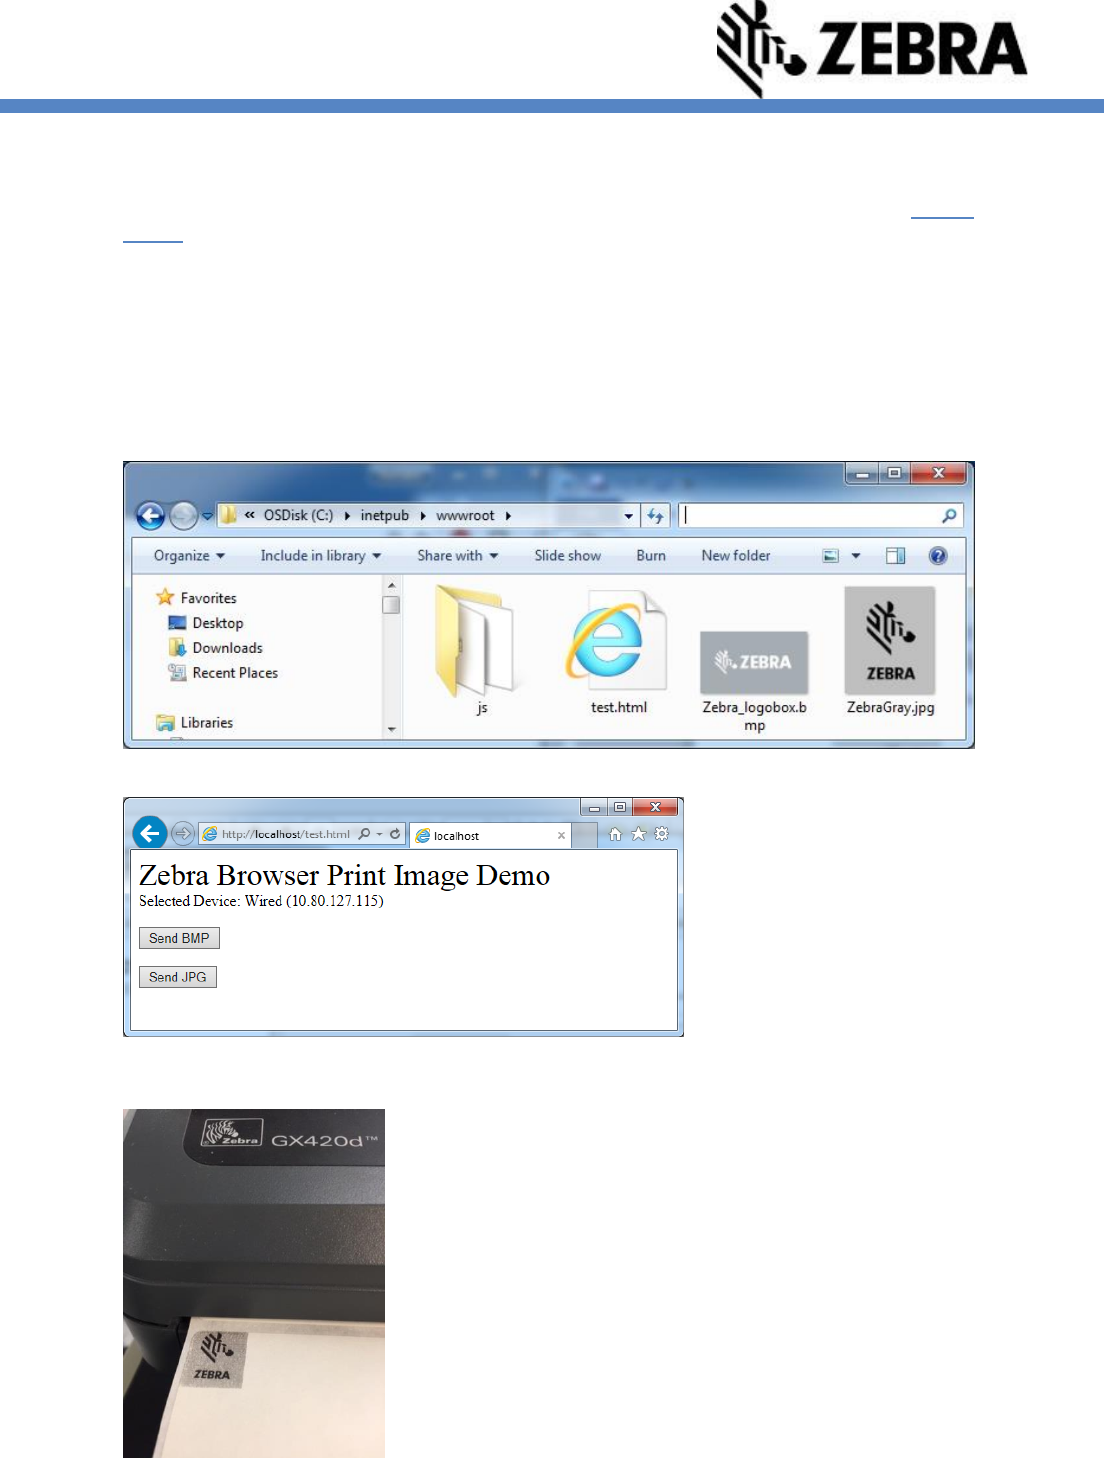
2. Copy in the contents of the “js” directory and files, “test.html”, “Zebra_logobox.bmp” and
“ZebraGray.jpg”into the proper directory (root in this example) of your test server:
i) For Windows, the directory is typically: “C:\Program Files (x86)\Zebra Technologies\Zebra
Browser Print\ZebraBrowserPrintDocsWebCodeExamples\sample”
ii) For Macintosh, the directory is typically: /Applications/Browser\
Print.app/Contents/Resources/documentation/sample
3. Point the web browser to the address for the test page (http:/localhost/test.html)
4. Click “Send BMP” or “send JPG”, the printer will print a label with a Zebra on it.
Integration
Zebra’s Browser Print is intended to make it easier to print to a device from a web-based application
using minimal coding effort.
Packaged with the Browser Print program, there is a full example of a web application that prints
using Browser Print in the sample directory. This sample contains the BrowserPrint.js file as a basic
API to help you integrate into your website. This file is also in the lib folder. It is recommended that
you include this JavaScript class in your web page to facilitate the use of the Browser Print
application.
<script type="text/javascript" src="js/BrowserPrint-
1.0.4.min.js"></script>
Full API documentation for the BrowserPrint-1.0.4.min.js file can be found in the “docs” directory.
Incompatibilities
Browser Print runs in the background of a computer; however, it cannot run at the same time as
certain other pieces of software. Browser Print cannot run when any other program is using the
computer’s 9100 or 9101 ports. These ports are used for RAW printing; that is, sending commands to
the printer in a printer language, such as ZPL.
When a program is using these ports, Browser Print will display a message stating that it cannot print
in the current state. This will also be the case if you have an older version of the program running.
Note: The only known Zebra software to be incompatible is CardStudio, ID card design software.

Uninstallation (Windows)
1. Right click the Browser Print icon in your system tray.
2. Select Exit. This makes Browser Print cease function in the background. The icon should
disappear.
3. Enter the Windows Start menu and open your computer’s Control Panel.
4. Click Programs and Features. Scroll down to Zebra Browser Print.
5. Right click Zebra Browser Print and select Uninstall.
6. Zebra Browser Print will then be uninstalled by your computer. The Zebra Browser Print icon will
disappear from your system tray and the Browser Print directory will no longer be on your system.
Uninstallation (mac OS X)
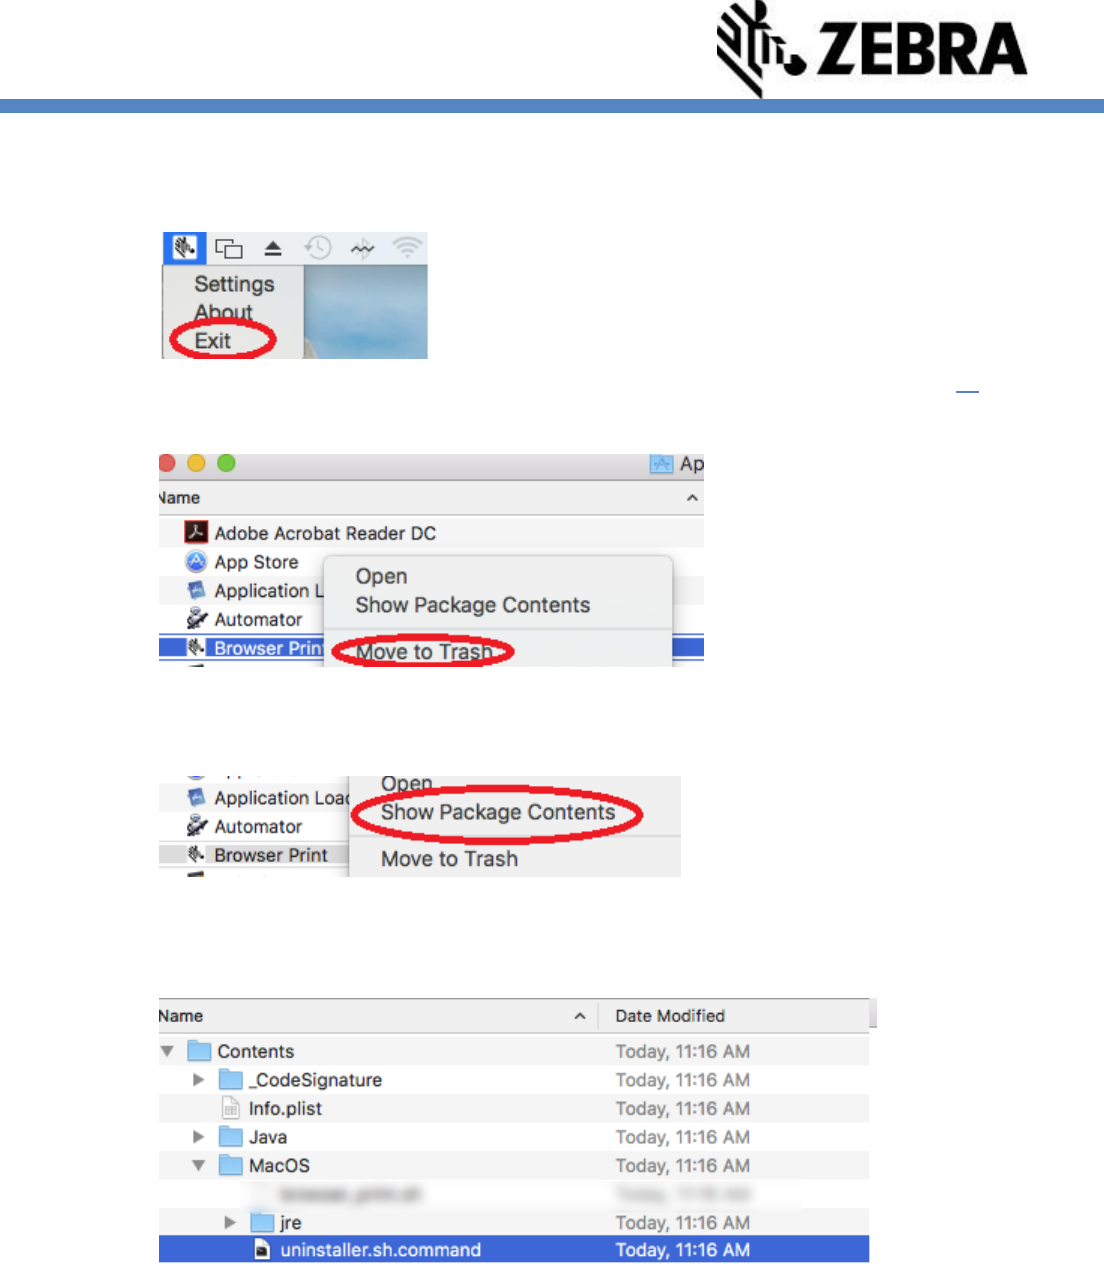
1. Exit the application:
2. NOTE: Just moving the application to the trash leaves behind a settings file, see step #3 to
remove this file first. To remove the application: Use Finder to go to “applications” Use the
CMD-Click, click “Move to Trash”
3. This step, and #4 are optional steps to remove the settings file: Use the CMD-Click, click
“Package Contents”
4. Expand “Contents” and “MacOS”, DoubleClick uninstaller.sh.app.command
Appendix – Supported Features
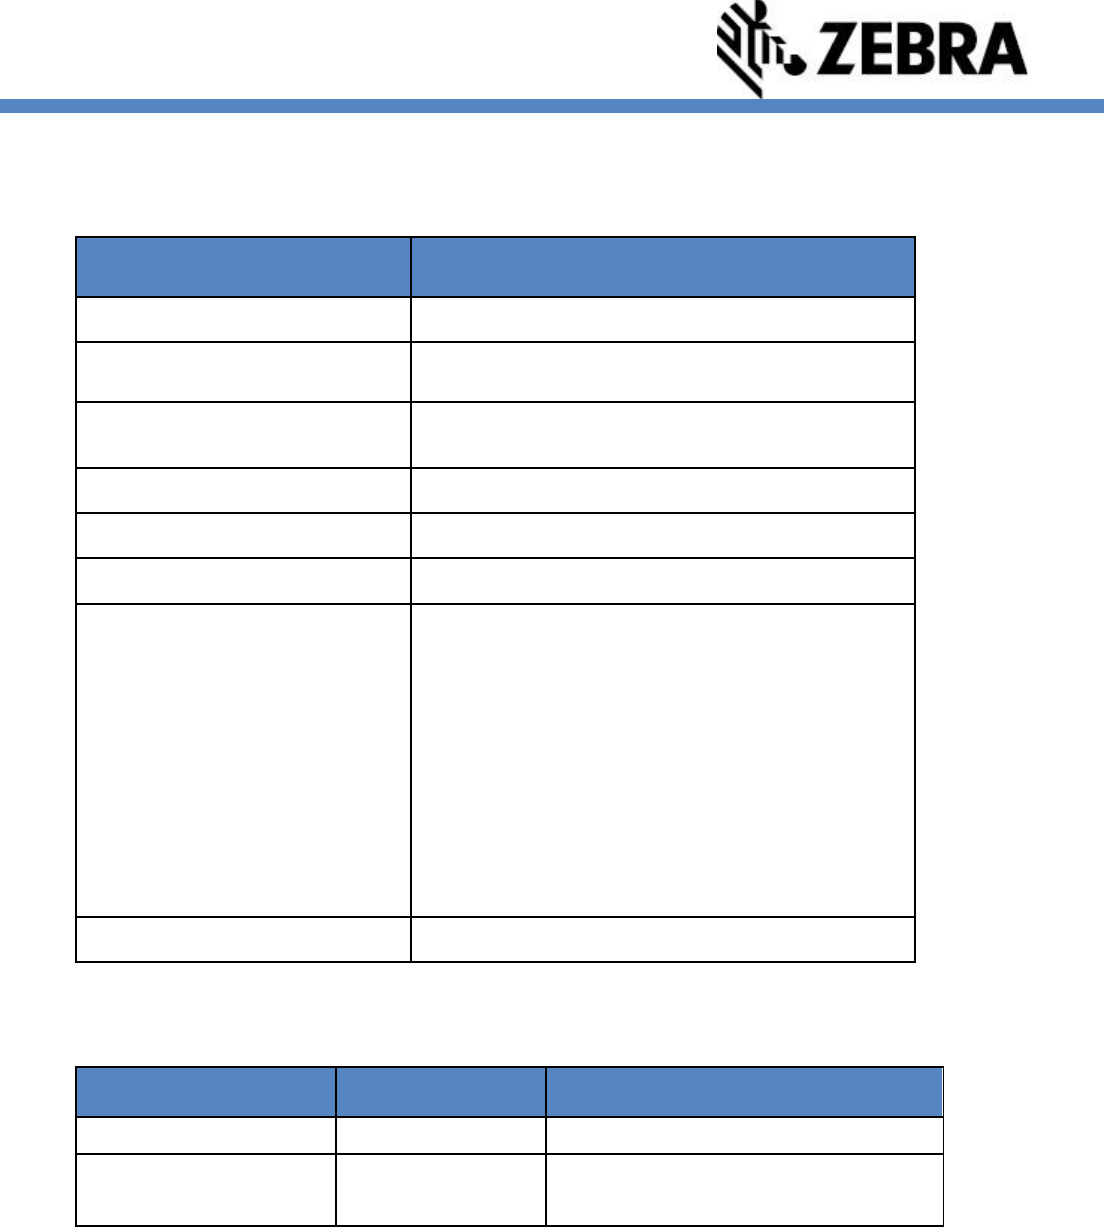
The following is a table of the currently supported features for Zebra’s Browser Print.
Feature
Current Release
OS
Windows 7, Windows 10, mac OS X 10.10+
Browsers
Chrome 51+, Internet Explorer 11+, Edge, Safari
9.1.3+
Printers
ZD500TM, ZD410 TM, LP2824+ TM, ZT230 TM,
ZT420 TM, QLn320 TM, GX420 TM
Print Languages
ZPL II
Connection Types
USB and Network
File Size Limit
2 MB download to printer
Bi-directional Communications
^H and ~H ZPL commands (except ^HZA), and
the following Set/Get/Do (SGD) commands:
device.languages (read and write)
appl.name (read only)
device.friendly_name (read and write)
device.reset (write only)
file.dir (read and write)
file.type (read only but must give an argument)
interface.network.active.ip_addr (read and write)
media.speed (read and write)
odometer.media_marker_count1 (read and write)
print.tone (read and write)
Image Printing
Yes (JPG, PNG or Bitmap)
Document Control
Version
Date
Description
1
August, 2016
Initial Release
2
November, 2016
mac OS X and Network Version 1.2.0
3
January,2017
Updated images, fix typos
Disclaimer
All links and information provided within this document are correct at time of writing.
Created for Zebra Global ISV Program by Zebra Development Services.
©2017 ZIH Corp and/or its affiliates. All rights reserved. Zebra and the stylized Zebra head are trademarks of ZIH Corp.,
registered in many jurisdictions worldwide. All other trademarks are the property of their respective owners.
