CSF Curriculum Guide 2018 Smaller
User Manual:
Open the PDF directly: View PDF ![]() .
.
Page Count: 305 [warning: Documents this large are best viewed by clicking the View PDF Link!]

CS Fundamentals Curriculum Guide
1
Table of Contents
Table of Contents 1
Curriculum Introduction 2
4 Lesson and Course Structure
Student Practices and Skills 7
Curriculum Values 8
Pedagogical Approach To Our Values 10
Classroom Practices and Instructional Strategies 11
Course Overviews and Lesson Outlines 15
15
17
19
Course A: Overview
Course B: Overview
Course C: Overview
Course D: Overview 21
23
25
27
Course E (Ramp-Up): Overview
Course E: Overview
Course F (Ramp-Up): Overview
Course F: Overview 29
31
32
34
34
Courses A-F Additional Supplies List
Implementation Tips and Considerations
Standards Mapping
Assessments
Getting Help 34
Appendix A:
Unplugged Lesson Plans 35
Appendix B:
Glossary of Vocabulary 293
Appendix C:
Student Skills and Strategies for Tackling Difficult Challenges 299
CS Fundamentals Curriculum Guide
Welcome to Computer Science Fundamentals, the Code.org® curriculum designed for students in grades K-5!
This guide has been created to help you navigate the lessons in Courses A-F. It begins with an introduction to
the CS Fundamental curriculum, provides a look into our core values and methods, and closes with a detailed
overview of each course offering. After this valuable information, you will find customized implementation
solutions for many different classroom situations.
All Code.org curriculum resources are free to use under a Creative Commons
Attribution-NonCommercial-ShareAlike 4.0 International License. Our technology is developed as an
open source project.
Are you ready to put the FUN in Fundamentals?
Curriculum Introduction
Who Made This Suite?
Launched in 2013, Code.org is a non-profit organization
dedicated to expanding access to computer science,
and increasing participation by women and
underrepresented students of color. Our vision is that
every student in every school has opportunity to learn
computer science. We believe computer science should
be part of core curriculum, alongside other courses such
as biology, chemistry, or algebra.
Code.org increases diversity in computer science by
reaching students of all backgrounds where they are —
at their skill-level, in their schools, and in ways that
inspire them to keep learning. Read about our efforts to increase diversity in computer science
[https://code.org/diversity]. In order to support this vision of diverse and meaningful access to computer
science, Code.org has developed a full pathway of learning opportunities that span K-12. The CS
Fundamentals curriculum is specifically designed to meet the needs of elementary school students and
teachers along that pathway.
At Code.org, we believe in teamwork. That’s why we’ve partnered up with some of the most innovative
elementary computer science educators in the country to create CS Fundamentals. Our curriculum kick-off
crew included Alana Aaron and Lionel Bergeron from the New York City Department of Education, as well as
Bryan Twarek from the San Francisco Unified School District, Grant Smith of Emerald Data Solutions, Joel
Spencer from the Little Rock School District, and Michael Harvey from Falmouth Elementary School...and that
was only the beginning!
Over the course of one year we successfully designed, implemented, and piloted six modified courses. Our
pilot was open to our dedicated Computer Science Fundamentals Facilitators, as well as thousands of
engaged educators from around the world. With their help, we were able to create this course in a way that
benefits schools of all different shapes and sizes.
2

CS Fundamentals Curriculum Guide
The CS Fundamentals curriculum continue to include lessons on Internet Safety and Digital Citizenship, thanks
to our friends at Common Sense Education.
As always, it is thanks to our generous donors that we were able to develop and offer this curriculum at no cost
to schools, teachers, or students: Microsoft, Infosys Foundation USA, Facebook, Omidyar Network, Google,
Ballmer Family Giving, Ali and Hadi Partovi, Bill Gates, The Bill and Melinda Gates Foundation, BlackRock,
Jeff Bezos, John and Ann Doerr, Mark Zuckerberg and Priscilla Chan, Quadrivium Foundation, Amazon Web
Services, The Marie-Josee and Henry R. Kravis Foundation, Reid Hoffman, Drew Houston, Salesforce, Sean
N. Parker Foundation, Smang Family Foundation, Verizon.
Who is This For?
CS Fundamentals was built with elementary school educators and students in mind. Courses A-F have been
specifically tailored to students in Kindergarten through 5th grade, and no prior experience is assumed.
The lessons in CS Fundamentals are presented with the understanding that many teachers will not have any
previous computer science training, and educators are therefore encouraged to learn along with their students.
Which Course is For Me?
CS Fundamentals, Courses A-F
CS Fundamentals is made up of 6 courses — one course for each grade, K-5. This grade alignment allows for
the most robust content along the entire elementary pipeline, while also allowing for students and teachers to
enter the pathway at any point.
Course A
Course B
Course C
Course D
Course E
Course F
Designed for
Kindergarten
Designed for
1st Grade
Designed for
2nd Grade
Designed for
3rd Grade
Designed for
4th Grade
Designed for
5th Grade
Ideal entry points exist at kindergarten, first, and second grades. Suitable entry points have been created in
grades 3, 4, and 5 with the addition of age-appropriate introduction lessons that present content from previous
courses at an accelerated pace (called “ramp up” lessons).
The core content of these courses range from approximately 12 lessons in A & B, to nearly 20 lessons in
Course F, with additional lessons available on the Code.org website to further support specific concepts.
3
CS Fundamentals Curriculum Guide
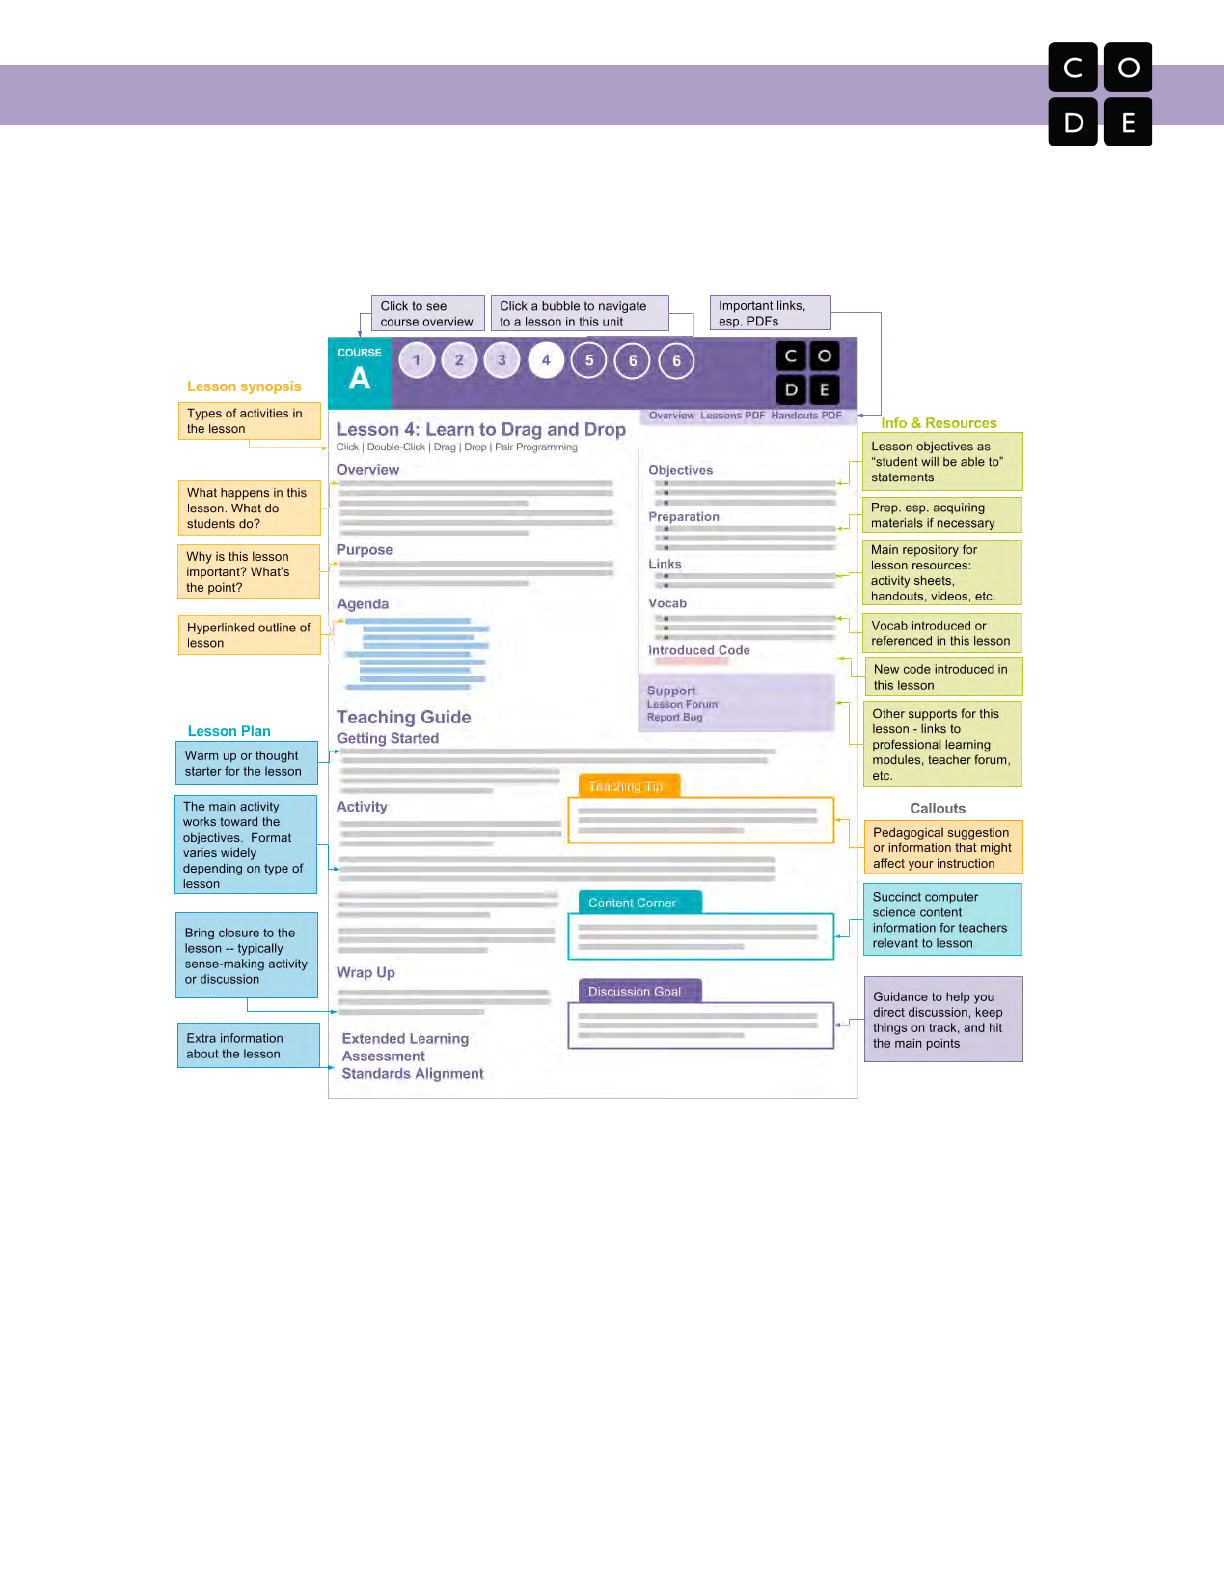
Lesson and Course Structure
Every lesson plan has a common structure that should make it easy to find what you need. Planning for a
lesson starts by looking at the overview, then reviewing the core activity to get a deeper sense of what it is and
how long it might take.
Lessons in CS Fundamentals are written for a wide variety of classrooms. An individual lesson might take one
classroom between 30-45 minutes, while another classroom will choose to complete it over several days. Many
lessons include time estimates, the usefulness of those estimates will vary based on the age of your students,
their background with the material, and their interests.
In Code.org curriculum, we refer to activities where students are not on the computer as “unplugged” lessons.
Lessons where they are on the computer are called “plugged”, or online puzzles. When writing the curriculum,
we planned the progression of unplugged and plugged lessons to build on each other. Often something that is
done in an unplugged environment is setting the stage for or reviewing a concept done in a plugged
environment. Both are vital pieces of the curriculum as they build student knowledge and understanding in
different ways.
4

CS Fundamentals Curriculum Guide
Unplugged Lessons
Unplugged activities are more than just an alternative
for the days when the computer lab is full. They are
intentionally-placed kinesthetic opportunities that help
students digest complicated concepts in ways that
relate to their own lives. Unplugged lessons can help
you build and maintain a collaborative environment in
your classroom, and can be a good way to check for
student understanding. While these lessons sometime
involve more advance preparation, they provide a
shared and concrete context that can be referenced
during plugged lessons. For a list of all unplugged
activities covered in the CS Fundamentals curriculum
(plus a few extras!) visit:
https://code.org/curriculum/unplugged
Bridging Activities
In the Computer Science Fundamentals curriculum,
we refer to activities that mix online and offline
elements as “bridging activities.” Bridging activities
connect our unplugged activities to our online
lessons in a real and concrete way. They often exist
as a method of turning an abstract concept or idea
learned through unplugged play into an actionable
tool for the plugged puzzles.
You will find a bridging activity as the “warm up” in
the first plugged lessons following each unplugged
lesson. As you become more comfortable with the
curriculum, feel free to come up with your own
online/offline blends to keep the curriculum relevant
to your classroom.
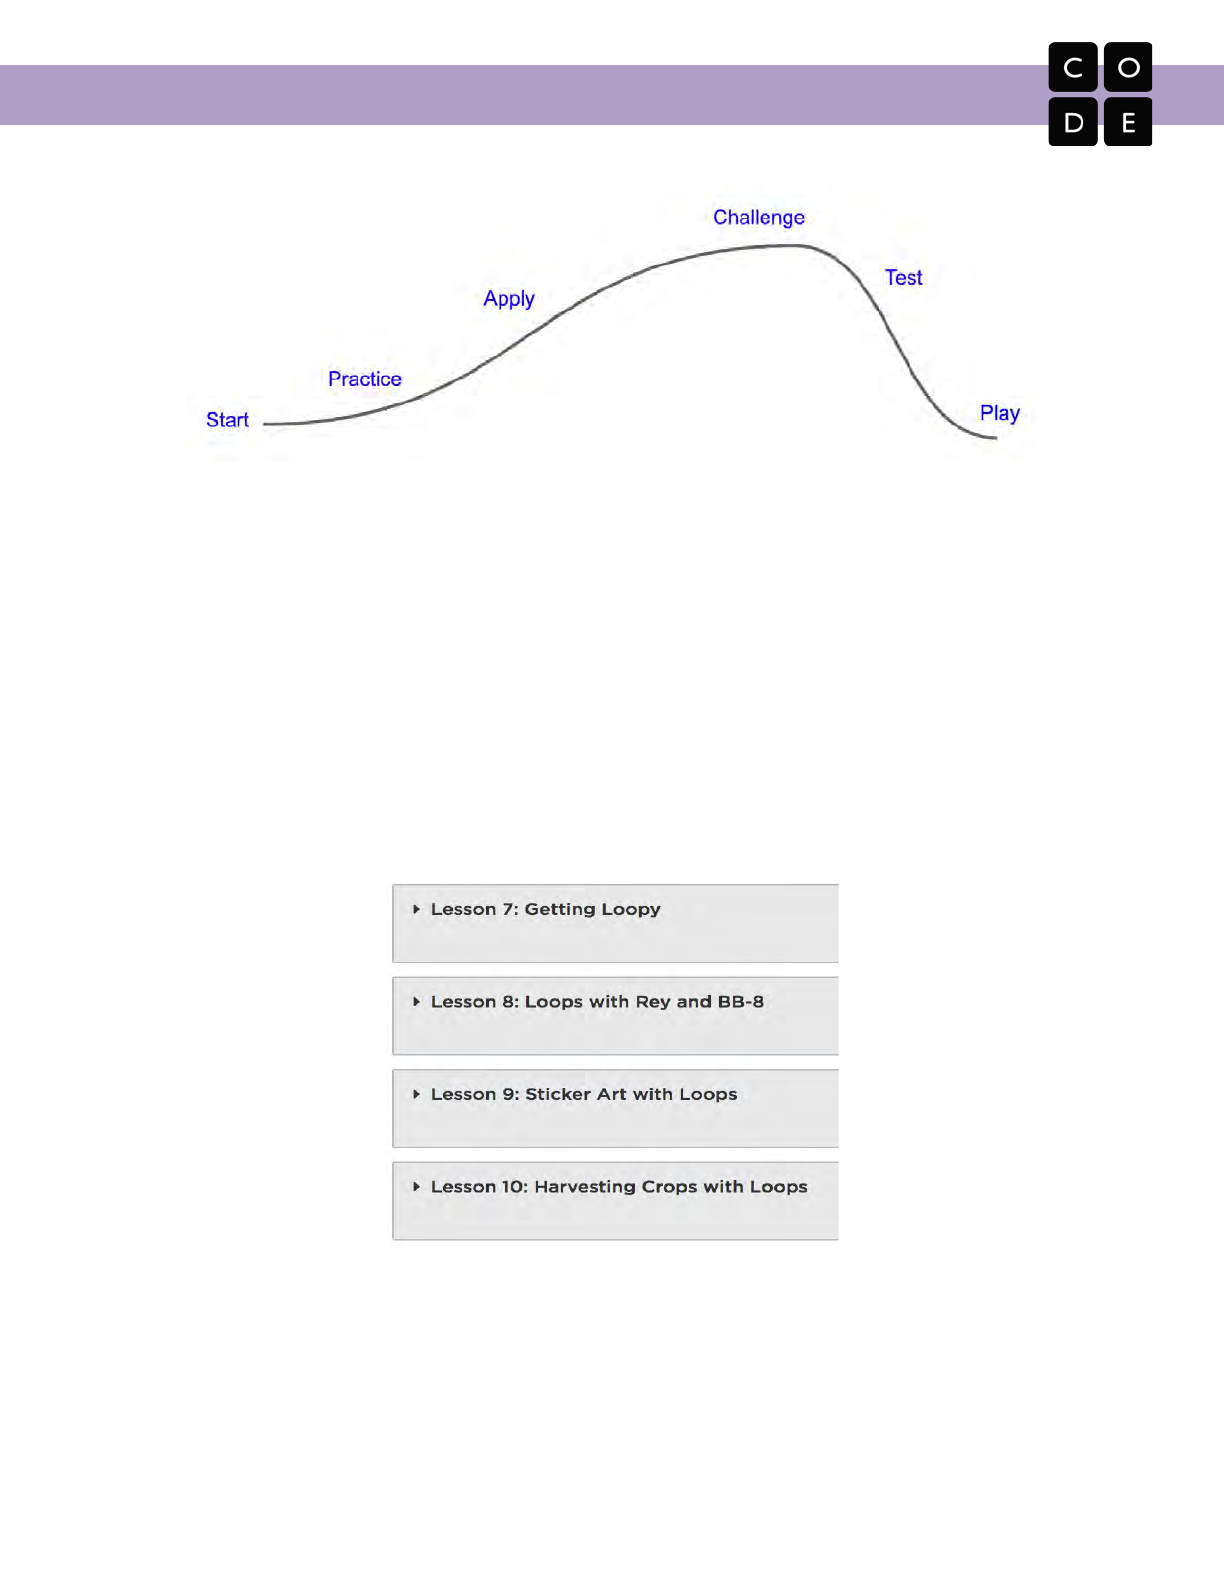
Plugged Lessons
Most of our online or “plugged” lessons are designed with an overarching lesson architecture where concepts
are carefully introduced using a structure that has been tailored to set classrooms up for success. These
puzzle progressions start by introducing ideas in a step-by-step manner, then proceed to a brain-bending
challenge before setting students gently back into a puzzle that perfectly represents the level of understanding
that was intended for that series.
5
CS Fundamentals Curriculum Guide
See the diagram below to get a better idea of how complexity changes over the course of an online lesson.
Once a topic has been introduced, it might be further explored through additional lessons that focus less on
skill building and more on creative problem solving using the concept. As an example, these lessons might
include puzzles with less obvious pathways, a complex use of concepts, or multiple correct solutions.
Conceptual Chunks
The unplugged and online puzzle lessons are chunked together by shared concepts, where the unplugged
lesson serves as a fun and gentle introduction to a computing concept that is further explored through coding
exercises. This allows each “chunk” to be separated into groups of lessons that can be taught within a defined
time period or as a sub-unit.
See this example from Course C in which the unplugged lesson, Getting Loopy, precedes three online lessons:
Loops Conceptual Chunk from CS Fundamentals, Course C
6
CS Fundamentals Curriculum Guide
End of Course Projects (Courses E & F)
While each course offers the opportunity for students to take
what they’ve learned at the end of a lesson and put it together
into a unique project that represents their own creativity,
Courses E & F take student projects to a whole new level.
In the final two courses in the series, project development
takes the stage. Here, students are encouraged to plan, build,
revise, and present projects of their own. Following a project
from inception to delivery offers an inside look at the software
development cycle. This guided project offers scaffolded
rubrics for the benefit of both student and teacher.
Student Practices and Skills
Lessons in CS Fundamentals help students work in a wide array of contexts, but these experiences are tied
together by a core set of practices and skills they develop throughout the course. These student practices
provide coherence and serve as helpful reminders of the high-level skills and dispositions they should be
continually developing.
Problem Solving
● Use a structured problem solving process to help solve new problems
● View challenges as solvable problems
● Break down larger problems into smaller components
Persistence
● Value and expect mistakes as a natural and productive part of problem solving
● Continue working towards solutions in spite of setbacks
● Iterate and continue to improve partial solutions
● Keep track of elements that worked and elements that did not to avoid repeating
mistakes
Creativity
● Incorporate your own interests or ideas into your work
● Experiment with new ideas and consider multiple possible approaches
● Extend or build upon the ideas and projects of others
Collaboration
● Work with others to develop solutions that incorporate all contributors
● Mediate disagreements and help teammates agree on a common solution
● Actively contribute to the success of group projects
Communication
● Structure your work so that it can be easily understood by others
● Consider the perspective and background of your audience when presenting your
work
● Provide and accept constructive feedback in order to improve your work
7
CS Fundamentals Curriculum Guide
Curriculum Values
While Code.org offers a wide range of curricular materials across a wide range of ages, the following values
permeate and drive the creation of every lesson we write.
Computer Science is Foundational for Every Student
We believe that computing is so fundamental to understanding and participating in society that it is valuable for
every student to learn as part of a modern education. We see computer science as a liberal art, a subject that
provides students with a critical lens for interpreting the world around them. Computer science prepares all
students to be active and informed contributors to our increasingly technological society whether they pursue
careers in technology or not. Computer science can be life-changing, not just skill training.
Teachers in Classrooms
We believe students learn best with the help of
an empowered teacher. We design our
materials for a classroom setting and provide
teachers robust supports that enable them to
understand and perform their critical role in
supporting student learning. Because teachers
know their students best, we empower them to
make choices within the curriculum, even as we
recommend and support a variety of
pedagogical approaches. Knowing that many of
our teachers are new to computer science
themselves, our resources and strategies
specifically target their needs.
Student Engagement and Learning
We believe that students learn best when they are intrinsically motivated. We prioritize learning experiences
that are active, relevant to students’ lives, and provide students authentic choice. We encourage students to be
curious, solve personally relevant problems and to express themselves through creation. Learning is an
inherently social activity, so we interweave lessons with discussions, presentations, peer feedback, and shared
reflections. As students proceed through our pathway, we increasingly shift responsibility to students to
formulate their own questions, develop their own solutions, and critique their own work.
Equity
We believe that acknowledging and shining a light on the historical inequities within the field of computer
science is critical to reaching our goal of bringing computer science to all students. We provide tools and
strategies to help teachers understand and address well-known equity gaps within the field. We recognize that
some students and classrooms need more supports than others, and so those with the greatest needs should
be prioritized. All students can succeed in computer science when given the right supports and opportunities,
regardless of prior knowledge or privilege. We actively seek to eliminate and discredit stereotypes that plague
computer science and lead to attrition of the very students we aim to reach.
8
CS Fundamentals Curriculum Guide
Curriculum as a Service
We believe that curriculum is a service, not just a product. Along with producing high quality materials, we seek
to build and nourish communities of teachers by providing support and channels for communication and
feedback. Our products and materials are not static entities, but a living and breathing body of work that is
responsive to feedback and changing conditions. To ensure ubiquitous access to our curriculum and tools,
they are web-based and cross-platform, and will forever be free to use and openly licensed under a Creative
Commons license.
9

CS Fundamentals Curriculum Guide
Pedagogical Approach To Our Values
When we design learning experiences, we draw from a variety of teaching and learning strategies all with the
goal of constructing an equitable and engaging learning environment.
Role of the Teacher
We design curriculum with the idea that the instructor will act as the lead learner. As the lead learner, the role
of the teacher shifts from being the source of knowledge to being a leader in seeking knowledge. The lead
learner’s mantra is: “I may not know the answer, but I know that together we can figure it out.” A very practical
residue of this is that we rarely ask a teacher to lecture or offer the first explanation of a CS concept. We want
the class activity to do the work of exposing the concept to students, allowing the teacher to shape meaning
from what the students have experienced. We also expect teachers to act as the curator of materials. Finally,
we include an abundance of materials and teaching strategies in our curricula - sometimes too many to use at
once - with the expectation that teachers have the professional expertise to determine how to best conduct an
engaging and relevant class for their own students.
Discovery and Inquiry
We take great care to design learning experiences in which students have an active and equal stake in the
proceedings. Students are given opportunities to explore concepts and build their own understandings through
a variety of physical activities and online lessons. These activities form a set of common lived experiences that
connect students (and the teacher) to the course content and to each other. The goal is to develop a common
foundation upon which all students in the class can construct their understanding of computer science
concepts, regardless of prior experience in the discipline.
Materials and Tools
Our materials and tools are specifically created for learners and learning experiences. They focus on
foundational concepts that allow them to stand the test of time, and they are designed to support exploration
and discovery by those without computer science knowledge. This allows students to develop an
understanding of these concepts through “play” and experimentation. From our coding environments to our
non-coding tools and videos, our resources have been engineered to support the lessons in our curriculum,
and thus our philosophy about student engagement and learning. In that vein, our videos can be a great tool
for sensemaking about CS concepts and provide a resource for students to return to when they want to refresh
their knowledge. They are packed with information and “star” a diverse cast of presenters and CS role models.
Creation and Personal Expression
Many of the projects, assignments, and activities in our curriculum ask students to be creative, to express
themselves, and then to share their creations with others. While certain lessons focus on learning and
practicing new skills, our goal is always to enable students to transfer these skills to creations of their own.
Everyone seeks to make their mark on society, including our students, and we want to give them the tools they
need to do so. When computer science provides an outlet for personal expression and creativity, students are
intrinsically motivated to deepen the understandings that will allow them to express their views and carve out
their place in the world.
10
CS Fundamentals Curriculum Guide
The Classroom Community
Our lessons almost always call for students to interact with other students in the class in some way. Whether
learners are simply conferring with a partner during a warm up discussion, or engaging in a long-term group
project, our belief is that a classroom where students are communicating, solving problems, and creating
things is a classroom that not only leads to active and better learning for students, but also leads to a more
inclusive culture in which all students share ideas and listen to ideas of others. For example, classroom
discussions usually follow a Think-Pair-Share pattern; we ask students to write computer code in pairs; and we
strive to include projects for teams in which everyone must play a critical role.
Classroom Practices and Instructional Strategies
The “classroom practices” for CS Fundamentals are strategies used repeatedly in many different lessons and
units. These classroom practices are at the core of the ways the curriculum is designed, as we believe these
are critical to positive classroom culture and ultimately student learning.
Lead Learner
What is it?
The curriculum has been written with the idea that the
instructor will act as the lead learner. As the lead learner
your role shifts from being the source of knowledge to being
a leader in seeking knowledge. The lead learner’s mantra is:
“I may not know the answer, but I know that together we can
figure it out.” The philosophy of the lead learner is that you
don’t have to be an expert on everything; you can start
teaching CS Fundamentals knowing what you already know,
and learn alongside your students. To be successful with
this style of teaching and learning, the most important things
are modeling and teaching how to learn.
How does it connect to the curriculum?
One of the Code.org curriculum values is developing teachers who are new to computer science. In order to
support those teachers, the curriculum is set up to create an engaging and relevant class that helps students
uncover and develop the knowledge they need. This makes it possible for a teacher to lead the course without
knowing all of the answers at first, as long as they embrace the lead learner role. In addition, it is not possible
to have complete command over every rapidly-changing facet of computer science, no matter how much
experience you have. Rather than feeling daunted, the lead learner welcomes this fact.
We believe that the lead learner technique represents good teaching practice in general. Acting as the lead
learner is an act of empathy toward your students and the challenges they face in learning material for the first
time. One important job of the teacher in the CS Fundamentals classroom is to model excitement about
investigating how things work by asking motivating questions about why things work the way they do, or why
they are the way they are. With your guidance, students will learn how to hypothesize; ask questions of peers;
test, evaluate, and refine solutions collaboratively.
11
CS Fundamentals Curriculum Guide
How do I use it?
● Allow students to dive into an activity without front loading the content first
● Encourage students to rely on each other for support
● Don’t give the answer right away, even if you know it
● Feel open to making mistakes in front of students so that they see it is part of the learning process
● Ask students questions that direct their attention toward the issue to investigate without giving away
what they need to change
● Model the steps you would go through as a learner of a new subject. Explain the different questions you
ask yourself along the way and the ways you go about finding answers
Pair Programming
What is it?
Pair programming is a technique in which two
programmers work together at one computer. The
“driver” writes code while the “navigator” directs the
design and setup of the code. The two programmers
switch roles often. Pair programming has been shown
to:
● improve computer science enrollment, retention,
and students' performance
● increase students' confidence
● develop students' critical thinking skills
● introduce students to a "real world" working
environment
How does it connect to the curriculum?
In CS Fundamentals there are many lessons on the computer (plugged lessons) during which students
develop programming skills. Pair programming can help to foster a sense of camaraderie and collaboration,
and can promote diversity in the classroom by reducing the "confidence gap" between female and male
students, while increasing the programming confidence of all students.
How do I use it?
To get students pair programming:
1. Form pairs
2. Give each pair one computer to work on
3. Decide upon initial roles
4. Have students start working
5. Ensure that students switch roles at regular intervals (every 3 to 5 minutes)
6. Ensure that navigators remain active participants
It can be hard to introduce pair programming after students have worked individually for a while, so we
recommend that teachers start with pair programming in the first few plugged lessons. Just like any other
classroom technique, you may not want to use this all the time as different types of learners will respond
12
CS Fundamentals Curriculum Guide
differently to working in this context. Once you have established pair programming as a practice early on, it will
be easier to come back to later.
Pair Programming Resources
Code.org also has a feature to help both students get “credit” on their accounts for the work they do together.
Check out the blog on Pair Programming: https://goo.gl/MorPnx. Explore videos outlining how to pair program
with Code.org: Teachers: youtu.be/sxToW3ixrwo | Students: youtu.be/vgkahOzFH2Q
The National Center for Women & Information Technology (NCWIT) has a great resource about the benefits of
pair programming. Check it out at:
www.ncwit.org/resources/pair-programming-box-power-collaborative-learning
Authentic Choice
What is it?
Authentic choice is the practice of allowing students to decide
on the focus of their creation when they are working on a
project. This can be scoped in different ways with different
projects, but the central point is to allow students to work on
something they are personally invested in.
How does it connect to the curriculum?
In the curriculum, we give students many opportunities to work on projects that we hope will feel personally
relevant. Whether it be a small freeplay level at the end of a lesson, or a course project designed by students
in older elementary, every student should get ample opportunity to develop creations of their own.
In addition, we encourage teachers to help students utilize their new skills in creative ways at the end of each
lesson, using the Lesson Extras option. There, students will find challenge puzzles and open-canvas projects
to use for deeper learning and self-expression.
How do I use it?
● Give students time to get creative and find something they are passionate about in the project that they
are working on
● Encourage students to find personally relevant contexts for the work they do
● Try to keep the projects as open to students’ interests as possible while still keeping them focused on
the learning at hand
Journaling
What is it?
In CS Fundamentals, students are encouraged to keep a journal nearby to write down thoughts and answer
questions.
How does it connect to the curriculum?
Courses A-F of Computer Science Fundamentals were written with the importance of journaling in mind.
Journaling for reflection is a popular tool in education, but we take that one step further. Like a chemist would
13
CS Fundamentals Curriculum Guide
catalog strategies and solutions, so do we ask our budding computer scientists to take notes on their trials and
achievements. Journals are useful as scratch paper for building, debugging, and strategizing, and they offer a
fantastic resource for referencing previous answers when struggling with more complex problems.
How do I use it?
● Encourage students to keep their journals beside them at all times when coding
● Remind students that they can write solutions out longhand, then circle patterns to find prime
opportunities for loops and functions
● Have students copy down answers to puzzles that they might need in future levels
● Ask students to draw emoticons at the top of the pages to help them identify how they’re feeling about
concepts
● End each lesson with a thought or question that students can answer in writing as a way of reflecting on
their growth for the day
In addition to the strategies above, consider the following tips for keeping your CS Fundamentals course active
and engaging:
Ditch the Uniformity
Students learn at different rates. They also come into technology with vastly
different skills. Trying to keep everyone on the same page will alienate both
the bottom third and top third of learners. Take the pressure off of everyone
by having a list of “approved” activities to focus on when they’ve finished
their class exercise. These should include the Lesson Extras at the end of
each CS Fundamentals lesson.
Frequent Breaks
Teachers are used to helping their class get very focused and encouraging
students to work quietly until an activity is done. In computer science,
students often benefit from small and frequent breaks, even if it’s just
switching to a new activity for a few minutes. Try having a student write a
sentence or two about what they’re trying to do or keep a notebook, like a
biologist or chemist might.
Collaborate
It’s really hard for a programmer to “cheat”. Collaboration is a requirement
out in the real world. This means helping one another solve problems,
researching issues on the internet, and looking at what others have done in
similar situations. The only bad method is claiming another’s work as your
own.
Don’t be a
Know-It-All
We often think that being a teacher means being an expert. In computer
science, it’s really much more important to be a cheerleader. Let the
students know that it’s possible for them to quickly become better at this
than you are. Foster determination. Encourage students to monitor
themselves and find answers for one another. Let them figure things out for
themselves, then let them teach you.
14

CS Fundamentals Curriculum Guide
Course Overviews and Lesson Outlines
Course A: Overview
Course A offers computer science curriculum for beginning readers in early elementary grades. Students will
learn to program using commands like loops and events. The lessons featured in this course also teach
students to collaborate with others meaningfully, investigate different problem-solving techniques, persist in the
face of difficult tasks, and learn about internet safety. By the end of this course, students create their very own
custom game in Play Lab.
Core concepts:
● Sequencing
● Loops
● Events
● Digital Citizenship
Attitudinal goals:
● Programming is fun
● It’s okay not to get it right the first time
● I can solve problems if I keep trying
Key teaching tips:
● Use the stories as a read-aloud and discuss the scenarios as a class
● Work through sample problems with students as a class
● Connect unplugged lessons to the online lessons using “bridging activities”
● Celebrate persistence as well as successes
● Honor the humor in the lessons and add more where possible
15
CS Fundamentals Curriculum Guide
Course A: Lesson Outlines
Online lessons are in regular text and unplugged lessons are in bolded text.
#
Lesson Name
Description
1
Unspotted Bugs
Students will learn the mantra: "What happened? What was
supposed to happen? What does that tell you?"
2
Stevie and the Big Project
Here, frustration is presented as a step in the creative process,
rather than a sign of failure.
3
Plant a Seed
Students will relate the concept of algorithms back to everyday,
real-life activities by planting an actual seed.
4
Sequencing with Angry Birds
This begins with a brief discussion on computer lab manners, then
will progress into using a computer to complete online puzzles.
5
Happy Maps
This activity will help students gain experience reading and writing in
shorthand code.
6
Programming with Angry Birds
In this set of online puzzles, students will build on the understanding
of algorithms, debugging, and general computer literacy.
7
Programming with Harvester
Students will apply the programming concepts that they have
learned to the Harvester environment.
8
Going Places Safely
Students find out that they can go exciting places online, but they
need to follow rules to remain safe. [Common Sense Education]
9
Happy Loops
Students will be driven to want an easier way to solve mundane
problems.
10
Loops with Harvester
Building on the concept of repeating instructions, this stage will have
students using loops to more efficiently get to the veggies.
11
Loops with Laurel
Continuing practice with loops, students will help Laurel the
Adventurer collect treasure!
12
Ocean Scene with Loops
Here, students use loops to create patterns. At the end of this stage,
students will be given the opportunity to create their own images
using loops.
13
The Big Event
This shows that events are a great way to add variety to a sequential
algorithm.
14
On the Move with Events
Students will have the opportunity to learn how to use events in Play
Lab and apply their coding skills to create an animated game.
16

CS Fundamentals Curriculum Guide
Course B: Overview
Course B was developed with first-graders in mind. Tailored to a novice reading level, this course also
assumes limited knowledge of shapes and numbers.
While the concepts in Course B parallel those in Course A, students will be exposed to more sophisticated
unplugged activities and greater variety in puzzles. Students will learn the basics of programming, collaboration
techniques, investigation and critical thinking skills, persistence in the face of difficulty, and internet safety. At
the end of this course students will create their very own custom game in Play Lab.
Core concepts:
● Sequencing
● Loops
● Events
● Copyright and Creativity
● Digital Citizenship
Attitudinal goals:
● Programming is fun
● It’s okay not to get it right the first time
● I can solve problems if I keep trying
Key teaching tips:
● Read through the Course A stories with your students beforehand (if possible) and talk about the
situations
● Work through sample problems with students as a class
● Connect unplugged lessons to the online lessons using “bridging activities”
● Remind students that they can go back and fix mistakes
● Celebrate persistence
17
CS Fundamentals Curriculum Guide
Course B: Lesson Outlines
Online lessons are in regular text and unplugged lessons are in bolded text.
#
Lesson Name
Description
1
Move It, Move It
This lesson will work to prepare students mentally for the coding
exercises that they will encounter over the length of this course.
2
Sequencing with Scrat
This begins with a brief discussion on computer lab manners, then
will progress into using a computer to complete online puzzles.
3
Your Digital Footprint
Students will learn that the information they put online leaves a
digital footprint or “trail.” [Common Sense Education]
4
My Robotic Friends Jr.
This teaches students the connection between algorithms and
programming, as well as the valuable skill of debugging.
5
Programming with Scrat
Students will use the concepts of programming to get Scrat to the
acorn.
6
It's Great to Create and Play
Fair
This lesson exists to help students understand the creative process
of sharing and inspiration. Along with that comes the promotion of
creative expression and the need to be fair with creative work.
7
Programming with Rey and
BB-8
In this lesson, students will use their newfound programming skills in
more complicated ways to navigate a tricky course with BB-8.
8
My Loopy Robotic Friends Jr.
Using the language from ‘My Robotic Friends’. Students find that
they can build big structures faster using loops.
9
Loops with Scrat
This lesson builds on the idea of using loops in a program.
10
Loops with Laurel (or Collecting
Treasure with Loops)
Students use loops to collect treasure more efficiently.
11
Drawing Gardens with Loops
Here, students use loops to create patterns. At the end of this stage,
students will be given the opportunity to create their own images
using loops.
12
The Big Event
This lesson shows that events are a great way to add variety to a
pre-written algorithm.
13
A Royal Battle with Events
In this online activity, students will have the opportunity to learn how
to use events in Play Lab and apply all of the coding skills that
they've learned to create an animated game.
18

CS Fundamentals Curriculum Guide
Course C: Overview
Course C was developed for students in and around the second grade. Lessons in this course may assume a
limited understanding of shapes and elementary math concepts.
Students will create programs with sequencing, loops, and events. They will translate their initials into binary,
investigate problem-solving techniques, and develop strategies for building positive communities both online
and off. By the end of the course, students will create interactive games that they can share. Each concept in
Course C is taught from the beginning, graduating toward experiences that allow for growth and creativity to
provide all students a rich and novel programming experience.
Core concepts:
● Sequencing
● Loops
● Events
● Digital Citizenship
● Binary
Attitudinal goals:
● I can read code and predict the outcome
● Programming can make repetitive tasks easy
Key teaching tips:
● Talk with students before you begin about how frustration will be present
● Use pair programming and encourage students to help each other
● Provide lesson examples to set students off on the right foot
● Connect unplugged lessons to the online lessons using “bridging activities”
19

CS Fundamentals Curriculum Guide
Course C: Lesson Outlines
Online lessons are in regular text and unplugged lessons are in bolded text.
#
Lesson Name
Description
1
Building a Foundation
Students will build a structure with common materials. Most students will not get
this right the first time, but it's important they push through and keep trying.
2
Coding with Angry Birds
Students will develop sequential algorithms to move a bird from one side of the
maze to a pig at the other side.
3
Debugging with Angry
Birds
Students will step through the existing code to identify errors, including incorrect
loops, missing blocks, extra blocks, and blocks that are out of order.
4
Paper Planes
Students will relate the concept of algorithms back to everyday activities.
5
Collecting Treasure with
Laurel
Students will continue to develop their understanding of algorithms and debugging
by creating sequential algorithms to pick up treasure with a Laurel the Adventurer.
6
Creating Art with Code
This Artist stage will allow students to create images of increasing complexity using
new blocks like `move forward by 100 pixels` and `turn right by 90 degrees.`
7
Getting Loopy
Students will dance their way to a better understanding of how to use repeat loops.
8
Loops with Rey and
BB-8
Students will use loops to traverse mazes more efficiently than before.
9
Sticker Art with Loops
This lesson builds on the understanding of loops from previous lessons and gives
students a chance to be truly creative.
10
Harvesting Crops with
Loops
Students will loop new actions to help the harvester collect multiple veggies
growing in large bunches.
11
The Big Event
Students will learn that events are a great way to make their program interactive.
12
Build a Flappy Game
In this special stage, students get to build their own Flappy Bird game by using
event handlers to detect mouse clicks and object collisions.
13
Screen Out the Mean
This helps children recognize that it is essential to tell a trusted adult if something
online makes them feel angry, sad, or scared. [Common Sense Education]
14
Chase Game with
Events
It's time to get creative and make a game in Play Lab!
15
Looking Ahead with
Minecraft
Students will get the chance to practice ideas that they have learned up to this
point, as well as getting a sneak peek at conditionals!
16
Binary Bracelets
This lesson helps demonstrate how it is possible to take something from real life
and translate it into a series of ons and offs.
20

CS Fundamentals Curriculum Guide
Course D: Overview
Course D was created for students who read at roughly a third grade level. Angles and mathematical concepts
are introduced with helpful videos and hints.
The course begins with a review of the concepts found in Courses A, B, and C. This review can be used to
introduce or refresh basic ideas such as loops and events. Afterward, students will develop their understanding
of algorithms, nested loops, while loops, conditionals, and events. Lessons on digital citizenship are also
included. This course is crafted to build a strong foundation of basic concepts before opening up to a wide
range of new and exciting topics.
Core concepts:
● Events
● Nested Loops
● While/Until Loops
● If/Else Conditionals
● Digital Citizenship
Attitudinal goals:
● Struggle is good, and a sign that I’m growing
● I can read programs and predict their outcomes
● Programs can be written to make simple choices
Key teaching tips:
● Talk to students about the frustration/learning connection before you begin
● Use pair programming and encourage students to help each other
● Begin to teach students the importance of solving their own issues
● Encourage students to use a journal during and after activities
● Give students the opportunity to share successes
21

CS Fundamentals Curriculum Guide
Course D: Lesson Outlines
Online lessons are in regular text and unplugged lessons are in bolded text.
#
Lesson Name
Description
1
Graph Paper Programming
By "programming" one another to draw, students will develop an
understanding of the connection between code and what it produces.
2
Introduction to Coding
Students will practice sequencing and debugging before adding new skills.
3
Relay Programming
Students will race against the clock as they break into teams and work
together to write a program one instruction at a time.
4
Debugging with Laurel
Students will practice debugging in the Collector environment.
5
Bounce
Students will work through puzzles making the program react to events.
6
Loops in Ice Age
This stage will have students using the repeat block to get Scrat to the acorn.
7
Drawing Shapes with Loops
This gets students thinking about why loops are better than longhand.
8
Nested Loops in Maze
Using Bee and Plants vs Zombies, students will learn to nest loops.
9
Fancy Shapes using Nested
Loops
In this online activity, students will create designs in Artist using nested loops.
10
Snowflakes with Anna and
Elsa
Students will get practice nesting loops while creating images that they will be
excited to share.
11
While Loops with the Farmer
Students will develop a beginner's understanding of condition-based loops.
12
Until Loops in Maze
Students will build programs that have the main character repeat actions until
they reach their desired stopping point.
13
Conditionals with Cards
This lesson demonstrates how conditionals can be used to tailor a program to
specific information.
14
If/Else with Bee
The if / else blocks will allow for a more flexible program.
15
Harvesting with Conditionals
It's time to get creative and make a game in Play Lab!
16
Digital Citizenship
Students learn the difference between what is and is not safe to share online.
[Common Sense Education]
17
Ninjas vs. Pirates Game
It's time to get creative and make a game in Play Lab!
18
Binary Images
This lesson illustrates how a computer can store complex information (such as
photos and colors) in binary.
19
Binary Images with Artist
In this lesson, students will build binary images in Artist by translating 0s and
1s to offs and ons (or black and white).
22

CS Fundamentals Curriculum Guide
Course E (Ramp-Up): Overview
Course E begins with a set of optional ramp-up lessons which will be presented again at the beginning of
Course F. These condensed lessons exist to help make sure that students are confident with basic concepts
before they begin learning more complex combinations later in the series.
The approach to the ramp-up section depends on your classroom. If your students have no prior experience,
then it’s essential that you use the ramp-up to provide your students with a solid introduction to the core
concepts that will be built upon later in the course. Pay particular attention to the unplugged lessons, as they
give students the real-life foundations that they will need to connect these concepts together later.
If students are already familiar with the concepts presented in the ramp-ups, you can pick and choose from the
lessons to keep the ramp-up experience slim. As long as students are confident using the various
programming environments present to program sequences, loops, and nested loops, they will have what they
need to be successful in later lessons.
Core concepts:
● Sequencing
● Debugging
● Loops
● Nested Loops
● Conditionals
Attitudinal goals:
● I’m comfortable with basic programming concepts
Key teaching tips:
● Remind students that this series is to help them learn, not to see how quickly they can solve puzzles
● Require students to make a first attempt at problem-solving before asking for help
● Remind students of the importance of persistence
● Encourage students to check themselves (and each other) for understanding during and after each
lesson
23

CS Fundamentals Curriculum Guide
Course E (Ramp-Up): Lesson Outlines
Online lessons are in regular text and unplugged lessons are in bolded text.
#
Lesson Name
Description
1
My Robotic Friends
This lesson teaches students the connection between symbols and actions, as
well as the difference between an algorithm and a program.
2
Coding with
Comments
Students will be guided through an introduction (or review depending on the
experience of your class) of Code.org's online workspace.
3
Building a
Foundation
Students will build a structure with common materials. Most students will not get it
right the first time, and should be encouraged to keep trying.
4
Debugging with Scrat
In this lesson, students will encounter puzzles that have been solved incorrectly.
They will then work to identify and fix errors.
5
Creating Art with
Code
This Artist stage will allow students to create images of increasing complexity using
new blocks.
6
My Loopy Robotic
Friends
Students learn the simplicity and utility of loops by “programming” their friends
using the language from ‘My Robotic Friends’.
7
Drawing Shapes with
Loops
This lesson builds on the understanding of loops from previous lessons and gives
students a chance to be truly creative.
8
Nested Loops in
Maze
In this online activity, students will have the opportunity to push their
understanding of loops to a whole new level. Playing with Bee and Plants vs
Zombies, students will learn how to nest loops.
9
Nested Loops with
Frozen
Now that students know how to layer their loops, they can create many beautiful
things. This lesson will take students through a series of exercises to help them
create their own portfolio-ready images.
10
Conditionals with
Cards
This lesson demonstrates how conditionals can be used to tailor a program to
specific information.
11
Conditionals with the
Farmer
This lesson briefly covers the conditional concepts, including `while` loops, `until`
loops, and `if/else` statements.
24

CS Fundamentals Curriculum Guide
Course E: Overview
Course E in CS Fundamentals was tailored to the needs of students in the fourth grade.
At this point students should be growing in their confidence using basic programming concepts, and are ready
to start using them to solve more novel problems. Throughout this course students will learn to identify when to
apply and combine the many concepts they’ve learned in previous courses. Students will begin with some light
review, followed by a deep dive into the idea of functions. For many, the lessons in Course E will provide the
first puzzles where difficult concepts are mixed together, making it one of the most challenging courses in the
series.
Because of the complexity of Course E, it is important to be consistent with expectations from the very
beginning. With fourth graders, it is advised that students be encouraged to work together to find solutions,
rather than relying on help from the teacher or other experienced supervisor. Students should be empowered
to try multiple techniques and should be given praise for persistence and for helping others.
Ultimately, Course E will be setting the foundation for Course F in the fifth grade. This means that it is as
critical for students to understand the ideas behind each puzzles as it is for them to successfully solve the
puzzle. For this reason, you might want to show students how to use peer interaction or journaling to help with
difficult puzzles. Mainly, they should mention four things:
● What does the puzzle want me to do?
● What did I try to make that happen?
● Where did it go wrong?
● What might be the next thing I could try?
Core concepts:
● Events
● Conditionals
● Functions
● Digital Citizenship
● Copyright and Creativity
Attitudinal goals:
● There are often many ways to solve a problem
● Reflecting on past problems helps me solve new ones
● Programming is creative
Key teaching tips:
● Promote an environment of cross-team collaboration for group activities and projects
● Help students understand that the content is supposed to be difficult and it will start to feel easier with
practice
● Encourage students to go back and replay puzzles if they are having trouble moving forward
25

CS Fundamentals Curriculum Guide
Course E: Lesson Outlines
Online lessons are in regular text and unplugged lessons are in bolded text.
#
Lesson Name
Description
12
Private and Personal
Information
[Common Sense Education] Developed by Common Sense Education, this lesson is
about the difference between information that is safe to share online and info that is not.
13
Build a Star Wars Game
Students will learn events before creating their own event-driven games.
14
Songwriting
This lesson will help students intuitively understand why combining chunks of code into
functions can be such a helpful practice.
15
Functions with Minecraft
Students will be taught that functions are helpful in this interactive Minecraft adventure!
16
Functions with the
Harvester
This lesson will push students to use functions in the new ways by combining them with
while loops and if / else statements.
17
Digital Sharing
Students will learn the proper way to handle the use of content that is not their own.
18
Functions with Artist
For more complicated patterns, students will learn about nesting functions by calling
one function from inside another.
19
Determine the Concept
This lesson gives students a chance to think critically about how they would solve each
problem, but without telling them which concept to apply.
20
Learning Sprite Lab
This lesson is designed to introduce students to the core vocabulary of Sprite Lab and
allow them to apply concepts they learned in other environments to this tool.
21
Alien Dance Party
This lesson features Sprite Lab, a platform where students can create their own alien
dance party with interactions between characters and user input.
22
Pet Giraffe
Students will use events, behaviors, and custom code to create their very own pet
giraffe that gets hungry, playful, and even filthy!
23
Explore Project Ideas
Students will play with examples of projects in both Artist and Sprite Lab for inspiration.
24
The Design Process
Students will learn about the design process and how to implement it in their projects.
25
Build Your Project
Students will be given their own space to create their project with either Artist or Sprite
Lab. This will be the longest portion of the project.
26
Present Your Project
Finally, students will be able to present their finished work to their peers or share with
their loved ones with a special link.
27
Internet
In this lesson, students will pretend to flow through the internet, all the while learning
about connections, URLs, IP Addresses, and the DNS.
28
Crowdsourcing
This lesson will show students how helpful teamwork can be in the industry of CS.
26

CS Fundamentals Curriculum Guide
Course F (Ramp-Up): Overview
Course F begins with the same set of optional ramp-up lessons presented in Course E, as well as an additional
review of functions. These condensed lessons are here to help make sure that students are confident with
basic concepts before they begin learning more complex combinations later in the series.
The approach to the ramp-up section depends on your classroom. If your students have no prior experience,
then it’s essential that you use the ramp-up to provide your students with a solid introduction to the core
concepts that will be built upon later in the course. Pay particular attention to the unplugged lessons, as they
give students the real-life foundations that they will need to connect these concepts together later.
If students are already familiar with the concepts presented in the ramp-ups, you can pick and choose from the
lessons to keep the ramp-up experience slim. As long as students are confident using the various
programming environments present to program sequences, loops, and nested loops, they will have what they
need to be successful in later lessons.
Core concepts:
● Sequencing
● Debugging
● Loops
● Nested Loops
● Conditionals
● Functions
Attitudinal goals:
● I’m comfortable with basic programming concepts
It is recommended that you:
● Remind students that this series is to help them learn, not to see how quickly they can solve puzzles
● Require students to make a first attempt at problem-solving before asking for help
● Remind students of the importance of persistence
● Encourage students to check themselves (and each other) for understanding during and after each
lesson
27
CS Fundamentals Curriculum Guide
Course F (Ramp-Up): Lesson Outlines
Online lessons are in regular text and unplugged lessons are in bolded text.
#
Lesson Name
Description
1
My Robotic Friends
This lesson teaches students the connection between symbols and actions, as
well as the difference between an algorithm and a program.
2
Coding with
Comments
Students will be guided through an introduction (or review depending on the
experience of your class) of Code.org's online workspace.
3
Building a
Foundation
Students will build a structure with common materials. Most students will not get it
right the first time, and should be encouraged to keep trying.
4
Debugging with Scrat
In this lesson, students will encounter puzzles that have been solved incorrectly.
They will then work to identify and fix errors.
5
Creating Art with
Code
This Artist stage will allow students to create images of increasing complexity using
new blocks.
6
My Loopy Robotic
Friends
Students learn the simplicity and utility of loops by “programming” their friends
using the language from ‘My Robotic Friends’.
7
Drawing Shapes with
Loops
This lesson builds on the understanding of loops from previous lessons and gives
students a chance to be truly creative.
8
Nested Loops in
Maze
In this online activity, students will have the opportunity to push their
understanding of loops to a whole new level. Playing with Bee and Plants vs
Zombies, students will learn how to nest loops.
9
Nested Loops with
Frozen
Now that students know how to layer their loops, they can create many beautiful
things. This lesson will take students through a series of exercises to help them
create their own portfolio-ready images.
10
Conditionals with
Cards
This lesson demonstrates how conditionals can be used to tailor a program to
specific information.
11
Conditionals with the
Farmer
This lesson briefly covers the conditional concepts, including `while` loops, `until`
loops, and `if/else` statements.
12
Functions with
Minecraft
Students will begin to understand how functions can be helpful in this fun and
interactive Minecraft adventure!
28

CS Fundamentals Curriculum Guide
Course F: Overview
The final course in CS Fundamentals is tailored to the needs of students in the fifth grade.
In this course, students will investigate problem-solving techniques and discuss societal impacts of computing
and the internet. By the end of the course, students will have created interactive stories and games that they
can share with their friends and family.
In Course F students are begin to understand how the concepts that they have learned impact the world
around them, and how they can be applied to solve interesting and personally relevant problems. By this point
students should be cognitively mature enough to think about plans that they want to bring to life, and have the
skills to start down that path.
Starting with the first few lessons students are given greater autonomy and creative freedom in programming,
which also necessitates an increased emphasis on debugging and problem solving. Students in the fifth grade
should be expected to take the first steps in solving all of their own coding problems as they arise, and when
solving problems they should be encouraged to work with peers to overcome obstacles rather than relying on
the teacher to do so.
Remember, solving
a puzzle is not as important as understanding
a puzzle, so when students are stuck,
encourage them to look at several angles until a solution begins to appear.
Core concepts:
● Variables
● For-loops
● Functions
● Digital Citizenship
Attitudinal goals:
● I can use computer science to solve real and meaningful problems
● Programming is creative
Key teaching tips:
● Promote an environment of cross-team collaboration for group activities and projects
● Help students understand that the content is supposed to be difficult and it will start to feel easier with
practice
● Encourage students to go back and replay puzzles if they are having trouble moving forward
● Provide students with autonomy, allowing them to make decisions, edits, and fixes for themselves
29
CS Fundamentals Curriculum Guide
Course F: Lesson Outlines
Online lessons are in regular text and unplugged lessons are in bolded text.
#
Lesson Name
Description
13
The Power of Words
[Common Sense Education] Students explore ways to handle cyberbullying and how to
respond in the face of upsetting language online.
14
Envelope Variables
This lesson explains what variables are and how to use them in different ways.
15
Variables with Artist
Students explore the creation of repetitive designs using variables in Artist.
16
Changing Variables
with Bee
Students will get further practice with variables by gathering honey and nectar.
17
Changing Variables
with Artist
This artist level takes variables to new heights.
18
For Loop Fun
`For` loops have extra structures built-in to create more powerful & dynamic code.
19
For Loops with Bee
This focuses on `for` loops and using the increment to solve more complicated puzzles.
20
For Loops with Artist
Students continue to practice `for` loops, this time with Artist.
21
Learning Sprite Lab
This lesson is designed to introduce students to the core vocabulary of Sprite Lab and
allow them to apply concepts they learned in other environments to this tool.
22
Alien Dance Party
This lesson features Sprite Lab, a platform where students can create their own alien
dance party with interactions between characters and user input.
23
Pet Giraffe
Students will use events, behaviors, and custom code to create their very own pet giraffe
that gets hungry, playful, and even filthy!
24
Explore Project Ideas
Students will play with pre-built examples to prepare for the creation of their own projects.
25
The Design Process
Students will learn about the design process and how to use it for their own projects.
26
Build Your Project
Students will be given their own space to create a project of their own design.
27
Revise Your Project
Students are given the opportunity to get feedback from peers and revise their projects.
28
Present Your Project
Students will present their finished work to their peers and/or share with their loved ones.
30

CS Fundamentals Curriculum Guide
Courses A-F Additional Supplies List
Most of the unplugged lessons in Courses A-F require only paper, scissors, and writing instruments. We have
included here a list of activities where lessons can benefit from more.
Course A
❏Marble Run [Lessons 1 & 2] - Tape, cardboard, other misc. supplies for building, kid friendly marbles
(or round cereal)
❏Real-Life Algorithms: Plant a Seed [Lesson 3] - Dirt, seeds, paper cups
❏Big Event (K-1 Version) [Lesson 13] - Printouts
Course B
❏Move It, Move It [Lessons 1] - Printouts, blank paper
❏My Robotic Friends [Lesson 4] - Plastic cups, index cards
❏My (Loopy) Robotic Friends [Lesson 8] - Plastic cups, index cards
❏Big Event (K-1 Version) [Lesson 12] - Printouts
Course C
❏Building a Foundation [Lesson 1] - Gumdrops and toothpicks or marshmallows and popsicle sticks
❏Real-Life Algorithms: Paper Airplanes [Lesson 4] - Paper for airplane construction
❏Binary Bracelets [Lesson 15] - Markers (Optional: beads and pipe cleaners)
Course D
❏Graph Paper / Relay Programming [Lessons 1 / 3] - Printouts, Markers
❏Conditionals with Cards [Lesson 11] - Deck of cards, or something similar
❏Digital Citizenship [Lesson 16] - Cubecraft superheros (see resources for more details)
❏Binary Images [Lesson 18] - Printouts, markers, optional: coin (with heads and tails)
Course E
❏My Robotic Friends [Lesson 1] - Plastic cups, index cards
❏Building a Foundation [Lesson 3] - Gumdrops and toothpicks or marshmallows and popsicle sticks
❏My (Loopy) Robotic Friends [Lesson 6] - Plastic cups, index cards
❏Conditionals with Cards [Lesson 10] - Deck of cards, or something similar
❏Functions: Songwriting [Lesson 14] - Paper, written song lyrics
❏Internet [Lesson 27] - Blank paper, lesson printouts
❏Crowdsourcing [Lesson 26] - Deck of cards, jar full of small items (buttons, beads, beans, etc)
Course F
❏My Robotic Friends [Lesson 1] - Plastic cups, index cards
❏Building a Foundation [Lesson 3] - Gumdrops and toothpicks or marshmallows and popsicle sticks
❏My (Loopy) Robotic Friends [Lesson 6] - Plastic cups, index cards
❏Conditionals with Cards [Lesson 10] - Deck of cards, or something similar
❏Envelope Variables [Lesson 14] - Envelopes
❏For Loop Fun [Lesson 18] - Dice
31

CS Fundamentals Curriculum Guide
Technology Requirements
A computing device and an Internet connection.
We work hard to build an environment that supports all modern web browsers on desktops and mobile devices.
This includes Internet Explorer 11+ and the latest versions of Firefox, Chrome, Safari.
Our instructional videos may be affected depending on your school's internet filters. If YouTube is blocked at
your school, our video player will attempt to use our non-YouTube player instead. For more details about the IT
requirements for accessing and playing our embedded videos, see our IT requirements page at
https://code.org/educate/it. We’ve made all of our videos available for download using a link located in the
bottom corner. If all fails, some videos have a “Show Notes” tab that provide a storyboard equivalent of the
video.
Implementation Tips and Considerations
This document offers suggestions for implementing an individual CS Fundamentals course in an elementary
school classroom, as well as planning the rollout of all Courses A-F as a pathway across elementary school
grade levels.
Scheduling The Lessons
The CS Fundamentals courses have been designed for flexibility in implementation, and have been
successfully used in a variety of formats, including in the classroom alongside other subjects, as a rotating
special, in computer lab time, or as stations. While each course is intended to run as one lesson per week for a
semester, they can alternatively be run two or three times a week for about two months, or one lesson every
two weeks for a year. Regardless of how you chose to pace the courses, it’s important to remember that
lessons are meant to be completed in order and can range from as little as 20 minutes to more than 45
minutes if extension activities are included.
Teaching in the Classroom
Here are implementation tips for four common situations in elementary school:
● Grade Specific Classroom
○Even if you have 1:1 computers, consider grouping students up for pair programming. This
setup allows students to gain insight into the problem solving processes of their peers while
helping them to develop collaboration and communication skills.
○ You do not need computers for unplugged days, unless you plan to double up and work on an
online lesson immediately after the offline one. Consider giving time for the concept to sink in
after an unplugged lesson before moving to online programming.
○ Keeping the class together on the same lesson helps to build a sense of community and
prevents struggling students from feeling left behind by their peers. Make sure students feel
empowered to travel at their own pace within a lesson and consider what you want to do with
students who finish early. Extension challenges or peer support can both be effective.
32

CS Fundamentals Curriculum Guide
○ End of Lesson puzzles should be seen as a great opportunity to showcase the things students
have learned during the day, not as a required assessment for the segment.
● Mixed Grade Classroom
○ When selecting groups for pair programming, make sure that students are paired either with
students of a similar age or a similar experience level. Having pairs that are too far separated in
skills is not fair to either member of the team.
○ If your class is regularly held in the lab, look for rooms to “visit” for unplugged activities (like the
library or the gym.) This will give students room to spread out and feel like they are learning
authentically, rather than trying to “make do” in the available space.
○ It’s expected that students from different grades could be on different lessons or even in
different courses. Decide on what rules you want to foster surrounding these differences and get
buy-in from students before each lesson to prevent things from getting unruly.
● Using “Centers” or “Stations”
○ Some classrooms have a small number of computers set up in one area and teachers use these
as activity centers. This can be very effective once the class has already gone through the
unplugged activities for a concept together.
○ Continue to encourage pair programming, even if students are only able to get through 2 to 4
puzzles at a time. The realizations that they have while learning to talk through problems will far
outweigh any reduction in speed that they experience while trading off.
○ If you have empty stations open, offer unplugged activities that relate back to the online lessons.
Providing extra opportunities for context switching will help to solidify ideas that might otherwise
cause them to struggle.
● Sporadic Lessons
○ If you are a teacher that struggles to find a time and place to integrate computer science into
your annual curriculum, you are in good company. Remember, when taught well, a little
computer science is better than no computer science.
○ Choose a concept and teach it thoroughly.
■ In elementary school, the main goal is to teach students that they are capable of learning
computer science. If you ditch a deep dive on concepts in favor of a shallow introduction,
students might be left feeling as if they don’t understand any of it.
■ Start with the unplugged lesson for the concept that you are choosing. Use the word
(such as “loops”) often in class for days after the unplugged lesson has been completed.
■ On your next trip to the computer lab, start by completing a bridging activity that ties your
concept to the online lessons that students are about to do. Spend that day in the lab
doing the straightforward, educational puzzles that come in the lesson directly following
the unplugged activity in the course.
■ If you have another chance to get to the lab, explore other online puzzles with that same
concept. This can be either a second concept lesson on Code.org, or a supporting
lesson from another tool or curriculum (such as Scratch or the Foos.)
33
CS Fundamentals Curriculum Guide
Standards Mapping
CS Fundamentals was written using both the K–12 Computer Science Framework
[https://k12cs.org] and the draft CSTA standards as guidance. Courses are also mapped to CC
and NGSS standards. Details can be found at curriculum.code.org/csf/standards.
Assessments
At Code.org, we believe that you know your students best, which is why we do not attempt to automatically
determine what “grade” students should receive for any given lesson. Instead, we try to build tools that allow
you to easily see student progress and to identify evidence of learning. The ability to see where a student is
succeeding and where they need help is fundamental to providing the opportunity to tailor their learning
experience. To that purpose, our teacher dashboard is continually evolving to better highlight the work done by
your class sections. Keep an eye on the Code.org blog [http://blog.code.org] for more information on changes
and improvements.
Please note, we have provided assessment worksheets with most unplugged activities, and “assessment”
puzzles for many online lessons. For more information on assessing student work using those items, see the
thread on our teacher forum at http://forum.code.org/t/assessment-in-csf.
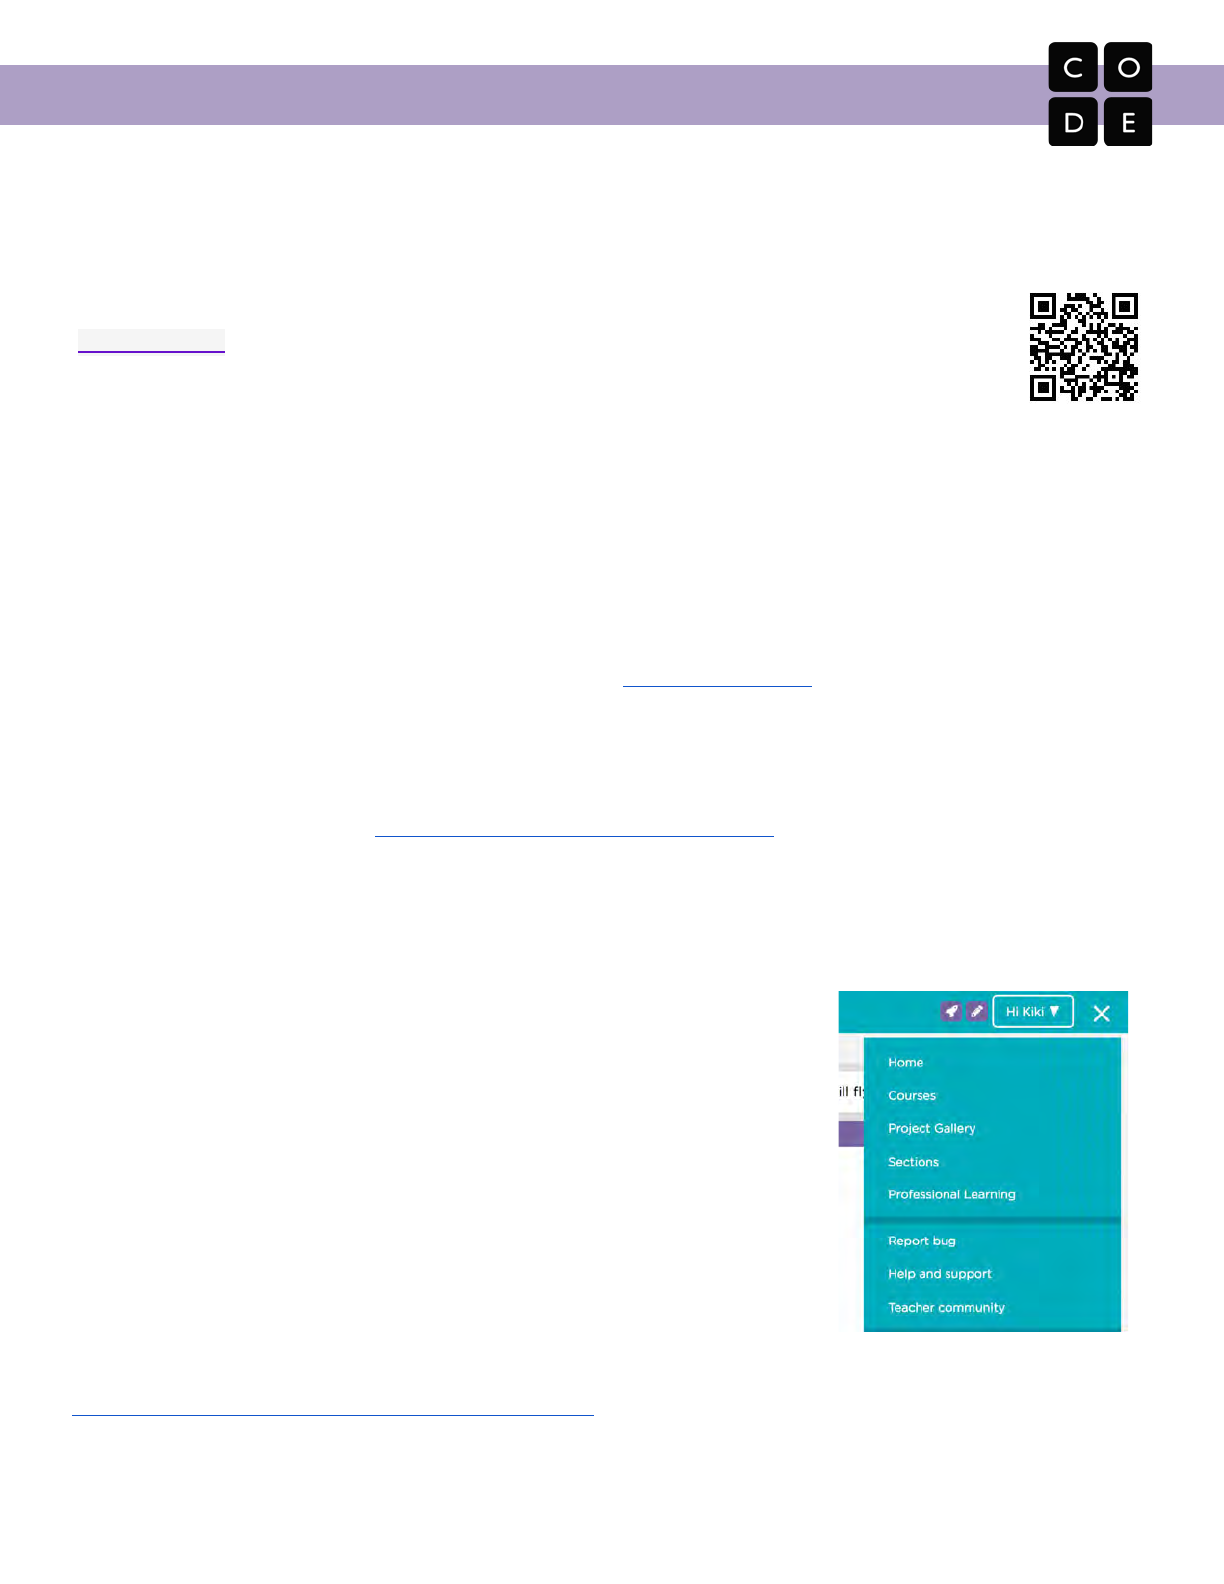
Getting Help
The curriculum is completely free for anyone to teach anywhere. For
support, click on the menu in the upper right-hand corner of the website.
Here, you’ll find our “Help and support” forum where you can email us or find
how-to articles. You’ll also see a link to our “Teacher community” forums
where you can connect to other teachers for support, teaching tips, or best
practices.
When you’re in a puzzle, you’ll see an additional “Report bug” link for that
puzzle. Thank you for helping us find and fix any issues!
If you are a teacher and you'd like to attend a free training on our K-5
Computer Science curriculum, you can find links to local workshops by visiting
https://code.org/professional-development-workshops.
34

CS Fundamentals Curriculum Guide
Appendix A:
Unplugged Lesson Plans
35

Table of Unplugged Lessons
Big Event (The) ………………………………………..………... 37
Big Event Jr. (The) ..…....………………………………..…...… 43
Binary Bracelets ………………………………………………… 49
Binary Images ………….……………………………………… 55
Building a Foundation…………...………………………………60
Conditionals with Cards ……………………………………..… 65
Crowdsourcing …………………...………………………...…… 72
Digital Citizenship ……………………………………………… 75
Digital Sharing ………………………...………………………… 80
Envelope Variables ………………………………………….… 84
For Loop Fun ……………………………………..……….…… 90
Getting Loopy ………………………………………….….…… 97
Going Places Safely ……………………………………...…… 104
Graph Paper Programming …………………………..……… 108
Happy Loops …………………………………...……….………117
Happy Maps …………………………………….…………….…128
Internet (The) …………………………………….…………...…138
It's Great to Create and Play Fair …………………………… 147
Marble Run (Stevie and the Big Project) …………..………
254
Move It, Move It ……………………………..….……………… 160
My Loopy Robotic Friends …………………..……………… 161
My Loopy Robotic Friends Jr. ……………….……………… 173
My Robotic Friends …………………...……………………… 182
My Robotic Friends Jr. ……………….…….………………… 193
Paper Planes …………………………………………………… 202
Plant a Seed ………………………………….………………… 207
Power of Words (The) ……………….…….………………… 213
Private and Personal Information ………...…………………221
Relay Programming ……………………………………………229
Screen Out the Mean …………………………..………………239
Songwriting ………………………….……….………………… 246
Stevie and the Big Project (Marble Run) ………………..…
254
The Big Event ……………………...………….………………… 37
The Big Event Jr. …………………….……….………………… 43
The Internet …………………………….……..…………………
138
The Power of Words ………………………..………………… 213
Unspotted Bugs …………………………….….……………… 266
Your Digital Footprint ………………………………....………277

Students will soon learn that events are a great way to add flexibility to a pre-
written algorithm. Sometimes you want your program to be able to respond to
the user exactly when the user wants it to. Events can make your program more
interesting and interactive.
Today, students will learn to distinguish events and actions. The students will
see activities interrupted by having a "button" pressed on a paper remote. When
seeing this , the class will react with a unique action. Events are widely
used in programming and should be easily recognizable after this lesson.
Repeat commands given by an instructor.
Recognize movements of the teacher as signals to
initiate commands.
Practice differentiating pre-defined actions and
event-driven ones.
Watch the .
Print one
and Event Controller.
Print one for each
student.
Make sure every student has a
.
Please make a copy of any
documents you plan to share with
students.
- Unplugged Video ( )
- Teacher Video
- Worksheet
- Assessment
- Assessment Answer Key
- Reflection Journal
- An action that causes something to happen.
37
Lesson Tip
If your students seem confused, talk about their favorite games
and all of the ways that they let the characters know what they're
supposed to do. Point out how the game would be really boring if it
ran from start to finish without any events required.
This lesson has one new and important vocabulary word:
Event - Say it with me: E-vent
An event is an action that causes something to happen.
Prep your class to answer a question:
"I'm going to ask you a question. I want you to raise your hand if you want me to call on you for the answer."
Ask a simple question that most of your students should be able to answer, such as:
How many thumbs do I have?
What is bigger, a bird or a horse?
Call on a student who has their hand raised and let them give their answer.
Upon finishing that display, ask the class how you knew that the student wanted you to call on them.
Your class will likely mention the raising of the hand.
Explain to everyone that when students raise their hand, it is an "event" that causes you to know that they want to be called on.
Ask the class if they can think of any other events that give signals.
You may need to remind them that you're not talking about an event like a birthday party or a field trip.
If they have trouble, you can remind them that an event is an action that causes something to happen.
What about an alarm clock going off? What does that make happen?
What about pressing "Start" on the microwave? What does that do?
What about pressing the power button on your tv remote?
Today, we're going to practice changing programs by introducing events.
Do you remember guiding Red from Angry Birds to the pig in
the Maze puzzles?
In that exercise, you knew in advance exactly where you
wanted Red to go, so you could make a program that took
Red from start to finish without any interruptions.
In most real programs, we can't do that because we want to
have options, depending on what the user needs.
Say that I only want my character to move when my
finger is on the screen of my phone. I would need to program the character to only move when I put my finger on the screen of my
phone.
Putting my finger on the screen would then become an "event" that tells my character to move.
In earlier lessons, we created algorithms that allowed us to control a friend or other character for several steps at a time. It was fun and
useful, but what happens when you don’t know everything that you want your friend to do in advance? This is where events come in!
Project the Event Controller onto your classroom screen.
38
Decide with your class what each button does. We suggest:
Pink Button -> Say “Wooooo!”
Teal Button -> “Yeah!”
Purple Dial -> “Boom!”
Green Button -> Clap
Orange Dial -> Stomp
Practice tapping the buttons on the overhead and having your class react.
Add some button sequences into the mix and have the students try to keep up with their sounds.
Let your class know that every time you push a button, it is an “event” that lets them know what they are expected to do next.
Get the class started on a planned task before interrupting them again with the buttons. We suggest:
Counting to 10
Singing “Old MacDonald”
Once their plan is underway, interject button presses sporadically.
Continue the blend until they understand the difference between actions that are guided by a plan and those that are event driven.
Why do we need to be able to handle events in a program?
What are some other kinds of events that you can think of?
Hand out the assessment worksheet and allow students to complete the activity independently after the instructions have been well
explained.
This should feel familiar, thanks to the previous activities.
39

Break the class up into groups. Using the Events Controller, assign each group a different reaction to the same button. Do this for all
three buttons, then watch the chaos!
- Language
- Speaking & Listening
- Math Practices
- Algorithms & Programming
- Engineering in the Sciences
If you are interested in licensing Code.org materials for commercial purposes,
Use these activities to enhance student learning. They can be used as outside of class activities or other enrichment.
Assign each student an event to watch out for, and an appropriate reaction to that event. Chain the actions so that each child's reaction
becomes an event that triggers the reaction of another student. Keep assigning until everyone has something to do and everyone makes
someone react.
40
The Big Event
Event Controller
Revision 140902.1a
U
41

You’ve been given a magical controller that changes the picture on the frame on your desk.
Take a look below to see what each button does. Can you figure out which series of button
events will cause your frame to show the pictures on the right? Draw a line from each set
of pictures to the button combination that causes it. The first one has been done for you.
The Big Event
Controlling by Events Assessment
Revision 160511 . 1a
Name: Date:
Unplugged
U
42

Events are a great way to add variety to a pre-written algorithm. Sometimes you
want your program to be able to respond to the user exactly when the user
wants it to. That is what events are for.
Today, students will learn to distinguish events from actions. The students will
see activities interrupted by having a "button" pressed on a paper remote. When
seeing this , the class will react with a unique action. Events are widely
used in programming and should be easily recognizable after this lesson.
Recognize actions of the teacher as signals to
initiate commands.
Practice differentiating pre-defined actions and
event-driven ones.
Watch the .
Print one
.
Print for each
student.
Make sure every student has a
.
Please make a copy of any
documents you plan to share with
students.
- Unplugged Video ( )
- Teacher Video
- Worksheet
- Assessment
- Assessment Answer Key
- Emotion Images
- Reflection Journal
- An action that causes something to happen.
43
Lesson Tip
If your students seem confused, talk about their favorite games
and all of the ways that they let the characters know what they're
supposed to do. Point out how the game would be really boring if it
ran from start to finish without any events required.
This lesson has one new and important vocabulary word:
- Say it with me: E-vent
An action that causes something to happen.
Prep your class to answer a question:
"I'm going to ask you a question. I want you to raise your hand if you want me to call on you for the answer."
Ask a simple question that most of your students should be able to answer, such as:
How many thumbs do I have?
What is bigger, a bird or a horse?
Call on a student who has their hand raised and let them give their answer.
Upon finishing that display, ask the class how you knew that the student wanted you to call on them.
Your class will likely mention the raising of the hand.
Explain to everyone that when students raise their hand, it is an "event" that causes you to know that they want to be called on.
Ask the class if they can think of any other events that give signals.
You may need to remind them that you're not talking about an event like a birthday party or a field trip.
If they have trouble, you can remind them that an event is an action that causes something to happen.
What about an alarm clock going off? What does that make happen?
What about pressing "Start" on the microwave? What does that do?
What about pressing the power button on your tv remote?
Today, we're going to create programs with events.
Do you remember helping the Flurbs find fruit?
In that exercise, you knew in advance exactly where you
wanted your Flurb to end up, so you could make a program
that took them from start to finish without any interruptions.
In most real programs, we can't do that because we want to
have options, depending on what the user needs.
Say that I only want my character to move when my
finger is on the screen of my phone. I would need to
program the character to only move when I put my finger on the screen of my phone.
Putting my finger on the screen would then become an "event" that tells my character to move.
In earlier lessons, we created algorithms that allowed us to control a friend or Flurb for several steps at a time. It was fun and useful, but
what happens when you don’t know everything that you want your friend to do in advance? This is where events come in!
Project the Event Controller onto your classroom screen.
44
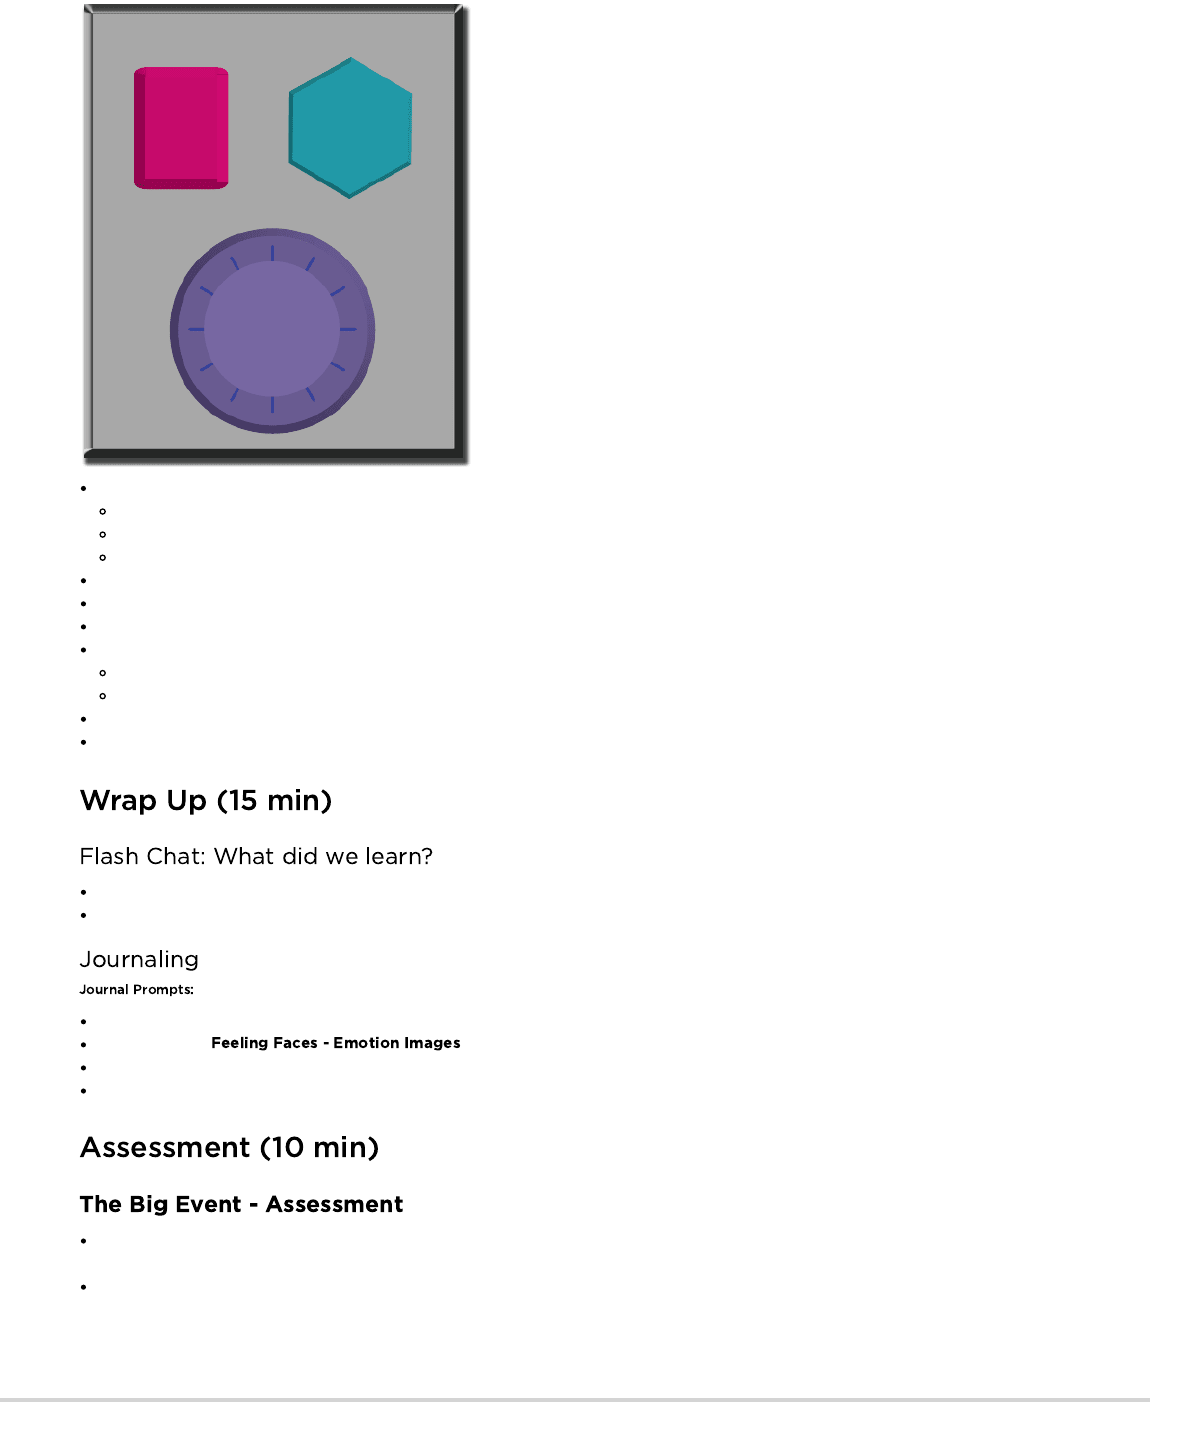
Decide with your class what each button does. We suggest:
Pink Button -> Say “Wooooo!”
Teal Button -> “Yeah!”
Purple Dial -> “Boom!”
Practice tapping the buttons on the overhead and having your class react.
Add some button sequences into the mix and have the students try to keep up with their sounds.
Let your class know that every time you push a button, it is an “event” that lets them know what they are expected to do next.
Get the class started on a planned task before interrupting them again with the buttons. We suggest:
Counting to 10
Singing “Old MacDonald”
Once their plan is underway, interject button presses sporadically.
Continue the blend until they understand the difference between actions that are guided by a plan and those that are event driven.
Why do we need to be able to handle events in a program?
What are some other kinds of events that you can think of?
What was today’s lesson about?
Draw one of the that shows how you felt about today's lesson in the corner of your journal page.
Draw an event that caused an action today.
Draw an action that was caused by an event that happened today.
Hand out the assessment activity and allow students to complete the activity independently after the instructions have been well
explained.
This should feel familiar, thanks to the previous activities.
45
Assign each student an event to watch out for, and an appropriate reaction to that event. Chain the actions so that each child's reaction
becomes an event that triggers the reaction of another student. Keep assigning until everyone has something to do and everyone makes
someone react.
Break the class up into groups. Using the Events Controller, assign each group a different reaction to the same button. Do this for all three
buttons, then watch the chaos!
- Language
- Speaking & Listening
- Counting And Cardinality
- Geometry
- Math Practices
- Algorithms & Programming
- Engineering in the Sciences
If you are interested in licensing Code.org materials for commercial purposes,
Use these activities to enhance student learning. They can be used as outside of class activities or other enrichment.
46
The Big Event
Event Controller
Revision 140709.1a
U
47
You’ve been given a magical controller that changes the picture on the frame on your desk.
Take a look below to see what each button does. Can you figure out which series of button
events will cause your frame to show the pictures on the right? Draw a line from each set
of pictures to the button combination that causes it. The first one has been done for you.
The Big Event
Controlling by Events Assessment
Revision 160511 . 1a
Name: Date:
Unplugged
U
48
Binary is extremely important in the world of computers. The majority of
computers today store all sorts of information in binary form. This lesson helps
demonstrate how it is possible to take something from real life and translate it
into a series of ons and offs.
In this lesson students will learn how information is represented in a way such
that a computer can interpret and store it. When learning , students will
have the opportunity to write codes and share them with peers as secret
messages. This can then be related back to how computers read a program,
translate it to binary, use the information in some way, then reply back in a way
humans can understand. For example, when we type a sentence into a
document then press save, a computer translates the sentence into binary,
stores the information, then posts a message indicating the document has been
saved.
Encode letters into binary.
Decode binary back to letters.
Relate the idea of storing letters on paper to the idea
of storing information in a computer.
Watch the .
Watch the
.
Gather markers for the bracelets. Other decorations
like beads and pipecleaners are optional.
Print one per
student.
Print one per
student.
Make sure every student has a
.
(Optional) Write a short message on the board in
binary.
Prepare to show the
.
Please make a copy of any
documents you plan to share with
students.
- Unplugged Video ( )
- Teacher Video
- Lesson in Action Video
- Worksheet
- Assessment
- Assessment Answer Key
- Student Video
- Reflection Journal
- A way of representing information using
only two options.
49
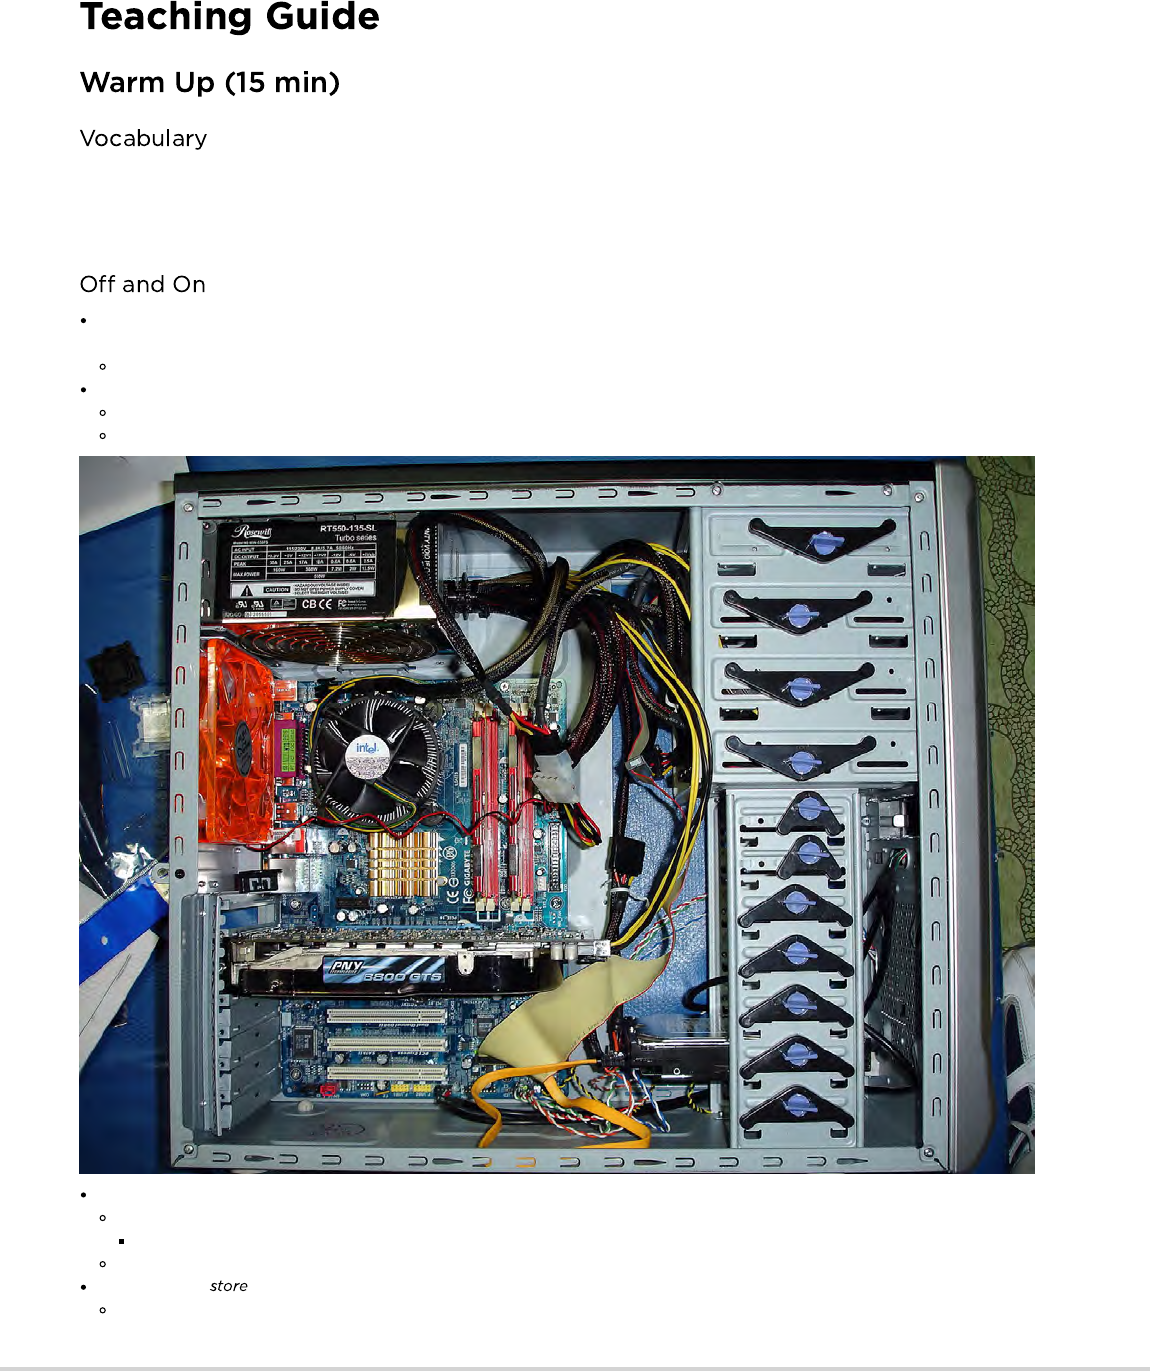
This lesson has one new and important word:
Binary - Say it with me: Bye-nair-ee
A way of representing information using only two options
If you've written a short message on the board in binary, call the students' attention to it and ask if anyone knows what it is or what it
means.
Put the message aside and move on to prepping for the activity.
You can start by asking the class if they have ever seen inside a computer.
What's in there?
This is a good place to actually show them the inside of a computer (or pictures of the inside of a computer).
Wires carry information through the machine in the form of electricity.
The two options that a computer uses with respect to this electrical information are "off" and "on." Just like the lights in this room!
When computers represent information using only two options, it's called "Binary."
That theme of two options doesn't stop when the information gets to its destination.
Computers also information using binary.
Binary isn't always off and on.
50

Lesson Tip
You know your classroom best. As the teacher, decide if students
should do this individually or if students should work in pairs or
small groups.
Lesson Tip
If your class has extra budget for materials, try doing this exercise
using thread (or pipe cleaners) and beads to create the binary
bracelets instead of pen and paper. You can provide any
combination of two colors in beads to the students, but black and
white tend to be easiest, given the way that the key is done.
Use the to show how a computer might represent capital letters.
This is a good time to mention that each spot where you have a binary option is called a "binary digit" or "bit" for short.
Ask if anyone knows what a grouping of eight bits is called (it's a byte.)
Fun fact: A grouping of four bits is called a nibble.
Watch the (~1 minute)
Go over a few examples of converting letters into binary, then back.
Afterward, write an encoded letter and give the class a few seconds to figure out what it is.
When the class can figure out that encoded letter on their own, you can move on to the activity.
You do not need to cover the whole of binary, like counting and
converting numbers back and forth from decimal. This lesson is
intended to be a fun introduction to how computers store
information, not a frustrating lesson in bases.
Directions:
Find the first letter of your first name on the activity sheet.
Fill in the squares of a bracelet to match the pattern of the squares next to the letter that you selected.
Cut the bracelet out.
Tape the bracelet around your wrist to wear it!
Share your bracelet with your classmates to see if they can figure out your letter.
After the activity, revisit the message that was on the board and
see if your class can decypher it using what they've learned.
What else do you think is represented as binary inside of a
computer?
How else might you represent binary instead of boxes that are filled or not filled?
What was your favorite part about that activity?
Hard Disk Drives store information using magnetic positive and magnetic negative.
DVDs store information as either reflective or non-reflective.
How do you suppose we can convert real-life things that we want to store in a computer into binary?
Let's start with letters.
51
Use the activity worksheet to write out the rest of your name or your favorite word in binary.
Imagine a world where we spoke in binary, saying "on" or "off", but nothing else. Draw two characters trying to talk to each other in binary.
Hand out the assessment worksheet and allow students to complete the activity independently after the instructions have been well
explained.
This should feel familiar, thanks to the previous activities.
Use these activities to enhance student learning. They can be used as outside of class activities or other enrichment.
There are several great resources on the web for taking this activity to the next level.
If your students are interested in how images (or even music) can be represented as binary, you can find more details in Thinkersmith's
.
- Language
- Speaking & Listening
- Math Practices
- Algorithms & Programming
- Engineering in the Sciences
If you are interested in licensing Code.org materials for commercial purposes,
Having students write about what they learned, why it’s useful, and how they feel about it can help solidify any knowledge they obtained
today and build a review sheet for them to look to in the future.
What was today’s lesson about?
How did you feel during today’s lesson?
52
Find the first letter of your first name.
Fill in the squares of the bracelet below to match the pattern of the squares next to the
letter that you found.
Cut the bracelet out and tape it around your wrist to wear it!
Binary Bracelets
Binary Decoder Key
Revision 140902.1a
Name: Date:
A
B
C
D
E
F
G
H
I
J
K
L
M
N
O
P
Q
R
S
T
U
V
W
X
Y
Z
Unplugged
U
53
Use the Binary Decoder Key below to decode the message at the bottom of the sheet.
Can you figure out what the message says?
Binary Bracelets
Assessment for Binary Bracelets Lesson
Revision 140710.1a
Name: Date:
A
B
C
D
E
F
G
H
I
J
K
L
M
N
O
P
Q
R
S
T
U
V
W
X
Y
Z
Unplugged
U
54
Though many people think of binary as strictly zeros and ones, students will be
introduced to the idea that information can be represented in a variety of binary
options. This lesson takes that concept one step further as it illustrates how a
computer can store even more complex information (such as images and
colors) in binary, as well.
In this lesson students will learn how information is represented in a way such
that a computer can interpret and store it. When learning , students will
have the opportunity to write code and share it with peers to view as images.
This can then be related back to how computers read a program, translate it to
binary, use the information in some way, then reply back in a way humans can
understand. For example, when we type a sentence into a document then press
"save", a computer translates the sentence into binary, stores the information,
then posts a message indicating the document has been stored.
Identify methods for encoding images into binary.
Relate images to a peer using binary encoding.
Reproduce an image, based on binary code.
Watch the .
Print one per pair.
Print one per
student.
Gather groupings of items that can show opposites
for students to use when coming up with their own
binary encodings (Optional).
Make sure every student has a
.
Please make a copy of any
documents you plan to share with
students.
- Unplugged Video ( )
- Teacher Video
- Worksheet
- Assessment
- Assessment Answer Key
- Thinkersmith Lesson
- Reflection Journal
- A way of representing information using
only two options.
- The two options used in your
binary code.
55
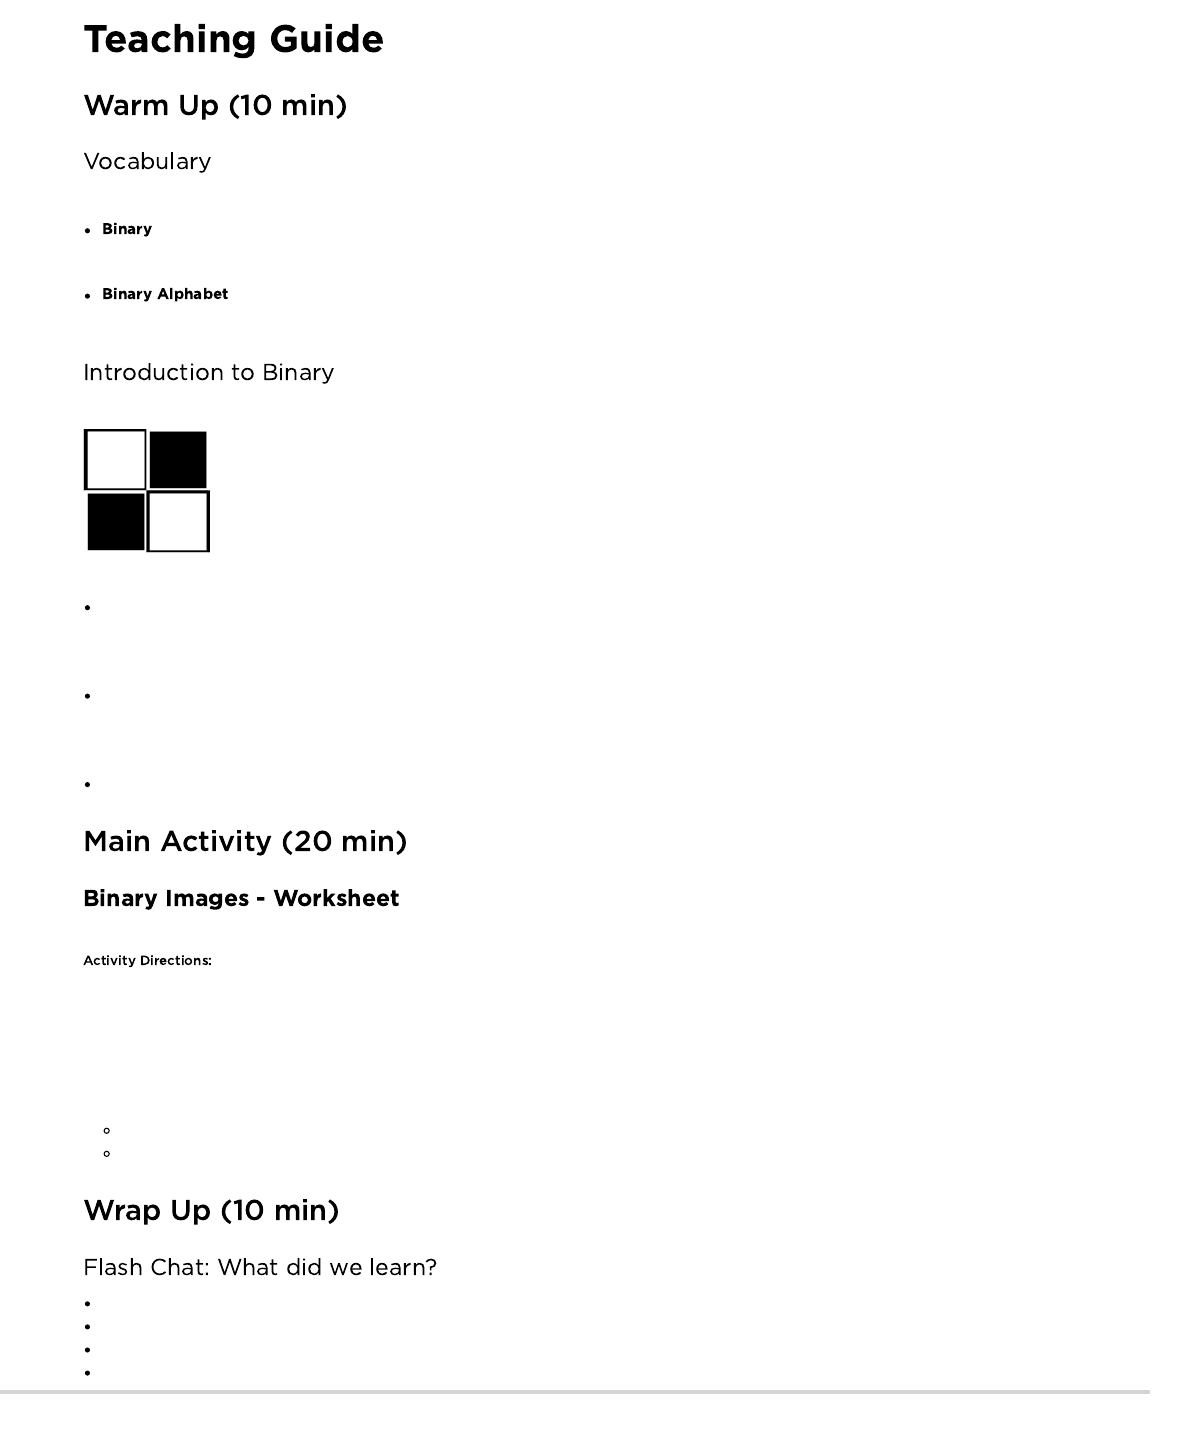
This lesson has two new terms:
- Say it with me: Bi-nare-ee
A way of representing information using only two options.
- Say it with me: Bi-nare-ee Al-fa-bet
The two options used in your binary code.
What if we had a picture like this, where there's only two color options for each square, black or white.
How might we encode this so that someone else could recreate the picture without seeing it?
Some students might think back to the Graph Paper Programming lesson. While there could be a lot of similarities, let them know that this
is different enough that they should not use that lesson to guide this one
You may hear suggestions like: "Say 'white, black, white, black'."
"That's a great suggestion! Now I'm going to break you up into pairs. Work with your teammate to decide on a binary alphabet."
Decide whether you want your pairs to share their encodings with the other groups ahead of time, and tell them if they will be creating a key,
or keeping their methods secret.
"Now, let's encode some images, just like a computer would!"
Now it's the students' turn!
1. Divide students into pairs.
2. Have them choose an image with their partner.
3. Encourage them to figure out what their binary alphabet is going to be.
4. Have them encode their image using their new binary alphabet.
5. Instruct students to trade encodings with another team and see if they can figure out which picture the other worked on.
6. Choose a Level
Easy: Let the other team know what your encoding method was
Tough: Have the other team guess your encoding method.
What did we learn today?
What kind of binary alphabet did you create?
Can you think of how you could encode an image using only your fingers?
Do you think you could create a binary alphabet out of sounds?
56
Having students write about what they learned, why it’s useful, and how they feel about it can help solidify any knowledge they obtained
today and build a review sheet for them to look to in the future.
What was today's lesson about?
How do you feel about today's lesson?
What is a binary alphabet?
What kind of information can you share using binary?
Pass out this assessment for students to do individually. Try to save time at the end to go over answers.
Use these activities to enhance student learning. They can be used as outside of class activities or other enrichment.
If your class really gets the idea behind storing binary images, they may want to know how to do color images.
First, you'll need to discuss how color works using binary (as in , page 21).
Then, introduce some images that use combinations of those colors
Encourage your students to come up with ways to code these color images.
Take the idea of color one step further to introduce .
- Language
- Speaking & Listening
- Geometry
- Math Practices
- Algorithms & Programming
- Engineering in the Sciences
If you are interested in licensing Code.org materials for commercial purposes,
57

Revision 141016.1a
Here are six images. Work with a partner to figure out how you can encode them into
binary in such a way that another team can use the code to figure out what image
you selected.
DIRECTIONS
1.
Choose an image with your partner.
2. Figure out what your binary alphabet is going to be.
3. Encode your image using your new binary alphabet.
4. Trade your encoding with another team and see if you can figure out which
picture they worked on.
5. Choose a Level
* Easy: Let the other team know what your encoding method was
* Tough: Have the other team guess your encoding method.
UBinary Images
Binary Representation Activity
Image 1 Image 2 Image 3
Image 4 Image 5 Image 6
Name: Date:
58
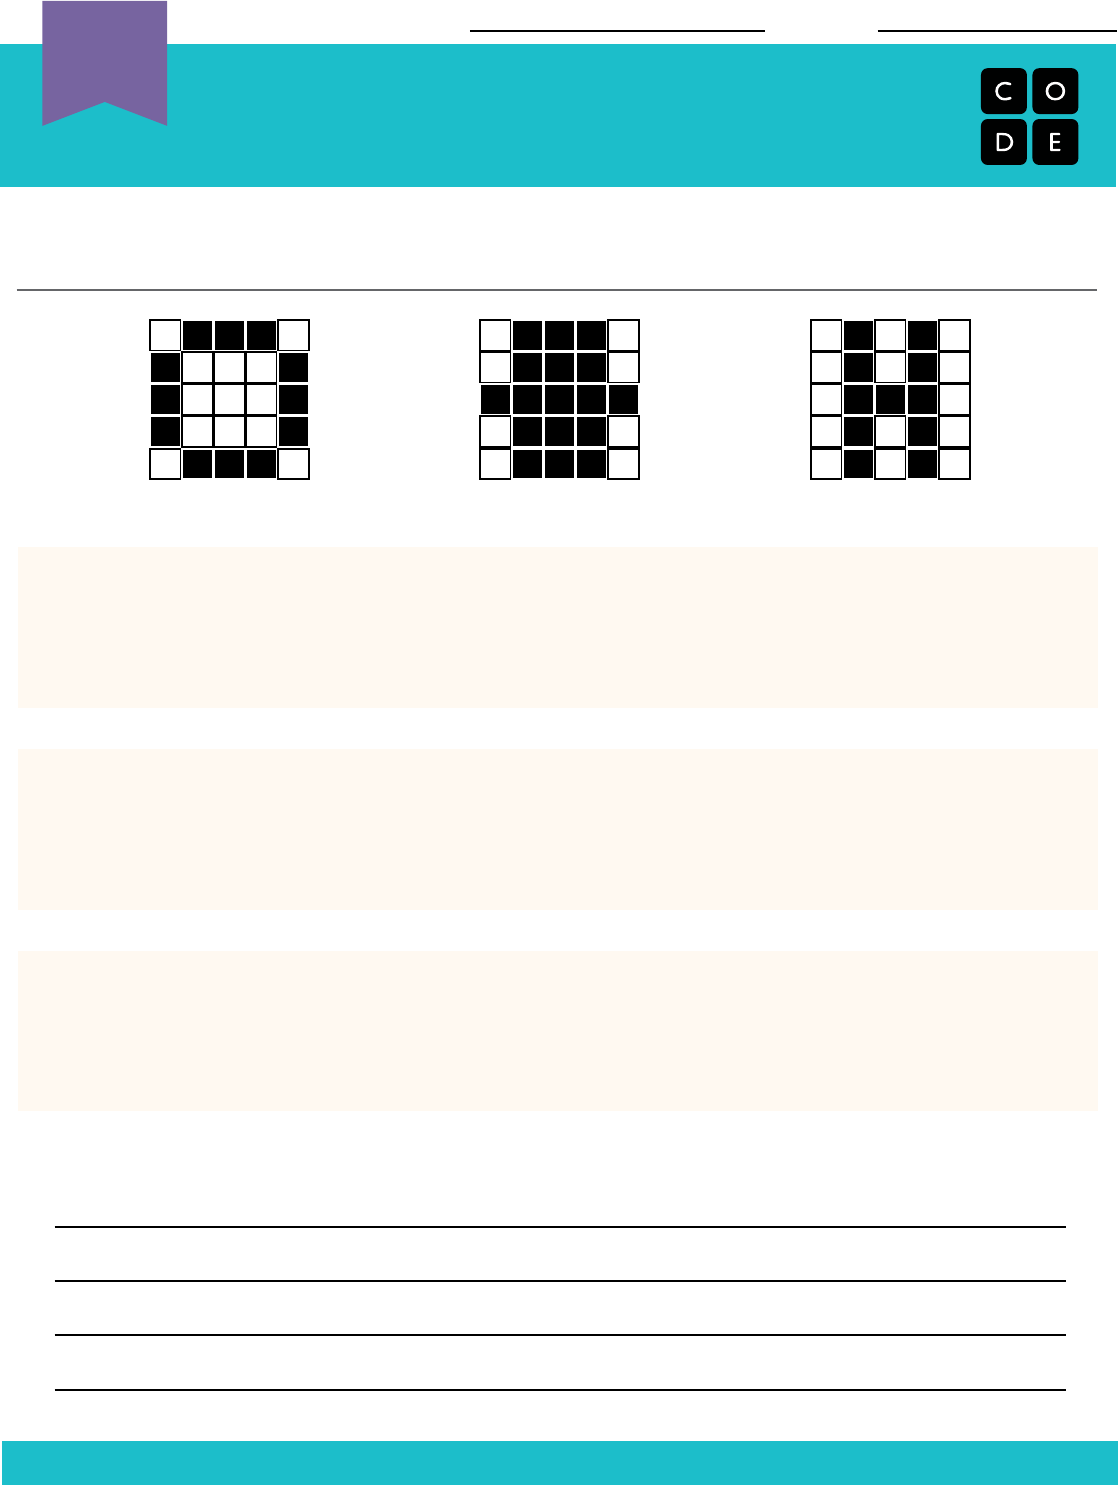
Revision 141019.1a
Match the image to the binary code that describes it. In order to get the images
correct, you will need to figure out the binary alphabet for each encoding.
UBinary Images
Binary Representation Activity
Name: Date:
image #1
A)
How do you know that your answers are correct?
B)
C)
This encodes image # _________
This encodes image # _________
This encodes image # _________
= _______________
= _______________
= _______________
= _______________
= _______________
= _______________
image #2 image #3
59
In this lesson, students are asked to build a load-bearing structure using
common materials. The structure will be tested on its ability to hold a textbook
for more than ten seconds. The goal of this activity is to engage students in a
difficult challenge to highlight strategies for showing persistence in the face of
frustration. Most students will not get this right the first time, but if they continue
trying and iterating, you can help them identify techniques to make struggle
productive.
While this lesson may not at first seem connected to Computer Science, it plays
an essential role in preparing students to tackle some of the more difficult
challenges that will come their way when approaching new CS content. This
lesson teaches that failure is not the end of a journey, but rather a step towards
success. The majority of students should feel frustrated at some point in this
lesson, but it's important to emphasize that failure and frustration are common
steps that lead to creativity and success.
Identify the feeling of frustration when felt or
described
List strategies for overcoming frustration during a
difficult task
Model persistence while working on a difficult task
Watch .
Watch the
.
Print
.
Gather enough building elements (marshmallows or
gumdrops with toothpicks or popsicle sticks) for
each group. You don't have to give any certain
amount; just make sure you put some limit on
materials.
Give a
to each student.
Please make a copy of any
documents you plan to share with
students.
- Lesson in Action Video
- Teacher Video
- Teacher Prep Guide
- Reflection Journal
- Feeling annoyed or angry because
something is not the way you want it.
- Trying again and again, even when
something is very hard.
60
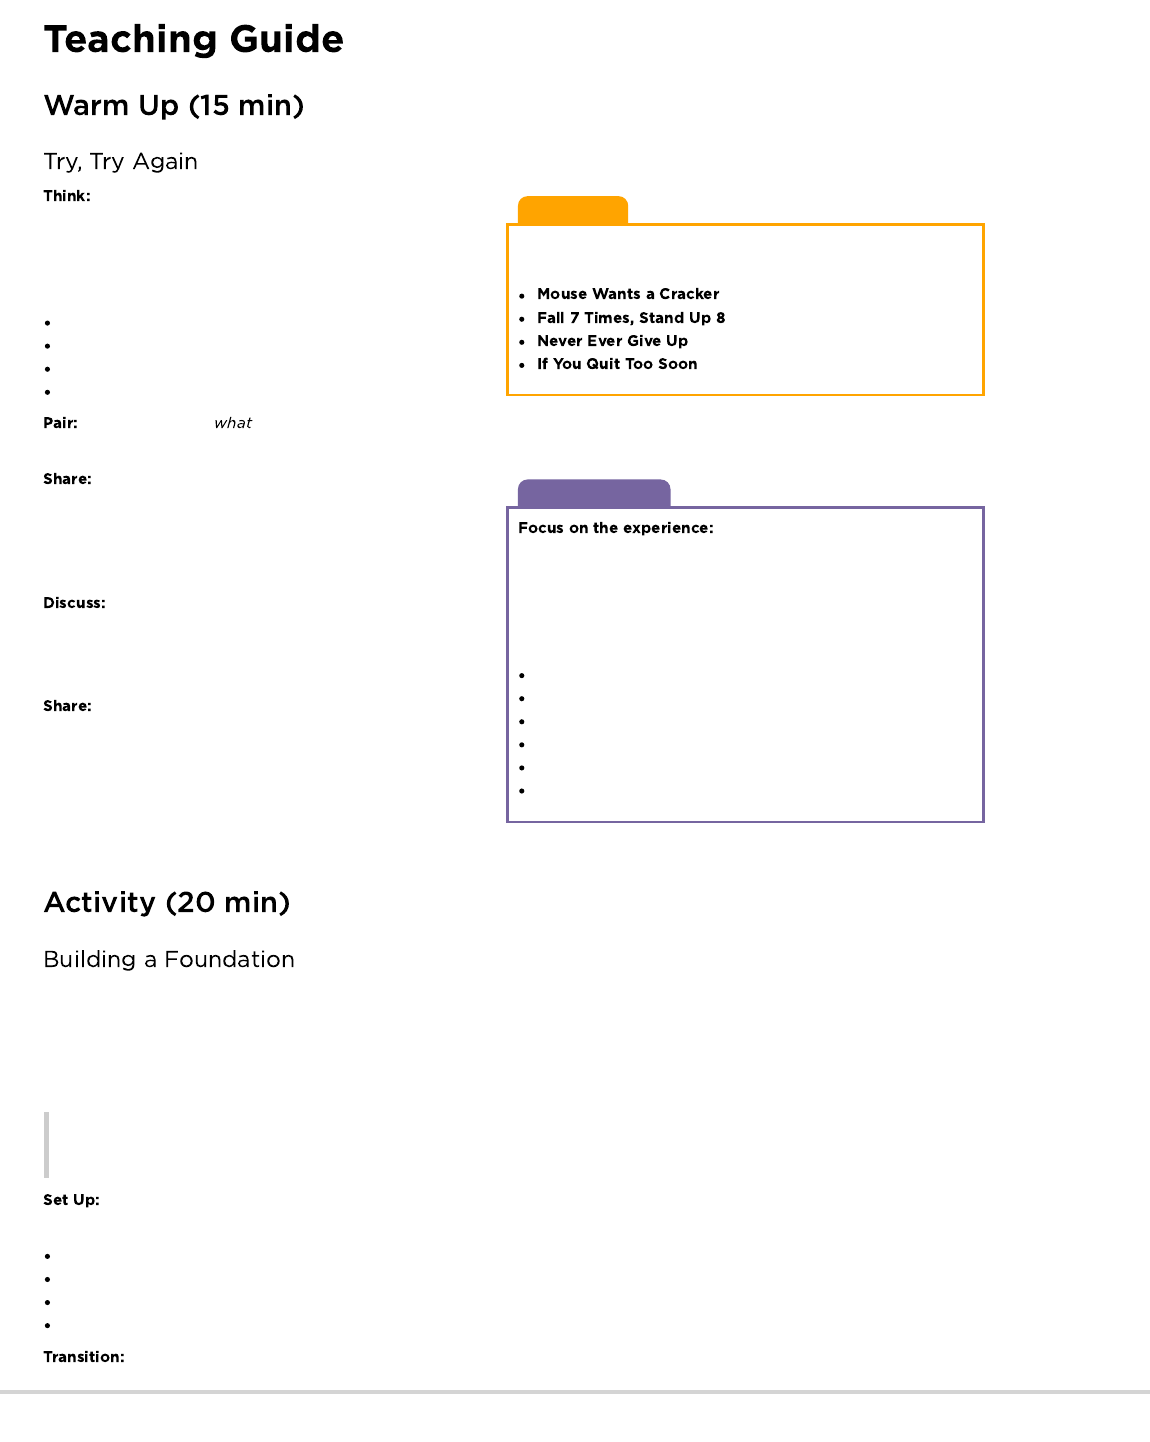
Lesson Tip
As you work to embed persistence into your classroom culture,
consider using some of these images as occasional reminders.
Discussion Goal
The goal of this discussion is to
remind students what it feels like to fail, because we want to be
able to identify those feelings when they occur so that we know
when to rely on persistence strategies. Students may be temped
to share information about the specific memories they thought of,
but redirect students to focus on their experience. Some expected
answers include:
Felt sad / mad
Cried
Yelled (or even cursed)
Threw or broke things
Asked for help
Quit
Ask students to close their eyes and think of a time where
they tried to do something and didn't succeed. Maybe it was
attempting a new sport, playing a tough video game, or learning a
new skill. As they are thinking silently, ask that they focus
specifically on:
What were you feeling?
What were you thinking?
What were you saying?
What were you doing?
Without discussing the actual situation was, have students share with a neighbor about what it looked to try something and not
succeed. Encourage them to talk about the things they were feeling, thinking, saying, and doing.
Once all of the students have had a chance to share
thoughts with their neighbors, ask a few to share what they were
talking about with the whole class. Keep track of common
answers somewhere that students can refer to later in the lesson
(and possibly during future lessons as well).
Using the list that the class generated, discuss which
responses to failure were productive (potentially led towards later
success) and which were not. Highlight the constructive
responses so that students can refer to them later.
Share out a personal experience where you (the teacher)
initially failed at something, but persisted through to success. Let
students know that today we are all going to work on a challenge
that is meant to be hard and even frustrating. Let them know that
it was chosen because it's likely to create several failed attempts
before it works but we can rely on some of the constructive
responses we talked about earlier to move towards success.
The goal of this lesson is not just building a structure, like the activity makes it appear. Instead, it's to prepare students to face failure and
frustration with persistence. In order for that to happen, students need to know that they are not alone in feeling bad when things go wrong.
They also need to be prepared to struggle. The outcome of this activity is much stronger when students know what they are about to
experience.
Remarks
We are going to work in groups today to solve a challenge. It is going to be a very hard challenge, and they made it this way on purpose!
Part of completing this challenge is knowing that we will struggle and we will probably even feel frustrated. Just know that if you hang in
there through the failure, you will eventually succeed!
You'll need to have a collection of supplies for each group ready for this activity. It's important that the available supplies are limited
in number and structurally unsound. Potential supply kits include:
20 gumdrops and 50 toothpicks
20 drinking straws and 6" of tape
20 marshmallows and 20 craft sticks
10 playing cards and 4" of tape
Introduce the challenge, which is to build a structure that can hold a textbook for at least 10 seconds, using provided materials.
61
Teaching Tip
The planning stage can be difficult for
young students. It may be helpful for you to place some idea
"examples" at the front of the room. Do not announce that they are
there. Simply encourage students to take a walk if they get
frustrated. Try to encourage students to locate the tips on their
own if at all possible. This helps students feel like they
"discovered" something that helped them, rather than being
rescued. Make sure you also have "tips" for being persistent and
for dealing with frustration written in a clear location.
Tips for Overcoming Frustration
Count to 10
Take deep breaths
Journal about them
Talk to a partner about them
Ask for help
Tips for Being Persistent
Keep track of what you have already tried
What is happening?
What is supposed to happen?
What does that tell you?
Make a change and try again
Discussion Goal
This Flash Chat is meant to help the students come to terms with
the negative emotions that they felt during the project, and help
them see that they were not alone in their struggle. It should also
prepare them to recall the tools that they used to help themselves
overcome frustration and be persistent so that they can access
those tools again when solving online puzzles.
Show rules that are similar to the ones itemized below
in a place where students can easily see and refer back to as
they work.
Use only the supplies provided to build a structure.
The structure can be any shape, but it has to be at least 2.5"
tall. (Example)
The structure must support the weight of a book for a full 10
seconds. (Example)
Ask groups to spend at least 5 minutes planning a
method for building their first tower. Each group should draw or
write down the steps in their plan.
Encourage students to begin building, and observe as
they work. Keep your eyes open for signs of frustration and
repeated failure. Make sure to acknowledge frustration and praise
their persistence. Refer to the methods of dealing with frustration
and the methods for productive persistence that are written on the
board. Keep reminding individuals that the goal of this lesson is to
experience frustration and persistence, so if they are failing,
they're really succeeding!
When groups have reached a design they believe will meet
conditions, move them to the "Testing and Iteration" phase.
The first time a group tests their structure, model for them them how you intend to test in line with the rules. Specifically you'll want
to:
Check that it's at least 2.5" tall
Ensure that they are using only provided materials
Gently place a text book on top and time how long it holds out.
If the group's structure failed, ask them to discuss:
Why it failed
Whether their plan needs revision, or just another try
How they're going to improve the next iteration
If the structure succeeded, push them to support more weight until it breaks, and then follow the same reflection and iteration process.
Allow as much time as you can for groups to continue iterating on their plans. Make sure to be excited not only for the
successes, but also the failures. Model for students how much you can learn from your failed attempts.
Present the vocab for this lesson, persistence, frustrated. Let the class know that they were showing persistence when they
worked through failures in their structures.
Reflect on the activity as a class, using the following
prompts as a start.
Did anyone feel frustrated during this lesson?
Can you share what that felt like?
(Alternatively, you can ask "Who felt frustrated at some point
during this lesson?" and cheer for the students who raise their
hand.)
Divide students into groups of three or four.
Pass out the building supplies, letting students know that they are limited to only the supplies you provide.
62

How did you get past that feeling?
Do you think that you would be more proud of yourself for solving something that was easy, or something that was very, very hard?
End the discussion by bringing the context back to the warm-up.
Where would you be now if you had not been persistent when you were learning to walk as a baby? Or if you had been too frustrated
to keep going when you were learning to talk? What other things did you learn to do, even though they were very, very hard?
Have students discuss this thought exercise with an elbow partner to come up with 1-3 things that fit that description.
Have students write the answers in their journals to remind themselves how strong they can be when faced with a challenge.
- Language
- Speaking & Listening
- Measurement And Data
- Math Practices
- Algorithms & Programming
- Engineering in the Sciences
If you are interested in licensing Code.org materials for commercial purposes,
Then YOU won this lesson, and YOU won this lesson, and
YOU won, too!
Was there a time that you thought about giving up?
What were you feeling, saying, doing, or thinking at that time?
63

Building a Foundation
Learning Persistence through Challenges
Revision 140902.1a
Directions:
1) Divide students into groups of 3 or 4.
2) Explain the rules of the challenge, provided on the other page.
3) Provide each group with limited supplies and make it known that they will
get no more.
4) Challenge the class to think ahead to the problem and plan out their
method of building their first tower.
5) Encourage students to begin building, then have them alert you when they
think they’ve met the challenge described by the rules.
6) Test each structure. Is it taller than the cup? Does it hold a book?
7) If not, have students enter a cycle of planning, fixing, testing, and planning
again until the challenge has been met.
8) Congratulate the students as they succeed and take pictures of the suc-
cessful towers (if possible) to upload to the Code.org site!
Unplugged
U
64
This lesson demonstrates how conditionals can be used to tailor a program to
specific information. We don’t always have all of the information we need when
writing a program. Sometimes you will want to do something different in one
situation than in another, even if you don't know what situation will be true when
your code runs. That is where conditionals come in. Conditionals allow a
computer to make a decision, based on the information that is true any time
your code is run.
One of the best parts of teaching is that students already
understand the concept from their everyday lives.
This lesson merges computer science into the real world by building off of their
ability to tell if a condition is true or false. Students will learn to use if
statements to declare when a certain command should be run, as well as if /
else statements to declare when a command should be run and what do run
otherwise. Students may not recognize the word , but most
students will understand the idea of using "if" to make sure that some action
only occurs when it is supposed to.
Define circumstances when certain parts of a
program should run and when they shouldn't.
Determine whether a conditional is met based on
criteria.
Traverse a program and predict the outcome, given a
set of input.
Watch the
.
Watch the
.
Gather decks of cards or something similar.
One
for the class to look at.
Print one
for each student.
Make sure every student has a
.
Please make a copy of any
documents you plan to share with
students.
- Unplugged Video
( )
- Teacher Video
- Lesson in Action Video
-
Teacher Prep Guide
- Assessment
- Assessment Video
- Assessment Answer
Key
- Reflection Journal
- Statements that only run under
certain conditions.
65
This lesson has one new and important word:
- Say it with me: Con-di-shun-uls
Statements that only run under certain conditions.
We can start this lesson off right away
Let the class know that if they can be completely quiet for thirty seconds, you will do something like:
Sing an opera song
Give five more minutes of recess
Do a handstand
Start counting right away.
If the students succeed, point out that they succeeded, so they get the reward.
Otherwise, point out that they were not completely quiet for a full thirty seconds, so they do not get the reward.
Ask the class "What was the condition of the reward?"
The condition was IF you were quiet for 30 seconds
If you were, the condition would be true, and you would get the reward.
If you weren't, the condition would be false, so the reward woud not apply.
Can we come up with another conditional?
If you can guess my age correctly, the class can give you applause.
If I know an answer, I can raise my hand.
What examples can you come up with?
Sometimes, we want to have an extra condition, in case the "IF" statement is not true.
This extra condition is called an "ELSE" statement
When the "IF" condition isn't met, we can look at the "ELSE" for what to do
Example: IF I draw a king from this deck of cards, everybody claps. Or ELSE, everyone says "Awwwwwwe."
Let's try it. (Draw a card and see if your class reacts appropriately.)
Ask the class to analyze what just happened.
What was the IF?
What was the ELSE?
Which condition was met?
Believe it or not, we have even one more option.
What if I wanted you to clap if I draw a 7, or else if I draw something less than seven you say "YAY," or else you say
"Awwwwwwwe"?
This is why we have the terms If, Else-If, and Else.
If is the first condition
Else-If gets looked at only if the "If" isn't true.
Else gets looked at only if nothing before it is true.
Now let's play a game.
Create a few programs with your class that depend on things like a card's suit, color, or value to award or subtract points. You can write
the program as an algorithm, pseudocode, or actual code.
Here is a sample algorithm:
66

Lesson Tip
Flash Chat questions are intended to spark big-picture thinking
about how the lesson relates to the greater world and the students'
greater future. Use your knowledge of your classroom to decide if
you want to discuss these as a class, in groups, or with an elbow
partner.
if (CARD is RED)
Award YOUR team 1 point
Else
Award OTHER team 1 point
Here is a sample of the same program in pseudocode:
If (card.color == RED){
points.yours = points.yours + 1;
}
Else {
points.other = points.other + 1;
}
Decide how you want to split your class into teams.
Each team should have a pile of cards (at least as many cards as team members) nearby.
Put one of your “Programs” up on the board for all to see.
Have the teams take turns drawing cards and following the program to see how many points they score in each round.
Play several times with several different programs to help the students really understand conditionals.
Once the class has had some practice, you can encourage students to nest conditionals inside one another. Make sure they understand that
if the card is red, YOUR team is awarded 1 point, and then , since the condition was met:
If (CARD is RED){
Award YOUR team 1 point
Else
If (CARD is higher than 9)
Award OTHER team 1 point
Else
Award YOUR team the same number of points on the card
Here is the same program in pseudocode:
If (card.color == RED ){
points.yours = points.yours + 1;
}
Else {
if (card.value > 9){
points.other = points.other + 1;
}
Else {
points.yours = points.yours + card.value;
}
}
If you were going to code this up in Blocky, what would you
need to add around your conditionals to let the code run more
than one time? (A loop)
What other things do you do during the day under certain
conditions?
If you are supposed to do something when the value of a card
is more than 5, and you draw a 5, do you meet that condition?
Notice that conditions are either "True" or "False." There is no
assessment of a condition that evaluates to "Banana."
When you need to meet several combinations of conditions, we can use something called "nested conditionals."
What do you think that means?
Can you give an example of where we saw that during the game?
What part of that game did you like the best?
67

What was today's lesson about?
How do you feel about today's lesson?
What is a conditional? How did you use a conditional today?
What are some of the conditionals you used today? Can you come up with some more that you would use with a deck of cards?
Hand out the assessment worksheet and allow students to complete the activity independently after the instructions have been well
explained. This should feel familiar, thanks to the previous activities. Here's a to watch as
a guide.
Use these activities to enhance student learning. They can be used as outside of class activities or other enrichment.
Line students up as if to play .
Select one person to stand in front as the Caller.
The Caller chooses a condition and asks everyone who meets that condition to take a step forward.
If you have a red belt, step forward.
If you are wearing sandals, take a step forward.
Try switching it up by saying things like "If you are blonde, step forward."
Break students up into pairs or small groups.
Have them write if statements for playing cards on strips of paper, such as:
the suit is clubs
the color is red
Have students create similar strips for outcomes.
Add one point
Subtract one point
Once that's done, have students choose three of each type of strip and three playing cards, paying attention to the order selected.
Using three pieces of paper, have students write three different programs using only the sets of strips that they selected, in any order.
Encourage students to put some if statements inside other if statements.
Now, students should run through all three programs using the cards that they drew, in the same order for each program.
Did any two programs return the same answer?
Did any return something different?
- Language
- Speaking & Listening
- Math Practices
- Algorithms & Programming
- Engineering in the Sciences
If you are interested in licensing Code.org materials for commercial purposes,
Having students write about what they learned, why it’s useful, and how they feel about it can help solidify any knowledge they obtained
today and build a review sheet for them to look to in the future.
68

Conditionals with Cards
Sample Program 1
U
Revision 140829.1a
Sample program as algorithm
This program has you choose a card. If the card is red, your team gets a point. Else, the other team gets a point.
Sample program from above as pseudocode (like code, but in no particular language)
If (CARD is RED)
Award YOUR team 1 point
Else
Award OTHER team 1 point
If (card.color == RED) {
points.yours = points.yours + 1;
}
Else {
points.other = points.other + 1;
}
69
Conditionals with Cards
Sample Program 2
U
Revision 140829.1a
Sample program as algorithm
This program has you choose a card. If the card is red, your team gets a point. Else, the card must be black. If your black card is higher than 9,
then the other team gets a point, else your card must be black and lower than or equal to 9, and you get as many points as are on your card.
Sample program from above as pseudocode (like code, but in no particular language)
If (CARD is RED)
Award YOUR team 1 point
Else
If ( CARD is higher than 9)
Award OTHER team 1 point
Else
Award YOUR team the same
number of points on the card
If (card.color == RED) {
points.yours = points.yours + 1;
}
Else {
If ( card.value > 9) {
points.other = points.other + 1;
}
Else {
points.yours = points.yours + card.value;
}
}
70
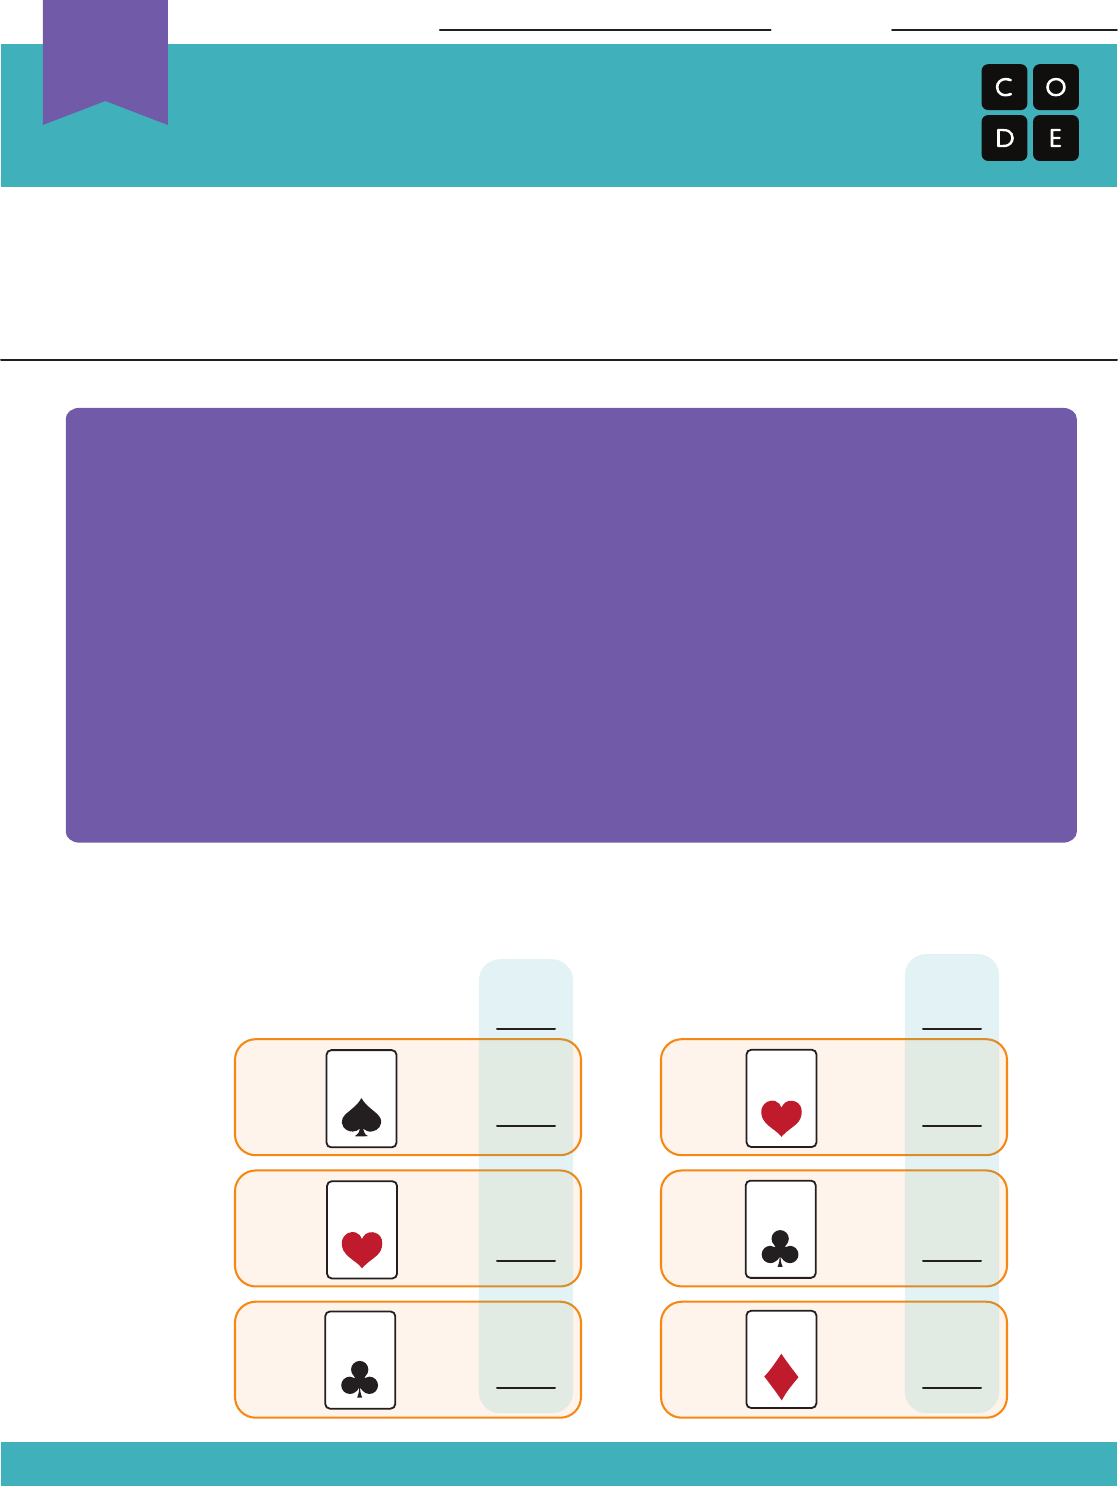
Conditionals with Cards
Assessment Activity
Unplugged
U
Revision 140625.1a
Look at the program below.
The steps below show each team taking turns to play the Conditionals Game. See if you
can figure out what happens for each draw. Write down the score during each round along
the way. After three rounds, circle the winner.
Here’s how the game went:
ROUND #1
ROUND #2
ROUND #3
TEAM #1
Name: Date:
If (CARD is lower than 5)
If ( CARD is BLACK)
Award YOUR team the same
number of points on the card.
Else
Award OTHER team 1 point.
Else
If ( CARD is HEARTS)
Award YOUR team 1 point
TEAM #2
0 0
END OF ROUND
SCORE
END OF ROUND
SCORE
3
4
7
4
95
71
In computer science, we face some big, daunting problems. Challenges such as
finding large prime numbers or sequencing DNA are almost impossible to do as
an individual. Adding the power of others makes these tasks manageable. This
lesson will show your students how helpful teamwork can be in the industry of
computer science.
It's very rare that one computer scientist works completely alone on a project.
Even when that does happen, there is always benefit in numbers. Today,
students will learn what it means to crowdsource a project. This activity builds
teamwork and creates an efficient environment for students to solve problems.
Identify a large task that needs to be done.
Rearrange a large task into several smaller tasks.
Build a complete solution from several smaller
solutions.
Watch the .
Review .
Obtain a jar of lots of something (pennies, buttons,
slips of paper, etc) and a deck of cards.
Make sure every student has a
.
Please make a copy of any
documents you plan to share with
students.
- Unplugged Video ( )
- Teacher Video
- Worksheet
- Reflection Journal
- Getting help from a large group of
people to finish something faster.
72
Lesson Tip
Jars of buttons and pennies work nicely, but if you find yourself
with little time to prepare, you can cut slips of paper and put them
in a ziplock bag or even a pencil box.
Lesson Tip
It can be challenging for students to figure out how to break apart
large tasks at first. Students might find it helpful to have some
ideas handed to them after working for a while. One great division
for sorting cards is as follows:
One person picks up the cards and determines the suit of each
one.
One person manages Hearts.
One person manages Diamonds.
One person manages Clubs.
One person manages Spades.
(If there's another, they can put all sorted suits back together
again.)
This lesson has one new and important word:
- Say it with me: Crowd-sore-sing
Getting help from a large group of people to finish something faster.
Show your students your jar full of something.
"Look at this jar. I have a lot of buttons in here, and I need to
tell the principal how many there are before the end of
class."
"Can you think of a way I could get these counted quickly?"
Your students may guide you toward seeking help, but if they
don't, you can suggest it, too.
Pour all of the buttons (or pennies, etc.) into a pile on the floor.
Invite all of the students to come up and grab a small number (ten is good, but you can do more if your students can handle it).
Once they've counted out their ten, have them report to you, drop their buttons back in the jar, and go again until the pile is gone.
Comment on how fast the task went.
Have the class reflect on how long it might have taken or how hard it may have felt to do alone.
Sometimes you have a big job that needs to get done, but it feels like it will take forever. Crowdsourcing is a way of using teamwork to make
the job go much faster! In this game, we’ll use crowdsourcing to sort decks of playing cards.
1. Divide into groups of 4, 5, or 6.
2. Grab your deck of playing cards and dump it into a bag,
bucket, or even a loose pocket that you can make with the
bottom of your shirt.
3. Shake the cards until they’re all mixed up.
4. Dump the cards out onto a table or desk where the whole
group can see them.
5. Decide how to break up the task of sorting the deck so that
every person has something to do and no one is doing too
much.
6. Time yourself sorting the cards. Can you figure out a way to do
it faster?
7. Repeat the game over and over until you think you have found
the fastest way of crowdsourcing the card sorting activity.
Have you ever tried to sort a pile of cards by yourself?
Do you think it was easier or harder to have help?
What other things do you have to do in life that could be easier with help?
73

Lesson Tip
Flash Chat questions are intended to spark big-picture thinking
about how the lesson relates to the greater world and the students'
greater future. Use your knowledge of your classroom to decide if
you want to discuss these as a class, in groups, or with an elbow
partner.
Having students write about what they learned, why it’s useful,
and how they feel about it can help solidify any knowledge they
obtained today and build a review sheet for them to look to in the
future.
What was today's lesson about?
How do you feel about today's lesson?
What are the benefits of crowdsourcing?
What kind of things do you want to make with computer science? How do you see crowdsourcing being beneficial in those projects?
Use these activities to enhance student learning. They can be used as outside of class activities or other enrichment.
Often we think of crowdsourcing as pulling things apart to make them more simple. You can also make big, beautiful things with the same
technique.
Have your students each grab three cards and build one segment of a . Each student can go one after another to build a grand
card tower.
Try with two, or even three students adding their chunk at a time.
Does crowdsourcing always make a task easier?
You can crowdsource all at the same time or you can do it one person at a time. Try having the whole class sort the same deck of cards,
one student at a time.
Shuffle the cards and place them in a pile in the center of the room.
Have each student approach the pile and choose four cards.
Have four piles for the students to sort their cards into
Spades
Clubs
Hearts
Diamonds
Once all cards have been put in their four piles, have the following four students sort the individual piles.
The last person will put all four piles together.
This version may not save a lot of time, but it still divides the work and lets each individual have more free time!
- Language
- Speaking & Listening
- Math Practices
- Algorithms & Programming
- Engineering in the Sciences
If you are interested in licensing Code.org materials for commercial purposes,
74
In collaboration with Common Sense Education, this lesson helps students
learn to think critically about the user information that some websites request or
require. Students learn the difference between private information and personal
information, distinguishing what is safe and unsafe to share online.
Students will also explore what it means to be responsible and respectful to
their offline and online communities as a step toward learning how to be good
digital citizens.
As students spend more time on computers, they should be aware that the
internet is not always a safe space. In this lesson, students are taught what
information is safe to share and what information should remain private.
Students will create "superheros" and learn what it means to be a Digital Citizen
on the internet.
Compare and contrast their responsibilities to their
online and offline communities.
Understand what type of information can put them at
risk for identity theft and other scams.
Reflect on the characteristics that make someone an
upstanding citizen.
Devise resolutions to digital dilemmas.
Watch the .
Print out a good selection of male and female
sheets for the whole class.
Print one for
each student.
Review
for more online safety content.
Please make a copy of any
documents you plan to share with
students.
- Teacher Video
- Manipulatives
- Assessment
- Assessment Answer Key
- Website
- Resource List
- Reflection Journal
- Someone who acts safely,
responsibly, and respectfully online.
75

Lesson Tip
If you have access to a computer, feel free to navigate to a site
that might require this type of information, such as Gmail or
Facebook.
This lesson has one new and important phrase:
- Say it with me: Dih-jih-tal Sit-i-zen
Someone who acts safely, responsibly, and respectfully online
Ask "What types of information do you think are okay to share
publicly online or on a profile that others will see?"
What are some examples of websites where you must register
in order to participate?
Write the names of the websites on the board.
What information is required and why do you think it is
required?
Information may be required to help distinguish one person from another.
The website may keep a record of who uses it.
Explain that it’s important to know that sharing some kinds of user information can put you and your family’s privacy at risk.
Point out that you do not have to fill out fields on websites if they are not required.
Required fields are usually marked by an asterisk (*) or are highlighted in red.
Elementary school students should never register for sites that require private information without the approval and guidance of a parent
or guardian.
Here is an example of public versus private information:
SAFE - Personal Information UNSAFE - Private Information
Your favorite food
Your opinion (though it shoud be done respectfully)
First name (with permission)
Mother's maiden name
Social Security number
Your date of birth
Parents' credit card information
Phone number
Explain that some people will actively try to get you to share this kind of information so that they can use it to take over your identity. Once
a thief has taken someone’s identity, he or she can use that person’s name to get a driver’s license or buy things, even if the person
whose identity they stole isn’t old enough to do these things!
It’s often not until much later that people realize that their identity has been stolen. Identity thieves may also apply for credit cards in
other people’s names and run up big bills that they don’t pay off. Let students know that identity thieves often target children and teens
because they have a clean credit history and their parents are unlikely to be aware that someone is taking on their child’s identity.
Now, let's see what we can do to keep ourselves safe.
Spiderman says "With great power comes great responsibility." This is also true when working or playing on the Internet.
The things we read, see, and hear online can lead people to have all sorts of feelings (e.g., happy, hurt, excited, angry, curious).
What we do and say online can be powerful.
The Internet allows us to learn about anything, talk to people at any time (no matter where they are in the world), and share our
knowledge and creative projects with other people.
76
Lesson Tip
For more in-depth modules, you can find additions to this
curriculum at the page
on Scope and Sequence.
Lesson Tip
Flash Chat questions are intended to spark big-picture thinking
about how the lesson relates to the greater world and the students'
greater future. Use your knowledge of your classroom to decide if
you want to discuss these as a class, in groups, or with an elbow
partner.
CREATE a three-column chart with the terms “Safe,” “Responsible,” and “Respectful” written at the top of each column. Invite students to
shout out words or phrases that describe how people can act safely, responsibly, and respectfully online, and then write them in the
appropriate column.
Safe Responsible Respectful
Now, let's really make sure we understand how to be a Super Digital Citizen!
Have each student grab a small selection of papercraft sheets
and encourage them to blend the pieces to make their very
own superhero.
Allow plenty of time for students to cut, glue, and color.
Give students a 5 minute warning to wrap up.
Separate students into groups of 2-4 and tell them to use their
superheroes and leftover supplies to stage a scene in which
one superhero sees an act of poor digital citizenship. Then have the superhero fix the problem … and save the day!
Go around the room, having each student explain their scene to the class.
What is a good way to act responsibly online?
What kinds of personal information could you share about
yourself without showing your identity?
What kinds of superpowers or qualities did your digital
superheroes have in common?
What does Spider-Man’s motto “With great power comes great
responsibility” mean to you, as someone who uses the
internet?
Having students write about what they learned, why it’s useful, and how they feel about it can help solidify any knowledge they obtained
today and build a review sheet for them to look to in the future.
What was today's lesson about?
How do you feel about today's lesson?
What is a Digital Citizen?
What do you need to do to be a Digital Citizen?
Hand out the assessment worksheet and allow students to complete the activity independently after the instructions have been well
explained.
This should feel familiar, thanks to the previous activities.
This also means that negative comments can spread very quickly to friends of all ages.
77
Visit to learn more about how you can keep your students safe in this digital age.
- Language
- Speaking & Listening
- Math Practices
- Networks & the Internet
If you are interested in licensing Code.org materials for commercial purposes,
Use these activities to enhance student learning. They can be used as outside of class activities or other enrichment.
78
Digital Citizenship
Assessment Worksheet
Unplugged
U
Revision 140625.1a
Just because you can do something online doesn’t mean that you should!
Cross out the information that you should not share online. Use the words that are leftover
as the key to what you should find in the word search.
Write a paragraph in the area below, telling about what you will do when you’re on the
Internet to make sure that you practice kind and respectful behavior.
Name: Date:
WORDS
1) Your Credit Card Info (CARD)
2) Your Online Name (NICKNAME)
3) What You Ate Today (FOOD)
4) Your Email (EMAIL)
5) Your Favorite Color (COLOR)
6) The Last Book you Read (BOOK)
7) The School You Attend (SCHOOL)
8) Your Favorite Band (BAND)
9) Your Phone Number (PHONE)
10) Your Address (ADDRESS)
11) Your Birthday (BIRTHDAY)
79
Loaned to Computer Science Fundamentals by the team over at Copyright and
Creativity, this lesson exists to help students understand the challenges and
benefits of respecting ownership and copyright, particularly in digital
environments. Students should be encouraged to respect artists’ rights as an
important part of being an ethical digital citizen.
Students will soon be creating projects to share and most of these projects will
contain either code or imagery that students did not create themselves. This
lesson is here to show students the proper way to handle the use of content
that is not their own.
Interpret ethical sharing of copyrighted material vs.
sharing that is not ethical.
Understand their own rights regarding materials that
they have created
Locate the copyright sharing video at
Download and review the complete
from Copyright and
Creativity
As the teacher, create a piece of art for the lesson
(picture, song, slideshow, etc.)
You will need a tablet or smart phone to replicate
the sharing of that item
Please make a copy of any
documents you plan to share with
students.
- Video
- the exclusive legal right to print,
publish, perform, film, or record literary, artistic, or
musical material, and to authorize others to do the
same
80

The following writing exercises are designed to create context, help students engage with the topic, and prepare them for the lesson
discussion.
Have students watch the one-minute .
Ask students to write a character sketch about one or both of the characters in the video. Be as creative as you can. There are no wrong
answers. Give these characters a life of their own, whatever you want it to be.
Prompt with questions:
Who is your character?
What is his/her name?
Who are his/her friends?
How long have they known each other?
Who are the people in his/her family? What are they like?
What’s his/her backstory?
Where does he/she live?
Where did he/she used to live?
What exciting thing might have happened to them back in kindergarten, first grade, etc.?
What is he/she looking forward to?
What is he/she afraid of?
Have all of your students stand up. Begin reading the list of ways to create content below . Instruct students to sit down as soon as
they can answer “Yes” to one of the prompts.
Have you ever made a video (on a camera, phone, iPad, or computer) and sent it to a family member or posted it online?
Have you taken a photo and sent to a family member or posted it online?
Have you created a piece of art to share with your family and friends?
Have you made up a song to make your friends laugh? Or a sad song to make them cry?
Have you written a poem for your mom or dad on their birthday?
How did it feel to produce something creative?
How did you feel when you were able to share your creation with others?
How do you feel when you view or listen to other people’s creations?
Help students feel the joy of creating something. Creating can be a lot of hard work, but it is one of the most rewarding things we do. Sharing
what we create is fun, and it can encourage more creativity and art. As we get older, we have more and more opportunities to share our
work and explore media and art that other people have created. We want to make sure we are always fair when using others’ art and
creative work.
81
Discussion Goal
I made this. That means I own it. I think I’m going to share it. I’m
going to take out my phone (iPad, camera, etc.) to get a picture.
I think I want to share it on my blog where I might make some
money advertising on[Use the site of your choice.] Is this fair?
[Yes, this is OK to share because I made it — I own the
copyright.]
What about a song I wrote? Can I share that? . . . Who gets to
decide?
[“That’s right, I do.”]
What will happen when I share it?
[Take responses: “It’s fun, . . . I’ll get a bunch of ‘likes’ . . .
People will want to use it for mashups.”]
Let’s say you draw a picture to sell at a school art show. The
money from the art sale will go to buy new library books. Is this
a good share . . . is it ethical?
[Yes.]
Why is this share OK?
[Take responses: “It’s yours!”, “You made it. You own it.
You can choose to share it.” ]
Have students think back to the art creation prompt where they first sat down. Inform them that they created an original work with
legal protection. Congratulations!
How might you know if something is copyrighted?
Where have you seen the copyright symbol?
[At the front of books, in movies, on images, posters, etc.]
Encourage students to share their answers with the class.
Show students how to draw a copyright symbol and write the year next to it. When you make something creative like this, it’s
automatically protected by copyright, even without the copyright symbol.
How does it feel when you share your things with someone else?
What does it feel like when someone takes your things and shares them without your permission?
The same principles of respect and fairness apply when we share our work or someone else’s work online.
Pull out the instructor’s creative work: picture, song, story, video, recipe.
Have students watch the one-minute
.
As we watch the video, decide if the music is OK to share or not.
What did you think of that? How do you think you would
feel if you wrote a song and people shared it without asking for
your permission? When we share digital files by:
sending pictures or songs through email
copying songs from our MP3 player to our friend’s computer
copying a movie from a DVD to all our friends’ computers
That's not just sharing, it's making new copies!
If you were one of these characters in the video, what
could you do to share fairly? What about other sharing situations?
What other ethical considerations are there?
(Some acceptable responses:) - Send your friend a link to the
artist’s YouTube channel where she can listen to the song. - Help
your friend buy the song from an online store that you can trust
because it’s used by a large online community, like iTunes or
Amazon.
Ask yourself: Who owns this? Do I have permission to share? Do
I have a right to make a copy? Am I being fair to everyone
involved?]
Remember, copyright protects all kinds of creative work so that artists/creators can get paid for their eort. This includes, original
writing (stories), art, photographs, audio, images, music, song lyrics, even the doodle you drew on your napkin at lunch. It doesn't matter if it
was created by a famous artist or by you. When you make an original work, you get to decide who can:
make copies
distribute copies
display or perform the work in public
make spin‐os; we call these derivatives (for example, like a book being made into a movie)
These rights are given to artists and creators to encourage them to make even more creative work.
82

Discussion Goal
Have you ever transferred songs to your friend’s MP3 player? Is
that OK?
[If it’s a song you hear on the radio, it’s most likely protected
by copyright and NOT OK to share, copy, and give away.]
What if your friend invites you to his house to watch a movie
that just came out on DVD? This is one of your favorite movies.
You want it on your phone, so you can watch it whenever you
want. So, you take out your phone and record the movie. Is this
a fair way to get a copy of the movie?
[No. This is not OK to share/copy. Why? Because you don’t
own the right to make a copy and give it away.]
How else could you get an authorized (legal) copy of the
movie for your phone?
[iTunes or Amazon sell movies legally.]
Teaching Tip
Demonstrate the following by handing a book to a student:
Sharing a digital file is dierent from face‐to‐face sharing. If I hand
you my book to share it with you, you have the book and I don’t—
that’s sharing. If I hand you my iPod, so you can listen to my
music, that is sharing. If I share a digital file with you—like a song
or a movie or computer game—we both end up with the file. In that
case, we made a copy. If I copy my songs for you to put on your
iPod, that is not sharing—it’s copying. Making copies of
copyrighted work hurts the artist/creators. In addition, P2P sharing
and torrent sites can put your computer at risk for bad stu:
malware, ads, and worse.
How did you feel during today’s lesson?
Give an example of a way that you have seen other creators
share or remix someone's work. Do you believe that was fair?
Why or why not?
Please be sure to visit to find more
lessons on digital sharing and creative rights.
- Language
- Reading Informational
- Speaking & Listening
- Algorithms & Programming
If you are interested in licensing Code.org materials for commercial purposes,
Having students write about what they learned, why it’s useful, and
how they feel about it can help solidify any knowledge they
obtained today and build a review sheet for them to look to in the
future.
What was today’s lesson about?
Remember, copyright is a protection given to writers and artists for
a limited time to let them receive payment for their work. It’s
intended to foster more creativity. As we share and use, we need to
respect each other’s work and the laws of copyright. Just because
we own a copy of something does not mean we have the right to
make more copies to give or sell to other people. Copyright gives
us some protection over how our art will be used and shared by
others.
83
Variables are used as placeholders for values such as numbers or words.
Variables allow for a lot of freedom in programming. Instead of having to type
out a phrase many times or remember an obscure number, computer scientists
can use variables to reference them. This lesson helps to explain what
variables are and how we can use them in many different ways. The idea of
variables isn't an easy concept to grasp, so we recommend allowing plenty of
time for discussion at the end of the lesson.
Variables are very helpful in programming. Students will be introduced to this
topic using envelopes to represent variables that have been given names. The
value of the variable will be written on a card inside of an envelope. This lesson
helps students understand how names can be a placeholder for values in the
physical world, so that programming with variables will seem less confusing in
the virtual world.
Identify variables and determine their values.
Define and call variables in the context of real-life
activities.
Create situations which require the use of variables.
Watch the .
Obtain 6 or more blank envelopes for warm up plus
some for the main activity.
Print one per
student.
Print one for
each student.
Provide students with envelopes, paper, pens &
pencils.
Make sure every student has a
.
Please make a copy of any
documents you plan to share with
students.
- Unplugged Video
( )
- Teacher Video
- Worksheet
- Worksheet Answer Key
- Assessment
- Assessment Answer Key
- Reflection Journal
- A placeholder for a piece of information
that can change.
84
This lesson has one important word:
- Say it with me: Vayr-ee-ah-buhl
A placeholder for a piece of information that can change.
Call four volunteers to the front of the room and line them up. Let the students know that you are going to write a poem for each of them.
On the board (or under your document camera) write the sentence for your first student (suppose it's Bill):
"My student Bill, standing proud
is a fine example for the crowd"
Encourage the students to clap at your abilities and thank Bill for volunteering. Allow Bill to sit down (or go to the back of the line) as you
erase the board, then call the next volunteer (we'll say that she's called Annie).
"My student Annie, standing proud
is a fine example for the crowd"
Again, accepting applause, erase the board and invite the next volunteer.
"My student Jenny, standing proud
is a fine example for the crowd"
As you call the final volunteer, inquire as to whether everyone in the class would like a poem written about each of them. Maybe the
everyone in the whole school? Goodness, that's going to take a while! Pose the question to your students:
"How could I do this more quickly?"
Your students will likely pick up on the fact that only one word is changing, and that word is simply a person's name. Help them see the
location by circling Jenny's name on the board and writing "firstName" next to it.
"It would take a long time to write a poem for everyone in the school if I couldn't start until I knew who I was writing it about, wouldn't it?"
How long do you think it would take to make a video game if they couldn't start until they knew your username?
How expensive would video games be if they had to be created separately for each person?
How do you think we can get around that?
By this time, it's quite likely that your class will come up with the idea of having a placeholder. With that, they're most of the way into
understanding where this lesson goes.
What would we call that placeholder?
We need to call it something that makes sense. We wouldn't want to call it "age" if it was a placeholder for their name, right?
Now, let's add some more volunteers. Give them each a piece of paper to write their name on, and have them tuck it inside individual
envelopes labeled firstName.
This time, put the poem on the board with a blank space labeled "firstName" where the student's name will go.
Have the first student in line (likely the last student from the previous example) pull their name from the envelope and that's what you'll
write in the space.
When you erase the board, only erase the portion with the last student's name in it.
Call the next student to show their variable.
Repeat as many times as is entertaining
Now it's time for the main activity.
85
Divide students into groups of 2-4.
Have students design (draw) a robot.
After 10-15 minutes, request that the students fill their envelopes with important details about their robot such as its name, height, and
purpose.
Collect each group's envelopes, then bring them to the front of the room to share.
Write on the board, "My robot's name is robotName, it is numUnitsTall tall, and it's purpose is purpose."
Use the envelopes to fill the appropriate variable in the sentence, then ask each group to stand when they hear the sentence that
describes their creation.
What did we learn today?
Can you think of anywhere that you have seen variables before?
There is at least one variable at the top of most homework hand outs? Can you think of what it could be?
Why do you think that professionals do not put spaces in variable names?
What would happen if there was a variable "eye" a variable "color" and a variable "eye color"?
Variables can be used to store numbers, too.
Suppose I have envelopes labeled num1 and num2, then I write num1+num2?
What happens if the "num1" envelope contains the number 4 and "num2" contains the number 5?
Having students write about what they learned, why it’s useful, and how they feel about it can help solidify any knowledge they obtained
today and build a review sheet for them to look to in the future.
What was today's lesson about?
How do you feel about today's lesson?
What is a variable?
Why do you think variables are important in programming?
Allow students enough time to finish this assessment. If you are willing to spare more time, go over the answers as a class.
Use these activities to enhance student learning. They can be used as outside of class activities or other enrichment.
Draw boxes on a piece of paper with simple mathematical operators between them.
For instance [] + [] = []
Have similar size squares with numbers between 1 & 20.
Ask one student to come create a true equation, using the numbers provided.
Once the student has finished (and the class verifies the equation) exchange one of the numbers with another one, then remove a
second number entirely.
Tell the students that there is a hidden number in the empty box that makes that equation true again.
What number is in the box?
Play this game over and over again until you can remove the number from any location and the students can figure out what it is
supposed to be.
Once the students understand how the envelopes relate to the sentences, pass out the activity worksheet and let them prepare some
variables of their own.
86
- Language
- Speaking & Listening
- Math Practices
- Algorithms & Programming
- Engineering in the Sciences
If you are interested in licensing Code.org materials for commercial purposes,
87
Name: Date:
Variables in Envelopes
Robot Variables Worksheet
Revision 180214.1a
Think about a robot. What is it supposed do? What does it look like?
Draw your robot on paper. When you’re done, answer the three questions below on
separate pieces of paper, then put them in the correct envelopes.
1. My robot's name is .
Unplugged
U
2.
My robot's height is
.
(don't forget units!)
3. My robot's primary purpose is .
purpose
numUnitsTall
robotName
robotName
numUnitsTall
purpose
88
Name: Date:
Variables in Envelopes
Variables Assessment Worksheet
Revision 150807.1a
Given the value of each variable envelope, fill-in the blanks to finish the sentence.
Variable envelopes can also contain number values. Use these envelopes and the
provided equations to figure out the magic numbers below.
Unplugged
U
animal
hobby
petalNumber
bestSport
numTwo
numOne
numThree
color
When I grow up, I want to own a guard _____________.
I found a flower with ______________ petals, so I
picked it.
My dad just painted his house ________________ to
match his car.
I love _______________ . I do it every evening.
There is no such thing as ________ rivers, so if you find
one, don’t swim in it!
The best sport in the world is _______________, do
you agree?
= pink
animal
magicNumberA numThree numOne
petalNumber
color
hobby
color
bestSport
= 22
= monkey
= 2=-
= 5
= 7
= golf
= coding
magicNumberB numTwo numOne
=*
magicNumberC numOne numTwo
=+
magicNumberB
*
89

We know that loops allow us to do things over and over again, but now we’re
going to learn how to use loops that have extra structures built right in. These
new structures will allow students to create code that is more powerful and
dynamic.
At this point, students have become masters of loops. Today, they will learn
about another loop commonly used in programming. The for loop repeats
commands a certain number of times, but also keeps track of the values it is
iterating over. For example, a for loop that begins at 4, ends with 8, and has a
step value of 1 will repeat 4 times, but the values 4, 5, 6, and 7 will also be
captured for use elsewhere. Using this structure with variables can create some
pretty fantastic programs. Today, students will simply be learning the basics of a
for loop before diving into programming with them next time!
Determine starting value, stopping value, and
stepping value for a `for` loop.
Illustrate the counter values hit each time through a
for loop during runtime.
Watch the .
Watch the
.
Print one per group.
Print one for each
student.
Make sure every student has a
.
Please make a copy of any
documents you plan to share with
students.
- Unplugged Video ( )
- Teacher Key
( )
- Teacher Video
- Lesson in Action Video
- Worksheet
- Worksheet Answer Key
- Assessment
- Reflection Journal
- Loops that have a predetermined
beginning, end, and increment (step interval).
90
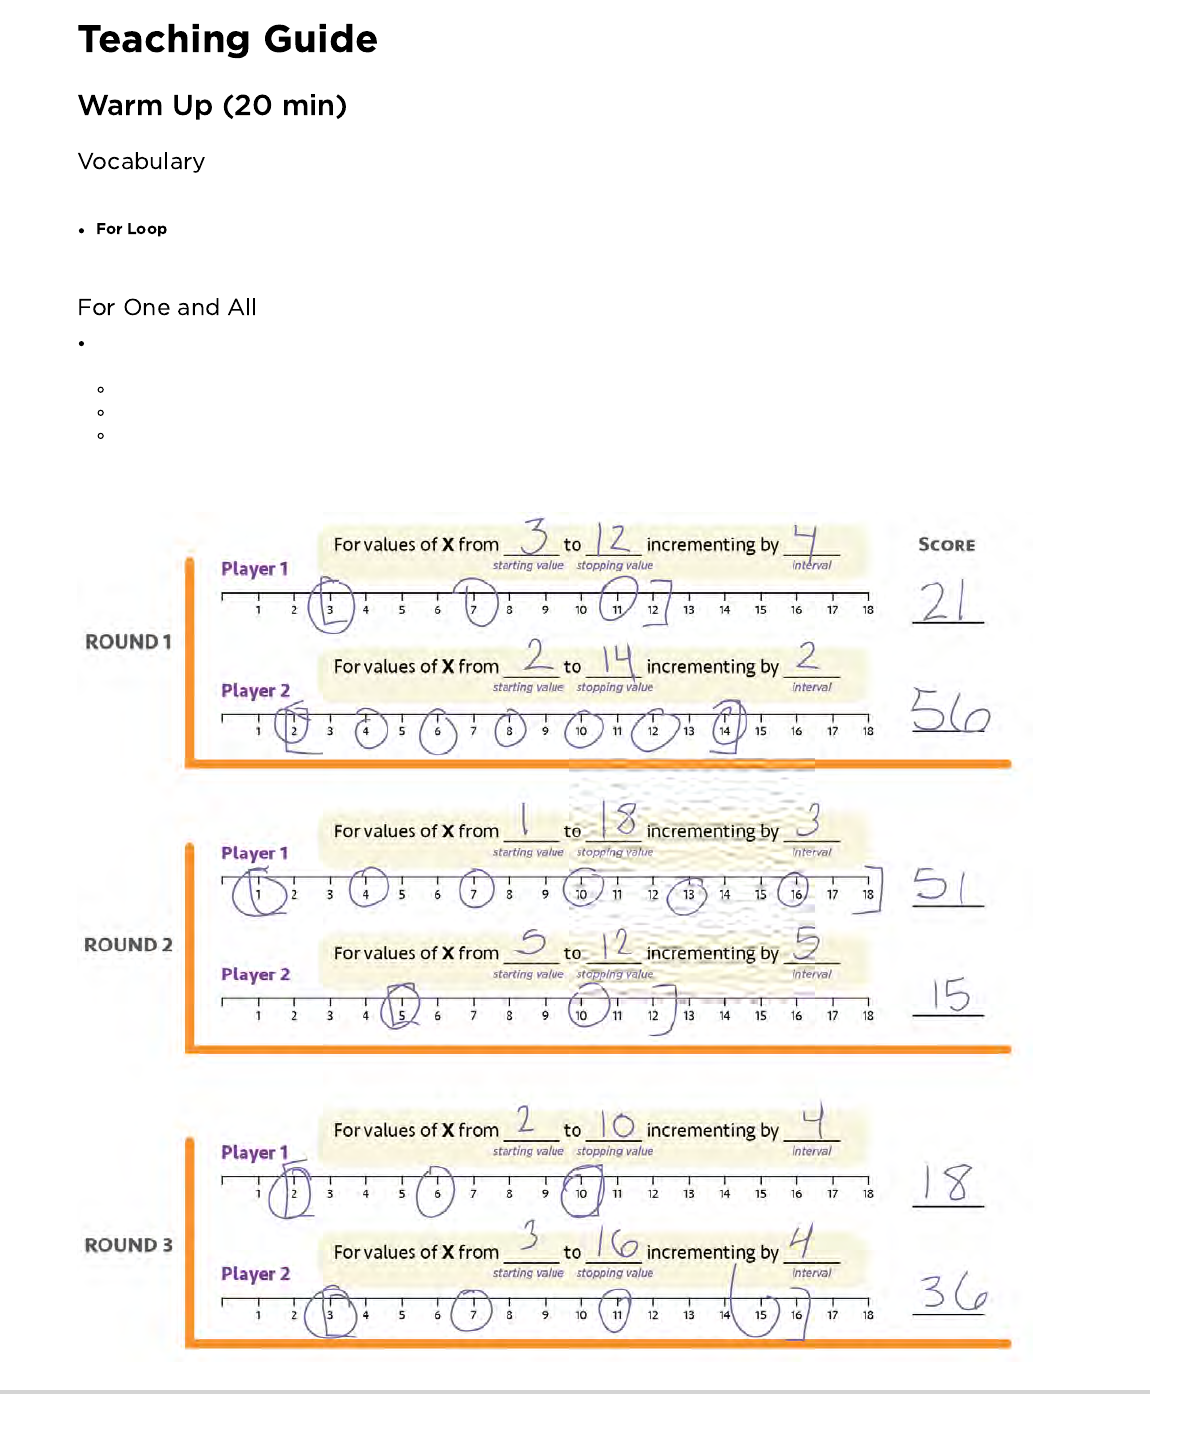
This lesson has one new and important word:
- Say it with me: For-Loop
Loops that have a predetermined beginning, end, and step value.
Point out that there are certain loops that happen very frequently, for example, loops where you need to keep track of how many times
you have been through
Sometimes, you don't want to start with one
Sometimes, you don't want to count by ones
for loops give you a powerful way to keep a counter that starts when you want, ends when you want, and increases by whatever size
step that you want
Here, you can jump right into a sample of the game (example in English)
91
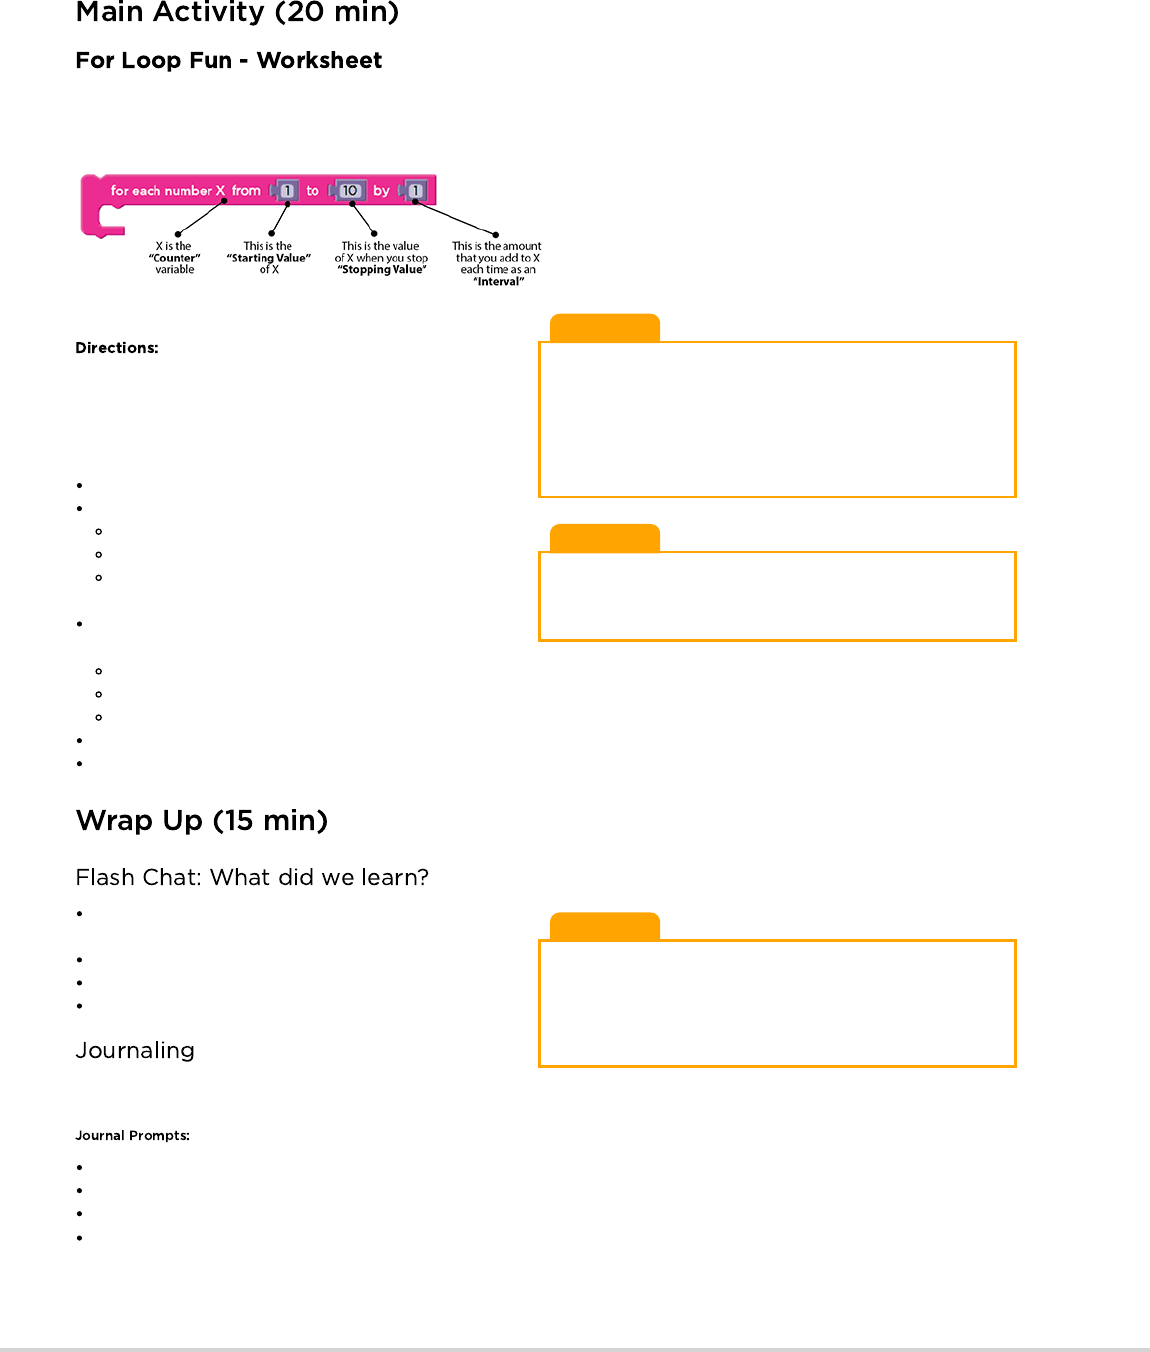
Lesson Tip
When you play this game, it's as if you're running through a loop
like this
for (x=startValue; x <= stopValue; x = x + step){
circle currentXvalue;
add currentXvalue to roundScore;
}
Lesson Tip
If any of the values rolled are outside the bounds of the game (like
rolling a start value of 6 but then rolling 2, 1, 2 for the end value),
have the student re-roll everything.
Lesson Tip
Flash Chat questions are intended to spark big-picture thinking
about how the lesson relates to the greater world and the students'
greater future. Use your knowledge of your classroom to decide if
you want to discuss these as a class, in groups, or with an elbow-
partner.
Sometimes we want to repeat things a certain number of times, but we want to keep track of values as we do. This is where a for loop
comes in handy. When you use a for loop, you know right from the start what your beginning value is, what your ending value is, and how
much the value changes each time through the loop.
for Loop block (in English)
It may be difficult for young students to understand this written in
pseudocode, but it may be helpful to have you explain out loud
(and perhaps with a diagram) what they will be using as the
content of a for loop.
Divide students into pairs
To start the round, each student rolls three times:
One die to determine the starting value of X
Three dice to determine the stopping value for X
One die to determine the stepping value of X each time
through
Use one of the provided number lines to trace the for loop
that they’ve made
Start at the starting value of X
Count down the number line, circling the numbers at the rolled interval
Stop when you get to the predetermined stopping value
Add all of the circled values to your score, then let the other player take a turn
Best 2 out of 3 wins
What would your interval need to be if you wanted to count
from 4 to 13 by threes?
What kinds of things do you think you could do with a for loop?
Can you reproduce a normal loop using a for loop?
What would you need to do?
Having students write about what they learned, why it’s useful,
and how they feel about it can help solidify any knowledge they obtained today and build a review sheet for them to look to in the future.
What was today's lesson about?
How do you feel about today's lesson?
What is a for loop?
Why would you use a for loop instead of a repeat loop or a while loop?
92
Use these activities to enhance student learning. They can be used as outside of class activities or other enrichment.
Try this activity again, but this time have the start number be selected using three dice, and the stop number with only one. Make sure to
have a negative increment!
Using chalk, draw a hop scotch diagram outside on the blacktop
Number the squares from bottom to top
Have students give each other a start square, stop square, and how many at a time they need to jump
When the jumper is done, have them write down the loop they just performed
Start adding additional activities to be done at each square, this will add complexity to the written portion, as well
- Language
- Speaking & Listening
- Math Practices
- Operations And Algebraic Thinking
- Algorithms & Programming
- Engineering in the Sciences
If you are interested in licensing Code.org materials for commercial purposes,
Hand out the assessment worksheet and allow students to complete the activity independently after the instructions have been well
explained. This should feel familiar, thanks to the previous activities.
93
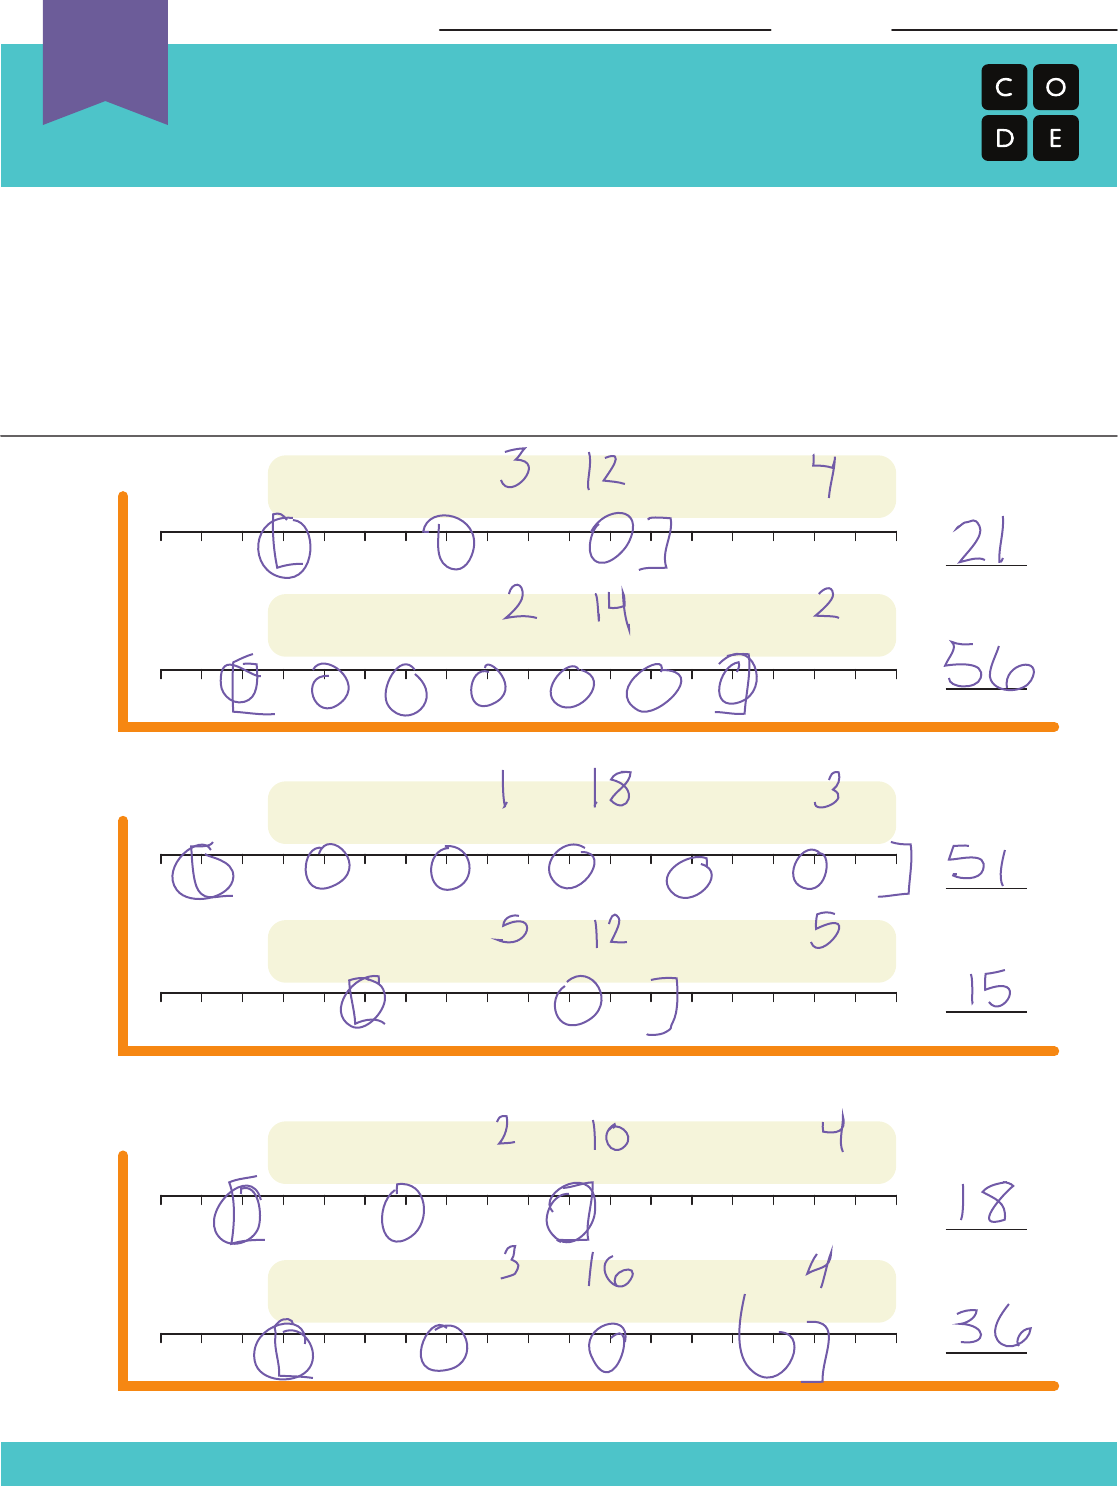
For values of X from _______ to _______ incrementing by _______
starting value stopping value interval
For values of X from _______ to _______ incrementing by _______
starting value stopping value interval
For values of X from _______ to _______ incrementing by _______
starting value stopping value interval
For values of X from _______ to _______ incrementing by _______
starting value stopping value interval
For values of X from _______ to _______ incrementing by _______
starting value stopping value interval
For values of X from _______ to _______ incrementing by _______
starting value stopping value interval
For Loop Fun
Sample Game Sheet
Unplugged
U
Revision 140927.1a
Name: Date:
1 2 3 4 5 6 7 8 9 10 11 12 13 14 15 16 17 18
1 2 3 4 5 6 7 8 9 10 11 12 13 14 15 16 17 18
Player 1
SCORE
ROUND 1
Player 2
1 2 3 4 5 6 7 8 9 10 11 12 13 14 15 16 17 18
1 2 3 4 5 6 7 8 9 10 11 12 13 14 15 16 17 18
Player 1
Player 2
1 2 3 4 5 6 7 8 9 10 11 12 13 14 15 16 17 18
1 2 3 4 5 6 7 8 9 10 11 12 13 14 15 16 17 18
Player 1
Player 2
ROUND 2
ROUND 3
Directions:
* Use the number lines to trace the “for loop” for each turn
* Start at the starting value of X
* Count down the number line, circling the numbers at the correct interval
* Stop when you get to the stopping value
* Add all of the circled values to get the score for your round
* Best 2 out of 3 Wins
SAMPLE
94
For Loop Fun
Number Lines and Score Sheet
Unplugged
U
Revision 140927.1a
Name: Date:
1 2 3 4 5 6 7 8 9 10 11 12 13 14 15 16 17 18
1 2 3 4 5 6 7 8 9 10 11 12 13 14 15 16 17 18
Player 1
SCORE
ROUND 1
Player 2
For values of X from _______ to _______ incrementing by _______
1 2 3 4 5 6 7 8 9 10 11 12 13 14 15 16 17 18
1 2 3 4 5 6 7 8 9 10 11 12 13 14 15 16 17 18
Player 1
Player 2
1 2 3 4 5 6 7 8 9 10 11 12 13 14 15 16 17 18
1 2 3 4 5 6 7 8 9 10 11 12 13 14 15 16 17 18
Player 1
Player 2
ROUND 2
ROUND 3
Directions:
* Use the number lines to trace the “for loop” for each turn
* Start at the starting value of X
* Count down the number line, circling the numbers at the correct interval
* Stop when you get to the stopping value
* Add all of the circled values to get the score for your round
* Best 2 out of 3 Wins
starting value stopping value interval
For values of X from _______ to _______ incrementing by _______
starting value stopping value interval
For values of X from _______ to _______ incrementing by _______
starting value stopping value interval
For values of X from _______ to _______ incrementing by _______
starting value stopping value interval
For values of X from _______ to _______ incrementing by _______
starting value stopping value interval
For values of X from _______ to _______ incrementing by _______
starting value stopping value interval
95
For Loop Fun
Assessment Worksheet
Unplugged
U
Revision 140928.1a
Below, you will find three rounds of the For Loop Game, along with what each player rolled during
their turn. Fill out the number lines and tally the scores for each round.
Who won the game?
Directions:
* Use the number lines to trace the “for loop” for each turn
* Start by circling the number at the starting value of X
* Count down the number line, circling the numbers at the correct interval
* Stop when you get to the stopping value
* Add all of the circled values to get the score for your round
* Best 2 out of 3 Wins
Name: Date:
1 2 3 4 5 6 7 8 9 10 11 12 13 14 15 16 17 18
1 2 3 4 5 6 7 8 9 10 11 12 13 14 15 16 17 18
Player 1
SCORE
ROUND 1
Player 2
1 2 3 4 5 6 7 8 9 10 11 12 13 14 15 16 17 18
1 2 3 4 5 6 7 8 9 10 11 12 13 14 15 16 17 18
Player 1
Player 2
1 2 3 4 5 6 7 8 9 10 11 12 13 14 15 16 17 18
1 2 3 4 5 6 7 8 9 10 11 12 13 14 15 16 17 18
Player 1
Player 2
ROUND 2
ROUND 3
WHO WON?
PLAYER # _______
For values of X from _______ to _______ incrementing by _______
starting value stopping value interval
For values of X from _______ to _______ incrementing by _______
starting value stopping value interval
For values of X from _______ to _______ incrementing by _______
starting value stopping value interval
For values of X from _______ to _______ incrementing by _______
starting value stopping value interval
For values of X from _______ to _______ incrementing by _______
starting value stopping value interval
For values of X from _______ to _______ incrementing by _______
starting value stopping value interval
1
1
2
2
3
3
3
4
5
5
6
6
11
11
17
17
15
18
96

As we start to write longer and more interesting programs, our code often
contains a lot of repetition. In this lesson, students will learn about how loops
can be used to more easily communicate instructions that have a lot of
repetition by looking at the repeated patterns of movement in a dance.
At this point in the course, students should have developed comfort with
programming a set of linear instructions. Frequently the linear set of instructions
includes patterns that are repeated multiple times and as students want to write
more complex and interesting programs, manually duplicating that code
becomes cumbersome and inefficient. To enable students to write more
powerful programs, we'll need to rely on structures that break out of the that
single linear list. allow for students to structure their code in a way that
repeats. In this lesson, we will focus on identifying patterns in physical
movement before moving back onto the computer to look for patterns in our
code.
Repeat actions initiated by the instructor.
Translate a picture program into a real-world dance.
Convert a series of multiple actions into a single
loop.
Watch the .
Print one for the
class.
Print one for each
student.
Make sure every student has a
.
Please make a copy of any
documents you plan to share with
students.
- Unplugged Video ( )
- Teacher Video
- Assessment Answer Key
- Worksheet
- Assessment
- Reflection Journal
- The action of doing something over and over
again.
- Do something again
97
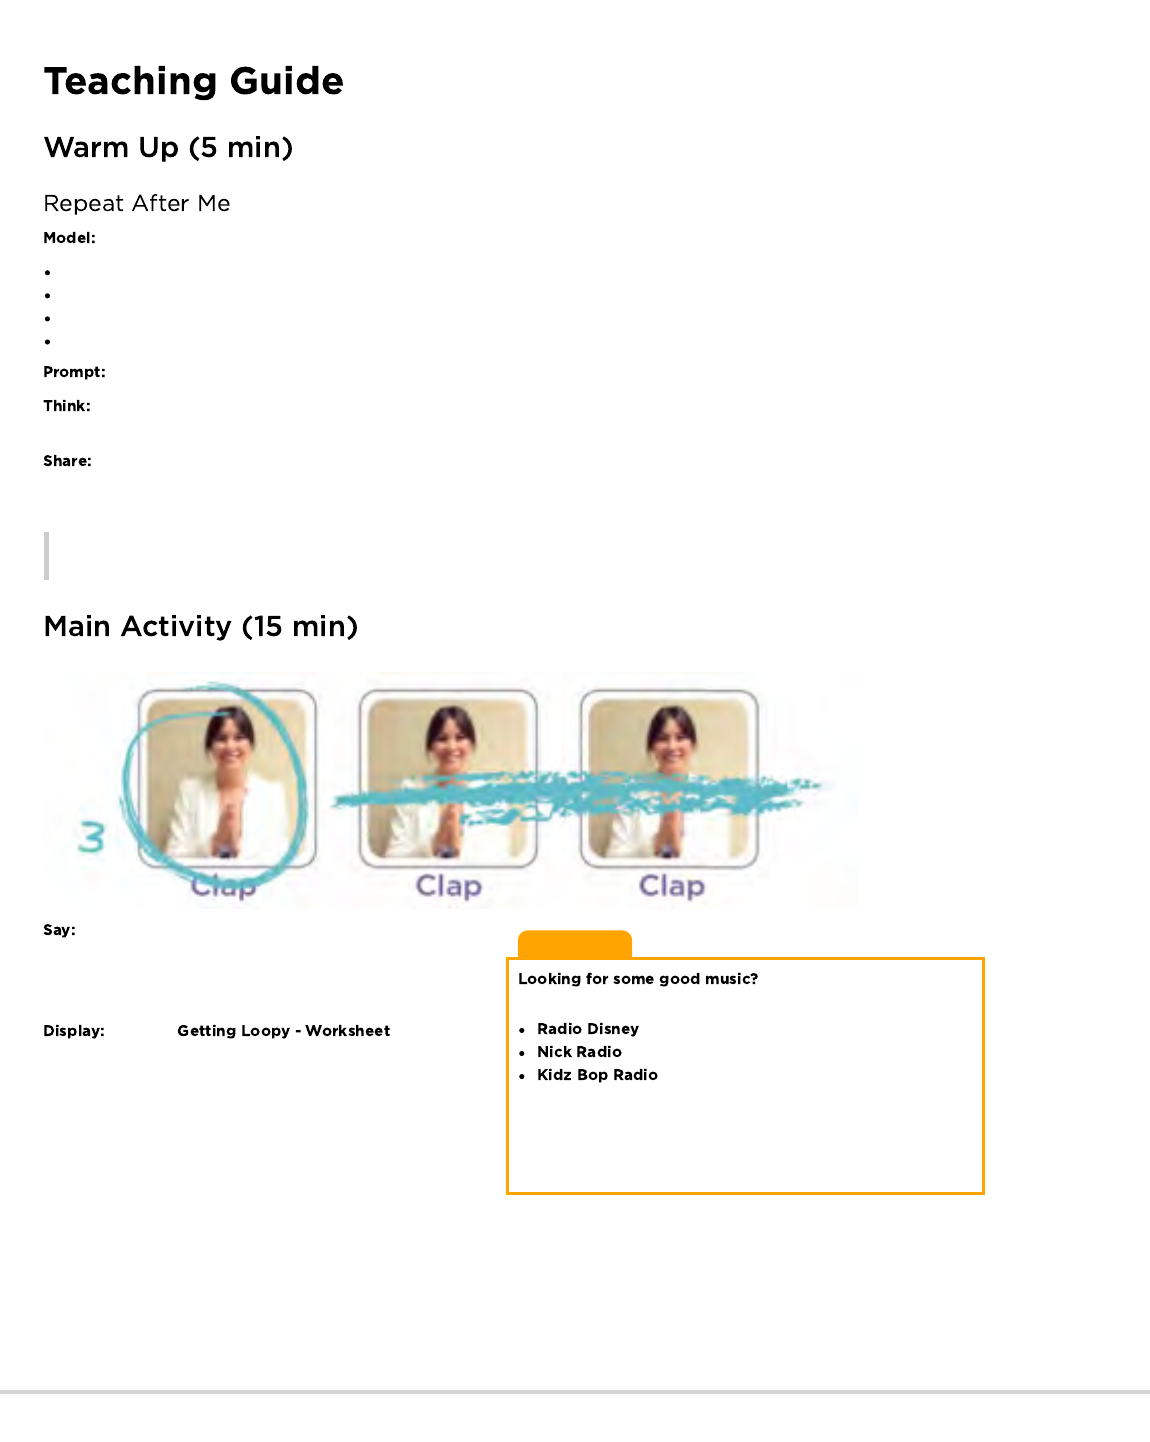
Lesson Tip:
Here are some great places to
find some:
Please be advised that some of these stations may display ads
with third-party content. If you find that displayed ads are
inappropriate, you may want to direct students to a different site, or
research ad-blockers that can prevent this content.
Ask for a volunteer and have them stand.
Instruct your volunteer to walk around the table (or their chair, or a friend).
When they finish, instruct them to do it again, using the exact same words you did before.
When they finish, instruct again.
Then again.
Would it have been easier for me to just ask you to go around the table four times?
What if I wanted you to do it ten times? How would you reword my instructions so that they were more efficient and I didn't have to
repeat myself so much? Feel free to write your instructions down on a piece of scrap paper.
Ask a few students to share their instructions with the class, pointing out how each approach has simplified the overall approach to
giving instructions.
Remarks
Today we're going to work on finding ways to make giving lots of instructions easier, especially when those instructions repeat themselves
a lot. This will be really useful when we go back to the computers and have to write lots of instructions in our programs.
### Dance Party
Introduce the main activity by letting the class know that we
will be having a dance party. In order to have that party, we'll need
to know what all of the steps in the dance are, and how many
times we should do them.
Show the so that all
students can see it. Talk through the different sections of the
dance as a class. Point out the section that repeats, in particular.
98

Show the class what the entire dance looks like done at full-speed. Then run through the dance slowly , asking a different student to
call out each line of instructions. Next, have the students perform the dance along with you, saying the instructions aloud as they get to each
move.
Ask students to work with a neighbor to find all of the sections of the dance that repeat.
Ask a few students to share the repeating patterns that they found. As a class, talk through how you might rework the instructions to
be even shorter by repeating those patterns.
Finally, help them understand a symbology for capturing
these loops on their picture program, since the
assessment will utilize this same method. Here is an
example:
Ending with an assessment sheet will help solidify this lesson for your students.
: Hand out the to each student. Allow students to complete the activity independently after the
instructions have been well explained. This should feel familiar, thanks to the previous activities.
Present the vocab for this lesson, loop. Ask the class to point out the main loop that was in the dance. Why do you think we call it a
loop?
99

What was your favorite part about that activity?
Having students write or draw about what they learned, why it’s useful, and how they feel about it can help solidify any knowledge they
obtained today and build a review sheet for them to look to in the future.
What was today’s lesson about?
How did you feel during today’s lesson?
Draw a picture of you dancing today. Draw the loops that you did, like clapping three times.
What else can you use a loop for?
Use these activities to enhance student learning. They can be used as outside of class activities or other enrichment.
Give the students pictures of actions or dance moves that they can do.
Have students arrange moves and add loops to choreograph their own dance.
Share the dances with the rest of the class.
Find some YouTube videos of popular dances that repeat themselves.
Can your class find the loops?
Try the same thing with songs!
- Language
- Speaking & Listening
- Math Practices
- Operations And Algebraic Thinking
- Algorithms & Programming
- Engineering in the Sciences
If you are interested in licensing Code.org materials for commercial purposes,
Do you think it is easier to add more pictures to the screen or change the number of times we loop?
Would your answer be the same if we wanted to loop 100 times?
Could we use these same loops with different dance moves?
Do you know any dances that are done inside a loop?
100
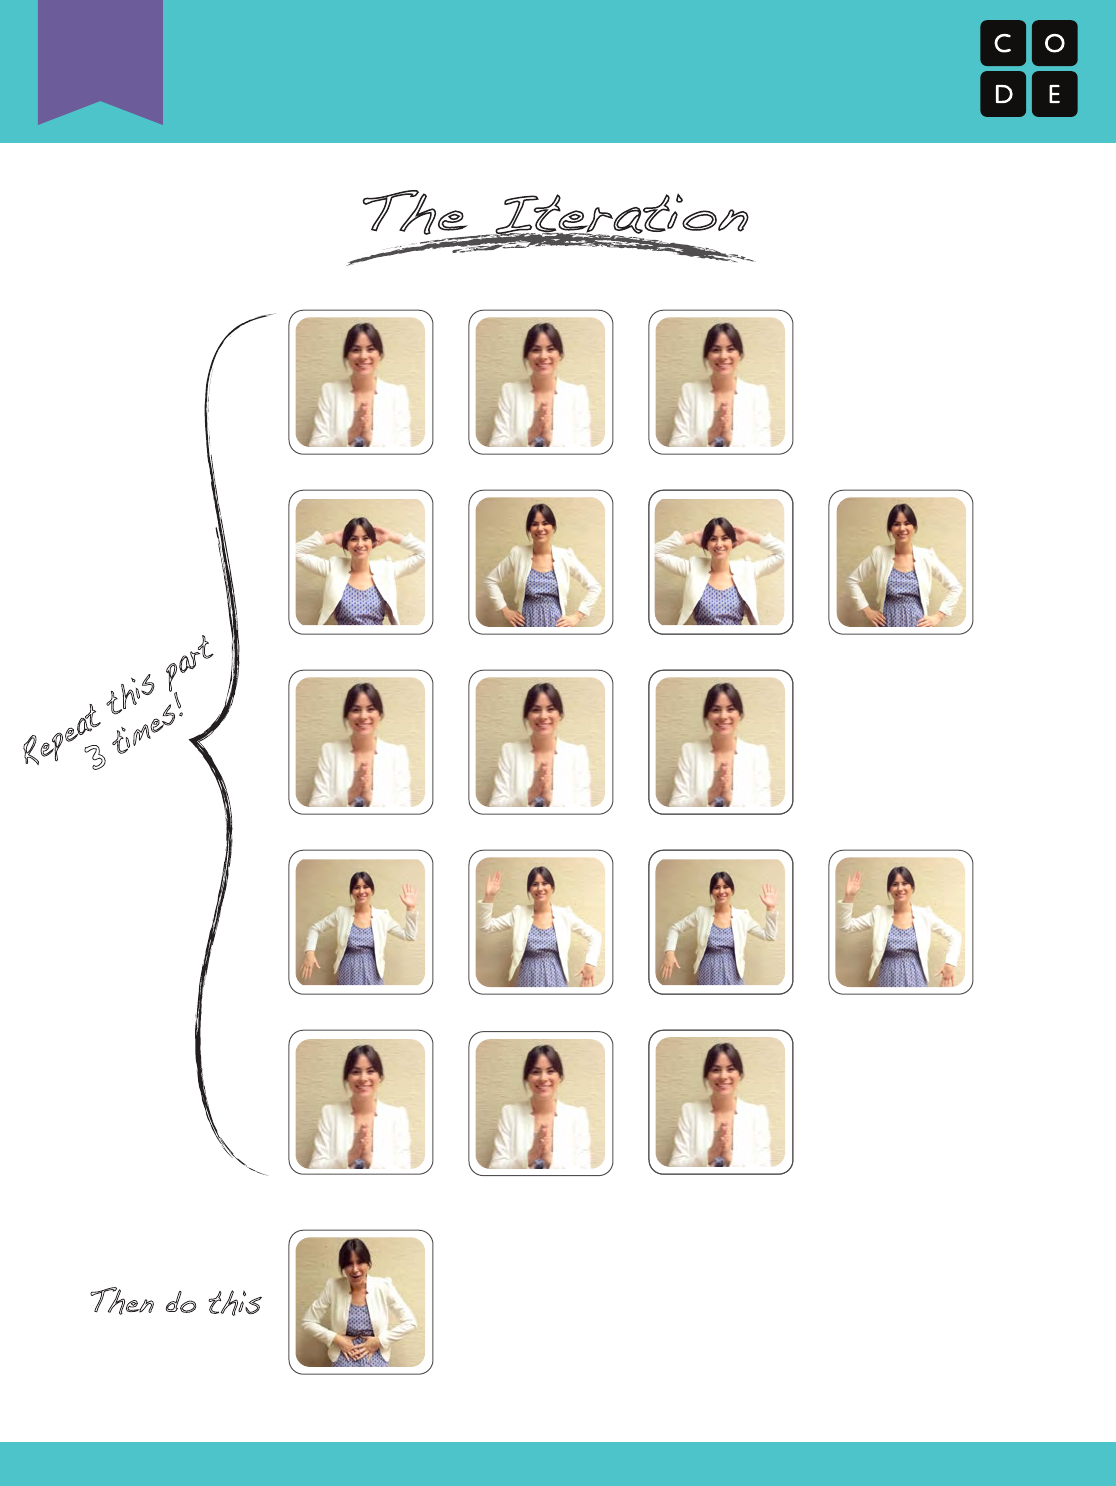
Getting Loopy
Unplugged Loops Activity
Revision 140709.2a
The Iteration
Clap Clap Clap
Behind Head Waist WaistBehind Head
Clap Clap Clap
Clap Clap Clap
Left Up Right Up Right UpLeft Up
Belly Laugh
Repeat this part
3 times!
Then do this
U
101
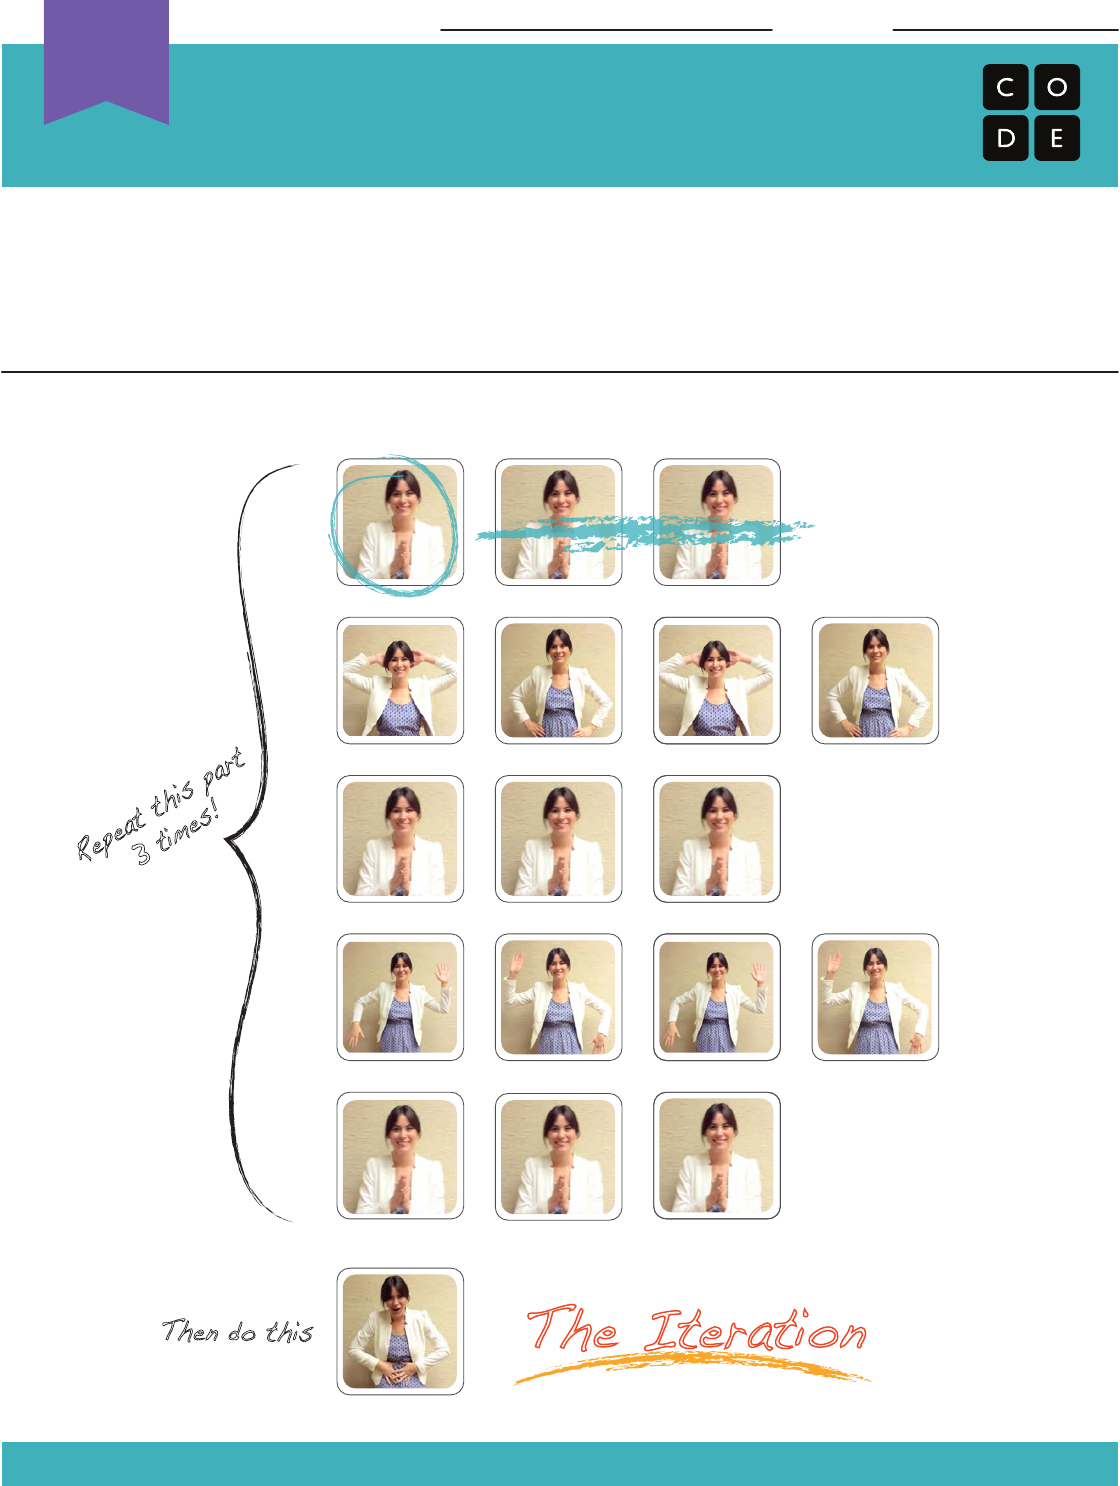
Looping can save space!
What if we wanted to take The Iteration dance below and make more loops inside? Can
you circle the actions that we can group into a loop and cross out the ones that we don’t
need anymore? Write a number next to each circle to let us know how many times to
repeat the action.
The first line has been done for you.
Getting Loopy
Unplugged Loops Activity
Revision 140709.1a
Name: Date:
The Iteration
Clap Clap Clap
Behind Head Waist WaistBehind Head
Clap Clap Clap
Clap Clap Clap
Left Up Right Up Right UpLeft Up
Belly Laugh
Repeat this part
3 times!
Then do this
3
Unplugged
U
102
In collaboration with , this lesson
helps students learn that many websites ask for information that is private and
discusses how to responsibly handle such requests. Students also find out that
they can go to exciting places online, but they need to follow certain rules to
remain safe.
Common Sense Education has created this lesson to teach kids the importance
of being safe online. By relating places in the real world to websites on the
internet, students will make important connections between safe websites and
safe places in their own neighborhood.
Understand that being safe when they visit websites
is similar to staying safe in real life
Learn to recognize websites that are safe for them to
visit.
Recognize the kind of information that is private and
understand that it should never be shared online.
Watch the
.
Prepare to show the
.
Live access or print-off of sign-up
page (Click “New Player,” select an age, and then
select “I’m a Girl” or “I’m a Boy.”).
Print one for
each student.
Make sure each student has a
.
Review
for more online safety content.
Please make a copy of any
documents you plan to share with
students.
- Teacher Video
- Lesson Video
- Assessment
- Assessment Answer Key
- Website
- Resource List
- Emotion Images
- Reflection Journal
103
This lesson has one new and important word:
Username - Say it with me: Yews-er-naym
A name you make up so that you can see or do things on a website, sometimes called a “screen name”
Invite students to talk about places they have visited on a class field trip.
If students have limited experience with field trips, provide some examples of the types of places they could visit as a class, such as
museums, science centers, or zoos.
Have students choose a place they would like to go on a class field trip.
Have students take an imaginary field trip to their chosen place.
Narrate the preparations while having students pantomime what’s happening – For example: put on your jacket; climb on/off the bus;
get your ticket checked; go inside.
Have students describe what they think they might see and do once they arrive.
Let the students sit back down, then ask: "What do you need to do to stay safe when you visit new places?"
Play .
What three rules does Jeremiah follow when he goes places online?
1) Always ask your parent (or teacher) first
2) Only talk to people you know
3) Stick to places that are just right for you
Now, let's see what more we can do to keep ourselves safe.
Access sign-up page live, or project a print-out on the board for the class to see.
Invite students to give examples of information that they should keep private.
Write down their responses on the board or chart paper so that you can return to them later in the lesson.
Make sure they understand that private information includes the following:
full name
age
address
telephone number
email address (or parents’ email addresses)
where they go to school or after school
where their parents work
Encourage students to discuss why it is important to keep this information private.
Stress that it is never safe to give out private information to people they don’t know.
Students should always ask a parent or caregiver before they give out private information to anyone.
Refer back to the sign-up page.
Ask "Do you think you should use your real name, or something that includes your real name, when you make up a username?"
Guide students through the following rules and tips for creating usernames:
104
Lesson Tip
For more in-depth modules, you can find additions to this
curriculum at the page
on Scope and Sequence.
Lesson Tip
Flash Chat questions are intended to spark big-picture thinking
about how the lesson relates to the greater world and the students'
greater future. Use your knowledge of your classroom to decide if
you want to discuss these as a class, in groups, or with an elbow
partner.
Never include any private information in your username, such as your real name, age, birthday, the name of your school or hometown,
parts of your address or phone number, or email address.
Avoid using symbols or spaces, as they are usually not allowed in usernames.
Include the name of something that will help you remember your username, like your favorite animal, character, or toy. You might have to
combine this with other words or numbers.
If the username you create is already taken, you will have to come up with another one.
Write down your username and password and, with the help of a parent, find a safe place to keep it in case you forget them.
Distribute paper and place students in pairs.
1. Have students interview their partner using the following
questions, and write down their responses:
2. What is your favorite pet or animal?
3. What is your favorite TV show, book, or movie character?
4. What are your favorite numbers?
5. Instruct students to make up three safe usernames for their
partner using information from their interview responses.
6. They should not include their partner’s name, age, school, email address, birthday, or any other private information.
7. Invite students to share one or more of their usernames with the class.
8. Encourage students to respond to one another’s usernames, confirming that each name follows the rules they have learned.
What information should you always keep private when you are using the computer?
What rules should you follow when you make up a username?
What can the Internet be used for?
What rules do we have for visiting places online?
Take the time to discuss again what is appropriate information to
share on the Internet, and what is not:
Appropriate Not Appropriate
Interests Address
Hobbies Full Name
First Name Information that would hurt
others
Having students write about what they learned, why it’s useful, and how they feel about it can help solidify any knowledge they obtained
today and build a review sheet for them to look to in the future.
What was today’s lesson about?
Draw one of the that shows how you felt about today's lesson in the corner of your journal page.
Draw some things that you should never talk to a stranger about on the internet. For example, draw your house to represent your
address, draw your school, or draw your family.
Ask a parent or other trusted adult before you create a username.
105

This should feel familiar, thanks to the previous activities.
Use these activities to enhance student learning. They can be used as outside of class activities or other enrichment.
Visit to learn more about how you can keep your students safe in this digital age.
- Language
- Speaking & Listening
- Geometry
- Math Practices
- Engineering in the Sciences
If you are interested in licensing Code.org materials for commercial purposes,
Hand out the assessment worksheet and allow students to complete the activity independently after the instructions have been well
explained.
106
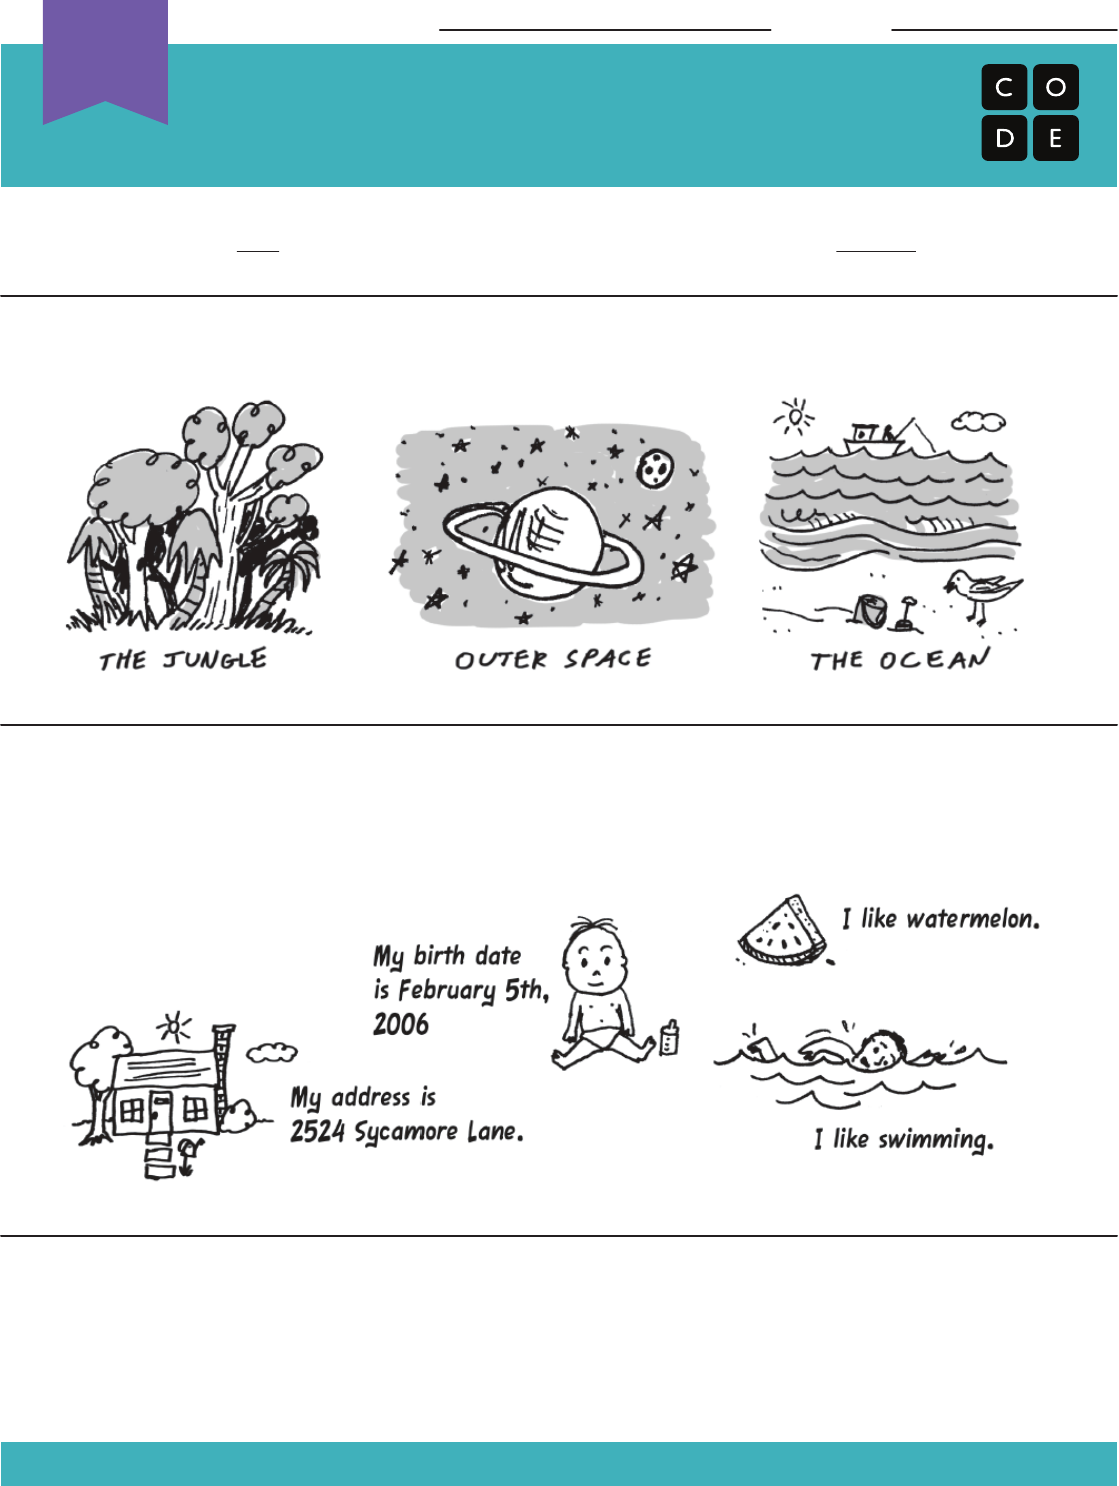
Keep It Private
Learning to be Safe and Responsible Assessment
Unplugged
U
Revision 140701.1a
Just because you can share something online doesn’t mean that you should!
1) Circle the place you would most like to visit online
2) Can you spot the private information? Mark “X” through the information that you should
not share with people you do not know well.
Name: Date:
3) On the back of this paper, draw something that you enjoy and want to share on the
Internet.
107
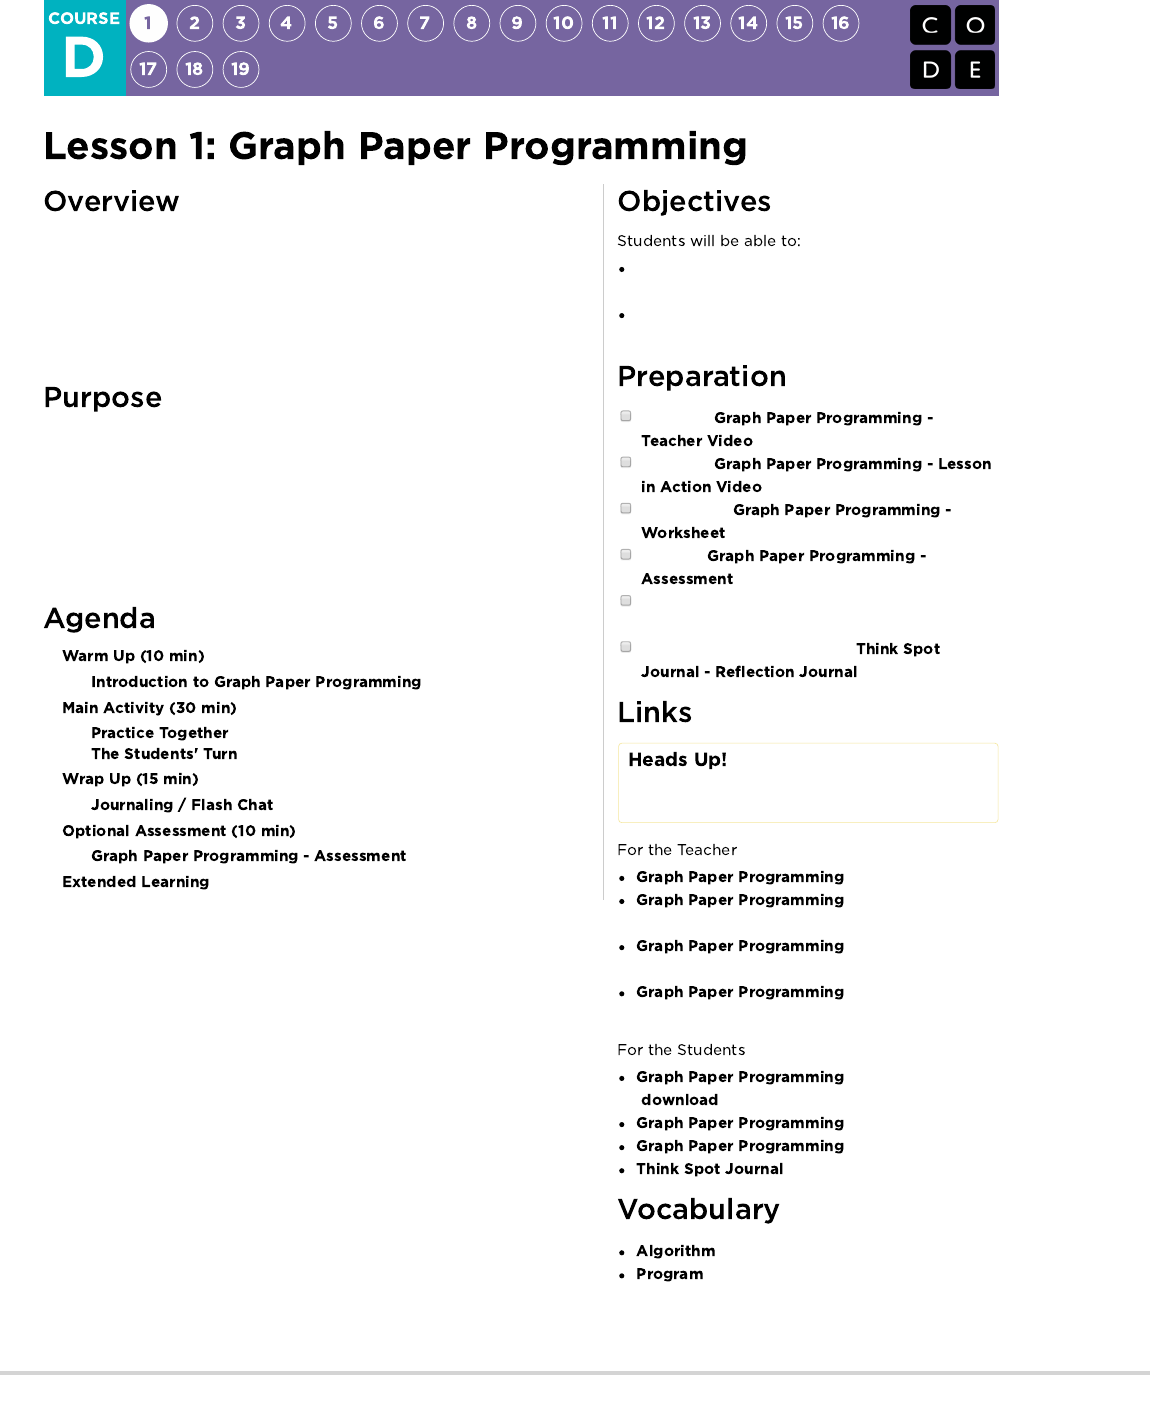
By "programming" one another to draw pictures, students get an opportunity to
experience some of the core concepts of programming in a fun and accessible
way. The class will start by having students use symbols to instruct each other
to color squares on graph paper in an effort to reproduce an existing picture. If
there’s time, the lesson can conclude with images that the students create
themselves.
The goal of this activity is to build critical thinking skills and excitement for the
course, while introducing some of the fundamental programming concepts that
will be used throughout the course. By introducing basic concepts like
sequencing and algorithms to the class in an unplugged activity, students who
are intimidated by computers can still build a foundation of understanding on
these topics. In this lesson, students will learn how to develop an algorithm and
encode it into a program.
Reframe a sequence of steps as an encoded
program
Explain constraints of translating problems from
human language to machine language
Watch the
.
Watch the
.
Print out one
for each group.
Print one
for each student.
Supply each group with several drawing grids,
paper, and pens/pencils.
Make sure every student has a
.
Please make a copy of any
documents you plan to share with
students.
- Teacher Video
- Lesson in Action
Video
- Worksheet Answer
Key
- Assessment Answer
Key
- Unplugged Video
( )
- Worksheet
- Assessment
- Reflection Journal
- A list of steps to finish a task.
- An algorithm that has been coded into
something that can be run by a machine.
108
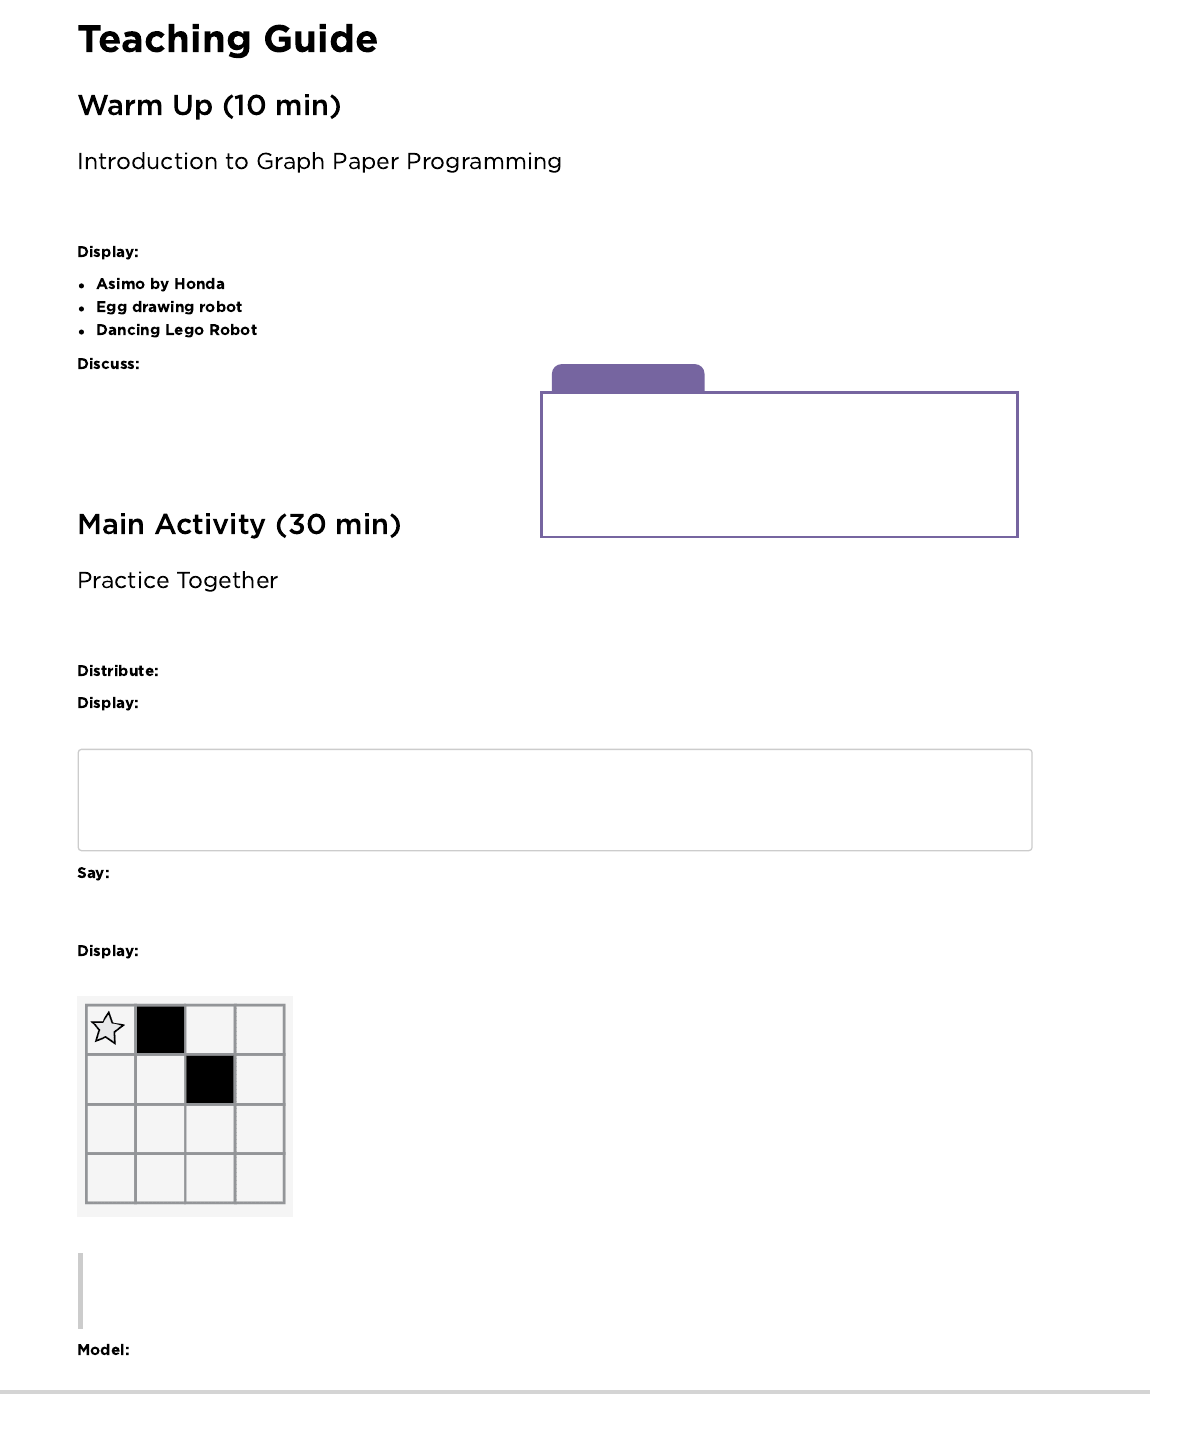
Discussion Goal
The goal of this quick discussion is to call out that while robots
may seem to behave like people, they're actually responding only
to their programming. Students will likely refer to robots from
movies and TV that behave more like humans. Push them to
consider robots that they've seen or heard of in real life, like
Roombas, or even digital assistants like Amazon Alexa.
In this activity, students will encode instructions to guide each other toward making drawings without letting the rest of their group see the
original image. This warm-up frames the activity for the class.
Watch one of the videos below to give students context for the types of things that robots can do:
(3:58)
(3:15)
(1:35)
How do you suppose that robots know how to do the
things that they do? Do they have brains that work the same way
that ours do?
Work this into a discussion on how people have to program
robots to do specific things, using specific commands.
In this activity, students will act as both programmers and robots, coloring in squares according to programs that they have written for one
another.
Students will use 4x4 grids (or sheets of graph paper with 4x4 boxes sectioned of f). They will also need the image worksheet.
Project these commands, or write them on the board. They won't persist long, but they will help students make the transition from
Algorithm to Program.
Move one square right
Move one square left
Move one square up
Move one square down
Fill in square with color
Today, we all get to program robots...and they're already here in the room! It's you! We're going to write programs using symbols with
special meanings to help each other recreate a picture. First, we'll practice together as if I am the robot and you are the programmers, then
we can break up into groups so that everyone can get a turn.
Display both the image that you are going to have the students walk you through, and a blank grid that you will fill-in with your
ARM. Make sure that the instructions, grid, and image remain visible at the same time.
Remarks
Here is an image. Pretend that I am the robot with an Automatic Realization Machine (ARM). These are the only instructions that I
understand.
Starting at the upper left-hand corner, guide my ARM out loud with your words.
The class might give you instructions like these below. As you hear an instruction that you intend to follow, make sure to repeat it out
loud so that the students can keep track of what you are doing.
109
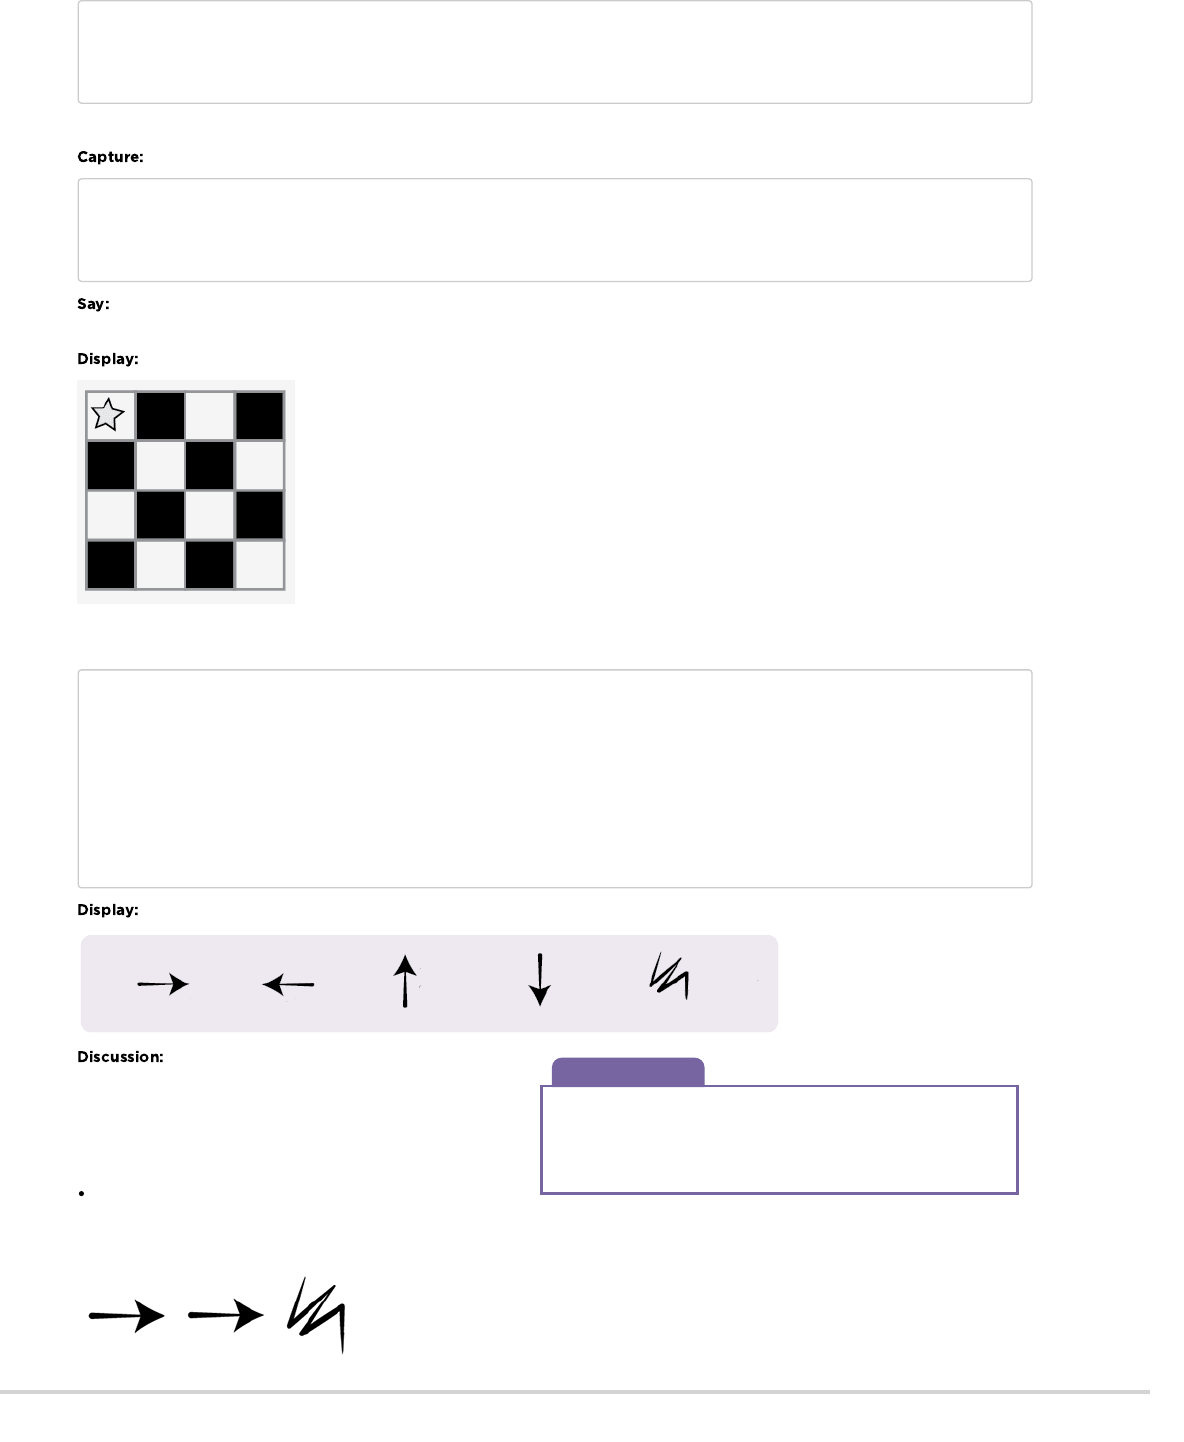
Discussion Goal
The goal for this discussion is to get at the idea that students can
use symbols to stand for entire phrases. Once they understand
that, share with them that making the switch from listing steps in
detail to encoding them is called "programming."
Move One Square Right
Fill In Square with Color
Move One Square Right
Move One Square Down
Fill In Square with Color
Continue with the activity until you have completed your sample square.
Write each of the commands down so that students can see all of the steps that went into the one image.
Move One Square Right
Fill In Square with Color
Move One Square Right
Move One Square Down
Fill In Square with Color
You just gave me a list of steps to finish a task. In programming, they call that an algorithm. Algorithms are great, because they are
easy for you to understand as the programmer. BUT, what happens when we want to write down the algorithm for a drawing like this?
Show the students a more complicated image, like the one below.
Next, begin writing down some of the instructions that it would take to replicate that image. Hopefully, students will see that writing
everything out longhand would quickly become a bit of a nightmare.
Move One Square Right
Fill In Square with Color
Move One Square Right
Move One Square Right
Fill In Square with Color
Move One Square Down
Move One Square Left
Fill In Square with Color
Move One Square Left
Move One Square Left
Fill In Square with Color
PLUS 12 MORE INSTRUCTIONS!
Show the students this list of symbols.
How could we use these symbols to make our
instructions easier?
Draw out ideas that relate to transitioning from the verbal
instructions to the symbols. Once the students get to that place,
point out that this text:
“Move one square right, Move one square right, Fill-in square
with color”
would now correspond to the program:
110
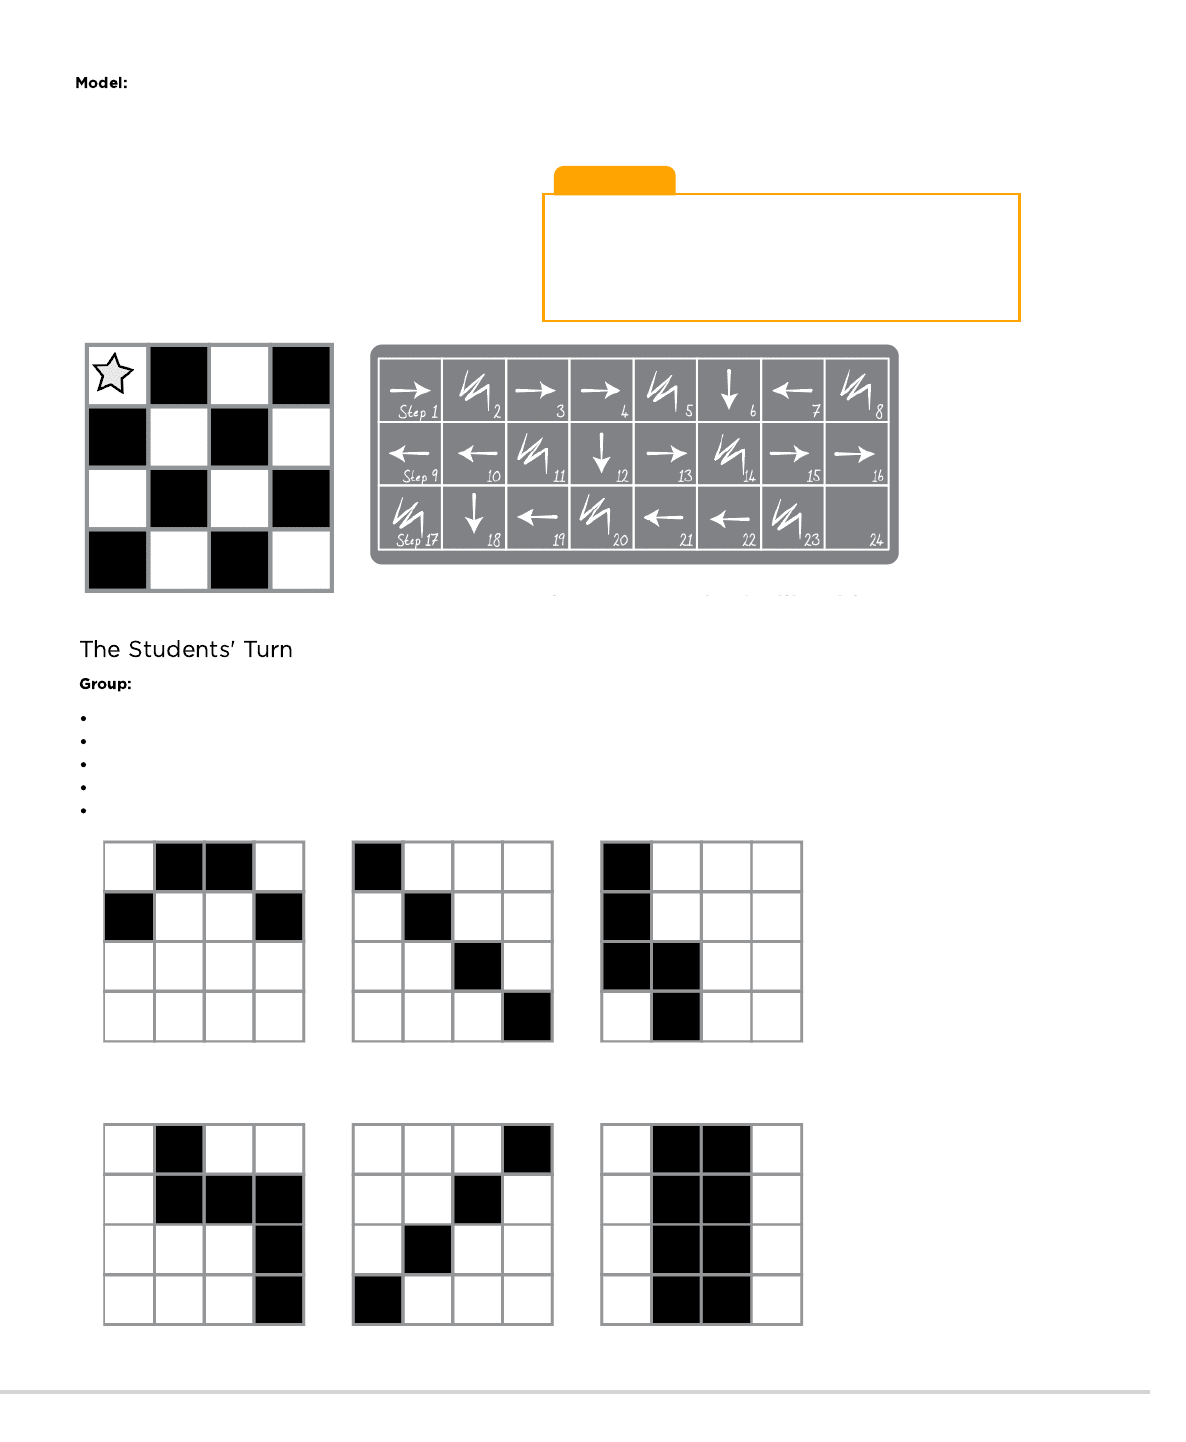
Teaching Tip
Notice that we have written our program from left to right like you
would read a book in English. Some students prefer this method.
Others like to start each line of the grid on a new line of paper. The
way they write their program doesn't matter as much as whether
the other people in their groups can follow along!
The classroom may be buzzing with suggestions by this point. If
the class gets the gist of the exercise, this is a good place to
discuss alternate ways of filling out the same grid. If there is still
confusion, save that piece for another day and work with another
example.
See a sample solution below:
Divide students into pairs or small groups.
Have each pair/group choose an image from the worksheet.
Discuss the algorithm to draw chosen image with partner(s).
Convert algorithm into a program using symbols.
Trade programs with another pair/group and draw one another's image.
Choose another image and go again!
Now, have the class help you draw the larger image using only symbols. Do not worry about unnecessary steps for now. If their final
program works to create the image, consider it a win.
111
How did you feel during today’s lesson?
Draw another image that you could code. Can you write the program that goes with this drawing?
What other types of robots could we program if we changed what the arrows meant?
Hand out the assessment worksheet and allow students to complete the activity independently after the instructions have been well
explained.
This should feel familiar, thanks to the previous activities.
Use these activities to enhance student learning. They can be used as outside of class activities or other enrichment.
Have your class try making up their own images.
Can they figure out how to program the images that they create?
As the teacher, draw an image on a 5x5 grid.
Can the class code that up along with you?
- Language
- Speaking & Listening
- Geometry
- Math Practices
- Algorithms & Programming
- Engineering in the Sciences
If you are interested in licensing Code.org materials for commercial purposes,
Having students write about what they learned, why it’s useful, and how they feel about it can help solidify any knowledge they obtained
today and build a review sheet for them to look to in the future.
What was today’s lesson about?
112

Image 1 Image 2 Image 3
Image 4 Image 5 Image 6
Move One
Square Right
Move One
Square Left
Move One
Square Up
Move One
Square Down
Fill-In Square
with Color
Graph Paper Programming
Four-by-Fours Activity Worksheet
Revision 180206.1a
Choose one of the drawings below to program for a friend. Don’t let them see
which one you choose!
Write the program on a piece of paper using symbols. Can they recreate your picture?
Use these symbols to write a program that would draw each image.
Name: Date:
Unplugged
U
113

Step 1 2 3 4 5 6 7 8 9 10
Step 16
17 18 19 20 21 22 23 24 25
11
26
12
27
13
28
14
29
15
30
Step 31
32 33 34 35 36 37 38 39 40 41 42 43 44 45
Game #1
Step 1 2 3 4 5 6 7 8 9 10
Step 16
17 18 19 20 21 22 23 24 25
11
26
12
27
13
28
14
29
15
30
Step 31
32 33 34 35 36 37 38 39 40 41 42 43 44 45
Game #2
Step 1 2 3 4 5 6 7 8 9 10
Step 16
17 18 19 20 21 22 23 24 25
11
26
12
27
13
28
14
29
15
30
Step 31
32 33 34 35 36 37 38 39 40 41 42 43 44 45
Game #3
Step 1 2 3 4 5 6 7 8 9 10
Step 16
17 18 19 20 21 22 23 24 25
11
26
12
27
13
28
14
29
15
30
Step 31
32 33 34 35 36 37 38 39 40 41 42 43 44 45
Game #4
Step 1 2 3 4 5 6 7 8 9 10
Step 16
17 18 19 20 21 22 23 24 25
11
26
12
27
13
28
14
29
15
30
Step 31
32 33 34 35 36 37 38 39 40 41 42 43 44 45
Game #5
114
115
Graph Paper Programming
Assessment Worksheet
Revision 180207.1a
You have just learned how to create algorithms and programs from drawings, and
how to draw an image from a program that someone gives to you. During the
lesson, you worked with other people to complete your activities. Now you can use
the drawings and programs below to practice by yourself.
Use the symbols below to write a program that would draw each image.
Now, read the program below and draw the image that it describes.
Move One
Square Forward
Move One
Square Backward
Move One
Square Up
Move One
Square Down
Fill-In Square
with Color
Start
Here
Start
Here
Start
Here
Start
Here
Name: Date:
Unplugged
U
Step 1 2 3 4 5 6 7 8 9 10
Step 11
12 13 14 15 16 17 18 19 20
Step 1 2 3 4 5 6 7 8 9 10
Step 11
12 13 14 15 16 17 18 19 20
Step 1 2 3 4 5 6 7 8 9 10
Step 11
12 13 14 15 16 17 18 19 20
Step 1 2 3 4 5 6 7 8 9 10
Step 11
12 13 14 15 16 17 18 19 20
116

This activity revisits Happy Maps. This time, student will be solving bigger,
longer puzzles with their code, leading them to see utility in structures that let
them write longer code in an easier way.
This lesson serves as an introduction to loops. Loops allow for students to
simplify their code by grouping commands that need to be repeated. Students
will develop critical thinking skills by noticing repetition in movements of their
classmates and determining how many times to repeat commands. By seeing
"Happy Maps" again, students will get the chance to relate old concepts such as
sequencing to the new concept of repeat loops.
Identify repeating code and shorten multiple actions
into a single loop.
Interpret a program with loops as a series of multiple
actions.
Watch the
Print out a to
display for the class
Print out
for each group
Print out for
each group
Print out
for each group
Make sure each student has a
Please make a copy of any
documents you plan to share with
students.
- Teacher Video
- Emotion Images
- Worksheet
- Worksheet
- Manipulatives
-
Manipulatives
- Reflection Journal
- The action of doing something over and over
again.
- Do something again
117
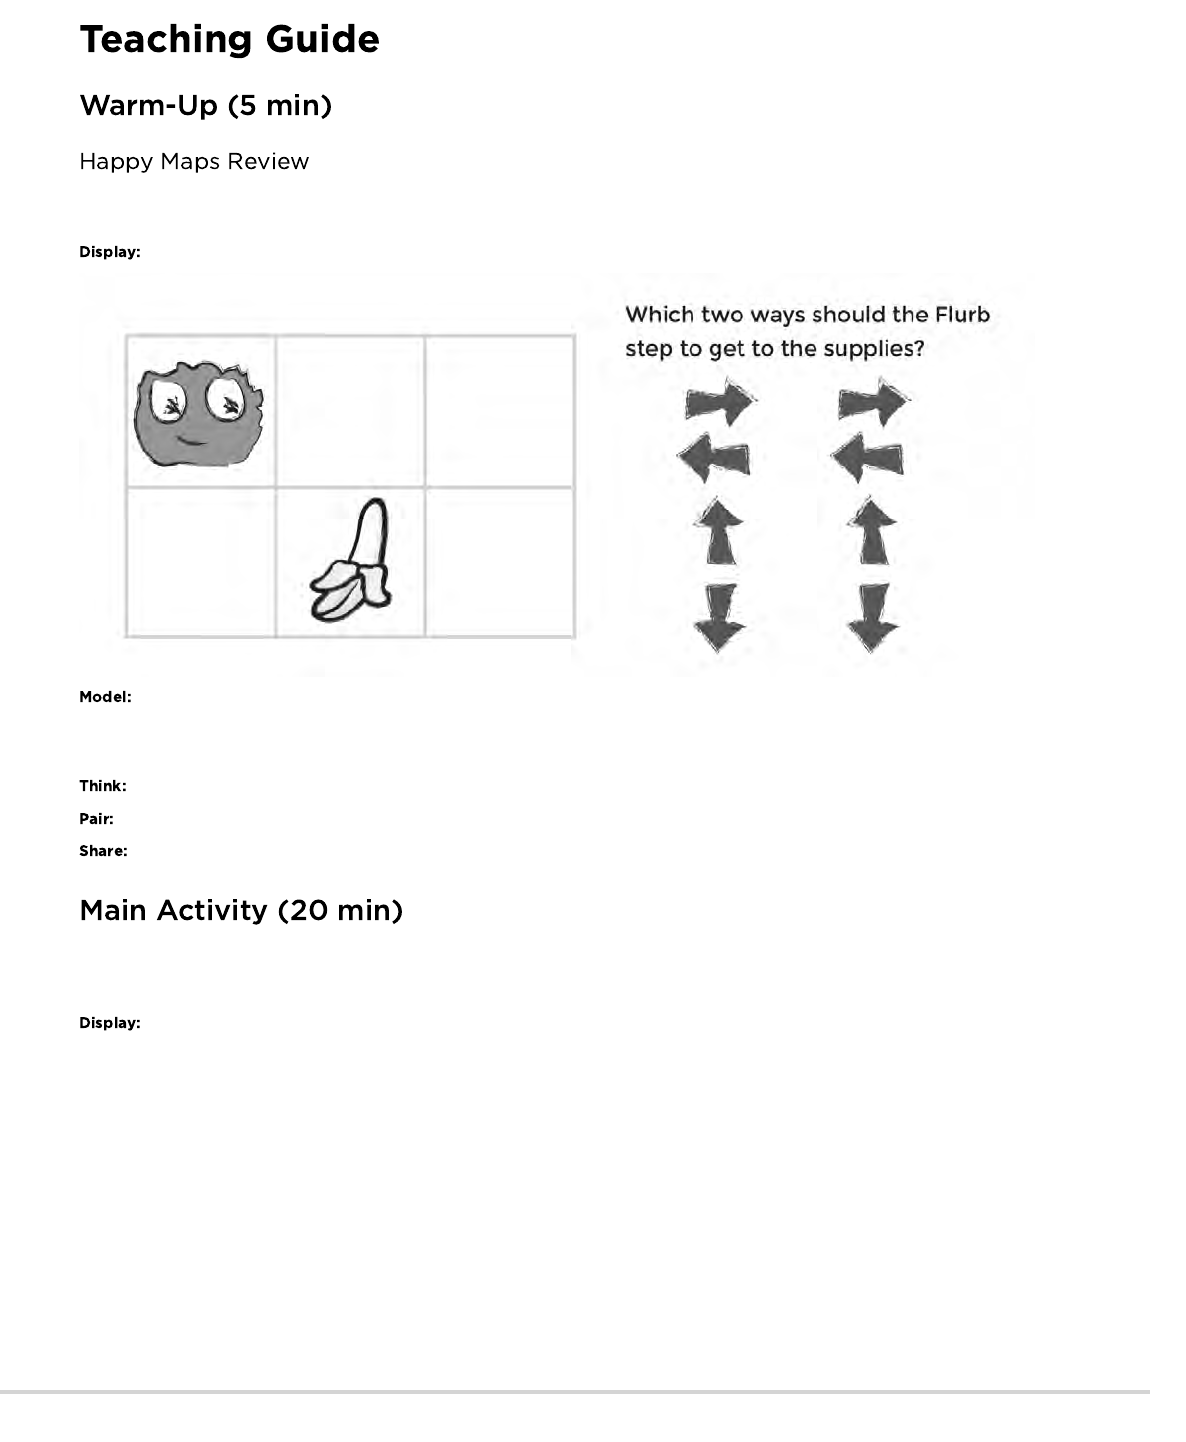
This lesson builds off of the Happy Maps actvity from earlier in the year. Students might benefit from a quick refresher before you hop into
the difficult stuff.
Select one of the maps that your class covered together in the last lesson.
Have students look at the puzzle, then think-pair-share their solution for how they would get the Flurb to the fruit (using the symbols from last
time).
Do you remember writing programs to get the Flurbs to the fruit? What would this program look like coded with arrows?
Have students discuss for about 90 seconds.
Ask a student to use their fingers to point in the direction of the arrows that they chose to solve this puzzle.
This portion of the lesson should help students see that there is an easier way to handle repetitive code than to brute force a solution with
dozens of the same symbols.
118
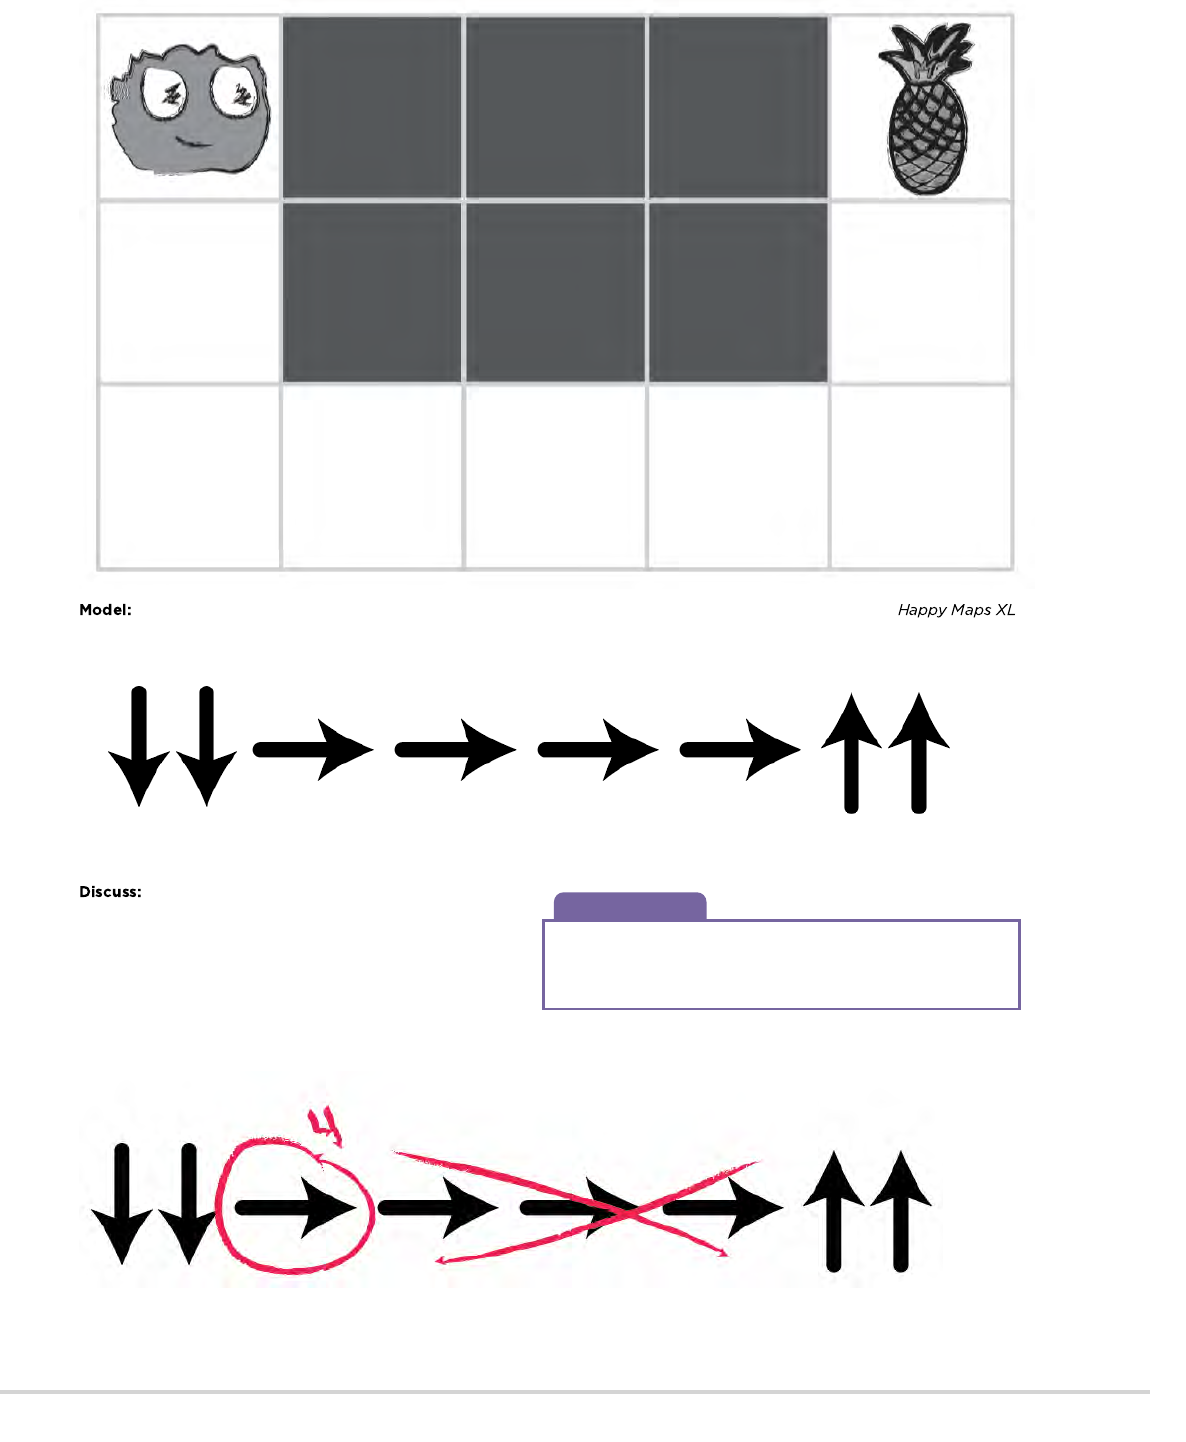
Discussion Goal
The point of this discussion is to get students to see that,
sometimes, many symbols are repeated and they can lump all of
those movements into a single icon.
Once you are confident that your students remember Happy Maps, pull up one of the new -- and much longer -- .
Can your students help you program these maps? The resulting code might look something like this:
It's a bit longer, isn’t it?
Give students the opportunity to brainstorm shorter ways to relay
the code that they’re creating. (This bit can be skipped over if
your students start saying things like: “Move forward 6 times.”
Since that will open the discussion about how to show “six times”
with symbols.)
Ideally, students will land on a method that looks like this one:
Which can be reduced even further to this:
119
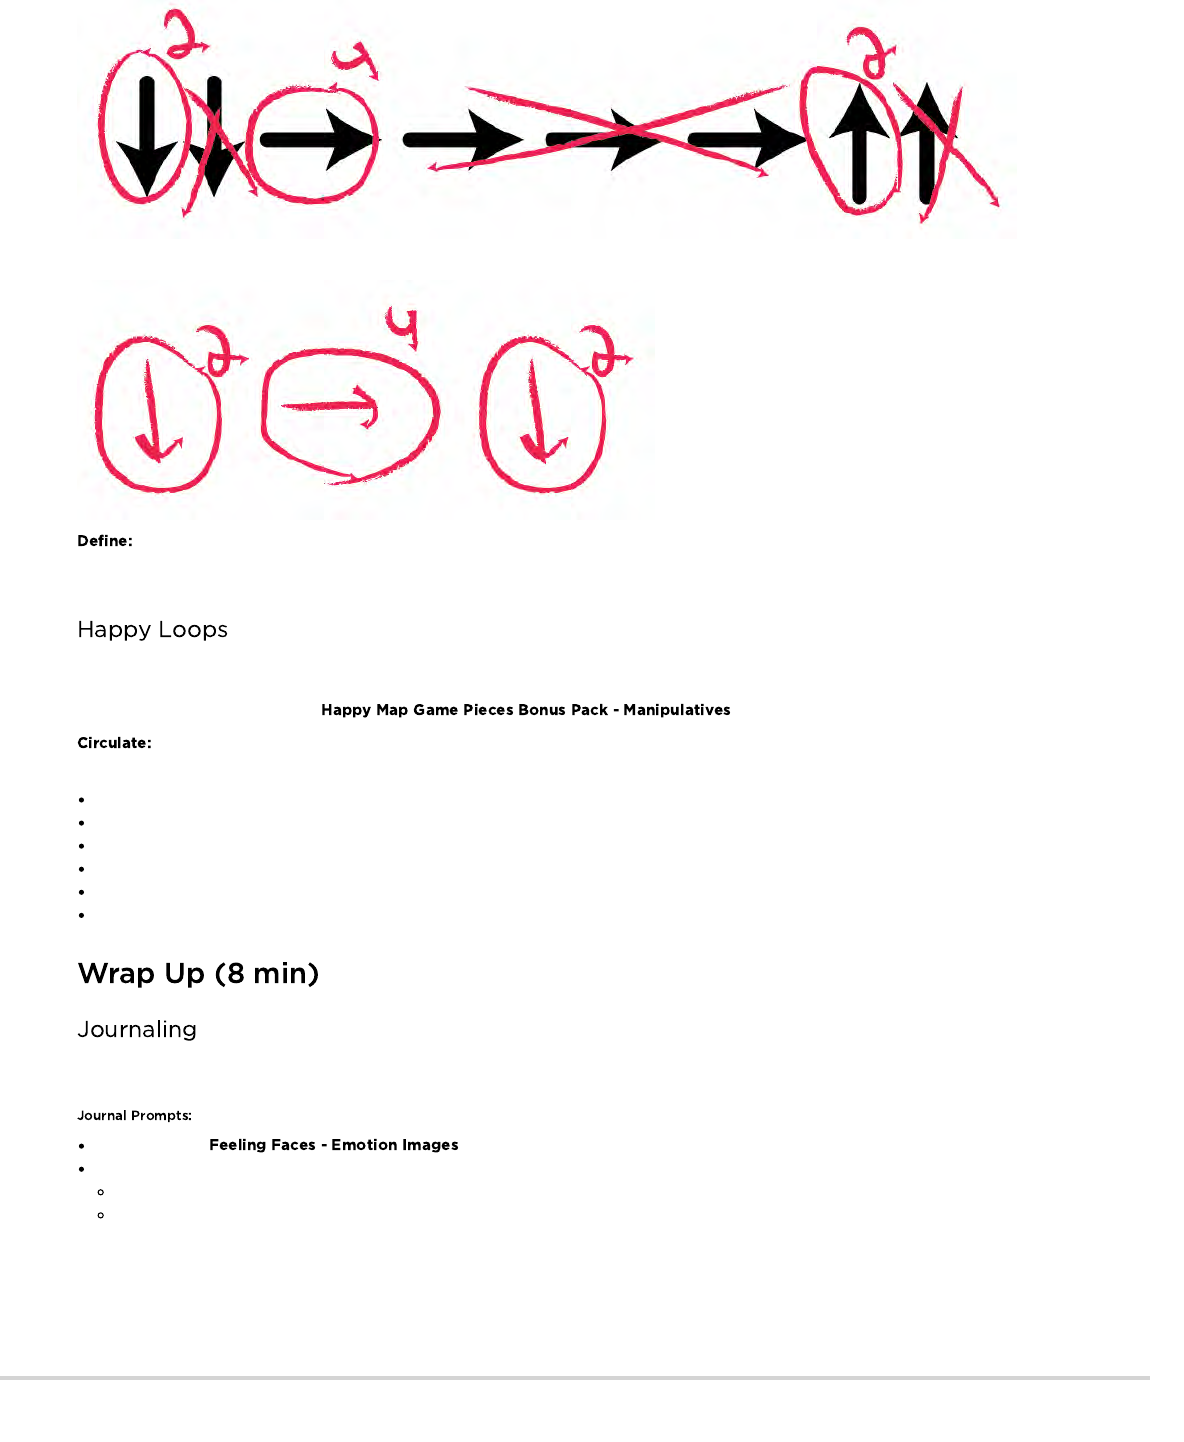
Eventually, students can write programs like this on the fly:
Once students have put together the idea of “repeating” code, give them the vocabulary around it. Make sure to share with them
that often the terms “repeat something” and “loop something” will be used interchangeably in Code Studio.
Now that students are familiar with the ability to repeat lots of code using a single loop, select an XL map and let them help you write code
for the situation. Do this as many times together as a class as you need, then set students off in groups to solve some problems on their
own. You may also need to add the to adapt this activity for loops.
Make sure to walk around and have students run through their code with you watching. Are there any bugs? Use the debugging
questions to help them find a solution.
What does it do?
What is it supposed to do?
What does that tell you?
Does it work at the first step?
Does it work at the second step?
Where does it stop working
Having students write about what they learned, why it’s useful, and how they feel about it can help solidify any knowledge they obtained
today and build a review sheet for them to look to in the future.
Draw one of the that shows how you felt about today's lesson in the corner of your journal page.
Have the students write or draw something in their journal that will remind them later what loops are. Prompts include:
What does "repeat" mean to you?
Draw a picture of you repeating something.
120
- Language
- Speaking & Listening
- Geometry
- Math Practices
- Algorithms & Programming
- Engineering in the Sciences
If you are interested in licensing Code.org materials for commercial purposes,
Create a life-size grid on the rug with tape and have student bring stuffies to school. Now students can program friends to move their
actual stuffies as directed in the programs.
Have students create their own maps for other students to solve using loops.
Draw a program on the board that uses several sets of repeated commands and have students take turns coming to the front to swap
symbols for repeat loops.
121
Happy Map XL 1
1
Happy Map XL 2
2
122
Happy Map XL 3
3
Happy Map XL 4
4
123
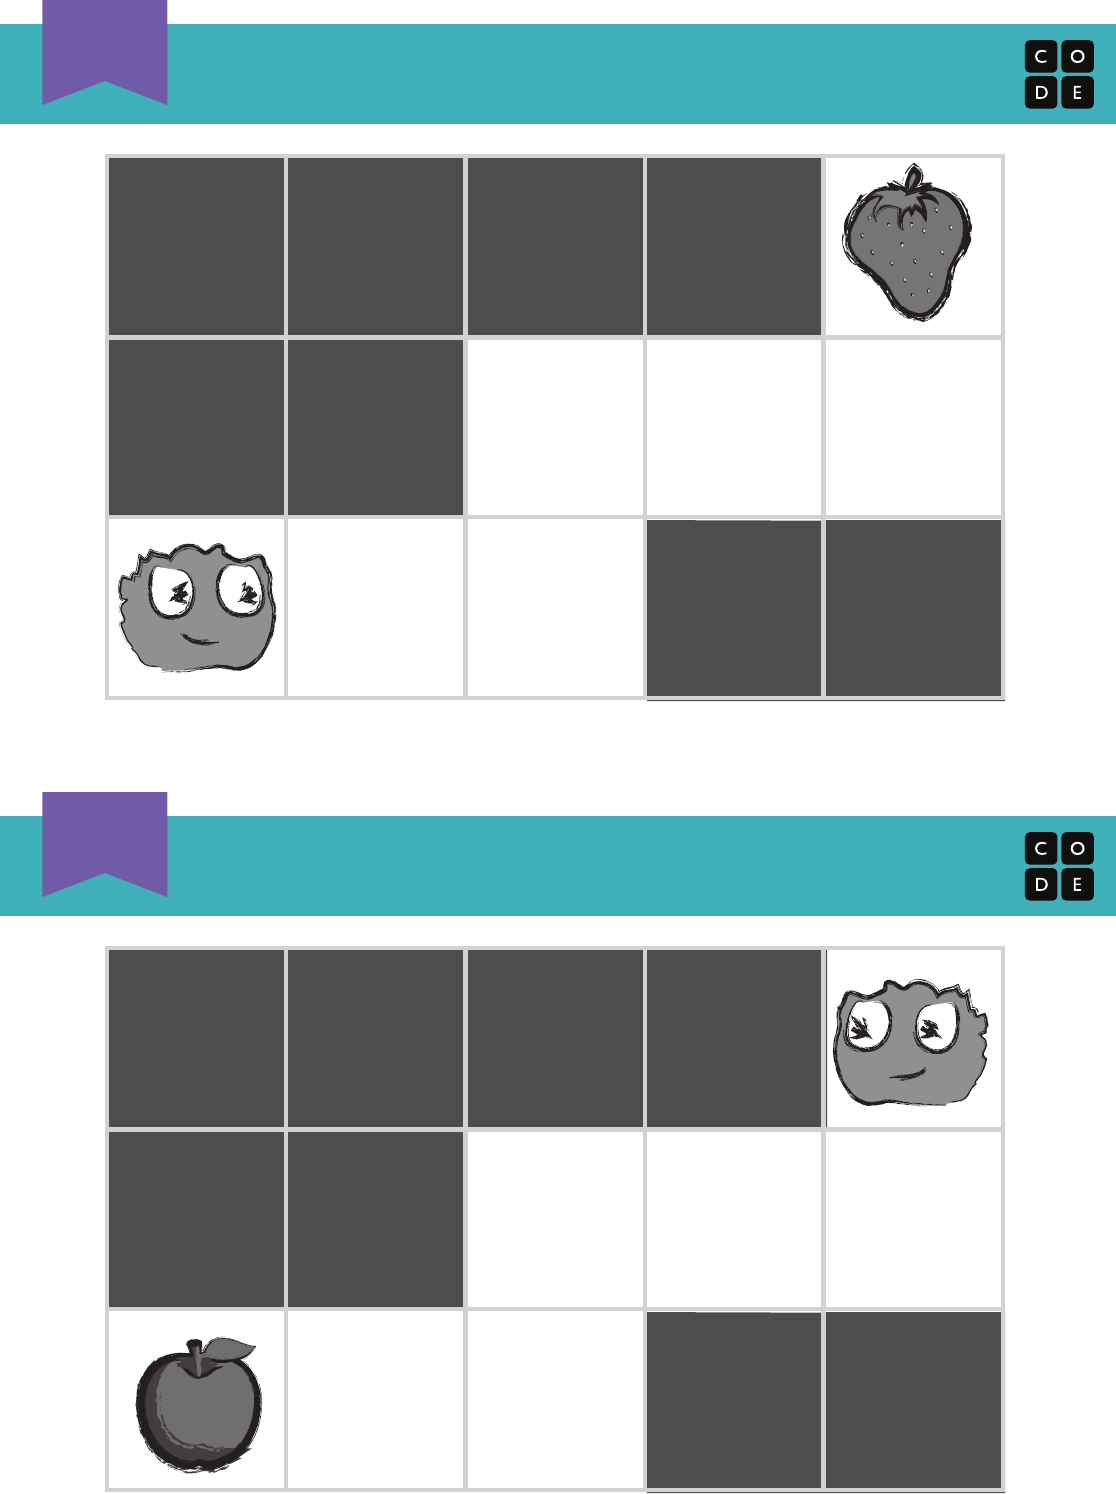
Happy Map XL 5
5
Happy Map XL 6
6
124

Revision 140428.1a
Name: Date:
Unplugged
U
repeat
repeat
repeat
repeat
Happy Maps
Game Pieces Bonus Pack
125

Happy Maps Game Pieces
Revision 140428.1a
Name: Date:
Unplugged
U
126
Happy Map XL Blank (right)
Revision 161003.1a
127

This unplugged lesson brings together teams with a simple task: get the "flurb"
to the fruit. Students will practice writing precise instructions as they work to
translate instructions into the symbols provided. If problems arise in the code,
students should also work together to recognize bugs and build solutions.
The bridge from algorithms to programming can be a short one if students
understand the difference between planning out a sequence and encoding that
sequence into the appropriate language. This activity will help students gain
experience reading and writing in shorthand code.
Translate an algorithm into a program
Decode and run a program created by someone else
Identify and address bugs or errors in sequenced
instructions
Watch the .
Print out for
each group.
Print out
for each group.
Make sure each student has a
.
Please make a copy of any
documents you plan to share with
students.
- Teacher Video
- Worksheet Answer Key
- Emotion Images
- Worksheet
- Manipulatives
- Reflection Journal
- A list of steps to finish a task.
- Finding and fixing problems in an
algorithm or program.
- An algorithm that has been coded into
something that can be run by a machine.
128
Teaching Tip
If the class starts shouting simultaneously, explain that you can
only hear one instruction at a time. Call on students individually if
that helps.
This warm-up is meant to get the class thinking about how to break a big problem down into a list of individual steps.
Start by asking the class for step-by-step directions on how to get to the chalkboard. Make sure that you ask students to break apart
any large instructions, like "Walk to the chalkboard," into smaller instructions like "Step forward."
When you reach the board, ask for instructions to draw a smiley face and try to get them to keep their instructions equally small.
Well done! You just gave me a list of steps to finish a task. In
computer science, that's called an Algorithm! [Follow up with your
typical method of introducing vocabulary: word wall, repeat-after-
me, etc.]
In this exercise, the class will get map cards that have a pre-defined start space (Flurb) and end space (fruit). Students will need to get the
Flurbs to the fruit on each card, using the arrows provided.
Select one of the intermediate maps, like the one shown above. Display it for the class and work through the puzzle together.
Have students look at the puzzle, then think-pair-share their solution for how they would get the Flurb to the fruit.
This Flurb needs to take two steps to get to the fruit. Work with your elbow partner to decide what you think those two steps are.
Have students discuss with neighbors for about 90 seconds.
Ask a few students to describe their algorithm to the class. Move your finger along the displayed map as the students read their
steps. Once you have a solution, ask if anyone else came up with a different idea that also works.
Now, share with the students that the magic step of changing an algorithm into a "program" happens when the code is written down using
symbols. Do the students see any symbols on the display?
Challenge students to encode the algorithm that they came up with before into symbols, and to write those symbols down in their
journals (or on a piece of paper.)
Once students have written down their symbols, ask them to swap with a partner to see if they can follow each others' instructions.
Ask for volunteers to come draw their arrows on the board. If the original code doesn't work, spend some time debugging as a class.
Students should be familiar with the idea of "debugging" from previous lessons, so be sure to use the vocabulary to get them comfortable
with it.
129
Once the code has been successfully written on the board, congratulate the class on writing their first program together!
If your class is comfortable, place students into small groups of 2-3. Otherwise, you can continue solving these problems as a class
and having them think-pair-share to write programs.
Pass out one of the images from the to each group as needed.
If you start noticing that students are ready for more, use the provided and let
students choose their own start and finish destinations on the blank map.
Encourage the students to follow these steps:
Discuss an algorithm to get the Flurb to the fruit.
Encode the algorithm into arrows in their journals.
Try their code to see if everything works as expected.
Debug any issues and fix their code until it works correctly.
When the lesson is done, offer to let groups share out the most difficult maps that they solved. If you had time, ask them to share
their solutions as well.
When it’s time to wind down, ask students if they can tell the difference between an algorithm and a program. Both are a list of
steps, but a program (code) has been encoded in a way that can be run by a machine (or a kindergartener!)
Do you think that someone who speaks another language would be able to run your program?
Why or why not?
Students should be encouraged to capture their thoughts in their journal after each activity (with text or images.) Choose a journal prompt
that will help students remember the purpose of this exercise.
What was today's lesson about?
Draw one of the that shows how you felt about today's lesson in the corner of your journal page.
Can you draw your own Flurb map?
What would the code be to solve your map?
Use these activities to enhance student learning. They can be used as outside of class activities or other enrichment.
Create a life-size grid on the rug with tape and have student bring stuffed animals to school.
Now students can program friends to move their actual stuffies as directed in the programs.
Have students create their own maps.
Have other students solve them using programs.
130

- Algorithms & Programming
- Engineering in the Sciences
If you are interested in licensing Code.org materials for commercial purposes,
- Language
- Speaking & Listening
- Geometry
- Math Practices
131
Happy Maps Game Pieces
Revision 140428.1a
Name: Date:
Unplugged
U
132
Happy Map 1
1
Revision 161003.1a
Happy Map 2
2
Revision 161003.1a
Which way should the Flurb
step to get to the supplies?
Which way should the Flurb
step to get to the supplies?
133
Happy Map 3
3
Revision 161003.1a
Happy Map 4
4
Revision 161003.1a
Which two ways should the Flurb
step to get to the supplies?
Which two ways should the Flurb
step to get to the supplies?
134
Happy Map 5
5
Revision 161003.1a
Happy Map 6
6
Revision 161003.1a
What should the Flurb do to get
to the supplies?
What should the Flurb do to get
to the supplies?
135
Happy Map Blank
5
Revision 161003.1a
136
Even though many people use the internet daily, not very many know how it
works. In this lesson, students will pretend to flow through the internet, all the
while learning about connections, URLs, IP Addresses, and the DNS.
If you have been doing every lesson in this course, then each student in your
classroom has used the internet...but how many know how it works? Learning
more about the internet will help students develop a better understanding of its
endless possibilities.
Learn about the complexity of sending messages
over the internet.
Translate URLs into IP Addresses.
Watch the .
Print enough
for each group.
Print one for each student.
Access to the internet (such as ).
Make sure every student has a
.
- Unplugged Video ( )
- Teacher Video
-
Manipulatives
- Assessment
- Assessment Answer Key
- Reflection Journal
- The service that translates URLs to IP
addresses.
- A method of sending information using
telephone or television cables.
- A connection that uses light to
transmit information
- A group of computers and servers that
are connected to each other.
- A number assigned to any item that is
connected to the Internet.
- Small chunks of information that have
been carefully formed from larger chunks of
information.
- Computers that exist only to provide
things to others.
- An easy-to-remember address for calling a
web page (like www.code.org).
- A wireless method of sending information
using radio waves.
137
Lesson Tip
A quick preview is all you need here. These words will all be
explained as part of the lesson, so it would be far less confusing to
do a brief intro to the words as a "see if you can spot these during
the day" type of heads-up.
Lesson Tip
There are some great YouTube videos on this subject that can
make this lesson a little easier to understand. You can show them
to the class in advance, or just watch them yourself.
. (We recommend watching from 1:44 - 5:13, if
possible.) The rest of the playlist is available .
This lesson has several new and important words:
- Say it with me: I-P Add-ress
A number assigned to any item that is connected to the Internet
- Say it with me: D-N-S
The service that translates URLs to IP addresses
- Say it with me: U-R-L
An easy-to-remember address for calling a web page (like www.code.org)
- Say it with me: In-ter-net
A group of computers and servers that are connected to each other
- Say it with me: Ser-vers
Computers that exist only to provide things to others
- Say it with me: Fye-ber Op-tic Cay-bl
A connection that uses light to transmit information
- Say it with me: Wye-Fye
A wireless method of sending information using radio waves
- Say it with me: D-S-L / Cay-bl
A method of sending information using telephone or television cables
- Say it with me: Pack-ets
Small chunks of information that have been carefully formed from larger chunks of information
It's quite likely that your students are aware of what the internet
is, but they may not really understand what the internet does.
Ask "What is the internet?"
Is the internet a public place or a private place?
(Truthfully, many people think it can be both, but it should be
viewed as a public space no matter what settings you think
you've mastered.)
How does information get from place to place?
Let's say that I want to look at the webpage for Code.org. What
do you suppose the process would be like for me to send a message to request that page?
What do I do as a user?
What do you think happens inside the internet?
Sending a message over the internet is a lot like sending a message through the mail...if every letter we sent required thousands of
envelopes!
Every message we send through the internet gets chopped up and each piece is wrapped in its own version of an envelope. We call those
"packets." Packets are specially formed chunks of information that are able to easily flow through any of the internet's channels.
Sometimes, a few of those packets will get lost, because the internet is a crazy place. In that case, the packets need to be resent, and the
whole message has to get put on hold until they arrive.
Where do you think those packets are headed?
138
Lesson Tip
If you're thinking that this is a lot of text and it would be extremely
boring to try to lecture this to a class full of elementary school kids,
you're absolutely right! If you're unable to show a YouTube video in
class to help explain it all, I highly recommend drawing pictures to
explain each idea above, or choosing students as volunteers to act
out what you describe while you're explaining. They're not
expected to get every detail and definition at this point, only to gain
exposure.
Servers don't have names like you and I do. They're actually addressed using numbers. These numbers are called IP addresses, and they
look a little strange.
For example: One of Code.org's IP addresses used to be 54.243.71.82
(Please be sure to check this out in advance. Most IP addresses change from time to time and they are then reused for other sites.)
There are many ways to reach the internet from your house, school, or place of business.
You can connect directly using a cable (that might be DSL, Cable, or Fiber Optic)
Or you can connect using radio waves over the air through Wi-Fi
Direct connections are most reliable, but they can be inconvenient.
Can you figure out why?
(You have to be attached to a cable!)
Wi-Fi connections are super convenient, but the aren't always reliable.
Can you figure out why not?
(Radio waves bounce all over the place and can get lost.)
So, if you're used to sending information to URLs (like
) and the servers actually have IP addresses for
names (like 54.243.71.82) how does the Internet change from
one to the other? That's what the DNS is for. The DNS (Domain
Name Server) has tables that allow the system to go back and
forth between URLs and IP addresses. If the Domain Name
Servers ever stopped working, it would shut down the internet as
we know it!
With that said, let's try to understand what the DNS does by
making a little DNS table ourselves.
Pull out a piece of paper and draw a grid similar to that in the internet activity:
Sample of DNS Table:
# URL IP Address
1 code.org 54.243.71.82
2
3
4
5
First, we need to fill in this table.
Survey the class for their favorite websites and write the URLs in the left column
Use a site like to find the IP addresses for those sites and write them in the corresponding rows of the right column.
Now let's take this DNS Table and pretend to send messages through the internet!
Even if you're sending messages to another person, they first have to go to at least one "server."
A server is a special computer that is supposed to be always on and ready to send and receive information.
Every website has a server.
Even email goes through servers.
139
Lesson Tip
If it feels like there are too many rules to explain outright, feel free
to post them on the board and just explain the game as you go.
You can play multiple rounds until the class really understands.
The Message Writer
The Internet
The Server (carries the IP address)
The Return Internet (optional)
The Message Receiver (optional)
Each group will draw an to find out where their message is going and
what their method of message delivery (Wi-Fi, Cable/DSL, or Fiber Optic Cable) will be.
The Message Writer will craft a note to send to the server.
The Internet will rip the message up into 4 small pieces called packets, then deliver each packet one at a time to the Server with the IP
address that was drawn from the IP Address Card stack.
The Server will make sure that the message arrives in order, then will send each packet off one at a time with the Return Internet (can be
the same person or different person than the original Internet).
The Return Internet will deliver each piece back to the Message Receiver (can be the same person or different person than the Message
Writer) and put it back together.
The Message Receiver will wait for all of the pieces to arrive, then read the message to be sure it arrived correctly!
The Internet must rip the message into exactly four packets.
If the Internet drops a packet, they have to pick it up and go back to the start to deliver it again.
The server has to wait for all of the message pieces to arrive before it can begin to send the message along.
Wi-Fi: Convenient, but spotty. Wi-Fi doesn’t require cables, but since the signal bounces all over the place, packets can get lost pretty
easily.
Simulation: Internet must carry each packet on their shoulder (no hands).
Cable/DSL: Fairly good at delivering messages, but you must be connected to a wire.
Simulation: Internet must carry each packet on the back of one hand and must keep the other hand touching a wall, desk, chair or the
floor at all times.
Fiber Optic Cable: The best at delivering messages, but you must be connected to a wire.
Simulation: Internet can carry packets in hand, but must keep the other hand touching a wall, desk, chair or the floor at all times.
To play this game, you can have your groups cluster anywhere,
but for the first time it can be less confusing to have groups play
in a line.
Line up the "Servers" on one end of the room (holding their IP
addresses). The Return Internet players can be over there as
well (if you have that many people in each group).
Have the everyone else line up across from their server at the other side of the room.
The Message Senders will likely be sending their messages to a server other than their own, so the Internet players will likely cross over
from group to group. It may look something like the diagram below (in English):
Create your own DNS table, similar to what is shown above.
Have the class help you fill in the blank spots in the table. Pick your favorite URLs and find their IP addresses using a site like
.
Divide into groups of 3 to 5.
Assign each group an IP address from the newly created table, and assign each person in the group a position:
140
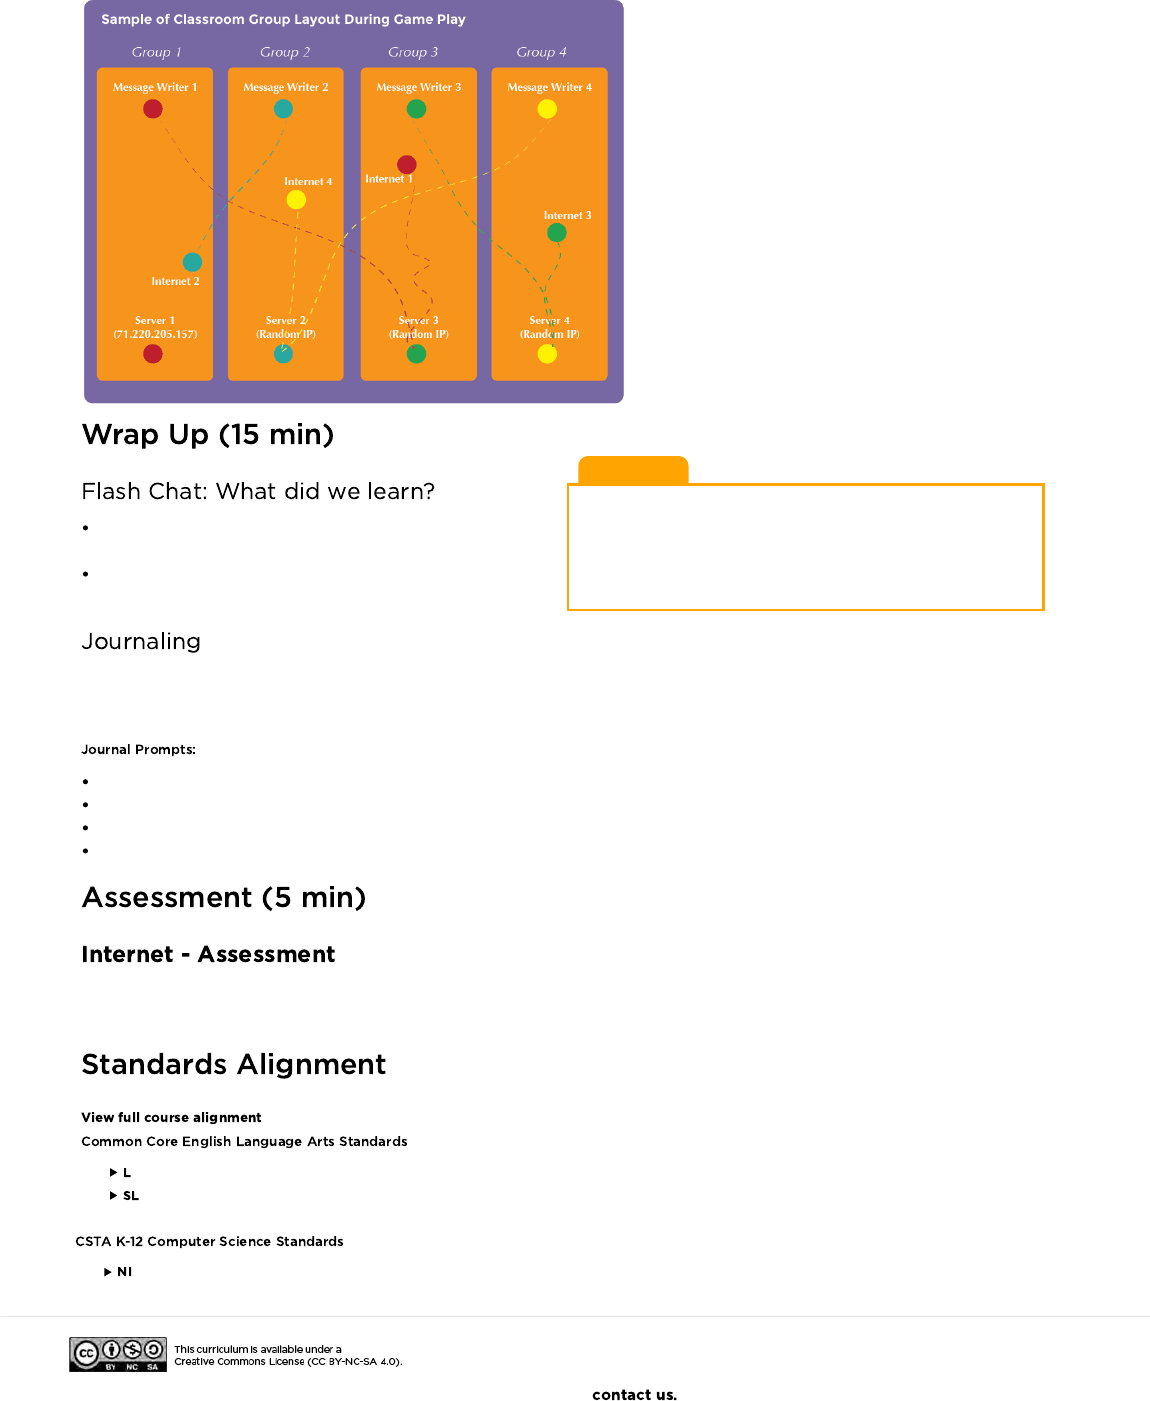
Lesson Tip
Flash Chat questions are intended to spark big-picture thinking
about how the lesson relates to the greater world and the students'
greater future. Use your knowledge of your classroom to decide if
you want to discuss these as a class, in groups, or with an elbow
partner.
What kind of connection would you rather have (Wi-Fi,
DSL/Cable, or Fiber Optic)? Why?
Why might it take your message a long time to get
somewhere?
Having students write about what they learned, why it’s useful,
and how they feel about it can help solidify any knowledge they
obtained today and build a review sheet for them to look to in the future.
What was today's lesson about?
How do you feel about today's lesson?
What's something you learned about the internet today?
Why is learning about the internet important?
Hand out the assessment worksheet and allow students to complete the activity independently after the instructions have been well
explained. This should feel familiar, thanks to the previous activities.
- Language
- Speaking & Listening
- Networks & the Internet
If you are interested in licensing Code.org materials for commercial purposes,
141

Internet
How the Internet Does What it Does
U
Revision 150517.1a
Directions:
1) Create your own DNS table, similar to what is shown here.
2) Have the class help you fill in the blank spots in the table.
Pick your favorite URLs and find their IP addresses using a site like www.getip.com.
3) Divide into groups of 3 to 5.
4) Assign each group an IP address from the table, and each person in the group a
position:
* The Message Writer
* The Internet
* The Server (carries the IP Address)
* The Return Internet (Optional)
* The Message Receiver (Optional)
5) Each group will draw an IP address Card and a Delivery Card to find out where their
message is going and what their method of message delivery (Wi-Fi, Cable/DSL, or
Fiber Optic Cable) will be.
6) The Message Writer will craft a note to send to the server.
7) The Internet will rip the message up into small pieces called packets, then deliver each
packet one at a time to the Server with the IP address that was drawn from the IP
address Card stack.
8) The Server will make sure that the message arrives in order, then will send each packet
off one at a time with the Return Internet (can be the same person or different person
than the original Internet).
9) The Return Internet will deliver each piece back to the Message Receiver (can be the
same person or different person than the Message Writer) and put it back together.
10) The Message Receiver will wait for all of the pieces to arrive, then read the message to
be sure it arrived correctly!
Rules:
1) The Internet must rip the message into exactly four packets.
2) If the Internet drops a packet, they have to pick it up and go back to the start to deliver
it again.
3) The server has to wait for all of the message pieces to arrive before it can begin to send
the message along.
142
Internet
How the Internet Does what it Does
U
Revision 150517.1a
Group 1 Group 2 Group 3 Group 4
Message Writer 1
Internet 2
Sample of Classroom Group Layout During Game Play
Sample of DNS Table
URL#
1
2
3
4
5
IP ADDRESS
www.code.org
Server 1
(71.220.205.157)
Message Writer 2
Server 2
(Random IP)
Message Writer 3
Server 3
(Random IP)
Message Writer 4
Server 4
(Random IP)
Internet 1
Internet 4
Internet 3
143
Internet
IP Address Cards
U
Revision 150517.1a
These cards correlate with numbered entries in the DNS Table.
(You should make one distinct row for each group.)
1 2
3 4
5 6
144
Internet
Delivery Type Cards
U
Revision 150517.1a
These cards correlate with different methods of
delivering messages over the Internet.
(Print enough to have one card for each group.)
Wi-Fi Fiber Optic
DSL Cable
Types:
1) Wi-Fi: Convenient, but spotty. Wi-Fi doesn’t require cables, but since the signal bounces
all over the place, packets can get lost pretty easily.
Simulation: Internet must carry each packet on their shoulder (no hands).
2) Cable/DSL: Fairly good at delivering messages, but you must be connected to a wire.
Simulation: Internet must carry each packet on the back of one hand and must keep
the other hand touching a wall, desk, chair or the floor at all times.
3) Fiber Optic Cable:
The best at delivering messages, but you must be connected to a wire.
Simulation: Internet can carry packets in hand, but must keep the other hand
touching a wall, desk, chair or the floor at all times.
145
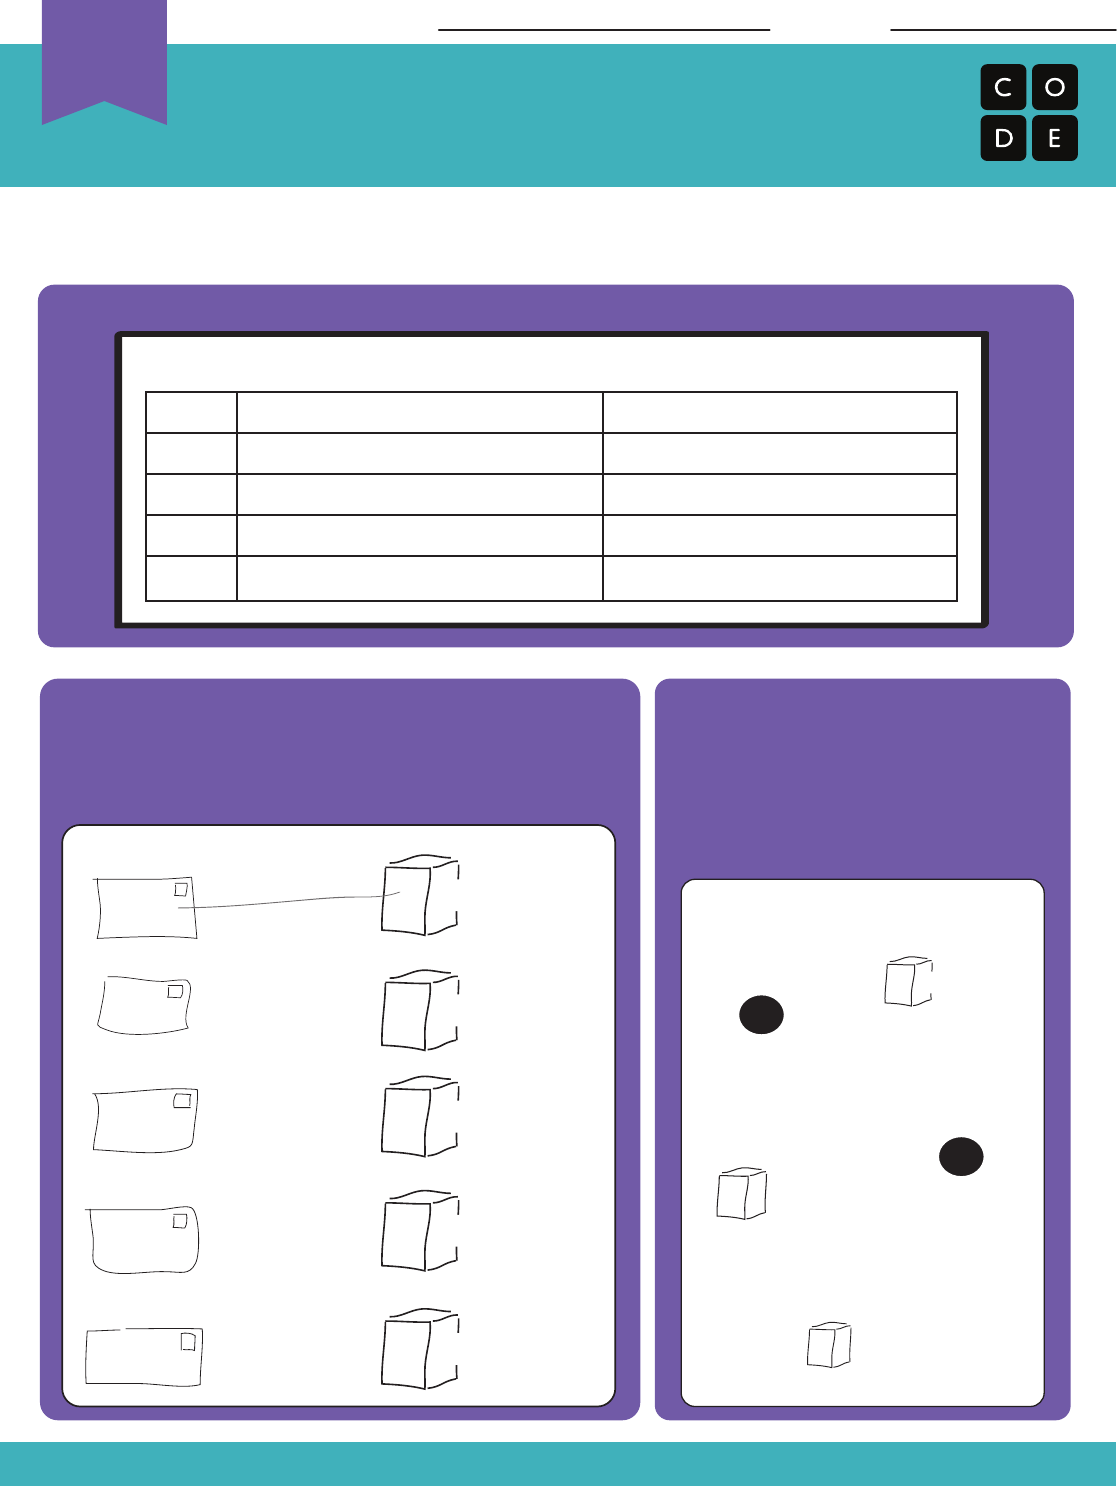
The Internet
How the Internet Does What it Does
Revision 140710.1a
The DNS has gone out, and now you’re in charge of delivering information all over the
Internet! Use the DNS Look-Up Table to figure out where each packet is supposed to go.
Draw a line from each packet to the server
where it is supposed to be delivered. The first
one has been done for you.
This message is being delivered
from someone at code.org to
someone at thinkersmith.org.
Draw the path that the message
is likely to take.
Name: Date:
code.org
light-bot.com
thinkersmith.org
khanAcademy.org
csisfun.com
DNS Look-Up Table
URL#
1
2
3
4
5
IP ADDRESS
code.org
csisfun.com
thinkersmith.org
light-bot.com
khanAcademy.org
54.243.71.82
100.42.50.110
64.14.68.10
54.209.61.132
23.23.224.106
100.42.50.110
64.14.68.10
54.209.61.132
23.23.224.106
23.23.224.106
54.243.71.82
64.14.68.10
Message
Sender
54.243.71.82 Message
Receiver
Unplugged
U
146
Loaned to Computer Science Fundamentals by the team over at Copyright and
Creativity, this lesson exists to help students understand the creative process of
sharing and inspiration. Along with that comes the promotion of creative
expression and the need to be fair with creative work.
Students will soon be creating projects to share and most of these projects will
contain either code or imagery that students did not create themselves. This
lesson is here to show students the proper way to handle the use of content
that is not their own.
Explain why it is not okay to claim that someone
else's work is your own.
Create original art for the purpose of empathizing
with other creators.
Review the original
lesson plan
Watch the
Prepare drawing/painting materials for main activity
Please make a copy of any
documents you plan to share with
students.
- Lesson Plan
-
Video
147
Teaching Tip
Encourage students to be as creative as they can. There are no
wrong answers. Give this character a life of his/her own.
Play the with your students. You can play it several times throughout this
lesson.
The following discussions are designed to create context, help students engage with the topic, and prepare them for the lesson discussion.
Ask students to help you create a character sketch about one of the characters in the video.
We’re going to do a character sketch where we decide who this person is.
Which one of the characters should we use? Let’s vote. [Take a quick vote.]
Write the character sketch on the board as students contribute
ideas. Prompt with questions:
Who is this character?
What is his/her name?
Who are his/her friends? How long have they known each
other?
Who are the people in his/her family? What are they like?
What is his/her backstory?
Where does he/she live?
Has he/she lived there all his/her life or has he/she moved from somewhere else?
What exciting thing might have happened to him/her back in kindergarten, first grade?
What does he/she look forward to?
What is he/she afraid of?
If possible, show images of two or three superheroes on the board.
Discuss the stories of these characters. What are their super powers? What do they use their powers for?
After discussion, ask your students to draw their own superhero character .
When they are finished, discuss what they created:
What did you create?
What inspired your character?
What makes your superhero different from or better than any other?
How is yours similar to other superheroes?
Have you ever seen a movie or played a video game that made you want to make something?
I’m going to play a short video. As you watch the video, think about how you would feel if this situation happened to you. What would
you do? Play the with your students.
It’s great to create. And, it’s great to recognize how others’ creations inspire our new creations. We want to be fair when we’re
using each other’s creative work.
What did you think about that situation? What was going on?
These students combined their work to make something new — the t-shirt.
What would you do in that situation?
Did these friends treat each other fairly?
What if she had wanted to add a ballerina tutu or big boots or glasses to the dragon?
Do you think the boy would have liked that?
Do you think that would be fair?
How would you have felt?
148
Creating new things is fun — art, music, movies, paper creations, structures, even buildings! It’s great to create and share and be inspired —
as long as we respect each other as artists and play fair.
Give the students a journal prompt to help them process some of the things that they encountered during the day. You can choose one of
the prompts below, or make up your own.
Journal Prompts:
Draw a feeling face in the corner of your journal page
Think of a superhero that one of your classmates made. Can you draw your own picture of that superhero? Give proper credit to your
classmate as the creator of the original version.
Please be sure to visit to find more lessons on digital sharing and creative rights.
- Speaking & Listening
- Algorithms & Programming
If you are interested in licensing Code.org materials for commercial purposes,
149
This lesson will work to prepare students mentally for the coding exercises that
they will encounter over the length of this course. In small teams, students will
use physical activity to program their classmates to step carefully from place to
place until a goal is achieved.
By using physical movement to program their classmates, students will run into
issues and emotions similar to what they will feel when they begin coding on a
computer. Encountering those stresses in a playful and open environment will
help to alleviate intensity and allow students to practice necessary skills before
they run into problems on their own.
Define a list of steps (algorithm) to get a friend from
their starting position to their goal
Translate a list of steps into a series of physical
actions
Identify and fix errors in the execution of an algorithm
Watch the
Print (or otherwise prepare) one
for displaying
to the class
Print one for
each group of 2-3 students
Print one for
each group of 2-3 students
Prepare blank papers to fill out the rest of the
walking grid (4-7 needed per group)
Please make a copy of any
documents you plan to share with
students.
-
PDF
- pdf
- PDF
- A precise sequence of instructions for
processes that can be executed by a computer
- Part of a program that does not work correctly.
- Finding and fixing problems in an
algorithm or program.
- Feeling annoyed or angry because
something is not the way you want it.
- Trying again and again, even when
something is very hard.
150
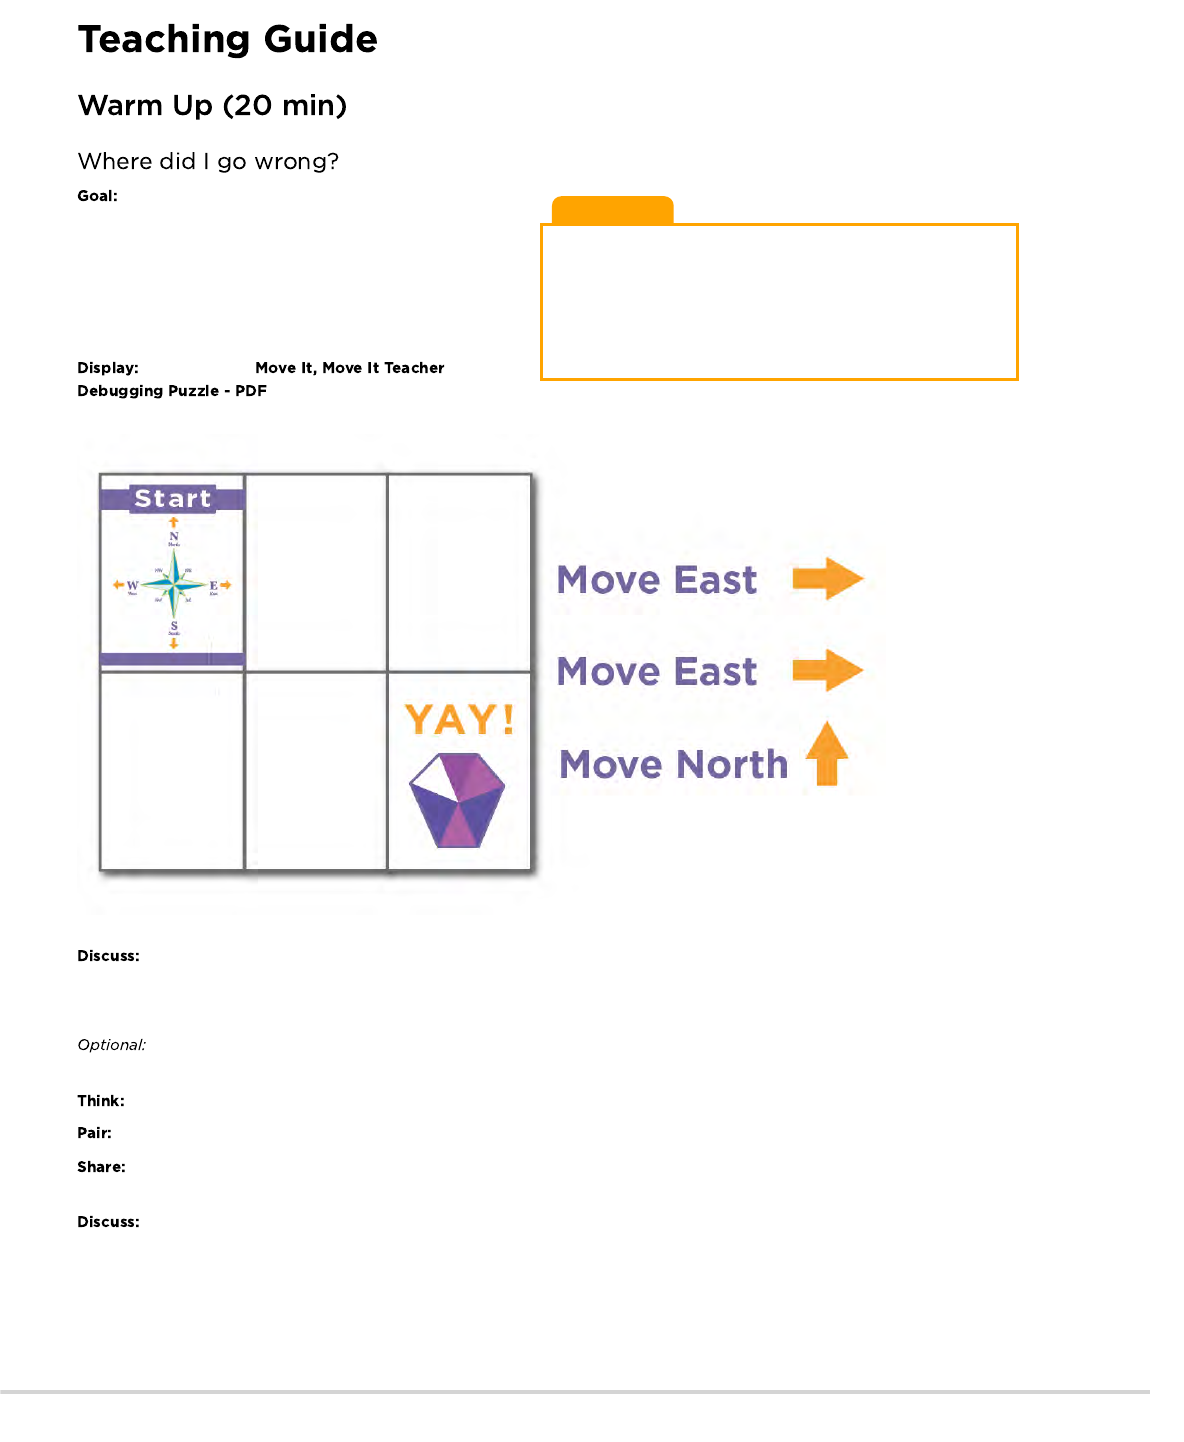
Teaching Tip
If your class has not already learned cardinal directions, it will be
worth covering them before they begin Course B. This conversion
will come in handy for nearly all of the online puzzles aimed at first
grade, as well as several of the unplugged activities.
Let students know that they will continue to see those directions in
the online programs next to the direction arrows.
In this lesson, we want to help students learn to identify
and fix bugs in their own programs. The easiest way to do that is
to first present students with a program that contains bugs that
are not their fault. Once they've helped you fix "your" program,
share with them how frustrating it can be to make mistakes, and
help them see that those feelings are completely normal and they
shouldn't feel embarrassed by them.
Put an image of
up on the screen where everyone
can see it.
Get the attention of the class and let them know that you are stuck! You have this challenge, and you thought you had solved it,
but it doesn't seem to be working. Your program has a bug, can they help you fix it?
Take a moment to walk them through the rules: - Start at the compass rose - Follow the instructions step-by-step - End at the happy face
Walk through your program using your fingers on top of the map, under the document camera. Express frustration when your
fingers end up off the map, instead of at the treasure.
My program says "East, East, North". Can you figure out why my program doesn't work?
Let students work together to see if they can figure out what the program is supposed to say .
Ask students if anyone was able to figure out a way to solve the problem. When you get a correct answer, let the students know that
they are great at "debugging"!
Ask the students if they could tell how you were feeling when you couldn't figure out the answer. They might suggest that you were
"mad" or "sad". Instead of telling them "no", describe that you were feeling a little bit mad, a little bit sad, and a little bit confused. When you
put all of those emotions together, it makes a feeling called "frustration". When you are "frustrated" you might think you are mad, sad, or
confused -- and you might be tempted to give up -- but frustration is a natural feeling and it's a big hint that you are about to learn something!
Instead of quitting, practice persistence. Keep trying over and over again. After a few times, you will start to understand how to debug your
problems!
151
Content Corner
For more on persistence and frustration, try reading
to your students. It will help them spot moments
of frustration. It will also help give them the tools to deal with it.
If you do not read the book, take a moment to cover tips on
frustration and persistence as a class:
Tips to Help With Frustration
Count to 10
Take deep breaths
Journal about them
Talk to a partner about them
Ask for help
Tips for Being Persistent
Keep track of what you have already tried
Describe what is happening
Describe what is supposed to happen
What does that tell you?
Make a change and try again
Teaching Tip
Here are some useful links in case your class hasn't yet talked
about the compass rose and cardinal directions:
To make sure that students understand the idea of
finding and fixing errors (debugging) pass out the
and have students complete the task in
pairs.
If you want to move the activity along more quickly, feel
free to complete these as a class, instead.
Now it's time to play the game!
Hand each group of 2-3 students a packet of Move It,
Move It maps, as well as the blank papers for the grid on the
ground. Allow students to either cut the halves of each map apart,
or fold the sheets in half so that each map is clearly visible
(without distraction.)
In each group, each player will get a task.
Player 1: Choose/set-up the map to play
Player 2: Programmer
Player 3: Walking Machine
Note that the rules are not the most important thing here. Feel free to clarify if the students have questions, but if the students are playing a
bit differently than described, you don't need to hold them to the letter of the game. The crucial bit is that they are moving from immediate
instructions to giving two or three instructions before the Walking Machine moves.
Give the students a journal prompt to help them process some of
the things that they encountered during the day. You can choose
one of the prompts below, or make up your own.
Journal Prompts:
Draw a feeling face in the corner of your journal page
What were the four directions on the compass rose?
What tricks can we use to remember North, South, East and West?
Draw another way we could we have given instructions without using our arms
Draw your favorite part about that game
Use these activities to enhance student learning. They can be used as outside of class activities or other enrichment.
Draw a tic-tac-toe board for the class.
Place a single X and a single O somewhere on the board.
Ask the class if they can get the X to the O using arm gestures as a class.
1) Decide who will take each job.
2) Have player 1 set a grid on the floor made up of pieces of paper (as shown on one of the Move It Maps) except with the gem
3) Player 3 will start by standing on the page with the compass rose.
4) Player 2 will then guide player 3 step-by-step through the paper maze using the provided arm signals.
5) When player 2 gives the signal to “STOP”, player 3 will flip over the page that they are on. If that page is a gem, then th
6) If there is time, let everyone rotate positions and go again!
152
This can be done in groups.
Groups can share their solutions for the class.
- Language
- Speaking & Listening
- Counting And Cardinality
- Geometry
- Math Practices
If you are interested in licensing Code.org materials for commercial purposes,
Similar to the activity above, but have the students write their programs in advance using arrows instead of hand gestures.
153

Unplugged
UMove It Move It
Debugging
Revision 180417.1a
Start
NE
SE
NW
SW
W
West
E
East
N
North
S
South
YAY!
Move East
Move East
Move North
154
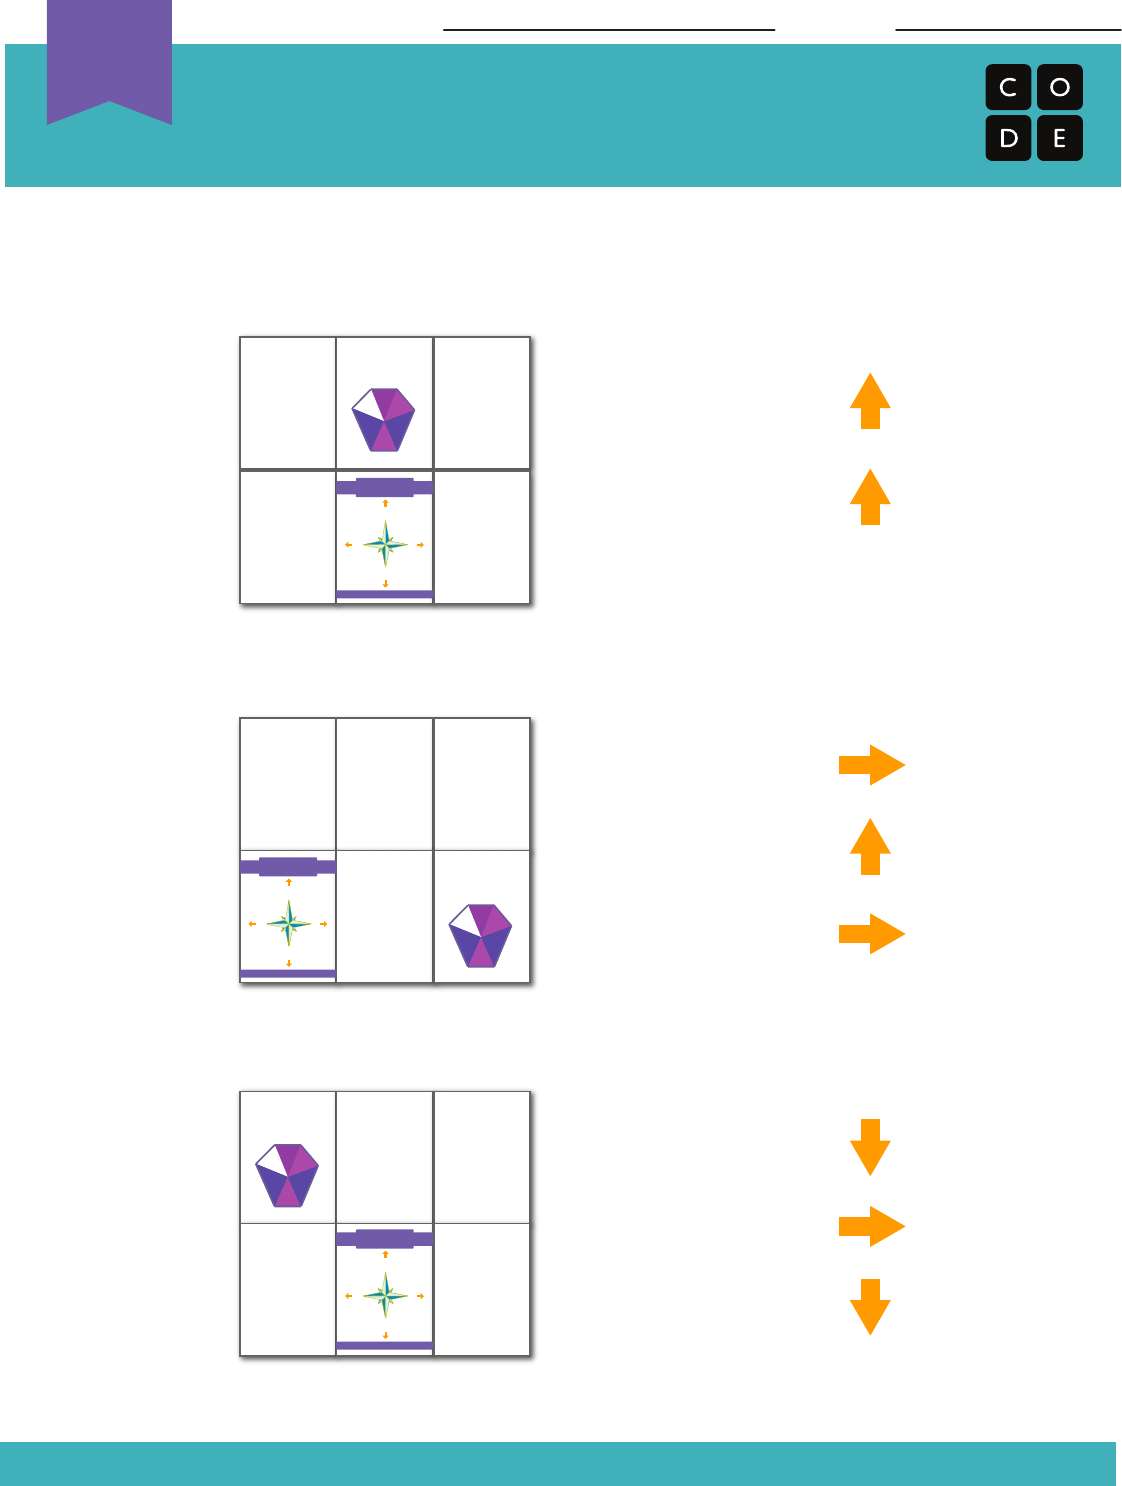
Revision 180417.1a
Move It Move It
Debugging
Name: Date:
Unplugged
U
YAY!
Start
NE
SE
NW
SW
W
West
E
East
N
North
S
South
Start
NE
SE
NW
SW
W
West
E
East
N
North
S
South
YAY!
YAY!
Start
NE
SE
NW
SW
W
West
E
East
N
North
S
South
Each of these algorithms has a mistake. Can you find the mistake and cross it out?
Move North
Move North
Move East
Move East
Move North
Move East
Move South
Move South
1)
2)
3)
155
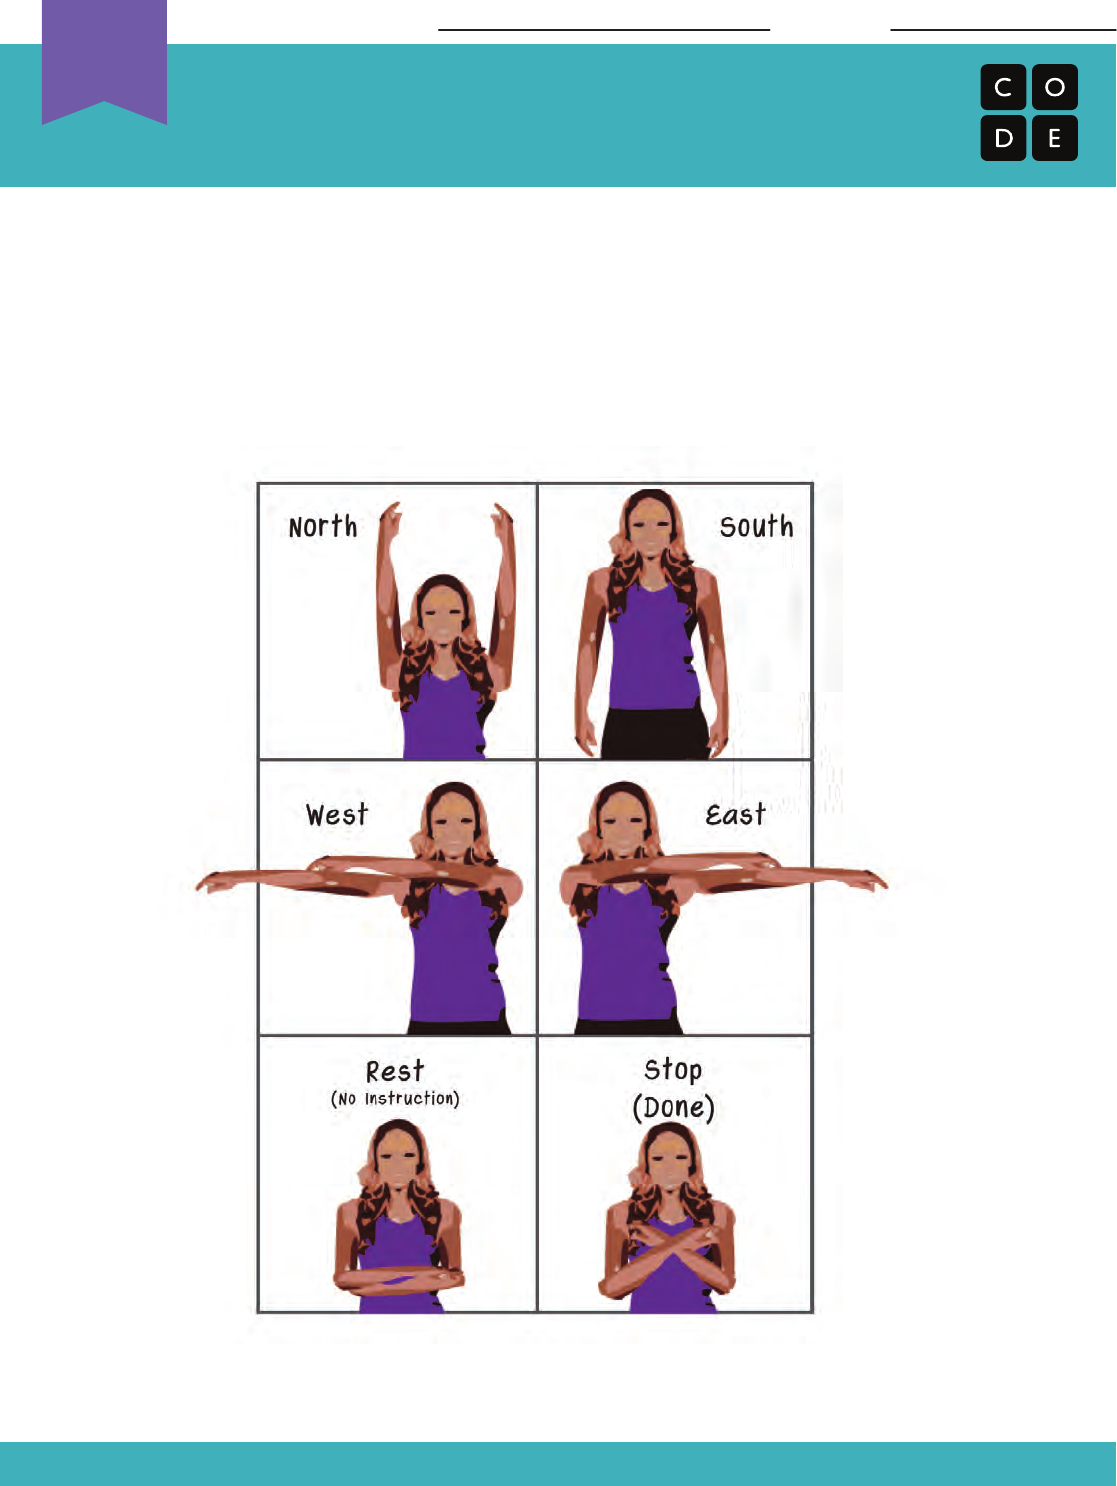
These are the moves that you can do to help guide your friend.
Practice a few times to be sure that you both understand what each move does.
Move It, Move It
Multi-Step Adventure Activity Key
Revision 180417.1a
Name: Date:
West
Rest
(No Instruction)
Stop
(Done)
SouthNorth
East
Unplugged
U
156

YAY!
157

Start
NE
SE
NW
SW
W
West
E
East
N
North
S
South
158
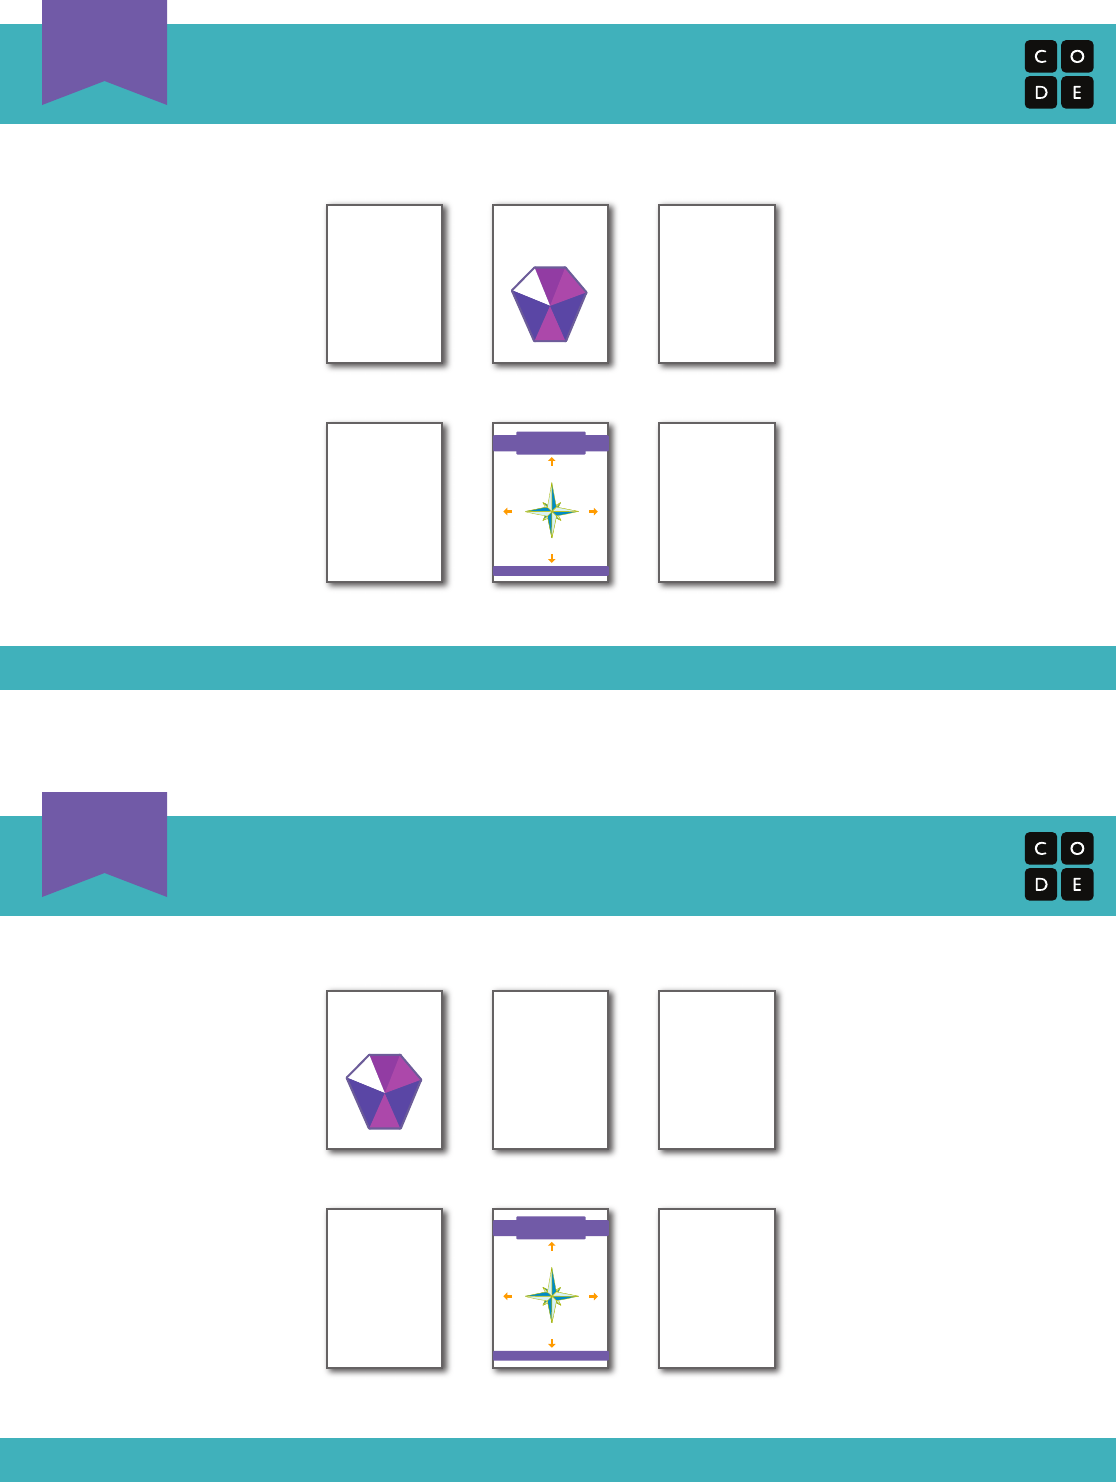
Move It Map 1
1
Revision 180417.1a
Move It Map 2
2
Revision 180417.1a
YAY!
YAY!
Start
NE
SE
NW
SW
W
West
E
East
N
North
S
South
Start
NE
SE
NW
SW
W
West
E
East
N
North
S
South
159
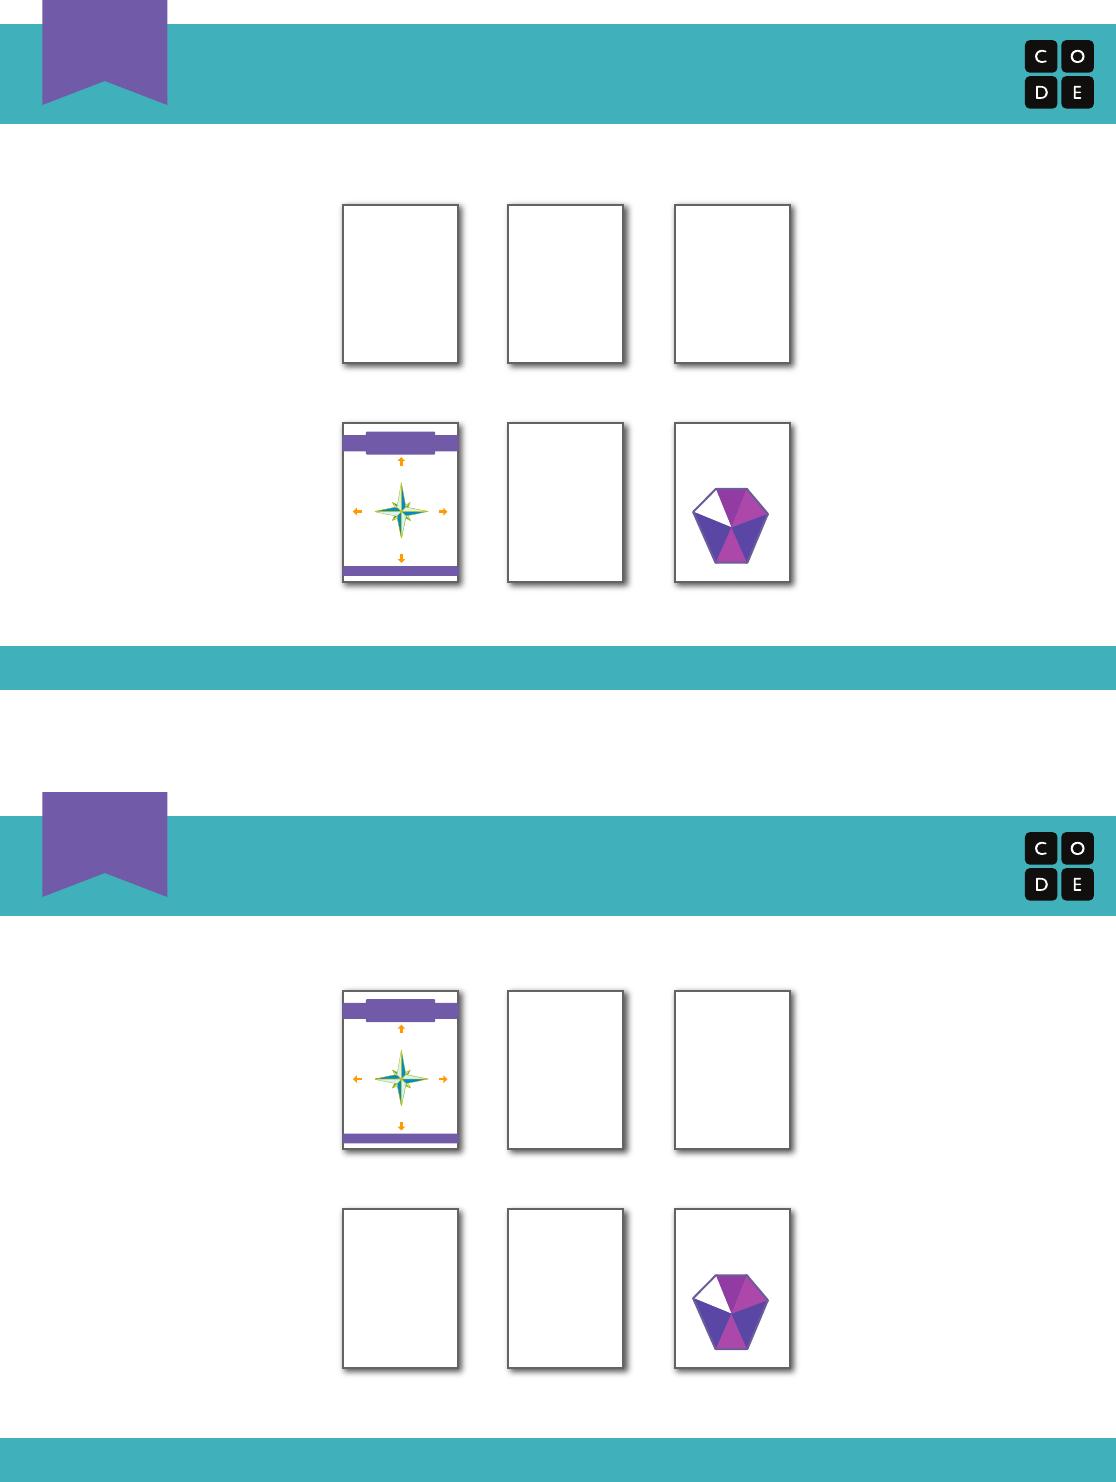
Move It Map 3
3
Revision 180417.1a
Move It Map 4
4
Revision 180417.1a
YAY!
YAY!
Start
NE
SE
NW
SW
W
West
E
East
N
North
S
South
Start
NE
SE
NW
SW
W
West
E
East
N
North
S
South
160
Building on the initial "My Robotic Friends" activity, students learn to use loops
when programming their robots in order to build bigger structures more
efficiently.
This lesson serves as a reintroduction to loops, using the now familiar set of
"robot" programming instructions. Students will develop critical thinking skills by
looking for patterns of repetition in the movements of classmates and
determining how to simplify those repeated patterns using loops.
Identify repeated patterns in code that could be
replaced with a loop
Write instructions that use loops to repeat patterns
Make sure each student has a
Watch the
Prepare a stack of 20 paper cups for each group of
4 students
(Optional) Print out one
per group of 4 students
Display the
where students can reference throughout the
lesson.
Print and cut out
for each group if your class is not
going to use cups.
Print out one set of
per group.
Please make a copy of any
documents you plan to share with
students.
- Teacher Video
- PDF
- The action of doing something over and over
again.
- An algorithm that has been coded into
something that can be run by a machine.
- The art of creating a program.
- Do something again
161
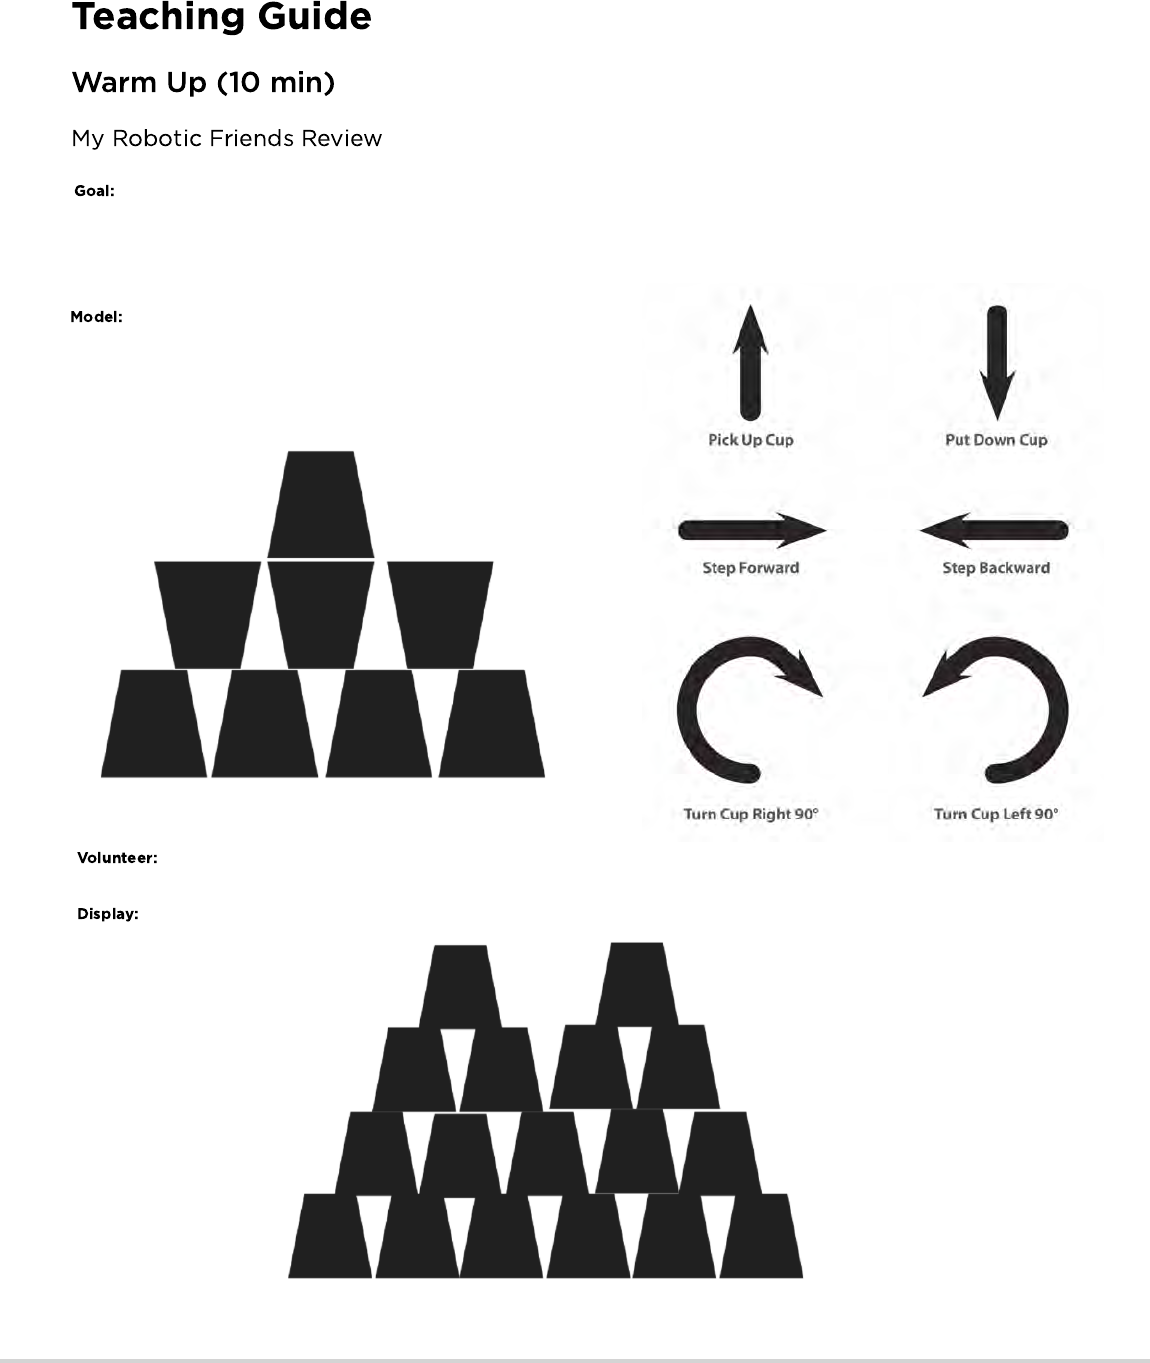
Display: Show the MyRoboticFriends-SymbolKey that we used in My Robotic
Friends. For each of the six symbols, ask students to show you what it looks like for
a robot to follow that instruction.
With the class together as a group, pull an easy puzzle from the "My Robotic
Friends" Cup Stack Pack and program together as a reminder of rules and
terminology.
Next, pull a puzzle that’s slightly harder, but also requires a lot of steps like the one below.
Ask a volunteer (or a group of volunteers) to come forward to help program this one on the board. If you make them stick strictly
to the “no symbols other than those on the key” rule, it will probably take a while!
Now, bring up this image:
What is the reaction of the class?
This review will refresh the students’ minds about how quickly programs for the
"My Robotic Friends" activity can get intense.
162
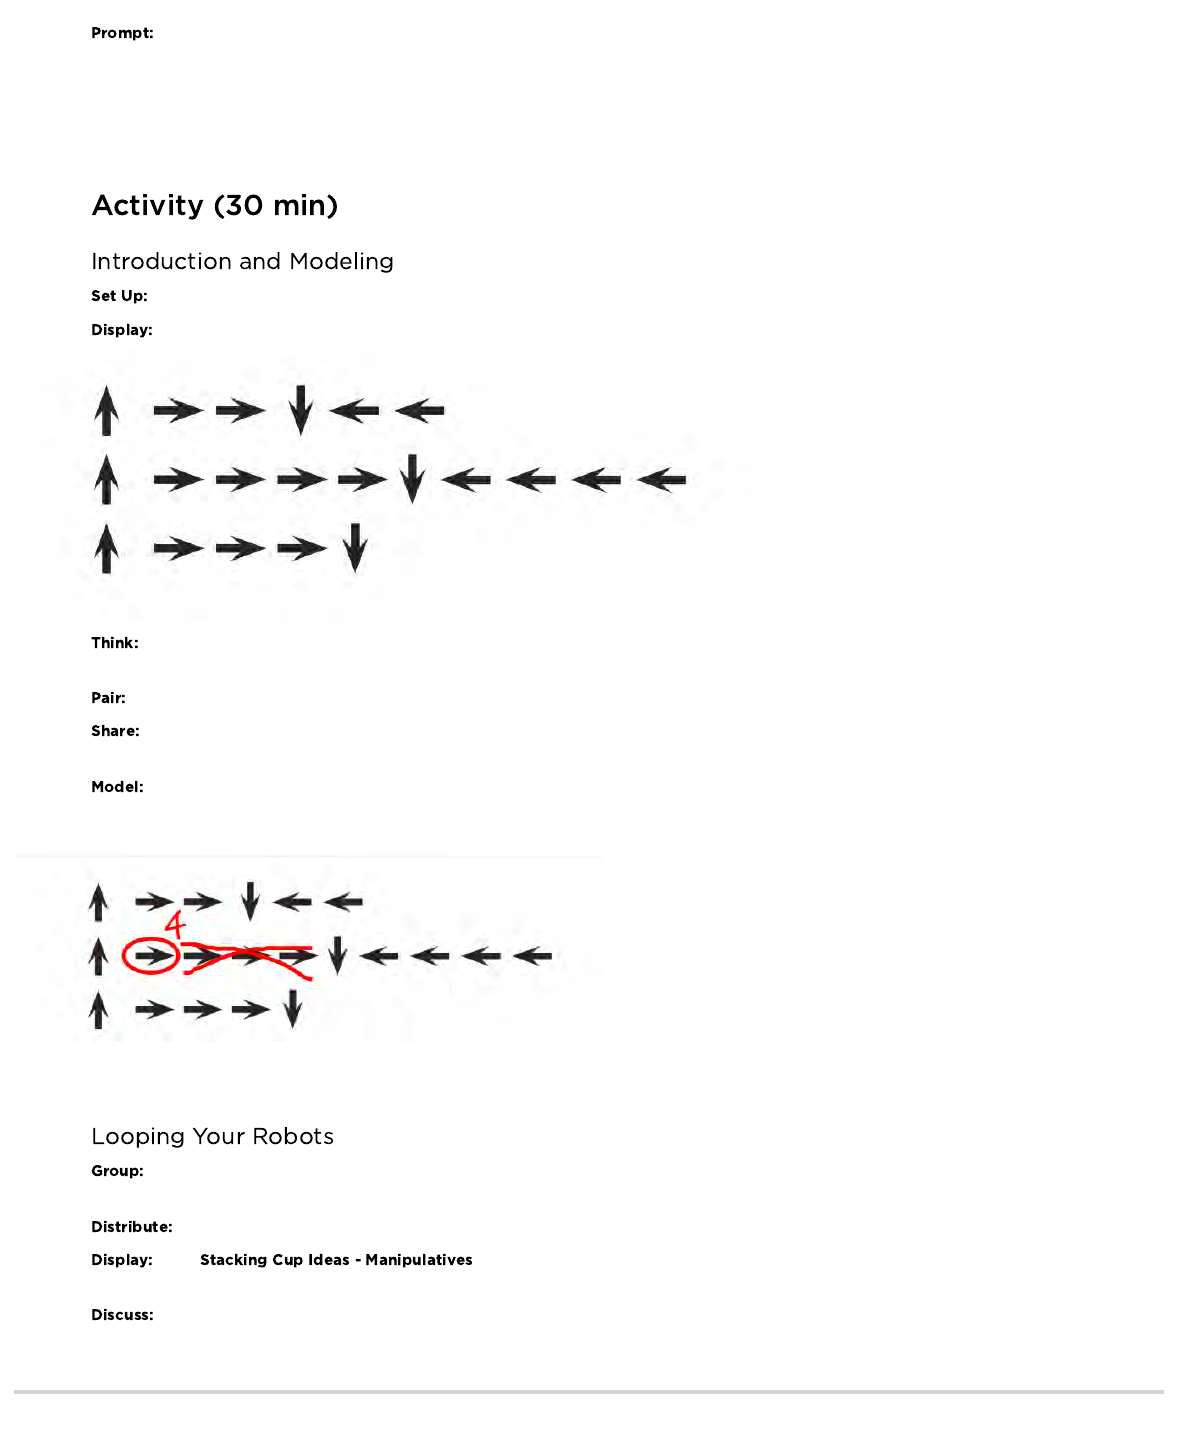
Once students have put together the idea of “repeating” code, give them the vocabulary around it. Make sure to share with them that the
terms “repeat something” and “loop something” are often used interchangeably.
Have stacks of cups or cut paper trapezoids available for groups.
Take the program from one of your previous cup stacks and display it for the class, or use the one below.
Ask students to think quietly about where in this program they can find a pattern of instructions that repeat uninterrupted (one
repetition after another).
Turn to a neighbor and share one of the repeating patterns you found.
Ask a few students to share out the patterns they identified. Try to pull out different approaches to grouping patterns. For each
pattern, ask students to identify how many times the pattern repeats.
Using one of the repeating patterns that the class identified, model how Circle the instruction or pattern that repeats, write the
number of loops near that circle, then cross out the rest of the arrows.
Repeat this until the entire program has been shortened, then re-write the program in a way where students can see how much more simple
the resulting instructions are.
Place students into groups of 4. Each group should then further break down into two pairs - each pair will develop their own
program for the other pair to "run".
Give each group one stack of cups or paper cutouts.
Show to the class or hand out individual copies for groups to use. Have each pair (not
group) choose which idea they would like their robot to do. Encourage pairs to select a more complicated pattern this time around.
Let each group discuss how the stack should be built, then instruct each group to translate the algorithm into the symbols. Make
sure each group writes down the program somewhere for the "robot" to read later. As students are working on their programs, remind them
to be on the lookout for opportunities to replace a repeating pattern with a loop.
Give students the opportunity to brainstorm shorter ways to relay the code that they’re about to create. (This bit can be skipped
over if your students start saying things like: “Move forward 6 times.” Since that will open the discussion about how to show “six times” with
symbols.)
163
Teaching Tip
Be sure to keep your eyes open for students
using loops. Try to avoid correcting their overall algorithms or
prescribing a solution, but feel free to direct students towards
patterns that could be shortened using a repeat circle.
Watch students as they run through the code. Are there any bugs?
Use the debugging questions to help them find a solution.
What does it do?
What is it supposed to do?
What does that tell you?
Does it work at the first step?
Does it work at the second step?
Where does it stop working?
When all of the pairs have had a chance to run their
programs, ask a few to share their solutions with the class. Use
this opportunity to discuss how groups came up with different
solutions to the same puzzle. In particular, you might ask of each
program:
How did they identify the loops?
Are there other ways those loops could have been written?
How much shorter is the program with loops than it would be
without?
Is the program easier to understand with loops or written out
longhand? Why?
Having students write about what they learned, why it’s useful, and how they feel about it can help solidify any knowledge they obtained
today and help to build a review sheet for them to look at in the future.
Here are some possible topics:
Do you feel like loops make programming easier or harder?
What other kinds of things in life do we repeat?
Eating - put food in mouth, chew 20 times
Brushing hair - brush through hair 35 times
Routines - Wake up, go to school, come home, go to bed
Write or draw something in your journal that will remind you later what loops are.
What does "repeat" mean to you?
Draw a picture of you repeating something.
Have students draw their own cup stacking creations for someone else to code.
Provide students with algorithms that utilize repeats, then have them expand the program back out to a full step-by-step version.
- Language
- Speaking & Listening
- Math Practices
- Operations And Algebraic Thinking
- Algorithms & Programming
- Engineering in the Sciences
If you are interested in licensing Code.org materials for commercial purposes,
When groups have finished their instructions, have each pair take turns "running" their code with another pair. Remind students to be on
the lookout for bugs in their code, but not to interrupt a robot until it's finished running the program.
164

Sample Table Arrangement for Cups
0
1 step
backward 1 2 3 74 5 6
0
steps
3
steps 5
steps
4
steps
165

0 1 2 3
Sample Template for Moving Cups
4 5 6
166
Pick Up Cup
Step Forward
Turn Cup Right 90°
Put Down Cup
Step Backward
Turn Cup Left 90°
167
168

169

170
171

To cut quickly:
First cut in horizontal strips, then snip along lines to make trapezoids.
172
Building on the initial "My Robotic Friends" activity, students tackle larger and
more complicated designs. In order to program their "robots" to complete these
bigger designs, students will need to identify repeated patterns in their
instructions that could be replaced with a loop.
This lesson serves as a reintroduction to loops, using the now familiar set of
"robot" programming instructions. Students will develop critical thinking skills by
looking for patterns of repetition in the movements of classmates and
determining how to simplify those repeated patterns using loops.
Identify repeated patterns in code that could be
replaced with a loop
Write instructions that use loops to repeat patterns
Make sure each student has a
Watch the
Prepare a stack of 20 paper cups for each group of
4 students
(Optional) Print out one
per group of 4 students
Display the
where students can reference
throughout the lesson.
Print and cut out
for each group if your class is not
going to use cups.
Print out one set of
per group.
Please make a copy of any
documents you plan to share with
students.
- Teacher Video
-
Key
- Emotion Images
- Manipulatives
- Image Pack
- The action of doing something over and over
again.
- Do something again
173
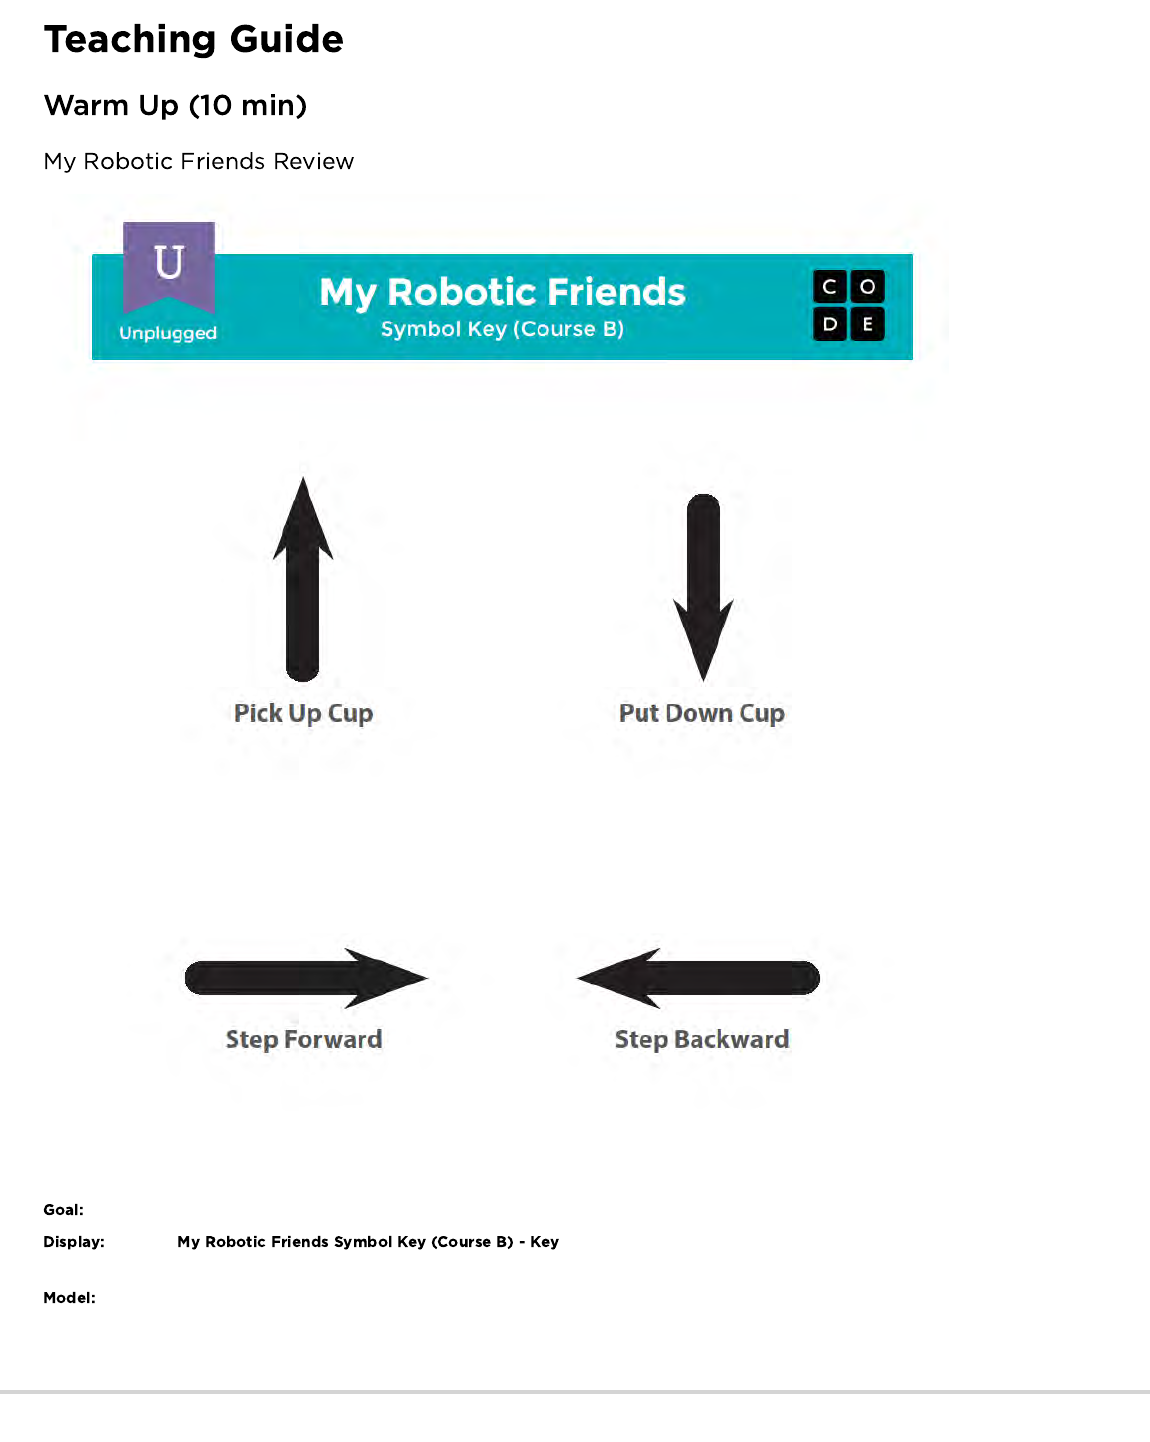
This review will refresh the students’ minds about how quickly programs for the "My Robotic Friends" activity can get intense.
Show the that we used in My Robotic Friends. For each of the four
symbols, ask students to show you what it looks like for a robot to follow that instruction.
With the class together as a group, pull an easy puzzle from the "My Robotic Friends" Cup Stack Pack and program with each other
as a reminder of rules and terminology.
Next, pull a puzzle that’s slightly harder, but also requires a lot of steps like the one below.
174
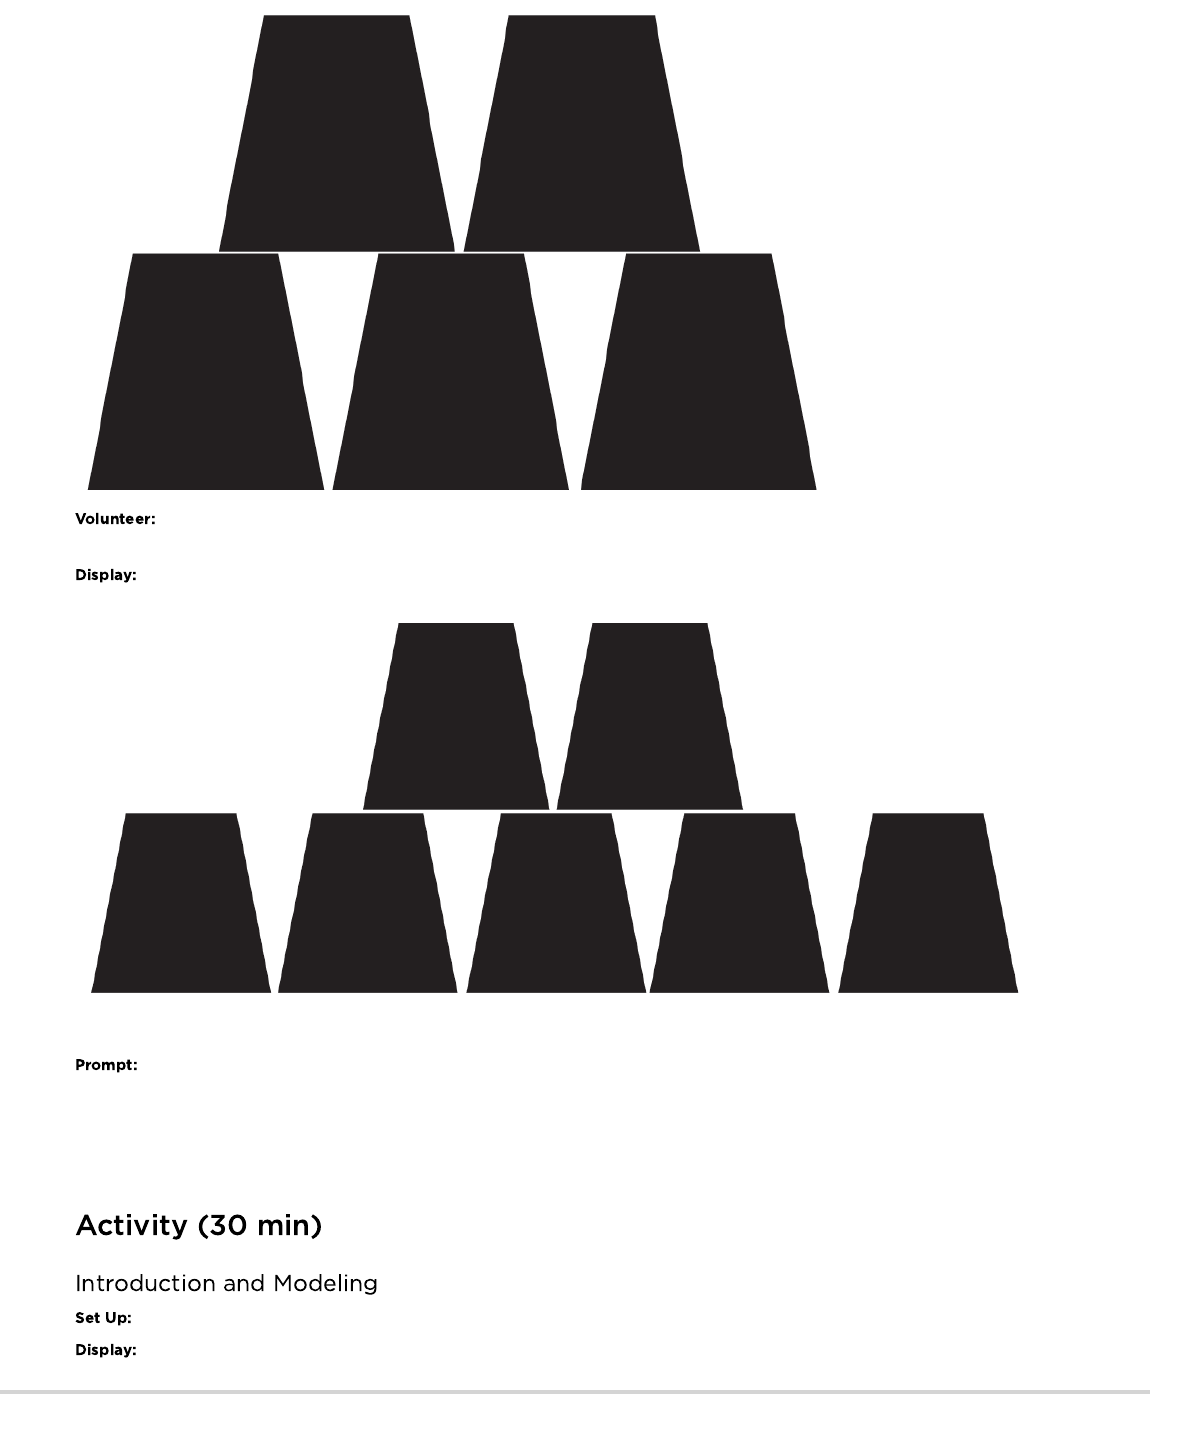
Ask a volunteer (or a group of volunteers) to come forward to help program this one on the board. If you make them stick strictly
to the “no symbols other than those on the key” rule, it will probably take a while!
Now, bring up this image:
What is the reaction of the class?
Give students the opportunity to brainstorm shorter ways to relay the code that they’re about to create. (This bit can be skipped
over if your students start saying things like: “Move forward 6 times.” Since that will open the discussion about how to show “six times” with
symbols.)
Once students have put together the idea of “repeating” code, give them the vocabulary around it. Make sure to share with them that often
the terms “repeat something” and “loop something” are often used interchangeably.
Have stacks of cups or cut paper trapezoids available for groups.
Take the program from one of your previous cup stacks and display it for the class, or use the one below.
175
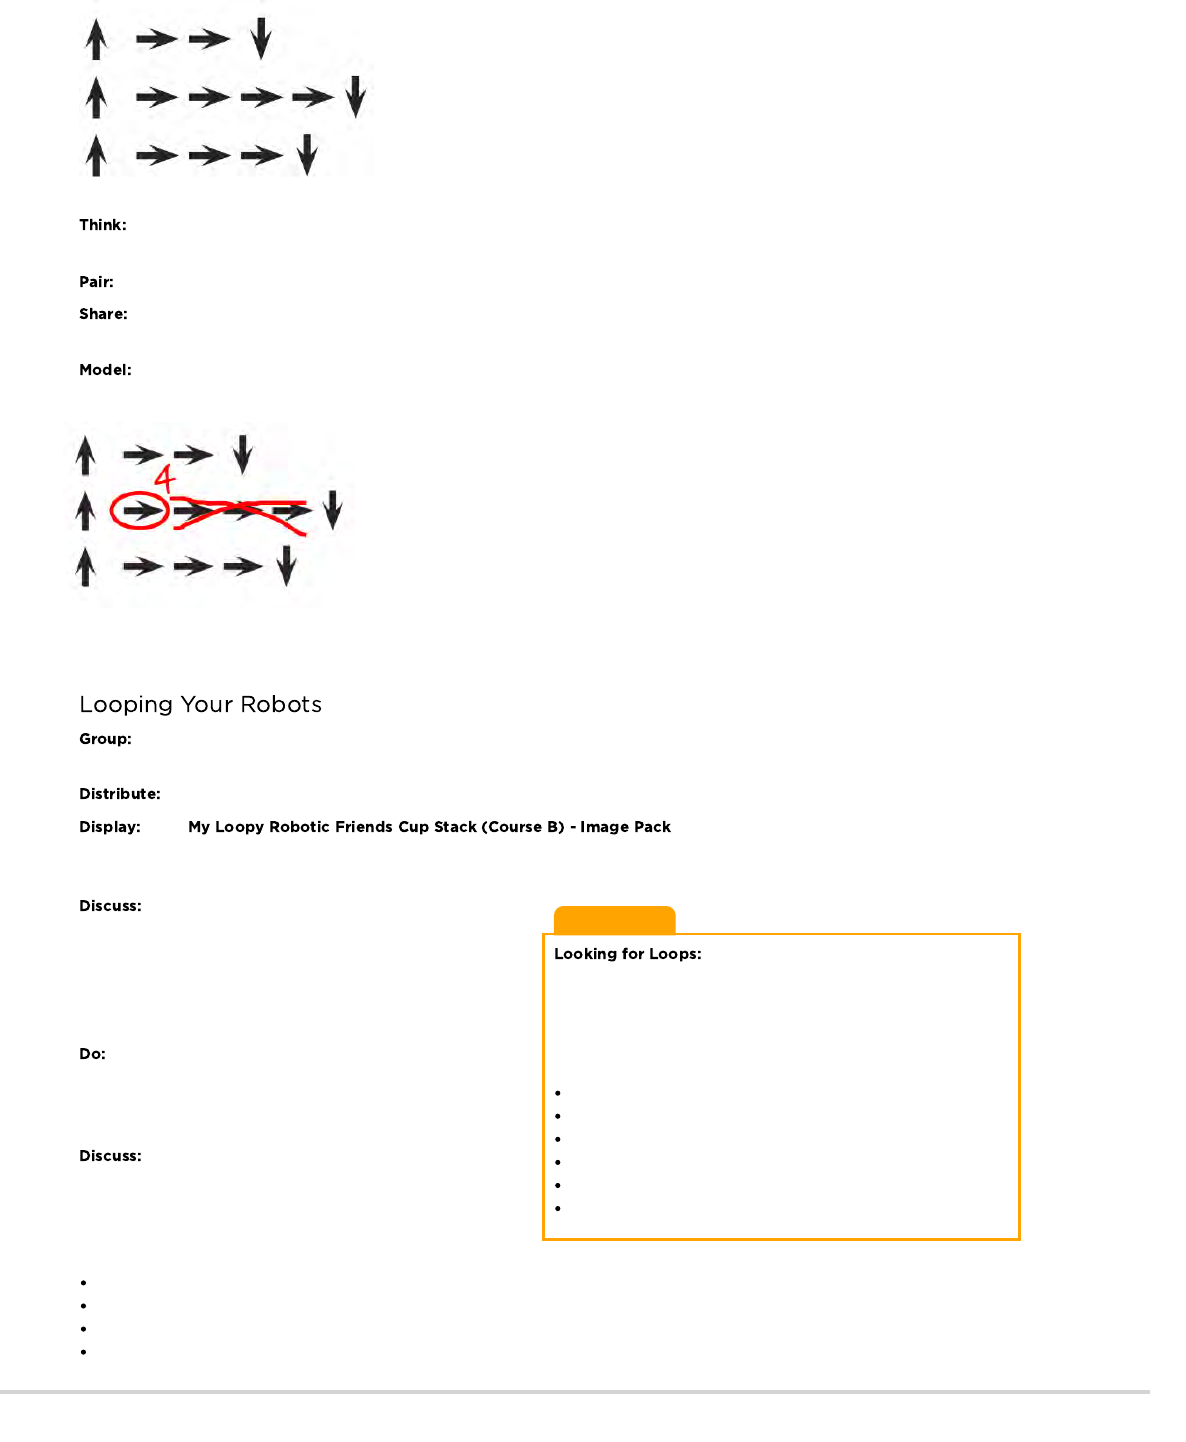
Teaching Tip
Be sure to keep your eyes open for students
using loops. Try to avoid correcting their overall algorithms or
prescribing a solution, but feel free to direct students towards
patterns that could be shortened by using a repeat circle.
Watch students as they run through the code. Are there any bugs?
Use the debugging questions to help them find a solution.
What does it do?
What is it supposed to do?
What does that tell you?
Does it work at the first step?
Does it work at the second step?
Where does it stop working?
Ask students to think quietly about where in this program they can find a pattern of instructions that repeat uninterrupted (one
repetition after another).
Turn to a neighbor and share one of the repeating patterns you found.
Ask a few students to share out the patterns they identified. Try to pull out different approaches to grouping patterns. For each
pattern, ask students to identify how many times the pattern repeats.
Using one of the repeating patterns that the class identified, model how Circle the instruction or pattern that repeats, write the
number of loops near that circle, then cross out the rest of the arrows.
Repeat this until the entire program has been shortened, then re-write the program in a way where students can see how much more simple
the resulting instructions are.
Place students into groups of 4. Each group should then further break down into two pairs - each pair will develop their own
program "run" on the other pair.
Give each group one stack of cups or paper cutouts.
Show to the class or hand out individual copies for groups
to use. Have each pair (not group) choose which stack they would like their robot to do. Encourage pairs to select a more complicated
pattern this time around.
Let each group discuss how the stack should be built,
then instruct each group to translate the algorithm into symbols.
Make sure each group writes down the symbol algorithm
somewhere for the "robot" to read later. As students are working
on their programs, remind them to be on the lookout for
opportunities to replace a repeating pattern with a loop.
When groups have finished their instructions, have each pair
trade with another pair to run one another's code. Remind
students to be on the lookout for bugs, but not to interrupt a robot
until it's finished running the program.
When all of the pairs have had a chance to run their
programs, ask a few to share their solutions with the class. Use
this opportunity to discuss how groups came up with different
solutions to the same puzzle. In particular, you might ask of each
program:
How did they identify the loops?
Are there other ways those loops could have been written?
How much shorter is the program with loops than it would be without?
Is the program easier to understand with loops, or written out longhand? Why?
176
Draw one of the that shows how you felt about today's lesson in the corner of your journal page.
Have the students write or draw something in their journal that will remind them later what loops are. This can come from a prompt like:
What does "repeat" mean to you?
Draw a picture of you repeating something.
Have students draw their own cup stacking creations for someone else to code.
Provide students with algorithms that utilize repeats, then have them expand the program back out to a full step-by-step version.
- Language
- Speaking & Listening
- Measurement And Data
- Math Practices
- Algorithms & Programming
- Engineering in the Sciences
If you are interested in licensing Code.org materials for commercial purposes,
177
TM
Traveling Circuits
Lesson 3: My Robotic Friends
Pick Up Cup
Step Forward
Put Down Cup
Step Backward
My Robotic Friends
Symbol Key (Course B)
Unplugged
U
178

179

180

To cut quickly:
First cut in horizontal strips, then snip along lines to make trapezoids.
181
Using a special set of offline commands, students will design algorithms to
instruct a "robot" to stack cups in different patterns. Students will take turns
participating as the robot, responding only to the algorithm defined by their
peers. This segment teaches students the connection between symbols and
actions, the difference between an algorithm and a program, and the valuable
skill of debugging.
This unplugged lesson brings the class together as a team with a simple task to
complete: get a "robot" to stack cups in a specific design. Students will work to
recognize real world actions as potential instructions in code. The art of
following precise instructions will also be practiced, as students work to
translate algorithms into code, using the symbols provided. If problems arise in
the code, students should work together to recognize bugs and build solutions.
This activity lays the groundwork for the programming that students will do
throughout the course as they learn the importance of defining a clearly
communicated algorithm.
Reframe a sequence of steps as an encoded
program
Identify and address bugs or errors in sequenced
instructions
Watch the .
(Optional) Print out one
per group or 4 students. Alternatively,
find a place to display this information where
students can reference throughout the lesson.
Prepare a stack of 10 disposable cups per group of
4 students, OR
(Optional) print and cut out
for each group if your
class is not going to use cups.
Print out one set of
per group.
Make sure each student has a
.
- Teacher Video
- Manipulatives
- Manipulatives
- Unplugged Video
( )
- Symbol Key
- A list of steps to finish a task.
- Part of a program that does not work correctly.
- Finding and fixing problems in an
algorithm or program.
- The action of doing something over and over
again.
- An algorithm that has been coded into
something that can be run by a machine.
- Do something again
182
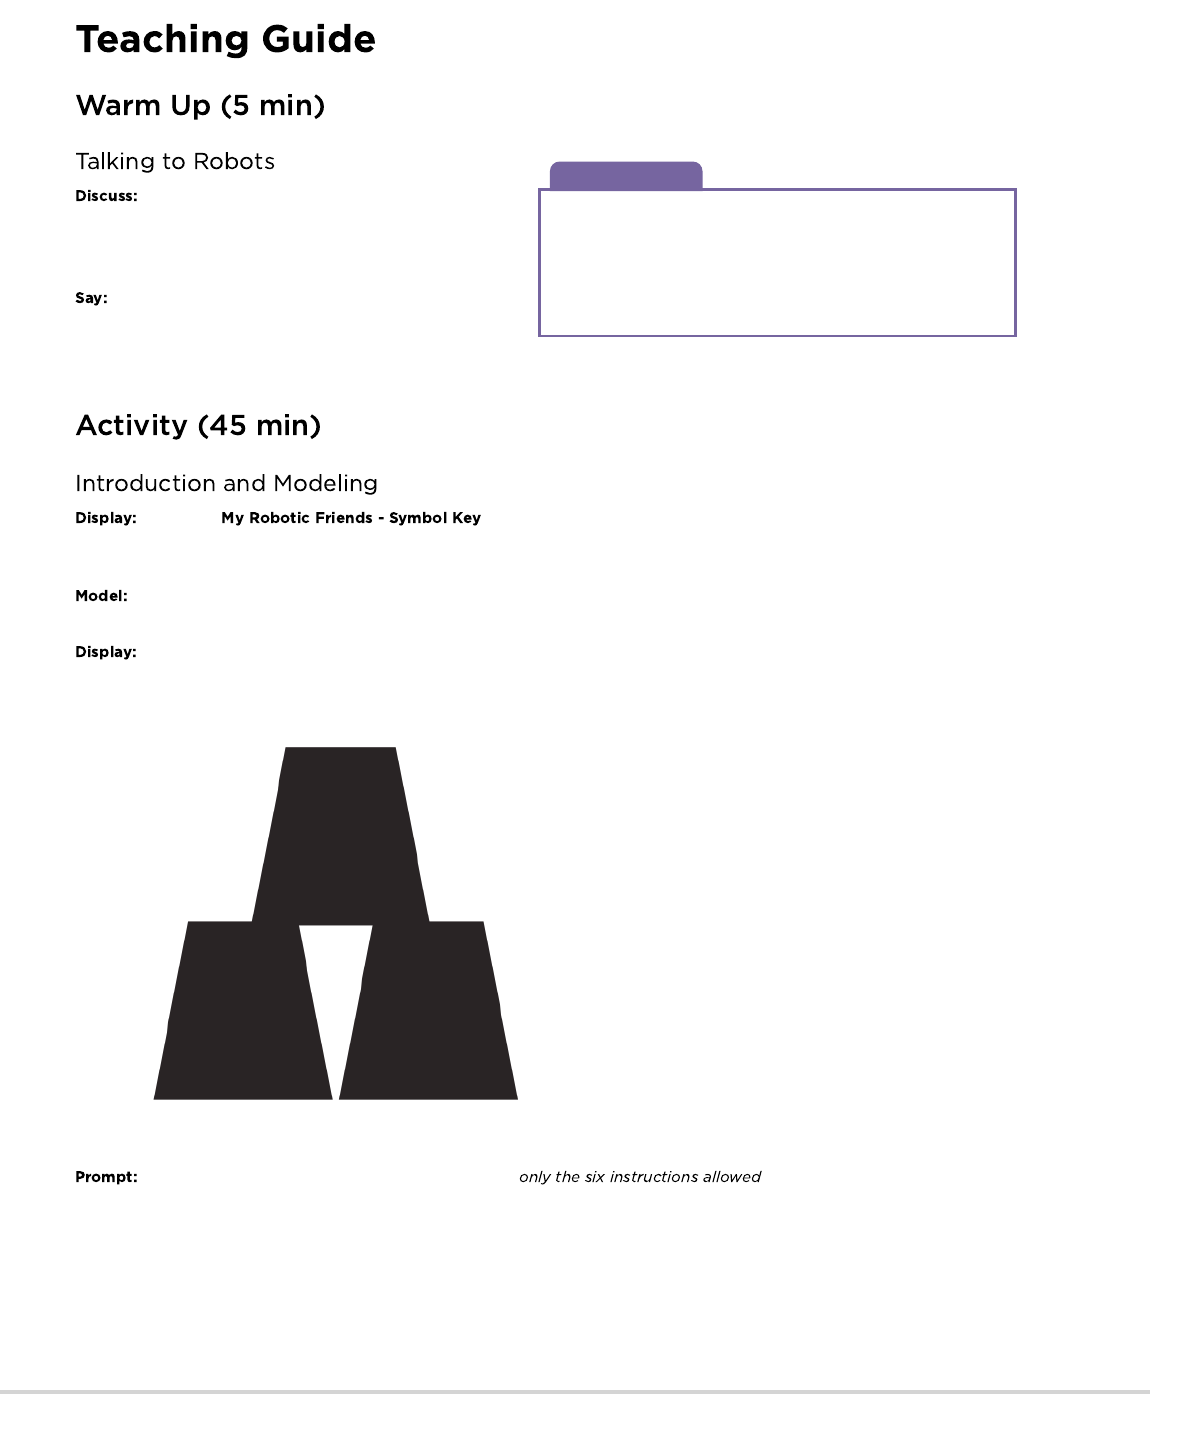
Discussion Goal
The goal of this quick discussion is to call out that while robots
may seem to behave like people, they're actually responding only
to their programming. Students will likely refer to robots from
movies and TV that behave more like humans. Push them to
consider robots that they've seen or heard of in real life, like
Roombas, or even digital assistants like Amazon Alexa.
Start by asking the class if anyone has heard of
robotics. Has anyone seen a robot or touched one? Does a robot
really “hear” you speak? Does it really “understand” what you
say?
Robots can only do what they've been instructed or
programmed to do. In order to accomplish a task, a robot needs
to have a list of instructions (sometimes called an algorithm) that
it can read. Today, we are going to learn what it takes to make that happen.
Display the or write the allowed actions on the board - make sure these are in a place
where they can be seen for the whole activity. Explain to the class that these will be the only six actions that they will be using for this
exercise. For this task, they will instruct their “robot” friend to build a specific cup stack using only the commands listed on the key.
In order to explain how the instructions are intended to work, model for the class how to create and follow an algorithm for
replicating a simple pattern. Place a single stack of cups in front of you to start.
Hold up the pattern you plan to model. A simple three cup pattern is a great place to start.
Ask the class what the first instruction should be, using . The first move should be to "pick up
cup." If students suggest something else from the list, perform that action and allow them to see their error. If they suggest something not
from the list, make a clear malfunction reaction and let them know that the command is not understood.
With cup in hand, ask the class to continue giving you instructions until the first cup is placed. This is a great place to clarify that a "step
forward" and "step backward" each imply moving half a cup width. See the image below for reference.
183

Teaching Tip
Does this all feel a little complicated for your
classroom? Here are a couple of tips to simplify the process:
Load lots of steps into the ups and downs
Up means that the cup automatically goes up as high as it
needs to
Down means that it automatically goes down until it lands on
something
Hand automatically returns to cup stack after setting down a
cup
Are your students more advanced? Do you want this
lesson to relate more closely to the online puzzles? Here are some
modifications that you can make:
One arrow corresponds to one movement
When a cup is removed from the stack, it returns to table-
level before moving
Students need to use multiple "up" arrows to lift the cup
multiple levels
Students need to use multiple "down" arrows to lower the
cups multiple levels
Students need to use the "back" arrows to get back to the
cup stack
Have stacks of cups or cut paper trapezoids
available for groups.
Continue asking for instructions from the classroom until you have completed the entire design.
Once your stack is complete, point out that they just gave you a list of instructions for completing a task. That's an algorithm. Algorithms are
great for sharing ideas, but spelling them out word by word can take a long time. That's what the symbols are for! When you encode an
algorithm into symbols that a robot (or computer) understands, that's called programming.
Ask the class to help you write the "program" for that first move, and then the rest of the moves necessary to complete the pattern.
Depending on the confidence of your students, you might switch back and forth frequently between acting as the "robot" and writing down
the code, or you might push them to write the whole program before you will implement it. One possible solution looks like this:
184

Teaching Tip
While the robot is working on the stack
make sure that the class knows:
Programmers are not allowed to talk when the robot is working.
This includes blurting out answers or pointing out when the
robot has done something wrong.
Programmers should raise their hand if they see a bug.
Discussion Goal
The goal of this discussion is to give students
space to make sense of their experience both as robot and
programmer. The questions are intentionally broad, but designed
to get students thinking about the challenges of writing a clear
program and the constraints of a robot or computer in interpreting
your instructions.
Once the class has completed the model program, ask one of the students to come up and act as the "robot" to ensure that the
program really works. Encourage them to say the instructions out loud as they "run" the code.
Place students into groups of 4. Each group should then further break down into two pairs - each pair will develop their own
program to be "run" by the other pair.
Give each group one stack of cups or paper cutouts.
Show to the class or hand out individual copies for groups to use. Have each pair (not
group) choose which idea they would like their robots to do. Try to push for an easier idea for the first time, then have them choose a more
complex design later on. Encourage pairs to keep their choice secret from the other half of their group.
Give each pair time to discuss how the stack should be built, using only the provided symbols. Make sure each group writes down
the "program" somewhere for the "robot" to read later.
Once both of the group's pairs have decided on their
algorithms, they can take turns being "robots" for each other by
following the instructions each pair wrote. Encourage students to
watch their "robot" closely to ensure that they are following
instructions. If a student sees a bug and raises their hand, have
the robot finish the instructions to the best of their ability.
Afterward, have the students discuss the potential bug and come
up with a solution. Continue repeating until the stack is built
properly.
Look for groups who are trying to take shortcuts by
adding things (like numbers) to their code. Praise them for their ingenuity, but remind them that for this exercise, the robots do not
understand but the provided symbols. If you like, you can hint that they should save their brilliant solution for the next time they
play this game, since they might get the chance to use it soon!
Depending on your time available, mix up the pairs and give them a chance to do a different pattern. Each time groups repeat the
process, encourage them to choose a more challenging pattern.
After everyone has had a chance to be the robot, bring
the class back together to discuss their experience. In particular,
discuss as a class:
What was the most difficult part of coming up with the
instructions?
Did anyone find a bug in your instructions once your robot was
following them?
What was the bug?
Why do you think you didn't notice it when writing the
program?
When you were the robot, what was the hardest part of following the instructions you were given?
185
Having students write about what they learned, why it’s useful, and how they feel about it can help solidify any knowledge they obtained
today and build a review sheet for them to look to in the future.
What was today’s lesson about?
How did you feel during today’s lesson?
Draw a stack of cups that the robot made today.
Draw a stack of cups that you would like a robot to make someday!
- Language
- Speaking & Listening
- Math Practices
- Algorithms & Programming
- Engineering in the Sciences
If you are interested in licensing Code.org materials for commercial purposes,
186
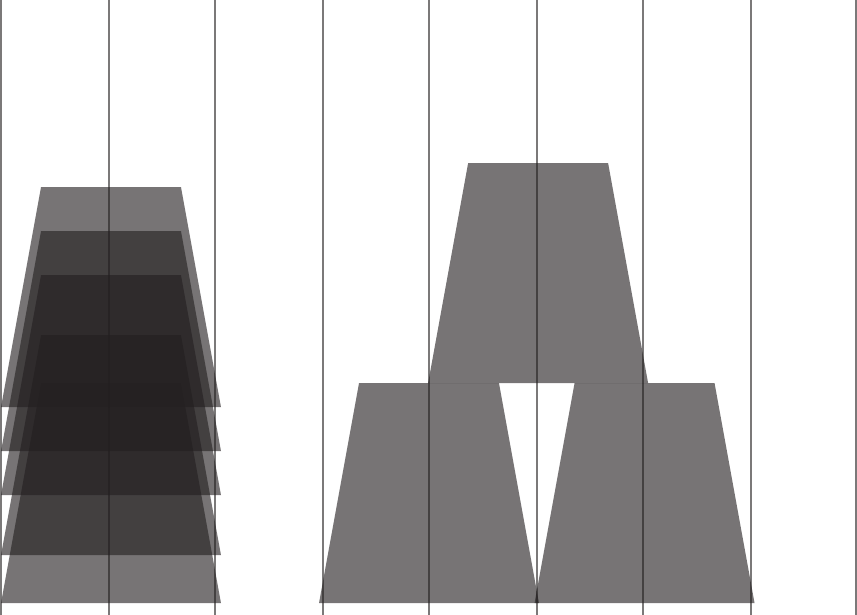
Sample Table Arrangement for Cups
0
1 step
backward 1 2 3 74 5 6
0
steps
3
steps 5
steps
4
steps
187

0 1 2 3
Sample Template for Moving Cups
4 5 6
188

Pick Up Cup
Step Forward
Turn Cup Right 90°
Put Down Cup
Step Backward
Turn Cup Left 90°
189

190

191

To cut quickly:
First cut in horizontal strips, then snip along lines to make trapezoids.
192
Using a set of symbols in place of code, students will design algorithms to
instruct a "robot" to stack cups in different patterns. Students will take turns
participating as the robot, responding only to the algorithm defined by their
peers. This segment teaches students the connection between symbols and
actions, the difference between an algorithm and a program, and the valuable
skill of debugging.
This unplugged lesson brings the class together as a team with a simple task to
complete: get a "robot" to stack cups in a specific design. This activity lays the
groundwork for the programming that students will do throughout the course as
they learn the importance of defining a clearly communicated algorithm.
Attend to precision when creating instructions
Identify and address bugs or errors in sequenced
instructions
Watch the .
(Optional) Print out one
per group or 2-3.
Alternatively, find a place to display this information
where students can reference throughout the
lesson.
Prepare a stack of 10 disposable cups per group of
2-3 students, OR
(Optional) print and cut out
for each group if your
class is not going to use cups.
Print out one set of
per group.
Make sure each student has a
.
- Teacher Video
- Emotion Images
-
Key
- Unplugged Video
( )
- Image Pack
- Manipulatives
- Reflection Journal
- A precise sequence of instructions for
processes that can be executed by a computer
- Part of a program that does not work correctly.
- Finding and fixing problems in an
algorithm or program.
- An algorithm that has been coded into
something that can be run by a machine.
193
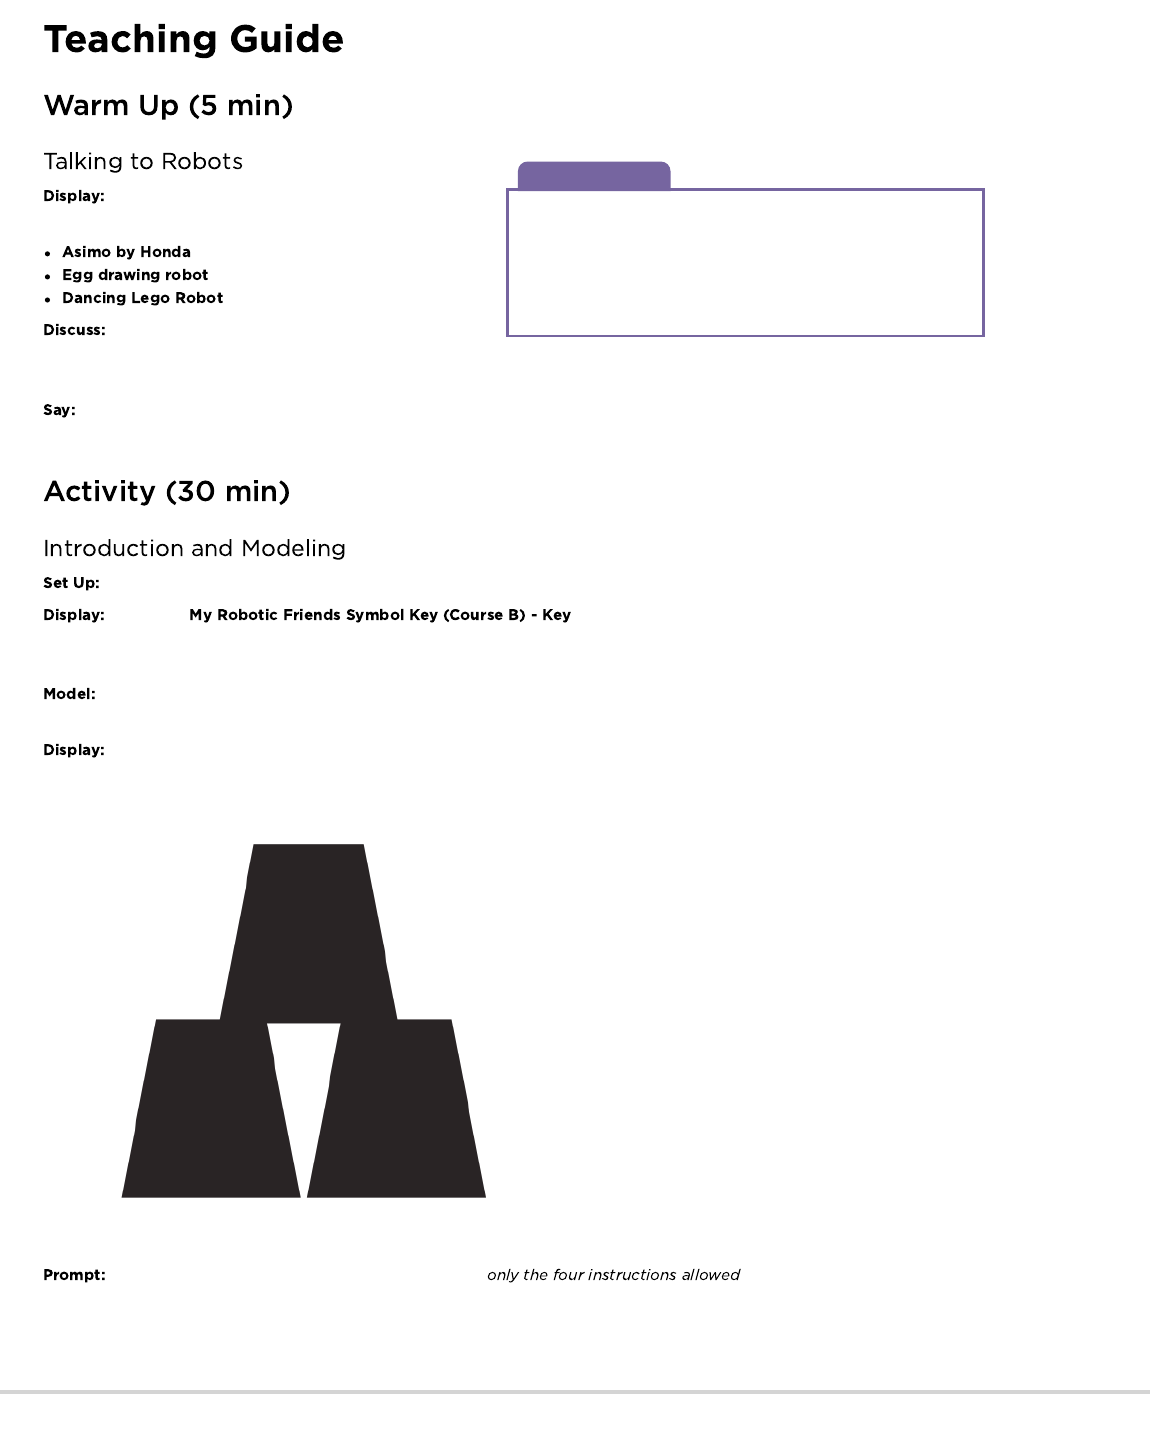
Discussion Goal
The goal of this quick discussion is to call out that while robots
may seem to behave like people, they're actually responding only
to their programming. Students will likely refer to robots from
movies and TV that behave more like humans. Push them to
consider robots that they've seen or heard of in real life, like
Roombas, or even digital assistants like Amazon Alexa.
Watch one of the videos below to give students context
for the types of things that robots can do:
(3:58)
(3:15)
(1:35)
Refer to the video that you chose and ask students how
they think that the robot knew what to do. Does a robot really
“understand” what you say? Is it worried about getting in trouble if it doesn't do what it's told?
Robots can only do what they've been told to do, but we don't just tell them using words. In order to do something, a robot needs to
have a list of steps that it can read. Today, we are going to learn what it takes to make that happen.
Have stacks of cups or cut paper trapezoids available for groups.
Display the or write the allowed actions on the board - make sure these
are in a place where they can be seen for the whole activity. Explain to the class that these will be the only four actions that they can use for
this exercise. For this task, they will instruct their “robot” friend to build a specific cup stack using only the commands listed on the key.
In order to explain how the instructions are intended to work, model for the class how to create and follow an algorithm for
replicating a simple pattern. Place a single stack of cups in front of you to start.
Hold up the pattern you plan to model. A simple three cup pattern is a great place to start.
Ask the class what the first instruction should be, using . The first move should be to "pick up
cup." If students suggest something else from the list, perform that action and allow them to see their error. If they suggest something not
from the list, make a clear malfunction reaction and let them know that the command is not understood.
With cup in hand, ask the class to continue giving you instructions until the first cup is placed. This is a great place to clarify that "step
forward" and "step backward" each imply moving half a cup width. See the image below for reference.
194
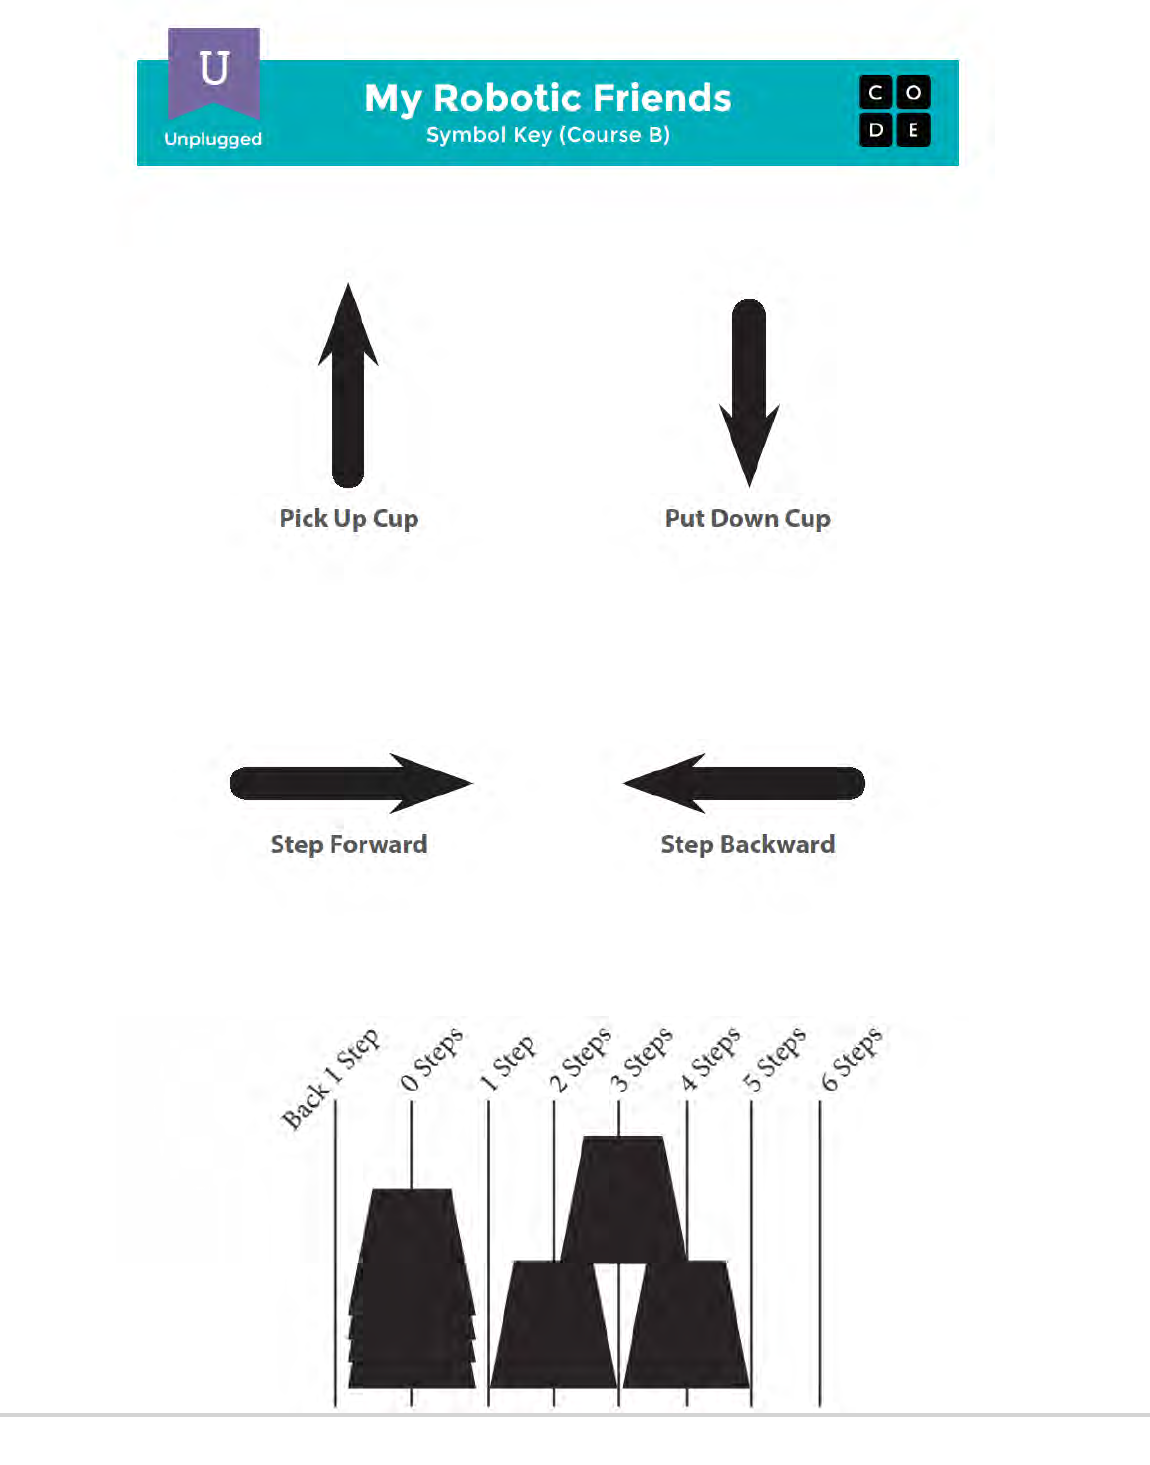
195
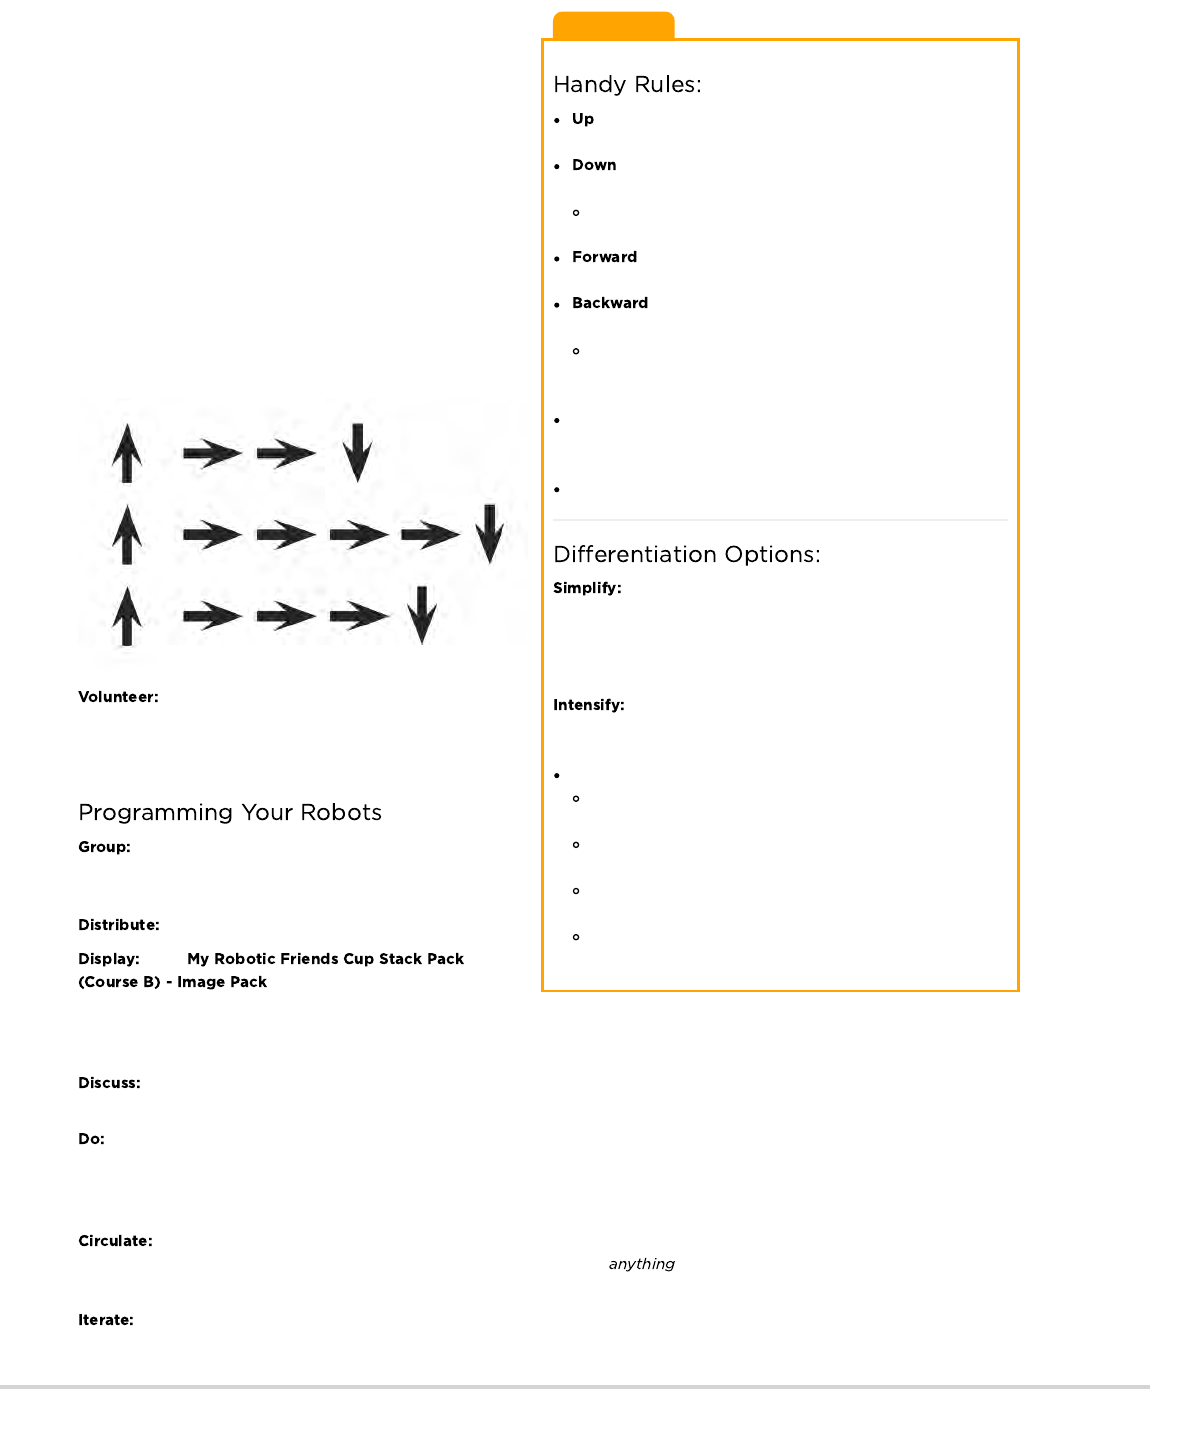
Teaching Tip
means that the cup automatically goes up as high as it
needs to
means that it automatically goes down until it lands on
something
The hand automatically returns to cup stack after setting
down a cup
means the robot moves one step (1/2 cup width)
forward
means the robot moves one step (1/2 cup width)
Backward
Note: Students may not use backward at this age unless
they want to build the cup stacks in reverse (which is also
okay)
Programmers are not allowed to talk when the robot is working.
This includes blurting out answers or pointing out when the
robot has done something wrong
Programmers should raise their hand if they see a bug
Does this all feel a little complicated for your students?
Don't forget to model this in front of the class until students
understand all of the rules. If it's still confusing, try running this
whole activity together as a classroom using volunteers as robots,
instead of breaking up into groups!
Are your students more advanced? Do you want this
lesson to relate more closely to the online puzzles? Here are some
modifications that you can make:
One arrow corresponds to one movement
When a cup is removed from the stack, it returns to table-
level before moving
Students need to use multiple "up" arrows to lift the cup
multiple levels
Students need to use multiple "down" arrows to lower the
cups multiple levels
Students need to use the "back" arrows to get back to the
cup stack
Continue asking for instructions from the classroom until you have
completed the entire design.
Once your stack is complete, point out that they just gave you a
list of steps for completing a task. That's an algorithm. Algorithms
are great for sharing ideas, but spelling them out word by word
can take a long time. That's what the symbols are for! When you
change an algorithm into symbols that a robot (or computer)
understands, that's called programming.
Ask the class to help you write the "program" for that first move by
changing the text into an arrow. Then work with them to write
down the rest of the moves necessary to complete the pattern.
Depending on the confidence of your students, you might switch
back and forth frequently between acting as the "robot" and
writing down the code, or you might push them to write the whole
program before you will implement it. One possible solution looks
like this:
Once the class has completed the model program,
ask one of the students to come up and act as the "robot" to
ensure that the program really works. Encourage them to say the
instructions out loud as they "run" the code.
Place students into groups of 4. Each group should then
further break down into two pairs - each pair will develop their
own program to be "run" by the other pair.
Give each group one stack of cups or paper cutouts.
Show
to the class or hand out individual
copies for groups to use. Have each pair (not group) choose
which idea they would like their robots to do. Try to push for an easier idea for the first time, then have them choose a more complex design
later on. Encourage pairs to keep their choice secret from the other half of their group.
Give each pair time to discuss how the stack should be built, using only the provided symbols. Make sure each group writes down
the "program" somewhere for the "robot" to read later.
Once both of the group's pairs have completed their programs, they can take turns being "robots" for each other by following the
instructions the other pair wrote. Encourage students to watch their "robot" closely to ensure that they are following instructions. If a student
sees a bug and raises their hand, have the robot finish the instructions to the best of their ability. Afterward, have the students discuss the
potential bug and come up with solutions. Continue repeating until the stack is built properly.
Look for groups who are trying to take shortcuts by adding extra things (like numbers) to their code. Praise them for their
ingenuity, but remind them that for this exercise, the robots do not understand but the provided symbols. If you like, you can hint
that they should save their brilliant solution for the next time they play this game, since they might get the chance to use their invention soon!
Depending on the time available, mix up the pairs and give them a chance to do a different pattern. Each time groups repeat the
process, encourage them to choose a more challenging pattern.
196
Discussion Goal
The goal of this discussion is to give students
space to make sense of their experience both as robot and
programmer. The questions are intentionally broad, but designed
to get students thinking about the challenges of writing a clear
program and the constraints of a robot or computer in interpreting
your instructions.
What was the most difficult part of coming up with the
instructions?
Did anyone find a bug in your instructions once your robot
started following them?
What was the bug?
Why do you think you didn't notice it when writing the
program?
When you were the robot, what was the hardest part of
following the instructions you were given?
Having students write about what they learned, why it’s useful, and how they feel about it can help solidify any knowledge they obtained
today and build a review sheet for them to look to in the future.
Draw one of the that shows how you felt about today's lesson in the corner of your journal page.
Draw your own stack of cups that you would like to see a robot build.
Can you create a program for that cup stack?
- Language
- Speaking & Listening
- Measurement And Data
- Math Practices
- Algorithms & Programming
- Engineering in the Sciences
If you are interested in licensing Code.org materials for commercial purposes,
After everyone has had a chance to be the robot, bring the class back together to discuss their experience. In particular, discuss
as a class:
197

TM
Traveling Circuits
Lesson 3: My Robotic Friends
Pick Up Cup
Step Forward
Put Down Cup
Step Backward
My Robotic Friends
Symbol Key (Course B)
Unplugged
U
198

199

200

To cut quickly:
First cut in horizontal strips, then snip along lines to make trapezoids.
201
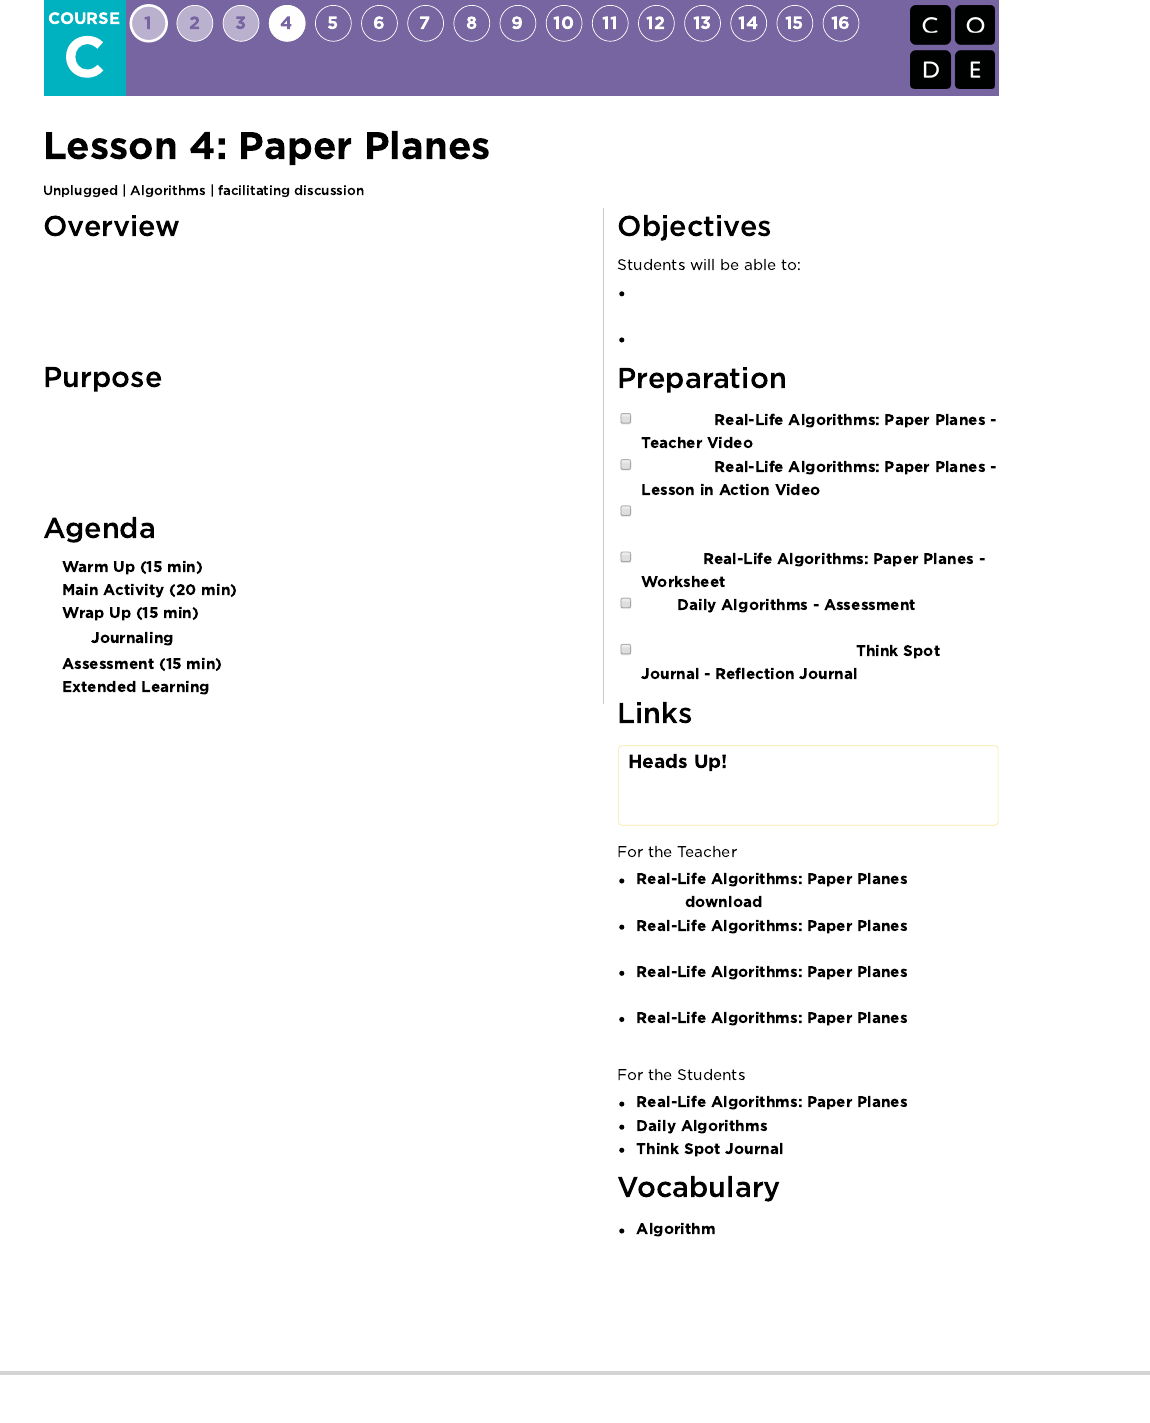
In this lesson, students will relate the concept of algorithms back to everyday
activities. After discussing their steps, students will make paper planes using an
algorithm. The goal here is to start building the skills to translate real world
situations to online scenarios and vice versa.
This lesson exists to help students see that an "algorithm" is just a list of steps
that someone can take to finish a task. Students will also learn that the order of
the individual steps can make a difference in the final product. This should help
lay a foundation of understanding for arranging blocks into programs.
Decompose large activities into a series of smaller
events.
Organize sequential events into their logical order.
Watch the
.
Watch the
.
Gather paper for students to construct paper
airplanes from.
Print out
for each student.
Print for each
student.
Make sure every student has a
.
Please make a copy of any
documents you plan to share with
students.
- Unplugged
Video ( )
- Teacher
Video
- Lesson in
Action Video
- Worksheet
Answer Key
- Worksheet
- Assessment
- Reflection Journal
- A list of steps to finish a task.
202
Lesson Tip
If you think it will be too difficult for your students to decide which
steps are correct, do that piece together as a class before you
break up into pairs.
Lesson Tip
If you are concerned about injury when your students begin flying
their paper planes, we recommend having them blunt the tip of the
plane by either folding it inward or ripping it off and covering the
ripped edges with tape.
This warm-up will help your students get perspective on what it means to create a list of steps to finish a task.
Ask your students what they did to get ready for school this morning.
Write their answers on the board. If possible, put numbers next to their responses to indicate the order that they happen. If
students give responses out of order, have them help you put them in some kind of logical order, pointing out places where order matters
and places where it doesn't.
Introduce students to the idea that it is possible to create algorithms for the things that we do everyday. Give them a couple of
examples, such as making breakfast, brushing teeth, and planting a flower.
You can use algorithms to help describe things that people do every day. In this activity, we will create an algorithm to help students fold a
paper plane.
Have students pair up with an elbow partner to cut the
individual steps apart. They should discuss among themselves
which six are needed and which three can be recycled.
Hand out some blank paper (or the back of other
papers) for students to glue/tape their instructions to once they've
decided on the order. Make sure they have a second peice that
they can actually fold into the final plane.
Finally, have students trade their finished algorithms with
another pair and have them use one another's algorithms to make
a paper plane.
Walk around during the activity and check that
students are trying to debug mistakes. If they get stuck, have
them check-in with the group who originally coded their algorithm
and see if they can work together to fix it.
What did we learn?
How many of you were able to follow your classmates' algorithms to make your planes?
Did we leave anything out when making the plane?
What would you have added to make the algorithm even better?
What if the algorithm had been only one step: "Fold a Paper Plane"?
Would it have been easier or harder?
What if it were forty steps?
What was your favorite part about this activity?
Having students write about what they learned, why it’s useful, and how they feel about it can help solidify any knowledge they obtained
today and build a review sheet for them to look to in the future.
What was today’s lesson about?
How did you feel during today’s lesson?
Can you imagine an algorithm for building a real plane? What do you think that would look like?
Write out an algorithm that would take you from your desk to the front of the class.
203
Hand out the and allow students to complete the activity independently after the instructions have
been well explained.
This should feel familiar, thanks to the previous activities.
Use these activities to enhance student learning. They can be used as outside of class activities or other enrichment.
Break the class up into teams.
Have each team come up with several steps that they can think of to complete a task.
Gather teams back together into one big group and have one team share their steps, without letting anyone know what the activity was
that they had chosen.
Allow the rest of the class to try to guess what activity the algorithm is for.
- Language
- Speaking & Listening
- Geometry
- Math Practices
- Algorithms & Programming
- Engineering in the Sciences
If you are interested in licensing Code.org materials for commercial purposes,
204

Real-Life Algorithms
Paper Airplane Worksheet
Revision 140710.1a
You can use algorithms to help describe things that people do every day. In this activity,
we will create an algorithm to help each other make paper airplanes.
Cut out the steps of making an airplane below. Glue the six the correct steps, in order, onto
a separate piece of paper. Trade your finished algorithm with another person or group and
let them use it to make an actual flying model paper plane!
Name: Date:
RIP CORNER OFF
PAPER
FOLD TOP CORNERS
TO CENTER
FOLD CORNER SIDES
TO CENTER
CREASE PAPER
DOWN THE CENTER CRUMBLE PAPER
FOLD PAPER
IN HALF AGAIN PULL SIDES DOWN
TOSS FINISHED PLANE
CUT CENTER OUT OF
PAPER
Unplugged
U
205
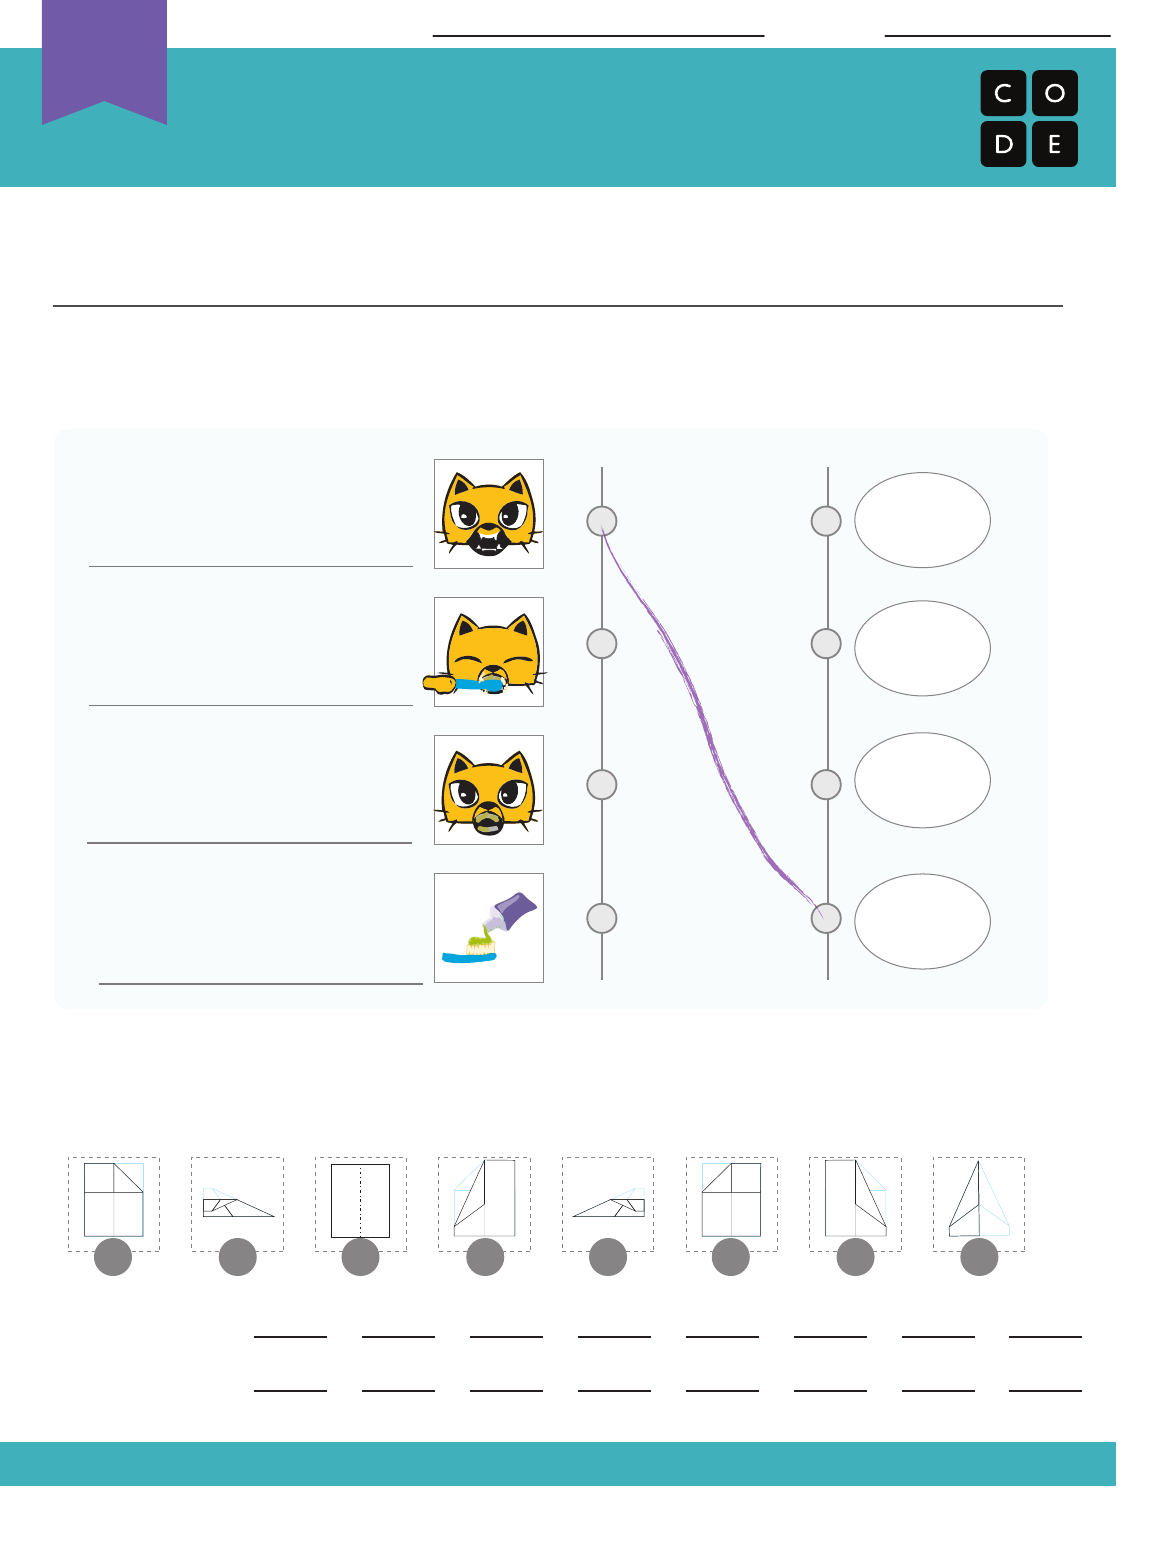
Unplugged
UDaily Algorithms
Assessment Worksheet
Revision 140710.1a
An algorithm is a list of instructions for accomplishing a task. We follow algorithms
everyday when it comes to activities like making the bed, making breakfast, or
even getting dressed in the morning.
These images are not in order. First, describe what is happening in each picture on
the line to its left, then match the action to its order in the algorithm. The first one
has been done for you as an example.
Sometimes you can have more than one algorithm for the same activity. The order
of some of these steps can be changed without changing the final product. Use the
letters on the images below to create two algorithms for making a paper airplane.
ALGORITHM 1:
Name: Date:
ALGORITHM 2:
Step 1
Step 2
Step 3
Step 4
Teeth are clean!
A B C D E F G H
206
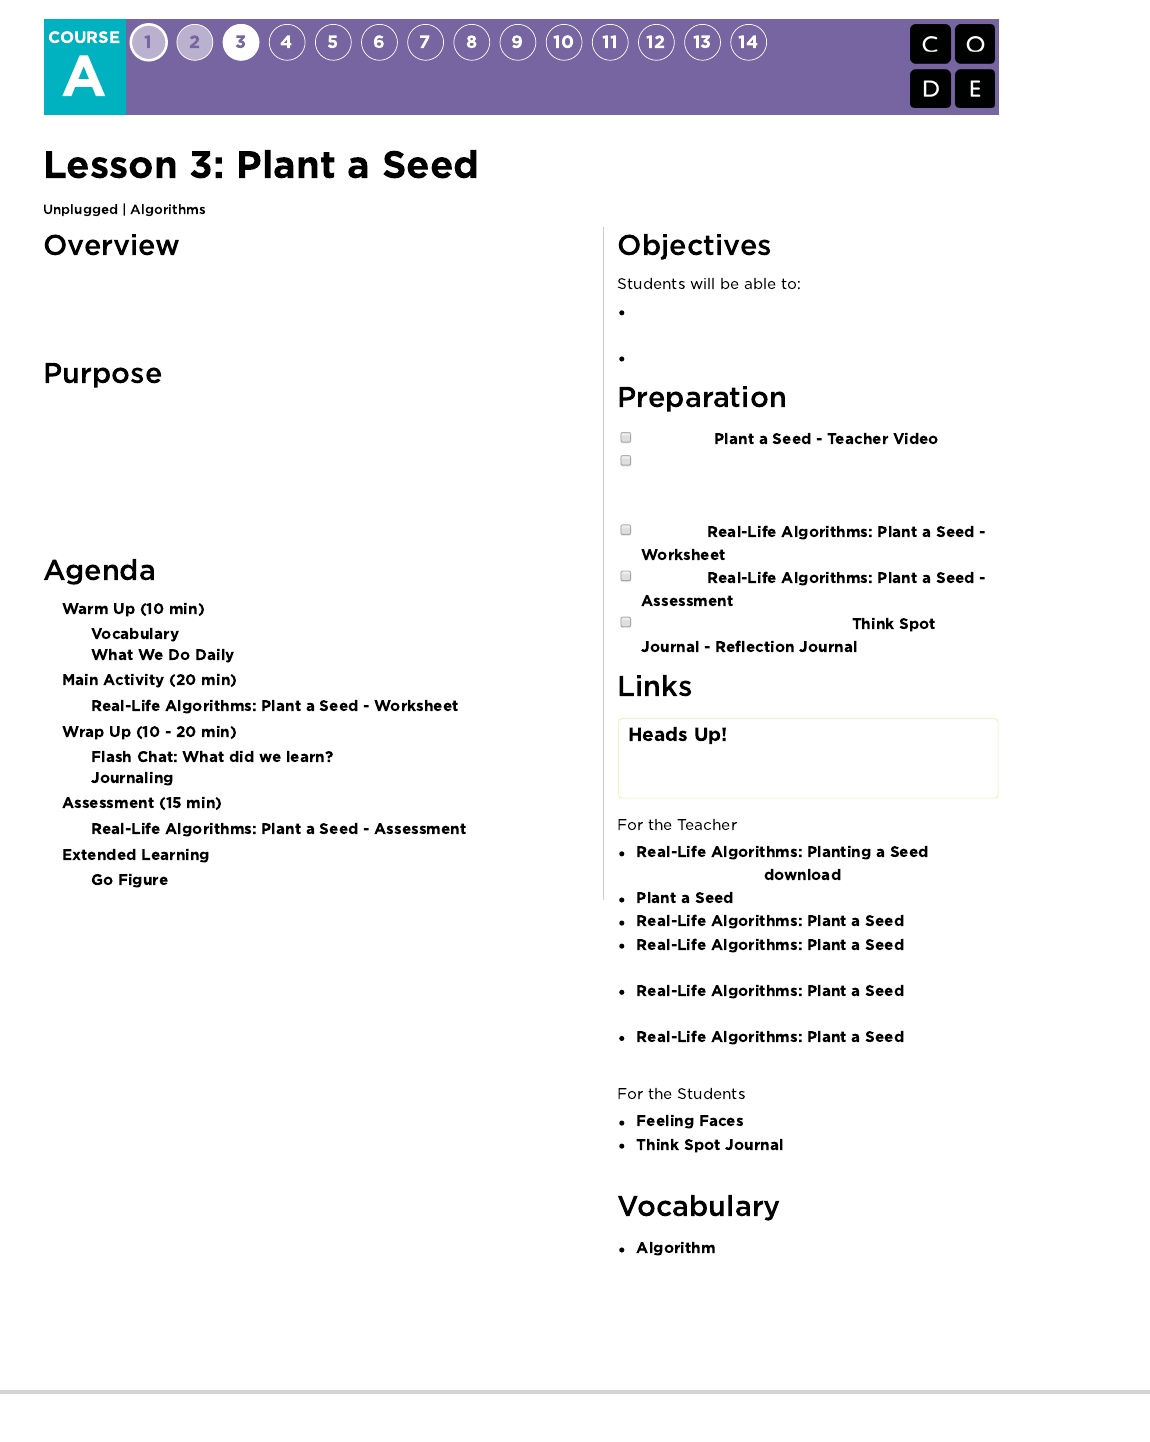
In this lesson, students will relate the concept of algorithms back to everyday,
real-life activities by planting an actual seed. The goal here is to start building
the skills to translate real-world situations to online scenarios and vice versa.
In this lesson, students will learn that algorithms are everywhere in our daily
lives. For example, it is possible to write an algorithm to plant a seed. Instead of
giving vague or over-generalized instructions, students will break down a large
activity into smaller and more specific commands. From these commands,
students must determine a special sequence of instructions that will allow their
classmate to plant a seed.
Decompose large activities into a series of smaller
events.
Arrange sequential events into their logical order.
Watch the .
Prepare supplies for planting seeds. You'll need
seeds, dirt, and paper cups for each student or
group.
Print one
for each student.
Print one
for each student.
Make sure each student has a
.
Please make a copy of any
documents you plan to share with
students.
-
Unplugged Video ( )
- Teacher Video
- Worksheet
- Worksheet
Answer Key
-
Assessment
-
Assessment Answer Key
- Emotion Images
- Reflection Journal
- A precise sequence of instructions for
processes that can be executed by a computer
207
Lesson Tip
You know your classroom best. As the teacher, decide if you
should all do this together, or if students should work in pairs or
small groups.
Lesson Tip
If deciding on the correct steps seems too difficult for your
students, do that piece together as a class before you break up
into teams.
This lesson has one vocabulary word that is important to review:
Algorithm - Say it with me: Al-go-ri-thm
A list of steps that you can follow to finish a task
Ask your students what they did to get ready for school this morning.
Write their answers on the board
If possible, put numbers next to their responses to indicate the order that they happen
If students give responses out of order, have them help you put them in some kind of logical order
Point out places where order matters and places where it doesn't
Introduce students to the idea that it is possible to create algorithms for the things that we do everyday.
Give them a couple of examples, such as making breakfast, tying shoes, and brushing teeth.
Let's try doing this with a new and fun activity, like planting a seed!
You can use algorithms to help describe things that people do
every day. In this activity, we will create an algorithm to help each
other plant a seed. Directions:
Cut out the steps for planting a seed from
.
Work together to choose the six correct steps from the nine
total options.
Glue the six correct steps, in order, onto a separate piece of paper.
Trade the finished algorithm with another person or group and let them use it to plant their seed!
How many of you were able to follow your classmates'
algorithms to plant your seeds?
Did the exercise leave anything out?
What would you have added to make the algorithm even better?
What if the algorithm had been only one step: "Plant the seed"?
Would it have been easier or harder?
What if it were forty steps?
What was your favorite part about that activity?
Ask the students to go back to their desks to reflect individually on what they learned. Write a couple of the questions up above on a
whiteboard. Ask the students to discuss these in their journal. Sample prompts include:
Draw one of the that shows how you felt about today's lesson in the corner of your journal page.
Draw the seed you planted today.
Write the algorithm you used to plant the seed.
208
Hand out the and allow students to complete the activity independently after the
instructions have been well explained.
This should feel familiar, thanks to the previous activities.
Use these activities to enhance student learning. They can be used as outside of class activities or other enrichment.
Break the class up into teams.
Have each team come up with several steps that they can think of to complete a task.
Gather teams back together into one big group and have one team share their steps, without letting anyone know what the activity was
that they had chosen.
Allow the rest of the class to try to guess what activity the algorithm is for.
- Language
- Speaking & Listening
- Geometry
- Math Practices
- Algorithms & Programming
- Life Science
If you are interested in licensing Code.org materials for commercial purposes,
209
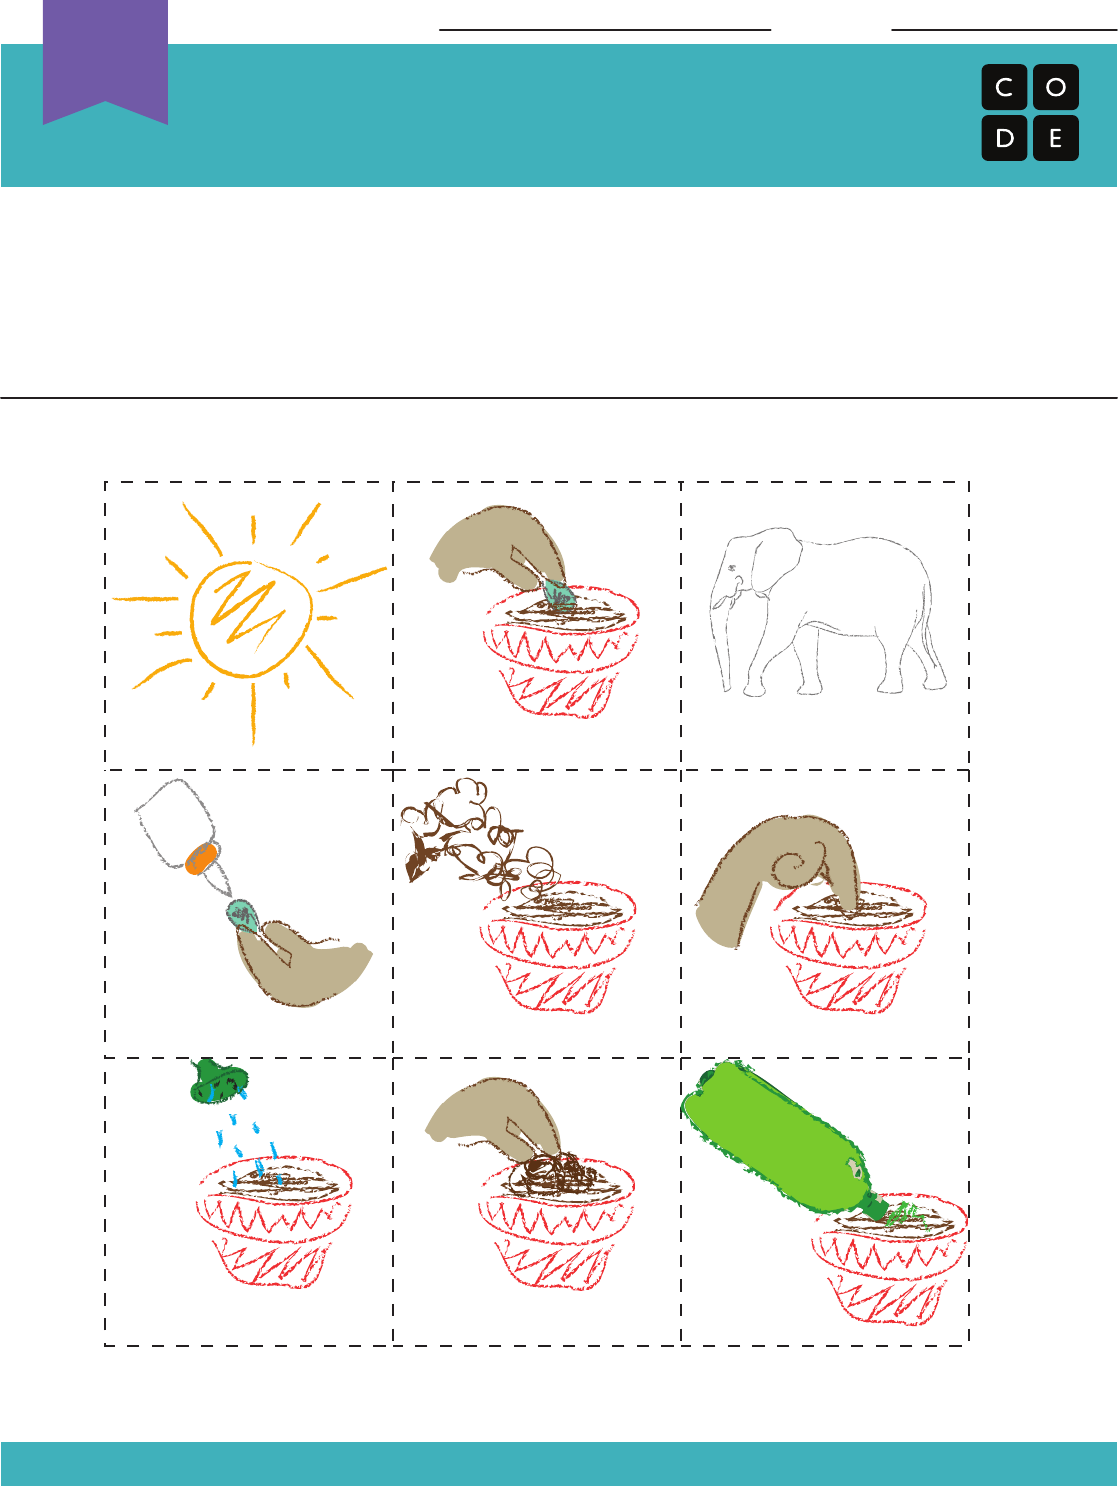
Real-Life Algorithms
Plant a Seed Worksheet
Revision 140710.1a
You can use algorithms to help describe things that people do every day. In this activity,
we will create an algorithm to help each other plant a seed.
Cut out the steps of planting a seed below, then work together to glue the six correct
steps, in order, onto a separate piece of paper. Trade your finished algorithm with another
person or group and let them use it to plant their seed!
Name: Date:
FILL POT WITH SOILPUT GLUE ON SEED POKE HOLE IN SOIL
PUT SEED IN HOLE HUG AN ELEPHANT
COVER SEED WITH SOIL POUR SODA POP IN POT
WATER POT
PUT POT IN SUNLIGHT
Unplugged
U
210
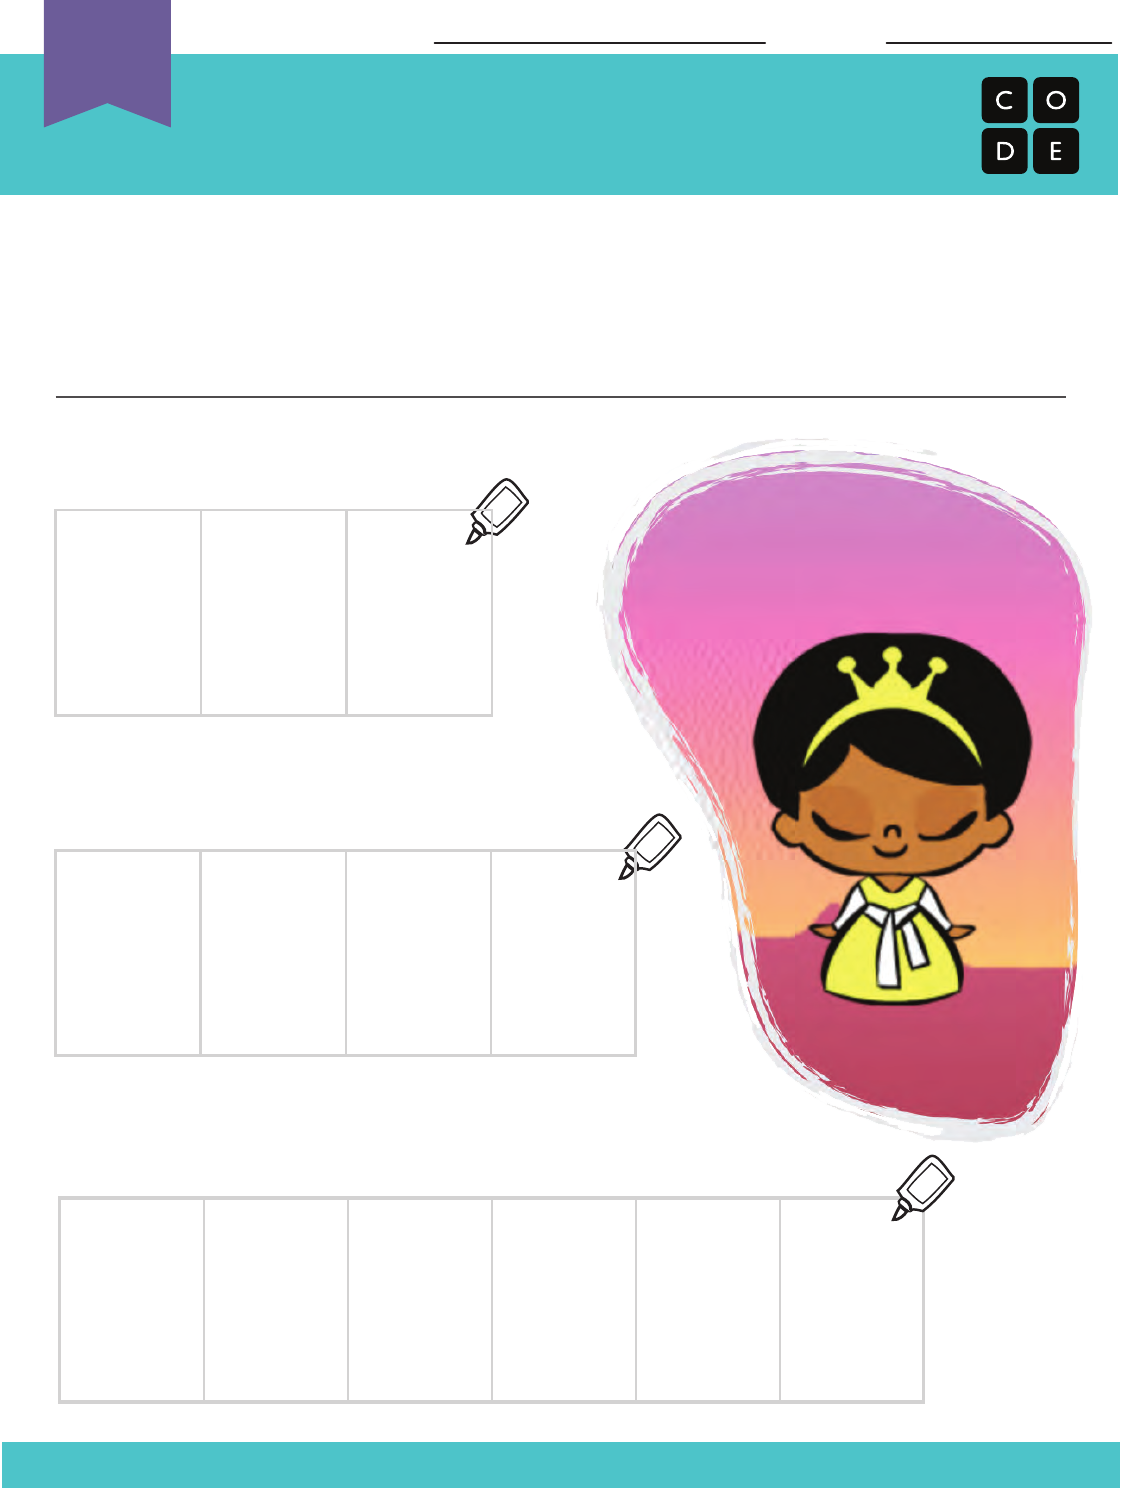
Revision 171129.1a
An algorithm is a list of steps that you can follow to finish a task. We follow
algorithms every day when it comes to activities like making the bed, making
breakfast, or even getting dressed in the morning.
Pria the Programmer just woke up and is still feeling very sleepy. Can you put
together some algorithms to help Pria get ready for the day?
Help Connie Put on Shoes:
Help Connie Plant a Seed:
Help Connie Brush her Teeth:
Real-Life Algorithms
Assessment Worksheet
Name: Date:
GLUE
GLUE
GLUE
Unplugged
U
1 2 3
1 2 3 4
1 2 3 4 5 6
211
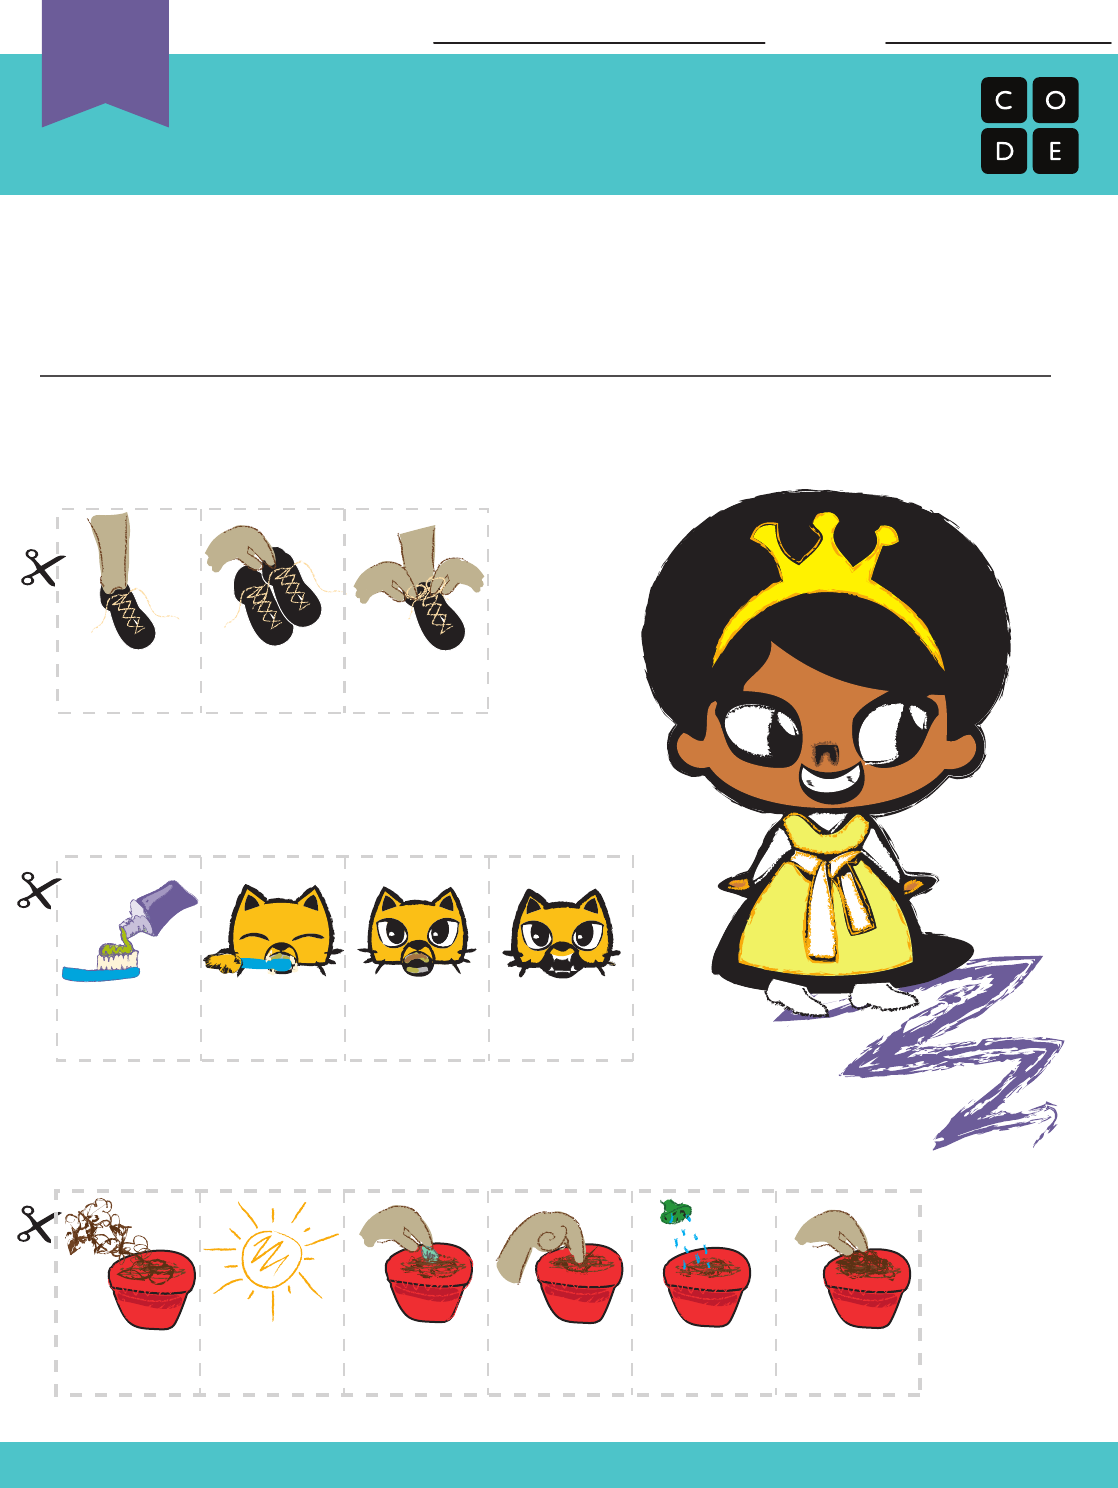
Revision 171129.1a
Put on Shoes
Real-Life Algorithms
Assessment Worksheet
Name: Date:
These items are out of order. To help Princess Pria, cut out each picture and
rearrange them into the right sequence.
Plant a Seed
Brush Teeth
FILL POT
WITH SOIL
POKE HOLE
IN SOIL
PUT SEED IN
HOLE COVER SEED
WITH SOIL
WATER POT
PUT POT IN
SUNLIGHT
DIRTY TEETH
PASTE ON
BRUSH
BRUSH
TEETH
CLEAN
TEETH
Unplugged
U
PICK UP
SHOES
PUT FOOT IN
SHOE
TIE SHOE
212
Students consider that while they are enjoying their favorite websites they may
encounter messages from other kids that can make them feel angry, hurt, sad,
or fearful. They explore ways to handle cyberbullying and how to respond in the
face of upsetting language online.
Students discuss all the ways they use technology for communication and
explore the similarities and differences between in-person and online
communication. Students then brainstorm ways to respond to cyberbullying.
This lesson will provide students with the tools that they need to handle
cyberbullying if they are ever in the situation of having someone negatively
responds to their online postings.
Students may not ever have the misfortune of experiencing cyberbullying, but
they should understand what it is so that they can spot it online. Students will
learn how to identify cyberbullying and what steps they should take to make it
stop. This may become helpful in later puzzles when students have the
opportunity to share their work.
Empathize with those who have received mean and
hurtful messages.
Judge what it means to cross the line from harmless
to harmful communication online.
Generate solutions for dealing with cyberbullying.
Preview the
and prepare to
show it to your class.
Print out the from
(page 7) for each group of
four.
Print out the from
(page 6) for each student.
Print out the assessment on page 8-9 of
.
Obtain colored pencils and a string the length of the
classroom.
Please make a copy of any
documents you plan to share with
students.
-
Teacher Prep Guide
- Lesson Video
- Website
- Resource List
- Emotion Images
- Reflection Journal
- Using technology tools to deliberately
upset someone else.
213
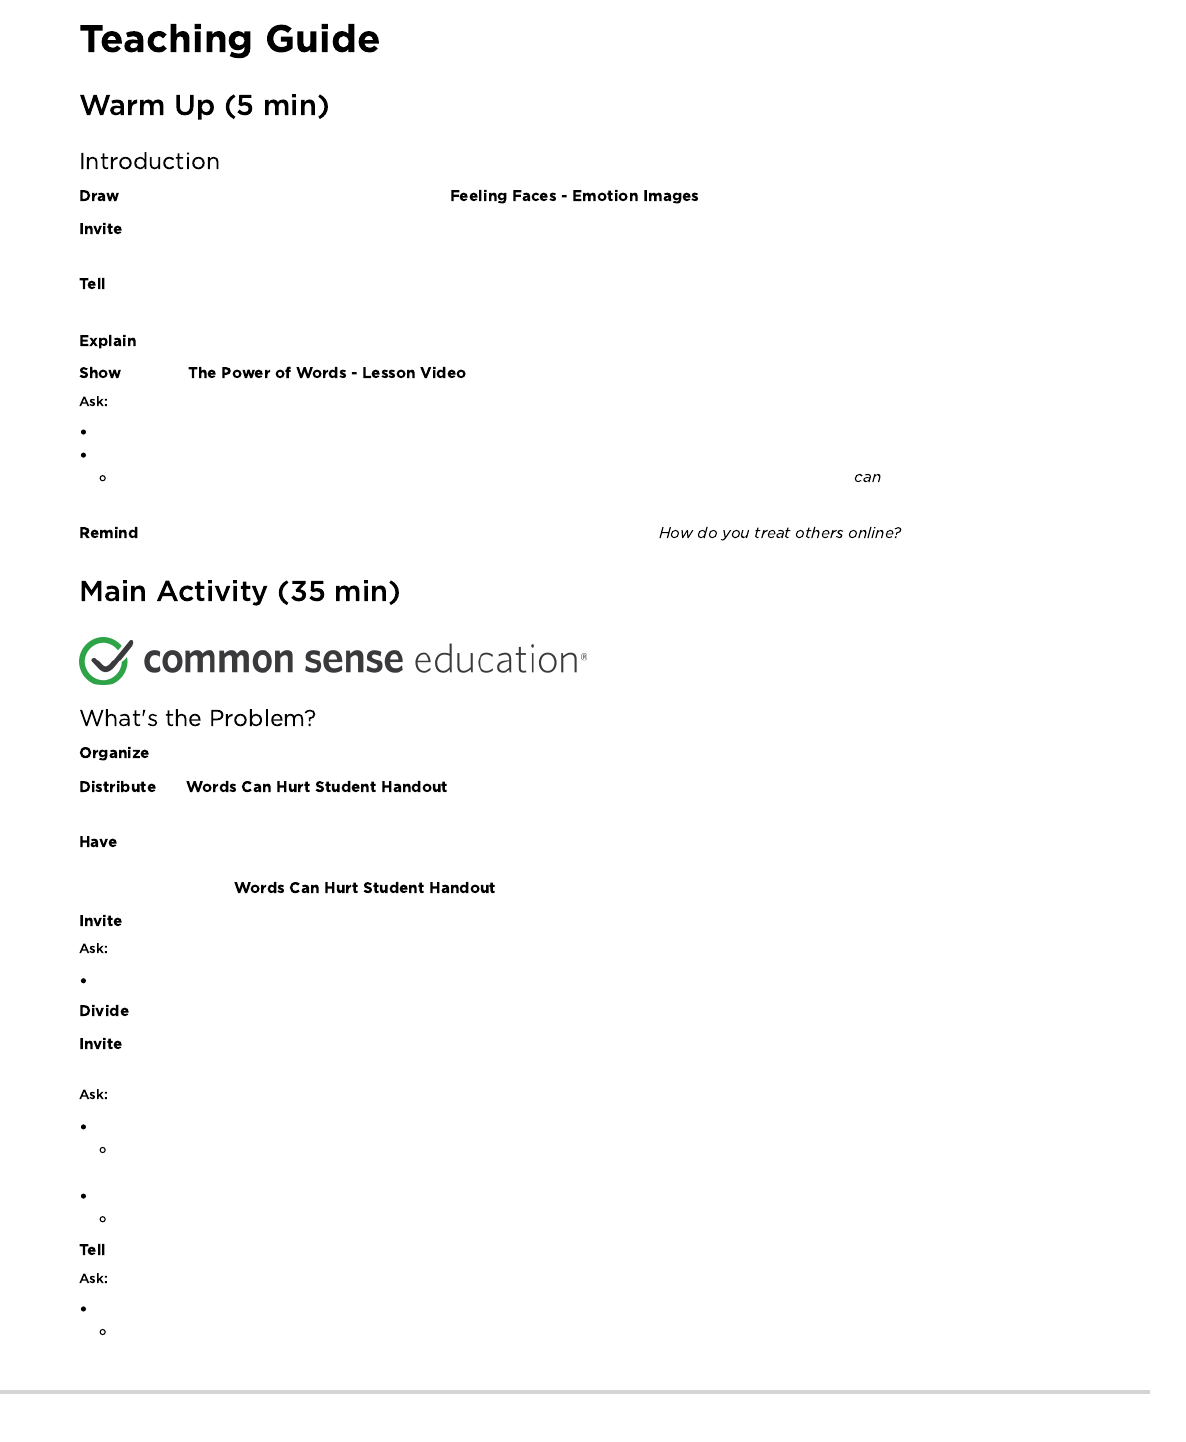
a series of expressive faces on the board. View for examples.
the students to suggest emotions that match each face's expression. With every suggestion, write the emotion next to the feeling
face. Answers will vary.
students that not everyone will react to a particular situation in the same way, but just because a reaction is different from our own,
doesn't mean we should discount others' feelings.
to students they are going to watch a video about how words, whether typed or spoken, can impact how someone else feels.
students .
Who has heard of the saying, "Sticks and stones may break my bones, but words will never hurt me"?
What did Guts mean in his text that sometimes words can hurt?
Words are powerful. Sometimes it is hard to ignore what someone is saying when it's a mean name. Names make you feel sad or
hurt.
students to keep Leg's question in the back of their mind during this lesson:
students into groups of four and have each group pick a person to record their ideas.
the . Have the groups of students read the scenario about Rani and Aruna receiving
mean messages through a children's game website.
each group answer the questions, then have them share their responses with the class. Look for responses that show empahty for
Rani and Aruna and acknowledge that the messages sent to them were mean and hurtful. Ask the students to read the 'Use Common
Sense!' section on the .
students to share their own stories.
Have you seen mean messages sent to you or others online? Tell us about it, but do not use real names.
students into pairs.
one partner to write the phrase "You're weird" on a piece of paper, then hand it to their partner. Tell them that they just received this
text.
What are the reasons the person might have texted "You're weird"?
They’re continuing an inside joke; the first person did something silly at an earlier time; a group of kids is teasing the kid; the person
who sent the text really does think the person is weird but is afraid to say it to his or her face.
How did the partner feel about being called weird?
Possibly like the other person was kidding around, but maybe that the person was teasing or being hurtful.
one person from each pair to say to the other person, "You're weird," with a smile on their face.
Why might you feel differently if you could see the person?
People give non-verbal cues through facial expressions and body language.
214
the piece of string across the length of the classroom. Ask students to stand on one side of the line. Then ask them to imagine that
they are online and somebody has sent them a message, which you will read to them. Tell the students to stay where they are if they think
the message is okay; to cross over the line if they think the message is not okay; or to stand on the line if they think the message is in
between.
You are my friend.
You are an idiot.
I'm having a party and you're not invited.
I like your new haircut.
You are ugly.
Thanks for the advice. Next time, will you tell me in person rather than through text?
Did you finish your homework?
Why is it taking you so long to finish it?
You are such a freak.
with the students that kids like to go online and use cell phones to email, chat, watch videos, send messages, play games, and do
homework. But sometimes the language can get mean or scary. Messages that make people feel bad cross the line. Sometimes that
meanness is unintentional, but when people use tools such as the internet and cell phones to deliberately upset someone else over and
over, that's cyberbullying.
students return to their seats.
how easy is it to feel angry or upset when somebody sends you a mean or scary message online.
: Using technology tools such as the internet and cell phones to deliberately upset someone else.
that cyberbullies deliberately try to make you feel that way, just like real-life bullies.
Cooling down can be a good first step when you receive a mean message online. Taking a deep breath, counting backwards from 10, or
pausing to think about what you will do next can give you time to think of the BEST way to handle the situation.
Finding help or telling a trusted adult or friend can be a good way to take action. You shouldn't deal with the cyberbullying situation alone.
The person you tell should be someone who wants to hear what you have to say and will help you work on a solution. Adults can be
especially good because they often have the power to influence the situation or they can give you advice about what to do.
Ignoring the person who is cyberbullying you can be very effective. Those who bully often like attention.
Whatever you do, remember to keep a copy of your communication with the individual who is cyberbullying you. If you delete the
communication, there is no proof of how the bully treated you if you need to show a trusted adult.
the to each student. Encourage them to depict a cyberbullying scenario and
possible solution. They can use pencils and paper to make the comics.
You can use these questions to assess your students' understanding of the lesson objectives. You may want to ask students to reflect in
writing on these questions in their .
Why is it a bad idea to send mean or scary messages online?
Because they can make the person who gets the message upset, angry, or scared.
Why might there be more misunderstandings between people when they send online messages as opposed to a face-to-face discussion?
Online messages can be more confusing or scarier than face-to-face messages because there are no face-to-face cues to help you
understand people's intentions.
What can kids do when they get cyberbullying messages?
1. Stay calm and take a deep breath
2. Tell a friend or trusted adult who can help develop a plan to handle the situation
3. Ignore the bully
4. Keep a copy of the communication with the bully.
215
Having students write about what they learned, why it’s useful, and how they feel about it can help solidify any knowledge they obtained
today and build a review sheet for them to look to in the future.
What was today's lesson about?
How do you feel about today's lesson?
What is cyberbullying?
Who are some people you can go to if you are ever bullied online or in person?
Print out the assessment from (page 8-9) and distribute it to the
class. Give students enough time to complete the assessment, but make sure there is enough time to go over answers.
- Language
- Speaking & Listening
- Math Practices
- Networks & the Internet
- Engineering in the Sciences
If you are interested in licensing Code.org materials for commercial purposes,
216
The Power of Words
TALK AND TAKE ACTION
1
DIGITAL LIFE 101 / ASSESSMENT / DIGITAL LITERACY AND CITIZENSHIP IN A CONNECTED CULTURE / REV DATE 2017
www.commonsense.org | CREATIVE COMMONS: ATTRIBUTION-NONCOMMERCIAL-SHAREALIKE
Directions
Create a cartoon about a cyberbullying situation. Each frame should
show a different part of the situation:
FRAME 1: Make a cartoon about something that a cyberbully might do or write
online. Remember to use language appropriate for school.
FRAME 2: Show what you might do if you saw what the cyberbully has done or written.
FRAME 3: What might be a positive outcome, or result, of the situation?
Use Common Sense!
What might a cyberbully say or do?
What would a positive outcome be?
What would you do in response?
• If someone is mean to you online, take a breather and ignore them. Save a copy of
your conversation between you and the bully.
•If you, or someone you know, is cyberbullied, talk to a trusted adult – like a parent,
family member, or teacher. Together, you can think of a plan for how to respond.
217
The Power of Words
WORDS CAN HURT
1
DIGITAL LIFE 101 / ASSESSMENT / DIGITAL LITERACY AND CITIZENSHIP IN A CONNECTED CULTURE / REV DATE 2017
www.commonsense.org | CREATIVE COMMONS: ATTRIBUTION-NONCOMMERCIAL-SHAREALIKE
Use Common Sense!
There’s an old saying: “Sticks and stones may break my bones, but words will never hurt me.”
I think that this saying is TRUE/NOT TRUE (circle one) because
Directions
Read the story below and then answer the questions that follow.
send
Player A: I hate you!
Player B: You are ruining the game!
Player C: You are so stupid.
Player D: You are a dork.
Group Chat:
1. How do you think Rani and Aruna feel when they read those messages?
Rani and Aruna feel
2. How would you feel if you received messages like these?
I would feel
3. Why do you think people send these kinds of message to people they don’t know?
People send these kinds of messages because
Rani and Aruna love a website
that has games and chatting
for kids. Their parents let them
play on the site. Lately, though,
Rani and Aruna have been
receiving mean messages on
the site, including:
218
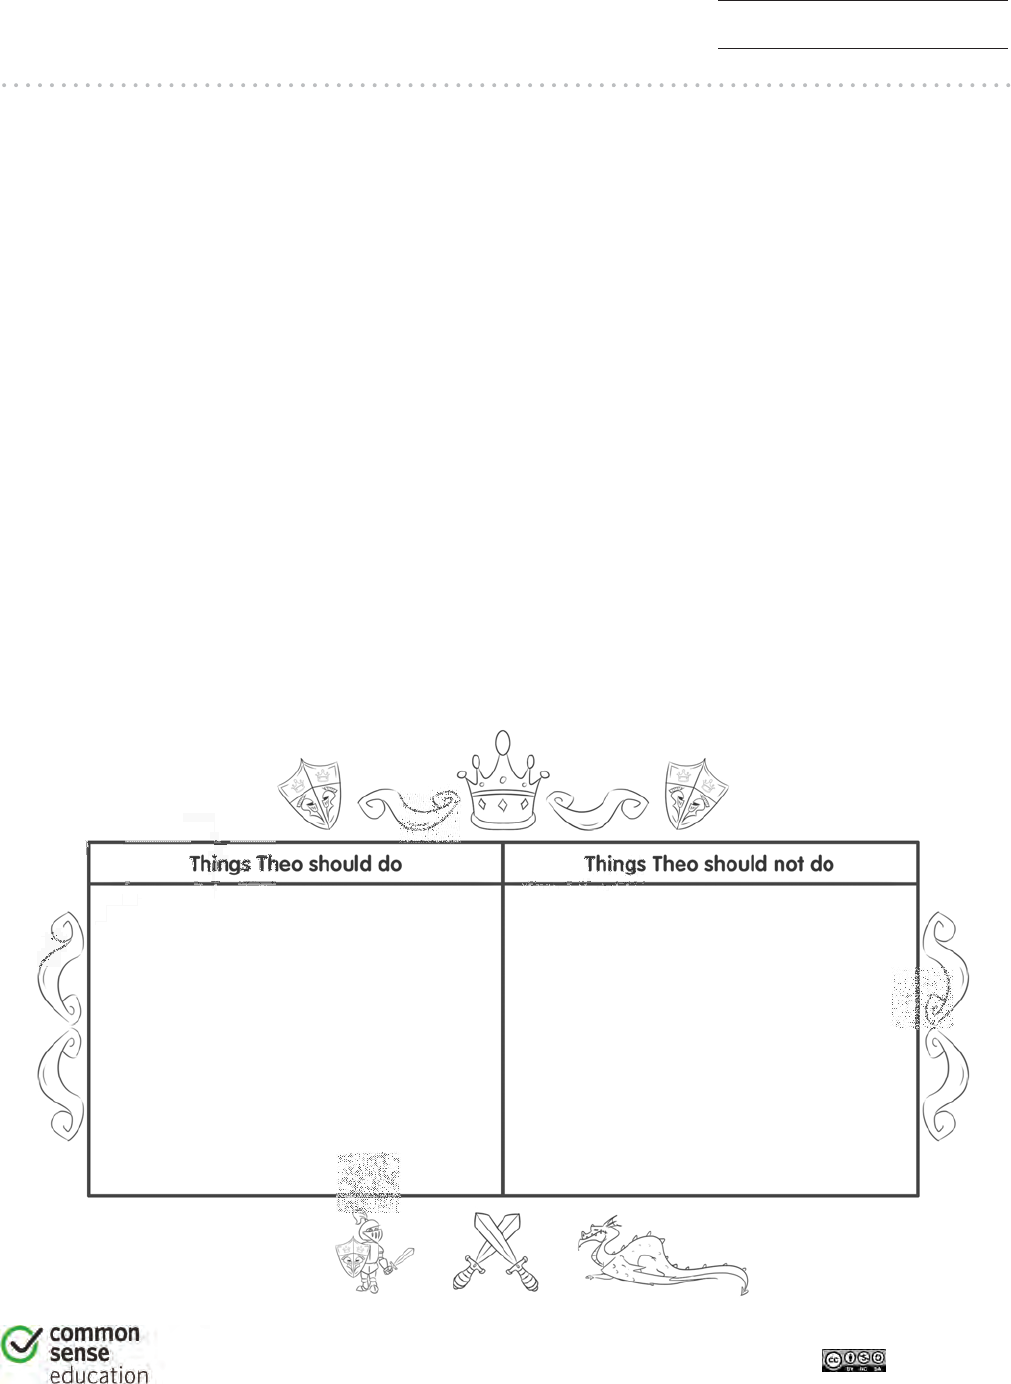
The Power of Words
ASSESSMENT
1
DIGITAL LIFE 101 / ASSESSMENT / DIGITAL LITERACY AND CITIZENSHIP IN A CONNECTED CULTURE / REV DATE 2017
www.commonsense.org | CREATIVE COMMONS: ATTRIBUTION-NONCOMMERCIAL-SHAREALIKE
1. Alicia receives a text message from her friend Ronald. The message says, “I am
having a party. You are not invited.” Circle the word that shows how Alicia might feel
after she receives the message.
a) hurt
b) excited
c) popular
2. Theo is having fun playing Dragons and Knights online. Then he sees a message
from another player. It says, “You’re ruining the game, stupid!” What should Theo do
about the message? What shouldn’t he do? Use the chart below to fill in the letters
that go with each answer.
a) Ignore the player who sent the mean message
b) Write a message back that says, “You’re so stupid, you’re the one ruining the game”
c) Pretend that he doesn’t feel hurt by the message
d) Save the message in case the other player sends Theo another mean message
e) Tell an adult about the message
f) Never play Dragons and Knights online again
219
The Power of Words
ASSESSMENT
2
DIGITAL LIFE 101 / ASSESSMENT / DIGITAL LITERACY AND CITIZENSHIP IN A CONNECTED CULTURE / REV DATE 2017
www.commonsense.org | CREATIVE COMMONS: ATTRIBUTION-NONCOMMERCIAL-SHAREALIKE
3. The following acronym, STOP, gives advice on what to do when something goes
wrong online. Explain what each letter means.
STOP What is the meaning of each phrase?
Explain in your own words.
Step away
Tell a trusted adult
Okay sites first
Pause and think online
220
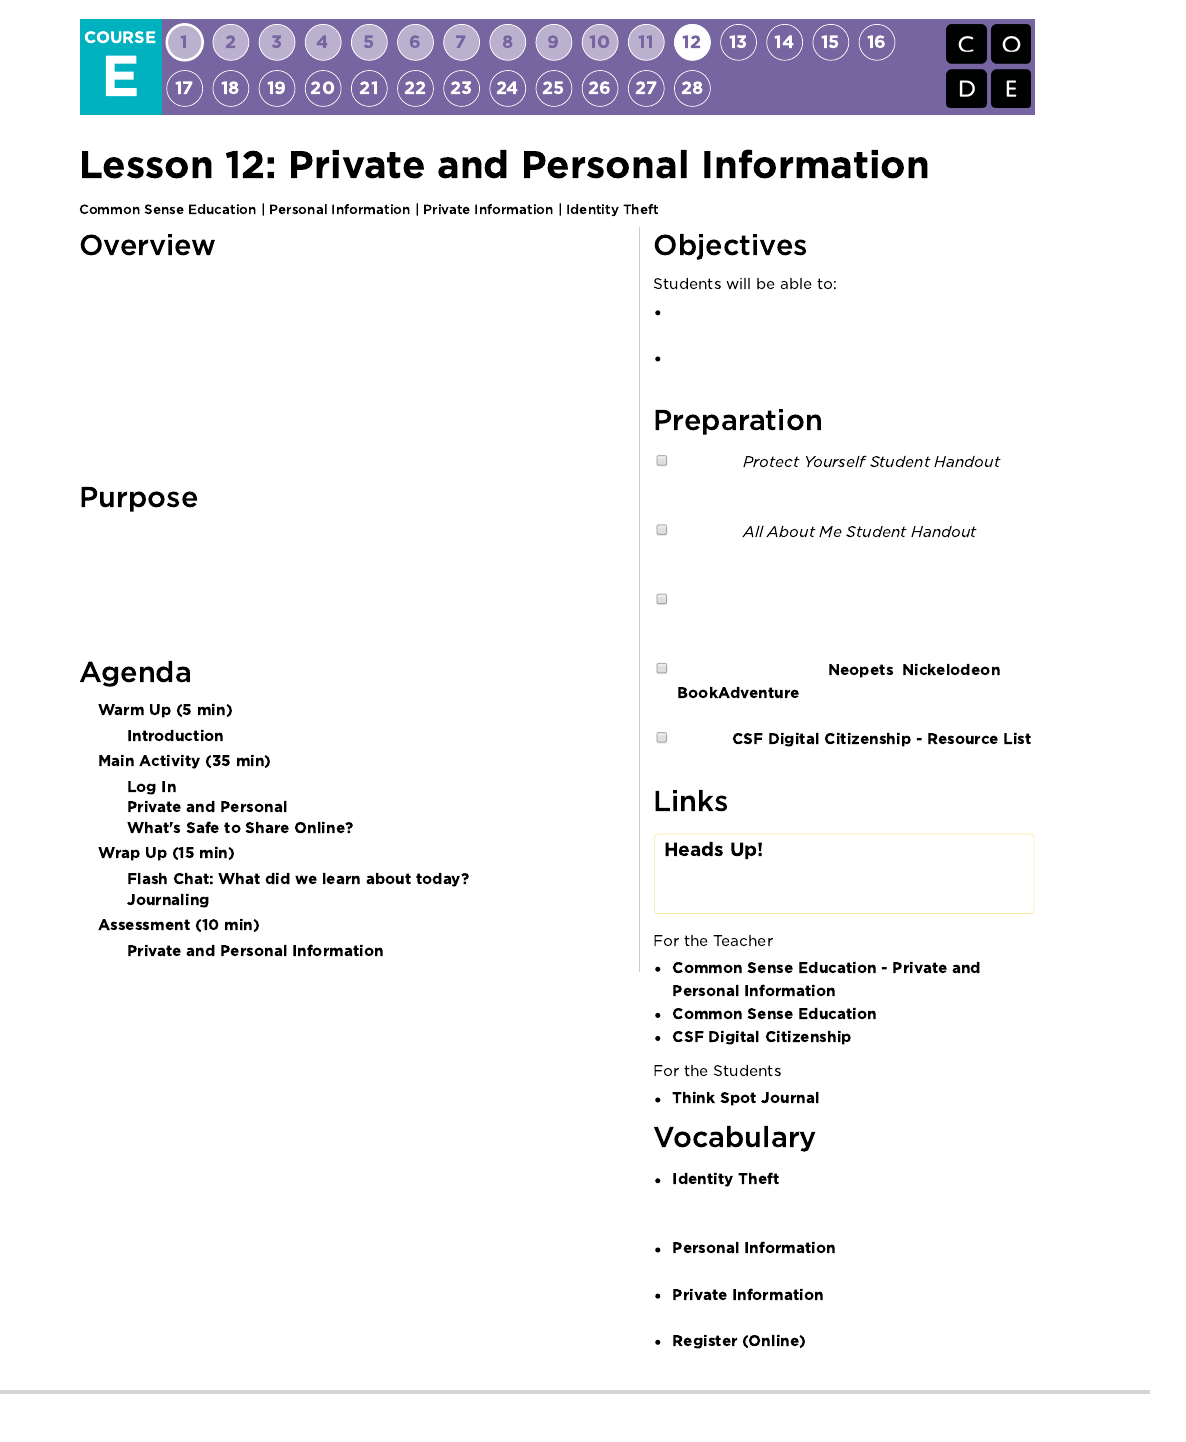
Developed by Common Sense Education, this lesson is about the difference
between information that is safe to share online and information that is not.
As students visit sites that request information about their identities, they learn
to adopt a critical inquiry process that empowers them to protect themselves
and their families from identity theft. In this lesson, students learn to think
critically about the user information that some websites request or require. They
learn the difference between private information and personal information, as
well as how to distinguish what is safe or unsafe to share online.
Common Sense Education has created this lesson to teach kids the importance
of security on the internet. By discussing the difference between personal and
private information, students will be able to recognize what information should
and shouldn't be shared. Students will also learn what signs you should look for
to determine if a website is safe or not.
Learn about the benefits and risks of sharing
information online.
Understand what type of information can put them at
risk for identity theft and other scams.
Copy the (7th
page of the teacher prep guide), one for each
student.
Copy the (6th
page of the teacher prep guide), one for each
student.
Print out an assessment (8th page of the teacher
prep guide) for each student. Teacher version is the
page after the student assessment.
Preview websites like , , and
and prepare to show them to the
class.
Review
for more online safety content.
Please make a copy of any
documents you plan to share with
students.
- Teacher Prep Guide
- Website
- Resource List
- Reflection Journal
- When a thief steals someone’s
private information in order to pretend to be that
person.
- Information that can’t be
used to identify you.
- Information that can be used
to identify you.
- To enter your information in
order to sign up and get access to a website.
221
Teacher Tip
As an offline alternative, print out and copy the website pages that
ask for registration and log-in information. Distribute these to the
students.
Teacher Tip
If you'd like a more clear distinction between "personal" and
"private" information in these definitions, you can use other
phrases like "friendly information" or "sharable information" to
better define the line that the students should recognize. We chose
to keep "personal" and "private" to stay true to Common Sense
Education's lesson plan.
What types of information do you think are okay to share publicly online such as on an online profile that others will see?
Interests and favorite activities
Opinions about a movie
First name
What are some examples of websites where you must register in order to participate?
Social networking sites
Video-sharing sites
Youth discussion sites
Ask-an-expert sites
Game sites
the names of the websites on the board. Explain that it's important to know that sharing some kinds of user information can put you
and your family's privacy at risk.
for the class, or have students go online to ,
, or .
with the students the kinds of information that each
website requires or requests before the users can participate.
What information is required? Why do you think it is required?
First name, username, password, password hint, gender, the state you live in, parent's permission, etc. This information is required
because it helps distinguish one person from another. Or perhaps the website is keeping a record of who uses it.
What information is optional? Why do you think it is optional?
Parent's email, birthday, state, country, gender, etc. This information is likely optional because the website does not require it for
payment or to distinguish people. Or perhaps the website wants to keep track of this kind of information.
Why do you think websites ask for this kind of information?
They want to get people to pay in order to use the site, they want to send messages to people who are signing up, or they want to try
to sell things to those people.
that you do not have to fill out fields on websites if they are not required. Required fields are usually marked by an asterisk (*) or
are highlighted in red.
to the students that some kinds of information are generally safe to share on the internet and some are not. However, the
information that's considered safe should not be shared one-on-one with people the students don't already know offline.
: Information that can’t be used to
identify you.
: Information that is about you and can
be used to identify you.
222
guardian before sharing this kind of information.
the following examples of information that is safe or unsafe to share:
SAFE - Personal Information UNSAFE - Private Information
- Your favorite food
- Your opinion (though it shoud be done respectfully)
- First name (with permission)
- Mother's maiden name
- Social Security number
- Your date of birth
- Parents' credit card information
- Phone number
Why would someone want to steal someone else's identity on the internet?
To steal money
To do something bad or mean
To hide their real identity
: When a thief steals someone’s private information in order to pretend to be that person.
that an identity thief uses private information to pretend to be the person whose identity he or she has stolen. Once the thief has
taken someone’s identity, he or she can use that person’s name to get a driver’s license or buy things, even if the person whose identity they
stole isn’t old enough to do these things! It’s often not until much later that people realize their identity has been stolen. Identity thieves may
also apply for credit cards in other people’s names and run up big bills that they don’t pay off. Let students know that identity thieves often
target children and teens because they have a clean credit history and their parents are unlikely to be aware that someone is taking on their
child’s identity.
the difference between private information (which can be used to steal your identity) and personal information (which cannot be
used to steal your identity). Invite students to answer the following questions (write their answers on the board):
What kinds of private information could an identity thief use to find out and steal your identity?
First and last name, postal address, email address, phone numbers, passwords, credit card numbers, Social Security number,
mother's maiden name.
What kinds of personal information could you share about yourself without showing your identity?
Your age, gender, how many siblings you have, your favorite music, your favorite food, what pets you have, the name of your pet, your
opinion about something.
to students that on the internet, people you interact with could be your friends next door or strangers who live on the other side of
the world. Because it’s hard to know the intentions of people who you’ve never met before, it is best to remain cautious when sharing your
information. You wouldn’t give strangers your private information in the real world, and you need to be just as careful when you’re online.
students how important it is each time they share information online to stop and think: “Am I giving out information that I should
keep private?” Point out that it can sometimes be safe to give out some private information. For example, a website might ask for your birth
date or email address. But students should always ask their parent or guardian before giving out private information.
the and have students complete the activity. Review the answers as a class.
the . Have students write down all the personal information they would like to share on a public profile
in an online community. Emphasize that even though personal information is safe to share online, it is okay to choose not to share it. Remind
students that everything on the list should be safe to share; none of it should be private information that can put their identity at risk.
students to share their lists with the class.
Is there anything on the lists that could be used by an identity thief? Why?
Guide students to explain their answers and encourage them to use the vocabulary terms.
Emphasize that personal information is usually safe to share
online. Private information is usually unsafe to share online,
meaning students should get permission from a parent or
223

You can use these questions to assess your students’ understanding of the lesson objectives. You may want to ask students to reflect in
writing on one of the questions, using a journal or an online blog/wiki.
What is identity theft?
Using someone else's private information to pretend to be that person.
How do personal information and private information differ?
Private information, such as a Social Security number, is unsafe to share. It should be kept private so that identity thieves cannot use
it. Personal information, such as your favorite food, cannot be used by identity thieves and is safe to share. Even though personal
information is usually safe to share online, you might choose not to share this information, and that’s fine.
What would be a good rule for kids about giving out private information?
They should not share it online without the permission of a teacher, parent, or guardian.
Having students write about what they learned, why it’s useful, and how they feel about it can help solidify any knowledge they obtained
today and build a review sheet for them to look to in the future.
What did you learn in today's lesson?
How do you feel about today's lesson?
Give an example of personal information and private information.
What's a website that you use often? How do you know it is a safe website to use?
Hand out the assessment to students. Allow students time to complete the assessment. If there is time left over, go over the answers with
the students.
- Language
- Speaking & Listening
- Math Practices
- Networks & the Internet
- Engineering in the Sciences
If you are interested in licensing Code.org materials for commercial purposes,
224
Private and Personal Information
ALL ABOUT ME
1
DIGITAL LIFE 101 / ASSESSMENT / DIGITAL LITERACY AND CITIZENSHIP IN A CONNECTED CULTURE / REV DATE 2017
www.commonsense.org | CREATIVE COMMONS: ATTRIBUTION-NONCOMMERCIAL-SHAREALIKE
Directions
Pretend you have a public profile in an online community. There are people you
know, and people you don’t know, who can view your profile.
Write down personal information that you would want to share about yourself.
Make sure that everything on your list is safe to share and that it is not private
information that could reveal your identity.
________________________________________________________________
________________________________________________________________
________________________________________________________________
________________________________________________________________
________________________________________________________________
________________________________________________________________
________________________________________________________________
________________________________________________________________
Use Common Sense!
Each time you share information about yourself online, stop and think: “Am I giving
out information that I should keep private?”
Personal information often is safe to share. But you should never share private
information without the permission of a parent, guardian, or teacher.
225
Private and Personal Information
PROTECT YOURSELF
1
DIGITAL LIFE 101 / ASSESSMENT / DIGITAL LITERACY AND CITIZENSHIP IN A CONNECTED CULTURE / REV DATE 2017
www.commonsense.org | CREATIVE COMMONS: ATTRIBUTION-NONCOMMERCIAL-SHAREALIKE
Directions
Decide if each piece of information below is an example of personal information or
private information. Then check the box to show your answer.
Information Personal Private
Full name (first and last)
Age
Street address
Email address
Date of birth
Gender
How many brothers and sisters you have
Favorite band
Phone numbers
Credit card information
Favorite food
The name of your pet
Mother’s maiden name
Name of your school
226
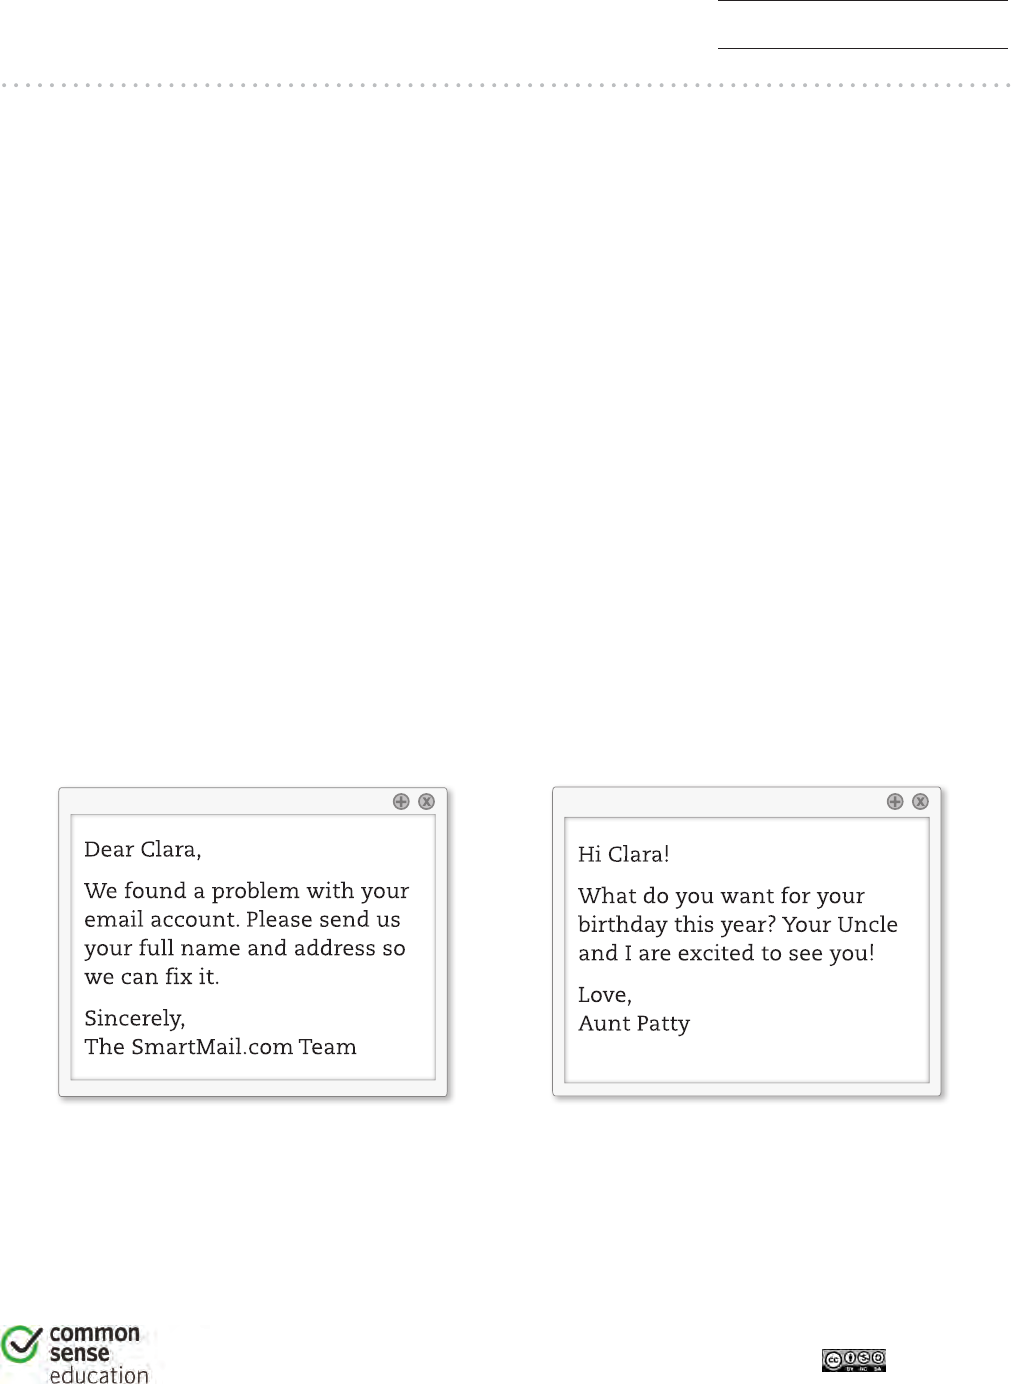
Private and Personal Information
ASSESSMENT
1
DIGITAL LIFE 101 / ASSESSMENT / DIGITAL LITERACY AND CITIZENSHIP IN A CONNECTED CULTURE / REV DATE 2017
www.commonsense.org | CREATIVE COMMONS: ATTRIBUTION-NONCOMMERCIAL-SHAREALIKE
1. If a website asks you for your __________________ online, you should talk to a
parent or family member.
a) favorite color
b) date of birth
c) screen name
2. An identity thief probably would not be interested in your personal information,
such as ___________________ .
a) our full name
b) your street address
c) your favorite movie
3. Clara received two emails. Which email should she NOT respond to?
Circle your answer.
227
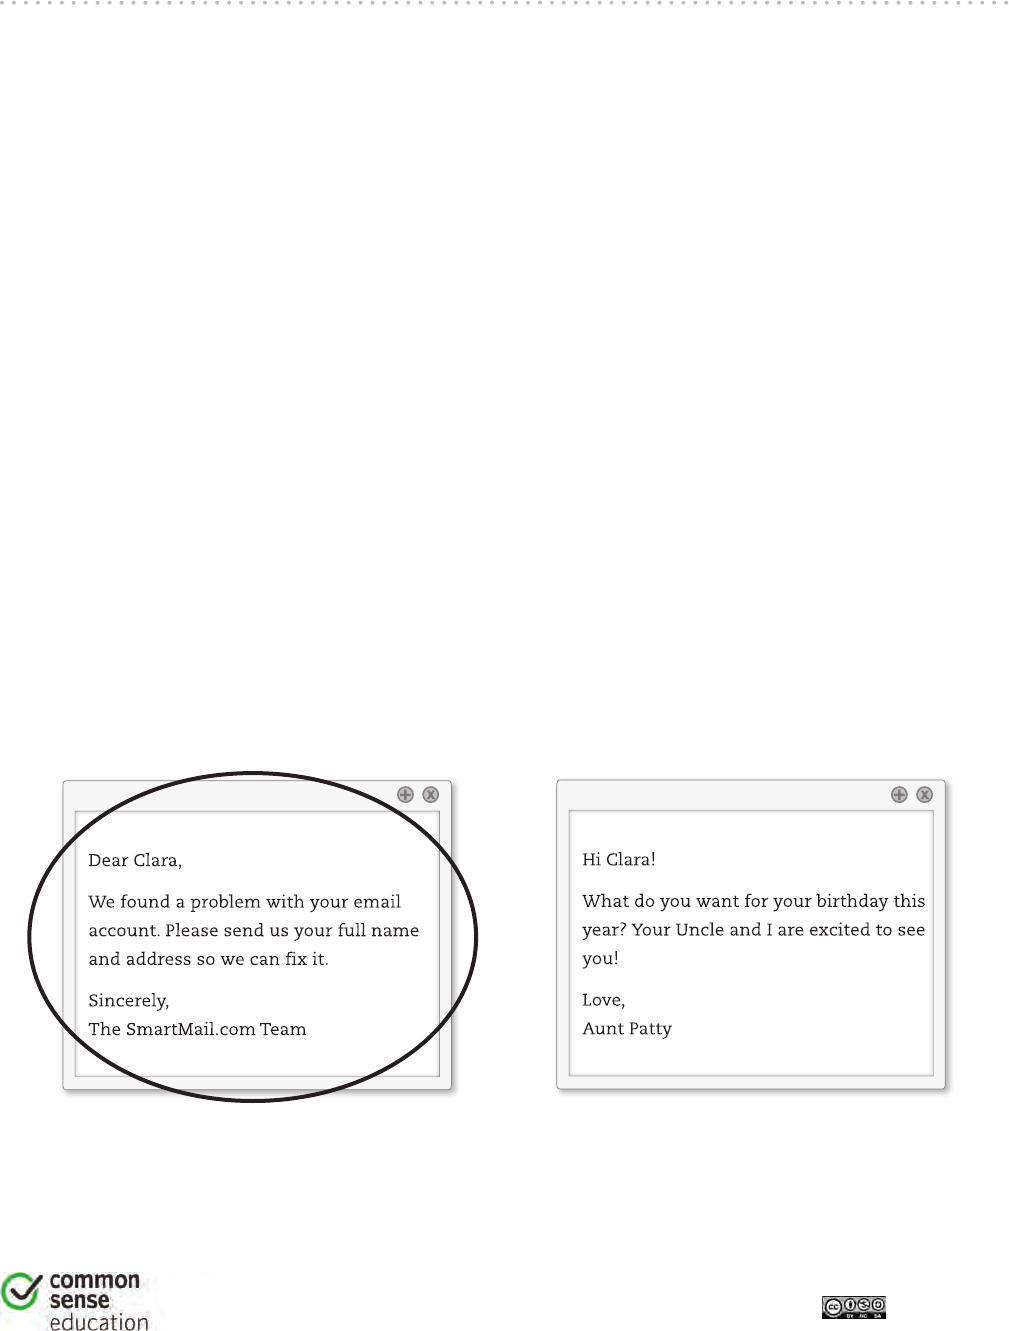
1
Private and Personal Information
ASSESSMENT
TEACHER VERSION
DIGITAL LIFE 101 / ASSESSMENT / DIGITAL LITERACY AND CITIZENSHIP IN A CONNECTED CULTURE / REV DATE 2017
www.commonsense.org | CREATIVE COMMONS: ATTRIBUTION-NONCOMMERCIAL-SHAREALIKE
1. If a website asks you for your ________________ online, you should talk to a parent
or family member.
a) favorite color
b) date of birth
c) screen name
Answer feedback
The correct answer is b. Your date of birth is an example of private information. If a website asks for
private information, you should ask a trusted adult before doing anything.
2. An identity thief probably would not be interested in your personal information, such
as __________________.
a) your full name
b) your street address
c) your favorite movie
Answer feedback
The correct answer is c. Both your full name and your street address are examples of private information.
Personal information, like your favorite movie, would probably not be useful for an identity thief.
3. Clara received two emails. Which email should she NOT respond to? Circle your answer.
Answer feedback
If an email asks you for private information, such as your full name or address, you should not
respond—especially if you do not know the person who sent the message.
228

This activity will begin with a short lesson on debugging and persistence, then
will quickly move to a race against the clock as students break into teams and
work together to write a program one instruction at a time.
Teamwork is very important in computer science. Teams write and debug code
with each other, instead of working as individuals. In this lesson, students will
learn to work together while being as efficient as possible.
This activity also provides a sense of urgency that will teach students to
balance their time carefully and avoid mistakes without falling too far behind.
This experience can be stressful (which is expected!) Make sure you provide
students with the tools to deal with potential frustration.
Define ideas using code and symbols.
Verify work done by teammates.
Identify signs of frustration
Watch the
.
Locate a wide open space for this activity, such as
the gym or outdoor field.
Print out one
for each group.
Supply each group with plenty of paper and
pens/pencils.
Print one for
each student.
Make sure every student has a
.
-
Image
- Unplugged Video
( )
- Teacher Video
- Activity
Packet
- Reflection Journal
- A list of steps to finish a task.
- Part of a program that does not work correctly.
- Finding and fixing problems in an
algorithm or program.
- Feeling annoyed or angry because
something is not the way you want it.
- Trying again and again, even when
something is very hard.
- An algorithm that has been coded into
something that can be run by a machine.
229
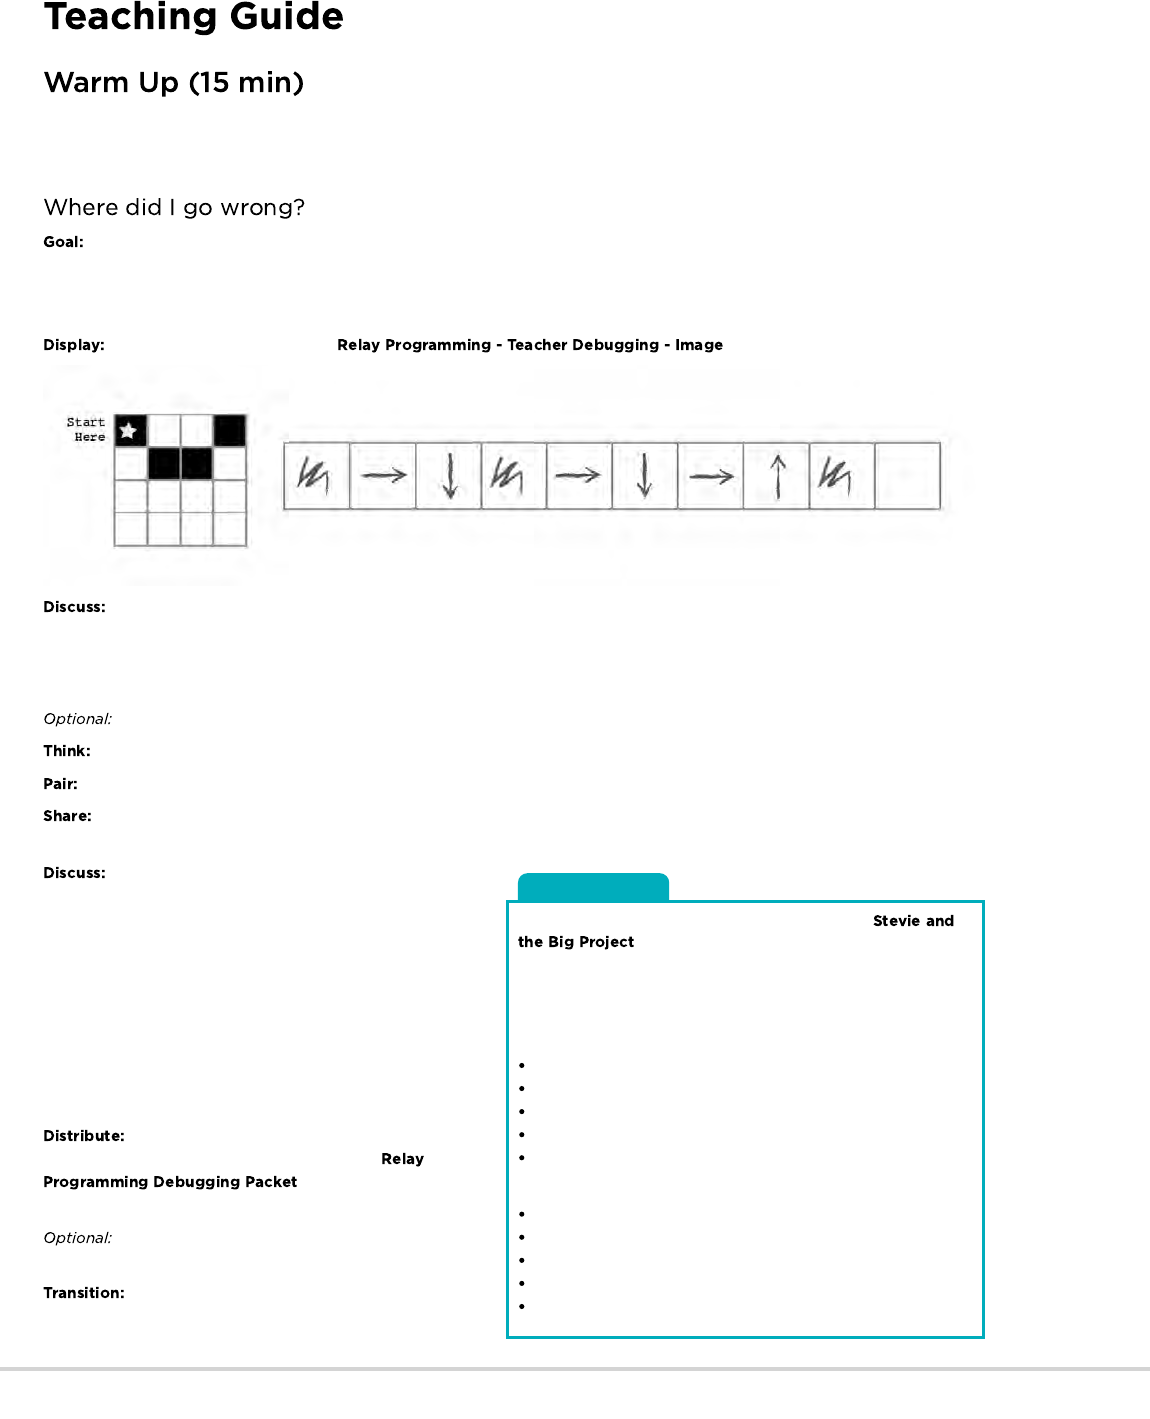
Content Corner
For more on persistence and frustration, try reading
to your students. It will help them spot moments
of frustration. It will also help give them the tools to deal with it.
If you do not read the book, take a moment to cover tips on
frustration and persistence as a class:
Tips to Help With Frustration
Count to 10
Take deep breaths
Journal about them
Talk to a partner about them
Ask for help
Tips for Being Persistent
Keep track of what you have already tried
Describe what is happening
Describe what is supposed to happen
What does that tell you?
Make a change and try again
Recall that in "Graph Paper Programming" we guided our teammate's Automatic Realization Machine (ARM) using arrows. This warm up will
bring back these ideas, which will be needed in the main activity.
In this lesson, we want to help students learn to identify and fix bugs in their own programs. The easiest way to do that is to first
present students with a program that contains bugs that are not their fault. Once they've helped you fix "your" program, share with them how
frustrating it can be to make mistakes, and help them see that those feelings are completely normal and they shouldn't feel embarrassed by
them.
Show your students the provided .
Get the attention of the class and let them know that you are stuck! You have this challenge, and you thought you had solved it,
but it doesn't seem to be working. Your program has a bug, can they help you fix it?
Take a moment to walk them through the rules: - Start at the star - Follow the instructions step-by-step - End when all of the right squares
are filled in
Follow along by filling in a blank grid. Express frustration when the picture doesn't turn out the way that you wanted it to.
Can you figure out why my program doesn't work?
Let students work together to see if they can figure out what the program is supposed to say .
Ask students if anyone was able to figure out a way to solve the problem. When you get a correct answer, let the students know that
they are great at "debugging"!
Ask the students if they could tell how you were feeling
when you couldn't figure out the answer. They might suggest that
you were "mad" or "sad". Instead of telling them "no", describe
that you were feeling a little bit mad, a little bit sad, and a little bit
confused. When you put all of those emotions together, it makes
a feeling called "frustration". When you are "frustrated" you might
think you are mad, sad, or confused -- and you might be tempted
to give up -- but frustration is a natural feeling and it's a big hint
that you are about to learn something! Instead of quitting, practice
persistence. Keep trying over and over again. After a few times,
you will start to understand how to debug your problems!
To make sure that students understand the idea of
finding and fixing errors (debugging) pass out the
and have students
complete the task in pairs.
If you want to move the activity along more quickly, feel
free to complete these as a class, instead.
Now it's time to play the game!
230
Clarifications
Here are some clarifications that need to be shared from time to
time:
Only one person from each group can be at the image at one
time.
It is okay to discuss algorithms with the rest of the group in line,
even up to the point of planning who is going to write what
when they get to the image.
When a student debugs a program by crossing out an incorrect
instruction (or a grouping of incorrect instructions) this counts
as their entire turn. The next player will need to figure out how
to correct the removed item.
With Graph Paper Programming in mind, it's time to split up into teams and prepare to run the activity as a relay!
Prepare the by printing out one copy for each team of 4-5 students.
Cut or fold each page along the center dotted line.
Go over the rules of the game with your class:
Divide students into groups of 3-5.
Have each group queue up relay-style.
Place an identical image at the other side of the room/gym/field
from each team.
Have the first student in line dash over to the image, review it,
and write down the first symbol in the program to reproduce
that image.
The first student then runs back and tags the next person in
line, then goes to the back of the queue.
The next person in line dashes to the image, reviews the
image, reviews the program that has already been written,
then either debugs the program by crossing out an incorrect
symbol, or adds a new one. That student then dashes back to
tag the next person, and the process continues until one group
has finished their program.
First group to finish with a program that matches the image is the winner! Play through this several times, with images of increasing difficulty.
Go through the game as many times as you can before time runs out or your students begin feeling exhausted.
Once the game is over, circle everyone up to share lessons learned.
What did we learn today?
What if each person on a team were allowed to do five arrows at a time?
How important would it be to debug our own work and the work of the programmer before us?
How about with 10 arrows?
10,000? Would it be more or less important?
Do you think a program is better or worse when more than one person has worked on it?
Do you think people make more or fewer mistakes when they're in a hurry?
If you find a mistake, do you have to throw out the entire program and start over?
Having students write about what they learned, why it’s useful, and how they feel about it can help solidify any knowledge they obtained
today and build a review sheet for them to look to in the future.
What was today's lesson about?
How did you feel during today's lesson?
How did teamwork play a role in the success of writing today's program?
Did you start to get frustrated at any point? What did you do about it?
Use these activities to enhance student learning. They can be used as outside of class activities or other enrichment.
If you don't have the time or room for a relay, you can have students pass the paper around their desk grouping, each writing one arrow
before they move the paper along.
231

Draw an image on the board. Have each student create a program for the image. Ask students to trade with their elbow partner and debug
each other's code.
Circle the first incorrect step, then pass it back.
Give the students another chance to review and debug their own work.
Ask for a volunteer to share their program.
Ask the class:
How many students had the same program?
Anyone have something different?
- Language
- Speaking & Listening
- Math Practices
- Algorithms & Programming
- Engineering in the Sciences
If you are interested in licensing Code.org materials for commercial purposes,
As the teacher, draw an image with as many filled squares as children in each group.
Have the students write as many arrows in the program as it takes to get to a filled-in square (including actually filling that square in)
before passing to the next person.
232

Step 1 2 3 4 5 6 7 8 9 10
Step 16
17 18 19 20 21 22 23 24 25
11
26
12
27
13
28
14
29
15
30
Step 31
32 33 34 35 36 37 38 39 40 41 42 43 44 45
Game #1
Step 1 2 3 4 5 6 7 8 9 10
Step 16
17 18 19 20 21 22 23 24 25
11
26
12
27
13
28
14
29
15
30
Step 31
32 33 34 35 36 37 38 39 40 41 42 43 44 45
Game #2
Step 1 2 3 4 5 6 7 8 9 10
Step 16
17 18 19 20 21 22 23 24 25
11
26
12
27
13
28
14
29
15
30
Step 31
32 33 34 35 36 37 38 39 40 41 42 43 44 45
Game #3
Step 1 2 3 4 5 6 7 8 9 10
Step 16
17 18 19 20 21 22 23 24 25
11
26
12
27
13
28
14
29
15
30
Step 31
32 33 34 35 36 37 38 39 40 41 42 43 44 45
Game #4
Step 1 2 3 4 5 6 7 8 9 10
Step 16
17 18 19 20 21 22 23 24 25
11
26
12
27
13
28
14
29
15
30
Step 31
32 33 34 35 36 37 38 39 40 41 42 43 44 45
Game #5
233

Relay Programming
Relay Image 1
1
Revision 140710.1a
Revision 140710.1a
Relay Programming
Relay Image 2
2
234
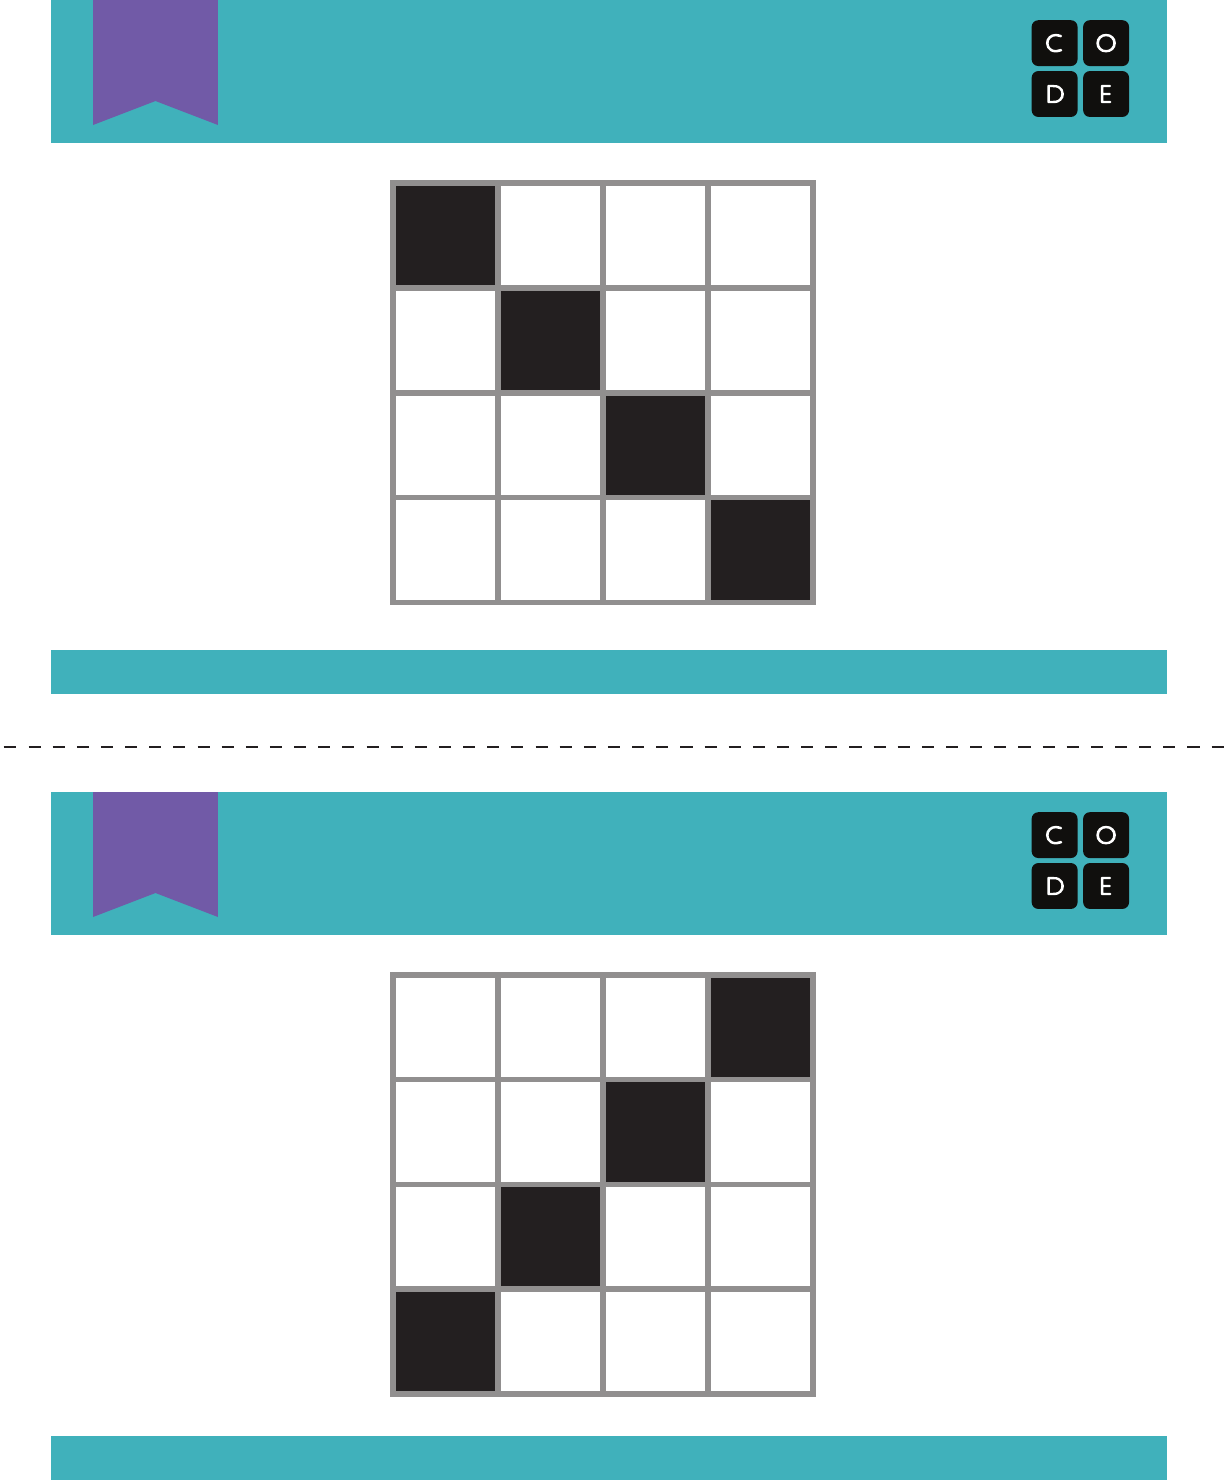
Relay Programming
Relay Image 3
3
Revision 140710.1a
Revision 140710.1a
Relay Programming
Relay Image 4
4
235

Relay Programming
Relay Image 5
5
Revision 140710.1a
Revision 140710.1a
Relay Programming
Relay Image 6
6
236
237
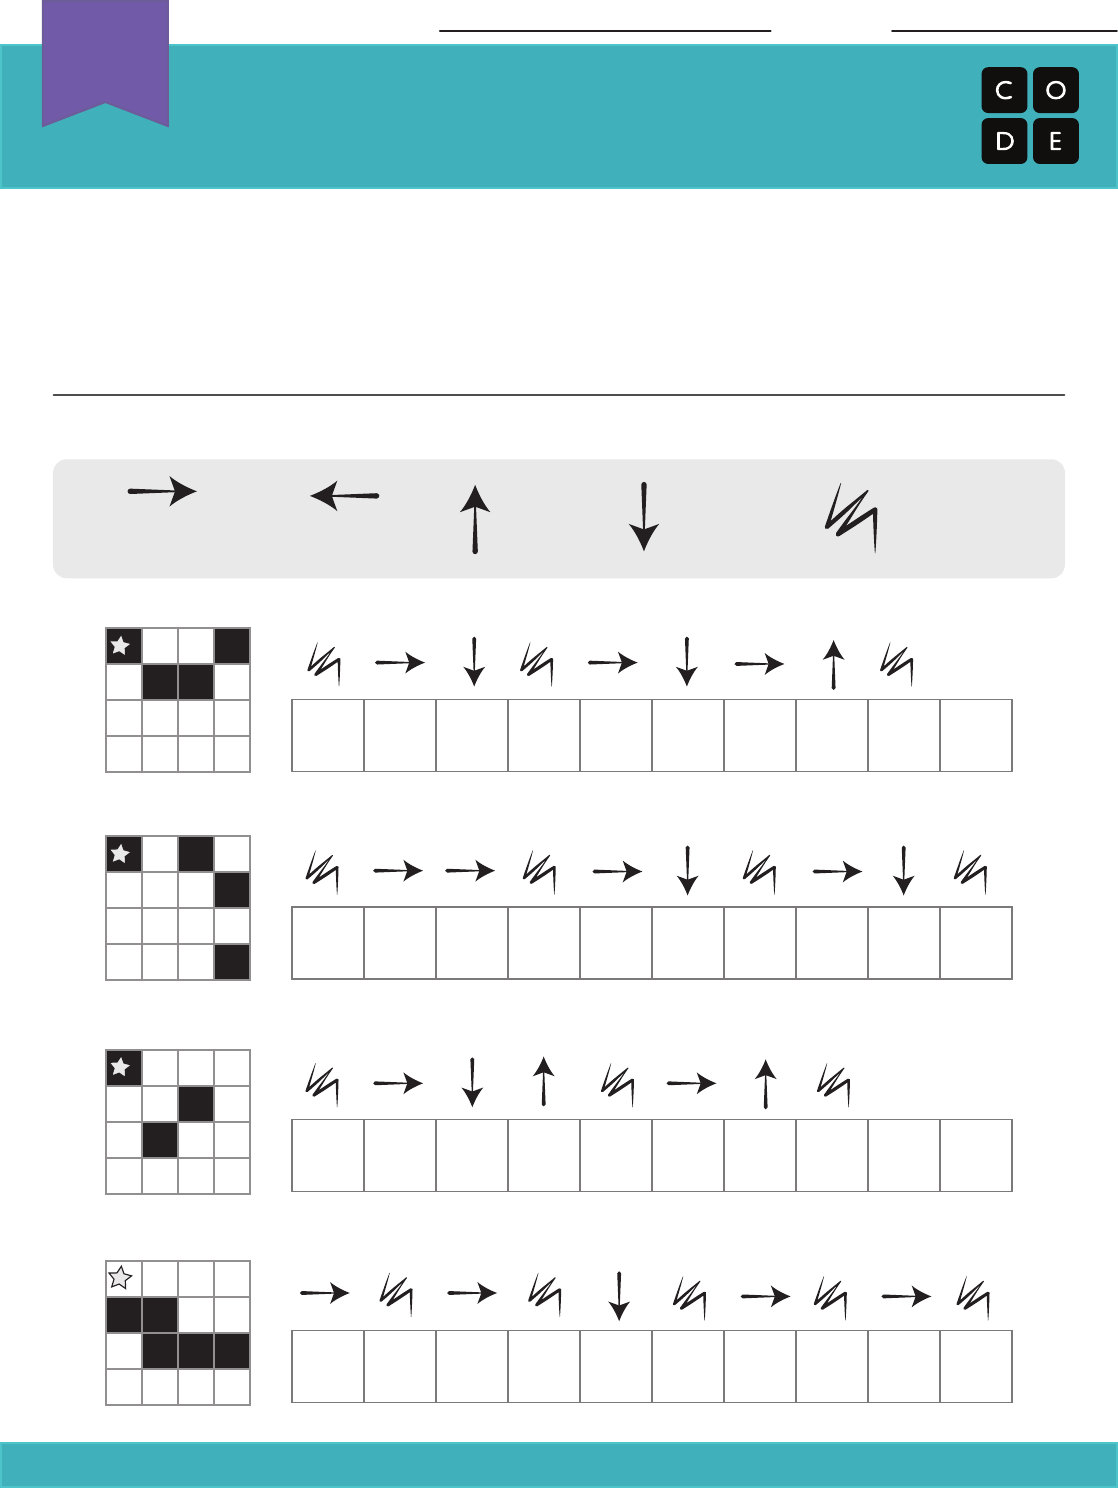
Name: Date:
Debugging
Assessment Worksheet
Revision 140830.1a
Sometimes when you are coding in groups, someone will make an error that will
affect everyone.
Somebody has already written programs for the images below, but each one has a
mistake! Figure out what the programs are supposed to look like, and circle the error
in each one. Then, draw the correct symbol in the box beneath.
Each program should use the symbols below to draw the image to its left.
Move One
Square Right
Move One
Square Left
Move One
Square Up
Move One
Square Down
Fill-In Square
with Color
Start
Here
Start
Here
Start
Here
Start
Here
Unplugged
U
238
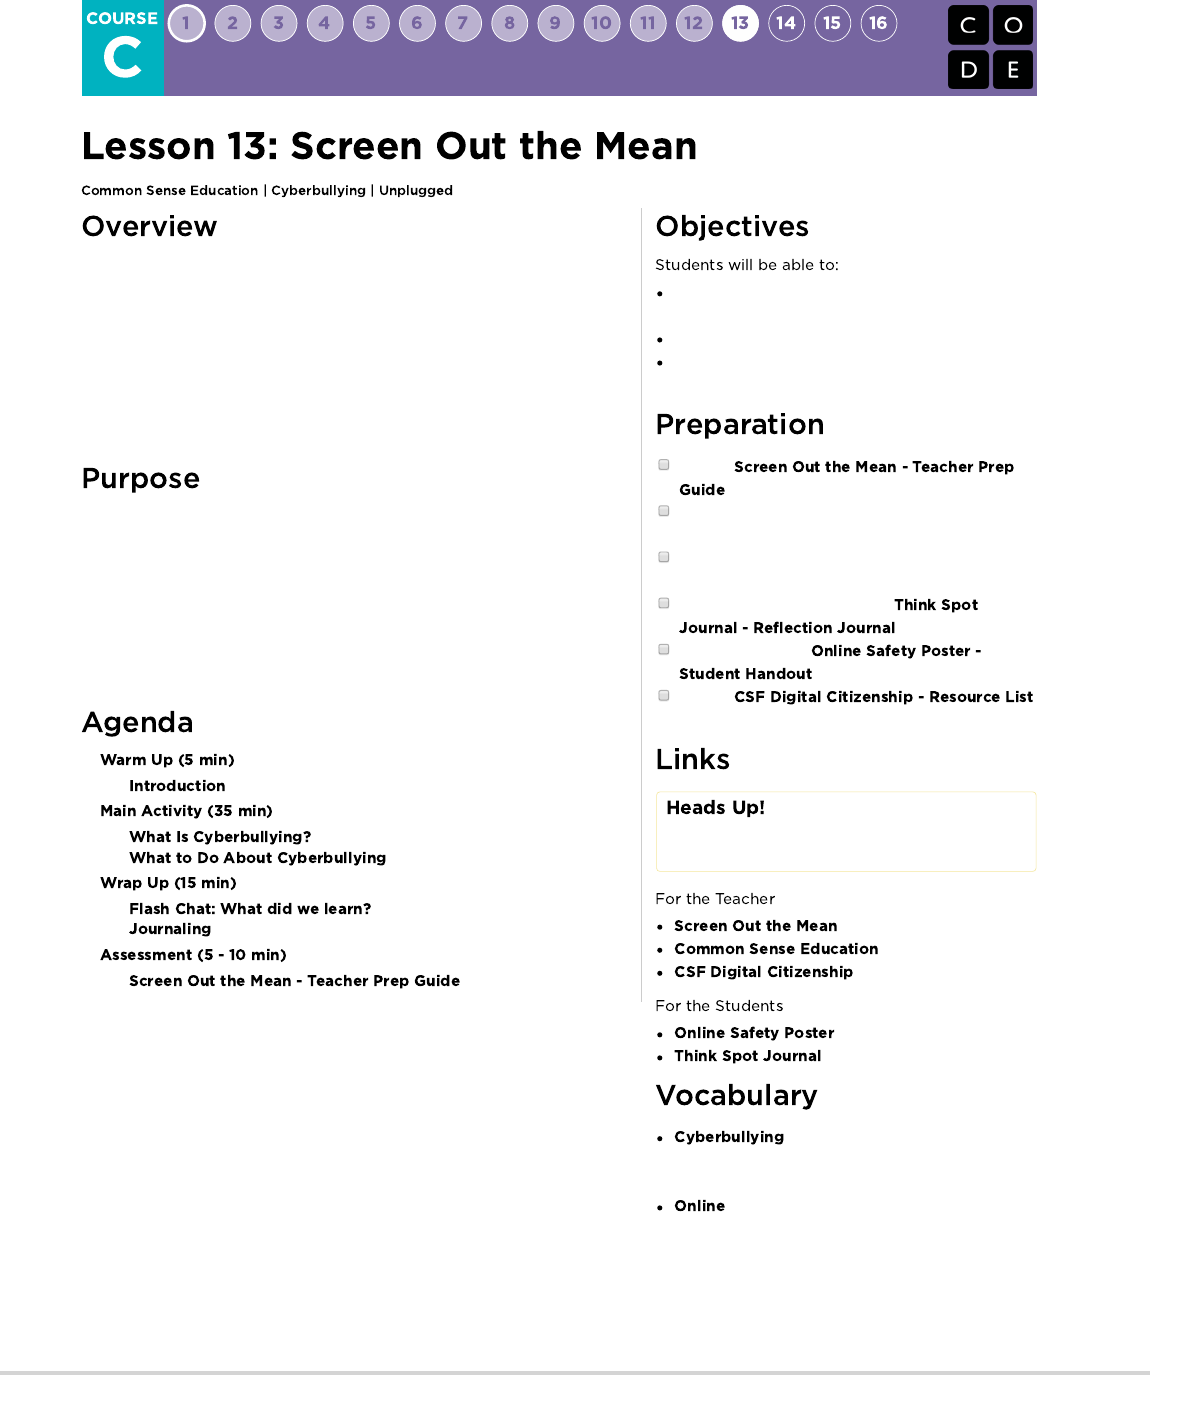
This lesson helps children to recognize that it is essential to tell a trusted adult if
something online makes them feel angry, sad, or scared.
Students learn that other people can sometimes act like bullies when they are
online. They will explore what cyberbullying means and what they can do when
they encounter it. After reading a scenario about mean online behavior,
students discuss what cyberbullying is, how it can make people feel, and how to
respond. Finally, they use their knowledge to create a simple tip sheet on
cyberbullying in their journal.
Students may not ever have the misfortune of experiencing cyberbullying, but
we want to make sure that the students are prepared for and knowledgeable
about it, in case they ever witness it during an online situation. Students will
learn how to identify cyberbullying and what steps they should take to make it
stop. This may become helpful in later puzzles when students have the
opportunity to share their work. If someone negatively responds to a student's
work, this lesson will provide them with the tools that they need to handle the
situation.
Analyze online behaviors that could be considered
cyberbullying.
Explain how to deal with a cyberbullying situation.
Recognize the importance of engaging a trusted
adult if the student experienced cyberbullying.
Review
from Common Sense Education's website.
Print out a worksheet from the link above (page 6)
for each student.
Print out an assessment from the link at the top
(page 7) for each student.
Make sure every student has a
.
Print or display the
for the class to see.
Review
for more online safety content.
Please make a copy of any
documents you plan to share with
students.
- Teacher Prep Guide
- Website
- Resource List
- Student Handout
- Reflection Journal
- Doing something on the internet,
usually again and again, to make another personal
feel angry, sad, or scared.
- Connected to the internet.
239
Encourage students to share what they know about bullying.
What kinds of things count as bullying?
Students should understand that bullying is behavior that is purposefully mean or scary to someone else. For example, making fun of
how someone looks, telling lies about them, or threatening to do something bad to them.
How does bullying make other people feel?
Hurt, angry, upset, scared
What is the best thing to do when you feel bullied, or when you see someone else being bullied?
Students should know to always tell a trusted adult when they experience or witness bullying.
Students will be learning about a kind of bullying that can take place when they use the internet.
: Connected to the internet
: Doing something on the internet, usually again and again, to make another person feel angry , sad, or scared
Some kids do not go online very much at all, either because of their family’s rules or because they do not like it very much. Other kids do go
online to do different things.
What do you do online, or what do you think you might like to do?
Students may mention activities like sending messages to friends and playing games.
Most of the time when students go online it is to do fun or interesting things. But sometimes people can be mean to each other online and
this is called cyberbullying.
Did you ever see someone make someone else feel bad online?
Answers will vary. Remind students to tell what happened, but not to use real names.
Tell students that they will be learning more about how cyberbullying occurs, and what to do when it happens to them or to someone they
know.
240
Discussion Goal
Questions to stimulate discussion include:
What do you think happened to Jada's game?
How do you think Jada, Kyle, or Sasha felt when these things
happened to them?
How do you know if someone is cyberbullying you?
Why do you think it is important to stop using the computer
when someone starts cyberbullying you?
It's possible that if students stay online, the cyberbullying
may continue or get worse.
Teacher Tip:
These scenarios can be read all at once and discussed as a
whole, or be read and discussed individually.
Ask the class to discuss to Jada's story. Tell the class there are
specific steps to handling a cyberbully.
Jada should STOP using the computer.
Jada should TELL an adult she trusts what happened.
Jada should not go back online or return to the pony website
until an adult says it is OK.
If Jada and Michael are good friends, Jada may want to tell
Michael how his actions made her feel after she gets help from
an adult.
If Michael continues cyberbullying her, she should play with
other kids who don't cyberbully others.
In general, there are four steps students should take if they or
someone they know are experiencing cyberbullying.
1. Stop using the computer until it is safe.
2. Tell an adult you trust.
3. Go online only when a trusted adult says it is okay.
4. Play online only with kids who you know and are nice.
What is cyberbullying. How does it make people feel?
Students should recognize that cyberbullying is any kind of online behavior that makes people feel sad, scared, angry or upset.
What four things can you do to help stop cyberbullying?
S. using the computer until it is safe.
T. an adult you trust.
O. Go only when a trusted adult says it is okay.
P. online only with kids who are nice.
What is the most important thing to do if someone starts cyberbullying you?
Telling a trusted adult is the most important response whenever someone makes them feel sad, scared, or angry online.
Having students write about what they learned, why it’s useful, and how they feel about it can help solidify any knowledge they obtained
today and build a review sheet for them to look to in the future.
What was today’s lesson about?
How did you feel during today’s lesson?
Write down the names of some trusted adults you can go to if you ever feel bullied.
What are the four steps you should take if you or someone you know is being cyberbullied.
Read aloud these two scenarios and discuss them briefly with the class.
Kyle keeps getting instant messages from someone saying means things about him. The person who is sending the messages doesn’t
use a real name, but Kyle can tell the messages are coming from someone who also makes fun of him at school in gym class.
Sasha is a new girl at school, and she’s making a lot of friends. Then Sasha finds out that another girl sent around an email that had a
picture of a cow with Sasha’s name on it.
Next, pass out the worksheet from page 6. Read aloud the story at the top and ask
students to work in pairs or groups to finish the worksheet.
241

- Math Practices
- Engineering in the Sciences
If you are interested in licensing Code.org materials for commercial purposes,
- Language
- Speaking & Listening
Pass out an assessment to each student. Allow students a few minutes to complete it then review the answers (page 9 of the link above)
with the class. If there's time, allow for a discussion about the questions.
242
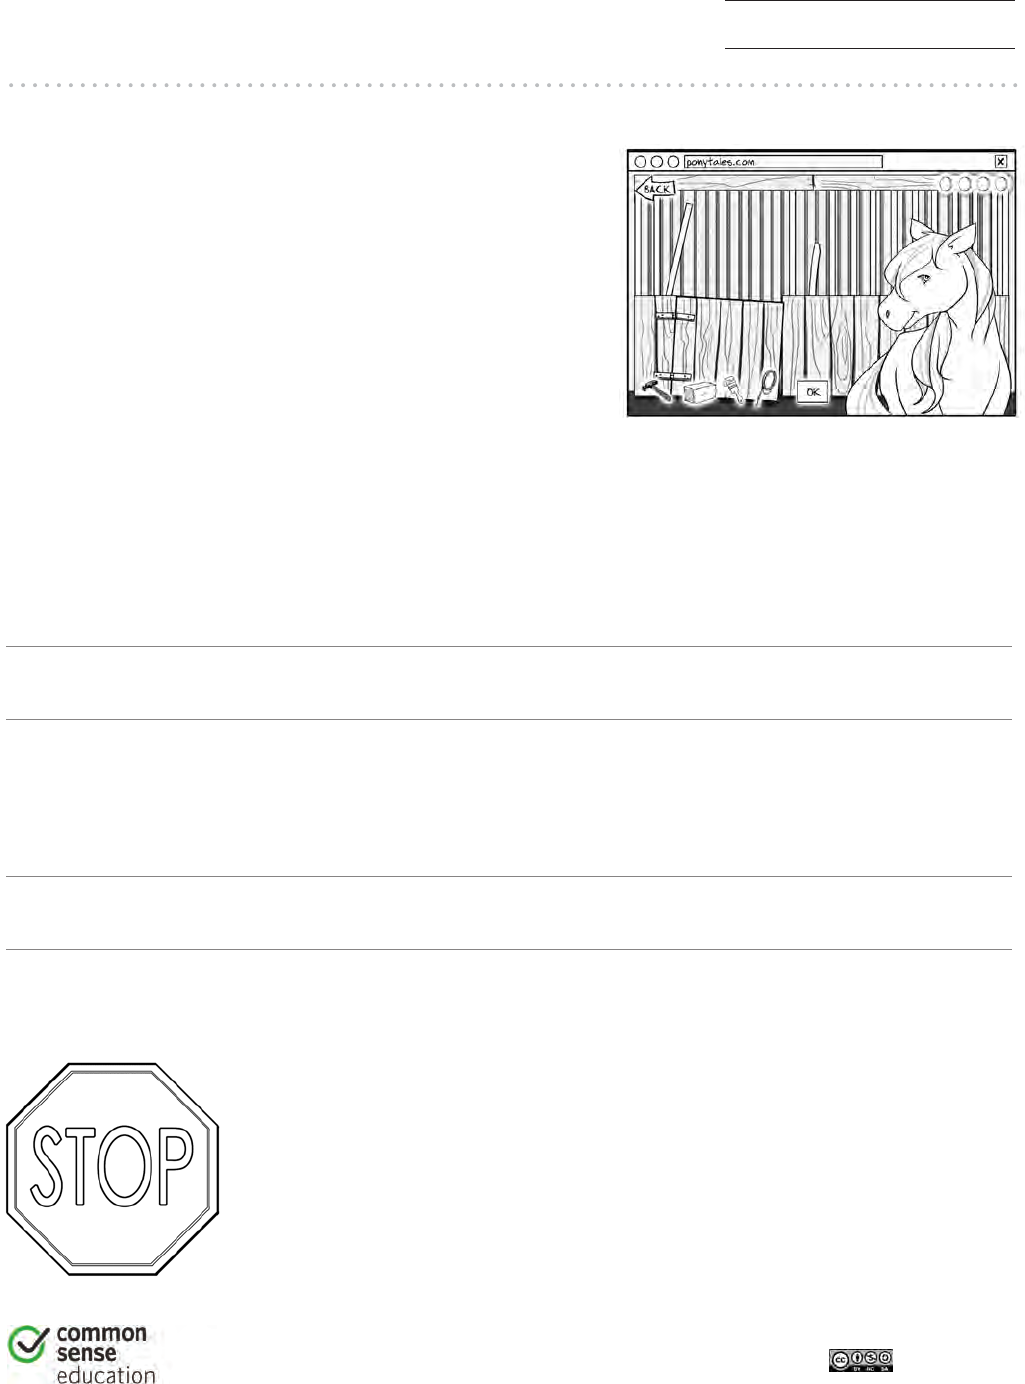
Screen Out the Mean
STOP CYBERBULLYING
1
DIGITAL LIFE 101 / ASSESSMENT / DIGITAL LITERACY AND CITIZENSHIP IN A CONNECTED CULTURE / REV DATE 2017
www.commonsense.org | CREATIVE COMMONS: ATTRIBUTION-NONCOMMERCIAL-SHAREALIKE
Directions
Jada’s parents let her play on a website
where she can take care of a pet pony
and decorate its stall. Her friend Michael
has played with her in the past and
knows her user name and password.
One day Jada goes to the site to care for
her pony. She finds that her pony’s stall
is a mess and that there are some things missing.
What do you think happened?
How do you think Jada feels?
What should you do if someone starts cyberbullying you?
STOP using the computer until it is safe.
TELL an adult you trust.
Go ONLINE only when a trusted adult says it’s OK.
PLAY online only with kids who are nice.
243
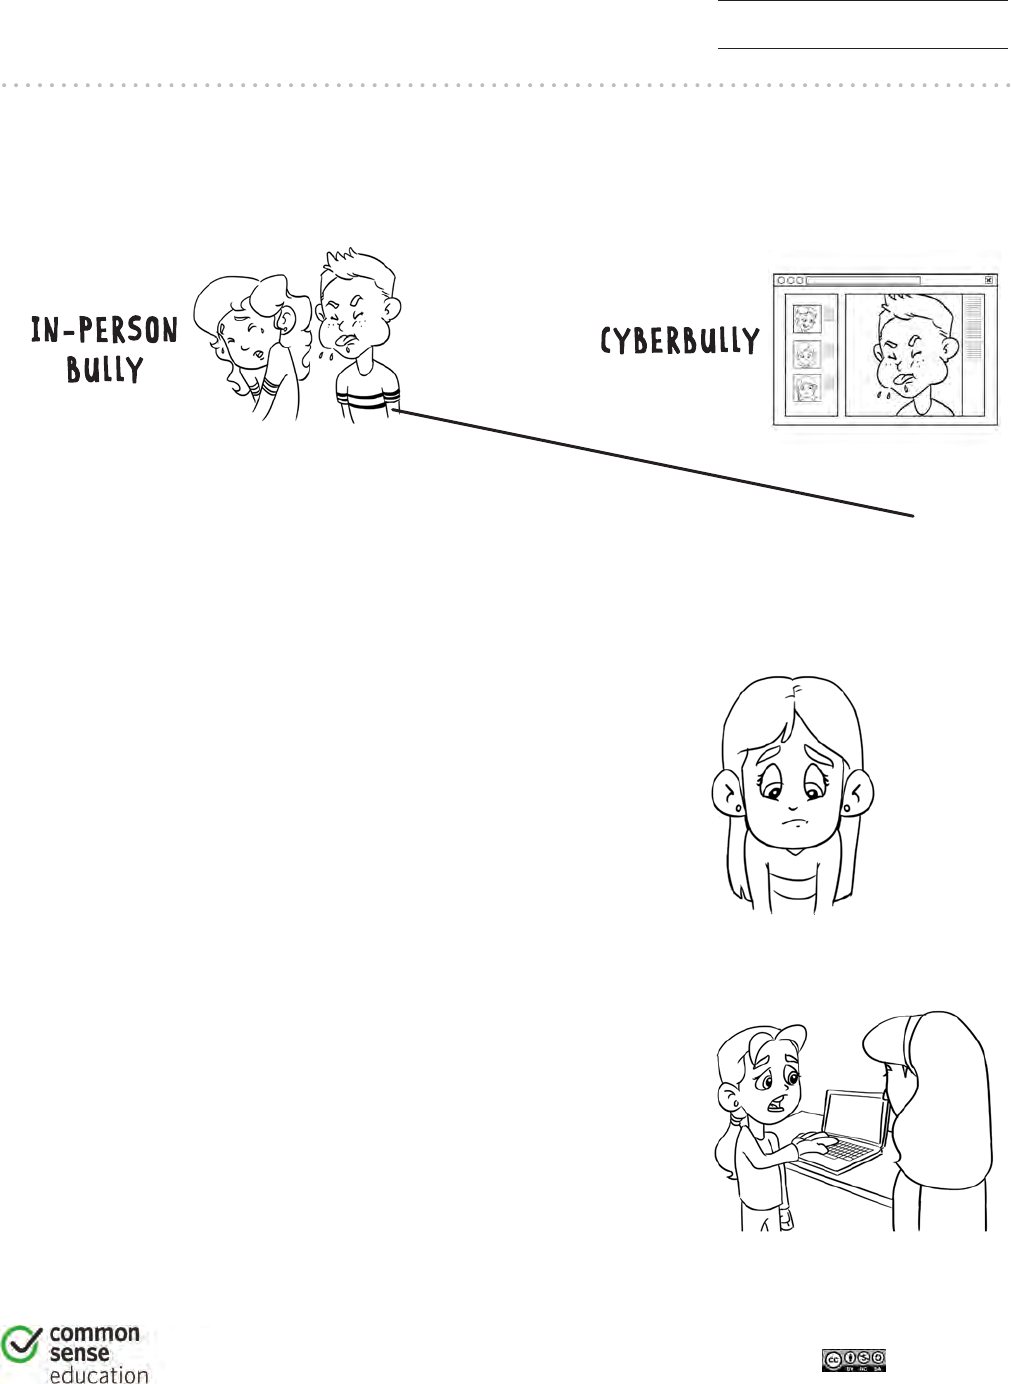
Screen Out the Mean
ASSESSMENT
1
DIGITAL LIFE 101 / ASSESSMENT / DIGITAL LITERACY AND CITIZENSHIP IN A CONNECTED CULTURE / REV DATE 2017
www.commonsense.org | CREATIVE COMMONS: ATTRIBUTION-NONCOMMERCIAL-SHAREALIKE
1. Draw lines to show which things a cyberbully would do most and which
things an in-person bully would do most.
Threatens to
pull your hair
Takes your stuff
in an online game
Sends mean
emails Hits you
2. A cyberbully might:
a) Write an email to make someone feel scared
b) Say mean things at recess
c) Share a knock-knock joke online
3. What should you do if you are cyberbullied?
a) Stop using the computer until it is safe
b) Tell an adult you trust
c) Both a and b
244
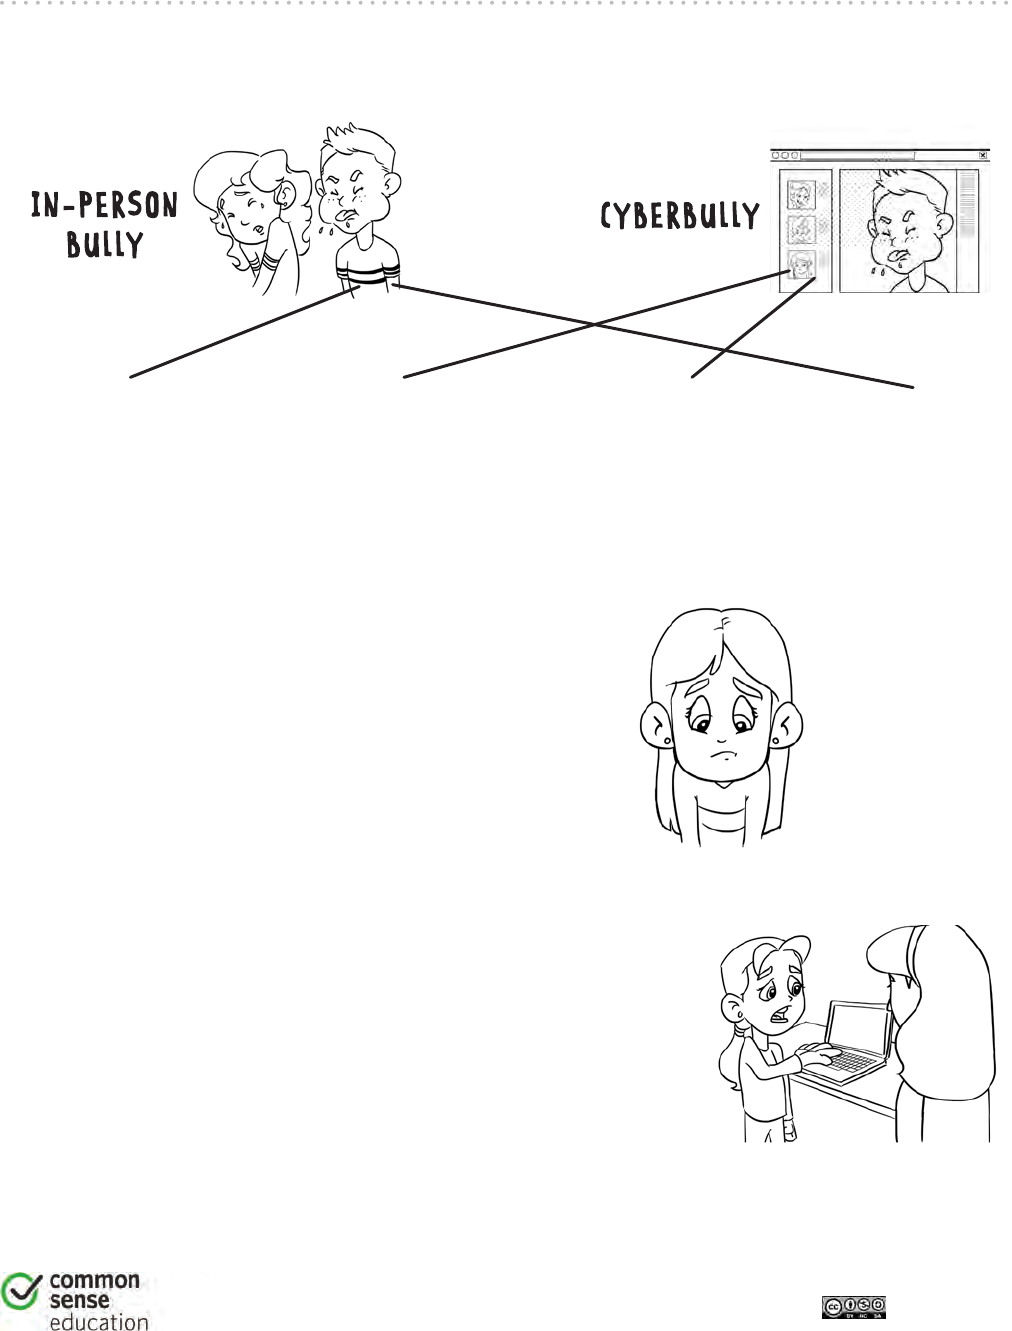
1
Screen Out the Mean
ASSESSMENT
TEACHER VERSION
DIGITAL LIFE 101 / ASSESSMENT / DIGITAL LITERACY AND CITIZENSHIP IN A CONNECTED CULTURE / REV DATE 2017
www.commonsense.org | CREATIVE COMMONS: ATTRIBUTION-NONCOMMERCIAL-SHAREALIKE
1. Draw lines to show which things a cyberbully would do most and which things an
in-person bully would do most.
Threatens to
pull your hair
Takes your stuff
in an online game
Sends mean
emails Hits you
Answer feedback
A cyberbully does and says mean things online. An in-person bully is mean in person.
2. A cyberbully might:
a) Write an email to make someone feel scared
b) Say mean things at recess
c) Share a knock-knock joke online
Answer feedback
The correct answer is a. Cyberbullies are mean online.
3. What should you do if you are cyberbullied?
a) Stop using the computer until it is safe
b) Tell an adult you trust
c) Both a and b
Answer feedback
The correct answer is c. If someone is mean to you online, get off
the computer and tell an adult. Saying mean things to a cyberbully won’t help.
245
One of the most magnificent structures in the computer science world is the
function. Functions (sometimes called procedures) are mini programs that you
can use over and over inside of your bigger program. This lesson will help
students intuitively understand why combining chunks of code into functions
can be such a helpful practice.
The use of functions helps simplify code and develop the student's ability to
organize their program. Students will quickly recognize that writing functions
can make their long programs easier to read and easier to debug if something
goes wrong.
Locate repeating phrases inside song lyrics.
Identify sections of a song to pull into a function.
Describe how functions can make programs easier
to write.
Watch the
.
Watch the
.
Print several
for each group.
Print one
for each student.
Access to the internet, or pre-downloaded songs
and lyrics for activity.
Make sure every student has a
.
Please make a copy of any
documents you plan to share with
students.
- Unplugged Video
( )
- Teacher Video
- Lesson in
Action Video
- Worksheet
-
Assessment
-
Assessment Answer Key
- Reflection Journal
- A named group of programming
instructions. Functions are reusable abstractions that
reduce the complexity of writing and maintaining
programs.
246
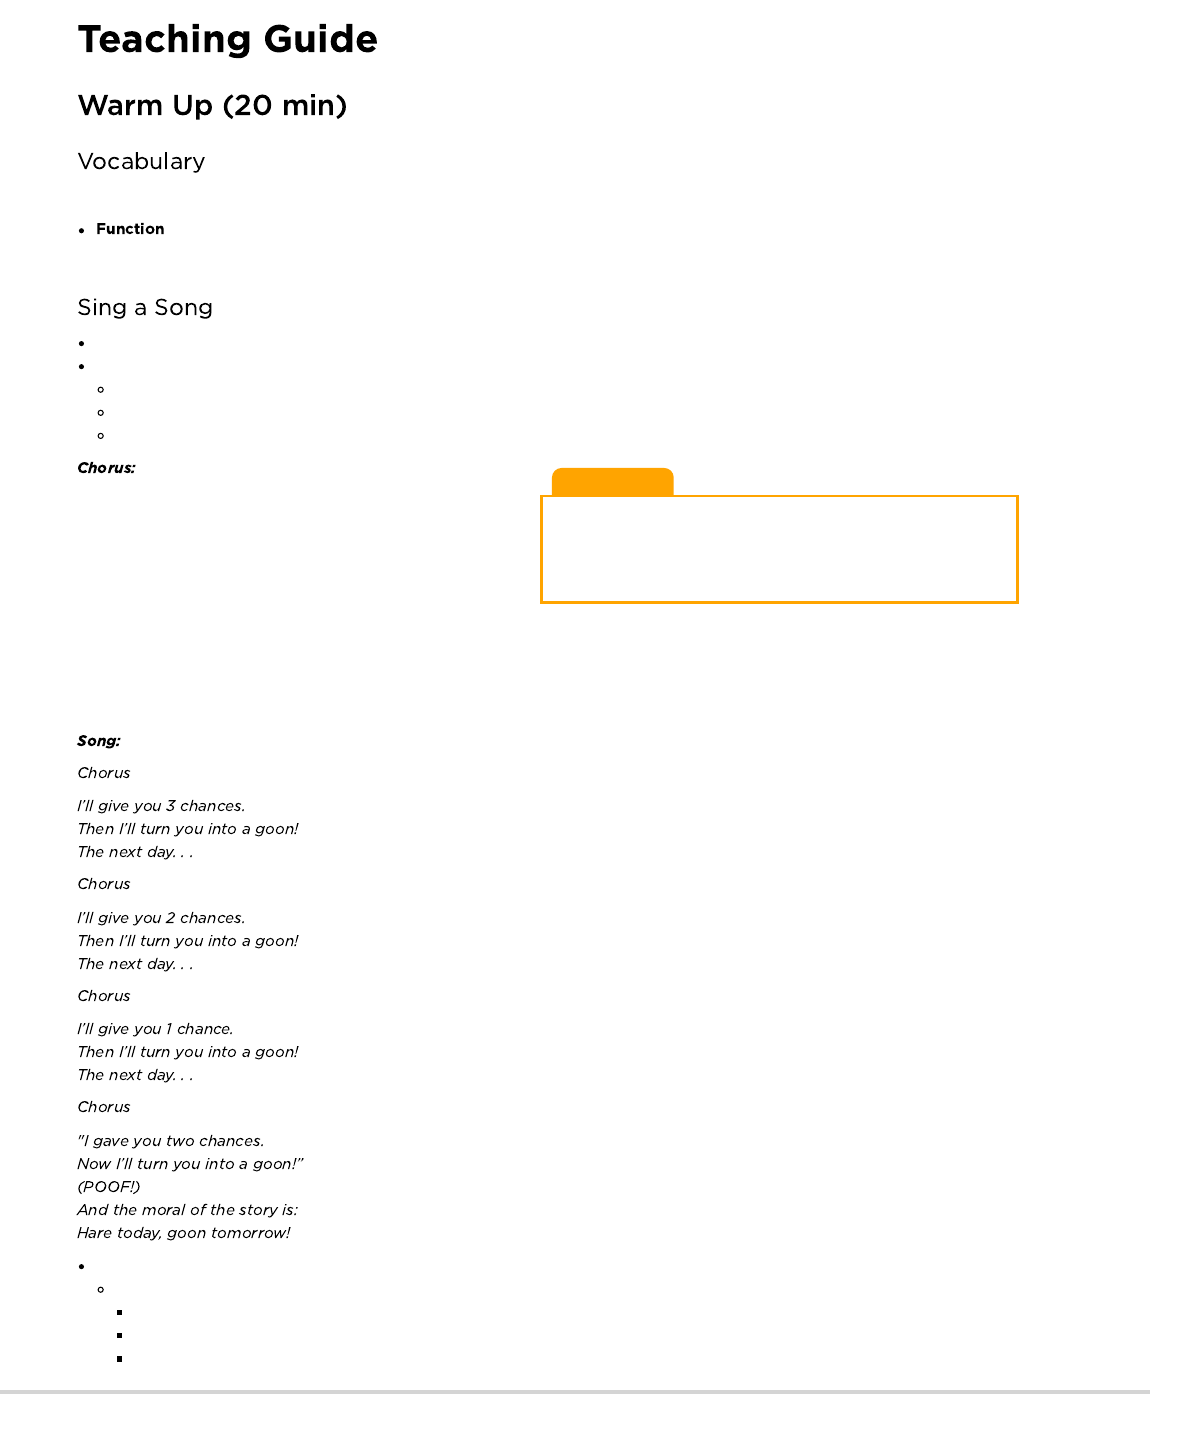
Teaching Tip
Little Bunny Foo Foo is being used here as an example only. If
your students know this song, feel free to use it. Otherwise,
choose an appropriate song that they might be more familiar with
(either from music class or the radio.)
This lesson has one new and important word:
- Say it with me: Func-shun
A piece of code that you can call over and over again.
Let the class know that today is song day!
We're going to learn a song together.
Start with a simple song, either written out or projected on the screen.
Point to the chorus and be sure that the class knows how it goes before you begin on the song.
Blast through the song, singing it with them in the beginning, then see what happens when you get to the part where it calls the chorus.
Little bunny Foo Foo
Hopping through the forest
Scooping up the field mice
And bopping ‘em on the head
Down came the Fairy
And she said
“Little bunny Foo Foo
I don’t wanna see you
Scooping up the field mice
And bopping ‘em on the head”*
It's quite likely that the majority of the class will sing the lyrics for the chorus when you point to that bit.
Stop the song once that happens, and explicitly highlight what just happened.
You defined the chorus.
You called the chorus.
They sang the chorus.
247
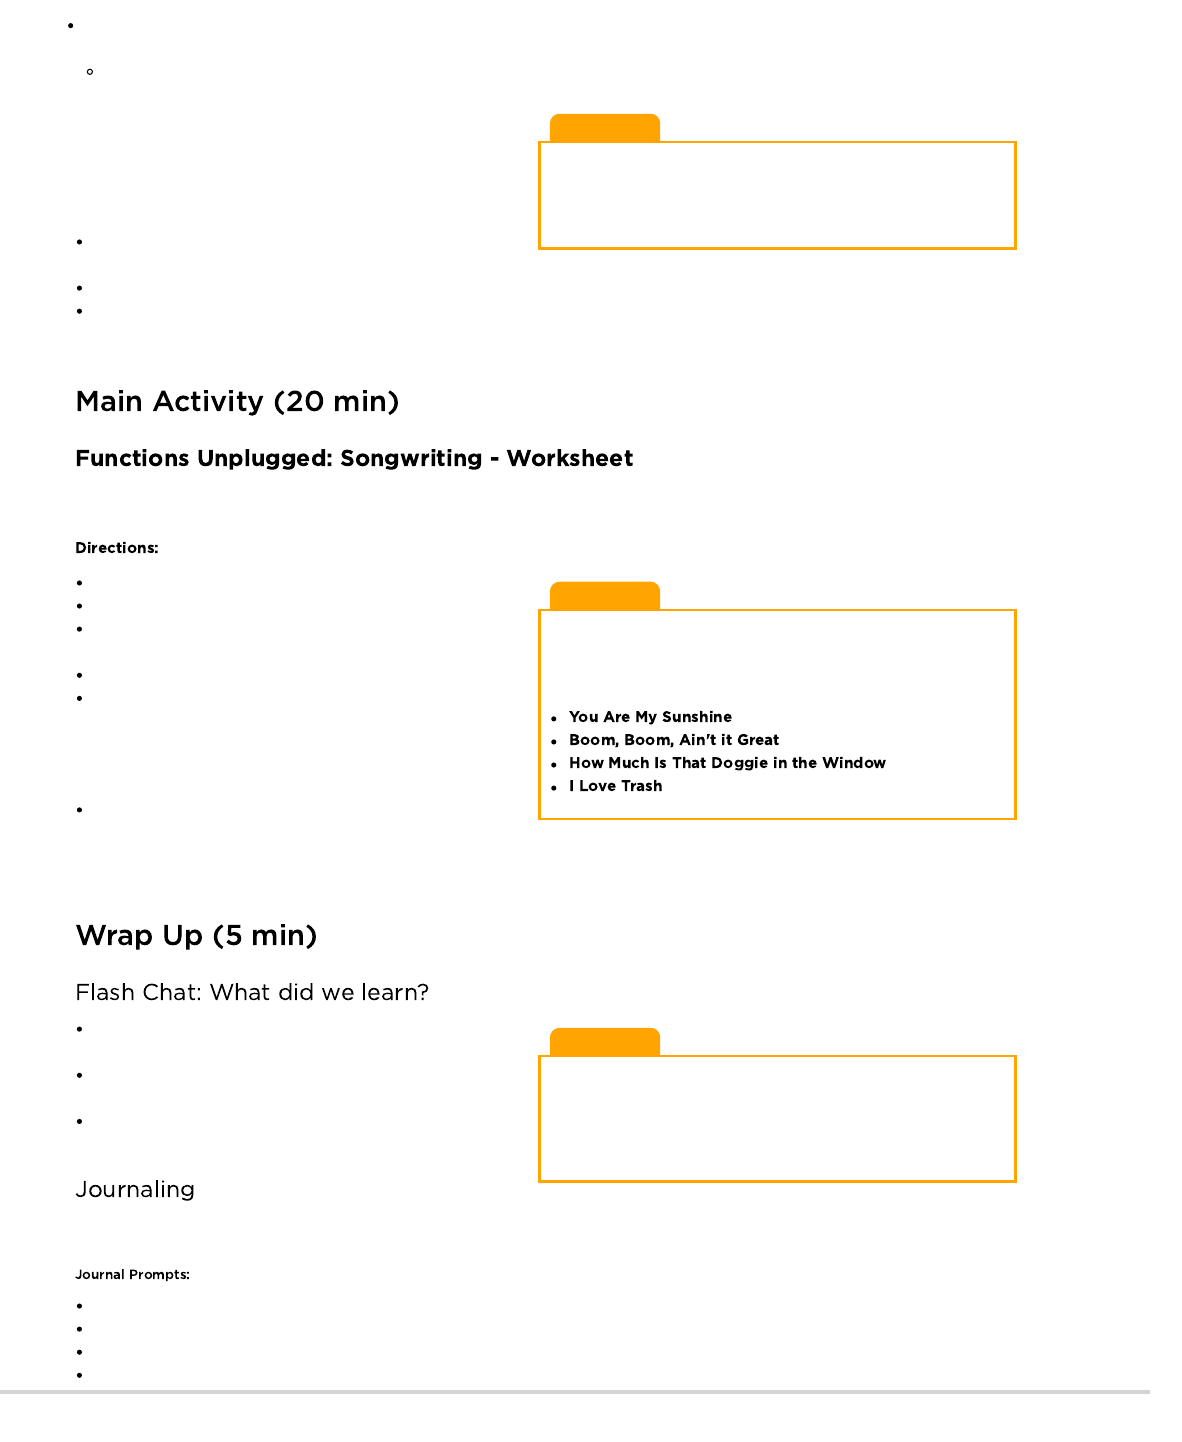
Lesson Tip
To hit this point home, you can look up the lyrics for some popular
songs on the Internet. Show the students that the standard for
repeating lyrics is to define the chorus at the top and call it from
within the body of the song.
Lesson Tip
It's most exciting for students to do this lesson with popular music
from the radio, but if you're having a hard time finding appropriate
songs where the lyrics repeat exactly, here are a few timeless
options:
Lesson Tip
Flash Chat questions are intended to spark big-picture thinking
about how the lesson relates to the greater world and the students'
greater future. Use your knowledge of your classroom to decide if
you want to discuss these as a class, in groups, or with an elbow
partner.
Now, imagine that this song is a computer program. Defining a
title (like "chorus") for a little piece of code that you use over and
over again is called creating a function.
This is helpful to computer scientists for some of the same
reasons that it is helpful to songwriters.
It saves time not having to write all the code over and over in
the program.
If you make a mistake, you only have to change it one place.
The program feels less complicated with the repeating pieces defined just once at the top.
We are going to play with songs a little more, to try to really understand how often this technique is used!
A fantastic way to compare functions to something we see in our everyday lives is to look at songs. Songs often have certain groups of lyrics
that repeat over and over. We call such a group a "chorus."
Divide into groups of 4, 5, or 6.
Give each group several copies of the Songwriting Worksheet.
Play a short song for the class that contains a clear chorus that
does not change from verse to verse.
Challenge the class to identify (and write down) the chorus.
Compare results from each group.
Did everyone get the same thing? Sing your choruses together to
find out! Play this game over and over until the class has little
trouble identifying the choruses.
It is often easier just to have the class listen to (or watch) the
song, then vote on what the chorus is by singing it together,
rather than writing the whole thing down. If you choose this method, consider having the class do a written chorus for the final song
selection to be sure that the visual learners get proper reinforcement.
Would you rather write lyrics over and over again or define a
chorus?
Do you think it's possible to make multiple choruses for the
same song?
Does it make sense to make a new chorus for every time it's
needed in a song?
Having students write about what they learned, why it’s useful, and how they feel about it can help solidify any knowledge they obtained
today and build a review sheet for them to look to in the future.
What was today's lesson about?
How do you feel about today's lesson?
What is a function and how do you use it?
Can you think of another activity where you might want to call a special group of instructions several times?
Ask the class why they suppose you only wrote the chorus once at the top of the paper instead of writing it over and over in each place
where it is supposed to be sung.
What are other benefits of only writing the chorus once when you sing it many times?
248
Hand out the assessment worksheet and allow students to complete the activity independently after the instructions have been well
explained. This should feel familiar, thanks to the previous activities.
Use these activities to enhance student learning. They can be used as outside of class activities or other enrichment.
Visit the or click on the link for . This activity
does take a few supplies from the craft store, but it helps students to see the value of calling multiple functions.
Start by creating a chorus together, then repeat it between verses of a song that you develop around it.
Make a change to the chorus, and ponder how much easier it is to change in just one place.
Change the chorus again, making it much longer than it was originally.
Add a second chorus and alternate between them in your verses.
What if we acted out songs instead of singing them? All of a sudden, our chorus would be a function of repeated actions, rather than
words.
Use the concepts of the arrows from the Graph Paper Programming lesson and create a program with lots of repeating instructions.
Circle those repeating actions so that the class can see where they are.
Define a function called "Chorus" above the program.
Cross out everywhere the repeating actions appear in the program and write "Chorus" instead.
Repeat until the class can go through this process with little direction.
- Language
- Speaking & Listening
- Math Practices
- Algorithms & Programming
- Engineering in the Sciences
If you are interested in licensing Code.org materials for commercial purposes,
249
Revision 140610.1a
One of the most magnificent structures in the computer science world is the function.
Functions (sometimes called procedures) are mini programs that you can use over and
over inside of your bigger program.
A fantastic way to compare functions to something we see in our everyday lives is to look
at songs. Songs often have certain groups of lyrics that repeat over and over. We call such
a group a “chorus.”
Directions:
1) Divide into groups of 4, 5, or 6.
2) Give each group several copies of the Songwriting Worksheet.
3) Play a short song for the class that contains a clear chorus that does not
change from verse to verse.
4) Challenge the class to identify (and write down) the chorus.
5) Compare results from each group. Did everyone get the same thing?
Let’s make a function for the bits that we use most often
so that we don’t need to write so much as we go.
New Word!
Say it with me: Func-shun
A piece of code that you can
call over and over again.
Function
Songwriting
Using Lyrics to Explain Functions and Procedures
Name: Date:
Unplugged
U
250

Revision 140610.1a
Song Name:
Chorus:
Song Name:
Chorus:
Songwriting Worksheet Example
Using Lyrics to Explain Functions and Procedures
Group Name: Date:
Unplugged
U
251
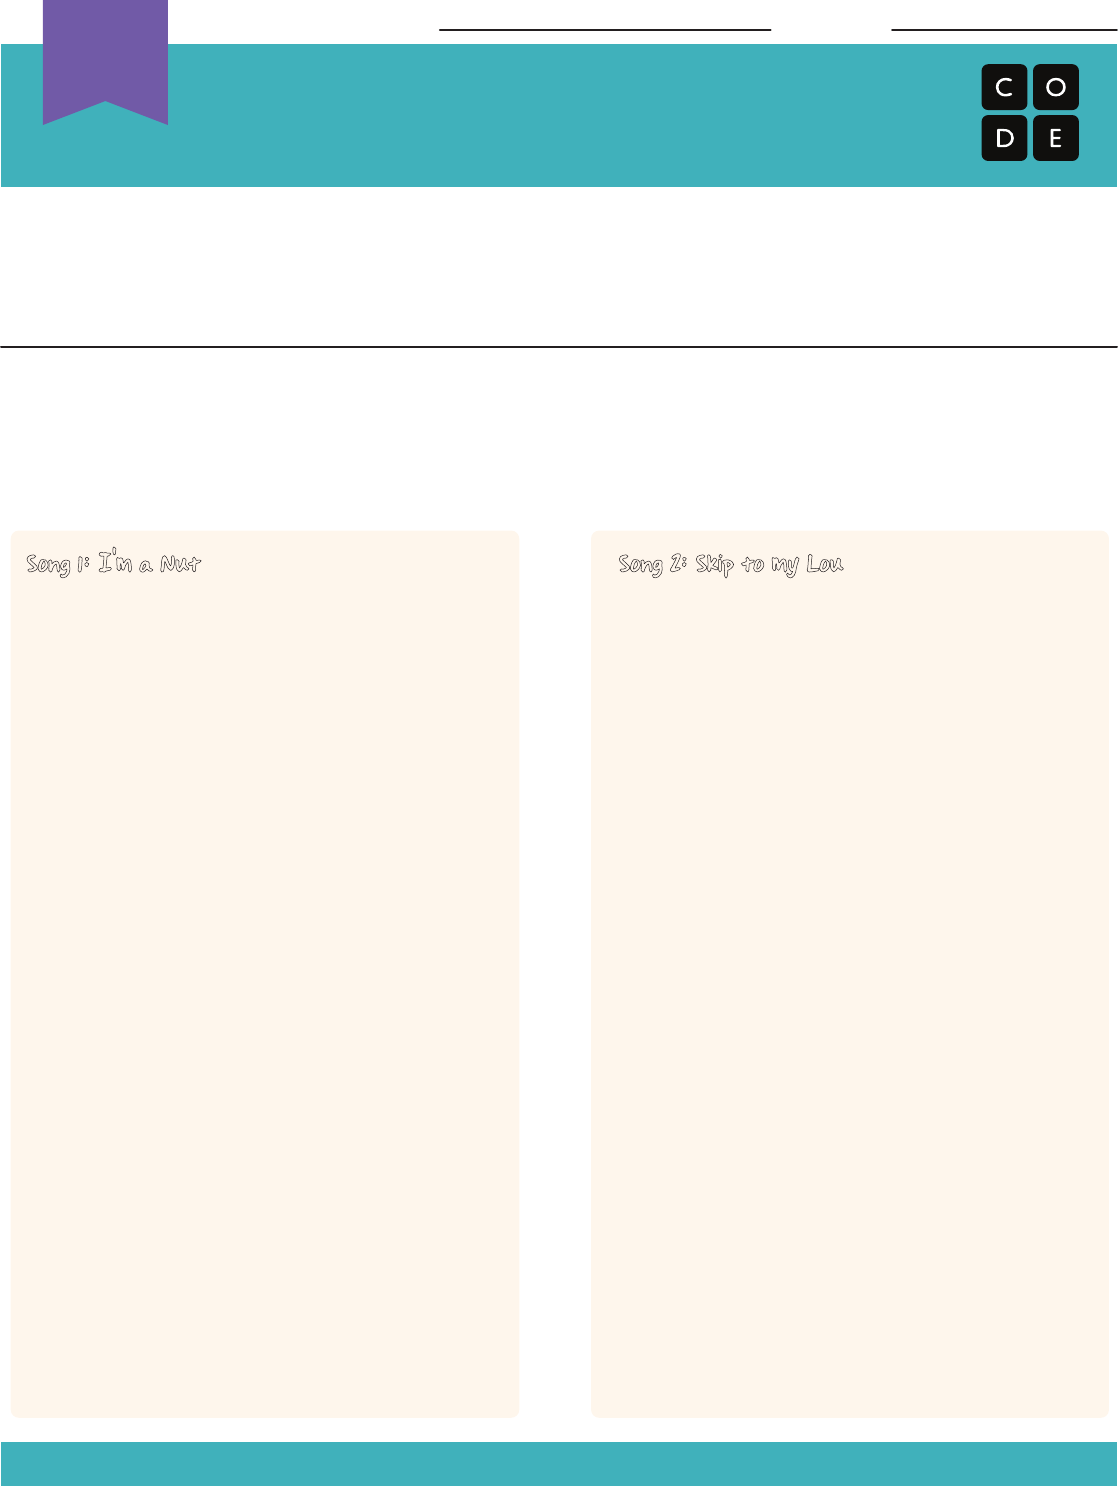
Revision 140610.1a
Look at the lyrics for the two songs below.
If it were your job to write these songs as computer programs, what chunk of code from
each would you turn into a function so that you could use it over and over again with just
one word?
Circle the segments of each program that repeat most often. Is everything that you circled
exactly the same? If so, that can be your chorus!
Finish by writing the chorus for each song on the Songwriting Worksheet and give it a
name. Those are your functions!
Song 1: I'm a Nut
I’m a little acorn brown
sitting on the cold, cold ground.
Everybody steps on me
that is why I'm cracked, you see.
I'm a nut
I'm a nut
I'm a nut, I'm a nut, I'm a nut
Called myself on the telephone
just to see if I was home.
Asked myself out on a date.
Picked me up at half-past eight.
I'm a nut
I'm a nut
I'm a nut, I'm a nut, I'm a nut
Took myself to the picture show.
Sat myself in the very first row.
Wrapped my arms around my waist.
Got so fresh, I slapped my face!
I'm a nut
I'm a nut
I'm a nut, I'm a nut, I'm a nut
Lou, Lou, skip to my Lou,
Lou, Lou, skip to my Lou,
Lou, Lou, skip to my Lou,
Skip to my Lou, my darlin'.
Fly's in the buttermilk,
Shoo, fly, shoo,
Fly's in the buttermilk,
Shoo, fly, shoo,
Fly's in the buttermilk,
Shoo, fly, shoo,
Skip to my Lou, my darlin'.
Lou, Lou, skip to my Lou,
Lou, Lou, skip to my Lou,
Lou, Lou, skip to my Lou,
Skip to my Lou, my darlin'.
Cows in the cornfield,
What'll I do?
Cows in the cornfield,
What'll I do?
Cows in the cornfield,
What'll I do?
Skip to my Lou, my darlin'.
Lou, Lou, skip to my Lou,
Lou, Lou, skip to my Lou,
Lou, Lou, skip to my Lou,
Skip to my Lou, my darlin'.
Song 2: Skip to my Lou
Songwriting
Using Lyrics to Explain Functions - Assessment
Name: Date:
Unplugged
U
252

Revision 140610.1a
Song 1 Name:
Chorus:
Chorus:
Song 2 Name:
Songwriting Worksheet
Using Lyrics to Explain Functions - Assessment
Group Name: Date:
Unplugged
U
253

When students run into a barrier while answering a question or working on a
project, it’s so easy for them to get frustrated and give up. This lesson will
introduce students to the idea that frustration can be an important part of
learning. Here, frustration is presented as a step in the creative process, rather
than a sign of failure.
This lession can be done over one or two class sessions. If you have more
time, feel free to draw out the building and revising phase of the Marble Run
activity.
The goal of this lesson is to help students realize that failure and frustration are
common when working on projects, but that doesn't mean that they should give
up.
In this lesson, students will develop an understanding of what it means to be
frustrated while working on a large project. It's possible that not every student
will experience frustration with this activity, but there are many opportunities to
open a discussion about moments in the past where students have felt
frustrated but nevertheless persisted.
Identify and point out symptoms of frustration.
Illustrate at least one reason why they will choose to
be persistent in the face of frustration, rather than
giving up.
Watch the
.
Pre-read "Stevie and the Big Project" to identify
appropriate questions for your class.
Follow instructions in the
to make a Marble Run.
Print copies of the (page 2 of
teacher guide) for each student or pair of students.
Prepare a resource station with cardstock, safety
scissors, tape, and anything else you think might be
fun for students to build with. Include a stack of the
pages from the Teacher Prep
Guide, but do not advertise their existence.
(Optional) Allow students to bring cardboard,
popsicle sticks, string, or other tidbits from home to
add to the resource station.
Make sure each student has a
.
Please make a copy of any
documents you plan to share with
students.
- Teacher Video
- Teacher Prep Guide
- Storybook (PDF)
( )
- Emotion Images
- Online Story
- Reflection Journal
- First Attempt In Learning
- Feeling annoyed or angry because
something is not the way you want it.
- Trying again and again, even when
something is very hard.
254

Lesson Tip
How would you feel if you were given a project that feels much
harder than what you are used to?
Do you think it’s okay to try something new, even if it doesn’t
work out the first time?
Why do you think Stevie smashed her project?
Do you think that helped her or hurt her when it comes to
reaching her goal?
What do you think Stevie should have done instead of
breaking her project?
Can somebody explain what frustration is?
How do you think you can know when you are frustrated?
What face do you make when you are frustrated?
How can you make yourself feel better when you start to get
frustrated?
We all get frustrated sometimes. Does that mean that we
should give up?
Can someone tell me what persistence is?
Why is it hard to learn if you're not persistent?
Can you tell me why you might be tempted not to be
persistent?
What happened when Stevie decided to be persistent?
Do you think you can be persistent?
This lesson is meant to introduce students to the idea that they
should not give up just because they are frustrated.
Begin by reading
. Students will be introduced to the ideas of
persistence and frustration through the relatable challenges of
Stevie the Squirrel and her crew. Chief among these are the
concept that struggle leads to learning and that persistence can
lead to success.
This book should be read as a classroom story, any other format
exists only for students without access to a teacher.
When sharing this story with your class, feel free to use
the reading techniques that work in your classroom. If your
students like to discuss things that happen as they appear in the
book, be sure to stop your class after large plot areas like when
Stevie breaks her structure, or when Laurel explains frustration.
If your students like to sit through a whole story and discuss at the
end, read through the book, then prompt their memory with some
“Remember when…” type questions.
The vocabulary in this lesson in among the most
important of the year. You may need to do a little extra work with
your students at the end of the story to make sure that they
understood that frustration is the feeling of being annoyed or
angry at something and that persistence is choosing not to give
up, and attempting something over and over again.
- Say it with me: Purr-siss-tense. Not giving up. Persistence works best when you try things many different ways, many
different times.
- Say it with me: Frus - straight - ted. Feeling annoyed or angry because something is not the way you want it.
- First Attempt in learning. When you try to do something, but you don't do it quite right.
This activity is meant to highlight and normalize the feeling of frustration, while giving students a chance to be persistent.
How you conduct this lesson depends heavily on your confidence in your own classroom. If you don't feel that your students are
ready to be taping rolled paper into tubes, then you might want to modify the lesson and its materials to be something that students can be
more successful with. Some alternatives are:
Newspapers taped to the wall/chair/floor
Cardboard tubes and paper cups
Wooden building blocks with train/car tracks
The options are really endless. Just make sure that the point of the activity remains the same. Students need to struggle with a hard task
long enough to be able to identify the feeling of frustration in themselves, then they must be intentionally persistent.
255
Teaching Tip
It is vitally important that students understand that this activity is
meant to help them learn about frustration and persistence. This is
not one of those times when we allow students to experience
something, then give it a name afterward. Students need to know
that they will be feeling some emotions, and that those emotions
are okay.
Take a moment to relate the next activity back to the book that you
just read. The class might be excited that they get to try the same
project that Stevie did, but they might also be apprehensive at the
thought of tackling something difficult.
Encourage your students to have their Think Spot Journals around
during the activity so they can use them to plan, solve, and voice
concerns.
Teaching Tip
Pre-planning time (3-5 minutes)
First attempt at building (10-15 minutes) -- For a longer (or two
day) time period --
Discuss with another group (3-5 minutes)
Revision of structure (10-15 minutes) -- Wrap Up Work --
Collaborative work time (5-15 minutes)
Teacher Tip
As you know, tears are a very common byproduct when
kindergarteners attempt difficult lessons. You will likely want to
have a pre-packaged prescription for students who become
emotionally raw.
Can you put into words what you are feeling right now?
Stevie would be so proud of you. What do you think Laurel and
Jorge would say if you told them how you feel?
What would it be called if you said out loud that you are
frustrated, but decided to keep working anyway?
Do you feel like you can be persistent with me today?
Remember, Stevie showed us that this might be difficult, and
sometimes difficult things are frustrating. It is okay if you get
frustrated during this activity. Most of us probably will at some
point. How should we handle those feelings?
Count to 10
Take deep breaths
Journal about them
Talk to a partner about them
Ask for help
Time to be an engineer!
Break students up into pairs and have them quickly come
up with a team name. This should help to unify them in their work.
Next, point out the resource station that you have set up with all
of the supplies and goodies that students will have access to.
Make sure you are very clear about whether they are limited only
to the items in the resource station or whether they are allowed to
ask for other items for their creation.
It can be a good idea to give students checkpoints for this activity.
Make sure that they know that there is no penalty for not finishing
on time.
Preplanning is optional, since prediction is not often a
kindergartener’s strong suit.
The first attempt at building will likely be hectic and a
bit sloppy, but it should give students access to the feelings and
opportunities for persistence that are being studied in this lesson.
Try to end the Marble Run build with an opportunity for groups to
collaborate. This will improve the chances of success for students
who have been struggling, without the need for teacher
intervention.
Time to do some damage control if any is needed.
Remind students that this activity was planned to teach students
how to identify feelings of frustration and work past them to be
persistent.
Discuss the difference between being successful at building their
contraption and being successful for the purpose of this activity.
Allow students the opportunity to celebrate their hard work and
persevering through frustration.
Goal: Allow students to reflect on the emotions and processes experienced during the lesson.
Finish out this lesson by asking students to spend some time in their Think Spot Journal.
Draw one of the that shows how you felt about today's lesson in the corner of your journal page.
Draw a picture of what you look like when you’re frustrated.
Draw a picture that shows things you can do to feel better when you’re frustrated.
What does persistence look like?
Remarks
Now, we’re going to do something very fun, and very challenging! I am going to let you all try to make a Marble Run of your own!
This is to be challenging. That’s part of the fun! Your Marble Run probably won’t work right the first time, and that’s
alright. The goal for this game is to practice being persistent.
256

Talking through frustration. Can students think of things that they can say to classmates to help them be persistent when they are
frustrated?
- Reading Literature
- Speaking & Listening
- Geometry
- Measurement And Data
- Math Practices
- Algorithms & Programming
- Engineering in the Sciences
If you are interested in licensing Code.org materials for commercial purposes,
Add a third piece to the beginning of the Marble Run. Can students start a marble up even higher and get it to flow through the rest of
their contraption?
257
Marble Run
Teacher Prep Guide
U
Teacher Prep
T
Revision 160921.1a
This guide will provide assistance through a set of two lessons using a Marble Run contraption.
The first portion of this kindergarten series is the debugging lesson, where students will help
you debug your Marble Run. In order to do this, you need to have a broken prototype that can
be fixed in a predictable way. This guide will suggest an easy step-by-step solution, and give
you tips for making a creation using your own design.
For the second half, we are going to ask students to do something incredibly challenging in
order to stretch their understanding and aptitude for persistence. This guide will provide
additional suggestions and resources to keep the project grade appropriate.
The Rules:
The Set-Up:
The rules of the student version of the Marble Run activity are pretty simple:
1) Build two Marble Runs.
2) Each Marble Run should have at least 3 pieces.
3) Marble Run 1 should take a marble at Start height and finish at Middle height.
4) Marble Run 2 should take a marble at Middle height and finish at End height.
5) Put the two Marble Runs together and watch the marble go from Start to End .
There are a couple of additional rules to adapt this to be eective for the lesson on debugging:
1) The teacher’s contraption must not work to begin with.
2) The fix for the issue should be detectable by following the marble’s path and determining
where the change from “expected” to “unexpected” occurs.
Use the Marble Run Ruler (provided on page 2) to determine the starting and ending height
for each of the two components, we will call those Component A and Component B.
Component A needs to take in a marble (Input A) at a height that falls somewhere within the
highlighted “Start” region. It should then return the marble (Output A) at a height somewhere
within the highlighted “Middle” region.
Component B should take a marble (input B) at a height that falls somewhere within the high-
lighted “Middle” region. It should then return the marble (Output B) at a height somewhere
within the highlighted “End” region.
Two simple ways for a teacher to initiate an easy-to-fix failure would be:
A) Have two working components, but connect them in an incorrect way
B) Have Component A release the marble lower than Component B can receive it
Proceed to the teacher guide for Stage 2 for more information on building a Marble Run that
falls into either of those categories.
Stage 1: Debugging
258

Start
Middle
End
Start
Middle
End
259

Marble Run
Teacher Prep Guide
U
Teacher Prep
T
The Rules:
The Set-Up:
These are the rules for the student version of the Marble Run activity:
1) Build two Marble Runs.
2) Each Marble Run should have at least 3 pieces.
3) Marble Run 1 should take a marble at Start height and finish at Middle height.
4) Marble Run 2 should take a marble at Middle height and finish at End height.
5) Put the two Marble Runs together and watch the marble go from Start to End.
Feel free to change the parameters of these heights as you see fit.
Set-up of the student resource area is crucial. Supplies should be plentiful and easy to locate.
In addition to the classroom norms (cardstock, tape, safety scissors) volunteers can also
donate extra items if given enough notice (paper cups, cereal boxes, and the like).
For further support, place a stack of copies of “Marble Run Hints” (pages 7 & 8) for students to
find. You do not need to let the class know that those are available. Students will feel more
like they have “discovered” something if the teacher is not involved in the process.
The Build:
We have provided tutorials on four relatively simple pieces that are quite helpful for this
project. These pieces are:
•Tube (fig. 1) - A piece of paper that has been rolled into a cylinder
•Ramp (fig. 2) -
Paper folded in a zig-zag fashion to provide a ramp with attaching flaps
•
Bridge (fig. 3) -
Paper where two sides have been folded into the center to create a bridge
•Cone (fig. 4) - Paper rolled first into a cylinder, then tightened at the bottom and
loosened at the top. Once the basic cone has been created, secure with tape, then
cut the top and bottom to customize.
A low-frills example contraption can be created using the steps that follow.
Component A:
1) Cut an 8.5”x11” sheet of cardstock in half lengthwise, then cut one of those
halves lengthwise again. Fold both of the quarter strips bridge style.
2) Lay the bridges on their sides and tape free edges together to form a square or
rectangle.
3) Cut an 8.5”x11” sheet of cardstock in quarters (length, then width). Roll two of
the pieces along the long edge and two along the short edge, then secure with
tape, to make a total of 4 tubes.
4) Tape the long tubes to the back of the square case from step 2, and the short
tubes should be taped in front.
Stage 2: Building a Marble Run
260

Marble Run
Teacher Prep Guide
U
Teacher Prep
T
Figure 4Figure 1 Figure 2 Figure 3
ConeTube Ramp Bridge
Component A (continued):
5) Cut an 8.5”x11” sheet of cardstock in half widthwise. Fold one piece in half
lengthwise, then fold the long edges back out toward the crease to make a
ramp.
6) Tape the edges of the ramp to the tops of the posts. This gives your main
marble path, but it’s not quite tall enough.
7) Add a cone at the intake point, and you’ll be set!
Component B:
8) Cut an 8.5”x11” sheet of cardstock in half widthwise and roll one of the pieces
along the short side, to make an 8.5” tube. Secure with tape.
9) Cut the tube at a point anywhere from 2” - 4” at about a 45 degree angle.
10) Rotate one of the pieces to form an elbow, and tape back together.
11) Cut a 1“ strip from the remaining 8.5” x 5.5” cardstock half (lengthwise) and
make a bridge to use as a triangular base for the tube to sit in.
12) Use the
remaining cardstock to make an input cone for the top of Component
B.
Trim tube and cone to get appropriate height.
Voila! Your very own Marble Run!
Note: It is highly unlikely that your students will come up with anything this clean and
stable. That is OKAY! The version here is meant to be messed with and reused.
261
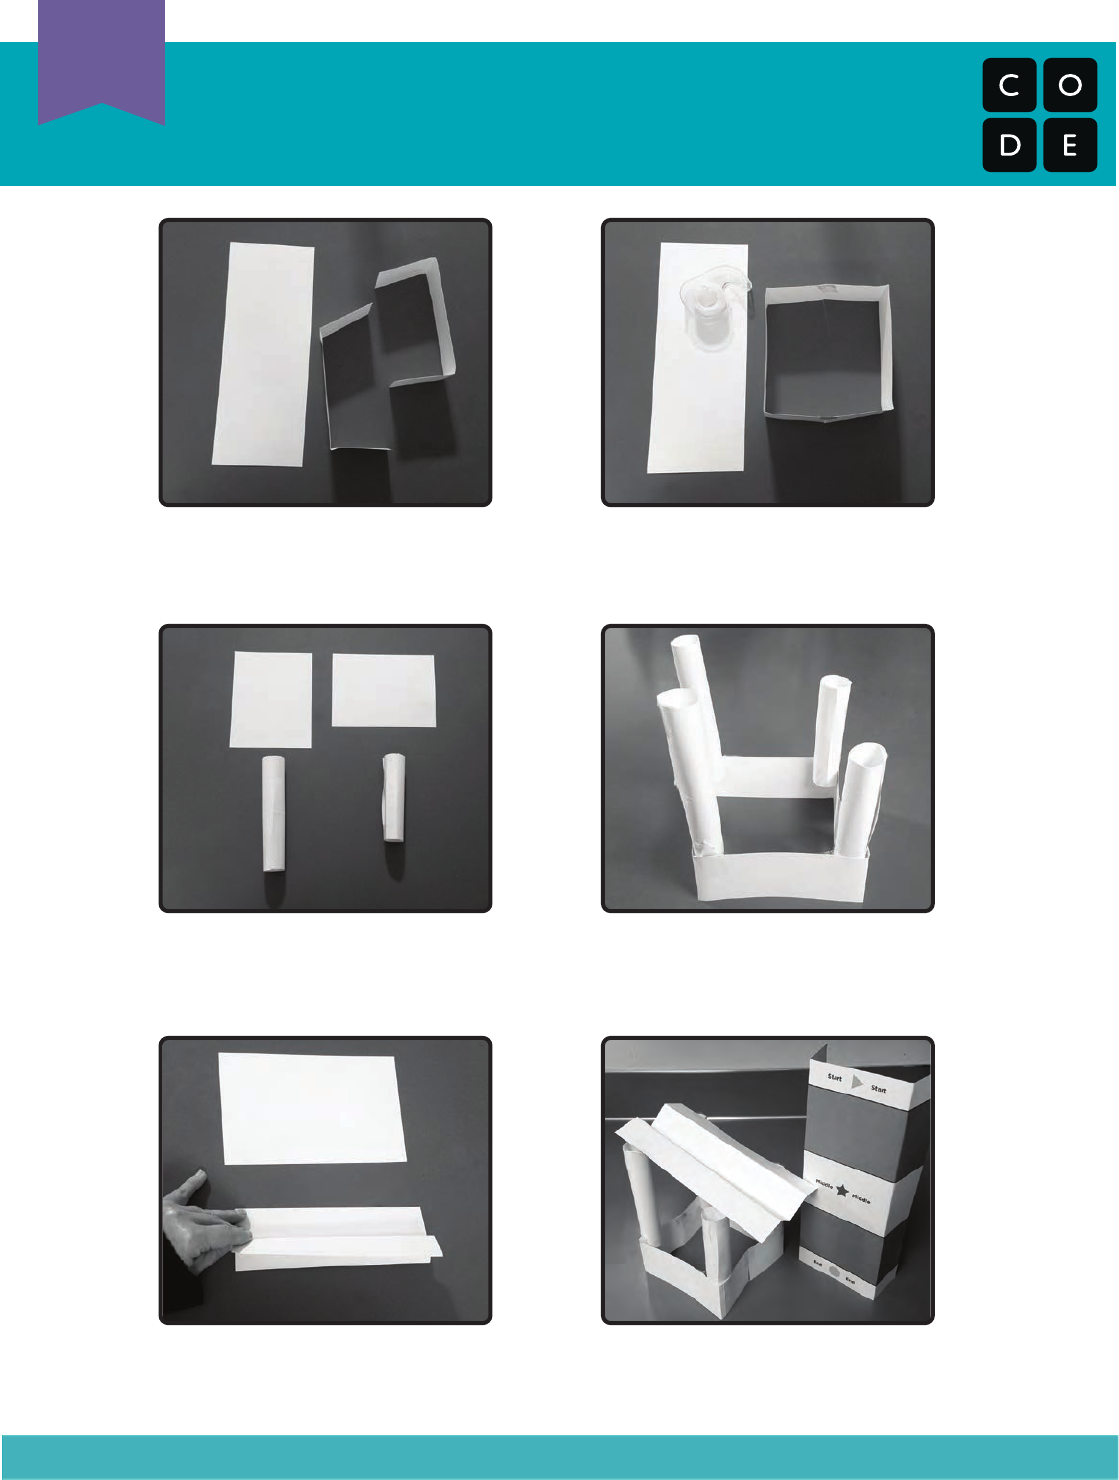
Marble Run
Teacher Prep Guide
U
Teacher Prep
T
Step 1: Fold strips “bridge style” Step 2: Tape ends of folded strips
together to make a base.
Step 3: Roll quartered paper into
tubes and secure with tape.
Step 4: Tape tubes inside case.
Make sure to tape them near the
top for height.
Step 5: Make a ramp from a half
sheet of cardstock.
Step 6: Tape ramp to base and
check height.
262
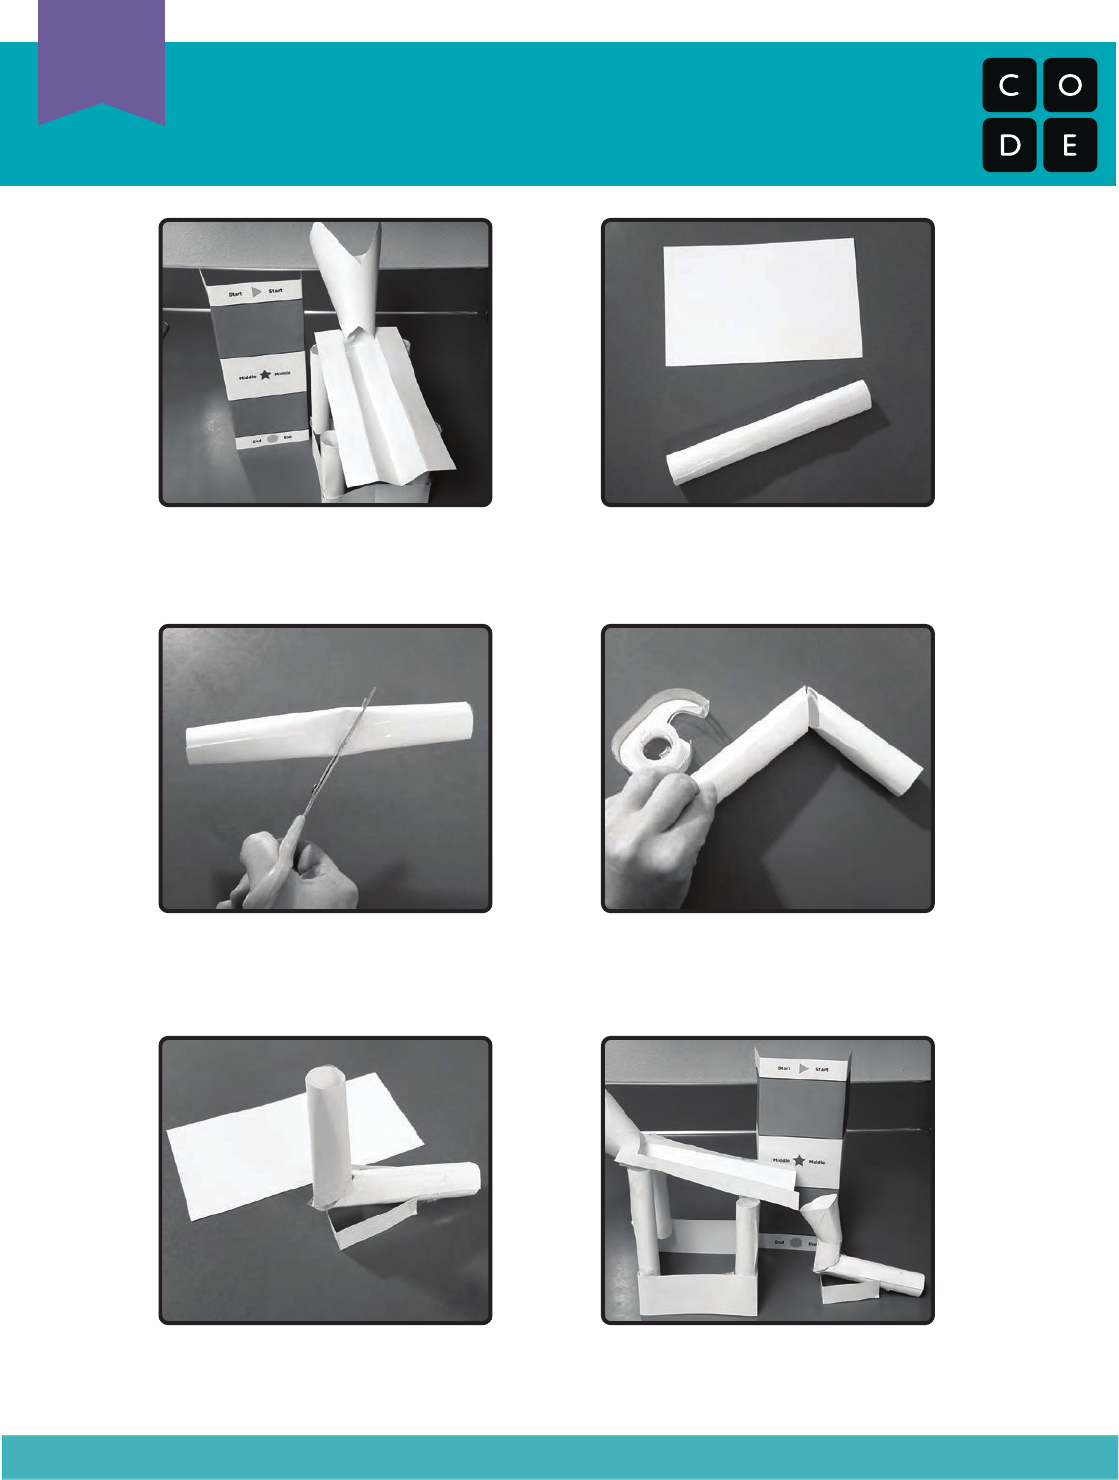
Marble Run
Teacher Prep Guide
U
Teacher Prep
T
Step 7: Add cone to nish
Component A.
Step 8: Roll 1/2 sheet into tube to
start on Component B.
Step 9: Cut tube at an angle. Step 10: Tape tubes back together
to make an elbow.
Step 11: Make a base from a thin
strip of cardstock.
Step 12: Add a cone to the top and
trim pieces to size.
263

Marble Run Hints
Student Handout
U
Handout
H
Try using some of these:
Cone
Tube
Bridge
Ramp
264
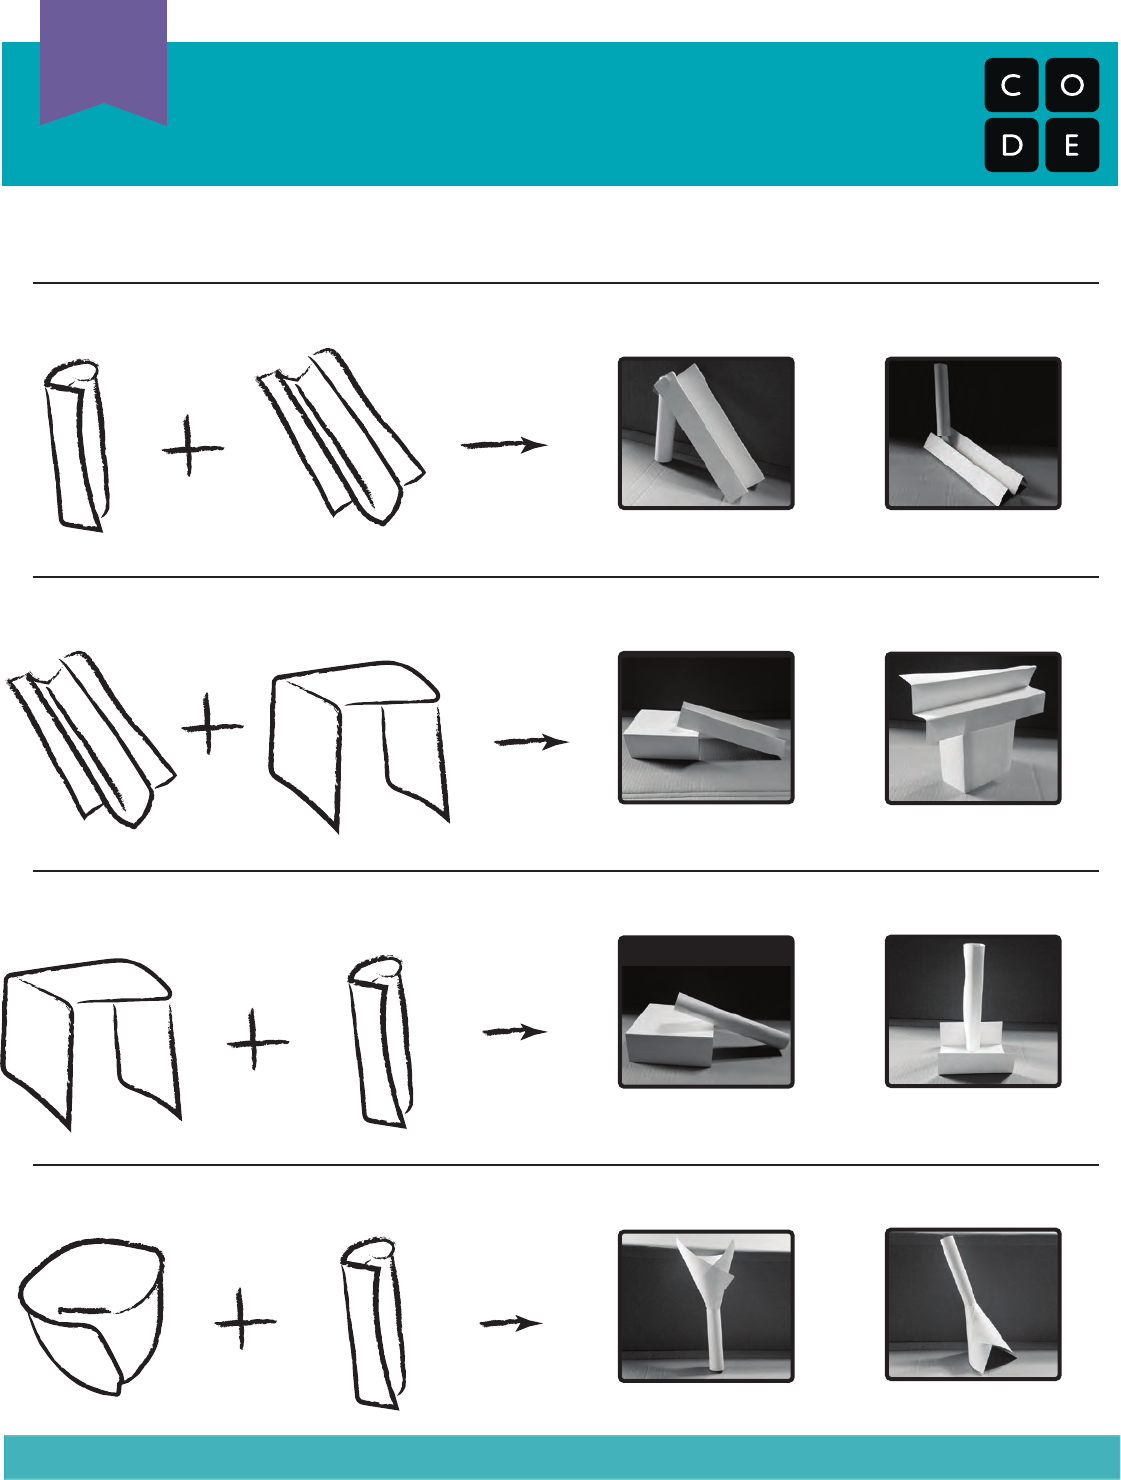
Marble Run Hints
(Continued)
U
Handout
H
Now try putting them together!
Cone
Tube
Tube
Tube
Bridge
Bridge
Ramp
Ramp
or
or
or
or
265
This lesson will guide students through the steps of debugging. Students will
learn the mantra: "What happened? What was supposed to happen? What
does that tell you?"
Research shows that some students have less trouble debugging a program
than writing one when they first learn to code. In this lesson, we introduce the
idea of debugging in a real world sense.
The goal in this lesson is to teach students steps to spot a bug and to increase
persistence by showing them that it's normal to find mistakes. In later lessons,
students will debug actual programs on Code.org.
Express that they have noticed when something
goes differently than what is expected.
Identify what the expected result was before an error
occurs.
Determine and describe the difference between what
was expected and what actually happened in the
event of an error.
Watch the .
Review the Unspotted Bugs Story (
)
Pre-read Unspotted Bugs to identify appropriate
questions for your classroom
Follow instructions in the
to make a Marble Run (which will be
arranged incorrectly at the start)
Give a
to each student
Please make a copy of any
documents you plan to share with
students.
- Teacher Video
- Teacher Prep Guide
- Storybook (PDF)
- Emotion Images
- Online Story
- Reflection Journal
- Part of a program that does not work correctly.
- Finding and fixing problems in an
algorithm or program.
- Trying again and again, even when
something is very hard.
266
Lesson Tip
Important ideas from the story:
What happened?
What was supposed to happen?
What does that tell you?
Did it work at the first step?
Did it work at the second step?
Where did it go wrong?
Goal: Help students understand the steps involved in debugging.
This story can be presented in several ways, including:
Circled up story time
Projected with document camera / smartboard
Pair shared with students at their computers
The story of Unspotted Bugs presents many of the ideas that
students will need to understand the debugging process of
coding. This warm-up is meant to tie a memorable story together
with a concept that young kids often find to be difficult.
Read the book and discuss the techniques that JD used to
discover and take care of bugs. Make sure those questions and
tactics get repeated often enough that students can recall (if not
recite) them without the story in hand.
Potential Questions for Storytime:
Page 3: What do you notice in the picture? What’s wrong with
the flower? (It’s upside down!) What’s wrong with the clock? (The hands aren’t in the center) Why do you think there is something wrong
with these items?(Because there are bugs on them!)
Page 7: What’s wrong with the picture? (The lamp is upside down) Why is that? (There’s a bug)
Page 11: What’s wrong in this scene? (The car doesn’t have wheels!) Why? (Because there are bugs on it!)
What did JD find when he went looking for the bug? What was wrong? What does this mean? (JD found an upside down tree. This is
wrong because the tree trunk should be touching the ground! This means there is a bug on the tree!)
This lesson has three new and important vocabulary words:
- Say it with me: Buhh-g. Something that is going wrong. An error .
- Say it with me: Dee-bug-ing. To find and fix errors.
- Say it with me: Purr-siss-tense. Not giving up. Persistence works best when you try things many different ways, many
different times.
Goal: Help students think critically about the difference between what is happening and what is expected.
Now that students have been introduced to the idea of looking for problems, they can try to apply it to more places in the real world. This
next activity gives them practice looking for bugs in Marble Runs (a project that they will be working with next week.)
Grab your sample marble run (built from our plans, or something similar.) Show the students how each piece works, then demonstrate
putting them together (but put them together incorrectly, to prevent the ball from flowing properly from A to B.
The goal of this exercise is to help the students identify when something goes wrong, so if they don’t catch it the first time, run it again, and
again. It can help to make exaggerated frustration faces when the ball doesn’t do what you would like it to do.
Let the students share hypotheses about what is going wrong, and how to fix it. Students should feel free to try things that you know will be
incorrect. If students misidentify solutions, use the bug finding formula on their configurations. Repeat until you get a working run.
Encouragement is key here. If things don’t work right away, praise the class for being so persistent and choosing not to give up. If they start
to get frustrated, encourage them to persist a bit longer, promising them that they will get it soon if they just hang in there.
267
Lesson Tip
Great! You all are so good at this, maybe you can help me with my
own problem!
See, I have this marble run that I made. It comes in two pieces.
When I put the ball in here (input A) it’s supposed to come out
here (output A). When I put the ball in here (input B) it’s supposed
to come out here (output B). Now, when I slide them together, I
should be able to put the ball in here (input A) and have it come
out here (output B). But it doesn’t work, watch.
[Slide the pieces together with output B facing output A.]
Watch what happens. [Drop ball at input A and notice that it does
not come out output B.]
BUG!
What happened?
The ball fell on the table.
What was supposed to happen?
The ball was supposed to drop from A into B.
What does that tell you?
You should turn B around so that the ball goes into the right
place!
Lesson Tip
What do you think we learned in this lesson?
Debugging
How to solve a problem
How to make a marble go
How do you think that can help us in other places?
Lesson Tip:
The signs of real-live bugs won’t be as dramatic as upside down
trees, but it might be dead leaves, spots on flowers, or slime on
the
sidewalk. Have the students brainstorm these before going outside
to look for them.
Goal: Students will start to understand the importance of the
activity they just completed by reflecting on it verbally, then
through drawing in their journals.
It can be distracting to a learner when they have unanswered
questions or doubts. To end this lesson, we’ll give everyone the
chance to get those out so that they can reflect on what they’ve
been taught.
Encourage students to share their thoughts and questions either
with the whole class or with an elbow partner.
Once they’ve had time to ponder their own thoughts, get the
students thinking about the purpose of the lesson that they just
learned. Why did you do this activity? How will it help them later?
Can they think of buggy things that they’ve seen in the real world?
Students should finish by drawing or writing in their journal.
Possible topics include:
Draw one of the that
shows how you felt about today's lesson in the corner of your
journal page.
How do you feel when something that you are working on acts
buggy?
How many times do you think you should try to fix a bug before
you give up?
What would you do if you notice that something is buggy, but
you don't know how to fix it?
Take your students outside. Do you see any signs of bugs? What
are they? Now look closer... can you find the actual bug?
- Reading Literature
- Speaking & Listening
- Geometry
- Measurement And Data
- Math Practices
- Algorithms & Programming
- Engineering in the Sciences
If you are interested in licensing Code.org materials for commercial purposes,
268

Marble Run
Teacher Prep Guide
U
Teacher Prep
T
Revision 160921.1a
This guide will provide assistance through a set of two lessons using a Marble Run contraption.
The first portion of this kindergarten series is the debugging lesson, where students will help
you debug your Marble Run. In order to do this, you need to have a broken prototype that can
be fixed in a predictable way. This guide will suggest an easy step-by-step solution, and give
you tips for making a creation using your own design.
For the second half, we are going to ask students to do something incredibly challenging in
order to stretch their understanding and aptitude for persistence. This guide will provide
additional suggestions and resources to keep the project grade appropriate.
The Rules:
The Set-Up:
The rules of the student version of the Marble Run activity are pretty simple:
1) Build two Marble Runs.
2) Each Marble Run should have at least 3 pieces.
3) Marble Run 1 should take a marble at Start height and finish at Middle height.
4) Marble Run 2 should take a marble at Middle height and finish at End height.
5) Put the two Marble Runs together and watch the marble go from Start to End .
There are a couple of additional rules to adapt this to be eective for the lesson on debugging:
1) The teacher’s contraption must not work to begin with.
2) The fix for the issue should be detectable by following the marble’s path and determining
where the change from “expected” to “unexpected” occurs.
Use the Marble Run Ruler (provided on page 2) to determine the starting and ending height
for each of the two components, we will call those Component A and Component B.
Component A needs to take in a marble (Input A) at a height that falls somewhere within the
highlighted “Start” region. It should then return the marble (Output A) at a height somewhere
within the highlighted “Middle” region.
Component B should take a marble (input B) at a height that falls somewhere within the high-
lighted “Middle” region. It should then return the marble (Output B) at a height somewhere
within the highlighted “End” region.
Two simple ways for a teacher to initiate an easy-to-fix failure would be:
A) Have two working components, but connect them in an incorrect way
B) Have Component A release the marble lower than Component B can receive it
Proceed to the teacher guide for Stage 2 for more information on building a Marble Run that
falls into either of those categories.
Stage 1: Debugging
269

Start
Middle
End
Start
Middle
End
270

Marble Run
Teacher Prep Guide
U
Teacher Prep
T
The Rules:
The Set-Up:
These are the rules for the student version of the Marble Run activity:
1) Build two Marble Runs.
2) Each Marble Run should have at least 3 pieces.
3) Marble Run 1 should take a marble at Start height and finish at Middle height.
4) Marble Run 2 should take a marble at Middle height and finish at End height.
5) Put the two Marble Runs together and watch the marble go from Start to End.
Feel free to change the parameters of these heights as you see fit.
Set-up of the student resource area is crucial. Supplies should be plentiful and easy to locate.
In addition to the classroom norms (cardstock, tape, safety scissors) volunteers can also
donate extra items if given enough notice (paper cups, cereal boxes, and the like).
For further support, place a stack of copies of “Marble Run Hints” (pages 7 & 8) for students to
find. You do not need to let the class know that those are available. Students will feel more
like they have “discovered” something if the teacher is not involved in the process.
The Build:
We have provided tutorials on four relatively simple pieces that are quite helpful for this
project. These pieces are:
•Tube (fig. 1) - A piece of paper that has been rolled into a cylinder
•Ramp (fig. 2) -
Paper folded in a zig-zag fashion to provide a ramp with attaching flaps
•
Bridge (fig. 3) -
Paper where two sides have been folded into the center to create a bridge
•Cone (fig. 4) - Paper rolled first into a cylinder, then tightened at the bottom and
loosened at the top. Once the basic cone has been created, secure with tape, then
cut the top and bottom to customize.
A low-frills example contraption can be created using the steps that follow.
Component A:
1) Cut an 8.5”x11” sheet of cardstock in half lengthwise, then cut one of those
halves lengthwise again. Fold both of the quarter strips bridge style.
2) Lay the bridges on their sides and tape free edges together to form a square or
rectangle.
3) Cut an 8.5”x11” sheet of cardstock in quarters (length, then width). Roll two of
the pieces along the long edge and two along the short edge, then secure with
tape, to make a total of 4 tubes.
4) Tape the long tubes to the back of the square case from step 2, and the short
tubes should be taped in front.
Stage 2: Building a Marble Run
271
Marble Run
Teacher Prep Guide
U
Teacher Prep
T
Figure 4Figure 1 Figure 2 Figure 3
ConeTube Ramp Bridge
Component A (continued):
5) Cut an 8.5”x11” sheet of cardstock in half widthwise. Fold one piece in half
lengthwise, then fold the long edges back out toward the crease to make a
ramp.
6) Tape the edges of the ramp to the tops of the posts. This gives your main
marble path, but it’s not quite tall enough.
7) Add a cone at the intake point, and you’ll be set!
Component B:
8) Cut an 8.5”x11” sheet of cardstock in half widthwise and roll one of the pieces
along the short side, to make an 8.5” tube. Secure with tape.
9) Cut the tube at a point anywhere from 2” - 4” at about a 45 degree angle.
10) Rotate one of the pieces to form an elbow, and tape back together.
11) Cut a 1“ strip from the remaining 8.5” x 5.5” cardstock half (lengthwise) and
make a bridge to use as a triangular base for the tube to sit in.
12) Use the
remaining cardstock to make an input cone for the top of Component
B.
Trim tube and cone to get appropriate height.
Voila! Your very own Marble Run!
Note: It is highly unlikely that your students will come up with anything this clean and
stable. That is OKAY! The version here is meant to be messed with and reused.
272

Marble Run
Teacher Prep Guide
U
Teacher Prep
T
Step 1: Fold strips “bridge style” Step 2: Tape ends of folded strips
together to make a base.
Step 3: Roll quartered paper into
tubes and secure with tape.
Step 4: Tape tubes inside case.
Make sure to tape them near the
top for height.
Step 5: Make a ramp from a half
sheet of cardstock.
Step 6: Tape ramp to base and
check height.
273

Marble Run
Teacher Prep Guide
U
Teacher Prep
T
Step 7: Add cone to nish
Component A.
Step 8: Roll 1/2 sheet into tube to
start on Component B.
Step 9: Cut tube at an angle. Step 10: Tape tubes back together
to make an elbow.
Step 11: Make a base from a thin
strip of cardstock.
Step 12: Add a cone to the top and
trim pieces to size.
274

Marble Run Hints
Student Handout
U
Handout
H
Try using some of these:
Cone
Tube
Bridge
Ramp
275

Marble Run Hints
(Continued)
U
Handout
H
Now try putting them together!
Cone
Tube
Tube
Tube
Bridge
Bridge
Ramp
Ramp
or
or
or
or
276
In collaboration with , this lesson
helps students learn about the similarities of staying safe in the real world and
when visiting websites. Students will also learn that the information they put
online leaves a digital footprint or “trail.” This trail can be big or small, helpful or
hurtful, depending on how they manage it.
Common Sense Education has created this lesson to teach kids the importance
of understanding the permanence of something posted on the internet. By
relating footprints on a map to what a student might post online, students will
make important connections between being tracked by a physical footprint on a
path and being tracked based on information posted online.
Understand that being safe when they visit websites
is similar to staying safe in real life.
Learn to recognize websites that are safe for them to
visit.
Recognize if they should ask an adult they trust
before they visit a particular website.
Explore what information is appropriate to be put
online.
Watch this
.
Prepare to show
.
(Optional) Prepare to show
.
Common Sense Education's
game.
Print one chart (page 7) for each
student.
Print one for
each student.
Review
for more online safety content.
- Teacher Video
- Lesson Video
- Worksheet
- Assessment
- Assessment Answer Key
- Website
- Resource List
- Emotion Images
- Reflection Journal
- The collected information about
an individual across multiple websites on the
Internet.
277
Lesson Tip
If you have access to a computer, feel free to navigate to sites that
might showcase each of these types (using extreme caution with
your RED selection).
This lesson has one new and important phrase:
- Say it with me: Dih-jih-tal Foot-print
The information about someone on the internet.
Ask What does it mean to be safe?
When you walk down the street or play in your neighborhood without a trusted adult there, how do you stay safe?
Tell students that just as they should stay safe in the real world, they should stay safe when they go into the online world (visiting
websites). Make parallels between the answers students gave you about their neighborhood and the online world.
Play the .
Introduce the idea that there are three different kinds of
websites that students may have the opportunity to visit.
Green: A “green” website is:
A good site for kids your age to visit
Fun, with things for you to do and see
Has appropriate words
Doesn’t let you talk to people you don’t know
Yellow: A “yellow” website is:
A site you are not sure is right for you
One that asks for information such as who you are, where you live, your phone number or email address, etc.
A place where you are allowed to communicate freely with others
Red: A “red” website is:
A site that is not right for you
A place you might have gone to by accident
Filled with things that are for older kids or adults
Discuss examples of each of these kinds of sites.
Now, let's see what we can do to keep ourselves safe.
Peruse the lesson on the Common Sense Education webpage.
Give each student an (page 7).
Mizzle
the Mouse
Electra
the Elephant
Whose full name do you know?
Whose house could you find?
Whose birth date do you know?
Whose user name and password do you know?
Who let out a secret on the internet?
Which animal can you describe better from his or her photo?
278
Lesson Tip
If your students have trouble writing, feel free to do this activity as
a group and have students raise their hand when they find clues.
This will allow you (or a teacher aide) to help communicate and
record the information being shared.
For more in-depth modules, you can find additions to this
curriculum at the page
on Scope and Sequence.
Lesson Tip
Flash Chat questions are intended to spark big-picture thinking
about how the lesson relates to the greater world and the students'
greater future. Use your knowledge of your classroom to decide if
you want to discuss these as a class, in groups, or with an elbow-
partner.
Place the on the ground, face down, in
two different trails, keeping Mizzle the Mouse and Electra the
Elephant’s trails separate from one another.
Share the stories of Mizzle and Electra. These animals
decided it would be fun to put some information about
themselves online. They went onto
and posted information. The only problem is that they forgot to
ask their parents if it was okay first.
Explain to students that they are from the “Things Big and Small” Detective Agency. A hunter has hired them to find out as much as
possible about Mizzle the Mouse and Electra the Elephant. The more the detectives learn, the better for their plan to take over the animal
kingdom.
Divide students into groups of four. Tell them that each group should have a detective that will keep detailed notes.
Invite students to go on a hunt for information. Let them know that the information that Mizzle and Electra post can be seen by anyone,
including the detectives. Each group should follow the digital trail of both animals, starting with the mouse and then the elephant. Stagger
the groups so they are on the trail at slightly different times. Students should fill out their handout as they go.
Who can the detectives find out more about, and why?
Which animal has a bigger digital footprint?
Mizzle says some interesting things about himself on the
Internet. What are they?
Is there anything that Electra posted on the Internet that could
become a problem for her? If so, what and why?
Take the time to discuss what is appropriate information to share
on the Internet, and what is not:
Appropriate Not Appropriate
Interests Address
Hobbies Full Name
First Name Information that would hurt others
Having students write about what they learned, why it’s useful, and how they feel about it can help solidify any knowledge they obtained
today and build a review sheet for them to look to in the future.
What was today’s lesson about?
Draw one of the that shows how you felt about today's lesson in the corner of your journal page.
Draw some things that you should never talk to a stranger about on the internet. For example, draw your house to represent your
address, draw your school, or draw your family.
Hand out the assessment worksheet and allow students to complete the activity independently after the instructions have been well
explained. This should feel familiar, thanks to the previous activities.
279
Use these activities to enhance student learning. They can be used as outside of class activities or other enrichment.
Visit to learn more about how you can keep your students safe in this digital age.
- Language
- Speaking & Listening
- Measurement And Data
- Math Practices
- Impacts of Computing
- Engineering in the Sciences
If you are interested in licensing Code.org materials for commercial purposes,
280
1
Follow the Digital Trail
LESSON PLAN
UNIT 2
DIGITAL LIFE 101 / ASSESSMENT / DIGITAL LITERACY AND CITIZENSHIP IN A CONNECTED CULTURE / REV DATE 2015
www.commonsense.org | CREATIVE COMMONS: ATTRIBUTION-NONCOMMERCIAL-SHAREALIKE
GRADES K-2
Essential Question
What information is appropriate in a digital footprint?
Lesson Overview
Students learn that the information they put online leaves a digital
footprint or “trail.” This trail can be big or small, helpful or hurtful,
depending on how they manage it.
Students follow the digital information trails of two fictional animals.
They make observations about the size and content of each trail, and
connect these observations by thinking critically about what kinds of
information they want to leave behind.
Learning Objectives
Students will be able to ...
• learn that the information they put online leaves a digital footprint
or “trail.”
• explore what information is appropriate to be put online.
• judge the nature of different types of digital footprints by following
the information trails of two fictional animals.
Estimated time: 45 minutes
Standards Alignment –
Common Core:
grade K: RL.1, RL.3, RL.4,
RL.10, RI.1, RI.4, RI.10, RF.4,
W.2, W.5, W.7, W.8, W.10, SL.1a,
SL.1b, SL.2, SL.3, SL.4, SL.6, L.6
grade 1: RL.1, RL.3, RL.4, RI.1,
RI.4, RI.10, RF.4a, W.5, W.7,
W.8, L6
grade 2: RL.1, RL.3, RI.4,
RI.10, RF.4a, W.2, W.5, W.7,
W.8, SL.1a, SL.1b, SL.1c, SL.3,
SL.6, L.6
NETS•S: 1a, 1d, 2d, 3d, 4a-c
Key Vocabulary –
trail: a path or track
digital footprint: the
informatiom about you on
the Internet
permanent: there forever
Materials and Preparation
• Cut apart the Digital Trail Squares (found at the end of the lesson plan),
keeping the elephant and mouse squares separate. Be prepared to lay out
each animal’s “tracks” in different locations in the classroom after the
lesson introduction.
•
Copy the Animal Tracks Student Handout, one for each group
of four.
Family Resources
• Send home the Privacy and Digital Footprints Family Tip Sheet
(Elementary School).
281
2
DIGITAL LIFE 101 / ASSESSMENT / DIGITAL LITERACY AND CITIZENSHIP IN A CONNECTED CULTURE / REV DATE 2015
www.commonsense.org | CREATIVE COMMONS: ATTRIBUTION-NONCOMMERCIAL-SHAREALIKE
introduction
Warm-up (5 minutes)
SHARE with students that you can place information online much like you pin something to a bulletin board.
ASK:
What kinds of things are on the bulletin
board or walls in our classroom?
Sample responses:
• Student work
• Photos of students
• Birthday chart
INVITE students to imagine that all of the information on the walls of their classroom was pinned up on a
bulletin board at a local grocery store.
ASK:
Would you be comfortable with this
information being up for everyone to see?
Guide students to think about how some information is better
kept for only their eyes or the eyes of people close to them.
EXPLAIN that there is certain information that might be fine to show anyone. But there is also personal and
private information – such as their addresses, birth dates, and photos of their family vacations – which is not
meant for most people’s eyes.
teach 1
Follow the Digital Trail (15 minutes)
DEFINE the Key Vocabulary term trail.
PLACE the Digital Trail Squares on the ground, face down, in two different trails,
keeping Mizzle the Mouse’s and Electra the Elephant’s trails separate from each another.
SHARE the stories of Mizzle and Electra. These animals decided it would be fun to put some information
about themselves online. They went onto www.wildkingdom.com and posted information. The only problem is
that they forgot to ask their mamas if it was okay first.
EXPLAIN to students that they are from the Things Big and Small Detective Agency. An evil human has hired
them to find out as much as possible about Mizzle the Mouse and Electra the Elephant. The more the detectives
learn, the better for their plan to take over the animal kingdom.
DIVIDE students into groups of four. Tell them that each group should have a detective that will keep
detailed notes.
DISTRIBUTE the Animal Tracks Student Handout to each group.
INVITE students to go on a hunt for information. Let them know that the information that Mizzle and Electra
post can be seen by anyone, including the detectives. Each group should follow the digital trail of both animals,
starting with the mouse and then the elephant. Stagger the groups so they follow the trails at slightly different
times. Students should fill out their handout as they go.
282

3
DIGITAL LIFE 101 / ASSESSMENT / DIGITAL LITERACY AND CITIZENSHIP IN A CONNECTED CULTURE / REV DATE 2015
www.commonsense.org | CREATIVE COMMONS: ATTRIBUTION-NONCOMMERCIAL-SHAREALIKE
teach 2
Digital Footprints (20 minutes)
INVITE each group to report to the rest of the class what they learned about each of
the animals, using the Animal Tracks Student Handout.
Mizzle the Mouse Electra the Elephant
1. Whose full name do you know? x
2. Whose house could you find x
3. Whose birth date do you know? x
4. Whose username and password do you know? x
5. Who let out a secret on the Internet? x
6. Which animal can you describe better from his or her photo? x
DEFINE the Key Vocabulary terms digital footprint and permanent.
ASK:
Who can the detectives find out more about,
and why?
Electra, because we now know where Electra lives, what she
looks like, and private and personal information about her
life. Point out to students that having a bigger digital footprint
means the detectives can learn more about them too.
Which animal has a bigger digital footprint? Electra, because she put more private and personal
information online than Mizzle.
Mizzle says some funny things about
himself on the Internet. What are they?
He says he likes Swiss cheese, his photo is of cheese, and
he has a pet flea.
Is there anything that Electra posted on the
Internet that could become a problem for
her? If so, what and why?
Private and personal information (e.g., address, full name)
allows others to learn more about her. This could be
unsafe. Saying that she fights with her brother could hurt
her brother’s feelings because it is public.)
CREATE a chart with students that summarizes which information is okay to share online and what is not okay.
Okay to Share NOT Okay to Share
Interests Address
Hobbies Full name
First name Information that would hurt others
283
4
DIGITAL LIFE 101 / ASSESSMENT / DIGITAL LITERACY AND CITIZENSHIP IN A CONNECTED CULTURE / REV DATE 2015
www.commonsense.org | CREATIVE COMMONS: ATTRIBUTION-NONCOMMERCIAL-SHAREALIKE
DISCUSS how Mizzle and Electra both had very interesting information online, but Mizzle used better
judgment about what was most appropriate to post. Mizzle had a smaller digital footprint. Electra put some
information online that might make her unsafe or might upset her brother.
REMIND students that the Internet is a public space where people they do not know will likely see their
information. And this information is very hard to remove. It is basically permanent.
EMPHASIZE that it’s important for students to ask their parents or caregives for permission before sharing
information about themselves online.
closing
Wrap-up (5 minutes)
You can use these questions to assess your students’ understanding of the lesson objectives.
ASK:
What is a digital footprint, and what did
Mizzle’s and Electra’s footprints look like?
A digital footprint is the information about you on the
Internet. Mizzle’s footprint is pretty small and does not
reveal private or personal information. Electra’s is large
and contains information that could make her unsafe or
upset others.
What kind of information is okay to share
on the Internet? What kind of information
is NOT okay to share on the Internet?
Appropriate: interests, hobbies, first name.
Inappropriate: full name, address, hurtful information about
others.
Can you put interesting and
funny information online and still
be appropriate?
Absolutely. Just look at the information that Mizzle posted.
284
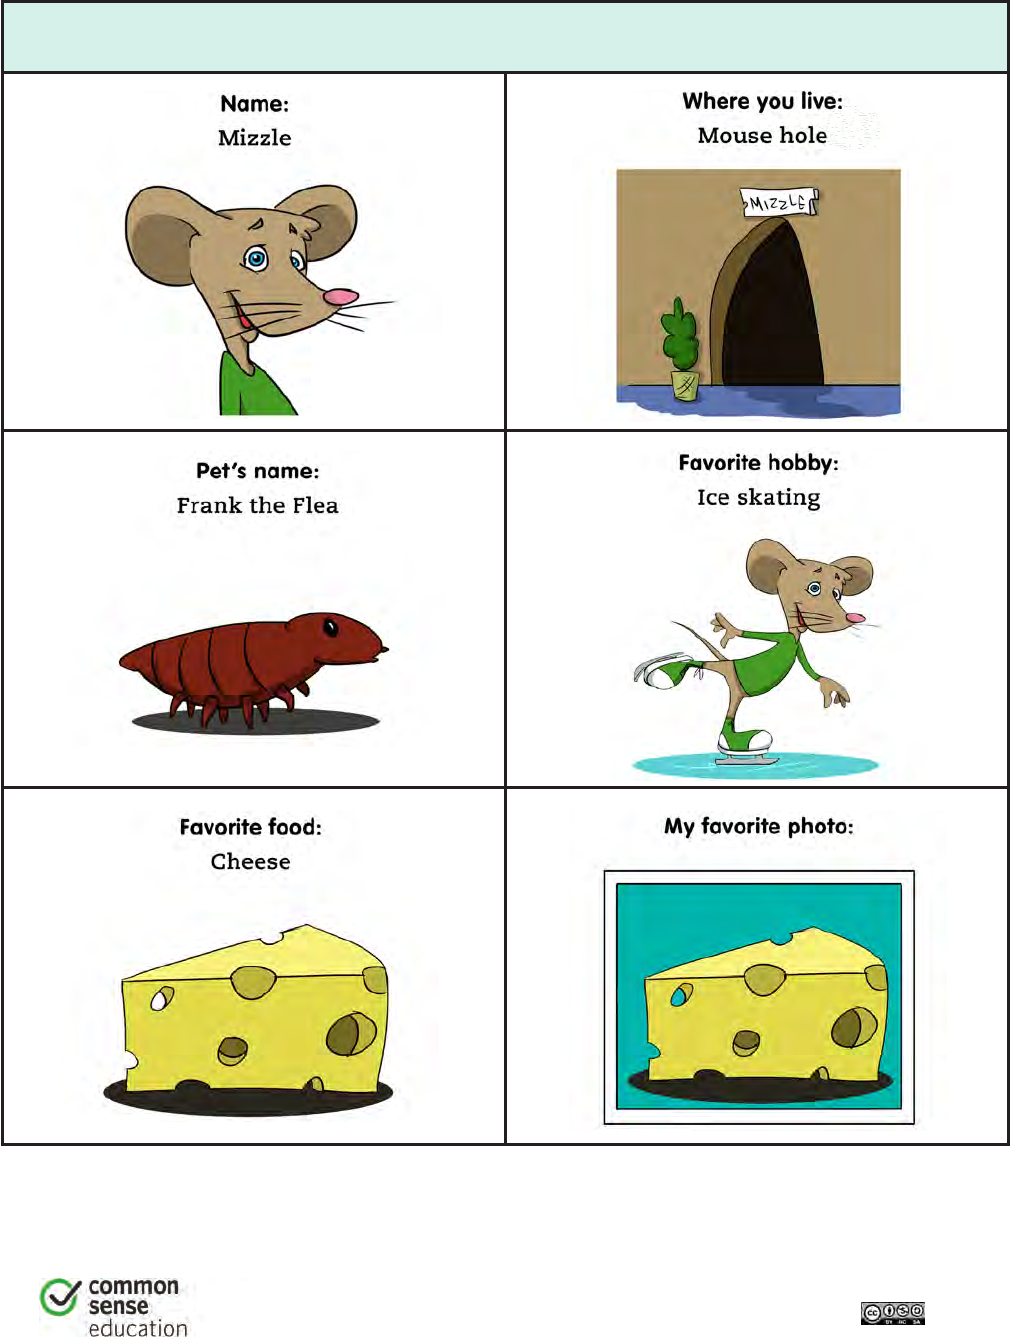
5
DIGITAL LIFE 101 / ASSESSMENT / DIGITAL LITERACY AND CITIZENSHIP IN A CONNECTED CULTURE / REV DATE 2015
www.commonsense.org | CREATIVE COMMONS: ATTRIBUTION-NONCOMMERCIAL-SHAREALIKE
Digital Trail Squares
Mizzle the Mouse
285
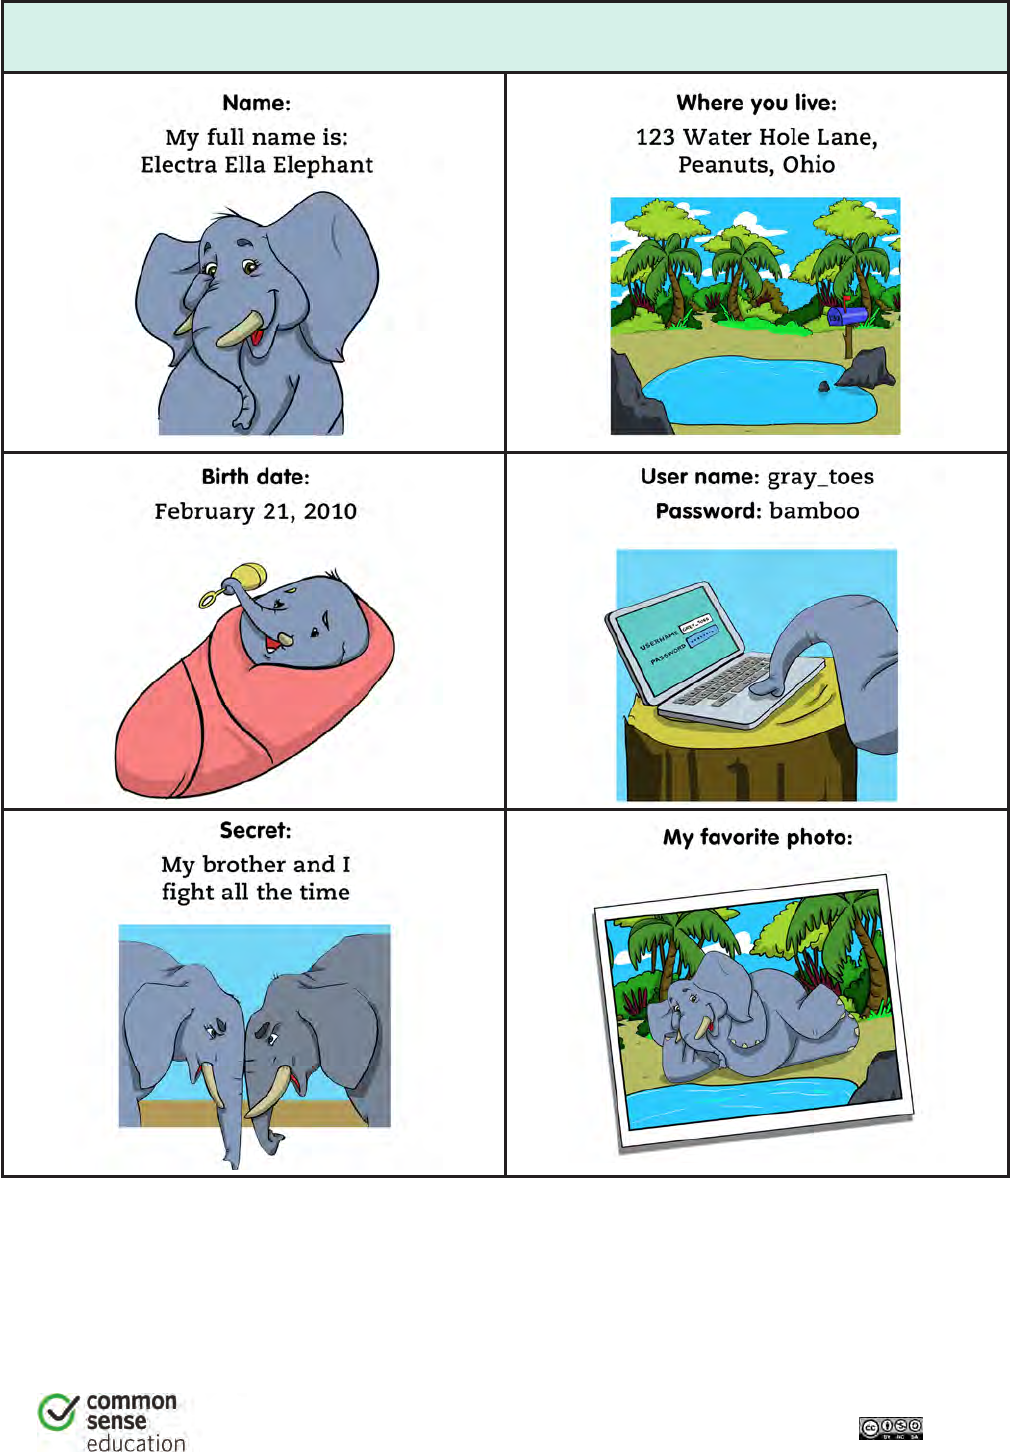
6
DIGITAL LIFE 101 / ASSESSMENT / DIGITAL LITERACY AND CITIZENSHIP IN A CONNECTED CULTURE / REV DATE 2015
www.commonsense.org | CREATIVE COMMONS: ATTRIBUTION-NONCOMMERCIAL-SHAREALIKE
Electra the Elephant
286

Follow The Digital Trail
ANIMAL TRACKS
1
DIGITAL LIFE 101 / ASSESSMENT / DIGITAL LITERACY AND CITIZENSHIP IN A CONNECTED CULTURE / REV DATE 2015
www.commonsense.org | CREATIVE COMMONS: ATTRIBUTION-NONCOMMERCIAL-SHAREALIKE
Directions
Follow the trails of Mizzle the Mouse and Electra the Elephant. Fill in the
chart below. Then answer the questions.
Mizzle
the Mouse
Electra
the Elephant
1. Whose full name do you know?
2. Whose house could you find?
3. Whose birth date do you know?
4. Whose username and password do
you know?
5. Who let out a secret on
the Internet?
6. Which animal can you describe
better from his or her photo?
Question
1. Who can the detectives find out more about, and why?
2. Which animal has a bigger digital footprint?
287
2
DIGITAL LIFE 101 / ASSESSMENT / DIGITAL LITERACY AND CITIZENSHIP IN A CONNECTED CULTURE / REV DATE 2015
www.commonsense.org | CREATIVE COMMONS: ATTRIBUTION-NONCOMMERCIAL-SHAREALIKE
3. Mizzle says some funny things about himself on the
Internet. What are they?
4. Is there anything that Electra posted on the Internet that
could become a problem for her? If so, what and why?
288

Follow the Digital Trail
ASSESSMENT
1
DIGITAL LIFE 101 / ASSESSMENT / DIGITAL LITERACY AND CITIZENSHIP IN A CONNECTED CULTURE / REV DATE 2015
www.commonsense.org | CREATIVE COMMONS: ATTRIBUTION-NONCOMMERCIAL-SHAREALIKE
1. What is a digital footprint?
a) A track that animals leave behind
b) Shoes that you buy on the Internet
c) The information about you on the Internet
2. What kind of information is safe to share online?
a) Your birth date
b) Your first name or computer username
c) Your address
3. Which animal below has the digital footprint that leaves him or her
most unsafe?
HINT: Think about which animal shares the most private information online.
a) Fran the Fish
b) Betty the Bird
c) Tony the Tiger
289
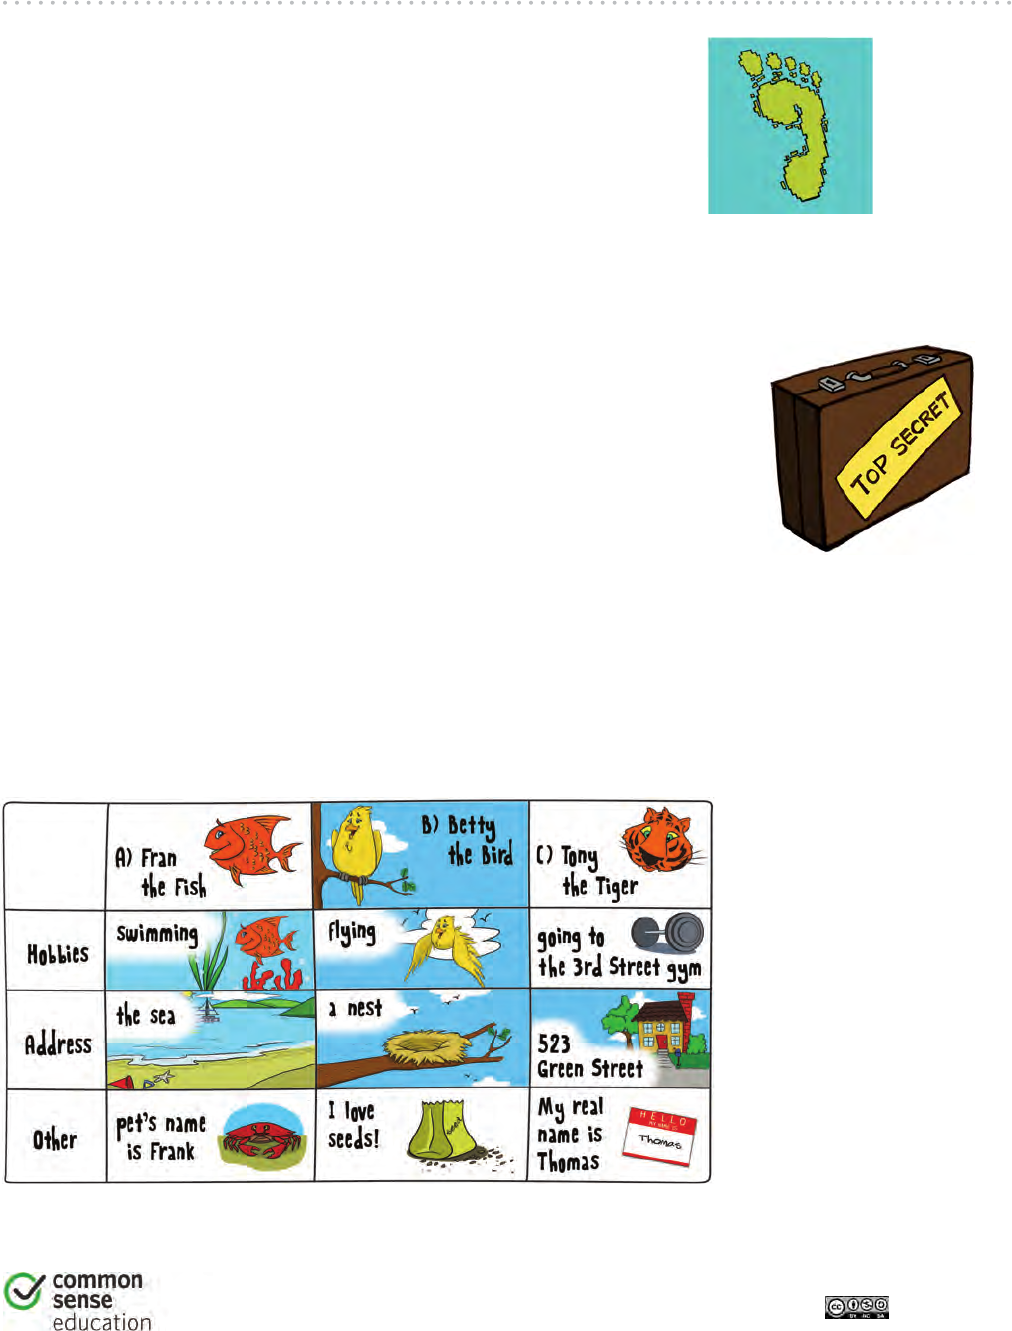
1
Follow the Digital Trail
ASSESSMENT
TEACHER VERSION
DIGITAL LIFE 101 / ASSESSMENT / DIGITAL LITERACY AND CITIZENSHIP IN A CONNECTED CULTURE / REV DATE 2015
www.commonsense.org | CREATIVE COMMONS: ATTRIBUTION-NONCOMMERCIAL-SHAREALIKE
1. What is a digital footprint?
a) A track that animals leave behind
b) Shoes that you buy on the Internet
c) The information about you on the Internet
Answer feedback
The correct answer is c. Your digital footprint is the information
about you online, such as a news story with your name in it or something that you write online.
2. What kind of information is safe to share online?
a) Your birth date
b) Your first name or computer username
c) Your address
Answer feedback
The correct answer is b. It is okay to share your first name or your
username online. But sharing your address or birth date could make your information unsafe
because other people might use your information to pretend to be you!
3. Which animal below has the digital footprint that leaves him or her most unsafe?
HINT: Think about which animal shares the most private information online.
a) Fran the Fish
b) Betty the Bird
c) Tony the Tiger
Answer feedback
The correct answer is c.
Tony the Tiger put private
information online, like his
address, which is not safe.
Fran and Betty shared
information, but they did
not share anything private
about themselves.
290
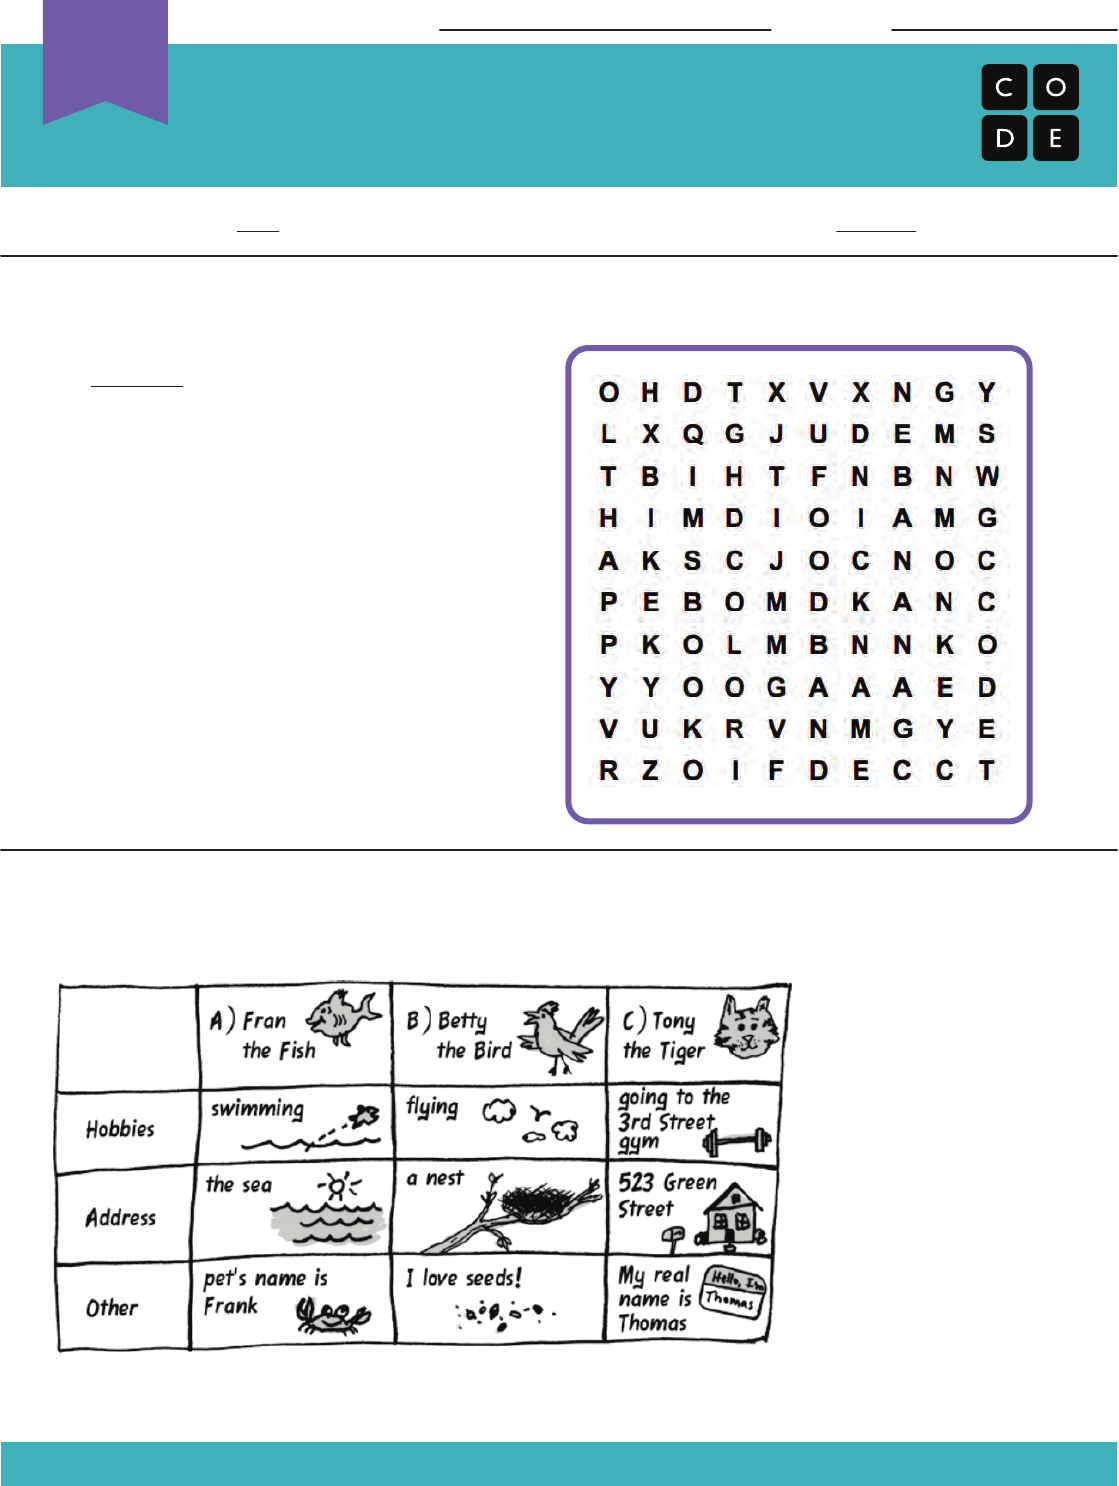
Your Digital Footprint
Staying Safe and Responsible Assessment
Unplugged
U
Revision 140625.1a
Just because you can share something online doesn’t mean that you should!
Cross out the information that you should not share online. Use the words that are leftover
as the key to what you should find in the word search.
Which animal below has the digital footprint that leaves him or her most unsafe?
HINT: Think about which animal shares the most private information online.
Name: Date:
WORDS
1) Your Real Name (NAME)
2) Your Online Name (NICKNAME)
3) Your Address (ADDRESS)
4) Your Email (EMAIL)
5) Your Favorite Color (COLOR)
6) The Last Book you Read (BOOK)
7) Your Credit Card Info (CARD)
8) Your Favorite Band (BAND)
9) Your Phone Number (PHONE)
10) What You Ate Today (FOOD)
11) Your Birthday (BIRTHDAY)
Circle One:
A) Fran the Fish
B) Betty the Bird
C) Tony the Tiger
291

CS Fundamentals Curriculum Guide
Appendix B:
Glossary of Vocabulary
292

CS Fundamentals Curriculum Guide
Vocabulary
Encouraging students to learn and use official computer science terms will enable them to
communicate correctly and efficiently with others and builds their knowledge such that it can be
further developed without having to relearn terms and concepts at a later time. The terms and
concepts used in the unplugged lessons are defined using words that young students can
understand.
abstraction
Pulling out specific differences to make one solution work for multiple problems.
accessibility
The design of products, devices, services, or environments taking into consideration the ability for all
users to access, including people who experience disabilities or those who are limited by older or
slower technology.
algorithm
A list of steps to finish a task. A set of instructions that can be performed with or without a computer.
For example, the collection of steps to make a peanut butter and jelly sandwich is an algorithm.
binary
A way of representing information using only two options.
binary alphabet
The two options used in your binary code.
bit
A contraction of "Binary Digit". A bit is the single unit of information in a computer, typically
represented as a 0 or 1.
block-based programming language
Any programming language that lets users create programs by manipulating “blocks” or graphical
programing elements, rather than writing code using text. Examples include Code Studio, Scratch,
Blockly, and Swift. (Sometimes called visual coding, drag and drop programming, or graphical
programming blocks)
Blockly
The visual programming language used in Code.org's online learning system for K-5 students.
bug
An error in a program that prevents the program from running as expected.
293

CS Fundamentals Curriculum Guide
byte
the most common fundamental unit of digital data eg. Kilobyte, Megabyte, etc. A single byte is 8
bits-worth of data.
call (a variable)
Use a variable in a program.
call (a function)
This is the piece of code that you add to a program to indicate that the program should run the code
inside a function at a certain time.
click
Press the mouse button.
code
One or more commands or algorithm(s) designed to be carried out by a computer. See also: program
command
An instruction for the computer. Many commands put together make up algorithms and computer
programs.
computational thinking
Mental processes and strategies that include: decomposition, pattern matching, abstraction,
algorithms (decomposing problems into smaller, more manageable problems, finding repeating
patterns, abstracting specific differences to make one solution work for multiple problems, and
creating step-by-step algorithms).
computer science
Using the power of computers to solve problems.
conditionals
Statements that only run under certain conditions or situations.
crowdsourcing
Getting help from a large group of people to finish something faster.
cyberbullying
Doing something on the internet, usually again and again, to make another personal feel angry, sad,
or scared.
294

CS Fundamentals Curriculum Guide
data
Information. Often, quantities, characters, or symbols that are the inputs and outputs of computer
programs.
debugging
Finding and fixing errors in programs.
decompose
Break a problem down into smaller pieces.
define (a function)
To add code inside a function so that the program knows what it is supposed to do when the function
is called.
digital citizen
Someone who acts safely, responsibly, and respectfully online.
digital footprint
The information about someone on the Internet.
DNS (domain name service)
The service that translates URLs to IP addresses.
double-click
Press the mouse button twice very quickly
drag
Click your mouse button and hold as you move the mouse pointer to a new location
drop
Release your mouse button to "let go" of an item that you are dragging
DSL/cable
A method of sending information using telephone or television cables.
event
An action that causes something to happen.
event-handler
A monitor for a specific event or action on a computer. When you write code for an event handler, it
will be executed every time that event or action occurs. Many event-handlers respond to human
actions such as mouse clicks.
295

CS Fundamentals Curriculum Guide
F.A.I.L
First Attempt In Learning
fiber optic cable
A connection that uses light to transmit information.
for loop
A loop with a predetermined beginning, end, and increment (step interval).
frustrated
Feeling annoyed or angry because something is not the way you want it.
function
A piece of code that you can easily call over and over again. Functions are sometimes called
‘procedures.’ A function definition is a segment of code that includes the steps performed in the
function. A function call is the code segment, typically within the main logic of the program, which
invokes the function.
function call
The piece of code that you add to a program to indicate that the program should run the code inside a
function at a certain time.
function definition
The code inside a function that instructs the program on what to do when the function is called.
if-statement
The common programming structure that implements "conditional statements".
input
A way to give information to a computer.
Internet
A group of computers and servers that are connected to each other.
IP address
A number assigned to any item that is connected to the Internet.
iteration
A repetitive action or command typically created with programming loops.
loop
The action of doing something over and over again.
296

CS Fundamentals Curriculum Guide
online
Connected to the internet.
output
A way to get information out of a computer.
packets
Small chunks of information that have been carefully formed from larger chunks of information.
pattern matching
Finding similarities between things.
parameter
An extra piece of information that you pass to the function to customize it for a specific need.
persistence
Trying again and again, even when something is very hard.
pixel
Short for "picture element" it is the fundamental unit of a digital image, typically a tiny square or dot
which contains a single point of color of a larger image.
program
An algorithm that has been coded into something that can be run by a machine.
programming
The art of creating a program.
repeat
To do something again.
run program
Cause the computer to execute the commands you've written in your program.
search engine
A program that searches for and identifies items in a database that correspond to keywords or
characters specified by the user, used especially for finding particular sites on the World Wide Web.
servers
Computers that exist only to provide things to others.
297

CS Fundamentals Curriculum Guide
toolbox
The tall grey bar in the middle section of Code.org's online learning system that contains all of the
commands you can use to write your program.
trustworthy
Able to be relied on as honest or truthful.
try
Attempt to do something
URL (universal resource locator)
A relatively easy-to-remember address for calling a web page (like www.code.org).
username
A name you make up so that you can see or do things on a website, sometimes called a “screen
name.”
variable
A placeholder for a piece of information that can change.
website
A location connected to the Internet that maintains one or more pages on the World Wide Web.
while loop
A loop that continues to repeat while a condition is true.
Wi-Fi
A wireless method of sending information using radio waves.
workspace
The white area on the right side of Code.org's online learning system where you drag and drop
commands to build your program.
298

CS Fundamentals Curriculum Guide
Appendix C:
Student Skills and Strategies for
Tackling Difficult Challenges
299

CS Fundamentals Curriculum Guide
This appendix outlines specific strategies that you can encourage students to take in tackling challenges in CS
Fundamentals.
Approaching Lesson Progressions
Growth Mindset
Throughout these lessons, it is critical that students understand that nobody is born knowing computer science.
Everyone starts at the beginning, experiences failure, learns from mistakes, then experiences success.
Students should not view frequent programming failures as a sign that they lack talent, but should instead be
proud of their own persistence as they make changes and try again. All computer scientists fail. The best
programmers are the ones who keep trying long enough to learn from the problems that they encounter.
Here are some tips to help your students stay persistent:
● Keep track of what you have already tried
● Figure out what is happening
● Understand what is supposed to happen
● Look at what that tells you
● Make a change and try again
Frustration
Frustration is a natural part of learning. Instead of trying to avoid frustration at Code.org, we embrace it. The
key to persistence is in learning that frustration is a positive sign, not a negative one. When a student gets
frustrated, it means that they are about to learn something new. It can be compared to the pain you feel in your
mouth before you get a new tooth, or the soreness in your muscles before you get stronger. Congratulate
students on recognizing and persevering through frustration.
Here are some tips to help your students deal with
frustration:
● Count slowly to 10
● Take some deep breaths
● Write your worries in a journal
● Talk to a partner about your feelings
● Ask for help
Paper and Pencil
It is common for a teacher to expect students to work out code in their head. This puts unfair stress on
students, as programs can get complicated and confusing. Encourage students to code with a piece of paper
and pencil nearby so that they can scribble down predictions and trace out paths for solving puzzles. Paper
can be helpful to record the ideas that have already been tried, as well as thoughts about what can be tried
next. It might even help students to write a little about what they did to pass a level so that they can share with
classmates who are in need of a little help.
Trying (Then Skipping) Challenges
When Code.org places so much value on persistence, it is hard to justify skipping puzzles because they feel
too difficult or confusing. It is, however, how our challenge puzzles were designed.
300
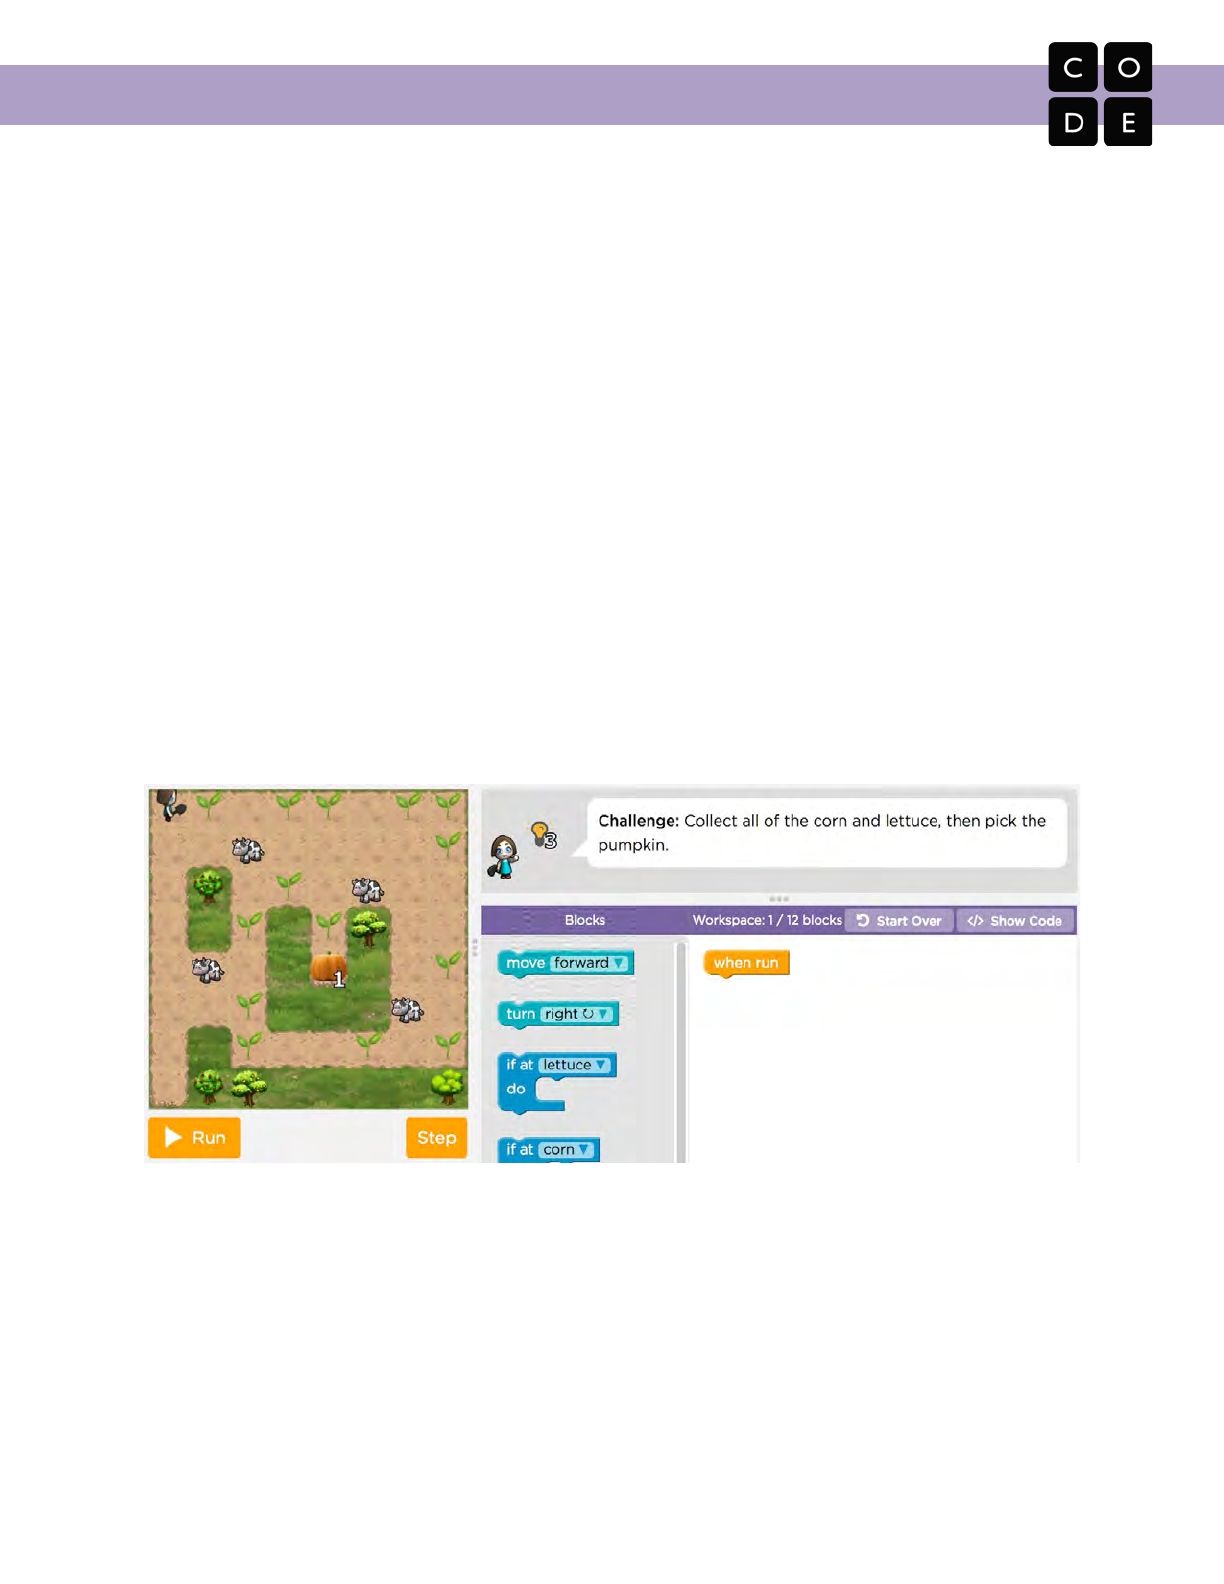
CS Fundamentals Curriculum Guide
Most of our online lessons contain one “challenge” puzzle near the end of the series. This puzzle was carefully
placed to inspire students to practice new concepts in a different way. It will test their persistence, highlight
misconceptions, and hopefully lead them to the “ah-ha” moment that educators love! Additionally, spending a
fair amount of time with the challenge puzzle will help the following levels feel simple in comparison, even
though the levels that follow demonstrate the exact target of understanding expected from a student by the
time they finish each lesson.
In order to provoke those strong accomplishments, challenge levels must all but guarantee that they cannot be
solved quickly. Because of this, they will be far too hard for many students, which means that the messaging of
these challenges is extremely important. Keep these things in mind, and make sure that you review them with
your students before each visit to the computer lab.
● When you get to the challenge puzzle, give it your best try!
● Keep notes as you try to solve the puzzle so that you don’t lose your place or try the same thing over
and over again.
● These puzzles are supposed to be hard. You don’t have to solve it in order to learn from it, but you do
have to try your best!
● Remember that you can come back to the challenge puzzle later. If you start to get frustrated, go ahead
and skip the challenge until you complete the rest of the lesson. You can come back to it when you’ve
finished everything else!
Lesson Extras
Many teachers like to keep their entire class on the same lesson instead of letting students skip ahead to new
concepts. For that reason, we have provided an area at the end of each lesson series where students can use
the concepts that they’ve learned in new and interesting ways. These puzzles are considered “optional.” They
are a sandbox to keep the quickest students challenged and entertained until the end of class. In addition, the
Lesson Extras can be used to add an additional day onto concept lessons, offering the opportunity for students
to come back and create personal and authentic projects with their newest concepts.
301

CS Fundamentals Curriculum Guide
Copy/Paste
Though we do not make it obvious, most individual blocks in CS Fundamentals are able to be copied/pasted
within the same level. If you feel that the ability to copy and paste blocks will enhance your student’s learning
experience, then you can share the copy/paste method with them:
1. Highlight the block that you want to copy
2. Press ctrl+c to copy
3. Press ctrl+v to paste
4. Move your pasted block to where you would like it
While this “hack” generally only allows you to copy one block at a time, there is a work around for duplicating
larger chunks of code. All you need to do is pull a statement block (like a loop, conditional, or simple function)
from the toolbox and place all of the code to be copied inside. Now, select the statement block and copy/paste.
All of the code inside will be duplicated. You can now pull the extra code out of the statement block and use it
as desired.
Puzzle/Problem Solving Recipe
Start a Puzzle with Understanding
Often, the quickest way to pass a level is to know where you’re headed from the start. Help students
understand that being successful means taking a look at what is required before dragging anything out to the
workspace. Here are some important questions that students should ask:
● What do the instructions say?
● What am I supposed to do?
● What has already been done?
● Are there any questions that I need answers to?
● Have I solved another problem like this one?
● Can I put the puzzle’s goal into my own words?
Debugging
Small misunderstandings can lead to big problems! Help keep students moving by showing them some basic
debugging skills.
Step Button
Most puzzles in CS Fundamentals have a “Step” button (excluding Artist, Play Lab, and BB-8 levels.) With the
“Step” button, it is possible to go through a program block by block to see what happens each step of the way.
This is a helpful tool when your code moves too quickly to understand where things get off course.
To use the “Step” button, simply click on “Step” instead of “Run”. Your code will run exactly one block before
coming to a rest again. To continue through the code, keep pressing “Step” until you have completed your
program, or found your bug!
In Artist puzzles, the “Step” button is replaced by a speed slider. For a similar effect, try moving the slider to
the far left and watching the artist go through each step very slowly.
302
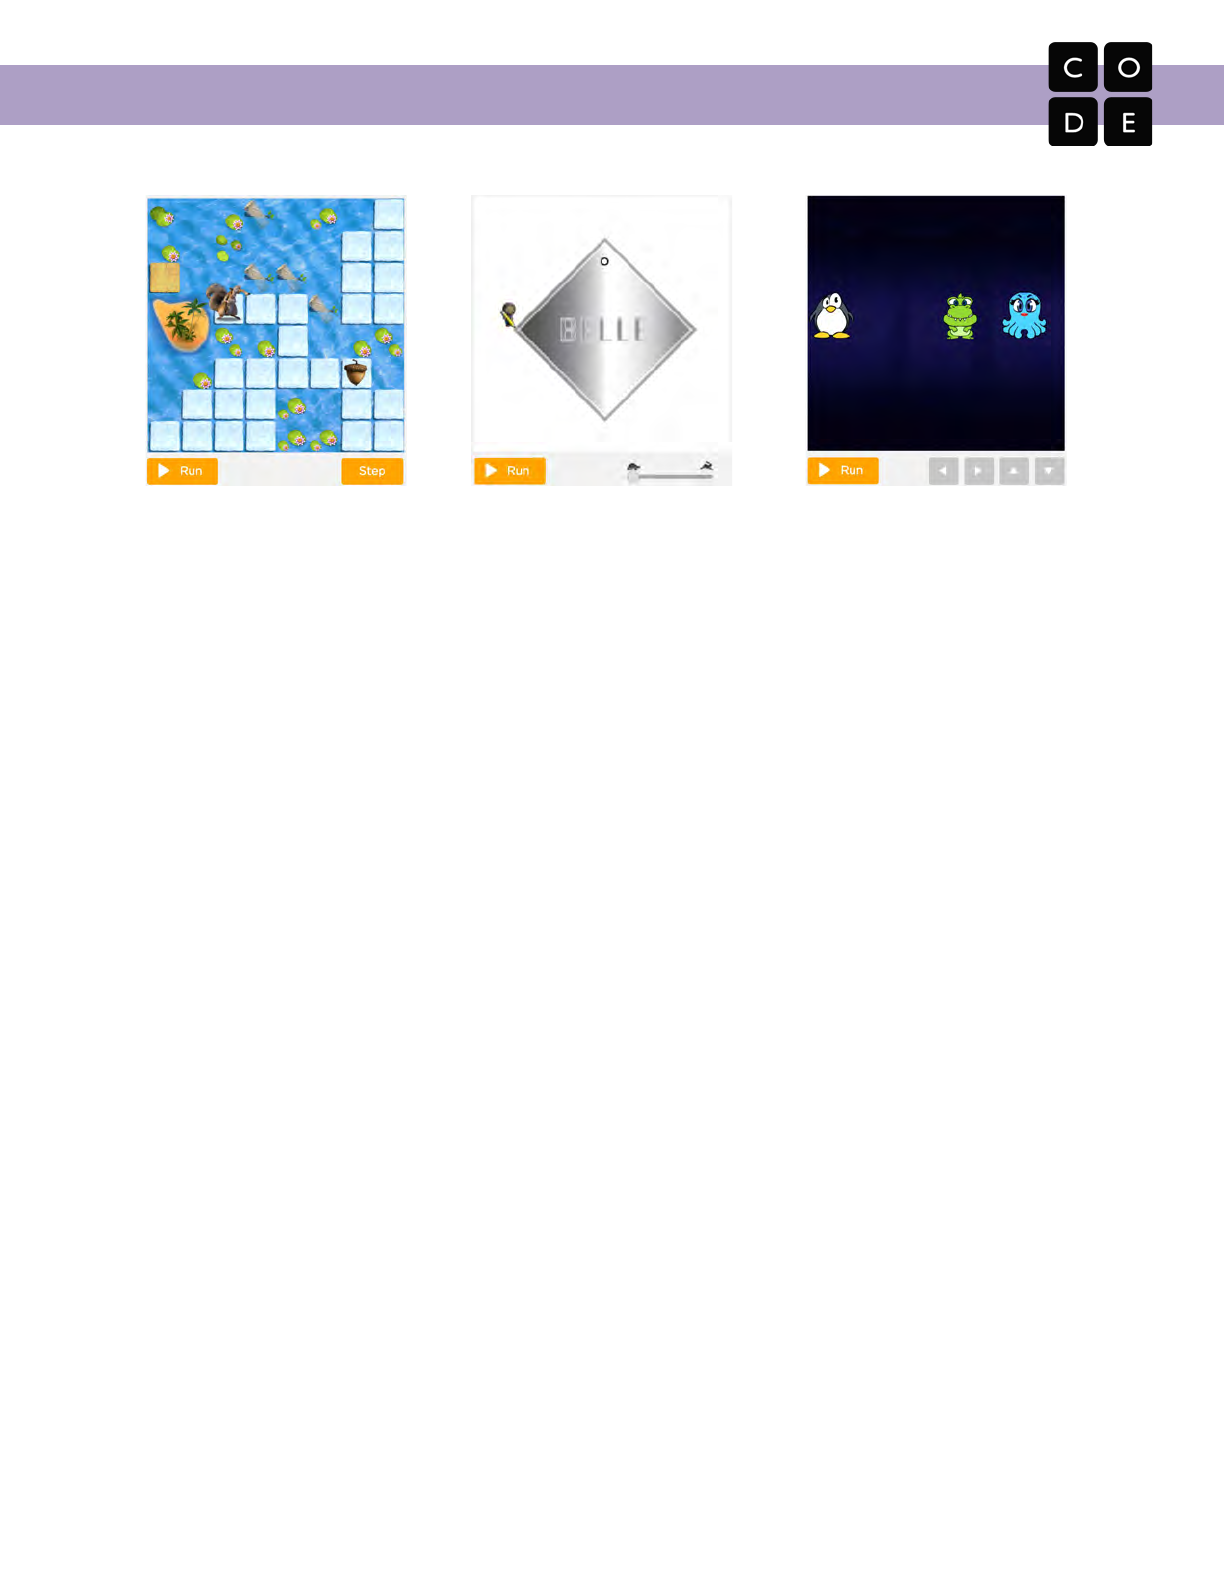
CS Fundamentals Curriculum Guide
Example of level with “Step” button.
Example of level with speed slider..
Example level with no “Step” button.
Finger/Paper Tracing
For puzzles that don’t have a “Step” button, students can find a great amount of help looking through their
program on their own.
The ability to predict what a program will do is an amazing skill, but it takes a lot of practice. Students can find
opportunities to grow in this area by using finger tracing and/or paper tracing as they code in CS
Fundamentals.
● Finger Tracing
○ Use your finger to point to the first block on the screen. What does everything look like? What
values do the variables hold (if there are any)? What happens to that landscape after the current
block is executed?
○ Drop your finger to the next block and ask the same questions.
○ Can you run through the whole program and predict the outcome?
● Paper Tracing
○ Draw a line down the center of your paper
○ On one side, write the code for your program
○ On the other side, write notes on the starting state of the program: Where are the characters?
What are the values of the variables? Anything else to note?
○ Now look at the first line of your program. What changes when it is executed? Write the new
details in your notes area.
○ Continue to run through the written code until you reach the end. Is everything as you
expected?
Critical Questions
If looking through your code does not provide the answers you need, you will have to dig a little more deeply.
These questions will help students to highlight the clues provided by their program when things are not
working:
● What does it do?
● What is it supposed to do?
● What does that tell me?
● Is it right at the first step?
● Is it still right at the second step?
● Where is the first place that it goes wrong?
303

CS Fundamentals Curriculum Guide
Asking for Help
In computer science, there’s a fine line between the benefit that you get from figuring out something on your
own, and the benefit of learning from the experience of a peer. For this reason, CS Fundamentals encourages
a “Try three / Try three / Ask me” system.
With this system (3/3/Me) students are asked to tackle a problem with three different solutions before asking
peers for help. Once their classmates get involved, they should try three more solutions together before
involving a teacher. At that point, as an educator, you should ask them to put in words what they tried and what
that told them. Also ask them if they have narrowed down any places where the problem is not. If they have
not yet solved their problem, guide them in trying a few additional options.
In all cases, make sure that you and your class are familiar with the right way to help a student:
●Don’t sit in the classmate’s chair
●Don’t use the classmate’s keyboard or tablet
●Don’t touch the classmate’s mouse
●Make sure the classmate can describe the solution to you out loud before you walk away
If, after all of this, issues still persist, you might consider filing a bug report with Code.org through the website
or by emailing support@code.org.
304
