Catalyst_Insight_User_Guide Catalyst Insight User Guide
User Manual: Catalyst Insight User Guide
Open the PDF directly: View PDF ![]() .
.
Page Count: 156 [warning: Documents this large are best viewed by clicking the View PDF Link!]
- Welcome to Insight
- Results
- Documents, Forms and Fields
- Document Interface
- Highlights
- Viewing PDFs
- Viewing Native Files
- Viewing TIFF Records
- Document Options
- Copy a Document to a Folder
- Convert to PDF
- Download Original
- Pause Review
- Redaction
- Redaction Sets
- Using Redaction Buttons
- Redaction Options
- Viewing Redaction Versions
- Upload PDF
- More Like This
- Translate
- Coding History
- Forms
- Fields
- Shortcuts and Rules
- Associated Documents
- Actions
- Copy to Folder
- Copy to Folder Dialog Box
- Creating Folders on the Fly
- Remove From Folder
- Printing and Downloading Documents
- Batch Print Wizard
- Create a Zipped Folder
- Create PDF File (Combine)
- Custom Bookmarks
- Footer and Watermark Information
- Separator Sheets
- Use Redacted Version
- Print Summary
- Exporting Fielded Information
- More Actions
- Lock/Unlock Documents
- Batch Wizard
- Bulk Convert to PDF
- Bulk OCR
- Bulk Update
- Bulk Updating a Single-Value Field
- Bulk Updating a Multi-Value Field
- Append To
- Update Collections
- Assign to Review Project
- Folders
- Your Review Projects
- Monitors


Insight User Guide
v.15-10162013 i
Contents
Welcome to Insight . . . . . . . . . . . . . . . . . . . . . . . . . . . . . . . . . . . . . . . . . . . . . . . . . . . . . . . . . . 1
Browser Settings ...................................................................................................................... 1
Chrome Settings ...................................................................................................................... 1
Viewing PDFs...................................................................................................................... 1
Clearing the Cache..............................................................................................................2
Reloading Chrome............................................................................................................... 3
Updating your Chrome Browser .......................................................................................... 3
Multiple Chrome Windows ....................................................................................................... 3
Firefox Settings ........................................................................................................................ 5
Safari Settings.......................................................................................................................... 7
Internet Explorer Browser Settings .......................................................................................... 7
IE Trusted Sites................................................................................................................... 8
Adobe Settings......................................................................................................................... 9
Getting Started ......................................................................................................................... 9
Navigating in Insight............................................................................................................... 11
Global Navigation .............................................................................................................. 11
Insight Settings and Support .................................................................................................. 15
Settings ............................................................................................................................. 15
Change Language............................................................................................................. 15
Change Password ............................................................................................................. 16
Help and Support............................................................................................................... 17

Insight User Guide
v.15-10162013 ii
Results . . . . . . . . . . . . . . . . . . . . . . . . . . . . . . . . . . . . . . . . . . . . . . . . . . . . . . . . . . . . . . . . . . . 19
Number of Documents Found ................................................................................................ 20
Table View ............................................................................................................................. 21
Score ................................................................................................................................. 21
Columns ............................................................................................................................ 22
Snippets ............................................................................................................................ 24
Document Preview ............................................................................................................ 24
Display Options ...................................................................................................................... 25
Edit Display ............................................................................................................................ 27
Column Menu .................................................................................................................... 29
Reorder Columns .............................................................................................................. 31
Other Results Options—Graphing and Charting Results....................................................... 31
Charts..................................................................................................................................... 32
Charts—Right-Click Menu...................................................................................................... 33
File Sizes................................................................................................................................ 33
Communication Tracker ......................................................................................................... 34
Communication Report .......................................................................................................... 36
Timeline.................................................................................................................................. 38
Results Page Search Text ..................................................................................................... 40
Documents, Forms and Fields . . . . . . . . . . . . . . . . . . . . . . . . . . . . . . . . . . . . . . . . . . . . . . . . 42
Document Interface................................................................................................................ 42
Highlights ............................................................................................................................... 44
Viewing PDFs......................................................................................................................... 46

Insight User Guide
v.15-10162013 iii
Viewing Native Files............................................................................................................... 47
Viewing TIFF Records............................................................................................................49
Annotations ....................................................................................................................... 50
Document Options ................................................................................................................. 52
Copy a Document to a Folder ................................................................................................ 53
Convert to PDF ...................................................................................................................... 54
Download Original.................................................................................................................. 55
Pause Review ........................................................................................................................ 56
Redaction ............................................................................................................................... 57
Redaction Sets....................................................................................................................... 57
Using Redaction Buttons........................................................................................................ 58
Redaction Options.................................................................................................................. 59
Save/Finalize..................................................................................................................... 60
Copy Recently Redacted Page ......................................................................................... 60
Redact the Whole Page..................................................................................................... 60
Remove all Redactions from Page.................................................................................... 60
Rotate and Zoom............................................................................................................... 60
Toggle Opacity and Visibility ............................................................................................. 60
Navigate to Next Page to Redact ...................................................................................... 61
Deleting and Adjusting Single Redaction Boxes ............................................................... 61
Redaction Box Menu ......................................................................................................... 61
Color Redactions............................................................................................................... 62
Viewing Redaction Versions .................................................................................................. 62

Insight User Guide
v.15-10162013 iv
Upload PDF............................................................................................................................ 63
More Like This........................................................................................................................ 64
Translate ................................................................................................................................ 65
Coding History........................................................................................................................ 66
Forms ..................................................................................................................................... 67
Fields...................................................................................................................................... 68
Shortcuts and Rules............................................................................................................... 73
Apply Previous................................................................................................................... 73
Shortcuts ........................................................................................................................... 74
Rules ................................................................................................................................. 75
Associated Documents .......................................................................................................... 77
Related .............................................................................................................................. 77
Duplicates.......................................................................................................................... 78
Equivio Email Threads....................................................................................................... 79
Equivio Near Duplicates .................................................................................................... 79
Actions . . . . . . . . . . . . . . . . . . . . . . . . . . . . . . . . . . . . . . . . . . . . . . . . . . . . . . . . . . . . . . . . . . . 81
Copy to Folder........................................................................................................................ 82
Copy to Folder Dialog Box ..................................................................................................... 84
Creating Folders on the Fly.................................................................................................... 84
Remove From Folder ............................................................................................................. 88
Printing and Downloading Documents ................................................................................... 88
Batch Print Wizard ................................................................................................................. 89
Create a Zipped Folder ..........................................................................................................90

Insight User Guide
v.15-10162013 v
Create PDF File (Combine).................................................................................................... 91
Custom Bookmarks................................................................................................................92
Footer and Watermark Information ........................................................................................ 93
Separator Sheets ................................................................................................................... 93
Use Redacted Version ........................................................................................................... 94
Print Summary ....................................................................................................................... 94
Exporting Fielded Information ................................................................................................ 95
More Actions .......................................................................................................................... 97
Lock/Unlock Documents ........................................................................................................ 97
Batch Wizard.......................................................................................................................... 98
Batch by Folder .................................................................................................................98
Group By ......................................................................................................................... 100
Batch Prefix ..................................................................................................................... 100
Max Batch Size................................................................................................................ 100
Include Related, Duplicates............................................................................................. 101
Batch by Field..................................................................................................................101
Include Related, Duplicates, Already Batched ................................................................ 101
Bulk Convert to PDF ............................................................................................................ 102
Bulk OCR ............................................................................................................................. 103
Bulk Update.......................................................................................................................... 104
Bulk Updating a Single-Value Field...................................................................................... 105
Bulk Updating a Multi-Value Field ........................................................................................ 106
Append To............................................................................................................................ 107

Insight User Guide
v.15-10162013 vi
Change To.......................................................................................................................107
Replace Value ................................................................................................................. 108
Field Updates .................................................................................................................. 109
Update Collections ............................................................................................................... 110
Assign to Review Project ..................................................................................................... 112
Folders . . . . . . . . . . . . . . . . . . . . . . . . . . . . . . . . . . . . . . . . . . . . . . . . . . . . . . . . . . . . . . . . . . 115
Static Folders ....................................................................................................................... 115
My Folders ........................................................................................................................... 116
Shared Folders..................................................................................................................... 118
Public Folders ...................................................................................................................... 119
Compare Folders .................................................................................................................121
Dynamic Folders .................................................................................................................. 121
Your Review Projects . . . . . . . . . . . . . . . . . . . . . . . . . . . . . . . . . . . . . . . . . . . . . . . . . . . . . . 123
Maximum Number of Documents......................................................................................... 126
Review Project Searching and Advanced Settings .............................................................. 127
Release Documents............................................................................................................. 130
Monitors . . . . . . . . . . . . . . . . . . . . . . . . . . . . . . . . . . . . . . . . . . . . . . . . . . . . . . . . . . . . . . . . . 132
Batching ............................................................................................................................... 132
Conversion ........................................................................................................................... 134
Export................................................................................................................................... 135
Folder/Field Updates............................................................................................................136
OCR ..................................................................................................................................... 137
Print...................................................................................................................................... 138

Insight User Guide
v.15-10162013 vii
Redaction ............................................................................................................................. 141
Review Projects ................................................................................................................... 142
Productions .......................................................................................................................... 143
Uploads ................................................................................................................................ 145
Processing ........................................................................................................................... 146
Non-Indexed Documents ..................................................................................................... 147

Insight User Guide
v.15-10162013 1
Welcome to Insight
Insight is Catalyst’s revolutionary e-discovery platform, engineered for the demanding
requirements of modern litigation. This guide provides you with information and procedures
covering a wide range of user features. The features available to you depend on the rights given
you.
Browser Settings
You can work in Insight using a Mac or PC computer. You need a connection to the Internet, a
Web browser and a PDF reader to work in Insight. Insight was developed in the Chrome browser,
but it is compatible with most major browsers. For opening and viewing PDFs, Catalyst
recommends using the free Adobe Acrobat Reader. Please note that while the FoxIt and
Schuber|it plugins for viewing PDFs will work with Insight, Catalyst recommends using Adobe
Reader with all browsers.
The Browser Compatibility Chart lists the operating systems and browsers you can use with
Insight. Below are Catalyst-recommended settings to optimize your experience.
Chrome Settings
Viewing PDFs
Catalyst recommends working in Insight using the Chrome browser. Insight is designed and fully
tested in Chrome. The Chrome browser provides a built-in reader for viewing PDFs from within
the browser; however, this Chrome PDF Viewer offers limited functionality when viewing records
in the PDF format. You can adjust your Chrome settings to open PDFs in another reader.
Catalyst recommends using the Adobe Reader, because Adobe allows you to view highlights in
an opened record and the number of pages in the PDF document. You can download a free
version of Adobe Reader if you do not already have Adobe Reader or Adobe Acrobat loaded to
your machine.
To set Adobe as your PDF viewer, open the Chrome browser and enter this URL in the address
bar: Chrome://plugins.
Insight User Guide
v.15-10162013 2
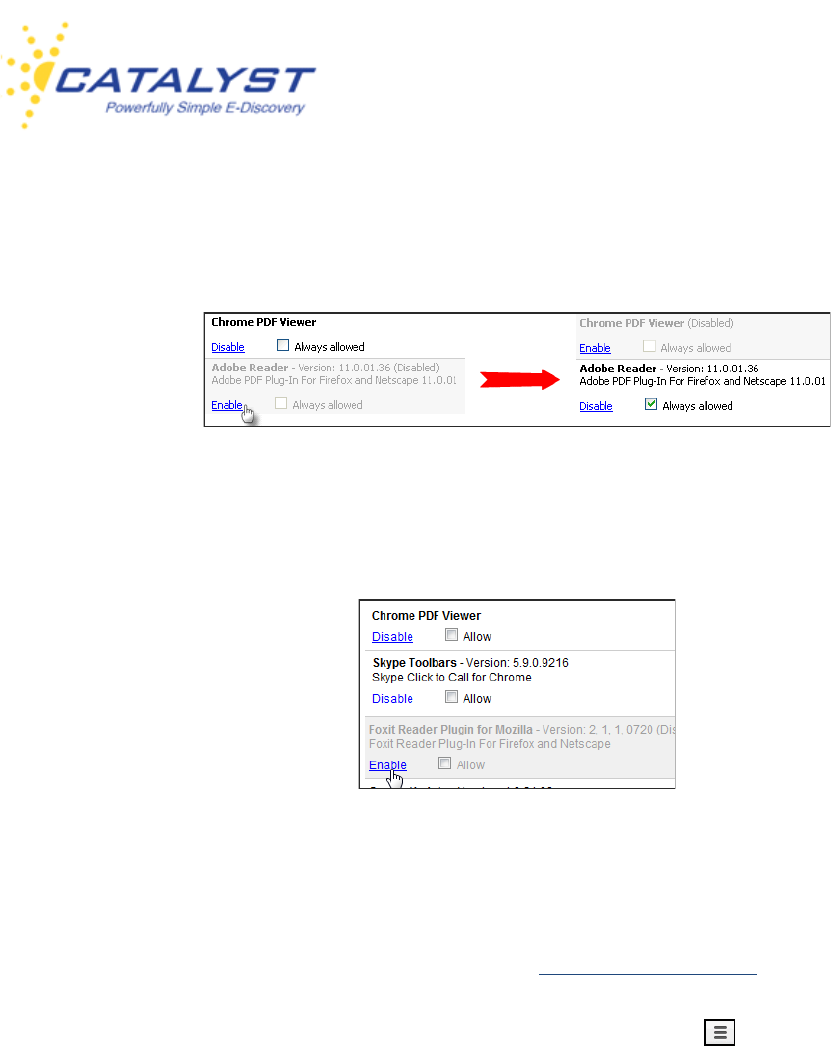
Find the Adobe Reader section on the Plugins page and click the Enable link. This automatically
enables the Adobe Reader and disables the Chrome PDF Viewer in the Chrome browser.
If you prefer to use the Foxit Reader or are using a Mac computer with the Schubert|it plugin,
enable that PDF reader in the same way:
Clearing the Cache
Catalyst recommends clearing your Chrome cache/browsing history after new releases to the
Insight application. You should receive an email when we release updates to the software, and
you can also visit the What’s New? section of our Documentation Center.
To clear your cache, open Chrome and click the Chrome Settings button in the top right of
the page.
Point to Tools and select Clear browsing data.
Expand the Obliterate the following items menu to set a time frame for the amount of data you
want to delete. Set the beginning of time to delete everything.
Select the Clear Browsing History checkbox and any other checkboxes for the types of
information that you want to remove.

Insight User Guide
v.15-10162013 3
Click Clear browsing data.
If you are using a Windows machine, the keyboard shortcut for quickly opening the Clear
Browsing Data dialog box is CTRL+SHIFT+DELETE. Follow the steps above once in the dialog
box.
You can also download a free plug-in for clearing your browsing data in Chrome. There are
several free plug-ins available at the Chrome Web Store. Select one and follow the instructions
for adding it to your Chrome browser.
Reloading Chrome
You can reload a document to ensure you are viewing the latest updates/changes to it. To do this
if using a Windows machine, use the keyboard shortcut of CTRL+SHIFT+R to reload the page.
Updating your Chrome Browser
Your Chrome browser needs to be updated if there is an arrow on the Settings button in the
Chrome browser tool bar. Click the Settings button and then click Update Google Chrome.
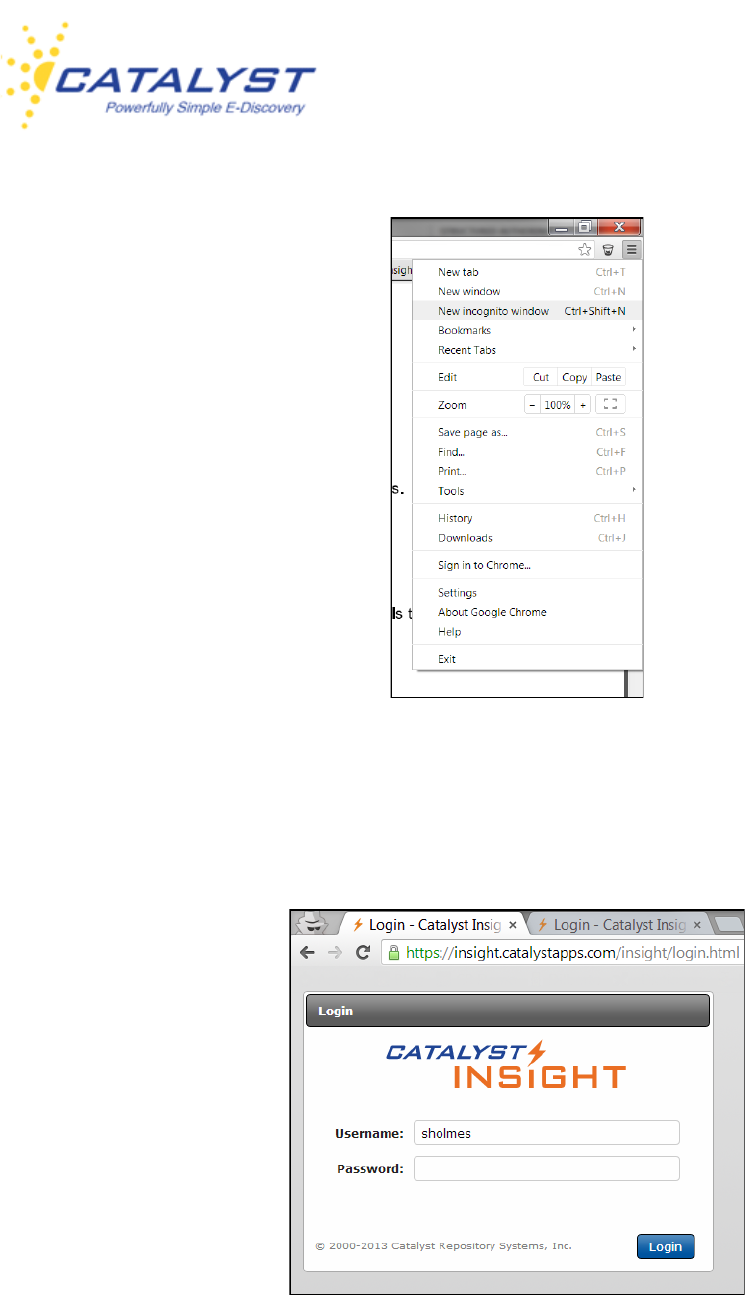
Multiple Chrome Windows
Insight can be opened in two separate Chrome windows at the same time by using the Incognito
Window feature. To do so, select New incognito window from the Settings button. Or use the
keyboard shortcut CTRL+SHIFT+N. Open two of these windows.
Insight User Guide
v.15-10162013 4
You can log in to Insight from within each Incognito window without loss of functionality. You
can combine the two tabs into a single window by dragging one Incognito window into the
other.

Insight User Guide
v.15-10162013 5
Firefox Settings
Before using Insight in Firefox, it is recommended that you have the latest update to Adobe Flash
Player installed on the browser to properly display many of the features of Catalyst Insight. To
determine if your version of Firefox has the latest update, visit the Adobe Flash Player page. If
your version of Firefox requires an update, follow the Adobe prompts to install the latest version
Adobe Flash Player.
Catalyst recommends you clear your cache after a new Insight software upload.
You can also turn off caching when using the Firefox browser. To do this, open an instance of
Firefox and point to the Firefox button at the top of the screen and then select Options from the
menu.
In the Privacy tab, select Never remember history from the History menu. Doing so will
prevent Firefox from storing any temporary Internet files.

Insight User Guide
v.15-10162013 6
If you don’t want to turn off all caching, you can select the clear your recent history link at the
bottom of the Privacy tab prior to reopening records.
You can also customize what Firefox clears or does not save from the Privacy tab.
At History, expand the menu and select Use custom settings for history and clear the
Remember my browsing and download history checkbox and any others that you’d like to
ensure are not saved by Firefox.
You can set up Firefox to clear certain histories when you close all instances of the Firefox
application. Select to Clear history when Firefox closes, and click the Settings button to
designate which histories you’d like to automatically clear upon exit.

Insight User Guide
v.15-10162013 7
Safari Settings
Before using Insight in Safari, it is recommended that you have the latest update to Adobe Flash
Player installed on the browser to properly display many of the features of Catalyst Insight. To
determine if your version of Safari has the latest update, visit the Adobe Flash Player page. If
your version of Safair requires an update, follow the Adobe prompts to install the latest version
Adobe Flash Player.
Catalyst recommends clearing your cache in Safari after each Insight software upload. To empty
the cache, open an instance of Safari, and point to Edit in the main menu, and select Empty
Cache, and then click Empty. Or press CTRL+ALT+E, and then click Empty.
Reloading a page always shows you the latest version of the page, bypassing the cache. To
reload or refresh the page you are in, click the Refresh button in the Safari address field. You can
also use the keyboard shortcut of CTRL+R.
Internet Explorer Browser Settings
Catalyst recommends you clear your browser cache after Insight releases (delete temporary
Internet files). To disable browser caching and/or clear your cache of stored, previously viewed
web pages, open Internet Explorer.
On the Tools menu, click Internet Options. In the General tab, click the Settings button located
in the Browsing History section.

Insight User Guide
v.15-10162013 8
To delete temporary files every time you exit Internet Explorer, under Browsing history in the
General tab, select the Delete browsing history on exit checkbox.
To manually delete temporary files, click Delete and select the Temporary Internet files
checkbox and any other data you want to delete, click Delete to confirm, and select OK.
IE Trusted Sites
We recommend you add your site to your list of Trusted Sites in Internet Explorer to prevent IE
from blocking access to records in your site and allowing your records to open normally. Making
a website a trusted site is the way you tell Internet Explorer that the website is reliable, and you
trust that the files you download from the site will not harm your computer. IE will then allow the
information from the site to be displayed. Without doing this, it could result in information not
displaying or displaying improperly.
To add your site to your list of Trusted Sites, access your Insight case (site) in the Internet
Explorer browser, and click Internet Options in the Tools menu.
Open the Security tab, click Trusted Sites to enable it, and then click the Sites button.

Insight User Guide
v.15-10162013 9
Your site URL will appear in the Add this website to the zone: text box. Click the Add button,
and the URL will move to the Websites text box. Click Close and then OK to close the Internet
Options dialog box.
Close and restart Internet Explorer.
Adobe Settings
Typically, most sites contain images in Adobe Acrobat’s Portable Document Format (PDF). If you
are using Adobe Acrobat or the Adobe Reader to view PDFs, here are some changes to view
PDF files more quickly on our systems.
In your Adobe application, from the Edit menu select Preferences. Highlight Internet under
Categories in the left frame. Under Web Browser Options, select the Allow fast web view
checkbox.
We recommend other settings changes based upon your Adobe version.
Getting Started
To log in to Catalyst Insight, go to the Catalyst website: www.catalystsecure.com. In the top of the
page, click Login and then Login to Insight.
Acrobat X and
XI
No other settings suggestions.
Version 9.0 Make sure the Allow speculative downloading in the
background checkbox is selected and click OK.
Pre 9 versions If you are using a version prior to 9.0, make sure the Allow
speculative downloading in the background checkbox is not
selected.

Insight User Guide
v.15-10162013 10
You will be prompted for your Username and Password.
Once you have logged in, you will either be taken to your site, or if you have access to more than
one site, you will be taken to a list of your sites.
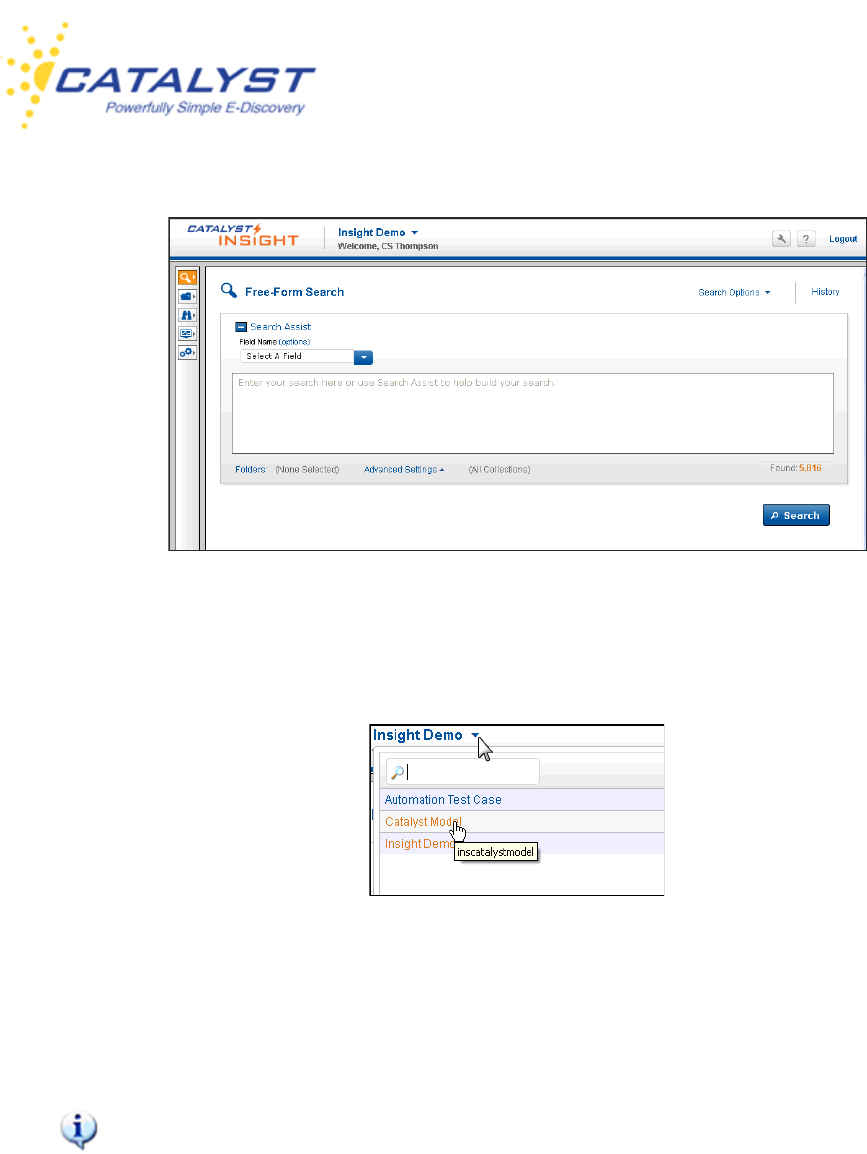
After you select the case, you will enter the site. You will see your name and the site name (Case
Name) at the top of the screen, next to the Catalyst Insight logo.
Insight User Guide
v.15-10162013 11
The Case Name is a menu. If you have rights to more than one case, click the name of the case
you are in, and switch cases by selecting the case in the list:
Navigating in Insight
You will see certain buttons and options from every screen in Insight, including your name as well
as the Case Name, the Settings and Support buttons, and the Logout link.
Remember your case name, so you will be able to quickly identify the site if you need to
contact Catalyst Support. This will help the support team more quickly resolve your issue.
Global Navigation
The buttons on the left side of the screen navigate the site. The buttons you see will take you to
the areas of the site to which you’ve been given access.
Insight User Guide
v.15-10162013 12
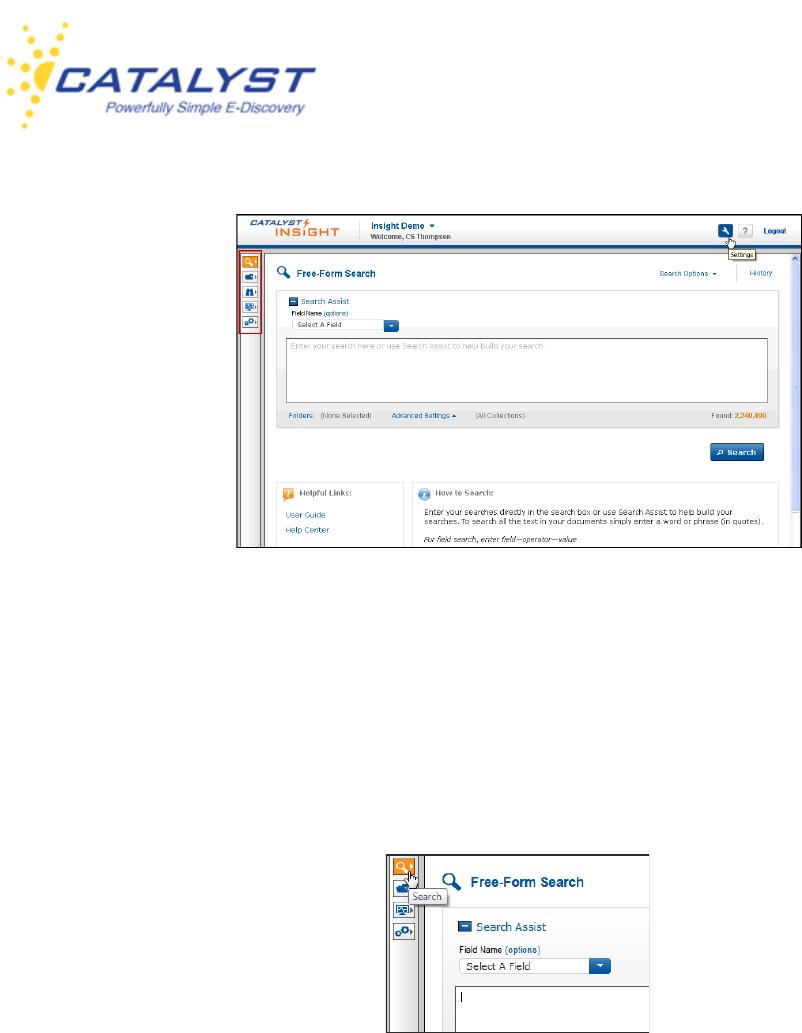
Point to a button in the interface to see the tool tip associated with it. The left navigation bar takes
you to different sections of the site, and the buttons you see will be based on the permissions you
have. For example, you may have access to Search, Folders, Review Projects, Monitors, and
Administration.
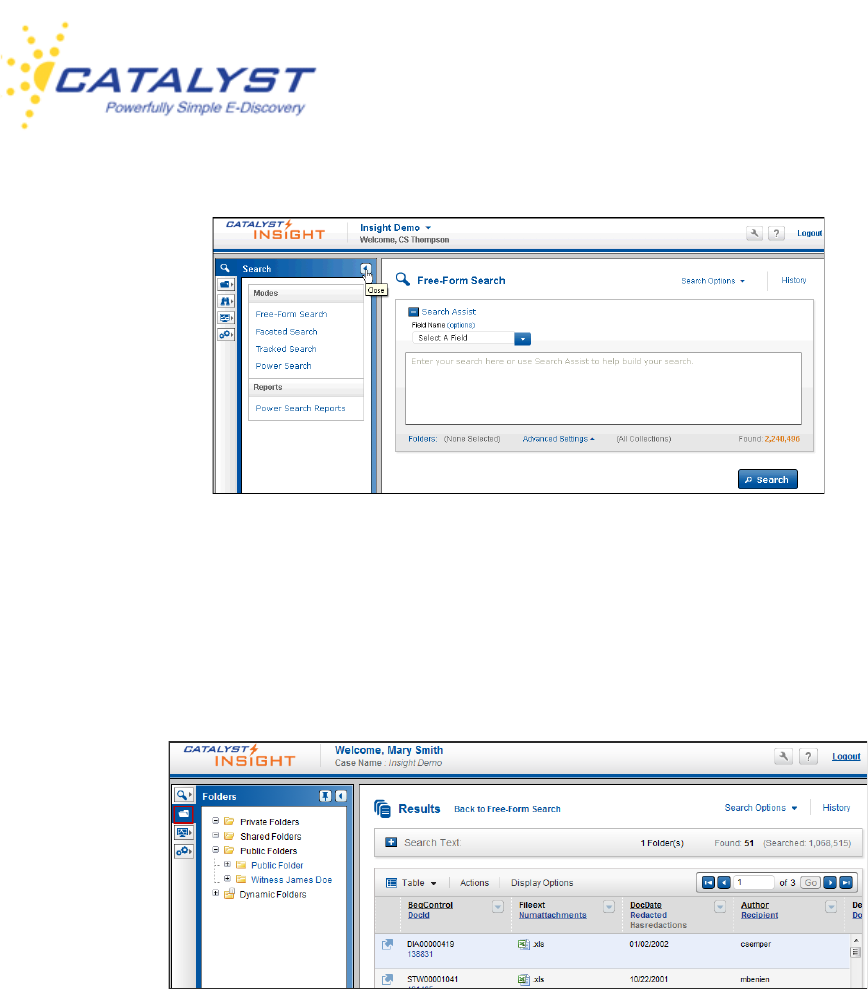
Click the Search button to show the Search modes.
After selecting your mode, you can use the Close button (left triangle) to minimize the Search
navigation frame and view your selected mode in full screen.
Insight User Guide
v.15-10162013 13
Clicking the Folders button takes you to the different types of folders available to you on your
site. Some folders are set up by Catalyst or the site administrator, and some are set up by users
of the site. Most users have permissions to Private, Shared, Public and Dynamic Folders.
Click the Plus sign (+) button next to a folder to expand it and see the sub-folders.
Depending on your permissions, you may not have rights to any folders, or you may see folders
in addition to the ones in the above image.
Click the Review Projects (binoculars) button to access your documents if you are a reviewer. If
you are a review administrator on the site, you will be able to manage your projects by clicking
this button as well.

Insight User Guide
v.15-10162013 14
Clicking the Monitors button allows you to view information about and the results of actions
taken in Insight. Reports, downloads, and other job information can be found here.
Most users can monitor only their actions, but administrators can access all user actions
as well as non-indexed documents.
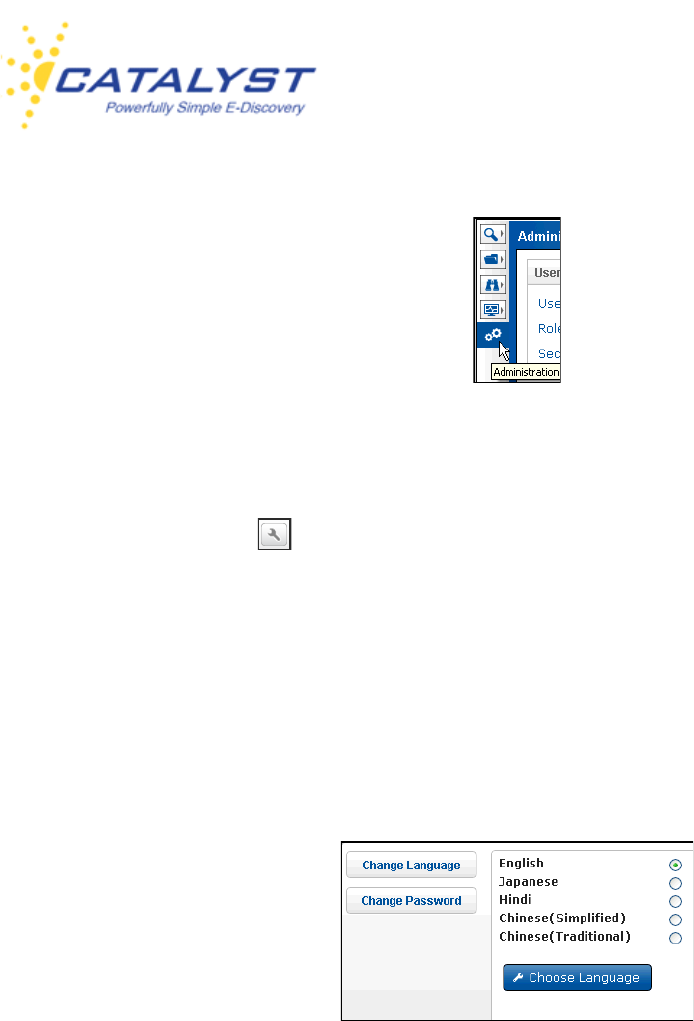
Click the Administration button to access the administrative features in Insight. If you are not an
administrator, you may not see the button.
Insight User Guide
v.15-10162013 15
Insight Settings and Support
Settings
The Settings button gives you access to your user settings. In this screen, you can change
the language of the user interface and change your password.
Change Language
Click the Change Language button and select the appropriate option. Your choices other than
English are Japanese, Hindi and Chinese, either simplified or traditional. Clicking Choose
Language changes the words on the interface into the selected language.
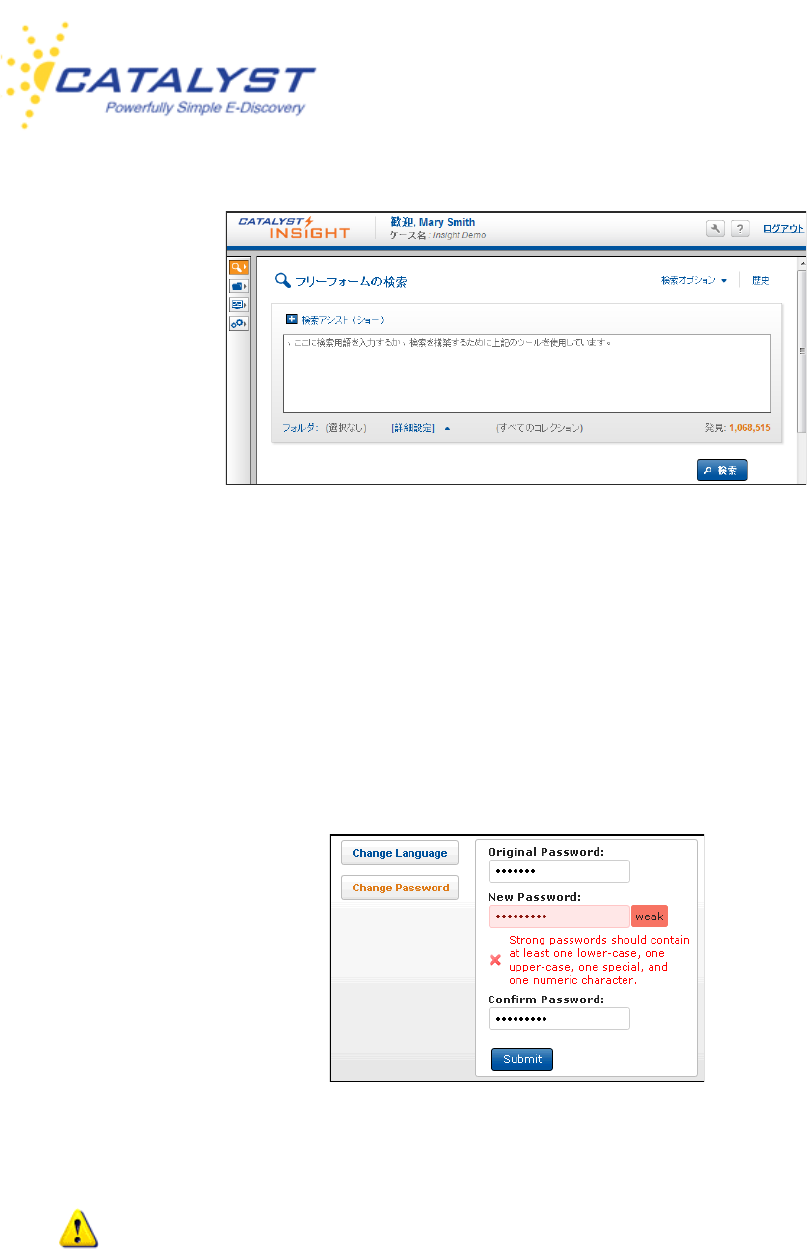
All menus and options are now displayed in this language.
Insight User Guide
v.15-10162013 16
To return it to English, follow the same steps.
Change Password
You can also change your password using the Settings button. Click Change Password and
enter the original password and the new one. The system will tell you if you have selected a weak
or a secure password. You must create a secure password between 8-24 characters, and it must
contain at least one uppercase, one lowercase, one special and one numeric character.
Confirm the new password, and then click Change Password to complete the change.
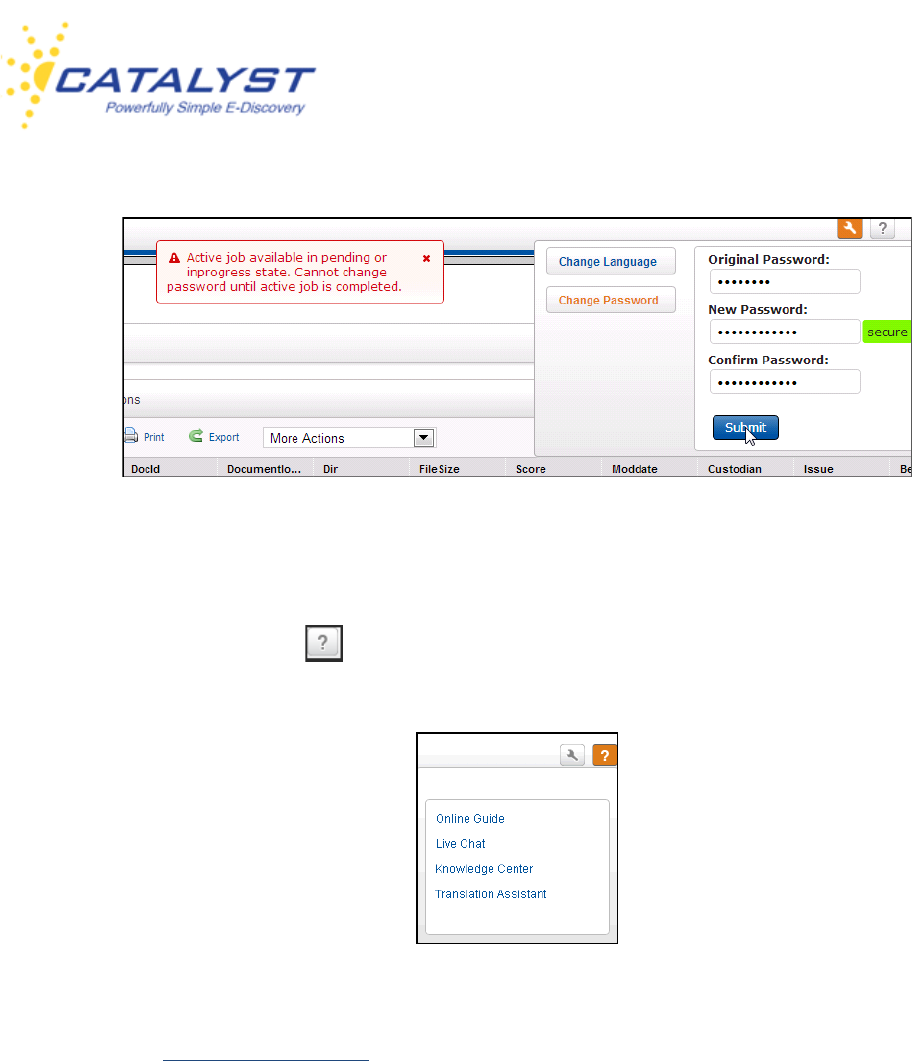
If you have active jobs running, such as batch printing documents, bulk updating, etc.,
you will not be able to change your password until the job is complete.
Insight User Guide
v.15-10162013 17
Help and Support
Click the Support button to access the Help menu.
Open the Online User Guide or access printable PDFs and quick guides at Online Guide.
Access the Catalyst Support Site by clicking Knowledge Center. This site provides users and
administrators with helpful information about Catalyst's products, services and policies. You will
find training videos, manuals, and other useful information, such as FAQs and notifications of
product releases.
Click Live Chat Support from the Help menu to start a conversation with the Catalyst Support
department. Enter your support needs into the Chat box and a technician will respond. If your
Insight User Guide
v.15-10162013 18
request is during non-business hours, submit the request and it will be routed to someone on
staff. See our Support Policy for more information.
Catalyst’s Technical Support is also available and can be reached 24 hours a day, 7 days a week
at 303-824-0911 or email Support at: support@catalystsecure.com.
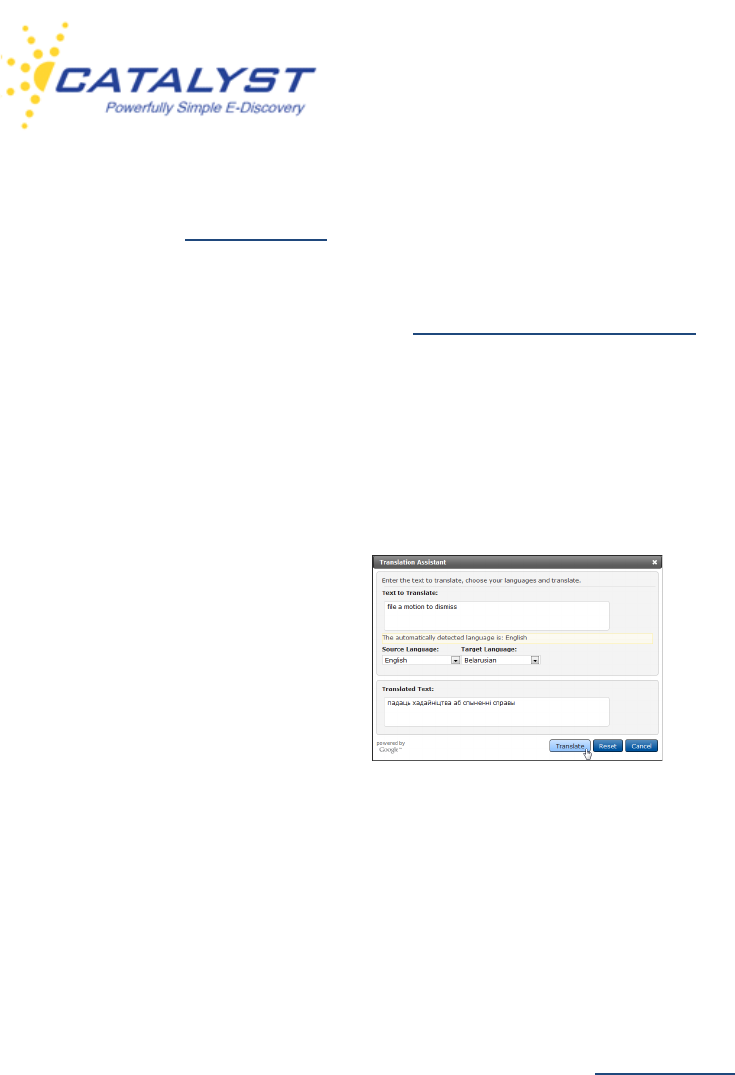
Catalyst Insight allows you to translate words or phrases (usually used for searching purposes)
with automatic language detection, and it supports 54 languages.
Click the Translation Assistant link in the Help menu.
Enter the text you wish to translate in the Text to Translate box. If you don’t select a Source
Language, the application will attempt to identify the language used and automatically translate
the phrase into English. Select the Target Language and then click the Translate button. Upon
successful translation, the text will display. If you don’t want to use the automatic language
detection, select your Source and Target languages in the lists provided.
To search a translated word or phrase, highlight it, right-click and copy the text. Then you can
paste it into the Free-Form Search box. Please refer to Insight Search for detailed information
about searching in Insight.
Insight User Guide
v.15-10162013 19
Results
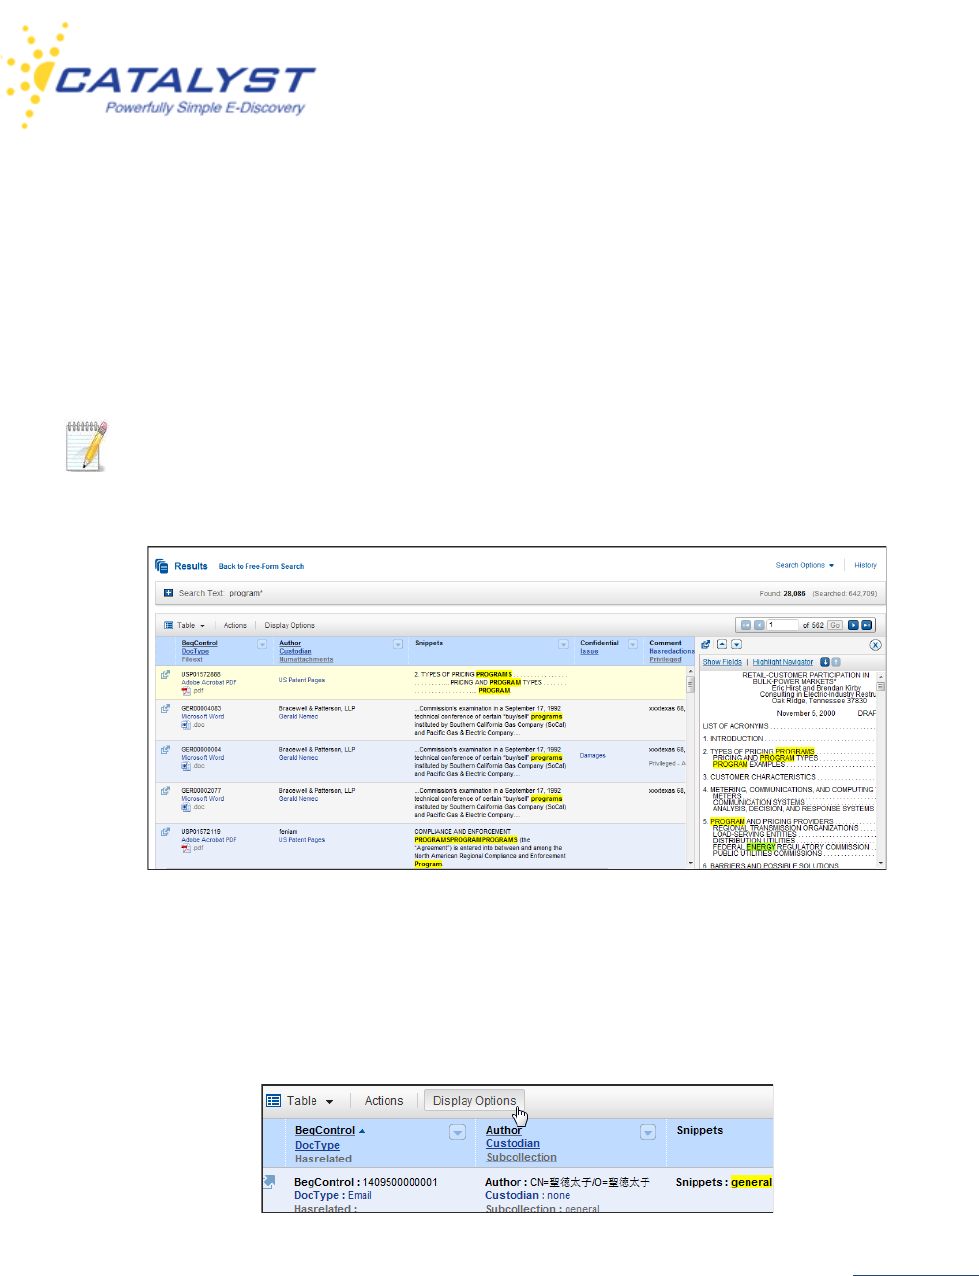
When you run a valid search or open a folder, the Results page displays. The Results page is
the central location for document activities. It provides access to the documents found. It also
shows your search query and the total number of documents your search found. The default
display for the document results is the Table (column and row) view shown here.
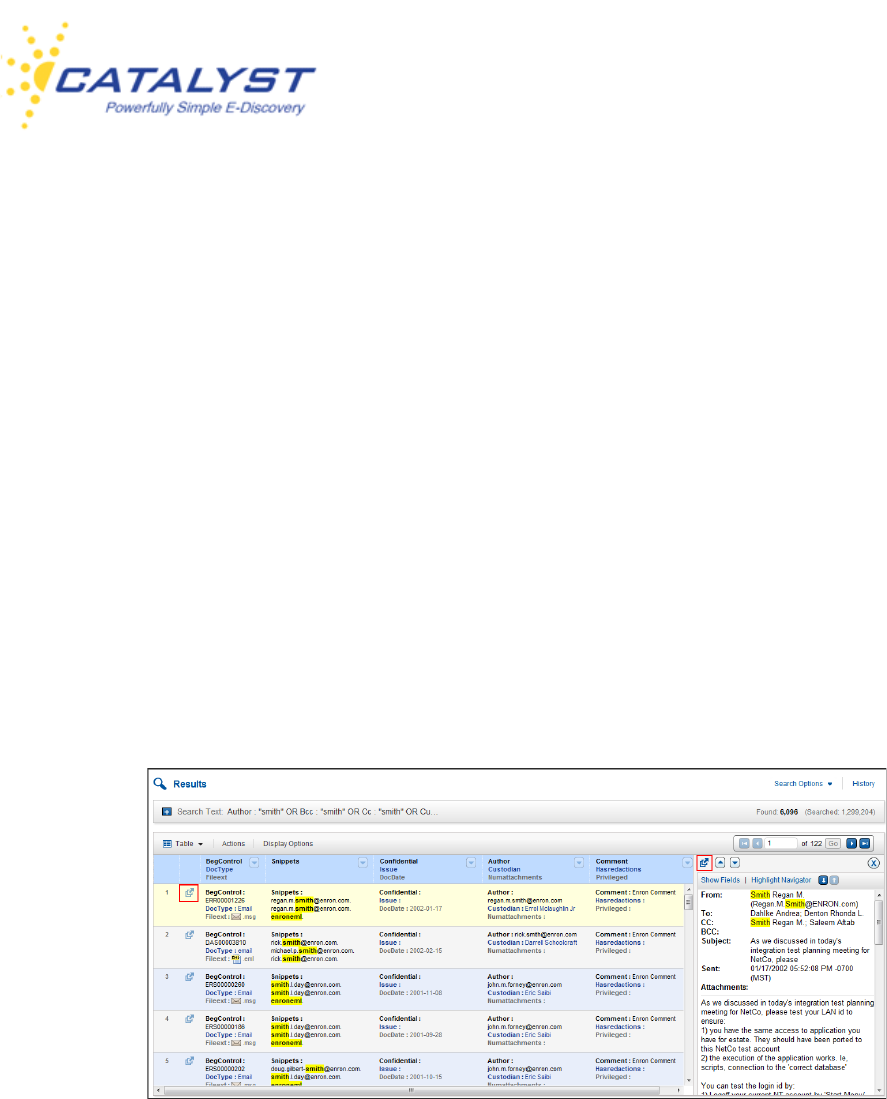
This Results page below shows the document preview enabled at the right of the page.
You’ll access your documents or preview them in the Table view, and you may have more than
one layout (displays) at Display Options. You’ll also be able to establish your sort order and the
number of records you’d like to appear on each page.
If you have appropriate rights, you can create and save your own displays. Refer to Edit Displays
for more details.
Insight User Guide
v.15-10162013 20
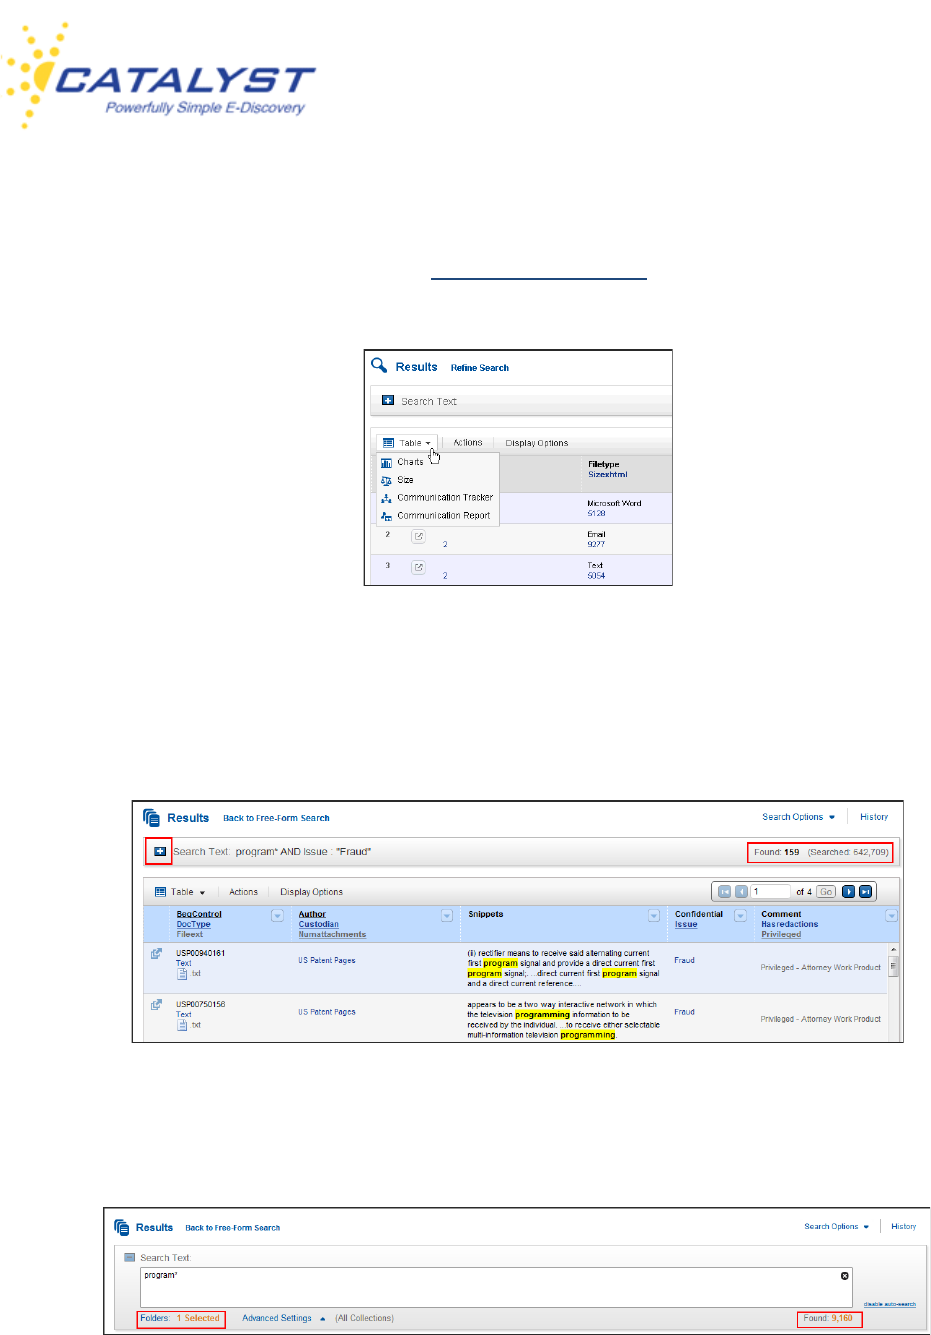
You can retrieve other information and create reports about the documents in your results by
expanding the Table menu and selecting another view: Charts, Size, Communication Tracker,
and Communication Report. Refer to Other Results Options for more information.
Number of Documents Found
The Results page lists the number of documents found and the number of documents searched
against. Your search query is also listed. To edit it, click the Search Text Plus (+) button.
If you’ve opened or searched a folder, you’ll see the number of folders searched and the number
of documents found.
Insight User Guide
v.15-10162013 21
Table View
The Results page can display 10, 20, 50 or 100 documents per page in the Table view (select
the number of documents per page in Display Options). Use the navigation buttons to go to
other pages of results. Enter a number and click Go or press ENTER on your keyboard to go to a
specific page; use the left and right arrow buttons to go forward or back one page. The double
arrow buttons will take you to the first or last page of documents.
You can also leave the page number set to the page you are in and click the Go button to refresh
the current page of documents.
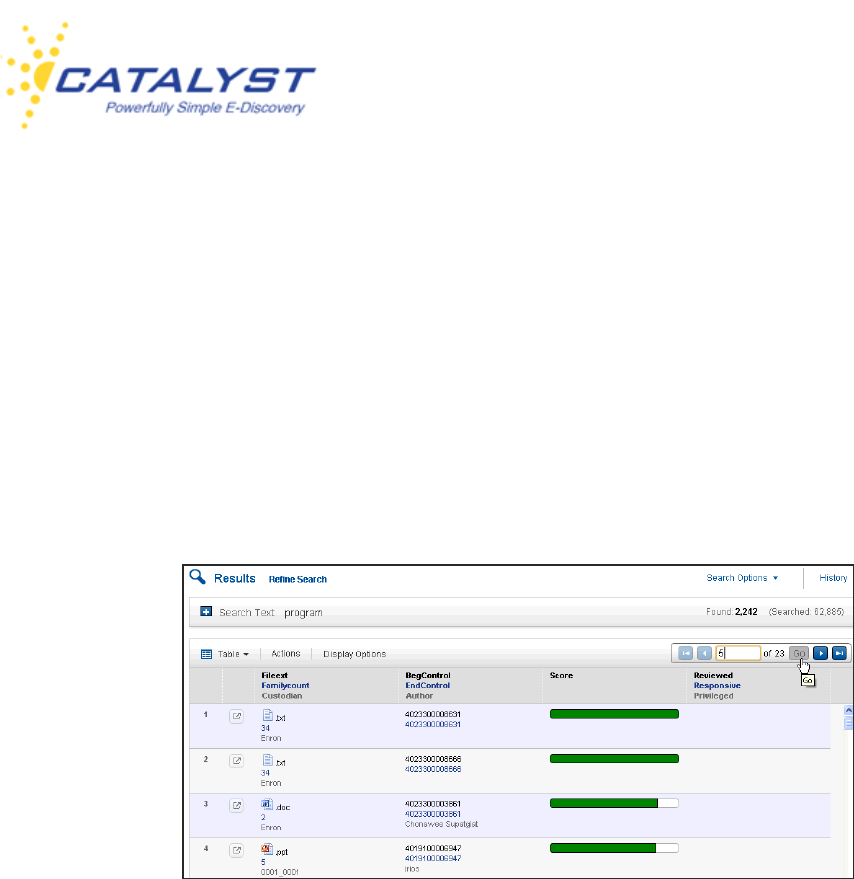
Score
The Insight default sort order for documents displayed in the Results page is Score (relevance).
If the Score field is displayed in a column of your Results page, you will see an indicator to let
you know how the search engine scores or ranks the documents. The score is determined using
a term frequency-inverse document frequency (TF-IDF) algorithm. Term frequency (TF) takes
into account the number of times a term appears in a document, and this number is normalized
to account for the size of the document. Inverse document frequency (IDF) provides a
measurement of how rich the document content is. Each time a search is run in Insight, the TF-
IDF algorithm calculates the number of documents in the database, the frequency in which the
search terms appear in the database, and the frequency in which the search terms appear in the
Insight User Guide
v.15-10162013 22
document. This document score or ranking is displayed when a Results page contains the
Score column; the longer the green bar, the higher the document is ranked.
When your documents are sorted by Score, the document with the highest score based upon the
algorithm is displayed first with the lowest scored document last. You cannot reverse the order to
show the lowest scored document first. You also cannot continue sorting on other fields. You can
select other fields to sort your documents by rather than Score in the Display Options.
Columns
When in the Table view of the Results page, your documents are displayed with column
headers, which are fields associated with your documents. The corresponding fielded information
appears in the document row, if available, and the font color of the column header matches the
font color of the fielded information in the document row. If your display is set up to show the
column header in each row, you’ll see this as well as the corresponding data.
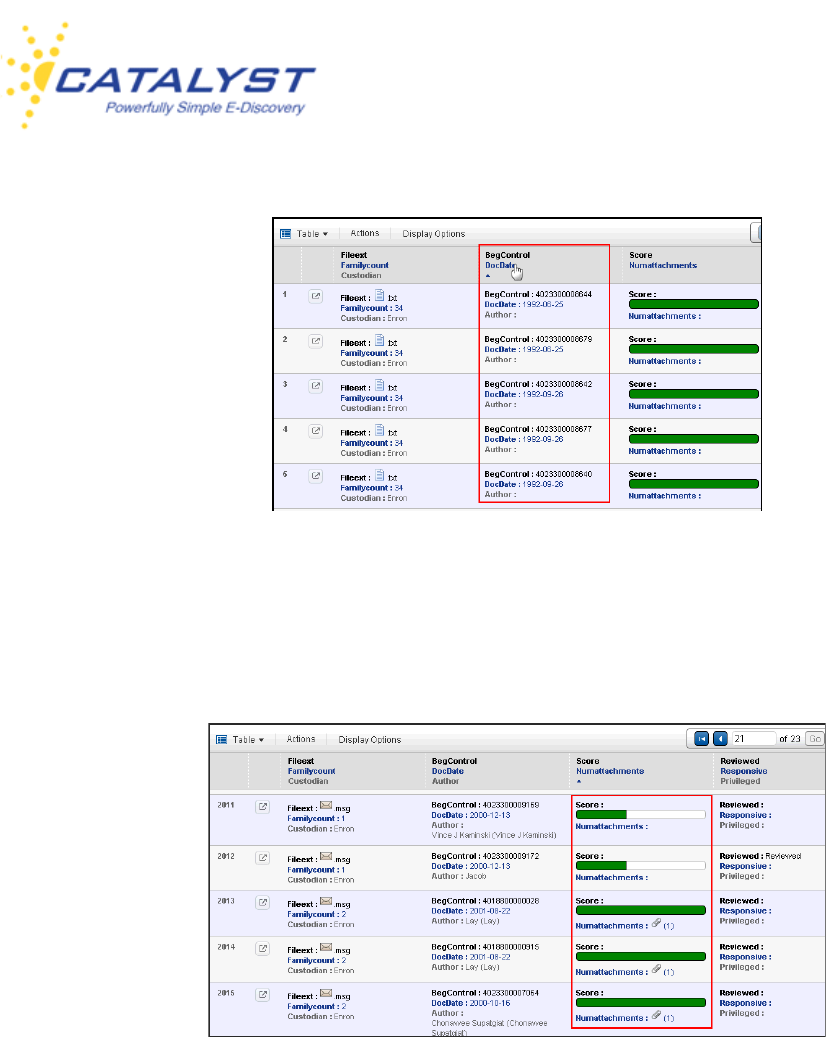
You can quickly sort the order of your documents by clicking certain column headers. Point to the
column header. A tool tip will let you know if you can sort your documents by that field. In the
below example, clicking the DocDate field reorders the documents based upon ascending date
order (the oldest document will appear first). Clicking DocDate a second time will reorder the
records again, but this time in descending order, so the first document will be the document with
the latest date.
Insight User Guide
v.15-10162013 23
When a numeric field, such as the Numattachments field is not populated, sorting by this field
displays the documents with the null value first when sorted in ascending order or last in
descending order.
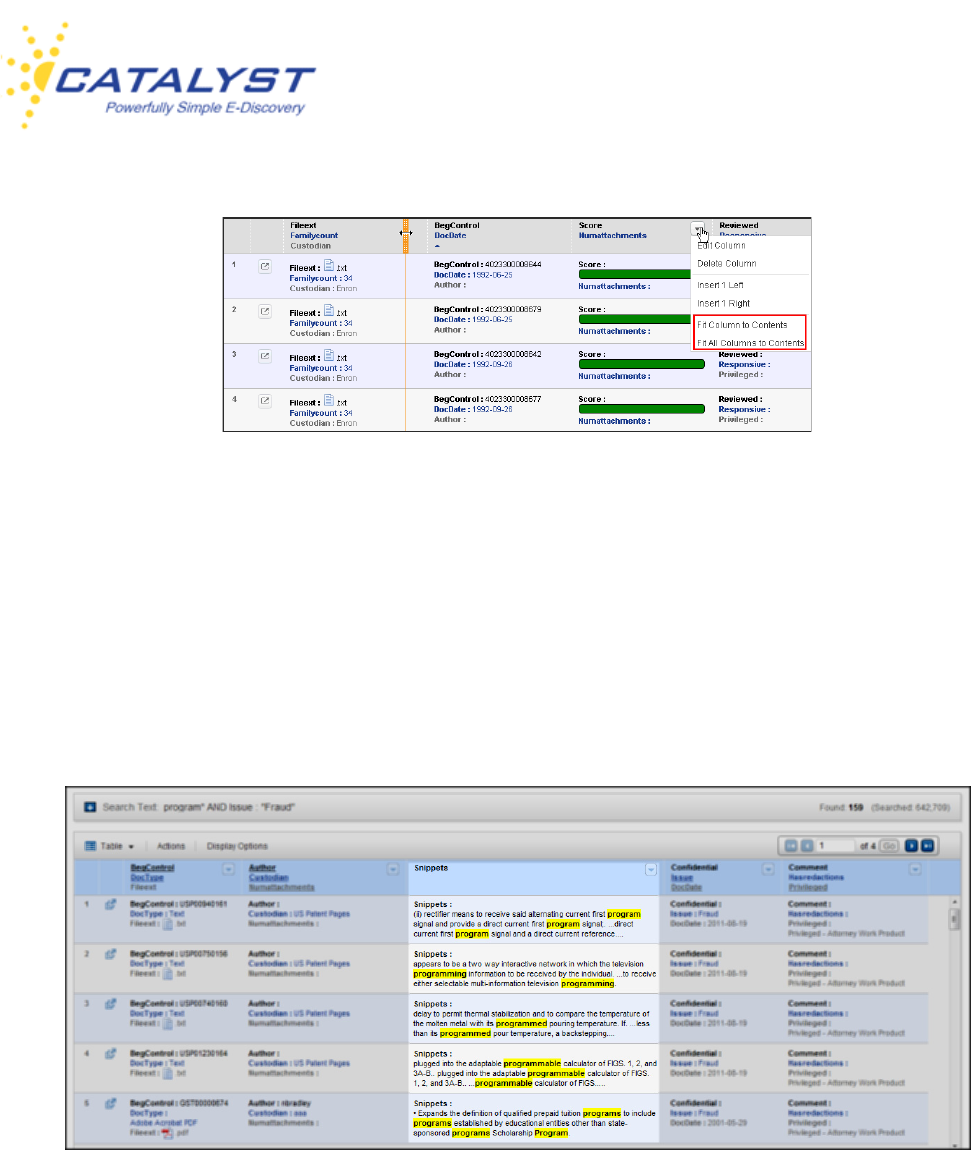
You can fit the contents of a column or all your columns to width. This works like standard text
wrapping for cells. Open the column menu by pointing to right part of the column header and
clicking the Triangle button. You can choose to fit all columns to width or just the column you are
in. You can also point to the border of a column, and when the pointer becomes a double-headed
arrow, drag the pointer to move the split line.
Insight User Guide
v.15-10162013 24
.
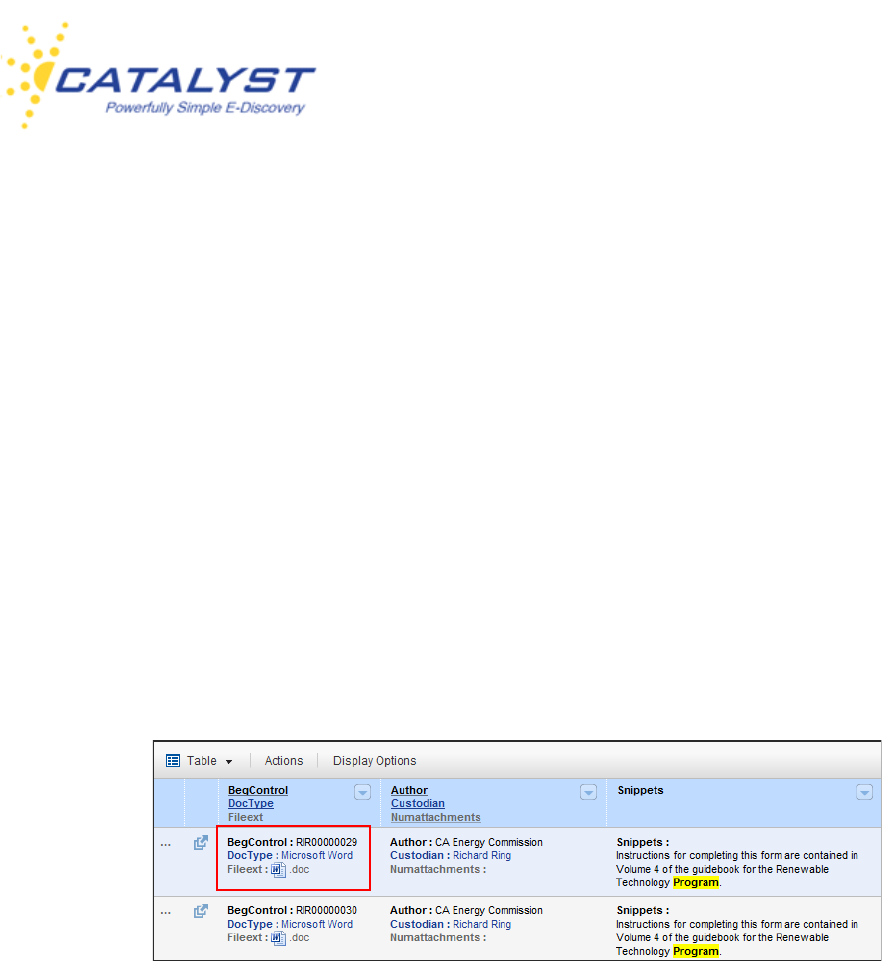
Snippets
Your Results page may contain a Snippets field. (If you have rights, you can also add the
Snippets field to an existing column or create a new display.)
Insight displays snippets of the document text in context with your search terms to provide you
with a general idea of how the word or phrase you’ve searched is used within the text and
highlights these terms within the snippet.
Document Preview
When Results page displays are created, the Enable Document Preview may be enabled,
which allows you to preview the content of a document without opening the document. To
preview a document, click anywhere in the row.
Insight User Guide
v.15-10162013 25
The preview will appear in the right side of the Results page. Any hits will be highlighted. You can
also use the scroll bar to continue through the preview.
Use the Up or Down Triangle buttons to go to the previous document or the next document.
To open the document in the document page, click the Launch Document button. This allows
you to maximize the document and work with any associated forms.
Display Options
If you are a standard user, you may have more than one way to display the your results. You can
also select fields to determine the order of your results and the number of records displayed per
page.
Administrators created one or more default displays for your site. Users can typically
create displays for their own use.
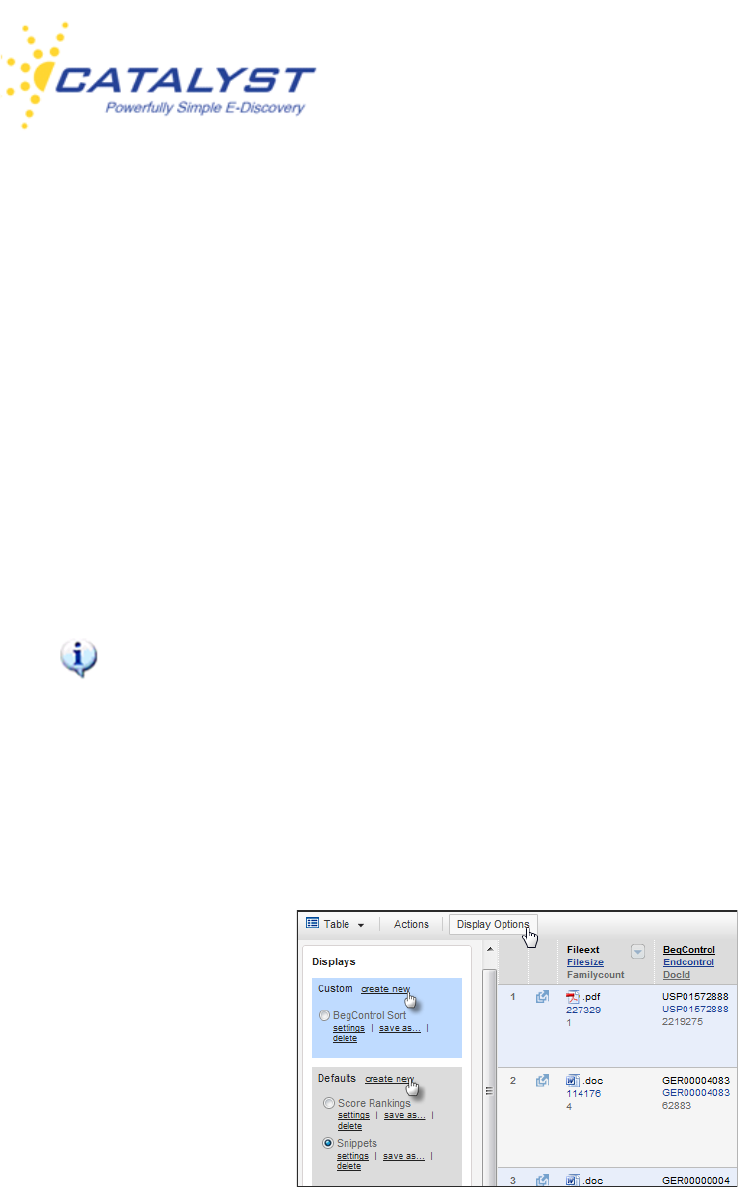
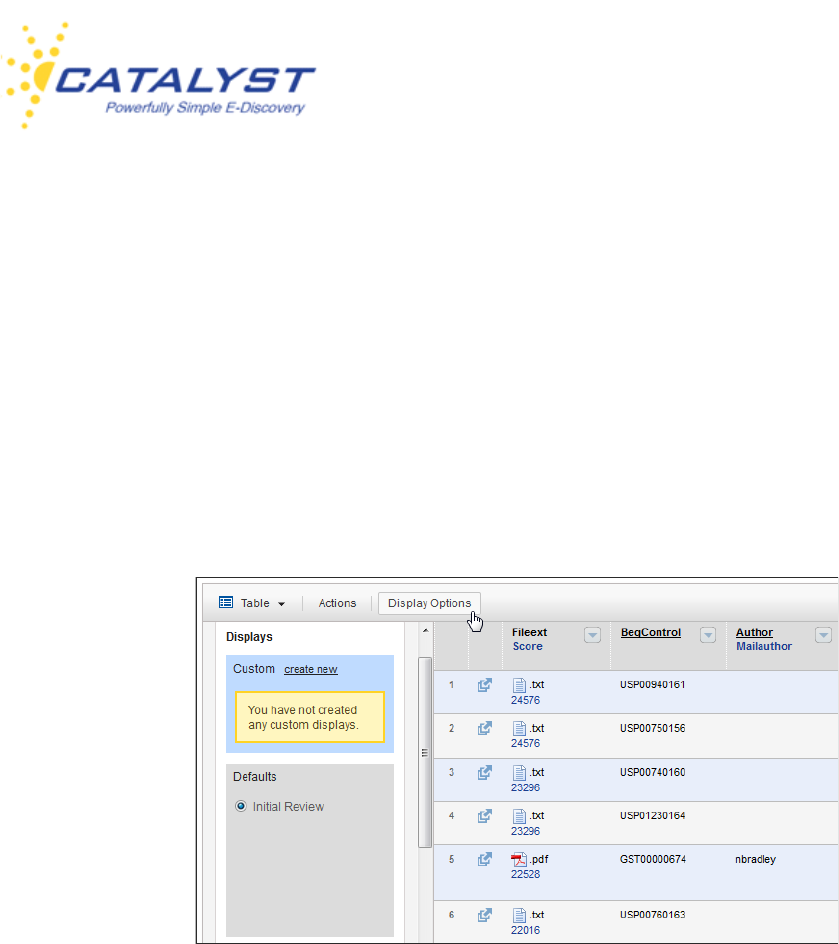
To change your display, click Display Options. Under Defaults, you will see the displays
available for your site. If you have created your own display, you’ll see it listed as an option under
Custom.
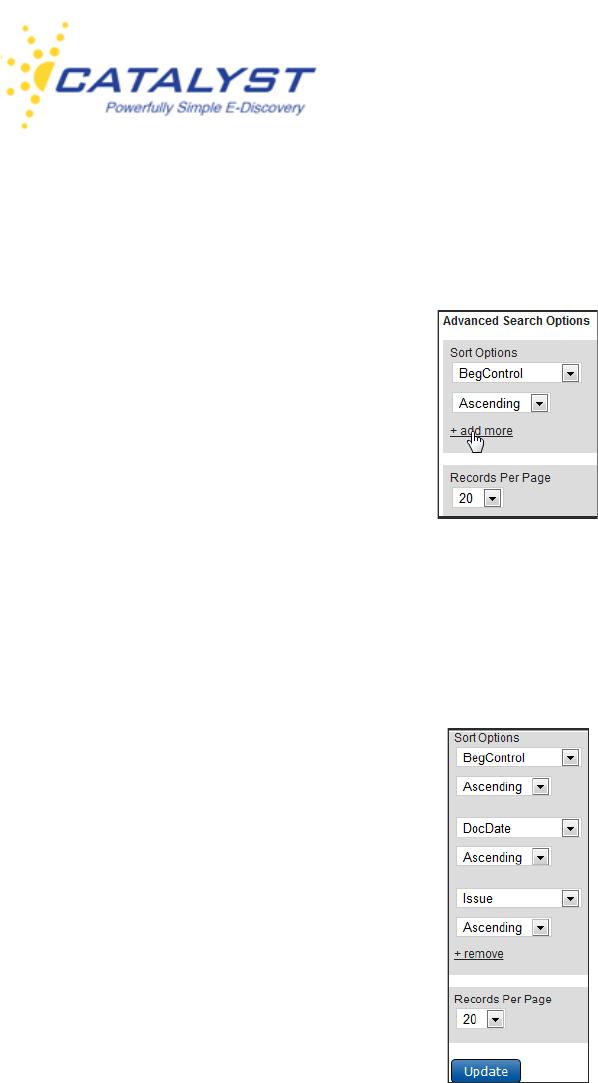
You can also change the way your documents are sorted in your Results page. The Insight
Default Sort Order is Score. Documents sorted by Score cannot be sorted on subsequent
Insight User Guide
v.15-10162013 26
levels. If you choose to sort your results by fields, select the field by expanding the Sort Option
menus and making your selection.
Select Add More if you’d like to sort by subsequent fields. You can select to sort by up to three
fields, and for each field, you can select ascending or descending order. You can also remove or
change a field. Clicking Remove deletes the lowest level.
By default, Insight displays 20 records per page. If you’d like your Results page to display more
or less records, expand the Records per Page menu using the arrow to make your selection.
Documents can be displayed by 10, 20, 50 or 100 records per Results page.
Click Update when you’ve completed your changes. Your Results page changes are saved and
will display your Results page based on your selections until you change them.
Insight User Guide
v.15-10162013 27
Edit Display
If you have Edit Display rights, you can create and edit custom displays to use in the Results
page. You will also be able to edit, reorder, remove and add columns in your custom displays
directly in the Results page.
Users with rights to create custom displays cannot change fields or rearrange the columns in a
Default Display, only in their own custom displays. Administrators have rights to create and edit
Default Displays for the site.
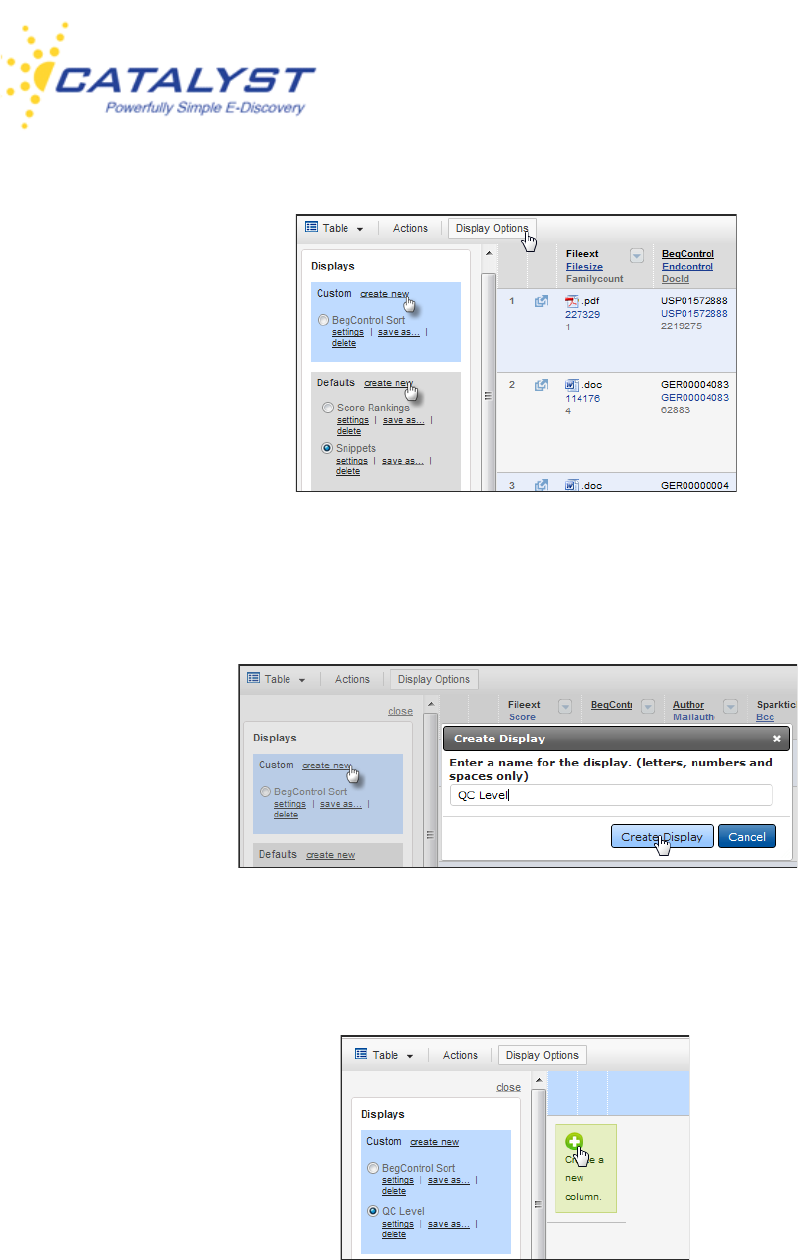
If you have the rights to create a new display, the create new link will be available at Custom.
Administrators who will be creating and editing site-wide displays will see the same options under
Defaults as available in Custom, allowing them to not only create displays for solely their use
but to also create site-wide (Default) displays.
Insight User Guide
v.15-10162013 28
To create a new display, click the create new link, enter a name in the Create Display dialog box
and click the Create Update button
Your new display now appears as the selected option. To start adding columns, click Add a new
column.
Insight User Guide
v.15-10162013 29
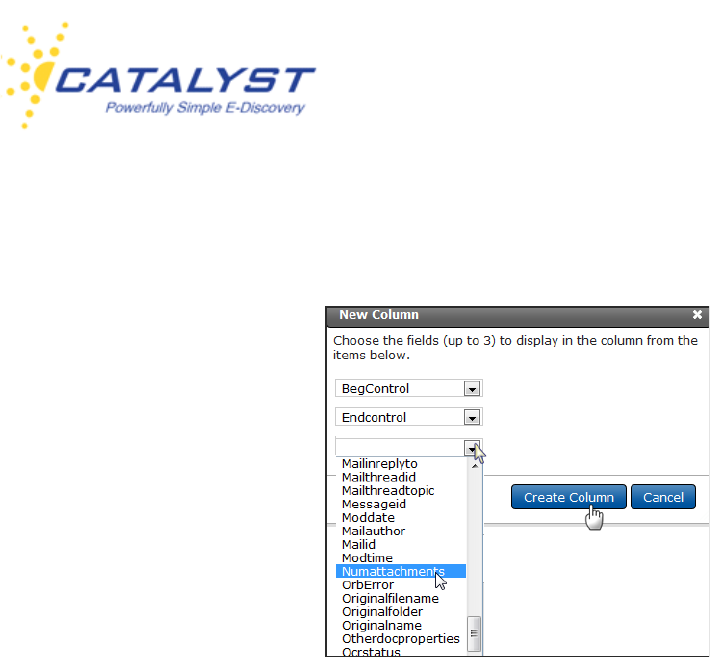
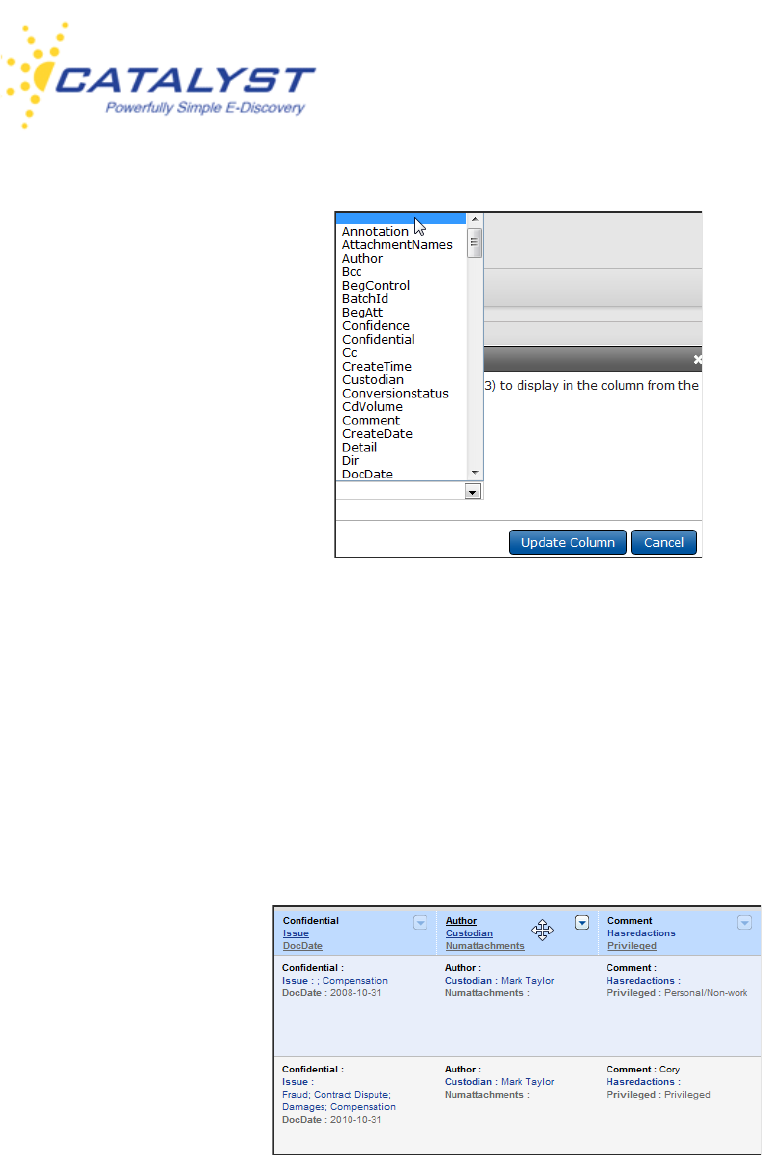
Expand the menus in the New Column dialog box and highlight a field to appear in the column
header. You can add up to three. Then click Create Column.
Your new column appears in your display with the results. You can now add and edit columns,
change fields, rearrange the layout and establish settings for your display.
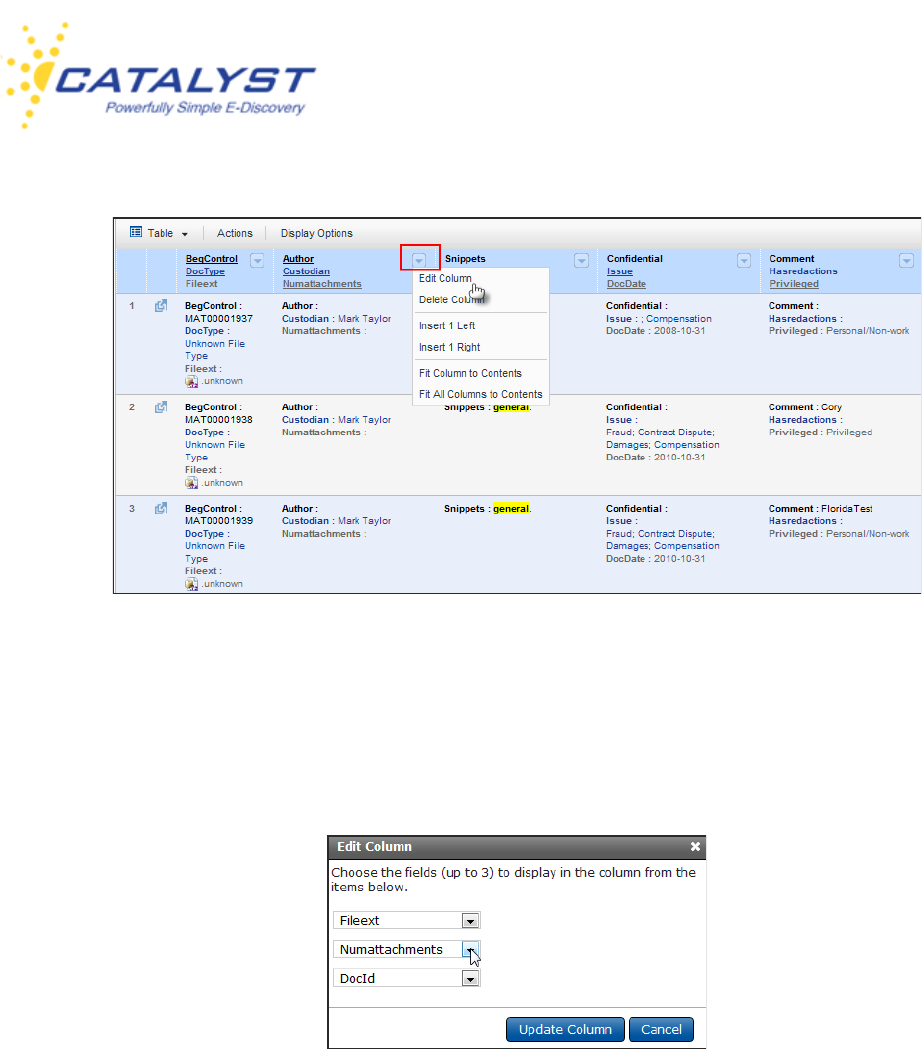
Column Menu
To continue adding columns to your display, click the Column Menu button and select Insert 1
Left or Insert 1 Right. (You can always rearrange columns at any point.) Using either Insert link
opens the New Column dialog box allowing you to choose up to three fields for your new
column.
Insight User Guide
v.15-10162013 30
Continue to add columns in this way as necessary.
To change the fields that appear in a column, click Edit Column in the Column menu
The Edit Column dialog box works like the Add Column dialog box.
If you’d like to remove just one field in a column at a time, select the null value in the drop-down
menu. It is the first entry:
Insight User Guide
v.15-10162013 31
You can delete an entire column using Delete Column in the Column menu and fit the contents
to the column width for this column or all your columns.
Reorder Columns
You can rearrange the order of columns already placed in your display by pointing to the header
of a column you’d like to move. When the pointer becomes a cross, hold down your mouse
button, drag the column to the desired location and release your mouse button.
Other Results Options—Graphing and Charting Results
You can quickly view other information about your results set using the Other Results Options
menu. Expand it to see the options, which allow you to graph file sizes, track communications
and view information about the results.

Insight User Guide
v.15-10162013 32
Charts
The Charts feature graphs your results by number of documents by faceted fields. Select the
Charts option in the Other Results Options menu.
Select the fields by clicking Change Selected Facet and using the checkbox or boxes to develop
the chart using your select faceted fields. You can change the number displayed or the type of
chart using the menus (above image).

Insight User Guide
v.15-10162013 33
Charts—Right-Click Menu
When working with charts in Insight, you can right-click in the chart to open a menu which allows
you to print the chart.
Enable Links is the default setting. This allows you to click any of the links and bring back those
documents in the Results page Table view.
Doughnut and Pie charts can be rotated. Right-click in the chart and select Enable Rotation.
Then drag the chart to rotate it. This can be useful when you are trying to display the categories
more clearly.
You can also separate the sections by selecting Enable Slicing Movement. You can also right-
click in the chart to undo your selections or to change from 3D to 2D.
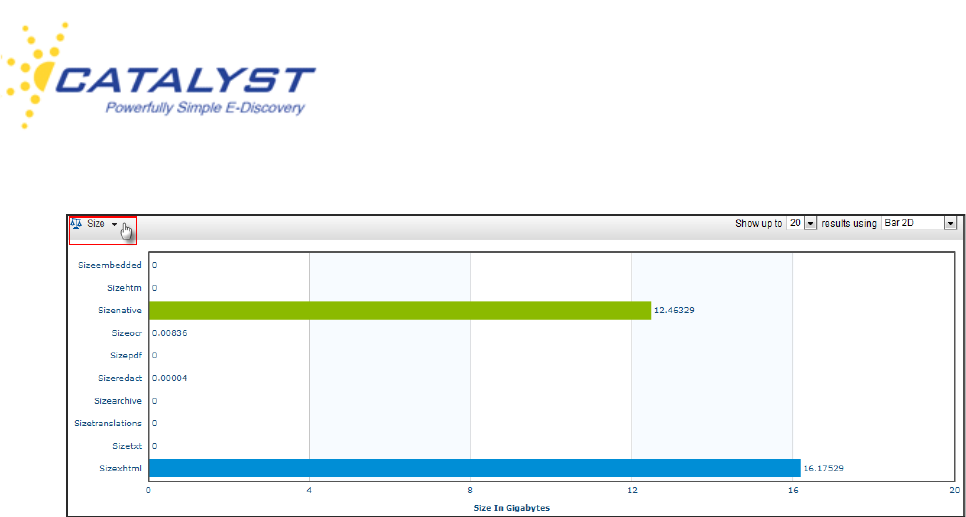
File Sizes
To graph the total sizes of the files of your results, select the Size option in the Other Results
Options menu.
The report is broken down by file types, for example, Text, Embedded, HTM, Native, OCR, and it
graphs the file sizes for the different file types in bytes.
Insight User Guide
v.15-10162013 34
You can change the number of file types displayed or the type of chart using the menus. To print
just the chart and not the entire Web page, right-click in the chart and select Print or Print Chart.
If you chose to use a Doughnut or Pie chart, you can right-click in the chart and select to slice or
rotate the chart.
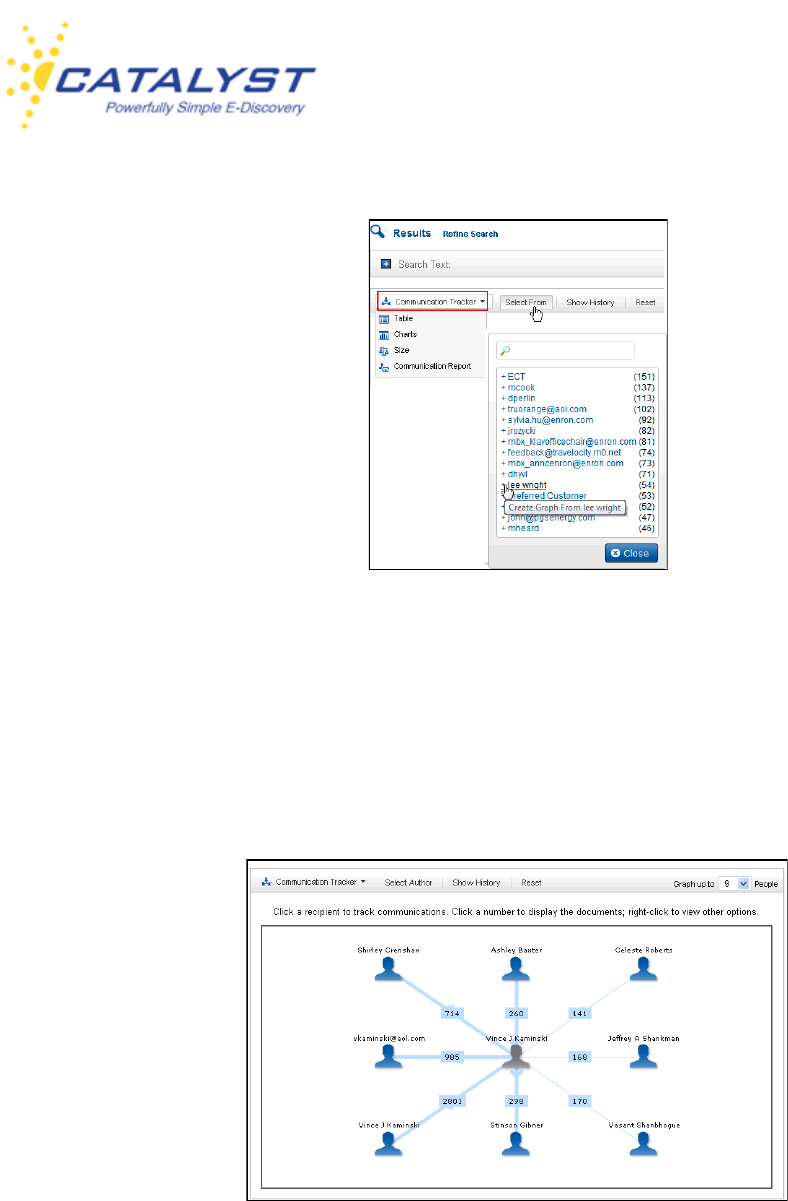
Communication Tracker
Communication Tracker allows you to explore documents that are authored by a particular
person. You can see the names or emails of the people who make up the communications in a
diagram. Then you can quickly go to those documents. This visual representation is a good way
to explore communications between key people. The Communication Tracker is made up of
several fields. The list of Authors is made up of the Author and From fields.The Recipients listed
in your graph contain data from the To, Recipient and CC fields.
Select Communication Tracker from the Other Results Options menu.
Insight User Guide
v.15-10162013 35
Select the name from the list or start typing the name into the text box to find it. The names
appear with a number in parentheses to show you how many documents are to that particular
person. Select the number of people to graph using Graph up to # People. The default is 9 but
you can select a higher or lower number. This number includes the person you’ve chosen to
track.
The top recipients (people the communications went to) are located around your selected sender.
The number in the line box is the number of records to that person. Click that number to bring
back the records in the Results page.

Insight User Guide
v.15-10162013 36
Click a recipient to see the communications from that person. This will put the recipient’s name in
the center of the diagram and then show the communications from that person to others.
Select Show History to see the selections you made so that you can easily go back to your
original author.
Click Reset to clear the display and create an entirely new search.
Communication Report
Quickly access and analyze communications between two people by clicking Communication
Report in the Other Results Options menu.
Expand the Person 1 and Person 2 menus to find the people whose communications you want
to explore.
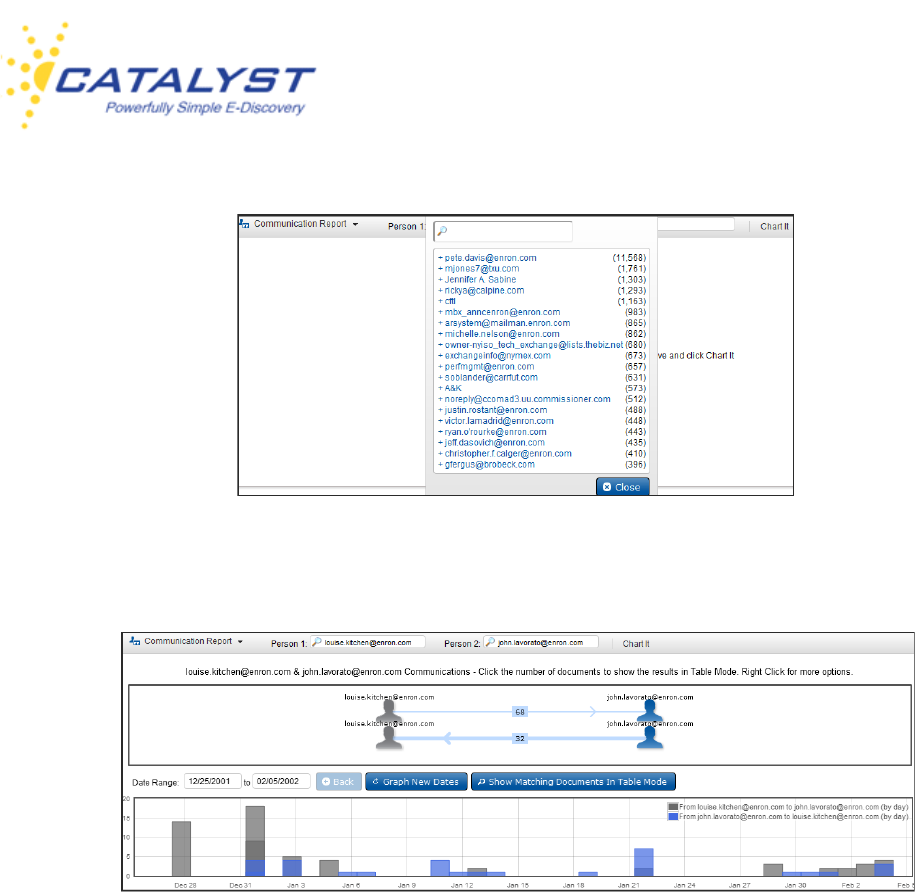
Insight User Guide
v.15-10162013 37
Then click Graph It.
The number of documents going in each direction is provided. Click the number to bring back the
documents in the Results page.
The graph displays a date range of the communications. You can change the date range by
dragging your pointer over your chosen date range, and the new dates will graph automatically.
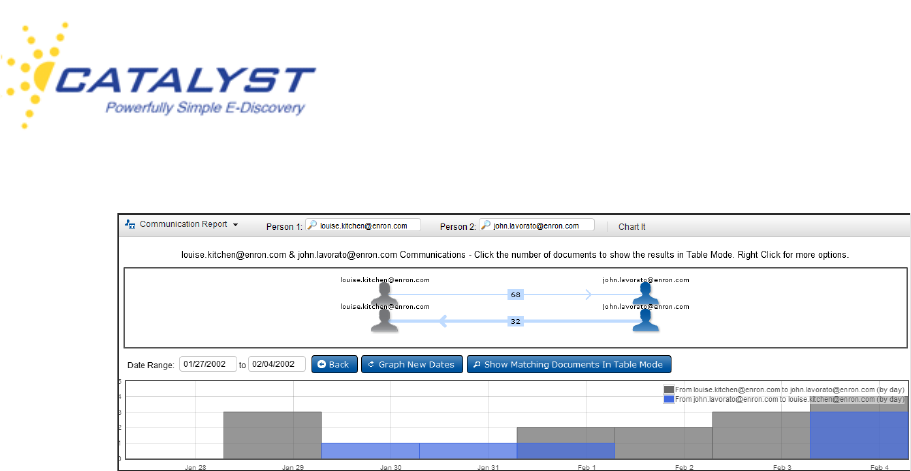
Insight User Guide
v.15-10162013 38
You can display the documents based on the new dates by selecting the Show Matching
Documents in Table Mode button.
If at any time you want to change either the Person 1 or Person 2 values, click the name and
select a different one. Then select Chart It to see the new results.
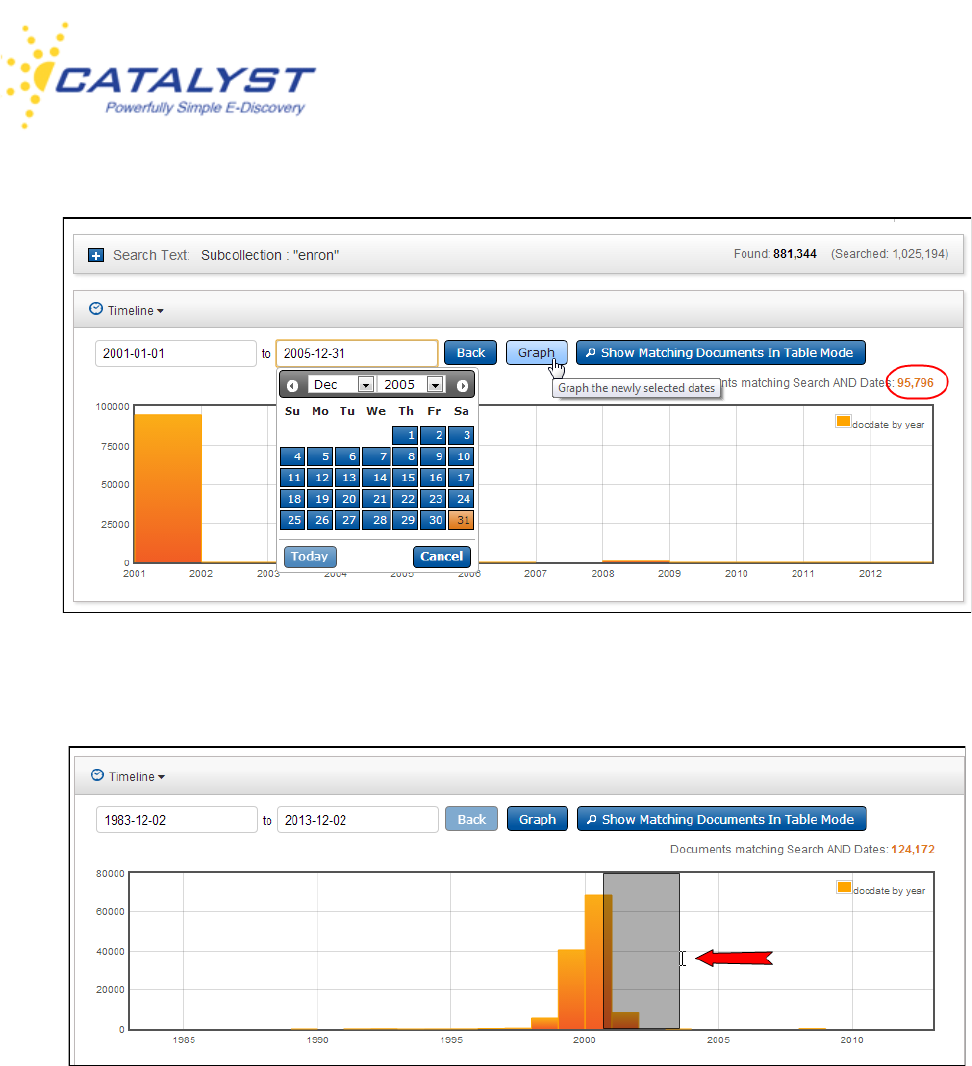
Timeline
Results can be graphed by dates with the Results page Timeline. In the Results page, expand
the Options menu and click Timeline. This gives you a look at the document dates of your
search results. You can change the date range by expanding the Date menus and selecting
different dates. Clicking Graph then updates to your new range and updates the number of
documents that will be returned based upon the new criteria.
Insight User Guide
v.15-10162013 39
To use your pointer to narrow in on date ranges, drag the bar to your chosen width.
The graph will update automatically.

Insight User Guide
v.15-10162013 40
Click Back to go back to the previous graph. You can also display the documents for that search
in the specified date range by clicking Show Matching Documents in Table Mode.
Results Page Search Text
If you’ve reached the Results page by running a search, the Results page allows you to view
and change the search without going back to the Search page. Your search will be populated in
the Search Text field on the Results page. If you’ve opened a folder to access your results, the
Search Text field will be empty, but you can use the Search Text field to focus a search within
your folder results.
Expand the Search Text field using the Plus [+] button. You can change the search in the
Search box or use the Search Assist to add clauses and edit the search.
Insight User Guide
v.15-10162013 41
Click the Search button or press the ENTER key on your keyboard to execute your search and
bring back new results.
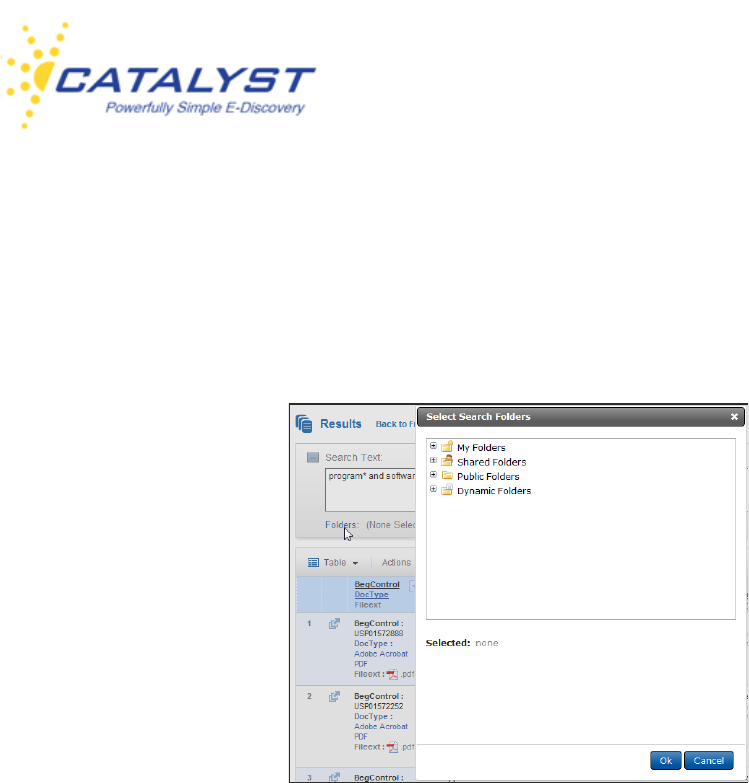
You can also change or limit your search query to a folder or folders. Click the Folders link to
open the Saved Search Folders dialog box, which allows you to select a folder to search.
You can also change your settings or collections.
Insight User Guide
v.15-10162013 42
Documents, Forms and Fields
Whether you’ve run a valid search or opened a Dynamic or Static Folder or you are working in
the Review Projects module, you will access your documents in the Results page at the Table
view.
The Preview mode is enabled in the Results page in the below example. Clicking in the
document row displays a preview of the document on the right. You can scroll through the entire
document viewing it in this Preview mode and navigate and view other documents using the
Preview by clicking the Up and Down Arrow buttons.
To review the complete record—document text and fielded information—click the Launch
Document button located in the first column of the document row. This opens the document in a
new Web page, which allows you to work in the document and navigate to other documents in
your Results set directly through this new page. When Preview is available, you can also click
the Launch Document button in the Preview pane.
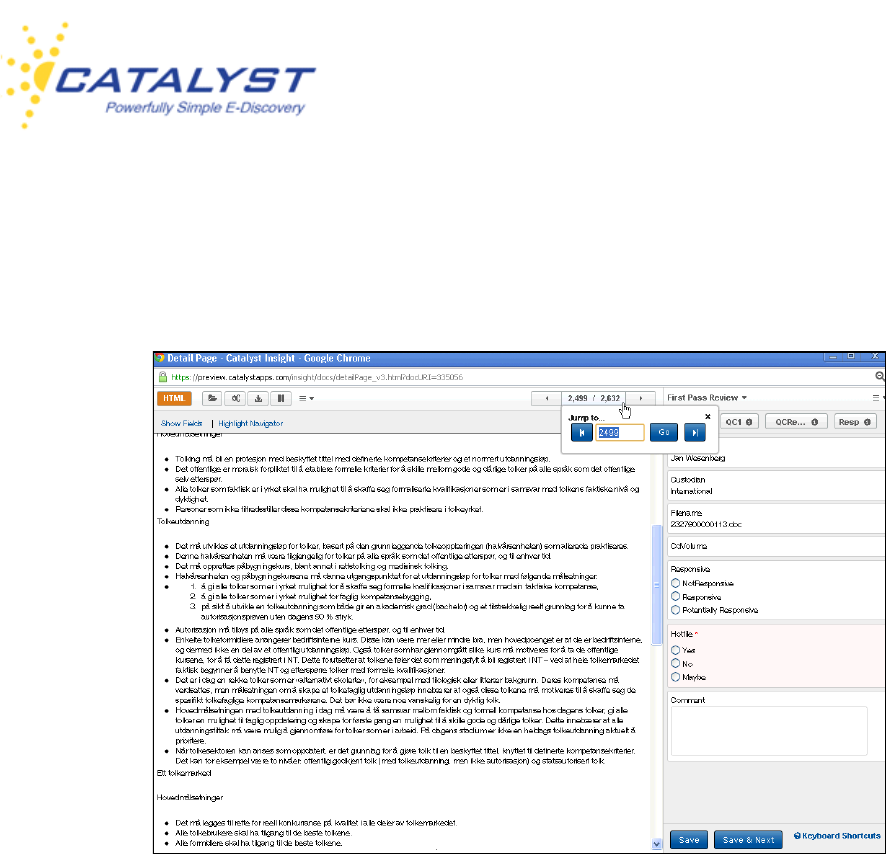
Document Interface
In an opened document, the body of the document is displayed in the left frame, and the
document form, containing the coding and metadata fields, is at the right.
Insight User Guide
v.15-10162013 43
Use the navigation buttons at the top right of the document frame to page to the next or previous
record. Click the XX/XX area to open the Jump to menu. Enter a specific number and click Go to
open that record.
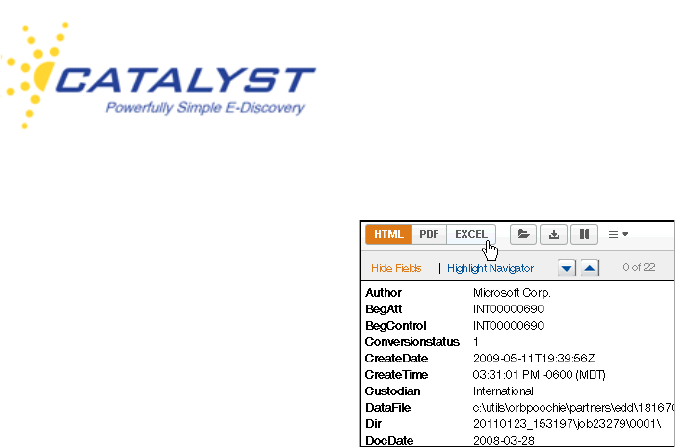
Every record has a quick-loading HTML preview of the content of the record. The button to
display this preview may be named HTML, Text or Preview on your site—for documentation
purposes, this button will be referred to as HTML henceforth. The Show Fields link is available
in the preview of your document. Clicking the Show Fields link displays the file’s metadata
information in the document pane. The fields will display in each record you open until you click
Hide Fields, as this is a sticky setting.
Apply coding changes to appropriate fields in the form, and use Save or Save & Next to capture
your changes. Save & Next will save the record you are in and move you to the next record in
the Results set.
Insight User Guide
v.15-10162013 44
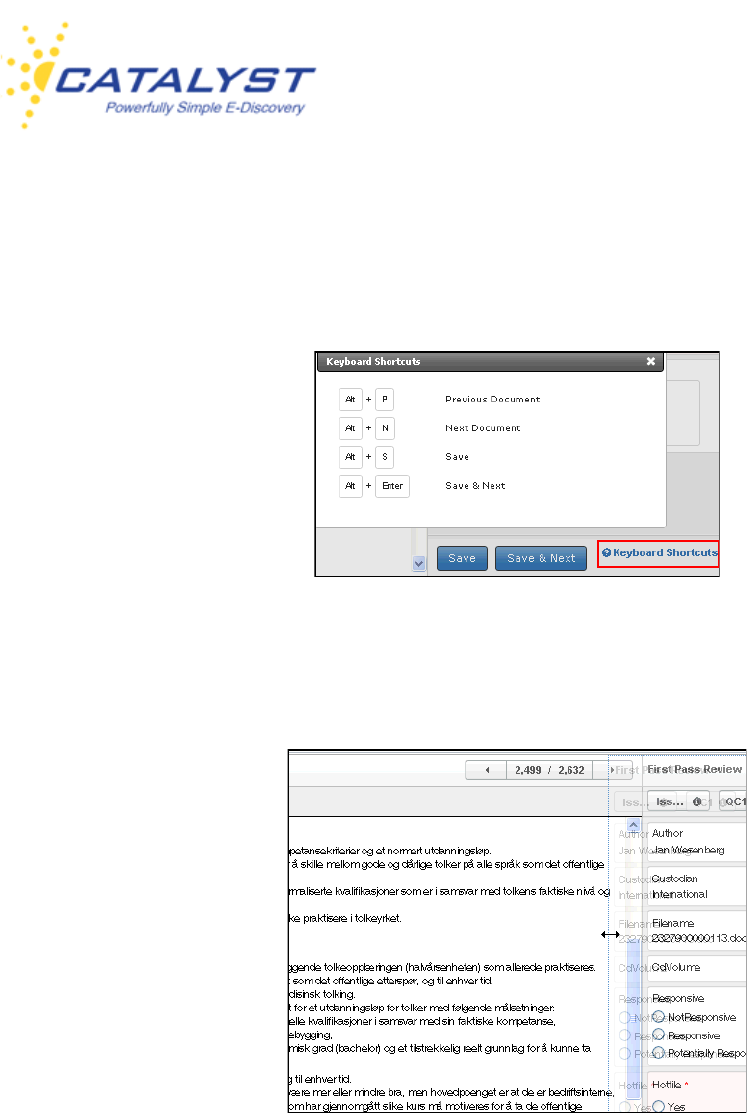
If you prefer to use your keyboard, there are also some shortcuts built in for navigating through
your documents and saving the record you are viewing using keys rather than your mouse. Click
Keyboard Shortcuts to see Insight’s built-in shortcut keys.
To enlarge or narrow the form, point to the split line. When the pointer becomes a double-headed
arrow, drag the pointer to move the split line.
Highlights
Insight displays search hit highlighting (Search Terms) and static highlighting (Key Terms). If you
search the text of the documents, the search terms will be highlighted in the document when you
are viewing the HTML preview of the record. If you’ve searched the metadata, such as Anytext
or the DocType field, highlighting will show up in the metadata information when you click Show

Insight User Guide
v.15-10162013 45
Fields in the HTML view. In addition to search hit highlights, your site administrator may
designate certain words to be highlighted each time these words appear in documents on your
site. These highlighted words or phrases are also viewable in the HTML preview of the record.
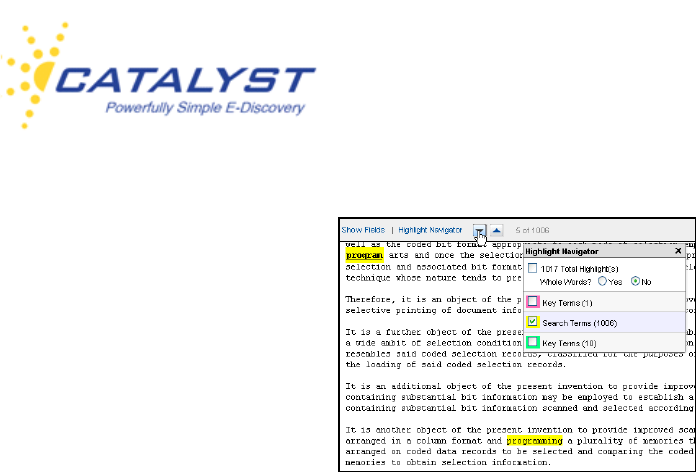
Click the Highlight Navigator link to open the Highlight Navigator dialog box. If the document
contains both search hits and static hits, the Highlight Navigator shows you the number of each
and allows you to display and navigate to just the search terms or the key terms hits or all the hits
using the checkboxes.
The Highlight Navigator includes an option for highlighting exact characters or entire words. It is
initially defaulted to the Yes option at Whole Words?. When the Yes option is chosen, only
complete words are highlighted. (Complete words are surrounded by at least one space on either
side.) For example, if a search were run for the word program, only that word would be
highlighted. Changing the option to No causes the letters program to be highlighted wherever
they appear, so this may include programs, programmable, programming, as well as
program.
This is particularly useful in CJK-language documents, where the same glyph can be used as
part of multiple words/phrases.
Insight User Guide
v.15-10162013 46
Click the Up or Down Arrow buttons next to the Highlight Navigator to scroll to the next or
previous highlighted term. Remember that to see the highlights and use the navigator, you must
be in the HTML view of the record.
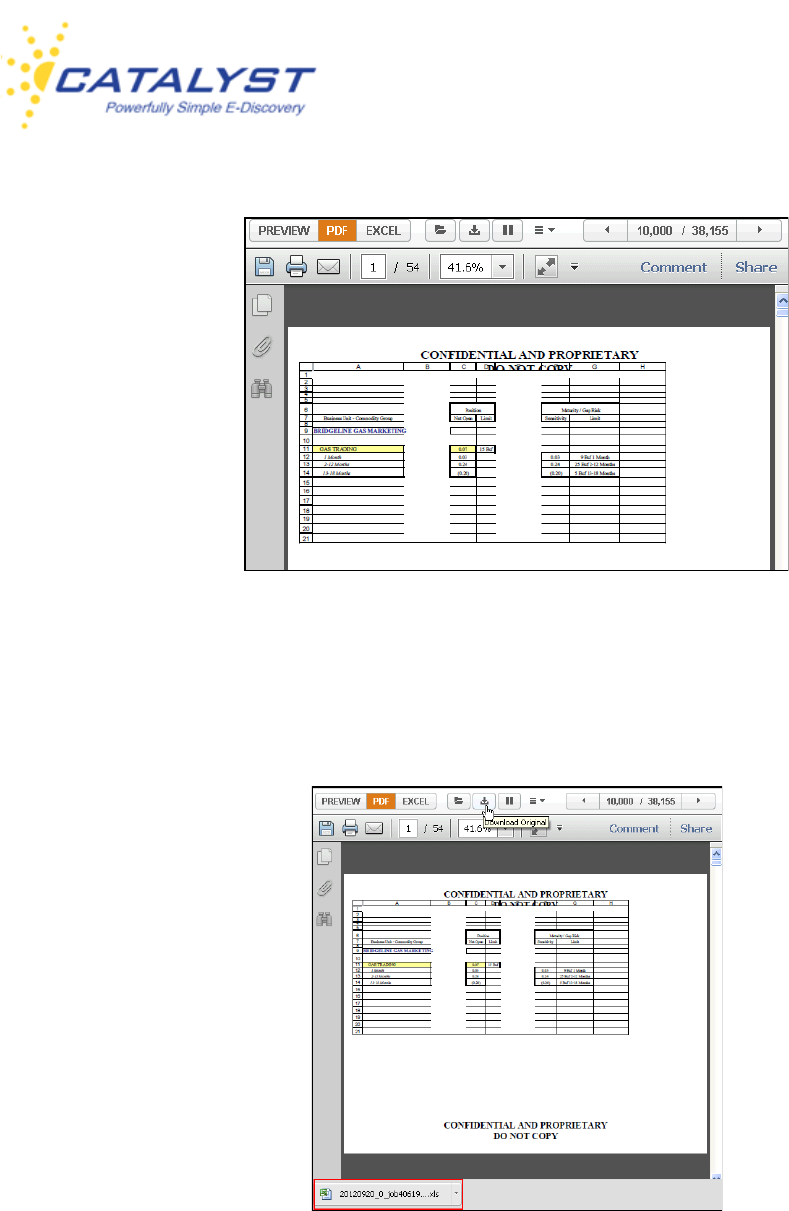
Viewing PDFs
When you open an Insight record that was uploaded into Insight as a PDF file, the PDF button
and an HTML button are available. If you or another user has converted a native file to PDF
within Insight, the PDF button will be available in this record as well.
The text of the document appears in the PDF view. If you click the HTML button, you will see the
HTML preview of the document text.
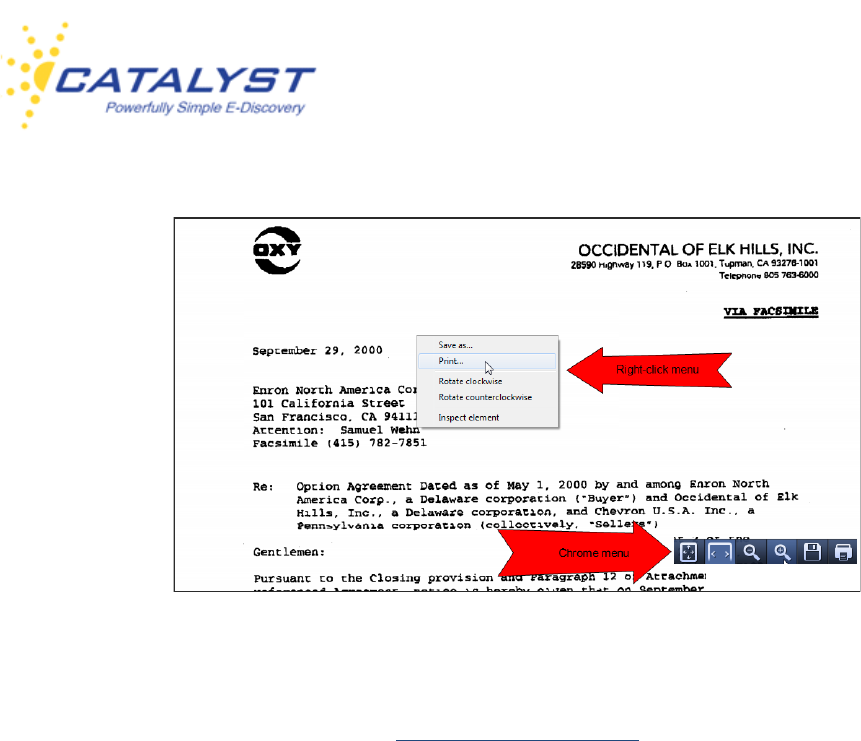
If you are using the Chrome browser with the default Chrome PDF Viewer to display PDFs, you
will not have the full Adobe functionality. To access the Chrome Viewer menu, point to the
bottom right of the document. These buttons will allow you to enlarge, minimize, zoom in or out,
save a copy of the document to your computer and print the document (send it to your local or
network printer). You can also right-click in the document to save, print and rotate the document.
When using the Chrome PDF Viewer to display a PDF document, you must use the right-click
menu in order to rotate.
Insight User Guide
v.15-10162013 47
If you prefer to use Adobe Reader because of its increased functionality, you can set this as your
default viewer in Chrome. Most other browsers also work well with Adobe Reader for viewing
PDFs in Insight. Please refer to the Insight Quick Start Guide for more information.
Viewing Native Files
If your site contains documents that were uploaded in their native file formats, opening a native
file will display it in the fast-opening HTML view, which provides a good representation of the
native file and automatically displays any highlights of search hits or terms chosen for persistent/
static highlighting. The HTML view is especially useful if you don’t have the native application
loaded to your computer. For example, you may be working in the site on a computer that does
not have MS Office loaded. While Word and Excel documents are uploaded in their native
format, all Power Point documents are converted to PDFs upon ingestion into the system. When
the PDF is placed onto Insight, the document text is extracted from the PDF. The HTML view is
available for all file types, including native files, OCR’d TIFFs and PDFs.
Excel records have an Excel button to display the Excel view in addition to the HTML view. If a
PDF version of a native record has been created on the fly, the PDF button will also be available.
Insight User Guide
v.15-10162013 48
While the HTML viewer displays the preview of the body content of the file, there may be
reviewer comments and track changes in Word that can only be viewed by downloading and
viewing the record in Word. The Excel view of an Excel file displays hidden rows, columns,
embedded charts and access to all the worksheets of an Excel spreadsheet. In order to view any
formulas associated with the file, you will want to download and open it in Excel.
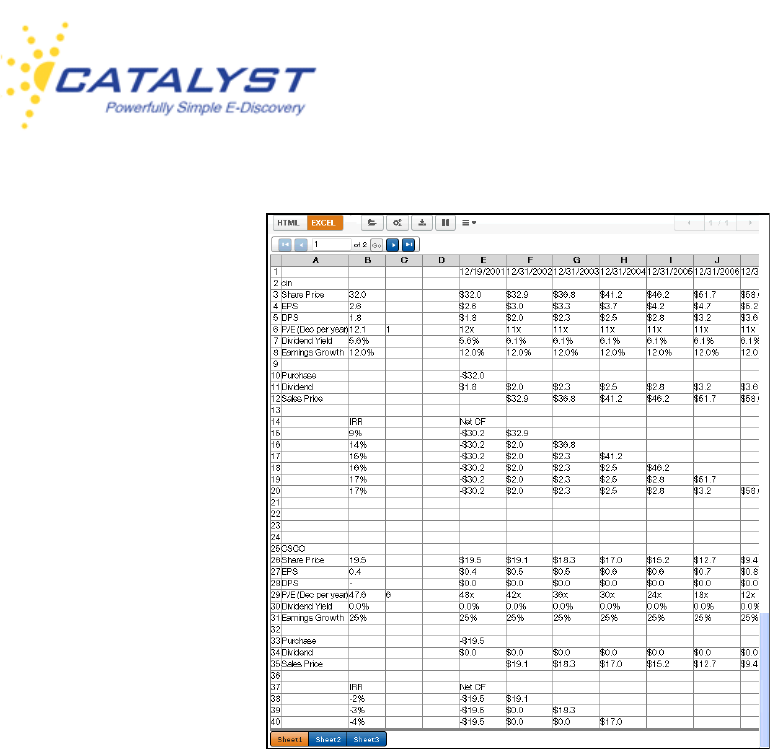
Click the Excel button to display the spreadsheet in Insight’s Excel viewer. This viewer displays
40 rows of data and as many columns as exist per page. To see more rows, use the Page
Control navigation buttons at the top of the page.
If the spreadsheet has more than one worksheet, you can view each worksheet by clicking the
tabs at the bottom (just as you would in the native Excel format).
Insight User Guide
v.15-10162013 49
To view the metadata information about the Excel file or any highlights, click the HTML button.
Viewing TIFF Records
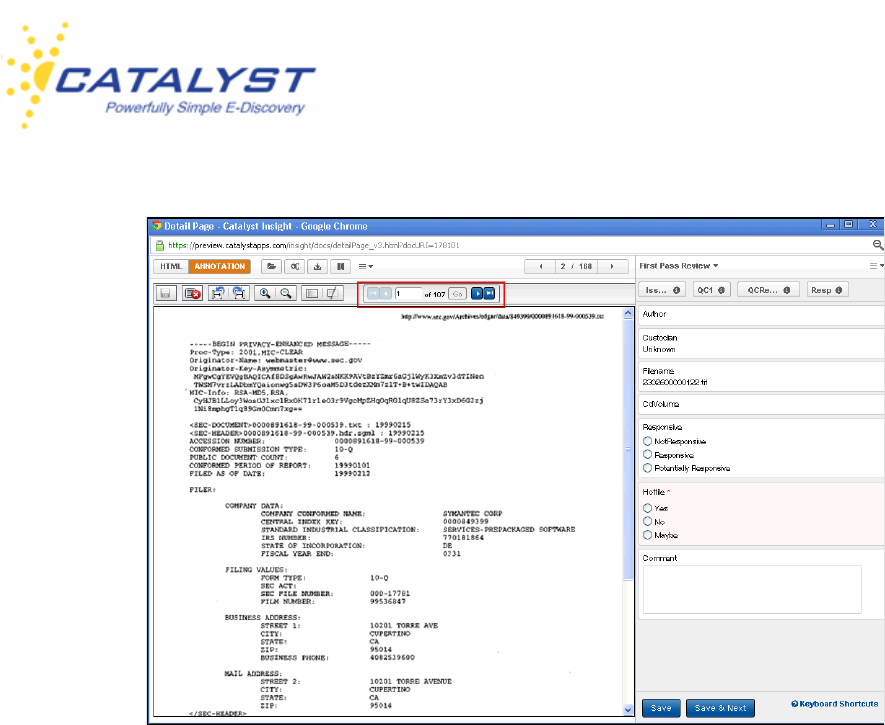
Insight supports multi-page TIFFs. TIFF records can be viewed in an image viewer (accessible
by clicking the Image or Annotation button). This view displays the scanned contents (image) of
the file. Clicking the HTML button, displays HTML rendering of the file and the Show/Hide Fields
link. In the Image view, only one page of the TIFF record is displayed at a time in the document
pane. Use the page navigation buttons (located to the right of the Annotations menu in the
below image) to change pages in the document.
Insight User Guide
v.15-10162013 50
Annotations
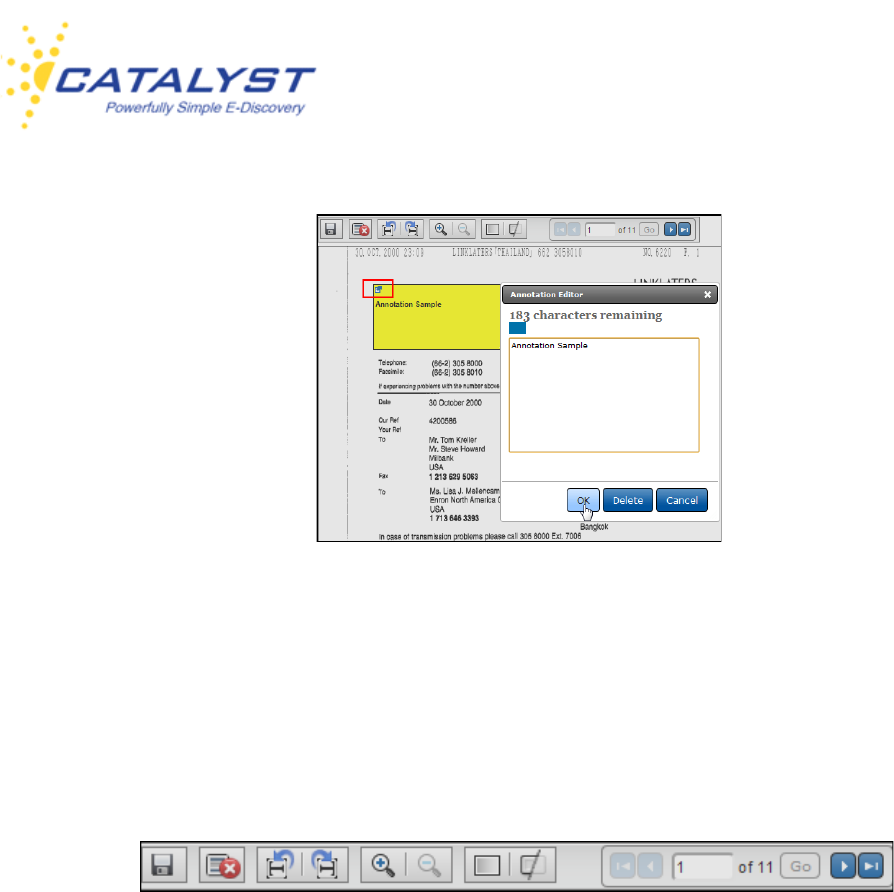
You may have the rights to place annotations on a TIFF image. In the Annotation view with the
scanned TIFF record visible, place your mouse pointer in the document image. The pointer
becomes a Plus sign. Click in the image, and holding down your mouse key, drag the pointer
over the area you’d like to place your annotation and release the mouse key. This places the
annotation box in the record and opens the Annotation Editor dialog box. Enter any text you
would like to appear in the box (you can also leave this blank), and then click OK. Click Delete to
remove the annotation.
Insight User Guide
v.15-10162013 51
To edit or remove a single annotation, click the Annotation Editor button in the top left of the
annotation box. This reopens the Annotation Editor (see above image), allowing you to delete
or add/edit the text.
Annotations Menu
The Annotations menu allows you to save or change the entire annotated version.
The system will automatically save a page of annotations when you move to a different page
using the page navigation buttons. Once you’ve added your annotations to the record, you can
also use the Save (disk) button at the far left of the menu to save the annotated version of the
record.
Moving to the right, the Delete button removes all the annotations in the page you are currently
viewing (it doesn’t remove annotations from other pages).
The next buttons allow you to rotate the image and increase or decrease the magnification.
The Toggle Annotation Opacity button allows you to switch between viewing opaque
annotations that will not show you the underlying information or the transparent view, allowing
you to see the annotations but view the underlying information.
Insight User Guide
v.15-10162013 52
Click the Toggle Annotation Visibility to view the record without the annotations showing. This
doesn’t remove the annotations; it makes them invisible. Click the button again to display the
annotations.
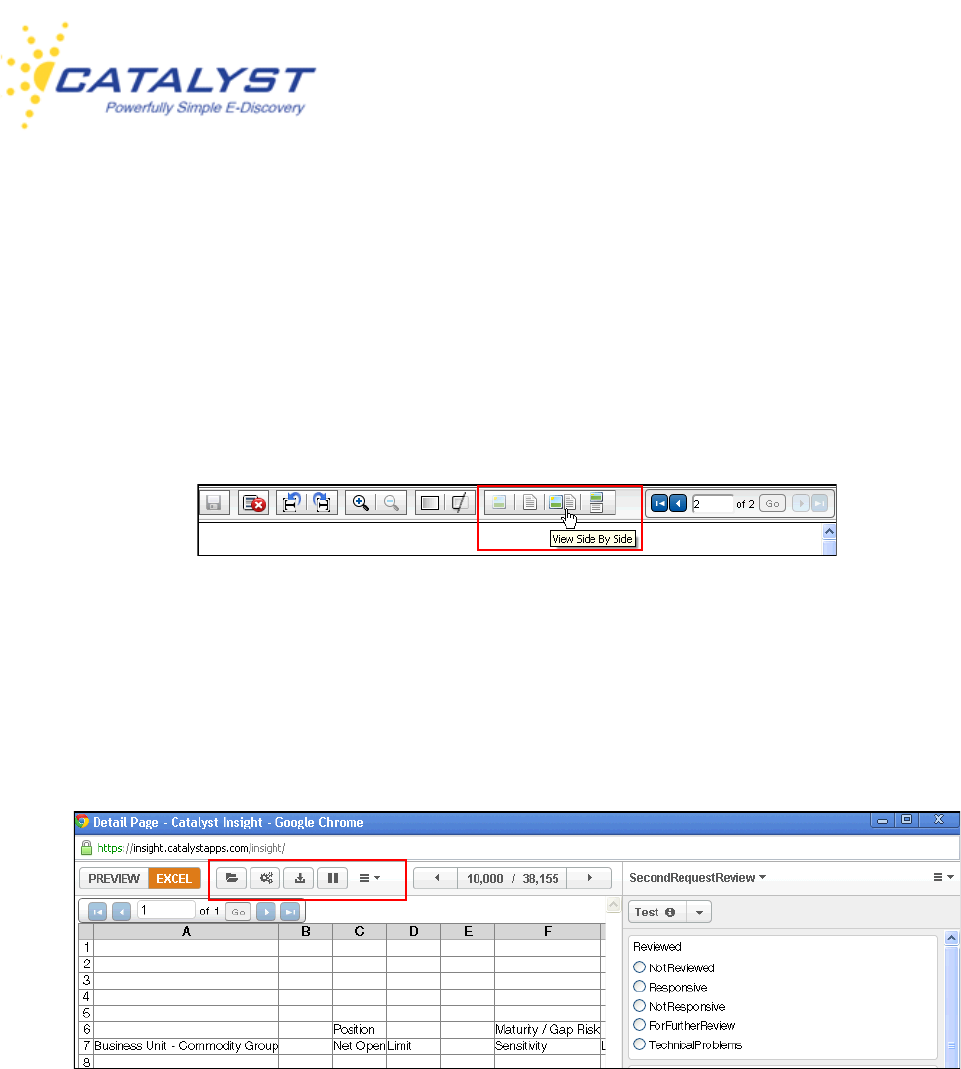
If the image has been OCR’d, buttons are available to view the image with text in the Document
frame. These include viewing just the image or just the text, the image and text side by side or
the image and text with the image above the text.
Document Options
The menu of buttons along the top of the document display contains commands for you to
complete tasks. Some of these are permission based. The full list of commands includes: Copy
to Folder, Convert to PDF, Download Original, and Pause.
The Options menu also contains commands. These can include Redact, Replace PDF, More
Like This and Translate.
Insight User Guide
v.15-10162013 53
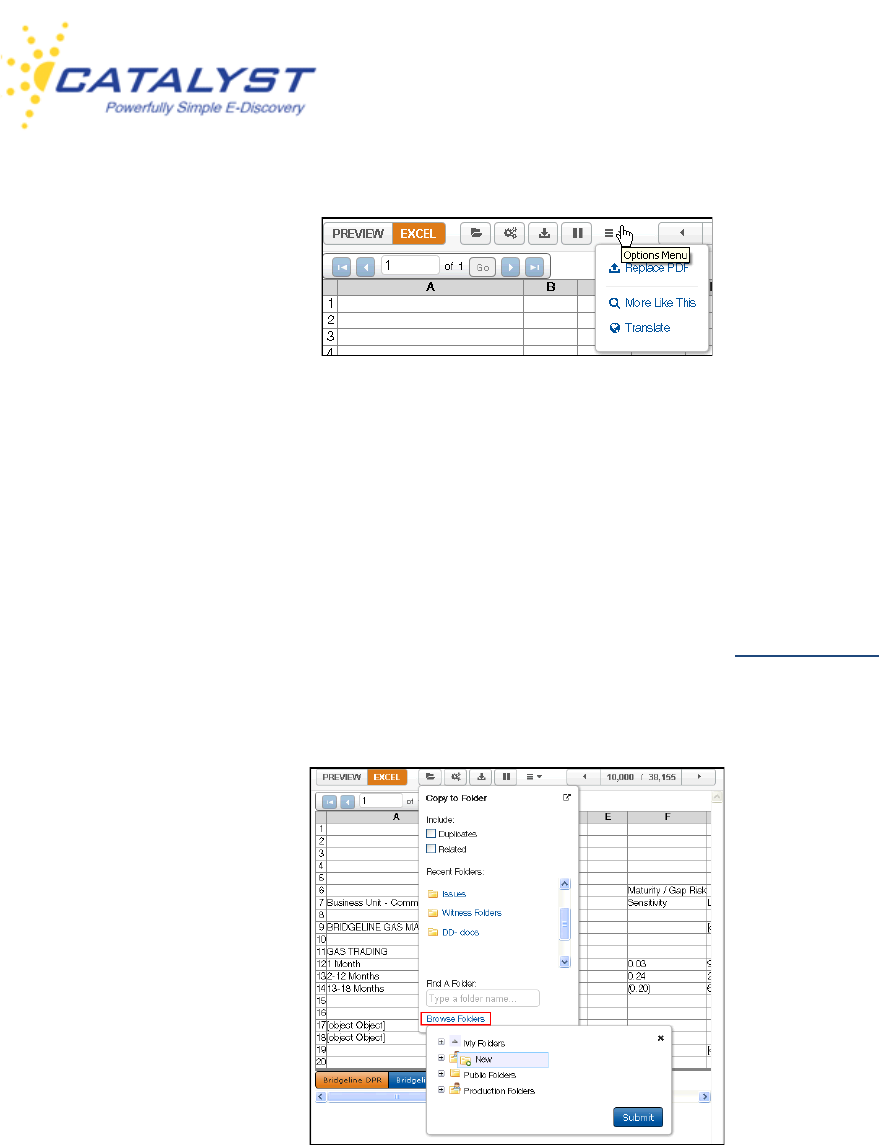
Copy a Document to a Folder
To copy a record to a Static Folder while within the opened record, click the Copy to Folder
button. The Copy to Folder dialog box has options for selecting to copy any related or duplicate
documents to the folder as well. At Recent Folders, select your destination folder if it appears in
the list. You can also search for the folder. Click the Browse Folders link to bring up the top-level
Static Folders structure. You can expand a folder to find your destination folder, or create a new
folder on the fly. Point to the folder and at the Wrench, click New. See Copy to Folder for more
information.
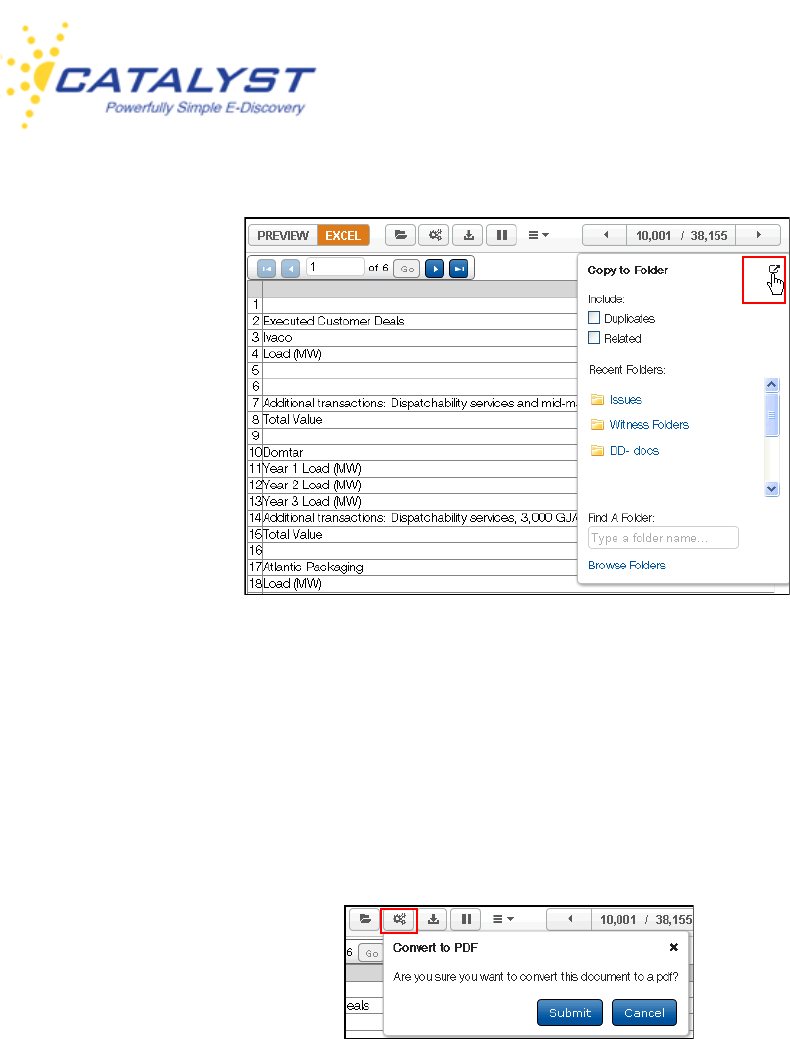
The Copy to Folder dialog box functions as a pod. It can be undocked and placed in another
position in the form. It will open to this position across documents until you undock and move it
again. Click the Undock button and then move the pod to a convenient place.
Insight User Guide
v.15-10162013 54
Convert to PDF
You may want to create a PDF version of the record you are in, and Insight allows conversion to
PDF on the fly if a PDF version of the record doesn’t yet exist. If you need to redact a record that
doesn’t yet have a PDF available, you are required to first convert the record to PDF.
Click the Convert to PDF button and then Submit.
Once the PDF is ready, a PDF button is available, and the record can be viewed in the PDF
format. If you have rights to redact, the Redact link is available in the Options menu. The
Convert to PDF button is no longer available.
Insight User Guide
v.15-10162013 55
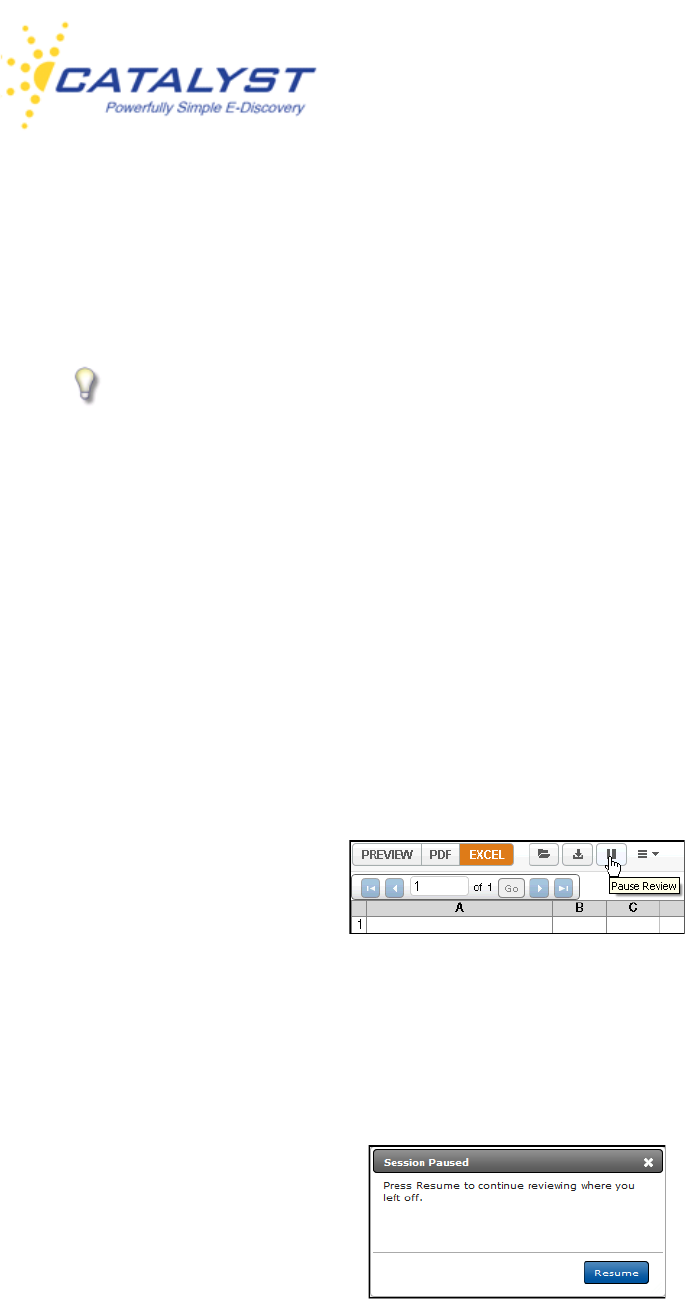
Download Original
You can download the record for opening in its native application (the file format it was originally
saved in) by clicking the Download Original button.
Insight User Guide
v.15-10162013 56
You can save the document to your computer, and if you have the native application, view the
document in its native format. (For example to view an Excel spreadsheet in its native format,
you’d need to have the Excel application loaded to your computer.)
The best practice when determining whether to download and open a document to
review in its native format is to look at the preview in the Results page or in the HTML
Preview display of the opened record and then determine whether it would be helpful to
analyze the file in its native format.
Common native files are typically processed to include comments and track changes, hidden
rows and columns. Certain information can only be viewed by opening the record in its native
application, such as the formulas used to populate a cell in Excel.
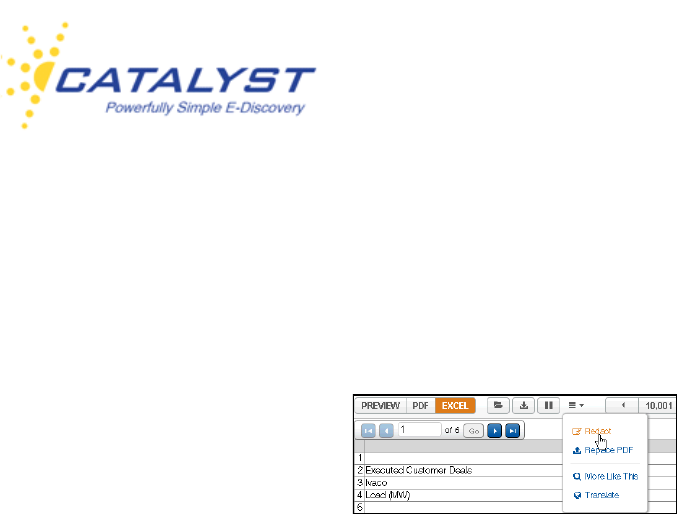
Pause Review
To pause the timer tracking your time spent reviewing a document, click the Pause Review
button.
After pausing a review, you will not be able to see your document again until you resume the
session by clicking the Resume button in the Session Paused dialog box. The timer starts
logging your time spent in review again.
Insight User Guide
v.15-10162013 57
Redaction
Insight provides web-based redaction. When a document has a PDF version, the Redact link is
available in the Options menu if you have permissions to redact. Talk to your administrator if you
feel you need redaction permissions.
To start the redaction process, open the document you need to redact. If there is not a PDF
version of the document, click the Convert to PDF button. Once a PDF of the record exists, an
image file of the PDF is made at the beginning of the redaction process. You will redact the image
version. Once you save the redacted image, the image file is then converted back into a
redacted-version PDF. Insight’s redaction system does not redact the PDF of the original record,
so that when a redacted version is distributed, the redactions cannot be removed.
Click the Redact link to open the redaction module.
Redaction Sets
Redaction sets are used to group redacted documents, so that when it is time to produce
documents, a particular set of redacted documents is pulled. More than one set is used typically
when documents on a site need to be redacted differently for production to different parties. Your
administrator will create appropriate redactions sets for your site and inform you about their use.
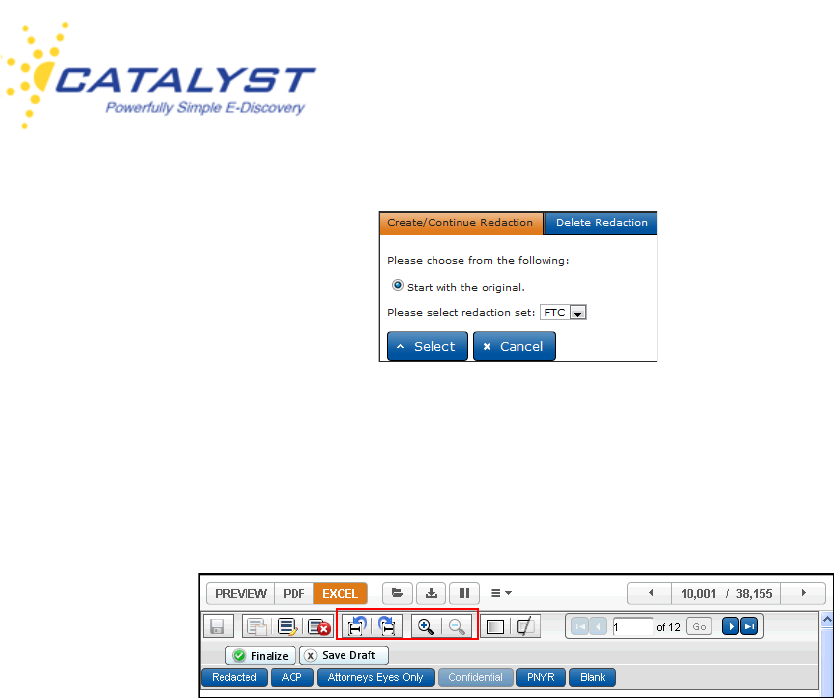
To create or continue a redacted version, click the Redact link in the Options menu, and in the
Create/Continue Redaction dialog box, select whether to start with the original document, or if a
document already has a saved redacted version, you can make changes to this version.
Additionally, if the Redaction module was closed prior to saving the redaction, you can select to
continue with the redaction that is in progress. Next, select the Redaction Set to store the
document.
Insight User Guide
v.15-10162013 58
Using Redaction Buttons
Use the controls at the top of the screen to rotate the page, which is useful for scanned images
that may be rotated, or to zoom in or out—increase or decrease the size of the document.
The Redaction Button Controls are at the top left of the document. These buttons allow you to
place the appropriate redaction box within the document image. Your administrator will have set
up a number of custom Redaction Controls with specific messages (e.g., Privileged, Work
Product). Your site may have a Blank redaction button. This button will redact but leave no
redaction message, only a box with a border. Additionally, you may have the option of using a
blank redaction button that does not have borders, so that the redacted copy doesn’t show areas
that have been redacted using this button. (This can be useful when you want to redact an old
Bates number that appears on the document.)
Click one of the redaction buttons and then draw a box around the text or image you need to
redact by holding down your mouse button and dragging the pointer over the area you need to
hide in the document.
Insight User Guide
v.15-10162013 59
You can change the size of the redaction box by dragging the corners or the sides with your
pointer.
As you move from one page to the next on a multi-page document, the system will save the
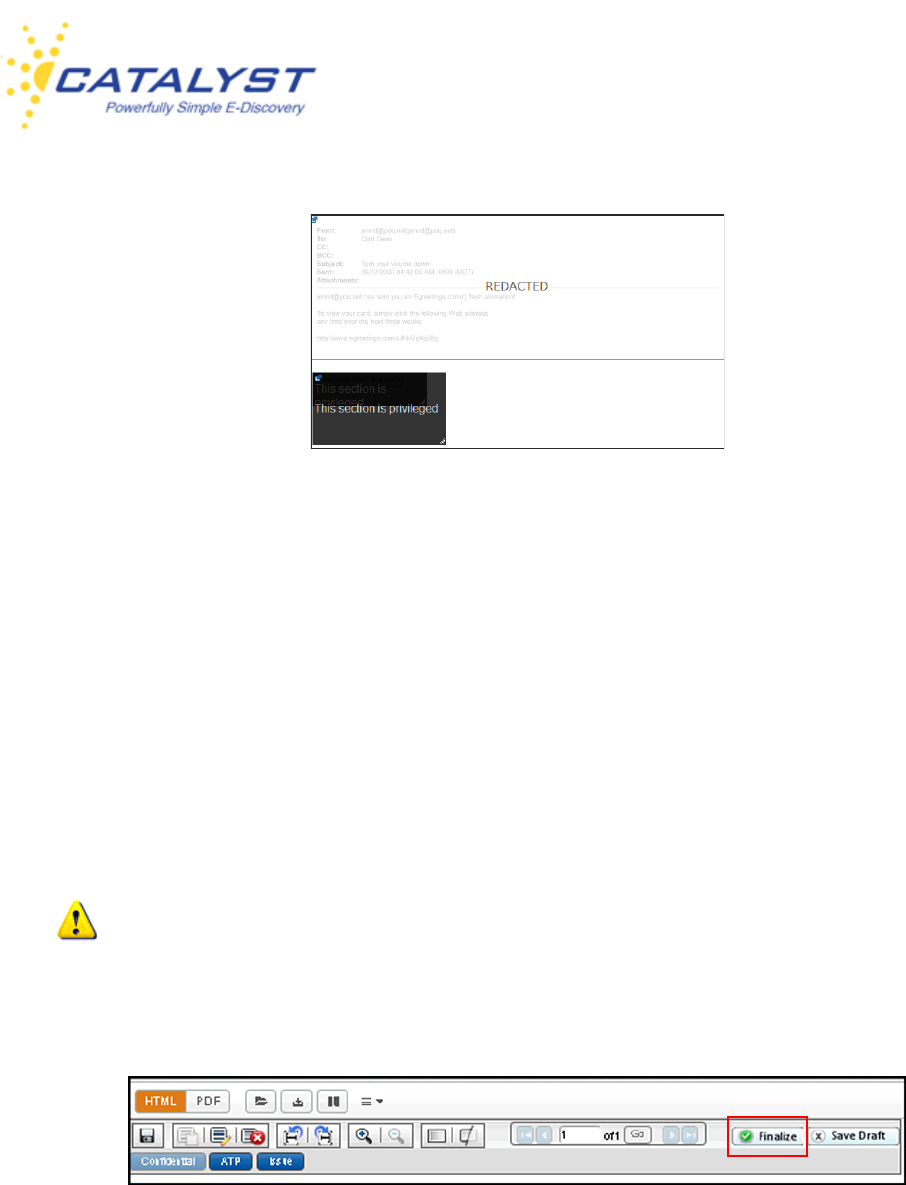
changes. You do not have to click the Save button or the Save Draft button as you move from
page to page. Click Safe Draft if you want to manually save your work and have only partially
completed a page.
Once you have finished redacting the document, click Finalize. This signals the system to
convert the redacted version into a secure PDF.
If you do not finalize the redaction by clicking Finalize, a redacted version will not be
pulled, as the system does not considered an un-finalized saved draft a redacted version.
You can go back and edit a finalized version, but make sure you remember to finalize it
again.
Redaction Options
The Redaction tool bar at the top of the image gives you some flexibility in how you create your
redactions on the document.

Insight User Guide
v.15-10162013 60
Point to each button to see the tool tip explaining the function of each button.
Save/Finalize
After you have input the redaction boxes, you can select the Save button (disc) to save your
redactions. This is saving a draft and works the same as the Save Draft button. The system does
not convert your redaction back to PDF unless you click the Finalize button. When redacted
versions of a record are pulled for printing or production, only finalized documents are considered
redacted versions. Always click Finalize when you have completed your redactions.
Copy Recently Redacted Page
The Copy Recently Redacted Page button will copy redactions and rotations from the most
recently redacted page. This is useful if you are redacting duplicate documents one after the
other.
Redact the Whole Page
Use this button to redact the entire page with the selected redaction text button.
Remove all Redactions from Page
Remove all redactions from the page by selecting the button with the red X.
Rotate and Zoom
Rotate and zoom in and out with the next four buttons on the menu.
Toggle Opacity and Visibility
When documents are redacted, we provide a transparent version so you can view the underlying
words or images that have been redacted. Use the toggle buttons to switch between the
transparent and opaque views. You can also temporarily remove the redaction visibility
completely.
Insight User Guide
v.15-10162013 61
Navigate to Next Page to Redact
Use the page controls for multi-page documents. You do not need to save each page after you
redact. The navigation will automatically save the redactions on each page.
Deleting and Adjusting Single Redaction Boxes
The administrator of your site set up the redaction buttons and entered the text that appears on
the redaction box. Redactions vary in size so you may find that adjusting the text within the box to
a larger or smaller size is necessary.
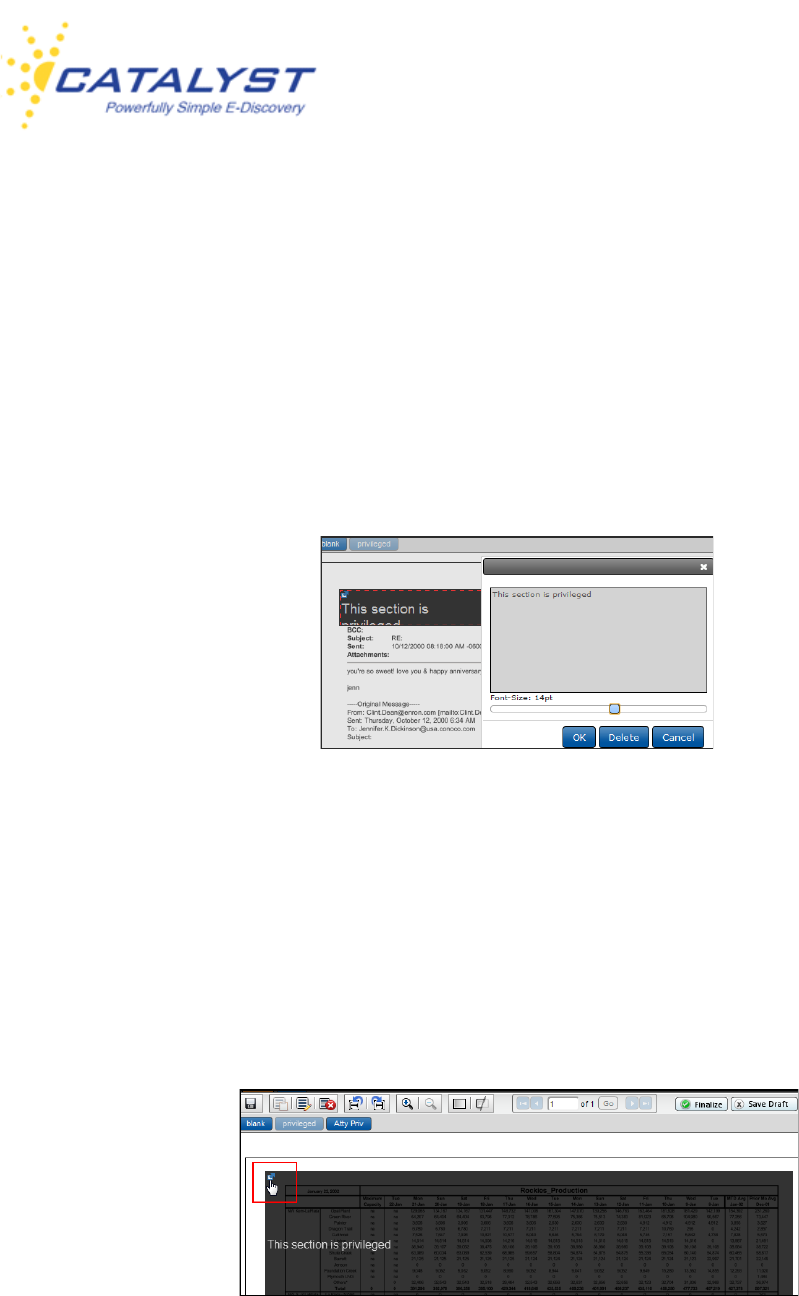
In the above image, the text in the left redaction box is too big for the redaction. Click the menu at
the top left of your redaction box to resize the text. Just drag the Font-size bar to the left to make
the font smaller. Drag it right to make it bigger.
Redaction Box Menu
You can delete a redaction box by expanding the menu at the top left of the redaction box and
selecting Delete from the options.
Insight User Guide
v.15-10162013 62
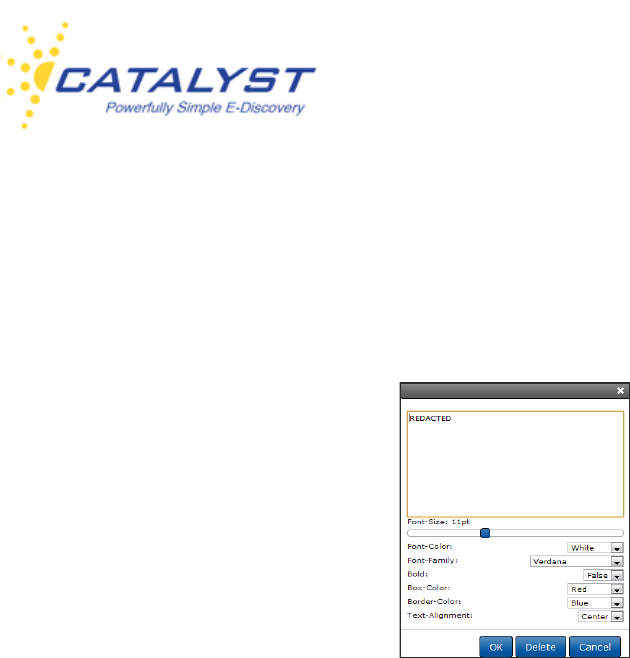
Redaction buttons may be set up so that you are able to edit the text of the redaction, the color of
the text, box and border, the alignment of the text, and the font. If these options are available,
click the menu at the top left of the redaction box (above image) and make your changes in the
Redaction dialog box (below image).
Color Redactions
Redacted versions of documents that contain colored fonts or images will retain the colors in the
redacted version.
Viewing Redaction Versions
Records that have a finalized redacted version will display a Redacted button to open the
redacted version or versions. (Stored redacted versions are only available to users who have the
rights to redact). In the redacted version, the left pane displays information, which includes: Doc
URI, Date Created, Redacted By, Redaction Set, Display Mode, Finalized Date and the
Redacted Pages.
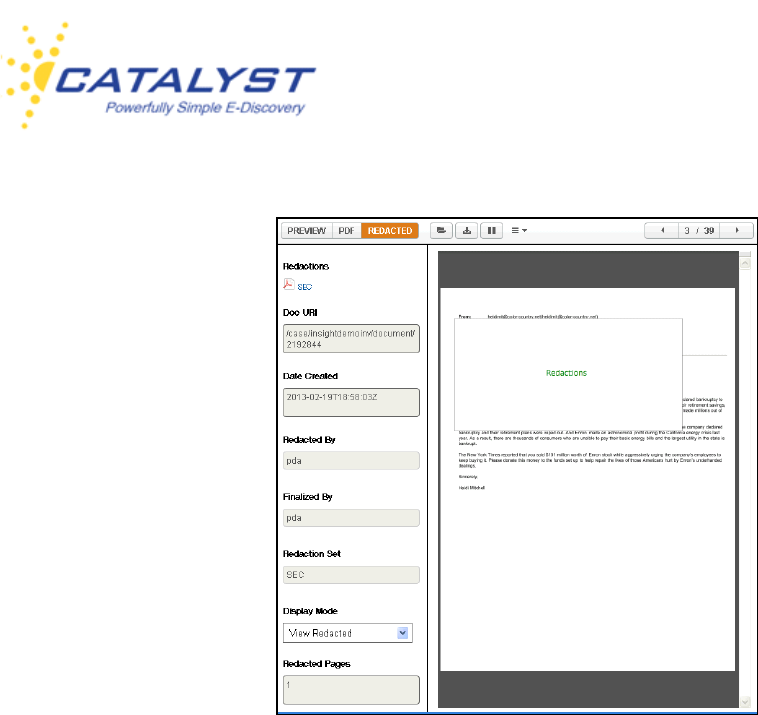
Insight User Guide
v.15-10162013 63
You can view the transparent version of the document by selecting Transparent from the
Display Mode in the right pane of the redacted document. If you want to make changes to the
redacted document, expand the Options menu and click the Redact link.
Upload PDF
You may have permissions to upload a new PDF version of the record you are in. For example,
perhaps the original file is an Excel spreadsheet, and the record was converted to PDF in the
Insight system but is not formatted properly. If you have permissions to do so, you can create and
upload a new PDF of the original file.
If you need to create a new PDF of the file, select the Download Original button. This will
download the file in its native format. Save the file to your computer, and make any necessary
formatting edits to the file. Print/Convert the file to PDF, and save the PDF version to your
computer.
Then, click Replace PDF in the Options menu.
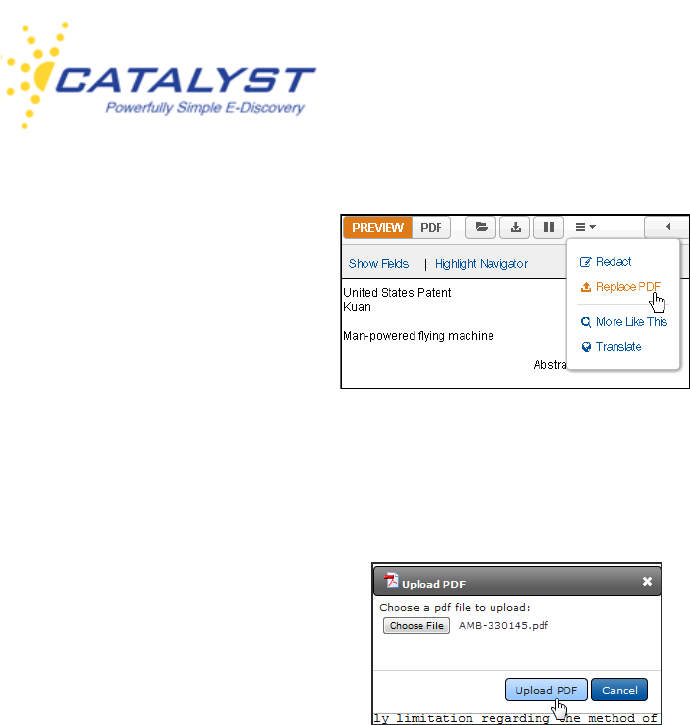
Insight User Guide
v.15-10162013 64
This takes you to the Upload PDF dialog box where you can browse to locate your newly saved
PDF by selecting Choose File. When the file is populated in the field, select Upload PDF.
When the upload is complete, you can view the PDF by clicking the PDF button.
More Like This
Insight searching includes the More Like This functionality, which provides the ability to find
documents similar to the document being reviewed. This allows you to quickly isolate documents
with similar content and themes.
When reviewing an important document, use your mouse pointer to highlight specific text within
the Preview panel of the record in the Results page or in the HTML/Preview view of the opened
record. This enables the More Like This button in the top right of the frame. The number of
characters you have highlighted is displayed (there is a 5,000 character maximum).
You can also expand the Options menu and select More Like This to include all the text within a
record (provided it is under the 5,000 character limit).
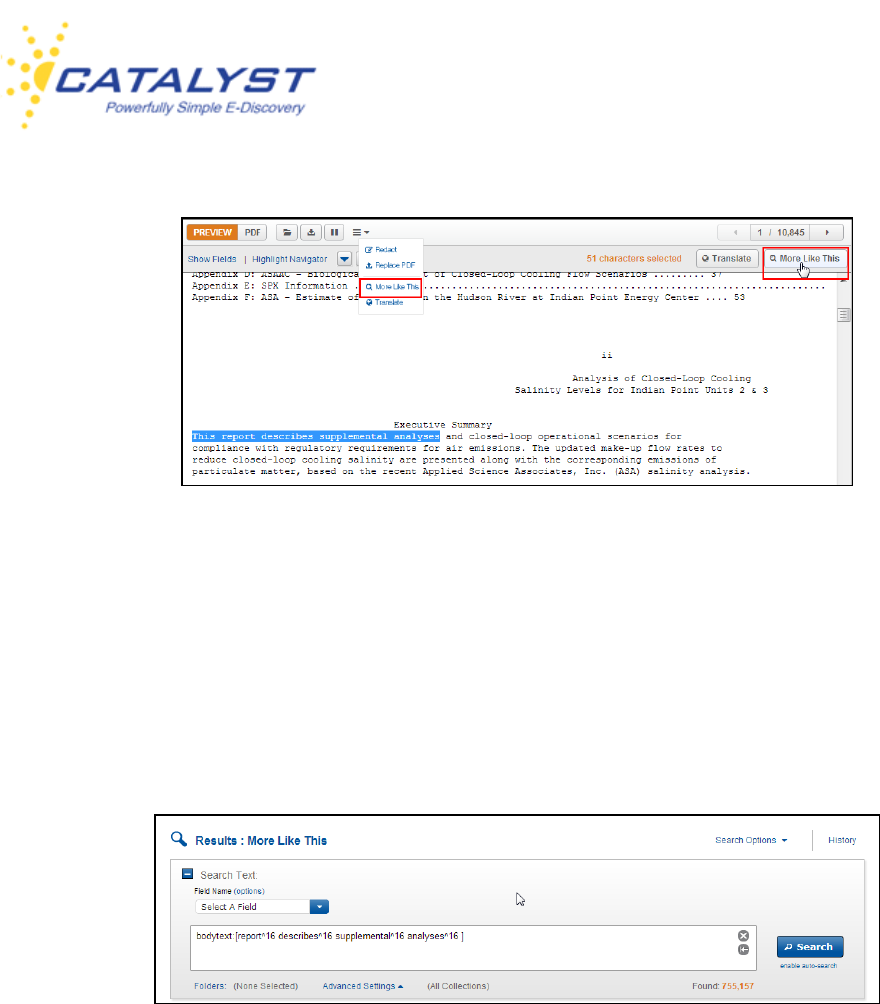
Insight User Guide
v.15-10162013 65
Clicking the More Like This button places a new query within the Results page Search box.
This is a BodyText query with an OR connector between each value highlighted in the text. The
Found: document count updates based on this new search query. You can customize this search
by removing or adding values or clauses to the search. As with all searching in Insight, you can
use Folders and Advanced Settings to define other search parameters. Retrieve the
documents by clicking Search.
Translate
You may have permission to can select and translate sections of document text “on the fly” while
working within the record. This is a quick way to understand the overall content of a foreign-
language document.
When reviewing documents that contain foreign words or phrases, use your mouse to highlight
the text (in the Results page preview or the HTML/Preview view of the opened record). This
enables the Translate button at the top right. Click it to open the Translate dialog box. You can
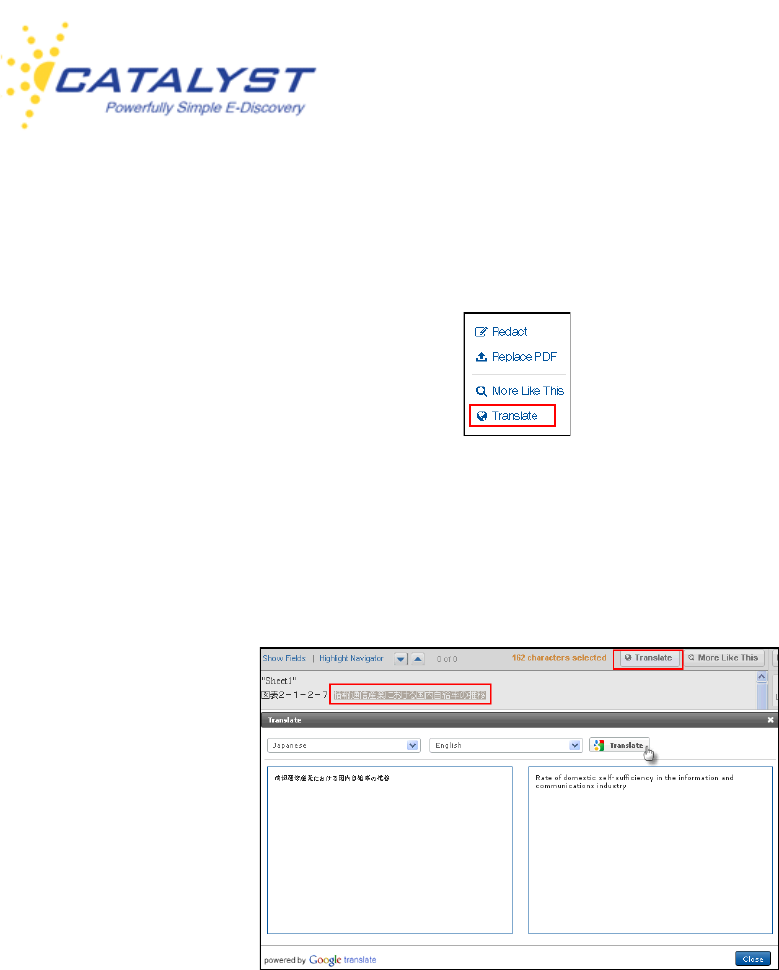
Insight User Guide
v.15-10162013 66
also select Translate from the Options menu to include all the text of your record. (There is a
5,000 character limit.)
Your highlighted text is in the left panel. The translator sets the source language (From
Language) when possible. Expand the To Language menu and select your target language,
and then click Translate.
Click Close to return to your document.
Coding History
You can view the history (audit trail) of changes made to a record while it has been associated to
your matter in Insight. Expand the Forms Options menu and then click Coding History.
This includes when a document’s data in the database was changed, who made the change, and
the value or values that were changed. Redaction, bulk updating, conversion and translation
information is also available.
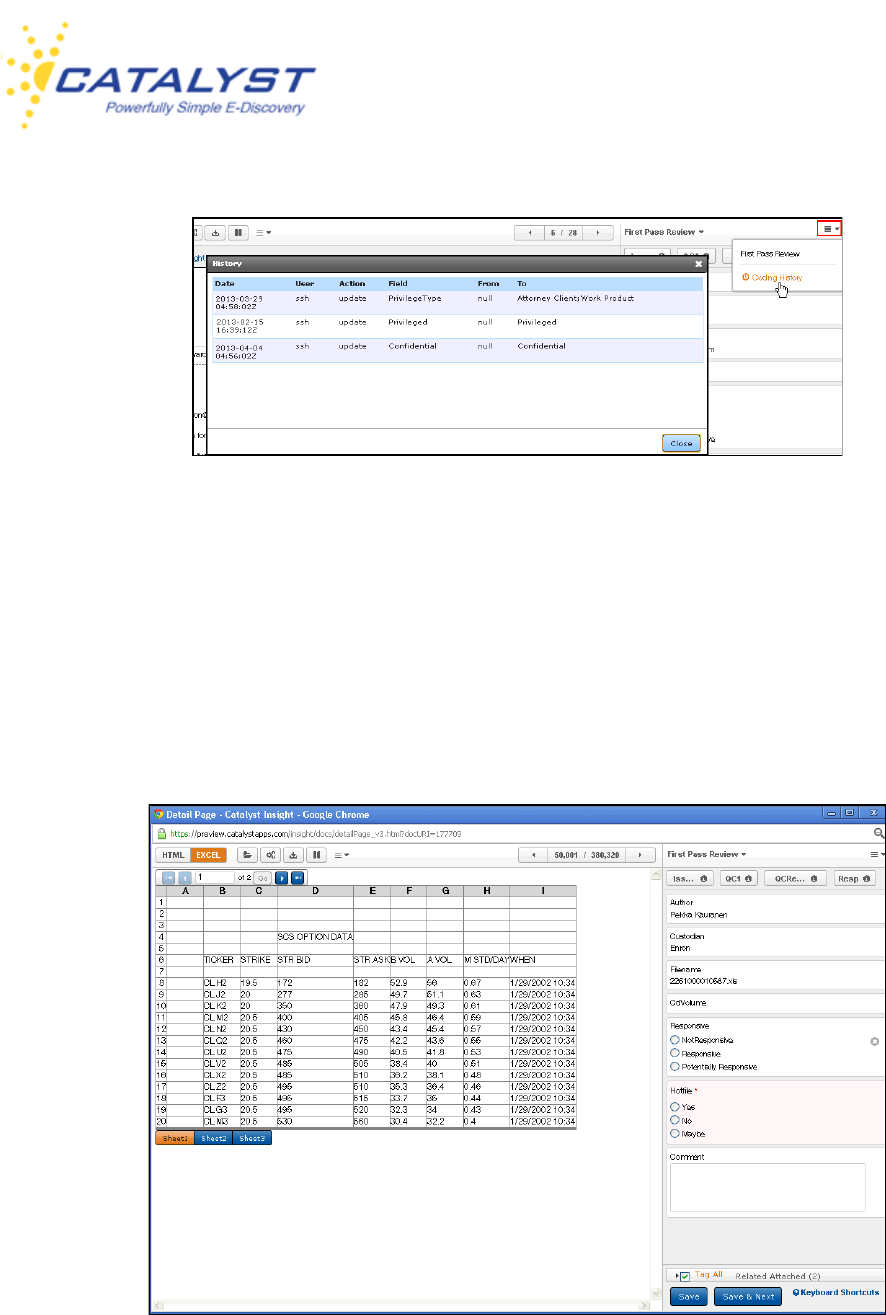
Insight User Guide
v.15-10162013 67
Forms
The database field information makes up the document form and is where you apply your coding
changes to the document. In an opened record, the form displays to the right of the document
text.
There may be more than one form associated with a document, and you have been given access
to the forms appropriate to the work you need to do.
Insight User Guide
v.15-10162013 68
You typically have access to at least one review form, which may display some of the metadata
information associated with your file. Metadata information can also be viewed by clicking Show
Fields in the document pane. All metadata fields populated with data can be viewed at Show
Fields.
To see the forms available to you, expand the Forms menu at the name of the form you are in. To
change forms, click the form name.
Fields
You will make coding changes to editable fields located in a specific Review form. These forms
may also contain some non-editable label fields, which provide you information about the
document.
Fields can have properties and rules assigned to them. Fields with a faint red background and an
asterisk (*) are required fields. You cannot save the record until you apply values to required
fields.
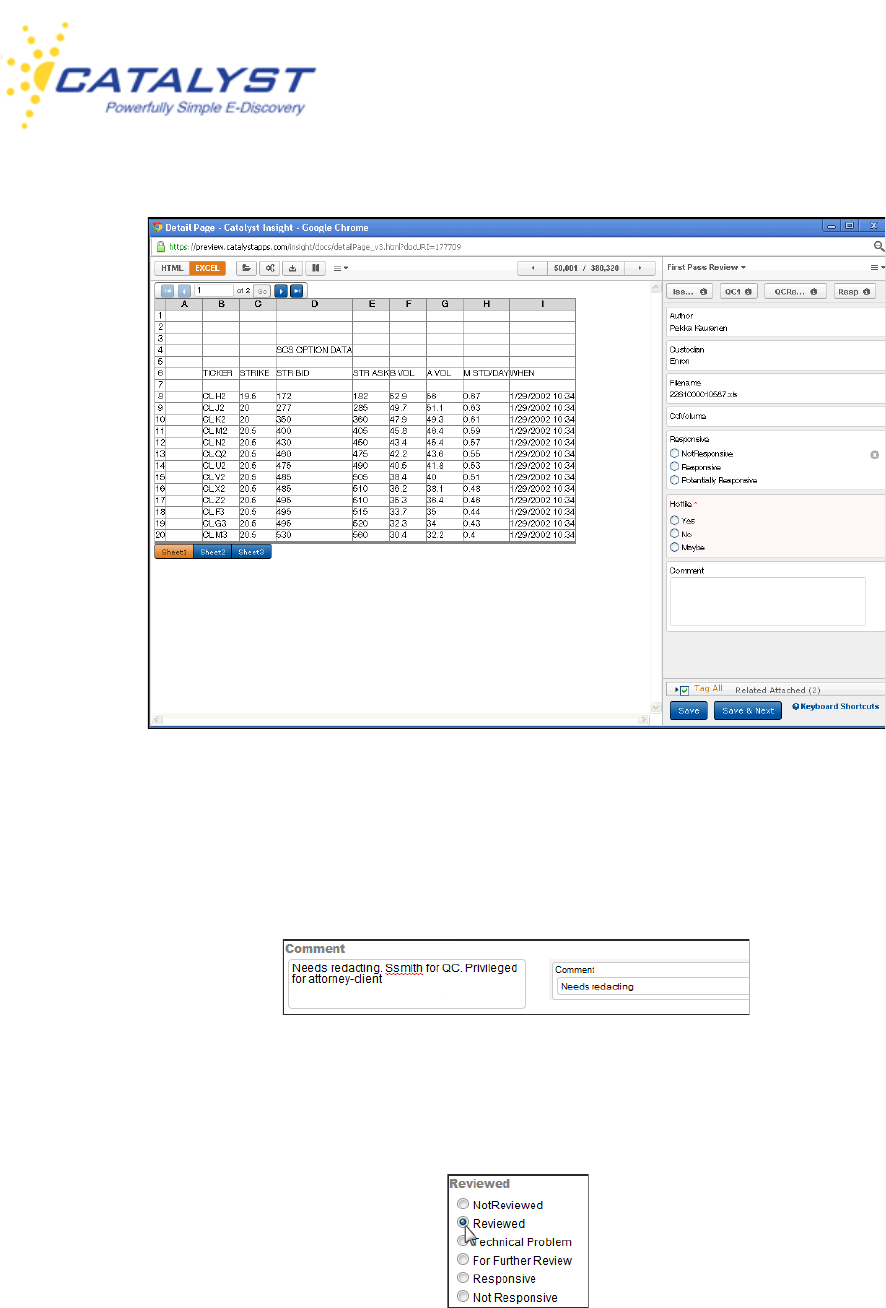
Insight User Guide
v.15-10162013 69
Insight forms may contain several different editable field types. Text fields allow you to add or edit
text. These work like standard text boxes and may be limited to short entries or allow longer
entries. Type in the box to include information.
Fields may allow you to choose one value from a list of values by selecting an option button
(radio button).
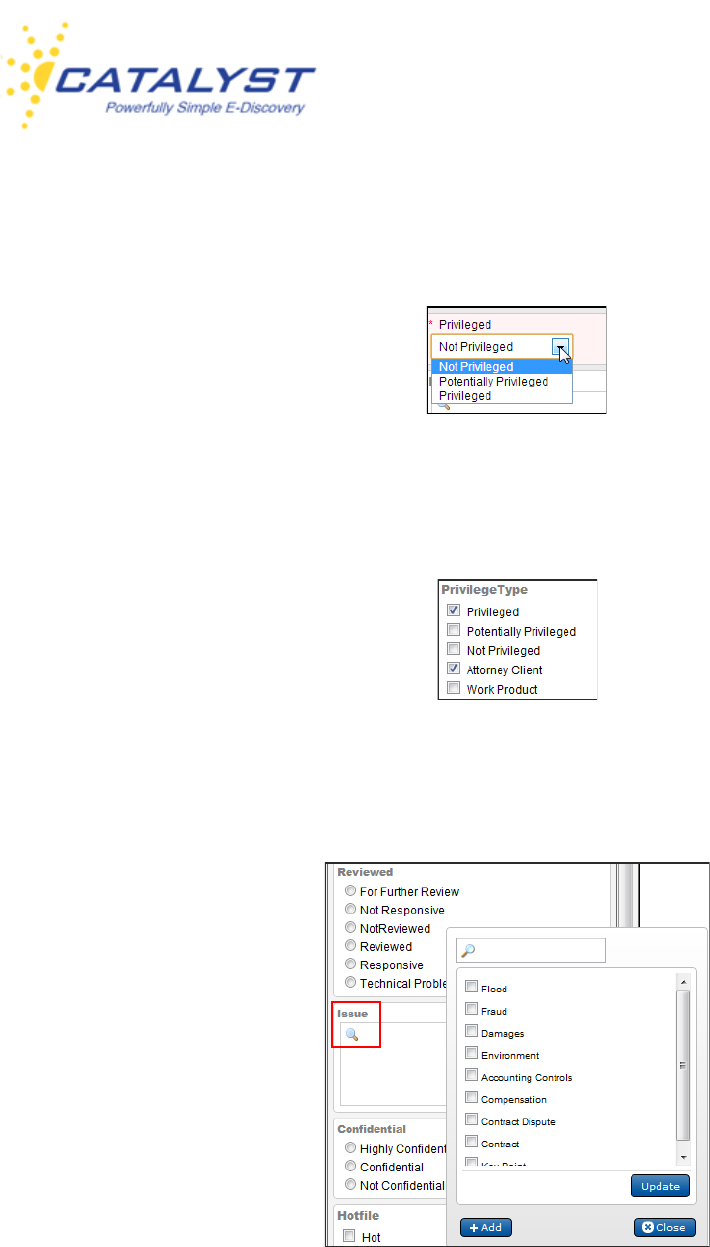
Insight User Guide
v.15-10162013 70
Another field which allows you to choose only one value is the drop-down menu. Expand the
menu and highlight your value.
You may also have fields which allow you to select more than one value. Checkbox fields display
all the value choices in the form, and you can select one or several.
The multi-value lookup field also allows you to make multiple choices. To populate this field, click
the Search button (magnifying glass).
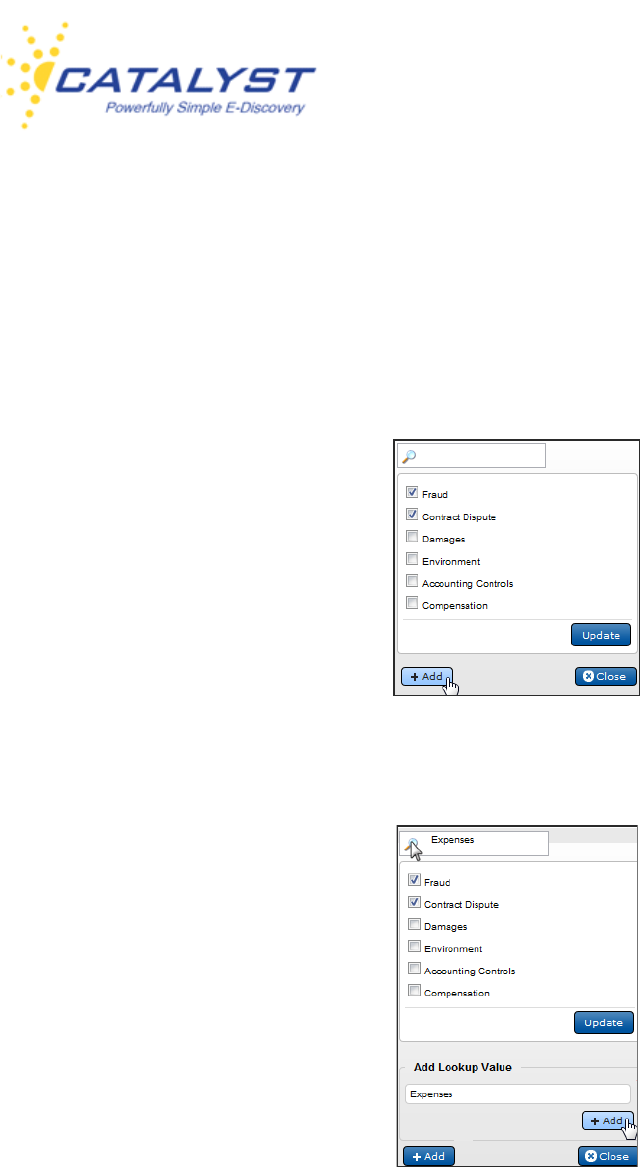
Insight User Guide
v.15-10162013 71
This opens the multi-value table. Find your values and select them using the checkboxes. You
can search for a value if this list is large. Type part or all of the word into the Search box above
the list, and click the Search button.
If the value isn’t available, you may have the ability to add it. If the Add button is available at the
bottom of the table, click it.
Type your value into the text box and click the Add button right beneath the text box.
Back in the list, find your new value and select it using the checkbox.
You can click Close to close the lookup table without adding any values.
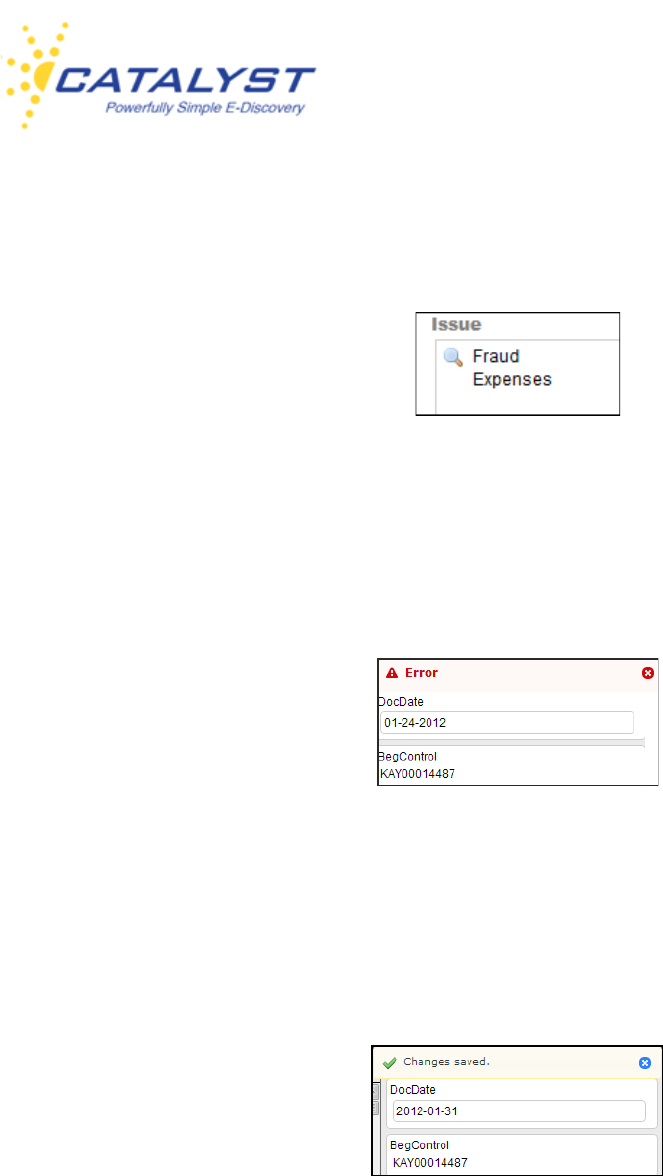
Insight User Guide
v.15-10162013 72
When you’ve chosen all the appropriate values you need, click Update. Your values will now
populate the field.
Some fields, such as Date fields, may require you to enter information in a particular format.
Insight adheres to the International Standards for Organization (ISO)-developed international
date format of YYYY-MM-DD. You may receive an error when you enter fielded information in the
wrong format and try to save the document.
When you have properly completed a form, clicking Save will save the record and leave you in
the current record. Click Save & Next to save your record and move to the next record in the
results.
You will receive a Success message if the record form is properly saved:
The Delete (X) button is available in a field to clear the field of all input. The button appears when
you point to a field.
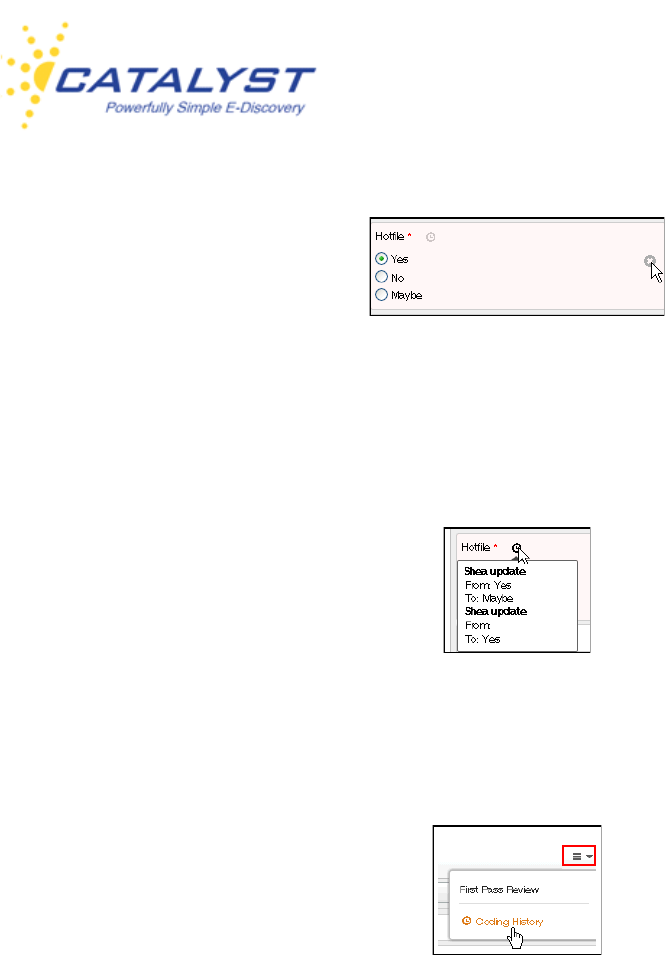
Insight User Guide
v.15-10162013 73
Each field on your form now includes a coding history graphic, which you can view if you are in a
Role with rights to see the coding history. This allows you to see what changes have been made
to a specific field.
To view a complete audit history of the changes to the record, expand the Forms Options menu,
and select the Coding History link.
Shortcuts and Rules
Your administrator can create buttons and rules on your form, making coding consistent, easier
and more efficient. Please speak with your administrator for specifics regarding the shortcut
buttons and rules used in your Review forms.
Apply Previous
The Apply Previous command is a user-permission that enables you to code a record with the
same coding as the last record you saved. This button is not available until you code and save a
record after each login. Click the Information (i) button to see how the last save was coded.
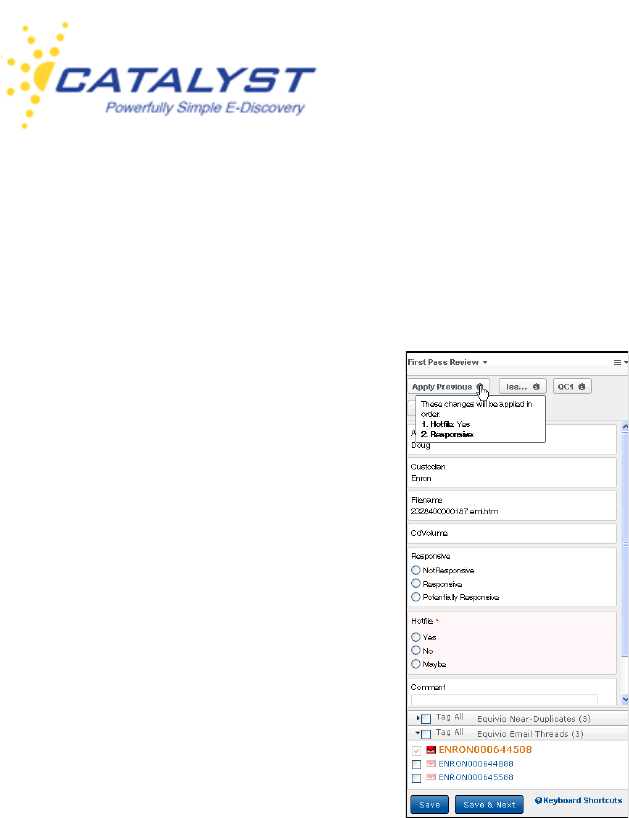
Insight User Guide
v.15-10162013 74
Click the button to apply the changes to the current record. When you log out, the Apply
Previous command ceases to capture. When you log back in, you must code and save a record
in order for the button to appear in the form.
Shortcuts
Your administrator may create Shortcut buttons for quick, one-click editing of coding forms.
These can be built for forms at any time during the review. Up to 10 Shortcut buttons can be
placed within a form. Point to the Information (i) button to see the coding that is applied to the
form when a Shortcut button is clicked. In the below example, clicking the QC Shortcut button
will change three fields and save the record and open the next record.
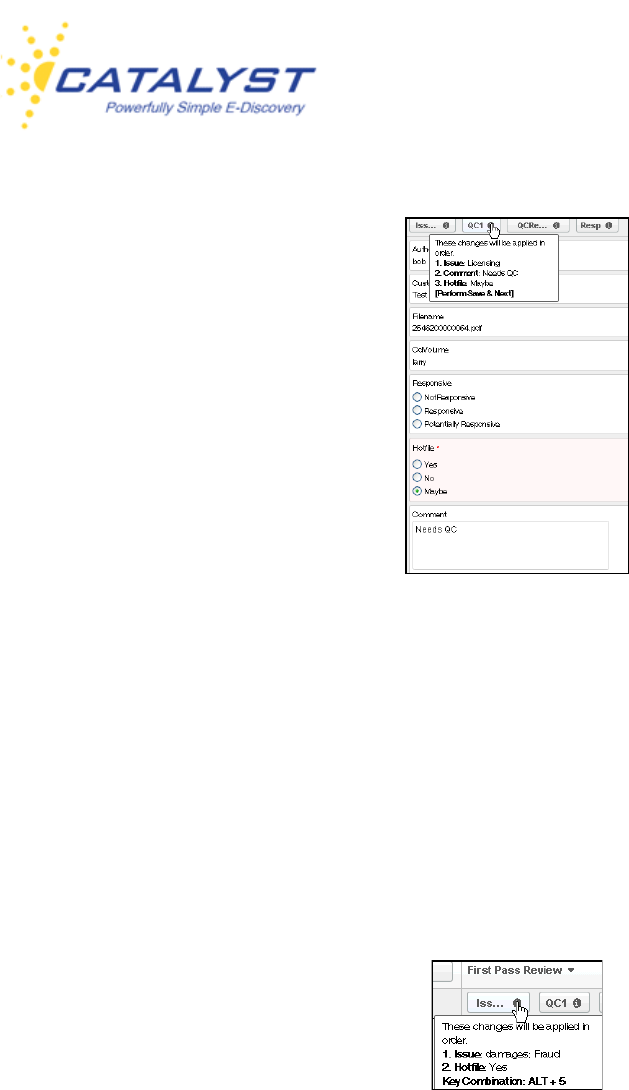
Insight User Guide
v.15-10162013 75
Your administrator can also assign keyboard hot keys to use in addition to the Shortcut button.
In this example, the Issues Shortcut button will change the Issue field to damages and Fraud,
and it will change the Hot file field to Yes, but it will not save the record. Click Save or Save &
Next or use the keyboard hot keys ALT+S to save your changes.
This Shortcut button also has a keyboard hot key combination of ALT+5; instead of clicking the
Shortcut button, the reviewer can choose to hold down the ALT key and the 5 key to code the
form according to this Shortcut button.
Rules
You may also find that some fields have Rules associated with them. Rules can show or hide a
dependent field based upon the selections made in the parent field. Rules can also code a value
in a dependent field or clear a dependent field. Rules are set up by your site administrator to suit
the needs of your matter.

Insight User Guide
v.15-10162013 76
In the below example, this form has a rule built upon the Privileged field.
The command displays the PrivilegeType field when the Privileged value is selected in the
Privileged field.
Rules can also select values at other fields. In the below example, when Yes is selected at
Hotfile, the HighlyConfidential value is automatically coded at Confidential.
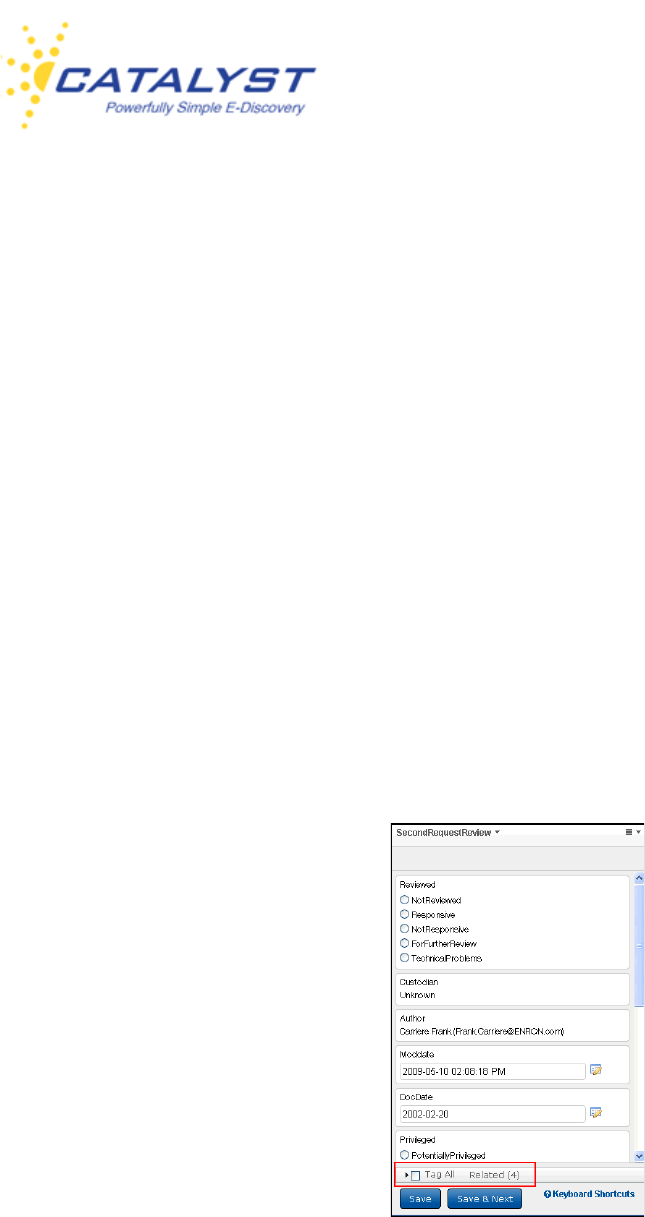
Insight User Guide
v.15-10162013 77
Your administrator will provide information about the rules and shortcuts associated with your
forms.
Associated Documents
Your site may have documents that have other documents associated to them, such as related
documents or duplicate documents. You can easily access these documents and find out other
information about the types of associations. Associated documents are grouped in the lower
portion of the form. Often, the Tag All checkbox is available for you to apply the changes you
make to all the documents.
Related
Family relationships are organized at the Related section at the bottom of your form. Documents
with relationships include emails with attachments or source documents and attachments (these
are commonly referred to as families with the parent being the email or source document and the
attachments as the children.) The number represents the entire number of documents in the
relationship (parent and all children).
Click the Triangle button at Related to expand this section and see a list of all related
documents.
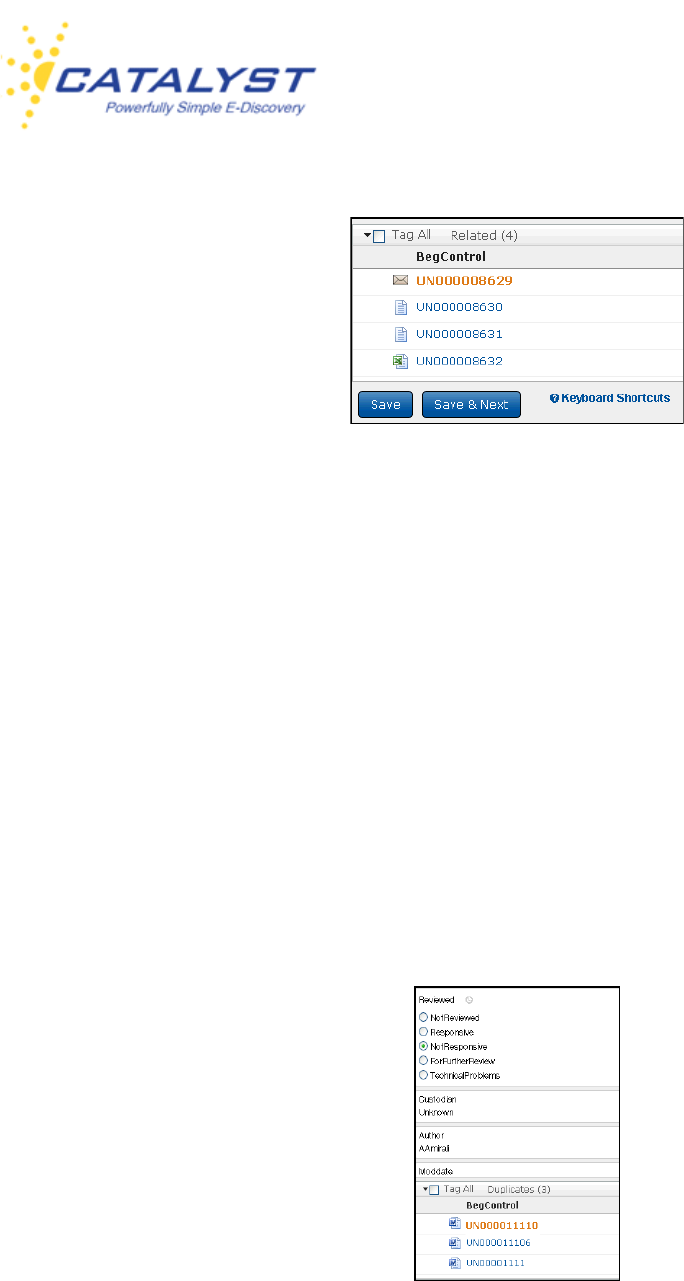
Insight User Guide
v.15-10162013 78
The document you are viewing is in the orange, larger font in the list. You can display a related
document in the Document pane at the left by clicking it in the list. If the list is large, use the scroll
bar to see the entire list. You can code related documents individually from this view by clicking to
open each document (the text of the new document displays in the Document pane at the left).
If Tag All is available and enabled on your site, you can select the Tag All checkbox to code all
related documents at the same time and in the same way you are tagging the document you are
viewing.
Duplicates
If duplicate documents have been identified on your site, you will see a Duplicate section in the
bottom of the form. This allows you, when necessary, to open and view the duplicates and use
the Tag All checkbox to code all duplicates in the same way if available.
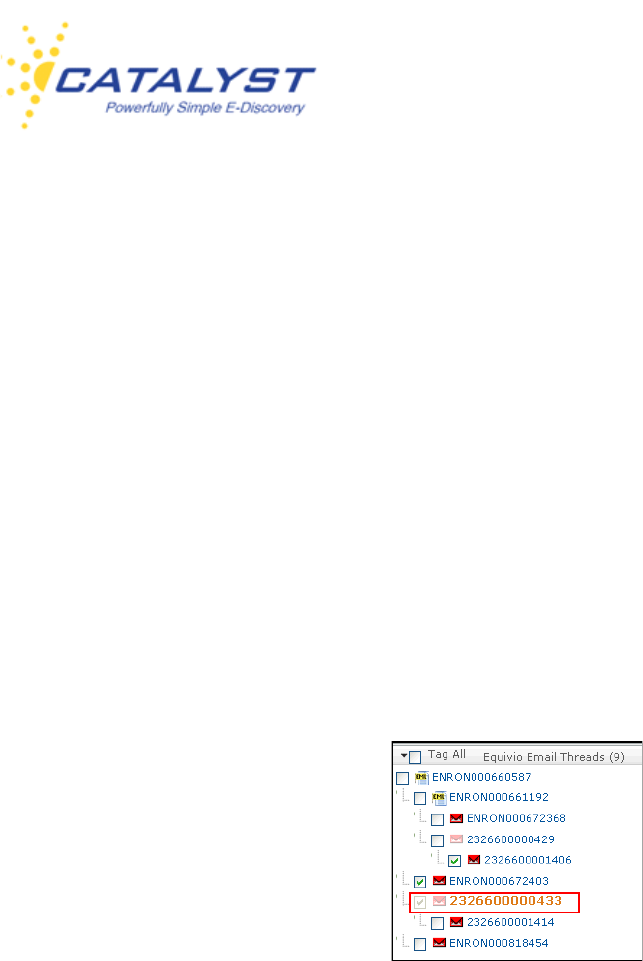
Insight User Guide
v.15-10162013 79
Equivio Email Threads
Your site may have been processed using Equivio technology for email threading identification.
Links to email records that are part of the thread are displayed at the bottom of a form. You can
view the inclusiveness of the thread and open any email attachments.
Inclusive email threads are represented by red Envelopes. Partially red indicates an inclusive
minus email, meaning that the email is inclusive of the entire conversation, but a previous email
in the thread has an attachment that is missing. A blue Envelope indicates a missing email from
the thread. The link for this node is not clickable, as there is no document in the site, but it is
useful information for analysis.
Reviewing the inclusive email (red) from the thread will provide all the email conversations in the
thread. Select the Tag All checkbox to code all the emails the same way or select specific emails
using the checkboxes. You are in the email in larger, orange font.
Equivio Near Duplicates
Equivio processing identifies both duplicate documents and near-duplicate documents. The
Equivio Near Duplicates section is also located at the bottom of the form. Besides access to the
documents, you can also see how similar a document is to the Pivot document. Click the
Triangle button at Equivio Near Duplicates. The Pivot document is usually the document that
has the most words in it compared to the other documents in the near duplicate identification
process (or it may be the newest document). The Grey bar is a visual indicator of similarity.
Duplicate means that the documents are exact duplicates and their binary signatures are
identical. Documents that are 100% similar contain exactly the same text, but their binary
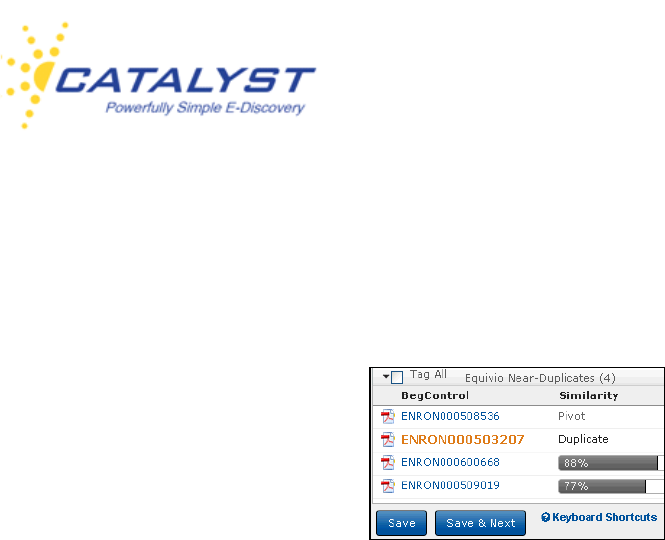
Insight User Guide
v.15-10162013 80
signatures are different. This may be because the formatting of the text is different, such as
different font or alignment.
You are displaying the document that is in larger, orange font. Click another document to open it.
If appropriate, select the Tag All checkbox to code all the near-duplicate documents in the same
way.

Insight User Guide
v.15-10162013 81
Actions
If you have appropriate permissions, the Results page, which displays the documents returned
from a valid search or an opened folder, allows you to perform several actions to documents,
including:
• Copying documents to a folder
• Creating a batch print job
• Exporting selected data from fields of chosen documents
• Removing documents from a folder
• Locking documents, so that no changes can be made to the form or unlocking documents
• Batching documents
• Bulk converting documents
• Bulk OCRing documents
• Bulk updating specific fields in documents
• Selecting collections for documents
• Assigning documents to a review project
Actions are permission-based, and you will be given rights to conduct the actions you need. You
may have access to all the available actions or specific actions.
In the Results page, click the Actions button. A checkbox will display beside each document,
allowing you to select certain documents; you can also select your entire set of document results
or just the page of documents currently displayed.

Insight User Guide
v.15-10162013 82
After clicking the Actions button, you will also see the actions you can take to the documents.
The above image shows the Folder, Print and Export links and the expanded More Actions
menu, which will list other actions available to you.
If your Results set is the contents of a folder, you may see the ability to remove documents from
the folder as well:
Copy to Folder
Insight allows you to view and work with documents in folders. You also may have the ability to
create and edit folders, tailor their contents and determine which other users may see and
access the folders. To create a folder from the Folders structure and for more information, see
the Folders section.
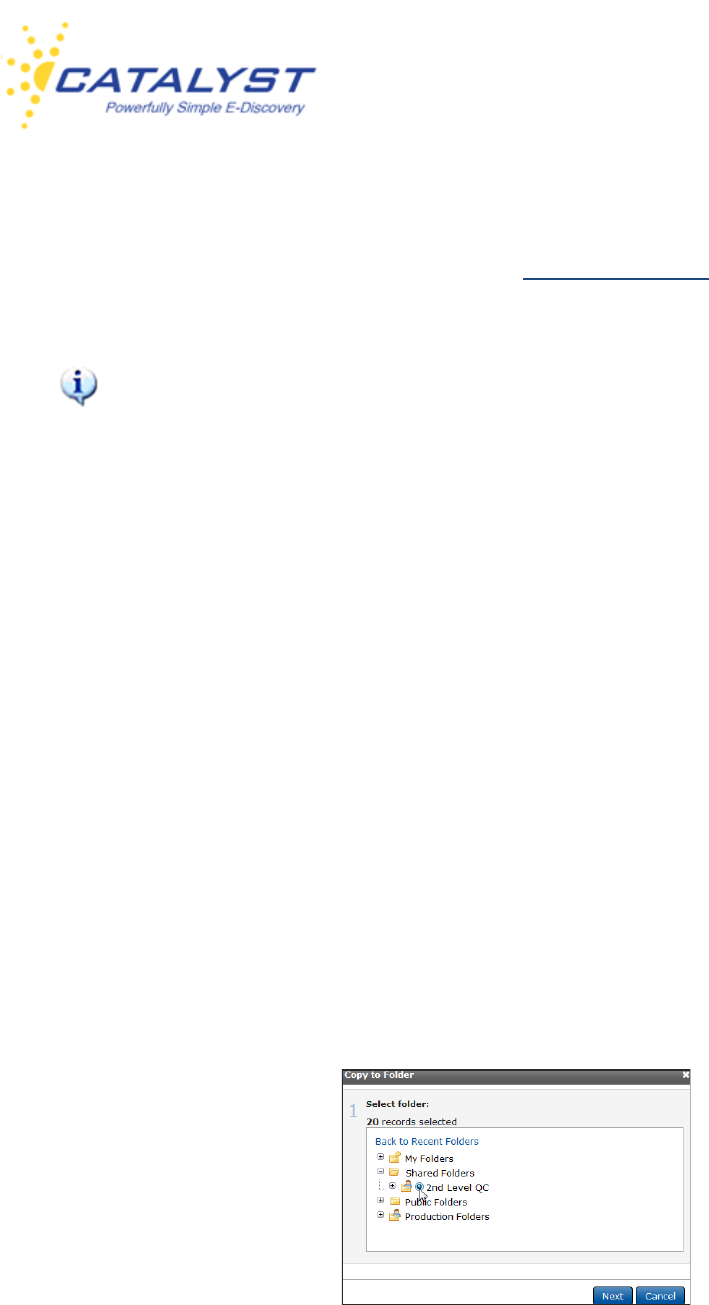
Insight User Guide
v.15-10162013 83
The Copy to Folder action in the Results page allows you to organize documents into Static
Folders. You can copy documents from your Results page into folders. You can also copy an
opened document to a folder, please refer to the Documents section.
Copying a document or documents to a folder is not moving the document from one
folder to another or creating a new instance of the document. Instead, you are creating a
quick hyperlink to your chosen documents in an easy-to-use folder structure.
When using the Copy to Folder function, you can use an already created folder or create a new
one during the process.
To copy documents to a folder from the Results page, click the Actions button, and use the
checkboxes to select your documents.
Next, click the Copy to Folder link.
If you have already performed any copy to folder actions, will see a list of your most recently used
folders. If the folder you’d like to use already exists, you can select its option button from the list
and click Next to go to the Copy to Folder dialog box.
If the folder isn’t in the list, click Other Folders. Folders are structured by access level. Find your
folder in the appropriate top-level access folder, select its option button, and click Next to go to
the Copy to Folder dialog box.
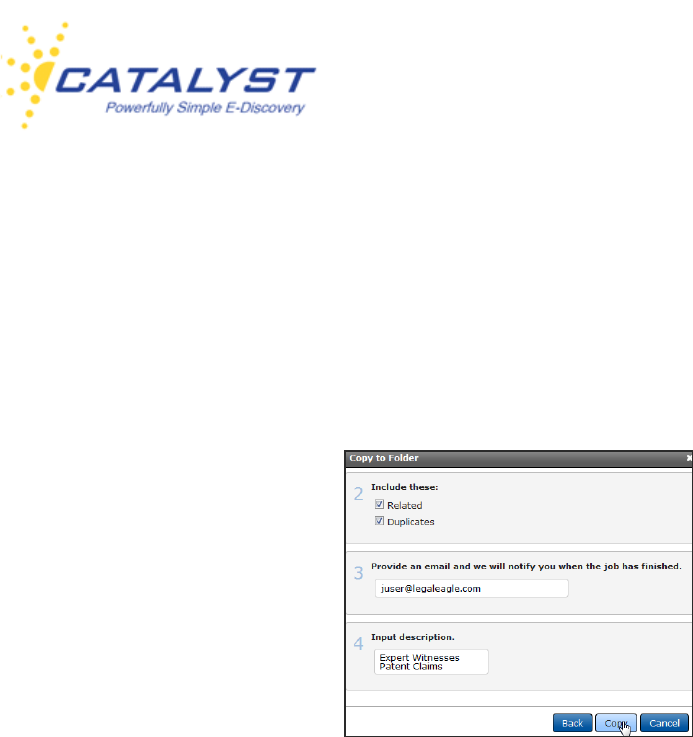
Insight User Guide
v.15-10162013 84
If the folder does not already exist, you can create a folder on the fly.
Copy to Folder Dialog Box
After selecting the appropriate folder to copy your documents, you can choose to include related
documents (thereby linking an entire family of documents to a folder) or include duplicates. At
Step 2, use the checkboxes to make these selections.
Your email address should automatically populate the Step 3 field; this field is editable if you need
to enter a different address.
If you have other descriptive information, you can make it a tool tip by using the Input
description text box. (This input will display at Monitors by clicking Field/Folder Updates under
Jobs.)
Click Copy to complete your copy to folder action.
Creating Folders on the Fly
Your top-level access folders are My Folders, Shared Folders, Public Folders, and you may
have rights to and, therefore, see Production Folders.
Shared Folders are folders shared with you by other users but are not public for every user on
the site to access. You are not able to edit Shared Folders, since other users have built these
folders and shared them with you.
Use My Folders to create folders for just your use or folders to share with select users.
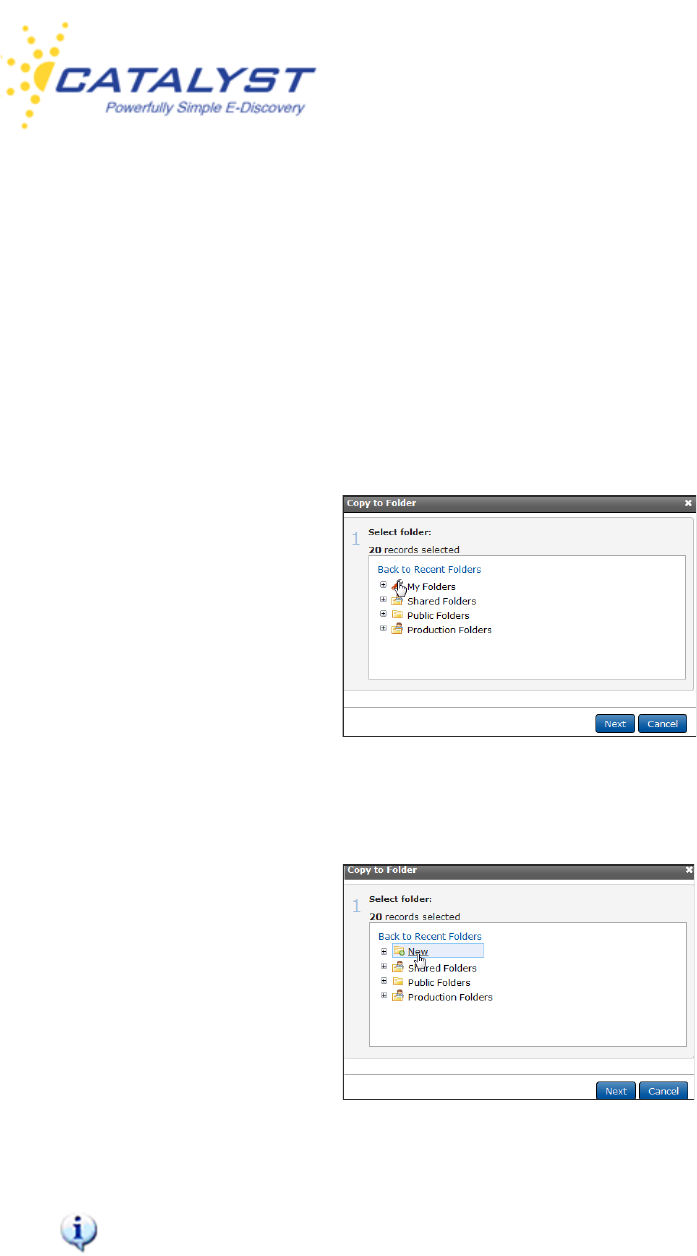
Insight User Guide
v.15-10162013 85
When you don’t need to select the other users to give access to a folder and instead want all
users to see and have the ability to access that folder, use Public Folders.
If you have rights to Production Folders, you can also copy documents to folders for production.
Ensure you are at the top-level folder structure (after clicking Copy to Folder, click Other
Folders). When you point to a folder, a wrench will appear if you have rights to edit the folder
contents. Click the wrench to create a new sub-folder.
Click the New link.
Ensure you are at the appropriate access level folder. For example, if you want to make a
new Public Folder, click the tool at Public Folders. You will be able to edit your folders
and establish new access levels or give other users rights to folders later, but it is best
practice to establish your folder in the appropriate top-level access folder.
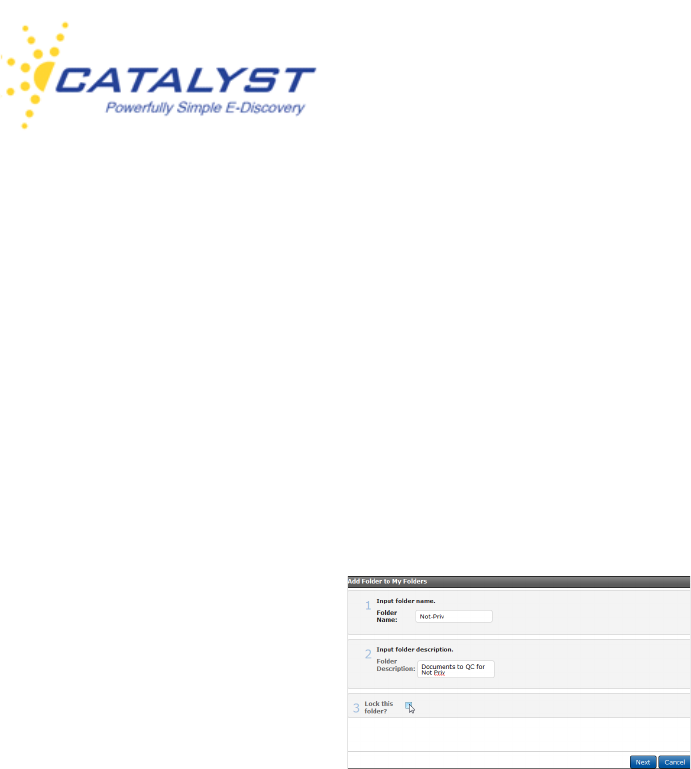
Insight User Guide
v.15-10162013 86
In the Add Folder To ... dialog box, enter your new folder’s name. You must give your folder a
name. If you enter an invalid character or character length, you will receive a prompt.
You can also enter a description if desired. This description becomes a tool tip when the folder is
pointed to in the Folders structure.
Select the Lock this Folder checkbox if you want to ensure the contents are not changed after
you’ve performed this copy function. As the folder creator, you would be able to unlock the folder
if you want to change the contents at a later time.
Click Next when ready.
If you chose to make a new folder under the My Folders top-level folder, you will have the ability
to share the folder (and therefore the contents) with selected users on your site.
Use the Right Arrow button to place a user in the Selected User text box (you can also remove
a user using the Left Arrow corresponding to the user’s name). The center Triangle buttons
allow you to move all users.
If you want to leave the folder private for just your use, don’t include any users in the Selected
User text box.
The Users you select will have access to the folder and its contents under the Shared Folders
top-level folder.
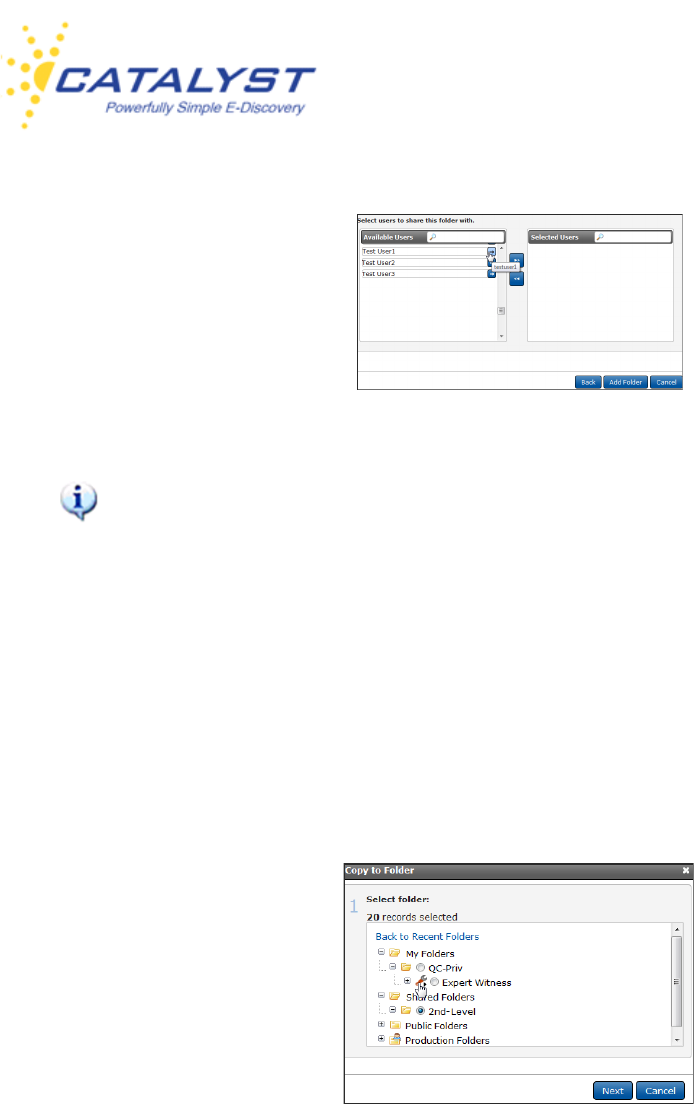
Insight User Guide
v.15-10162013 87
If your site is a Private Field site, you will only be able to share a folder with users who
have access to the same fields that you do.
If you’ve created a folder under the Public or Production top-level folders, you won’t see the
step to select users.
Click Add Folder. You will now see your folder in the folder structure. Select its option button,
and click Next to go to the Copy to Folder dialog box.
You can also nest a new folder within a sub-folder:
To monitor your copy jobs, click the Monitors button and then click Folder/Field Updates under
Jobs.
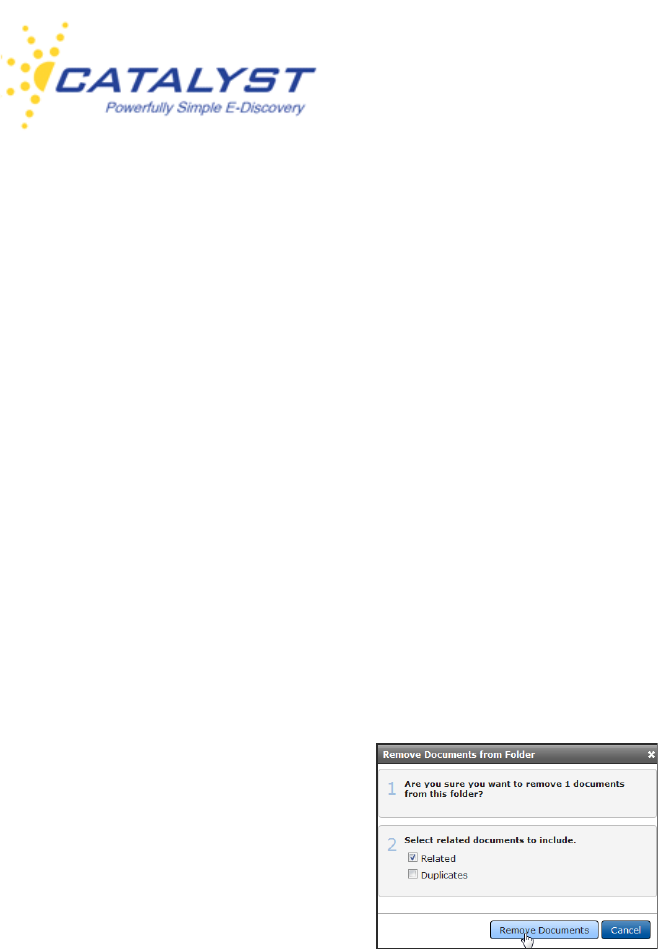
Insight User Guide
v.15-10162013 88
Remove From Folder
You may have permissions to remove documents from a folder. When removing documents from
a folder, you are not deleting documents from the site, only removing the link to a specific
document from the opened folder.
You must open the folder to display the foldered documents in the Results page.
Click Actions, and select your documents using the checkboxes.
Then, click the Remove From Folder link.
In Step 2, select whether to remove duplicates or related documents using the checkboxes, and
then click the Remove Documents button.
The selected documents are not deleted. Quick access to them via this folder is no longer
available.
Printing and Downloading Documents
If you have permissions to do so, you can create a downloadable file of selected documents from
your Results page. The Insight Print feature allows you to create a PDF file or a Zip file of the
documents you select. You can also choose to replace a document with a redacted version in
your print job. If you choose to make a PDF file, you can tailor it for printing to include separator
sheets between each document with fielded data, bookmarks, headers, footers, and watermarks.
If you choose to zip the records into a folder, you can select to use the native of the record or the
HTML preview, which allows for quick opening and doesn’t require the native application view the
contents of the record.
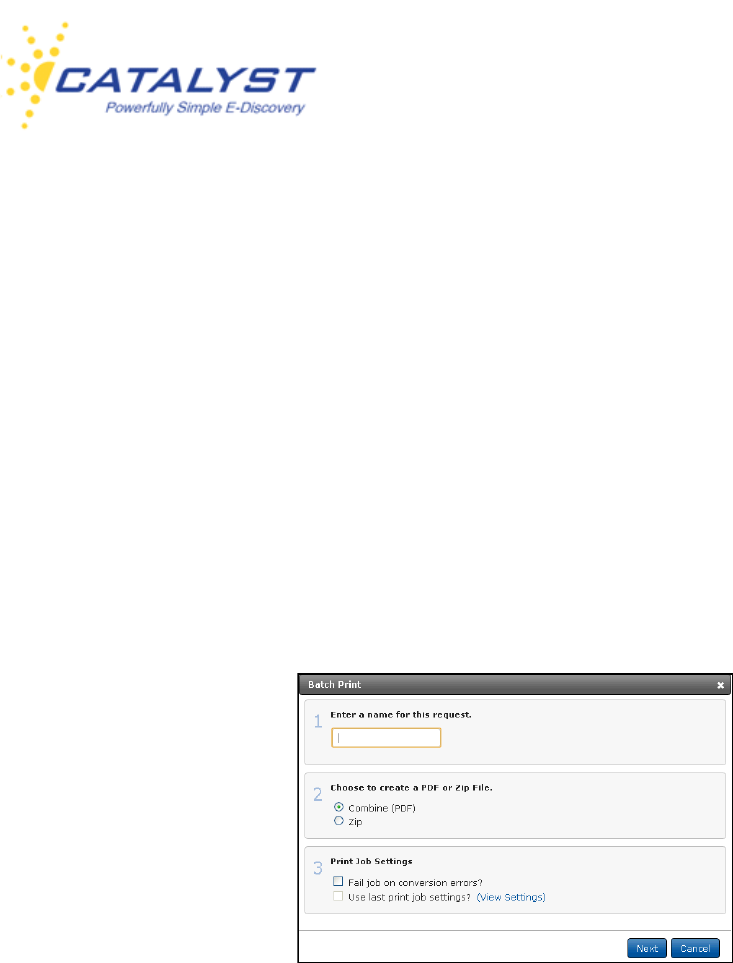
Insight User Guide
v.15-10162013 89
It is important to note that clicking the Print link at Actions in the Results page is not sending a
document or documents directly to your local or network printer; instead, it is allowing you to
create a downloadable file of all your selected documents and, if you select to make a PDF,
allowing you to customize the PDF file.
To access this feature, click Actions in the Results page, and select your documents using the
checkboxes.
Next, click Print to open the Batch Print wizard.
Batch Print Wizard
In Step 1, enter a name for your print job using 5-100 alphanumeric (or Unicode) characters. (You
will be prompted if the name is outside the character limit or contains unacceptable characters).
In Step 2, you can select your output file:
• Select the Zip option to create a zipped folder of each of your selected documents.
• Click the Combine option to create a PDF file, which combines all your selected documents
into one PDF file.
Step 3 allows you to enter some settings information. If you want the entire print job to fail if any
document fails to convert to PDF, select the Fail job on conversion error checkbox. Instead of
creating a PDF with some missing documents, the entire job will fail.
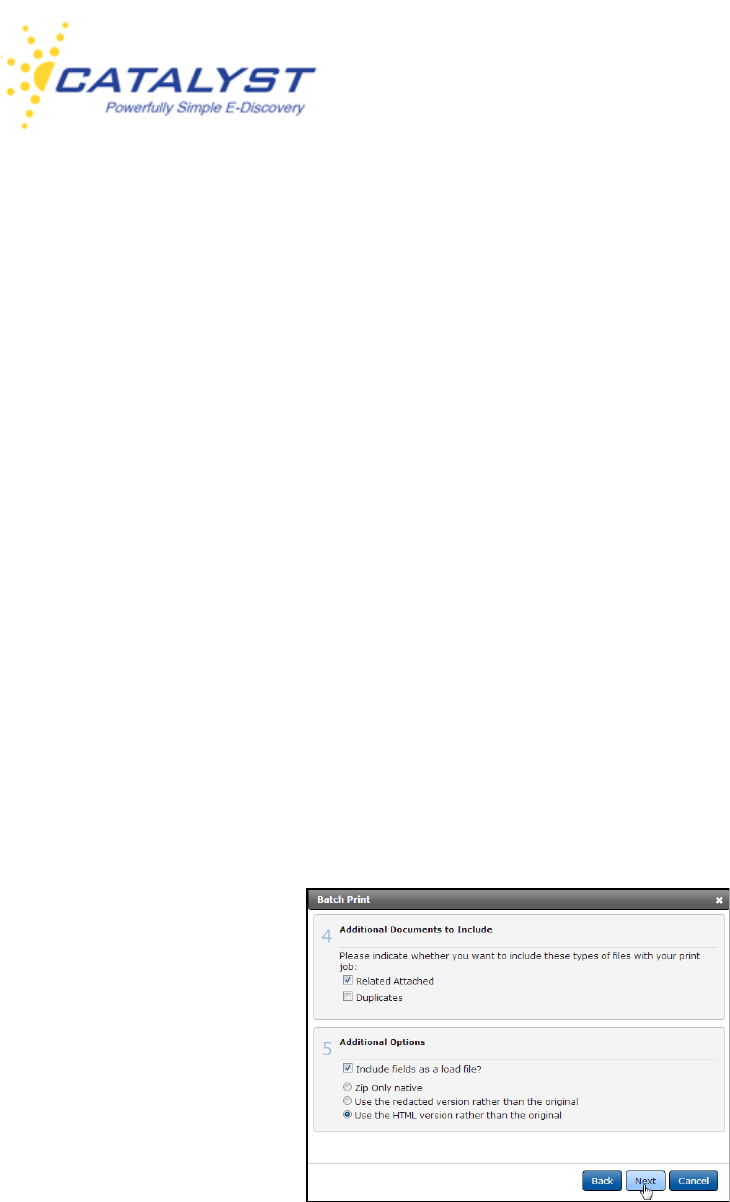
Insight User Guide
v.15-10162013 90
The Use last print job? checkbox applies your last settings to this print job if you have run prior
print jobs, you can click View Settings to see the way you customized your last print job.
Click Next.
Create a Zipped Folder
If you selected the Zip option in the Batch Print Wizard, you can make selections for your
zipped folder.
At Additional Documents to Include (Step 4), select the appropriate checkboxes if you’d like to
include related and duplicate documents in your folder.
Additional Options (Step 5) allows you to make some important selections for your zipped
folder. Select the Include Fields as a Load File checkbox to create a load file. (You will be able
to select specific fields in the next section.) You can choose to zip the native record or replace the
original version of the record with a redacted version. You can also zip up the HTML preview of
the record. The HTML option offers a smaller document file size, ensures quick opening of the
documents from the zipped folder, and the native application does not have to be loaded to view
the record.
If you selected the Include Fields as a Load File checkbox in the previous step, you will be
prompted to select your fields at Select fields for load file (Step 6). Hold down the CTRL key or

Insight User Guide
v.15-10162013 91
SHIFT key on your keyboard to highlight more than one field. The fields listed are determined by
your site administrator.
Clicking Next opens the Print Summary dialog box.
Create PDF File (Combine)
If you selected the Combine option in Step 2 of the Batch Print Wizard and you have applied
your Print Job Settings, you can select whether to include related or duplicate documents.
Step 5, Choose Any of These Options, allows you to customize your PDF file. Selecting the
checkboxes, you can:
• Include bookmarks in your PDF file that will take you to a specific record
• Apply customized footers and watermarks to the PDF
• Insert a separator sheet between each document, so there is clear delineation showing
when one record ends and another begins (this checkbox is selected by default, so if you
do not want separator sheets between each document, clear this checkbox)
• Include fielded information (metadata) on the separator sheet
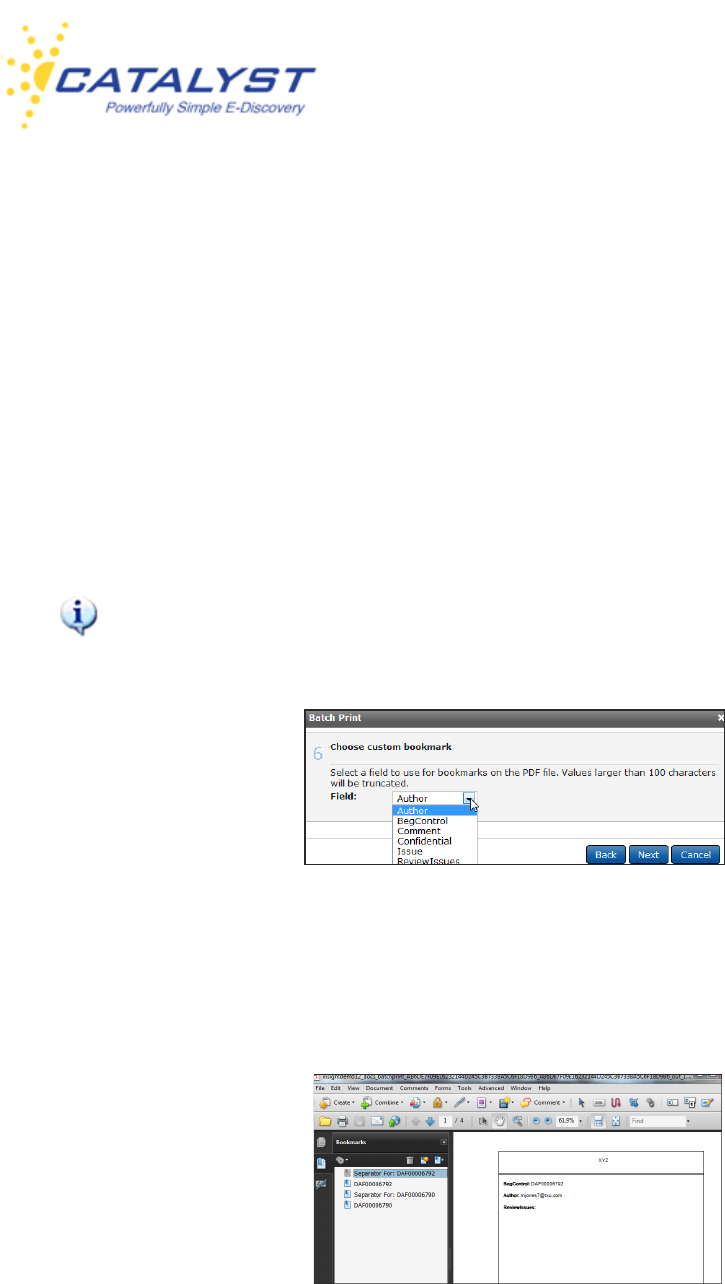
Insight User Guide
v.15-10162013 92
• Substitute the original document with a redacted version, either full redaction boxes or
transparencies.
Click Next after you’ve selected the appropriate checkboxes.
Custom Bookmarks
If you chose to include custom bookmarks at Choose Any of These Options in the Batch Print
Wizard, you can select a field for the PDF bookmark at Choose Custom Bookmark.
Using the Arrow, expand the menu to see the fields available, and click your field, and then click
Next. The fields available to use for a bookmark are enabled by your site administrator.
You can only choose one field for your bookmarks. If the value populating the field is over
100 characters, the bookmark title will be shortened, if appropriate.
When your print job is ready, readers can quickly go to any document in your PDF file by opening
it in Adobe Acrobat and using the bookmarks rather than having to scan the entire PDF file. In
this example, the BegControl field value of each document is a bookmark.

Insight User Guide
v.15-10162013 93
Footer and Watermark Information
If you chose to include footers and watermarks at Choose Any of These Options in the Batch
Print Wizard, you can design these at Step 7, Footer Information.
Select up to two fields to appear in the footer of your PDF. Expand the Field 1: menu using the
arrow and select your field. If you’d like to include two fields, use the Field 2: menu to select your
second field. The fields available are determined by your site administrator. You can also enter
custom text for the footer. If you selected the Include Custom Footer and Watermark checkbox
at Choose Any of These Options, you must include either a field or a custom entry for the footer.
You will be prompted if you don’t. You are not required to create a watermark.
To place a diagonal watermark on each page, enter a short word or phrase in the Watermark:
text box.
Click Next when ready.
All of the footer information will appear in the lower right of each page of your PDF file on a single
line. The watermark will appear diagonally across each page of your PDF.
Separator Sheets
If you left the Separator Sheets checkbox selected, you will have a separator sheet between
each record. If you selected Include Metadata on Separator Sheet at Choose Any of These
Options in the Batch Print Wizard, you can select which fielded information to display on your
separator sheets and you can create a custom header and/or footer to appear on the separator
sheets.
Click the Field Name in the Fields drop-down list and the field will appear in the box below. You
can order the fields using the Up and Down Arrow buttons. Delete a Field using the Minus (-)
button. You can also select the fonts and font sizes using the appropriate drop-down arrows.
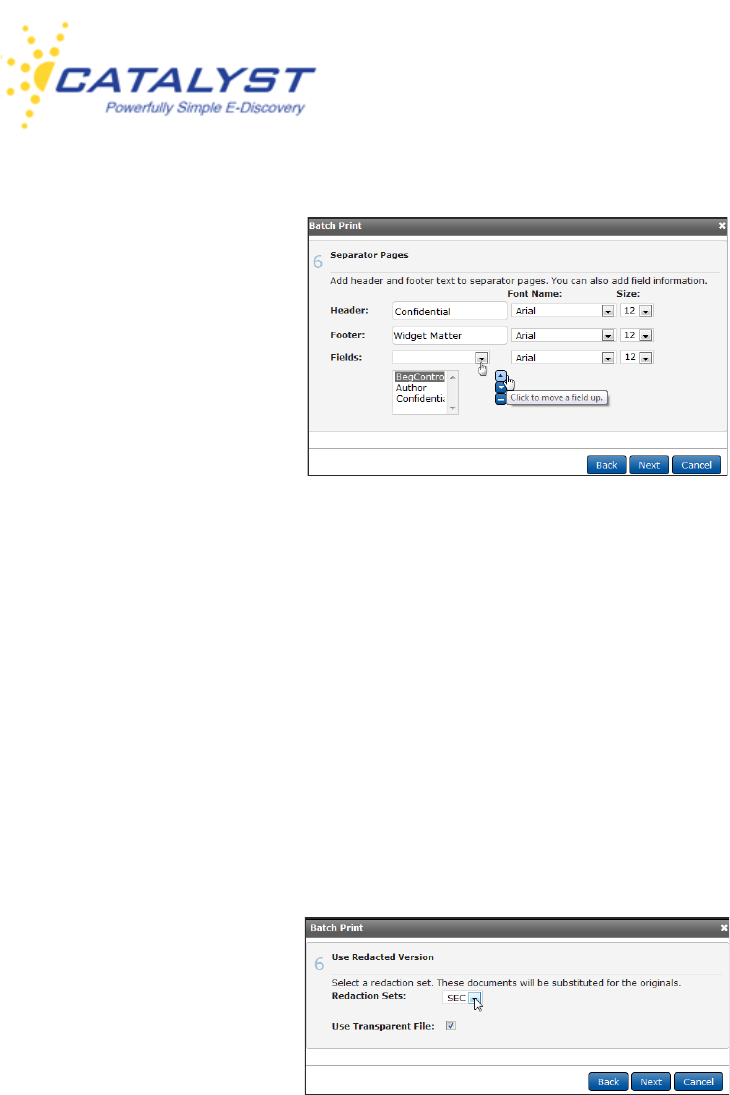
Insight User Guide
v.15-10162013 94
Click Next.
Use Redacted Version
If you selected to include the redacted versions of documents at Choose Any of These Options
in the Batch Print Wizard, you can designate the redaction set. Expand the Redaction Set
menu using the drop-down arrow and click the appropriate set name.
You can also select to include the transparency of the redacted document by selecting the Use
Transparent File: checkbox. This is often useful when you are wanting to first perform a quality
check on the document set.
Clicking Next opens the Print Summary dialog box.
Print Summary
The Print Summary provides details of your print job, including the name, number of records you
selected and the number of jobs ahead of yours in the queue. You can click Cancel to delete the
print job or click Back if you’d like to change anything before initiating the print job.
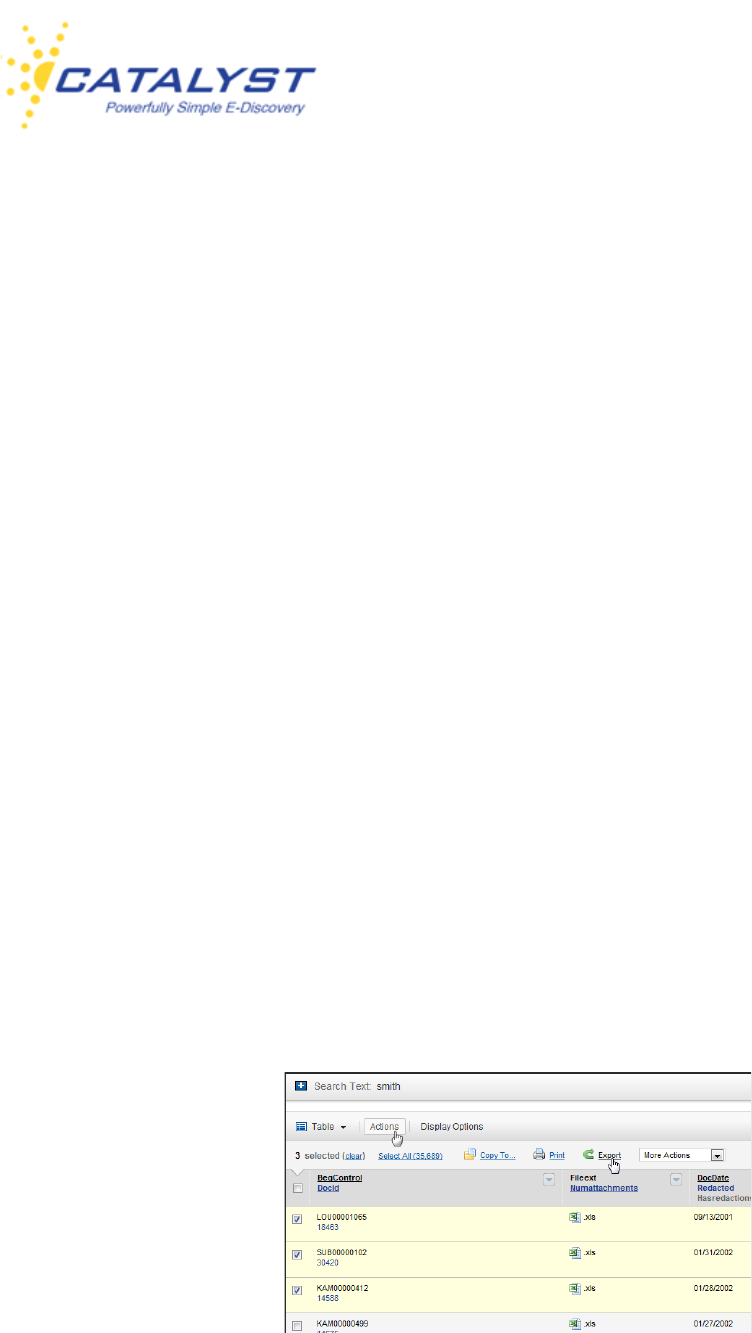
Insight User Guide
v.15-10162013 95
At the next page, your email address should be automatically populated. You can add it or
change it if it is incorrect or does not appear.
Click Create Batch Print to complete your print job.
You will receive email notification when the Zip file or PDF file is ready. Access the file and details
about your printing job by clicking the Monitors button and selecting Print under Jobs.
Exporting Fielded Information
If you have permissions to do so, you can select and download fielded information about the
documents found in your search and save the information in a standard file format, such as
Microsoft Excel, XML, HTML, Delimited Text, CSV and Word, or other programs that accept
ASCII (comma) delimited format. You can choose metadata fields and fields that have been
coded by reviewers to export to your report. You can create, for example, a Privilege Log using
Export.
Please note that when you use the Export feature, you are downloading selected fielded
information associated with the documents you choose; you are not exporting the contents of the
documents. The Print feature allows you to build a downloadable file of a complete record or a
set of records.
Export is available in the Results page as part of the Actions features, which are made
available by clicking the Actions button.
Select documents using the checkboxes and then click the Export link.
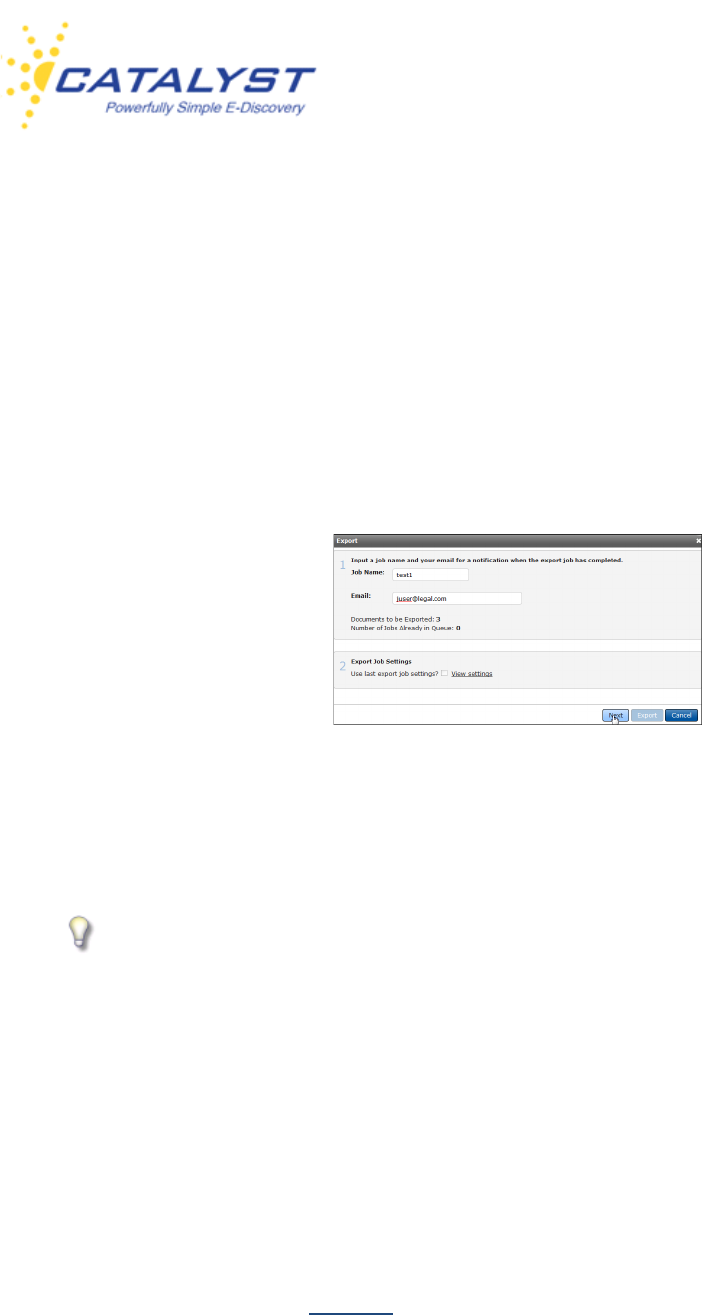
Insight User Guide
v.15-10162013 96
Enter a name for your exported file in the Job Name: text box using 5-100 alphanumeric (or
Unicode) characters. (You will be prompted if the name is outside the character limit or contains
unacceptable characters). Your email address should automatically populate the Email text box.
If it is empty, enter your address. You can also enter a different email if you’d prefer.
If you’ve created an export file before, you may want to select the Use last export settings?
checkbox which we create an export using the same settings as your prior export job.
Click the View settings link to view your last selections.
When ready, click Next.
Select the type of file to export your data into using the Export Type option buttons.
For large exports with many rows, Catalyst recommends either selecting the Delimited
Text format or the Access format rather than Excel. It will take less time to export.
To view the possible fields for your export file, click the Plus sign (+) button to expand Export
Fields.
To select a specific field, use its Arrow button to move it from the Available Fields list to the
Fields to Export list. You can also use the center Triangle buttons to move complete lists.
Click Export. The window will close, and the job will be submitted. You will receive an email
containing a hyperlink for quickly accessing your file when the file is ready. You can also find any
exported files at Export in Monitors.

Insight User Guide
v.15-10162013 97
More Actions
You may be given permissions to high-level user permissions in Insight that allow you to take
other actions to the documents in your Results page. These actions include:
• Locking documents, so that no more coding changes can be applied to the document form
or unlocking them so that coding can be applied;
• Batching documents (grouping documents together)—documents can be batched by folder
or by field;
• Converting multiple documents to PDF;
• Running OCR on documents, which do not have searchable text, making the documents
indexable and, therefore, searchable;
• Copying documents to a review project;
• Updating or changing field tags to multiple documents at one time;
• Selecting a collection to place your documents.
To access any of these features you have permissions to, click Actions in the Results page, and
expand the More Actions menu.
Lock/Unlock Documents
If you have the proper permissions you can lock or unlock documents. Locking makes
documents read only— the coding in the form cannot be changed. Save and Save & Next and
certain other functions are unavailable (they will appear dimmed).
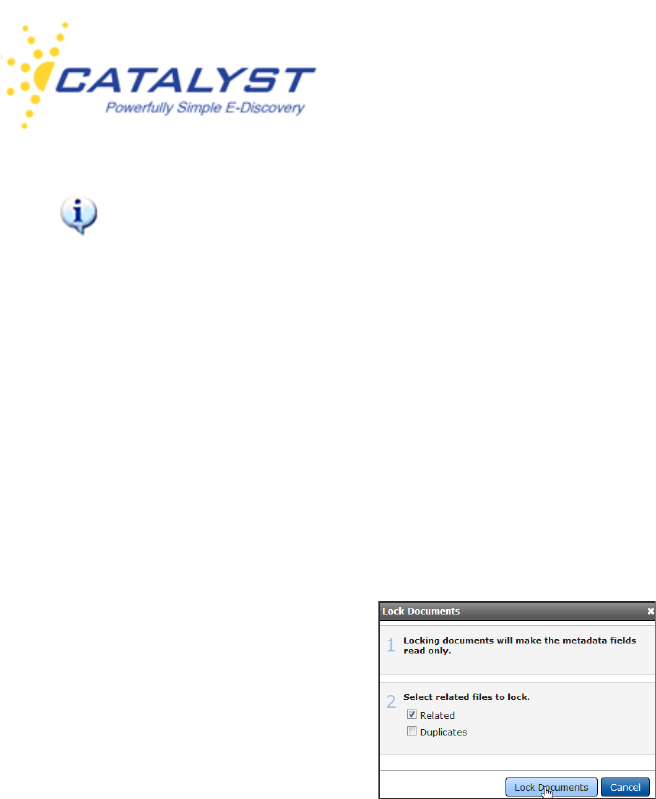
Insight User Guide
v.15-10162013 98
You or other users may have the ability to override the locking of documents and apply
coding changes when bulk updating.
To access this feature, click Actions in the Results page, and select your documents using the
checkboxes. Then expand the More Actions menu and click Lock (Unlock to make documents
locked available for coding changes).
Use the Related and Duplicates checkboxes to lock documents related to or duplicates of the
records you selected in the Results page. Then, click Lock Documents. The Unlock action also
allows you to unlock related and duplicates, if applicable.
Batch Wizard
If you have the rights to group or batch documents into folders (batching can be organized by a
field or a folder), the Batch Wizard button will be available in the More Actions menu. In the
Results page, click Actions and then use the checkboxes to select your documents. Expand the
More Actions menu and click Batch Wizard.
In the Batching Wizard dialog box, you will have the option to batch your selected documents
into a Static Folder or to Dynamic Folders by a specific field.
Batch by Folder
Keep the Batch Type set to By Folder, to group your documents into a Static Folder that you or
another user has created and is already in the folder structure.
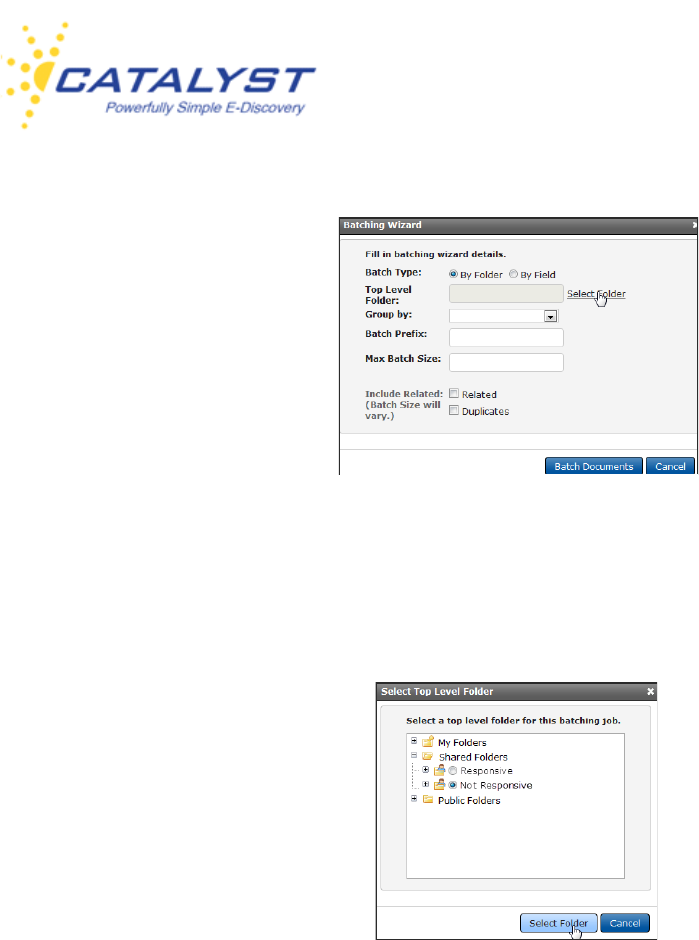
Insight User Guide
v.15-10162013 99
The Top Level Folder text box is a required field. To populate it, click the Select Folder link. This
opens the Static Folders structure. Expand the folders, and use the option button beside a folder
to select it, and then click the Select Folder button.
Your folder now populates the Top Level Folder box. The remaining text box fields are also
required.
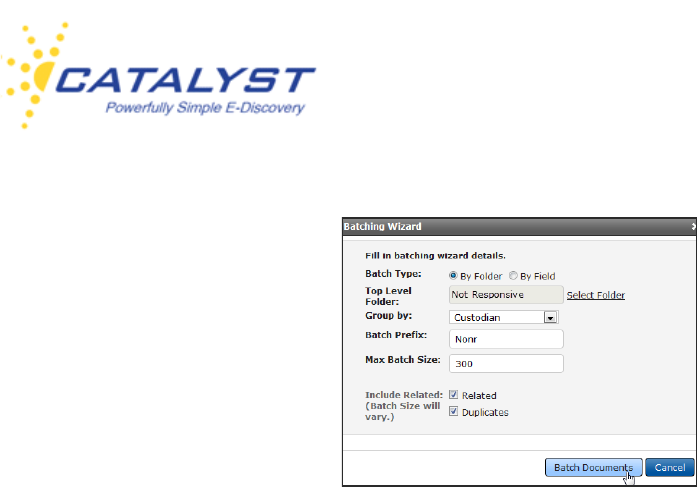
Insight User Guide
v.15-10162013 100
Group By
Expand the Group By menu field and select a field. The Group By field ensures that documents
are kept together based upon the field you select. For example, you may want to group
documents by custodian. Documents will be structured by custodian and then batched per
number of documents you select. Your site administrator configures this list of available fields.
Batch Prefix
At Batch Prefix, enter a 1-6 alpha character prefix. All batches in Insight will be padded with
three zeros to sort properly. The first batch, for example, will be 0001. Batch nine hundred would
be 0900. If you choose to add a prefix, for example ABC, you will create batches ABC0001
through ABC0900.
Max Batch Size
Max Batch Size sets the maximum number of documents in each batch. You can choose to
batch in any number between 50 and 9999, meaning the smallest batch you may make is 50
documents and the largest 9999. For example, if you have 10,000 documents that need to be
reviewed, you may choose to have batches of 500 documents (this is a typical batch size). This
will result in 20 batches of documents. If the documents you want to batch total 10,200, you will
have 21 batches, with the last batch having only 200 documents, rather than the full 500. Batch
size will also be affected if you choose to keep related and/or duplicate documents together.
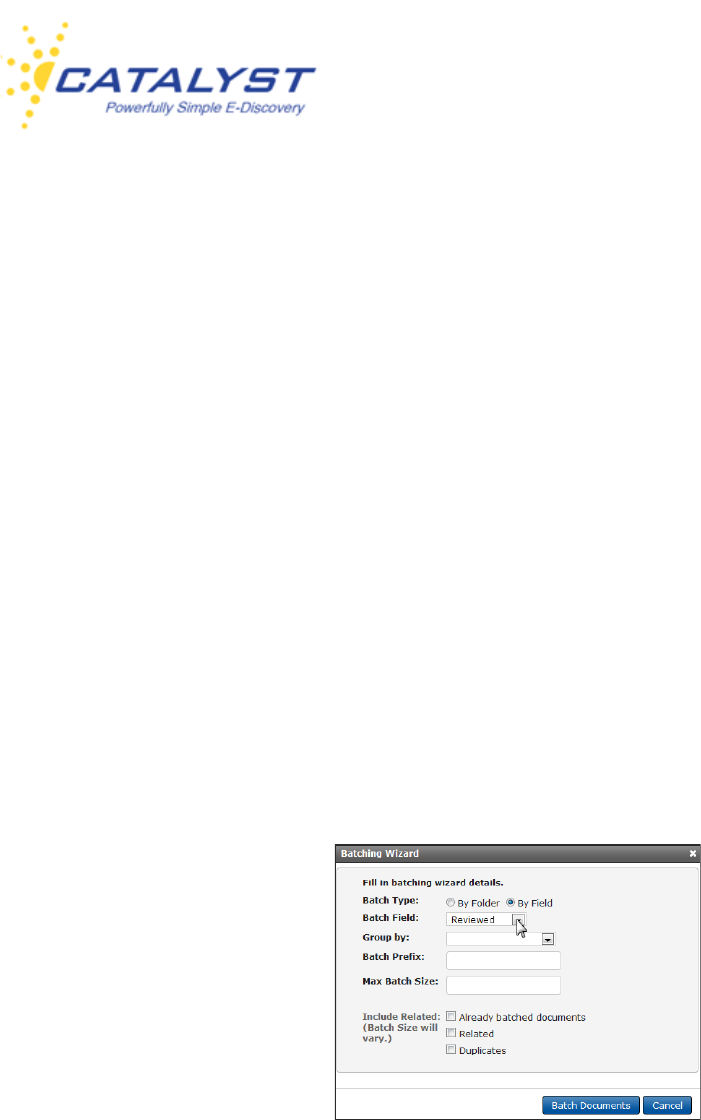
Insight User Guide
v.15-10162013 101
Include Related, Duplicates
To keep the related documents and/or the duplicates in the same batch as the parent/original
documents, select the appropriate checkboxes. The document counts may increase in your
batches, because the related or duplicate documents will be included in the parent or original
document batch.
Click Batch Documents to execute the batching process.
Batch by Field
Batching documents by a specific field allows you to batch documents to Dynamic Folders. You
must first set up your Dynamic Folders structure in the Administration/Case Configuration/
Dynamic Folders.
In the Batch Wizard, select By Field at Batch Type. For example, you may want to bulk update
all your documents to Not Reviewed and then batch your documents into the Dynamic Folders
by the Reviewed field. The Dynamic Folders structure will be based on the values in the
Reviewed field.
See the above sections for information on completing the remaining text box fields.
Include Related, Duplicates, Already Batched
If any of the documents you selected have already been batched, you’ll see the Already
Batched Documents checkbox. This allows you to re-batch the documents into your batches if

Insight User Guide
v.15-10162013 102
you select it. To keep the related documents and/or the duplicates in the same batch as the
parent/original documents, select the appropriate checkboxes. The document counts may
increase in your batches, because the related or duplicate documents will be included in the
parent or original document batch.
Click Batch Documents to execute the batching process.
You can monitor the progress at Batching in the Monitors section under Jobs.
Bulk Convert to PDF
For most native files, you can create a PDF version in the opened document; you can also create
PDF versions of documents in bulk from the Results page.
To convert multiple records to PDF, click Actions in the Results page and select your documents
using the checkboxes.
Expand the More Actions list and click Bulk Convert.
In Step 1, Check conversion options, you can overwrite an existing PDF if one exists for a
record. Select the Overwrite existing documents checkbox.
You may also have permission to replace the body text from the converted PDF. This replaces
the document’s text (for searching and in the HTML view) with the text taken from the PDF
version.
Select the Replace body text from the converted PDF to use text taken from the PDF rather
than from the native file.
Selecting the Related or Duplicates checkboxes in Step 2 will also convert those associated
records into PDF in addition to the records you selected in the Results page.
Your email address will automatically display in Step 3. You can remove it if you do not wish to be
emailed when the conversion is complete, or change the email address if preferable.
Click Convert to execute the conversion process. You can monitor the conversion job at
Conversion in Monitors.
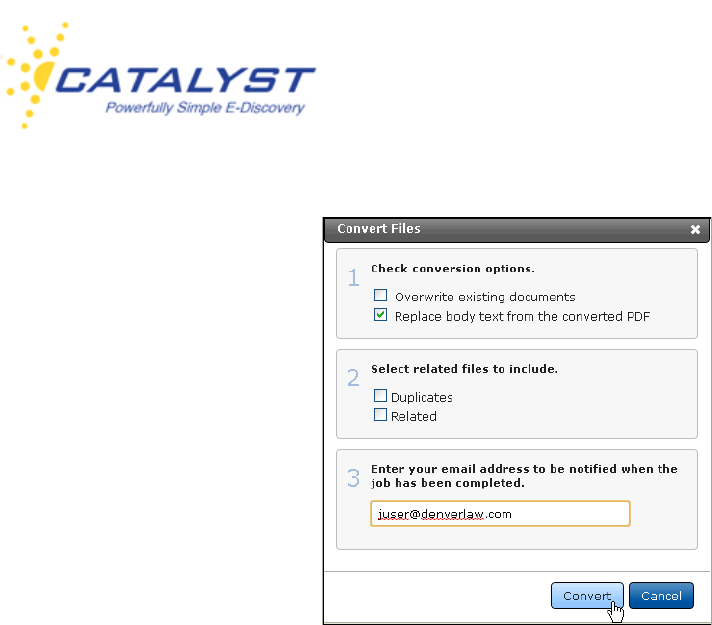
Insight User Guide
v.15-10162013 103
Bulk OCR
If you have appropriate permissions, you will be able to run OCR software on a document or set
of documents directly in the Insight interface. This is typically done to non-indexed documents
(the text of the document is not searchable) and will allow users to search the text of the
document.
Once the OCR process is ready, a searchable PDF format will be appended to the record. If the
record is in PDF or has been converted to PDF, you can select to replace the PDF with your new
OCR’d PDF.
To OCR documents, display the appropriate documents in the Results page, click Actions and
select your documents using the checkboxes.
Expand the More Actions list and click Bulk OCR.
In Step 1, Check the OCR job options, use the checkboxes to:
• Overwrite existing documents—If a PDF of the record exists, you can replace it with this
OCR’d version by selecting this checkbox.
• Use Color—If the record is color or image intensive, you may want to use this checkbox to
render your document in color rather than black and white.
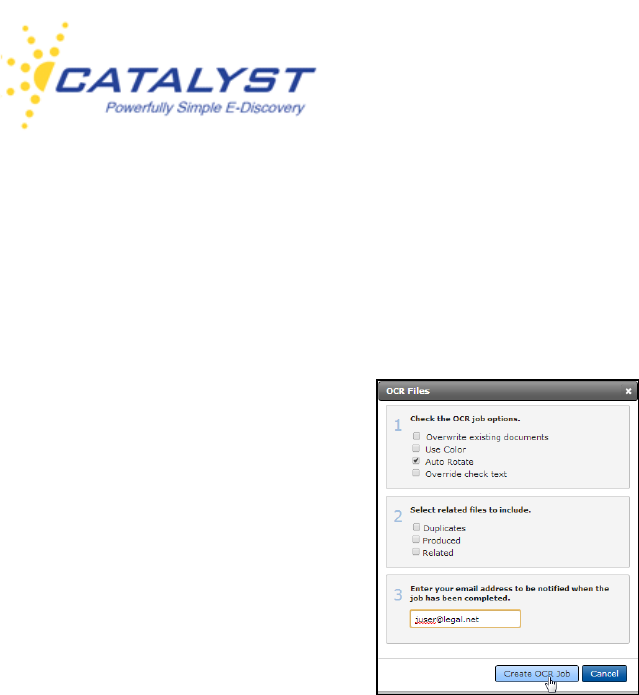
Insight User Guide
v.15-10162013 104
• Auto Rotate—Selected by default. Clear this checkbox if you don’t want the OCR process
to possibly rotate the document.
• Override Check Text—During the OCR process, if a document has a page that has text
content, the system, by default, will not OCR it. If you want to force OCR of every page,
select this checkbox.
Selecting the Related or Duplicates checkboxes in Step 2 will also OCR these associated
records if any exist.
Your email address should automatically display in Step 3. You can remove your email if you
don’t want to get receive an email notification. You can also enter a different email if you’d prefer.
Click Create OCR Job when you’ve completed your selections and are ready to run the OCR
process.
Your OCR job can be monitored at OCR Jobs under Monitors.
Bulk Update
If you have the rights to do so, you can apply the same coding changes to multiple documents at
once through the Insight Bulk Update feature. Fields available for bulk updating are established
by your site administrator.
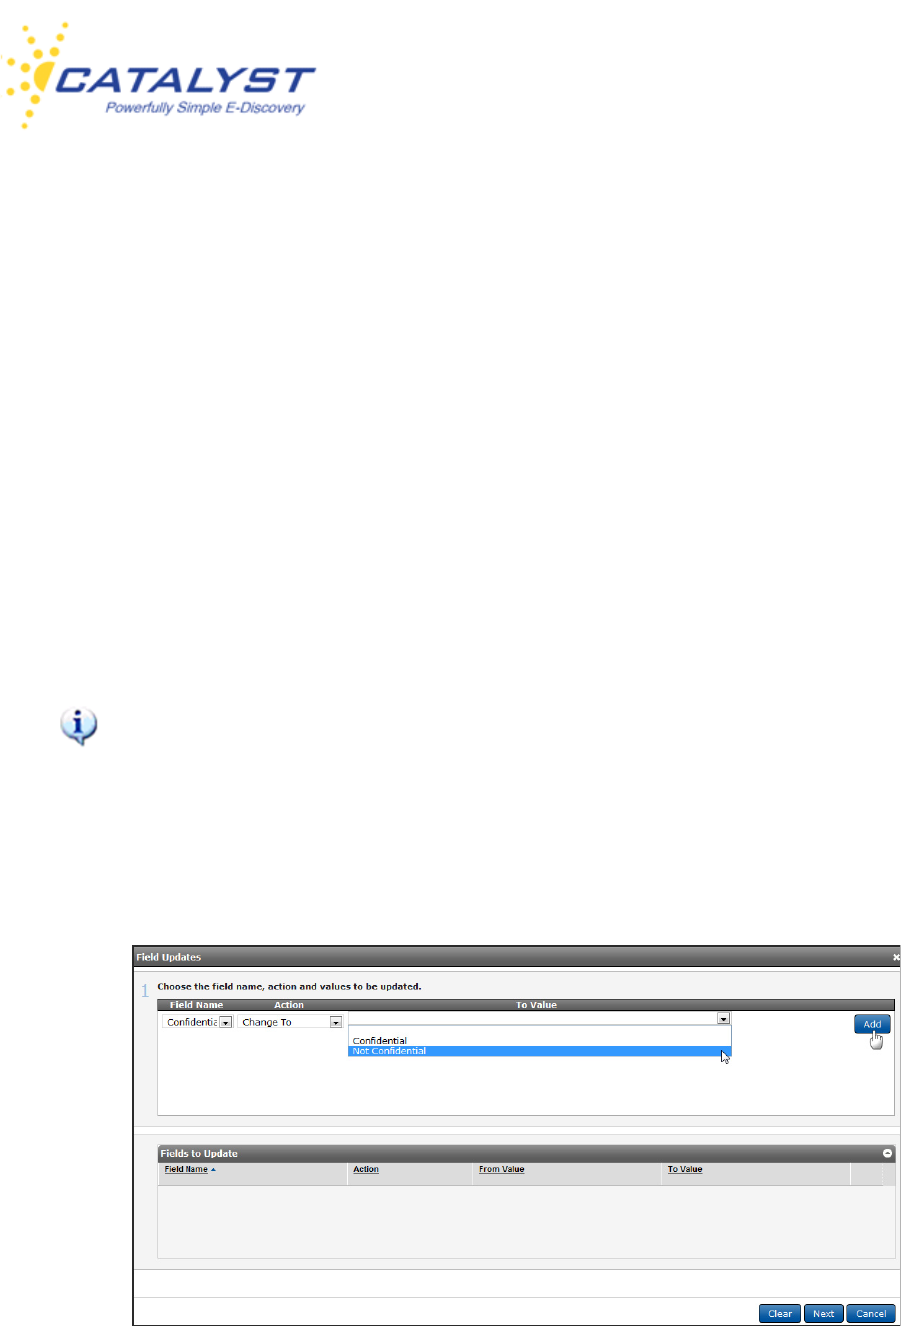
Insight User Guide
v.15-10162013 105
To apply codes to several documents at once, click Actions in the Results page and select your
documents using the checkboxes.
Expand the More Actions menu and click Bulk Update.
In the Field Updates dialog box, expand the Field Name menu and select your field. The type of
field you select determines your next options.
Bulk Updating a Single-Value Field
Single-value fields are fields in which only one coding choice can be made. In the document
form, these fields are typically option button fields.
When bulk updating a single-value field, your Action selection will be limited to Change To and
Make Empty.
Because only one codiing choice can be made, when bulk updating you may select to set
the value for all the documents you are updating or you can make the field null, taking it
back to an empty field.
If you want to change the value for your chosen documents and field, click Change To, and then
select the value using the To Value menu.
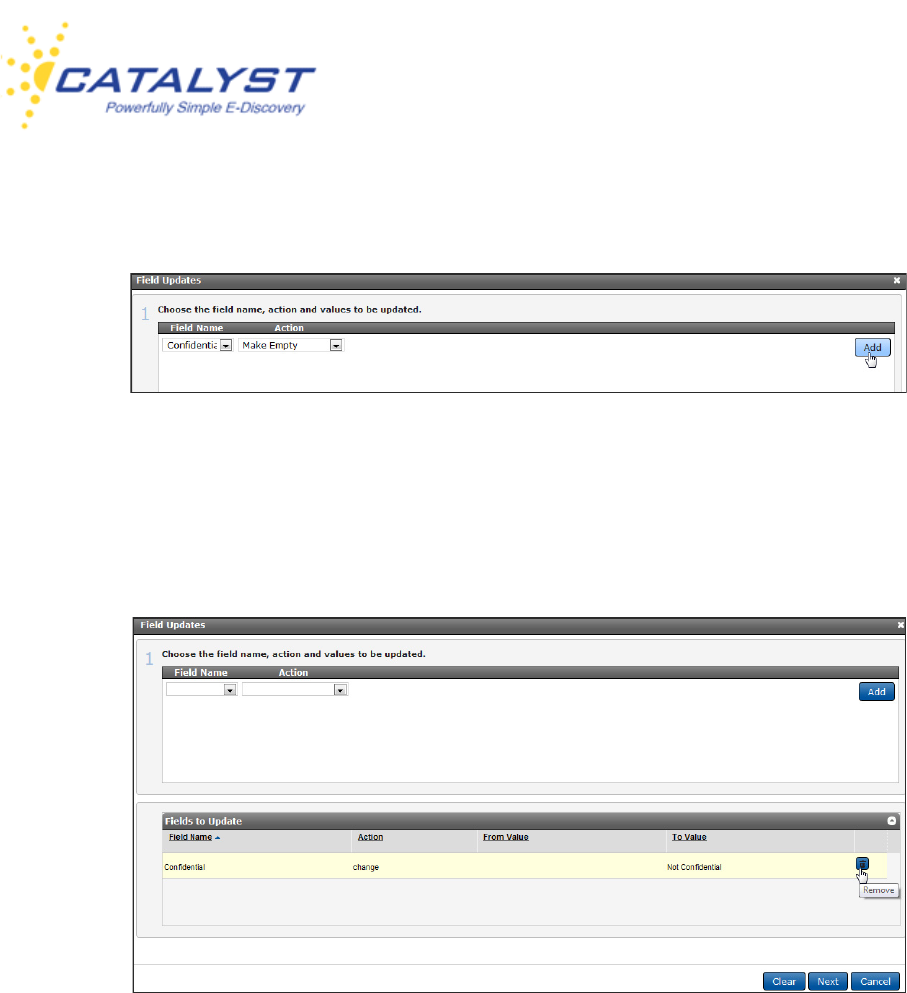
Insight User Guide
v.15-10162013 106
If you want to delete all data in the field, select Make Empty in the Action menu.
Click Add to place your action in the Fields to Update section. You can select additional fields
you’d like to update as well by following the above steps.
If you don’t want to use this bulk update query, you can delete it using the Remove button.
Click Next to go to the Field Updates dialog box.
Bulk Updating a Multi-Value Field
Mutli-value fields allow users to select and store more than one coding choice or value for the
field. In the form of a document, these fields allow users to select checkboxes or a multi-value
lookup table to apply one or more codes to a field.
When bulk updating a multi-value field for several documents, click Actions in the Results page
and select your documents. Expand More Actions and select Bulk Update. Select your multi-
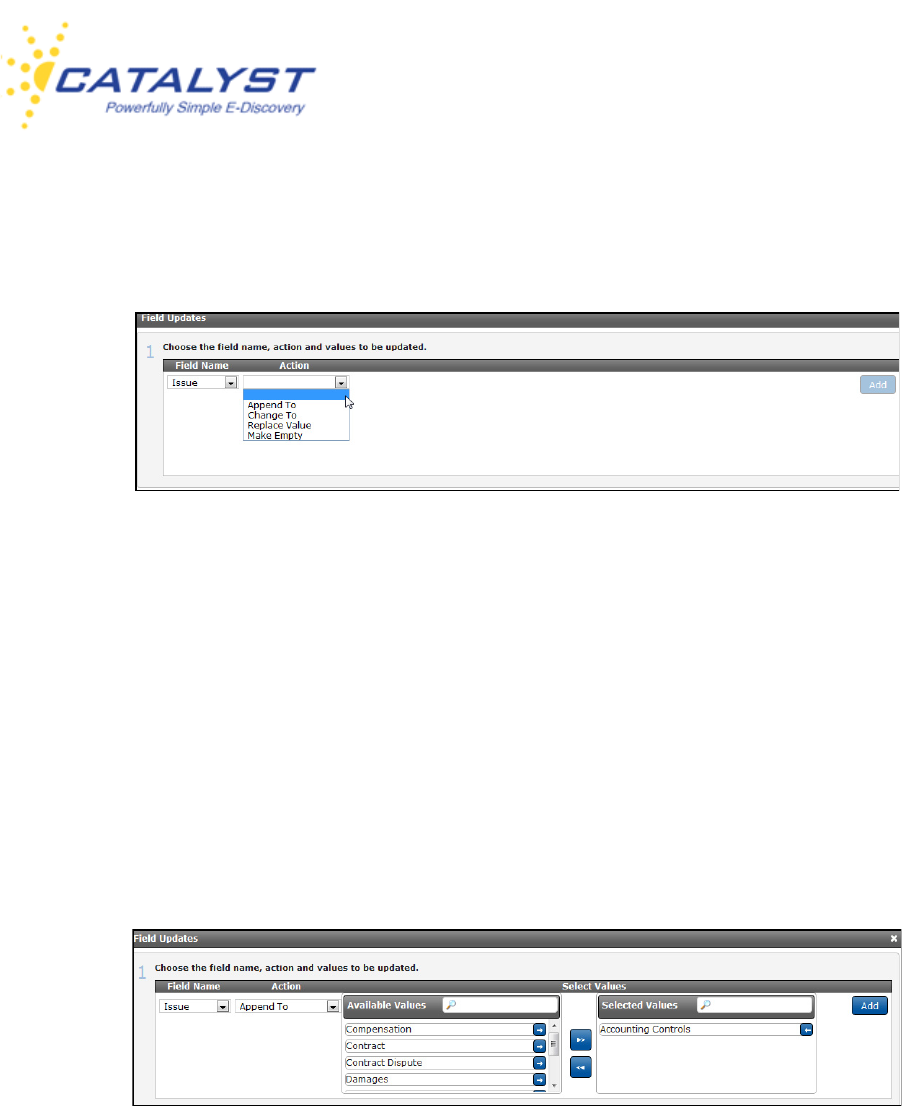
Insight User Guide
v.15-10162013 107
value field in the Field Name menu. Then, expand the Action list menu. Options for multi-value
fields include Append To, Change To, Replace Value and Make Empty.
Append To
If you select Append To you will be adding to those values already selected and saved in your
selected documents. For example, if the Issues field has been coded as Liability, and you have
determined that Fraud also applies, click Append To in the Actions list.
Next, move the value from the Available Values list to the Selected Values list using the Right
Arrow button adjacent to the value. You also remove a value or move all the values using the
center Triangle buttons.
Click Add to add the bulk update query to the Fields to Update section.
Click Next to go to the Field Updates dialog box.
Change To
Select Change To from the Actions list when you need to delete the value or values that already
exist in the field and enter a newly chosen value. For example, if Issue were coded with one or
more values already selected and saved in your documents, those values would be cleared, and

Insight User Guide
v.15-10162013 108
only the value you select will be applied to the Issue field in all the documents you selected for
bulk updating.
Remember that using the Change To action will delete the values currently saved for the
field and use the new value you’ve chosen for bulk updating.
Click Add to add the bulk update query to the Fields to Update section.
Click Next to go to the Field Updates dialog box.
Replace Value
Use Replace Value to replace an already saved value with another value, much like a find and
replace action is used to correct a word or phrase. If the field value to be replaced isn’t saved in
the document, the replace will not occur.
It is important to remember that Replace Value is only available in multi-value fields.
Select your Field Name, and then choose Replace Value using the Action list.
You must now use the From Value drop-down list to select the value to replace.
Next, expand the To Value list, to select the new value that will appear in the field in place of the
older value.
Click Add to add the bulk update query to the Fields to Update section.
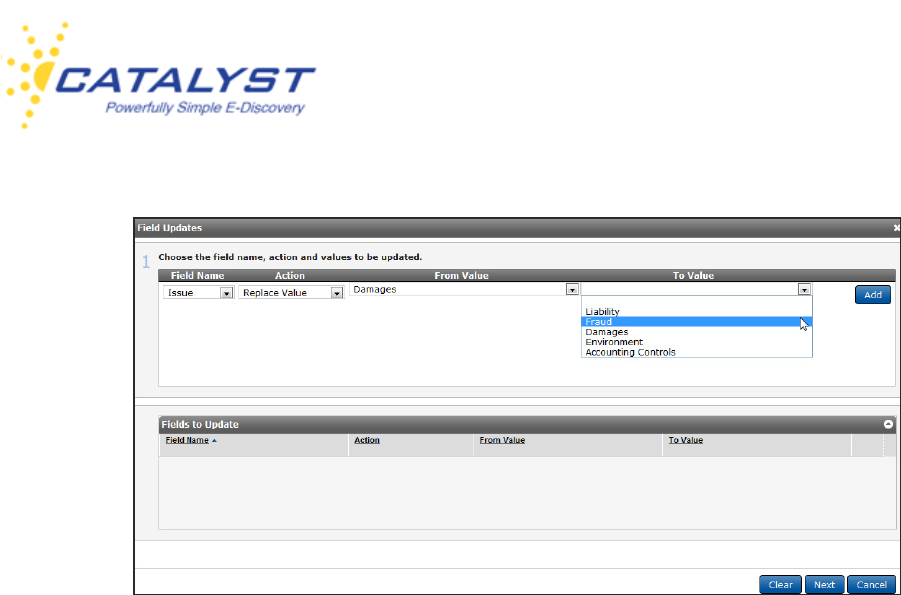
Insight User Guide
v.15-10162013 109
Click Next to go to the Field Updates dialog box.
Field Updates
Once you have added your bulk update query and clicked Next to open the Field Updates dialog
box, your email address should be automatically entered in Section 2. You can change the email
address or enter it if it doesn’t appear automatically. The system will notify you when your bulk
update is complete.
In Section 3, the Related/Attached checkbox enables you to include related documents in your
update statement. This will apply your changes not only to the selected documents but also to
any documents that are linked as related to the selected documents (attachments, parent, other
documents designed as related). Please note that the documents must be specifically linked as
Related for this to apply.
The Duplicates checkbox works in the same way for any documents specifically linked as
Duplicate.
Section 3 also gives you information about your job, which includes the number of documents
you’ve chosen to update and your bulk update job’s position in the queue.

Insight User Guide
v.15-10162013 110
Section 4 allows you to apply your bulk update changes to documents that have been locked,
meaning that typically changes to the form are no longer allowed. Select the Override Locked
Documents checkbox.
You can also enter a description about the bulk update job. The description will display in the
Monitor details. It must be 1-250 (alphanumeric or unicode) characters in length.
Click Update.
Make sure you have selected the correct action. You are changing multiple records, and
there is no Undo button for this action. Your option to correct an incorrect bulk update to
records would be to carry out a new bulk update.
Your update job, together with all other users’ bulk updates, is posted into a queue.
You can find the status of your job by clicking the Monitors button and selecting Folder/Field
Updates under Jobs.
Update Collections
If you have proper permissions you can change the collections for a document or documents.
Documents in Insight can be updated to more than one collection. By updating collections, you
are grouping your selected documents into your chosen collection or collections; you can also
remove them from a collection, but remember that documents must remain in at lease one
collection.
To access this feature, when the appropriate documents are available in the Results page, click
Actions and select the documents using the checkboxes. Then expand the More Actions menu
and click Update Collections.
Step 1 shows you the number of documents you’ve selected and their current collection. At Add
Action, selecting Add To includes the documents to your chosen collection (this does not
remove them from their current collection). After selecting the collection, click the Add button.
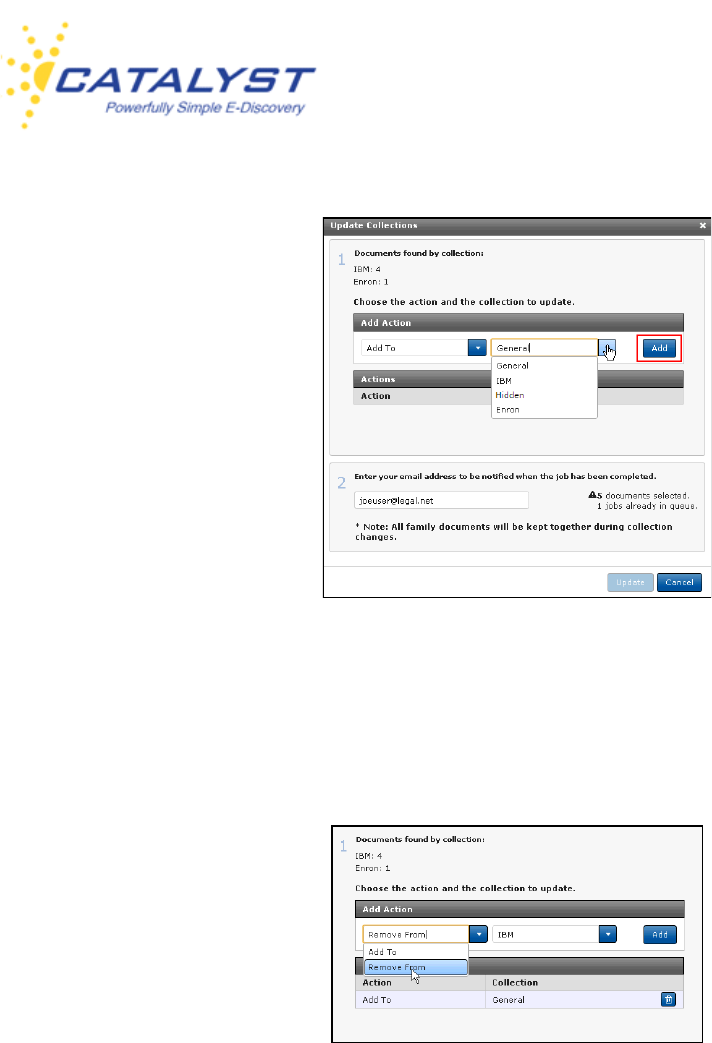
Insight User Guide
v.15-10162013 111
You can include more actions, such as adding the documents to yet another collection.
To remove documents from the collection they currently reside in, select Remove From at Add
Action and select the collection. Click Add to carry out this action.
In the below example, five documents will be added to the General collection, and four
documents will be removed from the IBM collection; therefore, one document will reside in both
the Enron and the General collections. You can remove any of the actions by clicking the Delete
(trash can) button if needed.
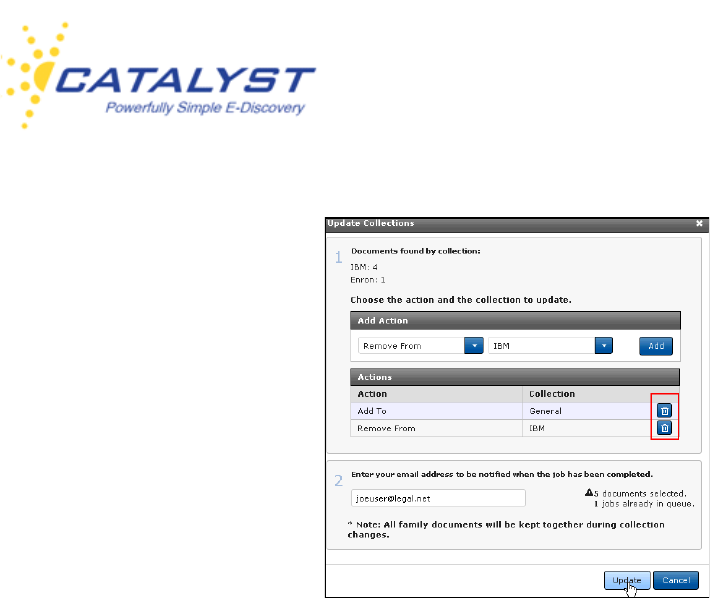
Insight User Guide
v.15-10162013 112
Your email address will automatically populate in Step 2. You can edit this field or remove your
email address if you do not want notification.
Note that the system will by default move any related documents, keeping families together in
collections.
Click the Update button when you are ready to update the document collections for your selected
records.
Go to Monitors to view the status of your update collections action.
Assign to Review Project
If you have appropriate rights, you can use the Assign to Review Project Action to place
documents into a Review Project. You must already have the project set up in order to place the
documents into the correct stage and assign them to users if applicable.
In the Results page, click the Actions button, and use the checkboxes to select your
documents.
Next, expand the More Actions menu and select Assign to Review Project.

Insight User Guide
v.15-10162013 113
Expand your project using the Plus sign (+) button. You can use the option buttons to assign the
documents to a stage. If the stage is set up to assign documents to particular users, you can
select the user within the stage to assign the documents (the user must already be placed in the
stage through the Review Administration).
Click Next and, if necessary, you can bulk update fields in the documents in the Assign to
Project wizard (see Bulk Update for more information on using the Bulk Update menus). You
are not required to bulk update fields.
After clicking Next, you can select the Include Related checkbox to keep the family relationships
together. Your email address should automatically populate, but you can delete or change it if
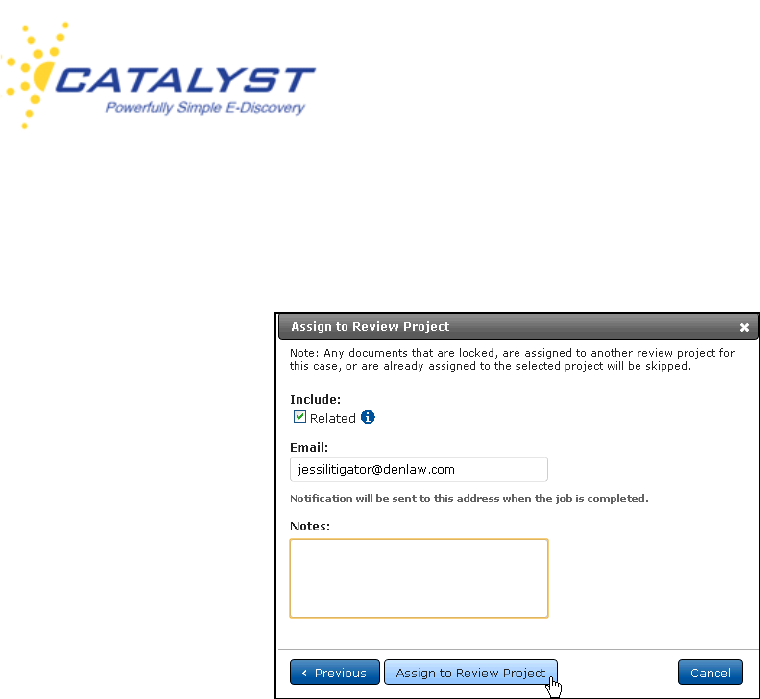
Insight User Guide
v.15-10162013 114
necessary. If you’d like to include any additional information, you can do this at Notes. Then,
click Assign to Review Project will initiate the copy job.
You can track the status of the job by going to Monitors and selecting Review Projects.
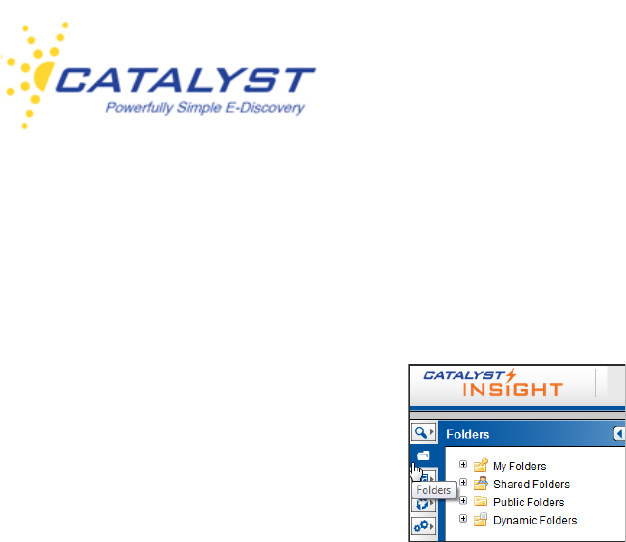
Insight User Guide
v.15-10162013 115
Folders
Insight allows users with rights to folders to view and work with documents in folders. Click the
Folders button in the left navigation bar to display the Folders view.
The permissions to use folders and access to available folder levels are specific to the work you
need to do in the site.
Static Folders are user defined and allow users quick access to documents. It is important to
realize that these folders refer or link to the files associated with them. Documents are not
duplicated to the folders or moved to the folders; the documents are pointed to from the folder.
Sub-folders available to you within Static Folders may include My Folders, Shared Folders
and Public Folders.
Production Folders are used to segregate documents for production and to run the production
through the interface.
Dynamic Folders are virtual folders that make navigating to documents quick and easy. The
folder structure is based upon database fields you and other reviewers tag in the documents.
This folder hierarchy is determined by your site administrator. When you open a Dynamic Folder,
a predefined search is run. As documents are tagged and saved, they automatically move to the
folder that is based upon the new coding.
Static Folders
Users with folders rights can create, manage and access folders within the top-level Static
Folders. You may have access to any or all levels, which include My Folders, Shared Folders,
Public Folders, and Production Folders.
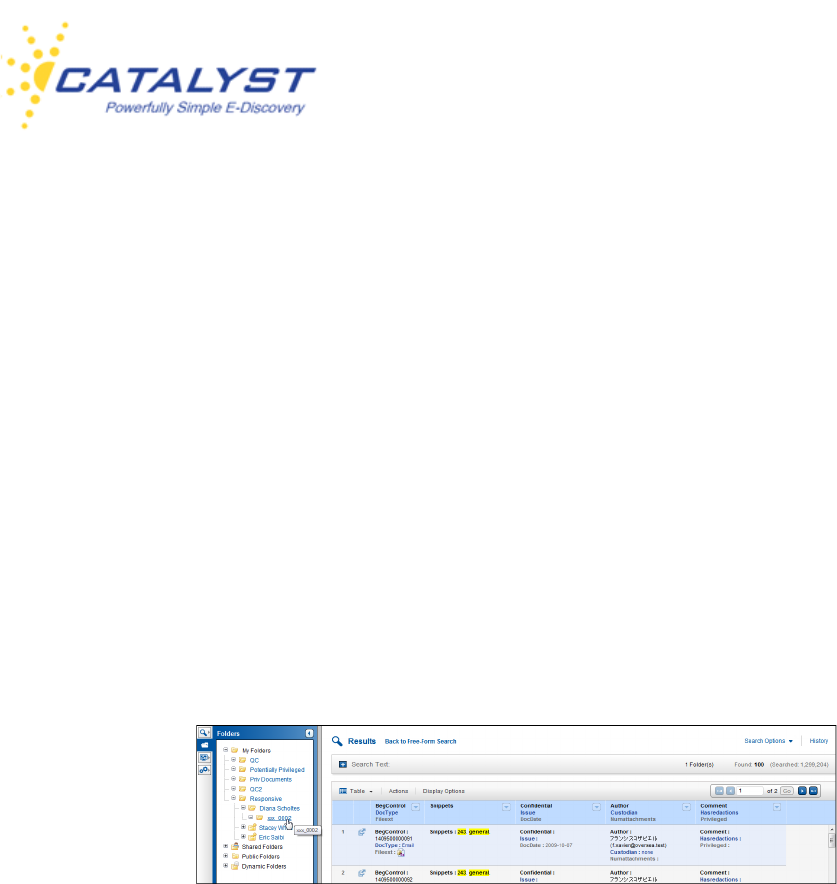
Insight User Guide
v.15-10162013 116
My Folders are the folders you create and can be private to just you or you can share them with
select users.
Shared Folders are those folders created by other users and shared with you. You cannot edit or
delete these folders. You can access the documents in these folders.
Public Folders are folders made available to everyone on the site. You or other users may have
created the folders within Public Folders. If you created the folder, you can edit or delete it.
If you have access to Production Folders, you will see it in the folder structure as well. This
folder is used to run productions through the Insight interface.
To display the contents of any folder available to you, expand to the folder structure using the
Plus (+) buttons beside the folders and then click the folder name. The documents associated
with the folder appear in the Results page.
My Folders
To create, edit properties or delete a folder, click the Folders button to go to the Folders page.
Ensure you are at the appropriate top-level folder (for example, if you want to edit or create a
private folder for just your use or to share with a few other users, you need to work in the My
Folders top-level folder).
If you have existing folders you have already created via the Folders page or on the fly, you can
view them by expanding My Folders. The folders that have a pestle are not shared with other
users. Notice in the below image, the Priv Documents folder is represented by a folder with a
person; this means you have shared this folder with one or more users on the site. The other
folders in My Folder have a pestle, showing that they are not available to other users.
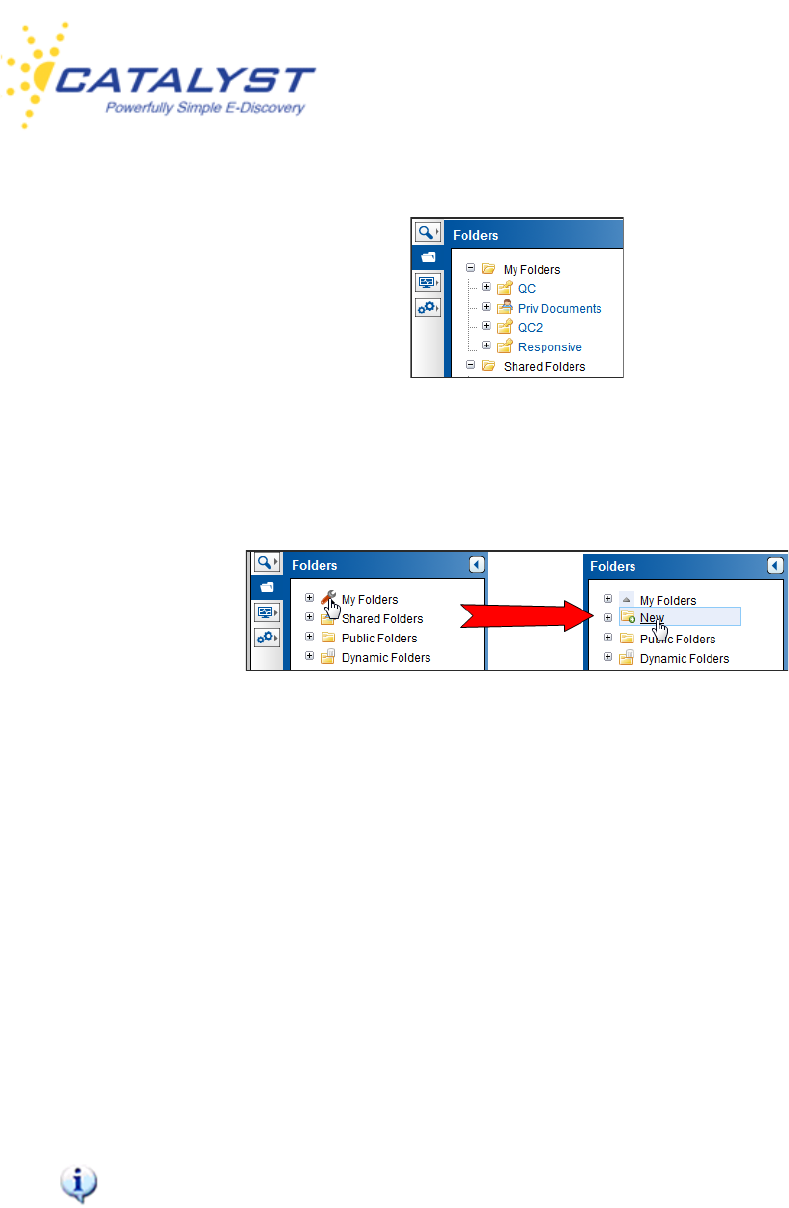
Insight User Guide
v.15-10162013 117
To create a private or shared folder, point to My Folders. A Wrench button appears, signifying
that you can make changes to this folder structure. Click the Wrench and then click New.
In the Add Folder To My Folders dialog box, enter your new folder’s name. This is required, and
if you enter an invalid character or character length, you will receive a prompt.
You can also enter a description, which displays a tool tip when the folder is pointed to. If you
want this to remain a folder private only to you, click Add Folder.
To share the folder (and therefore the contents) with selected users on your site, use the Right
Arrow button to place a user in the Selected User box (you can also remove a user using the
Left Arrow corresponding to the user’s name). The center Triangle buttons allow you to move all
users. Click Add Folder, and the Users you selected will have access to the folder at their
Shared Folders.
If your site is a Private Field site, you will only be able to share a folder with users who
have the same fields permissions as you.

Insight User Guide
v.15-10162013 118
At My Folders, you can also create folders within existing sub-folders (nest folders), edit folder
properties, and delete folders. You may also be given the rights to compare one folder’s contents
to another folder’s contents. See the Compare Folders section.
Point to the sub-folder and click the Wrench to see the options available. To add a folder, click
New. To edit the properties of the folder, click Edit or remove it by clicking Delete.
If you need to edit the folders properties, upon clicking Edit you can change the folder’s name,
add or edit the tool tip at Description and change the users who have access. The Edit Folder
dialog box works identically to the Add Folder dialog box (see above).
Shared Folders
To view documents shared with you by another user, click the Folders button in the navigation
bar and then expand Shared Folders. These folders were not made public for everyone on the
site to access. While you can open the folders and their contents, you cannot edit the folder
properties.

Insight User Guide
v.15-10162013 119
When you point to a sub-folder within Shared Folders if a Wrench appears, clicking it will
display the Compare link if you have rights to compare folders.
To display the documents associated with the folder, click the folder name. The documents are
displayed in the Results page. Actions you can take to the documents depend upon your
permissions.
Public Folders
Users with rights to Public Folders will be able to access existing folders and create folders within
Public Folders. When creating or editing a folder at this level, you will not establish which other
users can access the folder; on most typical sites, all users will be able to see these folders. You
will be able to edit and delete folders that you created.
Administrators may have the right to edit or delete folders created by users in Public
Folders.
Click the Folders button to go to the Folders page and expand Public Folders to open an
existing folder.
To create a new folder, point to Public Folders, click the Wrench and then New. In the Add
Folder To Public Folders dialog box, enter your new folder’s name. This is required, and if you
enter an invalid character or character length, you will receive a prompt.
You can also enter a description, which displays a tool tip when the folder is pointed to, and then
click Add Folder.
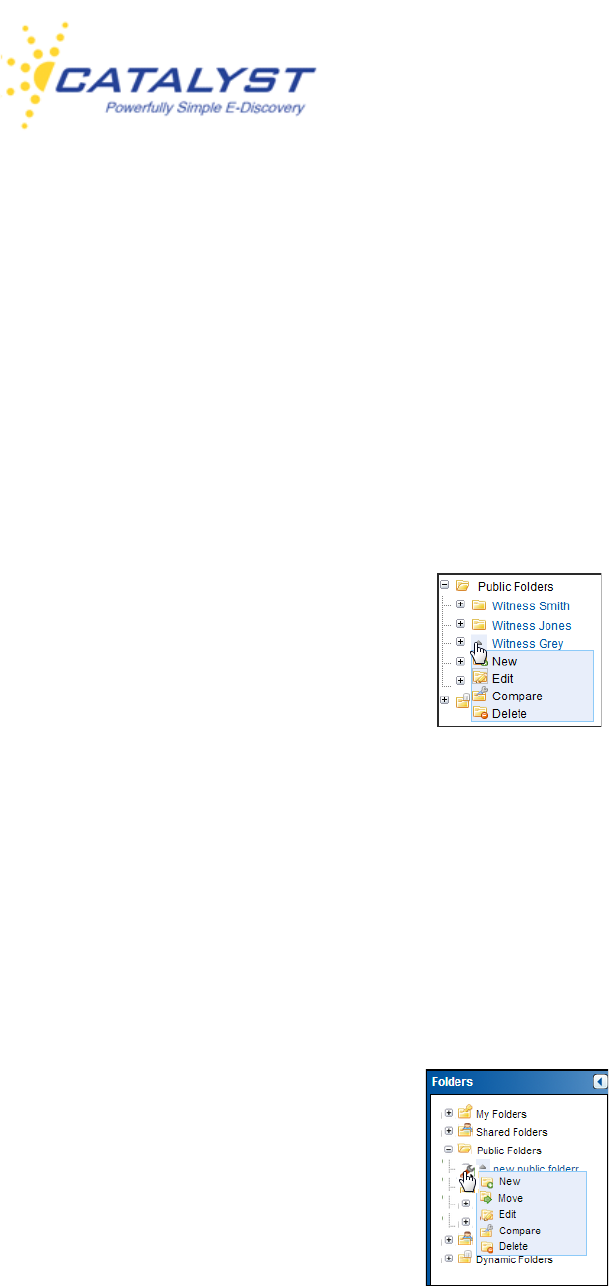
Insight User Guide
v.15-10162013 120
At Public Folders, you can also create folders within existing sub-folders, edit folder properties,
and delete folders that you have created. You may also be given the rights to compare one
folder’s contents to another folder’s contents.
Point to the sub-folder and click the Wrench to see the options available. To add a folder, click
New. To edit the properties of the folder, click Edit or remove it by clicking Delete.
If you need to edit the folders properties, upon clicking Edit you can change the folder’s name,
add or edit the tool tip at Description.The Edit Folder dialog box works identically to the Add
Folder dialog box (see above).
If you are associated to a Role with the permission ManagePublicFolders, you can create sub-
folders within user-created Public Folders, even those you did not create. This permission also
allows you to edit the existing name of a folder in Public Folders, move a folder within Public
Folders to another folder in Public Folders and delete folders and sub-folders.
Point to the folder within the Public Folders and click the Wrench. Then, make your select in the
menu.
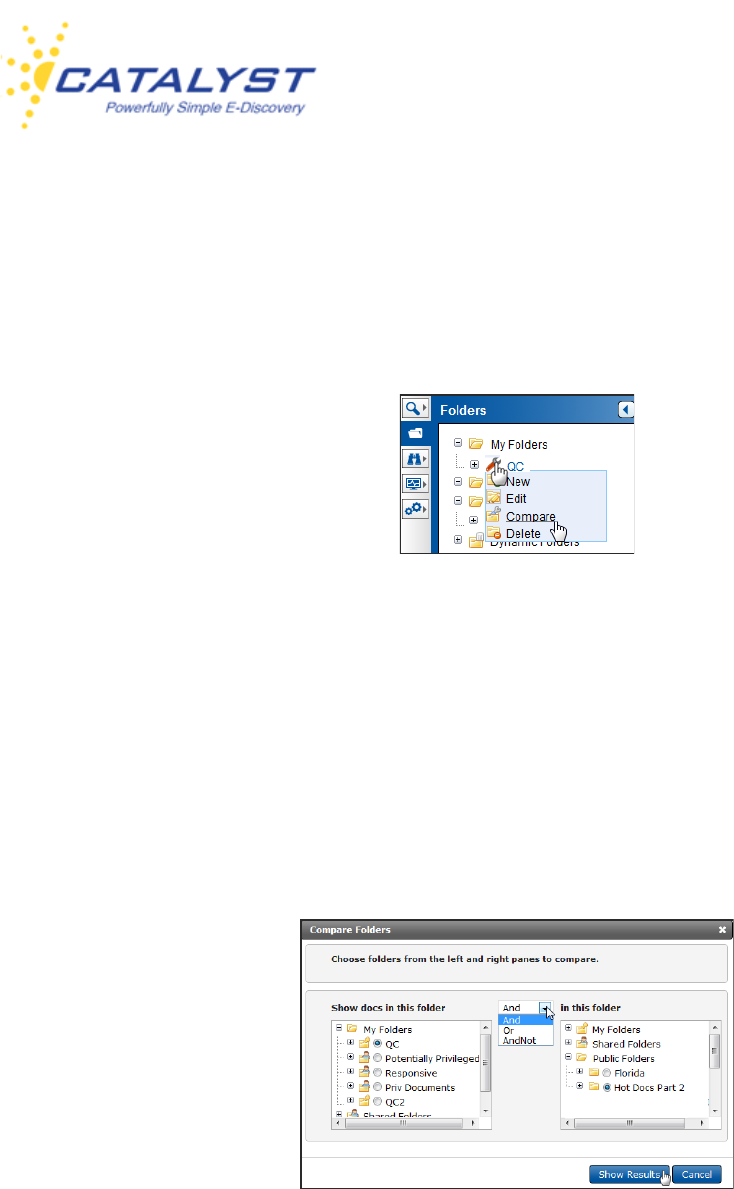
Insight User Guide
v.15-10162013 121
Compare Folders
If you have permissions to Compare Folders, point to one of the folders you’d like to compare.
Click the Wrench and then click the Compare link. This allows you to compare the contents of
two different static folders.
In the Compare Folders dialog box, the folder you chose will be selected at the Show Docs in
this Folder. You can keep it selected or change to another. Next, select a folder at in this folder.
By default, the operator is set to And. Leaving it set to And will return only documents that
appear in both folders when you click Show Results. You can change the comparison between
the two folders by expanding the menu and selecting Or or AndNot. Using Or will show
documents in either folder (in other words, all the documents in both folders). Selecting AndNot,
will return documents that are in the left folder but not in the right one.
Dynamic Folders
Dynamic Folders are virtual folders set up to structure the review workflow on your site. The
structure is based upon fields you and other users will be coding in documents. As you code and

Insight User Guide
v.15-10162013 122
save a document, the document will move to a different folder based upon the way you coded it.
For example, if a document is coded as Reviewed, and the Dynamic Folders are set up to
move documents based upon values in the Reviewed field, the document will go into the
Reviewed folder immediately upon being saved. (Because Insight is XML based, there is no
delay for indexing.)
To find documents in the Dynamic Folders, click the Folder button in the navigation bar, and
then expand the Dynamic Folders. Click the folder you need to review to display the documents
in the right Results pane.
In the below image, clicking the Not Reviewed folder returns all documents where the Author is
kkeiser and the documents have not been reviewed.
As you code and save documents, the Dynamic Folders structure dictates how the saved
documents will be foldered. In the above structure, documents in the NotReviewed folder that
are coded as Reviewed and then saved are moved to the Reviewed folder automatically.
Opening the Reviewed folder returns all documents where the Author is kkeiser and the
Reviewed field is coded as Reviewed.
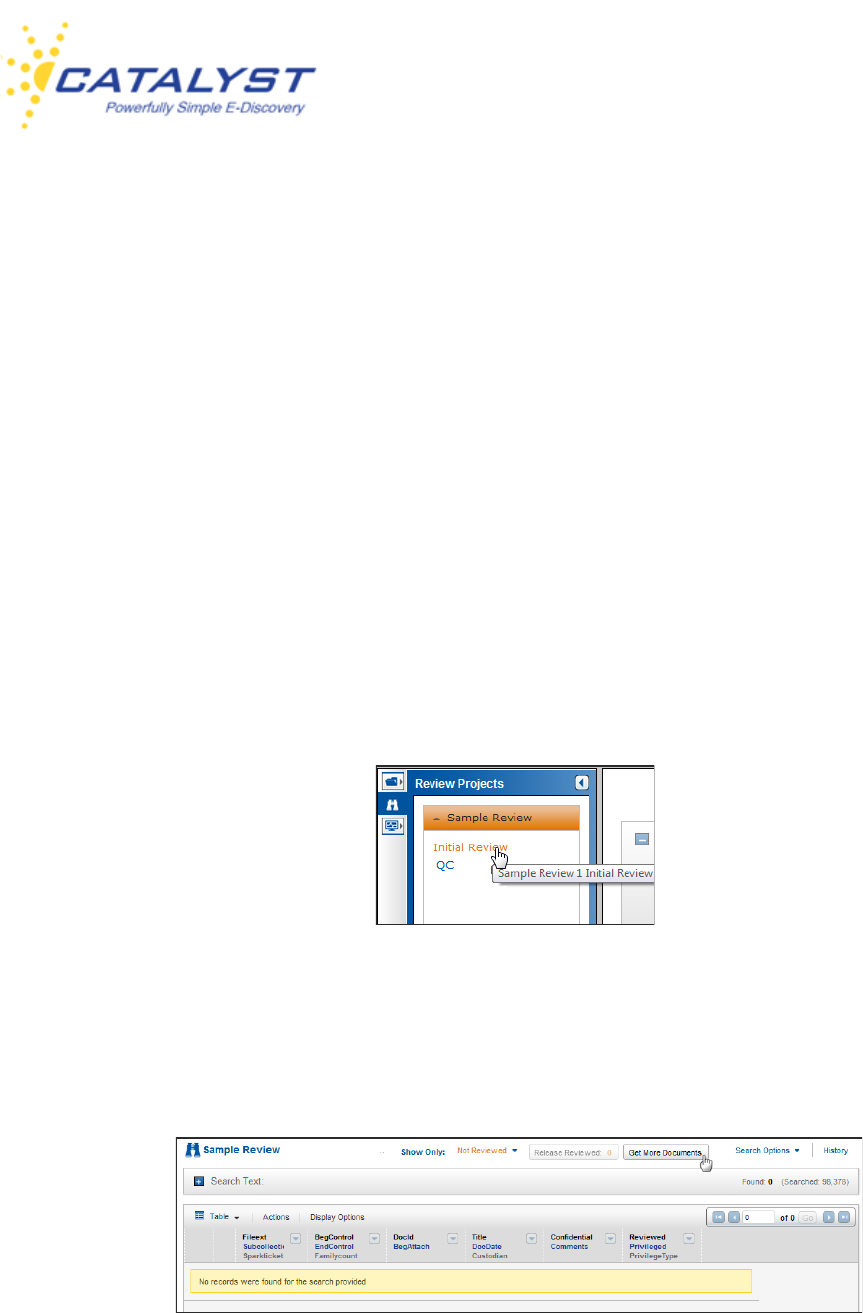
Insight User Guide
v.15-10162013 123
Your Review Projects
Your site may be set up with review projects, which allow you fast access to the documents you
need to review. A review project is made up of stages, and you will be assigned to the stages
where you need to work. Once you code and save documents, you can release them. If
available, you will also be able to retrieve more documents as you are working within a stage.
Your site can have more than one review project and each project may have several stages.
Perhaps your review manager has tasked you with reviewing documents in a first pass stage and
also with reviewing documents in a QC stage of a particular project. Insight will display the project
and these stages for you.
Click the Review Projects (binoculars) button in the left navigation bar. You will see the project
or projects, which you have been assigned in the Review Projects menu.
Expand the project and click the stage:
The Results page appears at the right. Unless your administrator has assigned documents
specifically to you, the page will be empty when you first access it. Click the Get More
Documents button to obtain documents from the Unassigned status of the stage.
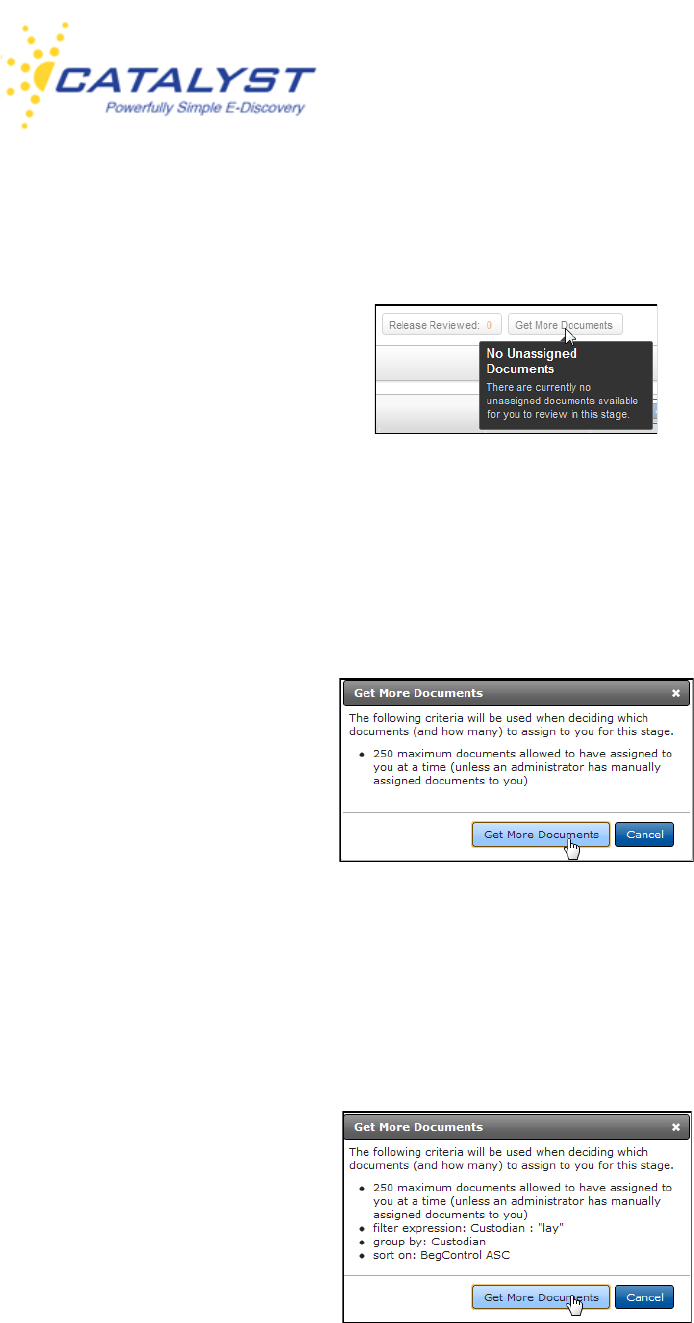
Insight User Guide
v.15-10162013 124
If no documents are currently available, the Get More Documents button will display this
message:
When documents are available in your stage, clicking the Get More Documents button displays
a summary dialog box. This allows you to see the parameters established by your review
administrator for this stage when you pull in documents. This includes the maximum number of
documents each reviewer can have in a particular stage.
Your administrator can also establish filters that will assign specific documents first. Perhaps all
the documents need to be reviewed in the First Pass stage, but certain custodians’ documents
need to be reviewed ad coded first. The way your documents are grouped and the order they are
displayed can also be set up and will appear in the Get More Documents summary dialog box
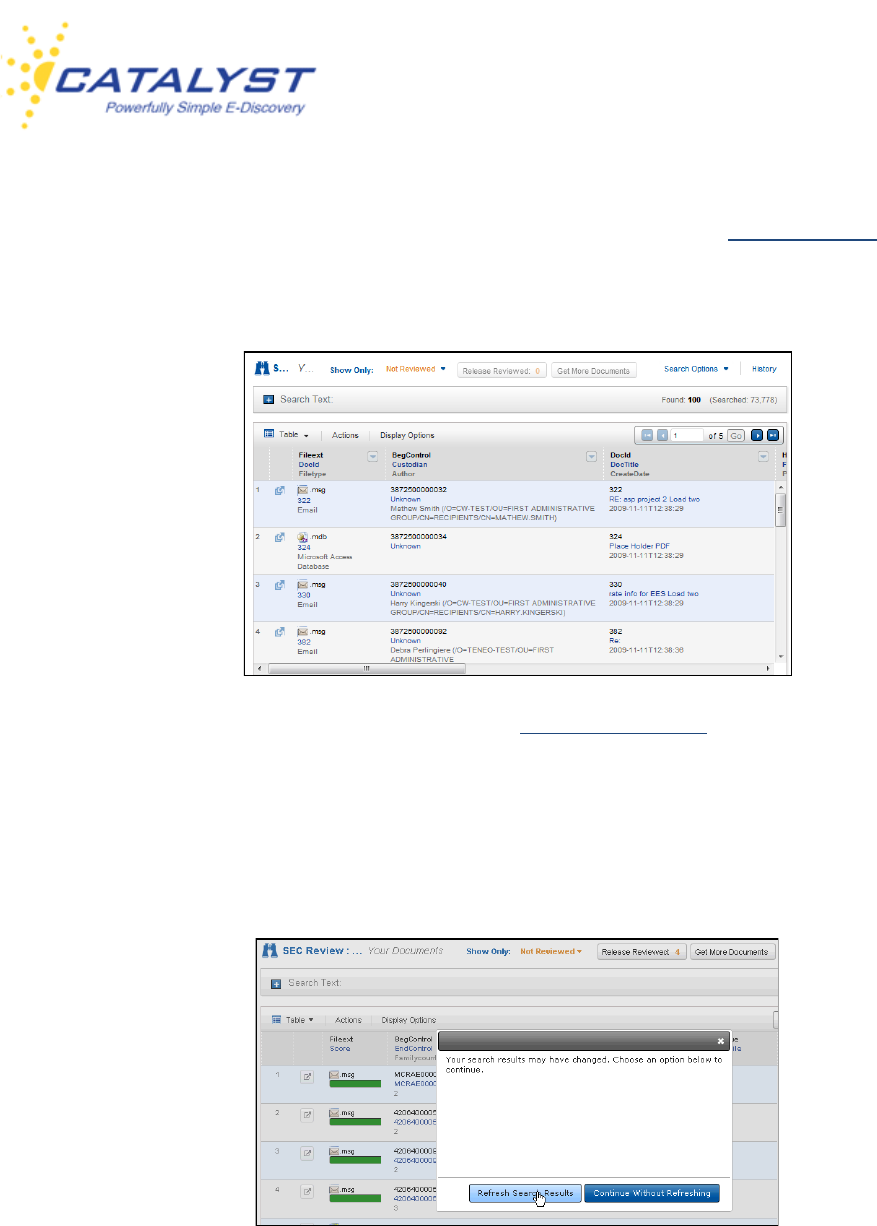
Insight User Guide
v.15-10162013 125
When ready, click the Get More Documents button in the dialog box. The system will refresh
and your documents will appear in the Results page. Please see the Results section for more
information about working with your Results page and tailoring it to your needs.
To open, code and save documents, refer to the Documents section for complete details.
As you code and save documents, their status will change from Not Reviewed to Reviewed.
Upon closing a document, you will get a Refresh dialog box. Click the Refresh Search Results
button to update your Results, moving the reviewed documents out of the not reviewed category.
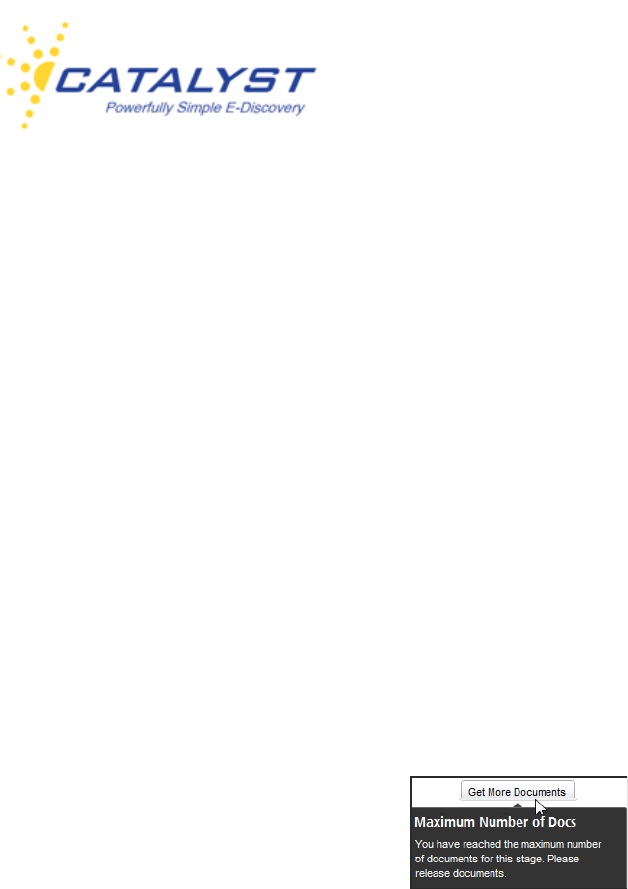
Insight User Guide
v.15-10162013 126
Maximum Number of Documents
Your administrator has determined the total number of documents that can be assigned to you at
a time in a stage. As you begin to code and save your documents, they will move from the Not-
Reviewed status to Reviewed and be available to release. If the threshold for the stage is 100
documents, and you have coded and saved 50 documents, you will not be able to get more
documents until the 50 reviewed documents are released. The maximum number of documents
is the total of all your documents for the stage, not the total number of not reviewed documents.
If your administrator has set up your project to keep document family relationships together, the
entire family is treated as one document; if a parent document is assigned as the threshold,
document, all members of the family will be included when you get more documents. Therefore,
the limit on the maximum number of documents might be exceeded when families are kept
together for review.
If your project does not maintain families, then the maximum documents limit will be enforced.
The default setting for displaying documents in your stage’s Results page is Not Reviewed. Use
the Show Only menu and select All to display all the documents assigned to you in the stage.
Selecting Reviewed will display only those documents you’ve already reviewed and coded.
Before clicking the Release Reviewed button and moving your saved documents out of the
stage and your permissions, you may want to QC the documents. Selecting Reviewed in the
Show Only menu allows you to quickly access those documents. In the below image, Show
Only is set to Not Reviewed. Changing it to All will display all 100 documents in the stage.
Selecting Reviewed will display the three documents which are reviewed and available for
release. The number in the Release Reviewed button represents the number of documents
ready for release. The Found number represents the number of documents you are currently
displaying and will change when you make different selections in the Show Only menu.
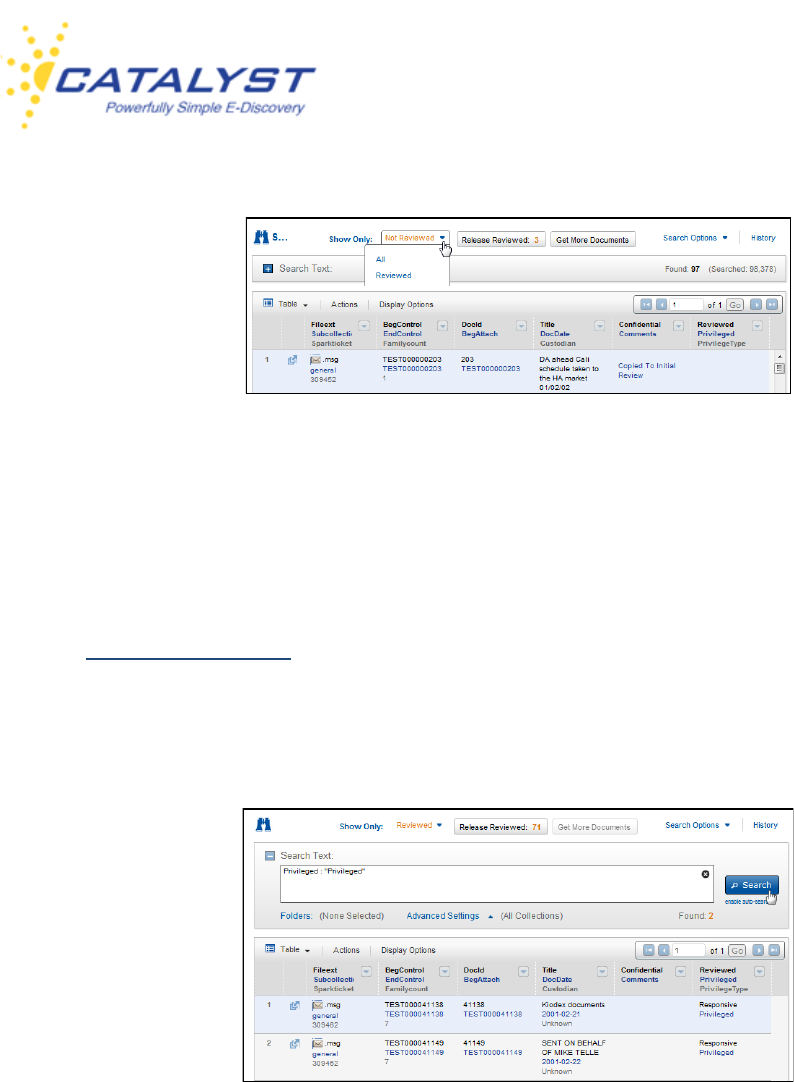
Insight User Guide
v.15-10162013 127
Review Project Searching and Advanced Settings
You can search within your stage and control your Advanced Settings selections. Perhaps you
have reviewed and coded a number of documents and prior to releasing them you’d like to QC
the documents you coded as Privileged. You can select to display your reviewed documents
using the Show Only menu. Then, expand the Search Text section and enter your query. See
the Insight Search Guide for more information on searching in Insight. You will see immediately
the number of documents that meet the query. Click the Search button to display just those
documents.
You can return to displaying all the reviewed documents by clicking the Delete (X) button at the
right in the Search Text box.
You can also run searches in your not reviewed documents or all the documents assigned to you
in the stage by making the appropriate selection in the Show Only menu and creating your query
in the same way.
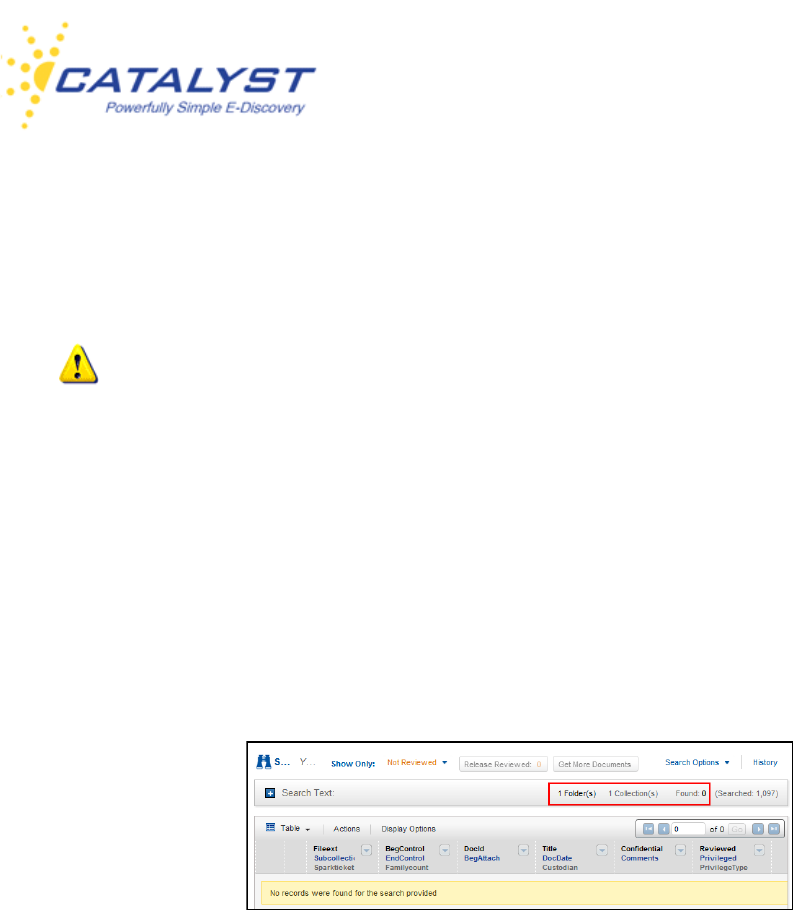
Insight User Guide
v.15-10162013 128
The Search Text section of the Results page of your stage also allows you to select or clear
search settings, folders and collections. Typically, it will be best practice to not limit the
documents you display by these settings.
It is always important to be aware of any settings selections as you are working within
your stage.
You may have rights to work in Dynamic Folders or other folders, and you may have access to
more than one collection of documents. It is important to ensure you are not limiting your results
or the documents you can assign yourself by these settings while working within your stage.
When you display documents in a review project, Insight is running a virtual search to bring back
those documents. Your settings, folders, and collections selections affect the search. and limit
your access to documents. In the below image, no documents have appeared in the Results.
Expand the Search Text section and select Folders. Clear the selected folder or folders. Click
the OK button.

Insight User Guide
v.15-10162013 129
Click the Search button to access the documents.
In most instances, you will want to ensure that all collections are selected. To do this, click
Advanced Settings and select all your collections. Clicking the Search button will display the
documents.
If your review manager has assigned you to a stage and you know documents should be
available to you but you getting the message that no documents are available, ensure that you
don’t have any folders selected and all collections are selected and click Get More Documents
to access your documents.
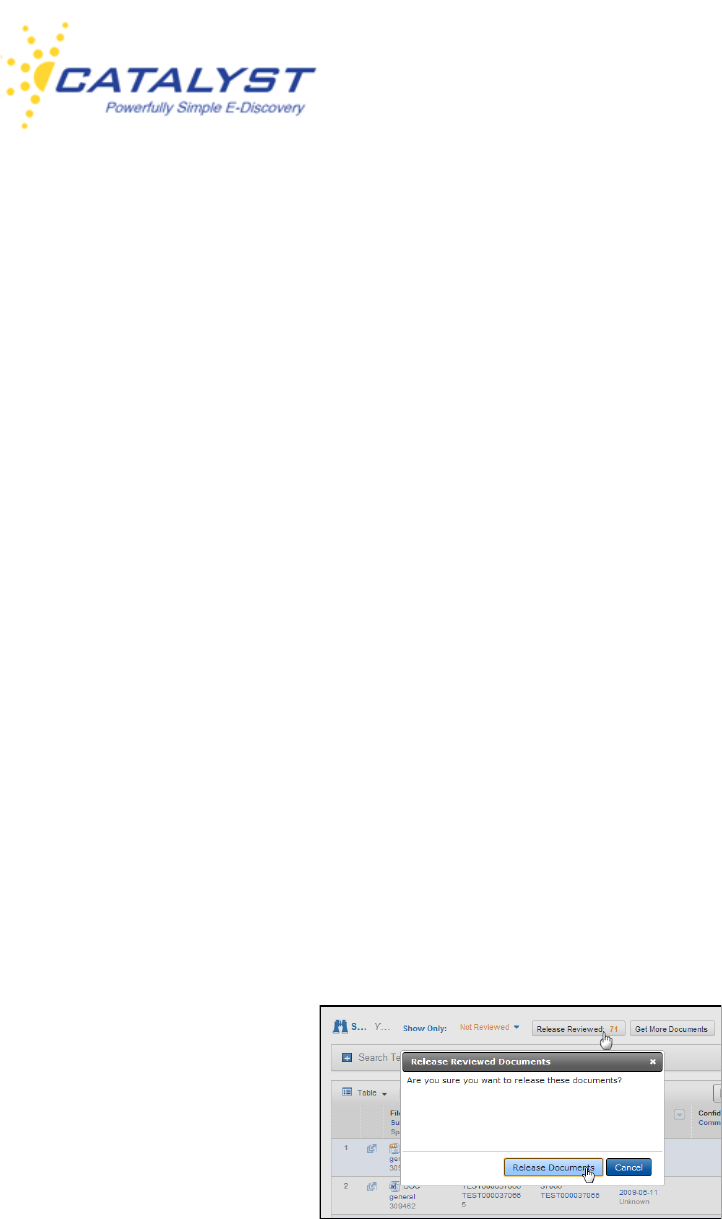
Insight User Guide
v.15-10162013 130
Release Documents
Review projects are automated to route documents based upon the needs of the matter. It is very
important to release documents you’ve reviewed. These documents, once removed from your
permissions, may remain in the stage until your review manager takes actions upon them or may
move to other stages and other reviewers. These decisions of how the documents are routed or
kept in the stage are determined by the rules set up for the project and the way you code the
documents. For example, you may be reviewing in a First Pass stage that may be set up to
move documents you’ve coded as privileged to a Privileged stage. The documents do not move
or collect appropriately until you release them. Other reviewers may be working in subsequent
stages, so releasing your documents may be necessary for them to access them.
Your review manager can also release your documents if appropriate.
In addition to routing the documents appropriately releasing documents allows you to access and
review more documents in the stage.
The Release Reviewed button is always available in the Results page of your stage. The
number of documents ready for release updates as you save documents the first time. If you
open reviewed documents, you can change and re-save them, but their Reviewed status will not
change again in this stage.
When ready, click Release Reviewed and then click Release Documents.
The system will display the release status.
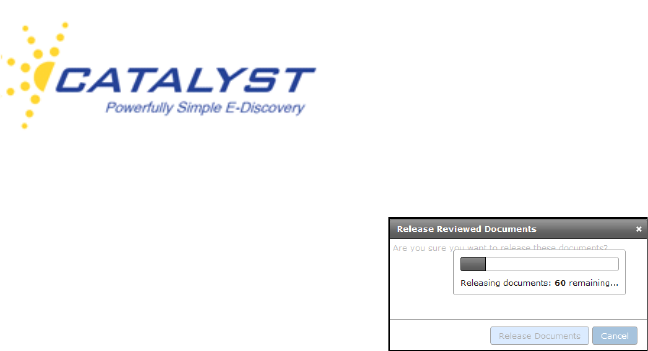
Insight User Guide
v.15-10162013 131
If appropriate, you will now be able to access new documents by clicking the Get More
Documents button. Remember that you will only be able to get the number of documents you’ve
released.

Insight User Guide
v.15-10162013 132
Monitors
Click the Monitors & Reports button to display information on actions you have performed
based upon your permissions. Actions include Batching, Conversion, Exports, Folder/Field
Updates, OCR, Print, Redaction, Review Projects, Productions, Uploads and Processing. If you
are a site administrator, you may be able to monitor the actions all the users have taken on your
site.
Additionally, most administrators have the rights to the Reports feature, which details document
activity and user activity within the site. Please refer to the Insight Administrator Guide for
information.
You may also have the rights to access documents that are not indexed and, therefore, the text is
not searchable at Non-Indexed Documents.
Batching
Click Batching in the Monitor menu to review the details of batching jobs. You can review jobs
by progress at Filters using the By Status checkboxes: Pending (jobs that are in the queue for
conversion); In Progress (documents are being batched); Completed (jobs that are finalized);
Error (jobs that caused an error at some point in the process and were not finalized).
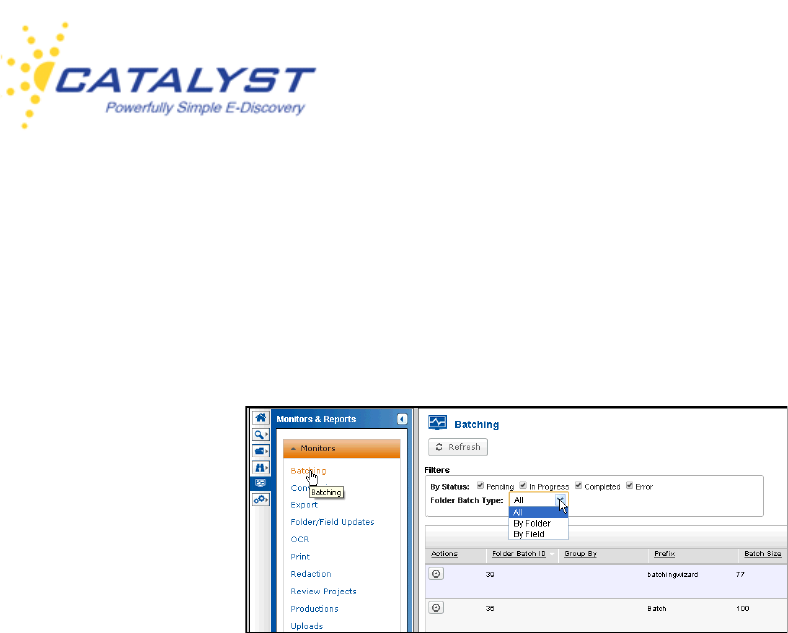
Insight User Guide
v.15-10162013 133
Use the Folder Batch Type menu to view a report of all batching jobs or the jobs batched by a
field or by a folder.
Administrators will see all batching jobs on the site. If you are a typical user on the site, you will
see your own jobs.
Once you’ve made your selections the report displays. The Folder Batch ID is a reference
number and is useful for working with Catalyst Support in troubleshooting jobs. Group By
displays the field that was selected in the Batching Wizard to group the documents. If there is no
information in this column, this option was not selected during the batching job. The Prefix is the
user-selected prefix added to the beginning of each batch name. The Batch Size is the user-
selected number of documents per batch. The Created By and Date columns provide
information about the user who created the job and when they requested the batching
process.The Status reflects what stage the job is in.
Buttons available in the Action column may include Delete (trash can) for pending or in progress
jobs. The Job State button (clock) displays details of the job state. If your job produced an error,
this is a good place to examine what went wrong. If the job failed, click the Resubmit button
(right triangle) to re-run an errored job.
You can sort the results by clicking any of the column headings. Use the Refresh button at the
top to refresh the page when you are waiting for Pending jobs to finish.
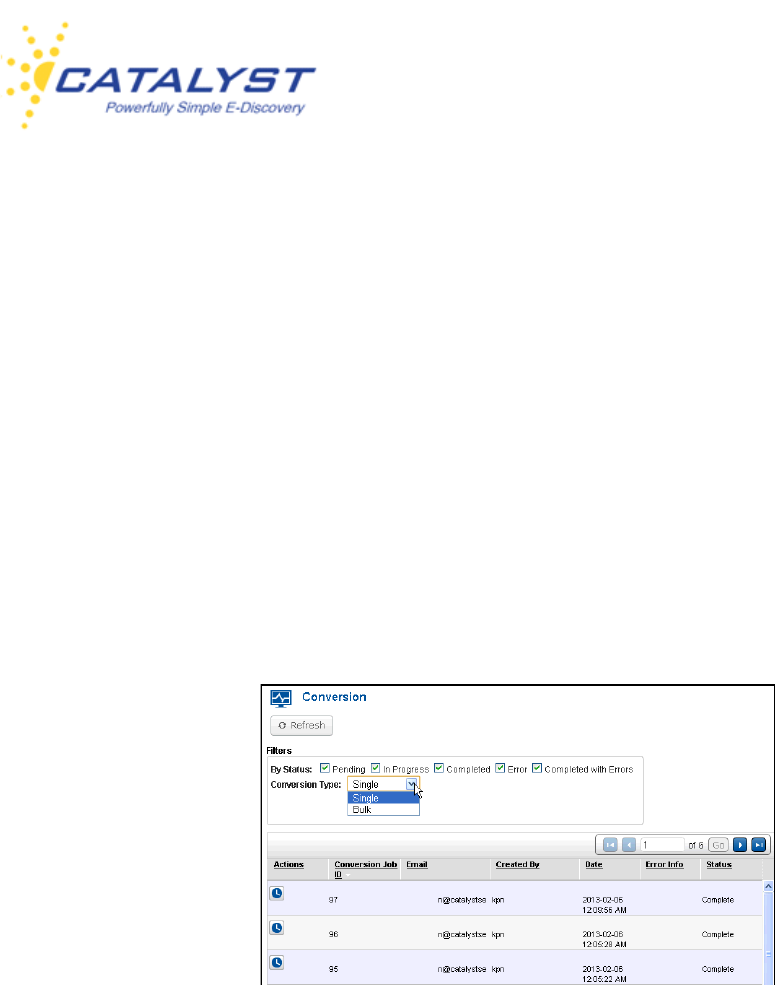
Insight User Guide
v.15-10162013 134
Conversion
Click Conversion in the Monitor menu to view the status of PDF conversion jobs—both single
conversions and those that were done in bulk. You can review jobs by progress at Filters using
the By Status checkboxes: Pending (jobs that are in the queue waiting for conversion); In
Progress (jobs that are being converted); Completed (jobs that are finalized); Error (jobs that
caused an error at some point in the process and were not finalized). By default each status
checkbox is selected. Use the Conversion Type menu to monitor single jobs or bulk jobs. Bulk
conversions are created in the Actions menu in the Results page. Single conversions are
created in the document using Convert to PDF.
Case Administrators will see all conversion jobs on the site. If you are a typical user on the site,
you will see your own jobs.
The report displays information about the conversion jobs.The Conversion Job ID is a reference
number and is useful for working with Catalyst Support in troubleshooting jobs. The Email,
Created By and Date columns provide you with information about the user who created the job
and when they requested the conversion.Error Info provides you with information about why the
conversion did not take place. Status shows where the job is in the process.
Buttons available in the Action column may include Delete (trash can) for pending or in progress
jobs. The Job State button (clock) displays details of the job state. If your job produced an error,
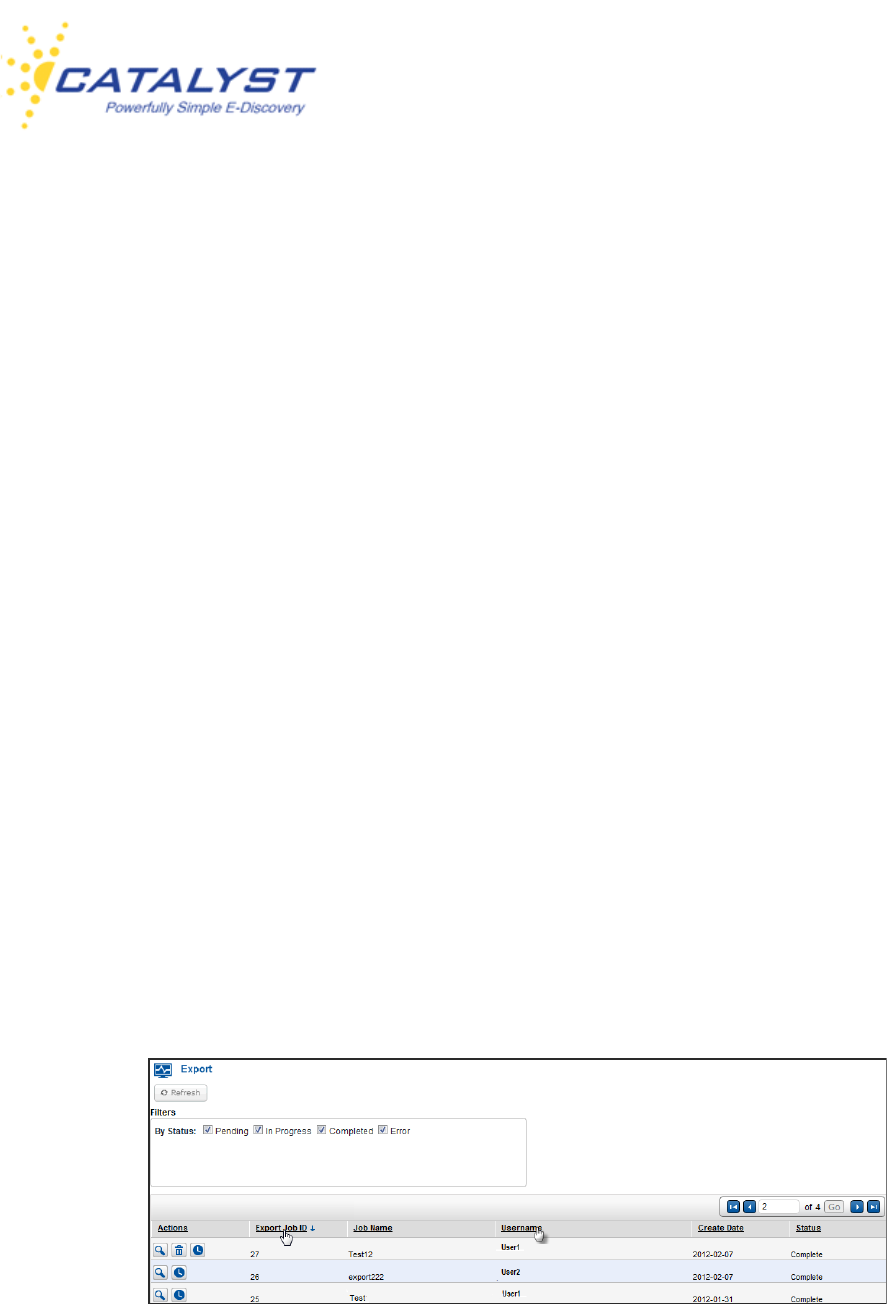
Insight User Guide
v.15-10162013 135
this is a good place to examine what went wrong. If the job failed, click the Resubmit button
(right triangle) to re-run an errored job.
You can sort the results by clicking any of the column headings. Use the Refresh button at the
top to refresh the page when you are waiting for Pending jobs to finish.
Export
Go to Export in the Monitors menu to review information about export files. You can select to
monitor exports based on progress at Filters using the By Status checkboxes: Pending (jobs
that are in the queue); In Progress (the export file is in process); Completed (jobs that are
finalized); Error (the export job caused an error at some point in the process). By default each
status checkbox is selected.
Case Administrators on the site will see all export jobs on the site. If you are a typical user on the
site, you will see your own jobs. You can sort the jobs based upon the column headers in the
report.
The Export Job ID is a reference number and is useful for working with Catalyst Support in
troubleshooting jobs. Job Name is the name created for the job. Username and Create Date
show who created the job and when. Status shows the progress of the job.
The Action column may include Delete (trash can) for pending or in progress jobs. Click the
View button (magnifying glass) to download the export file. You can save this file to your
computer, print it, email it, etc.

Insight User Guide
v.15-10162013 136
The Job State button (clock) displays details of the job state. If the job produced an error, this is
a good place to examine what went wrong.
If the job failed, click the Resubmit button (right triangle) to re-run an errored job.
You can sort the results by clicking any of the column headings. Use the Refresh button at the
top of the report to refresh the page when you are waiting for Pending jobs to finish.
Folder/Field Updates
Click the Monitors button and then Folder/Field Updates to display certain updates (Job
Types) performed from the Actions menu in the Results page. Case Administrators have the
ability to view all users’ actions (jobs) and can customize user reports at the By User menu. Most
users and administrators will see only the actions they have performed. These information about
these jobs can be viewed individually by selecting them in the Job Type menu and include:
• Copy to Folder
• Delete from Folder
• Bulk Update a field or several fields for more than one record
• Lock Documents
• Unlock Documents
• Organize documents into collections
The report results display in the lower part of the screen and include:
Bulk Update Job ID: useful as a reference to discuss a job with Catalyst Support.
Created by: the user name of the person who took the action.
Create Date: displayed in DD/MM/YYYY format, this is the date that the action took place.
Total Records: displays how many records were updated due to the action.
Status: Pending, In Progress, Completed or Error.
Job Status: the summary of the completed job.
Description: the description that the user gave the job when performing the action.
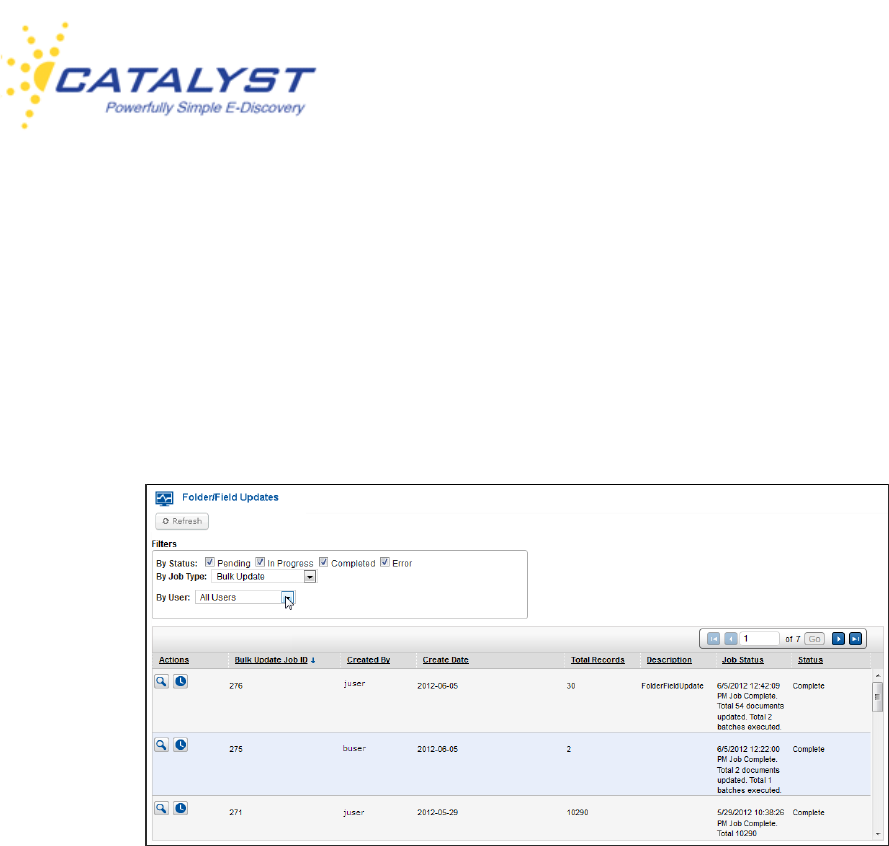
Insight User Guide
v.15-10162013 137
The Actions column allows you to remove the job by clicking the Delete button (trash can). Click
the View button (magnifying glass) to display the job details. Select the Job State button (clock)
to see the steps of the job process, and click the Resubmit button (right triangle) to re-run jobs
that have produced errors.
You can sort the results by clicking any of the column headings. Use the Refresh button at the
top to refresh the page when you are waiting for Pending jobs to finish.
OCR
Click OCR Jobs in the Monitor menu monitor to review OCR jobs. You can select to monitor
OCR jobs based on progress at Filters using the By Status checkboxes: Pending (jobs that are
in the queue); In Progress (the conversions are in process); Completed (jobs that are finalized);
Error (OCR jobs that caused an error at some point in the process). By default each status
checkbox is selected. The OCR Type menu defaults to Bulk. These jobs are created at the
Actions menu in the Results page. Changing this menu to Single will show OCR conversions
initiated for a single document within the document page.
Case Administrators on the site will see all export jobs on the site. If you are a typical user on the
site, you will see your own jobs. You can sort the jobs based upon the column headers in the
report.
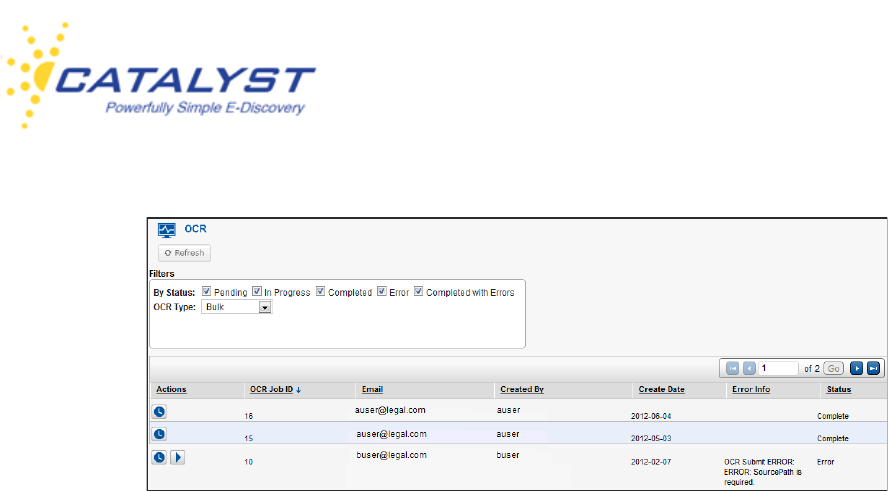
Insight User Guide
v.15-10162013 138
The report shows information about the OCR jobs. The OCR Job ID is a reference number and
is useful for working with Catalyst Support in troubleshooting jobs. The Email, Created By and
Date columns provide you with information about the user who created the job and when they
requested the OCR. Current Info provides you with additional details about the job. Error Info
provides you with information about why the OCR did not take place. Status shows where the job
is in the process.
Buttons available in the Action column may include Delete (trash can) for pending or in progress
jobs. The Job State button (clock) displays details of the job state. If your job produced an error,
this is a good place to examine what went wrong. If the job failed, click the Resubmit button
(right triangle) to re-run an errored job.
You can sort the results by clicking any of the column headings. Use the Refresh button at the
top of the report to refresh the page when you are waiting for Pending jobs to finish.
Print
To check the status and obtain other information about print jobs (PDF Combine or Zip), click
Print in the Monitors menu. You can select to monitor documents based on progress at Filters
using the By Status checkboxes: Pending (jobs that are in the queue for combining or zipping);
In Progress (the documents are being combined into PDF, being endorsed, or are in some other
step of the process); Completed (jobs that are finalized and ready to download); Error (jobs that
caused an error at some point in the process). By default each status checkbox is selected.
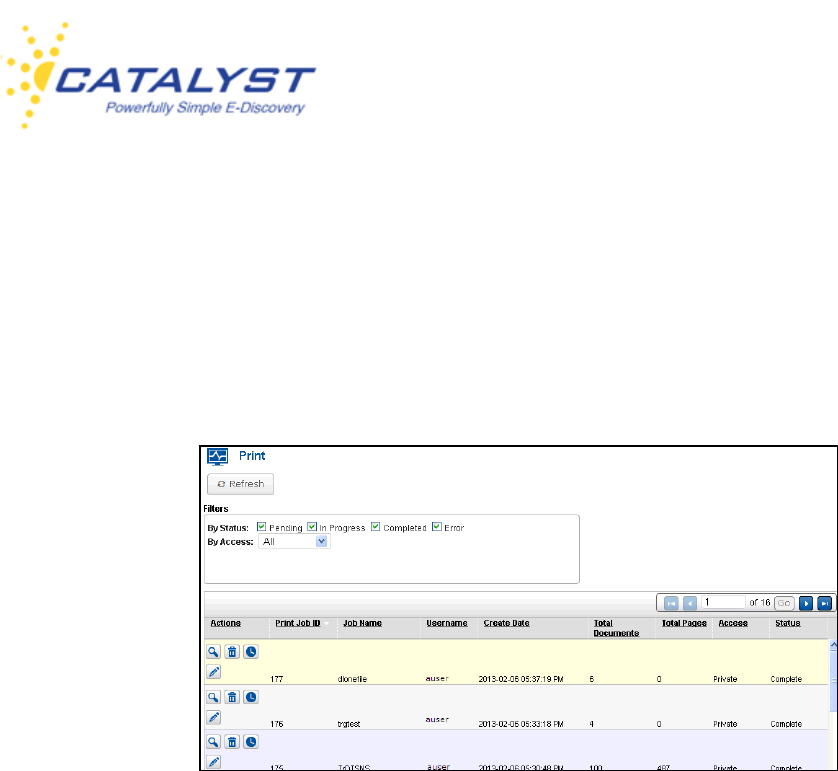
Insight User Guide
v.15-10162013 139
Case Administrators on the site will see all print jobs on the site. If you are a typical user on the
site, you will see your own print jobs and any print jobs shared with you or made public on the
site. The By Access menu defaults to All, but you can change the menu to Public, Shared or
Private to view just those jobs.
You can sort the jobs based upon the column headers in the report.
The Print Job ID is a reference number and is useful for working with Catalyst Support in
troubleshooting jobs. Job Name is the name created for the job. Username and Create Date
show who created the job and when. The Total Documents and Total Pages columns show how
many documents were selected for the print job and how big the document became after the
completion of the job (including table of contents, separator pages, etc.). Access shows whether
the job was made public, shared or left to private, and Status contains information about the print
job’s progress.
To download your complete print job file, click the View (magnifying glass) button in the row of
the job, and then click the file name.
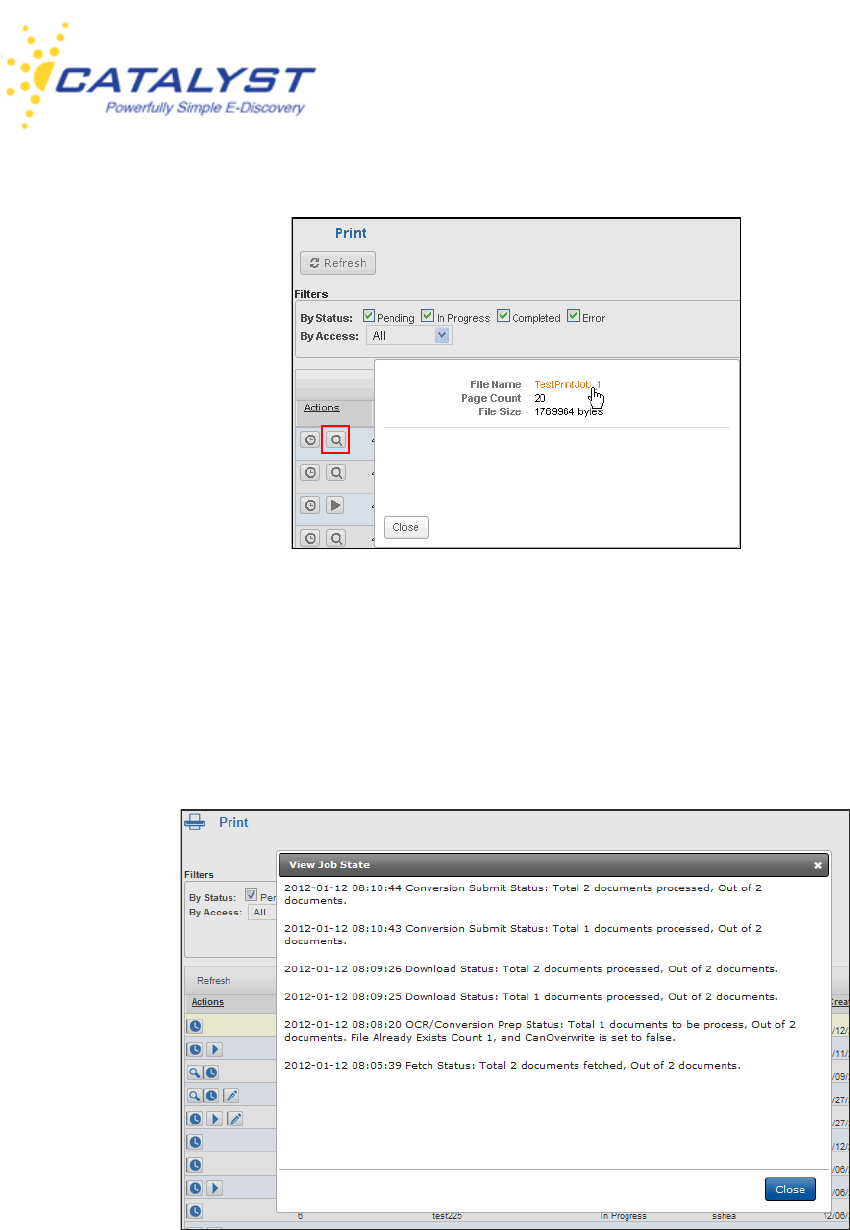
Insight User Guide
v.15-10162013 140
Buttons available in the Actions column may include Delete (trash can) if you created the print
job. After downloading the file, you may want to permanently remove it from the system.
Click the Job State (clock) button to display details of the job state. If your print job produced an
error, this is a good place to examine what went wrong.
If the job failed, click the Resubmit (right triangle) button to re-run a job that produced an error.
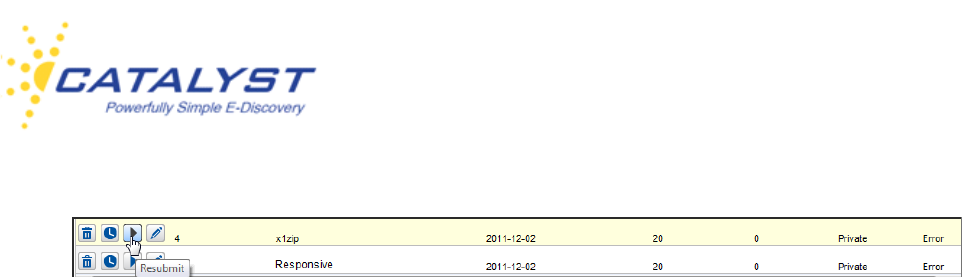
Insight User Guide
v.15-10162013 141
Use the Edit Access (pencil) button, which is available for print jobs you created to change the
access. Select Public or Shared to share the print job with other users or make it available to all
users. By default, all print jobs are Private.
You can sort the results by clicking any of the column headings. Use the Refresh button at the
top to refresh the page when you are waiting for Pending jobs to finish.
Redaction
To monitor the status of redactions, click Redaction in the Monitors menu. At By Status, each
checkbox is selected by default—Pending (documents in the queue for redaction); In Progress
(documents in the redaction process); Completed (finalized redactions) or Error (documents
that incurred errors during the redaction process); Redaction Completed, OCR in Progress;
Redaction Completed, OCR Error. You can clear or select the checkboxes you need.
The Redaction Job ID is a reference number and is useful when working with Catalyst Support
in troubleshooting jobs. Redaction ID is the identification number of the redacted document.
Redaction Set is set that contains the redacted document. Status is the state that the redaction
is currently in. Redacted by and Date show who redacted the document and when. Unless you
are a Case Administrator on the site, you will only be able to see information on documents
redacted by you. Parent DocURI is the identification number of the original, non-redacted
document.
The Actions column allows you to take certain actions on the jobs you are monitoring. Select the
Job State button (clock) to see details about the job process.

Insight User Guide
v.15-10162013 142
Click the Resubmit button (right triangle) to re-run jobs that have produced errors.
You can sort the results by clicking any of the column headings. Use the Refresh button at the
top to refresh the page when you are waiting for Pending jobs to finish.
Review Projects
To monitor the actions taken to Review Projects, click Review Projects in the Monitors menu. At
By Status, each checkbox is selected by default—Pending (jobs in the queue); In Progress (the
action is in process); Completed (finalized Review Projects jobs) or Error (jobs that incurred
errors). You can clear or select the checkboxes you need.
You can leave the Type menu set to All or expand it to build you report by a specific action:
• Copy to Review Project
• Remove From Review Project
• Move To (this reports on the action of moving to a different stage)
• Assign To
• Release
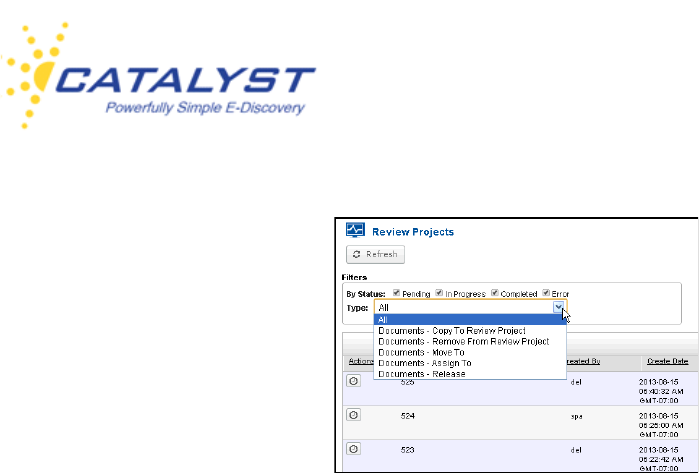
Insight User Guide
v.15-10162013 143
The Job ID is a reference number and is useful when working with Catalyst Support in
troubleshooting jobs. Email shows the email of the review administrator who took the action if
available. Created By displays who took the action. There is also a Create Date column that
shows the time the action was initiated. If the review administrator chose to include any notes in
the Wizard, this will show at Notes and you can see the Status and any Error Info, if available.
The Actions column allows you to take certain actions on the jobs you are monitoring. Select the
Job State button (clock) to see details about the job process.
You can sort the results by clicking any of the column headings. Use the Refresh button at the
top to refresh the page when you are waiting for Pending jobs to finish.
Productions
To monitor the status of production jobs, click Productions in the Monitors menu. Under Filters
at By Status, each checkbox is selected by default—Pending (documents in the queue for
production); In Progress (documents in the process); Completed (finalized productions) or
Error (documents that incurred errors during the process). You can clear or select the
checkboxes in order to see the list of productions based on the filters you select.
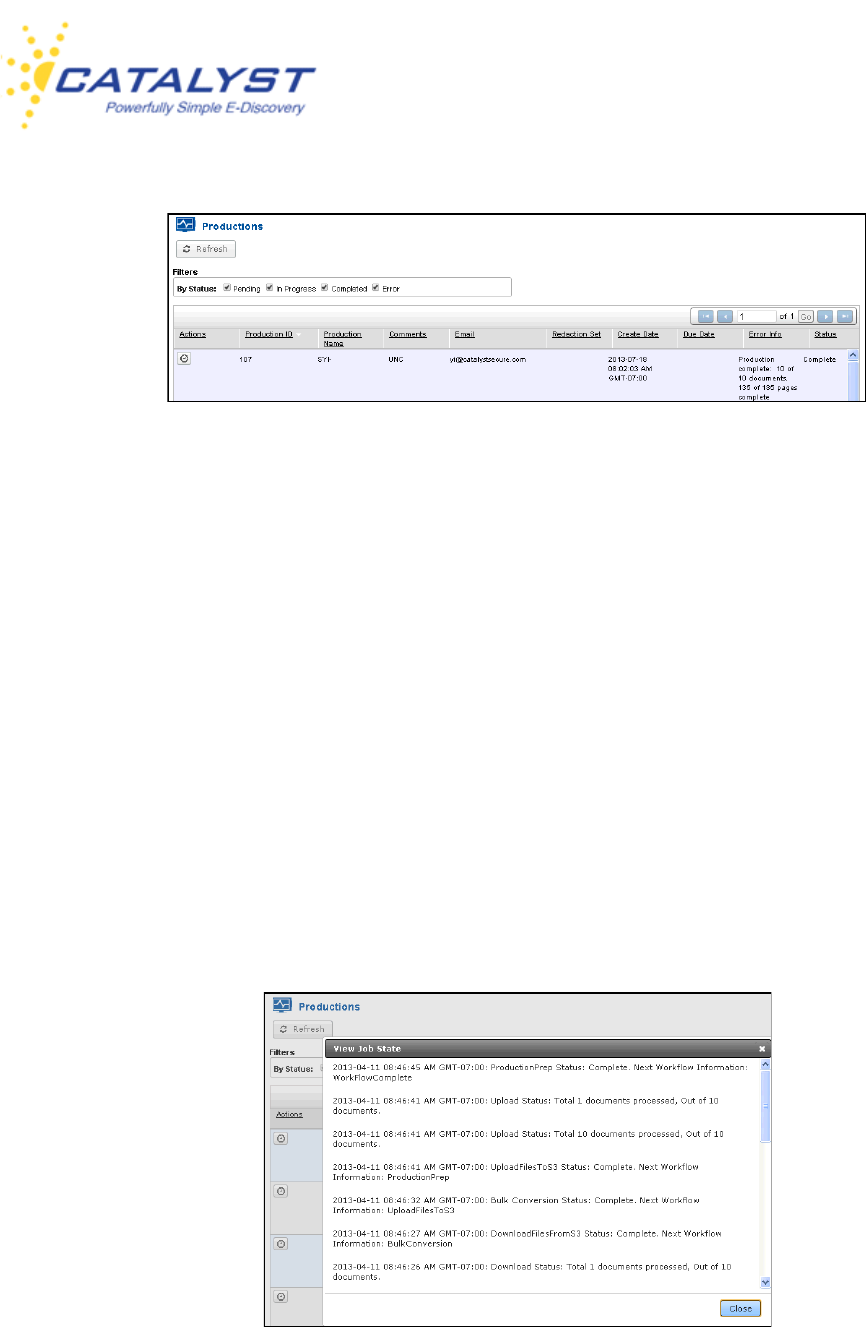
Insight User Guide
v.15-10162013 144
The Production ID is a reference number and is useful when working with Catalyst Support in
troubleshooting jobs. Production Name is the name given to a production job during the set up
of the production. If the user who ran the production, entered any extra information, this will
display in Comments. The user’s email address populates Email. If your site has more than one
redaction set, the set the documents were pulled from is listed at Redaction Set. Create Date is
system generated and lists when the production was initiated. Due Date is entered by the person
who created the job and is for reference purposes. If the job contains any errors, you can see this
at Error Info and you can see the progress of the job at Status.
You can sort the results by clicking any of the column headings. Use the Refresh button at the
top to refresh the page when you are waiting for Pending jobs to finish.
Click the Job State button (clock) in the Actions column to see details about the progress of the
production.
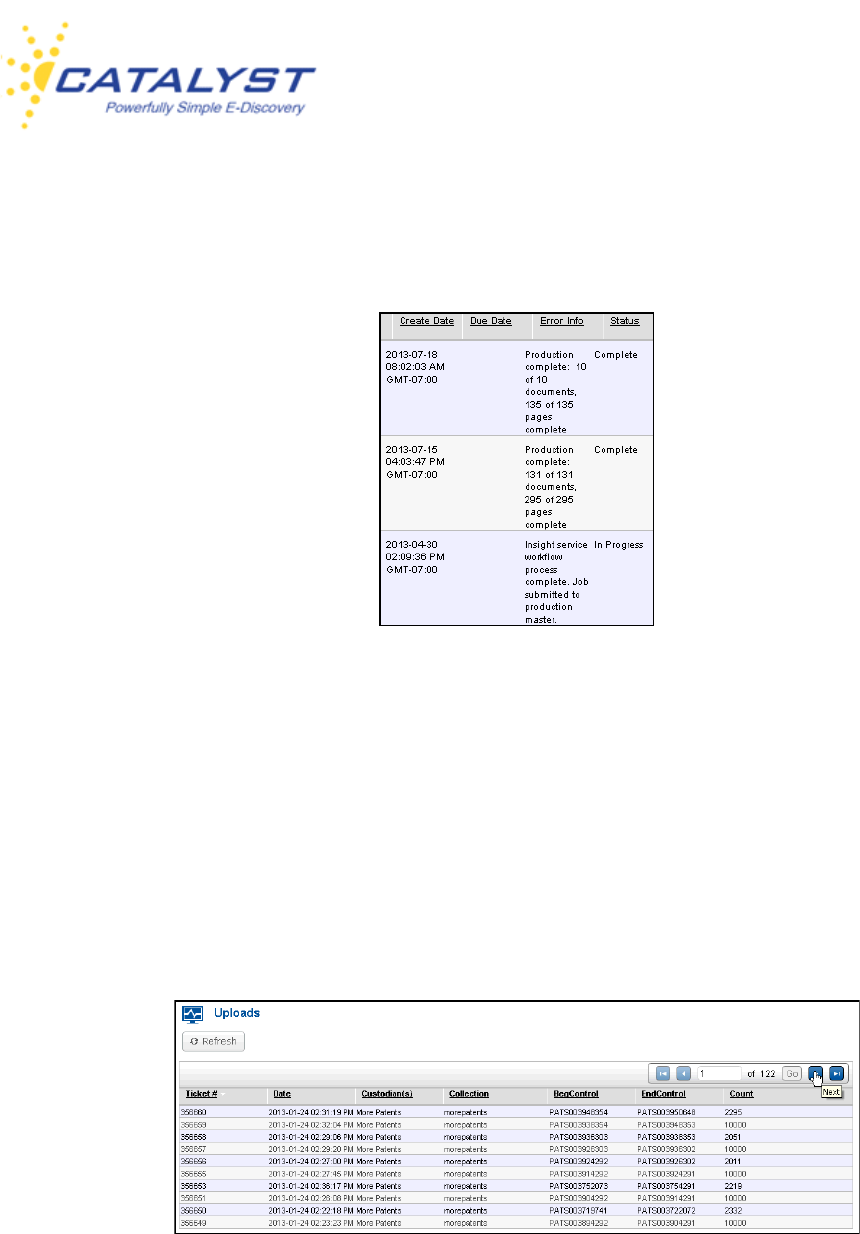
Insight User Guide
v.15-10162013 145
The Status column lists whether a production is completed or in progress or has failed. Other
information about the production is listed in the Error Info column.
Uploads
To monitor the status of Upload jobs, click Uploads in the Monitors menu. By default, the
uploads are listed by Ticket # in descending order. You can sort by any column in ascending or
descending order (these include the Date, Custodian, Collection, Beg Control, End Control
and the Count—the number of documents in the particular job). Use the page navigation buttons
to go to other pages of tickets. You can use the Refresh button to reload the page if you are not
seeing a recently completed upload.
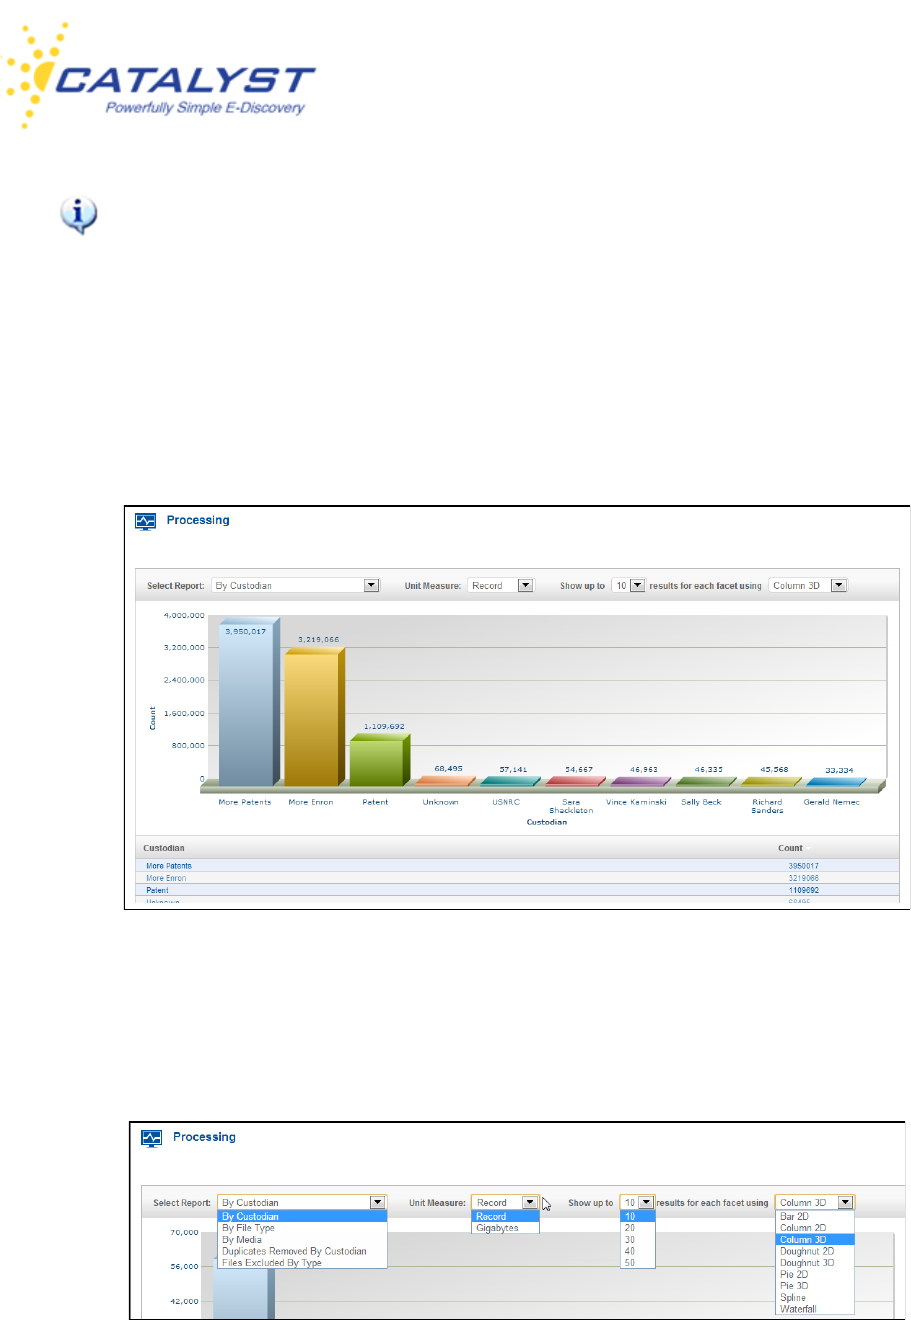
Insight User Guide
v.15-10162013 146
In order for the log of uploads to display, the TicketNumber field on your site must have a
facet built upon it.
Processing
If you have appropriate rights, you will be able to access reports about processing jobs. Click
Processing in the Monitors menu to display the processing reports associated with your case.
By default, the information is displayed By Custodian in both graphic and table format:
You can expand Select Report to create reports based on File Type, Media, Duplicates
Removed by Custodian, or Files Excluded by Type. You can also change the Unit Measure,
which by default displays Record (document), to Gigabytes.
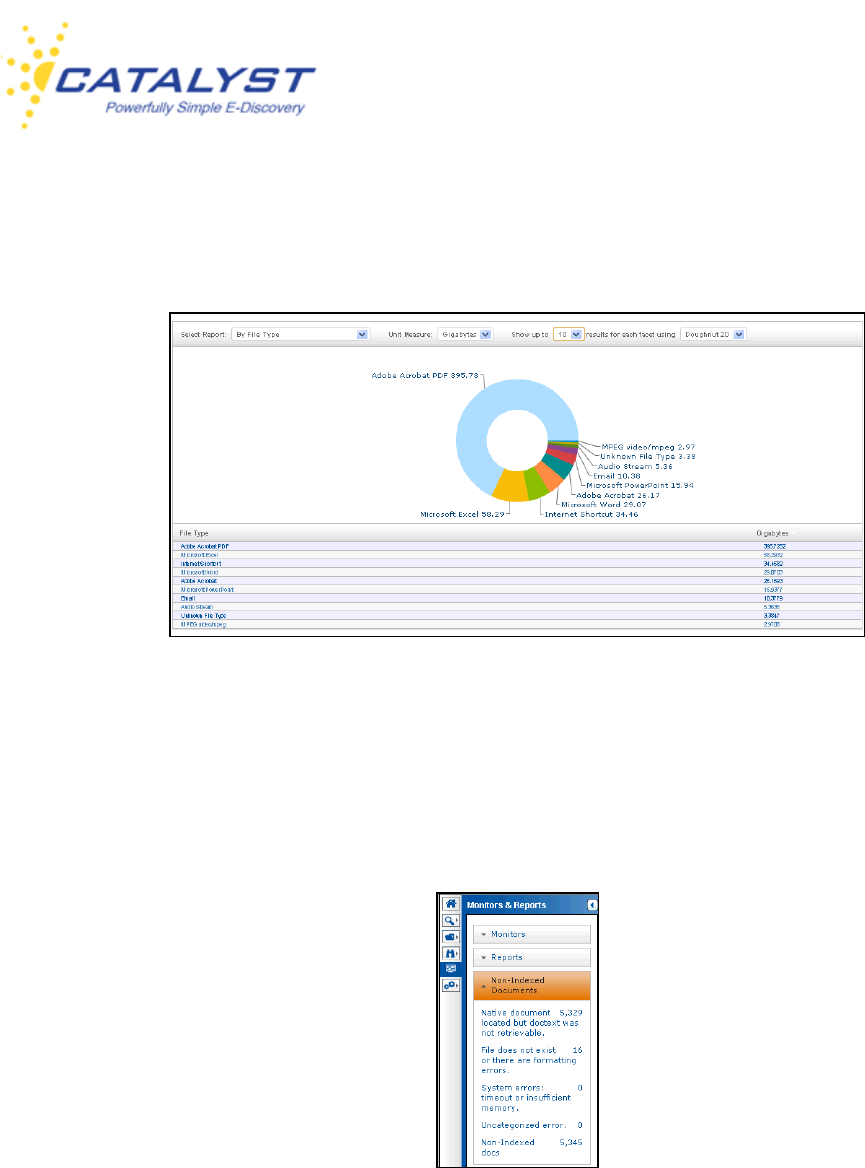
Insight User Guide
v.15-10162013 147
You can also change the number of results for your information using the Show up to menu and
graph your information using several different displays including columns and doughnuts:
Non-Indexed Documents
Your site may have documents the system could not index. Click the Monitors & Reports button
and expand the Non-Indexed Documents menu to view the types of indexing errors on your
site. Clicking an error runs a query and returns the documents associated with the error.
The descriptions explain the reason for the error, and the number reflects the number of
documents matching that error.

Insight User Guide
v.15-10162013 148
• Native Document located but doctext was not retrievable: This category means that the
text of the record was missing. This may be due to the document containing no text,
because it is an image document that has not gone through an OCR process. It may also
be a document that cannot be OCRed because it has no text, like a photograph.
• File does not exist or there are formatting errors: This error may occur when a
document is missing, but there is a document record. It could also be that the formatting of
the document produced errors in the indexing process.
• System error - timeout or insufficient memory: This error can occur because the file is
too big for indexing.
• Uncategorized error: This error can be due to any other problem with the document
indexing than those listed above.
• Non-Indexed docs: This link will bring back all errored documents no matter the reason.
Click any of the links, and the search will run, taking you to the Results page with the documents
retrieved.
