Netgear VPN Router User Guide Pro Safe FVS336G Connect
User Manual: ProSafe FVS336G
Open the PDF directly: View PDF ![]() .
.
Page Count: 22
- Chapter 2 Connecting the FVS336G to the Internet

2-1
v1.0, October 2007
Chapter 2
Connecting the FVS336G to the Internet
The initial Internet configuration of the ProSafe Dual WAN Gigabit Firewall with SSL & IPsec
VPN is described in this chapter.
This chapter contains the following sections:
•“Understanding the Connection Steps”
•“Logging into the VPN Firewall Router”
•“Navigating the Menus”
•“Configuring the Internet Connections”
•“Configuring the WAN Mode (Required for Dual WAN)”
•“Configuring Dynamic DNS (Optional)”
•“Configuring the Advanced WAN Options (Optional)”
Understanding the Connection Steps
Typically, six steps are required to complete the basic Internet connection of your VPN firewall.
1. Connect the firewall physically to your network. Connect the cables and restart your
network according to the instructions in the installation guide. See the Installation Guide,
FVS336G ProSafe Dual WAN Gigabit Firewall with SSL & IPsec VPN for complete steps. A
PDF of the Installation Guide is on the NETGEAR website at: http://kbserver.netgear.com.
2. Log in to the VPN Firewall. After logging in, you are ready to set up and configure your
VPN firewall. You can also change your password and enable remote management at this
time. See “Logging into the VPN Firewall Router” on page 2-2.
3. Configure the Internet connections to your ISP(s). During this phase, you will connect to
your ISPs. You can also program the WAN traffic meters at this time if desired. See
“Configuring the Internet Connections” on page 2-5.

ProSafe Dual WAN Gigabit Firewall with SSL & IPsec VPN FVS336G Reference Manual
2-2 Connecting the FVS336G to the Internet
v1.0, October 2007
4. Configure the WAN mode (required for dual WAN operation). Select either dedicated
(single WAN) mode, auto-rollover mode, or load balancing mode. For load balancing, you can
also select any necessary protocol bindings. See “Configuring the WAN Mode (Required for
Dual WAN)” on page 2-12.
5. Configure dynamic DNS on the WAN ports (optional). Configure your fully qualified
domain names during this phase (if required). See “Configuring Dynamic DNS (Optional)” on
page 2-18.
6. Configure the WAN options (optional). Optionally, you can enable each WAN port to
respond to a ping, and you can change the factory default MTU size and port speed. However,
these are advanced features and changing them is not usually required. See “Configuring the
Advanced WAN Options (Optional)” on page 2-20.
Each of these tasks is detailed separately in this chapter. The configuration of firewall and VPN
features is described in later chapters.
Logging into the VPN Firewall Router
To connect to the VPN firewall, your computer needs to be configured to obtain an IP address
automatically from the VPN firewall by DHCP. For instructions on how to configure your
computer for DHCP, refer to the link in Appendix B, “Related Documents.
To connect and log in to the VPN firewall follow these steps:
1. Start any of the qualified browsers, as detailed in “Qualified Web Browsers” on page 1-8.
2. Enter https://192.168.1.1 in the address field.
ProSafe Dual WAN Gigabit Firewall with SSL & IPsec VPN FVS336G Reference Manual
Connecting the FVS336G to the Internet 2-3
v1.0, October 2007
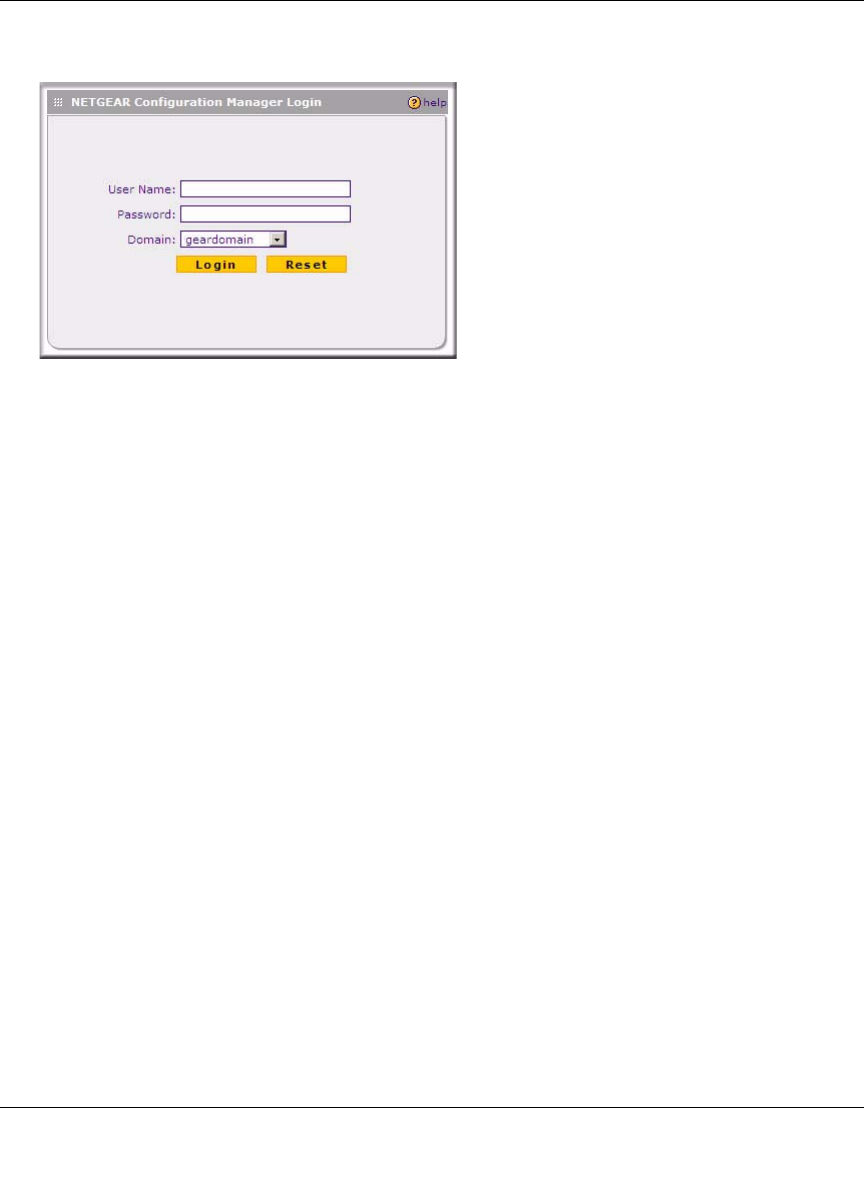
The Manager login features appear in the browser.
3. In the User field, type admin
4. In the Password field, type password
Note that both entries are in lower case letters.
5. Click Login.
Figure 2-1
ProSafe Dual WAN Gigabit Firewall with SSL & IPsec VPN FVS336G Reference Manual
2-4 Connecting the FVS336G to the Internet
v1.0, October 2007
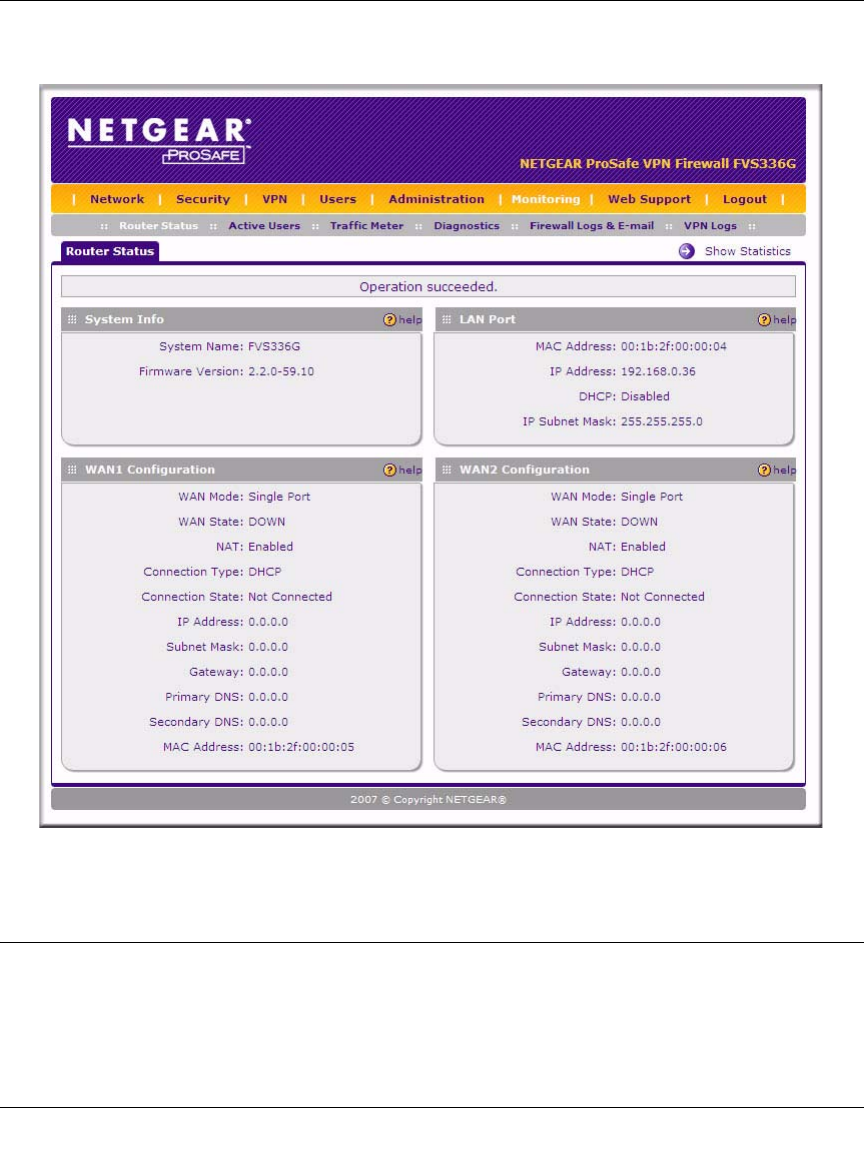
The Web Configuration Manager appears, displaying the Router Status menu:
Navigating the Menus
The Web Configuration Manager menus are organized in a layered structure of main categories
and submenus:
Figure 2-2

ProSafe Dual WAN Gigabit Firewall with SSL & IPsec VPN FVS336G Reference Manual
Connecting the FVS336G to the Internet 2-5
v1.0, October 2007
•Main menu. The horizontal orange bar near the top of the page is the main menu, containing
the primary configuration categories. Clicking on a primary category changes the contents of
the submenu bar.
•Submenu. The horizontal grey bar immediately below the main menu is the submenu,
containing subcategories of the currently selected primary category.
•Tab. Immediately below the submenu bar, at the top of the menu active window, are one or
more tabs, further subdividing the currently selected subcategory if necessary.
•Option arrow. To the right of the tabs on some menus are one or more blue dots with an arrow
in the center. Clicking an option arrow brings up either a popup window or an advanced option
menu.
You can now proceed to the first configuration task, configuring the VPN firewall’s Internet
connections.
Configuring the Internet Connections
To set up your VPN firewall for secure Internet connections, you configure WAN ports 1 and 2.
The Web Configuration Manager offers two connection configuration options:
• Automatic detection and configuration of the network connection.
• Manual configuration of the network connection.
Each option is detailed in the sections following.
Automatically Detecting and Connecting
To automatically configure the WAN ports for connection to the Internet:
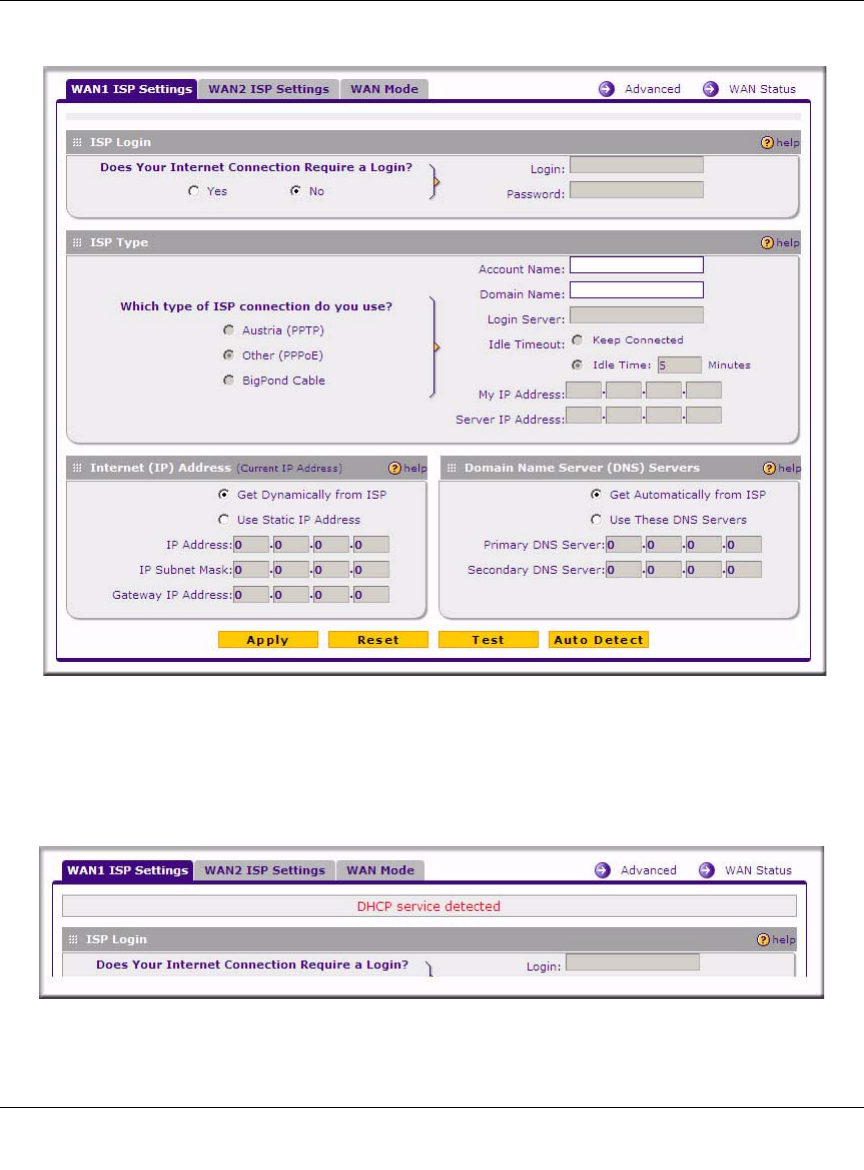
1. Select Network > WAN Settings from the menu. The WAN Settings tabs appear, with the
WAN1 ISP Settings tab in view.
Tip: In the instructions in this guide, we may refer to a menu using the notation
primary | subcategory, such as Network | WAN Settings. In this example,
Network is the selected primary category (in the main menu) and WAN
Settings is the selected subcategory (in the submenu).
ProSafe Dual WAN Gigabit Firewall with SSL & IPsec VPN FVS336G Reference Manual
2-6 Connecting the FVS336G to the Internet
v1.0, October 2007
2. Click Auto Detect at the bottom of the menu. Auto Detect will probe the WAN port for a
range of connection methods and suggest one that your ISP appears to support.
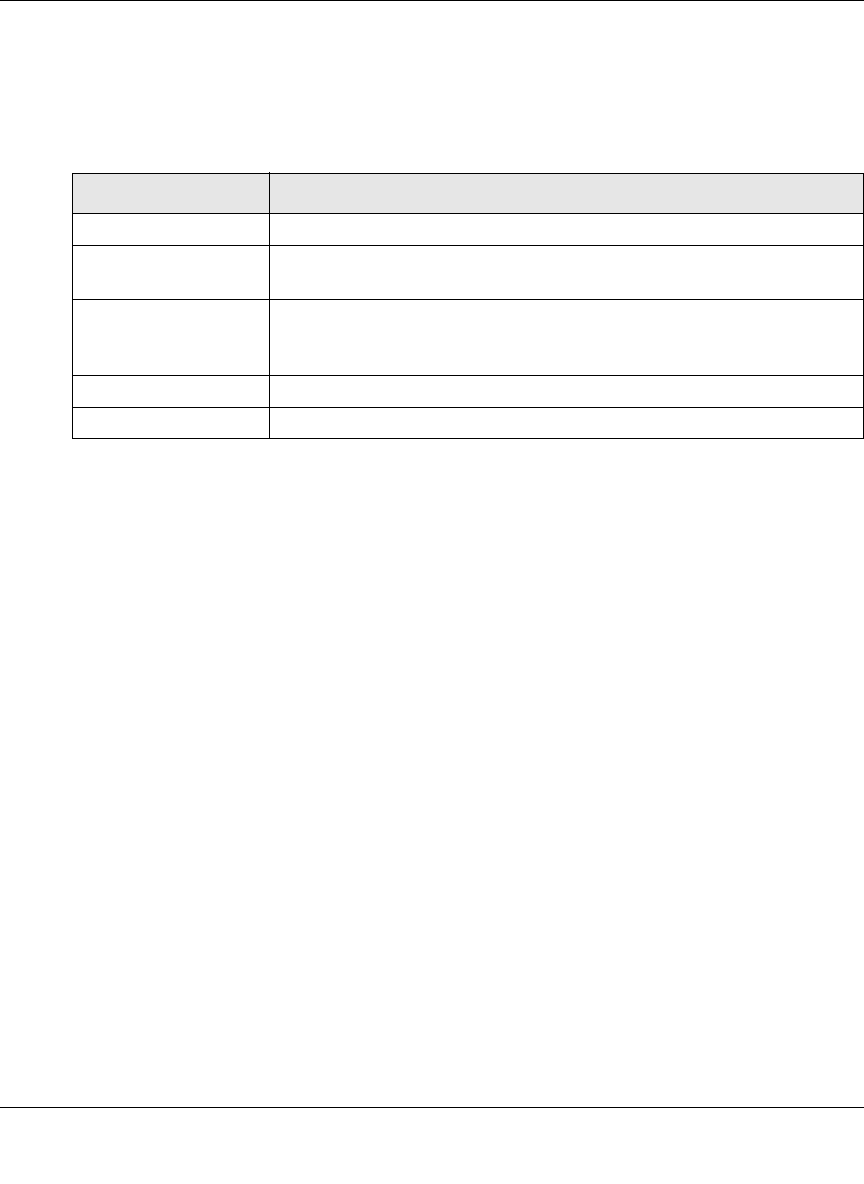
a. If Auto Detect is successful, a status bar at the top of the menu will display the results:.
Figure 2-3
Figure 2-4
ProSafe Dual WAN Gigabit Firewall with SSL & IPsec VPN FVS336G Reference Manual
Connecting the FVS336G to the Internet 2-7
v1.0, October 2007
b. If Auto Detect senses a connection method that requires input from you, it will prompt you
for the information. All methods with their required settings are detailed in the following
table.
c. If Auto Detect does not find a connection, you will be prompted to (1) check the physical
connection between your VPN firewall and the cable or DSL line, or to (2) check your
VPN firewall’s MAC address (For more information, see “Configuring the WAN Mode
(Required for Dual WAN)” on page 2-12 and “Troubleshooting the ISP Connection” on
page 10-4).
3. To verify the connection, click the WAN Status option arrow at the top right of the screen.
Table 2-1. Internet connection methods
Connection Method Data Required
DHCP (Dynamic IP) No data is required.
PPPoE Login (Username, Password);
Account Name, Domain Name (sometimes required).
PPTP Login (Username, Password),
Local IP address, and PPTP Server IP address;
Account Name (sometimes required).
BigPond Cable Login (Username, Password), Login Server.
Fixed (Static) IP Static IP address, Subnet, and Gateway IP; DNS Server IP addresses.
ProSafe Dual WAN Gigabit Firewall with SSL & IPsec VPN FVS336G Reference Manual
2-8 Connecting the FVS336G to the Internet
v1.0, October 2007
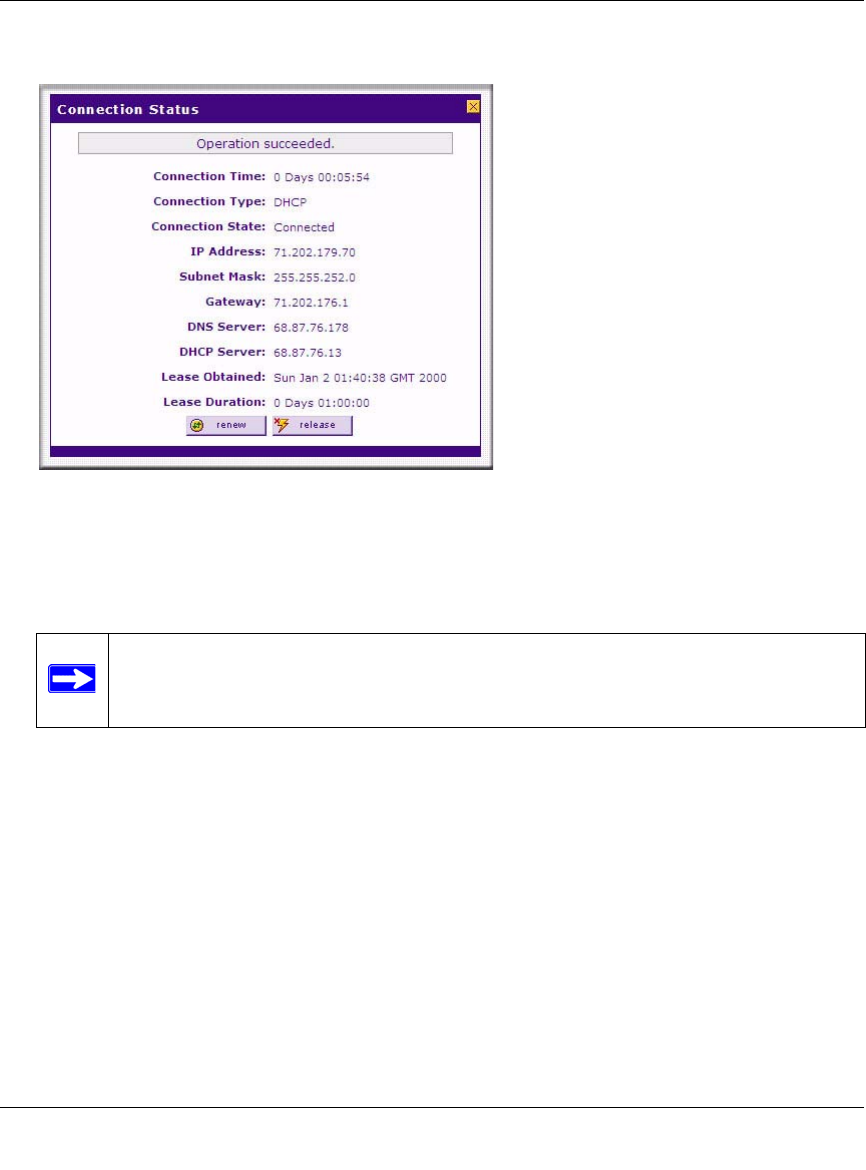
A popup window appears, displaying the connection status of WAN port 1.
The WAN Status window should show a valid IP address and gateway. If the configuration
was not successful, skip ahead to “Manually Configuring the Internet Connection” following
this section, or see “Troubleshooting the ISP Connection” on page 10-4.
4. Click the WAN2 ISP Settings tab.
5. Repeat the previous steps to automatically detect and configure the WAN2 Internet
connection.
6. Open the WAN Status window and verify a successful connection
If your WAN ISP configuration was successful, you can skip ahead to “Configuring the WAN
Mode (Required for Dual WAN)” on page 2-12.
If one or both automatic WAN ISP configurations failed, you can attempt a manual configuration
as described in the following section, or see “Troubleshooting the ISP Connection” on page 10-4.
Figure 2-5
Note: If the configuration process was successful, you are connected to the Internet
through WAN port 1. If you intend to use the dual WAN capabilities of the
VPN firewall, continue with the configuration process for WAN port 2.
ProSafe Dual WAN Gigabit Firewall with SSL & IPsec VPN FVS336G Reference Manual
Connecting the FVS336G to the Internet 2-9
v1.0, October 2007
Manually Configuring the Internet Connection
Unless your ISP automatically assigns your configuration automatically via DHCP, you will need
to obtain configuration parameters from your ISP in order to manually establish an Internet
connection. The necessary parameters for various connection types are listed in Table 2-1.
To manually configure your WAN1 ISP Settings:
1. Select Network > WAN Settings > WAN1 ISP Settings and enter the following:
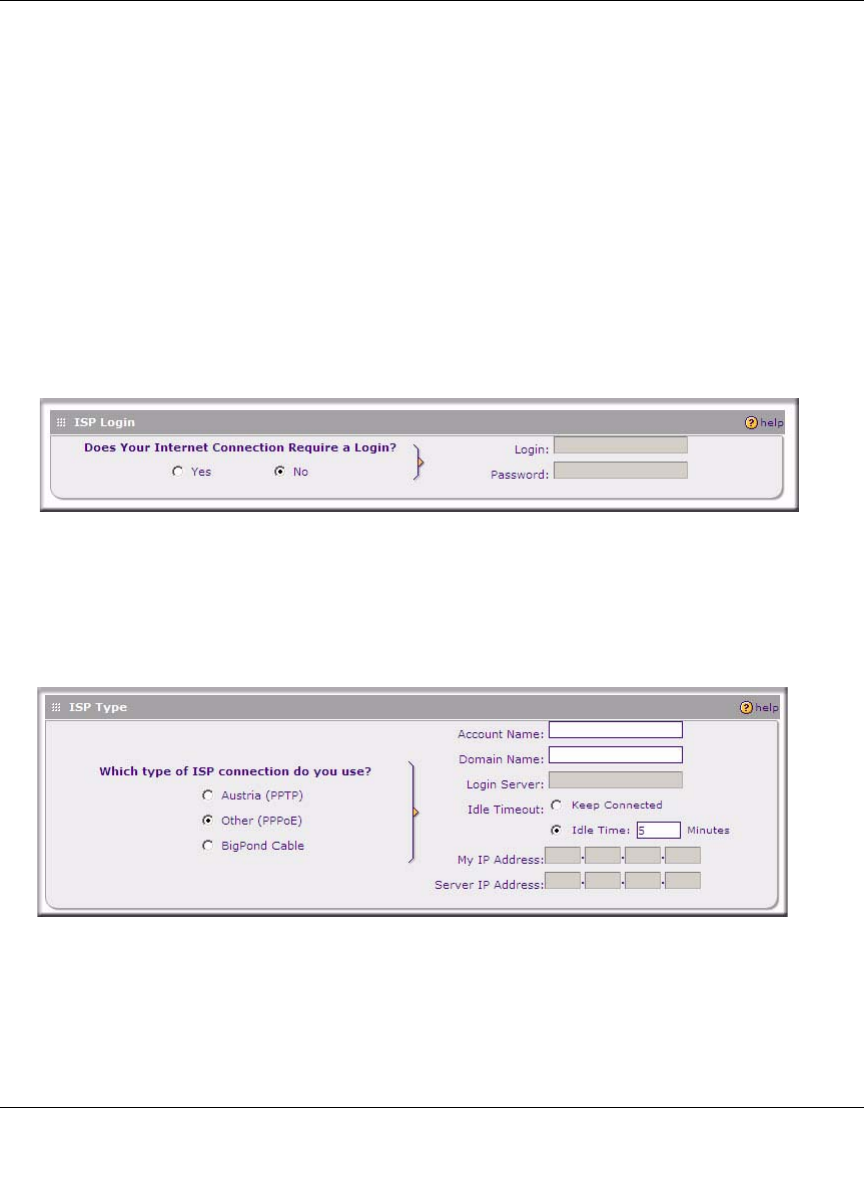
2. In the ISP Login options, choose one of these options:
• If your ISP requires an initial login to establish an Internet connection, click Yes (this is
the default).
• If a login is not required, click No and ignore the Login and Password fields.
3. If you clicked Yes, enter the ISP-provided Login and Password information.
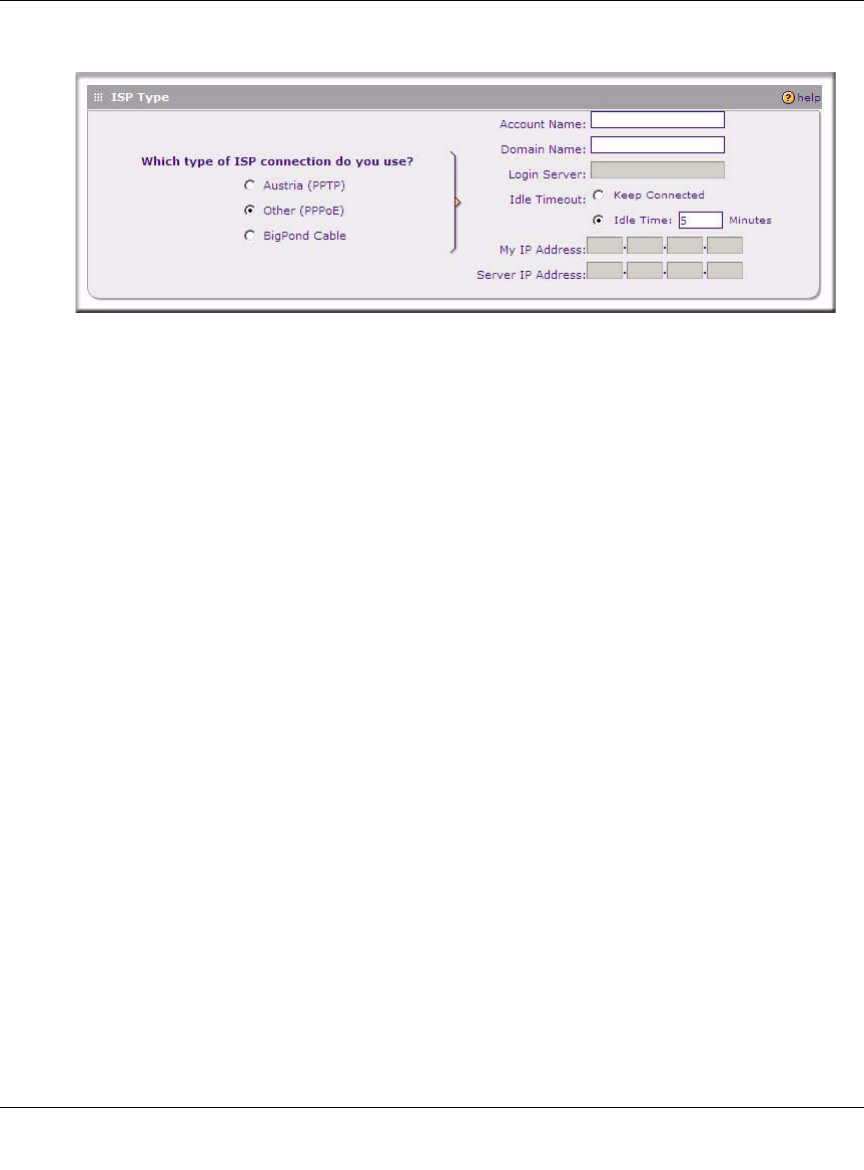
4. In the ISP Type options, select the type of ISP connection you use from the three listed
options. (By default, “Other (PPPoE)” is selected, as shown below.
(If your connection is PPPoE, PPTP or BigPond Cable, your ISP will require an initial login.)
5. If you have installed login software such as WinPoET or Enternet, then your connection type
is PPPoE. If your ISP uses PPPoE as a login protocol:
Figure 2-6
Figure 2-7
ProSafe Dual WAN Gigabit Firewall with SSL & IPsec VPN FVS336G Reference Manual
2-10 Connecting the FVS336G to the Internet
v1.0, October 2007
a. Select Other (PPPoE).
b. Configure the following fields:
•Account Name. Valid account name for the PPPoE connection
•Domain Name. Name of your ISP’s domain or your domain name if your ISP has
assigned one. In most cases, you may leave this field blank.
•Idle Timeout. Select Keep Connected, to keep the connection always on. To logout
after the connection is idle for a period of time, click Idle Time and in the timeout field
enter the number of minutes to wait before disconnecting.
6. If your ISP is Austria Telecom or any other ISP that uses PPTP as a login protocol:
a. Select Austria (PPTP).
b. Configure the following fields:
•Account Name (also known as Host Name or System Name). Enter the valid account
name for the PPTP connection (usually your email name as assigned by your ISP).
Some ISPs require entering your full email address here.
•Domain Name. Your domain name or workgroup name assigned by your ISP, or your
ISPs domain name. You may leave this field blank.
•Idle Timeout. Check the Keep Connected radio box to keep the connection always
on. To logout after the connection is idle for a period of time, click Idle Time and enter
the number of minutes to wait before disconnecting in the timeout field. This is useful
if your ISP charges you based on the amount of time you have logged in.
•My IP Address. IP address assigned by the ISP to make the connection with the ISP
server.
•Server IP Address. IP address of the PPTP server.
7. If your ISP is Telstra BigPond Cable:
Figure 2-8
ProSafe Dual WAN Gigabit Firewall with SSL & IPsec VPN FVS336G Reference Manual
Connecting the FVS336G to the Internet 2-11
v1.0, October 2007
a. Select BigPond Cable.
b. Configure the Login Server and Idle Timeout fields.
The Login Server is the IP address of the local BigPond Login Server in your area.
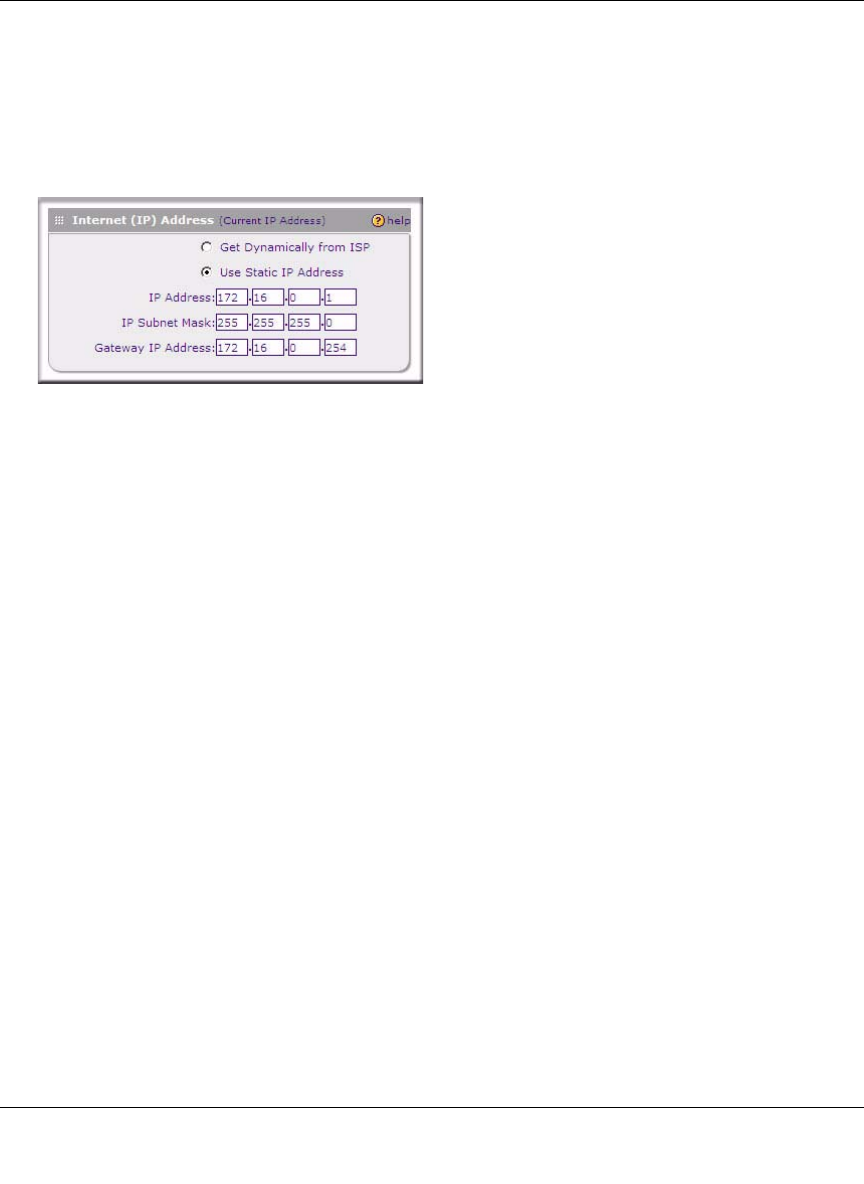
8. Review the Internet (IP) Address options.
These options are inactive if BigPond Cable is selected.
9. If your ISP has assigned a fixed (static) IP address, select Use Static IP Address, and
configure the following fields:
•IP Address. Enter the Static IP address assigned to you, that identifies the VPN firewall to
your ISP.
•Subnet Mask. Enter the mask provided by the ISP or your network administrator.
•Gateway IP Address. Enter the IP address of the ISP’s gateway, provided by the ISP or
your network administrator.
10. If your ISP has not assigned a static IP address, click Get dynamically from ISP. The text
fields will be inactivated.
The ISP will automatically assign an IP address to the VPN firewall using DHCP network
protocol.
Figure 2-9
ProSafe Dual WAN Gigabit Firewall with SSL & IPsec VPN FVS336G Reference Manual
2-12 Connecting the FVS336G to the Internet
v1.0, October 2007
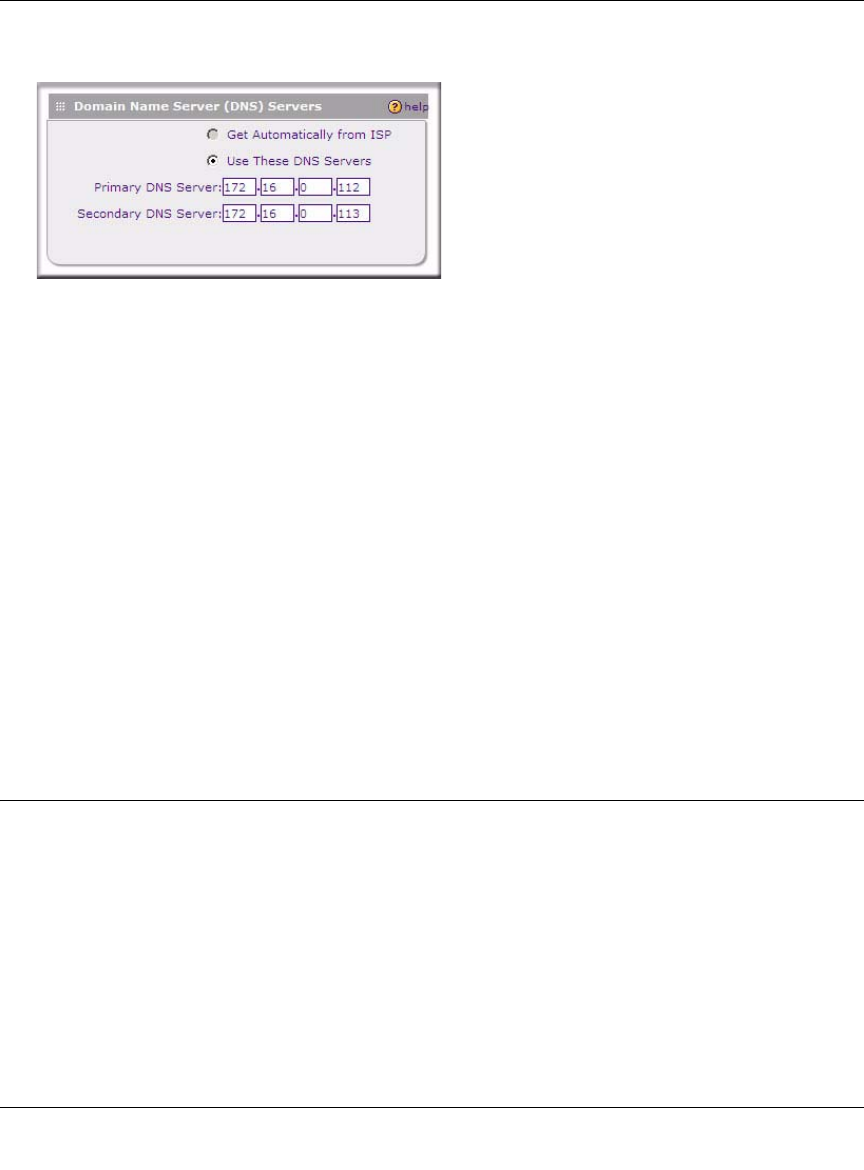
11. Review the Domain Name Server (DNS) Servers options.
• If your ISP has not assigned any Domain Name Servers (DNS) addresses, click Get
dynamically from ISP.
• If your ISP (or your IT department) has assigned DNS addresses, click Use these DNS
Servers and enter the DNS server IP addresses provided to you in the fields.
12. Click Apply to save any changes to the WAN1 ISP Settings. (Or click Reset to discard any
changes and revert to the previous settings.)
13. Click Test to evaluate your entries.
The VPN firewall will attempt to connect to the NETGEAR Web site. If a successful
connection is made, NETGEAR’s Web site appears.
14. If you intend to use a dual WAN mode, click the WAN2 ISP Settings tab and configure the
WAN2 ISP settings using the same steps as WAN1.
When you are finished, click Logout or proceed to additional setup and management tasks.
Configuring the WAN Mode (Required for Dual WAN)
The dual WAN ports of the ProSafe Dual WAN Gigabit Firewall with SSL & IPsec VPN can be
configured on a mutually exclusive basis for either auto-rollover (for increased system reliability)
or load balancing (for maximum bandwidth efficiency), or one port can be disabled.
•Auto-Rollover Mode. The selected WAN interface is made primary and the other is the
rollover link. As long as the primary link is up, all traffic is sent over the primary link. Once
the primary WAN interface goes down, the rollover link is brought up to send the
traffic.Traffic will automatically roll back to the original primary link once the original
primary link is back up and running again.
Figure 2-10

ProSafe Dual WAN Gigabit Firewall with SSL & IPsec VPN FVS336G Reference Manual
Connecting the FVS336G to the Internet 2-13
v1.0, October 2007
If you want to use a redundant ISP link for backup purposes, select the WAN port that will act
as the primary link for this mode. Ensure that the backup WAN port has also been configured
and that you configure the WAN Failure Detection Method to support Auto-Rollover.
•Load Balancing Mode. The VPN firewall distributes the outbound traffic equally among the
WAN interfaces that are functional.
•Single WAN Port Mode. The selected WAN interface is made primary and the other is
disabled.
For whichever WAN mode you choose, you must also choose either NAT or classical routing, as
explained in the following sections.
Network Address Translation
Network Address Translation (NAT) allows all PCs on your LAN to share a single public Internet
IP address. From the Internet, there is only a single device (the VPN firewall) and a single IP
address. PCs on your LAN can use any private IP address range, and these IP addresses are not
visible from the Internet.
• The VPN firewall uses NAT to select the correct PC (on your LAN) to receive any incoming
data.
• If you only have a single public Internet IP address, you MUST use NAT. (the default setting).
• If your ISP has provided you with multiple public IP addresses, you can use one address as the
primary shared address for Internet access by your PCs, and you can map incoming traffic on
the other public IP addresses to specific PCs on your LAN. This one-to-one inbound mapping
is configured using an inbound firewall rule.
Classical Routing
In classical routing mode, the VPN firewall performs routing, but without NAT. To gain Internet
access, each PC on your LAN must have a valid static Internet IP address.
If your ISP has allocated a number of static IP addresses to you, and you have assigned one of
these addresses to each PC, you can choose classical routing. Or, you can use classical routing for
routing private IP addresses within a campus environment.
Note: Scenarios could arise when load balancing needs to be bypassed for certain
traffic or applications. If certain traffic needs to travel on a specific WAN
interface, configure protocol binding rules for that WAN interface. The rule
should match the desired traffic.

ProSafe Dual WAN Gigabit Firewall with SSL & IPsec VPN FVS336G Reference Manual
2-14 Connecting the FVS336G to the Internet
v1.0, October 2007
To learn the status of the WAN ports, you can view the Router Status page (see “Monitoring VPN
Tunnel Connection Status” on page 9-15) or look at the LEDs on the front panel (see “Front Panel
Features” on page 1-6).
Configuring Auto-Rollover Mode
To use a redundant ISP link for backup purposes, ensure that the backup WAN port has already
been configured. Then select the WAN port that will act as the primary link for this mode and
configure the WAN Failure Detection Method to support Auto-Rollover.
When the VPN firewall is configured in Auto-Rollover Mode, it uses the selected WAN Failure
Detection Method to check the connection of the primary link at regular intervals to detect router
status. Link failure is detected in one of the following ways:
• By sending DNS queries to a DNS server, or
• By sending a Ping request to an IP address, or
• None (no failure detection is performed).
From each WAN interface, DNS queries or Ping requests are sent to the specified IP address. If
replies are not received, after a specified number of retries, the corresponding WAN interface is
considered down.
To configure the dual WAN ports for Auto-Rollover
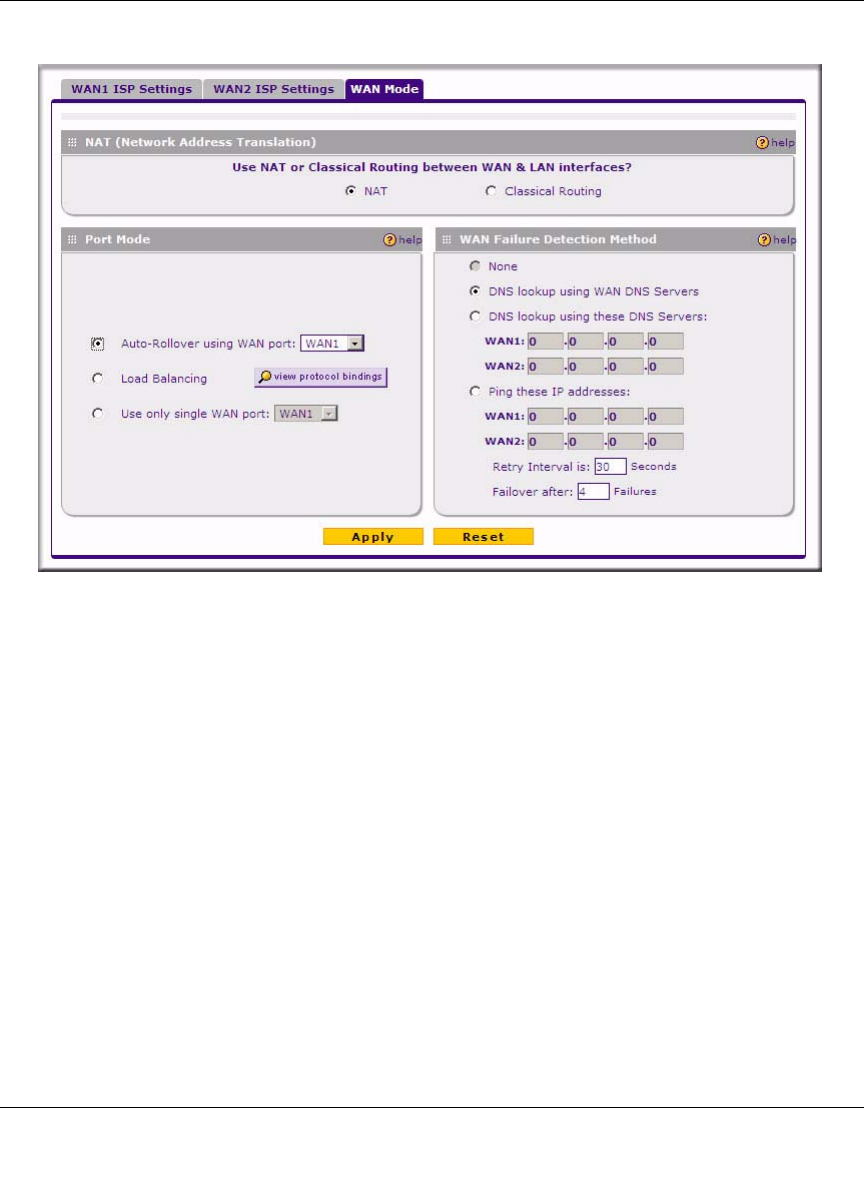
1. Select Network > WAN Settings from the main menu and click the WAN Mode tab. The WAN
Mode tab is displayed
ProSafe Dual WAN Gigabit Firewall with SSL & IPsec VPN FVS336G Reference Manual
Connecting the FVS336G to the Internet 2-15
v1.0, October 2007
2. In the Port Mode section, select Auto-Rollover Using WAN port.
3. From the pull-down menu, choose which WAN port will act as the primary link for this mode.
4. In the WAN Failure Detection Method section, select one of the following detection failure
methods:
•DNS lookup using ISP DNS Servers. DNS queries are sent to the DNS server configured
on the WAN ISP pages (see “Configuring the Internet Connections” on page 2-5).
•DNS lookup using this DNS Server. Enter a public DNS server. DNS queries are sent to
this server through the WAN interface being monitored.
•Ping to this IP addresses. Enter a public IP address that will not reject the Ping request
and will not consider Ping traffic to be abusive. Queries are sent to this server through the
WAN interface being monitored.
5. Enter a Retry Interval in seconds. The DNS query or Ping is sent periodically after every test
period. The default test period is 30 seconds.
Figure 2-11

ProSafe Dual WAN Gigabit Firewall with SSL & IPsec VPN FVS336G Reference Manual
2-16 Connecting the FVS336G to the Internet
v1.0, October 2007
6. Enter the Failover after count. The WAN interface is considered down after the configured
number of queries have failed to elicit a reply. The rollover link is brought up after this. The
Failover default is 4 failures.
The default time to roll over after the primary WAN interface fails is 2 minutes (a 30-second
minimum test period for a minimum of 4 tests).
7. Click Apply to save your settings.
Once a rollover occurs, an alert will be generated (see “E-Mail Notifications of Event Logs and
Alerts” on page 4-25). When the VPN firewall detects that the failed primary WAN interface has
been restored, it will automatically rollover again to the primary WAN interface. Alternatively,
you can manually force traffic back on the original primary WAN interface by reapplying the
Auto-Rollover settings in the WAN Mode menu.
Configuring Load Balancing
To use multiple ISP links simultaneously, select Load Balancing. In Load Balancing mode, either
WAN port will carry any outbound protocol unless protocol binding is configured. When a
protocol is bound to a particular WAN port, all outgoing traffic of that protocol will be directed to
the bound WAN port. For example, if the HTTPS protocol is bound to WAN1 and the FTP
protocol is bound to WAN2, then the VPN firewall will automatically route all outbound HTTPS
traffic from the computers on the LAN through the WAN1 port. All outbound FTP traffic will be
routed through the WAN2 port.
Protocol binding
Protocol binding addresses two issues:
• Segregation of traffic between links that are not of the same speed.
High volume traffic can be routed through the WAN port connected to a high speed link and
low volume traffic can be routed through the WAN port connected to the low speed link.
• Continuity of source IP address for secure connections.
Some services, particularly HTTPS, will cease responding when a client’s source IP address
changes shortly after a session has been established.
To configure the dual WAN ports for load balancing with protocol binding:
1. Select Network >WAN Settings, and click the WAN Mode tab.
2. In the Port Mode section, select Load Balancing.
ProSafe Dual WAN Gigabit Firewall with SSL & IPsec VPN FVS336G Reference Manual
Connecting the FVS336G to the Internet 2-17
v1.0, October 2007
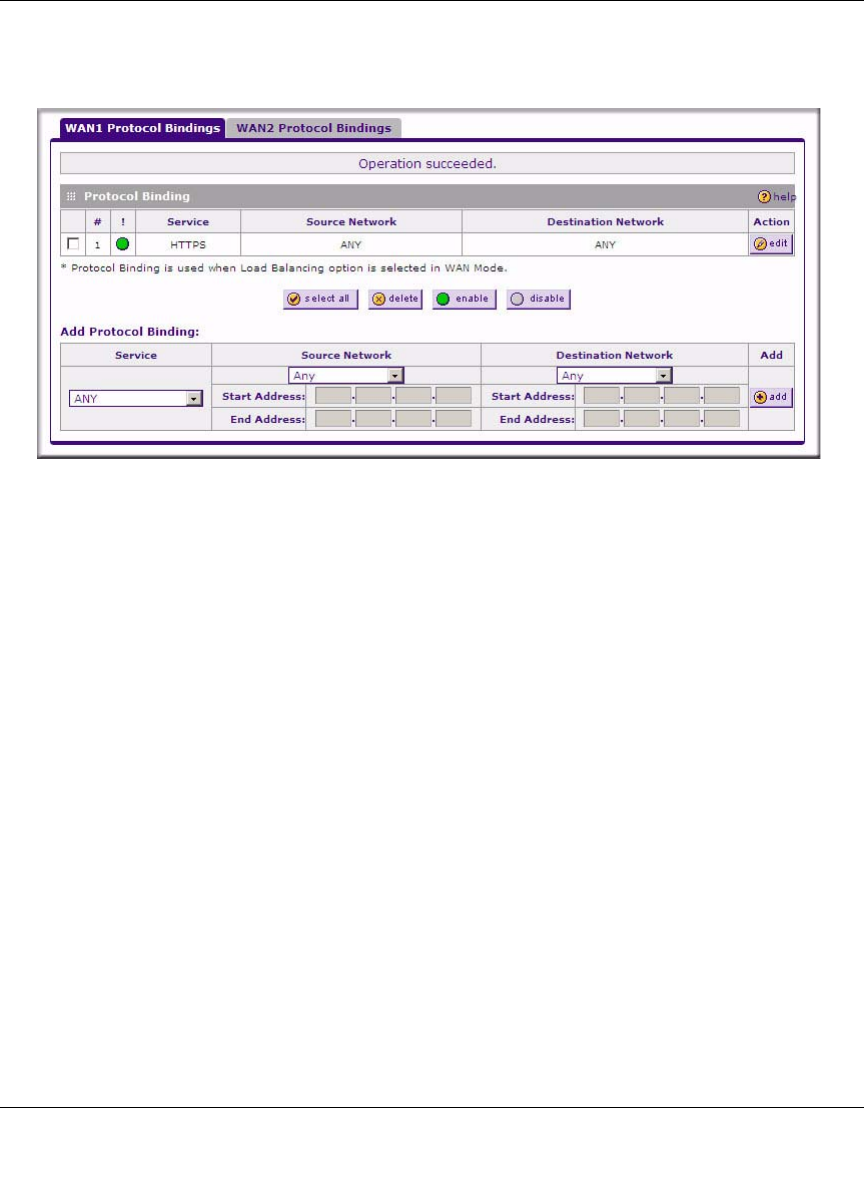
3. Click view protocol bindings (if required). The WAN1 Protocol Bindings screen is
displayed.
Enter the following data in the Add Protocol Binding options:
a. Service. From the pull-down menu, choose the desired Service or application to be
covered by this rule. If the desired service or application does not appear in the list, you
must define it using the Services menu (see “Services-Based Rules” on page 4-2).
b. Source Network. These settings determine which computers on your network are affected
by this rule. Select the desired options:
•Any. All PCs and devices on your LAN.
•Single address. Enter the required address and the rule will be applied to that
particular PC.
•Address range. If this option is selected, you must enter the start and finish fields.
•Group 1-Group 8. If this option is selected, the devices assigned to this group will be
affected. (You may also assign a customized name to the group. See Edit Group
Names on the Groups and Hosts menu in the LAN Groups sub-menu.)
c. Destination Network. These settings determine which Internet locations are covered by
the rule, based on their IP address. Select the desired option:
•Any. All Internet IP address are covered by this rule.
•Single address. Enter the required address in the start field.
Figure 2-12

ProSafe Dual WAN Gigabit Firewall with SSL & IPsec VPN FVS336G Reference Manual
2-18 Connecting the FVS336G to the Internet
v1.0, October 2007
•Address range. If this option is selected, you must enter the start and finish fields.
4. Click Add to save this rule.
The new Protocol Binding Rule will be enabled and added to the Protocol Binding Table for
the WAN1 port.
5. Open the WAN2 Protocol Bindings tab and repeat the previous steps to set protocol bindings
for the WAN2 port.
Configuring Dynamic DNS (Optional)
Dynamic DNS (DDNS) is an Internet service that allows routers with varying public IP addresses
to be located using Internet domain names. To use DDNS, you must setup an account with a
DDNS provider such as DynDNS.org, TZO.com or Iego.net. (Links to DynDNS, TZO and Iego
are provided for your convenience on the Dynamic DNS Configuration screen.) The VPN
firewall firmware includes software that notifies dynamic DNS servers of changes in the WAN IP
address, so that the services running on this network can be accessed by others on the Internet.
If your network has a permanently assigned IP address, you can register a domain name and have
that name linked with your IP address by public Domain Name Servers (DNS). However, if your
Internet account uses a dynamically assigned IP address, you will not know in advance what your
IP address will be, and the address can change frequently—hence, the need for a commercial
DDNS service, which allows you to register an extension to its domain, and restores DNS requests
for the resulting FQDN to your frequently-changing IP address.
After you have configured your account information in the firewall, whenever your ISP-assigned
IP address changes, your firewall will automatically contact your DDNS service provider, log in to
your account, and register your new IP address.
• For auto-rollover mode, you will need a fully qualified domain name (FQDN) to implement
features such as exposed hosts and virtual private networks regardless of whether you have a
fixed or dynamic IP address.
• For load balancing mode, you may still need a fully qualified domain name (FQDN) either for
convenience or if you have a dynamic IP address.
Note: If your ISP assigns a private WAN IP address such as 192.168.x.x or 10.x.x.x, the
dynamic DNS service will not work because private addresses will not be routed
on the Internet.
ProSafe Dual WAN Gigabit Firewall with SSL & IPsec VPN FVS336G Reference Manual
Connecting the FVS336G to the Internet 2-19
v1.0, October 2007
To configure Dynamic DNS:
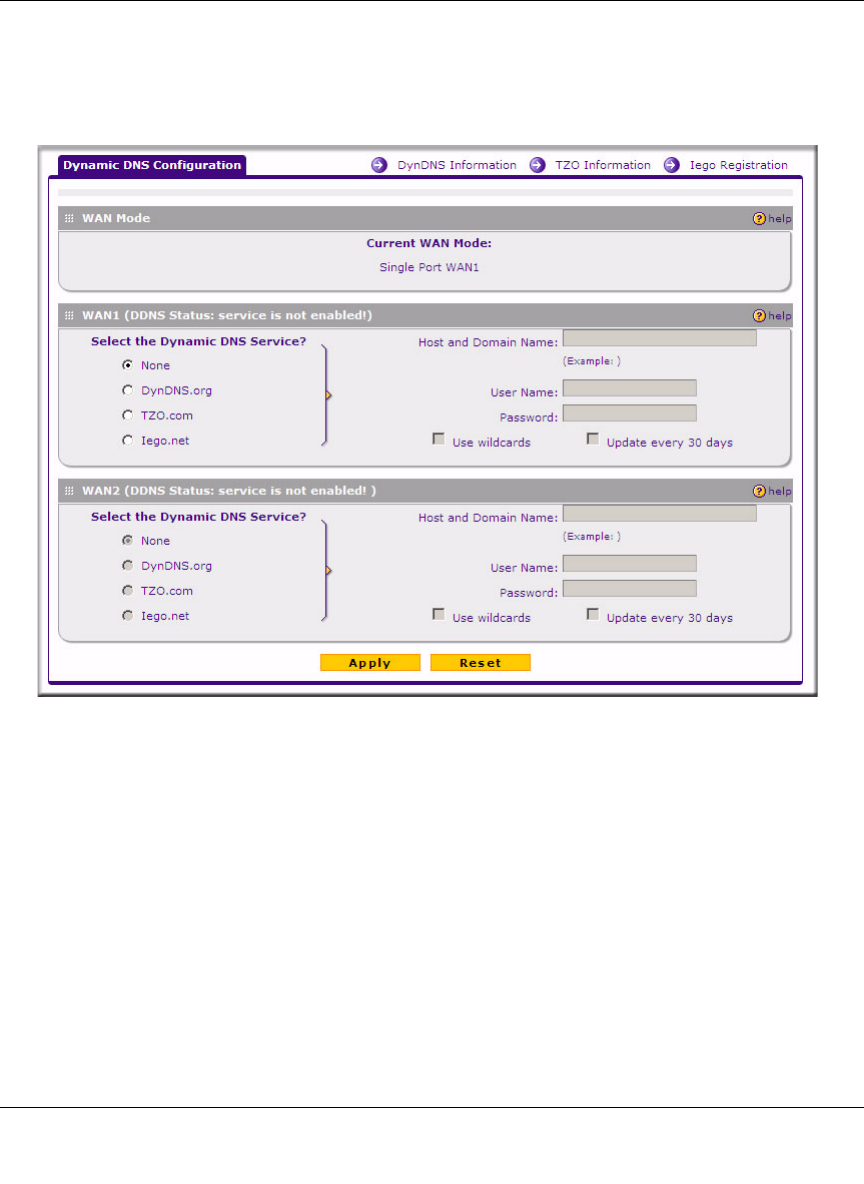
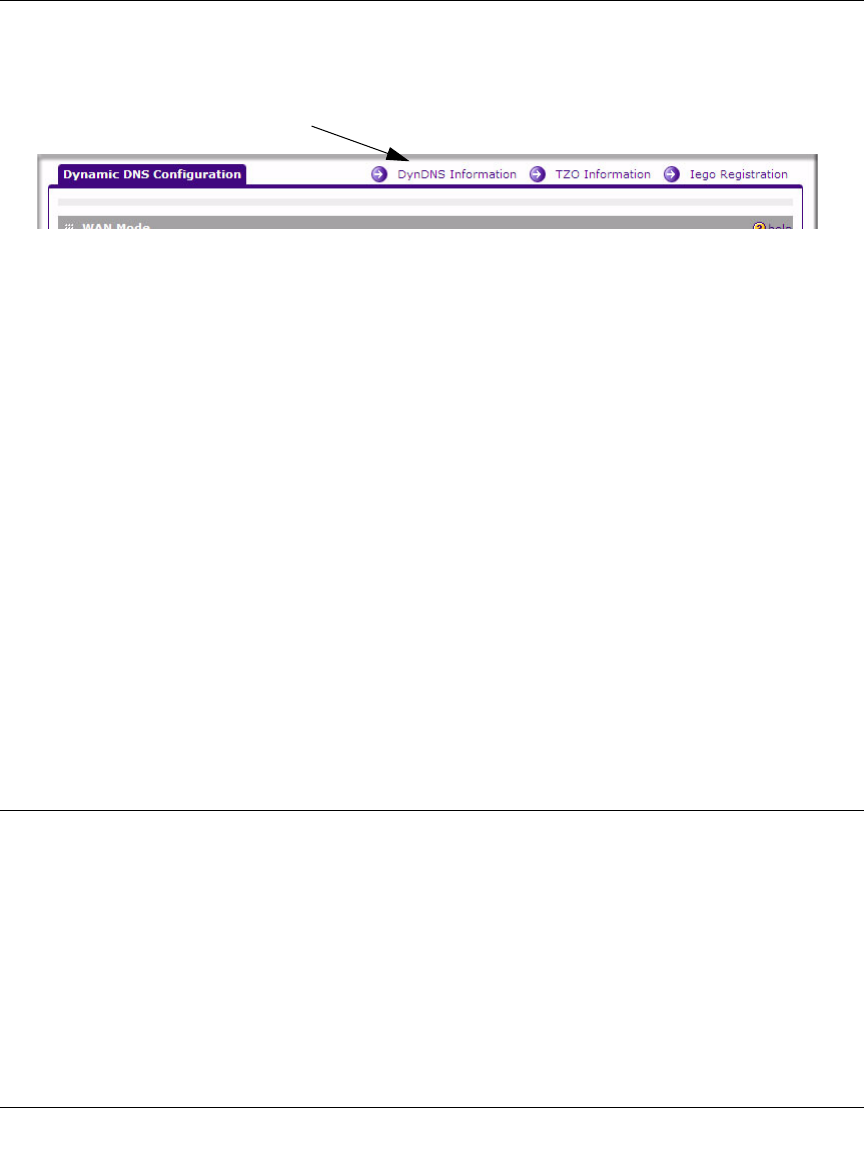
1. Select Network > Dynamic DNS from the main menu and click the Dynamic DNS
Configuration tab. THe Dynamic DNS Configuration screen is displayed.
The Current WAN Mode section reports the currently configured WAN mode. (For example,
Single Port WAN1, Load Balancing or Auto Rollover.) Only those options that match the
configured WAN Mode will be accessible.
2. Select the Dynamic DNS Service you will use.
The fields corresponding to the selection you have chosen will be activated. Each DDNS
service provider requires its own parameters.
Figure 2-13
ProSafe Dual WAN Gigabit Firewall with SSL & IPsec VPN FVS336G Reference Manual
2-20 Connecting the FVS336G to the Internet
v1.0, October 2007
3. Access the Web site of one of the DDNS service providers and set up an account. Links to
three DDNS providers are in the tab header.
4. After registering for your account, return to the Dynamic DNS Configuration menu and fill
in the required fields for the DDNS service you selected:
a. In the Host and Domain Name field, enter the entire FQDN name that your dynamic DNS
service provider gave you (for example: <yourname>.dyndns.org).
b. Enter the User Name, User email Address, or Account Name requested by the DDNS
Service to identify you when logging into your DDNS account.
c. Enter the Password, or User Key, for your DDNS account.
d. If your dynamic DNS provider allows the use of wildcards in resolving your URL, check
Use wildcards to activate this feature.
For example, the wildcard feature will cause anything.yourhost.dyndns.org to be aliased
to the same IP address as yourhost.dyndns.org
e. If your dynamic DNS provider requires you to renew your account monthly, check
Update every 30 days to have the VPN firewall renew the account automatically.
5. Click Apply to save your configuration.
Configuring the Advanced WAN Options (Optional)
To configure the Advanced WAN options:
1. Select Network > WAN Settings from the main menu. The WAN! ISP Settings screen will
display.
Figure 2-14
ProSafe Dual WAN Gigabit Firewall with SSL & IPsec VPN FVS336G Reference Manual
Connecting the FVS336G to the Internet 2-21
v1.0, October 2007
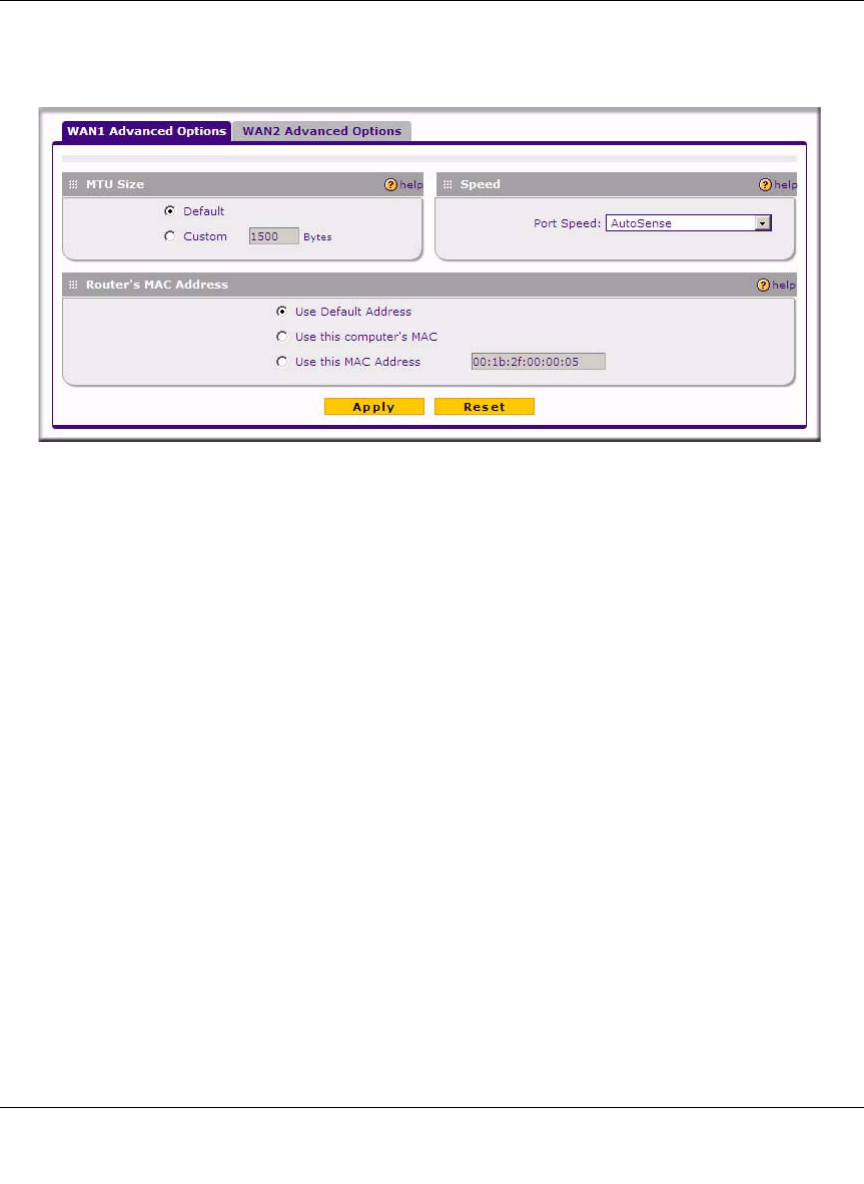
2. Click the Advanced link to the right of the tabs. The WAN1 Advanced Options tab is
displayed (along with the WAN2 Advanced Options tab).
3. Edit the default information you want to change.
a. MTU Size. The normal MTU (Maximum Transmit Unit) value for most Ethernet
networks is 1500 Bytes, or 1492 Bytes for PPPoE connections. For some ISPs, you may
need to reduce the MTU. This is rarely required, and should not be done unless you are
sure it is necessary for your ISP connection.
b. Port Speed. In most cases, your VPN firewall can automatically determine the connection
speed of the WAN port. If you cannot establish an Internet connection and the WAN Link
or Speed LED blinks continuously, you may need to manually select the port speed.
AutoSense is the default.
If you know the Ethernet port speed that your broadband modem supports, select it;
otherwise, select 10M. Use the half-duplex settings unless you are sure your broadband
modem supports full duplex.
c. Router's MAC Address. Each computer or router on your network has a unique 32-bit
local Ethernet address. This is also referred to as the computer's MAC (Media Access
Control) address. The default is Use default address. However, if your ISP requires MAC
authentication, then select either of these options:
• Use this Computer's MAC address to have the VPN firewall use the MAC address of
the computer you are now using, or
• Use This MAC Address to manually type in the MAC address that your ISP expects.
Figure 2-15

ProSafe Dual WAN Gigabit Firewall with SSL & IPsec VPN FVS336G Reference Manual
2-22 Connecting the FVS336G to the Internet
v1.0, October 2007
The format for the MAC address is 01:23:45:67:89:AB (numbers 0-9 and either uppercase
or lowercase letters A-F). If you select Use This MAC Address and then type in a MAC
address, your entry will be overwritten.
4. Click Apply to save your changes.
Additional WAN Related Configuration
• If you want the ability to manage the firewall remotely, enable remote management at this time
(see “Enabling Remote Management Access” on page 8-10). If you enable remote
management, we strongly recommend that you change your password (see “Changing
Passwords and Administrator Settings” on page 8-8).
• At this point, you can set up the traffic meter for each WAN, if desired. See “Enabling the
Traffic Meter” on page 9-1.
