Manual Cooja
User Manual:
Open the PDF directly: View PDF ![]() .
.
Page Count: 13

Resource: http://www.contiki-os.org/start.html
1
Get Started with Contiki
This manual will help you to create your first “Hello World” example in contiki.
Step 1: Grab Instant Contiki
Step 2: Start Cooja
Step 3: Run Contiki in simulation
Step 4: Run Contiki on hardware
Step 5: Now what?
Step 1: Grab Instant Contiki
Contiki is a very complex piece of software. Instant Contiki and Cooja makes Contiki easier to
install and get started with.
About Instant Contiki
Instant Contiki is an entire Contiki development environment in a single download. It is an Ubuntu
Linux virtual machine that runs in VMWare player and has Contiki and all the development tools,
compilers, and simulators used in Contiki development installed.
Instant Contiki is so convenient that even hardcore Contiki developers use it.
We begin by downloading Instant Contiki, installing VMWare Player, and booting up Instant
Contiki.
Download Instant Contiki
Download Instant Contiki. Get a coffee: it is a large file, just over 1 gigabyte. When downloaded,
unzip the file, place the unzipped directory on the desktop.
Download Instant Contiki »
Install VMWare Player
Download and install VMWare Player. It is free to download, but requires a registration. It might
require a reboot of your computer, which is unfortunate but needed to get networking working.
Download VMWare Player »
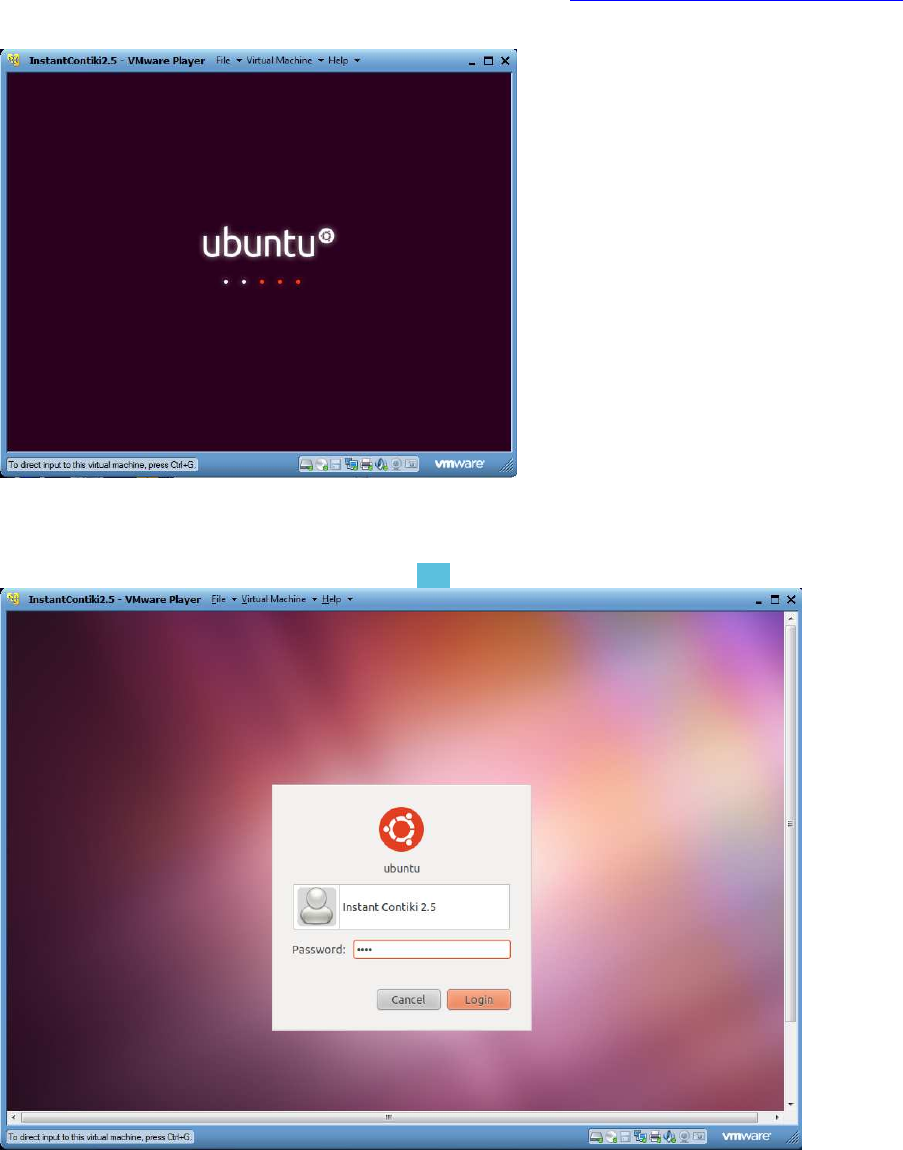
Start Instant Contiki
Boot Ubuntu
Start Instant Contiki by running InstantContiki2.6.vmx. Wait for the virtual Ubuntu Linux boot up.
Resource: http://www.contiki-os.org/start.html
2
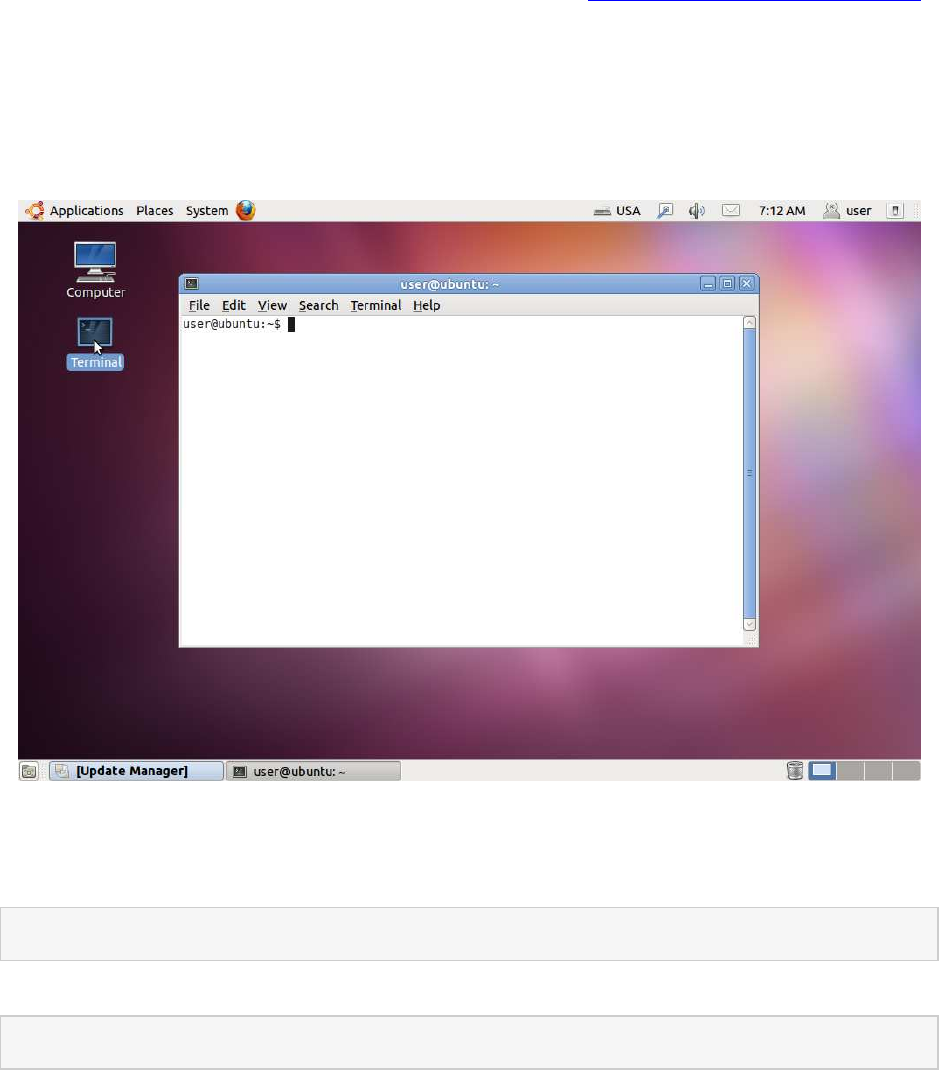
Log in
Log into Instant Contiki. The password is user.
Congratulations! Now that we have Instant Contiki up and running, we will start Cooja.
Step 2: Start Cooja
About Cooja
Cooja is the Contiki network simulator. Cooja allows large and small networks of Contiki motes to
be simulated. Motes can be emulated at the hardware level, which is slower but allows precise
inspection of the system behavior, or at a less detailed level, which is faster and allows
simulation of larger networks.
Resource: http://www.contiki-os.org/start.html
3
We will now compile and start Cooja, the Contiki network simulator.
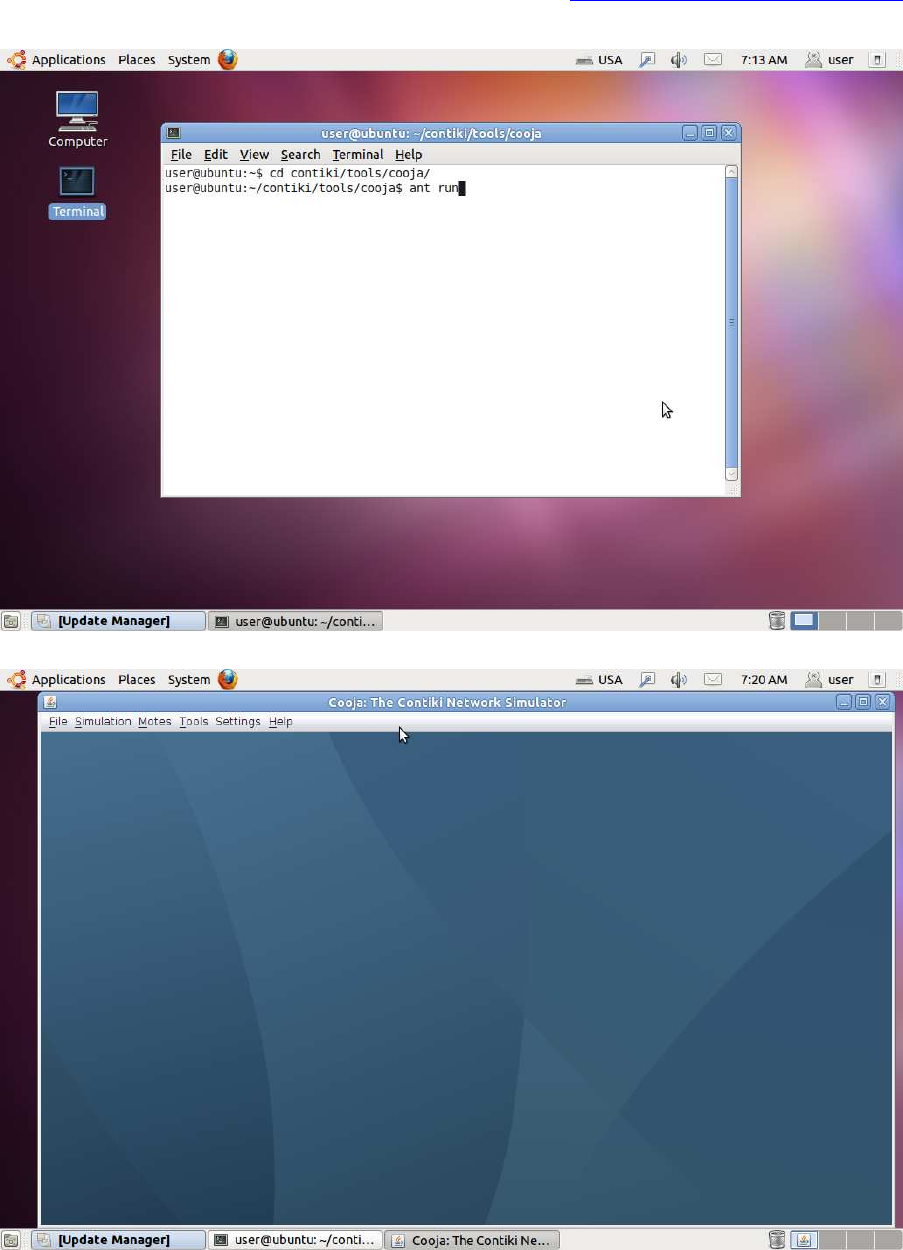
Open a terminal window
To start Cooja, first open a terminal window.
Start Cooja
In the terminal window, go to the Cooja directory:
cd contiki/tools/cooja
Start Cooja with the command:
ant run
Wait for Cooja to start
When Cooja first starts, it will first compile itself, which may take some time.
Resource: http://www.contiki-os.org/start.html
4
When Cooja is compiled, it will start with a blue empty window.
Now that Cooja is up and running, we can try it out with an example simulation.
Resource: http://www.contiki-os.org/start.html
5
Step 3: Run Contiki in simulation
About Cooja simulations
Cooja is a highly useful tool for Contiki development as it allows developers to test their code and
systems long before running it on the target hardware. Developers regularly set up new
simulations both to debug their software and to verify the behavior of their systems.
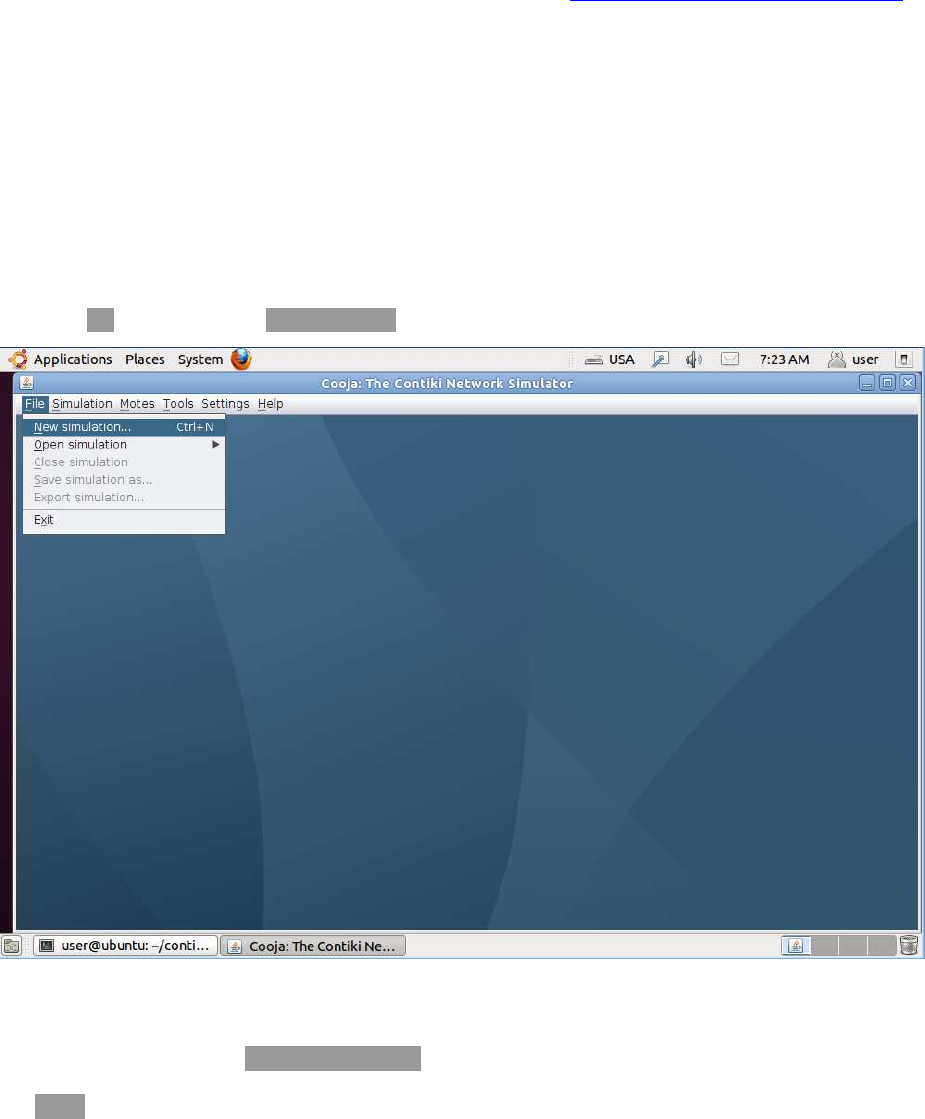
Create a new simulation
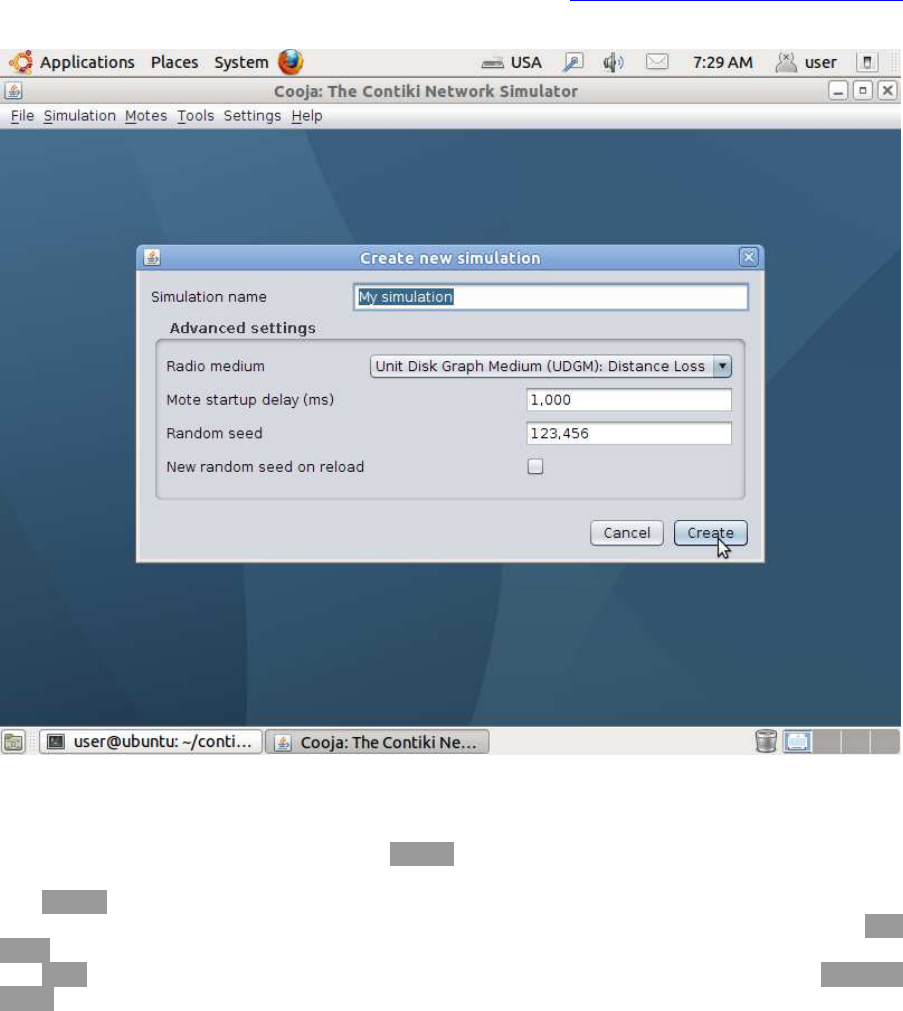
Click the File menu and click New simulation....
Set simulation options
Cooja now opens up the Create new simulation dialog. In this dialog, we may choose to give our
simulation a new name, but for this example, we'll just stick with My simulation. Click
the Create button.
Resource: http://www.contiki-os.org/start.html
6
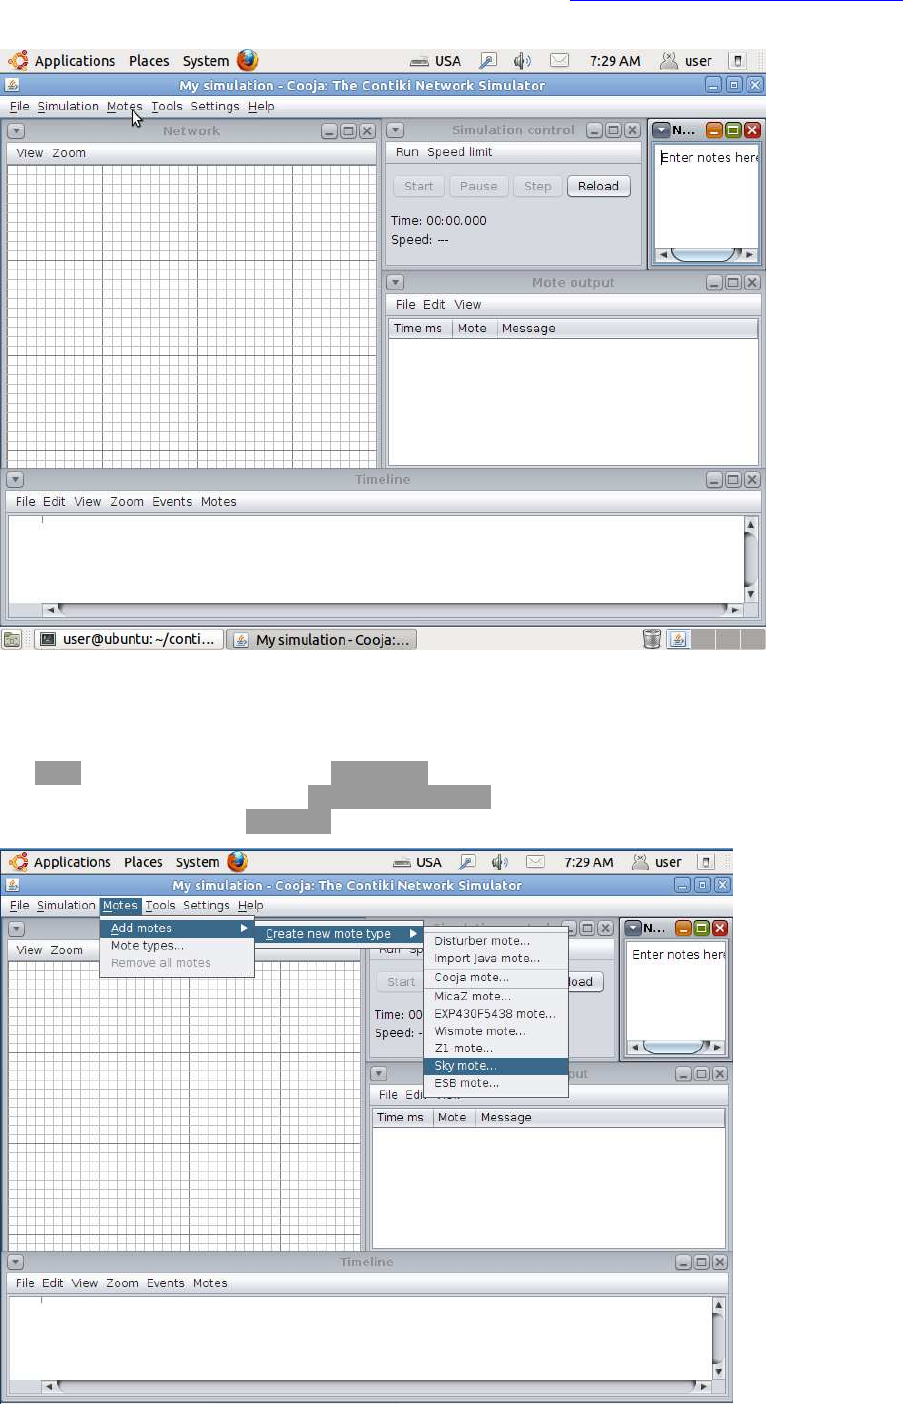
Simulation windows
Cooja brings up the new simulation. The Network window, at the top left of the screen, shows all
the motes in the simulated network - it is empty now, since we have no motes in our simulation.
The Timeline window, at the bottom of the screen, shows all communication events in the
simulation over time - very handy for understanding what goes on in the network. The Mote
output window, on the right side of the screen, shows all serial port printouts from all the motes.
The Notes window on the top right is where we can put notes for our simulation. And the Simulation
control window is where we start, pause, and reload our simulation.
Resource: http://www.contiki-os.org/start.html
7
Add motes to the simulation
Before we can simulate our network, we must add one or more motes. We do this via
the Motes menu, where we click on Add motes.... Since this is the first mote we add, we must first
create a mote type to add. Click Create new mote type... and select one of the available mote types.
For this example, we click Sky mote... to create an emulated Tmote Sky mote type.
Resource: http://www.contiki-os.org/start.html
8
Create a new mote type
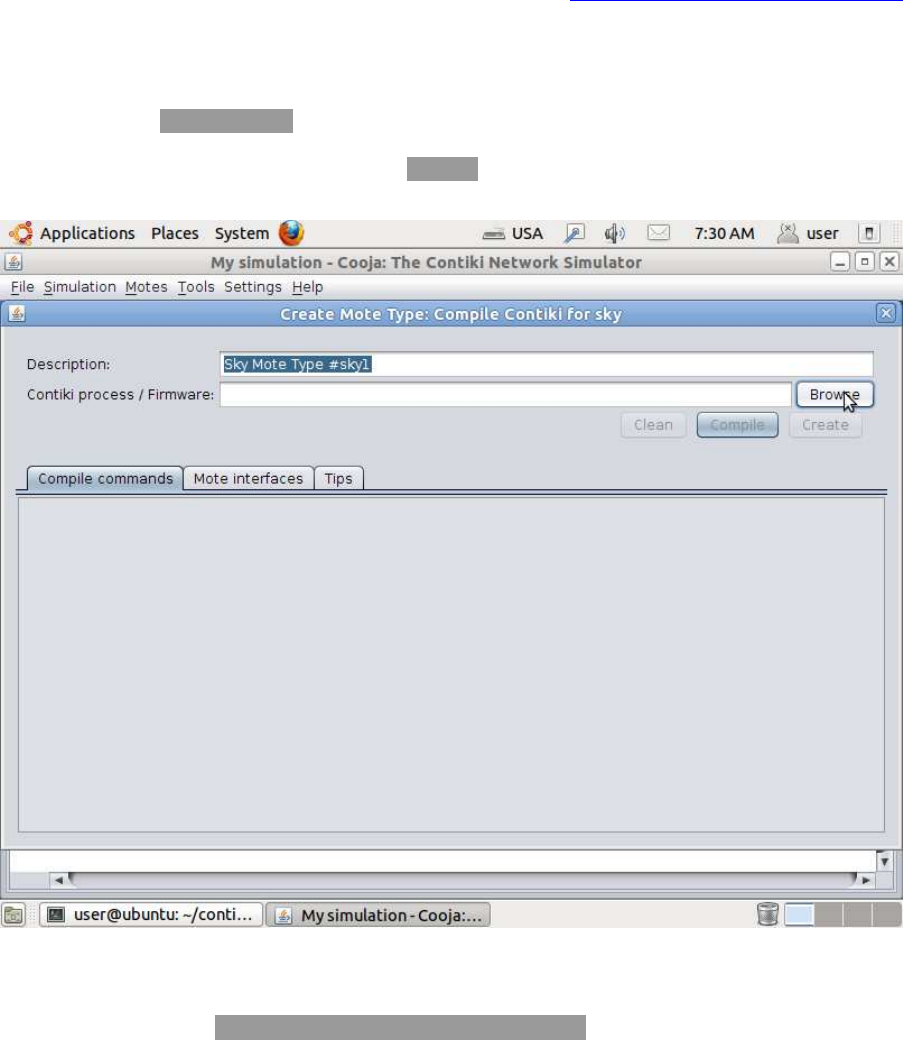
Cooja opens the Create Mote Type dialog, in which we can choose a name for our mote type as well
as the Contiki application that our mote type will run. For this example, we stick with the
suggested name, and instead click on the Browse... button on the right hand side to choose our
Contiki application.
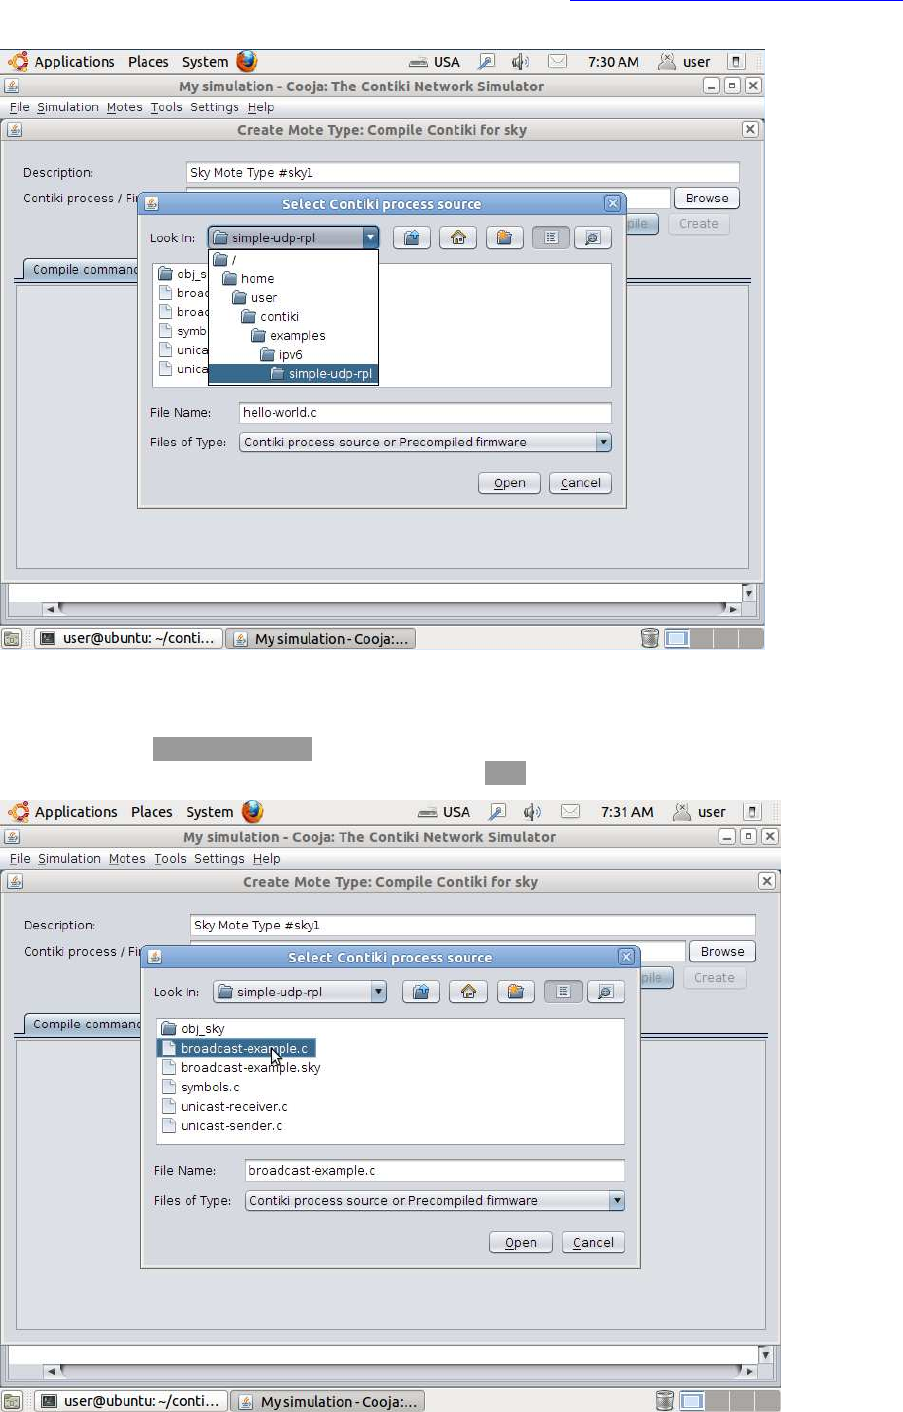
Find example Contiki application
We go to the directory /home/user/contiki/examples/ipv6/simple-udp-rpl. This directory holds a number of
Contiki applications that provide examples for how to do simple UDP communication over IPv6.
Resource: http://www.contiki-os.org/start.html
9
Specify application C source file
Choose the file broadcast-example.c. This file contains a simple Contiki application that randomly
broadcasts a UDP packet to its neighbors. Click the Open button to choose the file.
Resource: http://www.contiki-os.org/start.html
10
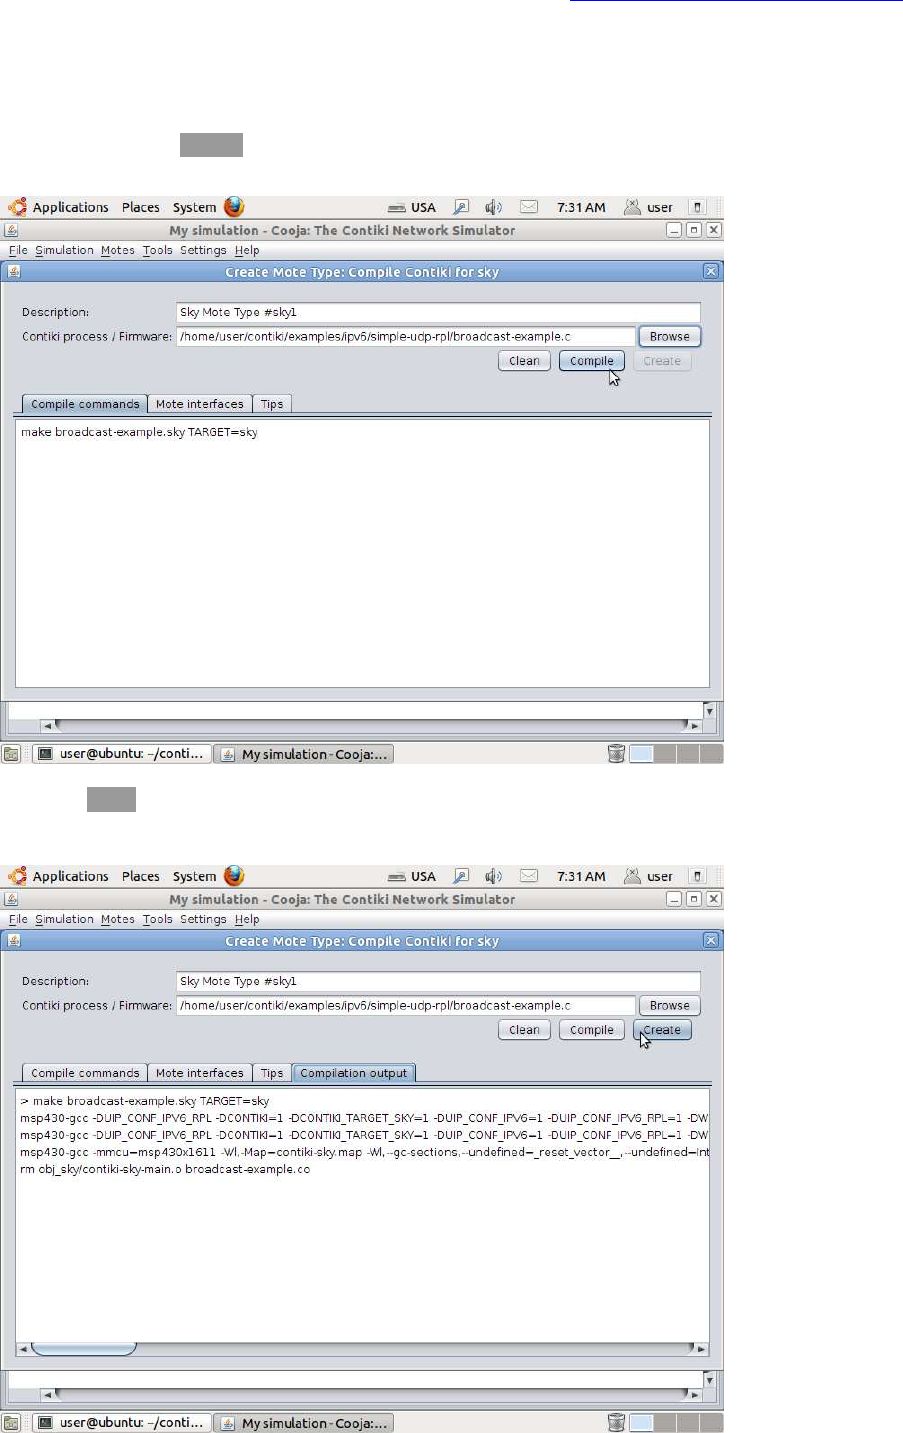
Compile Contiki and the application
Now Cooja will verify that the selected Contiki application compiles for the platform that we have
selected. Click the Compile button. The compilation output will show up in the white panel at the
bottom of the window.
Click the Create button to create the mote type. The window will close.
Resource: http://www.contiki-os.org/start.html
11
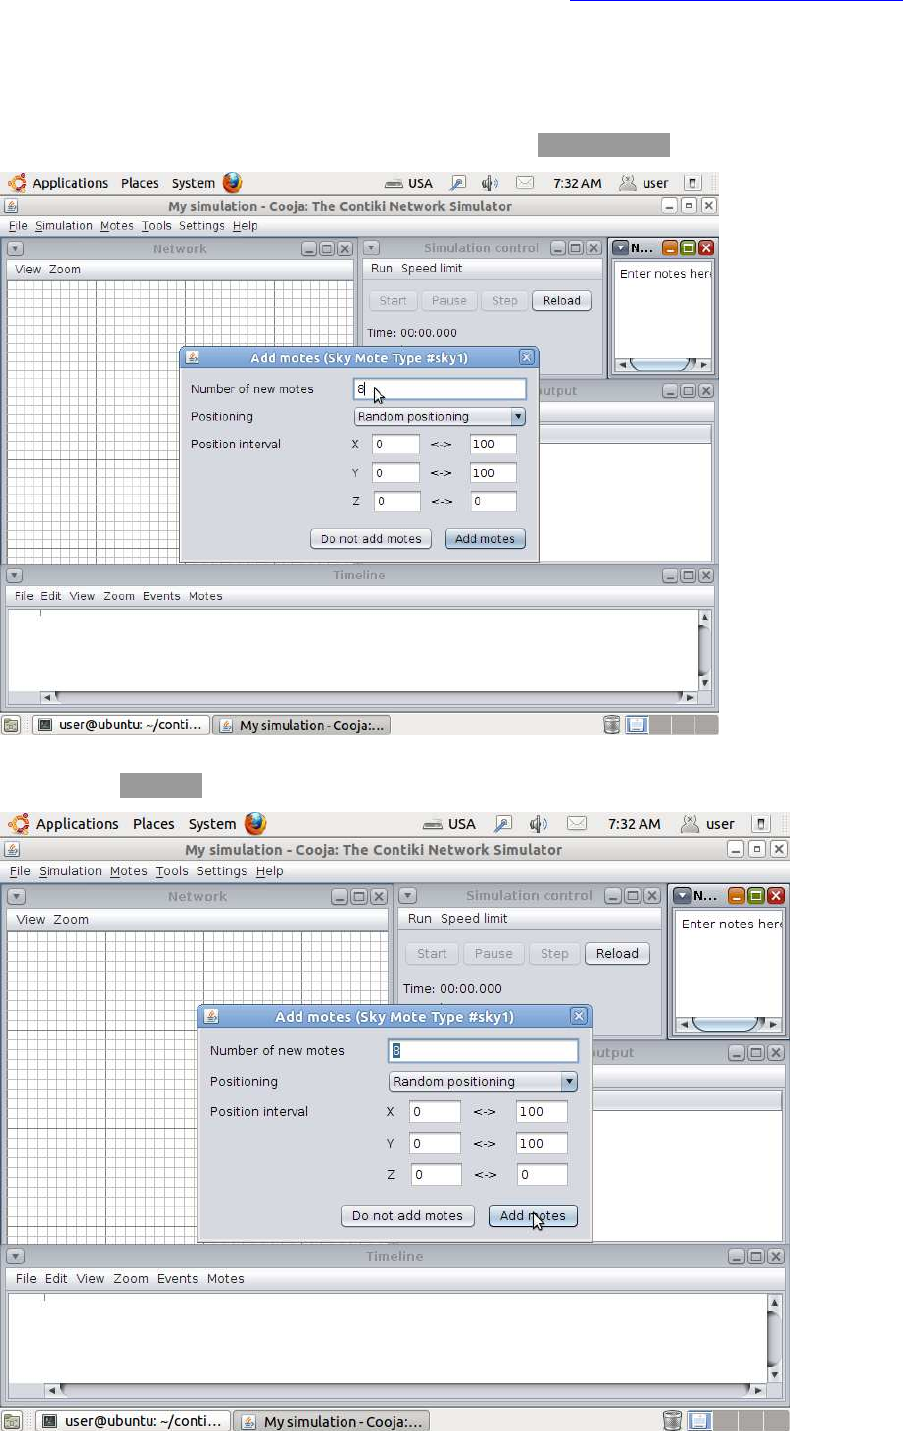
Add motes to simulation
Cooja will now ask us if we want to add motes from the newly created mote type to the
simulation. We change the number of motes to add in the Number of motes field to 8.
We click the Add motes button to add the motes to the simulation.

Resource: http://www.contiki-os.org/start.html
12
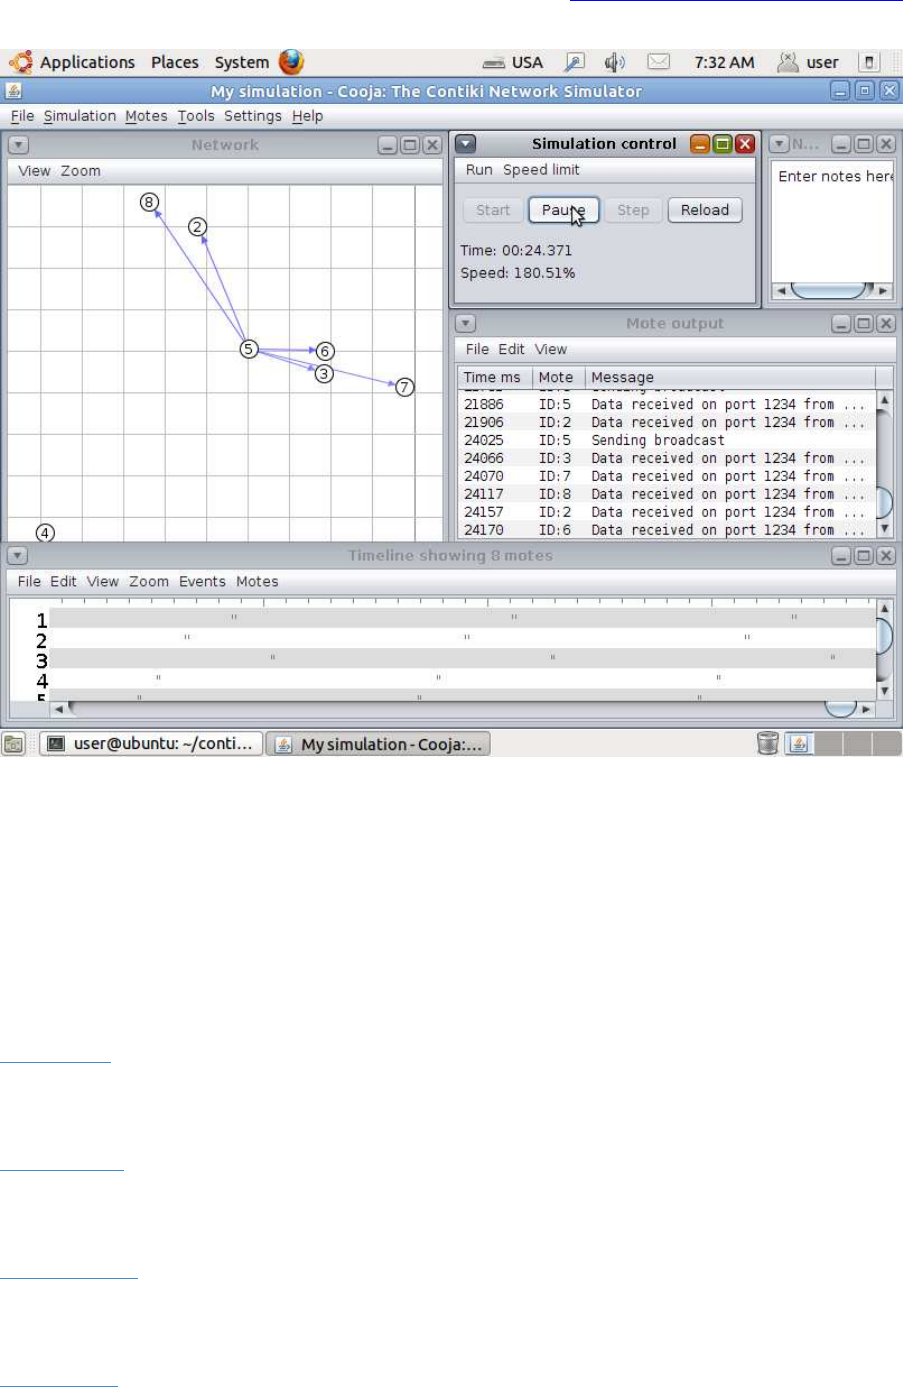
Start the simulation
We can now see the 8 motes we added to the simulation in the Network window. Click
the Start button to start the simulation.
Pause the simulation
We see printouts from the simulated motes appearing in the Mote output window.
The Network window shows communication going on in the network. The Timeline window shows
communication and radio events over time - the small gray lines are ContikiMAC periodically
waking the radio up. We can click the Pause button to pause the simulation.
Resource: http://www.contiki-os.org/start.html
13
Done!
Congratulations! We have now created your first Cooja simulation with Contiki nodes that send
periodic IPv6/UDP packets with ContikiMAC sleepy router functionaliy.
Source code
To dive into the Contiki source code, you can download the latest release or grab the current
development version with git:
Download »
Community
To engage with the Contiki developer community, go to the Contiki community page:
Community »
License
To read the legal details of the Contiki open source license, go to the Contiki license page:
Open source »
Resources
Read more about further Contiki resources:
Resources »
