Cura Print Guide Printing With Two Colors V1.4
User Manual:
Open the PDF directly: View PDF ![]() .
.
Page Count: 4

Cura
print
guide
Ultimaker 3
Printing with two colors
Printing with two colors makes it easy to highlight aspects in a 3D model.
This guide provides step by step information on how to create a dual color print.
1. Load models
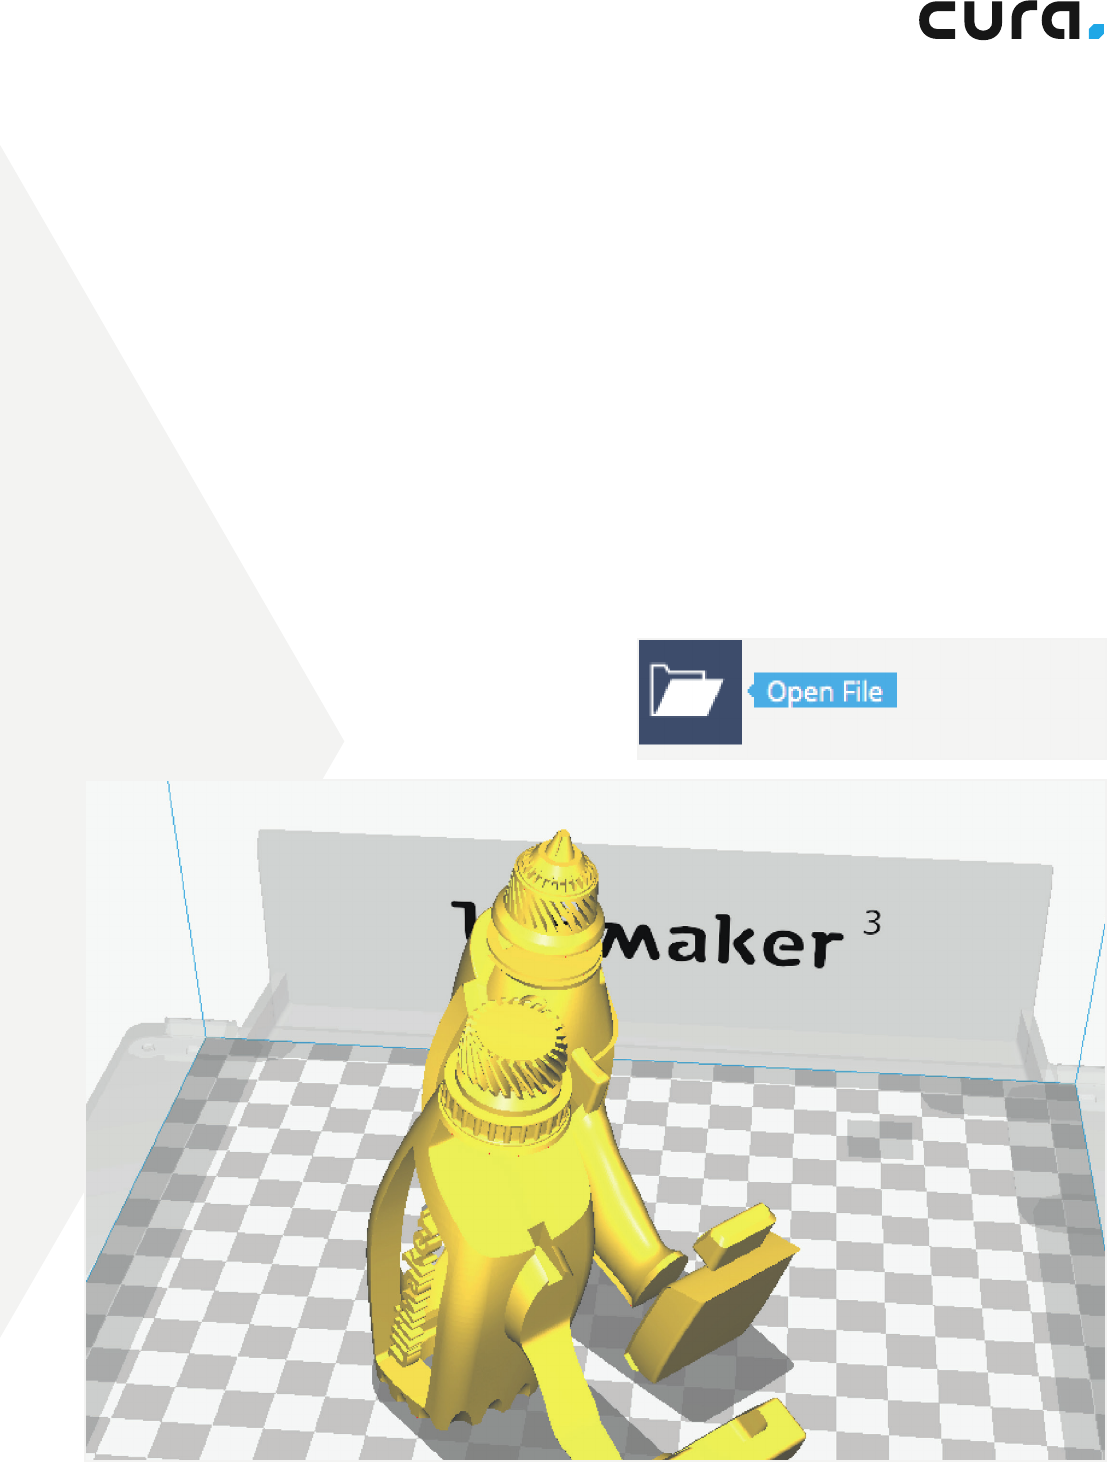
Load both parts into Cura by clicking the Open File
folder icon in the top left corner. The file browser
displays all files. Locate and select the relevant model
file. Cura supports the following files: .3mf, .x3d, .stl
and .obj.
Note: On popular 3D model websites, search for ‘Dual color’ or ‘Dual material’ to find model examples.
Tip: Select multiple files in your file browser to load them simultaneously.
To create a dual color print, two model files (exported to fit together) are required. This is necessary to assign the two
colors to the objects.

2. Set print cores and materials
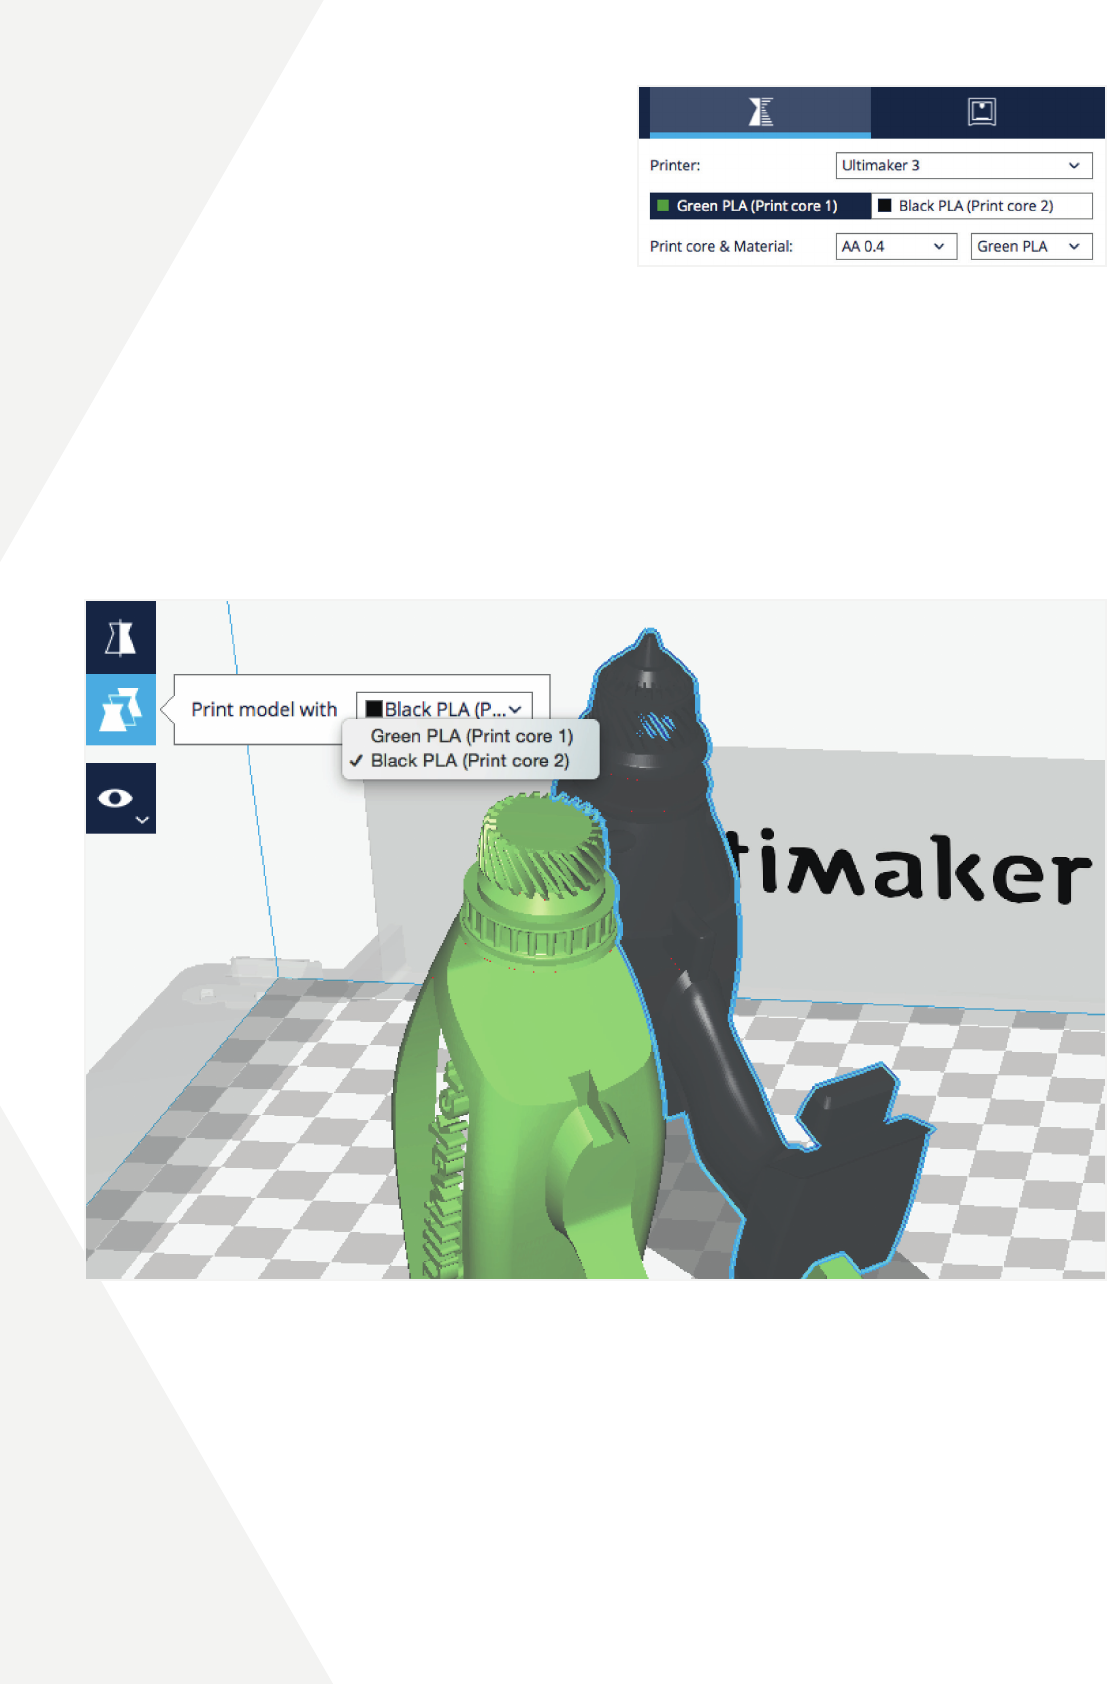
In the Sidebar, check if the Print Cores and Materials
are correct. Print core 1 should contain a print core AA
0.4 loaded with PLA (color 1). Print core 2 should also
contain a print core AA 0.4 loaded with PLA (color 2).
3. Set print core per model
All loaded objects are printed with Print core 1 by default. The material color set per print core reflects the color of the
corresponding model. To change the print core, select the Model by left clicking it. Go to Per Model Settings (left side of
the screen), and select Print model with Print core 2.
Tip: Cura is loaded with generic materials, which do not represent colors. To choose a colored material,
select Ultimaker > PLA > Color.
Note: If your Ultimaker 3 is connected via the network to Cura and loaded with the correct print cores and materials,
Cura will sync automatically to your machine.
Note: The model color automatically matches the color of Print Core 2.

4. Merge models
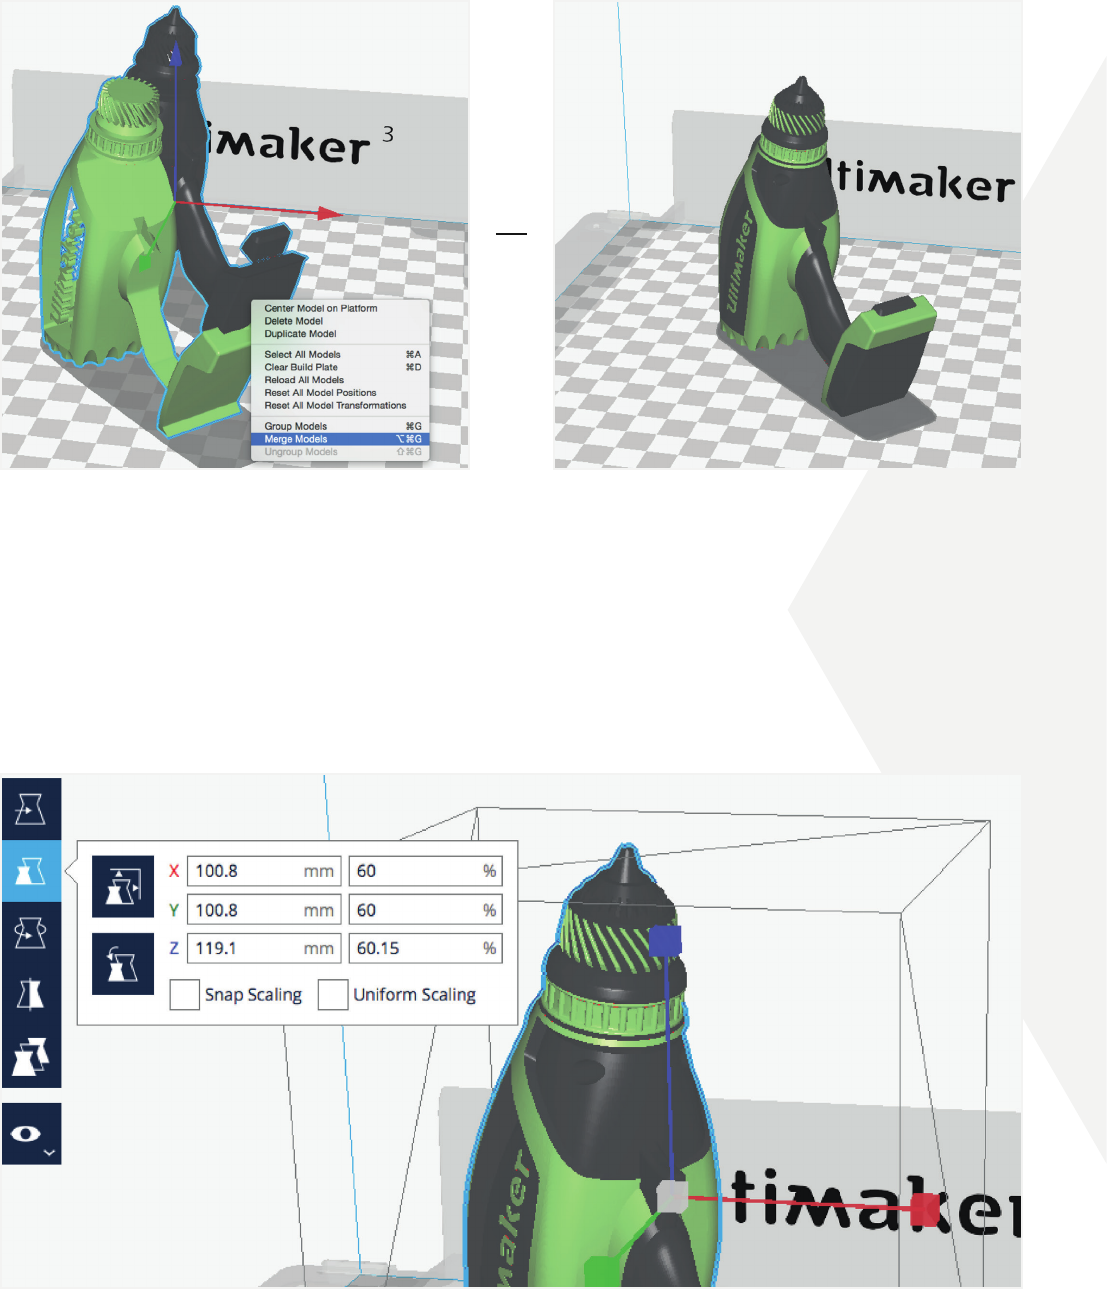
After selecting the desired color for your Models, it’s time to merge them. To select all models, hold shift and left click.
When all models are selected (shown by a blue outline), right click and select Merge Objects. The models automatically
merge, ready for dual printing.
5. Adjust model
Adjustment Tools can be used to position, scale and rotate the object. To use the Adjustment Tools, left click on the
merged model group. As the models are merged, they will be adjusted as a group.
Tip: If you’ve forgotten to set the Material color or any other setting, simply press CMD / CTRL + click on the model to
select it inside the group.
Note: If the models do not merge as intended, the model files have not been exported correctly. This must be resolved
in the design software.
Tip: When printing with two colors and no special support material, consider rotating the model to generate the least
support and best surface finish.

6. Select profile
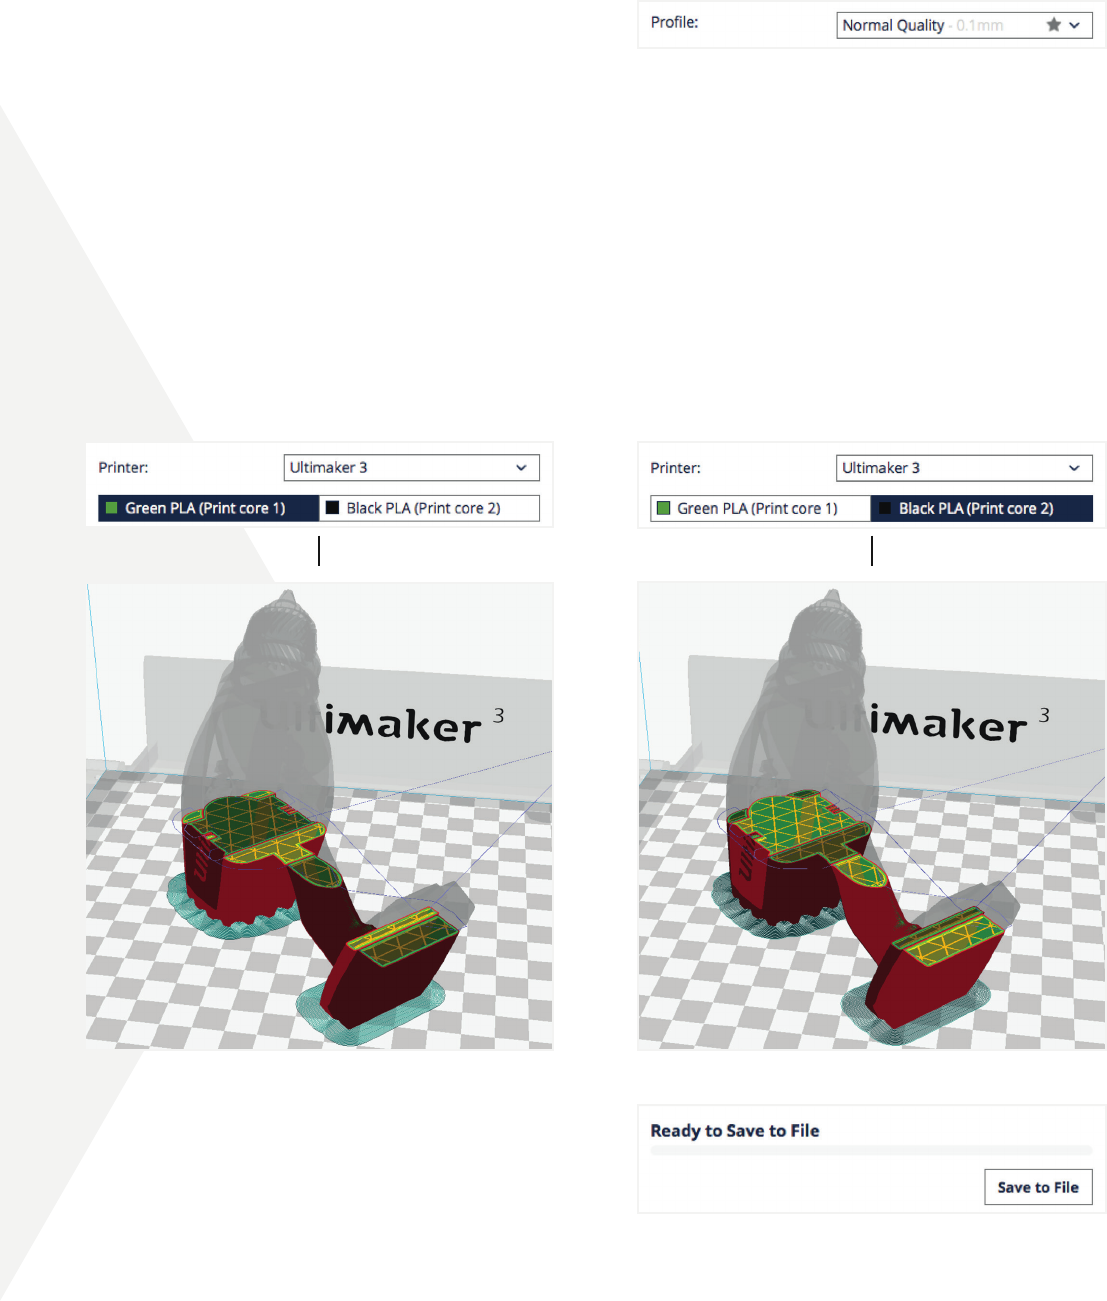
Select a Profile quality. Options include: Draft Print,
Fast Print, Normal and High Quality. The layer height is
displayed in light grey for indication.
7. Layer preview
To view the result of the selected profile settings, go to the View mode and select Layers. With Print core 1 selected
in the Sidebar, the model is highlighted. This indicates which parts are printed with the corresponding Print Core.
When switching visible Print Cores, (selecting the print core in the top right), the corresponding parts are highlighted,
indicating the sections that will be printed with Print core 2.
8. Print!
In the bottom right corner, select Save File, Save to
USB or Print Over Network, depending on the chosen
printing method.
Note: In the Recommended mode both print cores share the same settings. In the Custom mode, certain settings can be
adjusted per print core, such as infill and number of walls.
Note: Click the top right button to enter the Print Monitor. Note, this can only be done when the printer is connected to
the network.
Tip: The material used is displayed per print core in the bottom right of the 3D viewer, indicating how much material is
required per spool.
Thank you for choosing Ultimaker, happy printing!