ENGLISH 381 Sample 1 (Word Manual Chapter 2)
User Manual:
Open the PDF directly: View PDF ![]() .
.
Page Count: 9

Now that you’ve successfully finished the introduction, it’s time to begin using
Microsoft Word 2016’s many features. This chapter will guide you through
some of the basics of Word that might make you feel tech-savvy, such as
inserting page breaks and page numbers, aligning your margins, and copying
and pasting.
Some of our more experienced poets may find information they already know
well in this chapter—in that case, it’s always good to review. If you feel
confident about the following guides, however, feel free to skip to Chapter 3,
which focuses on the more creative aspect Microsoft Word can bring to your
poetry.
This chapter features steps on the following:
•2.1: Aligning Your Margins
•2.2: Inserting New Pages and Page Breaks
•2.3: Inserting Page Numbers
•2.4: Cutting, Copying, and Pasting
•2.5: Saving the Document
Ribbons
Group
Group
Group
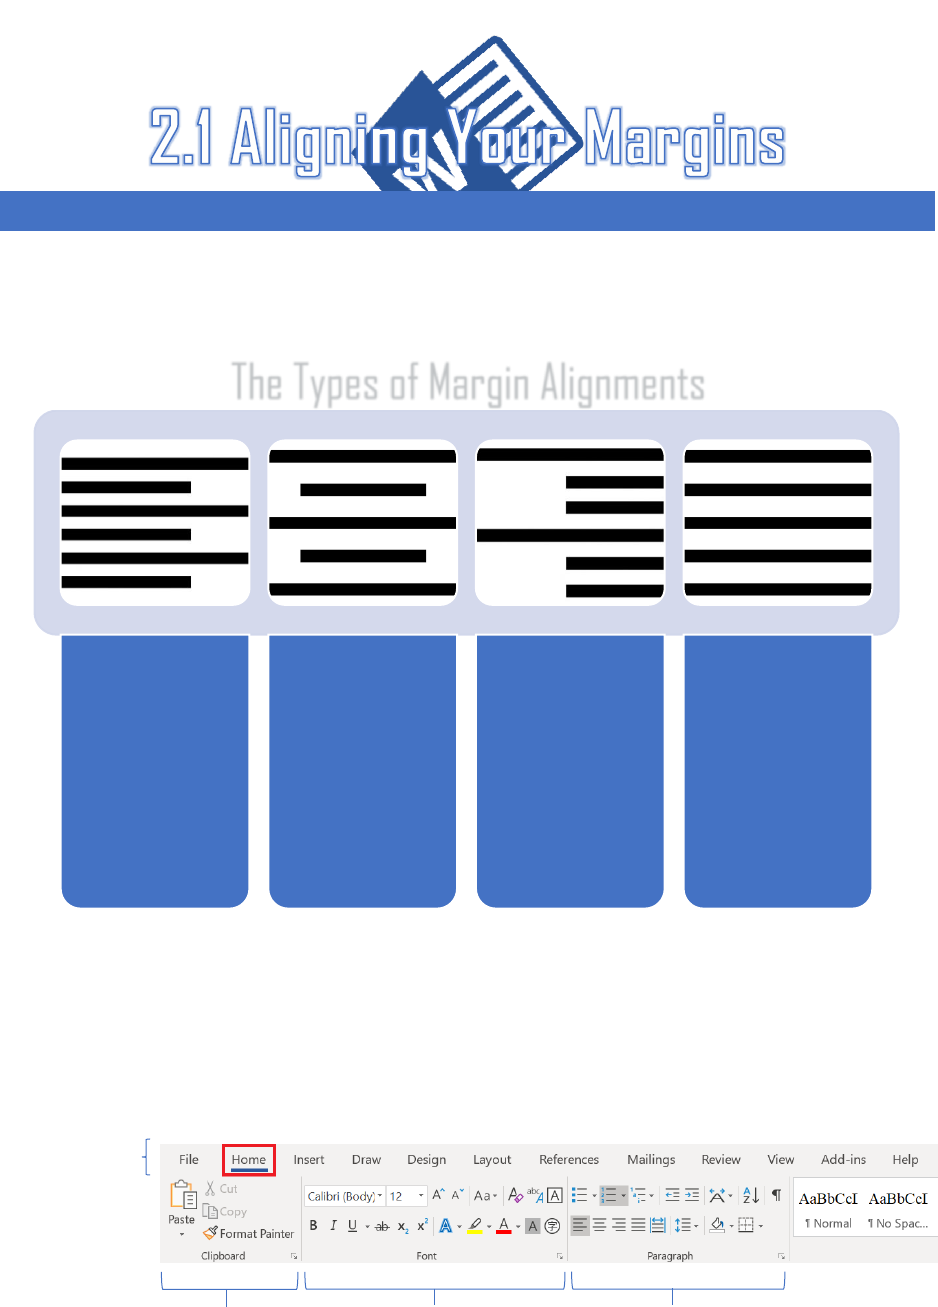
The Types of Margin Alignments
1. Open Microsoft Word 2016. (See 1.1: Opening Microsoft Word for steps on how to do
this.)
2. Open a New document or one you have previously worked on.
3. Navigate to the Home ribbon. You may be on this ribbon by default.
LEFT
Left alignment is
the standard for
most works of
writing, including
poetry. It creates
a hard-left margin.
CENTERED
Centered
alignment sets
your work
symmetrically in
the center of the
page as a column.
RIGHT
Right alignment
adjusts text to the
right margin. It's
often used in
languages where
text is read right-
to-left.
JUSTIFIED
Justified alignment
adjusts spaces
between each
word so the left
and right margins
are both even.
Margins can be aligned in four ways: left, centered, right, and justified. Each alignment has
its own advantages depending on the poetry you are writing—using different types of
margin alignments may allow for greater experimentation in formatting in your work.
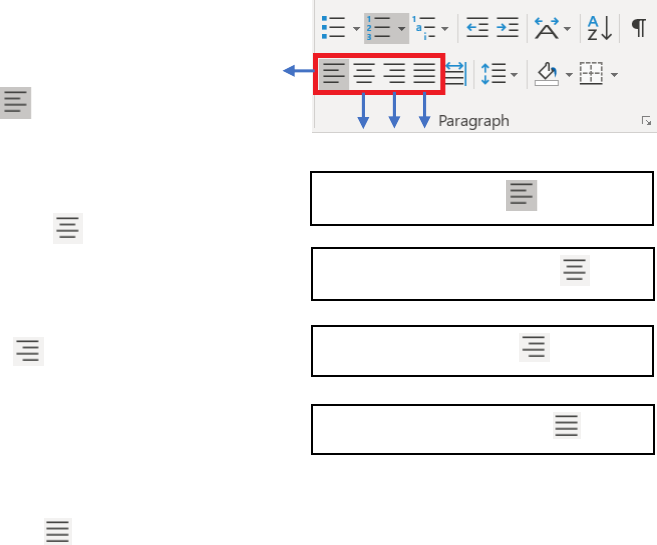
4. Choose one of the following options under the
Paragraph group of the Home ribbon:
• Click on the Left ( ) alignment option
to create a hard-left margin in your document.
This may already be selected as your default.
• Click on the Centered ( ) alignment option to
set your work into a symmetric column in the
middle of the page.
• Click on the Right ( ) alignment option to
create a hard-right margin in your document.
This is useful for languages read right-to-left
such as Hebrew or for experimentation in the
formatting of your poetry.
• Click on the Justified ( ) alignment option to create hard, even margins on both
the left and right sides of your document. This option does adjust the internal
spacing between each word, however, so it is uncommonly used within poetry.
A. Left alignment ( )
B. Centered alignment ( )
C. Right alignment ( )
D. Justified alignment ( )
A
B
C
D
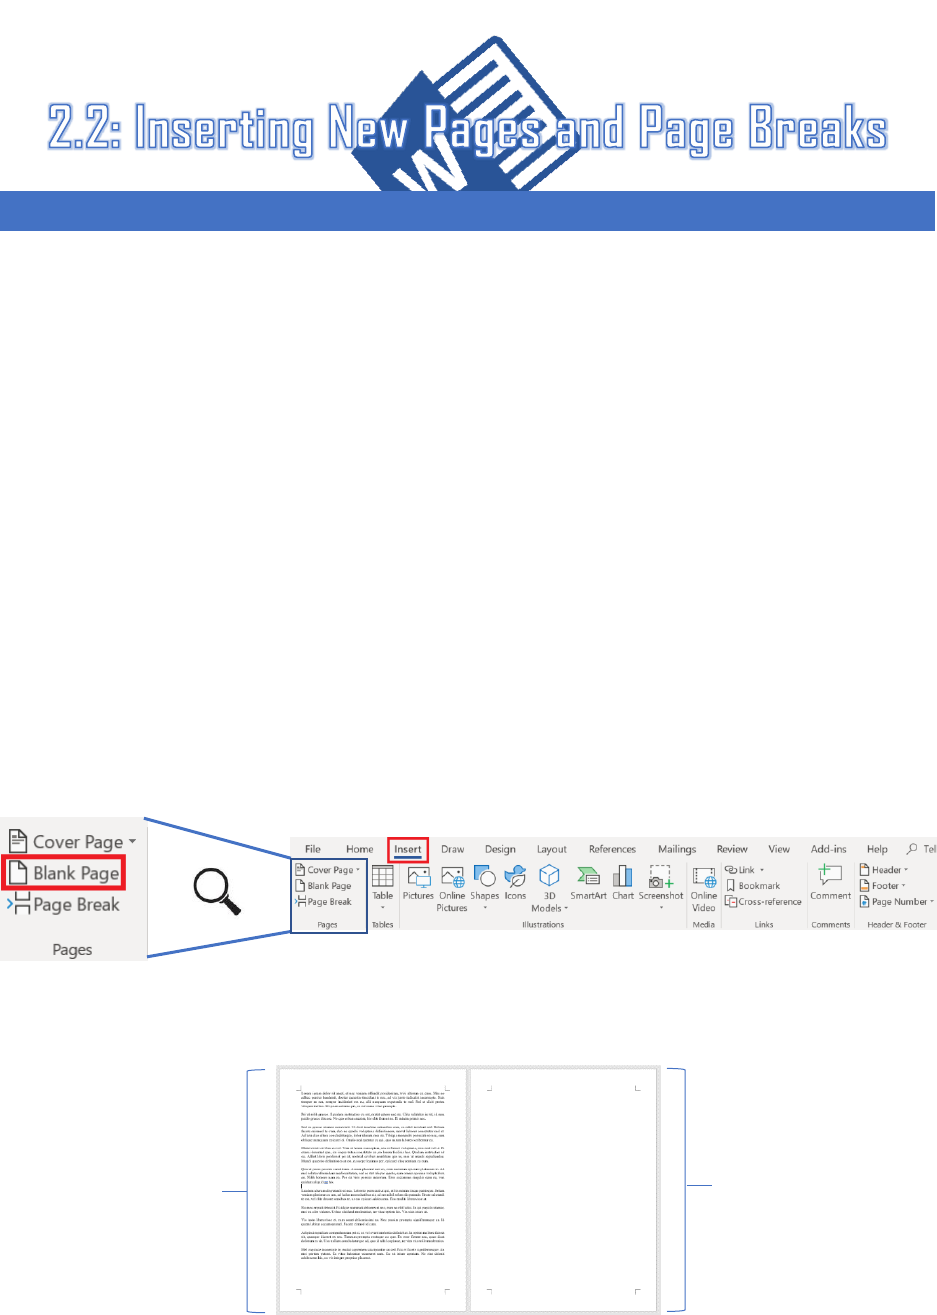
Blank new page
added from Blank
Page function
Current page
For Both Inserting New Pages / Inserting Page Breaks:
1. Open Microsoft Word 2016. (See 1.1: Opening Microsoft Word for steps on how to do this.)
2. Open a New document or one you have previously worked on.
Insert New Pages:
3. Navigate to the Insert ribbon.
4. Click the Blank Page option under the Pages group of the Insert ribbon. You see a blank new
page appear below your current page, even if your page has not been filled with text.
Inserting new pages manually in Microsoft Word without waiting for the contents of the
previous page to carry over is one of the program’s most valuable tools. This allows for you
to create a blank page immediately after your current page.
Inserting page breaks is similar but shifts any content you are writing below your text cursor
the top of the next page. This is especially useful for poets: you can carry over or change the
stylistic choices of the previous page(s) and the document is less likely to lose its formatting
integrity if you decide to send it or save it as anything other than a .doc file.
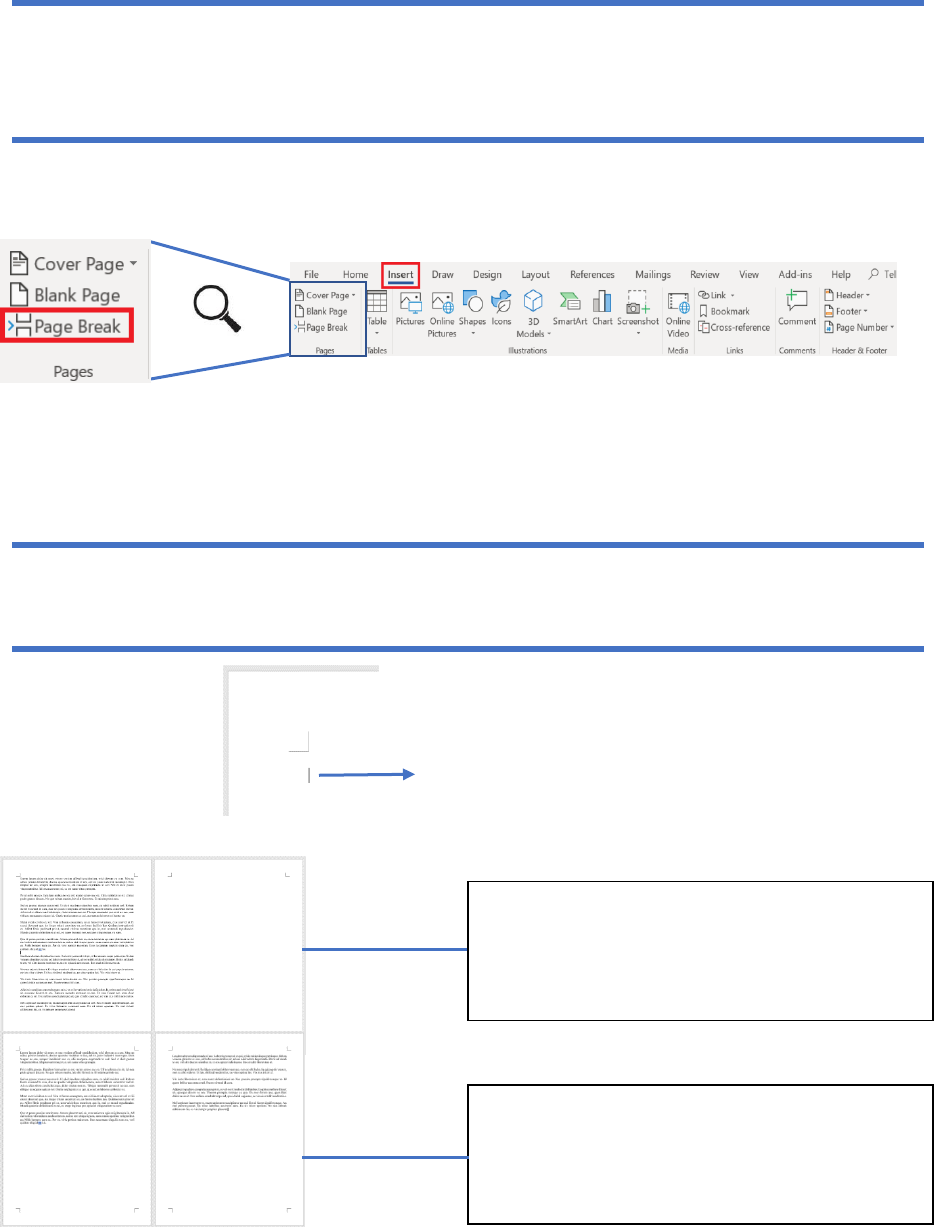
Text cursor as it appears in Word 2016
Insert Page Breaks:
3. Navigate to the Insert ribbon.
4. Click the Page Break option under the Pages group of the Insert ribbon. You see a new page
appear, even if your page has not been filled with text.
Microsoft Word 2016 automatically adds page breaks when you have reached the end of the document.
If you’d like to return to a page to include an image or end a poem and move a section onto a new page,
you can add breaks manually through a simple process.
Text only appears on this new page if your text cursor has text below it. Otherwise, the Page Break
option functions similarly to the Blank Page option previously explained.
This is the Page Break option selected when
the text cursor has no text beneath it. This
creates a new blank page similar to the
Blank Page option.
This is the Page Break option selected when
the text cursor has half a page of text
beneath it. The text beneath the cursor is
sent to the top of the new page.
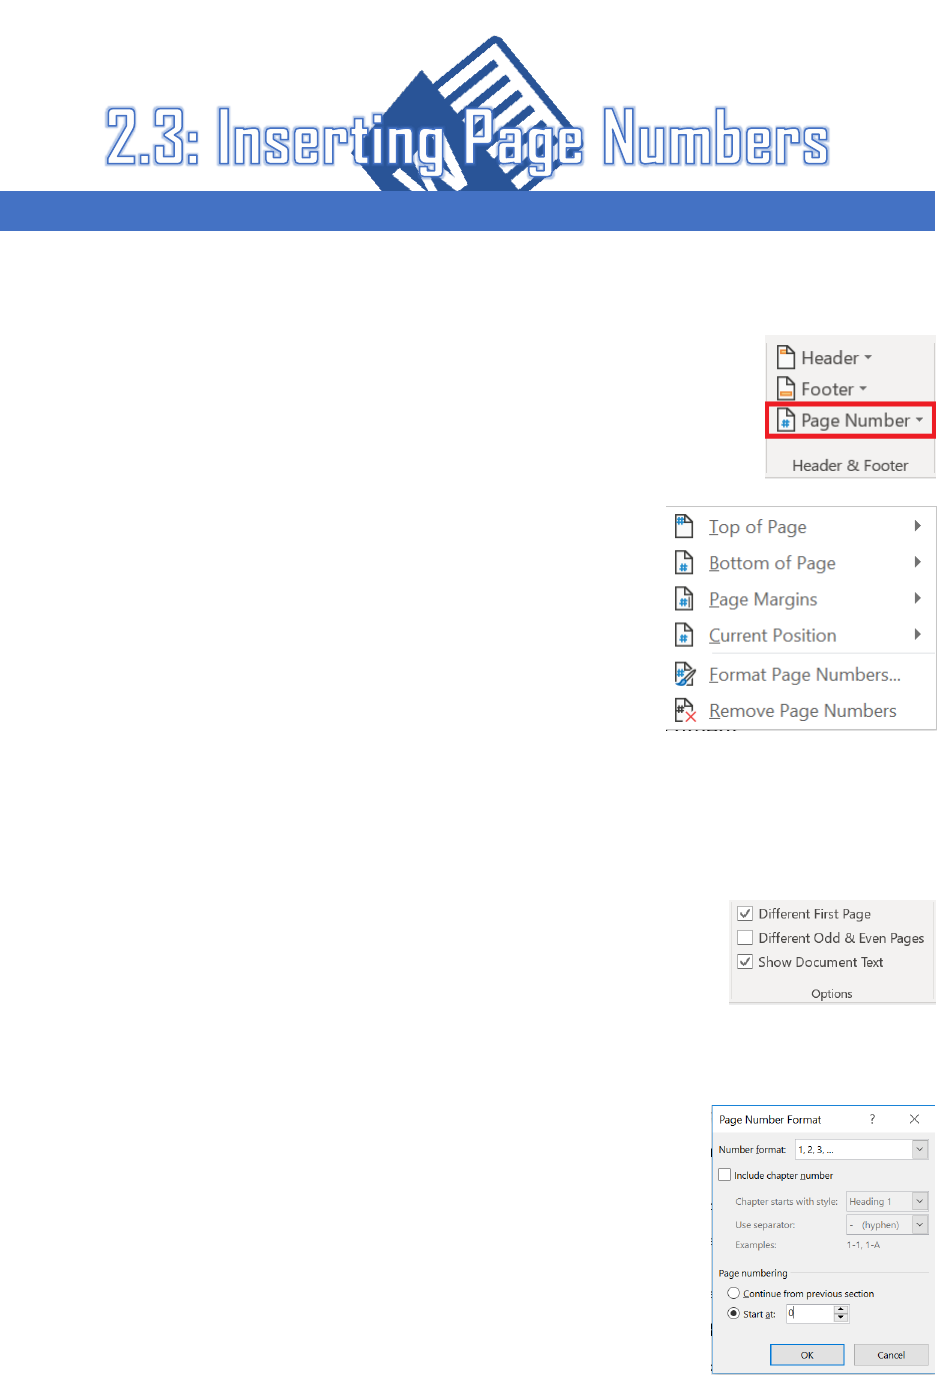
1. Navigate to the Insert tab. Select the Page Number option from the Header
& Footer group.
2. Choose one of the styles that appear through the drop-down menu:
• Top of Page sets your page number in the top left corner,
middle, or top right corner of your page.
• Bottom of Page sets your page number in the bottom left
corner, middle, or bottom right corner of your page.
• Page Margins sets the page numbers in the side margins of
the page.
• Current Position sets your page number directly after your
text cursor location.
Remove the Page Number from the First Page:
1. Double-click on the location of your page number. This sets your text
cursor within the header or footer.
2. Select the Design tab that appears (you may be on this tab by
default).
3. Select the Different First Page option.
Begin the Second Page Numbering with 1
1. Select the Page Number option from the Header & Footer group of
the Insert tab.
2. Select the Format Page Numbers option from the drop-down menu.
3. Type 0 into the Start at: option under Page numbering.
Inserting page numbers is important to poets because it may allow you to be more
organized and consistent with your work when compiling it into a larger document.
The drop-down menu
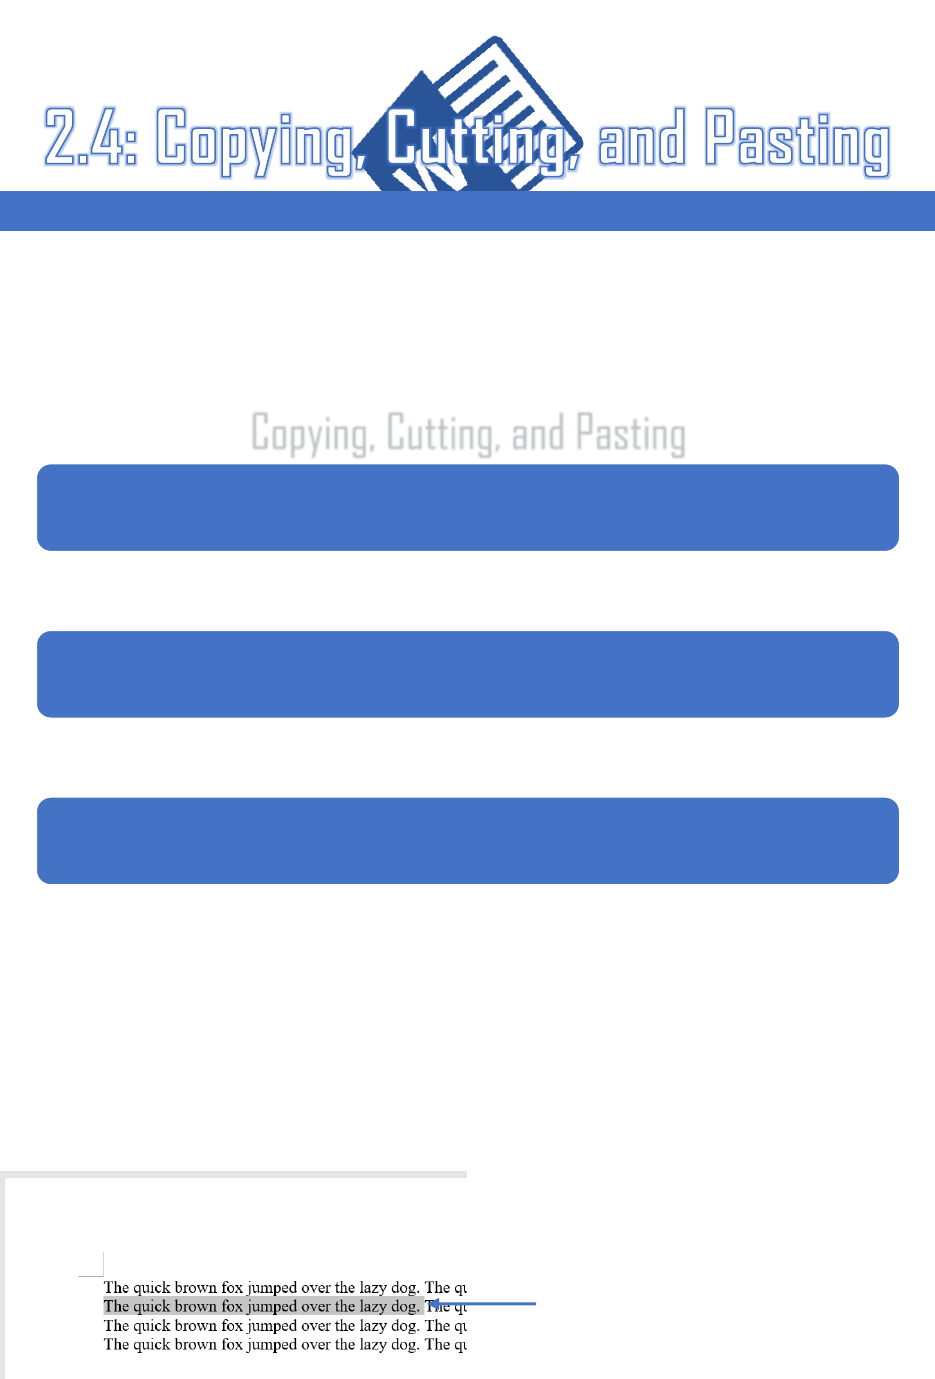
The gray-highlighted text is what you
will cut/copy.
Copying, Cutting, and Pasting
For Both Copying and Cutting:
1. Click and hold over the data you want to transfer, then drag your mouse over your intended
selection. The result is highlighted, as shown below:
Copying
•Copying creates a duplicate of the text you are attempting to move across
documents. The original text retains its place on the page.
Cutting
•Cutting performs the same function as copying but removes the selected text
from its original document.
Pasting
•Pasting inserts the text you cut/copied into the document you are currently
in.
Copying, cutting, and pasting are useful tools for writers of all genres because they allow you
to move your desired items to where you need them to be. By using these techniques, you
will be able to quickly and easily carry text or even images across documents. For the
purposes of this document, however, we will focus on text.
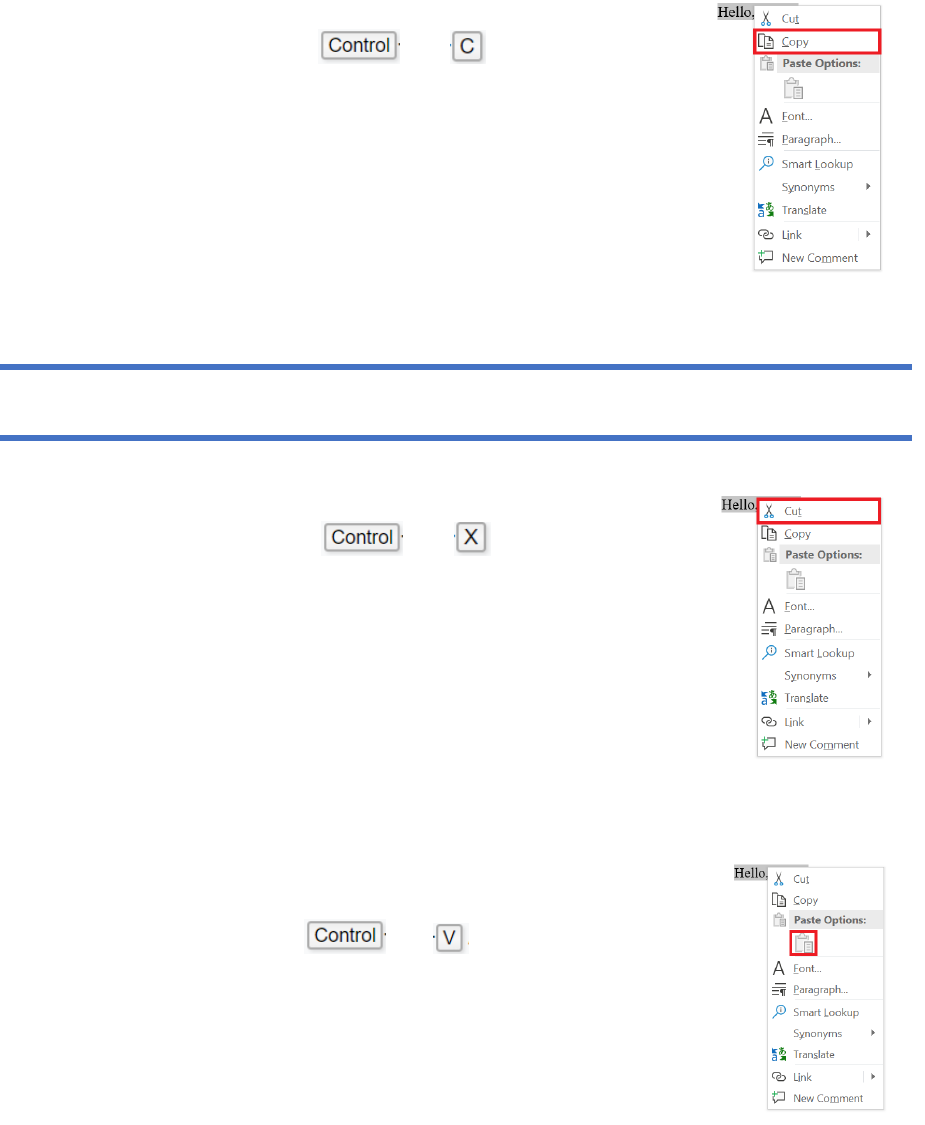
Copy:
2. Choose one of the following options to copy your selected text:
• On your keyboard, press and simultaneously. This
will transfer content to your Clipboard without removing your
selected text from your document.
or
• Right-click on the document and the drop-down menu will appear
(right). Click the Copy option.
Cut:
2. Choose one of the following options to cut your selected text:
• On your keyboard, press and simultaneously. This
will transfer content to your Clipboard and remove the text from
your original document.
or
• Right-click on the document and the drop-down menu will appear
(right). Click the Cut option.
Paste:
1. Choose one of the following options to paste your cut/copied text:
• On your keyboard, press and simultaneously. This will
paste your text into the document.
or
• Right-click the area in the document in which you want to paste
your cut/copied text and the drop-down menu will appear (right).
Click the Paste option.
Remember, cutting does not create a duplicate and removes the original text from the document.
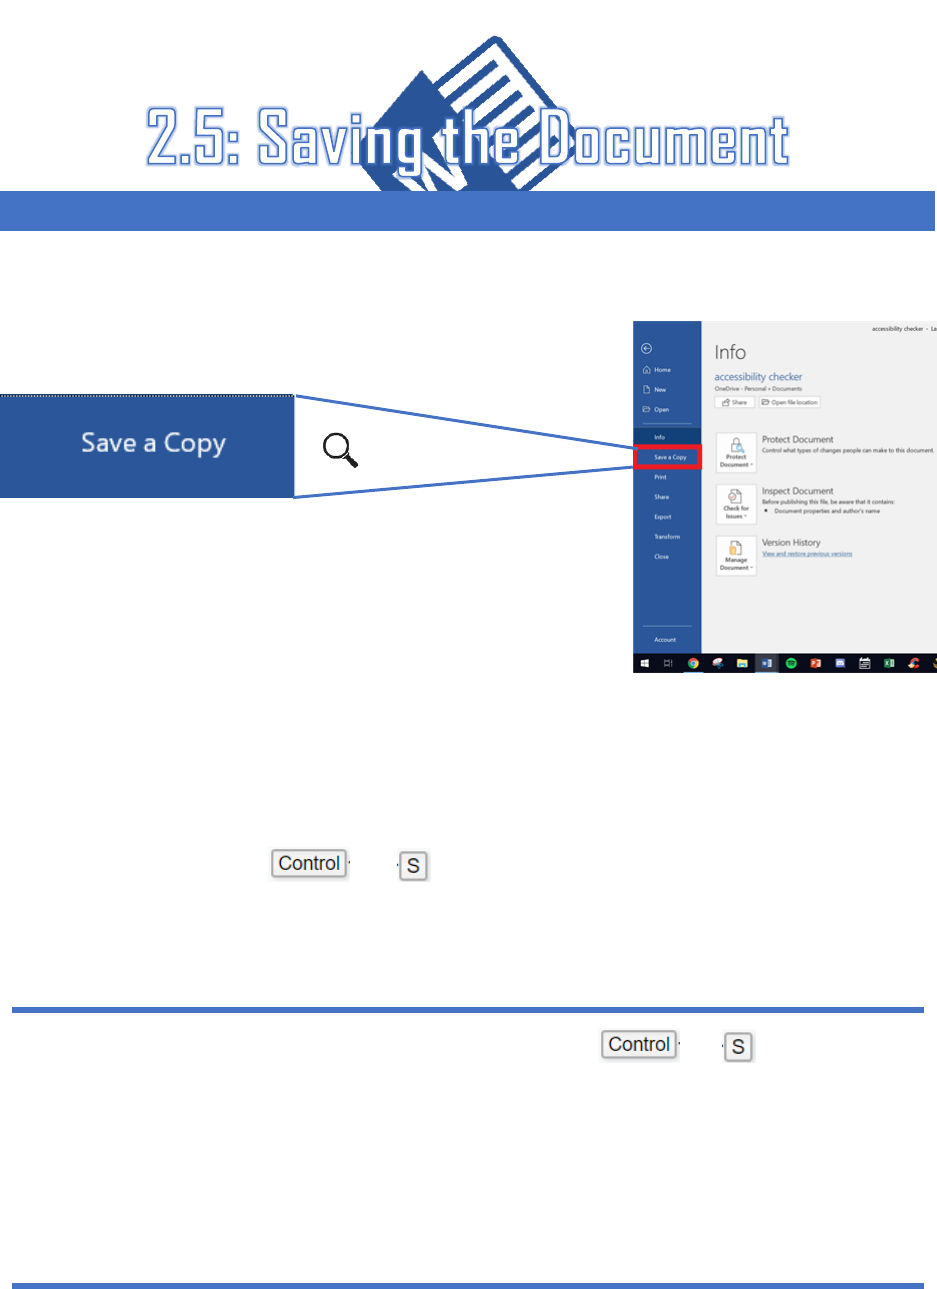
1. Navigate to the File tab of the ribbon.
2. Select the Save a Copy option from the side bar menu.
3. Name your document. Press Enter on the keyboard to confirm.
or
1. On your keyboard, press and simultaneously. This will automatically bring you to
the menu that allows you to name your document.
2. Name your document. Press Enter on the keyboard to confirm.
When you have completed a significant portion of your work or have finished editing, make
sure to save your document so you can access it again at any time. Saving your document
saves the integrity of your work.
After you have initially named and saved your document, pressing and simultaneously
will no longer bring you to the menu that allows you to name your document. Instead, it will save the
most recent changes you have applied to the document so that, when you close and re-open the
document next, your changes will be applied and saved.
It’s important to save your document often so that your progress will be secured in the case of a
power outage or other emergency.
