Eclipse Setup Guide EN
User Manual:
Open the PDF directly: View PDF ![]() .
.
Page Count: 11
Page 1 sur 11

Université Claude Bernard | 2019 2 / 11
VASA Kristjan | VIALLET Engueran
I. Necessary files
Eclipse
http://www.ni.com/download/labview-real-time-module-2014/4846/en/
C Support for myRIO
http://www.ni.com/download/labview-myrio-toolkit-2018/7583/en/
NiRIO Drivers
http://www.ni.com/download/compactrio-device-drivers-january-2019/7833/en/
Java
https://www.java.com/fr/download/
Université Claude Bernard | 2019 3 / 11
VASA Kristjan | VIALLET Engueran
II. Configuration of myRIO
Install « NiRIO Driver » leaving the default installation options. Restart the
computer when asked after the installation finishes.
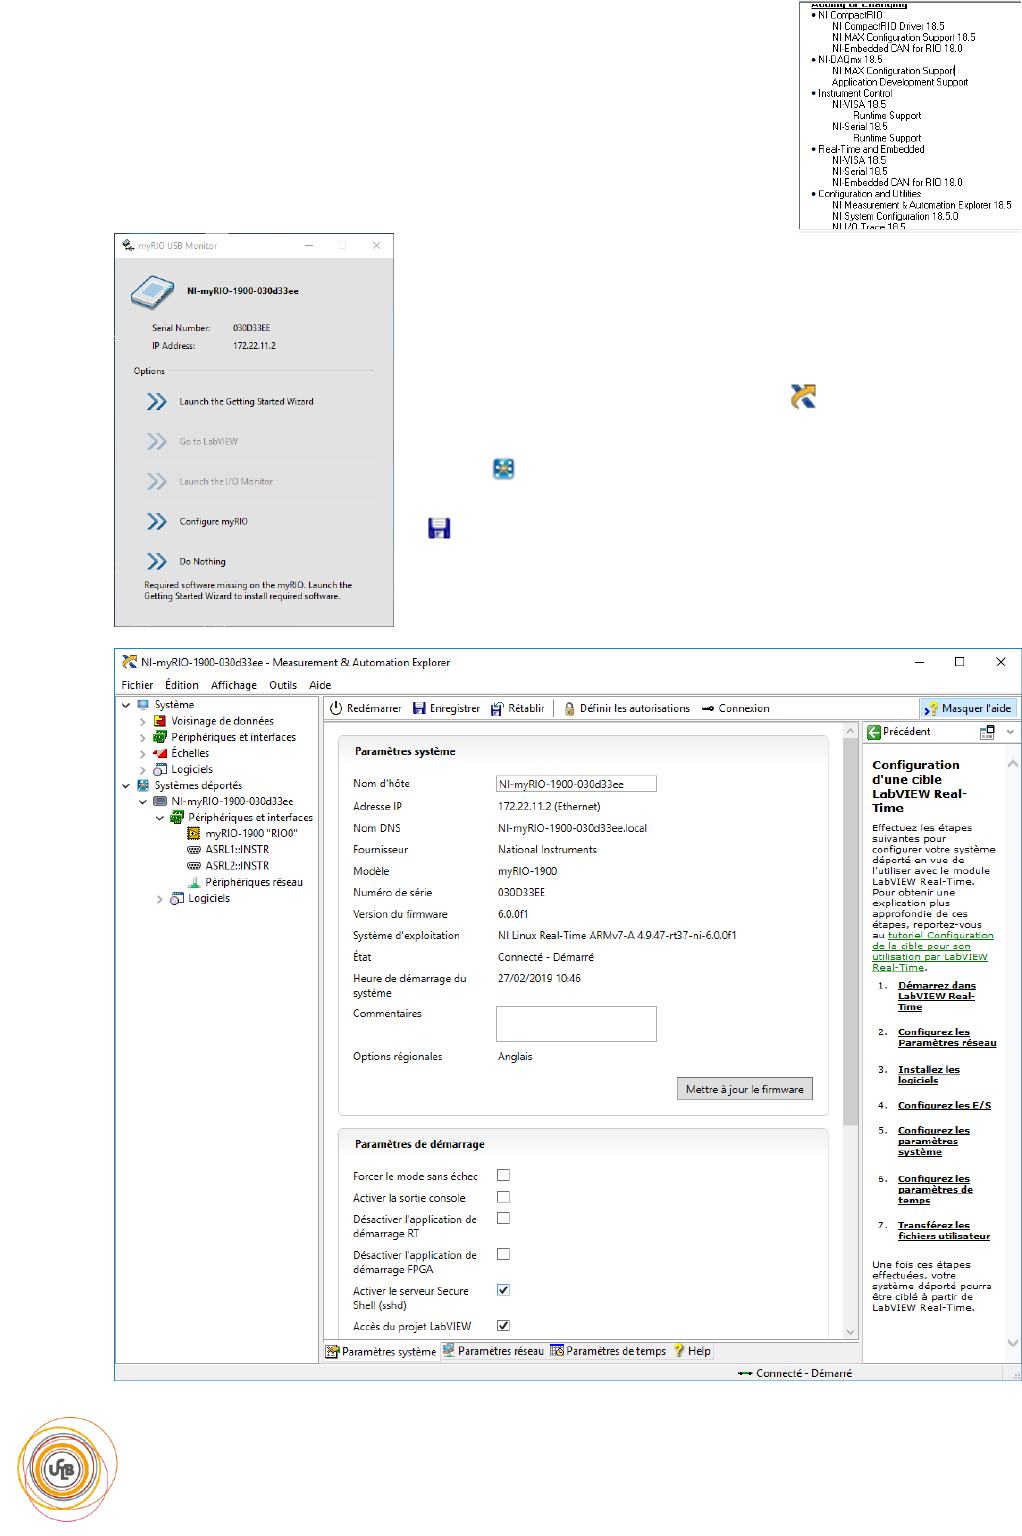
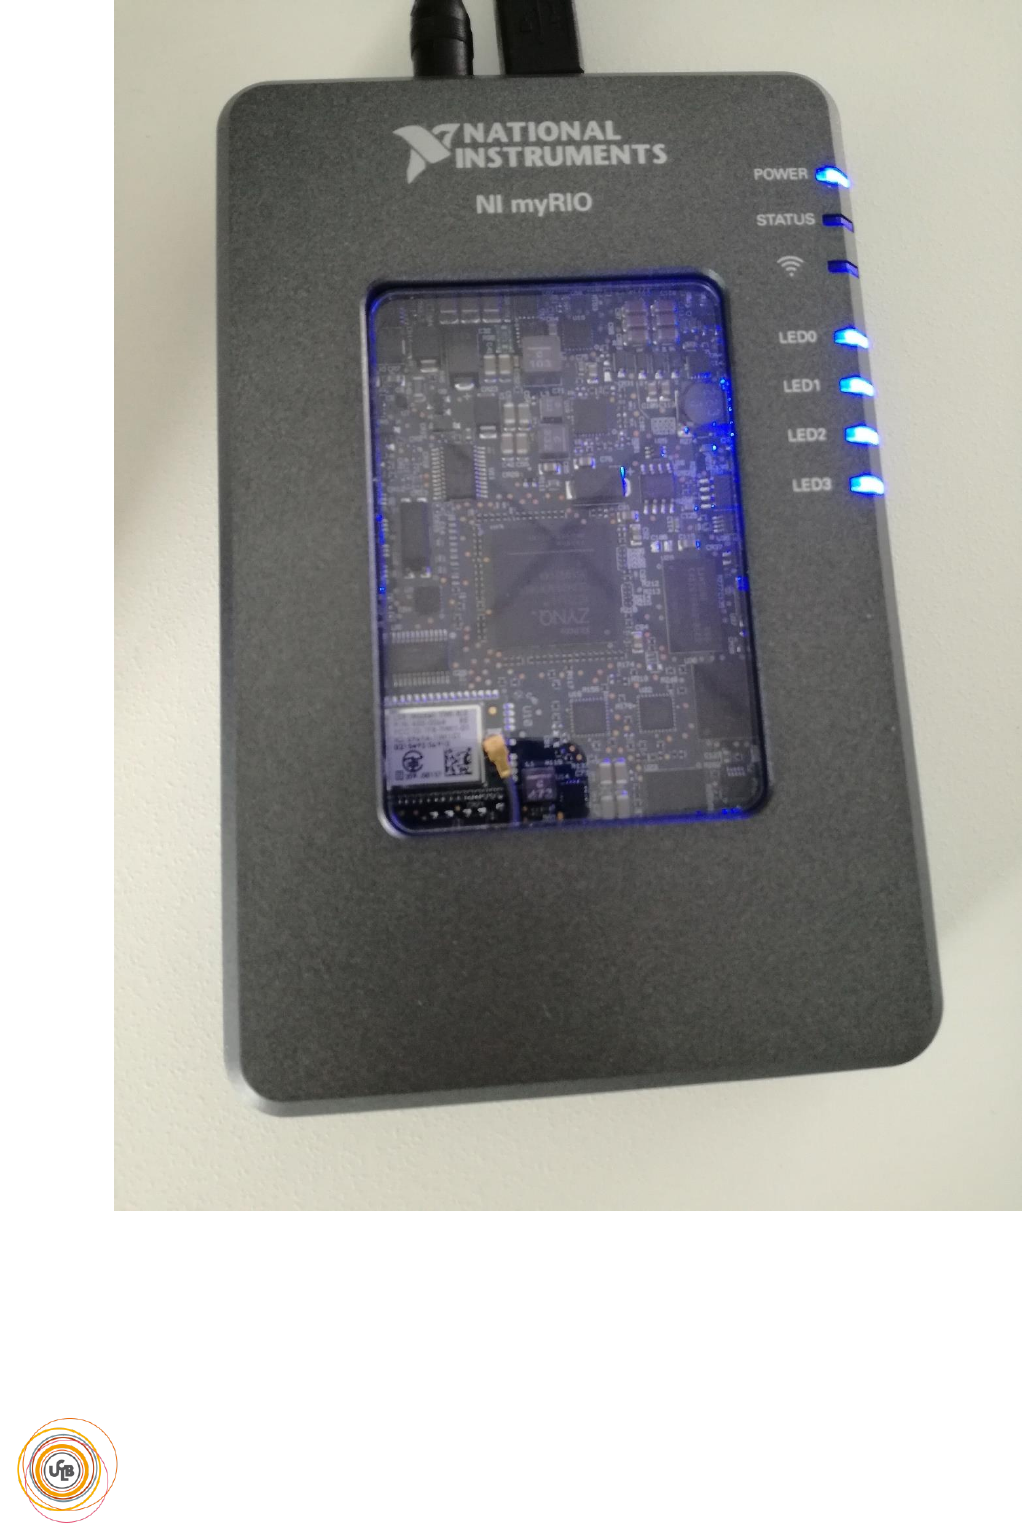
When the installation is complete, connect your myRio to your computer.
The window below should appear.
Choose « Launch the Getting Started Wizard » and follow the
instructions. The firmware will be flashed and updated on your
myRIO.
When the installation is finished, launch « NI MAX » (a shortcut
should be on the start menu).
Expand « Remote systems » and wait until myRIO is detected.
Select it, then check « Enable Secure Shell Server (sshd) » then
« Save ».
Close NI Max and myRIO USB Monitor.
Université Claude Bernard | 2019 4 / 11
VASA Kristjan | VIALLET Engueran
III. Installation
Install Java then Eclipse.
After installing, launch Eclipse (Start/National Instruments/C &
C++ Development Tools for NI Linux Real-Time 2014, Eclipse
Edition).
Close the « Welcome » window so you can access your project.
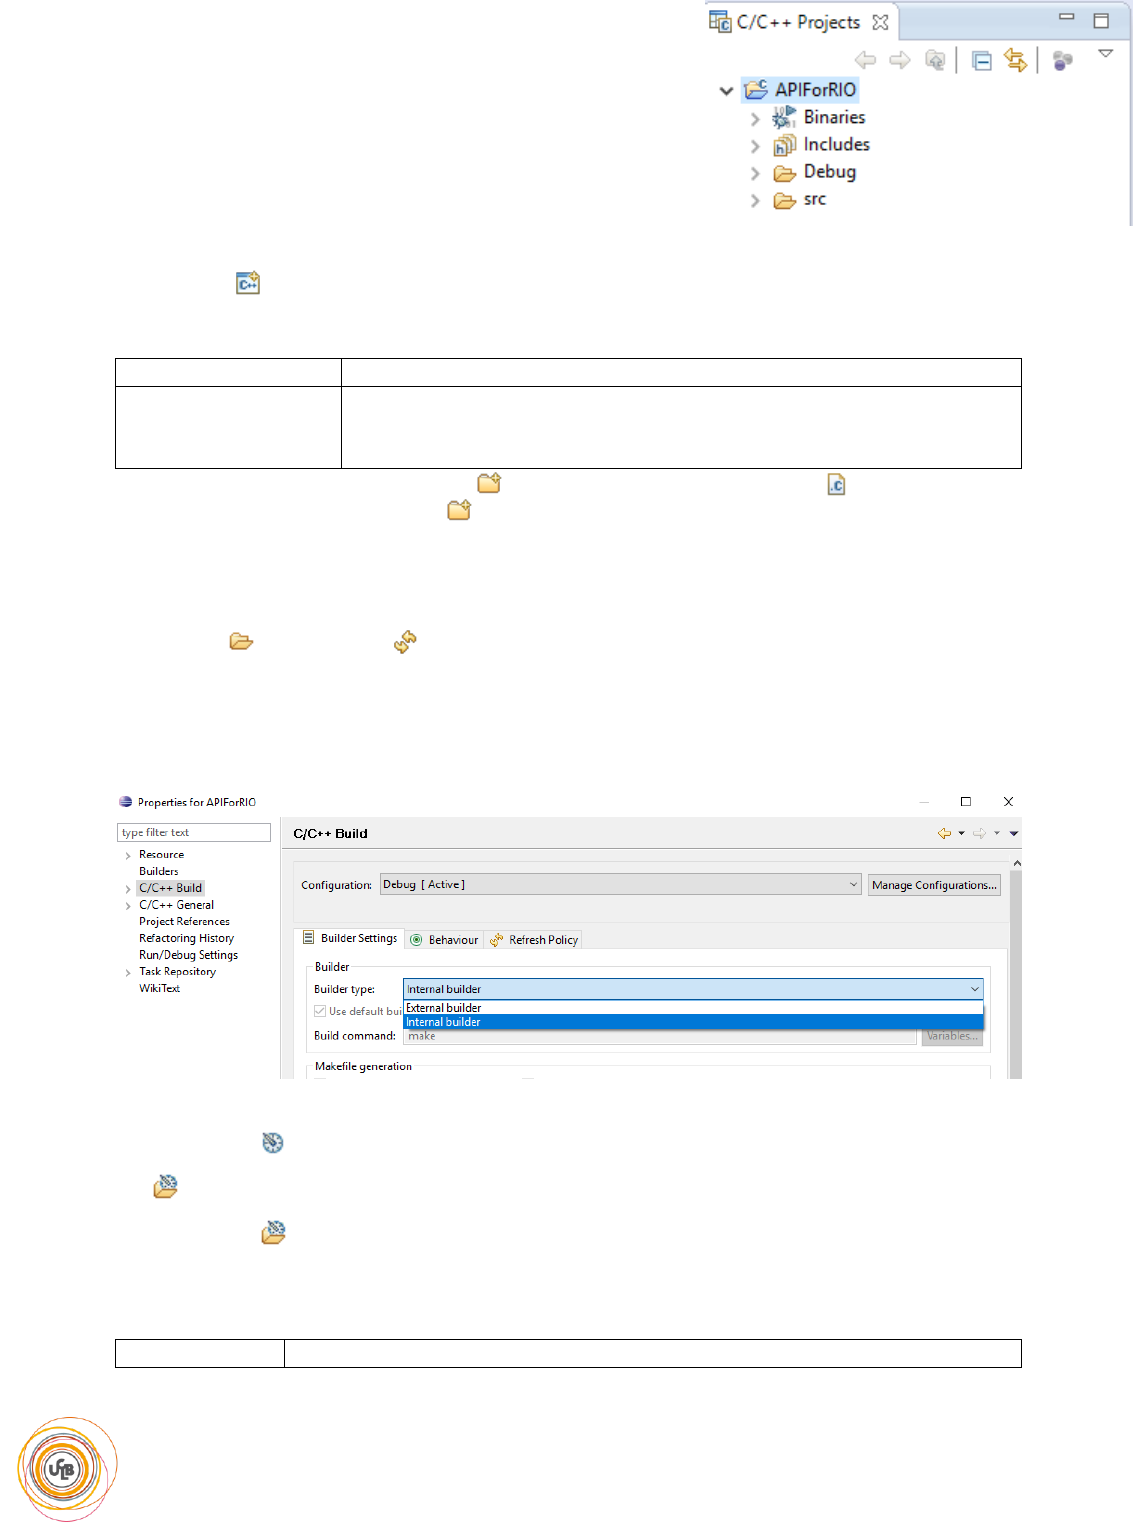
Create a new C/C++project, and name it, for example, « APIForRIO ».
Choose « Empty Project » and « Cross GCC ». Click « Next » two times.
Cross compiler prefix
arm-nilrt-linux-gnueabi-
Cross compiler path
(On a x64 computer)
C:\Program Files (x86)\National
Instruments\Eclipse\14.0\arm\sysroots\i686-nilrtsdk-
mingw32\usr\bin\armv7a-vfp-neon-nilrt-linux-gnueabi
On your project create a folder named « src »; inside it create a file named « main.cpp » and
lastly create another folder named « CAPI » (so its path will be APIForRIO/src/CAPI).
Extract « C_Support_for_myRIO_v6.0 » in a different directory.
Copy the files from « …/C Support/source/ » in the folder that you just created (CAPI).
Right click « CAPI », then « Refresh » to update the modifications that you just did to your
workspace.
Right click on the name of the project, then « Properties ».
In « C/C++ Build » option, choose « Internal builder » instead of « External builder ».
Expand « C/C++ Build » then click on « Settings ».
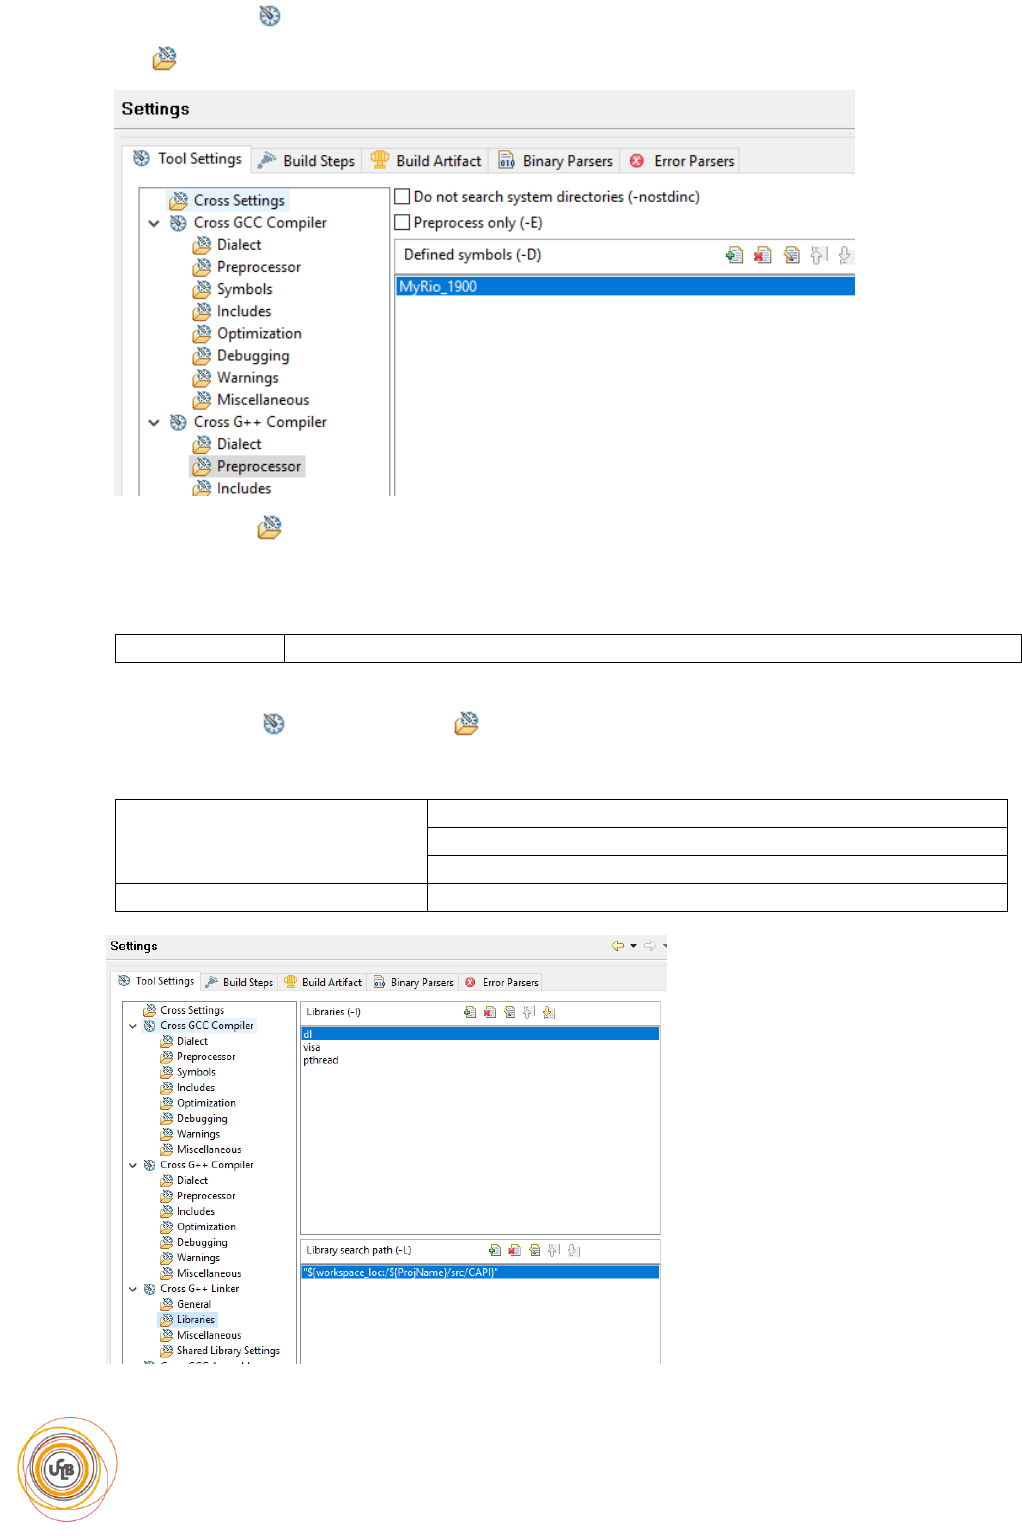
• In the « Cross GCC Compiler » section
In « Symbols → Defined symbols (-D) »: Add a new symbol named « MyRio_1900 ».
• In the « Miscellaneous » sections
In the field « Other flags », add « -mfpu=vfpv3 -mfloat-abi=softfp » for more precision with floating
numbers.
Other flags
-c -fmessage-length=0 -mfpu=vfpv3 -mfloat-abi=softfp
Université Claude Bernard | 2019 5 / 11
VASA Kristjan | VIALLET Engueran
• In the « Cross G++ Compiler » section
In « Preprocessor »: add a symbol named « MyRio_1900 ».
• In the « Miscellaneous » section
In the field « Other flags », add « -mfpu=vfpv3 -mfloat-abi=softfp » for more precision with floating
numbers.
Other flags
-c -fmessage-length=0 -mfpu=vfpv3 -mfloat-abi=softfp
• In the « Cross G++ Linker / Libraries» section
Add the following libraries and path of libraries:
Libraries
dl
visa
pthread
Library search path
"${workspace_loc:/${ProjName}/src/CAPI}"
Make sure that your window
matches this window and validate
the new properties by clicking OK.
Université Claude Bernard | 2019 6 / 11
VASA Kristjan | VIALLET Engueran
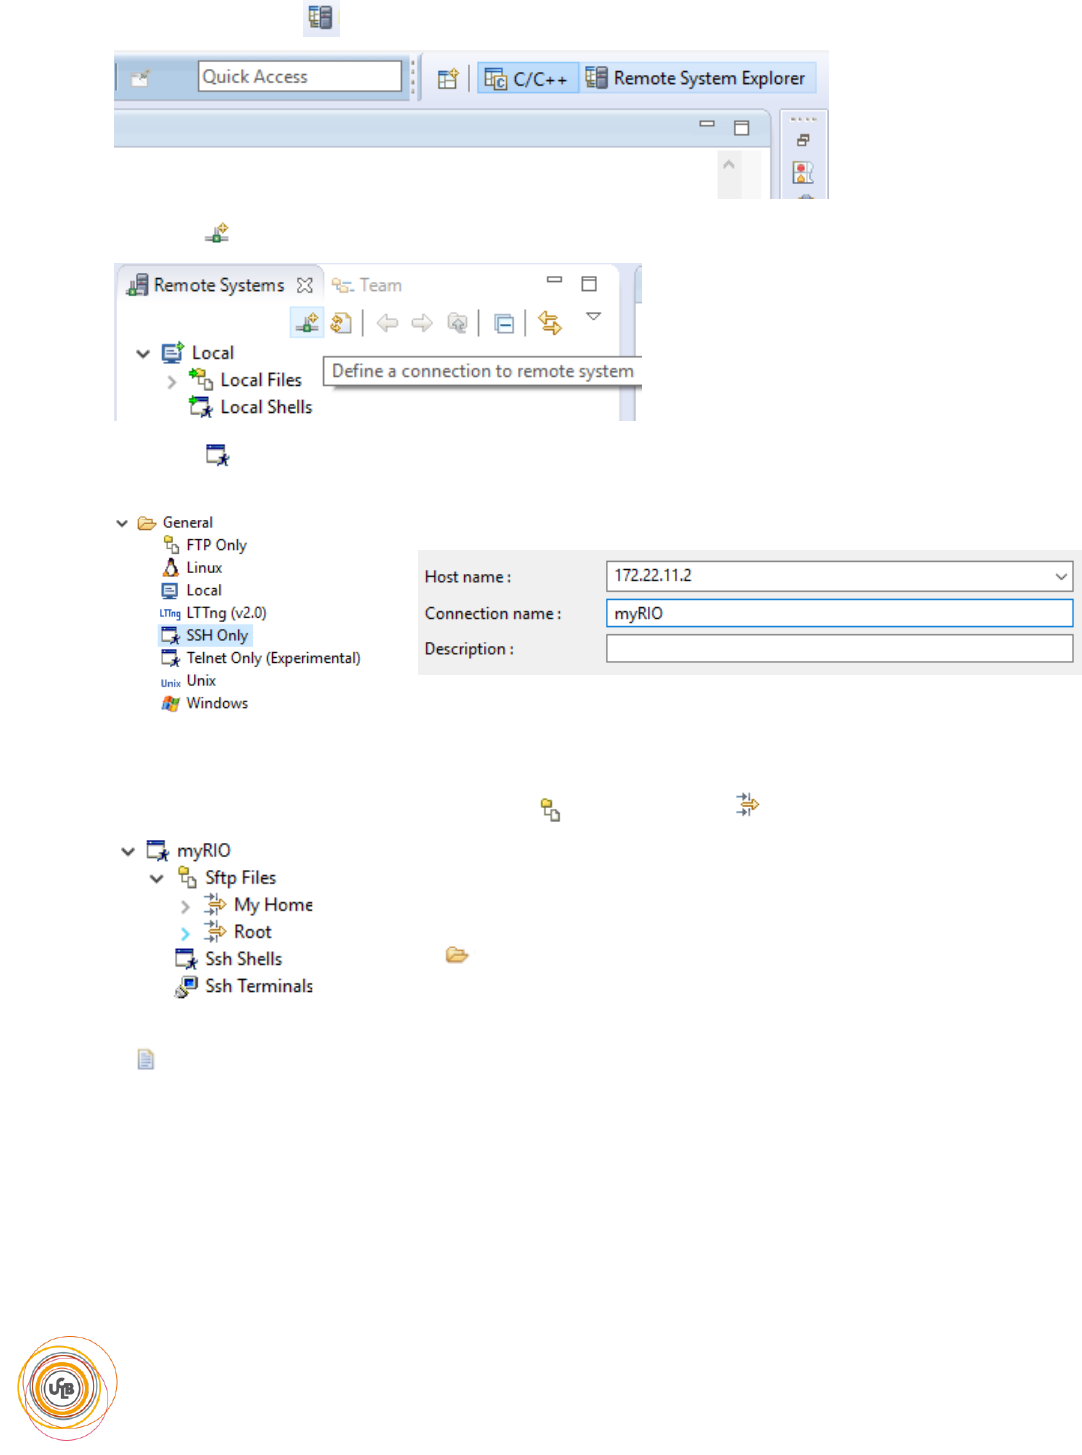
IV. Connection to myRIO
On Eclipse, choose « Remote System Explorer »
Choose « Define a connection to remote system »
Click on « SSH Only », then fill the fields « Host name » and « Connection name » with
« 172.22.11.2 » and « myRIO » respectively.
Then, click on « Next », « Next », « Next » then « Finish ».
A new connection appeared. Expand it, open « Sftp Files » then « Root ».
A window will pop up and ask for the user’s name and password: enter
« admin » as a user name and leave the field of the password empty.
Then confirm.
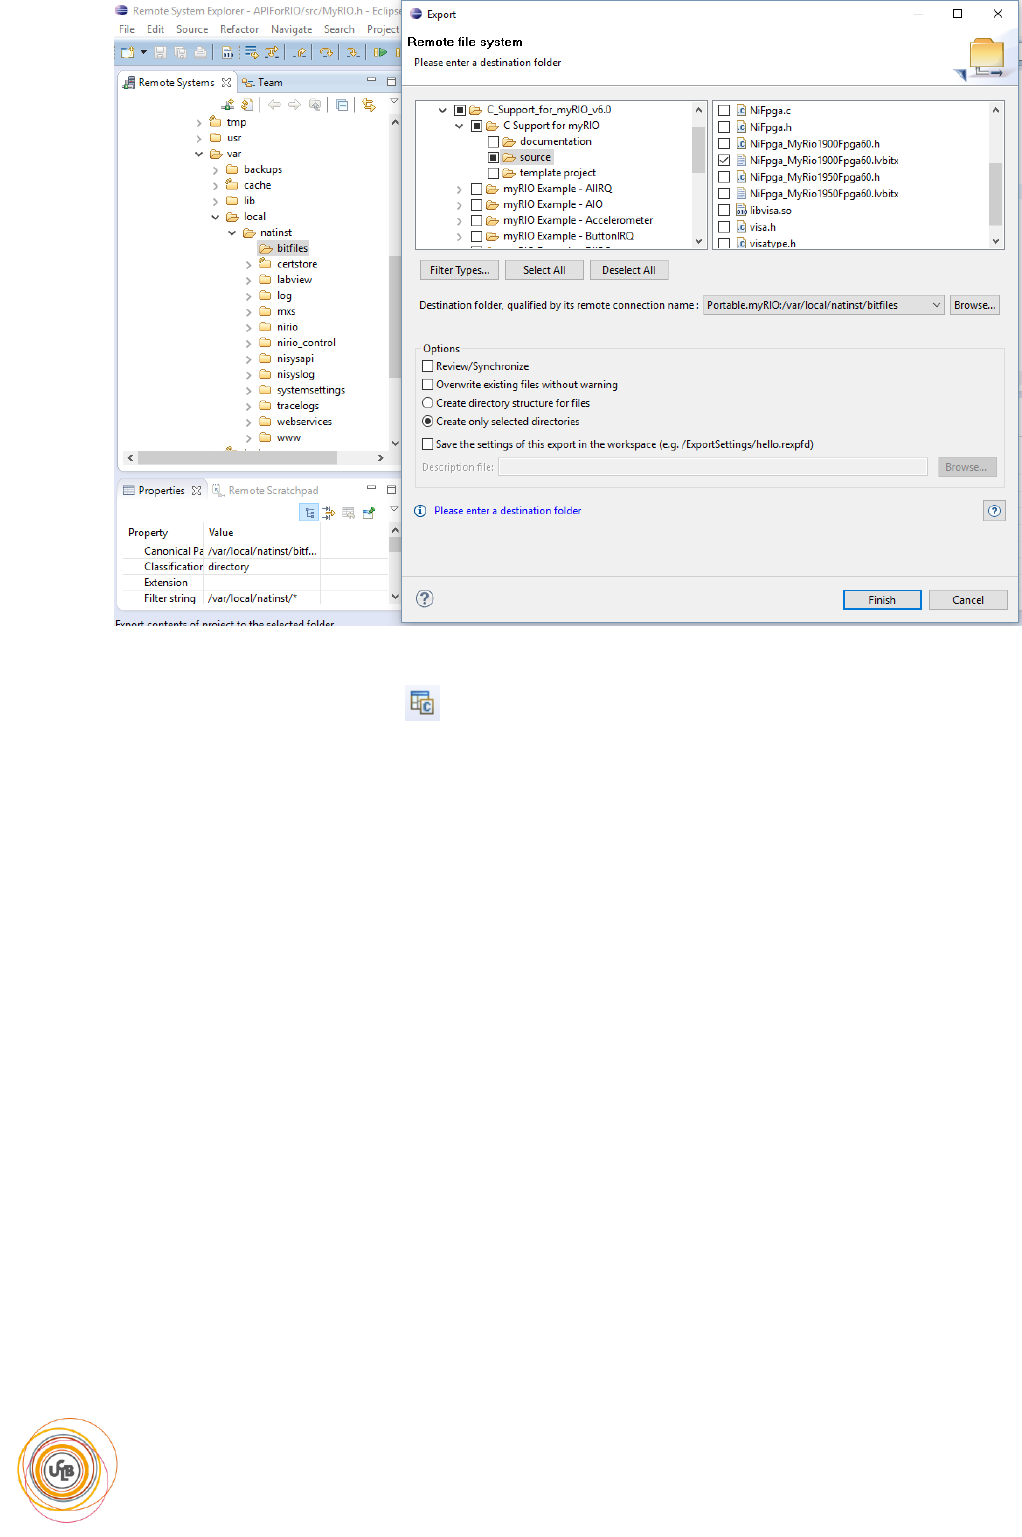
Go to « /var/local/natinst » and create a new folder named
« bitfiles ». Right click on this folder, then « Export from project… »
Go to the left window, into the « CAPI » folder. Check on the right window
« NiFpga_MyRio1900Fpga60.lvbitx » then click « Finish ».
Université Claude Bernard | 2019 7 / 11
VASA Kristjan | VIALLET Engueran
MyRIO is now configurated to support interactions on C/C++ language.
To return to your project, click « C/C++ » on the top right side.
Université Claude Bernard | 2019 8 / 11
VASA Kristjan | VIALLET Engueran
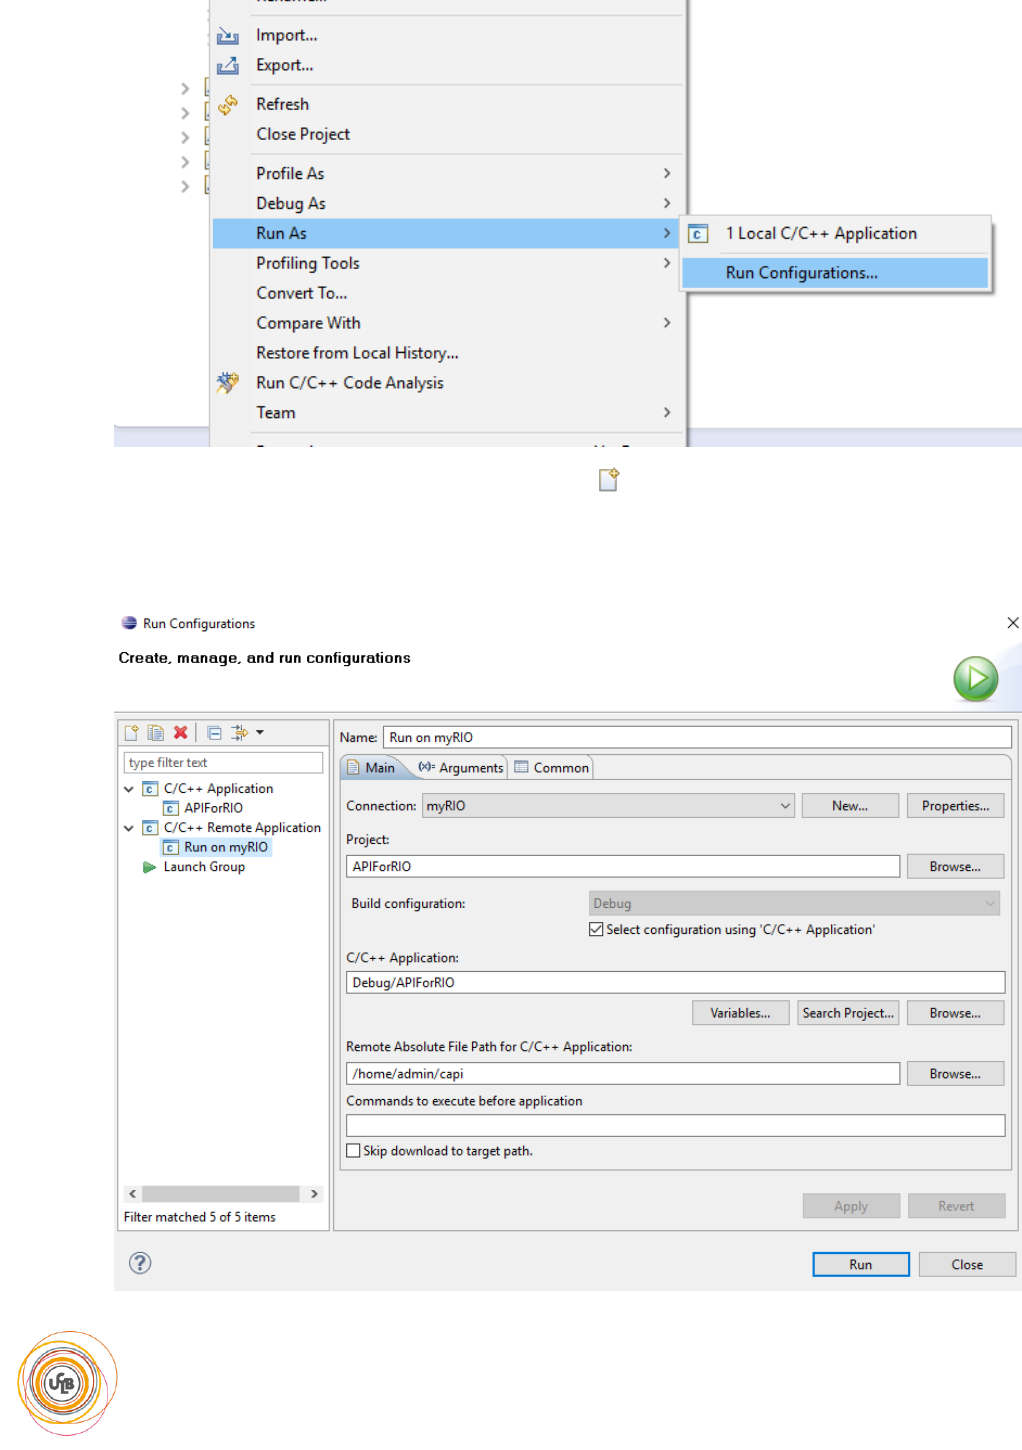
V. Configuration of the uploading
Right click on the project on Eclipse, then « Run As », then « Run configurations… »
Rright click on « Remote Application », then click on « New».
Name your configuration, choose the connection (myRIO previously connected), the project
(APIForRIO), the path of the application to send and the path of the distant implantation. Verify the
concordance with the following screenshot:
Université Claude Bernard | 2019 9 / 11
VASA Kristjan | VIALLET Engueran
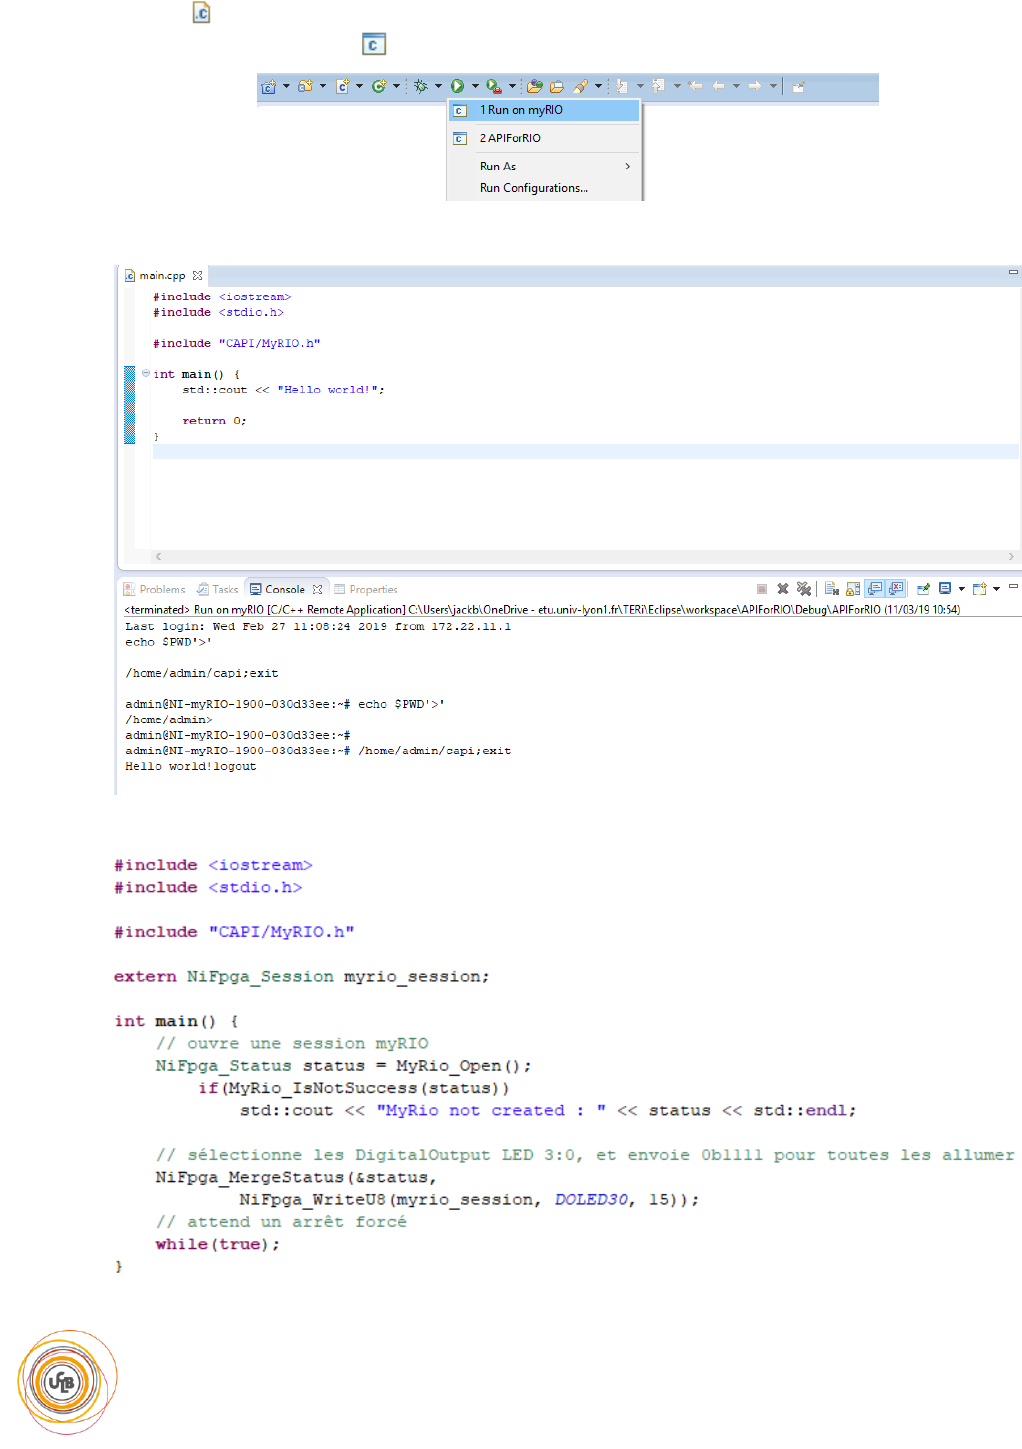
VI. Functional check
In the « main.cpp » file, #include « CAPI/MyRIO.h » then click on the name that you gave to your
configuration, in our case « Run on myRIO ».
If the configuration is correct, the console should give the output of myRIO.
To verify the good functioning of the registers, here is a little program to turn on the LEDs of myRIO:
Université Claude Bernard | 2019 10 / 11
VASA Kristjan | VIALLET Engueran
Université Claude Bernard | 2019 11 / 11
VASA Kristjan | VIALLET Engueran
VII. Useful links to go further
• Default FPGA personalities
http://zone.ni.com/reference/en-XX/help/373925B-01/myriohelp/myrio_fpga_personalities/
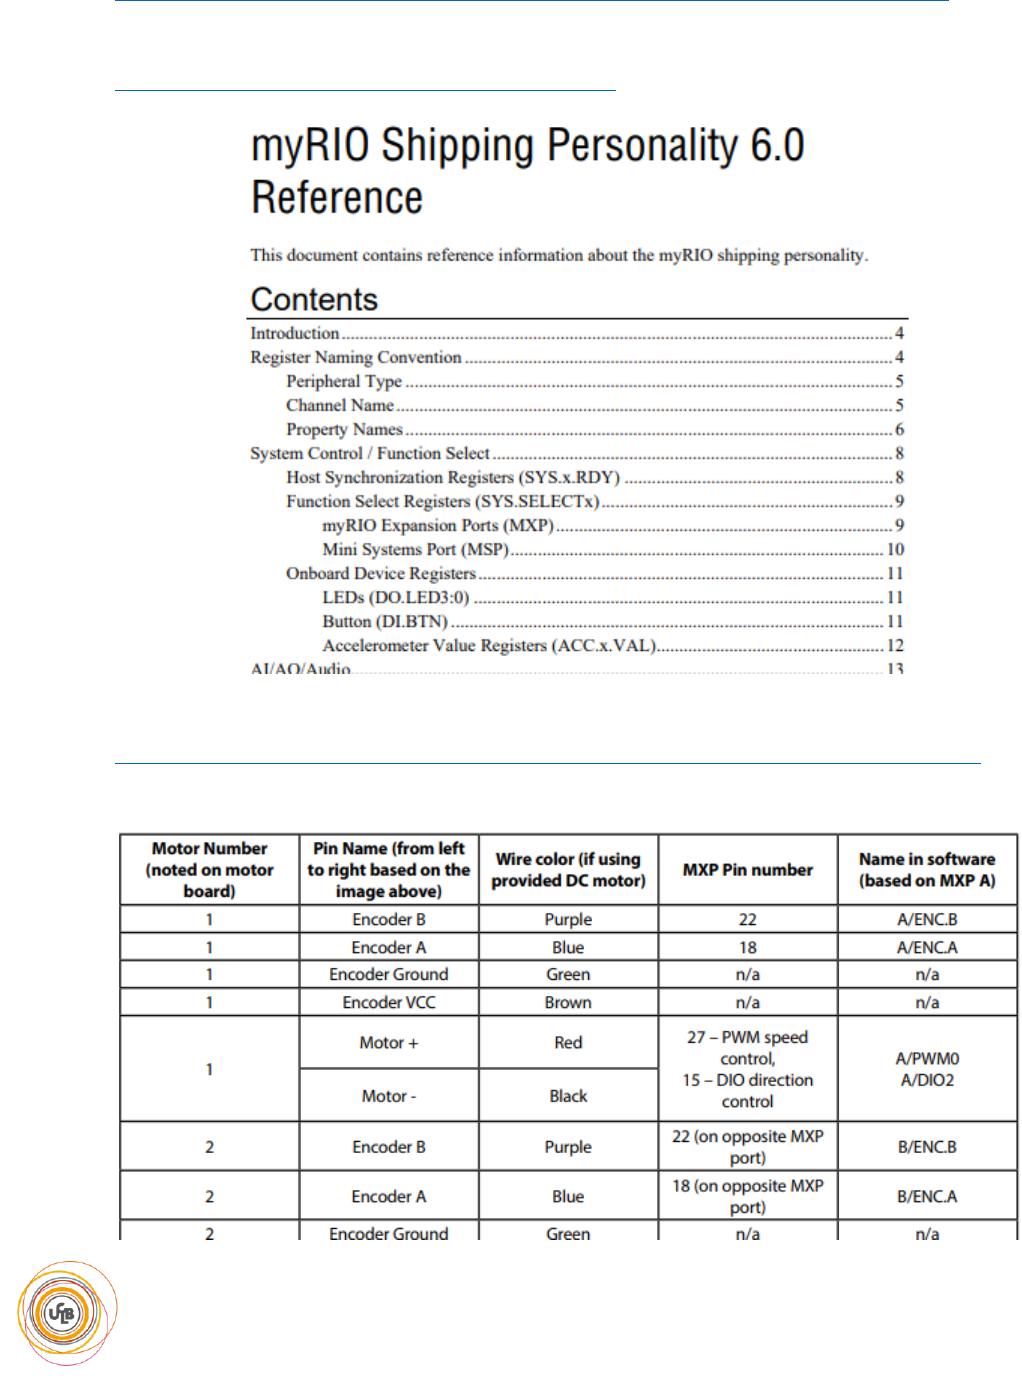
Documentation (associated registers…):
http://www.ni.com/product-documentation/14655/en/
• Extension board documentation
https://learn.ni.com/teach/resources/808/robot-builder-s-guide-pitsco-tetrix-prime-for-ni-myrio
Used ports descriptions (motors, gyroscope…) from page 38 to page 44.
