Exercise Guide
User Manual:
Open the PDF directly: View PDF ![]() .
.
Page Count: 15

Exercise:
Build a simple blog managed by
Contentful
The goal of this exercise is to learn about basic content management by configuring a
simple content model for a blog post, creating a blog post based on that content
model and finally connect it to a template made in HTML/CSS/JS.
First step: Sign up with Contentful
There are many CMS vendors out there. You might have heard of Wordpress, Umbraco, Drupal,
Sitecore, Joomla or even Episerver. But to keep this exercise as simple and ‘developer friendly’ as
possible, we’ll use Contentful, a completely cloud based SaaS system, where you can easily create a
free developer account.
Contentful works as a “ContentHub” or “Headless CMS” meaning that it’s purely storing content and
providing an editorial interface for it. Developers can then take the content and use it through a
powerful API and connectors to most major programming platforms. That way you can use the
content in both apps, static generated sites or regular backend driven web sites.
First, go to https://www.contentful.com/sign-up/
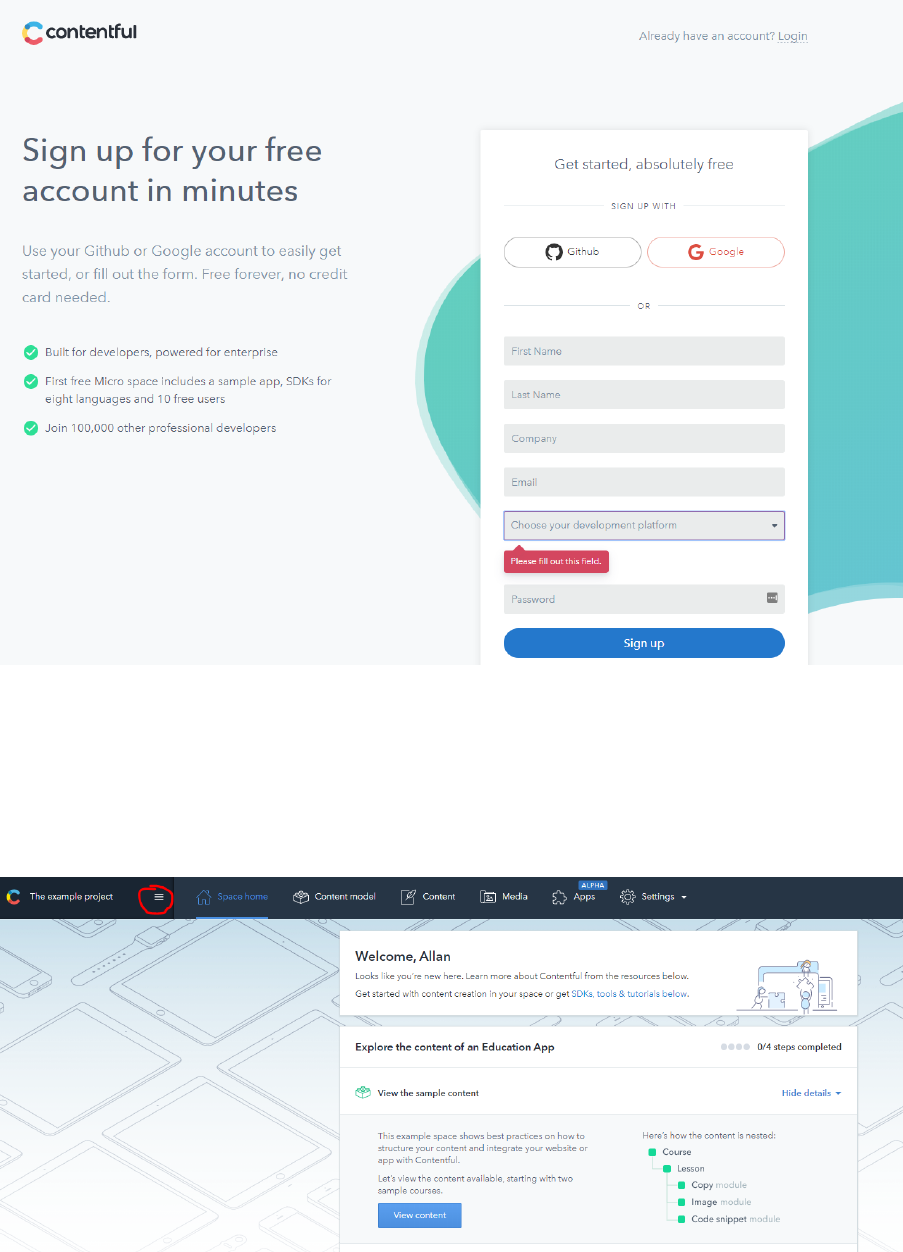
Here you can sign up – either fast and easy using Github or Google credentials, or with your email
and password.
Setting up an empty space
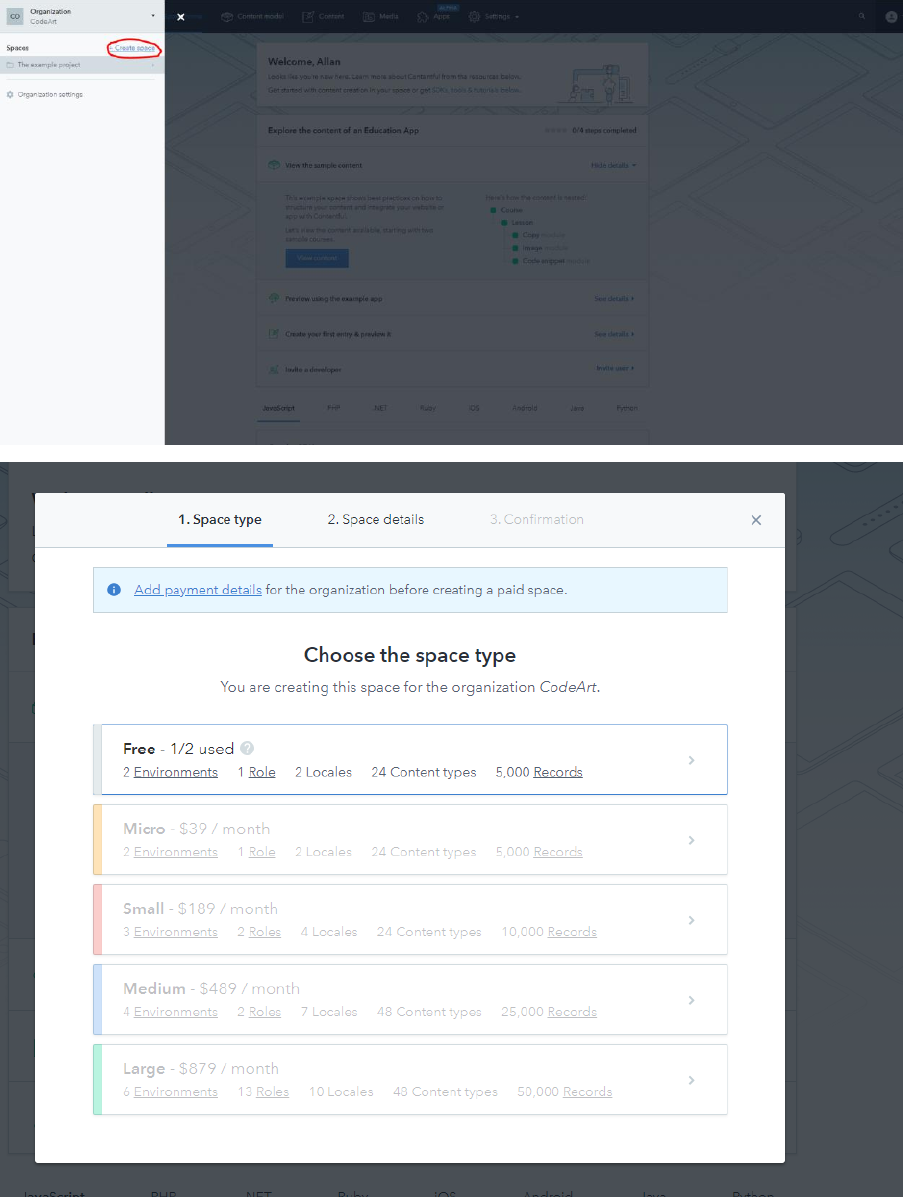
Once you have signed up, it will have started by setting up a sample project (called ‘Space’) for you.
However, we don’t need that right now, so instead click the menu next to “Space Home” and create
a new space.
Obviously, we’ll pick a free space for now (don’t worry, you can have 2 of them). No need to add
payment information at this time.
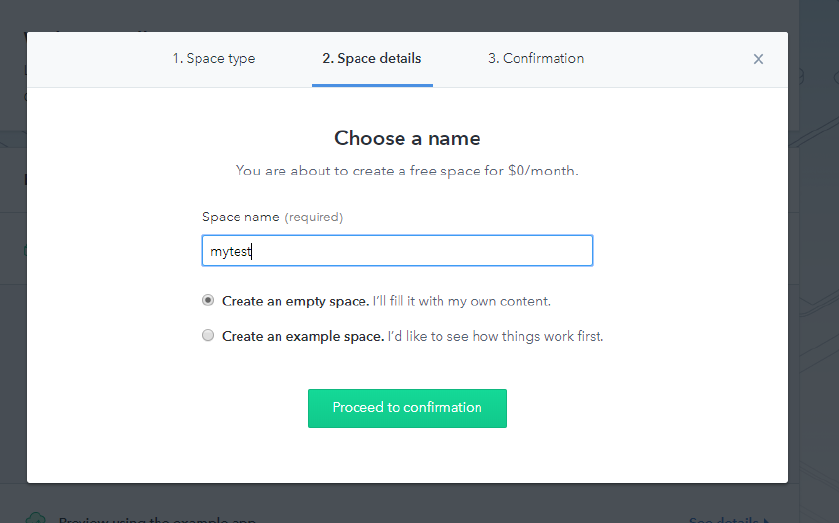
Give the space a name and choose “Empty space”. Go ahead and confirm it and it will be created.
Defining the content model
Now, it’s time to define the content model(s) we need – in this case we’ll just start simple with 1
content type, the “Blog Post”.
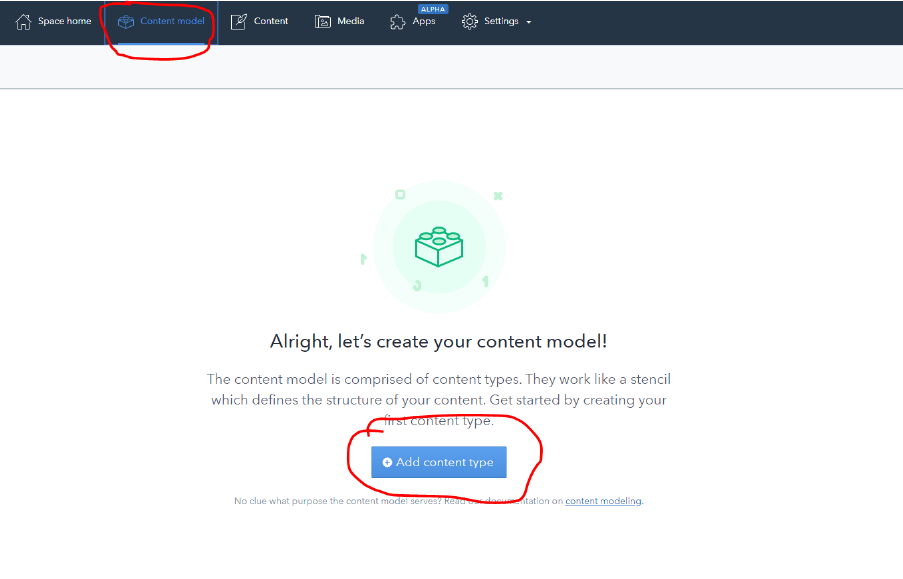
Go to the “Content Model” in the top navigation and then click “Add content type”.

Once created, we should give it a name (and if you want a description).
Now, it’s time to start adding fields/properties to the content type. This is done by clicking the “Add
field” on the right hand side.
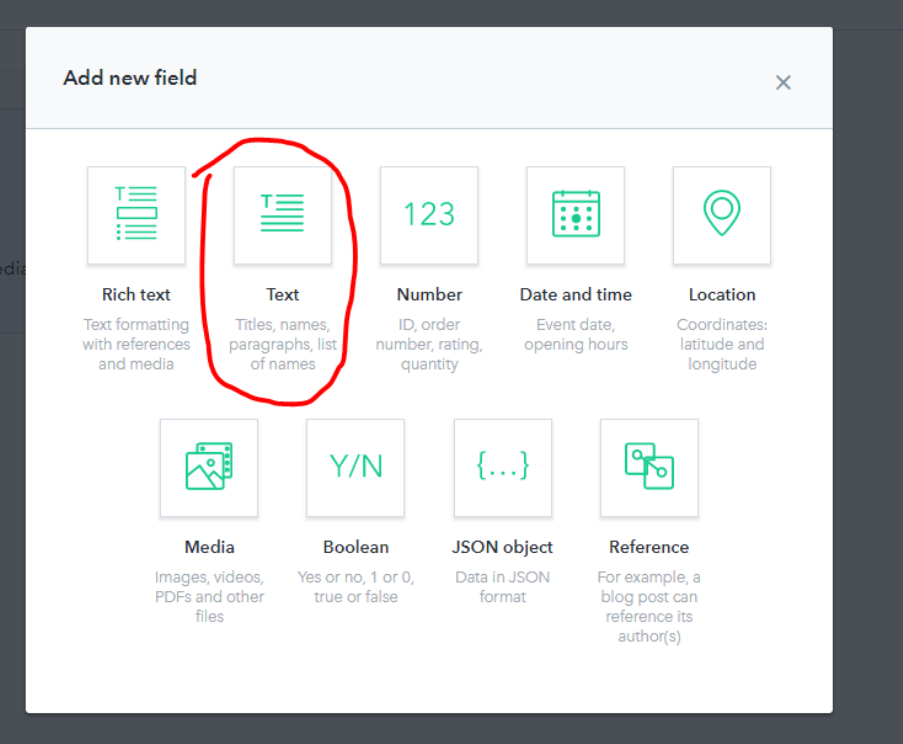
For starters we’ll create a “Text” field to hold the title/headline of the blog post.
We give it a name. In this case “Headline”. Note that there is also automatically a field ID created in
lowercase. We’ll need that later. Click “Create and Configure”.
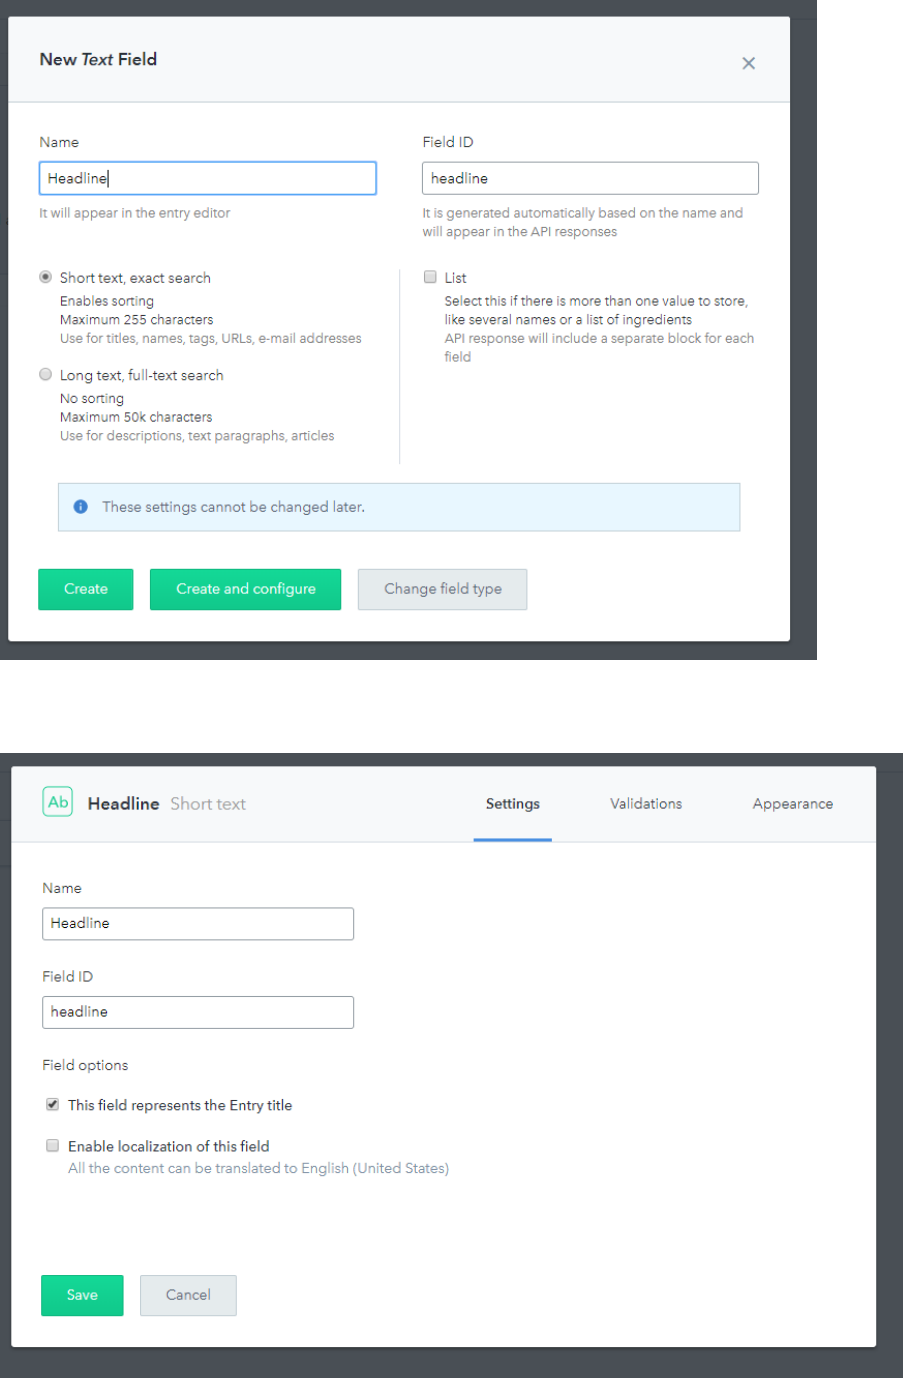
At this point we can set up various custom settings for the headline field. Let’s just check the box to
indicate that it’s the Title and save it.
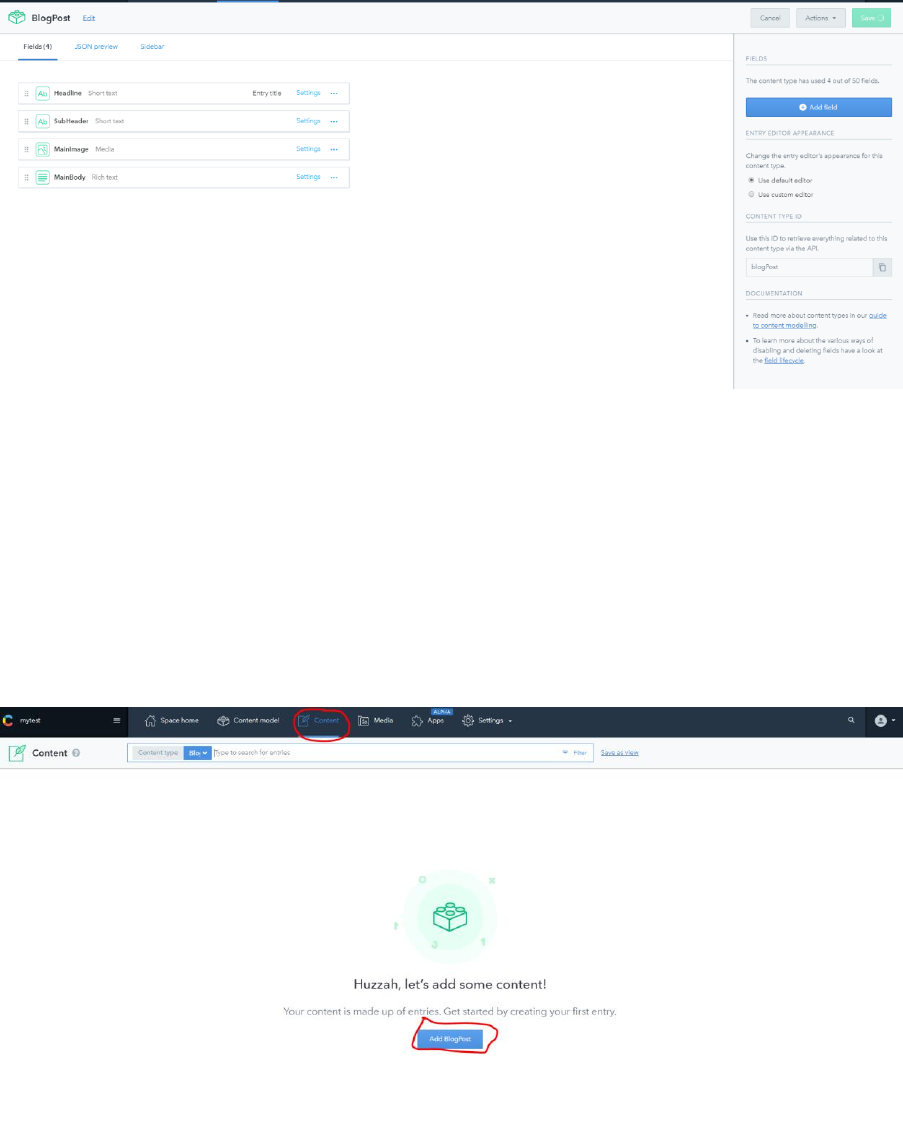
After that is done, we can add multiple other fields. I suggest a SubHeader, an image (called
“MainImage”) and a MainBody. Note that they have different types. The image for example is a
Media – meaning it holds a reference to a media item, and the MainBody is rich text edited using a
rich text editor.
Add them one at a time and when you are done with it all, save the content model. You can of
course always go back and add more.
Creating Content
It’s now time to start adding some content, so let’s click “Content” in the top menu, followed by
“Add BlogPost”.
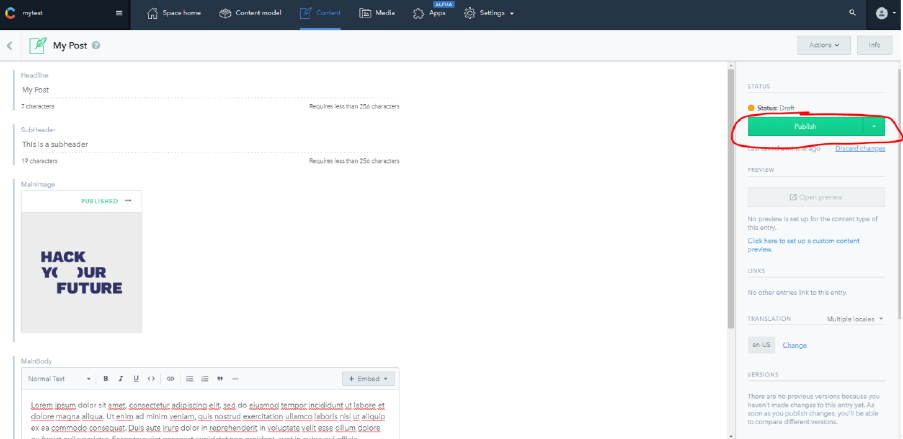
Now we are working as an editor would typically work, creating and managing content items. We
can see all the fields we defined earlier in the content model and we can start filling in some
content.
Add some text to the various fields – and for the image, you can “Add and link” a media item, where
you upload an image you have locally. Once you are ready click “Publish”.
Feel free to add multiple blog posts if you want.
Rendering the blog post to a web site visitor
Now that we have created a content model and some sample content it’s time we try to produce an
html template that can be used to render this content dynamically.
Since Contentful has a wide range of connectors, we could do this natively in NodeJS, React, Php,
.NET, Python or any other number of languages and platforms. To keep it simple and understandable
and within HYF curriculum the following example is based on plain Javascript, but feel free to use
whatever platform you prefer. There is good documentation for each connector in Contentful.
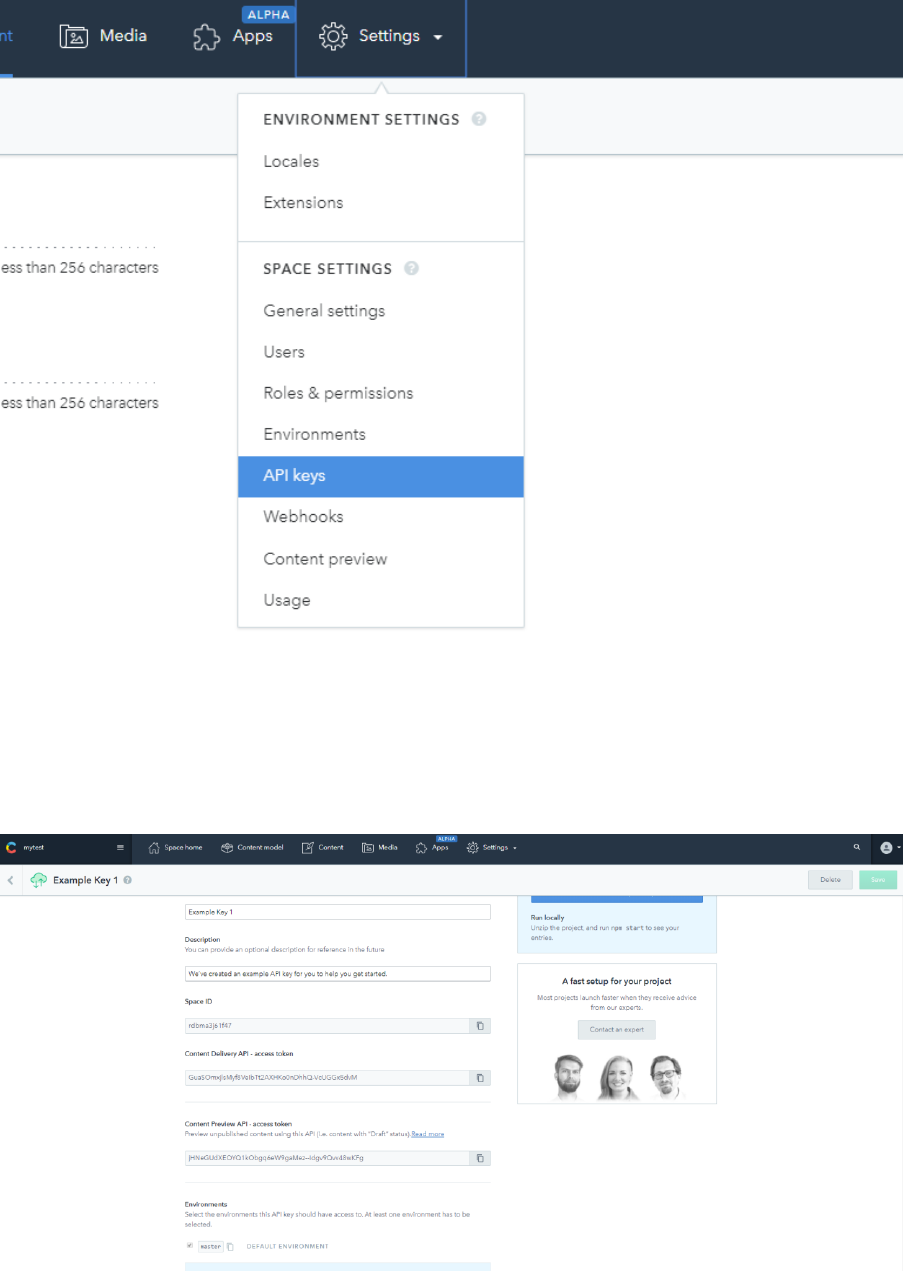
First off, we need to get the API keys in order to connect with the API. So we go to “Settings” and API
keys”. There should already be a set of keys called “Example Key” that we can use.
We’ll need the SpaceID and the “Content Delivery API access token” for now.
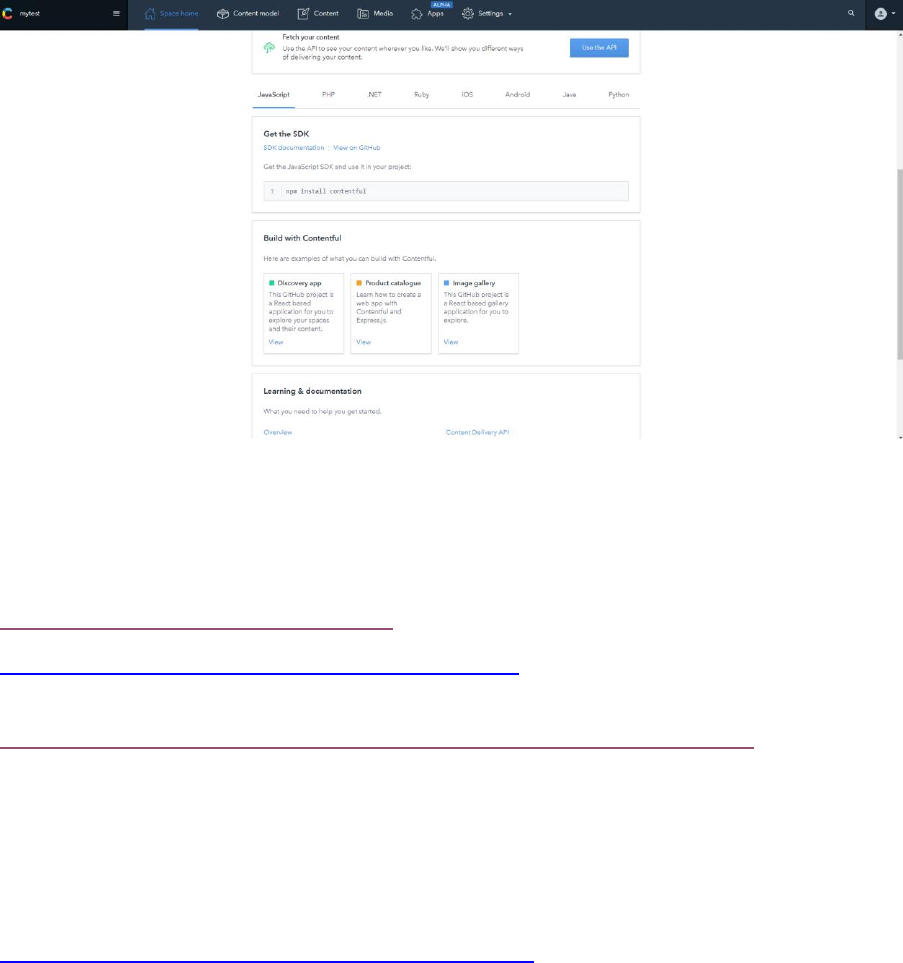
If you go to “Space Home” you’ll see a list of various platforms and instructions on how to get
started with them.
You will find some good introductions to using javascript here:
https://github.com/contentful/contentful.js
https://www.contentful.com/developers/docs/javascript/
The following steps are loosely based on this in-depth guide:
https://www.contentful.com/developers/docs/javascript/tutorials/using-js-cda-sdk/
The coding
You can either create your own HTML/CSS from scratch, or you can use a little template we put
together as a starting point. The template is here:
https://github.com/Majd-Darraj/HYF_contentful_workshop (you will need the “Index.html” and all
the files in the “assets” folder.
If you keep them locally you should be able to just open the “index.html” directly in your browser –
no need to set up a web server.
The template looks like this:
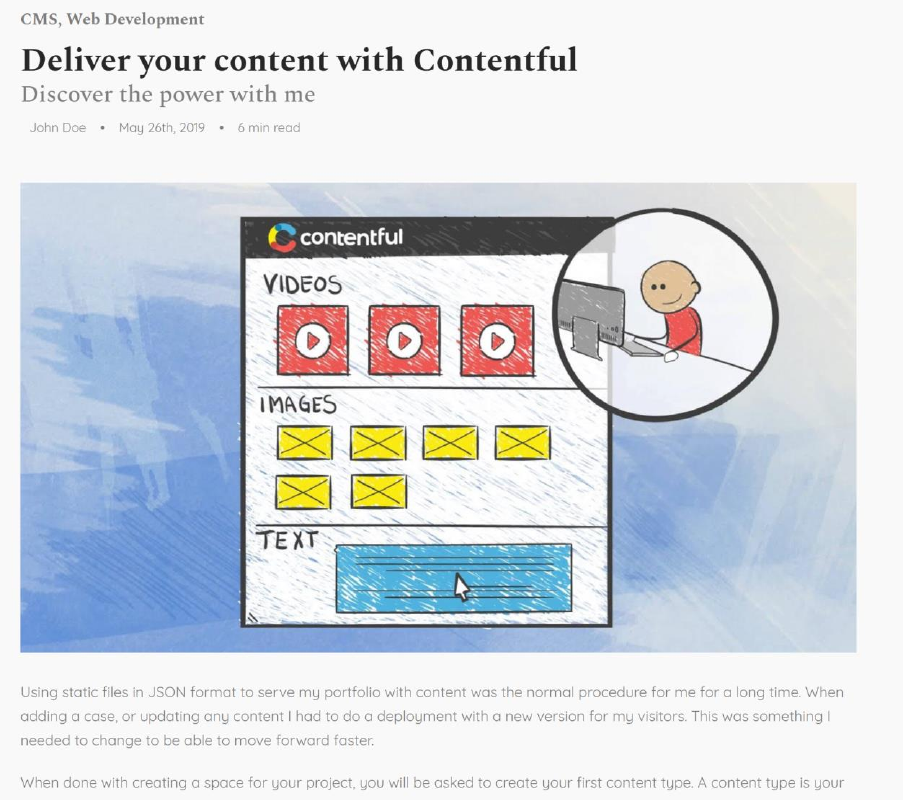
Notice the headline, subheader, image and mainbody? Now we want to make sure we manage the
content in them from Contentful.
First off, we need a few javascript libraries, so before the </head> we will add this:
<script src="https://cdn.jsdelivr.net/npm/contentful@latest/dist/contentful.browser.min.js"></script>
<script> var exports = {}; // quick fix because 'exports' is not defined in rich-text bundle below </script>
<script src="https://unpkg.com/@contentful/rich-text-html-renderer@12.0.0/dist/rich-text-html-renderer.es5.js"
charset="utf-8"></script>
The first line is fetching the Contentful JS library, the 2 next is to fetch the Rich text renderer.
Next, we create our own <script> tags below the lines above and create a client to access
managed content in our space by providing the proper space ID and access key:
var client = contentful.createClient({ space: '[spaceID]', accessToken: '[accesstoken]’});
Next, we want to get the content item to show. We could do a search for it based on
properties, but again – we’ll stay simple. We’ll use a hardcoded ID, but let is be possible to
replace it by adding “?id=[new id]” in the url.

Note: You get the contentful ID of a content item in the
“Info” box at the content item in Contentful.
var entryid="[my start page id]";
var urlParams = new URLSearchParams(location.search);
if(urlParams.has('id')){
entryid=urlParams.get('id');
}
Now, that we have the entryid, it’s straight forward to fetch the content from Contentful and
simply replace the properties with it. Note that the entry fields are named using the field ID
you saw when you created them in Contentful’s content model.
client.getEntry(entryid)
.then(entry => {
console.log(entry);
document.querySelector('#headline').innerHTML=entry.fields.headline;
document.querySelector(‘#subheader’).innerHTML=entry.fields.subheader;
document.querySelector('#mainImage').src="https://"+entry.fields.mainImage.fields.file.url;
document.querySelector('#mainBody').innerHTML=documentToHtmlString(entry.fields.mainBody);
});
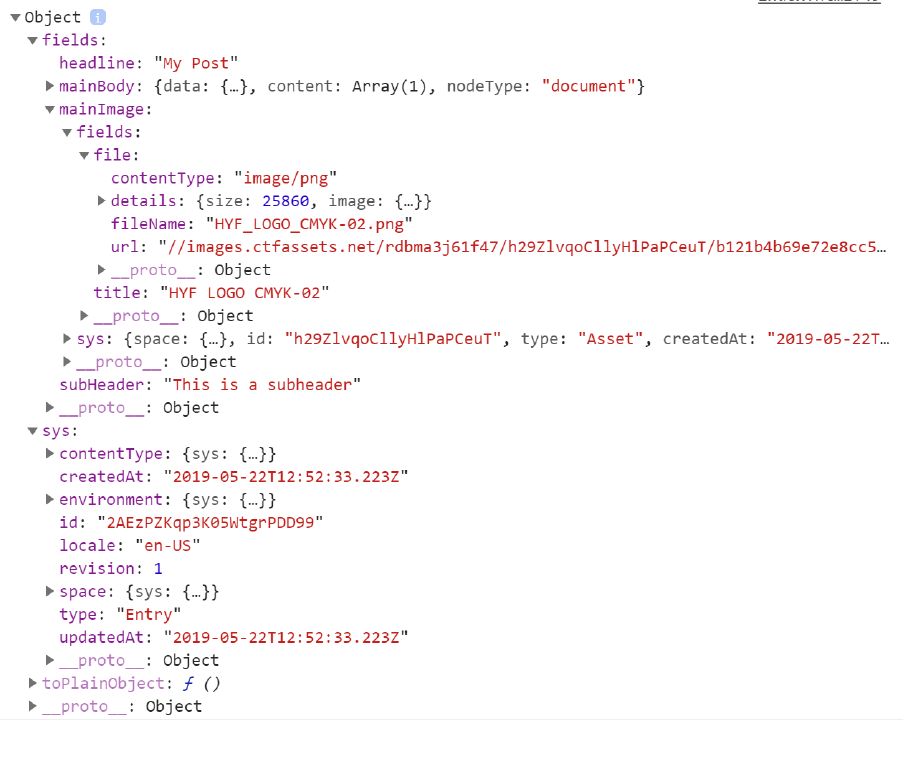
Notice how we output the entry itself to the console? That’s just for debugging purposes – this
way you can see what the content object consists of if you look in your Developer Tools console
in Chrome.
Congratulations – you should now have a blog post file with managed content.
Note: This is purely for demonstration purposes. Often, you wouldn’t rely on client-side
javascript to load the content and complete the rendering as clients might have javascript
turned off for security reasons. Instead, you can utilize NodeJS, .NET, PHP, Ruby or a similar
server-side technology to render it – or maybe generate static pages based on managed
content using a technology like GatsbyJS.
Additional exercises:
Here are some ideas for additional exercises you can try:
• Add fields in contentful and content manage the rest of the page – like the Tags (create a
Text field, then check the box to make it a List), the author name, or the Date (the published
date is already included in the entry object).
• Use the javascript API to retrieve a list of all BlogPost items and use that to produce a
navigation menu on the pages.
• Create a StartPage type and a corresponding HTML that lists the blog posts by their title and
links to them.
