Instructor Manual 2 Force Health Protection Nutrition And Exercise
User Manual: manual pdf -FilePursuit
Open the PDF directly: View PDF ![]() .
.
Page Count: 165 [warning: Documents this large are best viewed by clicking the View PDF Link!]
- Force Health Protection (cover)
- Title Page
- Foreword
- Acknowledgments
- Introduction
- Table of Contents
- Title - List of Figures
- Title - List of Tables
- Title - List of Worksheets
- Chapter 1 - Energy Balance and Body Composition
- Chapter 2 - Overview of Nutrition
- Chapter 3 - Eating for Optimal Health and Fitness
- Chapter 4 - Overview of Physical Fitness
- Chapter 5 - Cardiorespiratory Training
- Chapter 6 - Walk, Run, Swim!
- Chapter 7 - Strength Training
- Chapter 8 - Calisthenics
- Chapter 9 - Flexibility
- Chapter 10 - Training in Confined Spaces
- Chapter 11 - Nutrition for Exercise
- Chapter 12 - Deployment and Altered Climates
- Chapter 13 - Training and Overuse Injuries
- Chapter 14 - Supplements and Performance
- Chapter 15 - Training Issues for Women
- Chapter 16 - Age and Performance
- Chapter 17 - Adopting Healthy Habits
- Appendix A: Ideas for Healthy Food Choices
- Appendix B: Sample Workout
- Appendix C: Strength Exercises
- Appendix D: Resources
- Glossary
- Index

Force Health Protection:
Nutrition and Exercise
Resource Manual
Anita Singh, Ph.D., RD, Tamara L. Bennett, M.S. and
Patricia A. Deuster, Ph.D., M.P.H.
Department of Military and Emergency Medicine
Uniformed Services University of the Health Sciences
F. Edward Hebert School of Medicine
September 1999

Nutrition and Exercise Resource Manual i
Foreword
Funding to develop this guide was received from Health Affairs,
Department of Defense (DoD). Our project was one of many health promotion
and prevention initiatives selected for funding. The selection of this project
indicated a need for resources and materials that address the health and
fitness needs of military personnel. We recognize that there are a plethora of
books, tapes and websites dedicated to physical fitness and performance
nutrition for the general public. However, our goal was to develop a
comprehensive resource that is specifically tailored to address the unique
physical fitness and nutrition requirements of Navy personnel. Our previous
publications include “
The Navy SEAL Nutrition Guide
” and “
The Navy SEAL
Physical Fitness Guide
”. We hope that the nutrition and fitness information
in this guide will be a useful resource for all Navy personnel who are striving
to excel on the Physical Readiness Test (PRT). In addition, we hope this guide
will promote military readiness by improving the performance of personnel
on job-related tasks. Clearly the goals of the guide are broad and extend to
both personal and professional aspirations, which are important for any
health promotion activity.
A companion self-study guide for Navy personnel is entitled
“Peak
Performance Through Nutrition and Exercise.”

ii Force Health Protection:
Foreword from David J. Smith, CAPT, MC, USN, FACOEM
Executive Officer, US Naval Hospital Rota
Adjunct Assistant Professor, Biometrics and Prevention,
USUHS
Former Director, Occupational and Community Health,
National Naval Medical Center
It is my great pleasure to present the first edition of “
Force Health
Protection: Nutrition and Exercise Resource Manual
.
” Wellness and health
promotion are high priority goals for the Navy. Maintaining personal fitness
and sensible nutrition habits is essential to this goal. After the Authors’ “
The
Navy SEAL Nutrition Guide”
and “
The Navy Seal Physical Fitness Guide”
received great acclaim within the Special Warfare community, we felt that a
general instructor’s guide applicable to all Navy personnel would be very
beneficial. The resulting publication provides a common sense approach to
achieving improved health for Navy personnel.
Everywhere we look on a daily basis, we are confronted with endless,
often conflicting information about nutrition and fitness whether through
television, periodicals, Internet, or word of mouth. The quality of this
information ranges from sound, scientific based “must-do” information to
dangerous mis-information. The authors of this guide have done an excellent
job of distilling the vast amount of information available in the professional
literature and the lay press, providing an understandable, up-to-date,
practical instructor’s guide for nutrition and fitness. The goal of this manual
is to provide information to help you and your students make informed
decisions. Many sections are tailored specifically to meet Navy needs, such
as, maintaining physical fitness during deployments, whether in the field or
on ships when space is limited, and for altered physical environments, such
as, cold, heat and altitude. In addition, it provides sound advice on
controversial subjects, such as use of vitamin and protein supplements and
performance-enhancing aides. This guide offers scientific based information
to serve as a foundation for a fit lifestyle, helping you and others make
better, informed decisions concerning diet, exercise, and prevention efforts.
Adopting a healthier lifestyle is an important goal, but like many
resolutions, is frequently postponed or not seriously pursued until disease or
injury occurs. This manual provides practical, easy to use information for
both the beginner to fitness and those who consider themselves informed, but
want a scientific basis for their work with others. Please take some time to
examine it and see for yourself. Then use the manual’s information to help
educate your shipmates to make better lifestyle choices and as result enhance
their wellness and improve our operational readiness.

Nutrition and Exercise Resource Manual iii
Foreword from Jeannette E. South-Paul, COL, MC, USA
Chair, Department of Family Medicine, USUHS
Health promotion and disease prevention are increasingly recognized as
the best approaches to achieving and maintaining health in the general
population. This is even more true in the military. As a smaller overall
military force is receiving more taskings for operations other than war, those
who serve our nation and overseas must be in good health and at optimal
fitness levels. Service members of all ages seek to establish personal training
programs that are focused on individual needs, are an efficient use of time,
and which will result in measurable improvements.
This guide is an excellent reference for those who will be organizing unit
training or advising individual service members. Readers can calculate
fitness parameters for individuals at the beginning of a training program and
then monitor these indices throughout the program. Specific guidelines are
given for all ages and those with specific needs. The distinctive physiologic
differences between men and women are discussed to assist in avoiding injury
and maximizing training results. Pregnancy is discussed as a condition
requiring an adjusted focus rather than a disease.
From a clinician’s perspective, this guide is a welcome addition to the
armamentarium of resources that can be recommended to patients who have
learned appropriate health and fitness goals, but require more detailed, step-
wise instruction. A wealth of information on exercise physiology,
biomechanics, nutrition, and health that is usually not found in one
document is now available in this unique compendium. It will become a true
working document for clinicians, commanders, trainers, and service members
for many years to come. Enjoy!

iv Force Health Protection:
Acknowledgments
We would like to acknowledge the following for reviewing this guide and
for their invaluable suggestions:
From Bureau of Medicine (BUMED):
CAPT Janee Przybyl
From Bureau of Naval Personnel (BUPERS):
LCDR Sue Hite and LCDR Neil Carlson
From Navy Environmental Health Center (NEHC):
Ms. Mary Kay Solera, Ms. Sally Vickers and Ms. Diana Settles
From Navy Supply Systems Command (NAVSUP):
CDR Al Siewertsen, Ms. Pam Beward and Ms. Andrea Andrasi
From the Uniformed Services University of the Health Sciences (USUHS):
COL Jeannette E. South-Paul
Our thanks go to the following individuals whose photographs appear in
this guide: HM2 Jeanette Miller, HN Ellen Tate, HM1 (FMF) Rico Renteria,
HM1 (SW/AW) Michael Mitchell, HM2 (FMF) Keith Avery, J02 Cerise
Fenton, Dr. Jeffrey Bennett, and Dawn Schultz. Also, many thanks to HM1
(FMF) Otis B. Brown, the USUHS Brigade, and Morale, Welfare, and
Recreation (MWR) for allowing us to take pictures during the Navy PRTs
and the MWR sponsored events. We also want to acknowledge Mr. Gene
Jillson from Defense Visual Information Center for providing us with the
Navy images that appear throughout this guide.
Cover photo from Defense Visual Information Center’s “U.S. Forces in Haiti” CD ROM, image file
number IMG0342.PCD.
Disclaimer: The opinions and assertions expressed herein are those of the authors and should not be
construed as reflecting those of the Department of the Navy, the Uniformed Services University of
the Health Sciences (USUHS), or the Department of Defense.

Nutrition and Exercise Resource Manual v
Introduction
As documented in enclosure (1) of OPNAV6110.1E, it is the responsibility
of each service member to:
◆
Maintain a lifestyle that promotes optimal health and physical
readiness.
◆
Develop a regular, year-round, fitness program of aerobic,
flexibility, and muscular strength and endurance exercises using
resource information and the assistance of the Command Fitness
Coordinator (CFC) and recreational services departments.
This guide has been prepared to assist you, the Navy’s Health Promotion
Staff, in your efforts to promote the health and physical readiness of all Navy
personnel. A comprehensive overview of basic nutrition and physical fitness
programs that address aerobic conditioning and strength training are
provided. The importance of combining sound nutritional and physical fitness
practices for gaining and maintaining physical readiness are emphasized.
Navy-specific issues such as maintaining physical fitness during
deployments, whether aboard a ship and/or in extreme environmental
conditions are discussed. Women’s issues, such as nutrition and exercise
during pregnancy and lactation, and age-related changes in performance are
also addressed. Additionally, resources used to prepare this manual,
including websites for various Naval Commands and Civilian organizations
involved in health promotion, are provided in Appendix D.
(Source: http://www.navy.mil)
The mission of the Navy is to maintain, train and equip
combat-ready Naval forces capable of winning wars,
deterring aggression and maintaining freedom of the seas.

vi Force Health Protection:
We encourage you to use this manual to educate fellow military personnel
about the performance and health-related benefits of good dietary practices
and regular exercise. A concise, companion manual entitled
“Peak
Performance Through Nutrition and Exercise”
outlines the information
provided in this guide and has been prepared for your students. We hope that
the ideas presented in Chapter 17 (Adopting Healthy Habits) will be useful
and that you are successful in your efforts to promote physical readiness and
optimal health in Navy personnel.
Anita Singh, Ph.D., RD, LN
Tamara L. Bennett, M.S., ACSM certified Health and Fitness Instructor
Patricia A. Deuster, Ph.D., M.P.H., LN
Department of Military and Emergency Medicine
Uniformed Services University of the Health Sciences
F. Edward Hebert School of Medicine
September 1999

Nutrition and Exercise Resource Manual vii
Table of Contents (Click on page numbers to view sections.)
1 Energy Balance and Body Composition 1
Energy Balance
1
Components of Energy Expenditure
3
Body Composition
5
Fat Distribution
6
2 Overview of Nutrition 7
Energy Providing Nutrients
7
Micronutrients
12
Water
17
3 Eating for Optimal Health and Fitness 19
Dietary Guidelines for Americans
19
The Food Guide Pyramid
20
Food Labels
22
Selecting Nutrient-Dense Foods
23
Vegetarian Diets
23
Eating Out
24
Snacking
26
Nutrition Throughout Life
26
4 Overview of Physical Fitness 28
What is Physical Fitness?
29
FITT Principle
29
The Physical Activity Pyramid
30
Fuel Used During Exercise
31
Exercise Sequence
32
Training and Detraining
34
5 Cardiorespiratory Training 35
Cardiorespiratory Physiology
35
Benefits of Aerobic Exercise
36
Aerobic Exercise Guidelines
37
Intensity of Exercise
37
Type of Exercise
40
Training Design and Progression
43

viii Force Health Protection:
6 Walk, Run, Swim! 45
Walking and Running Gear
45
Walking
47
Running
48
Swimming
52
7 Strength Training 55
Strength versus Endurance
55
Benefits of Strength Training
56
Muscle Fiber Types
57
Determinants of Muscle Size
57
Strength Training Guidelines
58
Equipment
63
Types of Workouts
64
8 Calisthenics 66
Muscle Balance
66
Calisthenic Guidelines
66
9 Flexibility 72
Benefits of Stretching
72
Physiology of Stretching
73
Flexibility Exercises
74
10 Training in Confined Spaces 77
Aerobic Conditioning
78
Strength Training
78
Workout Design
84
Morale During Deployment
85
11 Nutrition for Exercise 86
Carbohydrate Needs
86
Protein Needs
88
Vitamin and Mineral Needs
90
Fluid Needs
90
Nutrition for Exercise Recovery
91
12 Deployment and Altered Climates 92
General Nutrition Issues
93
Hot Environments
94
Cold Environments
95
Altitude 98

Nutrition and Exercise Resource Manual ix
13 Training and Overuse Injuries 100
Injuries: Treatment and Prevention 100
When to Seek Medical Care 103
Return to Duty 103
Overtraining Syndrome 104
14 Supplements and Performance 105
Vitamin and Mineral Supplements 105
Nutritional Ergogenic Agents 107
Ergolytic Agents 111
15 Training Issues for Women 112
Pregnancy and Lactation 112
Female Athlete Triad 114
16 Age and Performance 117
Changes in Metabolism and Body Composition 117
Nutritional Needs 118
Countering Age-Associated Changes in Fitness 119
17 Adopting Healthy Habits 122
Setting “SMART” Goals 122
Reaching Goals 124
Maintaining Healthy Habits 125
Appendix A: Ideas for Healthy Food Choices 127
Appendix B: Sample Workout 130
Appendix C: Strength Exercises 133
Appendix D: Resources 139
Glossary 143
Index 147

x Force Health Protection:
List of Figures (Click on page numbers to view figures.)
Figure 1-1. Energy Balance: Intake vs. Output 2
Figure 2-1. Symptoms of Dehydration 18
Figure 3-1. Food Guide Pyramid 20
Figure 3-2. How to Read a Food Label 22
Figure 3-3. Food Guide Pyramid for Vegetarians 24
Figure 4-1. The Fitness Continuum 29
Figure 4-2. The Physical Activity Pyramid 30
Figure 4-3. Energy Use During Exercise 32
Figure 4-4. Recommended Exercise Sequence 33
Figure 5-1. Measuring Heart Rate at the Wrist 38
Figure 5-2. Target Heart Rate Zones 38
Figure 6-1. Three Traits of a Good Running Form 48
Figure 7-1. Factors that Affect Muscle Size 58
Figure 7-2. Exercises for Various Muscle Groups 62
Figure 8-1. Range of Motion of the Abdominals 70
Figure 10-1. Anchoring Elastic Tubing 79
Figure 11-1. CHO Loading for Endurance Events 88
Figure 11-2. Components of Muscle 89
Figure 15-1. The Female Athlete Triad 115

Nutrition and Exercise Resource Manual xi
List of Tables (Click on page numbers to view tables.)
Table 1-1. Estimate Your Activity Factor 4
Table 1-2. Classifications for BMI Ratios 5
Table 1-3. Standards for Waist-to-Hip Ratios 6
Table 2-1. Determining Your Protein Factor 10
Table 2-2. Requirements and Functions of Vitamins 15
Table 2-3. Requirements and Functions of Minerals 16
Table 3-1. Portion Sizes Equivalent to a Serving 21
Table 3-2. Suggested Servings Based on Total
Daily Caloric Intake 21
Table 4-1. Training vs. Detraining 34
Table 5-1. Relationship Between Measures of Intensity 40
Table 5-2. Examples of Aerobic Exercise 41
Table 5-3. Various Training Strategies 42
Table 6-1. Outline of a Walking Program 47
Table 6-2. Beginning a Jogging Program 50
Table 6-3. An Intermediate Running Program 51
Table 6-4. Swim Program to Build Your Distance 53
Table 7-1. Strength Requirements in Navy Jobs 56
Table 7-2. Free Weights vs. Resistance Machines 64
Table 8-1. Calisthenic Exercises Arranged by Muscle Group 68
Table 9-1. Static Stretches 74
Table 9-2. Dynamic Stretches 76
Table 10-1. Exercises to Perform in Confined Spaces 80
Table 10-2. Circuit Training Workout 84
Table 12-1. Substances that Can Cause Dehydration 95

xii Force Health Protection:
Table 12-2. Suggested Additional Intakes of Micronutrients
During Cold Weather Training 97
Table 13-1. Injuries, Treatments, and Prevention 101
Table 13-2. Symptoms of Overtraining Syndrome 104
Table 14-1. Claims and Risks of Ergogenic Agents 107
Table 14-2. Ergolytic Agents and Performance 111
Table 15-1. Nutrition and Exercise Guidelines
for Pregnancy 113
Table 17-1. Some General Nutrition and
Fitness-Related Goals 124
Table 17-2. Steps and Actions To Take To Reach Your
SMART Goals 125
Table A-1. Healthier Food Selections 127
Table B-1. Sample Workout 130
Table C-1. Examples of Common Training Mistakes 138

Nutrition and Exercise Resource Manual xiii
List of Worksheets (Click on page numbers to view worksheets.)
Worksheet 1-1. Calculate Your BMR 3
Worksheet 1-2. Calculate Your Estimated Energy
Requirement (EER) 4
Worksheet 1-3. Calculate Your BMI 5
Worksheet 1-4. Calculate Your Waist-to-Hip Ratio 6
Worksheet 2-1. Calculate Your CHO Requirements 9
Worksheet 2-2. Calculate Your Protein Requirements 10
Worksheet 2-3. Determine Your Maximum Fat Limit 12
Worksheet 2-4. Calculate Your Daily Water Requirement 17
Worksheet 2-5. Calculate Your Water Loss Limit 18
Worksheet 5-1. Determine Your Target Heart Rate 39
Worksheet 11-1. Calculate Your Daily CHO Needs 87
Worksheet 11-2. Calculate Your Protein Needs 89
Worksheet 12-1. Calculate Your Energy Requirements
for a Hot Environment 95
Worksheet 12-2. Calculate Your Energy Requirements
for a Cold Environment 96
Worksheet 12-3. Calculate Your Energy Requirements
at Altitude 99
Worksheet A-1. Nutrition Tracking Guide 129
Worksheet B-1. Aerobic Exercise Log 131
Worksheet B-2. Strength Exercise Log 132

xiv Force Health Protection:

Nutrition and Exercise Resource Manual 1
Energy Balance
and
Body Composition
1
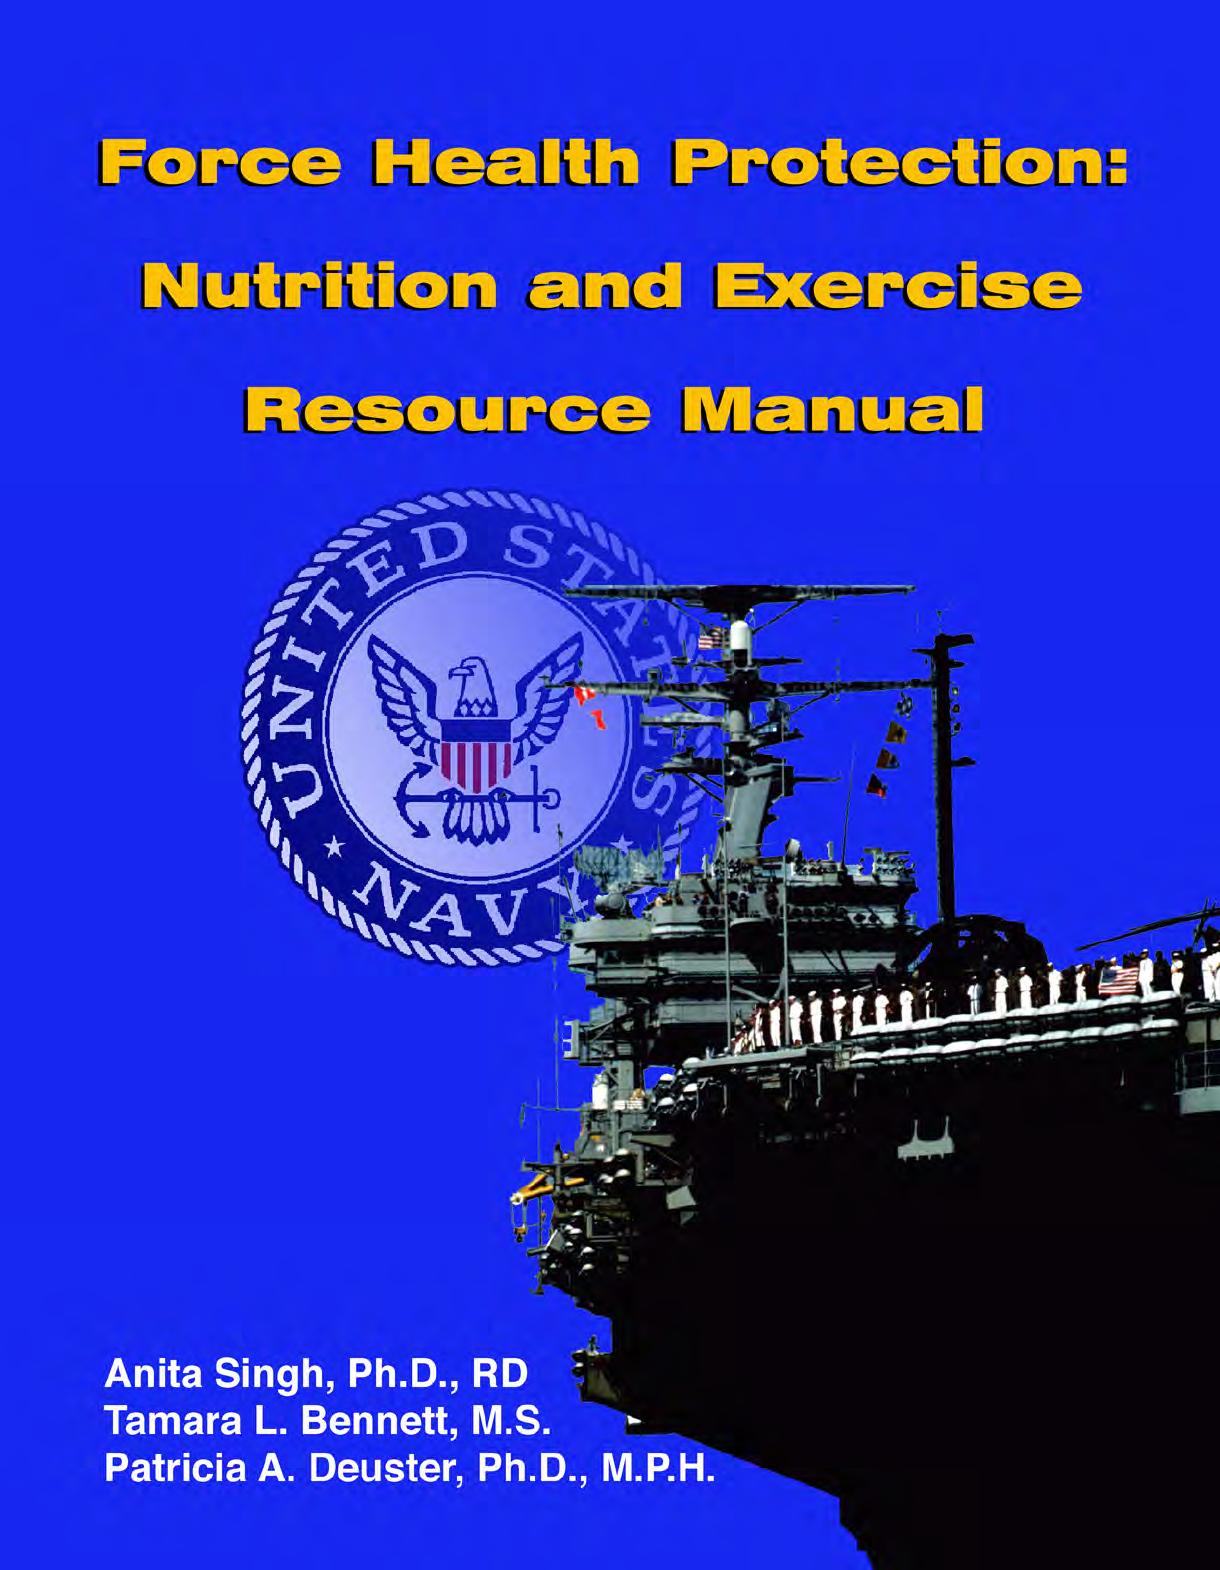
Maintaining a healthy body weight and
body fat percentage is one of the best practices to
ensure optimal health, fitness, and physical
performance. The best way to maintain a healthy body
weight and body fat percentage is to follow sound
dietary practices and to engage in physical activity.
These practices will also promote muscle endurance
and strength, improve cardiorespiratory conditioning,
and provide a solid foundation for optimal physical
performance. In addition, people who maintain a
healthy body weight have a lower risk of developing
psychological problems related to low self-esteem and
low self-image. All of these issues are relevant in
maintaining military readiness, force health
protection, and in promoting optimal health of military
personnel. This chapter introduces you to the basic
concepts of energy balance and body composition.
Energy Balance
The difference between energy intake, how many
kilocalories (kcal) we eat, and energy expenditure, how
many kcal we burn, is termed energy balance. Eating
the same number of kcal as you burn leads to a net
energy balance of zero, and your current weight is
maintained. Eating more or less kcal than you burn
leads to positive (weight gain) or negative (weight loss)
energy balances, respectively. See Figure 1-1.
The correct term to describe food
energy is kilocalorie (kcal). However,
kcals and Calories (with a capital “C”)
are used interchangeably.
Kilocalorie
vs.
Calorie
In this chapter
you will learn
about:
◆ Energy
balance.
◆ Estimating
energy
expenditure.
◆ Body
composition
and body fat
distribution.
2 Force Health Protection:
Figure 1-1. Energy Balance: Intake vs. Output
Sensitivity of Energy Balance
This energy balance equation can be unbalanced by changing energy
intake, energy expenditure, or both, as shown in the following examples.
(1 pound (lbs.) of fat equals 3,500 kcal.)
Intake = 3000 kcal Output = 3000 kcal Weight Maintained
Intake = 4000 kcal Output = 2000 kcal Weight Gain
Intake = 2000 kcal Output = 3000 kcal Weight Loss
Taken from FI Katch and WD McArdle. Nutrition, Weight Control, and Exercise, 3rd ed.
Philadelphia; Lea & Febiger, 1988.
Example 2:
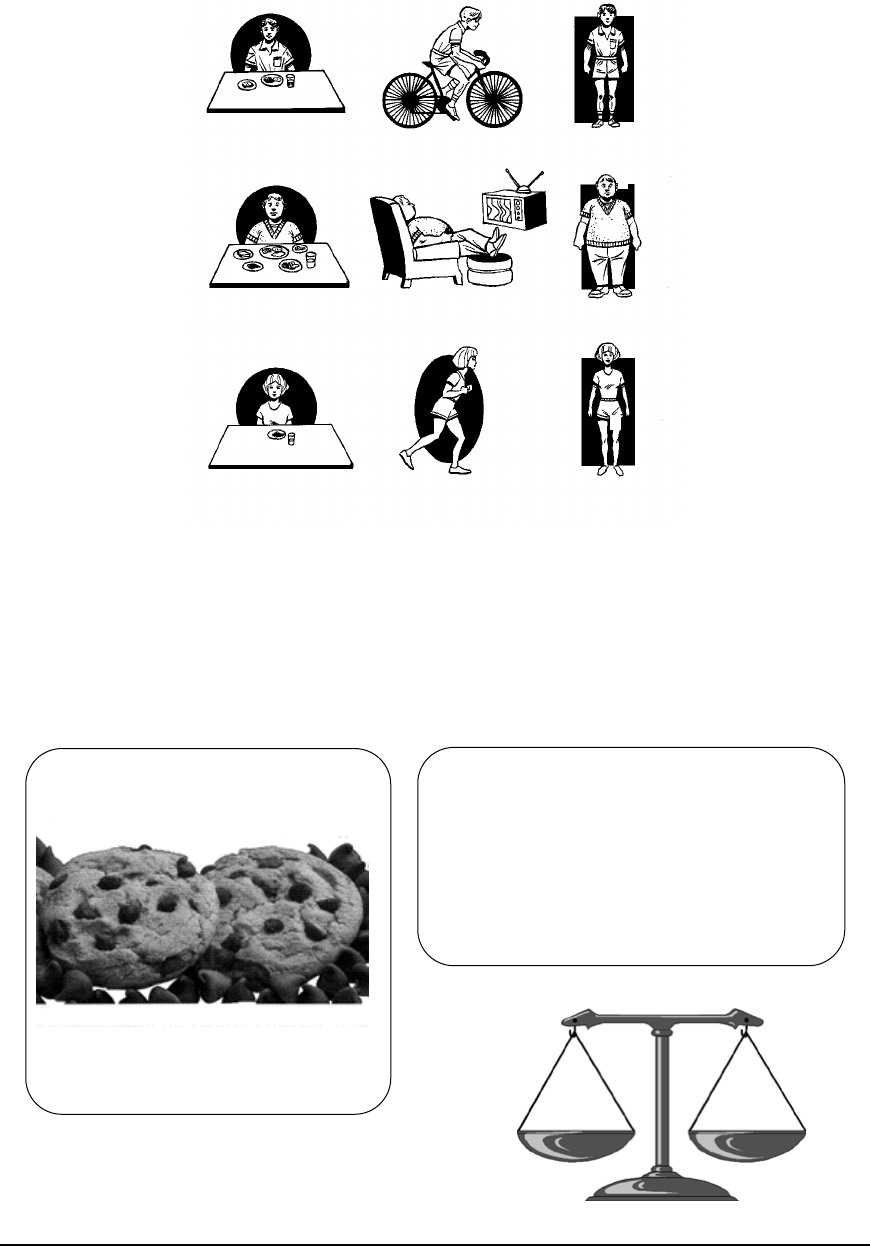
If you maintain your kcal intake and run an
extra mile per day, 5 days per week, you
would expend an extra 100 kcal/mile x 5
miles/week x 52 weeks = 26,000 kcals per
year. This would result in a net weight loss of
7.4 lbs. per year (26,000 ÷ 3,500).
Example 1:
Eating 1 extra chocolate chip cookie
(65 kcal) each day for 1 year
would be: 65 kcal x 365=23,725 kcal.
You see? The energy balance
equation is very sensitive!
This would add up at the end of
the year to a total net weight gain
of 6.8 lbs. (23,725 ÷ 3,500).

Nutrition and Exercise Resource Manual 3
Components of Energy
Expenditure
Energy requirements are based on daily
energy expenditures. The three major
contributors to energy expenditure are:
◆ Basal metabolic rate (BMR).
◆ Energy for digesting foods.
◆ Physical activity.
Basal Metabolic Rate
Basal metabolic rate (BMR) is the amount of energy required to maintain
life such as breathing, beating of the heart, and maintaining body
temperature. This accounts for the majority (~70%) of the total daily kcals
expended. BMR can be estimated by using the equations in Worksheet 1-1.
Find the equation that is appropriate for you and calculate your BMR.
Digestion
The body must work to digest food. However, the energy needed for
digestion is only a small amount and has been accounted for in the BMR
equations in Worksheet 1-1.
Worksheet 1-1. Calculate Your BMR
Equations to Calculate BMR (kcal/day)
Age (years): Equation:
Men: 18-30 6.95 x body weight (lbs.) + 679
30-60 5.27 x body weight (lbs.) + 879
Women: 18-30 6.68 x body weight (lbs.) + 496
30-60 3.95 x body weight (lbs.) + 829
Your BMR is kcal/day.
BMR
Digestion
Physical Activity

4 Force Health Protection:
Physical Activity
In addition to the energy used for BMR and digestion, you must account
for the energy expended during your daily activities. Based on your usual
daily level of activity, estimate your activity factor from the choices in
Table 1-1.
Total Daily Estimated Energy Requirement
To calculate your total daily estimated energy requirements (EER), you
multiply the kcals needed for your BMR and digestion (Worksheet 1-1), by
your physical activity factor (Table 1-1).
Worksheet 1-2. Calculate Your Estimated Energy
Requirement (EER)
Table 1-1. Estimate Your Activity Factor
Level of Activity Activity Factor
Very Light Seated and standing activities, driving, playing
cards, computer work. 1.2
Light Walking, sailing, bowling, light stretching, golf,
woodworking, playing pool. 1.4
Moderate Jogging, aerobic dance, light swimming, biking,
calisthenics, carrying a load. 1.6
Strenuous Stairmaster, ski machine, racquet sports,
running, soccer, basketball, obstacle course,
digging, carrying a load uphill, rowing. 1.9
Exceptional Running or swimming races, cycling uphill, hard
rowing, carrying heavy loads. 2.3
Your Activity Factor is .
Energy Needs = X
*BMR *Activity Factor
Your Estimated Energy Requirement (EER) = _______kcal/day.
*Your BMR is calculated in Worksheet 1-1. The Activity Factor is from Table 1-1.
Nutrition and Exercise Resource Manual 5
This EER is the amount of kcals you need to eat daily to have
an energy balance of “zero” and maintain your current body weight.
If you restrict the number of kcals you eat per day, your BMR will
decrease because your body will sense that it is being “starved”. If
your goal is to lose weight, you should lower your caloric intake
only slightly and engage in a well rounded exercise program. Your
goal should be to lose 1/2 - 1 lbs. per week. If you are losing more
weight than this, you are losing water and lean tissue (muscle).
If you want to gain weight, your goal should be to gain 1/2 - 1 lbs. per
week. The objective is to gain lean mass, not fat. Exercise routinely,
including strength training, and increase your caloric intake by using the
Food Guide Pyramid guidelines (discussed in Chapter 3). Also, eat healthy
snacks between meals.
If you have specific questions about weight management and kcal
requirements, consult the Navy Nutrition and Weight Control Self-Study
Guide (NAVPERS 15602A at http://www-nehc.med.navy.mil and http://
www.bupers.navy.mil/services under “Navy Nutrition and Weight Control),
or talk to a Registered Dietitian, your Command Fitness Coordinator, or your
primary health care provider.
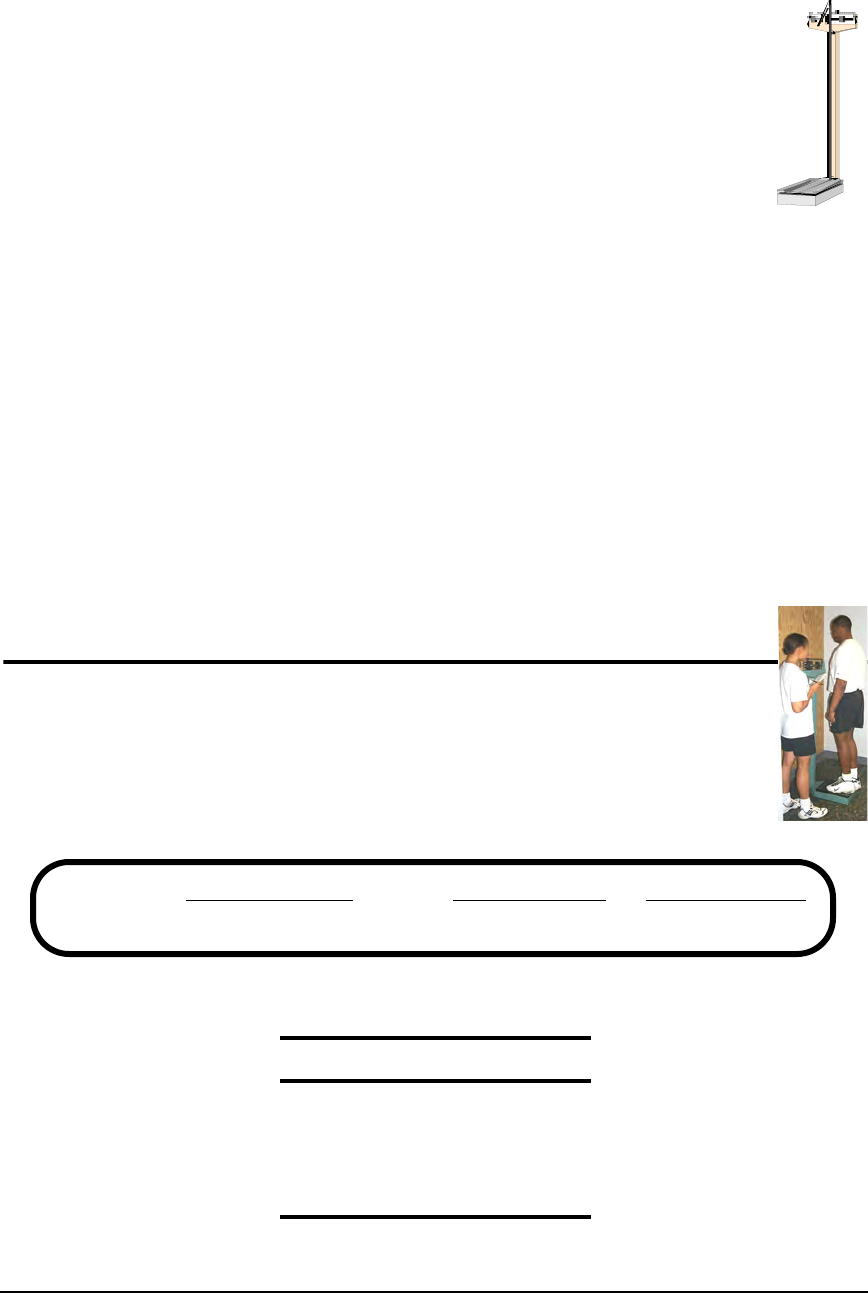
Body Composition
The Body Mass Index (BMI) is commonly calculated for assessing
body composition. It is a ratio of body weight in lbs. to body height
in inches. Calculate your BMI in Worksheet 1-3 and compare it to
the classifications in Table 1-2.
Worksheet 1-3. Calculate Your BMI
Table 1-2. Classifications for BMI Ratios
Ratio Classification
< 20 Underweight
20-25 Normal
25-30 Overweight
> 30 Obese
Your BMI = x 705 ÷ ( )2 = .
Body Weight (lbs) Height (inches)
6 Force Health Protection:
Reference standards have been developed to identify individuals at risk
for being either over- or underweight. However, BMI can misclassify some
large frame or muscular people as overweight. It is strictly a ratio and does
not necessarily reflect percent body fat accurately. If you feel your BMI
incorrectly categorizes you, have your percent body fat measured by a trained
professional. Body fat can be determined from a variety of techniques
including hydrostatic (underwater) weighing, or from skinfolds and
circumference (as done in the Navy) measures.
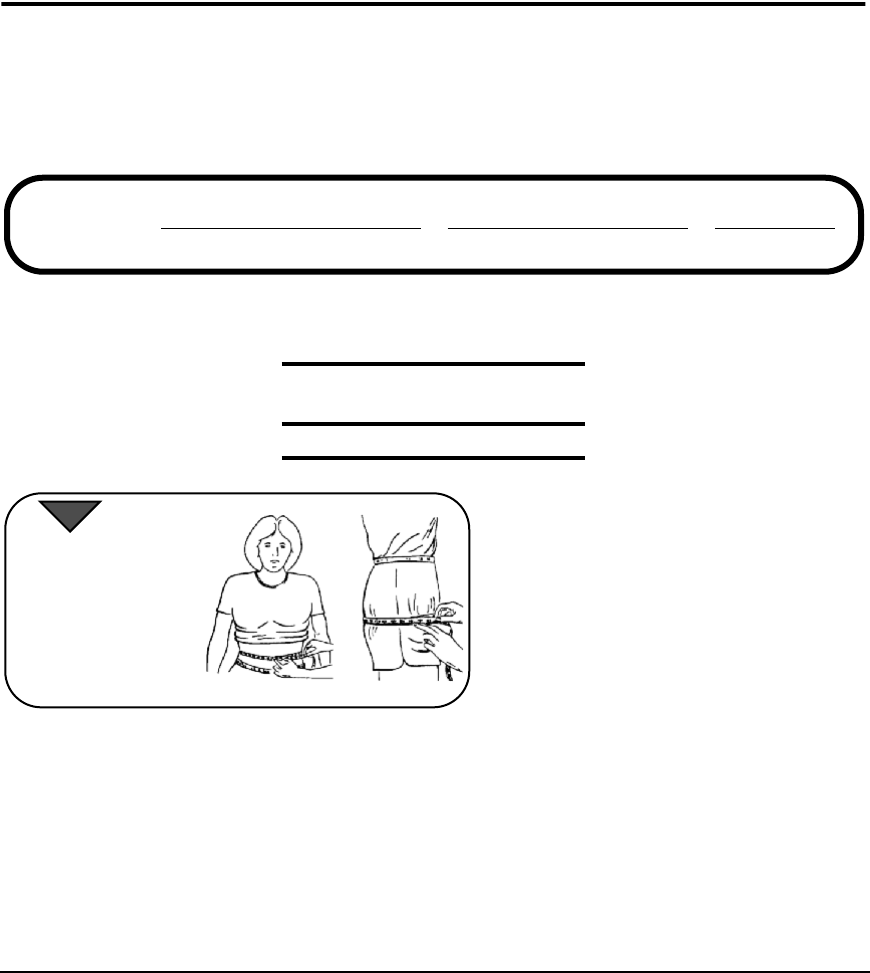
Fat Distribution
In addition to BMI, it is helpful to know your waist-to-hip ratio (WHR).
This ratio determines your pattern of fat distribution, i.e., where you store
body fat. The formula for calculating waist-to-hip ratio is:
Worksheet 1-4. Calculate Your Waist-to-Hip Ratio
The appropriate ratios for men
and women are listed in Table 1-
3. Ratios greater than these
indicate a tendency toward
central (torso) obesity. People
who store excess fat centrally, as
opposed to in their extremities,
are at increased risk for
cardiovascular (heart and blood
vessel) diseases and diabetes.
This chapter serves as an anchor around which the remaining chapters
have been developed. In the following chapters you will learn sound
nutritional practices and ways to enhance your physical performance.
Importantly, you will see how good nutrition and a balanced exercise
program together influence your physical fitness, military readiness, and
ultimately your overall health.
Table 1-3. Standards for Waist-to-Hip Ratios
Men Women
< 0.95 < 0.80
Your WHR = ÷ =
waist circumference (inches) hip circumference (inches)
Measuring
waist and hip
circumferences
using a tape
measure.
Adapted from OPNAVINST 6110.1E, March 1998 p.7-8.

Nutrition and Exercise Resource Manual 7
Overview
of
Nutrition
2
There are six classes of nutrients:
carbohydrates (CHO), proteins, fats, vitamins,
minerals and water. CHO, proteins, and fat, also
called macronutrients, are the energy providing
nutrients. Vitamins and minerals, also called
micronutrients, are needed in small amounts to help in
energy metabolism. Water is the most abundant
nutrient in the body and is essential for the normal
functioning of all the organs in the body. All six
nutrients will be discussed in detail throughout the
chapter.
Energy Providing
Nutrients
CHO, proteins, and
fats provide energy. The
ideal percentage of daily
kcals from these
macronutrients for
optimum health and
performance are shown in
the chart to the right.
Carbohydrates
CHO are found in grains, fruits, and vegetables and
are the main source of energy in a healthy diet.
Unfortunately, many people think CHO are unhealthy
and lead to weight gain. That notion came about
because most people add high-fat toppings and sauces
to their starchy foods. The two types of CHO are:
CHO
Fats
Proteins
55-60% total daily kcals
10-15% total
daily kcals
< 30% total
daily kcals
In this chapter
you will learn
about:
◆ The different
nutrients and
their functions
in the body.
◆ The various
food sources of
all the
nutrients.
◆ Importance
and
distribution of
water in the
body.

8 Force Health Protection:
◆ Simple CHO - have one (mono-) or two
(disaccharides) sugar molecules hooked
together. Examples include: glucose, table
sugar (sucrose), sugars in fruit (fructose),
honey (fructose and glucose), sugar in milk
(lactose), maple syrup, and molasses. Some
are added in processing. Added sugars
provide kcals and no nutrients.
◆ Complex CHO - have three or more simple sugar
molecules hooked together and are digested into
simple sugars by our bodies. Examples include:
whole grains, fruits, vegetables, and legumes (peas,
beans). Both starch (digestible) and dietary fiber
(indigestible) are forms of complex CHO. Although,
dietary fiber does not provide any kcals, for health
reasons it is recommended that adults eat 20-35
grams of fiber a day. This is achieved by eating more fruits,
vegetables, and whole grains (see page 22 and Appendix A).
CHO are used in the body to:
◆ Provide energy in the form of glucose (stored as glycogen).
◆ Provide fuel for the brain.
◆ Act as building blocks for chemicals needed by the body.
◆ Repair tissue damage in the body.
Energy From CHO
Based on your estimated energy requirement (EER) calculated in
Chapter 1, how many of your kcals should come from CHO? How many
grams of CHO should you eat each day?
1 gram of CHO supplies 4 kcal.
CHO should supply 55-60% of your total daily kcals.
Example1:
One fig newton has 10 grams of
CHO and provides a total of 60
kcals. The kcals from CHO and the
percent of total kcals from CHO are:
4 kcal X 10 grams = 40 kcal from CHO.
40 ÷ 60 = 0.67 = 67% of energy from CHO.
Example 2:
A woman eats 2,000 kcals per day. How
many kcals should be from CHO? How
many grams of CHO should she eat per
day?
2,000 kcal x 55%=1,100 kcal from CHO.
1,100 kcal ÷ 4 kcal per gram = 275 grams CHO.

Nutrition and Exercise Resource Manual 9
Worksheet 2-1. Calculate Your CHO Requirements
Proteins
Proteins are found in meat, fish, poultry and dairy foods. Beans and
grains also provide proteins but in smaller amounts than animal foods. All
proteins are made of various amino acids that are joined together. There
are 20 different amino acids. Nine of these are called essential amino acids
because the body cannot make them, so they must be obtained from the diet.
Proteins are used in the body to:
◆ Form muscle, hair, nails, skin, and other tissues.
◆ Provide energy.
◆ Repair injuries.
◆ Carry fats, vitamins and minerals to different parts of the body.
◆ Contract muscle.
◆ Serve a structural role for every part of the body.
Energy from Proteins
Your protein needs are determined by your age, body weight, and activity
level. Most people eat 100 to 200 g of proteins each day, which is more protein
than is actually needed by the body. Many people eat high-protein foods
÷ 4 kcal per gram = grams CHO per day.
kcal from CHO
x 0.55 = kcal from CHO per day.
Your EER
1 gram of protein supplies 4 kcal (the same as CHO).
Proteins should supply 10-15% of your total daily kcals.
Example:
One large hard boiled egg provides 78 kcal
and contains 6 grams of proteins. Therefore,
kcal from proteins are 4 kcal/gram x 6 grams =
24 kcal of energy from proteins.

10 Force Health Protection:
because they think that proteins make them grow “bigger and stronger”.
Actually, these excess kcals from proteins can be converted to fat and stored.
Although proteins provide energy, they should not be the main dietary source
of energy. High-protein intakes also increase fluid needs and may be
dehydrating if fluid needs are not met (see “Water” on page 17 and
Chapter 12). In addition, high-protein intakes put the kidneys under great
strain in order to get rid of all the breakdown products.
Table 2-1. Determining Your Protein Factor
Calculate your daily protein requirements in Worksheet 2-2 using your
protein factor from Table 2-1.
Worksheet 2-2. Calculate Your Protein
Requirements
Fats
Fats are an essential part of your diet, regardless of their bad reputation.
However, not all fats are created equal. By knowing about the different types
of dietary fats and using the guidelines for daily fat consumption, you can
eat the right amount of fat. The three types of fats naturally present in foods
are saturated, and mono- and polyunsaturated fats. A fourth type of fat is
trans fat and is created during the processing of some foods.
Grams of Proteins Per Pound of Body Weight
Your Protein Factor is .
Activity Level Protein Factor
Low to Moderate 0.5 grams
Endurance Training 0.6 - 0.8 grams
Strength Training 0.6 - 0.8 grams
x = grams of proteins per day.
Body Weight (lbs.) Protein Factor

Nutrition and Exercise Resource Manual 11
◆ Saturated Fats are solid at room temperature and are found
primarily in animal foods (red meats, lard, butter, poultry with
skin, and whole milk dairy products); tropical oils such as palm,
palm kernel and coconut are also high in saturated fat.
◆ Monounsaturated Fats are liquid at room temperature and are
found in olive oil, canola oil and peanuts.
◆ Polyunsaturated Fats are liquid at room temperature and are
found in fish, corn, wheat, nuts, seeds, and vegetable oils.
Saturated, monounsaturated, and polyunsaturated fats should each be
less than or equal to 10% of your total daily kcals. Therefore, total fat intake
should be less than or equal to 30% of your total daily kcal intake.
◆ Trans Fats are created during manufacturing by a process
known as hydrogenation. This process converts unsaturated fats
to saturated fats. Manufacturers hydrogenate foods to improve
the shelf-life of their products. Currently, food labels do not list
the trans fat content of a food but if “hydrogenated oils” are listed
under ingredients it indicates the presence of trans fats. The
more processed foods you eat the greater your trans fat intake.
Trans fats may increase blood cholesterol.
A high-fat diet is associated with many diseases, including heart disease,
cancer, obesity, and diabetes. On average, people who eat high-fat diets have
more body fat than people who eat high-CHO, low-fat diets. On the other
hand, a fat-free diet is also very harmful since fat is an essential nutrient
required by the body (see a list of its functions below).
Fats are used in the body to:
◆ Provide a major form of stored energy.
◆ Insulate the body and protect the organs.
◆ Carry other nutrients throughout the body.
(Canola, Olive, and Peanut oils)
12 Force Health Protection:
◆ Serve a structural role in cells.
◆ Satisfy hunger and add taste to foods.
Energy From Fat
Worksheet 2-3. Determine Your Maximum Fat Limit
Cholesterol
Cholesterol is a part of body cells, and serves as a building block for some
hormones (e.g., testosterone and estrogen), and it is required to digest fats.
The body makes cholesterol in the liver. Cholesterol is also consumed in the
diet by eating animal products. A diet high in dietary cholesterol and
saturated fats is associated with an increased risk for heart disease. The
American Heart Association recommends that daily cholesterol intakes do
not exceed 300 milligrams. Red meats and egg yolks are cholesterol rich foods
that should be consumed in moderation.
Micronutrients
Micronutrients include all vitamins and minerals. Neither provides any
kcals but both facilitate metabolism (the chemical breakdown) of the
macronutrients. Specific functions of micronutrients are listed in Table 2-2
and Table 2-3.
1 gram of fat supplies 9 kcal, more than twice the energy supplied by CHO.
Fats should supply no more than 30% of your total daily kcals.
Example:
A 1-ounce bag of potato chips that provides 152 kcals
contains 10 grams of fat. The kcals from fat are:
10 grams x 9 kcals = 90 kcals from fats.
x 0.30 = kcal of fat per day.
Your EER
÷ 9 kcal per gram = grams of fat per day.
kcal of fat

Nutrition and Exercise Resource Manual 13
Vitamins
Vitamins are classified as fat or water soluble.
◆ Fat Soluble Vitamins are absorbed with dietary fat, can be
stored in the body, and are not excreted in the urine. These
include vitamins A, D, E and K.
◆ Water Soluble Vitamins, including the B vitamins and Vitamin
C, are not stored in the body in appreciable amounts and excess
amounts are excreted in the urine each day.
Minerals
Minerals are classified according to their concentrations and functions in
the body.
◆ Minerals - examples include: calcium and magnesium.
◆ Trace Minerals - are less abundant than minerals; examples
include: zinc, copper and iron.
◆ Electrolytes - examples include sodium, potassium and chloride.
Recommended Dietary Allowances
The Recommended Dietary Allowances (RDA) shown in Table 2-2 and
Table 2-3 are the amounts of the vitamins and minerals, respectively, that a
healthy person should eat to meet daily requirements. The RDAs are
designed to meet the daily requirements for most healthy people. The RDAs
are undergoing revisions and new standards are gradually becoming
available. These new standards are called the Dietary Reference Intakes
(DRI). The military has also developed a set of allowances known as the
Military DRIs (MDRIs) to be used for designing military rations.
In most cases your micronutrient needs will be met by eating a variety of
foods. Taking multivitamin and mineral supplements is another way to meet
the RDAs for the micronutrients (see Chapter 14, page 105). However, if you
elect to take micronutrient supplements, you are urged to take only the RDA
amount for each micronutrient. Taking more than the RDA of a
micronutrient could lead to toxicity and create deficiencies of other
micronutrients.
Micronutrients in the Diet
No one food can provide all of the micronutrients, so you are encouraged
to eat a variety of foods. Also, food preparation can affect the amount of
nutrients that remain in the food, especially when cooking vegetables. To

14 Force Health Protection:
increase the retention of vitamins while preparing a meal:
◆ Cook food in just enough water to prevent
burning, do not soak.
◆ Cook vegetables only until they are crisp and
tender.
◆ Steam or stir-fry foods to retain the most
vitamins.
◆ Use leftover cooking water for preparing
soups and sauces to use the water soluble vitamins that were
leached out.
◆ Cut and cook vegetables shortly before serving or store them in
an airtight container.
The amount of minerals that will be absorbed from foods depends upon a
number of factors, such as:
◆ The presence of other dietary constituents, such as dietary fiber
and other minerals.
◆ Medications.
◆ The body’s need for the mineral and the mineral’s chemical form.
◆ The integrity of the intestinal tract.
Many things can affect your body’s ability to properly absorb
vitamins and minerals. These include caffeine, tobacco,
antibiotics, aspirin, alcohol and stress. For example, drinking
coffee or tea with meals can decrease iron absorption and taking
antibiotics can increase your Vitamin B needs.
The nutrient content of many foods can be found on food labels.
For most foods, including fresh produce, processed foods, and fast
foods, you can look up specific information on the USDA web site
(http://www.nal.usda.gov/fnic) or consult a dietitian
or nutritionist.

Nutrition and Exercise Resource Manual 15
From the 1989 RDA and 1998 DRIs for healthy adults 19 to 50 years. CHO = carbohydrates. mg=
milligrams, µg= micrograms.
Table 2-2. Requirements and Functions of Vitamins
Fat Soluble Vitamins Some Important Functions Food Sources
Vitamin A:
Retinol, Retinoids, Carotene
800-1,000 µg. RE or 5,000
International Units (IU).
Growth and repair of body tissues,
immune function, night vision.
Carotene is the water soluble form
with antioxidant properties.
Oatmeal, green and
yellow fruits and
vegetables, liver, milk.
Vitamin D:
5-10 µg. or 200 - 400 IU.
Regulates calcium metabolism and
bone mineralization. Fortified milk, egg yolk,
salmon, sunlight.
Vitamin E:
alpha-Tocopherol, 8-10 mg.
Antioxidant, protects cell
membranes, and enhances immune
function.
Fortified cereals, nuts,
wheat germ, shrimp,
green vegetables.
Vitamin K:
60 - 80 µg.
Assists in blood clotting and calcium
metabolism. Green and leafy
vegetables.
Water Soluble Vitamins Some Important Functions Food Sources
Vitamin B1:
Thiamin, 1.0 -1.5 mg.
Needed in energy production, CHO
metabolism, and growth. Supports
muscle, nerve, and cardiovascular
function.
Fortified cereals,
legumes, pork, nuts,
organ meats,
molasses, yeast.
Vitamin B2:
Riboflavin, 1.2 -1.7 mg.
Essential for energy metabolism;
growth and tissue repair. Cereals, liver, milk,
yogurt, green leafy
vegetables, nuts,
whole grain.
Vitamin B3: Niacin,
Niacinamide, Nicotinic acid
13 -19 mg.
Essential for energy metabolism,
blood circulation, nerve function, and
appetite.
Lean meat, seafood,
milk, yeast, fortified
cereals, whole grain.
Vitamin B5:
Pantothenic acid, 4 - 7 mg.
Essential for energy metabolism and
nerve function. Legumes, meat, fish,
poultry, wheat germ,
whole grain.
Vitamin B6:
Pyridoxine HCl, 2 mg.
Essential for CHO and protein
metabolism, immune function, red
blood cell production, nerve function.
Oatmeal and cereals,
banana, plantain,
poultry, liver.
Folate:
Folic acid, Folacin, 400 µg.
Vital for red blood cell synthesis.
Essential for the proper division of
cells. Maternal folate deficiency may
result in an infant with birth defects.
Fortified cereals, green
leafy vegetables, liver,
lentils, black-eyed
peas, orange juice.
Vitamin B12:
Cobalamin, 2 µg.
Required for red blood cell
production, energy metabolism, and
nerve function.
Ground beef, liver,
seafood, milk, cheese.
Biotin:
30 - 100 µg.
Participates in energy metabolism,
fatty acid formation, and utilization of
the B vitamins.
Legumes, whole grain,
eggs, organ meats.
Vitamin C:
Ascorbic acid, Ascorbate
60 mg.
Antioxidant, role in growth and repair
of tissues, increases resistance to
infection, and supports optimal
immune function.
Cantaloupe, citrus fruit,
strawberries,
asparagus, cabbage,
tomatoes, broccoli.

16 Force Health Protection:
From the 1989 RDA and 1998 DRIs for healthy adults 19 to 50 years. CHO = carbohydrates.
1Estimated safe and adequate daily intake range - meets requirements of individuals and avoids the
danger of toxicity (Food and Nutrition Board, 1989). 2Men should consult a physician before taking
iron supplements. 3The minimum daily requirement for potassium is 2,000 mg. 4The minimum daily
requirement for sodium is 500 mg. or 1,250 mg. of salt. Salt is 40% sodium and 60% chloride. One
teaspoon of salt (5g sodium chloride) has 2g (2,000 mg) of sodium. mg= milligrams, µg= micrograms.
Table 2-3. Requirements and Functions of Minerals
Mineral Some Important Functions Food Sources
Boron
Unknown
Important in bone retention. Fruits, leafy vegetables,
nuts, legumes, beans.
Calcium
1,000 - 1,300 mg.
Essential for growth and structural integrity of
bones and teeth; nerve conduction; muscle
contraction and relaxation.
Yogurt, milk, cheese,
tofu, fortified juices,
green leafy vegetables.
Chromium1
50 - 200 µg.
Participates in CHO and fat metabolism;
muscle function; increases effectiveness of
insulin.
Whole grains, cheese,
yeast.
Copper1
1.5 - 3 mg.
Essential for red blood cell production,
pigmentation, and bone health.
Nuts, liver, lobster,
cereals, legumes, dried
fruit.
Iron2
10 -15 mg.
Essential for the production of hemoglobin in
red blood cells and myoglobin in skeletal
muscle, and enzymes that participate in
metabolism.
Liver, clams, oatmeal,
farina, fortified cereals,
soybeans, apricot, green
leafy vegetables.
Magnesium
280 - 350 mg.
Essential for nerve impulse conduction;
muscle contraction and relaxation; enzyme
activation.
Whole grains, artichoke,
beans, green leafy
vegetables, fish, nuts,
fruit.
Manganese1
2 - 5 mg.
Essential for formation and integrity of
connective tissue and bone, sex hormone
production, and cell function.
Nuts, legumes, whole
grains.
Phosphorous
800 - 1,200 mg.
Essential for metabolism and bone
development. Involved in most biochemical
reactions in the body.
Fish, milk, meats, poultry,
legumes, nuts.
Potassium3
2,000 mg.
Essential for nerve impulse conduction, fluid
balance, and for normal heart function.
Squash, potatoes, beans,
fresh fruits (bananas,
oranges) and vegetables
(tomatoes).
Selenium
55 - 70 µg.
Antioxidant, works with vitamin E to reduce
oxidation damage to tissues.
Meats, seafood, cereals.
Sodium4
500 - 2,400 mg.
Essential for nerve impulse conduction,
muscle contraction, fluid balance, and acid-
base balance.
Table salt, canned and
processed foods.
Zinc
12 - 15 mg.
Involved in metabolism, immune function,
wound healing, and taste and smell
sensitivity.
Seafood, beef, lamb,
liver, eggs, whole grains,
legumes, peanuts.

Nutrition and Exercise Resource Manual 17
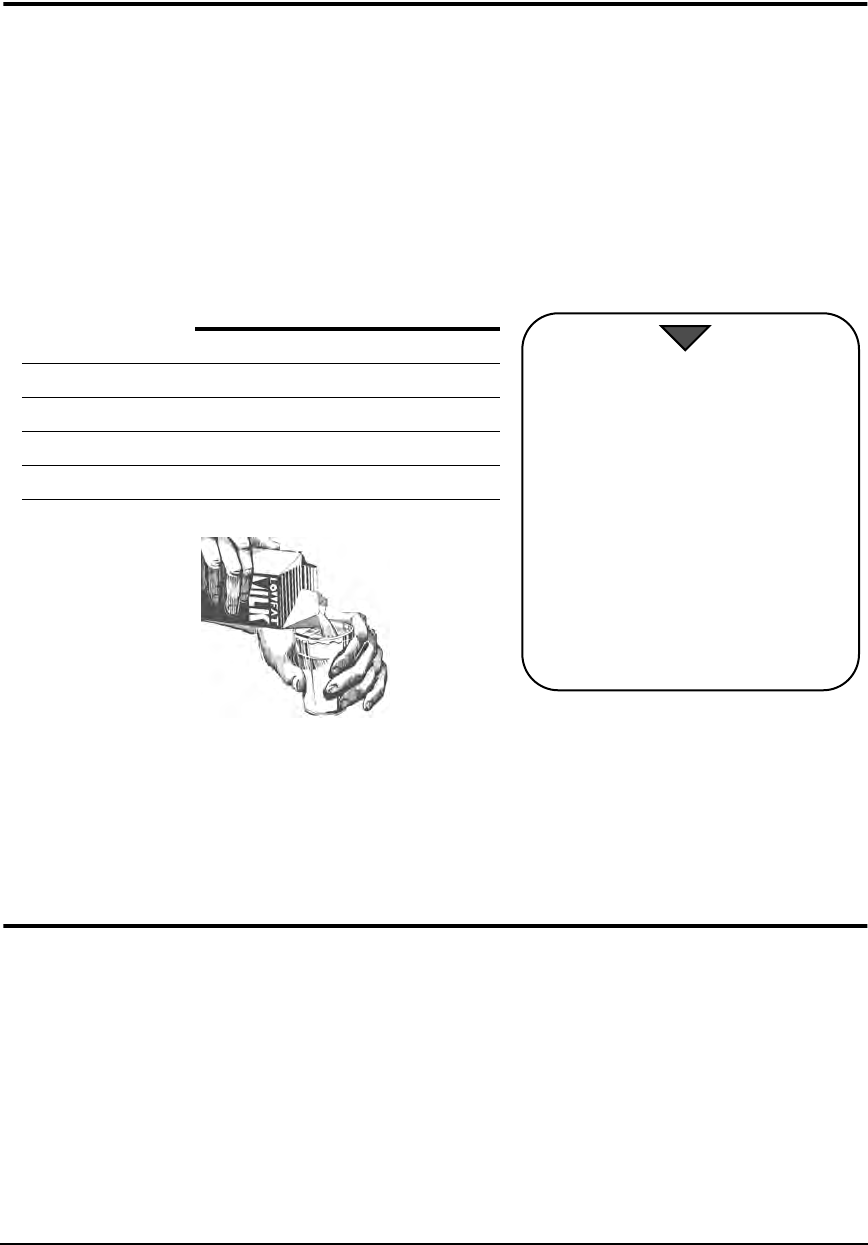
Water
Approximately 60% of total body weight is water. Thus,
adequate amounts of water must be consumed daily to ensure the
normal functioning of the body and to replenish lost fluids. Water
is found both inside and outside the cells of the body, but most
water is inside cells, especially muscle cells. The lowest
concentration of water is in bone and fat. Since muscle mass
contains more water than fat, the leaner you are, the more body
water you have! Water in the body serves many important roles, including:
◆ Digesting and absorbing nutrients.
◆ Excreting wastes.
◆ Maintaining blood circulation throughout the body.
◆ Maintaining body temperature.
Worksheet 2-4. Calculate Your Daily Water
Requirement
Note: Exercise, heat, cold, and altitude can increase fluid requirements. See Chapters 11 and 12.
Maintaining Fluid Balance
Fluid balance, like energy balance, is determined by the ratio of fluid
losses to fluid intakes. With dehydration, water loss exceeds intake and fluid
balance becomes negative. The average person loses 1,000 ml to 2,300 ml (1.0
to 2.4 quarts) of water per day. This water is lost in the urine, in stools, in
sweat, and through breathing. When activity levels are low, most fluids are
lost through the urine. When activity levels are high or the temperature is
high, most of the fluid is lost through sweat. In fact, up to 2,000 ml (2.1
quarts) per hour can be lost through sweating, depending on the temperature.
To maintain fluid balance you must consume enough fluids each day from:
◆ Water in beverages (water, fruit juices, milk, sport drinks).
◆ Water in food (fruits, vegetables, soups, meats, grains).
Your Body Weight = lbs.
0.5 x (body weight) ÷ 8 oz. per cup = cups per day.
18 Force Health Protection:
Dehydration
Dehydration results when fluid losses exceed fluid intake.
Conditions that can lead to dehydration include:
◆ Not drinking enough fluids daily.
◆ Working or exercising in a hot environment - wet or dry.
◆ Working or exercising in a cold environment - wet or dry.
◆ Going to high altitudes.
◆ Drinking too much alcohol or exercising with a hangover.
If 4% of your body weight is lost through fluid losses, decision-making,
concentration, and physical work are impaired. A loss of 20% of body water
can result in death (see Figure 2-1).
Figure 2-1. Symptoms of Dehydration
Worksheet 2-5. Calculate Your Water Loss Limit
Chapter 3 outlines the dietary guidelines which apply the information
discussed throughout this chapter to every day dietary practices and food
choices.
0% Feeling great!
1% Feeling thirsty.
2% Increasing thirst, feeling uncomfortable.
3% Dry mouth, blood and urine volumes down.
4% Feeling sick, performance reduced.
5% Feeling sleepy, headache, can’t concentrate.
% Body Weight Loss
20% Death.
A 2% loss in body weight due to fluid loss equals:
x 0.98 = lbs.
(Your body weight)
Goal: Always stay above this weight!
Nutrition and Exercise Resource Manual 19
Eating for Optimal
Health and Fitness
3
You have heard the saying “You are what you
eat”. That is because what you eat makes a difference
in how you perform, how you feel, and affects your
long-term health. This chapter provides information on
how to follow healthy dietary practices whether you are
eating at home, in a galley, or at a restaurant.
Dietary Guidelines for
Americans
The US Department of Agriculture (USDA) and the
Department of Health and Human Services (DHHS)
prepared Dietary Guidelines for all Americans 2 years
of age and older. (http://www.nal.usda.gov/fnic/dga).
The seven guidelines are:
1. Eat a variety of foods.
2. Balance the food you eat with
physical activity -- maintain or
improve your weight.
3. Choose a diet with plenty of
grain products, vegetables, and
fruits.
4. Choose a diet low in fat,
saturated fat and cholesterol.
5. Choose a diet moderate in
sugars.
6. Choose a diet moderate in salt
and sodium.
7. If you drink alcoholic beverages,
do so in moderation.
In this chapter
you will learn
about:
◆ Guidelines for
choosing a
healthy diet.
◆ The Food
Guide
Pyramid.
◆ Making wise
food choices
when eating
away from
home or
between meals.
◆ Vegetarian
diets.

20 Force Health Protection:
For more specific guidance on food selection, the USDA and the DHHS
developed the food guide pyramid in Figure 3-1.
The Food Guide Pyramid
You must have noticed the food guide pyramid on food labels. The USDA
and the DHHS designed this pyramid to be a flexible dietary guide for
Americans. Each compartment contains a different food group and the
recommended number of servings that should be consumed daily. The
primary macronutrient (see Chapter 2) found in each food group is written
in parenthesis. See Figure 3-1.
Figure 3-1. Food Guide Pyramid
Although this Food Guide Pyramid can be found on most food labels,
many people are still unsure how to use its information. The most common
questions concern both the size of a serving and how many servings should
be eaten. Often people overestimate the size of a serving, thereby eating more
kcals than they anticipated. Table 3-1 and Table 3-2 help answer questions
about serving sizes. Table 3-1 gives an estimate of the amount of food per
serving for each food group, and Table 3-2 lists the number of servings
required from each food group to meet the total daily kcals shown in the left
column. Using your Estimated Energy Requirements (EER) calculated in
Chapter 1 as your daily kcals, find the number of servings per food group
that best fit your caloric requirement.
Vegetable
Group: 3-5
servings (CHO)
Milk, Yogurt & Cheese
Group: 2-3 servings
(Proteins)
Fats, Oils & Sweets: use
sparingly (Fats & added sugar)
Bread, Cereal,
Rice & Pasta
Group:
6-11 servings
(CHO)
Meat, Poultry, Fish, Dry
Beans, Eggs & Nuts Group:
2-3 servings (Proteins)
Fruit Group:
2-4 servings (CHO)

Nutrition and Exercise Resource Manual 21
*oz. = ounces, Tbsp. = tablespoon, tsp = teaspoon.
Adapted from Navy Nutrition and Weight Control Self-Study Guide, NAVPERS 15602A 1996, p. 44.
Table 3-1. Portion Sizes Equivalent to a Serving
Food Group Serving Size
Bread, Cereal, Rice,
Pasta & Grains 1 slice of bread, 1/2 cup cooked rice or pasta, 1 oz.*
breakfast cereal, 1/2 bagel.
Vegetables 1 cup leafy vegetables, 1/2 cup raw or cooked
vegetable, 3/4 cup vegetable juice.
Fruits 1 medium size fruit, 1/2 cup canned fruit, 3/4 cup of
100% fruit juice, 1/4 cup dried fruit.
Milk, Yogurt, & Cheese 1 cup milk or yogurt, 2 oz. cheese.
Meat, Poultry, Fish, Dry
Beans, Eggs, Nuts 3 oz. lean meat, poultry, fish, 1 egg, 2 Tbsp*
peanut butter, 1/2 cup cooked beans.
Fats, Oils, Sweets 1 tsp* oil, 1 pat of butter, 1 Tbsp salad dressing or
sour cream (equivalent to 45 kcals).
Table 3-2. Suggested Servings Based on Total
Daily Caloric Intake
Total Daily
Kcals
NUMBER OF SERVINGS PER FOOD GROUP
Bread Vegetables Fruits Meats Milk Fat
grams
1,400 6 4 3 2 2 <47
1,600 7 5 4 2 2 <53
1,800 8 5 4 2 3 <60
2,000 10 5 4 2 3 <67
2,200 11 5 4 3 3 <73
2,400 12 6 5 3 3 <80
3,000 15 6 6 3 3 <100
22 Force Health Protection:
5-A-Day
You may have heard of the national campaign to
increase the amount of fruits and vegetables eaten by
all Americans. This campaign, called “5-a-Day” has
been adopted by all military services. Its purpose is to
encourage people to eat at least five servings of fruits
and vegetables each day. Following this program can add needed vitamins
and minerals to your daily food intake; cut your risk of heart disease, cancer
and digestive diseases; help control cholesterol; prevent constipation; and can
help manage your body weight and percent body fat. Additionally, many
fruits and vegetables contain “antioxidants” (see the Glossary) and other
nutrients that are beneficial to your health. Ideas to help you incorporate
more fruits and vegetables in your diet can be found in Appendix A.
Food Labels
To fully understand and use the information in the Food Guide Pyramid
you need to understand how to read the nutrition labels on foods. An example
of a food label is shown in Figure 3-2.
Figure 3-2. How to Read a Food Label
Serving size
reflects the
typical amount of
the food that
many people eat.
The % Daily
Values are based
on a 2,000 kcal
diet. Use the
number to
compare the
amount of
nutrients found
in various foods.
Percentage of
the daily
vitamin and
mineral
recommendation
that is met in
one serving of
the food.
The list of
nutrients displays
the amount in
one serving of the
food.
Ingredients are
listed from the
most to the least
abundant items
found in the food.
Ingredients: Lowfat milk, Vitamin
A palmitate, Vitamin D3
Nutrition and Exercise Resource Manual 23
Selecting Nutrient-Dense Foods
Foods that contain the most nutrients in the fewest kcals are called
nutrient-dense foods. Now that you know the number of kcals each
macronutrient provides and the importance of the micronutrients, can you
select foods that provide many nutrients without consuming too many kcals?
Let us equate this concept to bargain shopping. If you have $10 and you need
to buy several toiletries, you will buy the products that cost the least money
yet still meet your needs. The same should be true with respect to the amount
of kcals in the foods you eat. For an example look at the nutritional content
of skim milk and whole milk.
The goal of selecting nutrient-dense foods is not to avoid fat grams, but
rather to select foods that contain the essential macro- and micronutrients
without eating an overabundance of kcals.
Vegetarian Diets
The popularity of vegetarian diets has increased in recent years. One
reason, aside from religious or social beliefs, is that vegetarian diets have
been linked to lower risks for several diseases, including heart disease, high
blood pressure, and diabetes. There are many different types of vegetarian
diets. The similarities among them lie in their emphasis on grains,
vegetables, fruits, beans, and nuts to obtain the necessary macronutrients.
The vegan diet is the strictest of the vegetarian diets since it contains no
animal products. The lacto-ovo-vegetarian diet contains both dairy products
and eggs in addition to the above foods. Even within these two types of diets,
there is considerable variation based on food choices. The main concern
Skim Milk Whole Milk
Total kcal 85 157
grams CHO 12 11
grams proteins 8 8
grams fat 0 9
mg Calcium 303 290
Skim milk and whole milk
contain the same amounts of
proteins, CHO, and calcium;
however, skim milk has less
total kcals and less fat than the
whole milk. Therefore, you can
drink two glasses of skim milk
for the same amount of kcals as
1 glass of whole milk, yet you will
get twice the proteins, CHO, and
calcium.

24 Force Health Protection:
people have when deciding whether they would like to try a vegetarian diet
is whether the diets will meet their vitamins, minerals, and proteins needs.
Both protein and micronutrient intake is adequate among vegetarians as
long as they eat a variety of foods. Vegetarians who limit or omit animal
products from their diets may need to take Vitamin B12 and calcium
supplements. A well-rounded vegetarian diet follows the US dietary
guidelines and can meet the nutritional needs of adults, children, competitive
athletes, and pregnant women (see Figure 3-3).
Figure 3-3. Food Guide Pyramid for Vegetarians
Eating Out
On many occasions you may find yourself eating
away from home. If good food choices are made, it is
possible to follow the dietary guidelines when dining
out. It is likely that many of you eat five or more
meals per week away from home. Learning to “eat
out” is a very important aspect of optimizing your
health, fitness, and performance.
Fats, Oils, & Sweets: use
sparingly (Fats & added sugar)
Milk, Yogurt, &
Cheese Group:
2-3 servings (Proteins)
Bread, Cereal,
Rice, & Pasta Group:
6-11 servings (CHO)
Vegetable Group:
3-5 servings (CHO)
Fruit Group:
2-4 servings (CHO)
Legumes, Nuts, Seeds,
&
Meat Alternative Group:
2-3 servings (Proteins)
Adapted from the Vegsource organization web site at: http://vegsource.com/nutrition/pyramid.jpg
On average,
Americans eat 1 of 3
meals away from
home each day.

Nutrition and Exercise Resource Manual 25
Tips for Healthy Eating in Restaurants
◆ Order foods high in complex CHO (see Chapter 2, page 8).
◆ Choose foods described as baked, broiled, steamed, poached,
smoked, roasted, grilled, flame-cooked, and marinara.
◆ Order green salads, plain potatoes and rice. Ask for any
condiments, such as salad dressings, gravy, cheese, croutons and
sour cream “on the side;” use only a portion of what is served.
◆ Order dessert after you have eaten your main course only if you
are still hungry. Select sorbet, sherbet, frozen yogurt, ice milk,
fruit, or angel food cake.
◆ Trim all visible fat off the meat.
◆ Limit portions of margarine, butter and sour
cream.
◆ Eat plain rolls, breadsticks or crackers rather
than biscuits, chips or nuts as an appetizer.
Or ask for your salad to be served as your
appetizer.
◆ Avoid foods described as fried, breaded, battered, flaky, crispy,
creamy, au gratin, puffed, loaded, and tempura. Also, avoid
hollandaise and bearnaise sauces.
◆ Limit alcohol consumption.
Fast Food Restaurants
Although you are not encouraged to get your meals from fast food
establishments, fast foods are a way of life. If you learn to select the foods
with the most nutritional value then fast foods can be OK. Most restaurants
have a listing of the nutritional content of their foods and are available on
request. More information on the nutritional content of fast foods is available
at the USDA’s web site at: http:\\www.nal.usda.gov/fnic/cgi-bin/
nut_search.pl. Information may also be found on web sites for various fast
food restaurants.
26 Force Health Protection:
Snacking
Many people think snacking is unhealthy and leads to
weight gain because many people don't eat healthy snacks!
If you enjoy snacking and you want to maintain your body
weight and perform well, then selecting healthy snacks is
critical. Think through a typical day. How often and where
do you usually snack? Are your snacks healthy or loaded
with extra kcals? Many people snack on foods when they
are bored and often don’t realize how much food they have
eaten. Snacks should not replace a meal. Avoid these situations by being
aware of your behaviors, food selection, and kcal consumption. Follow these
tips to help promote healthy snacking!
◆ Stock foods such as plain popcorn, dried fruits, whole grain
crackers, pretzels, unsweetened fruit juices, fresh produce, and
low-fat yogurt.
◆ Snack on fresh fruits or vegetables with low-fat peanut butter or
low-fat cheese spreads. (Fruits and vegetables provide dietary
fiber.)
◆ Make a snack mix with wheat, rice, and corn ready-to-eat cereals.
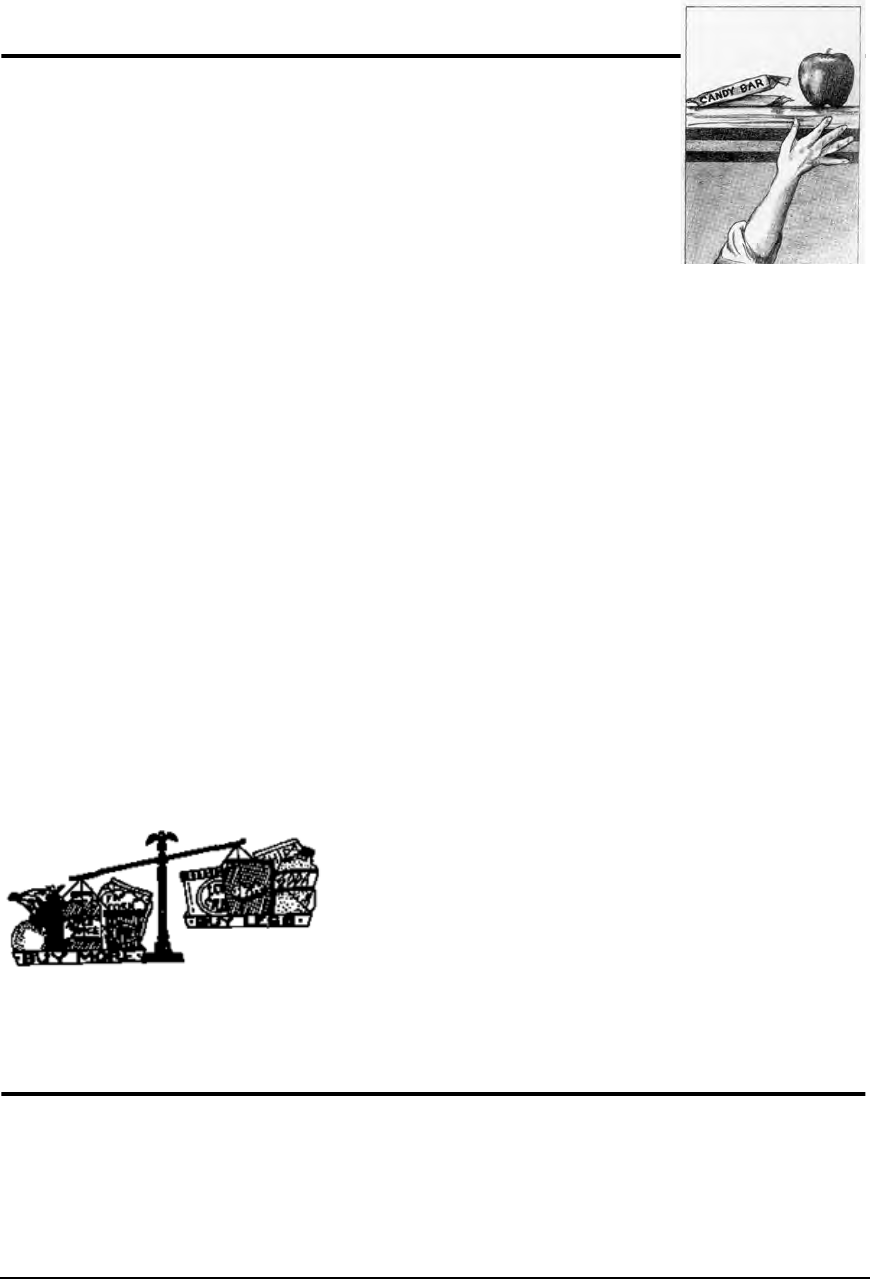
There can be times when you just don’t want to be healthy, you just want
to satisfy a sweet tooth or craving. When this happens, be selective of the
sweets you eat. If you must have a candy bar or other sweets, choose one that
is high in CHO and as low in fat as possible. Eating one now and then will
certainly not hurt you!
Many people replace high-fat snacks with the
low-fat alternatives in an attempt to lower
their total fat intake. Be cautious, however,
because even low-fat snacks can lead to weight
gain and increases in body fat when too many
kcals are consumed. Remember: low-fat does
not mean low kcals, so do not over eat!
Nutrition Throughout Life
The guidelines put forth in this chapter can be applied to everyone
throughout their lifetime. Identify the times in your life when your energy
needs are changing and adjust your diet appropriately to maintain your
health and fitness. Examples of when energy requirements may be reduced
are decreases in physical activity either from a change in job description or

Nutrition and Exercise Resource Manual 27
a change in your exercise habits. Examples of when energy requirements
may rise are increases in physical activity or during pregnancy and breast
feeding. Each individual should eat the appropriate number of servings from
each food group based on their EER. Refer to Chapter 1 and Table 3-2 for
the recommended daily kcals and the number of servings from each food
group to meet various kcal requirements. Seek the help of a Registered
Dietitian if you have any concerns about your diet or the diet of a family
member. Even if you do not cook your meals or if you eat in the galley, you
can make healthy food choices (see Appendix A). When eating in the galley,
ask for the Healthy Navy Options menu items (available in the larger
galleys and ships). Make high-fat foods the exception rather than the rule in
your diet.

28 Force Health Protection:
4
In the military, physical fitness is emphasized
because of its role in military readiness and force
health protection. Many jobs in the Navy require that
personnel handle heavy equipment, adapt quickly to
harsh environments, and are able to work in limited
quarters. Training for these situations ensures that you
are physically able to perform these tasks repeatedly,
without fail, whenever the need arises. In short, this is
the rationale for optimizing your physical fitness levels
and the reason you are required to perform PRT tests
every six months! (See OPNAV6110.1E at http://
www.bupers.navy.mil/services under “New Navy PRT
Program” for the PRT standards).
“Fitness, which has been defined as the
matching of an individual to his physical
and social environment, has two basic
goals: health and performance [which lie
on a continuum]. Physical fitness
requirements in the military consist of a
basic level of overall fitness required for
health of all individuals and a higher level
of fitness that is required for the
performance of occupational
activities...In addition to this, the military
must address the need for ongoing, job-
specific performance training.”
IOM (1998) Physical Fitness Policies and
Programs, in Assessing Readiness in Military
Women, p. 64
In this chapter
you will learn:
◆ The definition
of physical
fitness.
◆ The benefits of
being
physically fit
and its relation
to military
readiness.
◆ The FITT
Principle.
◆ The Physical
Fitness
Pyramid.
◆ Fuel used
during
exercise.
◆ Exercise
Sequence.
◆ Training and
Detraining.
Overview
of
Physical Fitness
Nutrition and Exercise Resource Manual 29
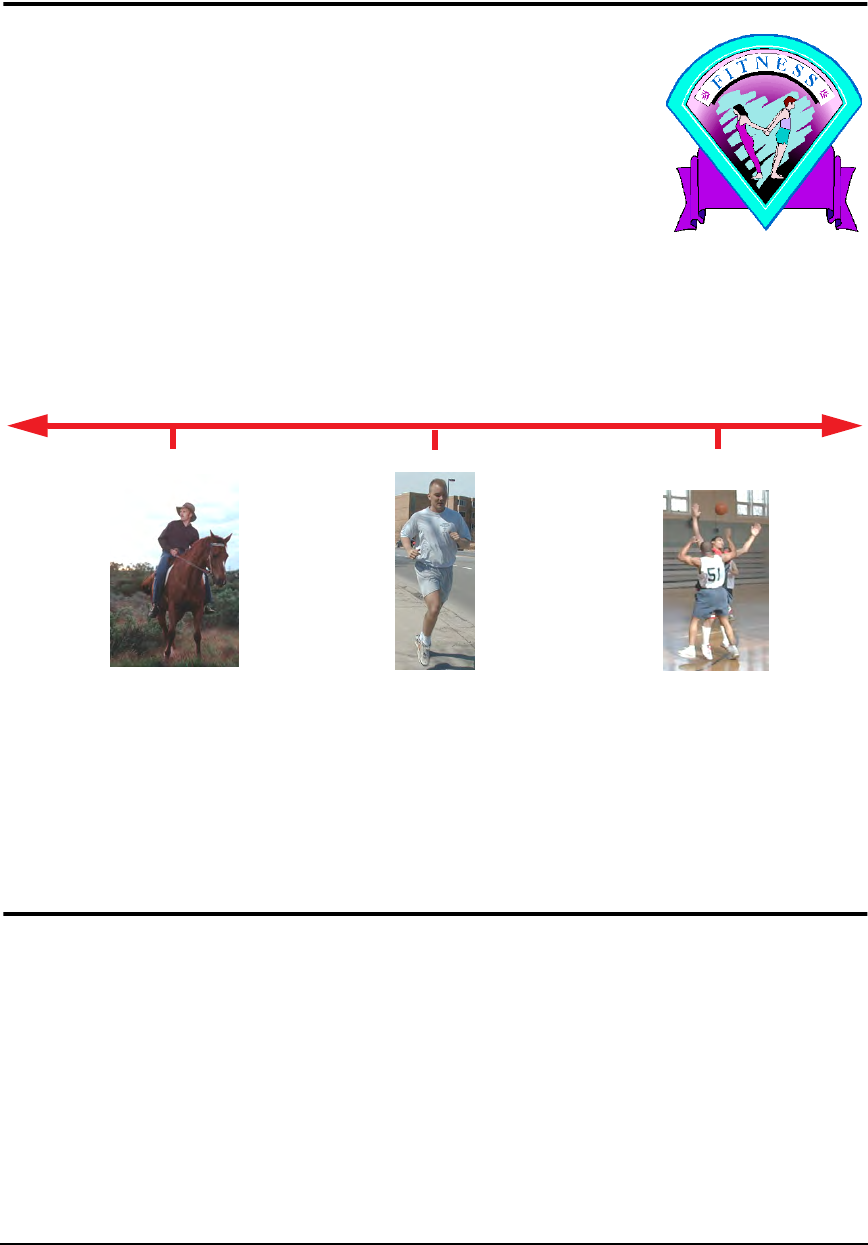
What is Physical Fitness?
What does it mean to be physically fit? The American
College of Sports Medicine (ACSM) has defined physical
fitness as a set of characteristics (i.e., the work capacity
of your heart and lungs, the strength and endurance of
your muscles, and the flexibility of your joints) that
relate to your ability to perform physical activities.
Regular physical activity leads to improved physical
fitness and many other physiologic, cosmetic, and psychological benefits.
Depending on personal goals and job requirements the level of physical
fitness to attain can range from basic, health-related to more specific,
performance-related fitness (Figure 4-1).
Figure 4-1. The Fitness Continuum
FITT Principle
There are four basic components in all physical fitness programs. These
are frequency of exercise, intensity of the exercise, time spent exercising, and
the type of activity. Each factor is essential in planning your exercise
routines and will influence the extent of your training results. Therefore, to
optimize training time, recommendations have been set for the different types
of training (i.e., cardiorespiratory (heart and lung) and muscle fitness). These
are outlined in the Physical Activity Pyramid in Figure 4-2 and are called
the FITT Principle guidelines.
FITT = Frequency, Intensity, Time & Type
Health-related Performance-
Lowers stress,
increases metabolism,
promotes health,
prevents disease.
Increases muscle and heart
and lung fitness, leads to a
healthy body composition,
improves flexibility. Most
Navy personnel are in this
category.
Enhances specific physical
tasks or skills. For Navy
personnel who perform
physically demanding tasks.
Also, for people competing
in organized sports.
General related
30 Force Health Protection:
The Physical Activity Pyramid
Just as the nutrition guidelines are outlined in the Food Guide Pyramid
(Chapter 3), the guidelines for physical activity are diagrammed in the
Physical Activity Pyramid (Figure 4-2). This pyramid was designed to help
people live an active lifestyle, reap the fitness and performance benefits of
routine exercise, reduce the health risks associated with inactivity, and
reduce the injury risks associated with too much activity.
Figure 4-2. The Physical Activity Pyramid
The four levels are arranged in the pyramid according to their FITT
principle recommendations. Activities that should be performed most
frequently are found at the base of the pyramid, and those that should be
Level 4
Level 3
Level 2
Level 1
In-
watching TV
sitting
F= infrequent
I = low T=short
Flexibility
Exercises
stretching
weight training
Muscle
Fitness
Exercises
calisthenics
activity
F = 3-7 days/week
I = light stretch
T = 10-40s, 1-3 sets
Lifestyle Physical Activity
walk to work
climb the stairs
do yard work
F = All or most days/week I = moderate T = 30+ min
F= 3-6 days/week; I= moderate-vigorous; T= 20+ min
Active Aerobics
aerobic dance
jogging
biking
Active Sports
and Recreation
tennis
hiking
F = 2-3 days/week
I = muscle overload
T = 8-12 reps, 1-3 sets
F = frequency; I = intensity; T = time; exercise Type is in bold
Adapted from CB Corbin and RP Pangrazi. Physical Activity Pyramid Rebuffs Peak
Experience. ACSM’s Health and Fitness Journal 1998; 2(1): pages 12-17.

Nutrition and Exercise Resource Manual 31
performed less frequently are found at the top of the pyramid. Level 1
activities include household chores, walking to work, and walking up and
down stairs. Level 2 activities include aerobic exercises and participation in
sports and recreational activities, such as tennis, hiking, and biking. Level 3
consists of strength and flexibility exercises, while Level 4 includes sedentary
activities, such as playing computer games and watching TV. It is
recommended that you do some Level 1-3 activities each day to get the most
health benefits.
Fuel Used During
Exercise
Before discussing the various exercise guidelines in
the following chapters, here is an overview of the energy systems used during
exercise. Your body uses the macronutrients you eat (CHO, fats, and
proteins) to make a chemical called adenosine triphosphate (ATP). You
need ATP to contract your muscles during exercise. ATP can be made two
ways. One way makes ATP without using oxygen and is called the
anaerobic energy system. The second way requires oxygen to make ATP
and is called the aerobic energy system. Both of these systems (described
below) are required during activity but, depending on the activity, there is a
greater reliance on one system over the other.
Anaerobic Energy System
Activities that depend largely on this energy system last less than 5
minutes or have frequent rest periods. Examples include weight lifting,
sprinting, and some interval training routines.
You may have heard about two of the chemicals involved in the
production of ATP without oxygen: creatine phosphate and lactic acid.
Creatine phosphate is present in the muscles and is used to make ATP
rapidly. Creatine phosphate can make enough ATP to last for 30 seconds
worth of exercise. To try and increase the amount of ATP that can be made
from creatine phosphate, some people take creatine supplements. However,
the research is not conclusive as to the benefits of taking creatine and the
long-term risks are not known (see Chapter 14). Furthermore, your body
makes creatine and it is obtained in the diet from meats. The second chemical
is lactic acid. When maximal or near maximal exercise continues beyond 30
seconds, the muscle must use glucose (a simple CHO) to produce ATP. During
this anaerobic energy process, the by-product lactic acid is formed. Small
amounts of lactic acid can be converted back into glucose and then broken
down again to form more ATP. However, as exercise continues, lactic acid
begins to accumulate in the muscles and the blood, and you begin to fatigue.
If maximal exercise is sustained, fatigue is inevitable within 3-5 minutes.
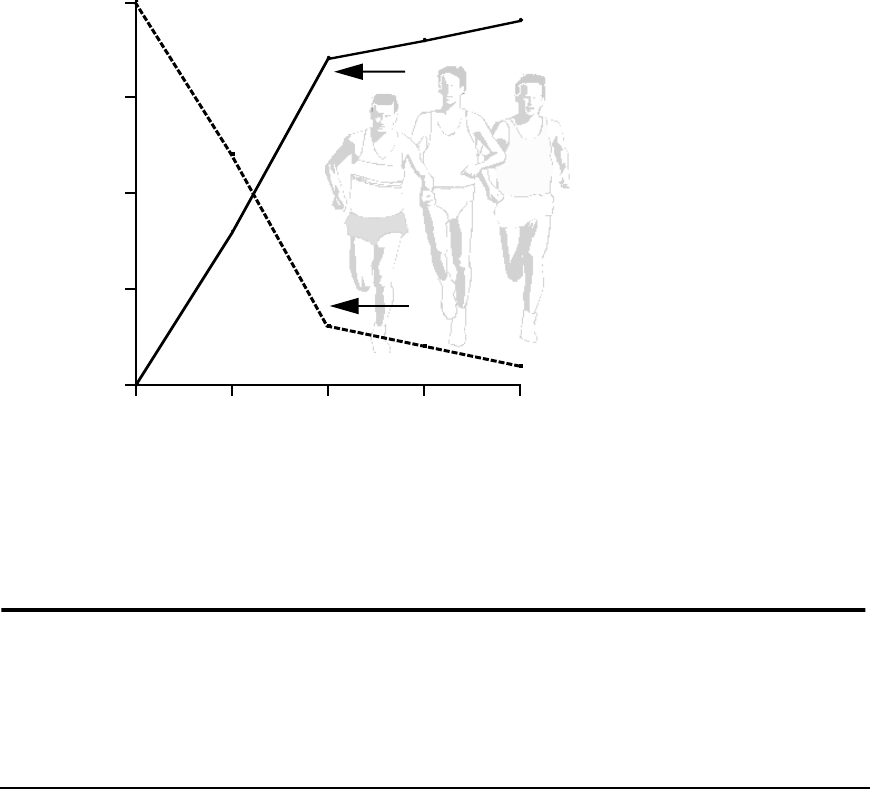
32 Force Health Protection:
Aerobic Energy System
When moderate exercise continues beyond a couple of minutes, the aerobic
energy system is activated to make ATP. Glucose and fats are used to make
ATP in the presence of oxygen. The aerobic energy system, which produces
much more ATP than the anaerobic energy system, is the primary system
used during exercise lasting longer than five minutes; such as a 5K run, a
30 minute walk, or a 500 meter swim.
During most types of exercise, both the aerobic and anaerobic energy
systems are involved. The amount of energy from each system depends on
the duration and intensity of the exercise. Figure 4-3 illustrates the
percentage of ATP each energy system contributes during exercise of various
durations. As shown, when exercise duration increases there is a shift from
greater use of anaerobic energy to aerobic energy.
Figure 4-3. Energy Use During Exercise
Exercise Sequence
Regardless of your goals and training routines, there is an exercise
sequence that should be followed to improve exercise performance and reduce
the risk of injury. This sequence includes warming-up, stretching, and
cooling-down, as outlined in Figure 4-4. The rationale for following this
sequence is discussed next.
0
25
50
75
100
0 10203040
Exercise Time (minutes)
% of Total Energy Used
From Aerobic Energy Production
From Anaerobic Energy Production
Powers S. (1993) Fundamentals of Exercise Metabolism. In Durstine JL et al (Eds). ACSM’s Resource Manual for
Guidelines for Exercise Testing and Prescription, 2nd ed. (p.61) Baltimore: Lea & Febiger

Nutrition and Exercise Resource Manual 33
Figure 4-4. Recommended Exercise Sequence
Warm-up
A warm-up prepares the body for physical activity by gradually increasing
muscle temperature and metabolism, and increasing blood flow and oxygen
delivery to the muscles. Warm-ups also protect connective tissue (the tendons
that connect muscle to bone) and improve performance by lengthening short,
tight (cold) muscles. Many individuals stretch in a misguided attempt to
warm-up. However, because cold muscles are tight, there is a chance of injury
when stretching without first warming-up. Start your warm-ups slowly (e.g.,
walk before running) and gradually increase the intensity. Warm-up for at
least 5 minutes.
Always warm-up before stretching or exercising.
Cool-down
To avoid pooling of blood in the muscles and to remove metabolic end-
products (i.e., lactic acid and carbon dioxide), exercise should end gradually.
The cool-down, or recovery period, is very important because it will
determine how you feel several hours after your workout. A cool-down should
use the same muscles just exercised, and should be done at a light pace for
at least 5 minutes after your main workout. This may help prevent muscle
cramps, stiffness, and preserve performance during subsequent exercise.
Rest
Though some form of physical activity every day is strongly encouraged,
rest is an exceedingly important factor in recovery from strenuous workouts.
*Refer to the exercises found in Levels 2 and 3 of the Physical Activity Pyramid.
**For more information on stretching see Chapter 9.
1. Warm-Up
2. Stretch (Dynamic)**
3. Physical Activity Session*
4. Cool-Down
5. Stretch (Static)**
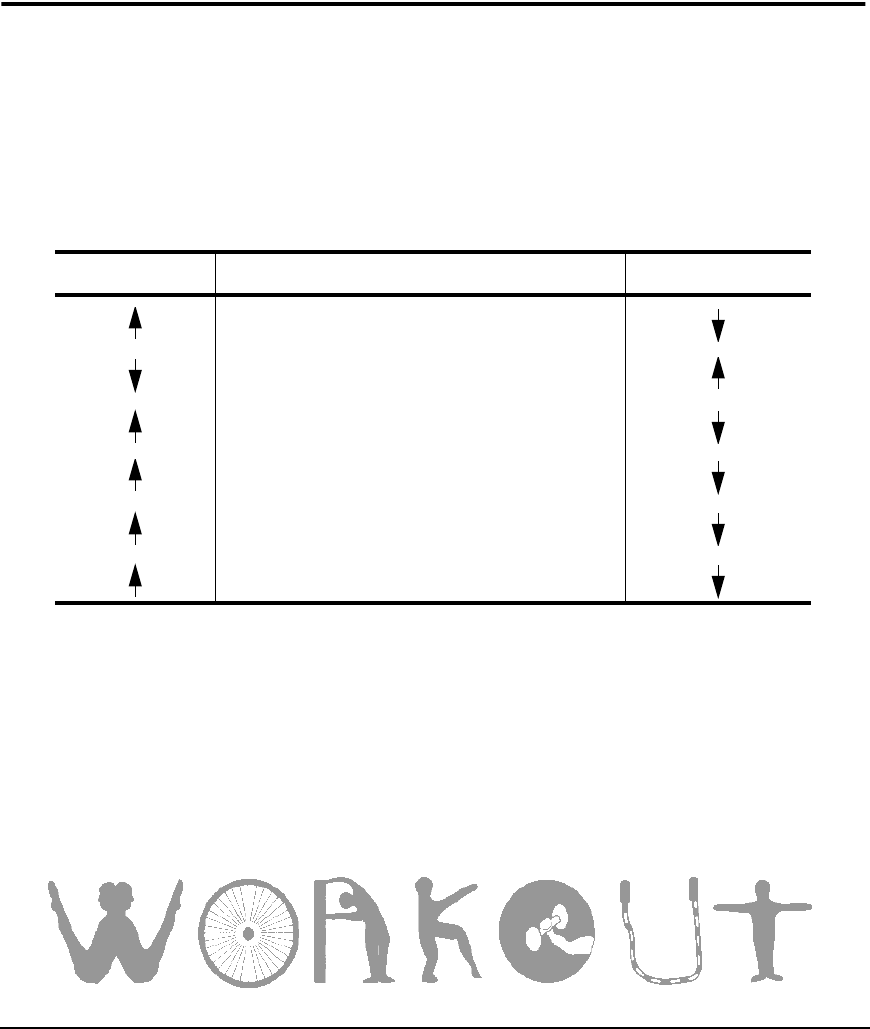
34 Force Health Protection:
Back-to-back high intensity workouts are not encouraged. Hard workout days
should be followed by easy workout days or rest. This gives your body time
to recover from the workouts. Days when you feel great should be your
harder workout days. On days when it is an effort to put on your workout
clothes, simply rest or perform a very light workout. The key is to make your
workouts fun and challenging, and listen to your body.
Training and Detraining
Training and detraining are responsible for gains and losses, respectively,
in fitness levels. Training according to the FITT Principle guidelines will
lead to optimal fitness benefits. On the other hand, decreases in fitness due
to detraining occur at twice the rate of training gains when physical activity
stops completely. Table 4-1 lists some changes in fitness measures due to
training and detraining.
Detraining only takes 1 - 2 weeks! However, this can be minimized by
maintaining your usual exercise intensity, even if the frequency and duration
of workouts is decreased. This concept is important for Navy sailors to
understand, as you may have limited time and fitness equipment available
while deployed for extended periods. Ironically, it is in these situations that
you depend most on your physical fitness to perform your duties. Therefore,
learn the basic training principles and how to work around equipment, space,
and time limitations (see Chapter 10).
Table 4-1. Training vs. Detraining
Training Fitness Component Detraining
Heart and lung function
Resting heart rates
Muscle strength and endurance
Resting metabolism
Muscle fuel (glycogen) stores
Ability to sweat and dissipate body heat

Nutrition and Exercise Resource Manual 35
Cardiorespiratory
Training
5
Cardiorespiratory activities make up
the bulk of the physical activities in Levels 1 and 2 of
the Physical Activity Pyramid (Chapter 4, Figure 4-2).
These activities improve health and fitness by
increasing the work capacity of the heart and lungs.
Other terms used to describe these activities include
cardiovascular, cardiopulmonary, and aerobic exercise.
Cardiorespiratory
Physiology
The heart is a muscle that is required to contract
continuously throughout your life to deliver oxygen to
all organs in the body. Your lungs breathe in oxygen
and breathe out carbon dioxide. Blood vessels connect
the heart and lungs so that carbon dioxide can be
removed from the blood and oxygen can be added to the
blood. The heart then pumps this blood throughout the
body. During exercise your heart must pump more
often and more strongly to supply oxygen to your
exercising muscles to make energy. In turn, you
In this chapter
you will learn
about:
◆ The physiology
of the heart
and lungs.
◆ Benefits of
cardio-
respiratory
training.
◆ The FITT
Principle
guidelines for
cardio-
respiratory
training.
◆ Aerobic
training
program
design and
progression.

36 Force Health Protection:
breathe in more often and more deeply to increase the amount of oxygen you
inhale and carbon dioxide that you exhale.
Therefore, the basis of cardiorespiratory training is to place greater
demands on the heart (e.g., make the heart beat more times per minute) than
what is required during rest. By regularly overloading the heart in this
fashion, it will become stronger. This results in pumping more blood and
delivering more oxygen to the body per heart beat, and a lower resting heart
rate.
How does lower resting heart rate affect aerobic
capacity? Maximum heart rate is determined largely
by genetics and age: view it as a fixed number of
beats per minute. So, by lowering your resting heart
rate, you increase the reserve capacity of your heart,
or the number of beats between your resting and
maximum heart rates. Therefore, if you decrease
your resting heart rate by increasing your physical
fitness, you will be able to perform more work above
rest.
Since most daily activities are aerobic in nature,
improving the delivery of oxygen to the muscles will
improve your work performance. On the other hand, a sedentary lifestyle
decreases the heart’s ability to circulate blood and oxygen. So, view your
heart as an aerobic muscle that must be conditioned for optimum functional
health and fitness throughout your life. Even though some people are born
with higher aerobic capacities than others, everyone will benefit from aerobic
conditioning.
Benefits of Aerobic Exercise
The benefits of cardiovascular conditioning include:
◆ A stronger heart and lower resting heart rate.
◆ Fitness and performance benefits, such as
increased aerobic capacity, increased muscle
endurance, and a greater ability to perform
high-intensity activities.
◆ Health benefits, such as maintenance of a
healthy body weight and body fat percentage,
management of stress, and decreases in blood
cholesterol and fat (triglycerides) levels.
Lungs
Heart

Nutrition and Exercise Resource Manual 37
◆ Increased performance in physically-demanding
jobs such as, load carriage and lift-and-carries.
◆ Cosmetic changes such as increased muscle tone,
better posture and overall appearance.
Aerobic Exercise Guidelines
The FITT Principle guidelines discussed in Chapter 4 and outlined in the
Physical Activity Pyramid for cardiorespiratory training are:
◆ Frequency - 3-5 days per week.
◆ Intensity - 60% to 90% of maximum heart rate. (Worksheet 5-1.)
◆ Time - 30-60 minutes within your target heart rate zone.
◆ Type - continuous, low resistance, high repetition activities.
The guidelines for aerobic exercise “intensity” and “type” can be
ambiguous and will be outlined in greater detail in the next two sections.
Intensity of Exercise
The “I” in “FITT” refers to the intensity of the exercise. Intensity is the
level of exertion at which an exercise is performed. There are several ways
to measure exercise intensity, some of which are discussed below.
Oxygen Consumption
Oxygen Consumption is a measure of exercise intensity that describes
how much oxygen is required to perform an activity. Maximal oxygen
consumption, or maximal aerobic capacity, varies from person to person and
is a measure of the maximum amount of oxygen a person can use to make
energy per minute during exercise. The higher your maximum oxygen
consumption, the greater your aerobic capacity.
Target Heart Rate Zone
Measuring increases in heart rate is a quick and easy method to gauge
the intensity of your workout. It is important to note, however, that the
increase in heart rate is not the training stimulus; it is only indicative
of the oxygen consumption required during the exercise. If an increase
in heart rate was all that was needed to increase aerobic capacity, then
watching a thrilling movie while sitting on your favorite couch would provide
an aerobic training benefit!
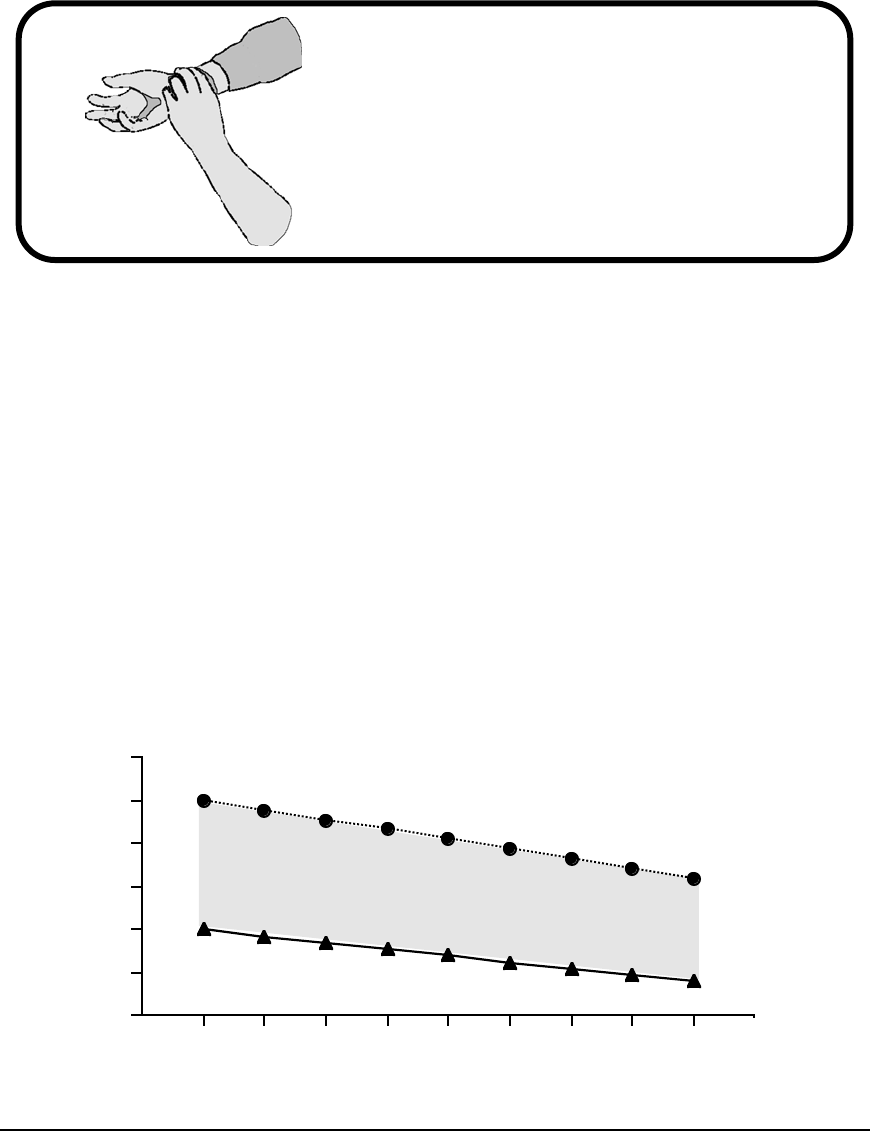
38 Force Health Protection:
To measure your heart rate during exercise, count your pulse at the
carotid artery (neck) or the radial artery (wrist) for 10 seconds (Figure 5-1).
Multiply this value by six to get your heart rate in beats per minute (bpm).
Figure 5-1. Measuring Heart Rate at the Wrist
Once you measure your exercising heart rate how do you know whether
you are exercising at the appropriate intensity?
◆ First calculate your age-predicted maximum heart rate (max HR):
Max HR (bpm) = 220 - your age (in years)
◆ Second, multiply your max HR by 0.60 and 0.90 to determine 60%
and 90% of your max HR, respectively. This range is your target
heart rate zone.
◆ Your exercising heart rate should be in this zone. If it is not,
increase or decrease your exercise intensity accordingly.
You may have seen the following figure displayed in gyms and fitness
centers. Use this figure or Worksheet 5-1 to find your target heart rate zone.
Figure 5-2. Target Heart Rate Zones
◆ Use your fingertips, not your thumb, to
find your pulse at the radial artery (at
your wrist, below your thumb).
◆ Count the beats for 10 seconds.
◆ Multiply this number by 6 to get your
heart rate in beats per minute (bpm).
80
100
120
140
160
180
200
15 20 25 30 35 40 45 50 55 60 65
Note: Max HR is lower during swimming and arm exercises. For these activities,
subtract 13 from Max HR before calculating your target training zone.
Heart Rate (bpm)
Target Heart Rate Zone 90% max HR
60% max HR
Age (years)

Nutrition and Exercise Resource Manual 39
Worksheet 5-1. Determine Your Target Heart Rate
See “Training Design and Progression” on page 43 to
determine what heart rates, within this range, you should aim
for during exercise based on your level of physical fitness and
your fitness goals.
Calories
The term “Calorie” is very familiar to most people and is often used to
gauge exercise intensity. Calories per hour is the amount of energy an
exerciser expends when maintaining the same exercise intensity for an hour.
This value is calculated by most exercise machines.
Perceived Exertion
Ratings of Perceived Exertion, or RPE, are the subjective measures of
exercise intensity perceived by the exerciser. Measurements are based on a
twenty-point scale, “6” is no exertion and “20” is maximal exertion. These
numbers were chosen because when multiplied by “10,” they are roughly
equal to the resting and max HR values of 60 and 200 beats/min.,
respectively. Once accustomed to a particular exercise, you will be able to
estimate your exercising heart rate based on your RPE. Most people should
workout at a perceived exertion between 12 and 15 (moderate to hard). See
Table 5-1.
Relationship Between Measures of Exercise
Intensity
Table 5-1 presents the relationship between %max HR, maximal aerobic
capacity, and RPE. Performance of exercises classified as “moderate” (level 1
in the Physical Activity Pyramid) is recommended on a daily basis. If your
goal is to maintain or improve general fitness (see Figure 4-1 on page 29),
exercise at an intensity of “moderate” to “hard.” At this intensity you should
be able to talk when exercising and take deep, comfortable breaths. If your
goal is to maintain or increase performance-related fitness, occasionally
exercise at an intensity of “hard” to “very hard.” Exercise intensities of “very,
Age-Predicted Max HR = 220 - your age = bpm.
60% max HR = max HR x 0.60 = bpm.
90% max HR = max HR x 0.90 = bpm.
Target HR Zone = to bpm.

40 Force Health Protection:
very hard” to “maximal” should only be performed by individuals in
extremely good aerobic condition who have been cleared by a physician to
perform near maximal exercise. Exercise in this range cannot be sustained
for long periods of time and is primarily performed to develop the anaerobic
energy system and improve performance in activities such as sprints.
Chart adapted from the American College of Sports Medicine 1998 Position Stand: The Recommended
Quantity and Quality of Exercise for Developing and Maintaining Cardiorespiratory and Muscular
Fitness, and Flexibility in Healthy Adults, and from ET Howley and BD Franks (1992) Health and
Fitness Instructor’s Handbook.
Other Measures of Exercise Intensity
Two other measures of exercise intensity that are used are METs and
Watts. A MET, or metabolic equivalent, is a measure of the amount of energy
needed to perform an activity and is expressed as a multiple of the energy
required at rest (rest = 1 MET). For example, if you exercise at 5 METs you
are using 5 times the energy you do at rest. A Watt is the amount of work
(kcal) performed in a given period of time. Therefore, the greater the watts
(kcal/min), the higher the intensity of the exercise.
Type of Exercise
The last “T” in “FITT” refers to the type of exercise performed. To increase
aerobic fitness, exercise should be a low-resistance, high-repetition activity
(e.g., biking) that trains the heart and the muscles to use oxygen more
efficiently. To choose the best exercises for you, consider the following:
◆ Training is exercise specific; what you practice, you perfect.
Therefore, to improve your run time, you must run.
Table 5-1. Relationship Between Measures of
Intensity
% Max HR % Max Aerobic Capacity RPE
55 40 9 very light
65 50 12 moderate Typical
Training
zone
70 55 13 somewhat hard
80 70 15 hard
90 85 17 very hard
95 90 19 very, very hard
100 100 20 maximal
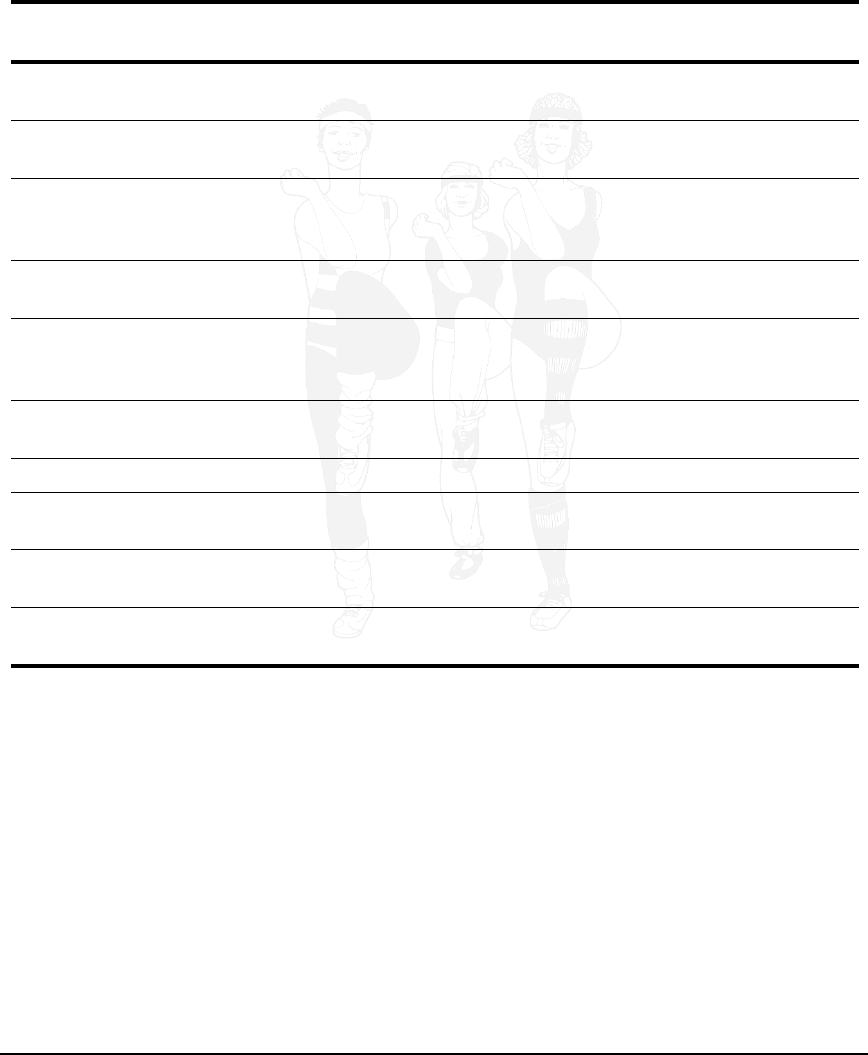
Nutrition and Exercise Resource Manual 41
◆ As a general rule, exercises that involve several muscle groups
and are weight bearing will require the greatest amount of
Calories and oxygen to perform.
◆ Exercises that you enjoy the most are the best exercises for you.
◆ Alleviate boredom and decrease your risk for injuries by
alternating the types of exercise you perform, i.e., cross-train.
Variations of these basic types of exercise include kickboxing, treading,
and spinning. Now that you are familiar with the different exercise choices,
look over Table 5-3 for descriptions of routines that you can use in your
workout. If you are exercising for health and general fitness benefits rather
than specific performance-related fitness, alternate the exercises and routines
that you perform. For example, try biking for 10 minutes, stairclimbing for
10 minutes, and jogging for 10 minutes. As long as you keep your intensity
within your target heart rate zone, add as much variety as you wish. This
may help alleviate boredom too!
The benefits of performing routines listed in Table 5-3 that increase your
anaerobic capacity include enhanced performance in fast, short duration
activities (like sprinting). These types of workouts increase the muscles’
Table 5-2. Examples of Aerobic Exercise
Activity Advantages Comments
Aerobic
Classes Group setting,
variety of levels Work at your own pace, ask instructor prior
to class for any tips.
Bicycling Low impact, good
for cross-training Bike at 70 rpms, with a slight bend in knee
to best work the quadriceps muscles.
Climbing
(Stairclimbing) Weight bearing Uses major muscles of lower body; weight-
bearing (by not leaning arms on machine);
Rock climbing strengthens upper body, too.
Cross-country
Skiing Low impact, good
for cross-training Uses most major muscle groups.
Jumping Rope Can be performed
in small quarters Variety of styles, fast pace mimics running,
wear good shoes and avoid cement
surface.
Martial Arts Group setting Popular; many focus on flexibility, strength,
and relaxation.
Rowing Low impact Works most major muscle groups.
Running Minimal gear
required High impact, alternate with other exercises.
Swimming,
water aerobics No impact, can be
a group setting Uses most major muscle groups; great as
primary, cross-training, or rehab. exercise.
Walking Low impact,
minimal gear Uses most major lower body muscle
groups; weight-bearing.

42 Force Health Protection:
ability to store and generate more energy via the anaerobic energy system.
This is beneficial in sports such as basketball, baseball, tennis, and soccer
that require several short bursts of speed throughout an entire game.
Cross-Training
It is good idea to vary your workout routines to avoid overuse injuries
which can be caused by the repetitive motions of your favorite exercise. The
major benefit of cross-training, or altering the types of exercise you perform,
lies in the prevention of injuries while maintaining cardiorespiratory fitness.
Engaging in a variety of activities will provide a good aerobic base while
using alternate muscle groups.
Table 5-3. Various Training Strategies
Workout Description
Long and Slow 20 to 60 minutes at an easy pace. Use to improve and maintain
health benefits and general fitness (see Figure 4-1).
Steady State 20 to 40 minutes at a pace which barely allows you to talk to
someone; uses anaerobic and aerobic systems. Use to
increase general fitness.
Intervals Ratios of recovery to work; i.e., 3 minutes normal (recovery)
pace, 1 minute sprint (work) pace (3:1); 30 second recovery to
15 second work (2:1), etc.; increases anaerobic and aerobic
systems depending on ratios. Use to increase general fitness
and performance fitness.
Fartleks
(Speed Play) Mix normal exercise pace with hard exercise pace in an
unstructured pattern; increases anaerobic and aerobic
systems. Use to increase general fitness and performance
fitness.
Time Trial Exercise for predetermined distance at a race pace. Use to
establish baseline of performance fitness.
Pyramids Exercise is divided in stages as follows:1 minute (min) hard: 1
min rest, 3 min hard: 2 min rest, 5 min hard: 3 min rest, 7 min
hard: 5 min rest, then work back down (5:3, 3:2, 1:1); increases
anaerobic and aerobic systems. Use to improve general fitness
and performance fitness.
Sprint Maximum exercise effort lasting 5-10 seconds, followed by
complete recovery; increases anaerobic system. Use to
improve performance fitness.
Acceleration Sprint Jog 100 yards (yds.), then sprint 100 yds., then walk 100 yds.;
repeat this pattern for a given distance or time; increases
anaerobic system. Use to improve performance fitness.

Nutrition and Exercise Resource Manual 43
Training Design and
Progression
Now you are ready to design your aerobic workout! When designing a
cardiovascular routine there are a few questions you must answer. These are:
You want to tailor your program to realistically meet your goals and time
demands, so answer the questions honestly. (See Chapter 17 for more
information on setting goals.) If you have been sedentary, begin by increasing
your physical activity by performing more daily activities, found in Level 1
of the Physical Activity Pyramid (Figure 4-2). Once you can easily perform
these activities, add 5-10 minutes of Level 2 activities two to four days per
week. Gradually increase the duration of the Level 2 activities by 10% per
week until you can perform 20 to 60 minutes continuously. Your training
intensity during these exercise sessions should be between 65% and 70% of
your max HR (see Worksheet 5-1).
If you can already perform 30+ minutes of Level 2 activities and wish to
maintain or increase your aerobic capacity, exercise between 65% and 80%
max HR for 30 to 60 minutes three to four days per week. If you are
interested in performance fitness benefits and are in excellent aerobic
condition, consider adding 15-30 minutes of high-intensity (80% to 90% max
HR) activities per week in addition to your aerobic training. This will
increase your anaerobic energy system and increase your ability to sprint and
recover more rapidly during sports such as basketball and soccer. For sport
specific performance, some of your training sessions should mimic movements
you perform during the sport.
The golden rules of training progression are:
◆ Increase only one FITT component, i.e., frequency, intensity,
time, or type, at a time.
◆ Increase your training by no more than 10% per week. Allow
yourself time to adjust to this new routine before you increase
your workout again. Increasing too fast will lead to injury and
overtraining (see Chapter 13).
Questions
1. What are your goals? Are you interested in health, general fitness, or
performance benefits? Get more specific as you
become more involved with your workout.
2. What do you enjoy? Do you prefer team or solitary activities? List at
least three activities that you enjoy doing.
3. What are your time limits? Be realistic about the time you can devote to these
activities.
4. What gear do you need? Plan to get the gear you need to participate in
these activities.
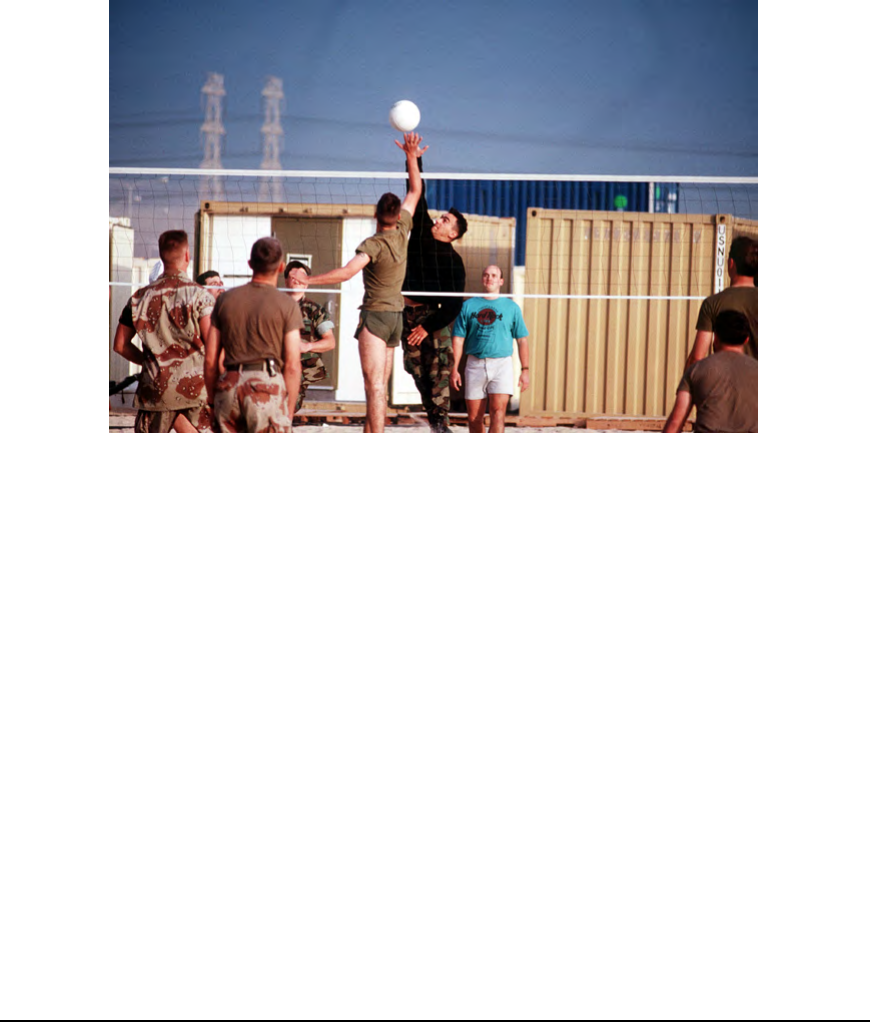
44 Force Health Protection:
◆ Signs of overexertion include pain in your chest, breathlessness
or gasping for breath, nausea, and dizziness. If you have any of
these symptoms, stop exercising immediately!
Based on your answers to the questions above and your current fitness
level, set up a weekly routine with moderate to hard workout days and rest
days. You will add a strength training workout to this schedule in Chapter 7.
Nutrition and Exercise Resource Manual 45
6
Walking, running, and swimming all provide
excellent aerobic workouts. These three types of
exercise will be discussed in this chapter for two
reasons: 1) walking and running are the most common
types of exercise that people engage in, and 2) all three
modes of exercise can be used to test your level of
physical fitness on the Navy PRT tests.
Walking and Running
Gear
To maintain or improve your fitness and avoid
injuries while walking and running you need to use the
right exercise gear. Below are some tips and
information to help you purchase training gear.
Shoes
A good pair of shoes will provide shock
absorption, cushioning, motion control and
durability. The proper shoes will help
correct biomechanical problems, such as foot
pronation (inward roll of your ankle) and arch height,
which can lead to pain or injury of the lower leg and
knees. Specialty stores, magazines, and web sites have
a lot of information about the latest footwear and what
footwear is best for you based on your foot type.
Tips for Buying Shoes
◆ Know your foot type; i.e., pronation and
arch (normal or high arch, or flat-footed).
In this chapter
you will learn
to:
◆ Design a
walking
program.
◆ Design a
running
program.
◆ Design a
swimming
program.
Walk,
Run,
Swim!

46 Force Health Protection:
◆ You should have a thumb’s width between your longest toe and
the end of the shoe.
◆ Replace shoes every 300 to 500 miles. Wearing worn-out shoes
can eventually lead to injuries.
◆ Try on shoes towards the end of the day while wearing athletic
socks and any inserts you use while exercising. Feet are smallest
first thing in the morning and swell slightly as the day
progresses. The shoe should hold your heel firmly in place.
◆ Do not buy shoes based on their brand name. Try on several
different shoes to determine which one might be best for you, for
the type of exercise you perform. Consider going to a specialty
shoe store where a knowledgeable salesperson can evaluate your
gait and foot type and recommend a shoe.
Other Gear
◆ Orthotics are shoe inserts that provide additional foot support
and control for people with biomechanical conditions that may
cause pain while running. They can be purchased as over-the-
counter inserts or custom-made. Commercial orthotics are sold
according to shoe size and can work as well as custom inserts. If
the pain continues or returns when you increase your mileage,
see a sports medicine specialist or podiatrist.
◆ Clothes - In hot weather, wear light-weight, light-colored clothes.
In cold weather, dress in layers. Experience will teach you what
to wear. When weather conditions are extreme, substitute
outdoor training with indoor activities.
◆ Heart Rate Monitors gauge exercise intensity by continuously
monitoring heart rate. These consist of a wrist watch and a chest
strap: the chest strap detects your heart beat and transmits it to
the watch which displays heart rate in beats per minute. This
allows you to check and maintain your heart rate within your
target training zone (see Chapter 5) while you exercise.
◆ Reflectors and portable beverage containers are
great for your safety and health when exercising
outdoors. Other gear, such as walkmans, can
provide entertainment, however, consider your
training environment to determine whether they
will hinder your safety by decreasing your
awareness of your surroundings.

Nutrition and Exercise Resource Manual 47
Walking
Walking is the easiest, most common, low impact exercise
that people engage in. However, there are many misconceptions
about the usefulness of walking for weight loss and
cardiorespiratory conditioning. These health benefits can be
realized by walking, as long as the intensity is high enough to
increase your heart rate to 60-75% of your max HR (Worksheet
5-1).
When you walk, keep your back straight and your stride comfortable. Do
not use ankle or hand weights because they increase the stresses placed
on your joints, especially as you quicken your pace. If you have been
sedentary and would like to begin a walking program, start by walking on a
flat surface. Walk for 15 minutes at a pace that allows you to talk somewhat
easily. Walk every other day. Each week increase the time you walk by 10%
until you can walk for 20 minutes continuously. Once you can comfortably
walk for 20 minutes, increase your pace by no more than 10% each week until
you can walk 1 mile in 20 minutes (3 m.p.h. pace). Once you reach this point,
hold your pace and gradually increase your distance (by no more than 10%
each week) until you can walk 2 miles. Once you have reached this point, try
the walking program outlined in Table 6-1.
Adapted from OPNAVINST 6110.1D Jan. 1990. *m.p.h. = miles per hour.
You can maintain a walking program indefinitely and reap the health and
fitness benefits. Once you can walk 60 minutes at a 4 m.p.h. pace, add hills
or inclines to vary your exercise intensity, add variety to your routine, and
to combat boredom. The key to maintaining your aerobic fitness level is to
maintain your walking intensity between 60% and 75% of your max HR.
Table 6-1. Outline of a Walking Program
Weeks Frequency
times/week
Miles Goal Time
(min)/ pace
Comments
1-2 3 2.0 40 min / 3.0 m.p.h* Quicken your pace by
1 min each week
3-4 4 2.0 38 min / 3.2 m.p.h.
5-6 5 2.0 36 min / 3.3 m.p.h.
7 5 2.0 34 min/ 3.5 m.p.h. Increase your distance
by 1/2 mile each week
8 5 2.5 43 min/ 3.5 m.p.h.
9 5 3.0 51 min/ 3.5 m.p.h.
10-15 5 3.0 45 min/ 4.0 m.p.h.
16-17 4 3.5 53 min/ 4.0 m.p.h.
18-19 4-5 4.0 60 min/ 4.0 m.p.h.

48 Force Health Protection:
Running
A running program should only be started if you are able to walk 4 miles
at a 4.0 m.p.h. pace. There are several reasons to begin a running program,
such as managing your body weight, increasing your cardiovasclar fitness,
and building your self-esteem.
Running Form
Once you have identified your goal, begin your program by paying
particular attention to your running form. This will ensure your running
style is biomechanically efficient and safe for your joints. The key is to run
naturally and remain relaxed. Running is a function of footstrike, forward
stride, body angle, and arm drive.
Figure 6-1. Three Traits of a Good Running Form
◆ Footstrike - For distance runners the heel-ball footstrike method
works well: (1) the outside of the heel strikes the surface; (2) the
foot rolls inwards to the ball of the foot while the knee is slightly
bent; and (3) the foot lifts off from propulsion provided by the big
toe. This method provides good shock absorption.
◆ Forward Stride - Your foot should contact the ground in line
with your knee, which should be slightly bent. As you run faster
the length and frequency of your strides will increase and you
will begin lifting your knees higher. Do not overstride such that
your foot hits the ground ahead of your knee (i.e. your leg should
not be straight at point of impact). Overstriding is hard on the
knees, back and the hips and can cause injuries. Alternatively,
short choppy strides, which usually result from tight or inflexible
muscles, require more energy and are inefficient.
◆ Body Angle - Keep your back straight, your head up and look
forward as much as possible. Lean forward only when going
uphill or sprinting as this puts stress on leg muscles and may
cause back pain and shin splints. Leaning back puts tremendous
Run Tall
Run Relaxed
Run Naturally

Nutrition and Exercise Resource Manual 49
pressure on the back and legs and has a “braking effect”. The key
is to run “tall” and remain relaxed: allow your shoulders to hang
in a relaxed manner and let your arms drop from time to time.
◆ Arm Drive - Relax your shoulders, elbows, wrists and fists.
Occasionally let your arms hang by your sides and loosely shake
them out. Vigorous pumping of your arms is unnecessary during
distance running.
Training Surfaces
The best running surfaces are unbanked, smooth cinder tracks or
artificially surfaced tracks. Grassy trails can hide uneven terrain that may
aggravate biomechanical problems or cause injury. Concrete and asphalt
sidewalks and roads are often banked and provide no shock absorption, so
you need shoes with good shock absorption. Beaches also tend to be slanted,
whether the sand is firmly packed or loose. Avoid running barefoot on this
surface, no matter how good the sand feels between your toes! Lastly, always
change the direction you run on a track or path from one session to the next
to reduce any biomechanical problems that may result from the track
conditions and repetition.
Other running surfaces include treadmills and water. Most
treadmills are state of the art in terms of cushioning and you can
control the speed and intensity of your workout. Deep water or
aqua running is mainly used for rehabilitation as it takes the
pressure off muscles and joints while providing cardiovascular
benefits. This type of exercise is becoming popular at various
swim centers.
Beginning a Running Program
When transitioning from a walking to a running program, combine
walking and jogging, gradually increasing the time spent jogging while
decreasing the time spent walking. Remember that your exercise intensity
should be between 60%-75% of your max HR, so adjust your pace accordingly.
Table 6-2 outlines a beginning jogging program to help make your transition
easier. Advance to the next phase once you can consistently perform the
walk-jog cycles outlined within your target heart rate zone.
If you are interested in running for fitness, a good goal is 6 to 8 miles
per week, spread over 3 running days of 2 to 3 miles each. Maintaining this
weekly mileage is sufficient for improving or maintaining your aerobic
fitness. The duration of your runs will depend solely on your pace. Distance
is the goal, so take walking breaks as necessary until you have reached your
target mileage. Start a running log to track your workouts (Worksheet B-1).
Note mileage, time, heart rate, and perceived exertion (see Chapter 5).

50 Force Health Protection:
Increasing Your Running Workout
If you can comfortably run 6-8 miles per week and you desire to progress
further in a running program, start by increasing either your mileage or
pace. This is beneficial if you are interested in running 5K or 10K races, if
you want to build a solid running base for longer distance races, or if you
enjoy progressively working toward new goals. Increasing either your
distance or pace too quickly can cause training injuries, so gradually increase
one at a time by no more than 10% per week. For example, if you can
comfortably run five miles, increase your distance by a half mile and keep
your pace constant. Maintain this new distance for at least one week, or until
it is consistently easy for you. Consistency is more important than speed.
Increase your mileage or pace by only 10% per week.
Do not increase your mileage and pace simultaneously.
Table 6-2. Beginning a Jogging Program
Phases Walk Jog
Total Time or
Distance Comments
Phase 1: 1 to 2 min. Work up to
jogging 2 min.
continuously.
20-30 min Check heart rate after
every jog interval, heart
rate should be 60-75%
max HR.
Phase 2: 1 to 2 min. Quarter mile
(1 lap on a
440 meter
track).
Jog six, quarter
mile laps. Check heart rate after
every quarter mile jog;
heart rate should be 60-
75% max HR.
Phase 3: 1 min. Half mile (2
laps on a 440
meter track).
Jog three, half
mile laps. Check heart rate after
every half mile jog;
heart rate should be 60-
75% max HR.
Phase 4: during
warm-up
and cool-
down
1 mile
continuously. 1-mile jog, 1-mile
walk. Periodically check heart
rate during jog, adjust
pace to keep heart rate
in training zone.
Phase 5: during
warm-up
and cool-
down.
Increase jog
by quarter-
mile
increments
until running 2
to 3 miles
continuously.
2 to 3 miles. Periodically check heart
rate during jog, adjust
pace to keep heart rate
in training zone.
Nutrition and Exercise Resource Manual 51
Frequency and Speed
Run three to four times per week with one or two rest days. When running
for exercise and not competition, your pace should be even and allow you to
talk comfortably. If you run too fast and get breathless, you may not be able
to go the distance. Check your heart rate to see that it is within your target
training zone (see Chapter 5). Tips to increase your running speed include:
◆ Increase the length of your stride without overstriding.
◆ Increase the frequency of your stride.
◆ Increase both the length and the frequency of your stride.
Distance
Increase your mileage only when you can consistently run your current
distance. Twenty to 30 miles per week is a good training distance for an
intermediate runner (Table 6-3). As a rule, your risk of injury sharply
increases as your running mileage increases. So, if running for exercise
rather than competition, keep your weekly mileage below 30 miles. Beyond
this, your injury risks far outweigh any additional aerobic fitness benefits.
To work on aerobic fitness without running more than 30 miles a week, try
cross-training by swimming or biking.
Cross train or rest on non-run days.
With an endurance base of 30 miles per week you can easily compete in
10Ks, the Army 10 Miler, and other similar events.
Training for Long Distance Runs
If you are interested in building an endurance base for running long
distance races, such as a half marathon, the Marine Corps marathon,
Table 6-3. An Intermediate Running Program
Week Mon Tues Wed Thur Fri Sat Sun Total
One 2 - 2 - 2 2 - 8
Three 2 - 3 - 3 2 - 10
Five 3 - 3 - 3 3 - 12
Seven 3 - 4 - 4 3 - 14
Nine 3 - 4 3 - 3 4 17
Eleven 4 - 5 3 - 5 3 20
Thirteen 4 - 5 5 - 4 5 23
Fifteen 5 - 5 5 - 6 5 26
Seventeen 5 - 6 6 - 6 7 30

52 Force Health Protection:
the Air Force Marathon, or similar events,
contact a local running group, a national running
program, or a trainer with experience in
coaching distance runners. Training for these
distance races can be very challenging, both
physically and mentally. For more information
on running distance races, contact the American Running and Fitness
Association at http://americanrunning.org.
Swimming
Swimming is an excellent exercise for overall
fitness. Because the water supports your body weight, swimming is a great
cross-training exercise for running and other gravity-intense activities.
Swimming is also an alternative for people with orthopedic problems or those
who are in rehabilitation.
Beginning a Swim Program
For swimming to be the primary mode of exercise, a swimmer must be
skilled. Unskilled swimmers are very inefficient. To emphasize the energy
expenditure during a swim, swimming 1/4 mile, or 440 meters, is equivalent
to jogging 1 mile. Therefore, it is very likely that an inexperienced swimmer
will not be able to swim continuously for 20 to 30 minutes. Knowing this, if
you are unfamiliar with the basic swimming strokes, focus on your technique
by taking lessons.
If you have never swum, start by walking or jogging
the width of the pool in chest deep water using any
flotation device you want. Once you can complete two to
four, 5-10 minute exercise bouts within your target HR
zone, progress to swimming exercises. Try walking or
jogging the width of the pool and swimming back, again
using a flotation device. Gradually decrease the distance
you walk or jog and increase the distance you swim until
you can swim four widths without stopping.
Once you have reached this point, begin swimming
the lengths of the pool (1 length = 25 meters; roughly 25
yards). Start by alternating a 25 meter swim with a 30
second rest. Gradually increase the number of lengths you swim without a
rest, until you can swim continuously for 20-30 minutes. Then you will have
a good base for increasing your distance or pace. Table 6-4 outlines a 10-week
swim program for intermediate swimmers.
Nutrition and Exercise Resource Manual 53
Table taken from OPNAVINST 6110.1D, Jan 1990, p 17.
Interval Training
Pool sessions with a pace clock allow you to design
workouts that vary in intensity and emphasis, as well
as provide good feedback. While runners often go for
long steady runs, a swimmer training this way
becomes slow and inefficient. This is due to the
inability to increase your respiratory rate during most
swim strokes. Since performance can be hindered by limited oxygen or
excessive amounts of carbon dioxide, interval training is ideal for swimming.
As mentioned in Chapter 5, intervals can train both the anaerobic and
aerobic energy systems depending on the time ratio between recovery and
work intervals. For swim intervals, swim at a set intensity during the work
interval (usually 50-100 yards) then rest during the recovery interval. The
basics of interval training include:
◆ To stimulate aerobic adaptations, recovery intervals should be
less than 15 seconds. Short rest intervals keep the aerobic system
functioning, particularly during the initial recovery.
◆ To stimulate anaerobic adaptations, recovery intervals should be
longer than one minute, up to twice the duration of the work
interval. These effects occur independent of distance or pace. The
longer the recovery interval between work intervals the greater
the reliance on the anaerobic system.
Table 6-4. Swim Program to Build Your Distance
Week Distance
(meters)
Number
of Lengths
Frequency
(Days/Week)
Goal Time
(minutes)
1 300 12 4 12
2 300 12 4 10
3 400 16 4 13
4 400 16 4 12
5 500 20 4 14
6 500 20 4 13
7 600 24 4 16
8 700 28 4 19
9 800 32 4 22
10 900 36 4 22.5

54 Force Health Protection:
Open-Water Swimming
Open-water swimming can be a very
challenging and rewarding workout. But
before heading out to sea, you should be able
to swim at least one mile continuously, and
consistently, in a lap pool. When swimming in
open water you are faced with many safety
issues not addressed in pool training, so follow
these safety rules:
◆ Ask lifeguards or locals about the safety of the area. (Are there
any strong currents or riptides? What marine life is in the area?
Avoid areas where sharks have been spotted.)
◆ Walk the beach along the course you will be swimming. Look at
buoys, surfers, and other swimmers to gauge the direction and
strength of the current. Pick landmarks (houses or lifeguard
stations) to use as markers while you are swimming.
◆ Wear proper gear for open-water swimming, including: a
comfortable, unrestricted suit (a wet suit in cold water); a swim
cap; goggles with UVA/UVB protection; water gloves and fins.
Use a waterproof sunscreen all over your body.
◆ Never swim alone, especially in unfamiliar waters. Ask someone
familiar with the waters to accompany you. On your first outing,
swim just past the breaking waves. As you feel more comfortable,
gradually move further out.
◆ Follow the shoreline as your primary guide, staying 100 to 150
yards outside the breaking waves. Check your distance from the
shoreline as you turn your head to breathe. Swim toward an
unmoving target in the distance so you do not get off course.
Check your position with this target every 50 to 100 yards and
adjust your course appropriately.
◆ A good starting distance for open-water swimming is a half mile.
Use your landmarks to judge your distance. Swim against the
current for the first quarter mile, then turn around and swim
with the current for the last quarter mile. As you become
comfortable swimming in open-water, gradually build up your
distance by quarter mile increments.
◆ Avoid boats and jet skis by wearing a brightly colored suit and
cap. If a boat is moving toward you, swim away from it and kick
hard, making large splashes that announce your presence.
Section adapted from L. Cox. Seaworthy. Women’s Sports and Fitness July-August 1995;17(5):73-75.
Nutrition and Exercise Resource Manual 55
Strength
Training
7
Muscle strength and endurance training are
essential components of overall fitness. Your ability to
perform daily tasks and strenuous physical tasks can
be enhanced by strength training. As you read through
this chapter think about the physical tasks you
perform routinely in your job or at home, the strength
needed to perform those tasks, and which exercises
mimic those tasks. The focus of your strength training
routine should be functional or applied strength for job-
specific activities, military readiness, and injury
prevention. This chapter outlines the principles of
muscle strength and muscle endurance training and
the proper use of exercise equipment to help you
achieve your goals.
Strength
versus
Endurance
◆ Muscle strength
is the force your muscle or group of muscles
can exert against resistance. As you lift and
lower a weight your muscle must generate
enough force to move that weight.
◆ Muscle endurance is the ability of your
muscles to repeatedly apply force to lift and
lower a weight. Muscle endurance describes
how long or how many times (number of
repetitions) you can lift and lower a given
weight.
In this chapter
you will learn
about:
◆ Muscle
strength.
◆ Muscle
endurance.
◆ Strength
training
guidelines.
◆ Designing a
strength
training
program.
◆ Proper
training
techniques.

56 Force Health Protection:
Benefits of Strength Training
Strength training should complement aerobic training workouts because
each type of training results in different benefits. General benefits of
strength training include:
◆ Increased muscle strength and muscle endurance, greater lean
body mass, less body fat, and higher energy metabolism.
◆ Increased connective tissue (ligaments that hold bones to bones;
and tendons that hold muscles to bones) strength.
◆ Increased coordination and greater protection against injury.
◆ Increased self-esteem and less perceived stress.
◆ With respect to military readiness, greater muscle strength and
endurance translates into better performance of physically-
demanding, job-related tasks. Table 7-1 lists the strength
requirements needed to perform some physical tasks in the Navy.
Adapted from Institute of Medicine. (1996) Assessing Readiness in Military Women: The Relationship
of Body Composition, Nutrition, and Health. Washington, D.C.; National Academy Press.
Table 7-1. Strength Requirements in Navy Jobs
Strength
Classification
(Percent of Navy Jobs)
Strength and
Endurance
Requirements
Examples of Some
Occupational Codes
High/High
(23.9)%
Occasionally lift over
100 lbs (45 kg);
Typically lift over 50
lbs (23 kg)
Artillery and Gunnery (GM); Aircraft
Engines (AE) & Accessories (ABE);
Construction (CM); Electricians (CE).
High/Moderate
(20.9%)
Occasionally lift 100
lbs (45 kg); Typically
lift 50 lbs (23 kg)
Machinists (MR); Food Service (MS);
Supply Administration(SK); Teletype
and Cryptographic Equipment (WT).
Moderate/Moderate
(9.0%)
Occasionally lift 80
lbs (36 kg); Typically
lift 40 lbs (18 kg)
Air Crew (PR); Missile Guidance and
Control (FC); Medical Care and
Treatment (HM); Interior
Communications (IC).
Moderate/Low
(4.5%)
Occasionally lift 50
lbs (23 kg); Typically
lift 25 lbs (11 kg)
Musicians (MU); Supply
Administration (AK).
Low/Low
(41.7%)
Occasionally lift 20
lbs (9 kg); Typically
lift 10 lbs (5 kg)
Radio/Radar (ET); Sonar (OTA); Air
Traffic Control (AC); Analysts (CTI);
Information/Education (JO);
Administration(YN).

Nutrition and Exercise Resource Manual 57
Which classification in Table 7-1 best matches the requirements of your
job? Which classification best describes your leisure activities?
Muscle Fiber Types
Before discussing strength training exercises and
guidelines, here is a quick review of muscle physiology. To
generate force, muscles contract. This action requires ATP
(see Chapter 4, page 31). Muscle fibers are classified
according to which energy system they use to make ATP.
The three types of skeletal muscle fibers are:
◆ Slow Twitch Oxidative (Type I) fibers are mostly involved in
endurance activities. They rely on ATP from aerobic energy
metabolism (see page 31) and are generally resistant to fatigue.
◆ Fast Twitch Glycolytic (Type IIb) fibers are involved in quick,
strong muscle contractions and rely on the anaerobic energy
systems to produce ATP. These fibers are susceptible to fatigue.
◆ Fast Twitch Oxidative-Glycolytic (Type IIa) fibers are a cross
between the slow and fast twitch fibers since they rely on both
aerobic and anaerobic systems (see page 31) for energy.
Everyone has all three muscle fiber types; however, genetics determine
which fiber type is more abundant in each person. Physical training can lead
to changes in the characteristics of the muscle fibers. For example, endurance
training makes the Type IIa fiber act more like the slow-twitch, Type I fiber.
Determinants of Muscle Size
Apart from muscle fiber type, various factors influence muscle size (see
Figure 7-1). Although some factors cannot be controlled, two factors that we
can control are exercise and nutrition habits (Chapters 3, 4, and 11).

58 Force Health Protection:
Figure 7-1. Factors that Affect Muscle Size
Men generally have more muscle mass than women, mainly
because men produce more testosterone than women.
Strength training may increase muscle mass slightly in
women; however, a common misconception is that strength
training will cause women to “bulk up.” Importantly, strength
training will greatly increase muscle strength and endurance
and reduce the risks for injury. Moreover, women tend to
have poor upper body strength and many military tasks
require upper body strength.
Strength Training Guidelines
Training Form
Correct lifting techniques are critical for achieving maximum benefits and
preventing injury (see Appendix C). If your form is incorrect, strength
training can lead to injury, not strength gains.
◆ When learning a new exercise, start with minimal weight.
◆ Use a closed grip (fingers and thumbs wrap around the bar or
handle and touch each other), and place hands equidistant from
the ends of the bar. Load the weights evenly across the bar.
◆ For free weights, feet should be hip to shoulder width apart,
knees slightly bent, and your back should keep its natural curve.
Keep your head level and eyes focused straight ahead. If
maintaining this posture is difficult than the weight is too heavy.
Genetics
Nutrition
Hormones
Physical
Activity
Nervous System
Activation
Adapted from WD McArdle, FI Katch, and VL Katch. Exercise Physiology, 4th ed. Baltimore;
Williams & Wilkins, 1996.
Muscle

Nutrition and Exercise Resource Manual 59
◆ If using resistance machines, adjust the pads to fit your body size.
This is very important since the pads support you during the lift.
Keep your head level and eyes focused straight ahead.
◆ Lifts should be slow, smooth, and controlled. Lift the weight
for at least 2 seconds and lower the weight for at least 4 seconds
to ensure that your muscle, not momentum, moves the weight.
◆ Exhale during the exertion (moving the weight against gravity),
and inhale when returning to the start position. Holding your
breath (Valsalva maneuver) causes extremely high increases in
blood pressure and can damage the cardiovascular system. Never
hold your breath while exercising!
◆ Always use a spotter when lifting free weights.
The most common training errors occur when people focus on lifting the
weight rather than focusing on stabilizing themselves and controlling the
weight. The best way to avoid training mistakes is to ask a staff member at
the gym to teach you new exercises and to suggest the best exercises for you
based on your fitness level and goals. See Appendix C for examples of
common errors in training techniques.
FITT Principle Guidelines
Once you are comfortable with the basic training techniques for
performing strength exercises, follow the FITT Principle, illustrated in the
Physical Activity Pyramid (Chapter 4, Figure 4-2), to set up your routine.
The FITT guidelines for strength training are:
◆ Frequency - 2 to 3 times per week for each major muscle group on
non-consecutive days.
◆ Intensity - the total weight lifted or the resistance.
◆ Time - the duration of the exercise.
◆ Type - equipment used and the exercises performed.
Two terms you need to know are repetition (rep) and set. A repetition
is a single lifting and lowering of the weight. For example, one rep of a leg
curl is equivalent to lifting your ankle toward your buttocks, pausing one
second, then returning your ankle to the start position. A set is the number
of reps performed without stopping to rest. For example, if you perform 10
leg curls, rest for 60 seconds, followed by another 10 leg curls, you would
have performed 2 sets, each of 10 leg curls. When recording the number of
sets and reps performed, write “sets x reps” (e.g., 2x10 for the leg curl
example above).

60 Force Health Protection:
Intensity of Exercise
Focus on the intensity of your training only after you have perfected your
lifting form. The basis of strength training is to gradually increase the
amount of weight that you lift during training to ultimately increase the
amount of force your muscles are capable of generating. This is called
progressively overloading the muscle to achieve gains in strength without
causing injury. The following intensity guidelines for general strength gains
are for beginners, for people who are restarting their routines after a break,
or for people learning new exercises.
◆ Once your form is perfected (page 58), gradually increase the
weight you are lifting until you reach a weight that you can lift
only 12 times with good form. If you can perform 13 or more reps
with relative ease, increase the weight. Conversely, if you cannot
perform 12 reps while maintaining proper form, decrease the
weight. Finding this 12-rep weight will be trial and error at first.
Be patient and gradually increase the weight to avoid straining
or injuring yourself.
◆ Your 12-rep weight will increase as you gain strength, so increase
the weight you are lifting appropriately (by no more than 10% per
week).
◆ Start a training routine consisting of one to two sets of 12 reps
for each major muscle group (defined in “Type of Exercise” on
page 61). Perform this routine for at least eight weeks.
A long-term strength routine of one to two sets of 12 reps is excellent for
maintaining and increasing general strength, even beyond the first eight
weeks of training. In addition, this type of routine only takes roughly 30
minutes to perform. Once you have developed a solid strength and endurance
base you may be interested in pursuing more specific training goals. In
general, the following guidelines apply to the various types of strength
training goals:
◆ Muscle endurance - two to three sets, 12-15 reps (with a weight
that cannot be lifted more than 15 times); 30-60 seconds rest
between sets.
◆ Muscle hypertrophy (increase in muscle mass) - three to six sets,
eight to 12 reps (with a weight that cannot be lifted more than 12
times); 30-90 seconds rest between sets.
◆ Muscle strength - three to five sets, two to eight reps (with a
weight that cannot be lifted more than eight times); at least 120
seconds rest between sets.
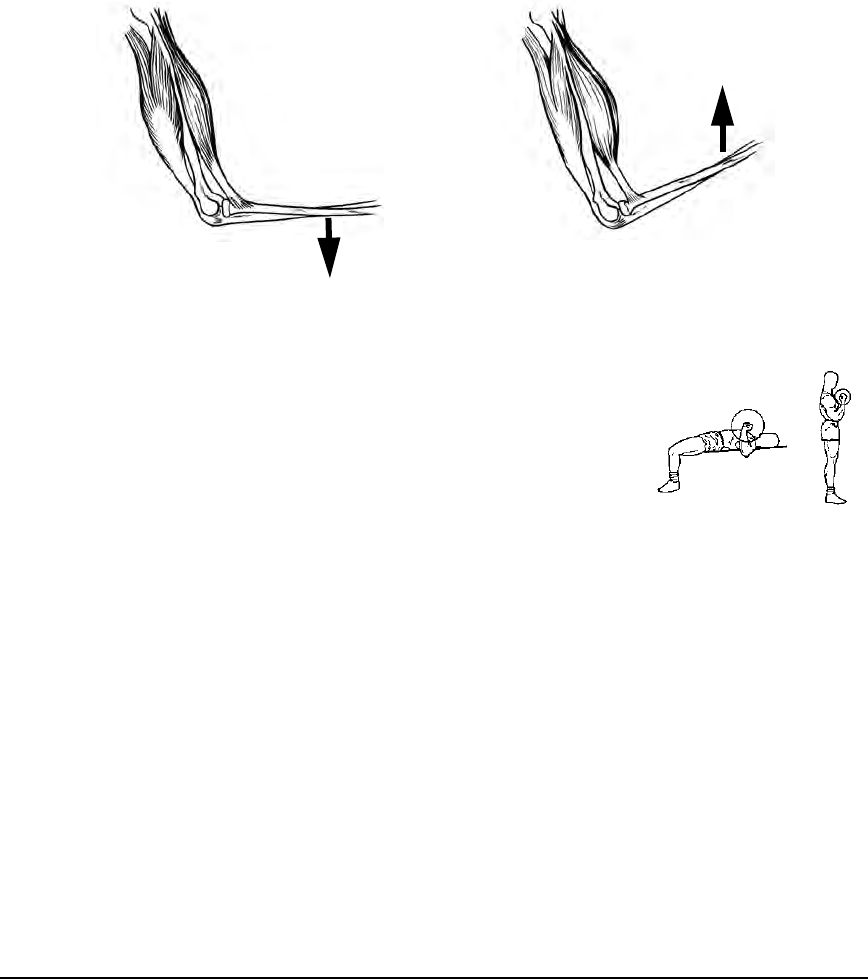
Nutrition and Exercise Resource Manual 61
Note: Do not perform maximal lifts when strength training.
Type of Exercise
Muscle balance refers to the strength ratio of opposing muscle groups
across a common joint; i.e., the biceps and triceps muscles in the upper arm.
By performing exercises that target the opposing muscle groups across the
joints, you improve the function of the joints and reduce your risks for injury.
With this in mind, select at least one exercise for each of the major muscle
groups. The major muscle groups are the chest, back, shoulders, arms, legs,
lower back, and abdominals. (See Worksheet B-2.)
With respect to exercise order, perform multi-joint
exercises (e.g., squats) before single-joint exercises (e.g.,
leg curl). To determine which exercises are multi- versus
single joint exercises, watch and feel how many joints
move while you perform the exercise. An example of a
multi-joint exercise is the bench press because your
upper and lower arms move at the shoulder and elbow
joints, respectively. An example of a single-joint exercise is a biceps curl
because only your lower arm moves at the elbow. Single-joint exercises target
and fatigue the smaller muscle groups that are needed to perform multi-joint
exercises. Therefore, fatiguing the smaller muscle groups by first performing
single-joint exercises will alter your lifting form and decrease the amount of
weight you can lift in the multi-joint exercises. Lastly, lower back and
abdominal exercises should be performed at the end of your workout because
these muscles are used during other exercises for balance and posture.
Figure 7-2 is a diagram of the muscle groups and the exercises that target
them. Pick at least one exercise per major muscle group.
From Harmon, E. The biomechanics of resistance exercise. In Essentials of Strength Training and
Conditioning. Baechle, TR. (Ed.). Human Kinetics. Champaign, Il. 1994. p.20.
Biceps (inactive)
Triceps
(active)
Biceps (active)
Triceps
(inactive)
Arm Curl
Bench Press
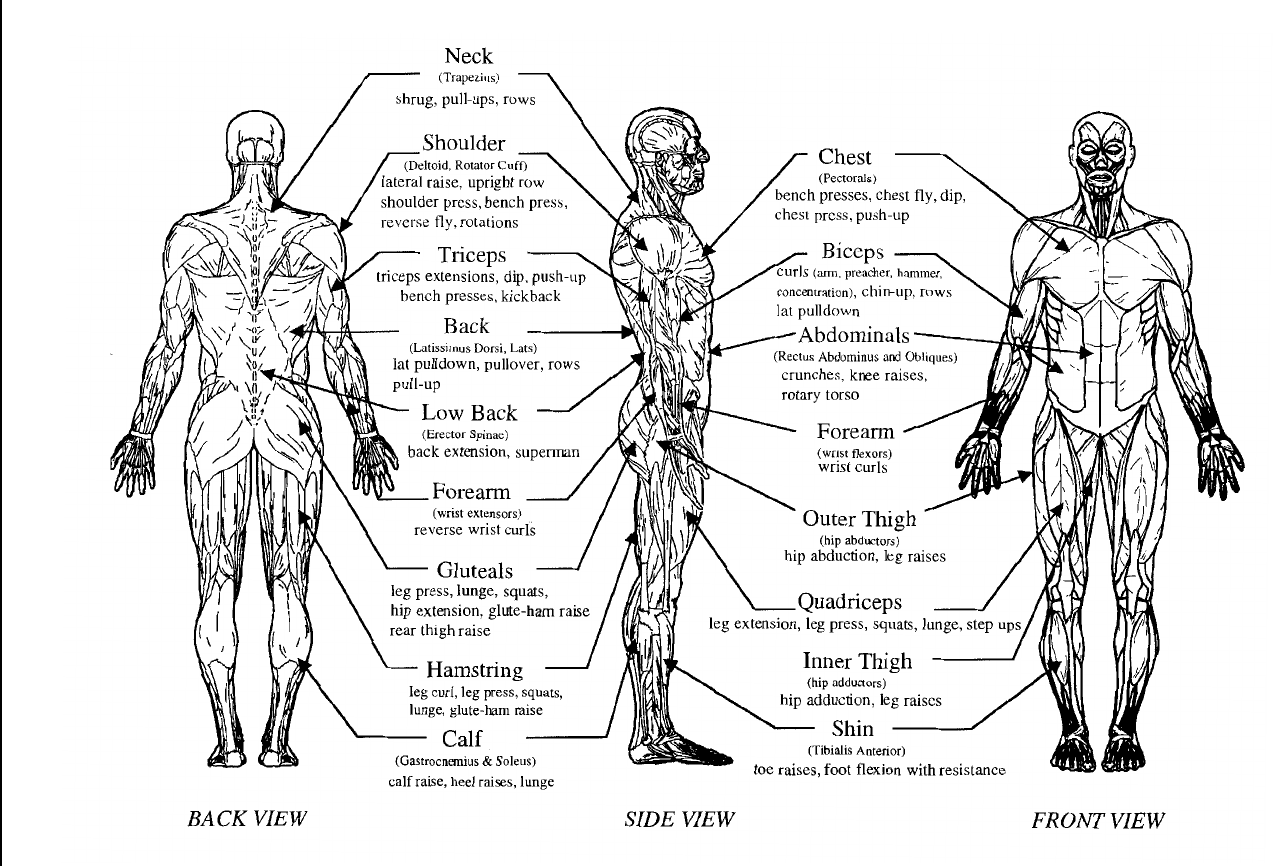
62 Force Health Protection:
Figure 7-2. Exercises for Various Muscle Groups

Nutrition and Exercise Resource Manual 63
Use Worksheet B-2 as a template to design your workout and to record
your training progress. Change the exercises you perform for each muscle
group every four to eight weeks, even if you keep the same set and rep
routine. Changing exercises will overload the muscles differently, increase
your strength gains, and alleviate boredom. To increase their upper body
strength, women should perform exercises that target the back, neck, chest,
shoulders and arms (Figure 7-2).
Equipment
Strength training requires minimal personal gear: weights, a pair of
supportive shoes, fitted lifting gloves, and standard PT attire. A weight
lifting belt is only recommended during maximal or near maximal lifts, and
is not recommended at all for exercises that do not stress the back. This is
because the belt takes over the role of the abdominal muscles in stabilizing
the torso, preventing the strengthening of the abdominal muscles which can
increase the risk for injury when lifting a heavy object without the belt.
The most common barbells found in gyms are Olympic style barbells.
These barbells have a narrow center bar for gripping and wider ends for
loading weights. They are 5 to 7 ft. long and weigh 30 to 45 pounds (lbs) or
13 to 20 kilograms (kg). The plates used to load the bars are available in
both lbs and kg, and range between 2.5 to 45 lbs or 1.25 to 20 kg. Make sure
you pay attention to the weight measurements in your gym; there is a big
difference between 10 lbs and 10 kg! Lastly, you are encouraged to use
adjustable collars to keep the plates on the bar. Depending on the style of
collar, the pair can add 1 to 5 lbs to your bar. There are several other styles
of barbells which range in size and weight. Ask a staff member at your gym
to help you determine which barbell would best suit your needs.
Choosing free weights, machines, or a combination of both depends largely
on your goals and training experience. Table 7-2 lists a comparison of free
weights and machines to help you with your choice. If you are new to a
fitness center or if you are unsure how to work a piece of equipment, ask a
fitness center staffer for an orientation. This orientation will help you design
a workout routine based on the equipment selection at your fitness center.

64 Force Health Protection:
Though this chapter focuses on resistance machines and free weights,
resistance for strength training can come from a variety of sources, including
your own body weight. To learn about other exercise techniques and
equipment available for strength training see Chapters 8 and 10. These other
options may be most beneficial when space and equipment are limited.
Types of Workouts
Following is a description of several strength training routines. Choose
the routine that is best for you based on the time available, your goals, your
training experience, and your fitness level.
◆ Full body workouts - All the major muscle groups (as listed in
Worksheet B-2) are exercised during a single session. Perform
one to two sets of an exercise for each muscle group and rest
between sets. This should take 20-45 minutes. For general
strength training purposes; should be done at least twice a week.
◆ Circuit Training - Combines aerobic and strength exercise
stations. Each exercise station takes 30-45 seconds to perform
and stations alternate between upper and lower body exercises.
The circuit is repeated two or more times per session. It improves
aerobic conditioning and moderately increases strength when
performed three times per week. This routine is good for people
who have less than 45 minutes to do both aerobic and strength
exercises. (See Table 10-2 for an example.)
The following routines are more advanced workouts. They should only be
performed once you have developed a solid strength base using one of the
above formats, and you have exercised regularly for at least eight weeks, and
are comfortable with the correct lifting techniques.
Table 7-2. Free Weights vs. Resistance Machines
Free Weights Resistance Machines
Low cost and versatile. Expensive, less versatile,
need access to equipment.
Form is crucial; spotter is
needed. Supports the body during the
exercise; easy to adjust.
Trains balance and posture;
mimics daily activities. Isolates muscle groups more
easily than free weights.
Can perform multi-joint and
single-joint exercises. Machines made for multi-joint
and single-joint exercises.
Muscles trained through
joint’s full range of motion. Muscle training occurs in a
limited range of motion.

Nutrition and Exercise Resource Manual 65
◆ Split-routine workouts - Different muscle groups are targeted
on alternate training days. Examples include: upper versus lower
body, or push (e.g., chest press, leg extension) versus pull (e.g.,
seated row, leg curl) exercises. Allows for more intense training
for each muscle group per training session; is time consuming.
◆ Pyramid sets - Successive sets of the same exercise are
performed with progressively greater resistance while decreasing
the number of reps. For example: perform 10 reps with a 10-rep
weight in set 1; perform eight reps with an eight-rep weight in
set 2; perform six reps with a six-rep weight in set 3. Rest
between sets. You can mix up the number of sets and reps per set
that are performed. Allows for a varied training intensity, but is
more time consuming than performing one set per exercise per
muscle group.
◆ Super sets - Performing two exercises for opposing muscle
groups without a rest period between sets. Example: a set of a
chest exercise immediately followed by a set of a back exercise,
followed by a rest. This combination can be repeated one to two
more times. Limit this type of workout to once a week; on the
remaining workout days, rest between each set. May be useful for
muscle hypertrophy.
◆ Compound sets - Performing two exercises for the same muscle
group without a rest period between sets. Example: a set of one
chest exercise immediately followed by a set of a different chest
exercise, followed by a rest. Repeat this combination one to two
more times. Limit this type of workout to once a week; on the
remaining workout days, rest between each set. May be useful for
muscle hypertrophy.
Use the guidelines provided to develop sound strength training programs
and alternate exercises with in each muscle group every four to eight weeks
to maximize strength gains, enhance job-related fitness, and have fun!

66 Force Health Protection:
Calisthenics
8
Calisthenics require minimal equipment
and can be performed in almost any location. These
exercises can be used to develop and maintain muscle
strength and muscle endurance, and can be
particularly useful when strength training equipment
is not available.
Muscle Balance
As discussed in Chapter 7, muscle balance is an
important consideration when designing any strength
workouts. Exercises should be selected according to
which muscle groups they target (Table 7-2). Table 8-1
lists several calisthenic exercises and the muscle
groups they target. Use this table to design your
calisthenic routine. Also, you can add any of these
exercises to your gym-based strength and endurance
routines to create variety and alleviate boredom.
Calisthenic Guidelines
When performing calisthenics to develop muscle
strength or endurance, you should follow the same
recommendations outlined in Chapter 7. Intensity is
largely based on the number of sets and reps, and the
length of rest periods. Resistance is provided by body
weight rather than an external resistance. Proper form
for calisthenic exercises follows many of the general
exercise guidelines outlined in Chapter 7. Detailed
instructions are found in Table 8-1. (Table 8-1 was
adapted from The Navy SEAL Physical Fitness Guide.)
In this chapter
you will learn
about:
◆ Proper form
and guidelines
for performing
calisthenics.
◆ Designing a
calisthenic
exercise
program.
◆ Abdominal
exercise
techniques.
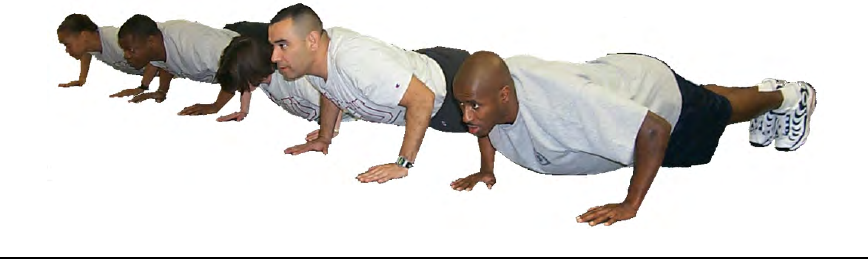
Nutrition and Exercise Resource Manual 67
To begin a calisthenics program select one exercise per muscle group from
Table 8-1. Perform this routine two to three times per week.
◆ For each exercise, start with one set of eight reps. Each set
should take about one minute. Rest for 60 seconds after each set.
◆ Gradually increase your workout by adding one or two reps per
week until you can perform twelve reps with good form.
◆ Once you have reached this point, do two sets of eight reps of
each exercise. Again, increase your workout by one or two reps
per set each week until you can perform two sets of twelve reps.
◆ Once you have reached this point, do three sets of eight reps;
again, gradually increase your workout by one or two reps per set
each week until you can do three sets of twelve reps.
◆ At this point you can increase the difficulty of your workout by:
1) changing the exercises you perform; 2) increasing the number
of reps per set; 3) modifying the difficulty of the exercise; 4)
decreasing your rest period; or 5) for each muscle group, do a
different exercise during each one of your sets (for example, do
one set of one-legged squats and one set of hand-to-knee squats as
your two sets of leg exercises).
Once you can perform three sets of 12 reps, try some of the modifications
listed below or in Table 8-1 to increase the difficulty of the exercises. These
modifications can be useful for developing and maintaining muscle strength
when training equipment is not available.
◆ Gradually add weight (e.g., do pull-ups or push-ups with a
weighted pack).
◆ Use a partner for resistance (e.g., have a partner push against
your lower leg during leg extensions).
◆ Exercise one side of the body first (i.e., one-legged squats), then
repeat the exercises for the other side.
◆ Modify the exercise (e.g., elevate legs during crunches).
◆ Perform super sets or pyramids (see Chapter 7).
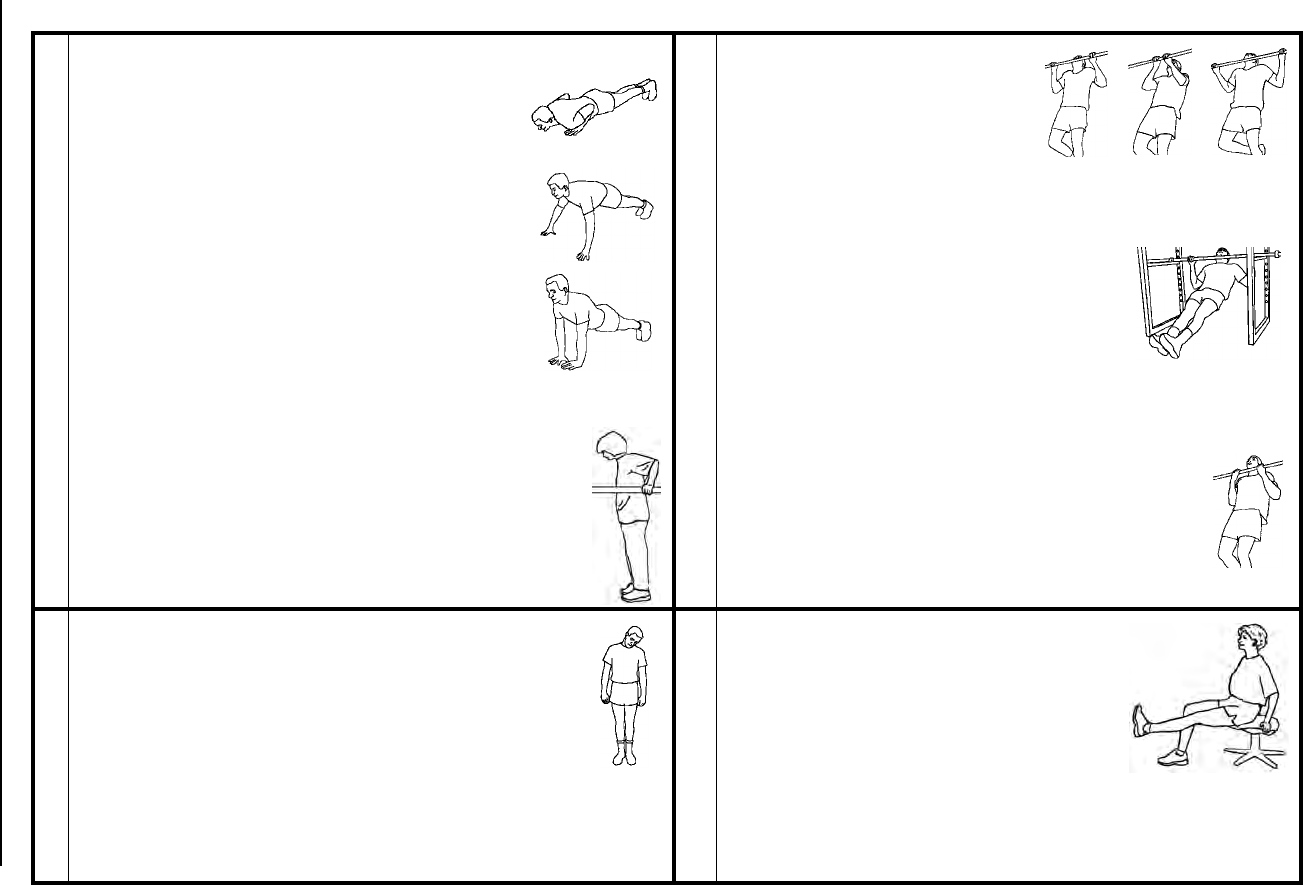
68 Force Health Protection:
Table 8-1. Calisthenic Exercises Arranged by Muscle Group
CHEST, SHOULDERS, ARMS
Push-Ups
Lie on stomach, feet and hands shoulder
width apart on deck, head facing forward,
body straight. Extend arms. Count 1: Bend
elbows 90o, lowering chest toward deck.
Count 2: Return to start position. Works
triceps, chest, shoulder, and abdominals.
Variations: Fingertip Push-ups - Begin as
above, except use fingertips to support
weight. Works forearms and improves grip
strength. Triceps Push-ups - Begin as
above, except place your hands close
together beneath your chest and spread
fingers apart. Your thumbs and index fingers
of both hands should almost touch.
Dips
Rest hands on parallel bars. Extend arms; legs are
not to support your weight unless needed for
assistance. Count 1: Bend the elbows until
shoulders are level with the elbows. Count 2:
Extend arms to return to start position. Works
triceps, chest and shoulders.
BACK, ARMS
Pull-Ups
Begin from a dead hang on a
horizontal bar, arms shoulder-
width apart, palms facing out.
Count 1: Pull body up until
chin touches bar. Do not kick.
Count 2: Return to start position. Works the back and
forearms. Grip variations: Narrow, Wide.
Incline Pull-Ups
Using a low bar, lie or sit on the deck
with chest under bar, place hands
shoulder-width apart on bar, palms out.
Count 1: Pull upper body toward bar at
a 45o angle. Squeeze shoulder blades
together during movement. Count 2: Extend arms. Works
back, shoulders, and arms.
Chin-Ups
Begin from a dead hang (i.e., full extension) on
a horizontal bar, arms shoulder-width apart,
palms facing in. Count 1: Pull body upward until
chin touches top of bar. Do not kick. Count 2:
Return to start position. Works the back, biceps.
NECK
Neck Rotations
Lie on back. Count 1: Lift head up and over to side.
Count 2: Bring head to center; Count 3: Bring head
to other side. Count 4: Return head to start
position. Works neck flexors.
HIP FLEXORS
Straight Leg Raise
Sit on the edge of a bench, keeping
back straight. Place hands behind you
for support. Bend left knee 90o.
Straighten right leg in front of you with
your right heel resting on the deck.
Count 1: Slowly raise your right leg,
lifting it no higher than your hips,
keeping your back straight. Count 2: Lower heel to 1 inch
above the deck. Works hip flexors. Variation to increase
difficulty: use an ankle weight.
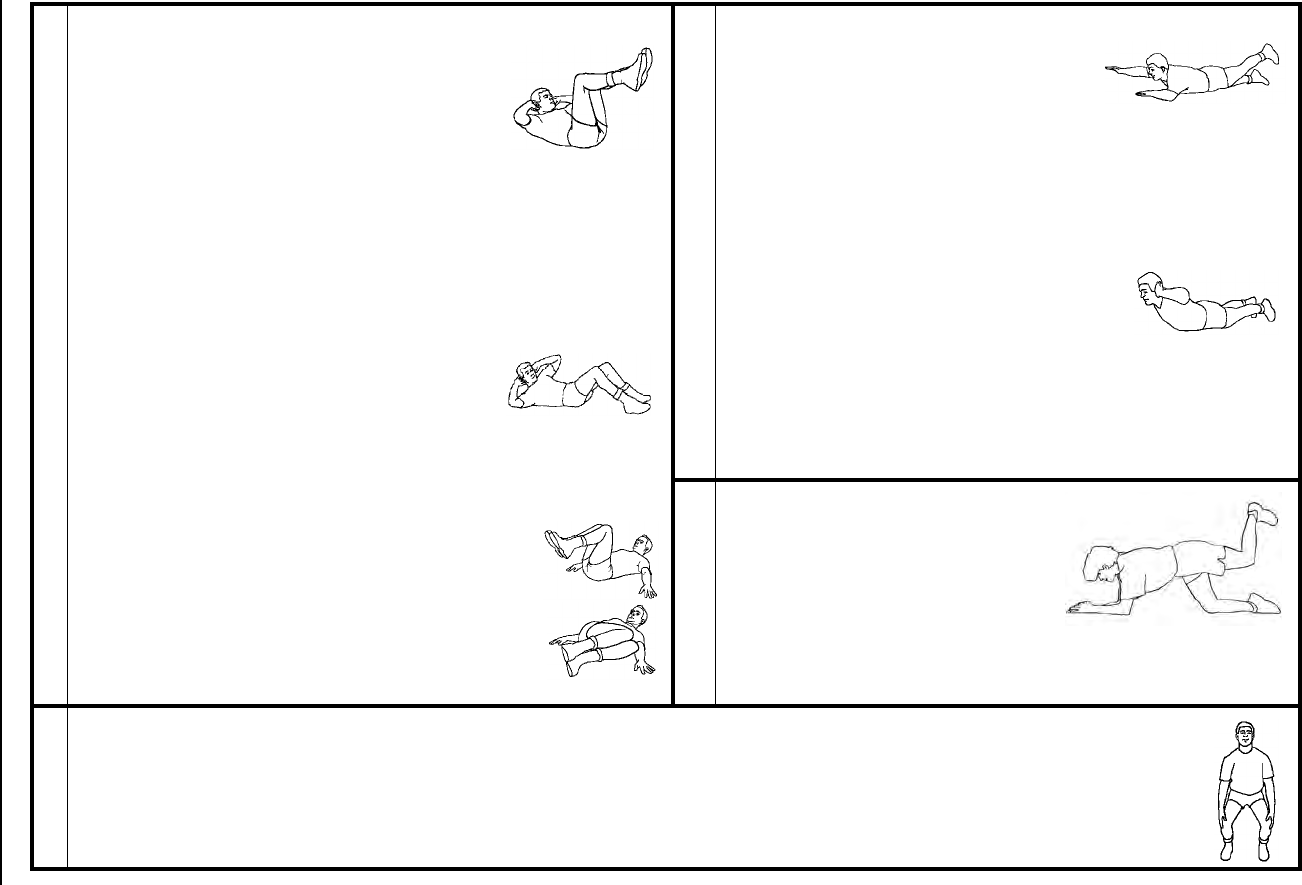
Nutrition and Exercise Resource Manual 69
ABDOMINALS (See “Abdominal Exercises” on page 70.)
Crunches
Lie on back, knees bent 90o, feet on deck,
hands behind head, elbows back. Count
1: Lift upper torso until shoulder blades
are off the deck, tilt pelvis so lower back is
pressed to the deck. Lead with the chest,
not the head. Count 2: Return to start
position. Works abdominals and obliques. Variations to
increase difficulty: bend legs and bring knees toward chest;
extend legs vertically, straight in the air; or place a rolled
towel under lower back. Arms may be placed (easy to most
difficult) alongside body, across chest, hands behind head,
or hands clasped above head.
Crossovers
Lie on back, hands behind head, knees
bent 90o, and feet on deck. Count 1: Turn
slightly and lift torso, bringing left rib cage
toward belly button. Count 2: Return to start position.
Repeat on other side. Works abdominals and obliques.
Hip Rollers
Lie on back, legs bent and elevated off deck.
Count 1: Slowly bring both knees down
together to the right until lower back begins to
rise off deck. Count 2: Return to start position.
Works abdominals and obliques.
LOWER BACK
Superman
Lie on stomach. Count 1: Lift
opposite arm and leg (i.e., right arm,
left leg) 6 inches off deck. Hold for 3-
5 seconds. Avoid hyperextension of
the back. Count 2: Slowly lower arm and leg to deck.
Repeat using opposite arm and leg. Variation to increase
difficulty: Add weights to arms and legs. Works lower
back and gluteals.
Prone Back Extension
Lie face down, hands clasped behind
back. Count 1: Lift upper torso until
shoulders and upper chest are off
Deck. Hold 3-5 seconds. Avoid hyperextension of back.
Count 2: Return to start position. Variations to increase
difficulty: Place hands behind back (easiest), behind
head, straight over head (most difficult). Works lower
back.
GLUTEALS
Rear Thigh Raises
Start on and knees and
forearms. Lift left leg, keeping it
bent 90o, so that left knee is no
higher than hips. Keep back flat.
Count 1: Lower left leg 6 inches.
Count 2: Lift leg to start position.
Switch legs and repeat. Works gluteals. Variation to
increase difficulty: Straighten leg to be lifted.
LEGS
Hand to Knee Squat
Place feet shoulder-width apart, arms at sides. Count 1: Bend at hip and knees, keep back straight and feet flat,
until your fingertips pass knees. Knees should not go beyond toes. Count 2: Push through the heels to return to
start position. Works quadriceps, hamstrings, and gluteals.
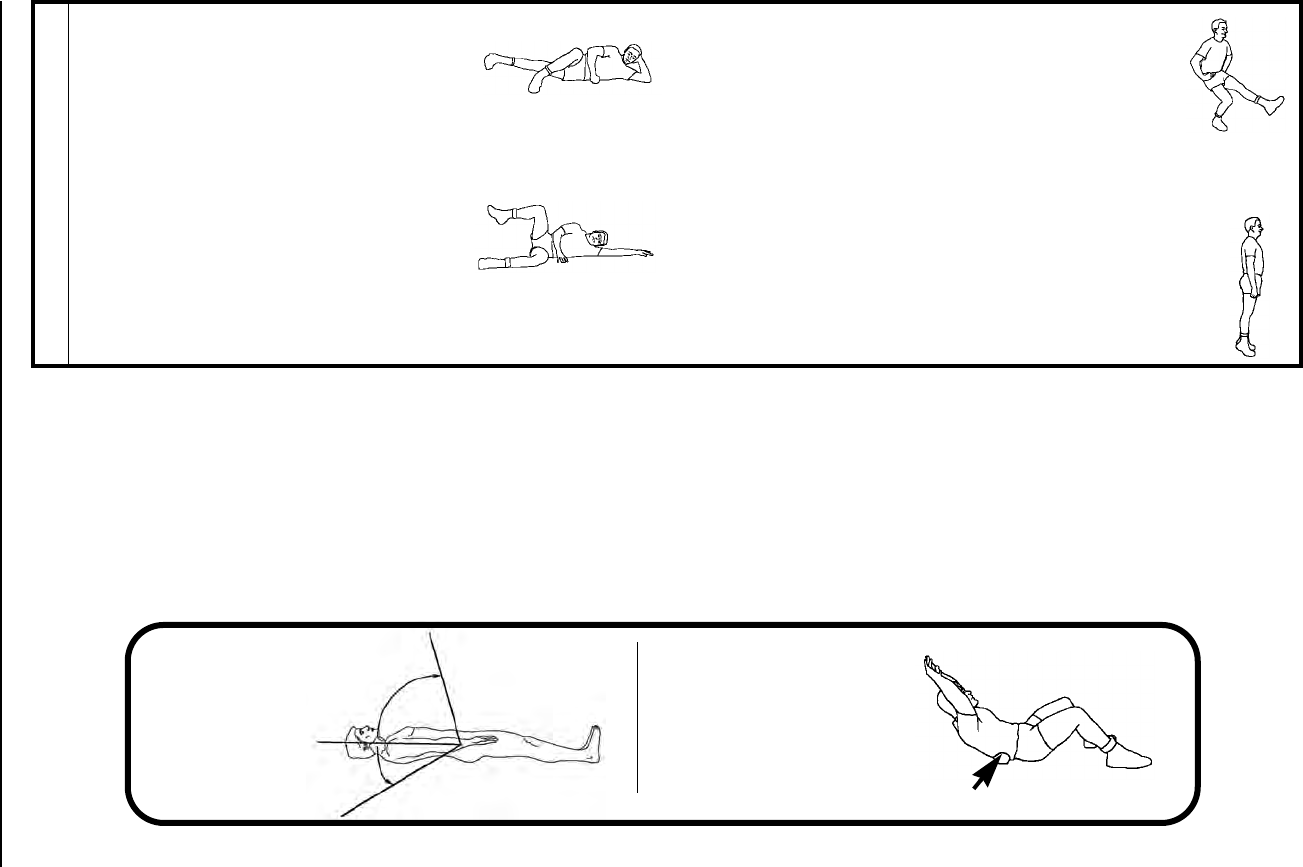
70 Force Health Protection:
Abdominal Exercises
Abdominal muscles help support the lower back. Therefore, strong abdominal muscles can decrease the risk of
developing lower back pain. When doing abdominal exercises on the deck, only a portion of the abdominal’s range
of motion is being strengthened because your lower back is flattened. However, by placing a rolled towel under
your lower back you can extend the range of motion for abdominal exercises (see Figure 8-1).
Figure 8-1. Range of Motion of the Abdominals
LEGS
Burt Reynolds
Lie on left side with head supported by
hand, bend right leg and place it in front
of left knee. Count 1: Lift left leg
approximately 8 inches off deck. Count
2: Lower left leg to 1 inch above the deck. Repeat for the
right leg. Works inner thigh (hip adductors).
One-Legged Squat
Shift weight to right leg, lifting the left leg
straight out in front of you. Count 1: Bend
right knee until it is over your toes. Count 2:
Push up through right heel to return to start
position. Repeat using other leg. Works
quadriceps, hamstring, and gluteal muscles.
Leg Lifts
Lie on left side, bend both knees at a
90o angle from torso. Count 1: Lift right
leg 6-8 inches, keeping knee and
ankle level. Count 2: Lower right leg to
1 inch above left leg. Repeat for the left leg. Works outer
thigh (hip abductors).
Calf Raises
Stand on step with heels hanging off edge.
Count 1: Lift heels 3 inches. Count 2: Lower
heels 3 inches. Works calf muscles. Variations:
Perform exercise with toes pointed inward,
straight forward, and turned outward.
Neutral (0o)
Flexion (75-90o)
Extension (30o)Towel
A rolled towel under the
lower back increases trunk
extension when performing
abdominal exercises.
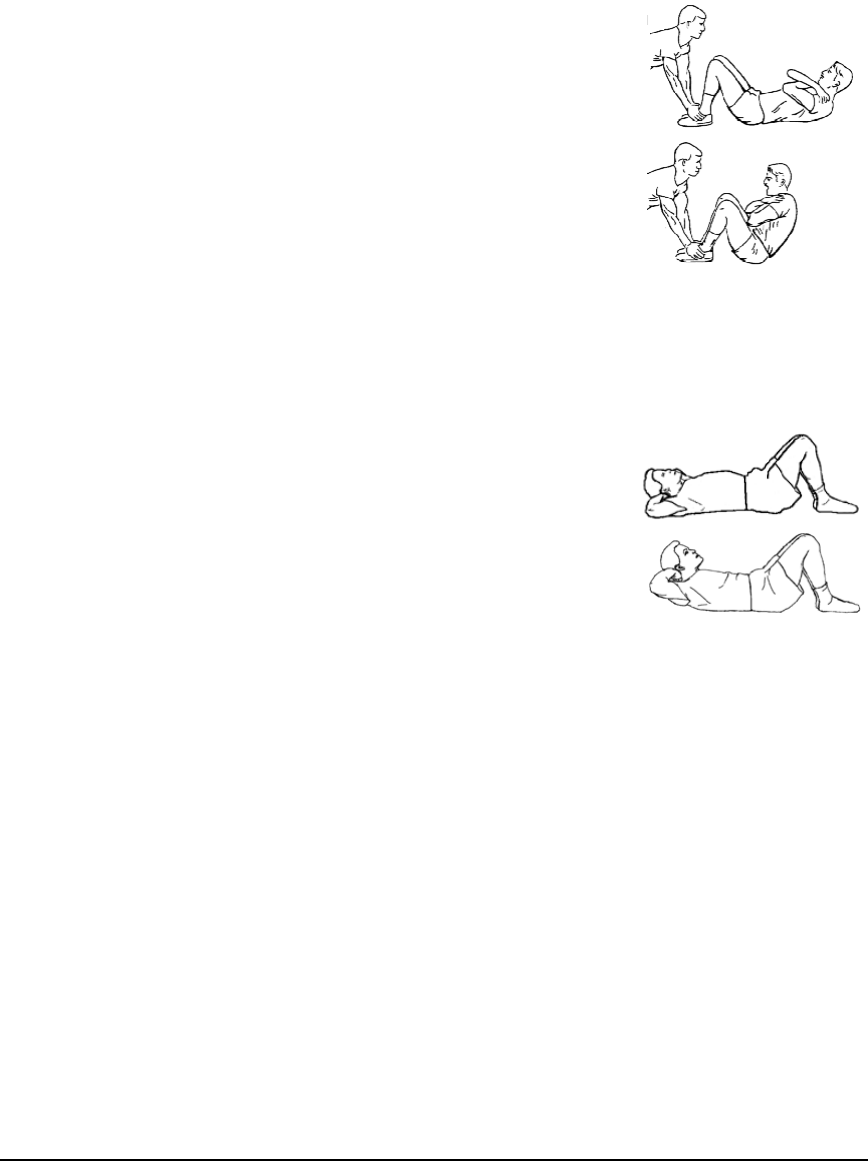
Nutrition and Exercise Resource Manual 71
In this section two common abdominal exercises, the curl-up and the
crunch, will be described. The curl-up, used on the PRT as a measure of
muscle endurance, targets both the abdominal and hip flexor muscles. The
form for the curl-up is:
◆ Lie on back with knees bent, feet flat on
deck, heels 10 inches from buttocks and held
down by a partner. Cross arms and hands on
chest or shoulders.
◆ Curl torso up, touching elbows to upper
thighs while hands remain on the chest or
shoulders. Exhale as you lift.
◆ Lie back until the lower edge of your
shoulder blades touches the deck. Inhale as
you lower.
The crunch is similar to the curl-up but is performed within a smaller
range of motion. The torso is lifted by abdominal muscles during a crunch.
The form for the crunch is:
◆ Lie on back with knees bent 90o, feet flat on
deck, shoulder width apart. Do not anchor
your feet. (Anchoring your feet or placing
your legs out straight on the deck will target
your hip flexors, not your abdominals.)
◆ Place fingertips lightly on the back of the
head, elbows out to sides and in line with
ears. (Variations to this include arms at sides, arms across chest,
and arms above head.)
◆ Lift torso until the shoulder blades come off the deck by moving
rib cage toward hips. Exhale as you lift. Look up at the ceiling to
prevent neck strain.
◆ Return to the starting position. Inhale as you lower.
Some people may develop lower back pain if they perform curl-ups
routinely. For them, the crunch is recommended as an alternate exercise.
Regardless of which exercise you choose when training, focus on the quality,
not the quantity, of repetitions. If you perform either exercise rapidly, you
are using momentum and not building abdominal strength!
From OPNAVIST 6110.1E

72 Force Health Protection:
Flexibility
9
Most trainers, exercise physiologists, and health
care professionals agree that flexibility training,
although often overlooked, is an important component
of a physical fitness program. Stretching becomes even
more important as you achieve advanced levels of
muscle strength and endurance. If optimum functional
fitness and military readiness are the goals, then well-
balanced flexibility training is a must.
Benefits of Stretching
What is flexibility? When
someone says they are flexible,
what do you think of? Maybe you
picture someone who can touch
their toes. Flexibility is the ability
to move your joints freely through
a full range of motion. The range
of motion at each joint is different and depends largely
upon the structure of the joint and the condition of the
muscles, tendons, and ligaments around the joint.
Proper stretching increases flexibility and leads to:
◆ Reduced muscle soreness after exercise.
◆ Lower risk for injury.
◆ Mental and physical preparation for
exercise or competition.
◆ Enhanced muscle performance through a
larger, functional range of motion.
◆ Mental relaxation.
In this chapter
you will learn
about:
◆ The benefits of
flexibility
training.
◆ Physiology of
stretching.
◆ Proper
stretching
techniques.
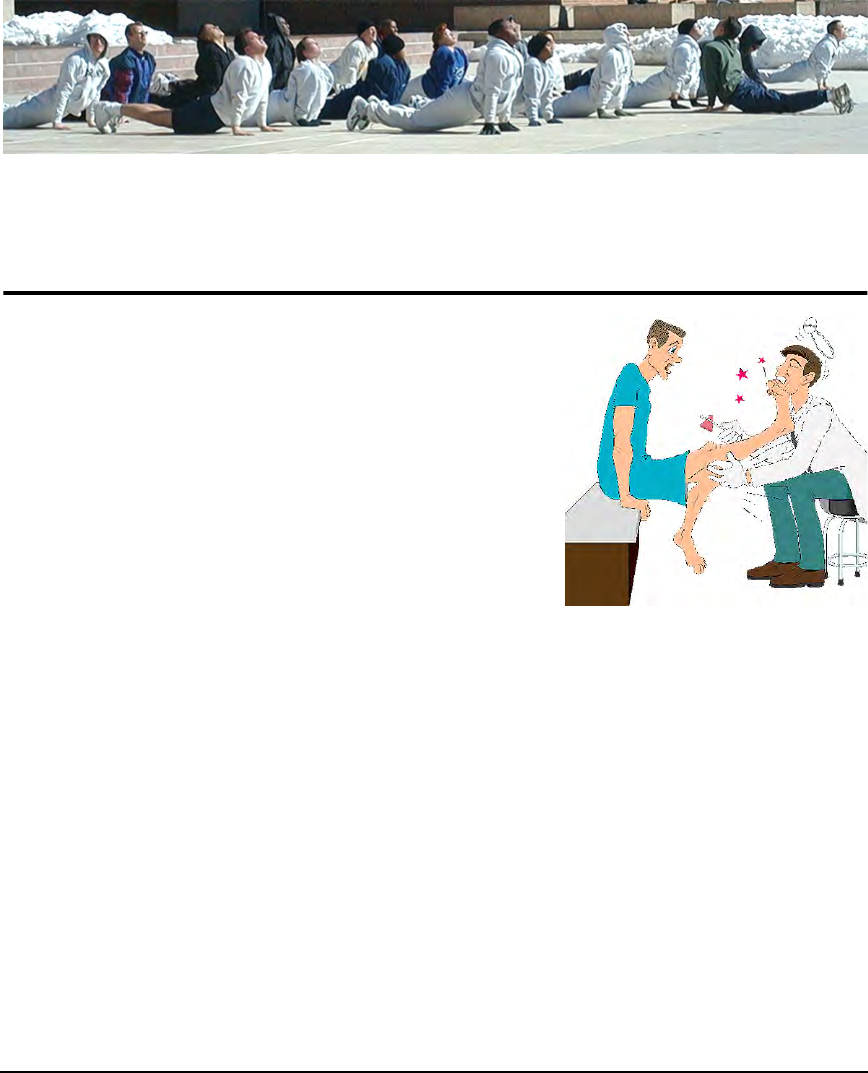
Nutrition and Exercise Resource Manual 73
The goal of flexibility training should be to enhance joint movement while
maintaining joint stability. Therefore, stretching exercises complement both
strength and aerobic activities. An intense workout can cause small tears in
muscles. Also, during exercise recovery, muscles and connective tissues
(ligaments and tendons; defined in the Glossary) can shorten. Stretching
prevents this muscle shortening and decreases the muscle soreness associated
with intense workouts.
Physiology of Stretching
To understand the proper techniques for
stretching it is helpful to know how the muscle
and connective tissue respond to being stretched.
There are areas within both your muscles and
tendons that can sense both how quickly and how
far your muscles and tendons are being
stretched. These areas protect your muscles and
tendons from becoming overstretched or torn
during a quick stretch by causing a reflex muscle
contraction. This muscle reaction is called the
stretch reflex. A classic example of this is when
someone taps your leg just below the kneecap. This action quickly stretches
the quadriceps muscle (see Figure 7-2) and causes your thigh to contract and
kick out your lower leg. The quicker the stretch, the stronger the reflex
contraction. Therefore, by stretching slowly you avoid contracting the muscle
you are trying to stretch!
Tendons respond to stretching as well. They cause the stretched muscle
attached to the tendon to relax and signal its opposing muscle to contract.
This protects the stretched muscle and tendon from tearing. As a stretch is
held your muscles and tendons adapt to the new length.
The most effective stretches are performed
slowly and are held for 10 - 30 seconds.
74 Force Health Protection:
Flexibility Exercises
One of the most safest and most beneficial types of flexibility exercises is static stretching. Static Stretches
are slow, controlled movements through a full range of motion. The term “static” means the stretch is held at the
end of the joint’s range of motion. These static exercises are considered safe and effective because they stretch the
muscles and connective tissue without using fast movements that will be resisted by the muscles. These exercises
can be done actively (e.g., you contract the opposing muscle group to stretch the target muscle group) or passively
(e.g., you use a towel to stretch the muscle). Incorporate the static stretches in Table 9-1 in your exercise program.
These exercises target the muscle groups shown in Chapter 7, Figure 7-2. Select at least one stretch for each muscle
group. Hold each stretch for 10-30 seconds then rest 10 seconds. Repeat each stretch 2-5 times. Muscle balance also
applies to stretching, so stretch opposing muscle groups (e.g., stretch hamstrings and quadriceps).
A second type of flexibility exercises is dynamic stretching (Table 9-2). Dynamic Stretches are controlled
muscle contractions through a joint’s range of motion. These stretches should be used to enhance the performance
of an activity that immediately follows the stretch; i.e., swinging your racket prior to a tennis match. This type of
stretching warms the muscles. Dynamic exercises are safe as long as you do not use momentum to force a joint
through a greater range of motion than it is capable. Also, avoid bouncing movements. (See page 73.)
Table 9-1. Static Stretches
Calf StretchStanding on a step,
place the ball of the
right foot on the
edge of the step.
Bend left knee and
gently drop right
heel. Stretches the
right gastrocnemius.
Variation: To stretch
the ankle, slightly bend the right
knee after dropping your right
heel. Switch legs and repeat.
Quadriceps Stretch
Lie on stomach with both legs
extended. Slowly bend left knee.
Gently grasp left ankle with right
hand and pull toward body. Keep
back straight. Stretches the
quadriceps. Switch legs and
repeat. Variation: Perform stretch
when standing, holding on to a
stationary object to keep your
balance.
Hamstring Stretch Lie on
back with
both legs
extended.
Bring left
leg to
chest and grasp left thigh with
both hands. Gently pull left leg
toward chest. Stretches left
hamstring and right hip flexor.
Switch legs and repeat.
Modified Hurdler’s Stretch
Sit down,
extend
right leg
and place
left foot
against
inner right
thigh.
Gently bend forward from the
hips, toward toes. Stretches the
hamstring. Switch legs and
repeat.
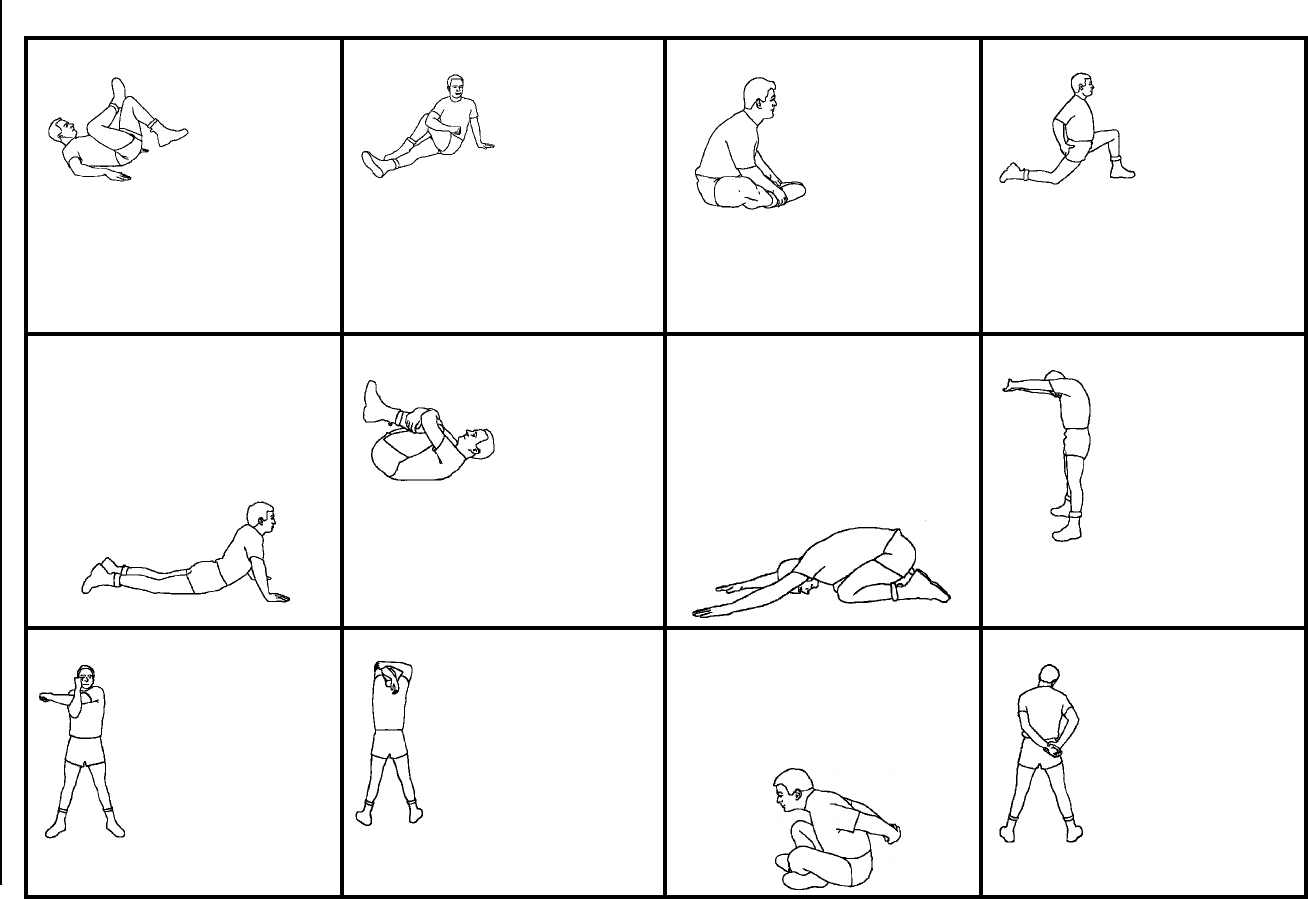
Nutrition and Exercise Resource Manual 75
Hip Stretch Lie on back
with knees
bent, feet flat
on the deck.
Place right
ankle on left
knee. Grasp left thigh with both
hands and gently pull it toward
chest. Switch legs and repeat.
Stretches hip extensors.
Pretzel Stretch Sit with both
legs straight.
Bend the left
knee and cross
left foot over
the right shin.
Turn torso left and place right
elbow just below the left knee.
Turn as far left as possible.
Stretches hip abductors, lower
back, and iliotibial band. Switch
legs and repeat.
Butterflies Sit with legs
bent and
bottoms of feet
together. Wrap
hands around
ankles and
gently lean
your torso
forward, keeping your back flat.
Do not pull on ankles or press
knees down with elbows.
Stretches hip adductors.
Lunge With feet side
by side, take a
large step
forward with
left foot. Bend
your left knee
until it is
directly over left ankle. Gently
press your hips forward and
down, keeping your back straight.
Stretches hip flexors. Switch legs
and repeat.
Lizard
Lie face down, palms on the
deck under your shoulders.
Gently lift torso with arms and
lower back muscles. Lift only
until your pelvis is off the deck.
Stretches the abdominals.
Lower Back Stretch
Lie on back,
bring knees to
chest and
grasp knees
with hands
(arms may
either be below
or above lower legs). Gently pull
both knees toward chest. Lift chin
toward chest. Stretches the lower
back.
Kneeling Back Stretch
Kneel down with knees shoulder
width apart. Sit back on your
heels. Lean forward so your
chest rests on your thighs.
Extend arms over head. Stretch
arms and chest as far forward as
possible. Stretches lower back.
Upper Back Stretch
Clasp hands
together in front of
chest, palms facing
out, arms extended.
Press through
palms until back and
shoulders are
rounded. Stretches
back and shoulders.
Can do seated or standing.
Posterior Shoulder Stretch
Bring left arm across
chest. Use right hand
to gently push upper
left arm toward chest.
Stretches shoulders.
Switch arms and
repeat.
Triceps Stretch
Bring left arm up and
back until left palm is
between shoulder
blades and left elbow is
above left ear. Gently
grasp upper left arm
with right hand and
push left arm behind
head. Stretches the
triceps. Switch arms and repeat.
Chest Stretch
Clasp hands behind lower back,
thumbs pointed down. Gently
pull arms up toward ceiling.
Stretches chest and shoulders.
Can do seated or standing.
Neck Stretch
Clasp hands behind
back. Bend neck so
right ear moves to
right shoulder. Gently
pull left arm.
Stretches neck.
Switch arms to
stretch the right side
of the neck.
Table 9-1. Static Stretches
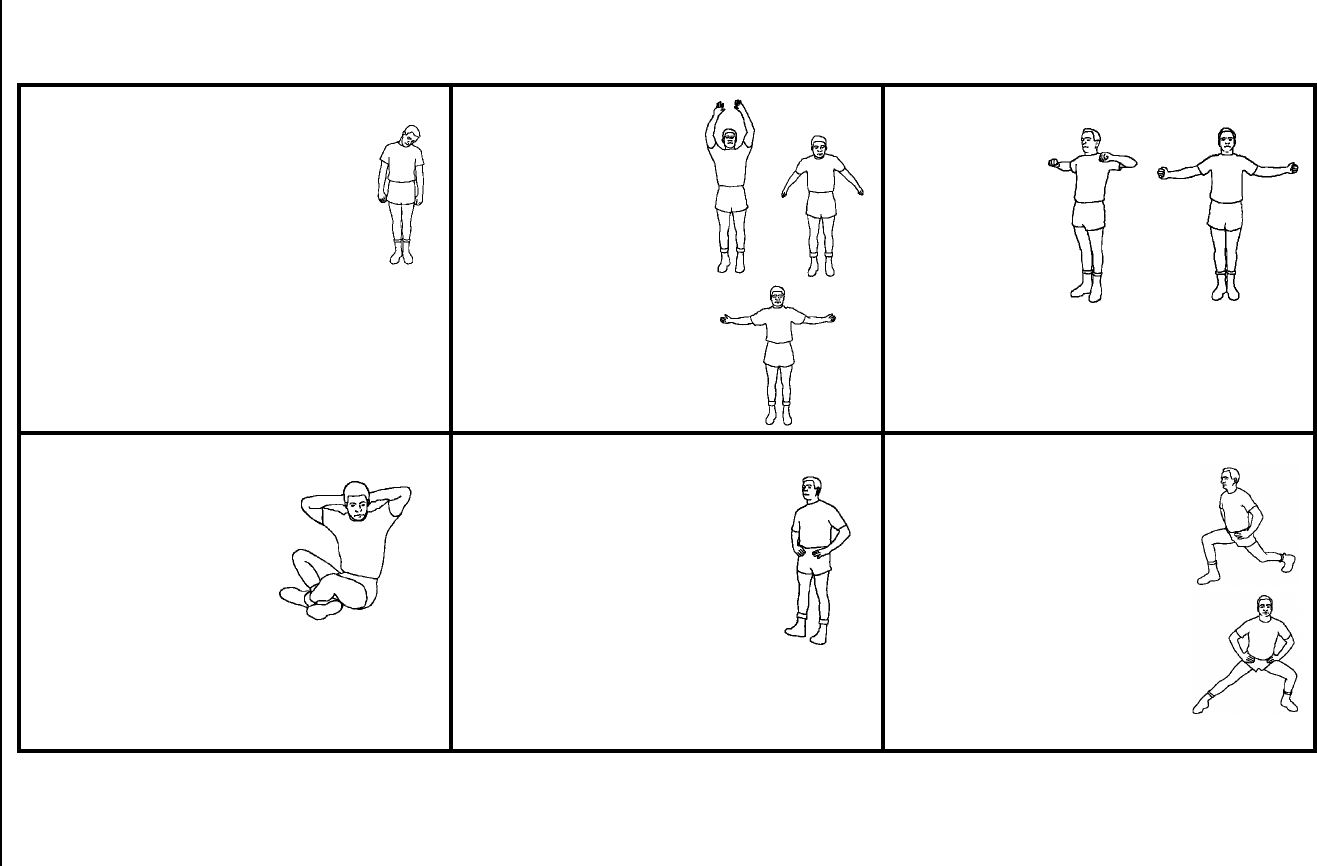
76 Force Health Protection:
Table 9-1 and Table 9-2 were adapted from The Navy SEAL Physical Fitness Guide.
Table 9-2. Dynamic Stretches
Neck Stretch
Begin from a standing position.
Count 1: slowly roll the head to one
side, Count 2: slowly roll the head to
the front, Count 3: slowly roll the
head to the other side, Count 4:
slowly roll the head to the front
again. Repeat. Do not roll the head
back. Stretches the neck muscles.
Variation: Turn your head to look over your
right shoulder then slowly turn your head to
look over your left shoulder. Repeat.
Up Back and Over
Begin from standing
position with arms at
sides. Count 1: slowly
bring both arms forward
and upward. Count 2:
slowly bring both arms
down and back. Count 3:
slowly move both arms
forward, up, back, and
around to complete a full
circle. Stretches the
shoulders, chest, and
back.
Press-Press-Fling
Begin from a
standing
position with
arms bent,
fists at chest
level, and
elbows out to
the side. Count
1: gently pull
elbows back
and release. Count 2: repeat count 1. Count 3:
slowly extend arms and pull them back.
Stretches the chest and shoulders.
Trunk Twisters
Begin in a seated
position with legs
crossed and hands
placed behind your
head. Count 1: slowly
turn your torso, at the
waist, to the right and
pause. Count 2: slowly
turn your torso to the
left and pause. Repeat. Stretches abdominals
and obliques.
Standing Toe Pointers
Start from a standing position
with body weight over the heels.
Flex and extend the feet and
toes. Stretches both the calf
muscles and the muscles in
front of the shins. Variation: walk
on the heels with toes pointed
upward.
Four-Way Lunges
Begin from a standing position.
Count 1: lunge forward with
right leg, distributing body
weight across both legs. When
lunging forward, the knee
should not extend beyond the
toe of that leg. Count 2: using
the right leg, push off and
return to start position. Repeat
this movement using the same
leg but lunge to the side.
Perform exercise with the left
leg. Stretches the leg muscles.

Nutrition and Exercise Resource Manual 77
Training in
Confined Spaces
10
During deployment or extended training
exercises you may encounter conditions that limit your
physical training routines and options. Submarines and
small assault craft probably create the greatest
challenge; but a well balanced training program can be
maintained even with limited space and equipment. So,
take this opportunity to design new routines with
alternative exercises and have fun. The concepts for
designing training routines in confined spaces is the
same as any gym-based routine, you just have to be
more creative. Follow the FITT Principle guidelines
outlined in Chapters 4, 5, and 7 and try some of the
exercise in this chapter when designing your workouts.
In this chapter
you will learn
about:
◆ Exercises to
perform when
space and
equipment are
limited.
◆ Designing a
circuit
training
workout.
◆ Maintaining
morale during
deployment.
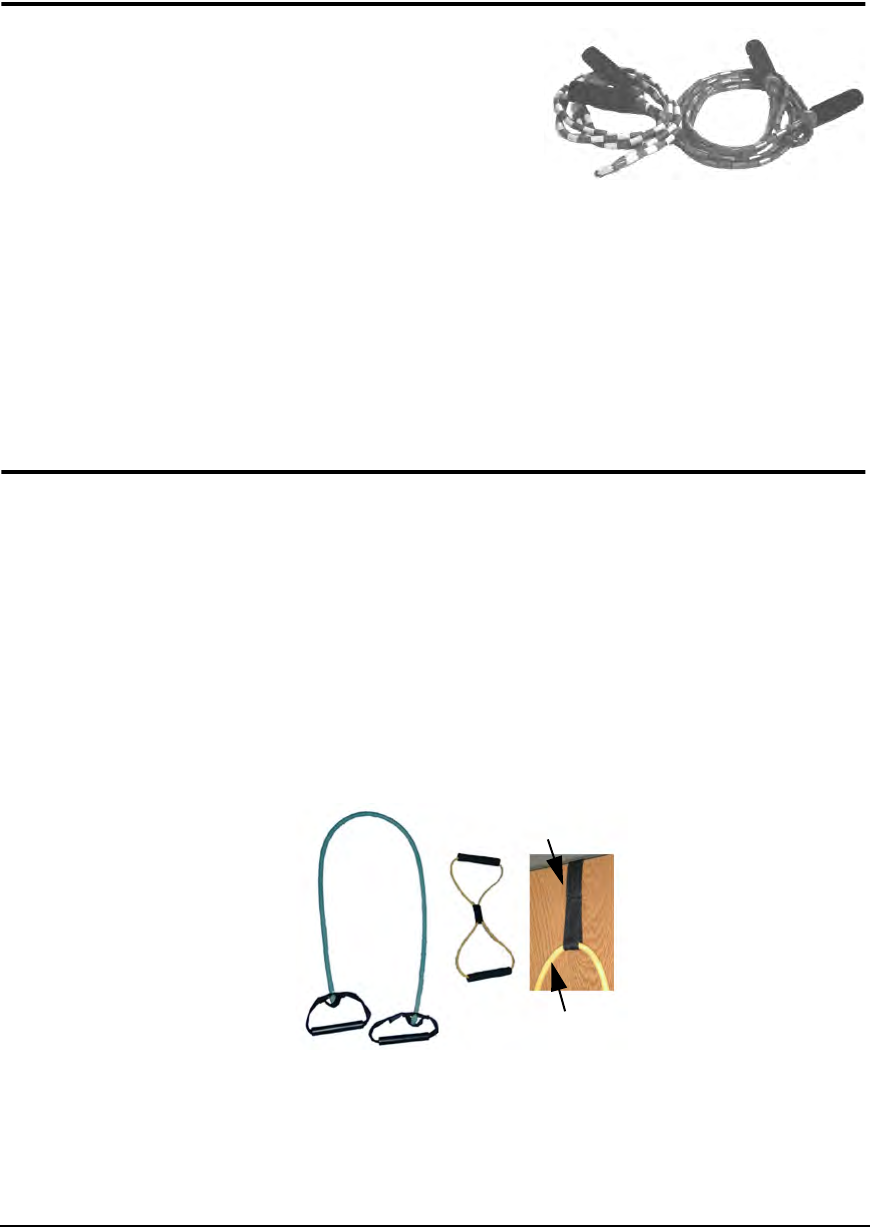
78 Force Health Protection:
Aerobic Conditioning
Performing your aerobic training routines
may seem impossible if you don’t have access
to cardiovascular training equipment or large
areas to train. However, with a little creativity
you can design a training routine to maintain
your fitness level. Some exercises you can
perform in confined quarters with minimal equipment include:
◆ Jogging or marching in place.
◆ Jumping rope or jumping jacks.
◆ Stair stepping, if you have access to stairs or if you have space for
an aerobic step bench (plastic step with risers).
Strength Training
In addition to calisthenics, strength exercises using light-weight, portable
equipment, such as elastic tubing, dumbbells or a ball, can be performed in
small spaces. Examples of these exercises are shown in Table 10-1.
Regardless of the equipment used, the general principles and techniques
outlined in Chapter 7 for muscle strength and endurance training apply.
Follow the set and rep recommendations outlined in Chapter 8 for calisthenic
exercises, starting with one set of eight reps. Include exercises for each of the
major muscle groups mentioned in Chapter 7, Figure 7-2.
Elastic Tubing and Bands
These come in
different widths and
resistances, each
designated by a different
color. (As a rule, the
smaller the tube’s width,
the less resistance it
provides.) The basis of
elastic tubing exercises
is that as you stretch the
tubing during your exercise, it provides a continuously increasing resistance.
Resistance can be adjusted by: 1) altering the placement of the tubing
(addressed in Table 10-1), 2) using two tubes, 3) using a thicker tube, or a
combination of all these. Note that using two thin tubes may provide less
resistance than using one thick tube. Typically, tubes and bands are sold in
a. b. c.
a.
a. 4 ft. elastic band.
b. 1 ft. elastic loop
with foam handles.
c. Nylon anchor
piece to place in
door jams.

Nutrition and Exercise Resource Manual 79
4 ft. lengths and cost $5 to $10. When purchasing tubing, buy one with
handles large enough to slip over your forearms. Buy several tubes of varying
widths since you will need different resistances for different exercises. Also,
check the tubes periodically for wear and tear.
Inflatable Resistance Balls
These light-weight balls are becoming very popular in
fitness centers and are excellent for abdominal, lower back,
stability, and stretching exercises. The goal in resistance
ball training is to keep your balance and stability while
performing exercises on the ball, which acts as an unstable
base. Resistance balls are typically 18 to 30 inches in diameter and cost about
$30. Purchase a resistance ball that when you sit on it after it is fully
inflated, your thighs are parallel to the deck. In addition, when you purchase
these balls, you get a video of various exercises and routines. One drawback
is that you need access to an air pump because, if the ball is kept inflated,
it can take up a lot of storage space.
Strength Exercises
Table 10-1 shows exercises that can be performed using resistance tubing
(bands) and balls. When performing elastic tubing exercises, you can use a
partner, instead of an anchor, to secure the tubing during your exercise. Just
be sure your partner holds the tubing at the appropriate height and distance
from you (and doesn’t let go!). When using the resistance bands, it is
important to anchor them properly. Some examples are shown in Figure 10-1.
Figure 10-1. Anchoring Elastic Tubing
2.
1. 1. Wrap the band around the top and sides of both feet, then pull
the handles up through the middle of your feet. This type of wrap
is useful for anchoring the band during rowing exercises.
2. a. Using the 1 ft. elastic loop, sit down and place your right foot
on the middle of the loop.
b. Wrap the right end of the tubing over your foot.
c. Pull the left end of the tubing up through the right end of the
tubing loop.
d. Take the left end of the tubing loop and wrap it around your
left foot.
This type of anchor is useful for leg lifts and leg curls.
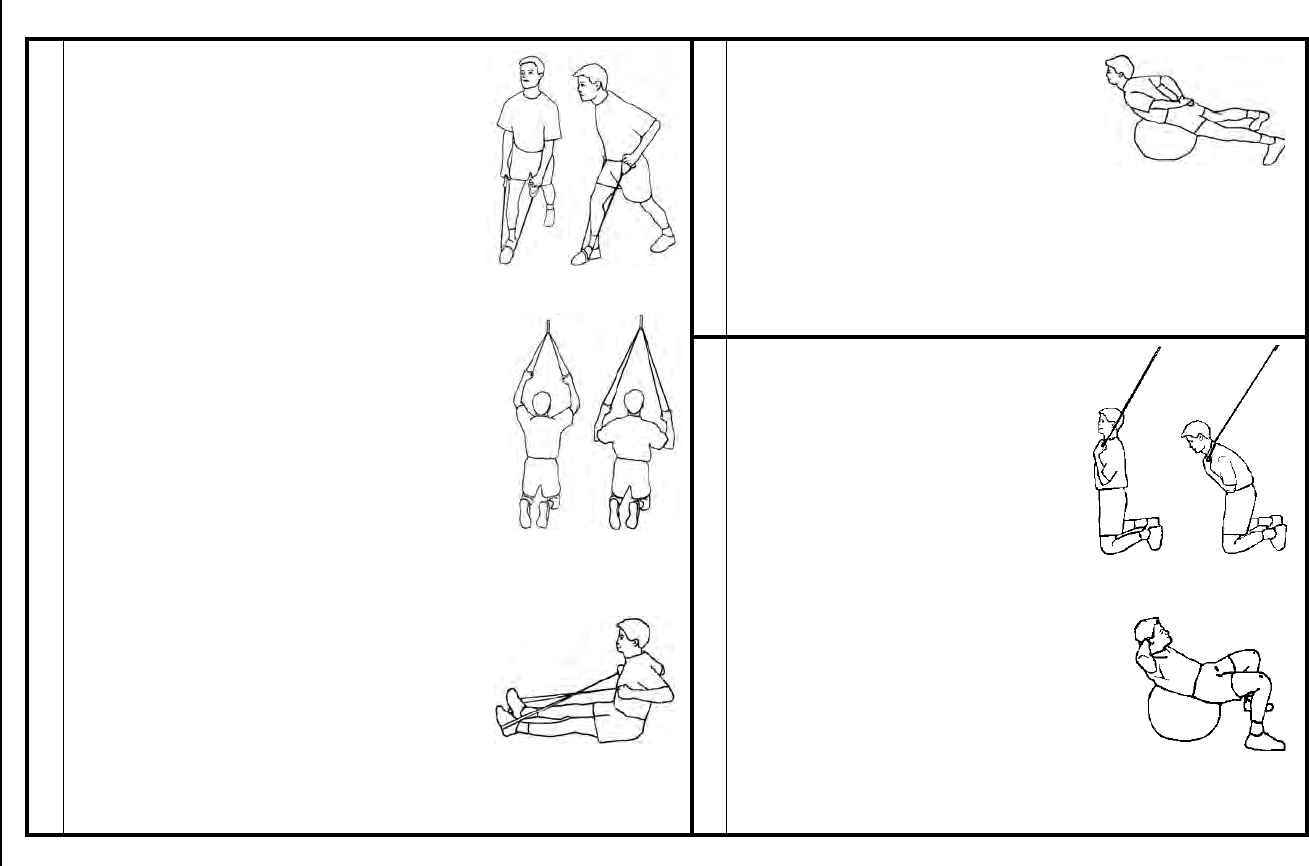
80 Force Health Protection:
Table 10-1. Exercises to Perform in Confined Spaces
Back
Bent-Over Row with Band
Grab one end of the band in each hand. Step
on the middle of the band with your left foot,
step back 2 ft. with your right foot. Bend
forward slightly at the waist, keep your
shoulders and hips facing forward. Count 1:
Lift both hands from your thighs to your
waist. This should take 2 seconds. Pause for
1 second. Count 2: Return hands to thigh
level in 4 seconds. Keep your elbows close
to your body throughout the exercise. Works
the back and biceps muscles.
Lat Pulldown with Band
Secure the middle of the band to a fixed object
above your head. Grasp one handle in each
hand. Facing the anchor, step back 1 foot and
kneel. Arms should be extended above head.
Count 1: Pull hands down to shoulder height in
front of your head, keeping chest and head up.
Back should remain straight. Press your
shoulder blades together in the middle of your
back as you pull your arms down. This should
take 2 seconds. Pause 1 second. Count 2:
Return to start position in 4 seconds. Variation:
may need to use the tubing loop instead of a band for adequate
resistance.
Lower Back
Lower Back on Ball
Kneel beside resistance ball, lay your
chest on top of the ball, place your
hands in front of the ball. Extend your
legs so only your feet are on the deck
and walk forward, rolling the ball back
closer to your hips. Place your hands
behind your back. Count 1: Keep your back straight and raise
your torso up off the ball until your back is extended. Count 2:
Return to the start position. Try to keep ball steady during
exercise. Works the lower back. Similar to prone back
extension performed on the deck. Variations: Can do all the
same extension exercises as on the deck.
Abdominals
Abdominal Crunch with Band
Anchor the middle of the band above
your head. Kneel 1 ft. in front of the
anchor, and grasp both ends of the
band in your hands. Place your hands
palms down on your shoulders. Count
1: Pull your rib cage down closer to
your hips. This should take 2
seconds. Pause 1 second. Keep your
hips and legs still. Count 2: Return to
the start position in 4 seconds.
Seated Row with Band
Sit on deck with legs extended, knees slightly
bent. Place the center of the band under your
feet. Count 1: With arms extended at chest
level and hands over knees, bend your
elbows and pull your hands back to each side
of your chest. This should take 2 seconds.
Pause 1 second. Count 2; Return to start
position in 4 seconds. Works back and biceps.
Abdominal Crunch on Ball
Sit on ball, slowly walk feet away from ball
as you lie back on to the ball. Ball should
be underneath your midback. Place your
hands behind your head. Count 1: Pull
your rib cage closer to your hips. Count 2:
Return to the start position. Try to keep
ball steady during exercise. Works the
abdominals. Variations: Use a towel under your lower back
instead of the ball; perform side crunches on the ball to target
the obliques.

Nutrition and Exercise Resource Manual 81
Chest
Chest Fly with Band
Sit on the deck with your left leg straight and
your right leg bent, with your right foot
touching your left thigh. Hold one handle of
the band in each hand. Wrap the band under
your left heel, about 1/3 the length of the
band down from your left hand. Keep your
back straight, head up, and shoulders back.
Place your right hand on the deck by your
right knee. Straighten your left arm so that
your elbow is only slightly bent and raise your
arm in front of you to chest level. Count 1:
Slowly pull your upper left arm across your
chest without bending your elbow; this
should take 2 seconds. Pause for 1 second.
Count 2: Return to the start position in 4 seconds. Your torso and hips
should not move during this exercise. Works your chest
muscles.Variations: a) perform this standing or kneeling by anchoring
the band to a stationary object at chest height; b) lie on your back on a
bench and use dumbbells; c) have a partner push (manual resistance)
against your upper arms as you do the exercise.
Incline Press with Band
Grab one end of the band in each
hand. Step on the band with your
right foot, step your left foot through
the band and forward 2 ft. Bring your
hands to your shoulders with your
palms facing forward. Count 1:
Extend your arms up and forward in
front; your hands should be in front of
and a little higher than your forehead.
This should take 2 seconds. Pause
for 1 second. Count 2: Return to start
position. Works the chest and shoulders. Variations: a) for
more resistance, use a second tube and place it under your
front foot; b) for less resistance, anchor the tube to a stationary
object at waist height, step forward 2 ft. and perform the
exercise.
Chest Press with Band
Wrap the band at shoulder height around a bench
that is wider than shoulder-width (or secure with
two anchors). Keep your back straight, shoulders
down and head up. Grip one end of the band in
each hand, and place your hands on each side of
your chest. Count 1: Extend arms straight in front
of you at chest height, do not lock your elbows;
this should take 2 seconds. Pause for 1 second.
Count 2: Return to the start position in 4 seconds.
Works your chest, shoulders, and
triceps.Variations: a) have a partner hold the band in both hands,
keeping his hands at your shoulder height and wider than your
shoulder-width; b) lie on back on a bench and use dumbbells; c)
have a partner provide manual resistance against your hands as you
perform a press.
Biceps
Biceps Curl with Band
Grab one end of the band in each
hand. Step on the band with your
left foot, step your right foot through
the band and forward 2 ft. Count 1:
With hands at sides and palms up,
bring your palms to your shoulders.
This should take 2 seconds. Pause
for 1 second. Count 2: Return to
start position. Works the biceps.
Variations: a) for more resistance,
use a second tube (as shown) and
place it under your front foot); b)
use dumbbells; c) have a partner
pull against your lower arm during the curl.
Table 10-1. Exercises to Perform in Confined Spaces
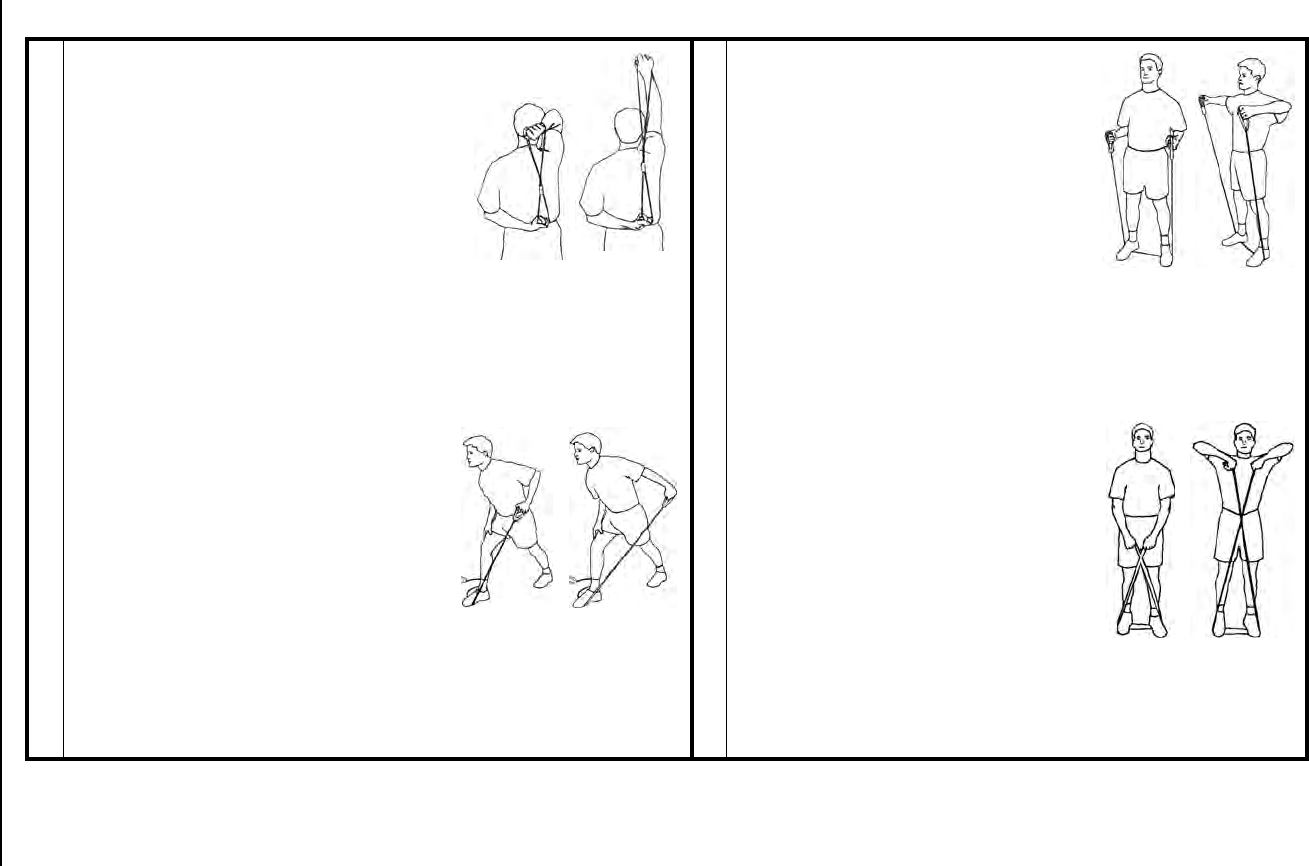
82 Force Health Protection:
Triceps
Triceps Extension with Band
Stand with feet hip distance apart, knees
slightly bent. Grab one end of the band in
your right hand and place it over your right
shoulder. Your right elbow should be
beside your head and the band should be
dangling down your back. Reach around
your back with your left hand and grab the
other end of the band with your left hand.
Place your left hand on your low back.
Count 1: Extend your right arm straight
above your head, keeping your left hand
still and your right elbow close to your head. Do not lock your right
elbow. This should take 2 seconds. Pause 1 second. Count 2:
Return to the start position in 4 seconds. Works the right triceps.
Switch arms to work the left triceps.Variations: a) if you have a long
piece of tubing, grab the middle of the tubing (instead of the end)
with your left hand; b) use dumbbells.
Shoulders
Lateral Raise with Band
Grab one end of the band in each hand.
Stand on middle of the band, feet
shoulder-width apart, knees slightly
bent. With arms at sides, bend elbows
90o. Count 1: raise your upper arms to
each side until your elbow (still bent
90o) is level with your shoulder. This
should take 2 seconds. Pause 1
second. Count 2: Return to start
position in 4 seconds. Keep your elbow
bent during the lift. Works the
shoulders. Variations: a) for more resistance, use 2 bands,
stand on only one band with each foot, hold one end of each
band in each hand; b) use dumbbells; c) have a partner push
down against your upper arms as you lift; d) increase the
difficulty of the exercise by straightening your elbow.
Upright Rows with Band
Stand on the middle of the band, feet
shoulder-width apart, knees slightly
bent. Cross ends of band in front of you
and grasp one end of the band in each
hand, palms facing back. Count 1: With
arms extended and hands together at
the center of your body, pull elbows up
and back to the level of your shoulders.
Your arms should form a “V”. This
should take 2 seconds. Pause 1
second. Count 2: Return to start
position in 4 seconds. Do not arch your
back during the lift. Works the front of the shoulders. Variations:
a) for more resistance, use 2 bands, stand on only one band
with each foot, hold one end of each band in each hand; b) use
dumbbells.
Triceps Kickback with Band
Grab one end of the band in each hand.
Step on the middle of the band with your
left foot, step back 2 ft. with your right
foot. Bend forward slightly at the waist,
keep your shoulders and hips facing
forward. Place your left hand on your left
thigh for support. Pull your right hand up
to your right hip, keeping your right elbow
close to your body. Count 1: Straighten
your lower right arm behind your back without lifting your elbow. This
should take 2 seconds. Pause 1 second. Count 2: Return to the start
position in 4 seconds. Works the right triceps. Switch to work the left
triceps. Variations: a) use dumbbells; b) have a partner push against
your lower arm during the lift.
Table 10-1. Exercises to Perform in Confined Spaces
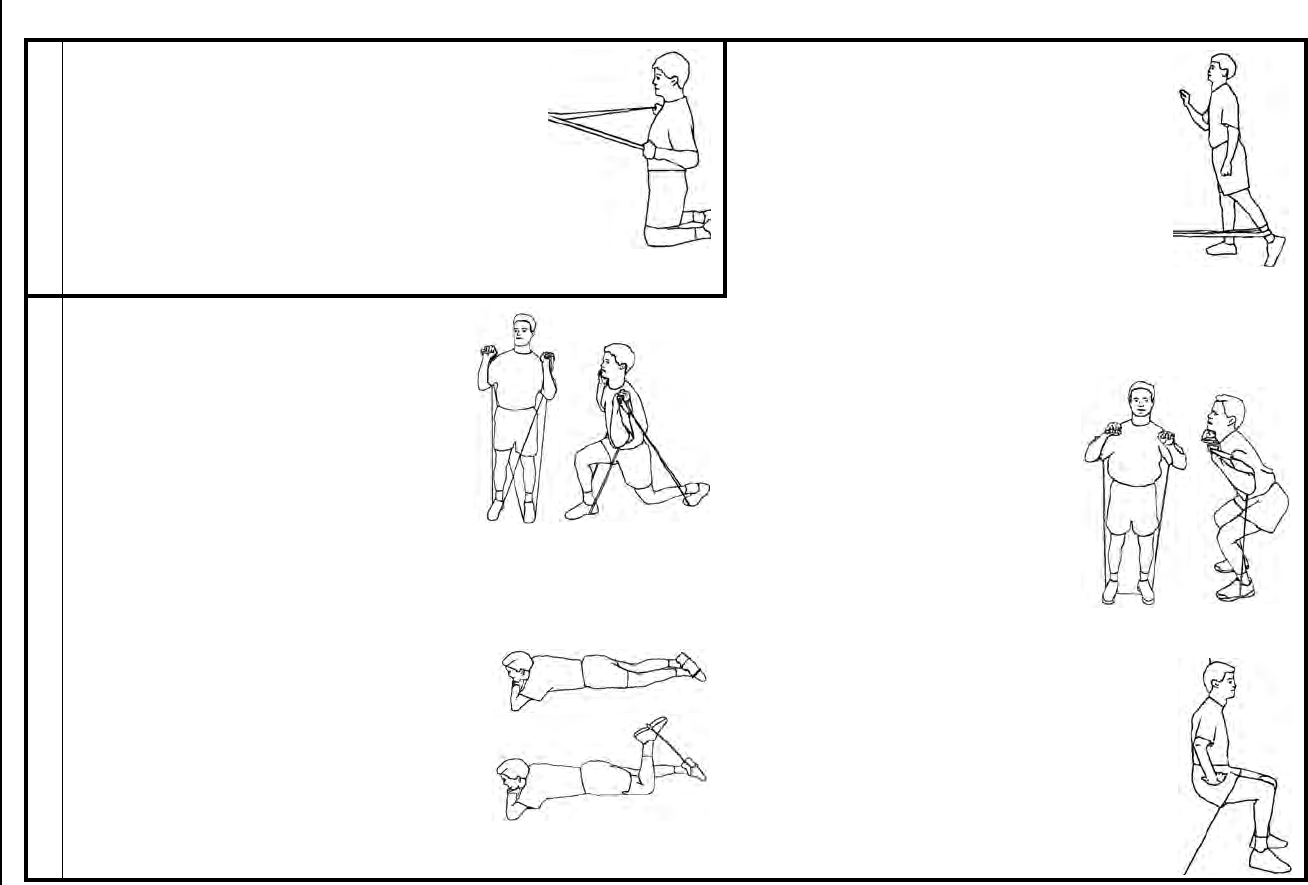
Nutrition and Exercise Resource Manual 83
Shoulders
Reverse Fly with Band
Anchor the middle of the band at chest height.
Facing the anchor, step back 4-5 ft. Grab one end
of the band in each hand. Extend your arms straight
in front of you at chest level, elbows slightly bent.
Count 1: Pull your upper arms out to each side
without bending your elbows any more. This should
take 2 seconds. Pause 1 second. Count 2: Return
to the start position in 4 seconds. Works the back of
the shoulders. Variations: a) kneel on one knee,
bend at the waist, rest chest on opposite thigh, and
use dumbbells or have a partner push against your upper arms.
Leg Lifts with Band
Anchor the band at shin height. Wrap the band
around your left ankle and, facing the anchor,
step back 3 ft. Place feet side by side and point
your left foot up. Place your hand on the wall for
support and slightly bend your right knee.
Count 1: Keeping your left leg extended, pull
your left ankle back 1-2 ft. This should take 2
seconds. Pause for 1 second. Count 2: Return
to start position in 4 seconds. Switch legs.
Works hamstring and gluteal muscles.
Variations: a) to work inner and outer thighs
and hip flexors, change the position of your body so you pull
against the band in all four directions (front, back, and two
sides); b) lie down and use ankle weights.
Squat with Band
Grasp one handle in each hand, step
on the band with feet hip-width apart,
knees slightly bent. Bring hands up to
shoulders, palms facing forward.
Band should be behind your arms.
Count 1: Slowly squat down; look
forward, keeping your shoulders back,
chest and head up. Squat until your
knees are above your toes. This
should take 2 seconds. Pause 1
second. Count 2: Return to the start
position in 4 seconds. Works the quadriceps and gluteals.
Wall Squat with Ball
Stand against a flat wall, place both feet 2 ft.
from the wall hip distance apart. Place a small
ball between your knees. Count 1: Slide down
the wall until your knees are over your feet and
squeeze the ball between your knees. Hold this
position for 10 seconds. Count 2: Return to the
start position. Works the thigh
muscles.Variations: a) hold dumbbells in your
hands.
Legs
Lunge with Band
Grab one end of the band in each hand.
Step on the middle of the band with your left
foot, step your right foot through the band
and beside your left foot. Bring hands up to
shoulders, palms facing forward. Band
should be behind your arms. Count 1: Take
a large step forward with your right foot,
keep your back straight and head up. Count
2: Squat straight down, dropping your left
knee, until your right knee is over your right
ankle. Count 3: Lift up. Count 4: Push off
your right foot to return to the start position. Works the leg muscles.
Switch sides. Variation: a) for more resistance, use a second tube and
place it under your front foot; b) on Count 1, step to the left or right
instead of straight ahead; c) use dumbbells.
Leg Curl with Band
Wrap one end of the tubing loop around your
right foot. Hook the other end on your left
foot. Lie on your stomach with both legs
extended. Count 1: Lift your left heel up
toward your buttocks, keeping your right knee
and hips flat on the deck. This should take 2
seconds. Pause 1 second. Count 2: Lower
your leg to the start position in 4 seconds.
Works the hamstrings.
Table 10-1. Exercises to Perform in Confined Spaces

84 Force Health Protection:
Workout Design
The FITT principle guidelines described in Chapters 4, 5, 7, and 9 should
be followed for each type of fitness training. Since space, equipment, and time
are limiting factors during deployment, one of the most effective workouts
for you to perform is circuit training (described in Chapter 7). The basics of
this type of workout are:
◆ Total session is 30-60 minutes, divided into 30-60 second stations.
◆ Each station is a new exercise; alternate aerobic and strength
stations, and upper and lower body exercises.
◆ Perform aerobic exercises in your target heart rate zone.
◆ Perform strength exercises with proper form and use a resistance
that you can lift 10-12 times.
◆ Stretch after your workout. (See Chapter 9.)
Note: One cycle of this circuit training workout has 7 minutes of aerobic exercises and one set of
strength exercises for each of the major muscle groups.
Table 10-2. Circuit Training Workout
Station Exercise Time
Warm-up 5 minutes
1 Wall Squat with Ball 60 sec
2 Push ups 60 sec
3 Jog in place 60 sec
4 Stair step/Jog 60 sec
5 Jumping Jacks 60 sec
Check heart rate 10 sec
6 Lat Pulldown with Band 60 sec
7 Abdominal Crunches and Lower Back Extensions 60 sec (30 sec each)
8 Biceps curl and Triceps Extension with band 60 sec (30 sec each)
9 Jumping Jacks 60 sec
10 Stair Step/Jog 60 sec
11 Jog in place 60 sec
12 Jumping Jacks 60 sec
Check heart rate 10 sec
Repeat Stations 1-12, 2-4 times
Cool Down 5 minutes
Stretch 5-10 minutes

Nutrition and Exercise Resource Manual 85
Morale During Deployment
Although confined spaces can limit your
training options and make you feel less than
enthusiastic to train, you need to remain
physically active. Stopping all physical
training results in a rapid decline in muscle
strength and endurance, flexibility, and
aerobic conditioning (see Chapter 4). One
option to boost morale and increase
participation in physical training during deployment is to create training
competitions. Some ideas include:
◆ Mini-triathlons - Perform any three aerobic exercises back-to-
back for the best time. Honor the winner by engraving his/her
name on a plaque or give him/her a token that is symbolic of the
competition.
◆ Organize team competitions that coincide with major sporting
tournaments, such as the NFL playoffs or the NCAA Final Four
tournament. Assign each crew member to a team and organize
the teams into tournament-style playoffs. Record the time each
team member exercises. The team with the most total exercise
time wins the tournament.
Anyone can organize these types of competitions. Such events make
exercising a social and morale boosting activity for all sailors during
deployment.
Finally, you may feel that the biggest barrier to working out when
deployed is time limitations. In actuality, it requires less time to maintain
fitness levels than to increase fitness levels. Though not ideal, you can
maintain your fitness level by working at your usual intensity fewer times
per week and for shorter durations than what is required to improve your
fitness level. A minimum of one strength session, which includes exercises
for all the major muscle groups (1 set of 8-12 repetitions), and two 20-minute
aerobic sessions, within your target heart rate zone, per week will allow you
to maintain your current fitness level. Though this limited amount of
training is not ideal for your overall fitness, it is much better than not
performing any exercise at all. Remember, detraining occurs rapidly when
all training is stopped (see Chapter 4).

86 Force Health Protection:
Nutrition
for
Exercise
11
Your physical performance is greatly influenced
by regular conditioning and by following sound dietary
practices. Both prolonged aerobic exercise and multiple
bouts of high intensity exercise impose significant
demands on energy and fluid balance. Failure to
replace energy and fluids used during exercise can
significantly impair performance in later activities.
The following recommendations are for an
individual who regularly participates in at least 90
minutes of aerobic exercise each day or in multiple,
strenuous bouts of exercise several times a week. This
information does not apply if you exercise less than one
hour per day.
Carbohydrate Needs
During heavy training you must increase your kcal
intake, especially from carbohydrates (CHO), to meet
your energy demands. Failure to do so may result in:
◆ Chronic muscular fatigue.
◆ A feeling of staleness.
◆ Weight and muscle mass loss.
◆ Poor sleep patterns.
In this chapter
you will learn
about:
◆ Dietary
practices for
enhancing
endurance and
strength
performance.
◆ Dietary
measures for
exercise
recovery.

Nutrition and Exercise Resource Manual 87
Liver and muscle glycogen are the primary sources of glucose for energy
during prolonged and intense physical activities. Once your glycogen stores
are used, your performance decreases sharply. So, the key to optimal
performance is to maintain glycogen stores by eating a high-CHO diet.
CHO for Endurance Training
The endurance capacity of an individual on a
high-CHO diet is approximately 3 times greater
than on a high-fat diet. When CHO intake is low,
several days of rigorous training will result in a
gradual depletion of muscle glycogen stores and
eventually impair performance. The guidelines for
CHO intake while training are:
60 - 65% of your total daily kcal intake.
Worksheet 11-1. Calculate Your Daily CHO Needs
Keep a dietary log for a few days to see if your CHO intake is adequate.
CHO Loading/Glycogen
Supercompensation
CHO Loading is a regimen that combines diet
and exercise to “pack” more glycogen into muscle
and liver (Figure 11-1). It is used by endurance
athletes to optimize physical performance during
prolonged endurance events. CHO loading causes
temporary weight gain (2.7 grams of water are
stored with every gram of glycogen). The extra
weight may impair performance. CHO loading is
unnecessary for individuals who eat according to
the dietary guidelines outlined in Chapter 3 and whose CHO intakes are
within the range calculated in Worksheet 11-1.
x 0.60 = kcal from CHO per day.
Your EER*
x 0.65 = kcal from CHO per day.
Your EER*
You should eat to kcals from CHO daily.
* Your estimated energy requirement (EER) was calculated in Chapter 1, Worksheet 1-2.
To calculate grams of CHO see Worksheet 2-1.
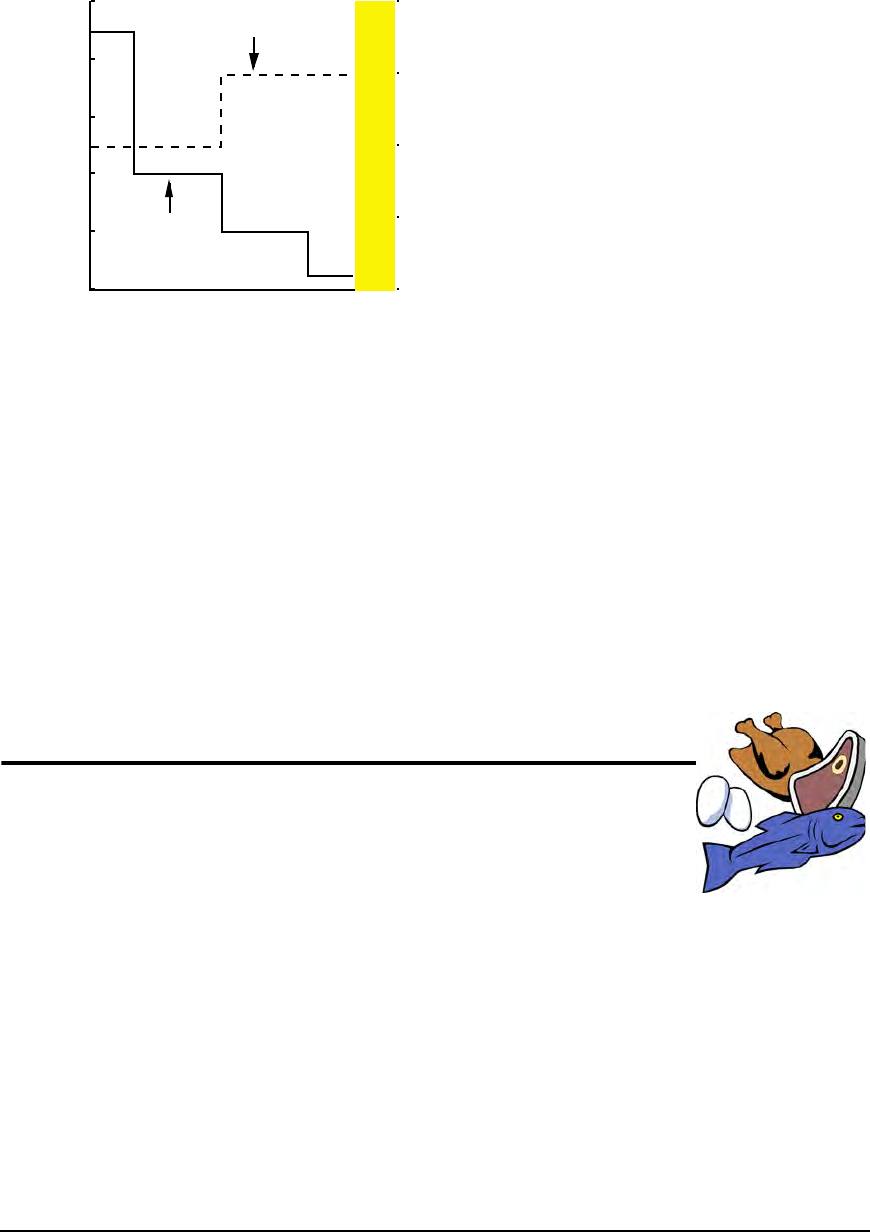
88 Force Health Protection:
Figure 11-1. CHO Loading for Endurance Events
CHO for Strength Training
CHO are required for strength training because the exercises rely on
muscle glycogen stores for energy. The recommended CHO intake is:
55-60% of your total daily caloric intake.
This is slightly lower than the requirements for endurance activities (see
Worksheet 11-1) because the total amount of energy expended is less. CHO
loading is not recommended for strength training because it causes extra
water to be stored in the muscle.
Protein Needs
Protein needs of strength athletes and endurance
athletes are quite similar at:
0.6 - 0.8 grams of proteins per pound of body
weight.
This corresponds roughly to 10-15% of your total daily kcals. It is highly
likely that your diet provides adequate proteins since most Americans
consume proteins in excess of their needs. Use Worksheet 11-2 or
Worksheet 2-2 (Chapter 2) to determine your protein needs.
0
25
50
75
100
% CHO in Diet
0
20
40
60
80
100
Exercise Time (minutes)
Days
123456
Race
Day
% CHO in Diet
Rest
Exercise
Time
CHO loading requires that you
reduce your training sessions and
increase your CHO intake the week
prior to an event. As shown to the
left, five to six days before the event
train no more than 40 minutes (solid
line). CHO intake (dotted line)
should be approximately 50% of your
total energy intake. Two to three
days before the event train no more
than 20 minutes a day and increase
CHO intake to 70% of your total
energy intake. Rest the day before
the event and keep CHO intake at
70%.
Nutrition and Exercise Resource Manual 89
Worksheet 11-2. Calculate Your Protein Needs
The High-Protein Myth
One of the most common myths is that eating high-protein diets and
protein supplements leads to bigger muscles. Clearly, this is not the case!
Muscle is only 20% proteins; the rest is water, minerals, lactic acid, and urea.
(See Figure 11-2.) Moreover, excessive protein intakes, mostly from protein
supplements, can cause:
◆ More waste production.
◆ Increased water needs.
◆ Greater demands on the liver and the kidneys.
◆ Imbalances in the essential amino acids.
◆ Diarrhea or abdominal cramps.
For these very reasons, avoid protein powder drinks that provide excessive
amounts of proteins or selected amino acids. Although heavily advertised and
endorsed by celebrities, you do not need protein supplements to build muscle.
Supplements can be very expensive, dangerous to your health, and they are
quite unnecessary. Spend your money on a variety of foods for a balanced
diet that will sufficiently meet your protein needs. Exercise to gain muscle!
Figure 11-2. Components of Muscle
Body Weight = lbs.
0.6 grams/lb x lbs. = grams proteins.
(Body weight)
0.8 grams/lb x lbs. = grams proteins.
(Body weight)
Your daily protein grams = to .
Muscle is:
20% proteins,
75% water, and
5% inorganic salts, urea,
and lactate.
90 Force Health Protection:
Vitamin and Mineral Needs
Any increased vitamin and mineral needs can be met by eating according
to the Food Guide Pyramid (Chapter 3, Figure 3-1). Particularly, increase the
number of fruits and vegetables you eat as these foods are good sources of
many vitamins and minerals, as well as antioxidants. (See Chapter 3
page 22, Table 2-2, Table 2-3, and Appendix A.) These antioxidants may
protect you from environmental stressors and may accelerate your recovery
from exhaustive exercise. Fresh fruits and vegetables also provide potassium,
which is lost during prolonged strenuous exercise (see Table 2-3).
Fluid Needs
Drinking fluids at regular intervals and eating foods
with a high water content (i.e., fresh fruits) are important
for maintaining hydration and fluid status during training.
See Chapter 2 for more information on fluid balance.
Getting Enough Fluids
◆ Drink 16 oz. (2 cups) of fluid two hours before
starting exercise.
◆ Drink 3 to 4 oz. (1/2 cup) of fluid every 15-20 minutes during
exercise.
◆ Weigh yourself before and after exercise to determine how much
fluid you lost. Drink 16 oz. of fluid for every pound of weight lost.
◆ Do not rely on thirst as an indicator of fluid needs because it is
not adequate. Once you feel thirsty you are already dehydrated.
◆ Drink water when exercising less than 60 minutes. Drink a
sports drink (5% to 8% CHO with electrolytes) when exercising
longer than 60 minutes.
◆ Monitor your urine: urine should be a pale yellow (unless you
take vitamin B supplements) and you should be urinating
frequently.
What to Drink
Many beverages can replenish lost fluids, so select
a beverage that:
◆ Tastes good.

Nutrition and Exercise Resource Manual 91
◆ Does not cause gastrointestinal or stomach discomfort.
◆ Is rapidly absorbed from your gut, especially when exercising.
◆ Contains electrolytes (see Glossary) and CHO (5% to 8%) when
performing prolonged or strenuous exercise.
◆ Rehydrate with a non-caffeinated, non-carbonated, non-alcoholic
beverage.
Overhydration
Although less common than dehydration, untreated
overhydration can be life threatening. It is seen when
plain water is used to replace fluid losses during
prolonged (greater than 3 hours) strenuous exercise.
Remember, water and electrolytes are lost during
sweating, so both need to be replaced in this situation.
Overhydration decreases the concentration of electrolytes in the body, upsets
metabolism and other bodily functions, and is just as harmful as dehydration.
Prevent overhydration by drinking a beverage that contains electrolytes
(such as a sport drink) or by eating a light snack (e.g., oranges) with your
water. Between exercise sessions, electrolytes lost through sweating can be
easily replenished by eating well-balanced meals and snacks (Chapter 3).
Nutrition for Exercise Recovery
Within 30 minutes of completing an extended or intense exercise session,
consume at least 50 grams of CHO (roughly 200 kcals). Also, continue to
snack on high-CHO foods for up to six hours. This will help restore your
muscle glycogen for the next exercise session. Some foods and servings sizes
that contain roughly 50 grams of CHO are:
For more information on the CHO content of foods, check food labels
(Figure 3-2), check the USDA website at http://www.usda.gov, or ask a
dietitian.
◆ Bagel with jam ◆ Shredded wheat cereal, 1.4 cups
◆ Baked potato with skin ◆ Baked Beans, 1 cup
◆ Cooked sweet corn, 1.5 cups ◆ Bananas (2)
◆ Cornflakes, 2.5 cups ◆ Cooked oatmeal, 2 cups
◆ Watermelon, 4.5 cups ◆ Cooked Rice, 1 cup
◆ Raisins, 0.4 cup ◆ Orange juice, 2 cups

92 Force Health Protection:
Deployment and
Altered Climates
12
Adapting to a
new environment, such as
extreme changes in climate
or altitude, imposes
considerable demands on
the body. This adaptation,
or acclimation, occurs
gradually, allowing the
individual to better tolerate and perform in that new
environment. Thus, acclimation is the gradual change
the body undergoes in order to function more efficiently
in a new environment.
Acclimating to New
Environments
Adapting to a new environment can take one to
three weeks. During this time, endurance activities
become more difficult and onset of fatigue occurs
sooner. If environmental conditions permit, gradually
increase the intensity of exercise until you reach your
desired training intensity. Having a good aerobic
fitness base will accelerate your acclimation to new
environments. Factors that negatively affect
acclimation include:
◆ Dehydration. ◆ Illness.
◆ Drinking alcohol. ◆ Infection.
◆ Cessation of physical activity. ◆ Injury.
◆ Electrolyte depletion. ◆ Loss of sleep.
◆ Inadequate energy intake.
In this chapter
you will learn
about:
◆ Acclimation.
◆ General
guidelines for
altered
environments.
◆ Maintaining
performance in
the heat, cold,
and at
altitude.

Nutrition and Exercise Resource Manual 93
General Nutrition Issues
Maintaining or improving health and fitness is more challenging in
adverse conditions such as extreme heat, cold, or altitudes. Even highly,
physically fit individuals can be quickly overcome by “environmental
exposure” if proper preparation is overlooked or if symptoms of impending
illness are ignored. The adaptation of the body to adverse environments
increases energy expenditure and water losses. Furthermore, dehydration
results in a loss of appetite. If energy and fluid needs are not met, then
performance will be impaired. General suggestions for meeting increased
energy and fluid requirements are provided below. Issues relevant to a
particular environment are provided later.
Maintaining Energy Balance
◆ Eat a high-CHO diet to meet increased kcal needs,
as CHO are more readily absorbed and better
tolerated than fats or proteins.
◆ Avoid fatty foods which may not be well tolerated.
◆ Avoid high-protein intakes which will increase water loss and can
lead to dehydration. (See Chapter 2 page 9.)
◆ Eat small frequent meals.
◆ When eating field rations, eat the entrees as well as the other
food and beverage items provided in the pack.
◆ Drink a high-CHO beverage to increase your kcal intake if you
are having difficulty eating enough solid foods to meet your
energy needs.
Maintaining Fluid Balance
Maintaining fluid balance is crucial to avoid dehydration, as stated
in Chapter 2 on page 17. Dehydration can limit performance and
severe dehydration can be life-threatening. Tips for maintaining fluid
balance include:
◆ Monitor hydration status by the frequency and color of your
urine. Infrequent and dark yellow urine suggests dehydration.
◆ When possible, monitor fluid status by weighing yourself prior to
and after prolonged physical activities. For every pound of weight
lost due to water losses, drink 2 cups (0.45 L or 16 oz.) of water.

94 Force Health Protection:
◆ Thirst is not a good indicator of fluid status. Drink fluids
regularly throughout the day. When working in the heat, do not
drink more than 6 cups of fluid an hour.
◆ Avoid alcoholic beverages as alcohol increases fluid losses.
◆ Reduce caffeine consumption as caffeine increases fluid losses.
◆ Avoid salty foods as salt increases fluid needs.
◆ Drink CHO/electrolytes beverages during prolonged physical
activity or on extended missions (Chapter 11, page 90).
Hot Environments
How hot is too hot? Heat advisories are
announced when a wet bulb-globe
temperature (WB-GT) is over 87° F (30.5°
C) or when temperature and humidity are
over 85° F and 60%, respectively. Under
these conditions exercise should be
performed indoors or undertaken with
caution. Any time you perform physical
activities in the heat, you will lose a lot of water and electrolytes through sweat.
Only the sweat that evaporates effectively cools the body; sweat that “drips”
provides little cooling effect. As you adapt to the heat, you will start
producing more dilute sweat (less salty) to conserve electrolytes. Factors that
can limit “effective cooling” include high humidity, impermeable clothing,
and skin conditions, such as sunburns or rashes.
Energy Needs
Although appetites may be suppressed in the hot weather, especially
during the first few days after arriving, adequate caloric intake is very
important. Inadequate food intake will lead to weight loss which can impair
both physical and mental performance. When you do the same task in a hot
environment, energy requirements are increased due to the increased work
of maintaining a normal body temperature. When living and working in
temperatures ranging from 86o to 104oF (30o to 40oC), kcal intakes should be
increased by 10%, unless your activity level decreases accordingly.
If your activity level decreases,
you do not need extra kcals!
Nutrition and Exercise Resource Manual 95
Worksheet 12-1. Calculate Your Energy
Requirements for a Hot Environment
Tips for Maintaining Performance in a Hot
Environment
◆ Prepare by maximizing aerobic fitness before your exposure.
◆ Plan your workouts to avoid the heat of the day.
◆ Plan for decreased physical performance the first two weeks.
◆ Drink plenty of fluids and eat enough kcals.
◆ Be aware of any symptoms that may predispose you to
dehydration (diarrhea, vomiting, fever).
◆ Be aware of the warning signs of heat illness. Stop if signs or
symptoms of heat injury become apparent (See Chapter 13).
◆ Avoid substances that can lead to dehydration or heat injuries.
Check with the medical department for other substances that may affect fluid balance.
Cold Environments
What is a cold environment? It is considered cold if the air
temperature is below 15° F and the wind speed is greater than
25 m.p.h, or the water temperature is below 64oF. Cold wind
and cold water accelerate heat loss by replacing the warm layer
of air or water surrounding the body with colder air or water.
Table 12-1. Substances that Can Cause Dehydration
Caffeine Alcohol Decongestants
Antihistamines Atropine and other anticholenergics
Your Estimated Energy Requirement (EER) = kcal/day.
(from Worksheet 1-2)
A 10% increase in energy requirements equals:
EER x 0.10 = kcal/day.
Your total energy requirement equals:
EER + 10% increase= kcal/day.
96 Force Health Protection:
The body responds to cold by constricting (tightening) blood vessels to
conserve heat and by shivering to generate heat and guard against
hypothermia. There is increased urination and increased energy metabolism
in cold environments, both on land and in water.
Energy Needs
Many studies have shown that soldiers tend to progressively lose weight
when conducting field exercises in the cold for two to three weeks. Because
significant weight loss can result in fatigue and performance decrements,
energy intake must increase to meet the increased energy demands. Energy
requirements can increase by 25 to 50% because of the increased work
associated with performing physical tasks in the cold and the kcal
expenditure due to shivering. Factors that increase energy requirements in
the cold include:
◆ Increased basal metabolic rate (BMR, see page 3).
◆ Shivering.
◆ Working in cold weather gear.
To meet energy needs consume a diet that is high in CHO (roughly 60%
of your total daily kcals). This will replace glycogen stores (page 7) that are
being used to maintain body temperature. Eat frequent high-CHO snacks to
help meet your kcal requirements. Keep fat intakes under 30% of your total
daily kcals since high-fat diets may cause stomach upset. Keep protein
intakes at 10% of your total daily kcals and avoid protein and amino acid
supplements because high-protein intakes increase water losses.
Worksheet 12-2. Calculate Your Energy
Requirements for a Cold Environment
Your Estimated Energy Requirement (EER) = kcal/day.
(from Worksheet 1-2)
A 25% increase in energy requirements equals:
EER x 0.25 = kcal/day.
Your total energy requirement equals:
EER + 25% increase= kcal/day.
e.g., If your EER is 3,000 kcals/day then in a cold environment your energy needs would
increase by 3,000 kcals x 0.25 = 750 kcals/day. Your total daily energy requirement would be
3,000 kcals + 750 kcals = 3,750 kcals/day.

Nutrition and Exercise Resource Manual 97
Vitamin and Mineral Needs
In addition to increased energy requirements, increased intakes of many
of the vitamins and minerals may be useful for maintaining performance
when working for prolonged periods in the cold. Vitamin and mineral
recommendations have been developed to account for possible increased
requirements based on intake data from field studies, urinary excretion of
nutrients, and other measures of “nutrient status”. Table 12-2 presents the
suggested additional amount of some nutrients that may be needed when
working in the cold. See Chapter 2, Table 2-2 and Table 2-3 for a list of food
sources for these nutrients. In most cases, if you meet your energy
requirements by eating all ration components, you should be meeting your
vitamin and mineral needs.
Adapted from Reynolds RD. (1995) Effects of Cold and Altitude on Vitamin and Mineral
Requirements. In: Marriot BM (Ed). Nutrient Requirements for Work in Cold and High Altitude
Environments. Washington, DC: National Academy Press. *Amounts in addition to the RDA (see
Chapter 2).
Tips for Maintaining Performance in a Cold
Environment
◆ Check weather conditions, dress appropriately, and avoid profuse
sweating.
◆ Allow for a longer warm-up.
◆ Replenish CHO and electrolyte losses.
◆ Drink plenty of fluids and try to avoid substances that cause
dehydration (see page 93 and Table 12-1).
◆ Be aware of the signs of cold injury (see Chapter 13).
◆ Eat snow only after melting and purifying it.
Table 12-2. Suggested Additional Intakes of
Micronutrients During Cold Weather Training
Nutrient Suggested
Increase* Nutrient Suggested
Increase
Vitamin B1 (Thiamin) 3 mg Folic Acid 200 µg
Vitamin B2 (Riboflavin) 2 mg Vitamin B12 1 µg
Vitamin B3 (Niacin) 5 mg Magnesium 200 mg
Pantothenic Acid 5 mg Zinc 5 mg

98 Force Health Protection:
Altitude
Ascent to altitude can cause a variety of physiologic
disturbances due to the drops in temperature and humidity,
and the lack of oxygen. Some major concerns are weight loss,
disturbances in digestion, and vitamin, mineral and fluid
needs.
Physical performance can suffer dramatically with changes
in altitude. The lower oxygen concentrations at altitude can
reduce aerobic capacity by 1-2% every 100 meters (328 feet)
above 1,500 meters (4,918 feet). Many adaptations occur
during extended exposure to high altitudes including:
◆ Increased number of oxygen-carrying proteins in the blood
(hemoglobin) and muscle.
◆ Increased density of blood vessels to and within the muscle.
◆ Increased rate of respiration.
Adequate nutrition can play a crucial role in maintaining performance.
Energy Needs
Energy requirements are 15-50% greater than at sea level
Virtually all persons who go to altitude experience weight loss and loss of
lean body mass. At altitudes below 5,000 m weight loss can be prevented by
increased caloric intake; whereas above 5,000 m, a 5-10% weight loss is
inevitable. Some reasons for weight loss at high-altitude are:
◆ Energy requirements are 15-50% greater than at sea level.
◆ Decreased appetite and sense of taste.
◆ Loss of body water from increased breathing rate and dry air.
◆ Impaired absorption of nutrients.
◆ Acute Mountain Sickness (AMS) - symptoms include headache,
nausea, vomiting, fatigue and poor appetite.

Nutrition and Exercise Resource Manual 99
Worksheet 12-3. Calculate Your Energy
Requirements at Altitude
A high-CHO diet (60% of total daily kcals) is preferred at altitude because
it restores glycogen, requires less oxygen to metabolize than a high-fat diet,
and can blunt or delay the severity of AMS symptoms.
Vitamin and Mineral Needs
Vitamin and mineral needs are likely to increase at altitude. In
particular, the increased metabolic rate and the lack of oxygen can increase
the production of harmful free radicals. These free radicals can slow blood
circulation and impair physical performance. Preliminary findings in men
indicate that taking 400 IU per day of vitamin E, an antioxidant, at high
altitude reduces free radical production and maintains aerobic energy
production. Increased amounts of many other nutrients should be considered,
especially since food intake usually decreases (see Table 12-2).
Tips for Maintaining Performance at Altitudes
◆ Plan on decreased physical performance the first few weeks.
◆ Drink plenty of fluids. Fluid requirements may be as high as 4.25
quarts, or more, each day.
◆ Listen to your body, be aware of any warning signs of illness or
symptoms of AMS and seek medical attention.
◆ Try to avoid substances that cause dehydration (Table 12-1).
As noted throughout this chapter, meeting energy and fluid requirements
are vital for maintaining physical performance in adverse environmental
conditions. Being physically fit and eating a healthy diet prior to deployment
will greatly improve your acclimation and adaptation to the new
environment.
Your Estimated Energy Requirement (EER) = kcal/day
(see Chapter 1)
A 50% increase in energy requirements equals:
EER x 0.50 = kcal/day
Your total energy requirement equals:
EER + 50% increase= kcal/day

100 Force Health Protection:
Training
and
Overuse Injuries
13
One of the hazards of physical training is
becoming injured. Sustaining either a sudden injury or
an overuse injury can mean loss of work days, forced
rest, and pain for a period of days to weeks. The goal
of this chapter is not to have you treat your own
injuries, but rather to be informed so that you will seek
appropriate help when needed. Central to rapid
recovery from training-related injuries is a step-wise
reconditioning program which starts immediately after
the injury. Such programs are designed to arrest the
inflammatory process, promote healing and accelerate
the return to full duty.
Injuries: Treatment
and Prevention
A variety of injuries can
occur during physical training.
Table 13-1 has a brief
description of acute and overuse
injuries, as well as their
treatment and prevention. Both
sudden-onset and recurring
injuries can result in
inflammation (localized warmth,
swelling, redness and pain). If left unchecked the
inflammatory response rapidly leads to:
◆ Tissue swelling. ◆ Stiffness.
◆ Loss of normal function. ◆ Weakness.
◆ Decreased range of motion of the joint.
In this chapter
you will learn
about:
◆ Treatment and
prevention of
injuries.
◆ When to seek
medical care.
◆ Returning to
duty.
◆ Overtraining
syndrome.

Nutrition and Exercise Resource Manual 101
RICE = rest, ice, compression, and elevation. See page 102.
Table 13-1. Injuries, Treatments, and Prevention
Injury Treatment Prevention
Delayed-Onset Muscle Soreness - Muscle pain occurring in
deconditioned muscle 12-72+ hours after training. Ice, stretch, warm-up.
Do not use NSAIDs. Resolves as muscle adapts to training.
Slowly increase training intensity.
Contusions - Swelling and bleeding (bruising) in the muscle,
tendon, or bone due to a direct blow. Ice Wear protective gear.
Muscle Cramp - Muscle pain caused by prolonged activity,
high heat or humidity, dehydration, and poor conditioning. Rehydrate (Chapter 2),
stretch, massage with
ice.
Allow time to adjust to training and
climate; drink frequently.
True Fractures - Break or chip in the bone. Seek medical help. Use protective gear; recondition.
Stress Fractures - Pain and weakening of the bone caused
by excessive stress and use. Seek medical help. Reduce high-impact activities, cross-
train, use proper gear, slowly increase
training.
Sprains - Acute or overuse injury to ligaments (connective
tissue that joins bone to bone). RICE.*
Seek medical help. Follow medical advise; slowly increase
training intensity, use proper gear.
Strains, Tendonitis - Acute or overuse injury to muscle or
tendons (connective tissue that joins muscle to bone). RICE.
Seek medical help. See “Sprains.”
Heat Injuries (cramp, exhaustion, heat stroke) - Painful
muscle contractions, nausea, fatigue, fever, or dizziness from
dehydration and electrolyte depletion; fevers >104oF can
damage vital organs and result in death.
Place person in a cool
location and rehydrate.
Seek medical help.
Acclimate to climate, avoid exercise in
extreme heat, avoid substances that
cause dehydration (Chapter 12), stay
well hydrated (Chapter 2).
Cold Injuries (hypothermia, frost bite, trench foot) - Body
temperature <95°F causing shivers, slurred speech,
clumsiness, and freezing of exposed body parts.
Gently place the
person in dry blankets
with another warm
person.
Wear proper gear, stay dry, avoid
exercise in extreme cold, stay well
hydrated (Chapter 2).

102 Force Health Protection:
The treatment of any injury should focus on controlling the inflammation
and allowing full joint range of motion for a rapid return to daily activities.
To accelerate healing, you must first decrease the inflammatory process.
Treatment steps to achieve this include:
RICE = Rest + Ice + Compression + Elevation
◆ Rest - partial or no weight-bearing of the extremity,
using crutches for locomotion. “Relative Rest” means
decreasing activities that cause pain and replacing
them with activities that are pain-free.
◆ Ice - as soon as possible apply ice, wrapped in a bag
or towel, to the injured area. Ice for 20 minutes every
two hours on the first day, then 3 times a day until
the swelling has decreased. To prevent nerve
damage, do not ice for longer than 20 minutes at a
time. Never apply ice directly to the skin or to an
open wound!
◆ Compression - wrap the injury for periods of 2-4 hours. Never
sleep with a compression wrap unless medically advised.
◆ Elevation - place the injury above the level of the heart,
allowing gravity to reduce the swelling.
Non-Steroidal Anti-Inflammatory
Drugs (NSAIDs)
In addition to RICE, non-steroidal anti-inflammatory
drugs (NSAIDs) are often used to decrease the symptoms
due to inflammation and fever associated with injury.
Although NSAIDs are usually available over-the-counter,
these medications should not be taken lightly. In the case of an acute injury
which involves bleeding, bruising, or swelling, NSAIDs should not be started
until after the bleeding has stopped (may take days) and the swelling has
stabilized. Some side-effects of NSAIDs include:
◆ Nausea, heartburn, vomiting, ulcers, and bleeding.
◆ Increased blood pressure.
◆ Decreases the ability of blood to clot.
◆ Worsening of asthma.
◆ Potential kidney damage with long-term use.
Some of the most common NSAIDs are aspirin (Bayer, Aspirin, Ecotrin),

Nutrition and Exercise Resource Manual 103
ibuprofen (Advil, Motrin), and ketoprofen (Orudis). Remember: NSAIDs
should not be used with alcohol. If you have stomach or gastrointestinal
problems, check with your doctor for the appropriate pain reliever.
When to Seek Medical
Care
Table 13-1 provides the description, prevention, and
treatment for some training injuries. Knowing the
differences between these injuries will help you safely
administer first aid treatment, should they occur, and help you determine
when you need to seek medical treatment. Some conditions demand
immediate medical attention, including:
◆ Numbness.
◆ Joint dislocation.
◆ Suspected fracture.
◆ Any hip pain which causes a limp.
◆ Back pain that radiates into the thigh, leg or foot.
◆ Severe pain or pain limiting activity for 3 to 5 days.
◆ Any lower extremity injury in which the individual is unable to
bear weight.
Return to Duty
After the pain and swelling are reduced and full range of motion is
possible, ask your physician or physical therapist to design a reconditioning
exercise program with the overall goal of returning to full activity. The
exercises prescribed will be specific to the site and type of injury, and will
work towards maximizing:
◆ Flexibility. ◆ Power.
◆ Strength. ◆ Speed.
◆ Endurance. ◆ Specific Duty Tasks.
104 Force Health Protection:
Overtraining Syndrome
Overtraining can negatively affect physical and mental
performance. Moreover, it can increase the likelihood of
sustaining an injury. Overtraining is exactly what the word
implies: too much physical activity.
The overtraining syndrome can present with a wide
range of physiologic or psychological symptoms which vary
widely among individuals (See Table 13-2). Overtraining is
generally associated with endurance sports, such as
swimming or running. The best indicators of overtraining
include a 10-15 beat elevation in (morning) resting heart
rate and an altered mood state, such as feelings of
frustration, anger, depression or apathy. Cross-training, rest,
monitoring of morning heart rate, assessing mood and
taking time off from certain physical activities will all
reduce overtraining symptoms and injuries. The person who continues
training despite the symptoms listed in Table 13-2 will only become more
overtrained, continue to have decreases in performance, and will be at an
increased risk for injury.
Table 13-2. Symptoms of Overtraining Syndrome
◆ Decreases in performance and
strength.
◆ Feeling “burned-out” or stale.
◆ Difficulty making decisions. ◆ Difficulty concentrating.
◆ Chronically fatigued. ◆ Angry and irritable.
◆ Lacking motivation. ◆ Muscle soreness.
◆ Disturbances in mood. ◆ Increased distractibility.
◆ Feelings of depression. ◆ Difficulty sleeping.

Nutrition and Exercise Resource Manual 105
Supplements
and
Performance
14
Gaining and maintaining physical fitness
takes time and dedication. Often, to achieve these
goals, people turn to various supplements based on
their claims as performance enhancers. However, no
supplement can replace the benefits of a well-planned
exercise routine and a nutritionally-sound diet!
The definition of a nutritional supplement is “a
nutrient taken in addition to your diet”. An ergogenic
agent is a substance taken with the intent of
improving physical performance. This chapter will
address vitamin and mineral supplements, nutritional
ergogenic agents (performance enhancers), and
substances that can be harmful to your health and
decrease physical performance.
Vitamin and Mineral
Supplements
Taking a vitamin or mineral supplement may be
something you are considering, especially if you find it
difficult to eat a variety of foods. Due to the various
physiologic functions of vitamins and minerals, the
supplement industry has tried to encourage
supplement use by physically active people. However,
multivitamin and mineral supplements do not appear
to enhance performance in healthy, well-nourished
individuals. A multivitamin and mineral supplement is
useful if:
◆ You have an existing vitamin or mineral
deficiency.
In this chapter
you will learn
about:
◆ Vitamin and
mineral
supplements.
◆ Nutritional
ergogenic
agents; hype
versus reality.
◆ Risks
associated
with using
performance
enhancers.
◆ Ergolytic
agents.

106 Force Health Protection:
◆ You have poor dietary habits. In this case, increase the amount of
nutrient dense foods and food variety in your diet!
◆ You are exposed to extreme environmental conditions, such as
cold climates or high altitudes (Chapter 12).
Buying Vitamin and Mineral Supplements
The more informed you are about the marketing and
manufacturing of supplements the more likely you can
save money and still buy a good supplement. Facts you
should know before buying a supplement are:
◆ Amount of Nutrients - Follow RDA/DRI
guidelines in Chapter 2, taking too much of
certain nutrients can be toxic. If you choose to
supplement, take a multi-vitamin and mineral
supplement that supplies nutrients in amounts
close to the RDA/DRIs. Excessive amounts of a
single nutrient can upset your nutrient
balance and cause a deficiency of other nutrients. Avoid “high
potency” supplements.
◆ Natural Versus Synthetic Vitamins - Both forms are used by your
body. If manufacturers add plant extracts or a bit of the natural
vitamin, they label the supplement as “natural” and sell it at a
higher price.
◆ Additives - Many supplements contain additives that may cause
headaches or other side effects in some people.
◆ Store Brands Versus Name Brand - A store brand supplement
from a national retailer is of similar quality to a name brand
supplement.
◆ Disintegration Rate - Supplement disintegration in the gut
should meet the U.S. Pharmacopoeia (USP) standards (found on
the label) of 30 to 45 minutes. This does not apply to time-release
or chewables.
◆ Check the expiration date of the supplements you buy.
◆ Stress tablets are a marketing ploy.
◆ Men should not take iron supplements, unless directed by their
doctor.

Nutrition and Exercise Resource Manual 107
Nutritional Ergogenic Agents
Taking performance-enhancing supplements is a personal choice. Table 14-1, which lists some popular ergogenic
agents grouped by type (identified in bold), their claimed benefits, and research findings, is designed to educate you
as a consumer. Many of the ergogenic agents listed in this table are classified as nutritional supplements. When
marketed as a nutritional supplement, these substances are not regulated by the Federal Drug Administration (FDA).
Often this means that the performance claims and the risks associated with using these substances have not been
thoroughly tested.
Table 14-1. Claims and Risks of Ergogenic Agents
Name Claims Benefit / Risk / Side Effect
Energy Enhancers
Inosine Increases endurance and strength, facilitates post-
exercise recovery, increases oxygen release to tissues. No benefits demonstrated; may cause an
increase in free radical production.
Coenzyme Q10
(COQ10) Raises heart enzyme levels to increase aerobic energy
production. No benefits in normal, healthy people.
Desiccated Liver Increase energy and performance by supplying extra
vitamins and minerals. No benefits demonstrated.
Bee Pollen Improves performance and post-exercise recovery
because it is a natural food with numerous nutrients. No benefits demonstrated; may cause allergic
reactions.
Fat Burners
Lean Body Mass
L-Carnitine Delays fatigue by increasing the use of fats for energy. No benefits demonstrated; diet meets needs;
not depleted with exercise; may cause nausea,
vomiting and cramps.
Gamma Oryzanol,
Ferulic Acid Increases testosterone and lean body mass. No benefits demonstrated; the plant sterols are
not readily absorbed by the body.
Hydroxy-Methyl-
Butyrate (HMB) Slows muscle breakdown during intense training,
increases strength. Research is inconclusive.
Chromium
Picolinate Increases muscle mass, burns fat by enhancing the
function of insulin. Benefits are questionable; may cause stomach
upset, anemia, or DNA damage.

108 Force Health Protection:
Growth Hormone (GH)
Releasers
Arginine, Lysine,
Ornithine Stimulate GH release. Some benefits for Arginine and Lysine, but not
Orthinine; may cause gastrointestinal (GI)
upset, potential amino acid imbalances, and
decreases in GH.
Branched chain
Amino Acids
(Leucine,
Isoleucine, Valine)
Stimulate GH, enhance muscle strength, endurance,
and aerobic capacity by providing fuel to muscle and
sparing muscle protein.
Some benefits demonstrated; may cause
diarrhea and cramping.
Free Amino Acids More readily absorbed in gut. Little benefit demonstrated.
Dibencozide,
Cobamamide Promotes growth. No benefits demonstrated on performance.
Glycogen Sparers
40-30-30, high fat/
protein diets Increase endurance by promoting fat metabolism. Some benefits; potential long-term risks are
increased blood cholesterol and heart disease.
Diet change 24-48 hr. before event leads to
decrease in performance.
Medium Chain
Triglycerides Increase energy and decrease body fat because they
are easier to absorb and use as fuel than triglycerides. No benefits demonstrated; may cause GI
problems.
Ginseng Reduces fatigue, increases energy and work capacity. No benefit demonstrated; may cause allergic
reaction or excitability; may contain alcohol.
Lactate Delays fatigue by maintaining blood glucose levels. Some benefits demonstrated.
Caffeine Delays fatigue, burns fat, increases performance by
elevating fatty acid levels in blood. Some benefits; may cause irritability, GI pain,
tremors, loss of concentration, and interfere
with iron absorption. No increase in anaerobic
or maximal aerobic capacity. Fewer benefits
seen in habitual users.
Choline Delays fatigue, reduces fat, improves physical and
mental performance. Benefits questionable; may cause nausea,
diarrhea, and “fishy” body odor.
Table 14-1. Claims and Risks of Ergogenic Agents
Name Claims Benefit / Risk / Side Effect

Nutrition and Exercise Resource Manual 109
Intercellular Buffers
Phosphate Salts Delay fatigue and increase oxygen transport to muscle. Results questionable; may cause GI upset.
Aspartate Salts
(Magnesium/
Potassium)
Increase aerobic capacity, delay fatigue by neutralizing
ammonia produced during exercise. Results are inconclusive.
Citrate Increases endurance and delays onset of fatigue by
buffering hydrogen ions produced during metabolism. Some benefits demonstrated; may cause GI
upset, diarrhea, nausea. Avoid large doses.
Sodium
Bicarbonate Delays fatigue during short, high intensity exercise by
buffering lactic acid. Some benefits demonstrated; may cause
cramps or diarrhea.
Testosterone Enhancers
Glandulars
(grounded organs) Ingesting animal organs high in testosterone leads to
greater lean muscle mass. No benefits demonstrated; may cause your
own production of testosterone to decline.
Sapogenins
(Smilax,
Diascorea,
Trillium, Yucca,
Sarsaparilla)
Ingesting testosterone precursors leads to greater
testosterone concentrations and muscle mass. No benefits demonstrated; may cause light-
headedness or aggression.
Yohimbine Aphrodisiac and purported to cure male impotence.
Increases muscle mass and decreases body fat. No demonstrated increase in testosterone
levels; conflicting results with regard to
impotence; may cause dizziness, nausea,
headaches, or depression.
Boron Increases production of testosterone. No benefits demonstrated; may cause rashes
nausea, vomiting, diarrhea, lethargy.
Androstenedione,
Androstenediol,
Norandrostenediol
Andro
Increases energy, strength, muscle mass, and possibly
greater sexual arousal and sense of well-being. Termed
“prohormones.”.
Considered a steroid; banned by many
organizations; long-term risks are not well
known. Risk of failing drug tests. “Natural” does
not mean “safe”!
DHEA Slows aging, builds muscle, burns fat, boosts libido by
increasing testosterone in body. Little or no benefits demonstrated with respect
to performance; side effects include acne,
nausea, virilization. May increase risk of some
cancers.
Table 14-1. Claims and Risks of Ergogenic Agents
Name Claims Benefit / Risk / Side Effect

110 Force Health Protection:
Miscellaneous
Octacosanol
(Wheat Germ Oil) Improves aerobic capacity by enhancing central
nervous system function. Some benefits demonstrated in reaction times
but not aerobic capacity; may cause allergic
reactions.
Glycerol Improves endurance by increasing blood volumes and
decreasing core temperatures. No benefits demonstrated; may cause cellular
dehydration, nausea, vomiting, diarrhea.
Omega-3 Fatty
Acids Improve aerobic capacity. No ergogenic effects have been demonstrated.
Creatine Increases stores of Creatine phosphate in muscle used
for ATP-PC anaerobic energy system. Some benefits demonstrated during short-
term, high intensity exercise, but negated if
ingested with caffeine.
Tyrosine Maintains cognitive performance during cold, stressful,
or distracting conditions. Benefits demonstrated.
Glutamine Promotes muscle growth, prevents fatigue, overtraining,
and immune deficiency. No performance benefits demonstrated.
Glucosamine
Sulfate with
Chondroitin
Sulphate
Component of connective tissue; has anti-inflammatory
properties which increase recovery from
musculoskeletal or overuse injuries.
Has potential for preventing and treating
injuries, however, is not yet endorsed by
doctors because of the lack of research.
Melatonin Increases mental and physical performance by
enhancing quality of sleep. Benefits demonstrated; may cause sleepiness
and fatigue at time of administration, but not
upon awakening.
Steroids and
Steroid
Alternatives
Increase muscle mass. Risks include aggressiveness, acne, changes
in behavior/ emotions, injury to connective
tissue, impaired immune function, tumors,
shrinking of testicles, decrease sperm and
testosterone production, and masculinization in
women. Use banned by the military.
Table 14-1. Claims and Risks of Ergogenic Agents
Name Claims Benefit / Risk / Side Effect

Nutrition and Exercise Resource Manual 111
Other sources of information include the Ergogenics Pamphlet (http://
www.usuhs.mil/mim/ergopam.pdf); the Alcohol Tobacco and Firearms web
site at http://www.ATF.treas.gov; the Federal Drug Agency at http://
www.fda.gov (select the “Food” icon); and the Federal Trade Commission at
http://www.ftc.gov (search “consumer publications”). Be aware of substances
that are banned by the military and various athletic associations.
Ergolytic Agents
Ergolytic agents are those substances which impair
physical and/or mental performance. When using these
substances, you are undoing the benefits gained through
training. Hopefully, by avoiding these substances, you can
maximally improve your physical fitness and
performance.
Table 14-2. Ergolytic Agents and Performance
Name Common Beliefs Side Effects /
Risks
Alcohol Relaxes, increases self-
confidence, alters perception of
fatigue.
Heavy drinking can cause
severe dehydration and
decrease performance.
Stimulants:
amphetamines,
ephedrine
Improve performance by
increasing central nervous
system arousal.
Banned by the military;
increases heart rate, increases
blood pressure; may cause
dizziness, stomach upset,
irritability, insomnia, and death.
Cigarettes or
Smokeless
Tobacco
(Nicotine)
Buzz leads to improved
performance and reaction time. Increases heart rate and blood
pressure, leading to decreased
performance.

112 Force Health Protection:
15
Guidelines for nutrition and exercise for
optimal health and performance are the same for
women and men. However, special issues, such as
pregnancy, will alter these practices. Seek the advice
of your physician, Registered Dietitian, Health
Promotion personnel, or contact the American College
of Obstetricians and Gynecologists (ACOG) at
(202)863-2518 for more information on women’s health.
Pregnancy and
Lactation
Pregnancy is one of the most
physiologically stressful events
undergone by healthy women.
Because exercise is also a physiologic
stress, there have been concerns
about the effects of exercise on the
health of the mother and child
during pregnancy. To address these
concerns, ACOG has established guidelines for exercise
during pregnancy. The general consensus is that
women in good health may continue (or start)
exercising during pregnancy. However, each woman
should consult her physician for personal
recommendations.
Proper nutrition and routine exercise during
pregnancy is important for your health and the health
of your baby. Table 15-1 outlines general nutrition and
exercise guidelines that you should follow during
pregnancy.
In this chapter
you will learn
about:
◆ Guidelines for
exercise during
pregnancy and
lactation.
◆ Eating
Disorders
◆ Osteoporosis.
Training Issues
for
Women
Nutrition and Exercise Resource Manual 113
Exercise guidelines adapted from the AGOC exercise guidelines.
There are some contraindications to exercise during pregnancy. If you
have any of the contraindications listed below, discuss them with your doctor.
Table 15-1. Nutrition and Exercise Guidelines
for Pregnant Women
Nutrition Guidelines Exercise Guidelines
Choose nutrient dense foods
(Chapter 3, page 23). Exercise at least three times per week.
Ideally, start this before your pregnancy or
during the first trimester. Consult your
doctor.
Eat according to the Food Guide
Pyramid to meet your increased
energy needs (Chapter 3).
Monitor exercise intensity according to
perceived exertion or effort (Chapter 5).
Target heart rate zone is not accurate since
heart rate is higher during pregnancy.
Get adequate folate intakes prior to
and during pregnancy to prevent birth
defects (Chapter 2, Table 2-2).
Try swimming as it is an excellent, low-
impact aerobic exercise and the water
helps regulate body temperature.
Talk to your doctor about the proper
amount of weight to gain for your
pregnancy.
Stop exercise if you feel short of breath,
feel any pain, feel dizzy or faint, or have
contractions.
Meet nutritional demands for both
pregnancy and exercise. You should
not attempt to lose weight.
Avoid supine (lying on your back) exercises
after the first three months of pregnancy.
Drink adequate amounts of water for
both hydration and dissipation of
heat.
Avoid activities that may result in trauma to
the abdominal area, such as contact
sports.
Avoid exercises requiring balance,
especially during the last three months of
pregnancy.
Avoid exhaustive and maximal exercise.
Avoid exercising in environmental
extremes.
Avoid saunas, stream rooms, and
whirlpools.
◆ High blood pressure. ◆ Irregular heart beats.
◆ Anemia. ◆ Premature labor.
◆ History of premature labor. ◆ Diabetes.
◆ Third trimester breech. ◆ Extreme obesity or underweight.
◆ Extremely sedentary lifestyle. ◆ Incompetent cervix.
◆ Multiple spontaneous abortions. ◆ Unexplained complications.

114 Force Health Protection:
After the baby’s birth, gradually resume exercise, ultimately building up
to your pre-pregnancy levels of duration and intensity. To lose weight after
your pregnancy, do so according to the guidelines in Chapter 1 and the Navy
Nutrition and Weight Control Self-Study Guide (NAVPERS 15602A).
Nutrition and Exercise Guidelines for
Lactating Women
Consult your baby’s pediatrician or your family physician with questions
and concerns you have about your and your baby’s diet.
◆ Energy needs are higher when breast feeding than during
pregnancy. Consume adequate kcals (roughly an extra 500 kcal
per day).
◆ Choose nutrient dense foods (Chapter 3, page 23).
◆ Drink adequate fluids to prevent dehydration.
◆ Consume adequate calcium (see Chapter 2).
◆ Lactic acid production during exercise can affect the taste of
breast milk, so breast feed prior to exercise.
◆ If you drink coffee, drink less than 2 cups a day; the caffeine may
cause your baby to be sleepless and irritable.
◆ Avoid alcohol; alcohol enters the breast milk and can decrease the
baby’s appetite.
◆ Avoid cigarette smoking; smoking decreases milk production.
Female Athlete Triad
The Female Athlete Triad is a trio of associated disorders found among
female athletes trying to balance the pressures of body image and physical
performance. The triad (Figure 15-1), marked by inadequate food intake,
menstrual abnormalities, and bone loss, can be fatal if left untreated.
Therefore, a healthy relationship between food, body image, and performance
must be established.
◆ Thyroid, cardiac, vascular, or
lung disease.
◆ Bleeding or abnormal symptoms
during this pregnancy.
◆ Carrying more than one baby.
Nutrition and Exercise Resource Manual 115
Figure 15-1. The Female Athlete Triad
Some signs of the Triad are:
◆ Dieting excessively to lose weight.
◆ Occurrence of stress fractures.
◆ Compulsively overexercising.
◆ Irregular or absent menstrual cycles.
◆ Self-esteem governed by body weight.
Eating Disorders
Eating disorders are more prevalent than one might think, especially
among young female athletes. An eating disorder results in inadequate
intakes of kcals and nutrients to replenish the energy used during daily
activities. Two common types of eating disorders are Anorexia Nervosa and
Bulimia Nervosa. Some behaviors people with eating disorders engage in are
starvation, self-induced vomiting, excessive exercise, and the misuse of
laxatives or diuretics. Both disorders are extremely damaging to the mind
and body, and, if untreated, can lead to death. These disorders can have long-
term health consequences by affecting the heart, liver, kidneys, and bone. In
addition, these behaviors severely limit physical and mental performance.
Amenorrhea
Amenorrhea is the cessation of menstrual cycles. A women is considered
amenorrheic when she misses three or more consecutive menstrual cycles. In
well-nourished women, heavy physical training should not result in
amenorrhea. When non-pregnant, premenopausal women become
amenorrheic it may reflect malnutrition.
Eating Disorder
Amenorrhea Osteoporosis
(cessation of menstrual cycles)
From FS Kaplan.
Prevention and
Management of
Osteoporosis. CIBA
Clinical Symposia.
47(1); 1995.

116 Force Health Protection:
Osteoporosis
The decreased levels of female hormones during
amenorrhea can lead to calcium loss from the bones and
increase the likelihood of developing osteoporosis later in
life. Osteoporosis is a major cause of bone fractures in the
elderly. Bone density throughout the adult lifespan is
greatly impacted by the amount of bone formed prior to the
early thirties. Therefore, amenorrhea and eating disorders
in young adults can negatively affect bone health for life.
Prior to menopause, a healthy diet (including adequate
calcium intakes) and the performance of weight bearing
activities are the two factors that have the greatest positive
influence on bone health (see Chapters 3, 4, 5, and 7). For
more information on bone health, ask your doctor or health
care provider.

Nutrition and Exercise Resource Manual 117
Age and Performance
16
Aging is a natural process that most, if not all,
people would like to avoid. Most people associate aging
with gaining weight, getting weaker, and not being
able to perform many of the activities they did in their
youth. Many of these conditions are actually the result
of inactivity, not aging. Although there are several
inevitable physiologic changes that will occur as you
age, the degree of these changes can be manipulated
through sound dietary and exercise practices.
Changes in
Metabolism and Body
Composition
Maintaining a healthy body weight and body fat
percentage throughout your adult life is key to
maintaining health and fitness as you age. This often
seems easier said than done, considering basal
metabolic rate (BMR, see Chapter 1) declines as you
age.
With aging, expect to see a gradual
decline in BMR, possibly resulting in
needing 100 fewer kcal a day with each
passing decade.
Taken from Tufts University Health and Nutrition Letter.
November 1998; 16(9): 6.
In this chapter
you will learn
about:
◆ Age-associated
changes in
metabolism
and body
composition.
◆ Countering
age-associated
changes in
physical
performance.
118 Force Health Protection:
The loss of muscle mass as you age is directly responsible
for the decline in BMR. Muscle is metabolically active,
which means that it requires a set number of kcals each day
to maintain its mass. On average, people lose some muscle
mass each year after the age of 35 years. This results in
fewer metabolic demands and less total daily kcal
requirements. However, the amount of muscle mass that you
lose is dependent upon how much physical activity you
perform as you age, particularly activities that require
muscle strength such as strength training. By engaging in
strength training exercises you will preserve and possibly
gain muscle mass, leading to a 10% to 15% boost in your BMR!
Along with a decrease in muscle mass, inactivity can also lead to an
increase in body fat. This occurs if the number of kcals consumed is greater
than the number of kcals expended through physical activity, as explained
in the energy balance equations in Chapter 1. This simultaneous increase in
body fat and decrease in muscle mass leads to a greater body mass index
(BMI) and is associated with an increased risk for heart and blood vessel
diseases, obesity, diabetes, and other diseases (see Chapter 1).
Any alterations in energy expenditure, either through changes in BMR or
changes in physical activity level, need to be countered by changes in kcal
intake to keep your net energy balance at zero and to maintain your current
body weight. Therefore, a combination of sound nutritional practices and
regular physical activity will enable you to maintain a healthy body weight
and body composition and remain physically fit as you age.
Nutritional Needs
The Dietary Guidelines for Americans and the
Food Guide Pyramid (outlined in Chapter 3) were
designed to provide basic nutritional information
and serve as educational tools for Americans over
2 years of age. Therefore, these guidelines should
be followed to ensure good nutrition throughout
your life. An important point to note is that
although the age-related decline in BMR results in the need for fewer daily
kcals, the requirements for nutrients such as vitamins, minerals, and
proteins do not decrease with age (see Chapter 2). Therefore, proper food
selection is essential to meet this challenge. Some ideas to help you meet
your nutrient requirements without eating extra kcals include following the
5-A-Day campaign (eat at least five fruits and vegetables a day) and eating
nutrient dense foods (see Chapter 3 and Appendix A).
Nutrition and Exercise Resource Manual 119
Countering Age-Associated
Changes in Fitness
Ever heard the saying “use it or lose it?” This is true for physical fitness.
Whether it is muscle strength or aerobic endurance, if you do not remain
physically active as you age you cannot maintain the muscle mass or heart
adaptations you need for peak performance (review the effects of detraining
listed in Chapter 4). Though aging can lead to decreases in fitness levels, the
amount of decline is strictly dependent on your exercise routine. Therefore,
age itself does not predispose you to have large decrements in physical
performance.
Some gradual changes you can expect in your
physical performance as you age are listed below.
◆ Aerobic Capacity - Declines in aerobic
capacity, about 5% to 15% per decade, can
start occurring after the age of 30. This is
due to a combination of less physical
activity, a lowering of the maximal heart
rate, and decreases in the elasticity of the
blood vessels. Declines in aerobic capacity
can be minimized by maintaining a
regular aerobic exercise routine. In
particular, maintaining your exercise intensity, even if you
exercise less frequently each week, will enable you to preserve
much of your cardiorespiratory fitness as you age (see Chapters 4,
5, and 6).
◆ Anaerobic Performance - Declines more than aerobic capacity
mainly because people tend to perform less near-maximal
exercise as they age. This decline can be minimized by
performing speed work in addition to your aerobic conditioning
(see Chapter 5 for performance-related workouts). Training for
speed is only necessary if you want to maintain your
performance-related fitness or are still participating in
competitive sports (see Chapters 4 and 5).
◆ Muscle Mass and Strength - Both muscle mass, particularly
the fast twitch fibers, and muscle strength decline after the age
of 40. Losses can be minimized and even reversed if strength
training exercises are performed regularly. As with aerobic
fitness, the intensity of the strength exercises will determine the
degree of your training benefits and slow the loss of muscle as
you age (see Chapters 4, 7, 8, 10, and Appendix C).

120 Force Health Protection:
◆ Flexibility - Connective tissue around your joints can become
less elastic with age. However, no measurable declines in
flexibility will occur if you regularly perform stretching exercises.
Maintaining your flexibility is important as this determines the
range of motion of your joints and decreases the feeling of
stiffness in your joints. Flexibility also serves an important role
in injury prevention and may reduce symptoms of arthritis. (See
Chapters 4 and 9.)
Other fitness issues to be aware of as you age include
the following:
◆ Warm-Up and Cool-Down - Longer warm-up
and cool-down times are needed to optimize
performance as you age, particularly if you
are participating in strenuous exercise. These
longer warm-up and cool-down times will help
prepare your body for the upcoming exercise
and reduce your risk of injury (see Chapter 4).
◆ Recovery from Workouts - You will need to
allow for longer recovery times from strenuous workouts and
competition as you age. You may actually notice this before you
notice a decline in your performance. Listen to your body and
allow for adequate recovery time by following a hard workout
with a couple rest days or light workout days. In addition, allow
your body adequate time to adapt to increases in your workout.
Again, maintaining your intensity is more important than
exercising more frequently to maintain your fitness. Also, pay
attention to the warning signs of overtraining (see Chapter 13).
◆ Recovery from Injuries - As with recovery from a strenuous
workout, you will need more time to recover from training
injuries. Be patient and allow yourself to fully recover. This will
help you avoid future injuries (see Chapter 13).
◆ Cross-Training - No specific exercise is better than another to
offset all the health and fitness changes mentioned. However,
many of these concerns can be addressed by cross-training, or
altering the types of exercises you perform, throughout the week
(see Chapter 5). By cross-training you can improve and maintain
your aerobic fitness while recovering from intense workouts or
while taking a break from weight-bearing exercises. This will
help prevent overtraining and overuse injuries (see Chapter 13)
while you remain physically active. Consider making cross-
training a regular practice in your exercise routine, if it is not
already.
Nutrition and Exercise Resource Manual 121
As you grow older your responsibilities, interests, leisure time activities,
as well as your level of motivation may affect how physically active you are.
However, it is important to remember that a sedentary or inactive lifestyle,
combined with poor eating habits, can increase the risk for developing
obesity, heart disease, strokes, diabetes, some types of cancers, high blood
pressure and osteoporosis. Adopting sound eating and exercise habits (the
earlier the better) can help reduce the risk for developing the above
mentioned diseases. Chapter 17 provides information on how to develop and
maintain healthy habits.

122 Force Health Protection:
Adopting
Healthy
Habits
In this chapter
you will learn
about:
◆ Setting
SMART
goals.
◆ Reaching
goals.
◆ Evaluating
progress.
◆ Staying
motivated and
overcoming
setbacks.
17
Forming habits to enhance physical
performance and for achieving a healthier lifestyle is
both personally and professionally rewarding. Using
the information provided in the preceding chapters, you
can set goals, develop healthy habits and achieve your
objectives. For example, if your objective is to improve
cardiovascular fitness, use the information provided in
Chapters 4, 5, 6, and 11 to design your a plan of action.
Remember, effective programs for enhancing physical
performance and overall health include both sound
nutrition practices and appropriate physical training.
The process of developing and maintaining healthy
habits can be challenging. It is a gradual process which
requires commitment, effort and perseverance.
Ultimately, the payoff will be in the form of enhanced
job-related physical performance, being in great
physical shape, and lowering your risk for developing
chronic health problems as you get older. Everyone
ages: steps you take now will last a lifetime!
Setting “SMART”
Goals
As you go through the process of changing and
adopting healthy habits, you are actively taking charge
of your health. Begin by setting Specific, Measurable,
Action-oriented, Realistic and Timed (SMART) goals to
meet your fitness and health-related objectives. A
SMART goal should be:

Nutrition and Exercise Resource Manual 123
◆ Specific - The more specific the goal, the easier it is to plan your
routines to reach the goal. If you have a general goal, pick a
specific area to focus on. For example, define “I want to increase
my running distance” to “I will increase my running distance by
one mile.” Another example, restate “I want to increase my
dietary fiber intake” as “I will add one additional serving each of
fruits and vegetables to my daily diet”.
◆ Measurable - Your specific goal should be easy for you to
measure so you can chart your progress. Taking the running
example above, you can easily measure the distance you run to
determine if you are meeting your goal. As for the fiber example,
you can record your fruit and vegetable intake (see Appendix A).
◆ Action-oriented - When defining a specific goal state exactly
what actions you must do to achieve the goal. This becomes your
plan to reach your goals. For example, “I will increase my run by
a quarter mile every two weeks until I am able to run an
additional mile.”
◆ Realistic - Be realistic in your expectations of yourself and what
you expect to gain. Taking large or long-term goals and breaking
them into smaller, more manageable goals to keep you motivated
and focused on your actions. For example, train for and run a 5k
race, then build up to a 10k race.
◆ Timed - Time lines provide direction in planning short-term
goals and actions to reach long-term goals and objectives. Using
the running example above: two weeks is the deadline for
increasing run distance by a quarter mile, and two months is the
long-term deadline for increasing distance by one mile.
Table 17-1 lists a number of general nutrition and fitness-related goals to as-
sist you in identifying your own goals and in designing and setting “SMART”
goals as described above.

124 Force Health Protection:
Reaching Goals
The more specific and realistic your goals, the easier it will be to develop
and follow action plans to meet these goals. More than likely, unforeseen
events will lead to altered plans; expect this and keep your ultimate goals in
mind when replanning. Next incorporate your plan into your daily routines.
At first you will have to consciously make efforts to follow your plans, but,
after continuous practice, these plans will become your new habit. The
following points and the steps and actions listed in Table 17-2 will help you
reach your goals:
◆ Start simple: pick a goal that you feel will be easy to achieve.
Table 17-1. Some General Nutrition and Fitness-
Related Goals
General Nutrition-Related Goals General Fitness-Related Goals
❑ Read food labels when buying
foods.
❑ Health benefits (lower cholesterol,
lower blood pressure, and lower
stress).
❑ Eat foods according to their
serving sizes.
❑ Improve/maintain heart and lung
(cardiovascular) fitness.
❑ Eat at least 5 servings of fruits
and vegetables each day.
❑ Improve/maintain muscular
strength.
❑ Include foods that are good
sources of calcium.
❑ Improve performance of job-
related physically-demanding
tasks.
❑ Follow the U.S. Dietary
Guidelines.
❑ Maintain healthy body weight and
body fat.
❑ Drink plenty of fluids to maintain
fluid balance.
❑ Improve/maintain flexibility.
❑ Eat more dietary fiber. ❑ Have strong bones.
❑ Reduce saturated fat and
cholesterol intakes.
❑ Improve physical appearance.
❑ Other: ❑ Other:
Nutrition and Exercise Resource Manual 125
◆ Work toward one goal at a time.
◆ If you notice that you are having difficulty achieving a goal,
revise your plan and alter your strategy.
Adapted from National Cancer Institute and Centers for Disease Control and Prevention
(http://5aday.nci.nih.gov/).
Maintaining Healthy
Habits
Once your “new” habit becomes a part of your
routine and is performed without forethought or effort,
you are maintaining, rather than adopting, this habit.
Maintaining healthy habits during interruptions in
your regular routine (such as vacations or illness) can
create challenges of its own. So how can you maintain
Table 17-2. Steps and Actions To Take To Reach
Your SMART Goals
STEPS ACTIONS
Develop Develop an support system of friends, family and/or
coworkers who will encourage you.
Make Make change a priority; Make time; Remember you
control your off-duty schedule.
Create Create a plan of action -- one that works for you,
motivates you and fits in your schedule.
Monitor Monitor your progress -- use the tracking charts provided
in Appendixes A and B.
Reward Reward yourself when you meet a goal.
Use Use long-term vision. Remember healthy habit will
greatly enhance the quality of your life in later years.

126 Force Health Protection:
your routine when faced with setbacks?
◆ Anticipate and try to avoid setbacks or upsets to your routine.
◆ Plan in advance how you will handle interruptions (e.g.vacation)
to your schedule.
◆ Motivate yourself to restart your routine when things “return to
normal”. For example, give your workout buddy $20 before you go
on vacation to keep on your behalf until you restart your exercise
routine.
◆ Reward yourself once you have achieved maintenance for your
goal. The reward should be appropriate for the goal attained
(preferably non-food). For example: put $1 in a piggy bank for
every workout you complete for a month and use it to buy
yourself new exercise gear or a ticket to your favorite sporting
event.
◆ Enhanced fitness builds self-confidence which is a powerful
motivator!
Ultimately, your perceptions of the health and fitness benefits associated
with healthy eating practices and regular exercise are important for
maintaining healthy lifestyle behaviors. We hope that the information
provided in this guide motivates you to personally follow healthy nutrition
and physical fitness practices and to educate fellow navy personnel to do the
same.

Nutrition and Exercise Resource Manual 127
Appendix A: Ideas for
Healthy Food Choices
Make gradual changes to your diet. Eating healthfully requires making
overall smart food selections throughout your life. Choosing a food that is less
nutritious every once in awhile does not mean your diet is bad; just make
those foods the exception in your diet, not the rule.
Table A-1. Healthier Food Selections
Try: In place of:
Grains
Whole grains and pastas, and brown
rice. Bleached, white, or processed
varieties.
Cooking pastas and rice in broths. Cooking pastas and rice in water with
butter.
Vegetables/
Fruits
Low-fat or non-fat salad dressings
or vinagrette on salads. Creamy salad dressings.
Vegetables marinated in herbs
and lemon or lime juice. Adding butter to vegetables.
Meats
Canadian bacon or ham. Bacon.
Ground turkey, extra-lean ground
beef, or Lean, trimmed red meats. Ground beef.
2 egg whites. 1 whole egg.
Poultry or fish. Marbled red meats.
Steaming, Broiling, Baking, or Grilling. Frying.
Dairy
Low-fat or non-fat sour cream, cottage
cheese (whipped until smooth), or
yogurt.
Sour cream.
Skim milk. Whole milk or nondairy creamer.
Low-fat cheeses. Cheese.

128 Force Health Protection:
5-A-Day Challenge
Some ideas to help you increase the number of fruits and vegetables you
eat each day to meet the 5-A-Day challenge are: (see Table 3-1 for serving sizes.)
◆ Eat fruit or drink fruit juice at breakfast.
◆ Snack on fruits and vegetables (especially bite-sized portions such
as baby carrots or dried fruits) throughout the day.
◆ Include one or more side servings of vegetables at lunch and
dinner.
◆ Eat at least one Vitamin A-rich fruit or vegetable - good food
sources include apricot, cantaloupe, carrot, mango, papaya,
pumpkin, spinach, sweet potato, romaine lettuce, mustard greens,
winter squash, kale, and collards.
◆ Eat at least one Vitamin C-rich fruit and vegetable - good food
sources include orange, grapefruit, kiwi, apricot, pineapple,
cantaloupe, strawberry, tomato, mango, plum, broccoli,
cauliflower, brussel sprouts, peppers, collards.
◆ Eat at least one Fiber-rich fruit and vegetable - good food
sources include apple, banana, berries, figs, prunes, cherry, kiwi,
orange, date, pear, cooked beans (kidney, lima, pinto, black,
lentils), black-eyed peas, peas, carrot, potato, and corn.
◆ Eat at least one Cruciferous vegetable (from cabbage family) -
examples include broccoli, cauliflower, brussel sprouts, bok choy,
red and green cabbage, kale, and turnip.
Remember: 5 fruits and vegetables a day is the minimum - more is better!
Fats
Applesauce for baking. Oil (1:1 substitution).
Wine or broth-based sauces. Cream and butter sauces.
Canola, olive, and safflower oils. Animal fats, coconut oil, and palm oil.
Cocoa. Chocolate.
Spray butter or margarine. Butter.
Table A-1. Healthier Food Selections
Try: In place of:

Nutrition and Exercise Resource Manual 129
Worksheet A-1. Nutrition Tracking Guide
Note: See Chapter 3 for recommended number of servings and serving sizes. Check off the number of servings you eat each day from each of the food
groups. 1 circle = 1 serving.
Date: Date: Date: Date:
Food Groups
Grains &
Cereals
6-11
servings
Fruit
2-4 servings
Vegetable
3-5 servings
Meat &
Meat
Substitute
2-3 servings
Dairy
2-3 servings
Fats, Oils, &
Sweets Use Sparingly Use Sparingly
Use Sparingly
Use Sparingly

130 Force Health Protection:
Appendix B: Sample Workout
This is a general cardiovascular and strength workout. Feel free to
substitute or add exercises according to the guidelines described in
Chapters 5 and 7. Use Worksheet B-1 and Worksheet B-2 to design your
workouts and chart your training progress.
Note that the duration of this workout is dependent on the number of exercises that are performed
and the length of the aerobic exercise. Perform the number and duration of exercises that are
appropriate for your fitness level and adjust the routine as your fitness improves.
Table B-1. Sample Workout
Sequence Activity Frequency Intensity Time
Warm-up before exercise 50% maxHR 5 min.
Aerobic Walk, Run,
Swim, etc. 3 to 7 days/week 60 to 75%
maxHR 30 to 60 min
Cool-down after exercise 100 bpm 5 min.
Strength 3 days/week
(Mon, Wed, Fri or
Tues, Thurs, Sat)
2 sets of 12
repetitions 20 to 45min
Legs Squats
Leg Curl
Chest Chest Press
Back Seated Row
Shoulder Lateral Raise
Triceps Triceps Extension
Biceps Biceps Curl
Lower Back Back Extension
Abdominals Ab Crunch
Side Crunch
Stretch 3 to 7 days/week 30 seconds
X 2 10 min
Quadriceps
Hamstring
Pretzel
Butterfly
Chest
Upper Back
Rock-n-roll
Lizard

Nutrition and Exercise Resource Manual 131
Worksheet B-1. Aerobic Exercise Log
Under “Comments”, list the type of workout you performed (i.e., intervals, fartleks), how you felt during exercise, your perceived exertion (6-20 on the Borg
scale), or any other measure that you use to track your progress.
Date:
Type
Heart Rate
Time
Comments
Date
Type
Heart Rate
Time
Comments
Date
Type
Heart Rate
Time
Comments
Date
Type
Heart Rate
Time
Comments

132 Force Health Protection:
Worksheet B-2. Strength Exercise Log
See Chapter 7 for strength training guidelines. Rep = repetition; Set = the number of reps performed without resting; wgt = weight lifted.
Exercises: Date:
set x rep /
wgt
Date:
set x rep /
wgt
Date:
set x rep /
wgt
Date:
set x rep /
wgt
Date:
set x rep /
wgt
Date:
set x rep /
wgt
Date:
set x rep /
wgt
Date:
set x rep /
wgt
Chest
////////
////////
////////
////////
Back
////////
////////
////////
////////
Shoulders
& Arms
////////
////////
////////
////////
Legs
////////
////////
////////
////////
////////
Lower
Back & Abs
////////
////////
////////
////////
Remember to stretch!
Nutrition and Exercise Resource Manual 133
Appendix C: Strength Exercises
Legs
Squats
Place barbell across shoulders on upper back,
not directly on neck. Keep head up, back
straight, feet slightly wider than shoulder-width
apart, and point toes out. Keep back
perpendicular to deck. Count 1: Squat in a
controlled motion until knees are over toes, but
no lower than having your thighs parallel to deck. Inhale
squatting down. Count 2: Return to start position, exhaling
while standing up. Variation: 3/4 Squat - Squat until knees are
at a 120˚ angle (half of the normal squat). Return to start
position. Works quadriceps, hamstrings, gluteals, calves.
Lunge
Stand with feet shoulder-width apart, bar
resting on back of shoulders. Count 1:
Take big step forward with one leg. Count
2: Squat straight down until the front leg’s
thigh is parallel to deck. Inhale when
lunging. Do not let front knee bend so it
moves in front of toes. Count 3: Stand up. Count 4: Push back
to start position, exhaling when standing up. Repeat with
other leg. Variation: Walking Lunge - perform lunges while
alternating legs as you walk across the deck. Works
hamstrings, quadriceps, gluteals, calves; can use dumbbells
placed at your sides
Leg Press
Keep hips and back flat
against support pad. Count 1:
Slowly lower platform until
knees are at a 90˚ angle.
Inhale lowering platform.
Count 2: Return to start
position, exhaling while raising platform. Do not lock your
knees. Works quadriceps and hamstrings.
Leg Extensions
Sit on machine with feet under foot pad,
lightly hold seat handles for support.
Count 1: Keeping feet flexed, raise
weight until legs are extended but knees
are not locked. Exhale while extending
legs. Do not bounce the weight. Count 2:
Slowly return to start position, inhaling while lowering legs. Do
not let weight drop. Works quadriceps.
Standing Calf Raises
Place shoulders under pads of machine, balls
of feet on foot rest. Count 1: Stand straight
with knees slightly bent, rise up on toes as
high as possible, keeping the balls of your feet
in contact with the machine. Exhale lifting up.
Count 2: Return to start position, inhaling while
lowering weight. Do not lock knees. Works calves.
Seated Calf Raises
Place balls of feet on foot rest, pads resting
on top of thighs. Count 1: Raise heels as
high as possible. Exhale lifting up. Count 2:
Slowly drop heels as low as possible. Inhale
lowering weight. Works calves.
134 Force Health Protection:
Legs
Leg Curls
Place heels, with feet flexed, under foot
pads so the pads are at the back of heels,
not calves. Count 1: Curl legs up, bringing
ankle pad close to your gluteals. Exhale
curling legs up. Count 2: Return to start
position, inhaling while extending legs. Do not lift hips or arch
back during lift. Works hamstrings.
Dips
Rest hands on parallel bars. Extend arms; legs are
not to support your weight unless needed for
assistance. Count 1: Bend the elbows until
shoulders are level with the elbows. Inhale while
lowering body. Count 2: Extend arms to return to
start position. Exhale while lifting body. Works
triceps, chest and shoulders.
Chest
Incline Dumbbell Press
Lie on 20˚ incline bench. Feet
flat on deck. Hold the dumbells
in front of shoulders, palms out.
Count 1: Press dumbbells
straight up until arms are
extended. Exhale raising
weight. Keep elbows slightly bent. Lower back should stay on
the bench and back should be straight. Count 2: Return to
start position, inhaling while lowering weight. Works chest,
shoulders and arms.
Bench Press
Lie on bench with feet flat on deck. Hold
barbell at arms length above mid chest with
palms facing out. Count 1: Lower barbell
until it barely touches your chest by bringing
your elbows straight down and behind you.
Inhale while lowering barbell. Do not bounce
the bar off your chest. Count 2: Return to
start position, exhaling while raising barbell.
Variation: Use dumbbells. Works chest,
shoulder and arms.
Cable Flys
Lie on bench with feet flat on
deck. Grip cable handles with
arms extended, palms up, and
elbows slightly bent. Count 1:
Bring arms up and over your
chest, crossing them over your chest. Exhale while pulling
cables across chest. Elbows should remain slightly flexed; but
do not bend them more to pull the cables. Count 2: Return to
start position, inhaling while extending arms. Keep upper
arms in line with shoulders and collarbone during movement.
Works chest.
Dumbbell Flys
Lie on bench with feet flat on deck. Hold
dumbbells at arms length above upper chest
with palms facing each other. Count 1:
Keeping elbows slightly bent, lower
dumbbells out to each side of chest in semi-
circular motion. Dumbbells should be even
with sides of chest. Inhale lowering
dumbbells. Count 2: Return to start position,
exhaling while raising dumbbells. Works chest.
Nutrition and Exercise Resource Manual 135
Back
Curl Grip Pulldowns
Grab pulldown bar using underhand grip, arms
extended shoulder-width apart. Sit on pad and
keep back straight. Count 1: Pull bar down
until it touches top of chest. Exhale on pull
down. Do not swing or rock lower back during
movement. Count 2: Return to start position,
inhaling as you extend your arms. Works back and biceps.
Lat Pulldowns
Grab pulldown bar using overhand grip, arms
extended shoulder-width apart. Sit on pad
and keep back straight. Count 1: Pull bar
down by bringing elbows down to your sides
until the bar touches your upper chest.
Exhale on pull down. Do not arch your lower
back during this exercise. Count 2: Return to start position,
inhaling as arms extend. Works back and biceps.
T-Bar Rows
Using a T-bar row machine, step onto foot
supports and lie torso flat on support pad.
Reach down and grab one set of handles on
the T-bar with an overhand grip, hands
shoulder width apart. Center and hold T-bar in
extended arms. This is your start position.
Count 1: Lift bar toward chest, pulling elbows
straight up and behind you. Keep torso still on the support
pad. Exhale when raising the T-bar. Count 2: Inhale while
fully extending arms. Works back and arms.
One Arm Dumbbell Rows
Place left knee and hand on
bench, extend right leg on
deck. Keep back straight.
Extend right arm straight down
below right shoulder and hold
dumbbell in right hand. Count 1:Pull dumbbell straight up to
rib cage by bringing elbow straight up and behind you. Exhale
raising dumbbell. Do not turn your torso. Count 2: Return to
start position, inhaling while lowering dumbbell. Switch sides
and repeat. Works back and biceps.
Seated Rows
Place feet against a stationary foot rest
with knees slightly bent. Hold pulley bar at
chest height with arms extended. Keep
back straight. Count 1: Pull bar to middle
of chest, keeping forearms parallel to
deck. Exhale pulling arms back. Do not
rock backwards or forward during
movement. Count 2: Return to start
position, inhaling while extending arms.
Works back and arms.
Back Extensions
On a back extension bench, place
your hip bones just over the front
end of the front pad and your ankles
under the rear pads. Count 1: Slowly
bend at the waist, lowering your
head to the deck. Bend at the waist
and keep your back straight. Inhale
when lowering torso. Count 2:
Slowly lift your torso up until your back is parallel to the deck.
Exhale when raising torso. Works lower back. For beginners,
see the lower back exercises on page 69 and 80.
136 Force Health Protection:
Arms
Rotating Dumbbell Curls
On incline bench, hold
dumbbells with arms extended
down, palms facing back.
Count 1: As you begin to lift
dumbbells, rotate hands so
palms face up before they
pass the bench pad. Keep palms up as you bring dumbbells
up to shoulder. Exhale raising dumbbell. Count 2: Return to
start position, rotating your palms to face back after they pass
the bench pad. Inhale while lowering dumbbell. Works biceps.
Barbell Curls
Stand with feet shoulder width apart, back
straight. Grab barbell with underhand grip,
shoulder-width apart. Extend arms down,
placing barbell against upper thighs. Count 1:
Bend elbows and lift barbell toward chest. Keep
elbows and arms close to sides. Do not throw
weight up by arching back and swinging barbell. Do not rock
elbows forward. Count 2: Return to start position. Exhale
raising barbell, inhale lowering barbell. Works biceps.
Triceps Pressdown
Grab bar or rope with hands close together in
center of body, elbows at 75o so forearms are not
quite parallel to deck. Push rope down until arms
are straight, elbows remaining close to your sides.
Exhale while pushing down. Count 2: Return to
start position, inhaling while bringing forearms up.
Works triceps.
Tricep Extension with Barbell
Lie on bench with feet flat on deck, head at
top of bench. Hold barbell above head with
hands approximately 6”apart, palms up.
Count 1: Lower bar to forehead, bending
elbows. inhale lowering barbell. Upper arm
should remain stationary. Count 2: Return
to start position, exhaling while raising
barbell. Works triceps.
Wrist Curls
Grab a dumbbell or barbell palms
up and sit on the edge of a bench.
Place elbows on bench edge
between knees. Let wrists hang
over bench. Count 1: Curl wrists
up to raise weight toward elbow.
The motion should resemble a semi-circle. Exhale raising
dumbbell. Keep forearms flat against bench through entire
exercise. Count 2: Return to start position, inhaling while
lowering weight. Works wrist flexors.
Reverse Wrist Curls
Grab a dumbbell or barbell palms down
and sit on the edge of a bench. Place
elbows on bench edge between knees.
Let wrists hang over bench. Count 1:
Curl wrists up to raise weight toward
elbow. The motion should resemble a
semi-circle. Exhale raising dumbbell. Keep forearms flat
against bench through entire exercise. Count 2: Return to
start position, inhaling while lowering weight. Works wrist
extensors.
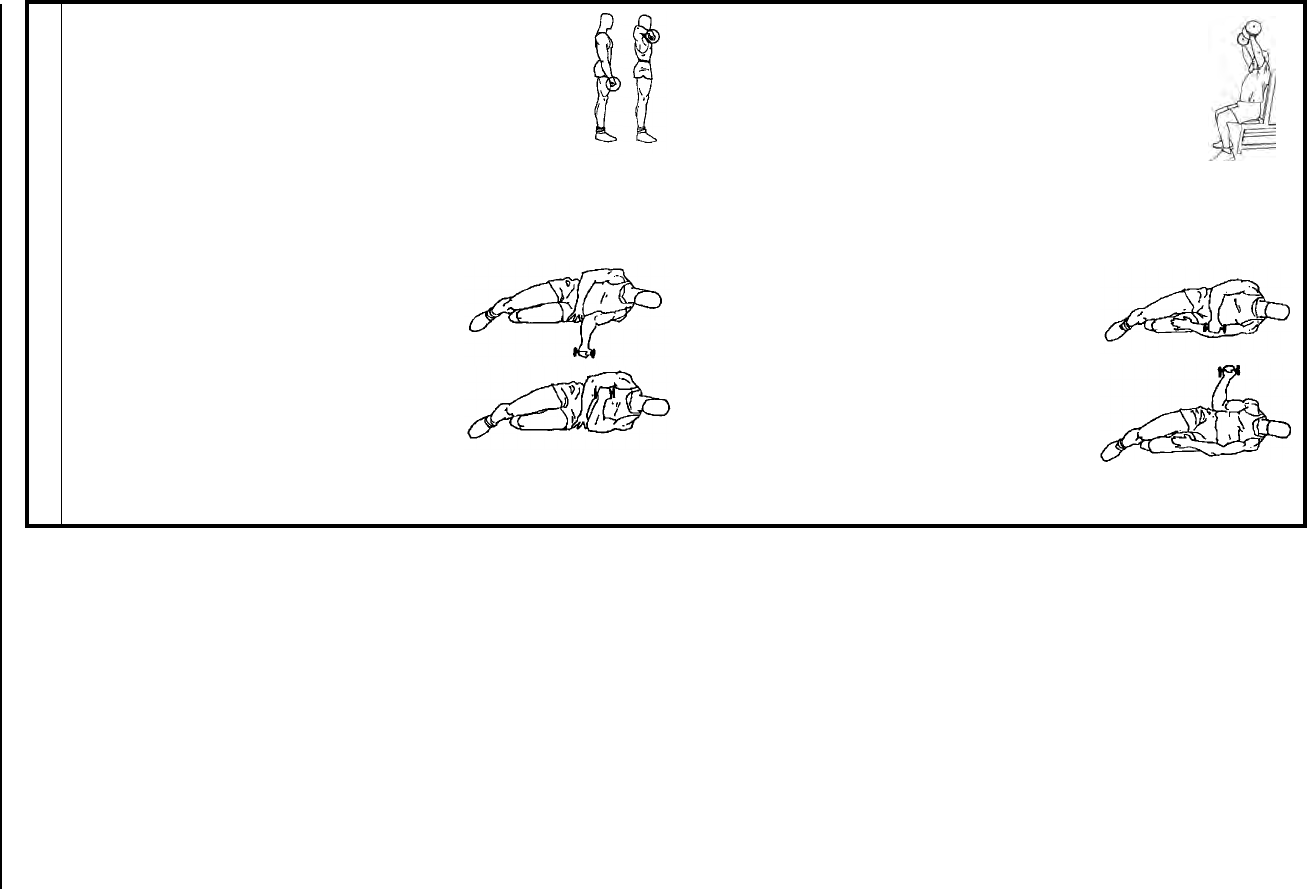
Nutrition and Exercise Resource Manual 137
Diagrams adapted from Strength Training for Sports, Applied FuturisticsSM, 1994 with permission from Fred Koch.
The following key points will help you perform most exercises correctly and help prevent many of the common
training errors listed in Table C-1.
◆ Understand which muscle groups you are targeting during an exercise, i.e., which joints need to move
to perform the lift?
◆ Think of strength training as keeping your balance and posture while moving a weight. Focus on your
muscle contractions, not the weight. This makes you aware of how your muscles work.
◆ Practice new exercises with a light weight until your form is perfected.
◆ Always perform slow, controlled movements.
Shoulders
Upright Rows
Hold barbell with narrow overhand grip. An E-Z curl
bar is suggested. Hands should be no more than 6
inches apart. Stand straight, hold barbell against
upper thighs at arms length. Count 1: Keeping bar
close to body and back straight, pull bar upward
until just under chin. Arms should form a slight “v” at
top of movement. Exhale raising bar. Keep elbows out and
up. Count 2: Return to start position, inhaling while lowering
bar. Works shoulders.
Shoulder Press
Sit with back straight and against support pad;
keep feet flat on the deck. Incline bench 5-10˚, if
possible. Raise dumbbells to shoulder height,
palms facing forward. Keep elbows out. Count 1:
Raise dumbbell overhead until arms are extended,
slight bend in elbow. Count 2: Return to start
position. Exhale raising weights, inhale lowering weights.
Works shoulders.
Internal Rotators
Hold a dumbbell in left hand and lie on
a bench on your left side. Bend left
elbow 90o. Count 1: Rotate left upper
arm so left hand is lifted up toward
your right side. Exhale on lift. Do not
move torso during exercise. Count 2:
Return to start position, inhaling while
lowering your left forearm. Works
internal shoulder rotators. Switch sides to work right shoulder.
External Rotators
Hold a dumbbell in right hand and lie on
a bench on your left side. Bend right
elbow 90o. Count 1: Rotate right upper
arm so right hand moves down toward
left side. Inhale while lowering right
forearm. Do not move torso during
exercise. Count 2: Rotate right upper
arm so right hand moves up above your
right side. Exhale when lifting weight. Works internal shoulder
rotators. Switch sides to work right shoulder.

138 Force Health Protection:
General training mistakes that you should be aware of and avoid include:
◆ Locking joints at the end of their range of motion. This places a lot of stress on the joint. You should
extend the joint as far as possible without locking it during your exercises.
◆ Moving your legs or “bouncing” during exercises. If you have to move or bounce body parts that are not
directly involved in the exercise to lift a weight, then the weight is too heavy. Lower the weight and
check your form by focusing on how your body is moving; do not focus on lifting the weight.
◆ Lifting and lowering weights rapidly. This can lead to injury. Slowly return the weight to the starting
position, as this is the part of the workout that results in the greatest training effects!
Table C-1. Examples of Common Training Mistakes
Exercise Common Mistakes Proper Form
Chest
Bench Press Bouncing the bar off the ribs - uses momentum to lift
the bar and can break ribs. Lower bar to within 1 inch of the chest,
pause, then lift.
Bench Press/
Chest Fly Lifting the lower back and hips off bench when lifting
the weight - weight too heavy, this motion increases
stress on the spine.
Decrease the weight to be lifted, keep
lower back and hips on the bench.
Shoulders
& Arms
Lateral Raises,
Biceps Curls Arching the back when lifting the weights - uses
momentum to lift the back and can cause back pain
and injury.
Decrease the weight to be lifted. Keep
a natural curve in the back, bend
knees, and push chest out. Lift and
lower the weight with control.
Back
Lat Pulldowns/
Seated Rows/
T-bar Rows
Rounding shoulders and bending forward at the
waist when pulling the weight - uses body weight,
not lat muscles to pull the bar; puts lots of stress on
the spine.
Squeeze shoulder blades together,
push chest out, back straight, and pull
bar down to chest.
Legs
Squats/ Lunges/
Leg Press Squatting or bending knees beyond the tips of toes
causes the heel to lift off deck and increases the
stress on the knees as they move past the toes.
Keep heels flat on deck and squat/
lunge. Stop when knees are directly
above toes.

Nutrition and Exercise Resource Manual 139
Appendix D: Resources
This manual and the companion self-study guide “Peak Performance
through Nutrition and Exercise” can be found on the internet at both the
Uniformed Services University of the Health Sciences (under Academics,
Military and Emergency Medicine, Human Performance Lab) and the Navy
Environmental Health Center (NEHC) Health Promotion web sites
(addresses listed on page 141). In addition, other health promotion materials
for Navy personnel can be found on NEHC’s web site.
◆ E. Aaberg. Resistance Training Instruction. Champaign, IL: Human
Kinetics, 1999.
◆ American College of Obstetricians and Gynecologists. Women’s Health
Pamphlets. Washington, DC. 1994. (202-863-2518.)
◆ American College of Sports Medicine. Exercise and Physical Activity for
Older Adults. 1998 Position Stand. Medicine and Science in Sports and
Exercise 1998;30(6):992-1008.
◆ TR. Baechle (Ed.) Essentials of Strength Training and Conditioning.
Champaign, IL: Human Kinetics, 1994.
◆ RC Cantu and LJ Micheli (Eds.). ACSM’s Guidelines for the Team
Physician. Philadelphia: Lea & Febiger, 1991.
◆ M. Cibrario. A Complete Guide to Rubberized Resistance Exercises.
Mundelein, IL: Spri Products, Inc.
◆ Committee on Dietary Allowances. Recommended Dietary Allowances,
10th ed. Washington, DC: National Academy Press, 1989.
◆ R. Cotton (Ed.) (1996) Lifestyle and Weight Management Consultant
Manual. San Diego, CA; American Council on Exercise.
◆ LT L. Cox. (1996) Navy Nutrition and Weight Control Self-Study Guide.
NAVPERS 15602A. (http://www.bupers.navy.mil; click “Services”; click
“Navy Nutrition and Weight Control.”)
◆ L. Cox. Seaworthy. Women’s Sports and Fitness July-August
1995;17(5):73-75.
◆ Defense Visual Imaging Center. http://www.dodmedia.osd.mil. Navy
photos.
◆ PA. Deuster, A. Singh, and P. Pelletier. The Navy SEAL Nutrition
Guide. Washington D.C.; Government Printing Office. 1994.
◆ PA. Deuster (Ed.) The Navy SEAL Physical Fitness Guide. Washington
D.C.; Government Printing Office. 1997

140 Force Health Protection:
◆ JL. Durstine, et. al. (Eds) ACSM’s Resource Manual for Guidelines for
Exercise Testing and Prescription. 2nd ed. Baltimore: Lea & Febiger.
1993.
◆ J. Ellis with J. Henderson, Running Injury-Free, Rodale Press, 1994.
◆ W. Gain and J. Hartmann. Strong Together! Developing Strength with a
Partner. Toronto: Sports Books Publisher, 1990.
◆ E. Howley and BD. Franks, Health and Fitness Instructor’s Handbook,
2nd ed. Champaign, IL: Human Kinetics, 1992.
◆ Institute of Medicine. Assessing Military Readiness in Women: The
Relationship Between Body Composition, Nutrition, and Health.
Washington, D.C.: National Academy Press, 1998.
◆ DT. Kirkenall and WE. Garrett, Jr. The Effects of Aging and Training
on Skeletal Muscle. American Journal of Sports Medicine 1998;
26(4):598-602.
◆ F. Koch. Strength Training for Sports; Applied FuturisticsSM, 1994.
◆ SJ. Montain, WA. Latzka, and MN. Sawka. Fluid Replacement
Recommendations for Training in Hot Weather. Military Medicine
1999;164(7):502-508.
◆ OPNAVINST 6110.1E. March 23, 1998. (http://neds.nebt.daps.mil/
directives/6110_1e.pdf)
◆ B. Pearl and G. Morgan. Getting Stronger. Bolinas, CA: Shelter
Publications Inc. 1986.
◆ B. Rodgers and S.Douglas. Adjusting to Aging. American Running &
Fitness Association, 1998. http://www.arfa.org.
◆ RJ. Shephard. Aging and Exercise. In: Encyclopedia of Sports Medicine
and Science, TD. Fahey (Ed.) Internet Society for Sport Science: http://
sportscience.org. March 7, 1998.
◆ M. Sudy (Ed.). Personal Trainer Manual: The Resource for Fitness
Instructors. Boston: Reebok University Press, 1993.
◆ Tufts University Health & Nutrition Letter. Outpacing Middle-Age
Spread: Running. November 1998, page 6.
◆ EN. Whitney, CB. Cataldo, and SR. Rolfes. Understanding Normal and
Clinical Nutrition, 5th ed. Wadsworth Publishing Company, 1998.
◆ US Dept. of Agriculture and US Dept. of Health & Human Services.
Nutrition and Your Health: Dietary Guidelines for Americans, 4th ed.
1995.

Nutrition and Exercise Resource Manual 141
World Wide Web Sites (http://...)
US Navy
(Link to Navy Commands) www.navy.mil
(www.navy.mil/nol)
Uniformed Services University of the Health Sciences
(USUHS), Human Performance Laboratory www.usuhs.mil/acad/
index.html
(select “Human Performance
Laboratory” under Military
and Emergency Medicine”
Navy Bureau of Personnel
PRT standards
Navy Nutrition and Weight Control Self-Study
Guide
www.bupers.navy.mil
/services/ under “new PRT”
/services under “Navy
Nutrition...”
Navy Environmental Health Center Health Promotions-
(NEHC)
Fitness Site
Nutrition Site
www-nehc.med.navy.mil/hp/
index.htm -
.../hp/fitness/index.htm
.../hp/nutrit/index.htm
Naval Health Research Center (NHRC) www.nhrc.navy.mil
American Alliance on Health, Physical Education,
Recreation, and Dance (AAHPERD) www.aahperd.org
American College of Sports Medicine (ACSM) www.acsm.org
American Council on Exercise (ACE) www.acefitness.org
American Dietetic Association www.eatright.org
American Heart Association (AHA) www.aha.org
American Running and Fitness Association (AR&FA) americanrunning.org
Centers for Disease Control
(US surgeon general’s report) www.cdc.gov
(/nccdphp/sgr/summ.htm)
National Academy of the Sciences
Dietary Reference Intakes (DRIs) www.nas.edu/
276a.html and 287e.html
National Coalition to Promote Physical Activity
(NCPPA) www.ncppa.org
National “5-A-Day” campaign websites 5aday.nci.nih.gov
www.5ADAY.com

142 Force Health Protection:
Note: Addresses for web sites may change. If you are not able to access a site, try to contact the
parent organization or search for their new site using a web browser.
National Institutes of Health (NIH) Office of Dietary
Supplements (ODS) odp.od.nih.gov/ods/
default.html
National Strength and Conditioning Association www.nsca-lift.org
SCAN’s Sports, Cardiovascular and Wellness
Nutritionists www.Nutrifit.org
US Department of Agriculture (USDA) www.usda.gov
Shape Up America! www.shapeup.org
US Food and Drug Association (FDA) www.fda.gov
US Federal Trade Commission www.ftc.gov
US Dept. of Health and Human Services www.dhhs.gov

Nutrition and Exercise Resource Manual 143
Glossary
acclimation - adaptations that occur within the body when exposed
to a new environment.
aerobic capacity - maximal amount of aerobic activity that can be done
aerobic energy system - process of making energy (ATP) that requires oxygen.
amenorrhea - the cessation of menstruation not due to pregnancy or
menopause; can be seen in women athletes whose
nutritional intake is not adequate; one component of
the female athlete triad.
anaerobic energy system - process of making energy (ATP) without using oxygen.
antioxidants - compounds that prevent breakdown (oxidation) of
substances in the body; nutrients such as Vitamin E
and C have antioxidant properties.
basal metabolic rate - the amount of energy (kcals) required to maintain life
when the body at rest (BMR).
body composition - a description of the amount of body weight that is lean
body mass (muscle, bones) and the amount of body
weight that is fat.
body mass index (BMI) - An index that looks at body weight in relation to
height.
Calorie - a measure of energy used to describe the energy
consumed in foods and expended through physical
activity; Calorie with a capital “C” is the same as
kilocalorie (kcal).
carbohydrates (CHO) - a macronutrient that supplies 4 kcals per gram;
primary nutrient found in the grain, vegetable, and
fruit food groups of the Food Guide Pyramid.
carbohydrate loading- nutritional training method used by endurance athletes
to increase the amount of glycogen stores in their
muscles before a competition.
cardiorespiratory fitness - ability of the heart, lungs, and blood vessels to deliver
oxygen-rich blood to and remove waste products from
the exercising muscles; the more trained the person,
the higher the cardiorespiratory capacity; see aerobic
capacity.
cholesterol - a substance made by the body that serves as a base for
hormones such as estrogen and testosterone, is a part
of all cells, and is consumed in the diet by eating
animal products.
dehydration - a depletion of bodily fluids that occurs when not
enough fluids are drunk to replace those lost through
breathing, urination, and sweating.
detraining - a loss of training adaptations that occurs when
training stops; can be avoided, stopped or reversed
through physical training.
electrolytes - minerals in the body that help regulate fluid balance,
are part of nerve conduction, and other essential bodily
functions; examples include sodium, potassium, and
chloride.

144 Force Health Protection:
energy balance - net metabolism balance of the total kcals eaten minus
the total kcals expended through basal metabolism and
physical activity.
ergogenic agent - nutritional supplement taken with the purpose to
enhance physical performance; examples include
creatine, ginseng, caffeine and DHEA; many claim to
improve performance but few have been demonstrated
to be beneficial; may have health risks associated with
long-term use.
ergolytic agent - supplement taken with the purpose to enhance
physical performance but actually decreases
performance; many have health risks associated with
long-term use; examples include alcohol and nicotine.
fat - a macronutrient that supplies 9 kcals per gram;
primary nutrient found in oils and butter; placed at the
top of the Food Guide Pyramid.
female athlete triad - cessation of menstrual cycles, loss of bone, and eating
disorders seen in some women who participate in
strenuous physical activity.
FITT Principle - combination of four training factors (frequency,
intensity, time, and type) that determine how an
individual adapts to physical training.
flexibility - the range of motion around a joint.
fluid balance - net amount of fluid consumed minus the fluid lost
through breathing, urine, and sweat.
glucose - a simple CHO that serves as the main fuel to make
energy (ATP) in the body.
glycogen - a storage form of glucose found in muscles and liver.
heart rate (HR) - the number of heart beats per minute.
kilocalorie (kcal) - a measure of energy used to describe the energy
consumed in foods and expended through physical
activity.
kilogram (kg) - metric measurement for weight; 1 kg = 2.2 pounds
(lbs).
lactic acid (lactate) - a by-product of the anaerobic energy system.
ligament - connective tissue that holds one bone to another bone.
macronutrient - a nutrient that supplies kcals for energy metabolism;
the three macronutrients are carbohydrate, protein,
and fat.
metabolism - chemical and physical processes that are required to
maintain life.
METs - metabolic equivalents; arbitrary unit of work in
relation to rest; e.g., rest is 1MET, so if you exercise at
5METs you are expending 5 times the kcals you do at
rest.
micronutrients - nutrients that are needed in small amounts to aid in
metabolism and other important bodily functions.
micronutrients do not supply any kcals; the two classes
are vitamins and minerals.

Nutrition and Exercise Resource Manual 145
minerals - class of micronutrient; examples of minerals are
calcium, sodium, and potassium.
muscle endurance - the ability of a muscle or muscle group to generate a
less than maximal force over a period of time.
muscle fiber - an individual muscle cell; there are three types of
muscle fibers categorized according to their capability
to produce energy.
muscle strength - the maximum force generated by a muscle or muscle
group.
nutritional supplement- a substance taken in addition to eating food to increase
the amount of a particular nutrient or group of
nutrients in the body. Some substances may also be
taken in an attempt to improve physical performance.
osteoporosis - a common bone disorder that is characterized by low
bone density and weakened bones; people with
osteoporosis have a greater risk of fracturing bones.
overhydration - a gain of body water that occurs when too much plain
water is drunk in an attempt to replace the fluid and
electrolytes lost through sweating during strenuous
and prolonged exercise; can be avoided by drinking a
carbohydrate-electrolyte drink, such as a sports
beverage, or eating a snack when exercising for more
than 60 minutes.
overload - placing greater-than-normal physical demands on the
body with the intent of improving physical fitness and
capability; this overload should be progressively
increased.
overtraining syndrome - a set of symptoms that are experienced when too much
or too intense a physical activity is performed without
adequate rest.
oxygen consumption - measure of the intensity of a physical activity.
Maximal oxygen consumption (VO2max) is a measure of
the maximum work that an individual can perform
both aerobically and anaerobically.
physical activity - movement of the muscles that results in energy
expenditure.
physical fitness - the ability to perform physical activity.
pounds (lbs) - a measure for weight; 2.2 lbs is equal to 1 kilogram
(kg).
protein - a macronutrient that supplies 4 kcals per gram;
primary nutrient found in the dairy and meat / meat
substitute food groups of the Food Guide Pyramid.
repetition - one lifting and lowering of a weight or resistance
during muscle training; often abbreviated “rep.”
set - a series of repetitions performed one after another
without a rest period.
SMART goals - defined goals that are specific, measurable, action-
oriented, realistic, and timed.

146 Force Health Protection:
specificity of training - a principle which describes that training adaptations
are optimized in a specific physical activity when that
activity is performed in training sessions.
target heart rate zone- a recommended heart rate range specific to each
person, dependent on age and fitness level, that is
within a safe intensity level to exercise.
tendon - connective tissue that holds a muscle to a bone.
Valsalva maneuver - when an individual holds his breath and bears down.
This is impedes blood flow, increases blood pressure,
and can be dangerous.
vitamins - class of micronutrient; can be fat or water soluble; do
not provide energy but are needed in many important
functions; excessive intakes can be toxic.
waist-hip-ratio (WHR)- a ratio of the waist circumferences (in inches) to the
hip circumference (in inches); used to describe the
distribution of body fat.
WATT - measurement of work that describes the amount of
kcals expended in a given time period; i.e., kcals/min.

Nutrition and Exercise Resource Manual 147
Index (Click on page numbers to view topics.)
A
Aerobic Energy System 31
Aerobic Training
See Cardiorespiratory Training
Age
Changes in Metabolism 117
Changes in Physical Performance 119
Nutrition 118
Amenorrhea 115
see Female Athlete Triad
Anaerobic Energy System 31
B
Body Fat 6
Body Mass Index 5
C
Calisthenics
Crunches 71
Curl Ups 71
Exercises 68
Guidelines 66
Calories
See Cardiorespiratory Training,
Energy Balance
Carbohydrates (CHO)
Dietary Requirements 7
Energy from 8
Types 7
Cardiopulmonary Training
See Cardiorespiratory Training
Cardiorespiratory Training
Benefits of 36
Cardiorespiratory Physiology 35
CHO Needs for Strenuous
Training 87
Cool-down 33
Exercise Guidelines 37
Intensity
Calories 39
METs and Watts 40
Oxygen Consumption 37
Perceived Exertion 39
Target Heart Rate Zone 37
Protein Needs for Strenuous
Training 88
Training Log 131
Types of Exercises 40
See Running, Swimming
Walking
Warm-up 33
Cardiovascular Training
See Cardiorespiratory Training
Cholesterol 12
Circuit Training 84
Confined Spaces
Aerobic Training 78
Exercise Examples 80
Morale 85
Strength Training
Elastic Tubing 78
Connective Tissue
See Ligaments and Tendons
Cool-Down 33
Creatine in Muscle 31
Cross-Training 42
D
Dehydration 18
Deployment
See Confined Spaces
Acclimating to New
Environments 92
Altitude 98
Cold Environments 95
Hot Environments 94
Hydration Issues 93
Morale 85
Nutritional Issues 93
Detraining 34
Dietary Guidelines 19
E
Eating Disorders 115
see Female Athlete Triad

148 Force Health Protection
Elastic (Resistance) Tubing 78
Endurance (Muscle) 55
Energy Balance 1
Daily Estimated Energy
Requirement (EER) 4
Energy Expenditure 3
Energy for Exercise 31
Ergogenic Agents 107
Ergolytic Agents 111
Exercise Sequence 32
F
Fats
Dietary Requirements 10
Energy from 12
Types of 10
Female Athlete Triad 114
Fitness
Definition 29
Fitness Continuum 29
FITT Principle 29
for Cardiorespiratory Training 37
for Strength Training 59
Physical Activity Pyramid 30
5-A-Day 22
Flexibility
Benefits 72
Definition of 72
Exercises 74
Physiology of Stretching 73
Fluid Balance
Daily Fluid Requirements 17
During Strenuous Training 90
Food Guide Pyramid 20
Food Labels 22
G
Goal Setting 122
Maintaining Habits 125
Reaching Goals 124
I
Injuries
Medication 102
Overtraining Syndrome 104
Prevention 100
RICE 102
Seeking Medical Care 103
Treatment 100
L
Lactation
Nutrition and Exercise
Guidelines 112
Lactic Acid (Lactate)
Production during Exercise 31
Ligaments 56
M
Minerals
Needs for Strenuous Training 90
RDAs 13
Supplements 105
Types 13
Muscle
Illustration of Muscle Groups 62
Muscle Mass 57
N
Nutrition
See Carbohydrates (CHO), Fats,
Minerals, Proteins, Vitamins, and
Water
Dietary Guidelines 19
During Deployment 93
Nutrition for Strenuous Training
Carbohydrate Loading 87
CHO Needs 86
Fluid Needs 90
High-Protein Myth 89
Minerals 90
Protein Needs 88
Vitamins 90
Nutrition for Exercise Recovery 91
Nutrition Tracking Guide 129
O
Osteoporosis 116
See Female Athlete Triad

Nutrition and Exercise Resource Manual 149
Overhydration 91
P
Performance Enhancing Supplements 107
Physical Activity Pyramid 30
Pregnancy
Guidelines for Training during 112
Proteins
Dietary Requirements 9
Energy from 9
High Protein Myth 89
R
Resistance Ball 79
RICE for Treatment of Injuries 102
Running 48
Beginning a Run Program 49
Gear 45
Increase Your Running Workout 50
Running Form 48
Training for Long Distance 51
Training Surface 49
S
Serving Sizes 21
SMART Goals 122
Strength (Muscle) 55
Examples of Navy Job
Requirements 56
Strength Training
See Calisthenics
Benefits of 56
CHO Needs for Strenuous
Training 88
Elastic Tubing 78
Equipment 63
Exercise Order 61
General Guidelines 58
Intensity of Exercise 60
Major Muscle Groups 61
Multi-joint exercises, definition 61
Muscle and Exercise Figure 62
Muscle Balance 61
Protein Needs for Strenuous
Training 88
Repetition (rep) 59
Resistance Ball 79
Sets 59
Single-joint exercises, definition 61
Technique 58
Training Log 132
Types of Exercises 61
Types of Workouts 64
Stretching
See Flexibility
Supplements
Ergogenic Agents 107
Ergolytic Agents 111
Minerals 105
Steroids 110
Vitamins 105
Swimming 52
Beginning a Swim Program 52
Interval Training 53
Open-Water Swimming 54
T
Target Heart Rate
See Cardiorespiratory Training
Tendons 56
V
Vegetarian Diets 23
Vitamins
Needs for Strenuous Training 90
RDAs 13
Supplements 105
Type 13
W
Waist-to-Hip Ratio 6
Walking
Gear 45
Walking Routine 47
Warm-Up 33
Water 17
