FLD Conventional Freightliner FLD120 Instruction
User Manual: Freightliner-FLD120-Instruction Igor's of metalworking and electrical manuals
Open the PDF directly: View PDF ![]() .
.
Page Count: 179 [warning: Documents this large are best viewed by clicking the View PDF Link!]

Introduction
This manual provides information needed to operate
and understand the vehicle and its components.
More detailed information is contained in the
Owner’s
Warranty Information for North America
booklet, and
in the vehicle’s service and maintenance manuals.
Custom-built Freightliners are equipped with various
chassis and cab components. Not all of the informa-
tion contained in this manual applies to every ve-
hicle. For details about components in your vehicle,
refer to the chassis specification pages included in all
new vehicles and to the vehicle specification decal,
located inside the vehicle.
For your reference, keep this manual in the vehicle
at all times.
IMPORTANT: Descriptions and specifications in this
manual were in effect at the time of printing. Freight-
liner Trucks reserves the right to discontinue models
and to change specifications or design at any time
without notice and without incurring obligation. De-
scriptions and specifications contained in this publi-
cation provide no warranty, expressed or implied,
and are subject to revisions and editions without no-
tice.
Environmental Concerns and
Recommendations
Whenever you see instructions in this manual to dis-
card materials, you should first attempt to reclaim
and recycle them. To preserve our environment, fol-
low appropriate environmental rules and regulations
when disposing of materials.
Event Data Recorder
This vehicle is equipped with one or more devices
that record specific vehicle data. The type and
amount of data recorded varies depending on how
the vehicle is equipped (such as the brand of engine,
if an air bag is installed, or if the vehicle features a
collision avoidance system, etc.).
Customer Assistance Center
Having trouble finding service? Call the Customer
Assistance Center at 1–800–385–4357 or 1–800–
FTL–HELP. Call night or day, weekdays or week-
ends, for dealer referral, vehicle information, break-
down coordination, or Fleetpack assistance. Our
people are knowledgeable, professional, and commit-
ted to following through to help you keep your truck
moving.
Reporting Safety Defects
If you believe that your vehicle has a defect which
could cause a crash or could cause injury or
death, you should immediately inform the National
Highway Traffic Safety Administration (NHTSA) in
addition to notifying Daimler Trucks North America
LLC.
If the NHTSA receives similar complaints, it may
open an investigation, and if it finds that a safety
defect exists in a group of vehicles, it may order a
recall and remedy campaign. However, NHTSA
cannot become involved in individual problems
between you, your dealer, or Daimler Trucks North
America LLC.
To contact NHTSA, you may call the Vehicle
Safety Hotline toll-free at 1-888-327-4236 (TTY:
1-800-424-9153); go to www.safercar.gov; or write
to: Administrator, NHTSA, 1200 New Jersey
Avenue, SE, Washington, DC 20590. You can also
obtain other information about motor vehicle safety
from www.safercar.gov.
Canadian customers who wish to report a safety-
related defect to Transport Canada, Defect Investi-
gations and Recalls, may telephone the toll-free
hotline 1-800-333-0510, or contact Transport
Canada by mail at: Transport Canada, ASFAD,
Place de Ville Tower C, 330 Sparks Street,
Ottawa, Ontario, Canada K1A 0N5.
For additional road safety information, please visit
the Road Safety website at:
www.tc.gc.ca/roadsafety/menu.htm.
Foreword
STI-203-1 (3/09P)
A24-00509-000
Printed in U.S.A.

© 1989–2009 Daimler Trucks North America LLC. All rights reserved. Daimler Trucks North America LLC is a Daimler
company.
No part of this publication, in whole or part, may be translated, reproduced, stored in a retrieval system, or transmitted
in any form by any means, electronic, mechanical, photocopying, recording, or otherwise, without the prior written per-
mission of Daimler Trucks North America LLC. For additional information, please contact Daimler Trucks North
America LLC, Service Systems and Documentation, P.O. Box 3849, Portland OR 97208–3849 U.S.A. or refer to
www.Daimler-TrucksNorthAmerica.com and www.FreightlinerTrucks.com.
Foreword

Contents
Chapter Page
Introduction, Environmental Concerns and Recommendations,
Event Data Recorder, Customer Assistance Center, Reporting
Safety Defects ..................................................... Foreword
1Vehicle Identification ...................................................... 1.1
2Instruments and Controls Identification ....................................... 2.1
3Vehicle Access .......................................................... 3.1
4Heater and Air Conditioner ................................................. 4.1
5Seats and Seat Belts ..................................................... 5.1
6Steering and Brake Systems ............................................... 6.1
7Engines and Clutches .................................................... 7.1
8Transmissions ........................................................... 8.1
9Rear Axles ............................................................. 9.1
10 Fifth Wheels and Trailer Couplings ......................................... 10.1
11 Pretrip and Post-Trip Inspections and Maintenance ............................ 11.1
12 Cab Appearance ........................................................ 12.1
13 In an Emergency ....................................................... 13.1
Index .................................................................. I.1

1
Vehicle Identification
Vehicle Specification Decal ......................................................... 1.1
Federal Motor Vehicle Safety Standard (FMVSS) Labels .................................. 1.1
Canadian Motor Vehicle Safety Standard (CMVSS) Labels ................................ 1.2
Tire and Rim Labels .............................................................. 1.2
EPA Emission Control Labels ........................................................ 1.2
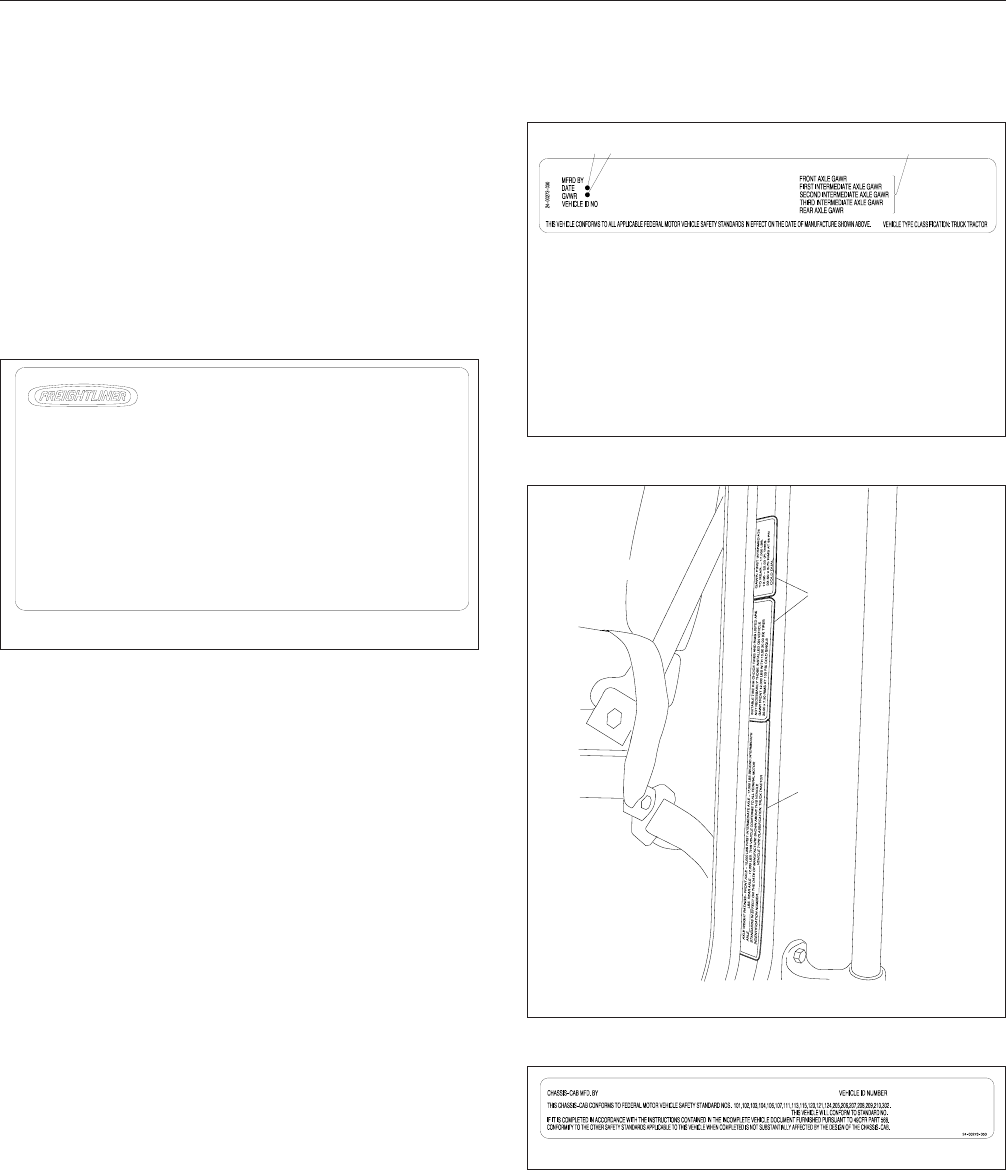
Vehicle Specification Decal
The vehicle specification decal (Fig. 1.1) lists the ve-
hicle model, identification number, and major compo-
nent models. It also recaps the major assemblies
and installations shown on the chassis specification
sheet. One copy of the specification decal is at-
tached to the inside of the glove box; another copy is
inside the rear cover of the
Owner’s Warranty Infor-
mation for North America
booklet.
NOTE: Labels shown in this chapter are ex-
amples only. Actual specifications may vary from
vehicle to vehicle.
Federal Motor Vehicle Safety
Standard (FMVSS) Labels
NOTE: Due to the variety of FMVSS certification
requirements, not all of the labels shown will
apply to your vehicle.
Tractors with or without fifth wheels purchased in the
U.S. are certified by means of a certification label
(Fig. 1.2) and the tire and rim labels. These labels
are attached to the left rear door post, as shown in
Fig. 1.3.
If purchased for service in the U.S., trucks built with-
out a cargo body have a certification label (Fig. 1.4)
attached to the left rear door post. See Fig. 1.3.In
addition, after completion of the vehicle, a certifica-
tion label similar to that shown in Fig. 1.2 must be
attached by the final-stage manufacturer. This label
will be located on the left rear door post and certifies that the vehicle conforms to all applicable FMVSS
regulations in effect on the date of completion.
f080021
11/21/96
USE VEHICLE ID NO.
WHEN ORDERING PARTS
WHEELBASE
ENGINE NO.
TRANS NO.
FRT AXLE NO.
REAR AXLE NO.
REAR AXLE NO.
RATIO
FOR COMPLETE PAINT INFORMATION
SEE VEHICLE SPECIFICATION SHEET
MANUFACTURED BY
MODEL
VEHICLE ID NO.
DATE OF MFR
ENGINE MODEL
TRANS MODEL MAIN
FRONT AXLE MODEL
REAR AXLE MODEL
PAINT MFR
PAINT NO.
PART NO. 24−00273−010
COMPONENT INFORMATION
IMRON PAINT−CAB
CAB COLOR A: WHITE (4775)
CAB COLOR B: BROWN (3295)
CAB COLOR C: BROWN (29607)
CAB COLOR D: DARK BROWN (7444)
Fig. 1.1, Vehicle Specification Decal, U.S.-Built Vehicle
Shown
11/21/96 f080053
123
1. Date of manufacture by month and year.
2. Gross vehicle weight rating; developed by taking the
sum of all the vehicle’s gross axle ratings.
3. Gross axle weight ratings; developed by considering
each component in an axle system, including
suspension, axle, wheels, and tires. The lowest
component capacity is the value used for the
system.
Fig. 1.2, Certification Label, U.S.
1
2
02/02/95 f600061b
1. Tire and Rim Labels 2. Certification Label
Fig. 1.3, Location of Labels
09/28/98 f080023
Fig. 1.4, Incomplete Vehicle Certification Label, U.S.
Vehicle Identification
1.1
Canadian Motor Vehicle Safety
Standard (CMVSS) Labels
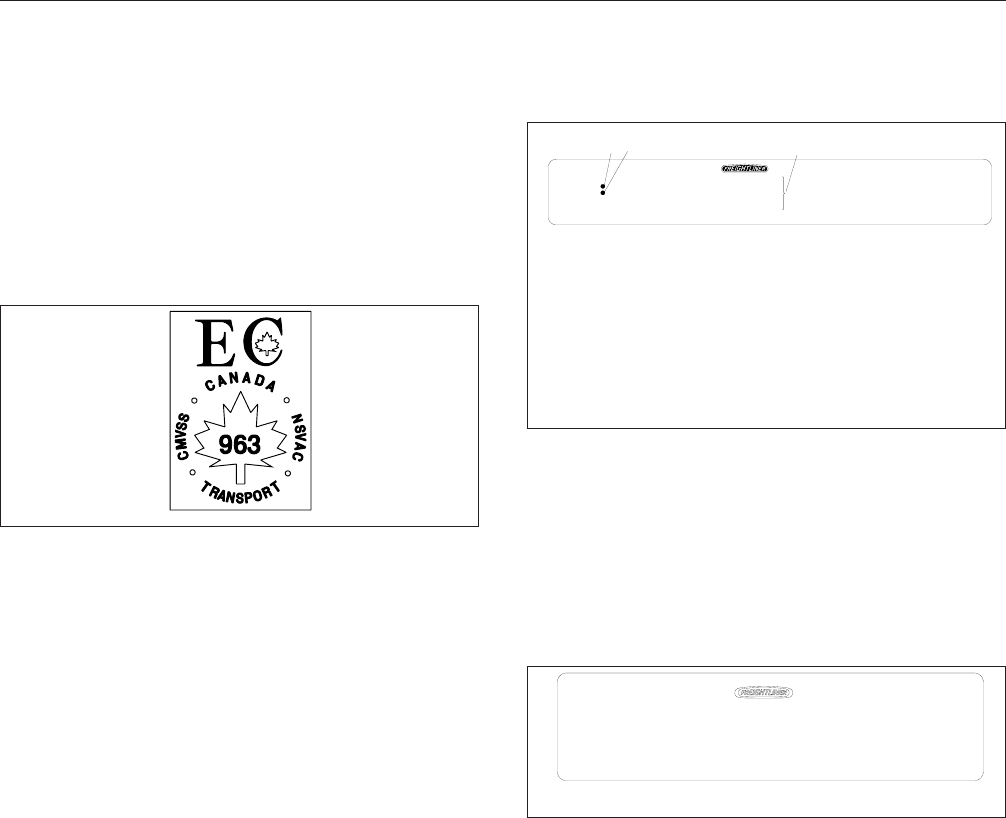
In Canada, tractors with fifth wheels are certified by
means of a "Statement of Compliance" label and the
Canadian National Safety Mark (Fig. 1.5), which are
attached to the left rear door post.
If purchased for service in Canada, trucks built with-
out a cargo body and tractors built without a fifth
wheel are certified by a "Statement of Compliance"
label, similar to Fig. 1.2. This label must be attached
by the final-stage manufacturer after completion of
the vehicle. The label is located on the left rear door
post, and certifies that the vehicle conforms to all
applicable CMVSS regulations in effect on the date
of completion.
Tire and Rim Labels
Tire and rim labels (attached to the left rear door
post) certify suitable tire and rim combinations that
can be installed on the vehicle, for the given gross
axle weight rating. See Fig. 1.6. Tires and rims in-
stalled on the vehicle at the time of manufacture may
have a higher load capacity than that certified by the
tire and rim label. If the tires and rims currently on
the vehicle have a lower load capacity than that
shown on the tire and rim label, then the tires and
rims determine the load limitations on each of the
axles.
Refer to Fig. 1.6 for U.S. and Canadian tire and rim
labels.
EPA Emission Control Labels
Vehicle Noise Emission Control Label
A vehicle noise emission control label (Fig. 1.7)is
attached either to the left side of the dashboard or to
the top-right surface of the frontwall between the
dash and the windshield.
IMPORTANT: Certain Freightliner incomplete
vehicles may be produced with incomplete noise
control hardware. Such vehicles will not have a
vehicle noise emission control information label.
For such vehicles, it is the final-stage manufac-
turer’s responsibility to complete the vehicle in
conformity to U.S. EPA regulations (40 CFR Part
205) and label it for compliance.
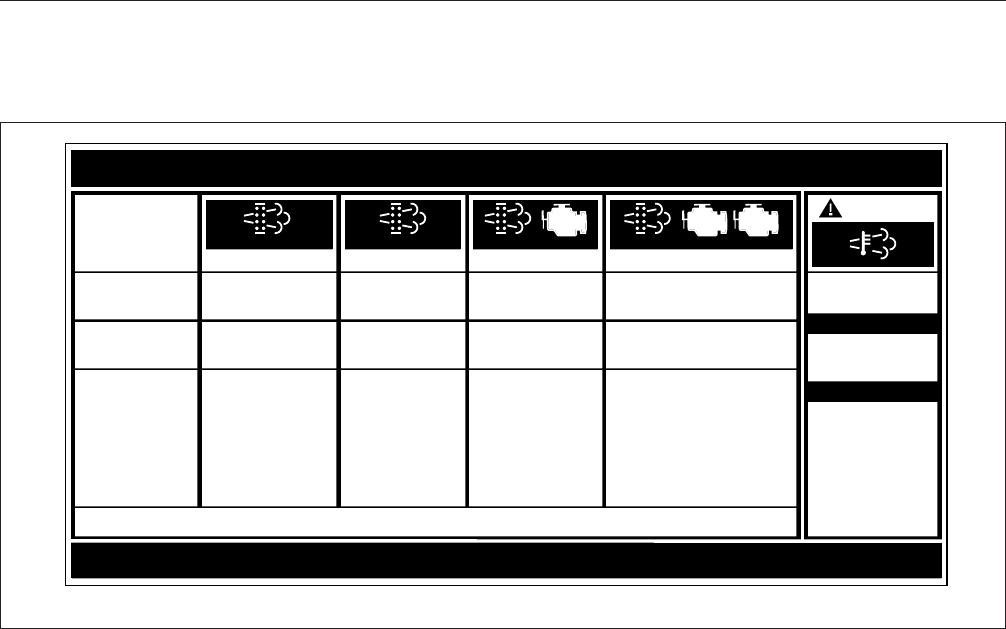
EPA07 Exhaust Emissions
To meet January 2007 emissions regulations, ve-
hicles with engines manufactured after January 1,
2007, are equipped with an emission aftertreatment
device. There is a warning label on the driver’s sun-
visor, explaining important new warning indicators in
the driver’s message display, that pertain to the after-
treatment system. See Fig. 1.8.
f080024
10/10/2006
Fig. 1.5, Canadian National Safety Mark
f080054
24−00273−040
TIRES AND RIMS LISTED ARE NOT NECESSARILY THOSE INSTALLED ON THE VEHICLE.
VEHICLE ID NO.
DATE OF MFR
GVWR
FRONT AXLE
FIRST INTERMEDIATE AXLE
SECOND INTERMEDIATE AXLE
THIRD INTERMEDIATE AXLE
REAR AXLE
GAWR TIRES RIMS PSI COLD
123
10/31/95
1. Date of manufacture by month and year.
2. Gross vehicle weight rating; developed by taking the
sum of all the vehicle’s gross axle ratings.
3. Gross axle weight ratings; developed by considering
each component in an axle system, including
suspension, axle, wheels, and tires. The lowest
component capacity is the value used for the
system.
Fig. 1.6, Tire and Rim Label
10/06/98 f080026
24−00273−020
VEHICLE NOISE EMISSION CONTROL INFORMATION
FREIGHTLINER CORPORATION
THIS VEHICLE CONFORMS TO U.S. EPA REGULATIONS FOR NOISE EMISSION
APPLICABLE TO MEDIUM AND HEAVY TRUCKS.
THE FOLLOWING ACTS OR THE CAUSING THEREOF BY ANY PERSON ARE PROHIBITED BY
THE NOISE CONTROL ACT OF 1972:
A. THE REMOVAL OR RENDERING INOPERATIVE, OTHER THAN FOR PURPOSES OF
MAINTENANCE, REPAIR, OR REPLACEMENT, OF ANY NOISE CONTROL DEVICE OR
ELEMENT OF DESIGN (LISTED IN THE OWNER’S MANUAL) INCORPORATED INTO THIS
VEHICLE IN COMPLIANCE WITH THE NOISE CONTROL ACT.
B. THE USE THIS VEHICLE AFTER SUCH DEVICE OR ELEMENT OF DESIGN HAS
BEEN REMOVED OR RENDERED INOPERATIVE.
DATE OF MANUFACTURE
01/96
Fig. 1.7, Vehicle Noise Emission Control Label
Vehicle Identification
1.2
It is a violation of federal law to alter exhaust plumb-
ing or aftertreatment in any way that would bring the
engine out of compliance with certification require-
ments. (Ref: 42 U.S.C. S7522(a) (3).) It is the own-
er’s responsibility to maintain the vehicle so that it
conforms to EPA regulations.
f080147
EXHAUST AFTERTREATMENT SYSTEM INFORMATION
Switch.
Level 1 Level 3Level 2 Level 4
Filter Regeneration
Recommended
Filter is reaching
Bring vehicle to
highway speeds to
Filter Regeneration
Necessary
Filter is now
reaching maximum
capacity
.
To avoid engine
derate bring vehicle
Parked Regeneration
Required − Engine
Derate
Filter has reached
maximum capacity
.
Vehicle must be
parked and a Parked
Parked Regeneration Required −
Engine Shut Down
Filter has exceeded
maximum capacity
Vehicle must be parked and a
Parked Regeneration or Service
(Solid)
(Flashing) (Flashing)
CHECK CHECK
(Flashing)
INDICATOR
LAMP(S)
Indicator Lamp
Message(s)
Diesel Particulate
Filter Condition
Required Action
capacity
. .
STOP
See Engine Operator’s Manual for complete Regeneration Instructions.
allow for an Automatic
Regeneration or
perform a Parked
Regeneration.
to highway speeds
to allow for an
Automatic
Regeneration or
perform a Parked
Regeneration as
soon as possible.
Regeneration must
be performed −
engine will begin
derate.
Regeneration must be performed.
Check engine operator’s manual
for details −engine will shut down.
For a driver performed Parked Regeneration, vehicle must be equipped with a dash mounted Regeneration Switch.
02/20/2009
24−01583−000B
W
ARNING
HEST (High Exhaust
System Temperature)
Exhaust Components
and exhaust gas are
operating at high
temperature. When
stationary, keep away
from people and
flammable materials,
vapors, or structures.
A regeneration is in
progress.
Flashing
Solid
Fig. 1.8, Sunvisor Warning Label
Vehicle Identification
1.3

2
Instruments and Controls
Identification
Instrument and Control Panel ....................................................... 2.1
Controls ......................................................................... 2.1
Warning and Indicator Lights ....................................................... 2.13
Collision Warning System (CWS), Eaton VORAD EVT–300, Optional ...................... 2.20
Instruments ..................................................................... 2.25
Exterior Switches ................................................................ 2.31
Instrument and Control Panel
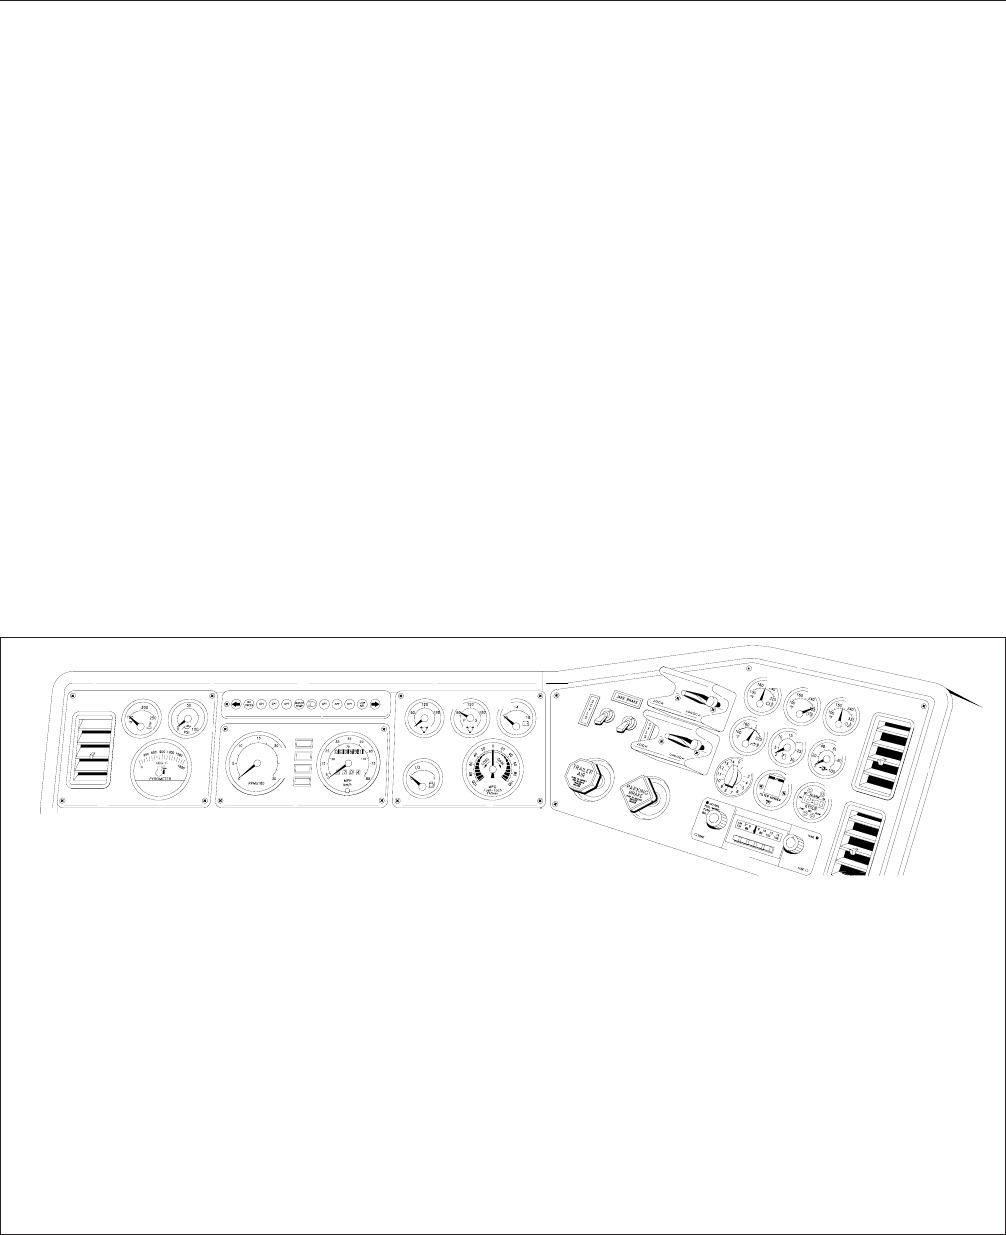
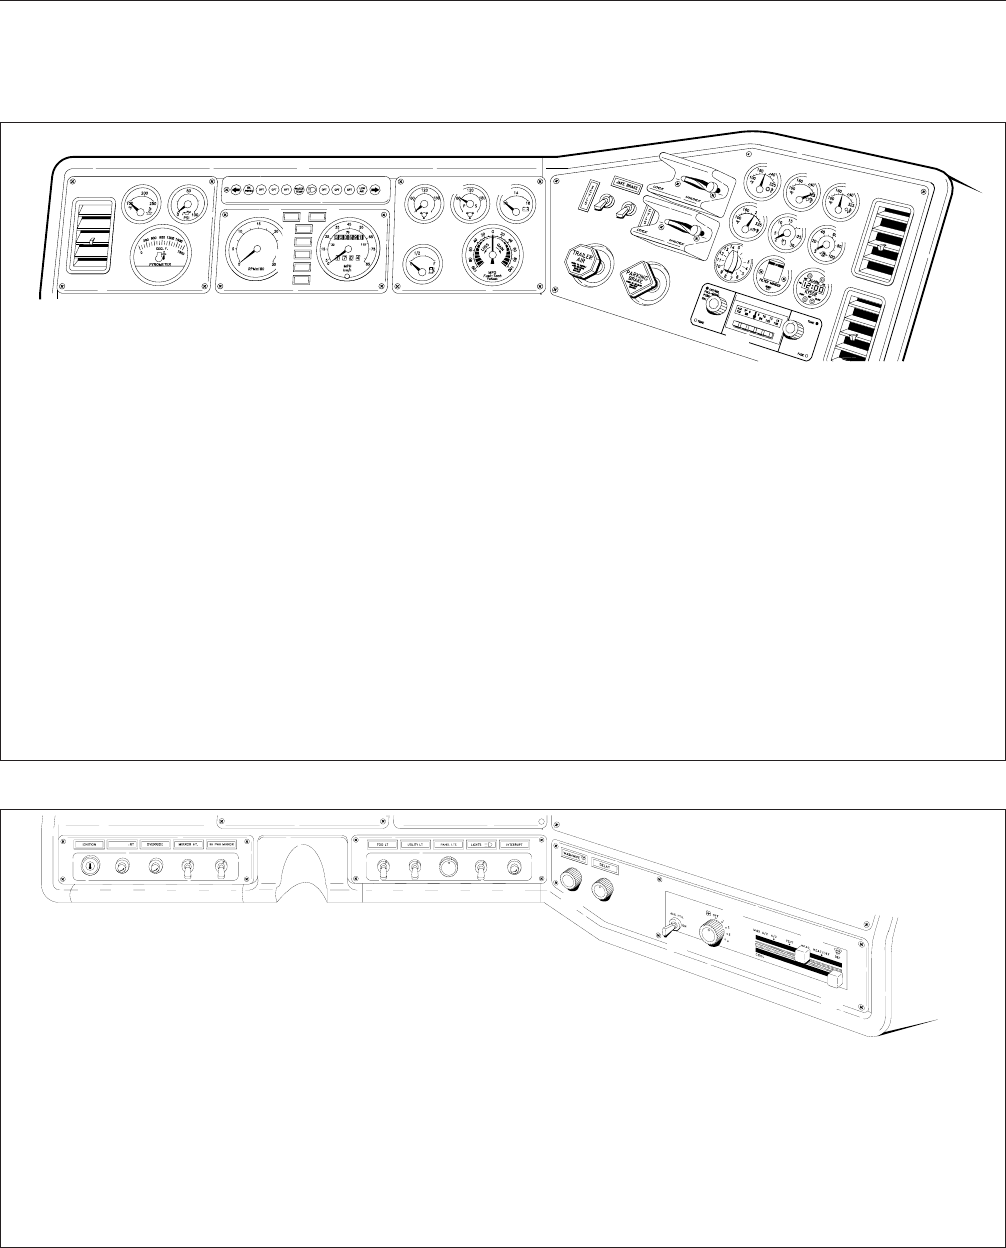
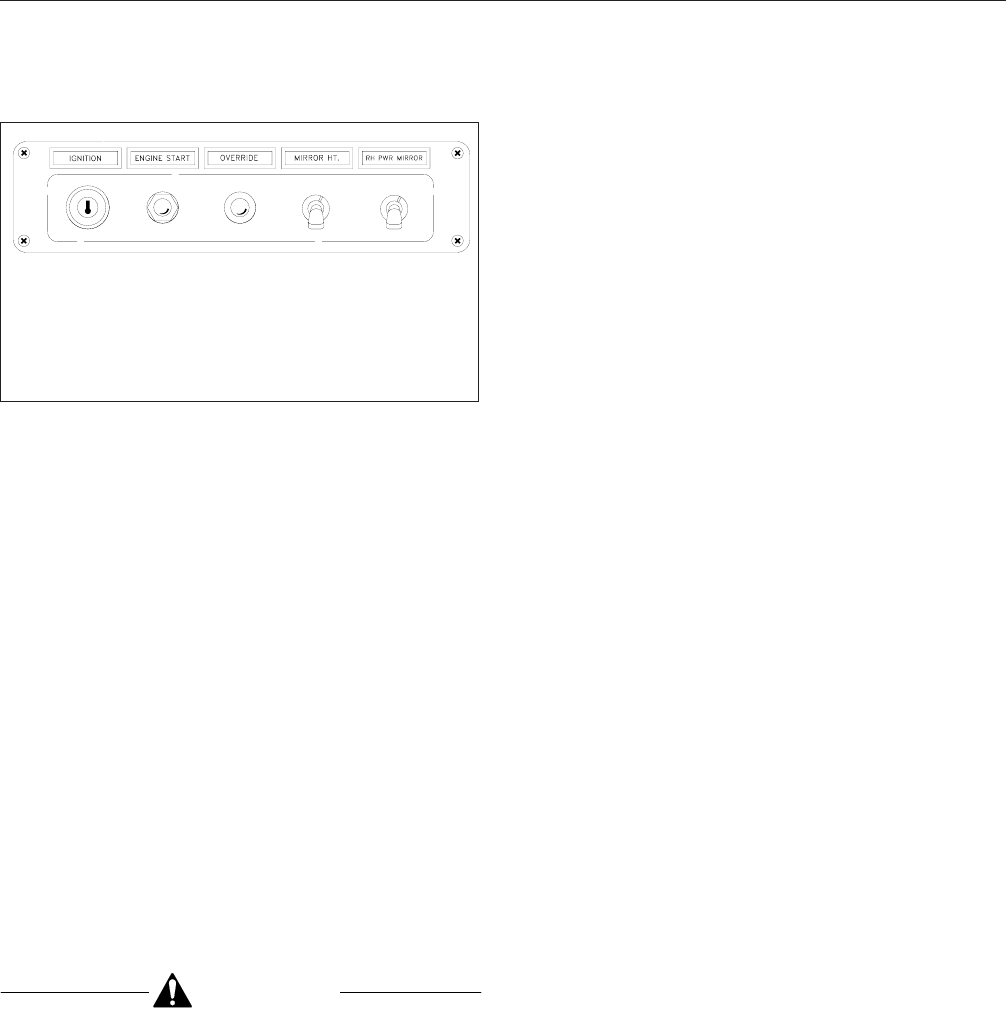
Figure 2.1,Figure 2.2, and Figure 2.3 represent a
portion of a typical Freightliner dash equipped with all
of the standard and many of the optional instruments
and accessories. Most standard and optional instru-
ment gauges and switches can be mounted in this
dash.
NOTE: On SilverAero models, switches for
cruise control and manual control for the engine
fan are standard. If these features are not re-
quested, dummy switches with blank labels are
installed.
A warning and indicator light module, located above
the speedometer and tachometer, houses all of the
standard and optional warning and indicator lights.
Some of the controls discussed in this chapter are
not dash-mounted.
Controls
Ignition Switch and Key
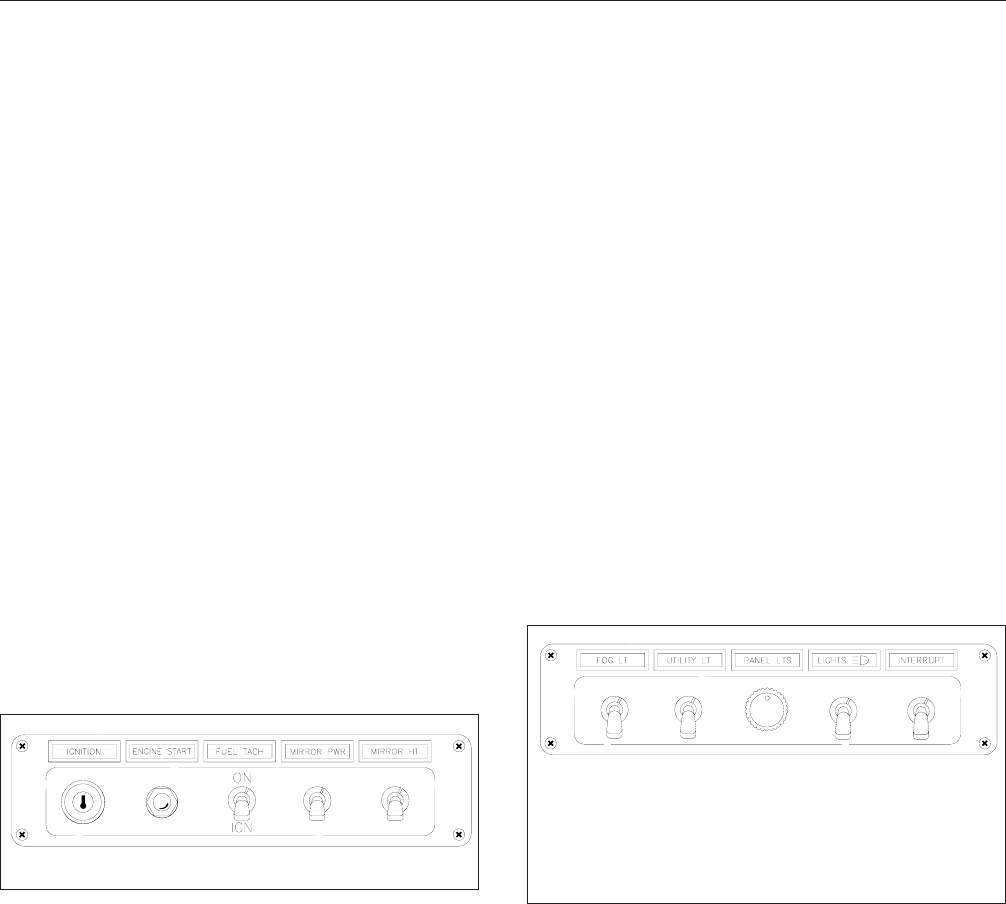
The ignition switch (Fig. 2.4) can be turned to three
positions: "Off," "Accessory," and "On." In addition,
the same key locks and unlocks the cab doors, bag-
gage door(s), and, if equipped, the bunk door(s).
In the "Off" position, the key slot is vertical; the key
can be inserted and removed only in this position.
The low beam headlights, taillights, brake lights, fog
lights, dome lights, clearance lights, turn signals,
hazard warning lights, utility and baggage lights,
spotlights, electric wipers, horn, CB radio, power mir-
rors, cigarette lighter, clock, refrigerator, fuel heater,
electric oil pan heater, and electric or diesel-fired
engine-coolant preheaters can be operated in the off
position (regardless of whether the key is inserted or
not).
In the "Accessory" position, the key is turned coun-
terclockwise. The auxiliary (bunk) fan, windshield
fan(s), radio or stereo system, mirror heat, ether start
12
34
6
910
11 14 15
16
17 18 19
20
7
5
8
12 13
21 22 23
24 25 26
27 28 29
30
02/02/95 f600831
NOTE: Instruments and controls, and their locations, may vary from those shown.
1. Water Temperature Gauge
2. Engine Oil Pressure Gauge
3. Pyrometer
4. Tachometer
5. Warning and Indicator Light Module (VIGIL and Kysor
shown)
6. Parking Brake Indicator Light
7. Antilock Braking System (ABS) Tractor Warning Light
8. ABS Wheel Spin Indicator Light
9. ABS Trailer Warning Light (dash light for DDEC
Optimized Idle®, if so equipped)
10. Speedometer/Odometer
11. Application Air Pressure Gauge
12. Dual System Air Pressure Gauge
13. Voltmeter
14. Fuel Gauge
15. Fuel Tach
16. Engine Brake Switches
17. Trailer Air Supply Valve
18. Parking Brake Control Valve
19. Fifth Wheel Air Slider Control Valve Switch
20. Interaxle Differential Lockout Control Valve Switch
21. Transmission Oil Temperature Gauge
22. Forward Differential Oil Temperature Gauge
23. Rear Differential Oil Temperature Gauge
24. Engine Oil Temperature Gauge
25. Turbocharger Boost Pressure Gauge
26. Fuel Pressure Gauge
27. Automatic Engine Idler/Timer
28. Intake-Air Restriction Gauge
29. Digital Clock
30. Radio (optional)
Fig. 2.1, Instrument and Control Panel Layout (upper dash) Pre-EPA07
Instruments and Controls Identification
2.1
12
3413
14 17 18
19
20 21 22
23
515 16
24 25 26
27 28 29
30 31 32
33
03/14/2007 f600831a
12
76
11
8
9
10
NOTE: Instruments and controls, and their locations, may vary from those shown.
1. Water Temperature Gauge
2. Engine Oil Pressure Gauge
3. Pyrometer
4. Tachometer
5. Warning and Indicator Light Module (VIGIL and Kysor
shown)
6. Engine Malfunction Indicator Light (MIL)
7. DPF Regen Warning Light
8. High Temperature Exhaust Warning Light (HEST)
9. Parking Brake Indicator Light
10. Antilock Braking System (ABS) Tractor Warning Light
11. ABS Trailer Warning Light (dash light for DDEC
Optimized Idle®, if so equipped)
12 Air Suspension Warning Light
13. Speedometer/Odometer
14. Application Air Pressure Gauge
15. Dual System Air Pressure Gauge
16. Voltmeter
17. Fuel Gauge
18. Fuel Tach
19. Engine Brake Switches
20. Trailer Air Supply Valve
21. Parking Brake Control Valve
22. Fifth Wheel Air Slider Control Valve Switch
23. Interaxle Differential Lockout Control Valve Switch
24. Transmission Oil Temperature Gauge
25. Forward Differential Oil Temperature Gauge
26. Rear Differential Oil Temperature Gauge
27. Engine Oil Temperature Gauge
28. Turbocharger Boost Pressure Gauge
29. Fuel Pressure Gauge
30. Automatic Engine Idler/Timer
31. Intake-Air Restriction Gauge
32. Digital Clock
33. Radio (optional)
Fig. 2.2, Instrument and Control Panel Layout (upper dash) EPA07
12
11
13
14
15
16
678910
123
45
02/02/95 f600832
NOTE: Instruments and controls, and their locations, may vary from those shown.
1. Ignition Switch
2. Engine Start Button
3. Engine Shutdown Override Button
4. Mirror Heat Switch
5. Right Side Power Mirror
6. Fog Light Switch
7. Utility Light Switch
8. Panel Light Control Knob
9. Headlight/Parking Light Switch
10. Marker Light/Taillight Interrupt Switch
11. Windshield Wiper/Washer Control Knob
12. Intermittent (delay) Wiper Control Knob
13. Auxiliary Heater Fan Switch
14. Heater/Air Conditioner Fan Switch
15. Airflow Lever Slide Control
16. Temperature Lever Slide Control
Fig. 2.3, Instrument and Control Panel Layout (lower dash)
Instruments and Controls Identification
2.2
system, air dryer, backup lights, and all of the electri-
cal systems that are operable in the "Off" position
are operable in the "Accessory" position.
In the "On" position, the key is turned clockwise. All
electrical systems are operable. Low air- and oil-
pressure warning lights and buzzer operate until the
engine is started and pressure is built up. The engine
can be started and operated only when the ignition
switch is on.
For vehicles built to operate in Canada, switching on
the ignition and releasing the parking brakes auto-
matically activates the headlight low beams (later
model vehicles) or high beams (earlier model ve-
hicles) at half voltage as daytime running lights. The
daytime running lights will operate until the parking
brakes are applied; then they will switch off. Turning
on the regular headlights will override the daytime
running lights. The vehicle cannot be driven unless
either the headlights or daytime running lights are
activated.
Engine Start Button
CAUTION
Do not push the engine start button with the en-
gine running. To do so could result in starter
damage.
With the ignition switch on, push the engine start but-
ton (Fig. 2.4) to engage the electric or air starter.
See the applicable engine operating instructions in
Chapter 7 for complete starting instructions.
On vehicles equipped with a Neutral start switch, the
transmission must be in Neutral before the engine
can be started.
Manual Override Push Button,
Optional Engine Shutdown System
If the vehicle is equipped with an engine shutdown
system with a manual override push button
(Fig. 2.4), simultaneously depress the engine start
button and the manual override push button. Once
the engine has started, release the engine start but-
ton, but continue to depress the override push button
until the warning bell stops.
Mirror Heat Switch, Optional
One or both outside door mirrors can be heated to
keep them defrosted. Whenever the mirror heat
switch (Fig. 2.4) is on, an indicator light illuminates
on the warning and indicator light module.
Power Mirrors
Both outside mirrors can be equipped with an electri-
cal remote control. Move the toggle switch (Fig. 2.4)
to adjust the mirror.
Detroit Diesel Electronic Engine
Control (DDEC) Operator Control
The DDEC system is centered around a computer
that is programmed to automatically control engine
timing and fuel injection, providing maximum engine
performance and fuel economy.
Some DDEC II®systems have an automatic engine
shutdown option. This option will shut down the en-
gine if potentially damaging conditions are detected.
An override button (on DDEC II engines, this button
is labelled "Override") is provided for emergency situ-
ations. It is mounted to the right of the ignition
switch, and provides the driver with an extra 30 sec-
onds of engine operating time.
Standard DDEC III®systems will shut down the en-
gine if sensors indicate an emergency engine condi-
tion such as low coolant level, high coolant tempera-
ture, or high oil temperature. If such a condition
occurs, the yellow "Check Engine" light in the lightbar
will glow. If the problem gets bad enough to cause
possible engine damage, the DDEC III will gradually
cut engine power down to 70 percent of original
power. At that point, the red "Shutdown Engine" light
will turn on, and 30 seconds later, DDEC III will shut
down the engine.
12345
01/18/95 f600068a
1. Ignition Switch
2. Engine Start Button
3. Manual Override Push Button
4. Mirror Heat Switch
5. Right-Side Power Mirror Switch
Fig. 2.4, Ignition/Start/Override/Mirror Switches
Instruments and Controls Identification
2.3
If DDEC III detects low oil pressure, both the "Check
Engine" and "Shutdown Engine" lights will go on, and
the engine will shut down in 30 seconds.
NOTE: If the vehicle is in a hazardous place
when the "Shutdown Engine" light goes on, the
driver must immediately press the "Override/
Chk" button or the engine will shut down in 30
seconds. Pressing the button will give the driver
an additional 30 seconds to move the vehicle. If
this is still not enough time, the driver must
press the button again for another 30-second
delay before engine shutdown.
Once the engine has shut down, cycle the ignition
key off and then on, and press the "Override/Chk"
button to restart the engine.
The cruise control and PTO governor options are
controlled in one of two ways:
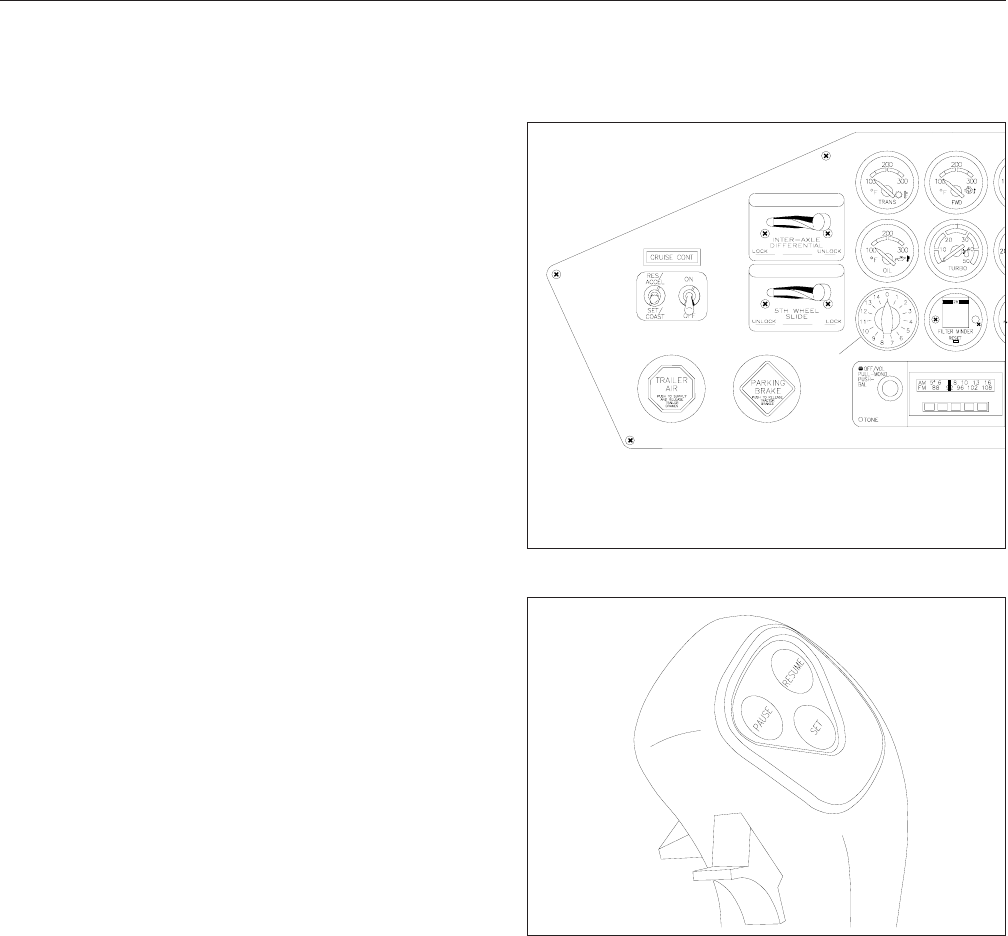
By two switches on the instrument control panel
(Fig. 2.5). The "On/Off" switch turns on the cruise
control option, and the spring-loaded "Set/Resume"
switch selects the cruise speed or resumes cruise
control after slowing down. For PTO operation, the
"On/Off" switch turns on the PTO, and the "Set/
Resume" switch either selects or resumes the engine
operating speed.
or
By three optional buttons on the transmission shift
knob
(Fig. 2.6). The "Pause" button allows the driver
to temporarily interrupt cruise control. The "Resume"
button allows the driver to resume the cruise speed
after slowing down. The "Set" button allows the
driver to select the cruise speed. For PTO operation,
the "Pause" button temporarily interrupts PTO opera-
tion, the "Resume" button resumes PTO operation at
the previously selected engine speed, and the "Set"
button is used to select the engine operating speed.
See Chapter 7 for complete instructions.
If the vehicle is equipped with Optimized Idle®, the
cruise control "On/Off" switch is also used to control
this option. Optimized Idle can be used to keep the
engine oil warm, recharge the battery, and maintain
sleeper temperature when the vehicle is parked for
long periods. See Chapter 7 for more information
and complete operating instructions.
Caterpillar C-10, C-12, and C-15
Electronic Engine Operator Control
The Caterpillar C-10, C-12, and C-15 electronic en-
gines use a computer (electronic control module) to
automatically control engine timing and fuel injection.
The electronic features of these engines include an
electronic governor, fuel-to-air ratio control, program-
mable engine ratings, injection timing control, fault
analysis and recording, and a data link used for pro-
gramming the electronic control module and trouble-
shooting the system.
03/30/94 f600705
A
A. If equipped with Jacobs engine brake controls, the
cruise switches may be installed here. The location
may vary depending on other vehicle options.
Fig. 2.5, Cruise Control Switches, Standard Location
05/23/95 f260316
Fig. 2.6, Transmission Shift Knob Buttons
Instruments and Controls Identification
2.4

All Caterpillar electronic engines have an engine
check light in the lightbar located above the speed-
ometer and tachometer. This warning light comes on
or flashes if the engine oil pressure is low, the cool-
ant temperature is high, the intake manifold air tem-
perature is high, the coolant level is low (optional), or
whenever there is a problem within the electronic
engine system. Some vehicles equipped with Cater-
pillar electronic engines have an automatic engine
shutdown option. This option will shut off fuel to the
engine if potentially damaging conditions are de-
tected. See the engine manufacturer’s service litera-
ture for troubleshooting procedures.
The cruise control and PTO governor options are
controlled in one of two ways:
By two switches on the instrument control panel
(Fig. 2.5). The "On/Off" switch turns on the cruise
control option, and the spring-loaded "Set/Resume"
switch selects the cruise speed or resumes cruise
control after slowing down. For PTO operation, the
"On/Off" switch turns on the PTO, and the "Set/
Resume" switch either selects or resumes the engine
operating speed.
By three optional buttons on the transmission shift
knob
(Fig. 2.6). The "Pause" button allows the driver
to temporarily interrupt cruise control. The "Resume"
button allows the driver to resume the cruise speed
after slowing down. The "Set" button allows the
driver to select the cruise speed. For PTO operation,
the "Pause" button temporarily interrupts PTO opera-
tion, the "Resume" button resumes PTO operation at
the previously selected engine speed, and the "Set"
button is used to select the engine operating speed.
See Chapter 7 for complete instructions.
BrakeSaver Control, Optional
The BrakeSaver (optional on Caterpillar C-15 en-
gines) is operated by a lever mounted in the cab.
The lever controls the amount of oil being directed
through the BrakeSaver. The time required to fill the
BrakeSaver with pressure oil to the point of maxi-
mum braking in the BrakeSaver is about 1.8 sec-
onds.
Cummins PACE and CELECT™
Electronic Engines, Operator Control
Cummins PACE, CELECT, and CELECT IV are elec-
tronic fuel control systems installed on model L10
and, for PACE only, Big Cam IV engines. These elec-
tronic engines are controlled by a microprocessor-
based computer. This computer controls specific en-
gine and vehicle speed modes of operation to
maximize vehicle fuel economy and performance.
Vehicles with these engine systems have a yellow
engine check light and a red engine stop light in the
lightbar located above the speedometer and tachom-
eter. With the ignition switch on, both lights come on
for about two seconds; then, if there is no problem
with the engine system, the lights will go out. When-
ever there is a problem within the electronic engine
system, one of the lights will come on and stay on as
long as the problem exists.
If the yellow engine check light comes on while driv-
ing, some features will not work, but the vehicle can
still be driven. If the red engine stop light comes on
while driving, and if the engine will not accelerate,
pull off of the road and shut down the engine. In ei-
ther situation, have the problem repaired as soon as
possible.
With the CELECT IV system—if the system is pro-
grammed to shut down—the engine shuts down 30
seconds after the red engine stop light comes on.
The ignition switch will restart the engine after shut-
down, but if the potentially damaging problem still
exists, the engine will operate at the reduced speed
or torque level allowed just prior to shutdown. To
check whether a vehicle is equipped with CELECT or
with CELECT IV, see the vehicle service manual.
The cruise control and PTO governor options are
controlled in one of two ways:
By two switches on the instrument control panel
(Fig. 2.5). The "On/Off" switch turns on the cruise
control option, and the spring-loaded "Set/Resume"
switch selects the cruise speed or resumes cruise
control after slowing down. For PTO operation, the
"On/Off" switch turns on the PTO, and the "Set/
Resume" switch either selects or resumes the engine
operating speed.
or
By three optional buttons on the transmission shift
knob
(Fig. 2.6). The "Pause" button allows the driver
to temporarily interrupt cruise control. The "Resume"
button allows the driver to resume the cruise speed
after slowing down. The "Set" button allows the
driver to select the cruise speed. For PTO operation,
the "Pause" button temporarily interrupts PTO opera-
tion, the "Resume" button resumes PTO operation at
the previously selected engine speed, and the "Set"
Instruments and Controls Identification
2.5
button is used to select the engine operating speed.
See Chapter 7 for complete instructions.
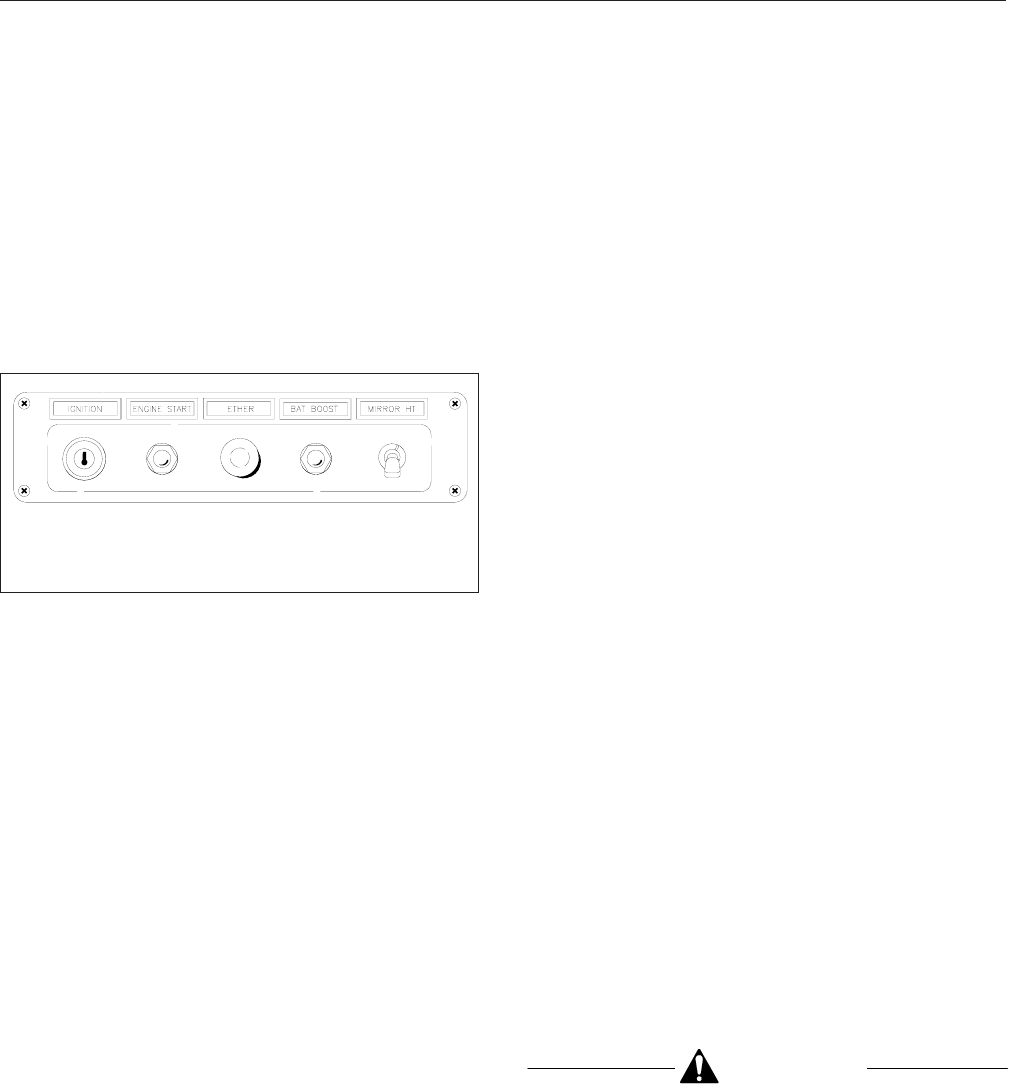
Ether Start Push Button, Optional
For cold weather starting, the vehicle may be
equipped with one of several manual-control, ether
start systems. To start the engine in cold weather,
push the ether button (Fig. 2.7), then start the en-
gine. See the engine operating instructions in Chap-
ter 7 for additional information.
Low Voltage Disconnect, Optional
The optional Sure Power Low Voltage Disconnect
(LVD) system monitors battery power when accesso-
ries are being used when the engine is shut down.
The system automatically turns off cab and sleeper
accessories when voltage drops to 12.3 volts to en-
sure that there is enough battery power to start the
vehicle. An alarm sounds for one minute before ac-
cessories are turned off. If no action is taken within
that minute, the LVD module will shut off power to
predetermined cab and sleeper circuits, and illumi-
nate an LED indicator on the LVD module, located
inside the baggage compartment. These circuits will
remain off until the LVD measures 13.0 volts applied
to the system, which can be done by starting the en-
gine. After the engine is started, the system will
reset.
All vehicles equipped with LVD should have a sticker
on the dash indicating the presence of the system.
Another sticker is located inside of the baggage com-
partment, along with the LVD module.
Battery Boost Push Button and
Optional Battery Isolator System
A battery isolator system has two or three regular
batteries to turn the starter motor, and one or two gel
cell batteries to provide power for cab and sleeper
accessories when the engine is off. The system uses
an isolator relay, which is normally open. The relay
isolates the engine-starting batteries while the engine
is not running, so that the engine can still be started
even if the gel cell battery has been used to the point
of complete discharge.
When all four batteries have a charge, the engine
can be started in the normal manner, by turning the
ignition key to the "Start" position and pressing the
starter push button.
To start the engine when the gel cell battery is
drained, press and hold the BATT BOOST push but-
ton (Fig. 2.6) while pressing the starter push button.
This will temporarily close the isolator relay, and con-
nect the engine-starting batteries to the ignition
switch for engine starting.
The isolator relay is closed only while the engine is
running or the BATT BOOST push button is de-
pressed. With the engine running, all four batteries
are connected in parallel, allowing the alternator to
charge them all, in addition to supplying power for all
vehicle loads.
When the engine is not running, the gel cell provides
all of the vehicle’s electrical needs except for turning
the starter motor. The gel cell is longer-lived and
cheaper to use than a standard wet cell, but it can
take a charge only within an extremely narrow
range—13.8 to 14.1 volts.
At 14 volts, a gel cell has a very high charge accep-
tance rate. Because a truck charging system oper-
ates at approximately 14 volts, under normal condi-
tions a gel cell will never need to be recharged with
an external charger.
CAUTION
Do not attempt to charge a gel cell with a stan-
dard battery charger. All standard battery charg-
ers supply at least 16 volts to the battery. This
will damage the gel cell.
IMPORTANT: To recharge a gel cell, see an au-
thorized Freightliner dealer or the instructions in
12
01/18/95 f600648a
1. Ether Start Push Button
2. Battery Boost Push Button
Fig. 2.7, Ether Start and Battery Boost Controls,
Optional
Instruments and Controls Identification
2.6
Group 54 of the
Heavy-Duty Trucks Service
Manual
.
However, the single gel cell, like any other single bat-
tery, has limited current-supply capability, and will
drain down faster than a standard multiple-battery
installation that has no battery isolator system. Avoid
ultra-deep discharging. Repeated ultra-deep dis-
charging of a gel cell will reduce its life significantly.
To protect against ultra-deep discharging, a low volt-
age warning alarm and indicator light activate when
the battery voltage falls to 12.0 volts or less. To si-
lence the alarm, turn off all cab electrical loads or
start the engine.
Fuel-Tach™Switch, Optional
The FloScan Fuel-Tach is an electronic monitoring
system that records fuel consumption and displays
average miles per gallon. The Fuel-Tach gauge pro-
vides you with immediate feedback, showing a per-
centage difference between the current fuel con-
sumption rate and the total trip miles per gallon
average.
The system is controlled by a toggle switch. See
Fig. 2.8.
With nonelectronically controlled engines the "On"
position allows you to receive average miles per gal-
lon information for specific periods of time. In this
position, the Fuel-Tach system stays on and stores
the average miles per gallon information in memory,
even if the engine is shut down.
In the IGN position, the Fuel-Tach system is on only
when the ignition switch is on. Shutting down the en-
gine cancels the information in memory.
With electronically controlled engines the digital dis-
play normally shows trip average miles per gallon. If
the engine datalink sends an electronic fault code,
the Fuel-Tach interrupts the miles per gallon display
for 60 seconds, showing an "F" plus the fault code,
for example, "F37." Fault codes are also stored in a
history file for later viewing. For engine fault code
instructions, see "Fuel Tach Gauge" in this chapter.
The "Reset" toggle switch cancels the information in
memory used for calculating average miles per gal-
lon and erases the fault code history file. To reset,
press and hold the reset switch. The average MPG
reading slowly blinks on and off for about 10 sec-
onds, indicating that you are in the reset mode. After
erasing the memory, the display blinks "Er" until you
release the reset switch. If you release the reset
switch before the display changes to "Er," the engine
fault code history will be displayed and the memory
will not be erased. After being reset, the display will
show "0" MPG until you drive at least 150 feet (46
m).
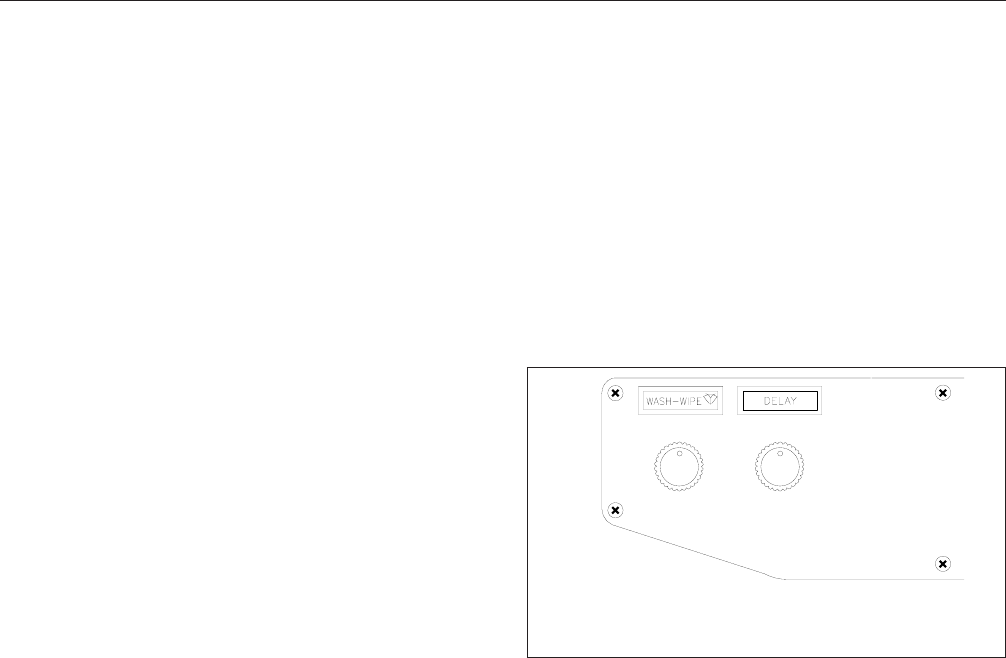
Fog Light Switch, Optional
The fog light switch (Fig. 2.9) operates the fog lights,
mounted on the bottom edge of the front bumper or
recessed into the front bumper.
For vehicles built to operate in the United States, the
low beam headlights must be turned on before the
fog lights can be turned on. The fog lights won’t go
on if the high beam headlights are already on, and
switching from low beams to high beams will switch
off the fog lights.
For vehicles built to operate in Canada, the taillights
and clearance lights must be on before the fog lights
can be turned on. Unless the headlight switch is all
the way up (headlights, taillights, clearance lights,
marker lights, and panel lights on) or down (taillights,
clearance lights, marker lights, and panel lights on),
the fog light switch will not turn on the fog lights.
01/18/95 f600070b
Fig. 2.8, Fuel-Tach Switch, Optional
12345
01/18/95 f600071a
1. Fog Light Switch
2. Utility Light Switch
3. Panel Lamp Control Knob
4. Headlight/Parking Light Switch
5. Marker Light/Taillight Interrupt Switch
Fig. 2.9, Light Controls
Instruments and Controls Identification
2.7
Utility Light Switch, Optional
Utility lights can be swivel-mounted on top of the
cab, mounted on the intake/exhaust support, or flush-
mounted in the back of the cab or bunk. They are
operated by the utility light switch (Fig. 2.8) which,
when turned on, also illuminates a red indicator light
on the dash.
Panel Lamp Control Knob
The circuit to the panel lamps is activated by the
headlight switch. When the headlights are on, the
panel lamp knob (Fig. 2.8) controls the intensity of
the instrument panel lamps. Turn the knob counter-
clockwise to brighten them and clockwise to dim
them. Turning the knob counterclockwise to the peg
will also turn off the panel lamps.
Headlight Switch and Daytime
Running Lights
A three-position headlight switch (Fig. 2.8) is used to
operate the exterior lights. When the switch is up the
headlights, and all other vehicle lights, are on. All
vehicle lighting is off when the switch is in the middle
position. When down, the switch activates only the
clearance, instrument panel, and marker lights, and
the taillights. The switch for the headlight high beams
is built into the turn signal lever. When the headlights
are on high beam, a green light in the warning and
indicator light module goes on. The ignition switch
must be on for the high beams to operate.
For vehicles built to operate in Canada, switching on
the ignition and releasing the parking brakes auto-
matically activates the headlight low beams (later
model vehicles) or high beams (earlier model ve-
hicles) at half voltage as daytime running lights. The
daytime running lights will operate until the parking
brakes are applied; then they will switch off. Turning
on the regular headlights will override the daytime
running lights. The vehicle cannot be driven unless
either the headlights or daytime running lights are
activated.
Interrupt Switch
A spring-loaded interrupt switch (Fig. 2.8) temporarily
deactivates the marker lights and taillights. With the
vehicle lights on, raise and release the interrupt
switch to briefly turn off the marker lights and tail-
lights.
Windshield Wiper/Washer Controls
Air Wipers
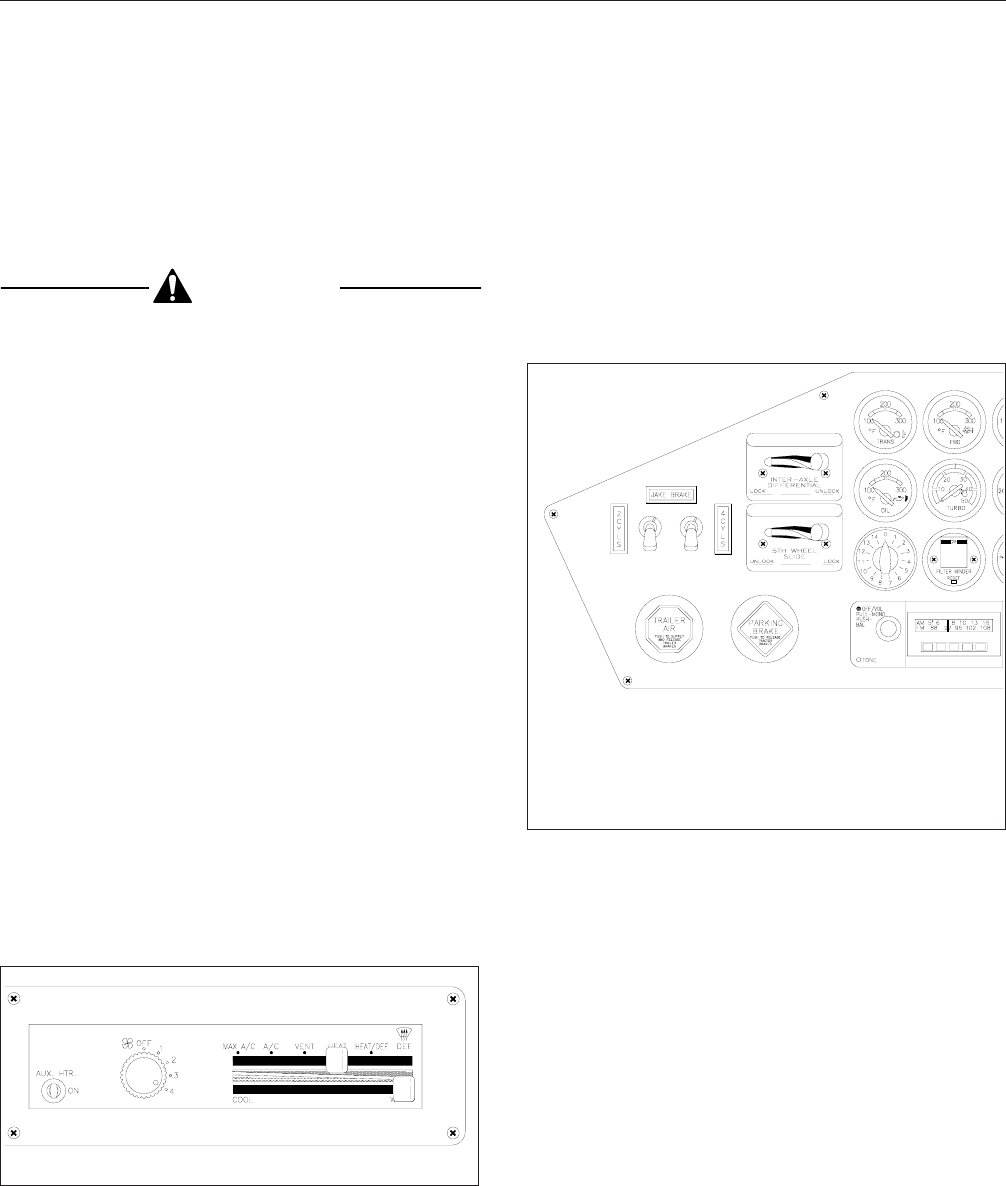
To operate the air wipers, turn the "Wash-Wipe" knob
(Fig. 2.10) clockwise. To increase wiper speed, con-
tinue to turn the knob clockwise. Turning the knob
counterclockwise decreases wiper speed. To turn the
windshield wipers off, turn the knob counterclockwise
to its full stop. When the wiper blades are parked,
release the knob.
The "Delay" switch controls intermittent operation
with air wipers. Rotating the knob clockwise in-
creases the time interval between wiper strokes. Turn
the knob clockwise until the desired interval is
reached. The longest delay is approximately 10 sec-
onds between strokes.
The delay knob operates the delay feature only; it
will not turn the wipers on.
IMPORTANT: After using the intermittent wind-
shield wipers, turn off the wiper control
(Fig. 2.9)
and
the intermittent (delay) control. If
the wiper control is off, but the intermittent con-
trol remains on, that control will continue to
cycle whenever the ignition is in the on or ac-
cessory position. Continued, constant cycling
will shorten the life of the intermittent wiper con-
trol.
Electric Wipers
To operate the electric wipers, turn the knob clock-
wise to the first position for low speed. Turn the knob
to the second position for high-speed operation.
12
01/18/95 f600433
1. Windshield Wiper/Washer Control Knob
2. Intermittent (delay) Wiper Control Knob
Fig. 2.10, Windshield Wiper/Washer Controls
Instruments and Controls Identification
2.8
In electric wiper systems, the delay feature is inte-
grated with the wiper switch between the stop and
low-speed positions. Turn the knob between the stop
and low speed until the desired interval is reached.
The longest delay is approximately 10 seconds be-
tween strokes.
CAUTION
Do not move the wiper arms manually. Wiper
motor damage will occur if the arms are moved.
Windshield Washer Control
To operate the windshield washers, turn the wind-
shield wipers to the desired speed. Push the "Wash-
Wipe" knob in to actuate the washers. Hold the knob
in for a constant stream of washer fluid. Push the
knob in and release it for intermittent streams of fluid.
Left and Right Windshield-Fan
Switches, Optional Ceiling-Mounted
Fans
Ceiling-mounted defogger fans are operated by
"Low/Off/High" toggle switches located in the base of
the fan.
Heater/Air-Conditioner Controls
(Standard) and Auxiliary Heater
Switch (Optional)
Heater/air-conditioner controls (Fig. 2.11) consist of
two lever slide controls, a four-speed fan control
switch, and a switch for the optional auxiliary heater
fan. See Chapter 4 for detailed operating instructions
of the heater/air-conditioner and the auxiliary heater.
Jacobs Engine Brake Switches,
Optional
Jake Brake controls consist of two dash-mounted
toggle switches (Fig. 2.12) which control the degree
of engine braking. In conjunction with these switches,
an engine-mounted microswitch (controlled by the
throttle pedal) and an under-deck-mounted mi-
croswitch (controlled by the clutch pedal) actuate the
engine brake.
See Chapter 7, under the heading "Engine Braking
System, Optional," for additional information.
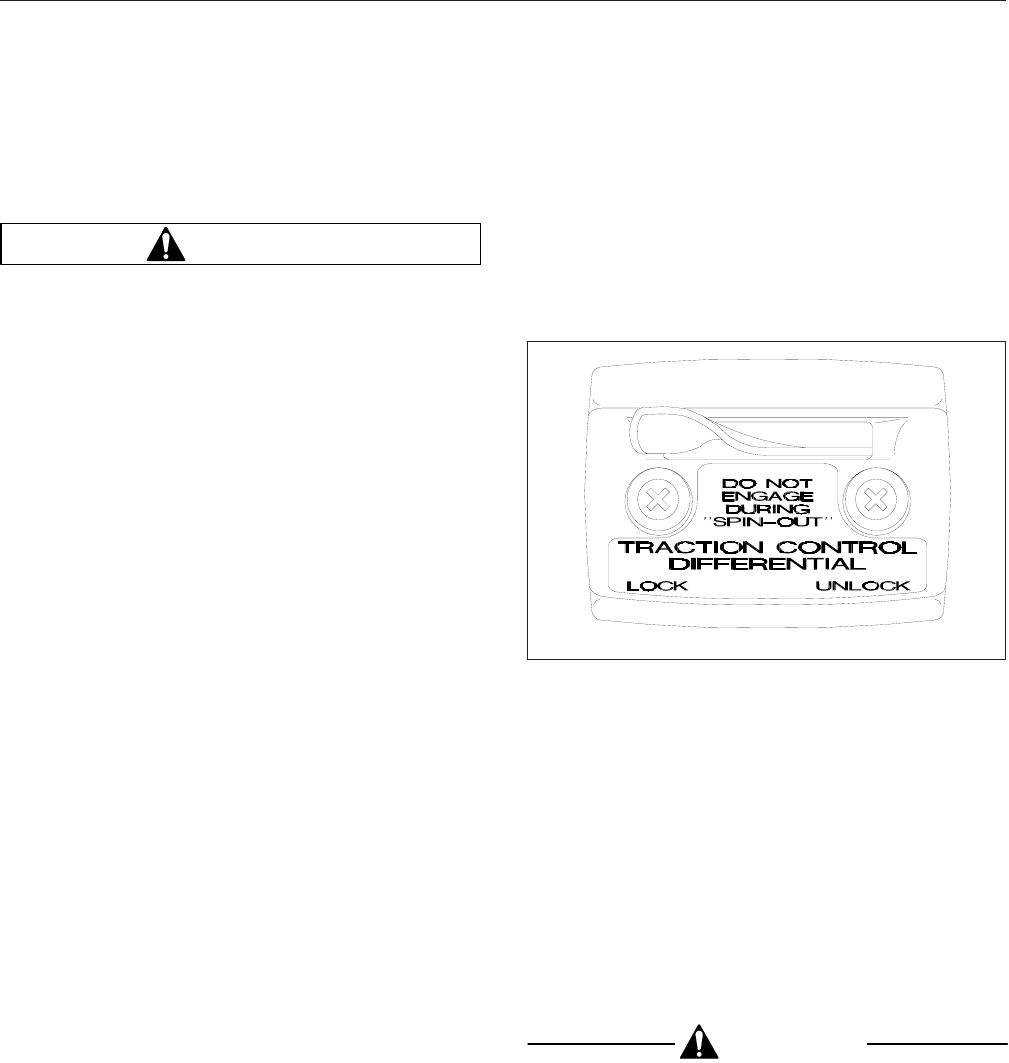
Interaxle Differential Lockout Control
Valve Switch
Differential lockout, standard on all dual-drive ve-
hicles, is driver-actuated by means of a "Lock/
Unlock" control valve switch (Fig. 2.12) mounted on
the control panel. A red indicator light comes on
whenever the interaxle differential is locked out
(switch is in the lock position; no differential action
between the drive axles). A guard around the switch
prevents it from being accidentally activated.
01/18/95 f600497
Fig. 2.11, Heater/Air-Conditioner Controls
1
2
3
54
f600507b
10/26/98
1. Engine Brake Switch
2. Interaxle Differential Lockout Control Valve Switch
3. Fifth Wheel Air Slider Control Valve Switch
4. Parking Brake Control Valve Knob
5. Trailer Air Supply Valve Knob
Fig. 2.12, Brake Switches and Control Valves
Instruments and Controls Identification
2.9
Fifth Wheel Air Slider Control Valve
Switch, Optional Air-Operated Sliding
Fifth Wheel
WARNING
Do not activate the fifth wheel air slider control
valve when the vehicle is in motion. Doing so
could result in damage to the fifth wheel member,
kingpin, cab, or trailer, and ultimately, to the driv-
etrain. A guard is positioned around the switch to
prevent it from being accidentally activated.
The fifth wheel air slider valve permits repositioning
of the sliding fifth wheel from inside of the cab. Mov-
ing the air slider control valve switch (Fig. 2.12)to
the lock position deactivates the control valve and
locks the fifth wheel to the baseplate. Moving the
switch to the unlock position activates the control
valve and unlocks the fifth wheel slide mechanism,
allowing changes to the total length of the tractor-
trailer and changes to axle loads, to comply with
varying state or provincial laws. A red indicator light,
if so equipped, is illuminated whenever the fifth
wheel slider is unlocked.
Parking Brake Control Valve and
Trailer Air Supply Valve
The yellow diamond-shaped knob (Fig. 2.12) oper-
ates the parking brake valve. Pull the knob out to
apply both the tractor and the trailer spring parking
brakes. Push the knob in to release the tractor spring
parking brakes. Before the spring parking brakes can
be released, the air pressure in either air brake sys-
tem must be at least 65 psi (447 kPa).
The red octagonal-shaped knob (Fig. 2.12) operates
the trailer air supply valve. After the vehicle and its
air hoses are connected to a trailer, and the pressure
in the air system is at least 65 psi (447 kPa), push
the trailer air supply valve knob in (it should stay in)
to charge the trailer air supply system and release
the trailer spring parking brakes. Before disconnect-
ing a trailer, or when operating a vehicle without a
trailer, pull the trailer air supply valve knob out.
See Chapter 6, under the heading "Brake System,"
for instructions regarding use of the trailer air supply
valve and parking brake valve.
Controlled Traction Differential Control
Valve Switch
On vehicles equipped with an Eaton single-drive rear
axle, a controlled traction differential feature is stan-
dard. A control valve switch (Fig. 2.13) engages and
disengages the controlled traction feature. A guard is
positioned around the switch to prevent it from being
accidentally activated.
See Chapter 9 for complete operating instructions.
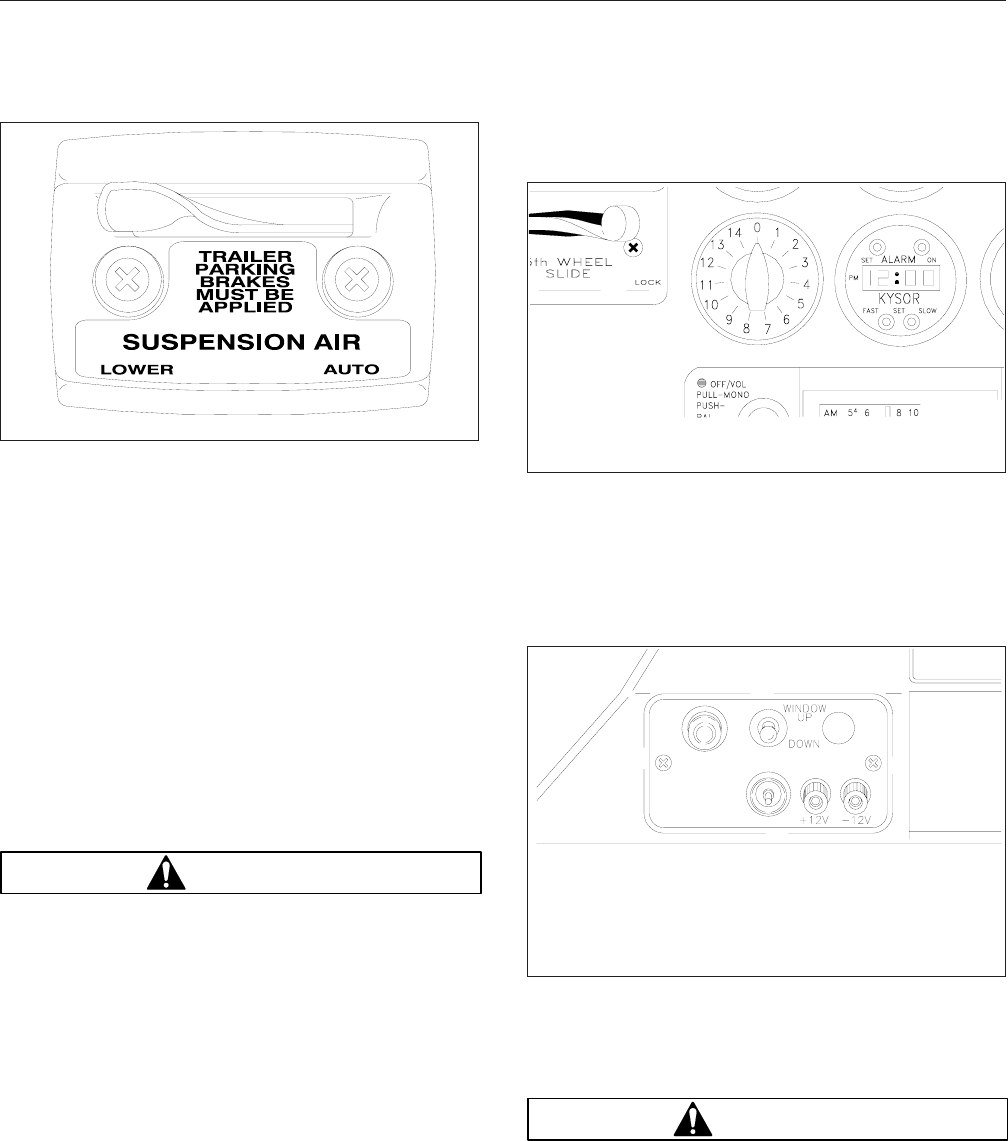
Air Suspension Dump Valve, Optional
The air suspension dump valve allows the air in the
vehicle air suspension to be quickly exhausted, low-
ering the rear of the vehicle. This makes it easier to
connect to or disconnect from a trailer. A control
valve switch (Fig. 2.14) exhausts and fills the air sus-
pension. To exhaust air from the suspension, move
the switch to LOWER. A guard is positioned around
the switch to prevent it from being accidentally
activated.
CAUTION
Never exhaust air from the suspension while
driving. If the air is exhausted, the suspension
will not absorb road shocks and could be dam-
aged.
f600307
10/04/93
Fig. 2.13, Controlled Traction Differential Control Valve
Switch
Instruments and Controls Identification
2.10
AirLiner Plus Suspension, Optional
The AirLiner Plus suspension is used on vehicles
with pusher or tag axles to improve traction perfor-
mance. The system maintains an accurate leveling of
frame height whether the vehicle is in motion or
parked. The Meritor WABCO®ECAS (Electronically
Controlled Air Suspension) system uses a height
sensor mounted between the frame and the drive
axle housing as well as other sensors to provide
frame height information to a control unit mounted
inside of the cab. The electronic control unit quickly
lowers or raises the frame height, as necessary. Al-
tering the height of the frame while the vehicle is
parked can be performed using a hand-held remote
control unit.
WARNING
Stand away from the rear of the vehicle when
raising or lowering the height of the frame. The
ECAS system operates quickly, and contact
could result in personal injury.
For the optional automatic function to work, the ve-
hicle must be equipped with a rear axle air suspen-
sion and ABS. Automatic Traction Control is recom-
mended for optimal vehicle traction control.
Automatic Engine Idler/Timer,
Optional
A Henke automatic engine idler/timer (Fig. 2.15) al-
lows the driver to select the idle time required for en-
gine shutdown. The driver can turn off the ignition,
remove the ignition key, lock the vehicle, and leave it
with the engine idling. The automatic timer will shut
the engine off at the end of the selected time.
Cigarette Lighter
Push the lighter in (Fig. 2.16) to heat the element.
The lighter will stay in and will automatically pop out
when the element is hot.
Air Window Control Valve Switch,
Optional Right-Hand Air Window
WARNING
Before raising the window, be sure that hands,
fingers, and other body parts or objects are away
from the window frame. Otherwise, serious physi-
cal injury could result.
01/18/95 f600545a
Fig. 2.14, Air Suspension Dump Valve Switch, Optional
12
01/18/95 f600508a
1. Automatic Engine Idler/Timer
2. Kysor Digital Clock
Fig. 2.15, Engine Idler/Timer and Clock
12
34
01/18/95 f600146a
1. Cigarette Lighter
2. Air Window Control Valve Switch
3. Antenna Connection
4. CB Radio Connections
Fig. 2.16, Window Control Switch
Instruments and Controls Identification
2.11
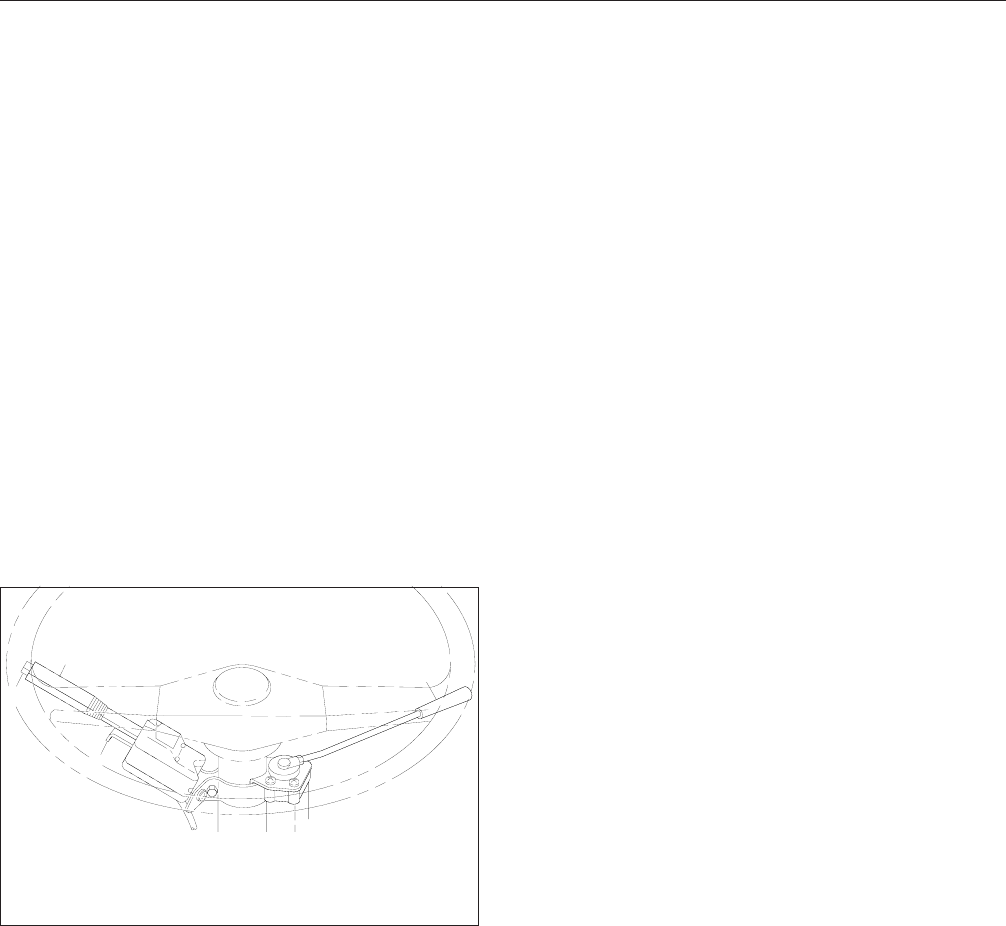
A toggle switch (Fig. 2.16) controls the air window.
Push the switch up to raise the window, or push it
down to lower the window.
CB Radio Connections
An antenna connection and positive (+) and negative
(–) power connections are provided for a CB radio.
See Fig. 2.16.
Turn Signal Lever
The turn signal lever (Fig. 2.17) is mounted on the
steering column. Pushing the lever counterclockwise
turns on the left-turn signal lights; pushing it clock-
wise turns on the right-turn signal lights. When one
of the turn signal lights is on, a green indicator light
flashes at the far left or far right of the warning and
indicator light panel. To cancel the signal, return the
lever to the neutral position, except when equipped
with an optional self-canceling switch.
Hazard Warning Light Tab
The hazard warning light tab (Fig. 2.17) is located
below the lever on the turn signal switch. Activate the
hazard warning lights by pulling the tab out. When
the hazard warning light tab is pulled out, all of the
turn signal lights and both of the indicator lights on
the control panel will flash. To cancel the warning
lights, move the turn signal lever up or down.
Headlight Dimmer
The headlight dimmer (Fig. 2.17) may be a push but-
ton at the end of the turn signal lever, or a lift-handle
type built into the turn signal lever.
To operate the push button type dimmer, press the
button once to change from low beam to high beam
headlights; press it again to cancel the high beam
lights.
To operate the lift-handle type dimmer, pull the turn
signal lever up to change from low beam to high
beam headlights, or from high beam back to low
beam.
When the headlights are on high beam, a green light
on the indicator light panel comes on. For vehicles
built to operate in the United States, switching from
low beams to high beams will switch off the fog
lights.
NOTE: The ignition switch must be on for the
high beams to work.
Trailer Brake Hand Control Valve
Lever
This lever is used for applying the trailer brakes with-
out applying the truck or tractor brakes and is
mounted on the steering column. See Fig. 2.17. See
Chapter 6 under the heading "Brake System," for
operating instructions.
Transmission Controls
If so equipped, the transmission range control valve
and splitter valve are attached to the gearshift knob.
Transmission shift pattern labels are located on the
header or sun visor above the driver’s windshield.
See Chapter 8 for complete transmission operating
instructions.
Suspension Seat Adjustment Controls
All adjustment controls for a suspension seat are lo-
cated on the seat base. See Chapter 5 for complete
instructions.
IMPORTANT: Due to the maximum adjustability
of mid- and high-back air suspension seats, it is
possible to combine the seat back recline ad-
justment and the seat slide adjustment so that
the seat back contacts the backwall. It is the
1
2
3
4
01/18/95 f460194a
1. Turn Signal Lever
2. Hazard Warning Light Tab
3. Headlight Dimmer Push Button
4. Trailer Brake Hand Control Lever
Fig. 2.17, Turn Signal Lever
Instruments and Controls Identification
2.12
responsibility of the driver to adjust the seat to
prevent damage to the seat and the cab interior.
Dome Light Switches
For vehicles with a single dome light mounted on the
roof inside of the cab, the light is operated by a
three-position switch mounted in the dome light. The
switch provides both a low- and a high-intensity set-
ting; in the middle position, the dome light is off.
For vehicles with a single dome light and two reading
lights mounted on the roof inside of the cab, each
light is operated by its own on/off switch, mounted in
the dome light.
Tilt Steering Wheel
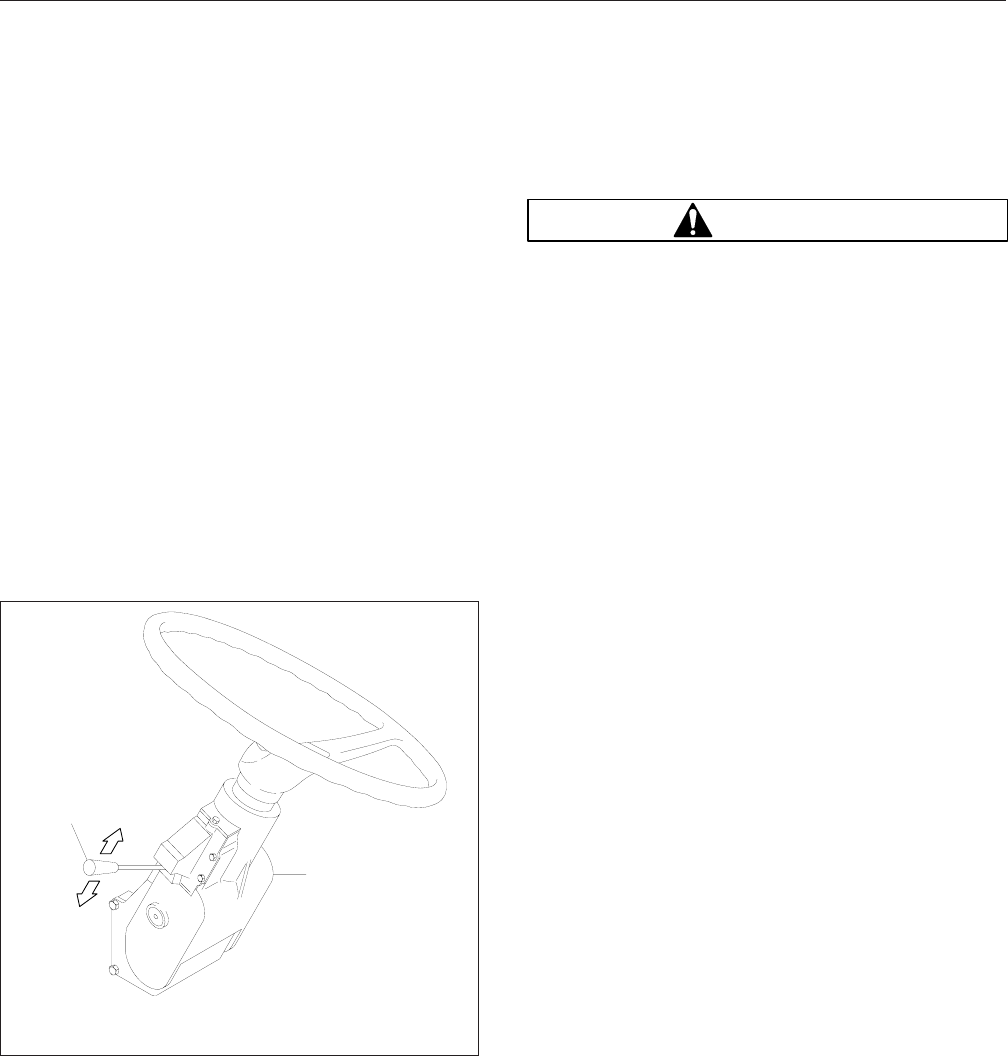
The tilt steering wheel (Fig. 2.18) has a tilt range of
15 degrees, and a telescoping range of 2-5/8 inches
(67 mm). A control lever is located just below the turn
signal switch on the steering column.
After adjusting the seat to the desired ride position,
unlock the steering column by pushing the control
lever and holding it all the way down. Tilt the steering
column to the desired position, then release the con-
trol lever to lock the steering column in place.
To adjust the height of the steering wheel, pull up-
ward on the control lever. While holding the control
lever in this position, move the steering wheel up-
ward or downward to the desired position. Release
the control lever to lock the steering wheel in place.
WARNING
Make sure that the control lever is in the locked
(neutral) position before driving the vehicle.
Never try to adjust the height of the steering
wheel or tilt the steering column while driving the
vehicle. Doing so could cause loss of vehicle
control, personal injury, and property damage.
Warning and Indicator Lights
All of the standard and optional warning and indicator
lights are housed in a lens and bezel assembly, lo-
cated above the speedometer and tachometer.
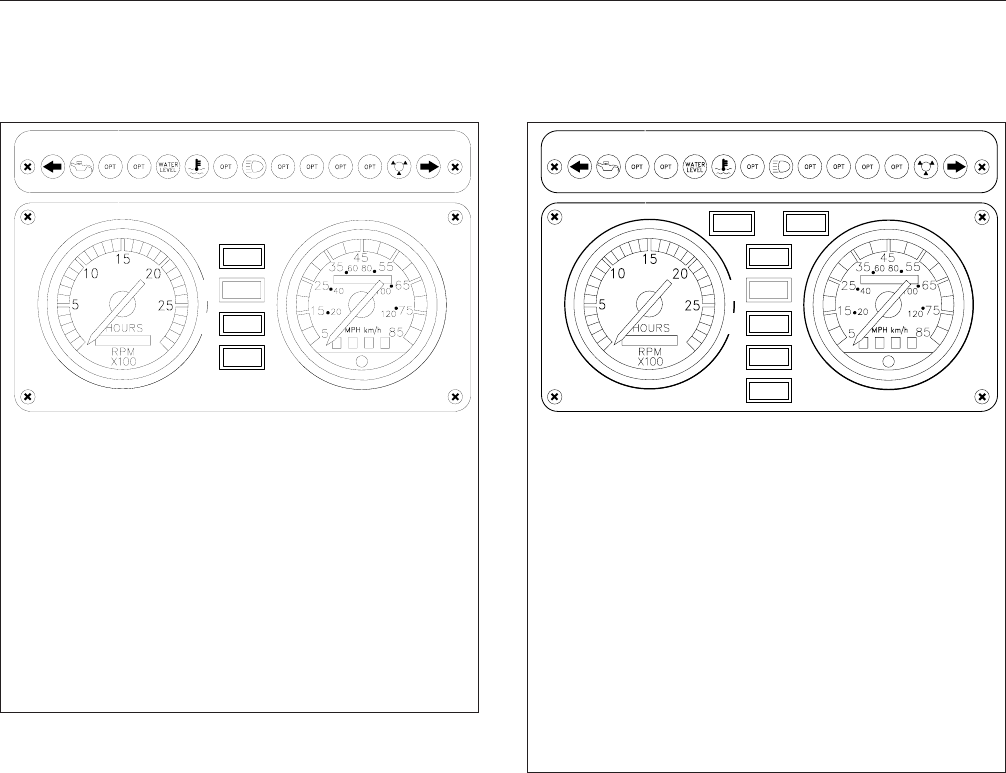
For pre-EPA07 vehicles, up to six rectangular indica-
tor lights may be installed on the center dash panel
between the tachometer and speedometer. See
Fig. 2.19. The pre-EPA07 standard installation in-
cludes one parking brake indicator light and two an-
tilock braking system (ABS) lights, the tractor warn-
ing light and the wheel spin indicator light. One other
ABS light, the trailer warning light, is optional. The
other two lights represent a variety of optional func-
tions that may not be installed on all models.
For EPA07 vehicles, up to ten rectangular indicator
lights may be installed on the center dash panel be-
tween the tachometer and speedometer. See
Fig. 2.20. The EPA07 standard installation includes
three indicator lights for the after treatment device;
an engine malfunction indicator light (MIL), a diesel
particulte filter (DPF) regen light, and a high exhaust
system temperature (HEST) light. Details of the after-
treatment lights can be found in Chapter 7, under
the heading
EPA07 Aftertreatment System (ATS)
.
The other standard lights are the parking brake indi-
cator light, and two antilock braking system (ABS)
lights. The other lights are for optional functions that
may not be installed on all models.
Parking Brake Indicator Light
The red parking brake indicator light (Fig. 2.19)
comes on whenever the parking brakes are activated
and the ignition is on.
Additional optional lights may be installed in the cen-
ter dash.
f460309a03/09/94
1
2
1. Control Lever
2. Tilt Wheel Assembly
Fig. 2.18, Tilt Steering Wheel
Instruments and Controls Identification
2.13
Meritor WABCO®Antilock Braking
System (ABS)
The Meritor WABCO®Antilock Braking System (ABS)
may have up to three of the following amber lights
(the first two are standard: a tractor warning light
(TRAC ABS), a wheel spin indicator light (WHL
SPIN), and an optional trailer warning light (TRLR
ABS). Vehicles built before July, 1994, also have a
DEEP SNOW/MUD indicator light.
With the tractor ABS system, the tractor warning light
(TRAC ABS) comes on after the engine is started
(Fig. 2.19). Once the vehicle moves faster than
about 4 mph (6 km/h), the warning light goes out
only if all of the tractor’s ABS components are work-
ing.
With the tractor and trailer ABS system, the vehicle
also has a trailer warning light labelled TRLR ABS
(Fig. 2.19).
After the engine is started, the TRLR ABS light
comes on if the trailer is equipped with a compatible
ABS system. Once the vehicle moves faster than
about 4 mph (6 km/h), the TRLR ABS warning light
goes out only if all of the trailer’s ABS components
are working. For more detailed information about
TRLR ABS light operation, see Chapter 6.
IMPORTANT: If any of the ABS warning lights
do not work as described above, or come on
while driving, repair the ABS system immedi-
ately to ensure full antilock braking capability.
The wheel spin indicator light (WHL SPIN) comes on
flashing if one of the drive wheels spins during accel-
eration (Fig. 2.19). The flashing light goes out when
the wheel stops spinning. A label (Fig. 2.21)onthe
dash explains what actions should be taken when
the WHL SPIN indicator light starts to flash.
If equipped with an electronic engine, an automatic
traction control (ATC) system may be installed. On
1234567
89
A
D
B
C
10/26/98 f600769b
A. Parking Brake Indicator Light
B. Tractor ABS Warning Light
C. Wheel Spin Indicator Light
D. Trailer ABS Warning Light
1. Left-Turn Signal Light
2. Oil Pressure Warning Light
3. Low-Water Warning Light
4. Water Temperature Warning Light
5. High-Beam Indicator Light
6. Low Air Pressure Warning Light
7. Right-Turn Signal Light
8. Tachometer
9. Speedometer
Fig. 2.19, Dash Assembly for VIGIL and Kysor Warning
Systems Pre-EPA07
1234567
89
C
F
D
E
03/14/2007 f600769c
AB
G
A. MIL Engine Warning Light
B. DPF Regen Warning Light
C. Hi-Temperature Exhaust Warning Light
D. Parking Brake Indicator Light
E. Tractor ABS Warning Light
F. Trailer ABS Warning Light
G. Air Suspension Warning Light
1. Left-Turn Signal Light
2. Oil Pressure Warning Light
3. Low-Water Warning Light
4. Water Temperature Warning Light
5. High-Beam Indicator Light
6. Low Air Pressure Warning Light
7. Right-Turn Signal Light
8. Tachometer
9. Speedometer
Fig. 2.20, Dash Assembly for VIGIL and Kysor Warning
Systems EPA07
Instruments and Controls Identification
2.14

these vehicles, the ATC system automatically con-
trols wheel spin during reduced-traction starts.
An "ATC Function" switch (if equipped), allows the
driver to select from two levels of drive axle traction-
control assistance:
•NORMAL—which reduces drive axle wheel
spin on icy, wet, or sand covered roads.
•DEEP SNOW/MUD—which allows a higher
threshold of drive axle wheel spin to help burn
through a thin layer of ice, or to help throw off
accumulated mud or snow.
The Deep Snow/Mud mode is indicated by a flashing
WHL SPIN light. To engage this mode, the ATC func-
tion switch must be in the Normal position when the
vehicle is initially powered up. Once the vehicle is
started, the ATC function switch can be set to the
Deep Snow/Mud position. The ECU indicates this
change by a constant flashing of the WHL SPIN
lamp (or by illumination of the Deep Snow/Mud light
on vehicles built before July, 1994).
If the ATC function switch is in the Deep Snow/Mud
position when the vehicle is powered up, the ECU
will not accept this function change and will remain in
the Normal mode. Indication of this condition will be
the absence of the flashing WHL SPIN light (on ve-
hicles built before July, 1994, the absence of an illu-
minated Deep Snow/Mud light). To engage the Deep
Snow/Mud mode in this situation, change the position
of the ATC function switch to the Normal mode. After
two seconds, move the switch to the Deep Snow/
Mud position. When this occurs, the indicator light
will activate as previously described.
The "ABS Chk" switch (if equipped), activates blink
code diagnostics, which are used to read ABS and
ATC system fault codes on the WHL SPIN light. This
switch is located in the lower dash panel cover, just
below the ignition switch, on the left side of the steer-
ing wheel. When turned on (in the "up" position),
blink code diagnostics are activated. See Group 42
of the
Heavy-Duty Trucks Service Manual
for trouble-
shooting procedures.
IMPORTANT: ABS and ATC blink code diagnos-
tics should only be performed when the vehicle
is stopped. If the vehicle is equipped with ATC,
turning "on" the ABS CHK switch will reduce
engine speed to idle for three seconds and af-
fect ATC function performance. If the vehicle is
driven with the ABS CHK switch "on" (in the
"up" position), the WHL SPIN light will illuminate
continuously. Under this condition, turning the
ABS CHK switch "off" (in the "down" position),
while the vehicle is still in motion, will only turn
off the WHL SPIN light, but will not restore ATC
function performance. To fully restore engine
and ATC function capability, the vehicle must be
brought to a complete stop. Then, move the
ABS CHK switch to "off" (in the "down" posi-
tion).
See the brake system operating instructions in Chap-
ter 6 for more information.
Bendix Antilock Braking System
(ABS)
With the Bendix Antilock Braking System (ABS), the
tractor warning light (TRAC ABS) comes on after the
key is turned on (Fig. 2.19). The warning light goes
out only if all of the tractor’s ABS components are
working properly.
If the tractor is attached to a trailer with a compatible
ABS system, the trailer ABS warning lamp (TRLR
ABS) will also come on momentarily after the key is
turned on.
Vehicles equipped with a Bendix ABS system may
also be equipped with an automatic traction control
(ATC) system. The ATC system automatically con-
trols wheel spin during reduced-traction starts.
The wheel spin indicator light (WHL SPIN) comes on
if one of the drive wheels spins during acceleration
(Fig. 2.19). The light goes out when the wheel stops
spinning. The Bendix system will either reduce en-
gine torque or apply gentle brake pressure to force
the differential to drive the stationary or slowly spin-
ning wheel. If slippery road conditions continue, en-
gage the axle lock.
IF REAR WHEEL SPIN OCCURS,
PARTIALLY RELEASE THROTTLE
PEDAL UNTIL WHEEL SPIN
AMBER LIGHT EXTINGUISHES,
THEN ENGAGE AXLE LOCK.
09/22/98 f600311a
Fig. 2.21, Dash Label
Instruments and Controls Identification
2.15

IMPORTANT: If any of the ABS warning lights
do not work as described above, or come on
while driving, repair the ABS system immedi-
ately to ensure full antilock braking capability.
See Group 42 of the
Heavy-Duty Trucks Ser-
vice Manual
for troubleshooting procedures.
See the brake system operating instructions in Chap-
ter 6 for more information.
VIGIL I Warning System
Standard Indicator Lights
Standard indicator lights (Fig. 2.19) include:
1. The green right- and left-turn signal lights flash
on and off whenever the outside turn signal lights
are flashing.
2. The green high-beam indicator light comes on
when the headlights are on high beam.
Standard Warning Lights
Standard red warning lights (Fig. 2.19) are for oil
pressure, water temperature, and low air pressure.
Whenever conditions cause one or more of these
lights to come on, a warning buzzer also alerts the
driver:
1. The water temperature warning light and buzzer
activate whenever the engine coolant tempera-
ture exceeds a preset point determined by the
engine manufacturer. See the engine manual for
this temperature.
2. The oil pressure warning light and buzzer acti-
vate whenever the oil pressure falls below the
minimum oil pressure recommended by the en-
gine manufacturer.
3. The low air pressure warning light and buzzer
activate whenever air pressure in the primary or
secondary air reservoir falls below 64 to 76 psi
(441 to 524 kPa).
When the ignition is turned on, oil- and air-pressure
warnings activate until the engine starts and mini-
mum pressures are exceeded. If the low-oil warning
light remains lit after running the engine for 15 sec-
onds, shut off the engine and determine the cause.
See the
Heavy-Duty Trucks Service Manual
for repair
procedures.
WARNING
If the warning system does not activate when the
ignition is turned on, repair the system to provide
warning protection for oil pressure, coolant tem-
perature, and brake system air pressure.
Optional Warning and Indicator Lights
The most common optional warning and indicator
lights (Fig. 2.19) consist of any combination of the
following:
•Interaxle differential indicator light, which is
standard on all dual-drive vehicles. An indicator
light illuminates whenever the interaxle differ-
ential is locked out (switch is in the lock posi-
tion).
•Automatic sludge ejector (moisture ejection
valve) indicator light. An indicator light comes
on whenever the ejector is operating.
•Utility light(s) indicator light. If utility lights are
installed in the back of the vehicle, an indicator
light comes on when they are in use.
•Mirror heat indicator light. An indicator light
comes on whenever the mirror heat switch is
on.
•Low-water warning light, which is standard
when a low-water probe warning system or a
four-way engine shutdown system is installed.
A warning light comes on whenever the coolant
level in the radiator drops below the low-water
probe.
•Fifth wheel slider indicator light. An indicator
light comes on whenever the air-operated lock-
pins on a fifth wheel are retracted from the
baseplate (the fifth wheel slider is unlocked).
Optional warning and indicator lights and their loca-
tions may vary, because of different optional equip-
ment installed. Other optional accessories and stan-
dard equipment that are or can be equipped with
warning or indicator lights include: engine heater,
parking brakes, tire sanders, spotlights, oil level, oil
temperature, cruise-control system, engine fan, and
other options.
Instruments and Controls Identification
2.16
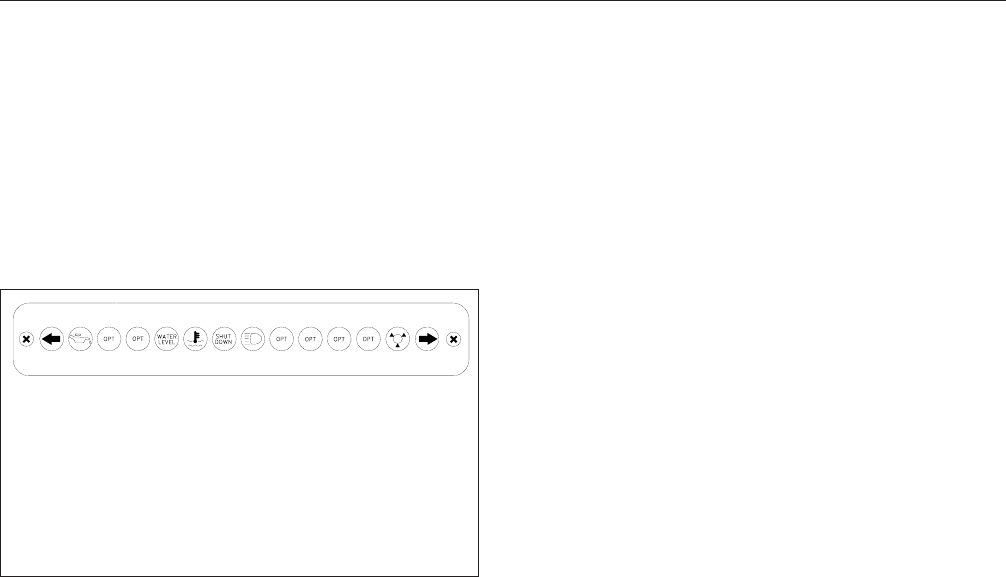
VIGIL II Warning System, Optional
The VIGIL II system is an electronically controlled
warning and engine shutdown system. It controls the
turn signal functions and various optional functions. A
solid state lightbar (Fig. 2.22) in the instrument panel
contains displays for the functions.
Engine Functions
The system monitors engine coolant temperature,
coolant level, and oil pressure.
•If the engine overheats, a warning light comes
on and a buzzer sounds. The temperature that
triggers the warning light and buzzer varies
with engine type and is programmed into the
system at the factory. If the temperature contin-
ues to rise to critical levels, the engine shut-
down light comes on, and the engine will be
shut down.
•If the coolant level drops below a sensor in the
cooling system, the low water level light comes
on. After 5 seconds, a buzzer sounds, and
after 30 seconds, the system will shut down
the engine.
•If the oil pressure drops below a preset level,
the low oil pressure light comes on and a
warning buzzer sounds. If the oil pressure
drops to a preset critical level, the engine shut-
down light comes on, and the engine will be
shut down.
•All shutdown features have an automatic over-
ride. If the vehicle needs to be moved to a safe
location after a shutdown, just crank the en-
gine. It will run for about 30 seconds before
shutting down again.
Turn Signal Functions
The system operates the turn signal relay and the in-
dicators.
Other Functions
The system also controls several functions such as
the headlight high beam indicator, low air pressure
warning light, and control of indicators for six optional
features. The optional features can be any combina-
tion of the following:
•transmission temperature
•axle temperature
•engine heater
•alternator no charge
•fifth wheel lock
•parking brake
•sand
•antilock
•mirror heater
•utility lights
•axle lock
•sludge ejector
or any six that are specially ordered.
Additional Features
When the ignition is turned on, all of the LEDs in the
lightbar will light and the low air and low oil pressure
alarms will sound. The lights and alarms will activate
for two one-second periods, separated by a half sec-
ond pause. This is a self-test to indicate whether or
not the lightbar is working. After the test, the LEDs
not in use will turn off. The low air and oil pressure
warnings will not sound again until the starter is
cranked. Once the starter is cranked, the alarms will
sound until system air and oil reach minimum operat-
ing pressures. If the lightbar does not operate as de-
scribed here, test it. For instructions, see Group 54
of the
Heavy-Duty Trucks Service Manual
.
12 3456 78
10/26/98 f600630b
1. Left-Turn Signal Light
2. Oil Pressure Warning Light
3. Low-Water Warning Light
4. Water Temperature Warning Light
5. Engine Shutdown Light
6. High-Beam Indicator Light
7. Low Air Pressure Warning Light
8. Right-Turn Signal Light
Fig. 2.22, VIGIL II and Kysor VIP Warning System,
Optional
Instruments and Controls Identification
2.17
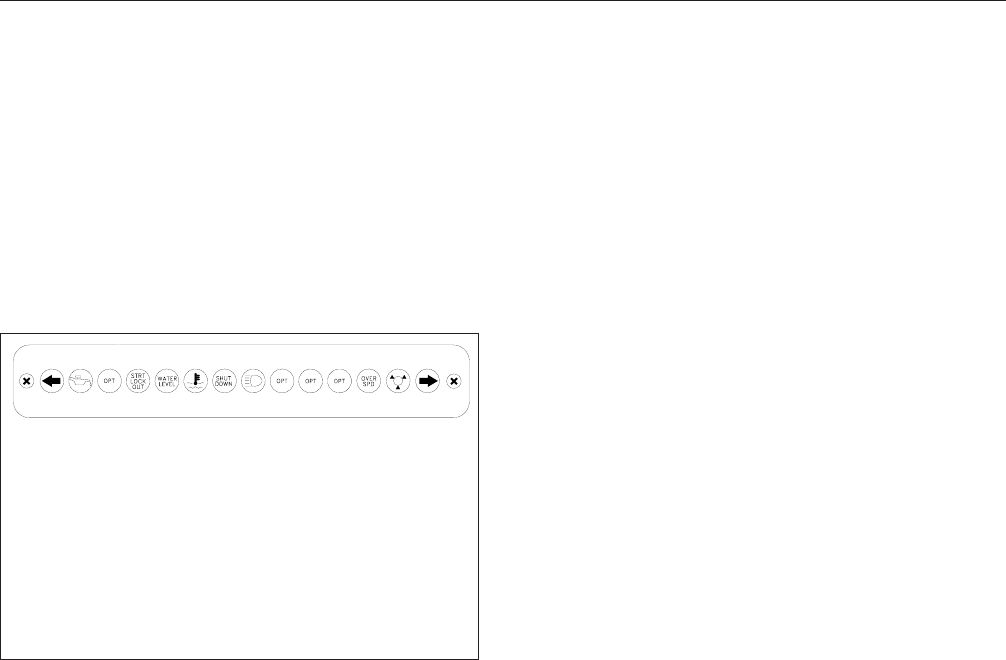
VIGIL III Warning System, Optional
The VIGIL III system is an electronically controlled
warning system with maximum vehicle speed control,
vehicle overspeed reporting, and optional engine
shutdown. It controls the turn signal functions and
various optional functions. A solid-state lightbar
(Fig. 2.23) in the instrument panel contains displays
for the functions.
Engine Functions
The system monitors engine coolant temperature,
coolant level, and oil pressure.
•If the engine overheats, a warning light
(Fig. 2.23) comes on and a buzzer sounds.
The temperature that triggers the warning light
and buzzer varies with engine type and is pro-
grammed into the system at the factory. If the
temperature continues to rise to critical levels,
the engine shutdown light comes on, and the
engine will shut down (if equipped with the
shutdown feature).
•If the coolant level drops below a sensor in the
cooling system, the low water level light comes
on. After 5 seconds, a buzzer sounds, and
after 30 seconds the system shuts down the
engine (if equipped with the shutdown feature).
•If the oil pressure drops below a preset level,
the low oil pressure light comes on and a
warning buzzer sounds. If the oil pressure
drops to a preset critical level, the engine shut-
down light comes on, and the engine will shut
down (if equipped with the shutdown feature).
•All shutdown features have an automatic over-
ride. If the vehicle needs to be moved to a safe
location after shutdown, just crank the engine.
It will run for about 30 seconds before shutting
down again.
Turn Signal Functions
The system operates the turn signal relay and the
turn indicators (Fig. 2.23).
The system features a special heavy-duty relay for
flashers, capable of driving up to fourteen 32-
candlepower bulbs.
Other Functions
The system protects the starter by locking out the
starter button whenever any of the following condi-
tions exist:
•Voltage at the key switch is greater than 18
volts or less than 9 volts before the starter but-
ton is pressed.
•The starter button has been pressed within the
last two seconds.
•Engine speed exceeds 350 rpm.
•The starter has been cranked for a total of 30
seconds within the last minute (the starter but-
ton is locked out for two minutes to allow the
starter to cool).
NOTE: If the lockout feature activates to let the
starter cool, the starter lockout warning light
(Fig. 2.23) will be on for the two-minute cooling
period. If the lockout feature activates for any
other reason, the light will glow only if the
starter button is pressed within two seconds of
the lockout occurring, and it will be on only as
long as the button is pressed.
•The system features a speed governor for
maximum vehicle speed control. The governor
can be set anywhere between 45 and 85 mph
(70 and 140 km/h), and controls vehicle speed
by cutting fuel delivery pressure when the pre-
determined speed is reached. If this system is
malfunctioning, the lightbar overspeed light
(Fig. 2.23) will flash on for ten seconds each
time that the engine is started.
12345678910
10/26/98 f600292b
1. Left-Turn Signal Light
2. Oil Pressure Warning Light
3. Starter Lockout Warning Light
4. Low-Water Warning Light
5. Water Temperature Warning Light
6. Engine Shutdown Light
7. High-Beam Indicator Light
8. Overspeed Light
9. Low Air Pressure Warning Light
10. Right-Turn Signal Light
Fig. 2.23, VIGIL III Warning System, Optional
Instruments and Controls Identification
2.18

•While driving, the overspeed light will flash on
if the driver exceeds a second predetermined
speed set by the customer.
The system also controls several functions such as
headlight high beam indicator (Fig. 2.23), low air
pressure warning light and alarm, and control for four
optional features. The optional features can be any
combination of the following or any four that are spe-
cially ordered:
•transmission temperature
•axle temperature
•engine heater
•alternator no charge
•fifth wheel lock
•parking brake
•sand
•antilock
•mirror heater
•utility lights
•axle lock
•sludge ejector
Additional Features
When the ignition is turned on, all the LEDs in the
lightbar will light and the low air and low oil pressure
alarms will sound. The lights and alarms will activate
for two one-second periods, separated by a half-
second pause. This is a self-test to indicate whether
or not the lightbar is working. After the test, the LEDs
not in use will turn off. The low air and oil pressure
warnings will not sound again until the starter is
cranked. Once the starter is cranked, the alarms will
sound until system air and oil pressures reach mini-
mum levels. If the lightbar doesn’t operate as de-
scribed here, test it. For instructions, see Group 54
of the
Heavy-Duty Trucks Service Manual
.
Kysor Vehicle Instrumentation and
Protection (VIP) System, Optional
The Kysor VIP system is an electronically controlled
warning and engine shutdown system. It also con-
trols the turn signal functions and various optional
functions. A solid state lightbar (Fig. 2.22) in the in-
strument panel contains displays for the functions.
Engine Functions
The system monitors engine coolant temperature,
coolant level, and oil pressure.
•If the engine overheats, a warning light comes
on and a buzzer sounds. The temperature that
triggers the warning light and buzzer varies
with engine type and is programmed into the
system at the factory. If the temperature contin-
ues to rise to critical levels, the engine shut-
down light comes on, and the engine will be
shut down.
•If the coolant level drops below a sensor in the
cooling system, the low water level light comes
on, and a buzzer sounds. After 30 seconds,
the system will shut down the engine. The low
coolant shutdown feature may be turned on or
off by setting a DIP switch in the control mod-
ule.
•If the oil pressure drops below a preset level,
the low oil pressure light comes on and a
warning buzzer sounds. If the oil pressure
drops to a preset critical level, the engine shut-
down light comes on, and the engine will be
shut down.
•All shutdown features have an automatic over-
ride. If the vehicle needs to be moved to a safe
location after a shutdown, just crank the en-
gine. It will run for about 30 seconds before
shutting down again.
Turn Signal Functions
The system operates the turn signal relay and the in-
dicators.
Other Functions
The system also controls several functions such as
the headlight high beam indicator, low air pressure
warning light and intermittent buzzer, dimming of the
turn signal indicators when the headlights are turned
on, and control of indicators for six optional features
(Fig. 2.22). The optional features can be any combi-
nation of the following:
•transmission temperature
•axle temperature
•engine heater
•alternator no charge
Instruments and Controls Identification
2.19

•fifth wheel lock
•parking brake
•sand
•antilock
•mirror heater
•utility lights
•axle lock
•sludge ejector
or any six that are specially ordered.
Three of the six optional indicators can trigger the
warning buzzer. The buzzer feature can be activated
at the factory or in the field by setting DIP switches
on the control module. The low air pressure buzzer is
an intermittent signal; all other warning buzzers give
a constant signal. When the air pressure is low, the
buzzer will sound intermittently, regardless of what
optional features are selected, how the DIP switches
are set, or what other warnings might be on.
Additional Features
When the ignition switch is turned on and the starter
is engaged, all of the LEDs in the lightbar will light up
as a check that they are working. When the starter is
released, those LEDs not in use will turn off.
If the ignition switch is turned on and the engine is
not cranked, there will be no warning buzzer for any
of the warning features. The warning buzzer is trig-
gered by the start circuit if the engine is cranked, re-
leasing the start switch turns on the buzzer. After re-
leasing the starter, the oil pressure buzzer sounds
during the time engine oil pressure is rising.
Collision Warning System
(CWS), Eaton VORAD EVT–
300, Optional
The Eaton VORAD EVT–300 is a computerized colli-
sion warning system (CWS) that uses front-mounted
and side-mounted (optional) radar to continuously
monitor vehicles ahead of and alongside your ve-
hicle.
The system warns of potentially dangerous situations
by means of visual and audible alerts. The system
performs in fog, rain, snow, dust, smoke, and dark-
ness. To be detected, objects must be within the
radar beam’s field of view and provide a surface area
that can reflect back the radar beam.
The front-looking antenna assembly transmits radar
signals to, and receives them back from, vehicles
and objects ahead. This allows the determination of
the distance to, relative speed of, and angle to the
target of vehicles and objects ahead. The system
uses this information to warn the driver of potentially
dangerous situations.
Optional side sensor(s) mounted on the side of the
vehicle also transmit and receive radar signals for a
distance of 2 to 10 feet (0.5 to 3 meters) alongside
your vehicle. The side sensor(s) provide a 15 degree
vertical by 15 degree horizontal beam pattern. The
side sensor(s) can detect unseen vehicles and ob-
jects moving and stationary adjacent to your vehicle.
WARNING
The Eaton VORAD EVT–300 Collision Warning
System (CWS) is intended solely as an aid for an
alert and conscientious professional driver. It is
not intended to be used or relied on to operate a
vehicle. Use the system in conjunction with rear-
view mirrors and other instrumentation to safely
operate the vehicle. Operate this vehicle,
equipped with the EVT–300 Collision Warning
System, in the same safe manner as if the EVT–
300 Collision Warning System were not present.
The EVT–300 Collision Warning System is not a
substitute for safe, normal driving procedures,
nor will it compensate for any driver impairment,
such as drugs, alcohol, or fatigue.
The EVT–300 Collision Warning System may pro-
vide little or no warning of hazards such as pe-
destrians, animals, oncoming vehicles, or cross
traffic.
Failure to drive safely and use the system prop-
erly could result in personal injury and/or death
and severe property damage.
Driver Display Unit (DDU)
NOTE: All system controls are located on the
DDU. See Fig. 2.24. Indicators to inform the
driver about the system’s operation are located
on both the DDU and the optional side sensor
display.
Instruments and Controls Identification
2.20
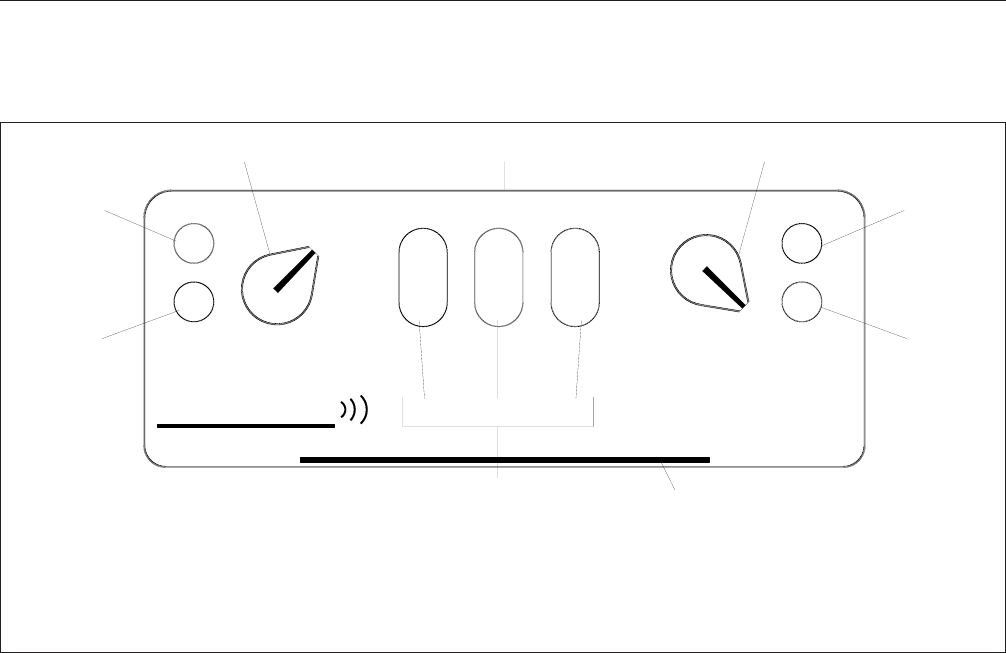
The DDU controls system power, range for vehicle
warnings, speaker volume, and all other system func-
tions. At the lower front edge of the DDU, a slot is
provided to insert the optional driver’s identification
card. Alert and indicator lights advise of multiple
warning levels, system power, system failure, and, if
so configured, failure of the driver to insert the identi-
fication card.
A light sensor automatically adjusts alert and indica-
tor light brightness depending on cab lighting condi-
tions. A small speaker provides audible alert tones to
warn of closing on an object ahead and, when
equipped with an optional side sensor, of objects
alongside when the turn signal is activated in prepa-
ration for a lane change. Additional tones indicate
speaker volume, system failure, driver’s card status,
and data extraction pass or fail.
1. The green power-on/driver’s card (optional) sta-
tus indicator light illuminates when the system is
activated and the power-on LED test is complete.
If the system is configured to require that the
driver’s card be read, and it is not, the ON light
blinks continuously.
2. Push in the volume control and power ON/OFF
knob to turn power on or off. Turn the knob left
or right to increase or decrease speaker volume.
Press and hold the knob for 5 seconds and then
release it to activate the failure display mode.
NOTE: The system may be configured to have
no on/off capability and the volume may be con-
figured to allow only some volume control.
3. The speaker is located under the top cover of
the DDU. It sounds audible tones to alert the
driver to potential hazards. Volume may be re-
stricted to a range above a minimum level.
NOTE: This is a configurable electronic param-
eter.
4. Rotate the range knob (if enabled) to change the
first alert detection range from 3 to 2 seconds.
This will also change the second alert detection
range from 2 to 1.75 seconds. Push and hold the
knob for 5 seconds to activate the accident re-
construction function and freeze the most recent
data in half of the allocated memory.
VOLUME ALERTS RANGE
EATON VORAD
TECHNOLOGIES
10/15/98 f610258
ON SC
1
2
345
6
7
8
12
FAIL
1011 9
1. Red System Failure Indicator Light
2. Green Power ON/Driver’s Card Status Indicator Light
3. Volume Control and Power ON/OFF Knob
4. Speaker
5. Range Knob
6. Green SC Indicator Light
7. Photo Light Sensor
8. Driver’s Identification Card Slot
9. Red Alert Light
10. Orange Alert Light
11. Yellow Alert Light
12. Distance/Danger Alert Lights
Fig. 2.24, Driver Display Unit, EVT-300
Instruments and Controls Identification
2.21

NOTE: The system may be configured to pre-
vent adjustment of the range levels.
5. The red system failure indicator light illuminates
if a system problem is detected. Press and hold
the volume control knob for 5 seconds to display
fault codes. The fault codes will be blinked out
as a pattern of flashes on this indicator light. See
Table 2.1 for fault codes.
Fault Codes (blink codes)
Fault Code Suspect Failure
11 Central Processing Unit (CPU)
12 CyberCard
13 Driver Display Unit (DDU)
14 Antenna Assembly
15 Right Side Sensor
16 Left Side Sensor
21 Right-Turn Signal
22 Left-Turn Signal
23 Brake
24 Speed
25 SmartCruise
31 J1587
32 J1939
33 VBUS
34 DDU Communications
35 Antenna Assembly Communications
41 No Fault or End of Fault Codes
Table 2.1, Fault Codes or Blink Codes
6. The green SC indicator light will flash 8 times if
the range knob is pressed to store accident re-
construction information. It will also flash 8 times
after the system is activated, after the power-on
LED test is finished, and if accident reconstruc-
tion data was previously stored.
7. The photo light sensor senses lighting conditions
in the cab and automatically adjusts the intensity
of the indicator and alert lights.
8. If the system’s configuration requires, insert the
driver’s identification card in the slot at the lower
front edge of the DDU. A high-pitched tone will
sound when the driver’s identification card has
been successfully read. One low tone will sound
if the driver’s card has been unsuccessfully read.
If so configured, a repeated low tone will sound if
the system is on and the requested driver’s card
has not been inserted.
9. The yellow alert light illuminates when an object
is detected within the system’s maximum range
of 350 feet (107 meters) on a straight road.
Range is reduced in curves by the turn radius of
the curve. This light also illuminates when the
proximity alarm threshold is crossed.
10. The yellow and orange alert lights illuminate
when your vehicle is within a 3-second following
interval behind another vehicle in the same lane.
If you are within a 2-second following interval,
and closing on the vehicle ahead, a warning tone
will also sound.
11. The yellow, orange, and red alert lights illuminate
when you are 1 second (and less than 1 second)
behind a vehicle. If the vehicle ahead is opening
the interval, no tone will sound. If you are closing
the interval, double tones will sound. Within a
1/2-second or less following interval, opening or
closing, the tones will repeat twice per second.
12. If a stationary vehicle or object, or an object
moving less than 3.4 mph (5.5 km/h) in the same
lane is detected within 220 feet (67 meters) and
within 3 seconds, all three alert lights will illumi-
nate and the double tones will sound. This warn-
ing overrides all others and is not affected by the
range control knob setting.
IMPORTANT: The system is disabled in turns
with a radius of less than 750 feet (230 meters)
and when the brakes are applied.
13. If your vehicle is traveling less than 2 mph (3
km/h) and an object is detected less than 15 feet
(4.5 meters) in front of your vehicle, and the
closing rate is more than 1/2 mph (1 km/h), the
yellow alert light will illuminate and a low-
frequency double tone will sound. This is the
proximity alert.
NOTE: All warnings apply only to objects within
the maximum detection range and in your lane.
Proximity alert tones and vehicle-closing 1/2-
second and 2-second following interval tones
are configured items. All tones are disabled in
sharp turns or when the brakes are applied. If
the configuration permits, the 3-second and
2-second alert levels may be adjusted with the
range control knob. A single low-frequency tone
sounds when a system failure is detected. A
Instruments and Controls Identification
2.22
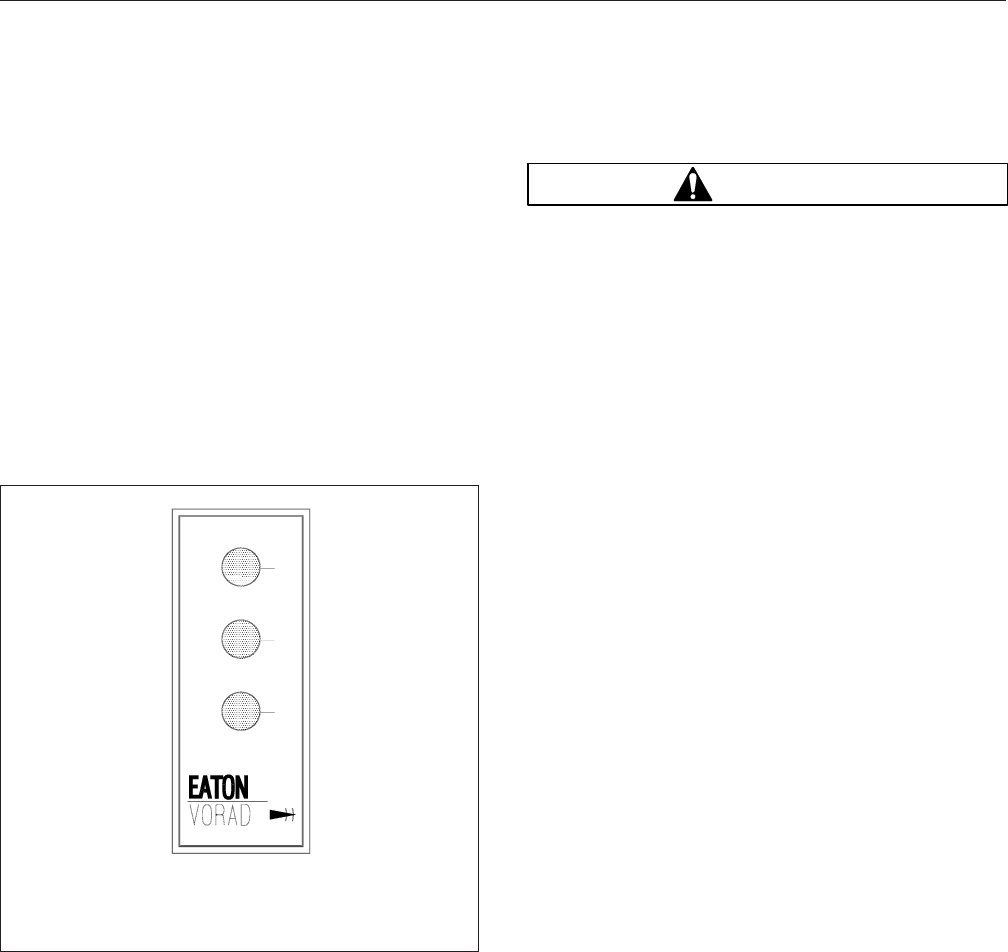
medium-frequency tone sounds when the vol-
ume control level is changed. Successful down-
loading of Eaton Vehicle Information Manage-
ment System (EVIMS) data will cause a double
tone to sound. Unsuccessful downloading will
cause a low-frequency tone to sound.
14. A failure of the optional side sensor(s) will cause
a continuous red light on the side sensor display
to appear.
Side Sensor Display, Optional
1. The yellow indicator light illuminates continuously
when no vehicle is detected by the side sen-
sor(s). See Fig. 2.25.
2. The photo light sensor senses lighting conditions
in the cab and automatically adjusts the intensity
of indicator and alert lights.
3. The red alert light illuminates when objects are
detected by the side sensor(s). If the right turn
signal is activated and the side sensor detects
an object, the red alert light will illuminate and
the DDU speaker will sound a high-frequency
double tone. This tone is sounded only once per
activation of the turn signal. The red light will
also illuminate and stay on if a failure of the side
sensor is detected.
Special Road Situations
WARNING
The Eaton VORAD EVT–300 Collision Warning
System (CWS) is intended solely as an aid for an
alert and conscientious professional driver. It is
not intended to be used or relied on to operate a
vehicle. Use the system in conjunction with rear-
view mirrors and other instrumentation to safely
operate the vehicle. This system will not warn of
many possible hazards. Do not assume it is "all
clear" if no alert lights are illuminated.
Failure to drive safely and use the system prop-
erly could result in personal injury and/or death
and severe property damage.
Certain special road situations may affect the sys-
tem’s ability to detect objects. These situations in-
clude the effects of curves, dips, and hills which can
provide an unexpected result:
NOTE: A warning may sound when an object is
detected in front of the vehicle even though the
driver intends to turn away or stop before reach-
ing the object.
•When an object is detected in a very sharp
right- or left-hand turn, the audible alarm will
not sound.
•When approaching a curve, before turning into
it, alarms may sound and lights illuminate be-
cause of an object off of the road, directly in
line with your vehicle. This will not occur when
the brakes are applied.
•Elevated obstacles, such as overpasses and
overhead signs, may be detected when ap-
proaching a roadway descending to a lower
elevation.
•Vehicles cannot be detected on the other side
of a hill. An alarm will not sound until the object
is within the antenna assembly’s field of view.
•On approaching a steep hill, objects above the
beam cannot be detected. Generally, the beam
hitting the road surface does not cause an
alarm.
01/27/97 f601259
2
3
1
1. Red Alert Light (vehicle or object detected)
2. Photo Light Sensor
3. Yellow Indicator Light (no vehicle or object detected)
Fig. 2.25, Side Sensor Display, Optional
Instruments and Controls Identification
2.23

•The side sensor only detects objects within its
field of view, next to the tractor. A vehicle far-
ther back, behind the field of view, will not be
detected.
•The side sensor range is set to detect average
sized vehicles, 2 to 10 feet (0.5 to 3 meters)
away, in the adjacent lane. The side sensor
provides a 15 degree vertical by 15 degree
horizontal beam pattern.
•The radar beam of the CWS will detect near
range cut-ins of approximately 30 feet (9
meters) or less, depending on the angle of en-
trance into the lane in front of your vehicle.
WARNING
Heavy rain or water spray at the side sensor may
temporarily prevent the system from providing
adequate warnings.
Failure to drive safely and use the system prop-
erly could result in personal injury and/or death
and severe property damage.
NOTE: A continuous fixed object on the right
side of the vehicle such as a guard rail, wall,
tunnel, or bridge may cause the side sensor
alert light to stay on.
In Case of Accident
The optional vehicle accident reconstruction capabil-
ity provides two segments of system data, one of
which can be stored in system memory. Push and
hold the DDU range knob for at least 5 seconds to
store the first segment. Within 6 seconds, the green
SC indicator light will blink rapidly 8 times, confirming
that the data has been saved. If the range knob is
pushed again, a fail tone will sound. After the first
segment is saved, the second segment runs continu-
ously, but only contains the last 10 minutes (approxi-
mately) of system data. The system will cease re-
cording data 30 seconds after the vehicle comes to a
stop.
NOTE: Once the first memory segment is fro-
zen, the other can’t be frozen. Only by discon-
necting the main CPU connector can the sec-
ond memory segment be preserved. If you
desire immediate downloading and interpretation
of accident reconstruction data, you must return
the CPU to Eaton VORAD. However, after 30
days the frozen information will automatically
clear if the vehicle is driven.
Maintenance and Diagnostics
1. Keep the antenna assembly and side sensor(s)
free of a buildup of mud, dirt, ice, or other debris
that might reduce the system’s range.
2. The system tests itself continuously and evalu-
ates the results every 15 seconds. If a problem
is detected with the front radar system, the red
FAIL light on the DDU illuminates continuously as
long as the failure is active. The corresponding
fault code is stored in the CPU’s memory.
3. Both active and inactive fault codes can be indi-
cated by the DDU when the system is placed in
failure display mode. Inactive faults are those
that have occurred and have cleared. Active
faults are still present. Fault codes provide the
driver the ability to record the system faults dur-
ing a trip and to notify his maintenance depart-
ment or Eaton VORAD. See "Failure Display
Mode/Fault Codes" below. In this mode, specific
fault codes are indicated by the pattern of blinks
of the driver display unit red FAIL light.
4. Each fault code is a two-digit number, as shown
in Table 2.1. The red FAIL light blinks the same
number of times as the first digit, a pause of ap-
proximately 3/4 of a second follows, then the
light blinks the same number of times as the sec-
ond digit.
5. Additional fault codes are blinked out at intervals
of approximately 3 seconds. After all of the fault
codes have been blinked out, a code 41 will be
blinked out.
Failure Display Mode/Fault Codes
NOTE: If the vehicle does not have ON/OFF
control on the DDU, press and hold the volume
knob after the ignition key is turned on and the
15-second self-test is complete.
1. Press and hold the DDU volume control and
power ON/OFF knob for at least 9 seconds. The
system will turn off if you release the knob before
9 seconds. After 9 seconds, the DDU FAIL light
begins to blink out the fault codes. After a
3-second interval additional fault codes, if
present, will be blinked out. A code 41 will be
Instruments and Controls Identification
2.24
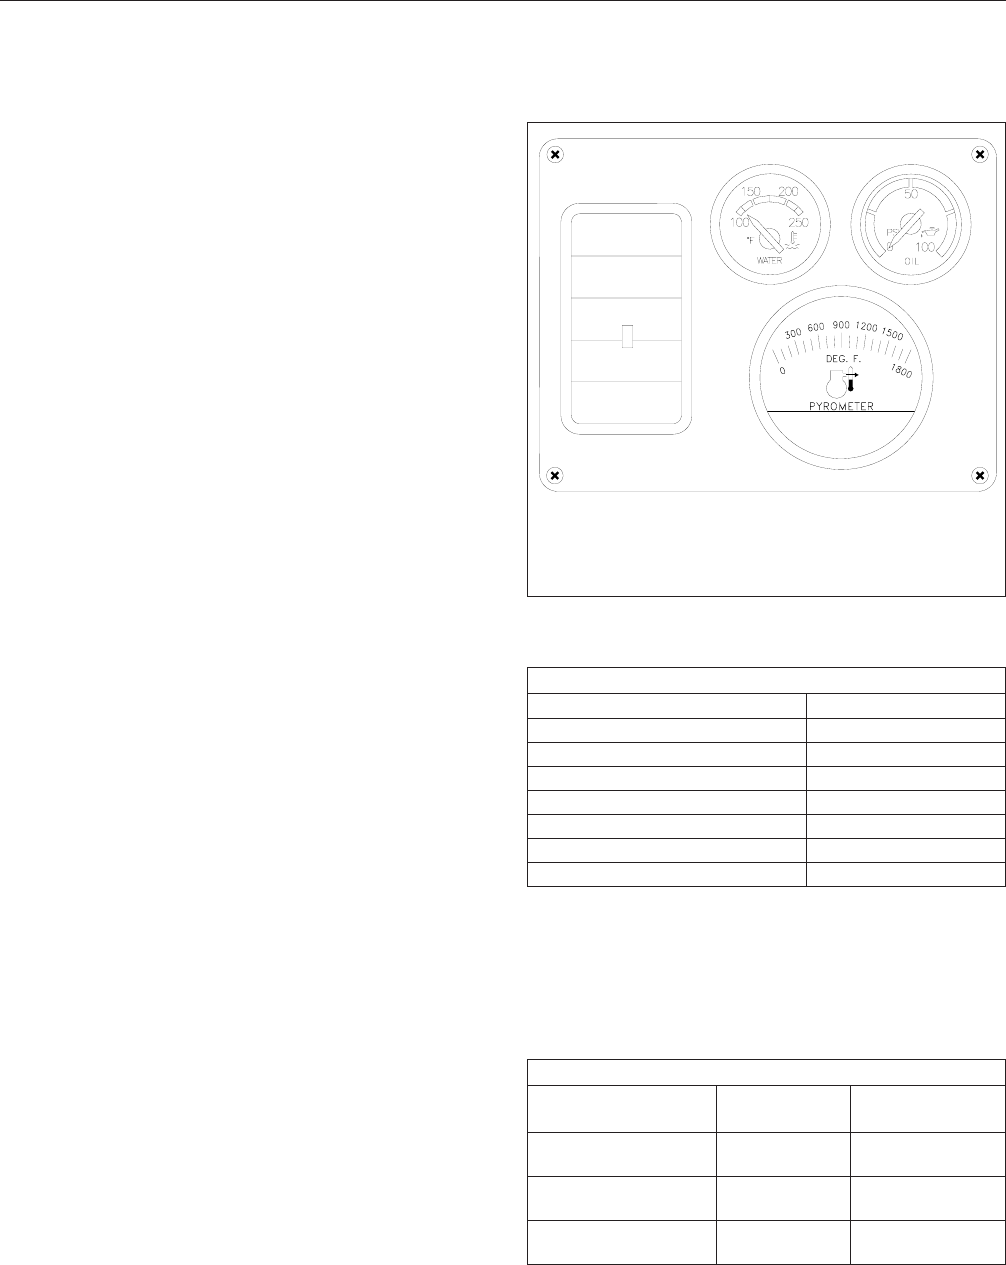
blinked out either if no faults are found or when
all fault codes have been blinked out.
2. Position the DDU range knob to the left to blink
active fault codes and to the right to blink inac-
tive codes.
3. To review, test, and clear all fault codes from
system memory, use a hand-held diagnostic tool
or ServiceRanger.
Instruments
Tachometer
A tachometer (Fig. 2.19) indicates engine speed in
revolutions per minute (rpm), and serves as a guide
for shifting the transmission and keeping the engine
in the appropriate rpm range. For low idle and rated
rpm, see the engine identification plate.
An optional tachometer is equipped with an engine
hour meter to record continuous operating hours of
the engine. In cases where actual mileage doesn’t
indicate overall usage, maintenance and lubrication
intervals for the engine and engine-operated equip-
ment can be determined by operating hours.
Speedometer
A speedometer (Fig. 2.19) registers speed in both
miles per hour (mph) and kilometers per hour (km/h).
Standard speedometer gauges are equipped with a
seven-digit odometer that records total distance trav-
eled.
An optional speedometer is equipped with a seven-
digit odometer, and a four-digit odometer that records
trip distance. The trip odometer can be reset to zero
by pressing a button near the lower edge of the
gauge face.
Water Temperature Gauge
During normal engine operation, the water tempera-
ture gauge (Fig. 2.26) should read 175 to 195°F (79
to 91°C). If the temperature remains below 160°F
(71°C) or exceeds the maximum temperature shown
in Table 2.2, inspect the cooling system to determine
the cause. See the
Heavy-Duty Trucks Service
Manual
for troubleshooting and repair procedures.
Maximum Water Temperature
Engine Model °F (°C)
Caterpillar C-10, C-12 216 (102)
Caterpillar C-15 225 (107)
Cummins L10 212 (100)
Cummins NTC 212 (100)
Cummins NTC-444 220 (104)
Cummins C Series 212 (100)
Detroit Diesel 210 (99)
Table 2.2, Maximum Water Temperature
Engine Oil Pressure Gauge
The oil pressure gauge (Fig. 2.26) should read as
shown in Table 2.3.
Oil Pressure*
Engine Model Idle Speed:
psi (kPa) Rated Speed:
psi (kPa)
Caterpillar C-10, C-12 10 (69) 43 to 53 (296 to
365)
Caterpillar C-15 23 (158) min. 61 to 71 (420 to
490) min.
Cummins L10 10 (69) min. 35 to 45 (241 to
310)
12
3
01/18/95 f600510a
1. Water Temperature Gauge
2. Oil Pressure Gauge
3. Pyrometer
Fig. 2.26, Water Temperature and Oil Pressure Gauges
and Pyrometer
Instruments and Controls Identification
2.25
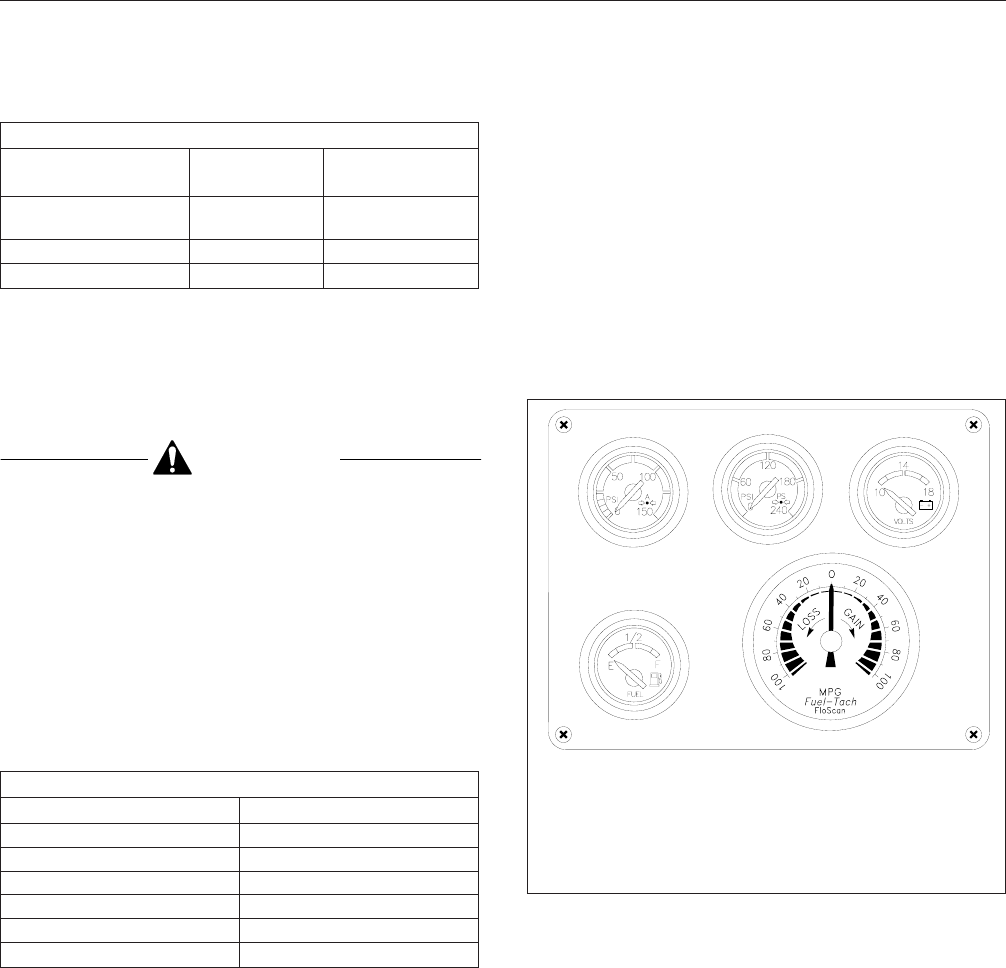
Oil Pressure*
Engine Model Idle Speed:
psi (kPa) Rated Speed:
psi (kPa)
Cummins NTC†10 (69) min. 35 to 45 (241 to
310)
Cummins C Series 10 (69) min. 30 (207)
Detroit Diesel 12 (83) 50 (345) min.
*Oil pressures are given with the engine at operating temperature. With
the engine cold, oil pressure may be higher.
†Individual engines may vary from the listed pressures; observe and
record pressures when the engine is new to serve as a guide for check-
ing engine condition.
Table 2.3, Oil Pressure
CAUTION
A sudden decrease or absence of engine oil
pressure may indicate mechanical failure. Bring
the vehicle to a safe stop, and investigate the
cause to prevent further damage. Do not operate
the engine until the cause has been determined
and corrected.
Pyrometer, Optional
A pyrometer (Fig. 2.26) registers the exhaust tem-
perature near the turbocharger. Normal exhaust tem-
peratures are listed in Table 2.4.
Normal Exhaust Temperature
Engine Model °F (°C)
Caterpillar C-10, C-12 935 to 1290 (500 to 700)
Caterpillar C-15 950 to 1050 (510 to 566)
Cummins L10 800 to 1000 (430 to 540)
Cummins NTC 750 to 950 (400 to 510)
Cummins C Series 1290 (700) max.
Detroit Diesel 700 to 950 (370 to 510)
Table 2.4, Normal Exhaust Temperature
Variations in engine load can cause exhaust tem-
peratures to vary. If the pyrometer reading shows
that exhaust temperature exceeds normal, throttle
less fuel to the engine until the exhaust temperature
is reduced. Shift to a lower gear if the engine is over-
loaded.
NOTE: A pyrometer is set to ambient tempera-
ture. When the engine is cold, the pyrometer
indicates the approximate outside temperature.
Do not attempt to adjust the pyrometer to zero
degrees.
Voltmeter
The voltmeter (Fig. 2.27) indicates the vehicle charg-
ing system voltage when the engine is running and
the battery voltage when the engine is stopped. By
monitoring the voltmeter, the driver can be aware of
potential charging system problems and have them
fixed before the batteries discharge enough to create
starting difficulties.
The voltmeter will normally show approximately 13.7
to 14.1 volts when the engine is running. The voltage
of a fully charged battery is 12.7 to 12.8 volts when
the engine is stopped. A completely discharged bat-
tery will produce only about 12.0 volts. The voltmeter
will indicate lower voltage as the vehicle is being
started or when electrical devices in the vehicle are
being used.
If the voltmeter shows an undercharged or over-
charged condition for an extended period, have the
charging system and batteries checked at a repair
facility.
On a vehicle equipped with a battery isolator system,
the voltmeter measures the average voltage of all of
123
45
01/18/95 f600511
1. Application Air Pressure Gauge
2. Dual System Air Pressure Gauge
3. Voltmeter
4. Fuel Gauge
5. FloScan Fuel-Tach
Fig. 2.27, Air Pressure, Fuel Gauges, and Voltmeter
Instruments and Controls Identification
2.26

the batteries when the engine is running. When the
engine is stopped, the voltmeter shows only the gel
cell battery voltage and does not indicate the voltage
of the engine-starting batteries.
Fuel-Tach Gauge, Optional
The FloScan Fuel-Tach (Fig. 2.27) is an electronic
monitoring system that records fuel consumption and
displays average miles per gallon. The Fuel-Tach
provides you with immediate feedback showing a
percentage difference between the current fuel con-
sumption rate and the total trip miles per gallon aver-
age.
The "0" point on the gauge means that the current
fuel consumption rate is the same as the miles per
gallon average of the total trip distance traveled.
Clockwise movement (into the green zone) of the
gauge needle shows the percentage improvement in
the current fuel consumption rate compared to the
miles per gallon trip average.
Counterclockwise movement (into the red zone) of
the gauge needle shows that the current fuel con-
sumption rate is higher than miles per gallon trip av-
erage. Needle movement into the red zone means
that the driver should shift the transmission or
change vehicle speed to increase fuel efficiency, as
driving conditions permit.
The Fuel-Tach system is operated by a toggle switch.
For switch operating instructions, see "Fuel-Tach
Switch" in this chapter.
The Fuel-Tach system installed in vehicles with elec-
tronic engines also displays fault codes correspond-
ing to any engine problems that might occur. When
the engine databus sends a fault code, it interrupts
the LED miles per gallon display for 60 seconds. An
"F" appears in the display together with the fault
code, for example "F37." If the engine sends a single
fault code, the display blinks on and off for 60 sec-
onds while displaying the code. It then goes back to
displaying the MPG. If the engine sends more than
one fault code, the display blinks each fault code on
and off three times and keeps repeating them for 60
seconds. It then goes back to reading MPG. To find
out the engine problem, look up the displayed num-
ber in your engine fault code list.
If you need to review the fault codes received, simply
press and release the "Reset" toggle switch to dis-
play the fault code history file. The display shows "h"
plus each fault code starting with the most recent, for
example, (h13, h27, h17). Each code blinks three
times before showing the next code. After showing all
of the codes, the display shows "- -" and then goes
back to displaying MPG. If there are no fault codes in
the history file, the display blinks "- -" four times and
goes back to showing MPG. The history file may be
viewed at any time.
If there are multiple active fault codes, they are sent
sequentially by the engine databus. The sequence
repeats as long as the faults are not corrected. Any
code appears in the history file only once even
though the sequence of codes is repeating. If you
view the history file several times in a short period of
time, the order of the codes may change depending
on which code of the repeating sequence was sent
most recently.
Engine Hour Meter, Optional
An engine hour meter records continuous operating
hours of the engine and is mounted in the control
panel. In cases where actual mileage does not indi-
cate overall usage, maintenance and lubrication in-
tervals for the engine and engine-operated equip-
ment can be determined by operating hours.
Application Air Pressure Gauge,
Optional
An application air pressure gauge (Fig. 2.27) regis-
ters the air pressure being used to apply the brakes
and should be used for reference only. The gauge
will not register air pressure until the foot brake pedal
is depressed or the trailer hand brake is applied.
Dual System Air Pressure Gauge
A dual system air pressure gauge (Fig. 2.27) regis-
ters the constant pressure in the primary and sec-
ondary air systems. Normal pressure, with the engine
running, is 100 to 120 psi (689 to 827 kPa) in both
systems. A low-air-pressure warning light and buzzer,
connected to both the primary and secondary sys-
tems, activates when air pressure in either system
drops below a minimum pressure of 64 to 76 psi
(441 to 524 kPa). When the engine is started, the
warning light and buzzer remain on until air pressure
in both systems exceeds minimum pressure.
Instruments and Controls Identification
2.27
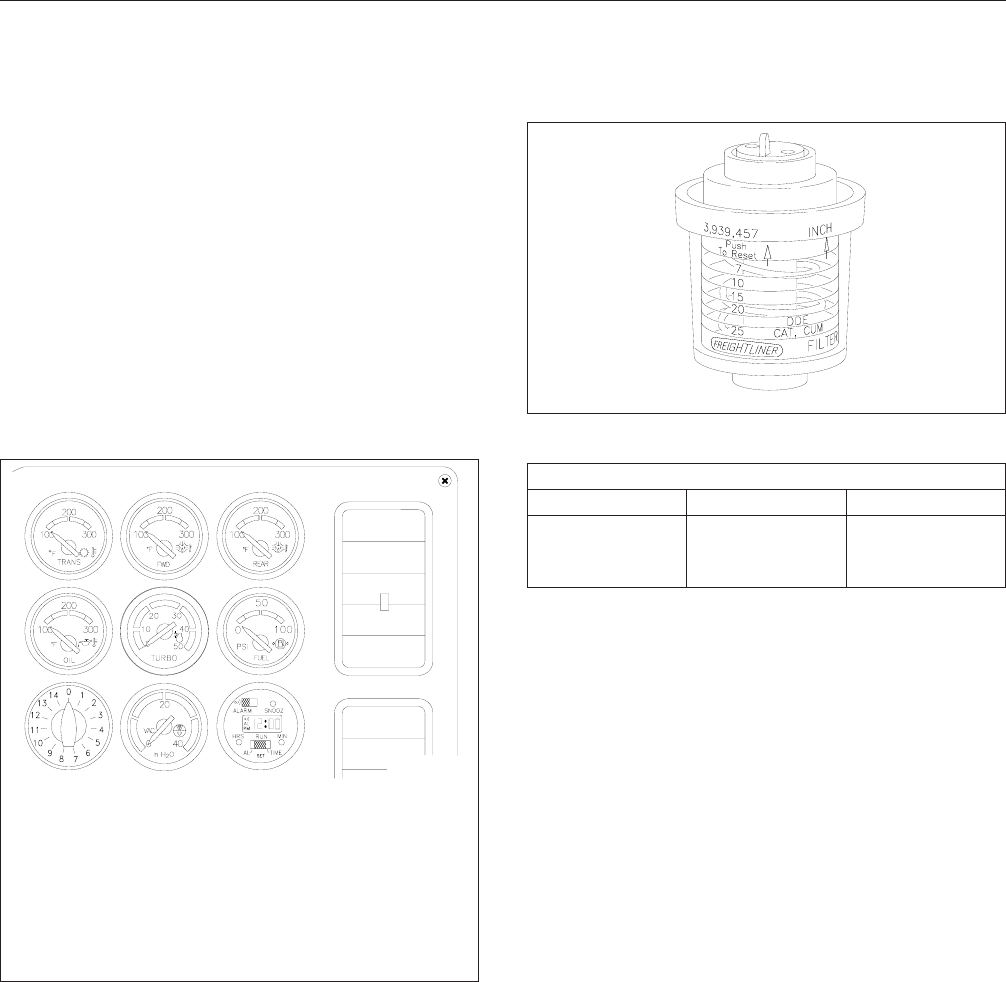
Fuel Gauge
The fuel gauge (Fig. 2.27) indicates the level of fuel
in the fuel tank(s). If equipped with a second (op-
tional) fuel gauge, each fuel tank level is indicated on
a separate gauge.
Intake-Air Restriction Gauge, Optional
An intake-air restriction gauge (Fig. 2.28) measures
the vacuum on the engine side of the air cleaner at
the air cleaner outlet. Vacuum is measured in inH
2
O
(inches of water). Service the air cleaner when the
vacuum reading equals the applicable level shown
under "Service" in Table 2.5.
Intake-Air Restriction Indicator
An intake-air restriction indicator (Fig. 2.29) mea-
sures the vacuum on the engine side of the air
cleaner at the air cleaner outlet. If the yellow signal
stays locked at or above the values shown in
Table 2.5, after the engine is shut down, service the
air cleaner. Then, press the yellow button to reset the
indicator.
Intake-Air Restriction
Engine Type*Initial inH
2
OService inH
2
O
Cummins 12 25
Detroit Diesel 12 20
Caterpillar 15 25
*Turbocharged engines must be checked at full load and governed en-
gine speed.
Table 2.5, Intake-Air Restriction
Fuel Pressure Gauge, Optional
A fuel pressure gauge (Fig. 2.28) registers output
pressure of the fuel pump. Whenever the engine is
operating, the fuel pressure reading should be con-
stant. If the fuel pressure drops, investigate the
cause and make the necessary repairs.
Ammeter, Optional
An ammeter measures current flowing to and from
the battery. When the batteries are charging, the
meter needle moves to the plus side of the gauge;
when the batteries are being discharged, the needle
moves to the minus side.
Engine Oil Temperature Gauge,
Optional
During normal operation, the engine oil temperature
gauge (Fig. 2.28) should read:
•180 to 225°F (82 to 107°C) for Cummins en-
gines;
•190 to 235°F (88 to 113°C) for Caterpillar en-
gines;
123
456
789
01/18/95 f600512a
1. Transmission Oil Temperature Gauge
2. Forward Differential Oil Temperature Gauge
3. Rear Differential Oil Temperature Gauge
4. Engine Oil Temperature Gauge
5. Turbocharger Boost Pressure Gauge
6. Fuel Pressure Gauge
7. Automatic Engine Idler/Timer
8. Intake-Air Restriction Gauge
9. Pana-Pacific Digital Clock
Fig. 2.28, Optional Gauges
01/18/95 f600148a
Fig. 2.29, Intake-Air Restriction Indicator
Instruments and Controls Identification
2.28
•200 to 230°F (93 to 110°C) for Detroit Diesel
engines.
Under heavy loads, such as when climbing steep
grades, temperatures which exceed the normal oil
temperature range for a short period are not unusual.
CAUTION
A sudden increase in engine oil temperature that
is not caused by a load increase may indicate
mechanical failure. Bring the vehicle to a safe
stop, and investigate the cause to prevent further
damage. Do not operate the engine until the
cause has been determined and corrected.
Transmission Oil Temperature Gauge,
Optional
During normal operation, the transmission oil tem-
perature gauge (Fig. 2.28) reading should not ex-
ceed 250°F (121°C) for Eaton-Fuller transmissions.
CAUTION
A sudden increase in transmission oil tempera-
ture that is not caused by a load increase may
indicate mechanical failure. Bring the vehicle to a
safe stop, and investigate the cause to prevent
further damage. Do not operate the vehicle until
the cause has been determined and corrected.
Forward and Rear Differential Oil
Temperature Gauges, Optional
During normal operation, forward and rear differential
oil temperature gauges (Fig. 2.28) should read be-
tween:
•160 to 220°F (71 to 104°C) for Meritor drive
axles;
•180 to 200°F (82 to 93°C) for Eaton drive
axles.
Under heavy loads, such as when climbing steep
grades, temperatures up to a maximum of 250°F
(121°C) are not unusual.
CAUTION
A sudden increase in differential oil temperature
that is not caused by a load increase may indi-
cate mechanical failure. Bring the vehicle to a
safe stop, and investigate the cause to prevent
further damage. Do not operate the vehicle until
the cause has been determined and corrected.
Turbocharger Boost Pressure Gauge,
Optional
A turbocharger boost gauge (Fig. 2.28) measures the
pressure in the intake manifold, in excess of atmos-
pheric pressure, being created by the turbocharger.
Pana-Pacific Digital Clock, Optional
A Pana-Pacific clock (Fig. 2.28) has black characters
on a constantly backlighted green display, with a
brightness that automatically adjusts for day or night.
The clock has a 24-hour alarm, with a 3-minute
snooze feature.
1. To set the time of day:
1.1 Push the Run/Set (lower) switch to the
right (TIME-SET position).
NOTE: When the hour setting is for a time
between noon and midnight, the small letters
"PM" will appear in the lower left corner of
the display; no "PM" indicates an A.M. set-
ting.
1.2 Advance the hour setting to the correct
number by pushing and releasing the hour
button as many times as needed. Or, if
the button is pressed and held in for
longer than two seconds, the numbers will
continue to advance until the button is re-
leased.
1.3 Advance the minute setting by repeatedly
pushing, or pushing and holding the
minute button, as needed.
1.4 Push the Run/Set switch to the middle
(RUN) position.
2. To set the alarm time:
2.1 Push the Run/Set switch to the left
(ALARM-SET position).
2.2 Set the alarm time by using the same pro-
cedure that you used to set the time of
day. Remember to set the hour for A.M.
(no letters in the corner of the display), or
P.M., as desired.
Instruments and Controls Identification
2.29
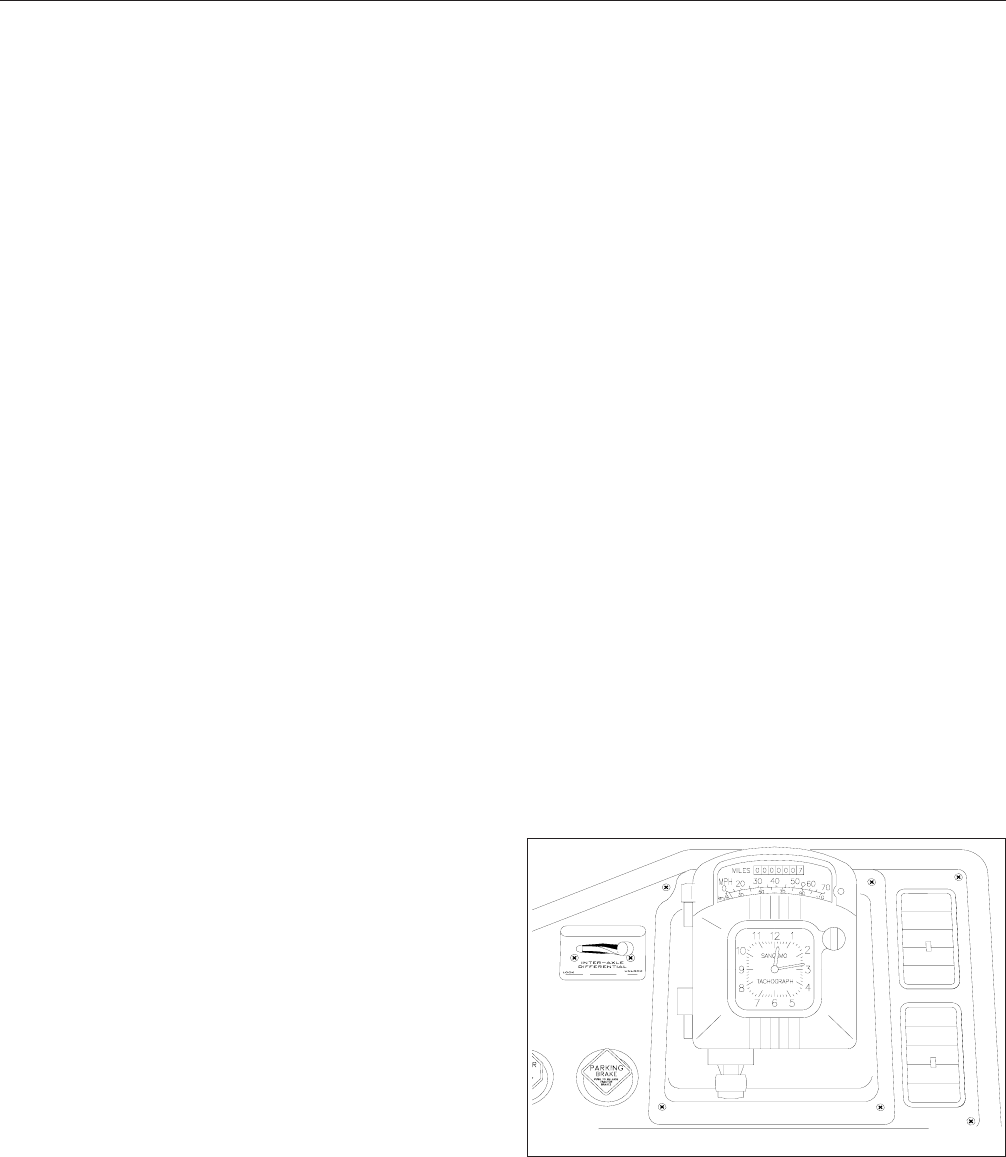
2.3 Return the Run/Set switch to the middle
(RUN) position. The readout will return to
the time-of-day setting.
3. To operate the alarm:
3.1 With the alarm time set, push the alarm
(upper) switch to the left. An alarm "wave"
symbol and the letters "AL" will appear in
the upper left corner of the display when
the alarm is on.
3.2 When the displayed time of day coincides
with the alarm time, the alarm will sound.
If the "snooz" button is not pushed or the
alarm switch is not moved, the alarm will
automatically stop sounding after 1
minute, and will not sound again for 24
hours.
3.3 If desired, press the "snooz" button while
the alarm is sounding, to shut the alarm
off for 3 minutes. The alarm symbol will
flash in the display when the button is
pushed, and will continue to flash until the
alarm switch is moved or the alarm has
sounded for 1 minute. The snooze proce-
dure can be done as many times as de-
sired.
3.4 Move the alarm switch to the right when
you wish to shut off or cancel the alarm;
the alarm symbol will disappear.
Kysor Digital Clock, Optional
A Kysor digital clock (Fig. 2.14) has a constant red
display, which automatically adjusts the brightness
for day or night. The clock features a 24-hour alarm.
1. To set the time of day:
1.1 Depress both of the time "Set" push but-
tons, labelled "Fast" and "Slow"; 12:00
A.M. will appear as the readout.
NOTE: A small illuminated red dot in the
upper left side of the clock (above "PM") in-
dicates P.M. No dot indicates A.M.
1.2 Advance to the correct time by pushing
either the "Fast" or "Slow" push button.
2. To set the alarm:
2.1 Depress the alarm "Set" push button. Ob-
serve that a red lamp above the word
"Alarm" illuminates.
2.2 Set the alarm time by using the same pro-
cedure that you used to set the time of
day. Remember to select either A.M. (no
red dot) or P.M. (red dot illuminates) when
setting the alarm time.
2.3 After the desired alarm time appears, de-
press the alarm "Set" push button again.
The readout will return to the time of day,
and the red lamp will go out.
2.4 To set the alarm, depress the alarm "On"
push button. Observe that a red dot on
the right side of the time-of-day readout is
illuminated. The alarm is now set, and
when the displayed time of day coincides
with the alarm time, the alarm will sound.
2.5 To cancel or shut off the alarm, depress
the alarm "On" push button again. The red
dot on the face of the clock will go out.
Tachograph, Optional
A Sangamo tachograph (Fig. 2.30) indicates and
records vehicle speed, time, and distance traveled. It
also records the length of time the engine is oper-
ated when the vehicle is stationary. A warning light
comes on whenever a preestablished speed limit is
exceeded.
01/18/95 f600151a
Fig. 2.30, Tachograph, Optional
Instruments and Controls Identification
2.30
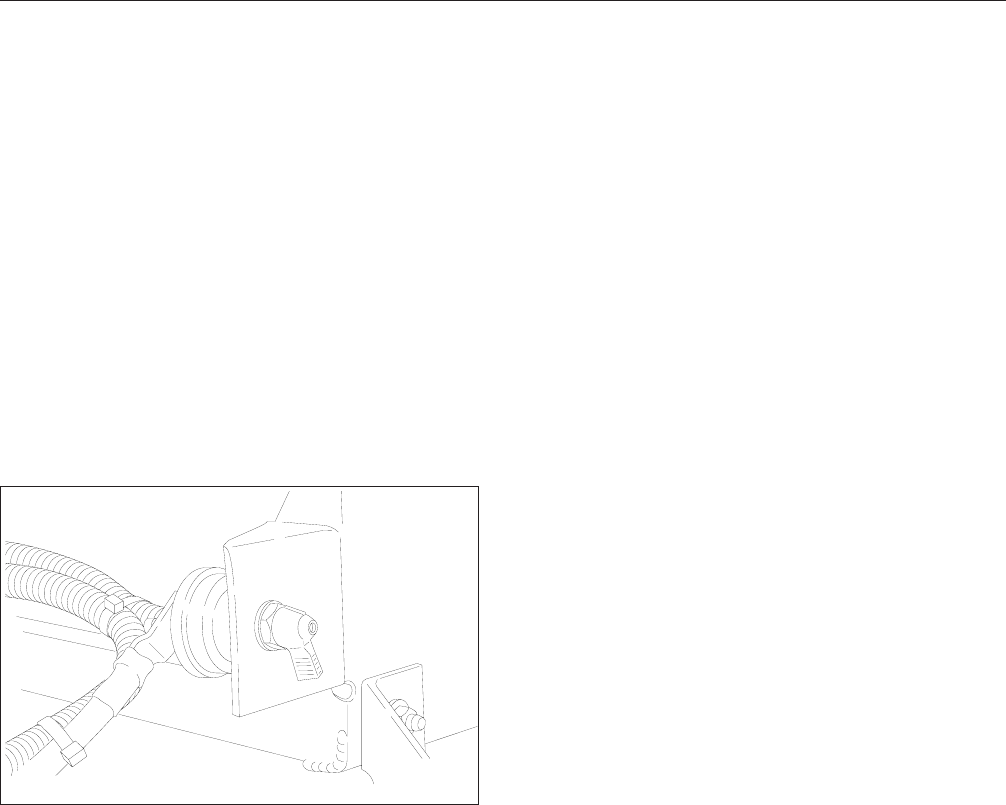
Exterior Switches
Battery Disconnect Switch, Optional
The switch is used whenever service operations re-
quire that the batteries be disconnected. It is also
used whenever the vehicle is placed out of service
for extended periods, to prevent battery discharge.
See Fig. 2.31.
IMPORTANT: The battery disconnect switch
does not completely isolate the batteries from
the electrical system. For service operations that
require that the batteries be disconnected, al-
ways shut down the engine and remove the
negative battery cables.
01/18/95 f600150a
Fig. 2.31, Battery Disconnect Switch
Instruments and Controls Identification
2.31

3
Vehicle Access
Ignition and Lock Key .............................................................. 3.1
Cab Door Locks and Handles ....................................................... 3.1
Grab Handles and Access Steps ..................................................... 3.1
Door Windows and Vent Windows ................................................... 3.2
Cab Door and Sleeper Compartment Vents ............................................ 3.3
Glove Box ...................................................................... 3.3
Circuit Breaker/Relay Panel ........................................................ 3.3
Cab-to-Sleeper Access ............................................................. 3.3
Upper Bunk Access, 70-Inch Raised Roof SleeperCab ................................... 3.4
Sleeper Compartment Exit Door ..................................................... 3.5
Baggage Compartment Doors ...................................................... 3.5
Back-of-Cab Grab Handles, Steps, and Deck Plate ...................................... 3.5
Battery Box Cover ................................................................ 3.6
Hood Tilting ..................................................................... 3.6
Windshield Washer Reservoir ....................................................... 3.7
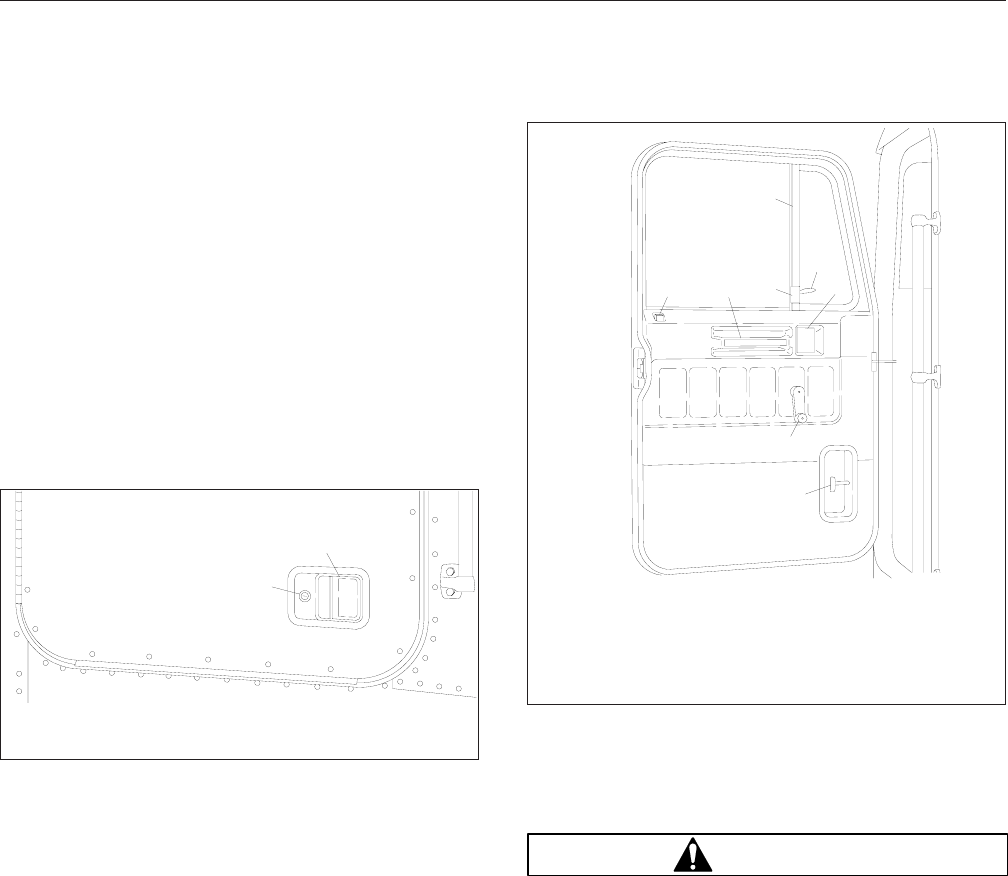
Ignition and Lock Key
One key operates the ignition switch and all of the
door locks for the cab, sleeper box, and glove box.
IMPORTANT: Each key is numbered. Record
the number so, if needed, a duplicate key can
be made.
Cab Door Locks and Handles
To unlock the driver’s door from outside the cab, in-
sert the key in the lockset and turn it one-quarter turn
clockwise. See Fig. 3.1. Turn the key counterclock-
wise to the original position to remove it. Pull out on
the paddle handle to open the door. See Fig. 3.1.
To unlock the passenger’s door from outside the cab,
insert the key in the lockset and turn it one-quarter
turn counterclockwise. Turn the key to the original
position to remove it.
NOTE: The cab door locks can be operated
when the doors are open.
To lock a door from outside the cab, insert the key in
the lockset and turn it opposite the unlocking direc-
tion, then close the door if it is open. Or, push down
the inside lock button (Fig. 3.2), then close the door.
To lock either door from inside the cab, push down
the lock button (Fig. 3.2), then close the door if it is
open. Pull the integral grab bar (Fig. 3.2) when clos-
ing the door.
To open the door from the inside, pull the door
handle toward you. See Fig. 3.2. This will unlatch the
door whether or not it is locked. To unlock the door
without unlatching it, pull the lock button up.
Grab Handles and Access
Steps
WARNING
Wet or dirty shoe soles greatly increase the
chance of slipping or falling. If your soles are wet
or dirty, be especially careful when climbing
onto, or down from, the back-of-cab area.
Always maintain three-point contact with the
back-of-cab access supports while entering and
exiting the back-of-cab area. Three-point contact
means both feet and one hand, or both hands
and one foot, on the grab handles, steps, and
deck plates. Other areas are not meant to sup-
port back-of-cab access, and grabbing or step-
ping in the wrong place could lead to a fall, and
personal injury.
1
2
01/18/95 f720055a
1. Lockset 1. Paddle Handle
Fig. 3.1, Exterior Door Handle
12
7
6
4
5
3
8
10/26/98 f720004b
1. Lock Button
2. Integral Grab Bar
3. Window Release
Lever Button
4. Slide Channel
5. Release Lever
6. Door Handle
7. Crank Handle
8. Cab Door Vent
Fig. 3.2, Door Interior
Vehicle Access
3.1
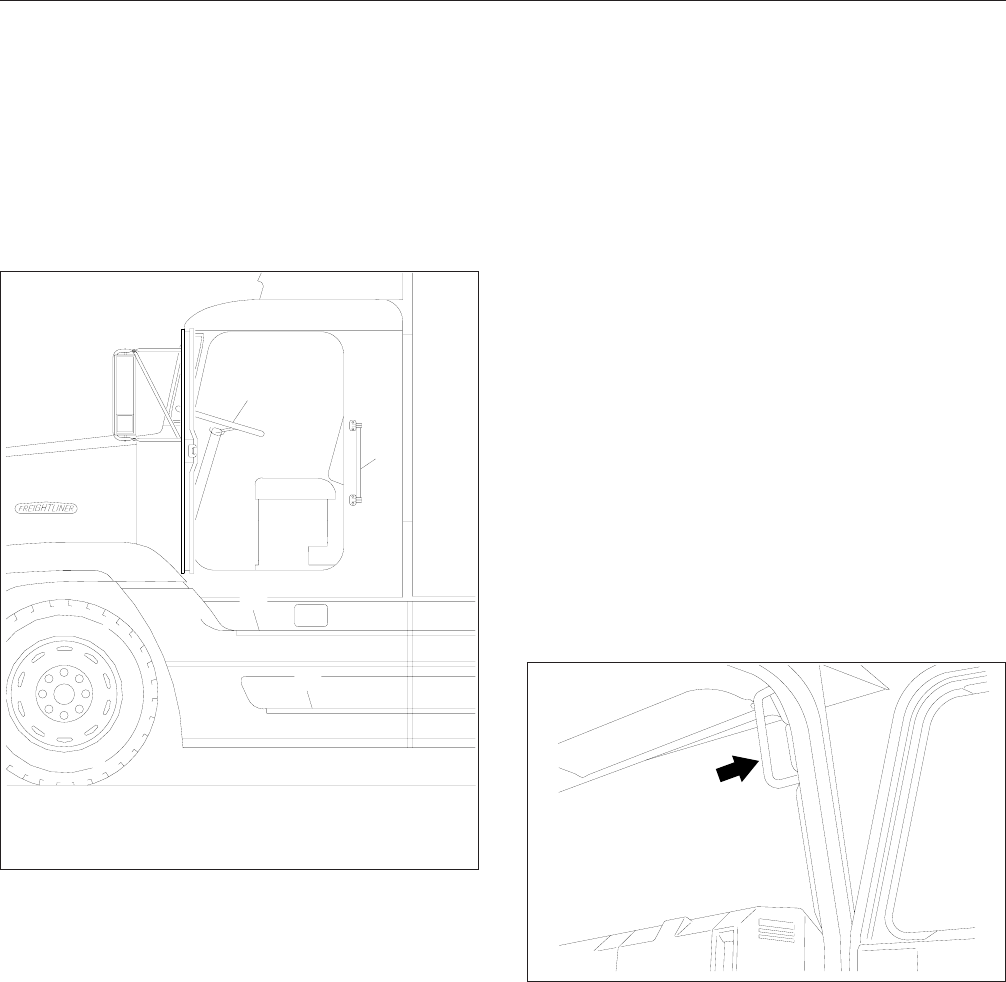
Be careful not to get hands or feet tangled in
hoses or other back-of-cab equipment. Careless-
ness could cause a person to trip and fall, with
possible injury.
Entering the Driver’s Side (See Fig. 3.3)
When entering the cab from the driver’s side, use the
grab handle and access steps as follows:
1. Open the driver’s door, and place anything that
you are carrying in the cab.
2. Grasp the grab handle with your right hand.
Reach up as far as is comfortable.
3. Place your right foot on the bottom step, and pull
yourself up.
4. Grasp the steering wheel with your left hand.
5. Place your left foot on the top step, and step up.
6. Step into the cab with your right foot first.
Exiting the Driver’s Side (See Fig. 3.3)
Exit the cab from the driver’s side as follows:
IMPORTANT: Do not attempt to exit the cab
while carrying any items in your hands.
1. Grasp the steering wheel with your left hand, and
stand on the threshold facing into the cab.
2. Place your left foot on the top step, then grasp
the grab handle with your right hand.
3. Move your right foot to the bottom step.
4. Step to the ground with your left foot.
Entering and Exiting the Passenger’s
Side
Enter and exit the cab from the passenger’s side,
using the same procedures given for entering and
exiting the driver’s side, but using opposite hands
and feet. Instead of the steering wheel, use the grab
handle inside the upper forward corner of the pas-
senger’s door opening. See Fig. 3.4.
Door Windows and Vent
Windows
To lower the driver’s side door window, turn the crank
handle clockwise. See Fig. 3.2. To lower the passen-
ger’s side, turn its handle counterclockwise. See
Chapter 2 for (optional) air window operating instruc-
tions.
1
2
3
4
01/18/95 f600066a
1. Steering Wheel
2. Grab Handle 3. Top Step
4. Bottom Step
Fig. 3.3, Driver’s Side Steps and Grab Handle
01/18/95 f720005a
Fig. 3.4, Grab Handle
Vehicle Access
3.2
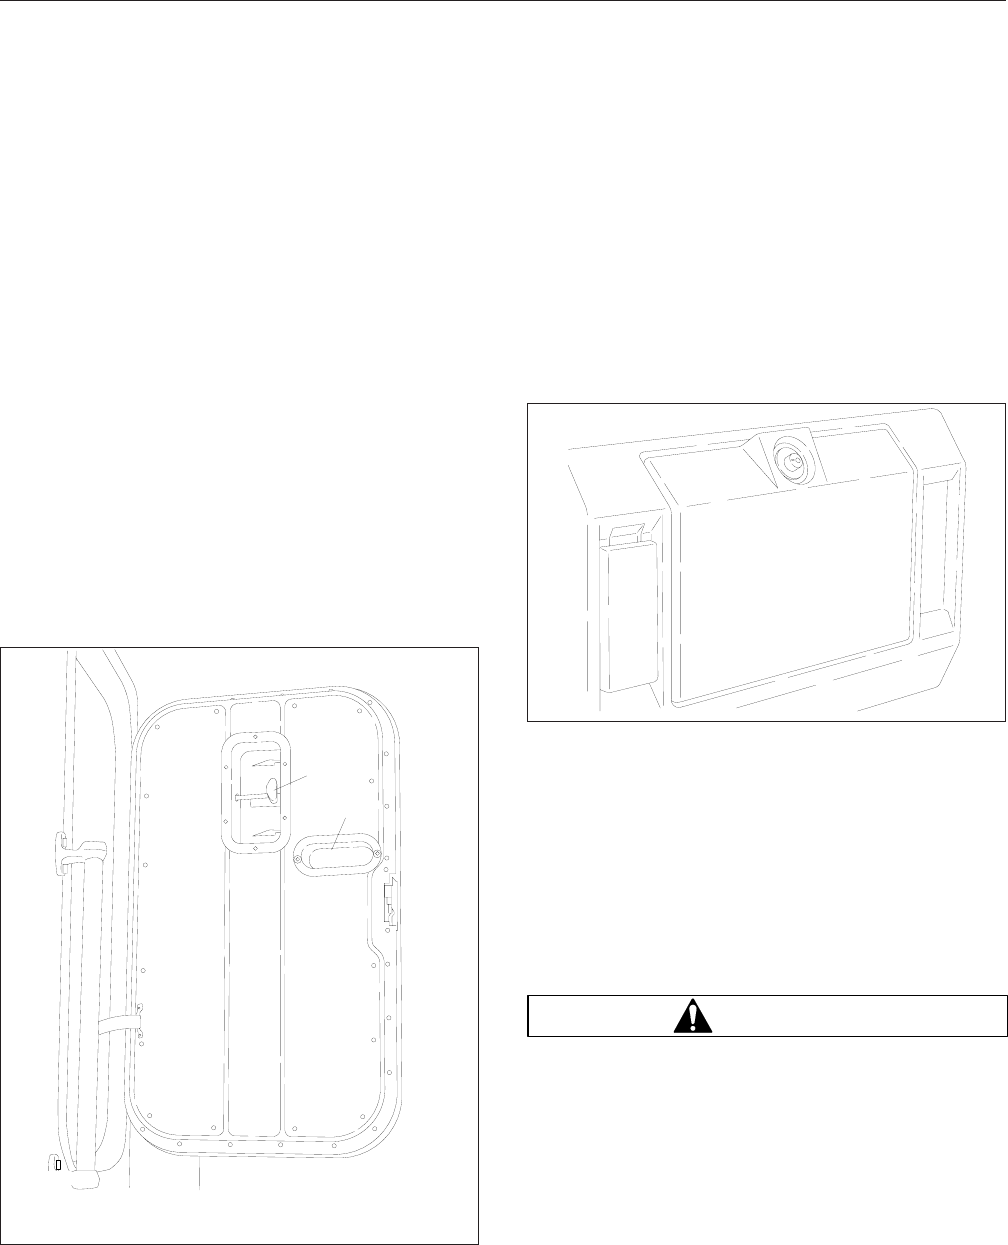
To open either vent window, push the vent window
release lever button while pivoting the top of the re-
lease lever 90 degrees forward. When the release
lever clears the slide channel, push outward on the
release lever.
When closing the vent window, hold the release lever
in the forward-pivoted position, and pull it inward.
When the outer edge of the lever clears the slide
channel, pivot the top of the lever 90 degrees rear-
ward. The button will automatically pop out to lock
the vent window.
Cab Door and Sleeper
Compartment Vents
To open any cab door vent (Fig. 3.2) or sleeper com-
partment vent (Fig. 3.5), push the vent handle out-
ward and forward with your fingertips. To close the
vent, turn your hand so that your fingers are pulling
on the handle from the front edge, then pull in and
back on the handle. Use care to avoid pinching your
fingers.
Glove Box
The glove box (Fig. 3.6) is located on the passen-
ger’s side of the dash. To lock the glove box, insert
the ignition key in the lockset, with the key teeth
pointing to the left, then, without pushing in on the
lockset, turn the key counterclockwise to vertical. Do
not turn the key clockwise to the original position to
remove it. To unlock the glove box, insert the key,
and turn it clockwise to horizontal. To open the glove
box door, push the door latch button (lockset) at the
top center of the door.
Circuit Breaker/Relay Panel
The circuit breaker/relay panel (see Fig. 3.7 and
Fig. 3.8) is located behind the dash skirt on the front
wall of the cab. To gain access to the relay panel,
turn the three access panel fasteners one-quarter
turn, then remove the access panel.
Cab-to-Sleeper Access
WARNING
Place rigid or heavy objects in storage areas on
the floor or under the bunk. Sudden stops or
swerves could cause personal injury if items fall
from overhead storage shelves.
To open the sleeper access on vehicles with vinyl
sleeper curtains, unzip the sleeper curtains. If de-
sired, unsnap the curtains all the way around the
sides and top, and remove the curtains.
1
2
01/18/95 f720059a
1. Sleeper Compartment Vent
2. Handle-Access Cutout
Fig. 3.5, Sleeper Compartment Exit Door
01/18/95 f600152a
Fig. 3.6, Glove Box
Vehicle Access
3.3
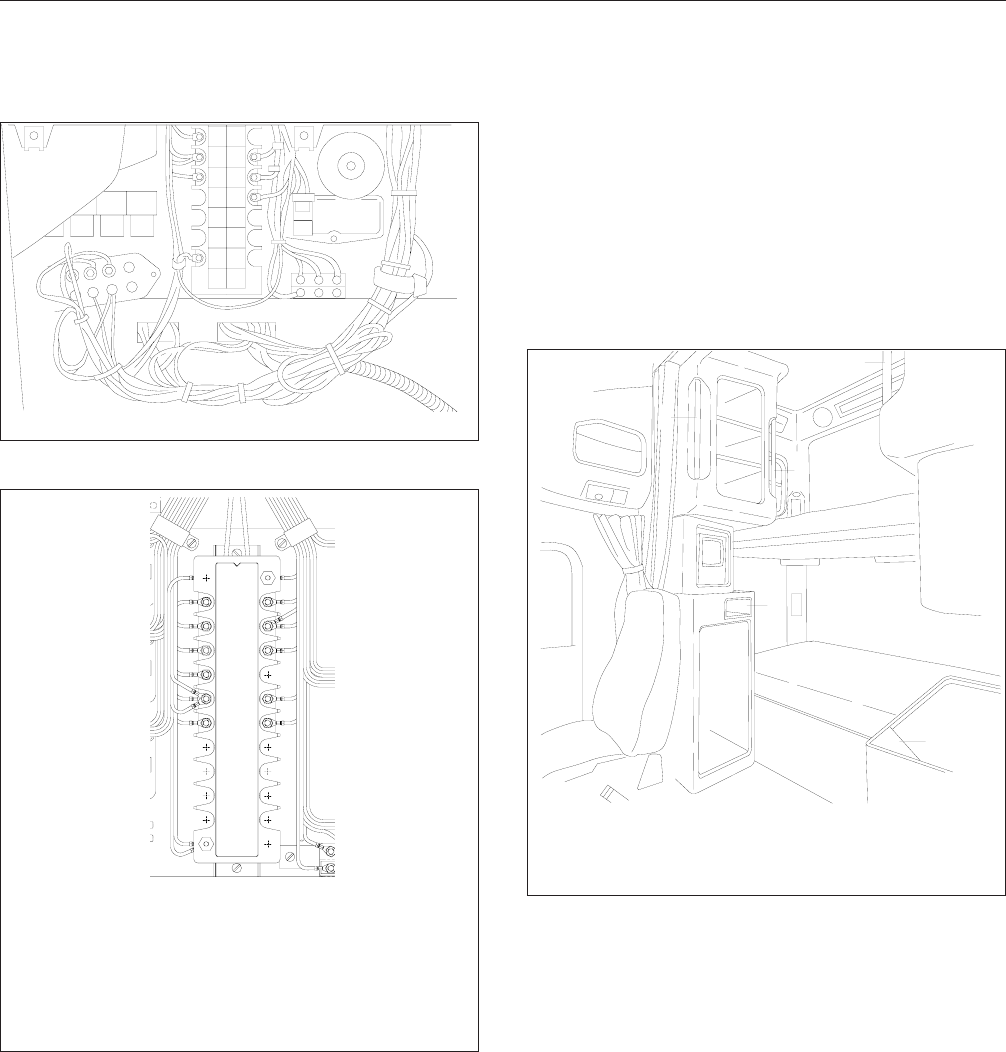
To open the sleeper access on vehicles with velour
sleeper curtains, unfasten the snaps at one side,
then push the curtain to the opposite side.
Upper Bunk Access, 70-Inch
Raised Roof SleeperCab
Grab handles are designed into the upper cabinets
on each side of the 70-inch raised roof SleeperCab.
See Fig. 3.9. There is a step built into the front of
the passenger’s side lower cabinet. Also, a slip-
resistant step pad is located on the top right corner
of the driver’s side lower cabinet.
IMPORTANT: Make sure the upper bunk is
folded down and locked into place before at-
tempting to access the upper bunk.
Accessing the Upper Bunk Using the
Passenger’s Side Cabinets
1. Grasp the passenger’s side upper cabinet grab
handles, one in each hand. Reach up as far as
is comfortable.
2. Place your left foot in the step built into the pas-
senger’s side lower cabinet, and pull yourself up
to a standing position.
01/04/96 f540041a
Fig. 3.7, Circuit Breaker/Relay Panel
02/26/99 f542803
02/26/99
1
2
3
4
5
6
7
8
9
10
11
12
13
14
1. Trailer Marker Lights
2. Left Headlight/DRLs
3. Turn Signal Flasher
4. Voltmeter
5. Ignition Switch
6. Horn/Cigarette Lighter
7. Brake Lights
8. Dome Lights
9. Trailer Tail Lights
10. Right Headlight
11. HVAC
12. Tractor Marker Lights/
Tail Lights
13. A/C Clutch
14. Panel Lights
Fig. 3.8, Circuit Breaker Layout (detail)
04/18/95 f600917
1
1
4
2
3
1. Passenger’s Side Grab Handle
2. Lower Cabinet Step
3. Lower Cabinet Step Pad
4. Driver’s Side Grab Handle
Fig. 3.9, Upper Bunk Access
Vehicle Access
3.4
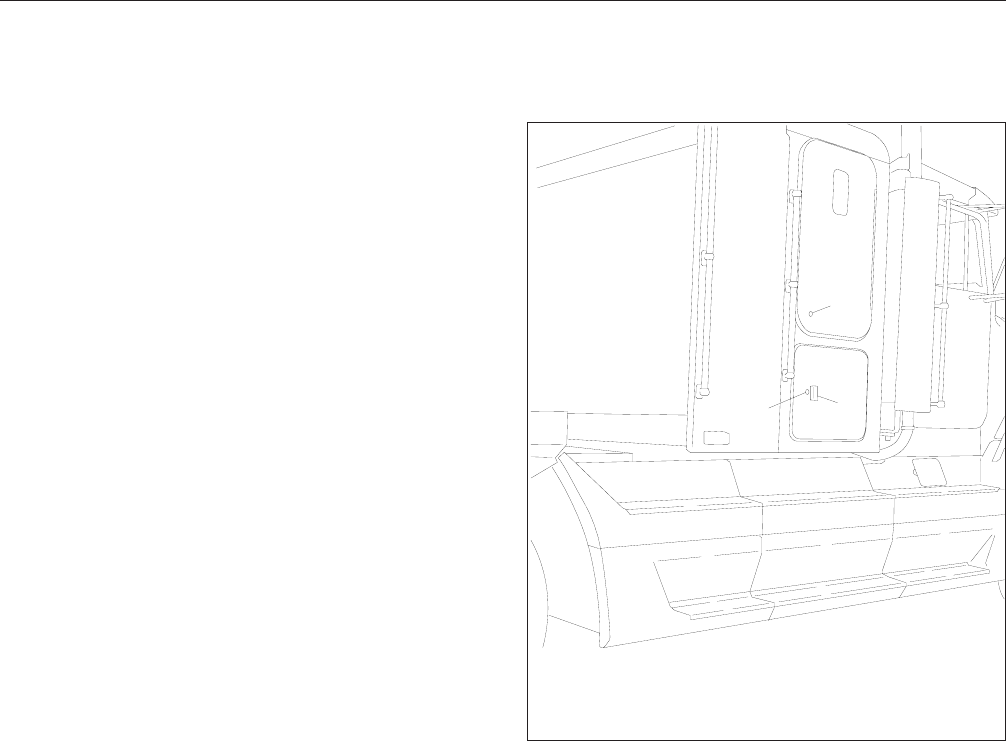
3. Swing your right hip over the bunk and use the
grab handles and your left foot to push yourself
backwards onto the bunk.
Accessing the Upper Bunk Using the
Driver’s Side Cabinets
1. Grasp the driver’s side upper cabinet grab
handles, one in each hand. Reach up as far as
is comfortable.
2. Place your right foot on the slip-resistant step
pad on top of the driver’s side lower cabinet, and
pull yourself up to a standing position on top of
the lower cabinet.
3. Swing your left hip over the bunk and use the
grab handles and your right foot to push yourself
backwards onto the bunk.
Sleeper Compartment Exit
Door
The sleeper compartment exit door is intended for
use as an emergency exit only.
To open the door from the inside, push down on the
lever handle at the bottom of the handle-access cut-
out. See Fig. 3.5. To open the door from the outside,
insert the ignition key in the lockset (Fig. 3.10) and
turn it one-quarter turn clockwise. Turn the key to the
original position to remove it. To close and lock the
door, push it closed until it latches.
Baggage Compartment Doors
To open the baggage compartment door on the pas-
senger’s side, insert the ignition key in the lockset,
and turn it one-quarter turn clockwise. See Fig. 3.10.
Hold the key in this position while pulling outward on
the baggage compartment door handle. Turn the key
to the original position to remove it. To close and lock
the door, push it closed until it latches.
Use the same procedure to open the baggage com-
partment door on the driver’s side, but turn the key
counterclockwise.
If the key is difficult to turn, push inward on the door
handle while turning the key.
Back-of-Cab Grab Handles,
Steps, and Deck Plate
A grab handle and steps facilitate safe climbing up or
down.
Accessing Back-of-Cab Area
When climbing onto the deck plate, use the grab
handle and access steps (see Fig. 3.14) as follows:
1. Facing the center of the deck plate, grasp the
grab handle with both hands. Reach up as far as
is comfortable.
2. Place one foot on the bottom step, and pull your-
self up.
3. Place your other foot on the top step.
4. Move your lower hand to a higher position on the
grab handle.
1
23
01/18/95 f720006a
1. Sleeper Compartment Exit Door Lockset
2. Baggage Compartment Door Lockset
3. Baggage Compartment Door Handle
Fig. 3.10, Sleeper Compartment Exit and Baggage
Compartment Doors
Vehicle Access
3.5
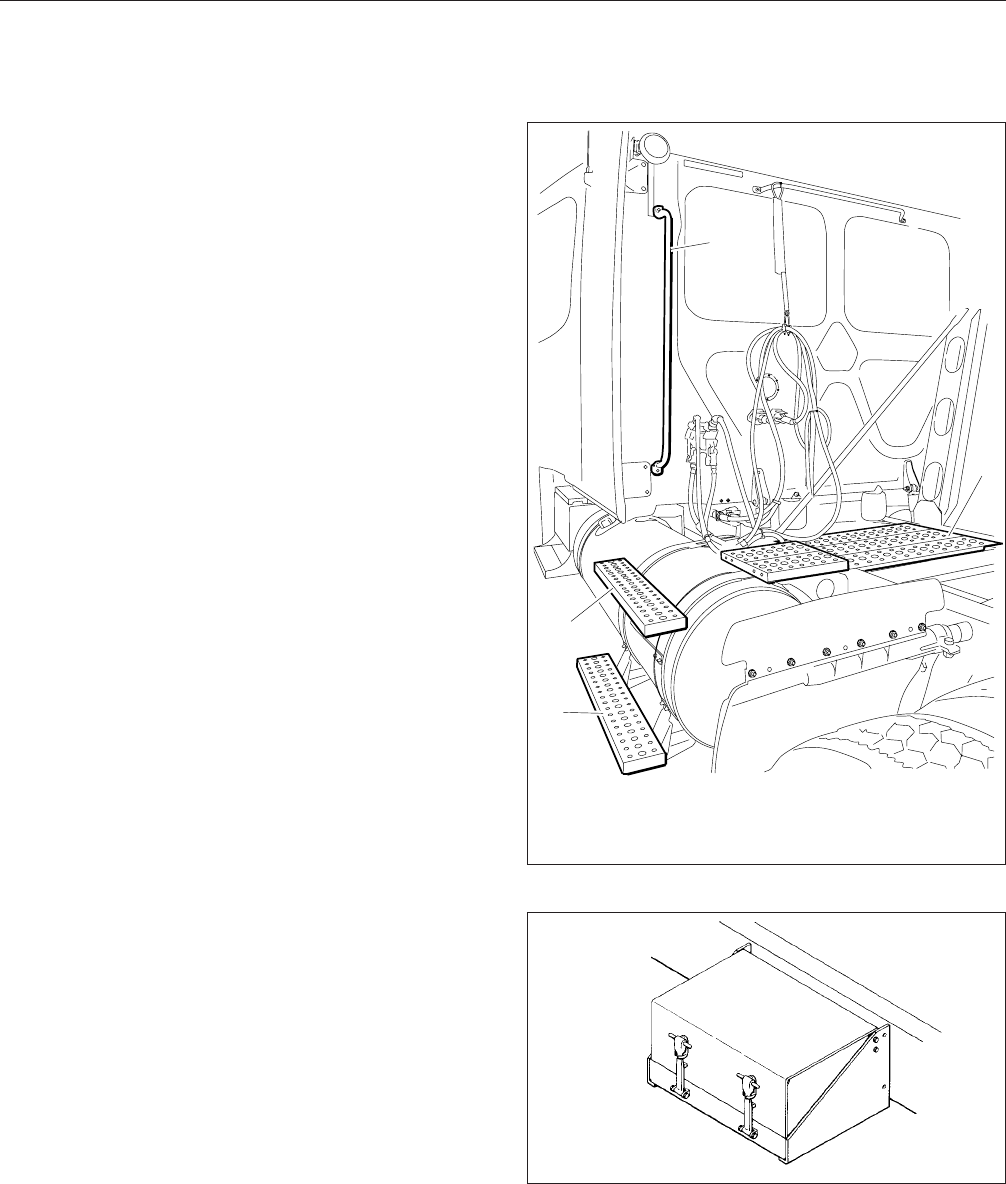
5. Step onto the deck plate.
Exiting the Back-of-Cab Area
When climbing down from the deck plate, use the
grab handle and access steps as follows:
1. Facing the center of the deck plate, grasp the
grab handle with both hands.
2. Step one foot at a time to the top step.
3. Move your upper hand to a lower position on the
grab handle.
4. Move one foot to the bottom step.
5. Move your upper hand to a lower position on the
grab handle.
6. Step to the ground with your upper foot first.
Battery Box Cover
To remove the battery box cover, pull on the end of
each holddown latch until the end clears the cover-
mounted catch. See Fig. 3.12. Pivot the latches out
of the way, then lift off the cover. When installing the
cover, be sure it is positioned properly before fasten-
ing the latches.
Hood Tilting
The hood can be tilted to a full-open position. A grab
handle at the front of the hood provides a hand-hold
for hood tilting. See Fig. 3.13. Tilt-assist springs
(FLD 120 Conventionals) or a torsion bar (FLD 112
Conventionals), help you to tilt the hood open, and to
return it to the operating position. Stop cables (FLD
120 Conventionals), or hood straps (FLD 112 Con-
ventionals), prevent the hood from overtravel. In the
operating position, the hood is secured to the lower
cab side panels by a hold-down latch on each side of
the hood.
To Tilt the Hood
1. Apply the parking brakes.
2. Release both hood hold-down latches by pulling
the end outward.
09/24/2007 f602335
2
1
1
3
1. Steps
2. Grab Handle
3. Deck Plate
Fig. 3.11, Back-of-Cab Access
01/18/95 f540036a
Fig. 3.12, Battery Box Cover
Vehicle Access
3.6
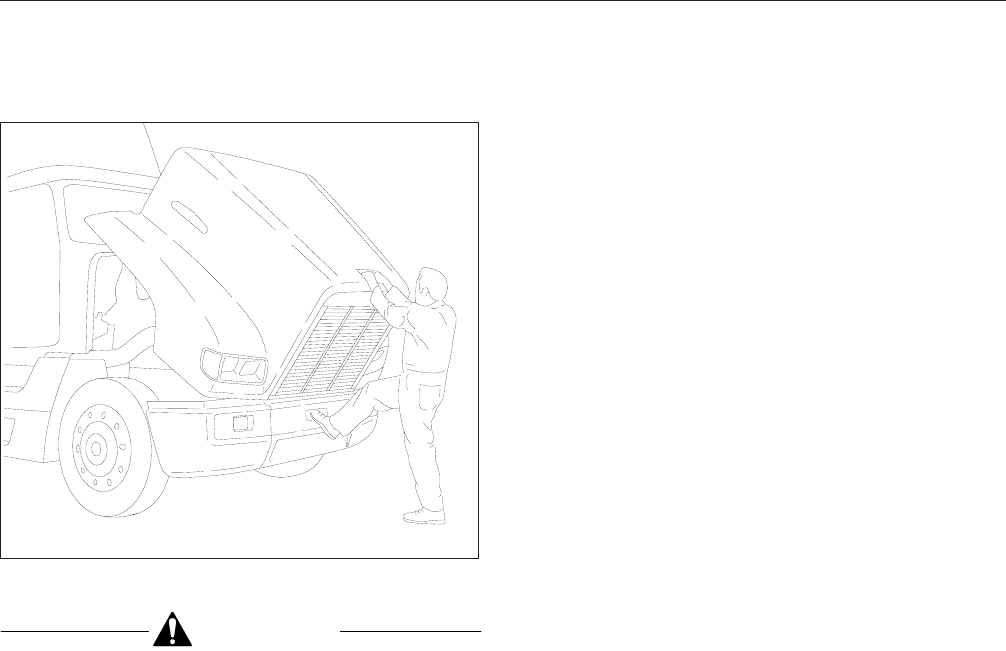
CAUTION
Do not let the hood free-fall to the full-open posi-
tion. To do so could cause damage to the hood
or hood straps.
3. Using the bumper step and grab handle, slowly
tilt the hood until the stop cables or straps sup-
port it.
To Return the Hood
1. Grasp the grab handle, and lift the hood to the
45-degree position.
2. As the hood goes over center, use the bumper
step and grab handle to control the rate of de-
scent to the operating position.
3. Make sure the hood is flush with the cowl, then
secure the hood by engaging both hood hold-
down latches.
IMPORTANT: Make sure that both hold-down
latches are fully engaged before operating the
vehicle.
Windshield Washer Reservoir
The windshield washer reservoir is located inside the
left-side baggage compartment. See Fig. 3.14.
01/18/95 f880023a
Fig. 3.13, Hood Tilting
Vehicle Access
3.7

4
Heater and Air Conditioner
HVAC General Information .......................................................... 4.1
Defogging and Defrosting Using Fresh Air ............................................. 4.1
Heating ......................................................................... 4.2
Air Conditioning .................................................................. 4.3
Fresh Air ....................................................................... 4.4
Heating, Sleeper Heater and Air Conditioner ........................................... 4.4
Air Conditioning, Sleeper Heater and Air Conditioner ..................................... 4.5
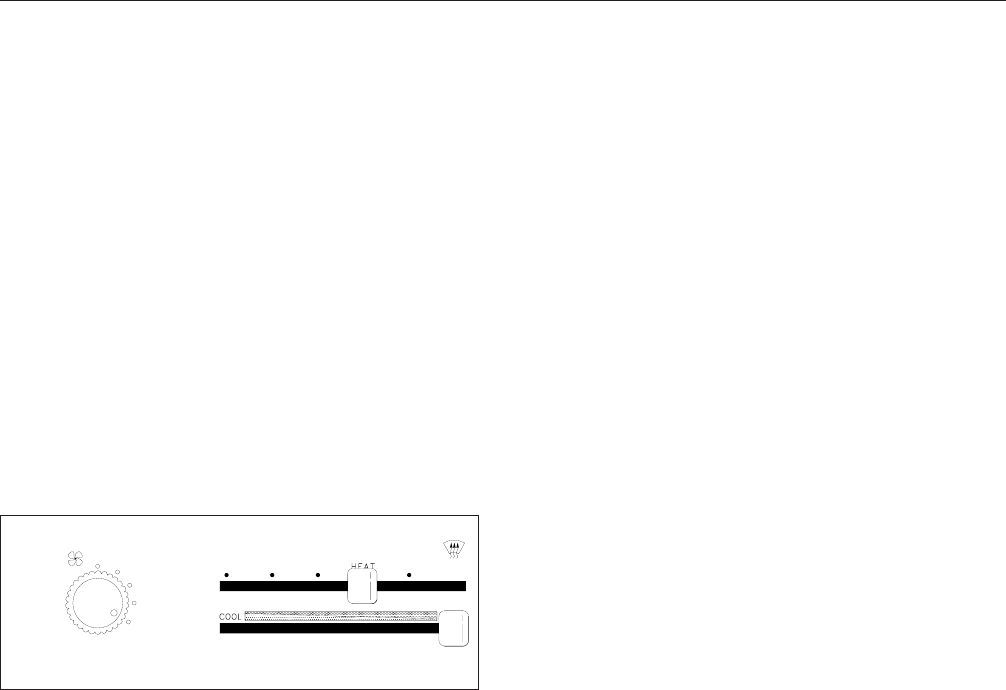
HVAC General Information
A dash-mounted climate control panel (Fig. 4.1) al-
lows you to control all of the heating, air conditioning,
defrosting, and ventilating functions.
A four-speed fan forces fresh or recirculated air to
any selected air outlets at the windshield, door win-
dows, dashboard face, and cab floor. See Fig. 4.2.
All of the dash-face outlets have adjustable louvers
that pivot right and left, and up and down. The out-
lets can be closed by moving the louvers all the way
down. Windshield defrost outlets and the passenger’s
door window defrost outlet have nonadjustable lou-
vers. The bunk outlet (on the right-hand wall of the
bunk) has two sets of vertical louvers that operate
like the horizontal dash-face louvers.
An auxiliary heater and air conditioner unit is stan-
dard when there is a sleeper compartment. The unit
is installed in the sleeper baggage compartment and
uses the cab’s refrigerant system for air conditioner
operation. The unit is equipped with a separate
evaporator coil, expansion valve, and fan. It is also
equipped with its own heater core and water valve,
independent of the cab heater. On vehicles with a
60-inch sleeper the auxiliary unit’s climate control
panel (Fig. 4.3 or Fig. 4.4) is located in the shelf
area; with a 40-inch sleeper it is mounted on the left
front wall. On vehicles with a 48-inch or 70-inch
SleeperCab, the control panel is mounted on the left
rear wall or the rear overhead storage compartment.
NOTE: Shutting off the heater supply gate valve
(if equipped) on the engine limits the ability to
control air conditioning temperature in the cab
and in the sleeper. With the valve shut off, warm
coolant is no longer available from the engine,
and the outlet air temperature controls can’t be
used to change air temperature.
A FRESH/RECIRC push button (Fig. 4.5) is standard
equipment when there is no air conditioning. This
control is an option when air conditioning is ordered.
It allows the AC, VENT, and HEAT modes to be used
with either fresh or recirculated air. When the mode
control (upper lever) is at HEAT/DEF or DEF, the
system draws in fresh air, regardless of the FRESH/
RECIRC push button setting. When the mode control
is at MAX A/C, the system draws
only
recirculated
air, regardless of the FRESH/RECIRC push button
setting. When the mode control is at A/C and the
FRESH/RECIRC control is set for recirculation (push
button in), the system functions the same as when
the mode control is at MAX A/C. To prevent the
buildup of fumes or odors inside the cab (for ex-
ample, from smoking),
do not
operate the heater and
air conditioning system in a recirculation mode for
more than 20 minutes.
Defogging and Defrosting
Using Fresh Air
1. Set the mode control (upper lever) to HEAT, the
fan switch to OFF and, if so equipped, the bunk
fan switch to OFF before starting the engine.
See Fig. 4.6.
2. Remove any ice or snow from the outside of the
windshield, door windows, and fresh air inlet
grille.
3. With the engine at operating temperature, slide
the temperature control (lower lever) to WARM.
4. Move the mode control to DEF. In this position
the system is engaged to dehumidify the air be-
fore heating it, unless the temperature at the
evaporator coil is less than 32°F (0°C). Warm,
dry air is directed to the windshield.
IMPORTANT: If equipped with a FRESH/
RECIRC push button, the system draws in fresh
air when the mode control (upper lever) is at
HEAT/DEF or DEF, regardless of the FRESH/
RECIRC push button setting.
NOTE: At DEF, airflow is directed to the wind-
shield outlets and the extreme left and right
dash-face outlets. To defrost the driver’s door
window, turn the extreme left dash-face outlet to
direct airflow to the upper left. In all positions of
the mode control, airflow is directed to the pas-
senger’s door window.
1
OFF
2
3
4
A/C HEAT/DEFMAX A/C VENT DEF
02/03/95 f830069a
Fig. 4.1, Climate Control Panel
Heater and Air Conditioner
4.1
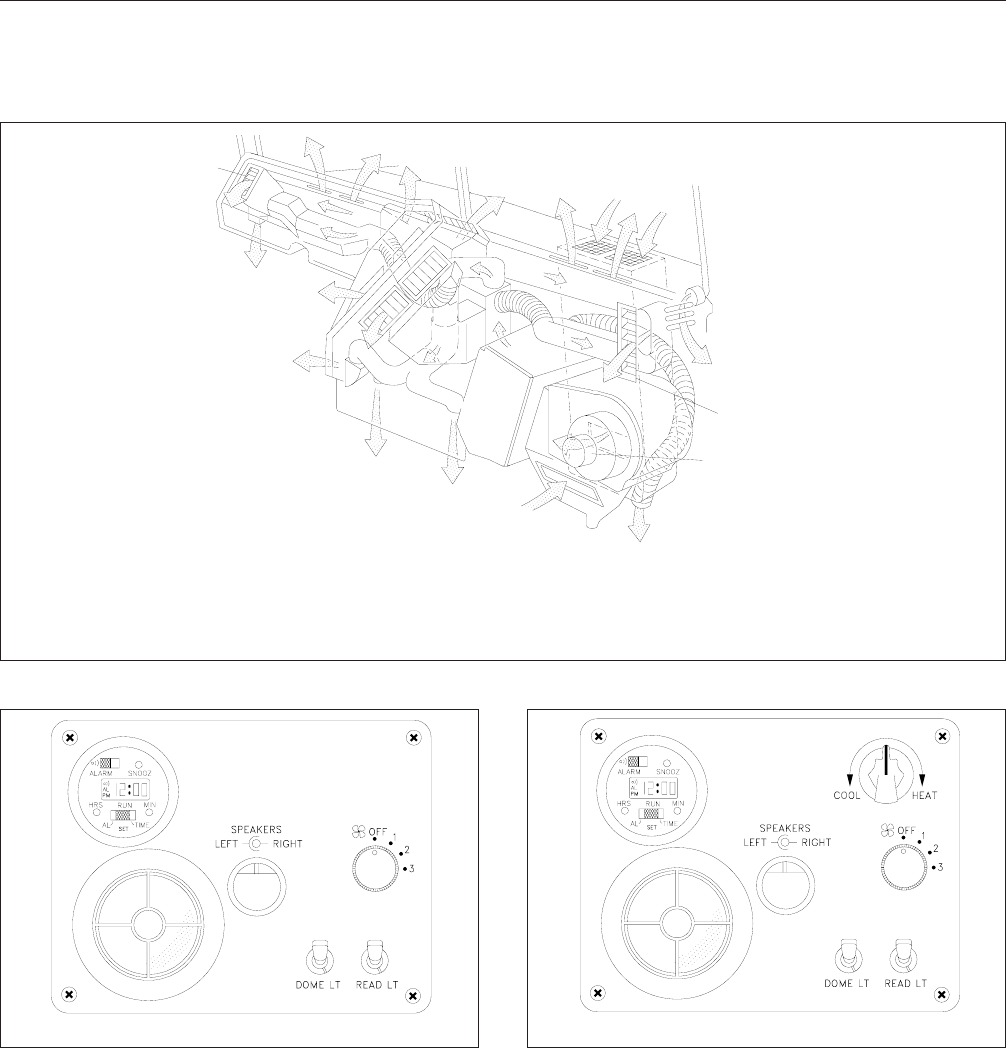
Heating
1. With the engine at operating temperature, set the
mode control to HEAT. See Fig. 4.7.
2. Slide the temperature control to WARM.
3. Turn on the fan switch to the desired speed.
IMPORTANT: If the windows start to fog, move
the mode control to HEAT/DEF or DEF, and
make sure the fan is on. To defog the driver’s
door window, turn the extreme left dash-face
outlet to direct airflow to the upper left. In all
12
23
4
5
6
7
8
7
9
7
02/09/95 f830350b
1. Dash Face Outlet (driver’s door window defrost outlet)
2. Windshield Defrost Outlet
3. Fresh Air Inlet
4. Passenger’s Door Window Defrost Outlet
5. Dash Face Outlet
6. Blower Motor
7. Floor Outlet
8. Recirculated Air Inlet
9. Dash Face Outlet
Fig. 4.2, Air Outlet and Inlet System
02/03/95 f600514a
Fig. 4.3, Control Panel for a Manual Temperature
Control Cable System
02/03/95 f600515a
Fig. 4.4, Control Panel for Automatic Temperature
Control System
Heater and Air Conditioner
4.2
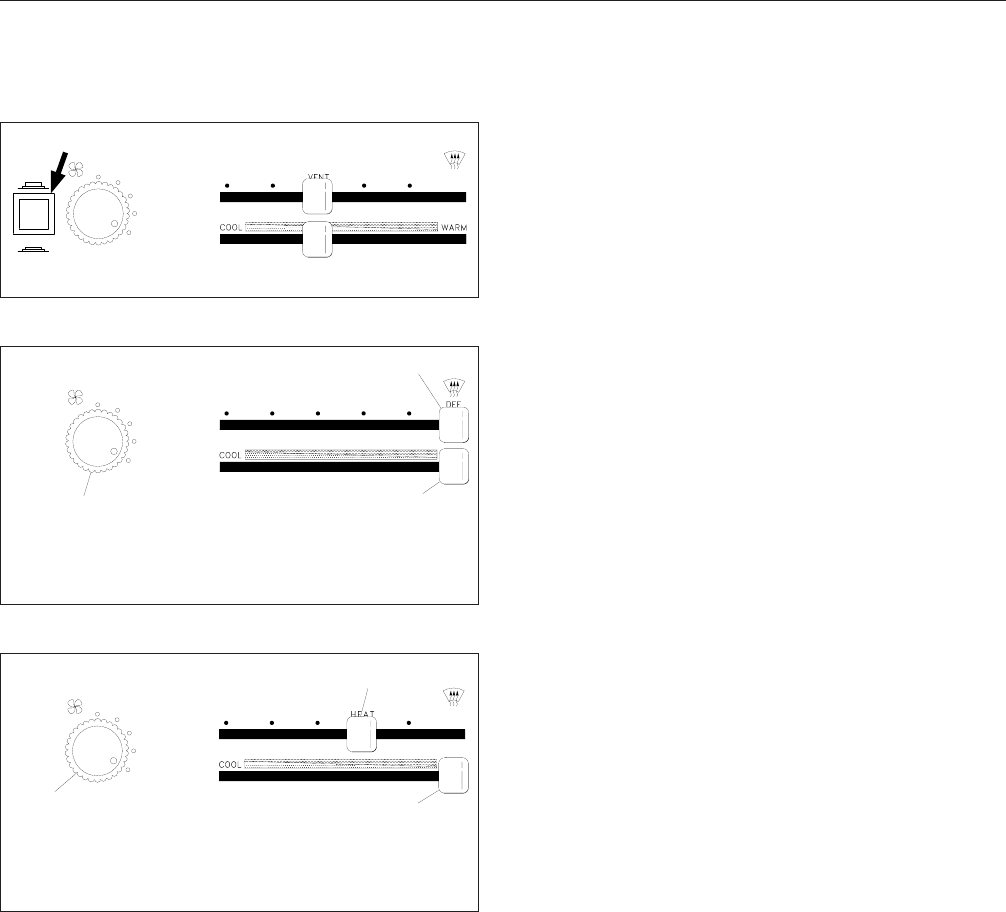
positions of the mode control, airflow is directed
to the passenger’s door window.
NOTE: In mild weather the fan switch can be
kept off, since forward motion of the vehicle will
provide airflow through the heater.
4. If the vehicle has a sleeper with a rear climate
control panel, set the controls as desired. For
instructions, refer to "Heating, Auxiliary Heater
and Air Conditioner."
5. When a comfortable temperature has been
reached, adjust the fan switch setting and tem-
perature control as needed to maintain the tem-
perature.
IMPORTANT: If equipped with a FRESH/
RECIRC push button (Fig. 4.5), the system
draws in fresh air when the mode control (upper
lever) is at HEAT/DEF or DEF, regardless of the
FRESH/RECIRC push button setting. However,
when the mode control lever is at HEAT, and the
push button is in, the system draws
only
recircu-
lated air. To prevent the buildup of fumes or
odors inside the cab (for example, from smok-
ing),
do not
operate the heater and air condi-
tioning system in a recirculation mode for more
than 20 minutes.
Air Conditioning
IMPORTANT: Operate the air conditioner at
least five minutes each month, even during cool
weather. This helps prevent drying and cracking
of tubing seals, reducing refrigerant leaks in the
system. Operate the air conditioner only after
the engine compartment is warm, and the inte-
rior of the cab is 70°F (21°C) or higher. During
cold weather, the heater can be operated at the
same time, to prevent discomfort.
1. If the cab is hot inside, temporarily open the win-
dows to let the hot air out.
2. Set the mode control to VENT and turn the fan
switch off before starting the engine.
3. Start the engine.
4. Move the mode control to A/C. See Fig. 4.8.
With the control at A/C, fresh air is drawn into
the cab. With the control at MAX A/C, the air in-
side the cab is recirculated.
IMPORTANT: If the outside air is dusty or
smoky, set the mode control at MAX A/C and
keep the windows and vent closed, to prevent
drawing in dust or smoke. On vehicles with the
FRESH/RECIRC push button, recirculated air
can be selected either with the push button in or
by setting the mode control to MAX A/C.
5. Move the temperature control to COOL. In this
position, no heat is given off by the heater.
6. Turn the fan switch to the highest speed, 4.
1
OFF
2
3
4
FRESH
RECIRC
A/C HEAT/DEFMAX A/C DEF
HEAT
10/08/98 f830070c
Fig. 4.5, FRESH/RECIRC Push Button
1
OFF
2
3
4
A/C HEAT/DEFMAX A/C VENT HEAT
02/06/95 f830071a
A
B
C
A. Fan Switch at Position 4
B. Mode Control at DEF
C. Temperature Control at WARM
Fig. 4.6, Settings for Defog/Defrost
1
OFF
2
3
4
A/C HEAT/DEFMAX A/C VENT DEF
02/06/95 f830074a
A
B
C
A. Fan Switch at Position 4 (or lower as desired)
B. Mode Control at HEAT
C. Temperature Control at WARM
Fig. 4.7, Settings for Maximum Heat
Heater and Air Conditioner
4.3
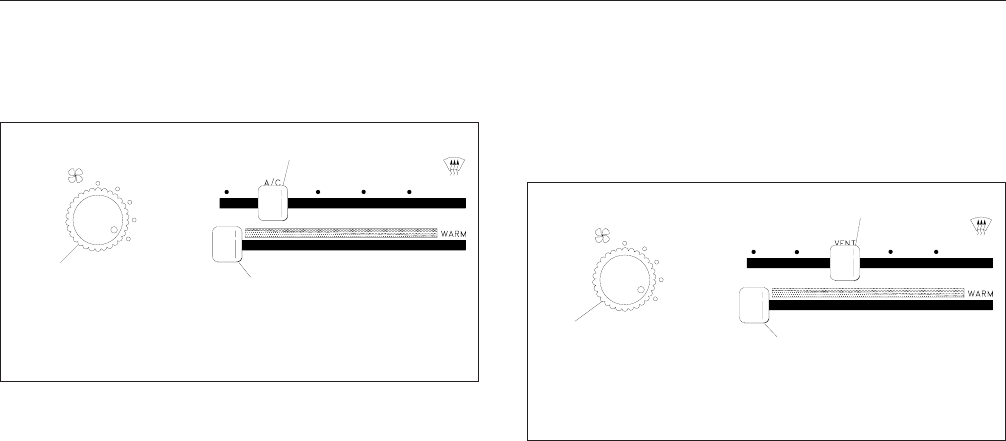
7. As soon as cool air is flowing from the dash-
board outlets, close the windows. Adjust the fan
switch setting as desired.
8. If the air from the vents is too cold, move the
temperature control toward WARM to adjust the
temperature.
IMPORTANT: A FRESH/RECIRC push button
(Fig. 4.5) is standard equipment when there is
no air conditioning. This control is an option
when air conditioning is ordered. It allows the
AC, VENT, and HEAT modes to be used with
either fresh or recirculated air. When the mode
control is at MAX A/C, the system draws
only
recirculated air, regardless of the FRESH/
RECIRC push button setting. When the mode
control is at A/C and the FRESH/RECIRC con-
trol is set for recirculation (push button in), the
system functions the same as when the mode
control is at MAX A/C. To prevent the buildup of
fumes or odors inside the cab (for example,
from smoking),
do not
operate the heater and
air conditioning system in a recirculation mode
for more than 20 minutes.
NOTE: The mode control must be at either A/C
or MAX A/C, and the fan switch must be on for
the air conditioning system to work.
Fresh Air
1. Move the mode control to VENT or HEAT. See
Fig. 4.9. In the VENT position, air comes out of
the dashboard outlets but not out of the floor out-
lets. In the HEAT position, air comes out of the
floor outlets and the outlets on either end of the
dashboard, but the center dashboard outlets are
closed.
2. Set the temperature control to COOL for no heat-
ing, or move it toward WARM for heat.
3. Set the fan switch at the desired speed.
IMPORTANT: If equipped with a FRESH/
RECIRC push button (Fig. 4.5), the system
draws
only
recirculated air when the mode con-
trol lever is at VENT or HEAT, and the push but-
ton is in. To prevent the buildup of fumes or
odors inside the cab (for example, from smok-
ing),
do not
operate the heater or ventilation
system in a recirculation mode for more than 20
minutes.
Heating, Sleeper Heater and
Air Conditioner
1. If equipped with the manual temperature control,
do the following (Fig. 4.10):
1.1 With the engine at operating temperature,
pull the temperature control cable (at-
tached to the outlet duct at the foot of the
bunk) all the way out. Turn the fan control
knob to position 3.
1.2 When the sleeper compartment heats to
the desired temperature, push in the tem-
perature control cable to adjust outlet air
temperature. Then, turn the fan control
knob to adjust the air flow level.
Use the manual temperature control and
the fan control knob as needed to help
maintain the desired temperature.
1
OFF
2
3
4
HEAT/DEFMAX A/C VENT DEF
HEAT
02/06/95 f830185a
A
B
C
A. Fan Switch at Position 4 (or lower as desired)
B. Mode Control at A/C
C. Temperature Control at COOL
Fig. 4.8, Settings for Cooling with A/C
1
OFF
2
3
4
A/C HEAT/DEFMAX A/C DEF
HEAT
02/06/95 f830073a
A
B
C
A. Fan Switch at Position OFF Through 4 as Desired
B. Mode Control at VENT or HEAT
C. Temperature Control at COOL
Fig. 4.9, Settings for Maximum Ventilation
Heater and Air Conditioner
4.4
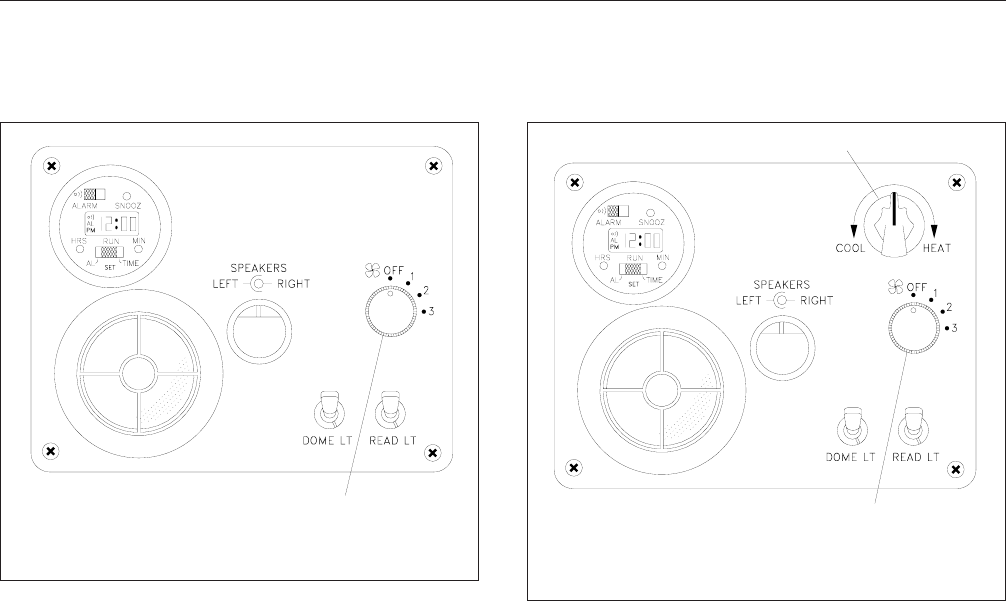
1.3 Whenever heat is not desired, push the
temperature control cable all the way in,
and turn off the fan.
2. If equipped with either the Red Dot constant tem-
perature control (CTC™) system, or the Behr au-
tomatic temperature control system (Fig. 4.11),
do the following:
2.1 With the engine at operating temperature,
turn the rotary knob on the temperature
rheostat all the way clockwise to HEAT.
Turn the fan control knob to position 3.
2.2 When the sleeper compartment heats to
the desired temperature, turn the rotary
knob on the temperature rheostat counter-
clockwise to adjust outlet air temperature.
Then, turn the fan control knob to adjust
the air flow level.
The system will automatically maintain the
selected outlet air temperature.
2.3 Whenever heat is not desired, turn the
rotary knob on the temperature rheostat
counterclockwise (as needed) and turn off
the fan.
Air Conditioning, Sleeper
Heater and Air Conditioner
1. If equipped with the manual temperature control,
do the following:
1.1 Turn on the cab air conditioner. For in-
structions, refer to "Air Conditioning."
1.2 Make sure that the temperature control
cable (attached to the outlet duct at the
foot of the bunk) is pushed in all the way.
Turn the fan control knob to position 3.
1.3 When the sleeper compartment cools to
the desired temperature, turn the fan con-
trol knob to adjust the air flow level. If
needed, pull the temperature control cable
out to adjust outlet air temperature. Use
the temperature control cable and the fan
control knob as needed to help maintain
the desired temperature.
1.4 Whenever air conditioning is not desired,
pull the temperature control cable out (as
needed) and turn off the fan.
NOTE: Whenever the refrigerant compressor
is operating, the fan will always run at a very
01/18/95
1
f600516a
1. Fan Control Knob
Fig. 4.10, Control Panel for Manual Temperature
Control System
1
2
f600517a
01/18/95
1. Temperature Rheostat
2. Fan Control Knob
Fig. 4.11, Control Panel for Automatic Temperature
Control System
Heater and Air Conditioner
4.5

low speed, even with the fan control knob in
the "Off" position. This prevents ice from
forming on the evaporator, especially during
humid weather.
2. If equipped with either the Red Dot constant tem-
perature control (CTC™) system, or the Behr au-
tomatic temperature control system, do the fol-
lowing:
2.1 Turn on the cab air conditioner. For in-
structions, refer to "Air Conditioning."
2.2 Turn the rotary knob on the temperature
rheostat all the way counterclockwise to
COOL. Turn the fan control knob to posi-
tion 3.
2.3 When the sleeper compartment cools to
the desired temperature, turn the rotary
knob on the temperature rheostat clock-
wise to adjust outlet air temperature.
Then, turn the fan control knob to adjust
the air flow level.
The system will automatically maintain the
selected outlet air temperature.
2.4 Whenever air conditioning is not desired,
turn the rotary knob on the temperature
rheostat clockwise (as needed) and turn
off the fan.
NOTE: Whenever the refrigerant compressor
is operating, the fan will always run at a very
low speed, even with the fan control knob in
the "Off" position. This prevents ice from
forming on the evaporator, especially during
humid weather.
Heater and Air Conditioner
4.6

5
Seats and Seat Belts
Seats ........................................................................... 5.1
Seat Belts and Tether Belts ......................................................... 5.8
Sleeper Compartment Bunk Restraints ............................................... 5.11
Bunk Mattress ................................................................... 5.12
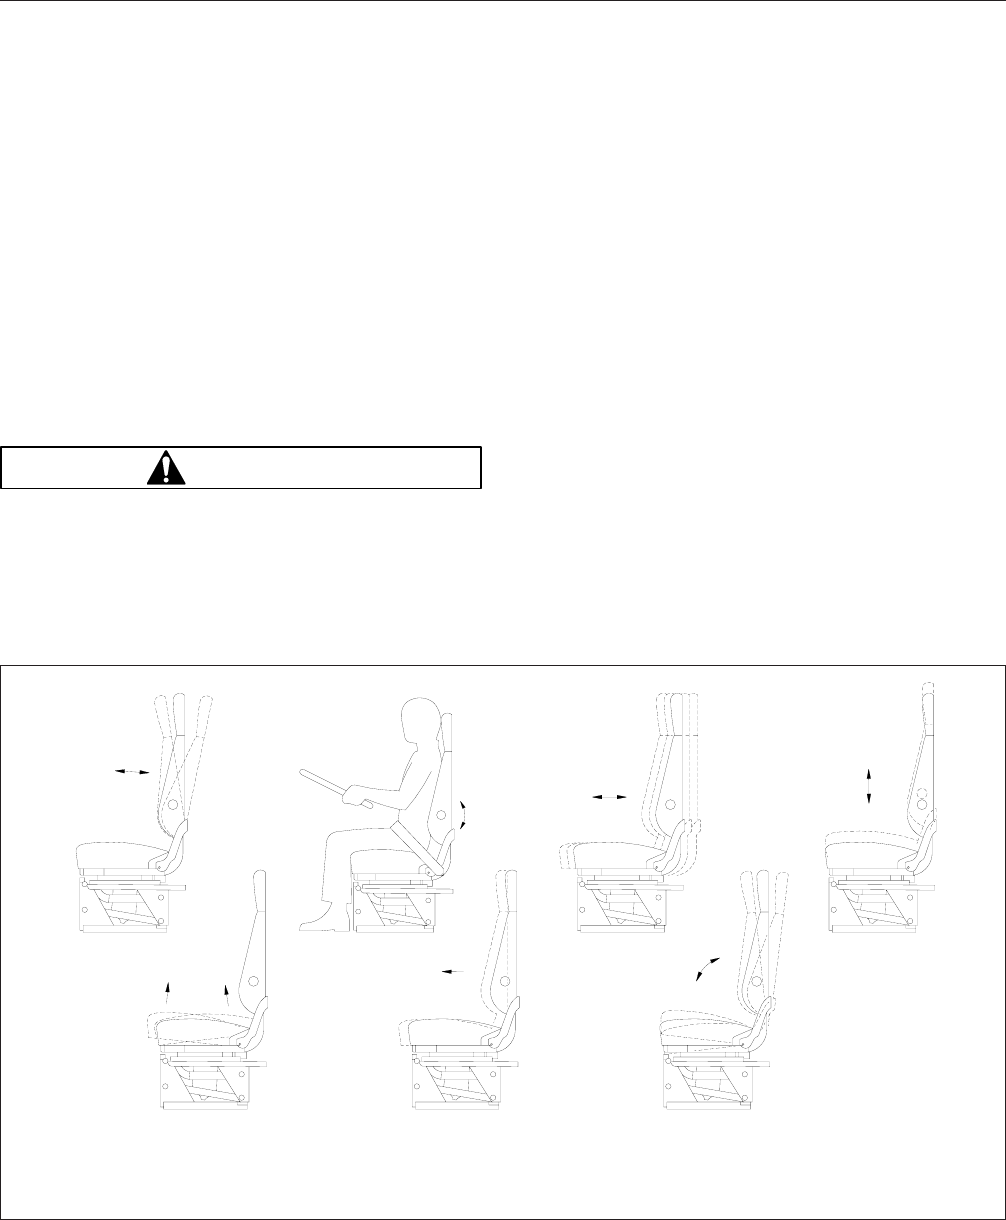
Seats
General Information (See Fig. 5.1)
When adjusting seats, unless otherwise noted, all
adjustments should be made while seated and be-
fore the engine is started.
Due to the maximum adjustability of mid- and high-
back air suspension seats, it is possible to combine
the seat back recline adjustment and the seat slide
adjustment so that the seat back contacts the back-
wall. It is the responsibility of the driver to adjust the
seat to prevent damage to the seat and the cab inte-
rior.
WARNING
Keep hands, tools, and other objects away from
the scissor points under the seats. Failure to do
so could cause personal injury.
The following is a description of adjustments that can
be made to various Freightliner-installed seats. Not
all seats have all of the adjustments listed below.
1. Back Cushion Tilt: This adjustment enables the
back cushion to pivot forward or backward.
2. Lumbar Support: Lumbar support changes the
shape of the seat back to give more or less sup-
port to the occupant’s lumbar (lower back) area.
3. Isolator Lockout: This feature (referred to as
back-slap isolator, Chugger-Snubber™, or isola-
tor) reduces the amount of road shock by isolat-
ing the occupant from the vehicle’s motion, and
allowing the upper seat to move in a simple pen-
dulum motion. A lockout feature is used when-
ever the isolator is not desired.
4. Height Adjustment: The entire seat moves up or
down when adjusting the height. The adjustment
is either manually controlled or air controlled, de-
pending on the make of the seat.
5. Bottom Cushion Angle or Front and Aft Bottom
Cushion Height: This feature enables the occu-
pant to raise or lower the front or back of the
bottom cushion. This adjustment is easier to per-
form when all weight is removed from the seat.
02/02/2001 f910169a
1
2
34
5
67
1. Back Cushion Tilt
2. Lumbar Support
3. Isolator Feature
4. Height Adjustment
5. Bottom Cushion Angle (fore and aft bottom cushion
height)
6. Fore and Aft Seat Adjustment (seat track adjustment)
7. Seat Tilt
Fig. 5.1, Seat Adjustments
Seats and Seat Belts
5.1
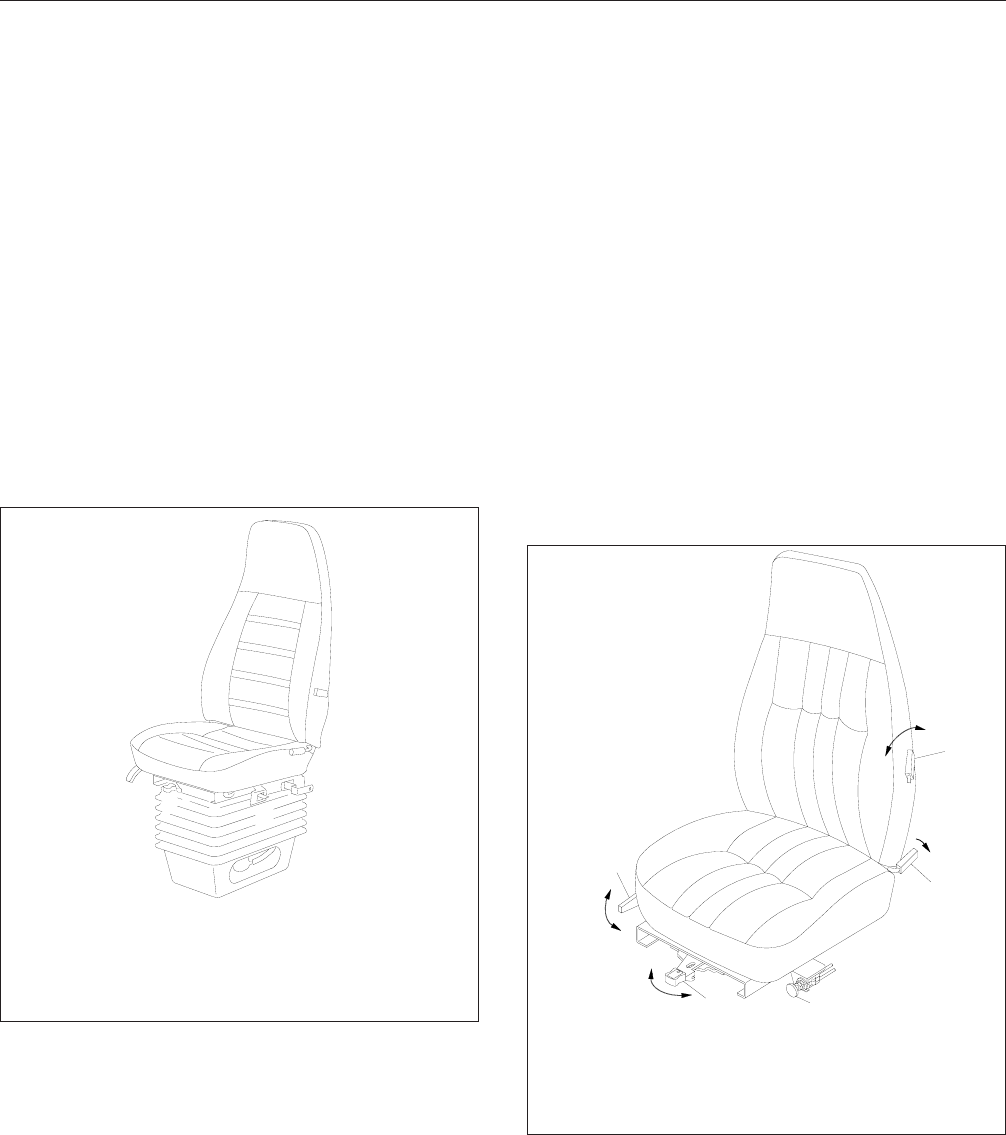
6. Fore and Aft Seat or Seat Track Adjustment: The
entire seat moves forward or backward when this
adjustment is made.
7. Weight Adjustment: On those seats with weight
adjustment, the feature is fully automatic. By sit-
ting on the seat, a leveling valve places you in
the center of the ride zone. Additional adjust-
ments are possible by using the height adjust-
ment feature.
Bostrom Seat, Air–715 Series (Fig. 5.2)
Back Cushion Tilt
By lifting the lever up, the back cushion angle posi-
tion may be moved either forward or backward. Re-
lease the lever to lock the back cushion in place.
Lumbar Support
Move the lever forward or backward for more or less
lower back support; there are three positions to
choose from.
Isolator Lockout
To engage the isolator, put the lever in the center
position. Lock it out by moving the lever to the right.
Height and Weight Adjustment
There are 4 inches (102 mm) of ride zone motion
plus 2 inches (51 mm) of height adjustment. Pull the
lever up to raise the seat, and push the lever down
to lower it. The seat should be no less than 2 inches
(51 mm) from either the top or bottom position.
Seat Tilt
Pull the lever up, and the back and bottom cushions
may be moved forward or backward by shifting your
weight.
Bostrom Air–915 Seat (Fig. 5.3)
Lumbar Support Adjustment
Move the lever forward to increase lumbar support.
Move the lever rearward to decrease lumbar support.
Back Cushion Tilt
Hold the lever rearward and lean forward or rearward
to the desired position, then release the lever.
1
23
4
5
01/18/95 f910033a
1. Seat Tilt Lever
2. Isolator Lockout Lever
3. Height and Weight Adjustment Lever
4. Back Cushion Tilt Lever
5. Lumbar Support Lever
Fig. 5.2, Bostrom Air-715E High Back Seat
04/16/96 f910146
1
2
3
4
5
1. Lumbar Support Adjustment Lever
2. Back Cushion Tilt Lever
3. Height Adjustment Knob
4. Fore and Aft Seat Adjustment and Isolator Lever
5. Seat Cushion Adjustment Lever
Fig. 5.3, Bostrom Air-915 Seat
Seats and Seat Belts
5.2
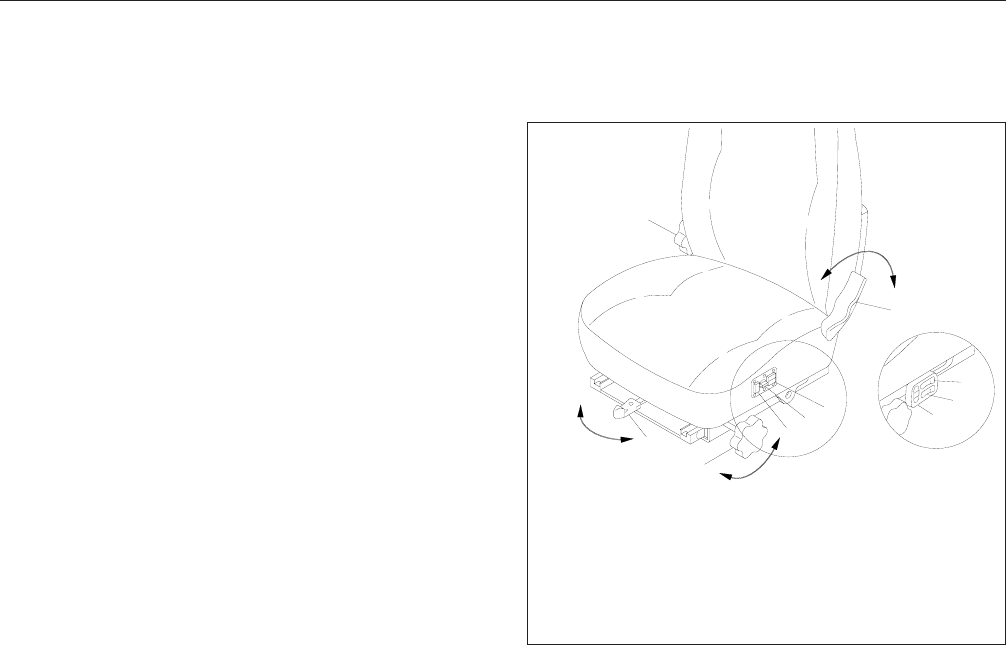
Height Adjustment
Push the knob in to inflate the suspension and raise
the seat height. Pull the knob out to deflate the sus-
pension and lower the seat.
Fore and Aft Seat Adjustment
Move the lever to the left and slide the seat forward
or rearward to the desired position. The slide range
is 6 inches (15 cm).
Isolator
Isolation is provided when the lever in the center po-
sition. Move the lever to the right to lock out isola-
tion.
Seat Cushion Adjustment
Move the lever downward to decrease or upward to
increase seat cushion tilt. There are five adjustment
positions available.
Bostrom Talladega 900 Seat (Fig. 5.4)
NOTE: Two different sets of controls are used
on Bostrom Talladega seats. On some models,
the height adjustment, lumbar support and
damper adjustment are controlled by switches
mounted to the bottom cushion. On other
models, these controls are mounted to the seat
frame.
Back Cushion Tilt
To tilt the back cushion, lean forward slightly to re-
move pressure from the cushion and hold the lever
rearward. Lean backward slowly to the desired posi-
tion and release the lever to lock the cushion in
place.
Height Adjustment
To raise the seat, push the top portion of the switch.
To lower the seat, push the lower portion of the
switch.
Isolator
To engage the isolator, put the lever in the center
position. Lock out the isolator by moving the lever to
the right.
Fore and Aft Seat Adjustment
Hold the lever to the left and slide the seat forward
or backward to the desired position.
Bottom Cushion Tilt Adjustment
Rotate the knob to increase or decrease bottom
cushion tilt.
Lumbar Support
To increase lumbar support on LSO models, press
the plus sign on the control switch. To decrease lum-
bar support on LSO models, press the minus sign on
the control switch. To increase lumbar support on
non-LSO models, rotate the knob forward. To de-
crease lumbar support on non-LSO models, rotate
the knob rearward.
Damper Adjustment
Rotate the knob or push the switch to adjust the
damper.
11/06/98 f910148a
1
2
3
4
5
6
7
432
1. Back Cushion Tilt Lever
2. Lumbar Support Control Switch
3. Damper Adjustment Knob
4. Height Adjustment Switch
5. Bottom Cushion Tilt Adjustment Knob
6. Fore and Aft Seat Adjustment and Isolator Knob
7. Lumbar Support Knob
Fig. 5.4, Bostrom Talladega 900 Seat
Seats and Seat Belts
5.3
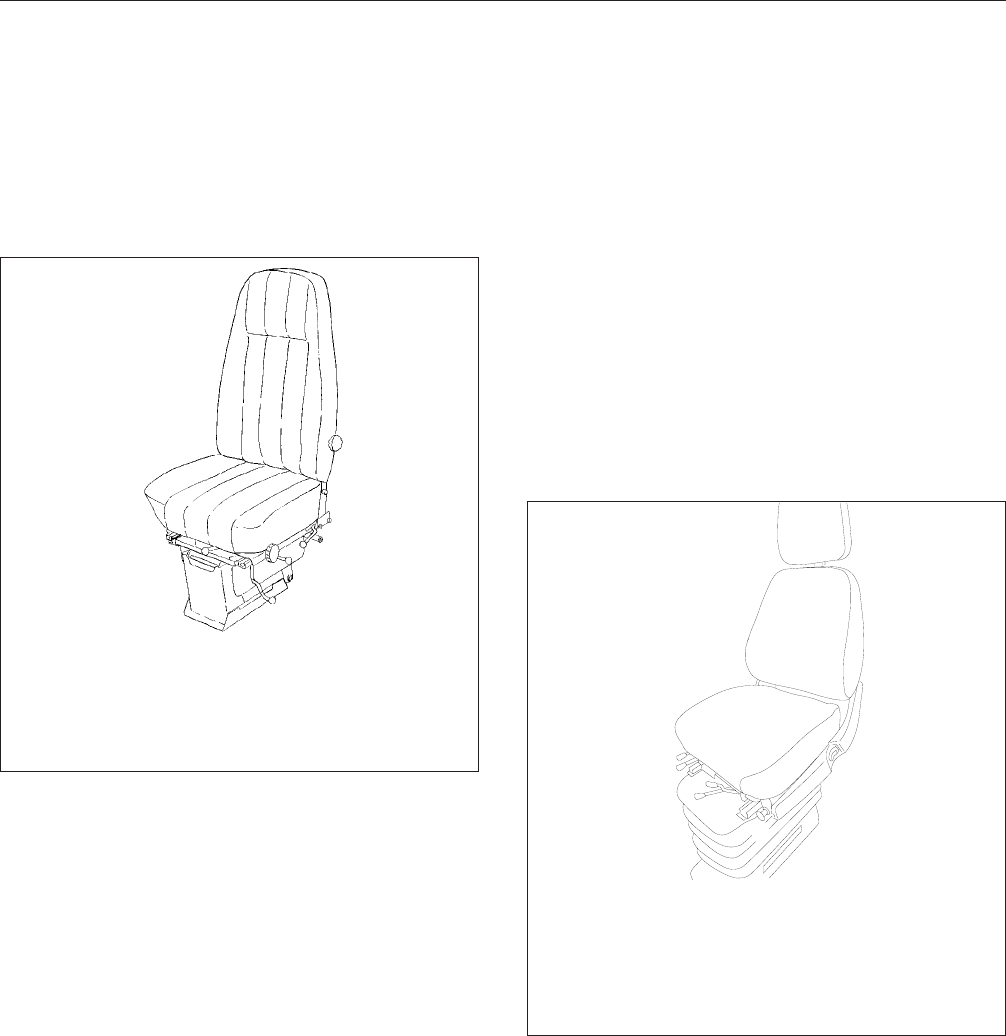
Bostrom Smart Seat Model (Fig. 5.5)
Back Cushion Tilt
The back angle has five positions in a 15-degree
range. To release the latch, pull up on the handle.
Lumbar Support
Turn the knob clockwise to increase support.
Isolator Lockout
Push the lever back to actuate the back-slap isolator;
push it forward to lock out this feature.
Height Adjustment
Height adjustment in the ride zone is continuously
variable over a 6-inch (152-mm) range. Move the
lever up or down to raise or lower the seat.
Weight Adjustment
The seat automatically adjusts itself regardless of the
driver’s weight. When unoccupied, the seat automati-
cally moves to the adjusted height position.
Bottom Cushion Angle
The front portion of the cushion can be adjusted to
any of six positions; rotate the knob to the desired
angle.
Seat Track Adjustment
Seat tracks have nine adjustment positions with a
total of 4 inches (102 mm) of travel. To unlatch the
seat, move the lever to the left.
Freightliner AirChair (Fig. 5.6)
Back Cushion Tilt
Pull on the handle and move it to your choice of one
of four settings.
Lumbar Support
Rotate the knob for precise fit.
Isolator Lockout
To lock out the fore-and-aft isolator feature, move the
handle to the left. See Fig. 5.7.
6
5
4
3
2
1
02/09/95 f910039a
1. Seat Track Adjustment Lever
2. Height Adjustment Lever
3. Bottom Cushion Angle Knob
4. Isolator Lockout Lever
5. Back Cushion Tilt Handle
6. Lumbar Support Knob
Fig. 5.5, Bostrom Smart Seat (High Back model shown)
1
2
3
4
5
6
7
02/09/95 f910035a
1. Lumbar Support Knob
2. Rear Bottom Cushion Height Handle
3. Isolator Lockout Handle
4. Fore and Aft Seat Adjustment Lever
5. Front Bottom Cushion Height Handle
6. Height Adjustment Air Button
7. Back Cushion Tilt Handle
Fig. 5.6, Freightliner AirChair
Seats and Seat Belts
5.4
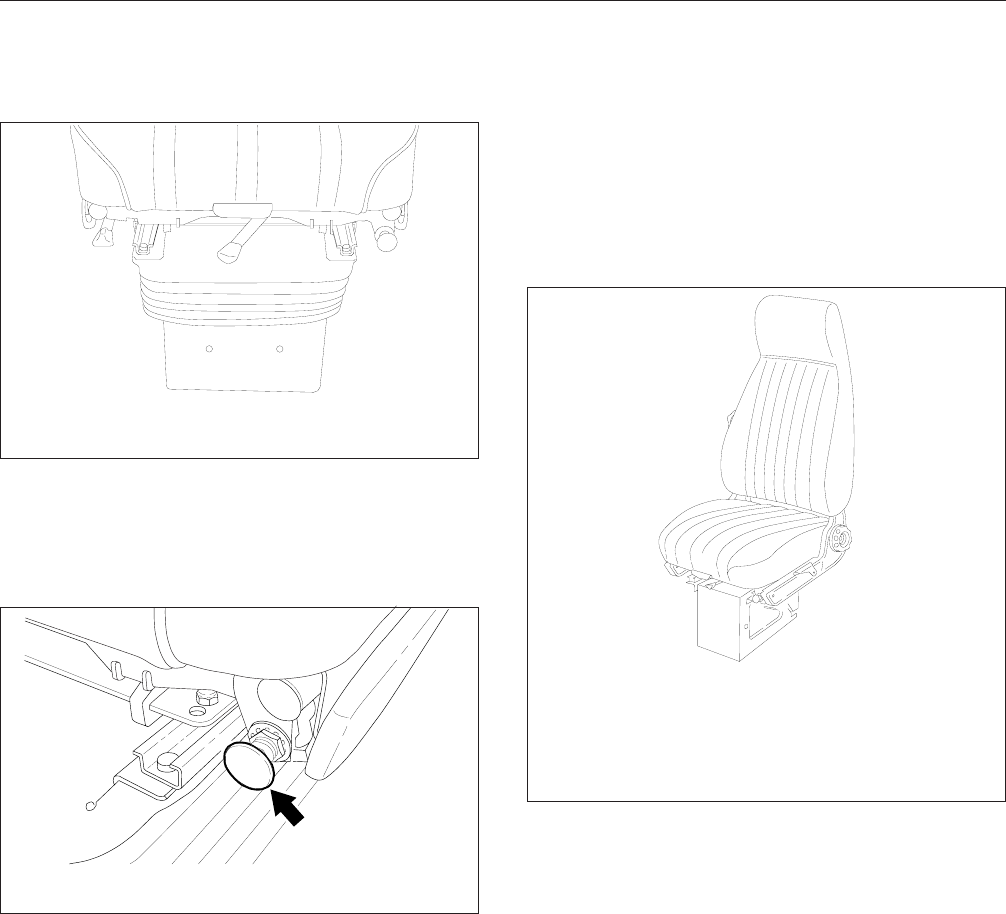
Height Adjustment
Push the air button to raise the seat; pull the air but-
ton to lower the seat. See Fig. 5.6 or Fig. 5.8.
Front and Rear Bottom Cushion Height
To adjust the height of the front of the bottom cush-
ion, lift the handle, and pull up and forward to one of
three settings. To adjust the height of the rear of the
bottom cushion, rotate the handle clockwise to one of
the three settings.
Fore and Aft Seat Adjustment
Move the lever to the right, and slide the seat.
Locked-in settings are in 1-1/2 inch (38 mm) incre-
ments. See Fig. 5.6 or Fig. 5.7.
National Cush-N-Aire Seats, Model
195 (Fig. 5.9)
Back Cushion Tilt
To tilt the back cushion through a range of 12 de-
grees, turn the knob and lean forward or backward.
Isolator Lockout
Called a Chugger-Snubber™, the isolator is locked
out by moving the handle down.
Height Adjustment
Push in the knob to inflate the suspension and raise
the seat height. Pull out on the knob to deflate the
suspension and lower the seat height.
Fore and Aft Seat Adjustment
Move the lever to the right and slide the seat forward
or backward to the desired position.
Front Bottom Cushion Height
To adjust the height of the front of the bottom cush-
ion, lift the handle, and pull forward or push back to
the desired setting.
1
2
02/09/95 f910002a
1. Fore-and-Aft Seat Adjustment Lever
2. Isolator Lockout Handle
Fig. 5.7, Seat Adjustment
f910037
05/30/2006
Fig. 5.8, Air Button
1
2
3
4
5
6
02/09/95 f910071a
1. Back Cushion Tilt Knob
2. Isolator Lockout Handle
3. Height Adjustment Knob
4. Fore and Aft Seat Adjustment Lever
5. Front Bottom Cushion Height Handle
6. Lumbar Support Knob
Fig. 5.9, National Cush-N-Aire Seat
Seats and Seat Belts
5.5
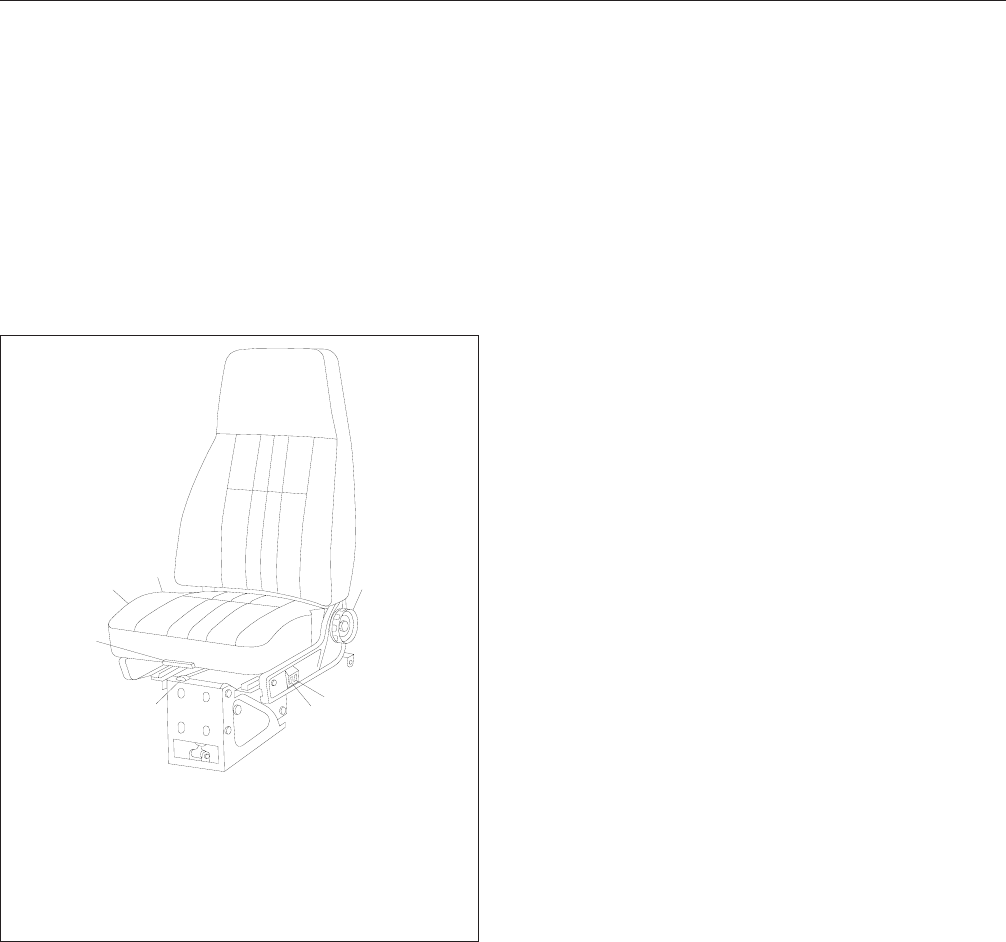
Lumbar Support
Turn the knob for precise fit.
National Cush-N-Aire II Seat (Fig. 5.10)
Back Cushion Tilt
To tilt the back cushion, turn the knob and lean for-
ward or backward.
Height Adjustment
To raise the seat, push the rocker switch on the side
of the seat up until the seat reaches the desired
height. To lower the seat, push the rocker switch
down until the seat reaches the desired height.
Fore and Aft Seat Adjustment
Move the lever to the left and slide the seat forward
or backward to the desired position.
Bottom Cushion Front Height
To adjust the height of the front of the bottom cush-
ion, lift the handle, and pull forward or push back to
the desired setting.
Lumbar Support
Push the rocker switch on the side of the seat up to
inflate lumbar support. Push the rocker switch down
to deflate lumbar support.
Back-of-Cushion Height
To adjust the height at the back of the cushion, rotate
the lever to the desired setting.
Isolator
Also called a Chugger-Snubber™, the isolator is
locked out by moving the handle down.
Dura-Form Seats (Fig. 5.11)
NOTE: Some vehicles may be equipped with
the Freightliner Power 6000 or nonpower 5000
seat available from Dura-Form. These seats
offer air lumbar, infinite recline, a map pocket, a
rear storage pocket, and a pen/glasses pocket.
The Power 6000 seat offers 6-way power
adjustment.
Back Cushion Tilt
To tilt the back cushion through a range of 10 de-
grees, push down on the handle. Move the back
cushion to the desired position and release the lever.
Height Adjustment
Push in the knob to inflate the suspension and raise
the seat height. Pull out on the knob to deflate the
suspension and lower the seat height.
Isolator Lockout and Fore-Aft Seat
Adjustment
Move the lever to the left to adjust the seat to the
desired fore-aft position. Move the lever to the center
position to lock out the isolator feature. Move the
lever to the right to engage the isolator.
11/02/95 f910128
1
2
3
4
5
67
1. Back Cushion Tilt Knob
2. Lumbar Support Switch
3. Height Adjustment Switch
4. Fore and Aft Seat Adjustment Lever
5. Bottom Cushion Front Height Handle
6. Isolator Handle
7. Back of Cushion Height Lever
Fig. 5.10, National Cush-N-Aire II Seat
Seats and Seat Belts
5.6
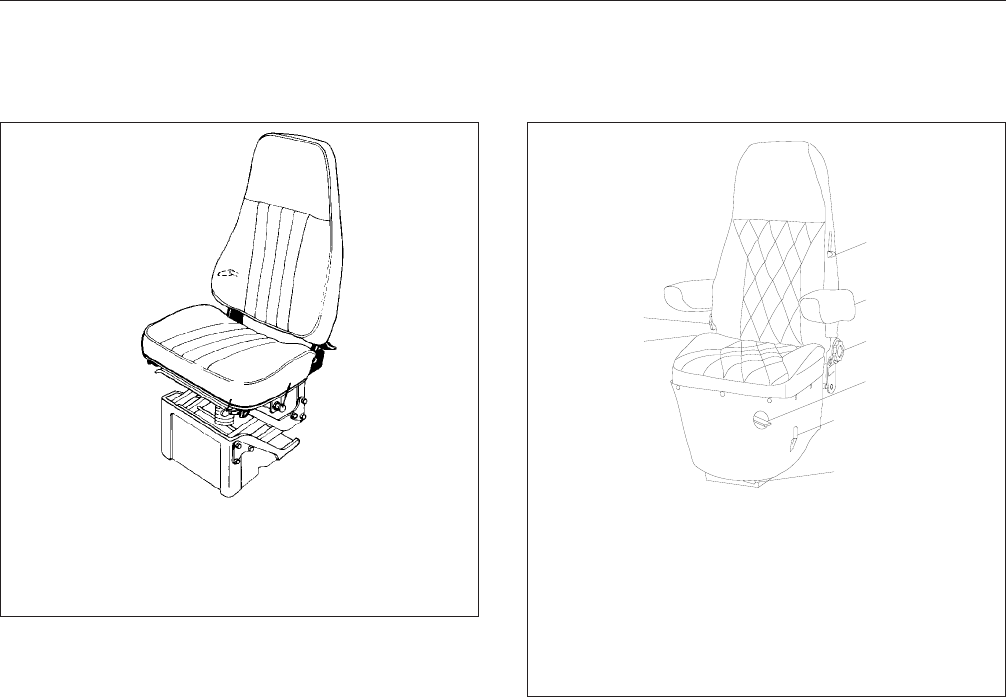
Seat Cushion Adjustment
To put the seat cushion in the upper position, lift up-
ward on the front of the cushion then push rearward.
To put the seat cushion in the lower position, pull for-
ward and then push downward.
Lumbar Support
Rotate the lever on the right side of the back cushion
to any of the three positions as desired.
Eldorado Seat (Fig. 5.12)
Back Cushion Tilt
To tilt the back cushion through a range of 15 de-
grees, turn the knob and lean forward or backward.
Isolator
Called the Glide-A-Lator™, use the lever to engage
or lock out the fore-and-aft isolator.
Fore and Aft Seat Adjustment
Use the lever to move the seat forward or backward
to the desired position.
Height Adjustment
Lift up the lever and add or remove body weight to
adjust seat height to the desired position, then firmly
push the lever down into locking position.
Air Ride Control Adjustment
Depress the air valve knob until the seat cushion is
level. (Height adjustment should be made prior to air
ride control adjustment.)
Lumbar Support Adjustment/Front to
Back
Turn the knob clockwise to increase lumbar support.
Turn the knob counterclockwise to decrease lumbar
support pressure.
Lumbar Support Adjustment/Vertical
(Optional)
Move the knob up or down to one of five positions
for desired area of back support.
1
2
5
3
4
02/09/95 f910003a
1. Back Cushion Tilt Handle
2. Height Adjustment Knob
3. Isolator Lockout and Fore-Aft Adjustment Lever
4. Seat Cushion Adjustment
5. Lumbar Support Lever
Fig. 5.11, Dura-Form Fleetcruiser Seat
10/26/95
1
2
3
4
5
6
7
8
f910142
1. Lumbar Support Adjustment Knob (vertical)
2. Armrest Angle Adjustment
3. Back Cushion Tilt Knob
4. Height Adjustment Lever
5. Isolator Lever
6. Fore and Aft Seat Adjustment Lever
7. Air Ride Control Adjustment Knob
8. Lumbar Support Adjustment Knob (front to back)
Fig. 5.12, Eldorado Seat
Seats and Seat Belts
5.7
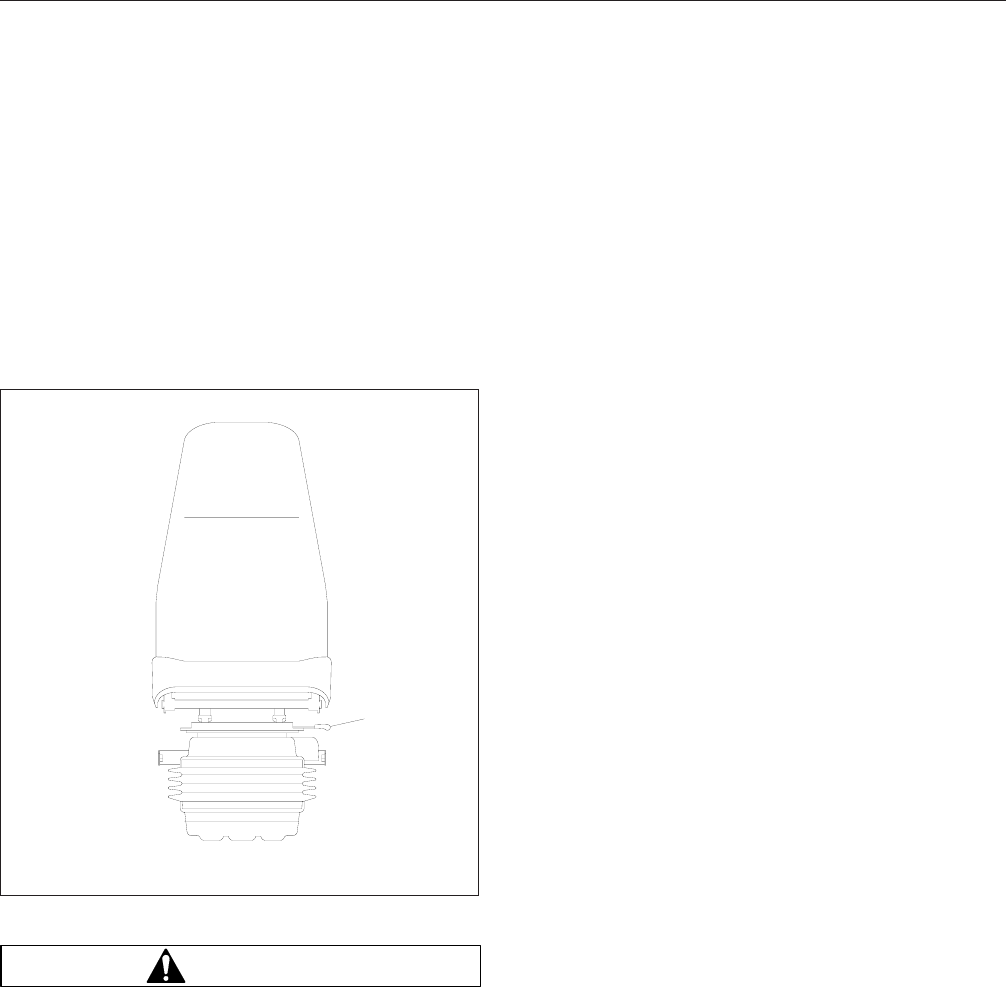
Armrest Angle Adjustment (Optional)
Rotate the 9/16-inch bolt head on the back of each
armrest clockwise to raise the armrest and counter-
clockwise to lower the armrest.
Swivel Seat (Fig. 5.13)
A swivel seat option is available for the passenger’s
seat only. A lever on the side of the seat base re-
leases the swivel mechanism, allowing the seat to
rotate on the base.
WARNING
Do not rotate the seat while the vehicle is in mo-
tion. Doing so could increase the chance of per-
sonal injury in the event of a crash.
Seat Belts and Tether Belts
General Information
Seat belt assemblies are designed to secure persons
in the vehicle to help lessen the chance of injury or
the amount of injury resulting from accidents or sud-
den stops. For this reason, Daimler Trucks North
America LLC urges that the driver and
all
passen-
gers, regardless of age or physical condition, use
seat belts when riding in the vehicle.
Seat belt assemblies in the vehicle meet Federal
Motor Vehicle Safety Standard 209, "Type 1," and
"Type 2" requirements. They are recommended for
all persons weighing over 50 pounds (23 kg).
A child restraint system should also be provided for
each child weighing 50 pounds (23 kg) or less. It
should meet the requirements of Federal Motor Ve-
hicle Safety Standard 213, "Child Restraint Systems."
When providing such a restraint system, carefully
read and follow all instructions pertaining to installa-
tion and usage for the child. Make certain the child
remains in the restraint system at all times when the
vehicle is in motion.
In addition to seat belt assemblies, tether belts are
installed on suspension-type seats. Tether belts help
secure the seat to the floor and are intended to re-
strain the seat and seat belt in case of an accident or
sudden stop.
IMPORTANT: Seat belts have a finite life which
may be much shorter than the life of the vehicle.
Regular inspections and replacement as needed
are the only assurance of adequate seat belt
security over the life of the vehicle. See Chap-
ter 11 for the inspection procedure.
Tether Belt Adjustment
1. Make sure the tether belt is attached to the cab
deck and seat frame. Also, check that the belt
webbing is correctly routed through the buckle,
as shown in Fig. 5.14.
2. To lengthen the tether belt, turn the buckle at a
right angle to the webbing, then pull the bottom
webbing strap through the buckle until the de-
sired length is reached. See Fig. 5.15.
3. Adjust the seat to the highest ride position. With
no weight on the seat, tighten each tether belt by
pulling the middle webbing strap away from the
buckle to remove all slack. See Fig. 5.16. Tether
belts should not be so tight as to restrict move-
ment of suspension seats. Be sure the straps are
not twisted.
04/16/96 f910143
1
1. Lever
Fig. 5.13, Swivel Seat
Seats and Seat Belts
5.8
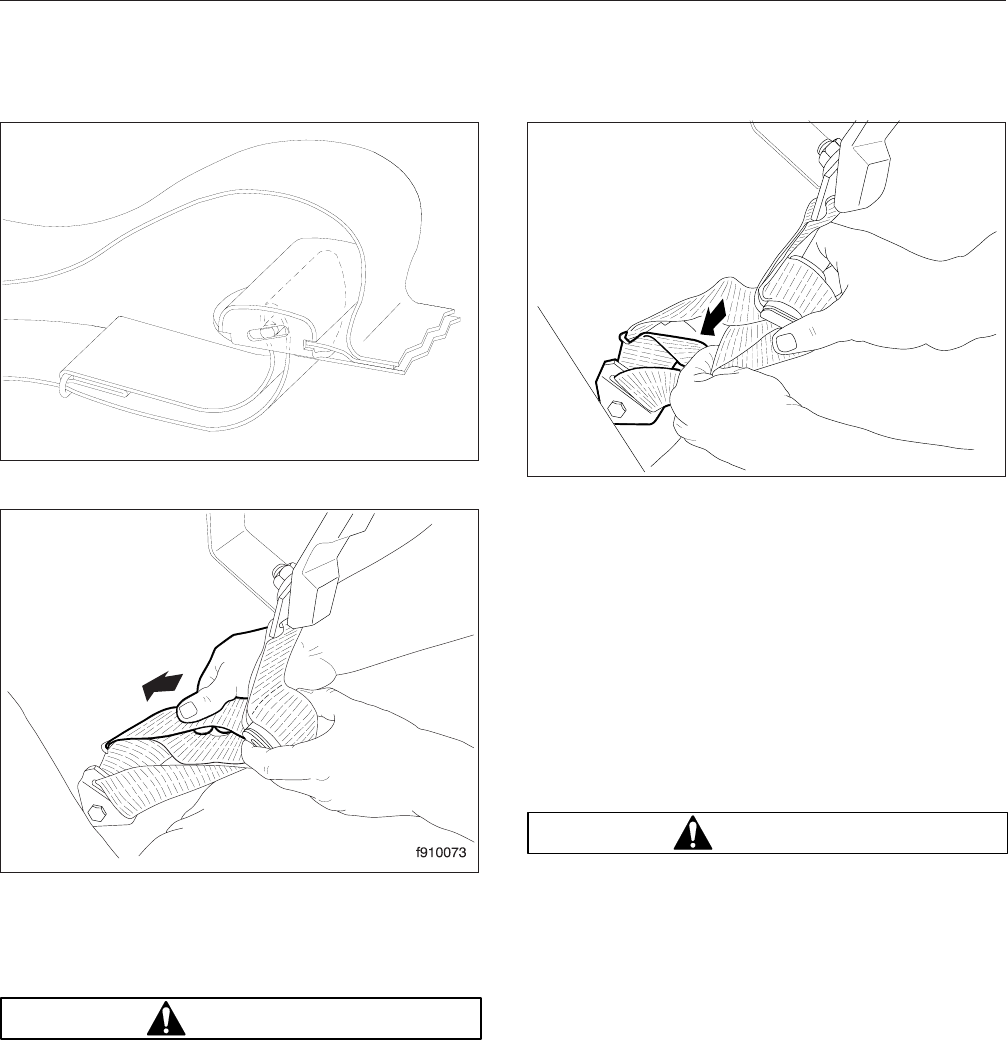
Seat Belt Operation
Lap Belt
WARNING
Wear lap belts only as described below. In case
of an accident or sudden stop, injuries could re-
sult from misuse. Lap belts are designed to be
worn by one person at a time.
1. Before driving the vehicle, slowly pull the link end
of the lap belt out of the retractor and pull it
across your lap far enough to engage the buckle.
If the retractor locks too soon, allow the belt to
retract slightly, then slowly pull it out again.
2. Fasten the lap belt by pushing the link into the
buckle until it latches. Give the belt a tug at the
buckle. If the buckle unlatches, repeat this step.
If the problem continues, replace the lap belt.
3. To unbuckle the lap belt, push the button on the
buckle to release the seat belt link.
NOTE: Make sure the lap belt is completely re-
tracted when it is not in use.
Three-Point Seat Belt With Komfort
Latch™
WARNING
Wear three-point seat belts only as described
below. In case of an accident or sudden stop, in-
juries could result from misuse. Three-point seat
belts are designed to be worn by one person at a
time.
1. Before driving the vehicle, slowly pull the link end
of the three-point seat belt out of the retractor
and pull it across your lap (from outboard to in-
board) far enough to engage the buckle. If the
retractor locks too soon, allow the belt to retract
slightly, then slowly pull it out again.
2. Fasten the three-point seat belt by pushing the
link into the buckle until it latches. See Fig. 5.17.
Give the belt a tug at the buckle. If the buckle
unlatches, repeat this step. If the problem contin-
ues, replace the three-point seat belt.
01/18/95 f910072a
Fig. 5.14, Tether Belt Routing
05/30/2006
Fig. 5.15, Lengthening the Tether Belt
f910074
05/30/2006
Fig. 5.16, Shortening the Tether Belt
Seats and Seat Belts
5.9
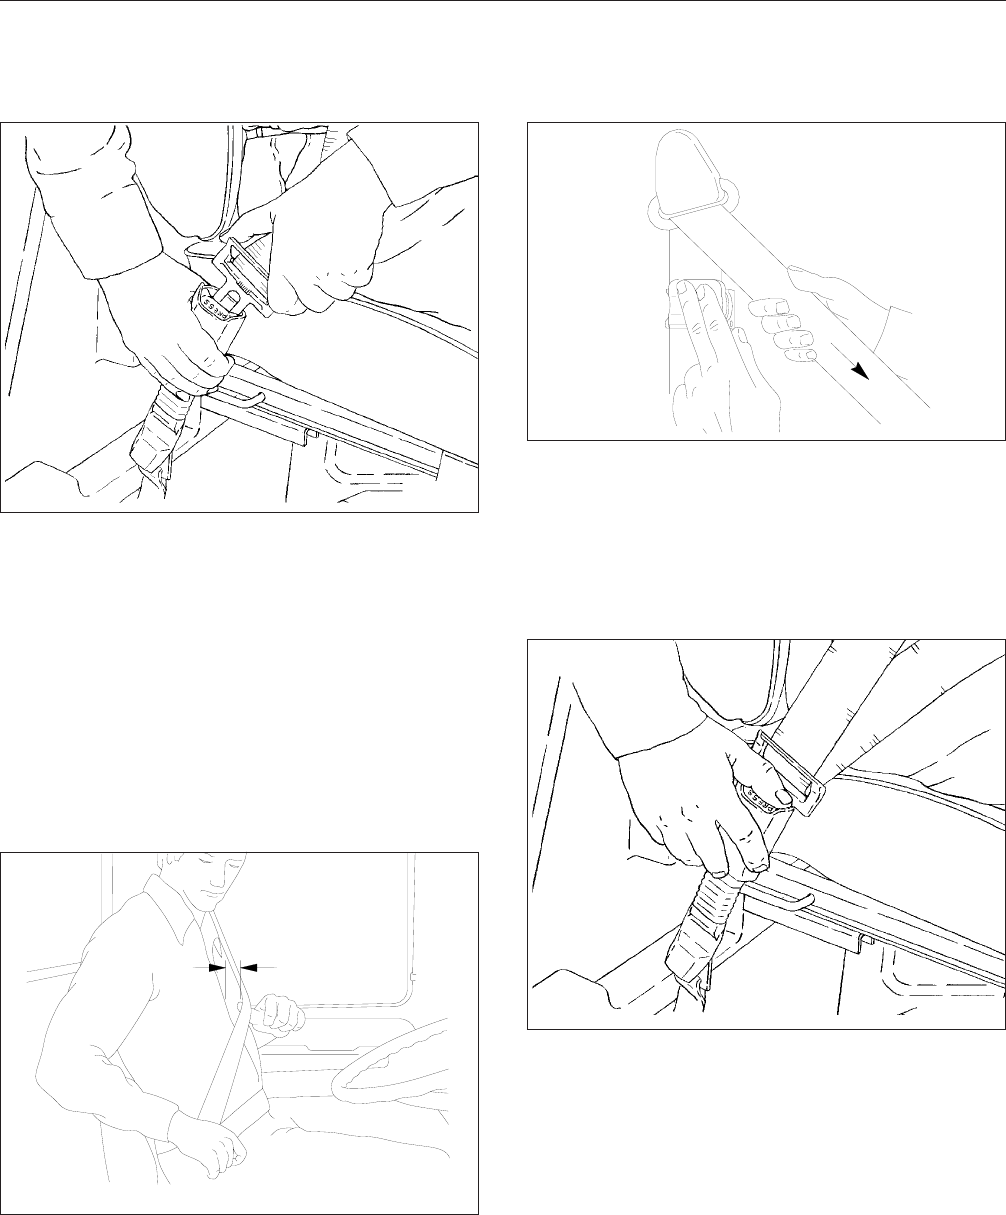
3. Position the shoulder strap diagonally across
your chest. If desired, engage the Komfort Latch
as follows:
Pull on the shoulder strap to lessen the pressure
of the strap on your shoulder and chest. Allow no
more than one inch (2.5 cm) of slack between
your chest and the shoulder harness. More slack
can significantly reduce the seat belt’s effective-
ness in an accident or a sudden stop. While
holding the belt slack, press the Komfort Latch
lever up, clamping the belt’s webbing. See
Fig. 5.18 and Fig. 5.19.
4. To unbuckle the three-point seat belt, push the
button on the buckle as shown in Fig. 5.20.Ifthe
Komfort Latch was used, release it by giving the
shoulder belt a quick tug. If you lean forward
against the shoulder belt, the Komfort Latch will
automatically release, and will need to be reset.
NOTE: The Komfort Latch does not have to be
released in an emergency situation. The Kom-
fort Latch will release by itself under rough road
or other abnormal conditions. Make sure the
three-point seat belt is completely retracted
when it is not in use.
01/18/95 f910004a
Fig. 5.17, Fastening the Three-Point Belt
A
01/06/95 f910048a
A. 1 Inch (2.5 cm) Maximum
Fig. 5.18, Adjusting Shoulder Harness Clearance
01/06/95 f910006a
Fig. 5.19, Locking Komfort Latch
01/18/95 f910049a
Fig. 5.20, Releasing the Three-Point Seat Belt
Seats and Seat Belts
5.10
Sleeper Compartment Bunk
Restraints
General Information
On vehicles equipped with a sleeper compartment,
bunk restraints should be used whenever the sleeper
compartment is occupied and the vehicle is moving.
Restraints are designed to lessen the chance of in-
jury or the amount of injury resulting from accidents
or sudden stops. For this reason, Daimler Trucks
North America LLC urges the use of bunk restraints
when the sleeper compartment is occupied in a mov-
ing vehicle.
WARNING
Do not use the sleeper compartment while the
vehicle is in motion unless a bunk restraint is
installed and used. Not using the bunk restraint
increases the chance of injury, or the degree of
injury, from accidents or sudden stops to all oc-
cupants of the vehicle.
Belt Adjustment (See Fig. 5.21)
1. Make sure the belt is attached to the bunk sup-
port and sleeper wall.
2. To lengthen the belt, tip the link end downward
and pull the link until it connects with the buckle.
3. After the belt is connected, shorten it by pulling
on the loose end until the belt is snug, but com-
fortable. Be sure the belts are not twisted.
Bunk Restraint Operation (See Fig. 5.22)
1. Starting at the foot of the bunk, pull up the link
end of the belt far enough to engage the buckle.
2. Fasten the belt by pushing the link end into the
buckle until they latch. Make sure that the belt is
not twisted. Check the engagement by trying to
pull the link out of the buckle. If they come apart,
repeat this step. If the problem continues, re-
place the belt. Repeat steps 1 and 2 for the
other two belts located in the middle and upper
portion of the bunk to lock the restraint in place.
NOTE: On 60-inch raised roof cabs, the upper
bunk restraint, if present, pulls up in front of the
bunk and fastens at the ceiling.
3. To release the bunk restraint, push the release
button on the buckle at the head of the bunk and
pull the link from the buckle.
Repeat this step for the other two buckles to
completely release the bunk restraint.
NOTE: When the sleeper compartment is not
occupied, the bunk restraint can be stored
under the mattress.
1
2
3
A
01/06/95 f910068a
A. Pull on the loose end to shorten the belt.
1. Buckle
2. Belt Release Button 3. Link
Fig. 5.21, Belt Adjustment
1
2
3
4
5
f910069a
01/18/95
1. Mattress
2. Sleeper Wall
3. Buckle
4. Link
5. Belt Anchor
Fig. 5.22, Bunk Restraint in 40-Inch Sleeper Shown
Seats and Seat Belts
5.11

Bunk Mattress
To prevent damage to the bunk mattress and to en-
sure even wear, it is recommended that the mattress
be turned over on a monthly basis.
Seats and Seat Belts
5.12
Steering System
General Information
When there is no load on the vehicle, and the front
tires are pointed straight ahead, the steering wheel
spokes should be at the 4 and 8 o’clock positions,
±10 degrees. See Fig. 6.1. See Group 46 of the
Heavy-Duty Trucks Service Manual
for steering ad-
justment procedures.
CAUTION
Never steam clean or high-pressure wash the
steering gear. Internal damage to gear seals, and
ultimately the steering gear, can result.
Manual Steering Gear Lubrication
When operating in temperatures continuously below
30°F (–1°C), using the wrong type of lubricant in the
steering gear could make the steering wheel difficult
to turn. To prevent trouble in cold temperatures, be
sure that the steering gear lubricant complies with
the cold weather recommendations specified in
Group 46 of the
Heavy-Duty Trucks Maintenance
Manual
.
WARNING
Failure to comply with the cold weather recom-
mendations could cause inadequate steering
control, which could result in an accident and
possible physical injury.
Power Steering System
The power steering system consists of a steering
gear (which includes a manual steering mechanism,
a hydraulic control valve, and a hydraulic power cyl-
inder), hydraulic hoses, power steering pump, reser-
voir, and other components. Some models are also
equipped with a separate hydraulic power cylinder on
the right side of the front axle. The power steering
pump, driven by the engine, provides the power as-
sist for the steering system. If the engine is not run-
ning, there is no power assist. If the power-assist
feature does not work due to hydraulic fluid loss,
steering pump damage, or some other cause, bring
the vehicle to a safe stop. Do not drive the vehicle
until the cause of the problem has been corrected.
WARNING
Driving the vehicle without the power-assist fea-
ture of the steering system requires much greater
effort, especially in sharp turns or at low speeds,
which could result in an accident and possible
injury.
Drivers should carefully use the power available with
a power steering system. If the front tires become
lodged in a deep chuckhole or rut, drive the vehicle
out instead of using the steering system to lift the
tires from the hole. Also, avoid turning the tires when
they are against a curb, as this places a heavy load
on steering components and could damage them.
Brake System
General Information
A dual air brake system uses a single set of brake
controls to operate two independent air brake sys-
tems. Each system has its own reservoirs, plumbing,
and brake chambers. The primary system operates
the service brakes on the rear axle; the secondary
system operates the service brakes on the front axle.
Service brake signals from both systems are sent to
the trailer.
10°10°
f460307a
05/24/94
12
10°10°
1. 8 o’Clock 2. 4 o’Clock
Fig. 6.1, Power Steering Wheel Position (with tires
pointed straight ahead)
Steering and Brake Systems
6.1

WARNING
Do not operate the vehicle with the front brakes
backed off or disconnected. Backing off or dis-
connecting the front brakes will not improve ve-
hicle handling and may lead to loss of vehicle
control resulting in property damage or personal
injury.
The rear service brakes will not work if the primary
system loses air pressure, but the front brakes and
the trailer brakes will continue to work with second-
ary system air pressure. Loss of secondary system
air pressure makes the front axle brakes inoperative,
but rear service brakes and trailer brakes will operate
through the primary system.
Before driving your vehicle, allow time for the air
compressor to build up at least 100 psi (689 kPa)
pressure in both the primary and secondary systems.
Monitor the air pressure system by observing the
dual system air pressure gauge and the low-air-
pressure warning light and buzzer. The warning light
and buzzer shut off when air pressure in both sys-
tems reaches 64 to 76 psi (441 to 524 kPa).
The warning light and buzzer come on if air pressure
drops below 64 to 76 psi (441 to 524 kPa) in either
system. If this happens, check the dual system air
pressure gauge to determine which system has low
air pressure. The brake pedal will slow the vehicle
but since one brake system will not be working, stop-
ping distance will increase. Bring the vehicle to a
safe stop, and have the air system repaired before
continuing.
On tractor-trailer vehicles, if both the primary and
secondary systems become inoperative, the trailer
service brakes or spring parking brakes will automati-
cally apply when air pressure drops below 35 to 45
psi (242 to 310 kPa). The tractor spring parking
brakes will automatically apply when air pressure
drops below 20 to 30 psi (138 to 207 kPa). On
straight trucks, spring parking brakes will apply when
air pressure drops below 20 to 30 psi (138 to 207
kPa). Do not wait for the brakes to apply automati-
cally; when the warning light and buzzer first come
on, immediately bring the vehicle to a safe stop. Be-
fore continuing operation of the vehicle, correct the
cause of the air loss.
Before the vehicle can be moved, the spring parking
brakes must be released by applying an external air
source at the gladhands, or by manually caging the
parking brake springs.
WARNING
Do not release the spring parking brakes and
then drive the vehicle. There would be no means
of stopping the vehicle, which could result in se-
rious personal injury or vehicle damage. Before
releasing the spring parking brakes, make the
connection to a towing vehicle or chock the tires.
After correcting the brake system problem, uncage
the spring parking brakes before resuming normal
vehicle operation.
Brake System Operation
Before driving the vehicle, secure all loose items in
the cab so that they will not fly forward during a full
brake application. Make sure that all passengers are
wearing seat belts.
IMPORTANT: An air brake proportioning system
is used in tractor air brake systems. When oper-
ating in bobtail mode, the rear brake chambers
(whose axle load has been greatly reduced) re-
ceive reduced or proportional air pressure, while
the front axle brake chambers receive full (nor-
mal) air pressure. This results in a different
brake pedal "feel," as the pedal seems to re-
quire more travel and/or effort to slow or stop
the vehicle. However, the air brake proportioning
system actually improves vehicle control when
the tractor is in the bobtail mode of operation.
When the tractor is towing a trailer, the rear
brake chambers will receive full (normal) appli-
cation air pressure.
During normal brake stops, depress the foot brake
control pedal until braking action slows down the ve-
hicle. Increase or decrease the pressure on the
pedal so that the vehicle comes to a smooth, safe
stop. When the forward speed of the vehicle has de-
creased to almost the idling speed of the engine,
push the clutch pedal in, and shift the transmission
into Neutral. Apply the spring parking brakes if the
vehicle is to be parked.
IMPORTANT: In the event of a total loss of ser-
vice brakes with full system air pressure, use
the parking brake control valve (yellow knob) to
Steering and Brake Systems
6.2
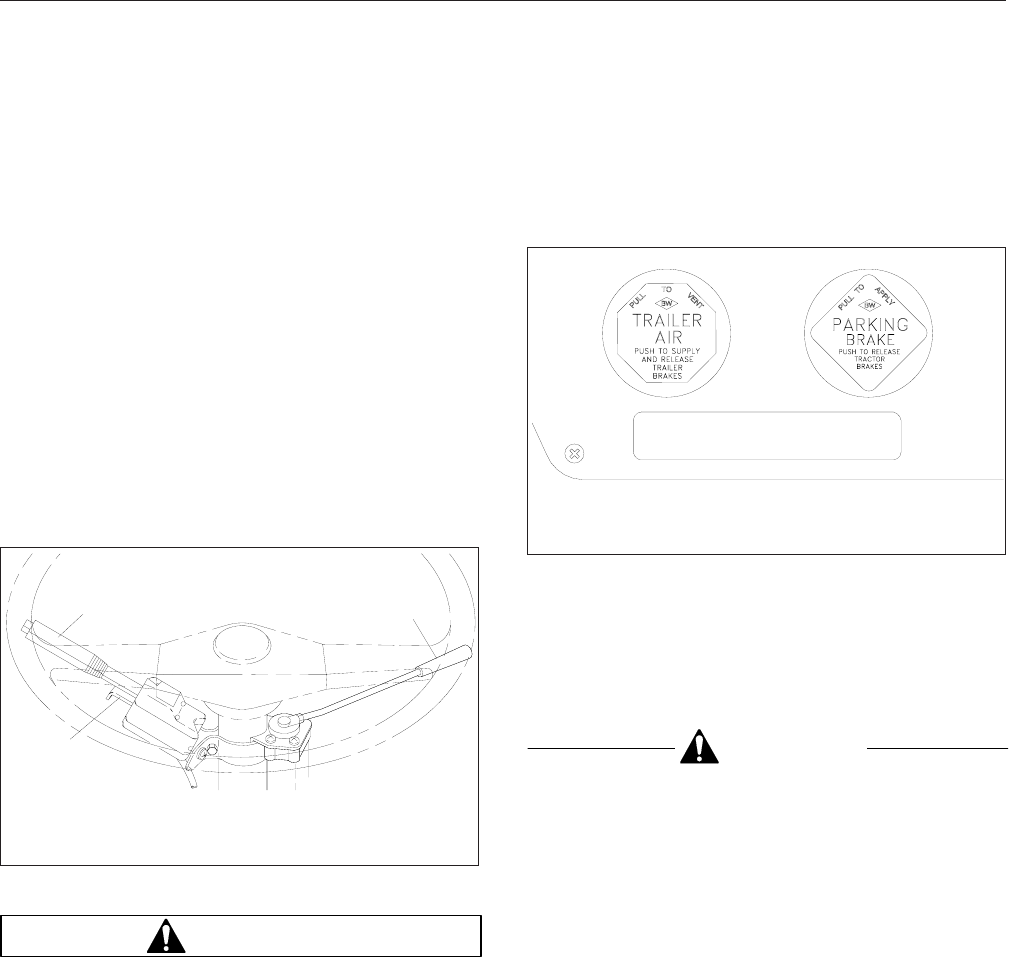
bring the vehicle to a complete stop in the saf-
est location possible.
NOTE: If equipped with main and auxiliary
transmissions, do not shift both transmissions
into Neutral while the vehicle is rolling. Shifting
both transmissions back into gear would be diffi-
cult while the vehicle is rolling.
The trailer brake hand control valve (Fig. 6.2) actu-
ates the trailer service brakes independently from the
vehicle chassis service brakes. The valve can be
partially or fully applied, but in any partially-on posi-
tion it will be overridden by a full application of the
foot brake control pedal. Moving the valve handle
clockwise actuates the trailer brakes, while moving it
counterclockwise releases the trailer brakes. The
valve handle remains in the position selected until it
is manually moved.
WARNING
Do not use the trailer service brakes for parking;
they are not designed for this purpose. If air
bleeds out of the trailer air tank during parking,
the vehicle could roll causing serious personal
injury or property damage.
The red octagonal-shaped knob (Fig. 6.3) in the con-
trol panel actuates the trailer air supply valve. After
the vehicle’s air hoses are connected to a trailer, and
the pressure in both air systems is at least 65 psi
(448 kPa), the red knob must be pushed in. It should
stay in, to charge the trailer air supply system and to
release the trailer spring parking brakes; it must be
pulled out before disconnecting a trailer. It must also
be pulled out when operating a vehicle without a
trailer. If pressure in both air systems drops to 35 to
45 psi (242 to 310 kPa), the red knob automatically
pops out, exhausting the trailer air supply, and apply-
ing the trailer service or spring parking brakes.
The yellow diamond-shaped knob (Fig. 6.3)inthe
control panel actuates the parking brake valve. Pull-
ing out the knob applies both the tractor and the
trailer spring parking brakes and automatically
causes the trailer air supply valve knob to pop out.
CAUTION
Do not use the spring parking brakes if the ser-
vice brakes are hot, such as after descending a
steep grade. Also, do not use the spring parking
brakes during freezing temperatures if the ser-
vice brakes are wet. To do so could damage the
brakes if hot, or cause them to freeze during cold
weather.
If the brakes are wet, drive the vehicle in low
gear and lightly apply the brakes to heat and dry
them. Allow hot brakes to cool before using the
spring parking brakes. Always chock the tires.
If the trailer is not equipped with spring parking
brakes, pulling out the yellow knob applies the tractor
spring parking brakes and the trailer service brakes.
When the tractor and trailer parking brakes (or trailer
service brakes) are both applied, the trailer brakes
are released by pushing in the red knob, leaving the
tractor parking brakes applied. Air pressure in the
primary or secondary reservoir must be at least 65
psi (447 kPa) before the tractor spring parking
11/06/98 f460002b
12
3
1. Turn Signal Lever
2. Trailer Brake Hand Control Valve
3. Hazard Warning Light Tab
Fig. 6.2, Steering Column-Mounted Controls
TRACTOR ONLY PARKING BRAKES
PULL PARKING BRAKES CONTROL
THEN PUSH TRAILER AIR CONTROL 24−227−0
12
f600503
08/27/93
1. Trailer Air Supply Valve Knob
2. Parking Brake Valve Knob
Fig. 6.3, Trailer Air Supply/Parking Brake Control Panel
Steering and Brake Systems
6.3
brakes, or the trailer service or spring parking
brakes, can be released.
On trailers not equipped with spring parking brakes,
chock the trailer tires before disconnecting the truck
or tractor when parking just the trailer.
When parking a truck or tractor with a trailer (combi-
nation vehicle), and the trailer is not equipped with
spring parking brakes, apply the truck or tractor
spring parking brakes.
WARNING
If a trailer is not equipped with spring parking
brakes, do not park it or a combination vehicle
by pulling out only the trailer air supply valve
knob. This would apply only the trailer service
brakes. If air were to bleed from the trailer brake
system, the trailer brakes would release, possibly
causing an unattended runaway vehicle.
CAUTION
Never apply the service and spring parking
brakes simultaneously. To do so transmits exces-
sive input force to the brake components, which
could damage or cause eventual failure of brake
actuating components.
Meritor WABCO®Antilock Braking
System (ABS)
The Meritor WABCO Antilock Braking System (ABS)
is an electronic wheel speed monitoring and control
system that works with the standard air brake sys-
tem. ABS passively monitors vehicle wheel speed at
all times, but
controls
wheel speed during an emer-
gency or reduced-traction stop. In normal braking
applications, the standard air brake system is in ef-
fect.
IMPORTANT: For proper ABS system operation,
do not change tire sizes. The sizes of the tires
installed during production are programmed into
the electronic control unit. Installing different
sized tires could result in a reduced braking
force, leading to longer stopping distances.
ABS includes signal-generating tone wheels and sen-
sors located in the wheel hubs of each sensed axle.
The sensors transmit vehicle wheel speed informa-
tion to an electronic control unit (ECU) located be-
hind the passenger seat. The ECU interprets the
speed sensor signals and compares wheel speed,
wheel braking and vehicle speed. If it senses wheel
lockup, the ECU signals the appropriate solenoid
control valve to reduce braking. During emergency
braking, the solenoid control valve constantly adjusts
air pressure supply in the brake chambers to prevent
wheel lockup.
CAUTION
An accumulation of road salt, dirt, or debris on
the ABS tone wheels and sensors can cause the
ABS warning light to come on. If the ABS light
does come on, the tone rings and sensors
should be inspected for corrosion and serviced if
necessary. The service should include cleaning
of the tone rings and sensors. If any tone ring on
a vehicle shows severe corrosion, all tone rings
on that vehicle should be replaced.
During winter months in areas where corrosive
materials are used on the highways, periodically
clean the underside of the vehicle, including the
tone rings and sensors, to ensure proper ABS
function and to protect the components from cor-
rosion. Clean more frequently when unusually
corrosive chemicals are being used.
The electronic control unit also has a safety circuit
that constantly monitors the wheel sensors, solenoid
control valves, and the electrical circuitry. If only the
tractor is equipped with an ABS system, the tractor
warning light (TRAC ABS) comes on after the engine
is started. See Fig. 6.4. If all of the tractor’s ABS
components are working, the light should go out
when the vehicle moves faster than about 4 mph (6
km/h).
If equipped with the tractor and trailer ABS system,
the vehicle also has a trailer warning light labelled
TRLR ABS (Fig. 6.4).
After the engine is started, the TRLR ABS light
comes on if the trailer is equipped with a compatible
ABS system. Once the vehicle moves faster than
about 4 mph (6 km/h), the TRLR ABS warning light
goes out only if all of the trailer’s ABS components
are working.
For more information on trailer ABS lamp operation,
see
Trailer ABS Lamp Operation
in this chapter.
A wheel spin indicator light (WHL SPIN) comes on if
one of the drive wheels spins during acceleration
Steering and Brake Systems
6.4
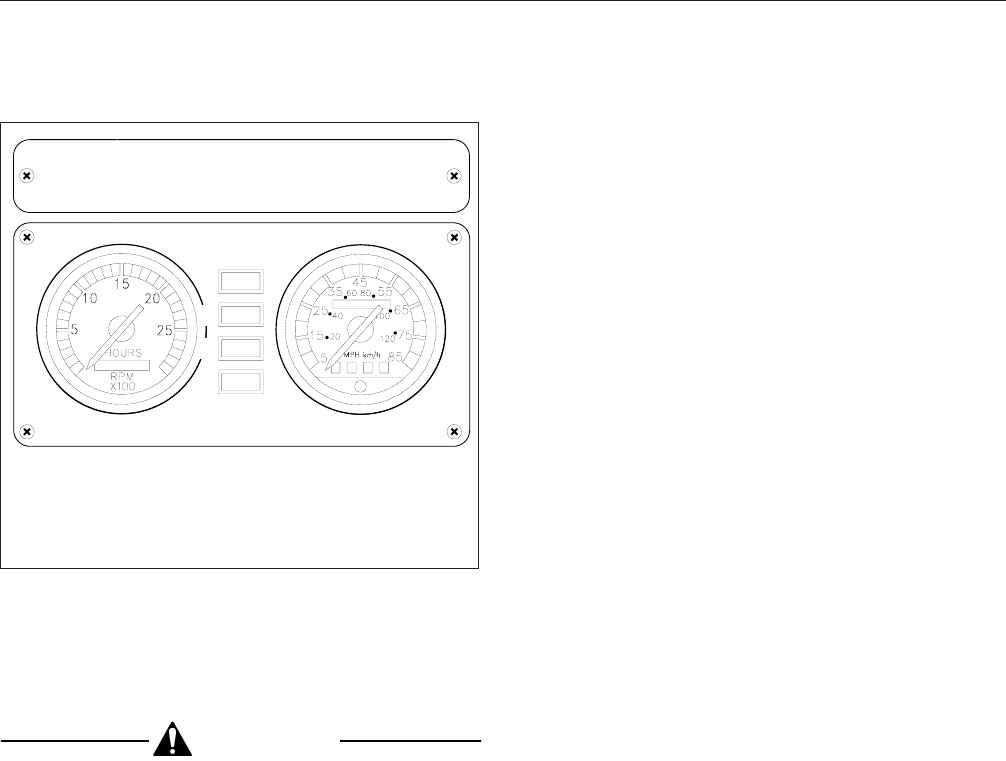
(Fig. 6.4). The light goes out when the wheel stops
spinning. When the light comes on, partially release
the throttle pedal until the light goes out. If slippery
road conditions continue, engage the axle lock.
CAUTION
Do not engage the axle lock while the WHL SPIN
light is on. To do so could damage the rear axle.
See Chapter 9, "Rear Axles," for axle lock in-
structions.
If the vehicle is equipped with an electronic engine,
an automatic traction control (ATC) system may be
installed. On these vehicles, the ATC system auto-
matically reduces wheel spin during reduced-traction
starts.
An "ATC Function" switch (if equipped), allows the
driver to select from two levels of drive axle traction-
control assistance:
•NORMAL—reduces drive axle wheel spin on
icy, wet, or sand covered roads.
•DEEP SNOW/MUD—allows a higher threshold
of drive axle wheel spin to help burn through a
thin layer of ice, or to help throw off accumu-
lated mud or snow.
The DEEP SNOW/MUD mode is indicated by a
flashing WHL SPIN light. To engage this mode, the
ATC function switch must be in the NORMAL position
when the vehicle is initially powered up. Once the
vehicle is started, the ATC function switch can be set
to the DEEP SNOW/MUD position. The ECU indi-
cates this change by a constant flashing of the WHL
SPIN lamp (or by illumination of the DEEP SNOW/
MUD light (Fig. 6.4) on vehicles built before July,
1994).
If the ATC function switch is in the DEEP SNOW/
MUD position when the vehicle is powered up, the
ECU will not accept this function change and will re-
main in the NORMAL mode. Indication of this condi-
tion will be the absence of the flashing WHL SPIN
light (on vehicles built before July, 1994, the absence
of an illuminated DEEP SNOW/MUD light). To en-
gage the DEEP SNOW/MUD mode in this situation,
change the position of the ATC function switch to the
NORMAL mode. After 2 seconds, move the switch to
the DEEP SNOW/MUD position. When this occurs,
the indicator light will activate as previously de-
scribed.
IMPORTANT: ABS and ATC blink code diagnos-
tics should only be performed when the vehicle
is stopped. If the vehicle is equipped with ATC,
turning "On" the ABS CHK switch will reduce
engine speed to idle for 3 seconds and affect
ATC function performance. If the vehicle is
driven with the ABS CHK switch "On" (in the
"Up" position), the WHL SPIN light will illuminate
continuously. Under this condition, turning the
ABS CHK switch "Off" (in the "Down" position),
while the vehicle is still in motion, will only turn
off the WHL SPIN light, but will not restore ATC
function performance. To fully restore engine
and ATC function capability, the vehicle must be
brought to a complete stop. Then, move the
ABS CHK switch to "Off" (in the "Down" posi-
tion).
The Meritor WABCO ABS system combines one
front-axle control channel with either one rear axle
(the 4-channel system), or two rear axles (the
6-channel system) to form one control circuit. For
example, the sensor and solenoid control valve at
the left-front axle form a control circuit with the sen-
sor(s) and solenoid control valve(s) on the right rear
axle(s). If, during vehicle operation, the safety circuit
senses a failure in any part of the ABS system (a
sensor, solenoid control valve, wiring connection,
short circuit, etc.), the tractor warning light (TRAC
1
2
3
4
05/31/95 f600771a
1. Parking Brake Indicator Light
2. Tractor ABS Warning Light
3. Wheel Spin Indicator Light
4. Trailer ABS Warning Light
Fig. 6.4, Warning and Indicator Lights
Steering and Brake Systems
6.5

ABS) comes on and the control circuit where the fail-
ure occurred is switched to normal braking action.
The remaining control circuit will retain the ABS ef-
fect. Even if the ABS system is partially or completely
inoperative, normal braking ability is maintained. The
vehicle is not disabled.
IMPORTANT: If any of the ABS warning lights
do not work as described above, or come on
while driving, repair the ABS system immedi-
ately to ensure full antilock braking capability.
During emergency or reduced-traction stops, fully
depress the brake pedal until the vehicle comes to a
safe stop;
do not pump
the brake pedal. With the
brake pedal fully depressed, the ABS system will
control all wheels to provide steering control and a
reduced braking distance.
Although the ABS system improves vehicle control
during emergency braking situations, the driver still
has the responsibility to drive appropriately for exist-
ing traffic and road conditions. For example, the ABS
system cannot prevent an accident if the driver is
speeding or following too closely on slippery road
surfaces.
Trailer ABS Lamp Operation
Antilock braking systems on tractors are designed to
communicate with trailer ABS systems, if they are
compatible. Compatibility will result in the illumination
of the trailer ABS lamp during vehicle start-up and
fault detection.
The dash-mounted lamp will operate as follows when
a compatible trailer is properly connected to a tractor:
•When the ignition key is turned to the ON posi-
tion, the trailer ABS lamp will illuminate mo-
mentarily, then turn off.
•If the lamp comes on momentarily during ve-
hicle operation, then shuts off, a fault was de-
tected and corrected.
•If the lamp comes on and stays on during ve-
hicle operation, there is a fault with the trailer
ABS. Repair the trailer ABS system immedi-
ately to ensure full antilock braking capability.
The Trailer ABS lamp will not illuminate unless a
compatible trailer is connected to the tractor.
IMPORTANT: If a compatible trailer is connected
and the lamp is not illuminating momentarily
when the ignition key is turned to the ON posi-
tion, it is possible that the lamp is burned out.
Automatic Slack Adjusters
Automatic slack adjusters are required on all vehicles
equipped with air brakes manufactured after October
20, 1994. Automatic slack adjusters should never be
manually adjusted except during routine maintenance
of the foundation brakes (e.g., replacing shoes), dur-
ing slack adjuster installation or in an emergency
situation.
When the brake pushrod stroke exceeds the legal
brake adjustment limit on a vehicle, there is likely a
mechanical problem with the foundation brake com-
ponents or the adjuster is improperly installed.
Visit a repair facility as soon as possible when
brakes equipped with automatic slack adjusters are
determined to be out of adjustment.
WARNING
Manually adjusting an automatic slack adjuster to
bring the pushrod stroke within legal limits is
likely masking a mechanical problem. Adjustment
is not repairing. In fact, continual adjustment of
automatic slack adjusters may result in prema-
ture wear of the adjuster itself. Further, the im-
proper adjustment of some automatic slack ad-
justers may cause internal damage to the
adjuster, thereby preventing it from properly
functioning.
Steering and Brake Systems
6.6

7
Engines and Clutches
EPA07 Aftertreatment System (ATS) .................................................. 7.1
Engine Starting ................................................................... 7.2
Ether Start System ................................................................ 7.5
Cold-Weather Operation ............................................................ 7.5
Engine Break-In .................................................................. 7.7
Engine Operation ................................................................. 7.7
Engine Shutdown ................................................................ 7.18
High-Altitude Operation ........................................................... 7.19
Bendix Cruise Control System, Optional .............................................. 7.20
Engine Braking System, Optional ................................................... 7.21
Clutches ....................................................................... 7.22

EPA07 Aftertreatment System
(ATS)
All on-road diesel engines built after December 31,
2006 (EPA07 engines) must meet strict new guide-
lines for reduced emissions of particulate matter and
nitrogen oxides (NOx) from the exhaust. NOx is lim-
ited to just over 1 gram per brake horsepower hour
(g/bhp-hr) and particulate matter cannot exceed 0.01
g/bhp-hr.
EPA07-compliant engines require ultralow-sulfur die-
sel (ULSD) fuel, and they should never be run on
fuel with sulfur content higher than 15 ppm. In addi-
tion, they require low-ash engine oil. The following
guidelines must be followed or the warranty may be
compromised.
•Use ultralow-sulfur diesel (ULSD) with 15 ppm
sulfur content or less, based on ASTM D2622
test procedure.
•Do not use fuel blended with used engine lube
oil or kerosene.
•Engine lube oil must have a sulfated ash level
less than 1.0 wt %; currently referred to as
CJ-4 oil.
The "exhaust system" in EPA07-compliant vehicles is
called the aftertreatment system (ATS). The ATS var-
ies according to engine manufacturer and vehicle
configuration, but instead of a muffler, an aftertreat-
ment system has a device that outwardly resembles
a muffler, called the aftertreatment device (ATD).
IMPORTANT: See your engine operation manual
for complete details and operation of the after-
treatment system.
Inside the ATD on Mercedes-Benz, Detroit Diesel,
and Cummins engines, the exhaust first passes over
the diesel oxidation catalyst (DOC), then it passes
through the diesel particulate filter (DPF), which traps
soot particles. If exhaust temperature is high enough,
the trapped soot is reduced to ash, in a process
called passive regeneration (regen). Passive regen-
eration occurs as the vehicle is driven normally
under load; the driver is not even aware that it is
happening. The harder an EPA07 engine works, the
better it disposes of soot, as the exhaust heat alone
is enough to burn the soot to ash. Over the course of
a workday, however, passive regeneration cannot
always keep the ATD filter clean, so the filter must
undergo active regeneration. In active regeneration,
extra fuel is injected into the exhaust stream to su-
perheat the soot trapped in the DPF and turn it to
ash. Active regeneration happens only when the ve-
hicle is moving above a certain speed, determined by
the engine manufacturer. Consult manufacturers’
documentation for details.
Both active and passive regeneration happen auto-
matically, without driver input.
NOTE: Caterpillar engines do not use a DOC;
Cat engines burn diesel fuel at the regeneration
head to superheat the exhaust and burn the
trapped soot to ash. Engine software monitors
and controls this process.
If conditions do not provide for at-speed active re-
generation, the vehicle will need a driver-activated
parked regeneration. The vehicle must be standing
still, and the driver must initiate parked regen. Com-
pleting a parked regen takes 20 minutes to an hour,
depending on ambient conditions.
DANGER
During parked regeneration, exhaust tempera-
tures are very high, and could cause a fire, heat
damage to objects or materials, or personal in-
jury to persons near the exhaust outlet.
Before a parked regeneration, make certain the
exhaust outlets are directed away from struc-
tures, trees, vegetation, flammable materials, and
anything else that may be damaged or injured by
prolonged exposure to high heat.
There are three warning lamps in the driver message
center that alert the driver of the need to perform a
parked regen, clean the filter, or of an engine fault
that affects the emissions.
A slow (10-second) flash of the high exhaust system
temperature (HEST) lamp, indicates a regeneration is
in progress, and the driver is not controlling the en-
gine idle speed.
A solid illuminated high exhaust system temperature
(HEST) lamp, alerts the operator of high exhaust
temperature during the regeneration process, when
the speed is below 5 mph (8 km/h). The HEST lamp
does not signify the need for any kind of vehicle or
engine service; it only alerts the vehicle operator of
high exhaust temperatures. Make sure the engine
exhaust pipe outlet is not directed at any person, or
Engines and Clutches
7.1
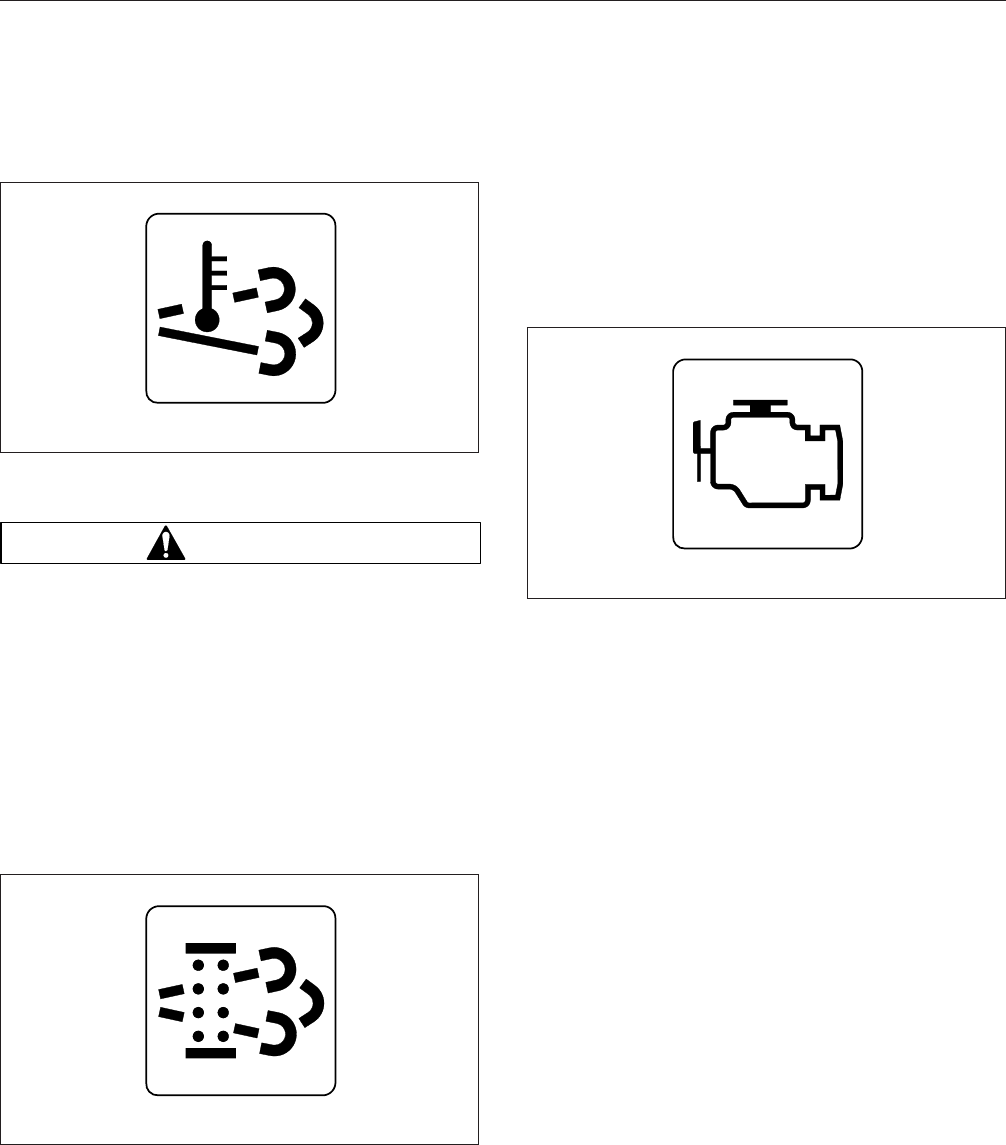
at any surface or material that will melt, burn, or ex-
plode. See Fig. 7.1.
WARNING
Automatic regeneration can occur any time the
vehicle is moving, and the exhaust can remain
hot after the vehicle has stopped moving. The
exhaust gas temperature could reach 1500°F
(800°C), which is hot enough to ignite or melt
common materials, and to burn people.
A solid yellow diesel particulate filter (DPF) lamp indi-
cates that a parked regen is required soon, and
should be scheduled for the earliest convenient time.
See Fig. 7.2. A blinking yellow DPF lamp indicates
that a parked regen is required immediately, or an
engine derate may occur.
A solid yellow malfunction indicator lamp (MIL) indi-
cates an engine fault that affects the emissions. See
Fig. 7.3.
Diesel particulate filter servicing must be performed
by an authorized technician, and a record must be
maintained for warranty purposes. The record must
include:
•date of cleaning or replacement;
•vehicle mileage;
•particulate filter part number and serial number.
The request/inhibit regen switch (Fig. 7.4), located
on the dash, may have three selectable positions:
•request regeneration;
•default (can include appropriate normal state
condition—either in an automatic regeneration
or inhibit state);
•inhibit regeneration.
NOTE: The regen switch can start an active
regen only when at least one of two conditions
exists: either the DPF light is lit, or the engine
software calls for it. If neither of those conditions
exist, the regen switch cannot cause a regen-
eration to happen.
The function of the switch will vary by the engine
make and model in the vehicle. See the engine op-
eration manual for switch operation details.
Engine Starting
For cold-weather starting, refer to "Ether Start Sys-
tem" in this chapter.
09/25/2006 f610816a
Fig. 7.1, High Exhaust System Temperature (HEST)
Lamp
09/25/2006 f610815a
Fig. 7.2, Diesel Particulate Filter (DPF) Status Lamp
09/25/2006 f610814a
Fig. 7.3, Malfunction Indicator Lamp (MIL)
Engines and Clutches
7.2
CAUTION
When starting a vehicle equipped with a manual
transmission and clutch lockout switch, the
clutch pedal must be fully depressed during the
entire start sequence. Failure to do so can cause
the pinion to release and re-engage, which could
cause ring gear and starter pinion damage.
If a vehicle does not start on the first attempt,
make sure that the engine has completely
stopped rotating before reapplying the starter
switch. Failure to do so can cause the pinion to
release and re-engage, which could cause ring
gear and starter pinion damage.
Moving a vehicle with the starter and/or using the
starter to bump the engine for maintenance pro-
cedures is strictly prohibited. Use of these meth-
ods to bump the engine over or move the vehicle
can cause the pinion to release and re-engage,
which could cause ring gear and starter pinion
damage.
IMPORTANT: Ring gear and starter pinion dam-
age caused by improper starting procedures is
not warrantable.
Caterpillar
NOTE: Before starting the engine, read Chap-
ter 2 in this manual for detailed information on
how to read the instruments and operate the
controls.
The information below contains guidelines for cold-
weather starting. For additional information, refer to
"Ether Start System."
WARNING
Do not use any starting aid, such as ether, in en-
gines with an intake air preheater. This could
cause an explosion, resulting in serious personal
injury or death.
1. Before engine start-up, perform the engine pre-
trip inspection and daily maintenance checks in
Chapter 11.
2. Set the spring parking brakes.
3. Turn the ignition switch to the on position. All the
electronic gauges on the ICU (instrumentation
control unit) complete a full sweep of their dials,
the warning and indicator lights light up, and the
buzzer sounds for three seconds.
NOTE: The engine electronics supply the cor-
rect amount of fuel for starting the engine. Pedal
pressure is unnecessary.
4. Turn the ignition switch to the start position. Do
not press down on the throttle pedal. Release
the switch the moment the engine starts. If the
engine does not start after 30 seconds of crank-
ing, turn the ignition switch off.
NOTE: Some starters are equipped with op-
tional overcrank protection. If overcranking oc-
curs, a thermostat breaks the electrical circuit to
the starter motor until the motor has cooled. For
air start systems, check the air supply before
starting the engine. There must be 100 psi (689
kPa) of air pressure available.
5. Wait two minutes to allow the starter motor to
cool. Turn the ignition switch back to the on posi-
tion and try to start the engine again.
CAUTION
If the oil pressure is less than 5 psi (35 kPa), shut
down the engine immediately to prevent serious
damage. If the vehicle is equipped with an auto-
matic shutdown system, the engine will shut
down after 30 seconds.
09/21/2006 f610844
Fig. 7.4, Request/Inhibit Regen Switch
Engines and Clutches
7.3

6. C-10, C-12, and C-15 engines may be operated
at low load and speed once the engine oil pres-
sure has reached 10 to 20 psi (69 to 138 kPa).
When the engine has reached the normal operat-
ing temperature of 189°F (87°C), the engine may
be operated at full load
Cummins and Detroit Diesel
NOTE: Before starting the engine, read Chap-
ter 2 in this manual for detailed information on
how to read the instruments and operate the
controls. On vehicles equipped with a neutral
start switch, the transmission must be in neutral
before the engine can be started.
1. Before engine start-up, perform the engine pre-
trip inspection and daily maintenance checks in
Chapter 11 of this manual.
2. Set the spring parking brakes.
CAUTION
Protect the turbocharger during the start-up by
not opening the throttle or accelerating the en-
gine above 1000 rpm until normal engine idle oil
pressure registers on the gauge.
3. Set the throttle idle (hold down the clutch pedal).
4. Make sure the transmission is in neutral.
CAUTION
Do not crank the engine for more than 30 sec-
onds at a time. Wait two minutes after each try to
allow the starter to cool. Failure to do so could
cause starter damage.
5. Turn on the ignition switch.
NOTE: A manual override knob, provided on the
forward end of the electric shutdown valve, al-
lows the valve to be opened in case of electric
power failure. To use the override, open it by
turning the knob fully clockwise. Return it to the
run position after repair.
IMPORTANT: For Detroit Diesel engines, pump-
ing the accelerator before or during cranking will
not aid in starting. If the engine won’t start,
check the main engine power fuses; they may
have blown. The fuses are located along the
main engine electrical harness on the left frame
rail, near the batteries. If needed, replace the
fuses. Be sure to find the cause of the blown
fuses as soon as possible.
NOTE: Some starters are equipped with an op-
tional thermostat. If overcranking occurs, the
thermostat breaks the electrical current to the
starter motor until the motor has cooled.
6. Press the start button. Release the button the
moment the engine starts.
If the vehicle is equipped with an automatic en-
gine shutdown system with a manual override
push button, press the override button while
pressing the engine start button. Once the en-
gine has started, release the engine start button,
but continue to press the override push button
until the warning bell stops.
If the vehicle is equipped with a battery isolator
system, and the gel cell battery is completely
discharged, press and hold the battery boost
push button while pressing the starter push but-
ton. This will temporarily disconnect the isolated
battery while connecting the engine-starting bat-
teries to the ignition switch for engine starting.
7. When the engine is started, it takes a while to
get the lubricating oil film reestablished between
the shafts and bearings, and between the pistons
and liners. Bring the engine up to operating
speed gradually as it warms up and develops
stable oil pressure.
The oil pressure gauge indicates any drop in lu-
bricating oil pressure or mechanical malfunction
in the lubricating oil system. The operator should
note the loss of oil pressure and shut down the
engine before damage can occur.
8. During the warm-up period, apply the load gradu-
ally until the oil temperature reaches 140°F
(60°C). For an engine starting a loaded vehicle,
the coolant temperature must be approximately
120°F (49°C).
Starting After Extended Shutdown or Oil
Change
Do the following steps after an oil change or after the
engine has been shut down for more than three
days:
Engines and Clutches
7.4
1. Disconnect the wire from the fuel pump solenoid
valve.
2. Crank the engine until oil pressure shows on the
gauge.
3. Connect the wire to the fuel pump solenoid
valve.
4. Start the engine. Refer to "Engine Starting"
above.
Ether Start System
Ether allows combustion with lower cylinder tempera-
tures. A pressurized spray-can or a rag dampened
with fluid will usually provide quick starting to as low
as –10°F (–23°C). Below this temperature, some
means of injecting a carbureted vapor directly into
the intake manifold is necessary.
Caterpillar truck engines with direct injection are de-
signed to start at temperatures above 10°F (–12°C)
without using start systems. If the temperature is
below 10°F (–12°C), a start system may be neces-
sary and/or crankcase oil may need to be heated.
Jacket water heaters are often used to assist starting
in cold temperatures.
The cold start system, approved for use on Cummins
engines, has been based upon starting aid capabili-
ties to –25°F (–32°C).
WARNING
If using a cold-weather-start system, be sure to
follow the manufacturer’s instructions regarding
its use, handling, and storage. Many starting flu-
ids are in capsules or pressure cans, and im-
proper usage can be dangerous.
Do not attempt to use any type of vapor-
compound start system near heat or open flame.
Engine damage due to an explosion or fire in the
intake manifold could result.
Do not breathe the ether fumes; doing so could
result in personal injury.
Cold-Weather Operation
IMPORTANT: If a winterfront is used on a ve-
hicle with an electronic engine equipped with a
charge air cooler, make sure that there are slit
openings distributed across the face of the win-
terfront to allow airflow through the entire
charge-air-cooler core. Do not use a winterfront
with closed areas that block uniform air flow
across any sections of the charge-air-cooler
crossflow tubes. This will adversely affect the
operation and durability of the charge air cooler.
Caterpillar
If the engine is in good mechanical condition and the
precautions necessary for cold-weather operation are
taken, ordinary cold weather will not cause difficulty
in starting, or loss of efficiency.
If the engine does not start, prime the fuel system.
When the use of unblended No. 2 diesel fuel in win-
ter cannot be avoided, install a thermostatically con-
trolled fuel heater. Fuel heaters can prevent wax
from clogging the fuel filters and formation of ice
crystals from water in the fuel.
IMPORTANT: If a fuel heater is used, make sure
it has thermostatic controls to prevent excessive
heating of the fuel in warm weather. Excessive
heating of fuel can cause a loss of engine
power.
For cold-weather operation, use the following guide-
lines:
1. When starting the engine in temperatures below
32°F (0°C), use engine lubricants of lower vis-
cosity. See your engine operation and mainte-
nance manual for specifications.
2. When the temperature is below freezing, use suf-
ficient antifreeze solution in the cooling system to
prevent freezing. Refer to Group 20 of the
Heavy-Duty Trucks Maintenance Manual
for
specifications.
3. During cold weather, give more attention to the
condition of the batteries. Test them frequently to
ensure sufficient power for starting. Inspect all
switches and connections in the electrical system
and keep them in good condition to prevent
losses through poor contacts. See Group 15 of
the
Heavy-Duty Trucks Service Manual
for de-
tailed information.
WARNING
Do not use any starting aid, such as ether, in en-
gines with an intake air preheater. This could
Engines and Clutches
7.5

cause an explosion, resulting in serious personal
injury or death.
4. If so equipped, turn off the battery disconnect
switch after the engine is stopped to prevent bat-
tery discharge while the starter motor is cooling.
For starting below 0°F (–18°C), an optional cold-
weather starting assist is recommended. For
temperatures below –10°F (–23°C), consult your
Caterpillar dealer for recommendations.
5. When the customer parameters include cold
mode operation and the coolant temperature is
below 64°F (18°C), the system puts the engine in
cold mode, limiting engine power, advancing tim-
ing, and adjusting the low idle to 600 rpm (for
C-15 engines) or 800 rpm (for C-10 and C-12
engines) to improve warm-up time. The system
will keep the engine in cold mode until the cool-
ant temperature rises above 82°F (28°C). After
the cold mode has been completed, operate the
vehicle at low load and low rpm until the engine
coolant reaches the normal operating tempera-
ture of 189°F (87°C).
6. Fuel cloud point is the temperature at which wax
crystals become visible, which is generally above
the pour point of the fuel. To keep the fuel filter
elements from plugging with wax crystals, the
cloud point should be no higher than the lowest
ambient temperature at which the engine must
start.
Cummins
Satisfactory performance of a diesel engine operating
in low ambient temperatures requires modification of
the engine, surrounding equipment, operating prac-
tices, and maintenance procedures. The colder the
temperatures, the greater the amount of modification
required, and yet with the modifications applied the
engines must still be capable of operation in warmer
climates without extensive changes.
The following information is provided to engine own-
ers, operators, and maintenance personnel on how
the modifications can be applied to get satisfactory
performance from their diesel engines.
There are three basic objectives:
•Reasonable starting characteristics followed by
practical and dependable warm-up of the en-
gine and equipment.
•A unit or installation which is as independent
as possible from external influences.
•Modifications which maintain satisfactory oper-
ating temperatures with a minimum increase in
maintenance of the equipment and accesso-
ries.
If satisfactory engine temperature is not maintained,
higher maintenance cost will result due to increased
engine wear. Special provisions to overcome low
temperatures are definitely necessary, whereas a
change to a warmer climate normally requires only a
minimum of revision. Most of the accessories should
be designed in such a way that they can be discon-
nected so there is little effect on the engine when
they are not in use.
The two most commonly used terms associated with
preparation of equipment for low-temperature opera-
tion are "winterization" and "arctic specifications."
Winterization of the engine and/or components so
that starting and operating are possible in the lowest
temperature to be encountered, requires:
A. Proper lubrication with low-temperature lubricat-
ing oils.
B. Protection from the low-temperature air. The
metal temperature does not change, but the rate
of heat dissipation is affected.
C. Fuel of the proper grade for the lowest tempera-
ture.
D. Heat to raise the engine block and component
temperatures to at least –25°F (–32°C) for start-
ing in lower temperatures.
E. Electrical equipment capable of operating in the
lowest expected temperature. All switches, con-
nections, and batteries in the electrical system
should be inspected and kept in good condition
to prevent losses through poor contacts.
Arctic specifications refer to the design of material
and specifications of components necessary for sat-
isfactory engine operation in extremely low tempera-
tures to –65°F (–54°C). Contact the nearest Freight-
liner dealer or Cummins engine dealer, to obtain the
special items required.
Engines and Clutches
7.6

CAUTION
"Antileak" antifreezes are not recommended for
use in Cummins engines. Although these anti-
freezes are chemically compatible with DCA
water treatment, the "antileak" agents may clog
the coolant filters.
IMPORTANT: Fuel heaters used on vehicles
with Cummins PACE or CELECT engine sys-
tems could cause high fuel temperatures that
affect engine performance and operation of the
electronic engine controls. If a fuel heater is
used, make sure it has thermostatic controls. If
the fuel heater has a timer, set the timer to acti-
vate only for a limited period of time before the
engine starts. Make sure the fuel heater is used
only for starting the engine.
Detroit Diesel
Preparations made in advance of winter and mainte-
nance performed during the cold months will help to
ensure efficient engine starting and operation.
1. Engine oil thickens as it gets colder, slowing
cranking speed. When cold, multigrade oil offers
less resistance to the cranking effort of the en-
gine and permits sufficient rpm to be developed
to start the engine. Refer to "Lubricating Oil Rec-
ommendations" in the Detroit Diesel
Owner’s and
Operator’s Guide
for specific recommendations.
2. When an engine equipped with a DDEC system
is started at temperatures below 25°F (–4°C), the
idle speed automatically increases to 900 rpm.
The injection timing is also advanced to de-
crease white smoke. As the engine oil warms up,
the idle speed gradually decreases. When the oil
temperature reaches 122°F (50°C), both the idle
speed and the injection timing return to normal.
3. During cold weather, the batteries should be
tested more frequently to ensure ample power
for starting. All electrical connections should be
tight and in good condition to prevent losses
through loose or corroded connections.
4. The ether start system should be properly
charged and in good working order.
5. Ethylene-glycol-base antifreeze is recommended.
An inhibitor system is included in this type of an-
tifreeze and the corrosion protection is sufficient
as long as the recommended concentration
range of 30 to 67 percent (antifreeze to water by
volume) is employed. See Group 20 of the
Heavy-Duty Trucks Maintenance Manual
for cool-
ing system capacity and quantity of antifreeze
required for the lowest anticipated temperature.
6. If the engine is to be operated in arctic tempera-
tures, consult the nearest Freightliner dealer or
an authorized Detroit Diesel engine dealer for
information regarding availability of special cold
weather equipment.
Engine Break-In
Every engine is tested on a dynamometer before
shipment, eliminating the need for a break-in period.
Before running the engine for the first time, follow the
instructions in the Engine Operator’s Manual.
Engine Operation
DANGER
Do not operate the engine in an area where flam-
mable vapors such as gasoline or diesel fumes
are present. Shut down the engine when in an
area where flammable liquids or gases are being
handled. Failure to observe these precautions
could result in serious injury or death.
All diesel engines have been built to comply with the
requirements of the Federal (U.S.) Clean Air Act.
Once an engine is placed in service, the responsibil-
ity for meeting both state and local regulations is with
the owner/operator. Good operating practices, regular
maintenance, and correct adjustments are factors
that will help to stay within the regulations. Proper
maintenance of the engine, which is the responsibility
of the owner/operator, is essential to keep the emis-
sion levels low.
Engine Protection
On electronic engines, an engine-protection system
monitors all engine sensors and electronic compo-
nents, and recognizes system malfunctions. If a criti-
cal fault is detected, an amber check-engine warning
lamp and a red stop-engine lamp illuminate.
The standard parameters that are monitored for en-
gine protection are: low coolant level, high coolant
Engines and Clutches
7.7
temperature, low oil pressure, high soot level (DPF),
and uncontrolled DPF regeneration.
Amber Check-Engine Warning Lamp
When the amber check-engine warning lamp comes
on for any reason, the vehicle can still be operated,
and the driver can proceed to the required destina-
tion. This condition should be reported to an autho-
rized service center as soon as possible.
Red Stop-Engine Lamp
WARNING
When the red stop-engine light illuminates, most
engines are programmed to shut down automati-
cally within 30 seconds. The driver must immedi-
ately move the vehicle to a safe location at the
side of the road to prevent causing a hazardous
situation that could cause bodily injury, property
damage, or severe damage to the engine.
The red stop-engine lamp illuminates to indicate that
the engine-protection system has been activated.
The conditions that will cause the red stop-engine
lamp to come on are:
•high coolant temperature
•loss of coolant
•low oil pressure
•high soot level (DPF)
•uncontrolled DPF regeneration
On some engines, the engine ECU will derate the
engine, allowing it to run at low rpm and slow vehicle
speed, until the vehicle can be driven to a safe loca-
tion or to a service facility. On other engines, the en-
gine ECU will first derate the engine, then if the con-
dition does not improve, shut it down completely 30
seconds after the light comes on. The driver must
safely bring the vehicle to a stop on the side of the
road before the engine shuts down.
To restart the engine (override the shutdown com-
mand) turn the ignition switch to OFF, leave it there a
few seconds, and turn the switch to START. The en-
gine will run for a short period and shut down again if
the condition does not improve.
IMPORTANT: Do not attempt to restart the en-
gine while the vehicle is moving. Bring the ve-
hicle to a safe stop and restart the engine with
the vehicle stopped.
Stop-Engine Override Switch
If the vehicle is equipped with a stop-engine override
(SEO) switch, it can be used to override the shut-
down sequence. This override resets the shutdown
timer, restoring power to the previous level before the
red stop-engine lamp was illuminated. The switch
must be recycled after five seconds to obtain a sub-
sequent override.
CAUTION
Using the override button so the engine operates
for an extended period may result in engine dam-
age. The operator has the responsibility to take
action to avoid engine damage.
Caterpillar Engine Operation
Proper operation and maintenance are key factors in
obtaining the maximum life and economy of a vehicle
engine. Follow the directions in the Caterpillar
Opera-
tion and Maintenance Management Manual
and this
manual for trouble-free, economical engine operation.
1. Operate the engine at low load. After normal oil
pressure is reached and the temperature gauge
begins to move, the engine may be operated at
full load.
Caterpillar electronic engines automatically idle
at 900 to 1000 rpm for the correct warm up time
after a cold engine start (less than 40°F [5°C]).
These electronic engine systems will reduce the
idle speed to 600 rpm when the engine is warm
enough to drive the vehicle.
IMPORTANT: Fuel heaters used on vehicles
with Caterpillar electronic engines could cause
excessive fuel temperatures that affect engine
performance and operation of the electronic en-
gine controls. If a fuel heater is used, make sure
it has thermostatic controls. If the fuel heater
has a timer, set the timer to activate only for a
limited period of time before the engine starts.
Make sure the fuel heater is used only for start-
ing the engine.
2. Keep the engine speed to a minimum. An ac-
ceptable range is 1200 to 1600 rpm.
Engines and Clutches
7.8
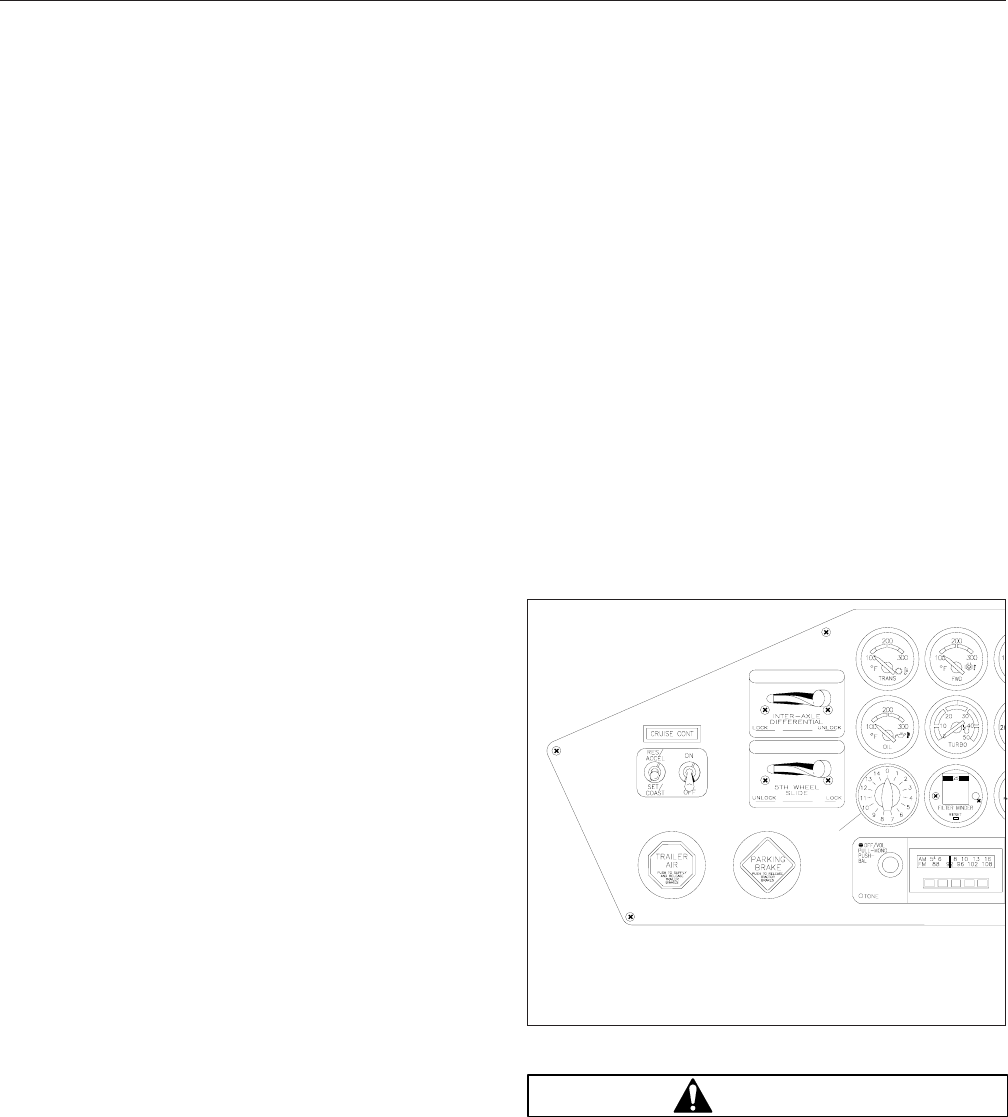
3. Select a gear that allows a smooth, easy start
without increasing engine speed above low idle
or slipping the clutch. Engage the clutch
smoothly. Jerky starts waste fuel and put stress
on the drivetrain.
It is not necessary to accelerate Caterpillar elec-
tronic engines to governed speed in the lower
gears to get the vehicle moving, except in a high
power demand situation such as starting on a
grade.
4. Continue to upshift until cruising speed is
reached. Use only the rpm needed to make an
upshift into the next gear. The engine speed
needed to make an upshift increases as the ve-
hicle speed increases or if upshifts are made on
uphill grades. If the vehicle can be operated in a
higher gear after reaching the desired speed,
select the highest gear available that will pull the
load. Experience with your vehicle will show you
what rpm is needed to make upshifts under vari-
ous conditions. This progressive shifting tech-
nique will lower fuel costs because the engine
will be operating at the lowest rpm needed to pull
the load.
Caterpillar electronic engines can be pro-
grammed to limit engine rpm while the vehicle is
operated in the lower and higher gears. This fea-
ture assists the driver in following progressive
shifting techniques.
5. On uphill grades, begin downshifting when the
engine rpm falls to 1200 rpm. Fuel economy will
be best if you let the engine lug back to around
this speed before you downshift. Downshift until
a gear is reached in which the engine will pull
the load. Let the engine lug down if you can
make it to the top of a hill without downshifting.
IMPORTANT: Don’t let the engine exceed 2300
rpm (2100 rpm if equipped with an exhaust
brake).
6. On a downhill grade, do not coast or put the
transmission in neutral. Select the correct gear
that does not allow the engine to exceed its
maximum speed. Use the brakes to limit the ve-
hicle speed.
A simple rule to follow is to select the same gear
(or one gear lower) that would be needed to go
up the grade.
7. As with any engine, prolonged idling of Caterpil-
lar engines is not recommended. An idling en-
gine wastes fuel and if left unattended, is also
unsafe.
Caterpillar engines can be programmed to shut
off automatically after a specified idling time. The
vehicle transmission must be in neutral and the
parking brake must be set for the automatic shut-
off option to work.
Cruise Control
The cruise control is activated by the "On/Off" and
"Set/Resume" switches on the dash (Fig. 7.5)orby
optional "Pause," "Resume," and "Set" buttons on
the transmission shift knob (Fig. 7.6). The minimum
speed at which cruise control can be used on Cater-
pillar electronic engines is 30 mph (48 km/h). The
minimum and maximum speed cruise control set lim-
its can be programmed, by authorized personnel, into
the ECM personality module.
WARNING
Do not use the cruise control system when driv-
ing conditions do not permit maintaining a con-
stant speed, such as in heavy traffic or on roads
that are winding, icy, snow covered, slippery, or
roads with a loose driving surface. Failure to fol-
low this precaution could cause a collision or
03/30/94 f600705
A
A. If equipped with Jacobs engine brake controls, the
cruise switches may be installed here. The location
may vary depending on other vehicle options.
Fig. 7.5, Cruise Control Switches, Standard Location
Engines and Clutches
7.9
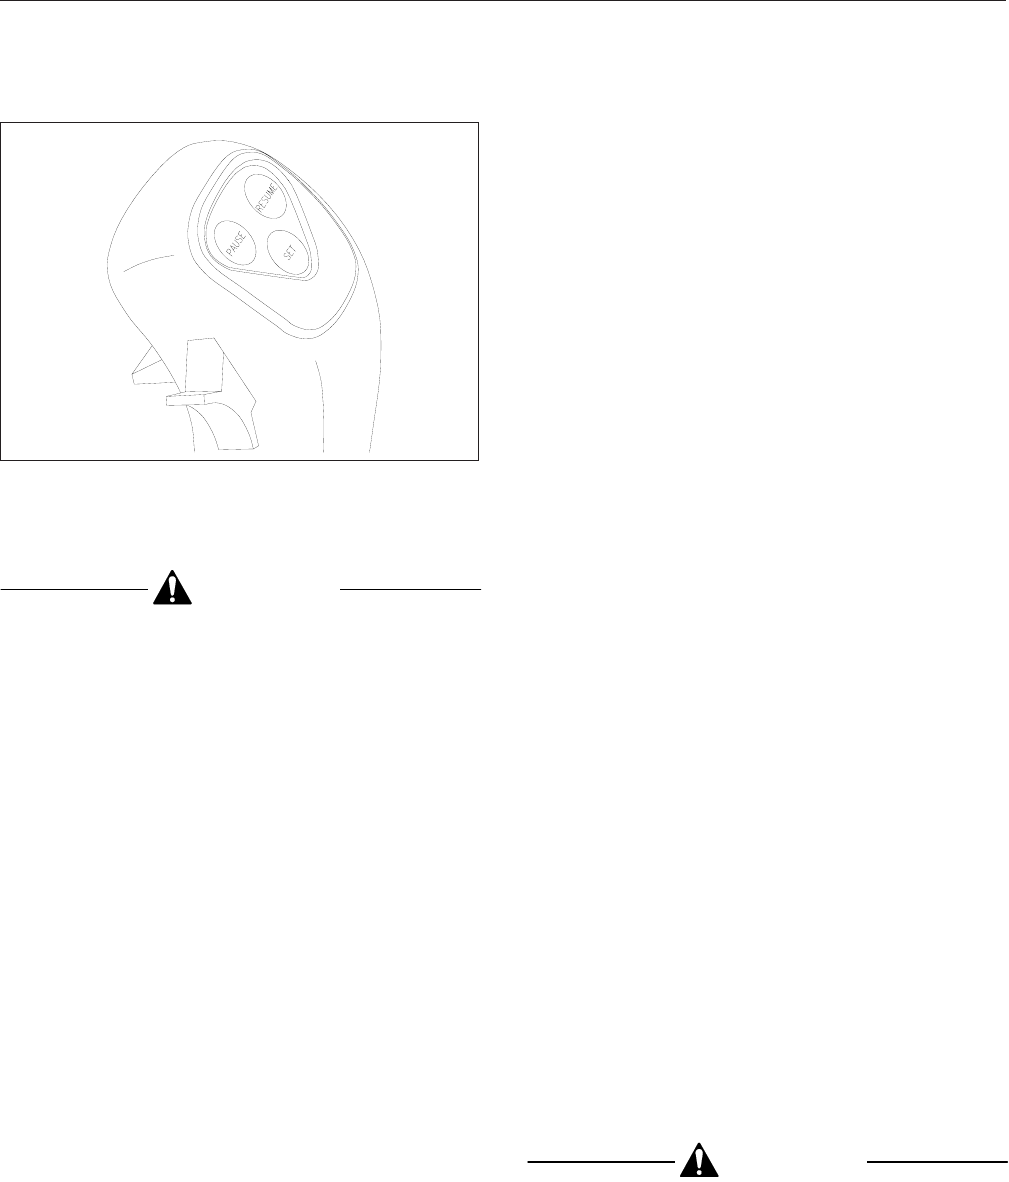
loss of vehicle control, possibly resulting in per-
sonal injury or property damage.
CAUTION
Do not attempt to shift gears without using the
clutch pedal when the cruise control is engaged.
Failure to follow this precaution will result in a
temporarily uncontrolled increase in engine
speed; transmission damage and gear stripping
could result.
1. To cruise at a particular speed:
1.1 Flip the ON/OFF switch on the instrument
control panel to ON.
1.2 Hold the throttle pedal until the speedom-
eter indicates the desired speed.
1.3 Momentarily move the SET/RESUME
switch on the instrument control panel to
SET or push the SET button on the trans-
mission shift knob.
2. To disengage the cruise control:
2.1 Depress the brake pedal, or clutch pedal,
or
2.2 Flip the ON/OFF switch on the instrument
control panel to OFF or push the PAUSE
button on the transmission shift knob.
3. To resume a preselected cruise speed:
3.1 If the ON/OFF switch on the instrument
control panel is in the OFF position, flip it
to ON.
3.2 Momentarily move the SET/RESUME
switch on the instrument control panel to
RESUME, or push the RESUME button on
the transmission shift knob. Cruise will
return to the last speed selected.
To adjust cruise speed up or down, hold
the SET/RESUME switch on the instru-
ment control panel at SET to accelerate or
at RESUME to decelerate until the desired
speed is reached, or press the SET button
on the transmission shift knob to acceler-
ate or the RESUME button to decelerate
until the desired speed is reached.
NOTE: The resume-vehicle-speed memory is
not maintained if the ignition is shut off.
BrakeSaver, Optional
The BrakeSaver (optional on C-15 engines) permits
the operator to control the speed reduction of the
vehicle on grades, curves, or anytime speed reduc-
tion is necessary but long applications of the service
brakes are not desired.
During downhill operation, the crankshaft is turned by
the rear wheels (through the drivetrain). To reduce
the speed of the vehicle, an application of braking
force can be made to the crankshaft. The Brake-
Saver does this by converting rotation energy into
heat which is removed by the engine cooling system.
The BrakeSaver is controlled by the driver, as neces-
sary, by operating a lever on the instrument panel.
Brake pressure increases as the lever is moved to-
ward the ON position. An air pressure gauge pro-
vides a relative indication of the braking force. An oil
temperature gauge indicates the heat in the Brake-
Saver during its operation. If the temperature gauge
indicates HOT, the BrakeSaver control lever must be
moved to the OFF position. The oil temperature will
decrease rapidly with the BrakeSaver off. When the
temperature reaches normal, the BrakeSaver can be
used.
CAUTION
Do not engage the BrakeSaver and control the
wheel speed with the accelerator. The design of
05/23/95 f260316
Fig. 7.6, Transmission Shift Knob Buttons
Engines and Clutches
7.10

the cooling system is for the control of the tem-
perature of the oil at full engine power or full
BrakeSaver capacity, but not both at the same
time.
Power Takeoff (PTO) Governor
Caterpillar electronic engines may be equipped with
a PTO governor. This mode is used only when the
vehicle is parked. The PTO mode is activated by the
ON/OFF and SET/RESUME switches on the dash
(Fig. 7.5) or by optional PAUSE, RESUME, and SET
buttons on the transmission shift knob (Fig. 7.6).
1. To engage the PTO:
1.1 Flip the ON/OFF switch on the instrument
control panel to ON.
1.2 Hold the throttle pedal until the tachometer
indicates the desired speed.
1.3 Momentarily move the SET/RESUME
switch on the instrument control panel to
SET, or push the SET button on the trans-
mission shift knob.
2. To disengage the PTO:
2.1 Depress the brake pedal, or clutch pedal,
or
2.2 Flip the ON/OFF switch on the instrument
control panel to OFF or press the PAUSE
button on the shift knob.
3. To resume a previously selected engine speed:
3.1 If the ON/OFF switch on the instrument
control panel is in the OFF position, flip it
to ON.
3.2 Momentarily move the SET/RESUME
switch on the instrument control panel to
RESUME, or press the RESUME button
on the transmission shift knob.
To adjust engine speed up or down, hold
the SET/RESUME switch on the instru-
ment control panel at SET to accelerate or
at RESUME to decelerate until the desired
speed is reached, or press the SET button
on the transmission shift knob to acceler-
ate or the RESUME button to decelerate
until the desired speed is reached.
NOTE: The resume-engine-speed memory is
not maintained if the ignition is shut off.
Cummins Engine Operation
Cummins diesel engines have been built by Cum-
mins to comply with the requirements of the Federal
(U.S.) Clean Air Act. Once the engine is placed in
service, the responsibility for meeting both state and
local regulations is with the owner/operator. Good
operating practices, regular maintenance, and proper
adjustments are factors which will help to stay within
the regulations.
Proper maintenance of the engine, which is the re-
sponsibility of the owner/operator, is essential to
keep the emission levels low.
Follow the directions in the Cummins
Operation and
Maintenance Manual
and this manual for trouble-
free, economical vehicle engine operation.
1. Cummins diesel engines produce high horse-
power and peak torque characteristics at lower
rpm. Because of this, it is not necessary to keep
the engine "wound up" to deliver the required
horsepower at the wheels. These characteristics
may also result in less shifting, and make shifting
at lower rpm (to peak torque) more practical.
2. Depending on the vehicle gearing, the posted
speed limit can sometimes allow operation in ei-
ther of the top two gears; however, for improved
operating efficiency (fuel economy and engine
life), operate in the top gear at reduced rpm,
rather than in the next lower gear at the maxi-
mum rpm.
3. Cruise at partial throttle whenever road condi-
tions and speed requirements permit. This driv-
ing technique permits operating within the most
economical power range of the engine.
4. When approaching a hill, open the throttle
smoothly to start the upgrade at full power, then
shift down as desired to maintain the maximum
vehicle speed. The higher torque of Cummins
engines may permit topping some grades without
shifting.
5. Cummins engines are designed to operate over
a wide speed range. More frequent shifting than
necessary does not allow proper utilization of this
flexibility. The driver who stays in top gear and
uses the wider speed range will achieve the best
fuel economy.
6. The Cummins diesel engine is effective as a
brake on downhill grades, but care must be used
Engines and Clutches
7.11
not to overspeed the engine going downhill. The
governor has no control over engine speed when
it is being pushed by the loaded vehicle.
Never turn off the ignition switch while going
downhill. With the engine still in gear, fuel pres-
sure will build up against the shutdown valve and
may prevent it from opening when the ignition
key is turned on.
CAUTION
Engine overspeed (engine speed exceeds high
idle, no-load rpm) can damage the engine.
7. Use a combination of brakes and gears to keep
the vehicle under control at all times and to keep
the engine speed below the rated governed rpm.
Cruise Control
The cruise control is activated by the ON/OFF and
SET/RESUME switches on the dash (Fig. 7.5)orby
optional PAUSE, RESUME, and SET buttons on the
transmission shift knob (Fig. 7.6). The minimum
speed at which cruise control can be used on Cum-
mins PACE and CELECT engines is 30 mph
(48 km/h).
WARNING
Do not use the cruise control system when driv-
ing conditions do not permit maintaining a con-
stant speed, such as in heavy traffic or on roads
that are winding, icy, snow covered, slippery, or
roads with a loose driving surface. Failure to fol-
low this precaution could cause a collision or
loss of vehicle control, possibly resulting in per-
sonal injury or property damage.
CAUTION
Do not attempt to shift gears without using the
clutch pedal when the cruise control is engaged.
Failure to follow this precaution will result in a
temporarily uncontrolled increase in engine
speed; transmission damage and gear stripping
could result.
1. To cruise at a particular speed:
1.1 Flip the ON/OFF switch on the instrument
control panel to ON.
1.2 Hold the throttle pedal until the speedom-
eter indicates the desired speed.
1.3 Momentarily move the SET/RESUME
switch on the instrument control panel to
SET or push the SET button on the trans-
mission shift knob.
2. To disengage the cruise control:
2.1 Depress the brake pedal, or clutch pedal,
or
2.2 Flip the ON/OFF switch on the instrument
control panel to OFF or push the PAUSE
button on the transmission shift knob.
3. To resume a preselected cruise speed:
3.1 If the ON/OFF switch on the instrument
control panel is in the OFF position, flip it
to ON.
3.2 Momentarily move the SET/RESUME
switch on the instrument control panel to
RESUME, or push the RESUME button on
the transmission shift knob. Cruise will
return to the last speed selected.
To adjust cruise speed up or down, hold
the SET/RESUME switch on the instru-
ment control panel at SET to accelerate or
at RESUME to decelerate until the desired
speed is reached, or press the SET button
on the transmission shift knob to acceler-
ate or the RESUME button to decelerate
until the desired speed is reached.
NOTE: The resume-vehicle-speed memory is
not maintained if the ignition is shut off.
Power Takeoff (PTO) Governor
Cummins electronic engines may be equipped with a
PTO governor. This mode is used only when the ve-
hicle is parked. The PTO mode is activated by the
ON/OFF and SET/RESUME switches on the dash
(Fig. 7.5) or by optional PAUSE, RESUME, and SET
buttons on the transmission shift knob (Fig. 7.6).
1. To engage the PTO:
1.1 Flip the ON/OFF switch on the instrument
control panel to ON.
1.2 Hold the throttle pedal until the tachometer
indicates the desired speed.
Engines and Clutches
7.12

1.3 Momentarily move the SET/RESUME
switch on the instrument control panel to
SET, or push the SET button on the trans-
mission shift knob.
IMPORTANT: Two PTO engine speeds can
be preset on PACE and CELECT engines.
With the ON/OFF switch on, move the SET/
RESUME switch to SET to reach the first
preset value or, move the switch to RE-
SUME for the second preset value. After one
preset value has been selected, you must
turn the ON/OFF switch off, then turn it back
on before using the second preset value.
2. To disengage the PTO:
2.1 Depress the brake pedal, clutch pedal, or
throttle pedal (CELECT engines only),
or
2.2 Flip the ON/OFF switch on the instrument
control panel to OFF or press the PAUSE
button on the shift knob.
3. To resume a previously selected engine speed:
3.1 If the ON/OFF switch on the instrument
control panel is in the OFF position, flip it
to ON.
3.2 Momentarily move the SET/RESUME
switch on the instrument control panel to
RESUME, or press the RESUME button
on the transmission shift knob.
3.3 To adjust engine speed up or down, hold
the SET/RESUME switch on the instru-
ment control panel at SET to accelerate or
at RESUME to decelerate until the desired
speed is reached, or press the SET button
on the transmission shift knob to acceler-
ate or the RESUME button to decelerate
until the desired speed is reached.
NOTE: The resume-engine-speed memory is
not maintained if the cruise control ON/OFF
switch is turned OFF or if the ignition is shut off.
Detroit Diesel Engine Operation
Individual driving habits can make a difference in the
performance and economy of any engine. The rec-
ommendations below call attention to the techniques
that can be employed to save fuel and extend the
operating efficiency and life of a new Detroit Diesel
engine for the longest possible time.
All engines have an operating range in which the en-
gine performs most efficiently. The operating range
extends from maximum torque rpm at the low end to
engine rated speed at the high end. Detroit Diesel
engines deliver best fuel economy when operated in
the low- and mid-speed segments of the efficiency
range and produce maximum horsepower at rated
speed, which is also the recommended maximum
speed of the engine.
IMPORTANT: If a winterfront is used on a ve-
hicle with an electronic engine equipped with a
charge air cooler, make sure that there are slit
openings distributed across the face of the win-
terfront to allow airflow through the entire
charge-air-cooler core. Do not use a winterfront
with closed areas that block uniform air flow
across any sections of the charge-air-cooler
crossflow tubes. This will adversely affect the
operation and durability of the charge air cooler.
1. It is seldom necessary to accelerate the engine
to governed speed in the lower gears to get the
vehicle moving, except in a high power demand
situation such as starting on a grade.
To conserve fuel, start off in low gear and de-
velop only the engine speed needed to get roll-
ing. Then, increase engine speed gradually as
upward gear shifting progresses.
As described by Detroit Diesel, this "progressive
shifting" technique will get the vehicle up to the
desired cruising speed while minimizing noise
emission and maximizing fuel economy. A pro-
gressive shift pattern is illustrated in Fig. 7.7.
010
(16) 20
(32) 30
(48) 40
(64) 50
(80) 60
(97)
f250319
11/02/95
1
2
3
4
1. Governed RPM
2. Engine RPM
3. Idle RPM
4. Miles (Kilometers) Per Hour
Fig. 7.7, Progressive Shift Pattern
Engines and Clutches
7.13

NOTE: A momentary hesitation in throttle re-
sponse will occur when a vehicle with a turbo-
charged engine is started on a grade.
Do not
disengage the clutch. The rpm will recover, and
the vehicle will accelerate up the grade.
2. For city driving, run in the highest gear possible
and reduce engine speed. This enables you to
operate at a safe speed for traffic conditions
while using less fuel and reducing noise. Also,
when slowing down for reduced speed zones,
remain in your running gear and reduce engine
rpm to stay within the speed limit. Avoid down-
shifting until you are ready to return to highway
cruising speed.
3. For highway cruising and for best fuel economy,
run the engine at 80 to 90 percent of rated rpm
to maintain highway speed. Engines with 1800
rpm ratings are exceptions and will provide fuel
economy when run at their rated speed. Proper
gear selection should permit cruising in the
economy range with no appreciable sacrifice in
desired highway speed.
It is okay to operate below rated rpm at full
throttle if you are satisfied with the way the ve-
hicle performs. However, there are times when
hilly terrain, high winds, or other conditions make
it impractical to operate without reserve power.
Such conditions are better met if the vehicle is
operated in a lower gear with reserve power
available for changes in terrain, wind, etc.
4. The proper use of gears will shorten time on hills
and minimize the amount of shifting. When start-
ing up a hill, gradually depress the accelerator
pedal all the way down and keep it there as the
vehicle moves up the grade. If the engine contin-
ues to maintain a satisfactory road speed, re-
main in that gear for the entire grade.
If the hill causes a steady decline in engine rpm,
downshift as required until the engine can main-
tain a stable uphill speed. Make full use of each
gear before going to a lower gear. By remaining
in a gear until arriving at the speed of the next
lower gear, the vehicle will top the grade in the
best possible time on less fuel and fewer shifts.
5. Because of their constant horsepower over a
wide speed range, Detroit Diesel engines can be
operated at full throttle at lower rpm than other
engines. This offers benefits in fuel economy and
engine life. And more than likely, it will be pos-
sible to top most grades without downshifting.
When the vehicle starts into a grade, allow the
engine to lug down to maximum torque rpm be-
fore downshifting. Downshift, if required, at maxi-
mum torque rpm also or at the predetermined
road speed for the next lower gear.
Do not be afraid to lug the engine down. It has
more than enough torque at low rpm to keep a
loaded vehicle moving against a grade and it
won’t harm the engine.
6. The driver who is not familiar with the vehicle’s
shift points can greatly improve driving skill by
learning them for all gears. By knowing rather
than guessing where the shift points are, it is
possible to avoid overspeeding the engine by
downshifting too soon or missing the full use of a
gear by downshifting too late. The shift points of
any vehicle can be determined by a simple road-
test method. Run the vehicle and determine the
maximum road speed possible in every gear at
the engine governed full-load speed setting.
The top road speed possible in a gear would be
the shift point for that gear. The results should be
recorded in the proper order of shifting and dis-
played inside the cab.
CAUTION
Do not allow the engine to exceed its governed
speed, or serious engine damage could result.
7. To slow the vehicle on downgrades and curves
(using the engine), shift to a lower gear and
allow the vehicle to decelerate in that gear. The
engine provides maximum braking effect when
running at the top end of the operating range,
but it must not be allowed to exceed its full-load
rated rpm. Continue to downshift as further re-
duction in vehicle speed is required. If the ve-
hicle is above the allowable maximum speed of a
lower gear, use the service brakes to slow the
vehicle to an acceptable speed where the trans-
mission may be downshifted safely. Again, the
importance of knowing the shift points is demon-
strated.
IMPORTANT: The engine governor has no con-
trol over engine rpm when the engine is being
pushed by a loaded vehicle down a grade. Use
service brakes and gears in combination on
Engines and Clutches
7.14

long grades to keep the vehicle speed under
control and the engine rpm below full-load rated
governed speed.
8. Essential information regarding the operation and
care of Allison automatic transmissions is con-
tained in the Allison
Driver’s Handbook.
Applying
the knowledge presented will not only make driv-
ing easier, but will give the maximum benefits
from an Allison-equipped vehicle.
Maintenance literature is also available for driv-
ers of Allison-equipped vehicles who desire
trouble-free performance and maximum life from
their equipment. These maintenance books are
available from any authorized Detroit Diesel en-
gine distributor.
9. As with all engines, prolonged idling of Detroit
Diesel engines is not recommended. An idling
engine wastes fuel and left unattended, is also
unsafe.
A Detroit Diesel Electronic Control (DDEC) en-
gine can be equipped to shut off automatically
after 5 minutes of idling. The vehicle transmis-
sion must be in neutral and the parking brake
must be set for the automatic shutoff option to
work. To start the engine, follow the normal
start-up procedure.
Engines equipped with DDEC will idle fast when
cold. As the engine warms up to operating tem-
perature, the idle speed will decrease. Warm the
engine until idle speed is normal before operat-
ing the vehicle.
Cruise Control
A DDEC engine may have cruise control. The mini-
mum speed at which cruise control can be used is
35 mph (56 km/h).
The cruise control is activated by the ON/OFF and
SET/RESUME switches on the dash (Fig. 7.5)orby
optional PAUSE, RESUME, and SET buttons on the
transmission shift knob (Fig. 7.6).
WARNING
Do not use the cruise control system when driv-
ing conditions do not permit maintaining a con-
stant speed, such as in heavy traffic or on roads
that are winding, icy, snow covered, slippery, or
roads with a loose driving surface. Failure to fol-
low this precaution could cause a collision or
loss of vehicle control, possibly resulting in per-
sonal injury or property damage.
CAUTION
Do not attempt to shift gears without using the
clutch pedal when the cruise control is engaged.
Failure to follow this precaution will result in a
temporarily uncontrolled increase in engine
speed; transmission damage and gear stripping
could result.
1. To cruise at a particular speed:
1.1 Flip the ON/OFF switch on the instrument
control panel to ON.
1.2 Hold the throttle pedal until the speedom-
eter indicates the desired speed.
1.3 Momentarily move the SET/RESUME
switch on the instrument control panel to
SET or push the SET button on the trans-
mission shift knob.
2. To deactivate the cruise control:
2.1 Depress the brake pedal, or clutch pedal,
or
2.2 Flip the ON/OFF switch on the instrument
control panel to OFF or push the PAUSE
button on the transmission shift knob.
3. To resume a preselected cruise speed:
3.1 If the ON/OFF switch on the instrument
control panel is in the OFF position, flip it
to ON.
3.2 Momentarily move the SET/RESUME
switch on the instrument control panel to
RESUME, or push the RESUME button on
the transmission shift knob. Cruise will
return to the last speed selected.
To adjust cruise speed up or down, hold
the SET/RESUME switch on the instru-
ment control panel at SET to accelerate or
at RESUME to decelerate until the desired
speed is reached, or press the SET button
on the transmission shift knob to acceler-
ate or the RESUME button to decelerate
until the desired speed is reached.
Engines and Clutches
7.15

NOTE: The resume vehicle speed memory
is not maintained if the ignition is shut off or
if the ON/OFF switch is off for more than 10
seconds.
Power Takeoff (PTO)
A power takeoff option is available for vehicles
equipped with a DDEC system. The PTO operates
only when the vehicle is at a standstill.
Some vehicles have separate controls for the PTO.
In the case of a preset nonadjustable PTO engine
speed, there is only an on/off switch labeled FAST
IDLE. If the vehicle is equipped with a variable PTO
engine speed, there are two controls: an on/off
switch, and a potentiometer knob. Both of these are
labeled GOVERNOR.
On other vehicles, the PTO mode is activated by the
ON/OFF and SET/RESUME cruise control switches
located on the instrument control panel on the dash
(Fig. 7.5), or by optional PAUSE, RESUME or SET
buttons on the transmission shift knob (Fig. 7.6).
1. Operating the PTO With Separate PTO Controls:
1.1 Set the parking brake.
1.2 Turn on the switch labeled GOVERNOR
(or FAST IDLE for vehicles with a preset
PTO system).
1.3 For vehicles with a variable PTO, use the
potentiometer knob to adjust the engine
rpm.
2. Operating the PTO Using Cruise Control
Switches:
2.1 To engage the PTO, flip the ON/OFF
switch on the instrument control panel to
ON.
2.2 Hold the throttle pedal until the tachometer
indicates the desired speed.
2.3 Momentarily move the SET/RESUME
switch on the instrument control panel to
SET or push the SET button on the trans-
mission shift knob.
2.4 To disengage the PTO, depress the brake
pedal, or clutch pedal,
or
flip the ON/OFF
switch on the instrument control panel to
OFF or press the PAUSE button on the
shift knob.
3. To resume a previously selected engine speed:
3.1 If the ON/OFF switch on the instrument
control panel is in the OFF position, flip it
to ON.
3.2 Momentarily move the SET/RESUME
switch on the instrument control panel to
RESUME or press the RESUME button on
the transmission shift knob.
To adjust engine speed up or down, hold
the SET/RESUME switch on the instru-
ment control panel at SET to accelerate or
at RESUME to decelerate until the desired
speed is reached, or press the SET button
on the transmission shift knob to acceler-
ate or the RESUME button to decelerate
until the desired speed is reached.
Optimized Idle®
The Optimized Idle option on DDEC III-equipped ve-
hicles is a system that automatically stops and re-
starts the engine to accomplish the following:
•Keep the engine oil temperature between 60 to
104°F (16 to 40°C)
•Keep the battery charged
•Keep the cab or sleeper at a constant, desired
temperature (if equipped with a thermostat)
The benefits of the system include reduced engine
idle time, fuel savings, reduction of exhaust emis-
sions and noise, increased starter and engine life,
and less chance of dead batteries due to electrical
loads.
Optimized Idle operates in two modes. They are the
engine mode or the thermostat mode. The engine
mode keeps the battery charged and the engine oil
temperature within factory set limits. The thermostat
mode is the same as the engine mode, but also
keeps the cab and sleeper at a constant preset tem-
perature.
The engine mode is always activated when the sys-
tem is operated. The thermostat mode is activated
when the thermostat is turned on.
The thermostat mode controls the set point, which is
the desired temperature of the cab and sleeper, and
the comfort zone, which is the number of degrees
from the set point before the engine needs to heat or
Engines and Clutches
7.16
cool the cab. There are three comfort zones: 4°F
(2°C), 7°F (4°C), or 10°F (6°C).
Vehicles equipped with Optimized Idle have a label
and light on the dashboard. The dash light is the bot-
tom one on the vertical array of lights in the center
dash panel, and the label is located on the "B" dash
panel. See Fig. 7.8 for the label appearance. If
equipped with the thermostat mode, a thermostat is
located in the sleeper, above the bunk. See Fig. 7.9.
The thermostat consists of an LCD readout and four
buttons.
The display normally shows the temperature of the
sleeper, but changes accordingly as the buttons are
pressed.
The button functions are as follows:
•Up Button: increases the set point and comfort
zone.
•Down Button: decreases the set point and
comfort zone.
•Cool/Heat Button: detects either cooling or
heating operation.
•Mode Button: scrolls through the various func-
tions. It can also be used to set desired tem-
perature values.
1. Activate Optimized Idle (engine mode) as fol-
lows:
1.1 Set the parking brake.
1.2 If it is tilted, close and secure the hood.
1.3 Start the engine and let it idle.
1.4 Put the transmission in neutral and in the
high range, if so equipped.
1.5 Turn on the cruise control.
IMPORTANT: The cruise control must be
turned on
after
the engine is idling. If it was
previously turned on, turn off the cruise con-
trol, then turn it on again.
1.6 The dash light will begin blinking, indicat-
ing that Optimized Idle is active. The sys-
tem is now in the engine mode, and after
an initial phase in which the idle speeds
up to 1000 or 1500 rpm (depending on the
outside temperature), the engine will stop
and start automatically to keep the battery
charged and the engine oil warm. The
dash light stays on and shines steadily at
this point.
2. Activate the thermostat mode (if so equipped) as
follows:
NOTE: When the system is in the thermostat
mode, it is also in the engine mode. It will
continue to operate in the engine mode even
if the thermostat mode is turned off.
11/13/96 f080062
TO AVOID
UNINTENTIONAL
VEHICLE MOVEMENT,
DO NOT MOVE SHIFT
LEVER OR RANGE
SELECTOR WHEN
OPTIMIZED IDLE IS ON
OPTIMIZED IDLETM
TO USE:
− IDLE ENGINE
− CLOSE HOOD
− ENGAGE PARKING BRAKES
− PUT TRANSMISSION IN
NEUTRAL AND
HI RANGE (IF EQUIPPED)
− THEN, MOVE CRUISE SWITCH
FROM OFF TO ON
− IF DESIRED, TURN CAB
THERMOSTAT ON (IF EQUIPPED)
Fig. 7.8, Optimized Idle Dash Label
MODE
°F
°C
11/08/96
1
2
345
6
7
8
9
10 f601250
1. Down Button
2. Up Button
3. Upper/Lower Temperature Icon
4. Temperature Display
5. Degrees Fahrenheit Indicator
6. Mode Button
7. Cooling Icon
8. Cool/Heat Selection Button
9. Heating Icon
10. Degrees Celsius Indicator
Fig. 7.9, Optimized Idle Thermostat
Engines and Clutches
7.17

2.1 With the system in the engine mode, set
the cab and sleeper heater or air condi-
tioner controls to the highest setting.
2.2 Turn on the thermostat by touching any of
the four buttons. See Fig. 7.9.
The display will flash the current sleeper
temperature and the previous mode (cool-
ing or heating) selected. If the cab needs
to be cooled or heated, the cool/heat icon
will flash.
2.3 Choose either cool or heat by pressing the
Cool/Heat
button. Make sure the selection
matches that of the cab controls.
IMPORTANT: If the heat or cool selection of
the thermostat does not match that of the
cab, the system will idle and cycle exces-
sively.
2.4 Select Fahrenheit or Celsius by pressing
and holding the
Mode
button until either
the "F" or "C" is displayed.
2.5 Select the temperature set point by press-
ing either the
Up
button or the
Down
but-
ton, as applicable. Holding the button will
cause the display to count up or down
rapidly. When the desired set point is dis-
played, release the button. The set point
is stored in memory.
2.6 Select the temperature comfort zone by
pressing the
Mode
button until the upper
and lower temperature limit icon is dis-
played. Then use the
Up
or
Down
button
to select one of the three comfort zones of
4°F (2°C), 7°F (4°C), or 10°F (6°C).
3. To change the display to either Fahrenheit or
Celsius, press the
Mode
button until only the
F°
or
C°
icon is flashing. Press the
Up
or
Down
but-
ton to change to the desired value. The main
display will appear five seconds after the button
is released.
4. To deactivate the thermostat mode and return to
just the engine mode, press the
Mode
button and
hold it for three seconds.
5. To shut down Optimized Idle completely, either
turn off the ignition or use the drive away feature.
The drive away feature allows the use of all the
DDEC features. Use the drive away feature as
follows:
5.1
If the engine is running:
Release the park-
ing brakes or put the transmission in gear.
If the engine is not running:
Start the en-
gine. Release the parking brakes or put
the transmission into gear.
5.2 Let the engine return to base idle. The
active light will turn off. Optimized Idle is
now disabled and all the DDEC features
are available.
Engine Shutdown
Caterpillar
CAUTION
Stopping the engine immediately after it has been
working under load can result in overheating and
accelerated wear of the engine components. Ex-
cessive temperatures in the turbocharger center-
housing will cause oil coking problems. Follow
the procedure, outlined below, to allow the en-
gine to cool.
1. With the vehicle stopped, apply the parking
brakes. Reduce the engine speed to low idle.
2. Place the transmission shift lever in neutral.
3. If the engine has been operating at low loads,
run it at low idle for 30 seconds before stopping.
If the engine has been operating at highway
speed or at high loads, run it at low idle for three
minutes to reduce and stabilize internal engine
temperatures before stopping.
4. Turn off the ignition key to shut down the engine.
5. If equipped with an idle shutdown timer, it can be
set to shut the engine down after a preset
amount of time. Ninety seconds before the pre-
set shutdown time, the CHECK ENGINE light will
begin to flash at a rapid rate. If the clutch pedal
or service brake indicates position change during
this final ninety seconds, diagnostic lamp flash-
ing, the idle shutdown timer will be disabled until
reset.
6. After stopping the engine, fill the fuel tank.
Engines and Clutches
7.18

7. Check the crankcase oil level while the engine is
stopped. Maintain the oil level between the ADD
and FULL marks on the dipstick.
8. If freezing temperatures are expected, allow the
engine jacket water expansion tank to cool, then
check the coolant for proper antifreeze protec-
tion. The cooling system must be protected
against freezing to the lowest expected outside
temperature. Add permanent-type antifreeze, if
required. For additional information, see Group
20 of the
Heavy-Duty Trucks Maintenance
Manual
.
9. Repair any leaks, perform minor adjustments,
tighten loose bolts, etc. Observe the vehicle mile-
age or the service meter reading, if so equipped.
Perform periodic maintenance as instructed in
the Lubrication and Maintenance Chart in the
Caterpillar
Operation and Maintenance Manage-
ment Manual
.
Cummins
1. With the vehicle stopped, apply the parking
brakes and place the transmission in neutral.
2. It is important to idle an engine three to five min-
utes before shutting it down. This allows the lu-
bricating oil and the water to carry heat away
from the combustion chamber, bearings, shafts,
etc. This is especially important with turbo-
charged engines.
Bearings and seals in the turbocharger are sub-
jected to the high heat of combustion exhaust
gases. While the engine is running, this heat is
carried away by oil circulation, but if the engine
is stopped suddenly, the turbocharger tempera-
ture may rise as much as 100°F (56°C). The ex-
treme heat may cause bearings to seize or oil
seals to leak.
3. Do not idle the engine for excessively long peri-
ods. Long periods of idling are not good for an
engine because the combustion chamber tem-
peratures drop so low the fuel may not burn
completely. This will cause carbon to clog the
injector spray holes and piston rings, and may
result in stuck valves.
If the engine coolant temperature becomes too
low, raw fuel will wash the lubricating oil off the
cylinder walls and dilute the crankcase oil; there-
fore, all moving parts of the engine will suffer
from poor lubrication.
4. If the engine is not being used, shut it down by
turning the ignition key off.
CAUTION
Stop the engine at the first sign of malfunction.
Almost all malfunctions give some warning to the
operator before significant damage occurs. Many
engines are saved because alert operators heed
the warning signs (sudden drop in oil pressure,
unusual noises, etc.) and immediately shut down
the engine.
Detroit Diesel
1. With the vehicle stopped, apply the parking
brakes, and place the transmission in neutral.
2. Allow the engine to run at half speed or slower,
with no load, for four to five minutes to cool the
engine gradually and uniformly.
3. Shut down the engine by turning the ignition key
off.
High-Altitude Operation
Cummins
Engines lose horsepower when operated at high alti-
tude because the air is too thin to burn as much fuel
as at sea level. This loss is about three percent for
each 1000 feet (300 m) altitude above sea level for a
naturally aspirated engine. Most turbocharged en-
gines are rated for higher altitudes than naturally as-
pirated engines. An engine will have smoky exhaust
at high altitudes unless a lower gear is used. The
engine will not demand full fuel from the fuel system
unless the engine is altitude-compensated by the use
of a turbocharger. Shift gears as needed to avoid
excessive exhaust smoke.
Engines and Clutches
7.19
Bendix Cruise Control System,
Optional
General Information
The Bendix cruise control system has two modes of
operation: cruise control and stationary throttle con-
trol. The cruise control mode maintains a driver-
selected speed above 20 mph (32 km/h). The sta-
tionary throttle control mode provides operator
control of the engine throttle position when the ve-
hicle is parked.
Cruise Control Operation
The cruise control is activated by the ON/OFF and
SET/RESUME switches. See Fig. 7.5. A light in the
warning and indicator light module is on when the
cruise control is engaged.
WARNING
Do not use the cruise control system when driv-
ing conditions do not permit maintaining a con-
stant speed, such as in heavy traffic or on roads
that are winding, icy, snow covered, slippery, or
roads with a loose driving surface. Failure to fol-
low this precaution could cause a collision or
loss of vehicle control, possibly resulting in per-
sonal injury or property damage.
CAUTION
Do not attempt to shift gears without using the
clutch when the cruise control is engaged. Fail-
ure to follow this precaution will result in a tem-
porarily uncontrolled increase in engine speed;
transmission damage and gear stripping could
result.
1. To cruise at a particular speed:
1.1 Flip the ON/OFF switch to ON.
1.2 Accelerate to the desired speed.
1.3 Push the SET/RESUME switch to SET.
NOTE: The cruise control will not work
below 20 mph (32 km/h).
2. To disengage the cruise control:
2.1 Flip the ON/OFF switch to OFF,
or
2.2 Depress the brake pedal,
or
2.3 Allow vehicle speed to drop below 20 mph
(32 km/h).
To resume the preselected cruise speed,
briefly push the SET/RESUME switch to
RESUME. Cruise will return to the last
speed selected.
NOTE: The resume vehicle speed memory is
not maintained if the ignition is shut off or if the
ON/OFF switch is flipped to OFF.
Cruise speed can be adjusted up or down by push-
ing the RESUME (accelerate) or SET (decelerate)
switch until the desired speed is reached.
The vehicle can be accelerated normally with the
cruise control engaged. Depress the throttle pedal as
needed. When the throttle pedal is released, the ve-
hicle will return to the set cruise speed.
Shifting can be done normally with the cruise control
engaged. When the clutch pedal is depressed, the
cruise control disengages, allowing the shift to be
completed. When the clutch pedal is released, the
cruise control reengages, and adjusts engine rpm to
return to the selected speed.
Stationary Throttle Control Operation
This mode is used when the vehicle is parked, and is
engaged by operating the ON/OFF and the SET/
RESUME switches (Fig. 7.5) as follows:
1. With the engine idling, flip the ON/OFF switch to
ON. A light in the warning and indicator light
module will come on.
2. Depress and release the RESUME switch until
the desired rpm is reached.
NOTE: It may be necessary to depress and re-
lease the switch several times before engine
speed increases.
3. To reduce engine rpm, depress and release the
SET switch until the desired rpm is reached.
4. To disengage the stationary throttle control:
4.1 Flip the ON/OFF switch to OFF,
or
4.2 Depress the clutch pedal.
IMPORTANT: In the throttle control mode,
engine speed is controlled by positioning the
Engines and Clutches
7.20
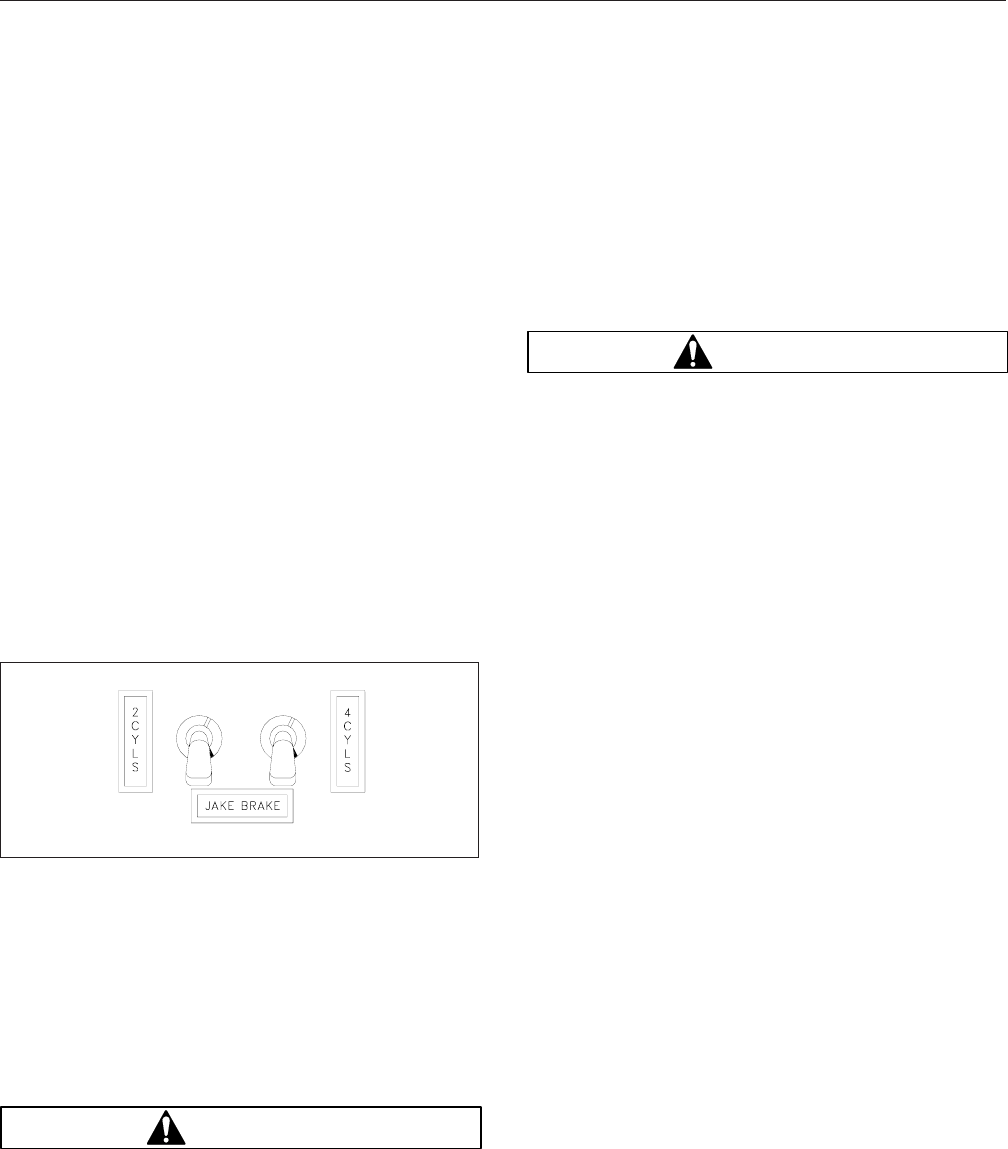
engine throttle linkage. Engine governor
characteristics and engine temperature may
cause engine speed to vary. Don’t leave the
vehicle unattended for long periods of time
while the stationary throttle control feature is
being used.
Engine Braking System,
Optional
Jacobs Engine Brake
A Jacobs engine brake is a hydraulic-electric engine
attachment that converts a diesel engine into an air
compressor. This is done by changing engine ex-
haust valve operation; it engages or disengages in
less than one-fourth of a second. An engine brake is
not a substitute for a service braking system, except
in emergencies.
The controls consist of:
•dual dash switches (Fig. 7.10), which are on/
off toggle switches;
•a clutch switch, which is a transmission-
mounted microswitch that actuates when the
driver removes his foot from the clutch pedal;
•a throttle switch, which is an engine-mounted
microswitch that actuates when the driver re-
moves his foot from the throttle pedal.
Jacobs Engine Brake Operation
WARNING
Do not use the engine brake if road surfaces are
slippery. Using the engine brake on wet, icy, or
snow-covered roads could result in loss of ve-
hicle control, possibly causing personal injury
and property damage.
To engage the engine brake, one or both of the dash
switches must be on (up), and both the clutch and
throttle pedals must be fully released. To disengage
the engine brake, depress the throttle or clutch
pedal, or turn both dash switches off (down). De-
pending on the engine type, dual dash switches en-
able the driver to operate the engine brake at one-
third, two-thirds, and full capacity or at half and full
capacity.
WARNING
Do not use the engine brake to shift gears. Using
the engine brake to shift gears could result in
loss of vehicle control, possibly causing personal
injury and property damage.
Since the engine brake is most effective at rated en-
gine speed, gear selection is very important. Gearing
down the vehicle within the limits of the rated engine
speed makes the engine brake more effective. Maxi-
mum braking occurs with the use of the lowest gear
that does not exceed the rated engine speed. A rule
of thumb for gear choice is to select the gear that
normally would be used to climb an approaching
downhill grade. Generally, this same gear can be
used with the engine brake for a controlled descent
of the hill.
"Control speed" is the speed at which the engine
brake performs 100 percent of the required downhill
braking, resulting in a constant speed of descent.
The control speed varies, depending on vehicle
weight and the downhill grade.
For faster descent, select a higher gear than that
used for control speed. Service brakes must then be
used intermittently to prevent engine overspeed and
to maintain desired vehicle speed.
IMPORTANT: When descending a grade, re-
member that frequent use of service brakes
causes them to become hot, which results in a
reduction of their stopping ability. Grade descent
speed should be such that the service brakes
are used infrequently and that they remain cool,
thus retaining their effectiveness.
A driver may descend slower than control speed by
selecting a lower gear, one that will not overspeed
the engine. The engine brake retarding force will
then be sufficient to cause vehicle deceleration. Oc-
casional deactivation of the engine brake may be
f600087
08/20/93
Fig. 7.10, Engine Brake Switches
Engines and Clutches
7.21
necessary to maintain the designated road speed
under these conditions.
The engine brake can be used to stop a vehicle if
the service brakes quit working. By energizing the
engine brake as soon as a service brake problem is
apparent, a retarding effect is applied to the vehicle.
As grade conditions permit, the driver can progres-
sively downshift, using the engine brake in each
gear. Eventually the engine brake will stop the ve-
hicle.
WARNING
Using the engine brake as a primary braking sys-
tem when the service brakes are operable is dan-
gerous. This can cause long, unpredictable stop-
ping distances, possibly resulting in personal
injury or property damage.
Whenever vehicle braking is required, the engine
brake may be used with the service brakes. There is
no time limit for operation of the engine brake.
1. After the engine is warmed up and the vehicle is
in motion, turn on the dash toggle switches (up
position).
On vehicles equipped with a Cummins NTC en-
gine, select either the left-side switch (one-third
engine brake retarding capacity), the right-side
switch (two-thirds engine brake retarding capac-
ity), or both switches (full engine brake retarding
capacity).
On vehicles equipped with a Cummins L10 or
Caterpillar engine, select either the left-side
switch or right-side switch (for one-half engine
brake retarding capacity), or both switches (for
full engine brake retarding capacity).
2. The engine brake activates when the driver’s feet
are removed from both the clutch and throttle
pedals. If it fails to activate, stop the vehicle in a
safe spot and check the adjustment of the
throttle and clutch switches. If no cause can be
detected in the electrical system, check the en-
gine brake system. See Group 01 of the
Heavy-
Duty Trucks Service Manual
for instructions.
3. To obtain maximum retarding, maintain the top
governed speed of the engine through appropri-
ate selection of gears when the engine brake is
in use.
4. When either the clutch or throttle pedal is de-
pressed, the engine brake is deactivated.
CAUTION
If the engine brake fails to shut off when either
the throttle or clutch pedal is depressed, place
the dash switch in the OFF position and do not
use the engine brake until the throttle or clutch
switch system is repaired. If the engine brake
fails to shut off when the dash switch is turned
off, the engine should be shut down and the en-
gine brake repaired before continuing operation.
Failure to do so could result in damage to the
engine.
Clutches
General Information
The major reason why clutches wear out too soon is
excessive heat. Clutches are designed to absorb and
dissipate more heat than encountered in typical op-
eration. The temperatures developed in typical op-
eration will not break down the clutch friction sur-
faces. However, if a clutch is slipped excessively or
asked to do the job of a fluid coupling, high tempera-
tures develop quickly and destroy the clutch. Tem-
peratures generated between the flywheel, driven
discs, and pressure plates can be high enough to
cause the metal to flow and the friction facing mate-
rial to char and burn.
Heat and wear are practically nonexistent when a
clutch is fully engaged. But during the moment of
engagement, when the clutch is picking up the load,
it generates considerable heat. An improperly ad-
justed or slipping clutch will rapidly generate suffi-
cient heat to destroy itself.
The most important items that a driver should be
aware of to ensure long service life of the clutch in-
clude: starting in the right gear, clutch malfunctions,
and when to adjust a clutch.
Clutch Operation
Eaton Valeo Clutch Break-In
With a newly installed Eaton Valeo clutch, the clutch
may slip for a short time while the friction surfaces
break-in. However, allowing the clutch to slip for
more than two seconds can severely damage the
clutch disc, pressure plate, and the flywheel.
Engines and Clutches
7.22
During initial operation of a new vehicle or a vehicle
with a new clutch, check for clutch slippage during
acceleration. If the clutch slips, decelerate until the
clutch does not slip. Allow the clutch to cool 15 to 30
seconds and then gradually accelerate again. If the
clutch continues to slip, repeat the procedure. If nec-
essary, repeat the procedure up to five times. If the
clutch slips after five attempts, stop the vehicle. Allow
the clutch to cool for at least one hour. Notify your
Freightliner dealer of the problem.
CAUTION
Do not allow sustained slippage of the clutch;
this could severely damage the clutch disc, pres-
sure plate, or flywheel. Damage caused by clutch
slippage due to improper break-in is not warrant-
able.
Starting the Vehicle in the Proper Gear
An empty truck can be started in a higher transmis-
sion gear ratio than when partially or fully loaded. A
good rule of thumb for the driver to follow is: select
the gear combination that allows you to start moving
with an idling engine, or, if necessary, just enough
throttle to prevent stalling the engine. After the clutch
is fully engaged, the engine should be accelerated to
the correct rpm for the upshift into the next higher
gear.
Gear Shifting Techniques
Many drivers upshift into the next gear, or even skip-
shift into a higher gear, before the vehicle has
reached the proper speed. This type of shifting is
almost as bad as starting off in a gear that is too
high since the engine rpm and vehicle speeds are
too far apart, requiring the clutch to absorb the speed
difference as heat. For transmission operating in-
structions, see Chapter 8 in this manual.
The clutch brake is applied by fully depressing the
clutch pedal. Its purpose is to stop the transmission
gears from rotating in order to engage the transmis-
sion gears quickly in making an initial start.
CAUTION
Never apply the clutch brake when making down-
shifts or upshifts. The clutch pedal should never
be fully depressed before the transmission is put
in neutral. If the clutch brake is applied with the
transmission still in gear, a reverse load will be
put on the gear. At the same time, it will have the
effect of trying to stop or decelerate the vehicle
with the clutch brake. Rapid wear of the friction
discs will take place necessitating frequent re-
placement. Considerable heat will be generated,
which will be detrimental to the release bearings
and transmission front bearings.
Excessive Vehicle Overload, or
Overloading the Clutch
Clutches are designed for specific vehicle applica-
tions and loads. These limitations should not be ex-
ceeded.
CAUTION
Overloading will not only result in damage to the
clutch, but also to the entire powertrain.
Riding the Clutch Pedal
Riding the clutch pedal is very destructive to the
clutch since partial clutch engagement permits slip-
page, generating excessive heat. Riding the clutch
pedal will also put a constant thrust load on the re-
lease bearing, which can thin out the lubricant. Re-
lease bearing failures can be attributed to this type of
misuse.
Holding the Vehicle on an Incline With a
Slipping Clutch
A slipping clutch accumulates heat faster than it can
be dissipated, resulting in early clutch failures. Never
use the clutch as a hill holder.
Coasting With the Clutch Released
(Pedal Depressed) and the Transmission
in Gear
Coasting with the clutch released and the transmis-
sion in gear can cause high driven disc rpm through
multiplication of ratios from the final drive and trans-
mission.
WARNING
Do not coast with the clutch released (pedal de-
pressed) and the transmission in gear. High
driven-disc rpm could cause the clutch facing to
Engines and Clutches
7.23
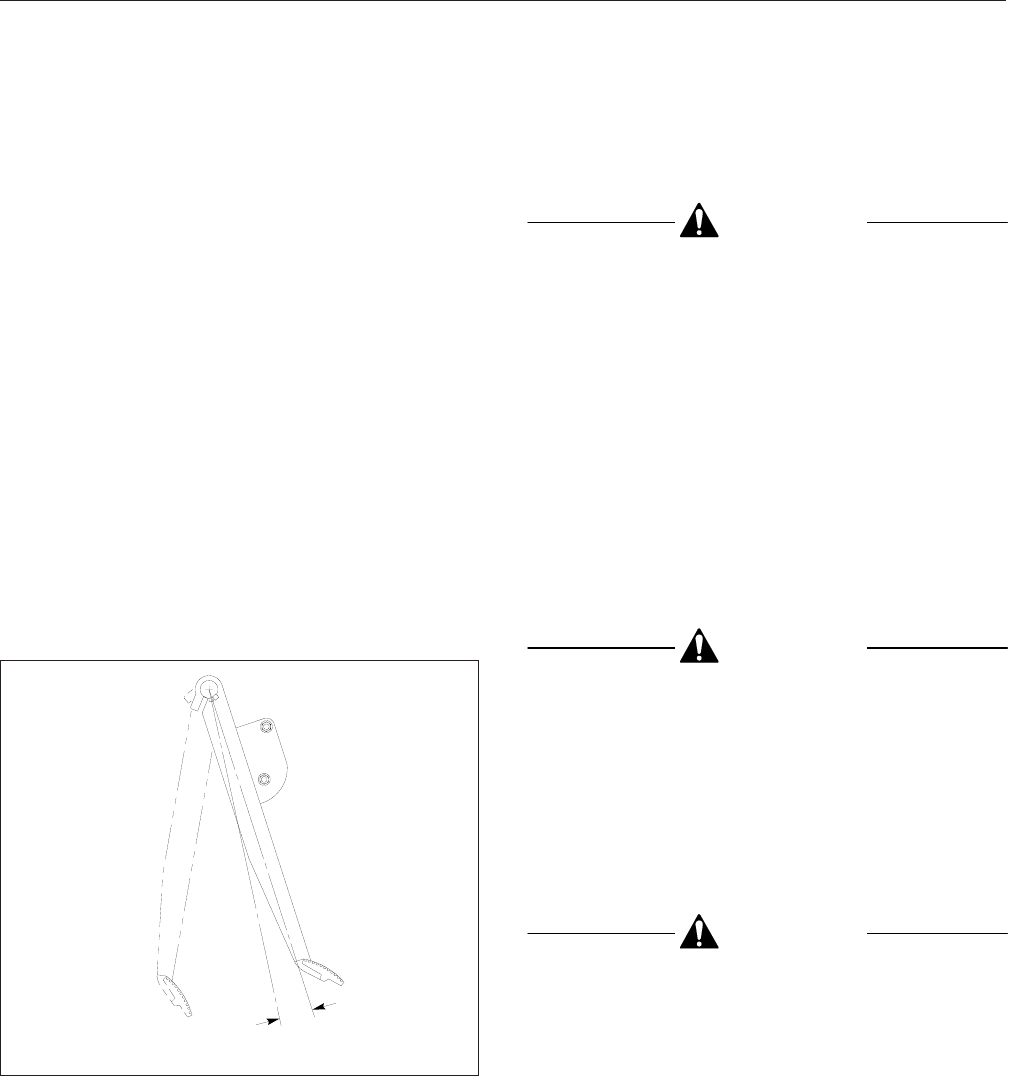
be thrown off the disc. Flying debris could cause
injury to persons in the cab.
Engaging the Clutch While Coasting
Engaging the clutch while coasting can result in tre-
mendous shock loads and possible damage to the
clutch, as well as to the entire drivetrain.
Reporting Erratic Clutch Operation
Promptly
Reporting erratic clutch operation as soon as pos-
sible will give maintenance personnel a chance to
inspect and lubricate the clutch components, make
necessary internal clutch and linkage adjustments,
etc.
Clutch free pedal is a decreased resistance felt at
the top of the clutch pedal stroke. See Fig. 7.11.
With the clutch pedal in this range, the clutch is fully
engaged, and the only resistance to clutch pedal
movement is the force of the return spring. If clutch
free pedal is 3/4 inch (20 mm) or less, measured at
the pedal, have the clutch adjusted.
Free pedal should be included and commented on
daily in the driver’s report since clutch free pedal is
the maintenance department’s guide to the condition
of the clutch and the release mechanism.
See Group 25 of the
Heavy-Duty Trucks Service
Manual
for clutch adjustment procedures and specifi-
cations.
CAUTION
Operating the vehicle with incorrect free pedal
could result in clutch damage.
Clutch brake squeeze is an increased resistance
(greater than the force of the clutch spring) felt as
the clutch pedal approaches the end of its stroke. If
the gears grind when shifting into first or reverse
gear with the clutch pedal fully depressed, the clutch
is out of adjustment or the clutch brake is worn and
needs to be replaced.
Clutch Adjustments
Clutches have an internal adjustment, and external
linkage adjustment. See Group 25 of the
Heavy-Duty
Trucks Service Manual
for clutch adjustment proce-
dures and specifications.
CAUTION
Operating the vehicle with the clutch improperly
adjusted could result in clutch or clutch brake
failure.
Lubrication
The release bearing and linkage should be lubricated
at frequent intervals. See Group 25 of the
Heavy-
Duty Trucks Maintenance Manual
for intervals and
procedures.
CAUTION
Failure to lubricate the release bearing and link-
age as recommended could result in release
bearing and clutch damage.
A
02/09/95 f250148b
A. Free Pedal
Fig. 7.11, Clutch Free Pedal
Engines and Clutches
7.24

8
Transmissions
Eaton®Fuller®Straight-Shift Models .................................................. 8.1
Eaton Fuller Range-Shift Models ..................................................... 8.2
Eaton Fuller Splitter and Range-Shift Models ........................................... 8.4
Eaton Fuller Deep-Reduction Models ................................................. 8.7
Eaton Fuller Super 10, Top 2, and Lightning Semi-Automated Transmissions ................ 8.10
Eaton Fuller AutoShift™Automated Transmissions ...................................... 8.13
Spicer Straight-Shift Models ........................................................ 8.15
Meritor™Range-Shift Models ....................................................... 8.16
Meritor Splitter and Range-Shift Models .............................................. 8.18
Meritor Engine Synchro Shift™(ESS) Automated Models ................................ 8.20

Eaton®Fuller®Straight-Shift
Models
Refer to the Eaton website for additional information,
www.roadranger.com
.
General Information, Eaton Straight-
Shift
Eaton Fuller straight-shift model transmissions are
not synchronized. They have seven forward speeds
and one reverse speed. See Fig. 8.1 for the shift
pattern. They are designed for use with on-highway,
fuel economy engines, where a minimum of shifting
is desired and less gear reduction is acceptable.
Operation, Eaton Straight-Shift
1. Always use 1st gear when starting to move the
vehicle forward.
2. Use the clutch brake to stop gear rotation when
shifting into 1st or reverse when the vehicle is
stationary. The clutch brake is actuated by de-
pressing the clutch pedal all the way to the floor.
For normal upshifts and downshifts, only a partial
disengagement of the clutch is necessary to
break engine torque.
3. Use double-clutching between all upshifts and
downshifts.
4. After your shifting ability improves, you may want
to skip some of the ratios. This may be done
only
when operating conditions permit, depend-
ing on the load, grade, and road speed.
IMPORTANT: Never use the clutch brake when
downshifting, or as a brake to slow the vehicle.
Upshifting
1. Position the gear shift lever in neutral, then start
the engine. Bring the air system pressure up to
100 to 120 psi (689 to 827 kPa).
2. Depress the clutch pedal to the floor. Shift into
1st gear, then engage the clutch, with the engine
at or near idle speed, to start the vehicle moving.
Accelerate to engine governed speed.
3. Once governed speed has been reached, disen-
gage the clutch, and shift the lever to neutral.
Engage the clutch; allow the engine speed to
drop about 800 rpm (the rpm drop may vary with
engines of different governed speeds), then dis-
engage the clutch. Move the shift lever to 2nd
gear, then engage the clutch, and accelerate to
engine governed speed.
Continue shifting upward, from 2nd to 3rd gear,
3rd to 4th gear, and 4th to 5th gear, using the
same sequence. See Fig. 8.1 for the shift pat-
tern.
4. Again, at governed speed, disengage the clutch,
and shift into neutral. Engage the clutch; allow
the engine speed to drop about 500 rpm (rpm
drop may vary with engines of different governed
speeds), then disengage the clutch. Move the
shift lever to 6th gear, then engage the clutch,
and accelerate to engine governed speed.
Shift into 7th gear, using the same sequence.
Downshifting
When downshifting, shift down from 7th gear through
each lower gear, as follows:
1. Allow the engine speed to drop about 500 rpm
(rpm drop may vary with engines of different gov-
erned speeds) below the governed speed. De-
press the clutch pedal enough to release the
torque, then shift into neutral. Engage the clutch
and bring the engine rpm up to governed speed.
Disengage the clutch, shift into gear, and engage
the clutch smoothly.
Follow the same sequence to downshift from 6th
into 5th gear.
2. When in 5th gear, and ready for the next down-
shift, allow the engine speed to drop about 800
rpm (rpm drop may vary with engines of different
governed speeds) below the governed speed.
Depress the clutch pedal enough to release the
N
R24
6
135
7
03/13/96 f260055a
Fig. 8.1, Eaton Fuller Straight-Shift Model
Transmissions Shift Pattern
Transmissions
8.1

torque, then shift into neutral. Engage the clutch
and bring the engine rpm up to governed speed.
Disengage the clutch, shift into 4th gear, and en-
gage the clutch smoothly.
Follow the same sequence to downshift from 4th
into 3rd, 3rd into 2nd, and from 2nd into 1st gear.
IMPORTANT: Never use the clutch brake when
downshifting, or as a brake to slow the vehicle.
Eaton Fuller Range-Shift
Models
Refer to the Eaton website for additional information,
www.roadranger.com
.
General Information, Eaton Range-
Shift
Range-Shift transmissions are typically upshifted by
moving the shift lever through all of the low gear po-
sitions and then activating a range switch to provide
an additional set of ratios in the high range using the
same shift lever positions as used in low range. The
shift lever then is moved sequentially through each
position as before but all the positions now provide a
higher gear ratio. The initial low gear is often used
only in low range.
Eaton Fuller Range-Shift transmissions are not syn-
chronized in the front section, but the range section
is synchronized to prevent grinding gears during
range shifts.
IMPORTANT: Not all lever positions are used in
each range and the shift patterns vary between
transmissions. Be sure to read the shift pattern
decal on the dash for the operating instructions
for the specific transmission installed in your
vehicle.
9-Speed RT, RTO, and RTX Models
Eaton Fuller 9-speed range-shift model transmissions
have a 5-speed front section, and a 2-speed rear
range section. The low gear in the front sections of
the RT-8609 and A and B ratio transmissions is used
only as a starting ratio. The high gear in the front
section of the "P" ratio transmissions is used only as
the top gear. The remaining gear positions of the
above transmissions are used once in the low range
and once in the high range.
See Fig. 8.2 for the shift patterns, noting that the
3rd/7th and 4th/8th shift positions in the RT (direct
ratio) and RTX-B (overdrive ratio) transmissions are
opposite of the RTO (overdrive ratio) transmissions.
The RTX-P ratio transmissions have the 1st/5th shift
positions where LO is in the A and B ratio transmis-
sions. The top gear in the RTX-P ratio transmissions
is called 9th gear.
10-Speed RT, RTO, and RTX Models
Eaton Fuller 10-speed range-shift model transmis-
sions have ten selective, evenly-spaced forward ra-
tios. Each transmission consists of a 5-speed front
section, and a 2-speed rear range section. The ten
forward speeds are obtained by twice using a
5-speed shift pattern: the first time in low range, the
second time in high range. See Fig. 8.3 for the shift
patterns, noting that the 4th/9th and the 5th/10th shift
positions in the RT (direct ratio) and RTX (overdrive
ratio) transmissions are directly opposite in the RTO
(overdrive ratio) transmissions.
Operation, Eaton Range-Shift
1. When operating off-highway, or under adverse
conditions, always use low gear (if so equipped)
when starting to move the vehicle.
When operating on-highway, with no load, or
under ideal conditions, use 1st gear when start-
ing to move the vehicle (except when equipped
with a 9-speed RTO transmission, then always
start in low gear).
For all conditions, use the highest gear that is
still low enough to start the vehicle moving with
engine idling, and without slipping the clutch ex-
cessively.
2. Use the clutch brake to stop gear rotation when
shifting into low (or 1st) or reverse when the ve-
hicle is stationary. The clutch brake is actuated
by depressing the clutch pedal all the way to the
floor.
For normal upshifts and downshifts, only a partial
disengagement of the clutch is necessary to
break engine torque.
3. Do not make range shifts with the vehicle moving
in reverse gear.
4. Never attempt to move the range preselection
lever with the gear shift lever in neutral while the
vehicle is moving. Preselection with the range
Transmissions
8.2
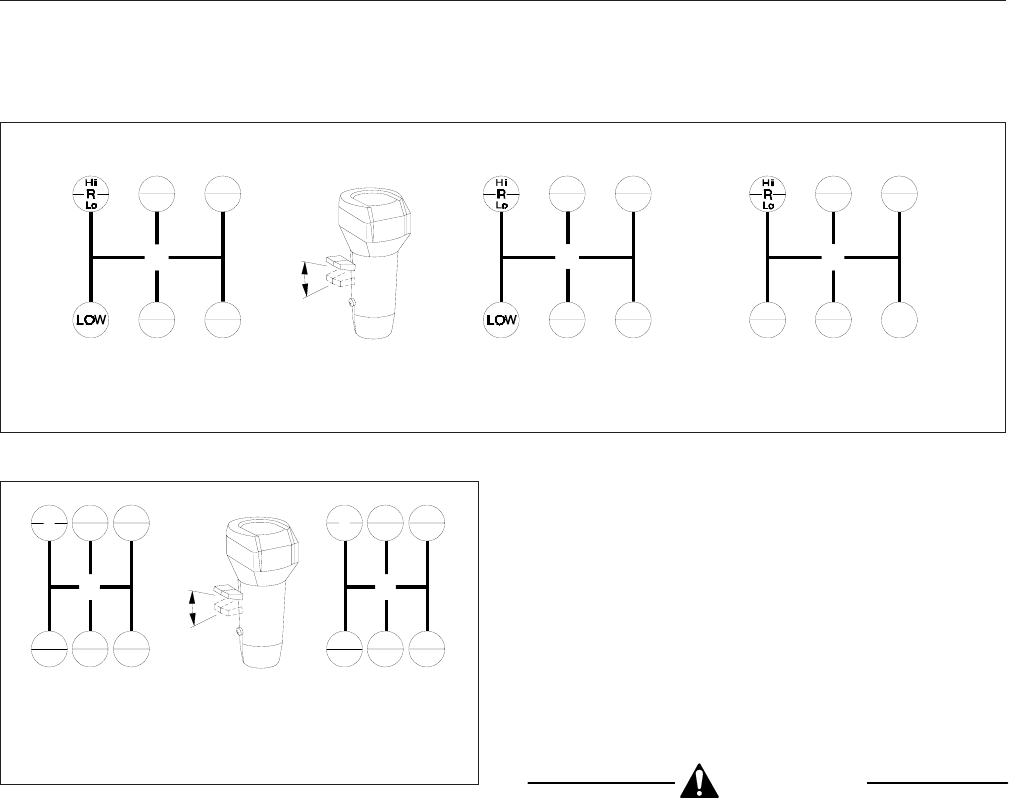
preselection lever must be made prior to moving
the shift lever out of gear into neutral.
5. Do not shift from high range to low range at high
vehicle speeds.
6. Use double-clutching between all upshifts and
downshifts.
7. After your shifting ability improves, you may want
to skip some of the ratios. This may be done
only when operating conditions permit, depend-
ing on the load, grade, and road speed.
Upshifting
1. Position the gear shift lever in neutral. Start the
engine, and bring the air system pressure up to
100 to 120 psi (689 to 827 kPa).
2. Position the range preselection lever down, into
low range.
3. Depress the clutch pedal to the floor. Shift into
low or 1st gear (Table 8.1), then engage the
clutch, with the engine at or near idle speed, to
start the vehicle moving. Accelerate to 80 per-
cent of engine governed speed.
4. Shift progressively upward from low or 1st gear,
to the top gear in low range (Table 8.1), double-
clutching between shifts, and accelerating to 80
percent of engine governed speed.
CAUTION
To prevent damage to the range section syn-
chros, make sure the range preselection lever is
in high range before moving the shift lever to
neutral. Leave the shift lever in neutral long
enough to be sure the range section has shifted.
5. While in the top gear of the low-range shift pat-
tern, and ready for the next upshift, flip the range
preselection lever up into high range. With the
lever in high range, double-clutch through neu-
tral, and shift into the bottom gear of the high
range (Table 8.1). As the shift lever passes
through neutral, the transmission will automati-
cally shift from low range to high range.
1
4
5
8
6
7
3
2
1
4
5
8
6
7
3
2
14
58
67
32 9
ABC
D
E
03/13/96 f260027a
NNN
A. All RT and RTX-B Transmissions
B. All RTO Transmissions
C. All RTX-P Transmissions
D. Up for High Range
E. Down for Low Range
Fig. 8.2, Eaton Fuller 9-Speed Range-Shift Transmissions Shift Patterns
4
N
7
29
6
18
310
5
7
210
5
6
18
39
4
R
Hi
Lo R
Hi
Lo
AB
C
D
03/13/96 f260043a
N
A. All RT and RTX Transmissions
B. All RTO Transmissions
C. Up for High Range
D. Down for Low Range
Fig. 8.3, Eaton Fuller 10-Speed Range-Shift Model
Transmissions Shift Patterns
Transmissions
8.3
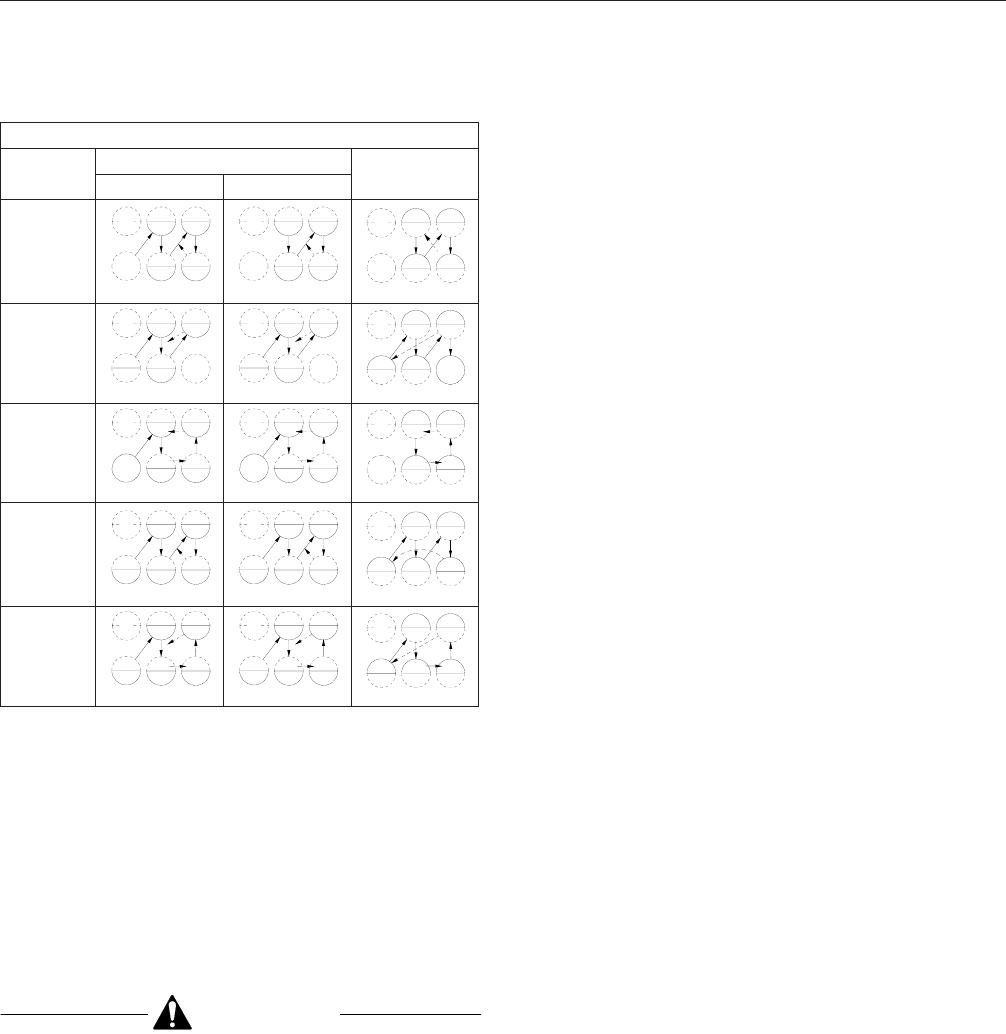
Eaton Fuller Shift Progressions
TRANS.
MODEL
LOW RANGE HIGH
RANGE
Off-Highway On-Highway
9-Speed
Direct or
Overdrive
(RT or
RTX)
1
2
3
4
f260322
R
LOW
1
2
3
4
f260323
R
7
68
5
f260324
R
9-Speed
Direct
(RTX-P)
2
3
4
1
f260325
R
2
3
4
1
f260325
R
8
79
6
f260326
R
5
9-Speed
Overdrive
(RTO)
1
2
4
f260327
R
3
LOW
1
2
4
f260327
R
3
LOW
8
67
5
f260328
R
10-Speed
Direct or
Overdrive
(RT or
RTX)
2
3
4
1
f260329
R
5
2
3
4
1
f260329
R
5
9
810
7
f260330
R
6
10-Speed
Overdrive
(RTO)
2
3
5
1
f260331
R
4
2
3
5
1
f260331
R
4
10
89
7
f260332
R
6
Table 8.1, Eaton Fuller Shift Progressions
6. With the transmission in high range, shift pro-
gressively upward through each of the high
range gears (Table 8.1), double-clutching be-
tween shifts.
Downshifting
1. With the transmission in high range, shift pro-
gressively downward to the bottom gear in high
range, double-clutching between shifts.
CAUTION
To prevent damage to the range section syn-
chros, make sure the range preselection lever is
in low range before moving the shift lever to neu-
tral. Leave the shift lever in neutral long enough
to be sure the range section has shifted.
2. When in the bottom gear of the high-range shift
pattern, and ready for the next downshift, push
the range preselection lever down into low range.
With the lever in low range, double-clutch
through neutral, and shift into the top gear of the
low range. As the shift lever passes through neu-
tral, the transmission will automatically shift from
high range to low range.
3. With the transmission in low range, downshift
through the low range gears as conditions re-
quire.
IMPORTANT: Never use the clutch brake when
downshifting, or as a brake to slow the vehicle.
Eaton Fuller Splitter and
Range-Shift Models
Refer to the Eaton website for additional information,
www.roadranger.com
.
General Information, Eaton Splitter
and Range-Shift
Combination splitter and range-shift transmissions
allow the choice of two splitter ratios in each lever
position as well as the additional ratios provided in
each lever position after shifting to the other range.
IMPORTANT: Not all lever positions are used in
each range and the shift patterns vary between
transmissions. Be sure to read the shift pattern
decal on the dash for the operating instructions
for the specific transmission installed in your
vehicle.
13-Speed RTO Models
Eaton Fuller 13-speed RTO model transmissions
have thirteen forward speeds and two reverse
speeds. Each transmission consists of a 5-speed
front section, and a 3-speed auxiliary section. The
auxiliary section contains low- and high-range ratios,
plus, an overdrive splitter gear. See Fig. 8.4 for the
shift patterns.
All of the thirteen speeds are controlled with one shift
lever. Built into the shift knob of the lever, are a
range preselection lever and a splitter control button
(on the side of the shift knob), that control range se-
lection and gear splits, respectively.
Low gear in the front section is used only as a start-
ing ratio. The remaining four forward positions are
used once in the low range and once in the high
range. However, each of the four high range gear
positions can be split with the underdrive ratio (RT
Transmissions
8.4
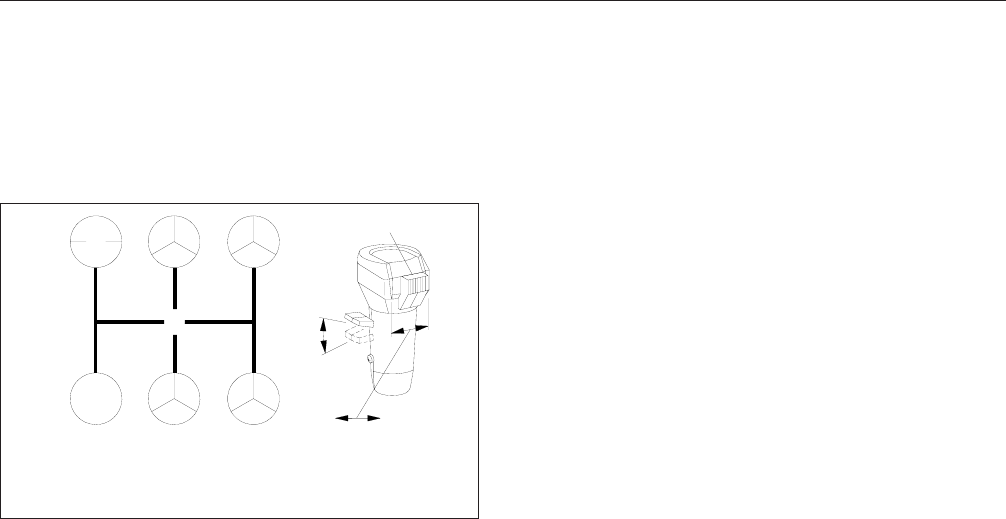
models), or overdrive ratio (RTO models) of the split-
ter gear. Ratios cannot be split while the transmis-
sion is in low range.
18-Speed RTLO Models
Eaton Fuller 18-speed RTLO model transmissions
have eighteen forward speeds and four reverse, con-
sisting of a 5-speed front section and a 3-speed aux-
iliary section. The auxiliary section contains low and
high range ratios, plus an overdrive splitter gear.
One ratio in the front section (low) is used as a start-
ing ratio; it is never used when the transmission is in
high range.
The other four ratios in the front section are used
once in low range and once again in high range;
however, each of the five ratios (low–1–2-–3–4) in
low range and each of the four ratios (5–6–7–8) in
high range can be split with the overdrive splitter
gear.
All of the eighteen speeds are controlled with one
shift lever. Built into the shift knob of the lever, are a
range preselection lever and a splitter control button
(on the side of the shift knob), that control range se-
lection and gear splits, respectively.
Operation, Eaton Splitter and Range-
Shift
IMPORTANT: On 13-speed transmissions, the
shifter knob has an interlock feature that pre-
vents the splitter control button from being
moved forward when the range preselection
lever is down (in low range). When in high
range and the splitter control button is in the
forward position, the range preselection lever
cannot be moved down.
1. When operating off-road, or under adverse condi-
tions, always use low gear when starting to move
the vehicle forward.
When operating on-highway, with no load, or
under ideal conditions, use 1st gear when start-
ing to move the vehicle forward.
For all conditions, use the highest gear that is
still low enough to start the vehicle moving with
the engine at or near idle speed, and without
slipping the clutch excessively.
2. Use the clutch brake to stop gear rotation when
shifting into low (or 1st) or reverse when the ve-
hicle is stationary. The clutch brake is actuated
by depressing the clutch pedal all the way to the
floor.
For normal upshifts and downshifts, only a partial
disengagement of the clutch is necessary to
break engine torque.
3. Use double-clutching between all upshifts and
downshifts that require movement of the shift
lever. Splitting of the high range gears does not
require movement of the shift lever.
4. Never move the shift lever into low gear while in
high range.
5. Never move the splitter control button while in
neutral.
6. Do not preselect with the splitter control button.
After moving the control button, complete the
shift immediately.
7. Except when downshifting from 5th direct to 4th
gear, never push the range preselection lever
down into low range while operating in high
range-the splitter will become inoperative.
8. Do not shift from high range to low range at high
vehicle speeds.
9. Do not make range shifts with the vehicle moving
in reverse gear.
10. Never attempt to move the range preselection
lever with the gear shift lever in neutral while the
vehicle is moving. Preselection with the range
R13
24
LOW
Dir OD
55 Dir OD
Dir OD Dir OD
77
66 8 8
Hi
Lo
A
B
CD
1
03/13/96 f260044a
N
A. Up for High Range
B. Down for Low Range C. Forward for Overdrive
D. Rearward for Direct
1. Splitter Control Button
Fig. 8.4, Eaton Fuller 13-Speed RTO Model
Transmissions Shift Patterns
Transmissions
8.5
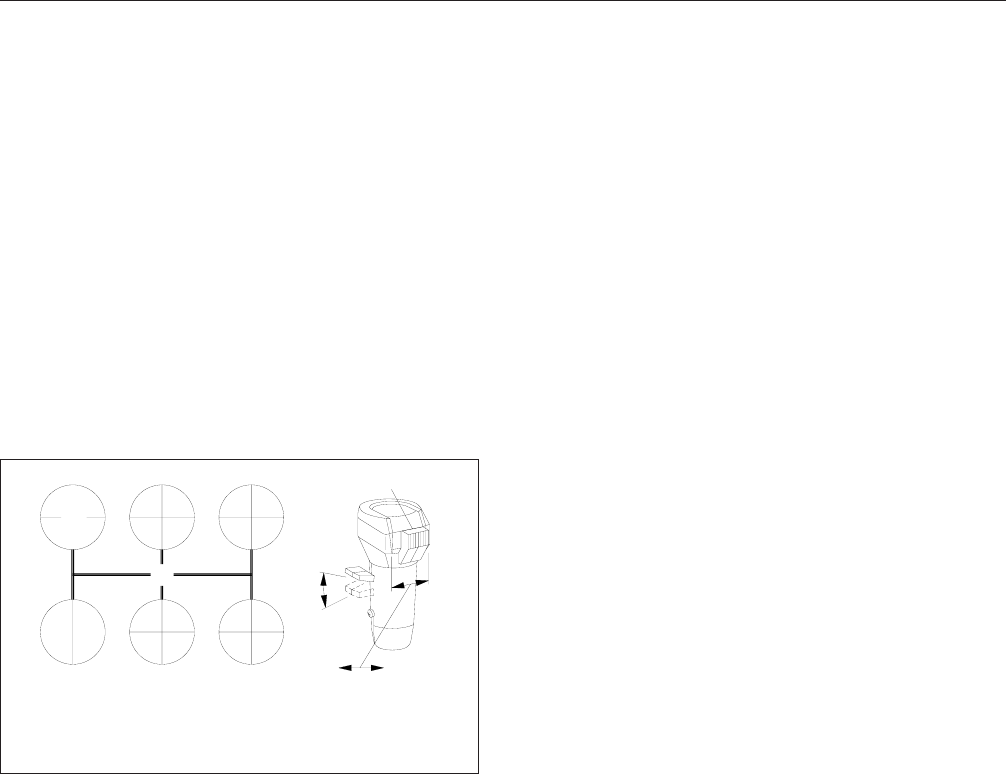
preselection lever must be made prior to moving
the shift lever out of gear into neutral.
11. After your shifting ability improves, you may want
to skip some of the ratios. This may be done
only
when operating conditions permit, depend-
ing on the load, grade, and road speed.
Upshifting
1. Position the gear shift lever in neutral. Start the
engine, and bring the air system pressure up to
100 to 120 psi (689 to 827 kPa).
2. Position the range preselection lever down, into
low range. See Fig. 8.4 or Fig. 8.5.
3. Make sure the splitter control button is in the di-
rect (rearward) position. See Fig. 8.4 or Fig. 8.5.
4. For 13-speed transmissions:
Depress the clutch to the floor, shift into low or
1st gear; then engage the clutch, with the engine
at or near idle speed, to start the vehicle moving.
Accelerate to 80 percent of engine governed
speed.
For 18-speed transmissions:
Depress the clutch to the floor, shift into low;
then engage the clutch, with the engine at or
near idle speed, to start the vehicle moving.
To shift from low direct to low overdrive, move
the splitter control button (Fig. 8.5) into the over-
drive (forward) position, then immediately release
the accelerator. Press and release the clutch
pedal. After releasing the clutch, accelerate
again.
5. For 13-speed transmissions:
Shift upward from low to 1st gear, 2nd, etc. until
4th gear, double-clutching between shifts, and
accelerating to 80 percent of engine governed
speed. See Fig. 8.4.
For 18-speed transmissions:
Shift upward from low overdrive to 1st direct by
first moving the splitter control button into the
direct (rearward) position (Fig. 8.5). Move the
shift lever, double-clutching, to the 1st gear posi-
tion.
Continue upshifting through the shift pattern.
Double-clutch during lever shifts (1st to 2nd to
3rd to 4th); single-clutch during split shifts (1st
direct to 1st overdrive, etc.).
6. When in 4th gear (13-speed transmissions) or
4th overdrive (18-speed transmissions) and
ready to shift up to 5th gear, use the range shift
lever as follows:
For 13-speed transmissions:
While in 4th gear, pull the range shift preselec-
tion lever up, into high range. The transmission
will automatically shift from low to high range as
the shift lever passes through neutral. Then, dis-
engage the clutch; double-clutch through neutral;
move the shift lever to 5th gear; engage the
clutch, and accelerate the engine.
For 18-speed transmissions:
While in 4th overdrive, pull the range shift prese-
lection lever up, into high range. The transmis-
sion will automatically shift from low to high
range as the shift lever passes through neutral.
Move the shift lever, double-clutching, to the 5th
gear position. Just before making final clutch en-
gagement, move the splitter control button to the
direct (rearward) position; then engage the clutch
and accelerate. Do not move the control button
while the shift lever is in neutral.
7. Shift up through the high range gears as follows:
For 13-speed transmissions:
To shift from 5th direct to 5th overdrive, move the
splitter control button (Fig. 8.4) into the overdrive
(forward) position, then immediately release the
N
R1
Dir
5
Dir 5
OD
1
OD 3
Dir
7
Dir 7
OD
3
OD
2
Dir
6
Dir 6
OD
2
OD 4
Dir
8
Dir 8
OD
4
OD
LOW
Dir LOW
OD
A
B
CD
1
03/13/96 f260157a
A. Up for High Range
B. Down for Low Range C. Forward for Overdrive
D. Rearward for Direct
1. Splitter Control Button
Fig. 8.5, Eaton Fuller 18-Speed RTLO Model
Transmission Shift Patterns
Transmissions
8.6
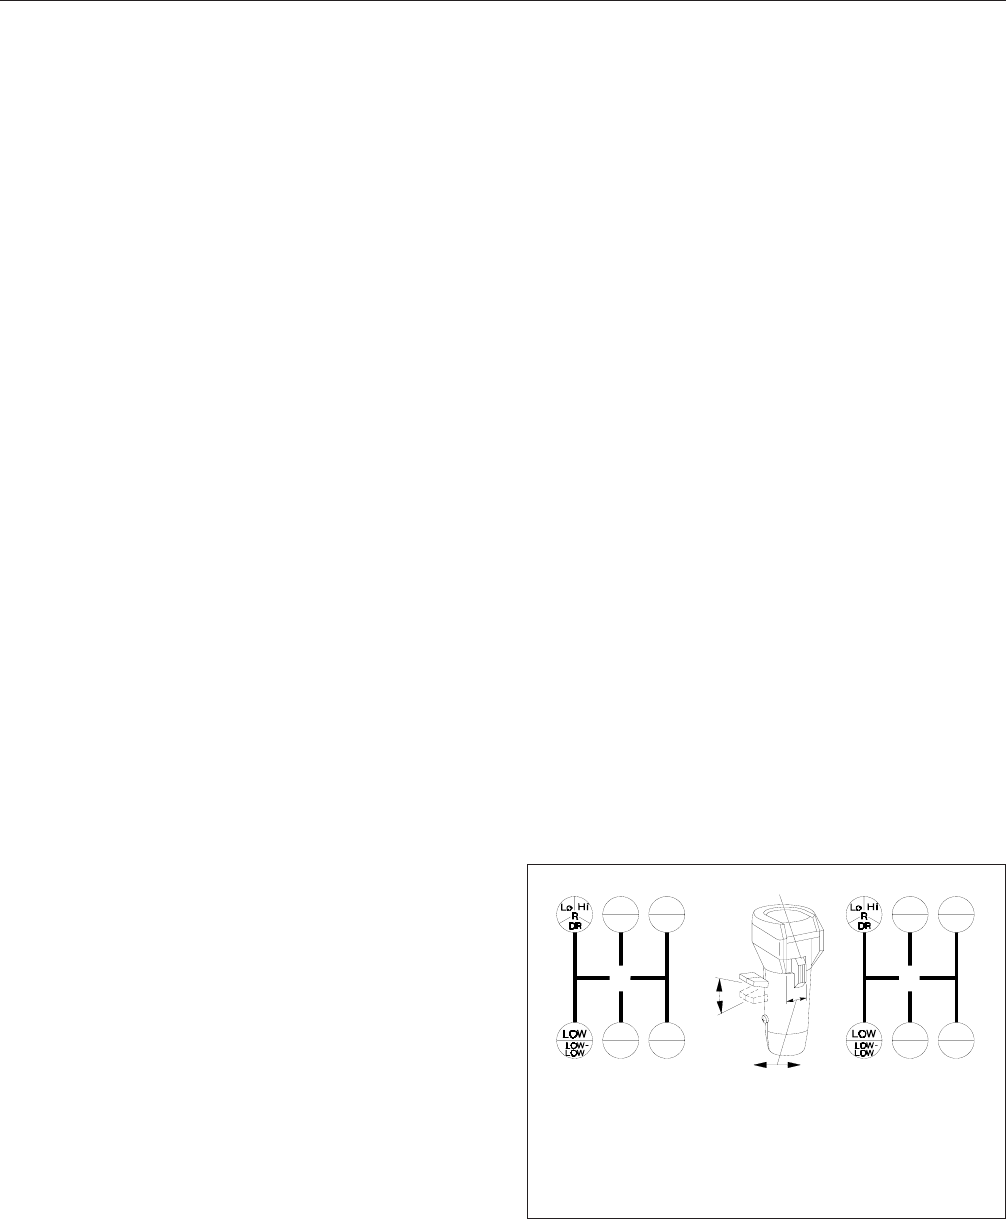
accelerator. Press and release the clutch pedal.
After releasing the clutch, accelerate again.
Continue upshifting through the shift pattern.
Double-clutch during lever shifts (6th to 7th to
8th); single-clutch during split shifts (6th direct to
6th overdrive, etc.).
For 18-speed transmissions:
To shift from 5th direct to 5th overdrive, move the
splitter control button (Fig. 8.5) into the overdrive
(forward) position, then immediately release the
accelerator. Press and release the clutch pedal.
After releasing the clutch, accelerate again.
Continue upshifting through the shift pattern.
Double-clutch during lever shifts (6th to 7th to
8th); single-clutch during split shifts (6th direct to
6th overdrive, etc.).
Downshifting
1. Downshift from 8th overdrive to 8th direct without
moving the shift lever. Flip the splitter control but-
ton to the direct (rearward) position; then, imme-
diately release the accelerator, and disengage
the clutch. Engage the clutch, and accelerate the
engine only after the transmission has shifted.
2. Start the downshift from 8th direct to 7th over-
drive by flipping the splitter control button to the
overdrive (forward) position; then, immediately
double-clutch through neutral, moving the shift
lever from 8th to 7th gear.
3. Shift downward through each of the high range
gears, alternating the procedures in steps 1 and
2, above, until reaching 5th direct.
4. While in 5th direct and ready for the downshift to
4th (13-speed transmissions) or 4th overdrive
(18-speed transmissions), push the range prese-
lection lever down. Then, double-clutch through
neutral and move the shift lever to the 4th gear
position. On 18-speed transmissions, move the
splitter control button to the overdrive (forward)
position
before
engaging the clutch. Do not move
the control button while the shift lever is in neu-
tral.
5. Continue downshifting from 4th to 1st as follows:
For 13-speed transmissions:
Downshift through the low range gears as condi-
tions require.
For 18-speed transmissions:
Continue downshifting from 4th overdrive to 4th
direct, then 4th direct to 3rd overdrive, 3rd over-
drive to 3rd direct, etc. Single clutch when split
shifting (direct to overdrive, overdrive to direct).
Double clutch when making lever shifts (4th to
3rd, 3rd to 2nd, etc.).
IMPORTANT: Never use the clutch brake when
downshifting, or as a brake to slow the vehicle.
Eaton Fuller Deep-Reduction
Models
Refer to the Eaton website for additional information,
www.roadranger.com
.
General Information, Deep-Reduction
10-Speed RTO Models
Eaton Fuller 10-speed RTO model transmissions
have a 5-speed front section, and a 2-speed rear-
range section, with a deep reduction gear. The low-
low, deep reduction gear is used only when operating
under adverse conditions. Low gear in the front sec-
tion is used only for rough, off-highway conditions, as
a starting ratio. The remaining four forward positions
are used once in the low range and once in the high
range. See Fig. 8.6 for the shift pattern, noting that
the 3rd/7th and 4th/8th shift positions in the RTX-LL
transmissions are opposite of the RTO-LL
transmissions.
14
58
67
32
13
57
2
68
4
AB
C
D
EF
1
03/13/96 f260026a
N N
A. All RTO
Transmissions
B. All RTX Transmissions
C. Up for High Range
D. Down for Low Range
E. Forward for IN
F. Rearward for OUT
1. Deep Reduction Button
Fig. 8.6, Eaton Fuller 10-Speed RTO Model
Transmissions Shift Patterns
Transmissions
8.7
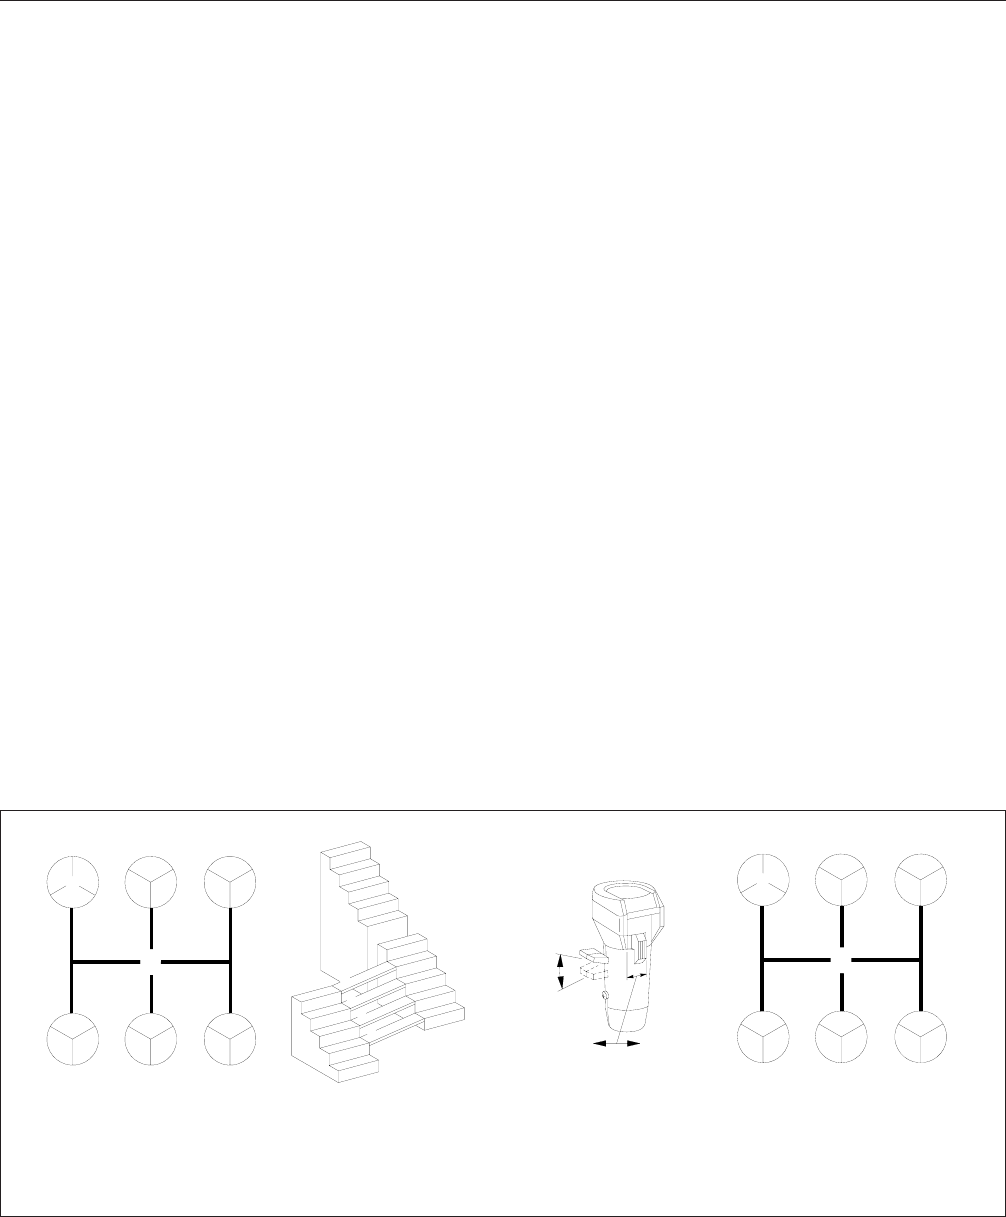
15-Speed RT, RTO, and RTX Models
Eaton Fuller 15-speed RT, RTO, and RTX model
transmissions have a 5-speed front section, and a
2-speed rear, range section. They also have five ad-
ditional deep reduction ratios. The 5-speed front sec-
tion, and the low- and high-range sections provide
ten evenly and progressively spaced forward speeds.
The five deep reduction ratios are also evenly and
progressively spaced; however, they do overlap the
low-range ratios, and should be used only when op-
erating under adverse conditions. See Fig. 8.7 for
the shift patterns, noting that the 4th/9th, and the 5th/
10th shift positions in the RT (direct ratio) and RTX
(overdrive ratio) transmissions are directly opposite in
the RTO (overdrive ratio) transmissions.
Operation, Deep-Reduction
IMPORTANT: The shifter knob has an interlock
feature that prevents the deep reduction button
from being moved forward when the range pre-
selection lever is up (in high range). When in
low range and the deep reduction button is in
the forward position, the range preselection
lever cannot be moved up.
1. For all driving conditions, use the highest gear
that is still low enough to start the vehicle moving
with the engine idling, and without slipping the
clutch excessively.
2. Use the clutch brake to stop gear rotation when
shifting into low-low, low-1st (whichever is used
as a starting ratio) or reverse, when the vehicle
is stationary. The clutch brake is actuated by de-
pressing the clutch pedal all the way to the floor.
For normal upshifts and downshifts, only a partial
disengagement of the clutch is necessary to
break engine torque.
3. Use double-clutching between all upshifts and
downshifts.
4. Never move the shift lever into low gear while in
high range.
5. Do not preselect with the deep reduction button.
When making the shift from a deep reduction
ratio to a low-range ratio, move the deep reduc-
tion button from a forward position to a rearward
position, then complete the shift immediately.
6. Never move the deep reduction button from a
rearward position to a forward position when the
transmission is in high range.
7. Do not shift from high range to low range at high
vehicle speeds.
8. Do not make range shifts with the vehicle moving
in reverse gear.
9. Never attempt to move the range preselection
lever with the gear shift lever in neutral while the
7 9
6 8 10
7 10
6 8 9
R
Lo Hi
DR DR Lo
2 2 DR Lo
DR Lo DR Lo DR Lo
4 4
1 1 3 3 5 5
R
Lo Hi
DR DR Lo DR Lo
DR Lo DR Lo DR Lo
2 2 5 5
1 1 3 3 4 4
1
1
2
2
3
3
4
4
5
5
6
7
8
9
10
1
2
3
4
5
6 7
03/13/96 f260045a
N N
A B
A. Eaton Fuller RT and RTX transmissions shift pattern B. Eaton Fuller RTO transmissions shift pattern
1. High Range
2. Low Range
3. Deep Reduction
4. High Range
5. Low Range 6. Forward for IN
7. Rearward for OUT
Fig. 8.7, Eaton Fuller 15-Speed RT, RTO and RTX Model Transmissions Shift Patterns
Transmissions
8.8

vehicle is moving. Preselection with the range
preselection lever must be made prior to moving
the shift lever out of gear into neutral.
10. After your shifting ability improves, you may want
to skip some of the ratios. This may be done
only
when operating conditions permit, depend-
ing on the load, grade, and road speed.
Upshifting
There are several patterns of upshifting, depending
on the vehicle load and the road conditions. See
Table 8.2 for suggested shifting sequences. Deep
reduction gears are best suited for heavy loads and
steep inclines. Low gear (in 10-speed transmissions)
is best suited for off-highway use.
The following instructions are recommended for start-
ing a loaded vehicle moving, under adverse condi-
tions.
1. Position the gear shift lever in neutral. Start the
engine, and bring the vehicle air system pressure
up to 100 to 120 psi (689 to 827 kPa).
2. Position the range preselection lever down, into
low range.
3. Move the deep reduction button to the forward
position, to engage the deep reduction gears.
4. Depress the clutch pedal to the floor. Shift into
low-low gear (10-speed transmissions) or 1st
gear of deep reduction (15-speed transmissions);
then engage the clutch, with the engine at or
near idle speed, to start the vehicle moving. Ac-
celerate to 80 percent of engine governed speed.
5. For 10-speed transmissions:
When ready for the next upshift, move the deep
reduction button rearward, then break the torque
on the gears by momentarily releasing the accel-
erator or depressing the clutch pedal. Do not
move the shift lever.
For 15-speed transmissions:
Shift upward from 1st gear of deep reduction to
5th gear of deep reduction, double-clutching be-
tween shifts and accelerating to 80 percent of
engine governed speed. See Table 8.2.
When ready for the next upshift, move the deep
reduction button from the forward position to the
rearward position, then double-clutch through
neutral, and move the shift lever to the 4th gear
position in the low range.
6. Shift upward from low gear (10-speed transmis-
sions) or 4th gear (15-speed transmissions), to
the top gear in low range (Table 8.2), double-
clutching between shifts, and accelerating to 80
percent of engine governed speed.
7. While in the top gear of the low-range shift pat-
tern, and ready for the next upshift, flip the range
preselection lever up into high range. Double-
clutch through neutral, and shift into the bottom
gear in high range (Table 8.2). As the shift lever
passes through neutral, the transmission will au-
tomatically shift from low range to high range.
Eaton Fuller Shift Progressions
TRANSMISSION
MODEL
DEEP REDUCTION LOW RANGE HIGH RANGE
Adverse Conditions
Only Off-Highway and
Adverse Conditions On-Highway and Ideal
Conditions All Conditions
15-Speed RTO
f260341
R
25
3
1DR
DR
DR
DR DR
4
f260342
R
Lo
Lo Lo
Lo
Lo
1
2
4
5
3
f260343
R
1
2
34
5
Lo
LoLo
Lo
Lo
R
6
7
89
10
f260344
15-Speed RT and RTX
f260345
R
DR DR
DR
DR
DR
1
2
3
4
5
f260346
R
Lo Lo Lo
Lo
Lo 4
2
35
1
f260347
R
Lo Lo Lo
LoLo
2
35
4
1
R
6
7
810
f260348
6
Table 8.2, Eaton Fuller Shift Progressions
Transmissions
8.9
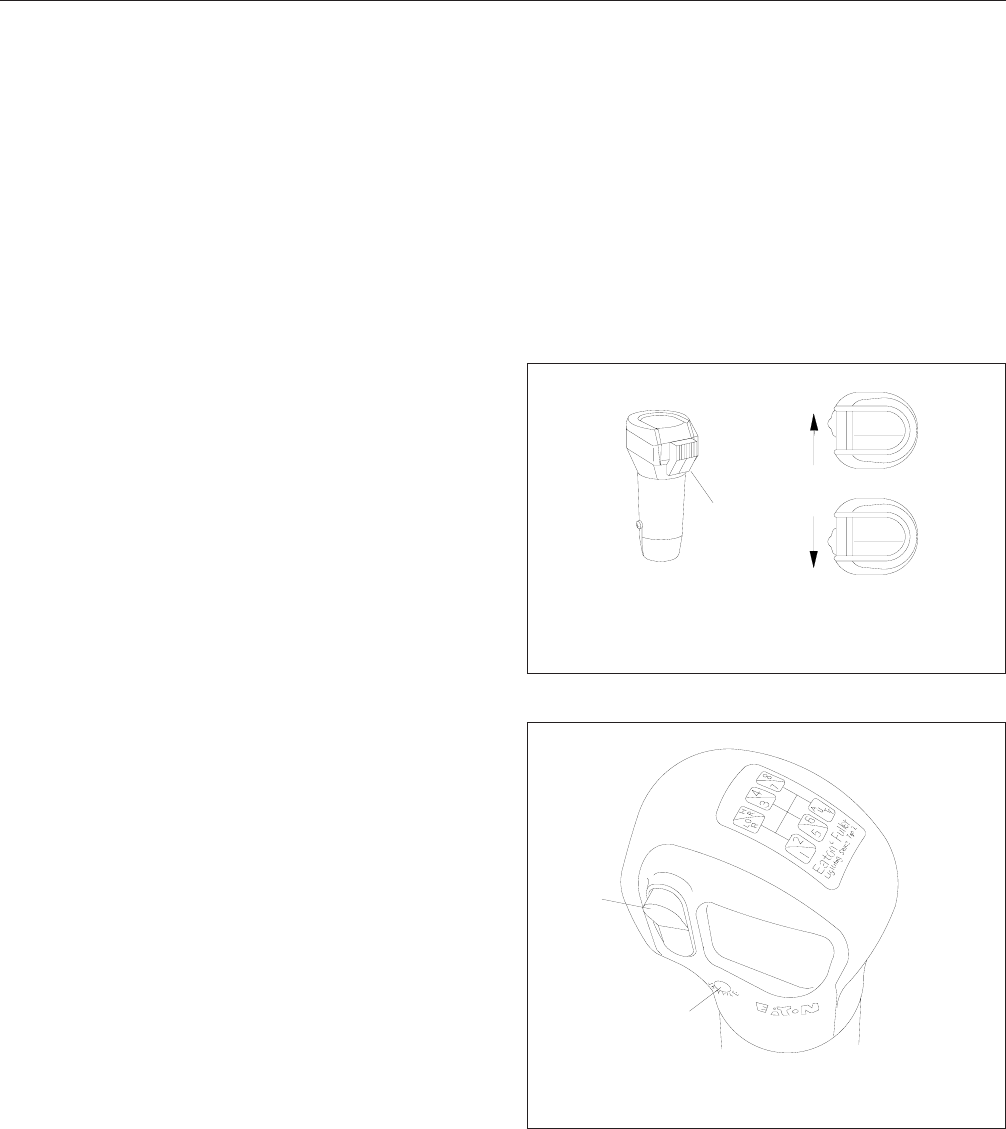
8. With the transmission in high range, shift pro-
gressively upward through each of the high
range gears (Table 8.2), double-clutching be-
tween shifts.
Alternate Upshifting Procedures (15-
Speed Transmissions Only)
The shift from deep reduction to low range can also
be made from 2nd, 3rd, or 4th gear of deep reduc-
tion, but must be made to the next gear lower in the
low range. The shift from 2nd gear of deep reduction
to 1st gear in low range (or 3rd gear of deep reduc-
tion to 2nd gear in low range, and 4th gear of deep
reduction to 3rd gear in low range), is an upshift, and
the same procedure should be followed as that
shown for shifting from 5th gear of deep reduction to
4th gear in low range. See step 5, under "Upshifting."
Downshifting
1. With the transmission in high range, shift pro-
gressively downward to the bottom gear in high
range, double-clutching between shifts.
2. When in the bottom gear of the high-range shift
pattern, and ready for the next downshift, push
the range preselection lever down into low range.
Double-clutch through neutral, and shift into the
top gear of the low-range shift pattern. As the
shift lever passes through neutral, the transmis-
sion will automatically shift from high range to
low range.
3. With the transmission in low range, downshift
through the low range gears, as conditions re-
quire.
IMPORTANT: Never use the clutch brake when
downshifting, or as a brake to slow the vehicle.
Eaton Fuller Super 10, Top 2,
and Lightning Semi-Automated
Transmissions
Refer to the Eaton website for additional information,
www.roadranger.com
.
General Information, Super 10/Top
2/Lightning
Super 10, Top 2, and Lightning transmissions have
10 selective forward ratios and a 2-speed rear sec-
tion. Half of the 10 speed ratios are shifted with the
shift lever and the other half are shifted by moving
the shift button. See Fig. 8.8 for the Super 10 and
Top 2 shift knob, and Fig. 8.9 for the Lightning shift
knob.
There are three types of shifts used with these trans-
missions. Button-only and combination button/lever
shifts are both full gear changes. The lever-only shift
skips a gear.
Fuller
Fuller
09/25/96 f260399
B
A
C
A. Shift Button
B. Gears 2, 4, 6, 8, 10 when button is forward
C. Gears 1, 3, 5, 7, 9 when button is rearward
Fig. 8.8, Super 10 and Top 2 Shift Knob
09/12/2002 f261190
1
2
1. Shift Button
2. Service Light
Fig. 8.9, Lightning Shift Knob
Transmissions
8.10
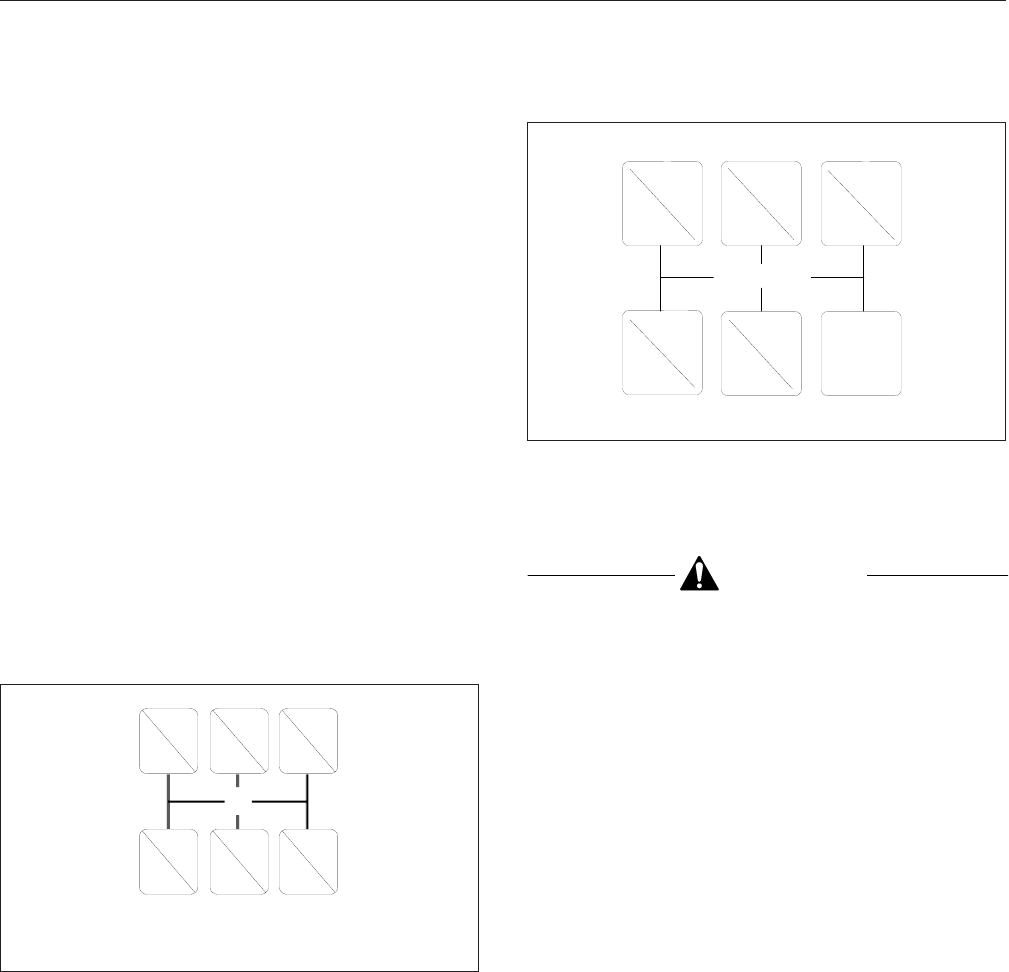
•The button-only shift is a gear split shift that
occurs by moving the shift button.
•The lever-only shift occurs when the shift lever
is moved without moving the shift button.
•The combination button/lever shift is a gear
ratio change that occurs when both the shift
button and the shift lever are moved.
The small red service light on the Lightning shift
knob illuminates for a few seconds when the engine
is turned on. This confirms that the transmission
electronics are operating properly.
NOTE: If the service light stays on or flashes, or
does not illuminate when the engine starts, take
the vehicle to an authorized Freightliner or
Eaton service facility as soon as possible.
See Fig. 8.10 for the Super 10 shift pattern, which is
also used by Top 2 and Lightning when the cruise
control is off. Top 2 and Lightning transmissions are
equipped with the Top 2 feature that allows the trans-
mission, with cruise control on, to automatically shift
between the top two gears (9th-10th) without the
need for a button-only shift. See Fig. 8.11.
IMPORTANT: Not all lever positions are used in each
range and the shift patterns vary between transmis-
sions. Be sure to read the shift pattern decal on the
dash for the operating instructions for the specific
transmission installed in your vehicle.
Operation, Super 10/Top 2/Lightning
CAUTION
Keep the transmission in gear at all times while
the vehicle in motion. Coasting in neutral could
lead to transmission damage.
1. When operating off-highway, or under adverse
conditions, always use low gear (if so equipped)
when starting to move the vehicle.
When operating on-highway, with no load, or
under ideal conditions, use 1st gear when start-
ing to move the vehicle.
For all conditions, use the highest gear that is
still low enough to start the vehicle moving with
engine idling, and without slipping the clutch ex-
cessively.
2. Use the clutch brake to stop gear rotation when
shifting into 1st or reverse when the vehicle is
stationary. The clutch brake is actuated by de-
pressing the clutch pedal all the way to the floor.
For normal upshifts and downshifts, only a partial
disengagement of the clutch is necessary to
break engine torque.
3. Do not make range shifts with the vehicle moving
in reverse gear.
4. The shift lever should not be moved to the center
or left rail positions at vehicle speeds above 40
mph (65 km/h).
N
R
R
4
3
8
7
1
26
5
10
9
HI
LO
09/24/96 f260397
NOTE: The Top 2 and Lightning transmissions use the
Super 10 shift pattern when cruise control is off.
Fig. 8.10, Super 10 Shift Pattern
12/14/1999
LO
HI
R
R
4
3
8
7
1
2 6
5
A
U
T
O
NEUTRAL
f261054
Fig. 8.11, Top 2 and Lightning Shift Patterns (with
cruise control on)
Transmissions
8.11
5. Double-clutch between all upshifts and down-
shifts.
6. After your shifting ability improves, you may want
to skip some of the ratios. This may be done
only
when operating conditions permit, depend-
ing on the load, grade, and road speed.
7. Avoid hunting for neutral by moving the gear shift
lever from the left rail to right rail. This action can
cause excessive transmission wear.
Upshifting
1. Position the gear shift lever in neutral. Start the
engine, and bring the air system pressure up to
100 to 120 psi (689 to 827 kPa).
2. Depress the clutch pedal to the floor. Shift into
1st gear, then engage the clutch, with the engine
at or near idle speed, to start the vehicle moving.
3. Button-only shift—Preselect the next gear by
sliding the shift button forward. Break torque by
releasing the throttle or by depressing the clutch
pedal. Decrease engine speed to synchronize
the engine speed with the transmission speed.
The shift will complete when the engine rpm has
decreased to the proper speed.
The button-only shift is used for gear changes
from 1st to 2nd, 3rd to 4th, 5th to 6th, 7th to 8th,
and 9th to 10th.
4. Lever-only shift—Break torque by releasing the
throttle and depressing the clutch pedal. Double-
clutching, move the shift lever to the next desired
gear position. Decrease engine speed to syn-
chronize the engine speed with the transmission
speed. The shift will complete when the engine
rpm has decreased to the proper speed.
The lever-only shift is used to skip a full gear.
With the shift button rearward—1st to 3rd, 3rd to
5th, 5th to 7th, and 7th to 9th. With the shift but-
ton forward—2nd to 4th, 4th to 6th, 6th to 8th,
8th to 10th.
NOTE: Lever-only shifts skip an entire gear ratio
and will require the engine rpm to decrease
twice the amount of a normal shift.
5. Combination button/lever shift—Preselect the
next gear by sliding the shift button rearward.
Break torque by releasing the throttle and de-
pressing the clutch pedal. Double-clutch and
move the shift lever to the next desired gear po-
sition.
The combination button/lever shift is used for
gear changes from 2nd to 3rd, 4th to 5th, 6th to
7th and 8th to 9th.
Downshifting
CAUTION
Do not attempt a button-only downshift at too
high an engine speed (generally above 1400
rpm). Doing so could result in damage to the en-
gine, transmission, and/or driveline.
1. Button-only shift—With the throttle still applied,
preselect the next gear by sliding the shift button
rearward. Break torque by releasing the throttle
or by depressing the clutch pedal. Increase en-
gine speed to synchronize the engine speed with
the transmission speed. The shift will complete
when the engine rpm has increased to the
proper speed.
The button-only shift is used for gear changes
from 10th to 9th, 8th to 7th, 6th to 5th, 4th to 3rd,
and 2nd to 1st.
CAUTION
Do not attempt a lever-only downshift at too high
an engine speed (generally above 1000 rpm).
Doing so could result in damage to the engine,
transmission, and/or driveline.
2. Lever-only shift—Break torque by releasing the
throttle and depressing the clutch pedal. Double-
clutching, move the shift lever to the next desired
gear position.
The lever-only shift is used to skip a full gear.
With the shift button rearward—9th to 7th, 7th to
5th, 5th to 3rd, and 3rd to 1st. With the shift but-
ton forward—10th to 8th, 8th to 6th, 6th to 4th
and 4th to 2nd.
IMPORTANT: Never use the clutch brake when
downshifting, or as a brake to slow the vehicle.
CAUTION
Do not attempt a combination button/lever down-
shift at too high an engine speed (generally
Transmissions
8.12
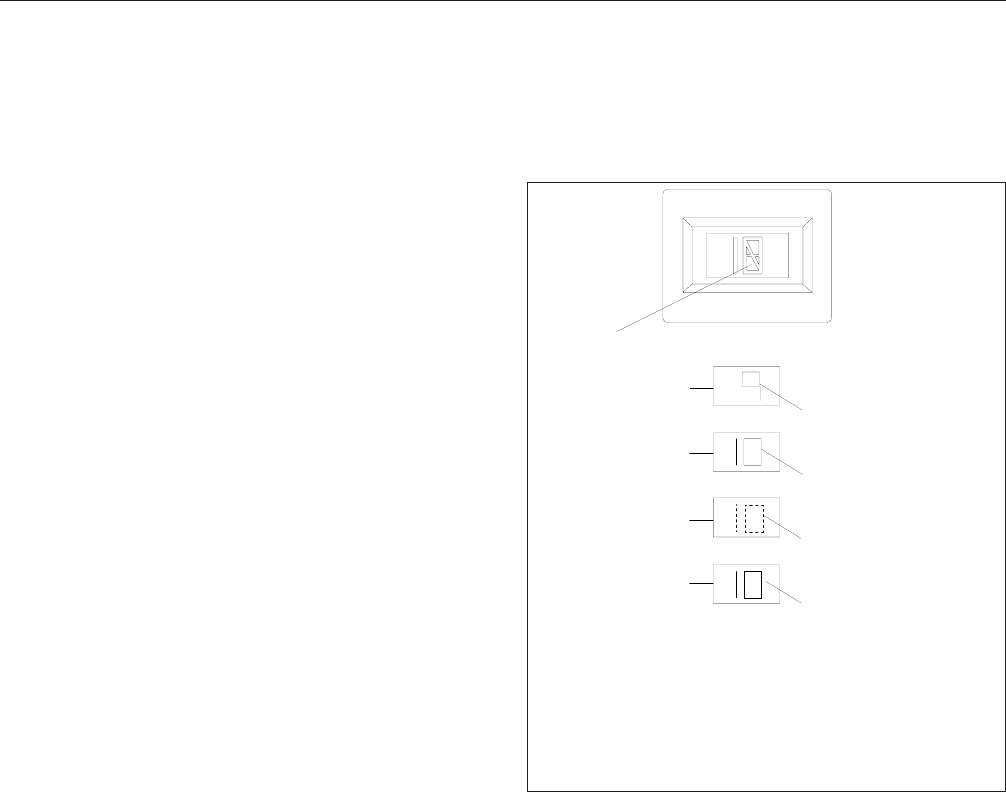
above 1400 rpm). Doing so could result in dam-
age to the engine, transmission, and/or driveline.
3. Combination button/lever shift—With the throttle
still applied, preselect the next gear by sliding
the shift button forward. Break torque by releas-
ing the throttle and depressing the clutch pedal.
Double-clutch and move the shift lever to the
next desired gear position.
The combination button/lever shift is used for
gear changes from 9th to 8th, 7th to 6th, 5th to
4th, and 3rd to 2nd.
Eaton Fuller AutoShift™
Automated Transmissions
Refer to the Eaton website for additional information,
www.roadranger.com
.
General Information, AutoShift
18-Speed RTLO Models
Eaton Fuller 18-speed RTLO model transmissions
have 18 forward speeds and four reverse speeds.
The transmission consists of a 5-speed front section
and a 3-speed rear section. The driver must use the
clutch to start and stop the vehicle.
10-Speed RTO Models
Eaton Fuller 10-speed RTO model transmissions
have 10 forward speeds and two reverse speeds.
The transmission consists of a 5-speed front section
and a 2-speed rear section. The driver must use the
clutch to start and stop the vehicle.
Both 10- and 18-speed AutoShift models are partially
automated transmissions. The driver does not need
to break torque or increase or decrease engine
speed to synchronize the shift. The transmission sig-
nals the engine controller when to break torque and
the engine controller automatically increases or de-
creases engine speed. When engine speed is cor-
rect, the transmission engages the next gear and
signals the engine controller to resume operation.
The AutoShift system consists of the following com-
ponents:
•The Gear Display Module (Fig. 8.12), mounted
on the dashboard, indicates the current gear
position. The display also flashes the next gear
to be engaged while the transmission is in neu-
tral during a gear change.
•The Driver Command Console (DCC) replaces
the shift lever and controls the transmission’s
shift patterns. On newer models, the Smart-
Shift™controller replaces the DCC. If your ve-
hicle is equipped with a SmartShift controller,
see the information under the heading "Freight-
liner SmartShift Transmission Shift Control."
•The Standard DCC (Fig. 8.13) has indicators
for the three forward positions: Drive, Low (2nd
gear), and Low1 (1st gear), plus Reverse and
Neutral positions. Service and wait lamps are
also located on the console. The gear select
handle contains only a gear select lever detent
button.
•The Enhanced DCC (Fig. 8.14) has indicators
for the three forward positions: Drive, Hold,
and Low, plus Reverse and Neutral positions.
Service and wait lamps are also located on the
1
4
5
SOLID
SOLID
FLASHING
02/17/98 f270062
3
2
SOLID
A
B
A. Gear Display Module B. Module Detail
1. Current Gear
2. 9th Gear Engaged
3. In 9th Gear, Preselected Toward 10th
4. Out Of Gear, Waiting For Engine/Transmission rpm
To Synchronize
5. 10th Gear Engaged
Fig. 8.12, Gear Display Module
Transmissions
8.13
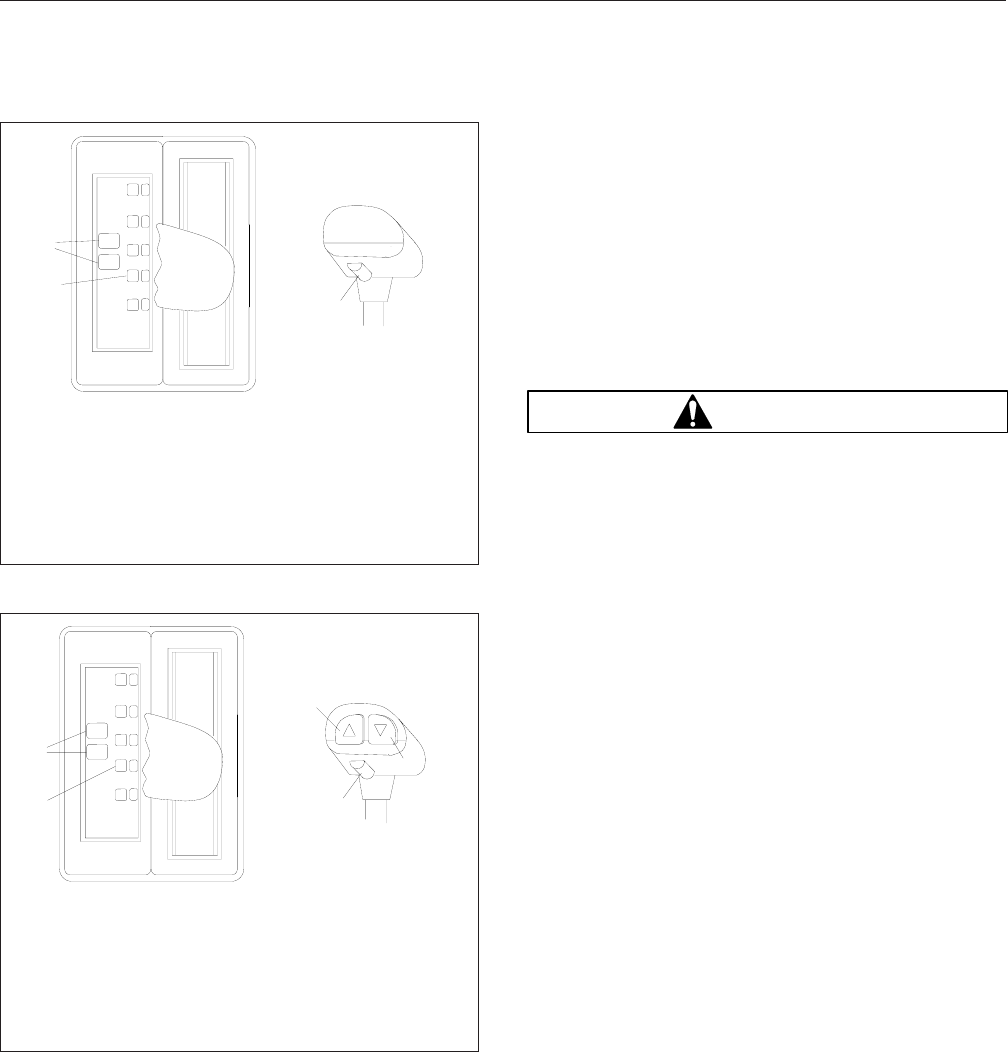
console. The gear select handle contains up-
shift and downshift buttons and a gear select
lever detent button.
•The shifter performs shifts at the front portion
of the transmission. It preselects the shift to
neutral and completes the gear change after
driver input.
•The Electronic Control Unit (ECU) includes two
controllers: a transmission ECU and a system
ECU. The transmission ECU controls all trans-
mission shift functions and the system ECU
manages all vehicle interfaces for transmission
shift functions.
•An electronic range valve, controlled by the
transmission ECU, is used to perform range
shifts.
Operation, AutoShift
WARNING
If the engine cranks in any gear other than neu-
tral, have the vehicle serviced immediately. If the
vehicle is started in gear it will suddenly move
forward or backward, which could result in per-
sonal injury and damage to property and the
transmission.
Start-Up
1. With the parking brake applied, press the clutch
all the way down to the floor.
2. Start the engine.
3. Check to make sure the transmission is in neu-
tral.
4. With the transmission in neutral, release the
clutch.
NOTE: This allows the speed sensor on the
input shaft to get a reading.
5. Press down on the clutch again and release the
parking brake.
6. Select the desired starting gear.
7. Release the clutch.
Reverse
NOTE: To drive in reverse, first depress the
clutch.
1. Move the gear select lever to the "R" position.
2. On 10-speed models, select either LO or HI re-
verse by depressing either the downshift or up-
shift button (Fig. 8.14) on the gear select handle
(if equipped).
N
D
SERVICE
WAIT
HOLD
R
1
2
3
A
B
02/16/98 f270063
L
L1
A. Console Top View
B. Select Handle Side
View
1. Indicator Lamps
2. Gear Position Indicator
3. Detent Button
Fig. 8.13, Standard Driver Command Console (DCC)
N
D
H
SERVICE
WAIT
HOLD
R
L
2
3
4
5
A
B
02/16/98
1
f270064
A. Console Top View
B. Select Handle Side
View
1. Indicator Lamps
2. Gear Position
Indicator
3. Upshift Button
4. Detent Button
5. Downshift Button
Fig. 8.14, Enhanced Driver Command Console (DCC)
Transmissions
8.14

On 18-speed models, four reverse gears are
available. Select either low range, low split (1R);
low range, high split (R); high range, low split
(1H); high range, high split (H).
3. Release the clutch.
NOTE: The clutch must be used for starting and
stopping.
Driving in the "D" Mode
NOTE: The drive mode is used for normal driv-
ing conditions.
1. Fully depress the clutch.
2. Move the gear select lever from neutral to drive.
NOTE: The clutch must be fully depressed to
shift from neutral to drive.
3. Upshifting and downshifting are performed auto-
matically with no driver interaction required.
NOTE: The clutch must be used for starting and
stopping.
Parking the Vehicle
1. With the clutch pedal depressed, move the gear
select lever to neutral.
2. Ensure that a solid "N" appears on the gear dis-
play module. See Fig. 8.12.
NOTE: If the gear display does not show a solid
"N," the transmission is not yet in neutral.
3. Set the parking brakes.
4. Slowly release the clutch pedal.
Selecting the Starting Gear (push button
equipped gear select handle only)
NOTE: On vehicles equipped with upshift and
downshift buttons (Fig. 8.14) on the gear select
handle (enhanced DCC), you may select the
starting gear. The gear you select is only active
while the vehicle is running. The transmission
resets to the default starting gear after you have
shut off the engine. Depending on the vehicle’s
load, you may select gears 1 through 5 as the
starting gear.
1. With the vehicle stopped, place the gear select
lever in the "D" or "H" position to select a starting
gear.
2. Select the starting gear with the upshift or down-
shift buttons on the gear select handle.
Driving in the "H" Mode (if equipped)
NOTE: You must use the upshift and downshift
buttons on the gear select handle to change
gears while in the "H" (hold) mode.
1. Depress the clutch pedal.
2. Place the shift lever in the "H" mode.
3. Select the starting gear you want.
4. Slowly release the clutch pedal.
Upshifting
NOTE: In the "H" mode you, the driver, decide
when to upshift and downshift.
1. Accelerate.
2. Press the upshift button on the gear select
handle. To skip shift, press twice.
3. The transmission automatically selects and shifts
to the next gear.
Downshifting
1. Decelerate.
2. Press the downshift button on the gear select
handle. To skip shift, press twice.
3. The transmission automatically selects and shifts
to the next gear.
Spicer Straight-Shift Models
Refer to the Spicer/TTC website for additional infor-
mation,
www.ttcautomotive.com
.
General Information, Spicer Straight-
Shift
Spicer 7-speed series transmissions are synchro-
nized in all gears except 1st and reverse. They have
seven forward gears and one reverse gear. See
Fig. 8.15 for the shift pattern.
Transmissions
8.15

Operation, Spicer Straight-Shift
1. Always use 1st gear when starting to move the
vehicle forward.
2. Use the clutch brake to stop gear rotation when
shifting into 1st or reverse when the vehicle is
stationary. The clutch brake is actuated by de-
pressing the clutch pedal all the way to the floor.
For normal upshifts and downshifts, only a partial
disengagement of the clutch is necessary to
break engine torque.
3. Double-clutch only when shifting out of neutral,
or when shifting down into 1st.
Upshifting
1. Position the gear shift lever in neutral, then start
the engine. Bring the air system pressure up to
100 to 120 psi (689 to 827 kPa).
2. Press the clutch pedal to the floor. Shift into 1st
gear, then engage the clutch, with the engine at
or near idle speed, to start the vehicle moving.
Accelerate to engine governed speed.
3. Once governed speed has been attained, disen-
gage the clutch enough to break torque, and
move the shift lever to 2nd gear. Then engage
the clutch, and accelerate back to engine gov-
erned speed.
4. Continue shifting upward, using the same se-
quence described in step 3 above. See Fig. 8.15
for the shift pattern.
Downshifting
When downshifting, shift progressively down through
each successive lower gear, as follows:
1. Depress the clutch pedal enough to release the
torque, shift into the next lower gear, and engage
the clutch smoothly while accelerating the engine
to keep the vehicle moving at the desired speed.
2. Continue downshifting, as conditions require,
using the same sequence described above.
When shifting down into 1st gear, remember that
1st gear isn’t synchronized. Double-clutch when
shifting down into 1st gear.
IMPORTANT: Never use the clutch brake when
downshifting, or as a brake to slow the vehicle.
Meritor™Range-Shift Models
Refer to the Meritor website for additional informa-
tion,
www.arvinmeritor.com
.
General Information, Meritor Range-
Shift
Range-shift transmissions are typically upshifted by
moving the shift lever through all of the low gear po-
sitions and then activating a range switch to provide
an additional set of ratios in the high range using the
same shift lever positions as used in low range. The
shift lever then is moved sequentially through each
position as before but all the positions now provide a
higher gear ratio. The initial low gear is often used
only in low range.
IMPORTANT: Not all lever positions are used in
each range and the shift patterns vary between
transmissions. Be sure to read the shift pattern
decal on the dash for the operating instructions
for the specific transmission installed in your
vehicle.
9-Speed Models
Meritor 9-speed M, MO, RM, RMO, and RMX model
transmissions have a 5-speed front section, and a
2-speed auxiliary section. The low gear in the front
sections of the "A" and "B" ratio transmissions is
used only as a starting ratio. The high gear in the
front section of the "R" ratio transmissions is used
only as the top gear. The remaining gear positions of
the above transmissions are used once in the low
range and once in the high range.
See Fig. 8.16 for the shift patterns.
f260118
R
5
13
24
7
6
03/12/96
N
Fig. 8.15, Spicer 7-Speed Transmission Shift Pattern
Transmissions
8.16
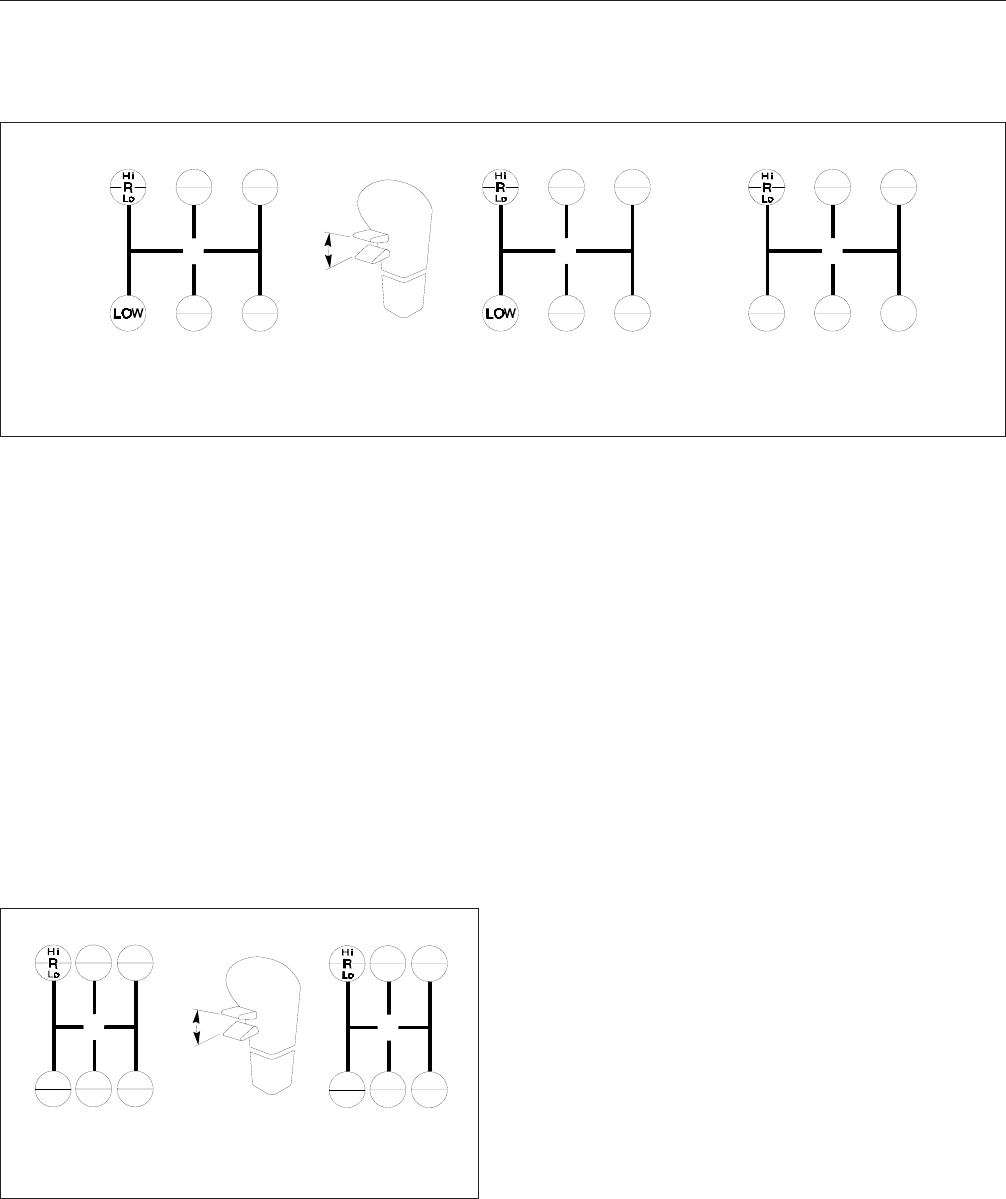
NOTE: The 3rd/7th and 4th/8th shift positions in
the standard "A" and "B" ratio transmissions
(both direct drive and overdrive) are opposite of
the RMO model (overdrive only) transmissions.
The "R" ratio transmissions have the 1st/5th shift po-
sitions where low is in the "A" and "B" ratio transmis-
sions. The top gear in the "R" ratio transmissions is
called 9th gear.
10-Speed Models
Meritor 10-speed transmissions have ten evenly-
spaced forward ratios. Each transmission consists of
a 5-speed front section, and a 2-speed auxiliary sec-
tion. The ten forward speeds are obtained by twice
using a 5-speed shift pattern: the first time in low
range, the second time in high range. See Fig. 8.17
for the shift patterns.
NOTE: The 4th/9th and 5th/10th shift positions
in the standard "A" and "B" ratio transmissions
(both direct drive and overdrive) are opposite of
the RMO model (overdrive only) transmissions.
Operation, Meritor Range-Shift
Reverse
To drive in reverse, push the range selector lever
down to put the transmission in the low range. Push
the clutch pedal to the bottom of travel so the clutch
brake slows the transmission for initial gear engage-
ment. Holding the clutch pedal at the bottom of
travel, shift into reverse.
Slowly release the clutch pedal to move the vehicle
in reverse.
Upshifting
1. To drive forward, make sure the vehicle is com-
pletely stopped and the range selector lever is
pushed down to put the transmission in the low
range.
Push the clutch pedal to the bottom of travel so
the clutch brake slows the transmission for initial
gear engagement. Holding the clutch pedal at
the bottom of travel, shift into low.
2. Slowly release the clutch pedal to begin moving
the vehicle forward.
3. To upshift into 1st gear, only partial depression of
the clutch pedal is needed. Do not push the
clutch pedal all the way to the floor and engage
the clutch brake; instead, partially depress the
1
4
5
8
6
7
3
2
1
4
5
8
6
7
3
2
14
58
67
32 9
ABC
1
2
03/13/96 f260156a
NNN
A. All Standard "A" and "B" Ratios B. RMO Models with "A" and "B"
Ratios C. All "R" Ratios
1. Up for High Range 2. Down for Low Range
Fig. 8.16, Meritor 9-Speed Transmission Shift Patterns
4
7
29
6
18
310
5
7
210
5
6
18
39
4
AB
C
D
03/13/96 f260155a
N
N
A. All Standard Models
B. RMO Models Only C. Up for High Range
D. Down for Low Range
Fig. 8.17, Meritor 10-Speed Transmission Shift Patterns
Transmissions
8.17
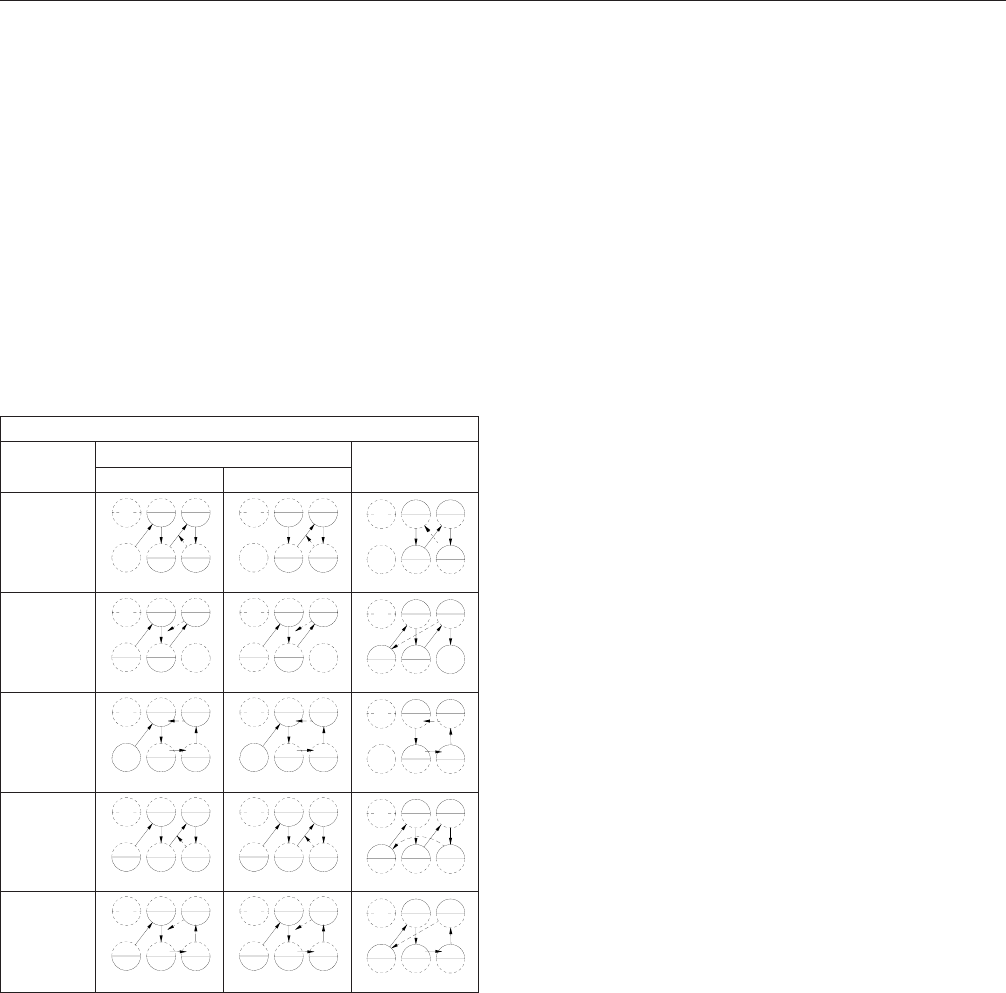
clutch pedal, and move the shift lever into neu-
tral.
4. Release the clutch, and allow the engine to de-
celerate until the road speed and the engine
RPM match.
5. Partially depress the clutch pedal, and move the
shift lever into first gear.
6. Double clutch to continue upshifting until the top
gear in the low range-4th gear in 9-speed
models, 5th gear in 10-speed models. See
Table 8.3.
Meritor Shift Progressions
MODEL LOW RANGE HIGH
RANGE
Off-Highway On-Highway
9-Speed
Standard
1
2
3
4
f260322
R
LOW
1
2
3
4
f260323
R
7
68
5
f260324
R
9-Speed
"R" Ratio
2
3
4
1
f260325
R
2
3
4
1
f260325
R
8
79
6
f260326
R
5
9-Speed
RMO
Models
1
2
4
f260327
R
3
LOW
1
2
4
f260327
R
3
LOW
8
67
5
f260328
R
10-Speed
Standard
2
3
4
1
f260329
R
5
2
3
4
1
f260329
R
5
9
810
7
f260330
R
6
10-Speed
RMO
Models
2
3
5
1
f260331
R
4
2
3
5
1
f260331
R
4
10
89
7
f260332
R
6
Table 8.3, Meritor Shift Progressions
7. To upshift into high range—with the transmission
still in the highest low-range gear—move the
range selector lever up to put the transmission
into high range, then partially depress the clutch
pedal and move the shift lever into neutral. As
the shift lever passes through neutral, the trans-
mission will automatically shift from low range to
high range.
8. Release the clutch pedal, and let the engine slow
until the road speed and engine RPM match.
9. Partially depress the clutch pedal, and move the
shift lever into the lowest gear in the high range-
5th gear in 9-speed models, 6th gear in 10-
speed models.
10. Double clutch to continue upshifting.
Downshifting
1. With the transmission in high range, shift pro-
gressively downward to the bottom gear in high
range-5th gear in 9-speed models, 6th gear in
10-speed models-double-clutching between
shifts. See Table 8.3.
2. When in the bottom gear of the high-range shift
pattern, and ready for the next downshift, push
the range selection lever down into low range.
Double-clutch through neutral, and shift into the
top gear of the low-range shift pattern. As the
shift lever passes through neutral, the transmis-
sion will automatically shift from high range to
low range.
3. With the transmission in low range, downshift
through the low range gears as conditions re-
quire.
IMPORTANT: Never use the clutch brake when
downshifting, or as a brake to slow the vehicle.
Meritor Splitter and Range-
Shift Models
Refer to the Meritor website for additional informa-
tion,
www.arvinmeritor.com
.
General Information, Meritor Splitter
and Range-Shift
Combination splitter and range-shift transmissions
allow the choice of two splitter ratios in each lever
position as well as the additional ratios provided in
each lever position after shifting to the other range.
IMPORTANT: Not all lever positions are used in
each range and the shift patterns vary between
transmissions. Be sure to read the shift pattern
decal on the dash for the operating instructions
for the specific transmission installed in your
vehicle.
Transmissions
8.18
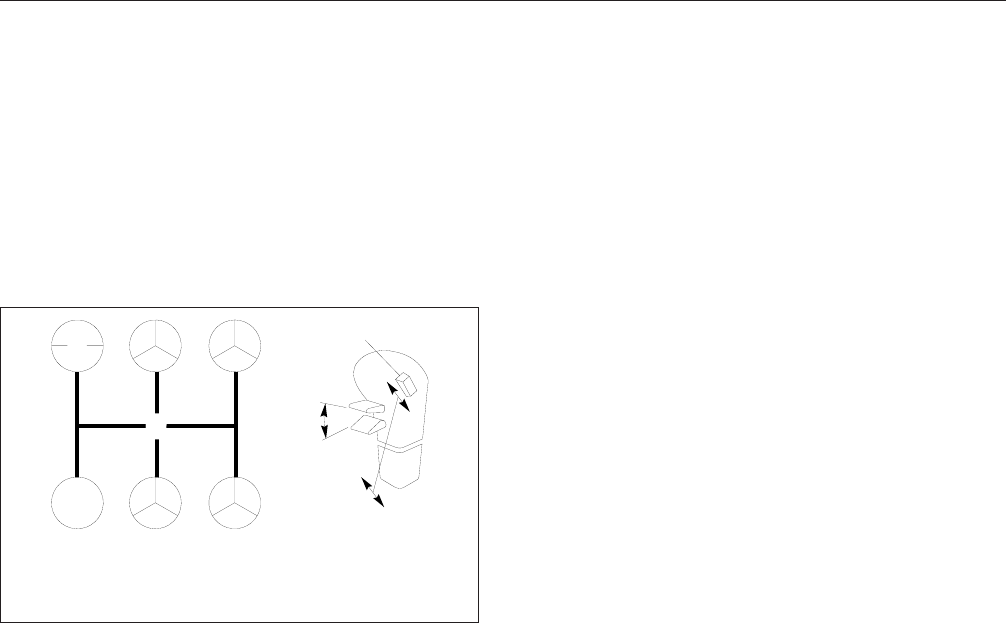
13-Speed Models
Meritor 13-speed transmissions have thirteen forward
speeds and two reverse speeds. Each transmission
consists of a 5-speed front section, and a 3-speed
auxiliary section. The auxiliary section contains low-
and high-range ratios, plus, an overdrive splitter gear.
See Fig. 8.18.
All of the thirteen speeds are controlled with one shift
lever. Built into the shift knob of the lever, are a
range selection lever and a splitter control button (on
the side of the shift knob), that control range selec-
tion and gear splits, respectively.
Low gear in the front section is used only as a start-
ing ratio. The remaining four forward positions are
used once in the low range and once in the high
range. However, each of the four high range gear
positions can be split with the overdrive ratio of the
splitter gear. Ratios cannot be split while the trans-
mission is in low range.
Operation, Meritor Splitter and
Range-Shift
IMPORTANT: The shifter knob has an interlock
feature that prevents the splitter control button
from being moved up when the range selection
lever is down (in the low range); when the trans-
mission is in the high range, and the splitter
control button is up, the range selection lever
cannot be moved down.
Reverse
To drive in reverse, push the range selector lever
down to put the transmission in the low range. Push
the clutch pedal to the bottom of travel so the clutch
brake slows the transmission for initial gear engage-
ment. Holding the clutch pedal at the bottom of
travel, shift into reverse.
Slowly release the clutch pedal to move the vehicle
in reverse.
Upshifting
1. To drive forward, make sure the vehicle is com-
pletely stopped and the range selector lever is
pushed down to put the transmission in the low
range.
Push the clutch pedal to the bottom of travel so
the clutch brake slows the transmission for initial
gear engagement. Holding the clutch pedal at
the bottom of travel, shift into low.
2. Slowly release the clutch pedal to begin moving
the vehicle forward.
3. To upshift into 1st gear, only partial depression of
the clutch pedal is needed. Do not push the
clutch pedal all the way to the floor and engage
the clutch brake; instead, partially depress the
clutch pedal, and move the shift lever into neu-
tral.
4. Release the clutch pedal, and allow the engine
to decelerate until the road speed and the engine
RPM match.
5. Partially depress the clutch pedal, and move the
shift lever into 1st gear.
6. Double clutch to continue upshifting until in fourth
gear. See Table 8.3.
7. To upshift into high range—with the transmission
still in 4th gear—push the range selection lever
up to put the transmission into high range, then
partially depress the clutch pedal and move the
shift lever into neutral. As the shift lever passes
through neutral, the transmission will automati-
cally shift from low range to high range.
8. Release the clutch pedal, and let the engine slow
until the road speed and engine RPM match.
9. Partially disengage the clutch, and move the shift
lever into 5th gear.
R13
24
LOW
Dir OD
55 Dir OD
Dir OD Dir OD
77
66 8 8
Hi
Lo
A
BC
D
1
03/13/96 f260154a
N
A. Up for High Range
B. Down for Low Range C. Up for Overdrive
D. Down for Direct
1. Splitter Control Button
Fig. 8.18, Meritor 13-Speed Transmission Shift Pattern
Transmissions
8.19

10. To upshift from 5th gear into 5th overdrive, flip
the splitter control button up to the overdrive po-
sition; then, immediately release the accelerator,
and press and release the clutch pedal. It is not
necessary to move the shift lever when shifting
from direct to overdrive; the transmission will
shift when synchronization with the engine’s
speed is reached. Accelerate the engine only
after the transmission has shifted.
11. To shift from 5th overdrive to 6th direct, partially
disengage the clutch, shift into 6th—but before
engaging the clutch—flip the splitter control but-
ton down into the direct drive position; then en-
gage the clutch, and accelerate the engine.
Do not move the control button while the shift
lever is in neutral.
12. Shift upward through each of the high range
gears, alternating the procedures in steps 10 and
11, above.
Downshifting
1. Downshift from 8th overdrive to 8th direct without
moving the shift lever. Flip the splitter control but-
ton down to the direct drive position; then, imme-
diately release the accelerator, and press and
release the clutch pedal. Accelerate the engine
only after the transmission has shifted.
2. To downshift from 8th direct to 7th overdrive, flip
the splitter control button up to the overdrive po-
sition; then, immediately double-clutch through
neutral, moving the shift lever from 8th to 7th
gear.
3. Downshift through each of the high range gears
alternating the procedures in steps 1 and 2,
above, until reaching 5th direct.
4. While in 5th direct, and ready for the next down-
shift, push the range selection lever down into
low range. Double-clutch through neutral, and
shift into 4th gear. See Fig. 8.18. As the shift
lever passes through neutral, the transmission
will automatically shift from high range to low
range.
5. With the transmission in low range, downshift
through the low range gears as conditions re-
quire.
IMPORTANT: Never use the clutch brake when
downshifting, or as a brake to slow the vehicle.
Meritor Engine Synchro Shift™
(ESS) Automated Models
Refer to the Meritor website for additional informa-
tion,
www.arvinmeritor.com
.
General Information, ESS
9–Speed and 10–Speed M, MO, RS, and
RSX Models
Meritor 9–Speed and 10–Speed M, MO, RS, and
RSX Model transmissions do not require use of the
clutch except to start and stop the vehicle.
NOTE: Meritor M and MO series ESS transmis-
sions are available only on vehicles equipped
with either Caterpillar or Cummins electronic
engines. Meritor RS and RSX series ESS trans-
missions are only available on vehicles
equipped with Detroit Diesel electronic engines.
The ESS system works with the engine fuel
control system to automatically synchronize en-
gine rpm to road speed during gear changes.
Use the clutch only to start and stop the vehicle
and to shift into Forward or Reverse. The HI
and LO ranges are automated, so the driver
does not have to select ranges. A "break torque"
feature allows the driver to move the shift lever
and take the transmission out of gear without
changing throttle position. Throttle position can
be maintained while braking and downshifting
through the gears when stopping the vehicle, as
well as on steep grades.
The major components of the ESS system are
the system switch, shift-intent switch, input and
output shaft speed sensors, a Neutral position
sensor, and an electro-pneumatic solenoid.
Operation, ESS
The ESS system collects and relays information per-
taining to the positions of the shift-intent and system
switches (Fig. 8.19), transmission input and output
shaft speeds, and shift lever position. The informa-
tion is received by the engine Electronic Control
Module (ECM), which signals the fuel control system
to increase or decrease engine rpm to match road
Transmissions
8.20
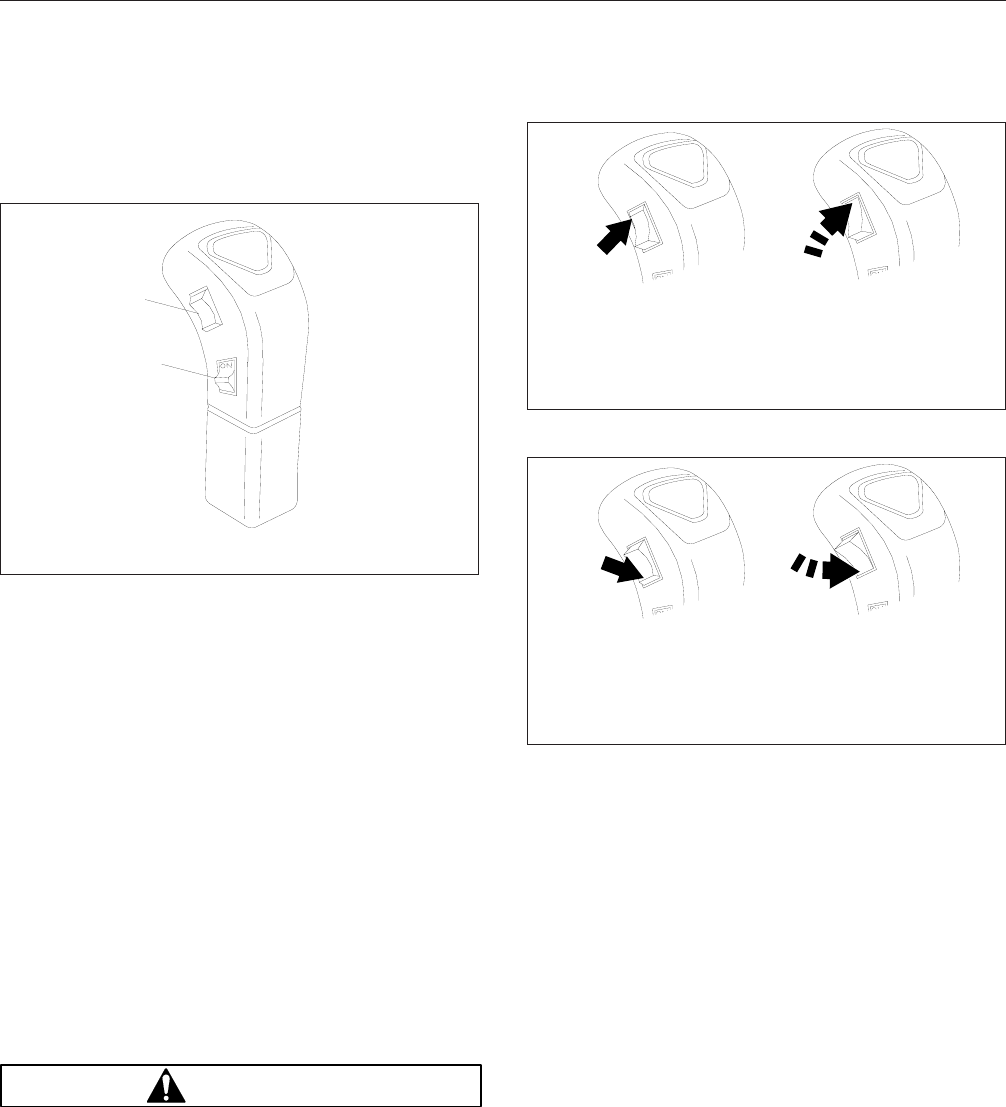
speed. The ECM also controls HI and LO range se-
lection in the auxiliary case on the rear of the
transmission.
The system switch (Fig. 8.19) is the lower switch lo-
cated on the driver’s side of the shift handle. It con-
trols ESS system operation. When in the down posi-
tion, the system is operating and the word ON is
visible on the switch. In the up position, the word
OFF is visible, the system is not operating, and the
transmission can be shifted manually.
The shift-intent switch (Fig. 8.19) is the upper switch
on the driver’s side of the shift handle. It has four
positions and controls upshifting and downshifting by
communicating to the ECM the driver’s intention of
changing gears.
NOTE: If the system switch is OFF, use the
shift-intent switch to select between ranges.
Push the top of the switch (Fig. 8.20) to select
the HI range on upshifts and the bottom of the
switch (Fig. 8.21) to select the LO range on
downshifts.
WARNING
Make sure that the transmission is in neutral (N)
when you start the vehicle. If the vehicle is
started in gear, it will suddenly move forward or
backward which could result in personal injury
and damage to property and the transmission.
Starting the Vehicle
1. Ensure that the shift lever is in the neutral (N)
position.
2. Push the clutch pedal to the bottom of its travel
to engage the clutch brake.
3. Start the engine.
4. Slowly release the clutch pedal.
5. Allow the system air to build up to the range
specified on the gauge.
6. Release the parking brake.
02/17/98 f270058
1
2
1. Shift-Intent Switch 2. System Switch
Fig. 8.19, ESS Shift Handle
02/17/98 f270059
AB
A. Press the top portion (engage the first position) of
the shift-intent switch to begin an upshift.
B. Press the top portion again (engage the second
position) to break torque.
Fig. 8.20, ESS Upshifting Using the Shift-Intent Switch
02/17/98
AB
f270060
A. Press the bottom portion (engage the first position)
of the shift-intent switch to begin a downshift.
B. Press the bottom portion again (engage the second
position) to break torque.
Fig. 8.21, ESS Downshifting Using the Shift-Intent
Switch
Transmissions
8.21

Shifting Into a Starting Gear
CAUTION
Always use the proper starting gear. Do not shift
into neutral and coast, as this will result in dam-
age to the transmission.
1. Press the system switch down, into the ON posi-
tion, to activate the ESS system.
2. Press the top portion of the shift-intent switch.
IMPORTANT: Use the clutch brake only when
initially engaging a gear with the vehicle stand-
ing still.
3. Push the clutch pedal to the bottom of its travel
so that the clutch brake stops the transmission
input shaft from rotating.
4. Move the shift lever and engage a starting gear.
5. Slowly release the clutch pedal.
NOTE: If you do not shift the transmission out of
neutral into a gear within two seconds, the ESS
system will "time out" and deactivate. The trans-
mission returns to manual operation. To reacti-
vate the ESS system, press the shift-intent
switch again. See the following procedures for
upshifting and downshifting for instructions on
how to use the shift-intent switch.
Upshifting
1. To upshift into the next higher gear:
1.1 Press the top portion of the shift-intent
switch.
1.2 Apply pressure with the shift lever toward
the neutral position.
1.3 Press the top portion of the shift-intent
switch again, far enough so that the
switch goes into a second position inside
the body of the shift handle. Then release
the switch. See Fig. 8.20. This will break
torque.
1.4 Immediately move the shift lever to the
neutral position.
1.5 Allow engine rpm to slow down enough to
synchronize with road speed.
1.6 Move the shift lever to the next higher
gear.
2. To upshift through the rest of the gears, repeat
the substeps above. Before each upshift, push
the top of the shift-intent switch into the shift
handle body to break torque. The range shift is
automatic.
3. To skip a gear, press the shift-intent switch into
the shift handle body, while in neutral, one time
for every gear that is skipped.
Downshifting
1. To downshift into the next lower gear.
1.1 Press the bottom portion of the shift-intent
switch.
1.2 Apply pressure with the shift lever toward
the neutral position.
1.3 Press the bottom portion of the shift-intent
switch again, far enough so that the
switch goes into a second position inside
the body of the shift knob. Then release
the switch. See Fig. 8.21. This will break
torque.
1.4 Immediately move the shift lever to the
neutral position.
1.5 Allow engine rpm to speed up enough to
synchronize with road speed.
1.6 Move the shift lever to the next lower
gear.
2. To downshift through the rest of the gears, re-
peat the substeps above. Before each downshift,
push the bottom of the shift-intent switch into the
shift handle body to break torque. The range
shift is automatic.
3. To skip a gear, press the shift-intent switch into
the shift handle, while in neutral, one time for
every gear that is skipped.
Reverse
1. Press the system switch on the shift handle so
that it is in the ON position and the ESS system
is activated.
2. Push the clutch pedal to the bottom of its travel
so that the clutch brake stops the transmission
input shaft from rotating.
Transmissions
8.22

3. Move the shift lever and engage reverse.
4. Slowly release the clutch pedal and move the
vehicle in the reverse direction.
NOTE: If a HI reverse range is required, follow
the steps below.
5. Press the system switch on the shift handle so
that it is in the OFF position and the ESS system
is deactivated.
6. Press the top portion of the shift-intent switch to
engage the HI range.
7. Push the clutch pedal to the bottom of its travel
so that the clutch brake stops the transmission
input shaft from rotating.
8. Move the shift lever and engage reverse.
9. Slowly release the clutch pedal and move the
vehicle in the reverse direction.
See Fig. 8.22 for two ESS 9-speed shift patterns
and one ESS 10-speed shift pattern.
02/17/98 f270061
R
R
R
R
R
R
5 7
1 3
3 3
LO 2
2 2
4
4
6 8
6 8
9
7
5
1
7 9
4
5
10
8
1
N N N
6
A B C
A. 9-Speed Shift Pattern with LO
Gear B. 9-Speed Shift Pattern C. 10-Speed Shift Pattern
Fig. 8.22, Meritor ESS 9- and 10-Speed Shift Patterns
Transmissions
8.23

9
Rear Axles
Meritor Single Drive Axles With Traction Equalizer ....................................... 9.1
Meritor Drive Axles With Main Differential Lock ......................................... 9.1
Meritor Main Differential Lock Operation ............................................... 9.1
Meritor Tandem Drive Axles With Interaxle Differential .................................... 9.2
Meritor Interaxle Differential Lockout Operation ......................................... 9.2
Eaton Single Reduction Axles With Controlled Traction Differential .......................... 9.2
Eaton 2-Speed Tandem Axles ....................................................... 9.3
Eaton Interaxle Differential Lockout Operation .......................................... 9.3
Meritor Single Drive Axles
With Traction Equalizer
Some Meritor single drive axles are equipped with a
traction equalizer which is a load sensing, self-
actuating feature. A traction equalizer provides nor-
mal differential action where traction is good. When
one wheel begins to spin faster than the other, clutch
plates in the differential housing automatically en-
gage, delivering power to both wheels. There is no
operator control with this feature.
A traction equalizer occasionally tends to slip in a
jerking motion, producing irregular intervals of sharp
noises. This generally occurs when the vehicle is op-
erating at low speeds on fairly sharp turns. This con-
dition, called slip-stick, is corrected by adding a fric-
tion modifier to the axle lubricant. This additive tends
to reduce the static coefficient of friction to a value
equal to, or lower than, the sliding coefficient.
See Group 35 of the
Heavy-Duty Trucks Mainte-
nance Manual
for additional information on friction
modifiers and when to add them to axle lubricants.
CAUTION
Tire sizes on both rear wheels should be the
same on axles equipped with a traction equalizer.
If not, excessive wear may occur in the traction
equalizer.
Meritor Drive Axles With Main
Differential Lock
The Meritor main differential lock is a driver-
controlled traction device operated from the vehicle
cab. A switch allows the driver to lock or unlock the
differential. An indicator light on the instrument panel
comes on when the differential lock is engaged. An
optional buzzer can also be used to indicate differen-
tial lock engagement.
The main differential lock provides maximum traction
under slippery conditions. When the differential lock
is engaged, the clutch collar completely locks the
differential case, gearing, and axle shafts together,
maximizing traction of both wheels and protecting
against spinout. Under normal traction conditions, do
not engage the differential lock. Operate the axle
with differential action between both wheels.
WARNING
Be especially careful when driving under slippery
conditions with the differential locked. Though
forward traction is improved, the vehicle can still
slip sideways, causing possible loss of vehicle
control, personal injury, and property damage.
Meritor Main Differential Lock
Operation
To lock the main differential and obtain maximum
traction under slippery conditions, move the control
switch to the lock position.
WARNING
Lock the main differential only when the vehicle
is standing still or moving less than 25 mph (40
km/h). Never lock the main differential when the
vehicle is traveling down steep grades or when
the wheels are slipping. This could damage the
differential or lead to loss of vehicle control,
causing personal injury and property damage.
NOTE: On some vehicles, the differential lock
system is connected through the low speed
range of the transmission. If this system is used,
the transmission must be in the low speed
range for the differential to fully lock.
If the vehicle is moving, maintain a constant vehicle
speed while engaging the differential lock. Briefly let
up on the accelerator to relieve torque on the gear-
ing, allowing the differential to fully lock. The indica-
tor light should come on and the buzzer should
sound on vehicles so equipped. When the differential
is fully locked, the turning radius will increase be-
cause the vehicle understeers. See Fig. 9.1. Drive
cautiously and do not exceed 25 mph (40 km/h).
To unlock the main differential, move the control
switch to the unlock position. Briefly let up on the
accelerator to relieve torque on the gearing, allowing
the differential to fully unlock.
NOTE: If the differential lock system is con-
nected through the low speed range of the
transmission, shifting out of low speed range will
also unlock the differential.
Rear Axles
9.1
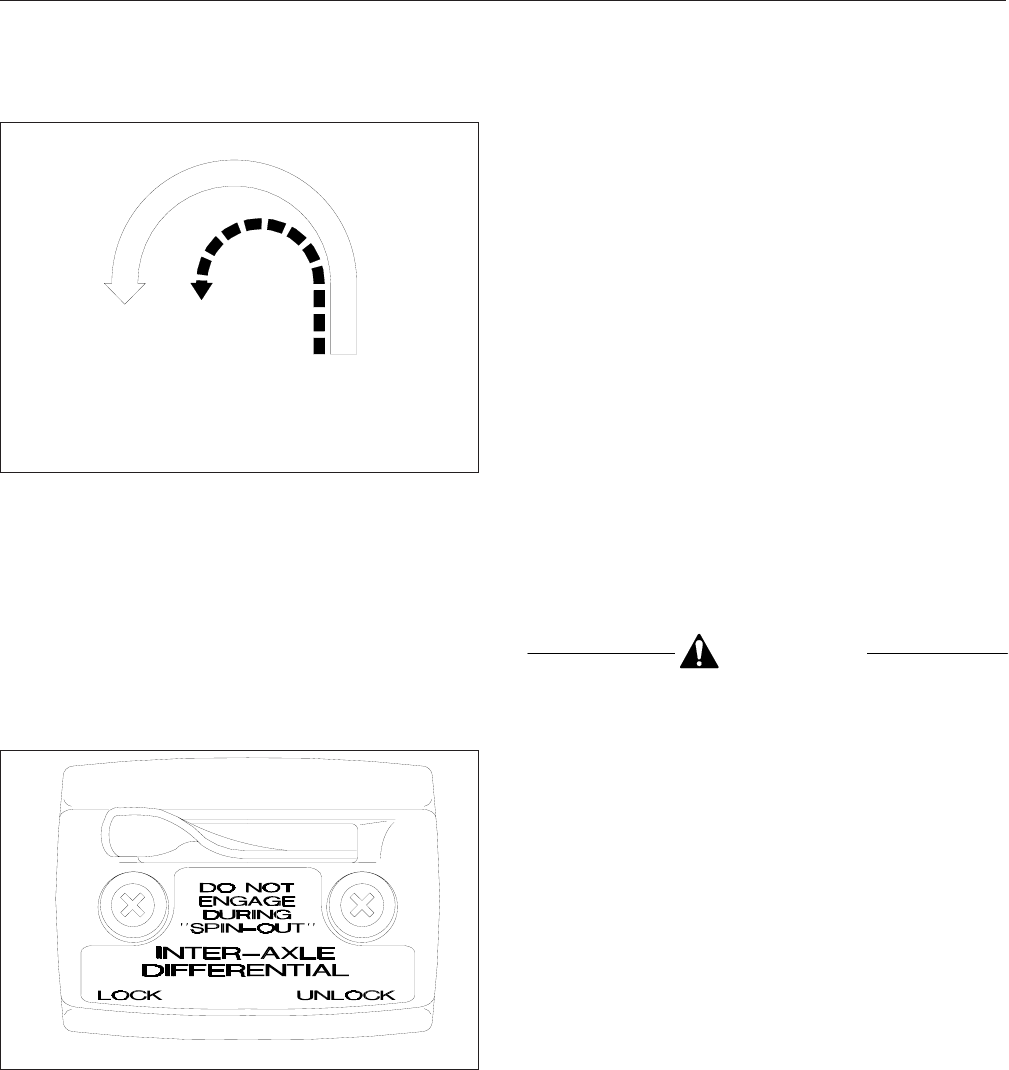
When the differential lock disengages, the indicator
light will go off and the buzzer will stop.
Meritor Tandem Drive Axles
With Interaxle Differential
Meritor tandem drive axles with an interaxle differen-
tial have a lockout feature. Differential lockout is con-
trolled by a switch (Fig. 9.2) on the control panel.
In the UNLOCK position, there is differential action
between the two axles. The differential compensates
for different wheel speeds and variations in tire size.
Keep the interaxle differential unlocked for normal
driving on roads where traction is good.
In the LOCK position, the interaxle differential is
locked out and the driveshaft becomes a solid con-
nection between the two axles. Power entering the
forward axle is also transmitted straight through to
the rear axle, so both axles turn together at the same
speed. The LOCK position should be used when the
vehicle encounters poor traction conditions; however,
it also increases drivetrain and tire wear and should
be used only when improved traction is required.
Meritor Interaxle Differential
Lockout Operation
To lock the interaxle differential and achieve maxi-
mum pulling power when approaching slippery or
poor road conditions, move the lockout control valve
to LOCK while maintaining vehicle speed, before en-
countering the poor road conditions. Let up momen-
tarily on the accelerator to engage the differential
lock. Proceed over poor road conditions with caution.
Do not wait until traction is lost and the tires are
spinning before locking the interaxle differential.
CAUTION
Do not actuate the interaxle differential control
valve while the tires are slipping. Do not operate
the vehicle continuously with the interaxle differ-
ential locked during extended good road condi-
tions. To do so could result in damage to the axle
gearing and excessive tire wear.
To unlock the interaxle differential, move the lockout
control valve to UNLOCK while maintaining vehicle
speed, after leaving the poor road conditions. Let up
momentarily on the accelerator to allow the shift,
then resume driving at normal speed.
Eaton Single Reduction Axles
With Controlled Traction
Differential
The controlled traction differential system is a differ-
ential assembly incorporating a friction plate assem-
bly designed to transfer torque from the slipping
wheel to the one with traction. The unit is basically a
multiple disc clutch designed to slip above predeter-
mined torque values. This controlled slipping charac-
teristic at higher torque values enables the vehicle to
negotiate turns in a normal manner. Resistance to
slippage at lower torque values enables the vehicle
02/09/96 f350079a
A
B
A. Turning Radius When Differential is Locked
(engaged)—Understeer Condition
B. Turning Radius When Differential is Unlocked
(disengaged)
Fig. 9.1, Turning Radius
01/19/95 f600306
Fig. 9.2, Interaxle Differential Control
Rear Axles
9.2
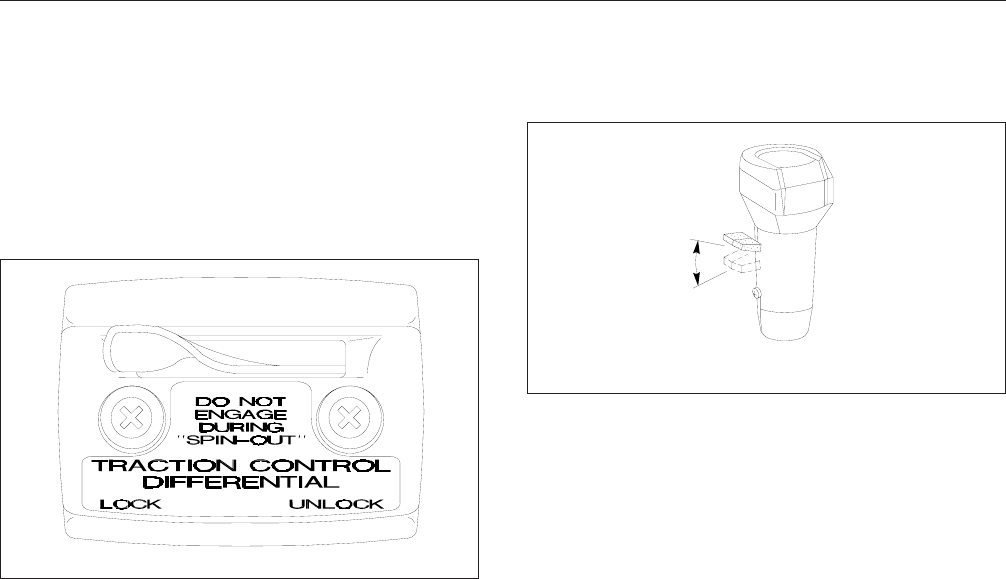
to maintain an appreciable amount of tractive effort
when one wheel encounters relatively poor traction.
A control valve (Fig. 9.3) in the cab is actuated by
the driver to engage and disengage the controlled
traction feature.
Disengaged, the axle has differential action all the
time. One wheel will spin independently of the other,
if slippery conditions are encountered.
Engaged, wheel slippage and spinout are minimized.
NOTE: The controlled traction differential can be
engaged at any speed, except during spinout.
Eaton 2-Speed Tandem Axles
Each axle of the 2-speed tandem contains a high
range single reduction gear set and a low range
double reduction gear set. The operator selects the
desired axle range by moving the range preselection
lever located on the shifter knob (Fig. 9.4).
Dual Range 2-Speed Tandem Axle
Operation With Multispeed
Transmissions
NOTE: See Chapter 8, "Transmissions," for de-
tailed information on how to use the range pre-
selection lever.
On multispeed transmission applications, the 2-speed
axle should be used as a dual range. Use the low
range when operating off-highway or when starting
out with a heavy load on-highway. After the vehicle is
moving on the highway, the axle can be shifted to
high range.
To shift the axle to the high range: Make sure the
interaxle differential lockout is disengaged, keep the
throttle pedal down, move the range preselection
lever to high, release the throttle pedal until the axle
shifts, then accelerate.
To shift the axle to the low range: Keep the throttle
pedal down, move the range preselection lever to
low, release and depress the throttle pedal quickly to
increase engine rpm. The axle will shift to low range.
NOTE: When parking the vehicle, put the axle in
the low range with the engine running. Engage
the clutch and transmission to be sure the axle
has completed the shift into the low range.
Some vehicle motion is required to ensure en-
gagement of the axle.
IMPORTANT: See "Eaton Interaxle Differential
Lockout Operation" for precautions that must be
taken when shifting axles in relation to the inter-
axle differential lockout.
Eaton Interaxle Differential
Lockout Operation
Interaxle differential lockout systems include a lock-
out control valve (Fig. 9.5) located in the cab, and an
air-operated shift unit mounted on the forward rear
axle.
When the interaxle differential lockout control valve is
in the LOCK position, the interaxle differential is
locked out and the driveshaft becomes a solid con-
nection between the two axles. Power entering the
forward axle is also transmitted straight through to
f600307
10/04/93
Fig. 9.3, Traction-Control-Differential Control
A
B
01/19/95 f260056a
A. High Range B. Low Range
Fig. 9.4, Range Preselection Lever
Rear Axles
9.3
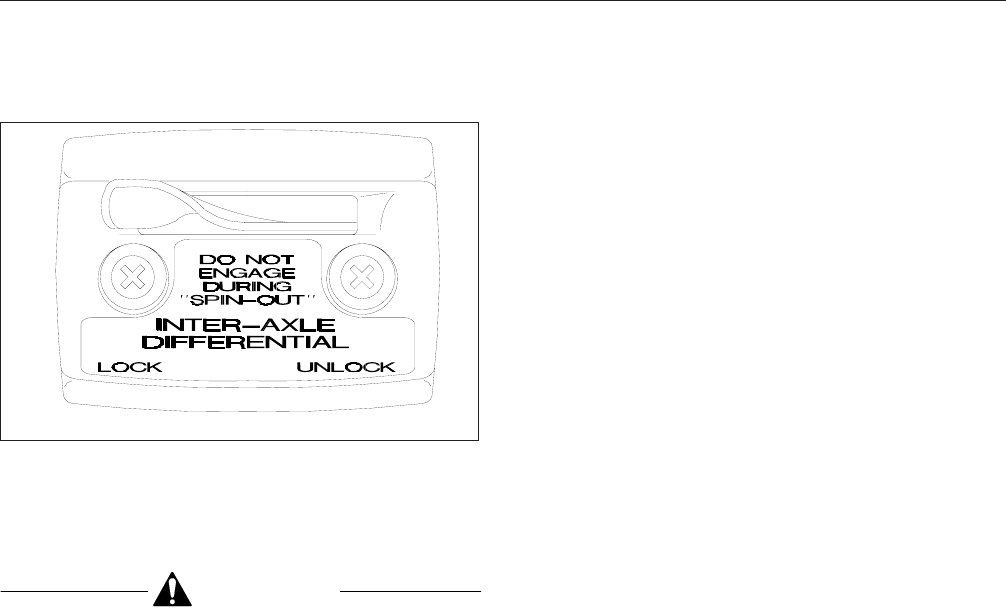
the rear axle, so both axles turn together at the same
speed. The LOCK position should be used when ad-
ditional traction is needed.
CAUTION
Engage the lockout only when stopped or at slow
speeds and never when the wheels are spinning.
Do not operate the axles on dry pavement with
the lockout engaged for prolonged periods. Use
only when additional traction is needed under
adverse road conditions. Disengage the interaxle
differential lockout before shifting the axle to a
higher range.
When the interaxle differential lockout control valve is
in the UNLOCK position, the interaxle differential al-
lows differential action between the axles thereby
compensating for different wheel speeds and varia-
tions in tire size. Keep the interaxle differential lock-
out in the UNLOCK position for normal driving on
roads where traction is good. On 2-speed axles, the
interaxle differential must be in the UNLOCK position
before attempting to shift the axles out of low or high
range.
01/19/95 f600306
Fig. 9.5, Interaxle-Differential Control
Rear Axles
9.4

10
Fifth Wheels and Trailer
Couplings
Holland Fifth Wheels ............................................................. 10.1
ASF Castloc®II and Simplex®Series Fifth Wheels ...................................... 10.7
Fontaine®Fifth Wheels ........................................................... 10.12
Premier Trailer Couplings ......................................................... 10.17
Holland Trailer Coupling .......................................................... 10.18
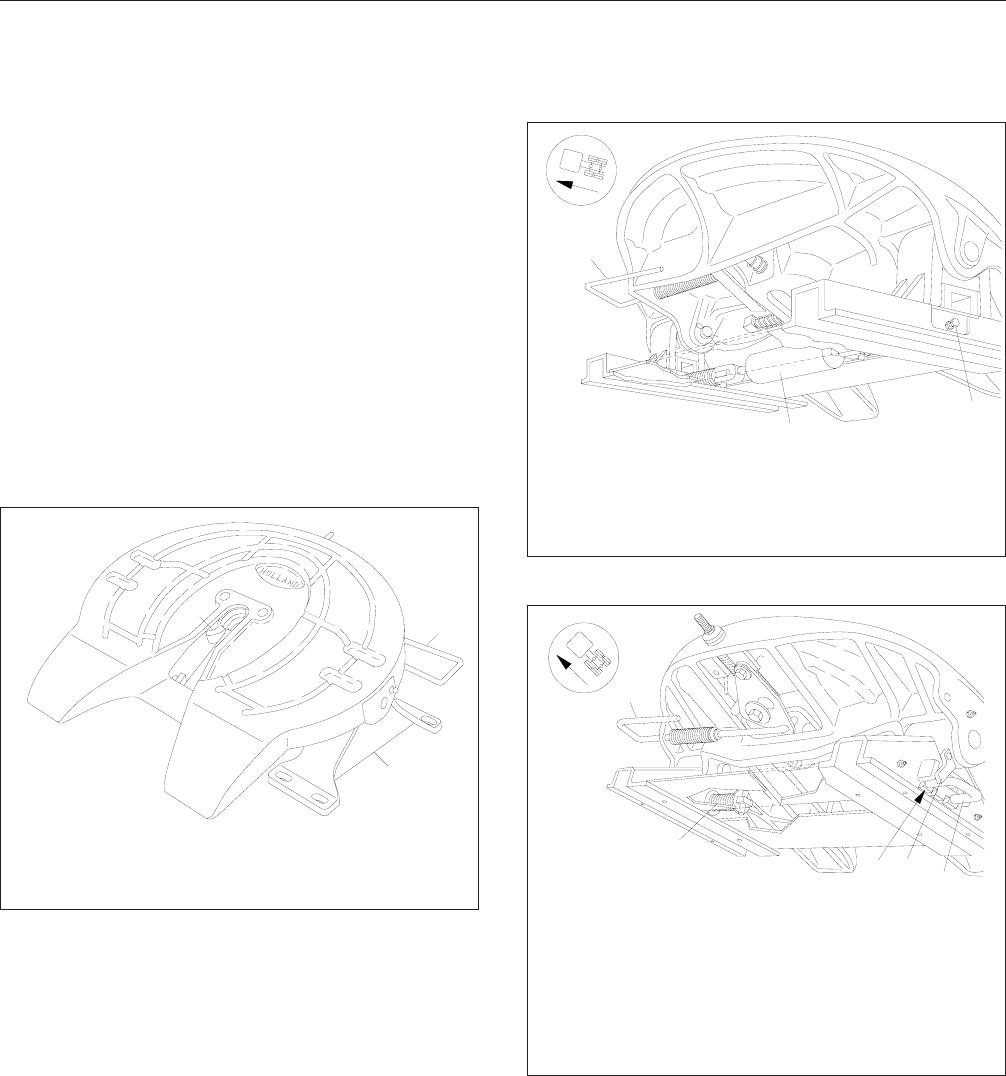
Holland Fifth Wheels
General Information
The 2535 and 2536 sliding fifth wheel models incor-
porate a Model FW8, 3500 or 3600 fifth wheel
(Fig. 10.1), equipped with an air-operated release
slide, a double manual release slide, or a single
manual release slide. Sliding fifth wheel assemblies
are mounted on a baseplate which permits forward
and rear movement along notched rails. Plungers are
meshed into teeth on the baseplate to lock the slid-
ing mechanism. Disengagement of the sliding mem-
ber is accomplished when the plungers are with-
drawn (manually or air-operated), releasing the fifth
wheel assembly so that it can be positioned for opti-
mum weight distribution over the tractor axles.
The air-operated release slide assembly (Fig. 10.2)
contains a double-ended air cylinder which locks and
unlocks both sides of the sliding member at the
same time. The air cylinder is activated by a two-
position air-control valve in the tractor cab.
The double manual release slide assembly
(Fig. 10.3) contains two slide plunger release
handles, one on each side of the bracket assembly.
Both handles must be manually operated to lock and
unlock each side of the sliding member.
The single manual release slide assembly (Fig. 10.4)
has a single lever which locks and unlocks both
sides of the sliding member. A hook is used to move
the lever to the locked and unlocked positions.
12
3
01/19/95 f310046a
1. Kingpin Lock Mechanism
2. Kingpin Control Handle
3. Mounting Bracket
Fig. 10.1, Holland Fifth Wheel
1
2
3
f310369
05/19/93
NOTE: Baseplate rails not shown.
1. Kingpin Lock Control Handle
2. Double-Ended Air Cylinder
3. Slide Plunger Release
Fig. 10.2, Air-Operated Release Slide Assembly
1
423
A
02/09/95 f310332b
NOTE: Baseplate rails not shown.
A. Slide plunger must be flush with mounting bracket
when locked.
1. Kingpin Lock Control Handle
2. Plunger Holdout Latch
3. Slide Plunger Release Handle (one side each)
4. Plunger Release Spring
Fig. 10.3, Double Manual Release Slide
Fifth Wheels and Trailer Couplings
10.1
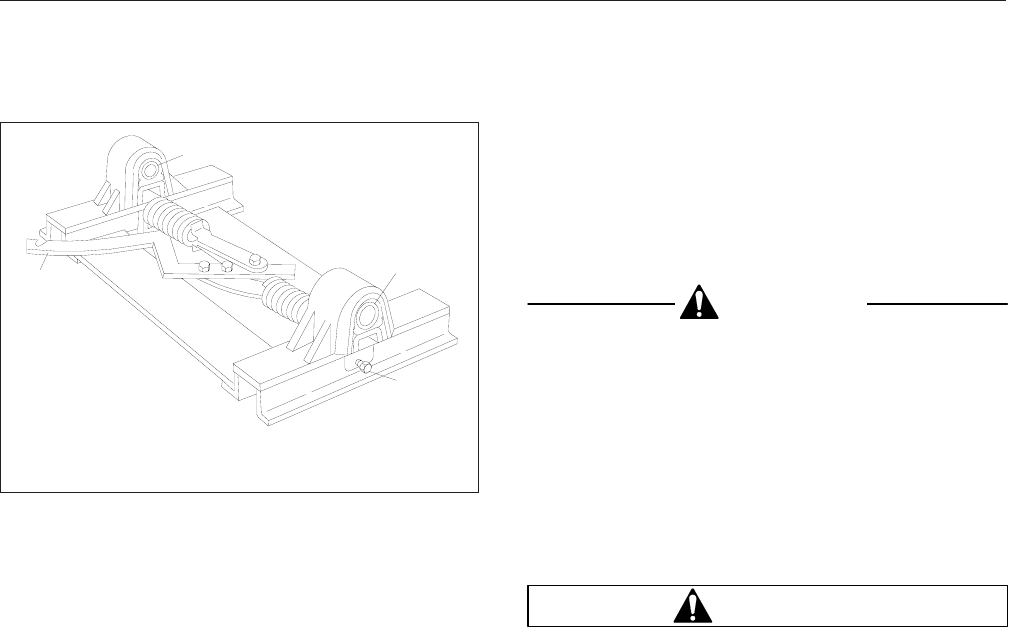
Type "B" Kingpin Lock Mechanism
(Fig. 10.5)
The Type "B" kingpin lock mechanism utilizes two
spring-loaded lock halves. The final forward motion
of the kingpin into the open lock halves forces the
locks to close in a 360 degree grip around the shoul-
der and neck of the kingpin, positioning sliding yokes
between the lock halves and tapered rib members of
the fifth wheel understructure. The kingpin can be
released only by manually operating the kingpin lock
control handle. The adjustment nut will compensate
for wear on the lock or kingpin.
Lockguard (Fig. 10.6)
The Holland lockguard is a device that prevents a
false lockup, and is used with Type "B" kingpin lock
mechanisms. The Lockguard is a spring-tensioned,
smooth-surfaced tongue that the kingpin passes over
and depresses when entering the lock mechanism.
The Lockguard will prevent the locks from engaging
before the kingpin fully enters the locks. If the kingpin
enters the fifth wheel incorrectly and does not de-
press the tongue, the locks are unable to close.
Type "A" Kingpin Lock Mechanism
(Fig. 10.7)
The Type "A" kingpin lock mechanism utilizes a
single hinged lock and a cam arm. The final forward
motion of the kingpin into the open lock forces the
hinged lock to pivot on a pin and close around the
kingpin. The lock is held in place by a spring loaded
plunger. The kingpin can be released only by manu-
ally operating the release handle. The adjustment nut
will compensate for wear on the lock or kingpin.
Fifth Wheel Locking Operation
Locking the Fifth Wheel Mechanism
CAUTION
Before attempting to lock or unlock the fifth
wheel lock mechanism of a sliding type fifth
wheel, the slide release plungers must be in the
locked position (flush with the mounting bracket
edge). This prevents the sliding member from
moving rapidly to the far forward or rearward po-
sition, which could damage the fifth wheel mem-
ber or kingpin.
1. Chock the front and rear of the trailer tires to
prevent the trailer from moving.
WARNING
Keep the fifth wheel plate lubricated to prevent
binding between the tractor and trailer. A binding
fifth wheel could cause erratic steering and loss
of vehicle control, possibly resulting in serious
personal injury or death.
2. The kingpin lock mechanism must be fully open,
and the fifth wheel plate must be completely lu-
bricated with chassis grease. For lubrication in-
structions, see Group 31 of the
Heavy-Duty
Trucks Maintenance Manual
.
3. Position the tractor so that the fifth wheel lock
opening is in line (both vertically and horizontally)
with the trailer kingpin. The kingpin should be in
a position to enter the throat of the locking
mechanism, to prevent a false lockup. See
Fig. 10.6. Adjust the trailer landing gear to give
enough alignment height so that the fifth wheel
picks up the trailer on the fifth wheel ramps.
4. With the fifth wheel lock opening aligned with the
trailer kingpin, back the tractor slowly toward the
trailer, making sure that the kingpin correctly en-
ters the throat of the locking mechanism. When
the trailer is picked up by the fifth wheel, stop the
tractor, then continue slow backward motion until
positive lockup occurs.
5. Apply the tractor parking brakes.
f310528
02/12/96
1
2
2
3
1. Release Lever
2. Up-Shock Bushing 3. Plunger Adjustment
Fig. 10.4, Single Manual Release Slide
Fifth Wheels and Trailer Couplings
10.2
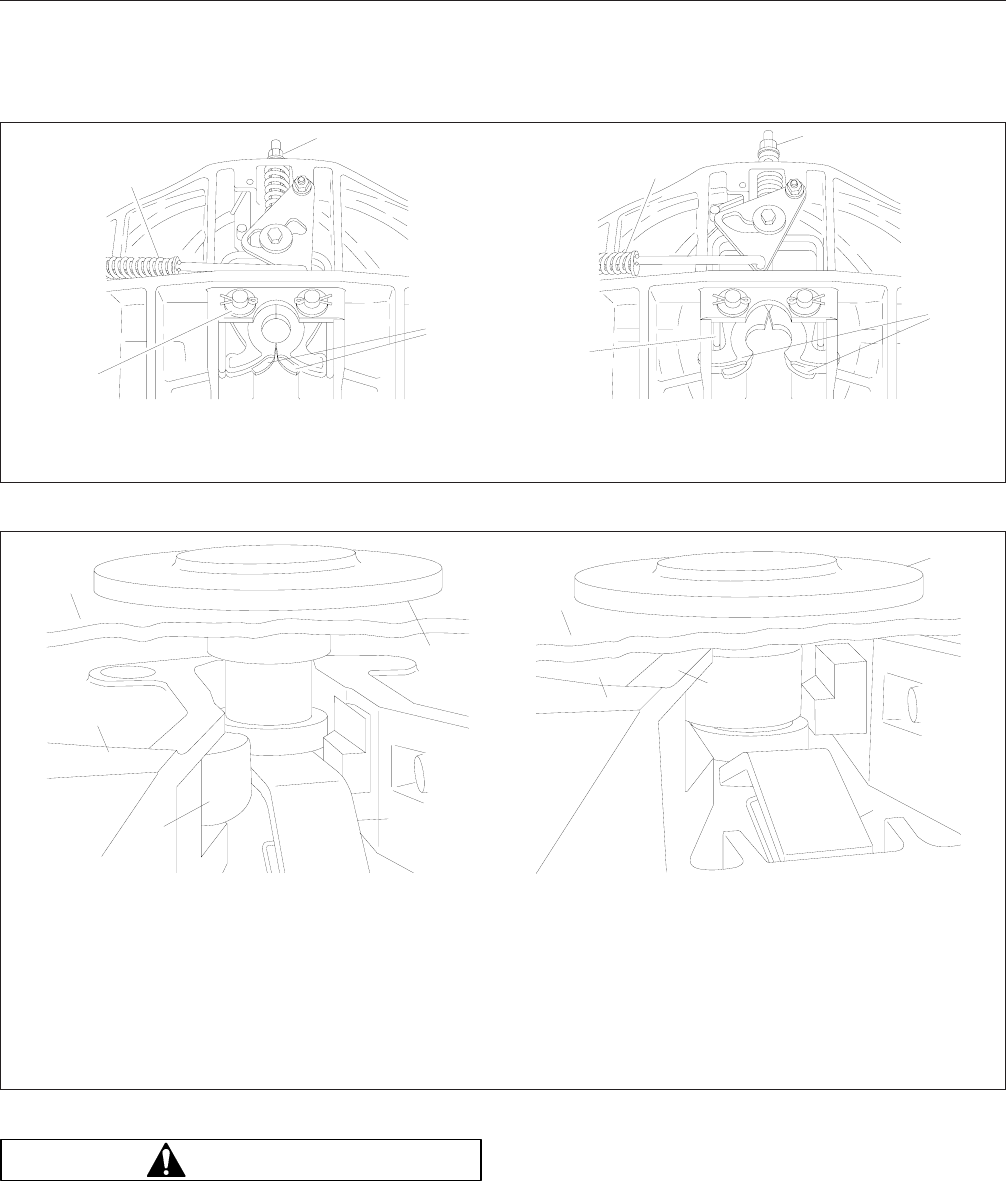
WARNING
Adjust the locks correctly to a maximum clear-
ance of 1/8 inch (3 mm). Incorrect adjustment of
the lock could cause the trailer to disconnect,
possibly resulting in serious personal injury or
death.
6. Make a visual check for proper kingpin lockup.
Release the tractor parking brakes. Test for king-
pin lockup by pulling on the trailer against the
07/11/2000 f310841
22
11
4
33
5
AB
A. Closed Position, Locked B. Open Position, Unlocked
1. Release Handle and Spring
2. Adjustment Nut 3. Lock Halves
4. Lock Pivot 5. Sliding Yoke
Fig. 10.5, Type "B" Kingpin Lock Mechanism (bottom view)
1
2
3
4
A
11/07/94 f310106a
1
2
3
4
B
DC
A. Locks open.
B. Locks closed.
C. Kingpin correctly entering the lock. Note how the depressed tongue allows lock halves to close completely around the
neck and shoulder of the kingpin.
D. Kingpin incorrectly entering the lock. Note how the steel tongue prevents lock halves from closing, preventing false
lockup.
1. Fifth Wheel Plate
2. Trailer 3. Kingpin
4. Lockguard
Fig. 10.6, Lockguard Mechanism (rear view)
Fifth Wheels and Trailer Couplings
10.3
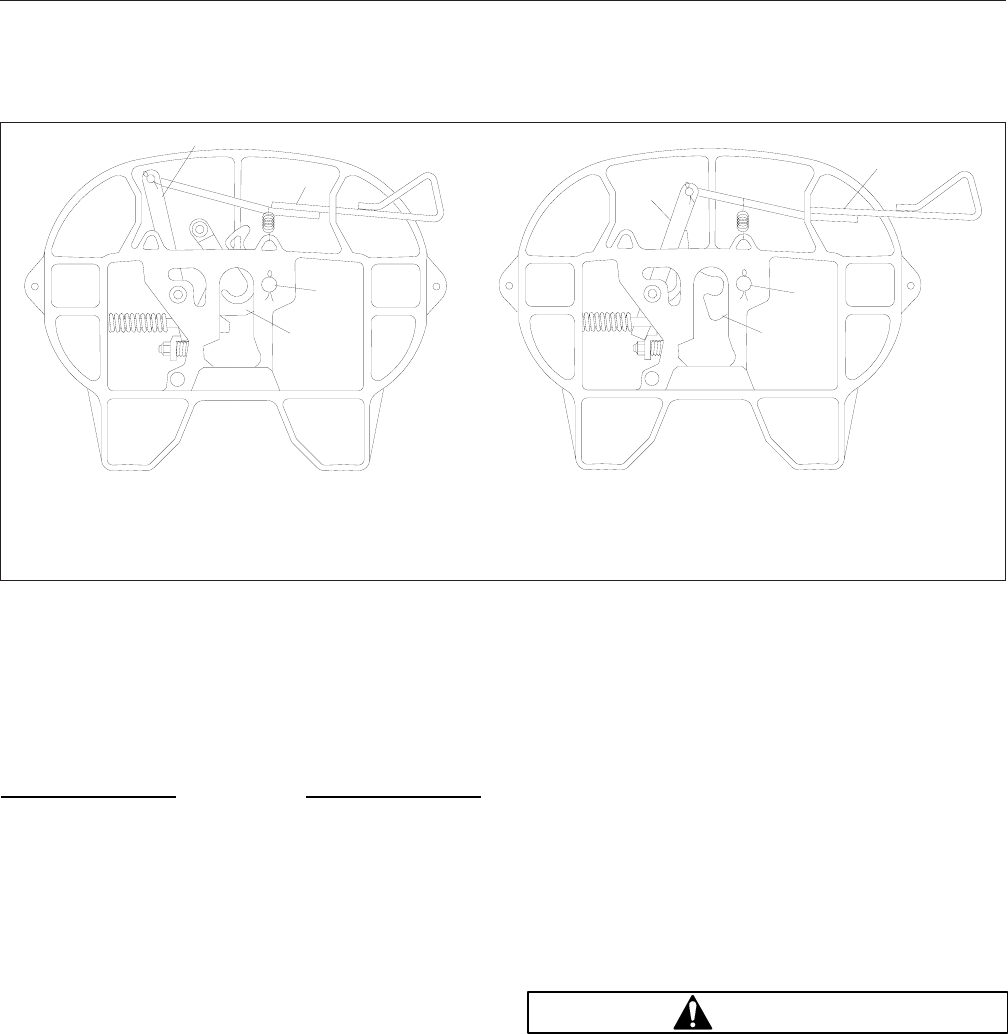
chocks. Check for correct maximum clearance
between the lock halves. If more than 1/8-inch
(3.2-mm) clearance exists between the lock
halves, the lock must be adjusted. See Group
31 of the
Heavy-Duty Trucks Service Manual
for
adjustment procedures.
NOTICE
Always make sure the connect-hanger/support
keeps the trailer air hoses and electrical cables
positioned so that they do not rub on anything.
Rubbing may wear through hoses or cables, re-
sulting in air leaks, or exposed or broken wires,
potentially affecting trailer brake or electrical sys-
tems.
7. After lockup is completed, connect the tractor-to-
trailer air system lines and electrical cable to the
trailer. Take care to prevent dirt or foreign mate-
rial from entering the air lines.
8. Charge the air brake system with air. Make sure
that the air connections do not leak.
9. Retract the trailer landing gear and secure the
ratchet handle.
10. Remove the chocks from the trailer tires.
11. The load distribution on the front steering axle
and rear drive axle(s) will have a direct effect on
the steering control of the vehicle.
Determine the front and rear axle weights by
weighing the vehicle on scales designed for this
purpose.
The maximum axle weight ratings are shown on
the Federal Motor Vehicle Safety Standard
(FMVSS) label or Canadian Motor Vehicle Safety
Standard (CMVSS) label attached to the left rear
door post of the tractor. The desired load on the
axle is no less than 80 percent of the maximum
axle weight rating, but in no instances should the
axle load exceed the maximum axle weight rat-
ing given on the FMVSS or CMVSS label.
WARNING
Do not overload any tractor axle by improperly
loading the trailer. This could cause erratic steer-
ing and loss of vehicle control, possibly resulting
in serious personal injury or death.
Unlocking the Fifth Wheel Lock
Mechanism
1. Apply the tractor parking brakes.
f310532
07/26/96
1
1
2
2
3 3
4 4
A B
A. Closed Position, Locked B. Open Position, Unlocked
1. Release Arm
2. Release Handle 3. Lock Pin 4. Hinged Lock
Fig. 10.7, Type "A" Kingpin Lock Mechanism
Fifth Wheels and Trailer Couplings
10.4
2. Pull the trailer air supply valve to cut off the air
supply to the trailer.
3. Chock the front and rear of the trailer tires to
prevent the trailer from moving.
WARNING
Do not use the trailer air supply for parking trail-
ers not equipped with spring parking brakes.
This applies the trailer service brakes only. As air
bleeds from the trailer brake system, brake appli-
cation is lost. This could allow the unattended
vehicle to roll away, possibly resulting in serious
personal injury or death.
4. Lower the trailer landing gear until the weight is
removed from the fifth wheel.
5. Disconnect the tractor-to-trailer air system lines
and electrical cable. Plug the air lines to prevent
dirt or foreign material from entering the lines.
CAUTION
Before attempting to lock or unlock the fifth
wheel lock mechanism of a sliding type fifth
wheel, the slide release plungers must be in the
locked position (flush with the mounting bracket
edge). This prevents the sliding member from
moving rapidly to the far forward or rearward po-
sition, which could damage the fifth wheel mem-
ber or kingpin.
6. Release the kingpin locking mechanism by pull-
ing the kingpin lock control handle (Fig. 10.1)to
the outward position.
7. Slowly drive the tractor away from the trailer.
Fifth Wheel Slide Operation
1. Connect the trailer kingpin to the tractor fifth
wheel. For instructions, refer to Holland "Fifth
Wheel Locking Operation," in this chapter.
2. After positive lockup of the fifth wheel lock
mechanism has been accomplished, release the
sliding member using one of the following meth-
ods:
2.1 For air-operated models, set the cab-
operated control switch (Fig. 10.8)to
UNLOCK.
2.2 For double manual release slide models,
pull both plunger release handles
(Fig. 10.3) outward, from each side of the
mounting brackets, to the unlocked posi-
tion. Position the plunger holdout latch in
the groove of the plunger. See Fig. 10.9.
5th WHEEL
SLIDE
LOCK
MUST BE LOCKED
WHEN VEHICLE
IS IN MOTION
22−11571−3
02/09/94 f310047a
Fig. 10.8, Fifth Wheel Slide Control Switch
1
1
A
B
01/24/96 f310439
A. Locked (engaged)
B. Unlocked (disengaged)
1. Plunger
Fig. 10.9, Plunger Positions
Fifth Wheels and Trailer Couplings
10.5
For single lever release slide models, use
the release hook to pull the lever to the
unlocked position (Fig. 10.7). Lift the re-
lease lever to the secure position behind
the catch. Visually check the slide plung-
ers to make sure they have released as
shown in Fig. 10.9.
3. Lower the trailer landing gear just enough to re-
move the weight from the tractor.
4. Pull the trailer air supply valve to cut off the air
supply to the trailer.
5. Chock the front and rear of the trailer tires to
prevent the trailer from moving.
WARNING
Do not use the trailer air supply for parking trail-
ers not equipped with spring parking brakes.
This applies the trailer service brakes only. As air
bleeds from the trailer brake system, brake appli-
cation is lost. This could allow the unattended
vehicle to roll away, possibly resulting in serious
personal injury or death.
6. Slowly move the tractor forward or backward
until the fifth wheel is in the desired location.
CAUTION
After moving the fifth wheel to the desired posi-
tion, be sure the trailer landing gear will not, at
any time, come in contact with the tractor frame
or other components. Make sure that the front of
the trailer will not come in contact with the rear
of the cab or with other components if they ex-
tend beyond the rear of the cab.
7. Apply the tractor parking brakes.
NOTE: The fifth wheel may have to be moved
slightly to enable the locking plungers to enter
the fully locked position.
8. Lock the sliding member into position using one
of the following methods:
WARNING
Check to be sure that the slide plungers are in
the locked position. Failure to achieve complete
lockup may allow disengagement of the tractor
from the trailer, possibly resulting in serious per-
sonal injury or death.
8.1 For air-operated models, set the cab-
operated control switch to LOCK. Visually
check the slide plungers to make sure
they are engaged in the fully locked posi-
tion.
8.2 For double manual release models, lift the
plunger holdout latch on each side of the
mounting brackets. Then, move the re-
lease plunger on each side of the mount-
ing brackets (Fig. 10.3) into the locked
position. Make sure that the slide plungers
are engaged in the fully locked position.
See Fig. 10.9.
8.3 For single manual release models, trip the
release lever (Fig. 10.4) to allow the slide
plungers to retract to the locked position.
Visually check the slide plungers to make
sure they are in the locked position as
shown in Fig. 10.9.
9. The amount of load distribution on the front
steering axle and rear drive axle(s) will have a
direct effect on the steering control of the vehicle.
Determine the front and rear axle weights by
weighing the vehicle on scales designed for this
purpose.
The maximum axle weight ratings are shown on
the Federal Motor Vehicle Safety Standard
(FMVSS) label or Canadian Motor Vehicle Safety
Standard (CMVSS) label attached to the left rear
door post of the tractor. The desired load on the
axle is no less than 80 percent of the maximum
axle weight rating, but in no instances should the
axle load exceed the maximum axle weight rat-
ing given on the FMVSS or CMVSS label.
WARNING
Adjust the fifth wheel slide correctly, and do not
overload any tractor axle by incorrectly loading
the trailer. Incorrect slide adjustment or improper
axle loading could cause erratic steering and
loss of vehicle control, possibly resulting in seri-
ous personal injury or death.
Fifth Wheels and Trailer Couplings
10.6
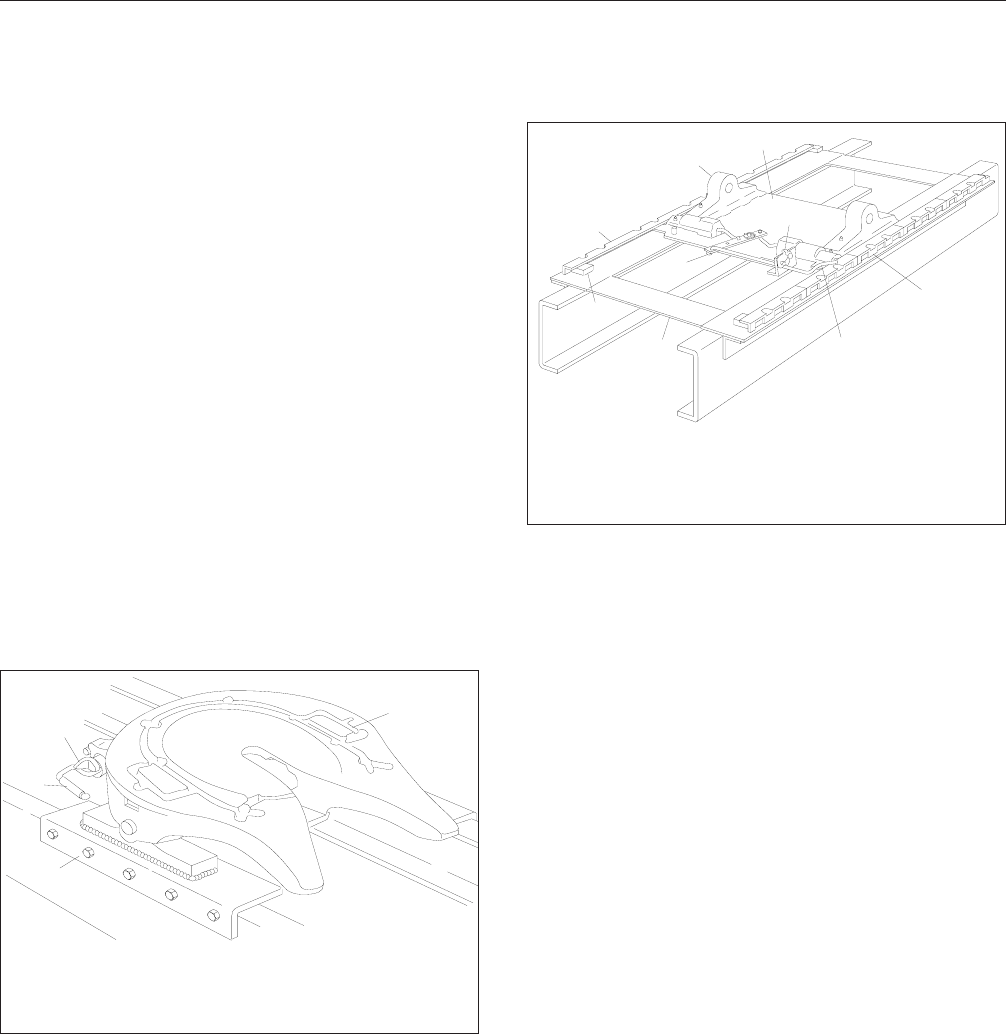
Fifth Wheel Lubrication
The fifth wheel plate must be kept well lubricated
with chassis grease to prevent friction and binding
between the tractor fifth wheel plate and the trailer.
Friction and binding, caused by insufficient grease on
the fifth wheel plate, could result in erratic steering.
For lubrication instructions, see Group 31 of the
Heavy-Duty Trucks Maintenance Manual
.
ASF Castloc®II and Simplex®
Series Fifth Wheels
General Information
The ASF Castloc II and Simplex series fifth wheels
are used for pulling trailers having the standard
2-inch diameter kingpin. When installed as a station-
ary fifth wheel (Fig. 10.10), they are bracket-mounted
to the tractor frame in a position that best distributes
the trailer load over the tractor axles. When used as
a sliding fifth wheel (Fig. 10.11), they are mounted
on the Taperloc®sliding mount (air-operated or
manual release).
The fifth wheel lock mechanism for the trailer kingpin
consists of a rotating jaw that grips the trailer kingpin
and a spring-actuated lock. The jaw rotates on a jaw
pin during coupling and uncoupling operations. King-
pin lockup occurs when the kingpin is forced into the
jaw and the operating rod handle moves to the
locked position. The kingpin is released either by ac-
tivating a manual operating rod, or if equipped with
Touchloc®, by a dash mounted release-knob, which
activates an air cylinder underneath the top plate.
The air cylinder activates the operating rod. The op-
erating rod is located on the left side of the fifth
wheel for Castloc II and Simplex II fifth wheels, and
on the right side for the Simplex fifth wheel assem-
bly.
On sliding fifth wheels, the top plate is mounted on a
sliding saddle plate, which slides along the baseplate
attached to the tractor frame. The baseplate rails
allow forward and rear movement of the slide assem-
bly, for optimum weight distribution over the tractor
axles.
Tapered slots in the baseplate rails, aligned in 4-inch
(102-mm) increments, provide for location of the fifth
wheel along the baseplate. Retractable, spring-
actuated lockpins are positioned through the slots to
hold the fifth wheel in the desired position. The lock-
pins are retracted either manually or by an air-
operated cylinder controlled from the cab.
The manually-operated slide contains an operating
rod (Fig. 10.11), which unlocks both sides of the
plate at the same time.
The air-operated sliding saddle plate contains an air
cylinder which moves the operating lever to unlock
both sides of the plate at the same time. The air cyl-
inder is activated by a two-position air-control valve
in the tractor cab.
f310353b
1
2
3
4
11/28/95
1. Lubricant Grooves
2. Safety Latch 3. Operating Rod
4. Mounting Bracket
Fig. 10.10, Simplex Stationary Fifth Wheel
1
2
3
45
6
3
04/08/96 f310445
7
8
1. Baseplate
2. Bolted Stop
3. Baseplate Rail
4. Fifth Wheel Mount
5. Slide Saddle Plate
6. Safety Latch
7. Operating Rod
8. Operating Lever
Fig. 10.11, Taperloc Slide, Manually-Operated Release
Fifth Wheels and Trailer Couplings
10.7
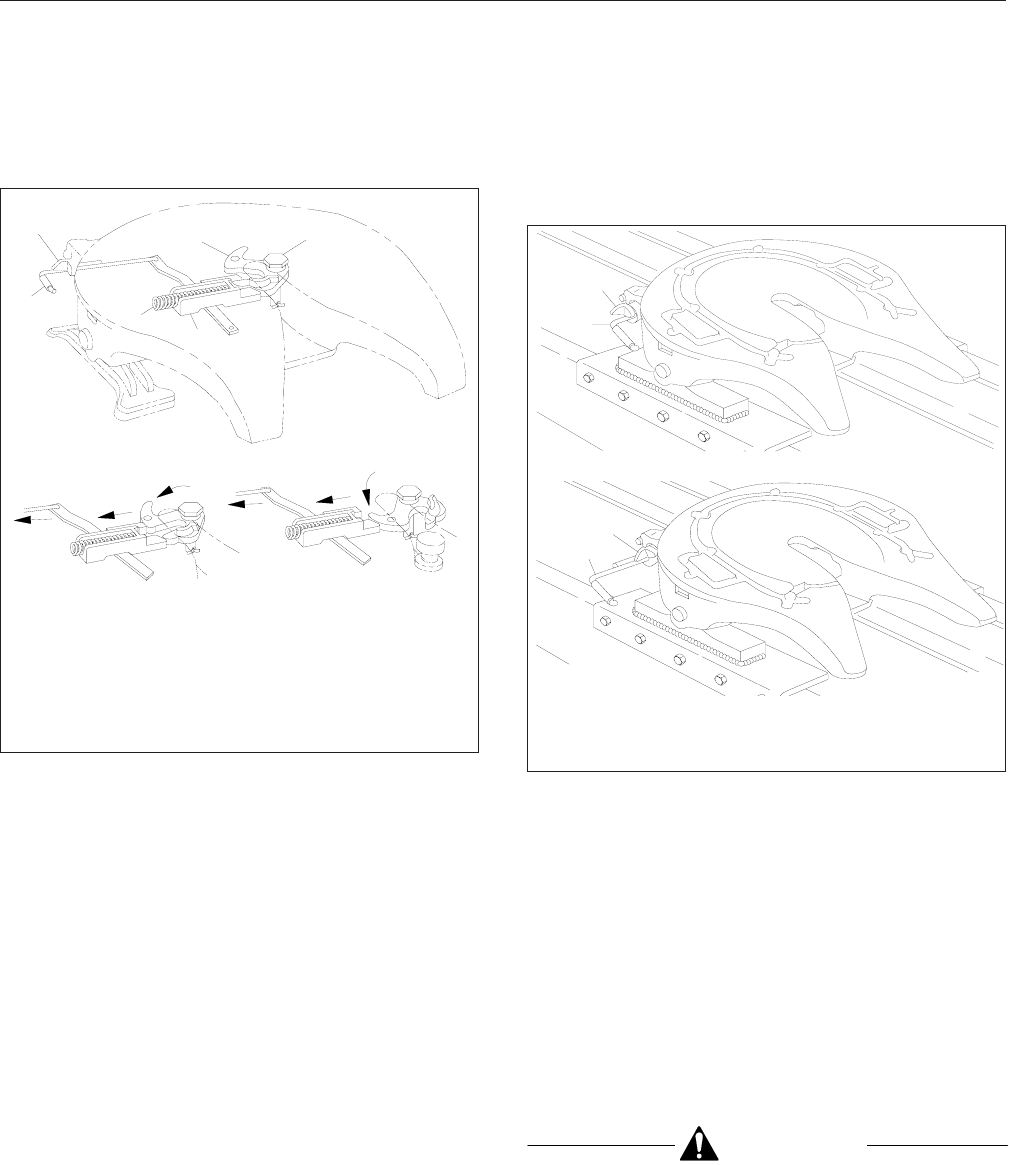
Fifth Wheel Lock Mechanism for Trailer
Kingpin (Fig. 10.12)
The Castloc II and Simplex Series fifth wheel lock
mechanism consists of a rotating jaw and a spring-
actuated lock that grips the trailer kingpin. The jaw
rotates on an eccentric pin during coupling and un-
coupling operations. The spring-actuated lock holds
the jaw in the locked position once kingpin lockup
has occurred.
In the locked position, there is approximately 1/16-
inch (1.6-mm) clearance between the jaw and king-
pin. The jaw eccentric pin can be removed and ro-
tated to compensate for wear and maintain an
approximate 1/16-inch (1.6-mm) clearance during
service.
Placing the operating rod in the lockset position
moves the lock away from the jaw. This action un-
locks the jaw so that it can be rotated by movement
of the kingpin. When the tractor is moved out from
under the trailer, the kingpin will rotate the jaw until
the jaw is in the unlocked position, allowing the king-
pin to move out of the mechanism. With the jaw in
the fully open position, the operating rod drops out of
the lockset position, and the fifth wheel is ready for
coupling. See Fig. 10.13.
During coupling, the kingpin contacts and rotates the
jaw into the locked position. This action automatically
moves the operating rod into the locked position.
This securely locks the jaw around the kingpin. In the
locked position the safety latch swings freely over the
operating rod. See Fig. 10.14.
Fifth Wheel Locking and Unlocking
Locking the Fifth Wheel Lock Mechanism
1. Chock the front and rear of the trailer tires to
prevent the trailer from moving.
CAUTION
Before attempting to lock the fifth wheel lock
mechanism of a sliding type fifth wheel, the slide
locking handle (Fig. 10.11) must be in the locked
position. This prevents the sliding member from
04/08/96 f310446
1
234
A
BC
5
6
A. Locked Position
B. Jaw movement compresses spring.
C. Fully open.
1. Operating Lever
2. Safety Latch
3. Jaw
4. Jaw Eccentric Pin
5. Lock
6. Spring
Fig. 10.12, ASF Castloc II and Simplex Series Kingpin
Locking Mechanism Operation
1
1
2
3
04/08/96 f310447
1. Safety Latch
2. Operating Rod (locked)
3. Operating Rod (unlocked)
Fig. 10.13, Simplex Kingpin Locking Mechanism,
Locking and Unlocking
Fifth Wheels and Trailer Couplings
10.8
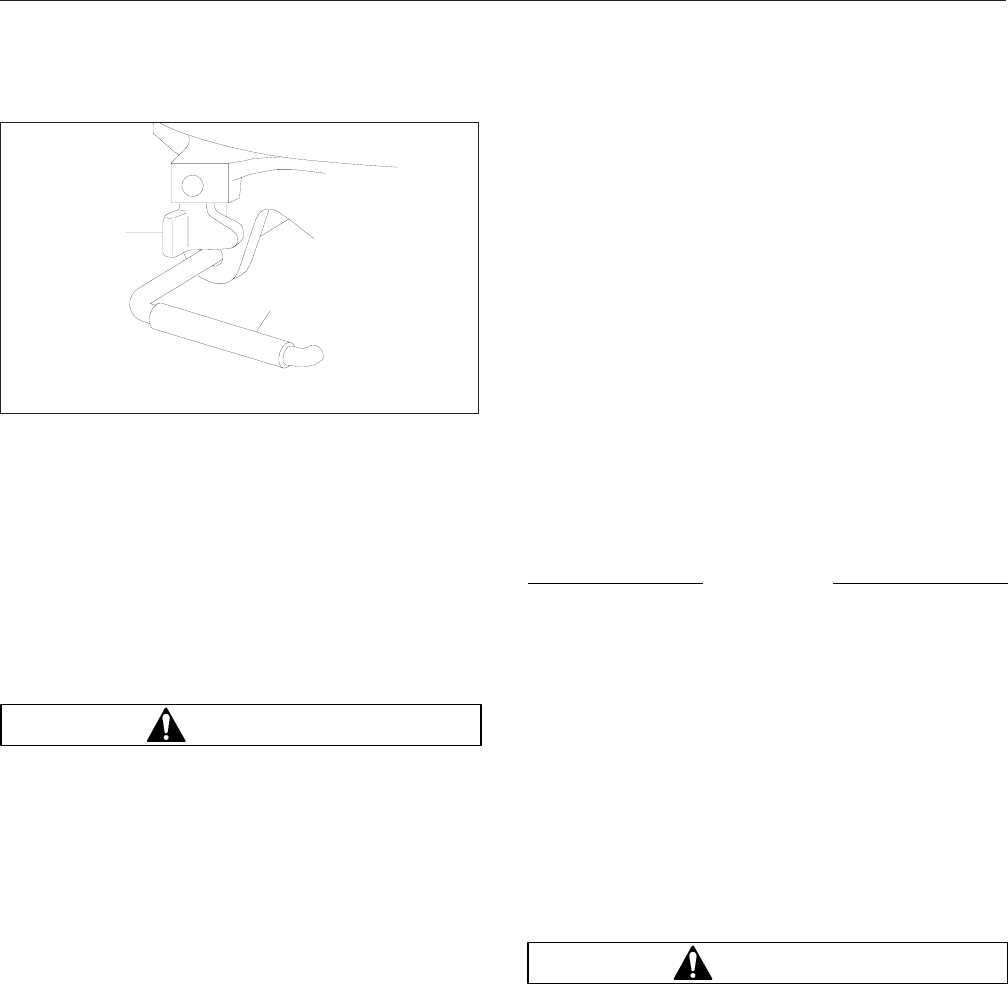
moving rapidly to the far forward or rearward po-
sition, which could damage the fifth wheel mem-
ber or kingpin.
2. The fifth wheel jaw must be fully open. Make
sure that the operating rod is in the unlocked po-
sition. The fifth wheel must be completely lubri-
cated with chassis or multi-purpose grease. For
lubrication instructions, see Group 31 of the
Heavy-Duty Trucks Maintenance Manual
.
WARNING
Keep the fifth wheel plate lubricated to prevent
binding between the tractor and trailer. A binding
fifth wheel could cause erratic steering and loss
of vehicle control, possibly resulting in serious
personal injury or death.
3. Make sure the fifth wheel top plate is tilted so the
ramps are as low as possible. If equipped with
an air suspension, make sure the air bags are
completely inflated.
4. Position the tractor so that the center of the fifth
wheel is in line with the trailer kingpin. The king-
pin should be in a position to enter the throat of
the locking mechanism. See Fig. 10.12. Adjust
the trailer landing gear so that the lower front
trailer edge contacts the top surface of the tilted
fifth wheel plate, approximately 8 inches (20 cm)
before the fifth wheel center.
5. With the fifth wheel lock opening aligned with the
trailer kingpin, back the tractor slowly toward the
trailer, making sure that the kingpin enters the
throat of the locking mechanism. Continue back-
ward motion until positive lockup occurs.
6. Apply the tractor parking brakes.
7. Make a visual check (even if equipped with the
Touchloc air-operated system) for positive king-
pin lockup. The trailer bed plate must be flush on
the fifth wheel plate surface. When positive
lockup has occurred, the fifth wheel operating
rod will have moved inward to the locked posi-
tion, and the safety latch will swing freely over
the operating rod. See Fig. 10.14.
NOTE: Only when the operating rod is fully re-
tracted in the locked position will the safety latch
be freely rotated down.
8. Release the tractor parking brakes. Test for king-
pin lockup by pulling on the trailer against the
chocks.
NOTICE
Always make sure the connect-hanger/support
keeps the trailer air hoses and electrical cables
positioned so that they do not rub on anything.
Rubbing may wear through hoses or cables, re-
sulting in air leaks, or exposed or broken wires,
potentially affecting trailer brake or electrical sys-
tems.
9. After lockup is completed, connect the tractor-to-
trailer air system lines and electrical cable to the
trailer. Take care to prevent dirt or foreign mate-
rial from entering the air system lines.
10. Charge the air brake system with air. Make sure
that the air connections do not leak.
WARNING
Adjust the jaw pin if there is more than 1/8-inch
(3-mm) clearance between the kingpin and the
lock. Incorrect adjustment could cause the trailer
to disconnect, possibly resulting in serious per-
sonal injury or death.
11. With the trailer wheels chocked and the brakes
set, check for clearance between the kingpin and
the fifth wheel jaws by moving the tractor forward
and backward against the locked kingpin. A
clearance of approximately 1/16 inch (1.6 mm)
between the jaw and kingpin is allowable. When
clearance between the jaw and kingpin exceeds
1
2
11/18/94 f310448
1. Safety Latch 2. Operating Rod
Fig. 10.14, Simplex Kingpin Locking Mechanism, Safety
Latch (locked position)
Fifth Wheels and Trailer Couplings
10.9
1/8 inch (3.2 mm), adjust the jaw to restore the
1/16-inch (1.6-mm) clearance between the jaw
and kingpin. For instructions, see Group 31 of
the
Heavy-Duty Trucks Service Manual
.
12. Retract the trailer landing gear, and secure the
ratchet handle.
13. Remove the chocks from the trailer tires.
14. The load distribution on the front steering axle
and rear drive axle(s) will have a direct effect on
the steering control of the vehicle.
Determine the front and rear axle weights by
weighing the vehicle on scales designed for this
purpose.
The maximum axle weight ratings are shown on
the Federal Motor Vehicle Safety Standard
(FMVSS) label or Canadian Motor Vehicle Safety
Standard (CMVSS) label attached to the left rear
door post of the tractor. The desired load on the
axle is no less than 80 percent of the maximum
axle weight rating, but in no instances should the
axle load exceed the maximum axle weight rat-
ings given on the FMVSS or CMVSS label.
WARNING
Do not overload any tractor axle by improperly
loading the trailer. This could cause erratic steer-
ing and loss of vehicle control, possibly resulting
in serious personal injury or death.
Unlocking the Fifth Wheel Lock
Mechanism
1. Apply the tractor parking brakes.
2. Pull the trailer air supply valve to cut off the air
supply to the trailer.
WARNING
Do not use the trailer air supply for parking trail-
ers not equipped with spring parking brakes.
This applies the trailer service brakes only. As air
bleeds from the trailer brake system, brake appli-
cation is lost. This could allow the unattended
vehicle to roll away, possibly resulting in serious
personal injury or death.
3. Chock the front and rear of the trailer tires to
prevent the trailer from moving.
4. Lower the trailer landing gear until the trailer
rises about 1/2 inch (13 mm).
5. Disconnect the tractor-to-trailer air system lines
and electrical cable. Plug the air lines to prevent
dirt or foreign material from entering the lines.
CAUTION
Before attempting to unlock the fifth wheel lock
mechanism of a sliding type fifth wheel, the slide
operating rod (Fig. 10.11) must be in the locked
position, and the slide lockpins must be in the
locked position, fully inserted in baseplate rail
slots. This prevents the sliding member from
moving rapidly to the far forward or rearward po-
sition, which could damage the fifth wheel mem-
ber or kingpin.
6.
If equipped with a manual kingpin lock release:
Release the kingpin lock mechanism by raising
the safety latch to the rear and pulling the lock
operating rod out and up into the lockset posi-
tion. See Fig. 10.13. The offset of the lock con-
trol upper rod should bottom against the plate
casting above the hole. If the operating rod can-
not be pulled to the lockset position, back the
tractor slightly to release the kingpin force
against the jaw.
If equipped with a Touchloc air-operated kingpin
lock release:
Pull and hold the dash-mounted
control valve out (approximately 2 to 3 seconds).
The air cylinder and slide cam (see Fig. 10.15)
will rotate the safety indicator and move the lock
control handle into the unlocked position, then
retract. The safety indicator will rotate towards
the rear and the lock control handle upper shoul-
der will rest on the fifth wheel plate just above
the rod hole. When the lock control handle is in
the out position, the trailer may be uncoupled
from the tractor.
WARNING
If the air mechanism does not operate properly,
do not attempt to use the system. Operate the
fifth wheel manually until the air mechanism is
repaired or replaced. Under no circumstances
should the vehicle be operated or the air mecha-
nism used when the spring brake section is
caged.
7. Slowly drive the tractor away from the trailer.
Fifth Wheels and Trailer Couplings
10.10
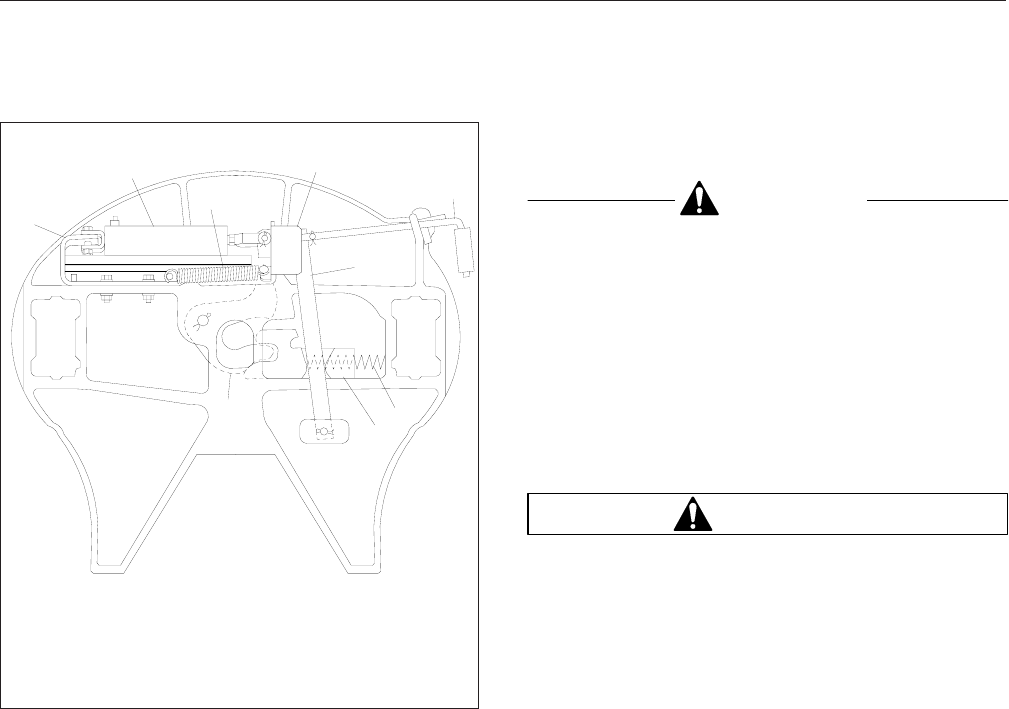
Fifth Wheel Slide Operation
1. Chock the front and rear of the trailer tires to
prevent the trailer from moving.
2. Connect the trailer kingpin to the tractor fifth
wheel. For instructions, refer to "Fifth Wheel
Locking Operation," in this chapter.
3. After positive lockup of the fifth wheel lock
mechanism has been accomplished, release the
slide using one of the following methods:
3.1 For air-operated models, set the cab-
operated control switch (Fig. 10.8)toUN-
LOCK.
3.2 For manually-operated models, raise the
safety latch and pull the slide operating
rod (Fig. 10.11) outward until the shoulder
is outside of the operating rod support,
then lower the operating rod as far as it
will go.
4. Lower the trailer landing gear just enough to re-
move the weight from the tractor.
5. Pull the trailer air supply valve to cut off the air
supply to the trailer.
CAUTION
After moving the fifth wheel to the desired posi-
tion, be sure the trailer landing gear will not, at
any time, come in contact with the tractor frame
or other components. Make sure that the front of
the trailer will not come in contact with the rear
of the cab or with other components if they ex-
tend beyond the rear of the cab.
6. Slowly move the tractor forward or backward
until the fifth wheel is in the desired location.
7. Apply the tractor parking brakes.
WARNING
Check to be sure that the lockpins are seated in
the holes and that the operating rod is in the
locked position with the safety latch securing the
operating rod. Failure to achieve complete lockup
may cause the trailer to detach from the tractor,
possibly resulting in serious personal injury or
death.
NOTE: The fifth wheel may have to be moved
slightly to enable the locking pins to enter the
fully locked position.
8. Lock the sliding member into position using one
of the following methods:
For air-operated models:
Set the cab-operated
control switch to LOCK. Visually inspect the lock-
pins to make sure they have seated in the base-
plate rail holes.
For manually-operated models:
Raise the operat-
ing rod so that it is free to move inward. Make
sure that the lockpins have seated in the base-
plate rail holes and the operating rod moves into
the locked position. Also, the safety latch must
drop downward so that it holds the operating rod
in the locked position.
9. The amount of load distribution on the front
steering axle and rear drive axle(s) will have a
direct effect on the steering control of the vehicle.
Determine the front and rear axle weights by
weighing the vehicle on scales designed for this
purpose.
1
2
3
4
5
6
7
8
9
f310544
10/17/96
1. Housing Weldment
2. Air Cylinder
3. Extension Spring
4. Slide Cam
5. Lock Control Handle
6. Lever Bar
7. Lock Spring
8. Lock
9. Jaw
Fig. 10.15, Touchloc Air-Operated Lock Control
Fifth Wheels and Trailer Couplings
10.11
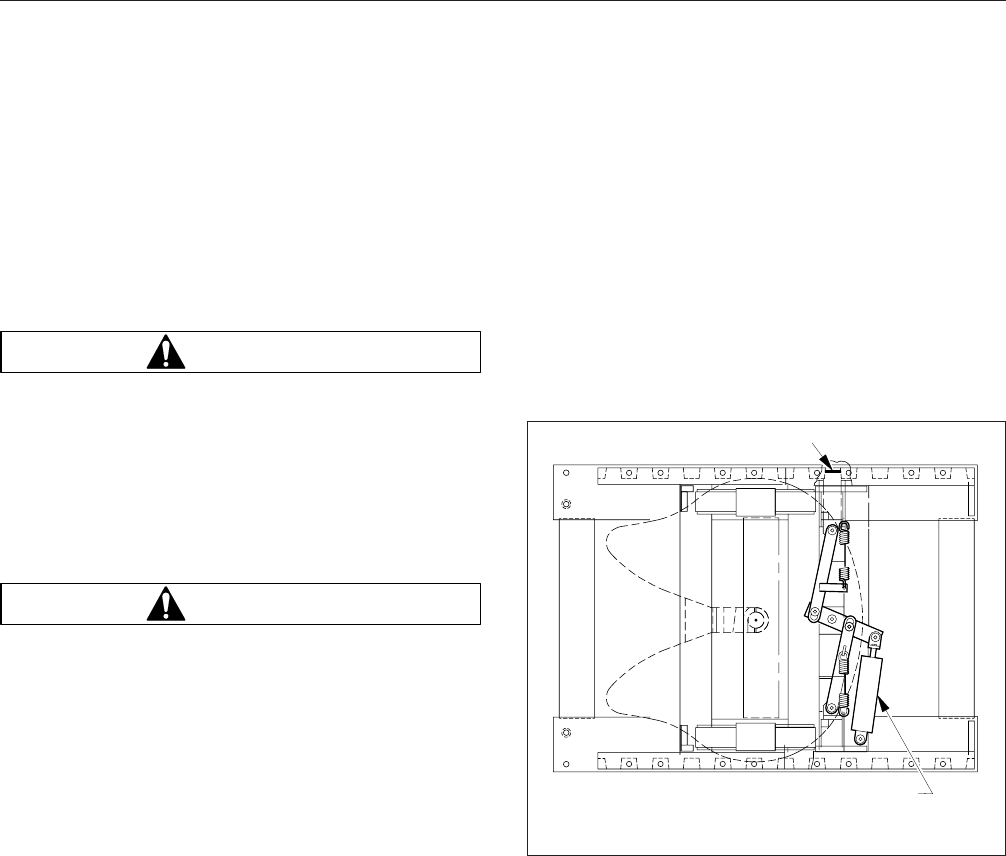
The maximum axle weight ratings are shown on
the Federal Motor Vehicle Safety Standard
(FMVSS) label or Canadian Motor Vehicle Safety
Standard (CMVSS) label attached to the left rear
door post of the tractor. The desired load on the
axle is no less than 80 percent of the maximum
axle weight rating, but in no instances should the
axle load exceed the maximum axle weight rat-
ing given on the FMVSS or CMVSS label.
WARNING
Adjust the fifth wheel slide correctly, and do not
overload any tractor axle by incorrectly loading
the trailer. Incorrect slide adjustment or improper
axle loading could cause erratic steering and
loss of vehicle control, possibly resulting in seri-
ous personal injury or death.
Fifth Wheel Lubrication
WARNING
Keep the fifth wheel plate lubricated to prevent
binding between the tractor and trailer. A binding
fifth wheel could cause erratic steering and loss
of vehicle control, possibly resulting in serious
personal injury or death.
The fifth wheel plate must be kept well lubricated
with chassis grease to prevent friction and binding
between the tractor fifth wheel plate and the trailer.
For lubrication instructions, see Group 31 of the
Heavy-Duty Trucks Maintenance Manual
.
Fontaine®Fifth Wheels
General Information
The Fontaine sliding fifth wheel mount is designed to
provide optimum axle loading for maximum tractor
use with different lengths and types of trailers. The
sliding fifth wheel mount is used with the Fontaine
H5092 series, and 6000/7000 No-Slack II series fifth
wheels, and is equipped with either an air-operated
release slide (AWB or HAWB models) or a manual
release slide (MWS or HMWS models).
On Fontaine fifth wheels, kingpin release is accom-
plished by activating a manual lock control handle
located on either the right side or left side of the fifth
wheel. Kingpin lockup occurs when the kingpin is
forced into the jaws and the lock control handle
moves to the locked position.
The fifth wheel top plate is mounted on a slide as-
sembly, which is attached to slide rails that are
mounted on the vehicle frame. The slide rails permit
forward and rearward movement of the slide assem-
bly, allowing for optimum weight distribution over the
tractor axles.
Slots are evenly spaced along the slide rails and re-
tractable lockpins are positioned through the holes to
hold the fifth wheel in the desired position. See
Fig. 10.16 or Fig. 10.17.
The slide portion of the sliding model may be at-
tached to either an air-operated release slide, or a
manual release slide.
The air-operated release slide contains an air cylin-
der that locks and unlocks the fifth wheel slide. See
Fig. 10.16. The air cylinder is activated by a two-
position air-control valve in the tractor cab.
The manual release slide contains a slide locking
control handle, located on the left side of the fifth
wheel, which locks or unlocks the fifth wheel slide.
See Fig. 10.17.
07/25/95 f310189
1
2
1. Locking Wedge 2. Air Cylinder
Fig. 10.16, Air-Operated Sliding Fifth Wheel Mount,
AWB Model
Fifth Wheels and Trailer Couplings
10.12
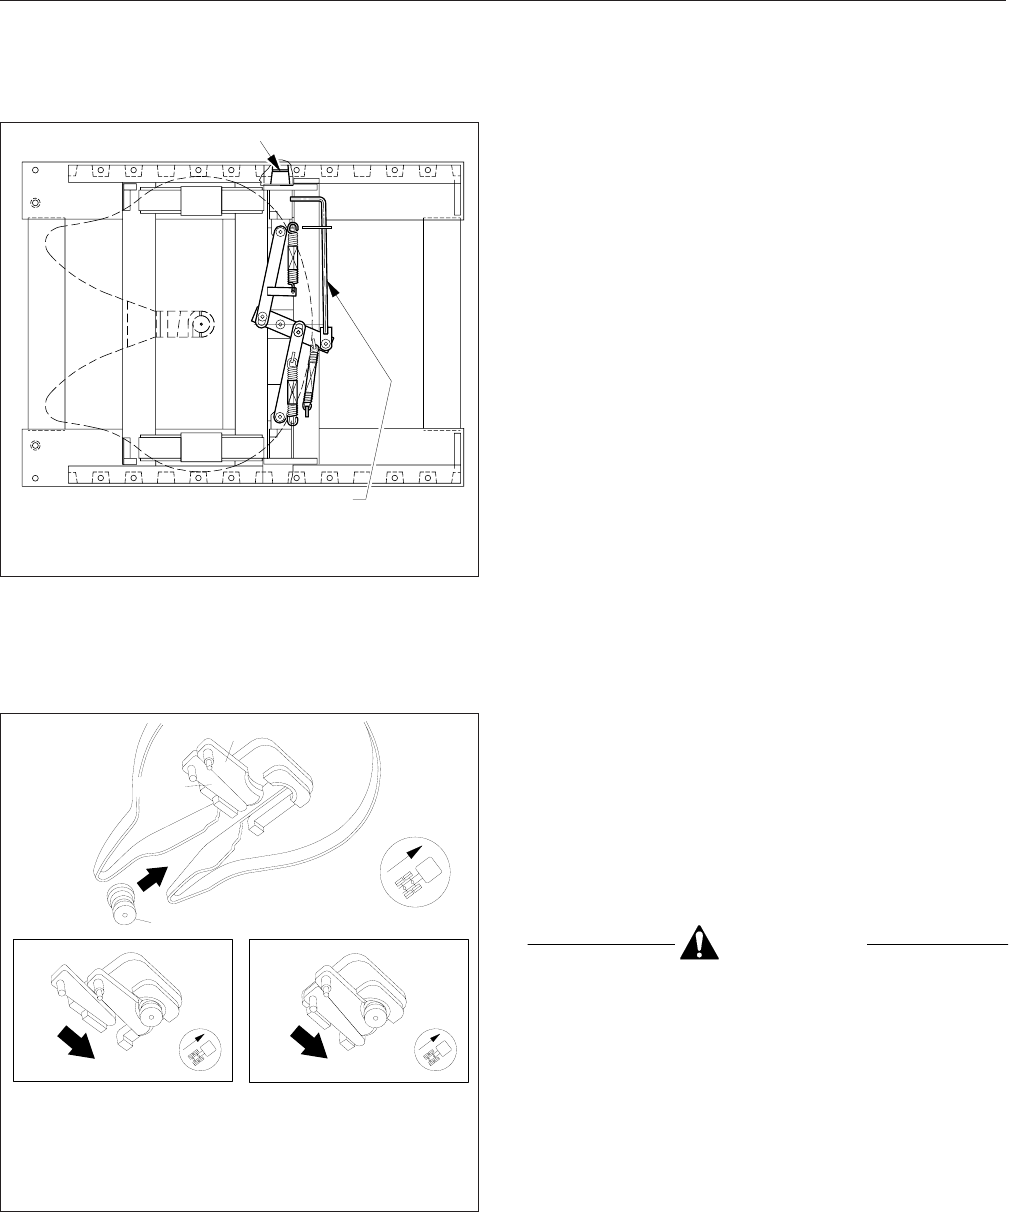
Fifth Wheel Lock Mechanism for Trailer
Kingpin (See Fig. 10.18)
The Fontaine fifth wheel lock mechanism for the
trailer kingpin consists of a spring-loaded jaw and a
sliding wedge.
The jaw and wedge each have a pin permanently
attached. The pin on the jaw and the pin on the
wedge fit into elongated notches in the lock control
handle. The notches in the handle control the limit of
movement for both the jaw and wedge. The notches
are arranged so that the wedge is actuated first dur-
ing release of the kingpin.
During lockup, the jaw is moved first with the spring-
loaded wedge being allowed to slip in place against
the jaw. A timing bracket ensures that the wedge and
jaw are moved at the proper time.
Placing the lock control handle in the unlocked posi-
tion moves the wedge away from the jaw. This action
unlocks the jaw so that it can be moved by the trailer
kingpin. When the tractor is moved out from under
the trailer, the kingpin moves the jaw until the kingpin
is out of the mechanism. With the jaw in the un-
locked position, the lock control handle will remain in
the unlocked position until manually moved by the
operator.
During coupling (Fig. 10.18), the motion of the king-
pin entering the jaw will actuate the jaw and wedge.
The jaw will move behind the kingpin, followed by the
wedge. The purpose of the wedge is to reinforce the
jaw and take up slack around the pin. Any wear on
the jaw is immediately taken up by the wedge so
there is no slack in the connection.
Fifth Wheel Locking Operation
Locking the Fifth Wheel Lock Mechanism
CAUTION
Before attempting to lock or unlock the fifth
wheel lock mechanism of a sliding type fifth
wheel, the slide locking handle, if so equipped,
and the slide lockpins must be in the locked po-
sition (fully inserted in the slider rail holes). This
prevents the sliding member from moving rapidly
to the far forward or rearward position, which
could damage the fifth wheel member or kingpin.
1. Chock the front and rear of the trailer tires to
prevent the trailer from moving.
07/25/95 f310190
1
2
1. Locking Wedge
2. Sliding Release Pull Handle
Fig. 10.17, Manual Release Sliding Fifth Wheel Mount,
MWS Model
1
2A
3
BC
01/04/95 f310184c
A. Unlocked Position
B. Locking C. Locked
1. Wedge
2. Jaw 3. Trailer Kingpin
Fig. 10.18, Fontaine Kingpin Lock Mechanism
Fifth Wheels and Trailer Couplings
10.13
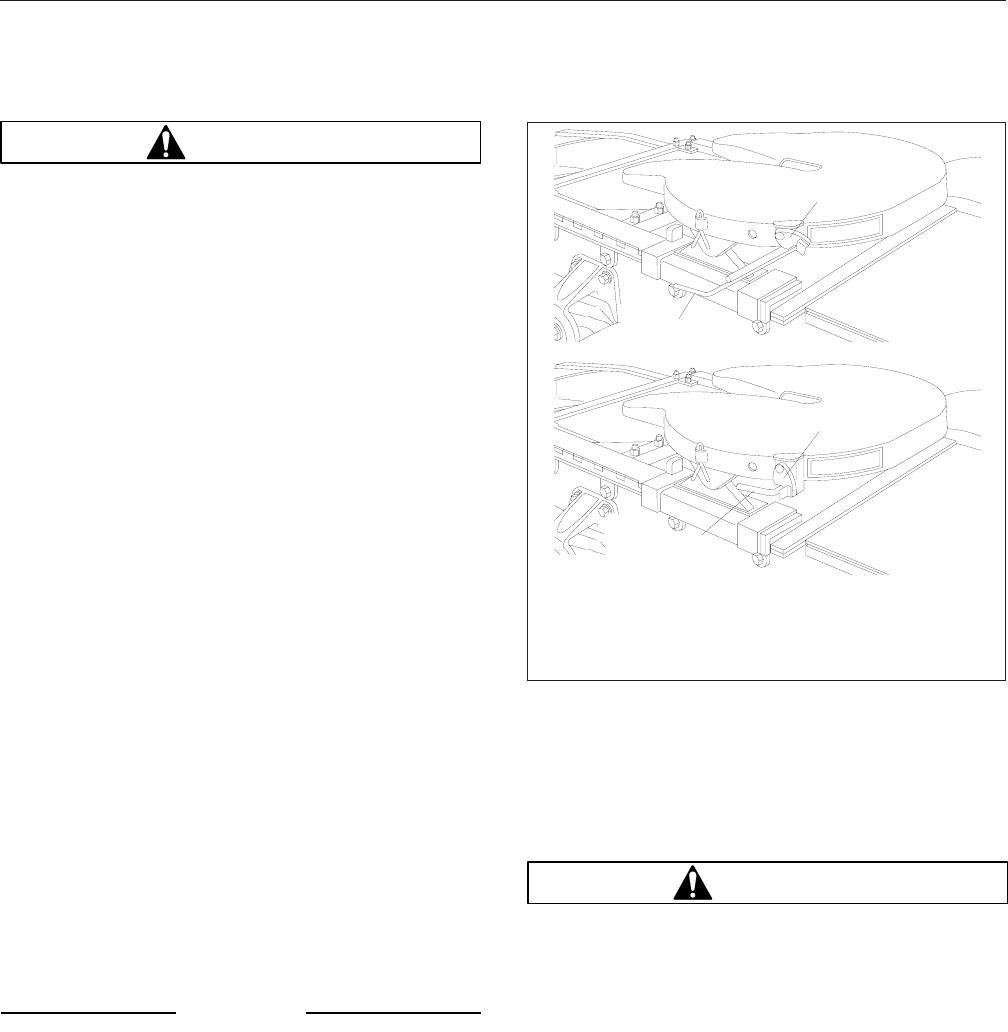
WARNING
Keep the fifth wheel plate lubricated to prevent
binding between the tractor and trailer. A binding
fifth wheel could cause erratic steering and loss
of vehicle control, possibly resulting in serious
personal injury or death.
2. The kingpin lock mechanism must be fully open,
the fifth wheel plate must be completely lubri-
cated with chassis grease. For lubrication in-
structions, see Group 31 of the
Heavy-Duty
Trucks Maintenance Manual
.
3. Position the tractor so that the fifth wheel lock
opening is in line (both vertically and horizontally)
with the trailer kingpin. The kingpin should be in
a position to enter the throat of the locking
mechanism, as shown in Fig. 10.18. Adjust the
trailer landing gear to give enough alignment
height for positive kingpin lockup.
4. With the fifth wheel lock opening aligned with the
trailer kingpin, back the tractor slowly toward the
trailer, making sure that the kingpin enters the
throat of the locking mechanism. Continue back-
ward motion until positive lockup occurs.
5. Apply the tractor parking brakes.
6. Make a visual and physical check for positive
kingpin lockup. When lockup has occurred, the
fifth wheel control handle will have moved to the
locked position. Make sure that the safety latch
is down over the lock control handle. See
Fig. 10.19. This will hold the control handle in
the locked position.
7. Release the tractor parking brakes. Test for king-
pin lockup by pulling on the trailer against the
chocks.
NOTICE
Always make sure the connect-hanger/support
keeps the trailer air hoses and electrical cables
positioned so that they do not rub on anything.
Rubbing may wear through hoses or cables, re-
sulting in air leaks, or exposed or broken wires,
potentially affecting trailer brake or electrical sys-
tems.
8. After lockup is completed, connect the tractor-to-
trailer air system lines and the electrical cable to
the trailer. Take care to prevent dirt or foreign
material from entering the air system lines.
9. Charge the air brake system with air. Make sure
that the air connections do not leak.
WARNING
Eliminate slack between the trailer and the trac-
tor. Incorrect fifth wheel adjustment could cause
the trailer to disconnect, possibly resulting in se-
rious personal injury or death.
10. With the trailer wheels chocked and the brakes
set, check for clearance between the kingpin and
the fifth wheel jaws by moving the tractor forward
and backward against the locked kingpin. There
should be no slack between the tractor and the
trailer. If slack is present, uncouple the trailer.
For adjustment instructions, refer to the appli-
cable manufacturer’s service information.
1
1
2
2
02/09/95 f310110a
A
B
NOTE: Make sure the safety latch is down when the
control handle is locked.
A. Unlocked B. Locked
1. Safety Latch 2. Lock Control Handle
Fig. 10.19, Fontaine 5000 Series Fifth Wheel, Locking
and Unlocking
Fifth Wheels and Trailer Couplings
10.14
11. Retract the trailer landing gear, and secure the
ratchet handle. Remove the chocks from the
trailer tires.
12. The load distribution on the front steering axle
and rear drive axle(s) will have a direct effect on
the steering control of the vehicle.
Determine the front and rear axle weights by
weighing the vehicle on scales designed for this
purpose.
The maximum axle weight ratings are given on
the Federal Motor Vehicle Safety Standard
(FMVSS) label or Canadian Motor Vehicle Safety
Standard (CMVSS) label attached to the left rear
door post of the tractor. The desired load on the
axle is no less than 80 percent of the maximum
axle weight rating, but in no instances should the
axle load exceed the maximum axle weight rat-
ing given on the FMVSS or CMVSS label.
WARNING
Do not overload any tractor axle by improperly
loading the trailer. This could cause erratic steer-
ing and loss of vehicle control, possibly resulting
in serious personal injury or death.
Unlocking the Fifth Wheel Lock
Mechanism
1. Apply the tractor parking brakes.
2. Pull the trailer air supply valve to cut off the air
supply to the trailer.
WARNING
Do not use the trailer air supply for parking trail-
ers not equipped with spring parking brakes.
This applies the trailer service brakes only. As air
bleeds from the trailer brake system, brake appli-
cation is lost. This could allow the unattended
vehicle to roll away, possibly resulting in serious
personal injury or death.
3. Chock the front and rear of the trailer tires to
prevent the trailer from moving.
4. Lower the trailer landing gear until the weight is
removed from the fifth wheel.
5. Disconnect the tractor-to-trailer air system lines
and electrical cable. Plug the air lines to prevent
dirt or foreign material from entering the lines.
CAUTION
Before attempting to lock or unlock the fifth
wheel lock mechanism of a sliding type fifth
wheel, the slide locking handle, if so equipped,
and the slide lockpins must be in the locked po-
sition (fully inserted in the slider rail holes). This
prevents the sliding member from moving rapidly
to the far forward or rearward position, which
could damage the fifth wheel member or kingpin.
6. Release the kingpin locking mechanism by lifting
the safety latch and pulling the lock control
handle to the unlocked position. See Fig. 10.19.
7. Slowly drive the tractor away from the trailer.
Fifth Wheel Slide Operation
1. Connect the trailer kingpin to the tractor fifth
wheel. For instructions, refer to Fontaine 5000
Series "Fifth Wheel Locking Operation," in this
chapter.
2. After positive lockup of the fifth wheel lock
mechanism has been accomplished, release the
slide using one of the following methods:
2.1 For air-operated release models, set the
cab-operated control switch to UNLOCK.
2.2 For manual release models, lift the slide
locking handle to disengage it from the
guide plate. Then, pull out the handle
(Fig. 10.20) until it is in the unlocked posi-
tion and can be positioned against the
guide plate to hold it out. The slide locking
handle will stay in the unlocked position
until it is manually disengaged from the
guide plate.
3. Lower the trailer landing gear just enough to re-
move the weight from the tractor.
4. Pull the trailer air supply valve to cut off the air
supply to the trailer.
WARNING
Do not use the trailer air supply for parking trail-
ers not equipped with spring parking brakes.
Fifth Wheels and Trailer Couplings
10.15
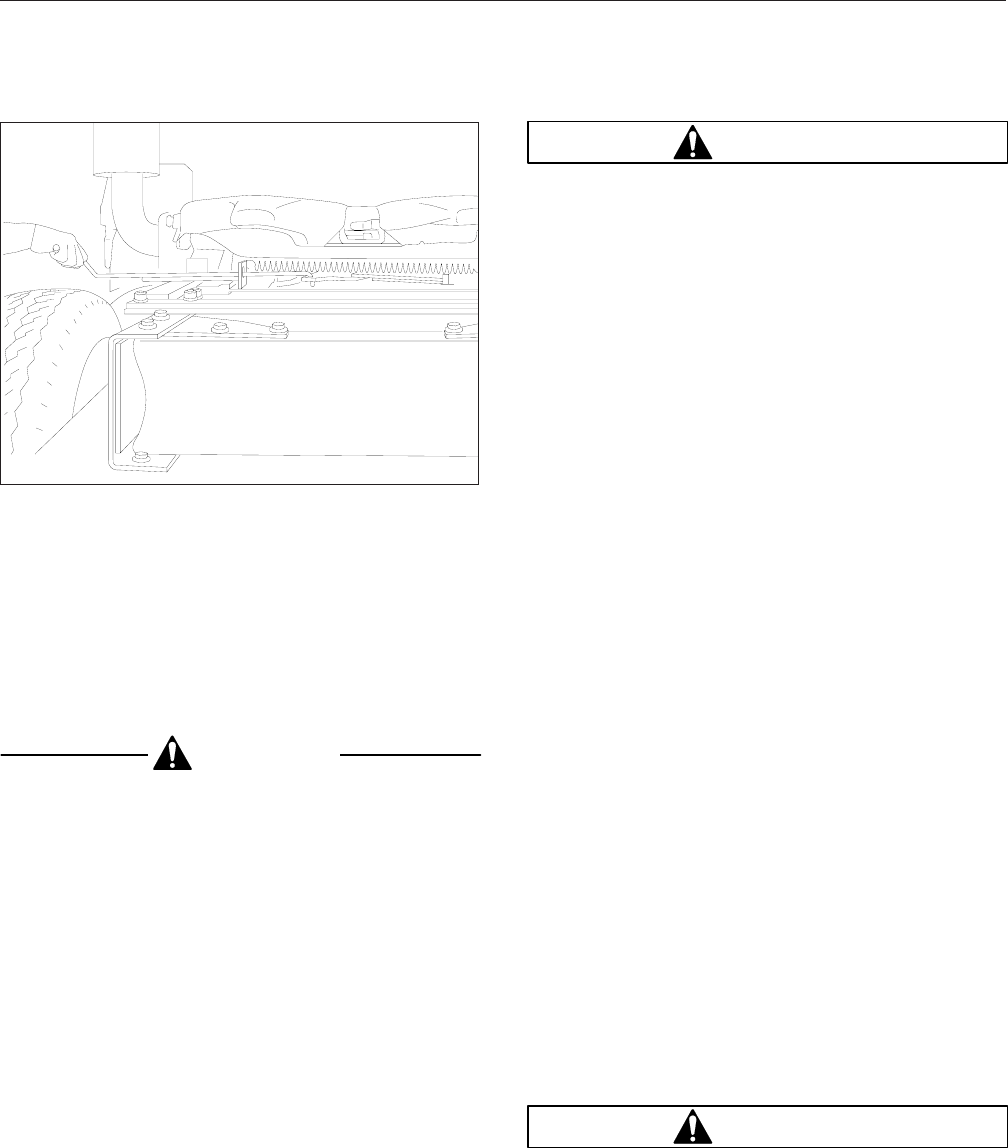
This applies the trailer service brakes only. As air
bleeds from the trailer brake system, brake appli-
cation is lost. This could allow the unattended
vehicle to roll away, possibly resulting in serious
personal injury or death.
5. Chock the front and rear of the trailer tires to
prevent the trailer from moving.
CAUTION
After moving the fifth wheel to the desired posi-
tion, be sure the trailer landing gear will not, at
any time, come in contact with the tractor frame
or other components. Make sure that the front of
the trailer will not come in contact with the rear
of the cab or with other components if they ex-
tend beyond the rear of the cab.
6. Slowly move the tractor forward or backward
until the fifth wheel is in the desired location.
7. Apply the tractor parking brakes.
NOTE: The fifth wheel may have to be moved
slightly to enable the locking pin(s) to enter the
fully locked position.
8. Lock the sliding member in position using one of
the following methods:
WARNING
Check to be sure that the lockpins are seated in
the holes. Failure to achieve complete lockup
may cause the trailer to detach from the tractor,
possibly resulting in serious personal injury or
death.
8.1 For air-operated release models, set the
cab-operated slide control switch to
LOCK. Visually inspect the lockpins to
make sure that they are fully inserted in
the slide rail holes.
8.2 For manual release models, disengage
the slide locking handle from the guide
plate. The slide locking handle is spring-
loaded in the locked position and will seek
the locked position when disengaged from
the guide plate. The fifth wheel may have
to be moved slightly to enable the locking
pins to fully enter the locked position.
When the slide lock control handle returns
to the fully in position, visually and physi-
cally check the lockpins to make sure they
are fully inserted into the holes in the slide
rails. Make sure the slide locking handle is
locked in position against the guide plate.
9. The amount of load distribution on the front
steering axle and rear drive axle(s) will have a
direct effect on the steering control of the vehicle.
Determine the front and rear axle weights by
weighing the vehicle on scales designed for this
purpose.
The maximum axle weight ratings are given on
the Federal Motor Vehicle Safety Standard
(FMVSS) label or Canadian Motor Vehicle Safety
Standard (CMVSS) label attached to the left rear
door post of the tractor. The desired load on the
axle is no less than 80 percent of the maximum
axle weight rating, but in no instances should the
axle load exceed the maximum axle weight rat-
ing given on the FMVSS or CMVSS label.
WARNING
Adjust the fifth wheel slide correctly, and do not
overload any tractor axle by incorrectly loading
the trailer. Incorrect slide adjustment or improper
axle loading could cause erratic steering and
05/19/94 f310050
Fig. 10.20, Fontaine 5000 Series Sliding Fifth Wheel
Manual Release
Fifth Wheels and Trailer Couplings
10.16

loss of vehicle control, possibly resulting in seri-
ous personal injury or death.
Fifth Wheel Lubrication
The fifth wheel plate must be kept well lubricated
with chassis grease to prevent friction and binding
between the tractor fifth wheel plate and the trailer.
Friction and binding, caused by insufficient grease on
the fifth wheel plate could result in erratic steering.
For lubrication instructions, see Group 31 of the
Heavy-Duty Trucks Maintenance Manual
.
Premier Trailer Couplings
General Information
Trailer couplings, used only on trucks, are attached
to the rear closing crossmember.
The Premier 260 and 460 trailer couplings
(Fig. 10.21) have a rigid pintle hook, and are air-
adjusted. An air chamber, mounted forward of the
coupling, operates a push rod, which pushes against
a shoe inside the coupling. The shoe maintains con-
stant pressure on the eye of the trailer drawbar when
it’s over the pintle hook. This takes up any slack in
the trailer connection, providing smoother towing and
less wear on the pintle hook. The air pressure is acti-
vated when the trailer brakes are released.
The Premier 690 trailer coupling (Fig. 10.22) has a
moveable pintle hook, and is non-air adjusted. It is
used for heavy-duty applications.
Operation
Trailer Hookup
1. Chock the front and rear tires of the trailer.
2. Open the coupling.
Models 260 and 460
(Fig. 10.21): Pull up on the
pawl lock; then, while squeezing the pawl
wedges together, lift up the pawl assembly. Lift
up the latch, and push it up against the pawl as-
sembly, locking the latch in place.
Model 690
(Fig. 10.22): Remove the linchpin
from the handle, then push in on the handle and
turn it toward you. Open the pintle hook by pull-
ing it down and toward you. Release the handle,
locking the pintle hook open.
3.
Models 260 and 460:
Back up the vehicle until
the drawbar eye is over the pintle hook, then
lower the trailer.
Model 690:
Back up the vehicle until the drawbar
eye enters the open jaw, contacts the back of the
pintle hook, and closes the coupling.
4. Close the coupling.
Models 260 and 460:
Push in on the pawl
wedges and lift the pawl assembly. The latch will
drop into the closed position. Lock the latch by
lowering the pawl assembly.
Model 690:
The pintle hook will automatically
close and lock from the pressure of the drawbar
eye against it. Install the linchpin.
NOTICE
Always make sure the connect-hanger/support
keeps the trailer air hoses and electrical cables
positioned so that they do not rub on anything.
Rubbing may wear through hoses or cables, re-
sulting in air leaks, or exposed or broken wires,
potentially affecting trailer brake or electrical sys-
tems.
5. Hook up the trailer’s electrical and air lines.
6. Remove the chocks from the trailer’s tires.
Trailer Release
1. Apply the truck and trailer parking brakes.
WARNING
Do not use the trailer air supply for parking trail-
ers not equipped with spring parking brakes.
This applies the trailer service brakes only. As air
bleeds from the trailer brake system, brake appli-
cation is lost. This could allow the unattended
vehicle to roll away, possibly resulting in serious
personal injury or death.
2. Chock the front and rear tires of the trailer.
3. Disconnect the trailer air and electrical lines.
Plug the air lines to keep out dirt.
4. Take the weight of the trailer drawbar eye off the
pintle hook.
5. Open the coupling.
Fifth Wheels and Trailer Couplings
10.17
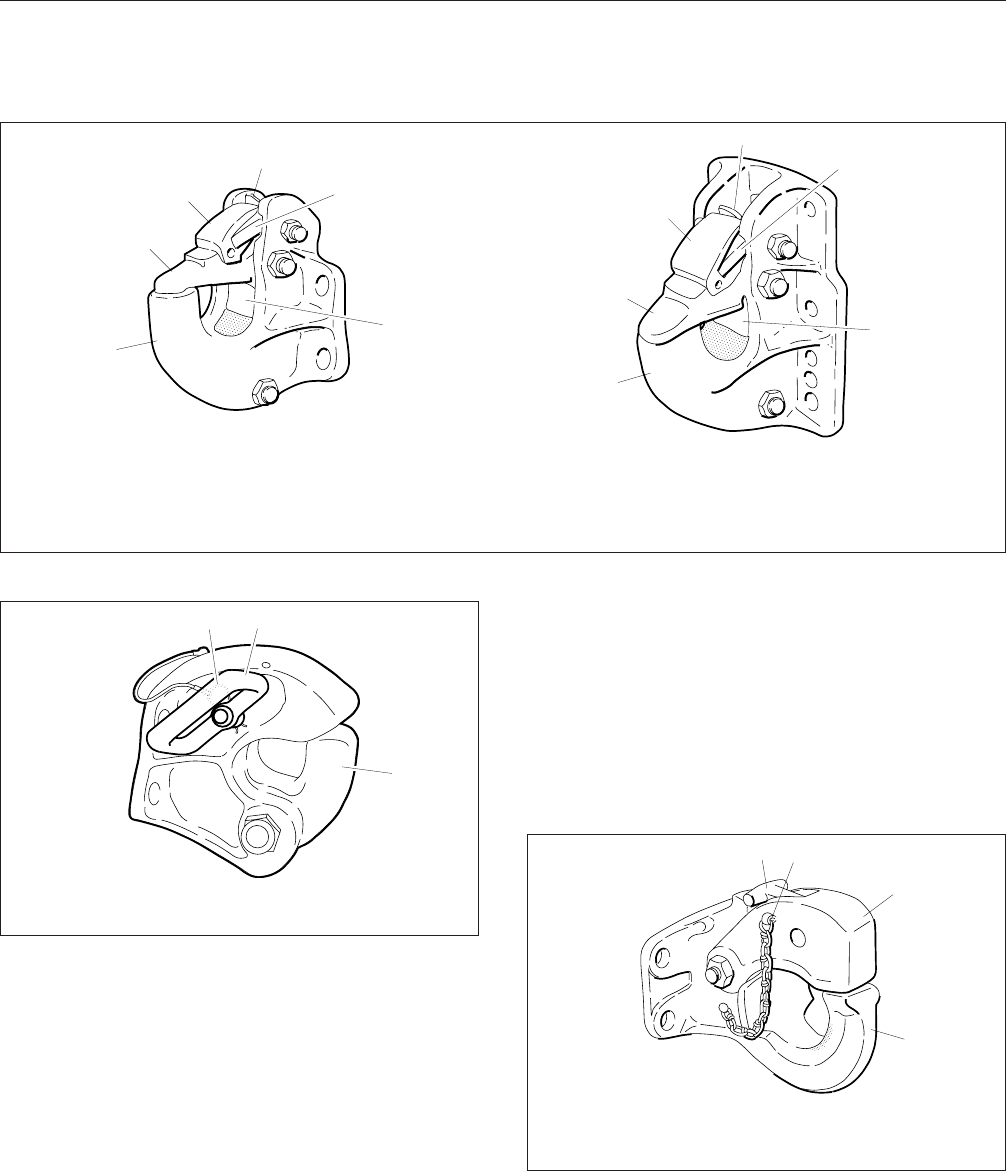
Models 260 and 460:
Pull up on the pawl lock;
then, while squeezing the pawl wedges together,
lift up the pawl assembly. Lift up the latch, and
push it up against the pawl, locking the latch in
place.
Model 690:
Remove the linchpin from the handle,
then push in on the handle and turn it toward
you. Open the pintle hook by pulling it down and
toward you. Release the handle, locking the
pintle hook open.
6. Slowly drive the vehicle away from the trailer.
Holland Trailer Coupling
General Information
The Holland PH–T–60–AL trailer coupling is de-
signed for use with trailers having a maximum gross
weight of 10,000 lbs (4536 kg). It is a rigid type pintle
hook, used only on truck applications, and is fas-
tened to the rear closing crossmember of the vehicle.
See Fig. 10.23. It is a non-air adjusted coupling.
1
2
3
4
5
6
1
2
3
4
5
6
AB
01/20/95 f310312a
A. Model 260 B. Model 460
1. Pintle Hook
2. Latch 3. Pawl Assembly
4. Pawl Lock 5. Pawl Wedge
6. Shoe
Fig. 10.21, Premier 260 and 460 Trailer Couplings
12
3
01/20/95 f310313a
1. Linchpin
2. Handle 3. Pintle Hook
Fig. 10.22, Premier 690 Trailer Coupling
12
3
4
01/20/95 f310314a
1. Lock
2. Cotter Pin 3. Latch
4. Pintle Hook
Fig. 10.23, Holland PH-T-60-AL Trailer Coupling
Fifth Wheels and Trailer Couplings
10.18

Operation
Trailer Hookup
1. Chock the front and rear tires of the trailer.
2. Remove the cotter pin, then lift the lock and raise
the latch.
3. Back up the vehicle until the drawbar eye is over
the pintle hook.
4. Lower the trailer until the drawbar eye rests on
the pintle hook.
5. Close the latch, then insert the cotter pin.
NOTICE
Always make sure the connect-hanger/support
keeps the trailer air hoses and electrical cables
positioned so that they do not rub on anything.
Rubbing may wear through hoses or cables, re-
sulting in air leaks, or exposed or broken wires,
potentially affecting trailer brake or electrical sys-
tems.
6. Hook up the trailer’s electrical and air lines.
7. Remove the chocks from the trailer’s tires.
Trailer Release
1. Apply the truck and trailer parking brakes.
WARNING
Do not use the trailer air supply for parking trail-
ers not equipped with spring parking brakes.
This applies the trailer service brakes only. As air
bleeds from the trailer brake system, brake appli-
cation is lost. This could allow the unattended
vehicle to roll away, possibly resulting in serious
personal injury or death.
2. Chock the front and rear tires of the trailer.
3. Disconnect the trailer air and electrical lines.
Plug the air lines to keep out dirt.
4. Take the weight of the trailer drawbar off the
pintle hook.
5. Open the latch by first removing the cotter pin,
then lift up the lock and raise the latch.
6. Slowly drive the vehicle away from the trailer.
Fifth Wheels and Trailer Couplings
10.19

Pretrip and Post Trip
Inspection Checklists
Regulations in both Canada and the United States
clearly indicate that it is the driver’s responsibility to
perform an inspection and ensure the complete road-
worthiness of a vehicle before placing it into service
for the day. Commercial vehicles may be subject to
inspection by authorized inspectors, and an unsafe
vehicle can be put "out of service" until the driver or
owner repairs it.
IMPORTANT: The pre- and post-trip checklists,
and inspections and maintenance procedures
detailed in this chapter, are not all-inclusive.
Also refer to other component and body manu-
facturers’ instructions for specific inspection and
maintenance instructions.
Use the inspection checklists to ensure that vehicle
components are in good working condition before
each trip. A driver that is familiar with the vehicle,
and drives it regularly, can perform the daily inspec-
tions, then add the weekly and monthly post-trip in-
spections as scheduled. If the driver does not oper-
ate the vehicle on a consistant basis, all three of the
inspection procedures should be performed before
the trip.
NOTE: Procedure reference numbers in the
checklists reference the corresponding detailed
instructions found under the pretrip and post-trip
maintenance procedures.
Pre- and post-trip inspections cannot be done
quickly. However, careful inspections save time by
eliminating stops later to adjust items overlooked or
forgotten.
If any system or component does not pass this in-
spection, it must be corrected before operating the
vehicle. Whenever equipment requires adjustment,
replacement, repair, addition of lubricants, or a
change of lubricants, see the
Heavy-Duty Trucks
Service Manual
for procedures and specifications,
and see the
Heavy-Duty Trucks Maintenance Manual
for lubricant recommendations, specifications, and
maintenance intervals.
See Table 11.1 for a list of procedures that should
be perfomed daily, before the first trip.
See Table 11.2 for a list of procedures that should
be performed weekly, post-trip.
See Table 11.3 for a list of procedures that should
be performed monthly, post-trip.
IMPORTANT: Before performing any checks,
apply the parking brake and chock the tires.
Pretrip and Post-Trip Inspections and Maintenance
11.1

Procedure Performed
(check off) Daily Pretrip Inspections/Checks Procedure
Reference
_______ Drain manually drained air reservoirs (that are not equipped with automatic drain
valves) D1
Check _______ windshield washer reservoir fluid D2
Inspect _______ wheel seal and hub cap (for leakage) —
Check _______ surge tank coolant level D3
Inspect _______ radiator and charge air cooler D4
Check _______ engine for fuel, oil, or coolant leaks —
Inspect _______ engine and chassis wiring D5
Inspect _______ air intake system D6
Check _______ intake-air restriction indicator mounted on air intake D6
Check _______ engine oil level D7
Check _______ power steering fluid level —
Inspect _______ fuel tank(s), fuel lines, and connections D8
Check _______ fuel level D9
Check _______ fuel/water separator D10
Inspect _______ front and rear suspension components D11
Inspect _______ headlights, mirrors, and window glass, and windshield wipers D12
Check _______ doors (open without difficulty and close securely) —
_______ Adjust driver’s seat, then align rearview and downview mirrors —
Check _______ dash-mounted intake-air restriction indicator D6
Check _______ oil- and air-pressure warning systems D13
Check _______ horn, windshield wipers, and windshield washer D14
Check _______ heater, defroster, and optional mirror heat controls D15
Check _______ backup alarm —
Check _______ panel lights and interior lights D16
Check _______ exterior lights and reflectors D17
Check _______ tire pressure D18
Inspect _______ tire condition D19
Inspect _______ rims and wheels D20
Check _______ automatic transmission fluid level —
Inspect _______ air brake chambers and pushrods D21
Inspect _______ air brake lines D22
Inspect _______ slack adjusters D23
Check _______ air brake system operation D24
Inspect _______ frame rails (missing bolts), crossmembers (bent or loose) —
Check _______ mud flaps (aren’t damaged, at least 10 inches above the ground, and brackets
are secure) —
Check _______ exhaust system (mounted securely, connected tightly, no signs of leaks such as
soot trails) —
_______ Remove chocks and test service brakes D25
Inspector___________________________________________________ Date ________________
Table 11.1, Daily Pretrip Inspection and Maintenance Checklist
Pretrip and Post-Trip Inspections and Maintenance
11.2
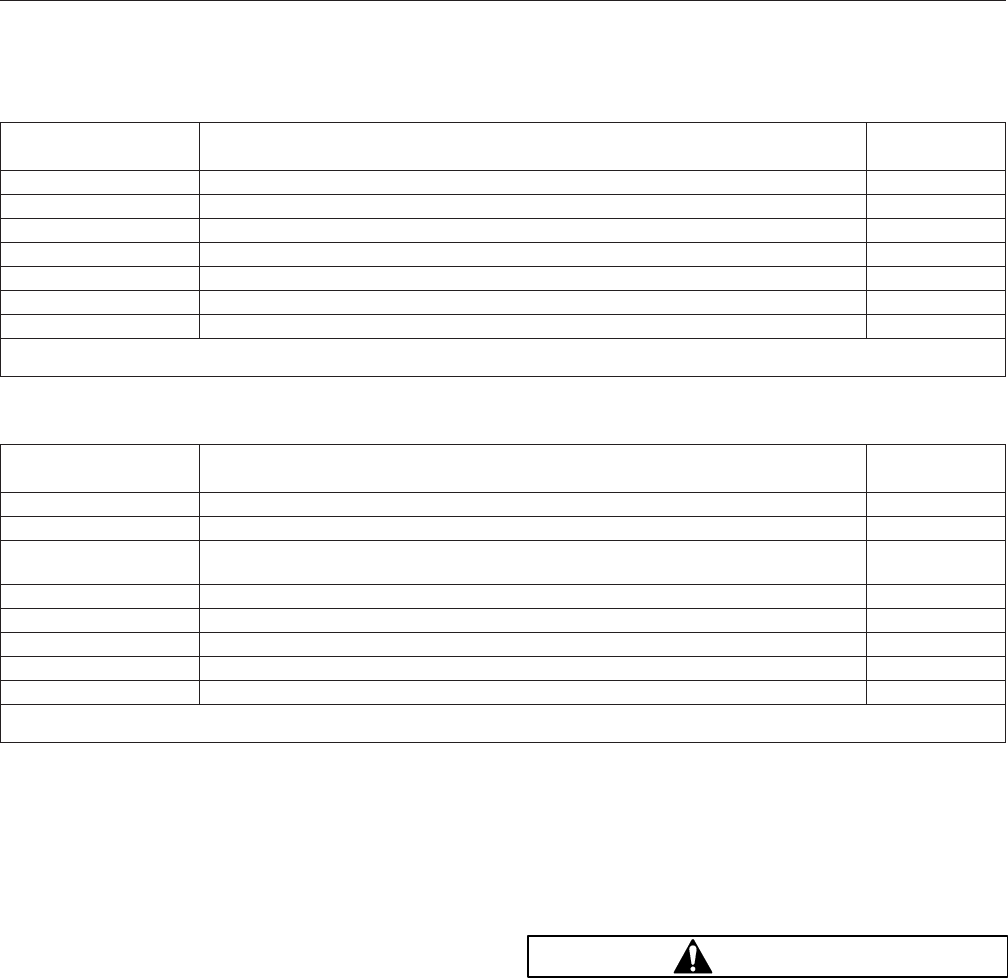
Procedure Performed
(check off) Weekly Post-Trip Inspections/Checks Procedure
Reference
_______ Manually drain air reservoirs that are equipped with automatic drain valves —
Inspect _______ batteries and battery cables W1
Check _______ wheel bearing lubricant level W2
Inspect _______ steering components W3
Check _______ serpentine drive belt condition W4
Check _______ V-belt tension W5
Inspect _______ seat belts and tether belts W6
Inspector___________________________________________________ Date ________________
Table 11.2, Weekly Post-Trip Inspection and Maintenance Checklist
Procedure Performed
(check off) Monthly Post-Trip Inspections/Checks Procedure
Reference
_______ Clean the battery terminals M1
Inspect _______ radiator hoses and heater hoses M2
Check _______ fluid level in the hydraulic clutch reservoir (if applicable, and if necessary, fill with
DOT 4 brake fluid) —
Check _______ steering wheel play M3
Check _______ outer surfaces of the hood and body (for visible surface breaks and damage) —
Check _______ hood tilt damper (attached at both ends) —
Inspect _______ brake lining wear M4
Inspect _______ driveshaft —
Inspector___________________________________________________ Date ________________
Table 11.3, Monthly Post-Trip Inspection and Maintenance Checklist
Pretrip and Post Trip
Maintenance Procedures
Whenever equipment requires adjustment, replace-
ment, repair, addition of lubricants, or a change of
lubricants, see the
Heavy-Duty Trucks Service
Manual
for procedures and specifications, and see
the
Heavy-Duty Trucks Maintenance Manual
for lubri-
cant recommendations, specifications, and mainte-
nance intervals. Specific references to the manual
will be found where appropriate.
Daily Pretrip Maintenance Procedures
1.
Drain manually drained air reservoirs.
Water and oil normally enter the air reservoir in
the form of vapor because of the heat generated
during compression. After the water and oil con-
dense, drain the resulting emulsion as follows:
1.1 Open the wet tank valve. The drain cock
or pull chain drain is located on the for-
ward end of the supply air reservoir, which
is connected directly to the air compres-
sor. Block the valve open.
WARNING
When draining the air reservoir, do not look into
the air jets or direct them toward anyone. Dirt or
sludge particles may be in the airstream and
could cause injury.
1.2 Exhaust the remaining air and moisture
from the system by opening the drain
cocks on the bottoms of the remaining air
reservoirs. Block the valves open.
Pretrip and Post-Trip Inspections and Maintenance
11.3
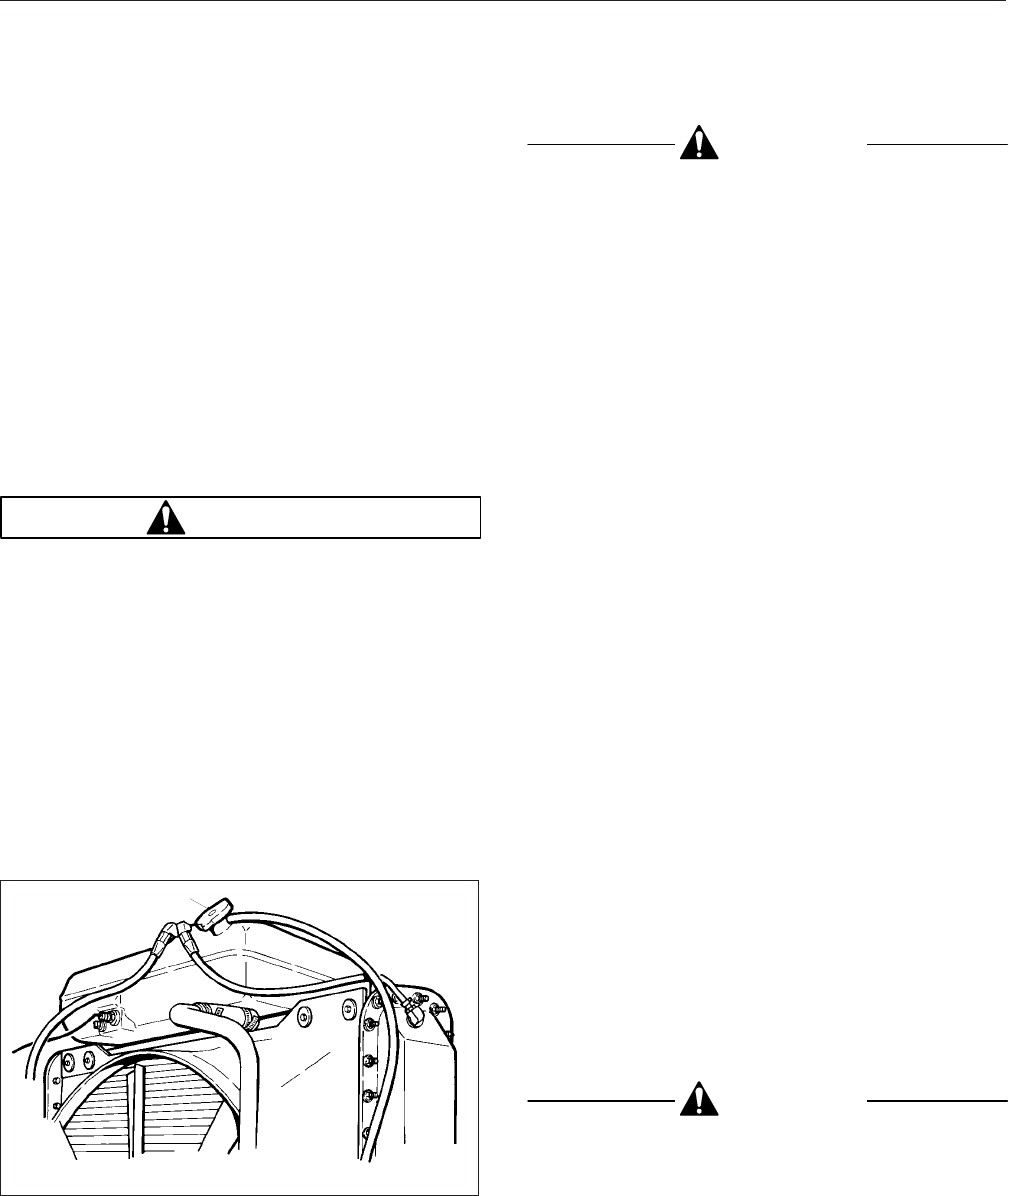
1.3 Water and oil emulsion often form pockets
that will not drain while compressed air is
in the reservoirs. Because of these pock-
ets, leave the valves blocked open during
the first part of the pretrip inspection.
1.4 If the drained water is cloudy or oily, it
may indicate a problem with the compres-
sor. If oil is allowed to contaminate the air
dryer, it will not remove the water from the
air brake system, which could adversely
affect braking.
2.
Check the fluid level in the windshield washer
reservoir.
Add washer fluid as needed. Unscrew the cap to
add fluid.
WARNING
Washer fluids may be flammable and poisonous.
Do not expose washer fluid to an open flame or
any burning material, such as a cigarette. Always
comply with the washer fluid manufacturer’s rec-
ommended safety precautions.
3.
Check the coolant level in the surge tank.
See Fig. 11.1. If the coolant is low, add a 50/50
mixture of water and the type of antifreeze cur-
rently installed in your vehicle. Fill the surge tank
with coolant to the MAX line when the tank is
cool. If the surge tank was empty, start the en-
gine after refilling and check the level again
when the engine is at operating temperature.
CAUTION
Coolant must be filled to the full line of the surge
tank. Low coolant could result in engine over-
heating, which could cause engine damage.
4.
Inspect the radiator and charge air cooler.
4.1 Inspect the radiator and charge air cooler
for clogged fins. Use compressed air or
water directed from the fan side of the
core to backflush any material restricting
airflow.
4.2 Inspect the radiator and charge air cooler
for damage and accumulated debris.
Straighten bent or damaged fins to permit
airflow across all areas of the cores.
NOTE: When traveling through areas of high
insect concentration, it may be necessary to
clean the exterior of the radiator or the
charge air cooler core as often as every 200
miles (320 km).
4.3 On vehicles equipped with air condition-
ing, also inspect and clean the condenser.
If clogged, the condenser can restrict air-
flow through the radiator.
4.4 Check the radiator for leaks. If leaks are
found, have the radiator repaired or re-
placed. See Group 20 of the
Heavy-Duty
Trucks Service Manual
for instructions, or
take the vehicle to an authorized Freight-
liner dealer.
5.
Inspect the engine and chassis wiring.
Check for loose wiring, chafed insulation, and
damaged or loose hold-down clamps. Tighten
loose wires or hold-down clamps; replace dam-
aged wiring or clamps.
6.
Inspect the air intake system for leaks or dam-
age.
CAUTION
Failure to maintain a sealed air intake system
could allow the entry of dirt and contaminants
into the engine. This could adversely affect en-
gine performance and result in engine damage.
6.1 Check the intake-air restriction indicator.
1
01/20/95 f500030a
1. Filler Neck
Fig. 11.1, Coolant Level Checking
Pretrip and Post-Trip Inspections and Maintenance
11.4
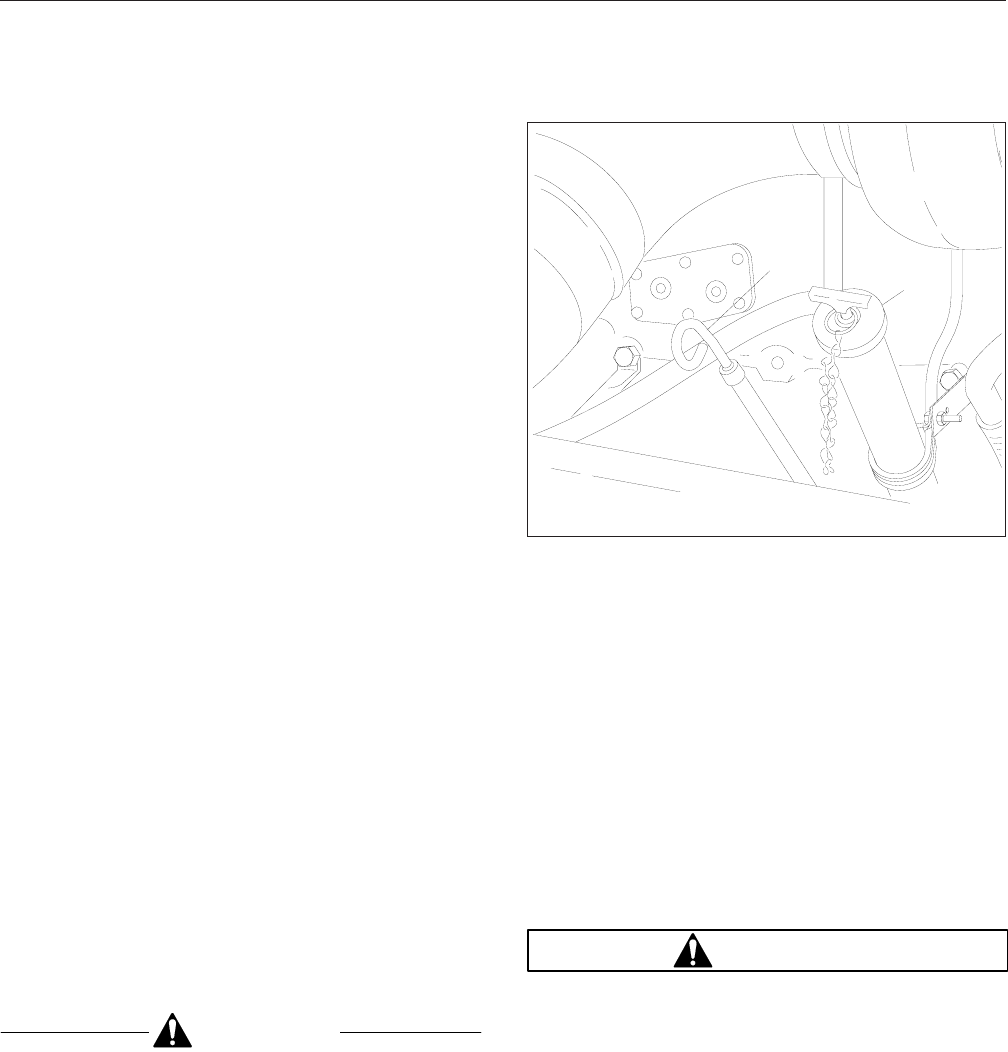
6.2 Replace the primary filter element in the
air cleaner if the yellow signal stays
locked at 25 inH
2
O for Caterpillar and
Cummins engines or 20 inH
2
O for Detroit
Diesel engines. See Group 09 of the
Heavy-Duty Trucks Service Manual
for
filter element replacement instructions, or
take the vehicle to an authorized Freight-
liner dealer.
NOTE: After replacing the filter element,
reset the restriction indicator by pressing the
rubber reset button.
6.3 Inspect the secondary or safety filter ele-
ment in the air cleaner when replacing the
primary element, and replace it when
clogged or dirty. This element should be
replaced with every third primary element
replacement.
6.4 Check the engine air intake piping from
the air cleaner to the engine intake. In-
spect the piping for loose connections,
cracks, torn or collapsed hoses, punc-
tures, and other damage. Tighten loose
connections, and have damaged compo-
nents replaced. Make sure the piping sys-
tem is airtight so that all intake air passes
through the air cleaner.
7.
Check the engine oil level.
If the oil level is at or below the minimum fill (or
"add") mark on the dipstick, add enough oil to
maintain the level between the minimum fill (or
"add") and the maximum fill (or "full") marks on
the dipstick. See Fig. 11.2. Engine lube oil must
have a sulfated ash level less than 1.0 wt %;
currently referred to as CJ-4 oil. Use the proper
SAE viscosity rating for the temperature and time
of year.
CAUTION
Operating the engine with the oil level below the
minimum fill (or "add") mark or above the maxi-
mum fill (or "full") mark could result in engine
damage.
8.
Inspect the fuel tanks, fuel lines, and connections
for leaks.
8.1 Check that the fuel tanks are secured to
their mounting brackets and that the
mounting brackets are secured to the
frame.
8.2 Replace leaking fuel tanks.
8.3 If lines or connections are leaking, have
them repaired or replaced.
For repair and/or replacement procedures,
see Group 47 of the
Heavy-Duty Trucks
Service Manual
, or take the vehicle in to
an authorized Freightliner dealer.
8.4 If equipped with fuel tank shutoff valves,
be sure the valves are fully open.
WARNING
Never operate the engine with the fuel tank shut-
off valves partly closed. This could damage the
fuel pump, causing sudden loss of engine power,
possibly resulting in serious personal injury due
to reduced vehicle control.
9.
Check the fuel level in the fuel tank(s).
To keep condensation to a minimum, fuel tanks
should be filled at the end of each day. Federal
regulations prohibit filling a fuel tank to more
than 95 percent of its liquid capacity.
1
2
02/09/95 f180002
1. Oil Check 2. Oil Fill
Fig. 11.2, Oil Level Checking
Pretrip and Post-Trip Inspections and Maintenance
11.5
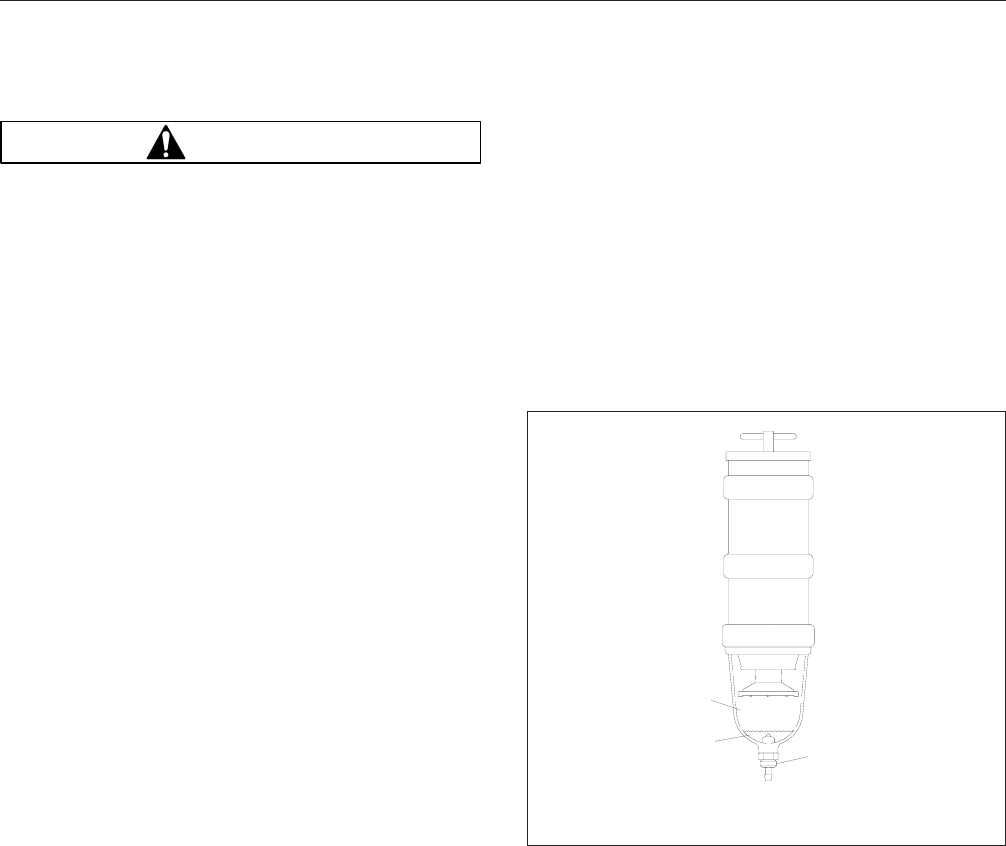
WARNING
Never fill fuel tanks to more than 95 percent of
their liquid capacity. This could make them more
likely to rupture from impact, possibly causing
fire and resulting in serious personal injury or
death by burning.
Do not mix gasoline or alcohol with diesel fuel.
This mixture could cause an explosion, possibly
resulting in serious personal injury or death. Do
not fill the fuel tanks in the presence of sparks,
open flames, or intense heat. These could ignite
the fuel, possibly causing severe burns.
IMPORTANT: Engines manufactured since
2007 must use ultralow-sulfur diesel (ULSD)
with 15 ppm sulfur content or less, based on
ASTM D2622 test procedure. Failure to use
ultralow sulfur diesel fuels may void the war-
ranty on emission components.
9.1 Fuel should always be strained or filtered
before being put into the tanks. This will
lengthen the life of the engine fuel filter
and reduce the chances of dirt getting into
the engine.
9.2 Before installing the fuel cap, clean the
area with a rag, or if necessary, clean the
cap with solvent.
9.3 If needed, prime the fuel system. For
priming procedures, see the applicable
engine manufacturer’s manual.
10. Drain the water from the fuel/water separator as
follows:
For a Racor Model 1000FG
(see Fig. 11.3):
Check the water level in the sight bowl. To drain
the water, loosen the valve at the bottom of the
bowl two full turns and allow the water to run out.
Close and tighten the valve finger-tight.
For a Davco Model 321
(see Fig. 11.4): If the
separator is equipped with a fuel filter and the
filter has a vent at the top, open the vent. To
drain the water, open the drain valve at the bot-
tom of the separator. Newer separators use a
ball valve with a handle that turns 90 degrees.
Older separators have a knurled, brass valve
that unscrews to open. Allow the water to drain
and close the valve finger-tight.
For a Webb Model 525
(see Fig. 11.5): Turn the
drain valve handle. If nothing flows from the
valve, it may be blocked. Use a pencil or screw-
driver to clear the valve. Allow the water to drain
and then close the valve. Start the engine and
raise the rpm for two or three minutes to purge
any air from the fuel system.
For ConMet Models
(see Fig. 11.6): Check the
water level in the sight bowl (if equipped). To
drain the water, loosen the valve at the bottom
and allow the water to run out. Close and tighten
the valve finger-tight.
IMPORTANT: When draining fluid from a fuel/
water separator, drain the fluid into an appropri-
ate container and dispose of it properly. Many
states now issue fines for draining fuel/water
separators onto the ground. On all types of
separators, stop draining fluid when you see
fuel come out of the separator drain valve.
11.
Inspect the front and rear suspension compo-
nents, including springs, spring hangers, shocks,
and suspension brackets.
11.1 Check for broken spring leaves, loose
U-bolts, cracks in the suspension
brackets, and loose fasteners in the spring
hangers and shackles.
1
23
02/09/95 f470103
1. Sight Bowl
2. Collected Water 3. Drain Valve
Fig. 11.3, Racor Fuel/Water Separator
Pretrip and Post-Trip Inspections and Maintenance
11.6
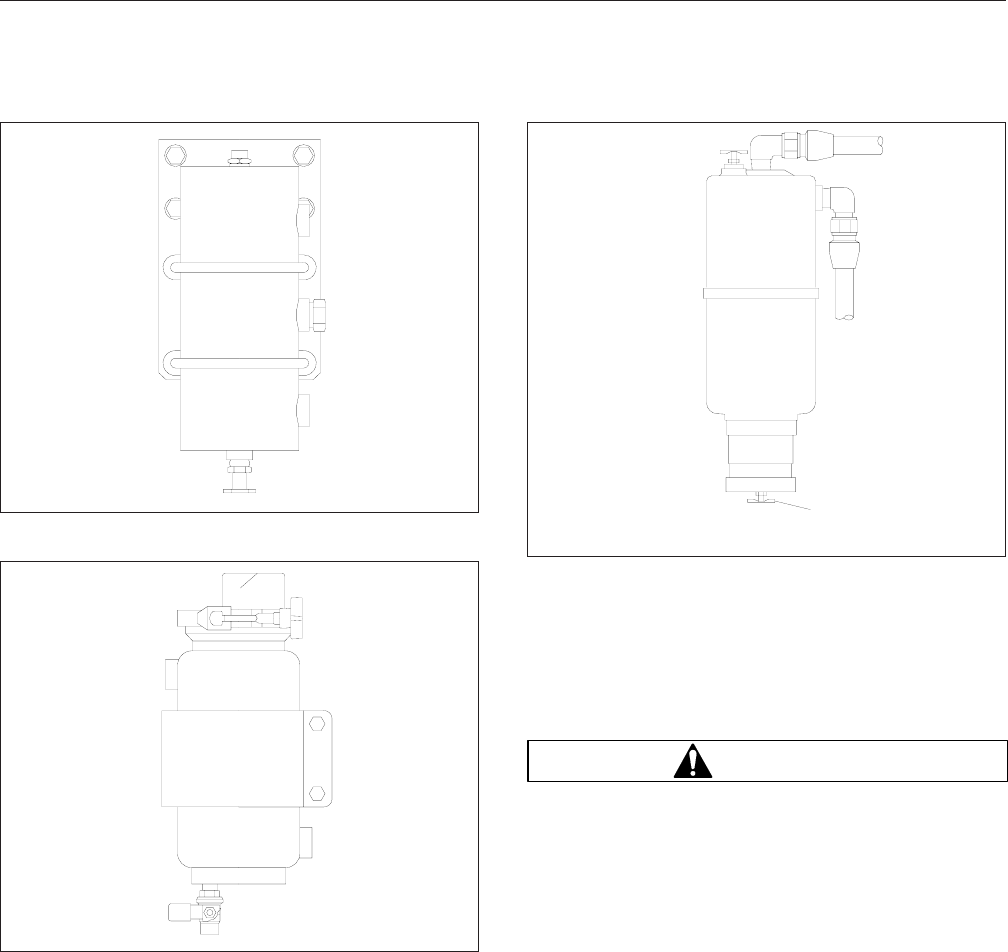
11.2 Inspect the shock absorbers for loose fas-
teners and leaks.
11.3 Tighten all loose fasteners and have any
component(s) replaced that are worn,
cracked, or otherwise damaged.
11.4 On vehicles with air suspensions, check
for leaks. Check air suspension compo-
nents for cuts and bulges.
12.
Clean the windshield, and the side and rear win-
dows, then check the condition of the windshield
wiper arms and blades.
12.1 Replace the wiper arms if the wiper
blades are not tensioned against the wind-
shield.
12.2 Replace damaged or deteriorated wiper
blades.
WARNING
When cleaning windshields and windows, always
stand on the ground or on a secure ladder or
platform. Use a long-handled window cleaner. Do
not use the cab steps, tires, fenders, fuel tanks,
engine, or under-hood components to access the
windshield or windows. Doing so could cause a
fall and result in an injury.
13.
Check the oil- and air-pressure warning systems.
13.1 Check if the warning systems come on
when the ignition is turned on, and if not,
have the systems repaired.
13.2 Start the engine, then check that the oil-
and air-pressure warning systems are op-
erating. The buzzer should stop sounding
when the preset minimum is reached. If
the air pressure in both systems is above
the preset minimum when the engine is
started, test the low air pressure warning
02/09/95 f470104
Fig. 11.4, Davco Fuel/Water Separator
02/09/95 f470105
Fig. 11.5, Webb Fuel/Water Separator
03/03/97 f470167a
1
1. Drain Valve
Fig. 11.6, ConMet Fuel/Water Separator
Pretrip and Post-Trip Inspections and Maintenance
11.7
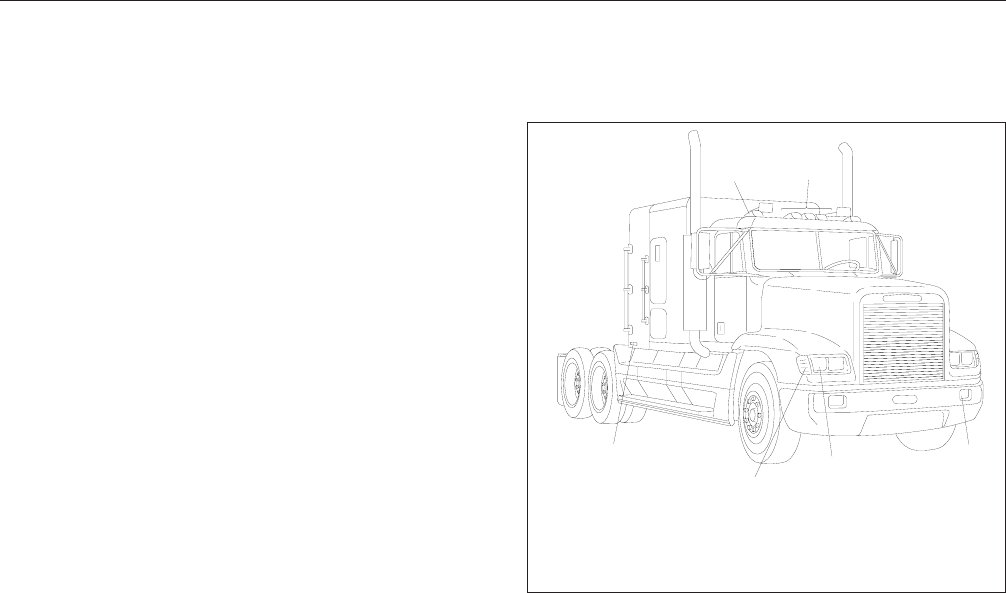
system by lowering the pressure to below
this range, or until the warning system
comes on.
The air pressure in both the primary and
secondary air reservoir systems must be
above 65 psi (448 kPa) on most vehicles.
For vehicles with an optional Bendix dryer
reservoir module (DRM), the cut-out pres-
sure is 130 psi (896 kPa).
14.
Make sure that the horn, windshield wipers, and
windshield washers are operating properly.
These devices must be in good working order for
safe vehicle operation.
14.1 Make sure that the horn works. If a horn is
not working, have it repaired before trip
departure.
14.2 Check the wiper and washer control on
the multifunction turn signal switch. If the
wipers and/or washers are not working,
have them repaired before trip departure.
15.
During cold weather, make sure the heater, de-
froster, and optional mirror heat controls are op-
erating properly. If so equipped, turn on the mir-
ror heat switch and make sure the system is
working.
16.
Check the operation of all the panel lights and
interior lights.
Turn on the headlights, dash lights, and four-way
flashers and leave them on. If any of the gauge
bulbs, the dome light bulbs, or the right- and left-
turn indicator bulbs are not working, replace
them.
17.
Make sure all the exterior lights are working
properly.
Check that all the lights and reflectors are clean.
See Fig. 11.7.
17.1 Check that the brake lights, taillights,
headlights, parking lights, turn signals,
marker lights, identification lights, road
lights (if so equipped), and front clearance
lights are working properly and are clean.
17.2 Test the high and low beams of the head-
lights.
17.3 Replace light bulbs or sealed beam units
that are not working.
17.4 Be sure all reflectors and lenses are in
good condition and are clean. Replace
any broken reflectors or lenses.
18.
Check tire inflation pressures using an accurate
tire pressure gauge.
Tires should be checked when cool. For inflation
pressures and maximum loads (per tire) see the
tire manufacturer’s guidelines.
A weekly pressure loss of 4 psi (28 kPa) or more
in a tire may indicate damage. The tire should be
inspected and, if necessary, repaired or replaced.
18.1 Be sure valve stem caps are on every tire
and that they are screwed on finger-tight.
18.2 Inflate the tires to the applicable pressures
if needed.
18.3 If a tire has been run flat or underinflated,
check the wheel for proper lockring and
side-ring seating, and possible wheel, rim,
or tire damage before adding air.
Moisture inside a tire can result in body
ply separation or a sidewall rupture. Dur-
ing tire inflation, compressed air reservoirs
and lines must be kept dry. Use well-
maintained inline moisture traps and ser-
vice them regularly.
f000018a
05/08/95
12
3
4
5
6
1. Clearance Lights
2. Identification Lights
3. Fog Lights
4. Headlights
5. Turn Signals and
Side-Marker Lights
6. Intermediate Turn
Signal Lights
Fig. 11.7, Exterior Lights
Pretrip and Post-Trip Inspections and Maintenance
11.8
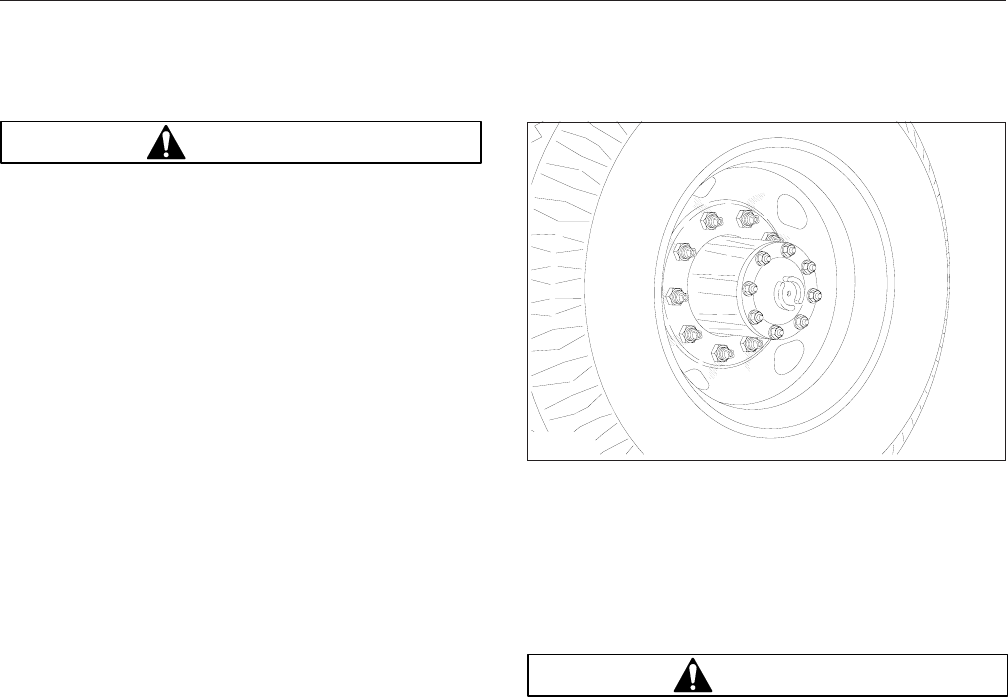
WARNING
Do not operate the vehicle with underinflated or
overinflated tires. Incorrect inflation can stress
the tires and make the tires and rims more sus-
ceptible to damage, possibly leading to rim or
tire failure and loss of vehicle control, resulting
in serious personal injury or death.
IMPORTANT: The load and cold inflation pres-
sure must not exceed the rim or wheel manu-
facturer’s recommendations, even though the
tire may be approved for a higher load inflation.
Some rims and wheels are stamped with a
maximum load and maximum cold inflation rat-
ing. If they are not stamped, consult the rim or
wheel manufacturer for the correct tire inflation
pressure for the vehicle load. If the load ex-
ceeds the maximum rim or wheel capacity, the
load must be adjusted or reduced.
19.
Inspect each tire for wear, bulges, cracks, cuts,
penetrations, and oil contamination.
19.1 Check the tire tread depth. If tread is less
than 4/32 inch (3 mm) on any front tire, or
less than 2/32 inch (1.5 mm) on any rear
tire, replace the tire.
19.2 Inspect each tire for bulges, cracks, cuts,
and penetrations.
19.3 Inspect each tire for oil contamination.
Fuel oil, gasoline, and other petroleum
derivatives, if allowed to contact the tires,
will soften the rubber and destroy the tire.
20.
Check the wheel nuts or rim nuts for indications
of looseness. Examine each rim and wheel com-
ponent.
20.1 Remove all dirt and foreign material from
the assembly. Dirt or rust streaks from the
stud holes, metal buildup around stud
holes, or out-of-round or worn stud holes
may be caused by loose wheel nuts. See
Fig. 11.8 and Fig. 11.9.
20.2 Examine the rim and wheel assembly
components (including rims, rings, flanges,
studs, and nuts) for cracks, or other dam-
age.
See Group 33 or Group 35 of the
Heavy-
Duty Trucks Service Manual
for service
procedures on the studs and hubs, and
see Group 40 in the same manual for
wheel and tire servicing, or take the ve-
hicle to an authorized Freightliner dealer.
WARNING
Have any worn or damaged wheel components
replaced by a qualified person using the wheel
manufacturer’s instructions and the wheel indus-
try’s standard safety precautions and equipment.
Otherwise a vehicle or workshop accident could
occur, possibly resulting in serious personal in-
jury or death.
20.3 Have broken, cracked, badly worn, bent,
rusty, or sprung rings and rims replaced.
Be sure that the rim base, lockring, and
side ring are matched according to size
and type.
20.4 Make sure all wheel nuts are tightened
450 to 500 lbf·ft (610 to 678 N·m) for Ac-
curide wheels with unlubricated threads.
Use the tightening pattern in Fig. 11.10 for
10-hole wheels, and the tightening pattern
in Fig. 11.11 for 8-hole wheels. See
Group 40 of the
Heavy-Duty Trucks Ser-
vice Manual
for more information.
02/09/95 f400058
Fig. 11.8, Dirt and Rust Streaks from the Stud Holes
Pretrip and Post-Trip Inspections and Maintenance
11.9
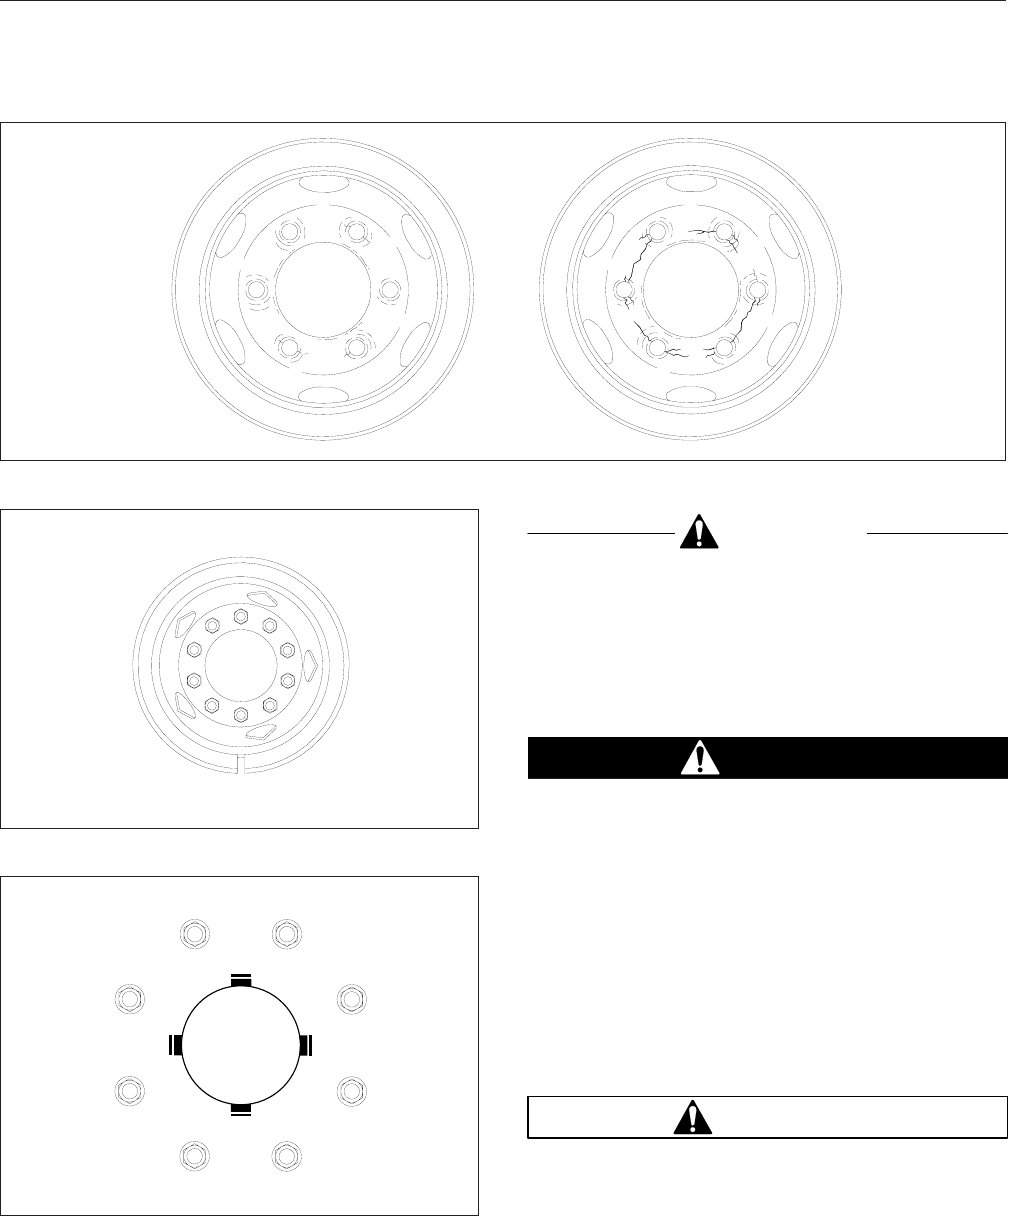
CAUTION
Insufficient wheel nut torque can cause wheel
shimmy, resulting in wheel damage, stud break-
age, and extreme tire tread wear. Excessive
wheel nut torque can break studs, damage
threads, and crack discs in the stud hole area.
Use the recommended torque values and follow
the proper tightening sequence.
DANGER
Do not loosen or remove the parking brake clamp
ring for any purpose. The parking/emergency
brake section of the brake chamber is not in-
tended to be serviced. Serious injury or death
may result from sudden release of the power
spring.
Before doing any repairs or adjustments on a
service/parking brake chamber, read the appli-
cable warnings and instructions in Group 42 of
the
Heavy-Duty Trucks Service Manual
.
21.
Inspect the air brake chamber and the air brake
chamber pushrods. See
Fig. 11.12 .
WARNING
Do not operate the vehicle with the front brakes
backed off or disconnected. Backing off or dis-
connecting the front brakes will not improve ve-
hicle handling and may lead to loss of vehicle
02/09/95 f400001
Fig. 11.9, Worn Stud Holes
1
2
3
45
6
7
8
9
10
f400081a
08/23/93
Fig. 11.10, Tightening Pattern, 10-Hole Wheels
f400052a
12
3
4
56
7
8
A
08/20/93
Fig. 11.11, Tightening Pattern, 8-Hole Wheels
Pretrip and Post-Trip Inspections and Maintenance
11.10
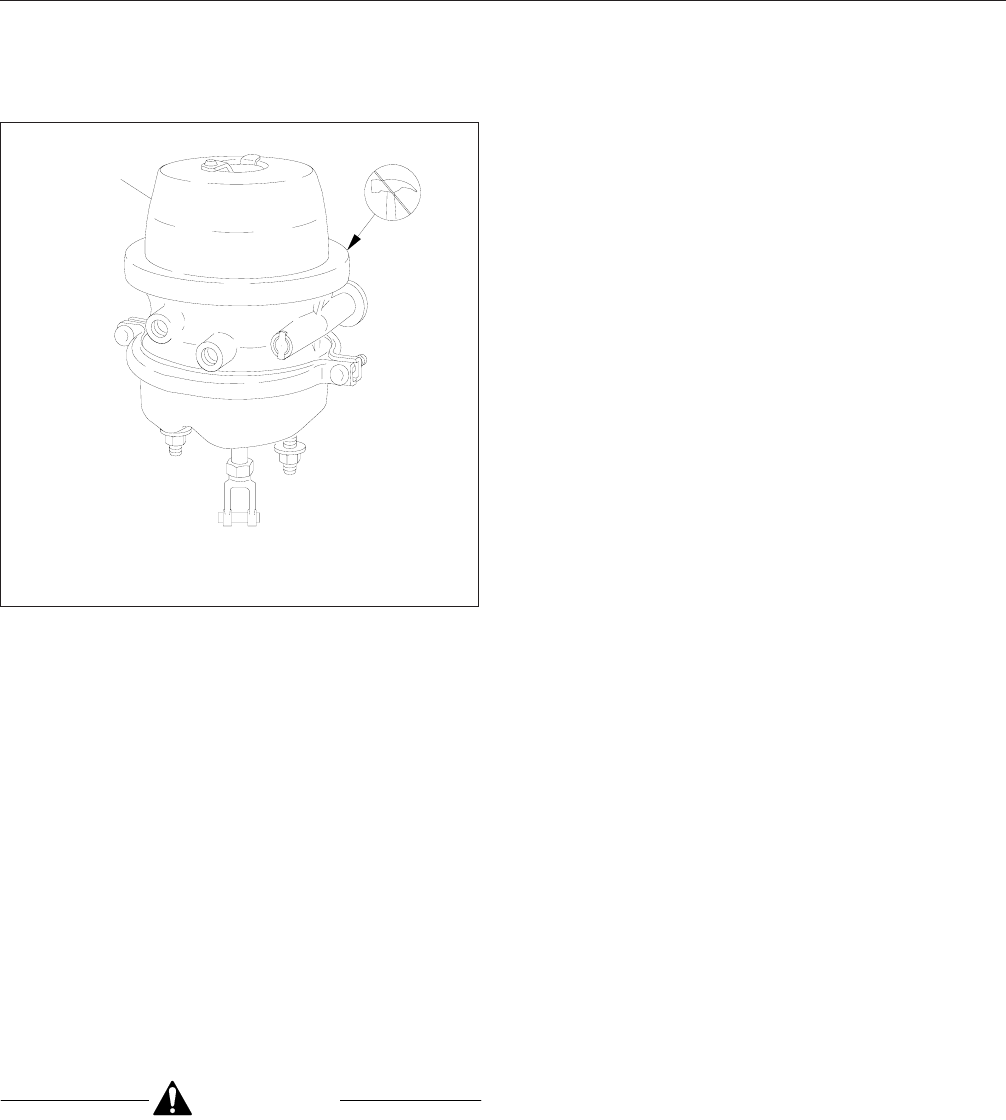
control resulting in property damage or personal
injury.
21.1 Check that the air brake chamber is
mounted securely on its mounting bracket,
and that there are no loose or missing
bolts.
21.2 Look for worn clevis pins on brake cham-
ber pushrods and missing or damaged
cotter pins on brake chamber pushrod cle-
vis pins. Replace worn clevis pins and in-
stall new cotter pins if necessary.
21.3 See if the chamber piston rod is in line
with the slack adjuster. Misalignment can
cause the piston rod to rub on the non-
pressure chamber and cause a dragging
brake. See Group 42 of the
Heavy-Duty
Trucks Service Manual
.
CAUTION
If the external breather tube or breather cap is
missing or incorrectly installed, road dirt and de-
bris can adversely affect the operation of the
brake chamber. Once inside of the chamber, dirt
and debris can cause the internal parts of the
chamber to deteriorate faster.
21.4 Inspect the exterior surfaces of the cham-
ber for damage. Make sure that breather
holes in the non-pressure section(s) are
open and free of debris. See Group 42 of
the
Heavy-Duty Trucks Service Manual
to
replace any damaged parts.
21.5 On all parking brake installations, make
sure the end cover cap or dust plug is se-
curely snapped into place.
NOTE: On most MGM parking brake cham-
bers equipped with an integral release bolt,
an end cover cap is installed over the re-
lease bolt.
21.6 Check for rusted connections, missing
snap rings, and damaged camshaft
grease seals. Have damaged or missing
parts repaired or replaced.
22.
Inspect the air brake lines.
22.1 Check the clearance between the hoses
and the exhaust manifold or other hot
spots. Excessive heat will cause material
in the hoses to deteriorate rapidly or be-
come brittle. Provide at least 6 inches
(150 mm) of clearance. More clearance is
recommended if the hose is located above
the heat source.
22.2 Check for kinks, dents, or swelling of the
hoses. If damaged, have the hose re-
placed with the same size and type.
NOTE: Do not route the hose on top of any-
thing likely to be stepped on.
22.3 Check for damage to hoses located near
moving parts, such as drivelines, kingpins,
suspensions, and axles. If moving parts
are catching or pinching the lines, correct
as needed.
22.4 Check for hose damage caused by abra-
sion. If abraded, have the hose replaced.
Check for the cause of abrasion, such as
loose or damaged hose clamps. Have the
clamps repaired or replaced as needed.
22.5 Observe the hose cover condition, espe-
cially hoses exposed to water splash and
ice. If dried out or ragged (the wire or liner
is showing through the cover), have the
hose(s) replaced.
1
A
02/22/2000 f421352
A. Do not remove this clamp ring.
1. MGM TR–T (TR Series) Brake Chamber shown
Fig. 11.12, Parking Brake Chamber Clamp
Pretrip and Post-Trip Inspections and Maintenance
11.11
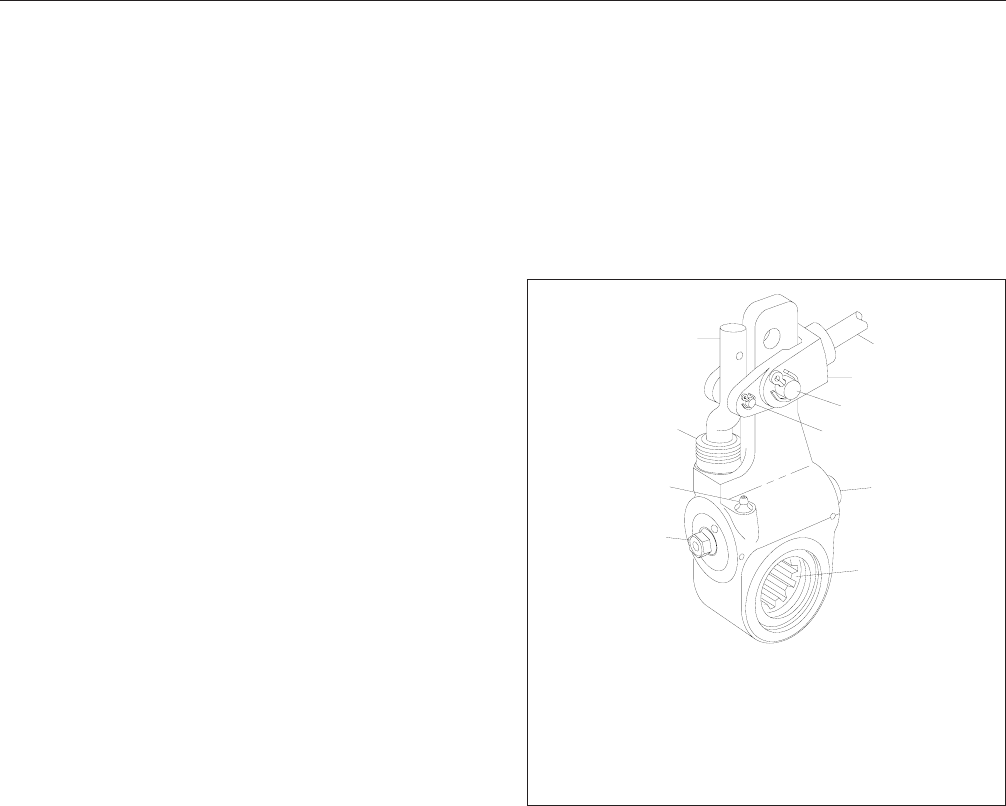
22.6 Inspect the air tubing, especially tubing
made of nylon. In cold weather, nylon tub-
ing is sensitive to damage, such as nicks
or cuts. Have nicked or cut tubing re-
placed, even if it is not leaking.
22.7 Check for kinked or twisted hoses. A
seven-percent twist in the hose can re-
duce its life by up to 90 percent. A twisted
hose under pressure tends to untwist,
which may loosen the fitting. Reconnect
hoses that are twisted.
NOTE: The front brake lines flex continu-
ously in vehicle operation, so they require
special examination. Give particular attention
to the areas near where they connect to the
front air brake chambers. This inspection
requires two people, one in the driver seat
and another to inspect the brake line con-
nections at the wheels.
22.8 Both wheel air lines must be inspected
with the emergency brake set, engine
idling, air pressure at 80 to 90 psi (550 to
620 kPa), and the brake pedal held down.
22.9 Turn the wheels to full lock in one direc-
tion and inspect both air lines where they
connect to the air chambers, then turn the
wheels to full lock in the other direction
and inspect both lines. If a hose is leak-
ing, have it replaced.
IMPORTANT: ABS-equipped vehicles operat-
ing in regions where especially corrosive ice
removal chemicals are used may experience
higher than normal rotor corrosion. Tone
rings should be routinely inspected for corro-
sion. Severe corrosion of the integral ABS
tone ring may cause the ABS warning lamp
in the dash to illuminate due to false wheel
speed readings. If the ABS warning lamp
illuminates at any time other than at vehicle
start-up, have the problem repaired immedi-
ately.
23.
Inspect the slack adjusters.
23.1
Meritor Slack Adjusters:
Check the boot
for cuts, tears, or other damage. Have it
replaced if necessary.
23.2
Gunite Slack Adjusters:
Inspect the slack
adjuster for any signs of damage. If dam-
aged, have the slack adjuster replaced.
Inspect the slack adjuster boot for cuts or
tears. If the boot is damaged, have it re-
placed. See Fig. 11.13.
23.3
Haldex Slack Adjusters:
Inspect each
slack adjuster and anchor strap for dam-
age. See Fig. 11.14. Have any damaged
components replaced.
Check that the control-arm nut is fully re-
leased. If the control arm is in the wrong
position, the brakes will drag.
24.
Check the air brake system for proper operation.
24.1 Check the air governor cut-in and cut-out
pressures as follows.
Run the engine at fast idle. The air gover-
nor should cut out the air compressor at
approximately 120 psi (827 kPa). With the
engine idling, apply the brake pedal sev-
eral times. The air governor should cut in
the air compressor at approximately 100
psi (689 kPa). If the air governor does not
f421398
06/17/2003
1
2
3
45
6
7
8
10
9
1. 7/16-inch Adjusting
Nut
2. Grease Fitting
3. Boot
4. Link
5. Brake Chamber Piston
Rod
6. Clevis
7. 1/2-inch Clevis Pin
8. 1/4-inch Clevis Pin
9. Grease Relief
Opening
10. Slack Adjuster Spline
Fig. 11.13, Gunite Automatic Slack Adjuster
Pretrip and Post-Trip Inspections and Maintenance
11.12
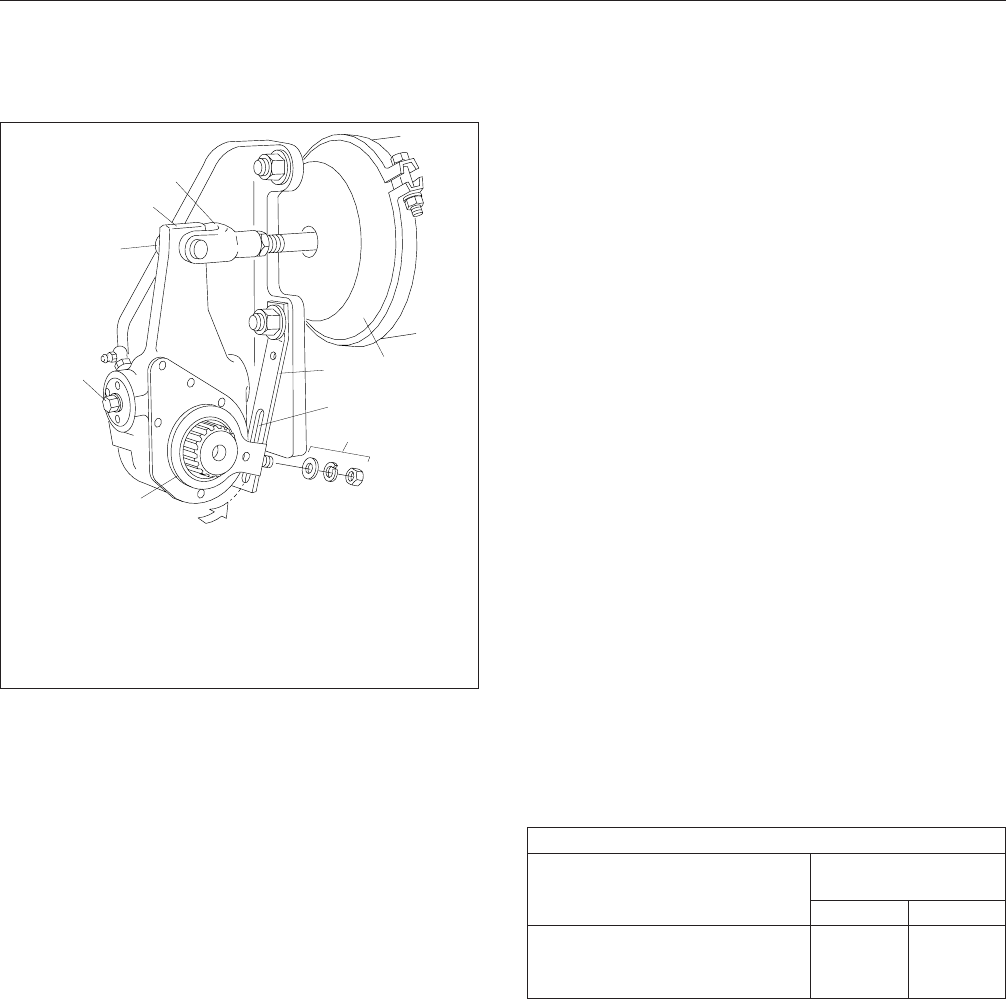
cut in and out as described above, it must
be adjusted to these specifications. If the
air governor cannot be adjusted or re-
paired, replace it before operating the ve-
hicle.
24.2 Check the air pressure buildup time as
follows.
With the air system fully charged to 120
psi (827 kPa), make one full brake appli-
cation and note the air pressure reading
on the gauge. Continue to reduce the air
pressure by moderate brake applications
to a maximum of 90 psi (620 kPa), then
run the engine at governed rpm. If the
time required to raise the air pressure to
120 psi (827 kPa) (from the pressure
noted after one brake application) is more
than 30 seconds, eliminate any leaks or
replace the air compressor before operat-
ing the vehicle.
24.3 Check the air pressure reserve as follows.
With the air system fully charged to 120
psi (827 kPa), stop the engine and note
the air pressure. Then make one full brake
application and observe the pressure
drop. If it drops more than 25 psi (172
kPa), all areas of leakage must be elimi-
nated before operating the vehicle.
24.4 Check the air leakage in the system as
follows.
With the parking brake (spring brake) ap-
plied, the transmission out of gear, and
the tires chocked, charge the air system
until cut-out pressure of 120 psi (827 kPa)
is reached.
With the service brakes released, shut
down the engine, wait one minute and
note the air pressure gauge reading. Ob-
serve the air pressure drop in psi (kPa)
per minute.
Charge the air system until cut-out pres-
sure of 120 psi (827 kPa) is reached. With
the parking brakes released and the ser-
vice brake applied, shut down the engine,
wait one minute and note the air pressure
gauge reading. Observe the air pressure
drop in psi (kPa) per minute.
If leakage exceeds the limits shown in
Table 11.4, repair all areas of leakage be-
fore driving the vehicle.
Maximum Allowable Service Brake Air Leakage
Description
Air Leakage in psi
(kPa) Per Minute
Released Applied
Truck or Tractor Only 2 (14) 3 (21)
Truck or Tractor w/Single Trailer 3 (21) 4 (28)
Truck or Tractor w/Two Trailers 5 (35) 6 (42)
Table 11.4, Maximum Allowable Service Brake Air
Leakage
25.
Test the service brakes.
When starting to move the vehicle and before
picking up speed, test the brakes with the foot
pedal and parking brake control valve (yellow
knob) to be sure they will bring the vehicle to a
safe stop.
10/11/2005 f421397
1
2
3
4
5
6
7
89
A
A. Rotate the control arm toward the brake chamber
until you can feel it contacting the internal stop.
1. Clevis
2. Slack Adjuster
3. Clevis Pin
4. Manual Adjusting Nut
5. Control Arm
6. Control-Arm Washers
and Nut
7. Anchor Strap Slot
8. Anchor Strap
9. Brake Chamber
Fig. 11.14, Haldex Automatic Slack Adjuster
Pretrip and Post-Trip Inspections and Maintenance
11.13
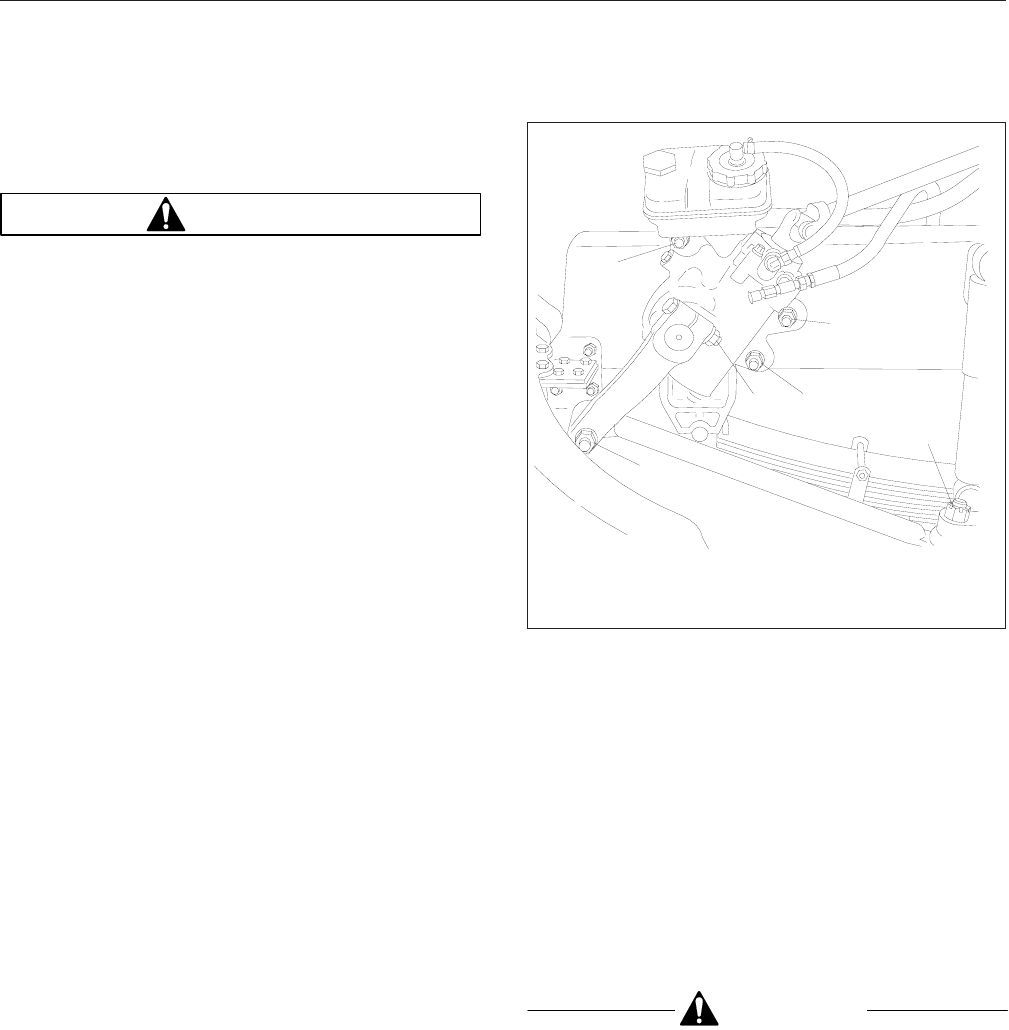
Weekly Post-Trip Maintenance
Procedures
WARNING
Battery posts, terminals, and related accessories
contain lead and lead compounds, chemicals
known to the State of California to cause cancer
and reproductive harm. To prevent possible per-
sonal injury, always wash your hands after han-
dling battery parts and related accessories.
1.
Inspect the batteries and battery cables.
1.1 Access the batteries. Be sure the battery
hold-down is secure. If it is loose, tighten
the hold-down bolts; if it is broken, replace
it.
1.2 If the battery is equipped with a built-in
hydrometer, examine the hydrometer. If a
green dot shows in the sight glass, the
battery is sufficiently charged.
If the sight glass is dark, the charge is low
and the battery must be recharged.
If the sight glass is clear, the battery has a
low level of electrolyte and must be re-
placed.
2.
Check the level of the wheel bearing lubricant in
the hub cap at each end of the front axle.
If needed, fill the hubs to the level indicated on
the hub cap. See Group 35 of the
Heavy-Duty
Trucks Maintenance Manual
, for recommended
lubricants.
IMPORTANT: Before removing the fill plug, al-
ways clean the hub cap and plug.
3.
Examine the steering components.
See Fig. 11.15. If repairs are needed, see
Group 46 of the
Heavy-Duty Trucks Service
Manual
for instructions, or take the vehicle to an
authorized Freightliner dealer.
3.1 Check the mounting bolts and pitman arm
nut for tightness.
3.2 Check the drag link nuts for missing cotter
pins.
3.3 Inspect the steering driveshaft and steer-
ing linkage for excessive looseness, or
other damage.
3.4 Tighten loose nuts, and have damaged
parts replaced as needed.
4.
Check the condition of the serpentine drive belt.
Look for signs of glazing, wear (frayed edges),
damage (breaks or cracks), or oil contamination.
If a belt is glazed, worn, damaged, or oil soaked,
have the belt replaced, following the instructions
in Group 01 of the
Heavy-Duty Trucks Service
Manual.
CAUTION
Do not drive with a serpentine belt that is visibly
worn or damaged. If it fails, the lack of coolant
flow could rapidly cause progressive damage to
engine components.
5.
Check the drive belt for proper tension.
Use your index finger to apply force at the center
of the belt free-span. See Fig. 11.16. There is no
10/11/2001 f461916
1
1
1
2
3
3
1. Steering Gear Mounting Bolt
2. Pitman Arm Pinch Bolt Nut
3. Drag Link Nut
Fig. 11.15, Steering Gear Fasteners
Pretrip and Post-Trip Inspections and Maintenance
11.14
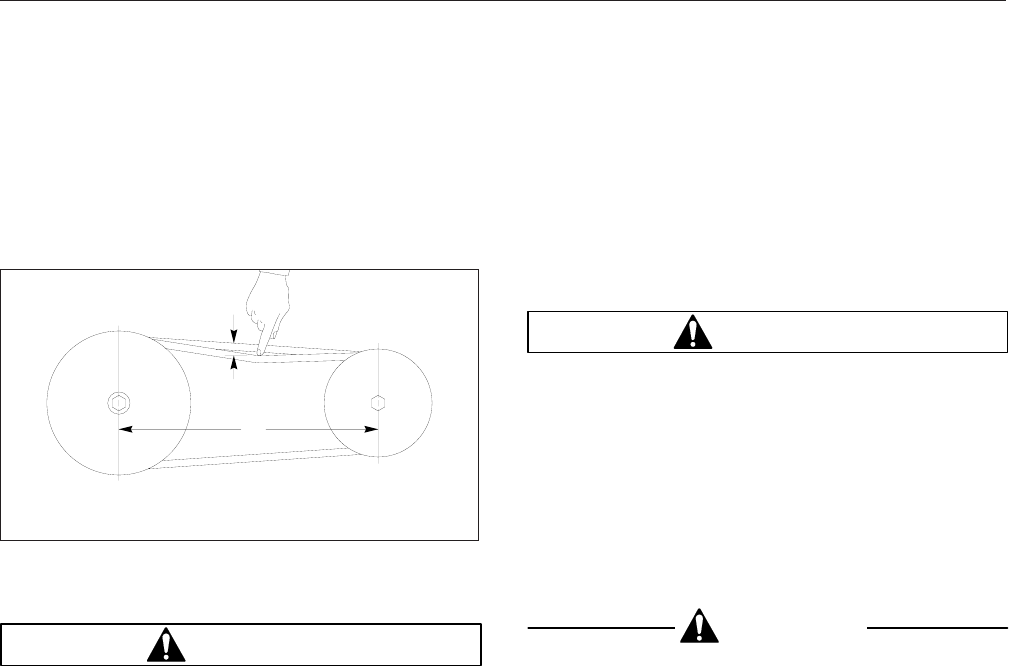
adjustment for belt tension on engines with auto-
matic belt tensioners. If there is not proper ten-
sion, have the belt tensioner replaced. See
Group 01 of the
Heavy-Duty Trucks Service
Manual
for instructions, or take the vehicle to an
authorized Freightliner dealer.
6.
Inspect the seat belts and tether belts.
WARNING
Inspect and maintain seat belts as instructed
below. Worn or damaged seat belts could fail
during a sudden stop or crash, possibly resulting
in serious injury or death.
IMPORTANT: Seat belts have a finite life
which may be much shorter than the life of
the vehicle. Regular inspections and re-
placement as needed are the only assur-
ance of adequate seat belt security over the
life of the vehicle.
NOTE: When any part of a seat belt needs
replacement, the entire seat belt must be
replaced, both retractor and buckle side.
6.1 Check the web for fraying, cuts, or ex-
treme wear, especially near the buckle
latch plate and in the D-loop guide area.
6.2 Check the web for extreme dirt or dust
and for severe fading from exposure to
sunlight.
6.3 Check the buckle and latch for operation
and for wear or damage.
6.4 Check the Komfort Latch for function and
cracks or other damage.
6.5 Check the web retractor for function and
damage.
6.6 Check the mounting bolts for tightness
and tighten any that are loose.
Monthly Post-Trip Maintenance
Procedures
WARNING
Battery posts, terminals, and related accessories
contain lead and lead compounds, chemicals
known to the State of California to cause cancer
and reproductive harm. To prevent possible per-
sonal injury, always wash your hands after han-
dling battery parts and related accessories.
1.
Clean the batteries.
1.1 Remove any corrosion from the hold-down
and the top of the battery.
CAUTION
Take care to keep the vent plugs tight so that the
neutralizing solution does not enter any of the
battery cells and damage the battery.
1.2 Use a soda solution to neutralize the acid
present, then rinse off the soda solution
with clean water.
1.3 If the battery posts or cable terminals are
corroded, disconnect the terminals from
the posts. Clean them with a soda solution
and a wire brush. After cleaning, connect
the terminals to the battery posts, then
apply a thin coat of petroleum jelly to the
posts and terminals to help retard corro-
sion.
2.
Inspect the radiator and heater hoses, including
the clamps and support brackets.
2.1 Make sure the radiator inlet and outlet
hoses are pliable and are not cracking or
ballooning. Replace hoses that show signs
of cracking, weakening, or ballooning.
2.2 Make sure the heater hoses are pliable
and are not cracking or ballooning. Re-
place hoses that show signs of cracking,
weakening, or ballooning.
10/31/94 f200036a
A
B
A. Deflection B. Belt Free-Span
Fig. 11.16, Checking Belt Tension
Pretrip and Post-Trip Inspections and Maintenance
11.15

2.3 Tighten hose clamps as necessary, but do
not overtighten, as hose life can be ad-
versely affected.
2.4 Be sure the hose support brackets are
securely fastened. Make sure the hoses
are not located near sources of wear,
abrasion, or high heat.
IMPORTANT: Replace all hoses, including
heater hoses, at the same time. Service-type
knitted or braided yarn-reinforced neoprene
hose is acceptable. Silicone hoses having an
extended service life can be substituted for the
reinforced neoprene type. See the Freightliner
Service Parts Catalog
or contact your Freight-
liner Dealer.
3.
Check the steering wheel for excessive play.
3.1 With the front tires straight ahead, turn the
steering wheel until motion is observed at
the front wheels.
3.2 Align a reference mark on a ruler, then
slowly turn the steering wheel in the oppo-
site direction until motion is again detected
at the wheels.
3.3 Measure the lash (free play) at the rim of
the steering wheel. Excessive lash exists
if steering wheel movement exceeds 2-1/4
inches (57 mm) with an 18-inch (450-mm)
steering wheel.
If there is excessive lash, check the steer-
ing system for wear or incorrect adjust-
ment of the linkage and steering gear be-
fore operating the vehicle.
4.
Check the brake lining wear on all vehicles, in-
cluding those with automatic slack adjusters.
Proper brake operation is dependent on periodic
maintenance and inspection of the brake linings.
4.1 Check that brake linings are free of oil and
grease.
4.2 Inspect the thickness of the brake linings.
If the axle assembly is equipped with a
dust shield or backing plate, remove the
inspection plugs. If
any
brake linings are
worn to less than approximately 1/4 inch
(6.4 mm) at the thinnest point, have the
linings replaced on
all
brake assemblies
on that axle. See Group 42 of the
Heavy-
Duty Trucks Service Manual
for lining re-
placement instructions and camshaft end-
play inspection.
4.3 Check the brake drums for wear and
cracks.
4.4 Check that the inspection plugs in the dust
shields or backing plates, if so equipped,
are installed.
Pretrip and Post-Trip Inspections and Maintenance
11.16

12
Cab Appearance
Cab Washing and Polishing ........................................................ 12.1
Care of Fiberglass Parts .......................................................... 12.1
Care of Chrome Parts ............................................................ 12.1
Dashboard Care ................................................................. 12.1
Vinyl Upholstery Cleaning ......................................................... 12.1
Velour Upholstery Cleaning ........................................................ 12.2
Leather Upholstery Cleaning ....................................................... 12.3

Cab Washing and Polishing
To protect the finish of your new vehicle, follow these
guidelines carefully:
•During the first 30 days, rinse your vehicle fre-
quently with water. If the vehicle is dirty, use a
mild liquid soap. Do not use detergent.
•During the first 30 days, do not use anything
abrasive on your vehicle. Brushes, chemicals,
and cleaners may scratch the finish.
•During the first 120 days, do not wax your
vehicle.
To extend the life of your vehicle’s finish, follow these
guidelines:
•Avoid washing your vehicle in the hot sun.
•Always use water. After the cab is completely
washed, dry it with a towel or chamois.
•Do not dust painted surfaces with a dry cloth,
as this will scratch the paint.
•Do not remove ice or snow from a painted sur-
face with a scraper of any sort.
•To prevent damage to the finish, wax it regu-
larly. Before waxing, if the finish has become
dull, remove oxidized paint using a cleaner
specifically designed for this purpose. Remove
all road tar and tree sap before waxing.
Freightliner recommends that a quality brand of
cleaner or cleaner-polish and polishing wax be
used.
•Do not let diesel fuel or antifreeze stand on a
painted surface. If either should occur, rinse
the surface off with water.
•To prevent rust, have any nicks or other dam-
age on the finish touched up as soon as pos-
sible.
•Park your vehicle in a sheltered area whenever
possible.
Care of Fiberglass Parts
Wash unpainted fiberglass air fairings and shields
monthly with a mild detergent, such as dishwashing
liquid. Avoid strong alkaline cleansers.
Apply a wax specifically designed for fiberglass.
Care of Chrome Parts
To prevent rust, keep chrome parts clean and pro-
tected at all times. This is especially important during
winter driving and in coastal areas where there is
exposure to salt air.
When cleaning chrome parts, use clean water and a
soft cloth or sponge. A mild detergent may also be
used.
Sponge gently, then rinse. If necessary, use a non-
abrasive chrome cleaner to remove stubborn rust or
other material. Do not use steel wool.
To help protect the chrome after cleaning, apply a
coat of polishing wax to the surface. Never use wax
on parts that are exposed to high heat, such as ex-
haust pipes.
Dashboard Care
Periodically wipe the dashboard with a water-
dampened cloth. A mild detergent can be used, but
avoid using strong detergents.
CAUTION
Do not use Armor-All Protectant®, STP Son-of-a-
Gun®, or other equivalent treatments. These
cleaners contain vinyl plasticizers that can cause
stress crazing in the interior plastic panels,
which can result in cracking of the panels.
Vinyl Upholstery Cleaning
To prevent soiling, frequent vacuuming or light brush-
ing to remove dust and dirt is recommended. Harsh
cleaning agents can cause permanent damage to
vinyl upholstery. To preserve the upholstery and pre-
vent damage, carefully review the following sections
for recommended cleaning procedures. Waxing or
refinishing improves soil resistance and cleanability
for all vinyls. Any hard wax, such as that used on
automobiles, may be used.
Ordinary Dirt
Wash the upholstery with warm water and mild soap,
such as saddle or oil soap. Apply soapy water to a
large area and allow to soak for a few minutes, then
rub briskly with a cloth to remove the dirt. This can
be repeated several times, as necessary.
Cab Appearance
12.1

If dirt is deeply imbedded, use a soft bristle brush
after applying the soap.
If dirt is extremely difficult to remove, wall-washing
preparations normally found around the home can be
used. Powdered cleaners, such as those used for
sinks and tiles, are abrasive and must be used with
caution as they can scratch the vinyl or give it a per-
manent dull appearance.
Chewing Gum
Harden the gum with an ice cube wrapped in a plas-
tic bag, then scrape off with a dull knife. Any remain-
ing traces of gum can be removed with an all-
purpose light oil (peanut butter will also work) and
wiped off.
Tars, Asphalts, and Creosote
Each of these items stains vinyl after prolonged con-
tact. They should be wiped off immediately and the
area carefully cleaned, using a cloth dampened with
naphtha.
Paint, Shoe Heel Marks
Paint should be removed immediately. Do not use
paint remover or liquid-type brush cleaner on vinyl.
An unprinted cloth, dampened with naphtha or tur-
pentine may be used. Use care to prevent contact
with parts of the upholstery that are not vinyl.
Sulfide Stains
Sulfide compounds, such as those found in eggs and
some canned goods, can stain after prolonged con-
tact with vinyl. These stains can be removed by plac-
ing a clean, unprinted piece of cloth over the spotted
area and pouring a liberal amount of 6 percent hy-
drogen peroxide onto the cloth. Allow the saturated
cloth to remain on the spot for 30 to 60 minutes. For
stubborn spots, allow the hydrogen-peroxide satu-
rated cloth to remain on the area overnight. Use cau-
tion to prevent the solution from seeping into the
seams, or it will weaken the cotton thread.
Nail Polish and Nail Polish Remover
Prolonged contact with these substances causes per-
manent damage to vinyl. Careful blotting immediately
after contact minimizes damage. Do not spread the
liquid during removal.
Shoe Polish
Most shoe polishes contain dyes which penetrate
vinyl and stain it permanently. Shoe polish should be
wiped off as quickly as possible using naphtha or
lighter fluid. If staining occurs, try the same proce-
dure as that under "Sulfide Stains."
Ball Point Ink
Ball point ink can sometimes be removed if rubbed
immediately with a damp cloth, using water or rub-
bing alcohol. If this does not work, try the procedure
used under "Sulfide Stains."
Miscellaneous
If stains do not respond to any of the treatments de-
scribed above, it is sometimes helpful to expose the
vinyl to direct sunlight for up to 30 hours. Mustard,
ball point ink, certain shoe polishes, and dyes often
bleach out in direct sunlight, leaving the vinyl undam-
aged.
Velour Upholstery Cleaning
To prevent soiling, frequent vacuuming or light brush-
ing to remove dust and dirt is recommended. Spot
clean with a mild solvent or upholstery shampoo, or
the foam from a mild detergent. When using a sol-
vent or a dry-cleaning product, follow instructions
carefully, and clean only in a well-ventilated area.
Avoid any product that contains carbon tetrachloride
or other toxic materials. With either method, pretest a
small area before proceeding. Use a professional
upholstery cleaning service when extensive cleaning
is needed.
Grease and Oil-Based Stains
Dampen a small absorbent cloth with dry-cleaning
solvent or spot remover. Apply carefully to the spot
from the outer edge to the center. Pat and blot with a
clean, dry cloth. Repeat several times, as necessary,
turning cloths so that the stain does not redeposit on
the fabric.
Sugar and Water-Based Stains
Apply water-based detergent or cleaner, working in
circular motions. Pat and blot as dry as possible. Re-
peat, if necessary, before drying thoroughly.
Cab Appearance
12.2

Chewing Gum or Wax
Harden the gum or wax with an ice cube wrapped in
a plastic bag, then scrape off with a dull knife. Ex-
cess wax can be absorbed by placing a thick white
blotter over the wax and heating with a warm (not
hot) iron. Remove the remainder by using the same
procedure under "Grease and Oil-Based Stains."
Mildew
Brush the dry fabric with a soft brush. Sponge with
detergent, and blot. If the fabric is colorfast, dilute a
teaspoon of bleach in one quart (one liter) of cool
water. Apply with a swab, directly on the mildew
stain. Dab repeatedly with clear, cool water, and blot
dry.
Leather Upholstery Cleaning
CAUTION
Do not apply oil to or use oil-based soaps on the
upholstery. Applying oil to leather upholstery will
damage the original oil finish, causing it to be-
come tacky in texture.
When soiled, leather upholstery can be cleaned with
warm water and a mild soap. Using a cheese cloth,
rub the soiled area briskly. Then, use a clean damp
cheese cloth and wipe away the soap residue. Finish
by wiping with a dry soft cloth.
Cab Appearance
12.3

13
In an Emergency
Hazard Warning Lights ............................................................ 13.1
Emergency Kit, Optional ........................................................... 13.1
Towing ......................................................................... 13.1
Emergency Starting With Jumper Cables ............................................. 13.3
Fire in the Cab .................................................................. 13.4
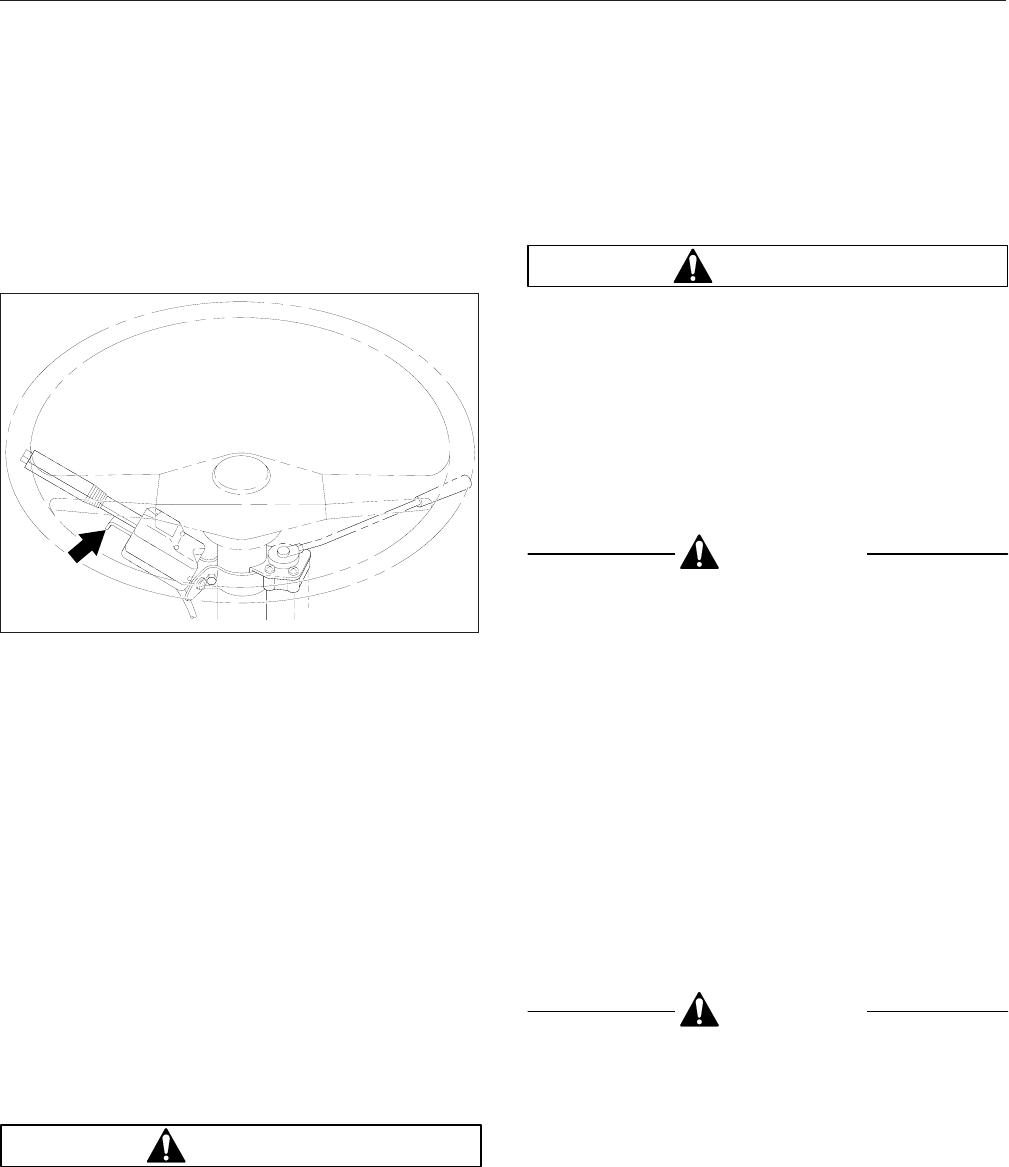
Hazard Warning Lights
The hazard warning light tab is located on the turn
signal control lever. See Fig. 13.1. To operate the
hazard lights, pull the tab out. All of the turn signal
lights and both of the indicator lights on the control
panel will flash.
To cancel the hazard warning lights, push the turn
signal control lever either up or down, then return the
lever to its neutral position.
Emergency Kit, Optional
An optional emergency kit package is located in the
baggage compartment behind the driver’s seat if the
vehicle has a sleeper compartment. If there is no
sleeper compartment, the emergency kit is located
behind and between the seats. The package includes
one or more of each of the following: fire extin-
guisher, first aid kit, and a triangular reflector and
flare kit.
If there is an emergency while driving, cautiously pull
off the road, paying attention to other traffic. Turn on
the hazard warning lights. Place the flares and reflec-
tor along the side of the road, to alert other drivers
that an emergency situation exists.
WARNING
Use extreme care when placing flares in emer-
gency situations that involve exposure to flam-
mable substances such as fuel. An explosion or
fire could occur causing serious personal injury.
Towing
When it is necessary to tow the vehicle, make sure
the instructions below are closely followed to prevent
damage to the vehicle.
WARNING
Do not tow an unbraked vehicle if the combined
weight of both vehicles is more than the sum of
the gross axle weight ratings (GAWR) of the tow-
ing vehicle. Otherwise brake capacity will be in-
adequate, which could result in personal injury or
death.
Front Towing Hookup
1. Disconnect the battery ground cables.
CAUTION
Failure to remove the axle shafts when towing
the vehicle with the rear wheels on the ground
could result in damage to the transmission and
other parts.
2. Remove both drive axle shafts. On dual drive
axles, if the vehicle is to be lifted and towed, re-
move only the rearmost drive axle shafts.
On vehicles equipped with an air fairing, remove
both the forward and rearmost drive axle shafts if
there is insufficient towing clearance.
3. Cover the ends of the hubs with metal plates or
plywood cut to fit the axle opening, and drilled to
fit the axle shaft studs. This prevents lubricant
from leaking out, and will keep contaminants
from getting into and damaging the wheel bear-
ings and axle lubricant.
CAUTION
Failure to protect the frame rails from the chains
could cause damage, leading to eventual frame
failure.
4. On dual drive axles, if the vehicle is to be lifted
and towed, chain the forward rear-axle assembly
to the vehicle frame. Use protection to keep the
chains from damaging the frame.
02/02/95 f460312
Fig. 13.1, Hazard Warning Light Tab
In an Emergency
13.1
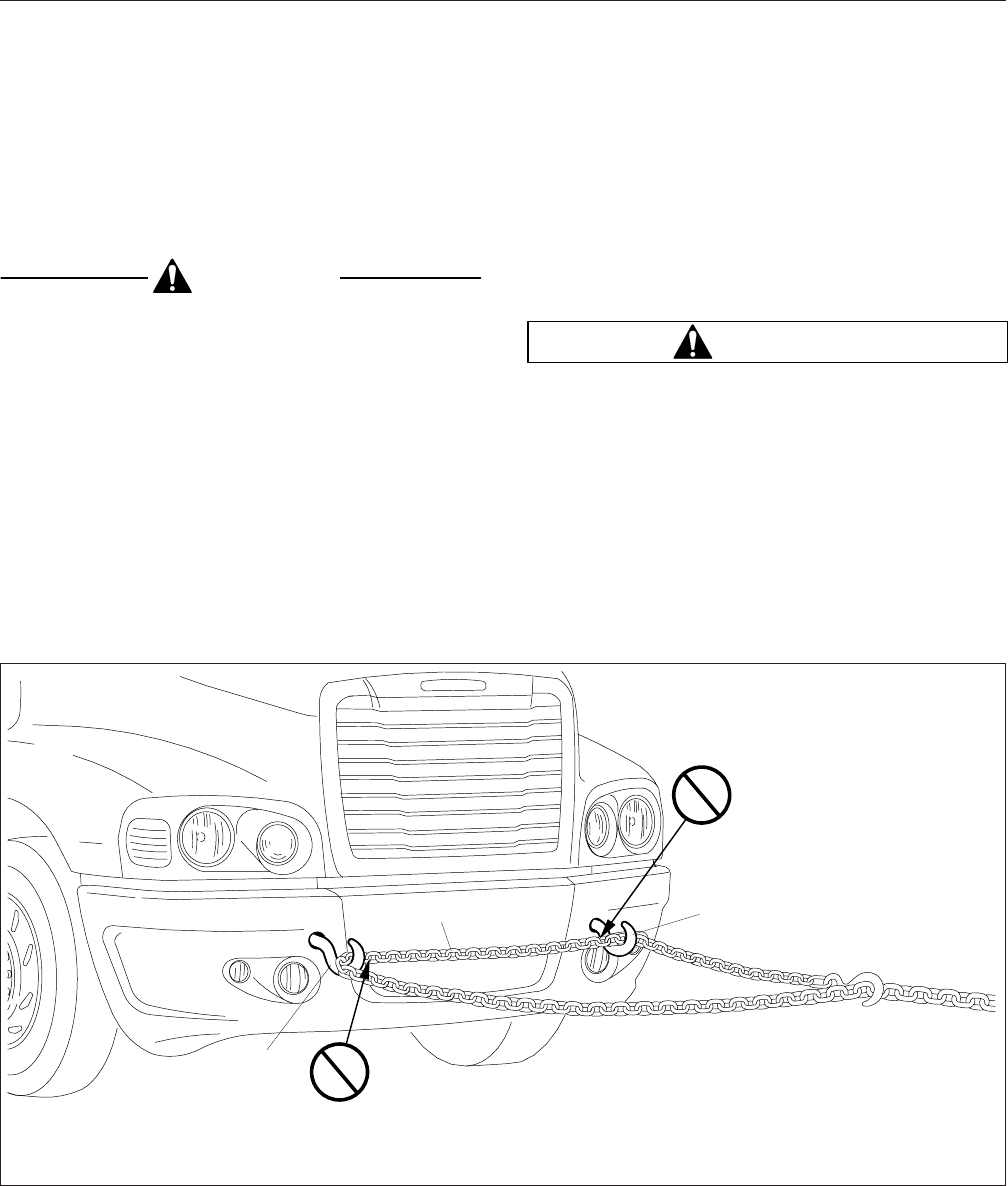
5. Remove the bumper extension and chrome
bumper, if so equipped. Remove the bumper fair-
ing, if so equipped.
6. On vehicles equipped with an air fairing, adjust
the trim tab to the lowest position.
CAUTION
Do not pass a sling (for example, a rope or chain)
from one tow hook to another to fasten for tow-
ing (see Fig. 13.2). Known as reeving, this prac-
tice is
not
permissible in most industrial applica-
tions of towing and hoisting. Reeving can
overload the hooks and result in damage to the
vehicle.
7. Attach the towing device. Due to the many vari-
ables that exist in towing, positioning the lifting
and towing device is the sole responsibility of the
towing-vehicle operator.
8. On vehicles equipped with an air fairing, mea-
sure the distance from the ground to the bumper,
or from the ground to a frame bracket.
9. Lift the vehicle, and secure the safety chains. If
extra towing clearance is needed, remove the
front wheels.
10. On vehicles equipped with an air fairing, repeat
the measurement taken in step 8. The difference
between the two measurements must not exceed
14 inches (36 cm). If necessary, lower the ve-
hicle.
WARNING
Failure to lower the vehicle could result in the air
fairing striking an overhead obstruction, such as
a bridge or overpass, and causing vehicle dam-
age or personal injury.
11. Connect the clearance lights, taillights, and sig-
nal lights. Connect any special towing lights re-
quired by local regulations.
12. Chock the disabled vehicle’s tires, and connect
the towing vehicle’s air brake system to the ve-
hicle being towed. Then, release the spring park-
ing brakes and remove the chocks.
f880694
01/11/2006
OK
OK
1
1
2
IMPORTANT: Do not reeve when towing.
1. Tow Hook 2. Chain
Fig. 13.2, Reeving
In an Emergency
13.2

WARNING
Failure to chock the tires or connect the tow
truck’s air brake system before releasing the
spring parking brakes could allow the disabled
vehicle to suddenly roll. This could cause prop-
erty damage or personal injury.
Rear Towing Hookup
CAUTION
Using a rear towing hookup on a vehicle
equipped with a roof fairing could cause damage
to the cab structure.
IMPORTANT: Because of the possibility of ex-
cessive wind force which could cause damage
to the cab, do not use a rear towing hookup on
any vehicle equipped with a roof fairing.
1. Place the front tires straight forward, and secure
the steering wheel in this position.
2. Disconnect the battery ground cables.
CAUTION
Failure to protect the frame rails from the chains
could cause damage, leading to eventual frame
failure.
3. On dual drive axles, using protection to keep the
chains from damaging the vehicle frame, chain
the forward-rear drive axle to the frame.
4. Attach the towing device. Due to the many vari-
ables that exist in towing, positioning the lifting
and towing device is the sole responsibility of the
towing-vehicle operator.
5. Lift the vehicle, and secure the safety chains. If
extra clearance is needed, remove the bumper
extension, if equipped.
6. Connect the clearance lights, taillights, and sig-
nal lights. Also connect any special towing lights
required by local regulations.
Emergency Starting With
Jumper Cables
When using jumper cables, follow the instructions
below.
WARNING
Batteries release explosive gas. Do not smoke
when working around batteries. Put out all flames
and remove all sources of sparks or intense heat
in the vicinity of the battery. Do not allow the ve-
hicles to touch each other. Do not lean over the
batteries when making connections, and keep all
other persons away from the batteries. Failure to
follow these precautions could lead to severe
personal injury as a result of an explosion or
acid burns.
CAUTION
Make sure both starting systems have the same
voltage outputs, and avoid making sparks. Other-
wise the vehicle charging systems could be se-
verely damaged. Also, do not attempt to charge
isolated, deep-cycle batteries with jumper cables.
Follow the battery manufacturer’s instructions
when charging deep-cycle batteries.
NOTE: On vehicles equipped with an optional
jump-start post, attach the positive cable clamp
to that post instead of to the battery.
1. Apply the parking brakes and turn off the lights
and all other electrical loads.
2. Connect an end of one jumper cable to the posi-
tive terminal of the booster battery (or jump-start
post, if equipped), and connect the other end of
the cable to the positive terminal of the dis-
charged battery (or jump-start post, if equipped).
See Fig. 13.3.
WARNING
Do the next step exactly as instructed and do not
allow the clamps of one cable to touch the
clamps of the other cable. Otherwise, a spark
could occur near a battery, possibly resulting in
severe personal injury from explosion and acid
burns.
In an Emergency
13.3
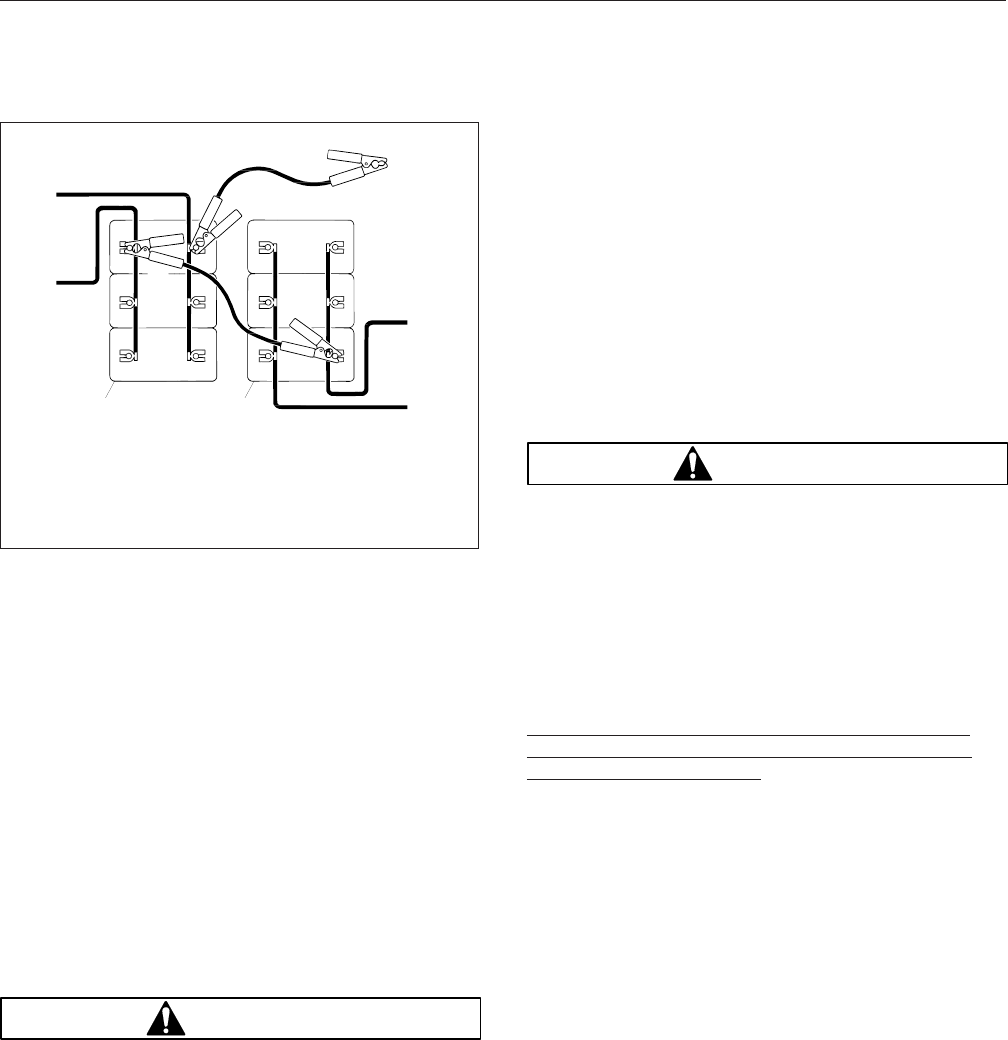
3. Connect one end of the second jumper cable to
the negative terminal of the booster battery, and
connect the other end of the cable to a ground at
least 12 inches (300 mm) away from the batter-
ies of the vehicle needing the start. The vehicle
frame is usually a good ground. Do
not
connect
the cable to or near the discharged batteries.
4. Start the engine of the vehicle with the booster
batteries, and let the engine run a few minutes to
charge the batteries of the other vehicle.
5. Attempt to start the engine of the vehicle with the
batteries receiving the charge. Do not operate
the starter longer than 30 seconds, and wait at
least two minutes between starting attempts to
allow the starter to cool.
6. When the engine starts, let it idle a few minutes.
WARNING
Do the next step exactly as instructed and do not
allow the clamps of one cable to touch the
clamps of the other cable. Otherwise, a spark
could occur near a battery, possibly resulting in
severe personal injury from explosion and acid
burns.
7. Disconnect the grounded cable from the frame or
other nonbattery location; then disconnect the
other end of the cable.
8. Disconnect the remaining cable from the newly
charged battery (or jump-start post, if equipped)
first; then disconnect the other end.
Fire in the Cab
The incidence of fire in heavy- and medium-duty
trucks is rare, according to data from the National
Highway Traffic Safety Administration. Federal Motor
Vehicle Safety Standard #302 limits the flammability
of specified materials used inside the cab, but de-
spite this, most materials will burn. The cab of this
vehicle contains urethane foam, which is of concern
in this respect.
WARNING
Urethane foam is flammable! Do not allow any
flames, sparks, or other heat sources such as
cigarettes or light bulbs to contact urethane
foam. Urethane foam in contact with such heat
sources could cause a serious, rapid fire, which
could result in death, severe burns, or gas poi-
soning, as well as damage to the vehicle.
In Case of a Cab Fire
As quickly as possible, bring the vehicle to a safe
stop, apply the parking brake, turn off the ignition,
and get out of the vehicle.
+
+
+
+
+
+
−
−
−
−
−
−
f540027b
10/18/94 1
AB
C
D
E
F
G
2A
E
A. To Ground
B. Connect 3rd
C. To Frame (ground)
D. Connect Last
E. To Starter
F. Connect 2nd
G. Connect 1st
1. Booster Battery 2. Discharged Battery
Fig. 13.3, Jumper Connections
In an Emergency
13.4

Subject Page
A
Air Conditioning, Sleeper
Heater and Air Conditioner ................. 4.5
Air Conditioning .......................... 4.3
ASF Castloc®II and Simplex®
Series Fifth Wheels ..................... 10.7
Fifth Wheel Locking and
Unlocking .......................... 10.8
Fifth Wheel Lubrication ................. 10.12
Fifth Wheel Slide Operation .............. 10.11
General Information .................... 10.7
B
Back-of-Cab Grab Handles,
Steps, and Deck Plate .................... 3.5
Accessing Back-of-Cab Area ............... 3.5
Exiting the Back-of-Cab Area ............... 3.6
Baggage Compartment Doors ................ 3.5
Battery Box Cover ........................ 3.6
Bendix Cruise Control System,
Optional ............................. 7.20
Cruise Control Operation ................. 7.20
General Information .................... 7.20
Stationary Throttle Control
Operation .......................... 7.20
Brake System ........................... 6.1
Automatic Slack Adjusters ................. 6.6
Brake System Operation .................. 6.2
General Information ..................... 6.1
Meritor WABCO®Antilock
Braking System (ABS) .................. 6.4
Bunk Mattress .......................... 5.12
C
Cab Door and Sleeper
Compartment Vents ...................... 3.3
Cab Door Locks and Handles ................ 3.1
Cab Washing and Polishing ................. 12.1
Cab-to-Sleeper Access ..................... 3.3
Canadian Motor Vehicle Safety
Standard (CMVSS) Labels ................. 1.2
Care of Chrome Parts ..................... 12.1
Care of Fiberglass Parts ................... 12.1
Circuit Breaker/Relay Panel .................. 3.3
Clutches .............................. 7.22
Clutch Operation ...................... 7.22
General Information .................... 7.22
Lubrication .......................... 7.24
Cold-Weather Operation .................... 7.5
Caterpillar ............................ 7.5
Subject Page
Cummins ............................ 7.6
Detroit Diesel ......................... 7.7
Collision Warning System
(CWS), Eaton VORAD EVT–
300, Optional ......................... 2.20
Driver Display Unit (DDU) ................ 2.20
Failure Display Mode/Fault
Codes ............................ 2.24
In Case of Accident .................... 2.24
Maintenance and
Diagnostics ......................... 2.24
Side Sensor Display,
Optional ........................... 2.23
Special Road Situations ................. 2.23
Controls ............................... 2.1
Air Suspension Dump Valve,
Optional ........................... 2.10
Air Window Control Valve
Switch, Optional Right-
Hand Air Window ..................... 2.11
AirLiner Plus Suspension,
Optional ........................... 2.11
Automatic Engine Idler/
Timer, Optional ...................... 2.11
Battery Boost Push Button
and Optional Battery
Isolator System ....................... 2.6
BrakeSaver Control, Optional ............... 2.5
Caterpillar C-10, C-12, and
C-15 Electronic Engine
Operator Control ...................... 2.4
CB Radio Connections .................. 2.12
Cigarette Lighter ...................... 2.11
Controlled Traction
Differential Control Valve
Switch ............................ 2.10
Cummins PACE and
CELECT™Electronic
Engines, Operator Control ................ 2.5
Detroit Diesel Electronic
Engine Control (DDEC)
Operator Control ...................... 2.3
Dome Light Switches ................... 2.13
Engine Start Button ..................... 2.3
Ether Start Push Button,
Optional ............................ 2.6
Fifth Wheel Air Slider Control
Valve Switch, Optional Air-
Operated Sliding Fifth
Wheel ............................ 2.10
Fog Light Switch, Optional ................. 2.7
Fuel-Tach™Switch, Optional ............... 2.7
Hazard Warning Light Tab ................ 2.12
Headlight Dimmer ..................... 2.12
Index
I-1

Subject Page
Headlight Switch and
Daytime Running Lights ................. 2.8
Heater/Air-Conditioner
Controls (Standard) and
Auxiliary Heater Switch
(Optional) ........................... 2.9
Ignition Switch and Key .................. 2.1
Interaxle Differential Lockout
Control Valve Switch ................... 2.9
Interrupt Switch ........................ 2.8
Jacobs Engine Brake
Switches, Optional ..................... 2.9
Left and Right Windshield-
Fan Switches, Optional
Ceiling-Mounted Fans .................. 2.9
Low Voltage Disconnect,
Optional ............................ 2.6
Manual Override Push
Button, Optional Engine
Shutdown System ..................... 2.3
Mirror Heat Switch, Optional ............... 2.3
Panel Lamp Control Knob ................. 2.8
Parking Brake Control Valve
and Trailer Air Supply
Valve ............................. 2.10
Power Mirrors ......................... 2.3
Suspension Seat Adjustment
Controls ........................... 2.12
Tilt Steering Wheel ..................... 2.13
Trailer Brake Hand Control
Valve Lever ........................ 2.12
Transmission Controls ................... 2.12
Turn Signal Lever ...................... 2.12
Utility Light Switch, Optional ................ 2.8
Windshield Wiper/Washer
Controls ............................ 2.8
D
Dashboard Care ........................ 12.1
Defogging and Defrosting Using
Fresh Air ............................. 4.1
Door Windows and Vent
Windows ............................. 3.2
E
Eaton 2-Speed Tandem Axles ................ 9.3
Dual Range 2-Speed
Tandem Axle Operation
With Multispeed
Transmissions ........................ 9.3
Eaton Fuller AutoShift™
Automated Transmissions ................. 8.13
Subject Page
General Information,
AutoShift .......................... 8.13
Operation, AutoShift .................... 8.14
Eaton Fuller Deep-Reduction
Models .............................. 8.7
General Information, Deep-
Reduction .......................... 8.7
Operation, Deep-Reduction ................ 8.8
Eaton Fuller Range-Shift
Models .............................. 8.2
General Information, Eaton
Range-Shift ......................... 8.2
Operation, Eaton Range-
Shift .............................. 8.2
Eaton Fuller Splitter and
Range-Shift Models ...................... 8.4
General Information, Eaton
Splitter and Range-Shift ................. 8.4
Operation, Eaton Splitter and
Range-Shift ......................... 8.5
Eaton Fuller Super 10, Top 2,
and Lightning Semi-
Automated Transmissions ................. 8.10
General Information, Super
10/Top 2/Lightning .................... 8.10
Operation, Super 10/Top
2/Lightning ......................... 8.11
Eaton Interaxle Differential
Lockout Operation ....................... 9.3
Eaton Single Reduction Axles
With Controlled Traction
Differential ............................ 9.2
Eaton®Fuller®Straight-Shift
Models .............................. 8.1
General Information, Eaton
Straight-Shift ........................ 8.1
Operation, Eaton Straight-
Shift .............................. 8.1
Emergency Kit, Optional ................... 13.1
Emergency Starting With
Jumper Cables ........................ 13.3
Engine Braking System,
Optional ............................. 7.21
Jacobs Engine Brake ................... 7.21
Engine Break-In ......................... 7.7
Engine Operation ......................... 7.7
Caterpillar Engine Operation ............... 7.8
Cummins Engine Operation ............... 7.11
Detroit Diesel Engine
Operation .......................... 7.13
Engine Protection ...................... 7.7
Engine Shutdown ........................ 7.18
Caterpillar ........................... 7.18
Cummins ........................... 7.19
Detroit Diesel ........................ 7.19
Index
I-2

Subject Page
Engine Starting .......................... 7.2
Caterpillar ............................ 7.3
Cummins and Detroit Diesel ............... 7.4
EPA Emission Control Labels ................. 1.2
EPA07 Exhaust Emissions ................. 1.2
Vehicle Noise Emission
Control Label ........................ 1.2
EPA07 Aftertreatment System
(ATS) ............................... 7.1
Ether Start System ........................ 7.5
Exterior Switches ........................ 2.31
Battery Disconnect Switch,
Optional ........................... 2.31
F
Federal Motor Vehicle Safety
Standard (FMVSS) Labels ................. 1.1
Fire in the Cab ......................... 13.4
In Case of a Cab Fire ................... 13.4
Fontaine®Fifth Wheels ................... 10.12
Fifth Wheel Locking
Operation ......................... 10.13
Fifth Wheel Lubrication ................. 10.17
Fifth Wheel Slide Operation .............. 10.15
General Information ................... 10.12
Fresh Air .............................. 4.4
G
Glove Box ............................. 3.3
Grab Handles and Access
Steps ............................... 3.1
Entering and Exiting the
Passenger’s Side ..................... 3.2
Entering the Driver’s Side ................. 3.2
Exiting the Driver’s Side .................. 3.2
H
Hazard Warning Lights .................... 13.1
Heating, Sleeper Heater and Air
Conditioner ........................... 4.4
Heating ............................... 4.2
High-Altitude Operation .................... 7.19
Cummins ........................... 7.19
Holland Fifth Wheels ..................... 10.1
Fifth Wheel Locking
Operation .......................... 10.2
Fifth Wheel Lubrication .................. 10.7
Fifth Wheel Slide Operation ............... 10.5
General Information .................... 10.1
Holland Trailer Coupling .................. 10.18
Subject Page
General Information ................... 10.18
Operation .......................... 10.19
Hood Tilting ............................ 3.6
To Return the Hood ..................... 3.7
To Tilt the Hood ........................ 3.6
HVAC General Information .................. 4.1
I
Ignition and Lock Key ...................... 3.1
Instrument and Control Panel ................. 2.1
Instruments ............................ 2.25
Ammeter, Optional ..................... 2.28
Application Air Pressure
Gauge, Optional ..................... 2.27
Dual System Air Pressure
Gauge ............................ 2.27
Engine Hour Meter, Optional .............. 2.27
Engine Oil Pressure Gauge ............... 2.25
Engine Oil Temperature
Gauge, Optional ..................... 2.28
Forward and Rear
Differential Oil Temperature
Gauges, Optional ..................... 2.29
Fuel Gauge .......................... 2.28
Fuel Pressure Gauge,
Optional ........................... 2.28
Fuel-Tach Gauge, Optional ............... 2.27
Intake-Air Restriction Gauge,
Optional ........................... 2.28
Intake-Air Restriction
Indicator ........................... 2.28
Kysor Digital Clock, Optional .............. 2.30
Pana-Pacific Digital Clock,
Optional ........................... 2.29
Pyrometer, Optional .................... 2.26
Speedometer ........................ 2.25
Tachograph, Optional ................... 2.30
Tachometer .......................... 2.25
Transmission Oil
Temperature Gauge,
Optional ........................... 2.29
Turbocharger Boost
Pressure Gauge, Optional ............... 2.29
Voltmeter ........................... 2.26
Water Temperature Gauge ................ 2.25
L
Leather Upholstery Cleaning ................ 12.3
Index
I-3

Subject Page
M
Meritor Drive Axles With Main
Differential Lock ........................ 9.1
Meritor Engine Synchro Shift™
(ESS) Automated Models ................. 8.20
General Information, ESS ................ 8.20
Operation, ESS ....................... 8.20
Meritor Interaxle Differential
Lockout Operation ....................... 9.2
Meritor Main Differential Lock
Operation ............................. 9.1
Meritor Single Drive Axles With
Traction Equalizer ....................... 9.1
Meritor Splitter and Range-Shift
Models ............................. 8.18
General Information, Meritor
Splitter and Range-Shift ................ 8.18
Operation, Meritor Splitter
and Range-Shift ..................... 8.19
Meritor Tandem Drive Axles
With Interaxle Differential .................. 9.2
Meritor™Range-Shift Models ................ 8.16
General Information, Meritor
Range-Shift ........................ 8.16
Operation, Meritor Range-
Shift ............................. 8.17
P
Premier Trailer Couplings .................. 10.17
General Information ................... 10.17
Operation .......................... 10.17
Pretrip and Post Trip Inspection
Checklists ............................ 11.1
Pretrip and Post Trip
Maintenance Procedures .................. 11.3
Daily Pretrip Maintenance
Procedures ......................... 11.3
Monthly Post-Trip
Maintenance Procedures ............... 11.15
Weekly Post-Trip
Maintenance Procedures ............... 11.13
S
Seat Belts and Tether Belts .................. 5.8
General Information ..................... 5.8
Seat Belt Operation ..................... 5.9
Tether Belt Adjustment ................... 5.8
Seats ................................ 5.1
Bostrom Air–915 Seat ................... 5.2
Bostrom Seat, Air–715
Series ............................ 5.2
Bostrom Smart Seat Model ................ 5.4
Subject Page
Bostrom Talladega 900 Seat ............... 5.3
Dura-Form Seats ....................... 5.6
Eldorado Seat ......................... 5.7
Freightliner AirChair ..................... 5.4
General Information ..................... 5.1
National Cush-N-Aire II Seat ............... 5.6
National Cush-N-Aire Seats,
Model 195 .......................... 5.5
Swivel Seat .......................... 5.8
Sleeper Compartment Bunk
Restraints ............................ 5.11
Belt Adjustment ....................... 5.11
Bunk Restraint Operation ................ 5.11
General Information .................... 5.11
Sleeper Compartment Exit Door ............... 3.5
Spicer Straight-Shift Models ................. 8.15
General Information, Spicer
Straight-Shift ........................ 8.15
Operation, Spicer Straight-
Shift ............................. 8.16
Steering System ......................... 6.1
General Information ..................... 6.1
Manual Steering Gear
Lubrication .......................... 6.1
Power Steering System .................. 6.1
T
Tire and Rim Labels ....................... 1.2
Towing ............................... 13.1
Front Towing Hookup ................... 13.1
Rear Towing Hookup ................... 13.3
U
Upper Bunk Access, 70-Inch
Raised Roof SleeperCab .................. 3.4
Accessing the Upper Bunk
Using the Driver’s Side
Cabinets ........................... 3.5
Accessing the Upper Bunk
Using the Passenger’s
Side Cabinets ........................ 3.4
V
Vehicle Specification Decal .................. 1.1
Velour Upholstery Cleaning ................. 12.2
Chewing Gum or Wax ................... 12.3
Grease and Oil-Based Stains .............. 12.2
Mildew ............................. 12.3
Sugar and Water-Based
Stains ............................ 12.2
Index
I-4

Subject Page
Vinyl Upholstery Cleaning .................. 12.1
Ball Point Ink ......................... 12.2
Chewing Gum ........................ 12.2
Miscellaneous ........................ 12.2
Nail Polish and Nail Polish
Remover .......................... 12.2
Ordinary Dirt ......................... 12.1
Paint, Shoe Heel Marks ................. 12.2
Shoe Polish ......................... 12.2
Sulfide Stains ........................ 12.2
Tars, Asphalts, and Creosote .............. 12.2
W
Warning and Indicator Lights ................ 2.13
Bendix Antilock Braking
System (ABS) ....................... 2.15
Kysor Vehicle
Instrumentation and
Protection (VIP) System,
Optional ........................... 2.19
Meritor WABCO®Antilock
Braking System (ABS) ................. 2.14
Parking Brake Indicator Light .............. 2.13
VIGIL I Warning System ................. 2.16
VIGIL II Warning System,
Optional ........................... 2.17
VIGIL III Warning System,
Optional ........................... 2.18
Windshield Washer Reservoir ................ 3.7
Index
I-5

