Practical Guide To Running R On HPC
User Manual:
Open the PDF directly: View PDF ![]() .
.
Page Count: 13
Practical guide to running R on HPC
Elzbieta Lauzikaite, Revised by Johnny Östman
5/3/2018, Revised 1/3/2019
Contents
1 Imperial HPC systems 1
1.1 CX1 .................................................. 2
1.2 AX4 .................................................. 2
2 Set up 3
2.1 Useraccount ............................................. 3
2.2 Login ................................................. 3
2.3 Filemanagement........................................... 3
3 Preparing working environment 4
4 Submitting jobs 6
4.1 Resourceestimation ......................................... 6
4.2 SubmittingRjobs .......................................... 7
5 Running R for XCMS on CX1 8
5.1 PBS-based pipeline for array XCMS job . . . . . . . . . . . . . . . . . . . . . . . . . . . . . . 8
6 Running R for XCMS on AX4 11
6.1 PBSscriptwithcheck-points .................................... 11
7 Useful links 13
1 Imperial HPC systems
Imperial has three cluster systems, which are designed for different kind of computations. A computer cluster
is system of loosely or tightly connected independent computers (
nodes
). These nodes are managed by a
batch system
(i.e. non-interactive processing mode), which monitors available resources (
NCPUS
and
memory
) and allocates users’ tasks (
jobs
) to available nodes. If none are available, jobs are put on hold in
aqueue, together with the jobs of other users, until sufficient resources are free to use.
User should select a cluster system appropriate for the planned work.
1
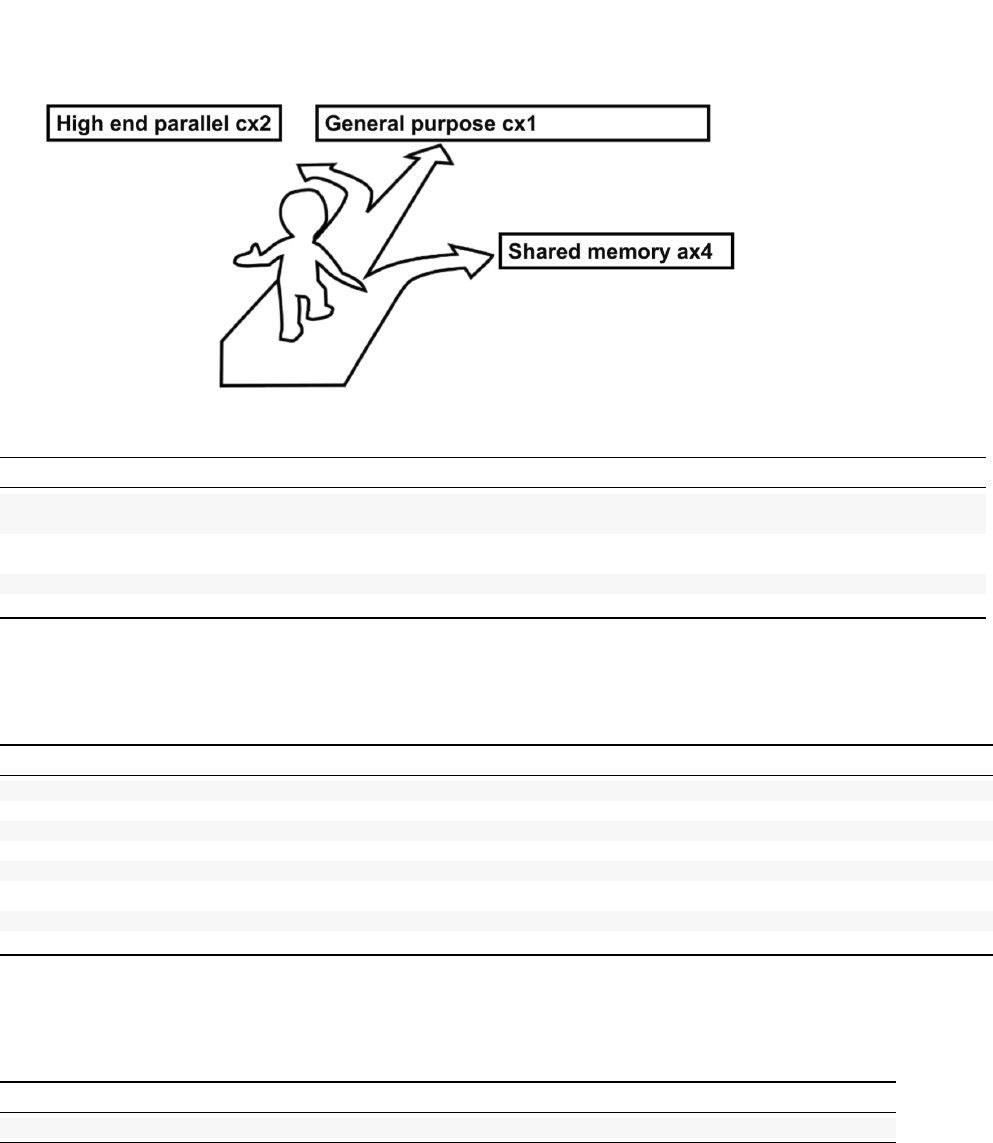
CX1 AX4 CX2
For large number of small jobs For very large memory datasets Suitable for optimised parallel
computations
Ideally jobs should fit a single node Consists of two systems: 160 and 1280
cores each
24 and 28 core compute nodes
12, 16 and 24 core nodes Total 16TB RAM and 1400 cores ~ 720 nodes, 17000 cores
Total ~1700 nodes and ~ 30000 cores
1.1 CX1
Table 2: Jobs allowed on CX1 system.
Job class Number of nodes N ncpus node Max mem node Max walltime hr Max number of running jobs per user
throughput 1 1-8 96GB up to 72hr unlimited for jobs <=24hr in length
general 1 - 16 16 62GB or 124GB up to 72hr unlimited for jobs <=24hr in length
singlenode 1 24 124GB up to 24hr 10
multinode 2 - 16 12 46GB up to 48hr unlimited
debug 1 1-8 96GB up to 30 mins 1
large memory 1 12 190 or 250GB 48 hr unlimited
GPU 1-1 1-4 16GB 48hr 8
long 1 1-8 96GB 72 - 1000 hr 1
1.2 AX4
Table 3: Jobs allowed on AX4 system. n = 1-100
Job class Number of nodes N ncpus node Max mem node Max walltime hr Max number of jobs per user
largemem 1 10*n 120*n GB 72 hr 50
2

2 Set up
2.1 User account
To access any of the HPC systems, an account must first be created. A request must be made by your group
leader through
self-service portal
. This will give you access to CX1 free-of-charge, for usage of AX4/CX2,
contact HPC/RCS support team.
2.2 Log in
All HPC systems can be accessed through the ssh command via terminal (Linux/Mac) when connected to
Imperial VPN:
ssh username@login.cx1.hpc.ic.ac.uk
ssh username@login.ax4.hpc.ic.ac.uk
ssh username@login.cx2.hpc.ic.ac.uk
Windows users can use the software Putty. When entering your password on the login node there will be no
asterisks shown in the entry field while typing. This is common for terminals. Just write your password and
press enter to log in.
After login, every user is connected to the
login node
, which can accommodate a large number of users,
but does not support heavy calculations. Therefore running applications directly on this node can crash the
whole system, or at least terminate your connection and your work. Use this node to perform light work,
such as data management, script preparation and job submission.
2.3 File management
Decision on data storage should be made as early as possible, since its set up can significantly prolong the
start of your work.
2.3.1 Local HPC storage
For smaller data sets to be processed on CX1, the general advise would be to use local HPC storage. Aliquoted
free-of-charge space is usually sufficient and can be extended further through the self-service portal. However,
note that these file systems are not appropriate for the storage of sensitive data.
Files can be copied over to the HPC storage by:
1. Secure copy command
scp /files.tgz username@login.cx1.hpc.ic.ac.uk:/home/username/file_location
2.
FileZilla on Mac and Windows. FileZilla is also handy when managing your scripts and job output on
the HPC.
3.
Mounting the home and ephemeral folders as networks locations. This is available for Mac and
Windows (Not Windows 7). On Mac: Finder -> Go -> Connect to Server -> Server Address
smb://rds.imperial.ac.uk/RDS/user/username. On Windows: File Explorer -> My PC -> Map
network drive -> Folder \\rds.imperial.ac.uk\RDS\user\username.
2.3.2 Remote storage
There is a number of options for remote data storage, though the default BOX and H:drive are not appropriate
for sensitive data either.
3

Table 4: Storage available to every user
Storage Default working space
$HOME 1 TB allocation (up to 10 million files)
Intended for storing datafiles, scripts and long term storage
/username/home
$EPHEMERAL Additional individual working space
Unlimited allocation
Files deleted after 30 days from creation data stamp
/username/ephemeral
$TMPDIR Default working directory for a job
Only exists when a job is running and deleted afterwards
On CX1 on a disk directly attached to a compute node
/tmp/*
$PBS_O_WORKDIR Only exists when a job is running
A directory from which your jobs was submitted
$RDS_PROJECT Your Research Data Store project allocation (if you applied for one)
$WORK Deprecated 12/10/2018. Moved into $HOME/WORK/
$SCRATCH Deprecated 12/10/2018. Moved into $HOME/SCRATCH/
Table 5: External storage options.
Storage Purpose
H:drive Access from CX1 only
Up to 8GB free of charge
For non-sensitive data only
Run ’module load hdrive’ and ’hdrive’
BOX Access from CX1 only
Unlimited data storage with 15GB per individual datafile
For non-sensitive data only
Run ’module load box’ and ’box’
Network drives Access from CX1/AX4
E.g. MED-BIO
Access granted to group members only
3 Preparing working environment
A large number of applications are already available on the systems. They are centrally installed and accessible
by every user through module command. Check whether your application is available through module avail
command on the login node. For some applications and libraries, additional modules need to be loaded. Read
more about modules on Imperial website.
The HPC uses Anaconda to manage packages. First Anaconda must be installed and a personal R environment
needs to be created. A guide to this can be found at the RCS website. In brief, submit the code below. This
only has to be run once in order to install anaconda, set up an R environment and install xcms.
module load anaconda3/personal
anaconda -setup
Then an R environment with an R version of choice needs to be created
conda create -n Renv r=3.5.1 r-biocmanager -c bioconda -c conda-forge
source activate Renv
conda install r-ncdf4 -c conda-forge
4

R
You will now be inside the R environment, where R input is executable and R packages can be installed.
Submit the code below to install xcms with dependencies. Further packages can be installed from Bioconductor
using the same code. Install.packages() also works inside the R environment.
BiocManager::install("mzR", version = "3.8")
BiocManager::install("MSnbase", version = "3.8")
BiocManager::install("xcms", version = "3.8")
XCMS is then installed on your HPC account, inside an R environment named Renv. This piece of code will
need to be submitted in every PBS script in order to direct your R script to the place were xcms is located.
To enter the environment submit:
module load anaconda3/personal
source activate Renv
When you have prepared your R environment it is recommended to clone it in case it malfunctions, which
has occurred at times. The following code clones an environment into a new one with another name. The
clone will retain all packages installed to it.
conda create --name Renv_clone --clone Renv
While most popular R packages are already available on CX1, AX4 has fewer of them. You may need to
install the missing ones yourself locally on your HOME directory while running R interactively on the login
node. Make sure that
all supporting modules are loaded to your environment
before you start R. If
a package is installed successfully, then you would load it by defining the path to your HOME. Some packages
are hard to install locally due to the requirement of additional Linux libraries. In such case, submit a request
to the HPC help desk.
.libPaths("/home/username/R/x86_64-pc-linux-gnu-library/3.4",.libPaths())
library(xcms)
5

4 Submitting jobs
Management of users’ jobs is done by the PSBPro (Portable Batch System Professional) queue system.
PBS
scheduler
allocates every job to nodes/cores according to the amount of resources requested by the user.
The scheduler starts the job when sufficient resources are available, runs it and returns the output to the user.
Jobs are submitted via a
PBS script
- a bash script. Such script must include the following information:
time of processing (walltime), required memory (mem) and number of nodes and cores (select,ncpus). If
the requested resources are exceeded during the job run, the job is terminated. Only walltime now can be
extended for running jobs via the self-service portal. Note that both your .pbs file and your .R script will
have to be located on the HPC. The home folder can be called by the wildcard ~, e.g. ~/run.pbs.
A PBS script run.pbs:
#!/bin/sh
#PBS -N job_name
#PBS -l walltime=24:00:00
#PBS -l select=1:ncpus=1:mem=50gb
Submitting run.pbs via terminal:
qsub /location of script/run.pbs
If job was submitted succesfully, a job ID will be returned. Monitor submitted jobs:
qstat
qstat -u username # all user's jobs
qstat -f job_id # returns more details on a single job
Once job is completed, it will be gone from the qstat list. You can also delete uncompleted jobs at any stage:
qdel job_id
4.1 Resource estimation
Before performing computations are the full-scale, it is advised to monitor resource usage on a small-scale.
E.g. apply your code on just a single datafile at once, or run the code in a serial mode to get the estimate for
a single
worker
before initiating a job with multiple parallel-workers. There are three different walltime
based queues: 24, 48 and 72 hours. A walltime of 24 h is standard and a job will not start faster even if a
shorter walltime is requested. To observe memory usage, one can define a parameter in the PBS script to
send an email if the code is aborted by the batch system(a), when execution begins(b) or ends(e):
#!/bin/sh
#PBS -m abe
For parallel code on CX1, a more detailed memory usage can be performed using module memusage. The
application will save the output in the current directory. The generated output files can be plotted using
module gnuplot, more details can be found on Imperial HPC Wiki page:
#!/bin/sh
#PBS -l walltime=24:00:00
#PBS -l select=1:ncpus=1:mem=1gb
cd $PBS_O_WORKDIR
/apps/memusage/memusage R
6

4.2 Submitting R jobs
The best approch for running R scripts in batch mode is
Rscript
. Rscript logs all output and allows to
submit command line arguments, both of which are essential when building an automated PBS-based pipeline.
Variables, such as datafiles or function parameters, can be supplied as arguments, while re-using the same R
code. This helps to perform optimisation tasks or carry out the same workflow with different datafiles.
A PBS script, which starts a serial R job with one argument, while capturing errors and details of the process
in an output Rout file:
#!/bin/sh
#PBS -N job_name
#PBS -l walltime=24:00:00
#PBS -l select=1:ncpus=1:mem=50gb
module load anaconda3/personal
source activate Renv
Rscript --no-save --no-restore --verbose your_code.R "args" >"/outfile.Rout" 2>&1
The corresponding your_code.R script:
args = commandArgs(trailingOnly=TRUE)
argument <- paste0(args[1])
Before uploading your .pbs, .R and .txt files to the HPC, make sure that they are UNIX formatted. This
can be ascertained by writing or saving them in e.g. Notepad++ with EOL set to UNIX (LF). Windows
formatting will make the files illegible by the UNIX based HPC.
7

5 Running R for XCMS on CX1
The most computationally demanding steps of LC-MS data pre-processing with XCMS are initial peak-picking
and zero-filling, which requires to load raw datafiles into R memory. Even though peak-picking algorithm is
normally applied to all files at the same time, it is an “embarrassingly parallel”" task, since each datafile is
processed separately inside the code and then the final single R object is obtained.
Large LC-MS datasets can be run on CX1 through the use of
arrays jobs
. An array job comprises of
multiple independently running R sessions, which for the sake of simplicity, are initiated using a single PBS
script. In each R session, the same R code is used with a different input data file.
5.1 PBS-based pipeline for array XCMS job
1.
Peak-picking of individual data files in independent R sessions (1st PBS script run-xcms-1.pbs initiates
an array job)
2.
Merging generated XCMS objects into a single one and running the remaining XCMS steps in a single
R session (2nd PBS script run-xcms-2.pbs initiates a serial job)
run-xcms-1.pbs script initiates 10 copies of the same job. Each of these subjobs run independently and
are identical except for the value of the environment variable PBS_ARRAY_INDEX, which ranges from
1 to 10. Each copy is allocated with 1 core and 4GB of memory for 24 hours. PBS_ARRAY_INDEX
is used as Rscript argument and specifies a single file from the submitted list of 10. This file list must
contain the full path of the .mzML file to be picked with one file path withing quotes per row, e.g.
“/rds/general/user/username/home/mzmldatafolder/File_1.mzML”. Note that both the data files and the file
list must be situated on the HPC (home or ephemeral folder).
Another environment variable PBS_JOBNAME encodes your given job name and is used to make a directory
for job’s output. Variable PBS_JOBID specifies the unique job ID, which is given by the PBS scheduler
once a job is submitted to the queue. Job ID here is used to write a unique Rout file for easier comparison
with other runs.
#!/bin/sh
#PBS -N xcms_v1
#PBS -l walltime=24:00:00
#PBS -l select=1:ncpus=1:mem=4gb
#PBS -J 1-10
dir="/rds/general/user/username/home/scripts_dir/"
file_list="/rds/general/user/username/home/file_list/filelist.txt"
out_dir="/rds/general/user/username/home/output_dir/$PBS_JOBNAME"
if [!-d"$out_dir"]; then
mkdir "$out_dir"
fi
cd "$dir"
module load anaconda3/personal
source activate Renv
Rscript --no-save --no-restore --verbose
/rds/general/user/username/home/scripts_dir/xcms-1.R
"$file_list" "$PBS_ARRAY_INDEX" "$out_dir">"$out_dir/$PBS_JOBID.Rout"
2>&1 >$out_dir/$PBS_JOBID.log
N.B. The last lines have to be submitted on the same line as Rscript, but are shown on separate lines here
for clarity.
The corresponding xcms-1.R script pick-peaks a single datafile and saves the xcmSet object into an .rds file
8

with unique name in the same directory. The log and Rout files will be directed to the output directory. The
R scripts below use XCMS2 notation and data handling. They can be updated to the corresponding XCMS3
style if required.
args = commandArgs(trailingOnly=TRUE)
library(xcms)
###--- Filelist
file_list <- paste0(args[1])
files <- read.table(file = file_list, stringsAsFactors = FALSE,header = F, sep = "")
###--- Datafile to process
f<-as.numeric(paste0(args[2]))
file <- files[f,1]
###--- Output dir
output_dir<- paste0(args[3])
###--- Peak picking ----
xset <- xcmsSet(files = file, noise=noise, method="centWave", ...)
saveRDS(xset, file = paste0(output_dir,"/xcms-1-",f,".rds"))
Note that for runs with several hundreds to thousands of .mzML files, the peakpicking sometimes tend to fail
for 5-10% of the files. The files failing are random and can be identified by as .rds files with a certain number
missing in the output folder. This can be fixed by rerunning the peakpicking with a new job name using the
same settings and then merging the output folders.
run-xcms-2.pbs script initiates a serial job for the remaining XCMS steps. It specifies the input directory
where first job objects were generated, an output directory and the number of BPPARAM workers for
fillPeaks() function (as many workers, as requested ncpus):
#!/bin/sh
#PBS -N xcms_v1
#PBS -l walltime=24:00:00
#PBS -l select=1:ncpus=4:mem=16gb
input_dir="/rds/general/user/username/home/output_dir/$PBS_JOBNAME"
out_dir="$input_dir"
if [!-d"$input_dir"]; then
echo "no input_dir, exit the job"
exit
fi
module load anaconda3/personal
source activate Renv
Rscript --no-save --no-restore --verbose
/rds/general/user/username/home/scripts_dir/xcms-2.R
"$file_list" "$PBS_ARRAY_INDEX" "$out_dir">"$out_dir/$PBS_JOBID.Rout"
2>&1 >$out_dir/$PBS_JOBID.log
N.B. The last lines have to be submitted on the same line as Rscript, but are shown on separate lines here
for clarity.
xcms-2.R script (note that graphic display is not supported on non-interactive jobs, thus plotting must be
disabled):
args = commandArgs(trailingOnly=TRUE)
library(xcms)
9

###--- Input dir
input_dir <- paste0(args[1])
###--- Output dir
output_dir<- paste0(args[2])
###--- BPPARAM workers
bw <- as.numeric(paste0(args[3]))
###--- Load xcmsSet objects into one
input <- list.files(input_dir, pattern = ".rds",full.names = T)
input_l <- lapply(input, readRDS)
xset <- input_l[[1]]
for(i in 2:length(input_l)) {
set <- input_l[[i]]
xset <- c(xset, set)
}
###--- Grouping ----
gset <- group(xset, , method="density", ...)
save(list = c("gset"), file = paste0(output_dir,"/xcms-2.RData"))
###--- RT correction ----
rset <- retcor.peakgroups(gset, plottype = "none", ...)
save(list = c("rset"), file = paste0(output_dir,"/xcms-3.RData"))
###--- Grouping no2 ----
grset <- group(rset, method="density", ...)
save(list = c("grset"), file = paste0(output_dir,"/xcms-4.RData"))
###--- Filling peaks ----
fset <- fillPeaks(grset,
method="chrom",
BPPARAM = MulticoreParam(workers = bw))
save(list = c("fset"), file = paste0(output_dir,"/xcms-5.RData"))
Table=peakTable(fset)
write.csv(Table, file=paste0(output_dir,"/Peak_Table_Name.csv"), col.names=F)
The produced peak table can then be post processed by e.g. the NPyC pipeline or used directly for multivariate
statistics in SIMCA.
Is possible to start a job on the condition that another one completes beforehand, where the input to one job
is generated by the previous job in a pipeline. Job dependency is defined in PBS script using the -W flag.
XSET_JOB_ID=`qsub run-xset.pbs`
qsub -W depend=afterok:$XSET_JOB_ID run-gset.pbs
10

6 Running R for XCMS on AX4
If access to AX4 has been given to you, it could be an easier approach to using XCMS than the CX1, since a
large amount of memory can be requested for a single R session. XCMS functions would be applied for all
datafiles at the same time using multicore parallelisation supported by BiocParallel library.
6.1 PBS script with check-points
The PBS scheduler on AX4 is prone to crashes, such as interruptions of the run and subsequent re-initiation.
There is no way to save output of a session, which was terminated, but it is possible to re-iniate a code from
the last check-point, rather than from the very start.
The check-points could be R objects, generated by individual XCMS functions throughout the workflow. To
find the last check-point, PBS bash script would look for specifically named R objects in the output directory
and initiate only one of the provided R scripts, depending on which R objects have already been generated.
Different R scripts start the XCMS workflow at different stages. Each script saves one RData object:
1. xcms-1.R starts with xcmsSet()
2. xcms-2.R starts with group()
3. xcms-3.R starts with retcor()
4. xcms-4.R starts with second group()
5. xcms-5.R starts with fillPeaks()
#!/bin/sh
#PBS -N xcms_v1
#PBS -l walltime=10:00:00
#PBS -l select=1:ncpus=40:mem=200gb
file_list="/work/username/filelist.txt"
out_dir="/work/username/out_dir/$PBS_JOBNAME"
check_1="$out_dir/xcms-1.RData"
check_2="$out_dir/xcms-2.RData"
check_3="$out_dir/xcms-3.RData"
check_4="$out_dir/xcms-4.RData"
check_5="$out_dir/xcms-5.RData"
if [!-d"$out_dir"]; then
mkdir "$out_dir"
fi
module load intel-suite libxml2 hdf5/1.8.14-serial netcdf/4.4.1 R/3.4.0
module load boost
if [-e "$check_5"]; then
echo "run is over"
else
if [-e "$check_4"]; then
Rscript --no-save --no-restore --verbose xcms-5.R "$NCPUS" "$file_list" "$out_dir"
"$check_4">"$out_dir/$PBS_JOBNAME.Rout" 2>&1
else
if [-e "$check_3"]; then
Rscript --no-save --no-restore --verbose xcms-4.R "$NCPUS"
"$file_list" "$out_dir" "$check_3">"$out_dir/$PBS_JOBNAME.Rout" 2>&1
else
if [-e "$check_2"]; then
Rscript --no-save --no-restore --verbose xcms-3.R "$NCPUS" "$file_list"
"$out_dir" "$check_2">"$out_dir/$PBS_JOBNAME.Rout" 2>&1
11

else
if [-e "$check_1"]; then
Rscript --no-save --no-restore --verbose xcms-2.R "$NCPUS"
"$file_list" "$out_dir" "$check_1">"$out_dir/$PBS_JOBNAME.Rout" 2>&1
else
Rscript --no-save --no-restore --verbose xcms-1.R "$NCPUS"
"$file_list" "$out_dir">"$out_dir/$PBS_JOBNAME.Rout" 2>&1
fi
fi
fi
fi
fi
12

