HADOOP 2.6.0 INSTALLATION GUIDE
User Manual:
Open the PDF directly: View PDF ![]() .
.
Page Count: 19
HADOOP - 2.6.0 INSTALLATION GUIDE
By. Mr.Gopal Krishna
Sr. Hadoop Architect
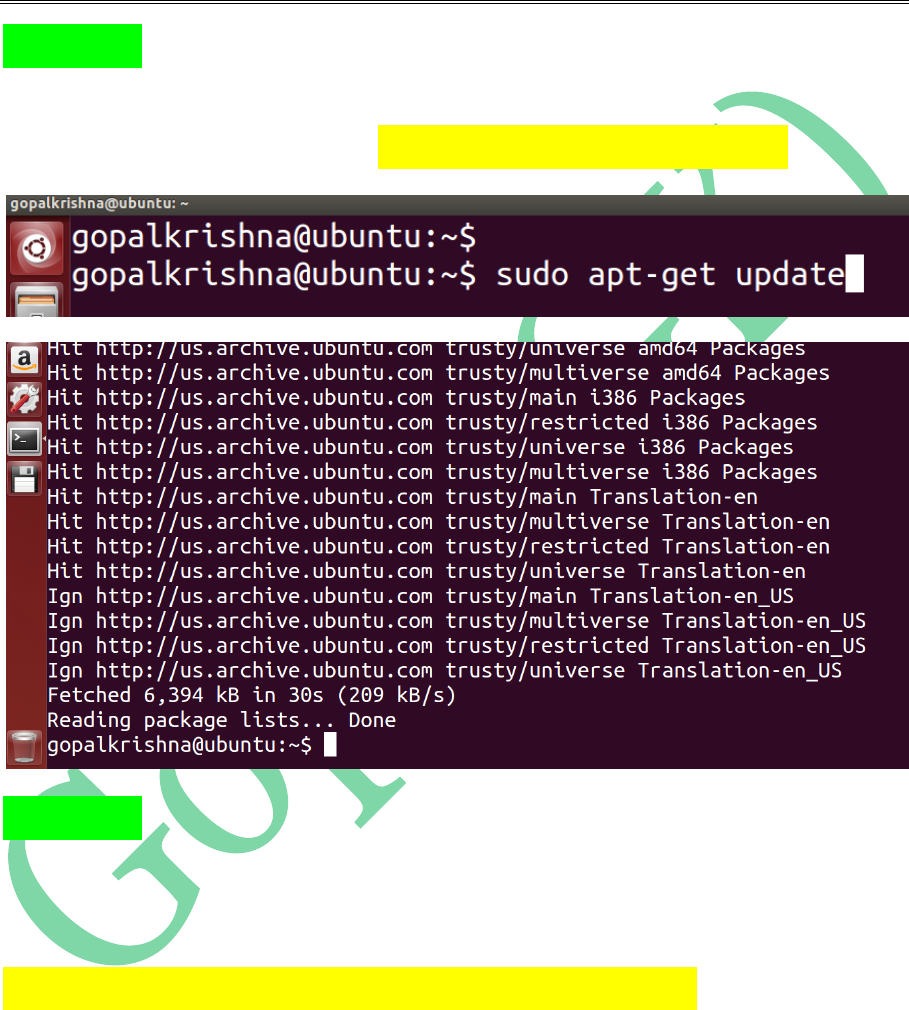
STEP 1: First we need to update the
“System Software Repositories” using
below command [ sudo apt-get update ]
STEP 2: Install java-1.7 version using below
command. [ This is a mandate step for
Hadoop Installation ]
sudo apt-get install openjdk-7-jdk
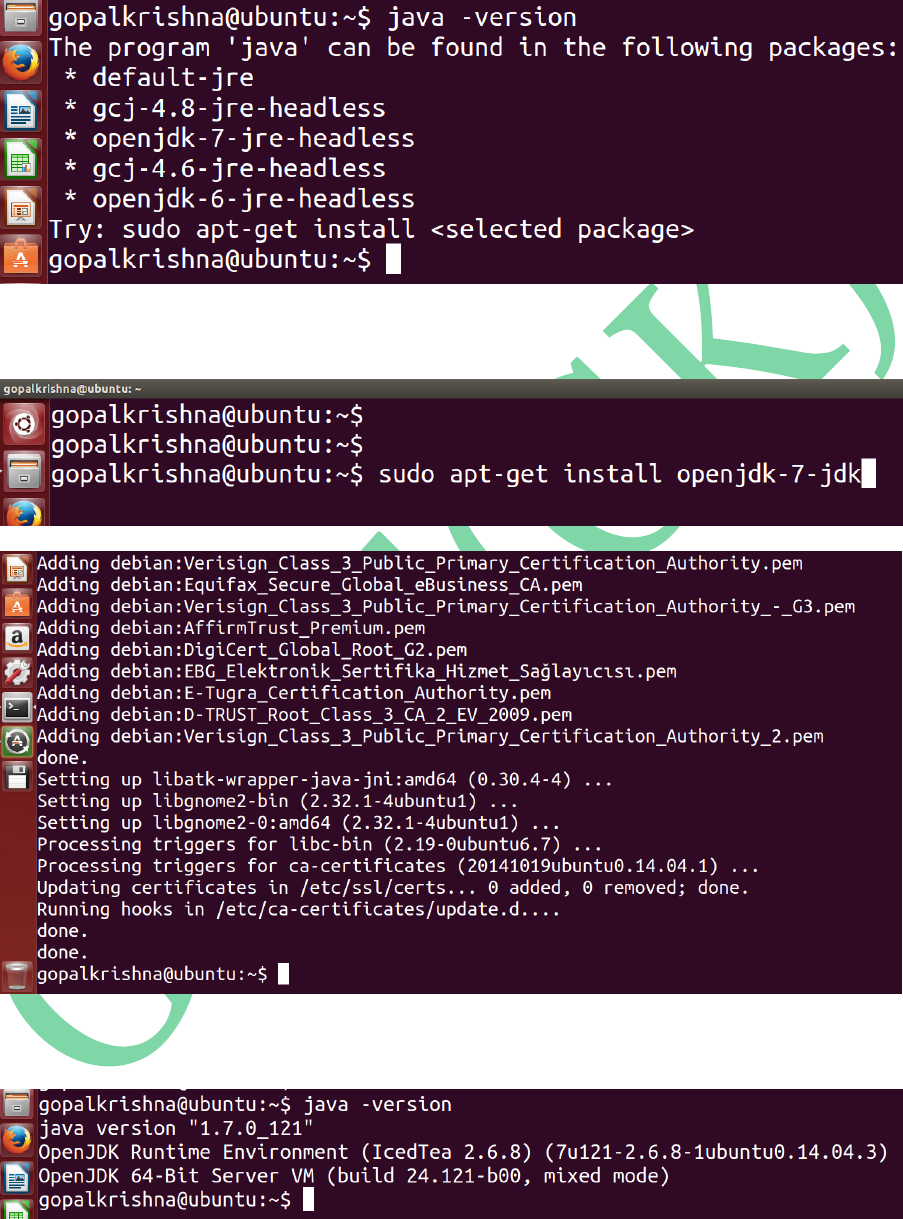
Before Java Installation:
For Java Installation
After Java Installation:
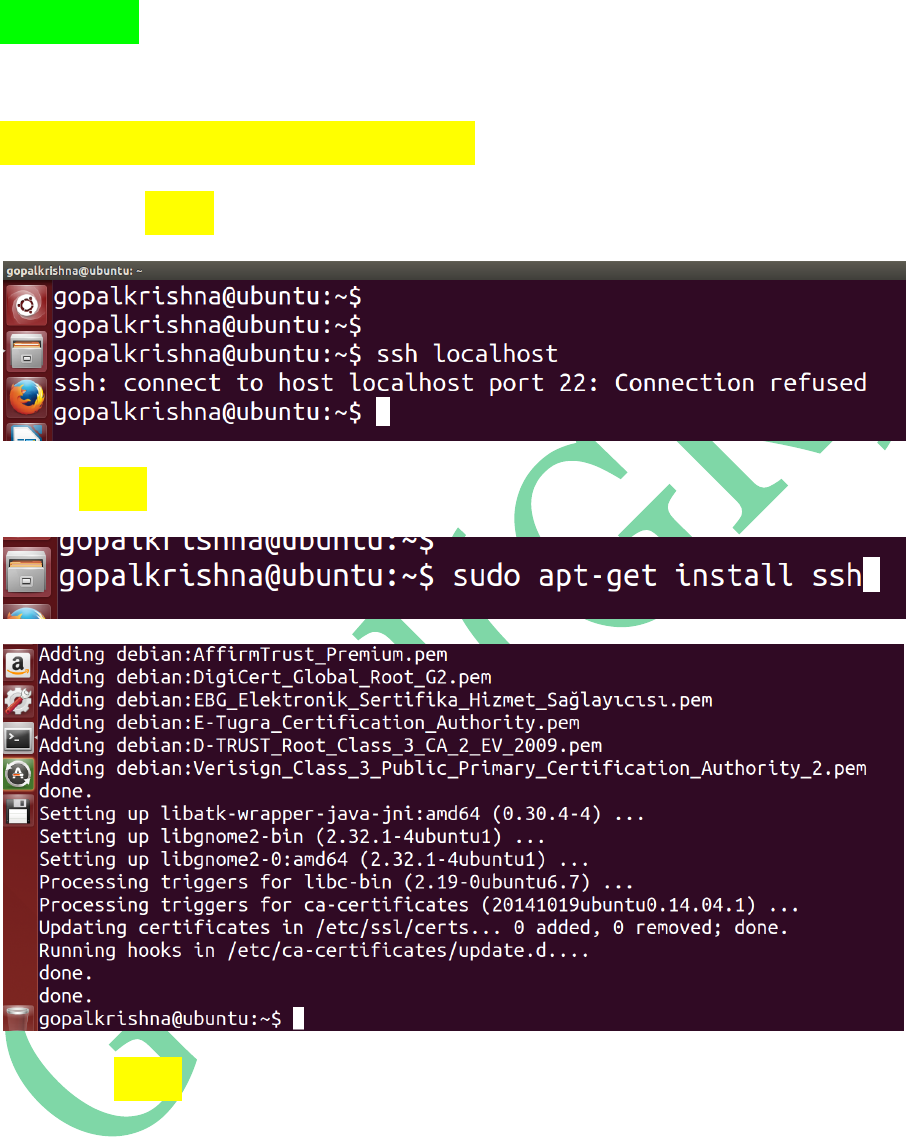
STEP 3: Install ssh (secure shell) using
below command
sudo apt-get install ssh
Before ssh installation
For ssh installation
After ssh installation
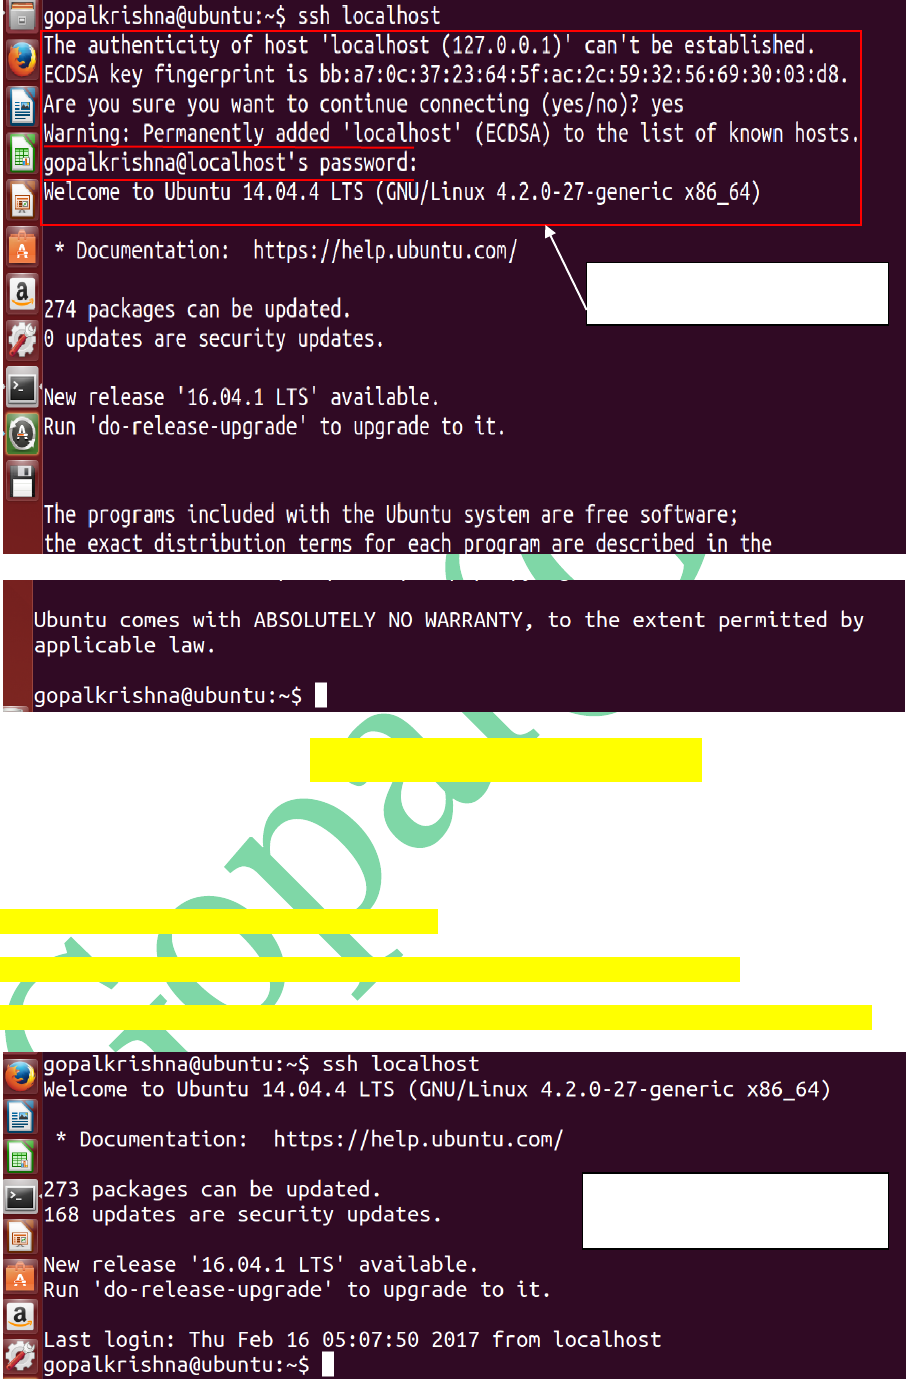
To Achieve the Password Less SSH
Communication, enter the below commands
at any terminal:
gopalkrishna@ubuntu:~$ ssh localhost
gopalkrishna@ubuntu:~$ ssh-keygen -t dsa -P '' -f ~/.ssh/id_dsa
gopalkrishna@ubuntu:~$ cat ~/.ssh/id_dsa.pub >> ~/.ssh/authorized_keys
Secure Shell (SSH) Communication
prompting for PASSWORD
Secure Shell (SSH) Communication
WITHOUT prompting for PASSWORD
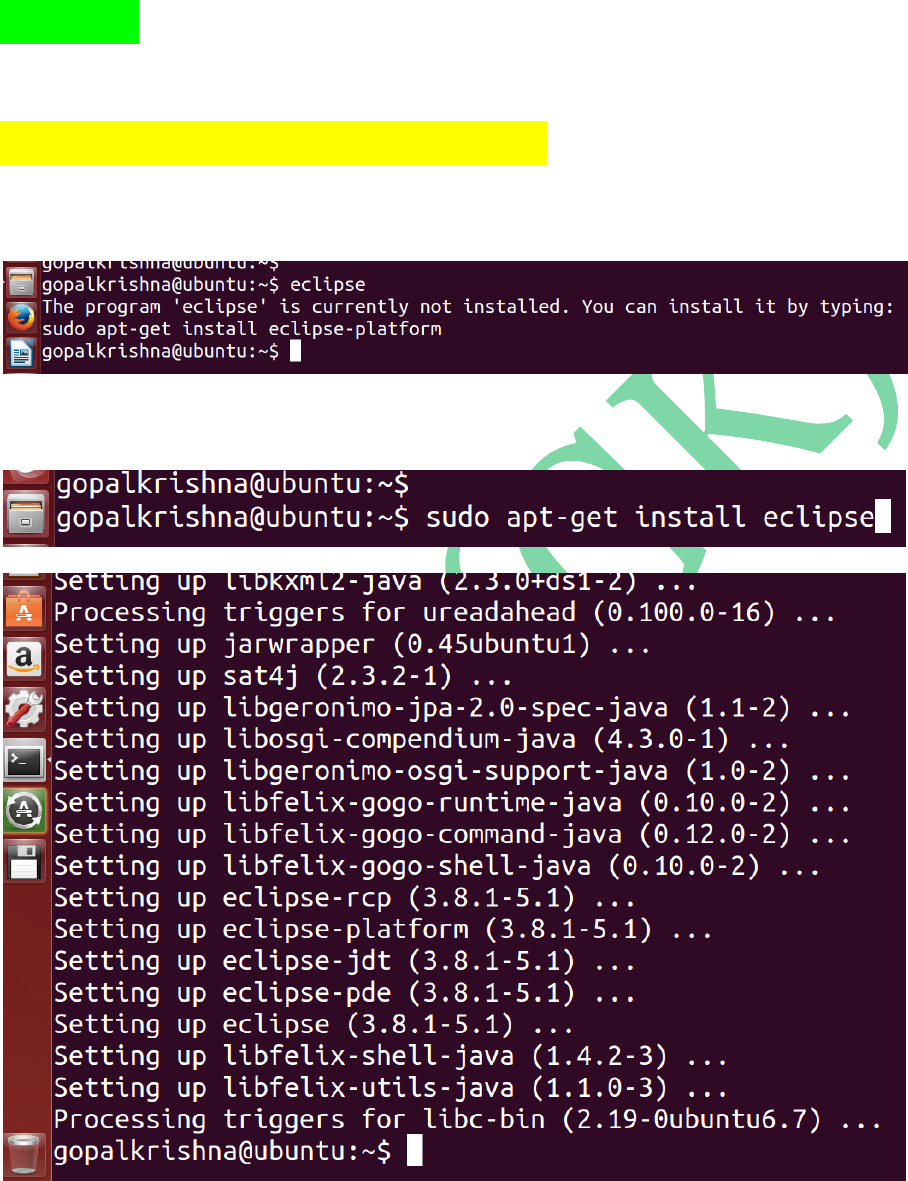
STEP 4: To Install eclipse IDE, use the
below command
sudo apt-get install eclipse
Before eclipse install
For Eclipse Installation
After Eclipse Installation
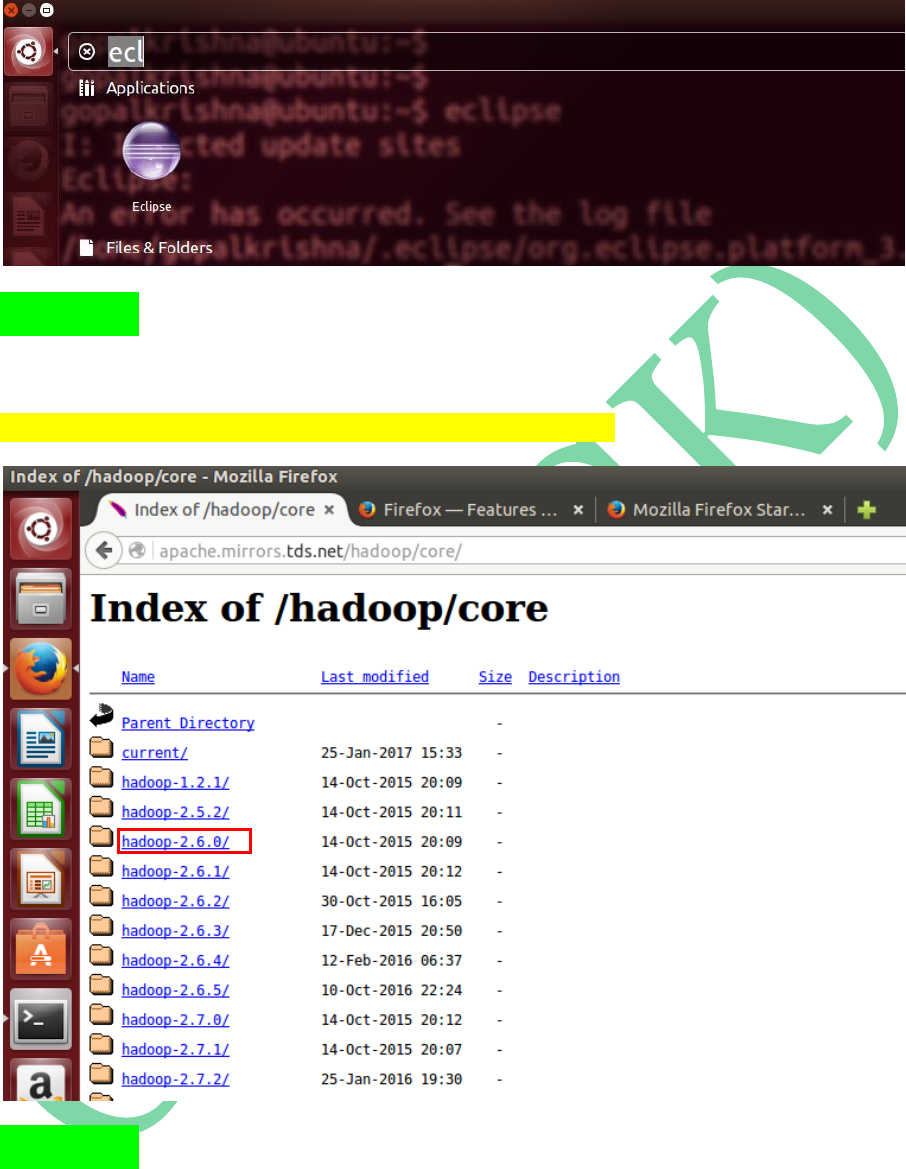
STEP 5: Download Hadoop-2.6.0 version tar
ball from Apache Mirrors
http://apache.mirrors.tds.net/hadoop/core/
STEP 6: Create ‘INSTALL’ directory in
‘/home/gopalkrishna’ folder
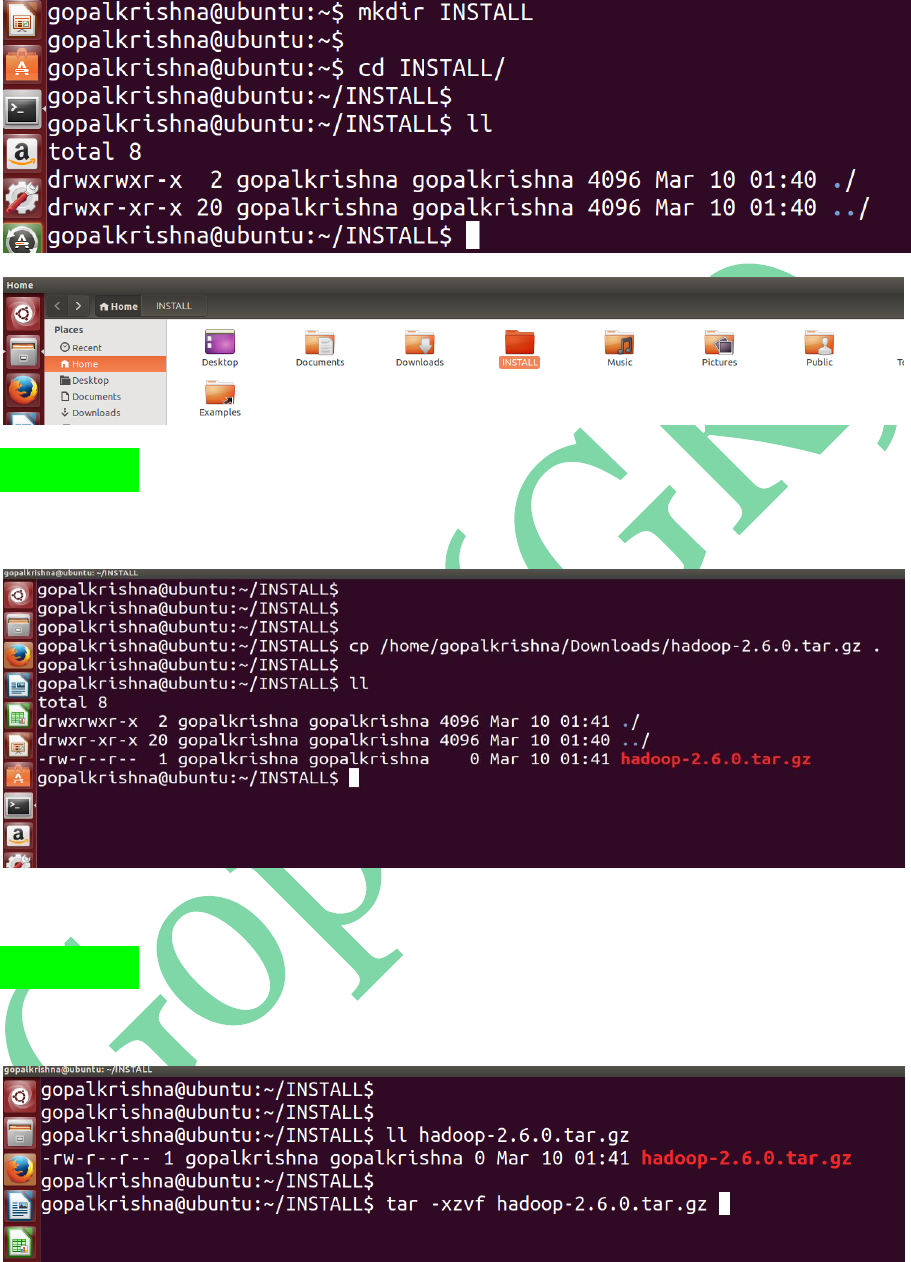
STEP 7: Copy the Downloaded ‘hadoop-
2.6.0.tar.gz’ file to INSTALL directory
STEP 8: Extract the copied tar ball [hadoop-
2.6.0.tar.gz] using below command:
After UNTARING: hadoop-2.6.0 directory is extracted
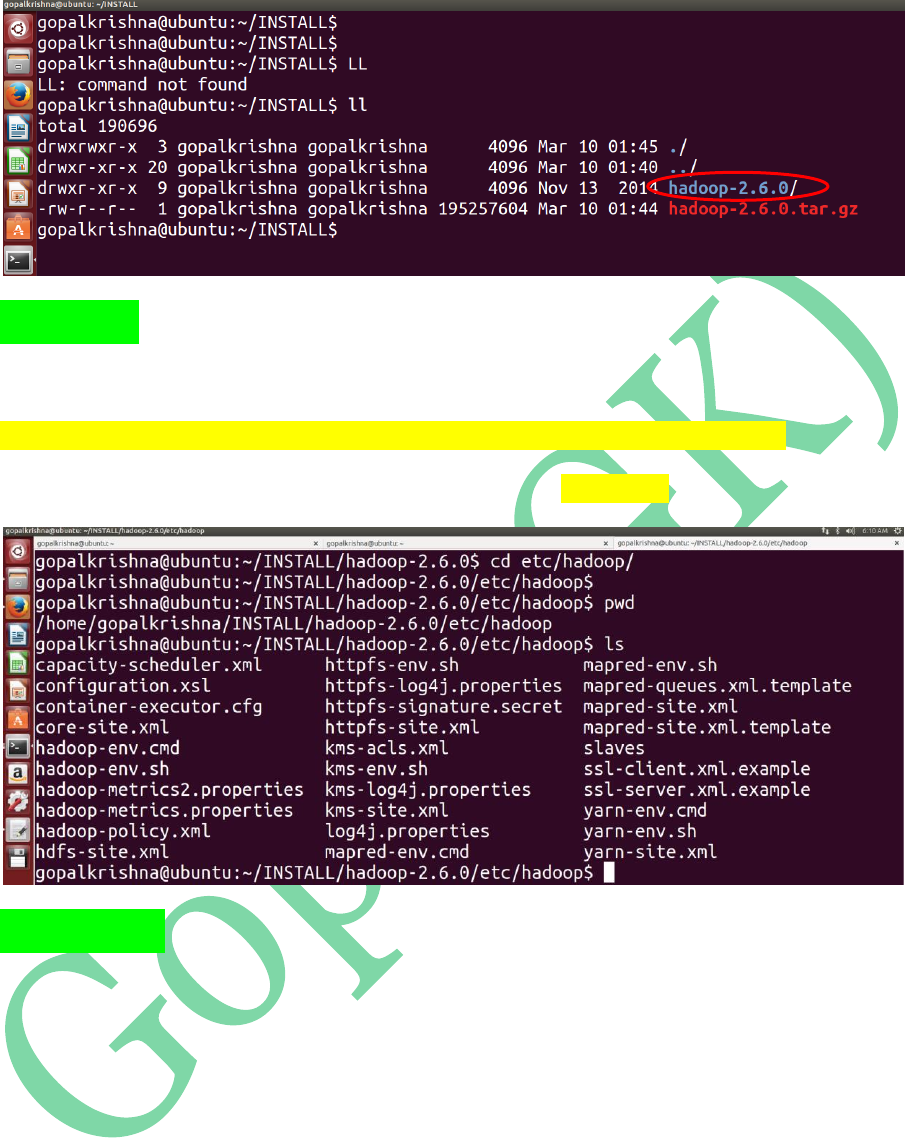
STEP 9: Go to the below path to update
configuration files:
/home/gopalkrishna/INSTALL/hadoop-2.6.0/etc/hadoop
Below are the total configuration files in ‘hadoop’ directory
STEP 10: We have to edit the below 8
configuration files as part of HADOOP
Installation:
1. core-site.xml
2. mapred-site.xml
3. mapred-env.sh
4. yarn-site.xml
5. hdfs-site.xml
6. hadoop-env.sh
7. yarn-env.sh
8. slaves
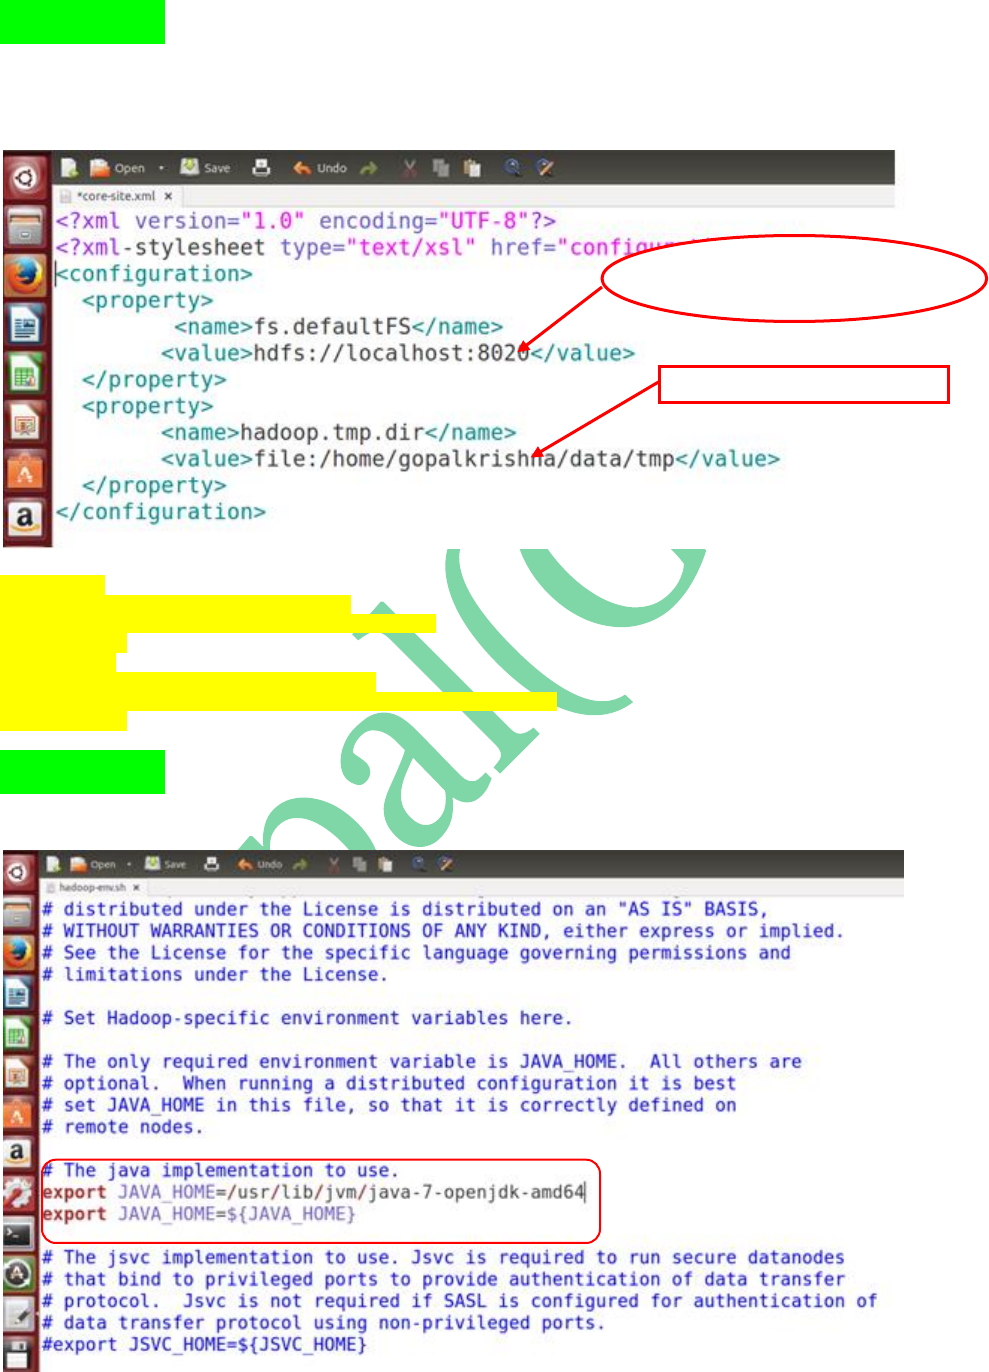
STEP 11: Open ‘core-site.xml’ file, add the
below 2 properties in between
<configuration> tags
<property>
<name>fs.defaultFS</name>
<value>hdfs://localhost:8020</value>
</property>
<property>
<name>hadoop.tmp.dir</name>
<value>file:/home/gopalkrishna/data/tmp</value>
</property>
STEP 12: Open ‘hadoop-env.sh’ file and
update JAVA_HOME path
Name Node Configuration Property...
RPC port is: 8020
To Store the data in Local File System
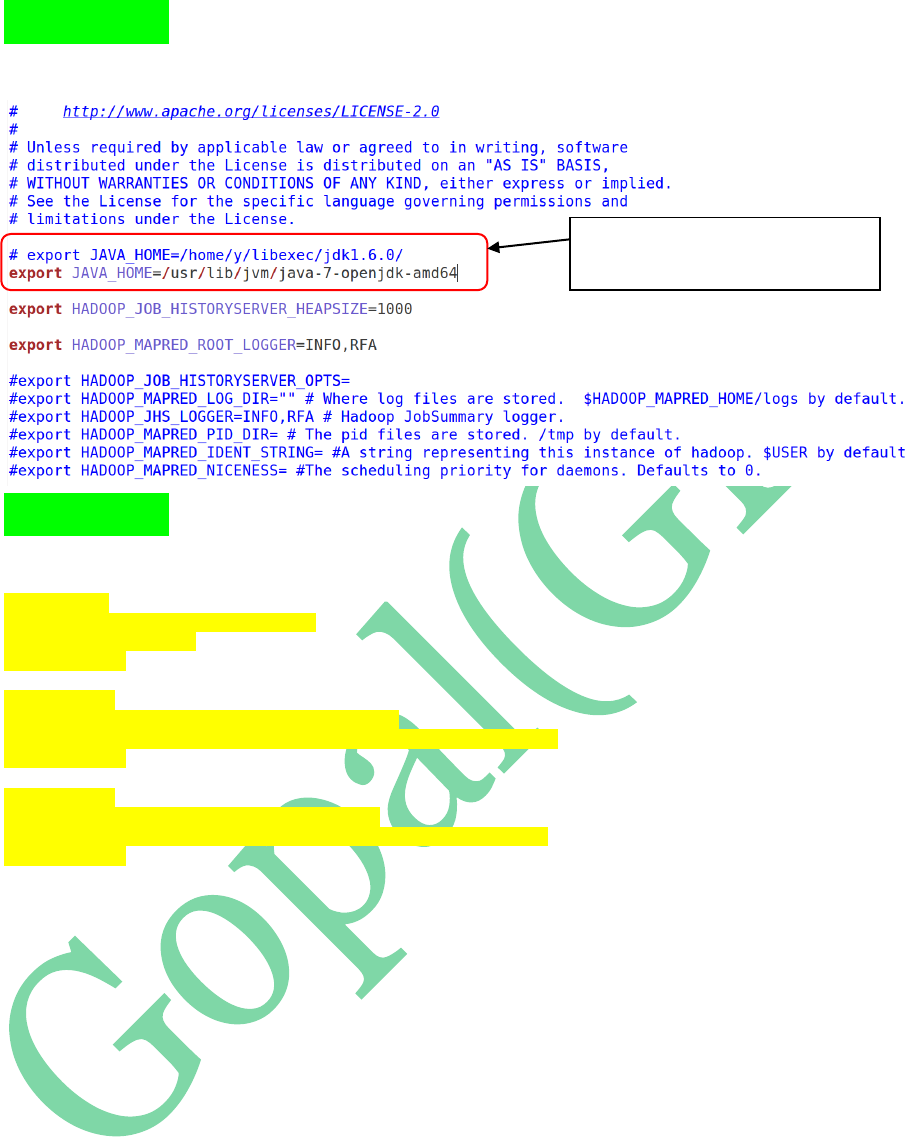
STEP 13: Open mapred-env.sh and update
JAVA_HOME in that
STEP 14: Open hdfs-site.xml file and add
the below properties:
<property>
<name>dfs.replication</name>
<value>1</value>
</property>
<property>
<name>dfs.namenode.name.dir</name>
<value>file:/home/gopalkrishna/data/dfs/name</value>
</property>
<property>
<name>dfs.datanode.data.dir</name>
<value>file:/home/gopalkrishna/data/dfs/data</value>
</property>
Updating JAVA_HOME path in
mapred_env.sh file
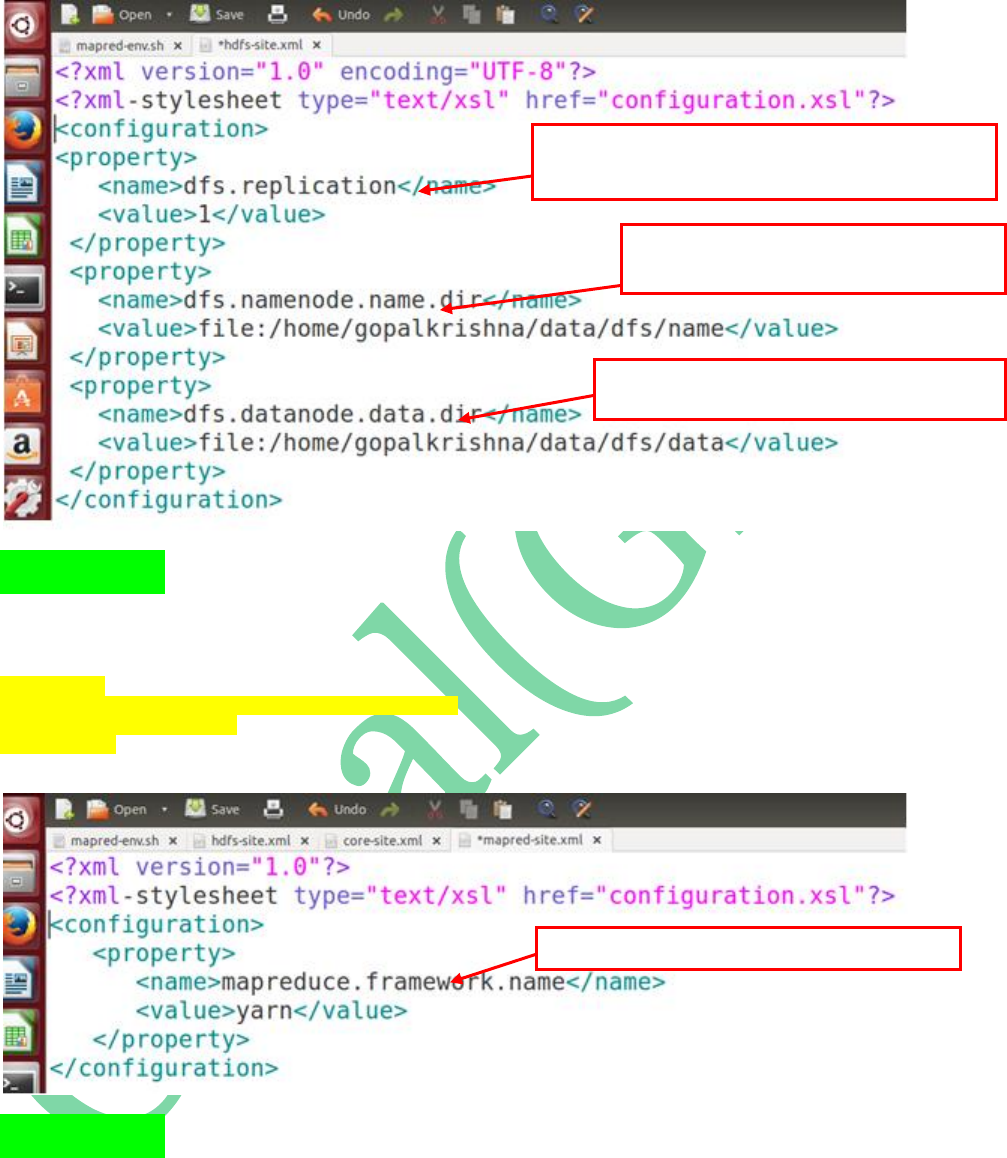
STEP 15: Open mapred-site.xml and update
the framework architecture details as ‘yarn’
<property>
<name>mapreduce.framework.name</name>
<value>yarn</value>
</property>
STEP 16: Open yarn-env.sh and update
JAVA_HOME path in that
First Property is to configuration “REPLICATION” factor...In
Single Node Cluster it’s always one...default is: 3
Second Property is to specify the path to store
Metadata in Name Node
Third property is to store the specify the path to
store the Actual Data on Data Node
This Property is to Specify MR2 architecture is “yarn”
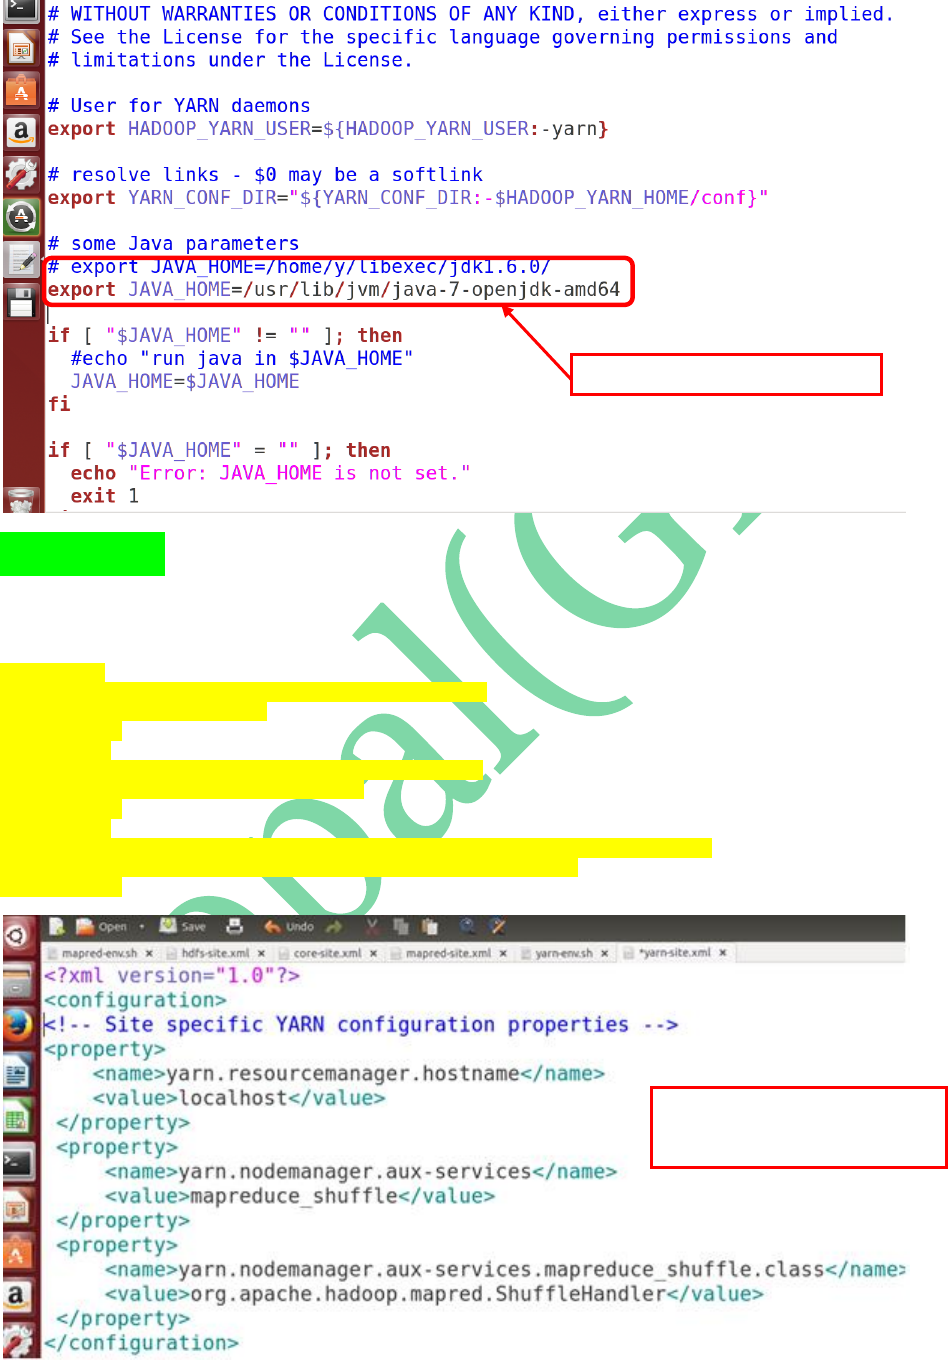
STEP 17: Open yarn-site.xml and add the
below properties to configure “Resource
Manager” & “Node Manager” details:
<property>
<name>yarn.resourcemanager.hostname</name>
<value>localhost</value>
</property>
<property>
<name>yarn.nodemanager.aux-services</name>
<value>mapreduce_shuffle</value>
</property>
<property>
<name>yarn.nodemanager.aux-services.mapreduce_shuffle.class</name>
<value>org.apache.hadoop.mapred.ShuffleHandler</value>
</property>
Updating JAVA_HOME in yarn-env.sh
These 3 properties are to specify
“ResourceManager” & “NodeManager”
Configurations.
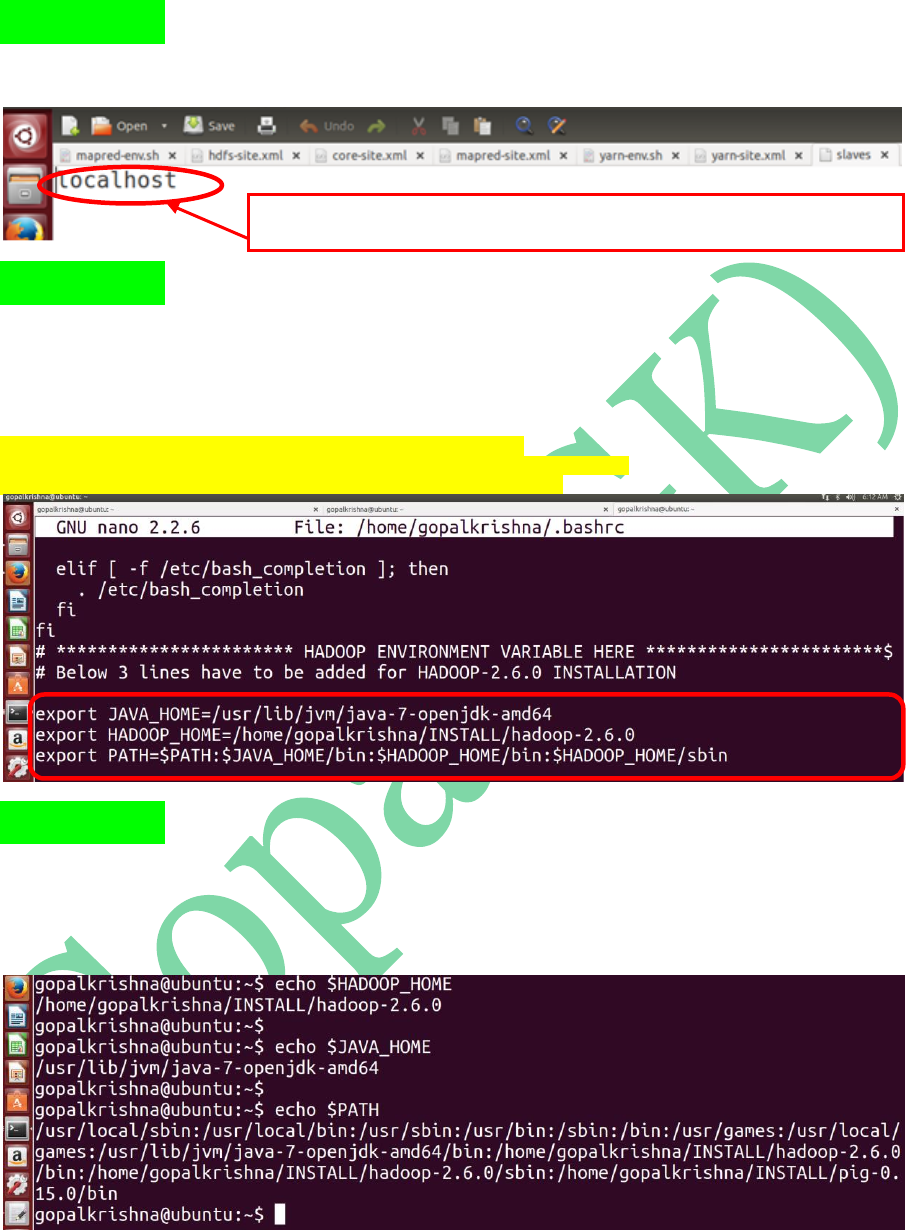
STEP 18: Open slaves file and check
whether the hostname is localhost or not
STEP 19: Open bashrc file ( ~/.bashrc ) and
update JAVA_HOME, HADOOP_HOME &
PATH variables:
export JAVA_HOME=/usr/lib/jvm/java-7-openjdk-amd64
export HADOOP_HOME=/home/gopalkrishna/INSTALL/hadoop-2.6.0
export PATH=$PATH:$JAVA_HOME/bin:$HADOOP_HOME/sbin
STEP 20: To check the bashrc changes, open
a new terminal and type the below
command: (echo $HADOOP_HOME)
In Case Of Singe Node Psedo Cluster Setup hostname will always point to “localhost” where as
in distributed cluster setup we must have to specify the individual datanode host names here
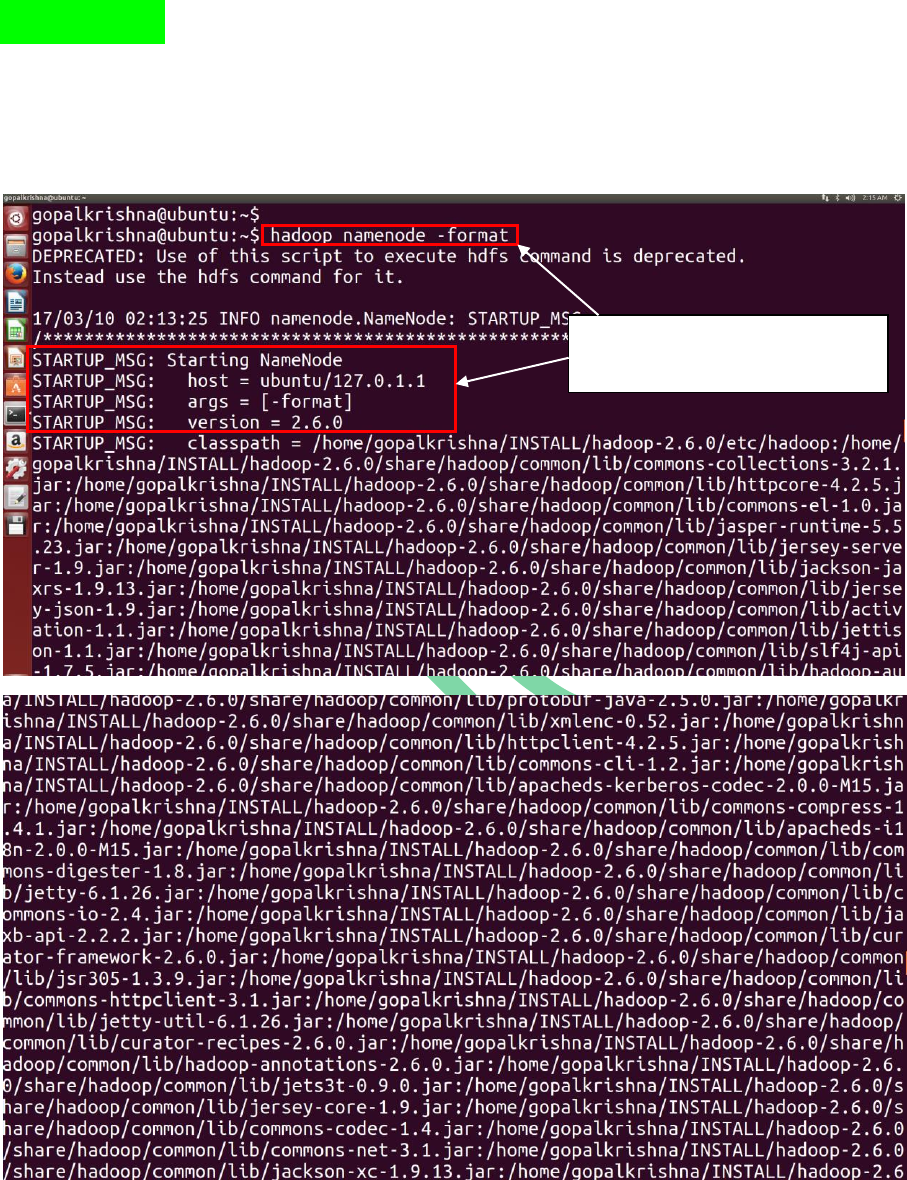
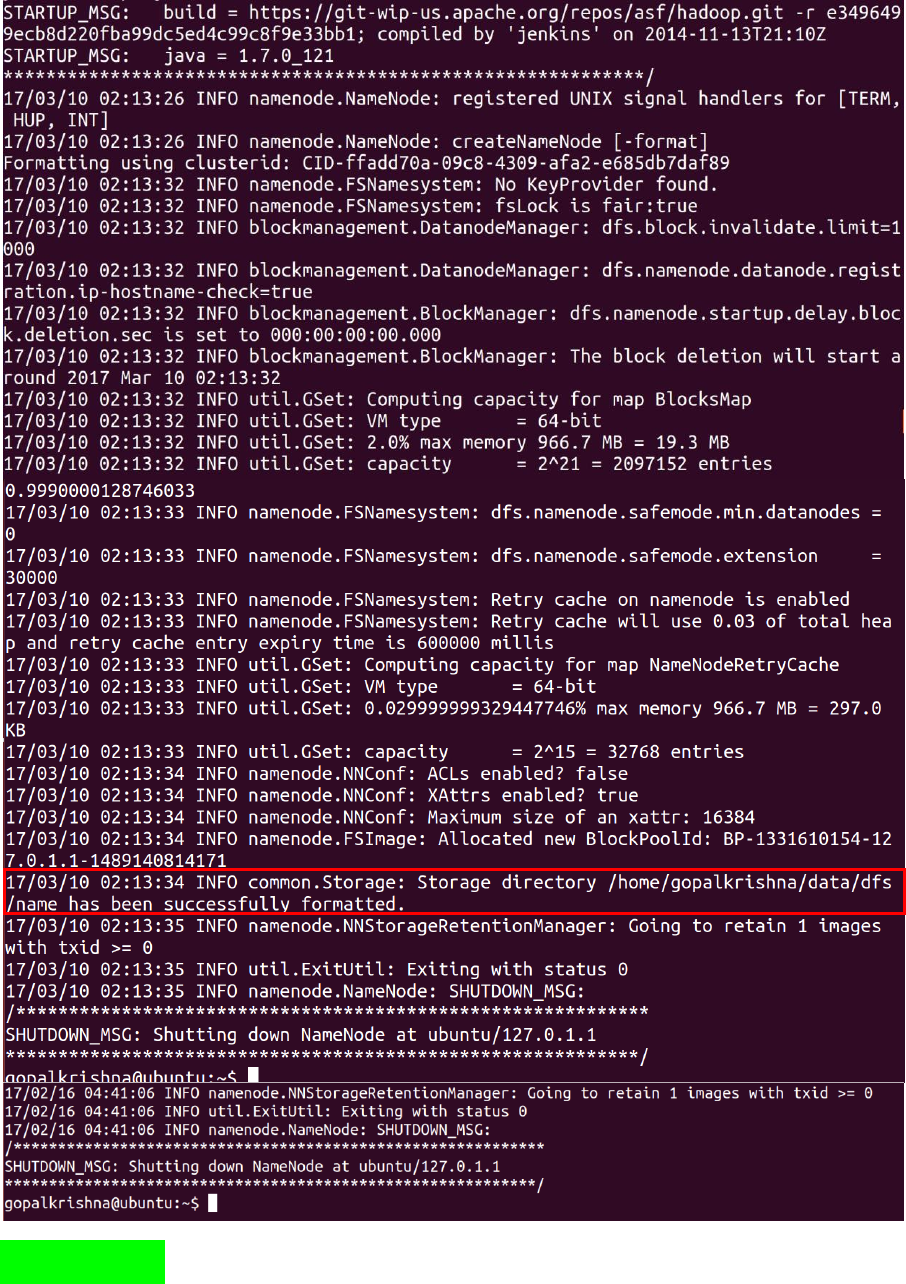
STEP 21: Before starting Name Node, we
must have to format the name node using
below command: (hadoop namenode –format)
Before starting name node, we must have
to format the name node, otherwise
daemons wont start even
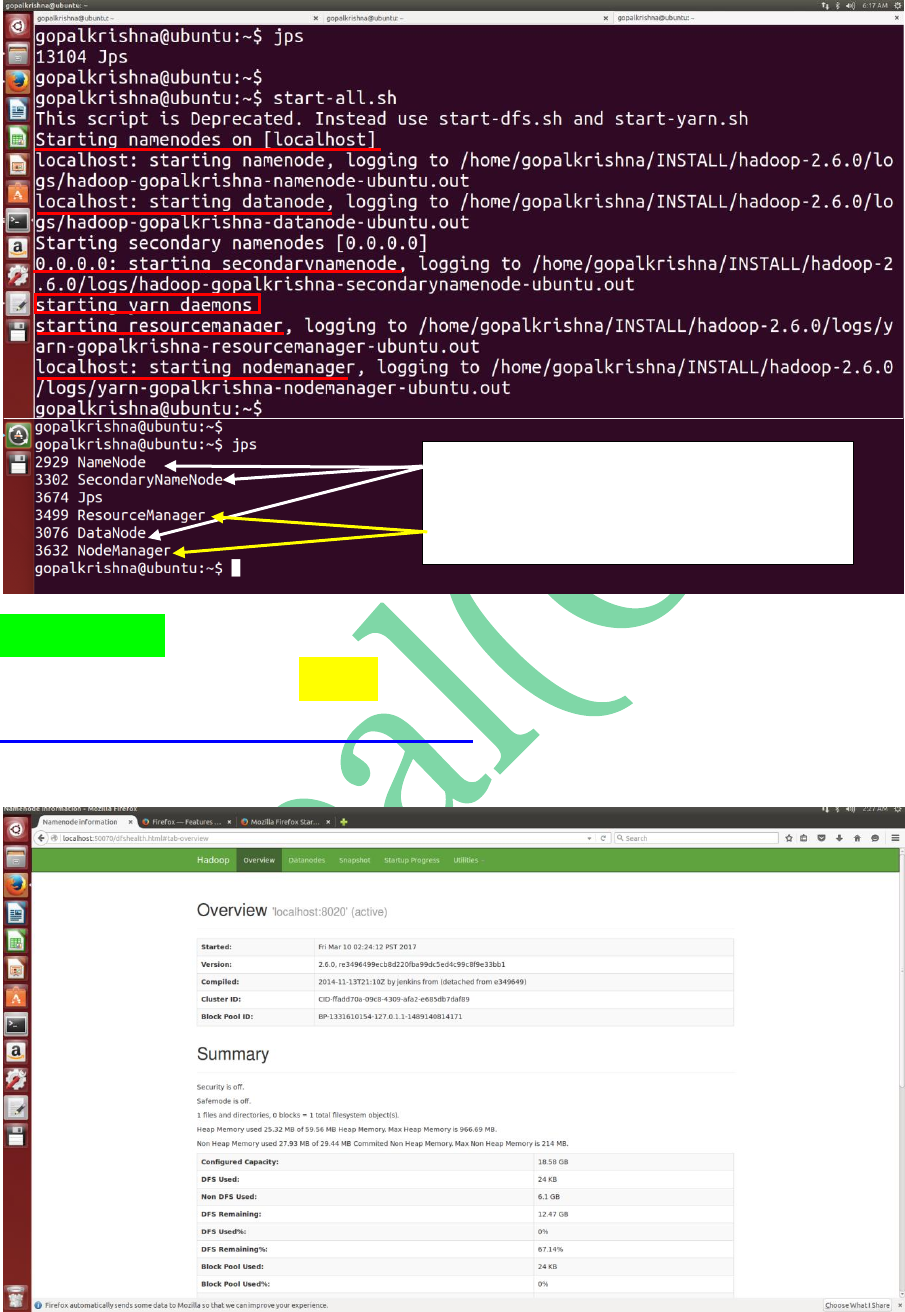
STEP 22: To start all the daemons of hadoop
in 2.X.X use “start-all.sh” command
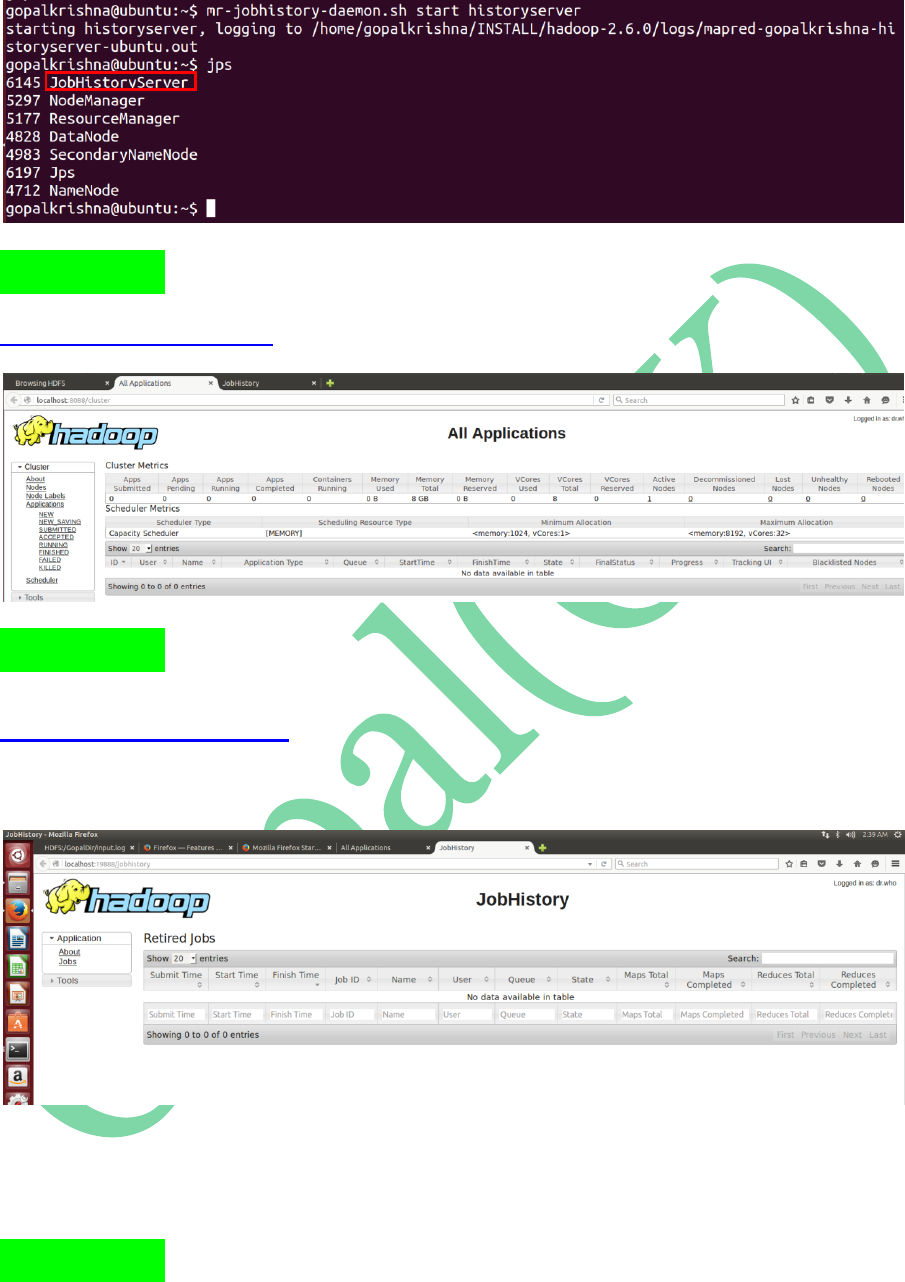
STEP 24: To Start Job History Server in
2.x.x.
mr-jobhistory-daemon.sh start historyserver
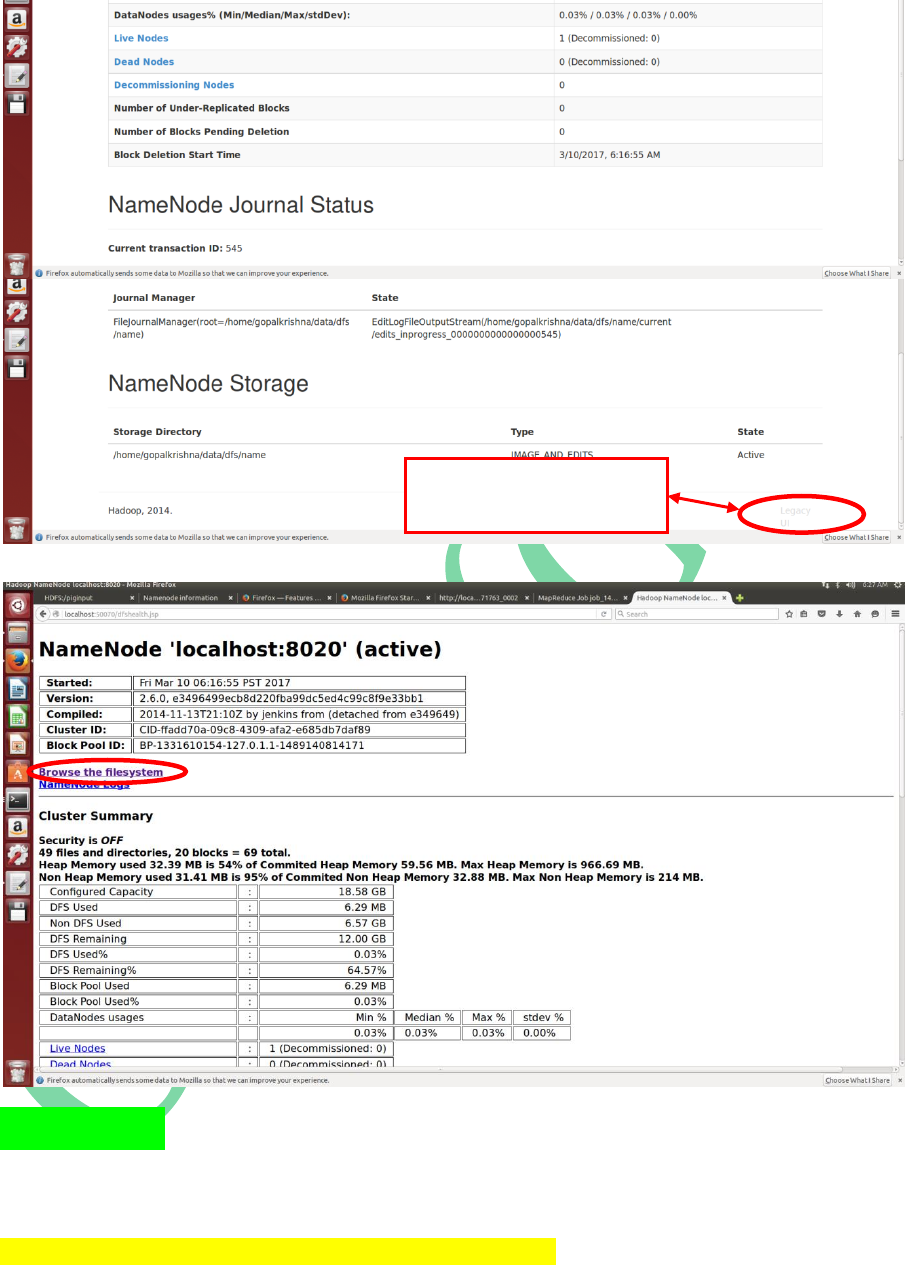
To Access Legacy UI page,
click here
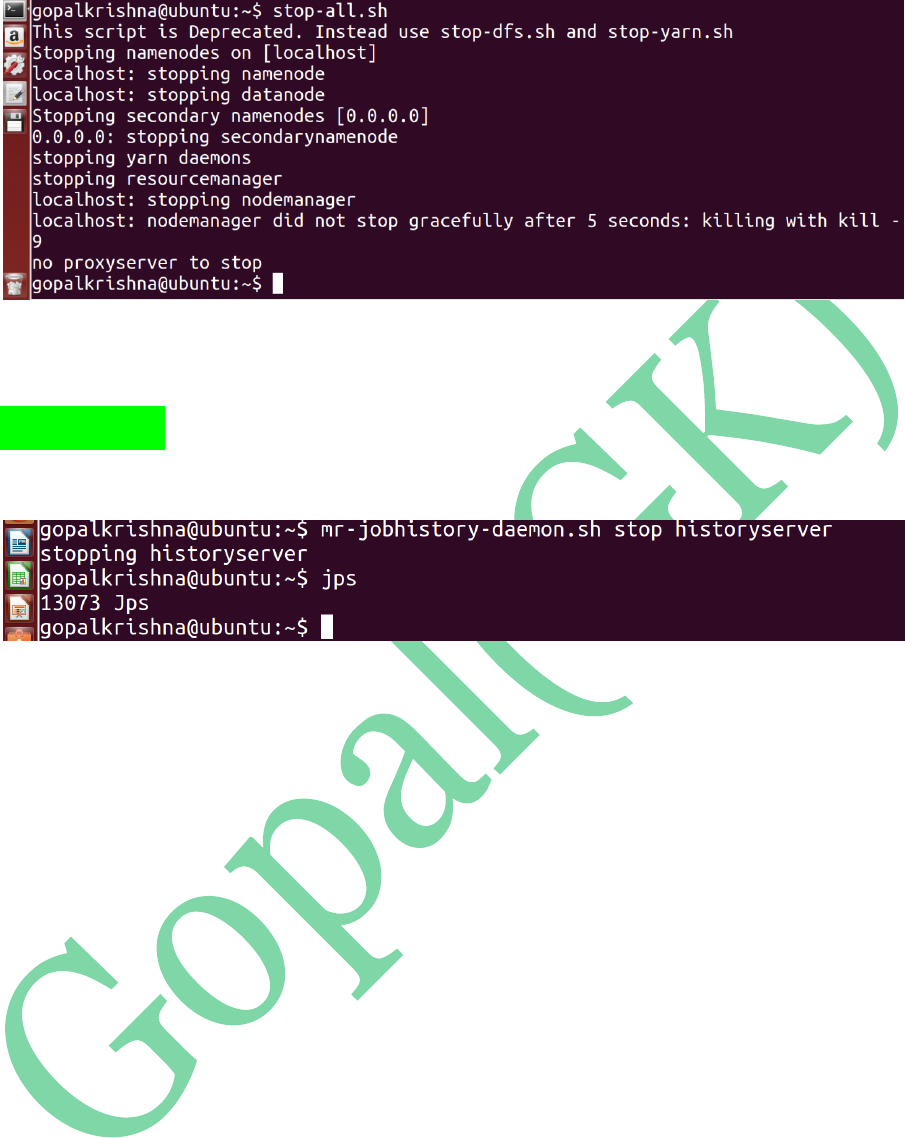
STEP 28: To Stop Job History Server in
2.x.x.
