HEL Tool Installation Instructions For State GIS Specialsit
User Manual:
Open the PDF directly: View PDF ![]() .
.
Page Count: 11
HEL Tool Installation instructions for State GIS Specialist
You can get a copy of the HEL model from https://github.com/ajdiazdk/HEL-Determination where the
tool will be maintained. Or the GIS SharePoint Shared Tools and Procedures
Save zip file and unzip. the tool can be saved anywhere. However, consistency for a field office is
important. We suggest keeping it on the C:\HEL (do NOT save on the desktop or within the user profile)
The ability to use bat files to quickly update portions of the tool will greatly help a state if the folder is
always found in the same location.
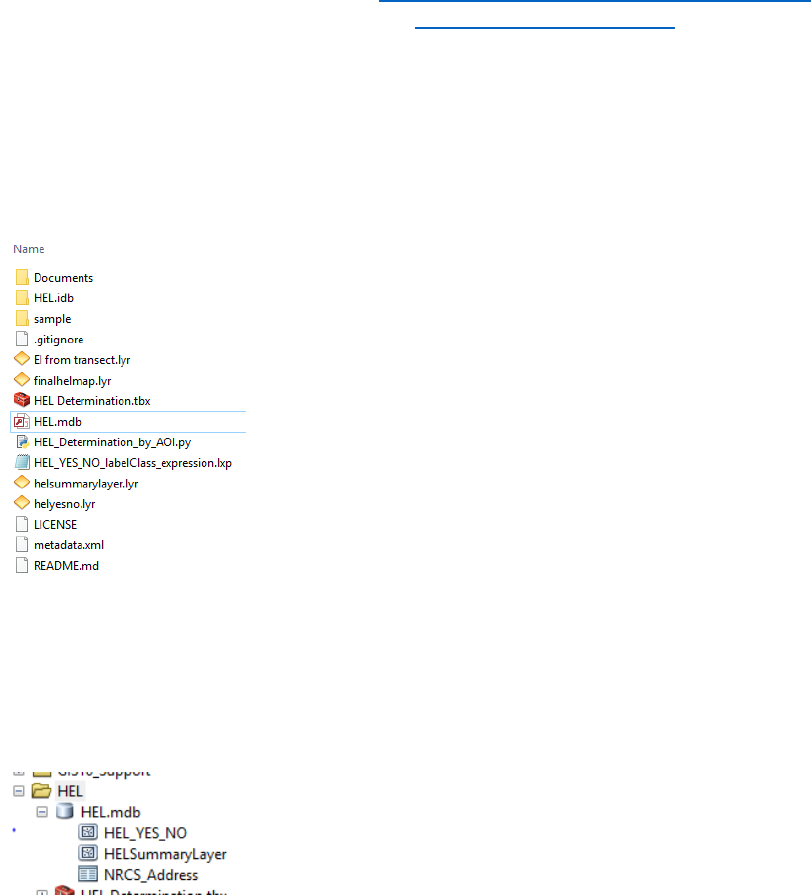
These are the minimum folders you need. You may wish to add extra folder for your field office.
The HEL.mdb is a personal geodatabase. Outputs are overwritten every time it is run. There is no feature
dataset therefore projection is not an issue. If the user gets an error. Make sure that the access mdb has
full write access. In my computer (ArcMap and access need to be closed) Right click
HEL.mdb>properties>security tab. Check permissions.
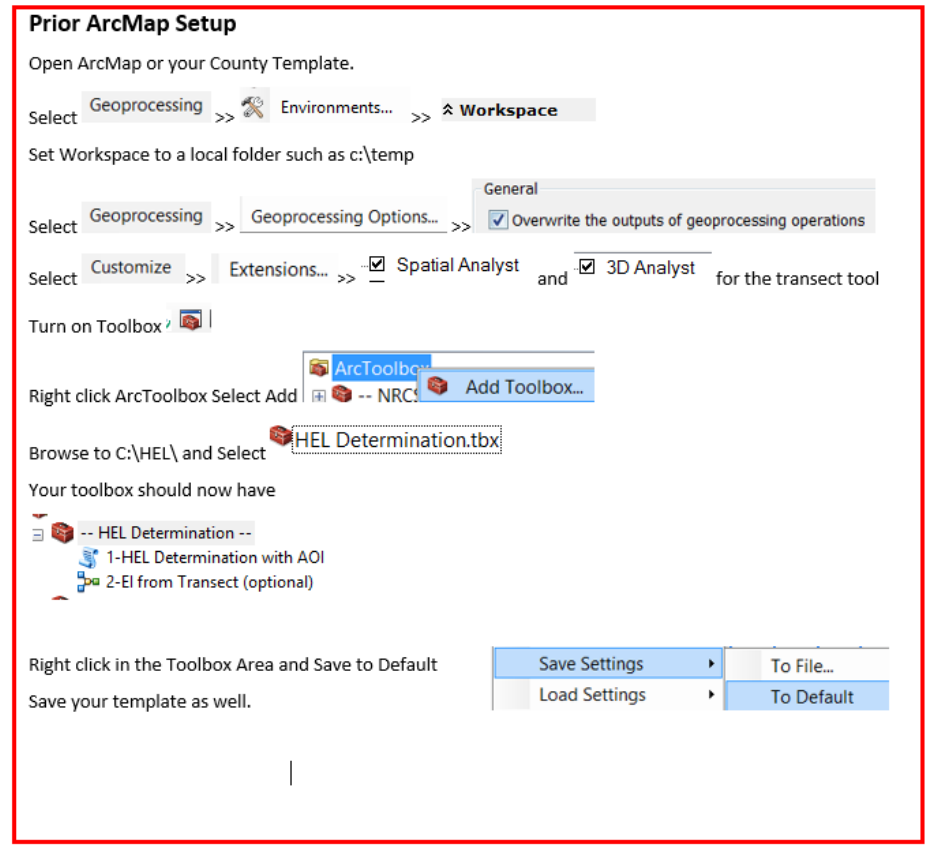
Here are the setting for ArcMap that are provided in the user manual. If the normal.mxt is deleted or a
new ArcMap version is used, those setting need to be verified.
Data:
1) CLU layer is readily available in field offices for Conservation Planning in Toolkit.
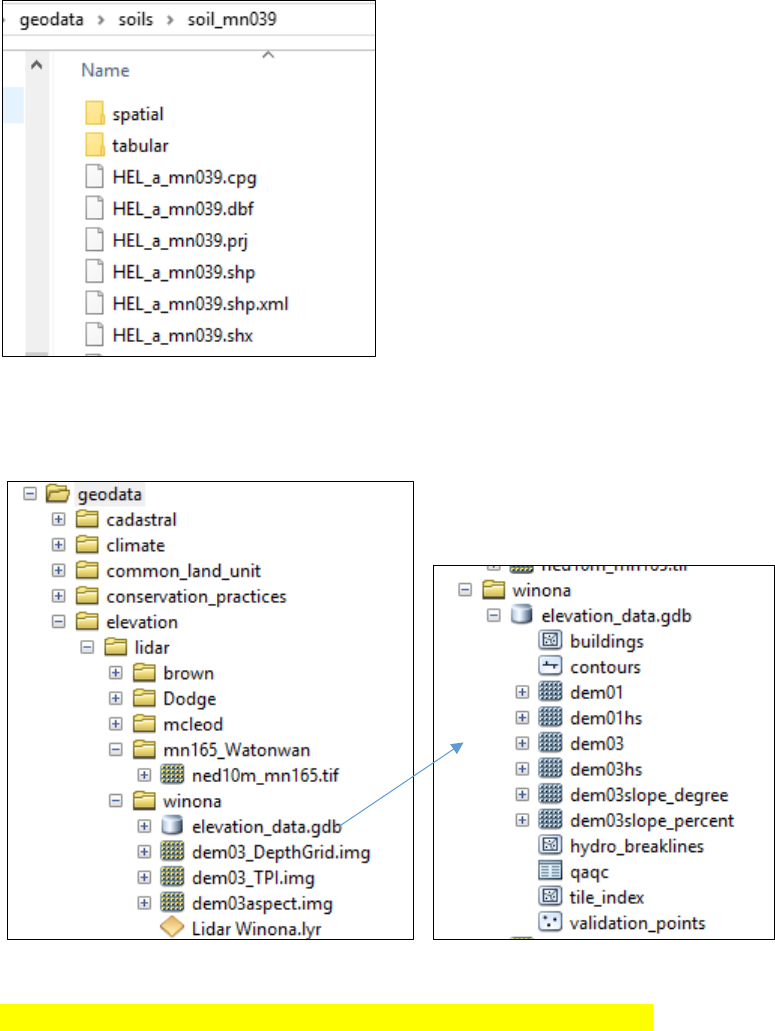
2) Soil layer is readily available in field offices for Conservation Planning in Toolkit. It is joined 1-1
relationship with Frozen HEL attributes, or a state may have access to the original frozen HEL layers.
Here is an example of HEL shapefile name and a good place to save it on the F:\ geodata
3) LiDAR DEM (3meter creates good results). Here is an example of how MN stores and distributes LiDAR
data. Notice also an example of ned10m_mn165.tif example if you do not have LiDAR yet the 3DEP 10m
DEM is a valuable elevation dataset.
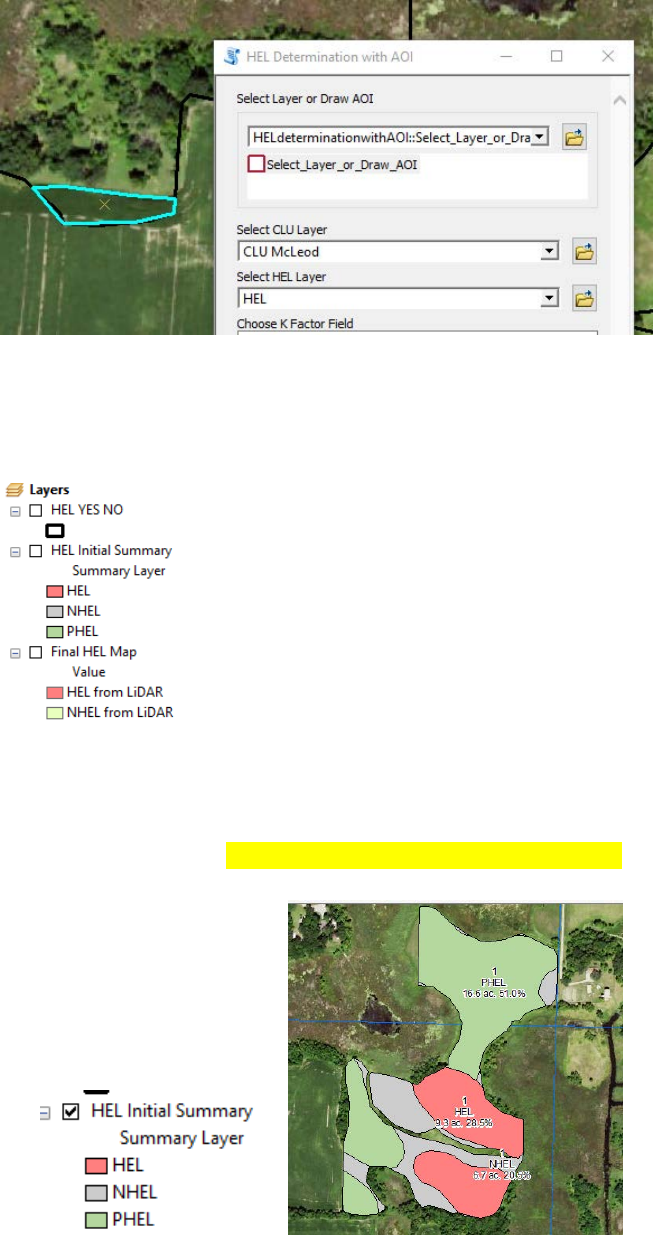
Running the tool:
BEFORE RUNNING ANY OF THE TOOLS, SELECT a CLU FIELD IN YOUR MAP.
The need to input a tract and field number was removed to allow more flexibility across states. Tract
numbers can change and would lead to unnecessary errors. In addition, a user would first zoom to the
tract indicated on a 1026 request to evaluate land use changes and location prior to running the model.
1) Open a county template in ArcMap used by field office users. Since many state have already
Toolkit templates created, those can be used and the user just adds the HEL and DEM layers.
2) Add the toolbox
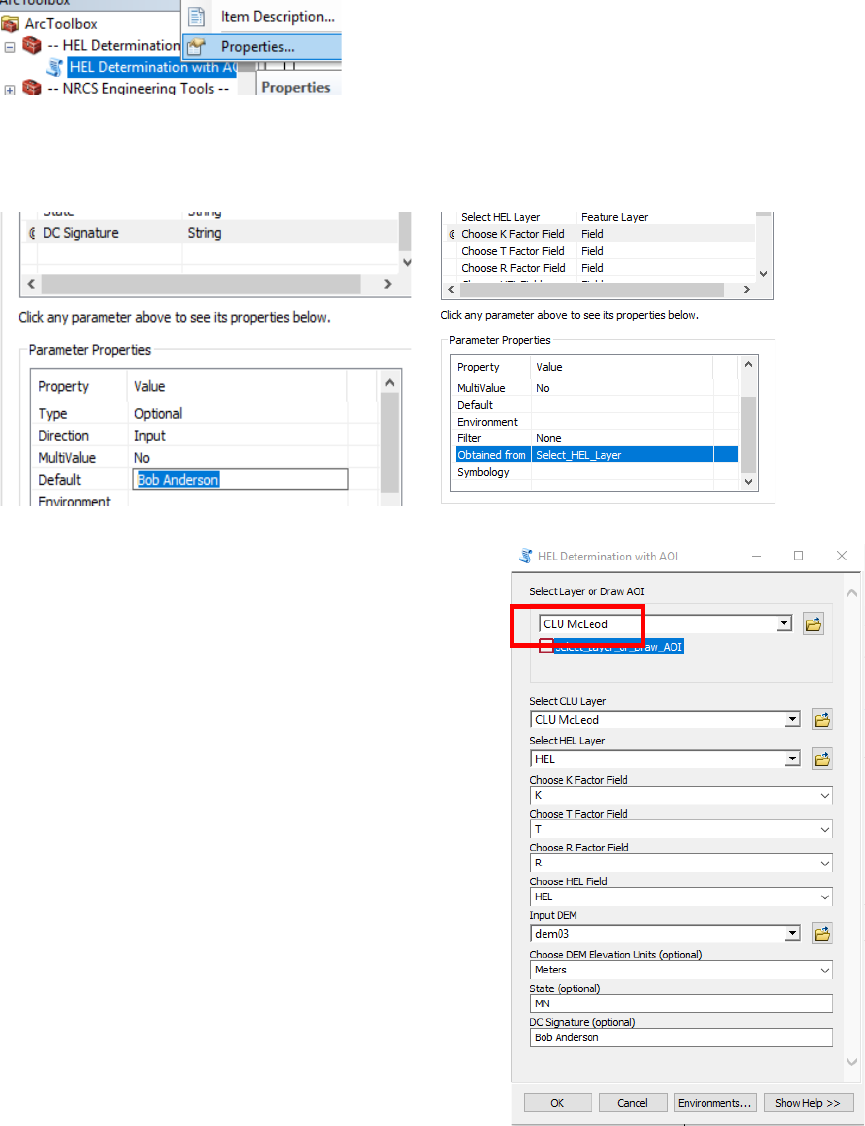
3) Modify the parameters by changing the properties of the py script
For example. You can set default for CLU and HEL layers and the state and DC name. The K,T,R
factor are extracted from the HEL layer and won’t need a default.
If the user will be using fields from the CLU or a shapefile. Then
the “Select Layer or Draw AOI” must be changed to a layer in
the map. This tends to be where there are user errors. Either
the layer was not changed or it was changed and no filed was
selected and the py is analyzing the entire county
If a field is not already defined in a CLU, the user can do 1 of 2
things
1) export a field to a shapefile, edit, and split out the new
areas converted to crop. Make sure each split has a
unique CLUNBR. You can then run the tool on the
temporary layer.
OR
2) If draw an Area Of Interest representing the newly
converted grounds. This is the default.
OUTPUTS:
3 layers are created, and MS Access will open to create reports and mailings
1) The “HEL Initial Summary” Layer provides percent of HELC prior to LiDAR analysis of PHEL soils
mapunits. Acres and Percent for each HEL type are tallied by field. This layer is more of a visual.
Essentially, it is the intersect of the HEL an CLU layers. It is a Multi part Polygon so the labels may be
duplicated. The User MAY NEED TO TURN OFF DUPLICATE LABELS in the Layer Properties. In any
given field you should only see one label for NHEL, one for PHEL and one for HEL
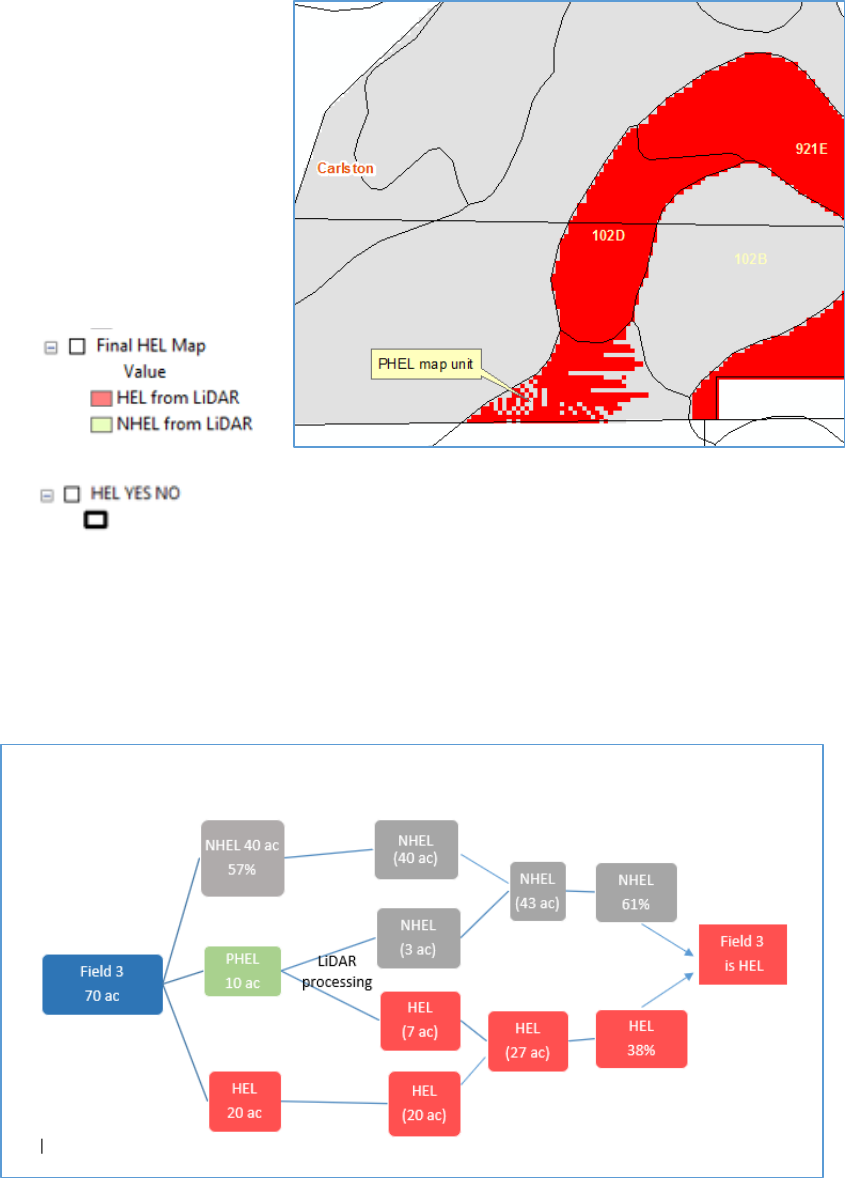
2) The “Final HEL map” includes pixels with the frozen HEL/NHEL values and pixels from PHEL mapuits
analysed using LiDAR to derive EI values. The tool then converts the EI to HEL/NHEL.
3)
The “HEL Yes No” layer is the output summarizing the total area covered by the ‘red’ pixels (HEL) for
each field analyzed within a Tract. So if a field has originally 70 ac HEL, 40 ac NHEL, and 10 ac PHEL.
The PHEL map unit would be broken down based on lidar analysis (speckled look on the map) 7ac
HEL and 3ac NHEL. Those are then tallied back with the other frozen HEL/NHEL map unit and the
33.33% or >=50 acr calculated.
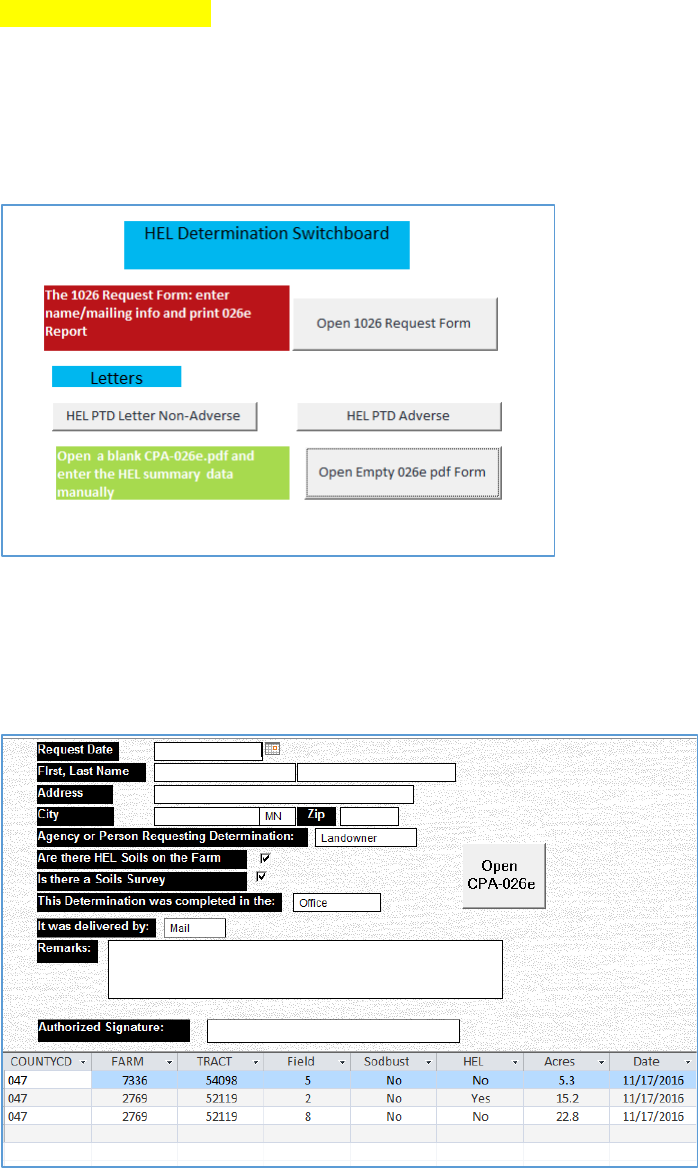
Setting up the HEL.mdb
After running the Model Access will automatically open. It is important to close ArcMap. You can also
open the HEL.mdb manually from C:\HEL (or your folder) \HEL.mdb in order to make changes.
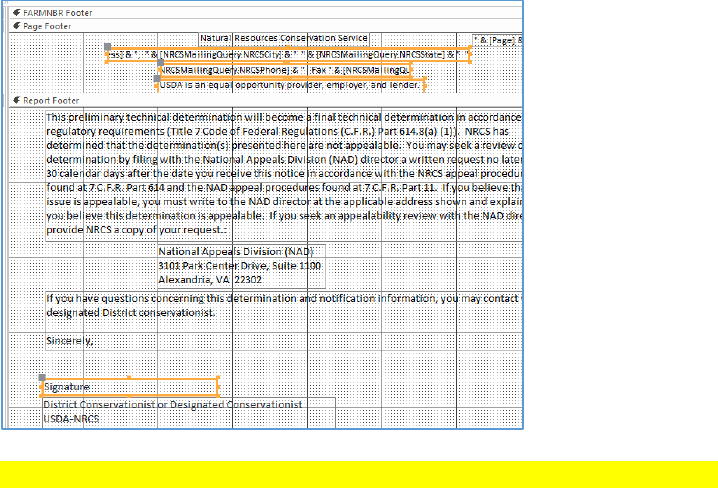
The Switchboard includes the Request Form for the 026e and sample of letters.
If you are not familiar with Access Contact Christiane (info below) to navigate through the changes for
your state.
The information in the Request form is pulled from the HEL_YES_NO table.
The table at the bottom of the form can be modified as needed. If multiple Tracts were accidentally
included. The extra line(s) could be deleted instead of re-running all the models in ArcMap (highlighted
below). Some field offices, only use the HEL.mdb to print out 026 e and letters instead of running the
ArcMap tool. When the determinations are simple HEL/NHEL.
If a field was Sodbusted the correct entry would need to be changed manually as the information is ‘by
field’ in the 026e form.

Updating LETTERS
The COUNTYCD field links to the Table via the Query
Here are the required fields
You can open the table NRCS_Address and copy and paste from an excel table, however make sure the
fields line up. There are 2 records in there to show the format I used. The Only important format is the
NRCSFIPS must match the CLU COUNTYCD code. Fipscode: 45 won’t match with the CLU COUNTYCD
045. Add leading 0 if they are missing in your state address list.
UPDATING SWITCHBOX
UPDATING LETTERS
The letters can all be customized by opening them in design view
Each text box (orange below) can be edited to fit a states need. Keep the text box small to fit on paper
better.
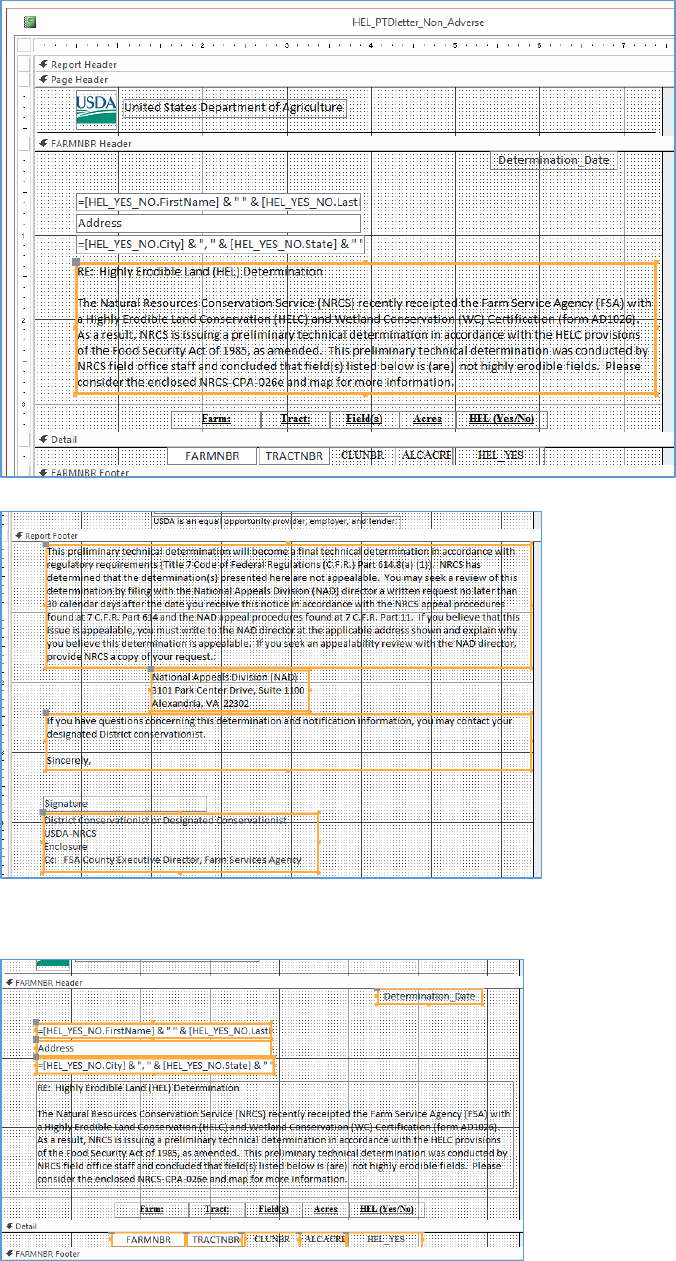
The other entries in the letters are data driven. And do not need to be changed
It is important to close the access database prior to using the model in ArcMap
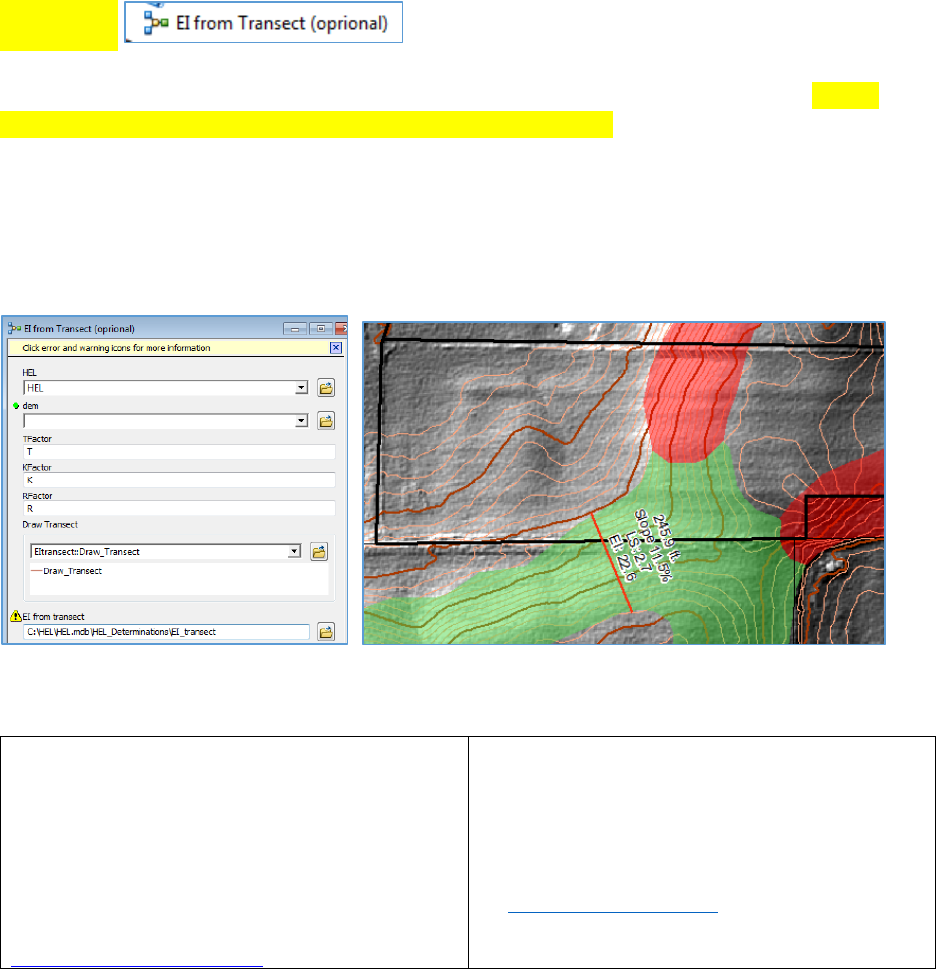
Optional tool
The Model will extract from your DEM the slope and length from a line drawn on the map. It is not
linked to any other process, and is for display and reference purpose. For example, if field calculations
were requested during the Preliminary appeal process. The Transect could be verified against the LiDAR
data. This tool requires 3D Analyst to be enabled
The tool is optional and as before, once Parameter are set in the Model (T,K,R,HEL), they can be
removed from the Model display.
Please provide any changes, improvements to this Tool.
Kevin Godsey, Soil Scientist
Missouri NRCS MLRA Soil Survey,
Marble office
PO BOX 199
406 East Main St.
Marble Hill, MO 63764
OFFICE 573-741-3033
FAX 855-835-0067
kevin.godsey@mo.usda.gov
Christiane Roy
SE MN Regional GIS Specialist
USDA - NRCS
1485 Industrial Drive #102, Rochester,
MN 555901
:office (507) 405-3580 cell (507)-951-2256
: christiane.roy@mn.usda.gov
