Hardcore SK Guide EN
User Manual:
Open the PDF directly: View PDF ![]() .
.
Page Count: 36

1 | P a g e
Guide: Beginner’s tips and tricks
If you wish to push the boundaries
of RimWorld and explore the limits of your capabilities,
then this modpack and guide is for you.
Hardcore SK - https://vk.com/hardcore_sk
Hardcore SK Russian Website - http://hardcore-sk.ru/
Website to download the current version of the modpack for RimWorld - https://github.com/skyarkhangel/Hardcore-SK
If you’re reading this guide, then you’ve already installed the mod and are looking forward to playing, but need a starting
point. Videos and streams on the game doesn’t always give you the best grounding. So read on, and enjoy!
1. Menu and Tabs Description
2
2. Overview: Icons and Functions
9
3. Selecting a location for your base and transferring items to a warehouse
11
4. Starting out: Differences in terrain and general tips for the first few days
18
5. Clothing functionality, features, and sets
23
6. Glossary of events and their meanings
25
7. Troubleshooting: Possible solutions to some critical errors
Acknowledgements and Discord/Forum Information
34
36
2 | P a g e
1. Menu and Tabs Description
Before you play the game, you should familiarize yourself with the existing game tabs/menus and their functions.
Architect – The main tab, where all the submenus for building are listed.
Manager – Define a list of settlers for what work is to be performed to what degree. You can specify who will hunt, in what
radius, who will work on logging tasks, collect mushrooms for food, etc.
Work - In the default ‘vanilla’ game, this tab allows you to either use a simple check system to turn on/off settler
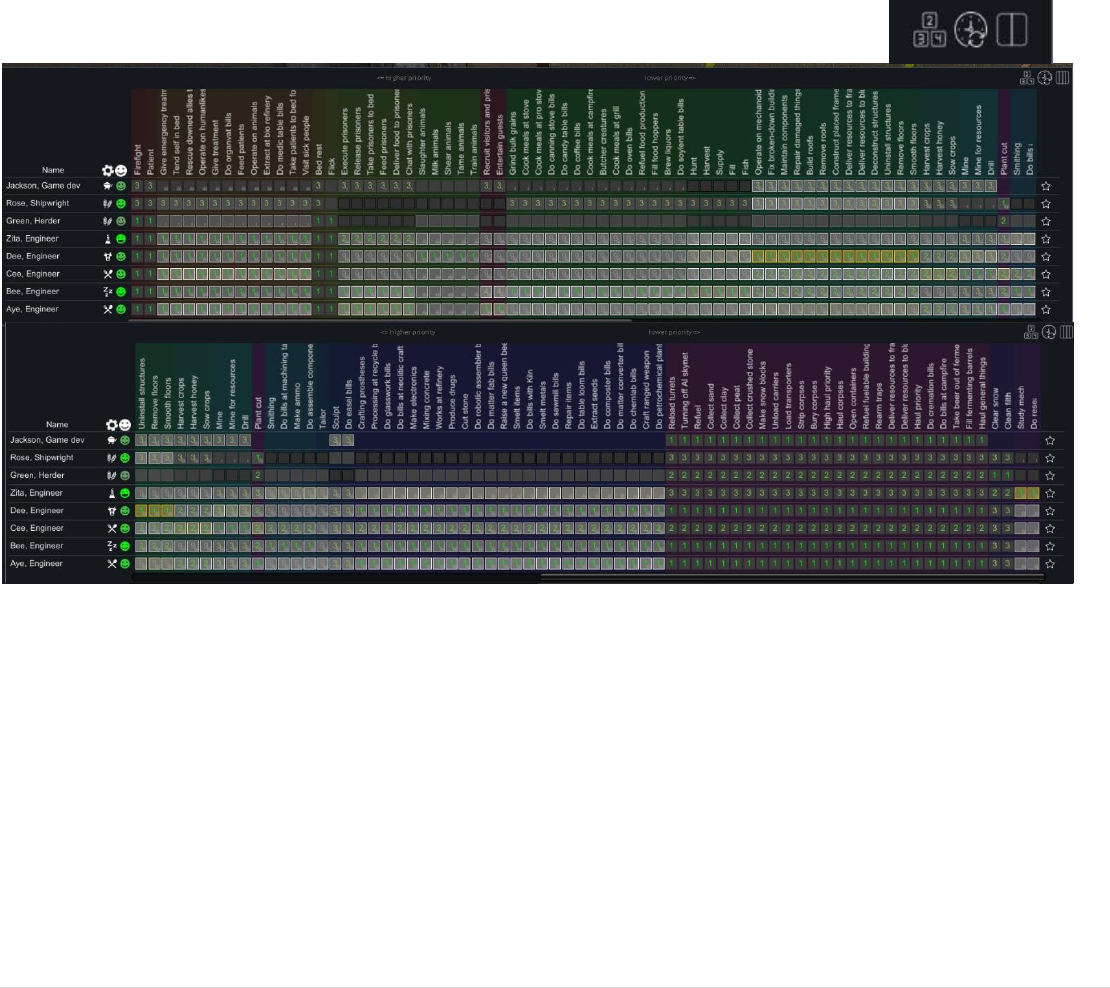
assignment to specific tasks, or you can choose to turn on the more detailed 1-4 priority system. Note: The tasks are
already lined up with the highest priority on the left and the less pressing towards the right. The numeric system allows for
slight overrides of this standard order. With Hardcore SK, you are further allowed to increase the priority system up to 9
digits for a more detailed hierarchy. There are options for more detailed lists of tasks as well so that even further precision
and control can be gained over your settler’s prioritization. See the screenshot below for an example:
Adjusting the priority settings can be made with the icons on the top right of the tab.
Note: There is a horizontal scroll bar at the bottom of the screen when this detailed view is enabled.
Medical - Monitor the health of the settlers and prohibit or authorize the use of medications and treatments.
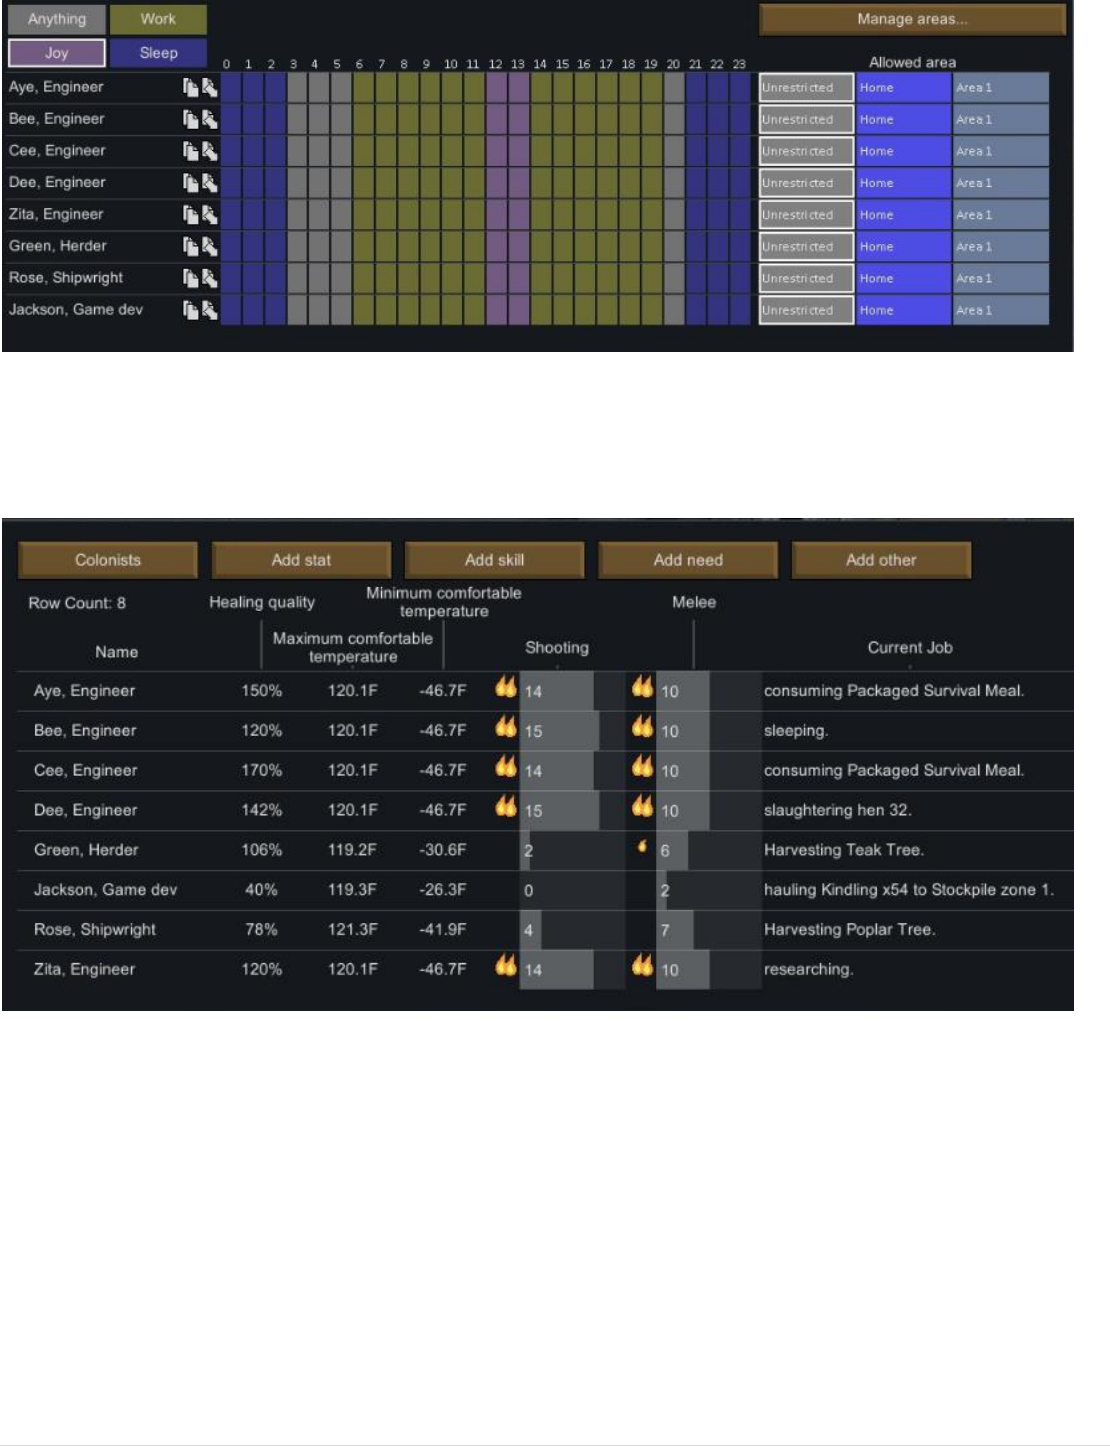
Restrict - Allows you to manage the time of day certain groups of tasks are performed for each settler. There are four
groups: Work(yellow), Sleep(blue), Joy(purple), and Anything(gray). When the time of day is set for them to work, they will
perform tasks based on the priority schedule as available. During Joy hours, they will perform recreational tasks if their
enjoyment is low. Sleep will allow them to finish the task they’re on, and then force their next task to be to get into bed for
the designated time whether they are tired or not. It’s recommended at first to always have at least a few hours of forced
recreation cut into the day to ensure adequate happiness levels.
3 | P a g e
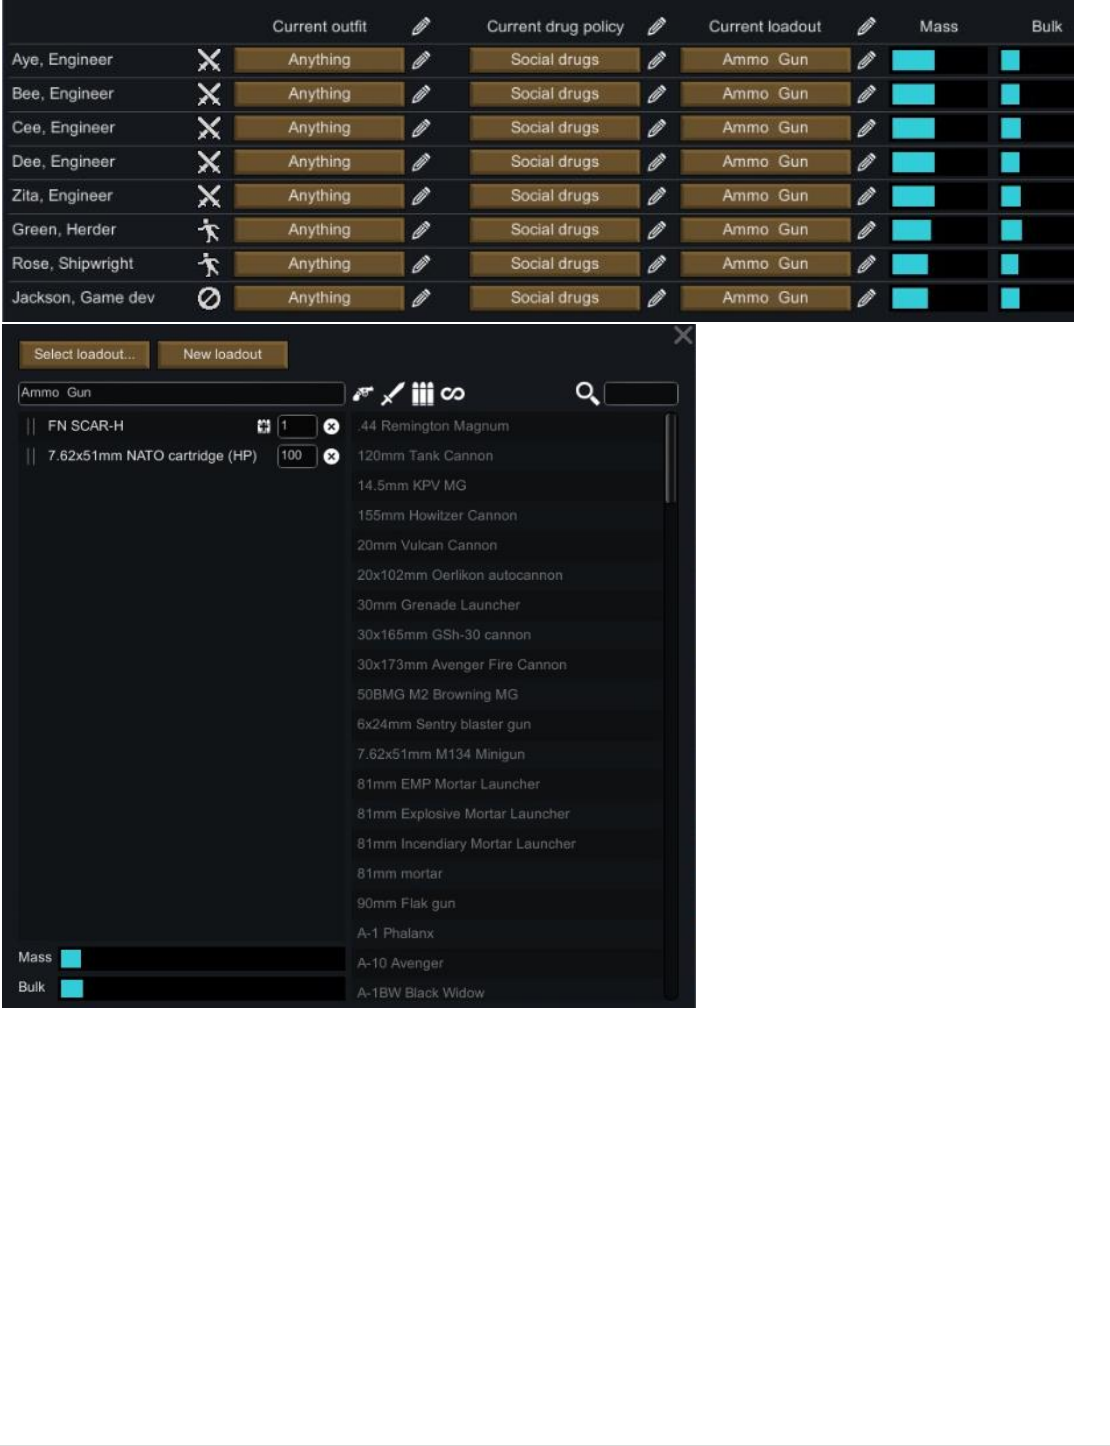
Numbers - This tab is a very important and mainly used tab. It allows you to view all of the information and statistics about
the settlers, enemies, wild animals, etc. in one screen for easy comparison. Use the add stat, add skill, add need, and add
other list buttons to build your custom view.
Assign - This tab allows you to create a set of clothing, equipment, and other portable items you wish them to have on
their person at all times. This can be beneficial in creating a uniform across all settlers, or quickly changing sets of attire for
warmer or colder clients. Additionally, you can assign your settler to hold a certain amount of ammo at all times to ensure
readiness for battle. Another great benefit is when your settler is injured and drops items to the ground, once they’ve been

4 | P a g e
rescued and healed up, they’ll go grab their items again, assuming they are unforbidden, of course! There’s a handy tool to
unforbid all forbidden items on the map:
At times you will notice an icon next to your settler’s name in the form of a man walking to the left, this is indicative that
your settler has detected danger and is fleeing the immediate area to get to safety. You can select this icon and change it to
a crossed circle meaning they will ignore the danger and carry on with their task, which can be detrimental to them and is
not recommended, but may be required in certain circumstances. The last selection is crossed swords, which will tell the
settler to attack the enemy!
Renaming a selection with ‘weapons1’ to any of their own, ‘weapons1’ must be completely emptied, then press backspace
or delete on the text.
Within the section for clothes and weapons, there is a very helpful search function to find the specific resources to assign.
Items that are currently available to be assigned will be in white against the master list.
5 | P a g e
Animals – This will show a list of animals that are tied to the settlers and colony. You can utilize this tab to indicate specific
areas they are allowed to wander in, a safe zone in the event of attacks, and to slaughter excess creatures. There’s also
options to train up creatures that have learning capabilities here such as haul. Turning ‘on’ the training on a particular
animal will allow those settlers with the Handle job.
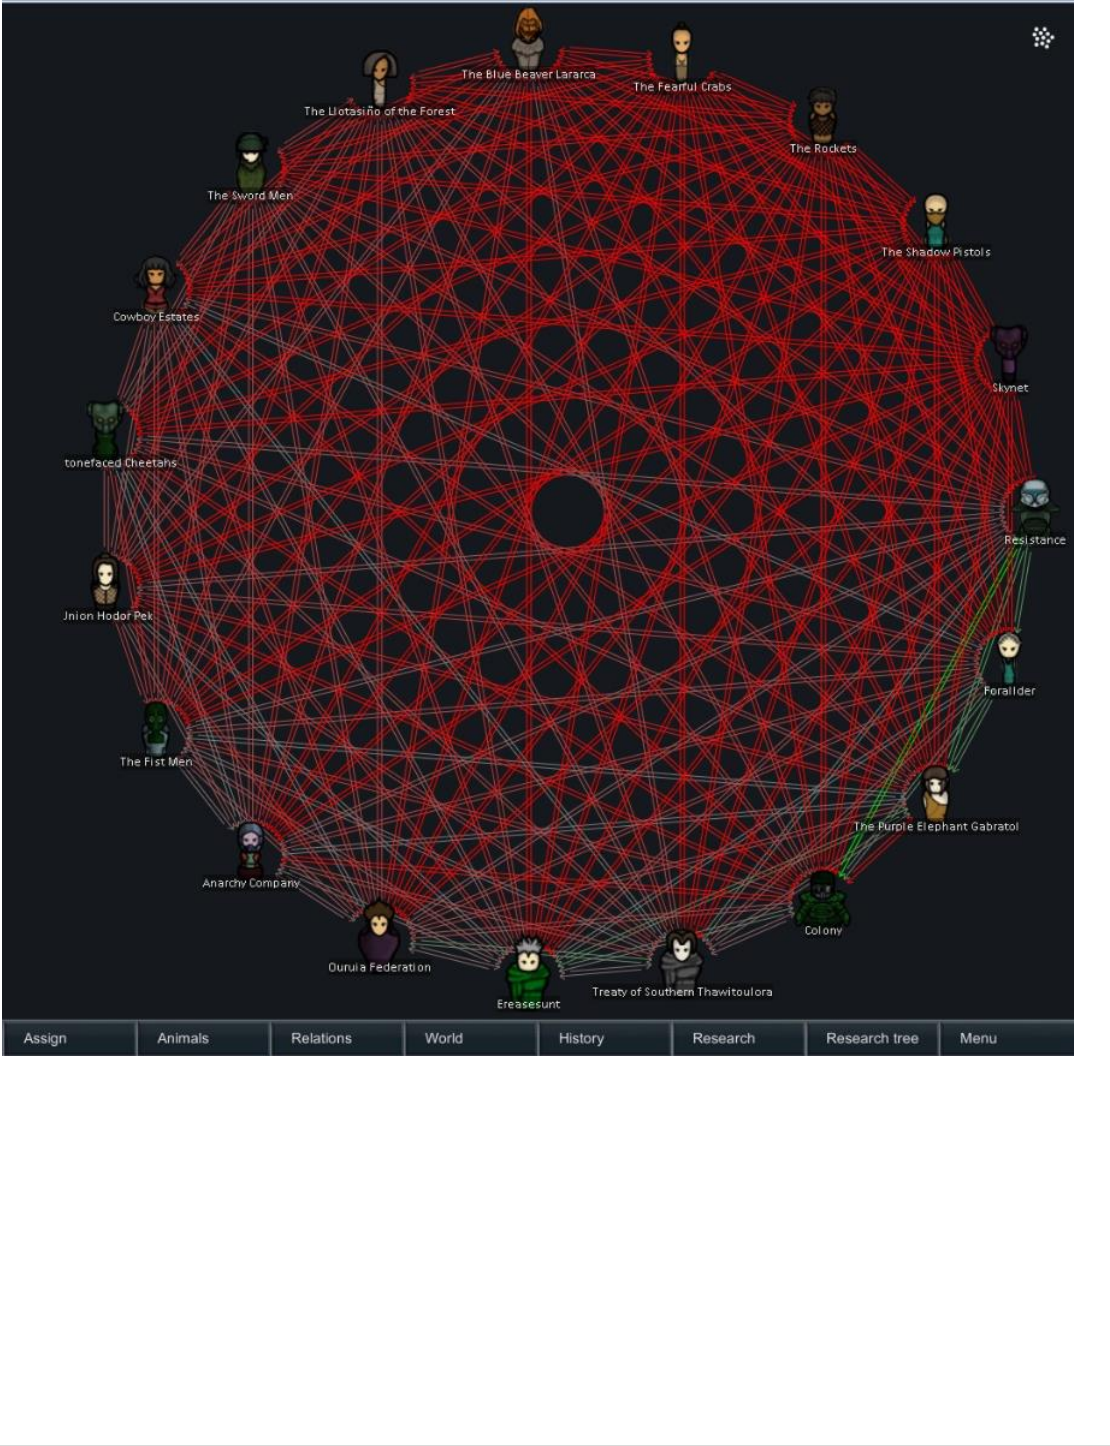
Relations – This chart will show the correlation of relationships between the settlers and other settlements towards you.
The top left button can be toggled between colonists and factions to see different views. Click the dot cluster icon in the
upper right corner of the screen to toggle between a static circle and a hover based dynamic mapping system, in the cluster
mode you can click individuals to see how others feel towards them quickly and chance focus.
6 | P a g e
World –Allows you to see the world map after settlement. Icons stipulate where certain factions are in relation to your icon
on the map. If you want to share the world with others because it’s so well located near a water source, then I’m afraid
you’ll be disappointed, as when you create a map, resources are generated differently each time.
History – A timeline graph of your colony’s wealth throughout the ages. Within History you’ll find the Statistics tab – This
holds details on the wealth of the colony, time since landing, number of raids, etc.
Help – Here you can look up what a new machine or recipe will do for your colony, or what is needed to utilize a newly
discovered resource to its greatest potential, etc.
It’s highly recommended you review the help tab to see if answers to your questions are there!
Research Tree – This research tree gives a better grouping, representation, and graphical examples of what will be
unlocked with different research and tiers. You can queue up and adjust research based on your tastes and desired next
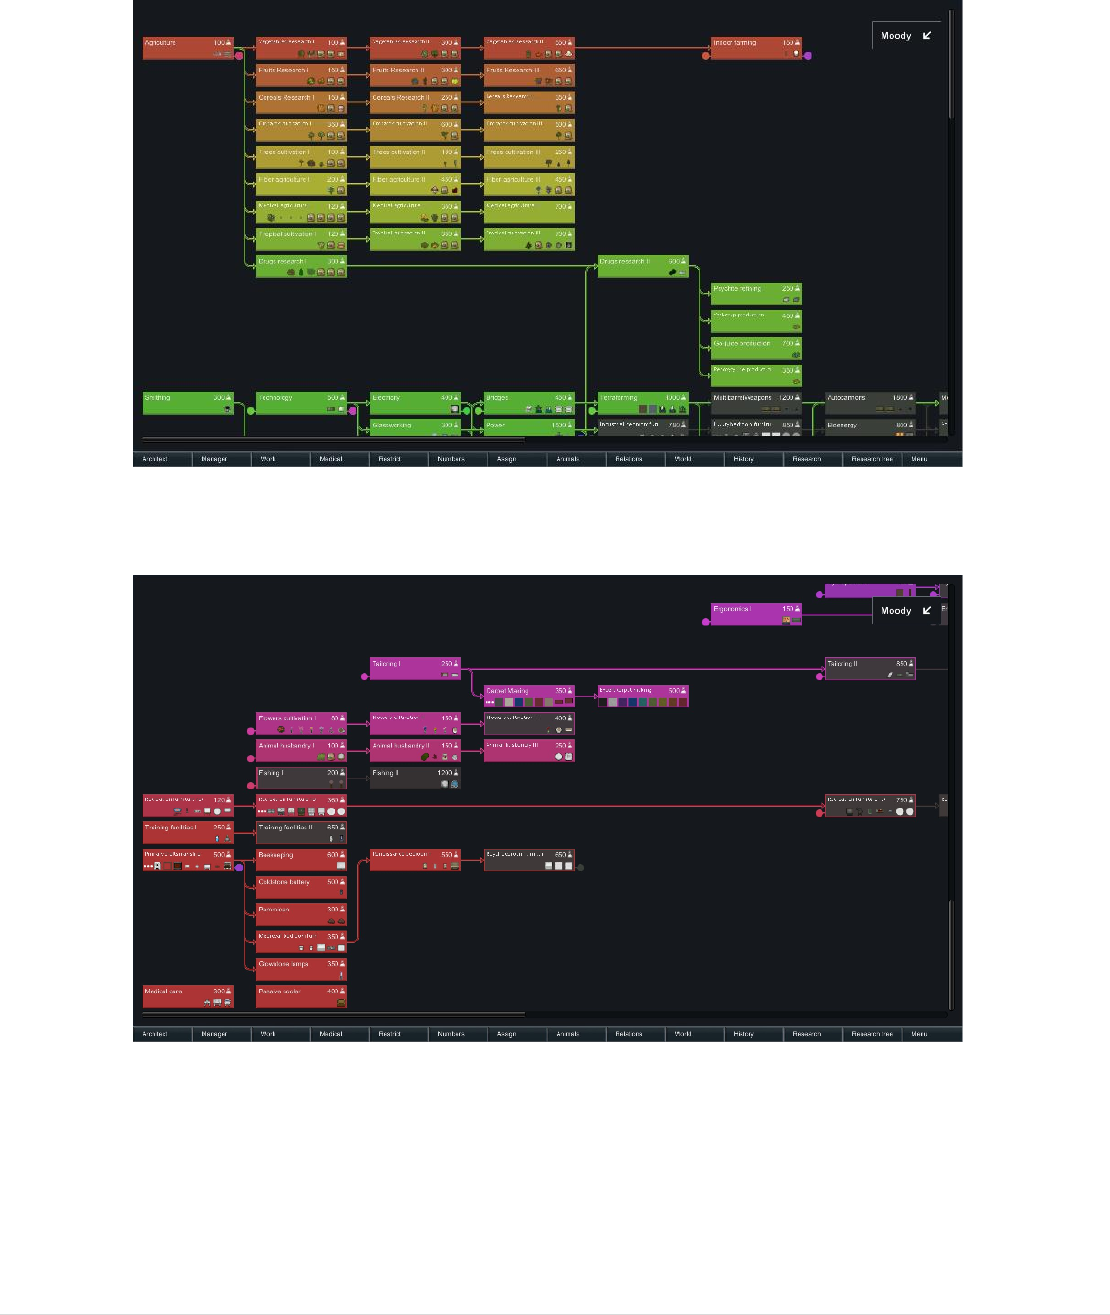
7 | P a g e
steps of progression within the game. To do so, hold the Shift key down while selecting subsequent research jobs. If your
settler does not proceed down the research path you’ve designated, you may not have met the prerequisites! Make sure
you have the most advanced research table/bench and an available researcher. You can learn more about this in the Help
tab.
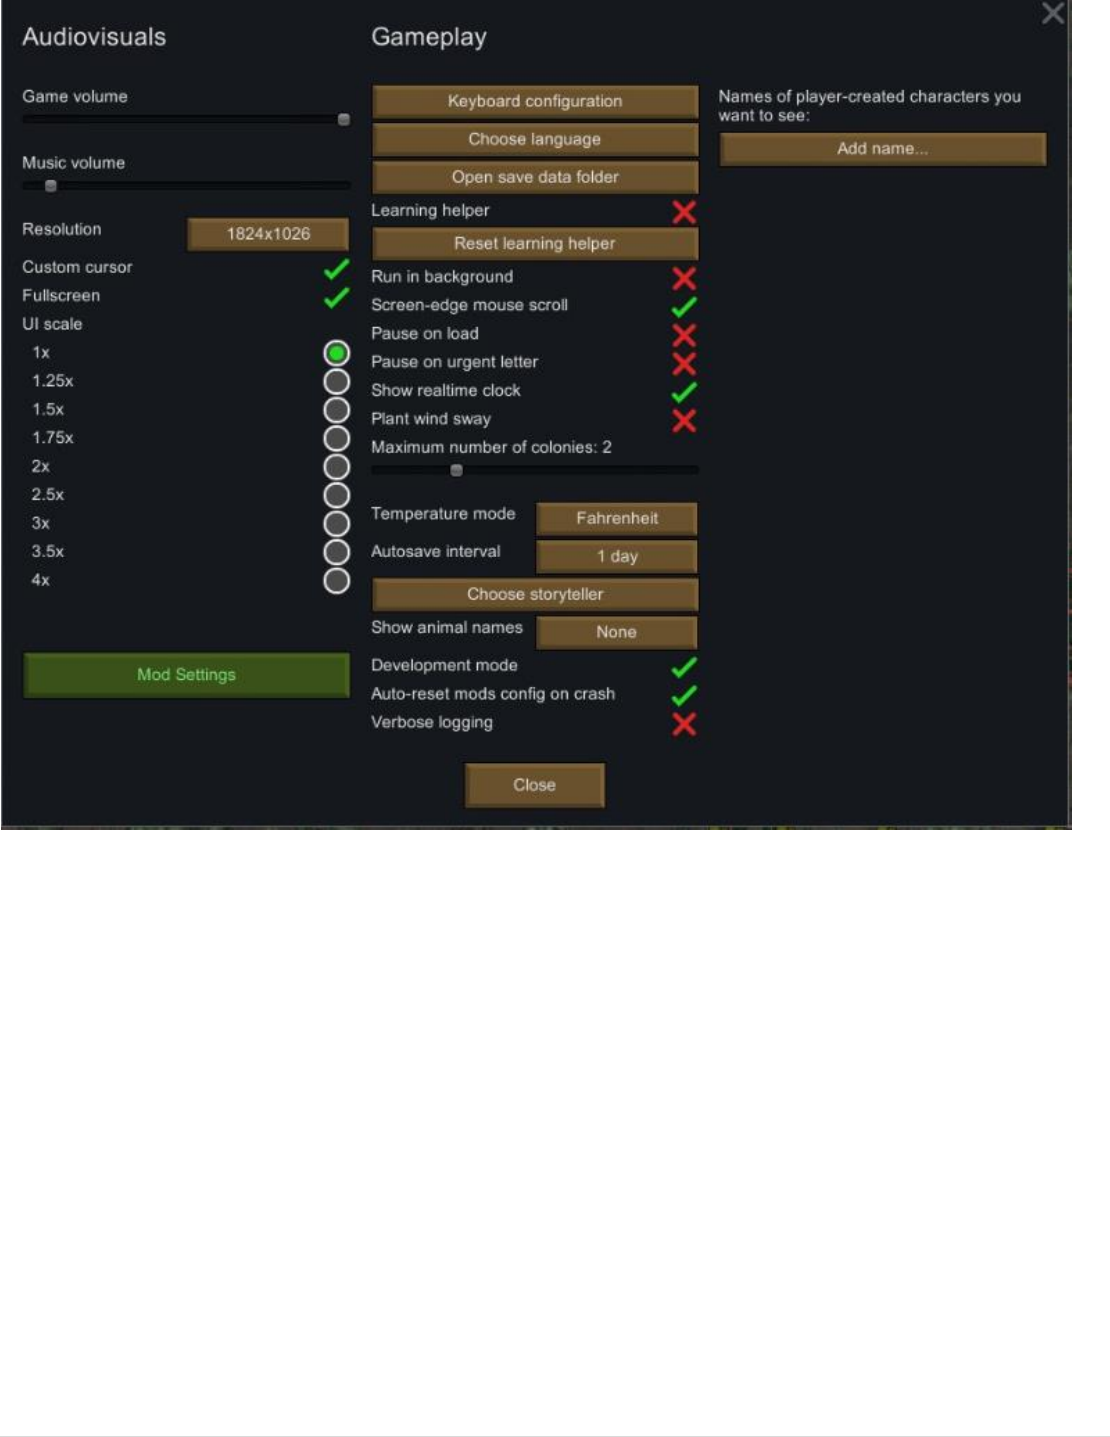
Menu – This is the game menu tab to save, load, configure, etc the game worlds. There are also settings for the game and
the mods within these menus, which will be touched on later.
8 | P a g e

9 | P a g e
2. Overview: Icons and Functions
First, we’ll describe the icons in the lower right corner of the screen above the Menu.
You can get useful information and overlays about what is happening with these menu
and toggle icons. You can turn on/off area displays and other functions. Depending on
where your cursor is hovering, you will see the temperature indoors or outdoors listed.
Note: You can change whether the output of temperature is Fahrenheit or Celsius in the
options menu.
Below the temperature listing, you’ll see the weather indicator. When no unusual
weather is present there will be no listing or it will simply state ‘Clear’, however at times
you’ll see indicators of Rain, Thunderstorm, Fog, Hurricane, etc. Pay close attention to
these and the upcoming weather alerts to ensure you move your settlers indoors when
necessary. Hovering your mouse cursor over the date also displays useful information.
Below the date you’ll see the pause, play, and speed up triangle buttons. These also
correlate to keybinds by default. The ‘space’ key will pause your game, the 1, 2, 3, and 4
buttons on your keyboard will then resume normal speed and increase respectively.
Next, we’ll discuss the description of the icons beneath the game speed indicators.
The first row with two icons directly under the game speed indicators have unique functions. The left most icon, looking
like a file page, will toggle on and condense the item list on the left hand side of your screen. Should the default list run too
long with too many unique items, you won’t be able to see all of your inventory at a glance. The solution here is to
condense the list into subfolders and similar item groups so that you can expand resources you want to track. The second
button to the right of the list icon, is to enable/disable the minimap.
On the next row we have the house icon. When enabled it will automatically create and expand the home zone in any
areas where your settlers have constructed a base, warehouse, or other facilities. The home zone is important because the
settlers will automatically work to repair walls and fight fires set within the home area. It also enables your settlers to
review the facilities as seen below.
The four square icon, when enabled, will show the top panel for settlers for easy location and quick reference to their
current status.
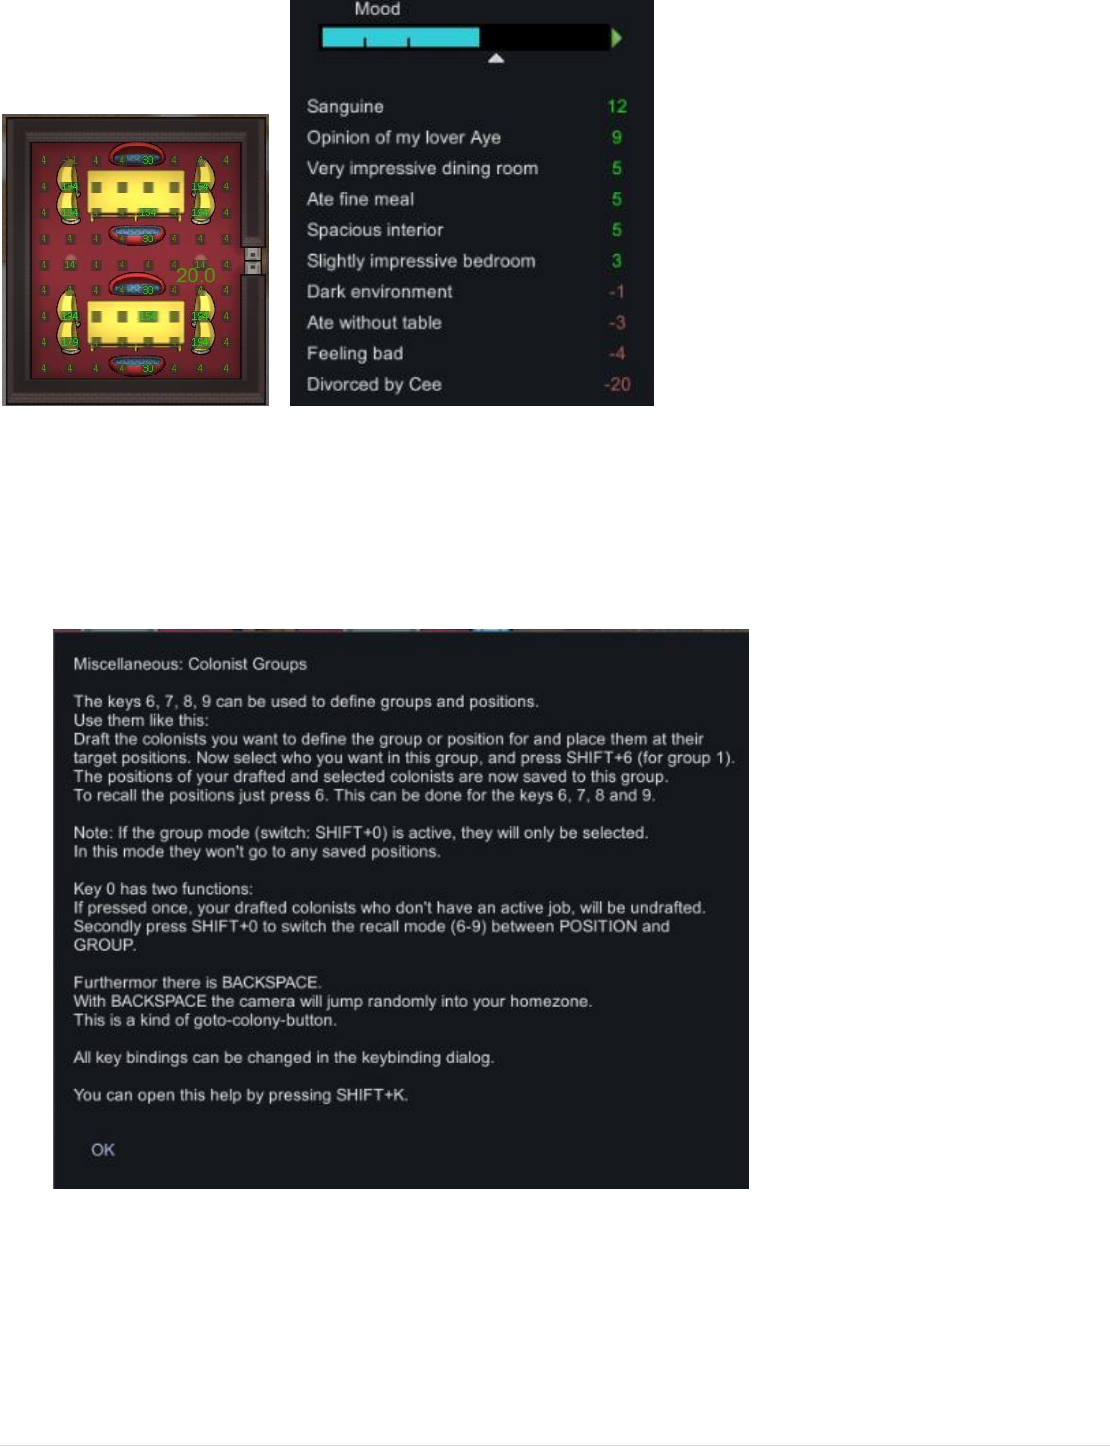
The third icon of graphical bars will allow your cursor to hover over rooms and display text boxes of the current room type
based on furniture and function, cleanliness, wealth, comfort, and other details to ascertain the happiness of your colony
and appeal to visiting factions who want to do business with you. The more comfortable a room, the larger happiness
bonus your settler receives when occupying it.
The fourth icon, which appears as a man’s head, will allow you to see a numerical and colored representation of the appeal
and beauty of wherever your mouse cursor hovers. The more positive and green the number, the better it is for your
settler, which increases the bonuses they receive towards happiness. The opposite is also true, negative, red numbers
mean less beauty and appeal, which can garner penalties and unhappiness.
10 | P a g e
The next to last button toggles the display areas such as ‘storehouse’, ‘landing’, etc. The very last icon below the ‘home
zone’ icon is to toggle the ‘Learning Helper’. The learning helper is the in game tutorial system that teaches you as you go
and is customized to what you interact with All these descriptions of each icon can be obtained by hovering over the icon in
game should you need a refresher.
Shift+K will open the FAQ for the beauty/fashion developers which gives robust detail about this functionality within the
game. You’ll find a lot of useful information including how to create a group of settlers for quick selection.

11 | P a g e
3. Selecting a location for your base and transferring items to a warehouse
Now that we have discussed some of the basics of the game, we move on to the tips and trips from the author himself. This
is not the be all, end all of how you must play, but recommendations to give an indication and a start for those who are
wanting a guide. As you play, you’ll most likely develop your own style and improve upon these basic steps.
So you have a group of settlers, what’s next?
Firstly, you’ll want to explore the map. Pause the game as soon as your settlers land in the zone. Scroll your mouse around
the map, zoom in using the middle scroll wheel on your mouse, and outward to get a better bird’s eye image. It’s
recommended you choose a place next to the hidden resource deposits. (Fig. 1 –deposit of ores, Fig. 2 - the oil field) as well
as near the water, if available on the map.
Fig. 1
Fig. 2
The hidden deposits of resources will allow you to build mines and extract certain kinds of ores. The oil field will allow you
to obtain and refine oil once unlocked. There are also hidden deposits of rare metals, but they won’t be available til much
later in gameplay. More on that later!
Once you have chosen your spot to set up a base, it’s necessary to first and foremost construct a warehouse for your
goods. Make sure you have four walls and a door surrounding an area that will be sufficient to hold all your current goods
and then some. Most items that you’ve landed with will start to decay in the open air over time (Medicine, food, weapons,
clothing etc.), and is at risk of being eaten by bugs, animals, etc. Crashbugs are especially interested in going after any
additional clothing and armor you have nearby. Once armor and clothing looks durability, they’re less effective. Go to the
Architect tab -> Zone/Area -> Storage. Click and drag the area you wish to set up as your storage area. Once it is enclosed,
your settlers should automatically build a rooftop overhead and when you move your curser over the area, it will show as
Indoor and display the temperature on the bottom right of the screen. If you single click the created zone, you’ll have a
small menu on the bottom left hand side of the screen with options to review the items and adjust what is and isn’t
allowable within the storage area. See Fig. 3 for the storage zone.

12 | P a g e
Fig. 3
You may also be delighted to find readymade structures and ruins on your map that you feel capable of setting up your
warehouse within. Be careful though, large structures with the inside obscured can mean unpleasant surprises once you
break in! Should your settlers approach the area and a message displays “Ancient danger” it’s recommended to avoid the
area during the early part of your game.
Once all your resources have been transferred to the warehouse, you can start to develop your colony. First, we’ll need to
prepare some basic building materials. Wood, blocks of stone, etc. Stone blocks can be obtained from deconstructing ruins
and floors or dismantling Cairns found around the map (Fig. 4) If the building is closed off, but there are no reports of an
“Ancient danger” when your settler walks near, be careful when excavating, as the roof may still be liable to collapse on
your settlers. This can result in death or a mangled settler. Building wooden wall pieces as roof support while mining is
recommended. Wood can be obtained from cutting down trees or dismantling totems (Fig. 5). At this stage in
development, it’s also recommended you begin dismantling and storing pieces of ship wreckage for these resources. This
will help boost you to a more industrial age once the basic research has been completed.

13 | P a g e
Fig. 4
Fig. 5
Walls built out of wood are put together quickly, but also burn equally quickly. The walls of stone blocks will not burn, but
take longer to put together. Your basic warehouse building may first be built out of wood and later replaced/expanded
with more study stone. The type of stone utilized does change the sturdiness of the walls. Granite has the highest hitpoints
and marble has the lowest.
Once you’ve extracted the required resources and built your first enclosed warehouse, you should begin constructing your
first benches:
Stone-cutting table (Requires: 70 stone blocks) Go to Architect -> Production -> Machining to select this table. You can
single click the table to reveal a menu and choose the appropriate stone type available to make the table. If you cannot
select the icon at all, look for a message at the top left of the screen indicating “You do not have the appropriate
materials”. This means you do not have at least 70 stone blocks of any kind. Time to dismantle and search for more cairns!
Once you have constructed the bench, you will set a Job to cut the stone. You can either select a predetermined amount to
be crafted, or utilize the various settings to have so many held in inventory at all times. Your settlers who are assigned to
crafting will get to work on carving stone as they prioritize their various daily tasks.
Sawmill (6 Components & 80 Wood Logs) Go to Architect -> Production -> Sawmill to select this table. This table will allow
us to turn wood logs into wood planks and kindling. It can be made out of wood logs and planks itself. Most likely, you’ll
have more wood logs available. Kindling is a very important fuel early in the game to generate light and heat for your
settlers. You’ll generate jobs on this table much like the stone-cutting table.
Butcher table (35 Stone Blocks) – Go to Architect -> Production -> Butchering to select this table. When a job is assigned to
this table you’ll be able to carve up animal corpses for meat, and after necessary studies, fillet fish. Please note that when
carving up animals it will soil the floor and cause extensive dirtiness within the room.
Grill (4 Components & 25 of any alloy) – Go to Architect -> Production -> Prepare Food/Grill (Depending on where you’re at
with research will determine how this is displayed) Grills require fuel which can be specified in the fuel tab once built. It’s
recommended you select wood logs as your only fuel source early in the game. Assuming you do not yet have an air-
conditioned room/freezer, your best long term food is jerky, as it lasts for 30 days at room temperature. All else cooked on
the grill requires refrigeration/freezing to keep long term or it will expire within 3 days. The warmer the temperature, the
faster the spoilage.
By default, the butcher tables do not allow for humanoid carving, as these meats give a negative mood when cut up,
cooked up, and consumed. If you’re in dire straits for food and prepared for the negative impact to happiness, you can turn

14 | P a g e
the option back on. Also note, insect meat is not desirable and gives a negative mood effect when consumed. Butchery is
on by default for these creatures, though. Some examples of the insect meats are antis, crash bugs, and megascarabs.
Now, when it comes to having a warehouse, it’s recommended you have these basic benches next to each warehouse.
When it comes time to have separate warehouses for different groups of materials, it’s best to have the correlating bench
either in the same room or in the adjoining room whenever possible. For example, by the warehouse where you store
blocks, gravel, sand, wood, and cement, you’d want to build the stone-cutting table so that the settlers can take their
finished products to this room to store immediately. The close the settler is to the storage warehouse for the result
resources, the more quickly they’ll be made.
Once these benches are ready, you can further develop your colonies ability to sustain itself. Your starting resources are
helpful to get you up and running, but they’re not infinite. When it comes to meals, you can produce them in several ways.
Hunting animals, fishing (after researching the technology), or growing plants if you have some starter seeds on hand. It’s
best to take some potato seeds at the beginning as these are the easiest to grow and thrive in a multitude of soil types.
They’re also capable of being fried on the grill providing an additional food source to jerky.
Now, we want to go ahead and build separate bedrooms for our settlers. You’ll notice that if they’re sleeping in a shared
room, on the ground, and being disturbed, they take a multitude of penalties to their happiness. Bedrooms are the best
answer to keeping your colonists happier longer, but at the very beginning it’s best to have a shared dormitory or just have
them sleep in the storage warehouse.
Making beds isn’t too difficult as long as you haven’t started on a glacier which lacks wood and grass. You should still have
some wood left over from dismantling totems and you can use the harvest tool in Architect -> Orders -> Harvest to gather
hay.
Hay beds have a very low restfulness gain, but it’s better than a sleeping spot as once the settler’s start using the hay beds,
they will lose the debuff from ‘sleeping on the ground’. You can also utilize animal hides to make beds. You’ll gain these
hides from butchering animals. There is a different hide type for each animal group you slaughter, so make sure that you
have enough of the specific animal type as they can’t mix and match animal hides to make one bed. The type of skin also
alters how much restfulness is gained from sleeping there. The highest gains are from rabbit and squirrel hide. The next

15 | P a g e
best option is muffalo hide. Even though rabbit and squirrel hide is the best, each animal only yields a small amount, so it’s
recommended to hunt for muffalo to make hide beds swiftly.
When your colonists take ill or are injured, beds offer varying bonuses to gaining immunity and recovery. Generally, the
author prefers to have a balanced bed that has good rest and immunity. The following animal hides do boast higher
immunity values though: turtle, cobra, alphabeaver, raptor. Also, hemp fabric, which can be obtained after dismantling
clothing that’s been traded for or recovered from raider victims, can be utilized and boosts a higher immunity.
The next step is to get your colonists eating off of a table rather than from the floor. This will help to alleviate the ‘ate
without table’ negative mood impact. Go to Architect -> Furniture -> Tables to build one of several starting table types.
Chairs can be placed around this to allow colonists to sit and eat there. It’s recommended to have the table in a room
adjoining your food stockpile warehouse.
After that, you’ll want to consider defense and building bedrooms for your settlers. The author tends to build rooms at
least 3x3 per bedroom.
The most important defense to set up is a ‘kill box’. The pathing of attacking AI is rather predictable, so some consider this
a little “OP” (overpowered). A kill box is an enclosed space that funnels the enemies into line to be attacked by your
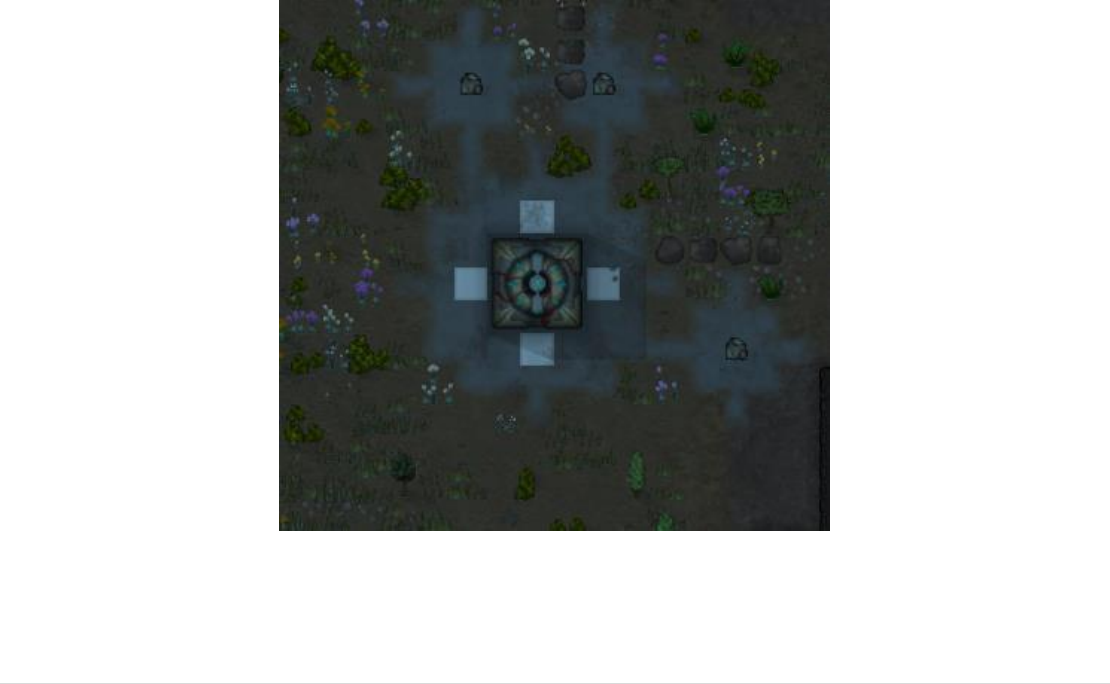
shielded and ready settlers. See Fig. 6 for a great example of a kill box setup. There are many variants and you can build
and improve as you unlock more security features from researching. Fig. 6
16 | P a g e
On the right in the above image you can see the colonists set up behind embrasures that will protect them from the
oncoming enemies which must navigate the narrow field on the left. The colonists will peak out from behind their
protection and fire through the embrasure slits to have the maximum cover against incoming attacks. The doors on the
sides will give you additional attack points for a large number of attackers.
This protection is not the only way to go about defending your base, but it is the author’s favorite. Just remember, the
doors require time to be opened and then you must take into account where to place your settlers, so a good deal of
strategy with the game on pause is required when an attack alert is received.
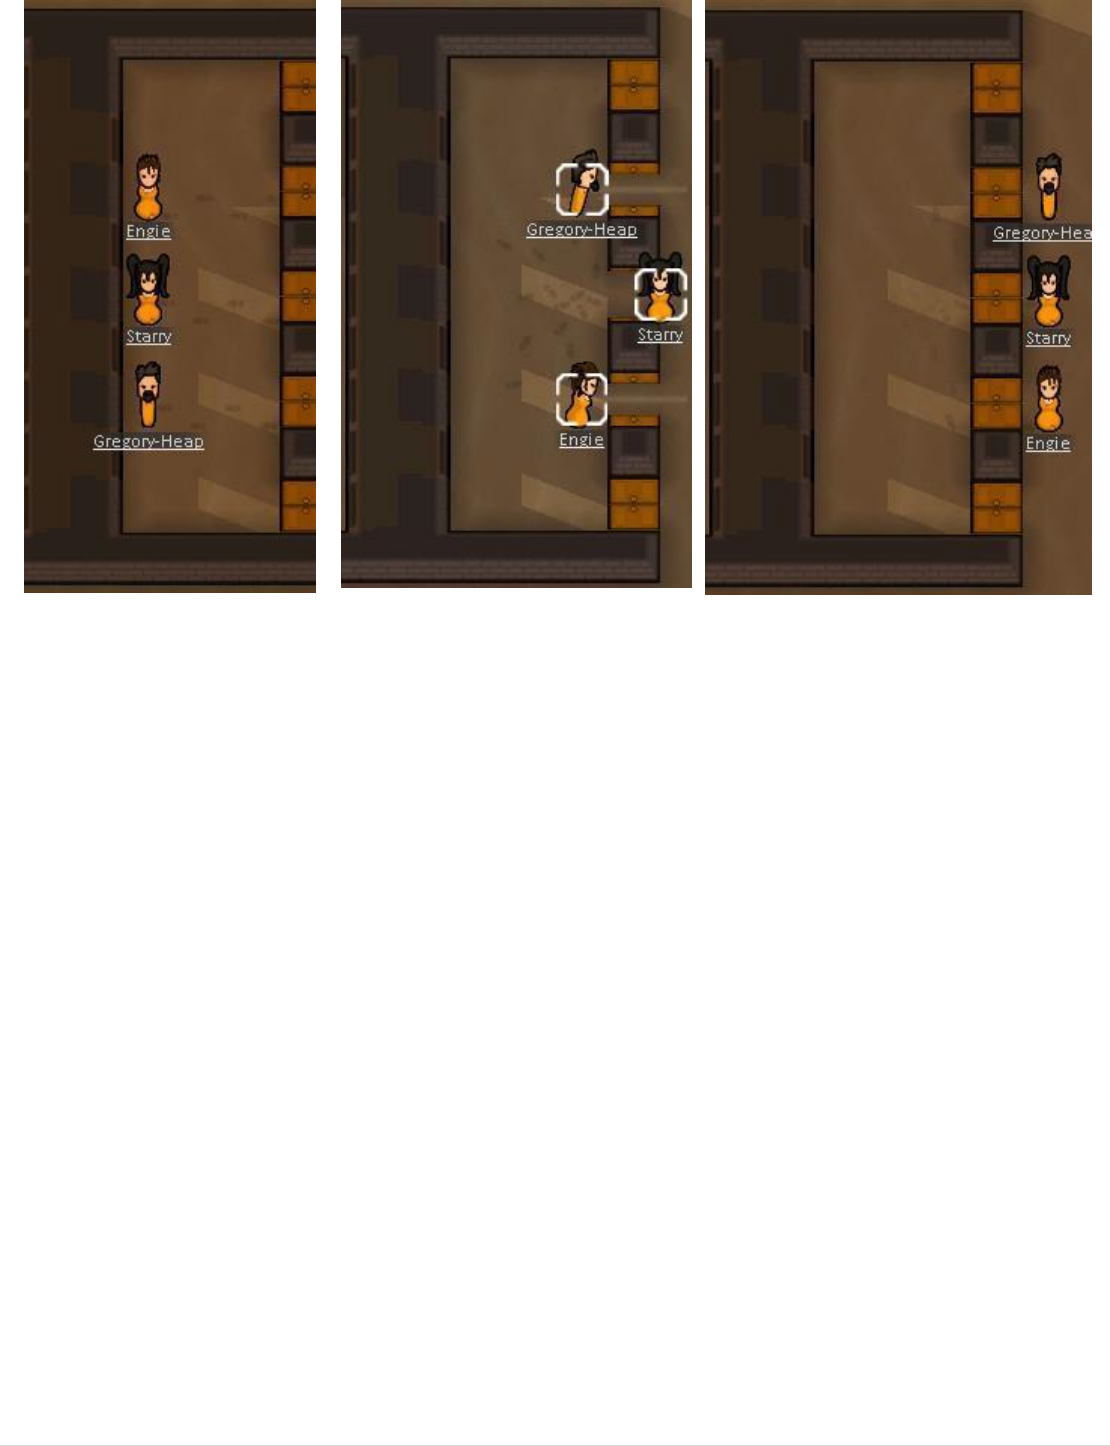
As noted in the fashion FAQ (Shift + M), you can save sets of settlers by pressing Shift 6 through 9. After you press 6, the
settlers will go into battle mode and go to the position saved. With these readymade combinations, you can automatically
adjust positions to maneuver your colonists to the best strategic position. For example: In position 6, the colonists stand
ready against the wall, in position 7, they stand outside the doors.
The main kill box zone should be built first. If possible, utilize the terrain adjustments to swamp the area where the
enemies will be funneled into to slow down their approach. Then you can develop the technology to build an obstacle
course. Keep in mind your enemies will break this obstacle course so repair will be needed after every attack.
At this point, you’ve taken in all the basic training this guide has to offer. The next part of the guide offers more
recommendations and opinions from the mod author.
17 | P a g e
Memorized position: Position 6
Switching between Position 6 and 7
to automatically move.
Memorized position: Position 7

18 | P a g e
4. Starting out: Differences in terrain and general tips for the first few days
Once you have the basic survival items covered, you’ll want to begin research to unlock useful technology. Go to the
Architect -> Misc tab and select the Primitive Research Table, or if you have the materials, build a Research Bench which
will allow you to research a wider variety of items before upgrading to the hi-tech table. These can be made out of various
kinds of stone blocks, wood, and metal.
Various research tables and multianalyzer above
As with animal hides that alter the amount of rest, speed of development, and immunity, different metals also provide
different bonuses to the research table. The author recommends utilizing tin alloy for the research tables whenever
possible as it provides a 120% increase to speed of research when utilized. Tin isn’t able to be gained by deconstructing
ship wreckage, so you’ll need to build a forge and go mining for the raw ore and coal to process ingots.
The mod author recommends the following order to research: Production I, and then Security I, II, and III to unlock wall
embrasures and IEDs. Next, you’ll want to start making ammo with the ammo crafting table found in Architect ->
Production. Note, this table like many works at full speed with power, but is not entirely unusable without power, speed
will be reduced to 40% when this is the case.
Now, you can explore fishing if there’s water nearby. Build a pier and assign the job to start obtaining fish. Then, you can
place custom floors, and better quality furniture for relaxing and dining. It’s also important to have a place designated for
your colonists to increase their ‘Joy’. Build items from the Joy tab once unlocked through the ‘recreation furniture’ research
tiers.
You’ll want to increase the quality of your food which means ever increasing perishable items. The best way to store these
items is in a refrigerator, as mentioned before. First, you’ll want to study any power source. Renewable power research will
unlock windmills, solar panels, etc. Conventional power will unlock steam and coal engines. Once you have a power source,
research Infrastructure I-III to unlock coolers and medium coolers, you can build a storage warehouse zone that is
enclosed, powered, and allows for only perishable food items. It’s recommended you use the standard cooler or medium
cooler in a 6x6 room for proper cooling capabilities.
19 | P a g e
Researching Geology will unlock machines to extract resources from the hidden deposits and begin drilling for oil.
Don’t neglect to light your rooms. Total darkness gives a debuff not only to happiness but to movement speed.
Conventional light sources such as torches and stone bowl lamps can get rid of the debuff. Keep in mind the basic flame
based light sources also produce heat which, in already warm climates, can cause discomfort to your settlers.
As mentioned before, mood is very important and influences many factors. Negatives from poor/shared bedrooms,
sleeping in the cold/heat, being in a dirty location, in pain, unpleasant conversations, insect meat, etc. can be offset with
good food, intimate conversations, parties, cigarettes, alcohol and other mood enhancing items.
Once you’ve taken down your enemies you need to dispose of them swiftly. If you go to Architect -> Misc -> Grave you can
bury the corpse and allow your colonists to go on with life. Otherwise, consistently walking by a decomposing body will
upset them repeatedly. After sufficient research, you can also unlock the crematorium to cremate the corpses. When it
comes to animal corpses, if you aren’t butchering them up then you can make a composter and generate fertilizer to enrich
your growing soil. The composter does best with pieces of meat rather than an entire corpse at a time.
When it comes to your weapons, make sure that they are not left out in the open as the elements will decay them making
them less accurate.
You can see there is a lot to do and it’s all important to get your colonist’s stable and happy as well as safe and secure. If
you have enough time in between attacks, go ahead and place down floor coverings to improve the beauty and enhance
the mood. Disassemble clothing and weapons that have dropped from the enemy to obtain more materials. Keep in mind
even the best armor dropped from a corpse will not be desirable. No one wants to wear what was on the dead. Once
clothes deteriorate, you’ll receive a message that the colonists are unhappy from wearing “tattered clothing” you can click

20 | P a g e
on this message on the right of the screen to point you towards the offending colonist. If you have the time, build up a
tailoring station so you can recycle clothing.
Now that you’re well set up, how can you increase the population of the colony?
There are several ways to do this:
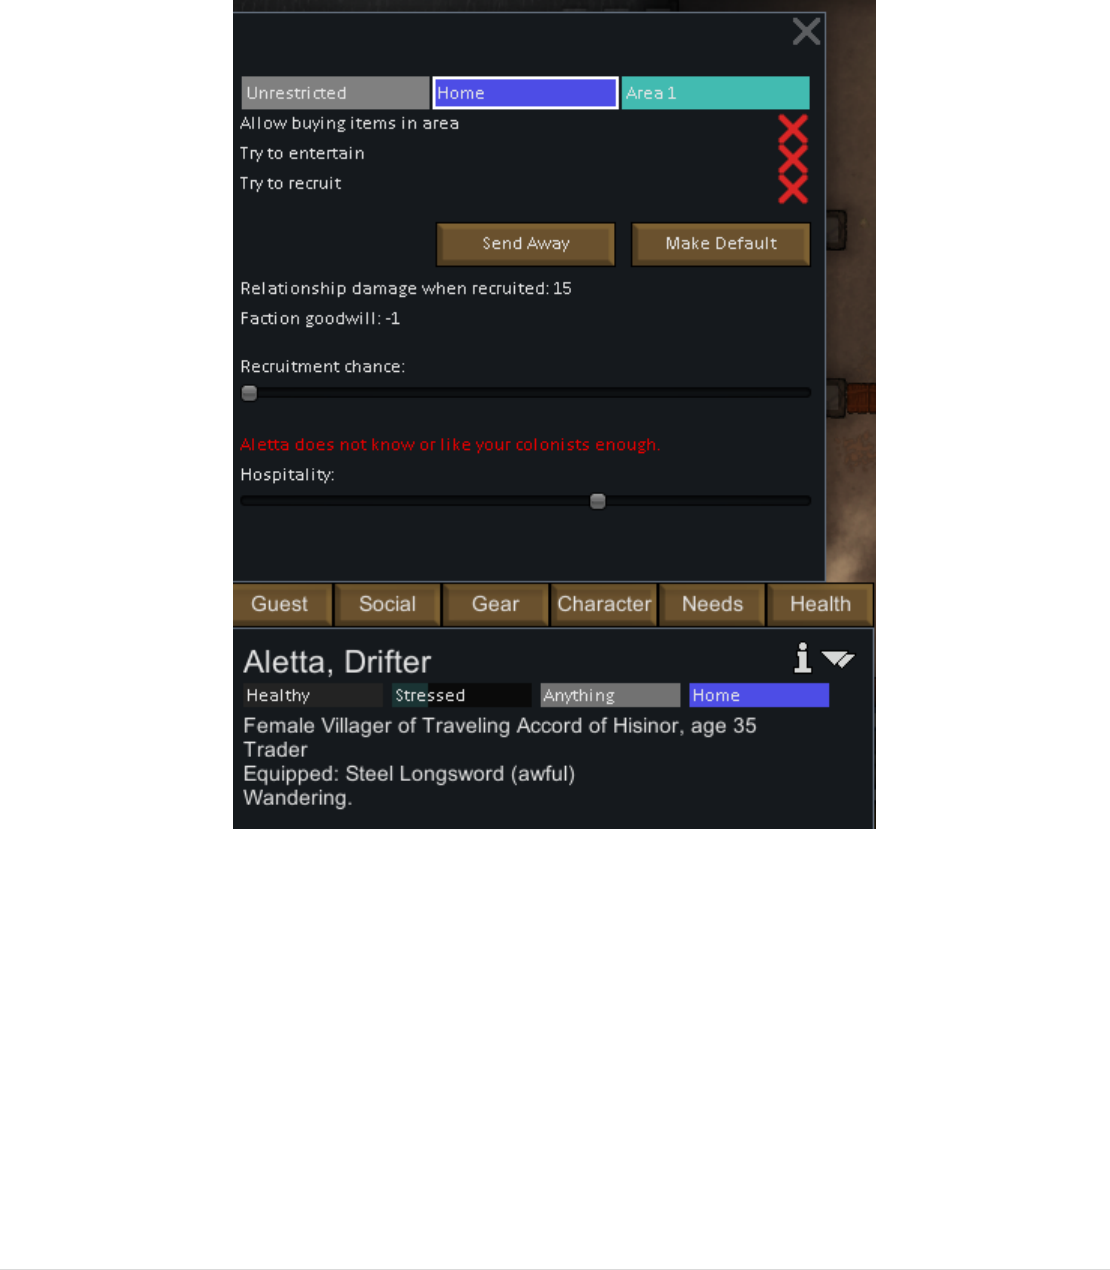
The interested wanderer event takes place when a wanderer shows interest in your colony and asks to join. You’ll be given
the option to accept or reject the wanderer with some brief information on their capabilities. Another way to gain a
colonist is by a fleeing refugee seeking protection. If you accept them, be prepared to fight off their enemies. If you don’t
have the resources to accommodate another mouth to feed, make sure to reject the request.
21 | P a g e
Another way you can obtain colonists is by recruiting them from the guests that come to visit and trade with your colony.
Recruiting a guest can gain you a valued worker, but the faction will take a -35 hit to your relationship with them. If the
relationship diminishes further, a faction war will commence.
To recruit a guest, highlight the guest and open the Guest tab. There, you can toggle between interactions to gain the
colonists loyalty.
The fourth option is to recruit your enemies. To do so, they must survive your defensive attacks. It’s best if you
incapacitate them, and then tell your settler to capture the enemies. Note that you’ll have to have a room set up with at
least one bed that has been designated as a prison bed. Keep in mind that any resources you have in this same prison room
cannot be utilized by the rest of the colonists. Whichever settlers have the Warden job enabled will assist in feeding and
healing the prisoner. Only the most basic medicine is allowed to them by default. In order to recruit them, you’ll have to
gussy up the prison to decent standards to put them in an agreeable mood, then alter the prisoner settings to allow for
good medicine and select the ‘chat & recruit’ radial button.
The fifth option, is to capture a wounded individual who fell from a capsule. You can capture and coerce this individual to
stay with you once healed, or, you can simply rescue and heal the individual and see if they choose to join your colony. The
latter has a less likely chance for success, but if they do leave your area and return to their native colony, you gain a bit of a
boost to the relationship with said colony. You never know who has fallen from the sky, though, so keep a close watch on
whoever you rescue for you may be in for a nasty surprise.

22 | P a g e
The individual pictured above will need rescued or captured, and brings limited resources with them
Trade can be carried out two ways: The first available to you will be from wandering caravans that will come stop by your
colony for a while. The individual that has a yellow question mark (?) by them can be right clicked and traded with by your
most avid negotiator to get the best prices. This will bring up the trade screen. The second way to trade is by researching
and installing an orbital scanner and comm system. Your negotiator can go to the comm panel and call nearby colonies and
sometimes passing ships. The benefits of a comm panel is access on demand as well as a wider variety of items to gain from
trading. You can also gift silver to other factions to gain their acceptance. Keep in mind, if you call in a colony on your map
and they get attacked by a raid within your area, they will blame you!
Finally, let’s discuss tactics in various environments.
If you are feeling bold enough to attempt to settle in the glacial terrain, make sure to utilize the Prepare Carefully mods to
take on warm clothing. The first thing you should do is build a medium sized room around a steam geyser for heat. Be
careful as to how large or small you build the room. Too small, and your colonists will die from heat stroke, too large and
they will freeze to death. You can research and utilize vents to push heat from the geyser room to several adjoining rooms
as well to keep your area warm.
If you decide to take on the desert, then remember that the heat will quickly rot your food stores and corpses. Don’t kill
too many animals too quickly and those that you do kill but are not yet ready to butcher, bury the animal corpse in a grave.
This will preserve them until you’re ready to dig them back up to butcher/cook/consume. As there are no mountains in the
desert to dig ores and coal from, it’s recommended you obtain alloys by dismantling weapons or build a good rapport with
a passing caravan that has metals and alloys. Buy up all you can and make sure you have something decent to trade them
so you have money for the next round of trading, as well.

23 | P a g e
5. Clothing functionality, features, and sets
The clothing in Hardcore SK is rather extensive, so we can’t touch on every single item, but it is possible to set up your
characters in a way for them to wear the items that best suit their profession or personality.
By default, the settlers will wear clothing depending on their current needs, the quality of the item, and the ambient
temperature.
To view what your colonist has currently put on and a brief idea of their temperature tolerance, click on the character and
go to ‘Gear’:
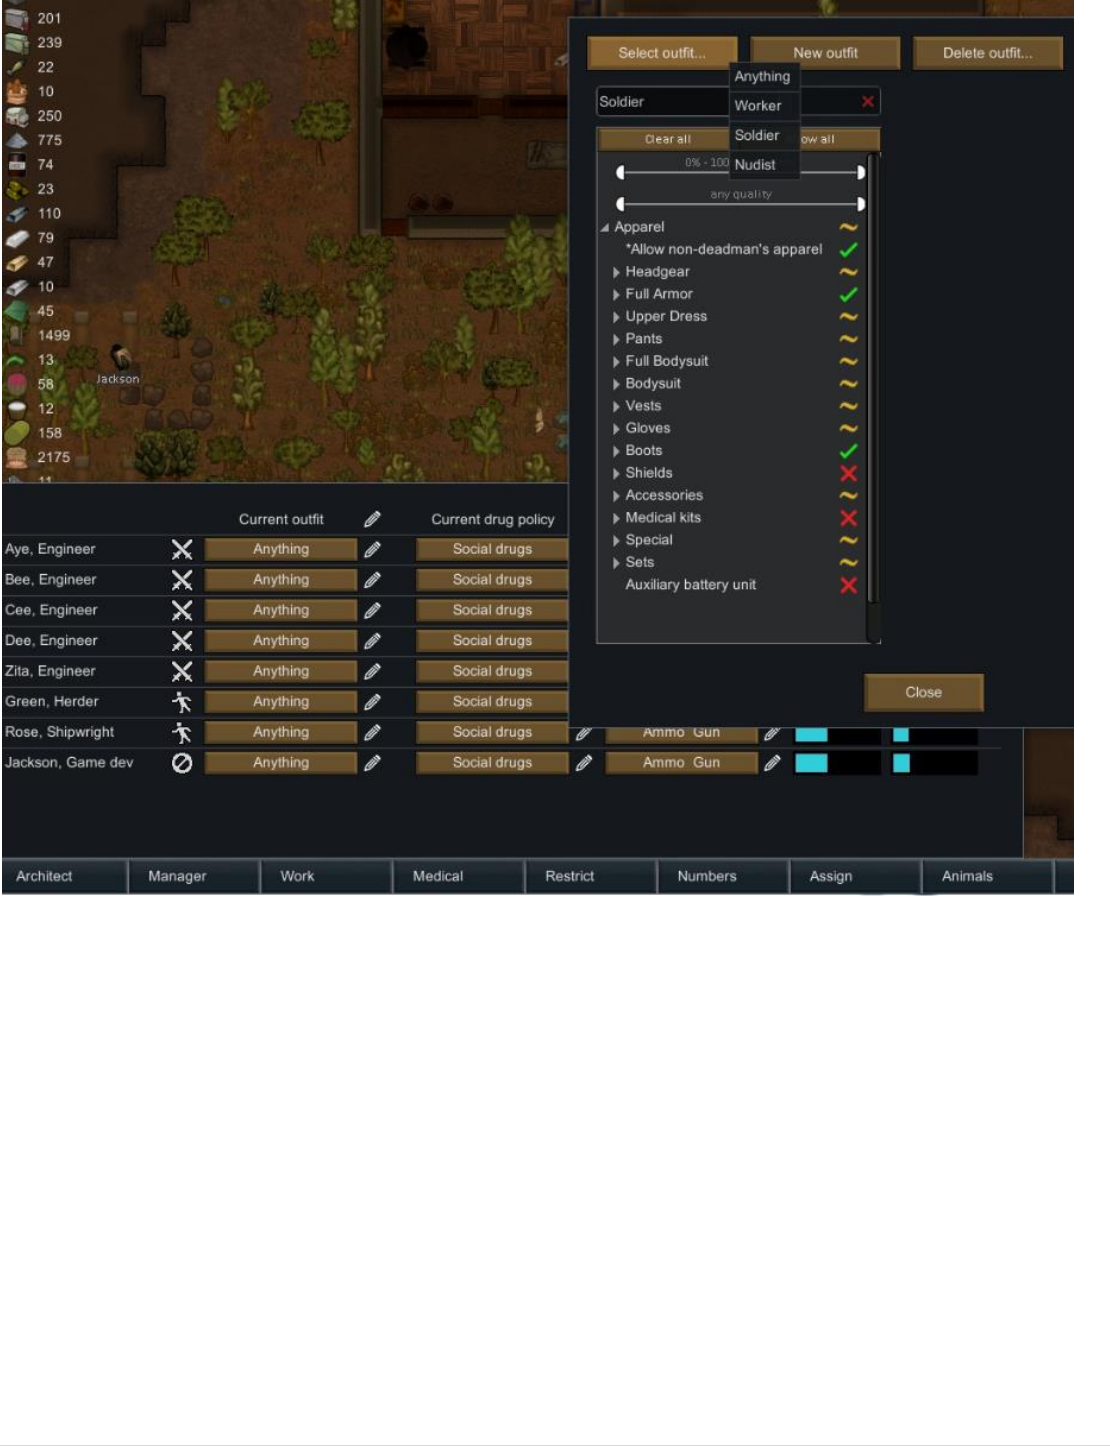
To adjust what the colonist can/can’t wear you should go to the ‘Assign’ tab and click the pencil to the right of the ‘Outfits’
column:
24 | P a g e
There are some standard ‘job’ settings that will give your colonist parameters on what they should put on and what they
should leave alone. You can also make custom outfits here.
If you’re playing in a warm climate, make sure to uncheck all the cold weather gear, and vice versa for perpetually
cold environment.
25 | P a g e
6. Glossary: Events and their descriptions
In recent years, often during livestreams, the streamers would ask about certain events and how to survive them. So, I
wanted to make a description for some of them and how to survive them.
Note, there are more events than listed here.
In this section you will find:
1. Terraformer Mechanoid
2. Psychic ship
3. Poison ship
4. Cold snap
5. Volcanic winter
6. Heat Wave
7. Lord of Darkness
8. Different diseases
9. Kirin and Feenix Wanderers
10. Insect Invasion
11. Razor rain / Meteor Shower
12. Boss Mechanoid (Zeon)
13. Assistant Terminator
14. Insect Swarm
The brackets will indicate the name of the Event as it appears on the console.
1. Terraformer Mechanoid (MechanoidTerraformerIncident) - As the name implies this mechanoid device affects the
weather by creating violent thunderstorms. The lightning will also increase over time.
This event occurs approximately after the 90th day of the game.
The Terraformer Mechanoid (referred to as "TM" from now on) will replace the ground surrounding it with Concrete and
create indestructible pylons.
When there are 8 pylons a full scale mechanoid invasion will begin to destroy your colony.
It is of course better to not wait. To prevent the invasion, damage the TM, however beware as right after a small invasion
force of several mechmind capsules will arrive (usually not less than 10). - Note they will attempt to destroy your colony if
not dealt with.

26 | P a g e
WARNING (!!!) Mini invasions occur when ANY damage is received. Razor rain, Drop-pods, lightning etc will all trigger the
TM. However a meteor or freight container may drop exactly on top of the TM and not trigger a mini invasion (with any
luck)
Letting a mechanoid escape with slight shock is a mistake. You will have to go through "neutralisation procedures". Once a
researcher starts work more mechanoid capsules (about 4-5) will arrive. It's therefore important to somehow protect the
area around the TM to not lose the researcher.
After the second wave it is safe to proceed studying it
What is needed for a TM? After all the neutralisation procedures you can break away from harm and the researcher may
study it. After which it will serve you as a power plant which produces a good amount of energy.
Be wary when your colonists study these creatures, you never know what they’ll uncover or how they’ll be affected
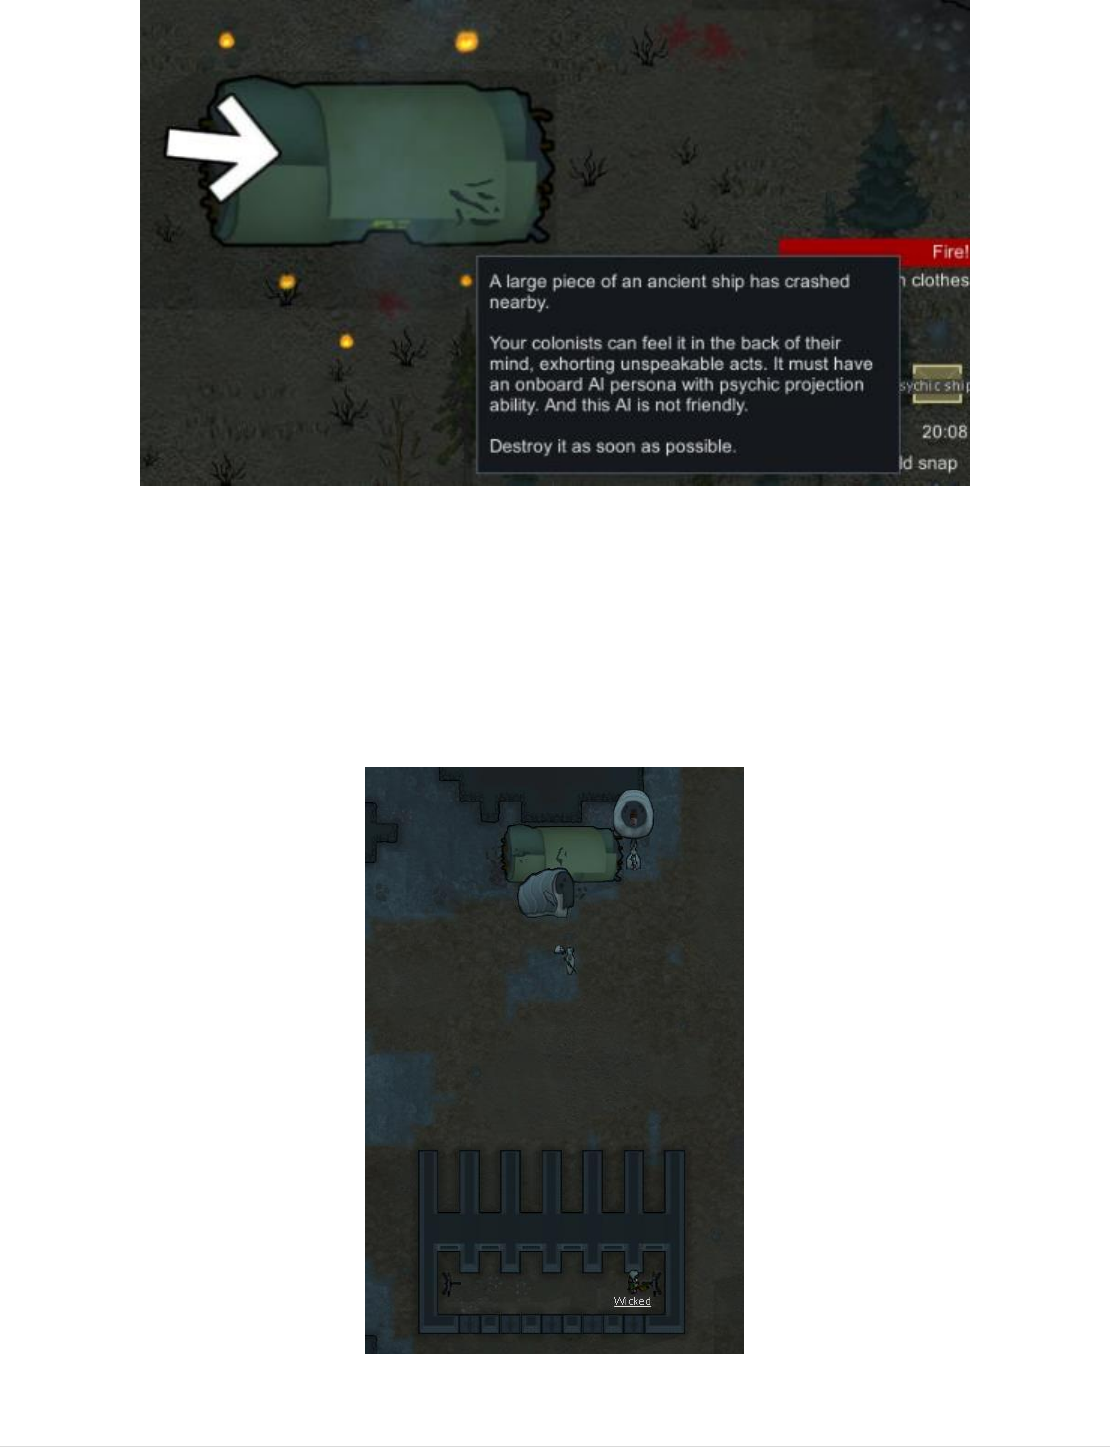
2. Psychic Ship (PsychicEmanatorShipPartCrash) - a huge intergalactic ship chunk. These are challenging to deal with at any
time. Ignoring it will cause increased aggravation to all but the psychically deaf of your colonists. It’s advised you eliminate
this threat promptly before everyone goes insane.
27 | P a g e
As with the ТМ, if the ship gets damaged, then the mechanoids within will emerge with a vengeance. The number and
strength of the mechanoids will depend on the current value of your colony as a gauge of how technologically far you’ve
made it. One important thing to note is that these mechanoids will remain near their damaged ship and not come towards
your base. They’ll only go after your home once their ship integrity is below 50%.
When this falls on your colony, it’s recommended you pause and immediately make plans and preparations to take down
the ship. If this happens at an early stage in your game and you do not yet have mortars to bomb the ship from a good
distance to force the mechanoids to maneuver through your killbox, then begin preparing whatever protective
constructions around the ship you can muster.
It’s recommended you build with the strongest materials you have available to you. Concrete or granite would be good
choices. If you have machine guns or turrets, now is the time to install them with a quick power source or wire over some
28 | P a g e
power if possible. Utilize protective double/triple wall thicknesses to further protect your colonists as they shoot at the
enemies. Beware of the precise weapon stalker (very precise and powerful) and the inferno guns from mammoths. These
shoot quickly and will ignite an area on fire. Make sure you have sufficient ammo on hand to reload guns and they are in a
safe place to avoid being caught on fire or destroyed before being picked up and used.
The biggest danger of these killboxes with such a powerful enemy is their ability to shoot the inferno gun through your
defenses, hit the walls, and the blast will injure/kill settlers.
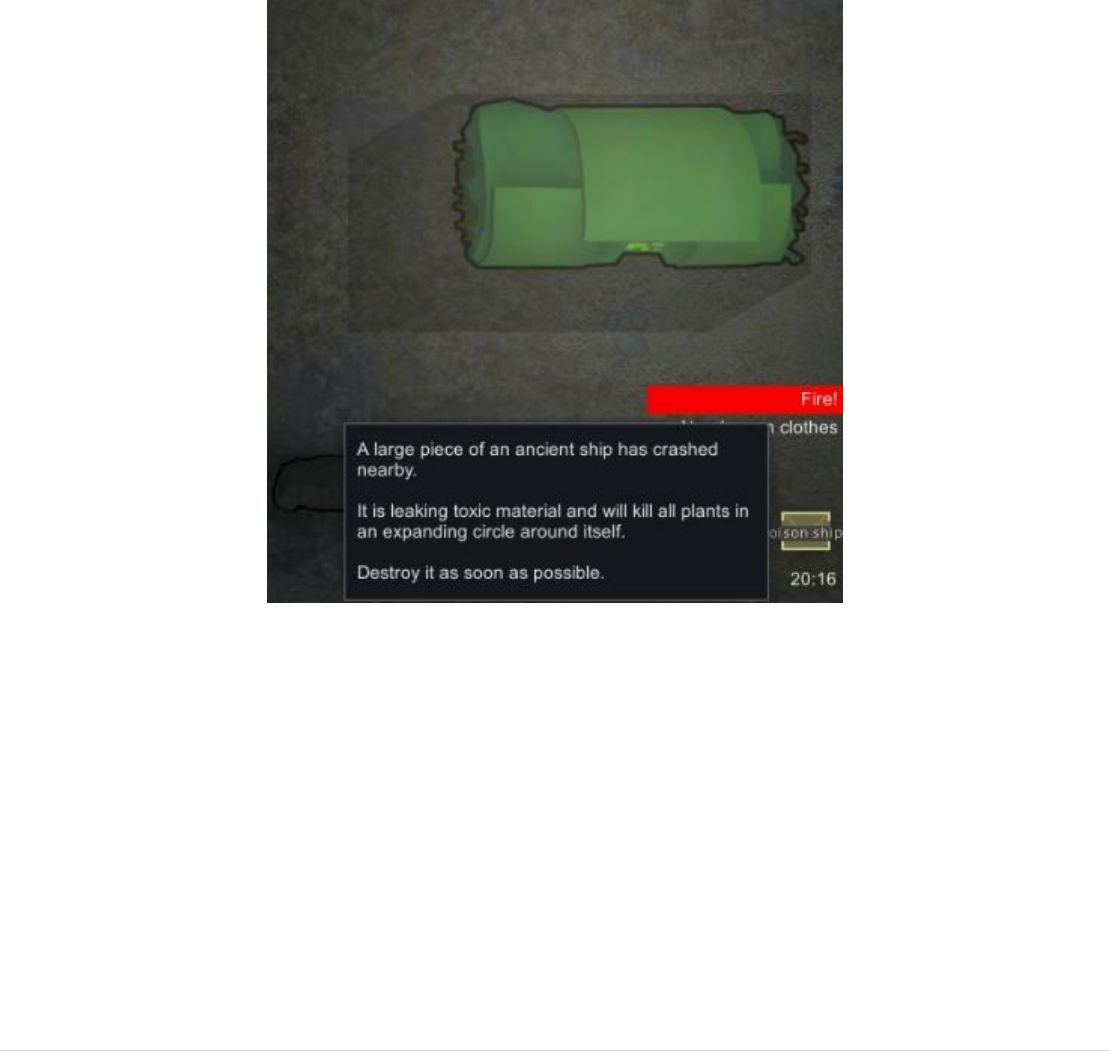
3. Poison Ship (PoisonShipPartCrash) - The Poison Ship is like the Psychic Ship, but a bit less dangerous as it does not affect
the psyche of your colonists, but poisons the ground and crops in the vicinity. Don’t immediately run to harvest your
partially grown crops, though. You will have enough time to wait for the full growth of the food and collect it. Perhaps
turn off replanting though until the poison ship has been destroyed. If you don’t have any plants and can’t mount an
attack against the poison ship it could even benefit your colonists to leave it be, or even, if it’s in an out of the way corner
of the map, damage it to release the mechanoid so they can guard their ship and that corner of the map against raiders.
4. Cold Snap(ColdSnap) - If you do not have warm clothes, heaters, wood, coal, or other fuel for fires and heat you’ll have a
challenging time ahead for the duration of a cold snap. If you are in a cold climate, it’s about to get a lot colder. This event
will take place when the Kirin makes an appearance as well. To survive the freezing make fires or electric heaters if you
have the supplies and a sufficient power source to handle the additional strain. If you have a coal plant, utilize the massive
heat it produces, but be careful not to overheat the room. Put vents in or break down some walls/leave doors open to
allow for a moderate temperature. Also, build zones to quarantine your colonists and animals to that are safe, warm, and
have some food and simple tasks to complete ideally. The cold snap can last a long time and even once the cold snap
breaks it can take awhile to warm back up.

29 | P a g e
5. Volcanic Winter(VolcanicWinter) - this is much worse than just a cold snap as it can last for several seasons. If you have a
cold snap on top of a volcanic winter temperatures can drop to -100 °С and if you’re in a glacial climate, -200 °С. If you’re
in a glacial environment it may be time to migrate south for a few seasons or consider other survival strategies.
There are times where the game can cause issues from the volcanic winter and it will perpetuate infinitely, or so it seems. If
you don’t want to endure any longer, you can use the End map condition in the dev tools to turn off the volcanic winter.
6. Heatwave (HeatWave) - Some people believe the heatwave worse than its frozen counterpart because it doesn't assist in
firefighting. Your only help is a walk-in freezer or really well insulated clothing.
Also be aware of the temperature dependence for your food storage as the increased temperature may significantly speed
up the spoiling process.
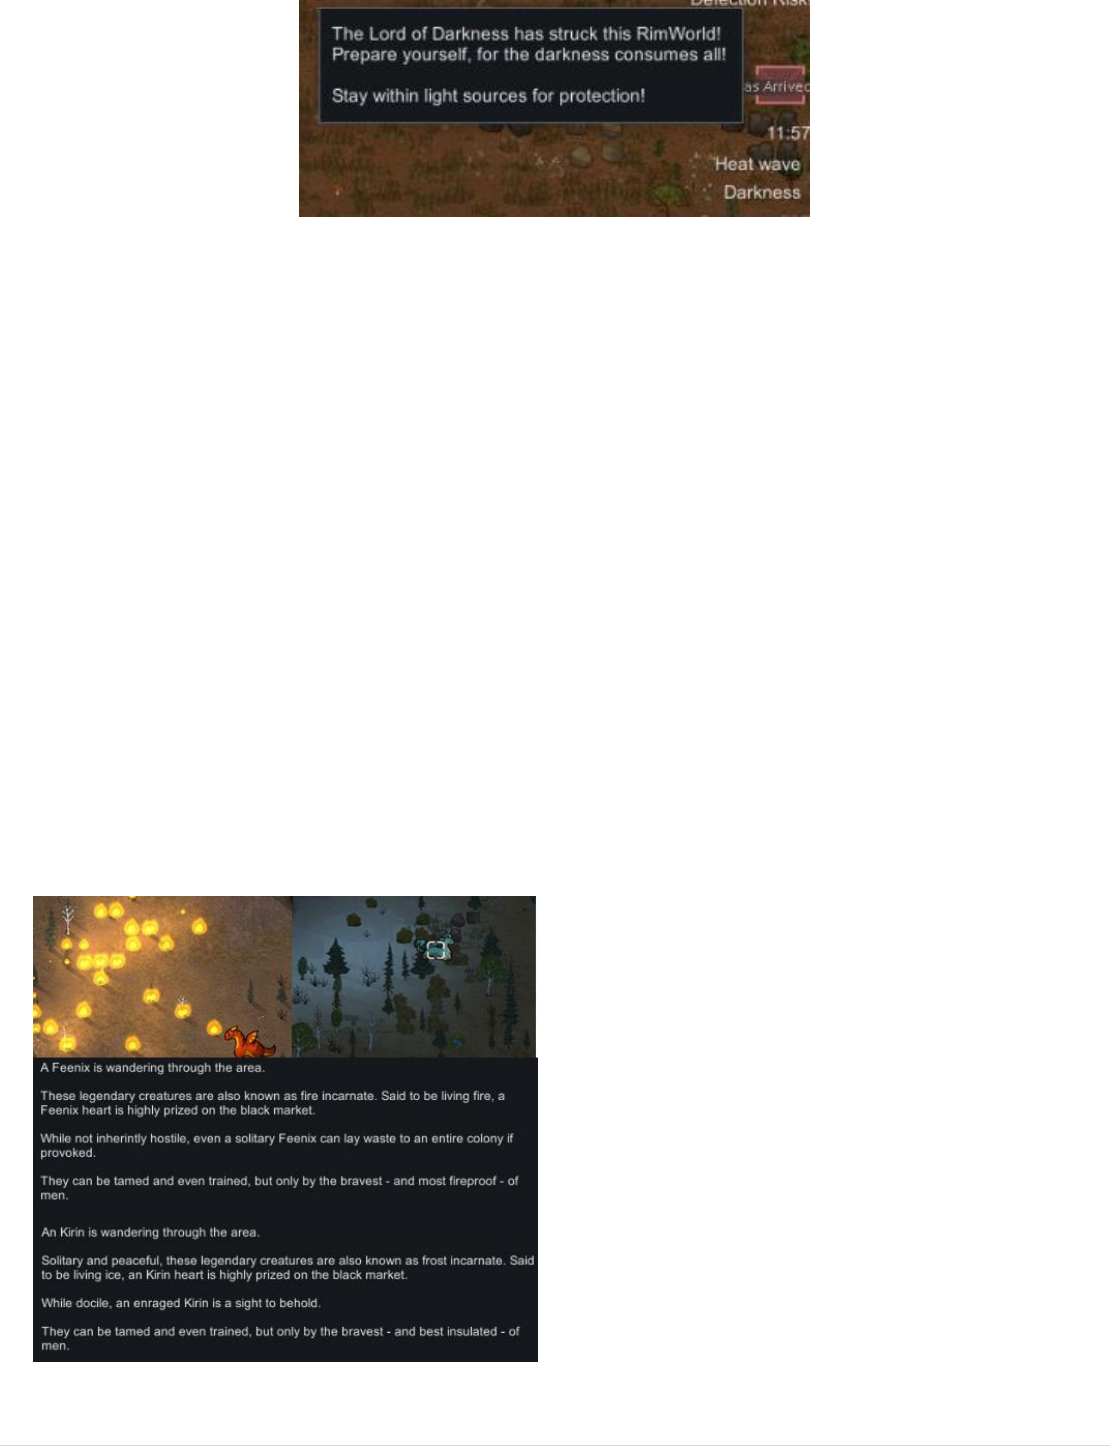
7. Darkness (Darkness) - A very interesting and extremely dangerous event. After a few seconds that entire map becomes
pitch black and the dark shadow will appear which will attack your settlers, your enemies and collect their corpses.
Your unconscious settlers and animals that remain still are safe from the darkness even if they’re left in an unlit area.
To save yourself from the Darkness use any light source possible. Mushrooms, fire, lights etc. The more the better.
30 | P a g e
Different Diseases (Disease_Disease Name) - Usually 3-4 settlers get sick from different diseases and at different degrees
of severity and impact.
For example, Fiber Mehanity increases the speed of settlers but this also increases the rate at which they get tired.
Knowing that this event can happen in the future can be vital. You should make sure you have enough Medical Beds,
medicine and doctors.
These events can happen as early as 3-5 days after the game start and the cure for the flu and malaria are not that difficult
to acquire as it requires the same bed.
The plague is very dangerous and needs to be treated at a bed with Immunity Development over 120%, at least some
medication and a good doctor.
Diseases such as Influenza, Plague & Malaria requires a settler in constant bed rest. A disease like Fiber Mehanity and the
like does not, as they are only to be treated once every couple of hours.
8. Kirin and Feenix Wanderers (Kirin - IcicatPasses; Feenix - FeenixPasses) - The Kirin Dragon brings with it freezing
temperatures and cold snaps, while the Feenix Dragon will wander in and start setting things aflame. While both are
generally non-aggressive, they may attack if they are hungry. While there is the option to tame them, it’s highly
recommended you do NOT try to do so. If you take down a dragon (do not send just one colonist, make sure you send at
least 3-4), you will get not only the carcass but a heart of fire/living frost. You can utilize the living frost to create an icy
artificial refrigerator. The heart of fire will keep a room toasty warm. Both the heart of fire and living frost last for 1
season (15 days). Although it can be sold, it’s a very high priced item worth about 2,000 silver, so finding traders that carry
that much may be challenging.

31 | P a g e
10. Insect Invasion (Infestation) - This event will cause several hives to appear in caves or within mountain passes. If
your colonists have set up inside a mountain beware! Megascarabs emerge from the hives and start digging into the caves.
While the creatures are not difficult to kill, keep in mind butchering them produces insect meat that is not particularly
enjoyed by the colonists. While the megascarab will not seek out colonists to attack, it will move away from the hive to
seek out food once it gets hungry. The hives may produce additional insect jelly, but also can generate glow pods that
prove to be a great light source when fighting against the Lord of Darkness.
Once you’ve killed the megascarabs you’ll need to attack the hives at close range, otherwise they will continue to spawn
additional megascarabs. If you can breed the creatures skillfully you can utilize their hives as a food and light producing
source, but keep in mind they do not agree with cold temperatures so if you are situated in the glaciers you’ll need to find
heat to provide a future farm site. Note that insect jelly can be eaten without any debuff.
9. Razor Rain/Meteor Shower (RazorRain; BoulderMassHit) - these are very dangerous events that involve falling
debris/meteorites that will damage anything within a certain radius of the impact sites. The best way to survive is to have
your colonists and animals restricted to indoors and under roofs only. Meteorites have a larger radius than the razor rain,
but the razor rain will fall evenly throughout the map making it equally deadly. Keep in mind whenever these events hit,
any psychic/toxic ships or walls that hide an ‘ancient danger’ could get damaged and complicate matters.
10. Boss Mechanoid (Zeon) (ZeonIncoming) - this is a newer event added to Hardcore SK by the developer. It’s
expected to appear later in the game and for very good reason. A Zeon Mechanoid will not only destroy your colony but
others on the world as well. Once he descends he will destroy improvements and has powerful weapons and tracking
capabilities. It’s recommended you have at least 5 heavy machine guns and rockets to even attempt destroying the
creature. Best of luck!
32 | P a g e
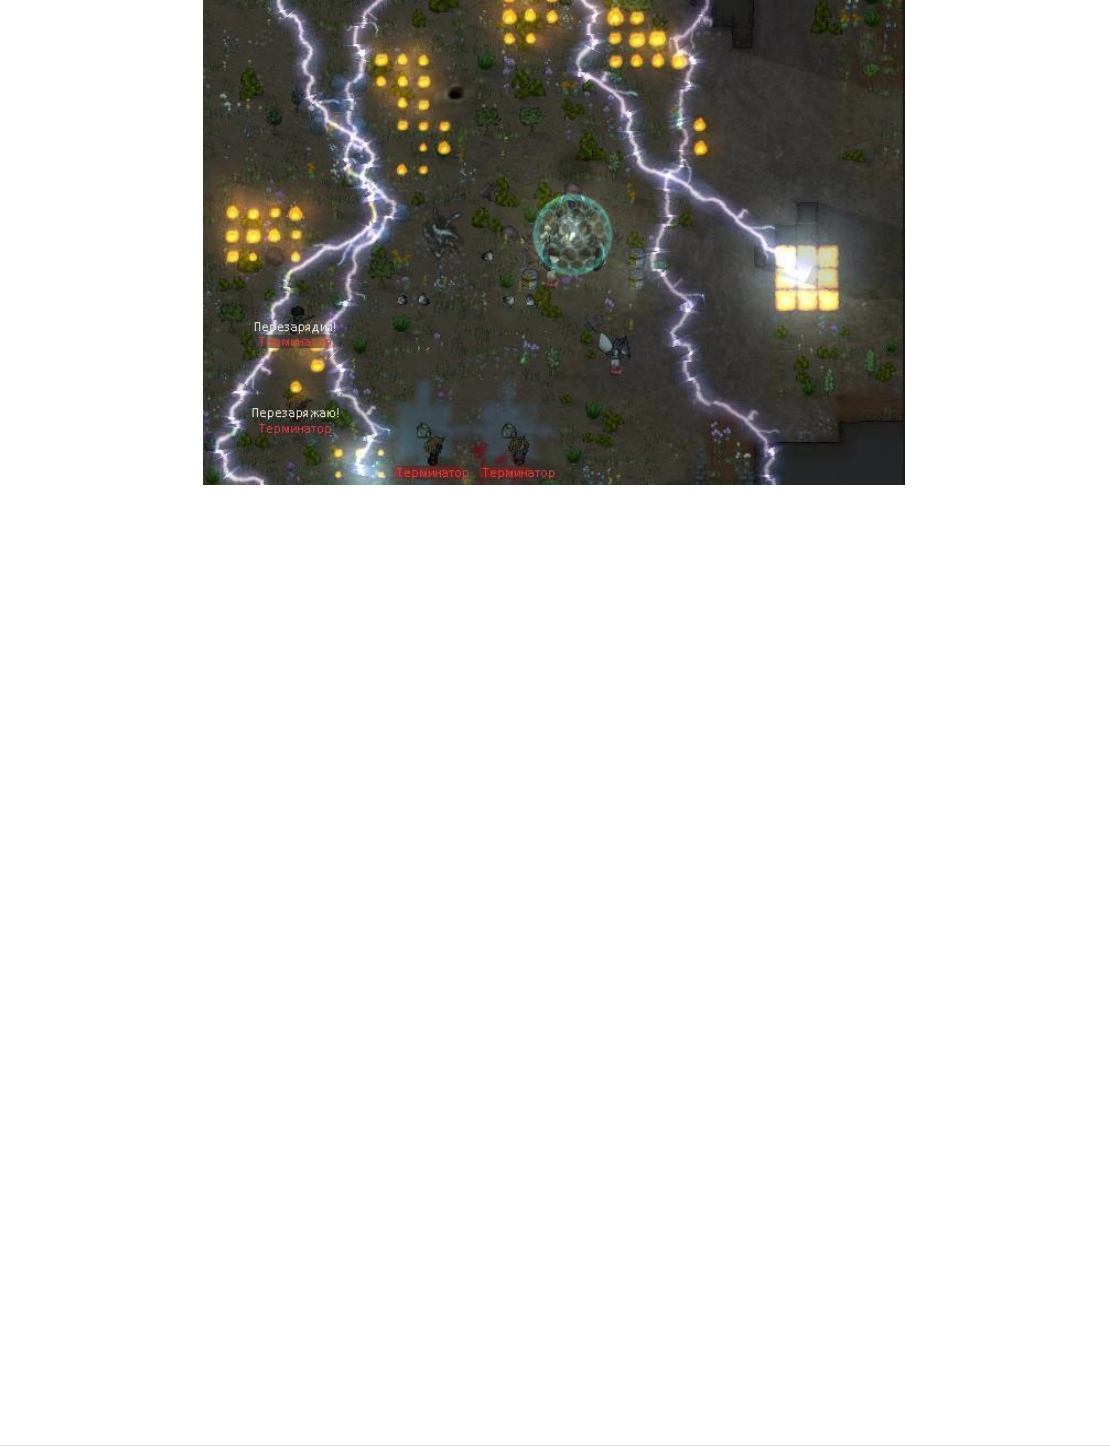
11. Terminator(Salvatioin) The terminator comes from the future and offers to join with the settlement. Do bear in
mind following him are hostile terminators which are pretty hard to kill.
There are three types of Terminators.
T-800 - A weak form of the Terminator. It may only die once, so if you get the T-800 take care of it.
T-1000 - An improved form of the T-800. It recovers health, can turn his hands into hammers and blades for Melee. The
only way to kill him is by breaking his head.
(When he is dead, right click his corpse and attempt to destroy him before he rises again)
T-X - A more advanced form of the T-1000. It quickly regenerates and is more dangerous than the T-1000 but the overall
strategy of destruction is the same.
All terminators have a large supply of health and can therefore be quite difficult to beat. Their numbers depend on
the wealth of your colony and they can also pick up your weapons to destroy the colony.
Some believe terminators to be unbalanced because of its features:
o Never sleeps & doesn’t eat.
o He has a habit of having 20 in both Shooting & Melee.
o However, due to being a robot it is unable to do a large variety of tasks.

33 | P a g e
12. Insect Swarm- newly added event where a large number of insects (flies/mosquitos) attack the colony. This may
not seem like a huge issue, except that the large numbers will gather around the colonists and crowd them.
Insects can begin to break down the door when they’ve attacked your settlers who are now hiding indoors. If this happens,
repair the door from the inside and they will dissipate over time. This isn’t always the most effective way to go, and it may
be best simply to preemptively hide your settlers indoors before the insects begin attacking.

34 | P a g e
7. Troubleshooting: Possible solutions to some critical errors
Critical errors are those that continue to repeat and break the save games or make the game unplayable outright. At times
raids will be noted to occur and do not. This will continue throughout the game and is considered a critical error as well.
To correct the problem with attacks, try to manually trigger one using the “Execute incident with…” tool on the developer
console. It may ‘push’ the bug into functionality once more. Open the main game options in order to enable the
Development mode:
If this method doesn’t help, then try this next one: First, we want to back up the save file just in case changes made go
wrong.
Your save files are located here: C:\Users\*PC Name*\AppData\LocalLow\Ludeon Studios\RimWorld by Ludeon
Studios\Saves.
Once backed up, open your save file using Notepad or Notepad++ (WordPad will not allow the save file to format and will
break it, use notepad or notepadd ++ only!)
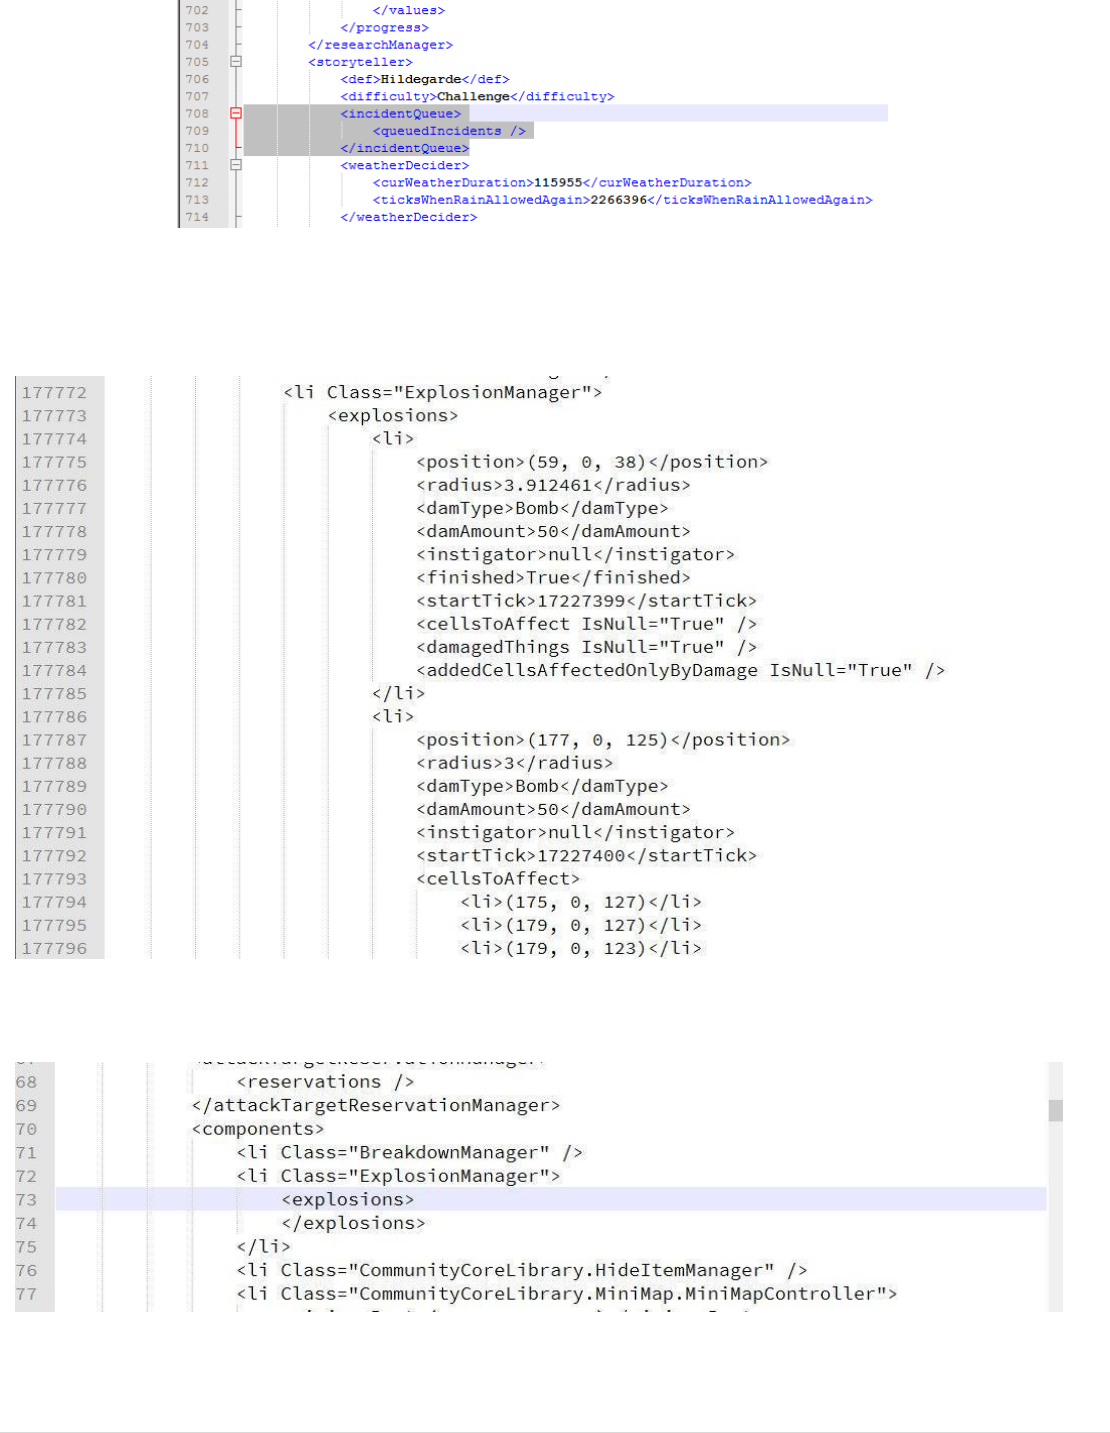
Search for the line <incidentQueue>. All that’s necessary is to remove what’s inside the tag (the second line of space
between the slash is required!):
<incidentQueue>
<queuedIncidents />
</incidentQueue>
35 | P a g e
Solution for the problem with explosions
The save is looking for the following lines:
Delete everything inside the tag to make it look like the following:

36 | P a g e
If something is unclear look for the answers in “Help”, ask the development team, streamers, or reach out to us in Discord!
https://discord.gg/FMPRSKr
Thank You All!
This guide will be updated periodically
Russian Original Author: Murdantiks
PM with any questions at https://vk.com/murdantiks
English Translation: #guide_project channel on Discord:
Soyaman | freijie | sidfu | Adenia | Rhyssia | And all the great Discord Community Members: Join us here
(https://discord.gg/FMPRSKr) with any questions!
