ILLUSIVE DETAILED GUIDE
User Manual:
Open the PDF directly: View PDF ![]() .
.
Page Count: 20

Documentation for 1.12.2+ Illusive Minecraft modded client
Written by John Skidmore
GitHub: github@wisys
Website: seshrad.io

Table of Contents
1. Prerequisites
2. Downloading an IDE
3. Minecraft Coder Pack and OptiFine Setup
4. Installing Illusive via GitHub Repository
5. Creating a Module with Illusive

Prerequisites
In order to work with Illusive source code alongside Minecraft and
OptiFine client source, you will need to have a few things:
• Java SE Development Kit
• Python 2.7+
• Minecraft installed on your machine
• Your favorite IDE
• Optional: ATOM from http://atom.io to edit individual “.java” files
Downloading an IDE
An IDE, or integrated development environment, is a certain program
to be installed on your choice of operating system that is used by
computer programmers to create software within a flexible and
extensive user interface while debugging and recompiling code in real
time.
Many intermediate programmers might use Eclipse, but one of my
current favorites has to be IntelliJ IDEA because you can commit
partially to a Git repository natively within the application. This is useful
because Git is usually ran through command-line and can push updates
to GitHub.
There are many other great Java IDE programs out there such as
NetBeans but, for this documentation guide, we will be using IntelliJ
IDEA.
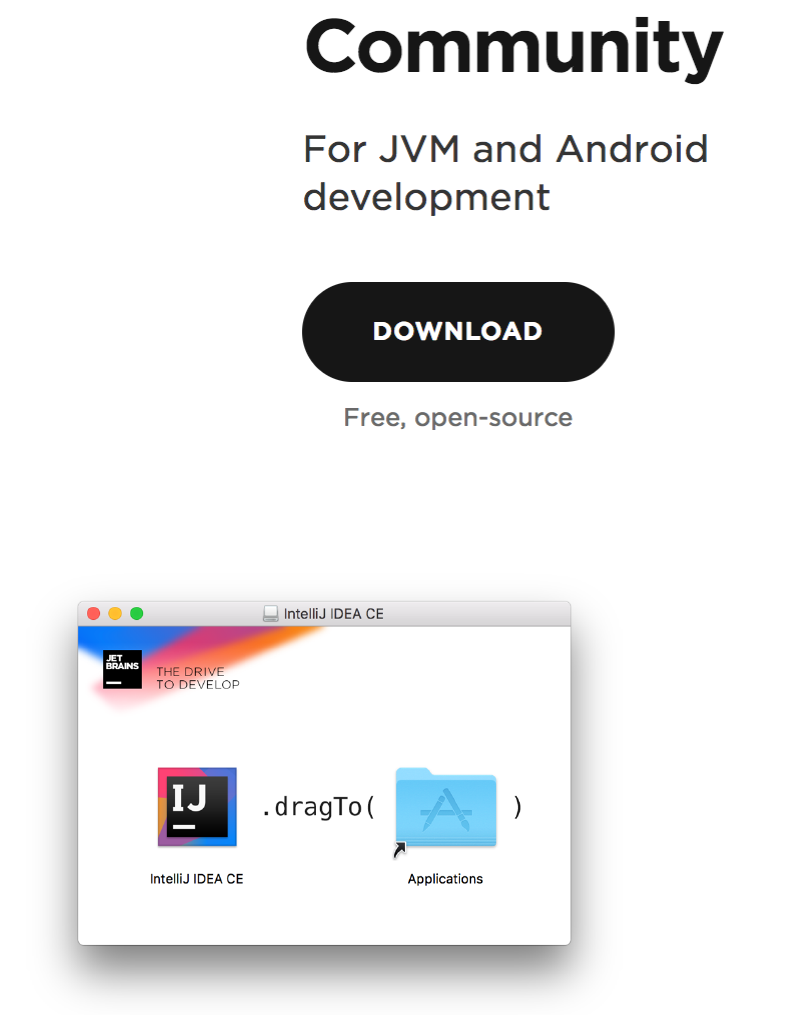
Upon visiting the download
link, you will see there are
two versions of this
software; free and paid
licenses.
Click the “Download”
button from the
Community open-source
version, for whichever OS
you plan to run the
software on.

Since I’m running on Mac OS X, all you have to do is drag the “IntelliJ
IDEA CE” app from the mounted installer disk to your Applications
folder.
On Windows, you will have to define a directory to install in, accept
JetBrains install, and create file associations if needed.
On Linux, the installer will be given in an Archive file appending in
“.tar.gz.” Extract this and navigate to the “bin” folder: there should be a
script called “idea.sh.” Launch a Terminal window and change directory
to that “bin” folder. Now run the file using this command (where “##” is
the IntelliJ IDEA enclosing folder):
name@computer:~/##/bin$ ./idea.sh
After installing the software, you will need to accept the JetBrains
Terms of Service and if you have any previous settings to import from
a previous environment, you will be asked to provide a directory. If not,
choose none or a clear / fresh settings file, set your user-interface
theme and configure first-time run options.
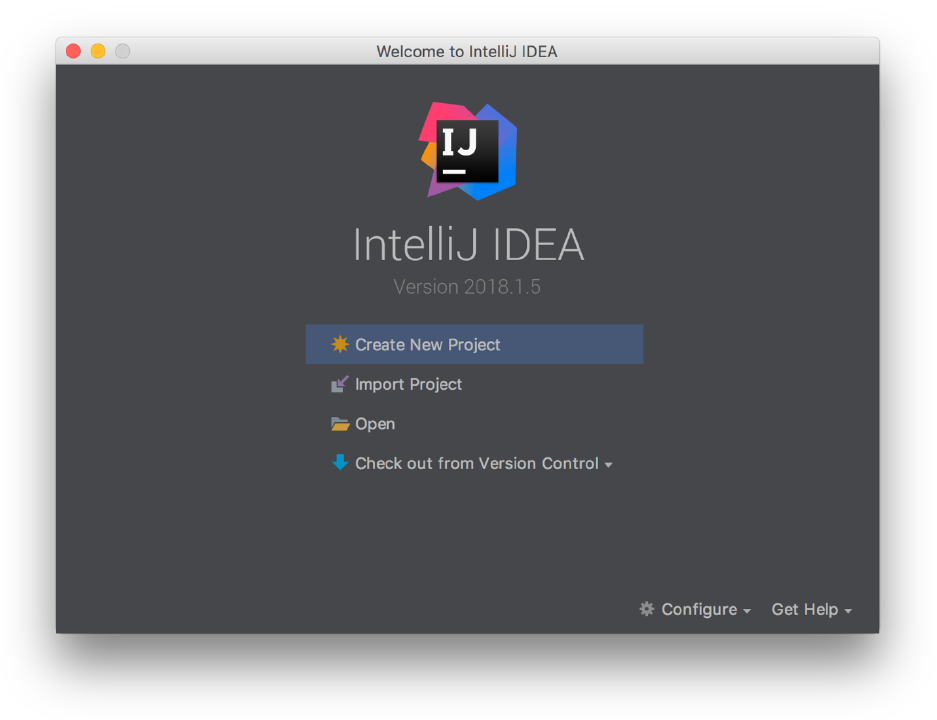
You should now be greeted to this Dialog box with a few File options:
You have now successfully setup JetBrains’ IntelliJ IDE.

MCP and OF Setup
You will need to download all of the listed resources below to
setup your decompiling workspace.
1. Minecraft Coder Pack is a collection of scripts and tools commonly
used to decompile Minecraft client and server JAR files and is based on
FernFlower. The core MCP Team is comprised of six main
programmers, but SeargeDP is the founder of MCP. The latest version
at the time of this writing is MCP v9.40 for Minecraft 1.12. Download
the latest version you’d like to setup an environment with.
Source: http://modcoderpack.com/
2. MCPBot is a very useful resource that gives daily and even hourly
updates for three CSV (Excel array document) files:
• fields.csv
• methods.csv
• params.csv
These contain key string translations that the decompiler uses to
change obfuscated client class-file names, methods, parameters,
variables and fields to plain English and fully commented. The files
should be inside the “conf” folder where ever mcp940.zip was
extracted to. Overwrite the current files with the ones downloaded
from MCPBot, and open “version.cfg” with ATOM or a generic Text-
editor application. Change “ClientVersion” and “ServerVersion” to
equal 1.12.2.
Source: http://export.mcpbot.bspk.rs/
3. You will also need updated SRG resources for the mapping out of
names and converting them, you can directly download the latest

release for 1.12.2 via FML/ForgeModLoader. Replace the files in the
root directory of where ever mcp940.zip was extracted to.
Source: http://files.minecraftforge.net/
4. OptiFine is a mod that greatly increases FPS (frames-per-second) in-
game and generally optimizes lighting and fog, texture binding, and
animations. Shaders, high-definition textures, mipmapping, antialiasing,
and anisotropic filtering are additions that are must-have to get the
most out of your Minecraft experience.
Source: http://optifine.net/home
5. Hexeption, also known as Strezz on Twitter, has released fixed
versions of the OptiFine source code categorized by Minecraft
version. The GitHub to all the different version repositories can be
found here. They will be given in a “.RAR/.ZIP” format, so make sure
you have an un-archive program and download the corresponding
version of Minecraft you want Illusive to run on. Since we are currently
working with 1.12.2, we will download “Optifine SRC Version [1.12.2
HD U C6].zip” from the repo.
Source: https://github.com/Strezzed/Optifine-SRC/
After setting up your slightly modified MCP v9.40 folder, (I changed
the MCP folder name to “1.12.2 - IDEA”) make sure you have launched
Minecraft at least once to have downloaded all the necessary assets
and libraries for your version to work on 1.12.2. This will populate the
“versions” folder where Minecraft installed.
On Mac OS X, the directory where Minecraft installs is:
~/Library/Application Support/minecraft
Where the tilde symbol (“~”) is the user’s Home folder on Mac OS X.

On Windows, the directory where Minecraft installs is:
%appdata%\Roaming\.minecraft or
C:\Users\NAME\AppData\Roaming\.minecraft\
Where “NAME” is the PC Name associated with the user’s HWID.
On Linux, the directory where Minecraft installs is:
~/.minecraft
Where the tilde symbol (“~”) is the user’s Home folder on the OS.
Copy the “assets,” “versions,” and “libraries” folders from the
Minecraft root install directory to the “jars” folder inside the extracted
MCP archive.
NOTE: For Mac and Linux machines, there is one extra step for making
sure MCP is able to decompile. Inside the MCP folder, there should be
a folder titled, “runtime.” Open this folder as well as the Python
document “MinecraftDiscovery.py” enclosed within. Near the end of
that source code file before the “getArchitecture()” method, there
should be two lines of code that reads as follows:
if 'natives' in library:
libFilename = "%s-%s-%s.jar"%(libSubdir, libVersion,
substitueString(library['natives'][osKeyword]))
Change those two lines of code to this excerpt to catch an exception:
if 'natives' in library:
if osKeyword not in library['natives']:
continue
libFilename = "%s-%s-%s.jar"%(libSubdir, libVersion,
substitueString(library['natives'][osKeyword]))
Now we are ready to decompile a vanilla Minecraft JAR file.
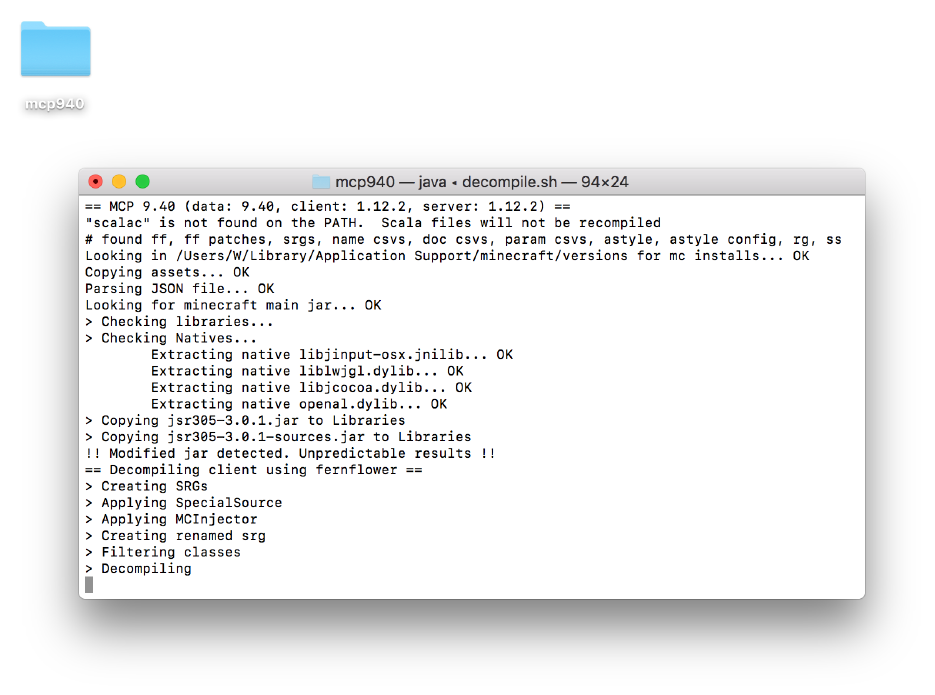
On Mac OS X or Linux, open a Terminal window and type, “cd ” and
drag your MCP folder onto the command window and it should
automatically add the directory string to that folder; press Enter. Since
we have made user-changes to the MCP configuration files, we will not
be running the “updatemcp.sh” script, but the “decompile.sh” script.
Make sure not to get this shell script file confused with
“decompile.bat,” which is used for Windows machines. Run the
“decompile.sh” script by typing, “bash ” and dragging the file onto the
command window and pressing Enter again.
If you’re running Windows, all you have to do is run that
“recompile.bat” file.
Finally, if all went well and there were no errors, you should now have a
decompiled 1.12.2 client ready to be opened in IntelliJ IDEA, but before
we do that there’s a couple more things we must do.
Remember the OptiFine source files we downloaded from
Hexception’s GitHub? Move all the contents within this extracted
archive to the folder titled “src” where it will overwrite some files.
Installing Illusive via GitHub Repo
Now take the Illusive client source downloaded from GitHub and
extract the contents into the “src” folder just as it was done for
OptiFine. Now you should have an environment ready to be loaded up
in any IDE for editing the Illusive client source with OptiFine for 1.12.2!
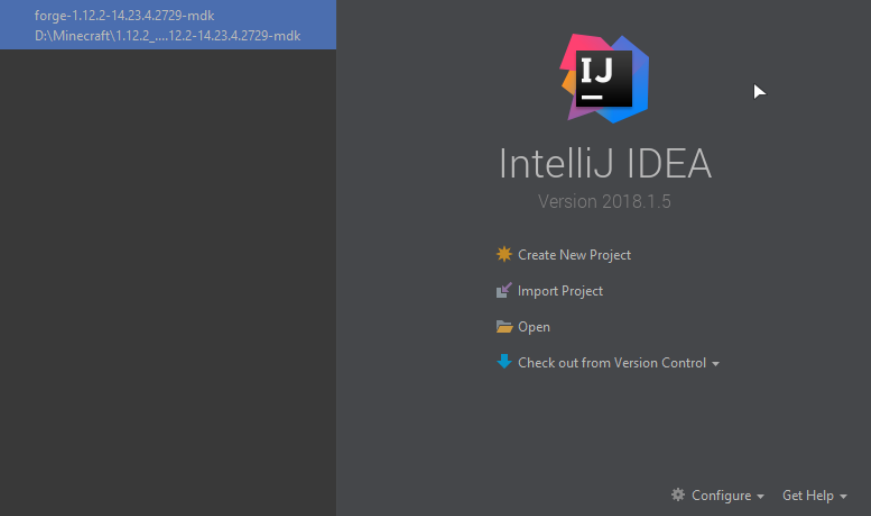
Go ahead and open up IntelliJ IDEA and select “Import Project.”
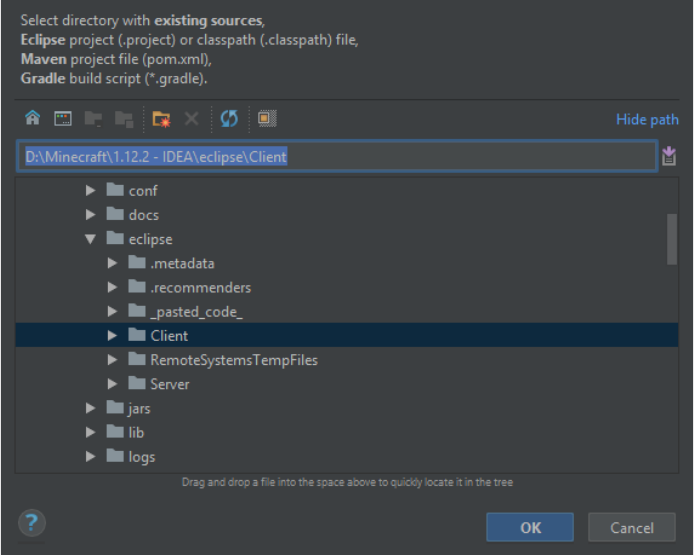
Navigate the file explorer to MCP’s default Eclipse Project workspace
folder titled “eclipse” and select the “Client” folder to import. It should
ask you to confirm Eclipse for the specified external model, click the
Next button.
This next pages are optional if you want to make changes, if not, keep
clicking the “Next” button until it changes to “Finish” and click it.
NOTE: If a dialog box saying: “Imported project refers to unknown
jdks JavaSE-1.6,” ignore because this just means you might have a
different Java SE version installed (I have 1.8 in this scenario on my
Windows machine) and press “OK”.
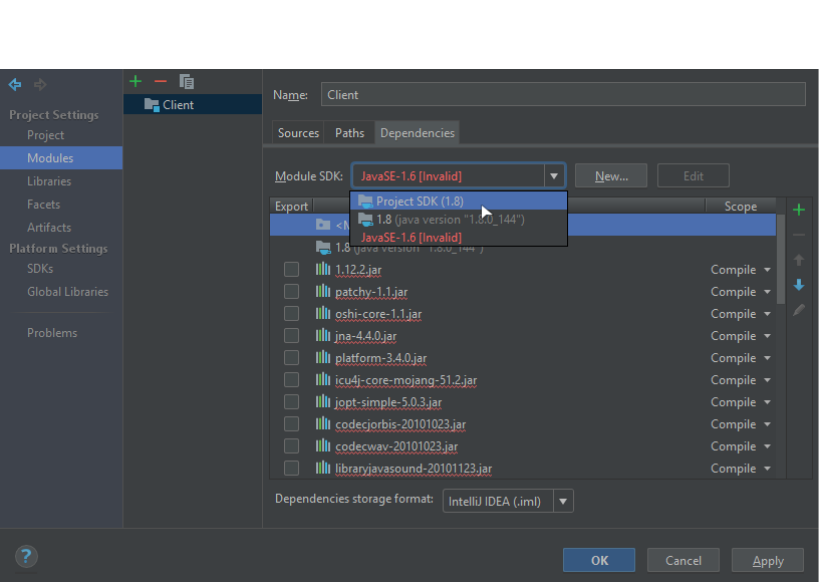
You can fix this warning by pressing these keys to get to the Project
Structure window, select the “Modules” option from the list on the left
and click on the “Dependencies” tab to change the Module SDK option
to Project SDK:
On Windows/Linux: SHIFT + CTRL + ALT + S
On OSX:
⌘
(Command Key) + ; (Colon/Semicolon Key)
This is a very useful tab because you can add any external JAR file,
whether it be an addon or a full blown API, you can go ahead and add
all those files now.
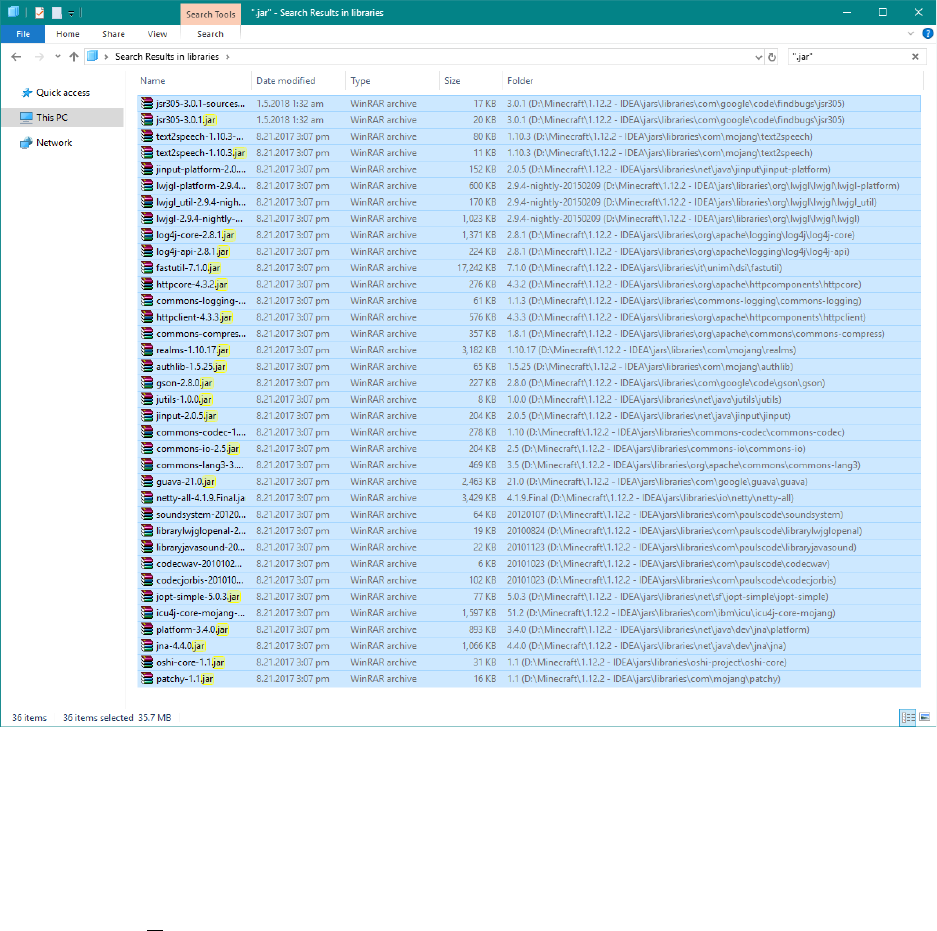
NOTE: If you run into an issue where all of the JAR files are broken like
the one pictured above, is probably because Eclipse has automatically
set it to a bad path. To fix this, delete all the bad JAR files (in my case,
all JAR files) and navigate to your MCP folder in File Explorer or Finder
and search for only “.jar” files, shown below:
Select them all and copy them into the folder titled “lib” in the working
MCP directory. You will also need to add the “1.12.2.jar” file from the
“versions” folder over to “lib” as well. After that, click on the green plus
sign, click “1 JARs or directories,” and select the “lib” folder. All of the
missing Java libraries should be updated and working now.
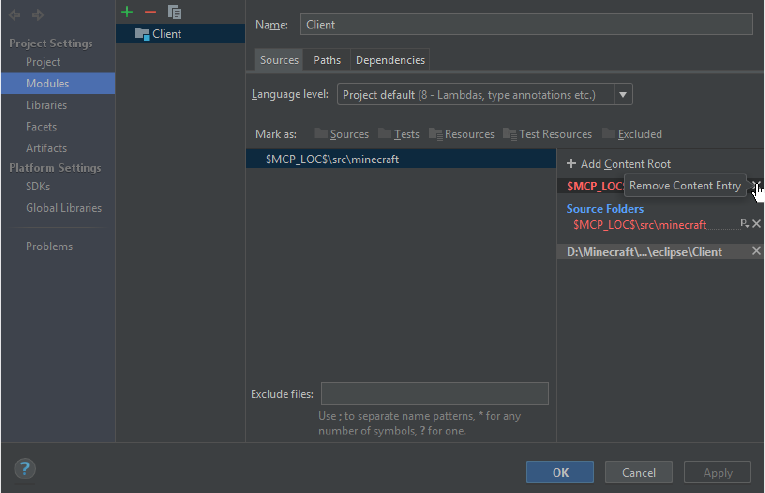
Afterwards, navigate to the Sources tab and delete the current Content
Root and confirm the Dialog box that pops up:
Add another Content Root and click the arrow next to the “src” folder
inside your MCP directory and select the “minecraft” folder to use as
the new Content Root directory. Finish by clicking “Apply” and “OK.”
The next step is to setup your Run options in order to start the client.
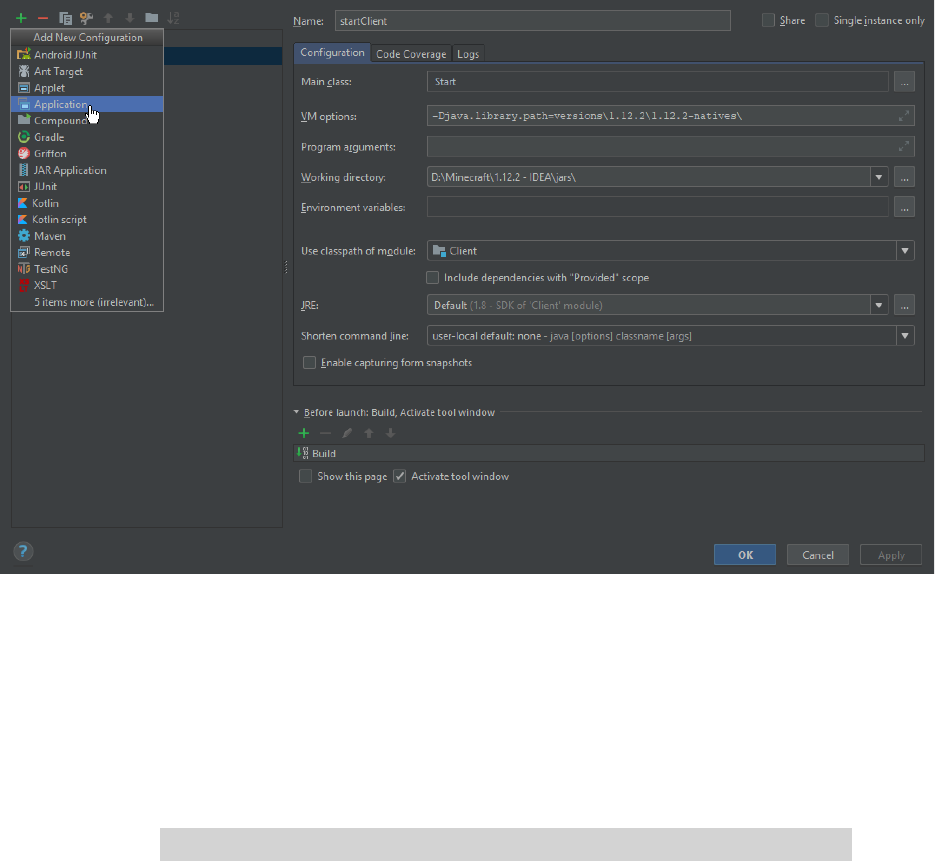
In the menu-bar at the top of IntelliJ, select “Run” and click the “Edit
Configurations…” button. Click on the green plus sign and select the
“Application” option from the dropdown box. For the guide, I used the
name, “startClient” but you can name it whatever you would like:
For the Main class-file, click the three ellipses button to browse and
click on the Project tab in the next window. Expand the “Client” folder,
expand the “minecraft” subfolder, then select the “Start.java” file.
For the VM options, add this line of code:
-Djava.library.path=versions\x\x-natives\
Where “x” is the version of Minecraft you wish to mod. (1.12.2)
For the Working Directory option in the Configuration tab, change it by
navigating to the MCP directory and select the “jars” folder.
If you click apply this should not create any exceptions and you should
be ready able to debug with Illusive loaded! This means you can also
use Illusive’s newly designed Alternate Account screen to login during a
debug session, very useful tool if you need to login to servers and
clean up some code.
Creating a Module with Illusive
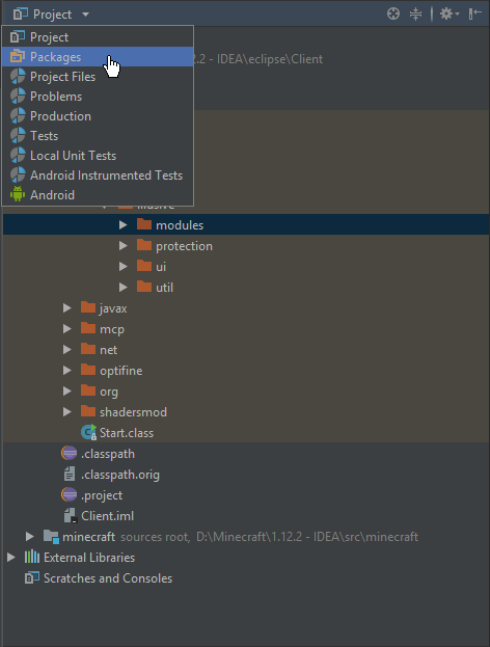
You can now switch over from Project view to Package view if you
would only like to see affected JAVA files in hierarchical form:
Navigate to the “modules” folder and expand it inside of the
“io.seshrad.illusive” package. You should see all of Illusive’s modules.
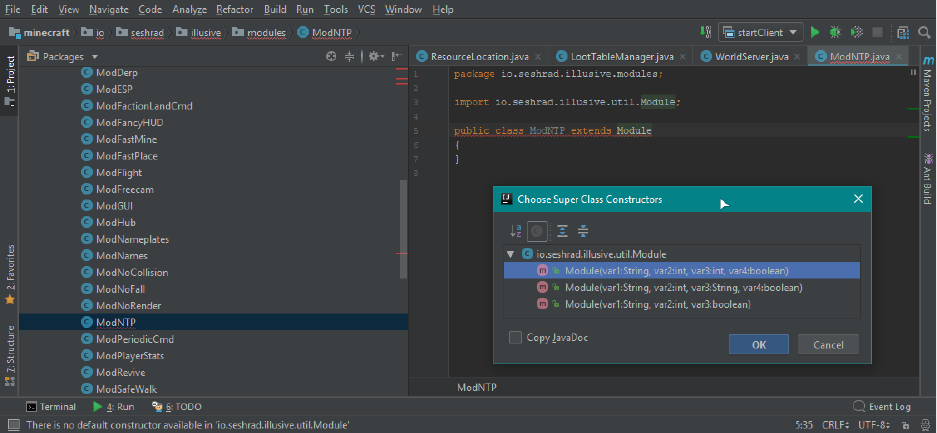
Create a new class by right-clicking on the modules folder, select this
option and set a module name:
New > Java Class…
I will be naming my java class “ModNTP” and make it extend Illusive’s
Module class:
IntelliJ should ask you for a super class constructor to use for the
extension of the base class-file, and you can pick the third option with
one String (mod name), one Integer (color, which is actually unused
because mod colors are chosen at random now), and one Boolean
variable (hidden from UI).
You can then explore all the Illusive classes yourself to see how I
hooked into Minecraft’s source and make your own mods from there. I
created a Java-Tag with the tag “ILL” within my source files where ever
I injected an Illusive line, but for now I will show you just a quick
method on how to add a Module with a Command attached to it to be
accessed as a dot-command in-game.
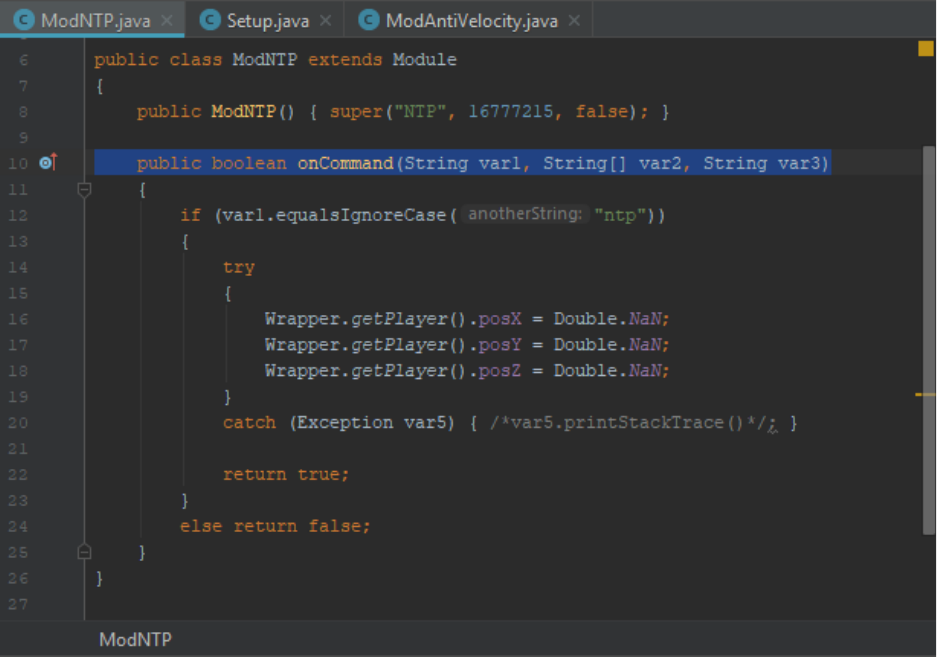
We can call the “onCommand” method in Module.java, where the first
parameter String is the first word inputted into the chat via a dot
command. The second parameter is a String array of every other
parameter after that separated by a Space in Minecraft chat, and the
third is the very last parameter sent by the user.
Now you can easily map out how to create other commands that
require input such as numbers or a string in quotations. Now, in order
for Illusive to register this new Module, go into your package list
viewer and navigate to “io.seshrad.illusive.util” and select the Setup.java
class-file.
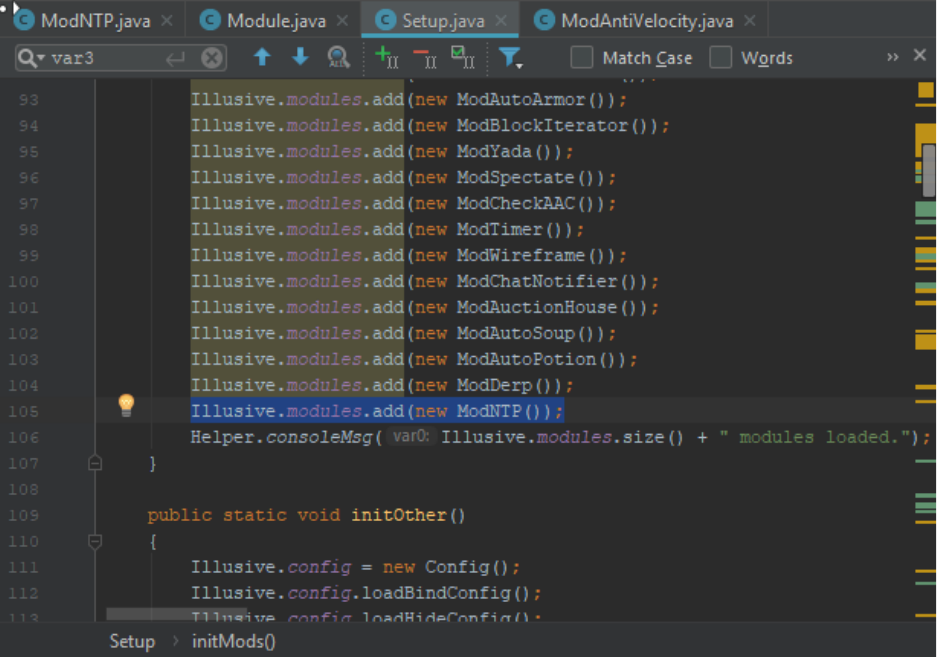
Next you can add the one highlighted line adding your Mod to Illusive’s
Modules array. The command should run properly by executing “.ntp”
in MC Chat!
