Zakeke Integration GUIDE
User Manual:
Open the PDF directly: View PDF ![]() .
.
Page Count: 3


WooCommerce
Log into your WordPress site.
Go to: Plugins > Add New.
Click on Upload Plugin.
Select The zip file of the Zakeke module that you downloaded.
Select Install Now.
Select Activate Now, and you’re ready to get started!
Go to: WooCommerce > Settings > Integrations > Zakeke Interactive Product Designer.
Setup Zakeke as follows:
Zakeke username: your Zakeke username. If you haven't created an account yet, please create one;
Zakeke password: your Zakeke password.
Finish by clicking on Save Changes.
Connect WooCommerce with your Zakeke account
Go to: WooCommerce > Settings > API and be sure that REST API are enabled.
Go to: WooCommerce > Settings > API > Keys/Apps.
Click on Add key.
Setup the details as below:
Description: insert Zakeke;
User: select your user, or an user in the Administrator or Shop manager role;
Permissions: select Read/Write;
Click on Generate API key.
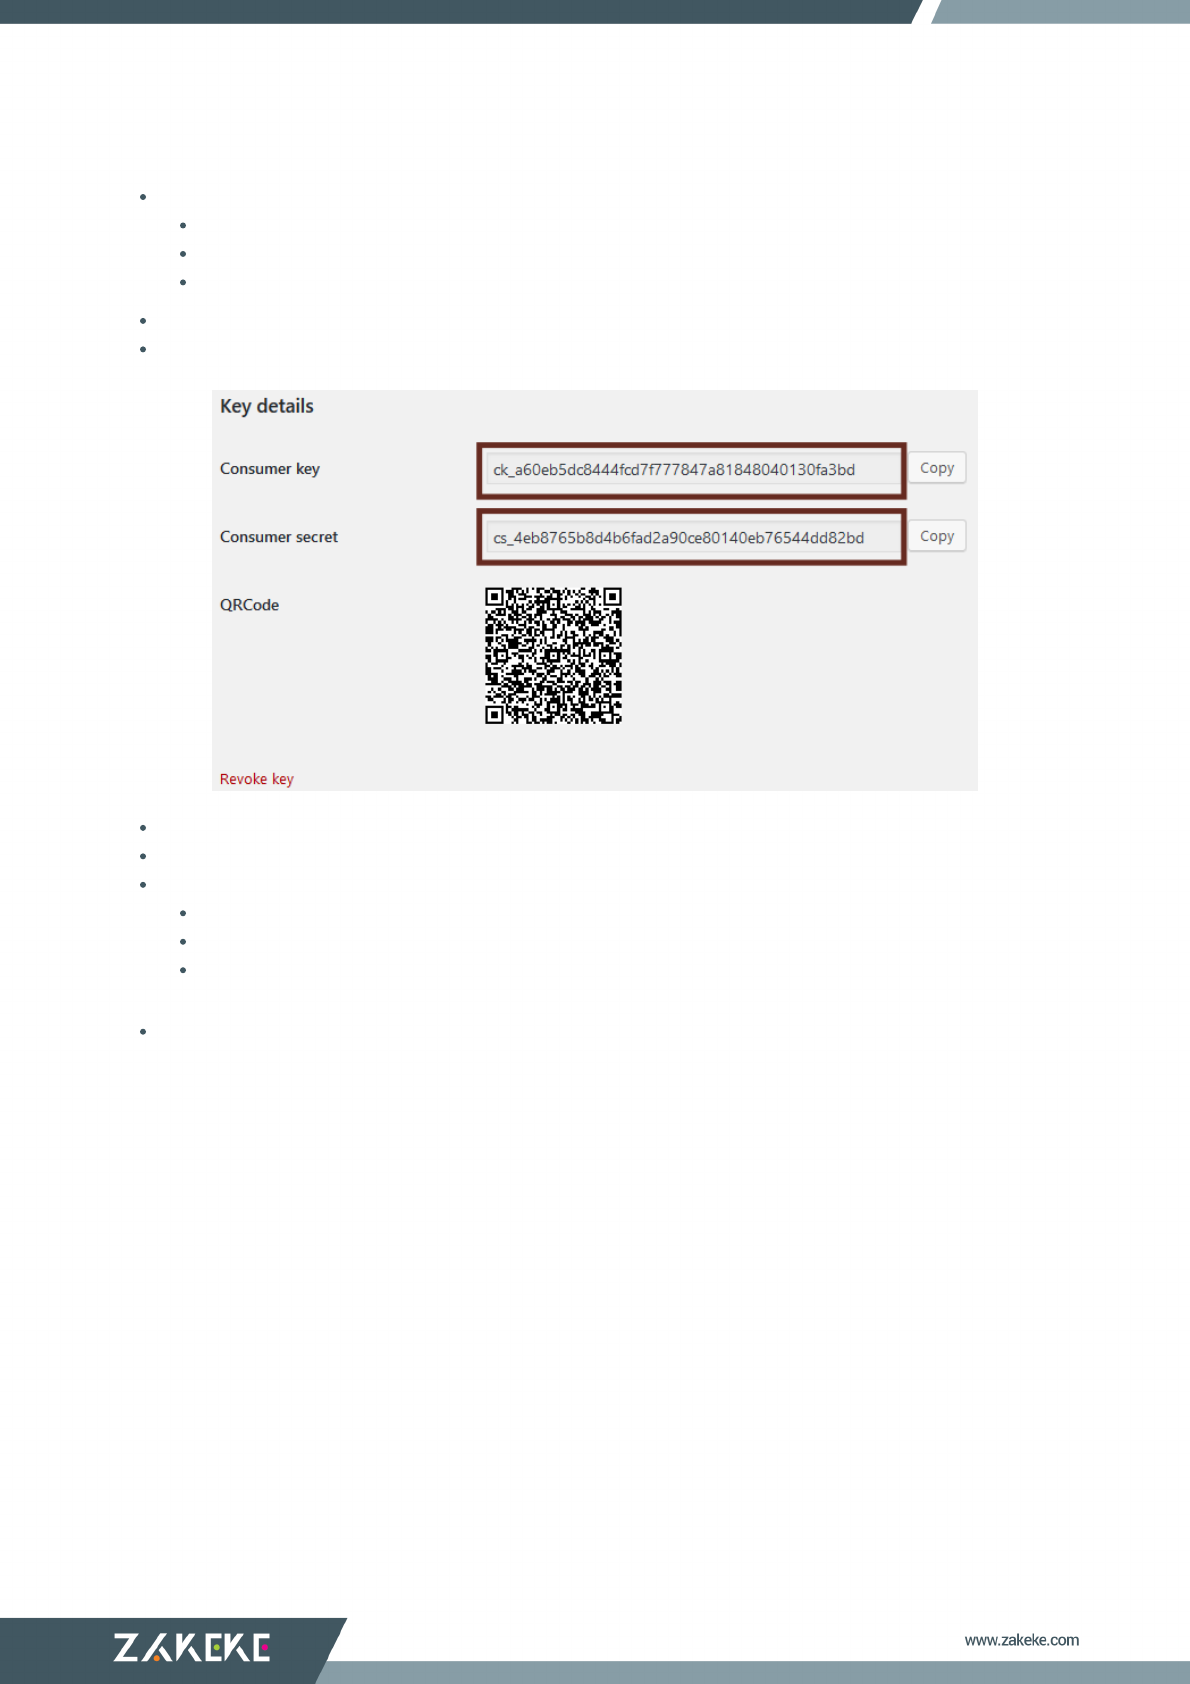
Take note of Consumer key and Consumer secret values.
Access to your Zakeke account and navigate to: ADVANCED > E-Commerce.
Select WooCommerce.
Setup the E-Commerce as below:
Consumer key: insert the Consumer key noted in step 6;
Consumer secret: insert the Consumer secret noted in step 6;
Store URL: insert your WooCommerce Store URL (Note: make sure if you have a multisite installation to
also include the installation path in the URL, es: https://www.store.com/en);
Click on CONFIRM.
At this point, you won't have any problems with Zakeke plugin on your store! If you have some troubles or
problems, see FAQs.
