Installation Manual
User Manual:
Open the PDF directly: View PDF ![]() .
.
Page Count: 13

Table of Contents
1.0. System Background 1
2.0. Hardware and Software Requirements 1
2.1. Hardware Specifications 1
2.2. Software Specifications 2
3.0. Installation Instruction 3
3.1. Database 3
3.2. XAMPP 7
3.3. Sharing and Permissions 9
1.0 System Description
Kernel is a web-based project management system especially made for Taters
Enterprises, Inc. (TEI) whose main objective is to serve as a main tool for
monitoring and updating projects in the project management process of the
company. It will be accessible by all seven (7) of TEI’s departments, Human
Resource, Facilities and Administration, Finance, Management Information
Systems, Procurement, Marketing, and Store Operations, as well as the company’s
Executives. The system has four (4) modules namely, Project Initiation and
Planning, Project Monitoring, Project Control, and Project Closing. The structure
and formation of the modules are modeled to reflect the project management life
cycle. The functions for each module are segregated as follows:
2.0 Hardware and Software Requirements
This section provides information regarding the system pre-requisites in terms of
hardware and software that is needed in a user’s machine.
2.1. Hardware Specifications
The minimum requirements in order for the system to run smoothly are as follows:
User
●Desktop Computer with Keyboard and Mouse / Laptop
●Processor: Dual Core 1 Ghz
●RAM: 1GB
●Disk Space: 1 GB
Project Initiation
and Planning Project Monitoring Project Control Project Closing
• Project Profile
• Project Templates
• Scheduling
• RACI Chart
• Gantt Chart
• Workload
Assessment
• Task Prioritization
• Project Progress
• Document
Tracking
• Team Gantt Chart
• Request for
Change
• Performance
Assessment
• Report Generation
• Project Archives
1

Server
●Processor: Quad core 2 Gz
●RAM: 5 GB
●Storage: 10GB
2.2. Software Specifications
The system can be accessed through the Internet ensuring that the device
accessing it from has the following minimum requirements in order for the system
to run smoothly.
●Operating System
○Windows 7 and above
○MacOS El Capitan and above
○Ubuntu 14.04 and above
●ISP Web Browser
○Internet Explorer 8+
○Safari 9+
○Firefox 38+
○Chrome 45+
○Opera 30+
●MySQL Community Server (8.0.13)
○https://dev.mysql.com/downloads/mysql/
●MySQL Workbench (8.0.13)
○https://dev.mysql.com/downloads/workbench/
●XAMPP (5.6.38)
○https://www.apachefriends.org/download.html
2
3.0. Installation Instruction
This section enumerates the step-by-step procedure to enable the system to start running
on a new machine.
3.1. Database
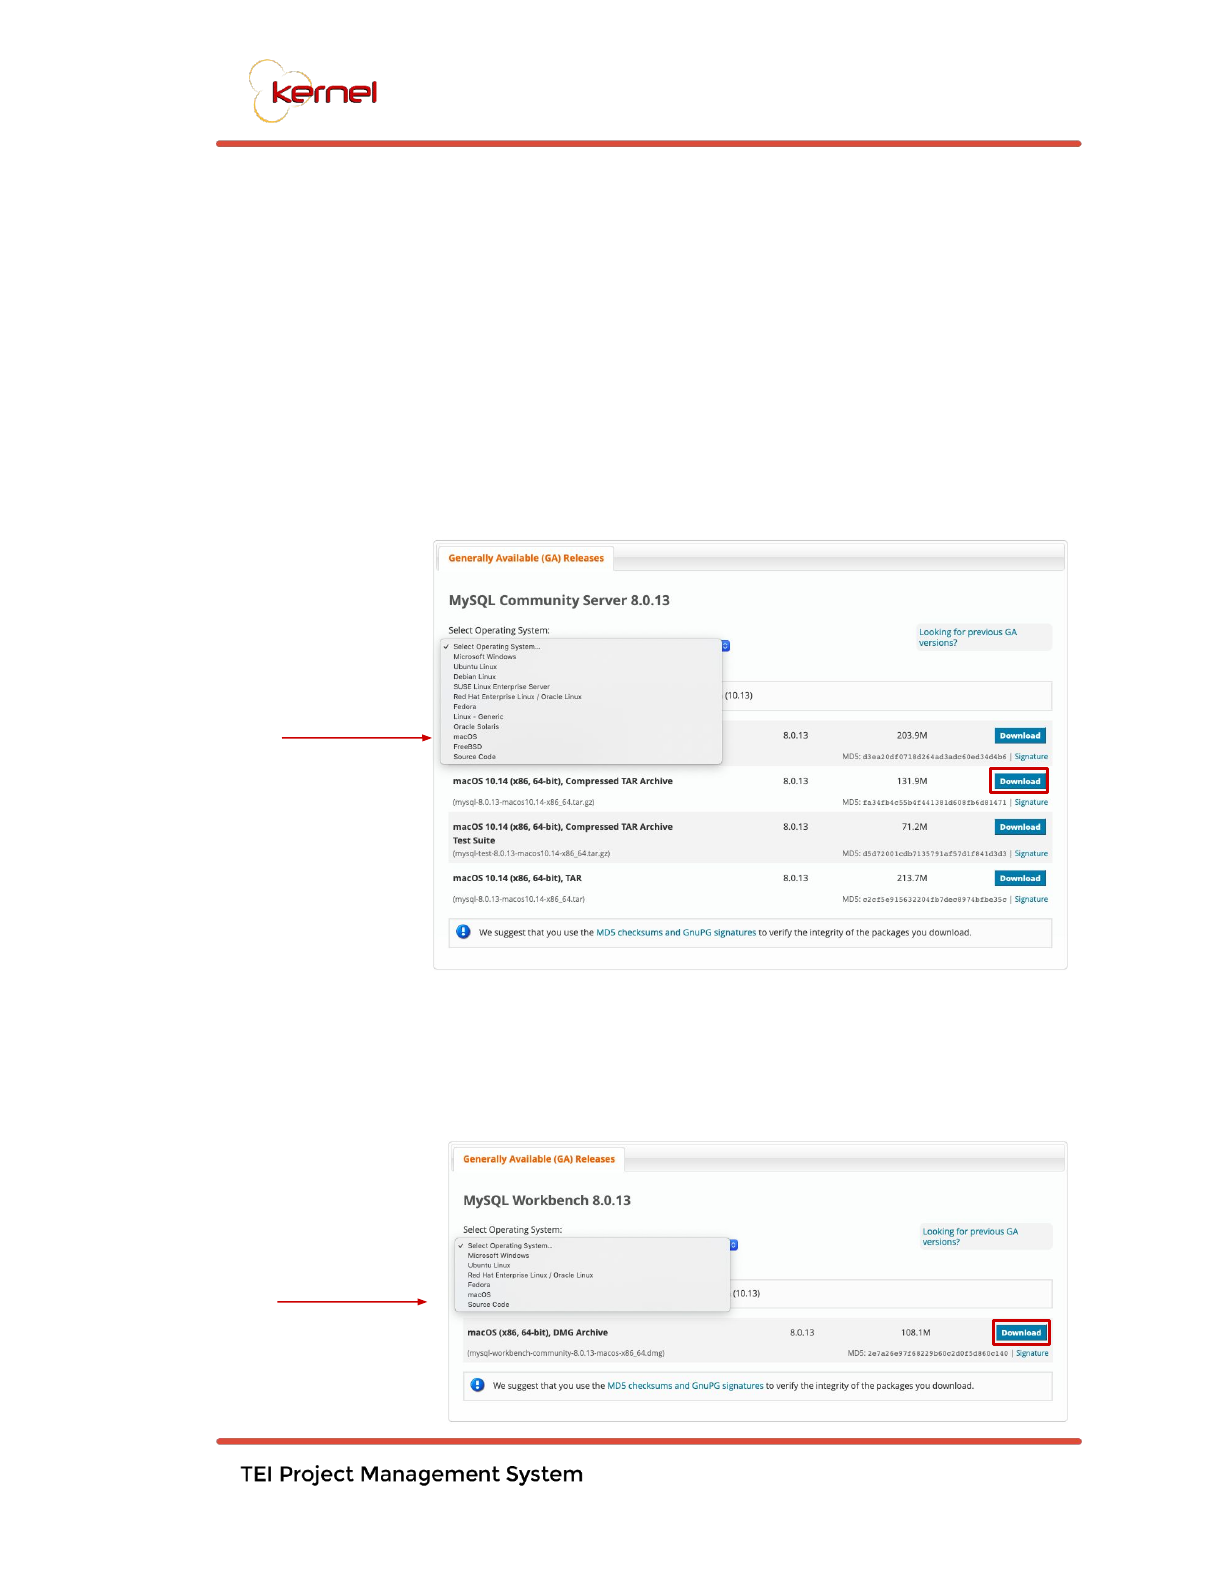
1. Download the recommended version for MySQL Community Server
(8.0.13) depending on the machine’s operating system.
2. Run the downloaded installer and follow the on-screen steps provided.
3. Download the recommended version for MySQL Workbench depending
on the machine’s operating system.
3
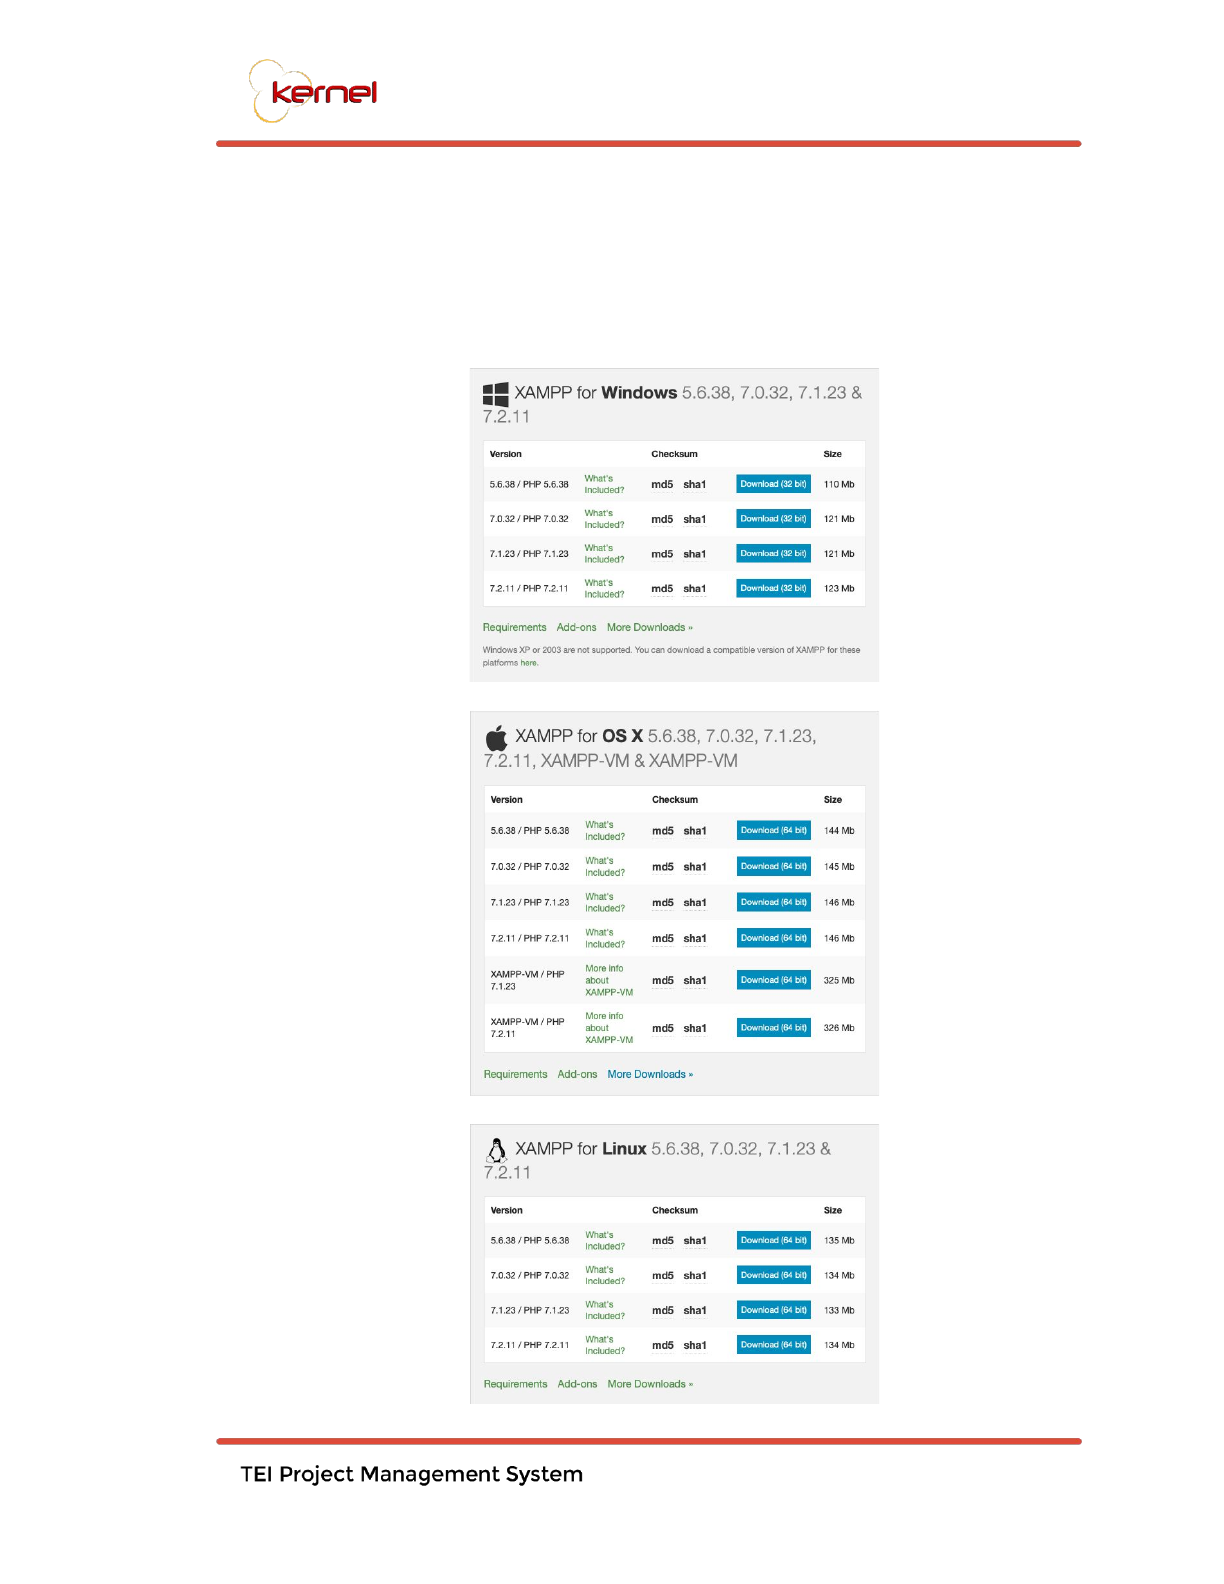
Choose the operating
system of the machine
Choose the operating
system of the machine
4. Run the .dmg file and drag it to the applications folder (OS X method) or
run the .exe file and follow the on-screen instructions (Windows method).
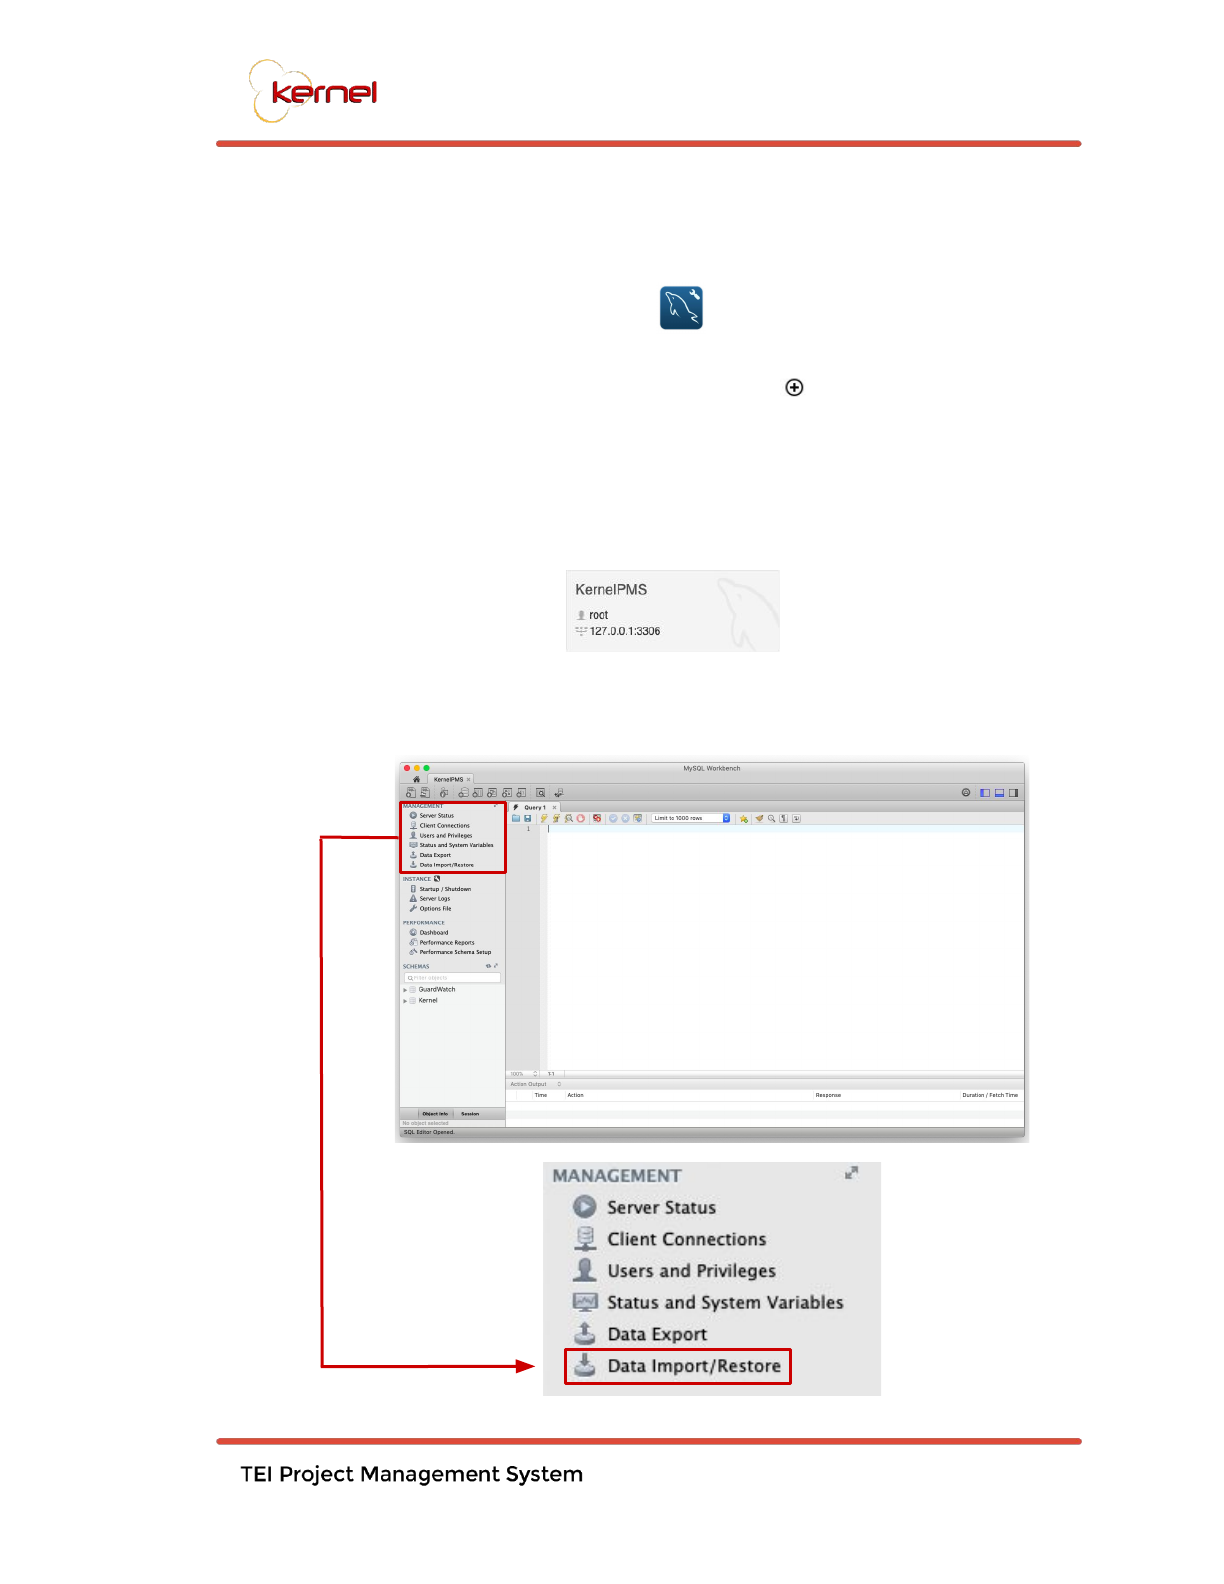
5. Open MySQL Workbench.
6. Create a new connection by clicking the button. Enter the necessary
information (Connection Name: KernelPMS) and click OK.
7. The new connection will appear in the homepage. Click it to proceed to
the next step.
8. On the left pane, under Management, click on Data Import/Restore.
4
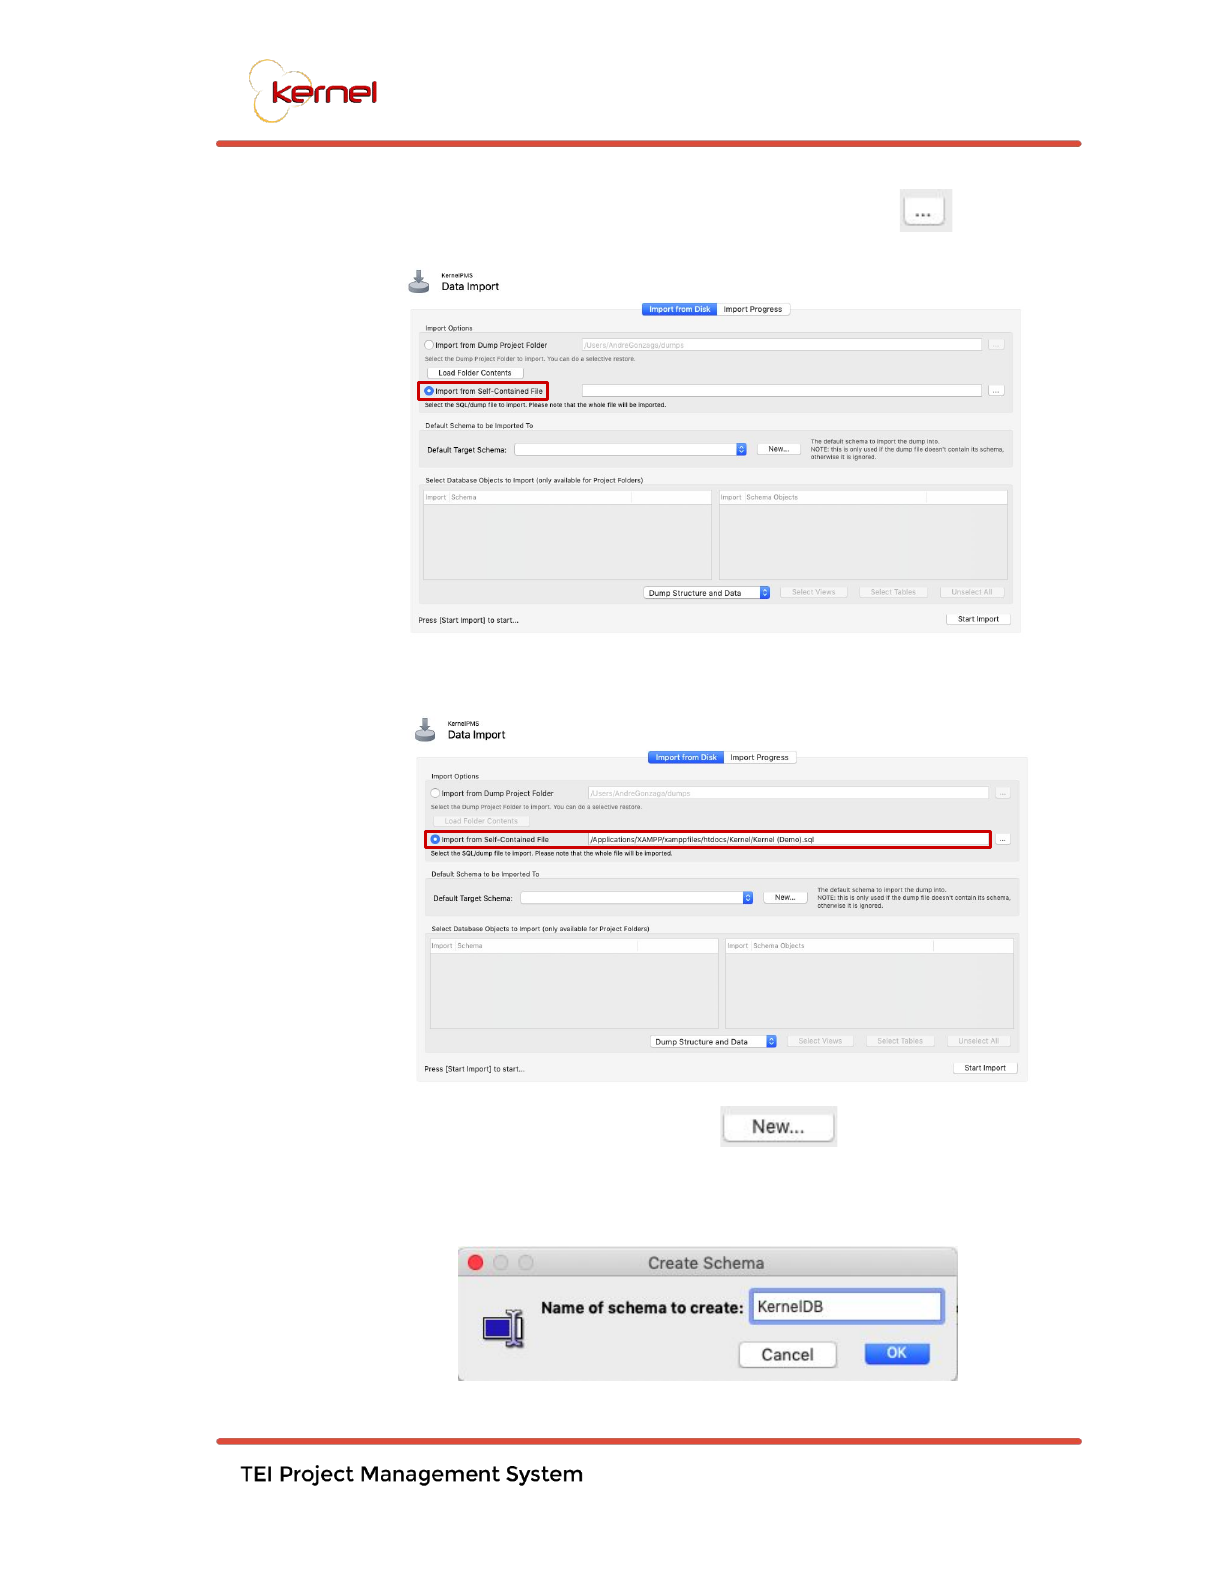
9. Choose Import from Self-Contained File and click the j to choose
a file.
10. From the Kernel System folder, choose the Kernel (Demo).sql file.
11. Create a new schema by clicking
12. A pop-up will appear prompting the user to enter a schema name.
(Schema Name: KernelDB).
5
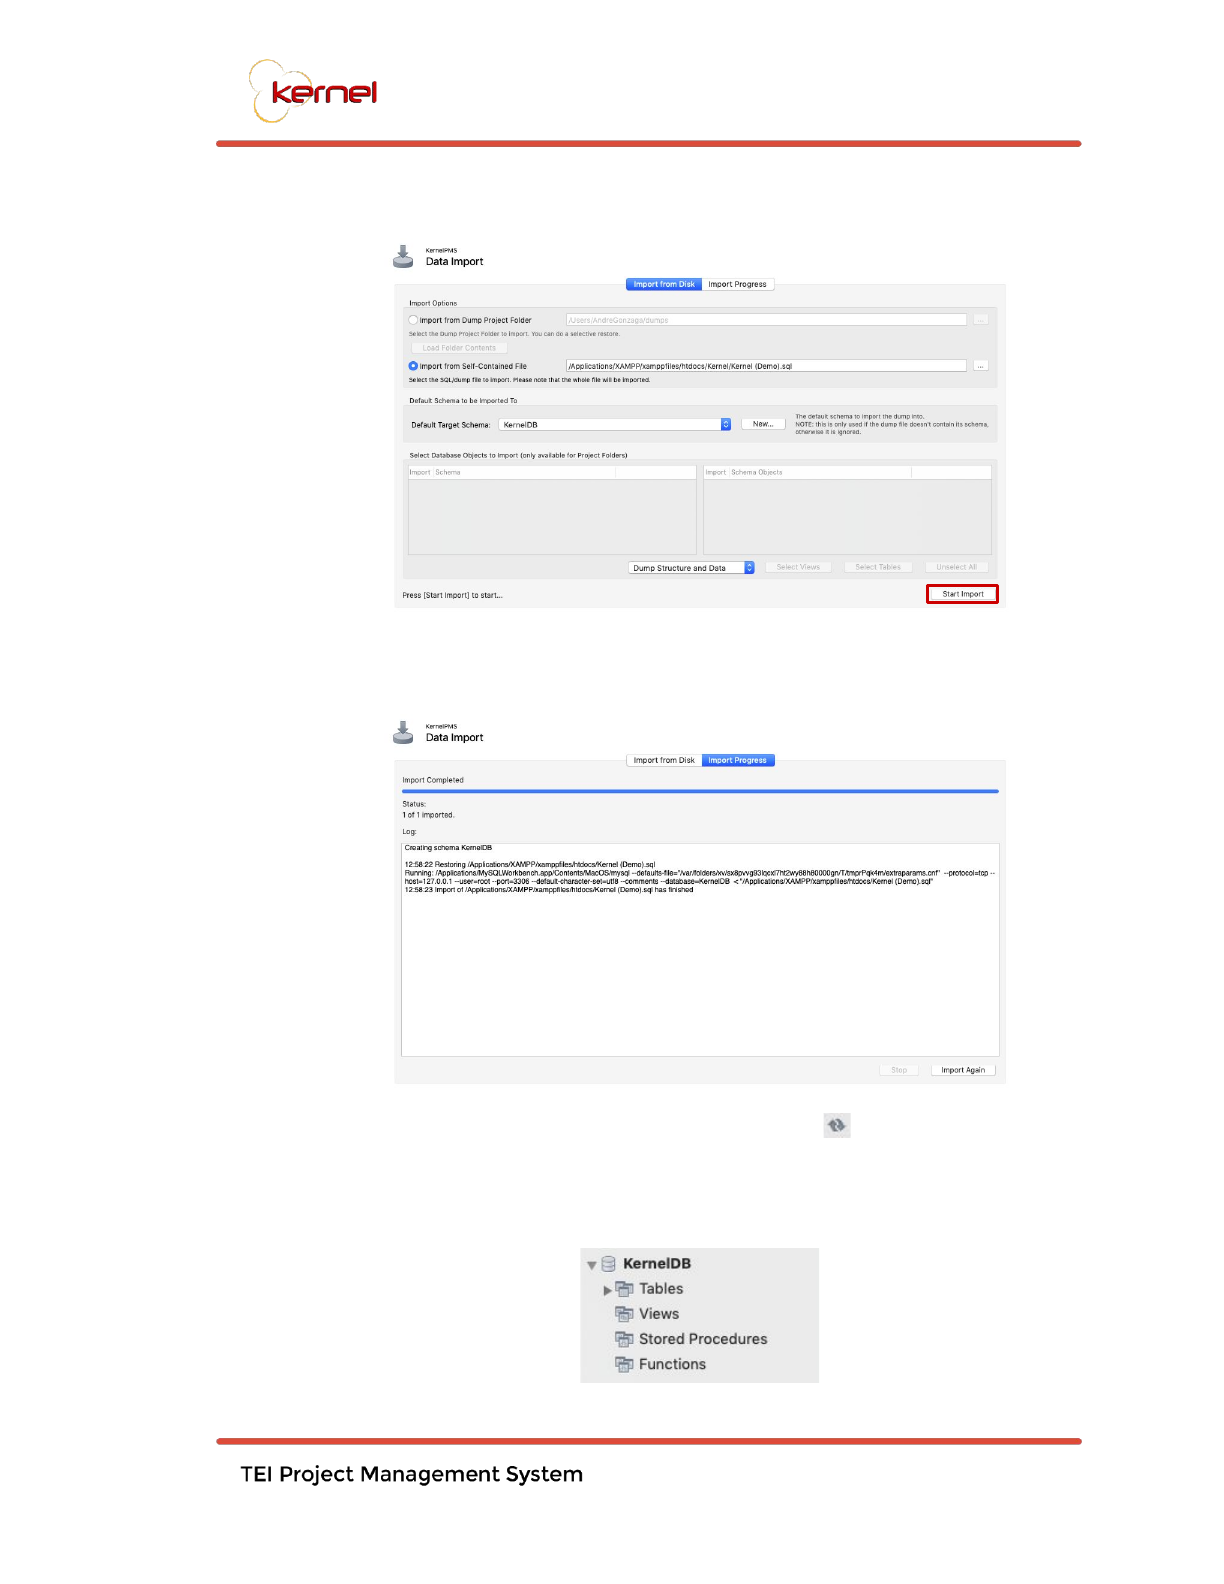
13. Click Start Import.
14. Import logs should appear with no errors, to consider it as successful.
15. On the lower left pane, under schema, click to add KernelDB to the
schema list.
16. Double click on KernelDB to select it as the working schema.
6
7
3.1. XAMPP
1. Download the recommended version for XAMPP depending on the
machine’s operating system.
2. Run the downloaded installer and follow the on-screen instructions.
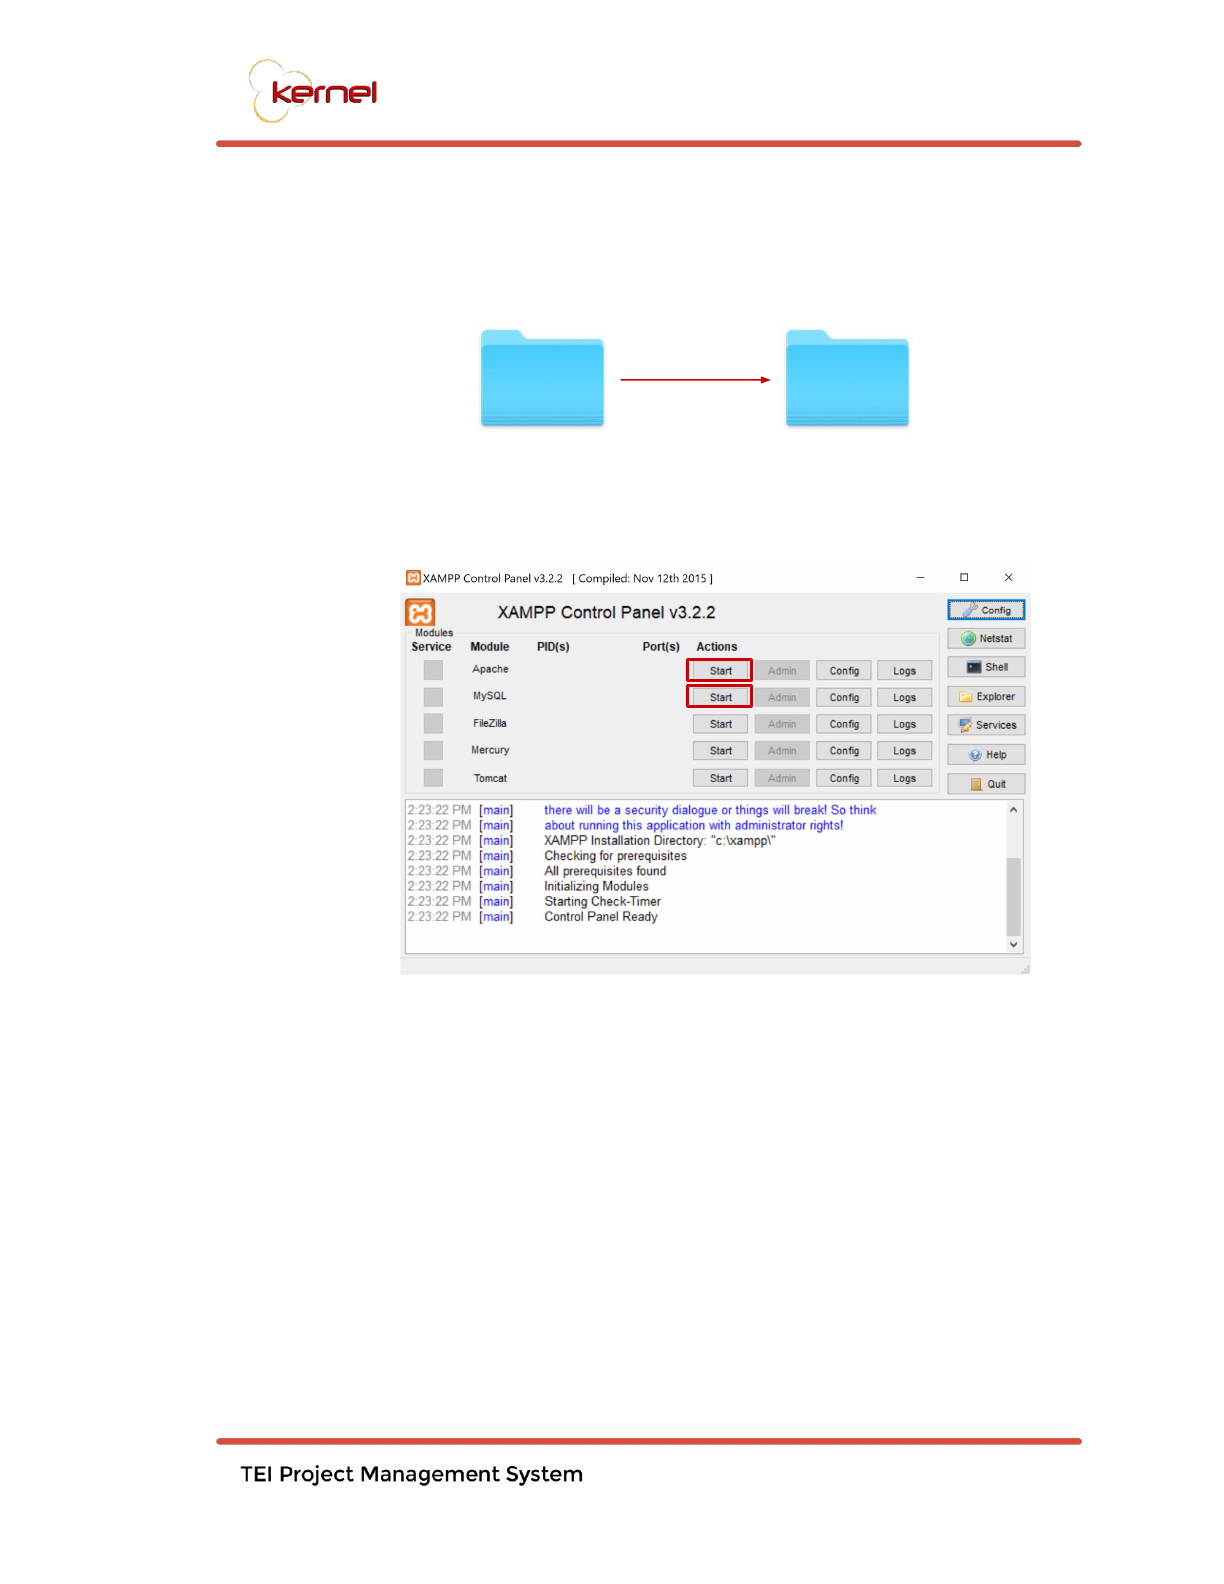
3. Place the Kernel folder in the htdocs folder. You can find htdocs within
the XAMPP folder in the location you initially set during installation.
Kernel htdocs
4. Open the XAMPP Control Panel (manager-osx for Max OS X) and run
MySQL and Apache.
5. Open the ISP Web browser of choice and enter this url:
http://localhost/Kernel/index.php/controller/login
8
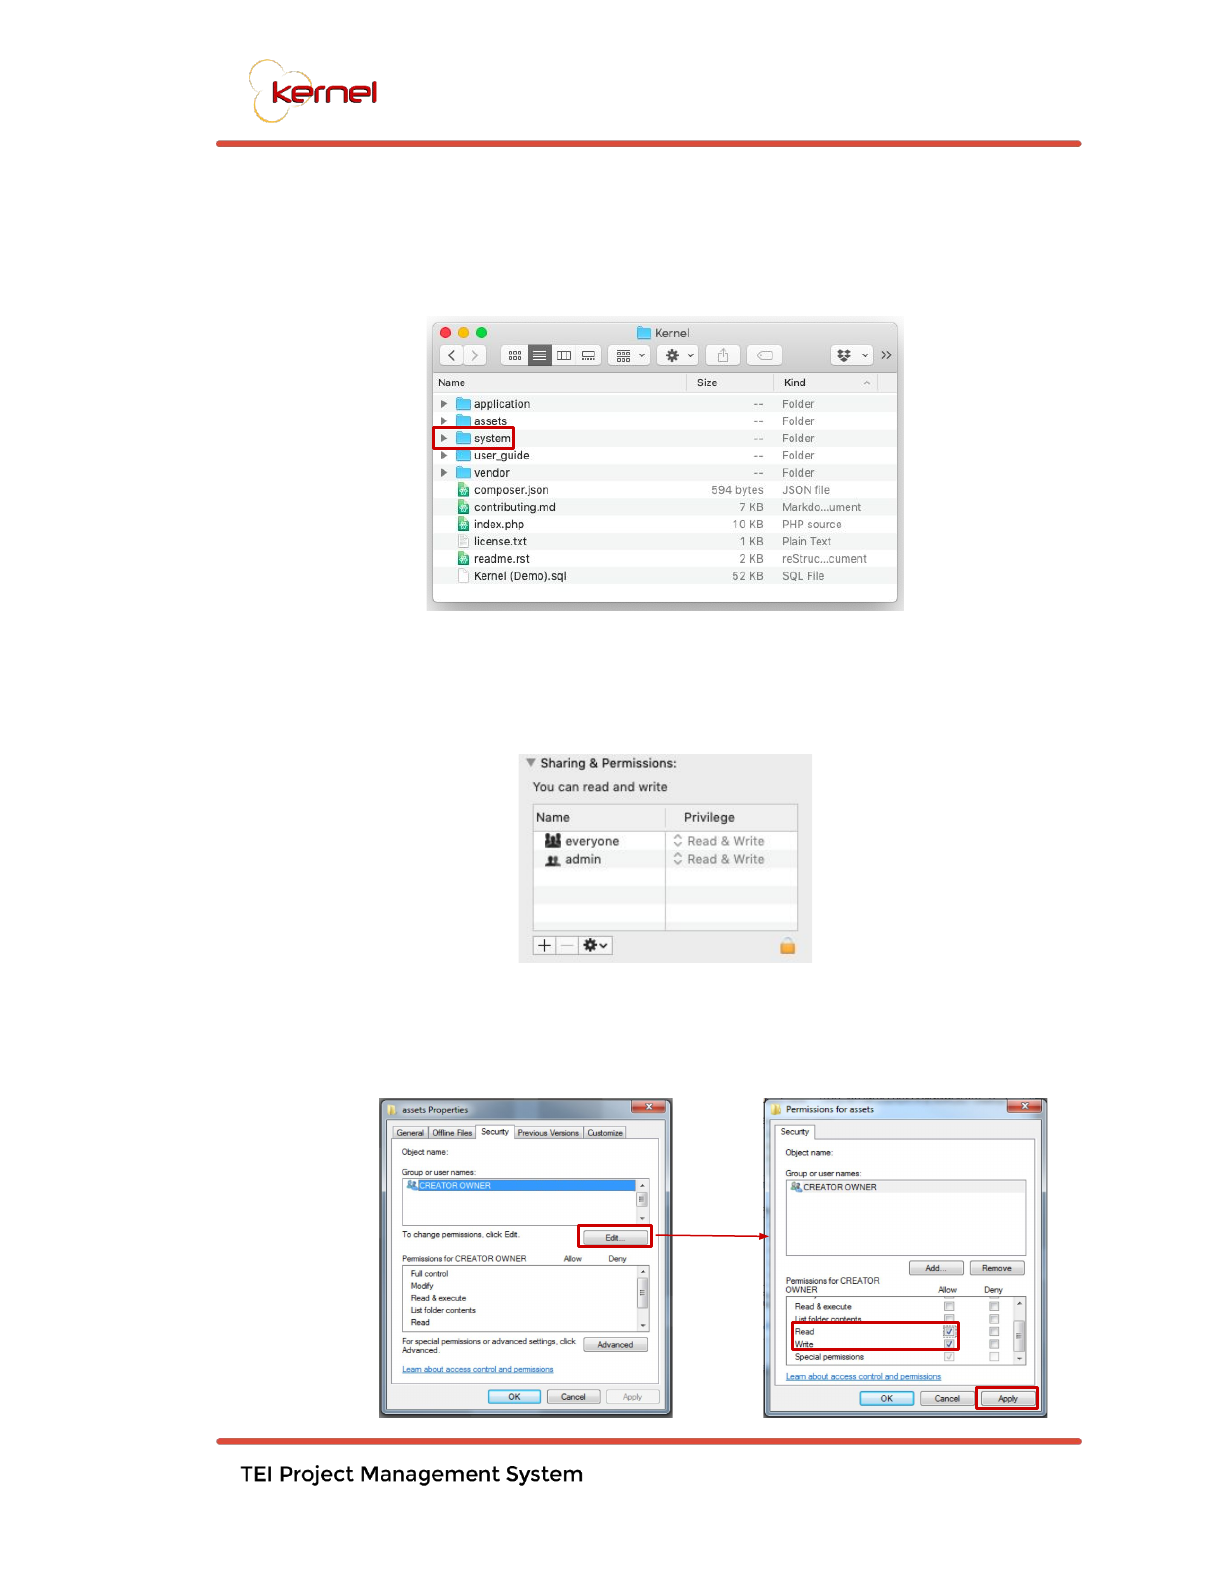
3.3. Sharing and Permissions
1. Go to the Kernel folder inside the htdocs folder and right click on the
assets folder.
For Mac OS X:
Choose Get Info. Under the Sharing & Permissions section, click the
privilege cell and choose Read & Write.
For Windows:
Choose Properties. Go to the Security tab and click Edit. Check “Read” and
“Write” checkbox under the Allow column and apply changes.
9
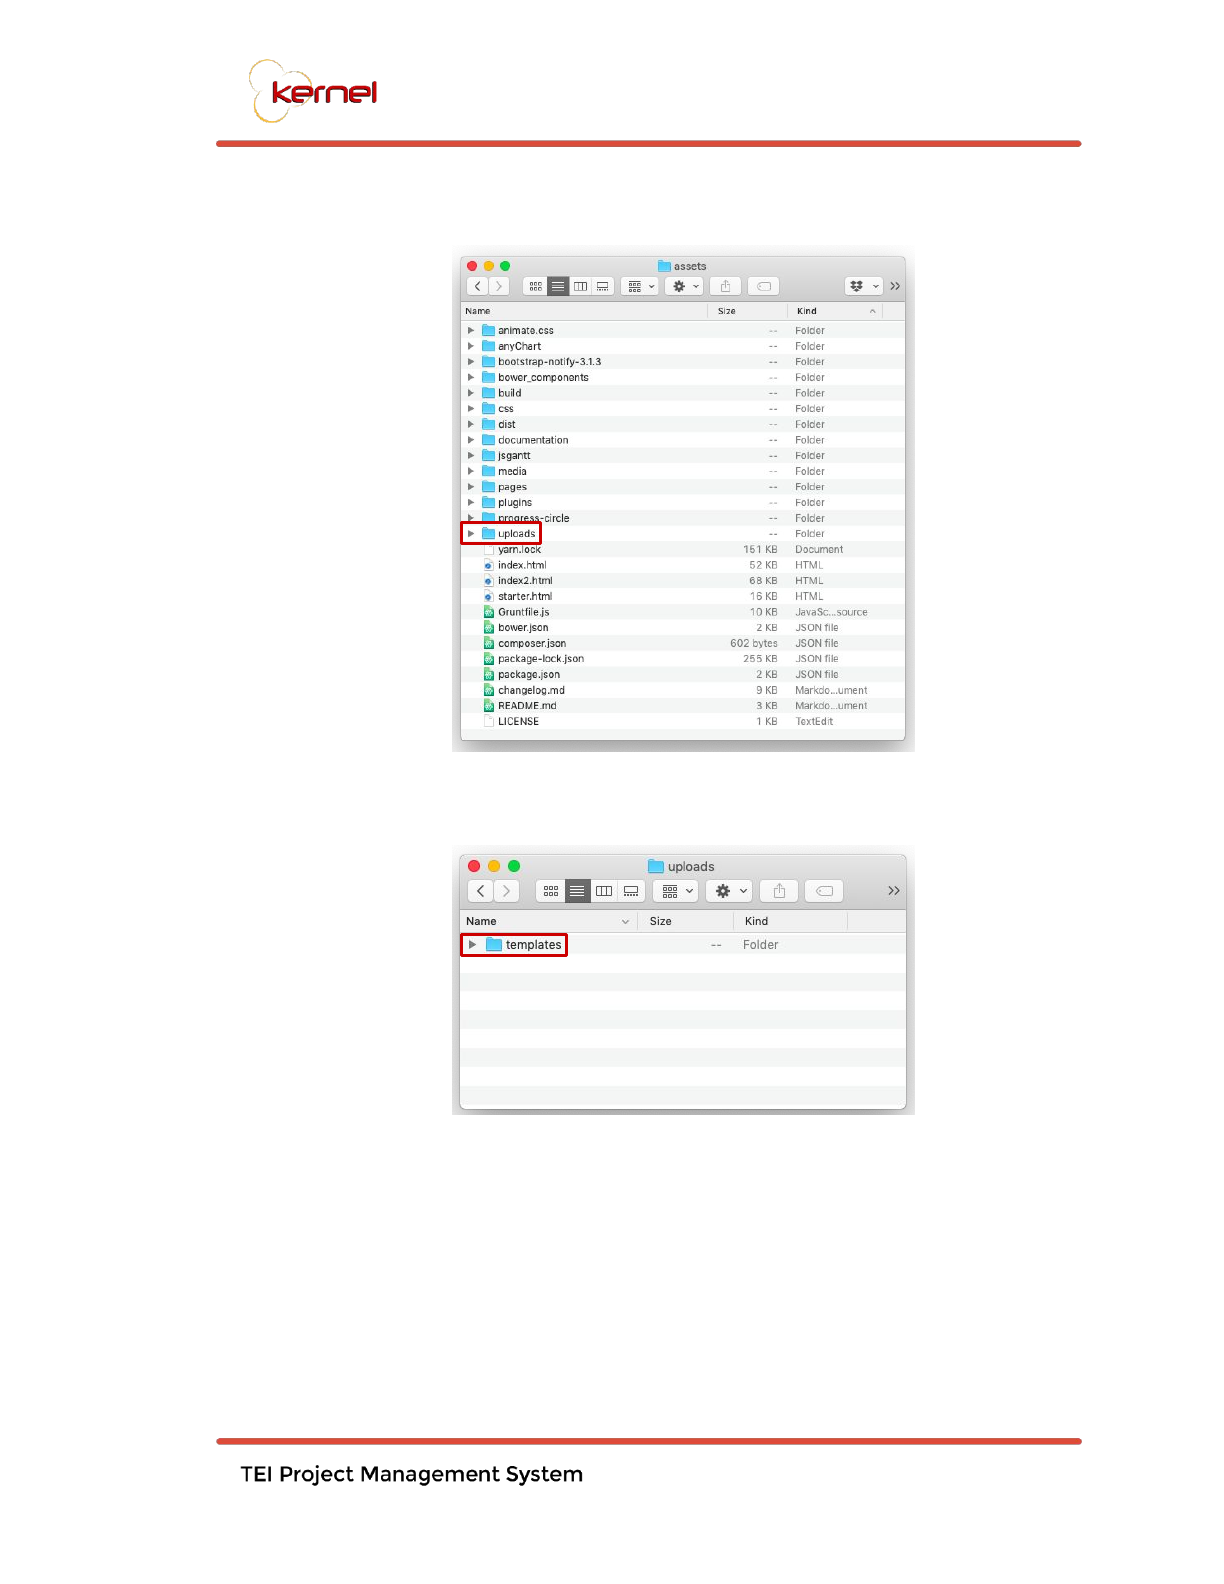
2. Repeat step 1 for the uploads folder within the assets folder.
3. Repeat step 1 for the templates folder within the uploads folder.
10