TIBCO JasperReports Server Community Project Upgrade Guide Jasper Reports CP
User Manual:
Open the PDF directly: View PDF ![]() .
.
Page Count: 30
- Chapter 1 Introduction
- Chapter 2 Upgrading from 7.1 to 7.2
- 2.1 Upgrade Steps Overview
- 2.2 Upgrading with Customizations
- 2.3 Back Up Your JasperReports Server Instance
- 2.4 Preparing the JasperReports Server 7.2 WAR File Distribution
- 2.5 Configuring Buildomatic for Your Database and Application Server
- 2.6 Upgrading to JasperReports Server 7.2
- 2.7 Starting and Logging into JasperReports Server 7.2
- 2.8 Additional Tasks to Complete the Upgrade
- Chapter 3 Upgrading from 6.3 - 6.4 to 7.2
- 3.1 Upgrade Steps Overview
- 3.2 Upgrading with Customizations
- 3.3 Back Up Your JasperReports Server Instance
- 3.4 Exporting Current Repository Data
- 3.5 Preparing the JasperReports Server 7.2 WAR File Distribution
- 3.6 Configuring Buildomatic for Your Database and Application Server
- 3.7 Upgrading to JasperReports Server 7.2
- 3.8 Starting and Logging into JasperReports Server 7.2
- 3.9 Additional Tasks to Complete the Upgrade
- 3.10 Old Manual Upgrade Steps
- Chapter 4 Upgrading JasperReports Server 6.2.x or Earlier
- Appendix A Planning Your Upgrade
- Appendix B Working With JDBC Drivers

TIBCO JasperReports® Server
Community Project Upgrade
Guide
Software Release 7.2

Important Information
SOME TIBCO SOFTWARE EMBEDS OR BUNDLES OTHER TIBCO SOFTWARE. USE OF SUCH EMBEDDED OR BUNDLED TIBCO
SOFTWARE IS SOLELY TO ENABLE THE FUNCTIONALITY (OR PROVIDE LIMITED ADD-ON FUNCTIONALITY) OF THE LICENSED
TIBCO SOFTWARE. THE EMBEDDED OR BUNDLED SOFTWARE IS NOT LICENSED TO BE USED OR ACCESSED BY ANY OTHER TIBCO
SOFTWARE OR FOR ANY OTHER PURPOSE.
USE OF TIBCO SOFTWARE AND THIS DOCUMENT IS SUBJECT TO THE TERMS AND CONDITIONS OF A LICENSE AGREEMENT
FOUND IN EITHER A SEPARATELY EXECUTED SOFTWARE LICENSE AGREEMENT, OR, IF THERE IS NO SUCH SEPARATE
AGREEMENT, THE CLICKWRAP END USER LICENSE AGREEMENT WHICH IS DISPLAYED DURING DOWNLOAD OR INSTALLATION OF
THE SOFTWARE (AND WHICH IS DUPLICATED IN THE LICENSE FILE) OR IF THERE IS NO SUCH SOFTWARE LICENSE AGREEMENT
OR CLICKWRAP END USER LICENSE AGREEMENT, THE LICENSE(S) LOCATED IN THE “LICENSE” FILE(S) OF THE SOFTWARE. USE OF
THIS DOCUMENT IS SUBJECT TO THOSE TERMS AND CONDITIONS, AND YOUR USE HEREOF SHALL CONSTITUTE ACCEPTANCE OF
AND AN AGREEMENT TO BE BOUND BY THE SAME.
ANY SOFTWARE ITEM IDENTIFIED AS THIRD PARTY LIBRARY IS AVAILABLE UNDER SEPARATE SOFTWARE LICENSE TERMS AND
IS NOT PART OF A TIBCO PRODUCT. AS SUCH, THESE SOFTWARE ITEMS ARE NOT COVERED BY THE TERMS OF YOUR
AGREEMENT WITH TIBCO, INCLUDING ANY TERMS CONCERNING SUPPORT, MAINTENANCE, WARRANTIES, AND INDEMNITIES.
DOWNLOAD AND USE OF THESE ITEMS IS SOLELY AT YOUR OWN DISCRETION AND SUBJECT TO THE LICENSE TERMS
APPLICABLE TO THEM. BY PROCEEDING TO DOWNLOAD, INSTALL OR USE ANY OF THESE ITEMS, YOU ACKNOWLEDGE THE
FOREGOING DISTINCTIONS BETWEEN THESE ITEMS AND TIBCO PRODUCTS.
This document is subject to U.S. and international copyright laws and treaties. No part of this document may be reproduced in any form without the
written authorization of TIBCO Software Inc.
TIBCO, the TIBCO logo, Jaspersoft, JasperReports, and Visualize.js are registered trademarks of TIBCO Software Inc. in the United States and/or other
countries.
Java and all Java based trademarks and logos are trademarks or registered trademarks of Oracle and/or its affiliates.
All other product and company names and marks mentioned in this document are the property of their respective owners and are mentioned for
identification purposes only.
THIS DOCUMENT IS PROVIDED “AS IS” WITHOUT WARRANTY OF ANY KIND, EITHER EXPRESS OR IMPLIED, INCLUDING, BUT NOT
LIMITED TO, THE IMPLIED WARRANTIES OF MERCHANTABILITY, FITNESS FOR A PARTICULAR PURPOSE, OR NON-INFRINGEMENT.
THIS DOCUMENT COULD INCLUDE TECHNICAL INACCURACIES OR TYPOGRAPHICAL ERRORS. CHANGES ARE PERIODICALLY
ADDED TO THE INFORMATION HEREIN; THESE CHANGES WILL BE INCORPORATED IN NEW EDITIONS OF THIS DOCUMENT. TIBCO
SOFTWARE INC. MAY MAKE IMPROVEMENTS AND/OR CHANGES IN THE PRODUCT(S) AND/OR THE PROGRAM(S) DESCRIBED IN
THIS DOCUMENT AT ANY TIME.
THE CONTENTS OF THIS DOCUMENT MAY BE MODIFIED AND/OR QUALIFIED, DIRECTLY OR INDIRECTLY, BY OTHER
DOCUMENTATION WHICH ACCOMPANIES THIS SOFTWARE, INCLUDING BUT NOT LIMITED TO ANY RELEASE NOTES AND "READ
ME" FILES.
This and other products of TIBCO Software Inc. may be covered by registered patents. Please refer to TIBCO's Virtual Patent Marking document
(https://www.tibco.com/patents) for details.
Copyright © 2005-2019. TIBCO Software Inc. All Rights Reserved.
Version 0619-JSO72-10 of the TIBCO JasperReports Server Community Project Upgrade Guide

TABLE OF CONTENTS
Chapter 1 Introduction 5
1.1 Server Upgrade Distributions 6
1.1.1 About Bundled Apache Ant 6
Chapter 2 Upgrading from 7.1 to 7.2 7
2.1 Upgrade Steps Overview 7
2.2 Upgrading with Customizations 7
2.3 Back Up Your JasperReports Server Instance 8
2.4 Preparing the JasperReports Server 7.2 WAR File Distribution 8
2.5 Configuring Buildomatic for Your Database and Application Server 8
2.5.1 Example Buildomatic Configuration 9
2.6 Upgrading to JasperReports Server 7.2 10
2.6.1 js-upgrade Test Mode 10
2.6.2 Output Log Location 10
2.6.3 Errors 11
2.7 Starting and Logging into JasperReports Server 7.2 11
2.7.1 Clearing Your Browser Cache 11
2.7.2 Logging into JasperReports Server 11
2.8 Additional Tasks to Complete the Upgrade 11
2.8.1 Handling JasperReports Server Customizations 11
2.8.2 Clearing the Application Server Work Folder 12
2.8.3 Clearing the Application Server Temp Folder 12
2.8.4 Clearing the Repository Cache Database Table 12
Chapter 3 Upgrading from 6.3 - 6.4 to 7.2 13
3.1 Upgrade Steps Overview 13
3.2 Upgrading with Customizations 14
3.3 Back Up Your JasperReports Server Instance 14
3.4 Exporting Current Repository Data 14
3.4.1 Using Buildomatic Scripts to Export Data 15
3.4.2 Using the js-export Script to Export Data 15
3.5 Preparing the JasperReports Server 7.2 WAR File Distribution 15
3.6 Configuring Buildomatic for Your Database and Application Server 16
3.6.1 Example Buildomatic Configuration 16
TIBCO Software Inc. 3

TIBCO JasperReports Server Community Project Upgrade Guide
3.7 Upgrading to JasperReports Server 7.2 17
3.7.1 js-upgrade Test Mode 17
3.7.2 Output Log Location 18
3.7.3 Errors 18
3.8 Starting and Logging into JasperReports Server 7.2 18
3.8.1 Clearing Your Browser Cache 18
3.8.2 Logging into JasperReports Server 18
3.9 Additional Tasks to Complete the Upgrade 18
3.9.1 Handling JasperReports Server Customizations 19
3.9.2 Clearing the Application Server Work Folder 19
3.9.3 Clearing the Application Server Temp Folder 19
3.9.4 Clearing the Repository Cache Database Table 19
3.10 Old Manual Upgrade Steps 20
Chapter 4 Upgrading JasperReports Server 6.2.x or Earlier 21
4.1 Upgrading from 6.2.x or Earlier 21
4.2 Best Practices for Upgrading on Windows 21
Appendix A Planning Your Upgrade 23
A.1 Changes in 7.2 That May Affect Your Upgrade 23
A.1.1 Changes to the Login Page 23
A.1.2 Spring Security Upgrade 24
A.2 Changes in 7.1 That May Affect Your Upgrade 25
A.2.1 Changes to the Login Page 25
A.3 Changes in 6.1 That May Affect Your Upgrade 26
A.3.1 Changes to Themes 26
Appendix B Working With JDBC Drivers 29
B.1 Open Source JDBCDrivers 29
B.1.1 PostgreSQL Example 29
B.1.2 MySQLExample 29
4 TIBCO Software Inc.

CHAPTER 1 INTRODUCTION
TIBCO JasperReports® Server builds on TIBCOJasperReports® Library as a comprehensive family of Business
Intelligence (BI) products, providing robust static and interactive reporting, report server, and data analysis
capabilities. These capabilities are available as either stand-alone products, or as part of an integrated end-to-end
BI suite utilizing common metadata and provide shared services, such as security, a repository, and scheduling.
The server exposes comprehensive public interfaces enabling seamless integration with other applications and
the capability to easily add custom functionality.
This section describes functionality that can be restricted by the software license for JasperReports
Server. If you don’t see some of the options described in this section, your license may prohibit you from
using them. To find out what you're licensed to use, or to upgrade your license, contact Jaspersoft.
The heart of the TIBCO Jaspersoft® BI Suite is the server, which provides the ability to:
•Easily create new reports based on views designed in an intuitive, web-based, drag and drop Ad Hoc
Editor.
•Efficiently and securely manage many reports.
•Interact with reports, including sorting, changing formatting, entering parameters, and drilling on data.
•Schedule reports for distribution through email and storage in the repository.
•Arrange reports and web content to create appealing, data-rich Jaspersoft Dashboards that quickly convey
business trends.
For users interested in multi-dimensional modeling, we offer Jaspersoft® OLAP, which runs as part of the server.
While the Ad Hoc Editor lets users create simple reports, more complex reports can be created outside of the
server. You can either use Jaspersoft® Studio or manually write JRXML code to create a report that can be run
in the server. We recommend that you use Jaspersoft Studio unless you have a thorough understanding of the
JasperReports file structure.
You can use the following sources of information to learn about JasperReports Server:
•Our core documentation describes how to install, administer, and use JasperReports Server and Jaspersoft
Studio. Core documentation is available as PDFs in the doc subdirectory of your JasperReports Server
installation. You can also access PDF and HTML versions of these guides online from the Documentation
section of the Jaspersoft Community website.
•Our Ultimate Guides document advanced features and configuration. They also include best practice
recommendations and numerous examples. You can access PDF and HTML versions of these guides online
from the Documentation section of the Jaspersoft Community website.
TIBCO Software Inc. 5
TIBCO JasperReports Server Community Project Upgrade Guide
•Our Online Learning Portal lets you learn at your own pace, and covers topics for developers, system
administrators, business users, and data integration users. The Portal is available online from the Professional
Services section of our website.
•Our free samples, which are installed with JasperReports Library, Jaspersoft Studio, and JasperReports
Server, are available and documented online. Please visit our GitHub repository.
•If you have a subscription to our professional support offerings, please contact our Technical Support team
when you have questions or run into difficulties. They're available on the web at and through email at
http://support.tibco.com and js-support@tibco.com.
JasperReports Server is a component of both a community project and commercial offerings. Each integrates the
standard features such as security, scheduling, a web services interface, and much more for running and sharing
reports. Commercial editions provide additional features, including Ad Hoc views and reports, advanced charts,
dashboards, Domains, auditing, and a multi-organization architecture for hosting large BI deployments.
1.1 Server Upgrade Distributions
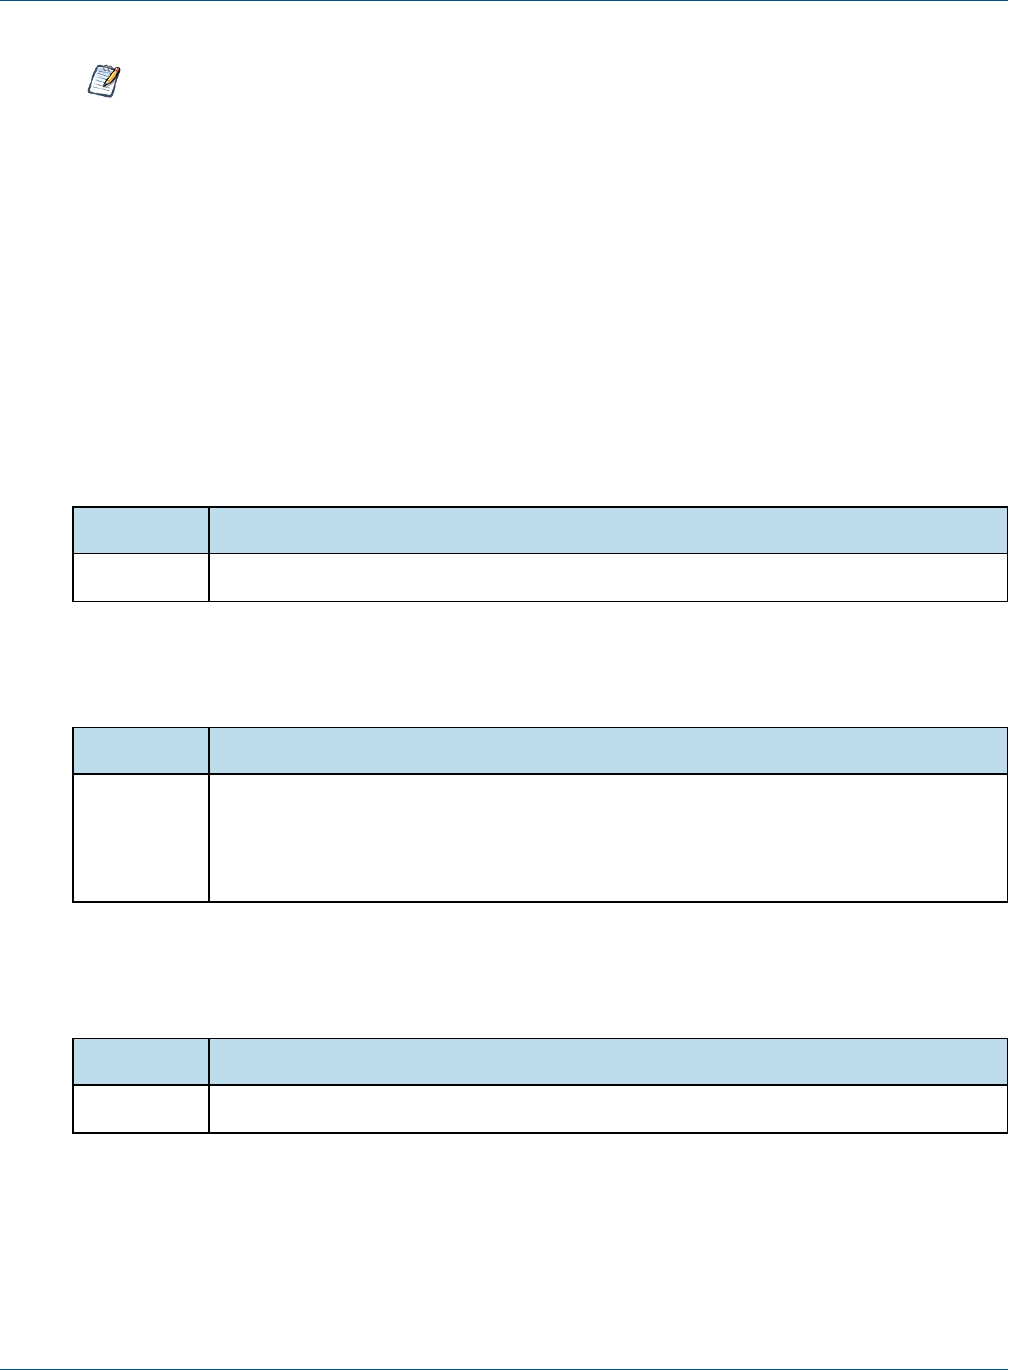
The following distribution package is available for JasperReports Server upgrade:
Distribution Package Description
WAR File Distribution Zip Supports upgrade from version 6.3 or later.
Supports all certified application servers.
Supports all certified repository databases.
Supports Windows, Linux, Mac, and other platforms.
File name is:TIB_js-jrs_cp_7.2.0_bin.zip
1.1.1 About Bundled Apache Ant
We recommend Apache Ant version 1.9.4, which is bundled with the War File Distribution ZIP. The Ant scripts
used for upgrade come with Windows and Linux batch scripts pre-configured to use the bundled version of
Apache Ant.
If you want to run your own version of Apache Ant, version 1.8.1 or later is required.
The bundled Apache Ant includes an additional jar This jar (ant-contrib.jar) enables conditional logic in Ant. If
you're running your own Ant you should copy the ant-contrib.jar to your <Ant_HOME>/lib folder.
On Linux and Solaris, the Ant commands may not be compatible with all shells. If you get errors, use the
bash shell explicitly. For more information, see the information on the bash shell in the Troubleshooting
appendix of the JasperReports Server Community Project Installation Guide.
6 TIBCO Software Inc.

CHAPTER 2 UPGRADING FROM 7.1 TO 7.2
This chapter describes the recommended procedure for upgrading to JasperReports Server 7.2 from version 7.1.
The examples show you how to upgrade using the js-upgrade shell scripts.
This chapter contains the following sections:
•Upgrade Steps Overview
•Upgrading with Customizations
•Back Up Your JasperReports Server Instance
•Preparing the JasperReports Server 7.2 WAR File Distribution
•Configuring Buildomatic for Your Database and Application Server
•Upgrading to JasperReports Server 7.2
•Starting and Logging into JasperReports Server 7.2
•Additional Tasks to Complete the Upgrade
2.1 Upgrade Steps Overview
These are the general steps used in this section:
1. Identify your customizations.
2. Back up your current JasperReports Server instance.
3. Download and set up the new 7.2 JasperReports Server WAR file distribution zip.
4. Run the js-upgrade script as described in 2.6, “Upgrading to JasperReports Server 7.2,” on page10.
If your current instance of JasperReports Server has modifications or extensions, keep track of these and re-
integrate them into your 7.2 instance after upgrading.
2.2 Upgrading with Customizations
If your current instance of JasperReports Server has modifications or extensions, keep track of these and re-
integrate them into your 7.2 instance after upgrading. See Appendix A, “Planning Your Upgrade ,” on
page23 to determine if any customizations you've made to your existing version of JasperReports Server are
affected by changes to the updated version.
TIBCO Software Inc. 7

TIBCO JasperReports Server Community Project Upgrade Guide
2.3 Back Up Your JasperReports Server Instance
First back up your JasperReports Server WAR file and jasperserver database so you can restore them if
necessary. Perform these steps from the command line in a Windows or Linux shell.
This backup example is for Tomcat with the PostgreSQL or MySQL database. For other databases, consult your
DB administration documentation for backup information.
Back up your JasperReports Server War File:
1. Create a folder where you can save your jasperserver war file. For example, C:\JS_BACKUP or /opt/JS_
BACKUP.
2. Copy <tomcat>/webapps/jasperserverto<path>/JS_BACKUP
Back up your jasperserver Database:
1. Create a folder (if you did not do so in the step above) where you can save your jasperserver database,
For example, C:\JS_BACKUP or /opt/JS_BACKUP.
2. Run the following commands for PostgreSQL or MySQL:
•PostgreSQL
cd <path>/JS_BACKUP
pg_dump --username=postgres jasperserver > js-db-dump.sql
•MySQL
cd <path>/JS_BACKUP
Windows: mysqldump --user=root --password=<password> jasperserver > js-db-dump.sql
Linux: mysqldump --user=root --password=<password> --host=127.0.0.1 jasperserver >
js-db-dump.sql
For MySQL, If you receive an error about packet size, see the Troubleshooting appendix of the
JasperReports Server Community Project Installation Guide.
2.4 Preparing the JasperReports Server 7.2 WAR File Distribution
Use the buildomatic js-upgrade scripts included in the 7.2 WAR file distribution ZIP release package to carry
out the upgrade. The WAR file distribution comes in a compressed ZIP file named TIB_js-jrs_cp_7.2.0_
bin.zip.
Follow these steps to obtain and unpack the WAR file distribution ZIP file:
1. Download the WAR file distribution from the Jaspersoft community site (http://community.jaspersoft.com).
2. Extract all files from TIB_js-jrs_cp_7.2.0_bin.zip. Choose a destination, such as a C:\Jaspersoft
folder on Windows, /home/<user> on Linux, or /Users/<user> on Mac.
After you unpack the WAR File Distribution, the resulting location will be known as:
<js-install-7.2>
2.5 Configuring Buildomatic for Your Database and Application Server
This upgrade procedure uses the js-upgrade-samedb-ce shell script.
8 TIBCO Software Inc.
Chapter 2 Upgrading from 7.1 to 7.2
For Unix, the bash shell is required for the js-upgrade scripts. If you're installing to a non-Linux Unix
platform such as HP-UX, IBM AIX, FreeBSD or Solaris, you need to download and install the bash shell.
See the Troubleshooting appendix of the JasperReports Server Community Project Installation Guide for
more information.
This section shows example configurations for the PostgreSQL and MySQL databases.
2.5.1 Example Buildomatic Configuration
The default_master.properties file handles the upgrade configuration. We provide a sample configuration
file for each database. You must specify your database credentials and application server location, and rename
the file to default_master.properties.
2.5.1.1 PostgreSQL Example
To configure default_master.properties for PostgreSQL:
1. Locate the postgresql_master.properties sample configuration file.
Database Master Properties File
PostgreSQL <js-install-7.2>/buildomatic/sample_conf/postgresql_master.properties
2. Copy the file to <js-install-7.2>/buildomatic
3. Rename the file default_master.properties
4. Edit default_master.properties for your database and application server.
Database Sample Property Values
PostgreSQL appServerType=tomcat (or wildfly, glassfish, etc.)
appServerDir=c:\\Apache Software Foundation\\Tomcat 9.0 (for example)
dbUsername=postgres
dbPassword=postgres
dbHost=localhost
2.5.1.2 MySQL Example
To configure default_master.properties for MySQL:
1. Locate the mysql_master.properties sample configuration file:
Database Master Properties File
MySQL <js-install-7.2>/buildomatic/sample_conf/mysql_master.properties
2. Copy the file to <js-install-7.2>/buildomatic
3. Rename the file default_master.properties
4. Edit default_master.properties for your database and application server.
TIBCO Software Inc. 9
TIBCO JasperReports Server Community Project Upgrade Guide
Database Sample Property Values
MySQL appServerType=tomcat (or wildfly, glassfish, etc.)
appServerDir=c:\\Apache Software Foundation\\Tomcat 9.0 (for example)
dbUsername=root
dbPassword=password
dbHost=localhost
2.6 Upgrading to JasperReports Server 7.2
Now that your buildomatic scripts are configured, you can complete the upgrade.
Make sure you've backed up your jasperserver database before proceeding.
Make sure you've backed up your old JasperReports Server WAR file before proceeding.
1. Stop your application server
2. Start your database server
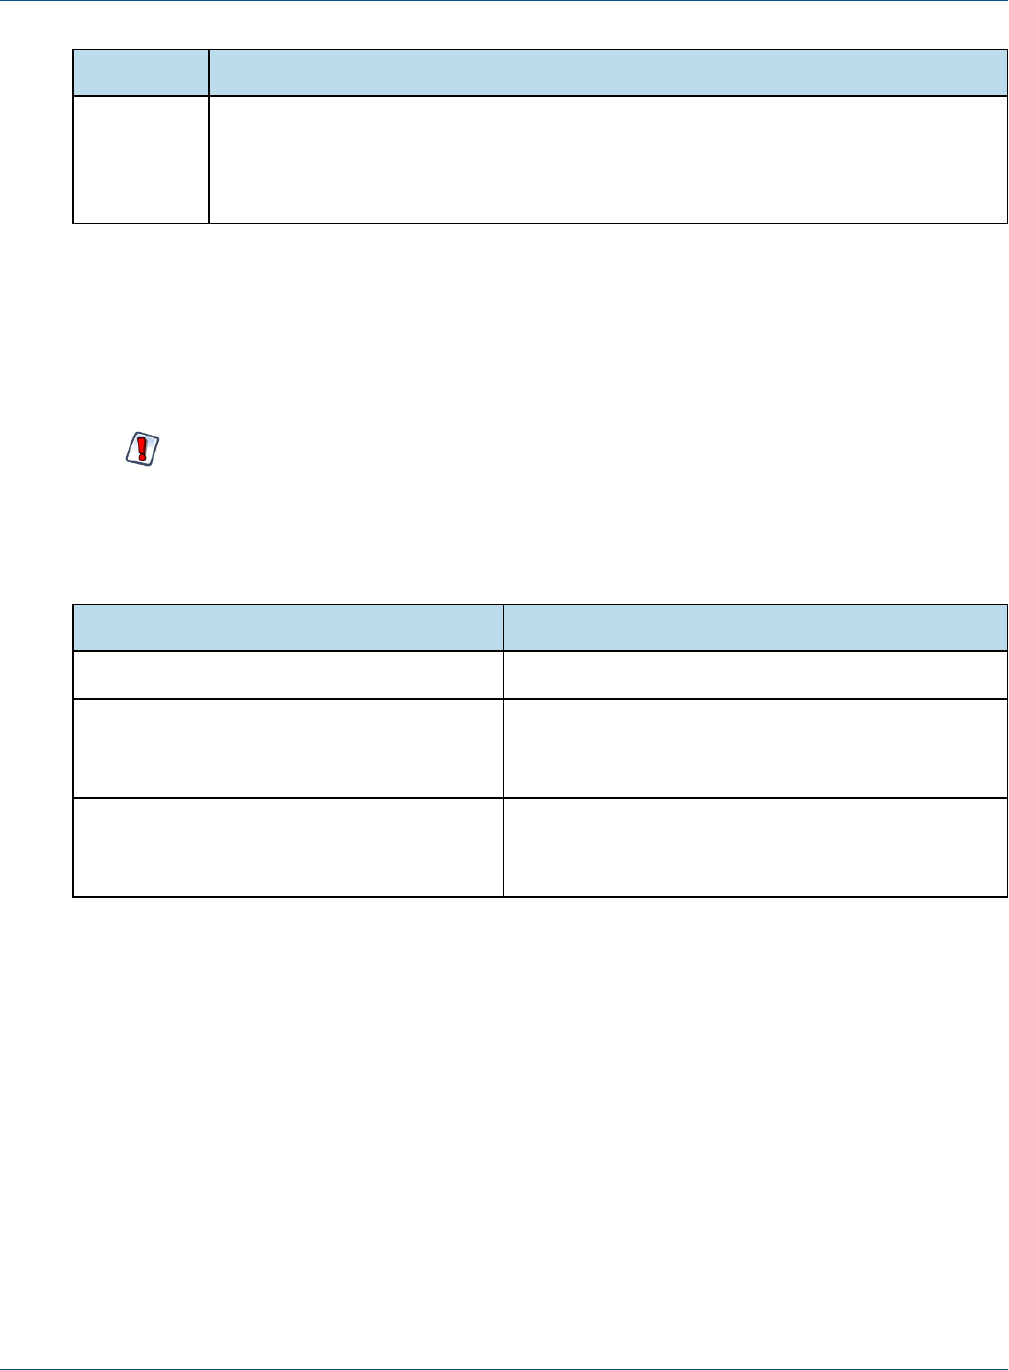
3. Run the following commands:
Commands Description
cd <js-install-7.2>/buildomatic
js-upgrade-samedb-ce.bat (Windows) Upgrade jasperserver war file, upgrade
jasperserver database to 7.2, add 7.2 repository resources
into the database
./js-upgrade-samedb-ce.sh (Linux) Upgrade jasperserver war file, upgrade
jasperserver database to 7.2, add 7.2 repository resources
into the database
2.6.1 js-upgrade Test Mode
Use the test option to run the js-upgrade script in test mode. For example, on Windows, enter:
cd <js-install-7.2>/buildomatic
js-upgrade-samedb-ce.bat test
In test mode, the js-upgrade scripts check your default_master.properties settings and validate your application
server location and its ability to connect to your database. Test mode can help you debug issues like an
incorrect database password without altering your system.
2.6.2 Output Log Location
The js-upgrade script creates an output log that captures both standard and error output. If problems occur
during script execution, or you just want to remember which options you chose, open the output log file located
10 TIBCO Software Inc.
Chapter 2 Upgrading from 7.1 to 7.2
here:
<js-install-7.2>/buildomatic/logs/js-upgrade-<date>-<number>.log
2.6.3 Errors
If you encounter errors running the js-upgrade script, first look at the output log to see if you can spot the
errors. For help, refer to the Troubleshooting appendix of the JasperReports Server Community Project
Installation Guide. The information in this appendix applies to both js-upgrade scripts and js-install
scripts.
If you need to modify values in your default_master.properties file, you can simply edit the file. When
you run the js-upgrade script again, it uses the new values.
2.7 Starting and Logging into JasperReports Server 7.2
Start your application server. Your database should already be running.
2.7.1 Clearing Your Browser Cache
Before you log in, make sure you and your end users clear the browser cache. JavaScript files, which enable the
UI elements of JasperReports Server, are typically cached by the browser. Clear the cache to ensure that the
newer files are used.
2.7.2 Logging into JasperReports Server
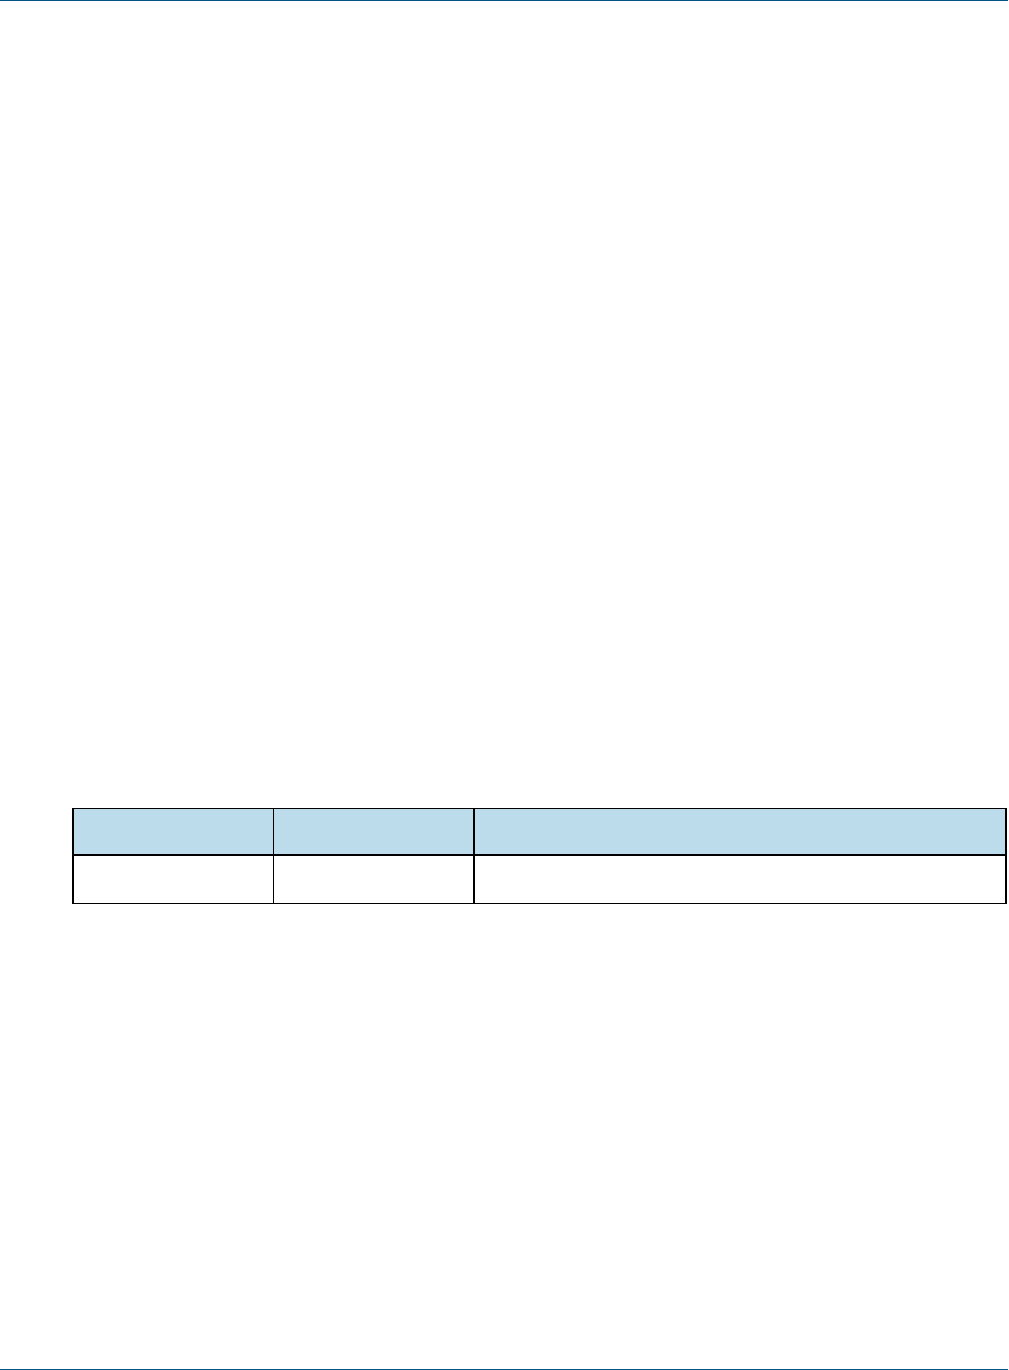
Log in using the following URL, user IDs, and passwords:
URL: http://localhost:8080/jasperserver
User ID Password Description
jasperadmin <your-password> Administrator for the default organization
Your JasperReports Server instance has now been upgraded to 7.2. If you have startup or login problems, refer to
the Troubleshooting appendix of the JasperReports Server Community Project Installation Guide.
2.8 Additional Tasks to Complete the Upgrade
Perform these tasks with the application server shutdown.
2.8.1 Handling JasperReports Server Customizations
If you made modifications to the original JasperReports Server application, these configurations are typically
found in the WEB-INF/applicationContext-*.xml set of files.
You'll need to manually copy configuration changes, like client-specific security classes or LDAP server
configurations, from your previous environment and integrate them with your upgraded environment.
TIBCO Software Inc. 11

TIBCO JasperReports Server Community Project Upgrade Guide
2.8.2 Clearing the Application Server Work Folder
Application servers have work folders where JasperReports Server files are compiled and cached and other
objects are stored. When you update the WAR file, the buildomatic deploy-webapp-ce target should
automatically clear the application server’s work directory, but it’s a good practice to double-check. A
permission problem, or some other problem, could prevent the clearing of the work folder.
To clear the work folder in Tomcat:
1. Change directory to <tomcat>/work.
2. Delete all the files and folders in this directory.
2.8.3 Clearing the Application Server Temp Folder
JasperReports Server uses caching to speed operations within the application. Caching files are created and
stored in the application server, usually in a temp folder. Clear this temp folder to avoid any post-upgrade
conflicts. Typically, the temp folder used by an application server corresponds to the path referenced by the
java.io.tmpdir Java system property. For Apache Tomcat the temp folder is <tomcat>/temp.
To clear the temp folder in Apache Tomcat:
1. Change directory to <tomcat>/temp
2. Delete all the files and folders in this directory
2.8.4 Clearing the Repository Cache Database Table
In the jasperserver database, compiled JasperReports Library resources are cached in the
JIRepositoryCache table for increased efficiency at runtime. Because the JasperReports Library JAR is
typically updated with each new release, old cached items can get out of date and cause errors at runtime. If you
encounter errors that mention a JasperReports Library “local class incompatible,” check your repository cache
table. In summary, you can clear your jasperserver database cache table as part of this upgrade process
whether or not there are errors.
To manually clear the repository cache database table, run a SQL command similar to one shown
below:
update JIRepositoryCache set item_reference = null;
delete from JIRepositoryCache;
12 TIBCO Software Inc.

CHAPTER 3 UPGRADING FROM 6.3 - 6.4 TO 7.2
This chapter describes the recommended procedure for upgrading from the latest version of JasperReports Server
6.3 through 6.4.x to JasperReports Server 7.2. If you're upgrading from version 7.1.x to 7.2, we recommend the
procedure in Chapter 2, “Upgrading from 7.1 to 7.2,” on page7.
If you are upgrading from an earlier version of JasperReports Server, you need to go through an intermediate
version before upgrading to 7.2. See Chapter 4, “Upgrading JasperReports Server 6.2.x or Earlier,” on
page21 for more information.
This upgrade procedure uses the JasperReports Server WAR File Distribution ZIP release package and the
included buildomatic scripts. Our examples are for upgrading from version 6.4.
This chapter contains the following sections:
•Upgrade Steps Overview
•Upgrading with Customizations
•Back Up Your JasperReports Server Instance
•Exporting Current Repository Data
•Preparing the JasperReports Server 7.2 WAR File Distribution
•Configuring Buildomatic for Your Database and Application Server
•Upgrading to JasperReports Server 7.2
•Starting and Logging into JasperReports Server 7.2
•Additional Tasks to Complete the Upgrade
•Old Manual Upgrade Steps
3.1 Upgrade Steps Overview
These are the general steps used in this section:
1. Plan your upgrade.
2. Back up your current JasperReports Server instance.
3. Export your existing repository data. For example, export your 6.4 data.
4. Download and set up the new 7.2 JasperReports Server WAR file distribution zip.
5. Run the js-upgrade script as described in 3.7, “Upgrading to JasperReports Server 7.2,” on page17.
TIBCO Software Inc. 13

TIBCO JasperReports Server Community Project Upgrade Guide
3.2 Upgrading with Customizations
If your current instance of JasperReports Server has modifications or extensions, keep track of these and re-
integrate them into your 7.2 instance after upgrading. See Appendix A, “Planning Your Upgrade ,” on
page23 to determine if any customizations you've made to your existing version of JasperReports Server are
affected by changes to the updated version.
3.3 Back Up Your JasperReports Server Instance
First back up your JasperReports Server WAR file and jasperserver database so you can restore them if
necessary. Perform these steps from the command line in a Windows or Linux shell.
This backup example is for Tomcat with the PostgreSQL or MySQL database. For other databases, consult your
DB administration documentation for backup information.
Back up your JasperReports Server War File:
1. Create a folder where you can save your jasperserver war file. For example, C:\JS_BACKUP or /opt/JS_
BACKUP.
2. Copy <tomcat>/webapps/jasperserverto<path>/JS_BACKUP
Back up your jasperserver Database:
1. Create a folder (if you did not do so in the step above) where you can save your jasperserver database,
For example, C:\JS_BACKUP or /opt/JS_BACKUP.
2. Run the following commands for PostgreSQL or MySQL:
•PostgreSQL
cd <path>/JS_BACKUP
pg_dump --username=postgres jasperserver > js-db-dump.sql
•MySQL
cd <path>/JS_BACKUP
Windows: mysqldump --user=root --password=<password> jasperserver > js-db-dump.sql
Linux: mysqldump --user=root --password=<password> --host=127.0.0.1 jasperserver >
js-db-dump.sql
For MySQL, If you receive an error about packet size, see the Troubleshooting appendix of the
JasperReports Server Community Project Installation Guide.
3.4 Exporting Current Repository Data
You need to export your old repository data. Use the JasperReports Server export utility to export using:
•the buildomatic scripts (if you originally installed using buildomatic).
•the js-export-ce.bat/.sh script found in the <js-install>/buildomatic folder.
14 TIBCO Software Inc.

Chapter 3 Upgrading from 6.3 - 6.4 to 7.2
3.4.1 Using Buildomatic Scripts to Export Data
If you configured buildomatic and your default_master.properties file for export as described in the
JasperReports Server Community Project Administrator Guide, you can use buildomatic to export your
repository data. For example, to export 6.4 repository data, use the following commands:
1. Navigate to the buildomatic directory:
cd <js-install-6.4>/buildomatic
2. Run buildomatic with the export target:
Windows: js-ant.bat export-everything-ce -DexportFile=js-6.4-export.zip
Linux: ./js-ant export-everything-ce -DexportFile=js-6.4-export.zip
Note the location of this export file so that you can use it during the 7.2 upgrade process.
3.4.2 Using the js-export Script to Export Data
To use the js-export-ce.bat/.sh script, navigate to the buildomatic folder, for example,
<js-install-6.4>/buildomatic. If you're using the PostgreSQL database the js-export script should already
be configured to run. If you're using a different database, or you've changed database passwords, you may need
to update the js-export configuration.
Run the following commands:
1. Navigate to the buildomatic directory:
cd <js-install-6.4>/buildomatic
2. Run the js-export script:
Windows: js-export-ce.bat --everything --output-zip js-6.4-export.zip
Linux: js-export-ce.sh --everything --output-zip js-6.4-export.zip
Note the location of this export file so that you can use it during the 7.2 upgrade process.
3.5 Preparing the JasperReports Server 7.2 WAR File Distribution
Use the buildomatic js-upgrade scripts included in the 7.2 WAR file distribution ZIP release package to carry
out the upgrade. The WAR file distribution comes in a compressed ZIP file named TIB_js-jrs_cp_7.2.0_
bin.zip.
Follow these steps to obtain and unpack the WAR file distribution ZIP file:
1. Download the WAR file distribution from the Jaspersoft community site (http://community.jaspersoft.com).
2. Extract all files from TIB_js-jrs_cp_7.2.0_bin.zip. Choose a destination, such as a C:\Jaspersoft
folder on Windows, /home/<user> on Linux, or /Users/<user> on Mac.
After you unpack the WAR File Distribution, the resulting location will be known as:
<js-install-7.2>
TIBCO Software Inc. 15
TIBCO JasperReports Server Community Project Upgrade Guide
3.6 Configuring Buildomatic for Your Database and Application Server
This upgrade procedure uses the js-upgrade-newdb-ce shell script.
For Unix, the bash shell is required for the js-upgrade scripts. If you're installing to a non-Linux Unix
platform such as HP-UX, IBM AIX, FreeBSD or Solaris, you need to download and install the bash shell.
See the Troubleshooting appendix of the JasperReports Server Community Project Installation Guide for
more information.
This section shows example configurations for the PostgreSQL and MySQL databases.
3.6.1 Example Buildomatic Configuration
The default_master.properties file handles the upgrade configuration. We provide a sample configuration
file for each database. You must specify your database credentials and application server location, and rename
the file to default_master.properties.
3.6.1.1 PostgreSQL Example
To configure default_master.properties for PostgreSQL:
1. Locate the postgresql_master.properties sample configuration file.
Database Master Properties File
PostgreSQL <js-install-7.2>/buildomatic/sample_conf/postgresql_master.properties
2. Copy the file to <js-install-7.2>/buildomatic
3. Rename the file default_master.properties
4. Edit default_master.properties for your database and application server.
Database Sample Property Values
PostgreSQL appServerType=tomcat (or wildfly, glassfish, etc.)
appServerDir=c:\\Apache Software Foundation\\Tomcat 9.0 (for example)
dbUsername=postgres
dbPassword=postgres
dbHost=localhost
3.6.1.2 MySQL Example
To configure default_master.properties for MySQL:
1. Locate the mysql_master.properties sample configuration file:
Database Master Properties File
MySQL <js-install-7.2>/buildomatic/sample_conf/mysql_master.properties
2. Copy the file to <js-install-7.2>/buildomatic
3. Rename the file default_master.properties
16 TIBCO Software Inc.
Chapter 3 Upgrading from 6.3 - 6.4 to 7.2
4. Edit default_master.properties for your database and application server.
Database Sample Property Values
MySQL appServerType=tomcat (or wildfly, glassfish, etc.)
appServerDir=c:\\Apache Software Foundation\\Tomcat 9.0 (for example)
dbUsername=root
dbPassword=password
dbHost=localhost
3.7 Upgrading to JasperReports Server 7.2
Now that your buildomatic scripts are configured, you can complete the upgrade.
Make sure you've backed up your jasperserver database before proceeding.
Make sure you've backed up your old JasperReports Server WAR file before proceeding.
1. Stop your application server
2. Start your database server
3. Run the following commands:
Commands Description
cd <js-install-7.2>/buildomatic Change to buildomatic directory
js-upgrade-newdb-ce.bat <path>\js-6.4-export.zip (Windows) Upgrade jasperserver war file,
drop and recreate the database, import
data file from previous version.
./js-upgrade-newdb-ce.sh <path>/js-6.4-export.zip (Linux) Upgrade jasperserver war file,
drop and recreate the database, import
data file from previous version.
On MySQL, if you receive an error about packet size, see the Troubleshooting appendix of the
JasperReports Server Community Project Installation Guide.
3.7.1 js-upgrade Test Mode
Use the test option to run the js-upgrade script in test mode. For example, on Windows, enter:
cd <js-install-7.2>/buildomatic
js-upgrade-newdb-ce.bat test <path>/js-6.4-export.zip
In test mode, the js-upgrade scripts check your default_master.properties settings and validate your application
server location and its ability to connect to your database. Test mode can help you debug issues like an
incorrect database password without altering your system.
TIBCO Software Inc. 17
TIBCO JasperReports Server Community Project Upgrade Guide
3.7.2 Output Log Location
The js-upgrade script creates an output log that captures both standard and error output. If problems occur
during script execution, or you just want to remember which options you chose, open the output log file located
here:
<js-install-7.2>/buildomatic/logs/js-upgrade-<date>-<number>.log
3.7.3 Errors
If you encounter errors running the js-upgrade script, first look at the output log to see if you can spot the
errors. For help, refer to the Troubleshooting appendix of the JasperReports Server Community Project
Installation Guide. The information in this appendix applies to both js-upgrade scripts and js-install
scripts.
If you need to modify values in your default_master.properties file, you can simply edit the file. When
you run the js-upgrade script again, it uses the new values.
3.8 Starting and Logging into JasperReports Server 7.2
Start your application server. Your database should already be running.
3.8.1 Clearing Your Browser Cache
Before you log in, make sure you and your end users clear the browser cache. JavaScript files, which enable the
UI elements of JasperReports Server, are typically cached by the browser. Clear the cache to ensure that the
newer files are used.
3.8.2 Logging into JasperReports Server
Log in using the following URL, user IDs, and passwords:
URL: http://localhost:8080/jasperserver
User ID Password Description
jasperadmin <your-password> Administrator for the default organization
Your JasperReports Server instance has now been upgraded to 7.2. If you have startup or login problems, refer to
the Troubleshooting appendix of the JasperReports Server Community Project Installation Guide.
3.9 Additional Tasks to Complete the Upgrade
Perform these tasks with the application server shutdown.
18 TIBCO Software Inc.

Chapter 3 Upgrading from 6.3 - 6.4 to 7.2
3.9.1 Handling JasperReports Server Customizations
If you made modifications to the original JasperReports Server application, these configurations are typically
found in the WEB-INF/applicationContext-*.xml set of files.
You'll need to manually copy configuration changes, like client-specific security classes or LDAP server
configurations, from your previous environment and integrate them with your upgraded environment.
3.9.2 Clearing the Application Server Work Folder
Application servers have work folders where JasperReports Server files are compiled and cached and other
objects are stored. When you update the WAR file, the buildomatic deploy-webapp-ce target should
automatically clear the application server’s work directory, but it’s a good practice to double-check. A
permission problem, or some other problem, could prevent the clearing of the work folder.
To clear the work folder in Tomcat:
1. Change directory to <tomcat>/work.
2. Delete all the files and folders in this directory.
3.9.3 Clearing the Application Server Temp Folder
JasperReports Server uses caching to speed operations within the application. Caching files are created and
stored in the application server, usually in a temp folder. Clear this temp folder to avoid any post-upgrade
conflicts. Typically, the temp folder used by an application server corresponds to the path referenced by the
java.io.tmpdir Java system property. For Apache Tomcat the temp folder is <tomcat>/temp.
To clear the temp folder in Apache Tomcat:
1. Change directory to <tomcat>/temp
2. Delete all the files and folders in this directory
3.9.4 Clearing the Repository Cache Database Table
In the jasperserver database, compiled JasperReports Library resources are cached in the
JIRepositoryCache table for increased efficiency at runtime. Because the JasperReports Library JAR is
typically updated with each new release, old cached items can get out of date and cause errors at runtime. If you
encounter errors that mention a JasperReports Library “local class incompatible,” check your repository cache
table. In summary, you can clear your jasperserver database cache table as part of this upgrade process
whether or not there are errors.
To manually clear the repository cache database table, run a SQL command similar to one shown
below:
update JIRepositoryCache set item_reference = null;
delete from JIRepositoryCache;
TIBCO Software Inc. 19

TIBCO JasperReports Server Community Project Upgrade Guide
3.10 Old Manual Upgrade Steps
This section describes the older, manual upgrade steps used before we implemented the js-upgrade shell
scripts in release 4.0. They're provided here mainly as a reference for internal use.
We recommend using the js-upgrade shell scripts described in the beginning of this chapter instead of these
manual commands.
Commands Description
cd <js-install-7.2>/buildomatic
js-ant drop-js-db
js-ant create-js-db
js-ant init-js-db-ce
Deletes and recreates your jasperserver db. Make sure
your original database is backed up.
js-ant import-minimal-ce
js-ant import-upgrade
-DimportFile="<path-and-filename>"
The -DimportFile should point to the <path> and
<filename> of the js-6.4-export.zip file you created earlier.
On Windows, you must use double quotation marks (“) if
your path or filename contains spaces. On Linux, you must
use double quotation marks, escaped with a backslash
(\”) in this case.
Note:"import-upgrade" will import resources from the 6.4
instance in a "non-update" mode (so that core resources
from 7.2 will stay unchanged). Additionally, the "update-
core-users" option will be applied so that the superuser
and jasperadmin users will have the same password as
set in the 6.4 instance.
js-ant import-sample-data-upgrade-ce (Optional) This step is optional; it loads the new sample
data. The old sample data is overwritten, so you may need
to redo certain changes such as configuring the sample
data sources for your database.
js-ant deploy-webapp-ce Deletes the existing older war file, deploys the new war
file.
20 TIBCO Software Inc.

CHAPTER 4 UPGRADING JASPERREPORTS SERVER 6.2.X OR EARLIER
4.1 Upgrading from 6.2.x or Earlier
If you're running JasperReports Server version 6.2.x or earlier, your upgrade requires multiple steps.
If you're running JasperReports Server 3.7 through 4.2:
1. Upgrade to the latest version of 6.3.x.
2. Upgrade 6.3.x to the latest version 6.4.x.
3. Upgrade 6.4.x to version 7.2.
If you're running JasperReports Server 4.5 through 6.2.x:
1. Upgrade to the latest version of 6.4.x.
2. Upgrade from 6.4.x to version 7.2.
The steps for the upgrade to 6.3.x or 6.4.x are documented in the JasperServer Installation Guide for that
release. Download the JasperReports Server WAR file distribution zip package for the release you want to get
the relevant files and documentation. The Installation Guide is in the docs folder.
If you're running a JasperServer version earlier than 3.7, first upgrade to 3.7.0, then to 6.3.x, then to 7.2.
4.2 Best Practices for Upgrading on Windows
The two methods for installing JasperReports Server are:
1. Installing with the Binary Installer and Bundled Components
The binary installer is an executable that puts all the components in place to run JasperReports Server. For
example, if you take the default installation choices, you'll get the Apache Tomcat application server, the
PostgreSQL database and Java execution environment.
But keep in mind that these components are specially configured to run a specific version of JasperReports
Server. This applies to the Windows Start Menu items created to start and stop JasperReports Server.
2. Installing to Pre-existing Components
When installing a “Production” instance of JasperReports Server, you may want to install the main
components before you install JasperReports Server. This way you have more control over updating and
upgrading components like the application server, database, and Java.
TIBCO Software Inc. 21

TIBCO JasperReports Server Community Project Upgrade Guide
Once you put these components in place, you have two options for installing JasperReports Server:
a. Use the War File ZIP distribution (file name: TIB_js-jrs_cp_7.2.0_bin.zip)
You'll install JasperReports Server to the existing components using the js-install.bat scripts.
You'll create a default_master.properties file that specifies the location of the application server and
database components.
b. Use the Binary Installer, TIB_js-jrs_cp_7.2.0__installer-windows-x64.exe
The installer will prompt you for the location of the application server and database components.
If you intend to upgrade your Windows installation with future releases of JasperReports Server, we recommend
installing to pre-existing components. This will reduce any post-upgrade confusion caused by the Windows
Start Menu showing the older version of JasperReports Server.
22 TIBCO Software Inc.

APPENDIX A PLANNING YOUR UPGRADE
Some of the new and enhanced features in JasperReports Server can affect your deployment, and you should
plan your upgrade accordingly. Before upgrading make sure to:
•Review this information carefully and determine how the changes described affect your deployment.
•Back up your current JasperReports Server installation and repository.
The versions and their affected functionality are:
•Changes in 7.2 affect customizations to the login page, external authentication, and customizations to the
Spring Security framework.
•Changes in 7.1 affect customizations to the login page.
•Changes in 6.1 affect themes.
Changes are cumulative, so review all topics that affect you. For example, if you're upgrading from 6.1 to 7.1,
you may be affected by changes in 6.1, 6.2, 6.2.1, and 6.4.
For versions of the software earlier than 6.1, see earlier versions of the JasperReports Server Community Project
Upgrade Guide.
This section describes only those changes that can significantly impact your existing deployment. For an
overview of new features, improvements, and bug fixes see the release notes in the root directory of the
distribution. For information on how to use the new features, see the JasperReports Server User Guide or the
JasperReports Server Administrator Guide.
This chapter contains the following sections:
•Changes in 7.2 That May Affect Your Upgrade
•Changes in 7.1 That May Affect Your Upgrade
•Changes in 6.1 That May Affect Your Upgrade
A.1 Changes in 7.2 That May Affect Your Upgrade
A.1.1 Changes to the Login Page
The layout of the login page changed in JasperReports Server 7.2. There were no changes to the CSS classes,
but some default values were changed. If you have customized the login page, test your customizations to
ensure they have the desired effect in 7.2, and make any necessary changes. If you haven't customized the login
page, this change doesn't affect you.
TIBCO Software Inc. 23

TIBCO JasperReports Server Community Project Upgrade Guide
A.1.2 Spring Security Upgrade
JasperReports Server uses the Spring Security framework to implement security throughout the product. In
JasperReports Server 7.2, the Spring Security framework was updated to Spring Security 4.2. For many users, this
upgrade will have no impact. However, you may need to make some changes if you have implemented the
following:
•External authentication – If you have implemented external authentication or single sign-on in your server
implementation, you need to update your implementation:
•If you implemented external authentication using one of the sample files included in the project, you
need to reimplement your changes in the updated sample files included in JasperReports Server 7.2.
•If you implemented a custom external authentication solution, you need to migrate your solution to the
new framework.
•Customizations – If you have customized the server using Spring Security classes, you need to migrate your
solution to the new framework.
A.1.2.1 Migrating External Authentication Sample Files
If you have implemented external authentication using one of the sample-applicationContext-
<customName>.xml files located in the <js-install>/samples/externalAuth-sample-config directory, migrate your
changes to JasperReports Server 7.2 as follows:
1. Prior to upgrade, back up your existing applicationContext-<customName>.xml (for example,
applicationContext-externalAuth-LDAP.xml), located in the <js-webapp>/WEB-INF directory of your
previous version of JasperReports Server.
2. Update your server installation to JasperReports Server 7.2, as described in the JasperReports Server
Community Project Upgrade Guide.
3. In the new installation, locate the sample file that corresponds to the file you implemented previously. For
example, if you implemented applicationContext-externalAuth-LDAP.xml, locate <js-install-
7.2>/samples/externalAuth-sample-config/sample-applicationContext-externalAuth-LDAP.xml.
4. Rename the JasperReports Server 7.2 sample file to remove the sample- prefix. For example, rename sample-
applicationContext-externalAuth-LDAP.xml to applicationContext-externalAuth-LDAP.xml.
5. Configure the properties in the new sample file to match the properties in your existing sample file. To do
this:
a. Locate each bean you have modified in the previous version.
b. Find the same bean in the JasperReports Server 7.2 sample. The names of the beans have not changed
between versions.
c. Copy or re-enter the properties you need for your server, taking care not to copy over class names or
class packages.
Although the bean names are the same in the JasperReports Server 7.2 sample files, the name
and package of the class in many bean definitions have changed. Make sure not to overwrite the
new names with the old ones.
d. Save the JasperReports Server 7.2 sample file.
e. Rename the JasperReports Server 7.2 sample file to remove the sample- prefix. For example, rename
sample-applicationContext-externalAuth-LDAP.xml to applicationContext-externalAuth-LDAP.xml.
f. Place the modified file in the <js-webapp-7.2>/WEB-INF directory.
24 TIBCO Software Inc.

Appendix A Planning Your Upgrade
A.1.2.2 Migrating Customizations
The Spring Security codebase was significantly restructured from 3.x to 4.x. Many classnames have changed and
other classes were moved to different packages. In addition, many classes were deprecated. At a minimum, you
need to update the names and paths of the Spring Security classes you reference in any customizations you have
made to JasperReports Server For information on updating your customizations see the Spring Security
migration guide:
https://docs.spring.io/spring-security/site/migrate/current/3-to-4/html5/migrate-3-to-4-xml.html
For specific information about migrating from deprecated classes in 4.x, see the Deprecations topic in the same
document.
A.2 Changes in 7.1 That May Affect Your Upgrade
A.2.1 Changes to the Login Page
The layout of the login page changed in JasperReports Server 7.1. There were no changes to the CSS classes,
but some default values were changed. If you have customized the login page, you should make sure your
customizations still have the desired effect in 7.1, and make any necessary changes.
If you have not customized the Login page, this change will not affect you.
TIBCO Software Inc. 25
TIBCO JasperReports Server Community Project Upgrade Guide
A.3 Changes in 6.1 That May Affect Your Upgrade
A.3.1 Changes to Themes
The look and feel of the JasperReports Server web interface has been redesigned to modernize the application's appearance. To accomplish this, markup and
styles have been modified. As a result of these modifications, custom themes developed for the previous interface will need to be updated for the new
interface.
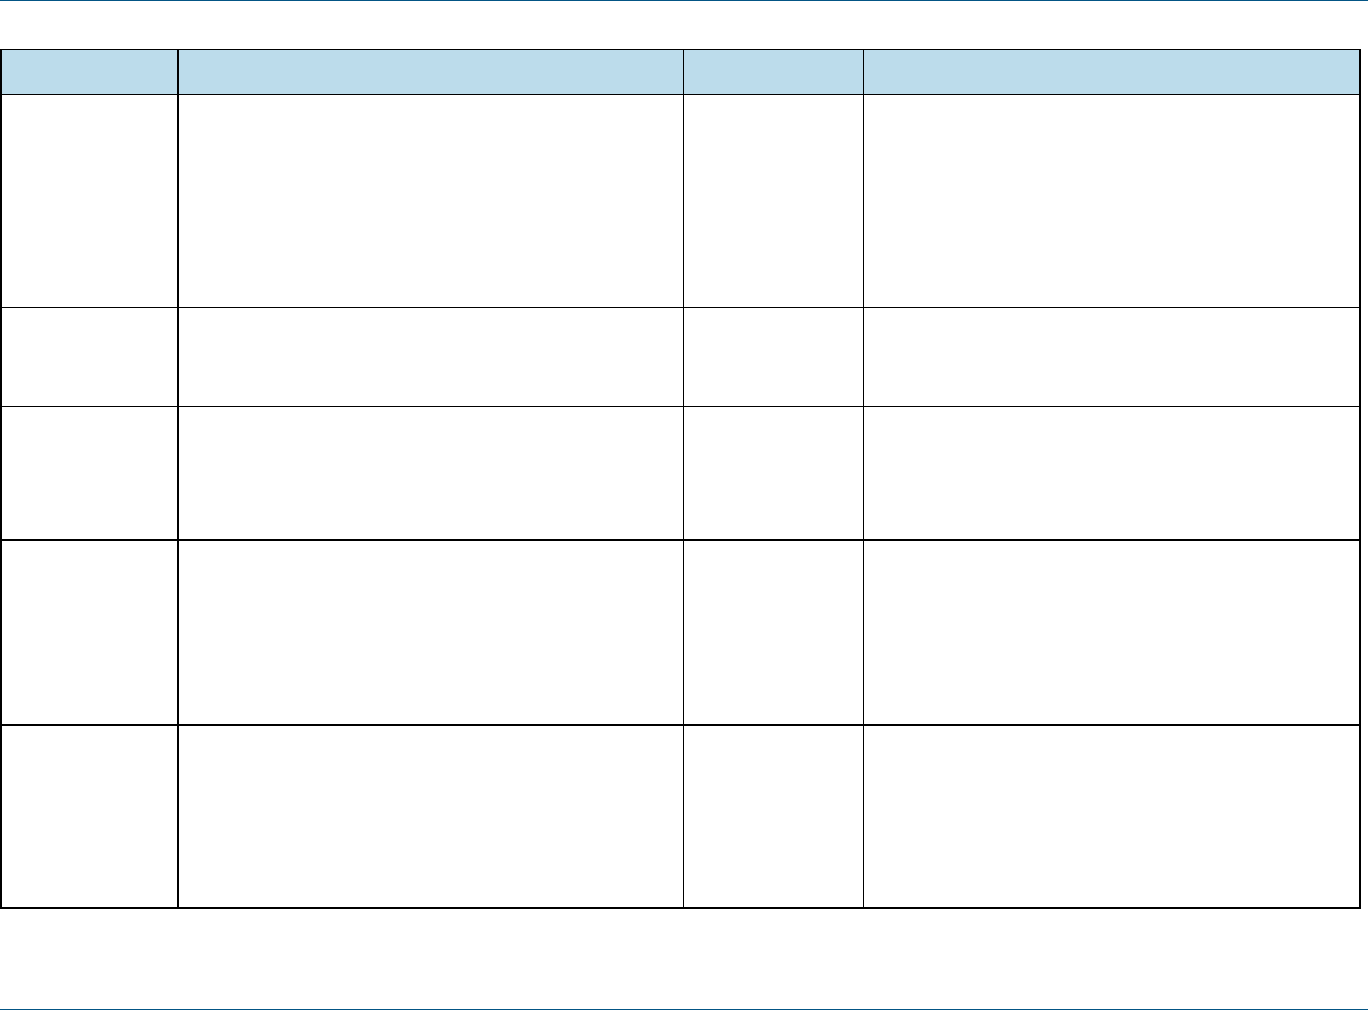
The following table lists the changes made to the user interface and describes some of the steps necessary to update custom themes in overrides_custom.css.
The main changes are in the banner, body, footer, and login page. The changes to the login page are extensive. Instead of attempting to update an existing
login page, you should re-implement the login page in the new default theme.
For information on developing new themes, see the JasperReports Server Community Project Administrator Guide and the JasperReports Server Ultimate
Guide.
Element Classname and Modifications File Notes
Banner .banner
Give custom value to height
containers.css Default value:
height: 32px
Body #frame
Set custom top and bottom values that position the body
of the application between the banner and footer without
overlap
containers.css Default value:
top: 32px
bottom: 17px
This value needs to be equal to or greater than the height
of .banner
The bottom position needs to be adjusted only if the
height of the footer is changed
Table A-1 Updating Themes in JasperReports Server 6.1
26 TIBCO Software Inc.
Appendix A Planning Your Upgrade
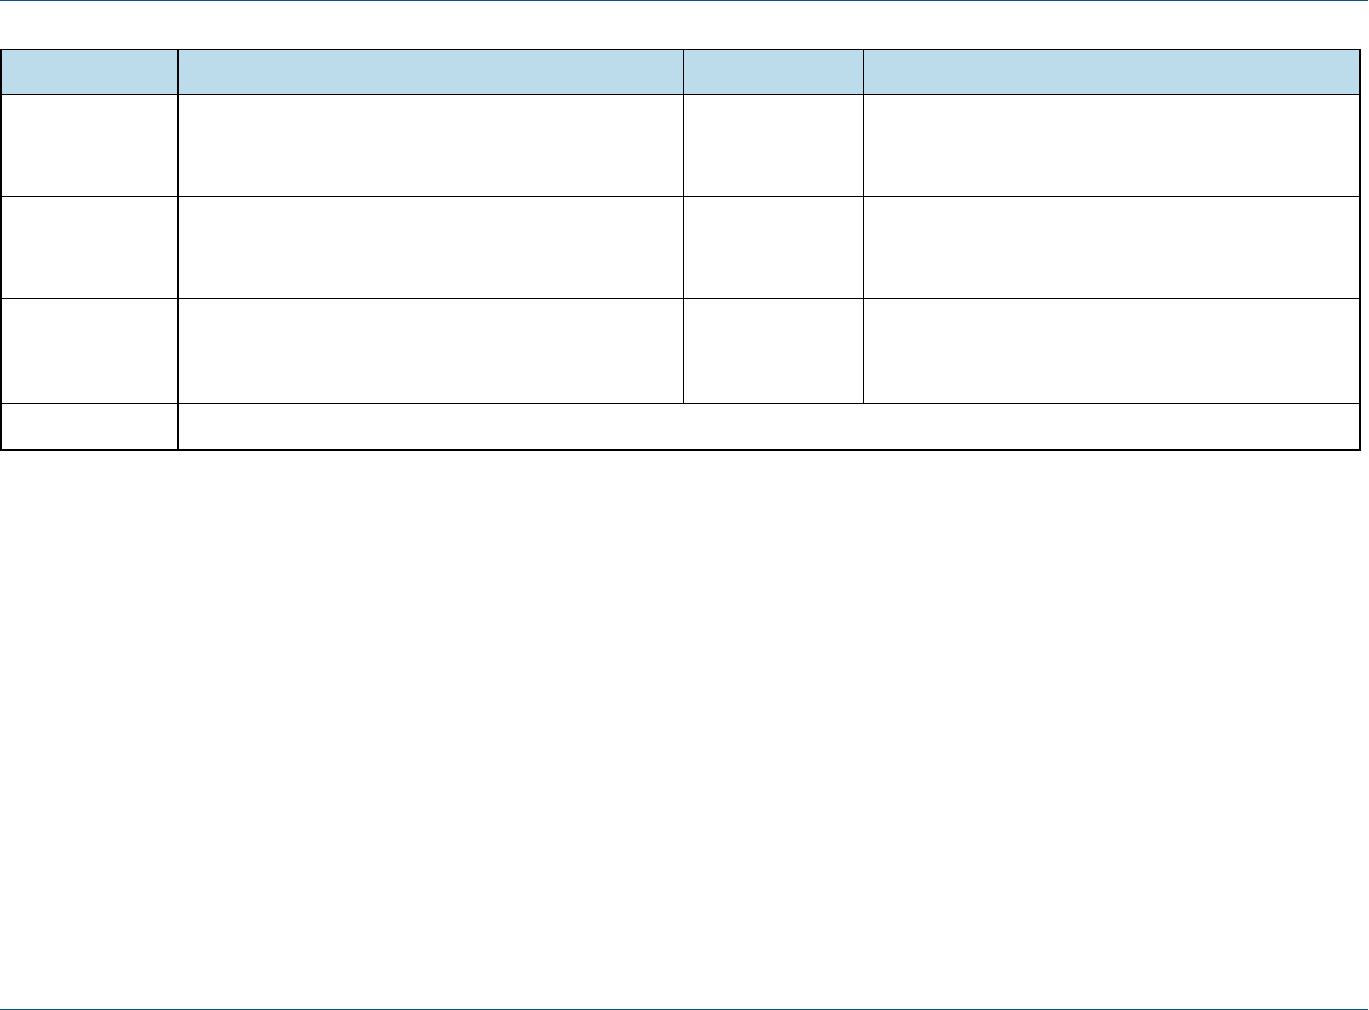
Element Classname and Modifications File Notes
Banner
Logo
#logo
Give custom values to height and width that match the
dimensions of your logo
Adjust margins around the logo if needed
theme.css Default values:
height: 22px
width: 176px
margin-top: 6px
margin-right: 4px
margin-bottom: 0
margin-left: 8px
Banner
Main Navigation
.menu.primaryNav .wrap
Set height and line-height to 1px shorter than .banner
containers.css height: 31px
line-height: 31px
Banner
Main Navigation
Home icon
.menu.primaryNav #main_home .wrap > .icon
Set height to be the same as .banner
Set values for width and background-position to fit your
image.
containers.css height: 32px
width: 14px
background-position: 0 -164px
background-position: 0 -163px (IE8-9)
Banner
Main Navigation
Item arrow icon
.menu.primaryNav .node > .wrap > .icon
Set height to your desired value, with the maximum value
being the same height measurement as the .banner
element.
Set background-position and width to a value that properly
displays the default or your custom image.
containers.css height: 32px
background-position: left -79px
width: 11px
Banner
Main Navigation
Item arrow icon
.menu.primaryNav .wrap.over
.menu.primaryNav .wrap.pressed
Set background-position to a value that properly displays
the default or your custom image.
containers.css background-position is not explicitly defined, the value is
cascaded from .menu.primaryNav .node > .wrap >
.icon
This only needs to be adjusted if you want a different
color disclosure indicator for the pressed and over states
of the main menu links
TIBCO Software Inc. 27
TIBCO JasperReports Server Community Project Upgrade Guide
Element Classname and Modifications File Notes
Banner
Search container
#globalSearch.searchLockup
Set margin-top to desired value that will vertically center it
within the banner.
controls.css margin-top: 5px
Banner
Metadata
#metalinks li
Set line-height to the desired value that will vertically
center it within the banner.
themes.css line-height: 20px
Footer #frameFooter
Set height if you want it to be anything other than the
default value.
containers.css height: 17px
Login page Re-implement in new theme.
28 TIBCO Software Inc.

APPENDIX B WORKING WITH JDBC DRIVERS
This section describes how to set up your installation to use a driver other than the default driver.
B.1 Open Source JDBCDrivers
For open source JDBC drivers, buildomatic is set up to use a single default driver. If you want to use a driver
other than the default driver, you can modify the buildomatic property files that determine the default JDBC
driver.
The buildomatic JDBC driver property files are set up to point to a specific driver jar. This allows for multiple
driver jar files in the same buildomatic/conf_source/db/<dbType>/jdbc folder. During the installation
procedure only the default driver jar is copied to your application server.
If you want to use a newer JDBCdriver version or a different JDBC driver, you can modify the buildomatic
properties seen in your default_master.properties file.
B.1.1 PostgreSQL Example
The buildomatic/conf_source/db/postgresql/jdbc folder contains the following driver file:
postgresql9.4-1210.jdbc41.jar
If, for instance, you want to change the default driver used by PostgreSQL from type jdbc4 to jdbc3, edit your
default_master.properties file:
<js-install>/buildomatic/default_master.properties
Uncomment and change:
# maven.jdbc.version=9.4-1210.jdbc41
To:
maven.jdbc.version=9.2-1002.jdbc3
When you next run a buildomatic command, such as deploy-webapp-ce, the jdbc3 driver will be copied to your
application server.
B.1.2 MySQLExample
The buildomatic/conf_source/db/mysql/jdbc folder contains this driver file:
TIBCO Software Inc. 29

TIBCO JasperReports Server Community Project Upgrade Guide
mariadb-java-client-1.1.2.jar
If, for instance, you want to use a JDBC driver built and distributed by the MySQL project, such asmysql-
connector-java-5.1.30-bin.jar, you first need to download the driver from the MySQLConnector/J
download location:
https://dev.mysql.com/downloads/connector/j/
Next, change your buildomatic configuration properties to point to this new driver.
Edit your default_master.properties file:
<js-install>/buildomatic/default_master.properties
Uncomment and change:
# jdbcDriverClass=com.mysql.jdbc.Driver
# maven.jdbc.groupId=mysql
# maven.jdbc.artifactId=mysql-connector-java
# maven.jdbc.version=5.1.30-bin
To:
jdbcDriverClass=com.mysql.jdbc.Driver
maven.jdbc.groupId=mysql
maven.jdbc.artifactId=mysql-connector-java
maven.jdbc.version=5.1.30-bin
30 TIBCO Software Inc.
