KAT Percussion KT KP1 Assembly Instructions
KAT Percussion KT KP1 Assembly Instructions kt-kp1-assembly-instructions KAT Percussion - KT - KP1 Assembly Instructions
KAT Percussion KT KP1 Assembly Instructions kt-kp1-assembly-instructions KAT Percussion - KT - KP1 Assembly Instructions
User Manual: KAT Percussion KT KP1 Assembly Instructions KAT Percussion - KT - KP1 Assembly Instructions
Open the PDF directly: View PDF ![]() .
.
Page Count: 1
For more information about KAT Percussion
visit www.katpercussion.com
Also join us on Facebook , Twitter, and
YouTube
KMC Music, Inc., 55 Griffin Road S.,
Bloomfield, CT 06002-9005
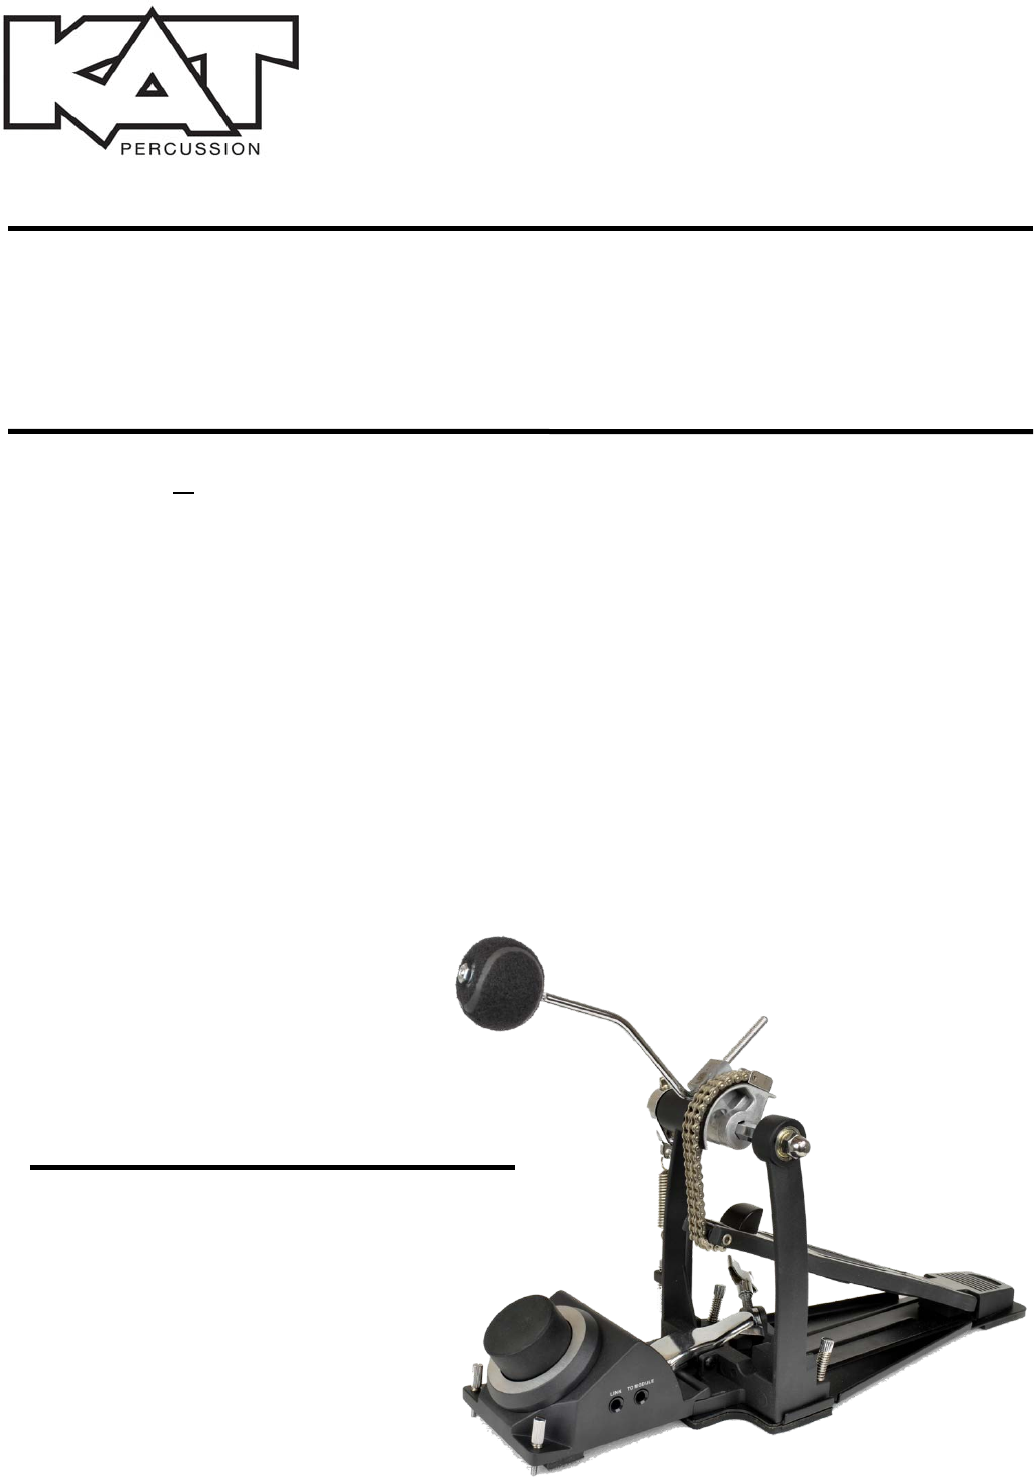
KT-KP1 Kick Pad
Compact Kick Trigger
Features
Kick Pad Unit, inverted beater, 1/4" cable, grip tape,
assembly guide, warranty card.
BOX CONTENTS
The KT-KP1 "KICK PAD" compact kick trigger is specially made to work with the KAT KTMP1 Multipad via a bass
drum pedal. The unit also works great with all common piezo input trigger interfaces and drum modules with a
piezo trigger input. It extends the sound triggering capability of the KTMP1 by providing bass drum operation
using this unit along with a standard bass drum pedal.
Assembly
Replace the beater on your kick pedal (sold separately) with the Kick Pad's inverted "Silent Strike" beater. Insert the
inverted beater up through the pedals beater holder instead of down through it, as you would conventionally do.
Attach your kick pedal to the Kick Pad in the same way you would attach it to a wood bass drum hoop. (Note: It is
normal for there to be a space between the bottom of the Kick Pad unit and the floor).
Place the pedal on the floor where you would normally place your kick drum pedal.
Using the provided cable, or any standard 1/4" cable, attach the Kick Pad's "To Module" jack to your Kat Multipad or
drum modules kick input.
Adjust the Kick Pad's metal spikes as needed to limit floor movement. Be careful not to damage floor surfaces as the
metal spikes can leave scratches or holes on some floors.
Use the included grip tape if necessary to help avoid floor movement. Again be careful not to damage the floor or
carpet surface, as this grip tape can form a very tight surface grip.
Optional: Using a standard 1/4" cable, connect the Kick Pad's LINK jack to the LINK jack of a second Kick Pad (sold
separately). This allows you to use a double-bass setup
1.
2.
3.
4.
5.
6
7.
