Lab Manual C++ Chapter2
User Manual:
Open the PDF directly: View PDF ![]() .
.
Page Count: 26
Lab 2.1 Exploring Addressing
Project 2.1 Binary Representation
Lab 2.2 Create Your Own Types—Enumerations
Project 2.2 Rock Operations
NOTES TO THE INSTRUCTOR
The first three lab exercises (1.1, 2.1, and 2.2) and projects (2.1 and 2.2) are intended for use in the first
week(s) of the course. Any of them can be assigned as first labs and projects; it depends on your
preferences for starting the course.
Lab Exercises 2.1 and 2.2 are intended for use with Chapter 2: “Introduction to Data Types” of the text
ADT,. Data Structures, and Problem Solving in C++, 2E. Lab Exercise 2.1 reviews the fundamental C++
data types and their memory requirements as discussed in Section 2.2: “C++’s Simple Data Types.” It also
serves as an introduction to address arithmetic, discussed in Section 2.4: “Pointers.”
The intent in Project 1.2 is to have students review the basic ideas and programming techniques they
acquired in a first programming course while at the same time learning something new—namely, C++’s
bitwise operations: &, |, ^ , ~, <<, and >>. These typically are not covered in a first course, but it is
important that students know about them, even if only to understand why boolean expressions such as (x
< 4) & (x > 1 ) or “malformed” output expressions like x << 3 do not cause compiler errors but
probably do not execute in the manner intended.
If the students come into this course knowing C++, these should be about the only new C++ features
they encounter in doing the project. If they come to this course from Java, the C++ statements used in this
program (except for input and output) are basically the same as in Java. Appendix E: “From Java to C++”
in the text has proved useful in helping these students make the transition in a matter of a week or so. All of
the students should be informed that Appendix C: “Basic C++” provides a ready reference for the essentials
of C++, and that Appendix D: “Other C++ Features” covers some of the more advanced features.
Notes:
You might use the following modern-day version of the Lewis Carroll quote at the beginning of the lab
exercise to illustrate the relationship between a variable, its name, its memory location, and its value:
“The student’s middle initial is called charVar."
“Oh, that’s her middle initial, is it?” Alice said, trying to feel interested.
“No, you don’t understand," the Knight said, looking a little vexed. “That’s what it’s called. charVar is the
name of a variable whose value is her middle initial.”
“Then I ought to have said The student’s middle initial is a variable’?” Alice corrected herself.
“No, you oughtn’t: that’s quite another thing! The variable is memory location 0x1224: but that’s only
what it’s called, you know!”
“Well, what is her middle initial, then?" said Alice, who was by this time completely bewildered.
“I was coming to that," the Knight said. “Her middle initial really is ‘A’ and it’s my own initialization."
Lab Exercise 2.2 uses the file g e o lo g y .cpp, which can be downloaded from the website whose URL is
given in the preface to this lab manual.
9

f
o
Lab 2.1: Exploring Addressing
Course Info:
_____________
Name:
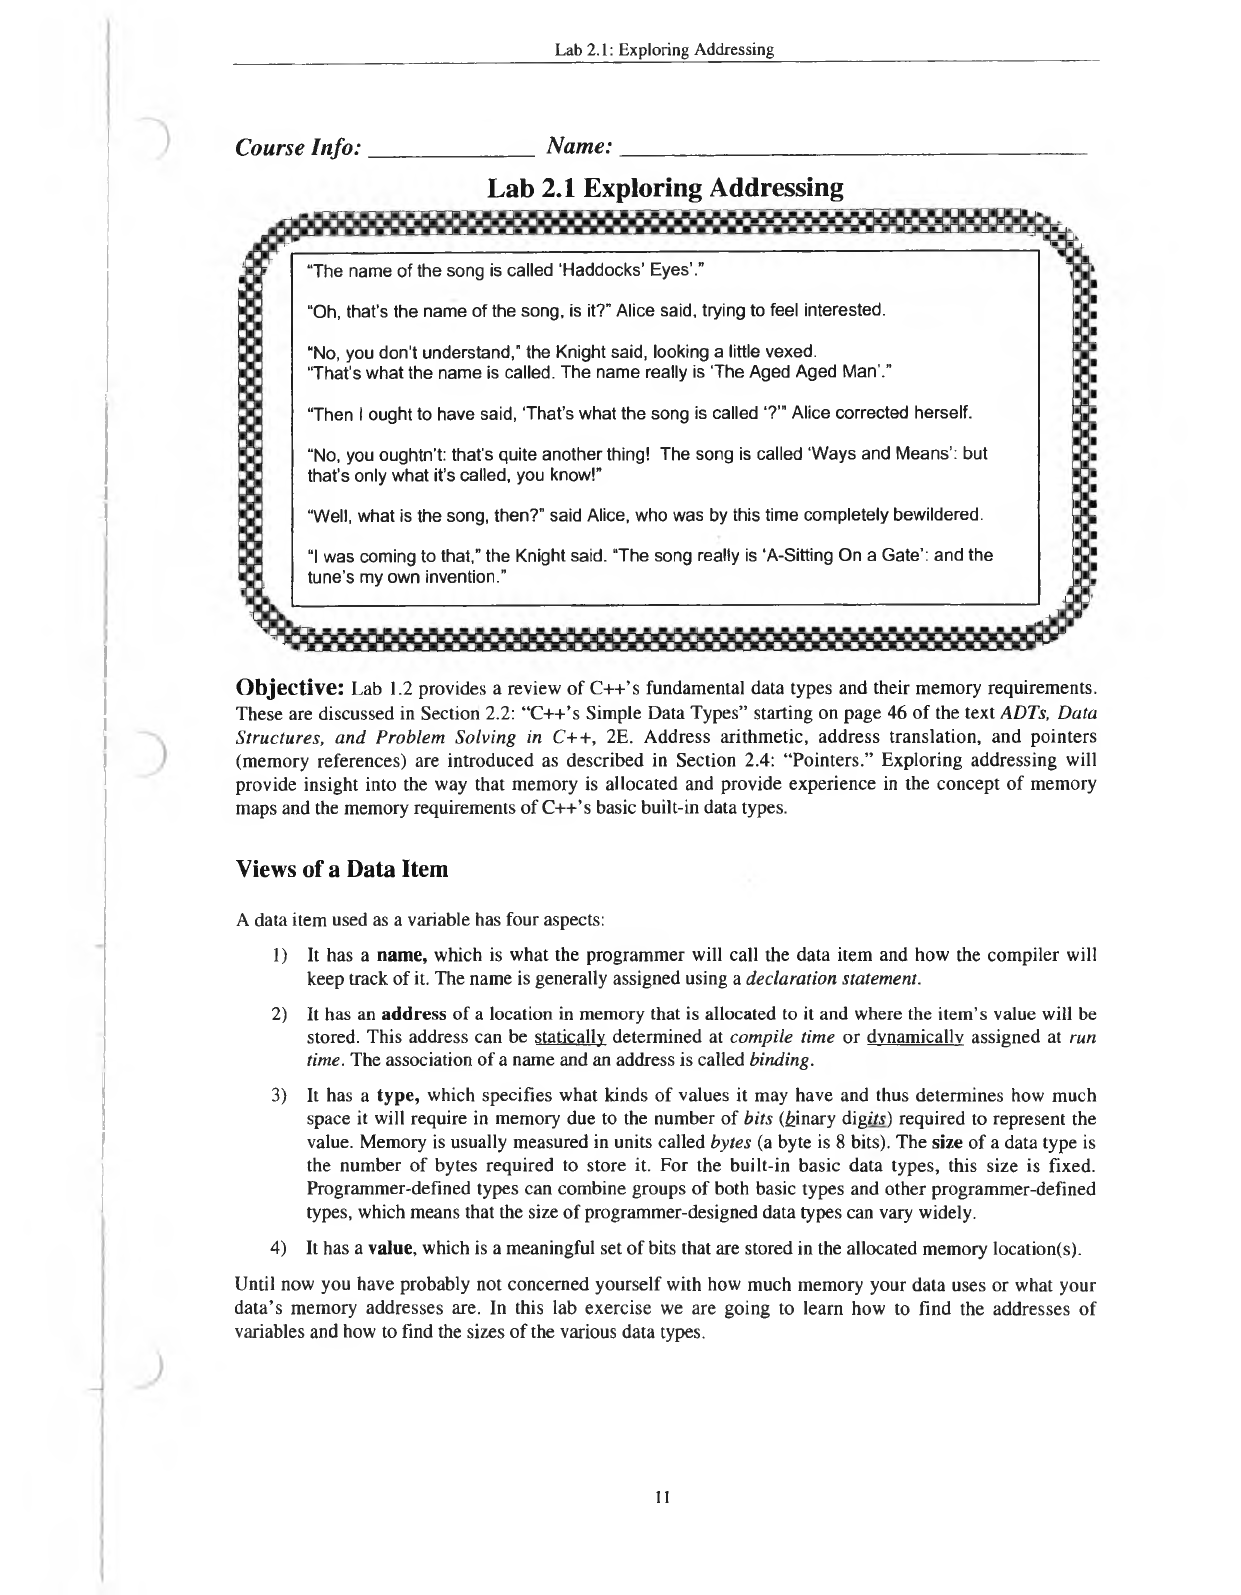
Lab 2.1 Exploring Addressing
Objective: Lab 1.2 provides a review of C++’s fundamental data types and their memory requirements.
These are discussed in Section 2.2: “C++’s Simple Data Types” starting on page 46 of the text ADTs, Data
Structures, and Problem Solving in C++, 2E. Address arithmetic, address translation, and pointers
(memory references) are introduced as described in Section 2.4: “Pointers.” Exploring addressing will
provide insight into the way that memory is allocated and provide experience in the concept of memory
maps and the memory requirements of C++’s basic built-in data types.
Views of a Data Item
A data item used as a variable has four aspects:
1) It has a name, which is what the programmer will call the data item and how the compiler will
keep track of it. The name is generally assigned using a declaration statement.
2) It has an address of a location in memory that is allocated to it and where the item’s value will be
stored. This address can be statically determined at compile time or dynamically assigned at run
time. The association of a name and an address is called binding.
3) It has a type, which specifies what kinds of values it may have and thus determines how much
space it will require in memory due to the number of bits (binary dig its) required to represent the
value. Memory is usually measured in units called bytes (a byte is 8 bits). The size of a data type is
the number of bytes required to store it. For the built-in basic data types, this size is fixed.
Programmer-defined types can combine groups of both basic types and other programmer-defined
types, which means that the size of programmer-designed data types can vary widely.
4) It has a value, which is a meaningful set of bits that are stored in the allocated memory location(s).
Until now you have probably not concerned yourself with how much memory your data uses or what your
data’s memory addresses are. In this lab exercise we are going to learn how to find the addresses of
variables and how to find the sizes of the various data types.
11
“The name of the song is called 'Haddocks’ Eyes’.”
“Oh, that’s the name of the song, is it?” Alice said, trying to feel interested.
“No, you don’t understand,” the Knight said, looking a little vexed.
"That’s what the name is called. The name really is The Aged Aged Man’.”
“Then I ought to have said, ‘That’s what the song is called ’?’” Alice corrected herself.
“No, you oughtn’t: that’s quite another thing! The song is called 'Ways and Means’: but
that’s only what it’s called, you know!”
“Well, what is the song, then?” said Alice, who was by this time completely bewildered.
“I was coming to that,” the Knight said. “The song really is ‘A-Sitting On a Gate’: and the
tune’s my own invention.”

Lab 2.1: Exploring Addressing
Finding Addresses
You will begin by building the shell of a test program a d d r e s s . cp p that will be the beginning
of your address laboratory.
/ *
-----
a d d re s s .c p p ---------------------------------------------------------------------------------------------
Program to e x p lo re a d d r e s s in g .
Name: D a te :
O th er in fo r m a tio n r e q u ir e d b y y o u r i n s t r u c t o r
-------------------------------------------------------------------------------------------------------------------------* /
tin c lu d e < io stream >
u s in g nam espace s td ;
i n t m a in ()
{s h o r t i n t s i 1 , s i 2 ; / / i n i t i a l d a t a d e c la r a ti o n
}
Enter and save this code using the procedures required at your site.
Check here when finished
____
You have declared two s h o r t i n t variables s i 1 and s i 2. These two variables have memory
locations associated with them where s h o r t i n t values can be stored. Our first objective is to
determine the addresses of these memory locations. We can do this by using the address-of operato r
(&).
The expression
|& v a ria b le ]
produces the address of the memory location associated with v a r ia b le . Thus, the values of the
expressions & s i1 and & si2 can be used to find the addresses of the variables s i l and s i 2. Add one
or more output statements to the program a d d r e s s e s . cpp to find where your system has put the
variables.
Note: Addresses are typically displayed in hexadecimal (base-16) form—e.g., 0xl23aef04
(remember that hexadecimal representations of integers in C++ begin with Ox). For some data
types—e.g., c h a r —addresses may not display correctly on some systems; in this case, it may
be necessary to typecast them to typeless values using a cast to v o id*:
c o u t « . . . « (void*)&.v a r i a b le « . . .
Run your updated program and record the resulting addresses below:
sil:
____________________________
si2: _______________________________
You declared the two variables s i l and s i2 consecutively, and one would expect that they will
be allocated adjacent memory locations. This makes it possible to determine how many bytes are
allocated to them to store a s h o r t i n t. Since the address for a variable is the beginning address of a
block of memory units for that variable, the difference between two adjacent variables’ addresses will
be the size of the data type.
Calculate the difference between the addresses of s i l and s i2 and write it here:
______________
The size of C++ data types is implementation dependent. Different implementations may use different
numbers of bytes. It is fairly common, for example, to use 4 bytes for an i n t and 2 bytes for a s h o rt
in t , but this is not guaranteed.
12
1
3
Lab 2.1: Exploring Addressing
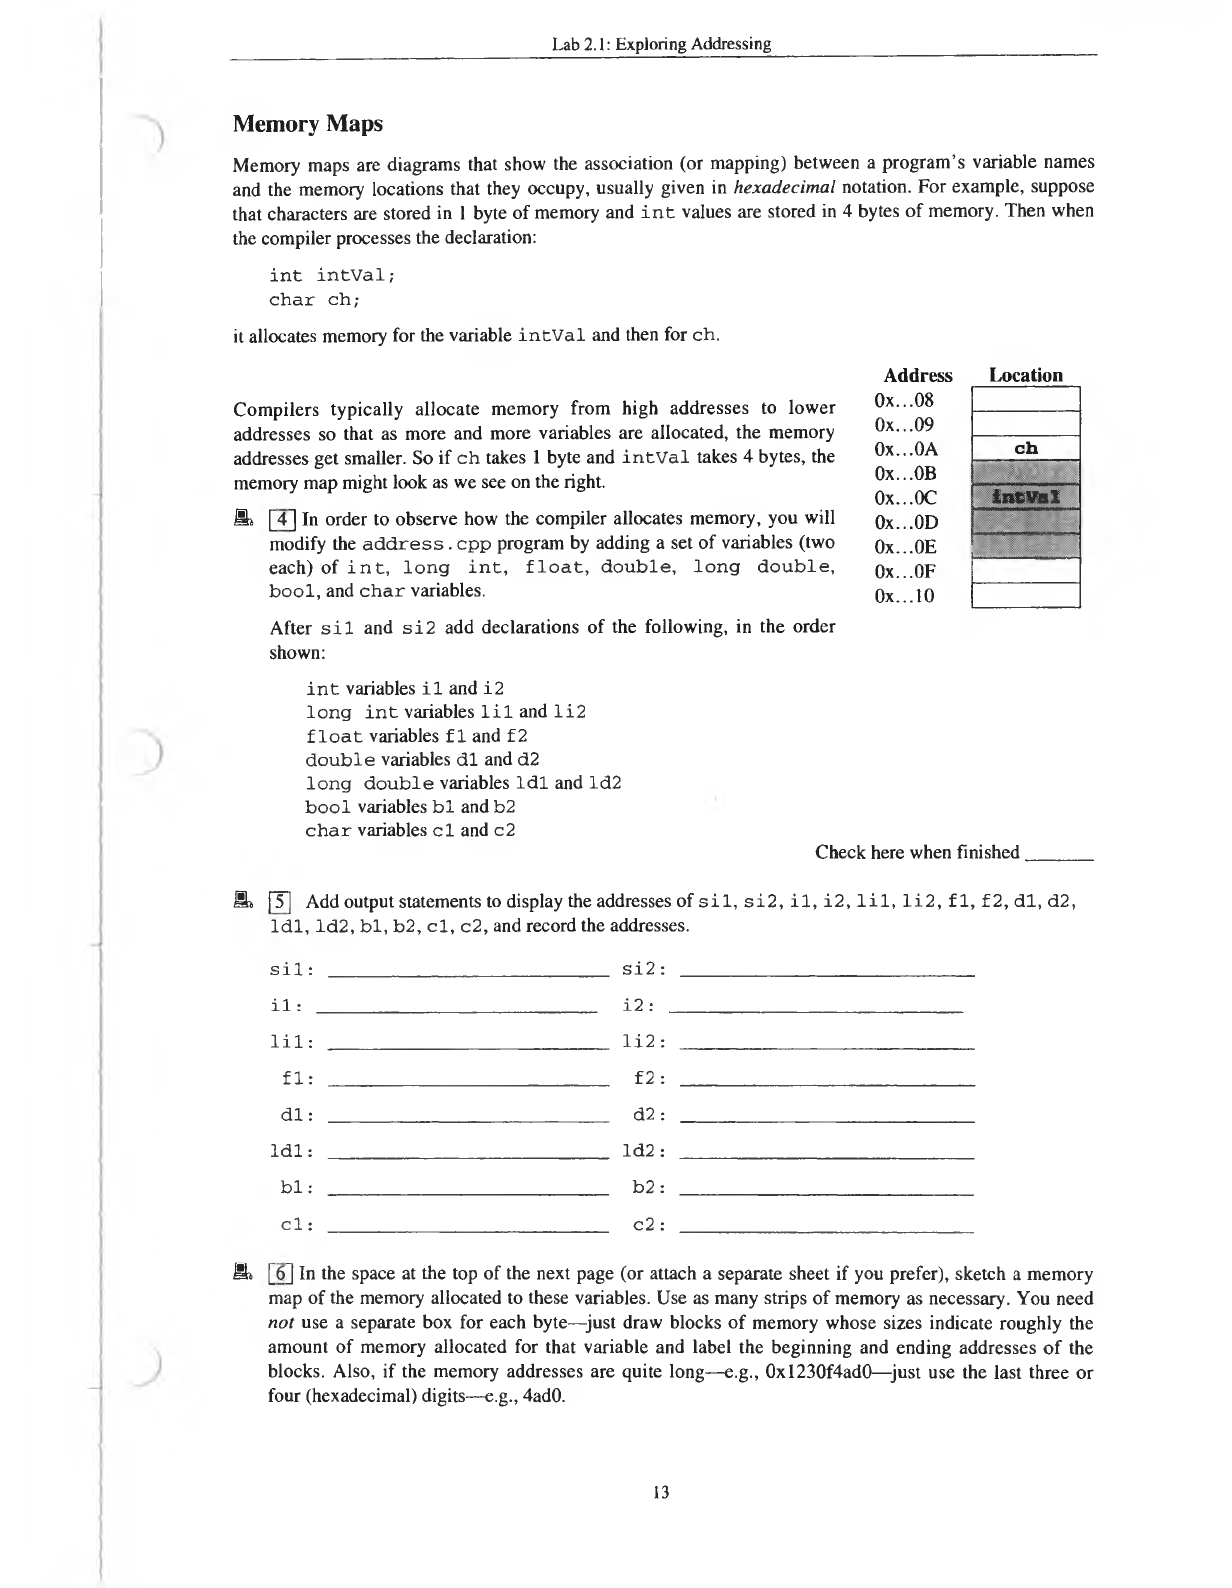
Memory Maps
Memory maps are diagrams that show the association (or mapping) between a program’s variable names
and the memory locations that they occupy, usually given in hexadecimal notation. For example, suppose
that characters are stored in 1 byte of memory and i n t values are stored in 4 bytes of memory. Then when
the compiler processes the declaration:
int intVal;
char ch;
it allocates memory for the variable intVal and then for ch.
Compilers typically allocate memory from high addresses to lower
addresses so that as more and more variables are allocated, the memory
addresses get smaller. So if ch takes 1 byte and in tV a l takes 4 bytes, the
memory map might look as we see on the right.
ML
[4] In order to observe how the compiler allocates memory, you will
modify the a d d r e s s . cpp program by adding a set of variables (two
each) of i n t , lo n g i n t , f l o a t , d o u b le, lo n g d o u b le ,
b o ol, and c h a r variables.
After s i l and s i2 add declarations of the following, in the order
shown:
Address Location
Ox...08
Ox...09
0x...0A c h
Ox...OB
0x...0C in tV a l
Ox...OD
0x...0E ■
Ox...OF
Ox... 10
i n t variables i l and i2
lo n g i n t variables l i l and l i 2
f l o a t variables f l and f2
d o u b le variables d l and d2
lo n g d o u b le variables l d l and ld2
b o o l variables b l andb2
c h a r variables c l and c2 Check here when finished
_____
S» jT] Add output statements to display the addresses of s i l , s i2 , i l , i2 , l i l , l i 2 , f 1, f 2, d l, d2,
ld l , ld 2 , b l, b2, c l, c2, and record the addresses.
s i l : si2 :
i l : i2 :
l i l : li2 :
fl: f 2 :
dl: d2 :
l d1 : ld2 :
bl: b2:
c l : c2 :
Mi [6] In the space at the top of the next page (or attach a separate sheet if you prefer), sketch a memory
map of the memory allocated to these variables. Use as many strips of memory as necessary. You need
not use a separate box for each byte—just draw blocks of memory whose sizes indicate roughly the
amount of memory allocated for that variable and label the beginning and ending addresses of the
blocks. Also, if the memory addresses are quite long—e.g., 0xl230f4ad0—just use the last three or
four (hexadecimal) digits—e.g., 4ad0.
13
4
5
6
Lab 2.1: Exploring Addressing
[T] From these displayed addresses we can determine how many bytes are used to store a value of a
particular type. For example, if variables tl and t2 have declarations of the form T t l , t 2 ; and the
address of t l is a 1 and the address of t2 is a 2, then values of type T are stored in lax - a 2l bytes (where I
I denotes absolute value). Do this calculation for the data in the previous experiment. (Note that addresses
are generally given in hexadecimal, so you will either have to convert to decimal or do your calculations in
hexadecimal. You could have the computer do it for you by casting the addresses to in ts and including the
appropriate computations.) Determine how many bytes are used to store values of each of the following
types:
s h o r t i n t i n t _ _ _
_____
lo n g i n t
_________
f l o a t _ _ _ _ _ _
do u b le
___________
lo n g d o u b le
_________
bo o l
___________
c h a r
___________
The sizeof operator has two common forms: |s iz e o f ( Type) or s iz e o f v a ria b le l
It produces the number of bytes allocated for an object of type Type, while the second form gives the
number of bytes allocated for an object named v a r ia b le . Using one of these forms, add statements
to your code from Step 6 to display about how many bytes are used to store the various data types.
Enter the results below:
s h o rt i n t i n t Io n a i n t f l o a t
double lon g d ou ble bool c h a r
Are the results you obtained the same as you obtained earlier? YIN
_
____
_
(You may find some “gaps” in your memory map caused by memory-allocation rules for a particular
system—e.g., it might have a rule that all beginning addresses of allocated memory blocks must be
divisible by 8.)
The dereferencing operator * is used to access the value stored in a memory location. Show this
by putting the following statements in your program:
s i l = 12345;
co u t << " s i l = " << s i l « en dl
<< "A ddress o f s i l = " << & sil << e n d l
<< "C o ntents o f " << & sil << "= " << *(& sil) << e n d l;
What output is obtained? & sil
___________________
* (& sil)
_______________________
You have finished. H and in: 1) the lab with answers filled in, and 2) a printout of a listing of your final
program.
14
8
9
Project 2.1 Binary Representation
Project 2.1 Binary Representation
O b je c tiv e : The b itw is e b in ar y o p e ra to r s
allow “bit twiddling” and are useful for many
detailed data tasks such as manipulating data
at the bit level. In this project you will use the
bitwise operators to examine how integer
values are stored internally in memory
locations to determine whether your system
uses the tw o ’s com plem en t representation of
integers described in Section 2.2 of the text
AD Ts, D ata Structures, a nd P ro b lem Solvin g
in C++, 2E.
Description: In this project you will use the bitwise binary operators: AND &, OR | , XOR (Exclusive OR)
^, NOT ~, SHIFT-LEFT <<, SHIFT-RIGHT >>, and shortcut versions used with the assignment operator
(&=, | =, ^=, ! =, <<=, >>=) as described in the following table:
Step 1: Write and test a function p rin tB in a r y () that receives an i n t value and displays its binary
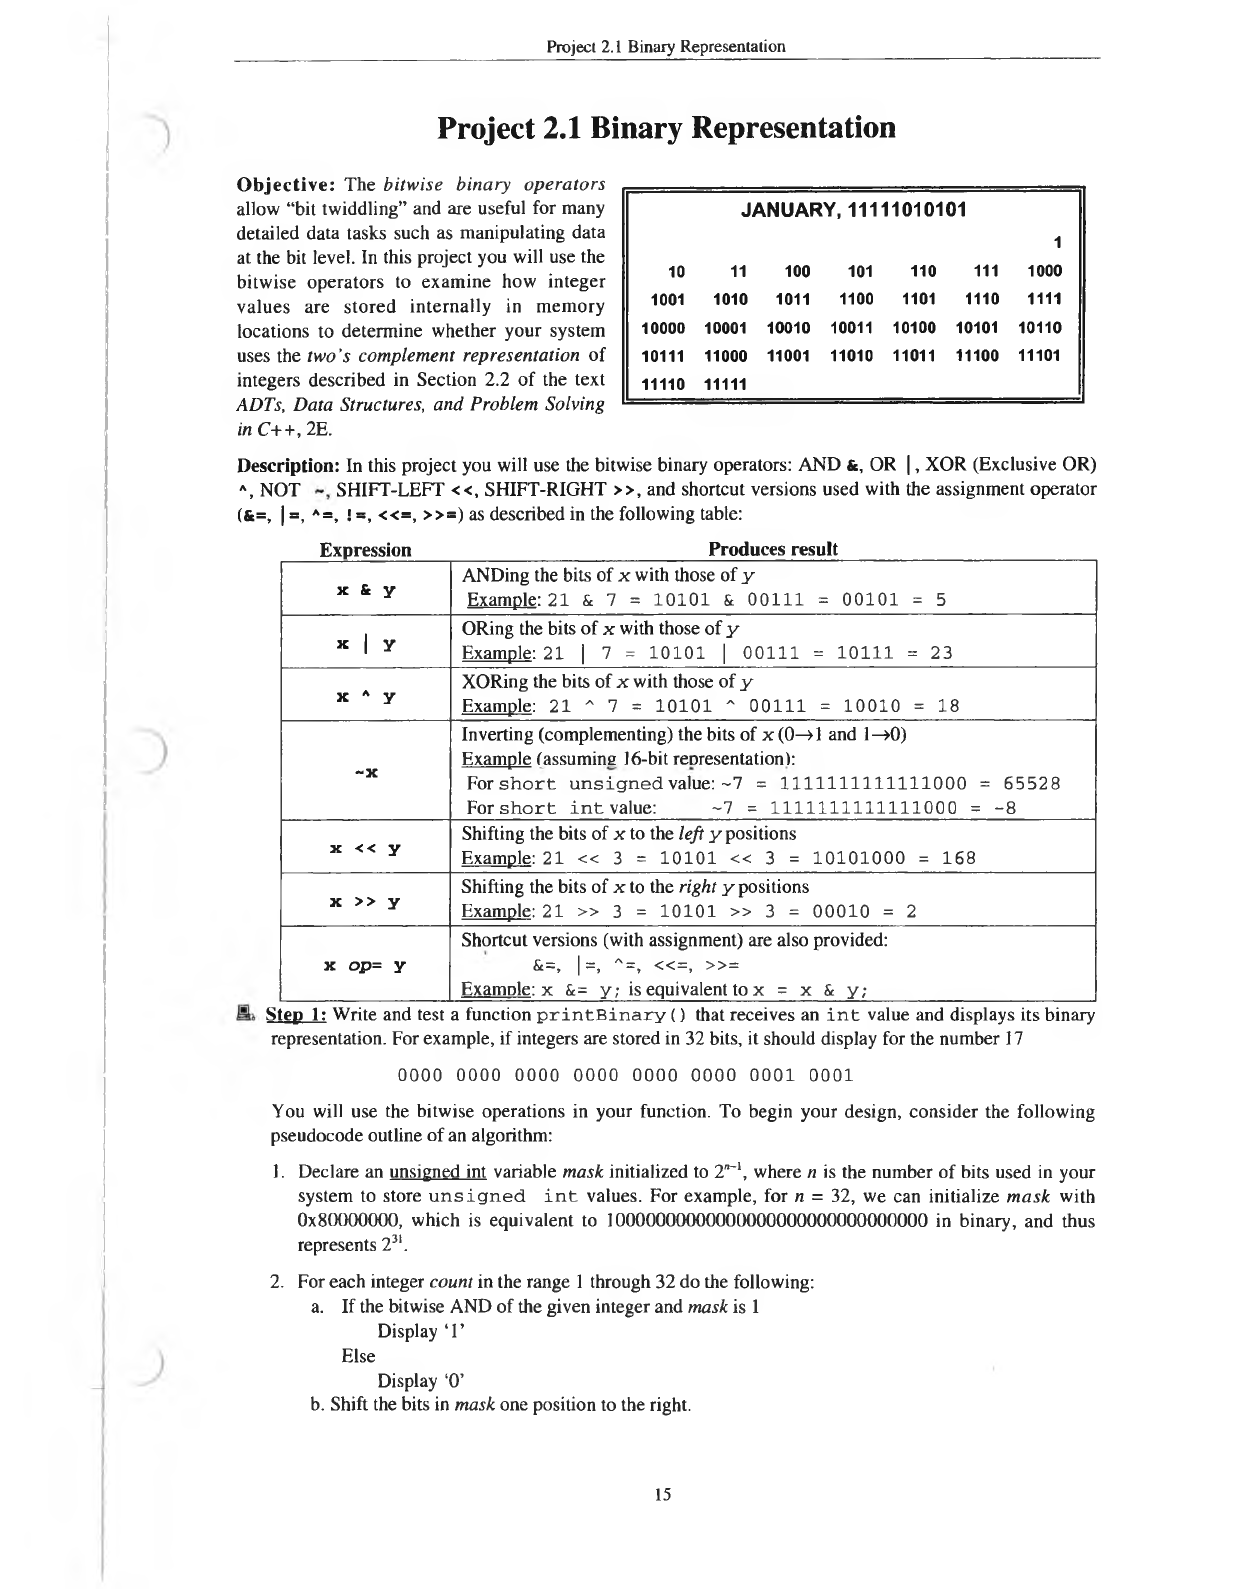
representation. For example, if integers are stored in 32 bits, it should display for the number 17
0000 0000 0000 0000 0000 0000 0001 0001
You will use the bitwise operations in your function. To begin your design, consider the following
pseudocode outline of an algorithm:
1. Declare an unsigned int variable m ask initialized to 2 n-1 where n is the number of bits used in your
system to store u n sig n e d i n t values. For example, for n = 32, we can initialize m a s k with
0x80000000, which is equivalent to 10000000000000000000000000000000 in binary, and thus
represents 231.
2. For each integer count in the range 1 through 32 do the following:
a. If the bitwise AND of the given integer and m ask is 1
Display ‘1’
Else
Display ‘0’
b. Shift the bits in m a sk one position to the right.
JANUARY, 11111010101
10 11 100 101 110 111
1
1000
1001 1010 1011 1100 1101 1110 1111
10000 10001 10010 10011 10100 10101 10110
10111 11000 11001 11010 11011 11100 11101
11110 11111
15
Expression Produces result
ANDing the bits of x with those of y
x & yExample: 21 & 7 = 10101 & 00111 = 00101 = 5
X I y ORing the bits of x with those of y
Example: 21 | 7 = 10101 | 00111 = 10111 = 23
x A y XORing the bits of x with those of y
Example: 21 ^ 7 = 10101 ^ 00111 = 10010 = 18
~ x
Inverting (complementing) the bits of x (0—>1 and 1—>0)
Example (assumine 16-bit representation):
For s h o r t u n s ig n e d value: ~7 = 1111111111111000 = 65528
For s h o r t i n t value: ~7 = 1111111111111000 = -8
x << yShifting the bits of x to the left y positions
Example: 21 « 3 = 10101 « 3 = 10101000 = 168
x >> yShifting the bits of x to the right y positions
Example: 21 » 3 = 10101 » 3 = 00010 = 2
>1
II
81
X
Shortcut versions (with assignment) are also provided:
&=, | =, ^ =, « = , » =
Examnle: x &= y ; is equivalent to x = x & y;

Project 2.1 Binary Representation
Work through an example by hand to ensure that you understand what the algorithm does. (It may be
helpful to do an example with only 8 bits to get the sense of how the algorithm works.)
• Write a function printBinary () that implements this algorithm—or if your instructor permits,
you may use bitsets instead (see Extra Credit 2 below)—and incorporate it into a program to test it.
Your program should repeatedly call for the user to enter an integer and then display it in binary.
Execute your program with the five inputs shown in item 2 of the grade sheet on the next page and
record the outputs produced. {Note: Do not be alarmed if the outputs for -2147483648 and -1 look a
bit “strange.”)
• Does your system use two’s-complement representation (see Section 2.2 of the text) for integers?
Record your answer on the grade sheet.
• Extra Credit 1: If fl o a t values require the same number of bits as in ts on your system, change
the parameter type of p r i n tB i n a r y () from in t to float and do the same for the
corresponding argument in the calling function to determine whether your system uses IEEE
representation (see Section 2.2 of the text) for f lo a t values. Record your conclusion on the grade
sheet and hand in two or three sample executions that demonstrate your conclusion.
• Extra Credit 2: Study the description of bitsets in Section 9.8 of the text and use bitsets instead of
the mask-shift algorithm to obtain a simpler version of printBinary ( ) .
Step 2: Once you are confident that your printBinary!) function is correct, incorporate it into a
bitwise-operator calculator program that reads lines of input, each of which contains a bitwise
operator and the appropriate number of operands—for example,
& 13 27
~ 1
» 960 8
and which then outputs the integer operand(s), the bitwise operator, and the result obtained by applying
the operator to the operands, with all numbers displayed both in decimal form and in 32-bit binary
representation.
• Use a function to display the output in a format similar to that on the next page; it should receive
the operator, the operand(s), and the result. The function should call printBinary () to display
the binary representations.
Suggested output format:
Applying the bitwise AND operator & to the following
13 = 00000000000000000000000000001101
27 = 00000000000000000000000000011011
produces 9 = 00000000000000000000000000001001
Applying the bitwise NOT operator - to the following
1 = 00000000000000000000000000000001
produces -2 = 11111111111111111111111111111110
Applying the bitwise RIGHT-SHIFT operator » to the following
960 = 00000000000000000000001111000000
with a shift of 8 bit positions produces
3 = 00000000000000000000000000000011
• Execute your program with the operands and operations listed on the grade sheet on the last page
and add at least five more lines with vour own data.
• Extra Credit 3: Design your program to read from a data file containing the lines of data and
produce output to another file. Hand in copies of your input and output files along with the
program.
H and in the items listed on the grade sheet.
16
Project 2.1 Binary Representation
Course Info:
________________
Name:
___________
Project 2.1 Grade Sheet
Hand in: This grade sheet attached to the following:
1. A listing of the program you used to test your p r in tB in a r y () function.
2. Record here (or attach) the output produced for the test inputs:
17
__________________
_
_____________________________________________________
32768_____________________________________________________________
_
__________
2147483647
________
_
______________________________________________________________
-2147483648_________________________________________________________________________
- 1 _________________________________________________________________________
Does your system use two's-complement representation for i n t s (Y/N)?
___________
3. A listing of your bitwise-calculator program
4. Evidence that this program compiles and links correctly
5. The output produced by executing your program with the following lines of data and another 5 lines of
your own: If you do the extra credit, attach copies of your input and output files.
& 13 27 Write your five lines of input data here:
~ 1
» 960 8
_____________________________________________
& 65535 1
| 15 241
^ 15 241
~ 1
___________________________________________
« 15 4
« 9 31
_____________________________________________
» 240 4
» 240 6
_____
_______________________
Category Points Possible Points Received
Correctness (including following instructions)....
...............
80
Design and structure of program..........................
...............
15
Use of functions....................................................
...............
15
Programming style
................................................
..............
(30)
Program appearance......................................
...............
10
Identifier names.............................................
...............
10
Documentation..............................................
...............
10
Extra Credit 1 (+5 points)
Does your system use IEEE for f lo a ts ?
Extra Credit 2 (+15 points)
Extra Credit 3 (+15 points)
Total 140
17

Lab 2.2: Create Your Own Types— Enumerations
Course Info:
_____________
Name:
__________________________
Lab 2.2 Create Your Own Types—Enumerations
Background: Predefined C++ data types are
not adequate to model all the complexity of
real-world phenomena. The result is that we
sometimes need to build our own data types
to model complex objects, either because
they are nonnumeric and nonalphabetical or
because they are heterogeneous (i.e., have
multiple attributes). The objective of this lab
exercise is to show how it is possible to
extend the programming language C++ by
adding new data types—albeit simple ones.
Objective: In this lab exercise you will be learning how to define and use enumerated data types. These are
described in Section 2.3: “Programmer-Defined Data Types” of the text ADTs, Data Structures, and
Problem Solving with C++, 2E, and you should study it in conjunction with this lab exercise.
You will be using the program g e o lo g y .c p p . You should get a copy of this code using the procedure
specified by your instructor. (It can be downloaded from the website given in the preface.) You will be
extending the code in the course of doing this lab.
Problem: We will model and process rocks of different types: basalt, dolomite, granite, gypsum, limestone,
marble, obsidian, quartzite, sandstone, and shale.
A Simple but Awkward Approach
We can give each rock type a unique integer code—e.g., 0 for basalt, 1 for dolomite, 2 for granite,
etc.—and use the built-in type i n t to model rock values. We might use code segments like the following:
i n t r o c k l, ro ck 2 ; / / v a r ia b l e s to s to r e ro c k s
/ / Make r o c k l r e p re s e n t b a s a lt
ro c k l = 0;
/ / Make ro c k 2 r e p re s e n t o b s id ia n
ro ck2 = 6;
To enter the two rocks basalt and obsidian for these two variables via a statement
c i n >> ro c k l » r o c k 2 ;
the user would have to know that 0 should be entered for ro c k l and 6 for ro ck2.
This approach has a number of serious difficulties:
• The programmer and user must remember the numeric codes of the rocks.
• The situation gets worse as we add more and more rock types.
• There are many things the programmer has to remember to maintain the code, and the problem gets
worse when other programmers have to maintain the code later.
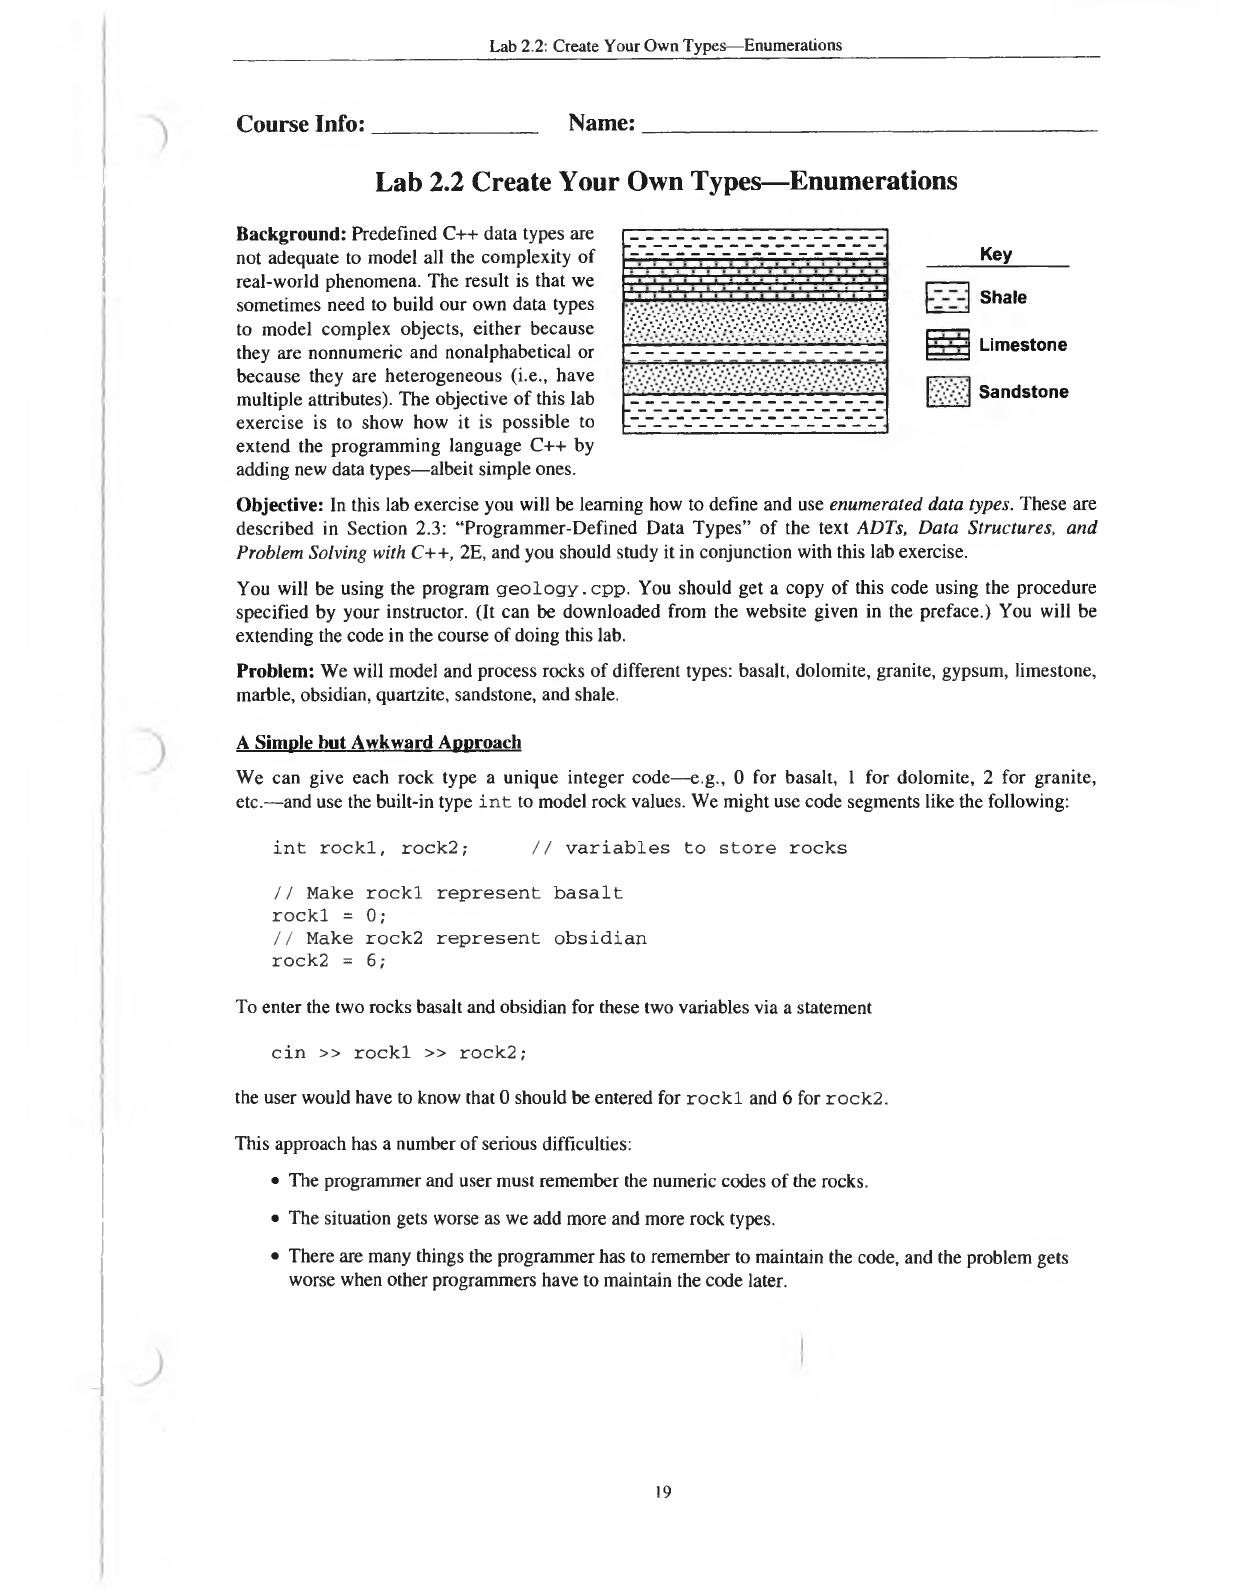
Key
Shale
Limestone
Sandstone
19
Lab 2.2: Create Your Own Types—Enumerations
A Somewhat Better Approach
Look at the program geology. cpp to see what it does. Note the long sequence of c o n s t declarations
that associate meaningful names with the numeric codes of the rocks.
Study the declarations and loops in the m ain () function. Now “reverse engineer” the program by
writing an algorithm for main() in pseudocode. (See p. 16 of the text for an example of an
algorithm written in pseudocode.)
Now compile and execute the geology. cpp program.
What happens if you enter the name of a rock such as BASALT?
WARNING:
MAY NOT WORK
AS YOU EXPECT
Now try entering the numeric codes of basalt, dolomite, and granite. Describe the output produced.
While the code itself is more readable, it is not clear that anything has been gained from the point of
view of the user running the program. He or she has to input numeric codes, and the output consists of
numeric codes.
We’d really like the compiler to help us in matters such as these.
An Alternate Approach Using Enumerations
A Brief Summary o f Enumerations (Text: pp. 60-62). The earliest programming languages had no
mechanisms by which a programmer could create new data types, so that one could use only the built-in
data types. We’ve just seen how numerical codes can be used to represent what are called “scalar” or
“enumerated” data types. C++ provides a built-in enumeration mechanism for defining such data types, as
described on pp. 60-62 of the text.)
One of the examples in the text is a declaration of an enumerated data type Color whose values are the
colors RED, ORANGE, YELLOW, GREEN, BLUE, INDIGO, and VIOLET followed by a special value
COLOR_OVERFLOW.
enum Color (RED, ORANGE, YELLOW, GREEN, BLUE, INDIGO, VIOLET,
COLOR_OVERFLOW);
20
1
2
Lab 2.2: Create Your Own Types—Enumerations
C o lo r acts as a new data type that was defined by the programmer. When the compiler encounters this
new type, it performs a 1:1 mapping from the enumerators (i.e., the words used for the colors) to the
integers, associating 0 with the first enumerator RED, 1 with ORANGE, and so forth, one by one, until it
associates 7 with COLOR_OVERFLOW.
Using a slightly different syntax, we can specify the integers to be assigned to the enumerators; for
example,
enum N um berB ase {BINARY = 2 , OCTAL = 8 , DECIMAL = 10, HEX = 16,
HEXADECIMAL = 16} ;
Associating the base’s value with its name allows us to use the names in expressions such as 2 *HEX + 1.
We can also cause the compiler to start numbering with a value other than 0 by specifying the value for the
first enumerator. The compiler, by default, will simply add one for each subsequent enumerator.
enum C o lo r {RED = 1 , ORANGE, YELLOW, GREEN, BLUE, INDIGO, VIOLET,
COLOR_OVERFLOW};
This will produce RED = 1, ORANGE = 2, YELLOW = 3, GREEN = 4, and so forth until
COLOR_OVERFLOW - 8. If we wanted the last four enumerators to be associated with 10, 11, 12, and 13,
we could use
enum C o lo r {RED = 1, ORANGE, YELLOW, GREEN, BLUE = 1 0, INDIGO, VIOLET,
COLOR_OVERFLOW};
Now we want to modify Part 1 of g e o lo g y . c p p as follows. Eliminate the c o n s t definitions and
replace them with the declaration of an enumerated data type called Rock. You might initially simply
comment them out and use them as a guide to write the enumerated data type declaration.
When you’ve finished that, change the type of s a m p le from
i n t to R o ck . Then recompile and execute the program,
noting any errors that occur. What happened?
WARNING:
MAY NOT WORK
AS YOU EXPECT
We’ve encountered a problem with the input operator » . It is not defined for type R ock. This will be
fixed in Project 2.2, but for right now, so that we can proceed, we’ll do something “quick and
dirty”—not recommended for general use.
Replace the statement c i n >> s a m p le ; with
i n t te m p; c i n >> te m p ; / / i n p u t ' a n i n t e g e r
sa m p le = R o c k (te m p ) ; / / c a s t th e i n t e g e r t o R ock ty p e
Now recompile and execute the program as you did before, entering the numeric codes for basalt,
dolomite, and granite. Describe any differences (if any) between this program’s output and that in our
earlier attempt in step 2.
A lot of work with not much gain, right? It should be clear by now that enumerated variables are only a
sort of “shell” over the integer values they are assigned to represent. The compiler just makes
substitutions for them.
Now we are going to modify g e o lo g y .c p p further. Specifically, change the type r o c k V a l in
the second f o r loop from i n t to R ock. Then attempt to recompile and execute the program. What
happened?
21
3
4
5
Lab 2.2: Create Your Own Types—Enumerations
Implementing a Data Type
In trying to use the enumerated data type to correct the rather awkward approach of doing it all manually
the way it was done in the original geology, cpp, we’ve encountered several problems. This time we
found that using the Rock type for rockVal revealed the fact that Rock has no ++ increment (prefix or
postfix) operator associated with it.
A data type has two parts:
1. A collection of values, and
2. Operations that are defined for using and operating on those values.
Our enum declaration does only the first part for our new data type Rock—it specifies the collection of
values (enumerators). But that is not enough. We also have to define functions that carry out the operations
on Rock values.
Also, after putting in all that work, we would also like to have our new data type reusable, so we want to
package it into a library (and later a class). For now our library will consist of two files:
1. A header or interface file, and
2. An implementation file which contains the definitions of the functions whose prototypes are in the
header file.
Header file (Interface file)
The header file performs a dual interface role.
• It informs the compiler what the implementation will contain. In our example, it will contain:
o The enumeration type declaration
o Prototypes of the functions that carry out the operations
• It acts as documentation for the user of the interface/implementation combination.
As a result it should contain thorough documentation of the following forms:
o Opening documentation, and
o Component documentation
Opening documentation should typically include the following elements:
1) The name of the programmer(s)
2) The organization (typically in a college environment it might be the name of the college, the course
and section numbers, and any items specified by your instructor)
3) A general description of the data type being defined, including its purpose, list of operations, and
any special instructions
For example, the opening documentation in R ock. h might be something like the following:
/*
--
R o c k . h ------------------------------------------------------
-
---
A header file for an enumerated data type Rock that models rocks
of various types (basalt, dolomite, granite, gypsum, limestone,
marble, obsidian, quartzite, sandstone, and shale)
Operations are:
next(): A successor function
other operations ...
W r itte n by: John Doe U n iv e rs a l U n iv e rs ity
W ritte n f o r : CS 112A S e p t. 9, 2005
-------------------------------------------------------------------------------------------------------------------*/
22
Lab 2.2: Create Your Own Types—Enumerations
Component documentation should include:
1) Any comments about the data type being defined if it is not self-explanatory.
2) Documentation to accompany each of the function prototypes that explains to the user:
• Purpose of the function—what it does
• Preconditions that must hold before the function can be used
• Postconditions that result after the function has been executed
In your current working directory, create a header file R o ck . h containing:
• The required opening documentation and
• The Rock enumeration declaration. You may copy and paste this from your earlier
g e o lo g y . cp p file.
Then remove the enumeration declaration from your g e o lo g y . cp p file and add the line
#in c lu d e "R ock.h"
to g e o lo g y . cpp below the u s in g nam espace s td ; line
Now recompile g e o lo g y .c p p and make sure that you don’t have any new compilation errors,
except for the ++ error we encountered in step 5.
Check here when finished
______
Defining a Successor Operation
Now it is time to fix the problem that we encountered in step 5 when we found that the Rock data type
didn’t have an associated increment or successor operation. You may not have immediately realized that
was the problem. The code for the f o r loop in Part 2 of the g e o lo g y . cp p code reads:
f o r (R ock ro c k V a l = BASALT; ro c k V a l < ROCK_OVERFLOW; rockVal++)
c o u t << ro c k V a l << “ ";
The increment operator ++ that is defined for integers doesn’t work because it is not defined for R ock
objects. You will fix that by constructing a n e x t () function that returns a successor of a R ock and that
will be used instead of the ++ operation. Later (Project 4.1) we will learn how to overload C++’s + +
operator for type Rock so that the f o r loop will operate as originally written.
Modify the f o r statement in Part 2 of g e o l o g y . c p p to use the n e x t () function instead of the + +
operator to move ro c k V a l from one R ock value to the next:
f o r (R ock ro c k V a l = BASALT; ro c k V a l < ROCK_OVERFLOW;
rockVal = next(rockVal))
c o u t << ro c k V a l << " ";
Now we need to develop the n e x t ( ) function. As with all function development, we begin by
formulating a specification. A good way to begin is to identify what things are to be passed to the
function (if any) and what the function is to return or what other actions it is to carry out. For n e x t ( ) ,
we have:
Receives: A R ock value ro c k V a l
Returns: The successor of r o c k V a l
(The successor of the last enumerator SHALE is ROCK_OVERFLOW.)
23
6
7
Lab 2.2: Create Your Own Types— Enumerations
Now we must add a prototype for the next () function to the Rock. h header file:
Rock next(Rock rockVal);
But that is not enough. Header files are also called in terface file s because they contain the information
someone needs to know in order to use the new data type, which includes the functions that carry out
the operations on that data type. This means that we must add appropriate documentation for these
functions. There are different ways to do this and often organizations will have specific requirements
which their programmers are expected to follow. The minimum documentation should describe:
1) The p u rp ose of the function—what it does
2) The function’s p re co n d itio n s—what must be true when the function is called (specific inputs
such as a valid ro c k V al)
3) The function’s p os tc on d itio n s—what must be true when the function finishes execution (for
example, next () returns the successor to the Rock value sent to it)
4) Any other information a programmer would need to use the code.
Annotation/Commenting and Programming Style— The single most important property that code should
have is being easy to rea d a n d u n derstand. Two obvious things to contribute to this are to:
• Use meaningful parameter names, function names, variable names, and user-defined type names.
• Use a consistent style for code to enhance readability—e.g, indent blocks of loops and selection
statements, properly align statements, use horizontal white space between items in expressions and
vertical white space to separate chunks of code.
Another important way to is to provide good documentation for each function. In the text, this is added to
each function prototype in the header file (although some programmers prefer to separate it out and put it in
a separate documentation file or after the opening documentation of the header file). For example,
Rock next(Rock rockVal);
/*-----------------------------------------------------------------------------------------------------------------
Find the successor of a Rock value.
Precondition: rockVal is a valid Rock value.
Postcondition: The successor of rockVal has been returned.
(The successor of SHALE is ROCK_OVERFLOW and
ROCK_OVERFLOW is its own successor.)
-----------------------------------------------------------------
*/
Some programmers prefer to put such documentation on the right side of the line of code and indent
subsequent lines:
Rock next(Rock rockVal); // Accepts a valid Rock value and returns
// the successor rock value. For SHALE
// and for ROCK_OVERFLOW, ROCK_OVERFLOW
// is returned.
Now design and add a prototype and your particular documentation for the next () function to the
R ock. h header file.
Check here when finished
24
8
Lab 2.2: Create Your Own Types—Enumerations
Implementation file
A header file tells what some functions are to do. An implementation file tells how those functions do their
work. It contains:
1) The definitions of the operations (functions) on the new data type. The declarations of functions
(function prototypes) are in the header file, while the definitions are in the implementation file.
2) These are preceded by a # in c lu d e directive to insert the library’s header file. This allows the
compiler to check that the declarations of prototypes agree with the headings of the function
definitions.
Complete the skeleton definition of n e x t () provided below and put it in Rock . cpp:
//
--
Definition of n e x t () for finding the successor of a Rock value
Rock next(Rock rockVal)
{switch(rockVal)
{case BASALT: return DOLOMITE;
default:
//output an error message and return ROCK_OVERFLOW
}
}
If necessary, review how the C++ s w itc h () statement operates (see Appendix C.10 of the text). Why
don’t the statements associated with the s w itc h () statement’s cases in the n e x t () function require a
b r e a k ; statement concluding the c a se implementations?
Now incorporate documentation into the implementation file.
• The opening documentation should contain the information about the programmer that is in the
header file (“Written by,” Written for”). In fact, if you like, you can just copy and paste the opening
documentation from the header file and replace the word “header” in the opening line with
“implementation.”
• Each function definition in the implementation file should be annotated with a short statement of
what is being defined. This can usually be done with no more than one or two lines of commentary.
Don’t forget to #include " Rock.h " in your Rock.cpp implementation file.
This will cause the preprocessor to insert the contents of the header file at the beginning of the
implementation file so that the compiler can check function prototypes against their definitions.
Now you are ready to use the compiler to translate the files to machine language, the linker to combine
these machine-code files together to form a binary executable, which can then be executed. Some IDEs
(Integrated Development Engironments) will generate the steps for this automatically, for example by
selecting the Build menu item in Visual C++. Regardless of whether it is done automatically for you,
the process is composed of two phases:
1) Compiling, in which C++ code is translated into linkable machine-language modules; and
2) Linking, in which calls to functions outside the main file are linked to their definitions.
25
9
10
Lab 2.2: Create Your Own Types—Enumerations
Thus, to create the binary executable that is finally loaded into the operating system to run, all the
implementation files must be compiled as well as the main program. The resulting object-code files are
then linked together to create the binary executable.
Here is a typical sequence that can be executed manually in the Unix systems that use the gnu C++
compiler:
Step 1: Separately compile the program file nam e. cpp to produce an object file named nam e. o in
some systems. This may require using a special compiler switch, as in the gnu C++ command
g++ -c g e o lo gy .c p p
Step 2: Separately compile each library implementation file in the same manner:
g++ -c R ock.cpp
This causes the compiler to generate an object file R ock. o.
Step 3: Link the object files together into a binary executable program—for example, in gnu C++
with the command
g++ g eo lo g y .o Rock.o -o geolog y
This command causes the two object files to be combined into the executable file named
geology. This can be executed by using the command
geolo g y
or
. /g e o lo g y
(if the current directory has not been added to the PATH environment variable).
If the linking command has been given in the form
g++ g eo lo g y .o R ock.o
the default name a. o u t will used by Unix for the binary executable.
Note: The compiling and linking steps can all be done with a single command:
g++ g e o lo g y .c p p R ock.cpp -o geo lo gy
Now, compile, link, and execute your g e o lo g y . cpp program. Briefly describe its behavior below.
As a program begins to use more and more libraries, it becomes increasingly difficult to keep track of
which files are out of date and need to be recompiled and which do not. Single commands such as we have
been using illustrate how the process can be done when the number of files is small. This becomes
cumbersome, however, as the number of files increases. Most IDEs provide projects that bundle the files
together, and a single command can be used to compile them all and link them together. In Unix, one can
use make files to automate the process. The make utility executes a file named Makefile in the current
directory that contains commands that control the compilation and linking process.
26
Lab 2.2: Create Your Own Types—Enumerations
If you are using a Unix environment:
Download the M a k e file for this lab if you haven’t already done so; be sure it is in the same
directory as g e o lo g y . cpp, R ock. h, and R ock. cpp. Then give the command make. You should
see only relinking take place because the files have already been compiled.
Check here when finished
___
Now make a small change in g e o lo g y . cpp, such as adding a blank line or a space at the end of
some line, and give the make command again. This time you should see g e o lo g y . cpp being
recompiled (but not R ock. cpp because it is up to date) followed by the linking.
Check here when finished
__
_
Now make a similar small change in R o ck . h and give the make command again. This time you
should see recompilation of both g e o lo g y . cpp and R ock. cp p and then the linking. This is
because they both have been modified since they include R ock. h which was changed.
Check here when finished
___
Adding a New Operation to the R o ck Data Type
You are now going to enhance the Rock data type by adding a new operation—determining whether a
rock is igneous, metamorphic, or sedimentary. Specifically, you are to add a new function kind () to
type Rock that returns one of the strings “igneous,” “metamorphic,” or “sedimentary,” indicating the
kind of rock, given that:
• Basalt, granite, and obsidian are igneous.
• Marble, and quartzite are metamorphic.
• Dolomite, limestone, gypsum, sandstone, and shale are sedimentary.
You can use the next ( ) function as a model. Before writing the kind() function you should
consider what information it needs and what information is should return.
What information must you send to your kind () function?
What information will your k in d () function return?
Write the kind () function and add appropriate documentation to the Rock. h and Rock. cpp files.
★ Note that since this function is returning a string value, you will have to include the <string>
library in Rock. h.
Check here when finished
____
Now add a for loop in geology. cpp to test drive the kind () function by displaying the kinds of
all the rocks. Compile, link, and execute the modified program to ensure that kind () works.
Check here when finished
You have finished. Hand in the items listed on the grade sheet on the next page.
27
11
12
Lab 2.2: Create Your Own Types—Enumerations
Lab Exercise 2.2 G rade Sheet Name:
H and in:
1. This lab handout with the answers filled in
2. Attach printouts showing:
a. Listings of R ock. h and Rock. cpp
b. A listing of g e o lo g y , cpp
c. A demonstration that everything compiles and links correctly
d. A sample run of g e o lo g y . cpp
Category Points Possible Points Received
Conmletion of Lab Handout....................................
.......
(35)
Driver Program
.........................................................
............
(25)
Correctness (including following instructions)
............
20
Style/Readabil ity/Documentation
....................
.............
5
Header File
................................................................
...........
(35)
Opening Documentation
..................................
............
10
Specifications
....................................................
............
10
Style/Readability
...............................................
.............
5
Enumeration Declaration and Function Protot)rpes
.....
10
Implementation File
..................................................
...........
(30)
Correctness
........................................................
............
25
Style/Readability...............................................
.............
5
Adequate Testing of Library ..................................
...........
(15)
Total.......................................................................... .............140
28
Project 2.2 Rock Operations
Project 2.2 Rock Operations
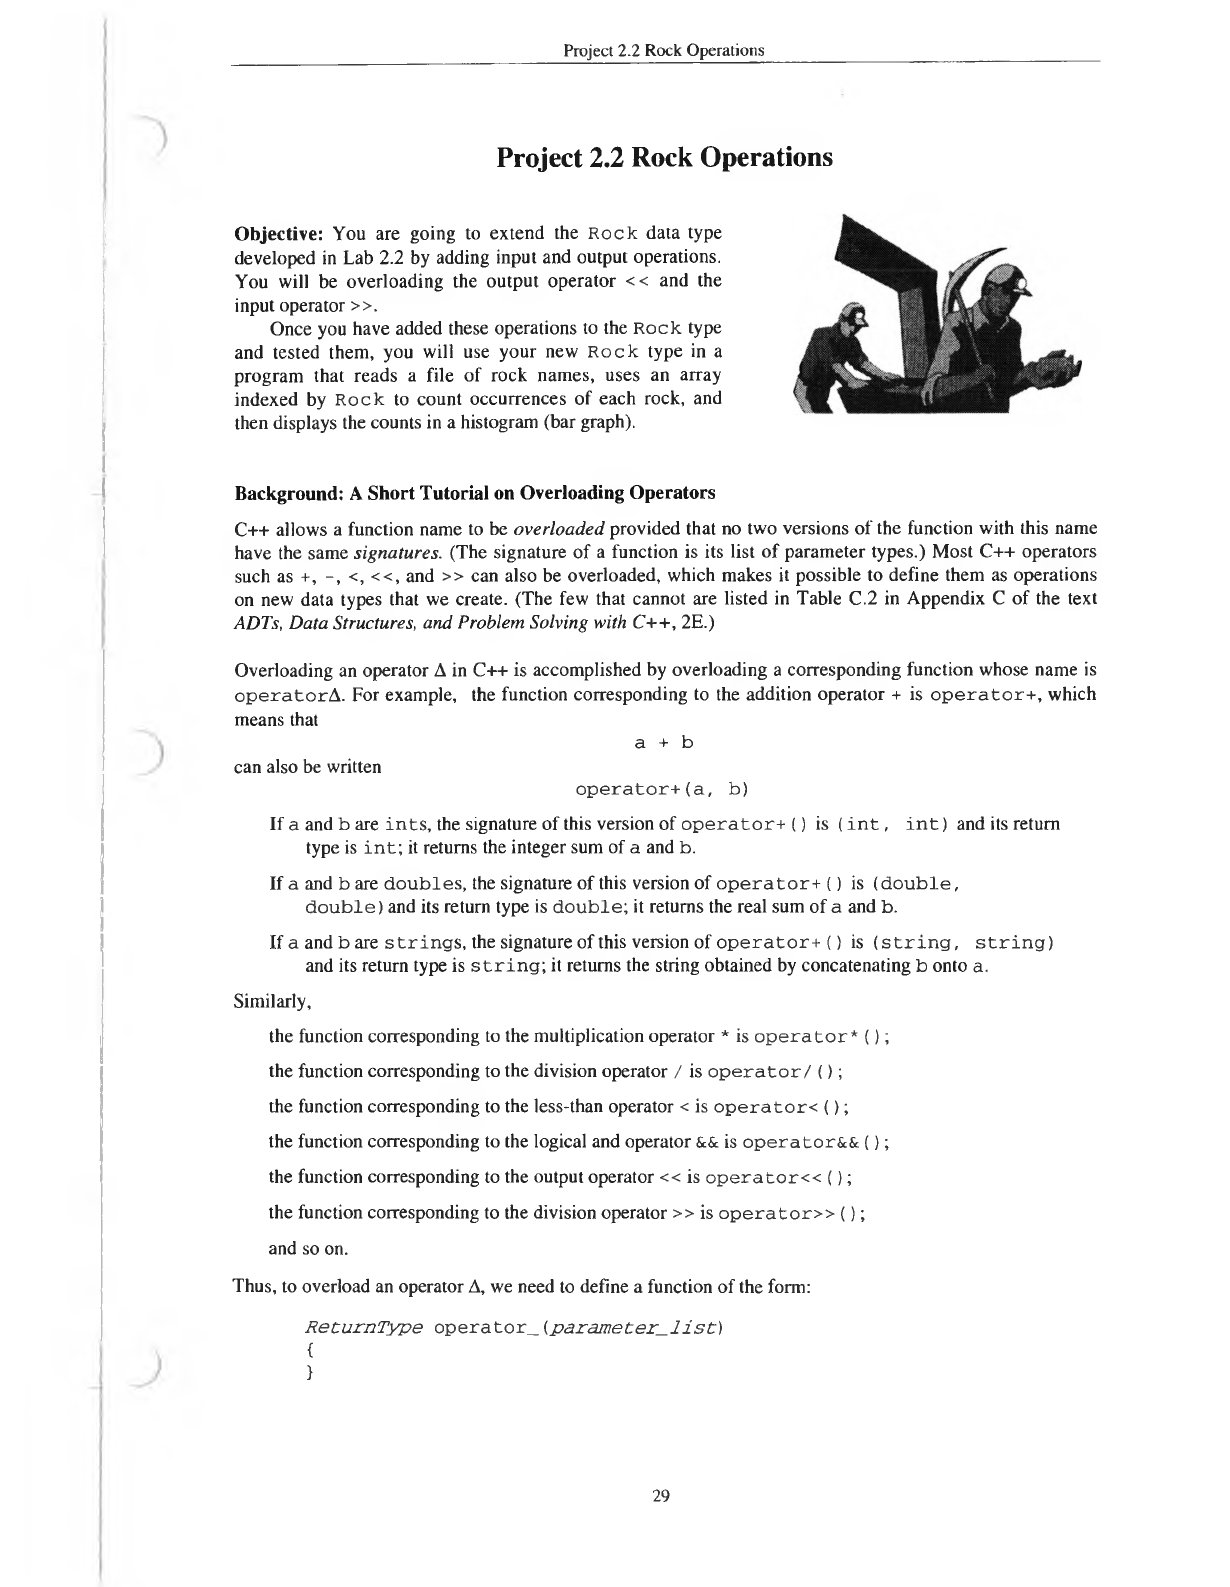
Objective: You are going to extend the Rock data type
developed in Lab 2.2 by adding input and output operations.
You will be overloading the output operator << and the
input operator >>.
Once you have added these operations to the Rock type
and tested them, you will use your new Rock type in a
program that reads a file of rock names, uses an array
indexed by Rock to count occurrences of each rock, and
then displays the counts in a histogram (bar graph).
Background: A Short Tutorial on Overloading Operators
C++ allows a function name to be overloaded provided that no two versions of the function with this name
have the same signatures. (The signature of a function is its list of parameter types.) Most C++ operators
such as +, -, <, <<, and >> can also be overloaded, which makes it possible to define them as operations
on new data types that we create. (The few that cannot are listed in Table C.2 in Appendix C of the text
ADTs, Data Structures, and Problem Solving with C++, 2E.)
Overloading an operator A in C++ is accomplished by overloading a corresponding function whose name is
o p e rato rA . For example, the function corresponding to the addition operator + is o p e ra to r + , which
means that a + b
can also be written o p e ra to r+ (a , b)
If a and b are in ts , the signature of this version of o p e r a to r+ () is (i n t , i n t ) and its return
type is in t; it returns the integer sum of a and b.
If a and b are d oubles, the signature of this version of o p e ra to r+ () is (d o u b le ,
d o u b le) and its return type is d o u ble; it returns the real sum of a and b.
If a and b are s trin g s , the signature of this version of o p e r a to r+ () is ( s tr in g , s t r i n g )
and its return type is s tr i n g ; it returns the string obtained by concatenating b onto a.
Similarly,
the function corresponding to the multiplication operator * is o p e r a to r* ();
the function corresponding to the division operator / is o p e r a to r / ();
the function corresponding to the less-than operator < is o p e ra to r< ();
the function corresponding to the logical and operator && is operator& & ();
the function corresponding to the output operator << is o p e r a to r< < ();
the function corresponding to the division operator >> is o p e r a t o r » ();
and so on.
Thus, to overload an operator A, we need to define a function of the form:
R e tu r n T yp e o p e ra to r_ (p a r a m e t e r _ l i s t )
{
}
29
Project 2.2 Rock Operations
Adding an Output Operator to Type Rock
After building the Rock type in Lab 2.2, we still have I/O problems. Displaying a value of type Rock
gives one of the integers 0, 1, 2,..., 9, which are assigned by the compiler to the Rock enumerators, instead
of the name of a rock. And to input a value of type Rock, we cannot enter the R ock’s name but rather
must enter the integer associated with it.
We will address the output problem first. We could just write a d i s p l a y ! ) function similar to the
n e x t () and k in d () functions in Lab 2.2. But if we want the output operator to work with output streams
like the standard output stream co u t for new data types like Rock in the same way that it does for built-in
data types, then we must overload the output operator <<.
As we saw earlier, we must write a function of the form
ReturnType
o p e r a t o r « (
parameter_list)
{
}
So we must figure out what to use for
ReturnType
and the
parameter_list.
We first look at the problem of determining the parameter list. From what we saw earlier, an
expression of the form
co u t << rockV al
corresponds to the function call
o p e r a t o r « (c o u t, ro c k V a l)
From this we see that the function o p e rato r< < () needs two parameters:
ReturnType
o p e r a t o r « (
_________
o u t,
__________
rock V al)
{
}
We need to determine what types to put in the blanks for the parameters. The type of rockV al clearly
is Rock,
ReturnType
o p e r a t o r « (
_________
o u t, Rock rockV al)
{
}
The type of the first parameter o u t needs to be o strea m , but in fact it must be a reference parameter so
that it refers to the same o str e a m object as—i.e., is an alias for—the corresponding argument (cout).
This is because when we output something to o ut, we want it to actually go to c o u t—if o u t were a
value parameter instead, it would be a copy of c o u t (which may, in fact, cause an error). So. to output a
Rock value, we need the signature (o stre am &, R ock); thus the function becomes
ReturnType
o p e r a t o r « (ostream & o u t, Rock rockV al)
{
}
We still need to determine what the return type should be. Since the left-hand side of an output expression
is an output stream variable, the function must return a variable of that type if we want to chain expressions
together such as
co u t << rock V al « " " « ano therR ock << en d l;
Moreover it needs to be a reference variable. Why? Because an output stream is an object and we don’t
want a copy returned but rather the object itself. Thus we need to return a reference to the output stream.
30
Project 2.2 Rock Operations
With this information we now know what the form of an overloaded output operator for our Rock type
should be:
ostream & operator<<(ostream & out, Rock rockVal)
{// statements to output to output stream out a text representation
//of the Rock datatype value rockVal passed as an argument
return out;
}
Now, all that remains is to write the statements that output a text representation of rockVal. When a
Rock value is used in an output statement like
cout « rockVal « endl; //rockVal being of type Rock
we want the output to be BASALT when the rockVal is BASALT and SHALE when the rockVal is
SHALE, and so on. To accomplish this, we need a Rock-to-string converter that will display the text string
that corresponds to a Rock value.
g te p jj A s w itc h statement is ideal for this kind of task. Its cases perform the Rock-to-string
conversions; for example,
case BASALT: out « "BASALT";
(Remember to put break statements after each case so execution doesn’t “fall through” from one case
to the next.)
Add a prototype for this new function along with appropriate documentation to your R ock .h header
file and the definition to your R ock.cp p file. Then modify the g e o lo g y , cpp program to test the
newly overloaded operators.
Recompile, link, and execute the program, entering the numeric codes of the rocks—you haven’t
implemented an input operator » yet—and observe the output produced.
Check to see whether the correct rock names were displayed.
Adding an Inp u t O p erator to T ype Rock
Now that you’ve seen how to overload the output (insertion) operator <<, you should be able to do the
input operator. You are to write it so it will accept any combination of upper- and lower-case letters
spelling out its particular enumeration, e.g., Basalt, BASALT, BasAlt, and so on. To accomplish this you
might need to use some of the string functions, such as the functions is lo w e r () and to u p p e r () from
< ccty p e> , to convert the individual characters in the input string to all upper case in a loop of the form
for (int i = 0; i < s tr .length(); i++)
if (islower(str[i]))
str[i] = toupper(str[i]);
Step 2: Write your new overloaded input (extraction) function so that it properly handles statements like
cin >> sample; //where sample is of type Rock
and will assign, for example, BASALT to sample if the user enters BASALT, basalt, Basalt,....
You have to be careful here, because the word BASALT can be either a string or a Rock value
depending on the context. Give some thought to how you will accomplish this.
31
Project 2.2 Rock Operations
By analogy with the output prototype , your input operator prototype will look like:
is tre a m & o p e r a t o r> > ( is tr e a m & i n , Rock & ro c k V a l);
Notice that we are using a reference variable for the R ock to be input. (What would happen if we
didn’t and omitted the & ?)
Add this prototype along with appropriate documentation to R o c k .h and add its definition to
R ock. cpp. (Remember: Strings cannot be used in s w itc h statements as c a s e values.)
When you have completed writing your overloaded input operator, adding it to R ock .h and
Rock, cpp, you will want to change the g e o lo g y . cpp program by removing the patch you used in
Lab 2.2— i n t tem p; c i n » tem p ; sam ple = R o c k (tem p) ; —and restoring the original
statement c in > > sampl e ;.
Now recompile, link, and execute this latest version of the program. Take it for a test run. How did it
do? If you have any problems, correct them and get it to run properly.
Application o f your R o ck c la s s
Now that you have a tested Rock class with quite a few capabilities, it’s time to use it in an application: a
bar-graph generator that will display the number of times each kind of rock appeares in a given data file.
Program Requirements
Write a program that uses your newly developed Rock type. You will run the program with the data file
Rockfile.txt that contains a random collection of names of rocks.
The program you write should do the following:
1. Declare an integer array count [ ] with all of its elements initialized to 0.
2. Read Rock values from the file RockFile.txt and for each rock, increment the appropriate element
of count [ ] by 1; for example, if Basalt is read, then count [BASALT] should be incremented by 1.
[Note that Rock values can be used as indices because each is associated with a nonnegative integer.]
3. Display the elements of count [ ] as a histogram (bar graph) something like the following:
BASALT XXXXXXXXXXXXXXX (15)
DOLOMITE XXXXX (5)
GRANITE XXXXXXXXXXXX (12)
GYPSUM XXX (3)
LIMESTONE XXXXXXXXXXXXXXXXXXXXXXXXXX (26)
MARBLE XXXXXXXXXXXXXX (14)
OBSIDIAN XXXXXXX (7)
QUARTZITE (0)
SANDSTONE XX (2)
SHALE X (1)
where the length of each bar (the number of X’s) and the number in parentheses indicate the number of
times that rock was found in the file.
32

Project 2.2 Rock Operations
Course Info: Name:
Project 2.2 Grade Sheet
Hand in printouts that contain the following items or additional items specified by your instructor:
1. Listings of R o ck . h and R ock. cpp
2. A listing of the program you used to test the library
3. A demonstration that your program and library compiled and linked correctly
4. A sample run of the driver program that thoroughly exercises all of your Rock operations and
demonstrates that they work correctly
Attach this grade sheet to vour printouts.
Cateeorv Points Possible Points Received
Finishine the Rock Date Twe:
Header File...............................................................
............
(20)
Opening Documentation..................................
..............
5
Function Prototypes and Specifications
..........
............
10
Style/Readability...............................................
..............
5
Implementation File
.................................................
............
(40)
Correctness of Function Definitions
...............
............
30
Structure of Function Definitions
...................
.............
5
Style/Readability...............................................
..............
5
Testing......................................................................
............
(30)
Driver Program..................................................
.............
15
Adequate Testing of Library
...........................
.............
15
S u b to ta l...................................................................
.............
90
Application:
Correctness (including following instructions)
.....
............
50
Structure ................................................................
..............
5
Style and Documentation .......................................
..............
5
S u b to ta l....................................................................
.............
60
T o ta l..........................................................................
............
150
33