Manual
Manual
User Manual:
Open the PDF directly: View PDF ![]() .
.
Page Count: 16

Manual: How to Produce a Theory on Demand
Contents
1. Introduction ................................................................................................................................................... 1
2. Prepare Your Desktop ................................................................................................................................ 1
3. Prepare Manuscript .................................................................................................................................... 2
4. Prepare Repository ..................................................................................................................................... 3
5. Make EPUB ..................................................................................................................................................... 6
6. Make PDF ...................................................................................................................................................... 10
7. Publish the Book Online .......................................................................................................................... 14

1
1. Introduction
This manual shows you, step by step, how to create a theory on demand.
For more information about the workflow and creating output for print files, visit the
PublishingLab site.
The Hybrid Publishing Toolkit method builds on chapter 6 of the Hybrid Publishing Toolkit
book, it relies on a makefile and using the command line.
2. Prepare Your Desktop
Step 2.1 Install all requirements
Before you begin you will need to install:
• text processor (Microsoft Office or Openoffice);
• GitHub Desktop (for working collaboratively);
• markdown editor like MacDown and XCode for Mac or MarkdownPad for Windows (to
edit your sourcefiles);
• plain-text editor (like Sublime Text or Gedit);
• Adobe InDesign;
• Calibre (to view/edit ebooks);
• Pandoc (you can install Pandoc with Homebrew);
• git (for Mac git is included in Xcode, for Windows see here;
• you will need to familiarise yourself with the command line (terminal on Mac or go to
the Start menu on Windows and type cmd into search/run – more here).
Step 2.2 Login to your GitHub Desktop
Make sure you login your Github desktop:
user:
pass:

2
3. Prepare Manuscript
Step 3.1 Styling the Manuscript Inside Word
For this step, please refer to the test.docx document in in the folder docx of your Manual folder.
• Prepare your text document according to the INC style guide.
• Assign the title, headlines, the bodytext, and the blockquotes accordingly so that the
structure will appear later on in your markdown-file. For this, refer to the template
options offered by Word in the Styles Panel.
Step 3.2 Saving your Documents
• Divide your document according to its parts. Avoid any special characters in the titles
and number them properly: 01colophon, 02introduction, 03chapter1 etc.
• IMPORTANT: please make sure that you save your word files as .docx.
3
4. Prepare Repository
Step 4.1 Get Your Git on
Go to https://github.com/ and login:
user:
pass:
• Create a new repository according to the title of your book. Please include number and
title of the book, for instance TOD23kaos;
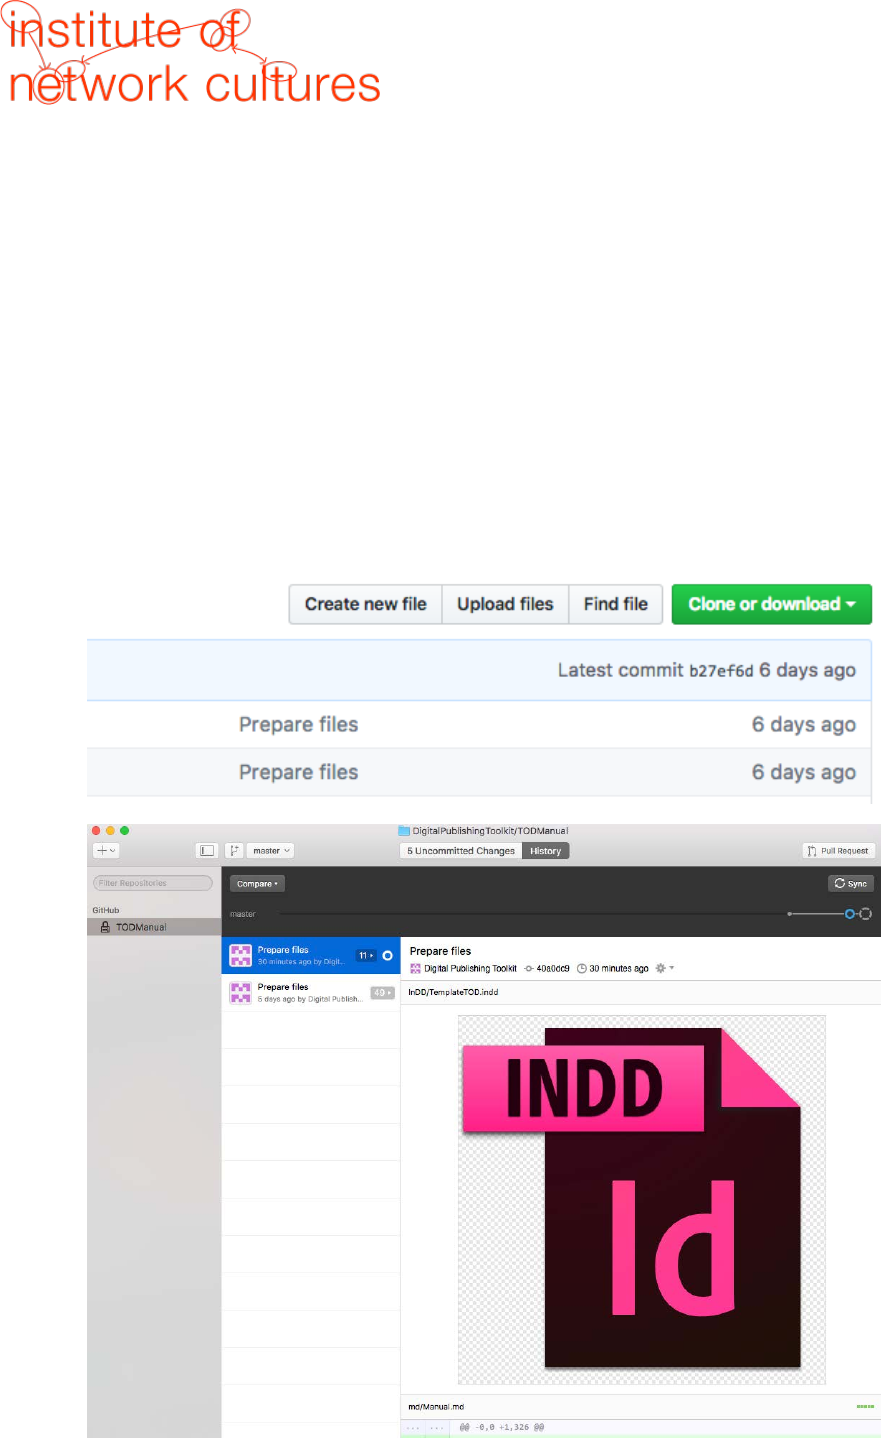
• Clone the repository to your Github desktop (click "Clone or download", then "Open in
Desktop");
4
Step 4.2 Prepare folder // commit to master
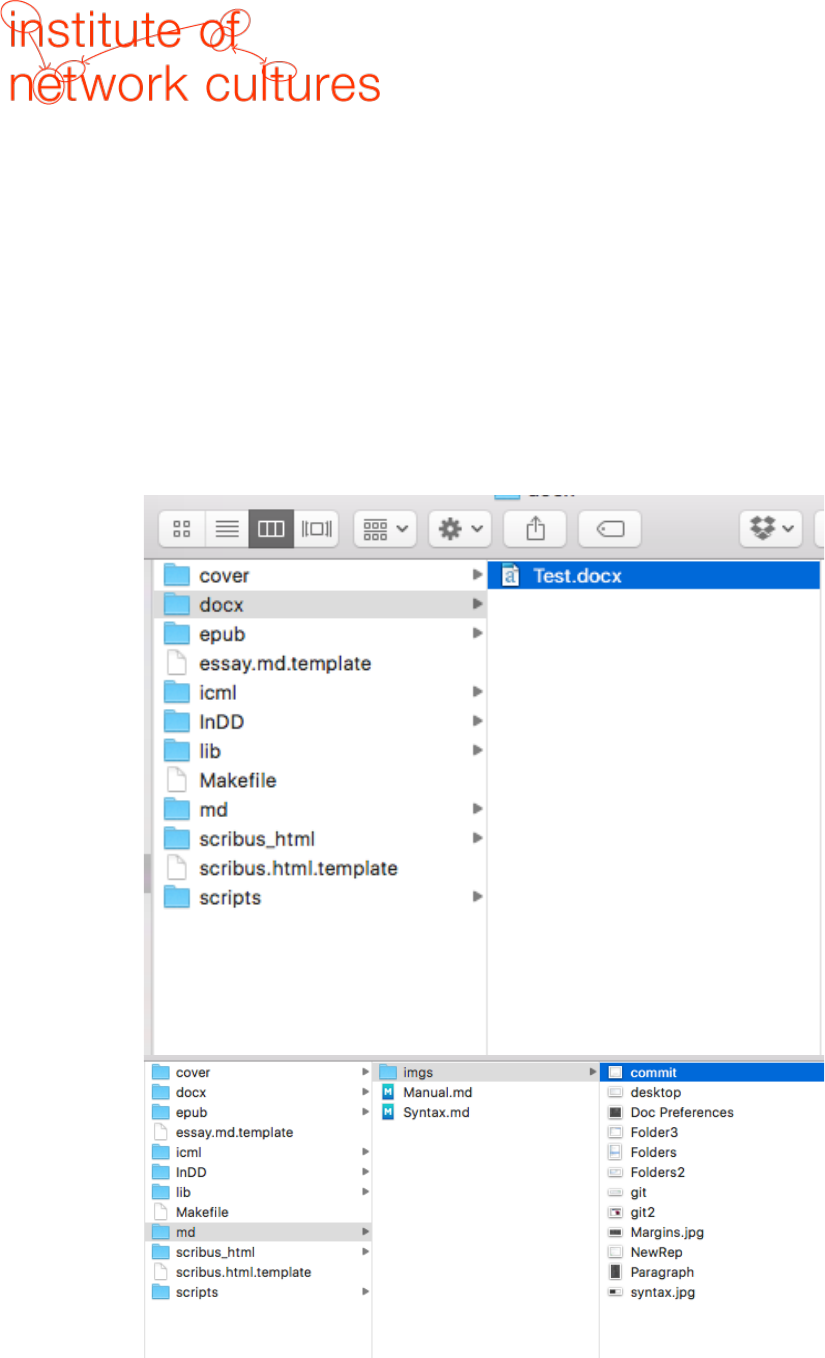
Copy folders from this repository (TODManual) to your own theory on demand repository:
• Make sure you copy all folders and make files.
• Make sure your manuscript(s) are saved as .docx files and move them to the .docx
folder, replacing the Test-chapter.docx file.
• Avoid any special characters in the title and number them properly: 01colophone,
02introduction, 03chapter1 etc.
• Copy all your images in the imgs folder of your md folder.
5
Avoiding Errors
• make sure there are no spaces or unusual characters (like %) in file names
• make sure you work with .docx files not .doc
• put any images (.jpg or .png) in the ‘imgs’ folder inside the markdown folder except the
cover
• the cover.jpg image belongs in the epub folder
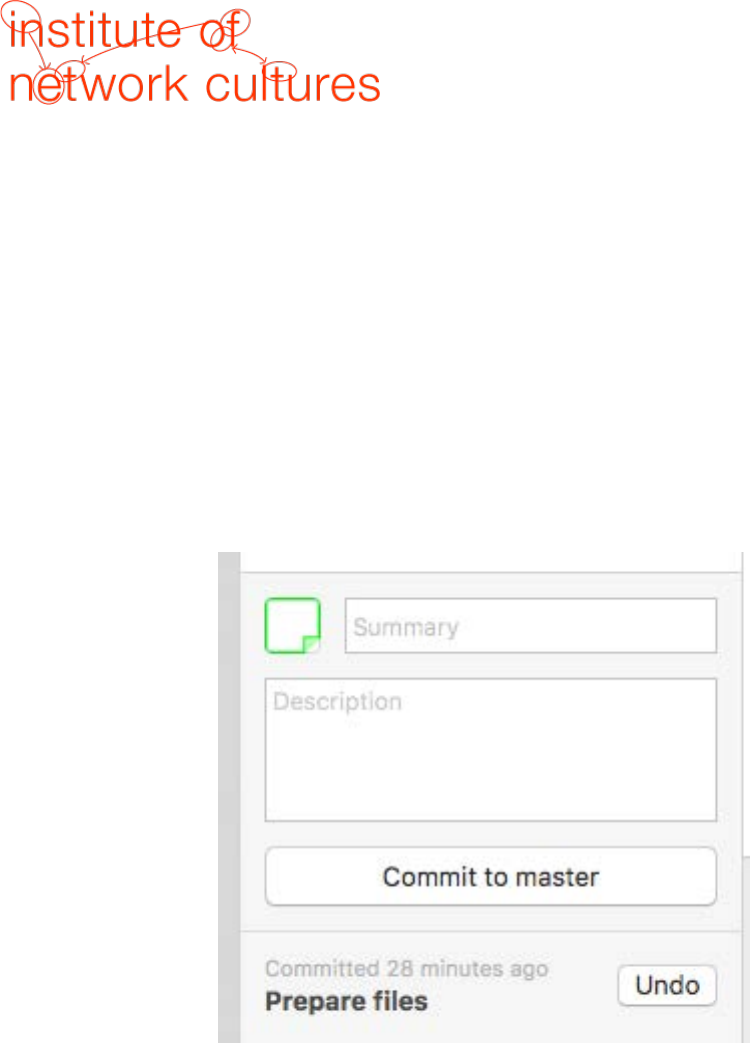
MAKE SURE YOU UPLOAD ALL CHANGES TO THE REPOSITORY ON GITHUB.ORG BY CLICKING
'COMMIT TO MASTER' AND 'SYNC' IN THE GITHUB DESKTOP
6
5. Make EPUB
Step 5.1 Convert the .docx to a Markdown Plain-text File
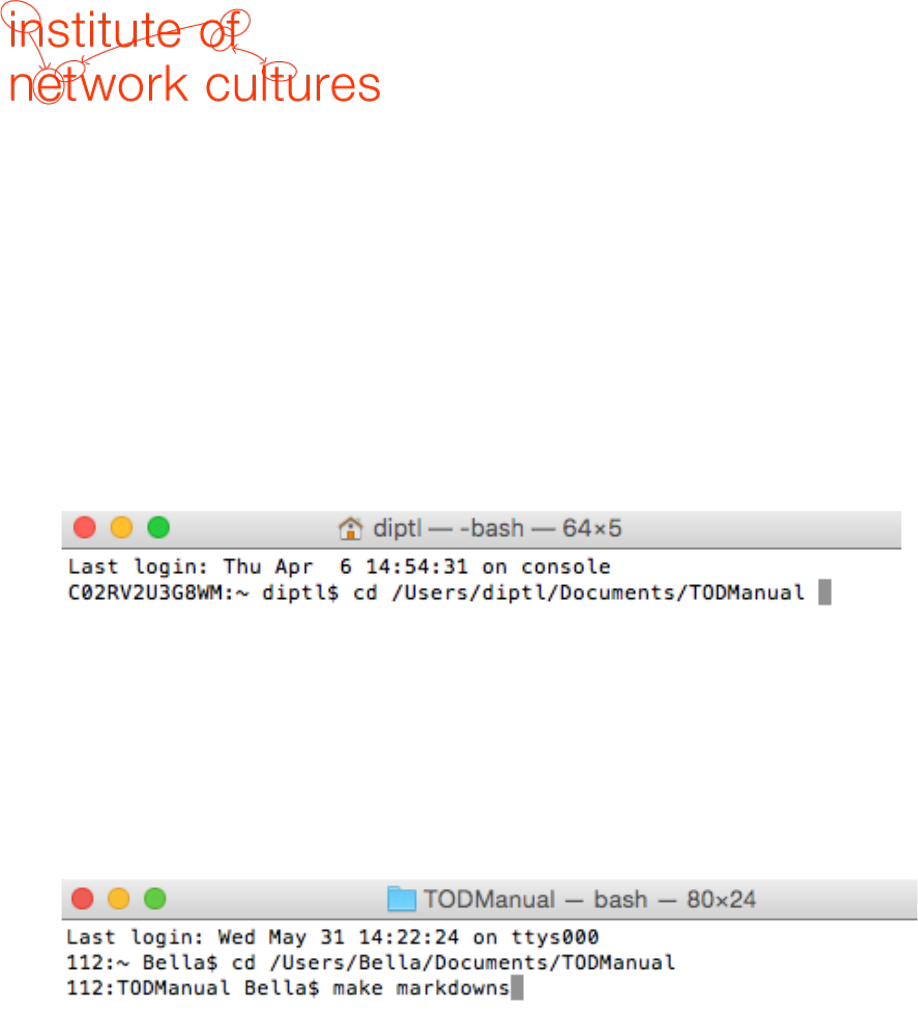
• Use the command line to navigate to your resources folder. You will need some
knowledge of using the command line, you can find help with this here. You can
navigate to that specific folder by typing cd, and then dragging and dropping to the
terminal the specific folder.
cd pathofyourfolder
• After navigating to the right folder, create the source file(s) for your ebook by typing in
"make markdowns", then press enter:
make markdowns
You will find the markdown files you created in the md-folder. From now on the Markdown
will be the working document, therefore all the changes you would like to make concerning
to the content, you should do in the markdown file.
7
Step 5.2 Edit you .md file(s)
Make sure you check the .md file(s) for any errors or glitches:
• fill out the metadata at the beginning of your .md file(s). Check with the editor if you
have the right metadata information, including the ISBN number. Here's more
information about metadata.
• make sure every H1, H2, footnote, blockquote etc. is converted correctly
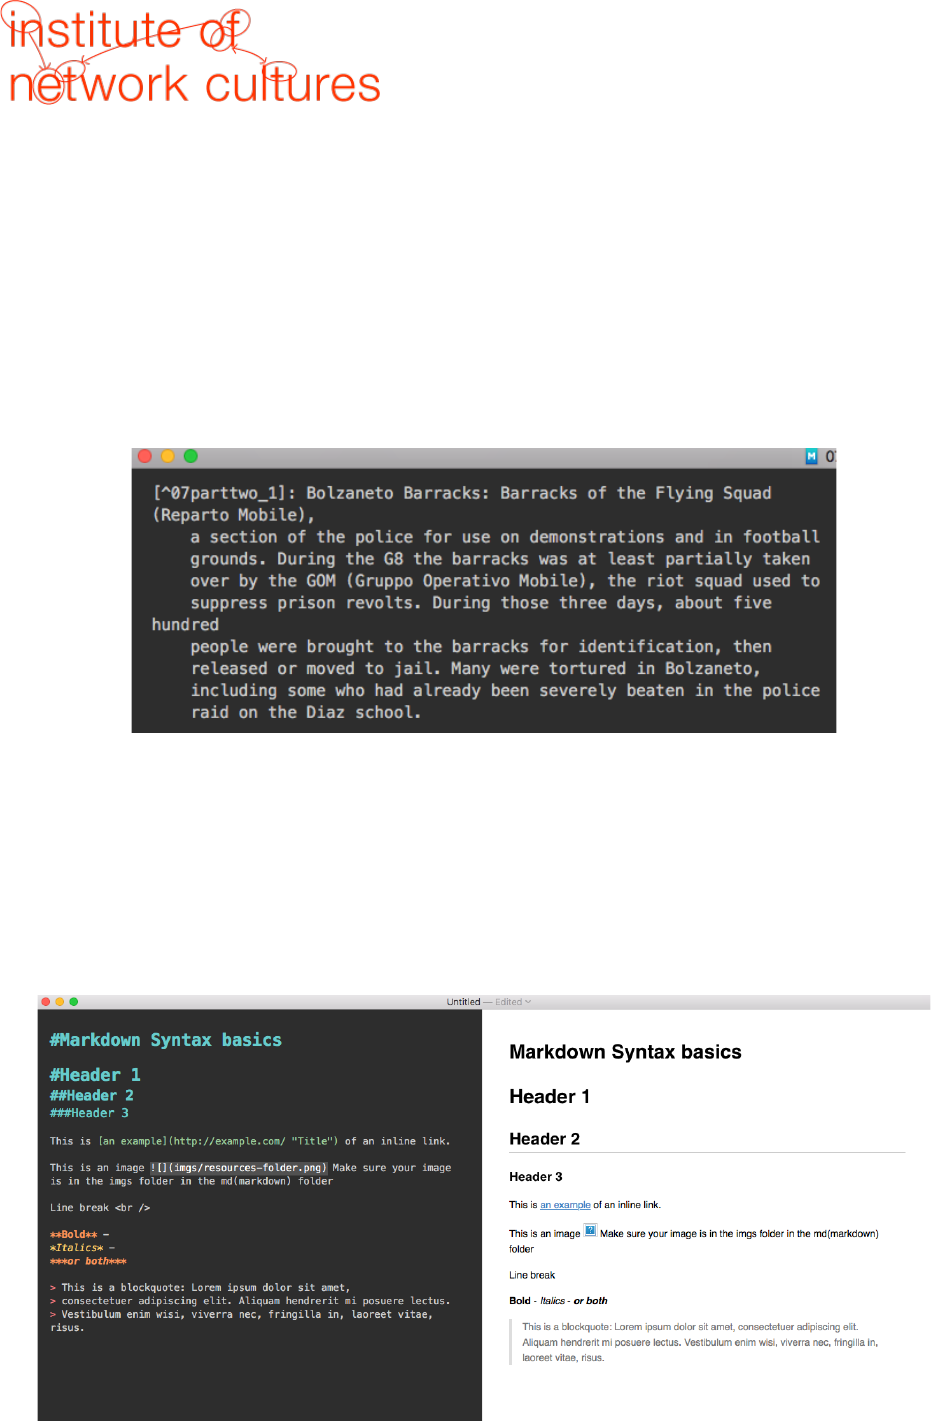
• footnotes appear at the end of you .md file(s) and look like this:
• make sure you add your images manually to the .md file(s) by using the syntax:

• make sure you name you cover image cover.jpg, and add it to the epub folder
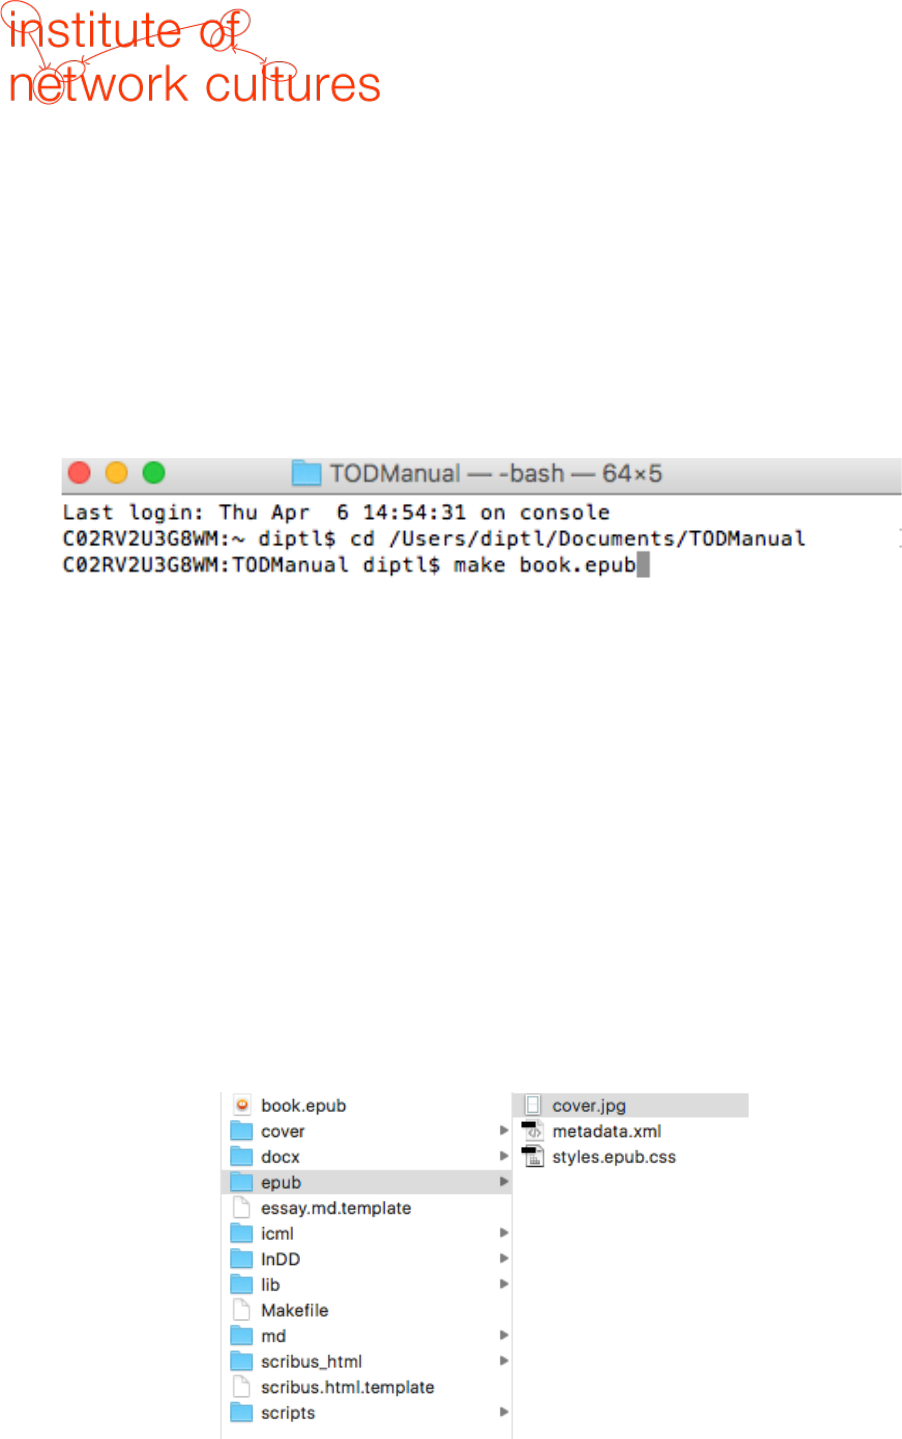
Most Used Syntaxes
In the image you can see the most used syntaxes. For more examples see here.
8
Step 5.3 Convert to EPUB
Now that you have your markdown file(s), you can create an EPUB:
• open the terminal, navigate to your resources folder as you did in 4.1
cd (with a space at end) pathofyourfolder
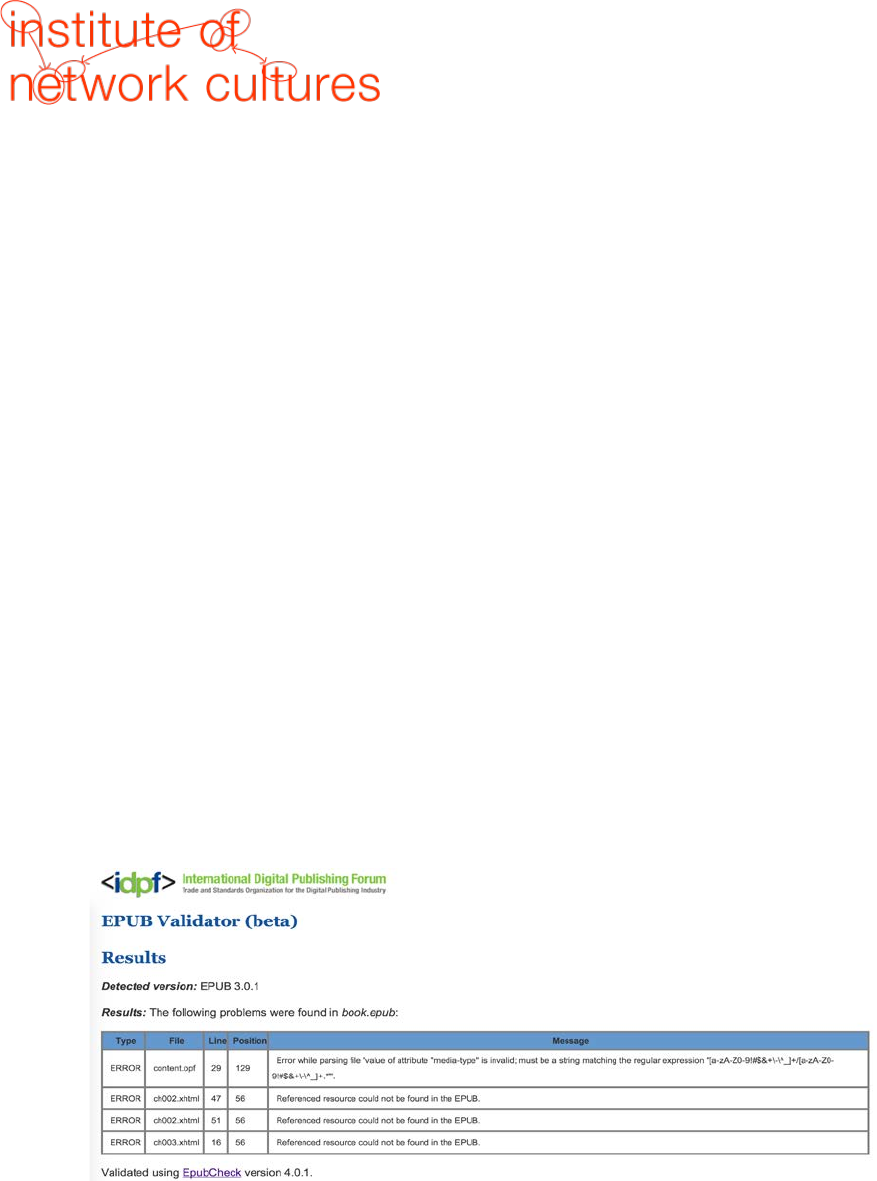
• then, type in "make book.epub" in your command line and press enter:
make book.epub
• Check the resources folder to see your book.epub file, which you can open with Calibre
or iBooks.
• If you get an error message, there is a useful resource section here to help you.
Step 5.4 Design Your EPUB
A successful EPUB has been visually styled (with css and a cover), correctly classified (with
metadata), and validated. The epub folder typically has 3 important components:
• the cover image (jpg)
• the metadata file
• the stylesheet
9
The look of your book is controlled by the styles that you can find in the stylesheet. You can
get color values and typeface suggestions from the print designer. Make sure you embed the
fonts you use by including them in the make file and in the lib folder. Here’s more
information about type in EPUBs.
If you want to change fonts and colors etc. within the epub you need to do this in the
styles.epub.css.
If you are having a problem with your table of contents in the EPUB, try to comment out the
following line of your style sheet:
page-break-before: always;
so that it looks like this:
/*page-break-before: always;*/
Step 5.5 Validating Your EPUB file
Last, but not least, the developer needs to validate EPUB to make sure there are no errors
that will cause it to be rejected from a retailer or not open correctly for readers:
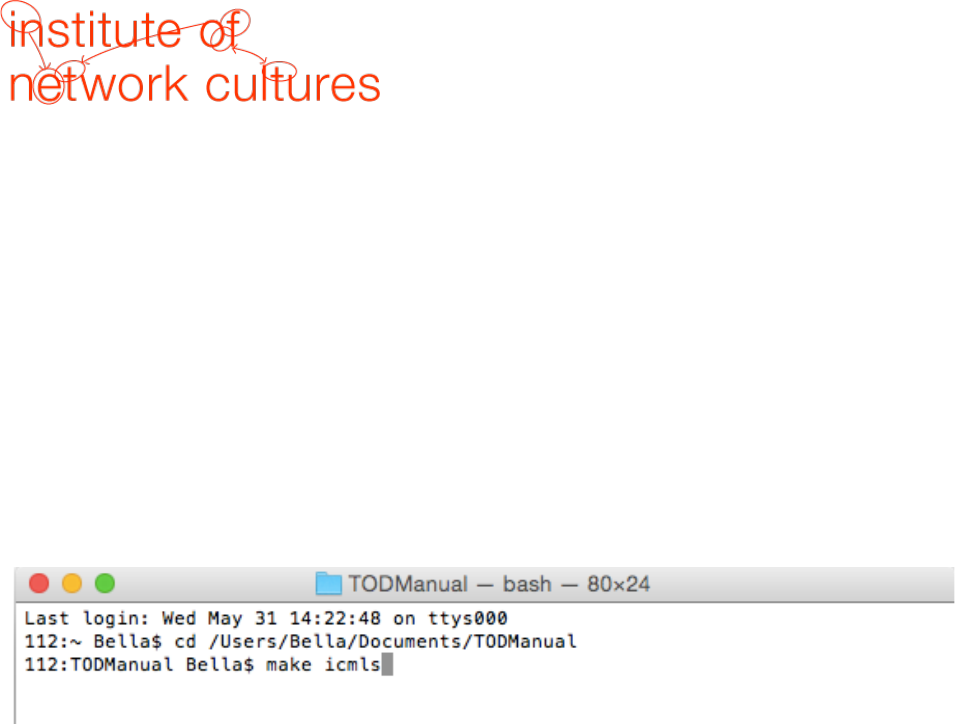
• You can use the online validator for smaller EPUBs (under 10MB). The validator will
show you where the errors are in your book. See the example below:
• The error occurs in chapter ch002.xhtml, line 47, there’s an explanation that a
‘referenced resource is missing’, but it helps a lot to edit the book in Calibre and further
diagnose that in this case an image is missing.
MAKE SURE YOU UPLOAD ALL CHANGES TO THE REPOSITORY ON GITHUB.ORG BY CLICKING
'COMMIT TO MASTER' AND 'SYNC' IN THE GITHUB DESKTOP
10
6. Make PDF
Step 6.1 Create icmls
• open the terminal and navigate to your resources folder as you did in 4.1
cd (with a space at end) pathofyourfolder
• Use the command line to convert your md files to icml files by typing:
make icmls
Press enter. You can then find the icmls in the icml folder.
Step 6.2 Load icmls in InDesign
• Copy the TemplateTOD.indd file in the InDD folder. Copy the template file for each of
your icml-files. Rename the files and make sure you do not use any special characters:
01colophone
02acknowledgments
03introduction
04chapter1
• Open the first template and make sure that you activate the already existing text
frames in the template. For this, press CTRL + SHIFT and click on the text frame you
would like to activate. You will need to repeat this for every page.
• Now, you can place the icml file you would like to start with into the document by
either using CTRL + D, or by clicking
File > Place
• Before you are able to edit/design the text in InDesign make sure you check out:
Edit > Incopy > Check Out
11
• Remember to also update the master page, where you can insert the title of your book
into the header. At this point, you do not need to worry about the page numbers. They
will update when you will merge all the files together in the end.
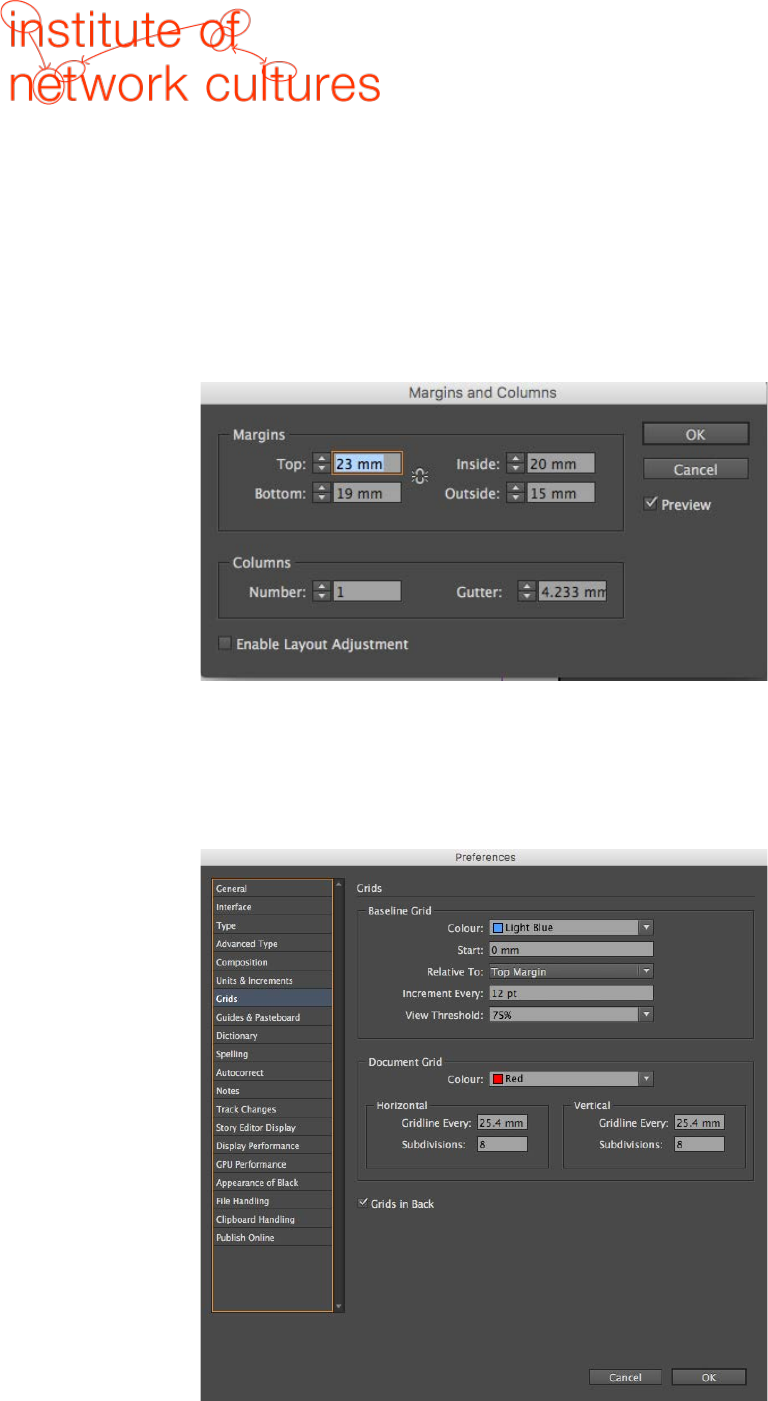
• Also, check if the margins and document presets equal with what you can see in the
following figure:
• In the Document Preferences you can adjust your baseline grid. You can see the
necessary settings in the following figure. Please make sure that it matches with what
you can see in your template.
12
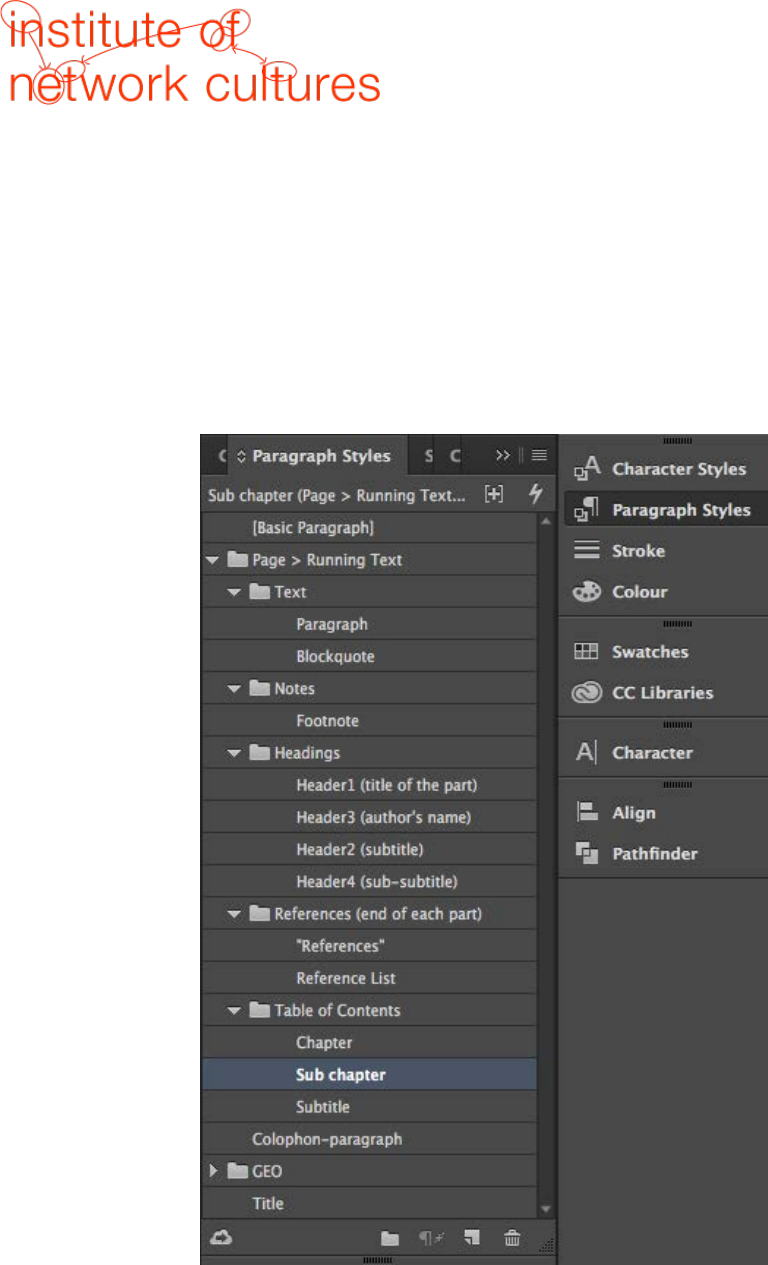
Step 6.3 Design your book
• Assign the different text components (headings, paragraph, footnotes) to the different
paragraph styles that you can find in the template.
– H1, H2, H3, titles use Lato font
– Body text use Trade Gothic Light
• Make sure that no font is missing – if so, please install the missing fonts. You can find
them in the folder “lib” in your Manual.
13
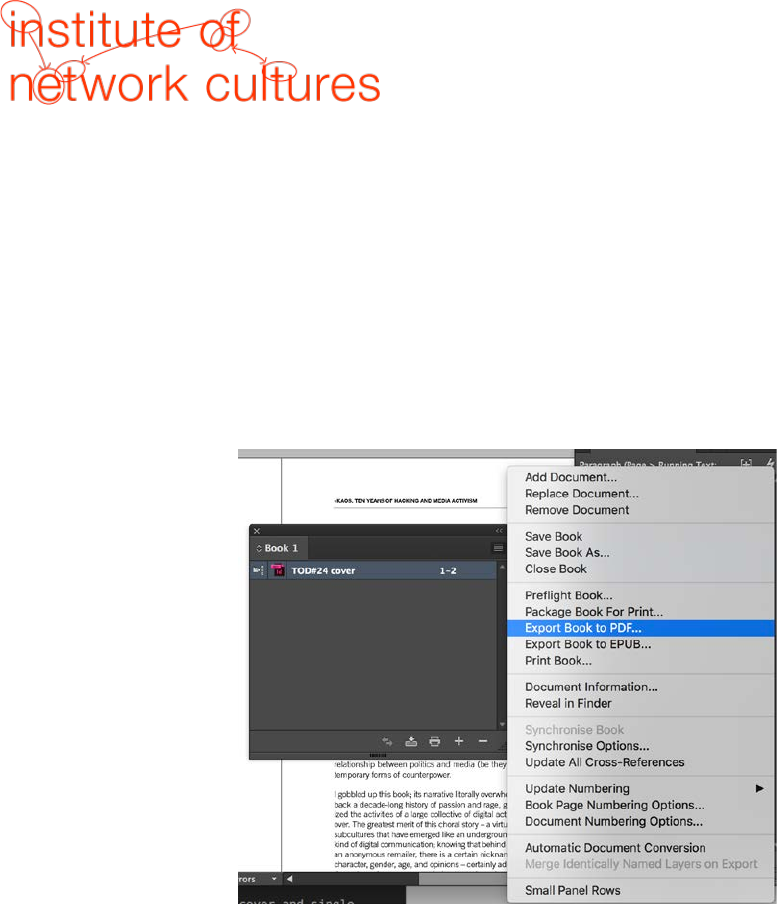
Step 6.4 Export Your Book
• To export the entire book make use of the book function. Go to:
File > New > Book
Define a name and the location: the InDD folder.
• Click on '+' to add all chapters of the book. All page numbers should update
automatically.
• Click on the right upper button and Export Book to PDF in pages:
Step 6.5 Design Your Cover
You will receive a designed cover. What you will need to do is to add:
• the title
• the number of the publication
• the blurb on the backcover
• the ISBN
Later, for the upload for LULU, you will also need to add a spine. For this, please refer to the
cover template in the folder “cover”. Please make sure that the page size is matching the
requirements on LULU. Take also care that the backcover is the first page, the spine is the
second page and the frontpage is the third page.
MAKE SURE YOU UPLOAD ALL CHANGES TO THE REPOSITORY ON GITHUB.ORG BY CLICKING
'COMMIT TO MASTER' AND 'SYNC' IN THE GITHUB DESKTOP

14
7. Publish the Book Online
Step 7.1 Issuu
• On Issuu the publication should be set with the cover and single pages in one single
PDF
• After the cover follows a white page
• In the case the cover is in a different file, use Adobe Acrobat to merge the PDF
Go to http://issuu.com/login? and login as INC:
user:
pass:
Click on upload: Upload your PDF and fill out the form:
• replace the automatically added title;
• add description (take this from the back cover text);
• add date;
• click Allow download and leave the visibility on Public;
• and then Publish!
Now you should be able to see your publication in http://issuu.com/home/publications.
Step 7.2 LULU
In this case we will need two PDFs:
• For the inside, we need a single PDF with single pages, without cover
• Spreadsheet for the cover (with spine)
Go to http://www.lulu.com/
user:
pass:
• Click on Creëren / Create and choose “Print book”. On the next page choose
“Premium pocketbook”, then scroll down and choose on the left “White Page”, and
on the right “Royal” as the format and end by clicking “Dit boek maken” in the orange
arrow.
• Fill in your Title and Author(s) and leave the first options (Lulu, Amazon, Barnes and
Nobles) selected.
• Add the ISBN to the publication, “don’t add the barcode”.
• Click on Choose File and select your inside PDF, then click on “Upload”.
• Click on “Make PrintReady File”.

15
• Click on “advanced onepiece cover designer”. You will be prompted with all the
necessary specs to create the PDF cover, including the measurements for the cover in
total as well as the measurements of the spine. You can design it using Adobe InDesign
by using the template that you can find in the cover folder.
• Choose your file and upload it, click “Save and Continue”.
• Fill the form with the requested info Click “Save and Continue”.
• Set the price as the minimum suggested by the platform and click on review project.
• Finally review your project and then click on “Save and Finish”. If you click on the blue
title you should see your book for sale on Lulu
Step 7.3 Upload on INC page
Embed the book on http://networkcultures.org/. In this last part we will create the page for
the publication on the INC blog.
Login to http://networkcultures.org/
• Go over Publications and click on Add New; fill the form with title of the book
• Go to the Issuu page relative to the publication and copy the URL
• Paste the url at the top of the content box according to the series, check the correct
category. It should look like this:
[embed]http://issuu.com/instituteofnetworkcultures/docs/issuethelistserves
kwerbin?e=3130431/44189048[/embed]
<a class="pwk-link" style="float: left;margin-right: 15px" href="http://ne
tworkcultures.org/wp-content/uploads/2017/02/KennethWerbinTheListServes22.
pdf"><img class="alignnone wp-image-4032 size-full" src="http://networkcul
tures.org/wp-content/uploads/2014/04/inc_icon_pdf_@2x.png" alt="inc_icon_p
df_@2x" width="42" height="42" /></a><a class="pwk-link" style="float: lef
t;margin-right: 15px" href="http://issuu.com/instituteofnetworkcultures/do
cs/playfulmappinginthedigitalageissue?e=3130431/41821881"><img class="alig
nnone size-full wp-image-4031" src="http://networkcultures.org/wp-content/
uploads/2014/04/inc_icon_issuu_@2x.png" alt="inc_icon_issuu_@2x" width="42
" height="42" /></a> <a class="pwk-link" href="http://www.lulu.com/shop/ke
nneth-c-werbin/the-list-serves/paperback/product-23062384.html" target="_b
lank"><img class="alignnone wp-image-4057" src="http://networkcultures.org
/wp-content/uploads/2014/04/inc_icon_lulu_@2x.png" alt="inc_icon_lulu_@2x"
width="42" height="42" /></a><a class="pwk-link" style="clear: both;margin
-right: 15px" href="http://networkcultures.org/_uploads/TheListServes.epub
" target="_blank"><img class="alignnone wp-image-4033 size-full" src="http
://networkcultures.org/wp-content/uploads/2014/04/inc_icon_epub_@2x.png" a
lt="inc_icon_scribd_@2x" width="42" height="42" /></a>
• Add a (small) cover image
• Add colophon info to the Info box
• Don’t add a link in the download area
• Click on Publish, you should finally see you publication:
http://networkcultures.org/publications/
