Maven: The Definitive Guide Maven
Maven_The_Definitive_Guide
Maven_The_Definitive_Guide
Maven%20(The%20Definitive%20Guide)%20-%20Sonatype%20-%20O'Reilly
Maven_The_Definitive_Guide
Maven_The_Definitive_Guide
User Manual:
Open the PDF directly: View PDF ![]() .
.
Page Count: 470 [warning: Documents this large are best viewed by clicking the View PDF Link!]
- Table of Contents
- Preface
- Part I. Introduction
- Part II. Maven by Example
- Chapter 3. A Simple Maven Project
- Chapter 4. Customizing a Maven Project
- Introduction
- Defining the Simple Weather Project
- Creating the Simple Weather Project
- Customize Project Information
- Add New Dependencies
- Simple Weather Source Code
- Add Resources
- Running the Simple Weather Program
- Writing Unit Tests
- Adding Test-Scoped Dependencies
- Adding Unit Test Resources
- Executing Unit Tests
- Building a Packaged Command-Line Application
- Chapter 5. A Simple Web Application
- Chapter 6. A Multimodule Project
- Chapter 7. Multimodule Enterprise Project
- Part III. Maven Reference
- Chapter 8. Optimizing and Refactoring POMs
- Chapter 9. The Project Object Model
- Chapter 10. The Build Lifecycle
- Chapter 11. Build Profiles
- Chapter 12. Maven Assemblies
- Introduction
- Assembly Basics
- Overview of the Assembly Descriptor
- The Assembly Descriptor
- Controlling the Contents of an Assembly
- Files Section
- fileSets Section
- Default Exclusion Patterns for fileSets
- dependencySets Section
- Customizing dependency output location
- Interpolation of properties in dependency output location
- Including and excluding dependencies by scope
- Fine-tuning: dependency includes and excludes
- Transitive dependencies, project attachments, and project artifacts
- Advanced unpacking options
- Summarizing dependency sets
- moduleSets Sections
- Repositories Section
- Managing the Assembly’s Root Directory
- componentDescriptors and containerDescriptorHandlers
- Best Practices
- Summary
- Chapter 13. Properties and Resource Filtering
- Chapter 14. Maven and Eclipse: m2eclipse
- Introduction
- m2eclipse
- Installing the m2eclipse Plugin
- Enabling the Maven Console
- Creating a Maven Project
- Create a Maven POM File
- Importing Maven Projects
- Running Maven Builds
- Working with Maven Projects
- Working with Maven Repositories
- Using the Form-Based POM Editor
- Analyzing Project Dependencies in m2eclipse
- Maven Preferences
- Summary
- Chapter 15. Site Generation
- Chapter 16. Repository Manager
- Chapter 17. Writing Plugins
- Chapter 18. Writing Plugins in Alternative Languages
- Part IV. Appendixes
- Index

Maven: The Definitive Guide

Maven: The Definitive Guide
Sonatype
Beijing
•
Cambridge
•
Farnham
•
Köln
•
Sebastopol
•
Taipei
•
Tokyo
Maven: The Definitive Guide
by Sonatype
Copyright © 2008 Sonatype. All rights reserved.
Printed in the United States of America.
Published by O’Reilly Media, Inc., 1005 Gravenstein Highway North, Sebastopol, CA 95472.
O’Reilly books may be purchased for educational, business, or sales promotional use. Online editions
are also available for most titles (http://safari.oreilly.com). For more information, contact our corporate/
institutional sales department: 800-998-9938 or corporate@oreilly.com.
Editor: Mike Loukides
Production Editor: Sarah Schneider
Production Services: Appingo, Inc.
Cover Designer: Karen Montgomery
Interior Designer: David Futato
Illustrator: Robert Romano
Printing History:
August 2008: First Edition.
O’Reilly and the O’Reilly logo are registered trademarks of O’Reilly Media, Inc. Maven: The Definitive
Guide, the image of a giant anteater, and related trade dress are trademarks of O’Reilly Media, Inc.
Many of the designations used by manufacturers and sellers to distinguish their products are claimed as
trademarks. Where those designations appear in this book, and O’Reilly Media, Inc. was aware of a
trademark claim, the designations have been printed in caps or initial caps.
While every precaution has been taken in the preparation of this book, the publisher and authors assume
no responsibility for errors or omissions, or for damages resulting from the use of the information con-
tained herein.
ISBN: 978-0-596-51733-5
[C] [9/09]
1252360668

Table of Contents
Preface . .................................................................... xi
Part I. Introduction
1. Introducing Apache Maven ................................................ 3
Convention over Configuration 3
A Common Interface 4
Universal Reuse Through Maven Plugins 5
Conceptual Model of a “Project” 6
Is Maven an Alternative to XYZ? 6
Comparing Maven and Ant 7
Summary 11
2. Installing and Running Maven ............................................ 13
Verify Your Java Installation 13
Downloading Maven 14
Installing Maven 14
Testing a Maven Installation 16
Maven Installation Details 16
Getting Help with Maven 17
Using the Maven Help Plugin 18
About the Apache Software License 21
Part II. Maven by Example
3. A Simple Maven Project . ................................................. 25
Introduction 25
Creating a Simple Project 26
Building a Simple Project 27
Simple Project Object Model 28
v

Core Concepts 30
Summary 41
4. Customizing a Maven Project ............................................. 43
Introduction 43
Defining the Simple Weather Project 43
Creating the Simple Weather Project 44
Customize Project Information 45
Add New Dependencies 46
Simple Weather Source Code 48
Add Resources 53
Running the Simple Weather Program 54
Writing Unit Tests 58
Adding Test-Scoped Dependencies 60
Adding Unit Test Resources 61
Executing Unit Tests 62
Building a Packaged Command-Line Application 65
5. A Simple Web Application ................................................ 67
Introduction 67
Defining the Simple Web Application 67
Creating the Simple Web Project 68
Configuring the Jetty Plugin 69
Adding a Simple Servlet 71
Adding J2EE Dependencies 73
Conclusion 75
6. A Multimodule Project ................................................... 77
Introduction 77
The Simple Parent Project 77
The Simple Weather Module 79
The Simple Web Application Module 81
Building the Multimodule Project 83
Running the Web Application 85
7. Multimodule Enterprise Project ........................................... 87
Introduction 87
The Simple Parent Project 90
The Simple Model Module 91
The Simple Weather Module 95
The Simple Persist Module 99
The Simple Web Application Module 105
Running the Web Application 116
vi | Table of Contents

The simple-command Module 117
Running simple-command 122
Conclusion 125
Part III. Maven Reference
8. Optimizing and Refactoring POMs . . . . . . . . . . . . . . . . . . . . . . . . . . . . . . . . . . . . . . . . 129
Introduction 129
POM Cleanup 130
Optimizing Dependencies 130
Optimizing Plugins 134
Optimizing with the Maven Dependency Plugin 136
Final POMs 139
Conclusion 147
9. The Project Object Model ............................................... 149
Introduction 149
The POM 149
POM Syntax 156
Project Dependencies 159
Project Relationships 168
POM Best Practices 173
10. The Build Lifecycle ..................................................... 181
Introduction 181
Package-Specific Lifecycles 185
Common Lifecycle Goals 189
11. Build Profiles ......................................................... 197
What Are They For? 197
Portability Through Maven Profiles 200
Profile Activation 203
External Profiles 206
Settings Profiles 207
Listing Active Profiles 209
Tips and Tricks 209
Summary 215
12. Maven Assemblies ..................................................... 217
Introduction 217
Assembly Basics 218
Overview of the Assembly Descriptor 226
Table of Contents | vii

The Assembly Descriptor 228
Controlling the Contents of an Assembly 229
Best Practices 252
Summary 259
13. Properties and Resource Filtering . . . . . . . . . . . . . . . . . . . . . . . . . . . . . . . . . . . . . . . . 261
Introduction 261
Maven Properties 261
Resource Filtering 266
14. Maven and Eclipse: m2eclipse ........................................... 271
Introduction 271
m2eclipse 271
Installing the m2eclipse Plugin 272
Enabling the Maven Console 274
Creating a Maven Project 275
Create a Maven POM File 280
Importing Maven Projects 282
Running Maven Builds 285
Working with Maven Projects 286
Working with Maven Repositories 292
Using the Form-Based POM Editor 294
Analyzing Project Dependencies in m2eclipse 298
Maven Preferences 303
Summary 306
15. Site Generation ....................................................... 309
Introduction 309
Building a Project Site with Maven 310
Customizing the Site Descriptor 311
Site Directory Structure 314
Writing Project Documentation 315
Deploying Your Project Web Site 317
Customizing Site Appearance 319
Tips and Tricks 328
16. Repository Manager ................................................... 333
Introduction 333
Installing Nexus 334
Using Nexus 341
Configuring Maven to Use Nexus Repositories 346
Configuring Nexus 354
Maintaining Repositories 374
viii | Table of Contents

Deploying Artifacts to Nexus 376
17. Writing Plugins ....................................................... 383
Introduction 383
Programming Maven 383
Plugin Descriptor 387
Writing a Custom Plugin 392
Mojo Parameters 400
Plugins and the Maven Lifecycle 406
18. Writing Plugins in Alternative Languages . . . . . . . . . . . . . . . . . . . . . . . . . . . . . . . . . 411
Writing Plugins in Ant 411
Creating an Ant Plugin 412
Writing Plugins in JRuby 414
Writing Plugins in Groovy 420
Part IV. Appendixes
A. Settings Details ....................................................... 425
B. Sun Specification Alternatives ........................................... 435
Index ..................................................................... 439
Table of Contents | ix

Preface
Although there are a number of references for Maven online, there is no single, well-
written narrative for introducing Maven that can serve as both an authoritative refer-
ence and an introduction. What we’ve tried to do with this effort is provide such a
narrative coupled with useful reference material.
Maven... What Is It?
The answer to this question depends on your own perspective. The great majority of
Maven users are going to call Maven a “build tool”: a tool used to build deployable
artifacts from source code. Build engineers and project managers might refer to Maven
as something more comprehensive: a project management tool. What is the difference?
A build tool such as Ant is focused solely on preprocessing, compilation, packaging,
testing, and distribution. A project management tool such as Maven provides a superset
of features found in a build tool. In addition to providing build capabilities, Maven can
also run reports, generate a web site, and facilitate communication among members of
a working team.
Here is a more formal definition of Apache Maven (http://maven.apache.org): Maven
is a project management tool that encompasses a Project Object Model, a set of stand-
ards, a project lifecycle, a dependency management system, and logic for executing
plugin goals at defined phases in a lifecycle. When you use Maven, you describe your
project using a well-defined Project Object Model, Maven can then apply cross-cutting
logic from a set of shared (or custom) plugins.
Don’t let the fact that Maven is a “project management” tool scare you away. If you
are just looking for a build tool, Maven will do the job. In fact, the first few chapters
of Part II will deal with the most common use case: using Maven to build and distribute
your project.
xi

Font Conventions
This book follows certain conventions for font usage. Understanding these conventions
upfront makes it easier to use this book:
Italic
Used for filenames, file extensions, URLs, application names, emphasis, and new
terms when they are first introduced.
Constant width
Used for Java™ class names, methods, variables, properties, data types, database
elements, and snippets of code that appear in text.
Constant width bold
Used for commands you enter at the command line and to highlight new code
inserted in a running example.
Constant width italic
Used to annotate output.
Maven Writing Conventions
The book follows certain conventions for naming and font usage in relation to Apache
Maven. Understanding these conventions upfront makes it easier to read this book:
Compiler plugin
Maven plugins are capitalized.
create goal
Maven goal names are displayed in a constant width font.
plugin
Maven revolves around the heavy use of plugins, but you won’t find plugin defined
in the dictionary. This book uses “plugin” without a hyphen because it is easier to
read and write and because it is a standard throughout the Maven community.
Maven Lifecycle, Maven Standard Directory Layout, Project Object Model
Core Maven concepts are capitalized whenever they are referenced in the text.
goalParameter
A Maven goal parameter is displayed in a constant width font.
compile phase
Lifecycle phases are displayed in a constant width font.
This icon signifies a tip, suggestion, or general note.
xii | Preface

This icon indicates a warning or caution.
Using Code Examples
This book is here to help you get your job done. In general, you may use the code in
this book in your programs and documentation. You do not need to contact us for
permission unless you’re reproducing a significant portion of the code. For example,
writing a program that uses several chunks of code from this book does not require
permission. Selling or distributing a CD-ROM of examples from O’Reilly books does
require permission. Answering a question by citing this book and quoting example
code does not require permission. Incorporating a significant amount of example code
from this book into your product’s documentation does require permission.
We appreciate, but do not require, attribution. An attribution usually includes the title,
author, publisher, and ISBN. For example: “Maven: The Definitive Guide by Sonatype.
Copyright 2008 Sonatype, 978-0-596-51733-5.”
If you feel your use of code examples falls outside fair use or the permission given above,
feel free to contact us at permissions@oreilly.com.
Safari® Books Online
When you see a Safari® Books Online icon on the cover of your favorite
technology book, that means the book is available online through the
O’Reilly Network Safari Bookshelf.
Safari offers a solution that’s better than e-books. It’s a virtual library that lets you easily
search thousands of top tech books, cut and paste code samples, download chapters,
and find quick answers when you need the most accurate, current information. Try it
for free at http://safari.oreilly.com.
How to Contact Us
Please address comments and questions concerning this book to the publisher:
O’Reilly Media, Inc.
1005 Gravenstein Highway North
Sebastopol, CA 95472
800-998-9938 (in the United States or Canada)
707-829-0515 (international/local)
707-829-0104 (fax)
Preface | xiii

O’Reilly’s web page for this book, where we list errata, examples, or any additional
information. You can access this page at:
http://www.oreilly.com/catalog/9780596517335
To comment or ask technical questions about this book, send email to:
bookquestions@oreilly.com
For more information about our books, conferences, Resource Centers, and the
O’Reilly Network, see our web site at:
http://www.oreilly.com
Acknowledgments
Sonatype would like to thank the following contributors who have provided feedback
that improved the quality of this book. Thanks to Chad Gorshing, Marcus Biel, Brian
Dols, Mangalaganesh Balasubramanian, Marius Kruger, and Mark Stewart. Special
thanks to Joel Costigliola for helping debug and correct the Spring web chapter. Stan
Guillory was practically a contributing author given the number of corrections he pos-
ted to the book’s Get Satisfaction page. Thank you, Stan. Special thanks to Richard
Coasby of Bamboo for acting as the provisional grammar consultant.
Sarah Schneider and Marlowe Shaeffer of O’Reilly Media, and Mark Jewett of Appingo,
should receive medals for the extreme patience they displayed as this book continued
to miss schedule after schedule. Thank you, Sarah, and the entire production depart-
ment for making this book a success. Thanks to Mike Loukides and Mike Hendrickson
for providing the necessary editorial oversight to make sure that we were given enough
time and feedback to publish a book that will remain relevant in the months and years
to come.
Thanks to all of the authors, especially Bruce Snyder, Brian Fox, John Casey, Jason van
Zyl, and Eugene Kuleshov. Everyone at Sonatype played a part in the content of this
book, and everyone worked together to help us create a foundation for this
documentation.
Thanks to all of our contributing authors, especially Eric Redmond.
Tim O’Brien would like to thank his perfect wife, Susan, and child, Josephine.
xiv | Preface

PART I
Introduction
The two chapters in this brief introduction describe Maven, explain how it stacks up
to and improves on other build tools throughout time, and show you how to install
and run it on all platforms. If you’ve already installed Maven and are familiar with the
core concepts of the tool, you might want to skip ahead to Part II. Then again, even if
you are already somewhat familiar with Maven, you might want to peruse some of the
propaganda in this introduction so you’re prepared when people start asking you why
your organization or project should use Maven. After this section, you should have a
better idea of what Maven is, what makes it different from some of the other options
out there, and how to install it and learn more from the built-in help facilities.

CHAPTER 1
Introducing Apache Maven
Convention over Configuration
Convention over configuration is a simple concept. Systems, libraries, and frameworks
should assume reasonable defaults without requiring that unnecessary configuration
systems should “just work.” Popular frameworks such as Ruby on Rails and EJB3 have
started to adhere to these principles in reaction to the configuration complexity of
frameworks such as the initial Enterprise JavaBeans™ (EJB) specifications. An illus-
tration of convention over configuration is something like EJB3 persistence. All you
need to do to make a particular bean persistent is to annotate that class with @Entity.
The framework will then assume table names and column names from the name of the
class and the names of the properties. Hooks are provided for you to override these
names if the need arises, but, in most cases, you will find that using the framework-
supplied defaults results in a faster project execution.
Maven incorporates the concept by providing sensible default behaviors for projects.
Without customization, source code is assumed to be in ${basedir}/src/main/java and
resources are assumed to be in ${basedir}/src/main/resources. Tests are assumed to be
in ${basedir}/src/test, and a project is assumed to produce a JAR (Java ARchive) file.
Maven assumes that you want to compile byte code to ${basedir}/target/classes and then
create a distributable JAR file in ${basedir}/target. Although this might seem trivial,
consider the fact that most Ant-based builds have to define the locations of these di-
rectories in every subproject. Maven’s adoption of convention over configuration goes
further than just simple directory locations; Maven’s core plugins apply a common set
of conventions for compiling source code, packaging distributions, generating web
sites, and many other processes. Maven’s strength comes from the fact that it is “opin-
ionated.” It has a defined lifecycle and a set of common plugins that know how to build
libraries and web applications. If you follow the convention, Maven will require almost
zero effort—just put your source in the correct directory, and Maven will take care of
the rest.
One side effect of using systems that follow “convention over configuration” is that
end users might feel that they are forced to use a particular setup. While it is certainly
3

true that Maven has some central opinions that shouldn’t be challenged, most of the
defaults can be customized. For example, the location of a project’s source code and
resources can be customized, names of JAR files can be customized, and through the
development of custom plugins, almost any behavior can be tailored to your specific
environment’s requirements. If you don’t follow convention, Maven will allow you to
customize defaults in order to adapt to your requirements.
A Common Interface
Before Maven provided a common interface for building software, every single project
had someone dedicated to managing a completely custom build system, and developers
had to take time away from developing software to learn about the idiosyncrasies of
each new project they wanted to contribute to. In 2001, you’d take a completely dif-
ferent approach to building a project such as Apache Turbine (http://turbine.apache
.org/) than you would to building a project such as Tomcat (http://tomcat.apache.org).
If a new source analysis tool came out that would perform static analysis on source
code, or if someone developed a new unit testing framework, everyone would have to
drop what they were doing and figure out how to fit it into each project’s custom build
environment. How would you run unit tests? There were a thousand different answers.
This environment was characterized by endless arguments about tools and build pro-
cedures. The age before Maven was an age of inefficiency—the age of the “Build
Engineer.”
Today, most open source developers have used or are currently using Maven to manage
new software projects. This transition is less about developers moving from one build
tool to another and more about developers starting to adopt a common interface for
project builds. As software systems have become more modular, build systems have
become more complex, and the number of projects has skyrocketed. Before Maven,
when you wanted to check out a project such as Apache ActiveMQ (http://activemq
.apache.org) or Apache ServiceMix (http://servicemix.apache.org) from Subversion and
build it from source, you really had to set aside about an hour to figure out the build
system for each particular project. What does the project need to build? What libraries
do I need to download? Where do I put them? What goals can I execute in the build?
In the best case, it took a few minutes to figure out a new project’s build, and in the
worst cases (like the old Servlet API implementation in the Jakarta Project), a project’s
build was so difficult it would take many hours just to get to the point where a new
contributor could edit source and compile the project. These days, with Maven, you
check it out from source, and you run mvn install.
Although Maven provides an array of benefits, including dependency management and
reuse of common build logic through plugins, the core reason it has succeeded is that
it has defined a common interface for building software. When you see that a project
such as Apache Wicket (http://wicket.apache.org) uses Maven, you can assume that
you’ll be able to check it out from source and build it with mvn install without much
4 | Chapter 1: Introducing Apache Maven

hassle. You know where the ignition key goes, and you know that the gas pedal is on
the right and the brake is on the left.
Universal Reuse Through Maven Plugins
The core of Maven is pretty dumb; it doesn’t know how to do much beyond parsing a
few XML documents and keeping track of a lifecycle and a few plugins. Maven has
been designed to delegate most responsibility to a set of Maven plugins that can affect
the Maven lifecycle and offer access to goals. Most of the action in Maven happens in
plugin goals that take care of things like compiling source, packaging bytecode, pub-
lishing sites, and any other task that needs to happen in a build. The Maven you down-
load from Apache doesn’t know much about packaging a WAR file or running JUnit
tests; most of Maven’s intelligence is implemented in the plugins, and the plugins are
retrieved from the Maven repository. In fact, the first time you run something like mvn
install with a brand new Maven installation, it retrieves most of the core Maven plugins
from the central Maven repository. This is more than just a trick to minimize the
download size of the Maven distribution; this is behavior that allows you to upgrade a
plugin to add capability to your project’s build. The fact that Maven retrieves both
dependencies and plugins from the remote repository allows for universal reuse of build
logic.
The Maven Surefire plugin is responsible for running unit tests. At some point between
version 1.0 and the version that is in wide use today, someone decided to add support
for the TestNG unit testing framework in addition to the support for JUnit. This hap-
pened in a way that didn’t break backward compatibility—if you were using the Surefire
plugin to compile and execute JUnit 3 unit tests, and you upgraded to the most recent
version of the Surefire plugin, your tests continued to execute without fail. You also
gained new functionality, so if you wanted to execute unit tests in TestNG, you now
had that ability, thanks to the efforts of the maintainers of the Surefire plugin. You also
gained the ability to run annotated JUnit 4 unit tests. You gained all of these capabilities
without having to upgrade your Maven installation or install new software. Most
importantly, nothing about your project had to change aside from a version number
for a plugin in a POM.
It is this mechanism that affects much more than the Surefire plugin: projects are com-
piled with a Compiler plugin, projects are turned into JAR files with a Jar plugin, and
there are plugins for running reports, plugins for executing JRuby and Groovy code, as
well as plugins to publish sites to remote servers. Maven has abstracted common build
tasks into plugins that are maintained centrally and shared universally. If the state of
the art changes in any area of the build, if some new unit testing framework is released
or if some new tool is made available, you don’t have to be the one to hack your project’s
custom build system to support it. You benefit from the fact that plugins are down-
loaded from a remote repository and maintained centrally. This is what is meant by
universal reuse through Maven plugins.
Universal Reuse Through Maven Plugins | 5

Conceptual Model of a “Project”
Maven maintains a model of a project: you are not just compiling source code into
bytecode, you are developing a description of a software project and assigning a unique
set of coordinates to a project. You are describing the attributes of the project. What
is the project’s license? Who develops and contributes to the project? What other
projects does this project depend on? Maven is more than just a “build tool”; it is more
than just an improvement on tools such as make and Ant; it is a platform that encom-
passes a new semantics related to software projects and software development. This
definition of a model for every project enables such features as:
Dependency management
A project is defined as unique coordinates that consists of a group identifier, artifact
identifier, and version. Projects can now use these coordinates to declare depend-
encies.
Remote repositories
Related to dependency management, we can use the coordinates defined in the
Maven Project Object Model (POM) to create repositories of Maven artifacts.
Universal reuse of build logic
Plugins are coded to work with the POM; they are not designed to operate on
specific files in known locations. Everything is abstracted into the model—plugin
configuration and customization happens in the model.
Tool portability and integration
Tools such as Eclipse, NetBeans, and IntelliJ now have a common place to find
information about a project. Before the advent of Maven, every integrated devel-
opment environment (IDE) had a different way to store what was essentially a
custom POM. Maven has standardized this description, and although each IDE
continues to maintain custom project files, they can be easily generated from the
model.
Easy searching and filtering of project artifacts
Tools such as Nexus allow you to index and search the contents of a repository
using the information stored in the POM.
Maven has provided a foundation for the beginnings of a consistent semantic descrip-
tion of a software project.
Is Maven an Alternative to XYZ?
So, sure, Maven is an alternative to Ant, but Apache Ant (http://ant.apache.org) con-
tinues to be a great, widely used tool. It has been the reigning champion of Java builds
for years, and you can integrate Ant build scripts with your project’s Maven build very
easily. This is a common usage pattern for a Maven project. On the other hand, as more
and more open source projects move to Maven as a project management platform,
6 | Chapter 1: Introducing Apache Maven

working developers are starting to realize that Maven not only simplifies the task of
build management, it is helping to encourage a common interface between developers
and software projects. Maven is more of a platform than a tool. Although you can
consider Maven an alternative to Ant, you are comparing apples to oranges. “Maven”
includes more than just a build tool.
This is the central point that makes all of the Maven versus Ant, Maven versus Buildr,
Maven versus Gradle arguments irrelevant. Maven isn’t totally defined by the mechan-
ics of your build system. It isn’t about scripting the various tasks in your build as much
as it is about encouraging a set of standards, a common interface, a lifecycle, a standard
repository format, a standard directory layout, etc. It certainly isn’t about what format
the POM happens to be in, i.e., XML versus YAML versus Ruby. Maven is much larger
than that, and Maven refers to much more than the tool itself. When this book talks
about Maven, it is referring to the constellation of software, systems, and standards
that support it. Buildr, Ivy, Gradle—all of these tools interact with the repository format
that Maven helped create, and you could just as easily use a tool such as Nexus to
support a build written entirely in Buildr. Nexus is introduced in Chapter 16.
Although Maven is an alternative to many of these tools, the community needs to evolve
beyond seeing technology as a zero-sum game between unfriendly competitors in a
contest for users and developers. This might be how large corporations relate to one
another, but it has very little relevance to the way that open source communities work.
The headline “Who’s winning? Ant or Maven?” isn’t very constructive. If you force us
to answer this question, we’re definitely going to say that Maven is a superior alternative
to Ant as a foundational technology for a build; at the same time, Maven’s boundaries
are constantly shifting and the Maven community is constantly trying to seek out new
ways to become more ecumenical, interoperable, and cooperative. The core tenets of
Maven are declarative builds, dependency management, repository managers, and uni-
versal reuse through plugins, but the specific incarnation of these ideas at any given
moment is less important than the sense that the open source community is collabo-
rating to reduce the inefficiency of “enterprise-scale builds.”
Comparing Maven and Ant
Although the previous section should convince you that the authors of this book have
no interest in creating a feud between Apache Ant and Apache Maven, we are cognizant
of the fact that most organizations have to make a decision between Ant and Maven.
In this section, we compare and contrast the tools.
Ant excels at build process; it is a build system modeled after make with targets and
dependencies. Each target consists of a set of instructions that are coded in XML. There
is a copy task and a javac task as well as a jar task. When you use Ant, you supply it
with specific instructions for compiling and packaging your output. Look at the simple
build.xml file shown in Example 1-1.
Comparing Maven and Ant | 7

Example 1-1. A simple Ant build.xml file
<project name="my-project" default="dist" basedir=".">
<description>
simple example build file
</description>
<!-- set global properties for this build -->
<property name="src" location="src/main/java"/>
<property name="build" location="target/classes"/>
<property name="dist" location="target"/>
<target name="init">
<!-- Create the time stamp -->
<tstamp/>
<!-- Create the build directory structure used by compile -->
<mkdir dir="${build}"/>
</target>
<target name="compile" depends="init"
description="compile the source " >
<!-- Compile the java code from ${src} into ${build} -->
<javac srcdir="${src}" destdir="${build}"/>
</target>
<target name="dist" depends="compile"
description="generate the distribution" >
<!-- Create the distribution directory -->
<mkdir dir="${dist}/lib"/>
<!-- Put everything in ${build} into the MyProject-${DSTAMP}.jar file -->
<jar jarfile="${dist}/lib/MyProject-${DSTAMP}.jar" basedir="${build}"/>
</target>
<target name="clean"
description="clean up" >
<!-- Delete the ${build} and ${dist} directory trees -->
<delete dir="${build}"/>
<delete dir="${dist}"/>
</target>
</project>
In this simple Ant example, you can see how you have to tell Ant exactly what to do.
There is a compile goal that includes the javac task, which compiles the source in the
src/main/java directory to the target/classes directory. You have to tell Ant exactly where
your source is, where you want the resulting bytecode to be stored, and how to package
this all into a JAR file. Although some recent developments help make Ant less proce-
dural, a developer’s experience with Ant is in coding a procedural language written in
XML.
Contrast the previous Ant example with a Maven example. In Maven, to create a JAR
file from some Java source, all you need to do is create a simple pom.xml, place your
source code in ${basedir}/src/main/java, and then run mvn install from the command
8 | Chapter 1: Introducing Apache Maven

line. The example Maven pom.xml that achieves the same results as the simple Ant file
listed in Example 1-1 is shown in Example 1-2.
Example 1-2. A simple Maven pom.xml
<project>
<modelVersion>4.0.0</modelVersion>
<groupId>org.sonatype.mavenbook</groupId>
<artifactId>my-project</artifactId>
<version>1.0</version>
</project>
That’s all you need in your pom.xml. Running mvn install from the command line will
process resources, compile source, execute unit tests, create a JAR, and install the
JAR in a local repository for reuse in other projects. Without modification, you can run
mvn site and then find an index.html file in target/site that contains links to Javadoc and
a few reports about your source code.
Admittedly, this is the simplest possible example project: a project that contains only
source code and produces a JAR; a project that follows Maven conventions and doesn’t
require any dependencies or customization. If we want to start customizing the behav-
ior, our pom.xml is going to grow in size, and in the largest of projects, you can see
collections of very complex Maven POMs that contain a great deal of plugin customi-
zation and dependency declarations. But even when your project’s POM files become
more substantial, they hold an entirely different kind of information from the build file
of a similarly sized project using Ant. Maven POMs contain declarations: “This is a
JAR project,” and “The source code is in src/main/java.” Ant build files contain explicit
instructions: “This is project,” “The source is in src/main/java,” “Run javac against this
directory,” “Put the results in target/classses,” “Create a JAR from the ....”, etc. Where
Ant has to be explicit about the process, there is something “built-in” to Maven that
just knows where the source code is and how it should be processed.
The differences between Ant and Maven in this example are:
Apache Ant
• Ant doesn’t have formal conventions such as a common project directory struc-
ture; you have to tell Ant exactly where to find the source and where to put the
output. Informal conventions have emerged over time, but they haven’t been
codified into the product.
• Ant is procedural; you have to tell Ant exactly what to do and when to do it.
You have to tell it to compile, then copy, then compress.
• Ant doesn’t have a lifecycle; you have to define goals and goal dependencies.
You have to attach a sequence of tasks to each goal manually.
Comparing Maven and Ant | 9

Apache Maven
• Maven has conventions: in the example, it already knew where your source code
was because you followed the convention. It put the bytecode in target/classes,
and it produced a JAR file in target.
• Maven is declarative; all you had to do was create a pom.xml file and put your
source in the default directory. Maven took care of the rest.
• Maven has a lifecycle, which you invoked when you executed mvn install. This
command told Maven to execute a series of sequence steps until it reached the
lifecycle. As a side effect of this journey through the lifecycle, Maven executed
a number of default plugin goals that did things such as compile and create a
JAR.
Maven has built-in intelligence about common project tasks in the form of Maven
plugins. If you want to write and execute unit tests, all you need to do is write the tests,
place them in ${basedir}/src/test/java, add a test-scoped dependency on either TestNG
or JUnit, and run mvn test. If you want to deploy a web application and not a JAR, all
you need to do is change you project type to WAR and put your docroot in ${basedir}/
src/main/webapp. Sure, you could do all of this with Ant, but you would be writing the
instructions from scratch. In Ant, you would first have to figure out where the JUnit
JAR file should be, and then you would have to create a classpath that includes the
JUnit JAR file, and then you would tell Ant where it should look for test source code,
write a goal that compiles the test source to bytecode, and execute the unit tests with
JUnit.
Without supporting technologies such as antlibs and Ivy (and even with these sup-
porting technologies), Ant has the feeling of a custom procedural build. An efficient set
of Maven POMs in a project that adheres to Maven’s assumed conventions has sur-
prisingly little XML compared to the Ant alternative. Another benefit of Maven is the
reliance on widely shared Maven plugins. Everyone uses the Maven Surefire plugin for
unit testing, and if someone adds support for a new unit testing framework, you can
gain new capabilities in your own build just by incrementing the version of a particular
Maven plugin in your project’s POM.
The decision to use Maven or Ant isn’t a binary one, and Ant still has a place in a
complex build. If your current build contains some highly customized process, or if
you’ve written some Ant scripts to complete a specific process in a specific way that
cannot be adapted to the Maven standards, you can still use these scripts with Maven.
Ant is made available as a core Maven plugin. Custom Maven plugins can be imple-
mented in Ant, and Maven projects can be configured to execute Ant scripts within the
Maven project lifecycle.
10 | Chapter 1: Introducing Apache Maven

Summary
This introduction has been kept purposefully short. We have covered a basic outline
of what Maven is and how it stacks up to and improves on other build tools throughout
time. The next chapter will explain how to install and run Maven, and Chapter 3 will
dive into a simple project and show how Maven can perform phenomenal tasks with
the smallest amount of configuration.
Summary | 11

CHAPTER 2
Installing and Running Maven
This chapter contains very detailed instructions for installing Maven on a number of
different platforms. Instead of assuming a level of familiarity with installing software
and setting environment variables, we’ve opted to be as thorough as possible to mini-
mize any problems that might arise due to a partial installation. The only thing this
chapter assumes is that you’ve already installed a suitable Java Development Kit (JDK).
If you are just interested in installation, you can move on to the rest of the book after
reading through the “Downloading Maven” and “Installing Maven” sections. If you
are interested in the details of your Maven installation, this entire chapter will give you
an overview of what you’ve installed and the Apache Software License.
Verify Your Java Installation
Although Maven can run on Java 1.4, this book assumes that you are running at least
Java 5. Go with the most recent stable JDK available for your operating system. Either
Java 5 or Java 6 will work with all of the examples in this book:
% java -version
java version "1.6.0_02"
Java(TM) SE Runtime Environment (build 1.6.0_02-b06)
Java HotSpot(TM) Client VM (build 1.6.0_02-b06, mixed mode, sharing)
Maven works with all certified Java-compatible development kits, and a few noncerti-
fied implementations of Java. The examples in this book were written and tested against
the official Java Development Kit releases downloaded from the Sun Microsystems web
site. If you’re working with a Linux distribution, you may need to download Sun’s
JDK yourself and make sure it’s the version you’re invoking (by running java
-version, as shown earlier). Now that Sun has open sourced Java, this will hopefully
improve in the future, and we’ll get the Sun Java Runtime Environment (JRE) and
JDK by default even in purist distributions. Until that day, you may need to do some
of your own downloading.
13
Downloading Maven
You can download Maven from the Apache Maven project web site by going to http://
maven.apache.org/download.html.
When downloading Maven, make sure you choose the latest version of Apache Maven
from the web site. The latest version of Maven at the time of this writing is Maven 2.0.9.
If you are not familiar with the Apache Software License, you should get acquainted
with the terms of the license before you start using the product. More information on
the Apache Software License can be found in “About the Apache Software License,”
later in this chapter.
Installing Maven
There are wide differences between operating systems such as Mac OS X and Microsoft
Windows, and there are subtle differences between different versions of Windows.
Luckily, the process of installing Maven on all of these operating systems is relatively
painless and straightforward. The following sections outline the recommended best-
practice for installing Maven on a variety of operating systems.
Installing Maven on Mac OS X
You can download a binary release of Maven from http://maven.apache.org/download
.html. Download the current release of Maven in a format that is convenient for you to
work with. Pick an appropriate place for it to live, and expand the archive there. If you
expanded the archive into the directory /usr/local/maven-2.0.9, you may want to create
a symbolic link to make it easier to work with and to avoid the need to change any
environment configuration when you upgrade to a newer version:
/usr/local % ln -s maven-2.0.9 maven
/usr/local % export M2_HOME=/usr/local/maven
/usr/local % export PATH=${M2_HOME}/bin:${PATH}
Once Maven is installed, you need to do a couple of things to make it work correctly.
You need to add its bin directory in the distribution (in this example, /usr/local/maven/
bin) to your command path. You also need to set the environment variable M2_HOME to
the top-level directory you installed (in this example, /usr/local/maven).
Installation instructions are the same for both OS X Tiger and Leopard.
It has been reported that Maven 2.0.6 is shipping with a preview release
of Xcode. If you have installed XCode, run mvn from the command line
to check availability. XCode installs Maven in /usr/share/maven. We
recommend installing the most recent version of Maven 2.0.9, as there
have been a number of bug fixes and improvements since Maven 2.0.9
was released.
14 | Chapter 2: Installing and Running Maven

You’ll need to add both M2_HOME and PATH to a script that will run every time you log in.
To do this, add the following lines to .bash_login:
export M2_HOME=/usr/local/maven
export PATH=${M2_HOME}/bin:${PATH}
Once you’ve added these lines to your own environment, you will be able to run Maven
from the command line.
These installation instructions assume that you are running bash.
Installing Maven on Microsoft Windows
Installing Maven on Windows is very similar to installing Maven on Mac OS X, the
main differences being the installation location and the setting of an environment var-
iable. This book assumes a Maven installation directory located at c:\Program Files
\maven-2.0.9, but it won’t make a difference if you install Maven in another directory
as long as you configure the proper environment variables. Once you’ve unpacked
Maven in the installation directory, you will need to set two environment variables—
PATH and M2_HOME. To set these environment variables from the command line, type in
the following commands:
C:\Users\tobrien > set M2_HOME=c:\Program Files\maven-2.0.9
C:\Users\tobrien > set PATH=%PATH%;%M2_HOME%\bin
Setting these environment variables on the command line will allow you to run Maven
in your current session, but unless you add them to the system environment variables
through the control panel, you’ll have to execute these two lines every time you log
into your system. Set both M2_HOME and PATH to point to your Maven installation.
Installing Maven on Linux
To install Maven on a Linux machine, follow the exact procedure outlined in “Installing
Maven on Mac OS X,” earlier in this chapter.
Installing Maven on FreeBSD or OpenBSD
To install Maven on a FreeBSD or OpenBSD machine, follow the exact procedure out-
lined in “Installing Maven on Mac OS X,” earlier in this chapter.
Installing Maven | 15

Testing a Maven Installation
Once Maven is installed, you can see if it is installed properly by running mvn -v from
the command line. If Maven has been installed, you should see something resembling
the following output:
~/examples $ mvn -v
Maven 2.0.9
If you see this output, you know that Maven has been successfully installed. If you do
not see this output and your operating system cannot find the mvn command, make
sure that your PATH and M2_HOME environment variables have been properly set.
Maven Installation Details
Maven’s download measures in at roughly 1.5 MiB.* It has attained such a slim down-
load size because the core of Maven has been designed to retrieve plugins and depend-
encies from a remote repository on demand. When you start using Maven, it will start
to download plugins to a local repository as described in the section “User-Specific
Configuration and Repository,” later in this chapter. In case you are curious, let’s take
a quick look at what is in Maven’s installation directory:
/usr/local/maven $ ls -p1
LICENSE.txt
NOTICE.txt
README.txt
bin/
boot/
conf/
lib/
LICENSE.txt contains the software license for Apache Maven. This license is described
in some detail later in the section “About the Apache Software License.” NOTICE.txt
contains some notices and attributions required by libraries that Maven depends on.
README.txt contains some installation instructions. bin/ contains the mvn script that
executes Maven. boot/ contains a JAR file (classwords-1.1.jar) that is responsible for
creating the Class Loader in which Maven executes. conf/ contains a global
settings.xml that can be used to customize the behavior of your Maven installation. If
you need to customize Maven, it is customary to override any settings in a set
tings.xml file stored in ~/.m2. lib/ contains a single JAR file (maven-core-2.0.9-
uber.jar) that contains the core of Maven.
*Ever purchased a 200 GB hard drive only to realize that it showed up as less than 200 GiB when you installed
it? Computers understand Gibibytes, but retailers sell products using Gigabytes. MiB stands for Mebibyte,
which is defined as 220 or 10242. These binary prefix standards are endorsed by the Institute of Electrical and
Electronics Engineers (IEEE), the International Committee for Weights and Measures (CIPM), and the
International Electrotechnical Commission (IEC). For more information about Kibibytes, Mebibytes,
Gibibytes, and Tebibytes, see http://en.wikipedia.org/wiki/Mebibyte.
16 | Chapter 2: Installing and Running Maven

User-Specific Configuration and Repository
Once you start using Maven extensively, you’ll notice that Maven has created some
local user-specific configuration files and a local repository in your home directory. In
~/.m2, there will be:
settings.xml
A file containing user-specific configuration for authentication, repositories, and
other information to customize the behavior of Maven.
repository/
This directory contains your local Maven repository. When you download a de-
pendency from a remote Maven repository, Maven stores a copy of the dependency
in your local repository.
In Unix (and OS X), your home directory will be referred to using a tilde
(i.e., ~/bin refers to /home/tobrien/bin). In Windows, we will also be
using ~ to refer to your home directory. In Windows XP, your home
directory is C:\Documents and Settings\tobrien, and in Windows Vista,
your home directory is C:\Users\tobrien. From this point forward, you
should translate paths such as ~/m2 to your operating system’s
equivalent.
Upgrading a Maven Installation
If you’ve installed Maven on a Mac OS X or Unix machine according to the details given
in “Installing Maven on Mac OS X” and “Installing Maven on Linux,” it should be easy
to upgrade to newer versions of Maven when they become available. Simply install the
newer version of Maven (/usr/local/maven-2.future) next to the existing version of
Maven (/usr/local/maven-2.0.9). Then, switch the symbolic link /usr/local/maven
from /usr/local/maven-2.0.9 to /usr/local/maven-2.future. Since you’ve already set your
M2_HOME variable to point to /usr/local/maven, you won’t need to change any environ-
ment variables.
If you’ve installed Maven on a Windows machine, simply unpack Maven to c:\Program
Files\maven-2.future and update your M2_HOME variable.
Getting Help with Maven
Although this book aims to be a comprehensive reference, there are going to be topics
we miss and special situations and tips that are not covered. The core of Maven is very
simple, but the real work in Maven happens in the plugins, and there are too many
plugins available to cover them all in one book. When you encounter problems and
features that are not covered in this book, we suggest searching for answers at the
following locations:
Getting Help with Maven | 17
http://maven.apache.org
This is the first place you should look; the Maven web site contains a wealth of
information and documentation. Every plugin has a few pages of documentation,
and it provides a series of “quick start” documents that will be helpful in addition
to the contents of this book. Although the Maven site contains plenty of informa-
tion, it can also be a frustrating, confusing, and overwhelming. A custom Google
search box on the main Maven page will search known Maven sites for information.
This provides better results than a generic Google search.
Maven user mailing list
The Maven user mailing list is the place for users to ask questions. Before you ask
a question on the user mailing list, you will want to search for any previous dis-
cussion that might relate to your question. It is bad form to ask a question that has
already been asked without first checking to see whether an answer already exists
in the archives. There are a number of useful mailing list archive browsers; we’ve
found Nabble to be the most useful. You can browse the user mailing list archives
here: http://www.nabble.com/Maven---Users-f178.html. You can join the user mail-
ing list by following the instructions available here: http://maven.apache.org/mail
-lists.html.
http://www.sonatype.com
Sonatype maintains an online copy of this book and other tutorials related to
Apache Maven.
Despite the best efforts of some very dedicated Maven contributors, the
Maven web site is poorly organized and full of incomplete (and some-
times misleading) snippets of documentation. Throughout the Maven
community there is a lack of a common standards for plugin documen-
tation. Some plugins are heavily documented, whereas others lack even
the most basic instructions for usage. Often your best bet is to search
for a solution in the archives of the user mailing list. If you really want
to help, submit a patch to the Maven site (or this book).
Using the Maven Help Plugin
Throughout the book, we will be introducing Maven plugins and talking about Maven
Project Object Model (POM) files, settings files, and profiles. There are going to be
times when you need a tool to help you make sense of some of the models that Maven
is using and what goals are available on a specific plugin. The Maven Help plugin allows
you to list active Maven profiles, display an effective POM, print the effective settings,
or list the attributes of a Maven plugin.
18 | Chapter 2: Installing and Running Maven

For a conceptual overview of the POM and plugins, see Chapter 3.
The Maven Help plugin has four goals. The first three goals—active-profiles,
effective-pom, and effective-settings—describe a particular project and must be run
in the base directory of a project. The last goal—describe—is slightly more complex,
showing you information about a plugin or a plugin goal. The following commands
provide some general information about the four goals:
help:active-profiles
Lists the profiles (project, user, global) that are active for the build.
help:effective-pom
Displays the effective POM for the current build, with the active profiles factored in.
help:effective-settings
Prints out the calculated settings for the project, given any profile enhancement
and the inheritance of the global settings into the user-level settings.
help:describe
Describes the attributes of a plugin. This need not run under an existing project
directory. You must give at least the groupId and artifactId of the plugin you wish
to describe.
Describing a Maven Plugin
Once you start using Maven, you’ll spend most of your time trying to get more infor-
mation about plugins. You’ll want to know: How do plugins work? What are the con-
figuration parameters? What are the goals? The help:describe goal is something you’ll
use very frequently to retrieve this information. With the plugin parameter, you can
specify a plugin you wish to investigate, passing in either the plugin prefix (e.g., maven-
help-plugin as help) or the groupId:artifact[:version], where version is optional. For
example, the following command uses the Help plugin’s describe goal to print out
information about the Maven Help plugin:
$ mvn help:describe -Dplugin=help
...
Group Id: org.apache.maven.plugins
Artifact Id: maven-help-plugin
Version: 2.0.1
Goal Prefix: help
Description:
The Maven Help plugin provides goals aimed at helping to make sense out of
the build environment. It includes the ability to view the effective
POM and settings files, after inheritance and active profiles
have been applied, as well as a describe a particular plugin goal to give
Using the Maven Help Plugin | 19

usage information.
...
Executing the describe goal with the plugin parameter prints out the Maven coordi-
nates for the plugin, the goal prefix, and a brief description of the plugin. Although this
information is helpful, you’ll usually be looking for more detail than this. If you want
the Help plugin to print a full list of goals with parameters, execute the
help:describe goal with the parameter full as follows:
$ mvn help:describe -Dplugin=help -Dfull
...
Group Id: org.apache.maven.plugins
Artifact Id: maven-help-plugin
Version: 2.0.1
Goal Prefix: help
Description:
The Maven Help plugin provides goals aimed at helping to make sense out of
the build environment. It includes the ability to view the effective
POM and settings files, after inheritance and active profiles have been
applied, as well as a describe a particular plugin goal to give usage
information.
Mojos:
===============================================
Goal: 'active-profiles'
===============================================
Description:
Lists the profiles which are currently active for this build.
Implementation: org.apache.maven.plugins.help.ActiveProfilesMojo
Language: java
Parameters:
-----------------------------------------------
[0] Name: output
Type: java.io.File
Required: false
Directly editable: true
Description:
This is an optional parameter for a file destination for the output of
this mojo...the listing of active profiles per project.
-----------------------------------------------
[1] Name: projects
Type: java.util.List
Required: true
Directly editable: false
Description:
20 | Chapter 2: Installing and Running Maven

This is the list of projects currently slated to be built by Maven.
-----------------------------------------------
This mojo doesn't have any component requirements.
===============================================
... remove the other goals ...
This option is great for discovering all of a plugin’s goals as well as their parameters.
But sometimes this gives you far more information than you need. To get information
about a single goal, set the mojo parameter as well as the plugin parameter. The fol-
lowing command lists all of the information about the Compiler plugin’s compile goal:
$ mvn help:describe -Dplugin=compiler -Dmojo=compile -Dfull
What’s a Mojo? In Maven, a plugin goal is known as a Mojo.
About the Apache Software License
Apache Maven is released under the Apache License, version 2.0. If you want to read
this license, you can look at ${M2_HOME}/LICENSE.txt or read it on the Open Source
Initiative’s web site at http://www.opensource.org/licenses/apache2.0.php.
Chances are good that, if you are reading this book, you are not a lawyer. If you are
wondering what the Apache License, version 2.0 means, the Apache Software Foun-
dation has assembled a very helpful Frequently Asked Questions (FAQ) page about the
license, available here: http://www.apache.org/foundation/licence-FAQ.html. Here’s the
answer to the frequently asked question “I am not a lawyer. What does it all mean?”:
[This license] allows you to:
• Freely download and use Apache software, in whole or in part, for personal, com-
pany internal, or commercial purposes;
• Use Apache software in packages or distributions that you create.
It forbids you to:
• Redistribute any piece of Apache-originated software without proper attribution;
• Use any marks owned by the Apache Software Foundation in any way that might
state or imply that the Foundation endorses your distribution;
• Use any marks owned by the Apache Software Foundation in any way that might
state or imply that you created the Apache software in question.
It requires you to:
• Include a copy of the license in any redistribution you may make that includes
Apache software;
About the Apache Software License | 21

• Provide clear attribution to the Apache Software Foundation for any distributions
that include Apache software.
It does not require you to:
• Include the source of the Apache software itself, or of any modifications you may
have made to it, in any redistribution you may assemble that includes it;
• Submit changes that you make to the software back to the Apache Software Foun-
dation (though such feedback is encouraged).
This ends the installation information. The next part of the book contains Maven
examples.
22 | Chapter 2: Installing and Running Maven

PART II
Maven by Example
The first Maven book was Maven: A Developer’s Notebook (O’Reilly). That book in-
troduced Maven in a series of steps via a conversation between you and a colleague
who already knew how to use Maven. The idea behind the (now-retired) Developer’s
Notebook series was that developers learn best when they are sitting next to other
developers and going through the same thought processes, learning to code by doing
and experimenting. Although the series was successful, the Notebook format had lim-
itations. Notebooks were designed to be “goal-focused” books that take you through
a series of steps to achieve very specific goals. By contrast, larger reference books pro-
vide comprehensive material that covers the entirety of the topic.
If you read Maven: A Developer’s Notebook, you’ll learn how to create a simple project
or a project that creates a WAR from a set of source files. But if you want to find out
the specifics of something like the Assembly plugin, you’ll hit an impasse. Because there
is currently no well-written reference material for Maven, you have to hunt through
plugin documentation on the Maven web site or cull from a series of mailing lists. Once
you really dig into Maven, you end up reading through thousands of HTML pages on
the Maven site written by hundreds of developers, each with a different idea of what it
means to document a plugin. Despite the best efforts of well-meaning volunteers, read-
ing through plugin documentation on the Maven site is frustrating at best, and at worst,
it’s a reason to abandon Maven. Quite often, Maven users get stuck because they just
can’t find an answer.
This lack of an authoritative (or definitive) reference manual has held Maven back for
a few years, and it has been something of a dampening force on Maven adoption. With
Maven: The Definitive Guide, we intend to change that situation by providing a com-
prehensive reference in Part III. In Part II, we’re preserving the narrative progression of
a Developer’s Notebook; it is valuable material that helps people learn Maven by ex-
ample. Thus, here we “introduce by doing,” and in Part III, we fill in the blanks and
dig into the details. Where Part III might use a reference table and a program listing
detached from an example project, Part II is motivated by real examples.

CHAPTER 3
A Simple Maven Project
Introduction
In this chapter, we introduce a simple project created from scratch using the Maven
Archetype plugin. This elementary application provides us with the opportunity to
discuss some core Maven concepts while you follow along with the development of the
project.
Before you can start using Maven for complex, multimodule builds, we have to start
with the basics. If you’ve used Maven before, you’ll notice that it does a good job of
taking care of the details. Your builds tend to “just work,” and you only really need to
dive into the details of Maven when you want to customize the default behavior or write
a custom plugin. However, when you do need to dive into the details, a thorough
understanding of the core concepts is essential. This chapter aims to introduce you to
the simplest possible Maven project and then presents some of the core concepts that
make Maven a solid build platform. After reading it, you’ll have an fundamental un-
derstanding of the build lifecycle, Maven repositories, dependency management, and
the Project Object Model (POM).
Downloading This Chapter’s Example
This chapter develops a very simple example that will be used to explore core concepts
of Maven. If you follow the steps as described, you shouldn’t need to download the
examples to recreate the code produced by Maven. We will be using the Maven Ar-
chetype plugin to create this simple project, and in this chapter we won’t modify the
project in any way. If you would prefer to read this chapter with the final example
source code, the example project may be downloaded with the book’s example code
at http://www.sonatype.com/book/mvn-examples-1.0.zip or http://www.sonatype.com/
book/mvn-examples-1.0.tar.gz. Unzip this archive in any directory, and then go to the
ch03/ directory. There you will see a directory named simple/, which contains the source
code for this chapter. If you wish to follow along with the example code in a web
25
browser, go to http://www.sonatype.com/book/examples-1.0 and click on the ch03/
directory.
Creating a Simple Project
To start a new Maven project, use the Maven Archetype plugin from the command line:
$ mvn archetype:create -DgroupId=org.sonatype.mavenbook.ch03 \
-DartifactId=simple \
-DpackageName=org.sonatype.mavenbook
[INFO] Scanning for projects...
[INFO] Searching repository for plugin with prefix: 'archetype'.
[INFO] artifact org.apache.maven.plugins:maven-archetype-plugin: checking for \
updates from central
[INFO] -----------------------------------------------------------------------
[INFO] Building Maven Default Project
[INFO] task-segment: [archetype:create] (aggregator-style)
[INFO] --------------------------------------------------------------------
[INFO] [archetype:create]
[INFO] artifact org.apache.maven.archetypes:maven-archetype-quickstart: \
checking for updates from central
[INFO] Parameter: groupId, Value: org.sonatype.mavenbook.ch03
[INFO] Parameter: packageName, Value: org.sonatype.mavenbook
[INFO] Parameter: basedir, Value: /Users/tobrien/svnw/sonatype/examples
[INFO] Parameter: package, Value: org.sonatype.mavenbook
[INFO] Parameter: version, Value: 1.0-SNAPSHOT
[INFO] Parameter: artifactId, Value: simple
[INFO] * End of debug info from resources from generated POM *
[INFO] Archetype created in dir: /Users/tobrien/svnw/sonatype/examples/simple
mvn is the Maven 2 command. archetype:create is called a Maven goal. If you are
familiar with Apache Ant, a Maven goal is analogous to an Ant target; both describe a
unit of work to be completed in a build. The -Dname=value pairs are arguments that are
passed to the goal and take the form of -D properties, similar to the system property
options you might pass to the Java Virtual Machine via the command line. The purpose
of the archetype:create goal is to quickly create a project from an archetype. In this
context, an archetype is defined as “an original model or type after which other similar
things are patterned; a prototype.”* A number of archetypes are available in Maven for
anything from a simple Swing application to a complex web application. In this chapter,
we are going to use the most basic archetype to create a simple skeleton starter project.
The plugin is the prefix archetype, and the goal is create.
Once we’ve generated a project, take a look at the directory structure Maven created
under the simple directory:
simple/
simple/pom.xml
/src/
/src/main/
*The American Heritage Dictionary of the English Language
26 | Chapter 3: A Simple Maven Project
/main/java
/src/test/
/test/java
This generated directory adheres to the Maven Standard Directory Layout. We’ll get
into more details later in this chapter, but for now, let’s just try to understand these
few basic directories:
The Maven Archetype plugin creates a directory that matches the artifactId. Sim-
ple. This is known as the project’s base directory.
Every Maven project has what is known as a Project Object Model (POM) in a file
named pom.xml. This file describes the project, configures plugins, and declares
dependencies.
Our project’s source code and resources are placed under src/main. In the case of
our simple Java project, this will consist of a few Java classes and some properties
files. In another project, this could be the document root of a web application or
configuration files for an application server. In a Java project, Java classes are placed
in src/main/java, and classpath resources are placed in src/main/resources.
Our project’s test cases are located in src/test. Under this directory, Java classes such
as JUnit or TestNG tests are placed in src/test/java, and classpath resources for tests
are located in src/test/resources.
The Maven Archetype plugin generated a single class org.sonatype.mavenbook.App,
which is a 13-line Java class with a static main function that prints out a message:
package org.sonatype.mavenbook;
/**
* Hello world!
*
*/
public class App
{
public static void main( String[] args )
{
System.out.println( "Hello World!" );
}
}
The simplest Maven archetype generates the simplest possible program: a program that
prints “Hello World!” to standard output.
Building a Simple Project
Once you have created the project with the Maven Archetype plugin by following the
directions from the previous section (“Creating a Simple Project”) you will want to
build and package the application. To do so, run mvn install from the directory that
contains the pom.xml:
Building a Simple Project | 27

$ mvn install
[INFO] Scanning for projects...
[INFO] -------------------------------------------------------
[INFO] Building simple
[INFO] task-segment: [install]
[INFO] -------------------------------------------------------
[INFO] [resources:resources]
[INFO] Using default encoding to copy filtered resources.
[INFO] [compiler:compile]
[INFO] Compiling 1 source file to /simple/target/classes
[INFO] [resources:testResources]
[INFO] Using default encoding to copy filtered resources.
[INFO] [compiler:testCompile]
[INFO] Compiling 1 source file to /simple/target/test-classes
[INFO] [surefire:test]
[INFO] Surefire report directory: /simple/target/surefire-reports
-------------------------------------------------------
T E S T S
-------------------------------------------------------
Running org.sonatype.mavenbook.AppTest
Tests run: 1, Failures: 0, Errors: 0, Skipped: 0, Time elapsed: 0.105 sec
Results :
Tests run: 1, Failures: 0, Errors: 0, Skipped: 0
[INFO] [jar:jar]
[INFO] Building jar: /simple/target/simple-1.0-SNAPSHOT.jar
[INFO] [install:install]
[INFO] Installing /simple/target/simple-1.0-SNAPSHOT.jar to \
~/.m2/repository/org/sonatype/mavenbook/ch03/simple/1.0-SNAPSHOT/ \
simple-1.0-SNAPSHOT.jar
You’ve just created, compiled, tested, packaged, and installed the simplest possible
Maven project. To prove to yourself that this program works, run it from the command
line:
$ java -cp target/simple-1.0-SNAPSHOT.jar org.sonatype.mavenbook.App
Hello World!
Simple Project Object Model
When Maven executes, it looks to the Project Object Model for information about the
project. The POM answers such questions as: What type of project is this? What is the
project’s name? Are there any build customizations for this project? Example 3-1 shows
the default pom.xml file created by the Maven Archetype plugin’s create goal.
Example 3-1. Simple project’s pom.xml file
<project xmlns="http://maven.apache.org/POM/4.0.0"
xmlns:xsi="http://www.w3.org/2001/XMLSchema-instance"
xsi:schemaLocation="http://maven.apache.org/POM/4.0.0
28 | Chapter 3: A Simple Maven Project

http://maven.apache.org/maven-v4_0_0.xsd">
<modelVersion>4.0.0</modelVersion>
<groupId>org.sonatype.mavenbook.ch03</groupId>
<artifactId>simple</artifactId>
<packaging>jar</packaging>
<version>1.0-SNAPSHOT</version>
<name>simple</name>
<url>http://maven.apache.org</url>
<dependencies>
<dependency>
<groupId>junit</groupId>
<artifactId>junit</artifactId>
<version>3.8.1</version>
<scope>test</scope>
</dependency>
</dependencies>
</project>
This pom.xml file is the most basic POM you will ever deal with for a Maven project.
Usually a POM file is considerably more complex, defining multiple dependencies and
customizing plugin behavior. The first few elements—groupId, artifactId, packaging,
version—are known as the Maven coordinates, which uniquely identify a project.
name and url are descriptive elements of the POM, providing a human-readable name
and associating the project with a project web site. Lastly, the dependencies element
defines a single, test-scoped dependency on a unit testing framework called JUnit.
These topics will be further introduced in the next section, “Core Concepts,” and in
Chapter 9. All you need to know at this point is that the pom.xml is the file that makes
Maven go.
Maven always executes against an effective POM, a combination of settings from this
project’s pom.xml, all parent POMs, a Super POM defined within Maven, user-defined
settings, and active profiles. All projects ultimately extend the Super POM, which de-
fines a set of sensible default configuration settings and which is fully explained in
Chapter 9. Although your project might have a relatively minimal pom.xml, the con-
tents of your project’s POM are interpolated with the contents of all parent POMs, user
settings, and any active profiles. To see this “effective” POM, run the following com-
mand in the simple project’s base directory:
$ mvn help:effective-pom
When you run this, you should see a much larger POM that exposes the default settings
of Maven. This goal can come in handy if you are trying to debug a build and want to
see how all of the current project’s ancestor POMs are contributing to the effective
POM. For more information about the Maven Help plugin, see “Using the Maven Help
Plugin” in Chapter 2.
Simple Project Object Model | 29

Core Concepts
Now that we’ve just run Maven for the first time, this is a good point to introduce a
few of the core concepts of Maven. In Example 3-1, you generated a project that con-
sisted of a POM and some code assembled in the Maven Standard Directory Layout.
You then executed Maven with a lifecycle phase as an argument that prompted Maven
to execute a series of Maven plugin goals. Lastly, you installed a Maven artifact into
your local repository. Wait—what is a “lifecycle”? What is a “local repository”? The
following section defines some of Maven’s central concepts.
Maven Plugins and Goals
In the previous section, we ran Maven with two different types of command-line
arguments. The first command was a single plugin goal, the create goal of the Arche-
type plugin. The second execution of Maven was a lifecycle phase, install. To execute
a single Maven plugin goal, we used the syntax mvn archetype:create, where arche
type is the identifier of a plugin and create is the identifier of a goal. When Maven
executes a plugin goal, it prints out the plugin identifier and goal identifier to standard
output:
$ mvn archetype:create -DgroupId=org.sonatype.mavenbook.ch03 \
-DartifactId=simple \
-DpackageName=org.sonatype.mavenbook
...
[INFO] [archetype:create]
[INFO] artifact org.apache.maven.archetypes:maven-archetype-quickstart: \
checking for updates from central
...
A Maven plugin is a collection of one or more goals (see Figure 3-1). Examples of Maven
plugins can be simple core plugins such as the Jar plugin that contains goals for creating
JAR files, the Compiler plugin that contains goals for compiling source code and unit
tests, or the Surefire plugin that contains goals for executing unit tests and generating
reports. Other, more specialized Maven plugins include the Hibernate3 plugin, for
integration with the popular persistence library Hibernate, and the JRuby plugin, which
allows you to execute Ruby as part of a Maven build or to write Maven plugins in Ruby.
Maven also provides you with the ability to define custom plugins. A custom plugin
can be written in any number of languages, including Java, Ant, Groovy, BeanShell,
and, as previously mentioned, Ruby.
A goal is a specific task that may be executed as a standalone goal or along with other
goals as part of a larger build. A goal is a “unit of work” in Maven. Examples of goals
include the compile goal in the Compiler plugin, which compiles all of the source code
for a project, or the test goal of the Surefire plugin, which can execute unit tests. Goals
are configured via configuration properties that can be used to customize behavior. For
example, the compile goal of the Compiler plugin defines a set of configuration
parameters that allow you to specify the target JDK version or whether to use the
30 | Chapter 3: A Simple Maven Project
compiler optimizations. In the previous example, we passed in the configuration
parameters groupId and artifactId to the create goal of the Archetype plugin via the
command-line parameters -DgroupId=org.sonatype.mavenbook.ch03 and
-DartifactId=simple. We also passed the packageName parameter to the create goal as
org.sonatype.mavenbook. If we had omitted the packageName parameter, the package
name would have defaulted to org.sonatype.mavenbook.ch03.
When referring to a plugin goal, we frequently use the shorthand nota-
tion: pluginId:goalId. For example, when referring to the create goal
in the Archetype plugin, we write archetype:create.
Goals define parameters that can define sensible default values. In the archetype:cre
ate example, we did not specify what kind of archetype the goal was to create on our
command line; we simply passed in a groupId and an artifactId. This is our first brush
with convention over configuration. The convention, or default, for the create goal is
to create a simple project called Quickstart. The create goal defines a configuration
property archetypeArtifactId that has a default value of maven-archetype-quick
start. The Quickstart archetype generates a minimal project shell that contains a
POM and a single class. The Archetype plugin is far more powerful than this first ex-
ample suggests, but it is a great way to get new projects started fast. Later in this book,
we’ll show you how the Archetype plugin can be used to generate more complex
projects such as web applications, and how you can use the Archetype plugin to define
your own set of projects.
The core of Maven has little to do with the specific tasks involved in your project’s
build. By itself, Maven doesn’t know how to compile your code or even how to make
a JAR file. It delegates all of this work to Maven plugins like the Compiler plugin and
the Jar plugin, which are downloaded on an as-needed basis and periodically updated
from the central Maven repository. When you download Maven, you are getting the
core of Maven, which consists of a very basic shell that knows only how to parse the
command line, manage a classpath, parse a POM file, and download Maven plugins as
needed. By keeping the Compiler plugin separate from Maven’s core and providing for
an update mechanism, Maven makes it easier for users to have access to the latest
options in the compiler. In this way, Maven plugins allow for universal reusability of
goal goal goal
plugin
Figure 3-1. A plugin contains goals
Core Concepts | 31

common build logic. You are not defining the compile task in a build file; you are using
a Compiler plugin that is shared by every user of Maven. If there is an improvement to
the Compiler plugin, every project that uses Maven can immediately benefit from this
change. (And, if you don’t like the Compiler plugin, you can override it with your own
implementation.)
Maven Lifecycle
The second command we ran in the previous section was mvn install. This command
didn’t specify a plugin goal; instead, it specified a Maven lifecycle phase. A phase is a
step in what Maven calls the “build lifecycle.” The build lifecycle is an ordered sequence
of phases involved in building a project. Maven can support a number of different
lifecycles, but the one that’s most often used is the default Maven lifecycle, which begins
with a phase to validate the basic integrity of the project and ends with a phase that
involves deploying a project to production. Lifecycle phases are intentionally vague,
defined solely as validation, testing, or deployment, and they may mean different things
to different projects. For example, the package phase in a project that produces a
JAR, means “package this project into a JAR”; in a project that produces a web appli-
cation, the package phase may produce a WAR file. Figure 3-2 shows a simplified rep-
resentation of the default Maven lifecycle.
Plugin goals can be attached to a lifecycle phase. As Maven moves through the phases
in a lifecycle, it will execute the goals attached to each particular phase. Each phase
may have zero or more goals bound to it. In the previous section, when you ran mvn
install, you might have noticed that more than one goal was executed. Examine the
output after running mvn install and take note of the various goals that are executed.
When this simple example reached the package phase, it executed the jar goal in the
Jar plugin. Since our simple Quickstart project has (by default) a jar packaging type,
the jar:jar goal is bound to the package phase (see Figure 3-3).
We know that the package phase is going to create a JAR file for a project with jar
packaging. But what of the goals preceding it, such as compiler:compile and
surefire:test? These goals are executed as Maven steps through the phases preceding
package in the Maven lifecycle; executing a phase will first execute all proceeding phases
in order, ending with the phase specified on the command line. Each phase corresponds
to zero or more goals, and since we haven’t performed any plugin configuration or
customization, this example binds a set of standard plugin goals to the default lifecycle.
The following goals are executed in order when Maven walks through the default life-
cycle ending with package:
resources:resources
The resources goal of the Resources plugin is bound to the process-resources
phase. This goal copies all of the resources from src/main/resources and any other
configured resource directories to the output directory.
32 | Chapter 3: A Simple Maven Project
compiler:compile
The compile goal of the Compiler plugin is bound to the compile phase. This goal
compiles all of the source code from src/main/java or any other configured source
directories to the output directory.
process-resources
compile
process-classes
process-test-resources
test-compile
test
prepare-package
package
There are more phases than shown
above; this is a partial list.
Note:
Phases
Figure 3-2. A lifecycle is a sequence of phases
package jar:jar
Phases Goals
Figure 3-3. A goal binds to a phase
Core Concepts | 33

resources:testResources
The testResources goal of the Resources plugin is bound to the process-test-
resources phase. This goal copies all of the resources from src/test/resources and
any other configured test resource directories to a test output directory.
compiler:testCompile
The testCompile goal of the Compiler plugin is bound to the test-compile phase.
This goal compiles test cases from src/test/java and any other configured test source
directories to a test output directory.
surefire:test
The test goal of the Surefire plugin is bound to the test phase. This goal executes
all of the tests and creates output files that capture detailed results. By default, this
goal will terminate a build if there is a test failure.
jar:jar
The jar goal of the Jar plugin is bound to the package phase. This goal packages
the output directory into a JAR file.
To summarize, when we run mvn install, Maven executes all phases up to install, and
in the process of stepping through the lifecycle phases, it executes all goals bound to
each phase (see Figure 3-4). Instead of executing a Maven lifecycle goal, you could
achieve the same results by specifying a sequence of plugin goals as follows:
mvn resources:resources \
compiler:compile \
resources:testResources \
compiler:testCompile \
surefire:test \
jar:jar
Executing the package phase is preferable to keeping track of all of the goals involved
in a particular build. It also allows every project that uses Maven to adhere to a well-
defined set of standards. The lifecycle is what allows a developer to jump from one
Maven project to another without having to know very much about the details of each
particular project’s build. If you can build one Maven project, you can build them all.
Maven Coordinates
The Archetype plugin created a project with a file named pom.xml. This is the Project
Object Model (POM), a declarative description of a project. When Maven executes a
goal, each goal has access to the information defined in a project’s POM. When the
jar:jar goal needs to create a JAR file, it looks to the POM to find out what the JAR
file’s name is. When the compiler:compile task compiles Java source code into byte-
code, it looks to the POM to see if there are any parameters for the compile goal. Goals
execute in the context of a POM. Goals are actions we wish to take upon a project, and
a project is defined by a POM. The POM names the project, provides a set of unique
identifiers (coordinates) for a project, and defines the relationships between this project
34 | Chapter 3: A Simple Maven Project
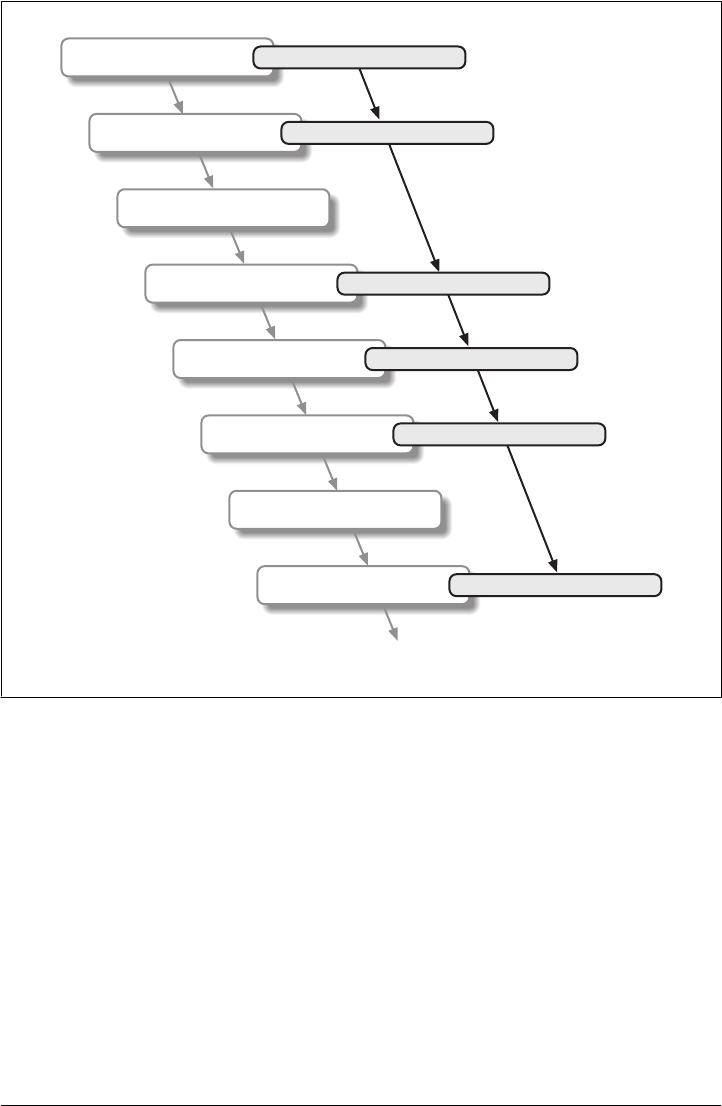
and others through dependencies, parents, and prerequisites. A POM can also cus-
tomize plugin behavior and supply information about the community and developers
involved in a project.
Maven coordinates define a set of identifiers that can be used to uniquely identify a
project, a dependency, or a plugin in a Maven POM. Take a look at the POM shown
in Figure 3-5.
We’ve highlighted the Maven coordinates for this project: groupId, artifactId,
version and packaging. These combined identifiers make up a project’s coordinates.†
Just as in any other coordinate system, a Maven coordinate is an address for a specific
process-resources
compile
process-classes
process-test-resources
test-compile
test
prepare-package
package
There are more phases than shown
above; this is a partial list.
Note:
Phases
resources:resources
Goals
compiler:compile
resources:testResources
complie:testCompile
surefire:test
jar:jar
Figure 3-4. Bound goals are run when their phases execute
†There is a fifth, seldom-used coordinate named classifier, which we will introduce later in the book. You
can feel free to ignore classifiers for now.
Core Concepts | 35

point in “space”: from general to specific. Maven pinpoints a project via its coordinates
when one project relates to another, either as a dependency, a plugin, or a parent project
reference. Maven coordinates are often written using a colon as a delimiter in the fol-
lowing format: groupId:artifactId:packaging:version. In the pom.xml file for our
current project, its coordinate is represented as mavenbook:my-app:jar:1.0-SNAPSHOT.
This notation also applies to project dependencies. Our project relies on JUnit version
3.8.1, and it contains a dependency on junit:junit:jar:3.8.1. Here is some more
information about each part of the coordinate:
groupId
The group, company, team, organization, project, or other group. The convention
for group identifiers is that they begin with the reverse domain name of the organ-
ization that creates the project. Projects from Sonatype would have a groupId that
begins with com.sonatype, and projects in the Apache Software Foundation would
have a groupId that starts with org.apache.
artifactId
A unique identifier under groupId that represents a single project.
version
A specific release of a project. Projects that have been released have a fixed version
identifier that refers to a specific version of the project. Projects undergoing active
development can use a special identifier that marks a version as a SNAPSHOT.
<project xmlns="http://maven.apache.org/POM/4.0.0"
xmlns:xsi=http://www.w3.org/2001/XMLSchema-instance"
xsi:schemaLocation="http://maven.apache.org/POM/4.0.0"
http://maven.apache.org/maven-v4_0_0.xsd"
<modelVersion>4.0.0</modelVersion>
<groupId>mavenbook</groupId>
<artifactId>my-app</artifactId>
<version>1.0-SNAPSHOT/<version>
<name>Maven Quick Start Archetype</name>
<url>http://maven.apache.org</url>
<dependencies>
<dependency>
<groupId>junit</groupId>
<artifactId>junit</artifactId
<version>3.8.1</version>
<scope>test</scope>
</dependency>
</dependencies>
</project>
coordinates
Figure 3-5. A Maven project’s coordinates
36 | Chapter 3: A Simple Maven Project

The packaging format of a project is also an important component in the Maven co-
ordinates, but it isn’t a part of a project’s unique identifiers. A project’s
groupId:artifactId:version make that project unique; you can’t have a project with
the same three groupId, artifactId, and version identifiers.
packaging
The type of project, defaulting to jar, describing the packaged output produced
by a project. A project with packaging jar produces a JAR archive; a project with
packaging war produces a web application.
These four elements become the key to locating and using one particular project in the
vast space of other “Mavenized” projects (see Figure 3-6). Maven repositories (pub-
lic, private, and local) are organized according to these identifiers. When this project
is installed into the local Maven repository, it immediately becomes locally available to
any other project that wishes to use it. All you must do is add it as a dependency of
another project using the unique Maven coordinates for a specific artifact.
Maven Repositories
When you run Maven for the first time, you will notice that Maven downloads a number
of files from a remote Maven repository. If the simple project described in this chapter
is the first time you run Maven, the first thing it will do is download the latest release
of the Resources plugin when it triggers the resources:resource goal. In Maven, arti-
facts and plugins are retrieved from a remote repository when they are needed. One of
the reasons the initial Maven download is so small (1.5 MiB) is that Maven doesn’t ship
with much in the way of plugins. Maven ships with the bare minimum and fetches from
com.mycompany.webteam
killerapp
2.1-beta-1
war
junit
junit
3.8.1
jar
Maven space
Figure 3-6. Maven space is a coordinate system of projects
Core Concepts | 37

a remote repository when it needs to. Maven ships with a default remote repository
location (http://repo1.maven.org/maven2), which it uses to download the core Maven
plugins and dependencies.
Often you will be writing a project that depends on libraries that are neither free nor
publicly distributed. In that case, you will either need to set up a custom repository
inside your organization’s network or download and install the dependencies manually.
The default remote repositories can be replaced or augmented with references to cus-
tom Maven repositories maintained by your organization. Multiple products are avail-
able that allow organizations to manage and maintain mirrors of the public Maven
repositories.
What makes a Maven repository? It’s defined by structure. A repository is a collection
of project artifacts stored in a structure and format that can be easily understood by
Maven. Everything is stored in a directory structure that closely matches a project’s
coordinates. You can see this structure by opening up a web browser and going to the
central Maven repository at http://repo1.maven.org/maven2/. You will notice that an
artifact with the coordinates org.apache.commons:commons-email:1.1 is available under
the directory /org/apache/commons/commons-email/1.1/ in a file named commons-
email-1.1.jar. The standard for a Maven repository is to store an artifact in a directory
relative to the root of the repository:
/<groupId>/<artifactId>/<version>/<artifactId>-<version>.<packaging>
Maven downloads artifacts and plugins from a remote repository to your local machine
and stores these artifacts in your local Maven repository. Once Maven has downloaded
an artifact from the remote repository, it never needs to download that artifact again,
as Maven will always look for the artifact in the local repository before looking else-
where. On Windows XP, your local repository is likely in C:\Documents and Settings
\USERNAME\.m2\repository, and on Windows Vista, your local repository is in
C:\Users\USERNAME\.m2\repository. On Unix systems, your local Maven repository
is available in ~/.m2/repository. When you build a project such as the simple one you
created in the previous section, the install phase executes a goal that installs your
project’s artifacts in your local Maven repository.
In your local repository, you should be able to see the artifact created by your simple
project. If you run the mvn install command, Maven will install our project’s artifact
in your local repository. Try it:
$ mvn install
...
[INFO] [install:install]
[INFO] Installing .../simple-1.0-SNAPSHOT.jar to \
~/.m2/repository/org/sonatype/mavenbook/simple/1.0-SNAPSHOT/ \
simple-1.0-SNAPSHOT.jar
...
As you can see from the output of this command, Maven installed our project’s JAR
file into our local repository. Maven uses the local repository to share dependencies
38 | Chapter 3: A Simple Maven Project

across local projects. If you develop two projects—project-a and project-b—and
project-b depends on the artifact produced by project-a, Maven will retrieve project-
a’s artifact from your local repository when it is building project-b. A Maven repository
is both a local cache of artifacts downloaded from a remote repository and a mechanism
for allowing your projects to depend on each other.
Maven’s Dependency Management
In this chapter’s simple example project, Maven resolved the coordinates of the JUnit
dependency—junit:junit:3.8.1—to a path in a Maven repository: /junit/junit/3.8.1/
junit-3.8.1.jar. The ability to locate an artifact in a repository based on Maven coordi-
nates gives us the ability to define dependencies in a project’s POM. If you examine the
simple project’s pom.xml file, you will see that there is a section that deals with
dependencies, and that this section contains a single dependency—JUnit.
A more complex project would contain more than one dependency, or it might contain
dependencies that depend on other artifacts. Support for transitive dependencies is one
of Maven’s most powerful features. Let’s say your project depends on a library that, in
turn, depends on 5 or 10 other libraries (Spring or Hibernate, for example). Instead of
having to track down all of these dependencies and list them in your pom.xml explicitly,
you can simply depend on the library you are interested in and Maven will add the
dependencies of this library to your project’s dependencies implicitly. Maven will also
take care of working out conflicts between dependencies, and provides you with the
ability to customize the default behavior and exclude certain transitive dependencies.
Let’s take a look at a dependency that was downloaded to your local repository when
you ran the previous example. Look in your local repository path under ~/.m2/reposi
tory/junit/junit/3.8.1/. If you have been following this chapter’s examples, there will be
a file named junit-3.8.1.jar and a junit-3.8.1.pom file, in addition to a few checksum
files that Maven uses to verify the authenticity of a downloaded artifact. Note that
Maven doesn’t just download the JUnit JAR file, it also downloads a POM file for the
JUnit dependency. The fact that Maven downloads POM files in addition to artifacts
is central to Maven’s support for transitive dependencies.
When you install your project’s artifact in the local repository, you will also notice that
Maven publishes a slightly modified version of the project’s pom.xml file in the same
directory as the JAR file. Storing a POM file in the repository gives other projects in-
formation about this project, most importantly what dependencies it has. If Project B
depends on Project A, it also depends on Project A’s dependencies. When Maven re-
solves a dependency artifact from a set of Maven coordinates, it also retrieves the
POM and consults the dependencies POM to find any transitive dependences. These
transitive dependencies are then added as dependencies of the current project.
A dependency in Maven isn’t just a JAR file; it’s a POM file that, in turn, may declare
dependencies on other artifacts. These dependencies of dependencies are called tran-
sitive dependencies, and they are made possible by the fact that the Maven repository
Core Concepts | 39
stores more than just bytecode; it stores metadata about artifacts. Figure 3-7 shows a
possible scenario for transitive dependencies.
In this figure, project-a depends on project-b and project-c, project-b depends on
project-d, and project-c depends on project-e. The full set of direct and transitive
dependencies for project-a would be project-b, project-c, project-d, and project-
e, but all project-a has to do is define a dependency on project-b and project-c.
Transitive dependencies come in handy when your project relies on other projects with
several small dependencies (such as Hibernate, Apache Struts, or the Spring Frame-
work). Maven also provides you with the ability to exclude transitive dependencies
from a project’s classpath.
Maven also provides for different dependency scopes. The simple project’s pom.xml
contains a single dependency—junit:junit:jar:3.8.1—with a scope of test. When
a dependency has a scope of test, it will not be available to the compile goal of the
Compiler plugin. It will be added to the classpath for only the compiler:testCompile
and surefire:test goals.
When you create a JAR for a project, dependencies are not bundled with the generated
artifact; they are used only for compilation. When you use Maven to create a WAR or
an EAR file, you can configure Maven to bundle dependencies with the generated ar-
tifact, and you can also configure it to exclude certain dependencies from the WAR file
using the provided scope. The provided scope tells Maven that a dependency is needed
for compilation, but should not be bundled with the output of a build. This scope
comes in handy when you are developing a web application. You’ll need to compile
your code against the Servlet specification, but you don’t want to include the Servlet
API JAR in your web application’s WEB-INF/lib directory.
com.sonatype.maven
project-a
1.0-SNAPSHOT
com.sonatype.maven
project-b
1.0-SNAPSHOT
com.sonatype.maven
project-c
1.0-SNAPSHOT
com.sonatype.maven
project-d
1.0-SNAPSHOT
com.sonatype.maven
project-e
1.0-SNAPSHOT
Dependencies
Transitive dependencies
Figure 3-7. Maven resolves transitive dependencies
40 | Chapter 3: A Simple Maven Project

Site Generation and Reporting
Another important feature of Maven is its ability to generate documentation and re-
ports. In your simple project’s directory, execute the following command:
$ mvn site
This will execute the site lifecycle phase. Unlike the default build lifecycle that manages
generation of code, manipulation of resources, compilation, packaging, etc., this life-
cycle is concerned solely with processing site content under the src/site directories and
generating reports. After this command executes, you should see a project web site in
the target/site directory. Load target/site/index.html and you should see a basic shell of
a project site. This shell contains some reports under “Project Reports” in the lefthand
navigation menu, and it also contains information about the project, the dependencies,
and developers associated with it under “Project Information.” The simple project’s
web site is mostly empty, since the POM contains very little information about itself
beyond a coordinate, a name, a URL, and a single test dependency.
On this site, you’ll notice that some default reports are available. A unit test report
communicates the success and failure of all unit tests in the project. Another report
generates Javadoc for the project’s API. Maven provides a full range of configurable
reports, such as the Clover report that examines unit test coverage, the JXR report that
generates cross-referenced HTML source code listings useful for code reviews, the
PMD report that analyzes source code for various coding problems, and the JDepend
report that analyzes the dependencies between packages in a codebase. You can cus-
tomize site reports by configuring which reports are included in a build via the
pom.xml file.
Summary
In this chapter, we have created a simple project, packaged the project into a JAR file,
installed that JAR into the Maven repository for use by other projects, and generated
a site with documentation. We accomplished this without writing a single line of code
or touching a single configuration file. We also took some time to develop definitions
for some of the core concepts of Maven. In the next chapter, we’ll start customizing
and modifying our project pom.xml file to add dependencies and configure unit tests.
Summary | 41

CHAPTER 4
Customizing a Maven Project
Introduction
This chapter expands on the information introduced in Chapter 3. We’re going to
create a simple project generated with the Maven Archetype plugin, add some depend-
encies, add some source code, and customize the project to suit our needs. By the end
of this chapter, you will know how to start using Maven to create real projects.
Downloading This Chapter’s Example
We’ll be developing a useful program that interacts with a Yahoo! Weather web service.
Although you should be able to follow along with this chapter without the example
source code, we recommend that you download a copy of the code to use as a reference.
This chapter’s example project may be downloaded with the book’s example code at
http://www.sonatype.com/book/mvn-examples-1.0.zip or http://www.sonatype.com/
book/mvn-examples-1.0.tar.gz. Unzip this archive in any directory, and then go to the
ch04/ directory. There you will see a directory named simple-weather/, which contains
the Maven project developed in this chapter. If you wish to follow along with the ex-
ample code in a web browser, go to http://www.sonatype.com/book/examples-1.0 and
click on the ch04/ directory.
Defining the Simple Weather Project
Before we start customizing this project, let’s take a step back and talk about the simple
weather project. What is it? It’s a contrived example, created to demonstrate some of
the features of Maven. It is an application that is representative of the kind you might
need to build. The simple weather application is a basic command-line-driven appli-
cation that takes a zip code and retrieves some data from the Yahoo! Weather RSS feed.
It then parses the result and prints the result to standard output.
We chose this example for a number of reasons. First, it is straightforward. A user
supplies input via the command line, the app takes that zip code, makes a request to
43

Yahoo! Weather, parses the result, and formats some simple data to the screen. This
example is a simple main() function and some supporting classes; there is no enterprise
framework to introduce and explain, just XML parsing and some logging statements.
Second, it gives us a good excuse to introduce some interesting libraries such as
Velocity, Dom4J, and Log4J. Although this book is focused on Maven, we won’t shy
away from an opportunity to introduce interesting utilities. Lastly, it is an example that
can be introduced, developed, and deployed in a single chapter.
Yahoo! Weather RSS
Before you build this application, you should know something about the Yahoo!
Weather RSS feed. To start with, the service is made available under the following
terms:
The feeds are provided free of charge for use by individuals and nonprofit organizations
for personal, noncommercial uses. We ask that you provide attribution to Yahoo!
Weather in connection with your use of the feeds.
In other words, if you are thinking of integrating these feeds into your commercial web
site, think again—this feed is for personal, noncommercial use. The use we’re encour-
aging in this chapter is personal educational use. For more information about these
terms of service, see the Yahoo Weather! API documentation here: http://developer
.yahoo.com/weather/.
Creating the Simple Weather Project
First, let’s use the Maven Archetype plugin to create a basic skeleton for the simple
weather project. Execute the following command to create a new project:
$ mvn archetype:create -DgroupId=org.sonatype.mavenbook.ch04 \
-DartifactId=simple-weather \
-DpackageName=org.sonatype.mavenbook \
-Dversion=1.0
[INFO] [archetype:create]
[INFO] artifact org.apache.maven.archetypes:maven-archetype-quickstart: \
checking for updates from central
[INFO] ------------------------------------------------------------------
[INFO] Using following parameters for creating Archetype: \
maven-archetype-quickstart:RELEASE
[INFO] ------------------------------------------------------------------
[INFO] Parameter: groupId, Value: org.sonatype.mavenbook.ch04
[INFO] Parameter: packageName, Value: org.sonatype.mavenbook
[INFO] Parameter: basedir, Value: ~/examples
[INFO] Parameter: package, Value: org.sonatype.mavenbook
[INFO] Parameter: version, Value: 1.0
[INFO] Parameter: artifactId, Value: simple-weather
[INFO] *** End of debug info from resources from generated POM ***
[INFO] Archetype created in dir: ~/examples/simple-weather
44 | Chapter 4: Customizing a Maven Project

Once the Maven Archetype plugin creates the project, go into the simple-weather di-
rectory and take a look at the pom.xml file. You should see the XML document that’s
shown in Example 4-1.
Example 4-1. Initial POM for the simple-weather project
<project xmlns="http://maven.apache.org/POM/4.0.0"
xmlns:xsi="http://www.w3.org/2001/XMLSchema-instance"
xsi:schemaLocation="http://maven.apache.org/POM/4.0.0
http://maven.apache.org/maven-v4_0_0.xsd">
<modelVersion>4.0.0</modelVersion>
<groupId>org.sonatype.mavenbook.ch04</groupId>
<artifactId>simple-weather</artifactId>
<packaging>jar</packaging>
<version>1.0</version>
<name>simple-weather2</name>
<url>http://maven.apache.org</url>
<dependencies>
<dependency>
<groupId>junit</groupId>
<artifactId>junit</artifactId>
<version>3.8.1</version>
<scope>test</scope>
</dependency>
</dependencies>
<build>
<plugins>
<plugin>
<artifactId>maven-compiler-plugin</artifactId>
<configuration>
<source>1.5</source>
<target>1.5</target>
</configuration>
</plugin>
</plugins>
</build>
</project>
Notice that we passed in the version parameter to the archetype:create goal. This
overrides the default value of 1.0-SNAPSHOT. In this project, we’re developing the 1.0
version of the simple-weather project, as you can see in the pom.xml version element.
Customize Project Information
Before we start writing code, let’s customize the project information a bit. We want to
add some information about the project’s license, the organization, and a few of the
developers associated with the project. This is all standard information you would
expect to see in most projects. Example 4-2 shows the XML that supplies the organi-
zational information, the licensing information, and the developer information.
Customize Project Information | 45

Example 4-2. Adding organizational, legal, and developer information to the pom.xml
<project xmlns="http://maven.apache.org/POM/4.0.0"
xmlns:xsi="http://www.w3.org/2001/XMLSchema-instance"
xsi:schemaLocation="http://maven.apache.org/POM/4.0.0
http://maven.apache.org/maven-v4_0_0.xsd">
...
<name>simple-weather</name>
<url>http://www.sonatype.com</url>
<licenses>
<license>
<name>Apache 2</name>
<url>http://www.apache.org/licenses/LICENSE-2.0.txt</url>
<distribution>repo</distribution>
<comments>A business-friendly OSS license</comments>
</license>
</licenses>
<organization>
<name>Sonatype</name>
<url>http://www.sonatype.com</url>
</organization>
<developers>
<developer>
<id>jason</id>
<name>Jason Van Zyl</name>
<email>jason@maven.org</email>
<url>http://www.sonatype.com</url>
<organization>Sonatype</organization>
<organizationUrl>http://www.sonatype.com</organizationUrl>
<roles>
<role>developer</role>
</roles>
<timezone>-6</timezone>
</developer>
</developers>
...
</project>
The ellipses in this example are shorthand for an abbreviated listing. Whenever you
see a pom.xml with “...” directly after the project element’s start tag and directly before
the end tag, it indicates that we are not showing the entire pom.xml file. In this case,
the licenses, organization, and developers elements are all added before the
dependencies element.
Add New Dependencies
The simple weather application will need to complete the following three tasks: retrieve
XML data from Yahoo! Weather, parse the XML from Yahoo, and then print formatted
46 | Chapter 4: Customizing a Maven Project

output to standard output. To accomplish these tasks, we have to introduce some new
dependencies to our project’s pom.xml. To parse the XML response from Yahoo!, we’ll
use Dom4J and Jaxen; to format the output of this command-line program, we’ll use
Velocity; and we also need to add a dependency for Log4J, which we will be using for
logging. After we add these dependencies, our dependencies element will look like
Example 4-3.
Example 4-3. Adding Dom4J, Jaxen, Velocity, and Log4J as dependencies
<project>
[...]
<dependencies>
<dependency>
<groupId>log4j</groupId>
<artifactId>log4j</artifactId>
<version>1.2.14</version>
</dependency>
<dependency>
<groupId>dom4j</groupId>
<artifactId>dom4j</artifactId>
<version>1.6.1</version>
</dependency>
<dependency>
<groupId>jaxen</groupId>
<artifactId>jaxen</artifactId>
<version>1.1.1</version>
</dependency>
<dependency>
<groupId>velocity</groupId>
<artifactId>velocity</artifactId>
<version>1.5</version>
</dependency>
<dependency>
<groupId>junit</groupId>
<artifactId>junit</artifactId>
<version>3.8.1</version>
<scope>test</scope>
</dependency>
</dependencies>
[...]
</project>
As you can see, we’ve added four more dependency elements in addition to the existing
element that was referencing the test-scoped dependency on JUnit. If you add these
dependencies to the project’s pom.xml file and then run mvn install, you will see Maven
downloading all of these dependencies and other transitive dependencies to your local
Maven repository.
How did we find these dependencies? Did we just “know” the appropriate groupId and
artifactId values? Some of the dependencies are so common (such as Log4J) that you’ll
just remember what the groupId and artifactId are every time you need to use them.
As for Velocity, Dom4J, and Jaxen, we located them using the very helpful web site
Add New Dependencies | 47

http://www.mvnrepository.com. This site provides a search interface for the Maven re-
pository that you can use to search for dependencies. To test this yourself, visit http://
www.mvnrepository.com and search for some commonly used libraries such as Hiber-
nate or the Spring Framework. When you search for an artifact on this site, it will show
you an artifactId and all of the versions known to the central Maven repository.
Clicking on the details for a specific version will load a page that contains the depend-
ency element you’ll need to copy and paste into your own project’s pom.xml. If you
need to find a dependency, you’ll want to check out http://www.mvnrepository.com,
because you’ll often find that certain libraries have more than one groupId. With this
tool, you can make sense of the Maven repository.
Simple Weather Source Code
The simple weather command-line application consists of the following five Java
classes:
org.sonatype.mavenbook.weather.Main
The Main class contains a static main() function, and is the entry point for this
system.
org.sonatype.mavenbook.weather.Weather
The Weather class is a straightforward Java bean that holds the location of our
weather report and some key facts, such as the temperature and humidity.
org.sonatype.mavenbook.weather.YahooRetriever
The YahooRetriever class connects to Yahoo! Weather and returns an
InputStream of the data from the feed.
org.sonatype.mavenbook.weather.YahooParser
The YahooParser class parses the XML from Yahoo! Weather, and returns a
Weather object.
org.sonatype.mavenbook.weather.WeatherFormatter
The WeatherFormatter class takes a Weather object, creates a VelocityContext, and
evaluates a Velocity template.
Although we won’t dwell on the code here, we will provide all the necessary code for
you to get the example working. We assume that most readers have downloaded the
examples that accompany this book, but we’re also mindful of those who may wish to
follow the example in this chapter step-by-step. The sections that follow list classes in
the simple-weather project. Each of these classes should be placed in the same package:
org.sonatype.mavenbook.weather.
Let’s remove the App and the AppTest classes created by archetype:create and add our
new package. In a Maven project, all of a project’s source code is stored in src/main/
java. From the base directory of the new project, execute the following commands:
$ cd src/test/java/org/sonatype/mavenbook
$ rm AppTest.java
48 | Chapter 4: Customizing a Maven Project

$ cd ../../../../../..
$ cd src/main/java/org/sonatype/mavenbook
$ rm App.java
$ mkdir weather
$ cd weather
This creates a new package named org.sonatype.mavenbook.weather. Now we need to
put some classes in this directory. Using your favorite text editor, create a new file
named Weather.java with the contents shown in Example 4-4.
Example 4-4. simple-weather’s Weather model object
package org.sonatype.mavenbook.weather;
public class Weather {
private String city;
private String region;
private String country;
private String condition;
private String temp;
private String chill;
private String humidity;
public Weather() {}
public String getCity() { return city; }
public void setCity(String city) { this.city = city; }
public String getRegion() { return region; }
public void setRegion(String region) { this.region = region; }
public String getCountry() { return country; }
public void setCountry(String country) { this.country = country; }
public String getCondition() { return condition; }
public void setCondition(String condition) { this.condition = condition; }
public String getTemp() { return temp; }
public void setTemp(String temp) { this.temp = temp; }
public String getChill() { return chill; }
public void setChill(String chill) { this.chill = chill; }
public String getHumidity() { return humidity; }
public void setHumidity(String humidity) { this.humidity = humidity; }
}
The Weather class defines a simple bean that is used to hold the weather information
parsed from the Yahoo! Weather feed. This feed provides a wealth of information, from
the sunrise and sunset times to the speed and direction of the wind. To keep this ex-
ample as simple as possible, the Weather model object keeps track of only the temper-
ature, chill, humidity, and a textual description of current conditions.
Simple Weather Source Code | 49

Now, in the same directory, create a file named Main.java. This Main class will hold the
static main() function—the entry point for this example. See Example 4-5.
Example 4-5. simple-weather’s Main class
package org.sonatype.mavenbook.weather;
import java.io.InputStream;
import org.apache.log4j.PropertyConfigurator;
public class Main {
public static void main(String[] args) throws Exception {
// Configure Log4J
PropertyConfigurator.configure(Main.class.getClassLoader()
.getResource("log4j.properties"));
// Read the Zip Code from the Command-line (if none supplied, use 60202)
String zipcode = "60202";
try {
zipcode = args[0]);
} catch( Exception e ) {}
// Start the program
new Main(zipcode).start();
}
private String zip;
public Main(String zip) {
this.zip = zip;
}
public void start() throws Exception {
// Retrieve Data
InputStream dataIn = new YahooRetriever().retrieve( zip );
// Parse Data
Weather weather = new YahooParser().parse( dataIn );
// Format (Print) Data
System.out.print( new WeatherFormatter().format( weather ) );
}
}
The main() function shown in this example configures Log4J by retrieving a resource
from the classpath. It then tries to read a zip code from the command line. If an ex-
ception is thrown while it is trying to read the zip code, the program will default to a
zip code of 60202. Once it has a zip code, it instantiates an instance of Main and calls
the start() method on an instance of Main. The start() method calls out to the
YahooRetriever to retrieve the weather XML. The YahooRetriever returns an
50 | Chapter 4: Customizing a Maven Project

InputStream, which is then passed to the YahooParser. The YahooParser parses the Ya-
hoo! Weather XML and returns a Weather object. Finally, the WeatherFormatter takes
a Weather object and spits out a formatted String, which is printed to standard output.
Create a file named YahooRetriever.java in the same directory with the contents shown
in Example 4-6.
Example 4-6. simple-weather’s YahooRetriever class
package org.sonatype.mavenbook.weather;
import java.io.InputStream;
import java.net.URL;
import java.net.URLConnection;
import org.apache.log4j.Logger;
public class YahooRetriever {
private static Logger log = Logger.getLogger(YahooRetriever.class);
public InputStream retrieve(int zipcode) throws Exception {
log.info( "Retrieving Weather Data" );
String url = "http://weather.yahooapis.com/forecastrss?p=" + zipcode;
URLConnection conn = new URL(url).openConnection();
return conn.getInputStream();
}
}
This simple class opens a URLConnection to the Yahoo! Weather API and returns an
InputStream. To create something to parse this feed, we’ll need to create the
YahooParser.java file in the same directory. See Example 4-7.
Example 4-7. simple-weather’s YahooParser class
package org.sonatype.mavenbook.weather;
import java.io.InputStream;
import java.util.HashMap;
import java.util.Map;
import org.apache.log4j.Logger;
import org.dom4j.Document;
import org.dom4j.DocumentFactory;
import org.dom4j.io.SAXReader;
public class YahooParser {
private static Logger log = Logger.getLogger(YahooParser.class);
public Weather parse(InputStream inputStream) throws Exception {
Weather weather = new Weather();
log.info( "Creating XML Reader" );
Simple Weather Source Code | 51

SAXReader xmlReader = createXmlReader();
Document doc = xmlReader.read( inputStream );
log.info( "Parsing XML Response" );
weather.setCity( doc.valueOf("/rss/channel/y:location/@city") );
weather.setRegion( doc.valueOf("/rss/channel/y:location/@region") );
weather.setCountry( doc.valueOf("/rss/channel/y:location/@country") );
weather.setCondition( doc.valueOf("/rss/channel/item/y:condition/@text") );
weather.setTemp( doc.valueOf("/rss/channel/item/y:condition/@temp") );
weather.setChill( doc.valueOf("/rss/channel/y:wind/@chill") );
weather.setHumidity( doc.valueOf("/rss/channel/y:atmosphere/@humidity") );
return weather;
}
private SAXReader createXmlReader() {
Map<String,String> uris = new HashMap<String,String>();
uris.put( "y", "http://xml.weather.yahoo.com/ns/rss/1.0" );
DocumentFactory factory = new DocumentFactory();
factory.setXPathNamespaceURIs( uris );
SAXReader xmlReader = new SAXReader();
xmlReader.setDocumentFactory( factory );
return xmlReader;
}
}
The YahooParser is the most complex class in this example. We’re not going to dive
into the details of Dom4J or Jaxen here, but the class deserves some explanation.
YahooParser’s parse() method takes an InputStream and returns a Weather object. To
do this, it needs to parse an XML document with Dom4J. Since we’re interested in
elements under the Yahoo! Weather XML namespace, we need to create a namespace-
aware SAXReader in the createXmlReader() method. Once we create this reader and parse
the document, we get an org.dom4j.Document object back. Instead of iterating through
child elements, we simply address each piece of information we need using an XPath
expression. Dom4J provides the XML parsing in this example, and Jaxen provides the
XPath capabilities.
Once we’ve created a Weather object, we need to format our output for human con-
sumption. Create a file named WeatherFormatter.java in the same directory as the other
classes. See Example 4-8.
Example 4-8. simple-weather’s WeatherFormatter class
package org.sonatype.mavenbook.weather;
import java.io.InputStreamReader;
import java.io.Reader;
import java.io.StringWriter;
import org.apache.log4j.Logger;
import org.apache.velocity.VelocityContext;
52 | Chapter 4: Customizing a Maven Project

import org.apache.velocity.app.Velocity;
public class WeatherFormatter {
private static Logger log = Logger.getLogger(WeatherFormatter.class);
public String format( Weather weather ) throws Exception {
log.info( "Formatting Weather Data" );
Reader reader =
new InputStreamReader( getClass().getClassLoader()
.getResourceAsStream("output.vm"));
VelocityContext context = new VelocityContext();
context.put("weather", weather );
StringWriter writer = new StringWriter();
Velocity.evaluate(context, writer, "", reader);
return writer.toString();
}
}
The WeatherFormatter uses Velocity to render a template. The format() method takes
a Weather bean and spits out a formatted String. The first thing the format() method
does is load a Velocity template from the classpath named output.vm. We then create
a VelocityContext, which is populated with a single Weather object named weather. A
StringWriter is created to hold the results of the template merge. The template is then
evaluated with a call to Velocity.evaluate(), and the results are returned as a String.
Before we can run this example, we’ll need to add some resources to our classpath.
Add Resources
This project depends on two classpath resources: the Main class that configures Log4J
with a classpath resource named log4j.properties, and the WeatherFormatter that refer-
ences a Velocity template from the classpath named output.vm. Both of these resources
need to be in the default package (or the root of the classpath).
To add these resources, we’ll need to create a new directory from the base directory of
the project: src/main/resources. Since this directory was not created by the
archetype:create task, we need to create it by executing the following commands from
the project’s base directory:
$ cd src/main
$ mkdir resources
$ cd resources
Once the resources directory is created, we can add the two resources. First, add the
log4j.properties file in the resources directory, as shown in Example 4-9.
Example 4-9. simple-weather’s Log4J configuration file
# Set root category priority to INFO and its only appender to CONSOLE.
log4j.rootCategory=INFO, CONSOLE
Add Resources | 53

# CONSOLE is set to be a ConsoleAppender using a PatternLayout.
log4j.appender.CONSOLE=org.apache.log4j.ConsoleAppender
log4j.appender.CONSOLE.Threshold=INFO
log4j.appender.CONSOLE.layout=org.apache.log4j.PatternLayout
log4j.appender.CONSOLE.layout.ConversionPattern=%-4r %-5p %c{1} %x - %m%n
This log4j.properties file simply configures Log4J to print all log messages to standard
output using a PatternLayout. Lastly, we need to create the output.vm, which is the
Velocity template used to render the output of this command-line program. Create
output.vm in the resources/ directory. See Example 4-10.
Example 4-10. simple-weather’s output Velocity template
*********************************
Current Weather Conditions for:
${weather.city}, ${weather.region}, ${weather.country}
Temperature: ${weather.temp}
Condition: ${weather.condition}
Humidity: ${weather.humidity}
Wind Chill: ${weather.chill}
*********************************
This template contains a number of references to a variable named weather, which is
the Weather bean that was passed to the WeatherFormatter. The ${weather.temp} syntax
is shorthand for retrieving and displaying the value of the temp bean property. Now that
we have all of our project’s code in the right place, we can use Maven to run the example.
Running the Simple Weather Program
Using the Exec plugin from the Codehaus Mojo project (http://mojo.codehaus.org), we
can execute this program. To execute the Main class, run the following command from
the project’s base directory:
$ mvn install
$ mvn exec:java -Dexec.mainClass=org.sonatype.mavenbook.weather.Main
...
[INFO] [exec:java]
0 INFO YahooRetriever - Retrieving Weather Data
134 INFO YahooParser - Creating XML Reader
333 INFO YahooParser - Parsing XML Response
420 INFO WeatherFormatter - Formatting Weather Data
*********************************
Current Weather Conditions for:
Evanston, IL, US
Temperature: 45
Condition: Cloudy
Humidity: 76
Wind Chill: 38
*********************************
...
54 | Chapter 4: Customizing a Maven Project

We didn’t supply a command-line argument to the Main class, so we ended up with the
default zip code, 60202. To supply a zip code, we would use the -Dexec.args argument
and pass in a zip code:
$ mvn exec:java -Dexec.mainClass=org.sonatype.mavenbook.weather.Main \
-Dexec.args="70112"
...
[INFO] [exec:java]
0 INFO YahooRetriever - Retrieving Weather Data
134 INFO YahooParser - Creating XML Reader
333 INFO YahooParser - Parsing XML Response
420 INFO WeatherFormatter - Formatting Weather Data
*********************************
Current Weather Conditions for:
New Orleans, LA, US
Temperature: 82
Condition: Fair
Humidity: 71
Wind Chill: 82
*********************************
[INFO] Finished at: Sun Aug 31 09:33:34 CDT 2008
...
As you can see, we’ve successfully executed the simple weather command-line tool,
retrieved some data from Yahoo! Weather, parsed the result, and formatted the result-
ing data with Velocity. We achieved all of this without doing much more than writing
our project’s source code and adding some minimal configuration to the pom.xml.
Notice that no “build process” was involved. We didn’t need to define how or where
the Java compiler compiles our source to bytecode, and we didn’t need to instruct the
build system how to locate the bytecode when we executed the example application.
All we needed to do to include a few dependencies was locate the appropriate Maven
coordinates.
The Maven Exec Plugin
The Exec plugin allows you to execute Java classes and other scripts. It is not a core
Maven plugin, but it is available from the Mojo (http://mojo.codehaus.org) project
hosted by Codehaus. For a full description of the Exec plugin, run:
$ mvn help:describe -Dplugin=exec -Dfull
This will list all of the goals that are available in the Maven Exec plugin. The Help
plugin will also list all of the valid parameters for the Exec plugin. If you would like to
customize the behavior of the Exec plugin to pass in command-line arguments, you
should use the documentation provided by help:describe as a guide. Although the Exec
plugin is useful, you shouldn’t rely on it as a way to execute your application outside
of running tests during development. For a more robust solution, use the Maven
Assembly plugin that is demonstrated in the section “Building a Packaged Command-
Line Application,” later in this chapter.
Running the Simple Weather Program | 55

Exploring Your Project Dependencies
The Exec plugin makes it possible for us to run the simplest weather program without
having to load the appropriate dependencies into the classpath. In any other build
system, we would have to copy all of the program dependencies into some sort of lib/
directory containing a collection of JAR files. Then, we would have to write a simple
script that includes our program’s bytecode and all of our dependencies in a classpath.
Only then could we run java org.sonatype.mavenbook.weather.Main. The Exec plugin
leverages the fact that Maven already knows how to create and manage your classpath
and dependencies.
This is convenient, but it’s also nice to know exactly what is being included in your
project’s classpath. Although the project depends on a few libraries such as Dom4J,
Log4J, Jaxen, and Velocity, it also relies on a few transitive dependencies. If you need
to find out what is on the classpath, you can use the Maven Dependency plugin to print
out a list of resolved dependencies. To print out this list for the simple weather project,
execute the dependency:resolve goal:
$ mvn dependency:resolve
...
[INFO] [dependency:resolve]
[INFO]
[INFO] The following files have been resolved:
[INFO] com.ibm.icu:icu4j:jar:2.6.1 (scope = compile)
[INFO] commons-collections:commons-collections:jar:3.1 (scope = compile)
[INFO] commons-lang:commons-lang:jar:2.1 (scope = compile)
[INFO] dom4j:dom4j:jar:1.6.1 (scope = compile)
[INFO] jaxen:jaxen:jar:1.1.1 (scope = compile)
[INFO] jdom:jdom:jar:1.0 (scope = compile)
[INFO] junit:junit:jar:3.8.1 (scope = test)
[INFO] log4j:log4j:jar:1.2.14 (scope = compile)
[INFO] oro:oro:jar:2.0.8 (scope = compile)
[INFO] velocity:velocity:jar:1.5 (scope = compile)
[INFO] xalan:xalan:jar:2.6.0 (scope = compile)
[INFO] xerces:xercesImpl:jar:2.6.2 (scope = compile)
[INFO] xerces:xmlParserAPIs:jar:2.6.2 (scope = compile)
[INFO] xml-apis:xml-apis:jar:1.0.b2 (scope = compile)
[INFO] xom:xom:jar:1.0 (scope = compile)
As you can see, our project has a very large set of dependencies. Although we included
direct dependencies on only 4 libraries, we appear to be depending on 15 dependencies
in total. Dom4J depends on Xerces and the XML Parser APIs, whereas Jaxen depends
on Xalan being available in the classpath. The Dependency plugin will print out the
final combination of dependencies under which your project is being compiled. If you
would like to know about the entire dependency tree of your project, you can run the
dependency:tree goal.
$ mvn dependency:tree
...
[INFO] [dependency:tree]
[INFO] org.sonatype.mavenbook.ch04:simple-weather:jar:1.0
56 | Chapter 4: Customizing a Maven Project

[INFO] +- log4j:log4j:jar:1.2.14:compile
[INFO] +- dom4j:dom4j:jar:1.6.1:compile
[INFO] | \- xml-apis:xml-apis:jar:1.0.b2:compile
[INFO] +- jaxen:jaxen:jar:1.1.1:compile
[INFO] | +- jdom:jdom:jar:1.0:compile
[INFO] | +- xerces:xercesImpl:jar:2.6.2:compile
[INFO] | \- xom:xom:jar:1.0:compile
[INFO] | +- xerces:xmlParserAPIs:jar:2.6.2:compile
[INFO] | +- xalan:xalan:jar:2.6.0:compile
[INFO] | \- com.ibm.icu:icu4j:jar:2.6.1:compile
[INFO] +- velocity:velocity:jar:1.5:compile
[INFO] | +- commons-collections:commons-collections:jar:3.1:compile
[INFO] | +- commons-lang:commons-lang:jar:2.1:compile
[INFO] | \- oro:oro:jar:2.0.8:compile
[INFO] +- org.apache.commons:commons-io:jar:1.3.2:test
[INFO] \- junit:junit:jar:3.8.1:test
...
If you’re truly adventurous or want to see the full dependency trail, including artifacts
that were rejected due to conflicts and other reasons, run Maven with the debug flag:
$ mvn install -X
...
[DEBUG] org.sonatype.mavenbook.ch04:simple-weather:jar:1.0 (selected for null)
[DEBUG] log4j:log4j:jar:1.2.14:compile (selected for compile)
[DEBUG] dom4j:dom4j:jar:1.6.1:compile (selected for compile)
[DEBUG] xml-apis:xml-apis:jar:1.0.b2:compile (selected for compile)
[DEBUG] jaxen:jaxen:jar:1.1.1:compile (selected for compile)
[DEBUG] jaxen:jaxen:jar:1.1-beta-6:compile (removed - causes a cycle
in the graph)
[DEBUG] jaxen:jaxen:jar:1.0-FCS:compile (removed - causes a cycle in
the graph)
[DEBUG] jdom:jdom:jar:1.0:compile (selected for compile)
[DEBUG] xml-apis:xml-apis:jar:1.3.02:compile (removed - nearer found:
1.0.b2)
[DEBUG] xerces:xercesImpl:jar:2.6.2:compile (selected for compile)
[DEBUG] xom:xom:jar:1.0:compile (selected for compile)
[DEBUG] xerces:xmlParserAPIs:jar:2.6.2:compile (selected for compile)
[DEBUG] xalan:xalan:jar:2.6.0:compile (selected for compile)
[DEBUG] xml-apis:xml-apis:1.0.b2.
[DEBUG] com.ibm.icu:icu4j:jar:2.6.1:compile (selected for compile)
[DEBUG] velocity:velocity:jar:1.5:compile (selected for compile)
[DEBUG] commons-collections:commons-collections:jar:3.1:compile
(selected for compile)
[DEBUG] commons-lang:commons-lang:jar:2.1:compile (selected for compile)
[DEBUG] oro:oro:jar:2.0.8:compile (selected for compile)
[DEBUG] junit:junit:jar:3.8.1:test (selected for test)
...
In the debug output, we see some of the guts of the dependency management system
at work. What you see here is the tree of dependencies for this project. Maven is printing
out the full Maven coordinates for all of your project’s dependencies and the
dependencies of your dependencies (and the dependencies of your dependencies’ de-
pendencies). You can see that simple-weather depends on jaxen, which depends on
Running the Simple Weather Program | 57

xom, which in turn depends on icu4j. You can also see that Maven is creating a graph
of dependencies, eliminating duplicates, and resolving any conflicts between different
versions. If you are having problems with dependencies, it is often helpful to dig a little
deeper than the list generated by dependency:resolve. Turning on the debug output
allows you to see Maven’s dependency mechanism at work.
Writing Unit Tests
Maven has built-in support for unit tests, and testing is a part of the default Maven
lifecycle. Let’s add some unit tests to our simple weather project. First, let’s create the
org.sonatype.mavenbook.weather package under src/test/java:
$ cd src/test/java
$ cd org/sonatype/mavenbook
$ mkdir weather
$ cd weather
At this point, we will create two unit tests. The first will test the YahooParser, and the
second will test the WeatherFormatter. In the weather package, create a file named
YahooParserTest.java with the contents shown in Example 4-11.
Example 4-11. simple-weather’s YahooParserTest unit test
package org.sonatype.mavenbook.weather.yahoo;
import java.io.InputStream;
import junit.framework.TestCase;
import org.sonatype.mavenbook.weather.Weather;
import org.sonatype.mavenbook.weather.YahooParser;
public class YahooParserTest extends TestCase {
public YahooParserTest(String name) {
super(name);
}
public void testParser() throws Exception {
InputStream nyData =
getClass().getClassLoader().getResourceAsStream("ny-weather.xml");
Weather weather = new YahooParser().parse( nyData );
assertEquals( "New York", weather.getCity() );
assertEquals( "NY", weather.getRegion() );
assertEquals( "US", weather.getCountry() );
assertEquals( "39", weather.getTemp() );
assertEquals( "Fair", weather.getCondition() );
assertEquals( "39", weather.getChill() );
assertEquals( "67", weather.getHumidity() );
}
}
58 | Chapter 4: Customizing a Maven Project

This YahooParserTest extends the TestCase class defined by JUnit. It follows the usual
pattern for a JUnit test: a constructor that takes a single String argument that calls the
constructor of the superclass, and a series of public methods that begin with “test”
that are invoked as unit tests. We define a single test method, testParser, which tests
the YahooParser by parsing an XML document with known values. The test XML docu-
ment is named ny-weather.xml and is loaded from the classpath. We’ll add test re-
sources in “Adding Unit Test Resources.” In our Maven project’s directory layout, the
ny-weather.xml file is found in the directory that contains test resources—${basedir}/
src/test/resources under org/sonatype/mavenbook/weather/yahoo/ny-weather.xml. The
file is read as an InputStream and passed to the parse() method on YahooParser. The
parse() method returns a Weather object, which is then tested with a series of calls to
assetEquals(), a method defined by TestCase.
In the same directory, create a file named WeatherFormatterTest.java. See Exam-
ple 4-12.
Example 4-12. simple-weather’s WeatherFormatterTest unit test
package org.sonatype.mavenbook.weather.yahoo;
import java.io.InputStream;
import org.apache.commons.io.IOUtils;
import org.sonatype.mavenbook.weather.Weather;
import org.sonatype.mavenbook.weather.WeatherFormatter;
import org.sonatype.mavenbook.weather.YahooParser;
import junit.framework.TestCase;
public class WeatherFormatterTest extends TestCase {
public WeatherFormatterTest(String name) {
super(name);
}
public void testFormat() throws Exception {
InputStream nyData =
getClass().getClassLoader().getResourceAsStream("ny-weather.xml");
Weather weather = new YahooParser().parse( nyData );
String formattedResult = new WeatherFormatter().format( weather );
InputStream expected =
getClass().getClassLoader().getResourceAsStream("format-expected.dat");
assertEquals( IOUtils.toString( expected ).trim(),
formattedResult.trim() );
}
}
The second unit test in this simple project tests the WeatherFormatter. Like the
YahooParserTest, the WeatherFormatterTest also extends JUnit’s TestCase class. The
single test function reads the same test resource from ${basedir}/src/test/resources under
Writing Unit Tests | 59

the org/sonatype/mavenbook/weather/yahoo directory via this unit test’s classpath.
We’ll add test resources in the section “Adding Unit Test Resources,” later in this
chapter. WeatherFormatterTest runs this sample input file through the YahooParser,
which spits out a Weather object, and this object is then formatted with the WeatherFor
matter. Since the WeatherFormatter prints out a String, we need to test it against some
expected input. Our expected input has been captured in a text file named format-
expected.dat, which is in the same directory as ny-weather.xml. To compare the test’s
output to the expected output, we read this expected output in as an InputStream and
use Apache Commons IO’s IOUtils class to convert this file to a String. This String is
then compared to the test output using assertEquals().
Adding Test-Scoped Dependencies
In WeatherFormatterTest, we used a utility from Apache Commons IO—the IOUtils
class. IOUtils provides a number of helpful static functions that take most of the work
out of input/output operations. In this particular unit test, we used
IOUtils.toString() to copy the format-expected.dat classpath resource to a String. We
could have done this without using Commons IO, but it would have required an extra
six or seven lines of code to deal with the various InputStreamReader and
StringWriter objects. The main reason we used Commons IO was to give us an excuse
to add a test-scoped dependency on Commons IO.
A test-scoped dependency is a dependency that is available on the classpath only dur-
ing test compilation and test execution. If your project has war or ear packaging, a test-
scoped dependency would not be included in the project’s output archive. To add a
test-scoped dependency, add the dependency element to your project’s dependencies
section, as shown in Example 4-13.
Example 4-13. Adding a test-scoped dependency
<project>
...
<dependencies>
...
<dependency>
<groupId>org.apache.commons</groupId>
<artifactId>commons-io</artifactId>
<version>1.3.2</version>
<scope>test</scope>
</dependency>
...
</dependencies>
</project>
After you add this dependency to the pom.xml, run mvn dependency:resolve and you
should see that commons-io is now listed as a dependency with scope test. We need to
do one more thing before we are ready to run this project’s unit tests: create the
60 | Chapter 4: Customizing a Maven Project

classpath resources these unit tests depend on. Dependency scopes are explained in
detail in “Dependency Scope” in Chapter 8.
Adding Unit Test Resources
A unit test has access to a set of resources that are specific to tests. Often, you’ll store
files containing expected results and files containing dummy input in the test classpath.
In this project, we’re storing a test XML document for YahooParserTest named ny-
weather.xml and a file containing expected output from the WeatherFormatter in format-
expected.dat.
To add test resources, you’ll need to create the src/test/resources directory. This is the
default directory in which Maven looks for unit test resources. To create this directory,
execute the following commands from your project’s base directory:
$ cd src/test
$ mkdir resources
$ cd resources
Once you’ve created the resources/ directory, create a file named format-expected.dat
there. See Example 4-14.
Example 4-14. simple-weather’s WeatherFormatterTest expected output
*********************************
Current Weather Conditions for:
New York, NY, US
Temperature: 39
Condition: Fair
Humidity: 67
Wind Chill: 39
*********************************
This file should look familiar. It is the same output that was generated previously when
you ran the simple weather project with the Maven Exec plugin. The second file you’ll
need to add to the resources directory is ny-weather.xml. See Example 4-15.
Example 4-15. simple-weather’s YahooParserTest XML input
<?xml version="1.0" encoding="UTF-8" standalone="yes" ?>
<rss version="2.0" xmlns:yweather="http://xml.weather.yahoo.com/ns/rss/1.0"
xmlns:geo="http://www.w3.org/2003/01/geo/wgs84_pos#">
<channel>
<title>Yahoo! Weather - New York, NY</title>
<link>http://us.rd.yahoo.com/dailynews/rss/weather/New_York__NY/</link>
<description>Yahoo! Weather for New York, NY</description>
<language>en-us</language>
<lastBuildDate>Sat, 10 Nov 2007 8:51 pm EDT</lastBuildDate>
<ttl>60</ttl>
<yweather:location city="New York" region="NY" country="US" />
Adding Unit Test Resources | 61

<yweather:units temperature="F" distance="mi" pressure="in" speed="mph" />
<yweather:wind chill="39" direction="0" speed="0" />
<yweather:atmosphere humidity="67" visibility="1609" pressure="30.18"
rising="1" />
<yweather:astronomy sunrise="6:36 am" sunset="4:43 pm" />
<image>
<title>Yahoo! Weather</title>
<width>142</width>
<height>18</height>
<link>http://weather.yahoo.com/</link>
<url>http://l.yimg.com/us.yimg.com/i/us/nws/th/main_142b.gif</url>
</image>
<item>
<title>Conditions for New York, NY at 8:51 pm EDT</title>
<geo:lat>40.67</geo:lat>
<geo:long>-73.94</geo:long>
<link>http://us.rd.yahoo.com/dailynews/rss/weather/New_York__NY/\</link>
<pubDate>Sat, 10 Nov 2007 8:51 pm EDT</pubDate>
<yweather:condition text="Fair" code="33" temp="39"
date="Sat, 10 Nov 2007 8:51 pm EDT" />
<description><![CDATA[
<img src="http://l.yimg.com/us.yimg.com/i/us/we/52/33.gif" /><br />
<b>Current Conditions:</b><br />
Fair, 39 F<BR /><BR />
<b>Forecast:</b><BR />
Sat - Partly Cloudy. High: 45 Low: 32<br />
Sun - Sunny. High: 50 Low: 38<br />
<br />
]]></description>
<yweather:forecast day="Sat" date="10 Nov 2007" low="32" high="45"
text="Partly Cloudy" code="29" />
<yweather:forecast day="Sun" date="11 Nov 2007" low="38" high="50"
text="Sunny" code="32" />
<guid isPermaLink="false">10002_2007_11_10_20_51_EDT</guid>
</item>
</channel>
</rss>
This file contains a test XML document for the YahooParserTest. We store this file so
that we can test the YahooParser without having to retrieve an XML response from
Yahoo! Weather.
Executing Unit Tests
Now that your project has unit tests, let’s run them. You don’t have to do anything
special to run a unit test; the test phase is a normal part of the Maven lifecycle. You
run Maven tests whenever you run mvn package or mvn install. If you would like to run
all the lifecycle phases up to and including the test phase, run mvn test:
62 | Chapter 4: Customizing a Maven Project

$ mvn test
...
[INFO] [surefire:test]
[INFO] Surefire report directory: ~/examples/simple-weather/target/\
surefire-reports
-------------------------------------------------------
T E S T S
-------------------------------------------------------
Running org.sonatype.mavenbook.weather.yahoo.WeatherFormatterTest
0 INFO YahooParser - Creating XML Reader
177 INFO YahooParser - Parsing XML Response
239 INFO WeatherFormatter - Formatting Weather Data
Tests run: 1, Failures: 0, Errors: 0, Skipped: 0, Time elapsed: 0.547 sec
Running org.sonatype.mavenbook.weather.yahoo.YahooParserTest
475 INFO YahooParser - Creating XML Reader
483 INFO YahooParser - Parsing XML Response
Tests run: 1, Failures: 0, Errors: 0, Skipped: 0, Time elapsed: 0.018 sec
Results :
Tests run: 2, Failures: 0, Errors: 0, Skipped: 0
Executing mvn test from the command line causes Maven to execute all lifecycle phases
up to the test phase. The Maven Surefire plugin has a test goal that is bound to the
test phase. This test goal executes all of the unit tests that this project can find under
src/test/java. In the case of this project, you can see that the Surefire plugin’s test goal
executes WeatherFormatterTest and YahooParserTest. When the Surefire plugin runs
the JUnit tests, it also generates XML and text reports in the ${basedir}/target/surefire-
reports directory. If your tests are failing, you should look in this directory for details
such as stack traces and error messages generated by your unit tests.
Ignoring Test Failures
You will often find yourself developing on a system that has failing unit tests. If you are
practicing Test-Driven Development (TDD), you might use test failure as a measure of
how close your project is to completeness. If you have failing unit tests, and you would
still like to produce build output, you are going to have to tell Maven to ignore build
failures. When Maven encounters a build failure, its default behavior is to stop the
current build. To continue building a project even when the Surefire plugin encounters
failed test cases, you’ll need to set the testFailureIgnore configuration property of the
Surefire plugin to true. See Example 4-16.
Example 4-16. Ignoring unit test failures
<project>
[...]
<build>
<plugins>
<plugin>
<groupId>org.apache.maven.plugins</groupId>
Executing Unit Tests | 63

<artifactId>maven-surefire-plugin</artifactId>
<configuration>
<testFailureIgnore>true</testFailureIgnore>
</configuration>
</plugin>
</plugins>
</build>
[...]
</project>
The plugin documents (http://maven.apache.org/plugins/maven-surefire-plugin/test
-mojo.html) show that this parameter declares an expression, as shown in Exam-
ple 4-17.
Example 4-17. Plugin parameter expressions
testFailureIgnore Set this to true to ignore a failure during \
testing. Its use is NOT RECOMMENDED, but quite \
convenient on occasion.
* Type: boolean
* Required: No
* Expression: ${maven.test.failure.ignore}
This expression can be set from the command line using the -D parameter:
$ mvn test -Dmaven.test.failure.ignore=true
Skipping Unit Tests
You may want to configure Maven to skip unit tests altogether. Maybe you have a very
large system where the unit tests take minutes to complete and you don’t want to wait
for them before producing output. Or maybe you are working with a legacy system that
has a series of failing unit tests, and instead of fixing them, you just want to produce a
JAR. Maven allows you to skip unit tests using the skip parameter of the Surefire plugin.
To skip tests from the command line, simply add the maven.test.skip property to any
goal:
$ mvn install -Dmaven.test.skip=true
...
[INFO] [compiler:testCompile]
[INFO] Not compiling test sources
[INFO] [surefire:test]
[INFO] Tests are skipped.
...
When the Surefire plugin reaches the test goal, it will skip the unit tests if the
maven.test.skip properties is set to true. Another way to configure Maven to skip unit
tests is to add the configuration shown in Example 4-18 to your project’s pom.xml. To
do this, you would add a plugin element to your build configuration.
64 | Chapter 4: Customizing a Maven Project

Example 4-18. Skipping unit tests
<project>
[...]
<build>
<plugins>
<plugin>
<groupId>org.apache.maven.plugins</groupId>
<artifactId>maven-surefire-plugin</artifactId>
<configuration>
<skip>true</skip>
</configuration>
</plugin>
</plugins>
</build>
[...]
</project>
Building a Packaged Command-Line Application
In the “Running the Simple Weather Program” section, earlier in this chapter, we exe-
cuted our application using the Maven Exec plugin. Although that plugin executed the
program and produced some output, you shouldn’t look to Maven as an execution
container for your applications. If you are distributing this command-line application
to others, you will probably want to distribute a JAR or an archive as a ZIP or TAR’d
GZIP file. This section outlines a process for using a predefined assembly descriptor in
the Maven Assembly plugin to produce a distributable JAR file, which contains the
project’s bytecode and all of the dependencies.
You can use the Maven Assembly plugin to create arbitrary distributions for your ap-
plications. Use it to assemble the output of your project in any format you desire by
defining a custom assembly descriptor. In a later chapter, we will show you how to
create a custom assembly descriptor that produces a more complex archive for the
simple weather application. In this chapter, we’re going to use the predefined jar-with-
dependencies format. To configure the Assembly Plugin, we need to add the plugin
configuration shown in Example 4-19 to our existing build configuration in the
pom.xml.
Example 4-19. Configuring the Maven Assembly descriptor
<project>
[...]
<build>
<plugins>
<plugin>
<artifactId>maven-assembly-plugin</artifactId>
<configuration>
<descriptorRefs>
<descriptorRef>jar-with-dependencies</descriptorRef>
</descriptorRefs>
</configuration>
Building a Packaged Command-Line Application | 65

</plugin>
</plugins>
</build>
[...]
</project>
Once you’ve added this configuration, you can build the assembly by running mvn
assembly:assembly, like so:
$ mvn install assembly:assembly
...
[INFO] [jar:jar]
[INFO] Building jar: ~/examples/simple-weather/target/simple-weather-1.0.jar
[INFO] [assembly:assembly]
[INFO] Processing DependencySet (output=)
[INFO] Expanding: \
.m2/repository/dom4j/dom4j/1.6.1/dom4j-1.6.1.jar into \
/tmp/archived-file-set.1437961776.tmp
[INFO] Expanding: .m2/repository/commons-lang/commons-lang/2.1/\
commons-lang-2.1.jar
into /tmp/archived-file-set.305257225.tmp
... (Maven Expands all dependencies into a temporary directory) ...
[INFO] Building jar: \
~/examples/simple-weather/target/\
simple-weather-1.0-jar-with-dependencies.jar
Once the assembly is assembled in target/simple-weather-1.0-jar-with-dependen
cies.jar, you can run the Main class again from the command line. To run the simple
weather app’s Main class, execute the following from your project’s base directory:
$ cd target
$ java -cp simple-weather-1.0-jar-with-dependencies.jar \
org.sonatype.mavenbook.weather.Main 10002
0 INFO YahooRetriever - Retrieving Weather Data
221 INFO YahooParser - Creating XML Reader
399 INFO YahooParser - Parsing XML Response
474 INFO WeatherFormatter - Formatting Weather Data
*********************************
Current Weather Conditions for:
New York, NY, US
Temperature: 44
Condition: Fair
Humidity: 40
Wind Chill: 40
*********************************
The jar-with-dependencies format creates a single JAR file that includes all of the
bytecode from the simple-weather project as well as the unpacked bytecode from all of
the dependencies. This somewhat unconventional format produces a 9 MiB JAR file
containing approximately 5,290 classes, but it does provide for an easy distribution
format for applications you’ve developed with Maven. Later in this book, we’ll show
you how to create a custom assembly descriptor to produce a more standard
distribution.
66 | Chapter 4: Customizing a Maven Project

CHAPTER 5
A Simple Web Application
Introduction
In this chapter, we create a simple web application with the Maven Archetype plugin.
We’ll run this web application in a Servlet container named Jetty, add some depend-
encies, write a simple Servlet, and generate a WAR file. At the end of this chapter, you
will be able to start using Maven to accelerate the development of web applications.
Downloading This Chapter’s Example
The example in this chapter is generated with the Maven Archetype plugin. While you
should be able to follow the development of this chapter without the example source
code, we recommend downloading a copy of the example code to use as a reference.
This chapter’s example project may be downloaded with the book’s example code at
http://www.sonatype.com/book/mvn-examples-1.0.zip or http://www.sonatype.com/
book/mvn-examples-1.0.tar.gz. Unzip this archive in any directory, and then go to the
ch05/ directory. In the ch05/ directory you will see a directory named simple-webapp/
that contains the Maven project developed in this chapter. If you wish to follow along
with the example code in a web browser, go to http://www.sonatype.com/book/examples
-1.0 and click on the ch05/ directory.
Defining the Simple Web Application
We’ve purposefully kept this chapter focused on Plain-Old Web Applications
(POWA)—a servlet and a JavaServer Pages (JSP) page. We’re not going to tell you how
to develop your Struts 2, Tapestry, Wicket, Java Server Faces (JSF), or Waffle applica-
tion in the next 20-odd pages, and we’re not going to get into integrating an Inversion
of Control (IoC) container such as Plexus, Guice, or the Spring Framework. The goal
of this chapter is to show you the basic facilities that Maven provides for developing
web applications—no more, no less. Later in this book, we’re going to take a look at
67

developing two web applications: one that uses Hibernate, Velocity, and the Spring
Framework; and the other that uses Plexus.
Creating the Simple Web Project
To create your web application project, run mvn archetype:create with an artifactId
and a groupId. Specify the archetypeArtifactId as maven-archetype-webapp. Running
this will create the appropriate directory structure and Maven POM:
~/examples$ mvn archetype:create -DgroupId=org.sonatype.mavenbook.ch05 \
-DartifactId=simple-webapp \
-DpackageName=org.sonatype.mavenbook \
-DarchetypeArtifactId=maven-archetype-webapp
[INFO] [archetype:create]
[INFO] ----------------------------------------------------------
[INFO] Using following parameters for creating Archetype:
maven-archetype-webapp:RELEASE
[INFO] ----------------------------------------------------------
[INFO] Parameter: groupId, Value: org.sonatype.mavenbook.ch05
[INFO] Parameter: packageName, Value: org.sonatype.mavenbook
[INFO] Parameter: basedir, Value: ~/examples
[INFO] Parameter: package, Value: org.sonatype.mavenbook
[INFO] Parameter: version, Value: 1.0-SNAPSHOT
[INFO] Parameter: artifactId, Value: simple-webapp
[INFO] ********************* End of debug info from resources from
generated POM *******
[INFO] Archetype created in dir: ~/examples/simple-webapp
Once the Maven Archetype plugin creates the project, change directories into the
simple-web directory and take a look at the pom.xml. You should see the XML docu-
ment shown in Example 5-1.
Example 5-1. Initial POM for the simple-web project
<project xmlns="http://maven.apache.org/POM/4.0.0"
xmlns:xsi="http://www.w3.org/2001/XMLSchema-instance"
xsi:schemaLocation="http://maven.apache.org/POM/4.0.0
http://maven.apache.org/maven-v4_0_0.xsd">
<modelVersion>4.0.0</modelVersion>
<groupId>org.sonatype.mavenbook.ch05</groupId>
<artifactId>simple-webapp</artifactId>
<packaging>war</packaging>
<version>1.0-SNAPSHOT</version>
<name>simple-webapp Maven Webapp</name>
<url>http://maven.apache.org</url>
<dependencies>
<dependency>
<groupId>junit</groupId>
<artifactId>junit</artifactId>
<version>3.8.1</version>
<scope>test</scope>
</dependency>
</dependencies>
68 | Chapter 5: A Simple Web Application

<build>
<finalName>simple-webapp</finalName>
<plugins>
<plugin>
<artifactId>maven-compiler-plugin</artifactId>
<configuration>
<source>1.5</source>
<target>1.5</target>
</configuration>
</plugin>
</plugins>
</build>
</project>
Notice the packaging element contains the value war. This packaging type is what con-
figures Maven to produce a web application archive in a WAR file. A project with
war packaging is going to create a WAR file in the target/ directory. The default name
of this file is ${artifactId}-${version}.war. In this project, the default WAR would be
generated in target/simple-webapp-1.0-SNAPSHOT.war. In the simple-webapp project,
we’ve customized the name of the generated WAR file by adding a finalName element
inside of this project’s build configuration. With a finalName of simple-webapp, the
package phase produces a WAR file in target/simple-webapp.war.
Configuring the Jetty Plugin
Once you’ve compiled, tested, and packaged your web application, you’ll likely want
to deploy it to a servlet container and test the index.jsp that was created by the Maven
Archetype plugin. Normally, this would involve downloading something like Jetty or
Apache Tomcat, unpacking a distribution, copying your application’s WAR file to a
webapps/ directory, and then starting your container. Although you can still do such a
thing, there is no need. Instead, you can use the Maven Jetty plugin to run your web
application within Maven. To do this, we’ll need to configure the Maven Jetty plugin
in our project’s pom.xml. Add the plugin element shown in Example 5-2 to your
project’s build configuration.
Example 5-2. Configuring the Jetty plugin
<project>
[...]
<build>
<finalName>simple-webapp</finalName>
<plugins>
<plugin>
<groupId>org.mortbay.jetty</groupId>
<artifactId>maven-jetty-plugin</artifactId>
</plugins>
</plugins>
</build>
[...]
</project>
Configuring the Jetty Plugin | 69

Once you’ve configured the Maven Jetty plugin in your project’s pom.xml, you can then
invoke the run goal of the Jetty plugin to start your web application in the Jetty Servlet
container. Run mvn jetty:run as follows:
~/examples$ mvn jetty:run
...
[INFO] [jetty:run]
[INFO] Configuring Jetty for project: simple-webapp Maven Webapp
[INFO] Webapp source directory = \
/Users/tobrien/svnw/sonatype/examples/simple-webapp/src/
main/webapp
[INFO] web.xml file = \
/Users/tobrien/svnw/sonatype/examples/simple-webapp/src/
main/webapp/WEB-INF/web.xml
[INFO] Classes = /Users/tobrien/svnw/sonatype/examples/simple-webapp/
target/classes
2007-11-17 22:11:50.532::INFO: Logging to STDERR via
org.mortbay.log.StdErrLog
[INFO] Context path = /simple-webapp
[INFO] Tmp directory = determined at runtime
[INFO] Web defaults = org/mortbay/jetty/webapp/webdefault.xml
[INFO] Web overrides = none
[INFO] Webapp directory = \
/Users/tobrien/svnw/sonatype/examples/simple-webapp/src/
main/webapp
[INFO] Starting jetty 6.1.6rc1 ...
2007-11-17 22:11:50.673::INFO: jetty-6.1.6rc1
2007-11-17 22:11:50.846::INFO: No Transaction manager found - if\
your webapp requires one, please configure one.
2007-11-17 22:11:51.057::INFO: Started SelectChannelConnector@0.0.0.0:8080
[INFO] Started Jetty Server
After Maven starts the Jetty Servlet container, load the URL http://localhost:8080/simple
-webapp/ in a web browser. The simple index.jsp generated by the Archetype is trivial;
it contains a second-level heading with the text “Hello World!”. Maven expects the
document root of the web application to be stored in src/main/webapp. This is the
directory where you will find the index.jsp file shown in Example 5-3.
Example 5-3. Contents of src/main/webapp/index.jsp
<html>
<body>
<h2>Hello World!</h2>
</body>
</html>
In src/main/webapp/WEB-INF, we will find the smallest possible web application
descriptor in web.xml, shown in Example 5-4.
Example 5-4. Contents of src/main/webapp/WEB-INF/web.xml
<!DOCTYPE web-app PUBLIC
"-//Sun Microsystems, Inc.//DTD Web Application 2.3//EN"
"http://java.sun.com/dtd/web-app_2_3.dtd" >
70 | Chapter 5: A Simple Web Application

<web-app>
<display-name>Archetype Created Web Application</display-name>
</web-app>
Adding a Simple Servlet
A web application with a single JSP page and no configured servlets is next to useless.
Let’s add a simple servlet to this application and make some changes to the pom.xml
and web.xml to support this change. First, we’ll need to create a new package under
src/main/java named org.sonatype.mavenbook.web:
$ mkdir -p src/main/java/org/sonatype/mavenbook/web
$ cd src/main/java/org/sonatype/mavenbook/web
Once you’ve created this package, change to the src/main/java/org/sonatype/maven
book/web directory and create a class named SimpleServlet in SimpleServlet.java, which
contains the code shown in Example 5-5.
Example 5-5. SimpleServlet class
package org.sonatype.mavenbook.web;
import java.io.*;
import javax.servlet.*;
import javax.servlet.http.*;
public class SimpleServlet extends HttpServlet {
public void doGet(HttpServletRequest request,
HttpServletResponse response)
throws ServletException, IOException {
PrintWriter out = response.getWriter();
out.println( "SimpleServlet Executed" );
out.flush();
out.close();
}
}
Our SimpleServlet class is just that: a servlet that prints a simple message to the re-
sponse’s Writer. To add this servlet to your web application and map it to a request
path, add the servlet and servlet-mapping elements shown in Example 5-6 to your
project’s web.xml file. The web.xml file can be found in src/main/webapp/WEB-INF.
Example 5-6. Mapping the simple servlet
<!DOCTYPE web-app PUBLIC
"-//Sun Microsystems, Inc.//DTD Web Application 2.3//EN"
"http://java.sun.com/dtd/web-app_2_3.dtd" >
<web-app>
<display-name>Archetype Created Web Application</display-name>
<servlet>
Adding a Simple Servlet | 71

<servlet-name>simple</servlet-name>
<servlet-class>org.sonatype.mavenbook.web.SimpleServlet</servlet-class>
</servlet>
<servlet-mapping>
<servlet-name>simple</servlet-name>
<url-pattern>/simple</url-pattern>
</servlet-mapping>
</web-app>
Everything is in place to test this servlet; the class is in src/main/java and the web.xml
has been updated. Before we launch the Jetty plugin, compile your project by running
mvn compile:
~/examples$ mvn compile
...
[INFO] [compiler:compile]
[INFO] Compiling 1 source file to ~/examples/ch05/simple-webapp/target/classes
[INFO] ------------------------------------------------------------------------
[ERROR] BUILD FAILURE
[INFO] ------------------------------------------------------------------------
[INFO] Compilation failure
/src/main/java/org/sonatype/mavenbook/web/SimpleServlet.java:[4,0] \
package javax.servlet does not exist
/src/main/java/org/sonatype/mavenbook/web/SimpleServlet.java:[5,0] \
package javax.servlet.http does not exist
/src/main/java/org/sonatype/mavenbook/web/SimpleServlet.java:[7,35] \
cannot find symbol
symbol: class HttpServlet
public class SimpleServlet extends HttpServlet {
/src/main/java/org/sonatype/mavenbook/web/SimpleServlet.java:[8,22] \
cannot find symbol
symbol : class HttpServletRequest
location: class org.sonatype.mavenbook.web.SimpleServlet
/src/main/java/org/sonatype/mavenbook/web/SimpleServlet.java:[9,22] \
cannot find symbol
symbol : class HttpServletResponse
location: class org.sonatype.mavenbook.web.SimpleServlet
/src/main/java/org/sonatype/mavenbook/web/SimpleServlet.java:[10,15] \
cannot find symbol
symbol : class ServletException
location: class org.sonatype.mavenbook.web.SimpleServlet
The compilation fails because your Maven project doesn’t have a dependency on the
Servlet API. In the next section, we’ll add the Servlet API to this project’s POM.
72 | Chapter 5: A Simple Web Application

Adding J2EE Dependencies
To write a servlet, we’ll need to add the Servlet API as a project dependency. The Servlet
specification is a JAR file that can be downloaded from Sun Microsystems at http://java
.sun.com/products/servlet/download.html. Once the JAR file is downloaded, you’ll need
to install the resulting JAR in your local Maven repository located at ~/.m2/repository.
The same process will have to be repeated for all of the Java Platform Enterprise Edition
(J2EE) APIs maintained by Sun Microsystems—Java Naming and Directory Interface
(JNDI), Java Database Connectivity (JDBC), Servlet, JSP, Java Transaction API (JTA),
and others. If this strikes you as somewhat tedious, you are not alone. Lucky for you,
there is a simpler alternative to downloading all of these libraries and installing them
manually—Apache Geronimo’s independent open source implementations.
For years, the only way to get the Servlet specification JAR was to download it directly
from Sun Microsystems. You had to go to the Sun web site, agree to a click-through
licensing agreement, and only then could you access the Servlet JAR. This was all nec-
essary because the Sun specification JARs were not made available under a license that
allowed for redistribution. Manually downloading Sun artifacts was something you just
had to do to write a Servlet or to use JDBC from a Maven project for a few years. It was
tedious and annoying until the Apache Geronimo project was able to create a Sun-
certified implementation of a number of enterprise specifications releasing these spec-
ification JARs under the Apache Software License version 2.0, a license that allows for
free redistribution of source and binary. Now, for the purposes of your programming,
there is little to no difference between the Servlet API JAR downloaded from Sun Mi-
crosystems and the Servlet API JAR implemented by the Apache Geronimo project.
Both have passed a rigorous Test Compatibility Kit (TCK) from Sun Microsystems.
Adding a dependency on something like the JSP API or the Servlet API is now very
straightforward, and it does not require you to manually download a JAR file from a
web site and install it in your local repository. The catch is that you have to know where
to look: what groupId, artifactId, and version to use to reference the appropriate
Apache Geronimo implementation. To add the Servlet specification API as a depend-
ency to your project’s POM, add the dependency element shown in Example 5-7 to
pom.xml.
Example 5-7. Add the Servlet 2.4 specification as a dependency
<project>
[...]
<dependencies>
[...]
<dependency>
<groupId>org.apache.geronimo.specs</groupId>
<artifactId>geronimo-servlet_2.4_spec</artifactId>
<version>1.1.1</version>
<scope>provided</scope>
</dependency>
</dependencies>
Adding J2EE Dependencies | 73

[...]
</project>
The groupId for all of the Apache Geronimo specification implementations is
org.apache.geronimo.specs. The artifactId contains the version of the specification
that you are most familiar with; for example, if you were going to include the Servlet
2.3 specification, you would have an artifactId of geronimo-servlet_2.3_spec, and if
you were targeting the Servlet 2.4 specification, your artifactId would be geronimo-
servlet_2.4_spec. As for the version, you’ll have to take a look at the public Maven
repository to figure out which version you should use. For versions, your best bet is
going to be the latest version for a particular specification implementation. If you are
looking for a specific alternative to a Sun specification from the Apache Geronimo
project, we’ve assembled a list of available specifications in Appendix B.
It is also worth pointing out that we have used the provided scope for this dependency.
This tells Maven that the JAR is “provided” by the container and thus should not be
included in the WAR.
If you were interested in writing a custom JSP tag for this simple web application, you
would need to add a dependency on the JSP 2.0 spec. Use the configuration shown in
Example 5-8 to add this dependency.
Example 5-8. Adding the JSP 2.0 specification as a dependency
<project>
[...]
<dependencies>
[...]
<dependency>
<groupId>org.apache.geronimo.specs</groupId>
<artifactId>geronimo-jsp_2.0_spec</artifactId>
<version>1.1</version>
<scope>provided</scope>
</dependency>
</dependencies>
[...]
</project>
Once you’ve add the Servlet specification as a dependency, run mvn clean install fol-
lowed by mvn jetty:run.
[tobrien@t1 simple-webapp]$ mvn clean install
...
[tobrien@t1 simple-webapp]$ mvn jetty:run
[INFO] [jetty:run]
...
2007-12-14 16:18:31.305::INFO: jetty-6.1.6rc1
2007-12-14 16:18:31.453::INFO: No Transaction manager found - if your webapp\
requires one, please configure one.
2007-12-14 16:18:32.745::INFO: Started SelectChannelConnector@0.0.0.0:8080
[INFO] Started Jetty Server
74 | Chapter 5: A Simple Web Application

At this point, you should be able to retrieve the output of the SimpleServlet. From the
command line, you can use curl to print the output of this servlet to standard output:
~/examples$ curl http://localhost:8080/simple-webapp/simple
SimpleServlet Executed
Conclusion
After reading this chapter, you should be able to bootstrap a simple web application.
This chapter didn’t dwell on the million different ways to create a complete web ap-
plication. Other chapters provide a more comprehensive overview of projects that
involve some of the more popular web frameworks and technologies.
Conclusion | 75

CHAPTER 6
A Multimodule Project
Introduction
In this chapter, we create a multimodule project that combines the examples from the
two previous chapters. The simple-weather code developed in Chapter 4 will be com-
bined with the simple-webapp project defined in Chapter 5 to create a web application
that retrieves and displays weather forecast information on a web page. At the end of
this chapter, you will be able to use Maven to develop complex, multimodule projects.
Downloading This Chapter’s Example
The multimodule project developed in this example consists of modified versions of
the projects developed in Chapters 4 and 5, and we are not using the Maven Archetype
plugin to generate this multimodule project. We strongly recommend downloading a
copy of the example code to use as a supplemental reference while reading the content
in this chapter. This chapter’s example project may be downloaded with the book’s
example code at http://www.sonatype.com/book/mvn-examples-1.0.zip or http://www
.sonatype.com/book/mvn-examples-1.0.tar.gz. Unzip this archive in any directory, and
then go to the ch06/ directory. There you will see a directory named simple-parent/,
which contains the multimodule Maven project developed in this chapter. In this di-
rectory, you will see a pom.xml and the two submodule directories, simple-weather/
and simple-webapp/. If you wish to follow along with the example code in a web
browser, go to http://www.sonatype.com/book/examples-1.0 and click on the ch06/
directory.
The Simple Parent Project
A multimodule project is defined by a parent POM referencing one or more submod-
ules. In the simple-parent/ directory, you will find the parent POM (also called the top-
level POM) in simple-parent/pom.xml. See Example 6-1.
77

Example 6-1. simple-parent project POM
<project xmlns="http://maven.apache.org/POM/4.0.0"
xmlns:xsi="http://www.w3.org/2001/XMLSchema-instance"
xsi:schemaLocation="http://maven.apache.org/POM/4.0.0
http://maven.apache.org/maven-v4_0_0.xsd">
<modelVersion>4.0.0</modelVersion>
<groupId>org.sonatype.mavenbook.ch06</groupId>
<artifactId>simple-parent</artifactId>
<packaging>pom</packaging>
<version>1.0</version>
<name>Chapter 6 Simple Parent Project</name>
<modules>
<module>simple-weather</module>
<module>simple-webapp</module>
</modules>
<build>
<pluginManagement>
<plugins>
<plugin>
<groupId>org.apache.maven.plugins</groupId>
<artifactId>maven-compiler-plugin</artifactId>
<configuration>
<source>1.5</source>
<target>1.5</target>
</configuration>
</plugin>
</plugins>
</pluginManagement>
</build>
<dependencies>
<dependency>
<groupId>junit</groupId>
<artifactId>junit</artifactId>
<version>3.8.1</version>
<scope>test</scope>
</dependency>
</dependencies>
</project>
Notice that the parent defines a set of Maven coordinates: the groupId is com.sona
type.maven, the artifactId is simple-parent, and the version is 1.0. The parent project
doesn’t create a JAR or a WAR like our previous projects; instead, it is simply a POM
that refers to other Maven projects. The appropriate packaging for a project like simple-
parent that simply provides a Project Object Model is pom. The next section in the
pom.xml lists the project’s submodules. These modules are defined in the modules ele-
ment, and each module element corresponds to a subdirectory of the simple-parent/
78 | Chapter 6: A Multimodule Project

directory. Maven knows to look in these directories for pom.xml files, and it will add
submodules to the list of Maven projects included in a build.
Lastly, we define some settings that will be inherited by all submodules. The simple-
parent build configuration configures the target for all Java compilation to be the Java
5 JVM. Since the Compiler plugin is bound to the lifecycle by default, we can use the
pluginManagement section do to this. We will discuss pluginManagement in more detail
in later chapters, but the separation between providing configuration to default plugins
and actually binding plugins is much easier to see when they are separated this way.
The dependencies element adds JUnit 3.8.1 as a global dependency. Both the build
configuration and the dependencies are inherited by all submodules. Using POM in-
heritance allows you to add common dependencies for universal dependencies such as
JUnit or Log4J.
The Simple Weather Module
The first submodule we’re going to look at is the simple-weather submodule. This
submodule contains all of the classes that take care of interacting with and parsing the
Yahoo! Weather feeds. See Example 6-2.
Example 6-2. simple-weather module POM
<project xmlns="http://maven.apache.org/POM/4.0.0"
xmlns:xsi="http://www.w3.org/2001/XMLSchema-instance"
xsi:schemaLocation="http://maven.apache.org/POM/4.0.0
http://maven.apache.org/maven-v4_0_0.xsd">
<modelVersion>4.0.0</modelVersion>
<parent>
<groupId>org.sonatype.mavenbook.ch06</groupId>
<artifactId>simple-parent</artifactId>
<version>1.0</version>
</parent>
<artifactId>simple-weather</artifactId>
<packaging>jar</packaging>
<name>Chapter 6 Simple Weather API</name>
<build>
<pluginManagement>
<plugins>
<plugin>
<groupId>org.apache.maven.plugins</groupId>
<artifactId>maven-surefire-plugin</artifactId>
<configuration>
<testFailureIgnore>true</testFailureIgnore>
</configuration>
</plugin>
</plugins>
</pluginManagement>
</build>
The Simple Weather Module | 79

<dependencies>
<dependency>
<groupId>log4j</groupId>
<artifactId>log4j</artifactId>
<version>1.2.14</version>
</dependency>
<dependency>
<groupId>dom4j</groupId>
<artifactId>dom4j</artifactId>
<version>1.6.1</version>
</dependency>
<dependency>
<groupId>jaxen</groupId>
<artifactId>jaxen</artifactId>
<version>1.1.1</version>
</dependency>
<dependency>
<groupId>velocity</groupId>
<artifactId>velocity</artifactId>
<version>1.5</version>
</dependency>
<dependency>
<groupId>org.apache.commons</groupId>
<artifactId>commons-io</artifactId>
<version>1.3.2</version>
<scope>test</scope>
</dependency>
</dependencies>
</project>
In simple-weather’s pom.xml file, we see this module referencing a parent POM using
a set of Maven coordinates. The parent POM for simple-weather is identified by a
groupId of org.sonatype.mavenbook, an artifactId of simple-parent, and a version of
1.0. See Example 6-3.
Example 6-3. The WeatherService class
package org.sonatype.mavenbook.weather;
import java.io.InputStream;
public class WeatherService {
public WeatherService() {}
public String retrieveForecast( String zip ) throws Exception {
// Retrieve Data
InputStream dataIn = new YahooRetriever().retrieve( zip );
// Parse Data
Weather weather = new YahooParser().parse( dataIn );
// Format (Print) Data
return new WeatherFormatter().format( weather );
80 | Chapter 6: A Multimodule Project

}
}
The WeatherService class is defined in src/main/java/org/sonatype/mavenbook/
weather, and it simply calls out to the three objects defined in Chapter 4. In this chap-
ter’s example, we’re creating a separate project that contains service objects that are
referenced in the web application project. This is a common model in enterprise Java
development; often a complex application consists of more than just a single, simple
web application. You might have an enterprise application that consists of multiple
web applications and some command-line applications. Often, you’ll want to refactor
common logic to a service class that can be reused across a number of projects. This is
the justification for creating a WeatherService class; by doing so, you can see how the
simple-webapp project references a service object defined in simple-weather.
The retrieveForecast() method takes a String containing a zip code. This zip code
parameter is then passed to the YahooRetriever’s retrieve() method, which gets the
XML from Yahoo! Weather. The XML returned from YahooRetriever is then passed to
the parse() method on YahooParser which returns a Weather object. This Weather object
is then formatted into a presentable String by the WeatherFormatter.
The Simple Web Application Module
The simple-webapp module is the second submodule referenced in the simple-parent
project. This web application project depends on the simple-weather module, and it
contains some simple servlets that present the results of the Yahoo! Weather service
query. See Example 6-4.
Example 6-4. simple-webapp module POM
<project xmlns="http://maven.apache.org/POM/4.0.0"
xmlns:xsi="http://www.w3.org/2001/XMLSchema-instance"
xsi:schemaLocation="http://maven.apache.org/POM/4.0.0
http://maven.apache.org/maven-v4_0_0.xsd">
<modelVersion>4.0.0</modelVersion>
<parent>
<groupId>org.sonatype.mavenbook.ch06</groupId>
<artifactId>simple-parent</artifactId>
<version>1.0</version>
</parent>
<artifactId>simple-webapp</artifactId>
<packaging>war</packaging>
<name>simple-webapp Maven Webapp</name>
<dependencies>
<dependency>
<groupId>org.apache.geronimo.specs</groupId>
<artifactId>geronimo-servlet_2.4_spec</artifactId>
<version>1.1.1</version>
</dependency>
<dependency>
The Simple Web Application Module | 81

<groupId>org.sonatype.mavenbook.ch06</groupId>
<artifactId>simple-weather</artifactId>
<version>1.0</version>
</dependency>
</dependencies>
<build>
<finalName>simple-webapp</finalName>
<plugins>
<plugin>
<groupId>org.mortbay.jetty</groupId>
<artifactId>maven-jetty-plugin</artifactId>
</plugin>
</plugins>
</build>
</project>
This simple-weather module defines a very simple servlet that reads a zip code from an
HTTP request, calls the WeatherService shown in Example 6-3, and prints the results
to the response’s Writer. See Example 6-5.
Example 6-5. simple-webapp WeatherServlet
package org.sonatype.mavenbook.web;
import org.sonatype.mavenbook.weather.WeatherService;
import java.io.*;
import javax.servlet.*;
import javax.servlet.http.*;
public class WeatherServlet extends HttpServlet {
public void doGet(HttpServletRequest request,
HttpServletResponse response)
throws ServletException, IOException {
String zip = request.getParameter("zip" );
WeatherService weatherService = new WeatherService();
PrintWriter out = response.getWriter();
try {
out.println( weatherService.retrieveForecast( zip ) );
} catch( Exception e ) {
out.println( "Error Retrieving Forecast: " + e.getMessage() );
}
out.flush();
out.close();
}
}
In WeatherServlet, we instantiate an instance of the WeatherService class defined in
simple-weather. The zip code supplied in the request parameter is passed to the
retrieveForecast() method, and the resulting test is printed to the response’s Writer.
Finally, to tie all of this together is the web.xml for simple-webapp in src/main/webapp/
WEB-INF. The servlet and servlet-mapping elements in the web.xml shown in Exam-
ple 6-6 map the request path /weather to the WeatherServlet.
82 | Chapter 6: A Multimodule Project

Example 6-6. simple-webapp web.xml
<!DOCTYPE web-app PUBLIC
"-//Sun Microsystems, Inc.//DTD Web Application 2.3//EN"
"http://java.sun.com/dtd/web-app_2_3.dtd" >
<web-app>
<display-name>Archetype Created Web Application</display-name>
<servlet>
<servlet-name>simple</servlet-name>
<servlet-class>org.sonatype.mavenbook.web.SimpleServlet</servlet-class>
</servlet>
<servlet>
<servlet-name>weather</servlet-name>
<servlet-class>org.sonatype.mavenbook.web.WeatherServlet</servlet-class>
</servlet>
<servlet-mapping>
<servlet-name>simple</servlet-name>
<url-pattern>/simple</url-pattern>
</servlet-mapping>
<servlet-mapping>
<servlet-name>weather</servlet-name>
<url-pattern>/weather</url-pattern>
</servlet-mapping>
</web-app>
Building the Multimodule Project
With the simple-weather project containing all the general code for interacting with
the Yahoo! Weather service and the simple-webapp project containing a simple servlet,
it is time to compile and package the application into a WAR file. To do this, you will
want to compile and install both projects in the appropriate order; since simple-
webapp depends on simple-weather, the simple-weather JAR needs to be created before
the simple-webapp project can compile. To do this, you will run mvn clean install from
the simple-parent project:
~/examples/ch06/simple-parent$ mvn clean install
[INFO] Scanning for projects...
[INFO] Reactor build order:
[INFO] Simple Parent Project
[INFO] simple-weather
[INFO] simple-webapp Maven Webapp
[INFO] ----------------------------------------------------------------------------
[INFO] Building simple-weather
[INFO] task-segment: [clean, install]
[INFO] ----------------------------------------------------------------------------
[...]
[INFO] [install:install]
[INFO] Installing simple-weather-1.0.jar to simple-weather-1.0.jar
[INFO] ----------------------------------------------------------------------------
[INFO] Building simple-webapp Maven Webapp
[INFO] task-segment: [clean, install]
[INFO] ----------------------------------------------------------------------------
Building the Multimodule Project | 83
[...]
[INFO] [install:install]
[INFO] Installing simple-webapp.war to simple-webapp-1.0.war
[INFO]
[INFO] ------------------------------------------------------------------------
[INFO] Reactor Summary:
[INFO] ------------------------------------------------------------------------
[INFO] Simple Parent Project ................................. SUCCESS [3.041s]
[INFO] simple-weather ........................................ SUCCESS [4.802s]
[INFO] simple-webapp Maven Webapp ............................ SUCCESS [3.065s]
[INFO] ------------------------------------------------------------------------
When Maven is executed against a project with submodules, Maven first loads the
parent POM and locates all of the submodule POMs. Maven then puts all of these
project POMs into something called the Maven Reactor, which analyzes the depend-
encies between modules. The Reactor takes care of ordering components to ensure that
interdependent modules are compiled and installed in the proper order.
The Reactor preserves the order of modules as defined in the POM un-
less changes need to be made. A helpful mental model for this is to
picture that modules with dependencies on sibling projects are “pushed
down” the list until the dependency ordering is satisfied. On rare occa-
sions, it may be handy to rearrange the module order of your build—
for example, if you want a frequently unstable module toward the be-
ginning of the build.
Once the Reactor figures out the order in which projects must be built, Maven executes
the specified goals for every module in a multimodule build. In this example, you can
see that Maven builds simple-weather before simple-webapp, effectively executing mvn
clean install for each submodule.
When you run Maven from the command line, you’ll frequently want
to specify the clean lifecycle phase before any other lifecycle stages.
When you specify clean, you make sure that Maven is going to remove
old output before it compiles and packages an application. Running
clean isn’t necessary, but it is a useful precaution to make sure that you
are performing a “clean build.”
84 | Chapter 6: A Multimodule Project

Running the Web Application
Once the multimodule project has been installed with mvn clean install from the parent
project, simple-project, you can then change directories into the simple-webapp project
and run the run goal of the Jetty plugin:
~/examples/ch06/simple-parent/simple-webapp $ mvn jetty:run
[INFO] -------------------------------------------------------------------
[INFO] Building simple-webapp Maven Webapp
[INFO] task-segment: [jetty:run]
[INFO] -------------------------------------------------------------------
[...]
[INFO] [jetty:run]
[INFO] Configuring Jetty for project: simple-webapp Maven Webapp
[...]
[INFO] Webapp directory = ~/examples/ch06/simple-parent/simple-webapp/src/
main/webapp
[INFO] Starting jetty 6.1.6rc1 ...
2007-11-18 1:58:26.980::INFO: jetty-6.1.6rc1
2007-11-18 1:58:26.125::INFO: No Transaction manager found - if your webapp\
requires one, please configure one.
2007-11-18 1:58:27.633::INFO: Started SelectChannelConnector@0.0.0.0:8080
[INFO] Started Jetty Server
Once Jetty has started, load http://localhost:8080/simple-webapp/weather?zip=01201 in
a browser and you should see the formatted weather output.
Running the Web Application | 85

CHAPTER 7
Multimodule Enterprise Project
Introduction
In this chapter, we create a multimodule project that evolves the examples from Chap-
ters 5 and 6 into a project that uses the Spring Framework and Hibernate to create both
a simple web application and a command-line utility to read data from the Yahoo!
Weather feed. The simple-weather code developed in Chapter 4 will be combined with
the simple-webapp project defined in Chapter 5. In the process of creating this multi-
module project, we’ll explore Maven and discuss the different ways it can be used to
create modular projects that encourage reuse.
Downloading This Chapter’s Example
The multimodule project developed in this example consists of modified versions of
the projects developed in Chapters 4 and 5, and we are not using the Maven Archetype
plugin to generate this multimodule project. We strongly recommend downloading a
copy of the example code to use as a supplemental reference while reading the content
in this chapter. Without the examples, you won’t be able to recreate this chapter’s
example code. This chapter’s example project may be downloaded with the book’s
example code at http://www.sonatype.com/book/mvn-examples-1.0.zip or http://www
.sonatype.com/book/mvn-examples-1.0.tar.gz. Unzip this archive in any directory, and
then go to the ch07/ directory. In the ch07/ directory, you will see a directory named
simple-parent/ that contains the multimodule Maven project developed in this chapter.
In the simple-parent/ project directory you will see a pom.xml and the five submodule
directories simple-model/, simple-persist/, simple-command/, simple-weather/, and
simple-webapp/. If you wish to follow along with the example code in a web browser,
go to http://www.sonatype.com/book/examples-1.0 and click on the ch07/ directory.
Multimodule Enterprise Project
Presenting the complexity of a massive enterprise-level project far exceeds the scope of
this book. Such projects are characterized by multiple databases, integration with
87
external systems, and subprojects that may be divided by departments. These projects
usually span thousands of lines of code and involve the effort of tens or hundreds of
software developers. Although such a complete example is outside the scope of this
book, we can provide you with a sample project that suggests the complexity of a larger
Enterprise application. In the conclusion, we suggest some possibilities for modularity
beyond that presented in this chapter.
In this chapter, we’re going to look at a multimodule Maven project that will produce
two applications: a command-line query tool for the Yahoo! Weather feed, and a web
application that queries the Yahoo! Weather feed. Both of these applications will store
the results of queries in an embedded database. Each will allow the user to retrieve
historical weather data from this embedded database. Both applications will reuse ap-
plication logic and share a persistence library. This chapter’s example builds upon the
Yahoo! Weather parsing code introduced in Chapter 4. This project is divided into five
submodules as shown in Figure 7-1.
In Figure 7-1, you can see that there are five submodules of simple-parent. They are:
simple-model
This module defines a simple object model that models the data returned from the
Yahoo! Weather feed. This object model contains the Weather, Condition,
Atmosphere, Location, and Wind objects. When our application parses the Yahoo!
Weather feed, the parsers defined in simple-weather will parse the XML and create
Weather objects, which are then used by the application. This project contains
model objects annotated with Hibernate 3 Annotations, which are used by the logic
in simple-persist to map each model object to a corresponding table in a relational
database.
Super POM
com.sonatype.maven
simple-project
1.0
com.sonatype.maven
simple-persist
1.0
com.sonatype.maven
simple-command
1.0
com.sonatype.maven
simple-weather
1.0
com.sonatype.maven
simple-webapp
1.0
com.sonatype.maven
simple-model
1.0
= Dependency
= Transitive Dependency
= Module of
= Inherits from
Figure 7-1. Multimodule enterprise application module relationships
88 | Chapter 7: Multimodule Enterprise Project

simple-weather
This module contains all of the logic required to retrieve data from the Yahoo!
Weather feed and parse the resulting XML. The XML returned from this feed is
converted into the model objects defined in simple-model. simple-weather has a
dependency on simple-model. simple-weather defines a WeatherService object that
is referenced by both the simple-command and simple-webapp projects.
simple-persist
This module contains some Data Access Objects (DAO) that are configured to
store Weather objects in an embedded database. Both of the applications defined
in this multimodule project will use the DAOs defined in simple-persist to store
data in an embedded database. The DAOs defined in this project understand and
return the model objects defined in simple-model. simple-persist has a direct de-
pendency on simple-model, and it depends on the Hibernate Annotations present
on the model objects.
simple-webapp
The web application project contains two Spring MVC Controller implementa-
tions that use the WeatherService defined in simple-weather and the DAOs defined
in simple-persist. simple-webapp has a direct dependency on simple-weather and
simple-persist; it has a transitive dependency on simple-model.
simple-command
This module contains a simple command-line tool that can be used to query the
Yahoo! Weather feed. This project contains a class with a static main() function
and interacts with the WeatherService defined in simple-weather and the DAOs
defined in simple-persist. simple-command has a direct dependency on simple-
weather and simple-persist; it has a transitive dependency on simple-model.
This chapter contains a contrived example simple enough to introduce in a book, yet
complex enough to justify a set of five submodules. Our contrived example has a model
project with five classes, a persistence library with two service classes, and a weather
parsing library with five or six classes, but a real-world system might have a model
project with a hundred objects, several persistence libraries, and service libraries span-
ning multiple departments. Although we’ve tried to make sure that the code contained
in this example is straightforward enough to comprehend in a single sitting, we’ve also
gone out of our way to build a modular project. You might be tempted to look at the
examples in this chapter and walk away with the idea that Maven encourages too much
complexity given that our model project has only five classes. Although using Maven
does suggest a certain level of modularity, do realize that we’ve gone out of our way to
complicate our simple example projects for the purpose of demonstrating Maven’s
multimodule features.
Introduction | 89

Technology Used in This Example
This chapter’s example involves some technology that, while popular, is not directly
related to Maven. These technologies are the Spring Framework and Hibernate. The
Spring Framework is an Inversion of Control (IoC) container and a set of frameworks
that aim to simplify interaction with various J2EE libraries. Using the Spring Frame-
work as a foundational framework for application development gives you access to a
number of helpful abstractions that can take much of the meddlesome busywork out
of dealing with persistence frameworks such as Hibernate or iBATIS or enterprise
APIs such as JDBC, JNDI, and Java Message Service (JMS). The Spring Framework has
grown in popularity over the past few years as a replacement for the heavyweight
enterprise standards coming out of Sun Microsystems. Hibernate is a widely used Ob-
ject-Relational Mapping framework that allows you to interact with a relational data-
base as if it were a collection of Java objects. This example focuses on building a simple
web application and a command-line application that uses the Spring Framework to
expose a set of reusable components to applications and that also uses Hibernate to
persist weather data in an embedded database.
We’ve decided to include references to these frameworks to demonstrate how one
would construct projects using these technologies when using Maven. Although we
make brief efforts to introduce these technologies throughout this chapter, we will not
go out of our way to fully explain these technologies. For more information about the
Spring Framework, please see the project’s web site at http://www.springframework
.org/. For more information about Hibernate and Hibernate Annotations, please see
the project’s web site at http://www.hibernate.org. This chapter uses Hyper-threaded
Structured Query Language Database (HSQLDB) as an embedded database; for more
information about this database, see the project’s web site at http://hsqldb.org/.
The Simple Parent Project
This simple-parent project has a pom.xml that references five submodules: simple-
command, simple-model, simple-weather, simple-persist, and simple-webapp. The top-
level pom.xml is shown in Example 7-1.
Example 7-1. simple-parent project POM
<project xmlns="http://maven.apache.org/POM/4.0.0"
xmlns:xsi="http://www.w3.org/2001/XMLSchema-instance"
xsi:schemaLocation="http://maven.apache.org/POM/4.0.0
http://maven.apache.org/maven-v4_0_0.xsd">
<modelVersion>4.0.0</modelVersion>
<groupId>org.sonatype.mavenbook.ch07</groupId>
<artifactId>simple-parent</artifactId>
<packaging>pom</packaging>
<version>1.0</version>
<name>Chapter 7 Simple Parent Project</name>
90 | Chapter 7: Multimodule Enterprise Project

<modules>
<module>simple-command</module>
<module>simple-model</module>
<module>simple-weather</module>
<module>simple-persist</module>
<module>simple-webapp</module>
</modules>
<build>
<pluginManagement>
<plugins>
<plugin>
<groupId>org.apache.maven.plugins</groupId>
<artifactId>maven-compiler-plugin</artifactId>
<configuration>
<source>1.5</source>
<target>1.5</target>
</configuration>
</plugin>
</plugins>
</pluginManagement>
</build>
<dependencies>
<dependency>
<groupId>junit</groupId>
<artifactId>junit</artifactId>
<version>3.8.1</version>
<scope>test</scope>
</dependency>
</dependencies>
</project>
Note the similarities between this parent POM and the parent POM defined in Exam-
ple 6-1. The only real difference between these two POMs is the list of submodules.
Where the earlier example listed only two submodules, this parent POM lists five sub-
modules. The next few sections explore each of these five submodules in some detail.
Because our example uses Java annotations, we’ve configured the compiler to target
the Java 5 JVM.
The Simple Model Module
The first thing most enterprise projects need is an object model. An object model cap-
tures the core set of domain objects in any system. A banking system might have an
object model that consists of Account, Customer, and Transaction objects, or a system
to capture and communicate sports scores might have Team and Game objects. Whatever
it is, there’s a good chance that you’ve modeled the concepts in your system in an object
model. It is a common practice in Maven projects to separate this project into a separate
project that is widely referenced. In this example system, we are capturing each query
The Simple Model Module | 91
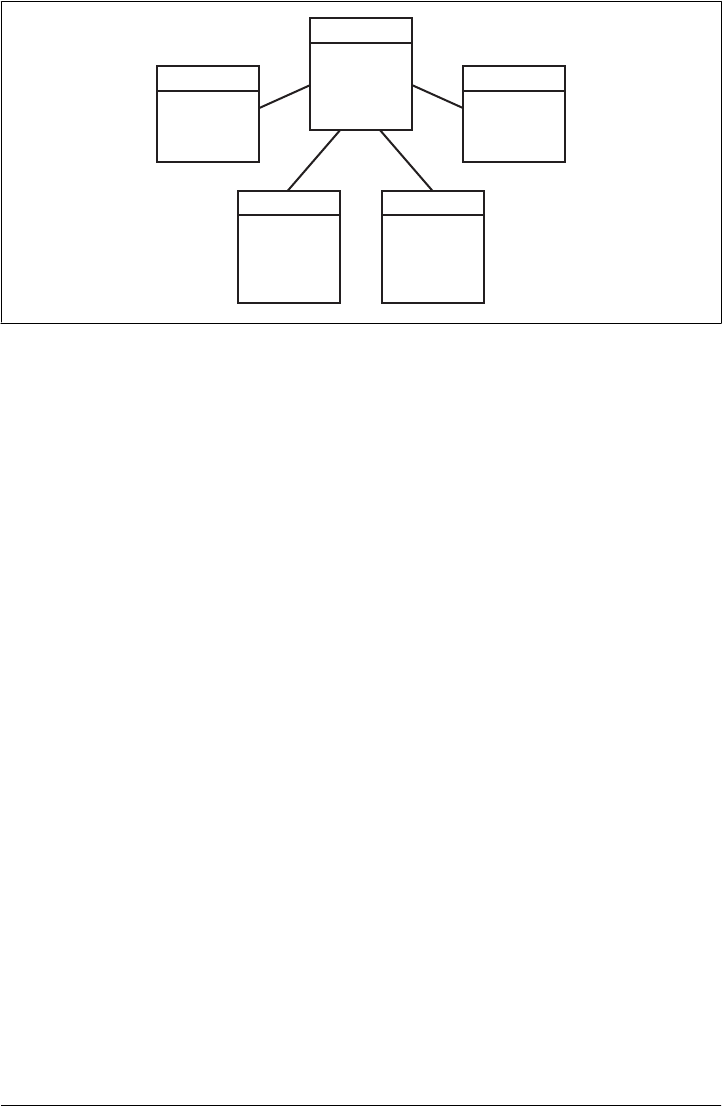
to the Yahoo! Weather feed with a Weather object that references four other objects.
Wind direction, chill, and speed are stored in a Wind object. Location data including
the zip code, city, region, and country are stored in a Location class. Atmospheric con-
ditions such as the humidity, maximum visibility, barometric pressure, and whether
the pressure is rising or falling is stored in an Atmosphere class. A textual description of
conditions, the temperature, and the data of the observation is stored in a Condition
class. See Figure 7-2.
The pom.xml file for this simple model object contains one dependency that bears some
explanation. Our object model is annotated with Hibernate Annotations. We use these
annotations to map the model objects in this model to tables in a relational database.
The dependency is org.hibernate:hibernate-annotations:3.3.0.ga. Take a look at the
pom.xml shown in Example 7-2, and then look at the next few examples for some
illustrations of these annotations.
Example 7-2. simple-model pom.xml
<project xmlns="http://maven.apache.org/POM/4.0.0"
xmlns:xsi="http://www.w3.org/2001/XMLSchema-instance"
xsi:schemaLocation="http://maven.apache.org/POM/4.0.0
http://maven.apache.org/maven-v4_0_0.xsd">
<modelVersion>4.0.0</modelVersion>
<parent>
<groupId>org.sonatype.mavenbook.ch07</groupId>
<artifactId>simple-parent</artifactId>
<version>1.0</version>
</parent>
<artifactId>simple-model</artifactId>
<packaging>jar</packaging>
<name>Simple Object Model</name>
<dependencies>
<dependency>
id
chill
direction
speed
Wind
id
location
condition
wind
atmosphere
Weather
zip
city
region
country
Location
id
text
code
temp
date
Condition
id
humidity
visibility
pressure
rising
Atmosphere
Figure 7-2. Simple object model for weather data
92 | Chapter 7: Multimodule Enterprise Project

<groupId>org.hibernate</groupId>
<artifactId>hibernate-annotations</artifactId>
<version>3.3.0.ga</version>
</dependency>
<dependency>
<groupId>org.hibernate</groupId>
<artifactId>hibernate-commons-annotations</artifactId>
<version>3.3.0.ga</version>
</dependency>
</dependencies>
</project>
In src/main/java/org/sonatype/mavenbook/weather/model, we have Weather.java,
which contains the annotated Weather model object. The Weather object is a simple Java
bean. This means that we have private member variables like id, location, condition,
wind, atmosphere, and date exposed with public getter and setter methods that adhere
to the following pattern: if a property is named name, there will be a public no-arg getter
method named getName(), and there will be a one-argument setter named
setName(String name). Although we show the getter and setter method for the id prop-
erty, we’ve omitted most of the getters and setters for most of the other properties to
save a few trees. See Example 7-3.
Example 7-3. Annotated Weather model object
package org.sonatype.mavenbook.weather.model;
import javax.persistence.*;
import java.util.Date;
@Entity
@NamedQueries({
@NamedQuery(name="Weather.byLocation",
query="from Weather w where w.location = :location")
})
public class Weather {
@Id
@GeneratedValue(strategy=GenerationType.IDENTITY)
private Integer id;
@ManyToOne(cascade=CascadeType.ALL)
private Location location;
@OneToOne(mappedBy="weather",cascade=CascadeType.ALL)
private Condition condition;
@OneToOne(mappedBy="weather",cascade=CascadeType.ALL)
private Wind wind;
@OneToOne(mappedBy="weather",cascade=CascadeType.ALL)
private Atmosphere atmosphere;
private Date date;
The Simple Model Module | 93

public Weather() {}
public Integer getId() { return id; }
public void setId(Integer id) { this.id = id; }
// All getter and setter methods omitted...
}
In the Weather class, we are using Hibernate annotations to provide guidance to the
simple-persist project. These annotations are used by Hibernate to map an object to
a table in a relational database. Although a full explanation of Hibernate annotations
is beyond the scope of this chapter, here is a brief explanation for the curious. The
@Entity annotation marks this class as a persistent entity. We’ve omitted the @Table
annotation on this class, so Hibernate is going to use the name of the class as the name
of the table to map Weather to. The @NamedQueries annotation defines a query that is
used by the WeatherDAO in simple-persist. The query language in the @NamedQuery
annotation is written in something called Hibernate Query Language (HQL). Each
member variable is annotated with annotations that define the type of column and any
relationships implied by that column:
Id
The id property is annotated with @Id. This marks the id property as the property
that contains the primary key in a database table. The @GeneratedValue controls
how new primary key values are generated. In the case of id, we’re using the
IDENTITY GenerationType, which will use the underlying database’s identity gener-
ation facilities.
Location
Each Weather object instance corresponds to a Location object. A Location object
represents a zip code, and the @ManyToOne makes sure that Weather objects that point
to the same Location object reference the same instance. The cascade attribute of
the @ManyToOne makes sure that we persist a Location object every time we persist
a Weather object.
Condition, Wind, Atmosphere
Each of these objects is mapped as a @OneToOne with the CascadeType of ALL. This
means that every time we save a Weather object, we’ll be inserting a row into the
Weather table, the Condition table, the Wind table, and the Atmosphere table.
Date
Date is not annotated. This means that Hibernate is going to use all of the column
defaults to define this mapping. The column name is going to be date, and the
column type is going to be the appropriate time to match the Date object.
94 | Chapter 7: Multimodule Enterprise Project
If you have a property you wish to omit from a table mapping, you
would annotate that property with @Transient.
Next, take a look at one of the secondary model objects, Condition, shown in Exam-
ple 7-4. This class also resides in src/main/java/org/sonatype/mavenbook/weather/
model.
Example 7-4. simple-model’s Condition model object
package org.sonatype.mavenbook.weather.model;
import javax.persistence.*;
@Entity
public class Condition {
@Id
@GeneratedValue(strategy=GenerationType.IDENTITY)
private Integer id;
private String text;
private String code;
private String temp;
private String date;
@OneToOne(cascade=CascadeType.ALL)
@JoinColumn(name="weather_id", nullable=false)
private Weather weather;
public Condition() {}
public Integer getId() { return id; }
public void setId(Integer id) { this.id = id; }
// All getter and setter methods omitted...
}
The Condition class resembles the Weather class. It is annotated as an @Entity, and it
has similar annotations on the id property. The text, code, temp, and date properties
are all left with the default column settings, and the weather property is annotated with
a @OneToOne annotation and another annotation that references the associated
Weather object with a foreign key column named weather_id.
The Simple Weather Module
The next module we’re going to examine could be considered something of a “service.”
The Simple Weather module is the module that contains all of the logic necessary to
retrieve and parse the data from the Yahoo! Weather RSS feed. Although Simple
The Simple Weather Module | 95

Weather contains three Java classes and one JUnit test, it is going to present a single
component, WeatherService, to both the Simple Web Application and the Simple
Command-line Utility. Very often an enterprise project will contain several API mod-
ules that contain critical business logic or logic that interacts with external systems. A
banking system might have a module that retrieves and parses data from a third-party
data provider, and a system to display sports scores might interact with an XML feed
that presents real-time scores for basketball or soccer. In Example 7-5, this module
encapsulates all of the network activity and XML parsing that is involved in the inter-
action with Yahoo! Weather. Other modules can depend on this module and simply
call out to the retrieveForecast() method on WeatherService, which takes a zip code
as an argument and which returns a Weather object.
Example 7-5. simple-weather module POM
<project xmlns="http://maven.apache.org/POM/4.0.0"
xmlns:xsi="http://www.w3.org/2001/XMLSchema-instance"
xsi:schemaLocation="http://maven.apache.org/POM/4.0.0
http://maven.apache.org/maven-v4_0_0.xsd">
<modelVersion>4.0.0</modelVersion>
<parent>
<groupId>org.sonatype.mavenbook.ch07</groupId>
<artifactId>simple-parent</artifactId>
<version>1.0</version>
</parent>
<artifactId>simple-weather</artifactId>
<packaging>jar</packaging>
<name>Simple Weather API</name>
<dependencies>
<dependency>
<groupId>org.sonatype.mavenbook.ch07</groupId>
<artifactId>simple-model</artifactId>
<version>1.0</version>
</dependency>
<dependency>
<groupId>log4j</groupId>
<artifactId>log4j</artifactId>
<version>1.2.14</version>
</dependency>
<dependency>
<groupId>dom4j</groupId>
<artifactId>dom4j</artifactId>
<version>1.6.1</version>
</dependency>
<dependency>
<groupId>jaxen</groupId>
<artifactId>jaxen</artifactId>
<version>1.1.1</version>
</dependency>
<dependency>
<groupId>org.apache.commons</groupId>
<artifactId>commons-io</artifactId>
96 | Chapter 7: Multimodule Enterprise Project

<version>1.3.2</version>
<scope>test</scope>
</dependency>
</dependencies>
</project>
The simple-weather POM extends the simple-parent POM, sets the packaging to jar,
and then adds the following dependencies:
org.sonatype.mavenbook.ch07:simple-model:1.0
simple-weather parses the Yahoo! Weather RSS feed into a Weather object. It has a
direct dependency on simple-model.
log4j:log4j:1.2.14
simple-weather uses the Log4J library to print log messages.
dom4j:dom4j:1.6.1 and jaxen:jaxen:1.1.1
Both of these dependencies are used to parse the XML returned from Yahoo!
Weather.
org.apache.commons:commons-io:1.3.2 (scope=test)
This test-scoped dependency is used by the YahooParserTest.
Next is the WeatherService class, shown in Example 7-6. This class is going to look very
similar to the WeatherService class from Example 6-3. Although the WeatherService is
the same, there are some subtle differences in this chapter’s example. This version’s
retrieveForecast() method returns a Weather object, and the formatting is going to be
left to the applications that call WeatherService. The other major change is that the
YahooRetriever and YahooParser are both bean properties of the WeatherService bean.
Example 7-6. The WeatherService class
package org.sonatype.mavenbook.weather;
import java.io.InputStream;
import org.sonatype.mavenbook.weather.model.Weather;
public class WeatherService {
private YahooRetriever yahooRetriever;
private YahooParser yahooParser;
public WeatherService() {}
public Weather retrieveForecast(String zip) throws Exception {
// Retrieve Data
InputStream dataIn = yahooRetriever.retrieve(zip);
// Parse DataS
Weather weather = yahooParser.parse(zip, dataIn);
return weather;
The Simple Weather Module | 97

}
public YahooRetriever getYahooRetriever() {
return yahooRetriever;
}
public void setYahooRetriever(YahooRetriever yahooRetriever) {
this.yahooRetriever = yahooRetriever;
}
public YahooParser getYahooParser() {
return yahooParser;
}
public void setYahooParser(YahooParser yahooParser) {
this.yahooParser = yahooParser;
}
}
Finally, in this project we have an XML file that is used by the Spring Framework to
create something called an ApplicationContext. First, some explanation: both of our
applications, the web application and the command-line utility, need to interact with
the WeatherService class, and they both do so by retrieving an instance of this class
from a Spring ApplicationContext using the name weatherService. Our web application
uses a Spring MVC controller that is associated with an instance of WeatherService,
and our command-line utility loads the WeatherService from an ApplicationContext in
a static main() function. To encourage reuse, we’ve included an applicationContext-
weather.xml file in src/main/resources, which is available on the classpath. Modules that
depend on the simple-weather module can load this application context using the
ClasspathXmlApplicationContext in the Spring Framework. They can then reference a
named instance of the WeatherService named weatherService. See Example 7-7.
Example 7-7. Spring ApplicationContext for the simple-weather module
<?xml version="1.0" encoding="UTF-8"?>
<beans xmlns="http://www.springframework.org/schema/beans"
xmlns:xsi="http://www.w3.org/2001/XMLSchema-instance"
xsi:schemaLocation="http://www.springframework.org/schema/beans
http://www.springframework.org/schema/beans/spring-beans-2.0.xsd
default-lazy-init="true">
<bean id="weatherService"
class="org.sonatype.mavenbook.weather.WeatherService">
<property name="yahooRetriever" ref="yahooRetriever"/>
<property name="yahooParser" ref="yahooParser"/>
</bean>
<bean id="yahooRetriever"
class="org.sonatype.mavenbook.weather.YahooRetriever"/>
<bean id="yahooParser"
98 | Chapter 7: Multimodule Enterprise Project

class="org.sonatype.mavenbook.weather.YahooParser"/>
</beans>
This document defines three beans: yahooParser, yahooRetriever, and
weatherService. The weatherService bean is an instance of WeatherService, and this
XML document populates the yahooParser and yahooRetriever properties with refer-
ences to the named instances of the corresponding classes. Think of this application
Context-weather.xml file as defining the architecture of a subsystem in this multimodule
project. Projects like simple-webapp and simple-command can reference this context and
retrieve an instance of WeatherService that already has relationships to instances of
YahooRetriever and YahooParser.
The Simple Persist Module
This module defines two very simple Data Access Objects (DAOs). A DAO is an object
that provides an interface for persistence operations. In an application that makes use
of an Object-Relational Mapping (ORM) framework such as Hibernate, DAOs are
usually defined around objects. In this project, we are defining two DAO objects:
WeatherDAO and LocationDAO. The WeatherDAO class allows us to save a Weather object to
a database and retrieve a Weather object by id, and to retrieve Weather objects that match
a specific Location. The LocationDAO has a method that allows us to retrieve a
Location object by zip code. First, let’s take a look at the simple-persist POM in
Example 7-8.
Example 7-8. simple-persist POM
<project xmlns="http://maven.apache.org/POM/4.0.0"
xmlns:xsi="http://www.w3.org/2001/XMLSchema-instance"
xsi:schemaLocation="http://maven.apache.org/POM/4.0.0
http://maven.apache.org/maven-v4_0_0.xsd">
<modelVersion>4.0.0</modelVersion>
<parent>
<groupId>org.sonatype.mavenbook.ch07</groupId>
<artifactId>simple-parent</artifactId>
<version>1.0</version>
</parent>
<artifactId>simple-persist</artifactId>
<packaging>jar</packaging>
<name>Simple Persistence API</name>
<dependencies>
<dependency>
<groupId>org.sonatype.mavenbook.ch07</groupId>
<artifactId>simple-model</artifactId>
<version>1.0</version>
</dependency>
<dependency>
<groupId>org.hibernate</groupId>
<artifactId>hibernate</artifactId>
The Simple Persist Module | 99

<version>3.2.5.ga</version>
<exclusions>
<exclusion>
<groupId>javax.transaction</groupId>
<artifactId>jta</artifactId>
</exclusion>
</exclusions>
</dependency>
<dependency>
<groupId>org.hibernate</groupId>
<artifactId>hibernate-annotations</artifactId>
<version>3.3.0.ga</version>
</dependency>
<dependency>
<groupId>org.hibernate</groupId>
<artifactId>hibernate-commons-annotations</artifactId>
<version>3.3.0.ga</version>
</dependency>
<dependency>
<groupId>org.apache.geronimo.specs</groupId>
<artifactId>geronimo-jta_1.1_spec</artifactId>
<version>1.1</version>
</dependency>
<dependency>
<groupId>org.springframework</groupId>
<artifactId>spring</artifactId>
<version>2.0.7</version>
</dependency>
</dependencies>
</project>
This POM file references simple-parent as a parent POM, and it defines a few depend-
encies. The dependencies listed in simple-persist’s POM are:
org.sonatype.mavenbook.ch07:simple-model:1.0
Just like the simple-weather module, this persistence module references the core
model objects defined in simple-model.
org.hibernate:hibernate:3.2.5.ga
We define a dependency on Hibernate version 3.2.5.ga, but notice that we’re ex-
cluding a dependency of Hibernate. We’re doing this because the javax.transac
tion:javax dependency is not available in the public Maven repository. This de-
pendency happens to be one of those Sun dependencies that has not yet made it
into the free central Maven repository. To avoid an annoying message telling us to
go download these nonfree dependencies, we simple exclude this dependency from
Hibernate and add a dependency on...
org.apache.geronimo.specs:geronimo-jta_1.1_spec:1.1
Just like the Servlet and JSP APIs, the Apache Geronimo project was nice enough
to release a certified version of many of the enterprise APIs under an Apache Li-
cense. This means that whenever a component tells you that it depends on the
100 | Chapter 7: Multimodule Enterprise Project

JDBC, JNDI, and JTA APIs (among others), you can look for a corresponding
library under the org.apache.geronimo.specs groupId.
org.springframework:spring:2.0.7
This includes the entire Spring Framework as a dependency.
It is generally a good practice to depend on only the components
of Spring you happen to be using. The Spring Framework project
has been nice enough to create focused artifacts such as spring-
hibernate3.
Why depend on Spring? When it comes to Hibernate integration, Spring allows us to
leverage helper classes such as HibernateDaoSupport. For an example of what is possible
with the help of HibernateDaoSupport, take a look at the code for the WeatherDAO in
Example 7-9.
Example 7-9. simple-persist’s WeatherDAO class
package org.sonatype.mavenbook.weather.persist;
import java.util.ArrayList;
import java.util.List;
import org.hibernate.Query;
import org.hibernate.Session;
import org.springframework.orm.hibernate3.HibernateCallback;
import org.springframework.orm.hibernate3.support.HibernateDaoSupport;
import org.sonatype.mavenbook.weather.model.Location;
import org.sonatype.mavenbook.weather.model.Weather;
public class WeatherDAO extends HibernateDaoSupport {
public WeatherDAO() {}
public void save(Weather weather) {
getHibernateTemplate().save( weather );
}
public Weather load(Integer id) {
return (Weather) getHibernateTemplate().load( Weather.class, id);
}
@SuppressWarnings("unchecked")
public List<Weather> recentForLocation( final Location location ) {
return (List<Weather>) getHibernateTemplate().execute(
new HibernateCallback() {
public Object doInHibernate(Session session) {
Query query = getSession().getNamedQuery("Weather.byLocation");
query.setParameter("location", location);
return new ArrayList<Weather>( query.list() );
}
The Simple Persist Module | 101

});
}
}
That’s it. No, really, you are done writing a class that can insert new rows, select by
primary key, and find all rows in Weather that join to an id in the Location table. Clearly,
we can’t stop this book and insert the 500 pages it would take to get you up to speed
on the intricacies of Hibernate, but we can do some very quick explanation:
This class extends HibernateDaoSupport. What this means is that the class is going
to be associated with a Hibernate SessionFactory, which it is going to use to create
Hibernate Session objects. In Hibernate, every operation goes through a Session
object. A Session mediates access to the underlying database and takes care of man-
aging the connection to the JDBC DataSource. Extending HibernateDaoSupport also
means that we can access the HibernateTemplate using getHibernateTemplate().
The save() method takes an instance of Weather and calls the save() method on a
HibernateTemplate. The HibernateTemplate simplifies calls to common Hibernate
operations and converts any database-specific exceptions to runtime exceptions.
Here we call out to save(), which inserts a new record into the Weather table. Alter-
natives to save() are update(), which updates an existing row, or saveOrUpdate(),
which would either save or update depending on the presence of a nonnull id prop-
erty in Weather.
The load() method, once again, is a one-liner that just calls a method on an instance
of HibernateTemplate. load() on HibernateTemplate takes a Class object and a
Serializable object. In this case, the Serializable corresponds to the id value of
the Weather object to load.
This last method, recentForLocation(), calls out to a NamedQuery defined in the
Weather model object. If you can think back that far, the Weather model object de-
fined a named query Weather.byLocation with a query of "from Weather w where
w.location = :location". We’re loading this NamedQuery using a reference to a
Hibernate Session object inside a HibernateCallback that is executed by the exe
cute() method on HibernateTemplate. You can see in this method that we’re popu-
lating the named parameter location with the parameter passed into the
recentForLocation() method.
Now is a good time for some clarification. HibernateDaoSupport and HibernateTem
plate are classes from the Spring Framework. They were created by the Spring Frame-
work to make writing Hibernate DAO objects painless. To support this DAO, we’ll
need to do some configuration in the simple-persist Spring ApplicationContext defi-
nition. The XML document shown in Example 7-10 is stored in src/main/resources in
a file named applicationContext-persist.xml.
102 | Chapter 7: Multimodule Enterprise Project

Example 7-10. Spring ApplicationContext for simple-persist
<beans xmlns="http://www.springframework.org/schema/beans"
xmlns:xsi="http://www.w3.org/2001/XMLSchema-instance"
xsi:schemaLocation="http://www.springframework.org/schema/beans
http://www.springframework.org/schema/beans/spring-beans-2.0.xsd"
default-lazy-init="true">
<bean id="sessionFactory"
class="org.springframework.orm.hibernate3.annotation.AnnotationSessionFactoryBean">
<property name="annotatedClasses">
<list>
<value>org.sonatype.mavenbook.weather.model.Atmosphere</value>
<value>org.sonatype.mavenbook.weather.model.Condition</value>
<value>org.sonatype.mavenbook.weather.model.Location</value>
<value>org.sonatype.mavenbook.weather.model.Weather</value>
<value>org.sonatype.mavenbook.weather.model.Wind</value>
</list>
</property>
<property name="hibernateProperties">
<props>
<prop key="hibernate.show_sql">false</prop>
<prop key="hibernate.format_sql">true</prop>
<prop key="hibernate.transaction.factory_class">
org.hibernate.transaction.JDBCTransactionFactory
</prop>
<prop key="hibernate.dialect">
org.hibernate.dialect.HSQLDialect
</prop>
<prop key="hibernate.connection.pool_size">0</prop>
<prop key="hibernate.connection.driver_class">
org.hsqldb.jdbcDriver
</prop>
<prop key="hibernate.connection.url">
jdbc:hsqldb:data/weather;shutdown=true
</prop>
<prop key="hibernate.connection.username">sa</prop>
<prop key="hibernate.connection.password"></prop>
<prop key="hibernate.connection.autocommit">true</prop>
<prop key="hibernate.jdbc.batch_size">0</prop>
</props>
</property>
</bean>
<bean id="locationDAO"
class="org.sonatype.mavenbook.weather.persist.LocationDAO">
<property name="sessionFactory" ref="sessionFactory"/>
</bean>
<bean id="weatherDAO"
class="org.sonatype.mavenbook.weather.persist.WeatherDAO">
<property name="sessionFactory" ref="sessionFactory"/>
</bean>
</beans>
The Simple Persist Module | 103

In this application context, we’re accomplishing a few things. The sessionFactory bean
is the bean from which the DAOs retrieve Hibernate Session objects. This bean is an
instance of AnnotationSessionFactoryBean and is supplied with a list of
annotatedClasses. Note that the list of annotated classes is the list of classes defined in
our simple-model module. Next, the sessionFactory is configured with a set of Hiber-
nate configuration properties (hibernateProperties). In this example, our Hibernate
properties define a number of settings:
hibernate.dialect
This setting controls how SQL is to be generated for our database. Since we are
using the HSQLDB database, our database dialect is set to org.hibernate.dia
lect.HSQLDialect. Hibernate has dialects for all major databases such as Oracle,
MySQL, Postgres, and SQL Server.
hibernate.connection.*
In this example, we’re configuring the JDBC connection properties from the Spring
configuration. Our applications are configured to run against a HSQLDB in
the ./data/weather directory. In a real enterprise application, it is more likely you
would use something like JNDI to externalize database configuration from your
application’s code.
Lastly, in this bean definition file, both of the simple-persist DAO objects are created
and given a reference to the sessionFactory bean just defined. Just like the Spring
application context in simple-weather, this applicationContext-persist.xml file defines
the architecture of a submodule in a larger enterprise design. If you were working with
a larger collection of persistence classes, you might find it useful to capture them in an
application context that is separate from your application.
There’s one last piece of the puzzle in simple-persist. Later in this chapter, we’re going
to see how we can use the Maven Hibernate3 plugin to generate our database schema
from the annotated model objects. For this to work properly, the Maven Hibernate3
plugin needs to read the JDBC connection configuration parameters, the list of anno-
tated classes, and other Hibernate configuration from a file named hibernate.cfg.xml in
src/main/resources. The purpose of this file (which duplicates some of the configuration
in applicationContext-persist.xml) is to allow us to leverage the Maven Hibernate3
plugin to generate Data Definition Language (DDL) from nothing more than our an-
notations. See Example 7-11.
Example 7-11. simple-persist hibernate.cfg.xml
<!DOCTYPE hibernate-configuration PUBLIC
"-//Hibernate/Hibernate Configuration DTD 3.0//EN"
"http://hibernate.sourceforge.net/hibernate-configuration-3.0.dtd">
<hibernate-configuration>
<session-factory>
<!-- SQL dialect -->
104 | Chapter 7: Multimodule Enterprise Project

<property name="dialect">org.hibernate.dialect.HSQLDialect</property>
<!-- Database connection settings -->
<property name="connection.driver_class">org.hsqldb.jdbcDriver</property>
<property name="connection.url">jdbc:hsqldb:data/weather</property>
<property name="connection.username">sa</property>
<property name="connection.password"></property>
<property name="connection.shutdown">true</property>
<!-- JDBC connection pool (use the built-in one) -->
<property name="connection.pool_size">1</property>
<!-- Enable Hibernate's automatic session context management -->
<property name="current_session_context_class">thread</property>
<!-- Disable the second-level cache -->
<property name="cache.provider_class">org.hibernate.cache.NoCacheProvider</property>
<!-- Echo all executed SQL to stdout -->
<property name="show_sql">true</property>
<!-- disable batching so HSQLDB will propagate errors correctly. -->
<property name="jdbc.batch_size">0</property>
<!-- List all the mapping documents we're using -->
<mapping class="org.sonatype.mavenbook.weather.model.Atmosphere"/>
<mapping class="org.sonatype.mavenbook.weather.model.Condition"/>
<mapping class="org.sonatype.mavenbook.weather.model.Location"/>
<mapping class="org.sonatype.mavenbook.weather.model.Weather"/>
<mapping class="org.sonatype.mavenbook.weather.model.Wind"/>
</session-factory>
</hibernate-configuration>
The contents of Examples 7-10 and 7-11 are redundant. While the Spring
Application Context XML is going to be used by the web application and the command-
line application, the hibernate.cfg.xml exists only to support the Maven Hibernate3
plugin. Later in this chapter, we’ll see how to use this hibernate.cfg.xml and the Maven
Hibernate3 plugin to generate a database schema based on the annotated object model
defined in simple-model. This hibernate.cfg.xml file is the file that will configure the
JDBC connection properties and enumerate the list of annotated model classes for the
Maven Hibernate3 plugin.
The Simple Web Application Module
The web application is defined in a simple-webapp project. This simple web application
project is going to define two Spring MVC Controllers: WeatherController and
HistoryController. Both of these controllers are going to reference components defined
in simple-weather and simple-persist. The Spring container is configured in this ap-
plication’s web.xml, which references the applicationContext-weather.xml file in
The Simple Web Application Module | 105
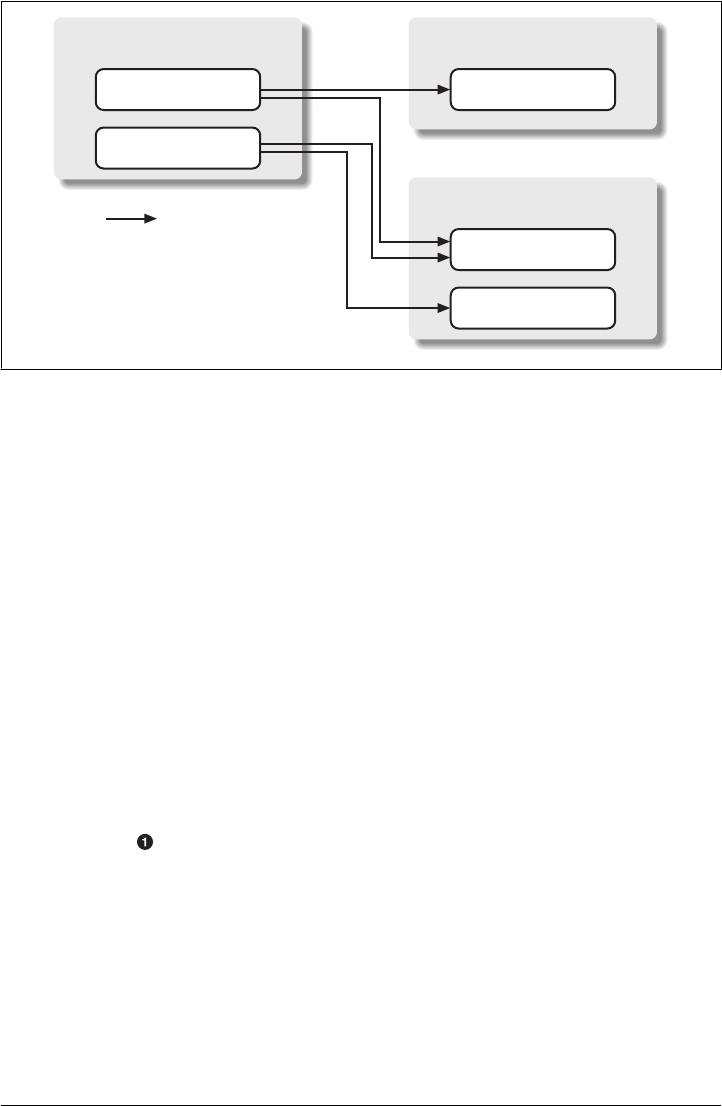
simple-weather and the applicationContext-persist.xml file in simple-persist. The com-
ponent architecture of this simple web application is shown in Figure 7-3.
The POM for simple-webapp is shown in Example 7-12.
Example 7-12. POM for simple-webapp
<project xmlns="http://maven.apache.org/POM/4.0.0"
xmlns:xsi="http://www.w3.org/2001/XMLSchema-instance"
xsi:schemaLocation="http://maven.apache.org/POM/4.0.0
http://maven.apache.org/maven-v4_0_0.xsd">
<modelVersion>4.0.0</modelVersion>
<parent>
<groupId>org.sonatype.mavenbook.ch07</groupId>
<artifactId>simple-parent</artifactId>
<version>1.0</version>
</parent>
<artifactId>simple-webapp</artifactId>
<packaging>war</packaging>
<name>Simple Web Application</name>
<dependencies>
<dependency>
<groupId>org.apache.geronimo.specs</groupId>
<artifactId>geronimo-servlet_2.4_spec</artifactId>
<version>1.1.1</version>
</dependency>
<dependency>
<groupId>org.sonatype.mavenbook.ch07</groupId>
<artifactId>simple-weather</artifactId>
<version>1.0</version>
</dependency>
<dependency>
<groupId>org.sonatype.mavenbook.ch07</groupId>
simple-webapp
weather-servley.xml
weatherController
historyController
simple-weather
applicationContext-weather.xml
weatherService
simple-persist
applicationContext-persist.xml
weatherDAO
locationDAO
= Dependency
Figure 7-3. Spring MVC controllers referencing components in simple-weather and simple-persist
106 | Chapter 7: Multimodule Enterprise Project
<artifactId>simple-persist</artifactId>
<version>1.0</version>
</dependency>
<dependency>
<groupId>org.springframework</groupId>
<artifactId>spring</artifactId>
<version>2.0.7</version>
</dependency>
<dependency>
<groupId>org.apache.velocity</groupId>
<artifactId>velocity</artifactId>
<version>1.5</version>
</dependency>
</dependencies>
<build>
<finalName>simple-webapp</finalName>
<plugins>
<plugin>
<groupId>org.mortbay.jetty</groupId>
<artifactId>maven-jetty-plugin</artifactId>
<dependencies>
<dependency>
<groupId>hsqldb</groupId>
<artifactId>hsqldb</artifactId>
<version>1.8.0.7</version>
</dependency>
</dependencies>
</plugin>
<plugin>
<groupId>org.codehaus.mojo</groupId>
<artifactId>hibernate3-maven-plugin</artifactId>
<version>2.0</version>
<configuration>
<components>
<component>
<name>hbm2ddl</name>
<implementation>annotationconfiguration</implementation>
</component>
</components>
</configuration>
<dependencies>
<dependency>
<groupId>hsqldb</groupId>
<artifactId>hsqldb</artifactId>
<version>1.8.0.7</version>
</dependency>
</dependencies>
</plugin>
</plugins>
</build>
</project>
As this book progresses and the examples become more and more substantial, you’ll
notice that the pom.xml begins to take on some weight. In this POM, we’re configuring
The Simple Web Application Module | 107

four dependencies and two plugins. Let’s go through this POM in detail and dwell on
some of the important configuration points:
This simple-webapp project defines four dependencies: the Servlet 2.4 specification
implementation from Apache Geronimo, the simple-weather service library, the
simple-persist persistence library, and the entire Spring Framework 2.0.7.
In our build configuration, we’re going to be configuring the Maven Hibernate3
plugin to hit an embedded HSQLDB instance. For the Maven Hibernate 3 plugin to
successfully connect to this database using JDBC, the plugin will need to reference
the HSQLDB JDBC driver on the classpath. To make a dependency available for a
plugin, we add a reference to the dependency as an extension. You can think about
extensions as providing you with the ability to add something to the classpath for
plugin execution. In this case, we’re referencing hsqldb:hsqldb:1.8.0.7.
The Maven Jetty plugin couldn’t be easier to add to this project; we simply add a
plugin element that references the appropriate groupId and artifactId. The fact that
this plugin is so trivial to configure means that the plugin developers did a good job
of providing adequate defaults that don’t need to be overridden in most cases. If you
did need to override the configuration of the Jetty plugin, you would do so by pro-
viding a configuration element.
In our build configuration, we’re going to be configuring the Maven Hibernate3
plugin to hit an embedded HSQLDB instance. For the Maven Hibernate3 plugin to
successfully connect to this database using JDBC, the plugin will need reference the
HSQLDB JDBC driver on the classpath. To make a dependency available for a plu-
gin, we add a dependency declaration right inside a plugin declaration. In this case,
we’re referencing hsqldb:hsqldb:1.8.0.7. The Hibernate plugin also needs the JDBC
driver to create the database, so we have also added this dependency to its config-
uration.
The Maven Hibernate plugin is when this POM starts to get interesting. In the next
section, we’re going to run the hbm2ddl goal to generate a HSQLDB database. In this
pom.xml, we’re including a reference to version 2.0 of the hibernate3-maven-plu
gin hosted by the Codehaus Mojo plugin.
The Maven Hibernate3 plugin has different ways to obtain Hibernate mapping in-
formation that are appropriate for different usage scenarios of the Hibernate3 plugin.
If you were using Hibernate Mapping XML (.hbm.xml) files, and you wanted to
generate model classes using the hbm2java goal, you would set your implementation
to configuration. If you were using the Hibernate3 plugin to reverse engineer a
database to produce .hbm.xml files and model classes from an existing database, you
would use an implementation of jdbcconfiguration. In this case, we’re simply using
an existing annotated object model to generate a database. In other words, we have
our Hibernate mapping, but we don’t yet have a database. In this usage scenario,
the appropriate implementation value is annotationconfiguration. The Maven
108 | Chapter 7: Multimodule Enterprise Project

Hibernate3 plugin is discussed in more detail in the later section “Running the Web
Application.”
A common mistake is to use the extensions configuration to add de-
pendencies required by a plugin. This is strongly discouraged, as the
extensions can cause classpath pollution across your project, among
other nasty side effects. Additionally, the extensions behavior is being
reworked in 2.1, so you’ll eventually need to change it anyway. The only
normal use for extensions is to define new wagon implementations.
Next, we turn our attention to the two Spring MVC controllers that will handle all of
the requests. Both of these controllers reference the beans defined in simple-weather
and simple-persist. See Example 7-13.
Example 7-13. simple-webapp WeatherController
package org.sonatype.mavenbook.web;
import org.sonatype.mavenbook.weather.model.Weather;
import org.sonatype.mavenbook.weather.persist.WeatherDAO;
import org.sonatype.mavenbook.weather.WeatherService;
import javax.servlet.http.*;
import org.springframework.web.servlet.ModelAndView;
import org.springframework.web.servlet.mvc.Controller;
public class WeatherController implements Controller {
private WeatherService weatherService;
private WeatherDAO weatherDAO;
public ModelAndView handleRequest(HttpServletRequest request,
HttpServletResponse response) throws Exception {
String zip = request.getParameter("zip");
Weather weather = weatherService.retrieveForecast(zip);
weatherDAO.save(weather);
return new ModelAndView("weather", "weather", weather);
}
public WeatherService getWeatherService() {
return weatherService;
}
public void setWeatherService(WeatherService weatherService) {
this.weatherService = weatherService;
}
public WeatherDAO getWeatherDAO() {
return weatherDAO;
}
public void setWeatherDAO(WeatherDAO weatherDAO) {
The Simple Web Application Module | 109

this.weatherDAO = weatherDAO;
}
}
WeatherController implements the Spring MVC Controller interface that mandates the
presence of a handleRequest() method with the signature shown in the example. If you
look at the meat of this method, you’ll see that it invokes the retrieveForecast()
method on the weatherService instance variable. Unlike the previous chapter, which
had a Servlet that instantiated the WeatherService class, the WeatherController is a bean
with a weatherService property. The Spring IoC container is responsible for wiring
the controller to the weatherService component. Also notice that we’re not using the
WeatherFormatter in this Spring controller implementation; instead, we’re passing the
Weather object returned by retrieveForecast() to the constructor of ModelAndView. This
ModelAndView class is going to be used to render a Velocity template, and this template
will have references to a ${weather} variable. The weather.vm template is stored in src/
main/webapp/WEB-INF/vm and is shown in Example 7-14.
In the WeatherController, before we render the output of the forecast, we pass the
Weather object returned by the WeatherService to the save() method on WeatherDAO.
Here we are saving this Weather object—using Hibernate—to an HSQLDB database.
Later, in HistoryController, we will see how we can retrieve a history of weather fore-
casts that were saved by the WeatherController.
Example 7-14. weather.vm template rendered by WeatherController
<b>Current Weather Conditions for:
${weather.location.city}, ${weather.location.region},
${weather.location.country}</b><br/>
<ul>
<li>Temperature: ${weather.condition.temp}</li>
<li>Condition: ${weather.condition.text}</li>
<li>Humidity: ${weather.atmosphere.humidity}</li>
<li>Wind Chill: ${weather.wind.chill}</li>
<li>Date: ${weather.date}</li>
</ul>
The syntax for this Velocity template is straightforward; variables are referenced using
${} notation. The expression between the curly braces references a property, or a prop-
erty of a property on the weather variable that was passed to this template by the
WeatherController.
The HistoryController is used to retrieve recent forecasts that have been requested by
the WeatherController. Whenever we retrieve a forecast from the WeatherController,
that controller saves the Weather object to the database via the WeatherDAO.
WeatherDAO then uses Hibernate to dissect the Weather object into a series of rows in a
set of related database tables. The HistoryController is shown in Example 7-15.
110 | Chapter 7: Multimodule Enterprise Project

Example 7-15. simple-web HistoryController
package org.sonatype.mavenbook.web;
import java.util.*;
import javax.servlet.http.*;
import org.springframework.web.servlet.ModelAndView;
import org.springframework.web.servlet.mvc.Controller;
import org.sonatype.mavenbook.weather.model.*;
import org.sonatype.mavenbook.weather.persist.*;
public class HistoryController implements Controller {
private LocationDAO locationDAO;
private WeatherDAO weatherDAO;
public ModelAndView handleRequest(HttpServletRequest request,
HttpServletResponse response) throws Exception {
String zip = request.getParameter("zip");
Location location = locationDAO.findByZip(zip);
List<Weather> weathers = weatherDAO.recentForLocation( location );
Map<String,Object> model = new HashMap<String,Object>();
model.put( "location", location );
model.put( "weathers", weathers );
return new ModelAndView("history", model);
}
public WeatherDAO getWeatherDAO() {
return weatherDAO;
}
public void setWeatherDAO(WeatherDAO weatherDAO) {
this.weatherDAO = weatherDAO;
}
public LocationDAO getLocationDAO() {
return locationDAO;
}
public void setLocationDAO(LocationDAO locationDAO) {
this.locationDAO = locationDAO;
}
}
The HistoryController is wired to two DAO objects defined in simple-persist. The
DAOs are bean properties of the HistoryController: WeatherDAO and LocationDAO. The
goal of the HistoryController is to retrieve a List of Weather objects that correspond
to the zip parameter. When the WeatherDAO saves the Weather object to the database, it
doesn’t just store the zip code; it stores a Location object that is related to the
Weather object in the simple-model. To retrieve a List of Weather objects, the
The Simple Web Application Module | 111

HistoryController first retrieves the Location object that corresponds to the zip pa-
rameter. It does this by invoking the findByZip() method on LocationDAO.
Once the Location object has been retrieved, the HistoryController will then attempt
to retrieve recent Weather objects that match the given Location. Once the
List<Weather> has been retrieved, a HashMap is created to hold two variables for the
history.vm Velocity template shown in Example 7-16.
Example 7-16. history.vm rendered by the HistoryController
<b>
Weather History for: ${location.city}, ${location.region}, ${location.country}
</b>
<br/>
#foreach( $weather in $weathers )
<ul>
<li>Temperature: $weather.condition.temp</li>
<li>Condition: $weather.condition.text</li>
<li>Humidity: $weather.atmosphere.humidity</li>
<li>Wind Chill: $weather.wind.chill</li>
<li>Date: $weather.date</li>
</ul>
#end
The history.vm template in src/main/webapp/WEB-INF/vm references the location var-
iable to print out information about the location of the forecasts retrieved from the
WeatherDAO. This template then uses a Velocity control structure, #foreach, to loop
through each element in the weathers variable. Each element in weathers is assigned to
a variable named weather, and the template between #foreach and #end is rendered for
each forecast.
You’ve seen these Controller implementations, and you’ve seen that they reference
other beans defined in simple-weather and simple-persist. They respond to HTTP
requests, and they yield control to some mysterious templating system that knows how
to render Velocity templates. All of this magic is configured in a Spring application
context in src/main/webapp/WEB-INF/weather-servlet.xml. This XML configures the
controllers and references other Spring-managed beans; it is loaded by a
ServletContextListener, which is also configured to load the applicationContext-
weather.xml and applicationContext-persist.xml from the classpath. Let’s take a closer
look at the weather-servlet.xml shown in Example 7-17.
Example 7-17. Spring controller configuration weather-servlet.xml
<beans>
<bean id="weatherController"
class="org.sonatype.mavenbook.web.WeatherController">
<property name="weatherService" ref="weatherService"/>
<property name="weatherDAO" ref="weatherDAO"/>
</bean>
112 | Chapter 7: Multimodule Enterprise Project
<bean id="historyController"
class="org.sonatype.mavenbook.web.HistoryController">
<property name="weatherDAO" ref="weatherDAO"/>
<property name="locationDAO" ref="locationDAO"/>
</bean>
<!-- you can have more than one handler defined -->
<bean id="urlMapping"
class="org.springframework.web.servlet.handler.SimpleUrlHandlerMapping">
<property name="urlMap">
<map>
<entry key="/weather.x">
<ref bean="weatherController" />
</entry>
<entry key="/history.x">
<ref bean="historyController" />
</entry>
</map>
</property>
</bean>
<bean id="velocityConfig"
class="org.springframework.web.servlet.view.velocity.VelocityConfigurer">
<property name="resourceLoaderPath" value="/WEB-INF/vm/"/>
</bean>
<bean id="viewResolver"
class="org.springframework.web.servlet.view.velocity.VelocityViewResolver">
<property name="cache" value="true"/>
<property name="prefix" value=""/>
<property name="suffix" value=".vm"/>
<property name="exposeSpringMacroHelpers" value="true"/>
</bean>
</beans>
The weather-servlet.xml defines the two controllers as Spring-managed beans.
weatherController has two properties that are references to weatherService and
weatherDAO. historyController references the beans weatherDAO and locationDAO.
When this ApplicationContext is created, it is created in an environment that has
access to the ApplicationContexts defined in both simple-persist and simple-
weather. In Example 7-18, you will see how Spring is configured to merge compo-
nents from multiple Spring configuration files.
The urlMapping bean defines the URL patterns that invoke the WeatherController
and the HistoryController. In this example, we are using the
SimpleUrlHandlerMapping and mapping /weather.x to WeatherController
and /history.x to HistoryController.
Since we are using the Velocity templating engine, we will need to pass in some
configuration options. In the velocityConfig bean, we are telling Velocity to look
for all templates in the /WEB-INF/vm directory.
The Simple Web Application Module | 113
Last, the viewResolver is configured with the class VelocityViewResolver. There are
a number of ViewResolver implementations in Spring from a standard View
Resolver to render JSP or JSTL (JavaServer Pages Standard Tag Library) pages to a
resolver that can render FreeMarker templates. In this example, we’re configuring
the Velocity templating engine and setting the default prefix and suffix that will be
automatically appended to the names of the template passed to ModelAndView.
Finally, the simple-webapp project was a web.xml that provides the basic configuration
for the web application. The web.xml file is shown in Example 7-18.
Example 7-18. web.xml for simple-webapp
<web-app id="simple-webapp" version="2.4"
xmlns="http://java.sun.com/xml/ns/j2ee"
xmlns:xsi="http://www.w3.org/2001/XMLSchema-instance"
xsi:schemaLocation="http://java.sun.com/xml/ns/j2ee
http://java.sun.com/xml/ns/j2ee/web-app_2_4.xsd">
<display-name>Simple Web Application</display-name>
<context-param>
<param-name>contextConfigLocation</param-name>
<param-value>
classpath:applicationContext-weather.xml
classpath:applicationContext-persist.xml
</param-value>
</context-param>
<context-param>
<param-name>log4jConfigLocation</param-name>
<param-value>/WEB-INF/log4j.properties</param-value>
</context-param>
<listener>
<listener-class>
org.springframework.web.util.Log4jConfigListener
</listener-class>
</listener>
<listener>
<listener-class>
org.springframework.web.context.ContextLoaderListener
</listener-class>
</listener>
<servlet>
<servlet-name>weather</servlet-name>
<servlet-class>
org.springframework.web.servlet.DispatcherServlet
</servlet-class>
<load-on-startup>1</load-on-startup>
</servlet>
114 | Chapter 7: Multimodule Enterprise Project
<servlet-mapping>
<servlet-name>weather</servlet-name>
<url-pattern>*.x</url-pattern>
</servlet-mapping>
</web-app>
Here’s a bit of magic that allows us to reuse applicationContext-weather.xml and
applicationContext-persist.xml in this project. The contextConfigLocation is used by
the ContextLoaderListener to create an ApplicationContext. When the weather serv-
let is created, the weather-servlet.xml from Example 7-17 is going to be evaluated
with the ApplicationContext created from this contextConfigLocation. In this way,
you can define a set of beans in another project and you can reference these beans
via the classpath. Since the simple-persist and simple-weather JARs are going to be
in WEB-INF/lib, all we do is use the classpath: prefix to reference these files. (An-
other option would have been to copy these files to /WEB-INF and reference them
with something like /WEB-INF/applicationContext-persist.xml.)
The log4jConfigLocation is used to tell the Log4JConfigListener where to look for
Log4J logging configuration. In this example, we tell Log4J to look in /WEB-INF/
log4j.properties.
This makes sure that the Log4J system is configured when the web application starts.
It is important to put this Log4JConfigListener before the ContextLoaderListener;
otherwise, you may miss important logging messages that point to a problem pre-
venting application startup. If you have a particularly large set of beans managed by
Spring and one of them happens to blow up on application startup, your application
will fail. If you have logging initialized before Spring starts, you might have a chance
to catch a warning or an error. If you don’t have logging initialized before Spring
starts up, you’ll have no idea why your application refuses to start.
The ContextLoaderListener is essentially the Spring container. When the
application starts, this listener will build an ApplicationContext from the
contextConfigLocation parameter.
We define a Spring MVC DispatcherServlet with a name of weather. This will cause
Spring to look for a Spring configuration file in /WEB-INF/weather-servlet.xml. You
can have as many DispatcherServlets as you need. A DispatcherServlet can contain
one or more Spring MVC Controller implementations.
All requests ending in .x will be routed to the weather servlet. Note that the .x
extension has no particular meaning; it is an arbitrary choice and you can use what-
ever URL pattern you like.
The Simple Web Application Module | 115

Running the Web Application
To run the web application, you’ll first need to build the database using the Hibernate3
plugin. To do this, run the following from the simple-webapp project directory:
$ mvn hibernate3:hbm2ddl
[INFO] Scanning for projects...
[INFO] Searching repository for plugin with prefix: 'hibernate3'.
[INFO] org.codehaus.mojo: checking for updates from central
[INFO] -------------------------------------------------------------
[INFO] Building Chapter 7 Simple Web Application
[INFO] task-segment: [hibernate3:hbm2ddl]
[INFO] -------------------------------------------------------------
[INFO] Preparing hibernate3:hbm2ddl
...
10:24:56,151 INFO org.hibernate.tool.hbm2ddl.SchemaExport - schema\
export complete
[INFO] -------------------------------------------------------------
[INFO] BUILD SUCCESSFUL
[INFO] -------------------------------------------------------------
Once you’ve done this, there should be a ${basedir}/data directory that will contain the
HSQLDB database. You can then start the web application with:
$ mvn jetty:run
[INFO] Scanning for projects...
[INFO] Searching repository for plugin with prefix: 'jetty'.
[INFO] ---------------------------------------------------------------
[INFO] Building Chapter 7 Simple Web Application
[INFO] task-segment: [jetty:run]
[INFO] ---------------------------------------------------------------
[INFO] Preparing jetty:run
...
[INFO] [jetty:run]
[INFO] Configuring Jetty for project: Chapter 7 Simple Web Application
...
[INFO] Context path = /simple-webapp
[INFO] Tmp directory = determined at runtime
[INFO] Web defaults = org/mortbay/jetty/webapp/webdefault.xml
[INFO] Web overrides = none
[INFO] Starting jetty 6.1.7 ...
2008-03-25 10:28:03.639::INFO: jetty-6.1.7
...
2147 INFO DispatcherServlet - FrameworkServlet 'weather':
initialization completed in 1654 ms
2008-03-25 10:28:06.341::INFO:
Started SelectChannelConnector@0.0.0.0:8080
[INFO] Started Jetty Server
Once Jetty is started, you can load http://localhost:8080/simple-webapp/weather.x?zip
=60202, and you should see the weather for Evanston, Illinois, in your web browser.
Change the zip code and you should be able to get your own weather report:
Current Weather Conditions for: Evanston, IL, US
116 | Chapter 7: Multimodule Enterprise Project
* Temperature: 42
* Condition: Partly Cloudy
* Humidity: 55
* Wind Chill: 34
* Date: Tue Mar 25 10:29:45 CDT 2008
The simple-command Module
The simple-command project is a command-line version of the simple-webapp. It is a
utility that relies on the same dependencies: simple-persist and simple-weather. In-
stead of interacting with this application via a web browser, you would run the simple-
command utility from the command line. See Figure 7-4 and Example 7-19.
Example 7-19. POM for simple-command
<project xmlns="http://maven.apache.org/POM/4.0.0"
xmlns:xsi="http://www.w3.org/2001/XMLSchema-instance"
xsi:schemaLocation="http://maven.apache.org/POM/4.0.0
http://maven.apache.org/maven-v4_0_0.xsd">
<modelVersion>4.0.0</modelVersion>
<parent>
<groupId>org.sonatype.mavenbook.ch07</groupId>
<artifactId>simple-parent</artifactId>
<version>1.0</version>
</parent>
<artifactId>simple-command</artifactId>
<packaging>jar</packaging>
<name>Simple Command Line Tool</name>
<build>
simple-command
Main.java
weatherController
historyController
simple-weather
applicationContext-weather.xml
weatherService
simple-persist
applicationContext-persist.xml
weatherDAO
locationDAO
= Dependency
Figure 7-4. The simple-command module
The simple-command Module | 117

<finalName>${project.artifactId}</finalName>
<plugins>
<plugin>
<groupId>org.apache.maven.plugins</groupId>
<artifactId>maven-compiler-plugin</artifactId>
<configuration>
<source>1.5</source>
<target>1.5</target>
</configuration>
</plugin>
<plugin>
<groupId>org.apache.maven.plugins</groupId>
<artifactId>maven-surefire-plugin</artifactId>
<configuration>
<testFailureIgnore>true</testFailureIgnore>
</configuration>
</plugin>
<plugin>
<artifactId>maven-assembly-plugin</artifactId>
<configuration>
<descriptorRefs>
<descriptorRef>jar-with-dependencies</descriptorRef>
</descriptorRefs>
</configuration>
</plugin>
<plugin>
<groupId>org.codehaus.mojo</groupId>
<artifactId>hibernate3-maven-plugin</artifactId>
<version>2.1</version>
<configuration>
<components>
<component>
<name>hbm2ddl</name>
<implementation>annotationconfiguration</implementation>
</component>
</components>
</configuration>
<dependencies>
<dependency>
<groupId>hsqldb</groupId>
<artifactId>hsqldb</artifactId>
<version>1.8.0.7</version>
</dependency>
</dependencies>
</plugin>
</plugins>
</build>
<dependencies>
<dependency>
<groupId>org.sonatype.mavenbook.ch07</groupId>
<artifactId>simple-weather</artifactId>
<version>1.0</version>
</dependency>
<dependency>
118 | Chapter 7: Multimodule Enterprise Project

<groupId>org.sonatype.mavenbook.ch07</groupId>
<artifactId>simple-persist</artifactId>
<version>1.0</version>
</dependency>
<dependency>
<groupId>org.springframework</groupId>
<artifactId>spring</artifactId>
<version>2.0.7</version>
</dependency>
<dependency>
<groupId>hsqldb</groupId>
<artifactId>hsqldb</artifactId>
<version>1.8.0.7</version>
</dependency>
</dependencies>
</project>
This POM creates a JAR file that will contain the org.sonatype.maven
book.weather.Main class shown in Example 7-20. In this POM, we configure the Maven
Assembly plugin to use a built-in assembly descriptor named jar-with-dependencies,
which creates a single JAR file containing all the bytecode a project needs to execute,
including the bytecode from the project you are building and all the dependency
bytecode.
Example 7-20. The Main class for simple-command
package org.sonatype.mavenbook.weather;
import java.util.List;
import org.apache.log4j.PropertyConfigurator;
import org.springframework.context.ApplicationContext;
import org.springframework.context.support.ClassPathXmlApplicationContext;
import org.sonatype.mavenbook.weather.model.Location;
import org.sonatype.mavenbook.weather.model.Weather;
import org.sonatype.mavenbook.weather.persist.LocationDAO;
import org.sonatype.mavenbook.weather.persist.WeatherDAO;
public class Main {
private WeatherService weatherService;
private WeatherDAO weatherDAO;
private LocationDAO locationDAO;
public static void main(String[] args) throws Exception {
// Configure Log4J
PropertyConfigurator.configure(Main.class.getClassLoader().getResource(
"log4j.properties"));
// Read the Zip Code from the Command-line (if none supplied, use 60202)
String zipcode = "60202";
try {
zipcode = args[0];
The simple-command Module | 119

} catch (Exception e) {
}
// Read the Operation from the Command-line (if none supplied use weather)
String operation = "weather";
try {
operation = args[1];
} catch (Exception e) {
}
// Start the program
Main main = new Main(zipcode);
ApplicationContext context =
new ClassPathXmlApplicationContext(
new String[] { "classpath:applicationContext-weather.xml",
"classpath:applicationContext-persist.xml" });
main.weatherService = (WeatherService) context.getBean("weatherService");
main.locationDAO = (LocationDAO) context.getBean("locationDAO");
main.weatherDAO = (WeatherDAO) context.getBean("weatherDAO");
if( operation.equals("weather")) {
main.getWeather();
} else {
main.getHistory();
}
}
private String zip;
public Main(String zip) {
this.zip = zip;
}
public void getWeather() throws Exception {
Weather weather = weatherService.retrieveForecast(zip);
weatherDAO.save( weather );
System.out.print(new WeatherFormatter().formatWeather(weather));
}
public void getHistory() throws Exception {
Location location = locationDAO.findByZip(zip);
List<Weather> weathers = weatherDAO.recentForLocation(location);
System.out.print(new WeatherFormatter().formatHistory(location, weathers));
}
}
The Main class has a reference to WeatherDAO, LocationDAO, and WeatherService. The
static main() method in this class:
• Reads the zip code from the first command-line argument.
• Reads the operation from the second command-line argument. If the operation is
“weather”, the latest weather will be retrieved from the web service. If the operation
is “history”, the program will fetch historical weather records from the local
database.
120 | Chapter 7: Multimodule Enterprise Project

• Loads a Spring ApplicationContext using two XML files loaded from
simple-persist and simple-weather.
• Creates an instance of Main.
• Populates the weatherService, weatherDAO, and locationDAO with beans from the
Spring ApplicationContext.
• Runs the appropriate method getWeather() or getHistory(), depending on the
specified operation.
In the web application, we use Spring VelocityViewResolver to render a Velocity tem-
plate. In the standalone implementation, we need to write a simple class that renders
our weather data with a Velocity template. Example 7-21 is a listing of the
WeatherFormatter, a class with two methods that render the weather report and the
weather history.
Example 7-21. WeatherFormatter renders weather data using a Velocity template
package org.sonatype.mavenbook.weather;
import java.io.InputStreamReader;
import java.io.Reader;
import java.io.StringWriter;
import java.util.List;
import org.apache.log4j.Logger;
import org.apache.velocity.VelocityContext;
import org.apache.velocity.app.Velocity;
import org.sonatype.mavenbook.weather.model.Location;
import org.sonatype.mavenbook.weather.model.Weather;
public class WeatherFormatter {
private static Logger log = Logger.getLogger(WeatherFormatter.class);
public String formatWeather( Weather weather ) throws Exception {
log.info( "Formatting Weather Data" );
Reader reader =
new InputStreamReader( getClass().getClassLoader().
getResourceAsStream("weather.vm"));
VelocityContext context = new VelocityContext();
context.put("weather", weather );
StringWriter writer = new StringWriter();
Velocity.evaluate(context, writer, "", reader);
return writer.toString();
}
public String formatHistory( Location location, List<Weather> weathers )
throws Exception {
log.info( "Formatting History Data" );
Reader reader =
new InputStreamReader( getClass().getClassLoader().
getResourceAsStream("history.vm"));
The simple-command Module | 121

VelocityContext context = new VelocityContext();
context.put("location", location );
context.put("weathers", weathers );
StringWriter writer = new StringWriter();
Velocity.evaluate(context, writer, "", reader);
return writer.toString();
}
}
The weather.vm template simply prints the zip code’s city, country, and region as well
as the current temperature, as shown in Example 7-22. The history.vm template prints
the location and then iterates through the weather forecast records stored in the local
database, as shown in Example 7-23. Both of these templates are in ${basedir}/src/main/
resources.
Example 7-22. The weather.vm Velocity template
****************************************
Current Weather Conditions for:
${weather.location.city},
${weather.location.region},
${weather.location.country}
****************************************
* Temperature: ${weather.condition.temp}
* Condition: ${weather.condition.text}
* Humidity: ${weather.atmosphere.humidity}
* Wind Chill: ${weather.wind.chill}
* Date: ${weather.date}
Example 7-23. The history.vm Velocity template
Weather History for:
${location.city},
${location.region},
${location.country}
#foreach( $weather in $weathers )
****************************************
* Temperature: $weather.condition.temp
* Condition: $weather.condition.text
* Humidity: $weather.atmosphere.humidity
* Wind Chill: $weather.wind.chill
* Date: $weather.date
#end
Running simple-command
The simple-command project is configured to create a single JAR containing the bytecode
of the project and all of the bytecode from the dependencies. To create this assembly,
122 | Chapter 7: Multimodule Enterprise Project

run the assembly goal of the Maven Assembly plugin from the simple-command project
directory:
$ mvn assembly:assembly
[INFO] ------------------------------------------------------------------------
[INFO] Building Chapter 7 Simple Command Line Tool
[INFO] task-segment: [assembly:assembly] (aggregator-style)
[INFO] ------------------------------------------------------------------------
[INFO] [resources:resources]
[INFO] Using default encoding to copy filtered resources.
[INFO] [compiler:compile]
[INFO] Nothing to compile - all classes are up to date
[INFO] [resources:testResources]
[INFO] Using default encoding to copy filtered resources.
[INFO] [compiler:testCompile]
[INFO] Nothing to compile - all classes are up to date
[INFO] [surefire:test]
...
[INFO] [jar:jar]
[INFO] Building jar: .../simple-parent/simple-command/target/simple-command.jar
[INFO] [assembly:assembly]
[INFO] Processing DependencySet (output=)
[INFO] Expanding: .../.m2/repository/.../simple-weather-1-SNAPSHOT.jar into \
/tmp/archived-file-set.93251505.tmp
[INFO] Expanding: .../.m2/repository/.../simple-model-1-SNAPSHOT.jar into \
/tmp/archived-file-set.2012480870.tmp
[INFO] Expanding: .../.m2/repository/../hibernate-3.2.5.ga.jar into \
/tmp/archived-file-set.1296516202.tmp
... skipping 25 lines of dependency unpacking ...
[INFO] Expanding: .../.m2/repository/.../velocity-1.5.jar into \
/tmp/archived-file-set.379482226.tmp
[INFO] Expanding: .../.m2/repository/.../commons-lang-2.1.jar into \
/tmp/archived-file-set.1329200163.tmp
[INFO] Expanding: .../.m2/repository/.../oro-2.0.8.jar into \
/tmp/archived-file-set.1993155327.tmp
[INFO] Building jar: .../simple-parent/simple-command/target/\
simple-command-jar-with-dependencies.jar
The build progresses through the lifecycle compiling bytecode, running tests, and fi-
nally building a JAR for the project. Then the assembly:assembly goal creates a JAR
with dependencies by unpacking all of the dependencies to temporary directories and
then collecting all of the bytecode into a single JAR in target/ that is named simple-
command-jar-with-dependencies.jar. This “uber” JAR weighs in at 15 MB.
Before you run the command-line tool, you will need to invoke the hbm2ddl goal of the
Hibernate3 plugin to create the HSQLDB database. Do this by running the following
command from the simple-command directory:
$ mvn hibernate3:hbm2ddl
[INFO] Scanning for projects...
[INFO] Searching repository for plugin with prefix: 'hibernate3'.
[INFO] org.codehaus.mojo: checking for updates from central
[INFO] ------------------------------------------------------------------------
[INFO] Building Chapter 7 Simple Command Line Tool
Running simple-command | 123

[INFO] task-segment: [hibernate3:hbm2ddl]
[INFO] ------------------------------------------------------------------------
[INFO] Preparing hibernate3:hbm2ddl
...
10:24:56,151 INFO org.hibernate.tool.hbm2ddl.SchemaExport - export complete
[INFO] ------------------------------------------------------------------------
[INFO] BUILD SUCCESSFUL
[INFO] ------------------------------------------------------------------------
Once you run this, you should see a data/ directory under simple-command. This
data/ directory holds the HSQLDB database. To run the command-line weather fore-
caster, run the following from the simple-command project directory:
$ java -cp target/simple-command-jar-with-dependencies.jar \
org.sonatype.mavenbook.weather.Main 60202
2321 INFO YahooRetriever - Retrieving Weather Data
2489 INFO YahooParser - Creating XML Reader
2581 INFO YahooParser - Parsing XML Response
2875 INFO WeatherFormatter - Formatting Weather Data
****************************************
Current Weather Conditions for:
Evanston,
IL,
US
****************************************
* Temperature: 75
* Condition: Partly Cloudy
* Humidity: 64
* Wind Chill: 75
* Date: Wed Aug 06 09:35:30 CDT 2008
To run a history query, execute the following command:
$ java -cp target/simple-command-jar-with-dependencies.jar \
org.sonatype.mavenbook.weather.Main 60202 history
2470 INFO WeatherFormatter - Formatting History Data
Weather History for:
Evanston, IL, US
****************************************
* Temperature: 39
* Condition: Heavy Rain
* Humidity: 93
* Wind Chill: 36
* Date: 2007-12-02 13:45:27.187
****************************************
* Temperature: 75
* Condition: Partly Cloudy
* Humidity: 64
* Wind Chill: 75
* Date: 2008-08-06 09:24:11.725
****************************************
* Temperature: 75
* Condition: Partly Cloudy
* Humidity: 64
124 | Chapter 7: Multimodule Enterprise Project

* Wind Chill: 75
* Date: 2008-08-06 09:27:28.475
Conclusion
We’ve spent a great deal of time on topics not directly related Maven to get this far.
We’ve done this to present a complete and meaningful example project that you can
use to implement real-world systems. We didn’t take any short cuts to produce slick,
canned results quickly, and we’re not going to dazzle you with some Ruby on Rails-
esque wizardry and lead you to believe that you can create a finished Java Enterprise
application in “10 easy minutes!” There’s too much of this in the market; there are too
many people trying to sell you the easiest framework that requires zero investment of
time or attention. What we’ve tried to do in this chapter is present the entire picture,
the entire ecosystem of a multimodule build. We’ve presented Maven in the context of
an application that resembles something you might see in the wild—not a fast-food,
10-minute screencast that slings mud at Apache Ant and tries to convince you to adopt
Apache Maven.
If you walk away from this chapter wondering what it has to do with Maven, we’ve
succeeded. We presented a complex set of projects, using popular frameworks, and we
tied them together using declarative builds. The fact that more than 60% of this chapter
was spent explaining Spring and Hibernate should tell you that Maven, for the most
part, stepped out of the way. It worked. It allowed us to focus on the application itself,
not on the build process. Instead of spending time discussing Maven, and the work you
would have to do to “build a build” that integrated with Spring and Hibernate, we
talked almost exclusively about the technologies used in this contrived project. If you
start to use Maven, and you take the time to learn it, you really do start to benefit from
the fact that you don’t have to spend time coding up some procedural build script. You
don’t have to spend your time worrying about mundane aspects of your build.
You can use the skeleton project introduced in this chapter as the foundation for your
own, and chances are that if you do, you’ll find yourself creating more and more mod-
ules as you need them. For example, the project on which this chapter was based has
two distinct model projects, two persistence projects that persist to dramatically dif-
ferent databases, several web applications, and a Java mobile application. In total, the
real-world system it’s based on contains at least 15 interrelated modules. The point is
that you’ve seen the most complex multimodule example we’re going to include in this
book, but you should also know that this example just scratches the surface of what is
possible with Maven.
Conclusion | 125
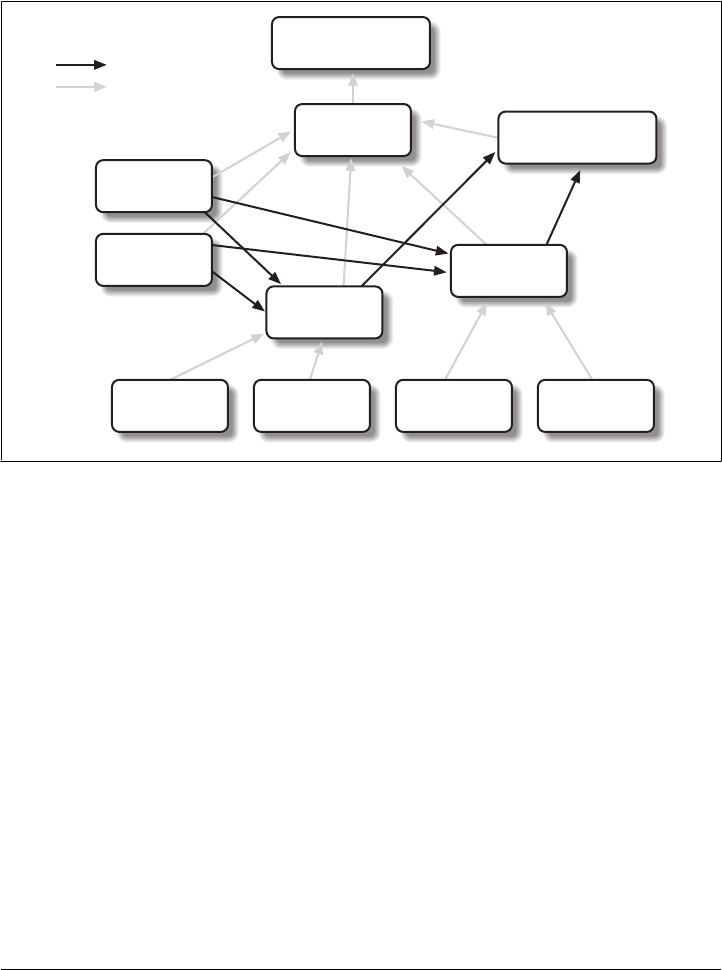
Programming to Interface Projects
This chapter explored a multimodule project that was more complex than the simple
example presented in Chapter 6, yet it was still a simplification of a real-world project.
In a larger project, you might find yourself building a system resembling Figure 7-5.
Super POM
com.sonatype
big-parent
1.0
com.sonatype
weather-model
1.0
com.sonatype
big-webapp
1.0
com.sonatype
big-command
1.0
com.sonatype
persist-api
1.0
com.sonatype
parse-api
1.0
com.sonatype
persist-xmldb
1.0
com.sonatype
persist-jdbc
1.0
com.sonatype
parse-noaa
1.0
com.sonatype
parse-yahoo
1.0
= Dependency
= Inherits from
Figure 7-5. An example of a large, complicated system
126 | Chapter 7: Multimodule Enterprise Project

PART III
Maven Reference
Maven needs more than a series of helpful guided introductions. This section provides
comprehensive reference material.

CHAPTER 8
Optimizing and Refactoring POMs
Introduction
In Chapter 7, we showed how many pieces of Maven come together to produce a fully
functional multimodule build. Although the example from that chapter suggests a real
application—one that interacts with a database, a web service, and that itself presents
two interfaces: one in a web application, and one on the command line—that example
project is still contrived. To present the complexity of a real project would require a
book far larger than the one you are now reading. Real-life applications evolve over
years and are often maintained by large, diverse groups of developers, each with a
different focus. In a real-world project, you are often evaluating decisions and designs
made and created by others. In this chapter, we take a step back from the examples
you’ve seen in Part II, and we ask ourselves if there are any optimizations that might
make more sense given what we now know about Maven. Maven is a very capable tool
that can be as simple or as complex as you need it to be. Because of this, there are often
a million ways to accomplish the same task, and there is often no one “right” way to
configure your Maven project.
Don’t misinterpret that last sentence as a license to go off and ask Maven to do some-
thing it wasn’t designed for. Although Maven allows for a diversity of approach, there
is certainly “A Maven Way,” and you’ll be more productive using Maven as it was
designed to be used. All this chapter is trying to do is communicate some of the opti-
mizations you can perform on an existing Maven project. Why didn’t we just introduce
an optimized POM in the first place? Designing POMs for pedagogy is a very different
requirement from designing POMs for efficiency. Although it is of course much easier
to define a certain setting in your ~/.m2/settings.xml than to declare a profile in a
pom.xml, writing a book is mostly about pacing and making sure we’re not introducing
concepts before you are ready. In Part II, we’ve made an effort not to overwhelm you
with too much information, and, in doing so, we’ve skipped some core concepts such
as the dependencyManagement element introduced later in this chapter.
There are many instances in Part II when the authors of this book took a shortcut or
glossed over an important detail to shuffle you along to the main point of a specific
129

chapter. You learned how to create a Maven project, and you compiled and installed
it without having to wade through hundreds of pages introducing every last switch and
dial available to you. We’ve done this because we believe it is important to deliver the
new Maven user to a result faster rather than meandering our way through a very long,
seemingly interminable story. Once you’ve started to use Maven, you should know
how to analyze your own projects and POMs. In this chapter, we take a step back and
look at what we are left with after the example from Chapter 7.
POM Cleanup
Optimizing a multimodule project’s POM is best done in several passes, as there are
many areas to focus on. In general, we are looking for repetition within a POM and
across the sibling POMs. When you are starting out, or when a project is still evolving
rapidly, it is acceptable to duplicate some dependencies and plugin configurations here
and there, but as the project matures and as the number of modules increases, you will
want to take some time to refactor common dependencies and configuration points.
Making your POMs more efficient will go a long way to helping you manage complexity
as your project grows. Whenever there is duplication of some piece of information,
there is usually a better way.
Optimizing Dependencies
If you look through the various POMs created in Chapter 7, note several patterns of
replication. The first pattern we can see is that some dependencies such as spring and
hibernate-annotations are declared in several modules. The hibernate dependency also
has the exclusion on javax.transaction replicated in each definition. The second pat-
tern of duplication to note is that sometimes several dependencies are related and share
the same version. This is often the case when a project’s release consists of several
closely coupled components. For example, look at the dependencies on hibernate-
annotations and hibernate-commons-annotations. Both are listed as version 3.3.0.ga,
and we can expect the versions of both these dependencies to change together going
forward. Both the hibernate-annotations and hibernate-commons-annotations are com-
ponents of the same project released by JBoss, and so when there is a new project
release, both of these dependencies will change. The third and last pattern of duplica-
tion is the duplication of sibling module dependencies and sibling module versions.
Maven provides simple mechanisms that let you factor all of this duplication into a
parent POM.
Just as in your project’s source code, any time you have duplication in your POMs, you
open the door a bit for trouble down the road. Duplicated dependency declarations
make it difficult to ensure consistent versions across a large project. When you only
have two or three modules, this might not be a primary issue, but when your organi-
zation is using a large, multimodule Maven build to manage hundreds of components
130 | Chapter 8: Optimizing and Refactoring POMs

across multiple departments, one single mismatch between dependencies can cause
chaos and confusion. A simple version mismatch in a project’s dependency on a byte-
code manipulation package called ASM three levels deep in the project hierarchy could
throw a wrench into a web application maintained by a completely different group of
developers who depend on that particular module. Unit tests could pass because they
are being run with one version of a dependency, but they could fail disastrously in
production where the bundle (WAR, in this case) was packaged up with a different
version. If you have tens of projects using something like Hibernate Annotations, each
repeating and duplicating the dependencies and exclusions, the mean time between
someone screwing up a build is going to be very short. As your Maven projects become
more complex, your dependency lists are going to grow, and you are going to want to
consolidate versions and dependency declarations in parent POMs.
The duplication of the sibling module versions can introduce a particularly nasty prob-
lem that is not directly caused by Maven and is learned only after you’ve been bitten
by this bug a few times. If you use the Maven Release plugin to perform your releases,
all these sibling dependency versions will be updated automatically for you, so main-
taining them is not the concern. If simple-web version 1.3-SNAPSHOT depends on simple-
persist version 1.3-SNAPSHOT, and if you are performing a release of the 1.3 version of
both projects, the Maven Release plugin is smart enough to change the versions
throughout your multimodule project’s POMs automatically. Running the release with
the Release plugin will automatically increment all of the versions in your build to 1.4-
SNAPSHOT, and the release plugin will commit the code change to the repository. Re-
leasing a huge multimodule project couldn’t be easier, until...
Problems occur when developers merge changes to the POM and interfere with a release
that is in progress. Often a developer merges and occasionally mishandles the conflict
on the sibling dependency, inadvertently reverting that version to a previous release.
Since the consecutive versions of the dependency are often compatible, it does not show
up when the developer builds, and won’t show up in any continuous integration build
system as a failed build. Imagine a very complex build where the trunk is full of com-
ponents at 1.4-SNAPSHOT, and now imagine that Developer A has updated Component
A deep within the project’s hierarchy to depend on version 1.3-SNAPSHOT of Component
B. Even though most developers have 1.4-SNAPSHOT, the build succeeds if version 1.3-
SNAPSHOT and 1.4-SNAPSHOT of Component B are compatible. Maven continues to build
the project using the 1.3-SNAPSHOT version of Component B from the developer’s local
repositories. Everything seems to be going quite smoothly—the project builds, the
continuous integration build works fine, and so on. Someone might have a mystifying
bug related to Component B, but she chalks it up to malevolent gremlins and moves
on. Meanwhile, a pump in the reactor room is steadily building up pressure, until
something blows....
Someone, let’s call him Mr. Inadvertent, has a merge conflict in Component A and
mistakenly pegs Component A’s dependency on Component B to 1.3-SNAPSHOT, while
the rest of the project marches on. A bunch of developers have been trying to fix a bug
Optimizing Dependencies | 131

in Component B all this time, and they’ve been mystified as to why they can’t seem to
fix the bug in production. Eventually, someone looks at Component A and realizes that
the dependency is pointing to the wrong version. Hopefully, the bug isn’t large enough
to cost money or lives, but Mr. Inadvertent feels stupid and people tend to trust him a
little less than they did before the whole sibling dependency screwup. (Ideally, Mr.
Inadvertent realizes that this was user error and not Maven’s fault, but more likely he
starts an awful blog and complains about Maven endlessly to make himself feel better.)
Fortunately, dependency duplication and sibling dependency mismatch are easily pre-
ventable if you make some small changes. The first thing we’re going to do is find all
the dependencies used in more than one project and move them up to the parent POM’s
dependencyManagement section. We’ll leave out the sibling dependencies for now. The
simple-parent pom now contains the following:
<project>
...
<dependencyManagement>
<dependencies>
<dependency>
<groupId>org.springframework</groupId>
<artifactId>spring</artifactId>
<version>2.0.7</version>
</dependency>
<dependency>
<groupId>org.apache.velocity</groupId>
<artifactId>velocity</artifactId>
<version>1.5</version>
</dependency>
<dependency>
<groupId>org.hibernate</groupId>
<artifactId>hibernate-annotations</artifactId>
<version>3.3.0.ga</version>
</dependency>
<dependency>
<groupId>org.hibernate</groupId>
<artifactId>hibernate-commons-annotations</artifactId>
<version>3.3.0.ga</version>
</dependency>
<dependency>
<groupId>org.hibernate</groupId>
<artifactId>hibernate</artifactId>
<version>3.2.5.ga</version>
<exclusions>
<exclusion>
<groupId>javax.transaction</groupId>
<artifactId>jta</artifactId>
</exclusion>
</exclusions>
</dependency>
</dependencies>
</dependencyManagement>
...
</project>
132 | Chapter 8: Optimizing and Refactoring POMs

Once these are moved up, we need to remove the versions for these dependencies from
each of the POMs; otherwise, they will override the dependencyManagement defined in
the parent project. Let’s look at only simple-model for brevity’s sake:
<project>
...
<dependencies>
<dependency>
<groupId>org.hibernate</groupId>
<artifactId>hibernate-annotations</artifactId>
</dependency>
<dependency>
<groupId>org.hibernate</groupId>
<artifactId>hibernate</artifactId>
</dependency>
</dependencies>
...
</project>
The next thing we should do is fix the replication of the hibernate-annotations and
hibernate-commons-annotations version, because these should match. We’ll do this by
creating a property called hibernate-annotations-version. The resulting simple-
parent section looks like this:
<project>
...
<properties>
<hibernate.annotations.version>3.3.0.ga</hibernate.annotations.version>
</properties>
<dependencyManagement>
...
<dependency>
<groupId>org.hibernate</groupId>
<artifactId>hibernate-annotations</artifactId>
<version>${hibernate.annotations.version}</version>
</dependency>
<dependency>
<groupId>org.hibernate</groupId>
<artifactId>hibernate-commons-annotations</artifactId>
<version>${hibernate.annotations.version}</version>
</dependency>
...
</dependencyManagement>
...
</project
The last issue we have to resolve is with the sibling dependencies. One technique we
could use is to move these up to the dependencyManagement section, just like all the
others, and define the versions of sibling projects in the top-level parent project. This
is certainly a valid approach, but we can also solve the version problem just by using
two built-in properties—${project.groupId} and ${project.version}. Since they are
sibling dependencies, there is not much value to be gained by enumerating them in the
Optimizing Dependencies | 133

parent, so we’ll rely on the built-in ${project.version} property. Because they all share
the same group, we can further future-proof these declarations by referring to the cur-
rent POM’s group using the built-in ${project.groupId} property. The simple-command
dependency section now looks like this:
<project>
...
<dependencies>
...
<dependency>
<groupId>${project.groupId}</groupId>
<artifactId>simple-weather</artifactId>
<version>${project.version}</version>
</dependency>
<dependency>
<groupId>${project.groupId}</groupId>
<artifactId>simple-persist</artifactId>
<version>${project.version}</version>
</dependency>
...
</dependencies>
...
</project>
Here’s a summary of the two optimizations we completed that reduce duplication of
dependencies:
Pull-up common dependencies to dependencyManagement
If more than one project depends on a specific dependency, you can list the de-
pendency in dependencyManagement. The parent POM can contain a version and a
set of exclusions; all the child POM needs to do to reference this dependency is use
the groupId and artifactId. Child projects can omit the version and exclusions if
the dependency is listed in dependencyManagement.
Use built-in project version and groupId for sibling projects
Use ${project.version} and ${project.groupId} when referring to a sibling
project. Sibling projects almost always share the same groupId, and they almost
always share the same release version. Using ${project.version} will help you
avoid the sibling version mismatch problem discussed previously.
Optimizing Plugins
If we take a look at the various plugin configurations, we can see the HSQLDB de-
pendencies duplicated in several places. Unfortunately, dependencyManagement doesn’t
apply to plugin dependencies, but we can still use a property to consolidate the versions.
Most complex Maven multimodule projects tend to define all versions in the top-level
POM. This top-level POM then becomes a focal point for changes that affect the entire
project. Think of version numbers as string literals in a Java class; if you are constantly
repeating a literal, you’ll likely want to make it a variable so that when it needs to be
134 | Chapter 8: Optimizing and Refactoring POMs

changed, you have to change it in only one place. Rolling up the version of HSQLDB
into a property in the top-level POM yields the following properties element:
<project>
...
<properties>
<hibernate.annotations.version>3.3.0.ga</hibernate.annotations.version>
<hsqldb.version>1.8.0.7</hsqldb.version>
</properties>
...
</project>
The next thing we notice is that the hibernate3-maven-plugin configuration is dupli-
cated in the simple-webapp and simple-command modules. We can manage the plugin
configuration in the top-level POM just as we managed the dependencies in the top-
level POM with the dependencyManagement section. To do this, we use the
pluginManagement element in the top-level POM’s build element:
<project>
...
<build>
<pluginManagement>
<plugins>
<plugin>
<groupId>org.apache.maven.plugins</groupId>
<artifactId>maven-compiler-plugin</artifactId>
<configuration>
<source>1.5</source>
<target>1.5</target>
</configuration>
</plugin>
<plugin>
<groupId>org.codehaus.mojo</groupId>
<artifactId>hibernate3-maven-plugin</artifactId>
<version>2.1</version>
<configuration>
<components>
<component>
<name>hbm2ddl</name>
<implementation>annotationconfiguration</implementation>
</component>
</components>
</configuration>
<dependencies>
<dependency>
<groupId>hsqldb</groupId>
<artifactId>hsqldb</artifactId>
<version>${hsqldb.version}</version>
</dependency>
</dependencies>
</plugin>
</plugins>
</pluginManagement>
</build>
Optimizing Plugins | 135

...
</project>
Optimizing with the Maven Dependency Plugin
On larger projects, additional dependencies often tend to creep into a POM as the
number of dependencies grow. As dependencies change, you are often left with de-
pendencies that are not being used, and just as often, you may forget to declare explicit
dependencies for libraries you require. Because Maven 2.x includes transitive depend-
encies in the compile scope, your project may compile properly but fail to run in pro-
duction. Consider a case where a project uses classes from a widely used project such
as Jakarta Commons BeanUtils. Instead of declaring an explicit dependency on
BeanUtils, your project simply relies on a project such as Hibernate that references
BeanUtils as a transitive dependency. Your project may compile successfully and run
just fine, but if you upgrade to a new version of Hibernate that doesn’t depend on
BeanUtils, you’ll start to get compile and runtime errors, and it won’t be immediately
obvious why your project stopped compiling. Also, because you haven’t explicitly listed
a dependency version, Maven cannot resolve any version conflicts that may arise.
A good rule of thumb in Maven is to always declare explicit dependencies for classes
referenced in your code. If you are going to be importing Commons BeanUtils classes,
you should also be declaring a direct dependency on Commons BeanUtils. Fortunately,
via bytecode analysis, the Maven Dependency plugin is able to assist you in uncovering
direct references to dependencies. Using the updated POMs we previously optimized,
let’s look to see if any errors pop up:
$ mvn dependency:analyze
[INFO] Scanning for projects...
[INFO] Reactor build order:
[INFO] Chapter 8 Simple Parent Project
[INFO] Chapter 8 Simple Object Model
[INFO] Chapter 8 Simple Weather API
[INFO] Chapter 8 Simple Persistence API
[INFO] Chapter 8 Simple Command Line Tool
[INFO] Chapter 8 Simple Web Application
[INFO] Chapter 8 Parent Project
[INFO] Searching repository for plugin with prefix: 'dependency'.
...
[INFO] ------------------------------------------------------------------------
[INFO] Building Chapter 8 Simple Object Model
[INFO] task-segment: [dependency:analyze]
[INFO] ------------------------------------------------------------------------
[INFO] Preparing dependency:analyze
[INFO] [resources:resources]
[INFO] Using default encoding to copy filtered resources.
[INFO] [compiler:compile]
[INFO] Nothing to compile - all classes are up to date
[INFO] [resources:testResources]
136 | Chapter 8: Optimizing and Refactoring POMs

[INFO] Using default encoding to copy filtered resources.
[INFO] [compiler:testCompile]
[INFO] Nothing to compile - all classes are up to date
[INFO] [dependency:analyze]
[WARNING] Used undeclared dependencies found:
[WARNING] javax.persistence:persistence-api:jar:1.0:compile
[WARNING] Unused declared dependencies found:
[WARNING] org.hibernate:hibernate-annotations:jar:3.3.0.ga:compile
[WARNING] org.hibernate:hibernate:jar:3.2.5.ga:compile
[WARNING] junit:junit:jar:3.8.1:test
...
[INFO] ------------------------------------------------------------------------
[INFO] Building Chapter 8 Simple Web Application
[INFO] task-segment: [dependency:analyze]
[INFO] ------------------------------------------------------------------------
[INFO] Preparing dependency:analyze
[INFO] [resources:resources]
[INFO] Using default encoding to copy filtered resources.
[INFO] [compiler:compile]
[INFO] Nothing to compile - all classes are up to date
[INFO] [resources:testResources]
[INFO] Using default encoding to copy filtered resources.
[INFO] [compiler:testCompile]
[INFO] No sources to compile
[INFO] [dependency:analyze]
[WARNING] Used undeclared dependencies found:
[WARNING] org.sonatype.mavenbook.ch08:simple-model:jar:1.0:compile
[WARNING] Unused declared dependencies found:
[WARNING] org.apache.velocity:velocity:jar:1.5:compile
[WARNING] javax.servlet:jstl:jar:1.1.2:compile
[WARNING] taglibs:standard:jar:1.1.2:compile
[WARNING] junit:junit:jar:3.8.1:test
In the truncated output just shown, you can see the output of the depend
ency:analyze goal. This goal analyzes the project to see whether there are any indirect
dependencies, or dependencies that are being referenced but are not directly declared.
In the simple-model project, the Dependency plugin indicates a “used undeclared de-
pendency” on javax.persistence:persistence-api. To investigate further, go to the
simple-model directory and run the dependency:tree goal, which will list all of the
project’s direct and transitive dependencies:
$ mvn dependency:tree
[INFO] Scanning for projects...
[INFO] Searching repository for plugin with prefix: 'dependency'.
[INFO] ------------------------------------------------------------------------
[INFO] Building Chapter 8 Simple Object Model
[INFO] task-segment: [dependency:tree]
[INFO] ------------------------------------------------------------------------
[INFO] [dependency:tree]
[INFO] org.sonatype.mavenbook.ch08:simple-model:jar:1.0
[INFO] +- org.hibernate:hibernate-annotations:jar:3.3.0.ga:compile
[INFO] | \- javax.persistence:persistence-api:jar:1.0:compile
Optimizing with the Maven Dependency Plugin | 137

[INFO] +- org.hibernate:hibernate:jar:3.2.5.ga:compile
[INFO] | +- net.sf.ehcache:ehcache:jar:1.2.3:compile
[INFO] | +- commons-logging:commons-logging:jar:1.0.4:compile
[INFO] | +- asm:asm-attrs:jar:1.5.3:compile
[INFO] | +- dom4j:dom4j:jar:1.6.1:compile
[INFO] | +- antlr:antlr:jar:2.7.6:compile
[INFO] | +- cglib:cglib:jar:2.1_3:compile
[INFO] | +- asm:asm:jar:1.5.3:compile
[INFO] | \- commons-collections:commons-collections:jar:2.1.1:compile
[INFO] \- junit:junit:jar:3.8.1:test
[INFO] ------------------------------------------------------------------------
[INFO] BUILD SUCCESSFUL
[INFO] ------------------------------------------------------------------------
From this output, we can see that the persistence-api dependency is coming from
hibernate. A cursory scan of the source in this module will reveal many javax.persis
tence import statements confirming that we are, indeed, directly referencing this de-
pendency. The simple fix is to add a direct reference to the dependency. In this example,
we put the dependency version in simple-parent’s dependencyManagement section be-
cause the dependency is linked to Hibernate, and the Hibernate version is declared
here. Eventually you are going to want to upgrade your project’s version of Hibernate.
Listing the persistence-api dependency version near the Hibernate dependency ver-
sion will make it more obvious later when your team modifies the parent POM to
upgrade the Hibernate version.
If you look at the dependency:analyze output from the simple-web module, you will see
that we also need to add a direct reference to the simple-model dependency. The code
in simple-webapp directly references the model objects in simple-model, and the simple-
model is exposed to simple-webapp as a transitive dependency via simple-persist. Since
this is a sibling dependency that shares both the version and groupId, the dependency
can be defined in simple-webapp’s pom.xml using the ${project.groupId} and
${project.version}.
How did the Maven Dependency plugin uncover these issues? How does
dependency:analyze know which classes and dependencies are directly referenced by
your project’s bytecode? The Dependency plugin uses the ObjectWeb ASM (http://asm
.objectweb.org/) toolkit to analyze the raw bytecode. The Dependency plugin uses ASM
to walk through all the classes in the current project, and it builds a list of every other
class referenced. It then walks through all the dependencies, direct and transitive, and
marks off the classes discovered in the direct dependencies. Any classes not located in
the direct dependencies are discovered in the transitive dependencies, and the list of
“used, undeclared dependencies” is produced.
In contrast, the list of unused, declared dependencies is a little trickier to validate, and
less useful than the “used, undeclared dependencies.” For one, some dependencies are
used only at runtime or for tests, and they won’t be found in the bytecode. These are
pretty obvious when you see them in the output; for example, JUnit appears in this list,
but this is expected because it is used only for unit tests. You’ll also notice that the
138 | Chapter 8: Optimizing and Refactoring POMs

Velocity and Servlet API dependencies are listed in this list for the simple-web module.
This is also expected because, although the project doesn’t have any direct references
to the classes of these artifacts, they are still essential during runtime.
Be careful when removing any unused, declared dependencies unless you have very
good test coverage, or you might introduce a runtime error. A more sinister issue pops
up with bytecode optimization. For example, it is legal for a compiler to substitute the
value of a constant and optimize away the reference. Removing this dependency will
cause the compile to fail, yet the tool shows it as unused. Future versions of the Maven
Dependency plugin will provide better techniques for detecting and/or ignoring these
types of issues.
You should use the dependency:analyze tool periodically to detect these common errors
in your projects. It can be configured to fail the build if certain conditions are found,
and it is also available as a report.
Final POMs
As an overview, the final POM files are listed as a reference for this chapter. Exam-
ple 8-1 shows the top-level POM for simple-parent.
Example 8-1. Final POM for simple-parent
<project xmlns="http://maven.apache.org/POM/4.0.0"
xmlns:xsi="http://www.w3.org/2001/XMLSchema-instance"
xsi:schemaLocation="http://maven.apache.org/POM/4.0.0
http://maven.apache.org/maven-v4_0_0.xsd">
<modelVersion>4.0.0</modelVersion>
<groupId>org.sonatype.mavenbook.ch08</groupId>
<artifactId>simple-parent</artifactId>
<packaging>pom</packaging>
<version>1.0</version>
<name>Chapter 8 Simple Parent Project</name>
<modules>
<module>simple-command</module>
<module>simple-model</module>
<module>simple-weather</module>
<module>simple-persist</module>
<module>simple-webapp</module>
</modules>
<build>
<pluginManagement>
<plugins>
<plugin>
<groupId>org.apache.maven.plugins</groupId>
<artifactId>maven-compiler-plugin</artifactId>
<configuration>
<source>1.5</source>
Final POMs | 139

<target>1.5</target>
</configuration>
</plugin>
<plugin>
<groupId>org.codehaus.mojo</groupId>
<artifactId>hibernate3-maven-plugin</artifactId>
<version>2.1</version>
<configuration>
<components>
<component>
<name>hbm2ddl</name>
<implementation>annotationconfiguration</implementation>
</component>
</components>
</configuration>
<dependencies>
<dependency>
<groupId>hsqldb</groupId>
<artifactId>hsqldb</artifactId>
<version>${hsqldb.version}</version>
</dependency>
</dependencies>
</plugin>
</plugins>
</pluginManagement>
</build>
<properties>
<hibernate.annotations.version>3.3.0.ga</hibernate.annotations.version>
<hsqldb.version>1.8.0.7</hsqldb.version>
</properties>
<dependencyManagement>
<dependencies>
<dependency>
<groupId>org.springframework</groupId>
<artifactId>spring</artifactId>
<version>2.0.7</version>
</dependency>
<dependency>
<groupId>org.apache.velocity</groupId>
<artifactId>velocity</artifactId>
<version>1.5</version>
</dependency>
<dependency>
<groupId>javax.persistence</groupId>
<artifactId>persistence-api</artifactId>
<version>1.0</version>
</dependency>
<dependency>
<groupId>org.hibernate</groupId>
<artifactId>hibernate-annotations</artifactId>
<version>${hibernate.annotations.version}</version>
</dependency>
<dependency>
<groupId>org.hibernate</groupId>
140 | Chapter 8: Optimizing and Refactoring POMs

<artifactId>hibernate-commons-annotations</artifactId>
<version>${hibernate.annotations.version}</version>
</dependency>
<dependency>
<groupId>org.hibernate</groupId>
<artifactId>hibernate</artifactId>
<version>3.2.5.ga</version>
<exclusions>
<exclusion>
<groupId>javax.transaction</groupId>
<artifactId>jta</artifactId>
</exclusion>
</exclusions>
</dependency>
</dependencies>
</dependencyManagement>
<dependencies>
<dependency>
<groupId>junit</groupId>
<artifactId>junit</artifactId>
<version>3.8.1</version>
<scope>test</scope>
</dependency>
</dependencies>
</project>
The POM shown in Example 8-2 captures the POM for simple-command, the command-
line version of the tool.
Example 8-2. Final POM for simple-command
<project xmlns="http://maven.apache.org/POM/4.0.0"
xmlns:xsi="http://www.w3.org/2001/XMLSchema-instance"
xsi:schemaLocation="http://maven.apache.org/POM/4.0.0
http://maven.apache.org/maven-v4_0_0.xsd">
<modelVersion>4.0.0</modelVersion>
<parent>
<groupId>org.sonatype.mavenbook.ch08</groupId>
<artifactId>simple-parent</artifactId>
<version>1.0</version>
</parent>
<artifactId>simple-command</artifactId>
<packaging>jar</packaging>
<name>Chapter 8 Simple Command Line Tool</name>
<build>
<pluginManagement>
<plugins>
<plugin>
<groupId>org.apache.maven.plugins</groupId>
<artifactId>maven-jar-plugin</artifactId>
<configuration>
<archive>
Final POMs | 141

<manifest>
<mainClass>org.sonatype.mavenbook.weather.Main</mainClass>
<addClasspath>true</addClasspath>
</manifest>
</archive>
</configuration>
</plugin>
<plugin>
<groupId>org.apache.maven.plugins</groupId>
<artifactId>maven-surefire-plugin</artifactId>
<configuration>
<testFailureIgnore>true</testFailureIgnore>
</configuration>
</plugin>
<plugin>
<artifactId>maven-assembly-plugin</artifactId>
<configuration>
<descriptorRefs>
<descriptorRef>jar-with-dependencies</descriptorRef>
</descriptorRefs>
</configuration>
</plugin>
</plugins>
</pluginManagement>
</build>
<dependencies>
<dependency>
<groupId>${project.groupId}</groupId>
<artifactId>simple-weather</artifactId>
<version>${project.version}</version>
</dependency>
<dependency>
<groupId>${project.groupId}</groupId>
<artifactId>simple-persist</artifactId>
<version>${project.version}</version>
</dependency>
<dependency>
<groupId>org.springframework</groupId>
<artifactId>spring</artifactId>
</dependency>
<dependency>
<groupId>org.apache.velocity</groupId>
<artifactId>velocity</artifactId>
</dependency>
</dependencies>
</project>
The POM shown in Example 8-3 is the simple-model project’s POM. The simple-
model project contains all of the model objects used throughout the application.
142 | Chapter 8: Optimizing and Refactoring POMs

Example 8-3. Final POM for simple-model
<project xmlns="http://maven.apache.org/POM/4.0.0"
xmlns:xsi="http://www.w3.org/2001/XMLSchema-instance"
xsi:schemaLocation="http://maven.apache.org/POM/4.0.0
http://maven.apache.org/maven-v4_0_0.xsd">
<modelVersion>4.0.0</modelVersion>
<parent>
<groupId>org.sonatype.mavenbook.ch08</groupId>
<artifactId>simple-parent</artifactId>
<version>1.0</version>
</parent>
<artifactId>simple-model</artifactId>
<packaging>jar</packaging>
<name>Chapter 8 Simple Object Model</name>
<dependencies>
<dependency>
<groupId>org.hibernate</groupId>
<artifactId>hibernate-annotations</artifactId>
</dependency>
<dependency>
<groupId>org.hibernate</groupId>
<artifactId>hibernate</artifactId>
</dependency>
<dependency>
<groupId>javax.persistence</groupId>
<artifactId>persistence-api</artifactId>
</dependency>
</dependencies>
</project>
The POM shown in Example 8-4 is the simple-persist project’s POM. The simple-
persist project contains all of the persistence logic that is implemented using
Hibernate.
Example 8-4. Final POM for simple-persist
<project xmlns="http://maven.apache.org/POM/4.0.0"
xmlns:xsi="http://www.w3.org/2001/XMLSchema-instance"
xsi:schemaLocation="http://maven.apache.org/POM/4.0.0
http://maven.apache.org/maven-v4_0_0.xsd">
<modelVersion>4.0.0</modelVersion>
<parent>
<groupId>org.sonatype.mavenbook.ch08</groupId>
<artifactId>simple-parent</artifactId>
<version>1.0</version>
</parent>
<artifactId>simple-persist</artifactId>
<packaging>jar</packaging>
<name>Chapter 8 Simple Persistence API</name>
<dependencies>
Final POMs | 143

<dependency>
<groupId>${project.groupId}</groupId>
<artifactId>simple-model</artifactId>
<version>${project.version}</version>
</dependency>
<dependency>
<groupId>org.hibernate</groupId>
<artifactId>hibernate</artifactId>
</dependency>
<dependency>
<groupId>org.hibernate</groupId>
<artifactId>hibernate-annotations</artifactId>
</dependency>
<dependency>
<groupId>org.hibernate</groupId>
<artifactId>hibernate-commons-annotations</artifactId>
</dependency>
<dependency>
<groupId>org.apache.geronimo.specs</groupId>
<artifactId>geronimo-jta_1.1_spec</artifactId>
<version>1.1</version>
</dependency>
<dependency>
<groupId>org.springframework</groupId>
<artifactId>spring</artifactId>
</dependency>
</dependencies>
</project>
The POM shown in Example 8-5 is the simple-weather project’s POM. The simple-
weather project is the project that contains all of the logic to parse the Yahoo! Weather
RSS feed. This project depends on the simple-model project.
Example 8-5. Final POM for simple-weather
<project xmlns="http://maven.apache.org/POM/4.0.0"
xmlns:xsi="http://www.w3.org/2001/XMLSchema-instance"
xsi:schemaLocation="http://maven.apache.org/POM/4.0.0
http://maven.apache.org/maven-v4_0_0.xsd">
<modelVersion>4.0.0</modelVersion>
<parent>
<groupId>org.sonatype.mavenbook.ch08</groupId>
<artifactId>simple-parent</artifactId>
<version>1.0</version>
</parent>
<artifactId>simple-weather</artifactId>
<packaging>jar</packaging>
<name>Chapter 8 Simple Weather API</name>
<dependencies>
<dependency>
<groupId>${project.groupId}</groupId>
<artifactId>simple-model</artifactId>
<version>${project.version}</version>
144 | Chapter 8: Optimizing and Refactoring POMs

</dependency>
<dependency>
<groupId>log4j</groupId>
<artifactId>log4j</artifactId>
<version>1.2.14</version>
</dependency>
<dependency>
<groupId>dom4j</groupId>
<artifactId>dom4j</artifactId>
<version>1.6.1</version>
</dependency>
<dependency>
<groupId>jaxen</groupId>
<artifactId>jaxen</artifactId>
<version>1.1.1</version>
</dependency>
<dependency>
<groupId>org.apache.commons</groupId>
<artifactId>commons-io</artifactId>
<version>1.3.2</version>
<scope>test</scope>
</dependency>
</dependencies>
</project>
Finally, the POM shown in Example 8-6 is the simple-webapp project’s POM. The
simple-webapp project contains a web application that stores retrieved weather forecasts
in an HSQLDB database and that also interacts with the libraries generated by the
simple-weather project.
Example 8-6. Final POM for simple-webapp
<project xmlns="http://maven.apache.org/POM/4.0.0"
xmlns:xsi="http://www.w3.org/2001/XMLSchema-instance"
xsi:schemaLocation="http://maven.apache.org/POM/4.0.0
http://maven.apache.org/maven-v4_0_0.xsd">
<modelVersion>4.0.0</modelVersion>
<parent>
<groupId>org.sonatype.mavenbook.ch08</groupId>
<artifactId>simple-parent</artifactId>
<version>1.0</version>
</parent>
<artifactId>simple-webapp</artifactId>
<packaging>war</packaging>
<name>Chapter 8 Simple Web Application</name>
<dependencies>
<dependency>
<groupId>org.apache.geronimo.specs</groupId>
<artifactId>geronimo-servlet_2.4_spec</artifactId>
<version>1.1.1</version>
</dependency>
<dependency>
<groupId>${project.groupId}</groupId>
<artifactId>simple-model</artifactId>
Final POMs | 145

<version>${project.version}</version>
</dependency>
<dependency>
<groupId>${project.groupId}</groupId>
<artifactId>simple-weather</artifactId>
<version>${project.version}</version>
</dependency>
<dependency>
<groupId>${project.groupId}</groupId>
<artifactId>simple-persist</artifactId>
<version>${project.version}</version>
</dependency>
<dependency>
<groupId>org.springframework</groupId>
<artifactId>spring</artifactId>
</dependency>
<dependency>
<groupId>javax.servlet</groupId>
<artifactId>jstl</artifactId>
<version>1.1.2</version>
</dependency>
<dependency>
<groupId>taglibs</groupId>
<artifactId>standard</artifactId>
<version>1.1.2</version>
</dependency>
<dependency>
<groupId>org.apache.velocity</groupId>
<artifactId>velocity</artifactId>
</dependency>
</dependencies>
<build>
<finalName>simple-webapp</finalName>
<plugins>
<plugin>
<groupId>org.mortbay.jetty</groupId>
<artifactId>maven-jetty-plugin</artifactId>
<version>6.1.9</version>
<dependencies>
<dependency>
<groupId>hsqldb</groupId>
<artifactId>hsqldb</artifactId>
<version>${hsqldb.version}</version>
</dependency>
</dependencies>
</plugin>
</plugins>
</build>
</project>
146 | Chapter 8: Optimizing and Refactoring POMs

Conclusion
This chapter has shown you several techniques for improving the control of your
dependencies and plugins to ease future maintenance of your builds. We recommend
periodically reviewing your builds in this way to ensure that duplication and thus
potential trouble spots are minimized. As a project matures, new dependencies are
inevitably introduced, and you may find that a dependency previously used in 1 place
is now used in 10 and should be moved up. The used and unused dependencies list
changes over time and can easily be cleaned up with the Maven Dependency plugin.
Conclusion | 147

CHAPTER 9
The Project Object Model
Introduction
This chapter covers the central concept of Maven—the Project Object Model (POM).
The POM is where a project’s identity and structure are declared, builds are configured,
and projects are related to one another. The presence of a pom.xml file defines a Maven
project.
The POM
Maven projects, dependencies, builds, artifacts: all of these are objects to be modeled
and described. These objects are described by an XML file called a Project Object
Model. The POM tells Maven what sort of project it is dealing with and how to modify
default behavior to generate output from source. In the same way a Java web application
has a web.xml that describes, configures, and customizes the application, a Maven
project is defined by the presence of a pom.xml. It is a descriptive declaration of a project
for Maven; it is the figurative “map” that Maven needs to understand what it is looking
at when it builds your project.
You could also think of the pom.xml as analogous to a Makefile or an Ant build.xml.
When you are using GNU make to build something like MySQL, you’ll usually have a
file named Makefile that contains explicit instructions for building a binary from source.
When you are using Apache Ant, you likely have a file named build.xml that contains
explicit instructions for cleaning, compiling, packaging, and deploying an application.
make, Ant, and Maven are similar in that they rely on the presence of a commonly
named file such as Makefile, build.xml, or pom.xml, but that is where the similarities
end. If you look at a Maven pom.xml, the majority of the POM is going to deal with
descriptions: Where is the source code? Where are the resources? What is the packag-
ing? If you look at an Ant build.xml file, you’ll see something entirely different. You’ll
see explicit instructions for tasks such as compiling a set of Java classes. The Maven
POM is declarative, and although you can certainly choose to include some procedural
customizations via the Maven Ant plugin, for the most part you will not need to get
into the gritty procedural details of your project’s build.
149
The POM is also not specific to building Java projects. Though most of the examples
in this book are geared toward Java applications, there is nothing Java-specific in the
definition of a Maven Project Object Model. Maven’s default plugins are targeted to
building JAR artifacts from a set of source, tests, and resources, but nothing is pre-
venting you from defining a POM for a project that contains C# sources and produces
some proprietary Microsoft binary using Microsoft tools. Similarly, nothing is stopping
you from defining a POM for a technical book. In fact, the source for this book and
this book’s examples is captured in a multimodule Maven project that uses one of the
many Maven DocBook plugins to apply the standard DocBook XSL to a series of chap-
ter XML files. Others have created Maven plugins to build Adobe Flex code into
Shockwave Components (SWCs) and Shockwave Flash files (SWFs), and yet others
have used Maven to build projects written in C.
We’ve established that the POM describes and declares; it is unlike Ant or make in that
it doesn’t provide explicit instructions, and we’ve noted that POM concepts are not
specific to Java. Diving into more specifics, take a look at Figure 9-1 for a survey of the
contents of a POM.
The POM contains four categories of description and configuration:
General project information
This includes a project’s name, the URL for a project, the sponsoring organization,
and a list of developers and contributors along with the license for a project.
Build settings
In this section, we customize the behavior of the default Maven build. We can
change the location of source and tests, we can add new plugins, we can attach
plugin goals to the lifecycle, and we can customize the site generation parameters.
POM
groupId
artifactId
version
Coordinate
POM Relationships
Multimodule
Inheritance
Dependencies
General
General Project Information
Contributions
Licenses
Build Settings
build
directories
extensions
resources
plugins
reporting
Build Environment
Environment Information
profiles
Maven Environment
Figure 9-1. The Project Object Model
150 | Chapter 9: The Project Object Model

Build environment
The build environment consists of profiles that can be activated for use in different
environments. For example, during development you may want to deploy to a
development server, whereas in production you want to deploy to a production
server. The build environment customizes the build settings for specific environ-
ments and is often supplemented by a custom settings.xml in ~/.m2. This settings
file is discussed in Chapter 11 and in the section “Quick Overview” in Appendix A.
POM relationships
A project rarely stands alone; it depends on other projects, inherits POM settings
from parent projects, defines its own coordinates, and may include submodules.
The Super POM
Before we dive into some examples of POMs, let’s take a quick look at the Super
POM. All Maven project POMs extend the Super POM, which defines a set of defaults
shared by all projects. This Super POM is a part of the Maven installation and can be
found in the maven-2.0.9-uber.jar file in ${M2_HOME}/lib. If you look in this JAR file,
you will find a file named pom-4.0.0.xml under the org.apache.maven.project package.
The Super POM for Maven is shown in Example 9-1.
Example 9-1. The Super POM
<project>
<modelVersion>4.0.0</modelVersion>
<name>Maven Default Project</name>
<repositories>
<repository>
<id>central</id>
<name>Maven Repository Switchboard</name>
<layout>default</layout>
<url>http://repo1.maven.org/maven2</url>
<snapshots>
<enabled>false</enabled>
</snapshots>
</repository>
</repositories>
<pluginRepositories>
<pluginRepository>
<id>central</id>
<name>Maven Plugin Repository</name>
<url>http://repo1.maven.org/maven2</url>
<layout>default</layout>
<snapshots>
<enabled>false</enabled>
</snapshots>
<releases>
<updatePolicy>never</updatePolicy>
</releases>
The POM | 151

</pluginRepository>
</pluginRepositories>
<build>
<directory>target</directory>
<outputDirectory>target/classes</outputDirectory>
<finalName>${pom.artifactId}-${pom.version}</finalName>
<testOutputDirectory>target/test-classes</testOutputDirectory>
<sourceDirectory>src/main/java</sourceDirectory>
<scriptSourceDirectory>src/main/scripts</scriptSourceDirectory>
<testSourceDirectory>src/test/java</testSourceDirectory>
<resources>
<resource>
<directory>src/main/resources</directory>
</resource>
</resources>
<testResources>
<testResource>
<directory>src/test/resources</directory>
</testResource>
</testResources>
</build>
<pluginManagement>
<plugins>
<plugin>
<artifactId>maven-antrun-plugin</artifactId>
<version>1.1</version>
</plugin>
<plugin>
<artifactId>maven-assembly-plugin</artifactId>
<version>2.2-beta-1</version>
</plugin>
<plugin>
<artifactId>maven-clean-plugin</artifactId>
<version>2.2</version>
</plugin>
<plugin>
<artifactId>maven-compiler-plugin</artifactId>
<version>2.0.2</version>
</plugin>
<plugin>
<artifactId>maven-dependency-plugin</artifactId>
<version>2.0</version>
</plugin>
<plugin>
<artifactId>maven-deploy-plugin</artifactId>
<version>2.3</version>
</plugin>
<plugin>
<artifactId>maven-ear-plugin</artifactId>
<version>2.3.1</version>
</plugin>
<plugin>
<artifactId>maven-ejb-plugin</artifactId>
152 | Chapter 9: The Project Object Model

<version>2.1</version>
</plugin>
<plugin>
<artifactId>maven-install-plugin</artifactId>
<version>2.2</version>
</plugin>
<plugin>
<artifactId>maven-jar-plugin</artifactId>
<version>2.2</version>
</plugin>
<plugin>
<artifactId>maven-javadoc-plugin</artifactId>
<version>2.4</version>
</plugin>
<plugin>
<artifactId>maven-plugin-plugin</artifactId>
<version>2.3</version>
</plugin>
<plugin>
<artifactId>maven-rar-plugin</artifactId>
<version>2.2</version>
</plugin>
<plugin>
<artifactId>maven-release-plugin</artifactId>
<version>2.0-beta-7</version>
</plugin>
<plugin>
<artifactId>maven-resources-plugin</artifactId>
<version>2.2</version>
</plugin>
<plugin>
<artifactId>maven-site-plugin</artifactId>
<version>2.0-beta-6</version>
</plugin>
<plugin>
<artifactId>maven-source-plugin</artifactId>
<version>2.0.4</version>
</plugin>
<plugin>
<artifactId>maven-surefire-plugin</artifactId>
<version>2.4.2</version>
</plugin>
<plugin>
<artifactId>maven-war-plugin</artifactId>
<version>2.1-alpha-1</version>
</plugin>
</plugins>
</pluginManagement>
<reporting>
<outputDirectory>target/site</outputDirectory>
</reporting>
</project>
The POM | 153
The Super POM defines some standard configuration variables that are inherited by all
projects. Those values are captured in the annotated sections (see also Figure 9-2):
The default Super POM defines a single remote Maven repository with an ID of
central. This is the central Maven repository that all Maven clients are configured
to read from by default. This setting can be overridden by a custom settings.xml file.
Note that the default Super POM has disabled snapshot artifacts on the central
Maven repository. If you need to use a snapshot repository, you will need to cus-
tomize repository settings in your pom.xml or in your settings.xml. Settings and pro-
files are covered in Chapter 11 and in the section “Quick Overview” in Appendix A.
The central Maven repository also contains Maven plugins. The default plugin re-
pository is the central Maven repository. Snapshots are disabled, and the update
policy is set to “never,” which means that Maven will never automatically update a
plugin if a new version is released.
The build element sets the default values for directories in the Maven Standard
Directory layout.
Starting in Maven 2.0.9, default versions of core plugins have been provided in the
Super POM. This was done to provide some stability for users who are not specifying
versions in their POMs.
The Simplest POM
All Maven POMs inherit defaults from the Super POM (introduced earlier in the section
“The Super POM”). If you are just writing a simple project that produces a JAR from
some source in src/main/java, want to run your JUnit tests in src/test/java, and want to
build a project site using mvn site, you don’t have to customize anything. All you would
need, in this case, is the simplest possible POM shown in Example 9-2. This POM
Super POM
= Inherits from com.mycompany
killerapp
1.0-SNAPSHOT
com.mycompany
killerapp-stores
1.0-SNAPSHOT
com.mycompany
killerapp-api
1.0-SNAPSHOT
com.mycompany
killerappmodel
1.0-SNAPSHOT
Figure 9-2. The Super POM is always the base parent
154 | Chapter 9: The Project Object Model

defines a groupId, artifactId, and version: the three required coordinates for every
project.
Example 9-2. The simplest POM
<project>
<modelVersion>4.0.0</modelVersion>
<groupId>org.sonatype.mavenbook.ch08</groupId>
<artifactId>simplest-project</artifactId>
<version>1</version>
</project>
Such a simple POM would be more than adequate for a simple project—e.g., a Java
library that produces a JAR file. It isn’t related to any other projects, it has no depend-
encies, and it lacks basic information such as a name and a URL. If you were to create
this file and then create the subdirectory src/main/java with some source code, running
mvn package would produce a JAR in target/simple-project-1.jar.
The Effective POM
This simplest POM brings us to the concept of the “effective POM.” Since POMs can
inherit configuration from other POMs, you must always think of a Maven POM in
terms of the combination of the Super POM, plus any parent POMs, and finally the
current project’s POM. Maven starts with the Super POM and then overrides default
configuration with one or more parent POMs. Then it overrides the resulting config-
uration with the current project’s POM. You end up with an effective POM that is a
mixture of various POMs. If you want to see a project’s effective POM, you’ll need to
run the effective-pom goal in the Maven Help plugin, which was introduced earlier in
the section “Using the Maven Help Plugin.” To run the effective-pom goal, execute
the following in a directory with a pom.xml file:
$ mvn help:effective-pom
Executing the effective-pom goal should print out an XML document capturing the
merge between the Super POM and the POM from Example 9-2.
Real POMs
Instead of typing up a contrived set of POMs to walk you through step-by-step, you
should take a look at the examples in Part II. Maven is something of a chameleon; you
can pick and choose the features you want to take advantage of. Some open source
projects may value the ability to list developers and contributors, generate clean project
documentation, and manage releases automatically using the Maven Release plugin.
On the other hand, someone working in a corporate environment on a small team might
not be interested in the distribution management capabilities of Maven nor the ability
to list developers. The remainder of this chapter is going to discuss features of the
POM in isolation. Instead of bombarding you with a 10-page listing of a set of related
The POM | 155

POMs, we’re going to focus on creating a good reference for specific sections of the
POM. In this chapter, we discuss relationships between POMs, but we don’t illustrate
such a project here. If you are looking for such an illustration, refer to Chapter 7.
POM Syntax
The POM is always in a file named pom.xml in the base directory of a Maven project.
This XML document can start with the XML declaration, or you can choose to omit it.
All values in a POM are captured as XML elements.
Project Versions
A Maven project’s version encodes a release version number that is used to group and
order releases. Maven versions contain the following parts: major version, minor ver-
sion, incremental version, and qualifier. In a version, these parts correspond to the
following format:
<major version>.<minor version>.<incremental version>-<qualifier>
For example, the version “1.3.5” has a major version of 1, a minor version of 3, and an
incremental version of 5. The version “5” has a major version of 5 and no minor or
incremental version. The qualifier exists to capture milestone builds such as alpha and
beta releases, and the qualifier is separated from the major, minor, and incremental
versions by a hyphen. For example, the version “1.3-beta-01” has a major version of 1,
a minor version of 3, and a qualifier of beta-01.
Keeping your version numbers aligned with this standard will become very important
when you start using version ranges in your POMs. Version ranges (introduced in the
section “Dependency Version Ranges,” later in this chapter) allow you to specify a
dependency on a range of versions, and they are supported only because Maven has
the ability to sort versions based on the version release number format introduced in
this section.
If your version release number matches the format <major>.<minor>.<incremental>-
<qualifier>, your versions will be compared properly; “1.2.3” will be evaluated as a
more recent build than “1.0.2,” and the comparison will be made using the numeric
values of the major, minor, and incremental versions. If your version release number
does not fit the standard introduced in this section, your versions will be compared as
strings; “1.0.1b” will be compared to “1.2.0b” using a String comparison.
Version build numbers
One gotcha for release version numbers is the ordering of the qualifiers. Take the ver-
sion release numbers “1.2.3-alpha-2” and “1.2.3-alpha-10,” where the “alpha-2” build
corresponds to the 2nd alpha build, and the “alpha-10” build corresponds to the 10th
alpha build. Even though “alpha-10” should be considered more recent than “alpha-2,”
156 | Chapter 9: The Project Object Model

Maven is going to sort “alpha-10” before “alpha-2” due to a known issue in the way
Maven handles version numbers.
Maven is supposed to treat the number after the qualifier as a build number. In other
words, the qualifier should be “alpha,” and the build number should be “2.” Even
though Maven has been designed to separate the build number from the qualifier, this
parsing is currently broken. As a result, “alpha-2” and “alpha-10” are compared using
a String comparison, and “alpha-10” comes before “alpha-2” alphabetically. To get
around this limitation, you will need to left-pad your qualified build numbers. If you
use “alpha-02” and “alpha-10,” this problem will go away, and it will continue to work
once Maven properly parses the version build number.
SNAPSHOT versions
Maven versions can contain a string literal to signify that a project is currently under
active development. If a version contains the string “SNAPSHOT,” then Maven will
expand this token to a date and time value converted to UTC (Coordinated Universal
Time) when you install or release this component. For example, if your project has a
version of “1.0-SNAPSHOT” and you deploy this project’s artifacts to a Maven repo-
sitory, Maven would expand this version to “1.0-20080207-230803-1” if you were to
deploy a release at 11:08 PM on February 7th, 2008 UTC. In other words, when you
deploy a snapshot, you are not making a release of a software component; you are
releasing a snapshot of a component at a specific time.
Why would you use this? Snapshot versions are used for projects under active devel-
opment. If your project depends on a software component that is under active devel-
opment, you can depend on a snapshot release, and Maven will periodically attempt
to download the latest snapshot from a repository when you run a build. Similarly, if
the next release of your system is going to have a version “1.4,” your project would
have a “1.4-SNAPSHOT” version until it was formally released.
As a default setting, Maven will not check for snapshot releases on remote repositories;
to depend on snapshot releases, users must explicitly enable the ability to download
snapshots using a repository or pluginRepository element in the POM.
When releasing a project, you should resolve all dependencies on snapshot versions to
dependencies on released versions. If a project depends on a snapshot, it is not stable,
as the dependencies may change over time. Artifacts published to nonsnapshot Maven
repositories such as http://repo1.maven.org/maven2 cannot depend on snapshot ver-
sions, since Maven’s Super POM has disabled snapshots from the central repository.
Snapshot versions are for development only.
Property References
A POM can include references to properties preceded by a dollar sign and surrounded
by two curly braces. For example, consider the following POM:
POM Syntax | 157

<project>
<modelVersion>4.0.0</modelVersion>
<groupId>org.sonatype.mavenbook</groupId>
<artifactId>project-a</artifactId>
<version>1.0-SNAPSHOT</version>
<packaging>jar</packaging>
<build>
<finalName>${project.groupId}-${project.artifactId}</finalName>
</build>
</project>
If you put this XML in a pom.xml and run mvn help:effective-pom, you will see that the
output contains the line:
...
<finalName>org.sonatype.mavenbook-project-a</finalName>
...
When Maven reads a POM, it replaces references to properties when it loads the POM
XML. Maven properties occur frequently in advanced Maven usage, and they are sim-
ilar to properties in other systems, such as Ant or Velocity. They are simply variables
delimited by ${...}. Maven provides three implicit variables that can be used to access
environment variables, POM information, and Maven settings:
env
The env variable exposes environment variables exposed by your operating system
or shell. For example, a reference to ${env.PATH} in a Maven POM would be re-
placed by the ${PATH} environment variable (or %PATH% in Windows).
project
The project variable exposes the POM. You can use a dot-notated (.) path to ref-
erence the value of a POM element. For example, in this section we used the
groupId and artifactId to set the finalName element in the build configuration.
The syntax for this property reference was: ${project.groupId}-${project.arti
factId}.
settings
The settings variable exposes Maven settings information. You can use a dot-
notated (.) path to reference the value of an element in a settings.xml file. For ex-
ample, ${settings.offline} would reference the value of the offline element in
~/.m2/settings.xml.
You may see older builds that use ${pom.xxx} or just ${xxx} to reference
POM properties. These methods have been deprecated, and only
${project.xxx} should be used.
In addition to the three implicit variables, you can reference system properties and any
custom properties set in the Maven POM or in a build profile:
158 | Chapter 9: The Project Object Model

Java system properties
All properties accessible via getProperties() on java.lang.System are exposed as
POM properties. Some examples of system properties are: ${user.name},
${user.home}, ${java.home}, and ${os.name}. A full list of system properties can be
found in the Javadoc for the java.lang.System class.
x
Arbitrary properties can be set with a properties element in a pom.xml or
settings.xml, or properties can be loaded from external files. If you set a property
named fooBar in your pom.xml, that same property is referenced with ${fooBar}.
Custom properties come in handy when you are building a system that filters re-
sources and targets different deployment platforms. Here is the syntax for setting
${foo}=bar in a POM:
<properties>
<foo>bar</foo>
</properties>
For a more comprehensive list of available properties, see Chapter 13.
Project Dependencies
Maven can manage both internal and external dependencies. An external dependency
for a Java project might be a library such as Plexus, the Spring Framework, or Log4J.
An internal dependency is illustrated by a web application project depending on an-
other project that contains service classes, model objects, or persistence logic. Exam-
ple 9-3 shows some examples of project dependencies.
Example 9-3. Project dependencies
<project>
...
<dependencies>
<dependency>
<groupId>org.codehaus.xfire</groupId>
<artifactId>xfire-java5</artifactId>
<version>1.2.5</version>
</dependency>
<dependency>
<groupId>junit</groupId>
<artifactId>junit</artifactId>
<version>3.8.1</version>
<scope>test</scope>
</dependency>
<dependency>
<groupId>org.apache.geronimo.specs</groupId>
<artifactId>geronimo-servlet_2.4_spec</artifactId>
<version>1.0</version>
<scope>provided</scope>
</dependency>
</dependencies>
Project Dependencies | 159

...
</project>
The first dependency is a compile dependency on the XFire SOAP library from Code-
haus. You would use this type of dependency if your project depended on this library
for compilation, testing, and during execution. The second dependency is a test-
scoped dependency on JUnit. You would use a test-scoped dependency when you need
to reference this library only during testing. The last dependency in Example 9-3 is a
dependency on the Servlet 2.4 API as implemented by the Apache Geronimo project.
The last dependency is scoped as a provided dependency. You would use a provided
scope when the application you are developing needs a library for compilation and
testing, but this library is supplied by a container at runtime.
Dependency Scope
Example 9-3 briefly introduced three of the five dependency scopes: compile, test, and
provided. Scope controls which dependencies are available in which classpath, and
which dependencies are included with an application. Let’s explore each scope in detail:
compile
compile is the default scope; all dependencies are compile-scoped if a scope is not
supplied. compile dependencies are available in all classpaths, and they are
packaged.
provided
provided dependencies are used when you expect the JDK or a container to provide
them. For example, if you were developing a web application, you would need the
Servlet API available on the compile classpath to compile a servlet, but you
wouldn’t want to include the Servlet API in the packaged WAR; the Servlet API
JAR is supplied by your application server or servlet container. provided depend-
encies are available on the compilation classpath (not runtime). They are not tran-
sitive, nor are they packaged.
runtime
runtime dependencies are required to execute and test the system, but they are not
required for compilation. For example, you may need a JDBC API JAR at compile
time and the JDBC driver implementation only at runtime.
test
test-scoped dependencies are not required during the normal operation of an ap-
plication, and they are available only during test compilation and execution phases.
The test scope was previously introduced in “Adding Test-Scoped Dependen-
cies” in Chapter 4.
system
The system scope is similar to provided except that you have to provide an explicit
path to the JAR on the local file system. This is intended to allow compilation
against native objects that may be part of the system libraries. The artifact is as-
160 | Chapter 9: The Project Object Model

sumed to always be available and is not looked up in a repository. If you declare
the scope to be system, you must also provide the systemPath element. Note that
this scope is not recommended (you should always try to reference dependencies
in a public or custom Maven repository).
Optional Dependencies
Assume that you are working on a library that provides caching behavior. Instead of
writing a caching system from scratch, you want to use some of the existing libraries
that provide caching on the file system and distributed caches. Also assume that you
want to give the end user an option to cache on the file system or to use an in-memory
distributed cache. To cache on the file system, you’ll want to use a freely available
library called EHCache (http://ehcache.sourceforge.net/), and to cache in a distributed
in-memory cache, you want to use another freely available caching library named
SwarmCache (http://swarmcache.sourceforge.net/). You’ll code an interface and create
a library that can be configured to use either EHCache or SwarmCache, but you want
to avoid adding a dependency on both caching libraries to any project that depends on
your library.
In other words, you need both libraries to compile this library project, but you don’t
want both libraries to show up as transitive runtime dependencies for the project that
uses your library. You can accomplish this by using optional dependencies as shown
in Example 9-4.
Example 9-4. Declaring optional dependencies
<project>
<modelVersion>4.0.0</modelVersion>
<groupId>org.sonatype.mavenbook</groupId>
<artifactId>my-project</artifactId>
<version>1.0.0</version>
<dependencies>
<dependency>
<groupId>net.sf.ehcache</groupId>
<artifactId>ehcache</artifactId>
<version>1.4.1</version>
<optional>true</optional>
</dependency>
<dependency>
<groupId>swarmcache</groupId>
<artifactId>swarmcache</artifactId>
<version>1.0RC2</version>
<optional>true</optional>
</dependency>
<dependency>
<groupId>log4j</groupId>
<artifactId>log4j</artifactId>
<version>1.2.13</version>
</dependency>
Project Dependencies | 161

</dependencies>
</project>
Once you’ve declared these dependencies as optional, you are required to include them
explicitly in the project that depends on my-project. For example, if you were writing
an application that depended on my-project and wanted to use the EHCache imple-
mentation, you would need to add the following dependency element to your project:
<project>
<modelVersion>4.0.0</modelVersion>
<groupId>org.sonatype.mavenbook</groupId>
<artifactId>my-application</artifactId>
<version>1.0.0</version>
<dependencies>
<dependency>
<groupId>org.sonatype.mavenbook</groupId>
<artifactId>my-project</artifactId>
<version>1.0.0</version>
</dependency>
<dependency>
<groupId>net.sf.ehcache</groupId>
<artifactId>swarmcache</artifactId>
<version>1.4.1</version>
</dependency>
</dependencies>
</project>
In an ideal world, you wouldn’t have to use optional dependencies. Instead of having
one large project with a series of optional dependencies, you would separate the
EHCache-specific code to a my-project-ehcache submodule and the SwarmCache-spe-
cific code to a my-project-swarmcache submodule. This way, instead of requiring
projects that reference my-project to specifically add a dependency, projects can just
reference a particular implementation project and benefit from the transitive
dependency.
Dependency Version Ranges
You don’t just have to depend on a specific version of a dependency; you can specify
a range of versions that would satisfy a given dependency. For example, you can specify
that your project depends on version 3.8 or greater of JUnit, or anything between ver-
sions 1.2.10 and 1.2.14 of JUnit. You do this by surrounding one or more version
numbers with the following characters:
(, )
Exclusive quantifiers
[, ]
Inclusive quantifiers
For example, if you wished to access any JUnit version greater than or equal to 3.8 but
less than 4.0, your dependency would be as shown in Example 9-5.
162 | Chapter 9: The Project Object Model

Example 9-5. Specifying a dependency range: JUnit 3.8–JUnit 4.0
<dependency>
<groupId>junit</groupId>
<artifactId>junit</artifactId>
<version>[3.8,4.0)</version>
<scope>test</scope>
</dependency>
If you want to depend on any version of JUnit no higher than 3.8.1, you would specify
only an upper inclusive boundary, as shown in Example 9-6.
Example 9-6. Specifying a dependency range: JUnit <= 3.8.1
<dependency>
<groupId>junit</groupId>
<artifactId>junit</artifactId>
<version>[,3.8.1]</version>
<scope>test</scope>
</dependency>
A version before or after the comma means +/– infinity, and is not required. For ex-
ample, “[4.0,)” means any version greater than or equal to 4.0. “(,2.0)” is any version
less than 2.0. “[1.2]” means only version 1.2, and nothing else.
When declaring a “normal” version such as 3.8.2 for JUnit, internally
this is represented as “allow anything, but prefer 3.8.2.” This means that
when a conflict is detected, Maven is allowed to use the conflict algo-
rithms to choose the best version. If you specify [3.8.2], only 3.8.2 will
be used and nothing else. If somewhere else there is a dependency that
specifies [3.8.1], you would get a build failure telling you of the conflict.
We point this out to make you aware of the option, but use it sparingly
and only when really needed. The preferred way to resolve this is via
dependencyManagement.
Transitive Dependencies
A transitive dependency is a dependency of a dependency. If project-a depends on
project-b, which in turn depends on project-c, then project-c is considered a transi-
tive dependency of project-a. If project-c depended on project-d, then project-d
would also be considered a transitive dependency of project-a. Part of Maven’s appeal
is that it can manage transitive dependencies and shield the developer from having to
keep track of all of the dependencies required to compile and run an application. You
can just depend on something like the Spring Framework and not have to worry about
tracking down every last dependency of the Spring Framework.
Maven accomplishes this by building a graph of dependencies and dealing with any
conflicts and overlaps that might occur. For example, if Maven sees that two projects
depend on the same groupId and artifactId, it will sort out which dependency to use
Project Dependencies | 163

automatically, always favoring the more recent version of a dependency. Although this
sounds convenient, there are some edge cases where transitive dependencies can cause
some configuration issues. For these scenarios, you can use a dependency exclusion.
Transitive dependencies and scope
Each of the scopes outlined earlier in the section “Dependency Scope” affects not just
the scope of the dependency in the declaring project, but also how it acts as a transitive
dependency. The easiest way to convey this information is through a table, as in Ta-
ble 9-1. Scopes in the top row represent the scope of a transitive dependency. Scopes
in the leftmost column represent the scope of a direct dependency. The intersection of
the row and column is the scope that is assigned to a transitive dependency. A blank
cell in this table means that the transitive dependency will be omitted.
Table 9-1. How scope affects transitive dependencies
-compile provided runtime test
compile compile -runtime -
provided provided provided provided -
runtime runtime -runtime -
test test -test -
To illustrate the relationship of transitive dependency scope to direct dependency
scope, consider the following example. If project-a contains a test-scoped dependency
on project-b, which contains a compile-scoped dependency on project-c, then
project-c would be a test-scoped transitive dependency of project-a.
You can think of this as a transitive boundary that acts as a filter on dependency scope.
Transitive dependencies that are provided- and test-scoped usually do not affect a
project. The exception to this rule is that a provided-scoped transitive dependency to
a provided-scope direct dependency is still a provided dependency of a project. Tran-
sitive dependencies that are compile- and runtime-scoped usually affect a project re-
gardless of the scope of a direct dependency. Transitive dependencies that are compile-
scoped will have the same scope regardless of the scope of the direct dependency.
Transitive dependencies that are runtime-scoped will generally have the same scope of
the direct dependency except when the direct dependency has a scope of compile. When
a transitive dependency is runtime-scoped and a direct is compile-scoped, the direct
dependency and the transitive dependency will have an effective scope of runtime.
Conflict Resolution
There will be times when you need to exclude a transitive dependency, such as when
you are depending on a project that depends on another project, but you would like to
either exclude the dependency altogether or replace the transitive dependency with
another dependency that provides the same functionality. Example 9-7 shows an ex-
164 | Chapter 9: The Project Object Model

ample of a dependency element that adds a dependency on project-a, but excludes the
transitive dependency project-b.
Example 9-7. Excluding a transitive dependency
<dependency>
<groupId>org.sonatype.mavenbook</groupId>
<artifactId>project-a</artifactId>
<version>1.0</version>
<exclusions>
<exclusion>
<groupId>org.sonatype.mavenbook</groupId>
<artifactId>project-b</artifactId>
</exclusion>
</exclusions>
</dependency>
Often, you will want to replace a transitive dependency with another implementation.
For example, if you are depending on a library that depends on the Sun JTA API, you
may want to replace the declared transitive dependency. Hibernate is one example.
Hibernate depends on the Sun JTA API JAR, which is not available in the central Maven
repository because it cannot be freely redistributed. Fortunately, the Apache Geronimo
project has created an independent implementation of this library that can be freely
redistributed. To replace a transitive dependency with another dependency, you would
exclude the transitive dependency and declare a dependency on the project you wanted
instead. Example 9-8 shows an example of a such replacement.
Example 9-8. Excluding and replacing a transitive dependency
<dependencies>
<dependency>
<groupId>org.hibernate</groupId>
<artifactId>hibernate</artifactId>
<version>3.2.5.ga</version>
<exclusions>
<exclusion>
<groupId>javax.transaction</groupId>
<artifactId>jta</artifactId>
</exclusion>
</exclusions>
</dependency>
<dependency>
<groupId>org.apache.geronimo.specs</groupId>
<artifactId>geronimo-jta_1.1_spec</artifactId>
<version>1.1</version>
</dependency>
</dependencies>
In this example, nothing is marking the dependency on geronimo-jta_1.1_spec as a
replacement; it just happens to be a library that provides the same API as the original
JTA dependency. Here are some other reasons you might want to exclude or replace
transitive dependencies:
Project Dependencies | 165

• The groupId or artifactId of the artifact has changed, where the current project
requires an alternately named version from a dependency’s version, resulting in
two copies of the same project in the classpath. Normally, Maven would capture
this conflict and use a single version of the project, but when groupId or
artifactId are different, Maven will consider this to be two different libraries.
• An artifact is not used in your project, and the transitive dependency has not been
marked as an optional dependency. In this case, you might want to exclude a de-
pendency because it isn’t something your system needs, and you are trying to cut
down on the number of libraries distributed with an application.
• An artifact that is provided by your runtime container, and thus should not be
included with your build. An example of this is if a dependency depends on some-
thing like the Servlet API and you want to make sure that the dependency is not
included in a web application’s WEB-INF/lib directory.
• You want to exclude a dependency that might be an API with multiple implemen-
tations. This is the situation illustrated by Example 9-8; a Sun API requires click-
wrap licensing and a time-consuming manual install into a custom repository
(Sun’s JTA JAR) versus a freely distributed version of the same API available in the
central Maven repository (Geronimo’s JTA implementation).
Dependency Management
Once you’ve adopted Maven at your super-complex enterprise and you have 220
interrelated Maven projects, you are going to start wondering if there is a better way to
get a handle on dependency versions. If every single project that uses a dependency like
the MySQL Java connector needs to independently list the version number of the de-
pendency, you are going to run into problems when you need to upgrade to a new
version. Because the version numbers are distributed throughout your project tree, you
are going to have to manually edit each of the pom.xml files that reference a dependency
to make sure that you are changing the version number everywhere. Even with find,
xargs, and awk, you are still running the risk of missing a single POM.
Luckily, Maven provides a way for you to consolidate dependency version numbers in
the dependencyManagement element. You’ll usually see the dependencyManagement ele-
ment in a top-level parent POM for an organization or project. Using the
dependencyManagement element in a pom.xml allows you to reference a dependency in a
child project without having to explicitly list the version. Maven will walk up the parent-
child hierarchy until it finds a project with a dependencyManagement element; it will then
use the version specified in this dependencyManagement element.
For example, if you have a large set of projects that make use of the MySQL Java
connector version 5.1.2, you could define the dependencyManagement element shown in
Example 9-9 in your multimodule project’s top-level POM.
166 | Chapter 9: The Project Object Model

Example 9-9. Defining dependency versions in a top-level POM
<project>
<modelVersion>4.0.0</modelVersion>
<groupId>org.sonatype.mavenbook</groupId>
<artifactId>a-parent</artifactId>
<version>1.0.0</version>
...
<dependencyManagement>
<dependencies>
<dependency>
<groupId>mysql</groupId>
<artifactId>mysql-connector-java</artifactId>
<version>5.1.2</version>
</dependency>
...
<dependencies>
</dependencyManagement>
Then, in a child project, you can add a dependency to the MySQL Java connector using
the following dependency XML:
<project>
<modelVersion>4.0.0</modelVersion>
<parent>
<groupId>org.sonatype.mavenbook</groupId>
<artifactId>a-parent</artifactId>
<version>1.0.0</version>
</parent>
<artifactId>project-a</artifactId>
...
<dependencies>
<dependency>
<groupId>mysql</groupId>
<artifactId>mysql-connector-java</artifactId>
</dependency>
</dependencies>
</project>
You should notice that the child project did not have to explicitly list the version of the
mysql-connector-java dependency. Because this dependency was defined in the top-
level POM’s dependencyManagement element, the version number is going to propagate
to the child project’s dependency on mysql-connector-java. Note that if this child
project did define a version, it would override the version listed in the top-level POM’s
dependencyManagement section. That is, the dependencyManagement version is used only
when the child does not declare a version directly.
Dependency management in a top-level POM is different from just defining a depend-
ency on a widely shared parent POM. For starters, all dependencies are inherited. If
mysql-connector-java were listed as a dependency of the top-level parent project, every
single project in the hierarchy would have a reference to this dependency. Instead of
adding in unnecessary dependencies, using dependencyManagement allows you to con-
solidate and centralize the management of dependency versions without adding de-
Project Dependencies | 167

pendencies that are inherited by all children. In other words, the
dependencyManagement element is equivalent to an environment variable that allows you
to declare a dependency anywhere below a project without specifying a version number.
Project Relationships
One of the compelling reasons to use Maven is that it makes the process of tracking
down dependencies (and dependencies of dependencies) very easy. When a project
depends on an artifact of another project, we can say that this artifact is a dependency.
In the case of a Java project, this can be as simple as a project depending on an external
dependency such as Log4J or JUnit. Although dependencies can model external de-
pendencies, they can also manage the dependencies between a set of related projects;
if project-a depends on project-b, Maven is smart enough to know that project-b
must be built before project-a.
Relationships are not only about dependencies and figuring out what one project needs
to be able to build an artifact. Maven can model the relationship of a project to a parent,
and the relationship of a project to submodules. This section gives an overview of the
various relationships between projects and how such relationships are configured.
More on Coordinates
Coordinates define a unique location for a project. They were first introduced in Chap-
ter 3. Projects are related to one another using Maven coordinates. project-a doesn’t
just depend on project-b; a project with a groupId, artifactId, and version depends
on another project with a groupId, artifactId, and version. To review, a Maven coor-
dinate is made up of three components:
groupId
A groupId groups a set of related artifacts. Group identifiers generally resemble a
Java package name. For example, the groupId org.apache.maven is the base
groupId for all artifacts produced by the Apache Maven project. Group identifiers
are translated into paths in the Maven repository; for example, the
org.apache.maven groupId can be found in /maven2/org/apache/maven on http://
repo1.maven.org/maven2/org/apache/maven.
artifactId
The artifactId is the project’s main identifier. When you generate an artifact, this
artifact is going to be named with the artifactId. When you refer to a project, you
are going to refer to it using the artifactId. The artifactId, groupId combination
must be unique. In other words, you can’t have two separate projects with the same
artifactId and groupId; artifactIds are unique within a particular groupId.
168 | Chapter 9: The Project Object Model

Although dots (.) are commonly used in groupIds, you should try
to avoid using them in artifactIds. They can cause issues when
trying to parse a fully qualified name down into the
subcomponents.
version
When an artifact is released, it is released with a version number. This version
number is a numeric identifier such as “1.0,” “1.1.1,” or “1.1.2-alpha-01.” You can
also use what is known as a snapshot version. A snapshot version is a version for
a component that is under development. Snapshot version numbers always end in
SNAPSHOT; for example, “1.0-SNAPSHOT,” “1.1.1-SNAPSHOT,” and
“1-SNAPSHOT.” The section “Project Versions,” earlier in this chapter, intro-
duced versions and version ranges.
There is a fourth, less-used qualifier:
classifier
You would use a classifier if you were releasing the same code, but needed to pro-
duce two separate artifacts for technical reasons. For example, if you wanted to
build two separate artifacts of a JAR, one compiled with the Java 1.4 compiler and
another compiled with the Java 6 compiler, you might use the classifier to produce
two separate JAR artifacts under the same groupId:artifactId:version combina-
tion. If your project uses native extensions, you might use the classifier to produce
an artifact for each target platform. Classifiers are commonly used to package up
an artifact’s sources, Javadocs, or binary assemblies.
When we talk of dependencies in this book, we often use the following shorthand
notation to describe a dependency: groupId:artifactId:version. To refer to the 2.5
release of the Spring Framework, we would refer to it as org.springframework:spring:
2.5. When you ask Maven to print out a list of dependencies with the Maven Depend-
ency plugin, you will also see that Maven tends to print out log messages with this
shorthand dependency notation.
Multimodule Projects
Multimodule projects are projects that contain a list of modules to build. A multimod-
ule project always has a packaging of pom and rarely produces an artifact. A multimodule
project exists only to group projects together in a build. Figure 9-3 shows a project
hierarchy that includes two parent projects with packaging of pom, and three projects
with packaging of jar.
The directory structure on the file system would also mirror the module relationships.
A set of projects illustrated by Figure 9-3 would have the following directory structure:
top-group/pom.xml
top-group/sub-group/pom.xml
Project Relationships | 169
top-group/sub-group/project-a/pom.xml
top-group/sub-group/project-b/pom.xml
top-group/project-c/pom.xml
The projects are related to one another because top-group and sub-group are referencing
sub-modules in a POM. For example, the org.sonatype.mavenbook:top-group project is
a multimodule project with packaging of type pom. top-group’s pom.xml would include
the modules element shown in Example 9-10.
Example 9-10. top-group modules element
<project>
<groupId>org.sonatype.mavenbook</groupId>
<artifactId>top-group</artifactId>
...
<modules>
<module>sub-group</module>
<module>project-c</module>
</modules>
...
</project>
When Maven is reading the top-group POM, it will look at the modules element and see
that top-group references the projects sub-group and project-c. Maven will then look
for a pom.xml in each of these subdirectories. Maven repeats this process for each of
the submodules: it will read the sub-group/pom.xml and see that the sub-group project
references two projects with the modules element shown in Example 9-11.
Example 9-11. sub-group modules element
<project>
...
com.sonatype.maven
top-group
packaging: pom
com.sonatype.maven
sub-group
packaging: pom
com.sonatype.maven
project-c
packaging: jar
com.sonatype.maven
project-a
packaging: jar
com.sonatype.maven
project-b
packaging: jar
Figure 9-3. Multimodule project relationships
170 | Chapter 9: The Project Object Model

<modules>
<module>project-a</module>
<module>project-b</module>
</modules>
...
</project>
Note that we call the projects under the multimodule projects “modules” and not
“children” or “child projects.” This is purposeful, so as not to confuse projects grouped
by multimodule projects with projects that inherit POM information from each other.
Project Inheritance
There are going to be times when you want a project to inherit values from a parent
POM. You might be building a large system, and you don’t want to have to repeat the
same dependency elements over and over again. You can avoid repeating yourself if
your projects make use of inheritance via the parent element. When a project specifies
a parent, it inherits the information in the parent project’s POM. It can then override
and add to the values specified in this parent POM.
All Maven POMs inherit values from a parent POM. If a POM does not specify a direct
parent using the parent element, that POM will inherit values from the Super POM.
Example 9-12 shows the parent element of project-a, which inherits the POM defined
by the a-parent project.
Example 9-12. Project inheritance
<project>
<parent>
<groupId>com.training.killerapp</groupId>
<artifactId>a-parent</artifactId>
<version>1.0-SNAPSHOT</version>
</parent>
<artifactId>project-a</artifactId>
...
</project>
Running mvn help:effective-pom in project-a would show a POM that is the result of
merging the Super POM with the POM defined by a-parent and the POM defined in
project-a. The implicit and explicit inheritance relationships for project-a are shown
in Figure 9-4.When a project specifies a parent project, Maven uses that parent POM
as a starting point before it reads the current project’s POM. It inherits everything,
including the groupId and version number. You’ll notice that project-a does not specify
either; both groupId and version are inherited from a-parent. With a parent element,
all a POM really needs to define is an artifactId. This isn’t mandatory; project-a could
have a different groupId and version, but by not providing values, Maven will use the
values specified in the parent POM. If you start using Maven to manage and build large
multimodule projects, you will often be creating many projects that share a common
groupId and version.
Project Relationships | 171
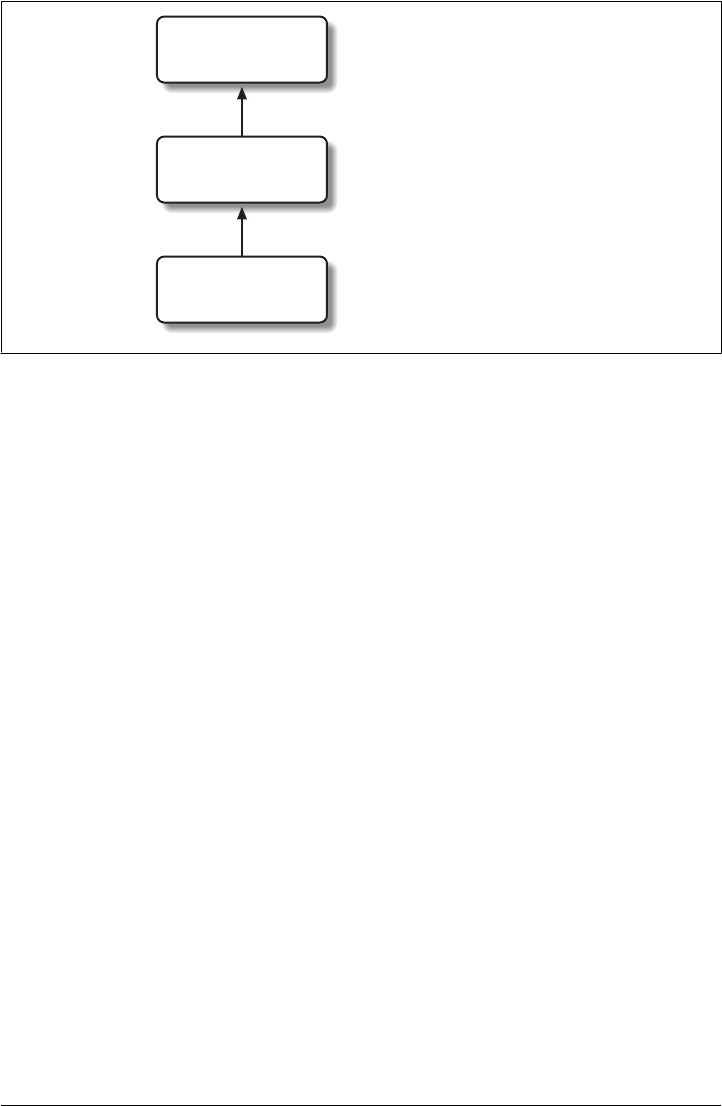
When you inherit a POM, you can choose to live with the inherited POM information
or to selectively override it. The following is a list of items a Maven POM inherits from
its parent POM:
• Identifiers (at least one of groupId or artifactId must be overridden)
• Dependencies
• Developers and contributors
• Plugin lists
• Reports lists
• Plugin executions (executions with matching IDs are merged)
• Plugin configuration
When Maven inherits dependencies, it will add dependencies of child projects to the
dependencies defined in parent projects. You can use this feature of Maven to specify
widely used dependencies across all projects that inherit from a top-level POM. For
example, if your system makes universal use of the Log4J logging framework, you can
list this dependency in your top-level POM. Any projects that inherit POM information
from this project will automatically have Log4J as a dependency. Similarly, if you need
to make sure that every project is using the same version of a Maven plugin, you can
list that version explicitly in a top-level parent POM’s pluginManagement section.
Maven assumes that the parent POM is available from the local repository, or available
in the parent directory (../pom.xml) of the current project. If neither location is valid,
this default behavior may be overridden via the relativePath element. For example,
some organizations prefer a flat project structure where a parent project’s pom.xml isn’t
in the parent directory of a child project. It might be in a sibling directory to the project.
If your child project were in a directory named ./project-a and the parent project were
Super POM
com.sonatype.maven
a-parent
1.0-SNAPSHOT
com.sonatype.maven
project-a
1.0-SNAPSHOT
(implicit) a-parent inherits from the Super POM
(explicit) project-a inherits a-parent
Figure 9-4. Project inheritance for a-parent and project-a
172 | Chapter 9: The Project Object Model

in a directory named ./a-parent, you could specify the relative location of parent-a’s
POM with the following configuration:
<project>
<parent>
<groupId>org.sonatype.mavenbook</groupId>
<artifactId>a-parent</artifactId>
<version>1.0-SNAPSHOT</version>
<relativePath>../a-parent/pom.xml</relativePath>
</parent>
<artifactId>project-a</artifactId>
</project>
POM Best Practices
Maven can be used to manage everything from simple, single-project systems to builds
that involve hundreds of interrelated submodules. Part of the learning process with
Maven isn’t just figuring out the syntax for configuring Maven; it is learning the “Maven
Way”—that is, the current set of best practices for organizing and building projects
using Maven. This section attempts to distill some of this knowledge to help you adopt
best practices from the start without having to wade through years of discussions on
the Maven mailing lists.
Grouping Dependencies
If you have a set of dependencies that are logically grouped together, you can create a
project with pom packaging that groups dependencies together. For example, let’s as-
sume that your application uses Hibernate, a popular Object-Relational Mapping
framework. Every project that uses Hibernate might also have a dependency on the
Spring Framework and a MySQL JDBC driver. Instead of having to include these de-
pendencies in every project that uses Hibernate, Spring, and MySQL, you could create
a special POM that does nothing more than declare a set of common dependencies.
You could create a project called persistence-deps (short for “persistence dependen-
cies”) and have every project that needs to do persistence depend on this convenience
project. See Example 9-13.
Example 9-13. Consolidating dependencies in a single POM project
<project>
<groupId>org.sonatype.mavenbook</groupId>
<artifactId>persistence-deps</artifactId>
<version>1.0</version>
<packaging>pom</packaging>
<dependencies>
<dependency>
<groupId>org.hibernate</groupId>
<artifactId>hibernate</artifactId>
<version>${hibernateVersion}</version>
</dependency>
POM Best Practices | 173

<dependency>
<groupId>org.hibernate</groupId>
<artifactId>hibernate-annotations</artifactId>
<version>${hibernateAnnotationsVersion}</version>
</dependency>
<dependency>
<groupId>org.springframework</groupId>
<artifactId>spring-hibernate3</artifactId>
<version>${springVersion}</version>
</dependency>
<dependency>
<groupId>mysql</groupId>
<artifactId>mysql-connector-java</artifactId>
<version>${mysqlVersion}</version>
</dependency>
</dependencies>
<properties>
<mysqlVersion>(5.1,)</mysqlVersion>
<springVersion>(2.0.6,)</springVersion>
<hibernateVersion>3.2.5.ga</hibernateVersion>
<hibernateAnnotationsVersion>3.3.0.ga</hibernateAnnotationsVersion>
</properties>
</project>
If you create this project in a directory named persistence-deps, all you need to do is
create this pom.xml and run mvn install. Since the packaging type is pom, this POM is
installed in your local repository. You can now add this project as a dependency, and
all of its dependencies will be added to your project. When you declare a dependency
on this persistence-deps project, as shown in Example 9-14, don’t forget to specify the
dependency type as pom.
Example 9-14. Declaring a dependency on a POM
<project>
<description>This is a project requiring JDBC</description>
...
<dependencies>
...
<dependency>
<groupId>org.sonatype.mavenbook</groupId>
<artifactId>persistence-deps</artifactId>
<version>1.0</version>
<type>pom</type>
</dependency>
</dependencies>
</project>
If you later decide to switch to a different JDBC driver (for example, JTDS), just replace
the dependencies in the persistence-deps project to use net.sourceforge.jtds:jtds
instead of mysql:mysql-java-connector and update the version number. All projects
depending on persistence-deps will use JTDS if they decide to update to the newer
version. Consolidating related dependencies is a good way to cut down on the length
174 | Chapter 9: The Project Object Model

of pom.xml files that start having to depend on a large number of dependencies. If you
need to share a large number of dependencies between projects, you could also just
establish parent-child relationships between projects and refactor all common depend-
encies to the parent project, but the disadvantage of the parent-child approach is that
a project can have only one parent. Sometimes it makes more sense to group similar
dependencies together and reference a pom dependency. This way, your project can
reference as many of these consolidated dependency POMs as it needs.
Maven uses the depth of a dependency in the tree when resolving con-
flicts using a nearest-wins approach. Using the dependency grouping
technique pushes those dependencies one level down in the tree. Keep
this in mind when choosing between grouping in a POM or using
dependencyManagement in a parent POM.
Multimodule Versus Inheritance
There is a difference between inheriting from a parent project and being managed by
a multimodule project. A parent project is one that passes its values to its children. A
multimodule project simply manages a group of other subprojects or modules. The
multimodule relationship is defined from the topmost level downwards. When setting
up a multimodule project, you are simply telling a project that its build should include
the specified modules. Multimodule builds are to be used to group modules together
in a single build. The parent-child relationship is defined from the leaf node upward.
The parent-child relationship deals more with the definition of a particular project.
When you associate a child with its parent, you are telling Maven that a project’s
POM is derived from another.
To illustrate the decision process that goes into choosing a design that uses inheritance
versus multimodule, or both approaches, consider the following two examples: the
Maven project used to generate this book, and a hypothetical project that contains a
number of logically grouped modules.
Simple project
First, let’s take a look at the Maven book project. The inheritance and multimodule
relationships are shown in Figure 9-5.
When we built this Maven book you are reading, we ran mvn package in a multimodule
project named maven-book. This multimodule project includes two submodules: book-
examples and book-chapters. Neither of these projects share the same parent; they are
related only in that they are modules in the maven-book project. book-examples builds
the ZIP and TGZ archives you downloaded to get this book’s example. When we ran
the book-examples build from book-examples/ directory with mvn package, it had no
knowledge that it was a part of the larger maven-book project. book-examples doesn’t
really care about maven-book; all it knows in life is that its parent is the topmost sonatype
POM Best Practices | 175
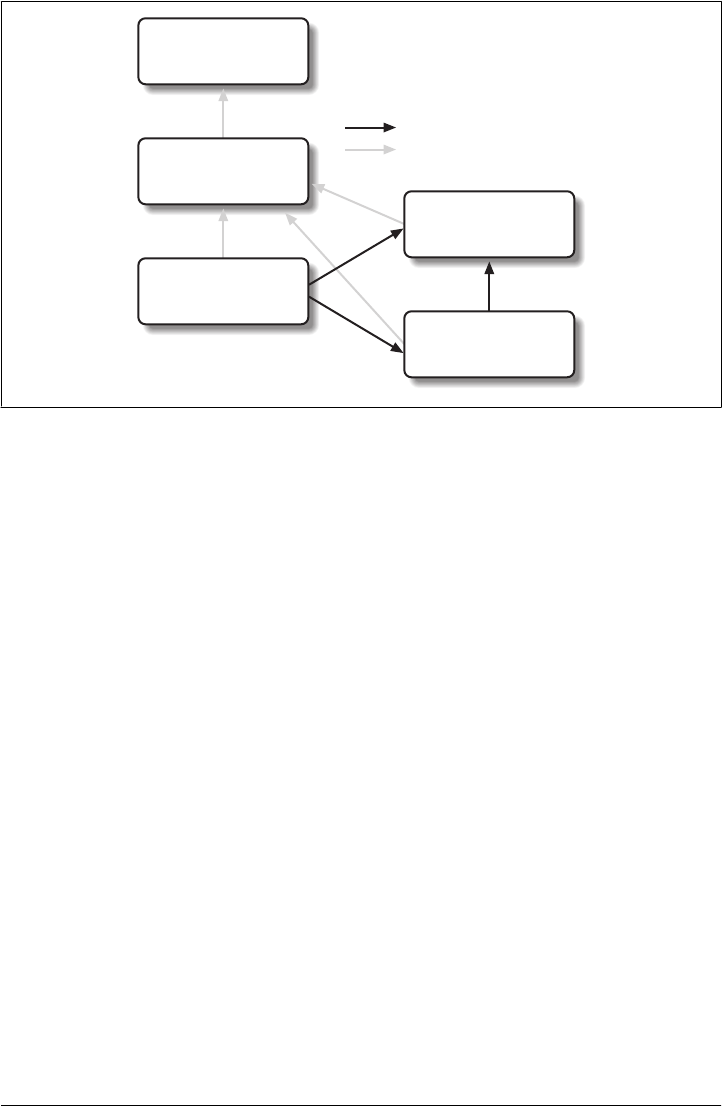
POM and that it creates an archive of examples. In this case, the maven-book project
exists only as a convenience and as an aggregator of modules.
The book projects do all define a parent. Each of the three projects—maven-book, book-
examples, and book-chapters—all list a shared “corporate” parent: sonatype. This is a
common practice in organizations that have adopted Maven. Instead of having every
project extend the Super POM by default, some organizations define a top-level cor-
porate POM that serves as the default parent when a project doesn’t have any good
reason to depend on another. In this book example, there is no compelling reason to
have book-examples and book-chapters share the same parent POM; they are entirely
different projects that have a different set of dependencies, have a different build con-
figuration, and use drastically different plugins to create the content you are now read-
ing. The sonatype POM gives the organization a chance to customize the default
behavior of Maven and supply some organization-specific information to configure
deployment settings and build profiles.
Multimodule enterprise project
Let’s take a look at an example that provides a more accurate picture of a real-world
project where inheritance and multimodule relationships exist side by side. Fig-
ure 9-6 shows a collection of projects that resemble a typical set of projects in an en-
terprise application. There is a top-level POM for the corporation with an artifactId
of sonatype. There is also a multimodule project named big-system that references
submodules server-side and client-side.
What’s going on in this figure? Let’s try to deconstruct the confusing set of arrows.
First, take a look at big-system. The big-system might be the project on which you
Super POM
com.sonatype
sonatype
3
com.sonatype.maven
maven-book
1.0-SNAPSHOT
com.sonatype.maven
book-examples
1.0-SNAPSHOT
com.sonatype.maven
book-chapters
1.0-SNAPSHOT
= Submodule Relationship
= Parent/Child Relationship
Figure 9-5. maven-book multimodule versus inheritance
176 | Chapter 9: The Project Object Model
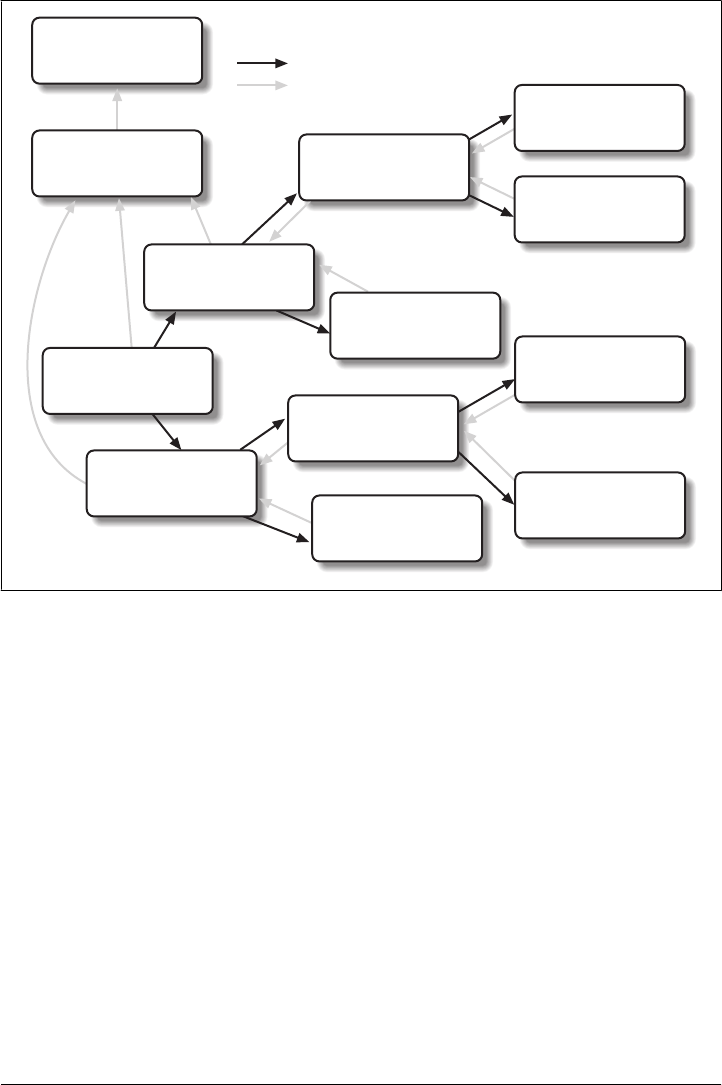
would run mvn package to build and test the entire system. big-system references sub-
modules client-side and server-side. Each of these projects effectively rolls up all of
the code that runs on either the server or on the client. Let’s focus on the server-side
project. Under the server-side project, we have a project called server-lib and a
multimodule project named web-apps. Under web-apps, we have two Java web appli-
cations: client-web and admin-web.
Let’s start with the parent-child relationships from client-web and admin-web to web-
apps. Since both of the web applications are implemented in the same web application
framework (let’s say Wicket), both projects would share the same set of core depend-
encies. The dependencies on the Servlet API, the JSP API, and Wicket would all be
captured in the web-apps project. Both client-web and admin-web also need to depend
on server-lib. This dependency would be defined as a dependency between
web-apps and server-lib. Because client-web and admin-web share so much configura-
tion by inheriting from web-apps, both client-web and admin-web will have very small
POMs containing little more than identifiers, a parent declaration, and a final build
name.
Super POM = Submodule Relationship
= Parent/Child Relationship
com.sonatype.maven
server-side
1.0-SNAPSHOT
com.sonatype.maven
sonatype
1.0-SNAPSHOT
com.sonatype.maven
big-system
1.0-SNAPSHOT
com.sonatype.maven
client-side
1.0-SNAPSHOT
com.sonatype.maven
server-lib
1.0-SNAPSHOT
com.sonatype.maven
swing-app
1.0-SNAPSHOT
com.sonatype.maven
client-lib
1.0-SNAPSHOT
com.sonatype.maven
streaming-client
1.0-SNAPSHOT
com.sonatype.maven
trading-client
1.0-SNAPSHOT
com.sonatype.maven
web-apps
1.0-SNAPSHOT
com.sonatype.maven
client-web
1.0-SNAPSHOT
com.sonatype.maven
admin-web
1.0-SNAPSHOT
Figure 9-6. Enterprise multimodule versus inheritance
POM Best Practices | 177

Next, we focus on the parent-child relationship from web-apps and server-lib to
server-side. In this case, let’s just assume that there is a separate working group of
developers who work on the server-side code and another group of developers who
work on the client-side code. The list of developers would be configured in the server-
side POM and inherited by all of the child projects underneath it: web-apps, server-
lib, client-web, and admin-web. We could also imagine that the server-side project
might have different build and deployment settings that are unique to the development
for the server side. The server-side project might define a build profile that only makes
sense for all of the server-side projects. This build profile might contain the database
host and credentials, or the server-side project’s POM might configure a specific ver-
sion of the Maven Jetty plugin, which should be universal across all projects that inherit
the server-side POM.
In this example, the main reason to use parent-child relationships is shared depend-
encies and common configuration for a group of projects that are logically related. All
of the projects below big-system are related to one another as submodules, but not all
submodules are configured to point back to a parent project that is included as a sub-
module. Everything is a submodule for reasons of convenience: to build the entire
system, just go to the big-system project directory and run mvn package. Look more
closely at the figure and you’ll see that there is no parent-child relationship between
server-side and big-system. Why is this? POM inheritance is very powerful, but it can
be overused. When it makes sense to share dependencies and build configurations, a
parent-child relationship should be used. When it doesn’t make sense is when there
are distinct differences between two projects. Take, for example, the server-side and
client-side projects. It is possible to create a system where client-side and server-
side inherited a common POM from big-system, but as soon as a significant divergence
between the two child projects develops, you have to figure out creative ways to factor
out common build configuration to big-system without affecting all of the children.
Even though client-side and server-side might both depend on Log4J, they also
might have distinct plugin configurations.
You may reach a certain point, defined more by style and experience, where you decide
that minimal duplication of configuration is a small price to pay for allowing projects
such as client-side and server-side to remain completely independent. Designing a
huge set of 30-plus projects that all inherit five levels of POM configuration isn’t always
the best idea. In such a setup, you might not have to duplicate your Log4J dependency
more than once, but you’ll also end up having to wade through five levels of POM just
to figure out how Maven calculated your effective POM—all of this complexity to avoid
duplicating five lines of dependency declaration. In Maven, there is a “Maven Way,”
but there are also many ways to accomplish the same thing. It all boils down to
preference and style. For the most part, you won’t go wrong if all of your submodules
turn out to define back-references to the same project as a parent, but your use of Maven
may evolve over time.
178 | Chapter 9: The Project Object Model
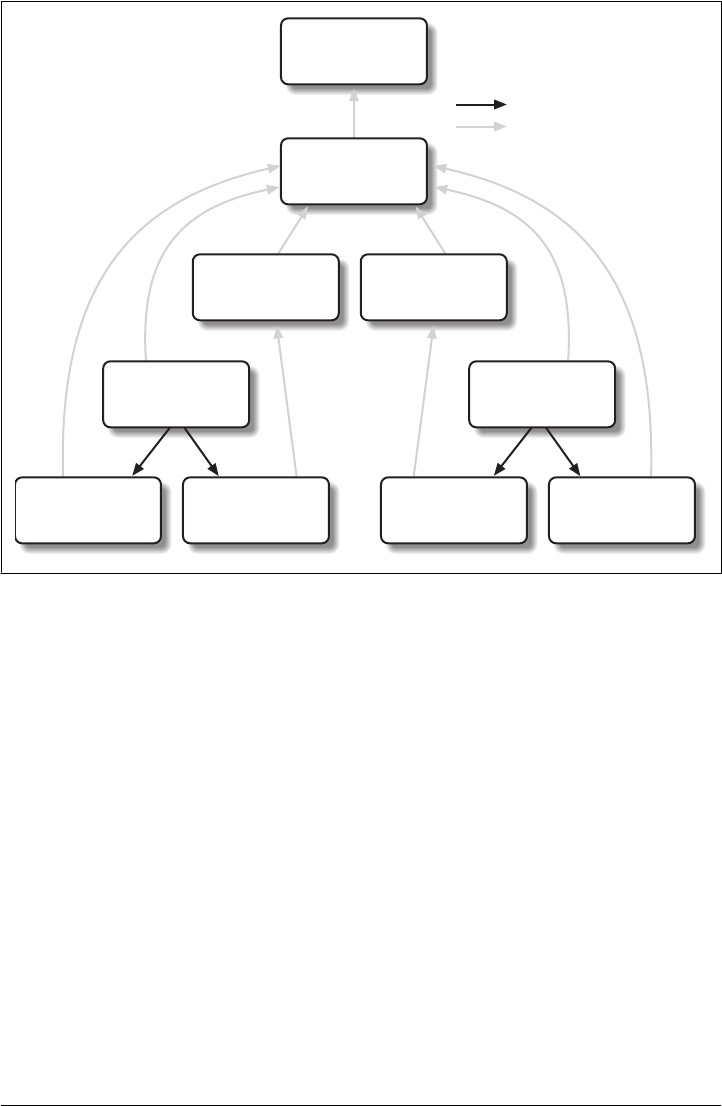
Prototype parent projects
Take the example shown in Figure 9-7 as another hypothetical and creative way to use
inheritance and multimodule builds to reuse dependencies.This figure represents yet
another way to think about inheritance and multimodule projects. In this example, you
have two distinct systems: system-a and system-b. Each define independent applica-
tions. system-a defines two modules, a-lib and a-swing. system-a and a-lib both define
the top-level sonatype POM as a parent project, but the a-swing project defines swing-
proto as a parent project. In this system, swing-proto supplies a foundational POM for
Swing applications, and the struts-proto project provides a foundational POM for
Struts 2 web applications. While the sonatype POM provides high-level information
such as the groupId, organization information, and build profiles, struts-proto defines
all of the dependencies that you need to create a Struts application. This approach
would work well if your development is characterized by many independent applica-
tions that each have to follow the same set of rules. If you are creating a lot of Struts
applications but they are not really related to one another, you might just define
everything you need in struts-proto. The downside to this approach is that you won’t
= Submodule Relationship
= Parent/Child Relationship
Super POM
com.sonatype
sonatype
1.0-SNAPSHOT
com.sonatype
swing-proto
1.0-SNAPSHOT
com.sonatype
struts-proto
1.0-SNAPSHOT
com.sonatype
system-a
1.0-SNAPSHOT
com.sonatype
a-lib
1.0-SNAPSHOT
com.sonatype
a-swing
1.0-SNAPSHOT
com.sonatype
system-b
1.0-SNAPSHOT
com.sonatype
b-struts
1.0-SNAPSHOT
com.sonatype
b-lib
1.0-SNAPSHOT
Figure 9-7. Using parent projects as “prototypes” for specialized projects
POM Best Practices | 179

be able to use parent-child relationships within the system-a and system-b project
hierarchies to share information like developers and other build configurations. A
project can have only one parent.
The other downside of this approach is that as soon as you have one project that “breaks
the mold,” you’ll either have to override the prototype parent POM or find a way to
factor customizations into the shared parent, without those customizations affecting
all the children. In general, using POMs as prototypes for specialized project “types”
isn’t a recommended practice.
180 | Chapter 9: The Project Object Model

CHAPTER 10
The Build Lifecycle
Introduction
Maven models projects as nouns that are described by a POM. The POM captures the
identity of a project: What does a project contain? What type of packaging does a
project need? Does the project have a parent? What are the dependencies? We’ve ex-
plored the idea of describing a project in the previous chapters, but we haven’t intro-
duced the mechanism that allows Maven to act upon these objects. In Maven, the
“verbs” are goals packaged in Maven plugins that are tied to phases in a build lifecycle.
A Maven lifecycle consists of a sequence of named phases: prepare-resources, compile,
package, and install, among others. There is a phase that captures compilation and a
phase that captures packaging. There are pre- and postphases that can be used to reg-
ister goals that must run prior to compilation, or tasks that must be run after a particular
phase. When you tell Maven to build a project, you are telling Maven to step through
a defined sequence of phases and to execute any goals that may have been registered
with each phase.
A build lifecycle is an organized sequence of phases that exist to give order to a set of
goals. Those goals are chosen and bound by the packaging type of the project being
acted upon. There are three standard lifecycles in Maven: clean, default (sometimes
called build), and site. In this chapter, you will learn how Maven ties goals to lifecycle
phases and how the lifecycle can be customized. You will also learn about the default
lifecycle phases.
Clean Lifecycle (clean)
The first lifecycle you’ll be interested in is the simplest lifecycle in Maven. Running
mvn clean invokes the clean lifecycle that consists of three lifecycle phases:
•pre-clean
•clean
•post-clean
181

The interesting phase in the clean lifecycle is the clean phase. The Clean plugin’s
clean goal (clean:clean) is bound to the clean phase in the clean lifecycle. The
clean:clean goal deletes the output of a build by deleting the build directory. If you
haven’t customized the location of the build directory, it will be the ${basedir}/target
directory as defined by the Super POM. When you execute the clean:clean goal, you
do not do so by executing the goal directly with mvn clean:clean; you do so by executing
the clean phase of the clean lifecycle. Executing the clean phase gives Maven an op-
portunity to execute any other goals that may be bound to the pre-clean phase.
For example, suppose you wanted to trigger an antrun:run goal task to echo a notifi-
cation on pre-clean, or to make an archive of a project’s build directory before it is
deleted. Simply running the clean:clean goal will not execute the lifecycle at all, but
specifying the clean phase will use the clean lifecycle and advance through the three
lifecycle phases until it reaches the clean phase. Example 10-1 shows a build configu-
ration that binds the antrun:run goal to the pre-clean phase to echo an alert that the
project artifact is about to be deleted. In this example, the antrun:run goal is being used
to execute some arbitrary Ant commands to check for an existing project artifact. If the
project’s artifact is about to be deleted, it will print this to the screen.
Example 10-1. Triggering a goal on pre-clean
<project>
...
<build>
<plugins>... <plugin>
<artifactId>maven-antrun-plugin</artifactId>
<executions>
<execution>
<id>file-exists</id>
<phase>pre-clean</phase>
<goals>
<goal>run</goal>
</goals>
<configuration>
<tasks>
<!-- adds the ant-contrib tasks (if/then/else used below) -->
<taskdef resource="net/sf/antcontrib/antcontrib.properties" />
<available file="${project.build.directory}/${project.build.finalName}.jar"
property="file.exists" value="true" />
<if>
<not>
<isset property="file.exists" />
</not>
<then>
<echo>No
${project.build.finalName}.${project.packaging} to
delete</echo>
</then>
<else>
<echo>Deleting
182 | Chapter 10: The Build Lifecycle

${project.build.finalName}.${project.packaging}</echo>
</else>
</if>
</tasks>
</configuration>
</execution>
</executions>
<dependencies>
<dependency>
<groupId>ant-contrib</groupId>
<artifactId>ant-contrib</artifactId>
<version>1.0b2</version>
</dependency>
</dependencies>
</plugin>
</plugins>
</build>
</project>
Running mvn clean on a project with this build configuration will produce output sim-
ilar to the following:
[INFO] Scanning for projects...
[INFO] ----------------------------------------------------------------------------
[INFO] Building Your Project
[INFO] task-segment: [clean]
[INFO] ----------------------------------------------------------------------------
[INFO] [antrun:run {execution: file-exists}]
[INFO] Executing tasks
[echo] Deleting your-project-1.0-SNAPSHOT.jar
[INFO] Executed tasks
[INFO] [clean:clean]
[INFO] Deleting directory ~/corp/your-project/target
[INFO] Deleting directory ~/corp/your-project/target/classes
[INFO] Deleting directory ~/corp/your-project/target/test-classes
[INFO] ------------------------------------------------------------------------
[INFO] BUILD SUCCESSFUL
[INFO] ------------------------------------------------------------------------
[INFO] Total time: 1 second
[INFO] Finished at: Wed Nov 08 11:46:26 CST 2006
[INFO] Final Memory: 2M/5M
[INFO] ------------------------------------------------------------------------
In addition to configuring Maven to run a goal during the pre-clean phase, you can
also customize the Clean plugin to delete files to the build output directory. You can
configure the plugin to remove specific files in a fileSet. Example 10-2 configures
clean to remove all .class files in a directory named target-other/ using standard Ant file
wildcards: * and **.
Example 10-2. Customizing the behavior of the Clean plugin
<project>
<modelVersion>4.0.0</modelVersion>
...
<build>
Introduction | 183

<plugins>
<plugin>
<artifactId>maven-clean-plugin</artifactId>
<configuration>
<filesets>
<fileset>
<directory>target-other</directory>
<includes>
<include>*.class</include>
</includes>
</fileset>
</filesets>
</configuration>
</plugin>
</plugins>
</build>
</project>
Default Lifecycle (default)
Most Maven users will be familiar with the default lifecycle. It is a general model of a
build process for a software application. The first phase is validate, and the last phase
is deploy. The phases in the default Maven lifecycle are shown in Table 10-1.
Table 10-1. Maven lifecycle phases
Lifecycle phase Description
validate Validate that the project is correct and all necessary information is available to complete
a build.
generate-sources Generate any source code for inclusion in compilation.
process-sources Process the source code; for example, to filter any values.
generate-resources Generate resources for inclusion in the package.
process-resources Copy and process the resources into the destination directory, ready for packaging.
compile Compile the source code of the project.
process-classes Post-process the generated files from compilation; for example, to do bytecode enhance-
ment on Java classes.
generate-test-sources Generate any test source code for inclusion in compilation.
process-test-sources Process the test source code; for example, to filter any values.
generate-test-resources Create resources for testing.
process-test-resources Copy and process the resources into the test destination directory.
test-compile Compile the test source code into the test destination directory.
test Run tests using a suitable unit testing framework. These tests should not require the code
be packaged or deployed.
prepare-package Perform any operations necessary to prepare a package before the actual packaging. This
often results in an unpacked, processed version of the package (coming in Maven 2.1+).
184 | Chapter 10: The Build Lifecycle

Lifecycle phase Description
package Take the compiled code and package it in its distributable format, such as a JAR, WAR, or
EAR.
pre-integration-test Perform actions required before integration tests are executed. This may involve things
such as setting up the required environment.
integration-test Process and deploy the package if necessary into an environment where integration tests
can be run.
post-integration-test Perform actions required after integration tests have been executed. This may include
cleaning up the environment.
verify Run any checks to verify the package is valid and meets quality criteria.
install Install the package into the local repository, for use as a dependency in other projects locally.
deploy Copies the final package to the remote repository for sharing with other developers and
projects (usually relevant only during a formal release).
Site Lifecycle (site)
Maven does more than build software artifacts from project; it can also generate project
documentation and reports about the project, or about a collection of projects. Project
documentation and site generation have a dedicated lifecycle that contains four phases:
1. pre-site
2. site
3. post-site
4. site-deploy
The default goals bound to the site lifecycle are:
•site (site:site)
•site-deploy (site:deploy)
The packaging type does not usually alter this lifecycle, since packaging types are con-
cerned primarily with artifact creation, not with the type of site generated. The Site
plugin kicks off the execution of Doxia (http://maven.apache.org/doxia/) document
generation and other report generation plugins. You can generate a site from a Maven
project by running the following command:
$ mvn site
For more information about Maven site generation, see Chapter 15.
Package-Specific Lifecycles
The specific goals bound to each phase default to a set of goals specific to a project’s
packaging. A project with jar packaging has a different set of default goals from a
Package-Specific Lifecycles | 185

project with a packaging of war. The packaging element affects the steps required to
build a project. For an example of how the packaging affects the build, consider two
projects: one with pom packaging and the other with jar packaging. The project with
pom packaging will run the site:attach-descriptor goal during the package phase, and
the project with jar packaging will run the jar:jar goal instead.
The following sections describe the lifecycle for all built-in packaging types in Maven.
Use these sections to find out which default goals are mapped to default lifecycle phases.
JAR
JAR is the default packaging type—the most common and thus the most commonly
encountered lifecycle configuration. The default goals for the JAR lifecycle are shown
in Table 10-2.
Table 10-2. Default goals for JAR packaging
Lifecycle phase Goal
process-resources resources:resources
compile compiler:compile
process-test-resources resources:testResources
test-compile compiler:testCompile
test surefire:test
package jar:jar
install install:install
deploy deploy:deploy
POM
POM is the simplest packaging type. The artifact that it generates is itself only, rather
than a JAR, SAR, or EAR. There is no code to test or compile, and there are no resources
to process. The default goals for projects with POM packaging are shown in Table 10-3.
Table 10-3. Default goals for POM packaging
Lifecycle phase Goal
package site:attach-descriptor
install install:install
deploy deploy:deploy
Maven Plugin
This packaging type is similar to the jar packaging type with three additions:
plugin:descriptor, plugin:addPluginArtifactMetadata, and plugin:updateRegistry.
186 | Chapter 10: The Build Lifecycle

These goals generate a descriptor file and perform some modifications to the repository
data. The default goals for projects with plugin packaging are shown in Table 10-4.
Table 10-4. Default goals for plugin packaging
Lifecycle phase Goal
generate-resources plugin:descriptor
process-resources resources:resources
compile compiler:compile
process-test-resources resources:testResources
test-compile compiler:testCompile
test surefire:test
package jar:jar, plugin:addPluginArtifactMetadata
install install:install, plugin:updateRegistry
deploy deploy:deploy
EJB
EJBs, or Enterprise JavaBeans, are a common data access mechanism for model-driven
development in Enterprise Java. Maven provides support for EJB 2 and 3. You must
configure the EJB plugin to specifically package for EJB 3; otherwise, the plugin defaults
to 2.1 and looks for the presence of certain EJB configuration files. The default goals
for projects with EJB packaging are shown in Table 10-5.
Table 10-5. Default goals for EJB packaging
Lifecycle phase Goal
process-resources resources:resources
compile compiler:compile
process-test-resources resources:testResources
test-compile compiler:testCompile
test surefire:test
package ejb:ejb
install install:install
deploy deploy:deploy
WAR
The WAR packaging type is similar to the JAR and EJB types. The exception being the
package goal of war:war. Note that the war:war plugin requires a web.xml configuration
in your src/main/webapp/WEB-INF directory. The default goals for projects with
WAR packaging are shown in Table 10-6.
Package-Specific Lifecycles | 187

Table 10-6. Default goals for WAR packaging
Lifecycle phase Goal
process-resources resources:resources
compile compiler:compile
process-test-resources resources:testResources
test-compile compiler:testCompile
test surefire:test
package war:war
install install:install
deploy deploy:deploy
EAR
EARs are probably the simplest Java Enterprise Edition (EE) constructs, consisting
primarily of the deployment descriptor application.xml file, some resources, and some
modules. The EAR plugin has a goal named generate-application-xml that generates
the application.xml based on the configuration in the EAR project’s POM. The default
goals for projects with EAR packaging are shown in Table 10-7.
Table 10-7. Default goals for EAR packaging
Lifecycle phase Goal
generate-resources ear:generate-application-xml
process-resources resources:resources
package ear:ear
install install:install
deploy deploy:deploy
Other Packaging Types
This is not an exhaustive list of every packaging type available for Maven. There are a
number of packaging formats available through external projects and plugins: the
NAR (native archive) packaging type, the SWF and SWC packaging types for projects
that produce Adobe Flash and Flex content, and many others. You can also define a
custom packaging type and customize the default lifecycle goals to suit your own
project packaging requirements.
To use one of these custom packaging types, you need two things: a plugin that defines
the lifecycle for a custom packaging type and a repository that contains this plugin.
Some custom packaging types are defined in plugins available from the central Maven
repository. Example 10-3 shows an example of a project that references the Israfil Flex
188 | Chapter 10: The Build Lifecycle

plugin and uses a custom packaging type of SWF to produce output from Adobe Flex
source.
Example 10-3. Custom packaging type for Adobe Flex (SWF)
<project>
...
<packaging>swf</packaging>
...
<build>
<plugins>
<plugin>
<groupId>net.israfil.mojo</groupId>
<artifactId>maven-flex2-plugin</artifactId>
<version>1.4-SNAPSHOT</version>
<extensions>true</extensions>
<configuration>
<debug>true</debug>
<flexHome>${flex.home}</flexHome>
<useNetwork>true</useNetwork>
<main>org/sonatype/mavenbook/Main.mxml</main>
</configuration>
</plugin>
</plugins>
</build>
...
</project>
We will show you how to create your own packaging type later in this chapter, but this
example should give you an idea of what you’ll need to do to reference a custom pack-
aging type. All you need to do is reference the plugin that supplies the custom packaging
type. The Israfil Flex plugin is a third-party Maven plugin hosted at Google Code. For
more information about this plugin and to learn how to use Maven to compile Adobe
Flex, go to http://code.google.com/p/israfil-mojo. This plugin supplies the lifecycle
shown in Table 10-8 for the SWF packaging type.
Table 10-8. Default lifecycle for SWF packaging
Lifecycle phase Goal
compile flex2:compile-swc
install install
deploy deploy
Common Lifecycle Goals
Many of the packaging lifecycles have similar goals. If you look at the goals bound to
the WAR and JAR lifecycles, you’ll see that they differ only in the package phase. The
package phase of the WAR lifecycle calls war:war and the package phase of the JAR
lifecycle calls jar:jar. Most of the lifecycles you will come into contact with share some
Common Lifecycle Goals | 189

common lifecycle goals for managing resources, running tests, and compiling source
code. In this section, we’ll explore some of these common lifecycle goals in detail.
Process Resources
Most lifecycles bind the resources:resources goal to the process-resources phase. The
process-resources phase “processes” resources and copies them to the output direc-
tory. If you haven’t customized the default directory locations defined in the Super
POM, this means that Maven will copy the files from ${basedir}/src/main/resources to
${basedir}/target/classes or the directory defined in ${project.build.outputDirectory}. In
addition to copying the resources to the output directory, Maven can also apply a filter
to the resources that allows you to replace tokens within resource file. Just as variables
are referenced in a POM using ${...} notation, you can reference variables in your
project’s resources using the same syntax. Coupled with build profiles, such a facility
can be used to produce build artifacts that target different deployment platforms. This
is something that is common in environments that need to produce output for devel-
opment, testing, staging, and production platforms from the same project. For more
information about build profiles, see Chapter 11.
To illustrate resource filtering, assume that you have a project with an XML file in src/
main/resources/META-INF/service.xml. You want to externalize some configuration
variables to a properties file. In other words, you might want to reference a JDBC
URL, username, and password for your database, and you don’t want to put these
values directly into the service.xml file. Instead, you would like to use a properties file
to capture all of the configuration points for your program. Doing this will allow you
to consolidate all configuration into a single properties file and make it easier to change
configuration values when you need to target a new deployment environment. First,
take a look at the contents of service.xml in src/main/resources/META-INF, shown in
Example 10-4.
Example 10-4. Using properties in project resources
<service>
<!-- This URL was set by project version ${project.version} -->
<url>${jdbc.url}</url>
<user>${jdbc.username}</user>
<password>${jdbc.password}</password>
</service>
This XML file uses the same property reference syntax you can use in the POM. In fact,
the first variable referenced is the project variable that is also an implicit variable made
available in the POM. The project variable provides access to POM information. The
next three variable references are jdbc.url, jdbc.username, and jdbc.password. These
custom variables are defined in a properties file, src/main/filters/default.properties,
shown in Example 10-5.
190 | Chapter 10: The Build Lifecycle

Example 10-5. default.properties in src/main/filters
jdbc.url=jdbc:hsqldb:mem:mydb
jdbc.username=sa
jdbc.password=
To configure resource filtering with this default.properties file, we need to specify two
things in a project’s POM: a list of properties files in the filters element of the build
configuration, and a flag telling Maven that the resources directory is to be filtered. The
default Maven behavior is to skip filtering and just copy the resources to the output
directory; you’ll need to explicitly configure the resource filter, or Maven will skip the
step altogether. This default ensures that Maven’s resource-filtering feature doesn’t
surprise you out of nowhere, clobbering any ${...} references you didn’t want it to
replace. See Example 10-6.
Example 10-6. Filter resources (replacing properties)
<build>
<filters>
<filter>src/main/filters/default.properties</filter>
</filters>
<resources>
<resource>
<directory>src/main/resources</directory>
<filtering>true</filtering>
</resource>
</resources>
</build>
As with all directories in Maven, the resources directory does not need to be in src/
main/resources. This is just the default value defined in the Super POM. You should
also note that you don’t need to consolidate all of your resources into a single directory.
You can always separate resources into separate directories under src/main. Assume
that you have a project that contains hundreds of XML documents and hundreds of
images. Instead of mixing the resources in the src/main/resources directory, you might
want to create two directories—src/main/xml and src/main/images—to hold this con-
tent. To add directories to the list of resource directories, you would add the
resource elements shown in Example 10-7 to your build configuration.
Example 10-7. Configuring additional resource directories
<build>
...
<resources>
<resource>
<directory>src/main/resources</directory>
</resource>
<resource>
<directory>src/main/xml</directory>
</resource>
<resource>
<directory>src/main/images</directory>
Common Lifecycle Goals | 191

</resource>
</resources>
...
</build>
When you are building a project that produces a console application or a command-
line tool, you’ll often find yourself writing simple shell scripts that need to reference
the JAR produced by a build. When you are using the assembly plugin to produce a
distribution for an application as a ZIP or TAR, you might place all of your scripts in
a directory such as src/main/command. In the POM resource configuration shown in
Example 10-8, you’ll see how we can use resource filtering and a reference to the project
variable to capture the final output name of the JAR. For more information about the
Maven Assembly plugin, see Chapter 12.
Example 10-8. Filtering script resources
<build>
<groupId>org.sonatype.mavenbook</groupId>
<artifactId>simple-cmd</artifactId>
<version>2.3.1</version>
...
<resources>
<resource>
<filtering>true</filtering>
<directory>${basedir}/src/main/command</directory>
<includes>
<include>run.bat</include>
<include>run.sh</include>
</includes>
<targetPath>${basedir}</targetPath>
</resource>
<resource>
<directory>${basedir}/src/main/resources</directory>
</resource>
</resources>
...
</build>
If you run mvn process-resources in this project, you will end up with two files, run.sh
and run.bat, in ${basedir}. We’ve singled out these two files in a resource element,
configuring filtering, and set the targetPath to be ${basedir}. In a second resource
element, we’ve configured the default resources path to be copied to the default output
directory without any filtering. Example 10-8 shows you how to declare two resource
directories and supply them with different filtering and target directory preferences.
The project from Example 10-8 would contain a run.bat file in src/main/command with
the following content:
@echo off
java -jar ${project.build.finalName}.jar %*
192 | Chapter 10: The Build Lifecycle

After running mvn process-resources, a file named run.bat would appear in
${basedir} with the following content:
@echo off
java -jar simple-cmd-2.3.1.jar %*
The ability to customize filtering for specific subsets of resources is another reason why
complex projects with many different kinds of resources often find it advantageous to
separate resources into multiple directories. The alternative to storing different kinds
of resources with different filtering requirements in different directories is to use a more
complex set of include and exclude patterns to match all resource files that match a
certain pattern.
Compile
Most lifecycles bind the Compiler plugin’s compile goal to the compile phase. This phase
calls out to compile:compile, which is configured to compile all of the source code and
copy the bytecode to the build output directory. If you haven’t customized the values
defined in the Super POM, compile:compile is going to compile everything from src/
main/java to target/classes. The Compiler plugin calls out to javac and uses default
source and target settings of 1.3 and 1.1. In other words, the Compiler plugin assumes
that your Java source conforms to Java 1.3 and that you are targeting a Java 1.1 JVM.
If you would like to change these settings, you’ll need to supply the target and source
configuration to the Compiler plugin in your project’s POM, as shown in Example 10-9.
Example 10-9. Setting the source and target versions for the Compiler plugin
<project>
...
<build>
...
<plugins>
<plugin>
<artifactId>maven-compiler-plugin</artifactId>
<configuration>
<source>1.5</source>
<target>1.5</target>
</configuration>
</plugin>
</plugins>
...
</build>
...
</project>
Notice we are configuring the Compiler plugin, and not the specific compile:compile
goal. If we were going to configure the source and target for just the compile:compile
goal, we would place the configuration element below an execution element for the
compile:compile goal. We’ve configured the target and source for the plugin because
compile:compile isn’t the only goal we’re interested in configuring. The Compiler
Common Lifecycle Goals | 193

plugin is reused when Maven compiles tests using the compile:testCompile goal, and
configuring target and source at the plugin level allows us to define it once for all goals
in a plugin.
If you need to customize the location of the source code, you can do so by changing
the build configuration. If you wanted to store your project’s source code in src/java
instead of src/main/java, and if you wanted build output to go to classes instead of
target/classes, you could always override the default sourceDirectory defined by the
Super POM, as shown in Example 10-10.
Example 10-10. Overriding the default source directory
<build>
...
<sourceDirectory>src/java</sourceDirectory>
<outputDirectory>classes</outputDirectory>
...
</build>
Although you may think it’s necessary to bend Maven to your own ideas
of project directory structure, we can’t emphasize enough that you
should sacrifice these ideas in favor of the Maven defaults. This isn’t
because we’re trying to brainwash you into accepting the Maven Way;
it’s because your project will be easier for people to understand if it
adheres to the most basic conventions. So forget about designing your
own project directory structure. Don’t do it.
Process Test Resources
The process-test-resources phase is almost indistinguishable from the process-
resources phase. There are some trivial differences in the POM, but most everything
else is the same. You can filter test resources just as you filter regular resources. The
default location for test resources is defined in the Super POM as src/test/resources, and
the default output directory for test resources is target/test-classes defined in
${project.build.testOutputDirectory}.
Test Compile
The test-compile phase is almost identical to the compile phase. The only difference
is that test-compile is going to invoke compile:testCompile to compile source from
the test source directory to the test build output directory. If you haven’t customized
the default directories from the Super POM, compile:testCompile is going to compile
the source in src/test/java to the target/test-classes directory.
As with the source code directory, if you want to customize the location of the test
source code and the output of test compilation, you can do so by overriding the
testSourceDirectory and the testOutputDirectory. If you wanted to store test source
in src-test/ instead of src/test/java, and you wanted to save test bytecode to
194 | Chapter 10: The Build Lifecycle

classes-test/ instead of target/test-classes, you would use the configuration shown in
Example 10-11.
Example 10-11. Overriding the location of test source and output
<build>
...
<testSourceDirectory>src-test</testSourceDirectory>
<testOutputDirectory>classes-test</testOutputDirectory>
...
</build>
Test
Most lifecycles bind the test goal of the Surefire plugin to the test phase. The Surefire
plugin is Maven’s unit testing plugin. The default behavior of Surefire is to look for all
classes ending in *Test in the test source directory and to run them as JUnit (http://www
.junit.org) tests. The Surefire plugin can also be configured to run TestNG (http://www
.testng.org) unit tests.
After running mvn test, you should also notice that the Surefire plugin produces a
number of reports in target/surefire-reports. This report’s directory will have two files
for each test executed by the Surefire plugin: an XML document containing execution
information for the test, and a text file containing the output of the unit test. If there is
a problem during the test phase and a unit test has failed, you can use the output of
Maven and the contents of this directory to track down the cause of a test failure. This
surefire-reports/ directory is also used during site generation to create an easy-to-read
summary of all the unit tests in a project.
If you are working on a project that has some failing unit tests, but you want the project
to produce output, you’ll need to configure the Surefire plugin to continue a build even
if it encounters a failure. The default behavior is to stop a build whenever a unit test
failure is encountered. To override this behavior, you’ll need to set the
testFailureIgnore configuration property on the Surefire plugin to true, as shown in
Example 10-12.
Example 10-12. Configuring Surefire to ignore test failures
<build>
<plugins>
<plugin>
<groupId>org.apache.maven.plugins</groupId>
<artifactId>maven-surefire-plugin</artifactId>
<configuration>
<testFailureIgnore>true</testFailureIgnore>
</configuration>
</plugin>
...
</plugins>
</build>
Common Lifecycle Goals | 195

If you would like to skip tests altogether, you can do so by executing the following
command:
$ mvn install -Dmaven.test.skip=true
The maven.test.skip variable controls both the Compiler and the Surefire plugin. If
you pass in maven.test.skip, you’ve told Maven to ignore tests altogether.
Install
The install goal of the Install plugin is almost always bound to the install lifecycle
phase. This install:install goal simply installs a project’s main artifact to the local
repository. If you have a project with a groupId of org.sonatype.mavenbook, an
artifactId of simple-test, and a version of 1.0.2, the install:install goal is going to
copy the JAR file from target/simple-test-1.0.2.jar to ~/.m2/repository/org/sonatype/ma
venbook/simple-test/1.0.2/simple-test-1.0.2.jar. If the project has POM packaging, this
goal will copy the POM to the local repository.
Deploy
The deploy goal of the Deploy plugin is usually bound to the deploy lifecycle phase.
This phase is used to deploy an artifact to a remote Maven repository, which is usually
required to update a remote repository when you are performing a release. The de-
ployment procedure can be as simple as copying a file to another directory or as complex
as transferring a file over SCP using a public key. Deployment settings usually involve
transporting credentials to a remote repository, and as such, deployment settings are
usually not stored in a pom.xml. Instead, deployment settings are more frequently
found in an individual user’s ~/.m2/settings.xml. For now, all you need to know is that
the deploy:deploy goal is bound to the deploy phase and that it takes care of transporting
an artifact to a published repository and updating any repository information that
might be affected by such a deployment.
196 | Chapter 10: The Build Lifecycle

CHAPTER 11
Build Profiles
What Are They For?
Profiles allow for the ability to customize a particular build for a particular environment;
profiles enable portability between different build environments.
What do we mean by different build environments? Two example build environments
are production and development. When you are working in a development environ-
ment, your system might be configured to read from a development database instance
running on your local machine, whereas in production your system is configured to
read from the production database. Maven allows you to define any number of build
environments (build profiles) that can override any of the settings in the pom.xml. You
can configure your application to read from your local, development instance of a
database in your “development” profile, and you can configure it to read from the
production database in the “production” profile. Profiles can also be activated by the
environment and platform; you can customize a build to run differently depending on
the operating system or the installed JDK version. Before we talk about using and con-
figuring Maven profiles, we need to define the concept of “build portability.”
What Is Build Portability?
A build’s “portability” is a measure of how easy it is to take a particular project and
build it in different environments. A build that works without any custom configuration
or customization of properties files is more portable than a build that requires a great
deal of work to build from scratch. The most portable projects tend to be widely used
open source projects such as Apache Commons or Apache Velocity, which ship with
Maven builds that require little or no customization. Put simply, the most portable
project builds tend to just work out of the box, and the least portable builds require
you to jump through hoops and configure platform specific paths to locate build tools.
Before we show you how to achieve build portability, let’s survey the different kinds of
portability we are talking about.
197

Nonportable builds
The lack of portability is exactly what all build tools are made to prevent; however, any
tool can be configured to be nonportable (even Maven). A nonportable project is build-
able only under a specific set of circumstances and criteria (e.g., your local machine).
Unless you are working by yourself and you have no plans to ever deploy your appli-
cation to another machine, it is best to avoid nonportability entirely. A nonportable
build runs only on a single machine; it is a “one-off.” Maven is designed to discourage
nonportable builds by offering the ability to customize builds using profiles.
When a new developer gets the source for a nonportable project, he will not be able to
build the project without rewriting large portions of a build script.
Environment portability
A build exhibits environment portability if it has a mechanism for customizing behavior
and configuration when targeting different environments. For example, a project that
contains a reference to a test database in a test environment and a production database
in a production environment is environmentally portable. It is likely that this build has
a different set of properties for each environment. When you move to a different envi-
ronment, one that is not defined and has no profile created for it, the project will not
work. Hence, it is only portable between defined environments.
When a new developer gets the source for an environmentally portable project, she will
have to run the build within a defined environment, or she will have to create a custom
environment to successfully build the project.
Organizational (in-house) portability
The center of this level of portability is a project’s requirement that only a select few
may access internal resources such as source control or an internally maintained Maven
repository. A project at a large corporation may depend on a database available only
to in-house developers, or an open source project might require a specific level of cre-
dentials to publish a web site and deploy the products of a build to a public repository.
If you attempt to build an in-house project from scratch outside of the in-house network
(for example, outside of a corporate firewall), the build will fail. It may fail because
certain required custom plugins are unavailable, or project dependencies cannot be
found because you don’t have the appropriate credentials to retrieve dependencies from
a custom remote repository. Such a project is only portable across environments in a
single organization.
Wide (universal) portability
Anyone may download a widely portable project’s source and compile and install it
without customizing a build for a specific environment. This is the highest level of
portability; anything less requires extra work for those who wish to build your project.
198 | Chapter 11: Build Profiles

This level of portability is especially important for open source projects, which depend
on the ability for would-be contributors to easily download and build from source.
Any developer could download the source for a widely portable project.
Selecting an Appropriate Level of Portability
Clearly, you’ll want to avoid creating the worst-case scenario: the nonportable build.
You may have had the misfortune to work or study at an organization that has critical
applications with nonportable builds. In such organizations, you cannot deploy an
application without the help of a specific individual on a specific machine. In such an
organization, it is also very difficult to introduce new project dependencies or changes
without coordinating the change with the single person who maintains such a non-
portable build. Nonportable builds tend to grow in highly political environments when
one individual or group needs to exert control over how and when a project is built and
deployed. “How do we build the system? Oh, we’ve got to call Jack and ask him to
build it for us; no one else deploys to production.” This is a dangerous situation that
is more common that you would think. If you work for this organization, Maven and
Maven profiles provide a way out of this mess.
On the opposite end of the portability spectrum are widely portable builds. Widely
portable builds are generally the most difficult build systems to attain. These builds
restrict your dependencies to those projects and tools that may be freely distributed
and are publicly available. Many commercial software packages might be excluded
from the most portable builds because they cannot be downloaded before you have
accepted a certain license. Wide portability also restricts dependencies to those pieces
of software that may be distributed as Maven artifacts. For example, if you depend on
Oracle JDBC drivers, your users will have to download and install them manually; this
is not widely portable, as you will have to distribute a set of environment setup in-
structions for people interested in building your application. On the other hand, you
could use a JDBC driver that is available from the public Maven repositories such as
MySQL or HSQLDB.
As stated previously, open source projects benefit from having the most widely portable
builds possible. Widely portable builds reduce the inefficiencies associated with con-
tributing to a project. In an open source project (such as Maven), there are two distinct
groups: end users and developers. When an end user uses a project like Maven and
decides to contribute a patch to the project, he has to make the transition from using
the output of a build to running a build. He first has to become a developer, and if it is
difficult to learn how to build a project, this end user has a disincentive to take the time
to contribute to a project. In a widely portable project, an end user doesn’t have to
follow a set of arcane build instructions to start becoming a developer; she can down-
load the source, modify the source, build, and submit a contribution without asking
someone to help her set up a build environment. When the cost of contributing source
back to an open source project is lower, you’ll see an increase in source code
What Are They For? | 199
contributions, especially casual contributions, which can make the difference between
a project’s success and a project’s failure. One side effect of Maven’s adoption across
a wide group of open source projects is that it has made it easier for developers to
contribute code to various open source projects.
Portability Through Maven Profiles
A profile in Maven is an alternative set of configuration values that set or override
default values. Using a profile, you can customize a build for different environments.
Profiles are configured in the pom.xml and are given an identifier. Then you can run
Maven with a command-line flag that tells Maven to execute goals in a specific profile.
The pom.xml shown in Example 11-1 uses a production profile to override the default
settings of the Compiler plugin.
Example 11-1. Using a Maven profile to override production compiler settings
<project xmlns="http://maven.apache.org/POM/4.0.0"
xmlns:xsi="http://www.w3.org/2001/XMLSchema-instance"
xsi:schemaLocation="http://maven.apache.org/POM/4.0.0
http://maven.apache.org/maven-v4_0_0.xsd">
<modelVersion>4.0.0</modelVersion>
<groupId>org.sonatype.mavenbook</groupId>
<artifactId>simple</artifactId>
<packaging>jar</packaging>
<version>1.0-SNAPSHOT</version>
<name>simple</name>
<url>http://maven.apache.org</url>
<dependencies>
<dependency>
<groupId>junit</groupId>
<artifactId>junit</artifactId>
<version>3.8.1</version>
<scope>test</scope>
</dependency>
</dependencies>
<profiles>
<profile>
<id>production</id>
<build>
<plugins>
<plugin>
<groupId>org.apache.maven.plugins</groupId>
<artifactId>maven-compiler-plugin</artifactId>
<configuration>
<debug>false</debug>
<optimize>true</optimize>
</configuration>
</plugin>
</plugins>
</build>
</profile>
200 | Chapter 11: Build Profiles

</profiles>
</project>
In this example, we’ve added a profile named production that overrides the default
configuration of the Maven Compiler plugin. Let’s examine the syntax of this profile
in detail:
The profiles element is in the pom.xml. It contains one or more profile elements.
Since profiles override the default settings in a pom.xml, the profiles element is
usually listed as the last element in a pom.xml.
Each profile has to have an id element. This id element contains the name that is
used to invoke this profile from the command line. A profile is invoked by passing
the -Pprofile_id command-line argument to Maven.
A profile element can contain many of the elements that can appear under the
project element of a POM XML document. In this example, we’re overriding the
behavior of the Compiler plugin, and we have to override the plugin configuration
that is normally enclosed in a build and a plugins element.
We’re overriding the configuration of the Maven Compiler plugin. We’re making
sure that the bytecode produced by the production profile doesn’t contain debug
information and that the bytecode has gone through the compiler’s optimization
routines.
To execute mvn install under the production profile, you need to pass the
-Pproduction argument on the command line. To verify that the production profile
overrides the default Compiler plugin configuration, execute Maven with debug output
enabled (-X) as follows:
~/examples/profile $ mvn clean install -Pproduction -X
... (omitting debugging output) ...
[DEBUG] Configuring mojo
'org.apache.maven.plugins:maven-compiler-plugin:2.0.2:testCompile' -->
[DEBUG] (f) basedir = ~\examples\profile
[DEBUG] (f) buildDirectory = ~\examples\profile\target
...
[DEBUG] (f) compilerId = javac
[DEBUG] (f) debug = false
[DEBUG] (f) failOnError = true
[DEBUG] (f) fork = false
[DEBUG] (f) optimize = true
[DEBUG] (f) outputDirectory =
c:\Users\tobrien\svnw\sonatype\examples\profile\target\test-classes
[DEBUG] (f) outputFileName = simple-1.0-SNAPSHOT
[DEBUG] (f) showDeprecation = false
[DEBUG] (f) showWarnings = false
[DEBUG] (f) staleMillis = 0
[DEBUG] (f) verbose = false
[DEBUG] -- end configuration --
... (omitting debugging output) ...
Portability Through Maven Profiles | 201

This excerpt from the debug output of Maven shows the configuration of the Compiler
plugin under the production profile. As shown in the output, debug is set to false
and optimize is set to true.
Overriding a Project Object Model
Although the previous example showed you how to override the default configuration
properties of a single Maven plugin, you still don’t know exactly what a Maven profile
is allowed to override. The short answer to that question is that a Maven profile can
override almost everything you would have in a pom.xml. The Maven POM contains
an element under project called profiles containing a project’s alternate configura-
tions, and under this element are profile elements that define each profile. Each profile
must have an id, and other than that, it can contain almost any of the elements one
would expect to see under project. The XML document in Example 11-2 shows all of
the elements, a profile is allowed to override.
Example 11-2. Elements allowed in a profile
<project>
<profiles>
<profile>
<build>
<defaultGoal>...</defaultGoal>
<finalName>...</finalName>
<resources>...</resources>
<testResources>...</testResources>
<plugins>...</plugins>
</build>
<reporting>...</reporting>
<modules>...</modules>
<dependencies>...</dependencies>
<dependencyManagement>...</dependencyManagement>
<distributionManagement>...</distributionManagement>
<repositories>...</repositories>
<pluginRepositories>...</pluginRepositories>
<properties>...</properties>
</profile>
</profiles>
</project>
A profile can override an element shown with ellipses. A profile can override the final
name of a project’s artifact in a profile, the dependencies, and the behavior of a project’s
build via plugin configuration. A profile can also override the configuration of distri-
bution settings depending on the profile. For example, if you needed to publish an
artifact to a staging server in a staging profile, you would create a staging profile that
overrides the distributionManagement element in a profile.
202 | Chapter 11: Build Profiles

Profile Activation
In the previous section, we showed you how to create a profile that overrides default
behavior for a specific target environment. In the previous build, the default build was
designed for development, and the production profile exists to provide configuration
for a production environment. What happens when you need to provide customiza-
tions based on variables such as operating systems or JDK version? Maven provides a
way to “activate” a profile for different environmental parameters. This is called profile
activation.
Take the following example. Assume we have a Java library that has a specific feature
available only in the Java 6 release—the Scripting Engine as defined in JSR-223 (see
http://jcp.org/en/jsr/detail?id=223). You’ve separated the portion of the library that
deals with the scripting library into a separate Maven project, and you want people
running Java 5 to be able to build the project without attempting to build the Java 6
specific library extension. You can do this by using a Maven profile that adds the script
extension module to the build only when the build is running within a Java 6 JDK.
First, let’s take a look at our project’s directory layout and how we want developers to
build the system.
When someone runs mvn install with a Java 6 JDK, you want the build to include the
simple-script project’s build; when they are running in Java 5, you would like to skip
the simple-script project build. If you failed to skip the simple-script project build in
Java 5, your build would fail because Java 5 does not have ScriptEngine on the class-
path. Let’s take a look at the library project’s pom.xml shown in Example 11-3.
Example 11-3. Dynamic inclusion of submodules using profile activation
<project xmlns="http://maven.apache.org/POM/4.0.0"
xmlns:xsi="http://www.w3.org/2001/XMLSchema-instance"
xsi:schemaLocation="http://maven.apache.org/POM/4.0.0
http://maven.apache.org/maven-v4_0_0.xsd">
<modelVersion>4.0.0</modelVersion>
<groupId>org.sonatype.mavenbook</groupId>
<artifactId>simple</artifactId>
<packaging>jar</packaging>
<version>1.0-SNAPSHOT</version>
<name>simple</name>
<url>http://maven.apache.org</url>
<dependencies>
<dependency>
<groupId>junit</groupId>
<artifactId>junit</artifactId>
<version>3.8.1</version>
<scope>test</scope>
</dependency>
</dependencies>
<profiles>
<profile>
<id>jdk16</id>
Profile Activation | 203
<activation>
<jdk>1.6</jdk>
</activation>
<modules>
<module>simple-script</module>
</modules>
</profile>
</profiles>
</project>
If you run mvn install under Java 1.6, you will see Maven descending into the simple-
script subdirectory to build the simple-script project. If you are running mvn install in
Java 1.5, the build will not try to build the simple-script submodule. Let’s explore this
activation configuration in more detail:
The activation element lists the conditions for profile activation. In this example,
we’ve specified that this profile will be activated by Java versions that begin with
“1.6.” This would include “1.6.0_03,” “1.6.0_02,” or any other string that begins
with “1.6.” Activation parameters are not limited to Java version; for a full list of
activation parameters, see the next section, “Activation Configuration.”
In this profile, we are adding the module simple-script. Adding this module will
cause Maven to look in the simple-script/ subdirectory for a pom.xml.
Activation Configuration
Activations can contain one or more selectors, including JDK versions, operating sys-
tem parameters, files, and properties. A profile is activated when all activation criteria
has been satisfied. For example, a profile could list an operating system family of Win-
dows and a JDK version of 1.4; this profile will be activated only when the build is
executed on a Windows machine running Java 1.4. If the profile is active, then all
elements override the corresponding project-level elements as if the profile were inclu-
ded with the -P command-line argument. Example 11-4 lists a profile that is activated
by a very specific combination of operating system parameters, properties, and a JDK
version.
Example 11-4. Profile activation parameters: JDK version, OS parameters, and properties
<project>
...
<profiles>
<profile>
<id>dev</id>
<activation>
<activeByDefault>false</activeByDefault>
<jdk>1.5</jdk>
<os>
<name>Windows XP</name>
<family>Windows</family>
<arch>x86</arch>
204 | Chapter 11: Build Profiles
<version>5.1.2600</version>
</os>
<property>
<name>mavenVersion</name>
<value>2.0.5</value>
</property>
<file>
<exists>file2.properties</exists>
<missing>file1.properties</missing>
</file>
</activation>
...
</profile>
</profiles>
</project>
This example defines a very narrow set of activation parameters. Let’s examine each
activation criterion in detail:
The activeByDefault element controls whether this profile is considered active by
default.
This profile will be active only for JDK versions that begin with “1.5.” This includes
“1.5.0_01” and “1.5.1.”
This profile targets a very specific version of Windows XP: version 5.1.2600 on a 32-
bit platform. If your project uses the native plugin to build a C program, you might
find yourself writing projects for specific platforms.
The property element tells Maven to activate this profile if the property
mavenVersion is set to the value 2.0.5. mavenVersion is an implicit property that is
available to all Maven builds.
The file element allows us to activate a profile based on the presence (or absence)
of files. The dev profile will be activated if a file named file2.properties exists in the
base directory of the project. The dev profile will be activated only if there is no file
named file1.properties file in the base directory of the project.
Activation by the Absence of a Property
You can activate a profile based on the value of a property such as environment.type.
You can activate a development profile if environment.type equals dev, or a production
profile if environment.type equals prod. You can also activate a profile in the absence
of a property. The configuration shown in Example 11-5 activates a profile if the prop-
erty environment.type is not present during Maven execution.
Example 11-5. Activating profiles in the absence of a property
<project>
...
<profiles>
Profile Activation | 205

<profile>
<id>development</id>
<activation>
<property>
<name>!environment.type</name>
</property>
</activation>
</profile>
</profiles>
</project>
Note the exclamation point prefixing the property name. The exclamation point is often
referred to as the “bang” character and signifies “not.” This profile is activated when
no ${environment.type} property is set.
External Profiles
If you start making extensive use of Maven profiles, you may want to separate your
profiles from your POM in a separate file named profiles.xml. You can mix and match
profiles defined in the pom.xml with profiles defined in the external profiles.xml file.
Just place the profiles element into profiles.xml in ${basedir} and run Maven as you
normally would. This profiles.xml file would look something like Example 11-6.
Example 11-6. Placing profiles in a profiles.xml file
<profiles>
<profile>
<id>development</id>
<build>
<plugins>
<plugin>
<groupId>org.apache.maven.plugins</groupId>
<artifactId>maven-compiler-plugin</artifactId>
<configuration>
<debug>true</debug>
<optimize>false</optimize>
</configuration>
</plugin>
</plugins>
</build>
</profile>
<profile>
<id>production</id>
<build>
<plugins>
<plugin>
<groupId>org.apache.maven.plugins</groupId>
<artifactId>maven-compiler-plugin</artifactId>
<configuration>
<debug>false</debug>
<optimize>true</optimize>
</configuration>
206 | Chapter 11: Build Profiles

</plugin>
</plugins>
</build>
</profile>
</profiles>
You might find that your profiles have grown so large that you are having trouble
managing the pom.xml, or you might just find separating the pom.xml from the
profiles.xml file is a cleaner approach to putting everything into a single file. You can
invoke profiles stored in profiles.xml the same way you would invoke them if they were
defined in the pom.xml.
Settings Profiles
Project profiles are useful when a specific project needs to customize a build setting for
a specific environment, but why would you want to override a build setting for every
project in Maven? How do you do something like add an internal repository that is
consulted on every Maven build? You can do this with a settings profile. Where project
profiles are concerned with overriding the configuration of a specific project, settings
profiles can be applied to any and all projects you build with Maven. You can place
settings profiles in two locations: a user-specific settings profile defined in
~/.m2/settings.xml or a global settings profile defined in ${M2_HOME}/conf/set
tings.xml. Here is an example of a settings profile defined in ~/.m2/settings.xml that
might set some user-specific configuration properties for all builds. The settings.xml
file shown in Example 11-7 is defined for user tobrien.
Example 11-7. Defining user-specific settings profiles (~/.m2/settings.xml)
<settings>
<profiles>
<profile>
<id>dev</id>
<plugin>
<groupId>org.apache.maven.plugins</groupId>
<artifactId>maven-jar-plugin</artifactId>
<executions>
<execution>
<goals>
<goal>sign</goal>
</goals>
</execution>
</executions>
<configuration>
<keystore>/home/tobrien/java/keystore</keystore>
<alias>tobrien</alias>
<storepass>s3cr3tp@ssw0rd</storepass>
<signedjar>${project.build.directory}/signed/
${project.build.finalName}.jar</signedjar>
<verify>true</verify>
</configuration>
Settings Profiles | 207

</plugin>
</profile>
</profiles>
</settings>
The previous example is a plausible use of a user-specific settings profile. This example
sets user-specific settings like the password and alias to use when signing a JAR file
during a release. These are configuration parameters you wouldn’t want to store in a
project’s shared pom.xml or a profiles.xml file because they involve some secrets that
should not be public.
The downside of settings profiles is that they tend to interfere with project portability.
If the previous example were an open source project, a new developer would not be
able to sign a JAR until he had manually configured a settings profile and talked to one
of the existing developers. In this case, the security requirements of signing a JAR are
in conflict with the larger goal of achieving a universally portable project build. On
most open source projects, there are tasks that require security credentials, such as
publishing an artifact to a remote repository, publishing a project’s web site, or signing
a JAR file. For these tasks, the highest level of portability we can hope for is organiza-
tional portability. These higher-security tasks usually require some manual setup and
configuration of a profile.
Instead of explicitly specifying the name of the profile with the -P command-line
argument, you can define a list of active profiles that are activated for every project you
run. For example, if you wanted to activate the dev profile defined in settings.xml for
every project you run, you would add the section shown in Example 11-8 to your ~/.m2/
settings.xml file.
Example 11-8. Defining active settings profiles
<settings>
...
<activeProfiles>
<activeProfile>dev</activeProfile>
</activeProfiles>
</settings>
This will activate settings profiles only, not project profiles with matching id elements.
For example, if you have a project with a profile defined in its pom.xml with an id of
dev, it will not be affected by the activeProfile set in your settings.xml. This
activeProfile setting affects only profiles defined in your settings.xml file.
Global Settings Profiles
Just like settings profiles, you can also define a set of global profiles in ${M2_HOME}/
conf/settings.xml. Profiles defined in this configuration file are available across all users
using a specific installation of Maven. The ability to define a global settings profile is
useful if you are creating a customized distribution of Maven for a specific organization
208 | Chapter 11: Build Profiles

and you want to ensure that every user of Maven has access to a set of build profiles
that ensure in-house portability. If you need to add custom plugin repositories or define
a custom set of plugins that are used only by your organization, you could distribute a
copy of Maven to your users that has these settings “baked in.” The configuration of
global settings profiles is the same as the configuration of user-specific settings profiles.
Listing Active Profiles
Maven profiles can be defined in either pom.xml, profiles.xml, ~/.m2/settings.xml, or
${M2_HOME}/conf/settings.xml. With these four levels, there’s no good way of keeping
track of profiles available to a particular project without remembering which profiles
are defined in these four files. To make it easier to keep track of which profiles are
available and where they have been defined, the Maven Help plugin defines a goal,
active-profiles, that lists all the active profiles and where they have been defined. You
can run the active-profiles goal as follows:
$ mvn help:active-profiles
Active Profiles for Project 'My Project':
The following profiles are active:
- my-settings-profile (source: settings.xml)
- my-external-profile (source: profiles.xml)
- my-internal-profile (source: pom.xml)
Tips and Tricks
Profiles can encourage build portability. If your build needs subtle customizations to
work on different platforms, or if you need your build to produce different results for
different target platforms, project profiles increase build portability. Settings profiles
generally decrease build portability by adding extra-project information that must be
communicated from developer to developer. The following sections provide some
guidelines and some ideas for applying Maven profiles to your project.
Common Environments
One of the core motivations for Maven project profiles was to provide for environment-
specific configuration settings. In a development environment, you might want to pro-
duce bytecode with debug information and configure your system to use a development
database instance. In a production environment, you might want to produce a signed
JAR and configure the system to use a production database. In this chapter, we defined
a number of environments with identifiers such as dev and prod. A simpler way to do
this would be to define profiles that are activated by environment properties and to use
these common environment properties across all of your projects. For example, if every
project had a development profile activated by a property named environment.type
Tips and Tricks | 209

having a value of dev, and if those same projects had a production profile activated by
a property named environment.type having a value of prod, you could create a default
profile in your settings.xml that always set environment.type to dev on your develop-
ment machine. That way, each project defines a dev profile activated by the same
environment variable. Let’s see how this is done; the settings.xml shown in Exam-
ple 11-9 defines a profile in ~/.m2/settings.xml that sets the environment.type property
to dev.
Example 11-9. ~/.m2/settings.xml defines a default profile setting environment.type
<settings>
<profiles>
<profile>
<activation>
<activeByDefault>true</activeByDefault>
</activation>
<properties>
<environment.type>dev</environment.type>
</properties>
</profile>
</profiles>
</settings>
This means that every time you run Maven on your machine, this profile will be acti-
vated and the property environment.type will have the value dev. You can then use this
property to activate profiles defined in a project’s pom.xml. Let’s take a look in Exam-
ple 11-10 at how a project’s pom.xml would define a profile activated by
environment.type having the value dev.
Example 11-10. project profile activated by environment.type equal to dev
<project>
...
<profiles>
<profile>
<id>development</id>
<activation>
<property>
<name>environment.type</name>
<value>dev</value>
</property>
</activation>
<properties>
<database.driverClassName>com.mysql.jdbc.Driver</database.driverClassName>
<database.url>jdbc:mysql://localhost:3306/app_dev</database.url>
<database.user>development_user</database.user>
<database.password>development_password</database.password>
</properties>
</profile>
<profile>
<id>production</id>
<activation>
<property>
210 | Chapter 11: Build Profiles

<name>environment.type</name>
<value>prod</value>
</property>
</activation>
<properties>
<database.driverClassName>com.mysql.jdbc.Driver</database.driverClassName>
<database.url>jdbc:mysql://master01:3306,slave01:3306/app_prod</database.url>
<database.user>prod_user</database.user>
</properties>
</profile>
</profiles>
</project>
This project defines some properties such as database.url and database.user, which
might be used to configure another Maven plugin configured in the pom.xml. There
are plugins available that can manipulate the database and run SQL, and plugins such
as the Maven Hibernate3 plugin can generate annotated model objects for use in per-
sistence frameworks. A few of these plugins can be configured in a pom.xml using these
properties. These properties can also be used to filter resources. In this example, be-
cause we’ve defined a profile in ~/.m2/settings.xml that sets environment.type to dev,
the development profile will always be activated when we run Maven on our develop-
ment machine. Alternatively, if we wanted to override this default, we could set a
property on the command line. If we need to activate the production profile, we can
always run Maven with:
~/examples/profiles $ mvn install -Denvironment.type=prod
Setting a property on the command line will override the default property set in ~/.m2/
settings.xml. We could have just defined a profile with an id of “dev” and invoked it
directly with the -P command-line argument, but using this environment.type property
allows us to code other project pom.xml files to this standard. Every project in the
codebase can have a profile that is activated by the same environment.type property set
in every user’s ~/.m2/settings.xml. In this way, developers can share common configu-
ration for development without defining this configuration in nonportable
settings.xml files.
Protecting Secrets
This best practice builds on the previous section. In Example 11-10, the production
profile does not contain the database.password property. We’ve done this on purpose
to illustrate the concept of putting secrets in your user-specific settings.xml. If you were
developing an application at a large organization that values security, it is likely that
the majority of the development group will not know the password to the production
database. In an organization that draws a bold line between the development group
and the operations group, this will be the norm. Developers may have access to a de-
velopment and a staging environment, but they might not have (or want to have) access
to the production database. There are a number of reasons why this makes sense, par-
ticularly if an organization is dealing with extremely sensitive financial, intelligence, or
Tips and Tricks | 211

medical information. In this scenario, the production environment build may be carried
out only by a lead developer or by a member of the production operations group. When
they run this build using the prod environment.type, they will need to define this variable
in their settings.xml, as shown in Example 11-11.
Example 11-11. Storing secrets in a user-specific settings profile
<settings>
<profiles>
<profile>
<activeByDefault>true</activeByDefault>
<properties>
<environment.type>prod</environment.type>
<database.password>m1ss10nimp0ss1bl3</database.password>
</properties>
</profile>
</profiles>
</settings>
This user has defined a default profile that sets the environment.type to prod and also
set the production password. When the project is executed, the production profile is
activated by the environment.type property and the database.password property is
populated. This way, you can put all of the production-specific configuration into a
project’s pom.xml and leave out only the single secret necessary to access the production
database.
Secrets usually conflict with wide portability, but this makes sense. You
wouldn’t want to share your secrets openly.
Platform Classifiers
Let’s assume that you have a library or a project that produces platform-specific cus-
tomizations. Even though Java is platform-neutral, there are times when you might
need to write some code that invokes platform-specific native code. Another possibility
is that you’ve written some C code that is compiled by the Maven Native plugin and
you want to produce a qualified artifact depending on the build platform. You can set
a classifier with the Maven Assembly plugin or with the Maven Jar plugin. The
pom.xml shown in Example 11-12 produces a qualified artifact using profiles that are
activated by operating system parameters. For more information about the Maven
Assembly plugin, see Chapter 12.
Example 11-12. Qualifying artifacts with platform-activated project profiles
<project>
...
<profiles>
<profile>
212 | Chapter 11: Build Profiles

<id>windows</id>
<activation>
<os>
<family>windows</family>
</os>
</activation>
<build>
<plugins>
<plugin
<artifactId>maven-jar-plugin</artifactId>
<configuration>
<classifier>win</classifier>
</configuration>
</plugin>
</plugins>
</build>
</profile>
<profile>
<id>linux</id>
<activation>
<os>
<family>unix</family>
</os>
</activation>
<build>
<plugins>
<plugin>
<artifactId>maven-jar-plugin</artifactId>
<configuration>
<classifier>linux</classifier>
</configuration>
</plugin>
</plugins>
</build>
</profile>
</profiles>
</project>
If the operating system is in the Windows family, this pom.xml qualifies the JAR artifact
with “-win”. If the operating system is in the Unix family, the artifact is qualified with
“-linux”. This pom.xml successfully adds the qualifiers to the artifacts, but it is more
verbose than it needs to be due to the redundant configuration of the Maven Jar plugin
in both profiles. This example could be rewritten to use variable substitution to mini-
mize redundancy, as shown in Example 11-13.
Example 11-13. Qualifying artifacts with platform-activated project profiles and variable substitution
<project>
...
<build>
<plugins>
<plugin>
<artifactId>maven-jar-plugin</artifactId>
<configuration>
Tips and Tricks | 213

<classifier>${envClassifier}</classifier>
</configuration>
</plugin>
</plugins>
</build>
...
<profiles>
<profile>
<id>windows</id>
<activation>
<os>
<family>windows</family>
</os>
</activation>
<properties>
<envClassifier>win</envClassifier>
</properties>
</profile>
<profile>
<id>linux</id>
<activation>
<os>
<family>unix</family>
</os>
</activation>
<properties>
<envClassifier>linux</envClassifier>
</properties>
</profile>
</profiles>
</project>
In this pom.xml, each profile doesn’t need to include a build element to configure the
Jar plugin. Instead, each profile is activated by the operating system family and sets the
envClassifier property to either win or linux. This envClassifier is then referenced in
the default pom.xml build element to add a classifier to the project’s JAR artifact. The
JAR artifact will be named ${finalName}-${envClassifier}.jar and included as a de-
pendency using the dependency syntax shown in Example 11-14.
Example 11-14. Depending on a qualified artifact
<dependency>
<groupId>com.mycompany</groupId>
<artifactId>my-project</artifactId>
<version>1.0</version>
<classifier>linux</classifier>
</dependency>
214 | Chapter 11: Build Profiles

Summary
When used judiciously, profiles can make it very easy to customize a build for different
platforms. If something in your build needs to define a platform-specific path for some-
thing like an application server, you can put these configuration points in a profile that
is activated by an operating system parameter. If you have a project that needs to
produce different artifacts for different environments, you can customize the build be-
havior for different environments and platforms via profile-specific plugin behavior.
Using profiles, builds can become portable. There is no need to rewrite your build logic
to support a new environment; just override the configuration that needs to change
and share the configuration points that can be shared.
Summary | 215

CHAPTER 12
Maven Assemblies
Introduction
Maven provides plugins that are used to create the most common archive types, most
of which are consumable as dependencies of other projects. Some examples include
the JAR, WAR, EJB, and EAR plugins. As discussed in Chapter 10, these plugins cor-
respond to different project packaging types, each with slightly different build pro-
cesses. Although Maven has plugins and customized lifecycles to support standard
packaging types, there are times when you’ll need to create an archive or directory with
a custom layout. Such custom archives are called Maven Assemblies.
There are any number of reasons why you may want to build custom archives for your
project. Perhaps the most common is the project distribution. The word “distribution”
means many different things to different people (and projects), depending on how the
project is meant to be used. Essentially, these are archives that provide a convenient
way for users to install or otherwise make use of the project’s releases. In some cases,
this may mean bundling a web application with an application server like Jetty. In
others, it could mean bundling API documentation alongside source and compiled
binaries like JAR files. Assemblies usually come in handy when you are building the
final distribution of a product. For example, products such as Nexus (introduced in
Chapter 16) are the result of large, multimodule Maven projects, and the final archive
you download from Sonatype was created using a Maven Assembly.
In most cases, the Assembly plugin is ideally suited to the process of building project
distributions. However, assemblies don’t have to be distribution archives; assemblies
are intended to provide Maven users with the flexibility they need to produce custom-
ized archives of all kinds. Essentially, assemblies are intended to fill the gaps between
the standard archive formats provided by project package types. Of course, you could
write an entire Maven plugin simply to generate your own custom archive format, along
with a new lifecycle-mapping and artifact-handling configuration to tell Maven how to
deploy it. But the Assembly plugin makes this unnecessary in most cases by providing
generalized support for creating your own archive recipe, so you don’t have to spend
so much time writing Maven code.
217

Assembly Basics
Before we go any further, it’s best to take a minute and talk about the two main goals
in the Assembly plugin: assembly:assembly and the single mojo. We list these two goals
in different ways to reflect the difference in how they’re used. The assembly:assembly
goal is designed to be invoked directly from the command line and should never be
bound to a build lifecycle phase. In contrast, the single mojo is designed to be a part
of your everyday build and should be bound to a phase in your project’s build lifecycle.
The main reason for this difference is that the assembly:assembly goal is what Maven
terms an aggregator mojo—that is, a mojo that is designed to run at most once in a
build, regardless of how many projects are being built. It draws its configuration from
the root project, usually the top-level POM or the command line. When bound to a
lifecycle, an aggregator mojo can have some nasty side effects. It can force the execution
of the package lifecycle phase to execute ahead of time, and it can result in builds that
end up executing the package phase twice.
Because the assembly:assembly goal is an aggregator mojo, it raises some issues in
multimodule Maven builds, and it should be called only as a standalone mojo from the
command line. Never bind an assembly:assembly execution to a lifecycle phase.
assembly:assembly was the original goal in the Assembly plugin and was never designed
to be part of the standard build process for a project. As it became clear that assembly
archives were a legitimate requirement for projects to produce, the single mojo was
developed. The single mojo assumes that it has been bound to the correct part of the
build process so that it will have access to the project files and artifacts it needs to
execute within the lifecycle of a large multimodule Maven project. In a multimodule
environment, it will execute as many times as it is bound to the different module
POMs. Unlike assembly:assembly, single will never force the execution of another life-
cycle phase ahead of itself.
The Assembly plugin provides several other goals in addition to these two. However,
discussion of these other Mojos is beyond the scope of this chapter, because they serve
exotic or obsolete use cases, and because they are almost never needed. Whenever
possible, you should definitely stick to using assembly:assembly for assemblies gener-
ated from the command line, and to single for assemblies bound to lifecycle phases.
Predefined Assembly Descriptors
Although many people opt to create their own archive recipes—called assembly de-
scriptors—this isn’t strictly necessary. The Assembly plugin provides built-in descrip-
tors for several common archive types that you can use immediately without writing a
line of configuration. The following assembly descriptors are predefined in the Maven
Assembly plugin:
218 | Chapter 12: Maven Assemblies

bin
The bin descriptor is used to bundle project LICENSE, README, and NOTICE
files with the project’s main artifact, assuming this project builds a JAR as its main
artifact. Think of this as the smallest possible binary distribution for completely
self-contained projects.
jar-with-dependencies
The jar-with-dependencies descriptor builds a JAR archive with the contents of
the main project JAR, along with the unpacked contents of all the project’s runtime
dependencies. Coupled with an appropriate Main-Class Manifest entry (discussed
in “Plugin Configuration” later in this chapter), this descriptor can produce a self-
contained, executable JAR for your project, even if the project has dependencies.
project
The project descriptor simply archives the project directory structure as it exists
in your file system and, most likely, in your version control system. Of course, the
target directory is omitted, as are any version-control metadata files such as the
CVS/ and .svn/ directories we’re all used to seeing. Basically, the point of this de-
scriptor is to create a project archive that, when unpacked, can be built using
Maven.
src
The src descriptor produces an archive of your project source and pom.xml files,
along with any LICENSE, README, and NOTICE files that are in the project’s
root directory. This precursor to the project descriptor produces an archive that
can be built by Maven in most cases. However, because of its assumption that all
source files and resources reside in the standard src/ directory, it has the potential
to leave out nonstandard directories and files that are nonetheless critical to some
builds.
Building an Assembly
The Assembly plugin can be executed in one of two ways: you can invoke it directly
from the command line, or you can configure it as part of your standard build process
by binding it to a phase of your project’s build lifecycle. Direct invocation has its uses,
particularly for one-off assemblies that are not considered part of your project’s core
deliverables. In most cases, you’ll probably want to generate the assemblies for your
project as part of its standard build process. Doing this has the effect of including your
custom assemblies whenever the project is installed or deployed into Maven’s reposi-
tories, so they are always available to your users.
As an example of the direct invocation of the Assembly plugin, suppose that you want
to ship off a copy of your project that people can build from source. Instead of just
deploying the end product of the build, you’ll want to include the source as well. You
won’t need to do this often, so it doesn’t make sense to add the configuration to your
POM. Instead, you can use the following command:
Assembly Basics | 219

$ mvn -DdescriptorId=project assembly:single
...
[INFO] [assembly:single]
[INFO] Building tar : /Users/~/mvn-examples-1.0/assemblies/direct-invocation/\
target/direct-invocation-1.0-SNAPSHOT-project.tar.gz
[INFO] Building tar : /Users/~/mvn-examples-1.0/assemblies/direct-invocation/\
target/direct-invocation-1.0-SNAPSHOT-project.tar.bz2
[INFO] Building zip: /Users/~/mvn-examples-1.0/assemblies/direct-invocation/\
target/direct-invocation-1.0-SNAPSHOT-project.zip
...
Suppose you want to produce an executable JAR from your project. If your project is
totally self-contained with no dependencies, you can achieve this with the main project
artifact using the archive configuration of the JAR plugin. However, most projects have
dependencies, and those dependencies must be incorporated in any executable JAR.
In that case, you want to make sure that every time the main project JAR is installed or
deployed, your executable JAR goes along with it.
Assuming the main class for the project is org.sonatype.mavenbook.App, the POM con-
figuration shown in Example 12-1 will create an executable JAR.
Example 12-1. Assembly descriptor for executable JAR
<project xmlns="http://maven.apache.org/POM/4.0.0"
xmlns:xsi="http://www.w3.org/2001/XMLSchema-instance"
xsi:schemaLocation="http://maven.apache.org/POM/4.0.0
http://maven.apache.org/maven-v4_0_0.xsd">
<modelVersion>4.0.0</modelVersion>
<groupId>org.sonatype.mavenbook.assemblies</groupId>
<artifactId>executable-jar</artifactId>
<version>1.0-SNAPSHOT</version>
<packaging>jar</packaging>
<name>Assemblies Executable Jar Example</name>
<url>http://sonatype.com/book</url>
<dependencies>
<dependency>
<groupId>commons-lang</groupId>
<artifactId>commons-lang</artifactId>
<version>2.4</version>
</dependency>
</dependencies>
<build>
<plugins>
<plugin>
<artifactId>maven-assembly-plugin</artifactId>
<version>2.2-beta-2</version>
<executions>
<execution>
<id>create-executable-jar</id>
<phase>package</phase>
<goals>
<goal>single</goal>
</goals>
220 | Chapter 12: Maven Assemblies

<configuration>
<descriptorRefs>
<descriptorRef>
jar-with-dependencies
</descriptorRef>
</descriptorRefs>
<archive>
<manifest>
<mainClass>org.sonatype.mavenbook.App</mainClass>
</manifest>
</archive>
</configuration>
</execution>
</executions>
</plugin>
</plugins>
</build>
</project>
You should notice two things about the configuration just shown. First, we’re using
the descriptorRefs configuration section instead of the descriptorId parameter we
used previously. This allows multiple assembly types to be built from the same As-
sembly plugin execution, while still supporting our use case with relatively little extra
configuration. Second, the archive element under configuration sets the Main-Class
manifest attribute in the generated JAR. This section is commonly available in plugins
that create JAR files, such as the JAR plugin used for the default project package type.
Now you can produce the executable JAR simply by executing mvn package. Afterward,
we’ll also get a directory listing for the target directory, just to verify that the executable
JAR was generated. Finally, just to prove that we actually do have an executable JAR,
we’ll try executing it:
$ mvn package
... (output omitted) ...
[INFO] [jar:jar]
[INFO] Building jar: /Users/~/mvn-examples-1.0/assemblies/executable-jar/target/\
executable-jar-1.0-SNAPSHOT.jar
[INFO] [assembly:single {execution: create-executable-jar}]
[INFO] Processing DependencySet (output=)
[INFO] Building jar: /Users/~/mvn-examples-1.0/assemblies/executable-jar/target/\
executable-jar-1.0-SNAPSHOT-jar-with-dependencies.jar
... (output omitted) ...
$ ls -1 target
... (output omitted) ...
executable-jar-1.0-SNAPSHOT-jar-with-dependencies.jar
executable-jar-1.0-SNAPSHOT.jar
... (output omitted) ...
$ java -jar \
target/executable-jar-1.0-SNAPSHOT-jar-with-dependencies.jar
Hello, World!
Assembly Basics | 221

From this output, you can see that the normal project build now produces a new
artifact in addition to the main JAR file. The new one has a classifier of
jar-with-dependencies. Finally, we verified that the new JAR actually is executable,
and that executing the JAR produced the desired output of “Hello, World!”
Assemblies as Dependencies
When you generate assemblies as part of your normal build process, those assembly
archives will be attached to your main project’s artifact. This means they will be in-
stalled and deployed alongside the main artifact, and are then resolvable in much the
same way. Each assembly artifact is given the same basic coordinate (groupId,
artifactId, and version) as the main project. However, these artifacts are attachments,
which in Maven means they are derivative works based on some aspect of the main
project build. To provide a couple of examples, source assemblies contain the raw
inputs for the project build, and jar-with-dependencies assemblies contain the
project’s classes plus its dependencies. Attached artifacts are allowed to circumvent the
Maven requirement of “one project, one artifact” precisely because of this derivative
quality.
Since assemblies are (normally) attached artifacts, each must have a classifier to dis-
tinguish it from the main artifact, in addition to the normal artifact coordinate. By
default, the classifier is the same as the assembly descriptor’s identifier. When using
the built-in assembly descriptors, as shown earlier, the assembly descriptor’s identifier
is generally also the same as the identifier used in the descriptorRef for that type of
assembly.
Once you’ve deployed an assembly alongside your main project artifact, how can you
use that assembly as a dependency in another project? The answer is fairly straightfor-
ward. Recall the discussions in the earlier sections “Maven Coordinates” in Chap-
ter 3 and “More on Coordinates” in Chapter 9 about project dependencies in Maven.
Projects depend on other projects using a combination of four basic elements, referred
to as a project’s coordinates: groupId, artifactId, version, and packaging. In “Platform
Classifiers” in Chapter 11, we explained that multiple platform-specific variants of a
project’s artifact are available, and the project specifies a classifier element with a
value of either win or linux to select the appropriate dependency artifact for the target
platform. Assembly artifacts can be used as dependencies using the required coordi-
nates of a project plus the classifier under which the assembly was installed or deployed.
If the assembly is not a JAR archive, we also need to declare its type.
Assembling Assemblies via Assembly Dependencies
How’s that for a confusing section title? Let’s try to set up a scenario that explains the
idea of assembling assemblies. Imagine you want to create an archive that itself contains
some project assemblies. Assume you have a multimodule build, and you want to de-
ploy an assembly that contains a set of related project assemblies. In this section’s
222 | Chapter 12: Maven Assemblies

example, we will create a bundle of “buildable” project directories for a set of projects
that are commonly used together. For simplicity, we’ll reuse the two built-in assembly
descriptors discussed earlier—project and jar-with-dependencies. In this particular
example, it is assumed that each project creates the project assembly in addition to its
main JAR artifact. Assume that every project in a multimodule build binds the single
goal to the package phase and uses the project descriptorRef. Every project in a mul-
timodule will inherit the configuration from a top-level pom.xml, whose pluginManage
ment element is shown in Example 12-2.
Example 12-2. Configuring the project assembly in top-level POM
<project>
...
<build>
<pluginManagement>
<plugins>
<plugin>
<artifactId>maven-assembly-plugin</artifactId>
<version>2.2-beta-2</version>
<executions>
<execution>
<id>create-project-bundle</id>
<phase>package</phase>
<goals>
<goal>single</goal>
</goals>
<configuration>
<descriptorRefs>
<descriptorRef>project</descriptorRef>
</descriptorRefs>
</configuration>
</execution>
</executions>
</plugin>
</plugins>
</pluginManagement>
</build>
...
</project>
Each project POM references the managed plugin configuration from Example 12-2
using a minimal plugin declaration in its build section, as shown in Example 12-3.
Example 12-3. Activating the Assembly plugin configuration in child projects
<build>
<plugins>
<plugin>
<artifactId>maven-assembly-plugin</artifactId>
</plugin>
</plugins>
</build>
Assembly Basics | 223

To produce the set of project assemblies, run mvn install from the top-level directory.
You should see Maven installing artifacts with classifiers in your local repository:
$ mvn install
...
[INFO] Installing ~/mvn-examples-1.0/assemblies/as-dependencies/project-parent/\
second-project/target/second-project-1.0-SNAPSHOT-project.tar.gz to
~/.m2/repository/org/sonatype/mavenbook/assemblies/second-project/1.0-SNAPSHOT/\
second-project-1.0-SNAPSHOT-project.tar.gz
...
[INFO] Installing ~/mvn-examples-1.0/assemblies/as-dependencies/project-parent/\
second-project/target/second-project-1.0-SNAPSHOT-project.tar.bz2 to
~/.m2/repository/org/sonatype/mavenbook/assemblies/second-project/1.0-SNAPSHOT/\
second-project-1.0-SNAPSHOT-project.tar.bz2
...
[INFO] Installing ~/mvn-examples-1.0/assemblies/as-dependencies/project-parent/\
second-project/target/second-project-1.0-SNAPSHOT-project.zip to
~/.m2/repository/org/sonatype/mavenbook/assemblies/second-project/1.0-SNAPSHOT/\\
second-project-1.0-SNAPSHOT-project.zip
...
When you run install, Maven will copy each project’s main artifact and each assembly
to your local Maven repository. All of these artifacts are now available for reference as
dependencies in other projects locally. If your ultimate goal is to create a bundle that
includes assemblies from multiple projects, you can do so by creating another project
that will include other project’s assemblies as dependencies. This bundling project
(aptly named project-bundle) is responsible for creating the bundled assembly. The
POM for the bundling project would resemble the XML document shown in Exam-
ple 12-4.
Example 12-4. POM for the assembly bundling project
<project xmlns="http://maven.apache.org/POM/4.0.0"
xmlns:xsi="http://www.w3.org/2001/XMLSchema-instance"
xsi:schemaLocation="http://maven.apache.org/POM/4.0.0
http://maven.apache.org/maven-v4_0_0.xsd">
<modelVersion>4.0.0</modelVersion>
<groupId>org.sonatype.mavenbook.assemblies</groupId>
<artifactId>project-bundle</artifactId>
<version>1.0-SNAPSHOT</version>
<packaging>pom</packaging>
<name>Assemblies-as-Dependencies Example Project Bundle</name>
<url>http://sonatype.com/book</url>
<dependencies>
<dependency>
<groupId>org.sonatype.mavenbook.assemblies</groupId>
<artifactId>first-project</artifactId>
<version>1.0-SNAPSHOT</version>
<classifier>project</classifier>
<type>zip</type>
</dependency>
<dependency>
<groupId>org.sonatype.mavenbook.assemblies</groupId>
<artifactId>second-project</artifactId>
224 | Chapter 12: Maven Assemblies

<version>1.0-SNAPSHOT</version>
<classifier>project</classifier>
<type>zip</type>
</dependency>
</dependencies>
<build>
<plugins>
<plugin>
<artifactId>maven-assembly-plugin</artifactId>
<version>2.2-beta-2</version>
<executions>
<execution>
<id>bundle-project-sources</id>
<phase>package</phase>
<goals>
<goal>single</goal>
</goals>
<configuration>
<descriptorRefs>
<descriptorRef>
jar-with-dependencies
</descriptorRef>
</descriptorRefs>
</configuration>
</execution>
</executions>
</plugin>
</plugins>
</build>
</project>
This bundling project’s POM references the two assemblies from first-project and
second-project. Instead of referencing the main artifact of each project, the bundling
project’s POM specifies a classifier of project and a type of zip. This tells Maven to
resolve the ZIP archive that was created by the project assembly. Note that the bundling
project generates a jar-with-dependencies assembly. jar-with-dependencies does not
create a particularly elegant bundle; it simply creates a JAR file with the unpacked
contents of all of the dependencies. jar-with-dependencies is really just telling Maven
to take all of the dependencies, unpack them, and then create a single archive that
includes the output of the current project. In this project, it has the effect of creating a
single JAR file that puts the two project assemblies from first-project and second-
project side by side.
This example illustrates how the basic capabilities of the Maven Assembly plugin can
be combined without the need for a custom assembly descriptor. It achieves the purpose
of creating a single archive that contains the project directories for multiple projects
side by side. This time, the jar-with-dependencies is just a storage format, so we don’t
need to specify a Main-Class manifest attribute. To build the bundle, we just build the
project-bundle project normally:
$ mvn package
...
Assembly Basics | 225

[INFO] [assembly:single {execution: bundle-project-sources}]
[INFO] Processing DependencySet (output=)
[INFO] Building jar: ~/downloads/mvn-examples-1.0/assemblies/as-dependencies/\
project-bundle/target/project-bundle-1.0-SNAPSHOT-jar-with-dependencies.jar
To verify that the project-bundle assembly contains the unpacked contents of the as-
sembly dependencies, run jar tf:
$ java tf \
target/project-bundle-1.0-SNAPSHOT-jar-with-dependencies.jar
...
first-project-1.0-SNAPSHOT/pom.xml
first-project-1.0-SNAPSHOT/src/main/java/org/sonatype/mavenbook/App.java
first-project-1.0-SNAPSHOT/src/test/java/org/sonatype/mavenbook/AppTest.java
...
second-project-1.0-SNAPSHOT/pom.xml
second-project-1.0-SNAPSHOT/src/main/java/org/sonatype/mavenbook/App.java
second-project-1.0-SNAPSHOT/src/test/java/org/sonatype/mavenbook/AppTest.java
After reading this section, the title “Assembling Assemblies via Assembly Dependen-
cies” should make more sense. You’ve assembled assemblies from two projects into an
assembly using a bundling project that has a dependency on each of the assemblies.
Overview of the Assembly Descriptor
When the standard assembly descriptors introduced earlier in the section “Assembly
Basics” are not adequate, you will need to define your own assembly descriptor. The
assembly descriptor is an XML document that defines the structure and contents of an
assembly. See Figure 12-1.
The assembly descriptor contains five main configuration sections, plus two additional
sections: one for specifying standard assembly-descriptor fragments, called component
descriptors, and another for specifying custom file processor classes to help manage
the assembly-production process. These five sections are:
Base configuration
This section contains the information required by all assemblies, plus some addi-
tional configuration options related to the format of the entire archive, such as the
base path to use for all archive entries. For the assembly descriptor to be valid, you
must at least specify the assembly ID, at least one format, and at least one of the
other sections shown in this list.
File information
The configurations in this segment of the assembly descriptor apply to specific files
on the file system within the project’s directory structure. This segment contains
two main sections: files and fileSets. You use files and fileSets to control the
permissions of files in an assembly and to include or exclude files from an assembly.
226 | Chapter 12: Maven Assemblies
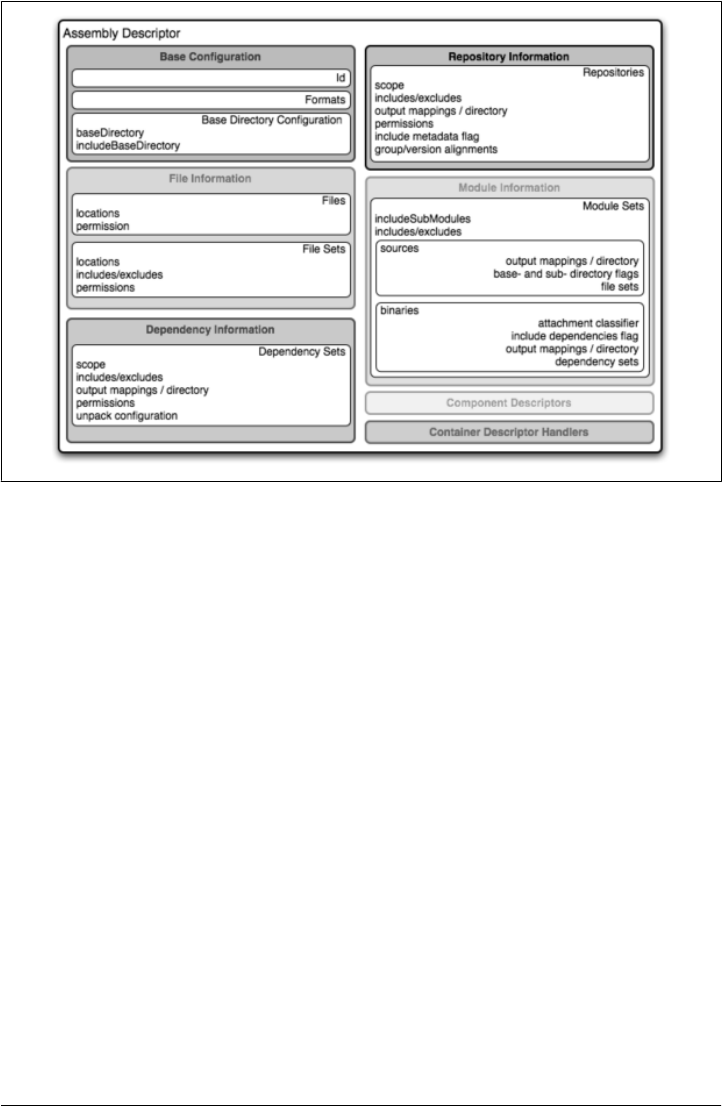
Dependency information
Almost all projects of any size depend on other projects. When creating distribution
archives, project dependencies are usually included in the end product of an as-
sembly. This section manages the way dependencies are included in the resulting
archive, and allows you to specify whether dependencies are unpacked, added
directly to the lib/ directory, or mapped to new file names. This section also allows
you to control the permissions of dependencies in the assembly as well as which
dependencies are included in an assembly.
Repository information
At times, it’s useful to isolate the sum total of all artifacts necessary to build a
project, whether they’re dependency artifacts, POMs of dependency artifacts, or
even a project’s own POM ancestry (your parent POM, its parent, and so on). This
section allows you to include one or more artifact-repository directory structures
inside your assembly, with various configuration options. The Assembly plugin
does not have the ability to include plugin artifacts in these repositories yet.
Module information
This section of the assembly descriptor allows you to take advantage of these
parent-child relationships when assembling your custom archive, and to include
source files, artifacts, and dependencies from your project’s modules. This is the
most complex section of the assembly descriptor, because it allows you to work
Figure 12-1. Assembly descriptor
Overview of the Assembly Descriptor | 227

with modules and submodules in two ways: as a series of fileSets (via the
sources section) or as a series of dependencySets (via the binaries section).
The Assembly Descriptor
This section is a tour of the assembly descriptor, which contains some guidelines for
developing a custom assembly descriptor. The Assembly plugin is one of the largest
plugins in the Maven ensemble, and one of the most flexible.
Property References in Assembly Descriptors
Any property discussed in the section “Maven Properties” in Chapter 13 can be refer-
enced in an assembly descriptor. Before any assembly descriptor is used by Maven, it
is interpolated using information from the POM and the current build environment.
All properties supported for interpolation within the POM itself are valid for use in
assembly descriptors, including POM properties, POM element values, system prop-
erties, user-defined properties, and operating-system environment variables.
The only exceptions to this interpolation step are elements in various sections
of the descriptor named outputDirectory, outputDirectoryMapping, or
outputFileNameMapping. The reason these are held back in their raw form is to allow
artifact- or module-specific information to be applied when resolving expressions in
these values, on a per-item basis.
Required Assembly Information
Two essential pieces of information are required for every assembly: the id and the list
of archive formats to produce. In practice, at least one other section of the descriptor
is required, since most archive format components will choke if they don’t have at least
one file to include. But without at least one format and an id, there is no archive to
create. The id is used both in the archive’s file name, and as part of the archive’s artifact
classifier in the Maven repository. The format string also controls the archiver-
component instance that will create the final assembly archive. All assembly descriptors
must contain an id and at least one format. See Example 12-5.
Example 12-5. Required assembly descriptor elements
<assembly>
<id>bundle</id>
<formats>
<format>zip</format>
</formats>
...
</assembly>
228 | Chapter 12: Maven Assemblies

The assembly id can be any string that does not contain spaces. The standard practice
is to use dashes when you must separate words within the assembly id. If you were
creating an assembly to create an interesting unique package structure, you would give
your assembly an id of something like interesting-unique-package. The Maven As-
sembly plugin also supports multiple formats within a single assembly descriptor,
allowing you to create the familiar .zip, .tar.gz, and .tar.bz2 distribution archive set with
ease. If you don’t find the archive format you need, you can also create a custom format.
Custom formats are discussed in the section “componentDescriptors and container-
DescriptorHandlers,” later in this chapter. The Assembly plugin supports several
archive formats natively, including:
•jar
•zip
•tar
•bzip2
•gzip
•tar.gz
•tar.bz2
•rar
•war
•ear
•sar
•dir
The id and format are essential because they will become a part of the coordinates for
the assembled archive. The example from Example 12-5 will create an assembly artifact
of type zip with a classifier of bundle.
Controlling the Contents of an Assembly
In theory, id and format are the only absolute requirements for a valid assembly de-
scriptor; however, many assembly archivers will fail if they do not have at least one file
to include in the output archive. The task of defining the files to be included in the
assembly is handled by the five main sections of the assembly descriptor: files,
fileSets, dependencySets, repositories, and moduleSets. To explore these sections
most effectively, we’ll start by discussing the most elemental section: files. Then, we’ll
move onto the two most commonly used sections, fileSets and dependencySets. Once
you understand the workings of fileSets and dependencySets, it’s easier to understand
repositories and moduleSets.
Controlling the Contents of an Assembly | 229

Files Section
The files section is the simplest part of the assembly descriptor. It is designed for files
that have a definite location relative to your project’s directory. Using this section, you
have absolute control over the exact set of files that are included in your assembly,
exactly what they are named, and where they will reside in the archive. See Exam-
ple 12-6.
Example 12-6. Including a JAR file in an assembly using files
<assembly>
...
<files>
<file>
<source>target/my-app-1.0.jar</source>
<outputDirectory>lib</outputDirectory>
<destName>my-app.jar</destName>
<fileMode>0644</fileMode>
</file>
</files>
...
</assembly>
Assuming you were building a project called my-app with a version of 1.0, Exam-
ple 12-6 would include your project’s JAR in the assembly’s lib/ directory, trimming
the version from the filename in the process so the final filename is simply
my-app.jar. It would then make the JAR readable by everyone and writable by the user
who owns it (this is what the mode 0644 means for files, using Unix four-digit octal
permission notation). For more information about the format of the value in
fileMode, see the Wikipedia entry on four-digit octal notation (http://en.wikipedia.org/
wiki/File_system_permissions#Octal_notation_and_additional_permissions).
You could build a very complex assembly using file entries, if you knew the full list of
files to be included. Even if you didn’t know the full list before the build started, you
could probably use a custom Maven plugin to discover that list and generate the as-
sembly descriptor using references like the one just shown. Although the files section
gives you fine-grained control over the permission, location, and name of each file in
the assembly archive, listing a file element for every file in a large archive would be a
tedious exercise. For the most part, you will be operating on groups of files and de-
pendencies using fileSets. The remaining four file-inclusion sections are designed to
help you include entire sets of files that match a particular criteria.
fileSets Section
Similar to the files section, fileSets are intended for files that have a definite location
relative to your project’s directory structure. However, unlike the files section,
fileSets describe sets of files, defined by file and path patterns they match (or don’t
230 | Chapter 12: Maven Assemblies

match), and the general directory structure in which they are located. The simplest
fileSet just specifies the directory where the files are located:
<assembly>
...
<fileSets>
<fileSet>
<directory>src/main/java</directory>
</fileSet>
</fileSets>
...
</assembly>
This fileset simply includes the contents of the src/main/java directory from our project.
It takes advantage of many default settings in the section, so let’s discuss those briefly.
First, you’ll notice that we haven’t told the file set where within the assembly matching
files should be located. By default, the destination directory (specified with
outputDirectory) is the same as the source directory (in our case, src/main/java). Ad-
ditionally, we haven’t specified any inclusion or exclusion file patterns. When these are
empty, the file set assumes that all files within the source directory are included, with
some important exceptions. The exceptions to this rule pertain mainly to source-
control metadata files and directories, and are controlled by the useDefaultExcludes
flag, which defaults to true. When active, useDefaultExcludes will keep directories such
as .svn/ and CVS/ from being added to the assembly archive. The section “Default
Exclusion Patterns for fileSets,” later in this chapter, provides a detailed list of the
default exclusion patterns.
If we want more control over this file set, we can specify it more explicitly. Exam-
ple 12-7 shows a fileSet element with all of the default elements specified.
Example 12-7. Including files with fileSet
<assembly>
...
<fileSets>
<fileSet>
<directory>src/main/java</directory>
<outputDirectory>src/main/java</outputDirectory>
<includes>
<include>**</include>
</include>
<useDefaultExcludes>true</useDefaultExcludes>
<fileMode>0644</fileMode>
<directoryMode>0755</directoryMode>
</fileSet>
</fileSets>
...
</assembly>
The includes section uses a list of include elements, which contain path patterns. These
patterns may contain wildcards, such as **, which matches one or more directories, or
Controlling the Contents of an Assembly | 231

*, which matches part of a filename, and ?, which matches a single character in a file-
name. Example 12-7 uses a fileMode entry to specify that files in this set should be
readable by all, but only writable by the owner. Since the fileSet includes directories,
we also have the option of specifying a directoryMode that works in much the same way
as the fileMode. Since a directory’s execute permission is what allows users to list its
contents, we want to make sure directories are executable in addition to being readable.
Like files, only the owner can write to directories in this set.
The fileSet entry offers some other options as well. First, it allows for an excludes
section with a form identical to the includes section. These exclusion patterns allow
you to exclude specific file patterns from a fileSet. Include patterns take precedence
over exclude patterns. Additionally, you can set the filtering flag to true if you want
to substitute property values for expressions within the included files. Expressions can
be delimited either by ${ and } (standard Maven expressions such as
${project.groupId}) or by @ and @ (standard Ant expressions such as
@project.groupId@). You can adjust the line ending of your files using the lineEnding
element. Valid values for lineEnding are:
keep
Preserve line endings from original files (this is the default value)
unix
Unix-style line endings
lf
Only a line feed character
dos
MS-DOS-style line endings
crlf
Carriage return followed by a line feed
Finally, if you want to ensure that all file-matching patterns are used, you can use the
useStrictFiltering element with a value of true (the default is false). This can be
especially useful if unused patterns may signal missing files in an intermediary output
directory. When useStrictFiltering is set to true, the Assembly plugin will fail if an
include pattern is not satisfied. In other words, if you have an include pattern that
includes a file from a build, and that file is not present, setting useStrictFiltering to
true will cause a failure if Maven cannot find the file to be included.
Default Exclusion Patterns for fileSets
When you use the default exclusion patterns, the Maven Assembly plugin is going to
be ignoring more than just SVN and CVS information. By default, the exclusion pat-
terns are defined by the DirectoryScanner (http://svn.codehaus.org/plexus/plexus-utils/
trunk/src/main/java/org/codehaus/plexus/util/DirectoryScanner.java) class in the
plexus-utils project (http://plexus.codehaus.org/plexus-utils/) hosted at Codehaus. The
232 | Chapter 12: Maven Assemblies

array of exclude patterns is defined as a static, final String array named
DEFAULTEXCLUDES in DirectoryScanner. The contents of this variable are shown in Ex-
ample 12-8.
Example 12-8. Definition of default exclusion patterns from plexus-utils
public static final String[] DEFAULTEXCLUDES = {
// Miscellaneous typical temporary files
"**/*~",
"**/#*#",
"**/.#*",
"**/%*%",
"**/._*",
// CVS
"**/CVS",
"**/CVS/**",
"**/.cvsignore",
// SCCS
"**/SCCS",
"**/SCCS/**",
// Visual SourceSafe
"**/vssver.scc",
// Subversion
"**/.svn",
"**/.svn/**",
// Arch
"**/.arch-ids",
"**/.arch-ids/**",
//Bazaar
"**/.bzr",
"**/.bzr/**",
//SurroundSCM
"**/.MySCMServerInfo",
// Mac
"**/.DS_Store"
};
This default array of patterns excludes temporary files from editors such as GNU Emacs
(http://www.gnu.org/software/emacs/) and other common temporary files from Macs
and a few common source control systems (although Visual SourceSafe is more of a
curse than a source control system). If you need to override these default exclusion
patterns, you set useDefaultExcludes to false and then define a set of exclusion patterns
in your own assembly descriptor.
Controlling the Contents of an Assembly | 233
dependencySets Section
One of the most common requirements for assemblies is the inclusion of a project’s
dependencies in an assembly archive. Where files and fileSets deal with files in your
project, dependency files don’t have a location in your project. The artifacts your
project depends on have to be resolved by Maven during the build. Dependency arti-
facts are abstract; they lack a definite location and are resolved using a symbolic set of
Maven coordinates. Whereas file and fileSet specifications require a concrete source
path, dependencies are included or excluded from an assembly using a combination of
Maven coordinates and dependency scopes.
The simplest dependencySet is an empty element:
<assembly>
...
<dependencySets>
<dependencySet/>
</dependencySets>
...
</assembly>
The dependencySet just shown will match all runtime dependencies of your project
(runtime scope includes the compile scope implicitly), and it will add these dependen-
cies to the root directory of your assembly archive. It will also copy the current project’s
main artifact into the root of the assembly archive, if it exists.
Wait… I thought dependencySet was about including my project’s de-
pendencies, not my project’s main archive? This counterintuitive side
effect was a widely used bug in the 2.1 version of the Assembly plugin,
and because Maven puts an emphasis on backward compatibility, this
counterintuitive and incorrect behavior needed to be preserved between
a 2.1 and 2.2 release. You can control this behavior by changing the
useProjectArtifact flag to false.
Although the default dependency set can be quite useful with no configuration what-
soever, this section of the assembly descriptor also supports a wide array of configu-
ration options, allowing you to tailor its behavior to your specific requirements. For
example, the first thing you might do to the dependency set shown previously is exclude
the current project artifact by setting the useProjectArtifact flag to false (again, its
default value is true for legacy reasons). This will allow you to manage the current
project’s build output separately from its dependency files. Alternatively, you might
choose to unpack the dependency artifacts by setting the unpack flag to true (it is
false by default). When unpack is set to true, the Assembly plugin will combine the
unpacked contents of all matching dependencies inside the archive’s root directory.
From this point, there are several things you might choose to do with this dependency
set. The upcoming sections discuss how to define the output location for dependency
234 | Chapter 12: Maven Assemblies

sets and how to include and exclude dependencies by scope. Finally, we’ll expand on
the unpacking functionality of the dependency set by exploring some advanced options
for unpacking dependencies.
Customizing dependency output location
Two configuration options are used in concert to define the location for a dependency
file within the assembly archive: outputDirectory and outputFileNameMapping. You may
want to customize the location of dependencies in your assembly using properties of
the dependency artifacts themselves. Let’s say you want to put all the dependencies in
directories that match the dependency artifact’s groupId. In this case, you would use
the outputDirectory element of the dependencySet, and you would supply something
like this:
<assembly>
...
<dependencySets>
<dependencySet>
<outputDirectory>${artifact.groupId}</outputDirectory>
</dependencySet>
</dependencySets>
...
</assembly>
This would have the effect of placing every single dependency in a subdirectory that
matches the name of each dependency artifact’s groupId.
If you want to perform a further customization and remove the version numbers from
all dependencies, you can customize the output file name for each dependency using
the outputFileNameMapping element as follows:
<assembly>
...
<dependencySets>
<dependencySet>
<outputDirectory>${artifact.groupId}</outputDirectory>
<outputFileNameMapping>
${module.groupId}-${module.artifactId}.${module.extension}
</outputFileNameMapping>
</dependencySet>
</dependencySets>
...
</assembly>
In the example just shown, a dependency on commons:commons-codec version 1.3 would
end up in the file commons/commons-codec.jar.
Interpolation of properties in dependency output location
As mentioned in the “Property References in Assembly Descriptors” section, earlier in
this chapter, neither of these elements are interpolated with the rest of the assembly
Controlling the Contents of an Assembly | 235

descriptor because their raw values have to be interpreted using additional, artifact-
specific expression resolvers.
The artifact expressions available for these two elements vary only slightly. In both
cases, all of the ${project.*}, ${pom.*}, and ${*} expressions that are available in the
POM and the rest of the assembly descriptor are also available here. For the
outputFileNameMapping element, the following process is applied to resolve expressions:
1. If the expression matches the pattern ${artifact.*}:
a. Match against the dependency’s Artifact instance (resolves: groupId,
artifactId, version, baseVersion, scope, classifier, and file.*).
b. Match against the dependency’s ArtifactHandler instance (resolves:
expression).
c. Match against the project instance associated with the dependency’s artifact
(resolves: mainly POM properties).
d. If the expression matches the patterns ${pom.*} or ${project.*}, match against
the project instance (MavenProject) of the current build.
2. If the expression matches the pattern ${dashClassifier?} and the artifact instance
contains a nonnull classifier, resolve to the classifier preceded by a dash (-
classifier). Otherwise, resolve to an empty string.
3. Attempt to resolve the expression against the project instance of the current build.
4. Attempt to resolve the expression against the POM properties of the current build.
5. Attempt to resolve the expression against the available system properties.
6. Attempt to resolve the expression against the available operating-system environ-
ment variables.
The outputDirectory value is interpolated in much the same way, the difference being
that there is no available ${artifact.*} information, only the ${project.*} instance
for the particular artifact. Therefore, the expressions just shown associated with those
classes (numbers 1a, 1b, and 3 in the process listing) are unavailable.
How do you know when to use outputDirectory and outputFileNameMapping? When
dependencies are unpacked, only the outputDirectory is used to calculate the output
location. When dependencies are managed as whole files (not unpacked), both
outputDirectory and outputFileNameMapping can be used together. When used to-
gether, the result is the equivalent of:
<archive-root-dir>/<outputDirectory>/<outputFileNameMapping>
When outputDirectory is missing, it is not used. When outputFileNameMapping is miss-
ing, its default value is:
${artifact.artifactId}-${artifact.version}${dashClassifier?}.${artifact.extension}
236 | Chapter 12: Maven Assemblies

Including and excluding dependencies by scope
In Chapter 9, we noted that all project dependencies have one scope or another. Scope
determines when in the build process that dependency normally would be used. For
instance, test-scoped dependencies are not included in the classpath during compila-
tion of the main project sources, but they are included in the classpath when compiling
unit test sources. This is because your project’s main source code should not contain
any code specific to testing, since testing is not a function of the project (it’s a function
of the project’s build process). Similarly, provided-scoped dependencies are assumed
to be present in the environment of any eventual deployment. However, if a project
depends on a particular provided dependency, it is likely to require that dependency in
order to compile. Therefore, provided-scoped dependencies are present in the compi-
lation classpath, but not in the dependency set that should be bundled with the project’s
artifact or assembly.
Also from Chapter 9, recall that some dependency scopes imply others. For instance,
the runtime dependency scope implies the compile scope, since all compile-time de-
pendencies (except for those in the provided scope) will be required for the code to
execute. A number of complex relationships exist between the various dependency
scopes that control how the scope of a direct dependency affects the scope of a transitive
dependency. In a Maven Assembly descriptor, we can use scopes to apply different
settings to different sets of dependencies accordingly.
For instance, if we plan to bundle a web application with Jetty (http://www.mortbay
.org/jetty-6/) to create a completely self-contained application, we’ll need to include all
provided-scope dependencies somewhere in the Jetty directory structure we’re includ-
ing. This ensures those provided dependencies actually are present in the runtime en-
vironment. Non-provided, runtime dependencies will still land in the WEB-INF/lib
directory, so these two dependency sets must be processed separately. These depend-
ency sets might look similar to the XML shown in Example 12-9.
Example 12-9. Defining dependency sets using scope
<assembly>
...
<dependencySets>
<dependencySet>
<scope>provided</scope>
<outputDirectory>lib/${project.artifactId}</outputDirectory>
</dependencySet>
<dependencySet>
<scope>runtime</scope>
<outputDirectory>
webapps/${webContextName}/WEB-INF/lib
</outputDirectory>
</dependencySet>
</dependencySets>
...
</assembly>
Controlling the Contents of an Assembly | 237

provided-scoped dependencies are added to the lib/ directory in the assembly root,
which is assumed to be a libraries directory that will be included in the Jetty global
runtime classpath. We’re using a subdirectory named for the project’s artifactId in
order to make it easier to track the origin of a particular library. runtime dependencies
are included in the WEB-INF/lib path of the web application, which is located within
a subdirectory of the standard Jetty webapps/ directory that is named using a custom
POM property called webContextName. What we’ve done in Example 12-9 is separate
application-specific dependencies from dependencies that will be present in a Servlet
that contains global classpath.
However, simply separating according to scope may not be enough, particularly in the
case of a web application. It’s conceivable that one or more runtime dependencies will
actually be bundles of standardized, noncompiled resources for use in the web appli-
cation. For example, consider a set of web applications that reuse a common set of
JavaScript, Cascading Style Sheets (CSS), SWF, and image resources. To make these
resources easy to standardize, it’s common practice to bundle them up in an archive
and deploy them to the Maven repository. At that point, they can be referenced as
standard Maven dependencies—possibly with a dependency type of zip—that are
normally specified with a runtime scope. Remember, these are resources, not binary
dependencies of the application code itself; therefore, it’s not appropriate to blindly
include them in the WEB-INF/lib directory. Instead, these resource archives should be
separated from binary runtime dependencies and unpacked into the web application
document root somewhere. In order to achieve this kind of separation, we’ll need to
use inclusion and exclusion patterns that apply to the coordinates of a specific
dependency.
In other words, say you have three or four web application that reuse the same resour-
ces, and you want to create an assembly that puts provided dependencies into lib/, puts
runtime dependencies into webapps/<contextName>/WEB-INF/lib, and then unpacks
a specific runtime dependency into your web application’s document root. You can do
this because the assembly allows you to define multiple include and exclude patterns
for a given dependencySet element. Read the next section for more development of this
idea.
Fine-tuning: dependency includes and excludes
A resource dependency might be as simple as a set of resources (CSS, JavaScript, and
images) in a project that has an assembly that creates a ZIP archive. Depending on the
particulars of our web application, we might be able to distinguish resource depend-
encies from binary dependencies solely according to type. Most web applications are
going to depend on other dependencies of type jar, and it is possible that we can state
with certainty that all dependencies of type zip are resource dependencies. Or we might
have a situation where resources are stored in jar format, but have a classifier of some-
thing like resources. In either case, we can specify an inclusion pattern to target these
resource dependencies and apply logic different than that used for binary dependencies.
238 | Chapter 12: Maven Assemblies

We’ll specify these tuning patterns using the includes and excludes sections of the
dependencySet.
Both includes and excludes are list sections, meaning they accept the subelements
include and exclude respectively. Each include or exclude element contains a string
value, which can contain wildcards. Each string value can match dependencies in a few
different ways. Generally speaking, three identity pattern formats are supported:
groupId:artifactId—version-less key
You would use this pattern to match a dependency by only the groupId and the
artifactId.
groupId:artifactId:type[:classifier]—conflict id
The pattern allows you to specify a wider set of coordinates to create a more specific
include/exclude pattern.
groupId:artifactId:type[:classifier]:version—full artifact identity
If you need to get really specific, you can specify all the coordinates.
All of these pattern formats support the wildcard character *, which can match any
subsection of the identity and is not limited to matching single identity parts (sections
between : characters). Also, note that the classifier section is optional, because patterns
matching dependencies that don’t have classifiers do not need to account for the clas-
sifier section in the pattern.
In the example given earlier, where the key distinction is the artifact type zip, and none
of the dependencies have classifiers, the following pattern would match resource de-
pendencies, assuming that they were of type zip:
*:zip
This pattern makes use of the second dependency identity: the dependency’s conflict
id. Now that we have a pattern that distinguishes resource dependencies from binary
dependencies, we can modify our dependency sets to handle resource archives differ-
ently, as shown in Example 12-10.
Example 12-10. Using dependency excludes and includes in dependencySets
<assembly>
...
<dependencySets>
<dependencySet>
<scope>provided</scope>
<outputDirectory>lib/${project.artifactId}</outputDirectory>
</dependencySet>
<dependencySet>
<scope>runtime</scope>
<outputDirectory>
webapps/${webContextName}/WEB-INF/lib
</outputDirectory>
<excludes>
<exclude>*:zip</exclude>
Controlling the Contents of an Assembly | 239

</excludes>
</dependencySet>
<dependencySet>
<scope>runtime</scope>
<outputDirectory>
webapps/${webContextName}/resources
</outputDirectory>
<includes>
<include>*:zip</include>
</includes>
<unpack>true</unpack>
</dependencySet>
</dependencySets>
...
</assembly>
In this example, the runtime-scoped dependency set from our previous example has
been updated to exclude resource dependencies. Only binary dependencies (non-zip
dependencies) should be added to the WEB-INF/lib directory of the web application.
Resource dependencies now have their own dependency set, which is configured to
include these dependencies in the resources directory of the web application. The
includes section in the last dependencySet reverses the exclusion from the previous
dependencySet, so that resource dependencies are included using the same identity pat-
tern (i.e., *:zip). The last dependencySet refers to the shared resource dependency, and
it is configured to unpack the shared resource dependency in the document root of the
web application.
Example 12-10 was based on the assumption that our shared resources project de-
pendency had a type that differed from all the other dependencies. What if the shared
resource dependency had the same type as all the other dependencies? How could you
differentiate the dependency? In that case, if the shared resource dependency had been
bundled as a JAR with the classifier resources, you could change to the identity pattern
and match those dependencies instead:
*:jar:resources
Rather than matching on artifacts with a type of zip and no classifier, we’re matching
on artifacts with a classifier of resources and a type of jar.
Just like the fileSets section, dependencySets support the useStrictFiltering flag.
When enabled, any specified patterns that don’t match one or more dependencies will
cause the assembly—and consequently, the build—to fail. This can be particularly
useful as a safety valve to make sure your project dependencies and assembly descrip-
tors are synchronized and interacting as you expect them to. By default, this flag is set
to false for the purposes of backward compatibility.
Transitive dependencies, project attachments, and project artifacts
The dependencySet section supports two more general mechanisms for tuning the sub-
set of matching artifacts: transitive selection options and options for working with
240 | Chapter 12: Maven Assemblies

project artifacts. Both of these features are a product of the need to support legacy
configurations that applied a somewhat more liberal definition of the word “depend-
ency.” As a prime example, consider the project’s own main artifact. Typically, this
would not be considered a dependency, yet older versions of the Assembly plugin in-
cluded the project artifact in calculations of dependency sets. To provide backward
compatibility with this “feature,” the 2.2 releases (currently at 2.2-beta-2) of the As-
sembly plugin support a flag in the dependencySet called useProjectArtifact, whose
default value is true. By default, dependency sets will attempt to include the project
artifact itself in calculations about which dependency artifacts match and which don’t.
If you’d rather deal with the project artifact separately, set this flag to false.
We recommend that you always set useProjectArtifact to false.
As a natural extension to the inclusion of the project artifact, the project’s attached
artifacts can also be managed within a dependencySet using the
useProjectAttachments flag (whose default value is false). Enabling this flag allows
patterns that specify classifiers and types to match on artifacts that are “attached” to
the main project artifact; that is, they share the same basic groupId/artifactId/ver
sion identity, but differ in type and classifier from the main artifact. This could be
useful for including Javadoc or source JARs in an assembly.
Aside from dealing with the project’s own artifacts, it’s also possible to fine-tune the
dependency set using two transitive-resolution flags. The first, called
useTransitiveDependencies (and set to true by default), simply specifies whether the
dependency set should consider transitive dependencies at all when determining the
matching artifact set to be included. As an example of how this could be used, consider
what happens when your POM has a dependency on another assembly. That assembly
(most likely) will have a classifier that separates it from the main project artifact, making
it an attachment. However, one quirk of the Maven dependency-resolution process is
that the transitive-dependency information for the main artifact is still used when re-
solving the assembly artifact. If the assembly bundles its project dependencies inside
itself, using transitive dependency resolution here would effectively duplicate those
dependencies. To avoid this, we simply set useTransitiveDependencies to false for the
dependency set that handles that assembly dependency.
The other transitive-resolution flag is far more subtle. It’s called useTransitiveFilter
ing and has a default value of false. To understand what this flag does, we first need
to understand what information is available for any given artifact during the resolution
process. When an artifact is a dependency of a dependency (that is, removed at least
one level from your own POM), it has what Maven calls a “dependency trail,” which
is maintained as a list of strings that correspond to the full artifact identities
Controlling the Contents of an Assembly | 241

(groupId:artifactId:type:[classifier:]version) of all dependencies between your POM
and the artifact that owns that dependency trail. If you remember the three types of
artifact identities available for pattern matching in a dependency set, you’ll notice that
the entries in the dependency trail—the full artifact identity—correspond to the third
type. When useTransitiveFiltering is set to true, the entries in an artifact’s
dependency trail can cause the artifact to be included or excluded in the same way its
own identity can.
If you’re considering using transitive filtering, be careful! A given artifact can be inclu-
ded from multiple places in the transitive-dependency graph, but as of Maven 2.0.9,
only the first inclusion’s trail will be tracked for this type of matching. This can lead to
subtle problems when collecting the dependencies for your project.
Most assemblies don’t really need this level of control over dependency
sets; consider carefully whether yours truly does. Hint: it probably
doesn’t.
Advanced unpacking options
As we discussed previously, some project dependencies may need to be unpacked in
order to create a working assembly archive. In the examples we have shown, the deci-
sion to unpack or not was simple. We didn’t take into account what needed to be
unpacked or, more importantly, what should not have been unpacked. To gain more
control over the dependency unpacking process, we can configure the unpackOptions
element of the dependencySet. Using this section, we have the ability to choose which
file patterns to include or exclude from the assembly, and whether included files should
be filtered to resolve expressions using current POM information. In fact, the options
available for unpacking dependency sets are fairly similar to those available for includ-
ing files from the project directory structure, using the filesets descriptor section.
To continue our web application example, suppose some of the resource dependencies
have been bundled with a file that details their distribution license. In the case of our
web application, we’ll handle third-party license notices by way of a NOTICES file
included in our own bundle, so we don’t want to include the license file from the
resource dependency. To exclude this file, we simply add it to the unpack options inside
the dependency set that handles resource artifacts, as shown in Example 12-11.
Example 12-11. Excluding files from a dependency unpack
<asembly>
...
<dependencySets>
<dependencySet>
<scope>runtime</scope>
<outputDirectory>
webapps/${webContextName}/resources
</outputDirectory>
<includes>
242 | Chapter 12: Maven Assemblies

<include>*:zip</include>
</includes>
<unpack>true</unpack>
<unpackOptions>
<excludes>
<exclude>**/LICENSE*</exclude>
</excludes>
</unpackOptions>
</dependencySet>
</dependencySets>
...
</assembly>
Notice that the exclude we’re using looks very similar to those used in fileSet decla-
rations. Here, we’re blocking any file starting with the word LICENSE in any directory
within our resource artifacts. You can think of the unpack options section as a light-
weight fileSet applied to each dependency matched within that dependency set. In
other words, it is a fileSet by way of an unpacked dependency. Just as we specified an
exclusion pattern for files within resource dependencies in order to block certain files,
you can also choose which restricted set of files to include using the includes section.
The same code that processes inclusions and exclusions on fileSets has been reused
for processing unpackOptions.
In addition to file inclusion and exclusion, the unpack options on a dependency set
also provides a filtering flag, whose default value is false. Again, this should be fa-
miliar from our earlier discussion of filesets. In both cases, expressions using either the
Maven syntax of ${property} or the Ant syntax of @property@ are supported. However,
filtering is a particularly nice feature to have for dependency sets, since it effectively
allows you to create standardized, versioned resource templates that are then custom-
ized to each assembly as they are included. Once you start mastering the use of filtered,
unpacked dependencies that store shared resources, you will be able to start abstracting
repeated resources into common resource projects.
Summarizing dependency sets
Finally, it’s worth mentioning that dependency sets support the same fileMode and
directoryMode configuration options that filesets do, though you should remember that
the directoryMode setting will be used only when dependencies are unpacked.
moduleSets Sections
Multimodule builds are generally stitched together using the parent and modules sec-
tions of interrelated POMs. Typically, parent POMs specify their children in a
modules section that, under normal circumstances, causes the child POMs to be inclu-
ded in the build process of the parent. Exactly how this relationship is constructed can
have important implications for the ways in which the Assembly plugin can participate
Controlling the Contents of an Assembly | 243

in this process, but we’ll discuss that later. For now, it’s enough to keep in mind this
parent-module relationship as we discuss the moduleSets section.
Projects are stitched together into multimodule builds because they are part of a larger
system. These projects are designed to be used together, and a single module in a larger
build has little practical value on its own. In this way, the structure of the project’s build
is related to the way in which we expect the project (and its modules) to be used. If we
consider the project from the user’s perspective, it makes sense that the ideal end goal
of that build would be a single, distributable file that the user can consume directly
with minimum installation hassle. Since Maven multimodule builds typically follow a
top-down structure, where dependency information, plugin configurations, and other
information trickles down from parent to child, it seems natural that the task of rolling
all of these modules into a single distribution file should fall to the topmost project.
This is where the moduleSet comes into the picture.
Module sets allow the inclusion of resources that belong to each module in the project
structure into the final assembly archive. Just as you can select a group of files to include
in an assembly using a fileSet and a dependencySet, you can include a set of files and
resources using a moduleSet to refer to modules in a multimodule build. They achieve
this by enabling two basic types of module-specific inclusion: file-based and artifact-
based. Before we get into the specifics and differences between file-based and artifact-
based inclusion of module resources into an assembly, let’s talk a little about selecting
which modules to process.
Module selection
By now, you should be familiar with includes and excludes patterns as they are used
throughout the assembly descriptor to filter files and dependencies. When you are
referring to modules in an assembly descriptor, you will also use the includes and
excludes patterns to define rules that apply to different sets of modules. The difference
in moduleSet includes and excludes is that these rules do not allow for wildcard patterns.
(As of the 2.2-beta-2 release, this feature has not really seen much demand, so it hasn’t
been implemented.) Instead, each include or exclude value is simply the groupId and
artifactId for the module, separated by a colon, like this:
groupId:artifactId
In addition to includes and excludes, the moduleSet also supports an additional selec-
tion tool: the includeSubModules flag (whose default value is true). The parent-child
relationship in any multimodule build structure is not strictly limited to two tiers of
projects. In fact, you can include any number of tiers, or layers, in your build. Any
project that is a module of a module of the current project is considered a submodule.
In some cases, you may want to deal with each individual module in the build separately
(including submodules). For example, this is often simplest when dealing with artifact-
based contributions from these modules. To do this, you would simply leave the
useSubModules flag set to the default of true.
244 | Chapter 12: Maven Assemblies

When you’re trying to include files from each module’s directory structure, you may
wish to process that module’s directory structure only once. If your project directory
structure mirrors that of the parent-module relationships that are included in the
POMs, this approach would allow file patterns such as **/src/main/java to apply not
only to that direct module’s project directory, but also to the directories of its own
modules as well. In case you don’t want to process submodules directly (they will
instead be processed as subdirectories within your own project’s modules), you should
set the useSubModules flag to false.
Once we’ve determined how module selection should proceed for the module set in
question, we’re ready to choose what to include from each module. As mentioned
earlier, this can include files or artifacts from the module project.
Sources section
Suppose you want to include the source of all modules in your project’s assembly, but
you would like to exclude a particular module. Maybe you have a project named secret-
sauce that contains secret and sensitive code that you don’t want to distribute with
your project. The simplest way to accomplish this is to use a moduleSet that includes
each project’s directory in ${module.basedir.name} and that excludes the secret-
sauce module from the assembly. See Example 12-12.
Example 12-12. Including and excluding modules with a moduleSet
<assembly>
...
<moduleSets>
<moduleSet>
<includeSubModules>false</includeSubModules>
<excludes>
<exclude>
com.mycompany.application:secret-sauce
</exclude>
</excludes>
<sources>
<outputDirectoryMapping>
${module.basedir.name}
</outputDirectoryMapping>
<excludeSubModuleDirectories>
false
</excludeSubModuleDirectories>
<fileSets>
<fileSet>
<directory>/</directory>
<excludes>
<exclude>**/target</exclude>
</excludes>
</fileSet>
</fileSets>
</sources>
</moduleSet>
Controlling the Contents of an Assembly | 245

</moduleSets>
...
</assembly>
In this example, since we’re dealing with each module’s sources, it’s simpler to deal
only with direct modules of the current project, handling submodules using filepath
wildcard patterns in the file set. We set the includeSubModules element to false so we
don’t have to worry about submodules showing up in the root directory of the assembly
archive. The exclude element will take care of excluding the secret-sauce module.
We’re not going to include the project sources for the secret-sauce module; they’re,
well, secret.
Normally, module sources are included in the assembly under a subdirectory named
after the module’s artifactId. However, since Maven allows modules that are not in
directories named after the module project’s artifactId, it’s often better to use the
expression ${module.basedir.name} to preserve the module directory’s actual name
(${module.basedir.name} is the same as calling MavenProject.getBasedir().get
Name()). It is critical to remember that modules are not required to be subdirectories of
the project that declares them. If your project has a particularly strange directory struc-
ture, you may need to resort to special moduleSet declarations that include specific
projects and account for your own project’s idiosyncrasies.
Try to minimize your own project’s idiosyncracies. Although Maven is
flexible, if you find yourself doing too much configuration, there is likely
an easier way.
Continuing through Example 12-12, since we’re not processing submodules explicitly
in this module set, we need to make sure submodule directories are not excluded from
the source directories we consider for each direct module. By setting the
excludeSubModuleDirectories flag to false, this allows us to apply the same file pattern
to directory structures within a submodule of the one we’re processing. Finally in
Example 12-12, we’re not interested in any output of the build process for this module
set. We exclude the target/ directory from all modules.
It’s also worth mentioning that the sources section supports fileSet-like elements
directly within itself, in addition to supporting nested fileSets. These configuration
elements are used to provide backward compatibility to previous versions of the As-
sembly plugin (versions 2.1 and under) that didn’t support multiple distinct file sets
for the same module without creating a separate module set declaration. They are dep-
recated and should not be used.
Interpolation of outputDirectoryMapping in moduleSets
In the section “Customizing dependency output location,” earlier in this chapter, we
used the element outputDirectoryMapping to change the name of the directory under
which each module’s sources would be included. The expressions contained in this
246 | Chapter 12: Maven Assemblies

element are resolved in exactly the same way as the outputFileNameMapping, used in
dependency sets. (See the explanation of this algorithm in the section “dependencySets
Section,” earlier in this chapter.)
In Example 12-12, we used the expression ${module.basedir.name}. You might notice
that the root of that expression, module, is not listed in the mapping-resolution algo-
rithm from the dependency sets section; this object root is specific to configurations
within moduleSets. It works in exactly the same way as the ${artifact.*} references
available in the outputFileNameMapping element, except it is applied to the module’s
MavenProject, Artifact, and ArtifactHandler instances instead of those from a de-
pendency artifact.
Binaries section
Just as the sources section is primarily concerned with including a module in its source
form, the binaries section is primarily concerned with including the module’s build
output, or its artifacts. Though this section functions primarily as a way of specifying
dependencySets that apply to each module in the set, a few additional features unique
to module artifacts are worth exploring: attachmentClassifier and
includeDependencies. In addition, the binaries section contains options similar to the
dependencySet section that relate to the handling of the module artifact itself. These
are: unpack, outputFileNameMapping, outputDirectory, directoryMode, and fileMode. Fi-
nally, module binaries can contain a dependencySets section to specify how each mod-
ule’s dependencies should be included in the assembly archive. First, let’s take a look
at how the options mentioned here can be used to manage the module’s own artifacts.
Suppose we want to include the Javadoc JARs for each of our modules inside our as-
sembly. In this case, we don’t care about including the module dependencies; we just
want the Javadoc JAR. However, since this particular JAR is always going to be present
as an attachment to the main project artifact, we need to specify which classifier to use
to retrieve it. For simplicity, we won’t cover unpacking the module Javadoc JARs, since
this configuration is exactly the same as what we used for dependency sets earlier in
this chapter. The resulting module set might look similar to Example 12-13.
Example 12-13. Including Javadoc from modules in an assembly
<assembly>
...
<moduleSets>
<moduleSet>
<binaries>
<attachmentClassifier>javadoc</attachmentClassifier>
<includeDependencies>false</includeDependencies>
<outputDirectory>apidoc-jars</outputDirectory>
</binaries>
</moduleSet>
</moduleSets>
...
</assembly>
Controlling the Contents of an Assembly | 247

In this example, we don’t explicitly set the includeSubModules flag, since it’s true by
default. However, we definitely want to process all modules—even submodules—
using this module set, since we’re not using any sort of file pattern that could match
on submodule directory structures within. The attachmentClassifier grabs the at-
tached artifact with the javadoc classifier for each module processed. The
includeDependencies element tells the Assembly plugin that we’re not interested in any
of the module’s dependencies, just the javadoc attachment. Finally, the outputDirec
tory element tells the Assembly plugin to put all of the Javadoc JARs into a directory
named apidoc-jars/ off the assembly root directory.
Although we’re not doing anything too complicated in this example, it’s important to
understand that the same changes to the expression-resolution algorithm discussed for
the outputDirectoryMapping element of the sources section also apply here. That is,
whatever was available as ${artifact.*} inside a dependencySet’s
outputFileNameMapping configuration is also available here as ${module.*}. The same
applies for outputFileNameMapping when used directly within a binaries section.
Finally, let’s examine an example where we simply want to process the module’s artifact
and its runtime dependencies. In this case, we want to separate the artifact set for each
module into separate directory structures, according to the module’s artifactId and
version. The resulting module set is surprisingly simply, and it looks like the listing in
Example 12-14.
Example 12-14. Including module artifacts and dependencies in an assembly
<assembly>
...
<moduleSets>
<moduleSet>
<binaries>
<outputDirectory>
${module.artifactId}-${module.version}
</outputDirectory>
<dependencySets>
<dependencySet/>
</dependencySets>
</binaries>
</moduleSet>
</moduleSets>
...
</assembly>
In this example, we’re using the empty dependencySet element, since that should in-
clude all runtime dependencies by default, with no configuration. With the
outputDirectory specified at the binaries level, all dependencies should be included
alongside the module’s own artifact in the same directory, so we don’t even need to
specify that in our dependency set.
For the most part, module binaries are fairly straightforward. In both parts—the main
part, concerned with handling the module artifact itself, and the dependency sets,
248 | Chapter 12: Maven Assemblies

concerned with the module’s dependencies—the configuration options are very similar
to those in a dependency set. Of course, the binaries section also provides options for
controlling whether dependencies are included and which main-project artifact you
want to use.
Like the sources section, the binaries section contains a couple of configuration op-
tions that are provided solely for backward compatibility and that should be considered
deprecated. These include the includes and excludes subsections.
moduleSets, parent POMs, and the binaries section
Finally, we close the discussion about module handling with a strong warning. There
are subtle interactions between Maven’s internal design as it relates to parent-module
relationships and the execution of a module-set’s binaries section. When a POM de-
clares a parent, that parent must be resolved in some way or other before the POM in
question can be built. If the parent is in the Maven repository, there is no problem.
However, as of Maven 2.0.9, this can cause big problems if that parent is a higher-level
POM in the same build, particularly if that parent POM expects to build an assembly
using its modules’ binaries.
Maven 2.0.9 sorts projects in a multimodule build according to their dependencies,
with a given project’s dependencies being built ahead of itself. The problem is that the
parent element is considered a dependency, which means the parent project’s build
must complete before the child project is built. If part of that parent’s build process
includes the creation of an assembly that uses module binaries, those binaries will not
exist yet, and therefore cannot be included, causing the assembly to fail. This is a com-
plex and subtle issue that severely limits the usefulness of the module binaries section
of the assembly descriptor. In fact, it has been filed in the bug tracker for the Assembly
plugin at http://jira.codehaus.org/browse/MASSEMBLY-97. Hopefully, future versions
of Maven will find a way to restore this functionality, since the parent-first requirement
may not be completely necessary.
Repositories Section
The repositories section represents a slightly more exotic feature in the assembly de-
scriptor, since few applications other than Maven can take full advantage of a Maven-
repository directory structure. For this reason, and because many of its features closely
resemble those in the dependencySets section, we won’t spend too much time on the
repositories section of the assembly descriptor. In most cases, users who understand
dependency sets should have no trouble constructing repositories via the Assembly
plugin. We’re not going to motivate you to use the repositories section; we’re not
going to go through the business of setting up a use case and walking you through the
process. We’re just going to bring up a few caveats for those of you who find the need
to use the repositories section.
Controlling the Contents of an Assembly | 249

Having said that, two features particular to the repositories section deserve some
mention. The first is the includeMetadata flag. When set to true, it includes metadata
such as the list of real versions that correspond to -SNAPSHOT virtual versions, and by
default it’s set to false. At present, the only metadata included when this flag is true
is the information downloaded from Maven’s central repository.
The second feature is called groupVersionAlignments. Again, this section is a list of
individual groupVersionAlignment configurations, whose purpose is to normalize all
included artifacts for a particular groupId to use a single version. Each alignment entry
consists of two mandatory elements—id and version—along with an optional section
called excludes that supplies a list of artifactId string values that are to be excluded
from this realignment. Unfortunately, this realignment doesn’t seem to modify the
POMs involved in the repository—neither those related to realigned artifacts nor those
that depend on realigned artifacts—so it’s difficult to imagine what the practical ap-
plication for this sort of realignment would be.
In general, it’s simplest to apply the same principles you would use in dependency sets
to repositories when adding them to your assembly descriptor. Although the
repositories section does support the extra options mentioned earlier, they are mainly
provided for backward compatibility and will probably be deprecated in future releases.
Managing the Assembly’s Root Directory
Now that we’ve made it through the main body of the assembly descriptor, we can
close the discussion of content-related descriptor sections with something lighter: root-
directory naming and site-directory handling.
Some may consider it a stylistic concern, but it’s often important to have control over
the name of the root directory for your assembly, or to decide whether the root directory
is there at all. Fortunately, two configuration options in the root of the assembly de-
scriptor make managing the archive root directory simple: includeBaseDirectory and
baseDirectory. In cases such as executable JAR files, you probably don’t want a root
directory at all. To skip it, simply set the includeBaseDirectory flag to false. (It’s
true by default.) This will result in an archive that, when unpacked, may create more
than one directory in the unpack target directory. Although this is considered bad form
for archives that are meant to be unpacked before use, it’s not so bad for archives that
are consumable as is.
In other cases, you may want to guarantee the name of the archive root directory re-
gardless of the POM’s version or other information. By default, the baseDirectory
element has a value equal to ${project.artifactId}-${project.version}. However, we
can easily set this element to any value that consists of literal strings and expressions
that can be interpolated from the current POM, such as ${project.groupId}-
${project.artifactId}. This could be very good news for your documentation team!
(We all have those, right?)
250 | Chapter 12: Maven Assemblies

Another configuration available is the includeSiteDirectory flag, whose default value
is false. If your project build has also constructed a web site document root using the
site lifecycle or the Site plugin goals, that output can be included by setting this flag
to true. However, this feature is a bit limited, since it includes only the outputDirec
tory from the reporting section of the current POM (by default, target/site) and doesn’t
take into consideration any site directories that may be available in module projects.
Use it if you want, but a good fileSet specification or moduleSet specification with
sources configured could serve equally well, if not better. This is yet another example
of legacy configuration currently supported by the Assembly plugin for the purpose of
backward compatibility. Your mileage may vary. If you really want to include a site that
is aggregated from many modules, you’ll want to consider using a fileSet or
moduleSet instead of setting includeSiteDirectory to true.
componentDescriptors and containerDescriptorHandlers
To round out our exploration of the assembly descriptor, we should touch briefly on
two other sections: containerDescriptorHandlers and componentDescriptors. The
containerDescriptorHandlers section refers to custom components that you use to ex-
tend the capabilities of the Assembly plugin. Specifically, these custom components
allow you to define and handle special files that may need to be merged from the mul-
tiple constituents used to create your assembly. A good example of this might be a
custom container-descriptor handler that merged web.xml files from constituent WAR
or WAR-fragment files included in your assembly, in order to create the single web-
application descriptor required for you to use the resulting assembly archive as a WAR
file.
The componentDescriptors section allows you to reference external
assembly-descriptor fragments and include them in the current descriptor. Compo-
nent references can be any of the following (in this order):
1. Relative filepaths, e.g., src/main/assembly/component.xml
2. Artifact references, e.g., groupId:artifactId:version[:type[:classifier]]
3. Classpath resources, e.g., /assemblies/component.xml
4. URLs, e.g., http://www.sonatype.com/component.xml
Incidentally, when resolving a component descriptor, the Assembly plugin tries those
different strategies in that exact order. The first one to succeed is used.
Component descriptors can contain many of the same content-oriented sections avail-
able in the assembly descriptor itself, with the exception of moduleSets, which is con-
sidered so specific to each project that it’s not a good candidate for reuse. Also included
in a component descriptor is the containerDescriptorHandlers section, which we
briefly discussed earlier. Component descriptors cannot contain formats, assembly IDs,
or any configuration related to the base directory of the assembly archive, all of which
are also considered unique to a particular assembly descriptor. Though it may make
Controlling the Contents of an Assembly | 251

sense to allow sharing of the formats section, this has not been implemented as of the
2.2-beta-2 Assembly plugin release.
Best Practices
The Assembly plugin provides enough flexibility to solve many problems in a number
of different ways. If your project has a unique requirement, there’s a good chance that
you can use the methods documented in this chapter to achieve almost any assembly
structure. This section of the chapter details some common best practices that, if ad-
hered to, will make your experiences with the Assembly plugin more productive and
less painful.
Standard, Reusable Assembly Descriptors
Up till now, we’ve been talking mainly about one-off solutions for building a particular
type of assembly. But what do you do if you have dozens of projects that all need a
particular type of assembly? In short, how can we reuse the effort we’ve invested to get
our assemblies just the way we like them across more than one project without copying
and pasting our assembly descriptor?
The simplest answer is to create a standardized, versioned artifact out of the assembly
descriptor, and deploy it. Once that’s done, you can specify that the Assembly plugin
section of your project’s POM include the assembly-descriptor artifact as a plugin-
level dependency, which will prompt Maven to resolve and include that artifact in the
plugin’s classpath. At that point, you can use the assembly descriptor via the
descriptorRefs configuration section in the Assembly plugin declaration. To illustrate,
consider this example assembly descriptor:
<assembly>
<id>war-fragment</id>
<formats>
<format>zip</format>
</formats>
<includeBaseDirectory>false</includeBaseDirectory>
<dependencySets>
<dependencySet>
<outputDirectory>WEB-INF/lib</outputDirectory>
</dependencySet>
</dependencySets>
<fileSets>
<fileSet>
<directory>src/main/webapp</directory>
<outputDirectory>/</outputDirectory>
<excludes>
<exclude>**/web.xml</exclude>
</excludes>
</fileSet>
</fileSets>
</assembly>
252 | Chapter 12: Maven Assemblies

Included in your project, this descriptor would be a useful way to bundle the project
contents so that they could be unpacked directly into an existing web application, so
you can add to it (an extending feature, say). However, if your team builds more than
one of these web-fragment projects, the team will likely want to reuse this descriptor
rather than duplicate it. To deploy this descriptor as its own artifact, we’re going to put
it in its own project, under the src/main/resources/assemblies directory.
The project structure for this assembly-descriptor artifact will look similar to the
following:
|-- pom.xml
`-- src
`-- main
`-- resources
`-- assemblies
`-- web-fragment.xml
Notice the path of our web-fragment descriptor file. By default, Maven includes the files
from the src/main/resources directory structure in the final JAR, which means our as-
sembly descriptor will be included with no extra configuration on our part. Also notice
the assemblies/ path prefix: the Assembly plugin expects this path prefix on all descrip-
tors provided in the plugin classpath. It’s important that we put our descriptor in the
appropriate relative location, so it will be picked up by the Assembly plugin as it
executes.
Remember, this project is separate from your actual web-fragment project now; the
assembly descriptor has become its own artifact with its own version and, possibly, its
own release cycle. Once you install this new project using Maven, you’ll be able to
reference it in your web-fragment projects. For clarity, the build process should look
something like this:
$ mvn install
(...)
[INFO] [install:install]
[INFO] Installing (...)/web-fragment-descriptor/target/\
web-fragment-descriptor-1.0-SNAPSHOT.jar
to /Users/~/.m2/repository/org/sonatype/mavenbook/assemblies/\
web-fragment-descriptor/1.0-SNAPSHOT/\
web-fragment-descriptor-1.0-SNAPSHOT.jar
[INFO] ---------------------------------------------------------------
[INFO] BUILD SUCCESSFUL
[INFO] ---------------------------------------------------------------
[INFO] Total time: 5 seconds
(...)
Since there are no sources for the web-fragment-descriptor project, the resulting jar
artifact will include nothing but our web-fragment assembly descriptor. Now, let’s use
this new descriptor artifact:
<project>
(...)
<artifactId>my-web-fragment</artifactId>
Best Practices | 253

(...)
<build>
<plugins>
<plugin>
<artifactId>maven-assembly-plugin</artifactId>
<version>2.2-beta-2</version>
<dependencies>
<dependency>
<groupId>org.sonatype.mavenbook.assemblies</groupId>
<artifactId>web-fragment-descriptor</artifactId>
<version>1.0-SNAPSHOT</version>
</dependency>
</dependencies>
<executions>
<execution>
<id>assemble</id>
<phase>package</phase>
<goals>
<goal>single</goal>
</goals>
<configuration>
<descriptorRefs>
<descriptorRef>web-fragment</descriptorRef>
</descriptorRefs>
</configuration>
</execution>
</executions>
</plugin>
(...)
</plugins>
</build>
(...)
</project>
Two things are special about this Assembly plugin configuration:
• We have to include a plugin-level dependency declaration on our new
web-fragment-descriptor artifact in order to have access to the assembly descriptor
via the plugin’s classpath.
• Since we’re using a classpath reference instead of a file in the local project directory
structure, we must use the descriptorRefs section instead of the descriptor sec-
tion. Also, notice that although the assembly descriptor is actually in the assemblies/
web-fragment.xml location within the plugin’s classpath, we reference it without
the assemblies/ prefix. This is because the Assembly plugin assumes that built-in
assembly descriptors will always reside in the classpath under this path prefix.
Now, you’re free to reuse the POM configuration above in as many projects as you like,
with the assurance that all of their web-fragment assemblies will turn out the same. As
you need to make adjustments to the assembly format—maybe to include other re-
sources, or to fine-tune the dependency and file sets—you can simply increment the
version of the assembly descriptor’s project and release it again. POMs referencing the
254 | Chapter 12: Maven Assemblies

assembly-descriptor artifact can then adopt this new version of the descriptor as they
are able.
One final point about assembly-descriptor reuse: you may want to consider sharing
the plugin configuration itself as well as publishing the descriptor as an artifact. This
is a fairly easy step; you simply add the configuration listed earlier to the
pluginManagement section of your parent POM, and then reference the managed plugin
configuration from your module POM, like this:
(...)
<build>
<plugins>
<plugin>
<artifactId>maven-assembly-plugin</artifactId>
</plugin>
(...)
If you’ve added the rest of the plugin’s configuration—listed in the previous example—
to the pluginManagement section of the project’s parent POM, then each project inher-
iting from that parent POM can add a minimal entry (such as the one just shown) and
take advantage of an advanced assembly format in their own builds.
Distribution (Aggregating) Assemblies
As we mentioned, the Assembly plugin provides multiple ways of creating many archive
formats. Distribution archives are typically very good examples of this, since they often
combine modules from a multimodule build, along with their dependencies and, pos-
sibly, other files and artifacts besides these. The distribution aims to include all these
different sources into a single archive that the user can download, unpack, and run with
convenience. However, we also examined some of the potential drawbacks of using the
moduleSets section of the assembly descriptor—namely, that the parent-child relation-
ships between POMs in a build can prevent the availability of module artifacts in some
cases.
Specifically, if module POMs reference as their parent the POM that contains the
Assembly plugin configuration, that parent project will be built ahead of the module
projects when the multimodule build executes. The parent’s assembly expects to find
artifacts in place for its modules, but these module projects are waiting on the parent
itself to finish building. A gridlock situation is reached, and the parent build cannot
succeed (since it’s unable to find artifacts for its module projects). In other words, the
child project depends on the parent project, which in turn depends on the child project.
As an example, consider the following assembly descriptor, designed to be used from
the top-level project of a multimodule hierarchy:
<assembly>
<id>distribution</id>
<formats>
<format>zip</format>
Best Practices | 255

<format>tar.gz</format>
<format>tar.bz2</format>
</formats>
<moduleSets>
<moduleSet>
<includes>
<include>*-web</include>
</includes>
<binaries>
<outputDirectory>/</outputDirectory>
<unpack>true</unpack>
<includeDependencies>true</includeDependencies>
<dependencySets>
<dependencySet>
<outputDirectory>/WEB-INF/lib</outputDirectory>
</dependencySet>
</dependencySets>
</binaries>
</moduleSet>
<moduleSet>
<includes>
<include>*-addons</include>
</includes>
<binaries>
<outputDirectory>/WEB-INF/lib</outputDirectory>
<includeDependencies>true</includeDependencies>
<dependencySets>
<dependencySet/>
</dependencySets>
</binaries>
</moduleSet>
</moduleSets>
</assembly>
Given a parent project called app-parent with three modules called app-core, app-web,
and app-addons, notice what happens when we try to execute this multimodule build:
$ mvn package
[INFO] Reactor build order:
[INFO] app-parent <----- PARENT BUILDS FIRST
[INFO] app-core
[INFO] app-web
[INFO] app-addons
[INFO] ---------------------------------------------------------------
[INFO] Building app-parent
[INFO] task-segment: [package]
[INFO] ---------------------------------------------------------------
[INFO] [site:attach-descriptor]
[INFO] [assembly:single {execution: distro}]
[INFO] Reading assembly descriptor: src/main/assembly/distro.xml
[INFO] ---------------------------------------------------------------
[ERROR] BUILD ERROR
[INFO] ---------------------------------------------------------------
[INFO] Failed to create assembly: Artifact:
org.sonatype.mavenbook.assemblies:app-web:jar:1.0-SNAPSHOT (included by \
256 | Chapter 12: Maven Assemblies

module) does not have an artifact with a file. Please ensure the \
package phase is run before the assembly is generated.
...
The parent project (app-parent) builds first. This is because each of the other projects
lists POM as its parent, which causes it to be forced to the front of the build order. The
app-web module, which is the first module to be processed in the assembly descriptor,
hasn’t been built yet. Therefore, it has no artifact associated with it, and the assembly
cannot succeed.
One workaround for this is to remove the executions section of the Assembly plugin
declaration that binds the plugin to the package lifecycle phase in the parent POM,
keeping the configuration section intact. Then, execute Maven with two command-
line tasks: the first, package, to build the multimodule project graph, and a second,
assembly:assembly, as a direct invocation of the assembly plugin to consume the arti-
facts built on the previous run and create the distribution assembly. The command line
for such a build might look like this:
$ mvn package assembly:assembly
However, this approach has several drawbacks. First, it makes the distribution-
assembly process more of a manual task that can increase the complexity and potential
for error in the overall build process significantly. Additionally, it could mean that
attached artifacts—which are associated in memory as the project build executes—are
not reachable on the second pass without resorting to file-system references.
Instead of using a moduleSet to collect the artifacts from your multimodule build, it
often makes more sense to employ a low-tech approach: using a dedicated distribution
project module and interproject dependencies. In this approach, you create a new
module in your build whose sole purpose is to assemble the distribution. This module
POM contains dependency references to all the other modules in the project hierarchy,
and it configures the Assembly plugin to be bound the package phase of its build life-
cycle. The assembly descriptor itself uses the dependencySets section instead of the
moduleSets section to collect module artifacts and determine where to include them in
the resulting assembly archive. This approach escapes the pitfalls associated with the
parent-child relationship discussed earlier, and has the additional advantage of using
a simpler configuration section within the assembly descriptor itself to do the job.
To do this, we can create a new project structure that’s very similar to the one used for
the module-set approach. With the addition of a new distribution project, we might
end up with five POMs in total: app-parent, app-core, app-web, app-addons, and app-
distribution. The new app-distribution POM looks similar to the following:
<project>
<parent>
<artifactId>app-parent</artifactId>
<groupId>org.sonatype.mavenbook.assemblies</groupId>
<version>1.0-SNAPSHOT</version>
</parent>
<modelVersion>4.0.0</modelVersion>
Best Practices | 257

<artifactId>app-distribution</artifactId>
<name>app-distribution</name>
<dependencies>
<dependency>
<artifactId>app-web</artifactId>
<groupId>org.sonatype.mavenbook.assemblies</groupId>
<version>1.0-SNAPSHOT</version>
<type>war</type>
</dependency>
<dependency>
<artifactId>app-addons</artifactId>
<groupId>org.sonatype.mavenbook.assemblies</groupId>
<version>1.0-SNAPSHOT</version>
</dependency>
<!-- Not necessary since it's brought in via app-web.
<dependency> [2]
<artifactId>app-core</artifactId>
<groupId>org.sonatype.mavenbook.assemblies</groupId>
<version>1.0-SNAPSHOT</version>
</dependency>
-->
</dependencies>
</project>
Notice that we have to include dependencies for the other modules in the project
structure, since we don’t have a modules section to rely on in this POM. Also, notice
that we’re not using an explicit dependency on app-core. Since it’s also a dependency
of app-web, we don’t need to process it (or avoid processing it) twice.
Next, when we move the distro.xml assembly descriptor into the app-distribution
project, we must also change it to use a dependencySets section, like this:
<assembly>
...
<dependencySets>
<dependencySet>
<includes>
<include>*-web</include>
</includes>
<useTransitiveDependencies>false</useTransitiveDependencies>
<outputDirectory>/</outputDirectory>
<unpack>true</unpack>
</dependencySet>
<dependencySet>
<excludes>
<exclude>*-web</exclude>
</excludes>
<useProjectArtifact>false</useProjectArtifact>
<outputDirectory>/WEB-INF/lib</outputDirectory>
</dependencySet>
</dependencySets>
...
</assembly>
258 | Chapter 12: Maven Assemblies

This time, if we run the build from the top-level project directory, we get better news:
$ mvn package
(...)
[INFO] ---------------------------------------------------------------
[INFO] Reactor Summary:
[INFO] ---------------------------------------------------------------
[INFO] module-set-distro-parent ...............SUCCESS [3.070s]
[INFO] app-core .............................. SUCCESS [2.970s]
[INFO] app-web ............................... SUCCESS [1.424s]
[INFO] app-addons ............................ SUCCESS [0.543s]
[INFO] app-distribution ...................... SUCCESS [2.603s]
[INFO] ---------------------------------------------------------------
[INFO] ---------------------------------------------------------------
[INFO] BUILD SUCCESSFUL
[INFO] ---------------------------------------------------------------
[INFO] Total time: 10 seconds
[INFO] Finished at: Thu May 01 18:00:09 EDT 2008
[INFO] Final Memory: 16M/29M
[INFO] ---------------------------------------------------------------
As you can see, the dependency-set approach is much more stable and—at least until
Maven’s internal project-sorting logic catches up with the Assembly plugin’s capabil-
ities—involves fewer opportunities for things to go wrong when running a build.
Summary
As we’ve seen in this chapter, the Maven Assembly plugin offers quite a bit of potential
for creating custom archive formats. Although the details of these assembly archives
can be complex, they certainly don’t have to be in all cases, as we saw with built-in
assembly descriptors. Even if your aim is to include your project’s dependencies and
selected project files in some unique, archived directory structure, writing a custom
assembly descriptor doesn’t have to be an arduous task.
Assemblies are useful for a wide array of applications, but they are most commonly
used as application distributions of various sorts. And, though there are many different
ways to use the Assembly plugin, using standardized assembly-descriptor artifacts and
avoiding moduleSets when creating distributions containing binaries are two sure ways
to avoid problems.
Summary | 259

CHAPTER 13
Properties and Resource Filtering
Introduction
Throughout this book, you will notice references to properties that can be used in a
POM file. Sibling dependencies in a multiproject build can be referenced using the
${project.groupId} and ${project.version} properties, and any part of the POM can
be referenced by prefixing the variable name with “project.” Environment variables
and Java System properties can be referenced, as well as values from your ~/.m2/set
tings.xml file. What you haven’t yet seen is an enumeration of the possible property
values and some discussion about how they can be used to help you create portable
builds. This chapter provides such an enumeration.
If you’ve been using property references in your POM, you should also know that
Maven has a feature called resource filtering that allows you to replace property refer-
ences in any resource files stored under src/main/resources. By default, this feature is
disabled to prevent accidental replacement of property references. This feature can be
used to target builds toward a specific platform and to externalize important build
variables to properties files, POMs, or profiles. This chapter introduces the resource
filtering feature and provides a brief discussion of how it can be used to create portable
enterprise builds.
Maven Properties
You can use Maven properties in a pom.xml file or in any resource that is being pro-
cessed by the Maven Resource plugin’s filtering features. A property is always sur-
rounded by ${ and }. For example, to reference the project.version property, one
would write:
${project.version}
261

Some implicit properties are available in any Maven project, namely:
project.*
Maven Project Object Model. You can use the project.* prefix to reference values
in a Maven POM.
settings.*
Maven settings. You use the settings.* prefix to reference values from your Maven
settings in ~/.m2/settings.xml.
env.*
Environment variables such as PATH and M2_HOME can be referenced using the
env.* prefix.
System properties
Any property that can be retrieved from the System.getProperty() method can be
referenced as a Maven property.
In addition to these implicit properties, a Maven POM, Maven settings, or a Maven
profile can define a set of arbitrary, user-defined properties. The following sections
provide more detail on the various properties available in a Maven project.
Maven Project Properties
When a Maven Project Property is referenced, the property name is referencing a prop-
erty of the Maven Project Object Model. Specifically, you are referencing a property of
the org.apache.maven.model.Model class that is being exposed as the implicit variable
project. When you reference a property using this implicit variable, you are using simple
dot notation to reference a bean property of the Model object. For example, when you
reference ${project.version}, you are really invoking the getVersion() method on the
instance of Model that is being exposed as project.
The POM is also represented in the pom.xml document present in all Maven projects.
Anything in a Maven POM can be referenced with a property. A complete reference for
the POM structure is available at http://maven.apache.org/ref/2.0.9/maven-model/
maven.html. The following list shows some common property references from the
Maven project:
project.groupId and project.version
Projects in a large, multimodule build often share the same groupId and version
identifiers. When you are declaring interdependencies between two modules that
share the same groupId and version, it is a good idea to use a property reference
for both:
<dependencies>
<dependency>
<groupId>${project.groupId}</groupId>
<artifactId>sibling-project</artifactId>
<version>${project.version}</version>
262 | Chapter 13: Properties and Resource Filtering

</dependency>
</dependencies>
project.artifactId
A project’s artifactId is often used as the name of a deliverable. For example, in
a project with war packaging, you will want to generate a WAR file without the
version identifiers. To do this, you would reference the project.artifactId in your
POM file like this:
<build>
<finalName>${project.artifactId}</finalName>
</build>
project.name and project.description
The name and project description can often be useful properties to reference from
documentation. Instead of having to worry that all of your site documents maintain
the same short descriptions, you can just reference these properties.
project.build.*
If you are ever trying to reference output directories in Maven, you should never
use a literal value such as target/classes. Instead, you should use property references
to refer to these directories:
•project.build.sourceDirectory
•project.build.scriptSourceDirectory
•project.build.testSourceDirectory
•project.build.outputDirectory
•project.build.testOutputDirectory
•project.build.directory
sourceDirectory, scriptSourceDirectory, and testSourceDirectory provide access
to the source directories for the project. outputDirectory and
testOutputDirectory provide access to the directories where Maven is going to put
bytecode or other build output. directory refers to the directory that contains all
of these output directories.
Other project property references
There are hundreds of properties to reference in a POM. A complete reference for
the POM structure is available at http://maven.apache.org/ref/2.0.9/maven-model/
maven.html.
For a full list of properties available on the Maven Model object, take a look at the
Javadoc for the maven-model project here: http://maven.apache.org/ref/2.0.9/maven
-model/apidocs/index.html. Once you load this Javadoc, take a look at the Model class.
From this Model class Javadoc, you should be able to navigate to the POM property you
wish to reference. If you need to reference the output directory of the build, you can
use the Maven Model Javadoc to see that the output directory is referenced via
Maven Properties | 263

model.getBuild().getOutputDirectory(); this method call would be translated to the
Maven property reference ${project.build.outputDirectory}.
For more information about the Maven Model module—the module that defines the
structure of the POM—see the Maven Model project page at http://maven.apache.org/
ref/2.0.9/maven-model.
Maven Settings Properties
You can also reference any properties in the Maven Local Settings file, which is usually
stored in ~/.m2/settings.xml. This file contains user-specific configuration, such as the
location of the local repository and any servers, profiles, and mirrors configured by a
specific user.
A full reference for the Local Settings file and corresponding properties is available here:
http://maven.apache.org/ref/2.0.9/maven-settings/settings.html.
Environment Variable Properties
Environment variables can be referenced with the env.* prefix. Some interesting envi-
ronment variables are listed here:
env.PATH
Contains the current PATH in which Maven is running. The PATH contains a list of
directories used to locate executable scripts and programs.
env.HOME
On *nix systems, this variable points to a user’s home directory. Instead of refer-
encing this, you should use the ${user.home} property.
env.JAVA_HOME
Contains the Java installation directory. This can point to either a Java Develop-
ment Kit (JDK) installation or a Java Runtime Environment (JRE). Instead of using
this, you should consider referencing the ${java.home} property.
env.M2_HOME
Contains the Maven 2 installation directory.
While they are available, you should always use the Java System properties if you have
the choice. If you need a user’s home directory, use ${user.home} instead of
${env.HOME}. If you do this, you’ll end up with a more portable build that is more likely
to adhere to the Write-One-Run-Anywhere (WORA) promise of the Java platform.
Java System Properties
Maven exposes all properties from java.lang.System. Anything you can retrieve from
System.getProperty() you can reference in a Maven property. Table 13-1 lists the avail-
able properties.
264 | Chapter 13: Properties and Resource Filtering

Table 13-1. Java system properties
System property Description
java.version Java Runtime Environment version
java.vendor Java Runtime Environment vendor
java.vendor.url Java vendor URL
java.home Java installation directory
java.vm.specification.version Java Virtual Machine specification version
java.vm.specification.vendor Java Virtual Machine specification vendor
java.vm.specification.name Java Virtual Machine specification name
java.vm.version Java Virtual Machine implementation version
java.vm.vendor Java Virtual Machine implementation vendor
java.vm.name Java Virtual Machine implementation name
java.specification.version Java Runtime Environment specification version
java.specification.vendor Java Runtime Environment specification vendor
java.specification.name Java Runtime Environment specification name
java.class.version Java class format version number
java.class.path Java classpath
java.ext.dirs Path of extension directory or directories
os.name Operating system name
os.arch Operating system architecture
os.version Operating system version
file.separator File separator (“/” on UNIX, “\” on Windows)
path.separator Path separator (“:” on UNIX, “;” on Windows)
line.separator Line separator (“\n” on UNIX and Windows)
user.name User’s account name
user.home User’s home directory
user.dir User’s current working directory
User-Defined Properties
In addition to the implicit properties provided by the POM, Maven Settings, environ-
ment variables, and the Java system properties, you have the ability to define your own
arbitrary properties. Properties can be defined in a POM or in a profile. The properties
set in a POM or in a Maven profile can be referenced just like any other property
available throughout Maven. User-defined properties can be referenced in a POM, or
they can be used to filter resources via the Maven Resource plugin. Example 13-1 is an
example of defining some arbitrary properties in a Maven POM.
Maven Properties | 265

Example 13-1. User-defined properties in a POM
<project>
...
<properties>
<arbitrary.property.a>This is some text</arbitrary.property.a>
<hibernate.version>3.3.0.ga</hibernate.version>
</properties>
...
<dependencies>
<dependency>
<groupId>org.hibernate</groupId>
<artifactId>hibernate</artifactId>
<version>${hibernate.version}</version>
</dependency>
</dependencies>
...
</project>
This example defines two properties: arbitrary.property.a and hibernate.version.
The hibernate.version is referenced in a dependency declaration. Using the period
character (.) as a separator in property names is a standard practice throughout Maven
POMs and profiles. There is nothing special about using a period as a separator; to
Maven, hibernate.version is just a key used to retrieve the property value 3.3.0.ga.
Example 13-2 shows you how to define a property in a profile from a Maven POM.
Example 13-2. User-defined properties in a profile in a POM
<project>
...
<profiles>
<profile>
<id>some-profile</id>
<properties>
<arbitrary.property>This is some text</arbitrary.property>
</properties>
</profile>
</profiles>
...
</project>
This example demonstrates the process of defining a user-defined property in a profile
from a Maven POM. For more information about user-defined properties and profiles,
see Chapter 11.
Resource Filtering
You can use Maven to perform variable replacement on project resources. When re-
source filtering is activated, Maven will scan resources for references to Maven property
references surrounded by ${ and }. When it finds these references, it will replace them
with the appropriate value in much the same way that the properties defined in the
266 | Chapter 13: Properties and Resource Filtering

previous section can be referenced from a POM. This feature is especially helpful when
you need to parameterize a build with different configuration values depending on the
target deployment platform.
Often a .properties file or an XML document in src/main/resources will contain a refer-
ence to an external resource, such as a database or a network location that needs to be
configured differently depending on the target deployment environment. For example,
a system that reads data from a database has an XML document that contains the JDBC
URL along with credentials for the database. If you need to use a different database in
development and a different database in production, you can use a technology such as
Java Naming and Directory Interface (JNDI) to externalize the configuration from the
application in an application server, or you can create a build that knows how to replace
variables with different values depending on the target platform.
Using Maven resource filtering, you can reference Maven properties and then use
Maven profiles to define different configuration values for different target deployment
environments. To illustrate this feature, assume you have a project that uses the Spring
Framework to configure a BasicDataSource from the Apache Commons Database Con-
nection Pool (DBCP) project (http://commons.apache.org/dbcp). Your project may con-
tain a file in src/main/resources named applicationContact.xml that contains the XML
listed in Example 13-3.
Example 13-3. Referencing Maven properties from a resource
<beans xmlns="http://www.springframework.org/schema/beans"
xmlns:xsi="http://www.w3.org/2001/XMLSchema-instance"
xsi:schemaLocation="http://www.springframework.org/schema/beans
http://www.springframework.org/schema/beans/spring-beans-2.5.xsd">
<bean id="someDao" class="com.example.SomeDao">
<property name="dataSource" ref="dataSource"/>
</bean>
<bean id="dataSource" destroy-method="close"
class="org.apache.commons.dbcp.BasicDataSource">
<property name="driverClassName" value="${jdbc.driverClassName}"/>
<property name="url" value="${jdbc.url}"/>
<property name="username" value="${jdbc.username}"/>
<property name="password" value="${jdbc.password}"/>
</bean>
</beans>
Your program would read this file at runtime, and your build would replace the refer-
ences to properties such as jdbc.url and jdbc.username with the values you defined in
your pom.xml. Resource filtering is disabled by default to prevent any unintentional
resource filtering. To turn on resource filter, you need to use the resources child element
of the build element in a POM. Example 13-4 shows a POM that defines the variables
referenced in Example 13-3 and activates resource filtering for every resource under
src/main/resources.
Resource Filtering | 267

Example 13-4. Defining variables and activating resource filtering
<project>
...
<properties>
<jdbc.driverClassName>com.mysql.jdbc.Driver</jdbc.driverClassName>
<jdbc.url>jdbc:mysql://localhost:3306/development_db</jdbc.url>
<jdbc.username>dev_user</jdbc.username>
<jdbc.password>s3cr3tw0rd</jdbc.password>
</properties>
...
<build>
<resources>
<resource>
<directory>src/main/resources</directory>
<filtering>true</filtering>
</resource>
</resources>
</build>
...
<profiles>
<profile>
<id>production</id>
<properties>
<jdbc.driverClassName>oracle.jdbc.driver.OracleDriver</jdbc.driverClassName>
<jdbc.url>jdbc:oracle:thin:@proddb01:1521:PROD</jdbc.url>
<jdbc.username>prod_user</jdbc.username>
<jdbc.password>s00p3rs3cr3t</jdbc.password>
</properties>
</profile>
</profiles>
</project>
The four variables are defined in the properties element, and resource filtering is
activated for resources under src/main/resources. Resource filtering is deactivated by
default, and to activate it you must explicitly set filtering to true for the resources
stored in your project. Filtering is deactivated by default to prevent accidental, unin-
tentional filtering during your build. If you build a project with the resource from
Example 13-3 and the POM from Example 13-4, and if you list the contents of the
resource in target/classes, you should see that it contains the filtered resource:
$ mvn install
...
$ cat target/classes/applicationContext.xml
...
<bean id="dataSource" destroy-method="close"
class="org.apache.commons.dbcp.BasicDataSource">
<property name="driverClassName" value="com.mysql.jdbc.Driver"/>
<property name="url" value="jdbc:mysql://localhost:3306/development_db"/>
<property name="username" value="dev_user"/>
<property name="password" value="s3cr3tw0rd"/>
</bean>
...
268 | Chapter 13: Properties and Resource Filtering

The POM in Example 13-4 also defines a production profile under the profiles/
profile element that overrides the default properties with values that would be appro-
priate for a production environment. In this particular POM, the default values for the
database connection are for a local MySQL database installed on a developer’s machine.
When the project is built with the production profile activated, Maven will configure
the system to connect to a production Oracle database using a different driver class,
URL, username, and password. If you build a project with the resource from Exam-
ple 13-3 and the POM from Example 13-4, with the production profile activated, and
if you list the contents of the resource in target/classes, you should see that it contains
the filtered resource with production values:
$ mvn -Pproduction install
...
$ cat target/classes/applicationContext.xml
...
<bean id="dataSource" destroy-method="close"
class="org.apache.commons.dbcp.BasicDataSource">
<property name="driverClassName" value="oracle.jdbc.driver.OracleDriver"/>
<property name="url" value="jdbc:oracle:thin:@proddb01:1521:PROD"/>
<property name="username" value="prod_user"/>
<property name="password" value="s00p3rs3cr3t"/>
</bean>
...
Resource Filtering | 269

CHAPTER 14
Maven and Eclipse: m2eclipse
Introduction
The Eclipse Integrated Development Environment (IDE) is the most widely used IDE
for Java development today. Eclipse has a huge number of plugins (see http://www
.eclipseplugincentral.com/), and innumerable organizations are developing their own
software on top of it. Quite simply, Eclipse is ubiquitous. The m2Eclipse (http://
m2eclipse.codehaus.org/) project provides support for Maven within the Eclipse IDE,
and in this chapter, we will explore the features it provides to help you use Maven with
Eclipse.
m2eclipse
The m2Eclipse plugins (see http://m2eclipse.codehaus.org/) provide Maven integration
for Eclipse. m2Eclipse also has hooks into the features of both the Subclipse plugin (see
http://subclipse.tigris.org/) and the Mylyn plugin (see http://www.eclipse.org/mylyn/).
The Subclipse plugin provides the m2eclipse plugin with the ability to interact with
Subversion repositories, and the Mylyn plugin provides the m2eclipse plugin with the
ability to interact with a task-focused interface that can keep track of development
context. Just a few of the features m2eclipse provides include:
• Creating and importing Maven projects
• Dependency management and integration with the Eclipse classpath
• Automatic dependency downloads and updates
• Artifact Javadoc and source resolution
• Creating projects with Maven archetypes
• Browsing and searching remote Maven repositories
• POM management with automatic update to dependency list
• Materializing a project from a Maven POM
• Checking out a Maven project from several SCM repositories
271

• Adapting nested multimodule Maven projects to the Eclipse IDE
• Integration with Web Tools Project (WTP)
• Integration with AspectJ Development Tools (AJDT)
• Integration with Subclipse
• Integration with Mylyn
• Form-based POM Editor
• Graphical display of dependency graph
• GUI presentation of Dependency Tree and resolved dependencies
m2eclipse has many more features beyond those listed here, and this chapter introduces
some of the more impressive features that are currently available. Let’s get started by
installing the m2Eclipse plugin.
Installing the m2eclipse Plugin
To install the m2Eclipse plugin, you need to install some prerequisites. You need to be
running Eclipse 3.2 or higher, JDK 1.4 or higher, and you also need to make sure that
Eclipse is running on a JDK, not a JRE. Once you have Eclipse and a compatible
JDK, you need to install two Eclipse plugins: Subclipse and Mylyn.
Installing Prerequisites
You can install these prerequisites when you install m2eclipse; just add a new remote
update site to Eclipse for each of the prerequisite components. To do so, go to Help →
Software Updates → Find and Install.... Selecting this menu item will load the Install/
Update dialog box. Choose the “Search for new features to install” option and click
Next. You will then be presented with a list of “Update sites to visit.” Click New Remote
Site..., and add a new update site for each new prerequisite. Add a new remote site for
each plugin, and then make sure that the remote site is selected. After you click Fin-
ish, Eclipse will ask you to select plugins components to install. Select the components
you want to install, and Eclipse will download, install, and configure your plugins.
Note that if you are using a recent build of Eclipse 3.4 (Ganymede; see http://www
.eclipse.org/ganymede), your plugin installation experience may be slightly different. In
Ganymede, you will select Help → Software Updates..., which will load the “Software
Updates and Add-ons” dialog. In this dialog, choose the Available Software panel and
click on Add Site..., which will load the simple “Add Site” dialog. Enter the URL of the
update site you wish to add, and click OK. In the “Software Updates and Add-ons”
dialog, the available plugins from an update site will appear as soon as the site is added.
You can then select the modules you want to install and click the Install... button.
Eclipse will then resolve all the dependencies for the selected plugins and will ask you
272 | Chapter 14: Maven and Eclipse: m2eclipse

to agree to the plugin license. After Eclipse installs new plugins, it will likely ask you
for permission to restart.
Installing Subclipse
To install Subclipse, use the following Eclipse plugin update site:
Subclipse 1.2
http://subclipse.tigris.org/update_1.2.x
For other versions of Subclipse, and for more information about the Subclipse plugin,
please see the Subclipse project’s web site at http://subclipse.tigris.org/.
Installing Mylyn
To install JIRA integration with Mylyn, add the Mylyn extras Eclipse update URL.
You’ll want to do this if your organization uses Atlassian’s JIRA (http://www.atlassian
.com/software/jira/) for issue tracking. To install Mylyn, use the following update sites:
Mylyn (Eclipse 3.3)
http://download.eclipse.org/tools/mylyn/update/e3.3
Mylyn (Eclipse 3.4)
http://download.eclipse.org/tools/mylyn/update/e3.4
Mylyn extras (JIRA support)
http://download.eclipse.org/tools/mylyn/update/extras
For more information about the Mylyn project, see the project’s web site at http://www
.eclipse.org/mylyn/.
Installing AspectJ Development Tools (AJDT)
If you are installing the 0.9.4 release of m2eclipse, you may also want to install both
the Web Tools Platform (WTP) and the AspectJ Development Tools (AJDT). To install
the AJDT, use one of the following update URLs in Eclipse:
AJDT (Eclipse 3.3)
http://download.eclipse.org/tools/ajdt/33/update
AJDT (Eclipse 3.4)
http://download.eclipse.org/tools/ajdt/34/dev/update
For more information about the AJDT project, see the project’s web site at http://www
.eclipse.org/ajdt/.
Installing the Web Tools Platform (WTP)
To install the Web Tools Platform (WTP), use one of the following update URLs in
Eclipse, or just look for the Web Tools Project in the Discovery Site, which should
already be in your Eclipse remote update sites list:
Installing the m2eclipse Plugin | 273

WTP
http://download.eclipse.org/webtools/updates/
For more information about the Web Tools Platform project, see the project’s web site
at http://www.eclipse.org/webtools/.
Installing m2eclipse
Once you’ve installed the prerequisites, you can install the m2eclipse plugin from the
following Eclipse update URL:
m2eclipse plugin
http://m2eclipse.sonatype.org/update/
If you would like to install the latest snapshot development version of the plugin, you
should use the update-dev URL instead:
m2eclipse plugin (development snapshot)
http://m2eclipse.sonatype.org/update-dev/
To install m2eclipse, just add the appropriate update site for m2eclipse. Go to Help →
Software Updates → Find and Install.... Selecting this menu item will load the Install/
Update dialog box. Choose the “Search for new features to install” option, and click
Next. You will then be presented with a list of “Update sites to visit.” Click New Remote
Site..., and add a new update site for m2eclipse. Add a new remote site for m2eclipse,
and then make sure that the remote site is selected. After you click Finish, Eclipse will
ask you to select plugins components to install. Select the components you want to
install, and Eclipse will download, install, and configure m2eclipse.
If you’ve installed the plugin successfully, you should see a Maven option in the list of
preferences options when you go to Window → Preferences....
Enabling the Maven Console
Before we begin to examine the features of m2eclipse, let’s first enable the Maven con-
sole. Open the Console View by going to Window → Show View → Console. Then,
click on the little arrow on the righthand side of the Open Console icon and select
Maven Console, as shown in Figure 14-1.
Maven Console shows the Maven output that normally appears on the console when
running Maven from the command line. It is useful to be able to see what Maven is
doing and to work with Maven debug output to diagnose issues.
274 | Chapter 14: Maven and Eclipse: m2eclipse
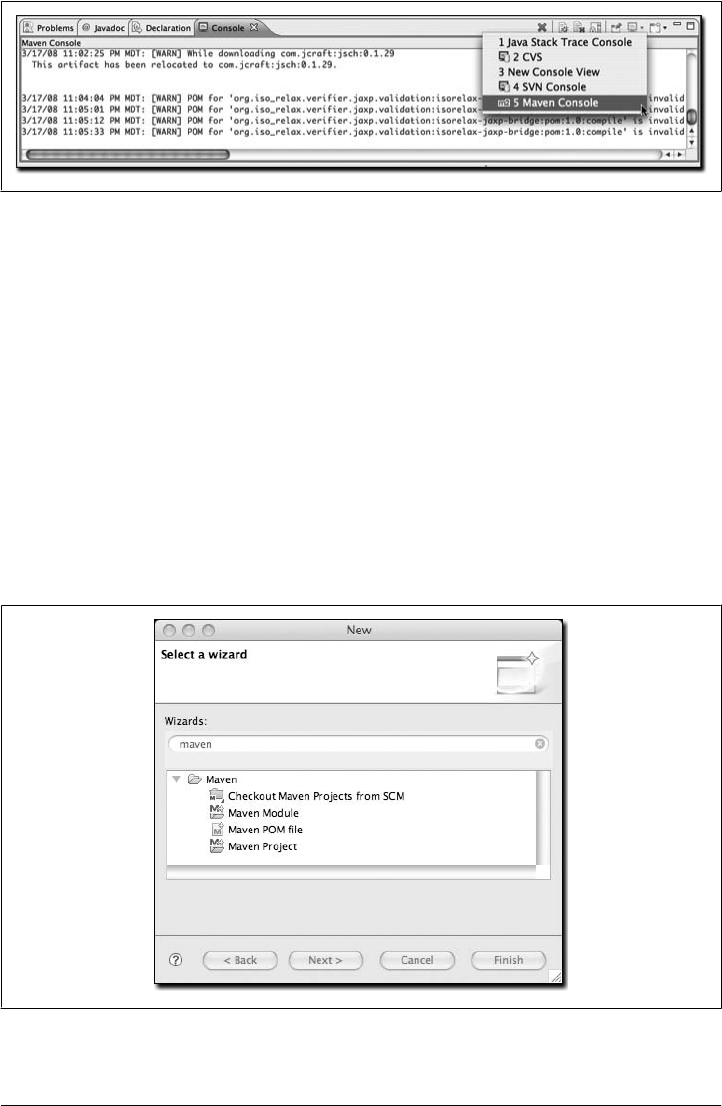
Creating a Maven Project
When using Maven, project creation takes place through the use of a Maven arche-
type. In Eclipse, project creation takes place via the new project wizard. The new project
wizard inside of Eclipse offers a plethora of templates for creating new projects. The
m2eclipse plugin improves on this wizard to provide the following additional
capabilities:
• Checking out a Maven project from a SCM repository
• Creating a Maven project using a Maven archetype
• Creating a Maven POM file
As shown in Figure 14-2, all three of these options are important to developers using
Maven. Let’s take a look at each option in the sections that follow.
Figure 14-2. Creating a new project with m2eclipse wizards
Figure 14-1. Enabling the Maven console in Eclipse
Creating a Maven Project | 275

Checking Out a Maven Project from SCM
m2eclipse provides the ability to check out a project directly from a SCM repository.
Simply enter the SCM information for a project, and it will check it out for you to a
location of your choice, as shown in Figure 14-3.
This dialog offers additional options for specifying a particular revision, either by
browsing the revisions in a Subversion repository or simply by entering the revision
number manually. These features reuse of some of the features in the Subclipse plugin
to interact with the Subversion repository. In addition to Subversion, the m2eclipse
plugin also supports the following SCM providers:
• Bazaar
• Clearcase
• CVS
• git
• hg
• Perforce
• Starteam
Figure 14-3. Checking out a new project from Subversion
276 | Chapter 14: Maven and Eclipse: m2eclipse
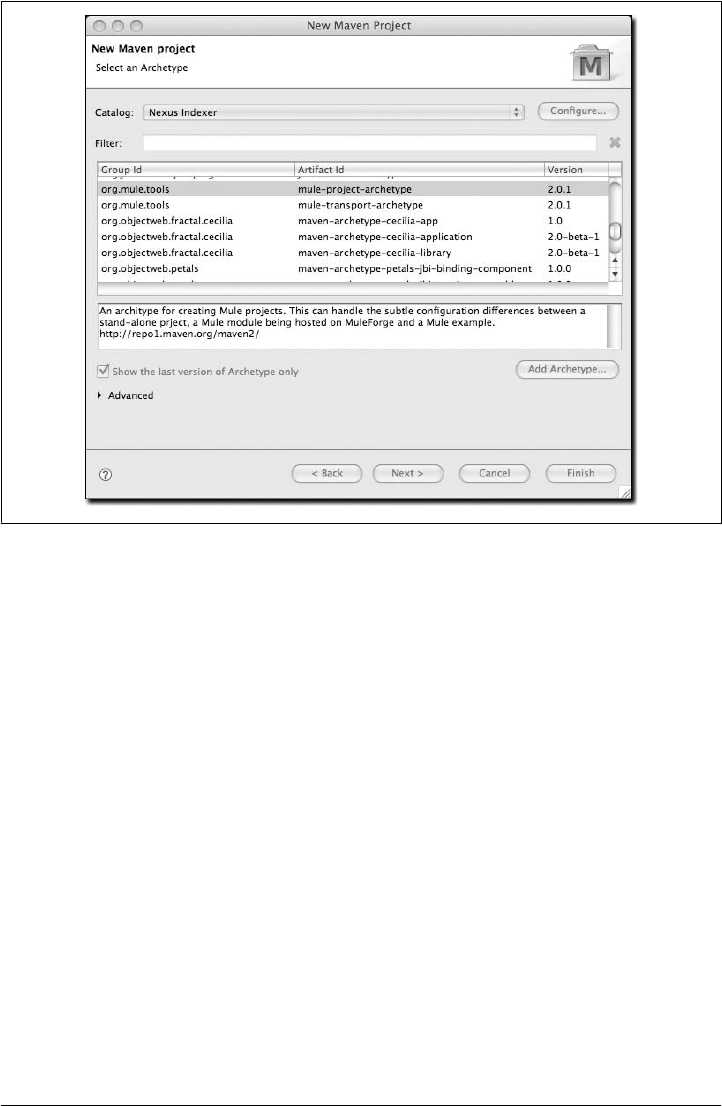
• Subversion
• Synergy
• Visual SourceSafe
Creating a Maven Project from a Maven Archetype
m2eclipse offers the ability to create a Maven project using a Maven archetype. There
are many Maven archetypes provided in the list that comes with m2eclipse, as shown
in Figure 14-4.
The list of archetypes in Figure 14-4 is generated by something called the Nexus In-
dexer. Nexus is a repository manager that will be introduced in Chapter 16. The Nexus
Indexer is a file that contains an index of the entire Maven repository, and m2eclipse
uses it to list all of the available archetypes in the entire Maven repository. At the time
of this writing, m2eclipse has approximately 90 archetypes in this archetype dialog.
Highlights of this list include:
• Standard Maven archetypes to create
— Maven Plugins
— Simple Web Applications
Figure 14-4. Creating a new project with a Maven archetype
Creating a Maven Project | 277

— Simple Projects
— New Maven Archetypes
• Databinder (http://databinder.net/site/show/overview) archetypes (data-driven
Wicket applications) under net.databinder
• Apache Cocoon (http://cocoon.apache.org) archetypes under org.apache.cocoon
• Apache Directory Server (http://directory.apache.org) archetypes under
org.apache.directory.server
• Apache Geronimo (http://geronimo.apache.org) archetypes under org.apache.ger
onimo.buildsupport
• Apache MyFaces (http://myfaces.apache.org) archetypes under org.apache.myfa
ces.buildtools
• Apache Tapestry (http://tapestry.apache.org) archetypes under org.apache.tapes
try
• Apache Wicket (http://wicket.apache.org) archetypes under org.apache.wicket
• AppFuse (http://appfuse.org/display/APF/Home) archetypes under org.app
fuse.archetypes
• Codehaus Cargo (http://cargo.codehaus.org) archetypes under org.codehaus.cargo
• Codehaus Castor (http://castor.codehaus.org) archetypes under org.codehaus.cas
tor
• Groovy-based (http://groovy.codehaus.org/GMaven) Maven plugin archetypes
(deprecated)* under org.codehaus.mojo.groovy
• Jini archetypes
•Mule (http://mule.mulesource.org/display/MULE/Home) archetypes under
org.mule.tools
• Objectweb Fractal (http://fractal.objectweb.org/index.html) archetypes under
org.objectweb.fractal
• Objectweb Petals (http://petals.objectweb.org/index.html) archetypes under
org.objectweb.petals
• ops4j archetypes under org.ops4j
• Parancoe (http://www.parancoe.org) under org.parancoe
• slf4j archetypes under org.slf4j
• Spring Framework (http://www.springframework.org) OSGI and Web Services ar-
chetypes under org.springframework
*Don’t use the Groovy Maven plugin in Codehaus’ Mojo project. Jason Dillon has moved the Groovy Maven
integration to the Groovy project in Codehaus. For more information, see http://groovy.codehaus.org/
GMaven.
278 | Chapter 14: Maven and Eclipse: m2eclipse
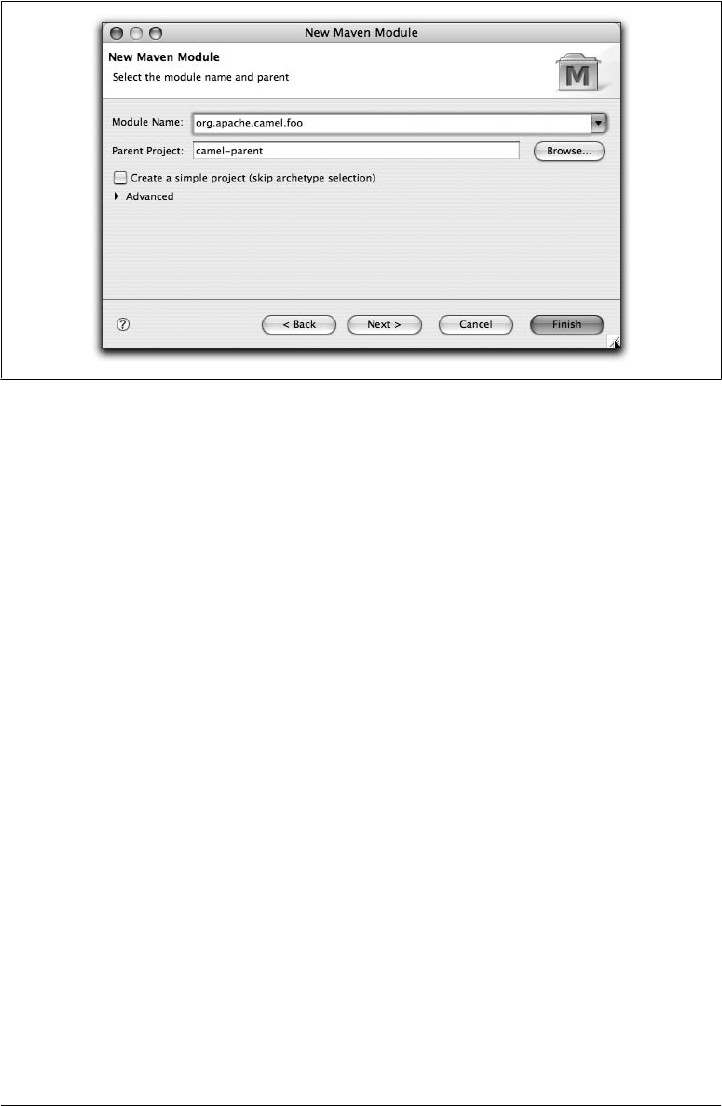
• Trails Framework (http://www.trailsframework.org) archetypes under org.trails
framework
And these were just the archetypes that were listed under the Nexus Indexer catalog,
if you switch catalogs, you’ll see other archetypes. Though your results may vary, the
following additional archetypes were available in the Internal catalog:
• Atlassian Confluence (http://www.atlassian.com) plugin archetype under
com.atlassian.maven.archetypes
• Apache Struts (http://struts.apache.org) archetypes under org.apache.struts
• Apache Shale archetypes under org.apache.shale
A catalog is simply a reference to a repository index. You can manage the set of catalogs
that the m2eclipse plugin knows about by clicking on the Configure... button next to
the catalog drop-down. If you have your own archetypes to add to this list, you can
click on Add Archetype... and add them.
Once you choose an archetype, Maven will retrieve the appropriate artifact from the
Maven repository and create a new Eclipse project with the selected archetype.
Creating a Maven Module
m2eclipse provides the ability to create a Maven module, as shown in Figure 14-5.
Creating a Maven module is almost identical to creating a Maven project, as it also
creates a new Maven project using a Maven archetype. However, a Maven module is a
subproject of another Maven project typically known as a parent project.
Figure 14-5. Creating a new Maven module
Creating a Maven Project | 279
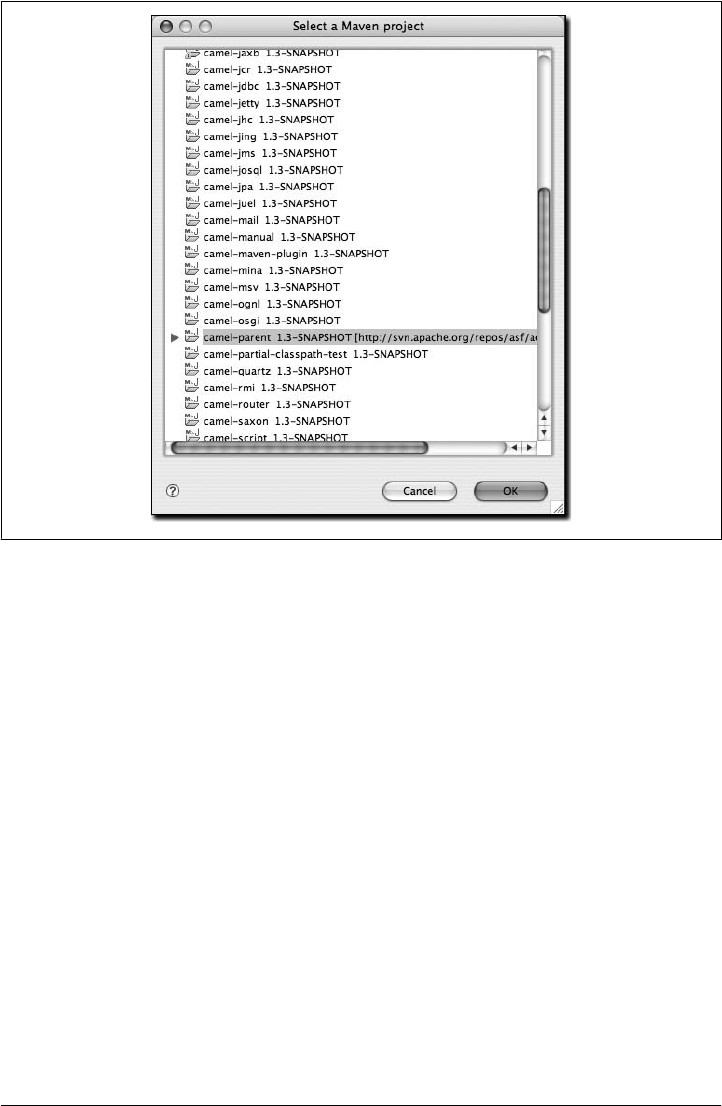
When creating a new Maven module you must select a parent project that already exists
inside of Eclipse. Clicking the browse button displays a list of projects that already
exist, as shown in Figure 14-6.
After selecting a parent project from the list, you are returned to the New Maven Mod-
ule window, and the Parent Project field is populated as shown in Figure 14-5. Clicking
Next will display the standard list of archetypes described earlier in the section “Cre-
ating a Maven Project from a Maven Archetype” so you can choose which one should
be used to create the Maven module.
Create a Maven POM File
Another important feature that m2eclipse offers is the ability to create a new Maven
POM file. m2eclipse provides a wizard that helps you easily create a new POM file
inside a project that is already in Eclipse. This POM creation wizard is shown in Fig-
ure 14-7.
Figure 14-6. Selecting a parent project for a new Maven module
280 | Chapter 14: Maven and Eclipse: m2eclipse
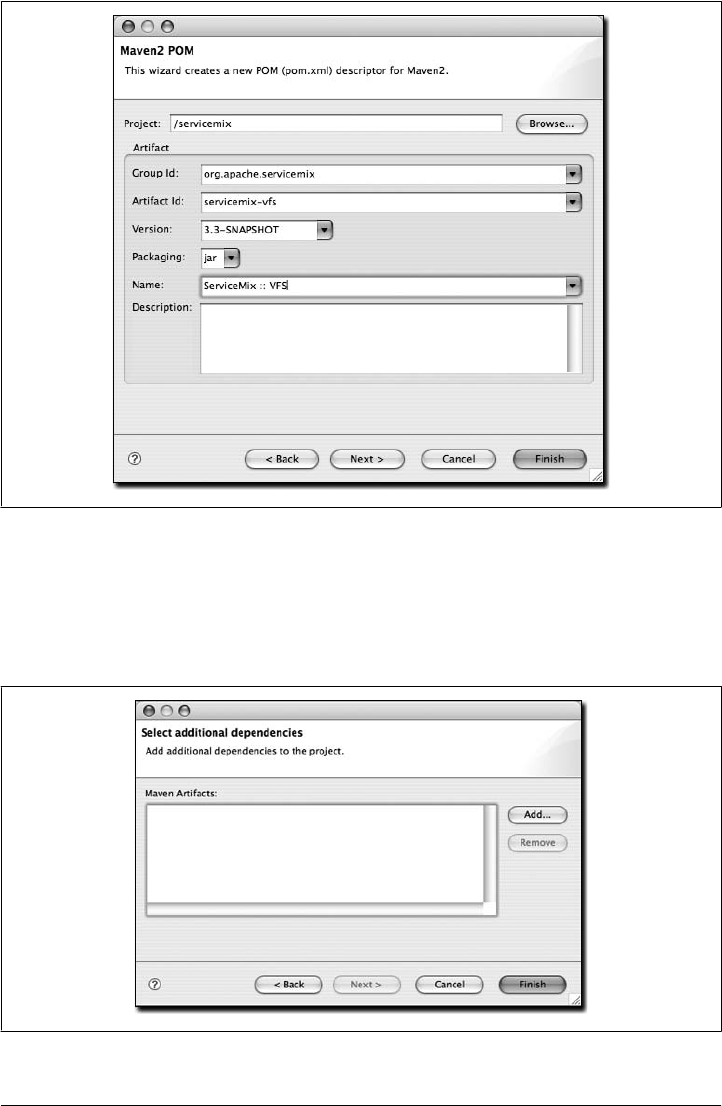
Figure 14-7. Creating a new POM
Creating a new Maven POM is just a matter of selecting a project, entering the Group
ID, Artifact ID, Version, choosing the Packaging type, and providing a Name in the
fields provided by m2eclipse. Click the Next button to start adding dependencies, as
shown in Figure 14-8.
Figure 14-8. Adding dependencies to a new POM
Create a Maven POM File | 281
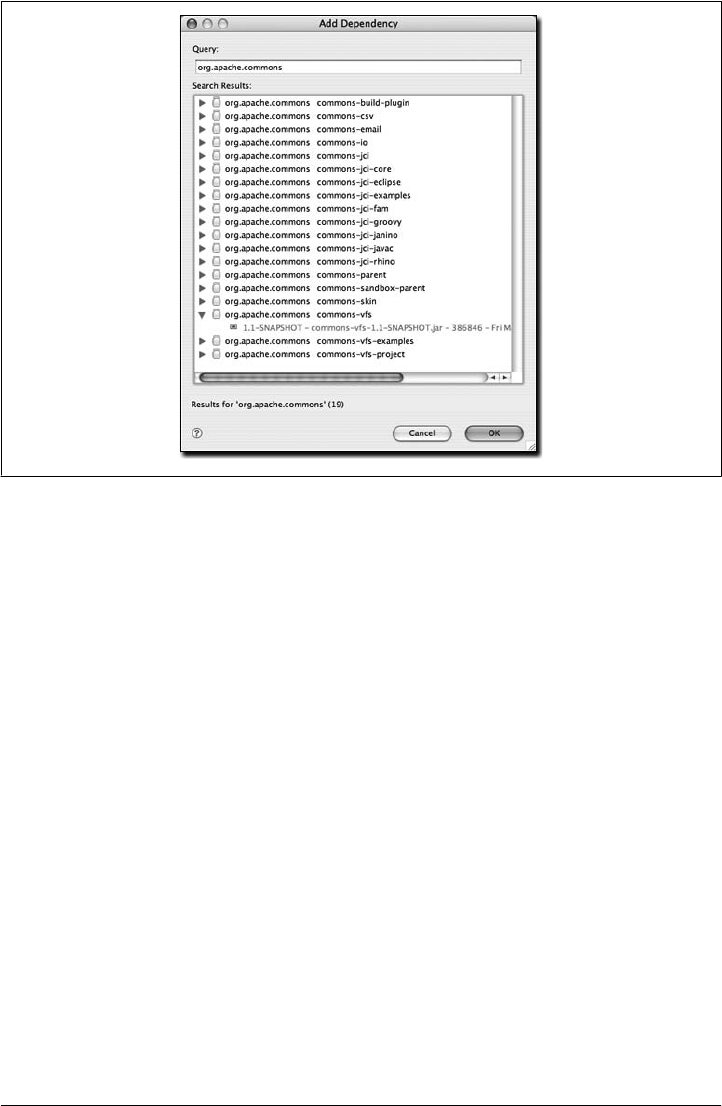
As you can see, no dependencies are in the POM yet. Just click the Add button to query
the central Maven repository for dependencies, as shown in Figure 14-9.
Querying for dependencies is as easy as entering the groupId for the artifact you need.
Figure 14-9 shows a query for org.apache.commons with commons-vfs expanded to see
which versions are available. Highlighting the 1.1-SNAPSHOT version of commons-vfs and
clicking OK takes you back to the dependency selection where you can either query for
more artifacts or just click finish to create the POM. When you search for dependencies,
m2eclipse is making use of the same Nexus repository index that is used in the Nexus
Repository Manager from Chapter 16.
Now that the you’ve seen the m2eclipse features for creating a new project, let’s look
at a similar set of features for importing projects into Eclipse.
Importing Maven Projects
m2eclipse provides three options for importing a Maven project into Eclipse,
including:
• Import an existing Maven project
• Check out a Maven project from SCM
• Materialize a Maven project
Figure 14-9. Querying the central repository for dependencies
282 | Chapter 14: Maven and Eclipse: m2eclipse

Figure 14-10 shows the wizard for importing projects with the options for Maven pro-
vided by m2eclipse.
The dialog in Figure 14-10 is displayed when you use the File → Import command in
Eclipse and then filter the options by entering the word “maven” in the filter field. As
noted earlier, three options are available for importing a Maven project into Eclipse,
including: Maven Projects, Check out Maven Project from Subversion, and Materialize
Maven Projects.
Importing a Maven project from Subversion is identical to creating a Maven project
from Subversion, as discussed in the previous section, so discussion of it here would
be redundant. Let’s move on now to review the other two options for importing a
Maven project into Eclipse.
Importing a Maven Project
m2eclipse can import a Maven project with an existing pom.xml. By pointing at the
directory where a Maven project is located, m2eclipse detects all the Maven POMs in
the project and provides a hierarchical list of them as shown in Figure 14-11.
Figure 14-11 displays the view of the project being imported. Notice that all the
POMs from the project are listed in a hierarchy. This allows you to easily select which
POMs (and therefore which projects) you want to be imported into Eclipse. Once you
select the project you would like to import, m2eclipse will import and build the
project(s) using Maven.
Figure 14-10. Importing a Maven project
Importing Maven Projects | 283
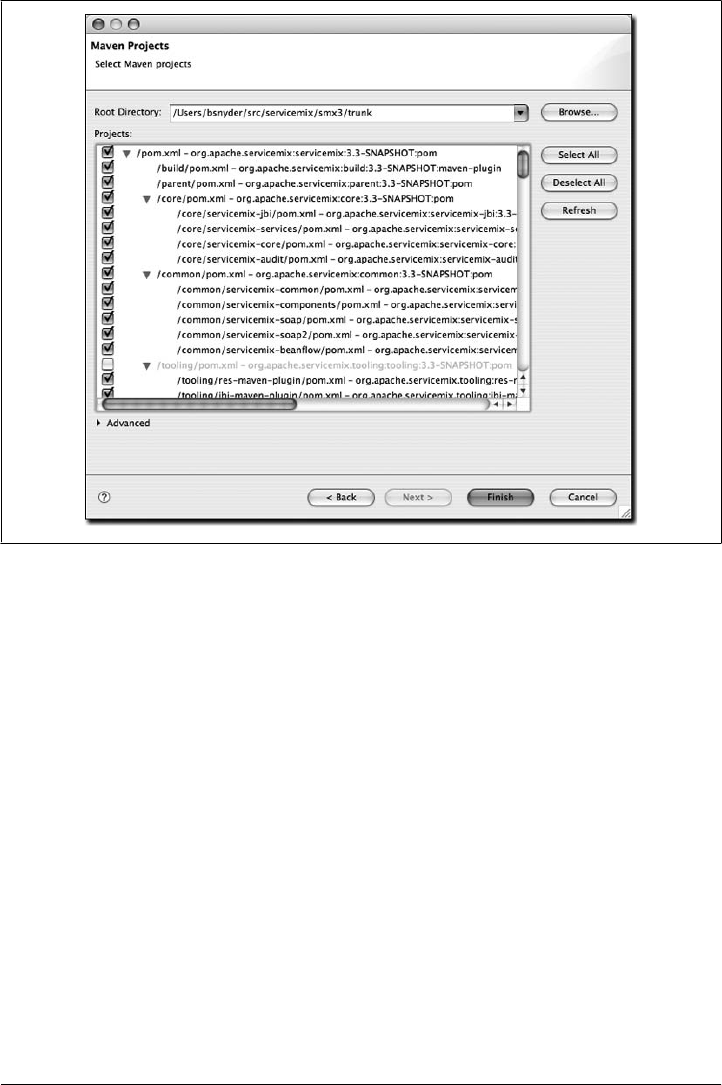
Materializing a Maven Project
m2eclipse also offers the ability to “materialize” a Maven project. Materialization is
similar to the process of checking out a Maven project from Subversion, but instead of
manually entering the URL to the project’s Subversion repository, the Subversion
URL is discovered from the project’s root POM file. You can use this feature to “ma-
terialize” projects from nothing more than a POM file if the POM file has the appro-
priate elements to specify the location of a source repository. Using this feature, you
can browse the central Maven repository for projects and materialize them into Eclipse
projects. This comes in handy if your project depends on a third-party open source
library and you need to get your hands on the source code. Instead of tracking down
the project web site and figuring out how to check it out of Subversion, just use the
m2eclipse project to magically materialize the Eclipse project.
Figure 14-12 shows the wizard after choosing to materialize Maven projects.
Figure 14-11. Importing a multimodule Maven project
284 | Chapter 14: Maven and Eclipse: m2eclipse
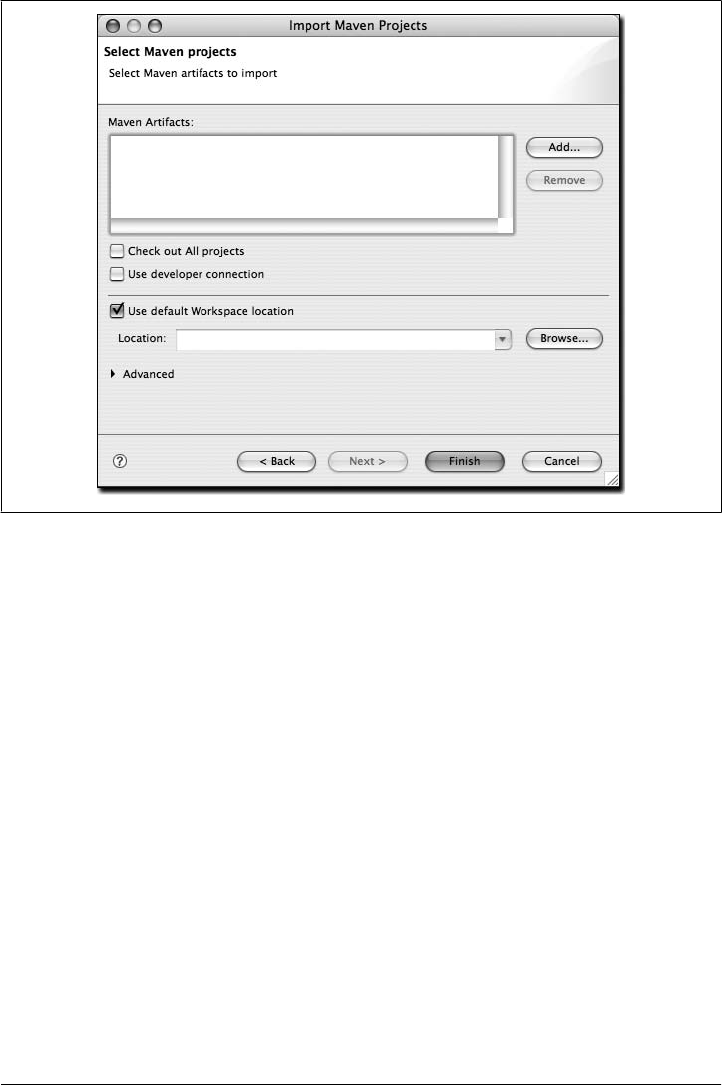
Notice that the dialog box for Maven artifacts in Figure 14-12 is empty. This is because
no projects have been added yet. To add a project, you must click the Add button on
the right side and select a dependency to add from the central Maven repository. Fig-
ure 14-13 shows how to add a project.
Upon entering a query, candidate dependencies will be located in the local Maven
repository. After a few seconds of indexing the local Maven repository, the list of
candidate dependencies appears. Select the dependency to add and click OK so that
they are added to the list, as shown in Figure 14-14.
Upon adding a dependency, you have the option of telling the m2eclipse plugin to check
out all projects for the artifact.
Running Maven Builds
m2eclipse modifies the Run As... and Debug As... menus to allow you to run a Maven
build within Eclipse. Figure 14-15 shows the Run As... menu for an m2eclipse project.
From this menu you can run one of the more common lifecycle phases such as clean,
install, or package. You can also load up the Run configuration dialog window and
configure a Maven build with parameters and more options.
Figure 14-12. Materializing a Maven project
Running Maven Builds | 285
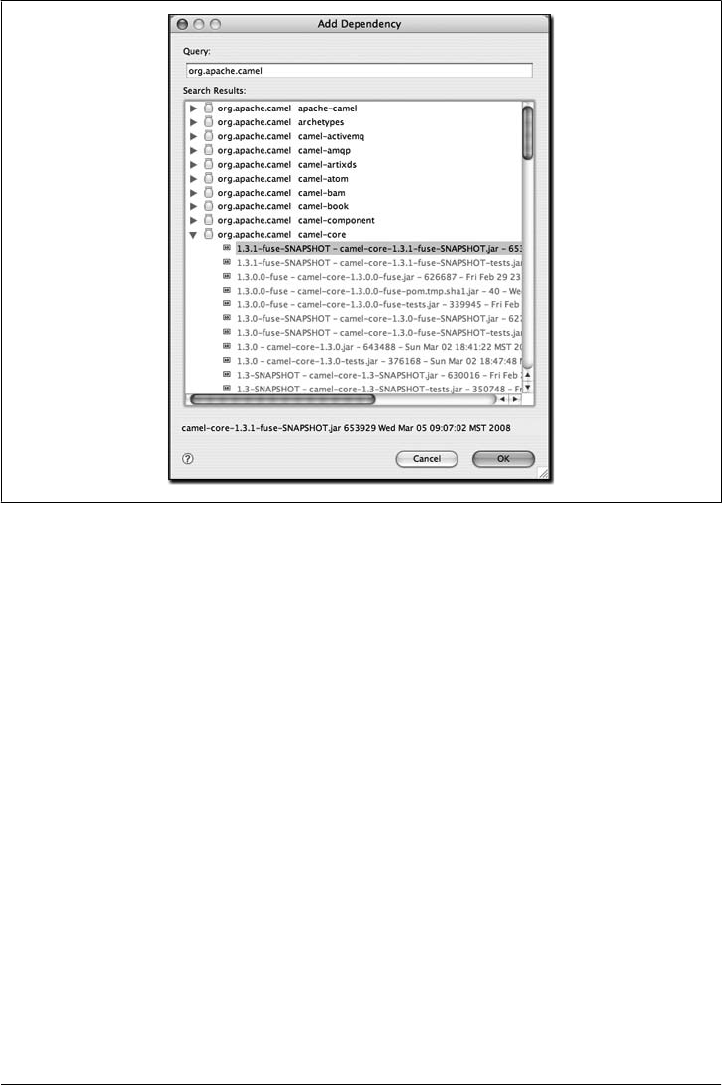
If you need to configure a Maven build with more options, you can choose Run Con-
figurations... and create a new Maven build. Figure 14-16 shows the Run dialog for
configuring a Maven build.
The Run configuration dialog allows you to specify multiple goals and profiles. It ex-
poses options such as “skip tests” and “update snapshots” and allows you to customize
everything from the project to the JRE to the environment variable. You can use this
dialog to support any custom Maven build that you wish to launch with m2eclipse.
Working with Maven Projects
The m2eclipse plugin also provides a set of features for working with Maven projects
once they are inside Eclipse. Many features make Maven in Eclipse easier to use, so
let’s dive right into them. In the previous section, I materialized a Maven project and
selected a subproject from the Apache Camel project named camel-core. We’ll use that
project to demonstrate these features.
By right-clicking on the camel-core project and selecting the Maven menu item, you
can see the available Maven features. Figure 14-17 shows a screenshot of this.
Figure 14-13. Selecting artifact to materialize
286 | Chapter 14: Maven and Eclipse: m2eclipse
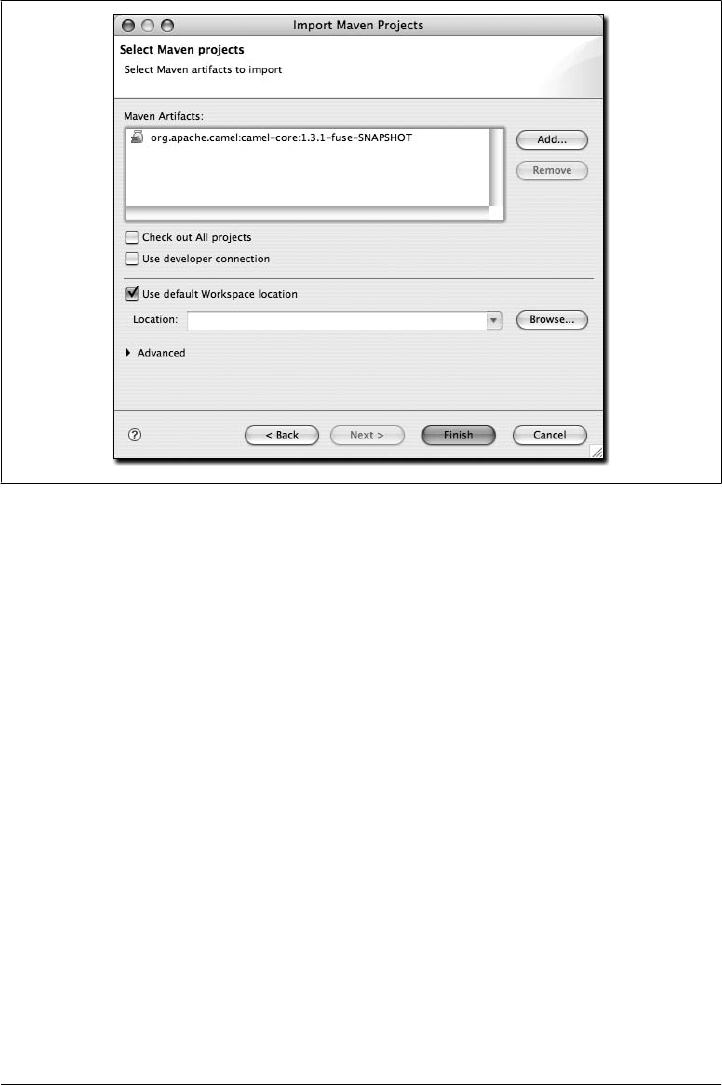
Notice in Figure 14-17 the available Maven features for the camel-core project,
including:
• Adding dependencies and plugins
• Updating dependencies, snapshots and source folders
• Creating a Maven module
• Downloading the source
• Opening Project URLs such as the Project Web Page, Issue Tracker, Source Con-
trol, and Continuous Integration tool
• Enabling/disabling workspace resolution, nested Maven modules and dependency
management
These features are also big timesavers, so let’s review them briefly.
Adding and Updating Dependencies and Plugins
Let’s say we’d like to add a dependency or a plugin to the camel-core POM. For the
sake of demonstration, we’re going to add commons-lang as a dependency. (Please note
that the functionality for adding a dependency and a plugin is exactly the same, so we’ll
demonstrate it by adding a dependency.)
Figure 14-14. Materializing Apache Camel
Working with Maven Projects | 287
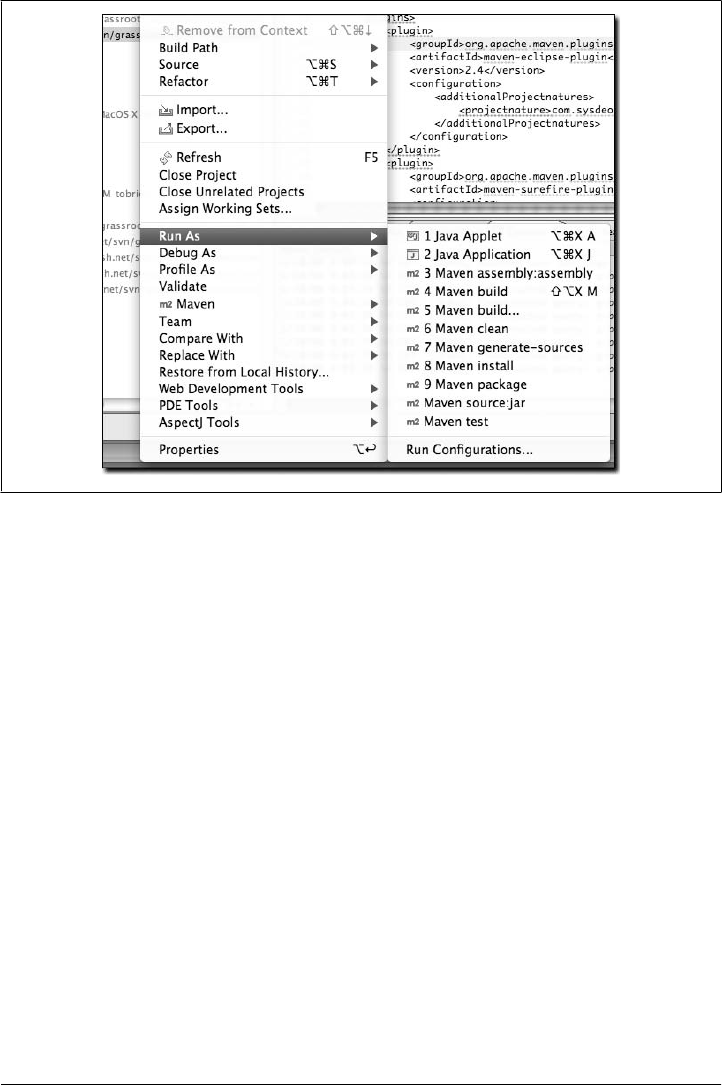
m2eclipse offers two options for adding dependencies to a project. The first option is
manually editing the POM file to type in the XML to add the dependency. The downside
to manually editing the POM file to add a dependency is that you must already know
the information about the artifact, or use the features discussed in the next section to
manually locate the artifact information in the repository indexes. The upside is that
after manually adding the dependency and saving the POM, the project’s Maven De-
pendencies container will be automatically updated to include the new dependency.
Figure 14-18 shows how I added a dependency for commons-lang to the camel-console
POM and the Maven Dependencies container was automatically updated to included it.
Manually adding a dependency works well, but it requires more work than the second
approach. Upon manually adding the dependency element to the POM, the Eclipse
progress in the lower righthand corner of the Eclipse workbench reflects the action, as
shown in Figure 14-19.
The second option for adding a dependency is much easier because you don’t have to
know any information about the artifact other than its groupId. Figure 14-20 shows
this functionality.
By simply entering a groupId into the query field, m2eclipse queries the repository
indexes and even shows a version of the artifact that is currently in your local Maven
repository. This option is preferred because it is such a tremendous timesaver. With
Figure 14-15. Running an Eclipse build with Run As...
288 | Chapter 14: Maven and Eclipse: m2eclipse
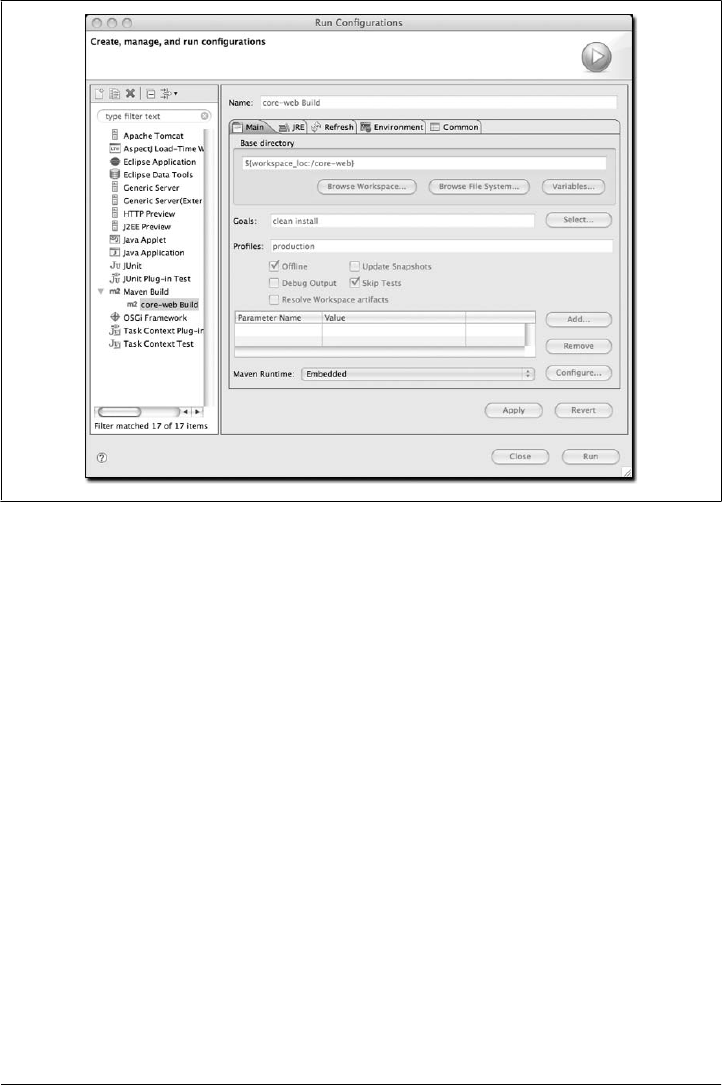
m2eclipse, you no longer need to hunt through the central Maven repository for an
artifact version.
Creating a Maven Module
m2eclipse makes it very easy to create a series of nested projects in a multimodule
Maven project. If you have a parent project, and you want to add a module to the
project, just right click on the project, go the Maven menu, and choose New Maven
Module Project. m2eclipse will walk you through the project creation process to create
a new project, then it will update the parent project’s POM to include the module
reference. Before m2eclipse came along it was very difficult to use a hierarchy of Maven
projects within Eclipse. With m2eclipse, the details of the underlying relationships
between parent and child projects are integrated into the development environment.
Downloading Source
If the central Maven repository contains a source artifact for a particular project, you
can download the source from the repository and expose it to the Eclipse
environment. When you are trying to debug a complex issue in Eclipse, nothing can
be easier than being able to right-click on a third-party dependency and drill into the
Figure 14-16. Configuring a Maven build as a run configuration
Working with Maven Projects | 289
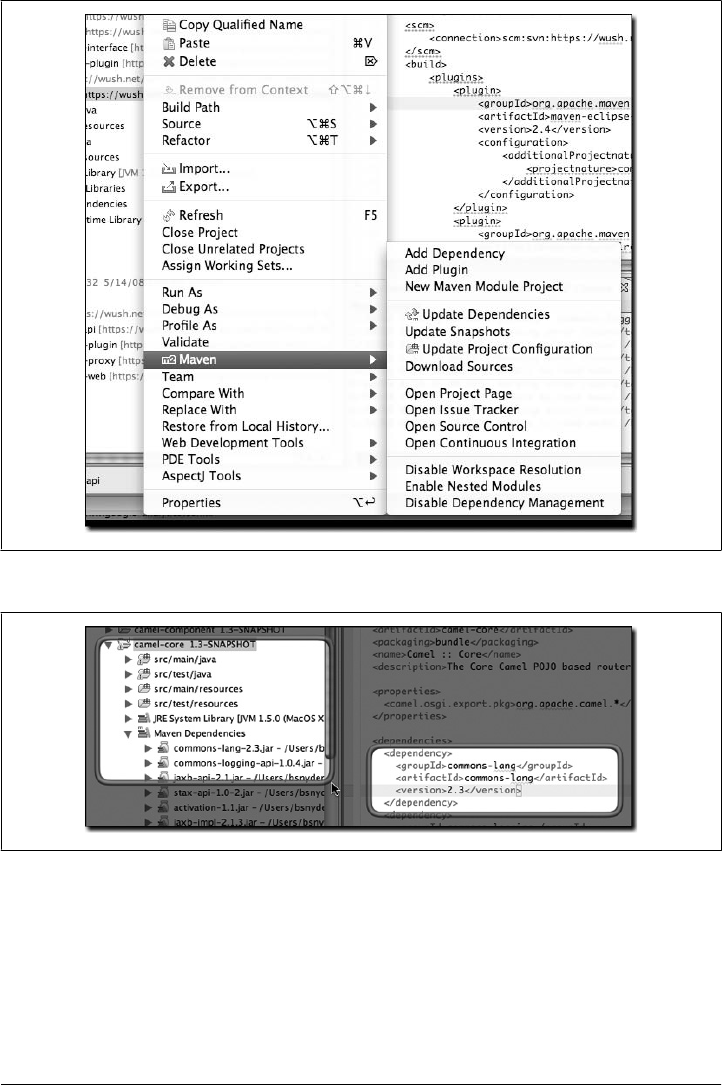
code in the Eclipse debugger. Select this option, and m2eclipse will attempt to down-
load the source artifact from the Maven repository. If it is unable to retrieve this source
artifact, you should ask the maintainers of the project in question to upload the ap-
propriate Maven source bundle to the central Maven repository.
Figure 14-17. Available Maven features
Figure 14-18. Manually adding a dependency to the project’s POM
290 | Chapter 14: Maven and Eclipse: m2eclipse
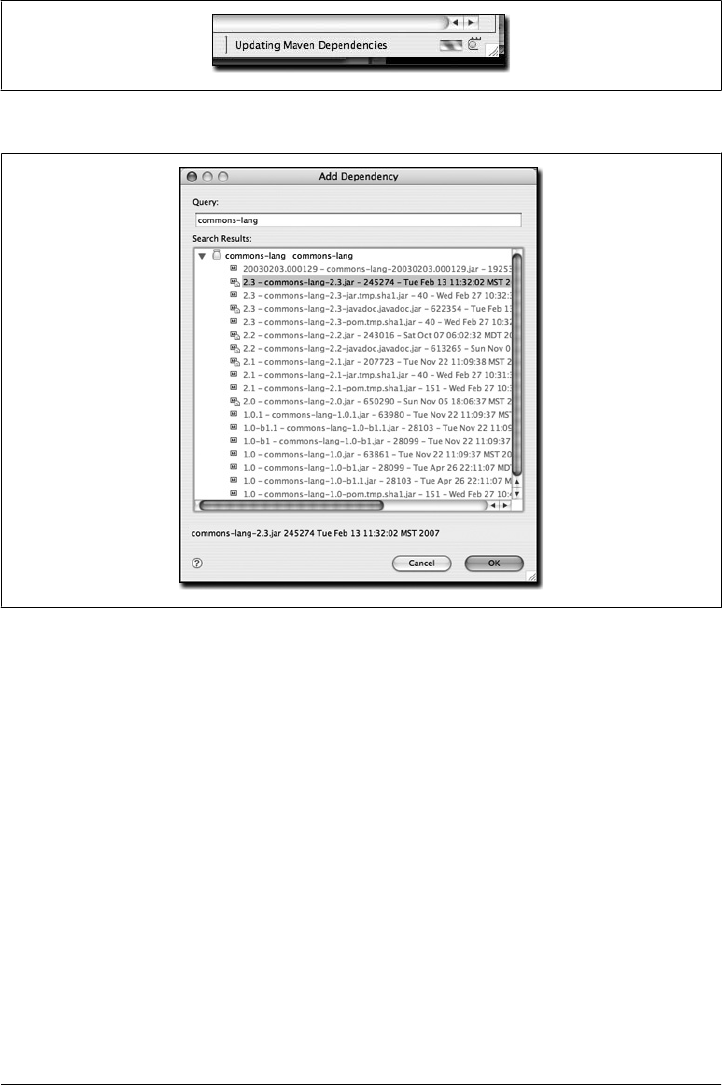
Opening Project Pages
A Maven POM contains some valuable URLs that a developer may need to consult.
These are the project’s web page, the URL for the source code repository, a URL for a
continuous integration system such as Hudson, and a URL for an issue tracker. If these
URLs are present in a project’s POM, m2eclipse will open these project pages in a
browser.
Resolving Dependencies
You can configure a project to resolve dependencies from a workspace. This has the
effect of altering the way that Maven locates dependency artifacts. If a project is con-
figured to resolve dependencies from the workspace, these artifacts do not need to be
present in your local repository. Assume that project-a and project-b are both in the
same Eclipse workspace, and that project-a depends on project-b. If workspace res-
olution is disabled, the m2eclipse Maven build for project-a will succeed only if
Figure 14-19. Updating Maven dependencies
Figure 14-20. Searching for a dependency
Working with Maven Projects | 291

project-b’s artifact is present in the local repository. If workspace resolution is enabled,
m2eclipse will resolve the dependency via the eclipse workspace. In other words, when
workspace resolution is enabled, project’s don’t have to be installed in the local repo-
sitory to relate to one another.
You can also disable dependency management. This has the effect of telling m2eclipse
to stop trying to manage your project’s classpath, and it will remove the Maven De-
pendencies classpath container from your project. If you do this, you are essentially on
your own when it comes to managing your project’s classpath.
Working with Maven Repositories
m2eclipse also provides some tools to make working with Maven repositories a bit
easier. These tools provide functionality for:
• Searching for artifacts
• Searching for Java classes
• Indexing Maven repositories
Searching For Maven Artifacts and Java classes
m2eclipse adds a couple of items to the Eclipse navigation menu that make searching
for Maven artifacts and Java classes easy work. Each option is available by clicking on
the Navigate menu, as shown in Figure 14-21.
Notice the available options in Figure 14-21 under the Eclipse Navigate menu named
Open Maven POM... and Open Type from Maven.... The Open Maven POM... option
allows you to search the Maven repository for a given POM, as shown in Figure 14-22.
Upon selecting an artifact and clicking OK, the POM for that artifact is opened in
Eclipse for browsing or editing. This is handy when you need to take a quick look at
the POM for a given artifact.
The second m2eclipse option in the Navigate menu is named Open Type from
Maven.... This feature allows you to search for a Java class by name in a remote repo-
sitory. Upon opening this dialog, simply type “factorybean” and you’ll see many classes
with the name FactoryBean in them, as shown in Figure 14-23.
This is a big timesaving feature because it means that manually searching through ar-
tifacts in a Maven repository for a particular class is a thing of the past. If you need to
use a specific class, just fire up Eclipse, go to the Navigate menu, and search for the
class. m2eclipse will show you the list of artifacts in which it appears.
292 | Chapter 14: Maven and Eclipse: m2eclipse
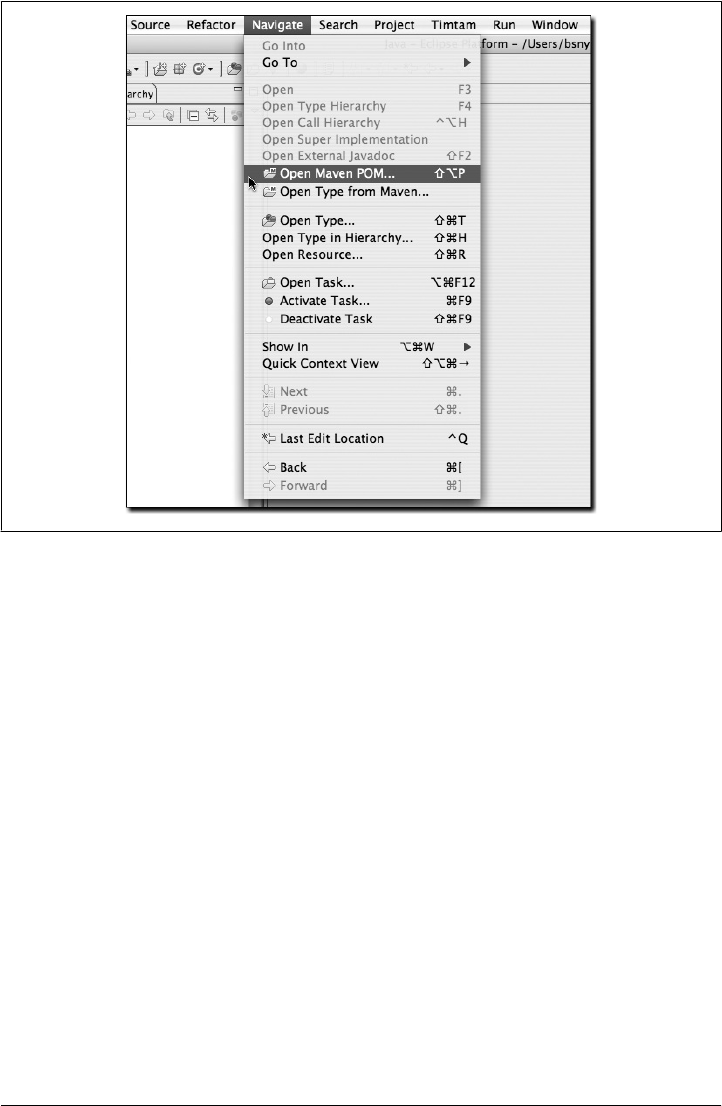
Indexing Maven Repositories
The Maven Indexes view allows you to manually navigate to POMs in a remote repo-
sitory and open them in Eclipse. To see this view, go to View → Show View → Other,
type the word “maven” into the search box, and you should see a view named Maven
Indexes, as shown in Figure 14-24.
Select this view, and click OK. This will show the Maven Indexes view, as shown in
Figure 14-25.
Additionally, Figure 14-26 shows the Maven Indexes view after you manually navigate
to locate a POM.
After finding the apache-camel artifact, double-clicking on it will open it in Eclipse for
browsing or editing.
These features make working with remote repositories from inside of Eclipse so much
easier and faster. After all the hours you may have spent doing these types of tasks by
manually over the last few years—visiting repositories through a web browser, down-
loading artifacts, and grepping through them for classes and POMs—you’ll find that
m2eclipse is a welcome improvement.
Figure 14-21. Searching for artifacts and classes
Working with Maven Repositories | 293
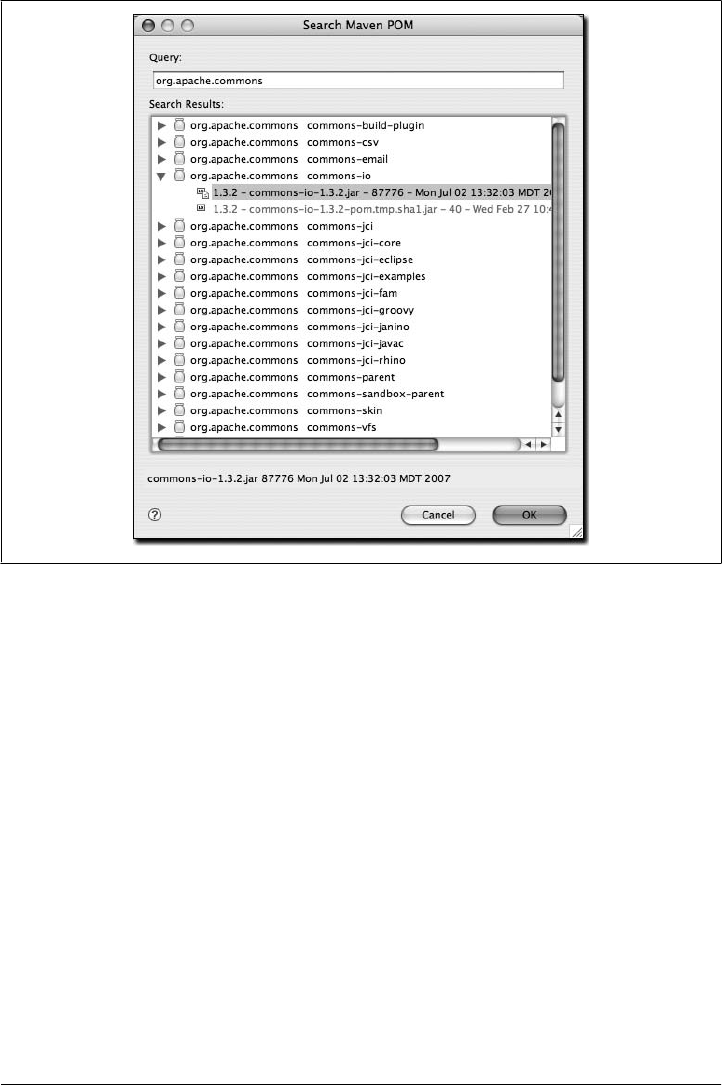
Using the Form-Based POM Editor
The latest release of the m2eclipse plugin has a form-based POM editor that allows you
to edit every part of a project’s pom.xml with an easy-to-use GUI interface. To open
the POM editor, click on a project’s pom.xml file. If you have customized the editors
for a pom.xml file, and the POM editor is not the default editor, you may need to right-
click on the file and choose Open With... → Maven POM Editor. The POM editor will
then display the Overview tab, as shown in Figure 14-27.
One common complaint about Maven is that it forces a developer to confront large and
often overwhelming XML documents in a highly complex multimodule project build.
Although the authors of this book believe this is a small price to pay for the flexibility
of a tool such as Maven, the graphical POM editor is a tool that makes it possible for
people to use Maven without ever having to know about the XML structure behind a
Maven POM.
The project shown in Figure 14-27 is a project with an artifactId of idiom-core. You’ll
notice that most of the fields in this idiom-core project are blank. There is no groupId
or version, and there is no SCM information supplied in the POM editor. This is
Figure 14-22. Searching for a POM
294 | Chapter 14: Maven and Eclipse: m2eclipse
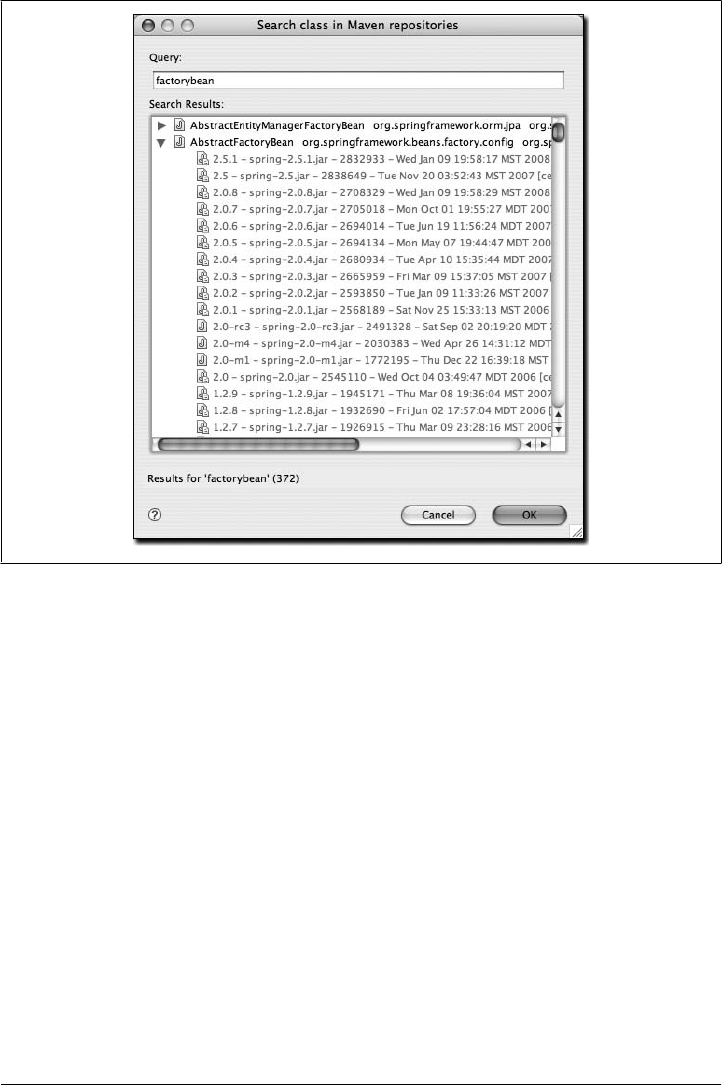
because idiom-core inherits most of this information from a parent project named
idiom. If we open the pom.xml for the parent project in the POM editor, we’ll see the
Overview tab shown in Figure 14-28.
That “open folder” icon on the various list entries throughout the POM editor indicate
that the corresponding entry is present in the Eclipse workspace, and the “jar” icon
indicates artifacts that are referenced from the Maven repository. You can double-click
those entries to open their POMs in the POM editor. This works for modules, depend-
encies, plugins, and other elements that have corresponding Maven artifacts. Under-
lined labels in several POM editor sections represent hyperlinks that can be used to
open the POM editor for corresponding Maven artifacts.
In this parent POM, we see that the groupId and version are defined and that the parent
POM supplies much of the information that was missing in the idiom-core project. The
POM editor will show you the contents of the POM that you are editing, and it will not
show you any of the inherited values. If you want to look at the idiom-core project’s
effective POM in the POM editor, you can use the Show Effective POM action in the
tool bar in the upper-righthand corner of the POM editor, which shows a left bracket
Figure 14-23. Searching the repository for a class
Using the Form-Based POM Editor | 295
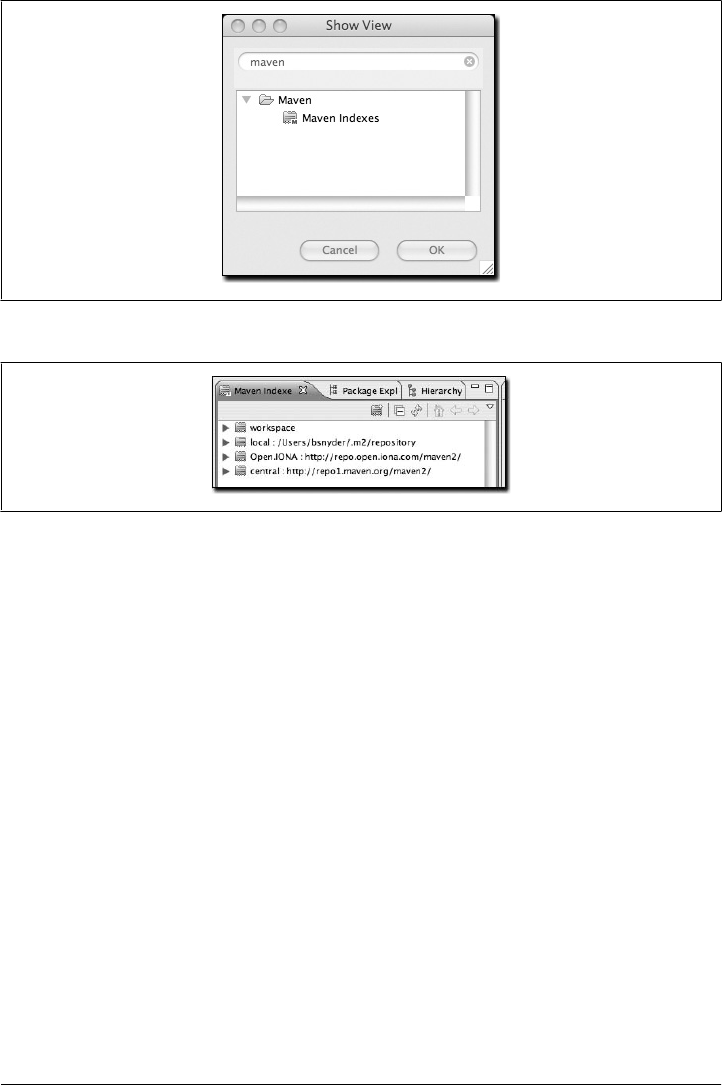
and an equals sign on a page with a blue M. It will load the effective POM for idiom-
core in the POM editor, as shown in Figure 14-29.
This effective view of the POM merges the idiom-core POM with the ancestor POMs
(the parent, the grandparent, etc.)—similar to the mvn help:effective-pom command—
and displays the POM editor with the effective values. Because the POM editor displays
a composite view of many different merged POMs, this effective POM editor is read-
only, and you will not be able to update any of the fields in this effective POM view.
If you are looking at the POM editor for the idiom-core project as shown in Fig-
ure 14-27, you can also navigate to the parent POM using the Open Parent POM action
from the POM editor tool bar in the upper-righthand corner of the POM editor.
The POM editor shows a number of tabs displaying various information from the
POM. The final tab exposes the pom.xml as an XML document. The Dependencies tab,
shown in Figure 14-30, exposes an easy-to-use interface for adding and editing de-
pendencies to your project, as well as for editing the dependencyManagement section of
the POM. This dependency management screen is also integrated with the artifact
searching facilities in the m2eclipse plugin. You can use actions from the editor sections
as well as Ctrl-Space typing assistance for the fields in the Dependency Details section.
Figure 14-24. Show Maven Indexes view
Figure 14-25. Maven Indexes view
296 | Chapter 14: Maven and Eclipse: m2eclipse
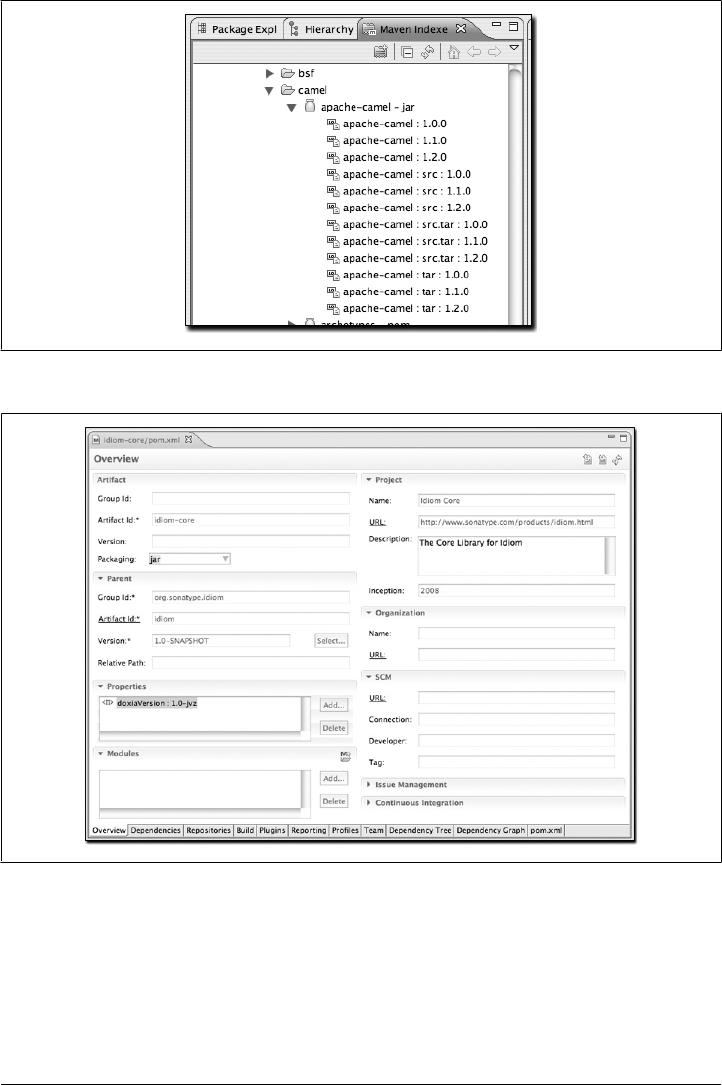
If you need to know more about one of the artifacts, you can use Open Web Page action
from the Dependency Details section tool bar to check the project web page.
The Build tab shown in Figure 14-31 provides access to the contents of the build ele-
ment. From this tab you can customize source directories, add extensions, change the
default goal name, and add resources directories.
Figure 14-26. Locating a POM from the Indexes view
Figure 14-27. Overview tab of POM editor for idiom-core
Using the Form-Based POM Editor | 297
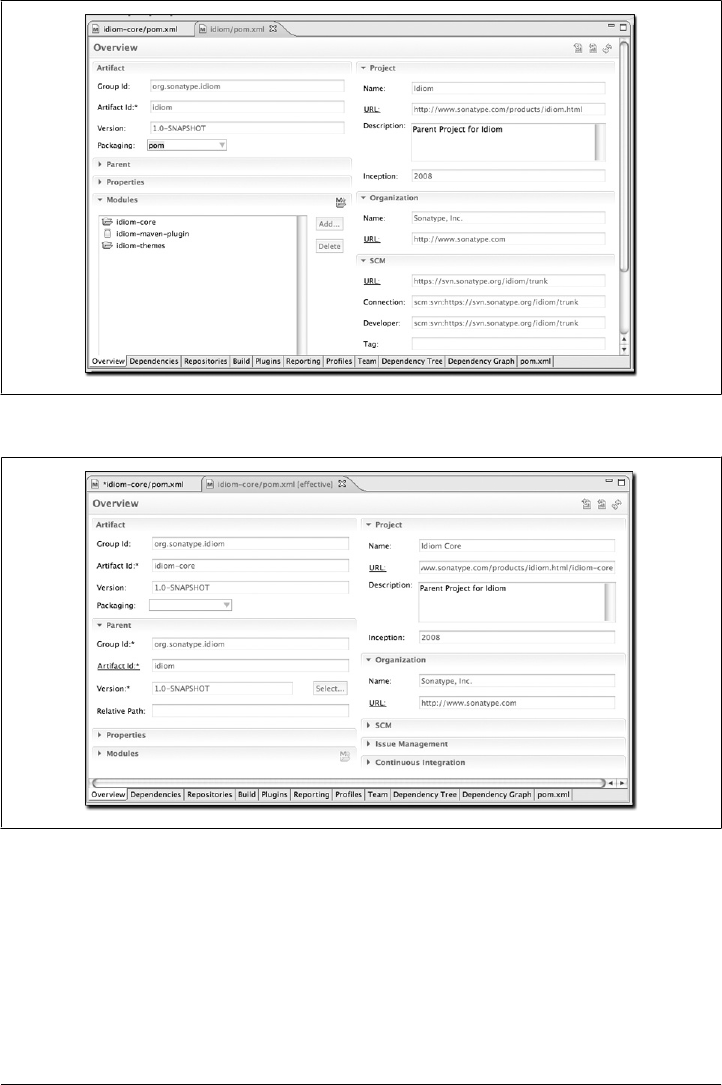
We have shown only a small subset of the POM editor here. If you are interested in
seeing the rest of the tabs, please download and install the m2eclipse plugin.
Analyzing Project Dependencies in m2eclipse
The latest release of m2eclipse contains a POM editor that provides some dependency
analysis tools. These tools promise to change the way users maintain and monitor a
Figure 14-28. Overview tab of POM editor for idiom parent project
Figure 14-29. Effective POM for idiom-core
298 | Chapter 14: Maven and Eclipse: m2eclipse

project’s transitive dependencies. One of Maven’s main attractions is the fact that it
manages a project’s dependencies. If you are writing an application that depends on
the Spring Framework’s Hibernate3 integration, all you need to do is depend on the
spring-hibernate3 artifact from the central Maven repository. Maven then reads this
artifact’s POM and adds all of the necessary transitive dependencies. Although this is
a great feature that attracts people to Maven in the first place, it can become confusing
when a project depends on tens of dependencies, each with tens of transitive
dependencies.
Problems begin to occur when you depend on a project with a poorly crafted POM that
fails to flag dependencies as optional, or when you start encountering conflicts between
transitive dependencies. If one of your requirements is to exclude a dependency such
as commons-logging or the servlet-api, or if you need to find out why a certain de-
pendency is showing up under a specific scope you will frequently need to invoke the
dependency:tree and dependency:resolve goals from the command-line to track down
the offending transitive dependencies.
This is where the POM editor in m2eclipse comes in handy. If you open a project with
many dependencies, you can open the Dependency Tree tab and see a two-column
display of dependencies, as shown in Figure 14-32. The lefthand side of the panel dis-
plays a tree of dependencies. The first level of the tree consists of direct dependencies
from your project, and each subsequent level lists the dependencies of each depend-
ency. This lefthand side is a great way to figure out how a specific dependency made
its way into your project’s resolved dependencies. The righthand side of this panel
displays the resolved dependencies. This is the list of effective dependencies after all
Figure 14-30. Dependencies tab of the POM editor
Analyzing Project Dependencies in m2eclipse | 299
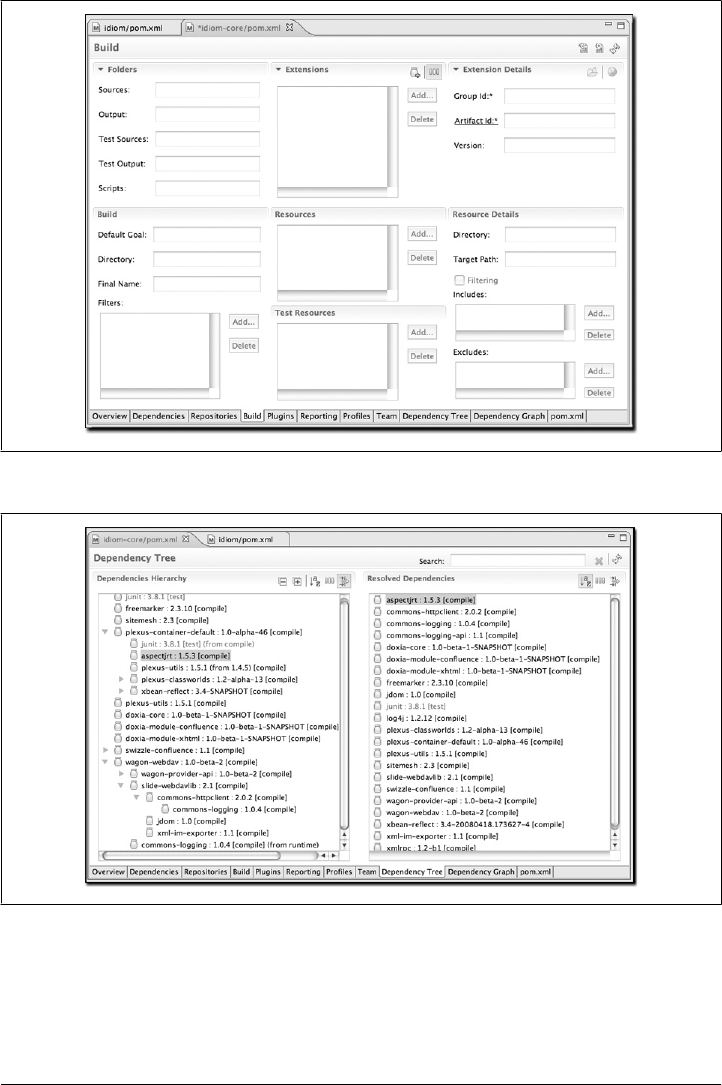
conflicts and scopes have been applied, and it is the effective list of dependencies that
your project will use for compilation, testing, and packaging.
Figure 14-31. Build tab of the POM editor
Figure 14-32. Dependency Tree tab of the POM editor
300 | Chapter 14: Maven and Eclipse: m2eclipse

The feature that makes the Dependency Tree tab so valuable is that it can be used as
an investigative tool to figure out how a specific dependency made it into the list of
resolved dependencies. Searching and filtering functionality available in the editor
makes it really easy to search and browse through the project dependencies. You can
use Search entry field from the editor tool bar and the Sort and Filter actions from the
Dependency Hierarchy and Resolved Dependencies sections to navigate through de-
pendencies. Figure 14-33 shows what happens when you click on commons-logging in
the Resolved Dependencies list. When filtering is enabled in the Dependencies Hier-
archy section, clicking on a resolved dependency filters the hierarchy on the lefthand
side of the panel to show all of the nodes that contributed to the resolved dependency.
If you are trying to get rid of a resolved dependency, you can use this tool to find out
which dependencies (and which transitive dependencies) are contributing the artifact
to your resolved dependencies. In other words, if you are trying to get rid of something
like commons-logging from your dependency set, the Dependency Tree tab is the tool
you will likely want to use.
m2eclipse also provides you with the ability to view your project’s dependencies as a
graph. Figure 14-34 shows the dependencies of idiom-core. The topmost box is the
idiom-core project, and the other dependencies are shown below it. Direct dependen-
cies are linked from the top box, and the transitive dependencies are linked from those.
You can select a specific node in the graph to highlight the linked dependencies, or you
can use the Search field at the top of the page to find matching nodes.
Note that the “open folder” icon on each graph node indicates that the corresponding
artifact is present in the Eclipse workspace, and the “jar” icon indicates that the node’s
artifact is referenced from the Maven repository.
Figure 14-33. Locating dependencies in the Dependency Tree
Analyzing Project Dependencies in m2eclipse | 301
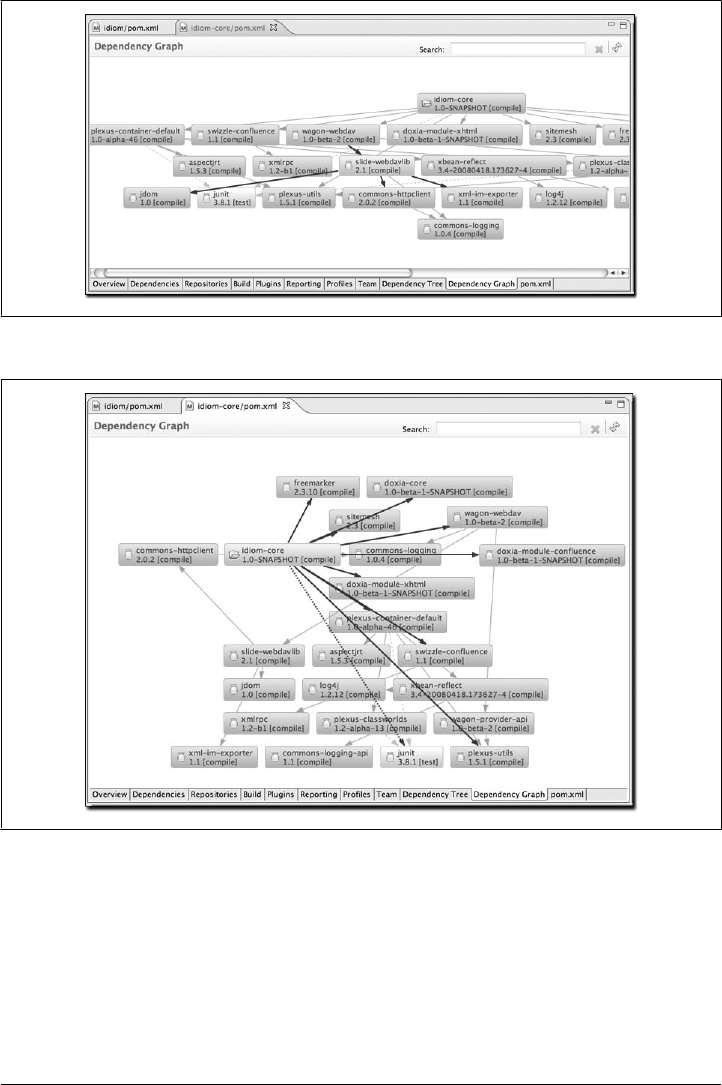
The graph presentation can be changed by right-clicking in the editor. You can choose
to show artifact IDs, group IDs, versions, scopes, or whether you want to wrap node
text or show icons. Figure 14-35 shows the same graph from Figure 14-34 but with a
radial layout.
Figure 14-34. Viewing the dependencies of a project as a graph
Figure 14-35. Radial layout of dependency graph
302 | Chapter 14: Maven and Eclipse: m2eclipse
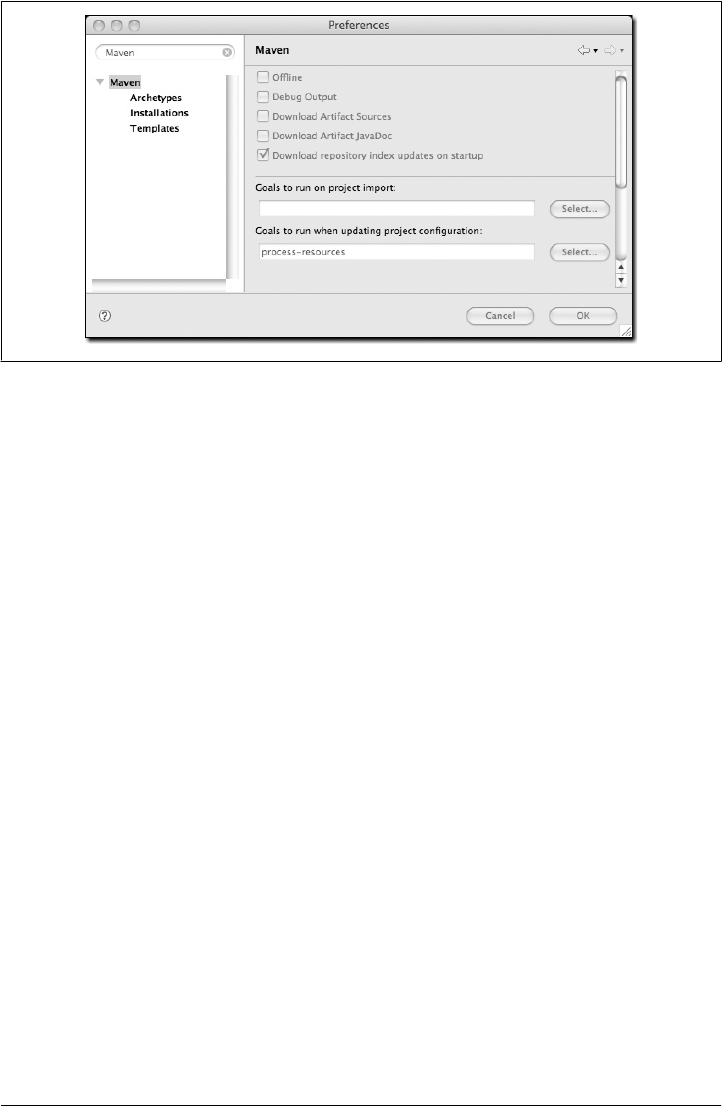
Maven Preferences
The ability to adjust the Maven preferences and some Maven options is an important
aspect of developing with Maven, and m2eclipse offers the ability to tweak these items
via the Maven preferences page inside of Eclipse. Typically, when using Maven on the
command line, such preferences and options are available from files in your ~/.m2
directory and as command-line options. m2eclipse provides access to some of the most
important preferences and options from the Eclipse IDE. Figure 14-36 shows the Maven
preferences page in Eclipse.
The checkboxes in the top section of Figure 14-36 provide you with the ability to:
• Run Maven in offline mode, disabling any downloads from remote repositories
• Enable debug output in the Maven console
• Download source JARs for artifacts from remote Maven repositories
• Download Javadoc JARs for artifacts from remote Maven repositories
• Download and update local indexes for remote repositories on startup
The next section offers a pop-up menu to select which goal you’d like to be executed
when a project is imported and when the source folders for a given project are updated.
The default goal is named process-resources, which copies and process the resources
for the project into the destination directory to make the project ready for packaging.
Customizing this list of goals can come in handy if you need to run any custom goals
that process resources or generate supporting configuration.
Figure 14-36. Maven preferences for Eclipse
Maven Preferences | 303
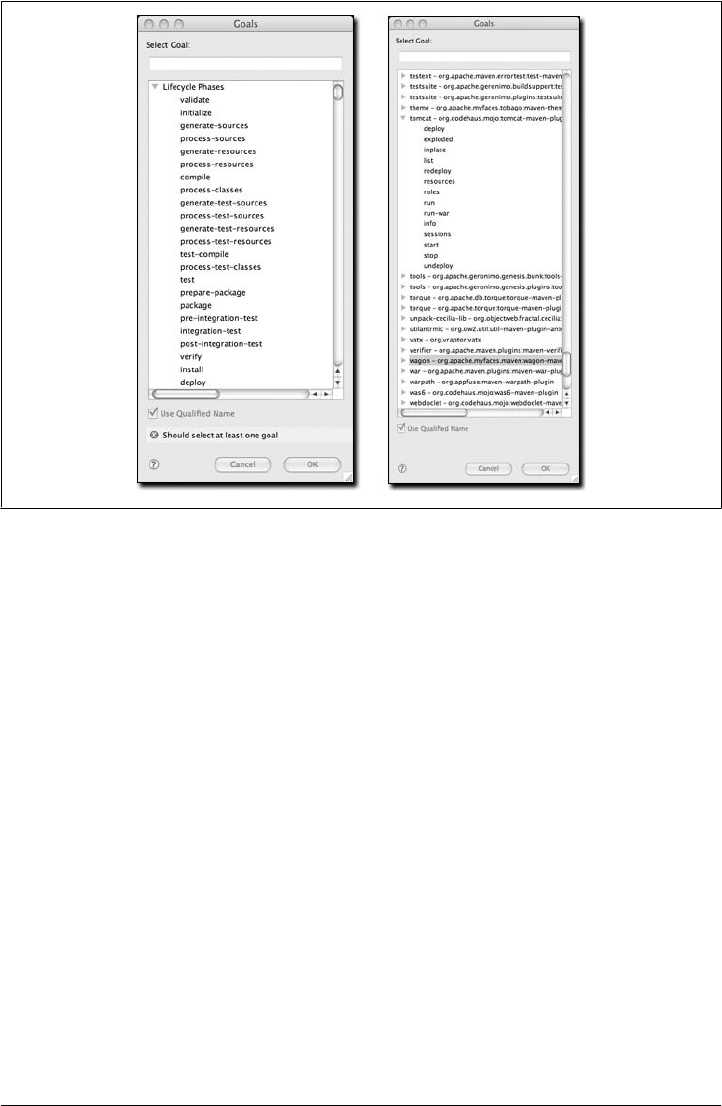
If you need help selecting a goal, click the Select... button to see the Goals dialog. The
dialog on the lefthand side ofFigure 14-37 shows the Goals dialog with a list of all the
phases in the default Maven lifecycle.
When you see the Goals dialog for the first time, you might be overwhelmed by the
number of goals it lists. There are literally hundreds of Maven plugins, for everything
from generating a database to running integration tests to performing static analysis to
generating web services with XFire. Over 200 plugins with selectable goals are listed in
the Goals dialog. The dialog on the righthand side of Figure 14-37 shows the Goals
dialog with the Tomcat Maven plugin’s goals highlighted. You can always narrow down
the list of goals shown in this dialog by typing some text in the search field. As you type
in text, m2eclipse reduces the list of available goals to those that contain the text in the
search field.
Another Maven preference page is the Maven installations configuration page, shown
in Figure 14-38.
This page allows you to add other Maven installations to the Eclipse environment. If
you want to use a different version of Maven with the m2eclipse plugin, you can
configure multiple installations of Maven from this configuration page. This is very
similar to the ability to add more than one Java Virtual Machine to be run inside of
Eclipse. An embedded version of the Maven known as the Maven Embedder is already
specified. This is what is used to execute Maven inside of Eclipse. If you have another
Figure 14-37. Maven Goals dialogs
304 | Chapter 14: Maven and Eclipse: m2eclipse
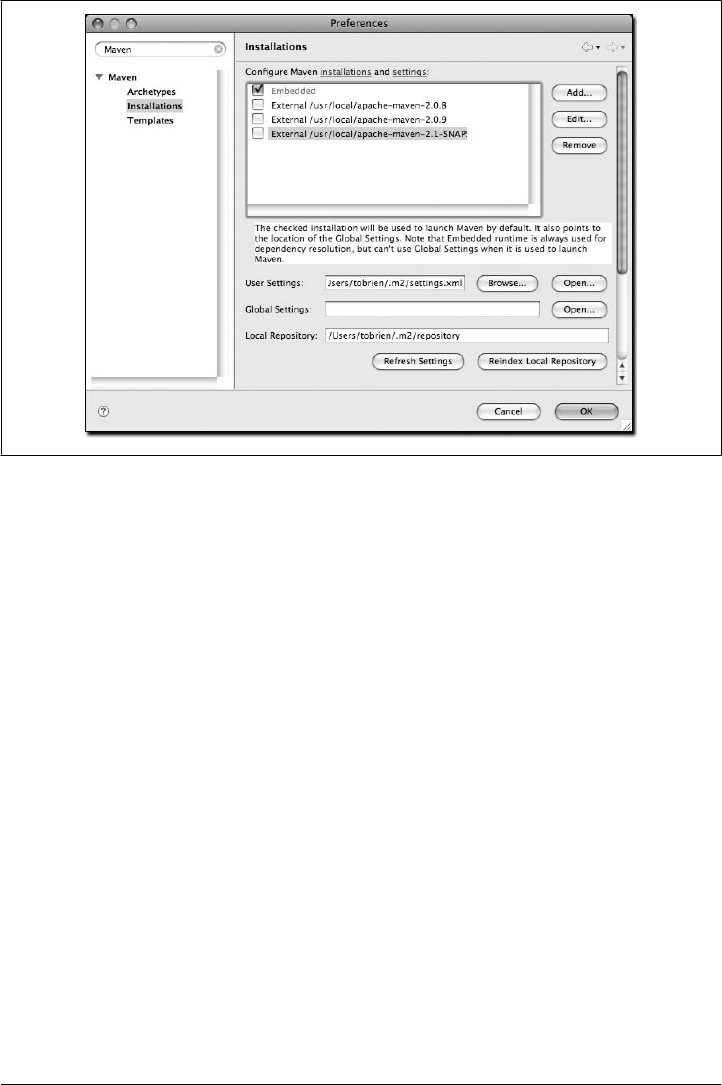
installation of Maven that you want to use instead of the Maven Embedder, you can
add another Maven runtime by clicking on the Add... button. Figure 14-38 shows a
configuration page that lists the Maven Embedder, Maven 2.0.9, and an installation of
Maven 2.1-SNAPSHOT.
The installations configuration page also allows you to specify the location of the global
Maven settings file. If you do not specify the location of this file on the configuration
page, Maven will use the default global settings file found in conf/settings.xml of the
selected Maven installation. You can also customize the location of your user settings
file from the default location of ~/.m2/settings.xml, and you can customize the location
of your local Maven repository from the default location of ~/.m2/repository.
Also available in the Eclipse preferences is the ability to enable a decorator called the
Maven Version Decorator. This preference provides a given project’s current version
on the Eclipse Package Explorer and is shown in Figure 14-39.
To enable this preference, simply check the Maven Version Decorator option that is
highlighted in Figure 14-39. If the Maven Version Decorator is not enabled, a project
will list only its name and relative path in the Package Explorer, as shown in Fig-
ure 14-40.
Figure 14-38. Maven installations preference page
Maven Preferences | 305
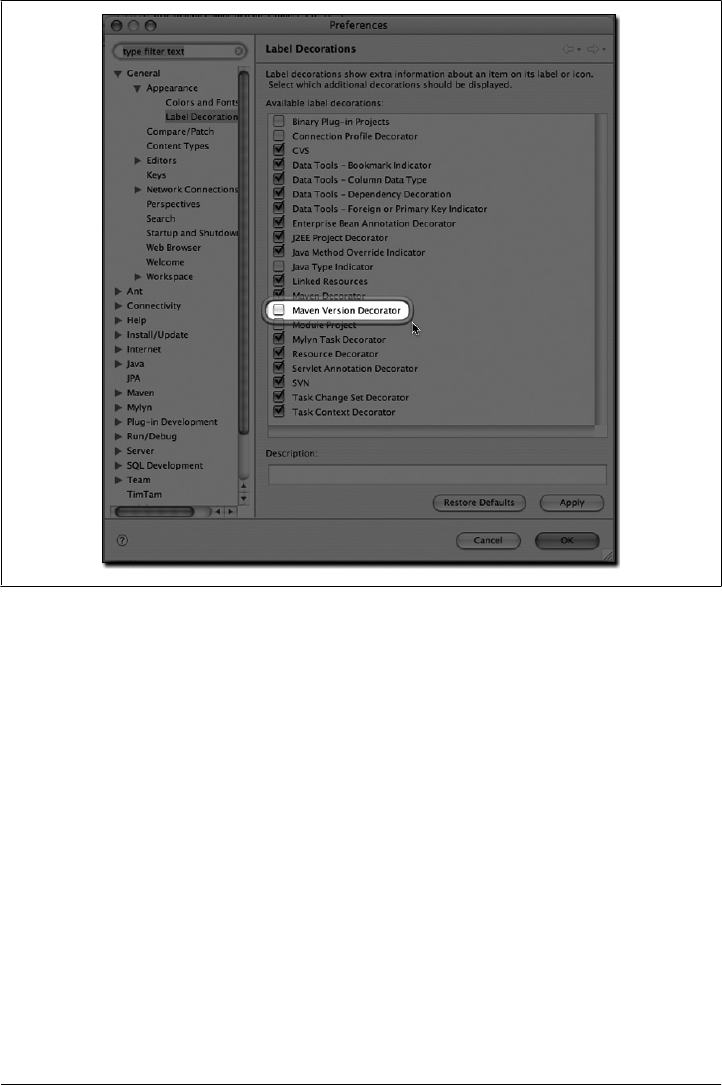
Upon enabling the Maven Version Decorator, the project name will include the current
project version, as shown in Figure 14-41.
This is a helpful feature that provides you with the project version at a glance instead
of requiring you to open the POM to locate the version element.
Summary
m2eclipse is more than just a simple plugin that adds Maven support to Eclipse; it is a
comprehensive integration that will make everything from creating new projects to
locating third-party dependencies orders of magnitude easier. m2eclipse is the first step
toward an IDE that is aware of the rich semantic treasure that is the central Maven
repository. As more people come to use m2eclipse, more projects are going to be
releasing Maven archetypes, and more projects are going to see value in publishing
Figure 14-39. Enabling the Maven Version Decorator
306 | Chapter 14: Maven and Eclipse: m2eclipse
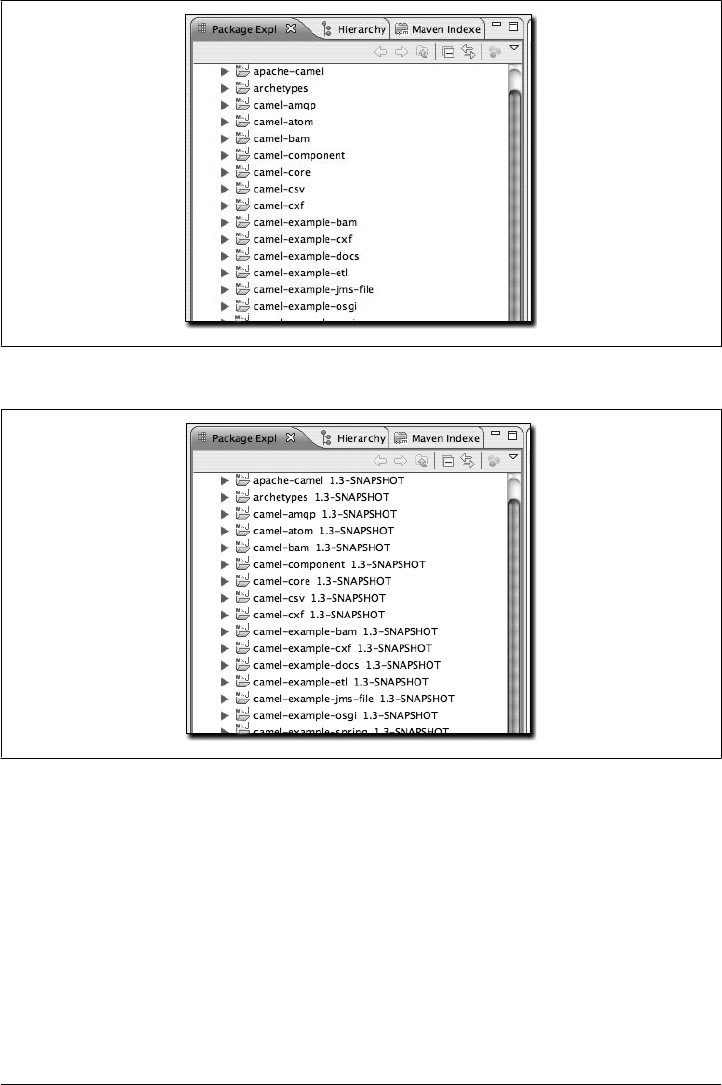
source artifacts to the Maven repository. If you’ve tried to use Eclipse and Maven to-
gether without a tool that can comprehend the hierarchical project relationships that
are central to any multimodule Maven project, you will know that the ability to work
with nested projects is essential to smooth integration between the Eclipse IDE and
Maven.
Figure 14-40. Package Explorer without Maven Version Decorator
Figure 14-41. Package Explorer with Maven Version Decorator enabled
Summary | 307

CHAPTER 15
Site Generation
Introduction
Successful software applications are rarely produced by a team of one. When we’re
talking about any software worth writing, we’re usually dealing with teams of collab-
orating developers ranging anywhere in size from a handful of programmers working
in a small team to hundreds or thousands of programmers working in a large distributed
environment. Most open source projects (such as Maven) succeed or fail based on the
presence or absence of well-written documentation for a widely distributed, ad hoc
collection of users and developers. In all environments, it is important for projects to
have an easy way to publish and maintain online documentation. Software develop-
ment is primarily an exercise in collaboration and communication, and publishing a
Maven site is one way to make sure that your project is communicating with your end
users.
A web site for an open source project is often the foundation for both the end user and
developer communities alike. End users look to a project’s web site for tutorials, user
guides, API documentation, and mailing list archives, and developers look to a project’s
web site for design documents, code reports, issue tracking, and release plans. Large
open source projects may be integrated with wikis, issue trackers, and continuous in-
tegration systems that help augment a project’s online documentation with material
that reflects the current status of ongoing development. If a new open source project
has an inadequate web site that fails to convey basic information to prospective users,
if often is a sign that the project in question will fail to be adopted. In other words, for
an open source project, the site and the documentation are as important to the forma-
tion of a community as the code itself.
Maven can be used to create a project web site to capture information that is relevant
to both the end user and the developer audience. Out of the box, Maven can generate
reports on everything from unit test failures to package coupling to code quality. Maven
provides you with the ability to write simple web pages and render those pages against
a consistent project template. Maven can publish site content in multiple formats, in-
cluding XHTML and PDF. Maven can be used to generate API documents and can also
309

be used to embed Javadoc and source code in your project’s binary release archive.
Once you’ve used Maven to generate all of your project’s end user and developer doc-
umentation, you can then use Maven to publish your web site to a remote server.
Building a Project Site with Maven
To illustrate the process of building a project web site, let’s create a sample Maven
project with the Archetype plugin:
$ mvn archetype:create -DgroupId=org.sonatype.mavenbook -DartifactId=sample-project
This creates the simplest possible Maven project with one Java class in src/main/java
and a simple POM. You can then build a Maven site by simply running mvn site. To
build the site and preview the result in a browser, you can run mvn site:run. This will
build the site and start an embedded instance of Jetty:
$ cd sample-project
$ mvn site:run
[INFO] Scanning for projects...
[INFO] Searching repository for plugin with prefix: 'site'.
[INFO] ------------------------------------------------------------------------
[INFO] Building sample-project
[INFO] task-segment: [site:run] (aggregator-style)
[INFO] ------------------------------------------------------------------------
[INFO] Setting property: classpath.resource.loader.class =>
'org.codehaus.plexus.velocity.ContextClassLoaderResourceLoader'.
[INFO] Setting property: velocimacro.messages.on => 'false'.
[INFO] Setting property: resource.loader => 'classpath'.
[INFO] Setting property: resource.manager.logwhenfound => 'false'.
[INFO] [site:run]
2008-04-26 11:52:26.981::INFO: Logging to STDERR via org.mortbay.log.StdErrLog
[INFO] Starting Jetty on http://localhost:8080/
2008-04-26 11:52:26.046::INFO: jetty-6.1.5
2008-04-26 11:52:26.156::INFO: NO JSP Support for /, did not find
org.apache.jasper.servlet.JspServlet
2008-04-26 11:52:26.244::INFO: Started SelectChannelConnector@0.0.0.0:8080
Once Jetty starts and is listening to port 8080, you can see the project’s site when you
go to http://localhost:8080/ in a web browser. You can view the results in Figure 15-1.
If you click around on this simple site, you’ll see that it isn’t very helpful as a real project
site. There’s just nothing there (and it doesn’t look very good). Since the sample-
project hasn’t configured any developers, mailing lists, issue tracking providers, or
source code repositories, all of these pages on the project site will have no information.
Even the index page of the site states, “There is currently no description associated with
this project.” To customize the site, you’ll have to start adding content to the project
and to the project’s POM.
If you are going to use the Maven Site plugin to build your project’s site, you’ll want
to customize it. You will want to populate some of the important fields in the POM
that tell Maven about the people participating in the project, and you’ll want to
310 | Chapter 15: Site Generation
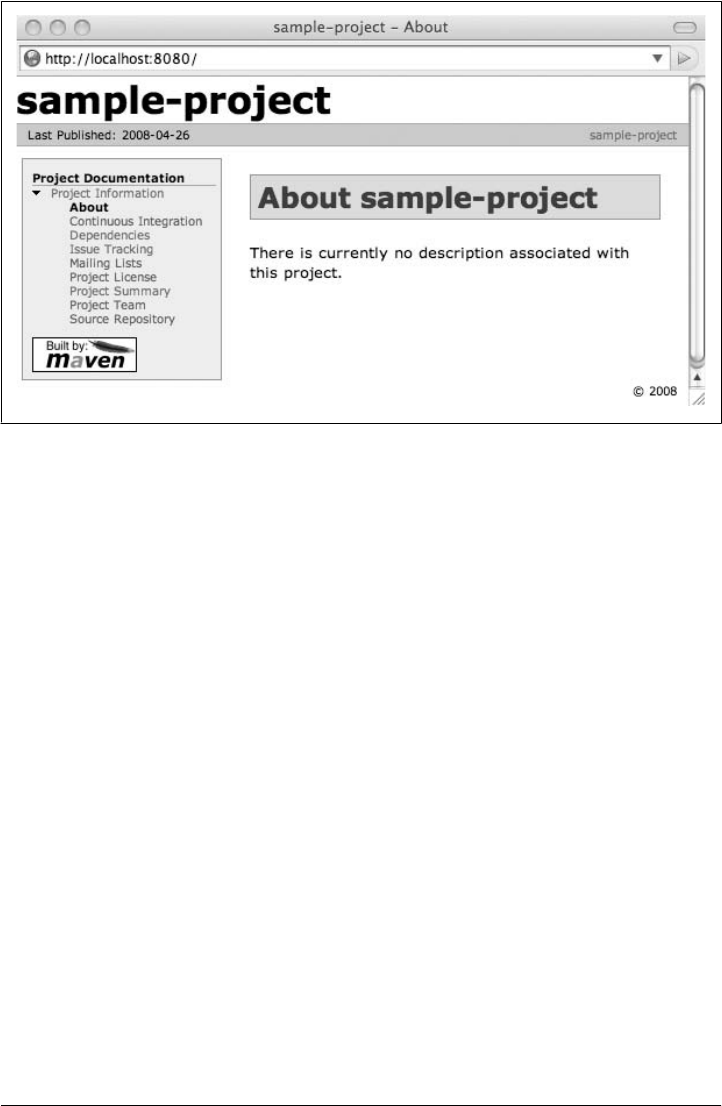
customize the lefthand navigation menu and the links visible in the header of the page.
To customize the contents of the site and affect the contents of the lefthand navigation
menu, you will need to edit the site descriptor.
Customizing the Site Descriptor
When you add content to the site, you are going to want to modify the lefthand navi-
gation menu that is generated with your site. The site descriptor shown in Exam-
ple 15-1 customizes the logo in the upper-lefthand corner of the site. In addition to
customizing the header of the site, this descriptor adds a menu section to the lefthand
navigation menu under the heading “Sample Project.” This menu contains a single link
to an overview page.
Example 15-1. An initial site descriptor
<project name="Sample Project">
<bannerLeft>
<name>Sonatype</name>
<src>images/logo.png</src>
<href>http://www.sonatype.com</href>
</bannerLeft>
<body>
<menu name="Sample Project">
<item name="Overview" href="index.html"/>
</menu>
<menu ref="reports"/>
</body>
</project>
Figure 15-1. Simple generated Maven site
Customizing the Site Descriptor | 311
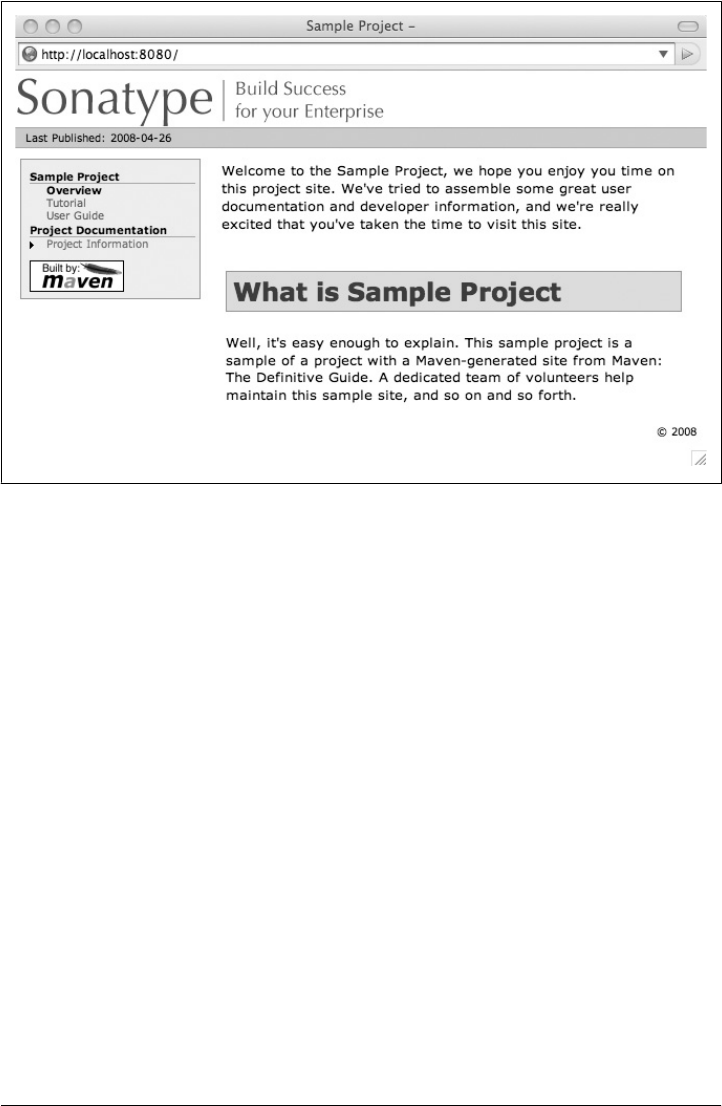
This site descriptor references one image. This logo.png image should be placed in
${basedir}/src/site/resources/images. In addition to the change to the site descriptor,
you’ll want to create a simple index.apt page in ${basedir}/src/site/apt. Put the following
content in index.apt; it will be transformed to the index.html and serve as the first page
a user sees when they come to your project’s Maven-generated web site:
Welcome to the Sample Project, we hope you enjoy your time
on this project site. We've tried to assemble some
great user documentation and developer information, and
we're really excited that you've taken the time to visit
this site.
What is Sample Project
Well, it's easy enough to explain. This sample project is
a sample of a project with a Maven-generated site from
Maven: The Definitive Guide. A dedicated team of volunteers
help maintain this sample site, and so on and so forth.
To preview the site, run mvn clean site followed by mvn site:run:
$ mvn clean site
$ mvn site:run
Once you do this, load the page in a browser by going to http://localhost:8080. You
should see something similar to the screenshot in Figure 15-2.
Figure 15-2. Customized sample project web site
312 | Chapter 15: Site Generation

Customizing the Header Graphics
To customize the graphics that appear in the upper lefthand and righthand corners of
the page, you can use the bannerLeft and bannerRight elements in a site descriptor, as
shown in Example 15-2.
Example 15-2. Adding a bannerLeft and bannerRight to a site descriptor
<project name="Sample Project">
<bannerLeft>
<name>Left Banner</name>
<src>images/banner-left.png</src>
<href>http://www.google.com</href>
</bannerLeft>
<bannerRight>
<name>Right Banner</name>
<src>images/banner-right.png</src>
<href>http://www.yahoo.com</href>
</bannerRight>
...
</project>
Both the bannerLeft and bannerRight elements take name, src, and href child elements.
In the site descriptor just shown, the Maven Site plugin will generate a site with banner-
left.png in the lefthand corner of the page and banner-right.png in the righthand corner
of the page. Maven is going to look in ${basedir}/src/site/resources/images for these
images.
Customizing the Navigation Menu
To customize the contents of the navigation menu, use the menu element with item child
elements. The menu element adds a section to the lefthand navigation menu. Each item
is rendered as a link in that menu. See Example 15-3.
Example 15-3. Creating menu items in a site descriptor
<project name="Sample Project">
...
<body>
<menu name="Sample Project">
<item name="Introduction" href="index.html"/>
<item name="News" href="news.html"/>
<item name="Features" href="features.html"/>
<item name="Installation" href="installation.html"/>
<item name="Configuration" href="configuration.html"/>
<item name="FAQ" href="faq.html"/>
</menu>
...
Customizing the Site Descriptor | 313

</body>
</project>
Menu items can also be nested. If you nest items, you will be creating a collapsible
menu in the lefthand navigation menu. Example 15-4 adds a “Developer Resources”
link, which links to /developer/index.html. When a user is looking at the Developer
Resources page, the menu items below the Developer Resources menu item will be
expanded.
Example 15-4. Adding a link to the site menu
<project name="Sample Project">
...
<body>
...
<menu name="Sample Project">
...
<item name="Developer Resources" href="/developer/index.html" collapse="true">
<item name="System Architecture" href="/developer/architecture.html"/>
<item name="Embedder's Guide" href="/developer/embedding.html"/>
</item>
</menu>
...
</body>
</project>
When an item has the collapse attribute set to true, Maven will collapse the item until
a user is viewing that specific page. In Example 15-4, when the user is not looking at
the Developer Resources page, Maven will not display the System Architecture and
Embedder’s Guide links; instead, it will display an arrow pointing to the Developer
Resources link. When the user is viewing the Developer Resources page, it will show
these links with an arrow pointing down.
Site Directory Structure
Maven places all site document under src/site. Documents of similar format are placed
in subdirectories of src/site. All Almost Plain Text (APT) documents should be in src/
site/apt, all FAQ Markup Language (FML) documents should be in src/site/fml, and
XDoc documents should be in src/site/xdoc. The site descriptor should be in src/site/
site.xml, and all resources should be stored under src/site/resources. When the Maven
Site plugin builds a web site, it will copy everything in the resources directory to the
root of the site. If you store an image in src/site/resources/images/test.png, you would
refer to the image from your site documentation using the relative path images/test.png.
The following example shows the location of all files in a project that contains APT,
FML, HTML, XHTML, and some XDoc. Note that the XHTML content is simply
stored in the resources/ directory. The architecture.html file will not be processed by
Doxia; it will simply be copied to the output directory. You can use this approach if
314 | Chapter 15: Site Generation

you want to include unprocessed HTML content and you don’t want to take advantage
of the templating and formatting capabilities of Doxia and the Maven Site plugin:
sample-project
+- src/
+- site/
+- apt/
| +- index.apt
| +- about.apt
| |
| +- developer/
| +- embedding.apt
|
+- fml/
| +- faq.fml
|
+- resources/
| +- images/
| | +- banner-left.png
| | +- banner-right.png
| |
| +- architecture.html
| +- jira-roadmap-export-2007-03-26.html
|
+- xdoc/
| +- xml-example.xml
|
+- site.xml
Note that the developer documentation is stored in src/site/apt/developer/embed
ding.apt. This extra directory below the apt directory will be reflected in the location
of the resulting HTML page on the site. When the Site plugin renders the contents of
the src/site/apt directory, it will produce HTML output in directories relative to the site
root. If a file is in the apt directory, it will be in the root directory of the generated web
site. If a file is in the apt/developer directory, it will be generated in the developer/
directory of the web site.
Writing Project Documentation
Maven uses a documentation-processing engine called Doxia that reads multiple source
formats into a common document model. Doxia can then manipulate documents and
render the result in several output formats, such as PDF or XHTML. To write docu-
mentation for your project, you will need to write your content in a format that can be
parsed by Doxia. Doxia currently has support for Almost Plain Text (APT), XDoc (a
Maven 1.x documentation format), XHTML, and FML (useful for FAQ documents)
formats.
This chapter provides only a cursory introduction to the APT format. For a deeper
understanding of the APT format, or for an in-depth introduction to XDoc or FML,
please see the following resources:
Writing Project Documentation | 315

APT reference
http://maven.apache.org/doxia/format.html
XDoc reference
http://jakarta.apache.org/site/jakarta-site2.html
FML reference
http://maven.apache.org/doxia/references/fml-format.html
APT Example
Example 15-5 shows a simple APT document with an introductory paragraph and a
simple list. Note that the list is terminated by the pseudoelement [ ].
Example 15-5. APT document
---
Introduction to Sample Project
---
Brian Fox
---
26-Mar-2008
---
Welcome to Sample Project
This is a sample project, welcome! We're excited that you've decided to read the
index page of this Sample Project. We hope you enjoy the simple sample project
we've assembled for you.
Here are some useful links to get you started:
* {{{news.html}News}}
* {{{features.html}Features}}
* {{{faq.html}FAQ}}
[]
If the APT document from this example is placed in src/site/apt/index.apt, the Maven
Site plugin will parse the APT using Doxia and produce XHTML content in index.html.
FML Example
Many projects maintain a Frequently Asked Questions (FAQ) page. Example 15-6
shows an example of an FML document.
Example 15-6. FAQ markup language document
<?xml version="1.0" encoding="UTF-8"?>
<faqs title="Frequently Asked Questions">
<part id="General">
316 | Chapter 15: Site Generation

<faq id="sample-project-sucks">
<question>Sample project doesn't work. Why does sample project suck?</question>
<answer>
<p>
We resent that question. Sample wasn't designed to work, it was designed to
show you how to use Maven. If you really think this project sucks, then
keep it to yourself. We're not interested in your pestering questions.
</p>
</answer>
</faq>
<faq id="sample-project-source">
<question>I want to put some code in Sample Project, how do I do this?</question>
<answer>
<p>
If you want to add code to this project, just start putting Java source in
src/main/java. If you want to put some source code in this FAQ, use the
source element:
</p>
<source>
for( int i = 0; i < 1234; i++ ) {
// do something brilliant
}
</source>
</answer>
</faq>
</part>
</faqs>
Deploying Your Project Web Site
Once your project’s documentation has been written and you’ve created a site to be
proud of, you will want to deploy it a server. To deploy your site, you’ll use the Maven
Site plugin, which can take care of deploying your project’s site to a remote server using
a number of methods, including File Transfer Protocol (FTP), Secure Copy (SCP), and
Distributed Authoring and Versioning (DAV). To deploy the site using DAV, configure
the site entry of the distributionManagement section in the POM, as shown in Exam-
ple 15-7.
Example 15-7. Configuring site deployment
<project>
...
<distributionManagement>
<site>
<id>sample-project.website</id>
<url>dav:https://dav.sample.com/sites/sample-project</url>
</site>
</distributionManagement>
...
</project>
Deploying Your Project Web Site | 317

The url in distribution management has a leading indicator dav, which tells the Maven
Site plugin to deploy the site to a URL that is able to understand WebDAV. Once you
have added the distributionManagement section to the sample-project POM, you can
try deploying the site:
$ mvn clean site-deploy
If you have a properly configured server that can understand WebDAV, Maven will
deploy your project’s web site to the remote server. If you are deploying this project to
a site and server visible to the public, you are going to want to configure your web server
to access for credentials. If your web server asks for a username and password (or other
credentials), you can configure these values in your ~/.m2/settings.xml.
Configuring Server Authentication
To configure a username and password combination for use during the site deploy-
ment, we’ll include the code shown in Example 15-8 in $HOME/.m2/settings.xml.
Example 15-8. Storing server authentication in user-specific settings
<settings>
...
<servers>
<server>
<id>sample-project.website</id>
<username>jdcasey</username>
<password>b@dp@ssw0rd</password>
</server>
...
</servers>
...
</settings>
The server authentication section can contain a number of authentication elements. In
the event that you’re using SCP for deployment, you may wish to use public-key
authentication. To do this, specify the publicKey and passphrase elements instead of
the password element. You may still want to configure the username element, depending
on your server’s configuration.
Configuring File and Directory Modes
If you are working with a large group of developers, you’ll want to make sure that your
web site’s files end up with the proper user and group permissions after they are pub-
lished to the remote server. To configure specific file and directory modes for use during
the site deployment, include the code shown in Example 15-9 in $HOME/.m2/set
tings.xml.
318 | Chapter 15: Site Generation

Example 15-9. Configuring file and directory modes on remote servers
<settings>
...
<servers>
...
<server>
<id>hello-world.website</id>
...
<directoryPermissions>0775</directoryPermissions>
<filePermissions>0664</filePermissions>
</server>
</servers>
...
</settings>
These settings will make any directories readable and writable by either the owner or
members of the owner’s primary group; the anonymous users will have access only to
read and list the directory. Similarly, the owner or members of the owner’s primary
group will have access to read and write any files, with the rest of the world restricted
to read-only access.
Customizing Site Appearance
The default Maven template leaves much to be desired. If you wish to customize your
project’s web site beyond simply adding content, navigational elements, and custom
logos, Maven offers several mechanisms for customizing your web site that allow suc-
cessively deeper access to content decoration and web site structure. For small, per-
project tweaks, providing a custom site.css is often enough. However, if you want your
customizations to be reusable across multiple projects, or if your customizations in-
volve changing the XHTML that Maven generates, you should consider creating your
own Maven web site skin.
Customizing the Site CSS
The easiest way to affect the look and feel of your project’s web site is through the
project’s site.css. Just like any images or XHTML content you provide for the web site,
the site.css file goes in the src/site/resources directory. Maven expects this file to be in
the src/site/resources/css subdirectory. With CSS, it is possible to change text styling
properties, layout properties, and even add background images and custom bullet
graphics. For example, if we decided to make the menu heading stand out a little more,
we might try the following style in src/site/resources/css/site.css:
#navcolumn h5 {
font-size: smaller;
border: 1px solid #aaaaaa;
background-color: #bbb;
margin-top: 7px;
margin-bottom: 2px;
Customizing Site Appearance | 319

padding-top: 2px;
padding-left: 2px;
color: #000;
}
When you regenerate the web site, the menu headers should be framed by a gray back-
ground and separated from the rest of the menu by some extra margin space. Using
this file, any structure in the Maven-generated web site can be decorated with custom
CSS. When you change site.css in a specific Maven project, the changes will apply to
that specific project. If you are interested in making changes that will apply to more
than one Maven project, you can create a custom skin for the Maven Site plugin.
No good reference exists for the structure of the default Maven site
template. If you are attempting to customize the style of your Maven
project, you should use a Firefox extension such as Firebug as a tool to
explore the Document Object Model (DOM) for your project’s pages.
Create a Custom Site Template
If the default Maven Site structure just doesn’t do it for you, you can always customize
the Maven site template. Customizing the Maven Site template gives you complete
control over the ultimate output of the Maven plugin, and it is possible to customize
your project’s site template to the point where it hardly resembles the structure of a
default Maven site template.
The Site plugin uses a rendering engine called Doxia, which in turn uses a Velocity
template to render the XHTML for each page. To change the page structure that is
rendered by default, we can configure the site plugin in our POM to use a custom page
template. The site template is fairly complex, and you’ll need to have a good starting
point for your customization. Start by copying the default Velocity template from
Doxia’s Subversion repository, default-site.vm (see http://svn.apache.org/viewvc/maven/
doxia/doxia-sitetools/trunk/doxia-site-renderer/src/main/resources/org/apache/maven/
doxia/siterenderer/resources/default-site.vm?revision=595592) to src/site/site.vm. This
template is written in a templating language called Velocity. Velocity is a simple tem-
plating language that supports simple macro definition and allows you to access an
object’s methods and properties using simple notation. A full introduction is beyond
the scope of this book; for more information about Velocity and a full introduction,
please go to the Velocity project site at http://velocity.apache.org.
The default-site.xml template is fairly involved, but the change required to customize
the lefthand menu is relatively straightforward. If you are trying to change the appear-
ance of a menuItem, locate the menuItem macro. It resides in a section that looks like this:
#macro ( menuItem $item )
...
#end
320 | Chapter 15: Site Generation

If you replace the macro definition with the following macro definition, you will inject
JavaScript references into each menu item, which will allow the reader to expand or
collapse the menu tree without suffering through a full page reload:
#macro ( menuItem $item $listCount )
#set ( $collapse = "none" )
#set ( $currentItemHref = $PathTool.calculateLink( $item.href, $relativePath ) )
#set ( $currentItemHref = $currentItemHref.replaceAll( "\\", "/" ) )
#if ( $item && $item.items && $item.items.size() > 0 )
#if ( $item.collapse == false )
#set ( $collapse = "collapsed" )
#else
## By default collapsed
#set ( $collapse = "collapsed" )
#end
#set ( $display = false )
#displayTree( $display $item )
#if ( $alignedFileName == $currentItemHref || $display )
#set ( $collapse = "expanded" )
#end
#end
<li class="$collapse">
#if ( $item.img )
#if ( ! ( $item.img.toLowerCase().startsWith("http") ||
$item.img.toLowerCase().startsWith("https") ) )
#set ( $src = $PathTool.calculateLink( $item.img, $relativePath ) )
#set ( $src = $item.img.replaceAll( "\\", "/" ) )
<img src="$src"/>
#else
<img src="$item.img" align="absbottom" style="border-width: 0"/>
#end
#end
#if ( $alignedFileName == $currentItemHref )
<strong>$item.name</strong>
#else
#if ( $item && $item.items && $item.items.size() > 0 )
<a onclick="expand('list$listCount')" style="cursor:pointer">$item.name</a>
#else
<a href="$currentItemHref">$item.name</a>
#end
#end
#if ( $item && $item.items && $item.items.size() > 0 )
#if ( $collapse == "expanded" )
<ul id="list$listCount" style="display:block">
#else
<ul id="list$listCount" style="display:none">
#end
#foreach( $subitem in $item.items )
#set ( $listCounter = $listCounter + 1 )
#menuItem( $subitem $listCounter )
#end
</ul>
Customizing Site Appearance | 321

#end
</li>
#end
This change adds a new parameter to the menuItem macro. For the new functionality to
work, you will need to change references to this macro, or the resulting template may
produce unwanted or internally inconsistent XHTML. To finish changing these refer-
ences, make a similar replacement in the mainMenu macro. Find this macro by looking
for something similar to the following template snippet:
#macro ( mainMenu $menus )
...
#end
Replace the mainMenu macro with the following implementation:
#macro ( mainMenu $menus )
#set ( $counter = 0 )
#set ( $listCounter = 0 )
#foreach( $menu in $menus )
#if ( $menu.name )
<h5 onclick="expand('menu$counter')">$menu.name</h5>
#end
<ul id="menu$counter" style="display:block">
#foreach( $item in $menu.items )
#menuItem( $item $listCounter )
#set ( $listCounter = $listCounter + 1 )
#end
</ul>
#set ( $counter = $counter + 1 )
#end
#end
This new mainMenu macro is compatible with the new menuItem macro just shown, and
it also provides support for a JavaScript-enabled top-level menu. Clicking on a top-level
menu item with children will expand the menu and allow users to see the entire tree
without waiting for a page to load.
The change to the menuItem macro introduced an expand() JavaScript function. This
method needs to be added to the main XHTML template at the bottom of this template
file. Find the section that looks similar to the following:
<head>
...
<meta http-equiv="Content-Type" content="text/html;
charset=${outputEncoding}" />
...
</head>
and replace it with this:
<head>
...
<meta http-equiv="Content-Type" content="text/html;
charset=${outputEncoding}" />
322 | Chapter 15: Site Generation

<script type="text/javascript">
function expand( item ) {
var expandIt = document.getElementById( item );
if( expandIt.style.display == "block" ) {
expandIt.style.display = "none";
expandIt.parentNode.className = "collapsed";
} else {
expandIt.style.display = "block";
expandIt.parentNode.className = "expanded";
}
}
</script>
#if ( $decoration.body.head )
#foreach( $item in $decoration.body.head.getChildren() )
#if ( $item.name == "script" )
$item.toUnescapedString()
#else
$item.toString()
#end
#end
#end
</head>
After modifying the default site template, you’ll need to configure your project’s
POM to reference this new site template. To customize the site template, you’ll need
to use the templateDirectory and template configuration properties of the Maven Site
plugin. See Example 15-10.
Example 15-10. Customizing the page template in a project’s POM
<project>
...
<build>
<plugins>
<plugin>
<artifactId>maven-site-plugin</artifactId>
<configuration>
<templateDirectory>src/site</templateDirectory>
<template>site.vm</template>
</configuration>
</plugin>
</plugins>
</build>
...
</project>
Now you should be able to regenerate your project web site. When you do, you may
notice that the resources and CSS for the Maven site are missing. When a Maven project
customizes the site template, the Site plugin expects the project to supply all of the
default images and CSS. To seed your project’s resources, you may want to copy the
resources from the default Doxia site renderer project to your own project’s resources
directory by executing the following commands:
Customizing Site Appearance | 323

$ svn co \
http://svn.apache.org/repos/asf/maven/doxia/doxia-sitetools/trunk/\
doxia-site-renderer
$ rm \
doxia-site-renderer/src/main/resources/org/apache/maven/doxia/\
siterenderer/resources/css/maven-theme.css
$ cp -rf \
doxia-site-renderer/src/main/resources/org/apache/maven/doxia/\
siterenderer/resources/*sample-project/src/site/resources
Check out the doxia-site-renderer project, remove the default maven-theme.css file,
and then copy all the resources to your project’s src/site/resources directory.
When you regenerate the site, you’ll notice that a few menu items look like regular
unstyled text. This is caused by a quirky interaction between the site’s CSS and the new
custom page template. It can be fixed by modifying the site.css to restore the proper
link color for these menus. Simply add this:
li.collapsed, li.expanded, a:link {
color:#36a;
}
After regenerating the site, the menu’s link color should be corrected. If you applied
the new site template to the same sample-project from this chapter, you’ll notice that
the menu now consists of a tree. Clicking on “Developer Resources” no longer takes
you to the “Developer Resources” page; instead, it expands the submenu. Since you’ve
turned the Developer Resources menu item into a dynamically folding submenu, you
have lost the ability to reach the developer/index.apt page. To address this change, you
should add an Overview link to the submenu that references the same page, as shown
in Example 15-11.
Example 15-11. Adding a menu item to a site descriptor
<project name="Hello World">
...
<menu name="Main Menu">
...
<item name="Developer Resources" collapse="true">
<item name="Overview" href="/developer/index.html"/>
<item name="System Architecture" href="/developer/architecture.html"/>
<item name="Embedder's Guide" href="/developer/embedding.html"/>
</item>
</menu>
...
</project>
Reusable Web Site Skins
If your organization has created many Maven project sites, you will likely want to reuse
site template and CSS customizations throughout an organization. If you want 30
projects to share the same CSS and site template, you can use Maven’s support for
skinning. Maven Site skins allow you to package up resources and templates that can
324 | Chapter 15: Site Generation

be reused by other projects in lieu of duplicating your site template for each project
that needs to be customized.
Although you can define your own skin, you may want to consider using one of Maven’s
alternate skins. You can choose from several skins. These each provide their own layout
for navigation, content, logos, and templates:
Maven classic skin
org.apache.maven.skins:maven-classic-skin:1.0
Maven default skin
org.apache.maven.skins:maven-default-skin:1.0
Maven stylus skin
org.apache.maven.skins:maven-stylus-skin:1.0.1
You can find an up-to-date and comprehensive listing in the Maven repository: http://
repo1.maven.org/maven2/org/apache/maven/skins/.
Creating a custom skin is a simple matter of wrapping your customized maven-
theme.css in a Maven project so that it can be referenced by groupId, artifactId, and
version. It can also include resources, such as images, and a replacement web site
template (written in Velocity) that can generate a completely different XHTML page
structure. In most cases, custom CSS can manage the changes you desire. To demon-
strate, let’s create a designer skin for the sample-project project, starting with a custom
maven-theme.css.
Before we can start writing our custom CSS, we need to create a separate Maven project
to allow the sample-project site descriptor to reference it. First, use Maven’s archetype
plugin to create a basic project. Issue the following command from the directory above
the sample-project project’s root directory:
$ mvn archetype:create -DartifactId=sample-site-skin -DgroupId=com.sonatyp.maven
This will create a project (and a directory) called sample-site-skin. Change directories
to the new sample-site-skin directory, remove all of the source code and tests, and create
a directory to store your skin’s resources:
$ cd sample-site-skin
$ rm -rf src/main/java src/test
$ mkdir src/main/resources
Creating a Custom Theme CSS
Next, write a custom CSS for the custom skin. The CSS file in a Maven site skin should
be placed in src/main/resources/css/maven-theme.css. Unlike the site.css file, which goes
in the site-specific source directory for a project, the maven-theme.css will be bundled
in a JAR artifact in your local Maven repository. In order for the maven-theme.css file
to be included in the skin’s JAR file, it must reside in the main project resources direc-
tory, src/main/resources.
Customizing Site Appearance | 325

As with the default site template, you will want to start customizing your new skin’s
CSS from a good starting point. Copy the CSS file used by the default Maven skin to
your project’s maven-theme.css. To get a copy of this theme file, save the contents of
maven-theme.css (see http://svn.apache.org/viewvc/maven/skins/trunk/maven-default
-skin/src/main/resources/css/maven-theme.css?view=co) from the maven-default-skin
project to src/main/resources/css/maven-theme.css in our new skin project.
Now that we have the base theme file in place, customize it using the CSS from our old
site.css file. Replace the #navcolumn h5 CSS block with the following:
#navcolumn h5 {
font-size: smaller;
border: 1px solid #aaaaaa;
background-color: #bbb;
margin-top: 7px;
margin-bottom: 2px;
padding-top: 2px;
padding-left: 2px;
color: #000;
}
Once you’ve customized the maven-theme.css, build and install the sample-site-skin
JAR artifact to your local Maven repository by running:
$ mvn clean install
Once the installation is complete, switch back to the sample-project project directory;
if you already customized the site.css earlier in this chapter, move site.css to
site.css.bak so it no longer affects the output of the Maven Site plugin:
$ mv src/site/resources/css/site.css src/site/resources/css/site.css.bak
To use the sample-site-skin in the sample-project site, you’ll need to add a reference
to the sample-site-skin artifact in the sample-project’s site descriptor. A site references
a skin in the site descriptor using the skin element, as shown in Example 15-12.
Example 15-12. Configuring a custom site skin in site descriptor
<project name="Sample Project">
...
<skin>
<groupId>org.sonatype.mavenbook</groupId>
<artifactId>sample-site-skin</artifactId>
</skin>
...
</project>
You can think of a Maven site skin as a site dependency. Site skins are referenced as
artifacts with a groupId and an artifactId. Using a site skin allows you to consolidate
site customizations to a single project, and makes reusing custom CSS and site tem-
plates as easy as reusing build logic through a custom Maven plugin.
326 | Chapter 15: Site Generation

Customizing Site Templates in a Skin
Just as you can customize the site CSS in a Maven site skin, you can also customize the
site template. Doxia’s site-rendering tools will expect to find a file called META-INF/
maven/site.vm inside the skin JAR. To incorporate a custom page template, copy the
template file into the correct location within the sample-site-skin. Copy the custom
site template developed earlier in the chapter to src/main/resources/META-INF/
maven in sample-site-skin:
$ mv sample-project/src/site/site.vm \
sample-site-skin/src/main/resources/META-INF/maven
If you already customized the site template in sample-project, remove the Site plugin
configuration that pointed to this site template. The Site plugin will render the site
using the site template referenced in the site skin:
<plugin>
<artifactId>maven-site-plugin</artifactId>
<configuration>
<templateDirectory>src/site</templateDirectory>
<template>site.vm</template>
</configuration>
</plugin>
A Maven site skin is expected to include all of the resources it depends on. This includes
CSS, images, and logos. If you already customized the site template earlier in this
chapter, you’ve already copied the default doxia-site-renderer resources to the
sample-project’s src/site/resources directory. You’ll need to move those files out of the
sample-project project and into the new sample-site-skin project by executing the
following commands:
$ cd ..
$ mkdir -p sample-site-skin/src/main/resources/css
$ mv sample-project/src/site/resources/css/maven-base.css \
sample-site-skin/src/main/resources/css
$ mkdir -p sample-site-skin/src/main/resources/images
$ mv sample-project/src/site/resources/images/logos \
sample-site-skin/src/main/resources/images
$ mv sample-project/src/site/resources/images/expanded.gif \
sample-site-skin/src/main/resources/images
$ mv sample/src/site/resources/images/collapsed.gif \
sample-site-skin/src/main/resources/images
You’ve changed the sample-site-skin, so you’ll need to install this skin into your local
Maven repository. Once you install the skin locally and rebuild the sample-project web
site, you’ll see that the skin’s custom site template was applied to the sample-
project’s web site. You’ll notice that the color of the menu items may be a little off
because you haven’t added the necessary CSS to the collapsed and expanded menu
items. To do this, modify src/main/resources/css/maven-theme.css. That is, change this:
Customizing Site Appearance | 327

a:link {
...
}
to this:
li.collapsed, li.expanded, a:link {
...
}
Rebuild the skin, then regenerate the web site, and you’ll see that the menu items have
returned to normal. You’ve successfully created a Maven theme that can be used to
apply CSS and templates to a set of projects.
Tips and Tricks
This section lists some useful tips and tricks you can use when creating a Maven site.
Inject XHTML into HEAD
To inject XHTML into the HEAD element, add a head element to the body element in
your project’s Site descriptor. Example 15-13 adds a feed link to every page in the
sample-project web site.
Example 15-13. Injecting HTML into the HEAD element
<project name="Hello World">
...
<body>
<head>
<link href="http://sample.com/sites/sample-project/feeds/blog"
type="application/atom+xml"
id="auto-discovery"
rel="alternate"
title="Sample Project Blog" />
</head>
...
</body>
</project>
Add Links Under Your Site Logo
If you are working on a project that is being developed by an organization, you may
want to add links under your project’s logo. Assuming that your project is a part of the
Apache Software Foundation, you might want to add a link to the Apache Software
Foundation web site right below your logo, and you might want to add a link to a parent
project as well. To add links below your site logo, just add a links element to the
body element in the Site descriptor. Each item element in the links element will be
rendered as a link in a bar directly below your project’s logo. Example 15-14 will add
328 | Chapter 15: Site Generation

a link to the Apache Software Foundation followed by a link to the Apache Maven
project.
Example 15-14. Adding links under your site logo
<project name="Hello World">
...
<body>
...
<links>
<item name="Apache" href="http://www.apache.org"/>
<item name="Maven" href="http://maven.apache.org"/>
</links>
...
</body>
</project>
Add Breadcrumbs to Your Site
If your hierarchy exists within a logical hierarchy, you may want to place a series of
breadcrumbs to give the user a sense of context and to give them a way to navigate up
the tree to projects that might contain the current project as a subproject. To configure
breadcrumbs, add a breadcrumbs element to the body element in the site descriptor. Each
item element will render a link, and the items in the breadcrumbs element will be ren-
dered in order. The breadcrumb items should be listed from the highest level to the
lowest level. In the site descriptor shown in Example 15-15, the Codehaus item would
be seen to contain the Mojo item.
Example 15-15. Configuring the site’s breadcrumbs
<project name="Sample Project">
...
<body>
...
<breadcrumbs>
<item name="Codehaus" href="http://www.codehaus.org"/>
<item name="Mojo" href="http://mojo.codehaus.org"/>
</breadcrumbs>
...
</body>
</project>
Add the Project Version
When you are documenting a project that has multiple versions, it is often very helpful
to list the project’s version number on every page. To display your project’s version on
the web site, simply add the version element to your site descriptor, as shown in
Example 15-16.
Tips and Tricks | 329

Example 15-16. Positioning the version information
<project name="Sample Project">
...
<version position="left"/>
...
</project>
This will position the version (in the case of the sample-project project, it will say
“Version: 1.0-SNAPSHOT”) in the upper lefthand corner of the site, just next to the
default “Last Published” date. Valid positions for the project version are:
left
Left side of the bar just below the site logo
right
Right side of the bar just below the site logo
navigation-top
Top of the menu
navigation-bottom
Bottom of the menu
none
Suppress the version entirely
Modify the Publication Date Format and Location
In some cases, you may wish to reformat or reposition the “Last Published” date for
your project web site. Just like the project version tip, you can specify the position of
the publication date by using one of the following (see Example 15-17):
left
Left side of the bar just below the site logo
right
Right side of the bar just below the site logo
navigation-top
Top of the menu
navigation-bottom
Bottom of the menu
none
Suppress the publication entirely
Example 15-17. Positioning the publish date
<project name="Sample Project">
...
<publishDate position="navigation-bottom"/>
330 | Chapter 15: Site Generation

...
</project>
By default, the publication date will be formatted using the date format string MM/dd/
yyyy. You can change this format by using the standard notation found in the Javadocs
for java.text.SimpleDateFormat (see the Javadoc for SimpleDateFormat at http://java
.sun.com/j2se/1.5.0/docs/api/java/text/SimpleDateFormat.html for more information).
To reformat the date using yyyy-MM-dd, use the publishDate element as shown in Ex-
ample 15-18.
Example 15-18. Configuring the publish date format
<project name="Sample Project">
...
<publishDate position="navigation-bottom" format="yyyy-MM-dd"/>
...
</project>
Using Doxia Macros
In addition to its advanced document rendering features, Doxia also provides a macro
engine that allows each input format to trigger injection of dynamic content. An ex-
cellent example of this is the snippet macro, which allows a document to pull a code
snippet out of a source file that’s available via HTTP. Using this macro, a small fragment
of APT can be rendered into XHTML. The following APT code calls out to the snippet
macro. Please note that this code should be on a single continuous line; the backslash
character is inserted to denote a line break so that this code will fit on the printed page
(see Example 15-19 for the output):
%{snippet|id=modello-model|url=http://svn.apache.org/repos/asf/maven/archetype/\
trunk/maven-archetype/maven-archetype-model/src/main/mdo/archetype.mdo}
Example 15-19. Output of the snippet macro in XHTML
<div class="source"><pre>
<model>
<id>archetype</id>
<name>Archetype</name>
<description><![CDATA[Maven's model for the archetype descriptor.]]></description>
<defaults>
<default>
<key>package</key>
<value>org.apache.maven.archetype.model</value>
</default>
</defaults>
<classes>
<class rootElement="true" xml.tagName="archetype">
<name>ArchetypeModel</name>
<description>Describes the assembly layout and packaging.</description>
<version>1.0.0</version>
<fields>
Tips and Tricks | 331

<field>
<name>id</name>
<version>1.0.0</version>
<required>true</required>
<type>String</type>
</field>
...
</fields>
</class>
</classes>
</model>
</pre></div>
Doxia macros must not be indented in APT source documents. Doing
so will result in the APT parser skipping the macro altogether.
For more information about defining snippets in your code for reference by the snippet
macro, see the “Guide to the Snippet Macro” on the Maven web site at http://maven
.apache.org/guides/mini/guide-snippet-macro.html.
332 | Chapter 15: Site Generation

CHAPTER 16
Repository Manager
Introduction
Repository managers serve two purposes: they act as highly configurable proxies be-
tween your organization and the public Maven repositories, and they also provide an
organization with a deployment destination for your own generated artifacts.
Proxying a Maven repository brings a number of benefits. Proxying speeds up builds
throughout your organization by installing a local cache for all artifacts from the central
Maven repository. If a developer in your organization needs to download version 2.5
of the Spring Framework and you are using Nexus, the dependencies (and the depend-
encies’ dependencies) need to be downloaded from the remote repository only once.
With a high-speed connection to the Internet, this might seem like a minor concern,
but if you are constantly asking your developers to download hundreds of megabytes
of third-party dependencies, the real cost savings are going to be the time it takes Maven
to check for new versions of dependencies and to download them. Serving Maven de-
pendencies from a local repository can save you hundreds of requests over HTTP, and
in very large multiproject builds, this can shave minutes from a build.
If your project is relying on a number of snapshot dependencies, Maven will need to
check for updated version of these snapshots. Depending on the configuration of your
remote repositories, Maven will check for snapshot updates periodically, or it might
check for snapshot updates on every build. When Maven checks for a snapshot update,
it needs to interrogate the remote repository for the latest version of the snapshot de-
pendency. Depending on your connection to the public Internet and the load on the
central Maven repository, a snapshot update can add seconds to your project’s build
for each snapshot update. When you host a local repository proxy with a repository
like Nexus, your repository manager is going to check for snapshot updates on a regular
schedule, and your applications will be able to interact with a local repository. If you
develop software with a lot of snapshot dependencies, using a local repository manager
can often shave minutes from a large multimodule project build. Your 5–10 second
snapshot update checks against the public central repository are going to execute in
hundreds of milliseconds (or less).
333

In addition to the simple savings in time and bandwidth, a repository manager provides
an organization with control over what is downloaded by Maven. You can include or
exclude specific artifacts from the public repository. Having this level of control over
what is downloaded from the central Maven repository is a prerequisite for organiza-
tions that need strict control over which dependencies are used throughout an organ-
ization. An organization that wants to standardize on a specific version of a dependency
such as Hibernate or Spring can enforce this standardization by providing access to
only a specific version of an artifact in a repository manager such as Nexus. Other
organizations might be concerned with making sure that every external dependency
has a license compatible with the legal standards of that organization. If a corporation
is producing an application that is distributed, it might want to make sure that no one
inadvertently adds a dependency on a third-party library that is covered under a copy-
left license such as the GNU General Public License (GPL). Repository managers
provide for the level of control that an organization needs to make sure that overall
architecture and policy can be enforced.
Aside from the benefits of mediating access to remote repositories, a repository manager
also provides something essential to full adoption of Maven. Unless you expect every
member of your organization to download and build every single internal project, you
will want to provide a mechanism for developers and departments to share both snap-
shots and releases for internal project artifacts. Nexus provides your organization with
such a deployment target. Once you install Nexus, you can start using Maven to deploy
snapshots and releases to a custom repository managed by Nexus. Over time, this
central deployment point for internal projects becomes the fabric for collaboration
between different development teams.
History of Nexus
Tamás Cservenák started working on Proximity in December 2005 as he was trying to
find a way to isolate his own systems from an incredibly slow ADSL connection pro-
vided by a Hungarian ISP. Proximity started as a simple web application to proxy ar-
tifacts for a small organization with connectivity issues. Creating a local on-demand
cache for Maven artifacts from the central Maven repository gave an organization access
to the artifacts on the central Maven repository, but it also made sure that these artifacts
weren’t downloaded over a very slow ADSL connection used by a number of develop-
ers. In 2007, Sonatype asked Tamas to help create a similar product named Nexus.
Nexus is currently considered the logical next step from Proximity. Nexus currently
has an active development team, and portions of the indexing code from Nexus are
also being used in m2eclipse.
Installing Nexus
The following subsections explain how to download, install, run, configure, and up-
grade Nexus on your system.
334 | Chapter 16: Repository Manager

Downloading Nexus from Sonatype
You can find information about Nexus at http://nexus.sonatype.org. To download
Nexus, go to http://nexus.sonatype.org/downloads/. Click on the Download link and
download the appropriate archive for your platform. Nexus is available as a ZIP and a
GZipped TAR file.
Installing Nexus
Installing Nexus is straightforward: unpack the Nexus archive in a directory. If you are
installing Nexus on a local workstation to give it a test run, you can install it in your
home directory or wherever else you like. Nexus doesn’t have any hardcoded directo-
ries; it will run from any directory. If you download the ZIP archive, run this:
$ unzip nexus-1.0.0-bundle.zip
And if you download the GZipped TAR archive, run this:
$ tar xvzf nexus-1.0.0-bundle.tgz
There are some known incompatibilities with the version of TAR pro-
vided by Solaris and the GZip TAR format. If you are installing Nexus
on Solaris, you must use the GNU tar application or you will end up
with corrupted files. Please see http://sunsolarisadmin.blogspot.com/
2007/03/how-to-install-gnu-tar-in-solaris.html.
If you are installing Nexus on a server, you might want to use a directory other than
your home directory. On a Unix machine, this could be under /usr/local/nexus-1.0.0
with a symbolic link /usr/local/nexus to the nexus directory. Using a generic symbolic
link nexus to a specific version is a common practice that makes it easier to upgrade
when a newer version of Nexus is made available:
$ sudo cp nexus-1.0.0-bundle.tgz /usr/local
$ cd /usr/local
$ sudo tar xvzf nexus-1.0.0-bundle.tgz
$ ln -s nexus-1.0.0 nexus
Although it isn’t required for Nexus to run, you may want to set an environment var-
iable NEXUS_HOME in your environment that points to the installation directory of Nexus.
This chapter will refer to this location as ${NEXUS_HOME}.
Running Nexus
When you start Nexus, you are starting a web server on the default port of localhost:
8081. Nexus runs within a servlet container called Jetty and is started with a native
service wrapper called the Tanuki Java Service Wrapper (http://wrapper.tanukisoftware
.org/doc/english/introduction.html). This service wrapper can be configured to run
Installing Nexus | 335
Nexus as a Windows service or a Unix daemon. To start Nexus, you will need to find
the appropriate startup script for your platform. To see the list of available platforms,
list the contents of the ${NEXUS_HOME}/bin/jsw directory.
The following example code starts Nexus using the script for Mac OS X. First we list
the contents of the ${NEXUS_HOME}/bin/jsw to show you the available platforms,
then we make the contents of the bin directory executable with chmod. The Mac OS X
wrapper is started with a call to app start, and after that we tail the wrapper.log in
${NEXUS_HOME}/container/logs. Nexus will initialize itself and print a message that
it is listening on localhost:8081:
$ cd Nexus
$ ls ./bin/jsw/
aix-ppc-32/ linux-ppc-64/ solaris-sparc-32/
aix-ppc-64/ linux-x86-32/ solaris-sparc-64/
hpux-parisc-32/ linux-x86-64/ solaris-x86-32/
hpux-parisc-64/ macosx-universal-32/ windows-x86-32/
$ chmod -R a+x bin
$ ./bin/jsw/macosx-universal-32/nexus start
Nexus Repository Manager...
$ tail -f container/logs/wrapper.log
INFO ... [ServletContainer:default] - SelectChannelConnector@0.0.0.0:8081
At this point, Nexus will be running and listening on port 8081. To use Nexus, fire up
a web browser and type in the URL http://localhost:8081/nexus. Click on the “Log In”
link in the upper-righthand corner of the web page, and you should see the login dialog
shown in Figure 16-1.
The default Nexus username and password are “admin” and
“admin123”.
Post-Install Checklist
Nexus ships with some default passwords and settings for repository indexing that need
to be changed for your installation to be useful (and secure). After installing and running
Nexus, you need to make sure to complete the following tasks:
Change the administrative password and email address
The administrative password defaults to “admin123”. The first thing you should
do to your new Nexus installation is change this password. To change the admin-
istrative password, log in as “admin” with the password “admin123”, and click on
Change Password under the Security menu in the lefthand side of the browser
window.
336 | Chapter 16: Repository Manager
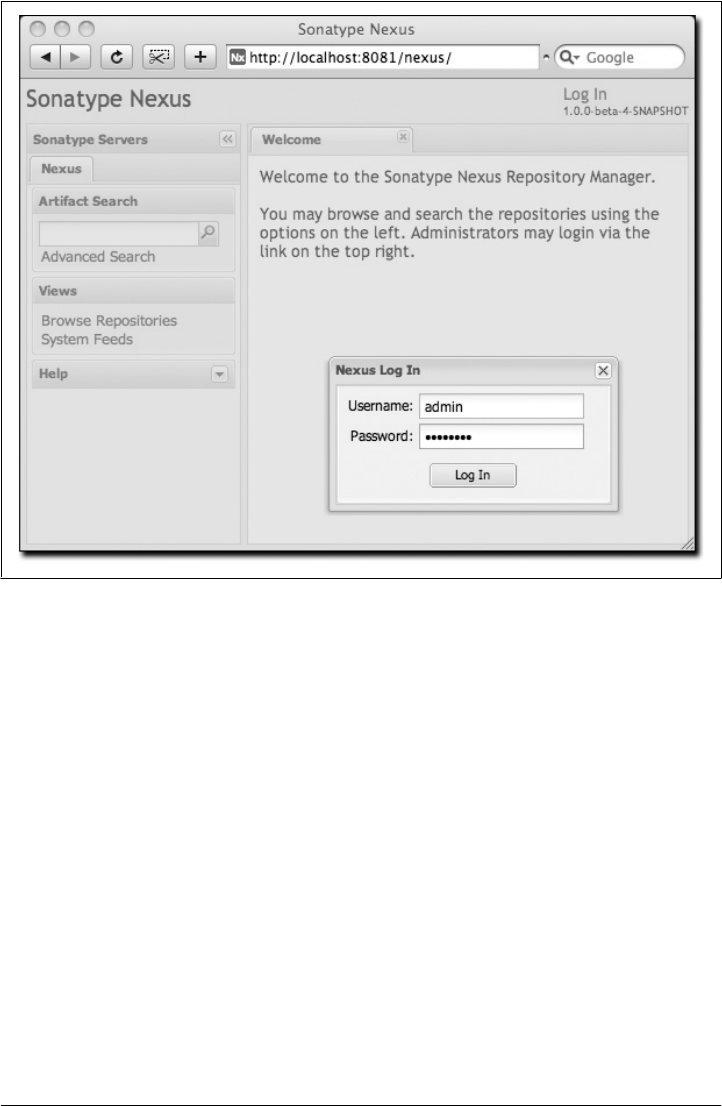
Configure the SMTP settings
Nexus can send username and password recovery emails. To enable this feature,
you need to configure Nexus with an SMTP host and port, as well as any necessary
authentication parameters that Nexus needs to connect to a mail server. To con-
figure the SMTP settings, load the server configuration dialog shown in “Custom-
izing Server Configuration.”
Enable remote index downloads
Nexus ships with three important proxy repositories: the central Maven repository,
the Apache snapshot repository, and the Codehaus snapshot repository. Each of
these repositories contains thousands (or tens of thousands) of artifacts, and it
would be impractical to download the entire contents of each. To that end, most
repositories maintain a Lucene index that catalogs the entire contents and provides
for fast and efficient searching. Nexus uses these remote indexes to search for ar-
tifacts, but index downloads are disabled as a default setting. To download remote
indexes:
1. Click on Repositories under the Administration menu, and change Download
Remote Indexes to “true” for the three proxy repositories. You’ll need to load
the dialog shown in “Managing Repositories” for each of the three repositories.
Figure 16-1. Nexus login window
Installing Nexus | 337

2. Right-click on each proxy repository and select “Re-index.” This will trigger
Nexus to download the remote index files.
It might take Nexus a few minutes to download the entire index, but once you have
it, you’ll be able to search the entire contents of the Maven repository.
Once you’ve enabled remote index downloads, you still won’t be able to browse
the complete contents of a remote repository. Downloading the remote index al-
lows you to search for artifacts in a repository, but until you download those arti-
facts from the remote repository, they will not show in the repository tree when
you are browsing a repository. When browsing a repository, you will be shown
only artifacts that have been downloaded from the remote repository.
Startup Scripts for Linux
You can configure Nexus to start automatically by copying the app script to the /etc/
init.d directory. On a Linux system (tested with Red Hat, Fedora, Ubuntu, or CentOS),
perform the following operations as the root user:
1. Copy either ${NEXUS_HOME}/bin/jsw/linux-ppc-64/app, ${NEXUS_HOME}/bin/
jsw/linux-x86-32/app, or ${NEXUS_HOME}/bin/jsw/linux-x86-64/app to /etc/
init.d/nexus.
2. Make the /etc/init.d/nexus script executable: chmod 755 /etc/init.d/nexus.
3. Edit this script changing the following variables:
• Change APP_NAME to “nexus”
• Change APP_LONG_NAME to “Sonatype Nexus”
• Add a variable NEXUS_HOME that points to your Nexus installation directory
• Add a variable PLATFORM that contains either linux-x86-32, linux-x86-64, or
linux-ppc-64
• Change WRAPPER_CMD to ${NEXUS_HOME}/bin/jsw/${PLATFORM}/wrapper
• Change WRAPPER_CONF to ${NEXUS_HOME}/conf/wrapper.conf
• Change PIDDIR to /var/run
• Add a JAVA_HOME variable that points to your local Java installation
• Add a ${JAVA_HOME}/bin to the PATH
4. (Optional.) Set the RUN_AS_USER to “nexus”. If you do this, you will need to:
• Create a Nexus user
• Change the owner and group of your Nexus install directory to “nexus”
At the end of this, you should have a file in /etc/init.d/nexus that starts with a series of
configuration properties that look something like this (assuming you’ve installed Nexus
in /usr/local/nexus and Java in /usr/java/latest):
338 | Chapter 16: Repository Manager

JAVA_HOME=/usr/java/latest
PATH=${PATH}:${JAVA_HOME}/bin
APP_NAME="nexus"
APP_LONG_NAME="Sonatype Nexus"
NEXUS_HOME=/usr/local/nexus
PLATFORM=linux-x86-64
WRAPPER_CMD="${NEXUS_HOME}/bin/jsw/${PLATFORM}/wrapper"
WRAPPER_CONF="${NEXUS_HOME}/conf/wrapper.conf"
PRIORITY=
PIDDIR="/var/run"
#RUN_AS_USER=nexus
Add Nexus as a service on Red Hat, Fedora, and CentOS
This script has the appropriate chkconfig directives, so all you need to do to add Nexus
as a service is run the following commands:
$ cd /etc/init.d
$ chkconfig --add nexus
$ chkconfig --levels 345 nexus on
$ service nexus start
Starting Sonatype Nexus...
$ tail -f /usr/local/nexus/logs/wrapper.log
The second command adds Nexus as a service to be started and stopped with the
service command and managed by chkconfig command. chkconfig manages the sym-
bolic links in /etc/rc[0-6].d that control the services that are started and stopped when
the operating system restarts or transitions between run-levels. The third command
adds Nexus to run-levels 3, 4, and 5. The service command starts Nexus, and the last
command tails the wrapper.log to verify that Nexus has been started successfully. If
Nexus has started successfully, you should see a message notifying you that Nexus is
listening for HTTP connections on a port.
Add Nexus as a service on Ubuntu
The process for setting up Nexus as a service on Ubuntu differs slightly from the process
used on a Red Hat variant. Instead of running chkconfig, you should run the following
sequence of commands once you’ve configured the startup script in /etc/init.d:
$ cd /etc/init.d
$ update-rc.d nexus defaults
$ service nexus start
Starting Sonatype Nexus...
$ tail -f /usr/local/nexus/logs/wrapper.log
Running Nexus Behind a Proxy
This section is entirely optional. Nexus is based on Jetty, which is a very high-
performance servlet container based on Java NIO. From a performance perspective,
there is no reason for you not to run Nexus by itself without a proxy. Yet, more often
than not, organizations run applications behind a proxy for security concerns and to
Installing Nexus | 339

consolidate multiple disparate applications using tools such as mod_rewrite and
mod_proxy. For this reason, we’ve included some brief instructions for configuration
mod_proxy in Apache HTTPd. We assume that you’ve already installed Apache 2 and
that you are using a virtual host for www.somecompany.com.
Let’s assume that you want to host Nexus behind Apache HTTPd at the URL http://
www.somecompany.com. To do this, you’ll need to change the context path that Nexus
is served from:
1. Edit plexus.xml in ${NEXUS_HOME}/conf. You’ll see an element named
webappInfos that contains the relevant elements. Change the contextPath element
from “/nexus” to “/”
2. Restart Nexus and verify that it is available on http://localhost:8081/.
3. Clear the Base URL in Nexus as shown in “Customizing Server Configuration”
under Application Server Settings.
At this point, edit the HTTPd configuration file for the www.somecompany.com virtual
host. Include the following to expose Nexus via mod_proxy at http://www.somecom-
pany.com:
ProxyRequests Off
ProxyPreserveHost On
<VirtualHost *:80>
ServerName www.somecompany.com
ServerAdmin admin@somecompany.com
ProxyPass / http://localhost:8081/
ProxyPassReverse / http://localhost:8081/
ErrorLog logs/somecompany/nexus/error.log
CustomLog logs/somecompany/nexus/access.log common
</VirtualHost>
Alternatively, if you just wanted to continue to serve Nexus at the /nexus context path,
you would not change the contextPath in ${NEXUS_HOME}/conf/plexus.xml, and you
would include the context path in your ProxyPass and ProxyPassReverse directives as
follows:
ProxyPass /nexus/ http://localhost:8081/nexus/
ProxyPassReverse /nexus/ http://localhost:8081/nexus/
Apache configuration is going to vary based on your own application’s requirements
and the way you intend to expose Nexus to the outside world. If you need more details
about Apache HTTPd and mod_proxy, please see http://httpd.apache.org.
340 | Chapter 16: Repository Manager
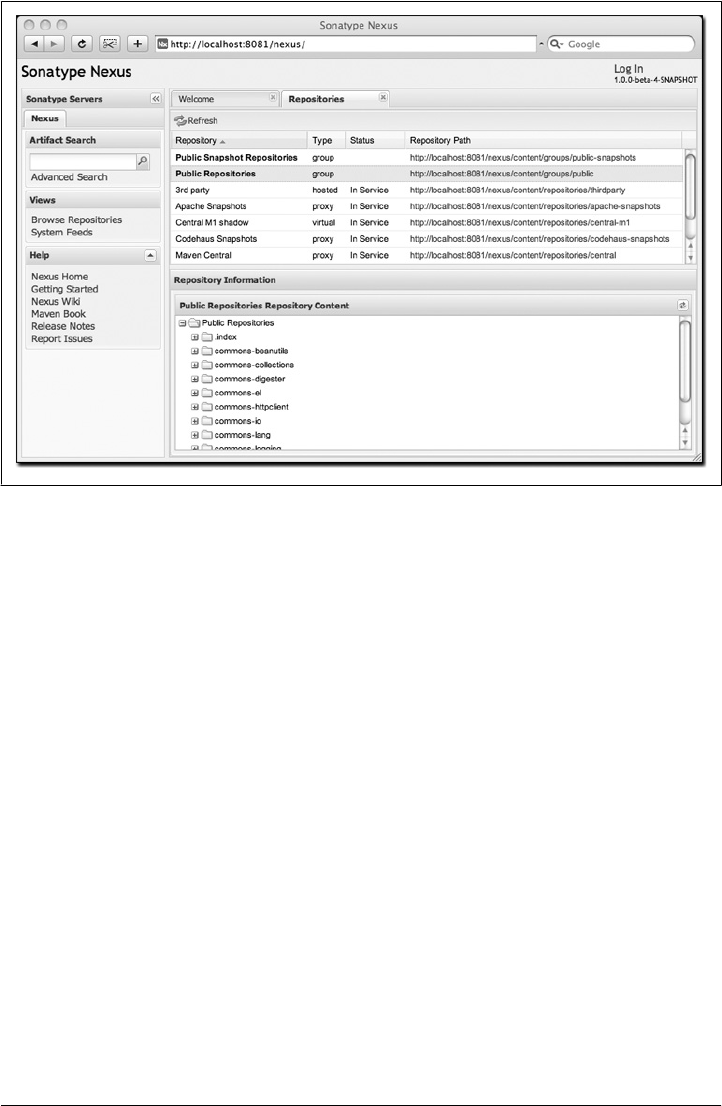
Using Nexus
Nexus provides for anonymous access for users who only need to search repositories,
browse repositories, and peruse the system feeds. This anonymous access level changes
the navigation menu and some of the options available when you right-click on a re-
pository. This read-only access displays a user interface shown in Figure 16-2.
Browsing Repositories
One of the most straightforward uses of the Nexus is to browse the structure of a Maven
repository. If you click on the Browse Repositories menu item in the Views menu, you
should see the display shown in Figure 16-3. The top half of the figure shows you a list
of groups and repositories along with the type of the repository and the repository
status.
When you are browsing a repository, you can right-click on any file and download it
directly to your browser. This allows you to retrieve specific artifacts manually or ex-
amine a POM file in the browser.
Figure 16-2. Nexus interface for anonymous users
Using Nexus | 341
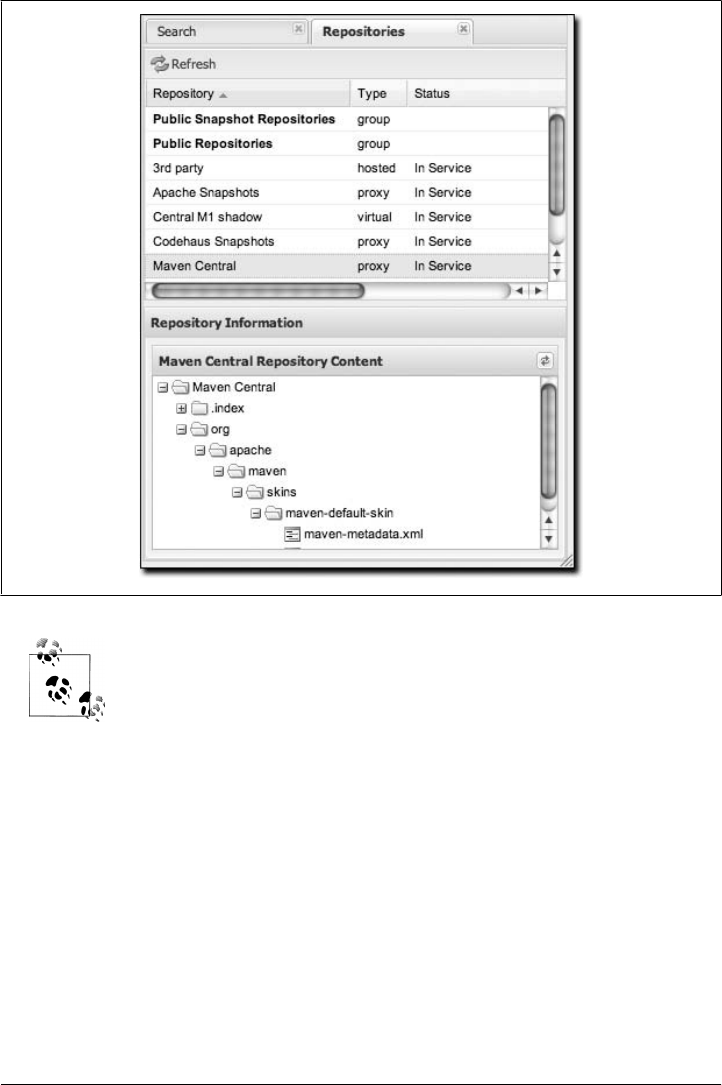
When browsing a remote repository, you might notice that the tree
doesn’t contain all of the artifacts in a repository. When you browse a
proxy repository, Nexus is displaying the artifacts that have been cached
locally from the remote repository. If you don’t see an artifact you ex-
pected to see through Nexus, it means only that Nexus has yet to cache
the artifact locally. If you have enabled remote repository index down-
loads, Nexus will return search results that may include artifacts not yet
downloaded from the remote repository. Figure 16-3 is just an example,
and you may or may not have the maven-default-skin artifact available
in your installation of Nexus.
Browsing Groups
Nexus contains ordered groups of repositories that allow you to expose a series of
repositories through a single URL. More often than not, an organization is going to
point Maven at the two default Nexus groups: public repositories and public snapshot
repositories. Most end users of Nexus are not going to know which artifacts are being
Figure 16-3. Browsing a Nexus repository
342 | Chapter 16: Repository Manager
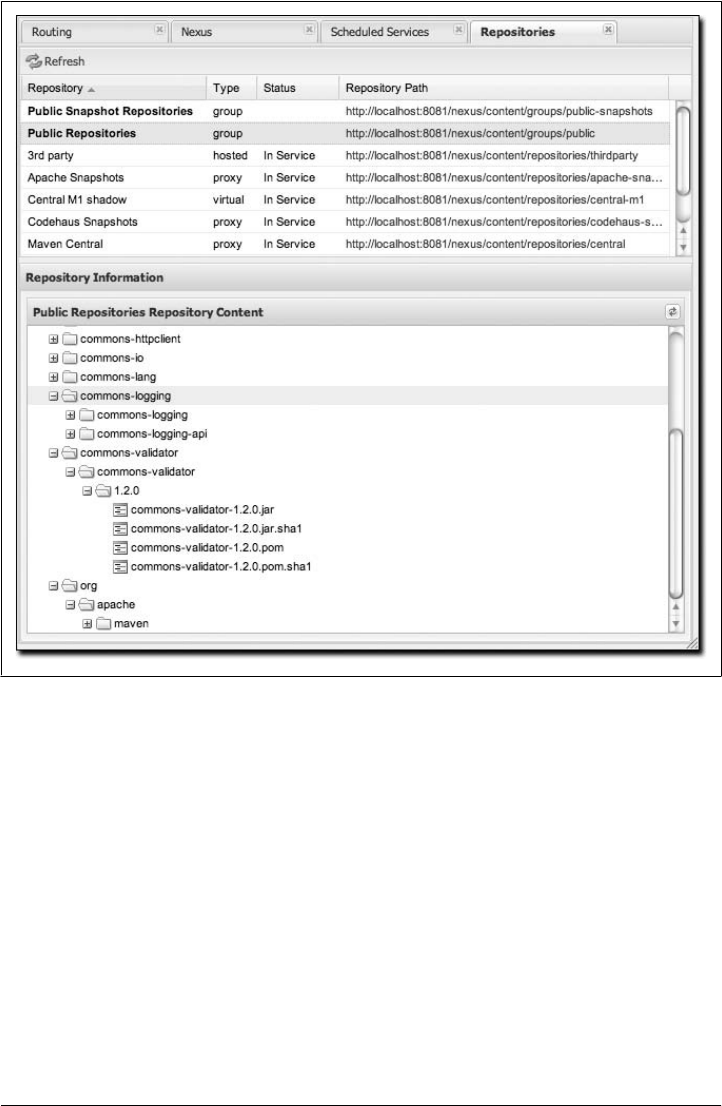
served from which specific repository, and they are going to want to be able to browse
the public repository. To support this use case, Maven allows you to browse the con-
tents of a Nexus group as if it were a single merged repository with a tree structure.
Figure 16-4 shows the browsing interface with a Nexus group selected for browsing.
The user experience of browsing a Nexus group is no different from that of browsing
a Nexus repository.
Searching for Artifacts
In the lefthand navigation area, there is an Artifact Search text field next to a magnifying
glass. To search for an artifact by groupId or artifactId, type in some text and click
the magnifying glass. Typing in the search term “maven” and clicking the magnifying
glass should yield a search result similar to Figure 16-5.
Figure 16-4. Browsing a Nexus group
Using Nexus | 343
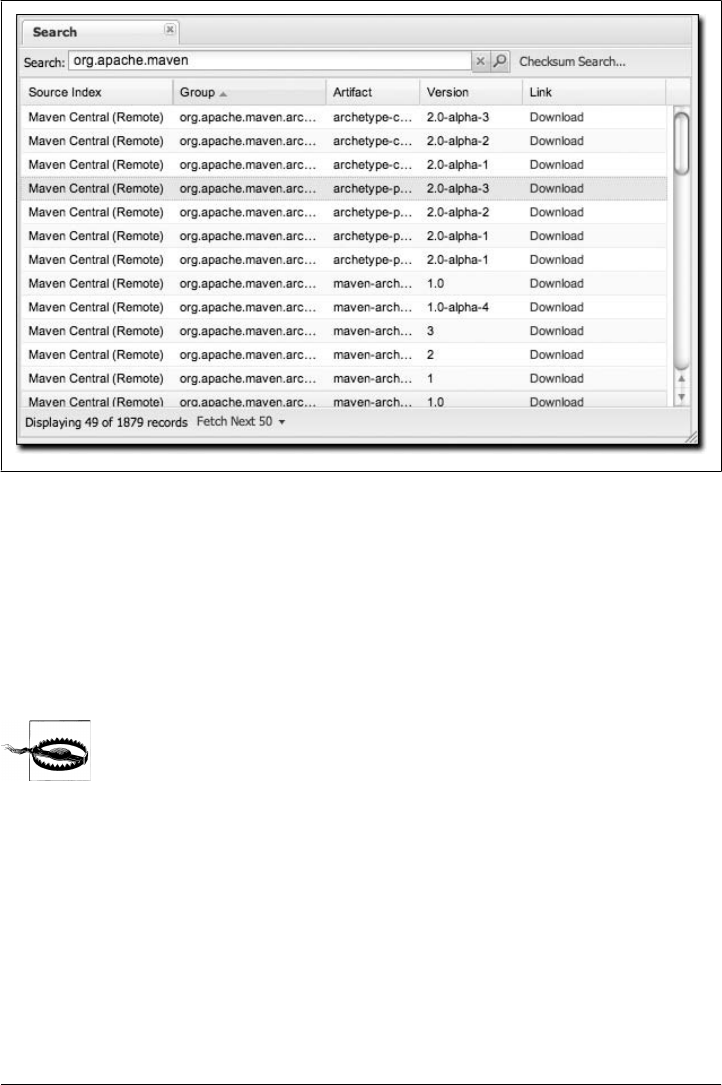
Once you’ve located the artifact you were looking for, you can click on the Download
link to download the artifact. Nexus shows you 50 results at a time and provides links
on the bottom of the search result panel for you to navigate through the results. If you
would prefer to see a list of all of the matching artifacts, you can select Fetch All from
the drop-down at the bottom of the search result panel.
In addition to searching by a groupId or an artifactId, Nexus has a feature that allows
you to search for an artifact by a checksum.
Let me guess—you installed Nexus, ran to the search box, typed in the
name of a group or an artifact, clicked the magnifying glass, and saw
absolutely nothing. No results. Why? Nexus won’t retrieve the remote
repository indexes by default; you need to activate downloading of re-
mote indexes for the three proxy repositories that Nexus ships with.
Without these indexes, Nexus has nothing to search. Find instructions
for activating index downloads in “Post-Install Checklist.”
Browsing System Feeds
Nexus provides feeds that capture system events. You can browse these feeds by click-
ing on System Feeds under the View menu. This will show the panel in Figure 16-6.
You can use this simple interface to browse the most recent reports of artifact
Figure 16-5. Results of an Artifact Search for “maven”
344 | Chapter 16: Repository Manager
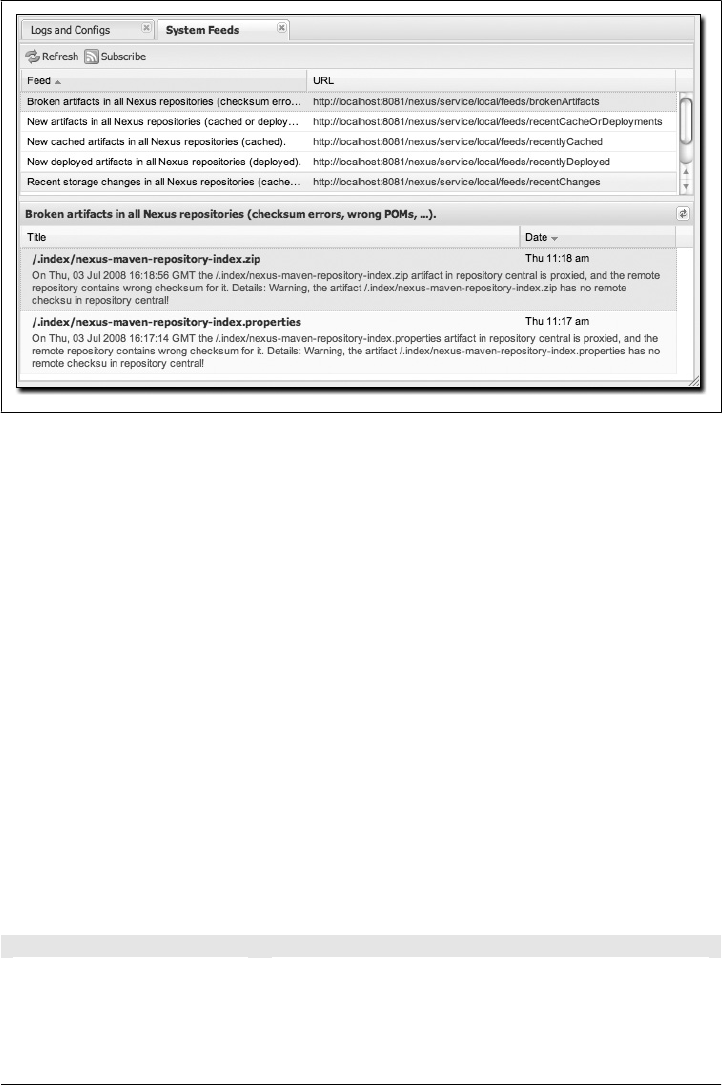
deployments, cached artifacts, broken artifacts, and storage changes that have occurred
in Nexus.
These feeds can come in handy if you are working at a large organization with multiple
development teams deploying to the same instance of Nexus. In such an arrangement,
all developers in an organization can subscribe to the RSS feeds for New Deployed
Artifacts as a way to ensure that everyone is aware when a new release has been pushed
to Nexus. Exposing these system events as RSS feeds also opens the door to other, more
creative uses of this information, such as connecting Nexus to external automated
testing systems. To access the RSS feeds for a specific feed, select the feed in the System
Feeds view panel and then click on the Subscribe button. Nexus will load the RSS feed
in your browser and you can subscribe to the feed in your favorite RSS reader.
Six system feeds are available in the System Feeds view, and each has a URL that
resembles the following:
http://localhost:8081/nexus/service/local/feeds/recentChanges
where recentChanges would be replaced with the identifier of the feed you were at-
tempting to read. Available system feeds are shown in Table 16-1.
Table 16-1. Available system feeds
Feed Identifier Description
brokenArtifacts Checksum mismatch, missing checksums, invalid POMs
recentCacheOrDeployments New artifacts in all repositories (cached or deployed)
recentlyCached New cached artifacts in all repositories
Figure 16-6. Browsing Nexus system feeds
Using Nexus | 345

Feed Identifier Description
recentlyDeployed New deployed artifacts in all repositories
recentChanges All caches, deployments, or deletions
systemRepositoryStatusChanges Automatic or user-initiated status changes (out-of-service and blocked proxies)
systemChanges Booting Nexus, changing configuration, re-indexing, and rebuilding of attributes
Browsing Log Files and Configuration
“Logs and Config Files” under the Views menu is visible only to administrative users.
Clicking on this option brings up the dialog shown in Figure 16-7. From this screen,
you can view the following log and configuration files by clicking on the drop-down
selection next to the Download button:
nexus.log
Think of this as the general application log for Nexus. Unless you are an admin-
istrative user, you might not have much interest in the information in this log. If
you are trying to debug an error, or if you have uncovered a bug in Nexus, you’ll
use this log viewer to diagnose problems with Nexus.
nexus.xml
This XML file contains most of the configuration data for your instance of Nexus.
It is stored in ${NEXUS_HOME}/runtime/apps/nexus/conf/nexus.xml.
Changing Your Password
If you have the appropriate security privilege, you will see an option to change your
password in the lefthand side of the browser. To change your password, click on
Change Password, supply your current password, and choose a new password. When
you click on Change Password at the bottom, as shown in Figure 16-8, your Nexus
password will be changed.
Configuring Maven to Use Nexus Repositories
To use Nexus, you will configure Maven to check Nexus instead of the public reposi-
tories. To do so, you’ll need to edit your mirror settings in your ~/.m2/settings.xml file.
First, we’re going to demonstrate how to configure Maven to consult your Nexus in-
stallation instead of retrieving artifacts directly from the central Maven repository. After
we override the central repository and demonstrate that Nexus is working, we’ll circle
back to provide a more sensible set of settings that will cover both releases and
snapshots.
346 | Chapter 16: Repository Manager
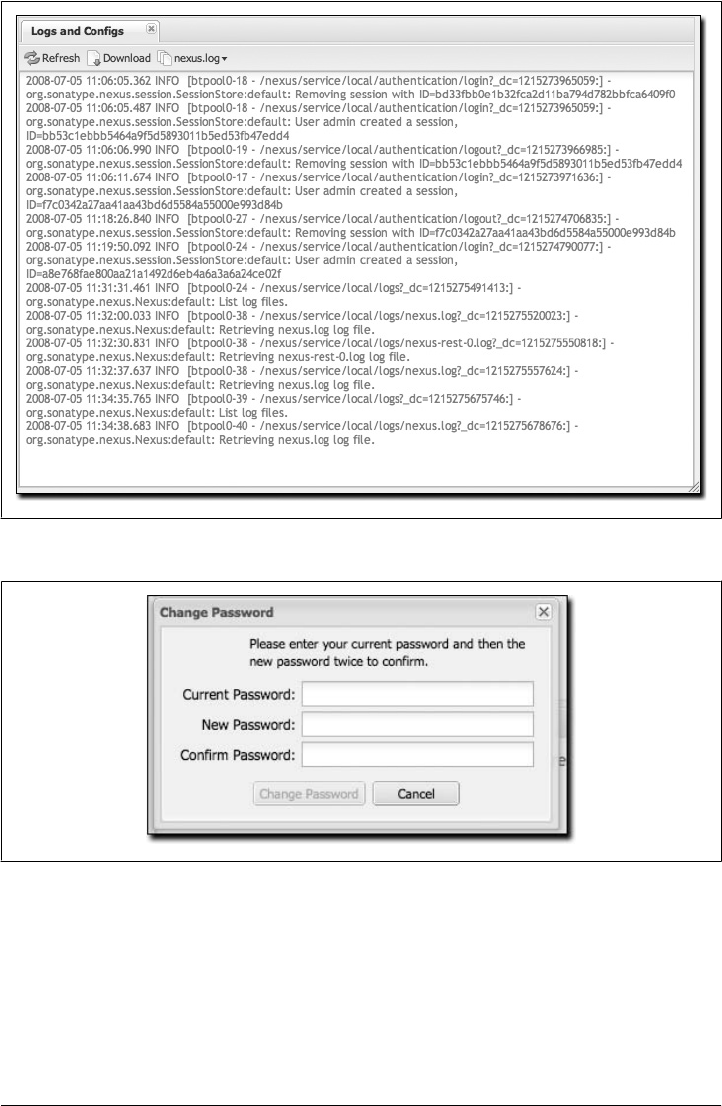
Using the Nexus Central Proxy Repository
To configure Maven to consult Nexus instead of the central Maven repository, add the
mirror settings from Example 16-1 to your ~/.m2/settings.xml file.
Figure 16-7. Browsing Nexus logs and configuration
Figure 16-8. Changing your Nexus password
Configuring Maven to Use Nexus Repositories | 347

Example 16-1. Configuring Maven settings for Nexus (~/.m2/settings.xml)
<?xml version="1.0"?>
<settings>
...
<mirrors>
<mirror>
<id>Nexus</id>
<name>Nexus Public Mirror</name>
<url>http://localhost:8081/nexus/content/groups/public</url>
<mirrorOf>central</mirrorOf>
</mirror>
</mirrors>
...
</settings>
Once you’ve configured Nexus to be the mirror for all repositories, Maven will now
consult the local installation of Nexus instead of going out to the central Maven repo-
sitory. If Nexus has the artifact requested, the artifact will be served from the local
Nexus installation. If Nexus does not have the artifact, Nexus will retrieve it from the
remote repository and then add it to the local mirror of that remote repository.
To test how Nexus is working, try deleting a directory from your local Maven repository
and then running a Maven build. If you delete ~/.m2/repository/org, you’ll be deleting
a large number of dependencies (including Maven plugins). The next time you run
Maven, you should see the following:
$ mvn clean install
...
Downloading: http://localhost:8081/nexus/content/groups/public/...
3K downloaded
This output should convince you that Maven is communicating with your local instal-
lation of Nexus instead of going out to the central Maven repository to retrieve an
artifact. After you’ve run a few builds against your local Nexus installation, you can
start to browse the contents cached in your local instance of Maven.
Using Nexus for Snapshot Repositories
The Maven settings described earlier in “Using the Nexus Central Proxy Repository”
will allow you to use the Nexus public group. This resolves artifacts from four reposi-
tories managed by Nexus, but it won’t allow you to reference the public-snapshots
group that includes the Apache and Codehaus snapshots. To configure Maven to use
Nexus for both releases and plugins, you will have to configure Maven to reference the
Nexus groups by adding the mirror configuration shown in Example 16-2 to your
Maven settings in ~/.m2/settings.xml.
348 | Chapter 16: Repository Manager

Example 16-2. Configuring Maven to use Nexus for releases and snapshots
<settings>
<mirrors>
<mirror>
<!--This is used to direct the public snapshots repo in the
profile below over to a different nexus group -->
<id>nexus-public-snapshots</id>
<mirrorOf>public-snapshots</mirrorOf>
<url>http://localhost:8081/nexus/content/groups/public-snapshots</url>
</mirror>
<mirror>
<!--This sends everything else to /public -->
<id>nexus</id>
<mirrorOf>*</mirrorOf>
<url>http://localhost:8081/nexus/content/groups/public</url>
</mirror>
</mirrors>
<profiles>
<profile>
<id>development</id>
<repositories>
<repository>
<id>central</id>
<url>http://central</url>
<releases><enabled>true</enabled></releases>
<snapshots><enabled>true</enabled></snapshots>
</repository>
</repositories>
<pluginRepositories>
<pluginRepository>
<id>central</id>
<url>http://central</url>
<releases><enabled>true</enabled></releases>
<snapshots><enabled>true</enabled></snapshots>
</pluginRepository>
</pluginRepositories>
</profile>
<profile>
<!--this profile will allow snapshots to be searched when activated-->
<id>public-snapshots</id>
<repositories>
<repository>
<id>public-snapshots</id>
<url>http://public-snapshots</url>
<releases><enabled>false</enabled></releases>
<snapshots><enabled>true</enabled></snapshots>
</repository>
</repositories>
<pluginRepositories>
<pluginRepository>
<id>public-snapshots</id>
<url>http://public-snapshots</url>
<releases><enabled>false</enabled></releases>
<snapshots><enabled>true</enabled></snapshots>
</pluginRepository>
Configuring Maven to Use Nexus Repositories | 349

</pluginRepositories>
</profile>
</profiles>
<activeProfiles>
<activeProfile>development</activeProfile>
</activeProfiles>
</settings>
In this example, we have defined two profiles: development and public-snapshots. The
development profile is configured to download from the central repository with a bogus
URL of http://central. The public-snapshots profile is configured to download from
the public-snapshots repository with a bogus URL of http://public-snapshots. These
bogus URLs are overridden by two mirror settings in the same settings.xml file. The
first mirror is configured to override the public-snapshots repository to the public-
snapshots Nexus group. The second mirror overrides all other repositories to the public
Nexus group. With these settings, all builds will include the public Nexus group. If you
want to include the public-snapshots group, you would have to add the
public-snapshots profile by using the -P flag on the command line as follows:
$ mvn -Ppublic-snapshots clean install
Adding Custom Repositories for Missing Dependencies
If you’ve configured your Maven settings.xml to list Nexus as a mirror for all public
repositories and all public-snapshot repositories, you might encounter projects that are
unable to retrieve artifacts from your local Nexus installation. This usually happens
because you are trying to build a project that has defined a custom set of
repositories and snapshotRepositories in a pom.xml. This is definitely going to happen
if you are building open source projects or if you’ve added custom third-party Maven
repositories to your configuration.
As an example, let’s try to build Apache Shindig from source we’ve checked out of the
Apache Incubator. What is Apache Shindig? It doesn’t matter to this example; all we
need is an example project we can easily check out from source control and build. If
you really want to know, Shindig is a project in the Apache Incubator that revolves
around the OpenSocial API from Google. Shindig aims to provide a container that will
allow people to execute OpenSocial gadgets. It provides us with an interesting example
project because it depends on some custom Maven repositories for components that
have yet to be added to the central Maven repository. Using Shindig, we can show you
what happens when Nexus doesn’t have your artifacts and what steps you can take to
add repositories to Nexus.
The following example assumes that you have Subversion installed and that you are
running Subversion from the command line. Let’s check out Apache Shindig from the
Apache Incubator with Subversion and attempt to build it from source. To do this,
execute the following commands:
350 | Chapter 16: Repository Manager

$ svn co http://svn.apache.org/repos/asf/incubator/shindig/trunk shindig
... Subversion will checkout the trunk of Apache Shindig ...
$ cd shindig
$ mvn install
... Maven will build Shindig ...
Downloading: http://localhost:8081/nexus/content/groups/public/\
caja/caja/r2178/caja-r2178.jar
...
[INFO] -------------------------------------------------------------------
[ERROR] BUILD ERROR
[INFO] -------------------------------------------------------------------
[INFO] Failed to resolve artifact.
Missing:
----------
1) caja:caja:jar:r2178
Try downloading the file manually from the project website.
...
----------
3 required artifacts are missing.
for artifact:
org.apache.shindig:shindig-gadgets:jar:1-SNAPSHOT
from the specified remote repositories:
nexus (http://localhost:8081/nexus/content/groups/public)
The build fails because it is unable to download three artifacts. One of the artifacts
Maven tries to download has a group identifier of caja, an artifact identifier of caja,
and a version of r2178. It is an artifact that is hosted on a custom repository: http://
google-caja.googlecode.com/svn/maven. Maven fails to download this artifact because
your settings.xml is configured to direct all mirrors to the public and public-snapshots
groups hosted on our Nexus installation. Even though the pom.xml for Apache Shindig
defines a repository and points it to http://google-caja.googlecode.com/svn/maven,
Nexus won’t retrieve an artifact from a repository it doesn’t know about, and you’ve
configured all requests for remote artifacts to pass through Nexus. In fact, there are
two repositories that Nexus doesn’t know about in this build: caja and oauth. Caja
(http://code.google.com/p/google-caja/) and OAuth (http://code.google.com/p/oauth/)
are two libraries that are still in development. Both projects have been “released,” and
the versions that Shindig depends on are certainly not snapshot releases, but these
projects have not been published to the central Maven repository. We need to find a
way to let Nexus know about these repositories before we can build this project.
There are two ways to fix this problem. First, you can change your settings.xml to
override specific repository identifiers. Instead of listing the Nexus public group as a
mirrorOf all repositories, you can change the mirrorOf element in your settings.xml to
“central”. If you do this, Maven will then attempt to download the dependencies di-
rectly from the oauth and caja repositories at the URLs listed in the previous code
Configuring Maven to Use Nexus Repositories | 351

listing. This will work because Maven will only consult Nexus for repositories that
match those specified in the mirrorOf element in settings.xml. If Maven sees the repo-
sitories identifier caja or oauth, and doesn’t see a mirror configured in your
settings.xml, it will attempt to connect to the repository directly.
The second, more interesting option is to add both of these repositories to Nexus and
then add these repositories to the public group. You’ll see how to do this in the next
sections.
Adding a New Repository
To add the caja repository, log into Nexus as an administrator and click on the Repo-
sitories link in the lefthand navigation menu in the Configuration section. Clicking on
this link should bring up a window that lists all the repositories Nexus knows about.
You’ll then want to create a new proxy repository. To do this, click on the Add link
that is directly above the list of repositories. When you click this button, click the down
arrow directly to the right of the word Add; this will show a drop-down that has the
options Hosted, Proxy, and Virtual. Since you are creating a proxy repository, click on
Proxy. Once you do so, you will see a screen resembling Figure 16-9. Populate the
required fields Repository ID and Repository Name with “caja” and “Google Caja”.
Set the Repository Policy to “Release” and the Remote Storage Location to http://google
-caja.googlecode.com/svn/maven.
Once you’ve filled out this screen, click on the Save button. Nexus will then be con-
figured with the caja proxy repository. Do the same thing for the oauth repository.
Create a repository with a Repository ID of “oauth”, a Release policy, and a Remote
Storage Location of http://oauth.googlecode.com/svn/code/maven.
Adding a Repository to a Group
Next, you will need to add both of these new repositories to the public Nexus group.
To do so, click on the Groups link in the lefthand navigation menu in the Configuration
section. When you see the Group management screen, click on the public group.
Clicking on the public group should bring up a screen which resembles Figure 16-10.
To add the two new repositories to the public Nexus group, find the repositories in the
Available Repositories list on the right, click on the repository you want to add, and
drag it to the left to the Ordered Group Repositories list. Once the repository is in that
list, you can click and drag the repository within the list to alter the order in which it
will be searched for a matching artifact. Once the Google Caja and Google OAuth
project repositories are added to the public Nexus group, you should be able to build
Apache Shindig and watch Maven download the Caja and OAuth artifacts from the
respective repositories.
352 | Chapter 16: Repository Manager
Nexus makes use of an interesting JavaScript widget library called
ExtJS (http://extjs.com/). ExtJS provides for a number of interesting UI
widgets that allow for rich interaction such as the drag-and-drop UI for
adding repositories to a group and reordering the contents of a group.
In the last few sections, you encountered a situation where you needed to add two
custom repositories to a build in order to download two libraries (Google Caja and
Google OAuth) that are not available in the central Maven repository. If you were not
using a repository manager, you would have added these repositories to the
repository element of your project’s POM, or you would have asked all of your devel-
opers to modify ~/.m2/settings.xml to reference two new repositories. Instead, you used
the Nexus repository manager to add the two repositories to the public group. If all of
Figure 16-9. Adding a Nexus repository
Configuring Maven to Use Nexus Repositories | 353
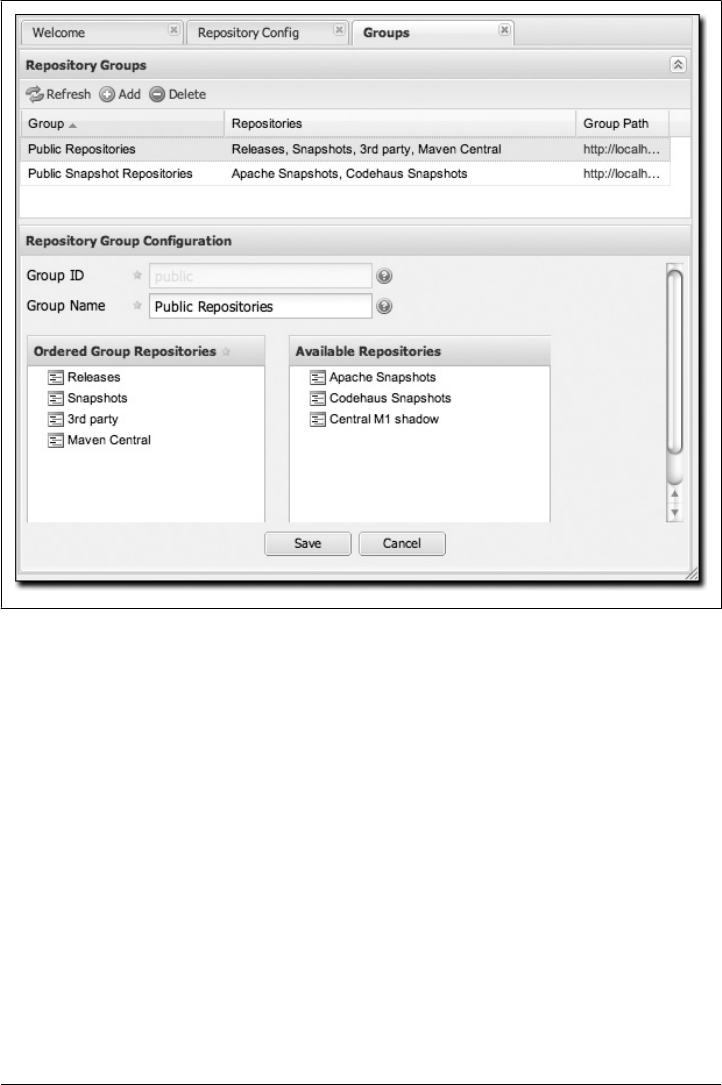
the developers are configured to point to the public group in Nexus, you can freely
swap in new repositories without asking your developers to change local configura-
tions, and you’ve gained a certain amount of control over which repositories are made
available to your development team.
Configuring Nexus
Many of the configuration screens shown in this section are available only to admin-
istrative users. Nexus allows the admin user to customize the list of repositories, create
repository groups, customize server settings, and create routes or “rules” that Maven
will use to include or exclude artifacts from a repository.
Customizing Server Configuration
In a real installation of Nexus, you’ll probably want to customize the administrative
password to something other than “admin123”, and you might want to override the
Figure 16-10. Adding new repositories to a Nexus group
354 | Chapter 16: Repository Manager

default directories that Nexus uses to store repository data. To do this, log in as the
administrative user and click on Server under Configuration in the lefthand navigation
menu. The server configuration screen is shown in Figures 16-11 and 16-12.
This screen allows you to change:
Working directory
Under the File Settings group, you can customize the working directory. You may
wish to customize the working directory if your Nexus installation is going to be
mirroring very large repositories and you want to put your working directory on
another partition.
Log directory
You can change where Nexus looks for logs. On a Unix machine, a common prac-
tice is to place all log files under /var/log. If you wanted to follow this practice, you
could create a /var/log/nexus directory with the appropriate permissions. Note that
Figure 16-11. Nexus server configuration (file, SMTP, and HTTP config)
Configuring Nexus | 355
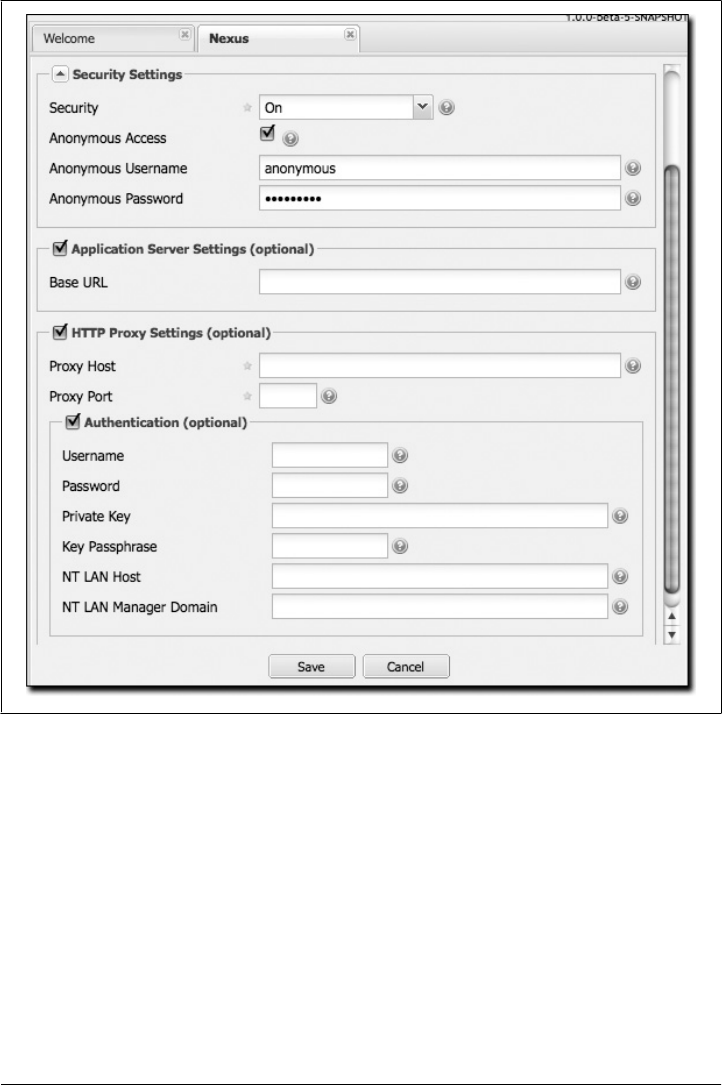
this setting does not change the logging directory used by Nexus; it simply tells
Nexus where to look for the logs. To change the location of the logs, you will need
to change the jul-logging.properties and log4j.properties files in the runtime/apps/
nexus/conf directory of your Nexus installation.
SMTP settings
Nexus sends email to users who need to recover usernames and password. To set
this up, you’ll need to configure the SMTP server settings in this dialog. This section
of the form takes an SMTP host and port as well as other parameters relating to
SMTP authentication and encryption. You can also change the From: header of an
email from Nexus.
Figure 16-12. Nexus server configuration (security, app server, and HTTP proxy config)
356 | Chapter 16: Repository Manager

User agent
This is the identifier Nexus uses when it is making an HTTP request. You may
want to change this if Nexus needs to use an HTTP proxy, and the proxy will work
only if the user agent is set to a specific value.
Additional URL parameters
This is a list of extra parameters to place on a GET request to a remote repository.
You could use this to add identifying information to requests.
Request timeout
The amount of time Nexus will wait for a request to succeed when interacting with
an external, remote repository.
Request retry attempts
The number of times Nexus will retry a failed HTTP request.
Security settings
You can choose to enable or disable security, enable or disable anonymous access,
and set the username and password for anonymous access. If you choose to enable
security, you are telling Nexus to enforce role-based access control to enforce read
and write access to repositories.
The anonymous username and password is used to integrate with other realms that
may need a special username for anonymous access. In other words, the username
and password here are what we attempt to authorize when someone makes an
anonymous request. You would change the anonymous username to “guest” if you
wanted to integrate Nexus with Microsoft’s Active Directory.
Application server settings
This section allows you to change the Base URL for your Nexus installation. It is
used when generating links in emails and RSS feeds. The Sonatype Nexus reposi-
tory is available on http://respository.sonatype.org, and it makes use of this Base
URL field to ensure that links in emails and RSS feeds point to the correct URL.
HTTP proxy settings
A number of HTTP proxy settings for Nexus installations need to be configured
to use an HTTP Proxy. You can specify a host, port, and a number of authentication
options that might be required by your proxy server.
Managing Repositories
To manage Nexus repositories, log in as the administrative user and click on Reposi-
tories in the Configuration menu in the lefthand navigation menu. Nexus provides for
three different kinds of repositories:
Proxy repository
A proxy repository is a proxy of a remote repository. By default, Nexus ships with
the following configured proxy repositories:
Configuring Nexus | 357

Apache Snapshots
This repository contains snapshot releases from the Apache Software Foun-
dation: http://people.apache.org/repo/m2-snapshot-repository
Codehaus snapshots
This repository contains snapshot releases from Codehaus: http://snapshots
.repository.codehaus.org/
Central Maven repository
This is the central Maven repository (for releases): http://repo1.maven.org/
maven2/
Hosted repository
A hosted repository is a repository that is hosted by Nexus. Maven ships with the
following configured hosted repositories:
3rd party
This hosted repository should be used for third-party dependencies not avail-
able in the public Maven repositories. Examples of these dependencies could
be commercial, proprietary libraries such as an Oracle JDBC driver that may
be referenced by your organization.
Releases
This hosted repository is where your organization will publish internal
releases.
Snapshots
This hosted repository is where your organization will publish internal
snapshots.
Virtual repository
This serves as an adapter to and from different types of repositories. Currently
Nexus supports conversion to and from Maven 1 repositories and Maven 2
repositories.
Figure 16-13 shows the Repository configuration screen for a proxy repository in
Nexus. From this screen, you can manage the settings for proxying an external repo-
sitory. You can configure:
Repository ID
The repository ID is the identifier that will be used in the Nexus URL. For example,
the central proxy repository has an ID of “central”, which means Maven can access
the repository directly at http://localhost:8081/nexus/content/repositories/central.
The Repository ID must be unique in a given Nexus installation. An ID is required.
Repository name
The display name for a repository. A name is required.
Repository type
The type of repository (proxy, hosted, or virtual). You can’t change the type; it is
selected when you create a repository.
358 | Chapter 16: Repository Manager
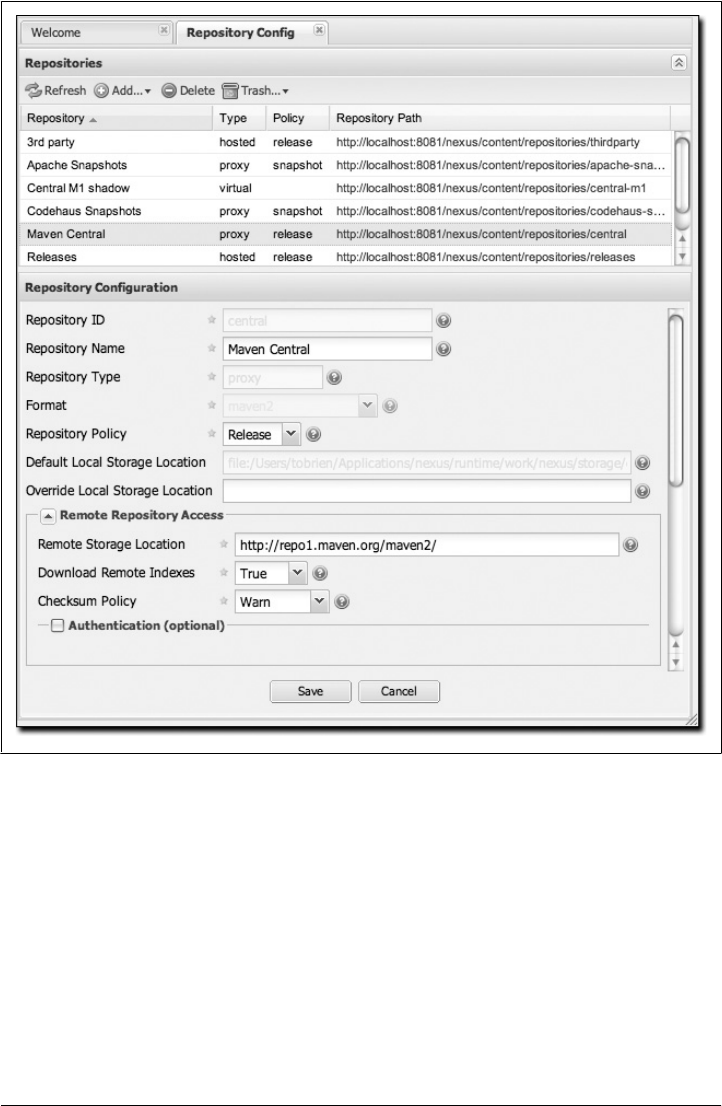
Repository policy
If a proxy repository has a policy of release, it will only access released versions
from the remote repository. If a proxy repository has a policy of snapshot, it will
download snapshots from the remote repository.
Default storage location
Not editable; shown only for reference. This is the default storage location for the
local cached contents of the repository.
Figure 16-13. Repository configuration screen for a proxy repository
Configuring Nexus | 359

Override storage location
You can choose to override the storage location for a specific repository. You would
do this if you were concerned about storage and wanted to put the contents of a
specific repository (such as central) in a different location.
Remote repository access
This section tells Nexus where to look for and how to interact with the remote
Maven repository being proxied:
Remote storage location
This is the URL of the remote Maven repository.
Download remote indexes (not shown in figure)
This field controls the downloading of the remote indexes. Currently, only
central has an index at http://repo1.maven.org/maven2/.index. If enabled,
Nexus will download the index and use that for its searches as well as serve it
up to any clients that ask for the index (such as m2eclipse). The default for
new proxy repositories is enabled, but all of the default repositories included
in Nexus have this option disabled. To change this setting for one of the proxy
repositories that ship with Nexus, change the option, save the repository, and
then re-index the repository. Once this is done, artifact search will return every
artifact available in the central Maven repository. The section “Managing Re-
positories,” earlier in this chapter, details the process for re-indexing a
repository.
Checksum policy
Sets the checksum policy for a remote repository. This option is set to Warn by
default. The possible values of this setting are:
Ignore
Ignore the checksums entirely.
Warn
Print a warning in the log if a checksum is not correct.
StrictIfExists
Refuse to cache an artifact if the calculated checksum is inconsistent with
a checksum in the repository. Perform this check only if the checksum file
is present.
Strict
Refuse to cache an artifact if the calculated checksum is inconsistent or if
there is no checksum for an artifact.
Authentication
This section allows you to set a username, password, private key, key pass-
phrase, NT LAN host, and NT LAN manager domain for a remote repository.
Access settings
This section configures access settings for a repository:
360 | Chapter 16: Repository Manager

Allow deployment
If set to true, Nexus will allow Maven to deploy artifacts to this repository.
This option is visible for hosted repositories.
Allow file browsing
When set to true, users can browse the contents of the repository with a web
browser.
Include in search
When set to true, this repository is searched when you perform an artifact
search in Nexus. If this setting is false, the contents of the repository are ex-
cluded from a search.
Expiration settings
Nexus maintains a local cache of artifacts and metadata. You can configure expi-
ration parameters for a proxy repository. The expiration settings are:
Not found cache TTL
If Nexus fails to locate an artifact, it will cache this result for a given number
of minutes. In other words, if Nexus can’t find an artifact in a remote reposi-
tory, it will not repeatedly attempt to resolve this artifact until the Not Found
Cache TTL time has been exceeded. The default for this setting is 1440 minutes
(or 24 hours).
Artifact max age
Tells Nexus when that maximum age of an artifact is before it retrieves a new
version from the remote repository. The default for this setting is –1 for a
repository with a release policy and 1440 for a repository with snapshot policy.
Metadata max age
Nexus retrieves metadata from the remote repository. It will retrieve updates
to metadata only after the Metadata Max Age has been exceeded. The default
value for this setting is 1440 minutes (or 24 hours).
HTTP request settings
This section lets you change the properties of the HTTP request to the remote
repository. You can configure the user agent of the request, add parameters to a
request, and set the timeout and retry behavior. This section refers to the HTTP
request made from Nexus to the remote Maven repository being proxied.
HTTP proxy settings
This section lets you configure the HTTP proxy for the request from Nexus to the
remote repository. You can configure a proxy host and port plus any authentication
settings you need to tell Nexus to use an HTTP proxy for all requests to a remote
repository.
Configuring Nexus | 361
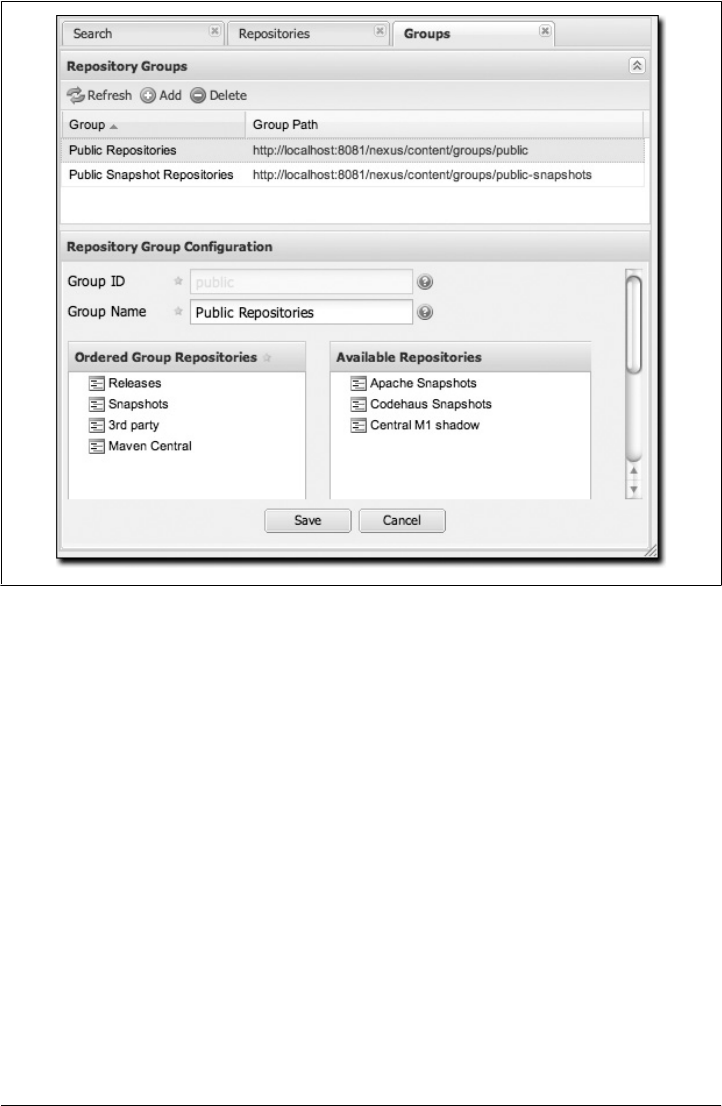
Managing Groups
Groups are a powerful feature of Nexus—they allow you to combine multiple reposi-
tories in a single URL. Nexus ships with two groups: public and public-snapshots. The
public group combines the three hosted repositories: 3rd party, releases, and snapshots
with the central Maven repository. The public-snapshots repository combines the
Apache snapshots and Codehaus snapshots repositories. In “Configuring Maven to
Use Nexus Repositories,” earlier in this chapter, we configured Maven via the set
tings.xml to look for artifacts in the public group managed by Nexus. Figure 16-14
shows the group configuration screen in Nexus; you can see the contents of the public
group.
Note that the order of the repositories listed in Order Group Repositories is important.
When Nexus searches for an artifact in a group of repositories, it returns the first match.
To reorder a repository in this list, click and the drag the repositories in the Ordered
Group Repositories selection list.
The order of repositories in a group can be used to influence the effective metadata that
will be retrieved by Maven from a Nexus repository group. We recommend placing
Figure 16-14. Group configuration screen in Nexus
362 | Chapter 16: Repository Manager

release repositories higher in the list than snapshot repositories so that LATEST and
RELEASE versions are merged appropriately. We also recommend placing repositories
with a higher probability of matching the majority of artifacts higher in this list. If most
of your artifacts are going to be retrieved from the central Maven repository, putting
the central repository higher in this list than a smaller, more focused repository will be
better for performance, as Nexus will not interrogate the smaller remote repository for
as many missing artifacts.
Managing Routes
Nexus routes are like filters you can apply to Nexus groups; they allow you to configure
Nexus to include or exclude repositories from a particular artifact search when Nexus
is trying to locate an artifact in a Nexus group. There are a number of different scenarios
in which you might configure a route in Nexus. The most common is when you want
to make sure that you are retrieving artifacts in a particular group ID from a particular
repository. This is especially useful when you want to make sure that you are trying to
retrieve your own organization’s artifacts from the hosted release and snapshot repo-
sitories. Nexus routes are applicable when you are trying to resolve an artifact from a
Nexus group; using routes allows you to modify the repositories Nexus will consult
when it tries to resolve an artifact from a group of repositories.
Figure 16-15 shows the route configuration screen. Clicking on a route will bring up a
screen that allows you to configure the properties of the route. The configuration op-
tions available are:
URL Pattern
This is the pattern that Nexus will use to match a request to Nexus. If the regular
expression in this pattern is matched, Nexus will either include or exclude the listed
repositories from a particular artifact query. In Figure 16-15, the two patterns are:
.*/(com|org)/somecompany/.*
This pattern would match all of the paths that included either “/com/some-
company/” or “/org/somecompany”. The expression in the parentheses
matches either com or org, and the .* matches one or more characters. You
would use a route like this to match your own organization’s artifacts and map
these requests to the hosted Nexus releases and snapshots repositories.
.*/org/some-oss/.*
This pattern is used in an exclusive route. It matches every path that contains
“/org/some-oss/”. This particular exclusive route excludes the local hosted
releases and snapshots directory for all artifacts that match this path. When
Nexus tries to resolve artifacts that match this path, it will exclude the releases
and snapshots repositories.
Rule Type
Rule type can be either “inclusive” or “exclusive.” An inclusive rule type defines
the set of repositories that should be searched for artifacts when the URL pattern
Configuring Nexus | 363
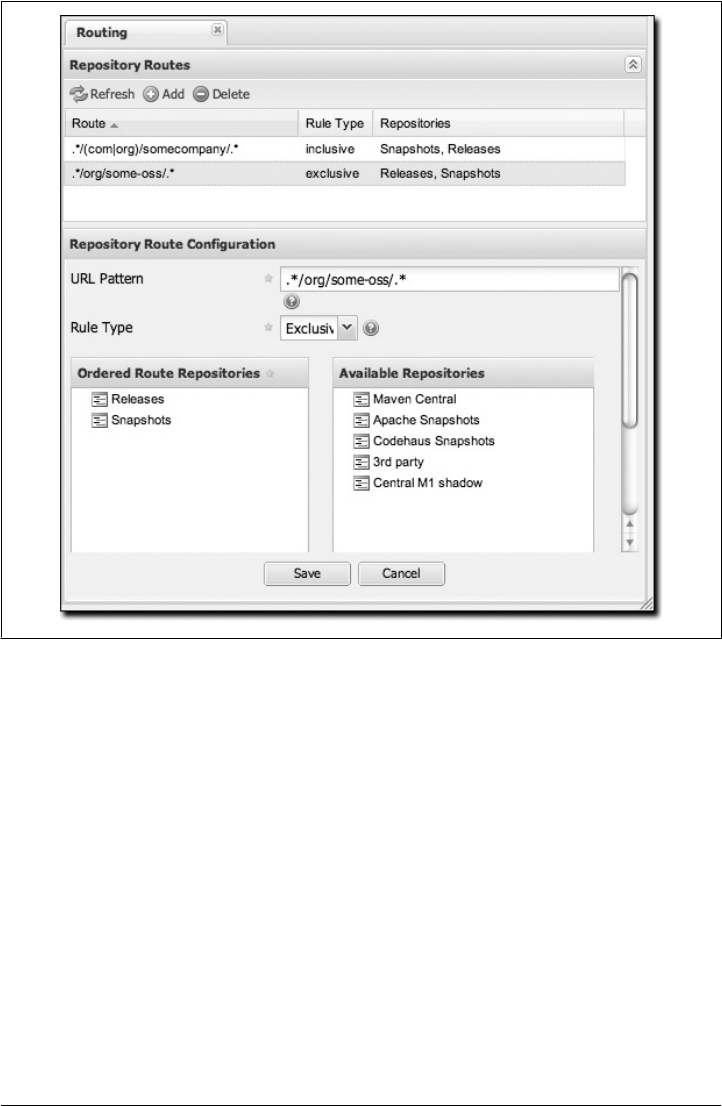
has been matched. An exclusive rule type defines repositories which should not be
searched for a particular artifact.
Ordered Route Repositories
This is an ordered list of repositories which Nexus will search to locate a particular
artifact. Nexus searches top to bottom; if it’s looking for an artifact, it will return
the first match. When Nexus is looking for metadata, all repositories in a group
are checked and the results are merged. The merging gives preference to the earlier
repositories. This is relevant when a project is looking for a LATEST or a RELEASE
version. Within a Nexus group, you should define the release repositories before
the snapshot repositories; otherwise, LATEST may incorrectly resolve to a snapshot
version.
In Figure 16-15, you can see the two dummy routes that Nexus has as default routes.
The first route is an inclusive route; it is provided as an example of a custom route that
an organization might use to make sure that internally generated artifacts are resolved
from the releases and snapshots repositories. If your organization’s group IDs all start
Figure 16-15. Routes configuration screen in Nexus
364 | Chapter 16: Repository Manager

with com.somecompany, and if you deploy internally generated artifacts to the releases
and snapshots repositories, this route will make sure that Nexus doesn’t waste time
trying to resolve these artifacts from public Maven repositories such as the central
Maven repository or the Apache snapshots repository.
The second dummy route is an exclusive route. This route excludes the releases and
snapshots repositories when the request path contains “/org/some-oss”. This example
might make more sense if we replaced “some-oss” with “apache” or “codehaus”. If the
pattern were “/org/apache”, this rule would be telling Nexus to exclude the internal
releases and snapshots repositories when it is trying to resolve these dependencies. In
other words, don’t bother looking for an Apache dependency in your organization’s
internal repositories.
What if there is a conflict between two routes? Nexus will process inclusive routes
before it will process the exclusive routes. Remember that Nexus routes only affect
Nexus’ resolution of artifacts when it is searching a group. When Nexus starts to resolve
an artifact from a Nexus group, it will start with the list of repositories in a group. If
there are matching inclusive routes, Nexus will then take the intersection of the repo-
sitories in the group and the repositories in the inclusive Nexus route. The order as
defined in the Nexus group will not be affected by the Inclusive routes. Nexus will then
take the result of applying the inclusive routes and apply the exclusive routes to this
new group. The resulting list is then searched for a matching artifact.
One straightforward use of routes is to create one that excludes the central Maven
repository from all searches for your own organization’s hosted artifacts. If you are
deploying your own artifacts to Nexus under a groupId of org.mycompany, and if you are
not deploying these artifacts to a public repository, you can create a rule that tells Nexus
not to interrogate central for your own organization’s artifacts. This will improve per-
formance because Nexus will not need to communicate with a remote repository when
it serves your own organization’s artifacts. In addition to the performance benefits,
excluding central from searches for your own artifacts will reduce needless queries to
the public repositories.
To summarize, there are creative possibilities with routes that the designers of Nexus
may not have anticipated, but we advise you to proceed with caution if you start relying
on conflicting or overlapping routes. Use routes sparingly, and use course URL pat-
terns. As Nexus evolves, there will be more features that allow for more fine-grained
rules to allow you to prohibit requests for specific artifacts and specific versions of
artifacts. Remember that routes are applied only to Nexus groups, and that routes are
not used when an artifact is requested from a specific repository.
Managing Scheduled Services
Nexus allows you to schedule tasks that will be applied to all repositories or to specific
repositories on a configurable schedule. You can create the following kinds of
scheduled services:
Configuring Nexus | 365
Remove snapshots from a repository
Often, you will want to remove snapshots from a snapshot repository to preserve
storage space. When you create a scheduled service to remove snapshots, you can
specify:
• Minimum snapshots to preserve in a repository
• Snapshot retention (in days)
• Whether snapshots should be removed if an artifact has been released
Clear repository caches
Nexus maintains information about a proxied remote repository to avoid unnec-
essary network traffic. Clear cache simply expires the artifacts so that the next time
they are requested, Nexus will recheck the remote. This scheduled job clears all
cached information about a remote repository stored in your installation of Nexus
and forces Nexus to retrieve artifacts and information from the remote repository.
Evict unused proxied items from repository caches
Use it or lose it. This scheduled service tells Nexus to get rid of all proxied items
that haven’t been “used” (referenced or retrieved by a client). This can be a good
job to run if you are try to conserve storage space. In this service, you can specify
the number of days over which Nexus will look for activity before making the
decision to evict an artifact. (See the upcoming note about deletion.)
Publish indexes
Just as Maven downloads an index from a remote repository, Nexus can publish
an index in the same format. This will make it easier for people using m2eclipse or
Nexus to interact with your repositories.
Purge nexus timeline
Nexus maintains a lot of data that relates to the interaction between itself, proxied
remote repositories, and clients on Nexus. While this information can be important
for purposes of auditing, it can also take up storage space. Using this scheduled
service, you can tell Nexus to periodically purge this information. (See the upcom-
ing note about deletion.)
Rebuild repository attributes
This scheduled service tells Nexus to walk every file in a repository and gather
information such as checksums and file contents for every file.
Re-index repositories
This service tells Nexus to re-index a repository.
The evict and purge actions do not delete data from the Nexus working
directory. They simply move data to be cleared or evicted to a trash
directory under the Nexus work directory. If you want to reclaim disk
space, you need to clear the trash on the Browse Repositories screen. If
something goes wrong with an evict or clear service, you can move the
data back to the appropriate storage location from the trash.
366 | Chapter 16: Repository Manager

When you create a new service, you can configure it to apply to all repositories, the
repositories in a Nexus group, or a specific Nexus repository. A service can be scheduled
to run once at a specific date and time, or periodically once every day, week, or month.
If none of these options suit your specific needs, you can select a recurrence of “Ad-
vanced” that will allow you to supply your own cron expression to specify when the
job should execute.
To create a new scheduled service, click on Scheduled Services under the Administra-
tion menu, and click on the Add button. This will bring up the screen shown in Fig-
ure 16-16.
Figure 16-16. Managing Nexus scheduled services
Configuring Nexus | 367

Managing Security
The latest release of Nexus has role-based access control (RBAC), which gives admin-
istrators very fine-grained control over who can read from a repository (or a subset of
repositories), who can administer the server, and who can deploy to repositories. The
security model in Nexus is also so flexible that it allows you to specify that only certain
users or roles can deploy and manage artifacts in a specific repository under a specific
groupId or asset class. The default configuration of Nexus ships with three roles and
three users with a standard set of permissions that will make sense for most users. As
your security requirements evolve, you’ll likely need to customize security settings to
create protected repositories for multiple departments or development groups. Nexus
provides a security model that can adapt to almost anything.
Nexus’ RBAC system is designed around the following four security concepts:
Privileges
Privileges are rights to read, update, create, or manage resources and perform op-
erations. Nexus ships with a set of core privileges that cannot be modified, and you
can create new privileges to allow for fine-grained targeting of role and user per-
missions for specific repositories.
Targets
Privileges are usually associated with resources or targets. In the case of Nexus, a
target can be a specific repository or a set of repositories grouped in something
called a repository target. A target can also be a subset of a repository or a specific
asset class within a repository. Using a target you can apply to a specific privilege
to apply to a single groupId.
Roles
Collections of privileges can be grouped into roles to make it easier to define col-
lections of privileges common to certain classes of users. For example, deployment
users will all have similar sets of permissions. Instead of assigning individual priv-
ileges to individual users, you use roles to make it easier to manage users with
similar sets of privileges. A role has one or more privilege and/or one or more roles.
Users
Users can be assigned roles and privileges, and model the individuals who will be
logging into Nexus and read, deploying, or managing repositories.
Managing privileges
Nexus has two types of privileges: application privileges, which cover actions a user
can execute in Nexus, and repository-target privileges, which govern the level of access
a user has to a particular repository or repository target. Behind the scenes, a privilege
is related to a single REST operation and method such as create, update, delete, or read.
See Figure 16-17.
368 | Chapter 16: Repository Manager
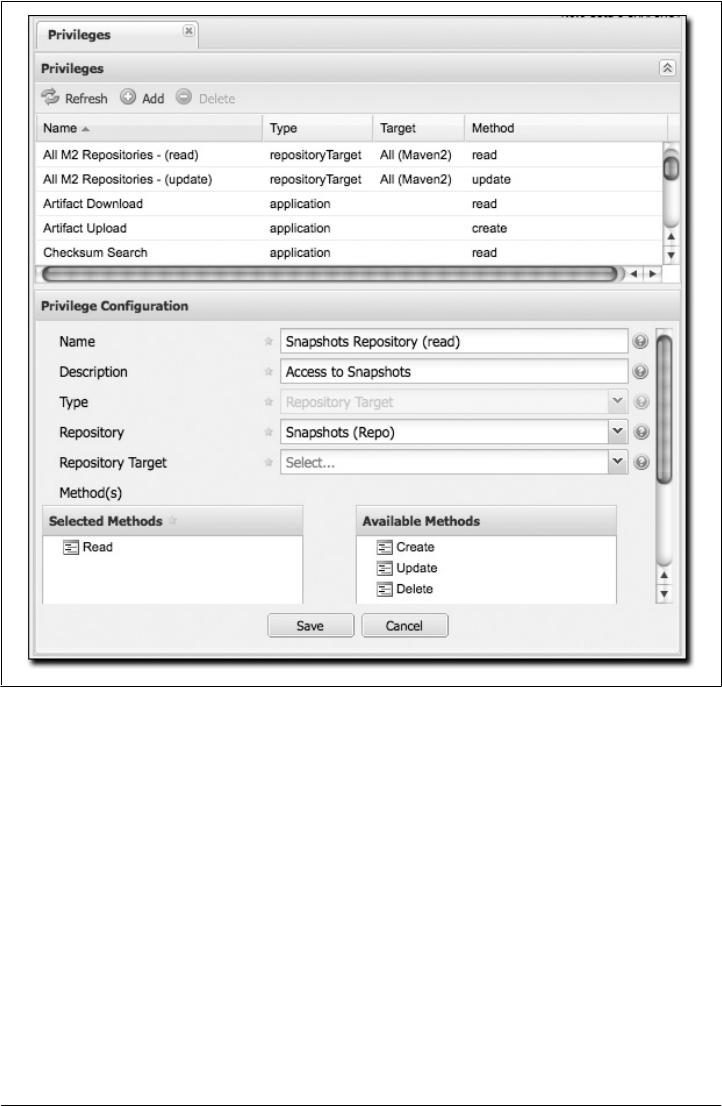
Repository target privileges can apply to individual repositories or repository targets.
All of the permissions that ship with Nexus target repository targets. To create a new
repository target privilege that targets a specific repository, click on the Add button
and select a repository from the repository drop-down. Application permissions cor-
respond to areas of the application to which a user has a specific level of access
(method). The available methods are create, read, update, and delete (CRUD). The list
of application permissions are as follows:
• Administrator privilege (ALL)
• Artifact download
• Artifact upload
• Checksum search
• Clear repository cache
Figure 16-17. Managing security privileges
Configuring Nexus | 369

• Configuration file
• Login to UI
• Logs
• Nexus remote control
• Read repository metadata
• Read repository status
• Rebuild repository attributes
• Re-index
• Repositories
• Repository groups
• Repository routes
• Repository targets
• Repository templates
• RSS feeds
• Scheduled tasks
• Search repositories
• Server settings
• Server status
• Status
• User change password
• User forgot password
• User forgot user ID
• User privileges
• User reset password
• User roles
• Users
• Wastebasket
Managing repository targets
A target is a set of regular expressions to match on a path (exactly how the route rules
work now). This allows you to define, for example, a target called Apache Maven that
is org/apache/maven/.* You can then add a new privilege that relates to the target and
controls the CRUD operations for artifacts matching that path (the privilege can span
multiple repositories if you want). You could thus delegate all control of
org.apache.maven targets to a “Maven” team. In this way, you don’t need to create
separate repositories for each logical division of your artifacts. See Figure 16-18.
370 | Chapter 16: Repository Manager
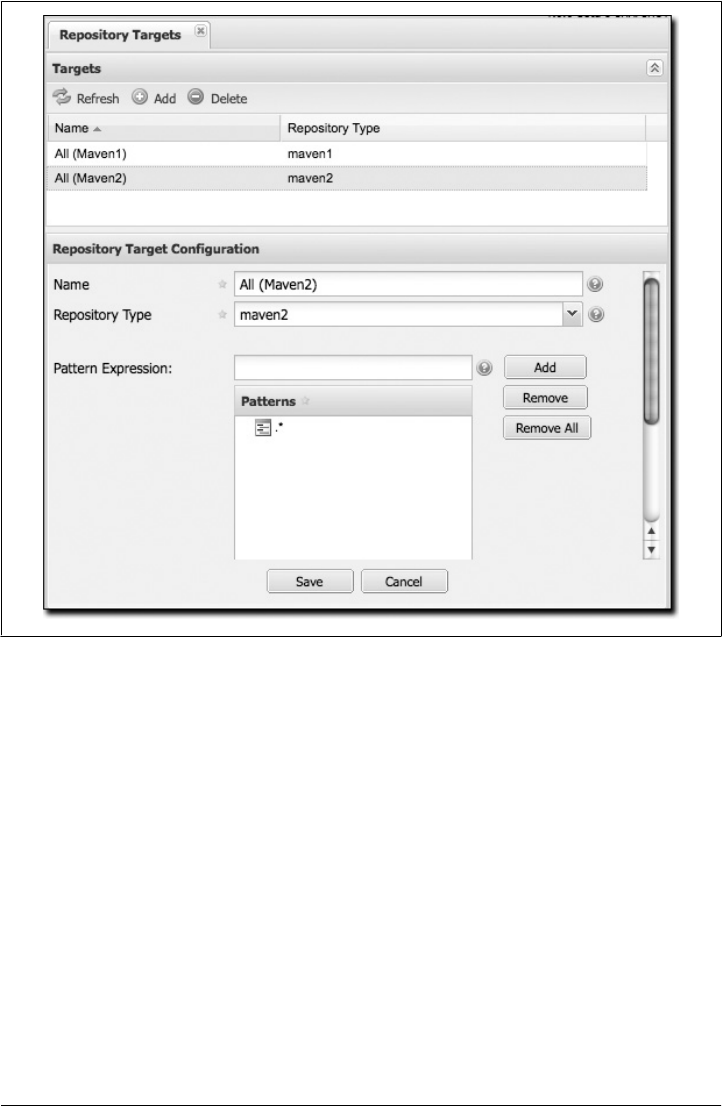
Managing security roles
Nexus ships with three roles: Nexus administrator role, Nexus anonymous role, and
Nexus deployment role. The administrator role grants all privileges, the anonymous
role grants read-only privileges, and the deployment role grants read and update per-
missions for all repositories. See Figure 16-19.
With the repository targets, you have fine-grained control over every action in the sys-
tem. For example, you could make a target that includes everything except sources
(.*(?!-sources)\.*) and assign that to one group while giving yet another group access
to everything. This means that you can host your public and private artifacts in a single
repository without giving up control of your private artifacts.
Managing users
Nexus ships with three users: admin, anonymous, and deployment. The admin user
has all privileges, the anonymous user has read-only privileges, and the deployment
Figure 16-18. Managing repository targets
Configuring Nexus | 371
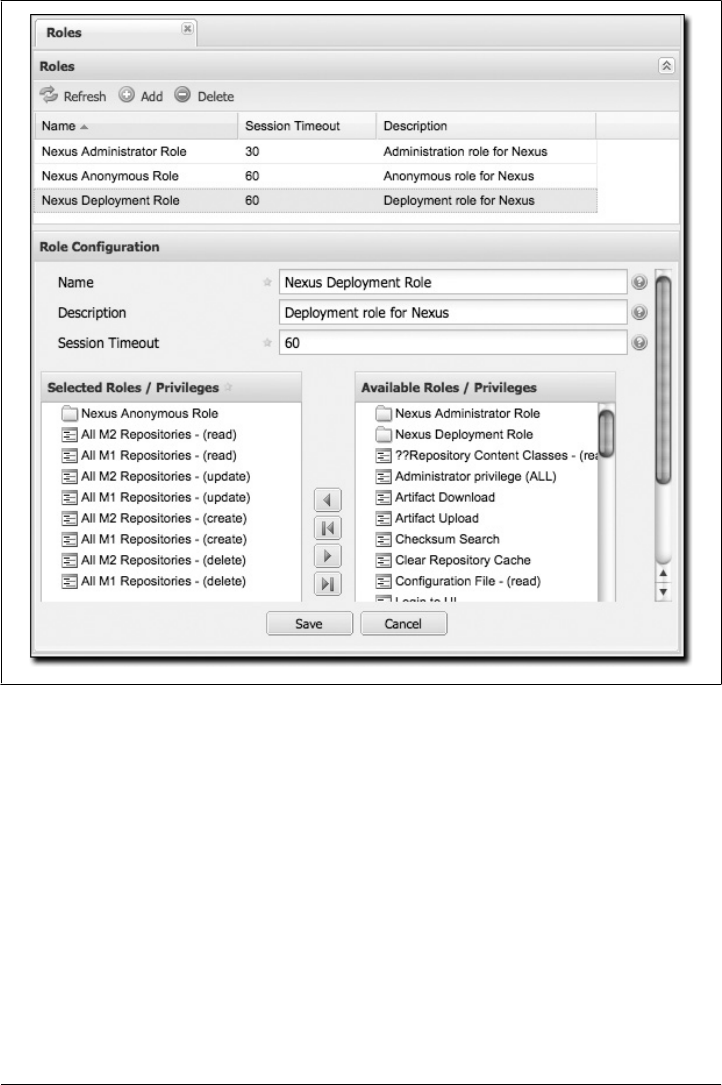
user can both read and deploy to repositories. If you need to create users with a more
focused set of permissions, you can click on Users under Security in the lefthand nav-
igation menu. Once you see the list of users, you can click on a user to edit that specific
user ID, name, email, or status. You can also assign or revoke specific roles or permis-
sions for a particular user. See Figure 16-20.
Network Configuration
By default, Nexus listens on port 8081. You can change this port by changing the value
in ${NEXUS_HOME}/conf/plexus.properties; this file is shown in Example 16-3. To
change the port, stop Nexus, change the value of applicationPort in this file, and then
Figure 16-19. Managing security roles
372 | Chapter 16: Repository Manager
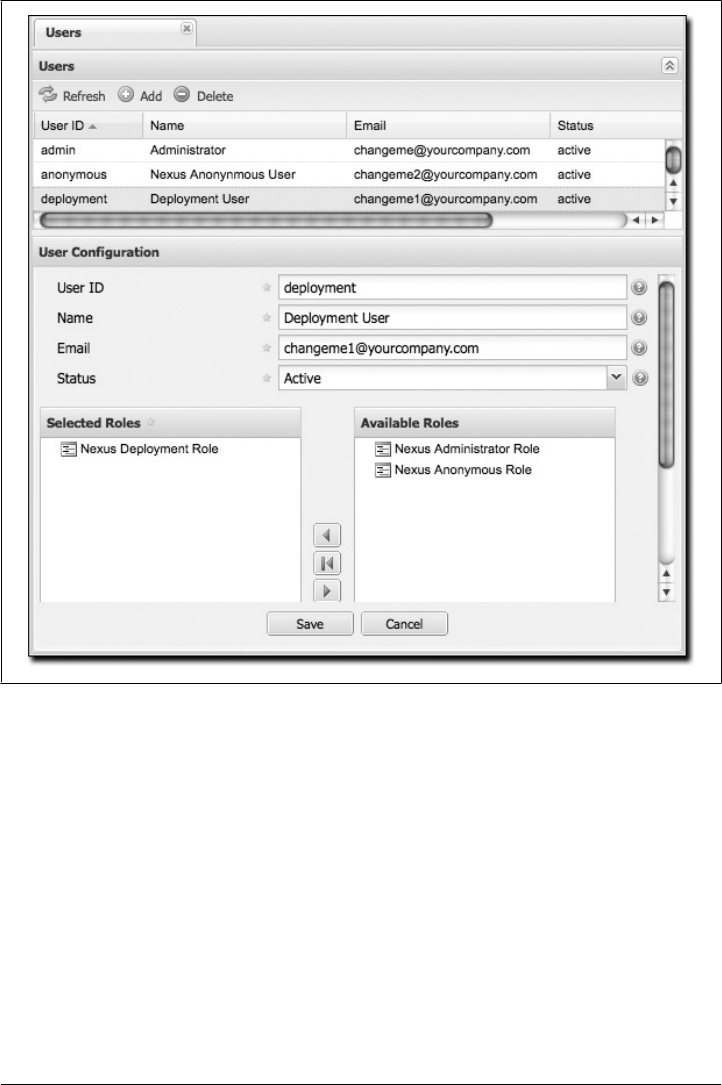
restart Nexus. Once you do this, you should see a log statement in ${NEXUS_HOME}/
logs/wrapper.log telling you that Nexus is listening on the altered port.
Example 16-3. Contents of ${NEXUS_HOME}/conf/plexus.properties
applicationPort=8081
runtime=${basedir}/runtime
apps=${runtime}/apps
work=${runtime}/work
webapp=${runtime}/apps/nexus/webapp
nexus.configuration=${runtime}/apps/nexus/conf/nexus.xml
Figure 16-20. Managing users
Configuring Nexus | 373
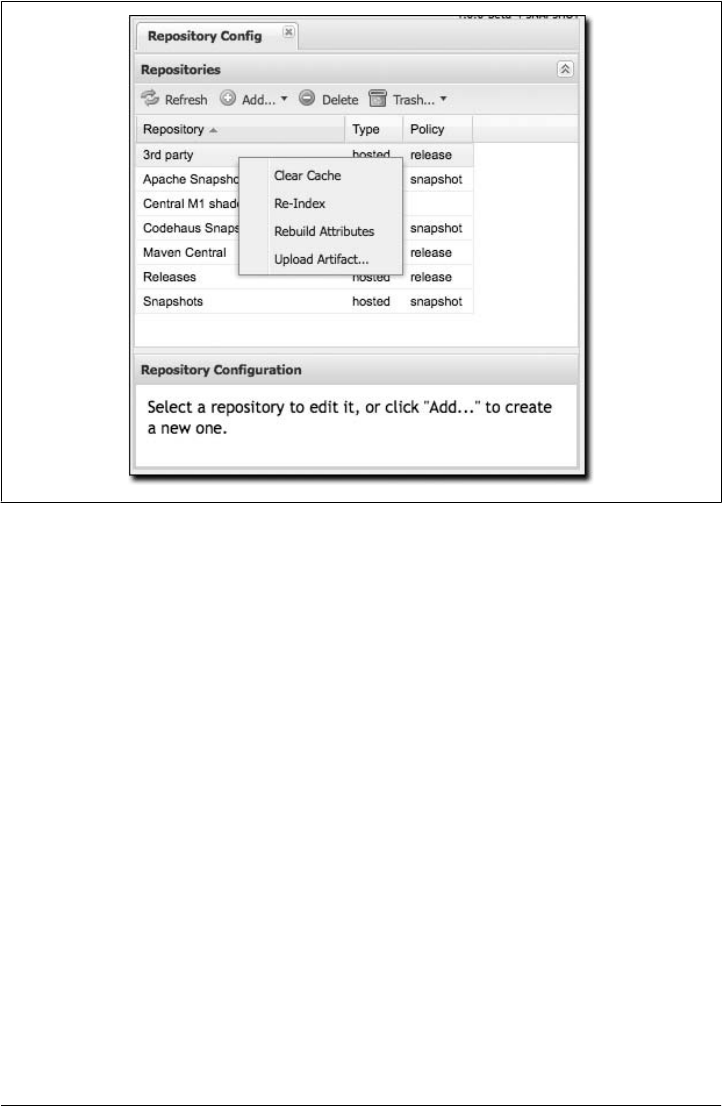
Maintaining Repositories
Once you’ve set up a series of repositories and grouped those repositories into Nexus
groups, users will be able to see a list of repositories in the Nexus UI by clicking on the
Repositories link in the lefthand navigation menu in the Maintenance section. This will
bring up a list of repositories. This list will show you the status of the remote repository.
To test this, edit one of your repositories to have a garbage remote storage location
URL; you will then notice that the status of this repository will change on the Manage
Repositories screen. Clicking on a repository will bring up a tree view that provides
users with a way to navigate through the contents of a repository.
Right-clicking on a repository will bring up a series of actions that can be applied to a
repository. The available actions for each repository are as follows (some are shown in
Figure 16-21):
Clear Cache
Clears the cache for the repository. This causes Nexus to check the remote repo-
sitory for new updates or snapshots. It also resets the Not Found Cache.
Re-Index
Causes Maven to re-index a repository. Nexus will recreate the index it uses to
search for a request artifact. If the repository has been configured to download the
remote index, this option will cause Nexus to download the remote index from
Figure 16-21. Repository options (right-click on a repository)
374 | Chapter 16: Repository Manager

the remote repository. Note that if you have enabled the remote index download,
the remote index may take some time to download from the remote repository.
You will know that the remote repository has been updated for a large remote
repository, such as the central Maven repository, when the artifact search results
start showing artifacts that haven’t been cached or requested.
Rebuild Attributes
Rebuilds the attributes for a given repository. This will cause Nexus to go through
the entire repository and process every file, updating attributes such as checksums.
Upload Artifact...
(Only visible for hosted repositories.) You can use this option to upload an artifact
to a hosted repository.
Put Out of Service
In the Browse Repositories view, you have the option of putting a repository “out
of service.” When a hosted repository is put out of service, no artifacts can be served
from that repository.
Block Proxy
In the Browse Repositories view, you have the option of blocking a proxy for a
proxy repository. Blocking a proxy repository has the side effect of cutting com-
munication between Nexus and the remote repository. Although this is a rather
blunt instrument for controlling the contents of a repository, you can use this
feature to make certain that no new artifacts are downloaded from a remote
repository.
Uploading Artifacts to Hosted Repositories
If you are using Nexus hosted repositories, the best way to deploy an artifact is to use
the procedure details covered in the upcoming section “Deploying Artifacts to
Nexus.” But there may be times when you just need to upload an artifact to Nexus
manually for a number of reasons. One frequent reason for uploading an artifact man-
ually is that a vendor or proprietary software vendor has left you with a single JAR file
for something like a commercial database and they haven’t bothered to publish this
driver’s JAR file in a public Maven repository. In this case, you’ll want to upload a JAR
artifact and supply the Maven coordinates so that Nexus can serve it from your third-
party hosted repository just like any other artifact.
To upload an artifact, select the repository in either the Browse Repositories list or the
list that is displayed when clicking on Repositories in the Administration menu. Right-
click on a hosted repository, and select Upload Artifact.... You should then see the
Artifact Upload form shown in Figure 16-22.
When you upload an artifact, you must choose a file to upload, and then you must
either supply a POM file or populate the Maven coordinates by selecting Attributes. If
you upload a JAR file such as test.jar, and then you supply a group ID, artifact ID,
version, and packaging of org.test, test, 1.0, and jar, Nexus will upload the file to
Maintaining Repositories | 375
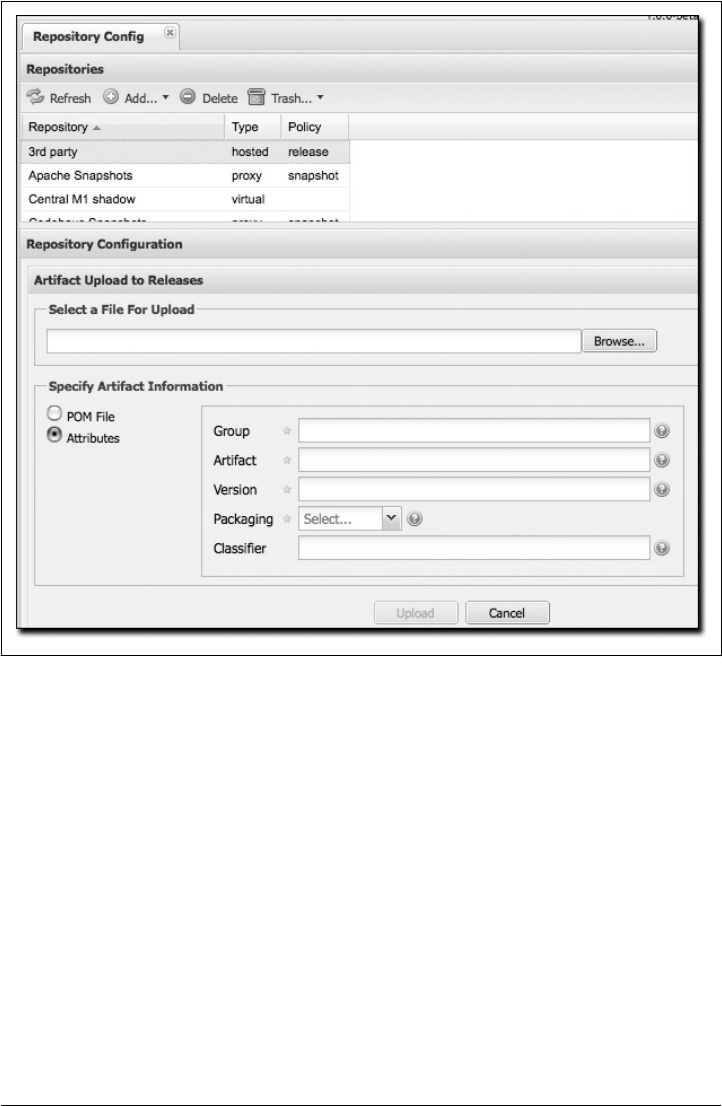
the appropriate directory and create a POM and a few checksums for the artifact. If
you choose to upload a pom.xml, Nexus will use the group ID, artifact ID, version, and
packaging of the upload POM to find the appropriate location for your manually up-
loaded artifact.
Deploying Artifacts to Nexus
Different organizations have different reasons for deploying artifacts to an internal re-
pository. In large organizations with hundreds (or thousands) of developers, an internal
Maven repository can be an efficient way for different departments to share releases
and development snapshots with one another. Most organizations that use Maven will
eventually want to start deploying both releases and artifacts to a shared, internal re-
pository. Using Nexus, it is easy to deploy artifacts to Nexus hosted repositories.
Figure 16-22. Manual upload of an artifact to a hosted repository
376 | Chapter 16: Repository Manager

To deploy artifacts to Nexus, supply the repository URL in distributionManagement
and run mvn deploy. Maven will push project POMs and artifacts to your Nexus in-
stallation with a simple HTTP PUT. No extra wagon extension is needed in your
project’s POM. Nexus works with Maven’s built-in wagon-http-lightweight.
Configuring Deployment Security
Nexus ships with a deployment user that has a default password of deployment123. For
this chapter, we’ll assume that you are using the default deployment password. To
configure Maven to deploy to Nexus, add the following server elements to your ~/.m2/
settings.xml file:
<settings>
...
<servers>
<server>
<id>releases</id>
<username>deployment</username>
<password>deployment123</password>
</server>
<server>
<id>snapshots</id>
<username>deployment</username>
<password>deployment123</password>
</server>
<server>
<id>thirdparty</id>
<username>deployment</username>
<password>deployment123</password>
</server>
</servers>
...
</settings>
You supply security credentials in your own Maven settings file in the form of a server
name, a username, and a password. When you attempt to deploy to a server with an
identifier of releases or snapshots, Maven will consult your settings.xml to find these
credentials.
Deploying Releases
To deploy a release artifact to Nexus, you need to configure a repository in the dis
tributionManagement section of your project’s POM. Example 16-4 shows an example
of a release deployment repository that is configured to point to the releases repository
at http://localhost:8081/nexus/content/repositories/releases. This is one of the default
hosted repositories that comes configured in Nexus.
Deploying Artifacts to Nexus | 377

Example 16-4. Configuring release repository for deployment
<project>
...
<distributionManagement>
...
<repository>
<id>releases</id>
<name>Internal Releases</name>
<url>http://localhost:8081/nexus/content/repositories/releases</url>
</repository>
...
</distributionManagement>
...
</project>
You would replace localhost:8081 with the host and port of your Nexus installation.
Once your project has this configuration, you can deploy an artifact by executing mvn
deploy:
$ mvn deploy
[INFO] Scanning for projects...
[INFO] Reactor build order:
[INFO] Sample Project
[INFO] ------------------------------------------------------------------
[INFO] Building Sample Project
[INFO] task-segment: [deploy]
[INFO] ------------------------------------------------------------------
[INFO] [site:attach-descriptor]
[INFO] [install:install]
[INFO] Installing ~/svnw/sample/pom.xml to ~/.m2/repository/sample/sample\
/1.0/sample-1.0.pom
[INFO] [deploy:deploy]
altDeploymentRepository = null
[INFO] Retrieving previous build number from snapshots
Uploading: http://localhost:8081/nexus/content/repositories/releases/\
sample/sample/1.0/sample-1.0.pom
24K uploaded
Note that Nexus can support multiple hosted repositories; you don’t need to stick with
the default releases and snapshots repositories. You can create different hosted repo-
sitories for different departments and then combine multiple repositories into a single
Nexus group.
Deploying Snapshots
To deploy a snapshot artifact to Nexus, you need to configure a snapshotRepository in
the distributionManagement section of your project’s POM. Example 16-5 shows an
example of a snapshot deployment repository that is configured to point to the snap-
shots repository at http://localhost:8081/nexus/content/repositories/snapshots.
378 | Chapter 16: Repository Manager

Example 16-5. Configuring snapshot repository for deployment
<project>
...
<distributionManagement>
...
<snapshotRepository>
<id>snapshots</id>
<name>Internal Snapshots</name>
<url>http://localhost:8081/nexus/content/repositories/snapshots</url>
</snapshotRepository>
...
</distributionManagement>
...
</project>
You would replace localhost:8081 with the host and port of your Nexus installation.
Once your project has this configuration, you can deploy an artifact by executing mvn
deploy. Maven will deploy to the snapshotRepository if your project has a snapshot
version (i.e., 1.0-SNAPSHOT):
$ mvn deploy
[INFO] Scanning for projects...
[INFO] Reactor build order:
[INFO] Sample Project
[INFO] ------------------------------------------------------------------------
[INFO] Building Sample Project
[INFO] task-segment: [deploy]
[INFO] ------------------------------------------------------------------------
[INFO] [site:attach-descriptor]
[INFO] [install:install]
[INFO] Installing ~/svnw/sample/pom.xml to ~/.m2/repository/sample/sample\
/1.0-SNAPSHOT/sample-1.0-20080402.125302.pom
[INFO] [deploy:deploy]
altDeploymentRepository = null
[INFO] Retrieving previous build number from snapshots
Uploading: http://localhost:8081/nexus/content/repositories/releases/\
sample/sample/1.0-SNAPSHOT/sample-1.0-20080402.125302.pom
24K uploaded
Deploying Third-Party Artifacts
Your Maven projects may start depending on artifacts that are not available from the
central Maven repository or any other public Maven repository. This can happen for a
number of reasons; perhaps the artifact in question is a JDBC driver for a proprietary
database such as Oracle, or perhaps you are depending on another JAR that is neither
open source nor freely available. In these cases, you will have to get your hands on the
artifact in question and publish it to your own repository. Nexus provides a hosted
“third-party” repository for just this purpose.
To illustrate the process of publishing an artifact to the third-party repository, we will
use a real artifact: the Oracle JDBC drivers. Oracle publishes a widely used commercial
Deploying Artifacts to Nexus | 379

database product that has a JDBC driver that is not present in the central Maven re-
pository. Although the central Maven repository maintains some POM information for
the Oracle JDBC driver at http://repo1.maven.org/maven2/com/oracle/ojdbc14/10.2.0.3
.0/, there is only a POM that references the Oracle site. Let’s say you add the dependency
shown in Example 16-6 to your project.
Example 16-6. Oracle JDBC JAR dependency
<project>
...
<dependencies>
...
<dependency>
<groupId>com.oracle</groupId>
<artifactId>ojdbc14</artifactId>
<version>10.2.0.3.0</version>
</dependency>
...
</dependencies>
...
</project>
Running a Maven build with this dependency will produce the following output:
$ mvn install
...
[INFO] ----------------------------------------------------------------------
[ERROR] BUILD ERROR
[INFO] ----------------------------------------------------------------------
[INFO] Failed to resolve artifact.
Missing:
----------
1) com.oracle:ojdbc14:jar:10.2.0.3.0
Try downloading the file manually from:
http://www.oracle.com/technology/software/tech/java/sqlj_jdbc/index.html
Then, install it using the command:
mvn install:install-file -DgroupId=com.oracle -DartifactId=ojdbc14 \
-Dversion=10.2.0.3.0 -Dpackaging=jar -Dfile=/path/to/file
Alternatively, if you host your own repository you can deploy the file there:
mvn deploy:deploy-file -DgroupId=com.oracle -DartifactId=ojdbc14 \
-Dversion=10.2.0.3.0 -Dpackaging=jar -Dfile=/path/to/file \
-Durl=[url] -DrepositoryId=[id]
Path to dependency:
1) sample:sample:jar:1.0-SNAPSHOT
2) com.oracle:ojdbc14:jar:10.2.0.3.0
----------
1 required artifact is missing.
380 | Chapter 16: Repository Manager

The Maven build fails because it can’t find the Oracle JDBC driver in the Maven repo-
sitory. To remedy this situation, you need to publish the Oracle JDBC artifact to your
Nexus third-party repository. To do so, download the Oracle JDBC driver from http:
//www.oracle.com/technology/software/tech/java/sqlj_jdbc/index.html and save it to the
file ojdbc.jar.
Once you have downloaded the file for this third-party asset, we recommend that you
use the UI-based upload that was shown in the section “Uploading Artifacts to Hosted
Repositories,” earlier in this chapter. Uploading via the UI is easier and less error-prone
than calling the deploy:deploy-file goal from the command line. If you prefer to upload
this third-party from the command line, execute the following command:
$ mvn deploy:deploy-file -DgroupId=com.oracle -DartifactId=ojdbc14 \
> -Dversion=10.2.0.3.0 -Dpackaging=jar -Dfile=ojdbc.jar \
> -Durl=http://localhost:8081/nexus/content/repositories/thirdparty \
> -DrepositoryId=thirdparty
...
[INFO] [deploy:deploy-file]
Uploading: http://localhost:8081/nexus/content/repositories/thirdparty/\
com/oracle/ojdbc14/10.2.0.3.0/ojdbc14-10.2.0.3.0.jar
330K uploaded
[INFO] Retrieving previous metadata from thirdparty
[INFO] Uploading repository metadata for: 'artifact com.oracle:ojdbc14'
[INFO] Retrieving previous metadata from thirdparty
[INFO] Uploading project information for ojdbc14 10.2.0.3.0
After you run mvn deploy:deploy-file, this artifact will be published to the third-party
repository in Nexus.
Deploying Artifacts to Nexus | 381

CHAPTER 17
Writing Plugins
Introduction
Although this chapter covers an advanced topic, don’t let the idea of writing a Maven
plugin intimidate you. For all of the theory and complexity of this tool, the fundamental
concepts are easy to understand and the mechanics of writing a plugin are
straightforward. After you read this chapter, you will have a better grasp of what is
involved in creating a Maven plugin.
Programming Maven
Most of this book has dealt with using Maven, though you haven’t yet seen many code
examples dealing with Maven customization. In fact, you haven’t seen any. This is by
design, since 99 out of 100 Maven users will never need to write a custom plugin to
customize Maven. There is an abundance of configurable plugins, and unless your
project has particularly unique requirements, you will have to work to find a reason to
write a new plugin. And a very small percentage of people who end up writing custom
plugins will ever need to crack open the source code for Maven and customize a core
Maven component. If you really needed to customize the behavior of Maven, you would
then write a plugin. Modifying the core Maven code is as far out of scope for most
developers as modifying the TCP/IP stack on an operating system; it is that abstract for
most Maven users.
On the other hand, if you are going to start writing a custom plugin, you will have to
learn a bit about the internals of Maven: How does it manage software components?
What does a plugin do? How can I customize the lifecycle? This section answers some
of those questions and introduces a few concepts at the core of Maven’s design. Learn-
ing how to write a custom Maven plugin is the gateway to customizing Maven itself. If
you were wondering how to begin understanding the code behind Maven, you’ve found
the proper starting place.
383

What Is Inversion of Control?
At the heart of Maven is an Inversion of Control (IoC) container called Plexus. What
does it do? It is a system for managing and relating components. Although Martin
Fowler wrote a canonical essay about IoC, the concept and term have been so heavily
overloaded in the past few years that it is tough to find a good definition of the concept
that isn’t a self-reference (or just a lazy reference to the aforementioned essay). Instead
of resorting to a Wikipedia quote, we’ll summarize Inversion of Control and Depend-
ency Injection (DI) with an analogy.
Suppose you have a series of components that need to be wired together. When you
think about components, think stereo components, not software components. Imagine
several stereo components hooked up to a PlayStation 3 and a TiVo that have to inter-
face with an Apple TV box as well as a 50” flat panel LCD TV. You bring everything
home from the electronics store, and you purchase a series of cables that you will use
to connect it all. You unpack all of these components, put them in their right places,
and then get to the job of hooking up 50,000 coaxial cables and stereo jacks to 50,000
digital inputs and network cables. Step back from your home entertainment center and
turn on the TV; you’ve just performed Dependency Injection, and you’ve just been
using an IoC container.
So, what does that have to do with anything? Your PlayStation 3 and a Java bean both
provide an interface. The PlayStation 3 has two inputs—power and network—and one
output to the TV. Your Java bean has three properties: power, network, and tvOutput.
When you open the box of your PlayStation 3, it doesn’t provide you with detailed
pictures and instructions for how to connect it to every different kind of TV that might
be in every different kind of house, and when you look at your Java bean, it just provides
a set of properties, not an explicit recipe for creating and managing an entire system of
components. In an IoC container such as Plexus, you are responsible for declaring the
relationships between a set of components that simply provide an interface of inputs
and outputs. You don’t instantiate objects; Plexus does. Your application’s code isn’t
responsible for managing the state of components; Plexus is. Although it sounds cheesy,
when you start up Maven, it starts Plexus and manages a system of related components
just like your stereo system does.
What are the advantages of using an IoC container? Well, what is the advantage of
buying discrete stereo components? If one component breaks, you can drop in a re-
placement for your PlayStation 3 without having to spend $20,000 on the entire system.
If you are unhappy with your TV, you can swap it out without affecting your CD player.
Most important to you, your stereo components cost less and are more capable and
reliable because manufacturers can build to a set of known inputs and outputs and can
focus on building individual components. IoC containers and DI encourage disaggre-
gation and the emergence of standards. The software industry likes to imagine itself as
the font of all new ideas, but DI and IoC are really just new terms for the concepts of
disaggregation and interchangeable machinery. If you really want to know about DI
384 | Chapter 17: Writing Plugins

and IoC, learn about the Model T, the cotton gin, and the emergence of a railroad
standard in the late 19th century.
Introduction to Plexus
The most important feature of an IoC container implemented in Java is the mechanism
of Dependency Injection. The basic idea of IoC is that the control of creating and man-
aging objects is removed from the code itself and placed into the power of an IoC
framework. Using DI in an application that has been programmed to interfaces, you
can create components that are not bound to specific implementations of these inter-
faces. Instead, you program to interfaces and then configure Plexus to connect the
appropriate implementation to the appropriate component. While your code deals with
interfaces, you can capture the dependencies between classes and components in an
XML file that defines components, implementation classes, and the relationships be-
tween your components. In other words, you can write isolated components, and then
you can wire them together using an XML file that defines how the components are
wired together. In the case of Plexus, system components are defined with an XML
document that is found in META-INF/plexus/components.xml.
In a Java IoC container, several methods exist for injecting dependencies values into a
component object: constructor, setter, or field injections. Although Plexus is capable
of all three Dependency Injection techniques, Maven uses only two types—field and
setter injection:
Constructor Injection
Constructor Injection is populating an object’s values through its constructor when
an instance of the object is created. For example, if you had an object of type
Person that had the constructor Person(String name, Job job), you could pass in
values for both name and job via this constructor.
Setter Injection
Setter Injection is using the setter method of a property on a Java bean to populate
object dependencies. For example, if you were working with a Person object with
the properties name and job, an IoC container that uses Setter Injection would create
an instance of Person using a no-arg constructor. Once it had an instance of
Person, it would proceed to call the setName() and setJob() methods.
Field Injection
Both Constructor and Setter Injection rely on a call to a public method. Using Field
Injection, an IoC container populates a component’s dependencies by setting an
object’s fields directly. For example, if you were working with a Person object that
had two fields name and job, your IoC container would populate these dependencies
by setting these fields directly (i.e., person.name = "Thomas"; person.job = job;).
Programming Maven | 385
Why Plexus?
Spring happens to be the most popular IoC container at the moment, and there’s a
good argument to be made that it has affected the Java “ecosystem” for the better,
forcing companies such as Sun Microsystems to yield more control to the open source
community and helping open up standards by providing a pluggable, component-ori-
ented “bus.” But Spring isn’t the only IoC container in open source. There are many
IoC containers (such as PicoContainer; see http://www.picocontainer.org/).
Years and years ago, when Maven was created, Spring wasn’t a mature option. The
initial team of committers on Maven were more familiar with Plexus because they had
invented it, so they decided to use it as an IoC container. Although it might not be as
popular as the Spring Framework, it is no less capable. And the fact that it was created
by the same person who created Maven makes it a perfect fit. After reading this chapter,
you will have an idea of how Plexus works. If you already use an IoC container, you’ll
notice similarities and differences between Plexus and the container you currently use.
Just because Maven is based on Plexus doesn’t mean that the Maven
community is “anti-Spring” (we’ve included a whole chapter with a
Spring example in this book; portions of the Spring project are moving
to Maven as a build platform). We get the question “Why didn’t you
use Spring?” often enough that it makes sense for us to address it here.
We know—Spring is a rock star, we don’t deny it, but it is on our con-
tinual to-do list to introduce people to (and document) Plexus. Choice
in the software industry is always a good thing.
What Is a Plugin?
A Maven plugin is a Maven artifact that contains a Plugin descriptor and one or more
Mojos. A Mojo can be thought of as a goal in Maven, and every goal corresponds to a
Mojo. The compiler:compile goal corresponds to the CompilerMojo class in the Maven
Compiler plugin, and the jar:jar goal corresponds to the JarMojo class in the Maven
Jar plugin. When you write your own plugin, you are simply grouping together a set
of related Mojos (or goals) in a single plugin artifact.
Mojo? What is a Mojo? The word mojo is defined as “a magic charm or
spell,” “an amulet, often in a small flannel bag containing one or more
magic items,” and “personal magnetism; charm.”* Maven uses the term
Mojo because it is a play on the word Pojo (Plain-Old Java Object).
A Mojo is much more than just a goal in Maven; it is a component managed by Plexus
that can include references to other Plexus components.
*The American Heritage Dictionary of the English Language
386 | Chapter 17: Writing Plugins

Plugin Descriptor
A Maven plugin contains a road map for Maven that tells Maven about the various
Mojos and plugin configurations. This plugin descriptor is present in the plugin JAR
file in META-INF/maven/plugin.xml. When Maven loads a plugin, it reads this XML
file, and instantiates and configures plugin objects to make the Mojos contained in a
plugin available to Maven.
When you are writing custom Maven plugins, you will almost never need to think about
writing a plugin descriptor. In Chapter 10, the lifecycle goals bound to the maven-plu
gin packaging type show that the plugin:descriptor goal is bound to the generate-
resources phase. This goal generates a plugin descriptor off the annotations present in
a plugin’s source code. Later in this chapter, you will see how Mojos are annotated,
and you will also see how the values in these annotations end up in the META-INF/
maven/plugin.xml file.
Example 17-1 shows a plugin descriptor for the Maven Zip plugin. This plugin is a
contrived plugin that simply zips up the output directory and produces an archive.
Normally, you wouldn’t need to write a custom plugin to create an archive from Maven;
you could simply use the Maven Assembly plugin that is capable of producing a dis-
tribution archive in multiple formats. Read through the plugin descriptor in this ex-
ample to get an idea of the content it contains.
Example 17-1. Plugin descriptor
<plugin>
<description></description>
<groupId>com.training.plugins</groupId>
<artifactId>maven-zip-plugin</artifactId>
<version>1-SNAPSHOT</version>
<goalPrefix>zip</goalPrefix>
<isolatedRealm>false</isolatedRealm>
<inheritedByDefault>true</inheritedByDefault>
<mojos>
<mojo>
<goal>zip</goal>
<description>Zips up the output directory.</description>
<requiresDirectInvocation>false</requiresDirectInvocation>
<requiresProject>true</requiresProject>
<requiresReports>false</requiresReports>
<aggregator>false</aggregator>
<requiresOnline>false</requiresOnline>
<inheritedByDefault>true</inheritedByDefault>
<phase>package</phase>
<implementation>com.training.plugins.ZipMojo</implementation>
<language>java</language>
<instantiationStrategy>per-lookup</instantiationStrategy>
<executionStrategy>once-per-session</executionStrategy>
<parameters>
<parameter>
<name>baseDirectory</name>
Plugin Descriptor | 387

<type>java.io.File</type>
<required>false</required>
<editable>true</editable>
<description>Base directory of the project.</description>
</parameter>
<parameter>
<name>buildDirectory</name>
<type>java.io.File</type>
<required>false</required>
<editable>true</editable>
<description>Directory containing the build files.</description>
</parameter>
</parameters>
<configuration>
<buildDirectory implementation="java.io.File">
${project.build.directory}</buildDirectory>
<baseDirectory implementation="java.io.File">
${basedir}</baseDirectory>
</configuration>
<requirements>
<requirement>
<role>org.codehaus.plexus.archiver.Archiver</role>
<role-hint>zip</role-hint>
<field-name>zipArchiver</field-name>
</requirement>
</requirements>
</mojo>
</mojos>
<dependencies>
<groupId>org.apache.commons</groupId>
<artifactId>commons-io</artifactId>
<version>1.3.2</version>
</dependencies>
</plugin>
A plugin descriptor has three parts: the top-level configuration of the plugin that con-
tains elements such as groupId and artifactId, the declaration of Mojos, and the dec-
laration of dependencies. Let’s examine each of these sections in more detail.
Top-Level Plugin Descriptor Elements
The top-level configuration values in the plugin element are:
description
This element contains a short description of the plugin. In the case of the Zip
plugin, this description is empty.
groupId, artifactId, version
Just like everything else in Maven, a plugin needs to have a unique coordinate. The
groupId, artifactId, and version are used to locate the plugin artifact in a Maven
repository.
388 | Chapter 17: Writing Plugins

goalPrefix
This element controls the prefix used to reference goals in a particular plugin. If
you were to look at the Compiler plugin’s descriptor, you would see that
goalPrefix has a value of compile, and if you look at the descriptor for the Jar
plugin, it would have a goalPrefix of jar. It is important that you choose a distinct
goal prefix for your custom plugin.
isolatedRealm (deprecated)
This is a legacy property that is no longer used by Maven. It is still present in the
system to provide for backward compatibility with older plugins. Earlier versions
of Maven provided a mechanism to load a plugin’s dependencies in an isolated
ClassLoader. Maven makes extensive use of a project called ClassWorlds (http://
classworlds.codehaus.org/) from the Codehaus community to create hierarchies of
ClassLoader objects that are modeled by a ClassRealm object. Feel free to ignore
this property and always set it to false.
inheritedByDefault
If inheritedByDefault is set to true, any Mojo in this plugin that is configured in a
parent project will be configured in a child project. If you configure a Mojo to
execute during a specific phase in a parent project, and the plugin has
inheritedByDefault set to true, this execution will be inherited by the child project.
If inheritedByDefault is not set to true, a goal execution defined in a parent project
will not be inherited by a child project.
Mojo Configuration
Next is the declaration of each Mojo. The plugin element contains an element named
mojos that contains a mojo element for each Mojo present in the plugin. Each mojo
element contains the following configuration elements:
goal
This is the name of the goal. If you were running the compiler:compile goal, then
compiler would be the plugin’s goalPrefix and compile would be the name of the
goal.
description
This contains a short description of the goal to display to the users when they use
the Help plugin to generate plugin documentation.
requiresDirectInvocation
If you set this to true, the goal can be executed only if it is explicitly executed from
the command line by the user. If someone tries to bind this goal to a lifecycle phase
in a POM, Maven will print an error message. The default for this element is false.
requiresProject
This specifies that a given goal cannot be executed outside of a project. The goal
requires a project with a POM. The default value for this requiresProject is true.
Plugin Descriptor | 389

requiresReports
If you were creating a plugin that relies on the presence of reports, you would need
to set requiresReports to true. For example, if you were writing a plugin to aggre-
gate information from a number of reports, you would set requiresReports to
true. The default for this element is false.
aggregator
A Mojo descriptor with aggregator set to true is supposed to run only once during
the execution of Maven. It was created to give plugin developers the ability to
summarize the output of a series of builds; for example, to create a plugin that
summarizes a report across all projects included in a build. A goal with
aggregator set to true should be run against only the top-level project in a Maven
build. The default value of aggregator is false. aggregator is slated for deprecation
in a future release of Maven.
requiresOnline
This specifies that a given goal cannot be executed if Maven is running in offline
mode (e.g., the -o command-line option). If a goal depends on a network resource,
you would specify a value of true for this element and Maven would print an error
if the goal were executed in offline mode. The default for requiresOnline is false.
inheritedByDefault
If inheritedByDefault is set to true, a Mojo that is configured in a parent project
will be configured in a child project. If you configure a Mojo to execute during a
specific phase in a parent project and the Mojo descriptor has
inheritedByDefault set to true, this execution will be inherited by the child project.
If inheritedByDefault is not set to true, then a goal execution defined in a parent
project will not be inherited by a child project.
phase
If you don’t bind this goal to a specific phase, this element defines the default phase
for this Mojo. If you do not specify a phase element, Maven will require the user
to explicitly specify a phase in a POM.
implementation
This element tells Maven which class to instantiate for this Mojo. This is a Plexus
component property (defined in Plexus ComponentDescriptor).
language
The default language for a Maven Mojo is java. This controls the Plexus
ComponentFactory used to create instances of this Mojo component. This chapter
focuses on writing Maven plugins in Java, but you can also write Maven in a number
of alternative languages such as Groovy, BeanShell, and Ruby. If you were writing
a plugin in one of these languages, you would use a language element value other
than java.
instantiationStrategy
This property is a Plexus component configuration property; it tells Plexus how to
create and manage instances of the component. In Maven, all mojos are going to
390 | Chapter 17: Writing Plugins

be configured with an instantiationStrategy of per-lookup; a new instance of the
component (mojo) is created every time it is retrieved from Plexus.
executionStrategy
The execution strategy tells Maven when and how to execute a Mojo. The valid
values are once-per-session and always. In truth, the valid values can be anything.
This particular property doesn’t do a thing; it is a holdover from an early design of
Maven. This property is slated for deprecation in a future release of Maven.
parameters
This element describes all of the parameters for this Mojo. What is the name of the
parameter? What is the type of parameter? Is it required? Each parameter has the
following elements:
name
This is the name of the parameter (i.e., baseDirectory).
type
This is the type (Java class) of the parameters (i.e., java.io.File).
required
Is the parameter required? If true, the parameter must be nonnull when the
goal is executed.
editable
If a parameter is not editable (if editable is set to false), the value of the
parameter cannot be set in the POM. For example, if the plugin descriptor
defines the value of buildDirectory to be ${basedir} in the descriptor, a
POM cannot override this value to be another value in a POM.
description
This is a short description to use when generating plugin documentation (using
the Help plugin).
configuration
This element provides default values for all of the Mojo’s parameters using Maven
property notation. This example provides a default value for the baseDir Mojo
parameter and the buildDirectory Mojo parameter. In the parameter element, the
implementation specifies the type of the parameter (in this case, java.io.File).
The value in the parameter element contains either a hardcoded default or a Maven
property reference.
requirements
This is where the descriptor gets interesting. A Mojo is a component that is man-
aged by Plexus, and because of this, it has the opportunity to reference other com-
ponents managed by Plexus. This element allows you to define dependencies on
other components in Plexus.
Although you should know how to read a plugin descriptor, you will almost never need
to write one of these descriptor files by hand. Plugin descriptor files are generated
automatically off a set of annotations in the source for a Mojo.
Plugin Descriptor | 391

Plugin Dependencies
Lastly, the plugin descriptor declares a set of dependencies, just like a Maven project.
When Maven uses a plugin, it will download any required dependencies before it at-
tempts to execute a goal from this plugin. In this example, the plugin depends on Jakarta
Commons IO version 1.3.2.
Writing a Custom Plugin
When you write a custom plugin, you are going to be writing a series of Mojos (goals).
Every Mojo is a single Java class that contains a series of annotations that tell Maven
how to generate the plugin descriptor described in the previous section. Before you can
start writing Mojo classes, you will need to create a Maven project with the appropriate
packaging and POM.
Creating a Plugin Project
To create a plugin project, you should use the Maven Archetype plugin. The following
command line will create a plugin with a groupId of org.sonatype.mavenbook.plugins
and an artifactId of first-maven-plugin:
$ mvn archetype:create \
-DgroupId=org.sonatype.mavenbook.plugins \
-DartifactId=first-maven-plugin \
-DarchetypeGroupId=org.apache.maven.archetypes \
-DarchetypeArtifactId=maven-archetype-mojo
The Archetype plugin will create a directory named my-first-plugin, which contains the
POM shown in Example 17-2.
Example 17-2. A plugin project’s POM
<?xml version="1.0" encoding="UTF-8"?><project>
<modelVersion>4.0.0</modelVersion>
<groupId>org.sonatype.mavenbook.plugins</groupId>
<artifactId>first-maven-plugin</artifactId>
<version>1.0-SNAPSHOT</version>
<packaging>maven-plugin</packaging>
<name>first-maven-plugin Maven Mojo</name>
<url>http://maven.apache.org</url>
<dependencies>
<dependency>
<groupId>org.apache.maven</groupId>
<artifactId>maven-plugin-api</artifactId>
<version>2.0</version>
</dependency>
<dependency>
<groupId>junit</groupId>
<artifactId>junit</artifactId>
<version>3.8.1</version>
392 | Chapter 17: Writing Plugins

<scope>test</scope>
</dependency>
</dependencies>
</project>
The most important element in a plugin project’s POM is the packaging element that
has a value of maven-plugin. This packaging element customizes the Maven lifecycle to
include the necessary goals to create a plugin descriptor. The plugin lifecycle was in-
troduced in the section “Maven Plugin” in Chapter 10. It is similar to the JAR lifecycle,
with three exceptions: plugin:descriptor is bound to the generate-resources phase,
plugin:addPluginArtifactMetadata is added to the package phase, and
plugin:updateRegistry is added to the install phase.
The other important piece of a plugin project’s POM is the dependency on the Maven
plugin API. This project depends on version 2.0 of the maven-plugin-api, and it also
adds in JUnit as a test-scoped dependency.
A Simple Java Mojo
In this chapter, we will introduce a Maven Mojo written in Java. Each Mojo in the
project will implement the org.apache.maven.plugin.Mojo interface. The Mojo imple-
mentation shown in the upcoming example implements the Mojo interface by extend-
ing the org.apache.maven.plugin.AbstractMojo class. Before we dive into the code for
this Mojo, let’s take some time to explore the methods on the Mojo interface. Mojo
provides the following methods:
void setLog( org.apache.maven.monitor.logging.Log log )
Every Mojo implementation has to provide a way for the plugin to communicate
the progress of a particular goal. Did the goal succeed? Or was there a problem
during goal execution? When Maven loads and executes a Mojo, it will call the
setLog() method and supply the Mojo instance with a suitable logging destination
to be used in your custom plugin.
protected Log getLog()
Maven will call setLog() before your Mojo is executed, and your Mojo can retrieve
the logging object by calling getLog(). Instead of printing out status to standard
output or the console, your Mojo is going to invoke methods on the Log object.
void execute() throws org.apache.maven.plugin.MojoExecutionException
This method is called by Maven when it is time to execute your goal.
The Mojo interface is concerned with two things: logging the results of goal execution
and executing a goal. When you are writing a custom plugin, you’ll be extending
AbstractMojo. AbstractMojo takes care of handling the setLog() and getLog()
implementations and contains an abstract execute() method. When you extend
AbstractMojo, all you need to do is implement the execute() method. Example 17-3
shows a trivial Mojo implement that simply prints out a message to the console.
Writing a Custom Plugin | 393

Example 17-3. A simple EchoMojo
package org.sonatype.mavenbook.plugins;
import org.apache.maven.plugin.AbstractMojo;
import org.apache.maven.plugin.MojoExecutionException;
import org.apache.maven.plugin.MojoFailureException;
/**
* Echos an object string to the output screen.
* @goal echo
* @requiresProject false
*/
public class EchoMojo extends AbstractMojo
{
/**
* Any Object to print out.
* @parameter expression="${echo.message}" default-value="Hello Maven World..."
*/
private Object message;
public void execute()
throws MojoExecutionException, MojoFailureException
{
getLog().info( message.toString() );
}
}
If you create this Mojo in ${basedir} under src/main/java in org/sonatype/mavenbook/
mojo/EchoMojo.java in the project created in the previous section and run mvn in-
stall, you should be able to invoke this goal directly from the command line with:
$ mvn org.sonatype.mavenbook.plugins:first-maven-plugin:1.0-SNAPSHOT:echo
That large command is mvn followed by the groupId:artifactId:version:goal. When
you run this command, you should see output that contains the output of the echo goal
with the default message: “Hello Maven World....” If you want to customize the mes-
sage, you can pass the value of the message parameter with the following command:
$ mvn org.sonatype.mavenbook.plugins:first-maven-plugin:1.0-SNAPSHOT:echo \
-Decho.message="The Eagle has Landed"
This command will execute the EchoMojo and print out the message “The Eagle has
Landed”.
Configuring a Plugin Prefix
Specifying the groupId, artifactId, version, and goal on the command line is cumber-
some. To address this, Maven assigns a plugin a prefix. Instead of typing:
$ mvn org.apache.maven.plugins:maven-jar-plugin:2.2:jar
You can use the plugin prefix jar and turn the command into mvn jar:jar. How does
Maven resolve something like jar:jar to org.apache.mven.plugins:maven-jar:2.3?
394 | Chapter 17: Writing Plugins

Maven looks at a file in the Maven repository to obtain a list of plugins for a specific
groupId. By default, Maven is configured to look for plugins in two groups:
org.apache.maven.plugins and org.codehaus.mojo. When you specify a new plugin
prefix such as mvn hibernate3:hbm2ddl, Maven will scan the repository metadata for
the appropriate plugin prefix. First, Maven will scan the org.apache.maven.plugins
group for the plugin prefix hibernate3. If it doesn’t find the plugin prefix hibernate3
in the org.apache.maven.plugins group, it will scan the metadata for the org.code
haus.mojo group.
When Maven scans the metadata for a particular groupId, it is retrieving an XML file
from the Maven repository that captures metadata about the artifacts contained in a
group. This XML file is specific for each repository referenced; if you are not using a
custom Maven repository, you will be able to see the Maven metadata for the
org.apache.maven.plugins group in your local Maven repository (~/.m2/repository) un-
der org/apache/maven/plugins/maven-metadata-central.xml. Example 17-4 shows a
snippet of the maven-metadata-central.xml file from the org.apache.maven.plugin
group.
Example 17-4. Maven metadata for the Maven plugin group
<?xml version="1.0" encoding="UTF-8"?>
<metadata>
<plugins>
<plugin>
<name>Maven Clean Plugin</name>
<prefix>clean</prefix>
<artifactId>maven-clean-plugin</artifactId>
</plugin>
<plugin>
<name>Maven Compiler Plugin</name>
<prefix>compiler</prefix>
<artifactId>maven-compiler-plugin</artifactId>
</plugin>
<plugin>
<name>Maven Surefire Plugin</name>
<prefix>surefire</prefix>
<artifactId>maven-surefire-plugin</artifactId>
</plugin>
...
</plugins>
</metadata>
As you can see in this example, this maven-metadata-central.xml file in your local re-
pository is what makes it possible for you to execute mvn surefire:test. Maven scans
org.apache.maven.plugins and org.codehaus.mojo. Plugins from org.apache.maven.plu
gins are considered core Maven plugins, and plugins from org.codehaus.mojo are
considered extra plugins. The Apache Maven project manages the
org.apache.maven.plugins group, and a separate independent open source community
manages the Codehaus Mojo project. If you would like to start publishing plugins to
your own groupId, and you would like Maven to automatically scan your own
Writing a Custom Plugin | 395

groupId for plugin prefixes, you can customize the groups that Maven scans for plugins
in your Maven settings.
If you want to be able to run the first-maven-plugin’s echo goal by running
first:echo, add the org.sonatype.mavenbook.plugins groupId to your ~/.m2/set
tings.xml, as shown in Example 17-5. This will prepend the org.sonatype.maven
book.plugins to the list of groups that Maven scans for Maven plugins.
Example 17-5. Customizing the plugin groups in Maven settings
<settings>
...
<pluginGroups>
<pluginGroup>org.sonatype.mavenbook.plugins</pluginGroup>
</pluginGroups>
</settings>
You can now run mvn first:echo from any directory and see that Maven will properly
resolve the goal prefix to the appropriate plugin identifiers. This works because the
project adheres to a naming convention for Maven plugins. If your plugin project has
an artifactId that follows the pattern maven-first-plugin or first-maven-plugin,
Maven will automatically assign a plugin goal prefix of first to your plugin. In other
words, when the Maven Plugin plugin is generating the plugin descriptor for your
plugin and you have not explicitly set the goalPrefix in your project, the plu
gin:descriptor goal will extract the prefix from your plugin’s artifactId when it
matches one of the following patterns:
•${prefix}-maven-plugin
•maven-${prefix}-plugin
If you would like to set an explicit plugin prefix, you’ll need to configure the Maven
Plugin plugin. This is plugin is responsible for building the plugin descriptor and per-
forming plugin-specific tasks during the package and load phases. The Maven Plugin
plugin can be configured just like any other plugin in the build element. To set the
plugin prefix for your plugin, add the build element shown in Example 17-6 to the
first-maven-plugin project’s pom.xml.
Example 17-6. Configuring a plugin prefix
<?xml version="1.0" encoding="UTF-8"?><project>
<modelVersion>4.0.0</modelVersion>
<groupId>org.sonatype.mavenbook.plugins</groupId>
<artifactId>first-maven-plugin</artifactId>
<version>1.0-SNAPSHOT</version>
<packaging>maven-plugin</packaging>
<name>first-maven-plugin Maven Mojo</name>
<url>http://maven.apache.org</url>
<build>
<plugins>
<plugin>
<artifactId>maven-plugin-plugin</artifactId>
396 | Chapter 17: Writing Plugins

<version>2.3</version>
<configuration>
<goalPrefix>blah</goalPrefix>
</configuration>
</plugin>
</plugins>
</build>
<dependencies>
<dependency>
<groupId>org.apache.maven</groupId>
<artifactId>maven-plugin-api</artifactId>
<version>2.0</version>
</dependency>
<dependency>
<groupId>junit</groupId>
<artifactId>junit</artifactId>
<version>3.8.1</version>
<scope>test</scope>
</dependency>
</dependencies>
</project>
This example sets the plugin prefix to blah. If you’ve added the org.sonatype.maven
book.plugins to the pluginGroups in your ~/.m2/settings.xml, you should be able to
execute the EchoMojo by running mvn echo:blah from any directory.
Logging from a Plugin
Maven takes care of connecting your Mojo to a logging provider by calling setLog()
prior to the execution of your Mojo. It supplies an implementation of
org.apache.maven.monitor.logging.Log. This class exposes methods that you can use
to communicate information back to the user. This Log class provides multiple levels
of logging similar to that API provided by Log4J (http://logging.apache.org/). Those
levels are captured by a series of methods available for each level—debug, info, error,
and warn. To save trees, we will list only the methods for a single logging level—debug:
void debug( CharSequence message )
Prints a message to the debug logging level
void debug( CharSequence message, Throwable t )
Prints a message to the debug logging level that includes the stack trace from the
Throwable (either Exception or Error)
void debug( Throwable t )
Prints out the stack trace of the Throwable (either Exception or Error)
Each of the four levels exposes the same three methods. The four logging levels serve
different purposes. The debug level exists for debugging purposes and for people who
want to see a very detailed picture of the execution of a Mojo. You should use the debug
logging level to provide as much detail on the execution of a Mojo, but you should
never assume that a user is going to see the debug level. The info level is for general
Writing a Custom Plugin | 397

informational messages that should be printed as a normal course of operation. If you’re
building a plugin that compiles code using a compiler, you might want to print the
output of the compiler to the screen.
The warn logging level is used for messages about unexpected events and errors that
your Mojo can cope with. If you are trying to run a plugin that compiles Ruby source
code and there is no Ruby source code available, you might want to just print a warning
message and move on. Warnings are not fatal, but errors are usually build-stopping
conditions. For the completely unexpected error condition, there is the error logging
level. You would use error if you couldn’t continue executing a Mojo. If you are writing
a Mojo to compile some Java code and the compiler isn’t available, you’d print a mes-
sage to the error level and possibly pass along an exception that Maven can print out
for the user. You should assume that a user is going to see most of the messages in
info and all of the messages in error.
Mojo Class Annotations
In the first-maven-plugin example, you didn’t write the plugin descriptor yourself;
you relied on Maven to generate the plugin descriptor from your source code. The
descriptor was generated using your plugin project’s POM information and a set of
annotations on your EchoMojo class. EchoMojo specifies only the @goal annotation. Here
is a list of other annotations you can place on your Mojo implementation:
@goal <goalName>
The only required annotation that gives a name to this goal that is unique to this
plugin.
@requiresDependencyResolution <requireScope>
Flags this Mojo as requiring the dependencies in the specified scope (or an implied
scope) to be resolved before it can execute. Supports compile, runtime, and test.
If this annotation had a value of test, it would tell Maven that the Mojo cannot be
executed until the dependencies in the test scope had been resolved.
@requiresProject (true|false)
Marks that this goal must be run inside of a project. The default is true. This is
opposed to plugins such as archetypes that do not.
@requiresReports (true|false)
If you were creating a plugin that relied on the presence of reports, you would need
to set requiresReports to true. The default value of this annotation is false.
@aggregator (true|false)
A Mojo with aggregator set to true is supposed to run only once during the exe-
cution of Maven. It was created to give plugin developers the ability to summarize
the output of a series of builds; for example, to create a plugin that summarizes a
report across all projects included in a build. A goal with aggregator set to true
398 | Chapter 17: Writing Plugins

should be run against only the top-level project in a Maven build. The default value
of aggregator is false.
@requiresOnline (true|false)
When set to true, Maven must not be running in offline mode when this goal is
executed. Maven will throw an error if you attempt to execute this goal offline. The
default is false.
@requiresDirectInvocation
When set to true, the goal can be executed only if it is explicitly executed from the
command line by the user. Maven will throw an error if someone tries to bind this
goal to a lifecycle phase. The default for this annotation is false.
@phase <phaseName>
This annotation specifies the default phase for this goal. If you add an execution
for this goal to a pom.xml and do not specify the phase, Maven will bind the goal
to the phase specified in this annotation by default.
@execute [goal=goalName|phase=phaseName [lifecycle=lifecycleId]]
This annotation can be used in a number of ways. If a phase is supplied, Maven
will execute a parallel lifecycle ending in the specified phase. The results of this
separate execution will be made available in the Maven property
${executedProperty}.
The second way of using this annotation is to specify an explicit goal using the
prefix:goal notation. When you specify only a goal, Maven will execute this goal
in a parallel environment that will not affect the current Maven build.
The third way of using this annotation is to specify a phase in an alternate lifecycle
using the identifier of a lifecycle:
@execute phase="package" lifecycle="zip"
@execute phase="compile"
@execute goal="zip:zip"
If you look at the source for EchoMojo, you’ll notice that Maven is not using the standard
annotations available in Java 5. Instead, it is using Commons Attributes (http://com
mons.apache.org/attributes/). Commons Attributes provided a way for Java program-
mers to use annotations before annotations were a part of the Java language specifica-
tion. Why doesn’t Maven use Java 5 annotations? Because Maven is designed to target
pre-Java 5 JVMs. Because Maven has to support older versions of Java, it cannot use
any of the newer features available in Java 5.
When a Mojo Fails
The execute() method in Mojo throws two exceptions: MojoExecutionException and
MojoFailureException. The difference between these two exceptions is both subtle and
important, and it relates to what happens when a goal execution “fails.” A
MojoExecutionException is a fatal exception: it means something unrecoverable hap-
pened. You will throw a MojoExecutionException if something happens that warrants
Writing a Custom Plugin | 399

a complete stop in a build: you are trying to write to disk, but there is no space left, or
you are trying to publish to a remote repository, but you can’t connect to it. Throw a
MojoExecutionException if there is no chance of a build continuing: that is, something
terrible has happened, and you want the build to stop and the user to see a “BUILD
ERROR” message.
A MojoFailureException is something less catastrophic: a goal can fail, but it might not
be the end of the world for your Maven build. A unit test can fail, or an MD5 checksum
can fail; both of these are potential problems, but you don’t want to return an exception
that is going to kill the entire build. In this situation, you would throw a
MojoFailureException. Maven provides for different “resiliency” settings when it comes
to project failure. These are described next.
When you run a Maven build, it can involve a series of projects, each of which can
succeed or fail. You have the option of running Maven in three failure modes:
mvn -ff
Fail-fast mode: Maven will fail (stop) at the first build failure.
mvn -fae
Fail-at-end: Maven will fail at the end of the build. If a project in the Maven reactor
fails, Maven will continue to build the rest of the builds and report a failure at the
end of the build.
mvn -fn
Fail never: Maven won’t stop for a failure and won’t report a failure.
You might want to ignore failures if you are running a continuous integration build and
you want to attempt a build, regardless of the success or failure of an individual project
build. As a plugin developer, you’ll have to make a call as to whether a particular failure
condition is a MojoExecutionException or a MojoFailureExeception.
Mojo Parameters
Just as important as the execute() method and the Mojo annotations is the fact that a
Mojo is configured via parameters. This section deals with some configuration and
topics surrounding Mojo parameters.
Supplying Values for Mojo Parameters
In EchoMojo, we declare the message parameter with the following annotations:
/**
* Any Object to print out.
* @parameter
* expression="${echo.message}"
* default-value="Hello Maven World"
*/
private Object message;
400 | Chapter 17: Writing Plugins

The default expression for this parameter is ${echo.message}. This means that Maven
will try to use the value of the echo.message property to set the value for message. If the
value of the echo.message property is null, the default-value attribute of the
@parameter annotation will be used instead. Instead of using the echo.message property,
we can configure a value for the message parameter of the EchoMojo directly in a
project’s POM.
We can populate the message parameter in the EchoMojo in a few ways. First, we can
pass in a value from the command line like this (assuming that you’ve added
org.sonatype.mavenbook.plugins to your pluginGroups):
$ mvn first:echo -Decho.message="Hello Everybody"
We can also specify the value of this message parameter by setting a property in our
POM or in our settings.xml:
<project>
...
<properties>
<echo.message>Hello Everybody</echo.message>
</properties>
</project>
This parameter can also be configured directly as a configuration value for the plugin.
If we wanted to customize the message parameter directly, we could use the following
build configuration, which bypasses the echo.message property and populates the Mojo
parameter in plugin configuration:
<project>
...
<build>
<plugins>
<plugin>
<groupId>org.sonatype.mavenbook.plugins</groupId>
<artifactId>first-maven-plugin</artifactId>
<version>1.0-SNAPSHOT</version>
<configuration>
<message>Hello Everybody!</message>
</configuration>
</plugin>
</plugins>
</build>
</project>
If we wanted to run the EchoMojo twice at difference phases in a lifecycle, and if we
wanted to customize the message parameter for each execution separately, we could
configure the parameter value at the execution level in a POM like this:
<build>
<build>
<plugins>
<plugin>
<groupId>org.sonatype.mavenbook.plugins</groupId>
<artifactId>first-maven-plugin</artifactId>
Mojo Parameters | 401

<version>1.0-SNAPSHOT</version>
<executions>
<execution>
<id>first-execution</id>
<phase>generate-resources</phase>
<goals>
<goal>echo</goal>
</goals>
<configuration>
<message>The Eagle has Landed!</message>
</configuration>
</execution>
<execution>
<id>second-execution</id>
<phase>validate</phase>
<goals>
<goal>echo</goal>
</goals>
<configuration>
<message>${project.version}</message>
</configuration>
</execution>
</executions>
</plugin>
</plugins>
</build>
</build>
Although this last configuration example seems very verbose, it illustrates the flexibility
of Maven. In the previous configuration example, you bound the EchoMojo to both the
validate and generate-resources phases in the default Maven lifecycle. The first exe-
cution is bound to generate-resources; it supplies a string value to the message param-
eter of “The Eagle has Landed!”. The second execution is bound to the validate phase;
it supplies a property reference to ${project.version}. When you run mvn install for
this project, you’ll see that the first:echo goal executes twice and prints out two dif-
ferent messages.
Multivalued Mojo Parameters
Plugins can have parameters that accept more than one value. Take a look at the
ZipMojo shown in Example 17-7. Both the includes and excludes parameters are
multivalued String arrays that specify the inclusion and exclusion patterns for a com-
ponent that creates a ZIP file.
Example 17-7. A plugin with multivalued parameters
package org.sonatype.mavenbook.plugins
/**
* Zips up the output directory.
* @goal zip
* @phase package
*/
402 | Chapter 17: Writing Plugins

public class ZipMojo extends AbstractMojo
{
/**
* The Zip archiver.
* @parameter expression="${component.org.codehaus.plexus.archiver.Archiver#zip}"
*/
private ZipArchiver zipArchiver;
/**
* Directory containing the build files.
* @parameter expression="${project.build.directory}"
*/
private File buildDirectory;
/**
* Base directory of the project.
* @parameter expression="${basedir}"
*/
private File baseDirectory;
/**
* A set of file patterns to include in the zip.
* @parameter alias="includes"
*/
private String[] mIncludes;
/**
* A set of file patterns to exclude from the zip.
* @parameter alias="excludes"
*/
private String[] mExcludes;
public void setExcludes( String[] excludes ) { mExcludes = excludes; }
public void setIncludes( String[] includes ) { mIncludes = includes; }
public void execute()
throws MojoExecutionException
{
try {
zipArchiver.addDirectory( buildDirectory, includes, excludes );
zipArchiver.setDestFile( new File( baseDirectory, "output.zip" ) );
zipArchiver.createArchive();
} catch( Exception e ) {
throw new MojoExecutionException( "Could not zip", e );
}
}
}
Mojo Parameters | 403

To configure a multivalued Mojo parameter, you use a series of elements for each value.
If the name of the multivalued parameter is includes, you would use an element
includes with child elements include. If the multivalued parameter is excludes, you
would use an element excludes with child elements exclude. To configure the
ZipMojo to ignore all files ending in .txt and all files ending in a tilde, you would use the
following plugin configuration:
<project>
...
<build>
<plugins>
<plugin>
<groupId>org.sonatype.mavenbook.plugins</groupId>
<pluginId>zip-maven-plugin</pluginId>
<configuration>
<excludes>
<exclude>**/*.txt</exclude>
<exclude>**/*~</exclude>
</excludes>
</configuration>
</plugin>
</plugins>
</build>
</project>
Depending on Plexus Components
A Mojo is a component managed by an IoC container called Plexus. A Mojo can depend
on other components managed by Plexus by declaring a Mojo parameter and using the
@parameter or the @component annotation. Example 17-8 shows a ZipMojo that depends
on a Plexus component using the @parameter annotation. This dependency could be
declared using the @component annotation.
Example 17-8. Depending on a Plexus component
/**
* The Zip archiver.
* @component role="org.codehaus.plexus.archiver.Archiver" roleHint="zip"
*/
private ZipArchiver zipArchiver;
When Maven instantiates this Mojo, it will then attempt to retrieve the Plexus com-
ponent with the specified role and role hint. In this example, the Mojo will be related
to a ZipArchiver component that will allow the ZipMojo to create a ZIP file.
Mojo Parameter Annotations
Unless you insist on writing your plugin descriptors by hand, you’ll never have to write
that XML. Instead, the Maven Plugin plugin has a plugin:descriptor goal bound to
the generate-resources phase. This goal generates the plugin descriptor from
404 | Chapter 17: Writing Plugins

annotations on your Mojo. To configure a Mojo parameter, you should use the fol-
lowing annotations on the private member variables for each of your Mojo’s parame-
ters. You can also use these annotations on public setter methods, but the most com-
mon convention for Maven plugins is to annotate private member variables directly:
@parameter [alias="someAlias"] [expression="${someExpression}"] [default-
value="value"]
Marks a private field (or a setter method) as a parameter. The alias provides the
name of the parameter. If alias is omitted, Maven will use the name of the variable
as the parameter name. The expression is an expression that Maven will evaluate
to obtain a value. Usually the expression is a property reference such as
${echo.message}. default-value is the value that this Mojo will use if no value can
be derived from the expression or if a value was not explicitly supplied via plugin
configuration in a POM.
@required
If this annotation is present, a valid value for this parameter is required prior to
Mojo execution. If Maven tries to execute this Mojo and the parameter has a null
value, Maven will throw an error when it tries to execute this goal.
@readonly
If this annotation is present, the user cannot directly configure this parameter in
the POM. You would use this annotation with the expression attribute of the pa-
rameter annotation. For example, if you wanted to make sure that a particular
parameter always had the value of the finalName POM property, you would list an
expression of ${build.finalName} and then add the @readOnly annotation. If this
were the case, the user could change the value of this parameter only by changing
the value of finalName in the POM.
@component
Tells Maven to populate a field with a Plexus component. A valid value for the
@component annotation would be:
@component role="org.codehaus.plexus.archiver.Archiver" roleHint="zip"
This would have the effect of retrieving the ZipArchiver from Plexus. The
ZipArchiver is the archiver that corresponds to the role hint zip. Instead of
component, you could also use the @parameter annotation with an expression at-
tribute of:
@parameter expression="${component.org.codehaus.plexus.archiver.Archiver#zip}"
Although the two annotations are effectively the same, the @component annotation
is the preferred way to configure dependencies on Plexus components.
@deprecated
The parameter will be deprecated. Users can continue configuring this parameter,
but a warning message will be displayed.
Mojo Parameters | 405

Plugins and the Maven Lifecycle
In Chapter 10, you learned that lifecycles can be customized by packaging types. A
plugin can both introduce a new packaging type and customize the lifecycle. In this
section, you will learn how you can customize the lifecycle from a custom Maven
plugin. You will also see how you can tell a Mojo to execute a parallel lifecycle.
Executing a Parallel Lifecycle
Let’s assume you write some goal that depends on the output from a previous build.
Maybe the ZipMojo goal can run only if there is output to include in an archive. You
can specify something like a prerequisite goal by using the @execute annotation on a
Mojo class. This annotation will cause Maven to spawn a parallel build and execute a
goal or a lifecycle in a parallel instance of Maven that isn’t going to affect the current
build. Maybe you wrote some Mojo that you can run once a day that runs mvn install
and then packages up all of the output in some sort of customized distribution format.
Your Mojo descriptor could tell Maven that before you execute your CustomMojo, you’d
like it to execute the default lifecycle up to the install phase and then expose the results
of that project to your Mojo as the property ${executedProject}. You could then ref-
erence properties in that project before some sort of postprocessing.
Another possibility is that you have a goal that does something completely unrelated
to the default lifecycle. Let’s consider something completely unexpected. Maybe you
have a goal that turns a WAV file into an MP3 using something like LAME, but before
you do that, you want to step through a lifecycle that turns a MIDI file to a WAV. (You
can use Maven for anything; this example isn’t that “far out.”) You’ve created a midi-
sound lifecycle, and you want to include the output of the midi-sound lifecycle’s
install phase in your web application project, which has a war packaging type. Since
your project is running in the war packaging lifecycle, you’ll need to have a goal that
effectively forks off an isolated build and runs through the midi-source lifecycle. You
would do this by annotating your mojo with @execute lifecycle="midi-source"
phase="install":
@execute goal="<goal>"
This will execute the given goal before the execution of this one. The goal name is
specified using the prefix:goal notation.
@execute phase="<phase>"
This will fork an alternate build lifecycle up to the specified phase before continuing
to execute the current one. If no lifecycle is specified, Maven will use the lifecycle
of the current build.
@execute lifecycle="<lifecycle>" phase="<phase>"
This will execute the given alternate lifecycle. A custom lifecycle can be defined in
META-INF/maven/lifecycle.xml.
406 | Chapter 17: Writing Plugins

Creating a Custom Lifecycle
A custom lifecycle must be packaged in the plugin under the META-INF/maven/lifecy
cle.xml file. You can include a lifecycle under src/main/resources in META-INF/maven/
lifecycle.xml. The lifecycle.xml shown in Example 17-9 declares a lifecycle named
zipcycle that contains only the zip goal in a package phase.
Example 17-9. Define a custom lifecycle in lifecycle.xml
<lifecycles>
<lifecycle>
<id>zipcycle</id>
<phases>
<phase>
<id>package</id>
<executions>
<execution>
<goals>
<goal>zip</goal>
</goals>
</execution>
</executions>
</phase>
</phases>
</lifecycle>
</lifecycles>
If you wanted to execute the zipcycle phase within another build, you could then create
a ZipForkMojo that uses the @execute annotation to tell Maven to step through the
zipcycle phase to package when the ZipForkMojo is executed. See Example 17-10.
Example 17-10. Forking a customer lifecycle from a Mojo
/**
* Forks a zip lifecycle.
* @goal zip-fork
* @execute lifecycle="zipcycle" phase="package"
*/
public class ZipForkMojo extends AbstractMojo
{
public void execute()
throws MojoExecutionException
{
getLog().info( "doing nothing here" );
}
}
Running the ZipForkMojo will fork the lifecycle. If you’ve configured your plugin to
execute with the goal prefix zip, running zip-fork should produce something similar
to the following output:
$ mvn zip:zip-fork
[INFO] Scanning for projects...
[INFO] Searching repository for plugin with prefix: 'zip'.
Plugins and the Maven Lifecycle | 407

[INFO] -------------------------------------------------------------------
[INFO] Building Maven Zip Forked Lifecycle Test
[INFO] task-segment: [zip:zip-fork]
[INFO] -------------------------------------------------------------------
[INFO] Preparing zip:zip-fork
[INFO] [site:attach-descriptor]
[INFO] [zip:zip]
[INFO] Building zip: ~/maven-zip-plugin/src/projects/zip-lifecycle-test/\
target/output.zip
[INFO] [zip:zip-fork]
[INFO] doing nothing here
[INFO] -------------------------------------------------------------------
[INFO] BUILD SUCCESSFUL
[INFO] -------------------------------------------------------------------
[INFO] Total time: 1 second
[INFO] Finished at: Sun Apr 29 16:10:06 CDT 2007
[INFO] Final Memory: 3M/7M
[INFO] -------------------------------------------------------------------
Calling zip-fork spawns another lifecycle. Maven executes the zipcycle lifecycle, and
then it prints out the message from ZipFormMojo’s execute method.
Overriding the Default Lifecycle
Once you’ve created your own lifecycle and spawned it from a Mojo, the next question
you might have is: How do you override the default lifecycle? How do you create custom
lifecycles and then attach them to projects? In Chapter 10, we saw that the packaging
of a project defines the lifecycle of a project. There’s something different about almost
every packaging type: war attaches different goals to package, custom lifecycles such as
swf from the Israfil Flex 3 plugin attach different goals to the compile phase. When you
create a custom lifecycle, you can attach that lifecycle to a packaging type by supplying
some Plexus configuration in your plugin’s archive.
To define a new lifecycle for a new packaging type, you’ll need to configure a
LifecycleMapping component in Plexus. In your plugin project, create a META-INF/
plexus/components.xml under src/main/resources. In components.xml, add the content
from Example 17-11. Set the name of the packaging type under role-hint, and the set
of phases containing the coordinates of the goals to bind (omit the version). Multiple
goals can be associated with a phase using a comma delimited list.
Example 17-11. Overriding the default lifecycle
<component-set>
<components>
<component>
<role>org.apache.maven.lifecycle.mapping.LifecycleMapping</role>
<role-hint>zip</role-hint>
<implementation>org.apache.maven.lifecycle.mapping.DefaultLifecycleMapping
</implementation>
<configuration>
<phases>
408 | Chapter 17: Writing Plugins

<process-resources>org.apache.maven.plugins:maven-resources-plugin:resources
</process-resources>
<compile>org.apache.maven.plugins:maven-compiler-plugin:compile</compile>
<package>org.sonatype.mavenbook.plugins:maven-zip-plugin:zip</package>
</phases>
</configuration>
</component>
</components>
</component-set>
If you create a plugin that defines a new packaging type and a customized lifecycle,
Maven won’t know anything about it until you add the plugin to your project’s POM
and set the extensions element to true. Once you do this, Maven will scan your plugin
for more than just Mojos to execute; it will look for the components.xml under META-
INF/plexus, and it will make the packaging type available to your project. See Exam-
ple 17-12.
Example 17-12. Configuring a plugin as an extension
<project>
...
<build>
...
<plugins>
<plugin>
<groupId>com.training.plugins</groupId>
<artifactId>maven-zip-plugin</artifactId>
<extensions>true</extensions>
</plugin>
</plugins>
</build>
</project>
Once you add the plugin with the extensions element set to true, you can use the
custom packaging type and your project will be able to execute the custom lifecycle
associated with that packaging type.
Plugins and the Maven Lifecycle | 409

CHAPTER 18
Writing Plugins in Alternative
Languages
You can write a Mojo in Java, or you can write a Mojo in an alternative language. Maven
has support for a number of implementation languages, and this chapter will show you
how to create plugins in three languages: Ant, Ruby, and Groovy.
Writing Plugins in Ant
Ant isn’t a language as much as it is a build tool that allows you to describe a build as
a set of tasks grouped into build targets. Ant then allows you to declare dependencies
between build targets; for example, in Ant you are essentially creating your own life-
cycle. An Ant build.xml might have an install target that depends on a test target that
depends on a compile target. Ant is something of an ancestor to Maven; it was the
ubiquitous procedural build tool that almost every project used before Maven intro-
duced the concept of wide-scale reusability of common build plugins and the concept
of a universal lifecycle.
Although Maven is an improvement on Ant, Ant can still be useful when describing
parts of the build process. Ant provides a set of tasks that can come in handy when you
need to perform file operations or XSLT transformations or any other operation you
can think of. There is a large library of available Ant tasks for everything from running
JUnit tests to transforming XML to copying files to a remote server using SCP. An
overview of available Ant tasks can be found online in the Apache Ant Manual (http://
ant.apache.org/manual/tasksoverview.html). You can use these tasks as a low-level build
customization language, and you can also write a Maven plugin where, instead of a
Mojo written in Java, you can pass parameters to a Mojo that is an Ant build target.
411

Creating an Ant Plugin
To create a Maven plugin using Ant, you need to have a pom.xml and a single Mojo
implemented in Ant. To get started, create a project directory named firstant-maven-
plugin. Place the pom.xml shown in Example 18-1 in this directory.
Example 18-1. POM for an Ant Maven plugin
<project>
<modelVersion>4.0.0</modelVersion>
<groupId>org.sonatype.mavenbook.plugins</groupId>
<artifactId>firstant-maven-plugin</artifactId>
<name>Example Ant Mojo - firstant-maven-plugin</name>
<packaging>maven-plugin</packaging>
<version>1.0-SNAPSHOT</version>
<dependencies>
<dependency>
<groupId>org.apache.maven</groupId>
<artifactId>maven-script-ant</artifactId>
<version>2.0.9</version>
</dependency>
</dependencies>
<build>
<plugins>
<plugin>
<artifactId>maven-plugin-plugin</artifactId>
<version>2.4</version>
<dependencies>
<dependency>
<groupId>org.apache.maven.plugin-tools</groupId>
<artifactId>maven-plugin-tools-ant</artifactId>
<version>2.4</version>
</dependency>
</dependencies>
</plugin>
</plugins>
</build>
</project>
Next, you will need to create your Ant Mojo. An Ant Mojo consists of two parts: the
Ant tasks in an XML file, and a file that supplies Mojo descriptor information. The Ant
plugin tools will look for both of these files in ${basedir}/src/main/scripts. One file will
be named echo.build.xml and will contain the Ant XML. See Example 18-2.
Example 18-2. Echo Ant Mojo
<project>
<target name="echotarget">
<echo>${message}</echo>
</target>
</project>
412 | Chapter 18: Writing Plugins in Alternative Languages

The other file will describe the Echo Ant Mojo and will be in the echo.mojos.xml file,
also in ${basedir}/src/main/scripts. See Example 18-3.
Example 18-3. Echo Ant Mojo descriptor
<pluginMetadata>
<mojos>
<mojo>
<goal>echo</goal>
<call>echotarget</call>
<description>Echos a Message</description>
<parameters>
<parameter>
<name>message</name>
<property>message</property>
<required>false</required>
<expression>${message}</expression>
<type>java.lang.Object</type>
<defaultValue>Hello Maven World</defaultValue>
<description>Prints a message</description>
</parameter>
</parameters>
</mojo>
</mojos>
</pluginMetadata>
This echo.mojos.xml file configures the Mojo descriptor for this plugin. It supplies the
goal name “echo”, and it tells Maven which Ant task to call in the call element. In
addition to configuring the description, this XML file configures the message parameter
to use the expression ${message} and to have a default value of “Hello Maven World.”
If you’ve configured your plugin groups in ~/.m2/settings.xml to include org.sona
type.mavenbook.plugins, you can install this Ant plugin by executing the following
command at the command line:
$ mvn install
[INFO] ------------------------------------------------------------------------
[INFO] Building Example Ant Mojo - firstant-maven-plugin
[INFO] task-segment: [install]
[INFO] ------------------------------------------------------------------------
[INFO] [plugin:descriptor]
[INFO] Using 3 extractors.
[INFO] Applying extractor for language: java
[INFO] Extractor for language: java found 0 mojo descriptors.
[INFO] Applying extractor for language: bsh
[INFO] Extractor for language: bsh found 0 mojo descriptors.
[INFO] Applying extractor for language: ant
[INFO] Extractor for language: ant found 1 mojo descriptors.
...
[INFO] ------------------------------------------------------------------------
[INFO] BUILD SUCCESSFUL
[INFO] ------------------------------------------------------------------------
Creating an Ant Plugin | 413

Note that the plugin:descriptor goal finds a single Ant mojo descriptor. To run this
goal, execute the following command:
$ mvn firstant:echo
...
[INFO] [firstant:echo]
echotarget:
[echo] Hello Maven World
[INFO] ------------------------------------------------------------------------
[INFO] BUILD SUCCESSFUL
[INFO] ------------------------------------------------------------------------
The echo goal executes and prints out the default value of the message parameter. If you
are used to Apache Ant build scripts, you will notice that Ant prints out the name of
the target executed and then adds a logging prefix to the output of the echo Ant task.
Writing Plugins in JRuby
Ruby is an object-oriented scripting language that provides a rich set of facilities for
metaprogramming and reflection. Ruby’s reliance on closures and blocks make for a
programming style that is both compact and powerful. Although Ruby has been around
since 1993, most people came to know Ruby after it was made popular by a Ruby-based
web framework known as Ruby on Rails. JRuby is a Ruby interpreter written in Java.
For more information about the Ruby language, see http://www.ruby-lang.org/, and for
more information about JRuby, see http://jruby.codehaus.org/.
Creating a JRuby Plugin
To create a Maven plugin using JRuby, you need to have a pom.xml and a single Mojo
implemented in Ruby. To get started, create a project directory named firstruby-maven-
plugin. Place the pom.xml shown in Example 18-4 in this directory.
Example 18-4. POM for a JRuby Maven plugin
<project>
<modelVersion>4.0.0</modelVersion>
<groupId>org.sonatype.mavenbook.plugins</groupId>
<artifactId>firstruby-maven-plugin</artifactId>
<name>Example Ruby Mojo - firstruby-maven-plugin</name>
<packaging>maven-plugin</packaging>
<version>1.0-SNAPSHOT</version>
<dependencies>
<dependency>
<groupId>org.codehaus.mojo</groupId>
<artifactId>jruby-maven-plugin</artifactId>
<version>1.0-beta-4</version>
<scope>runtime</scope>
</dependency>
</dependencies>
414 | Chapter 18: Writing Plugins in Alternative Languages

<build>
<plugins>
<plugin>
<artifactId>maven-plugin-plugin</artifactId>
<version>2.4</version>
<dependencies>
<dependency>
<groupId>org.codehaus.mojo</groupId>
<artifactId>jruby-maven-plugin</artifactId>
<version>1.0-beta-4</version>
</dependency>
</dependencies>
</plugin>
</plugins>
</build>
</project>
Next, you will need to create a Mojo implemented in Ruby. Maven will look for a Ruby
Mojo in ${basedir}/src/main/scripts. Put the Ruby class shown in Example 18-5 in
${basedir}/src/main/scripts/echo.rb.
Example 18-5. The Echo Ruby Mojo
# Prints a message
# @goal "echo"
# @phase "validate"
class Echo < Mojo
# @parameter type="java.lang.String" default-value="Hello Maven World" \
expression="${message}"
def message
end
def execute
info $message
end
end
run_mojo Echo
The Echo class must extend Mojo, and it must override the execute() method. At the
end of the echo.rb file, you will need to run the mojo with run_mojo Echo. To install this
plugin, run mvn install:
$ mvn install
[INFO] Scanning for projects...
[INFO] ------------------------------------------------------------------------
[INFO] Building Example Ruby Mojo - firstruby-maven-plugin
[INFO] task-segment: [install]
[INFO] ------------------------------------------------------------------------
...
[INFO] [plugin:descriptor]
...
[INFO] Applying extractor for language: jruby
Writing Plugins in JRuby | 415

[INFO] Ruby Mojo File: /echo.rb
[INFO] Extractor for language: jruby found 1 mojo descriptors.
...
[INFO] ------------------------------------------------------------------------
[INFO] BUILD SUCCESSFUL
[INFO] ------------------------------------------------------------------------
During the build, you should see that the Maven Plugin plugin’s descriptor goal applies
the JRuby extractor to create a plugin.xml that captures the annotations in the Echo
class. If you’ve configured your default plugin groups to include org.sonatype.maven
book.plugins, you should be able to run this echo goal with the following command:
$ mvn firstruby:echo
...
[INFO] [firstruby:echo]
[INFO] Hello Maven World
...
Ruby Mojo Implementations
Ruby Mojos are annotated using comments in Ruby source files. A single annotation
such as @parameter takes a number of attributes, and each of these attributes must be
specified on the same line. There can be no line breaks between an annotations attribute
in the Ruby source. Both classes and parameters are annotated. Parameters are anno-
tated with four annotations: @parameter, @required, @readonly, and @deprecated. The
@parameter attribute takes the following attributes:
alias
An alias for the parameter; an alternate name that can be used to populate the same
parameter.
default-value
Provides a default value to the parameter if the supplied value or the parameter
expression produces a null result. In echo.rb, we specify the default as “Hello
Maven World”.
expression
Contains an expression that can resolve to a Maven property or a System property.
type
The fully qualified Java type of the parameter. If the type is not specified, it will
default to java.lang.String.
In addition to the @parameter annotation, a parameter can take the following annota-
tions:
@required "<true|false>"
Marks the parameter as being required. The default value is false.
416 | Chapter 18: Writing Plugins in Alternative Languages

@readonly "<true|false>"
Marks the parameter as read-only. If this is true, you may not override the default
value or the value from the expression from the command line. The default value
is false.
@deprecated "<true|false>"
Marks the parameter as deprecated. The default value is false.
Putting this all together, a fully annotated message parameter from echo.rb would look
like the following code:
# @parameter type="java.lang.String" default-value="Hello Maven World" \
expression="${message}"
# @readonly true
# @required false
# @deprecated false
def message
end
Ruby Mojo classes are annotated with the following attributes:
@goal
Specifies the name of the goal.
@phase
The default phase to bind this goal to.
@requiresDependencyResolution
True if the Mojo requires that dependencies be resolved before execution.
@aggregator
Marks this mojo as an aggregator.
@execute
Provides the opportunity to execute a goal or lifecycle phase before executing this
Mojo. The @execute annotation takes the following attributes:
goal
Name of the goal to execute
phase
Name of the lifecycle phase to execute
lifecycle
Name of the lifecycle (if other than default)
For an example of an annotated Mojo class, consider the following code example:
# Completes some build task
# @goal custom-goal
# @phase install
# @requiresDependencyResolution false
# @execute phase=compile
class CustomMojo < Mojo
...
end
Writing Plugins in JRuby | 417

Mojo parameters can reference Java classes and Maven properties. Example 18-6 shows
you how to get access to the Maven Project object from a Ruby Mojo.
Example 18-6. Referencing a Maven Project from a Ruby Mojo
# This is a mojo description
# @goal test
# @phase validate
class Test < Mojo
# @parameter type="java.lang.String" default-value="nothing" alias="a_string"
def prop
end
# @parameter type="org.apache.maven.project.MavenProject" \
expression="${project}"
# @required true
def project
end
def execute
info "The following String was passed to prop: '#{$prop}'"
info "My project artifact is: #{$project.artifactId}"
end
end
run_mojo Test
In the example just shown, we can access properties on the Project class using standard
Ruby syntax. If you put test.rb in firstruby-maven-plugin’s src/main/scripts directory,
install the plugin, and then run it, you will see the following output:
$ mvn install
...
[INFO] [plugin:descriptor]
[INFO] Using 3 extractors.
[INFO] Applying extractor for language: java
...
[INFO] Applying extractor for language: jruby
[INFO] Ruby Mojo File: /echo.rb
[INFO] Ruby Mojo File: /test.rb
[INFO] Extractor for language: jruby found 2 mojo descriptors.
...
$ mvn firstruby:test
...
[INFO] [firstruby:test]
[INFO] The following String was passed to prop: 'nothing'
[INFO] My project artifact is: firstruby-maven-plugin
Logging from a Ruby Mojo
To log from a Ruby Mojo, call the info(), debug(), and error() methods with a message:
# Tests Logging
# @goal logtest
418 | Chapter 18: Writing Plugins in Alternative Languages

# @phase validate
class LogTest < Mojo
def execute
info "Prints an INFO message"
error "Prints an ERROR message"
debug "Prints to the Console"
end
end
run_mojo LogTest
Raising a MojoError
If there is an unrecoverable error in a Ruby Mojo, you will need to raise a MojoError.
Example 18-7 shows you how to raise a MojoError. This example Mojo prints out a
message and then raises a MojoError.
Example 18-7. Raising a MojoError from a Ruby Mojo
# Prints a Message
# @goal error
# @phase validate
class Error < Mojo
# @parameter type="java.lang.String" default-value="Hello Maven World" \
expression="${message}"
# @required true
# @readonly false
# @deprecated false
def message
end
def execute
info $message
raise MojoError.new( "This Mojo Raised a MojoError" )
end
end
run_mojo Error
Running this Mojo produces the following output:
$ mvn firstruby:error
...
INFO] [firstruby:error]
[INFO] Hello Maven World
[ERROR] This Mojo Raised a MojoError
Writing Plugins in JRuby | 419

Referencing Plexus Components from JRuby
A Ruby Mojo can depend on a Plexus component. To do this, you would use the
expression attribute of the @parameter annotation to specify a role and a hint for Plexus.
The Ruby Mojo shown in Example 18-8 depends on an Archiver component that
Maven will retrieve from Plexus.
Example 18-8. Depending on a Plexus component from a Ruby Mojo
# This mojo tests plexus integration
# @goal testplexus
# @phase validate
class TestPlexus < Mojo
# @parameter type="org.codehaus.plexus.archiver.Archiver" \
expression="${component.org.codehaus.plexus.archiver.Archiver#zip}"
def archiver
end
def execute
info $archiver
end
end
run_mojo TestPlexus
Please note that the attributes for an annotation in a Ruby Mojo cannot span multiple
lines. If you were to run this goal, you would see Maven attempt to retrieve a component
from Plexus with a role of org.codehaus.plexus.arhiver.Archiver and a hint of zip.
Writing Plugins in Groovy
Groovy is a dynamic language based on the Java Virtual Machine that compiles to Java
bytecode. Groovy is a project in the Codehaus community. If you are fluent in Java,
Groovy will seem like a natural choice for a scripting language. Groovy takes the fea-
tures of Java, pares down the syntax a bit, and adds features such as closures, duck-
typing, and regular expressions. For more information about Groovy, please see the
Groovy web site at http://groovy.codehaus.org.
Although it is possible to create a Groovy plugin using the techniques described in this
section, there is a newer project devoted to Groovy–Maven integration called GMaven
(http://groovy.codehaus.org/GMaven), which is scheduled to have a 1.0 release in Sep-
tember 2008. The authors of this book encourage you to look into this project as an
alternative to the methods described in this section.
420 | Chapter 18: Writing Plugins in Alternative Languages

Creating a Groovy Plugin
To create a Maven plugin using Groovy, you need only two files: a pom.xml and a single
Mojo implemented in Groovy. To get started, create a project directory named first
groovy-maven-plugin. Place the pom.xml shown in Example 18-9 in this directory.
Example 18-9. POM for a Groovy Maven plugin
<?xml version="1.0" encoding="UTF-8"?>
<project>
<modelVersion>4.0.0</modelVersion>
<groupId>org.sonatype.mavenbook.plugins</groupId>
<artifactId>firstgroovy-maven-plugin</artifactId>
<name>Example Groovy Mojo - firstgroovy-maven-plugin</name>
<packaging>maven-plugin</packaging>
<version>1.0-SNAPSHOT</version>
<dependencies>
<dependency>
<groupId>org.codehaus.mojo.groovy</groupId>
<artifactId>groovy-mojo-support</artifactId>
<version>1.0-beta-3</version>
</dependency>
</dependencies>
<build>
<plugins>
<plugin>
<artifactId>maven-plugin-plugin</artifactId>
<version>2.4</version>
</plugin>
<plugin>
<groupId>org.codehaus.mojo.groovy</groupId>
<artifactId>groovy-maven-plugin</artifactId>
<version>1.0-beta-3</version>
<extensions>true</extensions>
<executions>
<execution>
<goals>
<goal>generateStubs</goal>
<goal>compile</goal>
<goal>generateTestStubs</goal>
<goal>testCompile</goal>
</goals>
</execution>
</executions>
</plugin>
</plugins>
</build>
</project>
What’s going on in this POM? First, notice that the packaging of the POM is maven-
plugin because we are creating a project that will package a Maven plugin. Next, note
that the project depends on the groovy-mojo-support artifact in the org.code
haus.mojo.groovy group.
Writing Plugins in Groovy | 421

Then, under src/main/groovy in the directory org/sonatype/mavenbook/plugins, create
a file named EchoMojo.groovy that contains the EchoMojo class, as shown in Exam-
ple 18-10.
Example 18-10. EchoMojo.groovy
package org.sonatype.mavenbook.plugins
import org.codehaus.mojo.groovy.GroovyMojo
/**
* Example goal which echos a message
*
* @goal echo
*/
class EchoMojo extends GroovyMojo {
/**
* Message to print
*
* @parameter expression="${echo.message}"
* default-value="Hello Maven World"
*/
String message
void execute() {
log.info( message )
}
}
422 | Chapter 18: Writing Plugins in Alternative Languages


APPENDIX A
Settings Details
Quick Overview
The settings element in the settings.xml file contains elements used to define values that
configure Maven execution. Settings in this file are settings that apply to many projects
and should not be bundled to any specific project or distributed to an audience. These
include values such as the local repository location, alternate remote repository servers,
and authentication information. There are two locations where a settings.xml file may
live:
Maven installation directory
$M2_HOME/conf/settings.xml
User-specific settings file
~/.m2/settings.xml
Example A-1 shows an overview of the top elements under settings.
Example A-1. Overview of top-level elements in settings.xml
<settings xmlns="http://maven.apache.org/POM/4.0.0"
xmlns:xsi="http://www.w3.org/2001/XMLSchema-instance"
xsi:schemaLocation="http://maven.apache.org/POM/4.0.0
http://maven.apache.org/xsd/settings-1.0.0.xsd">
<localRepository/>
<interactiveMode/>
<usePluginRegistry/>
<offline/>
<pluginGroups/>
<servers/>
<mirrors/>
<proxies/>
<profiles/>
<activeProfiles/>
</settings>
425

Settings Details
Simple Values
Half of the top-level settings elements are simple values, representing a range of values
that configure core behavior of Maven. These are shown in Example A-2.
Example A-2. Simple top-level elements in settings.xml
<settings xmlns="http://maven.apache.org/POM/4.0.0"
xmlns:xsi="http://www.w3.org/2001/XMLSchema-instance"
xsi:schemaLocation="http://maven.apache.org/POM/4.0.0
http://maven.apache.org/xsd/settings-1.0.0.xsd">
<localRepository>${user.dir}/.m2/repository</localRepository>
<interactiveMode>true</interactiveMode>
<usePluginRegistry>false</usePluginRegistry>
<offline>false</offline>
<pluginGroups>
<pluginGroup>org.codehaus.mojo</pluginGroup>
</pluginGroups>
...
</settings>
The simple top-level elements are:
localRepository
This value is the path of this build system’s local repository. The default value is
${user.dir}/.m2/repository.
interactiveMode
true if Maven should attempt to interact with the user for input; false if not.
Defaults to true.
usePluginRegistry
true if Maven should use the ${user.dir}/.m2/plugin-registry.xml file to manage
plugin versions. Defaults to false.
offline
true if this build system should operate in offline mode. Defaults to false. This
element is useful for build servers that cannot connect to a remote repository, either
because of network setup or for security reasons.
pluginGroups
This element contains a list of pluginGroup elements. Each contains a groupId. The
list is searched when a plugin is used and the groupId is not provided in the com-
mand line. This list contains org.apache.maven.plugins by default.
426 | Appendix A: Settings Details

Servers
The distributionManagement element of the POM defines the repositories for deploy-
ment. However, certain settings such as security credentials should not be distributed
along with the pom.xml. This type of information should exist on the build server in
the settings.xml. See Example A-3.
Example A-3. Server configuration in settings.xml
<settings xmlns="http://maven.apache.org/POM/4.0.0"
xmlns:xsi="http://www.w3.org/2001/XMLSchema-instance"
xsi:schemaLocation="http://maven.apache.org/POM/4.0.0
http://maven.apache.org/xsd/settings-1.0.0.xsd">
...
<servers>
<server>
<id>server001</id>
<username>my_login</username>
<password>my_password</password>
<privateKey>${usr.home}/.ssh/id_dsa</privateKey>
<passphrase>some_passphrase</passphrase>
<filePermissions>664</filePermissions>
<directoryPermissions>775</directoryPermissions>
<configuration></configuration>
</server>
</servers>
...
</settings>
The elements under the server are:
id
This is the id of the server (not of the user to log in as) that matches the
distributionManagement repository element’s id.
username, password
These elements appear as a pair denoting the login and password required to au-
thenticate to this server.
privateKey, passphrase
Like the previous two elements, this pair specifies a path to a private key (the default
is ${user.home}/.ssh/id_dsa) and a passphrase, if required. The passphrase and
password elements may be externalized in the future, but for now they must be set
in plain text in the settings.xml file.
filePermissions, directoryPermissions
When a repository file or directory is created on deployment, these are the per-
missions to use. The legal values of each is a three-digit number corresponding to
*nix file permissions, i.e., 664 or 775.
Settings Details | 427

Mirrors
See Example A-4.
Example A-4. Mirror configuration in settings.xml
<settings xmlns="http://maven.apache.org/POM/4.0.0"
xmlns:xsi="http://www.w3.org/2001/XMLSchema-instance"
xsi:schemaLocation="http://maven.apache.org/POM/4.0.0
http://maven.apache.org/xsd/settings-1.0.0.xsd">
...
<mirrors>
<mirror>
<id>planetmirror.com</id>
<name>PlanetMirror Australia</name>
<url>http://downloads.planetmirror.com/pub/maven2</url>
<mirrorOf>central</mirrorOf>
</mirror>
</mirrors>
...
</settings>
The elements are:
id, name
The unique identifier of this mirror. The id is used to differentiate between mirror
elements.
url
The base URL of this mirror. The build system will use this URL to connect to a
repository rather than the default server URL.
mirrorOf
The ID of the server that this is a mirror of. For example, to point to a mirror of
the Maven central server (http://repo1.maven.org/maven2), set this element to
central. This must not match the mirror id.
Proxies
See Example A-5.
Example A-5. Proxy configuration in settings.xml
<settings xmlns="http://maven.apache.org/POM/4.0.0"
xmlns:xsi="http://www.w3.org/2001/XMLSchema-instance"
xsi:schemaLocation="http://maven.apache.org/POM/4.0.0
http://maven.apache.org/xsd/settings-1.0.0.xsd">
...
<proxies>
<proxy>
<id>myproxy</id>
<active>true</active>
<protocol>http</protocol>
428 | Appendix A: Settings Details

<host>proxy.somewhere.com</host>
<port>8080</port>
<username>proxyuser</username>
<password>somepassword</password>
<nonProxyHosts>*.google.com|ibiblio.org</nonProxyHosts>
</proxy>
</proxies>
...
</settings>
The elements are:
id
The unique identifier for this proxy. This is used to differentiate between proxy
elements.
active
true if this proxy is active. This is useful for declaring a set of proxies, but only one
may be active at a time.
protocol, host, port
The protocol://host:port of the proxy, separated into discrete elements.
username, password
These elements appear as a pair denoting the login and password required to au-
thenticate to this proxy server.
nonProxyHosts
This is a list of hosts that should not be proxied. The delimiter of the list is the
expected type of the proxy server; Example A-5 is pipe-delimited, and comma-
delimited is also common.
Profiles
The profile element in the settings.xml is a truncated version of the pom.xml profile
element. It consists of the activation, repositories, pluginRepositories, and
properties elements. The profile elements include only these four elements because
they concern themselves with the build system as a whole (which is the role of the
settings.xml file), not with individual Project Object Model settings.
If a profile is active from settings, its values will override any equivalent profiles with
matching identifiers in a POM or profiles.xml file.
Activation
Activations are the key of a profile. Like the POM’s profiles, the power of a profile
comes from its ability to modify some values only under certain circumstances; those
circumstances are specified via an activation element. See Example A-6.
Settings Details | 429

Example A-6. Defining activation parameters in settings.xml
<settings xmlns="http://maven.apache.org/POM/4.0.0"
xmlns:xsi="http://www.w3.org/2001/XMLSchema-instance"
xsi:schemaLocation="http://maven.apache.org/POM/4.0.0
http://maven.apache.org/xsd/settings-1.0.0.xsd">
...
<profiles>
<profile>
<id>test</id>
<activation>
<activeByDefault>false</activeByDefault>
<jdk>1.5</jdk>
<os>
<name>Windows XP</name>
<family>Windows</family>
<arch>x86</arch>
<version>5.1.2600</version>
</os>
<property>
<name>mavenVersion</name>
<value>2.0.3</value>
</property>
<file>
<exists>${basedir}/file2.properties</exists>
<missing>${basedir}/file1.properties</missing>
</file>
</activation>
...
</profile>
</profiles>
...
</settings>
Activation occurs when all specified criteria have been met, though not all are required
at once. These are the elements:
jdk
Activation has a built in, Java-centric check in the jdk element. This will activate
if the test is run under a jdk version number that matches the prefix given. In
Example A-6, 1.5.0_06 will match.
os
The os element can define some operating system-specific properties, shown
previously.
property
The profile will activate if Maven detects a property (a value that can be derefer-
enced within the POM by ${name}) of the corresponding name-value pair.
file
Finally, a given filename may activate the profile by the existence of a file, or if it
is missing.
430 | Appendix A: Settings Details

The activation element is not the only way that a profile may be activated. The
settings.xml file’s activeProfile element may contain the profile’s id. They may also
be activated explicitly through the command line via a comma-separated list after the
-P flag (e.g., -P test).
To see which profile will activate in a certain build, use the maven-help-plugin:
mvn help:active-profiles
Properties
Maven properties are value placeholders, like properties in Ant. Their values are ac-
cessible anywhere within a POM by using the notation ${X}, where X is the property.
They come in five different styles, all accessible from the settings.xml file:
env.X
Prefixing a variable with env. will return the shell’s environment variable. For ex-
ample, ${env.PATH} contains the $path environment variable. (%PATH% in Windows.)
project.x
A dot-notated (.) path in the POM will contain the corresponding elements value.
settings.x
A dot-notated (.) path in the settings.xml will contain the corresponding elements
value.
Java system properties
All properties accessible via java.lang.System.getProperties() are available as
POM properties, such as ${java.home}.
x
Set within a properties element or an external file, the value may be used as
${someVar}.
See Example A-7.
Example A-7. Setting the ${user.install} property in settings.xml
<settings xmlns="http://maven.apache.org/POM/4.0.0"
xmlns:xsi="http://www.w3.org/2001/XMLSchema-instance"
xsi:schemaLocation="http://maven.apache.org/POM/4.0.0
http://maven.apache.org/xsd/settings-1.0.0.xsd">
...
<profiles>
<profile>
...
<properties>
<user.install>${user.dir}/our-project</user.install>
</properties>
...
</profile>
</profiles>
Settings Details | 431

...
</settings>
The property ${user.install} is accessible from a POM if this profile is active.
Repositories
Repositories are remote collections of projects that Maven uses to populate the local
repository of the build system. It is from this local repository that Maven calls its plugins
and dependencies. Different remote repositories may contain different projects, and
under the active profile they may be searched for a matching release or snapshot artifact.
See Example A-8.
Example A-8. Repository configuration in settings.xml
<settings xmlns="http://maven.apache.org/POM/4.0.0"
xmlns:xsi="http://www.w3.org/2001/XMLSchema-instance"
xsi:schemaLocation="http://maven.apache.org/POM/4.0.0
http://maven.apache.org/xsd/settings-1.0.0.xsd">
...
<profiles>
<profile>
...
<repositories>
<repository>
<id>codehausSnapshots</id>
<name>Codehaus Snapshots</name>
<releases>
<enabled>false</enabled>
<updatePolicy>always</updatePolicy>
<checksumPolicy>warn</checksumPolicy>
</releases>
<snapshots>
<enabled>true</enabled>
<updatePolicy>never</updatePolicy>
<checksumPolicy>fail</checksumPolicy>
</snapshots>
<url>http://snapshots.maven.codehaus.org/maven2</url>
<layout>default</layout>
</repository>
</repositories>
<pluginRepositories>
...
</pluginRepositories>
...
</profile>
</profiles>
...
</settings>
These are the elements:
432 | Appendix A: Settings Details

releases, snapshots
These are the policies for each type of artifact, release or snapshot. With these two
sets, a POM has the power to alter the policies for each type independent of the
other within a single repository. For example, one may decide to enable only snap-
shot downloads, possibly for development purposes.
enabled
true or false for whether this repository is enabled for the respective type
(releases or snapshots).
updatePolicy
This element specifies how often updates should attempt to occur. Maven will
compare the local POMs timestamp to the remote. The choices are: always,
daily (default), interval:X (where X is an integer in minutes), or never.
checksumPolicy
When Maven deploys files to the repository, it also deploys corresponding check-
sum files. Your options are to ignore, fail, or warn on missing or incorrect
checksums.
layout
In the earlier description of repositories, we mentioned that they all follow a com-
mon layout. This is mostly correct. Maven 2 has a default layout for its repositories;
however, Maven 1.x had a different layout. Use this element to specify whether it
is default or legacy.
Plugin Repositories
Repositories are home to two major types of artifacts. The first are artifacts that are
used as dependencies of other artifacts. These are the majority of plugins that reside
within central. The other type of artifact is plugins. Maven plugins are themselves a
special type of artifact. Because of this, plugin repositories are separated from other
repositories. The structure of the pluginRepositories element block is similar to the
repositories element. The pluginRepository elements each specify a remote location
where Maven can find new plugins.
Active Profiles
See Example A-9.
Example A-9. Setting active profiles in settings.xml
<settings xmlns="http://maven.apache.org/POM/4.0.0"
xmlns:xsi="http://www.w3.org/2001/XMLSchema-instance"
xsi:schemaLocation="http://maven.apache.org/POM/4.0.0
http://maven.apache.org/xsd/settings-1.0.0.xsd">
...
<activeProfiles>
<activeProfile>env-test</activeProfile>
Settings Details | 433

</activeProfiles>
</settings>
The final piece of the settings.xml puzzle is the activeProfiles element. This contains
a set of activeProfile elements, which each have a value of a profile id. Any profile
id defined as an activeProfile will be active, regardless of any environment settings.
If no matching profile is found, nothing will happen. For example, if env-test is an
activeProfile, a profile in a pom.xml (or profile.xml with a corresponding id), it will
be active. If no such profile is found, execution will continue as normal.
434 | Appendix A: Settings Details
APPENDIX B
Sun Specification Alternatives
The Apache Geronimo project maintains implementations of various enterprise Java
specifications. Table B-1 lists the artifactId and artifact version for all of the specifi-
cations implemented by the Geronimo project. To use one of these dependencies, use
a groupId of org.apache.geronimo.specs, locate the version of the specification you want
to use, and reference the dependency with the artifactId and artifact version listed in
Table B-1.
All artifacts in Table B-1 have a groupId of org.apache.geronimo.specs.
Table B-1. Alternate spec implementations artifacts
Specification Spec version Artifact ID Artifact version
Activation 1.0.2 geronimo-activation_1.0.2_spec 1.2
Activation 1.1 geronimo-activation_1.1_spec 1.0.1
Activation 1.0 geronimo-activation_1.0_spec 1.1
CommonJ 1.1 geronimo-commonj_1.1_spec 1.0
Corba 2.3 geronimo-corba_2.3_spec 1.1
Corba 3.0 geronimo-corba_3.0_spec 1.2
EJB 2.1 geronimo-ejb_2.1_spec 1.1
EJB 3.0 geronimo-ejb_3.0_spec 1.0
EL 1.0 geronimo-el_1.0_spec 1.0
Interceptor 3.0 geronimo-interceptor_3.0_spec 1.0
J2EE Connector 1.5 geronimo-j2ee-connector_1.5_spec 1.1.1
J2EE Deployment 1.1 geronimo-j2ee-deployment_1.1_spec 1.1
J2EE JACC 1.0 geronimo-j2ee-jacc_1.0_spec 1.1.1
435
Specification Spec version Artifact ID Artifact version
J2EE Management 1.0 geronimo-j2ee-management_1.0_spec 1.1
J2EE Management 1.1 geronimo-j2ee-management_1.1_spec 1.0
J2EE 1.4 geronimo-j2ee_1.4_spec 1.1
JACC 1.1 geronimo-jacc_1.1_spec 1.0
JEE Deployment 1.1MR3 geronimo-javaee-deployment_1.1MR3_spec 1.0
JavaMail 1.3.1 geronimo-javamail_1.3.1_spec 1.3
JavaMail 1.4 geronimo-javamail_1.4_spec 1.2
JAXR 1.0 geronimo-jaxr_1.0_spec 1.1
JAXRPC 1.1 geronimo-jaxrpc_1.1_spec 1.1
JMS 1.1 geronimo-jms_1.1_spec 1.1
JPA 3.0 geronimo-jpa_3.0_spec 1.1
JSP 2.0 geronimo-jsp_2.0_spec 1.1
JSP 2.1 geronimo-jsp_2.1_spec 1.0
JTA 1.0.1B geronimo-jta_1.0.1B_spec 1.1.1
JTA 1.1 geronimo-jta_1.1_spec 1.1
QName 1.1 geronimo-qname_1.1_spec 1.1
SAAJ 1.1 geronimo-saaj_1.1_spec 1.1
Servlet 2.4 geronimo-servlet_2.4_spec 1.1.1
Servlet 2.5 geronimo-servlet_2.5_spec 1.1.1
STaX API 1.0 geronimo-stax-api_1.0_spec 1.0.1
WS Metadata 2.0 geronimo-ws-metadata_2.0_spec 1.1.1
The version numbers in the artifact version column may be out of date
by the time you read this book. To check on the version number, visit
http://repo1.maven.org/maven2/org/apache/geronimo/specs/ in a web
browser and click on the artifactId you want to add. Choose the high-
est version of the spec you want to depend on.
To illustrate how to use this table, if we wanted to write some code in our project that
interacted with the JTA 1.0.1B specification, we would need to add the dependency
shown in Example B-1 to our project.
436 | Appendix B: Sun Specification Alternatives

Example B-1. Adding JTA 1.0.1B to a Maven project
<dependency>
<groupId>org.apache.geronimo.specs</groupId>
<artifactId>geronimo-jta_1.0.1B_spec</artifactId>
<version>1.1.1</version>
</dependency>
Notice how the version of the artifact isn’t going to line up with the version of the
specification—the previous dependency configuration adds version 1.0.1B of the JTA
specification using the artifact version of 1.1.1. Be aware of this when depending on
the alternate Geronimo implementations, and always double-check that you are using
the latest artifact version number for your specifications.
Sun Specification Alternatives | 437

Index
A
absence of property, activating profiles upon,
205
AbstractMojo class, 393
activating build profiles, 203–206
according to environment, 209
according to platform, 212
<activation> element (settings.xml), 429
<active> element (<proxy> element), 429
active-profiles goal (Help plugin), 209
<activeByDefault> element (profile activation),
205
<activeProfile> element, 208, 434
aggregating assemblies, 255–259
@aggregator annotation (Mojo), 398
aggregator element (Mojo declarations), 390
AJDT (AspectJ Development Tools ), installing,
273
annotations (Hibernate), 92
annotations for Mojo classes, 398
Apache Geronimo project, 73, 100, 435
Apache License, about, 21
ApplicationContext (Spring Framework), 98
applications, building and packaging, 27
command-line applications, 65–66
APT (Almost Plain Text) format, 315
arbitrary properties, referencing, 159
Archetype plugin, 26
creating plugin project, 392
creating simple weather application with,
44
m2eclipse plugin and, 277–279
archetypes, defined, 26
archives (see assemblies)
artifactId attribute (pom.xml), 29, 36, 168
determining for dependencies, 47
Apache Geronimo implementation of
Servlet API, 73
referencing, 263
artifactId element (plugins), 388, 394–397
AspectJ Development Tools (AJDT), installing,
273
assemblies, 217–259
assembling via assembly dependencies,
222–226
best practices, 252–259
distribution assemblies, 255–259
standard and reusable descriptors, 252–
255
building, 219–222
controlling contents of, 229–252
<dependencySets> section, 234–243
<files> section, 230–233
<fileSets> section, 230–233
managing root directory, 250
<moduleSets> section, 243–249
<repositories> section, 249–250
as dependencies, 222
descriptors for, 228–229
basics of, 226–228
predefined descriptors, 218
Assembly plugin, 65, 217
default exclusion patterns, 232
direct invocation of, 219
distribution (aggregating) assemblies, 255–
259
supported formats, 229
<attachmentClassifier> flag (module sets),
248
We’d like to hear your suggestions for improving our indexes. Send email to index@oreilly.com.
439

authentication, project web site, 318
B
base configuration section (assembly
descriptors), 226
base directory, 27
best practices with POMs, 173–180
bin assembly descriptor, 219
<binaries> section (module sets), 247
module handling and, 249
binaries, module, 247
module handling and, 249
boundaries for version ranges, specifying, 163
breadcrumbs, in project web site, 329
build (pom.xml)
referencing, 263
<build> element (pom.xml), 154
build environment, 151
build information (in pom.xml), 150
build lifecycle, 32–34, 181–196
clean lifecycle, 181–183
common lifecycle goals, 189–196
default lifecycle, 184–185
default Maven lifecycle, 32
package-specific lifecycle, 185–189
plugins and, 406–409
custom plugin lifecycles, 407
default lifecycle, overriding, 408
parallel lifecycles, 406
site lifecycle, 185
build Maven
user-defined properties in, 265
build portability, 197–200
building using profiles (see build profiles)
selecting appropriate level of, 199
build profiles, 197–215
activating, 203–206
according to environment, 209
according to platform, 212
configuration in settings.xml, 429
external, 206–207
listing active, 209
overriding a POM, 202
overriding Compile plugin (example), 200–
202
portability, 197–200
selecting appropriate level of, 199
settings profiles, 207–209
tips and tricks with, 209–214
building applications, 27
building assemblies, 219–222
bundling assemblies into projects, 224
bytecode analysis (Dependency plugin), 138
C
central repository, 154
checking out projects from Subversion, 276
<checksumPolicy> element (<repository>
element), 433
classes
creating new, 49
where stored, 27
classifier attribute (pom.xml), 169
classifiers for environment, 212
classpath resources, where stored, 27
classwords-1.1.jar file, 16
clean lifecycle, 181–183
Clean plugin, 182
cleaning up POMs, 130
(see also optimizing POMs)
command-line applications, packaging, 65–66
compile dependencies, 160
compile goal, 33
compile phase (default lifecycle), 184
Compiler plugin, 193
compile goal, 33
overriding with a profile (example), 200
testCompile goal, 34
compiling projects, 83
(see also WAR files)
@component annotation (Mojo parameters),
405
<componentDescriptors> section (assembly
descriptors), 251
configuration element (Mojo declarations),
391
configure phase (default lifecycle), 193–194
conflict, dependency, 164
Console View, 274
consolidating dependencies (best practice),
173
constructor injection, 385
<containerDescriptorHandlers> section
(assembly descriptors), 251
convention over configuration, 31
coordinates, 29, 34–37, 168
for plugins, 388, 394–397
creating projects, 26
440 | Index

CSS for project web site, 319
custom themes, 325
custom archives (see assemblies)
custom packaging types, 188
customizing projects, 43–66
adding new dependencies, 46–48
adding project information to pom.xml, 45–
46
adding resources, 53–54
adding test-scoped dependencies, 60–61
building packaged command-line
applications, 65–66
creating the project, 44–45
defining the project, 43–44
running (executing), 54–58
testing resources, adding, 61–62
unit tests, executing, 62–64
web applications (see web applications)
writing unit tests, 58–60
D
DAO (Data Access Objects), 99
Databinder archetypes, list of, 278
date format, project web site, 330
debug( ) method (Log class), 397
default Maven lifecycle, 32, 184–185
common lifecycle goals, 189–196
overriding for plugins, 408
default.properties file, 190
dependencies, 159
adding or updating with m2eclipse, 287–
289
adding to projects, 46–48
assemblies as, 222
assembling assemblies using, 222–226
conflicts with, resolving, 164
declared in plugin descriptors, 392
exploring with Dependency plugin, 56
grouping (best practice), 173
how to manage, 166
including/excluding in assembly archives,
227, 234–243
advanced unpacking options, 242–243
by scope, 237–238
custom dependency output location,
235
fine-tuning, 238–240
interpolation of properties in
dependency output, 235–236
transitive dependencies and project
artifacts, 240–242
inheritance and (see project inheritance)
J2EE dependencies, adding, 73–75
javax.transaction:javax (unavailable), 100
on JSP 2.0 specification, 74
optimizing, 130–134
Maven Dependency plugin for, 136–
139
optional, 161
plugin (see plugins)
resolving with m2eclipse, 291
scope of, 160
excluding dependencies from assemblies
by, 237–238
test-scoped, 60–61, 160
transitive (see transitive dependencies)
<dependencies> element (pom.xml), 47
dependency information section (assembly
descriptors), 227, 234–243
custom dependency output location, 235
including/excluding dependencies
advanced unpacking options, 242–243
by scope, 237–238
fine-tuning, 238–240
transitive dependencies and project
artifacts, 240–242
interpolation of properties in dependency
output, 235–236
Dependency Injection (DI), 385
dependency management, 39–40
Dependency plugin, 56
analyze goal, 137
dependency trails, 241
<dependencyManagement> element
(pom.xml), 166
<dependencySets> section (assembly
definitions), 234–243
custom dependency output location, 235
including/excluding dependencies
advanced unpacking options, 242–243
by scope, 237–238
fine-tuning, 238–240
transitive dependencies and project
artifacts, 240–242
interpolation of properties in dependency
output, 235–236
deploy phase (default lifecycle), 185, 196
Deploy plugin, 196
Index | 441

deploying project web site, 317–319
@depreciated annotation (Mojo parameters),
405
depth of dependencies, 175
describing Maven plugins, 19
description attribute (pom.xml)
referencing, 263
description element (Mojo declarations), 389
description element (Mojo parameters), 391
description element, plugins, 388
descriptors, assembly, 228–229
basics of, 226–228
<dev> element (profile activation), 205
developer information (project information),
150
adding to project, 45
directory modes, project web site, 318
directory structures for projects, 26, 314
<directory Permissions> element, 427
distribution assemblies, 255–259
<distributionManagement> section
(pom.xml), 317, 427
documentation, project, 315–316
documentation generation, 41
downloading examples for this book, 25
downloading Maven, 14
downloading source with m2eclipse, 289
Doxia engine, 315
macros, 331
duplicated dependency declarations, 130
E
EAR packaging, 188
Eclipse IDE, 271 (see m2eclipse plugin)
editable element (Mojo parameters), 391
effective POMs, 155
EJBs (Enterprise JavaBeans), 187
Embedder, 304
<enabled> element (<repository> element),
433
Enterprise JavaBeans (EJBs), 187
enterprise project, multimodule (example), 87–
126
multimodule versus inheritance, 176
object model, 91–95
running web applications, 116
simple-parent project, 90–91
simple-persist module of, 99–105
simple-weather module of, 95–99
simple-webapp, 105–115
@Entity annotation (Hibernate), 94
env variable, 158
env.* properties, 262, 264, 431
environment portability, 198
environment variables, referencing, 262, 264,
431
environment-specific configurations, 209–211
example programs in this book, downloading,
25
<excludes> section (<fileSets> element), 232
excluding files from dependency unpacking,
242
excluding transitive dependencies, 164
exclusive boundaries (version ranges), 163
Exec plugin, 55
@execute annotation (Mojo), 399
execute( ) method (Mojo interface), 393
executing goals, 30
(see also goals)
executing lifecycle phases, 32
executionStrategy element (Mojo declarations),
391
external build profiles, 206–207
external dependencies, 159
F
field injection, 385
<file> element (profile activation), 205
<file> element (<activation> element), 430
file information section (assembly descriptors),
226, 230–233
file modes, project web site, 318
<filePermissions> element, 427
<files> section (assembly descriptors), 230
<fileSets> section (assembly descriptors), 230–
233
default exclusion patterns, 232
<filtering> flag (dependency set unpacking),
243
filtering resources, 190
<filtering> section (<fileSets> element), 232
FML documents, 316
<formats> element (assembly descriptions),
228
FreeBSD, installing Maven on, 15
442 | Index

G
generate-resources phase (default lifecycle),
184
generate-sources phase (default lifecycle), 184
generate-test-resources phase (default
lifecycle), 184
generate-test-sources phase (default lifecycle),
184
Geronimo project (see Apache Geronimo
project)
getLog( ) method (Mojo interface), 393
global settings profiles, 207, 208
@goal annotation (Mojo), 398
goal element (Mojo declarations), 389
goalPrefix element, plugins, 389
goals, 30
(see also plugins)
about, 26
attaching to lifecycle phases, 32
defined, 30
triggering on pre-clean phase, 182
graphical POM editor, 294
graphics for project web site, 313
group identifiers, about, 168
(see also groupId attribute)
group permissions, project web site, 318
groupId attribute (pom.xml), 29, 36, 168
built-in, to avoid dependency duplication,
133
determining for dependencies, 47
Apache Geronimo implementation of
Servlet API, 73
referencing, 262
groupId element (plugins), 388, 394–397
grouping dependencies (best practice), 173
<groupVersionAlignments> flag (assembly
repositories), 250
H
HEAD element, XHTML in (project web sites),
328
header graphics, project web site, 313
Help plugin, 18
help:describe goal, 19–21
help with Maven, getting, 17
Help:active-profiles goal, 209
Hibernate, 90
Hibernate annotations, 92
Hibernate plugin, 108
hibernate.cfg.xml file, 104
Hibernate3 plugin, 104, 108
building database using, 116
HOME environment variable, 264
<host> element (<proxy> element), 429
HQL (Hibernate Query Language), 94
hyperlinks at project web site, 328
I
<id> element, 427
assembly descriptions, 228
<mirror> element, 428
<profiles> element, 201
implementation element (Mojo declarations),
390
implicit variables, list of, 158
importing projects into Eclipse, 282–285
materializing projects, 284–285
in-house portability, 198
<includeDependencies> flag (module sets),
248
<includeMetadata> flag (assembly
repositories), 250
<includes> section (<fileSets> element), 231
<includeSubModules> flag (module sets), 244,
248
inclusive boundaries (version ranges), 163
incremental versions (projects), 156
indexing repositories with m2eclipse, 293
inheritance between projects or modules, 171
choosing multimodule projects instead of,
175
inheritedByDefault element (Mojo
declarations), 390
inheritedByDefault element, plugins, 389
install phase (default lifecycle), 185, 196
Install plugin, 196
installation directory
contents of, 16
identifying, 264
installing Maven, 13–17
details about, 16
on FreeBSD or OpenBSD, 15
on Linux, 15
on Mac OS X, 14
on Microsoft Windows, 15
testing the installation, 16
upgrade an installation, 17
Index | 443

instantiationStrategy element (Mojo
declarations), 390
integration-test phase (default lifecycle), 185
<interactiveMode> element (settings.xml),
426
internal dependencies, 159
(see also dependencies)
Inversion of Control (IoC), 384
isolatedRealm element, plugins, 389
J
J2EE dependencies, adding, 73–75
JAR files, 186
executable, producing from project, 220–
222
jar-with-dependencies assembly descriptor,
219
jar-with-dependencies format, 65
jar:jar goal, 34
Java classes, where stored, 27
Java installation, verifying, 13
Java system properties, referencing, 159, 262,
264, 431
javax.transaction:javax dependency
(unavailable), 100
JAVA_HOME environment variable, 264
<jdk> element (<activation> element), 430
Jetty plugin, 108
configuring in pom.xml, 69–70
JSP 2.0 specification, dependency on, 74
L
language element (Mojo declarations), 390
<layout> element (<repository> element),
433
license (Apache), about, 21
LICENSE.txt file, 16
licensing information (project information),
150
adding to project, 45
lifecycle, Maven (see build lifecycle)
<lineEnding> section (<fileSets> element),
232
links at project web site, 328
Linux, installing Maven on, 15
listing active profiles, 209
local repository, 38
<localRepository> element (settings.xml), 426
logging from plugins, 397
lower boundaries (version ranges), 163
M
m2 directory, contents of, 16
m2eclipse plugin, 271–307
adjusting Maven preferences, 303–306
creating Maven projects, 275–280
checking out projects from Subversion,
276
creating modules, 279–280, 289
from Maven archetype, 277
creating POMs, 280–282
importing Maven projects into Eclipse, 282–
285
materializing projects, 284–285
installing, 272–274
prerequisites for, 272–274
running Maven builds, 285–286
working with projects, 286–292
adding and updating dependencies and
plugins, 287–289
creating modules, 289
downloading source, 289
opening project pages, 291
resolving dependencies, 291
working with repositories, 292–293
indexing repositories, 293
searching for artifacts and Java classes,
292
M2_HOME environment variable, 264
Maven installation and, 14, 15
Mac OS X, installing Maven on, 14
major versions (projects), 156
managing dependencies, 166
(see also dependencies)
materializing projects, 284–285
Maven
downloading, 14
getting help on, 17
upgrading, 17
Maven, installing, 13–17
details about, 16
on Mac OS X, 14
on Microsoft Windows, 15
testing the installation, 16
Maven Archetype plugin, 26
creating plugin project, 392
444 | Index

creating simple weather application with,
44
m2eclipse plugin and, 277–279
Maven Assemblies, 217–259
assembling via assembly dependencies,
222–226
best practices, 252–259
distribution assemblies, 255–259
standard and reusable descriptors, 252–
255
building, 219–222
controlling contents of, 229–252
componentDescriptors and
containerDescriptorHandlers,
251
<dependencySets> section, 234–243
<files> section, 230–233
<fileSets> section, 230–233
managing root directory, 250
<moduleSets> section, 243–249
<repositories> section, 249–250
as dependencies, 222
descriptors for, 228–229
basics of, 226–228
predefined descriptors, 218
Maven Assembly plugin, 65
Maven Clean plugin, 182
Maven Compiler plugin, 193
overriding with a profile (example), 200
Maven Console, enabling, 274
Maven coordinates, 29, 34–37, 168
Maven core concepts, 30–41
Maven Dependency plugin, 56
analyze goal, 137
optimizing POMs with, 136–139
Maven Deploy plugin, 196
Maven Embedder, 304
Maven Exec plugin, 55
Maven goals, about, 26
Maven Hibernate plugin, 108
Maven Hibernate3 plugin, 104, 108
building database using, 116
Maven Install plugin, 196
Maven installation directory, identifying, 264
Maven installing
on FreeBSD or OpenBSD, 15
on Linux, 15
Maven Jetty plugin, 108
configuring in pom.xml, 69–70
Maven lifecycle (see build lifecycle)
Maven Plugin plugin, 396
Maven plugins (see plugins)
Maven profiles (see build profiles)
Maven projects (see projects)
Maven properties (see properties)
Maven repositories, 37
central, 154
dependency management, 39–40
Maven Site plugin, 185, 310
Maven Standard Dirctory Layout, 27
Maven Surefire plugin
binding goal to test lifecycle phase, 195
skip parameter, 64
test goal, 34, 63
testFailureIgnore configuration property,
63
Maven Version Decorator, 305
merging POM changes, 131
Microsoft Windows, installing Maven on, 15
minor versions (projects), 156
<mirror> element (settings.xml), 428
<mirrorOf > element (<mirror> element), 428
<module> element (pom.xml), 78
module information section (assembly
descriptors), 227, 243–249
module inheritance, 171
choosing multimodule projects instead of,
175
modules, creating with m2eclipse, 279–280,
289
<modules> element (pom.xml), 78
<moduleSets> section (assembly descriptors),
227, 243–249
Mojo class annotations, 398
Mojo configurations (plugin descriptors), 389
Mojo failure, responding to, 399
Mojo interface, 393
Mojo parameters, 400–405
multivalued, 402–404
Mojo, defined, 386
MojoExecutionException exception, 399
MojoFailureException exception, 399
multimodule project (example), 77–85
building, 83
multimodule enterprise project, 87–126
multimodule versus inheritance, 176
object model, 91–95
running web applications, 116
Index | 445

simple-parent project, 90–91
simple-persist module of, 99–105
simple-weather module of, 95–99
simple-webapp, 105–115
running, 85
simple-parent project, 77
simple-weather submodule, 79–81
simple-webapp submodule, 81–82
multimodule projects, in general, 169
inheritance versus, 175
module sets for assemblies, 227, 243–249
multimodule projects, optimizing POMs for,
130
multivalued Mojo parameters, 402–404
mvn install command, 27
mvn script, 16
Mylyn
installing, 273
Mylyn plugin, 271
N
name attribute (pom.xml), referencing, 263
name element (Mojo parameters), 391
<name> element (<mirror> element), 428,
429
@NamedQueries annotation (Hibernate), 94
@NamedQuery annotation (Hibernate), 94
navigation menu, project web site, 313
new project wizard, Eclipse, 275
nonportable builds, 198, 199
<nonProxyHosts> element (<proxy> element),
429
NOTICE.txt file, 16
O
object model (see POM; pom.xml file)
ObjectWeb ASM toolkit, 138
obtaining example programs for this book, 25
obtaining Maven, 14
<offline> element (settings.xml), 426
open source generation, web site for (see site
generation)
OpenBSD, installing Maven on, 15
opening project pages with m2eclipse, 291
optimizing POMs, 129–147
about cleaning up POMs, 130
dependency optimization, 130–134
Maven Dependency plugin, 136–139
plugin optimization, 134–135
optional dependencies, 161
ordering of version qualifiers, 156
organizational information (project
information), 150
adding to project, 45
organizational portability, 198
<os> element (<activation> element), 430
<outputDirectory> element (assembly
descriptors), 231
<outputDirectory > flag (module sets), 248
<outputDirectoryMapping> element
(assembly descriptors), 235
interpolation of, in module sets, 246
<outputFileNameMapping> element
(assembly descriptors), 235
overriding with profiles (see build profiles)
P
package phase (default lifecycle), 185
package-specific lifecycle, 185–189
packages
custom packaging types, 188
EARs as, 188
EJBs (Enterprise JavaBeans) as, 187
JAR files (see JAR files)
plugins as, 186
(see also plugins)
POM files (see POM; pom.xml file)
types of, 185
WAR files as (see WAR files)
packaging applications, 27
command-line applications, 65–66
packaging attribute (pom.xml), 29, 37
<packaging> element (pom.xml), 186
parallel lifecycles for plugins, 406
@parameter annotation (Mojo parameters),
405
parameters element (Mojo declarations), 391
parent POM, 26, 80
(see also POM)
configuring project assembly in, 223
dependency management in, 166
inheritance from (see project inheritance)
module sets and, 249
prototype parent projects, 179
resolving dependency duplication, 130
<passphrase> element, 427
<password> element, 427, 429
446 | Index

passwords in settings files, 211
PATH environment variable, 264
PATH variable, Maven installation and, 14, 15
permissions, project web site, 318
@phase annotation (Mojo), 399
phase element (Mojo declarations), 390
phases, lifecycle (see build lifecycle)
platform-specific customizations, 212
Plexus, 384
components of, for specifying Mojo
parameters, 404
introduction to, 385
reasons for, 386
plugin descriptors, 387–392
dependency declarations, 392
Mojo configurations, 389
top-level elements of, 388
plugin goals (see goals)
Plugin plugin, 396
<pluginGroups> element (settings.xml), 426
<pluginManagement> element (pom.xml),
135
project inheritance and, 172
<pluginRepositories> element (settings.xml),
433
plugins, 18, 19, 383–409
(see also specific plugin by name)
adding or updating with m2eclipse, 287–
289
default repository for, 154
defined, 30, 386
inheriting lists of (see project inheritance)
Maven lifecycle and, 406–409
custom plugin lifecycles, 407
default lifecycle, overriding, 408
parallel lifecycles, 406
optimizing, 134–135
packaging as, 186
writing, 392–400
configuring plugin prefix, 394–397
creating plugin projects, 392
logging from a plugin, 397
Mojo class annotations, 398
Mojo parameters, 400–405
simple Java Mojo (example), 393
when Mojos fail, 399
POM (Project Object Model), 28, 149–180
best practices, 173
creating with m2eclipse, 280–282
for enterprise projects, 91–95
merging POMs, 131
Mojo parameters in, 401
optimizing and refactoring, 129–147
about cleaning up POMs, 130
dependency optimization, 130–134
with Maven Dependency plugin, 136–
139
plugin optimization, 134–135
overriding with profiles, 202
parent (top-level), 80
configuring project assembly in, 223
dependency management in, 166
inheritance from (see project
inheritance)
module sets and, 249
prototype parent projects, 179
resolving dependency duplication, 130
project dependencies (see dependencies)
project relationships, 168–173
referencing properties in, 262, 431
Super POM
inheriting from, 171
syntax, 156–159
user-defined properties in, 265
pom.xml file, 27, 28, 149
(see also POM)
best practices, 173–180
build environment, 151
build information in, 150
defining submodules, 78
dependency management, 39
final POMs (for reference)
simple-command POM, 141
simple-model POM, 142
simple-parent POM, 139
simple-persist POM, 143
simple-weather POM, 144
simple-webapp POM, 145
for simple-web project (example), 68
Mojo parameters in, 401
optimizing (see optimizing POMs)
parent (top-level), 80
configuring project assembly in, 223
dependency management in, 166
inheritance from (see project
inheritance)
module sets and, 249
prototype parent projects, 179
Index | 447

resolving dependency duplication, 130
<profiles> element (see build profiles)
project information in, 150
adding, 45
referencing properties in, 262, 431
<port> element (<proxy> element), 429
portability, build, 197–200
building using profiles (see build profiles)
selecting appropriate level of, 199
post-integration-test phase (default lifecycle),
185
pre-clean phase (clean lifecycle), 182
pre-integration-test phase (default lifecycle),
185
predefined assembly descriptors, 218
preferences (Maven) for Eclipse, 303–306
prefix, plugin, 394–397
prepare-package phase (default lifecycle), 184
<privateKey> element, 427
process-classes phase (default lifecycle), 184
process-resources phase (default lifecycle), 184,
190–193
process-sources phase (default lifecycle), 184
process-test-resources phase
build lifecycle, 194
default lifecycle, 184
process-test-sources phase (default lifecycle),
184
<profile> element (settings.xml), 429
profiles (see build profiles)
<profiles> element (pom.xml), 201
profiles.xml file, 206
programs in this book, downloading, 25
project assembly descriptor, 219
project dependencies (see dependencies)
project documentation, writing, 315–316
project information (in pom.xml), 150
adding to project, 45
project inheritance, 171
choosing multimodule projects instead of,
175
Project Object Model (see POM; pom.xml file)
project pages, opening with m2eclipse, 291
project relationships, 168–173
project variable, 158
project versions, about, 156
(see also version attribute)
dependency version ranges, 162
project web site, 309–332
creating, 310–311
customizing site appearance, 319–328
CSS for, 319
CSS themes, 325
reusable skins, 324, 327
using site templates, 320–324, 327
customizing site descriptor, 311–314
header graphics, 313
navigation menu, 313
deploying, 317–319
site directory structure, 314
tips and tricks for, 328–332
writing project documentation, 315–316
project.* properties, 262, 431
projects
build portability, 197–200
building using profiles (see build
profiles)
selecting appropriate level of, 199
bundling assemblies into, 224
creating, 26
customizing, 43–66
adding new dependencies, 46–48
adding project information to pom.xml,
45–46
adding resources, 53–54
adding test-scoped dependencies, 60–
61
building packaged command-line
applications, 65–66
creating the project, 44–45
defining the project, 43–44
running (executing), 54–58
test resources, adding, 61–62
unit tests, executing, 62–64
writing unit tests, 58–60
m2eclipse plugin and, 286–292
adding and updating dependencies and
plugins, 287–289
creating modules, 289
creating projects, 275–280
downloading source, 289
importing projects into Eclipse, 282–
285
materializing projects, 284–285
opening project pages, 291
resolving dependencies, 291
properties of, 262–264
web applications (see web applications)
448 | Index

for writing plugins, 392
properties, 261–266
activating profiles upon absence of, 205
configuration in settings.xml, 431
project properties, 262–264
referencing in assembly descriptors, 228
referencing in pom.xml, 157
resource filtering, 266–269
settings properties, 264
user-defined, 265
properties file, 190
<property> element (<activation> element),
430
<protocol> element (<proxy> element), 429
prototype parent projects, 179
provided dependencies, 160
<proxies> element (settings.xml), 428
publication date format, project web site, 330
Q
qualifiers for project versions, 156
ordering of, 156
R
ranges for dependency versions, 162
README.txt file, 16
@readonly annotation (Mojo parameters),
405
real POMs, 155
refactoring POMs (see optimizing POMs)
references to properties, in pom.xml, 157
relationships, project, 168–173
<releases> element (<repository> element),
433
replacing transitive dependencies, 164
replicated dependencies, 130
report generation, 41
repositories, 37
central, 154
configuration in settings.xml, 432
dependency management, 39–40
m2eclipse tools for, 292–293
indexing repositories, 293
searching for artifacts and Java classes,
292
repository directory, 17
<repository> element (settings.xml), 432
repository information section (assembly
descriptors), 227, 249–250
@required annotation (Mojo parameters), 405
required element (Mojo parameters), 391
requirements element (Mojo declarations),
391
@requiresDependencyResolution annotation
(Mojo), 398
@requiresDirectInvocation annotation (Mojo),
399
requiresDirectInvocation element (Mojo
declarations), 389
@requiresOnline annotation (Mojo), 399
requiresOnline element (Mojo declarations),
390
requiresProject element (Mojo declarations),
389
@requiresProjet annotation (Mojo), 398
@requiresReports annotation (Mojo), 398
requiresReports element (Mojo declarations),
390
resolving dependencies with m2eclipse, 291
resolving dependency conflicts, 164
resource filtering, 190, 266–269
resources
adding to packages, 53–54
adding to unit tests, 61–62
resources directory, 61, 191
creating, 53
resources for programs, where stored, 27
Resources plugin
resources goal, 32
testResources goal, 34
reusable assembly descriptors, 252–255
root directory, assemblies, 250
componentDescriptors and
containerDescriptorHandlers,
251
runtime dependencies, 160
S
<scope> element (<dependency> element),
60
scope, dependency, 40, 160
excluding dependencies from assemblies by,
237–238
transitive dependencies and, 164
searching for dependency attributes, 47
security of project web site, 317–319
Index | 449

server authentication, project web site, 318
<server> element (settings.xml), 427
<servers> section, 318
Servlet API, adding as dependency, 73
servlet attribute (web.xml), 71
servlet-mapping attribute (web.xml), 71
servlets, adding to project, 71–72
setLog( ) method (Mojo interface), 393, 397
setter injection, 385
<settings> element (pom.xml), 207, 425–434
settings profiles, 207–209
settings variable, 158
settings.* properties, 262, 431
settings.xml file, 16, 17, 151, 207, 425
Mojo parameters in, 401
not storing passwords in, 211
properties in, 264
referencing, 262, 431
sibling module dependency duplication, 130,
131, 133
simple parent project (example)
final POM for (for reference), 139
simple weather application (see weather project
(example))
simple web application (see web applications)
simple-command POM (for reference), 141
simple-model POM (for reference), 142
simple-parent POM (for reference), 139
simple-parent project (example)
multimodule, 77
multimodule enterprise, 90–91
simple-persist POM (for reference), 143
simple-weather POM (for reference), 144
simple-webapp POM (for reference), 145
simplest POM, 154
single mojo (assemblies), 218
site descriptor, customizing, 311–314
header graphics, 313
navigation menu, 313
site directory, 314
site generation, 41, 309–332
creating, 310–311
customizing site appearance, 319–328
CSS for, 319
CSS themes, 325
reusable skins, 324, 327
using site templates, 320–324, 327
customizing site descriptor, 311–314
header graphics, 313
navigation menu, 313
deployment, 317–319
site directory structure, 314
tips and tricks for, 328–332
writing project documentation, 315–316
site lifecycle, 185
site lifecycle phase, 41
Site plugin, 185, 310
skins for project web site, 324, 327
<skip> element (<plugin> element), 64
skipping unit tests, 64
snapshot versions, 157, 169
<snapshots> element (<repository> element),
433
software license, about, 21
source, downloading with m2eclipse, 289
source code, where stored, 27
<sourceDirectory> element (pom.xml), 194
<sources> section (module sets), 245
Spring Framework, 90, 101
Spring IoC container, 386
src assembly descriptor, 219
Standard Dirctory Layout, 27
style sheets, project web site, 319
custom themes, 325
Subclipse plugin, 271
installing, 273
submodules, defining in pom.xml, 78
Subversion, checking out projects from, 276
Sun specification alternatives, 435
Super POM
inheriting from, 171
Surefire plugin
binding goal to test lifecycle phase, 195
skip parameter, 64
test goal, 34, 63
testFailureIgnore configuration property,
63
system properties, referencing, 158, 262, 264,
431
system-scope dependencies, 160
T
@Table annotation (Hibernate), 94
templates for project web site, 320–324, 327
test cases, where stored, 27
test phase (default lifecycle), 184, 195
test-compile phase (default lifecycle), 184, 194
test-scoped dependencies, 60–61, 160
450 | Index

testFailureIgnore configuration property
(Surefire plugin), 63
testing, 58
(see also debugging)
Maven installations, 16
Surefire:test goal, 34, 63
unit tests (see unit tests)
using test-scoped dependencies, 60–61,
160
<testOutputDirectory> element (pom.xml),
194
<testSourceDirectory> element (pom.xml),
194
themes for project web site appearance, 325
top-level POM, 26, 80
(see also POM)
configuring project assembly in, 223
dependency management in, 166
inheritance from (see project inheritance)
module sets and, 249
prototype parent projects, 179
resolving dependency duplication, 130
tracking profiles, 209
transitive dependencies, 163
resolving conflicts with, 164
support for, 39
triggering goals on pre-clean phase (clean
lifecycle), 182
type element (Mojo parameters), 391
U
unit tests
adding resources to, 61–62
dependency duplication and, 131
executing, 62–64
ignoring test failures, 63
skipping, 64
test-scoped dependencies, 60–61, 160
writing, 58–60
universal portability, 198
unpacking project dependencies, options for,
242–243
unused, undeclared dependencies
(Dependency plugin), 138
<updatePolicy> element (<repository>
element), 433
upgrading Maven installations, 17
upper boundaries (version ranges), 163
<url > element (<mirror> element), 428
used, undeclared dependencies (Dependency
plugin), 138
<usePluginRegistry> element (settings.xml),
426
useProjectArtifact flag, 234, 241
user permissions, project web site, 318
user-defined properties, 265
user-specific settings profiles, 207–209
not storing passwords in, 211
<username> element, 427, 429
<useStrictFiltering> section (<fileSets>
element), 232
useTransitiveDependencies flag, 241
useTransitiveFiltering flag, 241
V
validate phase (default lifecycle), 184
variable replacement on project resources (see
resource filtering)
Velocity
scripting language, 320
template, 110, 113
verify phase (default lifecycle), 185
verifying Java installation, 13
version, Java installation, 13
version attribute (pom.xml), 29, 36, 156, 169
built-in, to avoid dependency duplication,
133
dependency version ranges, 162
determining for dependencies
Apache Geronimo implementation of
Servlet API, 73
referencing, 262
Version Decorator, 305
version element (plugins), 388, 394–397
version information on project web site, 329
W
WAR files, 69, 187
compiling multimodule projects into, 83
warn logging level (Mojo), 398
weather project (example), 77
(see also multimodule project)
adding new dependencies, 46–48
adding project information to pom.xml, 45–
46
adding resources, 53–54
adding test-scoped dependencies, 60–61
Index | 451

building packaged command-line
applications, 65–66
creating, 44–45
defining, 43–44
final simple-weather POM, 144
running (executing), 54–58
source code, 48–53
unit test resources, adding, 61–62
unit tests, executing, 62–64
writing unit tests, 58–60
web applications
final simple-weather POM, 145
multimodule enterprise project (example)
object model, 91–95
multimodule enterprise project example,
87–126
multimodule versus inheritance, 176
running web applications, 116
simple-parent project, 90–91
simple-persist module of, 99–105
simple-weather module of, 95–99
simple-webapp, 105–115
multimodule project example, 77–85
building, 83
multimodule projects, in general, 169
running, 85
simple-parent project, 77
simple-weather submodule, 79–81
simple-webapp submodule, 81–82
simple-web project (example), 67–75
adding J2EE dependences, 73–75
adding simple servlet, 71–72
configuring Jetty plugin, 69–70
creating, 68–69
web site for open source generation (see site
generation)
Web Tools Platform (WTP), installing, 273
web.xml file, 82
servlet and servlet-mapping attributes, 71
wide portability, 198, 199
Windows operating systems, installing Maven
on, 15
writing project documentation, 315–316
WTP (Web Tools Platform), installing, 273
X
XHTML in site head, 328
Y
Yahoo! Weather RSS feed, about, 44
452 | Index

About the Author
The primary contributor to this book is Tim O’Brien, online editor of O’Reilly News,
and author of three other O’Reilly titles: Harnessing Hibernate, Maven: A Developer’s
Notebook, and Jakarta Commons Cookbook.
Colophon
The animal on the cover of Maven: The Definitive Guide is a giant anteater (Myrmeco-
phaga tridactyla), the largest species of anteater. It grows to an average length of seven
feet and weighs about 85 pounds—the size of a German shepherd dog. Its head tapers
to a long, narrow snout, and its tail is nearly as large as the rest of its body and covered
with bristly hair. Despite its species name, tridactyla (Greek for “three fingers”), the
anteater has five digits on each foot, but the middle three have extra-long claws. The
anteater uses these claws to break open insect mounds and defend itself against pred-
ators. It walks on its knuckles to protect the claws, causing it to walk with a shuffle.
Giant anteaters live in grasslands and tropical forests in Central and South America,
where ants and termites are plentiful. They prefer to eat soft-bodied insects because
anteaters are edentate animals, meaning they have no teeth; instead of chewing, they
crush their food against hard growths on the inside of their mouths.The anteater first
tears an opening in a tree trunk or an anthill with its claws, and then it uses its snout
and tongue to collect the insects inside. It has the longest tongue in proportion to body
size of any mammal—more than two feet long—and can scoop up thousands of insects
in minutes. A single anteater can eat up to 30,000 ants and termites each day.
Being solitary creatures, giant anteaters tend not to stay in one spot for long. They are
not aggressive, but they can be fierce and will use their claws to fight off pumas or
jaguars (their main natural predators). When threatened, the giant anteater stands on
its hind legs, using its tail for balance, and either strikes or hugs its attackers like a
bear—hence it is sometimes called the “ant bear.” Anteaters are frequently killed by
humans, whether hunted or hit by cars, and habitat destruction is the primary threat
to their survival. They are listed as “vulnerable” by the International Union for Con-
servation of Nature and Natural Resources.
The cover image is from the Dover Pictorial Archive. The cover font is Adobe ITC
Garamond. The text font is Linotype Birka; the heading font is Adobe Myriad Con-
densed; and the code font is LucasFont’s TheSansMonoCondensed.
