Wintellect Course Cover V4a Microsoft Azure Infrastructure Essentials Manual
User Manual:
Open the PDF directly: View PDF ![]() .
.
Page Count: 228 [warning: Documents this large are best viewed by clicking the View PDF Link!]

Microsoft Azure Infrastructure Essentials
Consulting / Training
wintellect.com

Microsoft Azure
Infrastructure
Essentials
Copyright © 2018
PUBLISHED BY
Wintellect, LLC
980 Hammond Drive
Bldg. Two, Suite 660
Atlanta, GA 30328
Copyright © 2018 by Dave Franklyn. Licensed to Wintellect, LLC
All rights reserved. No part of the contents of this book may be reproduced or transmitted in any form or
by any means without the written permission of the publisher.
The example companies, organizations, products, domain names, e-mail addresses, logos, people, places,
and events depicted herein are fictitious. No association with any real company, organization, product,
domain name, e-mail address, logo, person, place, or event is intended or should be inferred.
Table of Contents
Part 0 – Introduction to Azure Infrastructure
Part 1 – Azure Management Tools
Part 2 – Azure Virtual Network Service and Components
Part 3 – Virtual Machines in Microsoft Azure
Part 4 – Azure Storage Types and Capabilities
Part 5 – Azure Site Recovery and Supported Scenarios
Part 6 – Implementing Azure Active Directory
Notes Pages
This three-day instructor-led course covers a range of components, including Azure network services
Azure Compute, Azure Storage, Azure Backup and Site Recovery and Azure Active Directory in the
Microsoft Azure cyberspace. It also includes a number of demonstrations and labs that enable students
to develop hands-on skills that are necessary when implementing such solutions.
Overview of Microsoft Azure and What you will learn
Microsoft Azure
delivers a cloud platform built upon the foundational principles of security, privacy & control,
compliance, and transparency. Azure is a collection of services that provide computing and storage
resources. Customers can use these resources to build and operate their applications, rather than
relying exclusively on their on-premises IT infrastructure. A global network of datacenters host Azure
services. In general, Azure offers a 99.9 percent service level agreement (SLA), with respect to
availability, for the majority of its services. However, specifics of the SLA depend on such factors as
pricing tier and redundancy level in the Azure services’ design.
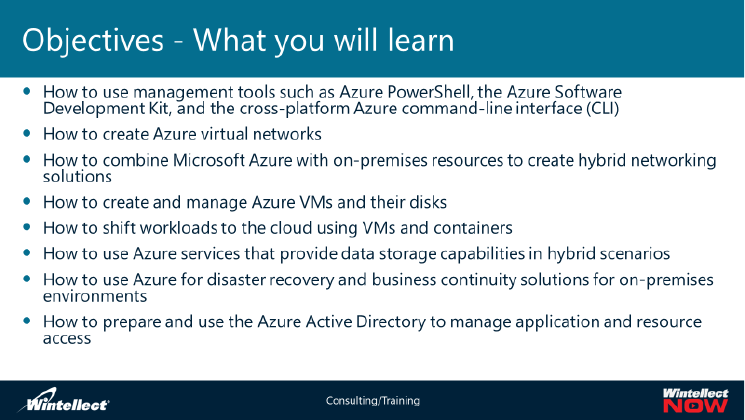
In this course you will learn to:
• Describe the core concepts of a Microsoft Azure Infrastructure
• Explain the primary tools used to manage a Microsoft Azure Infrastructure, including Azure
PowerShell, the Azure cross-platform command line tool and the Azure Software Development Kit
• Describe Azure hybrid networking technologies
• Create and manage Azure VMs and their disks. Explain Azure Cloud Services relationship to VMs,
and deliver cloud workloads in Azure containers
• Describe the Azure services that provide data storage capabilities in hybrid scenarios
• Explain the use of Azure disaster recovery and business continuity solutions for on-premises
environments
• Describe how the Azure Active Directory (Azure AD) is used to provide tenant identities for users,
groups and devices that can be used to gain access to cloud applications, resources and services,
as well as provide single sign-on and multifactor authentication.
Audience for this course
The intended
audience of
this course is
persons
working with
Microsoft
Azure and who
want to
evaluate
deploying,
configuring,
and
administering
the
infrastructure
of a Microsoft
Azure subscription. This includes:
•Information Technology (IT) professionals who have used on-premises virtualization
technologies, including both Hyper-V and VMware platforms, but want to deploy, configure, and
administer services and virtual machines in Azure
•Windows Server administrators who are looking to evaluate migrating on-premises Active
Directory roles and services to the cloud
•Are Windows and Linux administrators and are looking to evaluate and migrate on-premises
workloads and services to the cloud
•Want to use Azure to increase resiliency and agility of their on-premises environments
•Are IT professionals and DevOps personnel who are experienced in other non-Microsoft cloud
technologies, meet the course prerequisites, and are looking to cross-train on Azure
•Developers who want to evaluate the process for creating Azure solutions within the
infrastructure
Prerequisites for taking this course
Before attending this course, students should have:
• An understanding of on-premises virtualization technologies including: virtual machines, virtual
networking, and virtual hard disks
• An understanding of network configuration including: TCP/IP, Domain Name System (DNS),
virtual private networks (VPNs), firewalls, and encryption technologies
• An understanding of web applications including: creating, configuring, monitoring and deploying
web applications on Internet Information Services (IIS)
• An understanding of Active Directory concepts including: domains, forests, domain controllers,
replication, Kerberos, and Lightweight Directory Access Protocol (LDAP)
• Knowledge of Windows Server 2012 and Windows Server 2016 fundamentals, Windows
PowerShell command-line interface basics, and cloud computing basics
Modules
There are six modules covered over the 3-day period, as follows:
•Module 1, “Microsoft Azure management tools” describes how to use Azure PowerShell to
manage your Azure subscription. This module also describes how to use the Azure Software
Development Kit (SDK) and the Azure cross-platform command-line tool to manage your Azure
subscription.
•Module 2 “Azure Virtual Network service and components” describes how to implement Azure
virtual networks and integrate them with your on-premises computing resources by establishing
direct network connectivity between the two environments.
• Module 3, “Virtual machines in Microsoft Azure” describes how to create and configure VMs in
Azure, and how to manage their disks. It explains the differences between Azure Virtual
Machines and Azure Cloud Services.
• Module 4, “Azure Storage types and capabilities” starts with a description of “Azure Storage
types and their capabilities”. It then continues by describing Azure Backup, StorSimple hybrid
storage solution, Microsoft SQL Server Stretch Database, Azure Data Factory with Data
Management Gateway, and Azure Content Delivery Network. It concludes with a detailed
walkthrough of the implementation of Azure Recovery Services agent-based backups, and
Microsoft Azure Backup Server-based backups.
• Module 5, “Azure Site Recovery and supported scenarios” presents the main features of Azure
Site Recovery and the scenarios it supports. It also describes the planning considerations for
Azure Site Recovery, the different types of implementations of Azure as a disaster recovery site
for on-premises workloads, and the disaster recovery capabilities that StorSimple offers. In this
module, students will become familiar with the process of planning Site Recovery deployment
and will step through a sample deployment.
• Module 6, “Implementing Azure Active Directory” starts off with a look at the Azure Tenant, and
how to create and manage tenants in the Azure Active Directory (Azure AD). It then presents
how to configure applications and resource access in Azure AD. Finally, it overviews Azure AD
Premium, which allows Multi-Factor access and other security features.
After completing this course, students will be able to:
• Use Azure PowerShell, the Azure Software Development Kit (SDK), and the Azure command-line
interface (CLI) to manage Azure subscriptions
• Create and configure Azure virtual networks
• Create and configure virtual machines in Azure, and manage their disks
• Create, manage, and configure cloud storage in Azure
• Use Azure Site Recovery site for on-premises workloads, and provide disaster recovery
capabilities in Azure
• Deploy and configure Azure AD to create and manage tenants, applications and access to
resources.
Wintellect Learning and GitHub Labs, practices and demonstrations in Microsoft Azure
Azure changes all
the time, to reflect
new features,
updates and
functionality, as it’s
deployed as soon as
it is created, tested
and perfected. To
learn about
important Azure
product updates,
roadmap, and
announcements,
visit the Azure
Update page at
https://azure.microsoft.com/en-us/updates/
Given the dynamic nature of Microsoft cloud tools, you may experience Azure user interface (UI)
changes that were made following courseware development and that do not match up with lab
instructions.
The Wintellect Learning team will update these documents with appropriate changes and place them in
GitHub on a monthly basis. However, given the dynamic nature of cloud updates, you may run into
changes before we become aware of them.
If this occurs, you will have to adapt to the changes and work through them in the labs as necessary.
The GitHub-stored Azure Infrastructure Essentials lab files can be found at:
https://github.com/Wintellect/Azure-Infrastructure
New: On the Learn On Demand Labs (LODs) virtual machines, the updated Labfiles can be found in the
C:\Labfiles\AzComLabfiles directory
The training environment
You only need a few things in order to successfully finish this course. First and foremost, you and your
time, for the proscribed hours. Secondly, a computer. The course is designed to be taught in any
meeting room that has Internet access and everyone brings their own laptops or just a lab full of
desktop computers supplied by your organization. As previously stated, we’ll all need Internet access.
You also need credentials to an Azure subscription, which will be provided in the LODs labs. You will
need to create a new Microsoft account, and you will also need to sign up for a trial version of Microsoft
Azure, which does require (by Microsoft) a credit card. However, you are not charged with this. Your
instructor will provide you the URL to get to the lab exercise step-by-step documents on GitHub site.
Finally, you will have this book!
Log in:
Learn on Demand Labs: Https://davemct.learnondemand.net
Login as Student or Trainee XX@DaveMCT where XX is your assigned #.
EXAMPLE: Student07@davemct.com; use Pa55w.rd as your password.
Select the Azure Infrastructure hyperlink
Find the Launch button and select it!
Lab steps located on VMs hard drive – C:\Labfiles
Select browser to sign in to Microsoft Azure; Your credentials will vary per class. Your
instructor will let you know what they are.
Now let’s get started!
Module 1: Microsoft Azure management tools
Microsoft Azure can
be administered and
managed by a wide
variety of tools. The
Azure Portal is a web-
based graphical user
interface (GUI) that
most users are
familiar with. The
Azure Portal has
expansive and deep
functionality that
allow you to create
resources, services and apps as well as manage on-premises integration, user authentication and
management and a wide variety of other functionality. Another useful tool is Azure PowerShell, which is
an extension of Windows PowerShell. It lets Windows PowerShell users control Azure’s robust
functionality. Azure PowerShell uses preset scripts called cmdlets to perform complex tasks like
provisioning VMs or creating cloud services. Cmdlets can then be written into more complex sets of
actions that can be saved as scripts and reused whenever they are needed. Another useful
management tool is the Azure Command Line Interpreter (CLI) version 2.0, which is a command-line tool
providing a great experience for managing Azure resources. The CLI is designed to make scripting easy,
flexibly query data, support long-running operations as non-blocking processes, and more. Finally, there
are other management functions and suites of tools in Azure that can provide all kinds of resource and
project management, including Azure Active Directory (AZURE AD), the Azure Security Center and the
Operations Management Suite (OMS).
Before we get started, let’s watch a video on The Azure Datacenter:
https://www.youtube.com/watch?v=HVTmGC0V6xE
Note: Do not start the video in class, your instructor will play it for the entire classroom.
Here’s a video presentation that includes a virtual tour of the latest innovations in the Microsoft
Datacenter. Please watch privately:
https://cloud-platform-assets.azurewebsites.net/datacenter/
Lesson 1, The Azure Resource Manager
The Microsoft Azure Resource Manager is a management framework that allows administrators to
deploy, manage and monitor Azure resources. In this first lesson, we’ll discuss the Azure Resource
Manager model, and what it means to the Azure Infrastructure.
The Azure Resource Manager
The infrastructure for your application is typically made up of many components – maybe a virtual
machine, storage
account, and
virtual network,
or a web app,
database,
database server,
and third-party
services. You
don't see these
components as
separate
entities, instead
you see them as
related and
interdependent
parts of a single entity. You want to deploy, manage, and monitor them as a group. Azure Resource
Manager enables you to work with the resources in your solution as a group. You can deploy, update, or
delete all the resources for your solution in a single, coordinated operation. You use a template for
deployment and that template can work for different environments such as testing, staging, and
production. Resource Manager provides security, auditing, and tagging features to help you manage
your resources after deployment.
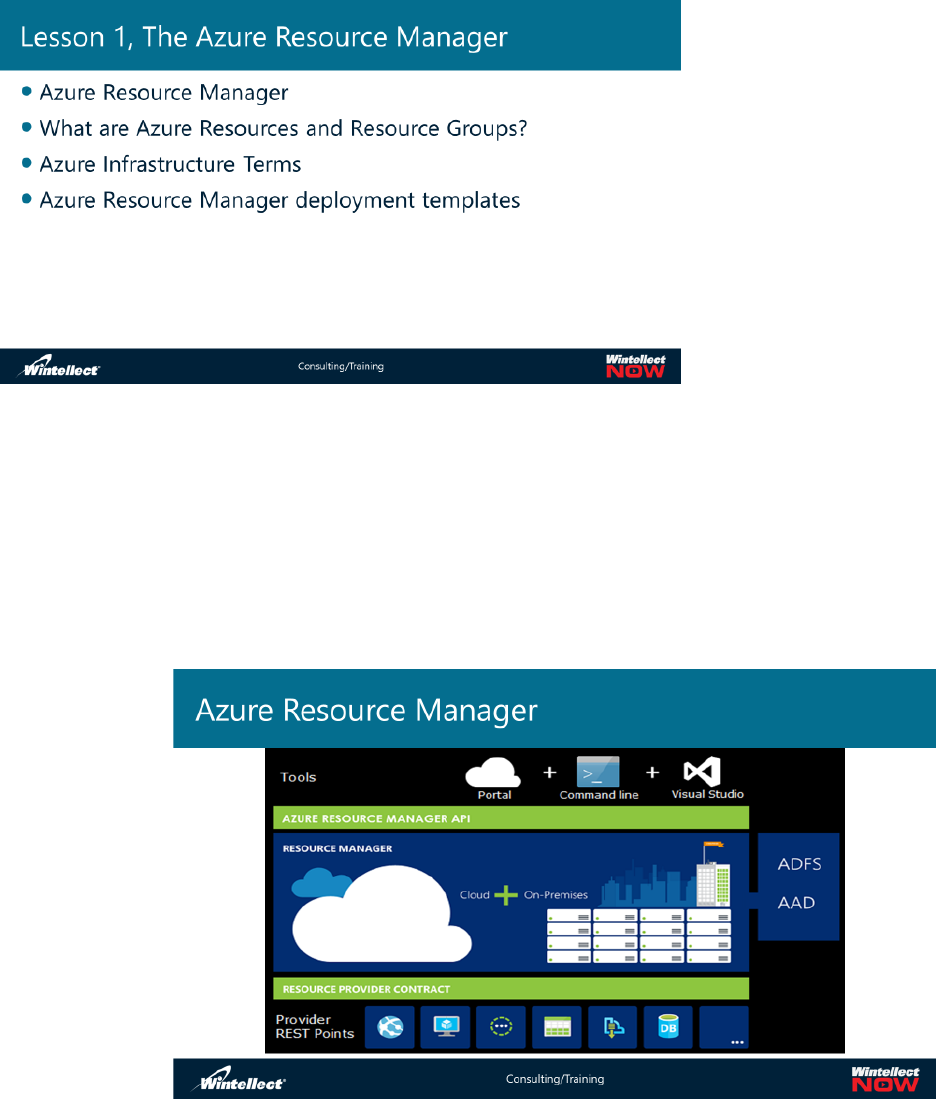
Resource Manager provides a consistent management layer to perform tasks through Azure PowerShell,
Azure CLI, Azure portal, REST API, and client SDKs. All capabilities that are available in the Azure portal
are also available through Azure PowerShell, Azure CLI, the Azure REST APIs, and client SDKs.
Functionality initially released through APIs will be represented in the portal within 180 days of initial
release. Choose the tools and APIs that work best for you - they have the same capability and provide
consistent results. The slide shows how all the tools interact with the same Azure Resource Manager
API. The API passes requests to the Resource Manager service, which authenticates and authorizes the
requests. Resource Manager then routes the requests to the appropriate resource providers.
Azure Resource Manager analyzes dependencies to ensure resources are created in the correct order. If
one resource relies on a value from another resource (such as a virtual machine needing a storage
account for disks), you set a dependency.
Resource Manager provides several benefits:
•You can deploy, manage, and monitor all the resources for your solution as a group, rather than
handling these resources individually.
•You can repeatedly deploy your solution throughout the development lifecycle and have
confidence your resources are deployed in a consistent state.
•You can manage your infrastructure through declarative templates rather than scripts.
•You can define the dependencies between resources so they're deployed in the correct order.
•You can apply access control to all services in your resource group because Role-Based Access
Control (RBAC) is natively integrated into the management platform.
•You can apply tags to resources to logically organize all the resources in your subscription.
•You can clarify your organization's billing by viewing costs for a group of resources sharing the
same tag.
What are Azure Resources and Resource Groups?
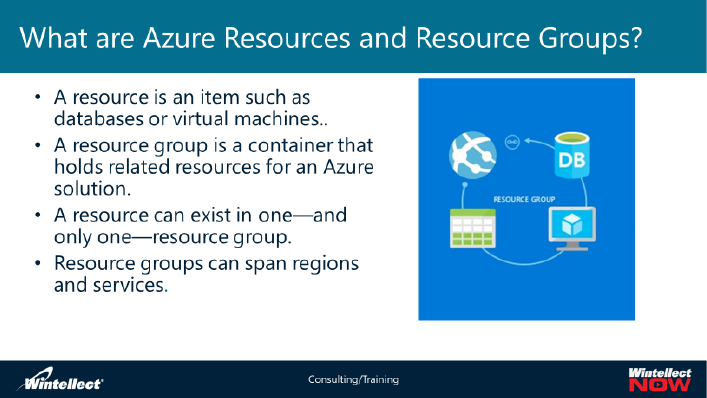
As stated in the term definitions, An Azure resource is simply a manageable item that is available
through Azure. Some common resources are a virtual machine, storage account, web app, database, and
virtual network, but there are many more.
The concept of the
resource is
fundamental in Azure
Resource Manager. A
resource is an
elementary building
block of services and
solutions that you
deploy into Azure. You
can manage each
resource by interacting
with its resource
provider, which
implements actions
that you invoke through any of the available administrative interfaces, such as the Azure portal, Azure
PowerShell, Azure CLI, or REST API.
Every resource exists in one, and only one, resource group. A resource group is a logical container that
simplifies managing multiple resources. Resources in the same resource group typically share the same
lifecycle, although you can customize your choice of criteria for grouping resources. By using resource
groups, you can manage resources as a group, rather than individually. This allows you to delegate
permissions on the resource group level, obtain estimated costs, audit events, and utilize data for all
resources within the groups. When you no longer need the resources in a resource group, you can
remove them all in a single step.
Azure Resource Manager supports very granular delegation of administration based on the role-based
access control (RBAC) model. The delegation relies on predefined and custom-defined roles within the
target Azure subscription. Each role represents a collection of actions and the corresponding resources.
For example, you can create a role that will grant the ability to stop and start an Azure virtual machine.
Alternatively, you can use the predefined Virtual Machine Contributor role that grants the ability to
carry out a more extensive set of virtual machine management actions.
Tagging is another benefit of the Azure Resource Manager deployment model. Tags are custom labels
that you can assign to resources, resource groups, and subscriptions. You can utilize this functionality to
describe your cloud environment. For example, you can specify the ownership of individual resources,
assign them to the appropriate cost center, or designate them as production, test, or development. Tags
appear in the billing data available to the Account Administrator. This simplifies identifying costs
associated with tagged resources for chargeback purposes.
A template is a JavaScript Object Notation (JSON)–formatted file that defines a collection of resources
that you intend to create and configure. During a deployment, you provide the template, specify its
parameters, and specify the resource group where the deployment should take place. Once the
deployment completes, the target resource group contains resources created and configured according
to the template’s content.
Azure Resource Manager also includes support for policies and locks that enhance resource deployment
and management capabilities. Policies allow you to define conditions that, if satisfied, affect the
outcome of a deployment. For example, you can prevent users from creating resources without
assigning to them a specific tag. You can also restrict the sizes of VMs that users can provision, or restrict
locations to which users can deploy such VMs.
The primary purpose of locks is to prevent accidental modification or deletion of resources. There are
two types of locks:
• Read-only. This lock prevents modification within the scope where the lock is assigned.
• Delete. This lock prevents deletion within the scope where the lock is assigned.
You can assign a lock on a resource, a resource group, or a subscription.
Azure Infrastructure Terms
If you're new to
Azure Resource
Manager, there are
some terms you
might not be
familiar with. This
list is not all-
inclusive, as there
are other terms.
However, these
terms all the ones
you are most likely
to encounter. They
are, as follows:
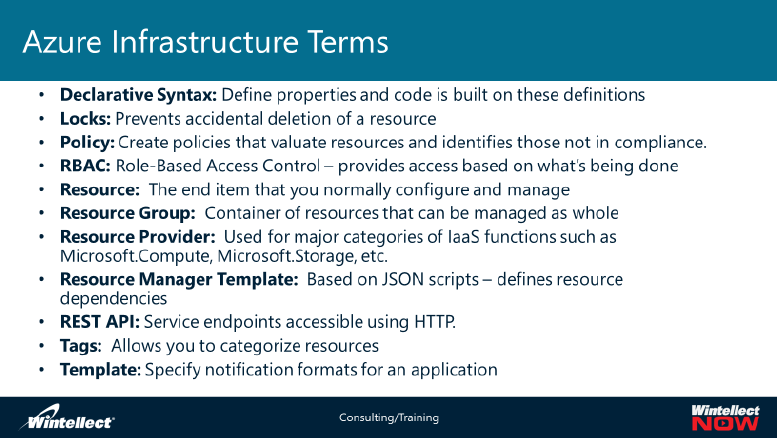
• Declarative
syntax: Syntax that lets you state "Here is what I intend to create" without having to write the
sequence of programming commands to create it. The Resource Manager template is an
example of declarative syntax. In the file, you define the properties for the infrastructure to
deploy to Azure.
• Locks: The primary purpose of locks is to prevent accidental deletion or modification of
resources. For example, once you apply a delete lock to a resource, any attempt to delete it will
fail.
• Policy: A service in Azure that you use to create, assign and, manage policies. These policies
enforce different rules and effects over your resources, so those resources stay compliant with
your corporate standards and service level agreements. Azure Policy does this by running
evaluations of your resources and scanning for those not compliant with the policies you have
created.
• RBAC: Role-based access control (RBAC) helps you manage who has access to Azure resources,
what they can do with those resources, and what areas they have access to.
• Resource: A manageable item that is available through Azure. Some common resources are a
virtual machine, storage account, web app, database, and virtual network, but there are many
more.
• Resource group: A container that holds related resources for an Azure solution. The resource
group can include all the resources for the solution, or only those resources that you want to
manage as a group. You decide how you want to allocate resources to resource groups based on
what makes the most sense for your organization. See Resource groups.
• Resource provider: A service that supplies the resources you can deploy and manage through
Resource Manager. Each resource provider offers operations for working with the resources
that are deployed. Some common resource providers are Microsoft.Compute, which supplies
the virtual machine resource, Microsoft.Storage, which supplies the storage account resource,
and Microsoft.Web, which supplies resources related to web apps. See Resource providers.
• Resource Manager template: A JavaScript Object Notation (JSON) file that defines one or more
resources to deploy to a resource group. It also defines the dependencies between the deployed
resources. The template can be used to deploy the resources consistently and repeatedly. See
Template deployment.
• REST API: Representational State Transfer (REST) APIs are service endpoints that support sets
of HTTP operations (methods), which can be used to create, retrieve, update and delete access
to the service's resources.
• Tags: Resource Manager provides a tagging feature that enables you to categorize resources
according to your requirements for managing or billing. Use tags when you have a complex
collection of resource groups and resources and need to visualize those assets in the way that
makes the most sense to you.
• Templates: Templates enable a client application to specify the exact format of the notifications
it wants to receive.
Azure Resource Manager deployment templates
With Resource Manager, you can create a template (in JSON format) that defines the infrastructure and
configuration of your Azure solution. By using a template, you can repeatedly deploy your solution
throughout its lifecycle and have confidence your resources are deployed in a consistent state. When
you create a solution from the portal, the solution automatically includes a deployment template. You
don't have to create your template from scratch because you can start with the template for your
solution and customize it to meet your specific needs. You can retrieve a template for an existing
resource group by either exporting the current state of the resource group, or viewing the template
used for a particular deployment. Viewing the exported template is a helpful way to learn about the
template syntax.
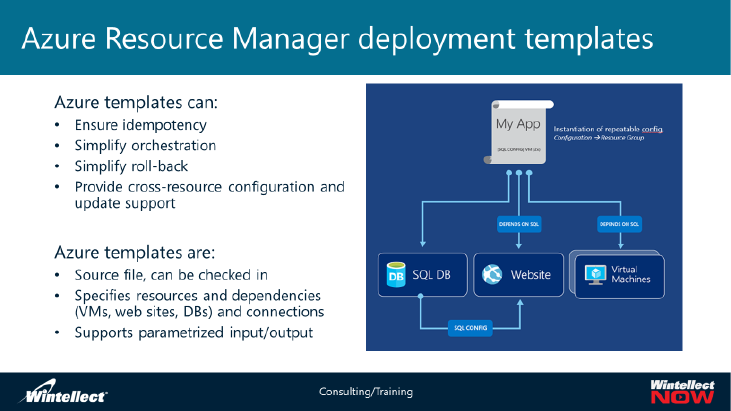
Resource Manager processes the template like any other request. It parses the template and converts
its syntax into REST API operations for the appropriate resource providers. Azure Resource Manager
analyzes dependencies to ensure resources are created in the correct order. If one resource relies on a
value from another resource (such as a virtual machine needing a storage account for disks), you set a
dependency. For more information, see Defining dependencies in Azure Resource Manager templates.
You can also use the
template for
updates to the
infrastructure. For
example, you can
add a resource to
your solution and
add configuration
rules for the
resources that are
already deployed. If
the template
specifies creating a
resource but that resource already exists, Azure Resource Manager performs an update instead of
creating a new asset. Azure Resource Manager updates the existing asset to the same state as it would
be as new.
Resource Manager provides extensions for scenarios when you need additional operations such as
installing particular software that isn't included in the setup. If you're already using a configuration
management service, like DSC, Chef or Puppet, you can continue working with that service by using
extensions. For information about virtual machine extensions, see About virtual machine extensions and
features.
Finally, the template becomes part of the source code for your app. You can check it in to your source
code repository and update it as your app evolves. You can edit the template through Visual Studio.
Resource Manager template are idempotent, which means it can be executed as many times as you
wish, and the result will be the same every time. Azure takes care of the execution and identifies the
changes that need to be executed.
Templates support VM extensions, which allow you to configure operating systems within Azure VMs.
These extensions include a number of common configuration management technologies, such as the
PowerShell Desired State Configuration, Chef, or Puppet.
Since templates take the form of JSON files, you can include them in any source control solution. You
can check them in to your source code repository and update them as your solution evolves. For editing
templates, you should consider using a JSON editor. Visual Studio provides a convenient, GUI-driven
method of creating and updating Azure Resource Manager templates.
Lesson 2, Using the Azure Portal
The Azure portal
The Azure portal is a web-based management tool that lets you build, manage, and monitor everything
from simple web apps to complex cloud applications in a single, unified console. With the Azure portal
you can view and manage all of your applications in one unified hub—including web apps, databases,
virtual machines, virtual networks, storage, and Visual Studio team projects. For most people, the Azure
portal is the primary way they will provision and manage Azure resources and services.
In order to access the Azure portal, one must have in Azure subscription. In an organization’s production
environment, one would use a Work or School Account, provisioned as part of the organization’s
subscription, in the form of username@organizationname.onMicrosoft.com or
username@organizationname.gov (if organization DNS name is configured). The Microsoft Azure portal
address is https://portal.azure.com
A Windows Account name can also be used, usually in the format of username@outlook.com or
username@Hotmail.com when connecting to the Microsoft Azure portal address at
https://portal.azure.com. One can also use a Work or School Account at this address as well.
Work or School Accounts are different from Microsoft accounts, as they are sourced from the Azure AD
tenant associated with a particular subscription. You can manage these accounts by being the global
administrator in your Azure AD tenant.
The Azure portal Web console has a number of primary elements as shown in the slides.

First there is the Hub
Menu. The hub menu
is a vertical bar on the
left side of the portal
page and is
customizable. There
are many nodes in the
hub menu. To see
them all you must
scroll down within the
hub menu to find some
of them. In the slide,
the hub menu is the
area marked in a red
rectangle.
Next is the Dashboard. The Azure dashboard is your homepage whenever you log into the Azure portal.
It is customizable and you can pin items that you regularly use to the dashboard. The dashboard
includes, by default, several pre-created tiles, including the All resources area, Services health, Quick
starts & tutorials, which provide hyperlinks to documentation and webpages describing the various
items and services you are likely to create. Also, there is a tile for the Marketplace. Note also there is a
menu bar directly atop the dashboard tiles. The items in this menu are self-explanatory and you can use
them to do various things as shown. In the slide, the default dashboard area is in a green box.
The Azure menu bar and Search is shown in the slide in the blue box. There are a number of icons you
can use that can help you get additional information or find out what’s going on. First is the Search text
box. You can type in any word or phrase to search Microsoft’s entire Azure realm and documentation
areas. It will return a list of items with the top items being the most likely solutions. Next there is an icon
that looks like a bell. This is the Notifications area. When you create an Azure item, a blue bar will scroll
left to right under the Notifications icon, which lets you know the item is in the process of being created.
Additionally, a numeric value may be located within the Notifications icon, which informs you about the
results of different operations you might have performed. You can click on it and a context blade that
shows the notifications in text format. The next icon, which looks like a gear, is the Portal settings area.
This opens another blade that allows you to make changes to the look and feel of the portal, change the
theme, provide an idle timeout, set a default language and format and also has a hyperlink which lets
you go back to the default view if you make too many changes. Next is an icon that looks like a smiling
face Which Is the Send us feedback blade. From here you can notify Microsoft about your thoughts and
comments on the portal itself. Next is an icon of a question mark in a circle. This is the Help blade which
can take you to the Azure Help and Support page. If you have more than one subscription available to
you, immediately to the right of the Help icon is the Global subscription filter that lets you open up other
subscriptions and view their portals. Finally, there is an area which has your sign in information based on
the account you used to sign in on. Clicking this allows you to sign out, change your password and
several other functions. There is one more icon that as of this writing is not shown on the Azure
Government portal nor is its functionality available. This is the Cloud Shell item, represented by an icon
of a greater than sign with a line under it. The Cloud Shell lets you manipulate and administer Azure
resources and services with Azure PowerShell. We will discuss Azure PowerShell in the next lesson. The
Cloud Shell also allows you to use Linux BASH, a command line scripting tool for Linux VM’s. Microsoft
states that the Cloud Shell functionality will be ported to Azure Government in October 2018. In this
case you may already have it.
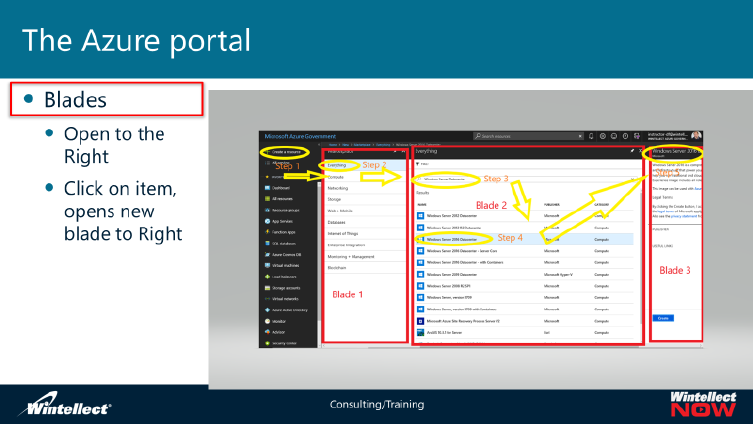
Next in the slides we have the concept of blades. We’ve already mentioned blades, but basically a blade
is a key element from an item that can be selected either from the hub menu or the dashboard itself
that opens to the right and lets you further manipulate or see information about that item. An example
is shown in
the slide.
Notice in the
slide that
the hub
menu is to
the right-
hand side
and to the
right of this,
in order, is
Blade 1,
then Blade
2, and then
Blade 3.
There are also five steps illustrated. In step one, in the hub menu you click on the item entitled Create a
resource. This will immediately open Blade 1, the Marketplace. In the Marketplace Blade, you select the
Everything node which then opens Blade 2, which has a Filter Search text box. You type Windows Server
Datacenter into the text box and press enter, which returns a list of results underneath the Filter area.
Next you click the Windows Server 2016 Datacenter result item which then opens Blade 3. This blade,
entitled Windows Server 2016 Datacenter is the first blade you will see that allows you to create a VM
with this operating system. Note the large Create button at the bottom of this blade. Clicking Create
with then open yet another blade to the right where you can set the name and user account and other
values for the VM and so on and so forth. Because clicking an item opens a blade immediately to the
right the leftmost blades will disappear but note the scrollbar at the bottom of all the blades that lets
you scroll back to a previous blade in case you want to see what you selected there.
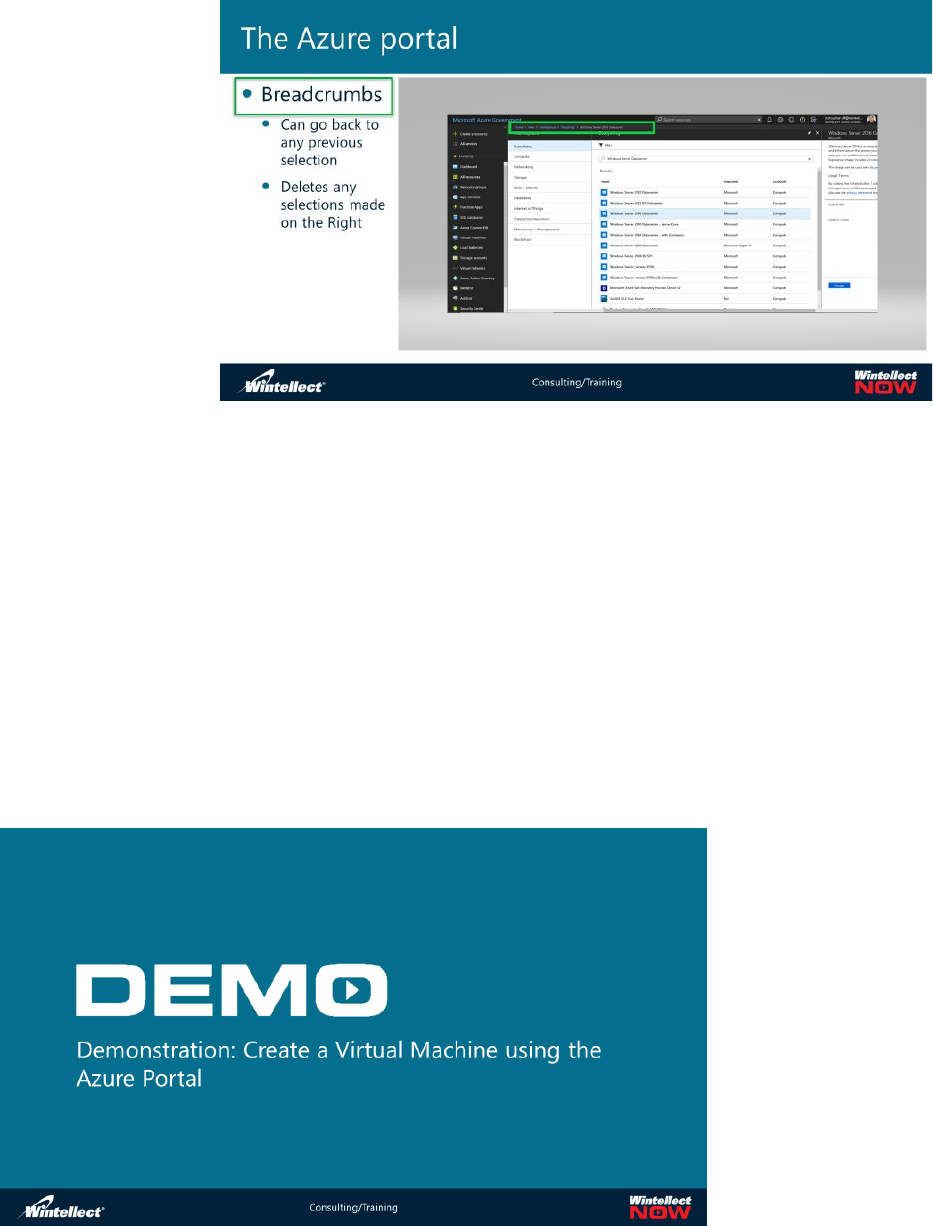
The next slide is a continuation of the blade process and shows the Breadcrumbs feature. Note the area
on the slide enclosed
in green. The
Breadcrumbs area
shows all the previous
blades from the left-
hand side as
hyperlinks until you
reach the rightmost
blade which is not a
hyperlink. You can
click any of the
hyperlinks to go back
to that particular
blade. This can be
useful if you made the
wrong selection in that blade and you just want to go back and make a different selection. Do note that
if you do this it will delete any selections made on the blades to the right of that hyperlink you selected.
The Azure portal will also warn you that this will occur and gives you an opportunity to cancel moving to
that blade and subsequently losing selections from the blades to the right.
Note that there are many ways you can get to a particular blade within the Azure portal. Each way will
get you to the same blade. Therefore, you can use whichever way is most comfortable to you. For
example, from the Hub menu, you can click the Create a resource item, which will take you to the New
blade. As an alternative, in the Dashboard, you can click the Marketplace title which will then take you
to the New blade, although with the Marketplace blade further extended. You could also click the All
resources node from the Hub menu, and in the All resources blade Add item or the Create resources
button, or in the Dashboard in the All resources area, click the Create resources button there! Each one
of these separate actions will take you to the same New blade.
Demonstration: Create a Virtual Machine using the Azure Portal

In this demonstration, your instructor will create a virtual machine in the Azure portal. Note: This
demonstration is not about the nuances of virtual machine creation, but focuses on creating resources
and resource groups using the Azure Portal.
Module 1 Lab A, Create a Virtual Machine using the Azure Portal
In this lab, you will create a virtual machine in the Azure portal, similar to what the demonstration
showed you. Like the demonstration, this lab’s focus is no using the Azure portal to create Azure
Resouce Manager resources and resource groups. The script for the lab can be found in the GitHub
portal, under the name of Mod_1_lab_A.md and in the LODs virtual machine C drive.
Lesson 3, Using Azure PowerShell
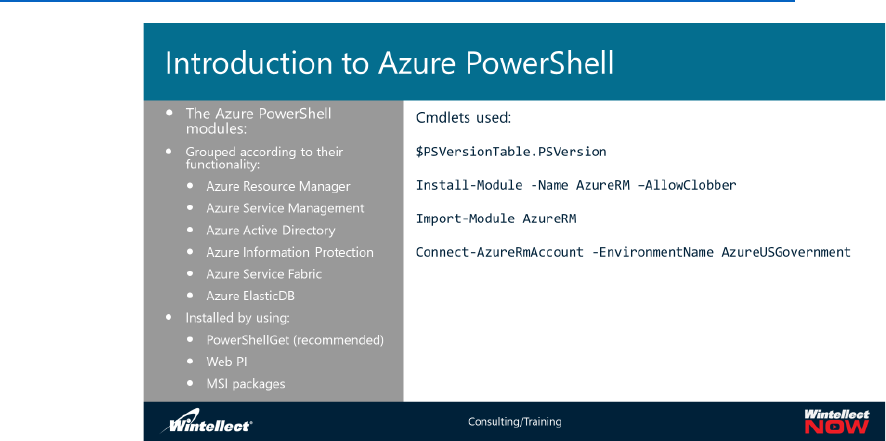
Introduction to Windows PowerShell
Windows PowerShell is a Windows command-line shell designed especially for system administrators.
Windows PowerShell includes an interactive prompt and a scripting environment that can be used
independently or in combination.
Unlike most shells,
which accept and
return text,
Windows
PowerShell is built
on top of the .NET
Framework
common language
runtime (CLR) and
the .NET
Framework, and
accepts and returns
.NET Framework
objects. This
fundamental
change in the environment brings entirely new tools and methods to the management and
configuration of Windows.
Windows PowerShell introduces the concept of a cmdlet, a simple, single-function command-line tool
built into the shell. You can use each cmdlet separately, but their power is realized when you use these
simple tools in combination to perform complex tasks. Windows PowerShell includes more than one
hundred basic core cmdlets, and you can write your own cmdlets and share them with other users.
Like many shells, Windows PowerShell gives you access to the file system on the computer. In addition,
Windows PowerShell providers enable you to access other data stores, such as the registry and the
digital signature certificate stores, as easily as you access the file system.
Before Windows PowerShell was introduced there were a number of different and disparate commands
you can do in the command prompt rather than the GUI on a Windows operating system. You could
even script using different scripting languages such as Visual Basic and others; all of these scripting
environments have their own unique set of commands and unique syntaxes. Moreover, at the command
line there were many different .exe commands that had their own parameters and their own syntax in
the way of addressing things etc. This included various command prompt programs, often called DOS
commands, that could do various things, some of them going back decades.
This made using the command line extremely complex and required you to remember not one
environment for running scripts but multitudes of them.
Windows PowerShell was designed to consolidate all of that into one overall scripting language with one
set of parameters in a much simpler syntax. In fact, you can use PowerShell cmdlets to do just about any

command line functionality. This means scripting is a breeze because you do not have to do any
callbacks to a particular or different scripting language within an overall command prompt script.
There are two main Windows PowerShell environments: The Windows PowerShell console and the
Windows PowerShell Integrated Scripting Environment (ISE). The PowerShell console can be used for
both running written scripts or running ad hoc cmdlets either one at a time or interactively. The main
benefit of PowerShell ISE is that it includes the ability to open, edit, and run multiple scripts
simultaneously, and access to context-sensitive, graphical help.
Not all PowerShell cmdlets are available on every Windows device. Certain functionality, normally
performed in a server role or Windows feature, are only loaded when such roles were features have
been installed on that device. PowerShell uses modules to load the cmdlets associated with such
installed roles or features. However, you can install modules even if the associated roles or features are
not on your Windows computer. This allows you to remotely connect to and use PowerShell cmdlets
associated with a role or feature running on that remote system.
Windows PowerShell cmdlets use a verb – noun syntax. Note the command Get-Module. Get is a
common cmdlet verb meaning to show or display and Module is a particular noun associated with
those groups of cmdlets that perform a particular role or feature. Each noun has a common set of
associated verbs. Usually, a cmdlet Verb-Noun is followed by a parameter name, proceeded by a dash,
and then a value. All cmdlets, parameters and values are separated on the same line by whitespace.
Any value that has whitespace within it, for example, “Windows Server”, should be enclosed with
quotation marks. To find all the available verbs for particular noun you can issue the following cmdlet:
Get-Command -Noun <NounName>
To find all the available nouns for particular verb you can issue the following cmdlet:
Get-Command -Verb <VerbName>
To find the correct syntax, including parameters and potential values, you can use both the
Get-Command and Get-Help cmdlets. You can use the Get-Module -ListAvailable
cmdlet to see all the PowerShell modules loaded on your computer. Use the Get-Module -
ListAvailable -All cmdlet to see all the PowerShell modules that can be imported.
To add a PowerShell module not listed you can run the Import-Module -Name <Name of
Module> cmdlet. Note that the <Name of Module> value must be accurate and in the correct
case.
Multiple Windows PowerShell cmdlets can be used within one line, and feed results from one cmdlet as
input in the next by using the pipe symbol (|).
Introduction to Azure PowerShell
You can manage Azure resources by using Windows PowerShell, but first you need to install the Azure
PowerShell modules. Today, we use the Azure Resource Manager resource provider for Azure
PowerShell, which means we will install the particular module called AzureRM. There was in earlier
module which use the Azure Classic resource provider but Azure Classic is no longer available directly.
There are other, separate modules that allow you to manage specific Azure resources, such as Azure
Active Directory, Azure Information Protection, Azure Service Fabric, and Azure ElasticDB.
PowerShellGet and module management is the preferred way to install Azure PowerShell but if you
would rather install with the Web Platform Installer or MSI package you can do so. For instructions on
how to use the Web Platform Installer or MSI package see the information provided at the following
URL: https://docs.microsoft.com/en-us/powershell/azure/other-install?view=azurermps-6.7.0
Starting with Azure
PowerShell version
6.0, Azure
PowerShell
requires
PowerShell version
5.0. To check the
version of
PowerShell running
on your machine,
run the following
cmdlet in the
Windows
PowerShell
console:
$PSVersionTable.PSVersion
The output on a Windows 10 operating system appears as follows:
Major Minor Build Revision
----- ----- ----- --------
5 1 17134 228
You need elevated privileges to install modules from the PowerShell Gallery. To install Azure PowerShell,
run the following command in an elevated session:
Install-Module -Name AzureRM
Note: If you have a version older than 2.8.5.201 of NuGet, you are prompted to download and install
the latest version of NuGet.
Note: If the computer on which you are running Windows PowerShell has ever had any Azure modules
installed previously, you may get an error. To avoid this, use the AllowClobber parameter. It will
overwrite any previously installed modules.
Install-Module -Name AzureRM -AllowClobber
By default, the PowerShell gallery isn't configured as a trusted repository for PowerShellGet. The first
time you use the PSGallery you see the following prompt:
Untrusted repository
You are installing the modules from an untrusted repository. If you
trust this repository, change
its InstallationPolicy value by running the Set-PSRepository cmdlet.
Are you sure you want to install the modules from 'PSGallery'?
[Y] Yes [A] Yes to All [N] No [L] No to All [S] Suspend [?] Help
(default is "N"):
Answer Y Yes or A Yes to All
The AzureRM module is a rollup module for the Azure PowerShell cmdlets. Installing it downloads all of
the available Azure Resource Manager modules, and makes their cmdlets available for use.
To start working with Azure PowerShell, you need to load AzureRM into your current PowerShell session
with the Import-Module cmdlet, and then sign in with your Azure credentials.
To import the module (note you installed earlier, now you import) into the PowerShell session, type the
following and press Enter:
Import-Module AzureRM
To connect to Azure with an interactive dialog for sign-in, type the following and press Enter:
Connect-AzureRmAccount
For Azure Government, add the following parameter and value:
Connect-AzureRmAccount -EnvironmentName AzureUSGovernment
A Windows Security dialog box will appear asking you to sign in with your credentials.
You are now ready to start using AzureRM and other Azure module cmdlets.

Demonstration: Installing the Azure PowerShell modules
In this demonstration,
your instructor will
install Azure Resource
Manager PowerShell
and connect to the
Azure Government
subscription with it.
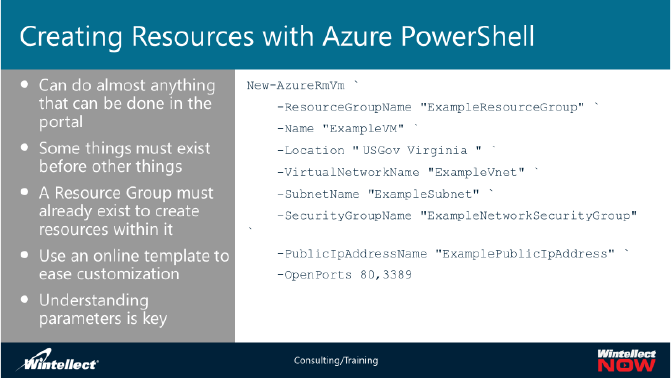
Creating Resources with Azure PowerShell
The Azure PowerShell module is used to create and manage Azure resources from the PowerShell
command line or in scripts. You can also use Azure PowerShell with Resource Manager templates to
deploy your resources to Azure. The Resource Manager template you deploy can either be a local file on
your machine, or an external file that is located in a repository like GitHub.
When deploying resources to Azure, you:
1. Log in to your Azure account
2. Create a resource group that serves as the container for the deployed resources. The name of
the resource group can only include alphanumeric characters, periods, underscores, hyphens,
and parenthesis. It can be up to 90 characters. It cannot end in a period.
3. Deploy to the resource group the template that defines the resources to create.
A template can include
parameters that enable
you to customize the
deployment. For example,
you can provide values that
are tailored for a particular
environment (such as dev,
test, and production). The
sample template defines a
parameter for the storage
account SKU.
The following example
creates a resource group,
and deploys a template from the GitHub Quickstart Azure repository:
Connect-AzureRmAccount
Select-AzureRmSubscription -SubscriptionName <yourSubscriptionName>
New-AzureRmResourceGroup -Name ExampleResourceGroup -Location " USGov
Virginia"
New-AzureRmResourceGroupDeployment -Name ExampleDeployment -
ResourceGroupName ExampleResourceGroup -TemplateUri
https://raw.githubusercontent.com/Azure/azure-quickstart-
templates/master/101-storage-account-create/azuredeploy.json -
storageAccountType Standard_GRS
Note: After you issue the first cmdlet (Connect) and Sign in, you should get your subscription
information. If it is accurate and you have no other subscriptions, you will not need to select the
subscription (second cmdlet). You can run Get-AzureRMSubscription to check your particular
subscription. Additionally, test the actual Template URI in a browser to be sure it is still available. Also
note that the New-AzureRMResourceGroupDeployment parameters are all on one line, the text here
has been word wrapped, so some parameter ‘dash’ switches are actually directly followed by their
parameter name in the line, not the next. In other words, there is no next line.
The Azure PowerShell module can also be used to create and manage Azure resources from the
PowerShell command line or in scripts. You can, for example, use Azure PowerShell to deploy a VM in
Azure that runs Windows Server 2016.
Create a VM with New-AzureRmVM. Provide names for each of the resources and the New-
AzureRmVM cmdlet creates if they don't already exist.
New-AzureRmVm `
-ResourceGroupName "ExampleResourceGroup" `
-Name "ExampleVM" `
-Location " East US" `
-VirtualNetworkName "ExampleVnet" `
-SubnetName "ExampleSubnet" `
-SecurityGroupName "ExampleNetworkSecurityGroup" `
-PublicIpAddressName "ExamplePublicIpAddress" `
-OpenPorts 80,3389
When prompted, provide a username and password to be used as the logon credentials for the VM:
Note: The ticks, that is, the ` character at the end of each line, lets Azure PowerShell know that the next
line is actually part of the first. Note that each line starts off with a full parameter name. This is a
common formatting option you can use to make you cmdlets more readable.
To see your VM in action, you can then RDP to the VM and install the IIS web server. First, get the public
IP address. To see the public IP address of the VM, use the Get-AzureRmPublicIpAddress cmdlet:
Get-AzureRmPublicIpAddress -ResourceGroupName "ExampleResourceGroup" |
Select "IpAddress"
Use the following command to create a remote desktop session from your local computer. Replace the
IP address with the public IP address of your VM. When prompted, enter the credentials used when the
VM was created:
mstsc /v:publicIpAddress
To see your VM in action, install the IIS web server. Open a PowerShell prompt on the VM and run the
following command:
Install-WindowsFeature -name Web-Server -IncludeManagementTools
With IIS installed and port 80 now open on your VM from the Internet, use a web browser of your
choice to view the default IIS welcome page. Use the public IP address of your VM obtained in a
previous step.
When no longer needed, you can use the Remove-AzureRmResourceGroup cmdlet to remove the
resource group, VM, and all related resources:
Remove-AzureRmResourceGroup -Name ExampleResourceGroup
You can create and manage many Azure Resource Manager resources with Azure PowerShell. The list is
long and comprehensive. It includes such resources as Active Directory, Analysis Services, App Services,
Application Gateway, Automation, Backup, CDN, Container Services, Data Factories, Data Migration,
Azure DNS, ExpressRoute, Media Services, Networking, Policies, Recovery Services, Service Bus, Virtual
Machines, Virtual Networks and VPNs to name only a few.
For more information on Azure PowerShell cmdlets, consult the reference (found in the hub menu)
here: https://docs.microsoft.com/en-us/powershell/azure/overview?view=azurermps-6.7.0
Azure Cloud Shell is an interactive, browser-accessible shell for managing Azure resources. It provides
the flexibility of choosing the shell experience that best suits the way you work. Linux users can opt for a
Bash experience, while Windows users can opt for PowerShell.
As previously stated, Azure Cloud Shell offers a browser-accessible, pre-configured shell experience for
managing Azure resources without the overhead of installing, versioning, and maintaining a machine
yourself. Cloud Shell provisions machines on a per-request basis and as a result machine state will not
persist across sessions. Since Cloud Shell is built for interactive sessions, shells automatically terminate
after 20 minutes of shell inactivity. To persist files across sessions, Cloud Shell walks you through
attaching an Azure file share on first launch. Once completed, Cloud Shell will automatically attach your
storage (mounted as $Home\clouddrive) for all future sessions. Additionally, your $Home directory is
persisted as an .img in your Azure File share. Files outside of $Home and machine state are not persisted
across sessions. You will need to have an Azure Storage account to do store the $home file.
The PowerShell version of Cloud Shell uses the same cmdlets as Azure PowerShell from the local
machine.
Demonstration: Create a VM using Azure PowerShell
In this demonstration,
your instructor will use
Azure PowerShell to
create a Resource Group
and then a Windows
Server VM, provision the
VM with the Web Server
role, and verify the
installation.
Module 1, Lab B, Create a VM using Azure PowerShell
In this lab, you will create and provision a resource group and VM using Azure PowerShell. The script for
the lab can be found in the GitHub portal, under the name of Mod_1_lab_B.md.
Lesson 4, Using the Azure SDK and CLI
What is the Azure SDK?
The Azure Software Development Kit for .NET is the core building block that helps developers author
Cloud Services using Azure Service Runtime Programming model, debug using emulators on the local
machine, and deploy to Azure data centers in the cloud.Besides.net, there are other platforms you can
use such as Java, node.JS, Python, Ruby and PHP. The Azure SDK is a collection of tools, runtime
binaries, client libraries, and templates that considerably simplify the development, testing, and
deployment of Azure services and applications.
To that end it is usually used by developers, programmers and coders. However, there may be times
when an administrator may
find certain functionality of
the SDK enormously useful.
Take the docker tools for
example, if you're working
with containers you're
basically working with
docker. Therefore, if your job
as an administrator is to set
up containers to be used by
the development staff,
having access to this tool
makes your job a lot easier.
Use of the Azure SDK
normally requires that Visual Studio is installed. You then run the Azure SDK from Visual Studio.
The following table lists the Azure SDK tools available and their primary function:
SDK Name
Function
ASP.NET and Web Tools for Visual
Studio
Facilitates the creation, deployment, and management
o
f web apps.
Azure Authoring Tools
Automates the deployment and configuration of Azure
PaaS cloud services deployment packages
.
Azure Data Factory Tools
Simplifies Azure Data Factory authoring.
Azure Diagnostics
Identifies and diagnoses performance-related issues in
live Azure apps and services.
Azure Emulator and Azure storage
emulator
Simulates Azure compute and storage services within
the Visual Studio interface.
Azure HDInsight tools for Visual
Studio
Runs your Hive query and provides insight into HDInsight
job execution.

Azure Libraries for .NET
Includes NuGet packages for Azure Storage, Azure Service
Bus, and Azure Cache, to make it possible to develop Azure
projects while offline.
Azure Resource Manager Tools
Includes templates, snippets, and scripts to assist with
creating and deploying Azure Resource Management
resources.
Azure Service Fabric Tools
Enables the creation, deployment, and upgrading Azure
Service Fabric projects from within Visual
Studio.
Azure Storage Tools
Provide tools, such as AzCopy, that allow you to optimize
the transfer of data into and out of an Azure Storage
account.
Azure Tools for Visual Studio
Simplifies working with applications hosted in Azure
Platform as a Service (PaaS) cloud services and
Infrastructure as a Service (IaaS) virtual machines.
Docker Tools for Visual Studio
Provides support for Windows containers.
There are more tools and kits available at GitHub. Refer to the following URL for more:
https://github.com/Azure/azure-sdk-for-net/blob/psSdkJson6/Documentation/sdk-for-net-packages.md
For more information on using the SDK, including prerequisites, target frameworks, and building and
running tests, refer to the following URL: https://github.com/Azure/azure-sdk-for-
net/blob/psSdkJson6/README.md
Introduction to the Azure CLI
The Azure CLI provides a command-line, shell-based interface used to interact with Azure subscriptions.
If at all possible, you should use Azure PowerShell rather than the CLI. However, many organizations
might have been using the Azure CLI for some time and have written whole script libraries and functions
with it. The Azure CLI still exists and it still can be accessed and used in a variety of different ways.
Since the release
of Azure
PowerShell more
people are using
it in the
Windows
environment,
but the Linux
world still uses
the Azure CLI
more so.
However,
Microsoft has
released
PowerShell Core
which is able to run on Linux machines and the Cloud Shell can be run directly in Bash.
There are two versions of the Azure CLI available, 1.0 which can support Azure Classic as well as Azure
Resource Manager, and version 2.0 which only supports Azure Resource Manager. In these command
sets the word Azure is part of the 1.0 version and the word AZ is part of the 2.0 version.
One thing we should note: in Microsoft Azure we can make virtual machines that run on not only
Windows operating systems but also Linux. In fact, there are number of virtual machines you can deploy
that already have built-in functionality, such as different SQL databases preinstalled, and some of these
may be based on Windows or Linux operating system. To that end Azure has a considerable amount of
Linux support built into it.
Both versions of Azure CLI are available on Windows, Linux, and macOS. You can install Azure CLI 2.0
directly on Windows or within a Bash environment on Windows. The second method offers a user
experience that is closest to running Azure CLI directly on Linux. This, in turn, facilitates running the
majority of Linux command-line tools without any modifications.
The process to install Azure CLI depends on its version and on the target operating system. Note that
Azure CLI 1.0 has been deprecated and you should use Azure CLI 2.0 in most cases. To run Azure CLI 2.0,
Python is a prerequisite for installing Azure CLI 2.0. Python installers are available from the following
URL: https://www.python.org/downloads/. The current version of the CLI is 2.0.44.
On Windows the Azure CLI 2.0 binary is installed via an MSI, which gives you access to the CLI through
the Windows Command Prompt (CMD) or PowerShell. If you are running the Windows Subsystem for
Linux (WSL), packages are available for your Linux distribution. The MSI distributable is used for
installing, updating, and uninstalling the az command on Windows. You can download the MSI at the
following URL: https://docs.microsoft.com/en-us/cli/azure/install-azure-cli-windows?view=azure-cli-
latest
When the installer asks if it can make changes to your computer, click the "Yes" box.
You can now run the Azure CLI with the az command from either Windows Command Prompt or
PowerShell. PowerShell offers some tab completion features not available from Windows Command
Prompt. To sign in, run the az login command. If the CLI can determine your default browser and has
access to open it, it will do so and direct you immediately to the sign in page.
Otherwise, you need to open a browser page and follow the instructions on the command line to enter
an authorization code after navigating to https://aka.ms/devicelogin in your browser.
Sign in with your account credentials in the browser.
The table below lists a few of the common commands used in the CLI links out to their documentation
pages in the reference. All subcommands of these groups and their documentation can be looked up in
online reference or with the --help argument.
Resource type
Azure CLI command group
Resource group
az group
Virtual machines
az vm
Storage accounts
az storage account
Key Vault
az keyvault
Web applications
az webapp
SQL databases
az sql server
CosmosDB
az cosmosdb
Commands in the CLI are provided as subcommands of groups. Each group represents a service provided
by Azure, and the subgroups divide commands for these services into logical groupings.
To search for commands, use az find. For example, to search for command names containing secret, use
the following command:
az find -q secret
If you know which group of commands you want to work with, the --help argument may be a better
choice. This displays not just detailed information for a command, but when used with a command
group, displays all of the available subcommands. For example, when working with Network Security
Groups (NSGs) you can find the available NSG subgroups and commands.
Demonstration: Installing and using the Azure CLI
In this demonstration, your
instructor will install and
then use Azure CLI 2.0 to
deploy a VM
Module 1, Lab C, Deploy an Azure VM with Azure CLI
In this lab, you will create and provision a resource group and VM using Azure CLI 2.0. The script for the
lab can be found in the GitHub portal, under the name of Mod_1_lab_C.md at the following location:
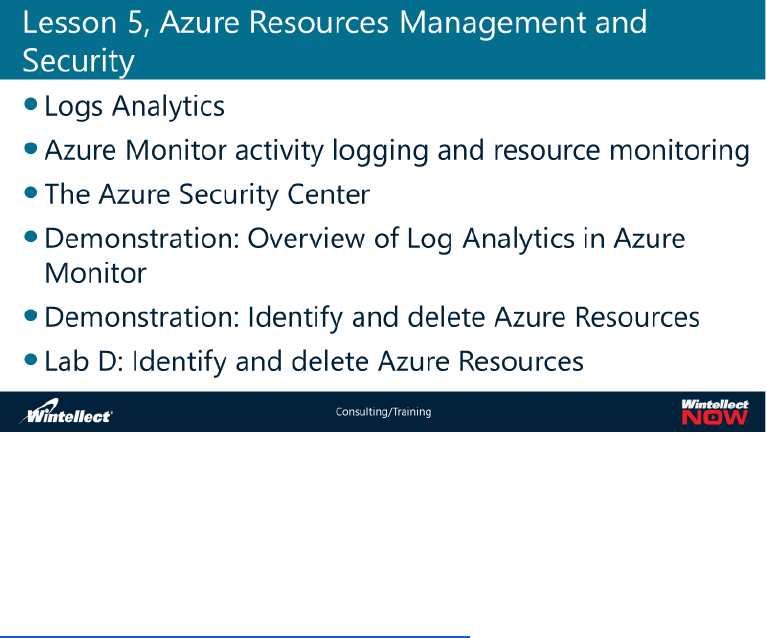
Lesson 5, Azure Resources Management and Security
Logs Analytics
To begin this topic, let’s watch a short, Microsoft-produced video:
https://portal.loganalytics.io/demo#/discover/home
Note: Do not click the link while in class. Your instructor will show the video form the main classroom
screen.
The Azure portal is the hub for all Azure services and offers a rich management experience with
capabilities such as dashboards for pinning resources, intelligent search for finding resources, and
tagging for resource management. To consolidate and streamline the monitoring and management
workflow, the Microsoft Azure team started adding the OMS portal capabilities into the Azure portal. All
of the features of the OMS portal are now part of the Azure portal. In fact, some of the new features
such as Traffic Analytics are only available in the Azure portal. You will be able to accomplish everything
you were doing in the OMS portal with the Azure portal and more. If you haven’t already done so, you
should start using the Azure portal today!
Note: The OMS portal will be officially retired on January 15, 2019. See more here:
https://docs.microsoft.com/en-us/azure/log-analytics/log-analytics-oms-portal-transition
For many years,
Microsoft has
continued to evolve
a concept of
administration that
can be centrally
managed and
controlled. In the
earliest days of PC
level computing, it
was common for
the administrator
to physically go to
each computer,
whether client or
server, to add software, configure some parameter or repair something. Those days are long over.
Today we cannot run complex and extensive configurations of computers, sometimes running into the
tens of thousands, by visiting each device to do something. It would be impossible or you would need a
team of potentially tens of thousands of administrators! The challenge is formidable. To that end
Microsoft continues to support solutions that consolidate administration and make systems easier to
manage, especially when things are changing constantly.
Microsoft Azure gives us a whole host of solutions to that end. With many organizations either
integrating cloud services to the datacenter or going exclusively to the cloud, Microsoft Azure gives you
complete, centralized control over the modern cloud and on-premises datacenter integrated operations.
Recently, Microsoft decided to change the name from OMS to nomenclature that better describes the
functions being used. The name will change to Microsoft Azure Management and Microsoft Azure
Security. Additionally, the documentation sites you use, such as Docs.Microsoft.com, and the MSDN
and TechNet websites still list the overall area.
Log Analytics was previously treated as its own service in Azure. It is now considered a part of Azure
Monitor and focuses on storage and analysis of log data using its query language. Features that were
considered part of Log Analytics, such as Windows and Linux agents for data collection, views to
visualize existing data, and alerts to proactively notify you of issues, have not changed but are now
considered part of Azure Monitor.
Log data collected by Azure Monitor is stored in a Log Analytics workspace, which is based on Azure
Data Explorer. It collects telemetry from a variety of sources and uses the query language from Data
Explorer to retrieve and analyze data. Azure Data Explorer is a fast and highly scalable data exploration
service for log and telemetry data. It helps you handle the many data streams emitted by modern

software, so you can collect, store, and analyze data. Azure Data Explorer is ideal for analyzing large
volumes of diverse data from any data source, such as websites, applications, IoT devices, and more.
Activity logging and resource monitoring in Azure Monitor
Azure Monitor appears by default in the Azure portal Hub menu as Monitor. The Activity Log is one
section of Azure Monitor.
First, let’s watch a short, Microsoft-produced video: https://www.youtube.com/watch?v=_hGff5bVtkM
Note: Do not click the link while in class. Your instructor will show the video from the main classroom
screen.
The Azure Activity Log is a subscription log that provides insight into subscription-level events that have
occurred in Azure. This includes a range of data, from Azure Resource Manager operational data to
updates on Service Health events. The Activity Log was previously known as “Audit Logs” or
“Operational Logs,” since the Administrative category reports control-plane events for your
subscriptions. Using the Activity Log, you can determine the ‘what, who, and when’ for any write
operations (PUT, POST, DELETE) taken on the resources in your subscription. You can also understand
the status of the operation and other relevant properties. The Activity Log does not include read (GET)
operations or operations for resources that use the Classic/"RDFE" model.
The Activity Log differs from Diagnostic Logs. Activity Logs provide data about the operations on a
resource from the outside (the "control plane"). Diagnostics Logs are emitted by a resource and provide
information about the operation of that resource (the "data plane").
You can retrieve
events from your
Activity Log using the
Azure portal, CLI,
PowerShell cmdlets,
and Azure Monitor
REST API.
The Activity Log
contains several
categories of data. For
full details on the
schemata of these
categories, see this
article. These include:
• Administrative. This category contains the record of all create, update, delete, and action
operations performed through Resource Manager. Examples of the types of events you would
see in this category include "create virtual machine" and "delete network security group" Every
action taken by a user or application using Resource Manager is modeled as an operation on a
particular resource type. If the operation type is Write, Delete, or Action, the records of both the
start and success or fail of that operation are recorded in the Administrative category. The
Administrative category also includes any changes to role-based access control in a subscription.
• Service Health. This category contains the record of any service health incidents that have
occurred in Azure. An example of the type of event you would see in this category is "SQL Azure
in East US is experiencing downtime." Service health events come in five varieties: Action
Required, Assisted Recovery, Incident, Maintenance, Information, or Security, and only appear if
you have a resource in the subscription that would be impacted by the event.
• Alert. This category contains the record of all activations of Azure alerts. An example of the type
of event you would see in this category is "CPU % on myVM has been over 80 for the past 5
minutes." A variety of Azure systems have an alerting concept -- you can define a rule of some
sort and receive a notification when conditions match that rule. Each time a supported Azure
alert type 'activates,' or the conditions are met to generate a notification, a record of the
activation is also pushed to this category of the Activity Log.
• Autoscale. This category contains the record of any events related to the operation of the
autoscale engine based on any autoscale settings you have defined in your subscription. An
example of the type of event you would see in this category is "Autoscale scale up action failed."
Using autoscale, you can automatically scale out or scale in the number of instances in a
supported resource type based on time of day and/or load (metric) data using an autoscale
setting. When the conditions are met to scale up or down, the start and succeeded or failed
events are recorded in this category.
• Recommendation. This category contains recommendation events from Azure Advisor.
• Security. This category contains the record of any alerts generated by Azure Security Center. An
example of the type of event you would see in this category is "Suspicious double extension file
executed."
• Policy and Resource Health. These categories do not contain any events; they are reserved for
future use.
You can access the Activity Log by searching for the Activity Log under All services in the left-hand
navigation pane.
Any resource's resource, for example, the configuration blade for a Virtual Machine. The Activity Log is
be one of the sections on most of these resource blades, and clicking on it automatically filters the
events to those related to that specific resource.
Azure Monitor provides base-level infrastructure metrics and logs for most services in Microsoft Azure.
Azure services that do not yet put their data into Azure Monitor will put it there in the future.
Microsoft ships additional products and services that provide additional monitoring capabilities for
developers, DevOps, or IT Ops that also have on-premises installations.
Azure Monitor has a landing page that helps users:
• Understand the monitoring capabilities offered by Azure.
• Discover, configure, and on-board Azure’s platform and premium monitoring capabilities.
The page is a starting point for navigation, including on-boarding. It shows curated notable issues from
different services and allows the user to navigate to them in context.
When you open the page, you can select among the subscriptions you have read access to. For a
selected subscription, you can see:
•Triggered alerts and alert sources. This table shows summary counts, alert sources, and how
many times alerts fired for the selected time duration. It applies to both older and newer alerts.
Read more about the newer Azure Alerts.
•Activity Log Errors. If any of your Azure resources log events with error-level severity, you can
view a high-level count and click through to the activity log page to investigate each event.
•Azure Service Health. You can see a count of Service Health service issues, planned
maintenance events, and health advisories. Azure Service Health provides personalized
information when problems in the Azure infrastructure impact your services. See Azure Service
Health for more information.
•Application Insights. See KPIs for each AppInsights resource in the current subscription. The
KPIs are optimized for server-side application monitoring across ASP.NET web apps, Java, Node,
and General application types. The KPIs include metrics for request rate, response duration,
failure rate, and availability %.
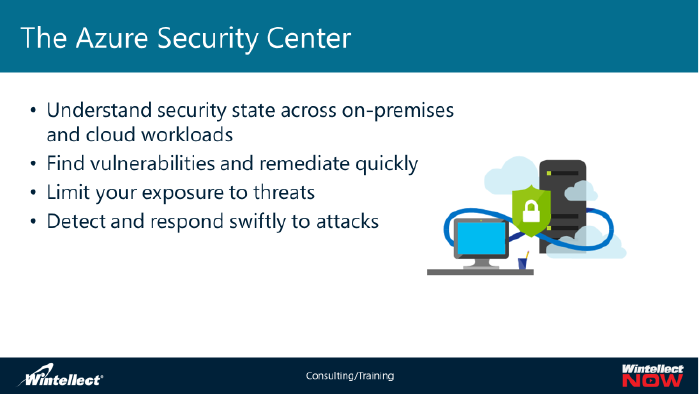
The Azure Security Center
A new component of
Azure Security and
Compliance service is
the Azure Security
Center. The Azure
Security Center has
been created to provide
unified security
management and
advanced threat
protection for
workloads running in
Azure, on-premises and
in other clouds. It
delivers visibility and control over hybrid cloud workloads, active defenses that reduce your exposure to
threats, and intelligent detection to help you keep pace with rapidly evolving cyber-attacks.
Using the Azure Security Center gives you the feature benefits of Unified visibility and control, Adaptive
threat prevention and Intelligent threat detection and response. Let's look at each on separate slides:
•Unified visibility and control. There are number of features that you can use here, such as:
o Understanding security state across hybrid workloads, which allows you to manage all
your hybrid cloud workloads – on-premises, Azure, and other cloud platforms – in one
console. Built-in dashboards provide instant insights into security issues that require
attention.
o Visibility into cloud workloads. Automatically discover and onboard new resources
created in your Azure subscriptions.
o A centralized policy management ensures compliance with company or regulatory
security requirements by centrally managing security policies across all your hybrid
cloud workloads.
Optional video by Microsoft (8:22) on Azure Security Center:
https://www.youtube.com/watch?v=5edPZ47CB5E
Demonstration: Overview of Azure Monitor - Activity Log; OMS – Log Analytics; Azure
Security Center
In this demonstration, watch as the instructor shows the Azure Monitor, Log Analytics service.
Demonstration: Identify and Delete Azure Resources
In this demonstration, watch your instructor identify and then remove remaining resources.
Module 1, Lab D, Identify and delete Azure Resources
In this lab, you will identify and
remove all previously created
resource groups and verify all
resources are gone. The script for
the lab can be found in the GitHub
portal, under the name of
Mod_2_lab_D.md at the following
location:
Module Review and Takeaways
Review Question
1. Which scripting language do you prefer? Azure PowerShell or Azure CLI
2.0 and why?
2. What is a blade?
3. Name an advantage to using the Azure Security Center.
Best Practices
Use Azure PowerShell rather than Azure CLI unless you have numerous scripts in CLI already in
production. You should, however, move them over to PowerShell when possible.
Tools
The following table lists the tools that this module references:
Tool
Use to
Where to find it (or about it)
Azure portal
Manage Azure resources
Additional Reading: For more information, refer
to the Azure portal at https://portal.azure.us
Azure PowerShell
Manage Azure
https://docs.microsoft.com/en-
us/powershell/azure/overview?view=azurermps-
6.8.1

Module 2 - Azure Virtual Network service and components
An Azure Virtual Network (VNet) is a logical extension of your physical network topology in the cloud,
dedicated and isolated to your Azure subscription. You can fully control the IP address blocks, DNS
settings, security policies, and route tables within this network. Azure VNets enable many types of
Azure resources, such as an Azure VM, to securely communicate with other VMs, the Internet, and on-
premises networks. In this module, we will take a look at what is the Azure Virtual Network Service and
then we will learn about extending our on-premises networks into Azure.
Note that this module is being presented before the module on virtual machines. We’ve already seen
how to create VMs and done some manipulation of those VMs. However, in order to use a VM we must
have the connectivity required to communicate with them. To that end, we’ll cover VNets first and then
move over to a detailed module on VMs.
Lesson 1: Overview of Azure Virtual Network Service
On-premises and Azure virtual networking
Whether you are deploying user computers or network servers in your on-premises environment, you
normally connect them to a network to allow them to communicate with each other. Generally
speaking, the network exists first and then you connect computers into it so they can do their various
functions for your organization.
There are many
types of networks
and network
topologies you may
use, but normally
most organizations
use ethernet
networks with the
hub and spoke
topology. The
normal network
protocol in use is
TCP/IP. In the past
there were many
competing network and network topology designs, but ethernet and TCP/IP is today’s standard. One big
reason for this is the Internet. In order to connect to a website, one must use TCP/IP. As the early
Internet developed into a global commercial enterprise, more and more organizations selected to use
today’s standard—ethernet and TCP/IP.
When many organizations began to use virtualization technologies in their environment, they set up
VNets for the use of those virtual machines, which allowed them to virtualize the physical network
settings their servers were connected to and segregate network settings from the VMs they were
running. This had the effect of allowing many more options when it came to networking.
An Azure Virtual Network (VNet) can provide only local connectivity to a few VM’s or connectivity from
anywhere in the public Internet. This means we can use Azure VNet optional components to connect on-
premises servers to Azure VM’s and services.
You can assign IP addresses to Azure resources to communicate with other Azure resources, on-
premises network, and the Internet. There are two types of IP addresses you can use in Azure:
•Public IP addresses: Used for communication with the Internet, including Azure public-facing
services.
•Private IP addresses: Used for communication within an Azure virtual network (VNet), and on-
premises network, when you use a VPN gateway or ExpressRoute circuit to extend your network
to Azure.
An Azure VNet is a representation of your own network in the cloud. It is a logical isolation of the Azure
cloud dedicated to your subscription. You can use VNets to provision and manage virtual private
networks (VPNs) in Azure and, optionally, link the VNets with other VNets in Azure, or with your on-
premises IT infrastructure to create hybrid or cross-premises solutions. A VNet is made up of a logical
boundary defined by an IP address. You can further divide this IP address space into one or more
subnets, just like with your on-premises networks. In fact, in Azure many of the things we would do on-
premises are even easier. For example, some networking features, like routing between subnets on the
same VNet, are automatically available. By default, every VM can access the Internet, and that includes
support for outbound connections and DNS name resolution.
When you make a VM it is dynamically assigned an IP address. When you create a VM, Azure uses a
private pool of addresses by default. Alternatively, you can configure a separate Azure VNet and define
your own private IP address range and subnets to it. Once a VM is created this dynamic address stays
with the VM even when it is restarted. However, to avoid being charged for a VM’s compute resources
when it is not needed, you can deallocate and stop that virtual machine. The virtual machine can be
restarted at any time by you but can be, at this point, assigned a different dynamic IP address. Dynamic
IP addresses are assigned by the Azure Dynamic Host Configuration Protocol (DHCP) service. Each VNet
you create has its own Classless Inter-Domain Routing (CIDR) block, and can be linked to other VNets
and on-premises networks as long as the CIDR blocks do not overlap. You also have control of DNS
server settings for VNets, and segmentation of the VNet into subnets. In any particular subnet of private
IP addresses, such as 192.168.1.0/24, where the/24 is the CIDR block, the first three addresses get
reserved for systems use to the first available address would be 192.168.1.4.
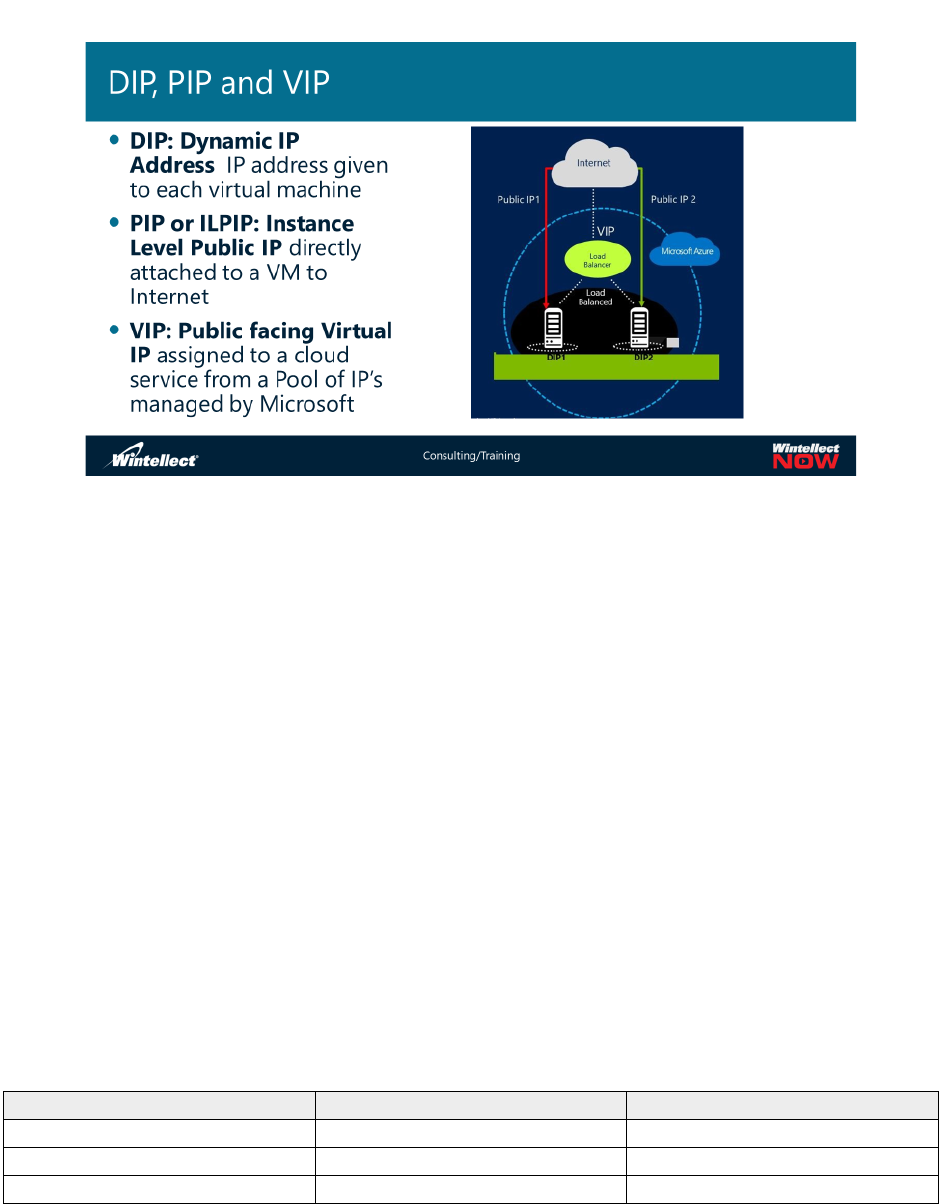
A VM deployed into Microsoft Azure is associated with several types of IP address. These are:
• DIP – dynamic IP address
• PIP – instance-level public IP address
• VIP – virtual IP address
The DIPs are private to the VNET or cloud service in which the VM is hosted, while the VIP and the PIP
are exposed on the internet. A VM may have endpoints configured on it describing how traffic should be
load balanced before being routed to the VM.
Azure supports two types of load balancer: The Azure, or Internal Load Balancer associating a VIP/port
combination with a DIP/port combination on the VM; and the Internet, or Public Load Balancer which
allows incoming internet traffic to your VMs.
Azure supports Network Security Groups which can be used to allow and deny traffic flowing in or out of
a VNET, between subnets, and in or out of a VM. It also supports Endpoint Access Control Lists to restrict
traffic arriving at the VIP.
Private IP addresses allow Azure resources to communicate with other resources in a cloud service or
another VNet, or to on-premises network (through a VPN gateway or ExpressRoute circuit), without
using an Internet-reachable IP address.
Keep in mind the dynamic IP address is part of the private IP address ranges assigned by the Internet
Network authorities. The private IP address ranges are based on the classes of addresses that are
publicly assigned. The following table shows this association:
IP Class
Network and CIDR
Available addresses
A
10.0.0.0/8
10.0.0.1 to 10.255.255.254
B
172.16.0.0/16
172.16.0.1 to 172.31.255.254
C
192.168.0.0/24
192.168.0.1 to 192.168.255.254

Note that when assigning a public IP address range to an Azure virtual network does not make it publicly
routable. There are additional steps that will need to be taken.
A best practice when planning your Azure-based IP address space is to not use subnet addresses that
you already have in place on-premises or other locations. This helps you avoid having an overlap in an
existing network subnet that you will have to re-create.
It is not only VMs that require an IP address. Many cloud services will also require an address. This can
be as complex as a PaaS solution such as Azure SQL services or a simple Azure website. In case of a
standalone cloud service, resources get a private IP address allocated dynamically from the Azure
datacenter private IP address range. It can be used only for communication with other VMs within the
same cloud service. This IP address can change when the resource is stopped and started.
In case of a cloud service deployed within a virtual network, resources get private IP address(es)
allocated from the address range of the associated subnet(s) (as specified in its network configuration).
This private IP address(es) can be used for communication between all VMs within the VNet.
Additionally, in case of cloud services within a VNet, a private IP address is allocated dynamically (using
DHCP) by default. It can change when the resource is stopped and started. To ensure the IP address
remains the same, you need to set the allocation method to static, and provide a valid IP address within
the corresponding address range.
All Azure VMs and PaaS role instances are configured with Azure-managed DNS servers by default,
unless you explicitly configure custom DNS servers. These DNS servers provide internal name resolution
for VMs and role instances that reside within the same VNet or cloud service.
When you create a VM, a mapping for the hostname to its private IP address is added to the Azure-
managed DNS servers. In case of a multi-NIC VM, the hostname is mapped to the private IP address of
the primary NIC. However, this mapping information is restricted to resources within the same cloud
service or VNet.
In case of a standalone cloud service, you will be able to resolve hostnames of all VMs/role instances
within the same cloud service only. In case of a cloud service within a VNet, you will be able to resolve
hostnames of all the VMs/role instances within the VNet.
You can assign a private IP address to the front-end configuration of an Azure Internal Load Balancer
(ILB) or an Azure Application Gateway. This private IP address serves as an internal endpoint, accessible
only to the resources within its virtual network (VNet) and the remote networks connected to the VNet.
You can assign either a dynamic or static private IP address to the front-end configuration. You can also
assign multiple private IP addresses to enable multi-vip scenarios.
The table below shows each resource type with the possible allocation methods (dynamic/static), and
ability to assign multiple private IP addresses:
Resource
Dynamic
Static
Multiple IP
addresses
VM (in a standalone cloud service or VNet)
Yes
Yes
Yes
PaaS role instance (in a standalone cloud service or VNet)
Yes
No
No
Internal load balancer front end
Yes
Yes
Yes
Resource
Dynamic
Static
Multiple IP
addresses
Application gateway front end
Yes
Yes
Yes
The table below shows the limits imposed on IP addressing in Azure per subscription. You can contact
support to increase the default limits up to the maximum limits based on your business needs:
Type of Address
Default limit
Maximum limit
Public IP addresses (dynamic)
5
contact support
Reserved public IP addresses
20
contact support
Public VIP per deployment (cloud service)
5
contact support
Private VIP (ILB) per deployment (cloud service)
1
1
Azure Resource Manager (ARM) networking
A key difference between the deprecated Azure Classic and Azure Resource Manager is that with Azure
Classic, A cloud service was created that served as a logical container for virtual machines. As previously
stated, the Azure Classic model is no longer available for creating items, although it still is available for
items that were previously created under it. The Azure Resource Manager is the current and only model
available for creating items. There is no support for cloud services in Azure Resource Manager. To
provide network connectivity, the Azure Resource Manager deployment model provides many
additional resource types. For example, to implement load balancing and NAT, you can implement an
Azure load balancer. To allow connectivity to a virtual machine, you must attach it to a virtual network
interface. While this increases the complexity of the provisioning process, it offers significant
performance and flexibility benefits. In any case, you can deploy your solutions much faster than when
using the classic deployment model.
Azure Resource
Manager
networking
offers a number
of features and
benefits over
Azure Classic to
include such
features as:
• Accelerated Networking. Allows your virtual machines to get a maximum of 30 Gbps transfer
rate while providing ultra-low latency and high packet per second rates for VM to VM traffic.
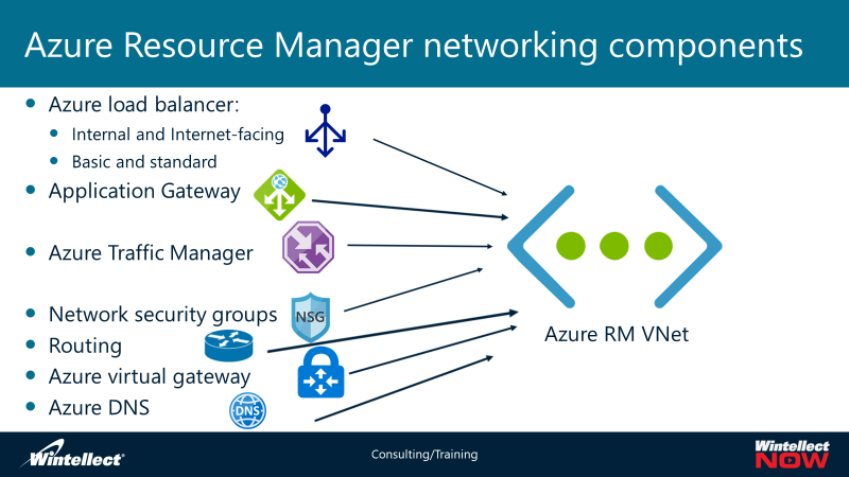
•Load Balancer standard. The next generation of our existing Load Balancer that allows you to
design your high-performance virtual data center and support any TCP or UDP application. Use
standalone VM instances, or up to 1,000 instances of virtual machine scale sets in a back-end
pool. Continue to use low forwarding latency, high throughput performance, and scale to
millions of flows on a fully managed Azure service.
•Virtual network peering. Enables you to seamlessly connect two Azure virtual networks. Once
peered, the virtual networks appear as one for connectivity purposes. The traffic between
virtual machines in the peered virtual networks is routed through the Microsoft backbone
infrastructure, much like traffic is routed between virtual machines in the same virtual network,
through private IP addresses only.
•Virtual network service endpoints. Extend your virtual network private address space and the
identity of your VNet to the Azure services, over a direct connection. Endpoints allow you to
secure your critical Azure service resources to only your virtual networks. Traffic from your VNet
to the Azure service always remains on the Microsoft Azure backbone network.
Azure Resource Manager networking components
A load balancer constitutes a separate Azure Resource Manager resource, while in the classic
deployment model it was part of the cloud service in which load-balanced virtual machines reside.
Similarly, a network interface was an inherent part of a classic virtual machine, but Azure Resource
Manager implements it as a separate resource. The same principle applies to a public IP address. More
specifically, every cloud service must have at least one automatically assigned public IP address. Public
IP address assignment is optional with Azure Resource Manager and involves creating a public IP address
resource. You can choose to assign it to either Azure load balancers or network interfaces.
The load balancer provides enhanced availability and scalability of our networking infrastructure. To
configure
the load
balancer,
you need
to specify
the front-
end IP configuration.
This detects traffic that requires load balancing. You also must set up a backend address pool which
simply specifies the virtual machines that will be load balanced. Also, you can set up load balancing and
inbound NAT rules and probes to verify the back in virtual machine health.
There are two types of Azure load balancers; the internal load balancer and the Internet facing load
balancer. You can get a basic or standard SKU load balancer in Azure. The standard has more features
than the basic such as load balancing abilities for up to 1000 virtual machines on the same virtual
network, improve diagnostic insights support for high availability ports and load balancing virtual
machines across availability zone.
You can use an internal load balancer with one private address assigned to the front end across many
virtual machines in the back-end pool. You can direct on-premises traffic to the internal load balancer in
Azure.
You can use an Internet facing load balancer to distribute traffic to a public IP address assigned to the
front end across too many virtual machines in the backend. You can also define NAT rules for the
Internet facing load balancer.
Azure also supports an Application Gateway which acts as a layer 7 load balancer. It can do SSL
offloading. You can add a server certificate to it and create a port 443 listener on it. The Azure
application Gateway can provide cookie-based affinity, URL pass base routing and web application
firewall functionality.
The Azure Traffic Manager uses a DNS load balancing solution. It is similar to DNS “round robin” but is
aware when address in the common name pool is unavailable and can redirect traffic or load balance
traffic to the other actively and healthy entities.
Network security groups are made by default when you create virtual machines and other IP
addressable resources. This help set firewall rules to allow or block traffic to those resources.
Azure provides a default routing configuration to help ensure traffic is well-managed within your virtual
networks. It to provide user-defined routes for within the virtual network subnets and border Gateway
protocol routes between on premise and Azure virtual networks. Routing in Azure uses rules to assign
system routes to every virtual network subnet. It provides for a local virtual network, on-premises and
Internet rules. The routes themselves contain the address prefix, the next hop type, and the next hop
value.
By combining your user-defined routes, network security groups and NVA's you can configure perimeter
networking for specific subnets in your Azure virtual network.
Force tunneling lets you apply user-defined routes to particular scenarios. You can target a VPN tunnel
specifically between your Azure virtual network and the on-premises network. This forces all Internet
bound traffic through your default route.
The Azure virtual gateway provides a VPN you can use to connect either point to site, that is individual
computers on-premises to Azure virtual network, or site to site which just provides the connectivity
between the on-premises network and the Azure virtual network across the Internet. We also have
Microsoft Azure ExpressRoute. This provides a private connection that doesn't use the Internet and is
not packet-switched through routers on the Internet. It costs a lot more money and you have to
negotiate it through a communications vendor.
Azure virtual networks can also be connected to communicate to each other within Azure. You can use
the VNet to VNet connection which is an IP sec tunnel or VNet peering which is a direct connection
between two virtual networks. VNet peering is considered the best choice for connecting virtual
networks. You cannot use VNet peering classic virtual networks. You can have up to 10 VNet peering
per virtual network.
We will discuss many of the virtual gateway options in greater detail in a subsequent lesson of this
module.
Azure DNS, not the default name resolution service on virtual networks, is a manage Azure service. It
provides DNS zones as well is name resolution. It can also be an authoritative resolver for your internal
namespace.
Demonstration: Implementing Azure Resource Manager virtual networks by using the Azure
portal
In this demonstration, watch as your instructor creates Azure VNets, VNet peering and associated
resources.
Lab A: Implementing Azure Resource Manager virtual networks by using the Azure portal
In this lab, you will create two Azure Resource Manager VNets, create VNet peering between them, and
then add VMs to both VNets to communicate with each other. The script for the lab can be found in the
GitHub portal, under the name of Mod_2_lab_A.md
Lesson 2: Extending on-premises networks to Azure
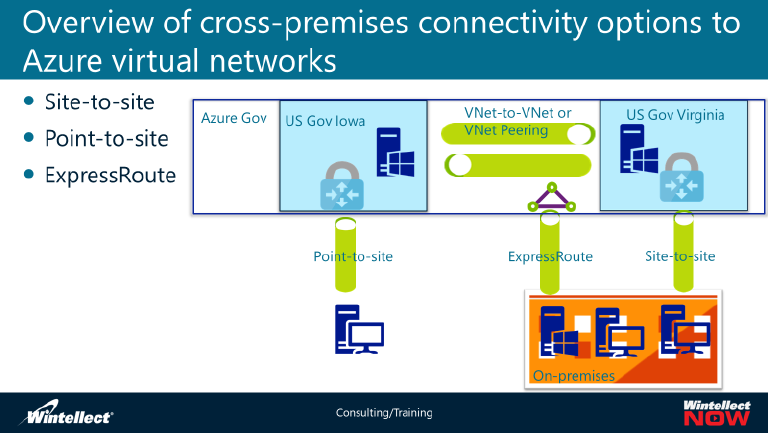
Overview of cross-premises connectivity options to Azure virtual networks
In the previous lesson, we briefly described the different types of VPNs you can use: point to site, site to
site and ExpressRoute. Each has its own set of benefits, but basically, they're all doing the same--
providing cross premise connection to Azure virtual networks.
Point-to-site is
generally used
when you have
only a few client
computers on-
premises that
you want to be
able to connect
across to an
Azure virtual
network that
might have
multiple virtual
machines and
other resources
there. You deploy a virtual gateway and Azure to make this work. You can put multiple point the site
VPNs across the same virtual gateway.
Site-to-site Uses an IPSec VPN Tunnel.
At your on-premises side you can use a hardware VPN device or you can install Routing and Remote
Access (RRAS) on a Windows Server. Generally, you use this when you have a large number of
computers on the on-premises side connecting to a large number of VMs and Cloud Services on the
Azure virtual network.
ExpressRoute is a private circuit that you pay for using an ExpressRoute service provider. It costs more
but it has a heck of a lot more performance ability up through 10 Gb per second.
We’ll explain each of these options over the next several slides.
Overview of a site-to-site VPN
The site-to-site VPN uses IPSec tunneling to provide authenticated headers (AH) and encapsulated
security payload (ESP). This uses several advanced tunneling methods, such as the Internet Key
Exchange (IKE) and the Advanced Encryption Standard (AES). It requires a VPN at both the on-premises
network and the Azure virtual network.
You can use static routes or the border Gateway protocol routing to connect to the IPSec tunnel from
the on-premises location to the Azure virtual network. If you are using static routes keep in mind that
Azure will use the endpoints between on-premises in your virtual networks but might not be aware of
additional routes you have inside your on-premises location so you need to provide that information so
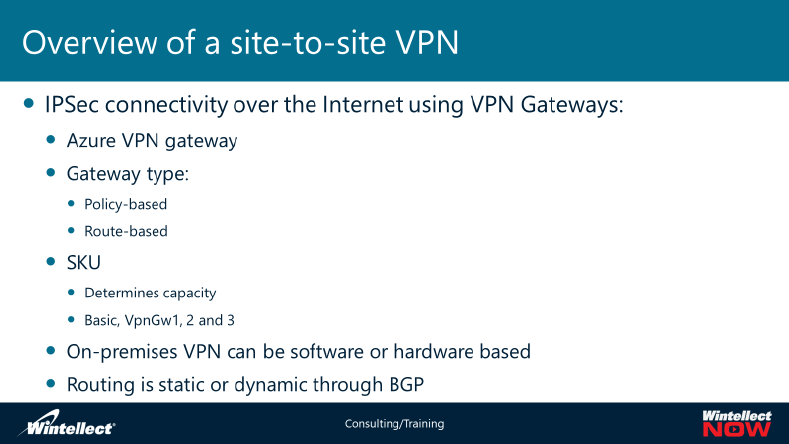
that everything can route properly. The on-premises VPN gateway then passes the on-premises routes
to the Azure VPN gateway.
A site-to-site
VPN
infrastructure
requires a
VPN gateway
on each side
of the VPN
tunnel. It also
requires a
reliable
Internet
connection
from your on-
premises
network.
When you
create a site-to-site VPN on the Azure side, the VPN gateway is provisioned as part of the site-to-site
VPN. For the on-premises side, you can use software-based or hardware-based VPN solutions. For
hardware-based VPNs, Microsoft has configuration instructions for each of the many validated VPN
devices. If a VPN device is not validated it still might support site-to-site VPN, but will require further
testing on your part.
When you create the VPN gateway on the Azure side there are four SKUs you can select:
• Basic, up to 100 Mb per second
• VpnGw1, up to 650 Mb per second
• VpnGw 2, up to 1 Gb per second and
• VpnGw3, up to 1.25 Gb per second
The throughput is also dependent in your overall on-premises network connection to the Internet.
There are two types of VPN gateways we can create; policy-based or static, which is the type we can use
for the basic SKU, and then route-based for dynamic, which is supported by all SKUs. Policy-based use
the local IPSec policies you create. Route-based devices use the routes in the local routing table through
a specific IPSec tunnel, which means all traffic will be automatically encrypted.
Policy-based only support a single site-to-site link whereas route-based you can have 10 site-to-site
connections on the Basic SKU and up to 30 for any of the other SKUs. Policy-based gateways don't,
however, support point-to-site VPNs.
The encryption standards for policy-based uses IKE version 1 AES 256, AES 128 or Triple DES. It uses
SHA1 for the hash. Route-based can use IKE version 2, AES 256 and Triple DES and both SHA1 and SHA2
for the hash.
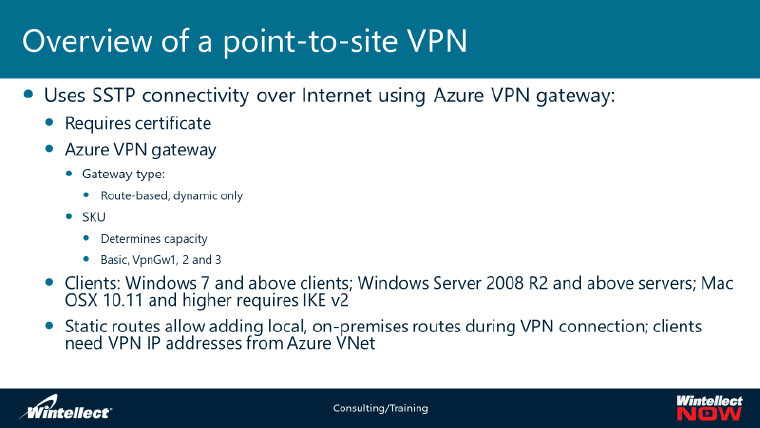
Policy-based or static only support static routing. If you want to use Border Gateway Protocol (BGP)-
routing it must be on a route-based VPN. Therefore, if you wish to do dynamic routing you’ll need to use
BGP. You can implement a number of previously unsupported scenarios by using BGP in a site to site
VPN to include:
•Transitive routing between on-premises locations and multiple Azure VNets.
•Multiple tunnels between a VNet and an on-premises location using the active – passive or
active – active configuration, with automatic failover between them.
Note that Microsoft does assess any outbound data transfer charge at a standard data transfer rate so
that your volume of traffic can affect your overall bill. This charge is only for outbound traffic, as
inbound traffic is not charged. The availability rate Service Level Agreement (SLA) is 99.9% for Basic SKU
and 99.95% for the other SKUs.
Overview of a point-to-site VPN
The point-to-site VPN uses the Secure Sockets Transport Protocol (SSTP), relies on an SSL certificate. You
can use a self-signed certificate on the VPN gateway on the Azure side and then export it over to the on-
premises devices or RRAS, where you can then import that certificate. You can however, still use a
certificate created by a certificate authority, either your own or a public certificate authority. Keep in
mind that there is considerable administrator overhead in providing individual computers in the on-
premises location with individual certificates. If we you will have multiple client computers making
connections to the same Azure VNet, it is considered a best practice to then use site-to-site VPNs.
AD Domain
authentication
allows users to
connect to Azure
using their
organization
domain credentials.
It requires a RADIUS
server that
integrates with the
AD server.
Organizations can
also leverage their
existing RADIUS
deployment. The RADIUS server could be deployed on-premises or in your Azure VNET. During
authentication, the Azure VPN Gateway acts as a pass through and forwards authentication messages
back and forth between the RADIUS server and the connecting device. So Gateway reachability to the
RADIUS server is important. If the RADIUS server is present on-premises, then a VPN site-to-site
connection from Azure to the on-premises site is required for reachability. The RADIUS server can also
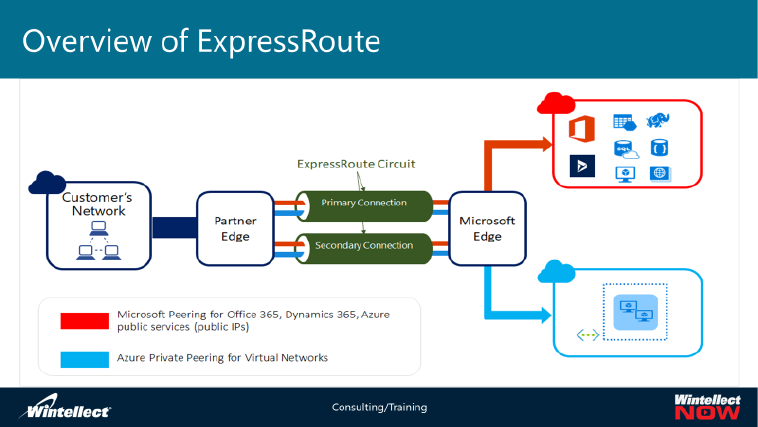
integrate with AD certificate services. This lets you use the RADIUS server and your enterprise certificate
deployment for Point-to-site certificate authentication as an alternative to the Azure certificate
authentication. The advantage is that you don’t need to upload root certificates and revoked certificates
to Azure.
The point-to-site VPN only uses route based dynamically rather than static routes. It has the same SKU
types as site-to-site. Because point-to-site VPNs allow individual, on-premises computers to connect to
VMs or cloud services on the Azure network, it can use a variety of client VPN software.
When clients connect they will be automatically assigned an IP address from the Azure VNet VPN.
However, you will need to initially designate an IP address range for VPN client computers. This allows
them to correctly communicate with virtual machines and other resources on the Azure side. Routing
information is collected and created into the routing tables here. As with the point to point VPN, there
are data rate charges for outbound but not inbound traffic. Also, the same reliability rates apply.
The on-premises computer operating systems that can use the point to site VPN is any Windows 7 or
higher client operating system and/or Windows Server 2008 R2 and higher server operating system. To
connect from Mac devices (OSX versions 10.11 and above), rather than using SSTP and a certificate, you
can use IKEv2 VPN.
Note: Starting July 1, 2018, support is being removed for TLS 1.0 and 1.1 from Azure VPN Gateway. VPN
Gateway will support only TLS 1.2. Only point-to-site connections are impacted; site-to-site connections
will not be affected. If you’re using TLS for point-to-site VPNs on Windows 10 clients, you don’t need to
take any action. If you are using TLS for point-to-site connections on Windows 7 and Windows 8 clients,
you must install the following updates: KB3140245 and KB2977292. See the Microsoft Download
Center for the updates.
Microsoft, according to their documentation, does not support Linux operating system connections via a
point–to–site VPN. However, there are several websites which document a process to use IKEv2 VPN to
make the connection work. You can do a search for such procedures but understand it is not directly
supported by Microsoft.
Overview of
ExpressRoute
Microsoft Azure
ExpressRoute
requires
additional costs
and a paid
communications
vendor. This is
very much like a
circuit path
agreement with a
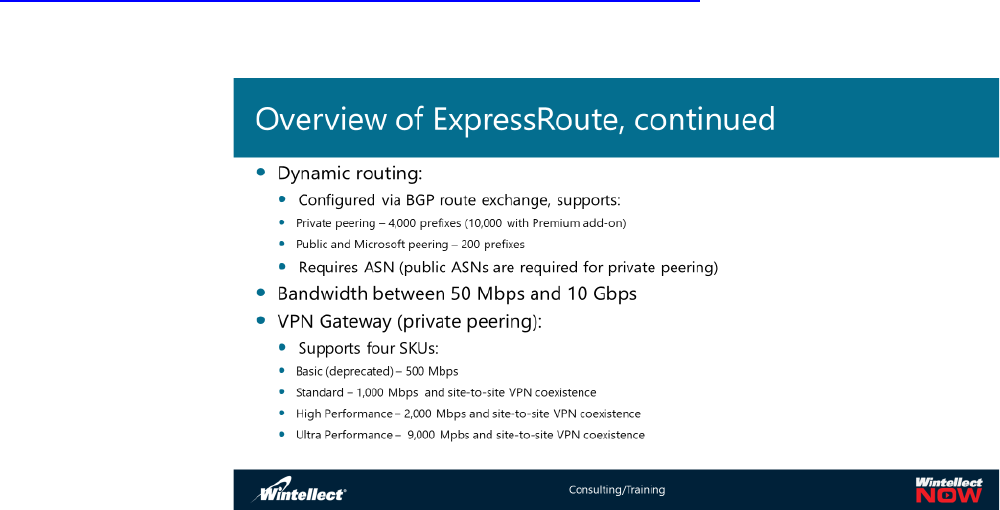
telecom provide. ExpressRoute lets you extend your on-premises networks into the Microsoft cloud
over a private connection facilitated by a connectivity provider. With ExpressRoute, you can establish
connections to Microsoft cloud services, such as Microsoft Azure, Office 365, and Dynamics 365. While
having a higher cost, ExpressRoute offers several benefits, such as:
•Layer 3 connectivity between your on-premises network and the Microsoft Cloud through a
connectivity provider. Connectivity can be from an any-to-any (IPVPN) network, a point-to-point
Ethernet connection, or through a virtual cross-connection via an Ethernet exchange.
•Connectivity to Microsoft cloud services across all regions in the geopolitical region.
•Global connectivity to Microsoft services across all regions with ExpressRoute premium add-on.
•Dynamic routing between your network and Microsoft over industry standard protocols (BGP).
•Built-in redundancy in every peering location for higher reliability.
•Connection uptime SLA.
•QoS support for Skype for Business.
ExpressRoute locations are found multiple US cities including Chicago, Dallas, Los Angeles, New York,
Phoenix, San Antonio, Seattle, Silicon Valley, Washington DC and many more.
Note: To find an ExpressRoute connectivity provider, see the following list:
https://docs.microsoft.com/en-us/azure/expressroute/expressroute-locations
Connectivity can be from an any-to-any (IP VPN) network, a point-to-point Ethernet network, or a virtual
cross-connection through a connectivity provider at a co-location facility. ExpressRoute connections do
not go over the public
Internet. This lets
ExpressRoute
connections offer more
reliability, faster
speeds, lower latencies,
and higher security
than typical
connections over the
Internet. There are
three types of
ExpressRoute
connections:
•Private peering
This allows you
to connects to Azure VNets directly from your on-premises location.
•Public peering This lets you connect to Azure services that are not directly connected to Azure
networks.
•Microsoft peering This lets you connect directly to Office 365 and Dynamics CRM services.
Each peering type makes up a separate routing domain even though they use or can use the same
physical connection. You can connect to any region that has an ExpressRoute circuit. The ExpressRoute
premium allows you to connect globally.
ExpressRoute supports using Microsoft peering with route filters for Azure PaaS services, such as Azure
storage and Azure SQL Database. You now need only one routing domain to access Microsoft PaaS and
SaaS services. You can use route filters to selectively advertise the PaaS service prefixes for Azure
regions you want to consume.
When provisioning ExpressRoute, besides implementing physical connections, you also need to create
one or more logical ExpressRoute circuits. You can identify each individual circuit based on its service
key (s-key), which takes the form of a globally unique identifier (GUID). A single circuit can support up to
three routing domains (private, public, and Microsoft, as listed above). Each circuit has a specific
nominal bandwidth associated with it, which can range between 50 Mbps and 10 Gbps, shared across
the routing domains. You have the option to increase or decrease the amount of provisioned bandwidth
without the need to re-provision the circuit.
In private peering scenarios, establishing connection to a target virtual network requires creating a link
between the ExpressRoute circuit and the ExpressRoute gateway attached to that virtual network. As
the result, the effective throughput on a per-virtual network basis depends on the SKU of the
ExpressRoute gateway:
• Basic. Up to 500 Mbps. It does not support the coexistence of a site-to-site VPN and
ExpressRoute. Being deprecated by Microsoft.
• Standard. Up to 1,000 Mbps. It supports the coexistence of a site-to-site VPN and ExpressRoute.
• High Performance. Up to 2,000 Mbps. It supports the coexistence of a site-to-site VPN and
ExpressRoute.
• Ultra-Performance. Up to 9,000 Mbps. It supports the coexistence of a site-to-site VPN and
ExpressRoute.
There are three ExpressRoute connectivity models:
• A co-location in a facility hosting an ExpressRoute exchange provider. This facilitates private
routing to Microsoft Cloud by using either Layer 2 or managed Layer 3 cross-connect with the
exchange provider.
• A Layer 2 or managed Layer 3 connection to an ExpressRoute point-to-point provider.
• An any-to-any network (IPVPN) network, implemented commonly as a Multiprotocol Label
Switching (MPLS) cloud, with a wide area network (WAN) provider handling Layer 3 connectivity
to the Microsoft cloud.
ExpressRoute is dynamic and uses BGP route exchange. It uses autonomous system numbers (ASN). An
ASN is a unique number that's available globally to identify an autonomous system and which enables
that system to exchange exterior routing information with other neighboring autonomous systems.
There are both public and private ASNs. ExpressRoute does not support transitive routing. However, you
might be able to order this from the communications vendor.
To properly route between your on-premises network and the Microsoft’s edge routers, you will need to
designate several ranges of IP addresses. Specifics of this configuration depend to some extent on the
peering arrangement, but:
• You must choose a pair of /30 subnets or a /29 subnet for each peering type.
•Each of the two /30 subnets will facilitate a separate BGP session. It is necessary to establish two
sessions to qualify for the ExpressRoute availability SLA.
•With private peering, you can use either private or public IP addresses. With public peering and
Microsoft peering, public IP addresses are mandatory.
Some providers manage routing of ExpressRoute traffic as part of their managed services. Usually,
however, when provisioning ExpressRoute via Layer 2 connectivity providers, routing configuration and
management is the customer’s responsibility.
There are three billing methods you can choose:
•Unlimited data. This set monthly fee covers the service and an unlimited amount of data transfers.
•Metered data. This set monthly fee covers the service. There is an additional charge for outbound data
transfers on a per GB basis. Prices depend on the zone where the Azure region resides.
•ExpressRoute Premium add-on. This service extension provides additional ExpressRoute capabilities
including:
oAn increased number of routes that can be advertised in the public and private peering
scenarios, up to the 10,000-route limits.
oGlobal connectivity to Microsoft Cloud from a circuit in an individual Azure region.
oAn increased number of virtual network links from an individual circuit, up to the 100 link limit.
Implementing a site-to-site VPN by using the Azure Resource Management deployment
model
A Site-to-Site VPN gateway connection is used to connect your on-premises network to an Azure virtual
network over an IPsec/IKE (IKEv1 or IKEv2) VPN tunnel. This type of connection requires a VPN device
located on-premises that has an externally facing public IP address assigned to it.
Before you start, verify that you have met the following criteria before beginning your configuration:
•Make sure you have a compatible VPN device and someone who is able to configure it. For more
information about compatible VPN devices and device configuration, see About VPN Devices.
•Verify that you have an externally facing public IPv4 address for your VPN device. This IP address
cannot be located behind a NAT.
•If you are unfamiliar with the IP address ranges located in your on-premises network
configuration, you need to coordinate with someone who can provide those details for you.
When you create this configuration, you must specify the IP address range prefixes that Azure
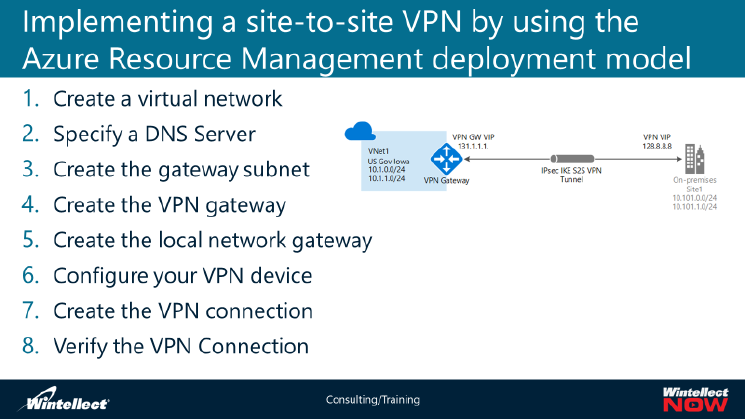
will route to your
on-premises
location. None of
the subnets of
your on-premises
network can
overlap with the
virtual network
subnets that you
want to connect
to.
To implement a site-to-site VPN using the ARM model, you should follow the following steps:
1. Create a virtual network. To create a VNet in the Resource Manager deployment model by
using the Azure portal, then Create Virtual network from Create a Resource and click to open
the Virtual Network page.
2. Specify a DNS server. DNS is not required to create a Site-to-Site connection. However, if you
want to have name resolution for resources that are deployed to your virtual network, you
should specify a DNS server. This setting lets you specify the DNS server that you want to use for
name resolution for this virtual network. It does not create a DNS server.
3. Create the gateway subnet. The virtual network gateway uses specific subnet called the
gateway subnet. The gateway subnet is part of the virtual network IP address range that you
specify when configuring your virtual network. It contains the IP addresses that the virtual
network gateway resources and services use. The subnet must be named 'GatewaySubnet' in
order for Azure to deploy the gateway resources. You can't specify a different subnet to deploy
the gateway resources to. If you don't have a subnet named 'GatewaySubnet', when you create
your VPN gateway, it will fail.
When you create the gateway subnet, you specify the number of IP addresses that the subnet
contains. The number of IP addresses needed depends on the VPN gateway configuration that
you want to create. Some configurations require more IP addresses than others. We
recommend that you create a gateway subnet that uses a /27 or /28.
If you see an error that specifies that the address space overlaps with a subnet, or that the
subnet is not contained within the address space for your virtual network, check your VNet
address range. You may not have enough IP addresses available in the address range you
created for your virtual network. For example, if your default subnet encompasses the entire
address range, there are no IP addresses left to create additional subnets. You can either adjust
your subnets within the existing address space to free up IP addresses, or specify an additional
address range and create the gateway subnet there.
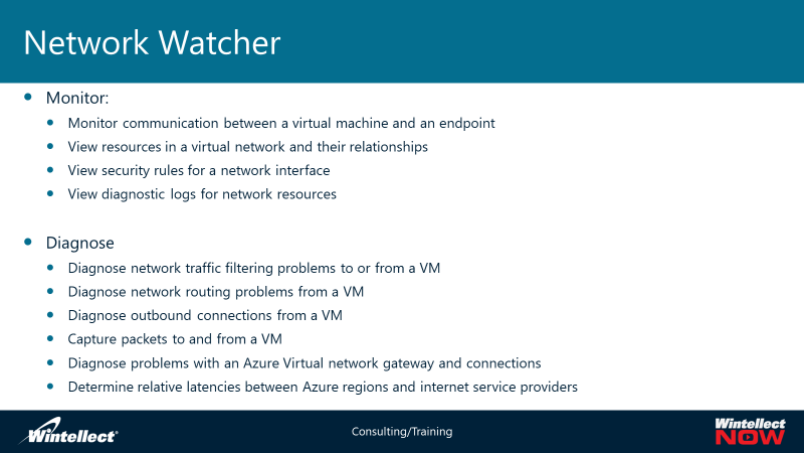
4. Create the VPN gateway. In the portal page, Create Virtual network from Create a Resource
and, locate and click Virtual network gateway. On the Create virtual network gateway page,
specify the values for your virtual network gateway.
5. Create the local network gateway. The local network gateway typically refers to the on-
premises location. You give the site a name by which Azure can refer to it, then specify the IP
address of the on-premises VPN device to which you will create a connection. You also specify
the IP address prefixes that will be routed through the VPN gateway to the VPN device. The
address prefixes you specify are the prefixes located on your on-premises network. If the on-
premises network changes or you need to change the public IP address for the VPN device, you
can easily update the values later.
6. Configure your VPN device. This provides the site-to-Site connections to an on-premises
network require a VPN device. In this step, you configure your VPN device.
7. Create the VPN connection. Create the Site-to-Site VPN connection between your virtual
network gateway and your on-premises VPN device.
8. Verify the VPN connection. In the Azure portal, you can view the connection status of a
Resource Manager VPN Gateway by navigating to the connection.
Azure Network Watcher
Azure Network
Watcher provides
tools to monitor,
diagnose, view
metrics, and enable or
disable logs for
resources in an Azure
virtual network. There
are a number of
different things you
can do with Network
Watcher involving
both monitoring and
diagnosing issues, as
follows:
•Monitor
communication between a virtual machine and an endpoint
Endpoints can be another virtual machine (VM), a fully qualified domain name (FQDN), a
uniform resource identifier (URI), or IPv4 address. The connection monitor capability monitors
communication at a regular interval and informs you of reachability, latency, and network
topology changes between the VM and the endpoint. For example, you might have a web server
VM that communicates with a database server VM. Someone in your organization may,
unknown to you, apply a custom route or network security rule to the web server or database
server VM or subnet.
If an endpoint becomes unreachable, connection troubleshoot informs you of the reason.
Potential reasons are a DNS name resolution problem, the CPU, memory, or firewall within the
operating system of a VM, or the hop type of a custom route, or security rule for the VM or
subnet of the outbound connection.
Connection monitor also provides the minimum, average, and maximum latency observed over
time. After learning the latency for a connection, you may find that you're able to decrease the
latency by moving your Azure resources to different Azure regions. Learn more about
determining relative latencies between Azure regions and internet service providers and how to
monitor communication between a VM and an endpoint with connection monitor. If you'd
rather test a connection at a point in time, rather than monitor the connection over time, like
you do with connection monitor, use the connection troubleshoot capability.
Network performance monitor is a cloud-based hybrid network monitoring solution that helps
you monitor network performance between various points in your network infrastructure. It
also helps you monitor network connectivity to service and application endpoints and monitor
the performance of Azure ExpressRoute. Network performance monitor detects network issues
like traffic blackholing, routing errors, and issues that conventional network monitoring
methods aren't able to detect. The solution generates alerts and notifies you when a threshold
is breached for a network link. It also ensures timely detection of network performance issues
and localizes the source of the problem to a particular network segment or device.
• View resources in a virtual network and their relationships
As resources are added to a virtual network, it can become difficult to understand what
resources are in a virtual network and how they relate to each other. The topology capability
enables you to generate a visual diagram of the resources in a virtual network, and the
relationships between the resources.
• View security rules for a network interface
The effective security rules for a network interface are a combination of all security rules applied
to the network interface, and the subnet the network interface is in. The security group view
capability shows you all security rules applied to the network interface, the subnet the network
interface is in, and the aggregate of both. With an understanding of which rules are applied to a
network interface, you can add, remove, or change rules, if they're allowing or denying traffic
that you want to change.
• View diagnostic logs for network resources
You can enable diagnostic logging for Azure networking resources such as network security
groups, public IP addresses, load balancers, virtual network gateways, and application gateways.
The Diagnostic logs capability provides a single interface to enable and disable network resource
diagnostic logs for any existing network resource that generates a diagnostic log. You can view
diagnostic logs using tools such as Microsoft Power BI and Azure Log Analytics.
• Diagnose network traffic filtering problems to or from a VM
When you deploy a VM, Azure applies several default security rules to the VM that allow or
deny traffic to or from the VM. You might override Azure's default rules, or create additional
rules. At some point, a VM may become unable to communicate with other resources, because
of a security rule. The IP flow verify capability enables you to specify a source and destination
IPv4 address, port, protocol (TCP or UDP), and traffic direction (inbound or outbound). IP flow
verify then tests the communication and informs you if the connection succeeds or fails. If the
connection fails, IP flow verify tells you which security rule allowed or denied the
communication, so that you can resolve the problem.
• Diagnose network routing problems from a VM
When you create a virtual network, Azure creates several default outbound routes for network
traffic. The outbound traffic from all resources, such as VMs, deployed in a virtual network, are
routed based on Azure's default routes. You might override Azure's default routes, or create
additional routes. You may find that a VM can no longer communicate with other resources
because of a specific route. The next hop capability enables you to specify a source and
destination IPv4 address. Next hop then tests the communication and informs you what type of
next hop is used to route the traffic. You can then remove, change, or add a route, to resolve a
routing problem.
• Diagnose outbound connections from a VM
The connection troubleshoot capability enables you to test a connection between a VM and
another VM, an FQDN, a URI, or an IPv4 address. The test returns similar information returned
when using the connection monitor capability, but tests the connection at a point in time, rather
than monitoring it over time, as connection monitor does.
• Capture packets to and from a VM
Advanced filtering options and fine-tuned controls, such as the ability to set time and size
limitations, provide versatility. The capture can be stored in Azure Storage, on the VM's disk, or
both. You can then analyze the capture file using several standard network capture analysis
tools.
• Diagnose problems with an Azure Virtual network gateway and connections
Virtual network gateways provide connectivity between on-premises resources and Azure
virtual networks. Monitoring gateways and their connections are critical to ensuring
communication is not broken. The VPN diagnostics capability provides the ability to diagnose
gateways and connections. VPN diagnostics diagnoses the health of the gateway, or gateway
connection, and informs you whether a gateway and gateway connections, are available. If the
gateway or connection is not available, VPN diagnostics tells you why, so you can resolve the
problem.

• Determine relative latencies between Azure regions and internet service providers
You can query Network Watcher for latency information between Azure regions and across
internet service providers. When you know latencies between Azure regions and across Internet
service providers, you can deploy Azure resources to optimize network response time
Demonstration: Implementing a VNet-to-VNet connection by using the Azure Resource
Manager deployment model
In this demonstration, watch as your instructor creates an Azure VNet-to-VNet connection in AR using
Azure PowerShell.
https://docs.microsoft.com/en-us/azure/vpn-gateway/vpn-gateway-vnet-vnet-rm-ps
Implementing ExpressRoute by using Azure Resource Manager
Implementing ExpressRoute connectivity is a multi-step process that involves interaction with the
connectivity or exchange provider to establish physical connectivity. The process relies on the
coordinated effort between the provider and Microsoft to provision the virtual circuit. On a high level, it
consists of the following sequence of tasks:
1. Satisfy prerequisites. This includes designating an Azure subscription in which the ExpressRoute
connection will be defined, selecting a provider available at your location, and establishing
physical connectivity with the provider.
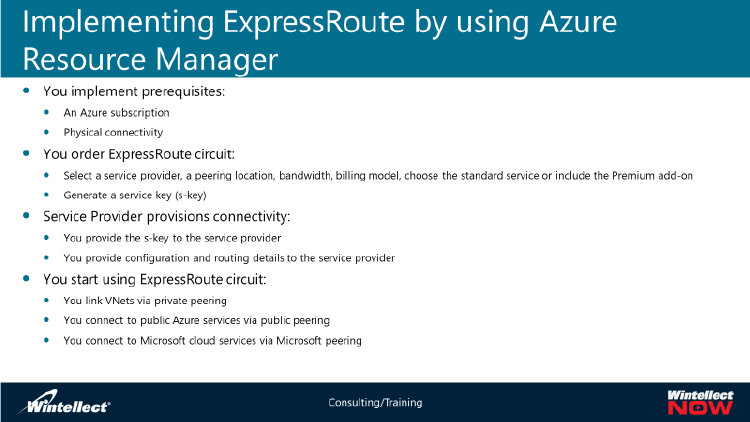
2. Initiate creation of an ExpressRoute circuit. You can use the Azure portal, Azure PowerShell, or
Azure CLI for this purpose. As part of the circuit creation, you will need to specify several circuit
properties, including:
a) Provider. The connectivity or exchange provider that you selected.
b) Peering location. The location hosting the physical connection.
c) Bandwidth. The nominal bandwidth of the circuit.
d) SKU. Either the Standard or Premium, where the latter represents the Premium add-on
option.
e) Billing model. Either the Unlimited or Metered billing model
3. Relay the value of a service key to the provider. The provisioning task generates a service key
that uniquely identifies the circuit. You need to relay its value to the provider, which will
complete the provisioning process.
4. Configure routing. In general, connectivity providers that deliver Layer 3 services will manage
this part of the process for you. When using Layer 2 connectivity providers, satisfying routing
prerequisites and configuring routing are your responsibilities, as described in the Overview of
ExpressRoute topic.
5. Link virtual networks to ExpressRoute circuits. This is necessary in private peering scenarios.
Virtual networks do not have to reside in the same subscription as the ExpressRoute circuit.
Note: Following
the proper
sequence and
timing between
the first and the
second step are
important because
billing of an
ExpressRoute
circuit starts the
moment that
Microsoft issues
the corresponding
service key.
When creating an
ExpressRoute circuit, you can determine the progress of its provisioning by monitoring its two
properties:
•Service provider provisioning state. This represents progress on the connectivity provider’s side
and can take one of the following values:
oNotProvisioned
oProvisioning
oProvisioned
•Status. This represents progress on the Microsoft side, and includes:
oEnabling
oEnabled

o Disabling
The circuit must be in the Provisioned service provider provisioning state and have the Enabled status in
order to be operational. You can identify the values of both properties by using Azure PowerShell or the
Azure portal.
If you encounter routing issues, you should also check a couple of additional BGP related parameters:
• BGP provisioning state. This indicates whether BGP-based peering is in effect on the Microsoft
edge.
• Advertised public prefixes state. Use this to detect mismatches between advertised prefixes and
ASNs.
For details regarding creating an ExpressRoute circuit by using the Azure portal, refer to “Create and
modify an ExpressRoute circuit” at https://docs.microsoft.com/en-us/azure/expressroute/expressroute-
howto-circuit-portal-resource-manager.
For details regarding creating an ExpressRoute circuit by using Azure PowerShell, refer to “Create and
modify an ExpressRoute circuit using PowerShell” at https://docs.microsoft.com/en-
us/azure/expressroute/expressroute-howto-circuit-arm.
For details regarding creating an ExpressRoute circuit by using Azure CLI, refer to “Create and modify an
ExpressRoute circuit using CLI” at https://docs.microsoft.com/en-us/azure/expressroute/howto-circuit-
cli.
Configuring networking for hybrid solutions
By combining the Azure networking features described in this module, you can configure Azure virtual
networks to function as an extension of your on-premises datacenter. You can deploy multi-tier
production workloads in Azure and make them available to on-premises clients via internal load
balancers. Another possibility is to implement your lab or test environment in a dedicated subnet or a
virtual network that is fully isolated from your production systems. You can also leverage Azure virtual
machines to host your disaster recovery site. ExpressRoute introduces a range of additional options,
including high-volume backups, cross-premises big data solutions, and hybrid applications with tiers
distributed between the on-promises network and the Azure virtual network.
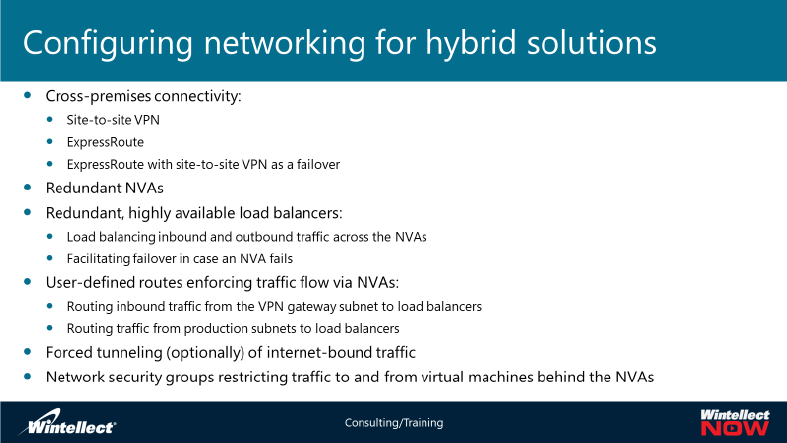
When architecting solutions such as these, in addition to implementing site-to-site or ExpressRoute
connectivity as described in the previous topic, you can also leverage a variety of Azure networking
technologies,
such as load
balancers, user-
defined routes,
forced
tunneling, NSGs,
or VNet peering.
For more
advanced
networking
functionality,
you can choose
virtual
appliances
available on
Microsoft Azure
Marketplace, including products from such vendors as Barracuda, CheckPoint, Cisco, Cohesive Networks,
Fortinet, or SecureSphere.
Combining these technologies also allows you to build a hybrid solution, which includes one or more
subnets of an Azure virtual network serving the role of a perimeter network (also referred to as a
screened subnet). The recommended design involves the following components:
•Cross-premises connectivity in the form of a site-to-site VPN, ExpressRoute, or both, with site-
to-site VPN providing failover if the ExpressRoute circuit fails.
•Two or more NVAs with packet inspection and traffic filtering capabilities.
•A redundant, highly available load balancer distributing inbound and outbound traffic across the
NVAs and facilitating failover if an NVA fails. To implement redundancy and high availability,
consider using an internal Load Balancer Standard with High Availability Ports.
•User-defined routes enforcing traffic flow via NVAs. You can assign a routing table that includes
a user-defined route to the Azure VPN gateway subnet that is directs the incoming traffic to the
load balancer. Similarly, you can assign a routing table that includes user-defined routes to the
subnets hosting the virtual machines that run your production workloads. This allows you to
control the flow of outbound traffic. Optionally, you can implement forced tunneling to ensure
that the outbound traffic to the Internet flows via an on-premises traffic inspection system for
auditing purposes.
•NSGs minimizing any potential network-based attacks by restricting traffic to and from virtual
machines behind the NVAs.
The specifics of implementing forced tunneling depend on the cross-premises connectivity method. In
particular, with site-to-site VPN and static routing, you must create a user-defined route with the default
route of 0.0.0.0/0, and set its next hop type to be the VPN gateway. You must assign this route to every
subnet to override the default, direct route to the Internet. In addition, if there are multiple on-premises
sites connected to the virtual network, you need to define the default site where traffic will be routed.
To do this, run the Set-AzureRmVirtualNetworkGatewayDefaultSite Azure PowerShell cmdlet.
ExpressRoute, on the other hand, relies on the advertisement of default routes via private peering
sessions.
For details regarding configuring internal Load Balancer Standard with High Availability Ports in
combination with NVAs, refer to “Understanding High Availability Ports at:
https://docs.microsoft.com/en-us/azure/load-balancer/load-balancer-ha-ports-overview
For details regarding configuring forced tunneling by using Azure PowerShell, refer to:
https://docs.microsoft.com/en-us/azure/vpn-gateway/vpn-gateway-forced-tunneling-rm.
For more information regarding configuring the custom route to KMS, refer to Configure forced
tunneling using the Azure Resource Manager deployment model: http://aka.ms/mx9zgq
To learn about Microsoft best practices for design and implementation of hybrid connectivity and secure
Azure virtual networks, refer to “Azure Reference Architectures” at https://docs.microsoft.com/en-
us/azure/architecture/reference-architectures/.
Lab B: Implementing a point-to-site VPN by using Azure Resource Manager
In this lab, you will implement a point-to-site VPN by using Azure Resource Manager. The script for the
lab can be found in the GitHub portal, under the name of Mod_2_lab_B.md
Module Review and Takeaways
Review Question
1. By default, how are IP addresses assigned when you make a VM?
2. What are the 4 VPN gateways SKUs?
3. What is an ExpressRoute connectivity provider?
Best Practices
Use Azure PowerShell rather than Azure CLI unless you have numerous scripts in CLI already in
production. You should, however, move them over to PowerShell when possible.
Tools
The following table lists the tools that this module references:
Tool
Use to
Where to find it
Azure Load Balancer
Detects traffic that requires load
balancing
Found in the Azure portal

Azure Traffic Manager
Redirects traffic or load balance
traffic to the other actively and
healthy entities.
Found in the Azure portal
Azure DNS
Provides name resolution
between on-premises, Azure and
public Internet locations
Found in the Azure portal
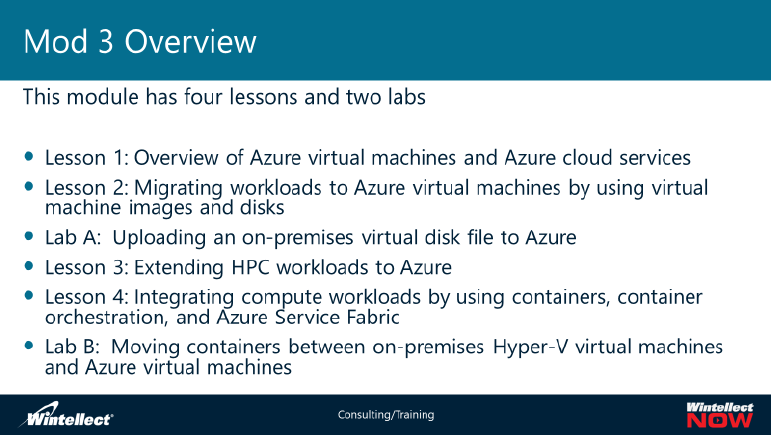
Module 3 Virtual machines in Microsoft Azure
Microsoft Azure contains expansive range of computing resources that you can use to replace or
supplement your on-premises workloads. You can even make Azure to be an extension of your on-
premises datacenters by using hybrid scenarios and fast, secure networking. Still, you must realize that
integrating your existing computing environment with Azure warrants extra considerations.
This module will explore different compute Azure resource types available in the context of hybrid
scenarios. First, it explains the differences between Azure VMs and Azure cloud services and how you
can use each of them to migrate on-premises compute workloads. Next, it describes migrating your on-
premises VMs to Azure by using VM images and disks. It also explains how to extend Big Compute
workloads to Azure by integrating them with on-premises high performance computing (HPC)
deployments and by using Azure Batch. Finally, it concludes with coverage of containers, container
orchestration, Azure Container Service, and Azure Service Fabric.
Lesson 1: Overview of Azure virtual machines and Azure cloud services
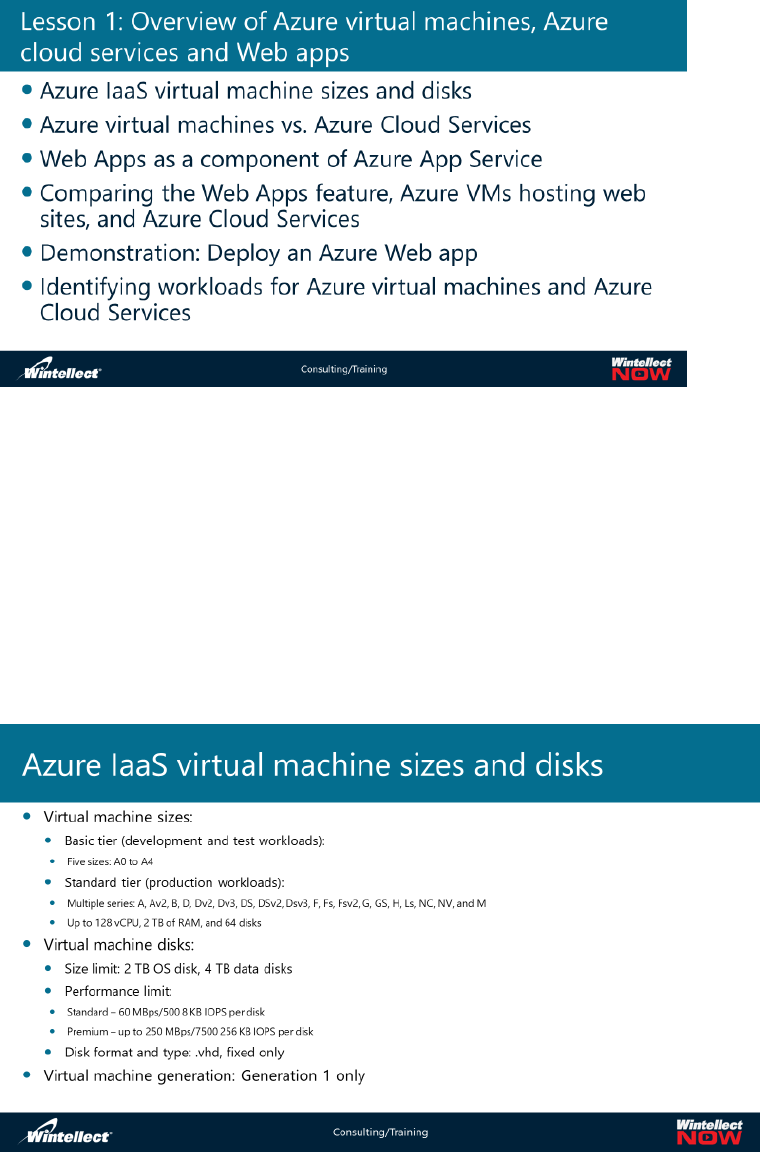
Azure IaaS virtual machine sizes and disks
Both Hyper-V
and Azure use
the same
virtualization
platform based
on the Microsoft
Hypervisor, so
that Azure VM’s
share the
majority of their
characteristics
with Hyper-V
VM’s that you’re
likely to deploy in
your on-premises
datacenter. There are however, several differences between them, such as:
• Azure virtual machines: When you create VMs in Azure they are only available in specific sizes.
You do not have the option of specifying arbitrary processing, memory, or storage parameters
when deploying a virtual machine. Instead, you must select one of the predefined choices.
Microsoft offers virtual machines in two tiers: basic and standard. The basic tier, intended for
development and test workloads, includes five virtual machine sizes, ranging from 1 core with
0.75 gigabytes (GB) of RAM to 8 cores with 14 GB of RAM. The standard tier has several series,
including A, A0-A7, Av2, B, D, Dv2, Dv3, DS, DSv2, Dsv3, Ev3, ESv-3, F, Fs, Fsv2, G, GS, H, L, Ls, NC,
NV, and M. Each series consists of several VM sizes, with differing capacity and performance
characteristics. At the time of authoring this course, the largest VM size available in Azure is
M128s, featuring 128 virtual CPUs (vCPUs), 2 terabytes (TB) of RAM, and up to 64 data disks.
•Storage size limits: There is a 2-TB size limit on the operating system virtual disk and a 4-TB size
limit on virtual data disks that you attach to an Azure virtual machine. The latter of these two
values is not equivalent to the limit on the size of data volumes, because you can create
multidisk volumes. To accomplish this, you can use Storage Spaces when running Windows
Server or volume managers, such as Logical Volume Manager or mdadm, when running Linux.
By following this approach, you can create data volumes of up to 256 TB. The maximum volume
size depends on the size of the virtual machine, which determines the maximum number of
disks you can attach to that virtual machine.
oOperating system disk. Every virtual machine has one attached operating system disk.
It's registered as a SATA drive and labeled as the C: drive by default. Azure creates an
operating system disk when you create a virtual machine from an image. If you use an
image that includes data disks, Azure also creates the data disks when it creates the
virtual machine. Otherwise, you add data disks after you create the virtual machine.
oData disk. A data disk is a VHD that's attached to a virtual machine to store application
data, or other data you need to keep. Data disks are registered as SCSI drives and are
labeled with a letter that you choose. Each data disk has a maximum capacity of 4095
GB. The size of the virtual machine determines how many data disks you can attach to it
and the type of storage you can use to host the disks. You can add data disks to a virtual
machine at any time, by attaching the disk to the virtual machine. You can use a VHD
that you've uploaded or copied to your storage account, or use an empty VHD that
Azure creates for you. Attaching a data disk associates the VHD file with the VM by
placing a 'lease' on the VHD so it can't be deleted from storage while it's still attached.
oTemporary disk. Each VM contains a temporary disk. The temporary disk provides
short-term storage for applications and processes and is intended to only store data
such as page or swap files. Data on the temporary disk may be lost during a
maintenance event or when you redeploy a VM. During a successful standard reboot of
the VM, the data on the temporary drive will persist. The temporary disk is labeled as
the D: drive by default and it used for storing pagefile.sys.
•I/O and throughput limits: A limit also exists on the throughput and input/output operations
per second (IOPS) that individual disks support. With standard storage, you should expect about
60 megabytes per second (MBps) or 500 8-kilobyte (KB) Input/Output Per Second (IOPS). With
Azure Premium Storage, performance depends on the disk size. The largest available disk of 4 TB
supports up to 250 MBps throughput and 7,500 256-KB IOPS. You can increase the overall
throughput and IOPS of Azure virtual machine disks by creating multiple-disk volumes.
•Virtual Hard Drive format: Any virtual disks that you intend to attach to Azure virtual machines
must be in the .vhd format.
• Disk type: No support exists for dynamically expanding or differencing virtual disks in Azure
virtual machines—they all must be fixed.
• Generation version: You do not have the option of using Generation 2 Hyper-V virtual machines
in Azure.
• ISCSI Initiator: Azure virtual machines place exclusive locks on attached virtual disk files. As a
result, you cannot directly implement clustering configurations that include small computer
system interface (SCSI)–attached, shared storage. However, you can use a number of
alternatives to deploy Windows Failover Clustering in Azure, where shared storage is a
requirement:
o Windows Server 2016 supports shared storage in the form of Storage Spaces Direct
(S2D) volumes. S2D relies on Server Message Block (SMB) 3, SMB Direct, and SMB
Multichannel protocols to provision highly available volumes consisting of local disks
attached to individual cluster nodes.
o You can use third-party products, such as SIOS DataKeeper to emulate shared storage.
These products provide block-level, synchronous replication between individual disks of
cluster nodes. They then present these synchronized disks as a single clustered resource
to the operating system. SIOS DataKeeper is available for both Windows and Linux
operating system platforms.
o Another supported scenario involves using remote, on-premises, Internet SCSI (iSCSI)
Target Server shared block storage via ExpressRoute.
o Rather than relying on a shared disk as a cluster quorum, you can use Cloud Witness or
Node Majority to establish a quorum.
There are many more virtual machine choices in Azure then there is in Hyper-V. You have a wide variety
of Windows and Linux virtual machines you can deploy, and you can deploy them with different arrays
of resources. For example, some can have multiple processor cores, with different numbers of total
cores, more RAM, more hard drive space, more NICs with faster speed, etc. etc. generally speaking the
beefier if you will the virtual machine, the more will cost you. Many virtual machines come with
preinstalled applications such as databases or roles that are available as soon as the virtual machine is
started.
Azure virtual machines vs. Azure Cloud Services
Years ago, the standard procedure in setting up a server room was to take physical servers install the
latest operating system on them, and add whatever roles or applications they were to run and then
support them through their lifecycle, with maintenance, updates, upgrades etc., etc. when
VMware/Hyper-V became available we started to transfer the operating systems with their roles or
applications to virtual machines. In this still is the standard operating procedure in most on-premises
data centers.
Contrast this to an Azure cloud service. Azure lets you make virtual machines. Hyper-V lets you make
virtual machines. Since most administrators know how to set up virtual machines in Hyper-V or VMware
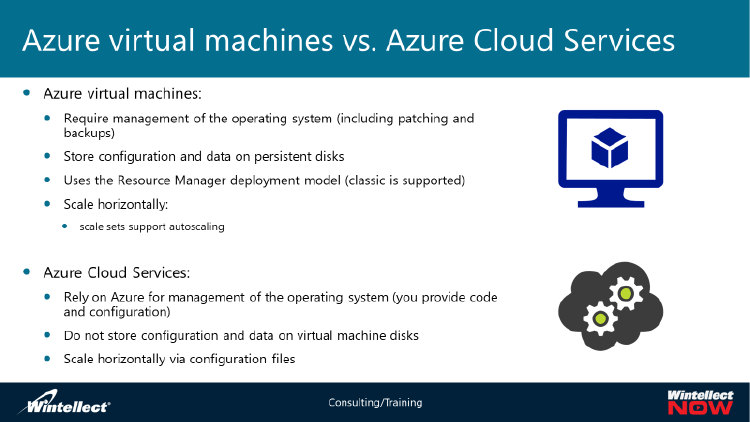
then it would be
natural to extend
that functionality to
Azure virtual
machines. However,
we have many more
options and levels to
do things in Azure
that we simply don't
have in an on-
premises datacenter.
You could install a
particular role or
application on a
virtual machine in
Azure, or run the role or application without an underlying virtual machine and operating system. The
operating system in the virtual machine functionality is conceptualized by Azure – – if you don't need it
you don't have to use it. The application is your focus. Azure has taken several roles and applications
that normally would run on a virtual machine and provide them as a cloud service in the Azure platform
as a service realm for consumption by their tenant consumers. The tenant doesn't worry about the
underlying infrastructure and keeping it up and running nor maintaining the underlying infrastructure.
Instead, that is all run and guaranteed by Azure.
In deciding which to use, that is the role or application running on a distinct virtual machine, or just the
service as its run separate from the underlying infrastructure, there are many factors, including not just
direct costs but secondary costs. For example, the application that you run on on-premises virtual
machine might have been very customized over the years for your particular organization. It might
prove difficult to redo all that customization on a cloud service of that application. Whereas you can
provide the customization on the same type of application running on a virtual machine in Azure. Keep
in mind that is just one factor.
Azure virtual machines are best used for infrastructure services such as domain controllers or DNS
servers, for highly customized applications with complex configurations and certain state for workloads
requiring persistent storage.
Azure cloud services are generally superior when it comes to horizontal scaling capabilities. You can
scale out to thousands of instances based on demand over very short period of time which could take
you a very long time if you were using applications running on virtual machines and trying to scale those
up. Azure cloud services are best used for multitiered web apps and stateless apps that require highly
scalable and performing environments.
Web Apps as a component of Azure App Service
Web Apps make up a distinct Azure service. However, they are closely related to several other Azure
services and is typically presented as part of this larger group known as Azure App Service. The Azure
App Service Environment is an Azure App Service feature that provides a fully isolated and dedicated
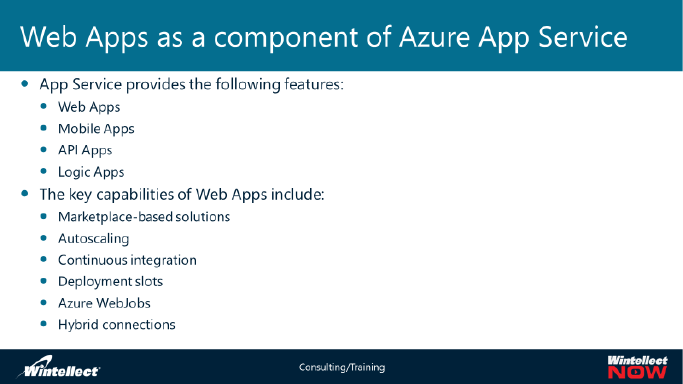
environment for securely
running App Service apps
at high scale. Web apps
are part of this service
along with mobile apps
API apps and other logical
apps.
App Service provides the following features:
• Web Apps. Allows you to develop, configure, host, and manage web apps.
• Mobile Apps. Allows you to develop, configure, host, and manage mobile apps.
• API Apps. Allows you to develop, host, and consume web-based APIs.
• Logic Apps. Allows you to implement cloud-based, event-triggered workflows that integrate
distinct Software as a Service (SaaS) apps (with nominal or no programming).
Azure Web Apps enables you to build and host web applications in the programming language of your
choice without managing infrastructure. It offers auto-scaling and high availability, supports both
Windows and Linux, and enables automated deployments from GitHub, Visual Studio Team Services, or
any Git repository. Web Apps is a service for hosting web applications, REST APIs, and mobile back ends.
With web apps we get a number of key capabilities. We can use the Azure Marketplace to choose
various solutions that really simplify development and deployment of popular web apps so we don't
actually even have to write them. We can also auto scale very rapidly up and down from the number of
web app instances we required to do something. The web app code from the cloud source control
systems is continuously integrated and updated. You can also deploy multiple versions of a particular
app and have these versions running concurrently through the use of deployment slots. And finally, If
you have on-premises services, such as SQL Server databases, you can integrate these with Azure using
hybrid connections.
The key capabilities of Web Apps include:
• Marketplace-based solutions. You can use Azure Marketplace to choose from a wide range of
solutions that simplify the development and deployment of the most popular types of web apps.
You can find the full list of such solutions in the Web apps section of the Marketplace at
http://aka.ms/T7tb1w.
• Autoscaling. You can configure a dynamic increase or decrease in the number of instances of
web apps to automatically adjust to variations in their workload. Auto-scaling integrates with
the Azure load balancer and distributes incoming requests among all instances.
•Continuous integration. You can deploy the web app code from cloud source control systems,
such as Visual Studio Team Services or GitHub, from on-premises source control systems, such
as Team Foundation Server (TFS) or Git, as well as from on-premises deployment tools, such as
Visual Studio, FTP clients or MSBuild. You also can use continuous integration tools, such as
Bitbucket, Hudson, or HP TeamSite to automate build, test, and integration processes.
•Deployment slots. You can create two or more concurrently running versions of the same app
hosted on the same virtual machine. The execution environment of these concurrently running
apps is referred to as a slot. For example, you can create one slot for the production-ready
version of your web app, and then deploy your successfully tested and verified code into it. You
then can create a second slot intended for your staging environment and deploy the new
version of your code to it to run final acceptance tests. The staging slot will have a different URL.
When the new version of your staging-slot web app passes all the tests, you can quickly deploy it
to production by swapping the slots. Note that this approach also provides a straightforward
rollback path. If the new version causes unexpected problems, you can swap the slots once
again to revert to the previous version of the production code.
•Azure WebJobs. You can create scripts or compiled code and configure them as so-called
WebJobs to execute background processes. This allows you to offload from web apps time-
consuming or I/O bound tasks such as updating databases or archiving log files.
•Hybrid connections. You can implement hybrid connections from web apps to access on-
premises resources (such as Microsoft SQL Server databases) or virtual machines within an
Azure virtual network. By using the Hybrid Connection Manager, you can facilitate such
connectivity without opening any inbound ports on firewalls protecting your internal network.
Comparing the Web Apps feature, Azure VMs hosting web sites, and Azure Cloud Services
One of the strengths of Microsoft Azure is the different ways you can deploy it to do similar things.
As an example, for domain administrators, perhaps you want to enhance the survivability of your Active
Directory Domain Services (AD DS) by deploying some of it to Azure. You actually have a couple of
choices to do so. You could create a Windows Server virtual machine on Azure in an environment that
has a VPN gateway that allows your on-premises domain controllers to send encrypted packets directly
to that virtual machine, and then promoted to be a domain controller in your domain. You can create a
separate site for it, or, if your bandwidth is robust enough just have it act as a replica domain controller
in your domain.
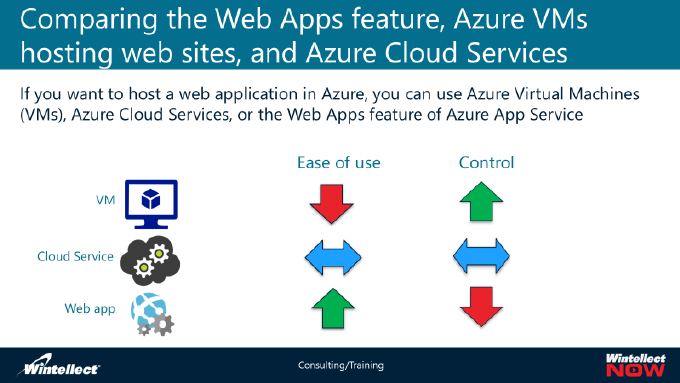
Or you can go an entirely
opposite direction. You
can use Azure Active
Directory (Azure AD). It's
not the same thing as
what I just described, but
rather it's just an active
directory service that you
can synchronize with your
on-premises domain
controllers so that your
users can directly access
web and other apps as
service components in
Azure, and do so as Azure AD authenticated users. You can then use Azure Backup and Recovery to
completely back up your on-premises domain controller's active directory database, which would allow
you to do a NTDS restore locally.
Because you have full control over the operating system on an Azure virtual machine, you can install any
web server software such as Internet Information Server (IIS) or Apache. You can perform this
installation interactively through a Remote Desktop session or in an automated manner, for example by
using VM Agent extensions. In this case, implementation of web apps and their resulting functionality
mirror your on-premises environments. As a result, using the virtual machines option is most suitable in
scenarios where you want to migrate on-premises web applications into Azure with few or no
modifications.
However, having full control over the operating system has also some potential disadvantages because
this requires you to invest time to update and maintain the Azure virtual machine. In addition, while the
Azure platform fully supports both the horizontal scaling and load balancing of Azure virtual machines,
implementing them is not as straightforward as with solutions based on PaaS.
We could use a cloud service. Another option is to use the Azure PaaS cloud service, which typically
consists of a web role, with virtual machines hosting the application’s front end, and one or more
worker roles, with virtual machines handling background tasks. Virtual machines, in this context, are
referred to as role instances. You can scale each role independently by changing their pricing tiers and
the number of its instances.
PaaS cloud services combine the advantages of virtual machines and web apps. As a PaaS cloud service,
they eliminate the management overhead associated with IaaS-based solutions and they provide
additional control over their instances, including the ability to connect to them by using Remote
Desktop.
However, you should keep in mind that PaaS cloud services are unique to Azure. This means that for any
existing on-premises web apps, you need to modify them first before you can migrate them to the Azure
PaaS cloud services.
You can also deploy an Azure app service, and use web apps created in their own environment we don’t
manage. You are not paying for platform, rather, just the web app. Under the hood the web app is
indeed running on something like a virtual machine but unlike a virtual machine that we control we
don't control that aspect of it. In this case we just control the web app functionality itself. You can scale
a web app vertically by changing its pricing tier. However, unlike Azure virtual machines, which require a
reboot, this change takes effect instantaneously. This change increases or decreases the amount of
computing resources allocated to that individual web app instance to accommodate changes in the
demand for its services. Alternatively, you can scale web apps horizontally. Doing so increases or
decreases the number of web app instances and relies on built-in Azure load balancing to distribute
incoming requests among them, which addresses fluctuating demand.
Despite their agility and scalability, web apps are intended primarily for one or two-tier solutions where
the second tier provides a persistent data store. In addition, you do not have exclusive access, such as
through Remote Desktop Protocol, to the virtual machine that is hosting and running the web apps.
Demonstration: Deploy an Azure Web app
In this demonstration, watch as your instructor creates and deploys an Azure Cloud Service.
https://docs.microsoft.com/en-us/azure/vs-azure-tools-azure-project-create
https://docs.microsoft.com/en-us/azure/cloud-services/cloud-services-how-to-create-deploy-portal
https://docs.microsoft.com/en-us/azure/cloud-services/cloud-services-how-to-configure-portal
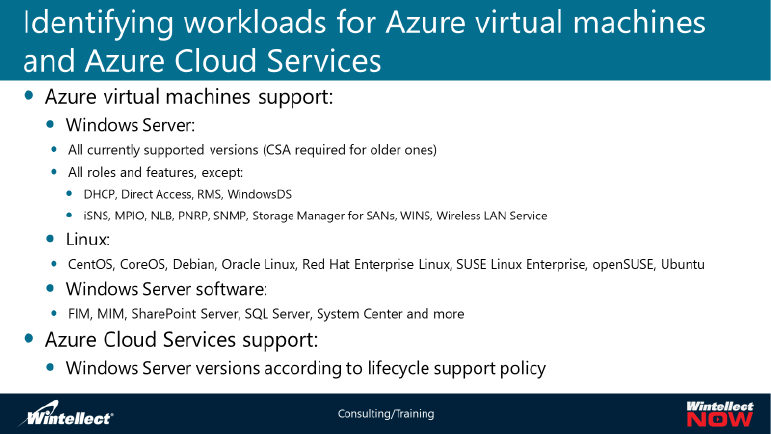
Identifying workloads for Azure virtual machines and Azure Cloud Services
Certain types of workloads are more suitable for deployment in Azure, as opposed to on-premises,
including:
• Periodic workloads, such as:
o A complex data analysis of sales figures that an organization needs to run at the end of
each month.
o Seasonal marketing campaigns on an organization’s website.
o Annual retail sales spurts that might occur during festive holidays.
• Unpredictable-growth workloads, such as those experienced by small but rapidly expanding
organizations or those corresponding to short-term increases in sales of fad products.
• Spiking workloads, such as those experienced by websites that provide news services or by
branch offices that perform end-of-day reporting to a head office.
• Workloads that require high availability and multi-region resiliency, such as commercial online
stores.
• Steady workload scenarios where the operational costs in Azure are lower than the combination
of on-premises capital expenditures and ongoing maintenance charges.
Some workload scenarios might not benefit from the elasticity and flexibility of Azure Cloud Services.
This applies to low-volume or limited-growth workloads that can run on-premises on commodity
hardware. Other scenarios where use of the public cloud might be unsuitable involve highly regulated
environments—
for example,
where a local
government
restricts the
type of data
that
organizations or
companies can
host outside of
their internal
networks. In
such situations,
you could
consider
implementing a
hybrid solution, with workloads split between Azure and an on-premises environment.
Azure virtual machines can host all the currently supported versions of the Windows Server operating
system. A custom support agreement (CSA) is required to obtain support for operating systems that
have reached their end of support.
Additionally, there are several Windows application products you can run including FIM, MIM,
SharePoint, SQL Server and some System Center products.
Linux variants include Centos, CoreOS, Debian, Oracle Linux, Red Hat enterprise, SUSE Enterprise,
OpenSuse and Ubuntu.
Support for the operating system of Azure Cloud Services virtual machines is more restrictive. It includes
Windows Server operating systems only and follows the Azure Cloud Services lifecycle support policy.
This policy relates to the lifecycle of the Software Development Kit (SDK) versions on which Azure Cloud
Services depends.
The following table shows the Windows Server roles that Azure virtual machines do and do not support:
Supported Windows Server roles
Unsupported Windows Server roles and features
Active Directory Domain Services (AD DS)
Dynamic Host Configuration Protocol (DHCP) Server
Active Directory Federation Services
Remote Access (Direct Access)
Active Directory Lightweight Directory Services
Rights Management Services (RMS)
Application Server
Windows Deployment Services (Windows DS)
DNS Server
Microsoft iSNS Server
Failover Clustering
Multipath I/O (MPIO)
File Services
Network Load Balancing (NLB)
Hyper-V (on Dv3 and Ev3 Azure VM sizes)
Peer Name Resolution Protocol (PNRP)
Network Policy and Access Services
Simple Network Management Protocol (SNMP)
service
Print and Document Services
Storage Manager for storage area networks (SANs)
Remote Access (Web Application Proxy)
Windows Internet Name Service (WINS)
Remote Desktop Services
Wireless local area network (LAN) service
Web Server (Internet Information Services)
Windows Server Update Services
Virtual Machine Serial Console
The Virtual Machine Serial Console on Azure provides access to a text-based console for Linux virtual
machines. This serial connection is to the COM1 serial port of the virtual machine, providing access to
the virtual machine that is independent of a virtual machine's network or operating system state. Access
to the serial console for a virtual machine can currently only be done via the Azure portal and is allowed
only for those users who have VM Contributor or above access to the virtual machine.
Let’s watch a 13 minute, Microsoft-produced video on the VM serial Console:
Note: Do not click the link while in class. Your instructor will show the video form the main classroom
screen.
https://azure.microsoft.com/en-us/resources/videos/azure-friday-azure-virtual-machine-serial-console/

Lesson 2: Migrating workloads to Azure virtual machines by using virtual machine images and
disks
Planning for moving virtual machine workloads between an on-premises Hyper-V
environment and Azure
Most modern data centers have moved over to virtualization anywhere from 10 to 5 years ago. At the
time, much consideration had to be given to server workloads versus role or application workloads. This
on-premises virtualization had many advantages among them being the ability to better utilize hardware
resources by applying multiple workloads to a single server. Nevertheless, careful planning is needed to
ensure that certain resources were not over consumed when these workloads were moved over to the
virtual world. Memory had to be shared by the virtual machines gathered on a single host. The same
applied to the CPU, disk space and networking components.
When you migrate your on-premises workloads to Azure virtual machines, you can select from a wide
range of available sizes and configuration options to match performance characteristics between the
two environments. You must also consider deployment aspects that are specific to Azure during the
transition. In Azure, virtual machine sizes are categorized to help you select the option best matching
your deployment workload. First, there are two tiers from which you would choose. There is the Basic
tier, which is only used for test and development workloads. The basic tier has a limited disk throughput
of 300 IOPS and lack of support for auto scaling or load-balancing. There are five virtual machine sizes in
the basic tier. A Basic_A0 VM is the smallest in this category. It offers a single central processing unit
(CPU) core, 768 MB of memory, and a single data disk. The largest VM in the basic tier is the Basic A4
VM with 8 CPU cores, 14 GB of memory, and up to 16 data disks. The other tier is the Standard tier. The
standard tier can be used for any production workload. There are over 80 virtual machine sizes and use
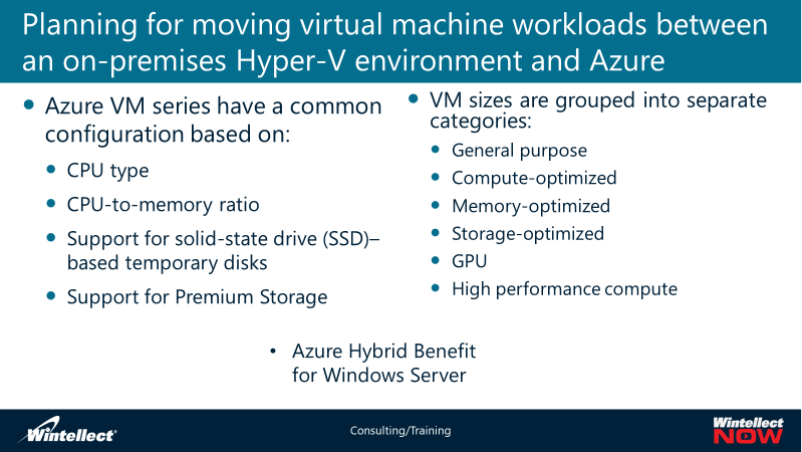
features such as Azure load-balancing, premium storage, and virtual machine scale sets available in
Standard.
Each VM size is represented by a combination of one or more letters and numbers. The leading
character designates a collection of VM sizes referred to as VM series a common configuration which
share a common configuration as follows:
•CPU type
•CPU-to-memory ratio
•Support for solid-state drive (SSD)–based temporary disks
•Support for Premium Storage
Each series includes multiple VM sizes, with differing number of CPU cores, memory amount, local
temporary disk size, and maximum number of network adapters and data disks. For VM sizes that
support Premium Storage, there is also have a varying maximum disk I/O throughput that each
individual VM size supports.
VM sizes are grouped into separate categories that help explain their overall purpose. These categories
are as follows:
•General purpose. This category offers a balanced CPU-to-memory ratio, making it most suitable
for test, proof-of-concept, and development environments. In addition, this category is suitable
for hosting small-to-medium databases or web servers. This category includes A0-A7, Av2, B, D,
Dv2, Dv3, DS, DSv2, and DSv3 series VM sizes. B series VMs are suitable for workloads that
experience occasional bursts in demand, while their typical CPU utilization remains low. Their
pricing model allows you to accumulate monetary credits during idle times and use them
towards charges from high CPU-utilization periods. Dv3, Dsv3, Ev3, and Esv3 series Azure VMs
also provide support for nested virtualization.
•Compute-optimized. This category offers a high CPU-to-memory ratio, making it most suitable
for compute-intensive workloads that do not have extensive memory requirements. Such

characteristics are typical for medium-level traffic web servers or application servers, network
appliances, or servers handling batch processing. This category includes F, Fs, and Fsv2 series
VM sizes.
• Memory-optimized. This category offers a high memory-to-CPU ratio, making it most suitable
for memory-intensive workloads that do not have extensive compute requirements. Such
characteristics are typical for workloads that keep the bulk of their operational content in
memory, such as database or caching servers. This category includes D, Dv2, DS, DSv2, Ev3, Esv3,
Ms, G, and GS series VM sizes.
• Storage-optimized. This category offers high-performance disk I/O, most suitable for big data
processing with both SQL and non-SQL database management systems. This category consists of
the Ls VM sizes.
• GPU. This category offers graphics processing unit support, with thousands of CPU cores, ideal
for implementing workloads such as graphic rendering, video editing, crash simulations, or deep
learning. This category includes NV and NC series VM sizes.
• High performance compute. This category offers VMs with the fastest CPUs and optional high-
throughput Remote Direct Memory Access (RDMA) network interfaces. This category includes H
series VMs and A8-A11 VM sizes.
Azure Hybrid Benefit for Windows Server
For customers with Software Assurance, Azure Hybrid Benefit for Windows Server allows you to use
your on-premises Windows Server licenses and run Windows virtual machines on Azure at a reduced
cost. You can use Azure Hybrid Benefit for Windows Server to deploy new virtual machines with
Windows OS.
There are few ways to use Windows virtual machines with the Azure Hybrid Benefit:
• You can deploy VMs from one of the provided Windows Server images on the Azure
Marketplace
• You can upload a custom VM and deploy using a Resource Manager template or Azure
PowerShell
• You can toggle and convert existing VM between running with Azure Hybrid Benefit or pay on-
demand cost for Windows Server
• You can also apply Azure Hybrid Benefit for Windows Server on virtual machine scale set as well
Let’s watch a 7 minute, Microsoft-produced video on the Azure Hybrid Benefit for Windows Server:
Note: Do not click the link while in class. Your instructor will show the video form the main classroom
screen.
https://www.youtube.com/watch?v=xaHz5QOCWi4&list=PLLasX02E8BPCsnETz0XAMfpLR1LIBqpgs
Implementing Azure virtual machines by using custom on-premises images
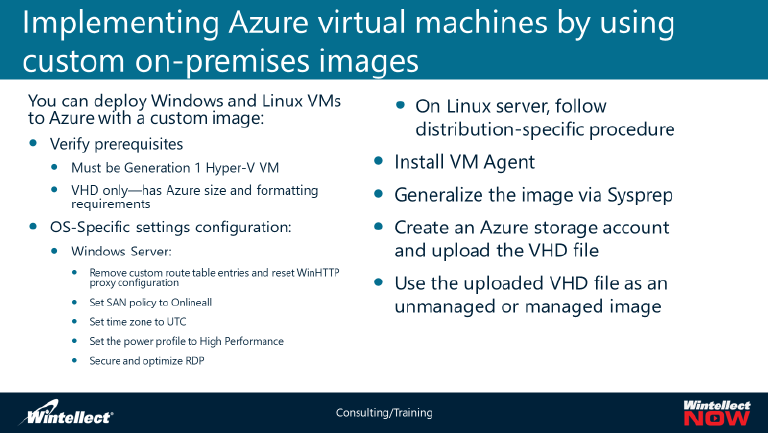
One of the benefits when working with Hyper-V and Windows Azure is the portability of Virtual
Machines. For example, when Virtual Machines are created in Windows Azure, you have the option to
pull them down and run them on your Hyper-V servers, or you have the option to push Hyper-V Virtual
Machines to Windows Azure. Rather than moving your workloads from on-premises to Azure virtual
machines you’re taking those virtual machines with their already established workloads and simply
moving the virtual hard disk (VHD) file to Azure and then creating an Azure virtual machine with that
VHD. Then, once you start it, the entire workload is now running on Azure. Of course, a great advantage
to doing this was also fulfilled when administrators went from single workloads on an individual server
to several virtual machines running on a host server. You can consider migrating a virtual machine to
Azure in the same way.
Note that there are
more ways to
automate this
process, especially
when you have
large volumes of
on-premises virtual
machines you want
to quickly get into
Azure. This can be
done through
Azure Site
Recovery, through
a process known as
lift and shift. This
allows real time replication and many tools to ensure the process goes on without loss of data,
processing and connectivity. We will discuss this in greater depth in module six.
In order to take an on-premises virtual machine and migrated to Azure, there are several steps you must
take to make this happen.
Before you upload a Windows virtual machines (VM) from on-premises to Microsoft Azure, you must
prepare the virtual hard disk (VHD or VHDX). Azure supports only generation 1 VMs that are in the VHD
file format and have a fixed sized disk. The maximum size allowed for the VHD is 1,023 GB. You can
convert a generation 1 VM from the VHDX file system to VHD and from a dynamically expanding disk to
fixed-sized. But you can't change a VM's generation.
There are several steps to prepare the image for deployment before you actually upload it to Azure. You
must remove the local routing tables persistent routes, reset the WIN HTTP proxy, set the SAN policy to
online all, set the time to UTC, set the power profile to high performance, configure services for network
connectivity in Azure and ensure the RDP settings are all on and ready for Azure. Additionally, you will
want to check the firewall and ensure PowerShell Remoting is turned on, and finally, set up the boot
configuration database or BCD to ensure that the virtual machine can start in the Azure environment.
While some of the settings can be made within the GUI tools of the virtual machine itself, others must
be run in Windows PowerShell. Additionally, as said earlier you need to make sure PowerShell Remoting
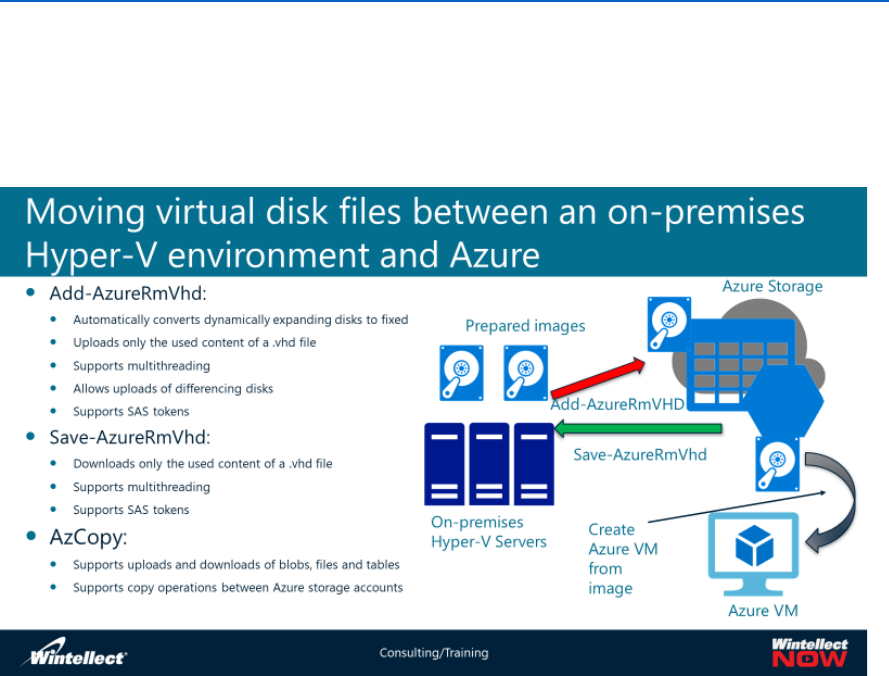
is installed and available on the image, as you will use this after you upload the prepared VHD to Azure.
In any case, the steps you take to prepare the image will involve GUI tools, Windows PowerShell and
even command line tools such as BCDedit.exe and sysprep.exe.
You can find the step-by-step guide for these commands at the following URL:
https://docs.microsoft.com/en-us/azure/virtual-machines/windows/prepare-for-upload-vhd-image
Your instructor will demonstrate these steps in the next demonstration.
Moving virtual disk files between an on-premises Hyper-V environment and Azure
Once you have completed all the virtual disk requirements to prepare the on-premises Hyper-V virtual
machine and verified all actions, you are ready to begin uploading to Azure. You can use Azure
PowerShell or the Azure CLI to move VHDs between your on-premises Hyper-V and Azure virtual
machines.
In Windows PowerShell we can use the Add–AzureRMVhd and Save-AzureRMVhd cmdlets to move
VHDs, or use the AzCopy CLI executable.
The Add-AzureRmVhd cmdlet uploads on-premises virtual hard disks, in .vhd file format, to a blob
storage account as fixed virtual hard disks. You can configure the number of uploader threads that will
be used or overwrite an existing blob in the specified destination URI. Also supported is the ability to
upload a patched version of an on-premises .vhd file. When a base virtual hard disk has already been
uploaded, you can upload differencing disks that use the base image as the parent. Shared access
signature (SAS) URI is supported also.
Note: In the context of Azure virtual machine virtual disk files, the term image refers to a .vhd file
containing a generalized operating system installation. The term disk refers to a .vhd file containing
either an operating system installation that is not generalized or a data disk.
The benefits of Add-AzureRmVhd are that it:
• Automatically converts dynamically expanding disks to fixed as part of an upload.
• Uploads only the actual content of the .vhd file. The bandwidth and time it takes for an upload
to complete depends on the amount of used space on the virtual disk, not on its total size.
• Enables you to enforce multithreading by allowing you to specify the value of the
‑NumberOfThreads parameter.
• Supports uploads of differencing disks when the base image already resides in Azure Storage.
This allows you to minimize the amount of time and bandwidth it takes to upload an updated
version of the image.
• Gives you the option of accessing the target Azure storage account by using a Shared Access
Signature (SAS) token rather than by using a storage account key. This allows you to restrict the
permissions of the person performing the upload to an individual storage account blob
container or even an individual blob. You can also specify the time window during which the SAS
token is valid.
For example, you can run the following cmdlet to upload the win2016baseimage.vhd file from the
D:\vhd folder on your computer to a page blob in an Azure storage account that you reference by using
an SAS token.
Add-AzureRmVhd -Destination
"http://adatumstorageaccount.blob.core.windows.net/vhdstore/win2016bas
eimage.vhd?st=2016-08-21T22%3A15%3A49Z&se=2016-08-
23T23%3A10%3A49Z&sr=b&sp=w&sig=
13T9Ow%2FRJAMmhfO%2FaP3HhKKJ6AY093SmveO SIV4%2FR7w%3D" -LocalFilePath
"D:\vhd\win2016baseimage.vhd" –NumberOfThreads 32
The Save-AzureRmVhd cmdlet performs a download of a .vhd file from an Azure storage account to
your local computer. Before you start the download, make sure that you have a sufficient amount of
disk space on the local computer, because the .vhd file is a fixed disk.
The benefits of Save-AzureRmVhd, which are similar to those available when running Add-AzureRmVhd,
are that it:
• Downloads only the actual content of the .vhd file. The bandwidth and time it takes for a
download to complete depends on the amount of used space on the virtual disk, not on its total
size.
• Enables you to enforce multithreading by allowing you to specify the value of the
‑NumberOfThreads parameter.
• Gives you the option of accessing the target Azure storage account by using an SAS token rather
than by using a storage account key. This allows you to restrict the permissions of the person
performing the download to an individual storage account blob container or even an individual
blob. You can also specify the time window during which the SAS token is valid.

For example, you can run the following cmdlet to download the win2016disk.vhd file from a page blob in
an Azure storage account that you reference by using an SAS token to the D:\vhd folder on your
computer.
Save-AzureRmVhd -SourceUri
"http://adatumstorageaccount.blob.core.windows.net/vhdstore/win2016dis
k.vhd?st=2016-08-21T22%3A15%3A49Z&se=2016-08-
23T23%3A10%3A49Z&sr=b&sp=w&sig=
13T9Ow%2FRJAMmhfO%2FaP3HhKKJ6AY093SmveO SIV4%2FR7w%3D" -LocalFilePath
"D:\vhd\win2016disk.vhd" –NumberOfThreads 32
As an alternative, you can use the AzCopy command line utility. This versatile utility allows you to copy
data to and from Azure storage blobs, files, and tables, both between on-premises locations and Azure
storage accounts and between Azure storage accounts. It is available as part of Azure Storage Tools,
which are included in the Azure Software Development Kit (SDK).
AzCopy, similarly to the Add-AzureRmVhd and Save-AzureRmVhd PowerShell cmdlets uploads
only the actual content of the .vhd file. As the result, the bandwidth and time it takes for an upload to
complete depends on the amount of used space on the virtual disk, not on its total size. On the other
hand, AzCopy will not automatically convert dynamically expanding disks into fixed, so, when using it to
upload .vhd files to Azure, make sure that the disks they contain are already of the fixed type.
Demonstration: Uploading a .vhd file to Azure
In this demonstration, watch as your instructor uploads a VHD to Azure Storage.
Lab A: Uploading an on-premises virtual disk file to Azure
In this lab, you will upload an on-premises VHD to Azure. The script for the lab can be found in the
GitHub portal, under the name of Mod_3_lab_A.md at the following location:
Lesson 3: Extending HPC workloads to Azure
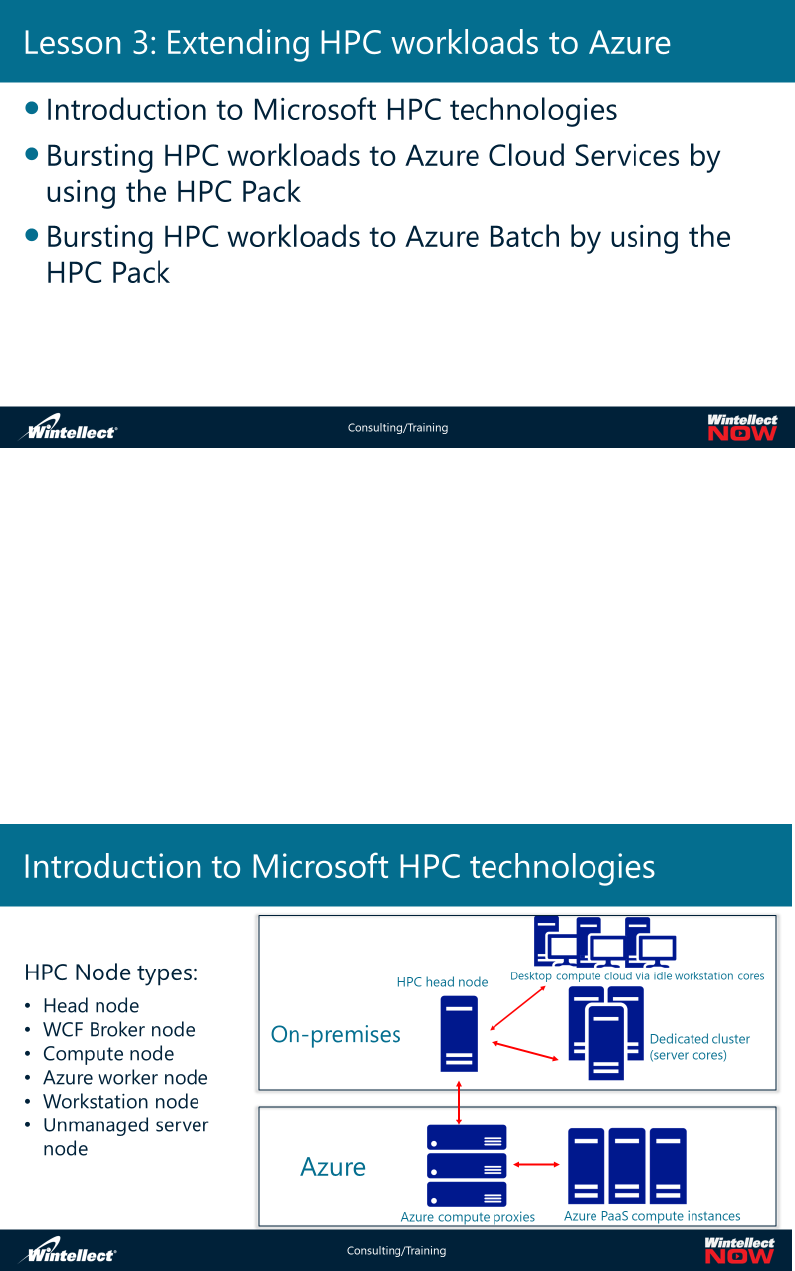
Introduction to Microsoft HPC technologies
Azure offers vast amounts of compute resources that you can provision on an as-needed basis. Access to
these resources allows you to run high-demand processing workloads that are commonly referred to as
Big Compute. An HPC workload is an example of this. This works with on-premises multi-node clustered
servers using either Windows Server or Linux nodes, part-time servers, workstation computers, and
dedicated or on-demand compute resources that are deployed in Microsoft Azure.
You create
and manage a
cloud-based
high-
performance
computing
(HPC) cluster
by taking
advantage of
Microsoft
HPC Pack and
Azure
compute and
infrastructure
services. HPC
Pack, available as a free download, is built on Microsoft Azure and Windows Server technologies and
supports a wide range of HPC workloads.
Individual virtual machines are referred to as nodes, and these nodes are gathered together in what is
called an HPC pack. The HPC pack can run on-premises, which is the more common method of doing
this, and now can also run in the cloud in Azure.
An HPC Pack–based deployment consists of groups of nodes. There are different types of nodes
depending on what they do for the HPC pack, as follows:
•Head node. This is the node that acts as the cluster manager and job scheduler for the HPC
pack.
•Windows Communication Foundation (WCF) broker node. Acts as a gateway to the client
requests coming into the HPC pack and pushes out the request to the other nodes. When the
other nodes finish their compute they use the WCF broker to push the results back to the client.
•Compute node. This actually runs the requests from the clients. The operating system of the
compute node can use Windows server 2008 R2 SP1 and above and various Linux variants.
•Azure worker node. Same as compute node but runs as underlying infrastructure for an Azure
cloud service.
•Workstation node. Like a compute node but usually runs a client operating system.
•Unmanaged server node. Like the workstation node but running a Windows server operating
system.
Depending on the operating system a node is running under, you can switch roles. You can also run
more than one node on a single VM.
The latest version of HPC Pack is Microsoft HPC Pack 2016 Update 1. It is free and can be downloaded
from the Microsoft Download Center. There had been a number of improvements in this latest update,
and these improvements can be found at the following URL: https://docs.microsoft.com/en-
us/powershell/high-performance-computing/what-s-new-in-hpc-pack-2016-update-1?view=hpc16-ps
Before you can use HPC Pack, you should deploy an HPC cluster. This involves five steps, as follows:
1. Prepare for your deployment. Before you start deploying your HPC cluster, review the list of
prerequisites and initial considerations.
2. Deploy the head node. Deploy the head node by installing Windows Server and HPC Pack.
3. Configure the cluster. Configure the cluster by following the steps in the Deployment To-do List
in HPC Cluster Manager.
4. Add Windows nodes to the cluster. Add on-premises nodes to the cluster by deploying them
from bare-metal, by importing an XML file or by manually configuring them.
5. Add Linux nodes to the cluster. Add on-premises Linux compute nodes to the cluster by
manually configuring them.
Note: Configuring the HPC Pack involves a number of sub-steps to the steps listed above. (For classes
using the Wintellect Government subscriptions only.) While HPC Pack is available in Azure Government
the particular Azure Government training subscription we have does not allow us to create an HPC Pack.

For more information about doing so, visit the following URL: https://docs.microsoft.com/en-
us/powershell/high-performance-computing/get-started-guide-for-hpc-pack-2016?view=hpc16-ps
Let’s watch a short, Microsoft-produced video on High Performance Computing (HPC) options in Azure:
Note: Do not click the link while in class. Your instructor will show the video form the main classroom
screen.
https://azure.microsoft.com/en-us/resources/videos/high-performance-computing-options-in-azure/
Bursting HPC workloads to Azure Cloud Services by using the HPC Pack
One of the benefits of using an HPC pack in Azure is the ability to dynamically expand additional nodes
as needed due to demand and increase workloads. This is referred to as bursting. It would be almost
impossible to do only in on-premises in real time. However, with HPC Pack you can dynamically expand
your on-premises HPC cluster through Azure. This process is called bursting, and bursting involves the
automatic deployment of HPC compute nodes onto Azure Cloud Services Worker role instances. You can
set up a hybrid HPC cluster by using HPC Pack. The on-premises cluster head node communicates with
compute nodes running Azure Cloud Services Worker role instances.
There are seven main steps you take to expand your on-premises HPC pack into Azure for bursting.
These steps are as follows:
1. Verify prerequisites. Make sure all the prerequisites have been done. This includes having a
proper Azure subscription, all nodes running a minimum of Windows Server 2012 R2, having the
HPC Pack 2016 installation files available, the user account with local administrator rights on the
head node, connectivity on TCP port 443 on the headnote and a management certificate to the
Azure subscription.
2. Run the Microsoft HPC Pack 2016 installation wizard on the system that will serve as the head
node. The installation wizard will walk you through the setup steps. This includes creating the
head node and the rest of the cluster and where the HPC databases are located.
3. Prepare the Azure subscription. You will need to create an Azure Cloud Service and Storage
Account. You will also add your Microsoft HPC management certificate from the head node and
setup the cloud service host worker instances in HPC.
4. Configure the head node. The head node needs to recognize and be able to access nodes in
Azure. There is an Azure node template you can use for this.
5. Add the cluster nodes to the cluster. You do this based on the Azure node template you
selected in the previous step. This is run through the HPC Cluster Manager console on the head
node.
6. Start the compute nodes. This is also done from the HPC Cluster Manager console. This will
provision out the Azure cloud service worker instances. When this happens, you will incur
compute charges.
7. Submit jobs that run on the cluster. The HPC cluster will then automatically distribute the job to
the various compute nodes as required, and as is most efficient. You can use the HPC Cluster
Manager console to monitor the job progress and which nodes are running that job.
In order to manipulate the burst functionality, you can configure the AutoGrowShrink property in the
HPC cluster manager console. This will allow you to dynamically increase or decrease the number of
compute nodes based on the current workload. This is not available for Linux virtual machines.
Bursting HPC workloads to Azure Batch by using the HPC Pack
Microsoft has deprecated the Azure Services Model (ASM), or Azure Classic, for the Azure Resource
Manager (ARM). Azure Cloud Services remain as part of Azure Classic, and are actually named Azure
Cloud Services (Classic) in the new portal. There is some confusion on whether or not Azure Cloud
Services are also being deprecated. Since Azure Cloud Services (Classic) are now part of ARM they are
not specifically being deprecated. While many Azure subscribers have moved away from Cloud Services
to other ARM products or functions, Azure Cloud Services (Classic) are still fully supported by Microsoft.
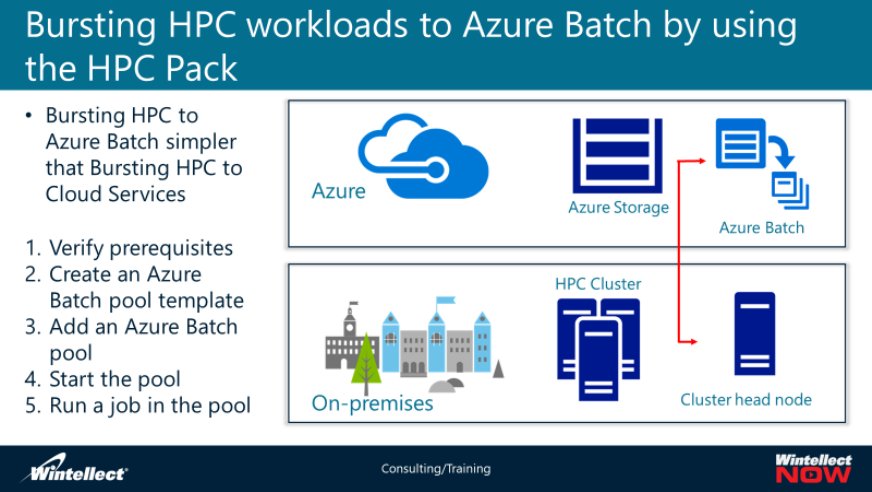
This topic presents a simpler way to configure HPC bursting, but through using the Azure Batch Service.
An important managed service you can use with HPC Pack is named Azure Batch. Azure batch delivers
job scheduling and the auto scaling of compute resources that run your applications. There is a Batch
SDK which lets you implement solutions by developing custom code that defines tasks you want to run,
provides task parameters, and describes the distribution of applications and their associated data. You
can implement scaling and the scheduled execution of specific tasks by using Azure Batch. Alternatively,
you can use HPC Pack without custom programming to configure Azure Batch, as an additional compute
resource in your HPC cluster. That way, you are able to burst on-premises HPC cluster workloads to
Azure Batch in a manner similar to bursting to Azure Cloud Services. Azure Batch is also available in
Azure Government.
You can use the Azure Batch SDK to develop custom code, which will define the task you want to run
including configuring various parameters and distributions of your applications.
The steps are simpler than using Burst in Azure Cloud Services. There are only five steps vice seven.
1. Verify prerequisites. This includes having a proper Azure subscription, all nodes running a
minimum of Windows Server 2012 R2, having the HPC Pack 2016 installation files available, the
user account with local administrator rights on the head node, connectivity on TCP port 443 on
the headnote and a management certificate to the Azure subscription. Also, you will need an
Azure Batch account. You will be asked for the account name, URL and key.
2. Create an Azure Batch pool template. From the HPC Cluster Management console, run the
Create Node Template Wizard and then select Azure Batch pool template as the template type.
Then put in The Azure Batch account information, as specified above, configure your Remote
Desktop credentials. You can also set up the Azure Bash start task at this point. This will allow
you to run arbitrary tasks whenever and Azure Batch node starts to perform various actions
such as installing applications or starting background processes.
3. Add an Azure Batch pool. This is also done from the HPC Cluster Manager console by running
the Add Node Wizard. From here, you can configure the number of compute nodes, their size,
the operating system, and the maximum number of concurrent tasks that can run on each node.
4. Start the pool. This you can do directly from the HPC Cluster Manager console. Once started,
you can monitor the status of the nodes from the console or create a Remote Desktop session
to each computer node using the credentials you specified in step two. The HPC Cluster
Manager console also has a Heat Map view that can give you insight into a node’s performance
by showing counters for CPU usage, disk throughput, network usage and available physical
memory.
5. Run a job in the pool. Once the Azure Batch pool is provisioned, you can launch a new job
running the clusrun command. This command lets you run an executable file or script on
multiple nodes and redirect the output from all the nodes to one.
Lesson 4: Integrating compute workloads by using containers, container orchestration, and
Azure Service Fabric
Introduction to containers
In the last decade, hardware virtualization has drastically changed the IT landscape. One of many
consequences of this trend is the emergence of cloud computing. However, a more recent virtualization
approach promises to bring even more significant changes to the way people develop, deploy, and
manage compute workloads. This approach is based on the concepts of containers and microservices.
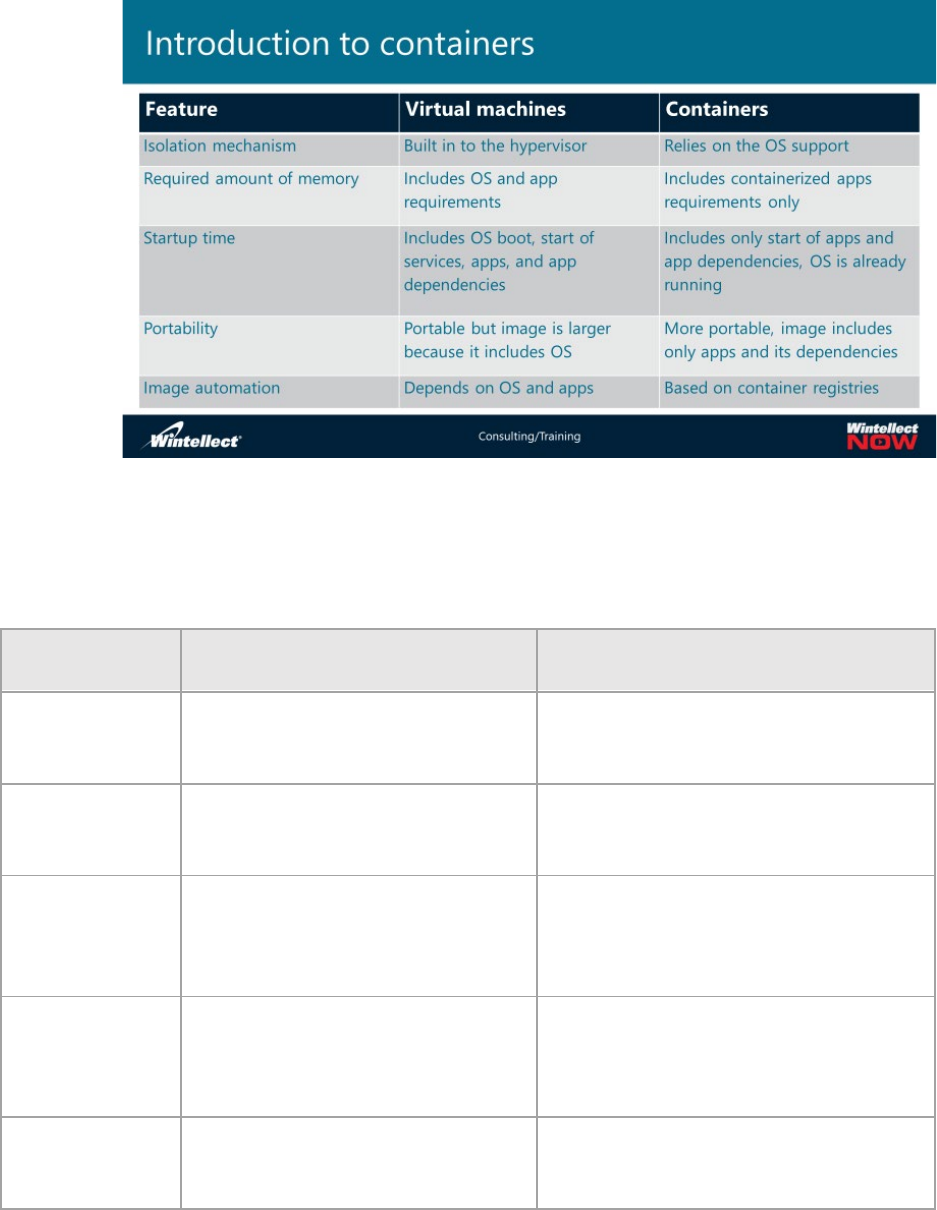
One of the
key
differences
between
the virtual
machine
and a
container is
the virtual
machine
isolates
both the
user mode
and kernel
mode,
making the virtual machine an entire separate operating system, whereas a container only isolates the
user mode of an operating system and actually relies on the underlying operating system for
functionality.
The following table lists the high-level differences between virtual machines and containers.
Feature
Virtual machines
Containers (both Windows and Linux)
Isolation
mechanism
Built in to the hypervisor
Relies on operating system support.
Required amount
of memory
Includes operating system and app
requirements
Includes containerized apps requirements
only.
Startup time
Includes operating system boot, start
of services, apps, and app
dependencies
Includes only start of apps and app
dependencies. The operating system is
already running.
Portability
Portable, but the image is larger
because it includes the operating
system
More portable, because the image
includes only apps and their
dependencies.
Image
automation
Depends on the operating system
and apps
Based on the container registries
You can have multiple containers, where each one is isolated from the others in the user mode, but they
will still make calls to the one kernel running the operating system. You could run a virtual machine with
a separate container on it to completely isolate each kernel instance.
When you start a container, it runs the application that you wanted to run and nothing else. The
container itself is a minimal resource environment that acts as a shell to hold the application. There is no
operating system to boot up as the container has already been established.
One of the main reasons to run containers on Azure virtual machines is cost. Workloads on virtual
machines are priced out per virtual machine and virtual machine size and capabilities, and not on the
workload itself. Containers can run individual workloads and multiple containers can run on a single
Azure virtual machine. By running containers on Azure virtual machine you’re not charged for all the
container workloads you’re running but only for running the Azure virtual machine.
Azure supports containers through the process of namespace isolation and resource governance, as
follows:
•Namespace isolation. Each container operates in its own isolated namespace, which provides
the resources necessary to run containerized applications, including files or network ports.
These resources map to the resources of the host operating system. When an application makes
a change to a file that is part of its namespace, the container performs a copy-on-write
operation. From that point on, the container keeps track of the differences between its version
of the modified file and the underlying file system resource.
•Resource governance. The host operating system controls the amount of resources, such as
CPU, random access memory (RAM), or network, that each of its containers can use. This
prevents any container from affecting the performance and stability of other containers.
Linux supports containers as well as Windows Server 2016. Windows Server 2016 has two types of
containers: Windows Server containers, which run on a Windows Server computer, and Microsoft
Hyper-V containers, which can isolate the kernel and is a separate operating system with one container.
Implementing Docker hosts in Azure
Docker is one of the most common tools in use to create containers. While not required it currently
offers the only solution to running containers in Windows Server. Within Azure, there are other ways
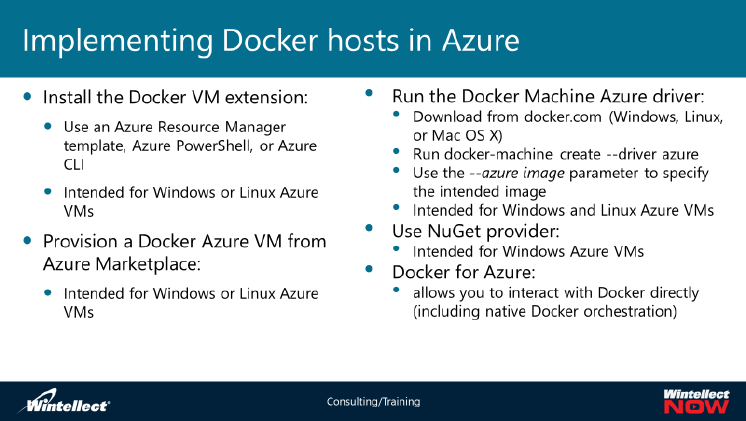
besides Docker to run containers.
There are number of Docker tools, including the following:
• Docker client, which is a command line-based management software that lets you create, start
and administer containers.
• The Docker engine, which is a lightweight runtime environment for Docker containers that
includes an in-host service that you can use to communicate from the docker client to the
containers and build, deploy and run containers. It runs as a service on Windows and a daemon
on Linux. Docker Compose allows you to build and run Docker apps on multiple containers.
• Docker Machine lets you provision Docker hosts by deploying the Docker engine on a target
machine, as well as installing and configuring the Docker client to communicate back to the
Docker Engine.
• The Docker registry contains a repository of container images that you can select from using the
Docker API.
• Kitematic is a graphical user interface from the Docker hub on both Windows and Apple Mac
computers.
• Docker swarm, which is a Docker native clustering technology, and it lets you run more than one
Docker Engine at the same time.
There are several ways to install Docker on Azure virtual machines. Each way includes support for
Docker containers.
• Docker VM extension. You can install the Docker VM extension on a Linux virtual machine. You
can also use the extension when deploying a new Azure virtual machine via an ARM template or
a command line script. When you install the extension, it installs the Docker engine and client,
and Docker Compose.
• Docker Azure VM image. You can deploy a Docker Azure VM image from the Azure
Marketplace, which has prebuilt containers for Windows server 2016 Datacenter as well as
Ubuntu and CentOS Linux virtual machines.
• Docker Machine Azure driver. You can also use the Docker machine Azure driver which is a
command line tool that lets you do Docker tasks. The tool includes support for deploying
Docker hosts on Azure VMs. When you create a VM via this tool is deployed with several default
settings. The VM uses the Standard_A2 size, a canonical Ubuntu Server 16.04.0 – LTS image and
is assigned in Azure VNet name Docker Machine. It also provides inbound connectivity on TCP
port 22 for SSH connections and TCP port 23764 remote connections from the Docker client. It
also generates self–signed certificates and stores the private key in the user’s account profile.
• NuGet provider Windows PowerShell Module. Use the NuGet module in PowerShell to install
the Docker engine in the Docker tools. Run the following cmdlets in a Windows PowerShell
console:
1. Install the Docker module from PSGallery:
Install-Module –Name DockerMsftProvider –Repository PSGallery
-Force
2. Install the latest version of the Docker installer package:
Install-Package –Name docker –ProviderName DockerMsftProvider
-Force
3. Restart the computer by running the following command:
Restart-Computer -Force
• Docker for Azure. Docker for Azure provides a Docker-native solution that avoids operational
complexity and adding unneeded additional APIs to the Docker stack. Docker for Azure allows
you to interact with Docker directly (including native Docker orchestration), instead of
distracting you with the need to navigate extra layers on top of Docker. You can focus instead on
the thing that matters most: running your workloads. Docker for Azure is installed with an
Azure template that configures Docker in swarm mode, running on VMs backed by a custom
virtual hard drive (VHD). There are two ways you can deploy Docker for Azure. You can use the
Azure Portal (browser based), or use the Azure CLI. Docker for Azure will be further discussed in
another topic page.
• Container service cluster. The container service cluster lets you provision and manage multiple
instances of Docker containers running on clustered Docker hosts.
• Azure Container Instances (ACI) service. With this service, you can deploy individual containers
without having to explicitly provision Azure VMs that will serve as Docker hosts.
• Web App for Containers. This is a new feature in preview that designed to combine the ease of
Azure Web Apps with containers. You can easily deploy and run containerized applications on
Windows and Linux VMs. Additionally, you can also easily deploy and run containerized
applications that scale with your business. This service uses a fully-managed platform to
perform infrastructure maintenance and takes advantage of built-in auto scaling and load
balancing. It is also can be deployed and managed with a streamlined command line with
Docker Hub, Azure Container Registry, and GitHub.
Here is a short, Microsoft-produced video on Web App for Containers:
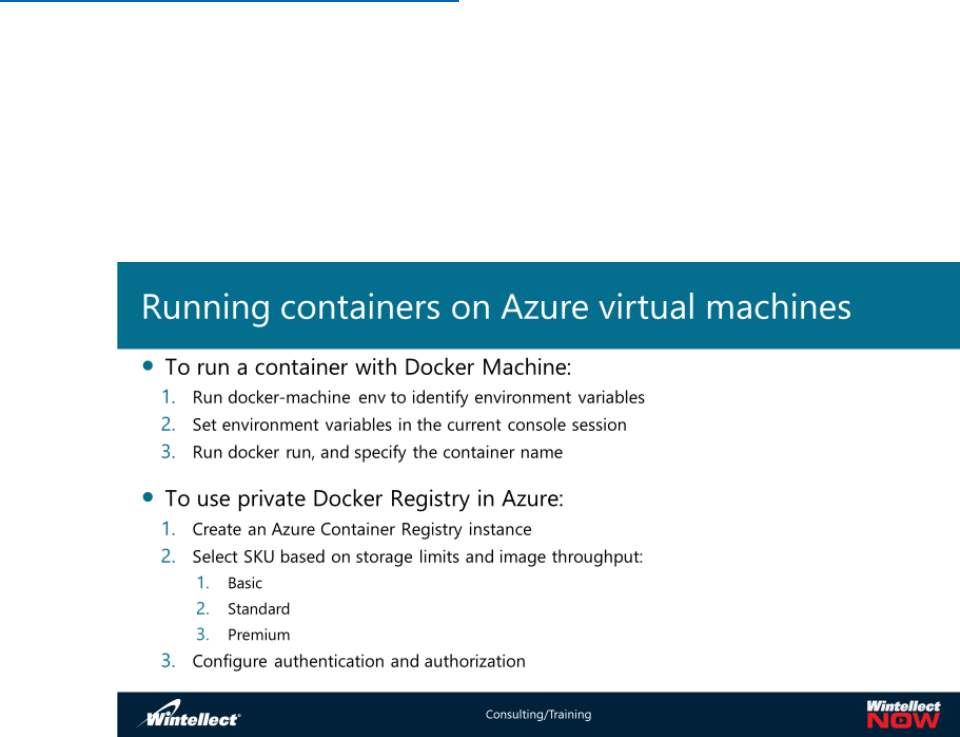
Note: Do not click the link while in class. Your instructor will show the video form the main classroom
screen.
https://www.youtube.com/watch?v=OzeG8VtBJ5Q
Running containers on Azure virtual machines
When you are deciding the most convenient and efficient way to run containers in your environment
will depend on the location of your Docker hosts. There are many options to choose from as previously
shown. For this course we have chosen the Docker Machine option because it lets us manage hybrid
deployments and integrate an on-premises environment into Azure in a consistent way. We can also use
Docker Machine in Windows, Linux and Mac OS X.
When you
provision
out an
Azure VM,
Docker
Machine
creates a
self-signed
certificate
you use to
remote
connect
securely
with SSH
to the
Docker
Engine. It also stores the certificate private key in your user account profile. This will let you deploy and
manage Docker containers from the same computer deployed the Docker host. You can also figure
environmental variables in your Windows command prompt session to simplify management of this
process. You can identify the environmental variables by running the following command:
docker-machine env dockervm1
Where dockervm1 is the name of the Azure VM that you deployed by running the docker-machine
create command. The above command should return output similar to the following:
SET DOCKER_TLS_VERIFY=”1”
SET DOCKER_HOST=”tcp://41.127.56.221:2376”
SET DOCKER_CERT_PATH=”C:\Users\Admin\.docker\dockervm1\certs”
SET DOCKER_MACHINE_NAME=”dockervm1”
@FOR /f "tokens=*" %i IN ('docker-machine env dockervm1) DO @%i
You can now start a container on the Azure VM by running the following command:
docker run -d -p 80:80 --restart=always container_name
The docker run command automatically locates the container with the name container_name, and then
publishes it to port 80, and then initiates its execution in the detached mode. To start a container in
detached mode, you use -d=true or just -d option. The detached mode means that the command
prompt session isn’t attached to the container process, so you can use it to run other commands. In the
attached mode, the command prompt session will display any message that the Docker container
creates.
Docker runs processes in isolated containers. The Docker host may be local or remote. When an
operator executes docker run, the container process that runs is isolated in that it has its own file
system, its own networking, and its own isolated process tree separate from the host. it checks its
version against the Docker Hub, which is a central, Docker-managed repository of Docker images
available publicly on the Internet. If there is no locally cached container image or if its version is out of
date, the Docker Engine automatically downloads the latest version from the Docker Hub.
When running docker run, you must specify an image from which to create the container. This image
must have a number of configured settings, including:
• The detached or attached mode
• The network settings
• Any run time constraints on CPU and memory
You can override or add to these image defaults when using docker run.
The Docker client includes other command line options besides docker run, including:
• docker images. This lets the images available on the local Docker host.
• docker stop. This stops a running container.
• docker rm. This removes an existing container.
Additionally, the docker client includes tools to automate the creation of container images. While you
can create container images manually, using an automated image creation process has a number of
benefits, including:
• Ability to store container images as code.
• Rapid and precise re-creation of container images for maintenance and upgrade purposes.
• Continuous integration between container images and the development cycle.
There are three Docker components that drive this automation, as follows:
• Dockerfile. This is a text file that contains the instructions needed to create a new container
image from a base image. This includes the identifier of the base image, commands to run
during the image creation process, and a command that will run when new instances of the
container image is deployed.
• docker build. This Docker Engine command uses a Dockerfile and then triggers the image
creation process.
• docker commit. This command commits the changes that you made to the container and
creates a new container image.
You can house and use your own private registry of containers by using the Azure Container Registry
service. The service allows you to create and maintain your own collection of Docker container images,
while benefiting from the availability, performance and resiliency of the Azure platform.
There are several ways in which you can create a container registry. You can create one directly from the
Azure portal, or by using Azure CLI, or via an Azure Resource Manager template-based deployment. You
must assign a unique name in the azurecr.io DNS namespace, and then specify in Azure subscription, an
Azure region and either an existing or new resource group where the container registry will reside. You
will also have to choose a registry SKU there are three SKUs available; Basic, Standard and Premium.
You also must decide which authentication and authorization model to use. The basic approach as you
use the admin user account with two passwords. Using two passwords allow you to regenerate one of
them without affecting authentication attempts with the other. By default, however, the account is
disabled. You can enable it and then use authentication to the registry with the two passwords. The
admin user has full permissions on the registry. Try to limit the use of the admin user account to single
user scenarios. When multiple users are using the same set of credentials, it makes it difficult to audit
access.
When you have multiuser scenarios, create one or more service principals in the Azure AD associated
with your Azure subscription and then assign the service principals to the registry. You will then be able
to authenticate when accessing the registry by using a service principal name and its password.
Additionally, you can implement RBAC and grant the service principals the Reader, Contributor, or
Owner role.
The following steps explain how to push images to and pull images from a container registry named
WintellectRegistry by using the Docker client:
1. Log in to the registry from your local computer with the Docker client installed by using an Azure
AD service principal and its password:
docker login wintellectregistry.azurecr.io –u xxxxxxxx-xxxx-xxxx-
xxxx-xxxxxxxxxxxx –p Pa55w.rd1234
Note: The value of the –u switch represents the ApplicationID property of the service
principal and the value of the –p switch represents the corresponding password.
2. Use the docker pull command to download a public image from Docker Hub to the local
computer (image_name represents the name of the image):
docker pull image_name
3. Use the docker tag command to create an alias of the image that you downloaded in the
previous step. The alias contains a fully qualified path to the registry, with an additional
namespace (optionally):
docker tag nginx wintellectregistry.azurecr.io/lab/image_name
4. Upload the newly tagged image to the container registry, run the docker push command:
docker push wintellectregistry.azurecr.io/lab/image_name
5. Download the newly uploaded image, run:
docker pull wintellectregistry.azurecr.io/lab/image_name
6. Run a container based on this image and make it accessible via port 8080 on the local computer,
use the docker run command in the following manner:
docker run –it --rm –p 8080:80
wintellectregistry.azurecr.io/lab/image_name
7. To remove the image from the container registry when no longer needed, run the docker rmi
command:
docker rmi wintellectregistry.azurecr.io/lab/image_name
Demonstration: Running containers in Azure virtual machines
In this demonstration, watch as your instructor:
• Installs Docker Toolbox.
• Deploys a Docker host on an Azure VM by using Docker Machine.
• Deploys a containerized app to the Azure VM.
Overview of Azure Service Fabric
Azure Service Fabric is a Platform as a Service (PaaS) offering designed to facilitate the development,
deployment and management of highly scalable and customizable applications for the Microsoft Azure
cloud platform.
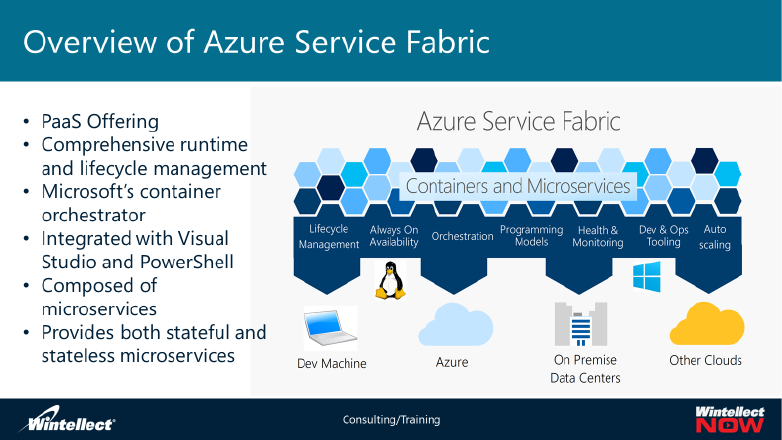
Service Fabric provides comprehensive runtime and lifecycle management capabilities to applications
that are composed of these microservices. Service Fabric enables you to build and manage scalable and
reliable applications composed of microservices that run at high density on a shared pool of machines,
which is referred to as a cluster. It provides a sophisticated, lightweight runtime to build distributed,
scalable, stateless, and stateful microservices running in containers. It also provides comprehensive
application management capabilities to provision, deploy, monitor, upgrade/patch, and delete deployed
applications including containerized services.
Service Fabric is Microsoft's container orchestrator deploying microservices across a cluster of machines.
Microservices can be developed in many ways from using the Service Fabric programming models,
ASP.NET Core, to deploying any code of your choice. Importantly, you can mix both services in processes
and services in
containers in
the same
application. If
you just want
to deploy and
manage
containers,
Service Fabric
is a perfect
choice as a
container
orchestrator.
For Windows
development,
the Service
Fabric .NET SDK is integrated with Visual Studio and Powershell. For Linux development, the Service
Fabric Java SDK is integrated with Eclipse, and Yeoman is used to generate templates for Java, .NET Core,
and container applications.
Service Fabric provides both Stateless and stateful microservices. Stateless microservices (such as
protocol gateways and web proxies) do not maintain a mutable state outside a request and its response
from the service. Azure Cloud Services worker roles are an example of a stateless service. Stateful
microservices (such as user accounts, databases, devices, shopping carts, and queues) maintain a
mutable, authoritative state beyond the request and its response
Extending Azure Service Fabric to on-premises environments
A Service Fabric cluster is a network-connected set of virtual or physical machines into which your
microservices are deployed and managed. A machine or VM that is part of a cluster is called a cluster
node. Clusters can scale to thousands of nodes. If you add new nodes to the cluster, Service Fabric
rebalances the service partition replicas and instances across the increased number of nodes. Overall
application performance improves and contention for access to memory decreases. If the nodes in the
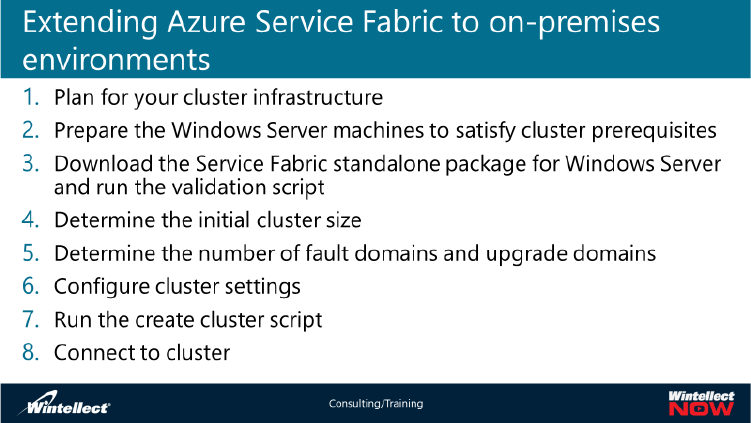
cluster are not being used efficiently, you can decrease the number of nodes in the cluster. Service
Fabric again rebalances the partition replicas and instances across the decreased number of nodes to
make better use of the hardware on each node.
Service Fabric allows for the creation of Service Fabric clusters on any VMs or computers running
Windows Server or Linux. This means you are able to deploy and run Service Fabric applications in any
environment where you have a set of Windows Server or Linux computers that are interconnected, be it
on-premises, Microsoft Azure or with any cloud provider.
Service Fabric provides an install package for you to create standalone Service Fabric clusters on-
premises or on any cloud provider. You can use the same set of applications in Service Fabric clusters in
Azure and standalone on-premises clusters, without the need for code changes. This allows you to move
workloads between the
two environments to
address scalability or
resiliency requirements.
However, it is important
to note that running
Service Fabric clusters
in Azure offers a
number of benefits,
including support for
Azure Resource
Manager, integration
with Azure
infrastructure, and
autoscaling.
To deploy an on-premises Service Fabric cluster, perform the following steps:
1. Plan for your cluster infrastructure. You must consider the resiliency of the hardware and
network components, physical security of their location, and capacity requirements based on
expected utilization.
2. Prepare the Windows Server computers that will form a cluster to satisfy the installation
prerequisites. Each computer must be running Windows Server 2016 or Windows Server 2012
R2. Each computer must also have at least 16 GB of RAM, a 4-core CPU, a minimum of 40 GB of
available disk space, and Microsoft .NET Framework 4.5.1 or newer installed. Additionally,
ensure that the Remote Registry service is running on all servers.
3. Download the Service Fabric standalone package for Windows Server from
https://docs.microsoft.com/en-us/azure/service-fabric/service-fabric-cluster-standalone-
package-contents. You can use the TestConfiguration.ps1 script included in the package to
confirm that the servers satisfy the installation prerequisites.
4. Determine the initial cluster size. At a minimum, a production cluster should have three nodes,
with one node per physical or virtual machine. Adjust the number of nodes according to your
projected workload.
5. Determine the number of fault domains and upgrade domains. The assignment of fault domains
should reflect the underlying physical infrastructure and the level of its resiliency to a single
component failure. Typically, you consider a single physical rack to constitute a single fault
domain. The assignment of upgrade domains should reflect the number of nodes that you plan
to take down during application or cluster upgrades.
6. Define the cluster configuration. Specify the cluster settings before provisioning. To accomplish
this, use one of the JavaScript Object Notation (JSON)–formatted files included in the Service
Fabric standalone package for Windows Server. Each file has several sections, including:
• NodeTypes. NodeTypes allow you to divide cluster nodes into groups represented by a
node types and assign common properties to the nodes within each group. These
properties specify endpoint ports, placement constraints, or capacities.
• Nodes. Nodes determine the settings of individual cluster nodes, such as the node
name, IP address, fault domain, or upgrade domain.
7. Run the create cluster script. After you customize the JSON file to match your requirements and
preferences, run the CreateServiceFabricCluster.ps1 Windows PowerShell script and reference
the name of the JSON file as its parameter. You can run the script on any computer with
connectivity to all the cluster nodes.
8. Connect to the cluster. To manage the cluster via a browser, connect to
http://IP_Address_of_a_node:19080/Explorer, where IP_Address_of_a_node is the IP address
of any of the cluster nodes. To manage the cluster via scripting methods, you can use the
ServiceFabric PowerShell module, automatically included with the installation. The Connect-
ServiceFabricCluster cmdlet establishes a connection to the cluster.
Lab B: Moving containers between on-premises Hyper-V virtual machines and Azure virtual
machines

In this lab, you will move a container between on-premises Hyper-V virtual machine and Azure virtual
machine. The script for the lab can be found in the GitHub portal, under the name of Mod_3_lab_B.md
at the following location:
Module Review and Takeaways
Review Question
1. What is the storage size limit for an Azure VM’s operating system disk? A data disk?
2. What server roles cannot be performed on an Azure Windows Server VM?
3. At what level are containers isolated?
Best Practices
Use Azure PowerShell rather than Azure CLI unless you have numerous scripts in CLI already in
production. You should, however, move them over to PowerShell when possible.
Tools
The following table lists the tools that this module references:
Tool
Use to
Where to find it

Module 4 Azure Storage types and capabilities
Azure Storage is a Microsoft-managed service providing cloud storage that is highly available, secure,
durable, scalable, and redundant. Azure Storage is Microsoft's cloud storage solution for modern data
storage scenarios. Azure Storage offers a massively scalable object store for data objects, a file system
service for the cloud, a messaging store for reliable messaging, and a store modeled in means other than
tabular relations, often called a NoSQL store. Azure Storage includes Azure Blobs (objects), Azure
Tables, Azure Queues, and Azure Files. In this module, you will learn how to leverage Azure Storage.
Lesson 1: Overview of Azure Storage and data services
Overview of Azure Storage
First, let’s watch a short, Microsoft-produced video on Azure Storage:
Note: Do not click the link while in class. Your instructor will show the video form the main classroom
screen.
https://azure.microsoft.com/en-us/resources/videos/get-started-with-azure-storage/
Azure Storage is Microsoft's cloud storage solution for modern data storage scenarios. Azure Storage
offers a massively scalable object store for data objects, a file system service for the cloud, a messaging
store for reliable messaging, and a NoSQL store. Azure Storage is:
• Durable and highly available. Redundancy ensures that your data is safe in the event of
transient hardware failures. You can also opt to replicate data across datacenters or
geographical regions for additional protection from local catastrophe or natural disaster. Data
replicated in this way remains highly available in the event of an unexpected outage.
• Secure. All data written to Azure Storage is encrypted by the service. Azure Storage provides you
with fine-grained control over who has access to your data.
Note: Storage accounts are encrypted by default, which provides protection of their content at
rest. Azure Storage services automatically encrypt any data during storage account write
operations and decrypt it during read operations. Microsoft manages the encryption keys.
• Scalable. Azure Storage is designed to be massively scalable to meet the data storage and
performance needs of today's applications.
• Managed. Microsoft Azure handles maintenance and any critical problems for you.
• Accessible. Data in Azure Storage is accessible from anywhere in the world over HTTP or HTTPS.
Microsoft provides SDKs for Azure Storage in a variety of languages -- .NET, Java, Node.js,
Python, PHP, Ruby, Go, and others -- as well as a mature REST API. Azure Storage supports
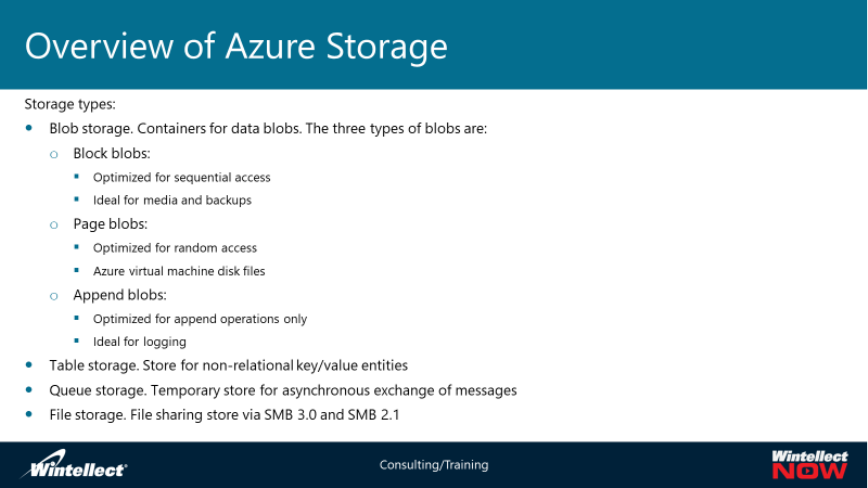
scripting in Azure PowerShell or Azure CLI. And the Azure portal and Azure Storage Explorer
offer easy visual solutions for working with your data.
Azure Storage includes these data services, and each service is accessed through a storage account:
• Azure Blobs: A massively scalable object store for text and binary data. Azure Storage offers
three types of blobs -- block blobs, append blobs, and page blobs (used for VHD files).
o Block blobs store text and binary data, up to about 4.7 TB. Block blobs are made up of
blocks of data that can be managed individually. They are optimized for sequential
access. This makes them extremely useful for media content.
o Page blobs store random access files up to 8 TB in size. Page blobs store the VHD files
that back VMs. There are two tiers of page blob storage, Standard and Premium.
Premium storage offers better performance equivalent to that of a solid-state drive
(SSD). Standard storage performance is equivalent to that of traditional spinning hard
drives.
• Append blobs are made up of blocks like block blobs, but are optimized for append operations.
Append blobs are ideal for scenarios such as logging data from virtual machines or auditing
services.
• Azure Tables: A NoSQL store for schema-less storage of structured data of non-relational
key/value entities. In an Azure Table, rows are referred to as entities. These structures are ideal
for use as a backend store for the various Azure App or Cloud services.
• Azure Queues: Temporary store for asynchronous exchange of reliable messaging between
application components. As an example, instead of going to the process of trying to send a
message all the way to the destination, the message can be placed in a queue, so that the
destination resource can process all the messages in the queue, without forcing the source
resource to wait for acknowledgment. This is synchronous communication will also minimize the
possibility of losing messages due to temporary unavailability of the destination resource.
• Azure Files: File sharing store via SMB 3.0 and SMB 2.1. Azure Files manage file shares for cloud
or on-premises deployments. To a certain extent they are similar to blobs in that they provide
storage for unstructured data, but the locking mechanism they use allows filesharing in a
manner similar to on-premises Windows file shares. With SMB 3.0 you can use encryption and
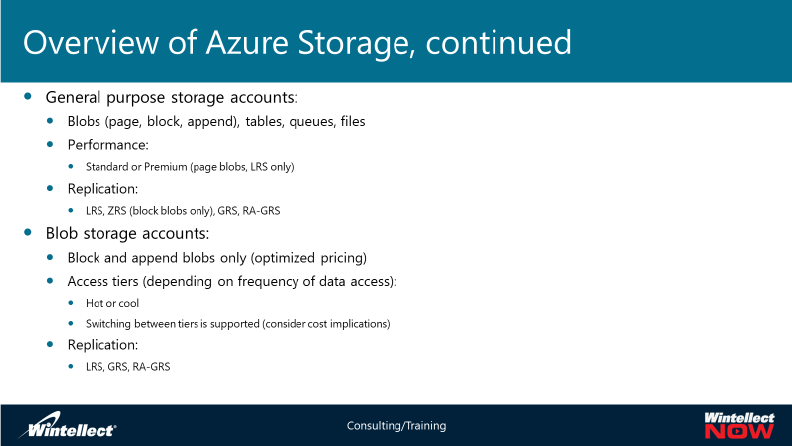
persistent handles. You can establish in SMB 3.0 connection using encryption to in Azure hosted
file share from other azure regions and on-premises locations, if they allow outbound TCP traffic
on port 445. When using SMB 2.1, you can only connect to file shares within the same Azure
region. Persistent handles let SQL Server databases and IIS processes store data directly in Azure
File storage. You can create multiple levels of folders to categorize their content within each file
share. Each directory can contain multiple files and folders. Files can be up to 1 TB in size. The
maximum size of an entire file share is 5 TB.
Storage accounts
Before you can use
Azure Storage, you
must create a
storage account.
By default, you can
create up to 200
separate storage
accounts and a
single Azure
subscription.
However, if you
need more you can
ask for an increase
by opening a
service ticket with
Azure support.
Standard storage accounts can hold up to 500 TB of data, whereas the maximum size of a Premium
storage account is 35 TB. Be aware that while this is less for the Premium storage, it is on much faster
devices.
Standard storage. Standard storage accounts are backed by magnetic drives and provide the lowest
cost per GB. They're best for applications that require bulk storage or where data is accessed
infrequently.
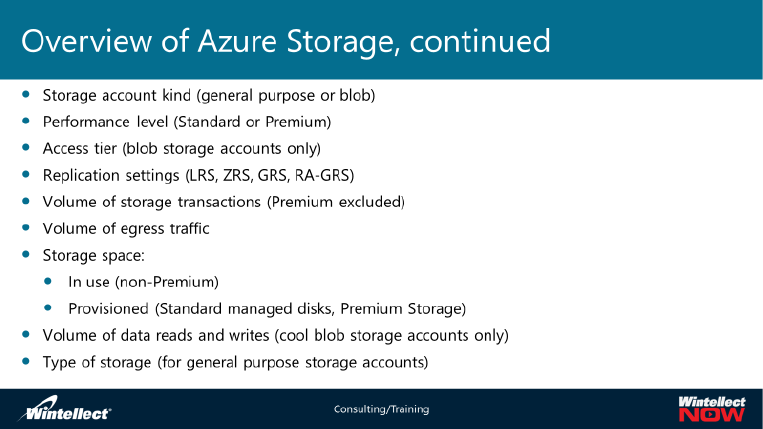
Premium storage. Premium storage accounts are backed by solid state drives and offer consistent low-
latency performance. They can only be used with Azure virtual machine disks, and are best for I/O-
intensive applications, like databases. Additionally, virtual machines that use Premium storage for all
disks qualify for a 99.9% SLA, even when running outside of an availability set. This setting can't be
changed after
the storage
account is
created.
For each storage
account, you
must specify:
• Name. This
defines the
unique URL that
other services
and applications
use to access a
storage
account’s
content. All such URLs include the “core.windows.net” domain suffix. The fully qualified domain
name (FQDN) depends on the type of storage that you want to use. For example, if you
designate the “mystorageaccount” storage account name, you can access its blob service via
http://mystorageaccount.blob.core.windows.net.
•Deployment model. You can choose between Azure Resource Manager and classic. This affects
the functionality that the storage account will support. For example, classic storage accounts do
not support some more recently introduced features, such as Azure Storage Service Encryption
for data at rest or hot and cool access tiers.
•Kind. This determines the type of content that you will be able to store in the storage account as
well as support for access tiers. More specifically, Azure Storage supports two kinds of accounts:
oGeneral purpose. Provides the ability to host blobs, tables, queues, and files.
oBlob storage. Offers optimized support for block and append blobs. This optimization
relies on the ability to set the access tier of the storage account. The choice of access
tier, which can take the value of either cool or hot, affects the way the storage-related
charges are calculated. As a result, you can minimize the cost of storage based on its
usage patterns. More specifically, in case of the hot access tier, the price per gigabyte
(GB) is higher, but charges associated with the number of storage transactions are
lower. In addition, you do not pay the amount of data that you write to or read from the
storage account. In case of the cool access tier, while the price per GB is more than 50
percent lower, transactional charges are higher and you do pay for the amount of data
you write to or read from a storage account.
You can switch between the two access tiers. However, you must consider the potential cost
implications. While changing the hot access tier to cool does not introduce any extra cost,
the opposite could potentially result in a significant one-time charge. This is because such an
operation requires reading the entire content of the storage account, which, with the cool
access tier, is priced separately.
• Performance. This dictates performance characteristics of the provisioned storage and has
direct impact on the storage service that the account supports. You can choose the performance
to be either Standard or Premium. With a Premium performance storage account, you get I/O
throughput and latency characteristics equivalent to those delivered by SSDs; however, its usage
is limited to page blobs. Effectively, its sole purpose is to host virtual disk files of Azure Virtual
Machines that require superior I/O performance, typical for enterprise-level workloads. A
Standard performance storage account can host any type of content (blobs, tables, queues, and
files), including virtual disk files of Azure Virtual Machines. In this case, though, the resulting
virtual disk throughput and latency characteristics are equivalent to those delivered by
commodity hard disk drives (HDDs).
• Replication. To ensure resiliency and availability, Azure automatically replicates your data across
multiple physical servers. There are four replication options:
o Locally redundant. Data updates replicate synchronously across three copies within a
single facility in a single region. Locally redundant storage (LRS) protects your data
against server hardware failures but not against a failure of the facility itself. This is the
only option available for Premium storage accounts.
o Zone-redundant. Data updates replicate asynchronously across three copies that reside
in separate datacenters in one or two Azure regions. Zone-redundant storage (ZRS)
offers more resiliency than LRS; however, it does not protect against failures that affect
an entire region. More importantly, ZRS can contain only block blobs, which makes it
unsuitable for hosting IaaS virtual machine disk files, tables, queues, or file shares.
o Geo-redundant. Data updates first replicate synchronously within the same region.
Then, when the update successfully completes, they replicate asynchronously from the
primary region to a secondary region. Predefined pairing between the two regions
ensures that data stays within the same geographical area. Data also replicates
synchronously across three replicas in each of the regions, resulting in six copies of
storage account content. If failure occurs in the primary region, Azure Storage
automatically fails over to the secondary region. Effectively, geo-redundant storage
(GRS) offers improved resiliency over LRS and ZRS.
o Read-access geo-redundant. As with GRS, data updates replicate synchronously within
each region and then asynchronously across two regions, resulting in six copies of a
storage account. However, with read-access geographically redundant storage (RA-GRS),
the copies in the secondary region are readable. This increases availability by giving you
the option of redirecting read requests in case the primary region becomes temporarily
unavailable. You also can perform near real-time data analysis and reporting tasks
without affecting performance of your production workloads.
• Secure transfer required. In general, it is possible to access a storage account by using either
HTTP or HTTPS protocol. By enabling this option, you can enforce the use of HTTPS. Note that
Azure Storage does not support HTTPS when using custom domain names.
• Location. This designates the Azure datacenter where the primary instance of your storage
account resides. In general, you should choose a region that is close to users, applications, or
services that consume the storage account’s content.
•Virtual networks. You can leverage a functionality called virtual network service endpoints. This
functionality allows you to grant exclusive access to the storage account from designated
subnets of a virtual network that you designate and simultaneously prevent connectivity from
the internet. As part of the service endpoints configuration of Azure Storage accounts, you can
also allow connections which originate from on-premises locations and are routed via
ExpressRoute. To accomplish this, when configuring service endpoints, provide on-premises
network address translation (NAT) IP addresses used for ExpressRoute public peering. Note that,
at the time of authoring this course, the virtual network service endpoints functionality is in the
preview stage.
Azure storage pricing
The cost associated with Azure storage depends on a number of factors, including:
•Storage account kind. The choice between the general-purpose and blob-storage accounts has a
number of implications, such as the ability to choose storage account performance level, access
tier, or replication settings.
•Storage account performance level. The choice between the Standard and Premium
performance levels also significantly affects the pricing model.
•Access tier. This applies to blob storage accounts, which allow you to choose between the cool
and hot access tier. This, in turn, affects charges associated with such storage-related metrics
such as space in use, volume of storage transactions, or volume of data reads and writes.
•Replication settings. LRS storage accounts are cheaper than ZRS accounts, which are cheaper
than GRS accounts; read-access geographically redundant storage accounts are the most
expensive. Note that the Premium performance level implies the use of LRS, because Premium
storage accounts do not support zone and geo-replication.
•Volume of storage transactions (for blob storage accounts and general accounts with Standard
performance level). A transaction represents an individual operation (an individual
representational state transfer application programming interface [REST API] call) targeting a
storage account. Pricing is provided in a currency amount per 100,000 transactions. In case of
Premium performance level storage accounts, there are no transaction-related charges.
•Volume of egress traffic (out of the Azure region where the storage account resides). Inbound
data transfers to Azure are free, and outbound data transfers from Azure datacenters are free
for the first 5 GB per month. Banded pricing applies above this level. Effectively, when services
or applications co-locate with their storage, Azure does not impose charges for bandwidth usage
between compute and storage resources. Data transfers incur extra cost when compute and
storage resources span regions or when compute resources reside in an on-premises
environment.
•Amount of storage space in use (for blob storage accounts and general storage accounts with
the Standard performance level). Charges are on a per-GB basis. For page blobs, charges depend
on whether you have implemented the corresponding virtual machine disks as managed or
unmanaged disks. The cost of unmanaged disks residing in Standard storage accounts is directly
proportional to the amount of disk space in use. The cost of managed disks residing in Standard
storage accounts depends on the total disk size, regardless of the amount of the disk space in
use.
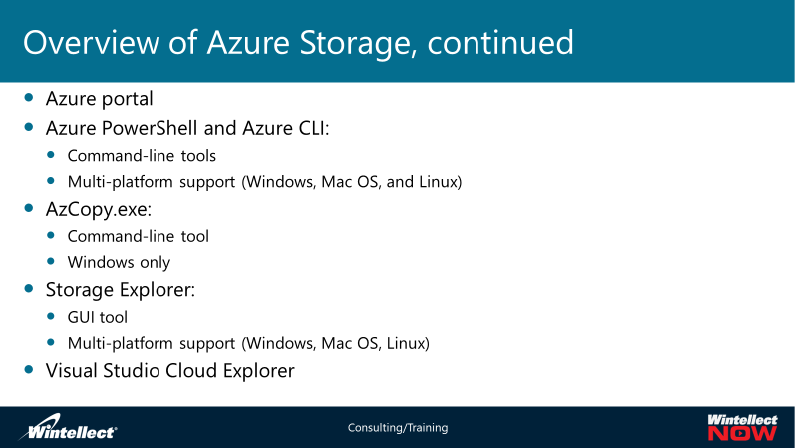
• Amount of storage space provisioned (for general purpose storage accounts with Premium
performance). Azure Premium Storage pricing is calculated based on the size of the disks that
you provision, for both managed and unmanaged disks.
• Volume of data reads and writes (for blob storage account with cool access tier only).
• Type of storage (for general purpose storage accounts). Pricing varies depending on whether
you use a storage account to host page blobs, block blobs, tables, queues, or files.
Managing and accessing Azure Storage
Storage access operations typically rely on programmatic methods. These methods might use the Azure
software development kit (SDK) libraries or the REST interfaces that developers can call by using HTTP
and HTTPS requests.
However,
there are
also
numerous
tools that
allow you to
examine and
manage
content of
Azure
storage
accounts
without the
need for
programming. Popular examples of such tools include the Azure portal, Windows PowerShell cmdlets,
Azure Command-Line Interface (CLI) commands, the AzCopy.exe command-line tool, the Storage
Explorer Windows app, and Microsoft Visual Studio.
Azure PowerShell storage cmdlets. You can use the following Azure PowerShell cmdlets to explore an
Azure storage account’s content. Each cmdlet includes the prefix noun AzureStorage. For example,
Get-AzureStorageBlob lists the blobs in a specified container and storage account.
Azure CLI storage commands. Azure CLI offers the same features as Azure PowerShell for managing
Azure Storage. Each command begins with az storage. For example, az storage blob list. Lists
the blobs in a specified container and storage account.
AzCopy.exe. AzCopy.exe is a Windows command-line tool that optimizes data transfer operations within
the same storage account, between storage accounts, and between on-premises locations and Azure
Storage.
Azure Storage Explorer. Azure Storage Explorer is an app available for Windows, Linux, and Mac OS. It
provides a graphical interface for managing several advanced operations on Azure Storage blobs, tables,
queues, files, and Microsoft Azure Cosmos DB entities.
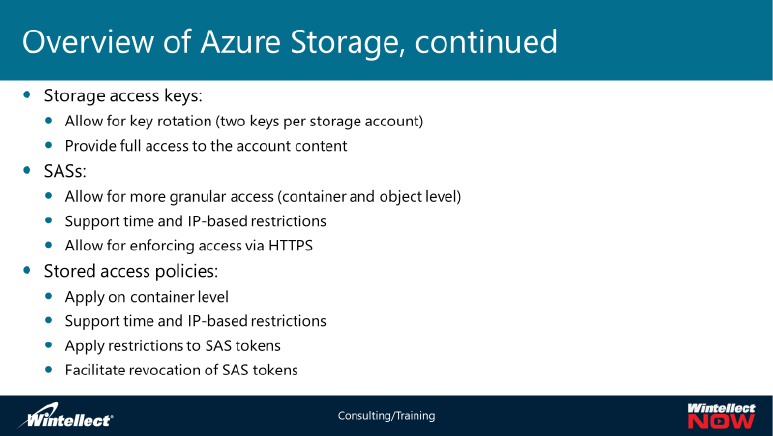
Visual Studio. Starting with Microsoft Azure SDK 2.7 for Microsoft .NET, you can use Server Explorer
and Cloud Explorer from within the Visual Studio interface to access Azure storage accounts and manage
their content. Both tools allow you to create storage accounts and manage individual storage services.
Storage access keys
Azure automatically generates a primary and secondary access key for each storage account. Knowledge
of both key and the corresponding storage account name provides full access to its content from
management
tools, scripts,
and client
applications.
The Azure
portal offers a
convenient way
to copy both
keys to the
clipboard.
Alternatively,
you can
retrieve them
by running the
Get-
AzureRmStorageAccountKey Azure PowerShell cmdlet or az storage account keys
list Azure CLI command. Either method requires that you have sufficient management privileges to
the storage account.
Having two storage keys allows you to regenerate one of them without disrupting applications that
require continuous access to the storage account. For example, if you regenerate the primary key,
applications can still successfully authenticate if they reference the secondary key. Next, you can repeat
this process to regenerate the secondary key, starting with modifying your applications by pointing them
to the new primary key.
To regenerate access keys, use the Azure portal, the New-AzureRmStorageAccountKey Azure
PowerShell cmdlet, or az storage account keys renew Azure CLI command.
Note: You can use Azure role-based access control (RBAC) to grant or revoke permissions to view or
regenerate storage account keys. Azure RBAC includes the built-in Storage Account Key Operator Service
role that you can use for this purpose. Alternatively, you can create a custom role that provides a
custom level of permissions to satisfy your requirements.
Shared access signatures (SASs)
The automatically generated primary and secondary access keys provide full access to the content of the
storage account. This is not suitable for scenarios in which you must delegate more restrictive privileges.
To answer this need, Azure Storage also supports the SAS authentication mechanism. By using
authentication based on SAS, you can:
• Limit access to designated blob containers, tables, queues, and file shares only, or even narrow
it down to individual resources such as blobs, ranges of table entities, and files.
• Specify the set of operations that are permitted on these resources.
• Limit the period of validity of SAS authentication tokens by setting the start date, expiration
date, and time of the delegated access.
• Designate the range of IP addresses from which access requests must originate.
• Enforce the use of HTTPS for connections to storage accounts.
Microsoft also supports storage account-level SAS. Using this functionality, you can grant permissions to
perform service-level operations, such as creating blob containers or file shares.
A SAS takes the form of a Uniform Resource Identifier (URI), which is signed with one of the two storage
account keys. An application or a user with the knowledge of that URI can connect to the corresponding
storage account resources and perform delegated actions within the period that the token validity
parameters specify.
Most commonly, applications rely on the REST API to generate SAS URIs. However, you can also create
them by using the Azure portal, Azure PowerShell, or Azure CLI. For example, the New-
AzureStorageRmContainerSASToken Azure PowerShell cmdlet and the az storage
container generate-sas Azure CLI command generate a SAS token for a blob container in an
Azure Resource Manager storage account.
Stored access policies
Although you can use SASs to narrow down the scope of privileges and duration of access to content for
an Azure storage account, managing them presents some challenges. Revoking access that was granted
directly through a SAS requires replacing the storage account key with which the SAS URI was signed.
Unfortunately, such an approach is disruptive, because it invalidates any connections to the storage
account that rely on the same storage account key.
To address this challenge, Azure Storage supports stored access policies. You define such policies on the
resource container level, including blob containers, tables, queues, or file shares. Each policy can include
the same parameters that you would otherwise assign directly to a SAS, such as permissions, start and
end of the token validity, or the range of IP addresses from which access requests can originate. After a
shared access policy is in place, you can generate SAS URIs that inherit its properties. Revoking policy-
based SAS tokens requires modifying or deleting the corresponding policy only, which does not affect
access granted via storage account keys or SAS URIs that are associated with other policies.
Creating file shares
Within a storage account, you can create multiple file shares. To create a file share, you can use any of
the methods described earlier in this topic. Within each share, you can create a folder hierarchy to
organize content. Folder management is available by using the same Windows tools that apply to on-
premises environments, including File Explorer, Windows PowerShell, or the Command Prompt in
Windows.
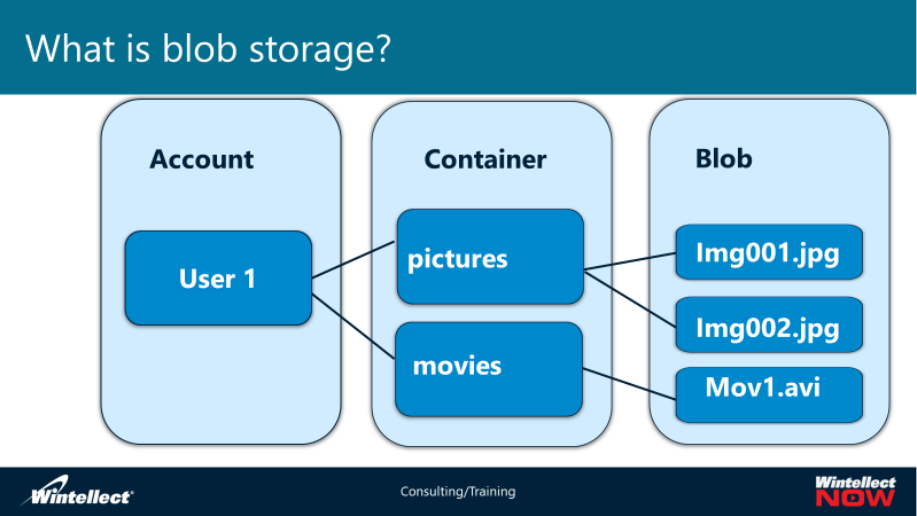
What is blob storage?
Blob storage has a hierarchical structure and different types of blobs. There are three types of Blob
storage:
• Page blobs. This storage type is optimized for random read and write operations, due to their
page-based structure. Each page is 512 bytes in size and represents the scope of an individual
storage operation. Most commonly, people use this type of blob to store virtual hard drives for
VMs. The maximum size of a page blob is 8 TB.
Note: When creating Azure VM disk files, you have the option of using managed disks. This
eliminates the need to explicitly create or manage the corresponding storage accounts, because
the Azure platform handles these responsibilities automatically. Managed disks were covered in
Module 3 of this course, Microsoft Azure Fundamentals.
• Block blobs. This storage type is optimized for streaming audio and video, due to their block-
based structure. A block ID identifies each block from a single blob, and it can include an MD5
hash of its content. When you upload a large file to a block blob, the resulting blob is divided
into blocks of up to 100 megabytes (MB) in size, which Azure uploads concurrently and then
combines into a single file. This results in a faster upload time. Additionally, when you need to
modify data, you can modify blob data at the block level by replacing existing blocks. A block
blob can consist of up to 50,000 blocks of 100 MB each in size, which yields the maximum size of
approximately 4.75 TB.
• Append blobs. This storage type is for append operations, but does not include support for
modifying existing content. This type of blob is useful for storing logging, monitoring, or auditing
data.
To organize blobs in a storage account, we recommend that you create one or more containers, which
are equivalent to file-system folders, and have the blobs correspond to the files within them. You cannot
nest these folders, so they are only one level deep. If you want to emulate multilevel folder hierarchy
within a container, you can include multiple “\” characters in the name of blobs that reside in the same
container.
You can access each blob by using its unique URL in the following format:
https://<storageaccountname>.blob.core.windows.net/<containername>/<blobname>.
Microsoft provides several software development kits (SDKs) that developers can use for
programmatically working with Blob storage. At the time of writing this course, we support the following
languages and platforms:
• .NET
• C++
• Java
• PHP
• Node.js
• Ruby
• Python
• iOS
• Xamarin
What is Azure Table storage?
The term table, in the context of Azure and Azure Table storage, describes a group of entities. An entity
is a collection of properties (also referred to as keys) and values stored together in the table. You can
define up to 252 custom properties; however, each table also contains three system properties:
• Partition key. This system property allows you to group multiple rows together based on the
common property value assigned to each.
• Row key. This system property uniquely identifies each row within its partition (effectively, the
combination of the row key and the partition key uniquely identifies each row in the entire
table).
• Time stamp. This system property optimizes table updates.

At a high level, this
type of storage is
somewhat similar
to a database or a
Microsoft Excel
spreadsheet
because its tables
consist of
collections of rows
(entities) and
supports
manipulating and
querying the data
contained in the
rows. However,
entities that co-exist in the same Azure table do not necessarily have the same structure or the same
schema. The absence of the consistent schema is one of the differences between Azure Table storage
and relational databases. Another distinction is that there is no support for relations between tables.
This is why Azure Table storage is sometimes described by using the term NoSQL storage. In addition,
Azure tables have limited indexing capabilities. A table contains only a single clustered index based on
the combination of the partition key and the row key.
Table storage can accommodate any number of tables, up to the total capacity of 500 TB per storage
account. The largest entity can contain up to 1 MB of data.
Storing and accessing data in Azure Table storage typically involves using programmatic methods. Most
applications use client libraries or call the REST API directly. Each table is accessible via its unique URL in
the following format: https://<storageaccountname>.blob.core.windows.net/<tablename>.
What is Queue storage?
Azure Queue storage provides a mechanism for applications and services to pass messages to each
other asynchronously. You can use Queue storage to provide temporary storage for large volumes of
messages that you can access from any location via authenticated calls over the HTTP or HTTPS
protocols. A common practice is to store references to images in a queue, rather than storing images
directly in it. This approach eliminates the dependency on the message size limits that Azure Queue
storage imposes, and it typically improves performance.
A storage account can contain an unlimited number of queues, up to the total capacity of 500 TB per
storage account. Individual messages are limited to 64 kilobytes (KB), with the total number limited only
by the total capacity of the storage account, which means that a single queue can contain millions of
messages.
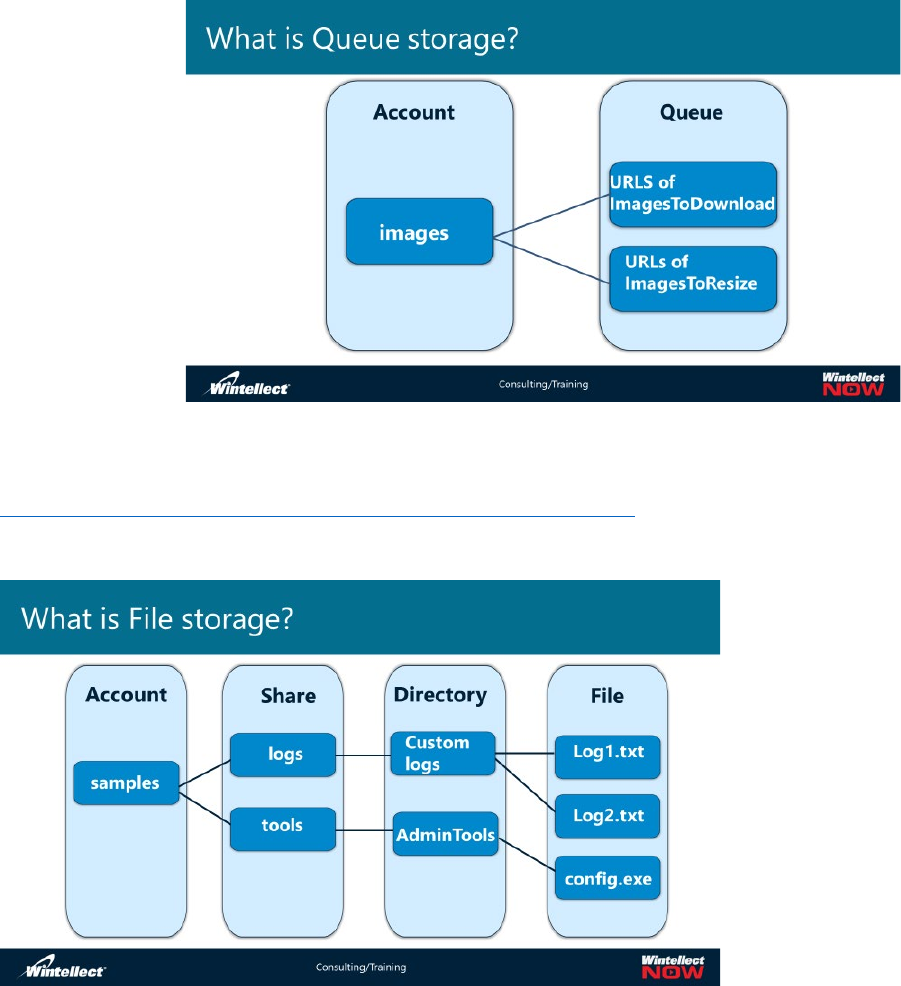
A common
scenario that
relies on Queue
storage involves
passing messages
from a web role to
a worker role of
an Azure cloud
service. A web
role is usually a
website or web
application. A
worker role is
typically a service
or process that manages background processing tasks.
Queues can be addressed by using the following URL format:
https://<storageaccountname>.queue.core.windows.net/<queuename>.
What is File storage?
Similar to block blobs,
Azure File storage
provides the ability to
store unstructured
files. However, in
addition to
supporting access via
the REST API
(including .NET, Java,
and Python), it also
facilitates access via
the SMB protocol (in particular, both SMB 2.1 and SMB 3.0). In addition, rather than using containers to
store files, File storage allows you to create shares and a multi-level folder hierarchy within them. This
enables File storage to emulate file sharing, which is equivalent to that implemented by using on-
premises Windows and Samba file servers.
As a result, you can connect to the https://<storageaccountname>.file.core.windows.net/<sharename>
Azure File storage share by using the net use command. To do this, you must specify the target storage
account and its share, in addition to establishing a security context for the connection (by providing the
storage account name and one of two storage account keys), as shown below:
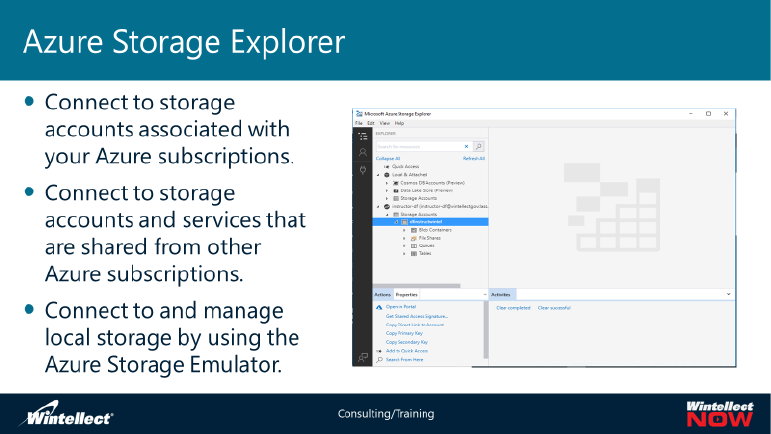
net use <driveletter>:
\\<storageaccountname>.file.core.windows.net\<sharename>
/u:<storageaccountname> <storageaccountkey>
Azure Storage Explorer
Azure Storage Explorer is a standalone app that enables you to easily work with Azure Storage data on
Windows, macOS, and Linux. You can easily manage the contents of your storage account with Azure
Storage Explorer. Upload, download, and manage blobs, files, queues, tables, and Cosmos DB entities.
Storage
Explorer gives
you easy access
to manage your
virtual machine
disks. Work
with either
Azure Resource
Manager or
classic storage
accounts, plus
manage and
configure cross-
origin resource
sharing (CORS)
rules.
Azure Storage Explorer is supported on the following versions of Windows:
•Windows 10 (recommended)
•Windows 8
•Windows 7
•Windows Server 2016
•Windows Server 2012, 2012 R2
For all versions of Windows, .NET Framework 4.6.2 or greater is required.
Note: It is possible to install and use on Windows Server 2016. However, this is not yet documented by
Microsoft.
Storage Explorer provides several ways to connect to storage accounts. For example, you can:
•Connect to storage accounts associated with your Azure subscriptions.
•Connect to storage accounts and services that are shared from other Azure subscriptions.
•Connect to and manage local storage by using the Azure Storage Emulator.
In addition, you can work with storage accounts in global and national Azure:
• Connect to an Azure subscription: Manage storage resources that belong to your Azure
subscription.
• Work with local development storage: Manage local storage by using the Azure Storage
Emulator.
• Attach to external storage: Manage storage resources that belong to another Azure subscription
or that are under national Azure clouds by using the storage account's name, key, and
endpoints.
• Attach a storage account by using an SAS: Manage storage resources that belong to another
Azure subscription by using a shared access signature (SAS).
• Attach a service by using an SAS: Manage a specific storage service (blob container, queue, or
table) that belongs to another Azure subscription by using an SAS.
• Connect to an Azure Cosmos DB account by using a connection string: Manage Cosmos DB
account by using a connection string.
Now let’s watch a short, Microsoft-produced video on Storage Explorer:
Note: Do not click the link while in class. Your instructor will show the video form the main classroom
screen.
https://www.youtube.com/watch?v=ycfQhKztSIY
Demonstration: Creating and managing Azure Storage accounts
In this demonstration, watch as your instructor shows you how to:
• Create a general-purpose storage account with the Standard performance level.
• Modify the replication settings for the general-purpose storage account.

•Create a general-purpose storage account with the Premium performance level.
•Create a blob storage account.
•Modify access tiers of the blob storage account.
•Use Azure Storage Explorer to create blob containers and upload blobs.
Demonstration: Using Azure File storage in cross-premises scenarios
In this demonstration, watch as your instructor shows you how to:
•Create an Azure File storage share.
•Create a drive mapping to the Azure File storage share.
•Configure the drive mapping to be persistent.
Lab A: Configure Azure Storage
In this lab, you Create a storage account and then create and manage blob storage. The script for the
lab can be found in the GitHub portal, under the name of Mod_4_lab_A.md at the following location:
Exercise
1: Creating an Azure Storage account. Before you start managing your data in Azure, you should first
create a storage account, examine the account’s properties, and copy its access key to a text file.
Exercise 2: Creating and managing blobs. Now that you have created your storage account, you need to
create a container and upload data to the container.
Lesson 2: Implementing Azure Backup for on-premises workloads
This lesson first overviews Azure Backup, and then presents a couple of physical solutions to moving
data securely to the Azure Datacenter, and the covers two primary options for implementing Azure
Backup in an on-premises environment. The first option is the use of Azure Recovery Services agent to
back up local files and folders and Windows System State on Windows computers. The second one relies
on implementation of Azure Backup Server or System Center DPM in combination with Azure Recovery
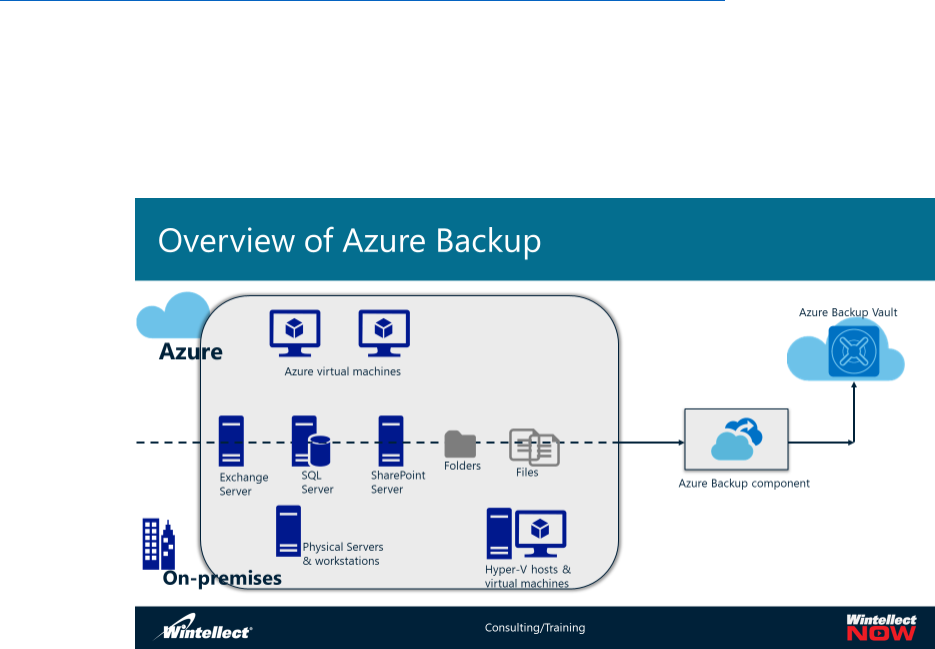
Services agent to provide remote backup of Windows and Linux computers, including support for
common server workloads, such as SQL Server, SharePoint Server, or Exchange Server.
Overview of Azure Backup
First, let’s watch a 12 minute, Microsoft-produced video on Azure Storage:
Note: Do not click the link while in class. Your instructor will show the video form the main classroom
screen.
https://azure.microsoft.com/en-us/resources/videos/azure-friday-azure-backup/
Azure offers several different options for backup of on-premises systems. Some Azure backup options
integrate seamlessly with existing Microsoft backup products, including built-in Windows Backup
software and Microsoft System Center 2016 Data Protection Manager (DPM). Other options, including
Microsoft Azure Backup Server, can enhance or even replace existing backup solutions.
The Azure
Backup
service
provides
short-term
and long-
term storage
that you can
use to
minimize or
even
eliminate
the need for
maintaining
physical backup media such as tapes, hard drives, and DVDs. Since its introduction, the service has
evolved from its original form, which relied exclusively on a Windows Server backup agent that was
downloadable from the Azure portal, into a much more diverse offering. The Azure Backup service
includes:
•64-bit Windows Server and client file and folder-level backups and Windows System State
backups with the Azure Recovery Services agent and the Online Backup integration module for
Windows Server 2016 Essentials. Support for Windows System State backup allows you to
protect clustered file servers, Active Directory Domain Services (AD DS) domain controllers, and
IIS Web servers.
• Long-term storage for backups with DPM and Recovery Services Agent.
• Long-term storage for backups with Azure Backup Server and Recovery Services Agent.
• Windows-based and Linux-based Azure VM–level backups with the Azure Backup (VM
extension).
Azure Recovery Services vault
Regardless of the backup approach that you intend to implement, to use Azure Backup, you must first
create a Recovery Services vault in Azure. The vault should reside in an Azure region that is close to the
physical location of the systems that you intend to back up. The vault represents the logical destination
of backups and contains information about the computers that Azure Backup protects. You generate this
information by registering each computer with the vault.
Two resiliency options are available when creating an Azure Backup vault: locally redundant and geo
redundant. The first option utilizes block blobs residing in a locally replicated Azure Storage account,
consisting of three copies of backed-up content in the same Azure region. The second option utilizes
block blobs residing in geo-replicated Azure Storage account, which includes three additional copies in
another Azure region, providing an additional level of data protection. Note that you cannot change this
option after you register the first of your systems with the vault.
An Azure subscription can host up to 25 vaults. Each vault can store data for up to 50 computers that
run the Azure Recovery Services agent. There is no limit on the amount of data in the vault for each
protected computer. There also is no limit on the maximum retention time of backed-up content.
However, there is a restriction on the size of each data source: about 54,000 GB for Windows 8,
Windows Server 2012, and newer operating systems. The meaning of the term data source depends on
the workload you are backing up. For example, when backing up operating system volumes, each
volume would constitute a single data source. When backing up Microsoft SQL Server databases, each
database is considered a data source. The maximum backup frequency differs depending on the
implementation approach, with up to three backups per day when using Windows Server or Windows
Client operating system running Azure Recovery Services agent and up to two backups per day when
using DPM or the Azure Backup Server.
All backups are encrypted at the source with a passphrase that the customer chooses and maintains.
There are no additional charges for the traffic generated during backup into Azure and during restore
out of Azure.
Azure Recovery Services agent-based backups
The basic functionality of Azure Backup is to protect folders and files on 64-bit Windows Server and
client operating systems, regardless of their location. This functionality relies on the Azure Recovery
Services agent, which becomes available for download directly from the Azure portal when you create
an Azure Recovery Services vault. You must install the agent on every system that you want to protect,
and you must register it with the target vault.
Note: If the computer that you want to protect contains a large amount of data and your internet
connection to Azure has limited bandwidth, consider using the Azure Import/Export service to perform
the initial backup. With this approach, you copy the data that you intend to back up to an encrypted
physical disk, encrypt it, and then ship the disk to the Azure datacenter where the vault is located. At
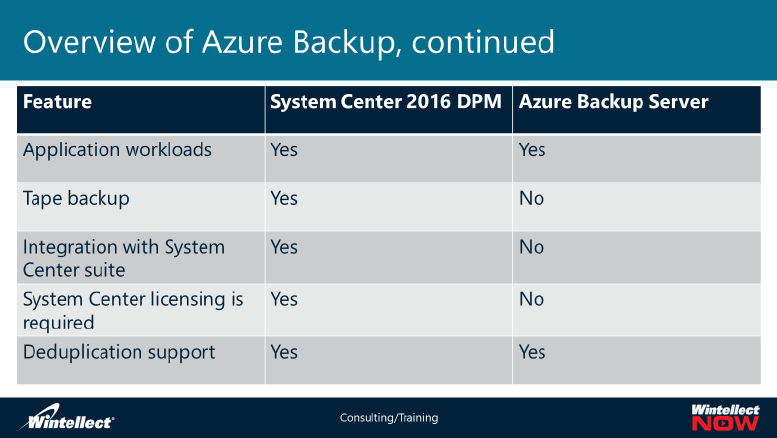
that point, the Azure support copies the content directly into the vault. As a result, you can perform an
incremental backup, rather than a full one, following the registration.
Azure Backup with DPM and Azure Backup Server
If your environment contains many systems that require more advanced backup capabilities, you might
want to consider implementing Azure Backup Server. Alternatively, if you have an existing
implementation of DPM, you will likely benefit from integrating it with Azure Backup by installing the
Azure Recovery Services agent on the DPM server.
These two
methods yield
mostly
equivalent
results. Azure
Backup Server
provides the
same set of
features as
DPM except for
tape backups
and integration
with other
System Center
products.
Azure Backup
Server also features the same management interface as DPM. Effectively, by implementing Azure
Backup Server, you gain enterprise-grade backup functionality without requiring System Center licenses.
With both products, you can provide backup and restore of Linux and Windows operating systems that
run on-premises or in Azure, if an Azure Backup Server or DPM server resides in the same location. DPM
and Azure Backup Server support application-consistent backups of the most common Windows server
workloads, including SQL Server, Office SharePoint Server, and Microsoft Exchange Server. They also
deliver superior efficiency and disk space savings because of built-in deduplication capabilities.
Best Practice: Remember that unlike the other Azure Recovery Services agent-based methods, neither
DPM nor Azure Backup Server can back up data directly to an Azure Recovery Services vault. Instead,
they operate as disk-to-disk-to-cloud solutions, using their local disks as the immediate backup target,
and then copying content of the newly created backup to Azure.
Azure Backup pricing
The cost of Azure Backup depends on several factors, including:
•The number of computers that you back up to an Azure Backup vault. In the context of Azure
billing, these are referred to as protected instances and can include both on-premises physical
and virtual computers and Azure virtual machines.

• The volume of storage that a backup of each protected instance occupies, which considers
instance size and the total amount of Azure Storage in use. There are three tiers of pricing
dependent on the instance size:
o The first tier includes instances of up to 50 GB in size, with a set price per instance and
additional charges proportional to the amount of consumed storage.
o The second tier includes instances of the size between 50 GB and 500 GB, with a set
price per instance and additional charges proportional to the amount of consumed
storage. In this case, the per instance price is double the amount of the one associated
with the first tier.
o The third tier includes instances of the size above 500 GB, with the per-instance price
associated with the second tier for each 500 GB and additional charges proportional to
the amount of consumed storage.
• The level of redundancy of Azure Storage hosting the Azure Backup vault, which can be either
local or geo redundant.
Demonstration: Implementing Azure Backup Server-based backups
In this demonstration, your instructor will show you how to:
• Create a Recovery Services vault.
• Download and install the Software package.
• Extracting the software package.
• Install instance of SQL Server.
• Register the local server with the Recovery Services vault.
• Perform the initial backup.
StorSimple appliances and virtual arrays
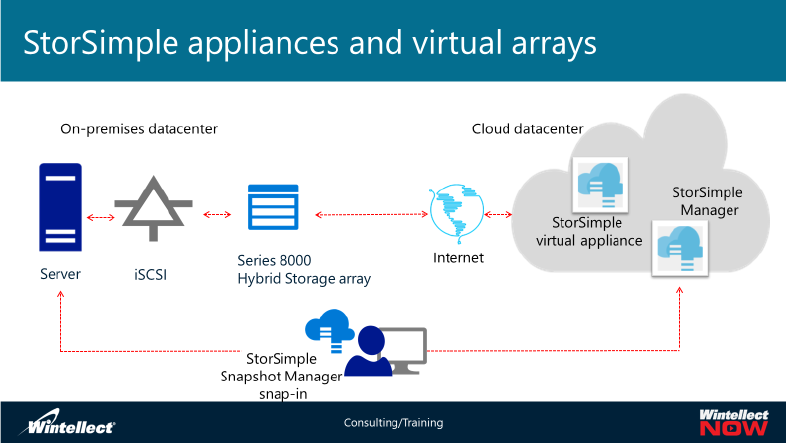
StorSimple is a multi-purpose, cross-premises storage solution that takes advantage of Azure storage
and compute capabilities to provide several features, including:
•Multi-tier storage for workloads ranging from static archives, through moderately-used file
shares, to highly dynamic content such as SQL Server databases or virtual machine disks.
•Automated data archival.
•Snapshot-based backups.
•Disaster recovery.
In the
context of
hybrid
scenarios,
the core
component
of
StorSimple-
based
solutions is
an on-
premises
appliance,
which is
available as
either:
•A StorSimple 8000 series physical device or
•A virtual device also referred to as StorSimple virtual array, running on the Microsoft Hyper-V or
VMware ESX platform.
The most common use of StorSimple involves implementing hybrid storage, with Azure serving as the
tier in which less-frequently accessed content resides. StorSimple virtual arrays include a single local
storage tier managed by the same hypervisor that hosts the virtual device. StorSimple 8000 series
devices contain both SSD and HDD tiers. Data is transferred automatically between tiers according to
the usage patterns and policies you define. You have, however, the ability to designate individual
volumes that should always remain available locally by configuring them as locally pinned. This makes
the StorSimple devices suitable for workloads, such as virtual machines or SQL Server databases that
cannot tolerate latency associated with the use of secondary or tertiary tiers. For any data that qualifies
for upload to Azure Storage, the device automatically applies deduplication, compression, and
encryption to ensure maximum efficiency and security. StorSimple additionally offers support for hot
and cool access tiers of Azure blob storage accounts, which allows you to further optimize the usage of
cloud storage in the most cost-effective manner.
A StorSimple 8000 series physical device operates as an Internet Small Computer System Interface
(iSCSI) target, delivering functionality equivalent to an enterprise-level storage area network solution. A
StorSimple virtual device can function either as an iSCSI target or an SMB file server. A virtual device is
more suitable for branch office scenarios, where higher latency and lack of high availability are
acceptable.
In addition to serving as a multi-tier storage solution, StorSimple allows you to perform either on-
demand or scheduled backups to Azure Storage. These backups take the form of incremental snapshots,
which limit the amount of space required to accommodate them and complete much quicker than
differential or full backups. You can use these backups to perform restores on the on-premises device.
The backup capability also offers several other advantages. StorSimple service includes the support for
deploying into Azure virtual appliances, known as StorSimple Cloud Appliances. This, in turn, makes it
possible for you to duplicate your on-premises environment in Azure by mounting backed-up volumes
onto the Azure virtual appliance. These arrangements facilitate a range of business scenarios, including
performing nondisruptive tests against copies of live data, carrying out data migrations, or implementing
disaster recovery. For additional resiliency, you can configure Azure Storage hosting backed up content
as zone (ZRS) or geo-replicated (GRS). To accommodate disaster recovery workloads that require higher
throughput or lower latency of I/O operations, you can create a virtual device that provides access to
Azure Premium Storage.
To manage these physical and virtual StorSimple components, you can use graphical and command-line
utilities and interfaces, including:
• StorSimple Device Manager service. This interface, available from the Azure portal provides the
ability to administer physical or virtual StorSimple devices and appliances, including their
services, volumes, alerts, backup policies, and backup catalogs. Note that you must use one
instance of StorSimple Manager to manage physical devices and Azure virtual appliances and
another instance for managing virtual devices.
• Local web user interface. This interface allows you to perform the initial setup of a virtual or
physical device and register it with the StorSimple Device Manager service.
• Windows PowerShell for StorSimple. This is a collection of cmdlets that perform actions specific
to physical devices, such as registration, network and storage configuration, installation of
updates, or troubleshooting. To access these cmdlets, you must either connect directly to the
target appliance via its serial port or establish a Windows PowerShell remoting session.
• Azure PowerShell StorSimple cmdlets. This is a collection of cmdlets that perform service-level
administrative tasks, primarily those available via the StorSimple Manager interface.
• StorSimple Snapshot Manager. This is a Microsoft Management Console snap-in for initiating
and administering backups, restores, and cloning operations.
• StorSimple Adapter for SharePoint. This is a plug in for the SharePoint Administration portal that
facilitates moving SharePoint SQL Server content databases to Azure blob storage.
StorSimple Pricing
You can purchase StorSimple as part of your existing Microsoft Enterprise Agreement or reach out to
storagesales@microsoft.com regarding the procurement process.
Azure Data Box

Data is being generated at record levels, and moving stored or in-flight data to the cloud can be
challenging. Azure Data Box products provide both offline and online solutions for moving your data to
the cloud.
Data Box, Data
Box Disk, and
Data Box Heavy
devices help you
transfer large
amounts of data
to Azure when
the network isn’t
an option. These
offline data
transfer devices
are shipped
between your
organization and
the Azure
datacenter. They
use AES encryption to help protect your data in transit, and they undergo a thorough post-upload
sanitization process to delete your data from the device.
Data Box Edge and Data Box Gateway are online data transfer products that act as network storage
gateways to manage data between your site and Azure. Data Box Edge, an on-premises network device,
transfers data to and from Azure and uses artificial intelligence (AI)-enabled edge compute to process
data. Data Box Gateway is a virtual appliance with storage gateway capabilities.
Like a StorSimple
solution, Azure
Data Box relies on
Azure Storage as a
secondary or
tertiary tier to
host less
frequently used
files. In Data Box
Disk, Data Box,
and Data Box
Heavy, you
connect these
physical devices
and use Azure
management
tools to store your data on them. Periodically, you ship these physical devices to the nearest Microsoft
datacenter where the contents are placed in your Azure Storage. The main purpose is to get you data
into Azure Storage without overwhelming your available bandwidth. The type of Azure Box devices are
as follows:
• Data Box Disk: Uses an 8 TB SSD, with a USB/SATA interface, has 128-bit encryption. You can
customize it to your needs—it comes in packs of up to five for a total of 40 TB. Facilitates longer
data retention periods.
• Data Box: This ruggedized device, with 100 TB of capacity, uses standard NAS protocols and
common copy tools. It features AES 256-bit encryption for safer transit.
• Data Box Heavy: As its name implies, this ruggedized, self-contained device is designed to lift 1
PB of data to the cloud.
Azure also offers Data Box Online. The purpose of Data Box Online is to transfer and easily move your
data to and from the cloud where your bandwidth solutions allow. Data Box Online needs to have high-
speed network. Microsoft strongly recommends that you have at least one 10 GbE connection. If a 10
GbE connection is not available, a 1 GbE data link can be used to copy data but the copy speeds are
impacted. Data Box Online data transfer products, Data Box Edge and Data Box Gateway, create a link
between your site and Azure storage. This makes moving data to and from Azure as easy as working
with a local network share. Their high-performance transfer capabilities take the hassle out of network
data transport. Data Box Edge is also an artificial intelligence (AI)-enabled edge computing appliance.
There are two types, as follows:
• Data Box Edge: This on-premises physical network appliance transfers data to and from Azure.
Analyze, process, and transform your on-premises data before uploading it to the cloud using AI-
enabled edge compute capabilities.
• Data Box Gateway (PREVIEW): Data Box Gateway also transfers data to and from Azure—but
it’s a virtual appliance.
The Data Box workflow
Order - Create an order in the Azure portal, provide shipping information, and the destination Azure
storage account for your data. If the device is available, Azure prepares and ships the device with a
shipment tracking ID.
Receive - Once the device is delivered, cable the device for network and power using the specified
cables. Turn on and connect to the device. Configure the device network and mount shares on the host
computer from where you want to copy the data.
Copy data - Copy data to Data Box shares.
Return - Prepare, turn off, and ship the device back to the Azure datacenter.
Upload - Data is automatically copied from the device to Azure. The device disks are securely erased as
per the National Institute of Standards and Technology (NIST) guidelines.
Throughout this process, you are notified via email on all status changes.
Note: Data Box products, which were at the time of this writing were in Preview, are scheduled to go
online on 1 November, 2018.
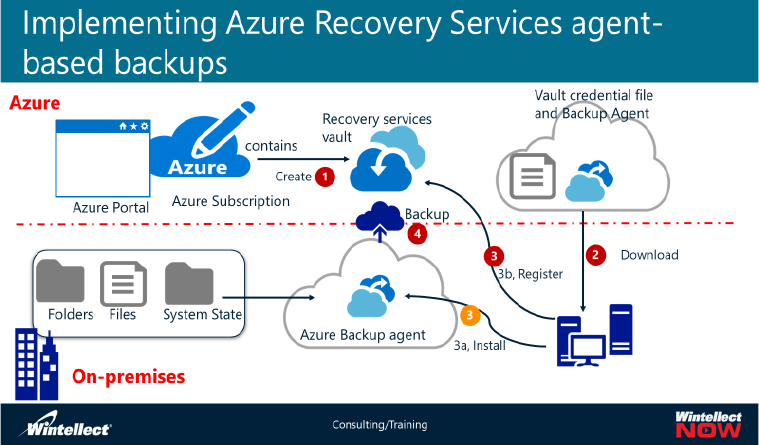
Implementing Azure Recovery Services agent-based backups
To set up
Azure
Recovery
Services
agent-based
protection,
you must
perform the
following
steps:
1. Create an Azure Recovery Services vault by using the Azure portal, Azure PowerShell, or Azure
CLI. Configure the desired Storage replication type option (locally-redundant or geo-redundant)
of the vault.
2. Download the vault credentials. The download link appears in the Prepare infrastructure blade
of the vault on the Azure portal. The Azure Recovery Services agent uses vault credentials to
register with the vault during the installation process.
3. Download the Azure Recovery Services agent. The download link also appears in the Prepare
infrastructure blade of the vault in the Azure portal. Choose the appropriate backup agent for
the system that you want to protect. In this case, you must select the Download Agent for
Windows Server or Windows Client option.
4. Install and register the Azure Recovery Services agent. When registering the local computer with
the vault, you must point to the file containing the vault credentials and designate a passphrase
used for encrypting backups.
5. Use the Azure Backup console to configure and schedule backups. After the installation of the
agent completes, you gain the ability to use the Azure Backup console. Its interface closely
resembles the native Windows Backup console. From here, you can select files and folders to
back up and schedule a backup to the Azure Recovery Services vault. You also have the option of
enabling Windows System State backup. Alternatively, you can use Azure PowerShell to
configure and initiate backup operations. After you schedule a backup, you also have the option
to run an on-demand backup.
Note: When dealing with larger amounts of data, consider using the Azure Import/Export service to
perform the initial backup. In such cases, you copy the entire data set to physical disks, encrypt
them, and ship them to the Azure datacenter where the vault is located. When the shipment
reaches its destination, Azure support personnel copy data directly to the vault. Effectively, the
initial backup consists only of incremental changes between the current, locally hosted data and the
data set you copied to Azure via the Import/Export service.
Demonstration: Implementing Azure Recovery Services agent-based backups
In this demonstration, your instructor will show you how to:
• Create a Recovery Services vault.
• Download and install the Azure Recovery Services agent.
• Register the local server with the Recovery Services vault.
• Confirm the installation and registration.
• Perform the initial backup.
Integrating System Center DPM with Azure Backup and implementing Azure Backup Server
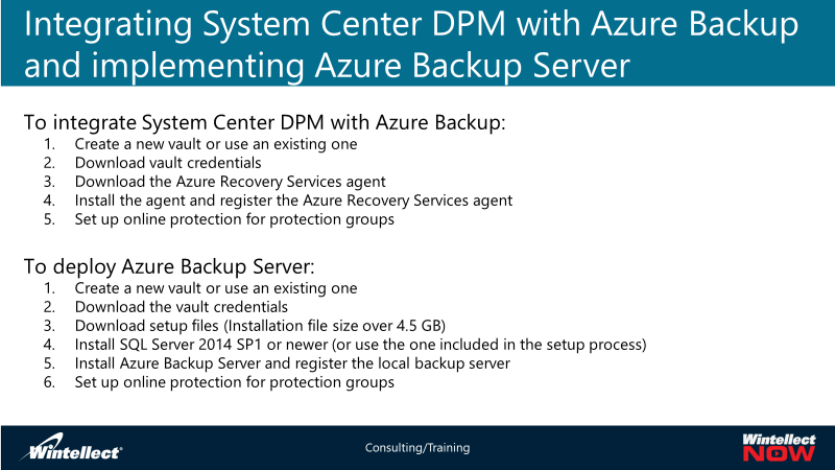
To
integrate
System
Center
DPM
with
Azure
Backup,
you must
perform
the
following
steps:
1. If you do not already have an existing backup vault, create a new one in Azure by using the
Azure portal, Azure PowerShell, or Azure CLI. Configure the desired storage replication option
(locally-redundant or geo-redundant) of the vault.
2. Download the vault credentials. The download link appears in the Properties blade of the vault
on the Azure portal. The System Center DPM uses the vault credentials to register with the vault
during the setup process.
3. Download the Azure Recovery Services agent. The download link also appears in the Properties
blade of the vault in the Azure portal.
4. Install and register the Azure Recovery Services agent. When registering the System Center DPM
computer with the vault, you must point to the file containing the vault credentials and
designate a passphrase used for encrypting backups.
5. To take advantage of the Azure Backup vault from the Protection workspace of the DPM
Administrator Console, create a protection group or modify an existing one. Within the
protection group settings, enable the Online Protection option. Note that you must enable
short-term protection by using local disks. You can additionally enable long-term protection to
tape. As part of the protection group configuration, specify an online backup schedule, online
protection data, online retention policy, and initial online backup methodology. Just as with the
Azure Backup consoles, you can choose between performing initial backup over the internet or
using the Azure Import/Export service to copy it offline.
To deploy Azure Backup Server, perform the following steps:
1. If you do not have an existing Azure Recovery Services vault, create a new one by using the
Azure portal, Azure PowerShell, or Azure CLI. Configure the desired storage replication option
(locally-redundant or geo-redundant) of the vault.
2. From the on-premises Windows Server computer that will host Azure Backup Server, download
the vault credentials. The download link appears in the Prepare infrastructure blade of the vault
on the Azure portal. The Azure Backup Server uses vault credentials to register with the vault
during the installation process. Supported versions of the operating system include Standard
and Datacenter edition of Windows Server 2012 R2 or 2016. However, you must use Windows
Server 2016 to fully leverage the backup-storage benefits included in Azure Backup Server.
Note that to install Azure Backup Server v2, the computer should be a member of an Active
Directory Domain Services domain.
3. From the same server, download the installation files. The download link appears in the Prepare
infrastructure blade of the vault on the Azure portal. Note that the total size of installation files
is over 4.5 GB in size.
4. Extract the download package content by running MicrosoftAzureBackupInstaller.exe, and then
start the setup process.
5. Install Azure Backup Server and register the local backup server. Note that Azure Backup
Server requires a local instance of the Standard or Enterprise edition of SQL Server 2014 SP1 or
newer. You have the option of using a SQL Server 2016 SP1 instance deployed automatically
during the setup or using an instance you installed prior to running the setup. When you receive
a prompt, provide the path to the vault credentials that you downloaded in the second step. You
must also provide or generate a passphrase that will be used to encrypt future backups.
6. Set up online protection for protection groups. Because Azure Backup Server has the same
administrative interface as System Center DPM, after setup completes, the backup configuration
steps are equivalent to the steps applicable to System Center DPM. The only exception involves
tape backup-related operations, which are not supported in this case.
Demonstration: Implementing Azure Backup Server-based backups
In this demonstration, your instructor will show you how to:
• Install Azure Backup Server.
• Register the local server with the Recovery Services vault.
• Confirm the installation and registration.
• Perform the initial backup (if time permits).
Lab B: Implementing the Azure Recovery Services agent-based backups
In this lab, you will implement the Azure Recovery Services agent-based backups. The script for the lab
can be found in the GitHub portal, under the name of Mod_4_lab_B.md at the following location:
Exercise 1: Preparing your Microsoft Azure subscription for the implementation
Before you can test the Azure Recovery Services agent-based backup of a virtual machine running on
one of your Hyper-V hosts, you must first create and configure the Azure Recovery Services vault.
Exercise 2: Configuring a virtual machine for Azure Recovery Services agent-based backups
With the Azure Recovery Services vault in place, you must now install the Azure Recovery Services agent
on your on-premises test virtual machine and register it with the vault.
Exercise 3: Testing the backup of the virtual machine files and folders
With all the prerequisites successfully completed, you are ready to test the backup of your on-premises
test virtual machine.
Exercise 4: Testing the restore of the virtual machine files and folders
To verify that the backup was successful, you must next test the restore process and examine the
results. Finally, to minimize the cost of your testing, you will identify and delete all the Azure resources
that you created in this lab.
Module Review and Takeaways
Review Question
1. What are the four major storage types?
2. Media (digital pictures, videos) are usually stored as what type?
3. How is Azure Backup data protected at the source?
Best Practices
Use Azure PowerShell rather than Azure CLI unless you have numerous scripts in CLI already in
production. You should, however, move them over to PowerShell when possible.
Tools
The following table lists the tools that this module references:
Tool
Use to
Where to find it
Azure Storage
Explorer
Tool to manage all your Azure
Storage resources
www.storageexplorer.com
Azure Data Box
Physical appliance used to store
and move large volumes of data
https://docs.microsoft.com/en-
us/azure/databox/data-box-deploy-
ordered

Module 5, Azure Site Recovery and supported scenarios
As an organization you need to adopt a business continuity and disaster recovery (BCDR) strategy that
keeps your data safe, and your apps and workloads up and running, when planned and unplanned
outages occur. Disaster recovery (DR) is focused on recovering from a catastrophic loss of application
functionality. For example, if an Azure region hosting your application becomes unavailable, you need a
plan for running your application or accessing your data in another region.
Business and technology owners must determine how much functionality is required during a disaster.
This level of functionality can take a few forms: completely unavailable, partially available via reduced
functionality or delayed processing, or fully available. Resiliency and high availability strategies are
intended to handling temporary failure conditions. Executing this plan involves people, processes, and
supporting applications that allow the system to continue functioning.
Developing a business continuity plan involves identifying the steps that are necessary to recover from a
disaster that significantly affects the availability of these resources. When identifying these steps, there
are two main factors to consider:
•Recovery Time Objective (RTO), which represents the acceptable amount of time it takes to
restore the original functionality of a production system.
•Recovery Point Objective (RPO), which represents the acceptable amount of data loss following
the restore of a production system.
The values of RTO and RPO differ, depending on factors such as the type and size of a business.
However, the recommended approach to delivering a disaster recovery solution typically involves
provisioning an alternative site and hosting standby computing resources that are easy to activate if the
production site experiences an extensive outage. However, traditional means of maintaining a standby
recovery site are very expensive and usually introduce a significant amount of management overhead.
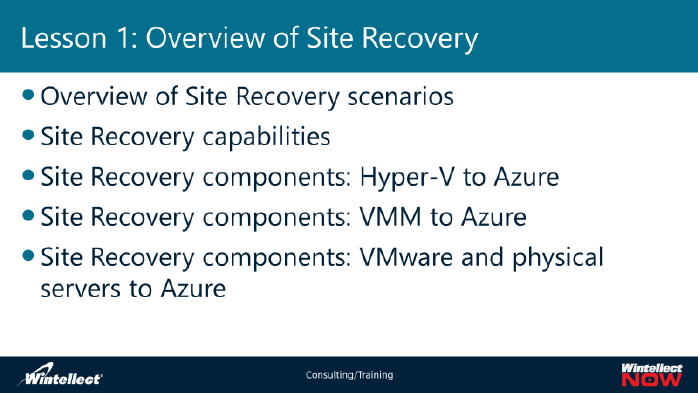
In this module, you will learn about the different types of environments that you can protect by using
Site Recovery. You will become familiar with the process of planning Site Recovery deployment and will
step through a sample deployment.
Lesson 1: Overview of Site Recovery
Azure Site Recovery
provides a simple way
to replicate Azure VMs
between regions. It has
minimal management
overhead, because you
don't need to provision
any additional resources
in the secondary region.
When you enable
replication, Site
Recovery automatically
creates the required
resources in the target
region, based on the source VM settings. It provides automated continuous replication, and enables you
to perform application failover with a single click. You can also run disaster recovery drills by testing
failover, without affecting your production workloads or ongoing replication. The topics that follow
provide an architectural overview of every scenario, focusing in each case on the components of Site
Recovery. The lesson concludes with a description of the capabilities of Site Recovery.
Overview of Site Recovery scenarios
Site Recovery is a disaster recovery and business continuity service that provides two types of
functionality—replication and orchestration. Replication synchronizes the content of the operating
systems and data disks between physical or virtual machines that are in a primary site that is hosting
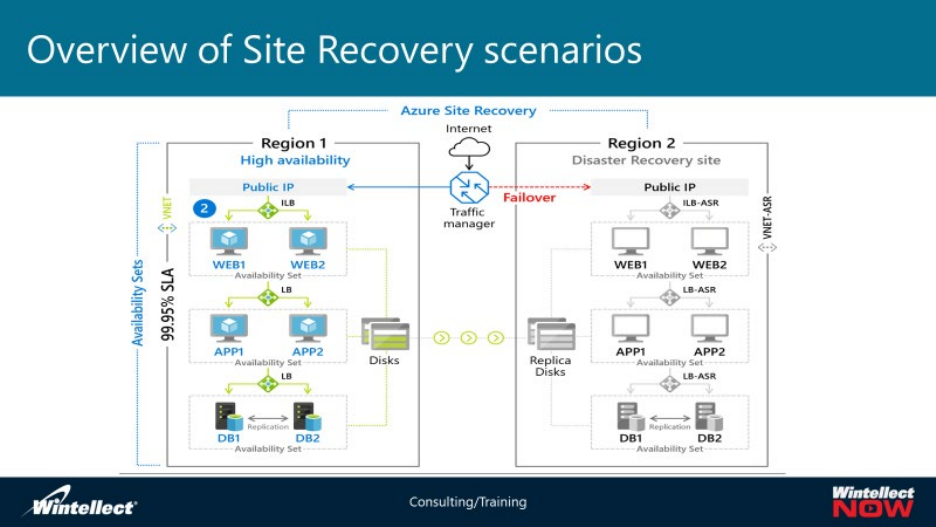
your production workloads and virtual machines in a secondary site. Orchestration provides orderly
failover and failback between these two locations.
In terms of architecture, Azure Site Recovery provides support for the following three disaster recovery
scenarios, depending on the location of the primary and secondary sites:
•Failover and failback between two on-premises sites
•Failover and failback between an on-premises site and an Azure region
•Failover and failback between two Azure regions
In addition, you can use Site Recovery to migrate virtual machines to an Azure region by performing
failover only. This capability is available for Linux and Windows operating system instances running in
on-premises locations, in Azure, or in the Amazon Web Services environment.
Site Recovery allows you to protect both physical and virtual machines, including support for Hyper-V
and VMware virtualization platforms. How you implement this protection depends on several factors,
including the:
•Location of the recovery site (on-premises or Azure).
•Type of computer to protect (physical or virtual).
•Virtualization platform (Microsoft Hyper-V or VMware vSphere).
•Virtualization management software (Microsoft System Center Virtual Machine Manager [VMM]
or VMware vCenter).
•Replication mechanism (Azure Site Recovery agent, Hyper-V replica, or the combination of
Mobility service and a process server specific to VMware VMs and physical servers).

Taking these factors into account, the different types of Site Recovery deployments include the
following:
• Disaster recovery of Hyper-V virtual machines managed by VMM from one on-premises location
to another with Hyper-V–based replication.
• Disaster recovery of Hyper-V virtual machines managed by VMM from an on-premises location
to Azure with Site Recovery–based replication.
• Disaster recovery of Hyper-V virtual machines not managed by VMM from an on-premises
location to Azure with Site Recovery–based replication.
• Disaster recovery of VMware virtual machines from one on-premises location to another with
Mobility service–based replication.
• Disaster recovery of VMware virtual machines from an on-premises location to Azure with
Mobility service–based replication.
• Disaster recovery of physical servers running Windows and Linux operating systems from an on-
premises location to Azure with Mobility service–based replication.
• Disaster recovery of physical servers running Windows and Linux operating systems from one
on-premises location to another with Mobility service–based replication.
• Disaster recovery of virtual machines from one Azure region to another with Site Recovery–
based replication.
• Migration of virtual machines from a non-Microsoft cloud-hosting provider to Azure with
Mobility service–based replication.
Replication of Hyper-V virtual machines across two on-premises sites leverages Hyper-V Replica, a
component of the Hyper-V role of the Windows Server operating system. When replicating Hyper-V
virtual machines in cross-premises scenarios, Site Recovery utilizes the Azure Recovery Services agent.
The agent is a Site Recovery component that you must install on Hyper-V servers that are hosting
protected virtual machines. For replication of physical servers and VMware virtual machines, Site
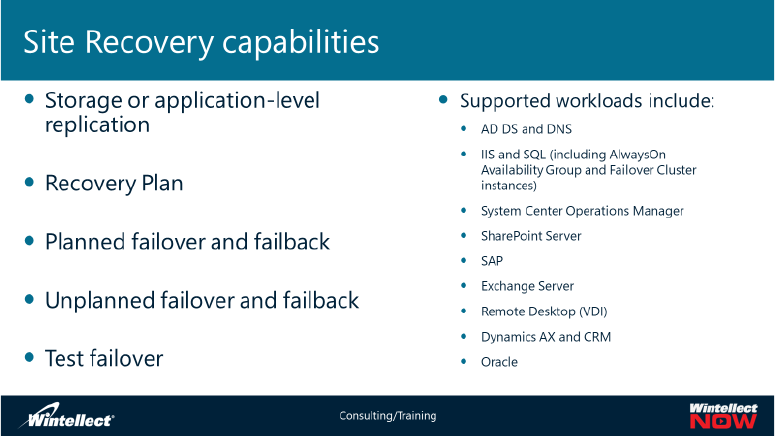
Recovery relies on a combination of the Mobility service—a Site Recovery component that you must
install directly on computers that you want to protect—and one or more process servers. Process
servers function as replication gateways between one or more instances of Mobility service and storage
in the secondary site. Process servers implement performance optimization and security tasks, such as
compression, caching, and encryption.
Note: The process server is a part of VMware-specific Azure Site Recovery infrastructure, which also
includes a configuration server and a master target server. The configuration server coordinates
communication between the on-premises environment and Azure in a production environment. The
master target server coordinates communication and replication during failback.
Site Recovery supports the protection of physical computers with failover to Azure virtual machines.
However, there is no support for failback to physical computers. Instead, you must fail back to VMware
virtual machines.
Site Recovery capabilities
Site
Recovery
provides a
number of
capabilities
that help
you
accomplish
your
business
continuity
goals.
These
capabilities
include
support for:
• Storage replication. As the topic “Overview of Site Recovery scenarios” explained briefly, storage
replication maintains the synchronization of disks between your production and disaster
recovery computers. Hyper-V Replica and the Azure Site Recovery Services agent offer
replication frequency in 30-second, 15-minute, or 30-minute intervals. They also allow you to
generate application-consistent snapshots for individual VMs. With the Mobility service,
replication is continuous, allowing you to create application-consistent snapshots for individual
VMs or across groups of VMs. Note: Multi-VM consistency groups are in preview at the time of
authoring this content.
• Orchestration of planned failover and failback. With planned failover and failback, orchestration
performs an orderly transition between your production and disaster recovery environments
without any data loss.
• Orchestration of unplanned failover and failback. In this case, orchestration performs a
transition between your production and disaster recovery environments. Depending on the
availability of the primary site, this transition might result in data loss.
• Orchestration of test failover. Test failover typically takes place in an isolated network, making it
possible to evaluate your disaster recovery implementation without affecting the production
environment.
Recovery plan
To implement failover and failback, you need to create a recovery plan. A recovery plan identifies
protected physical machines and virtual machines, and dictates the order in which Site Recovery
performs individual steps during failover and a failback. Recovery plans support Azure Automation
scripts and workflows in addition to manual steps. This provides a sufficient level of flexibility to account
for more complex disaster recovery scenarios and helps you achieve your RTO.
Site Recovery integrates with a wide range of applications, some of which support their own replication
technologies. How you implement an optimal disaster recovery solution typically depends on the
application and on whether the secondary site resides on-premises or in Azure. In general, you take one
of the following two approaches:
• Using application-specific technology to replicate to an online virtual machine in the secondary
site, either on-premises or in Azure.
• Using Azure Site Recovery–specific replication technology to an online virtual machine in an on-
premises secondary site or to a storage account in Azure.
A recovery plan helps you to define a systematic recovery process, by creating small independent units
that you can fail over. A unit typically represents an app in your environment. A recovery plan defines
how machines fail over, and the sequence in which they start after failover. Using a recovery plan is
considered a best practice for using Azure Site Recovery. Use recovery plans to:
• Model an app around its dependencies.
• Automate recovery tasks to reduce RTO.
• Verify that you're prepared for migration or disaster recovery by ensuring that your apps are
part of a recovery plan.
• Run test failover on recovery plans, to ensure disaster recovery or migration is working as
expected.
With either approach, you can use Azure Site Recovery to facilitate a test failover and orchestration
during planned and unplanned failover and failback. The workloads that you can protect in this manner
include:
• Active Directory domain controllers hosting the Domain Name System (DNS) server role
• Microsoft SQL Server with support for AlwaysOn Availability Groups and Failover Cluster
instances
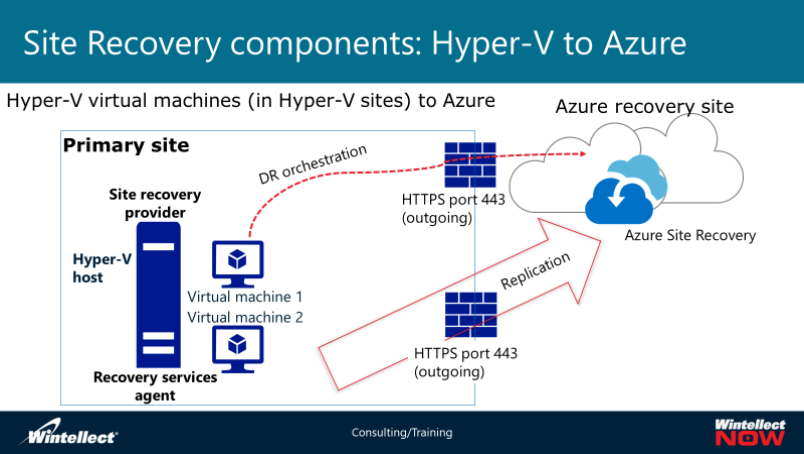
•Internet Information Services (IIS) web apps with SQL Server as their database backend
•System Center Operations Manager
•Microsoft SharePoint Server
•SAP
•Microsoft Exchange Server
•Remote Desktop Virtual Desktop Infrastructure (VDI)
•Microsoft Dynamics AX and Dynamics CRM
•Oracle
•Windows File Servers
•Citrix XenApp and XenDesktop
Site Recovery components: Hyper-V to Azure
You will use
several Site
Recovery
components
when
protecting
Hyper-V
virtual
machines
with Azure
as the
disaster
recovery
site. These
components
include
Azure
components and on-premises components.
Azure components
The Azure components you will use are:
An Azure subscription that is hosting a Site Recovery vault.
•A Site Recovery vault that is providing central management point of disaster recovery-related
replication and orchestration.
•An Azure general-purpose Standard storage account that is storing replicated data. You can
configure the storage account with either a locally redundant storage (LRS) or a geo-redundant
storage (GRS) setting. The storage account must reside in the same region as the Site Recovery
vault.
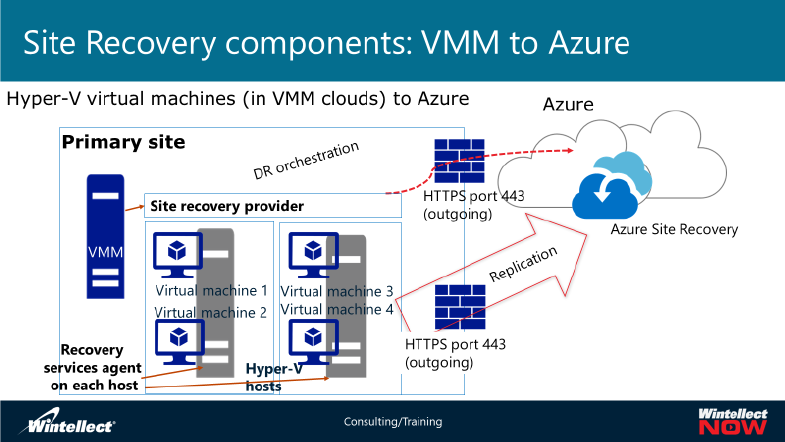
• An Azure Premium storage account, if you want to fail over your on-premises virtual machines
to Azure VMs with Premium storage disks. Note that, in this case, you still require a Standard
storage account, which hosts replication logs that track changes to disks of the on-premises
virtual machine. You can set the replication frequency to either 5 minutes or 15 minutes.
• An Azure virtual network hosting virtual machines in your disaster recovery site. Site Recovery
will automatically provision these virtual machines during failover as part of the recovery plan
you define. The virtual network must also reside in the same region as the Site Recovery vault.
On-premises components
The on-premises components you will use are:
• Protected Hyper-V virtual machines.
• A computer that is running Windows Server 2012 R2 or Windows Server 2016 and has the
Hyper-V server role hosting the virtual machines that you want to protect.
• Azure Site Recovery Provider and Azure Site Recovery Services agent running on each Hyper-V
host that contains protected Hyper-V virtual machines. The provider handles communication
with the Recovery Services vault. The agent is responsible for data replication.
Site Recovery components: VMM to Azure
You will use
several Site
Recovery
components when
protecting Hyper-
V virtual machines
in VMM clouds
with Azure as the
disaster recovery
site. These
components
include Azure
components and
on-premises
components.
Azure components
The Azure components you will use are:
• A Microsoft Azure subscription that is hosting a Site Recovery vault.
• A Site Recovery vault that is serving as the central management point for disaster recovery-
related replication and orchestration. Site Recovery also hosts recovery plans.
• An Azure general-purpose Standard storage account that is storing replicated data. You can
configure the account with either an LRS or a GRS setting. The storage account must reside in
the same region as the Site Recovery vault.
• Optionally, an Azure Premium storage account, if you want to fail over your on-premises virtual
machines to Azure VMs with Premium storage disks. Note that you still require a Standard
storage account, which hosts replication logs that track changes to disks of the on-premises
virtual machine. You can set the replication frequency to either 5 minutes or 15 minutes.
• Optionally, Azure managed disks, if you want to leverage the minimized management overhead
and increased resiliency that they offer. If you choose this option, Azure Site Recovery still relies
on a Standard storage account as the target of cross-premises replication. It dynamically creates
managed disks when it provisions Azure VMs during a failover.
• An Azure virtual network that is hosting virtual machines in your disaster recovery site. Site
Recovery will automatically provision these virtual machines during failover as part of the
recovery plan you define. The virtual network must also reside in the same region as the Site
Recovery vault.
On-premises components
The on-premises components you will use are:
• Protected Hyper-V virtual machines.
• Computers running Windows Server 2012 R2 or Windows Server 2016 with the Hyper-V server
role hosting the virtual machines that you want to protect.
• A System Center 2012 R2 Virtual Machine Manager or System Center 2016 Virtual Machine
Manager server that is hosting one or more private clouds and logical networks.
• Virtual machine networks linked to logical networks associated with the VMM clouds. You must
map virtual machine networks to Azure networks when creating a recovery plan in Site Recovery
vault.
• The Azure Site Recovery Provider running on the VMM server. The provider handles
communication with the Recovery Services vault.
• The Azure Site Recovery Services agent running on each Hyper-V host that contains protected
Hyper-V virtual machines. The agent is responsible for data replication.
Site Recovery components: VMware and physical servers to Azure
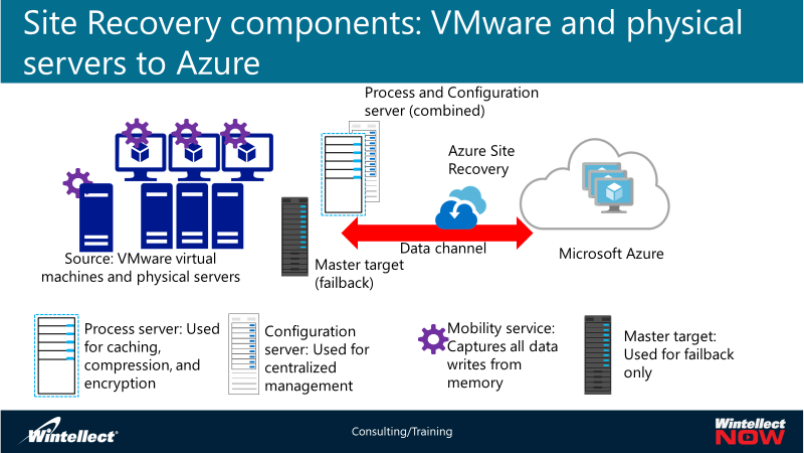
You will use
several Site
Recovery
components
when protecting
VMware virtual
machines with
Azure as the
disaster
recovery site.
These
components
include Azure
components
and on-
premises
components.
Azure components
The Azure components you will use are:
• A Microsoft Azure subscription that is hosting a Site Recovery vault.
• A Site Recovery vault that is providing a central management point for disaster recovery-related
replication and orchestration.
• An Azure general-purpose Standard storage account that is storing replicated data. You can
configure the account with either an LRS or a GRS setting. The storage account must reside in
the same region as the Site Recovery vault. While the replication is continuous, the number of
crash-consistent and application-consistent recovery points depends on the replication policy
that you define. Standard storage accounts support retention of recovery points for up to 72
hours.
• Optionally, an Azure Premium storage account, if you want to fail over your on-premises virtual
machines to Azure VMs with Premium storage disks. Note that you still require a Standard
storage account, which hosts replication logs that track changes to disks of the on-premises
virtual machine. While the replication is continuous, the number of crash-consistent and
application-consistent recovery points depends on the replication policy that you define.
Premium storage accounts support retention of recovery points for up to 24 hours.
• An Azure virtual network that is hosting virtual machines in your disaster recovery site. Site
Recovery will automatically provision these virtual machines during failover as part of the
recovery plan you define. The virtual network must also reside in the same region as the Site
Recovery vault.
• An Azure virtual machine that is hosting a process server. This component is required only
during failback in order to replicate Azure virtual machines to on-premises VMware virtual
machines.
On-premises components
The on-premises components you will use are:
•Protected VMware virtual machines and physical computers running the Mobility service.
•vSphere hosts that are hosting protected VMware virtual machines.
•A vCenter server that is providing centralized management of vSphere hosts and their virtual
machines. This component is optional, but recommended.
•The Mobility service that is running on all protected VMware virtual machines or physical
servers. The service handles Site Recovery-related on-premises communication. It also keeps
track of changes to local disks and continuously replicates them out.
•A physical computer or a VMware virtual machine, referred to as the configuration server, which
is hosting the following Site Recovery components:
oConfiguration server component. This component is responsible for communication
between on-premises protected physical computers or virtual computers and Azure,
including the management of the data replication and recovery process.
oProcess server component. This component operates as a replication gateway during
normal operations (outside of disaster recovery events). All replication data from the
Mobility service that is running on the protected physical computers or virtual
computers in the primary site flows via the process server, which applies caching,
encryption, and compression to secure and optimize its transfer. The process server also
automatically discovers VMware virtual machines within a vCenter environment and
allows you to remotely install the Mobility service on them.
oMaster target server component. This component performs data replication during
failback from Azure. It is also running the software component referred to as the Unified
agent, which facilitates communication with the configuration server and the process
server.
Cross-premises component
You will also require a cross-premises component, which is a hybrid network connection between the
on-premises network and the Azure virtual network that is hosting virtual machines in your disaster
recovery site. The connection is necessary only during failback. During normal operations, replication
traffic and cross-premises communication with a Site Recovery vault flows via the Internet by default,
unless you provision public peering via Azure ExpressRoute. This does not compromise the security of
your environment in any way, because the configuration server and the process server always encrypt
communication traffic and replication data. You can implement this connection by using either site-to-
site virtual private network (VPN) or ExpressRoute.
Lesson 2: Planning for Site Recovery
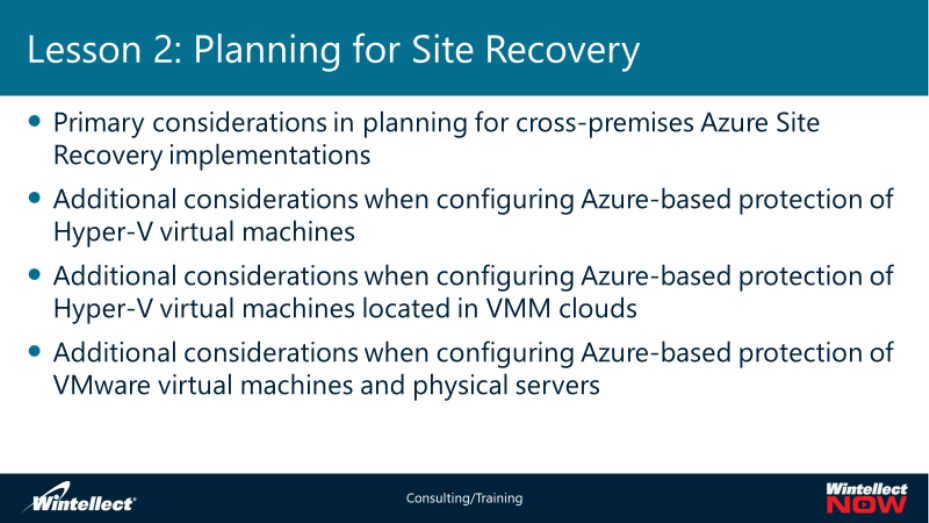
A recovery plan helps you to define a systematic recovery process, by creating small independent units
that you can fail over. A unit typically represents an app in your environment. A recovery plan defines
how machines fail over, and the sequence in which they start after failover. Use recovery plans to:
• Automate recovery tasks to reduce RTO.
• Verify that you're prepared for migration or disaster recovery by ensuring that your apps are
part of a recovery plan.
• Run test failover on recovery plans, to ensure disaster recovery or migration is working as
expected.
In this lesson, you will learn about the factors you must consider when you are planning for Site
Recovery in scenarios in which the secondary site resides in Azure. This planning should include factors
such as the processing capacity of Azure virtual machines and cross-premises network connectivity. In
addition, you will find out how differences between the capabilities of on-premises Hyper-V
environments and the virtualization platform in Azure affect the planning of Site Recovery deployments.
Primary considerations in planning for cross-premises Azure Site Recovery implementations
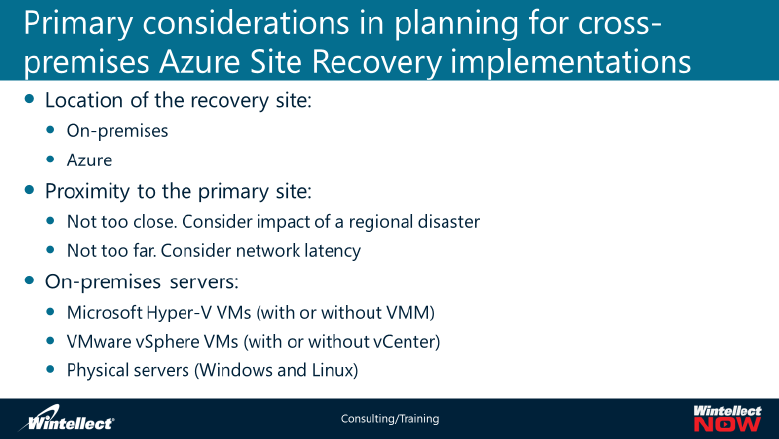
The first factor
to consider
when planning
for Site
Recovery is
whether the
disaster
recovery site
will reside in
an on-
premises
location or in
Azure. In
addition, you
must also
consider the characteristics of your primary site, including:
•The location. You should ensure that the secondary site is far enough from the primary site so
that it will remain operational if there is a region-wide disaster affecting the availability of the
primary site. On the other hand, the secondary site should be relatively close to the primary site
to minimize the latency of replication traffic and connectivity from the primary site.
•The existing virtualization platform. The architecture and capabilities of your solution will
depend to some extent on whether you are using Hyper-V or vSphere and whether you rely on
VMM or vCenter to manage virtualization hosts.
•The computers and workloads that you intend to protect. Your secondary site should provide a
sufficient amount of compute and storage resources to accommodate production workloads
following the failover.
Capacity planning for Hyper-V replication to Azure
Microsoft offers Azure Site Recovery Capacity Planner for Azure Site Recovery scenarios that involve
Hyper-V virtual machines. This is a downloadable, Microsoft Excel macro-enabled workbook. It helps you
estimate capacity requirements in disaster recovery scenarios with a secondary site residing either on-
premises or in Azure. The Site Recovery Capacity Planner helps with analyzing the existing workloads
that you intend to protect. In addition, in the case of failover to Azure, it provides recommendations
regarding the compute, storage, and network resources that you will require to implement their
protection.
The workbook operates in two modes:
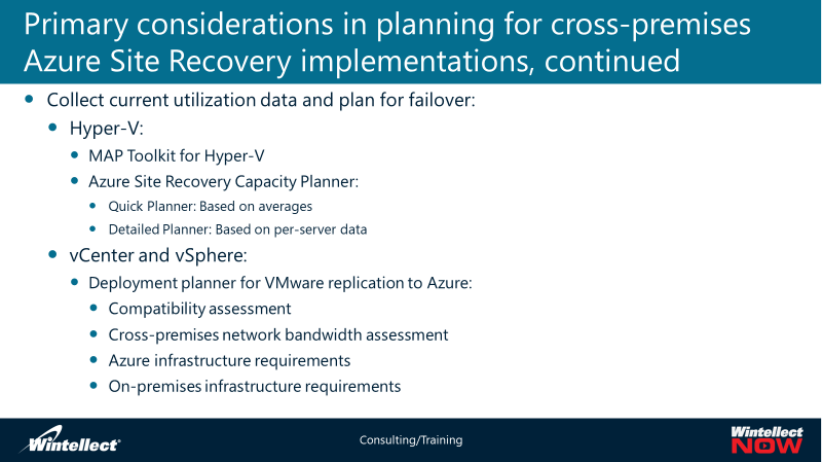
• Quick Planner. This mode provides an estimate based on general statistics that you provide,
representing the current capacity and utilization of your production site. These statistics include
the total number of virtual machines, average number of disks per virtual machine, average size
of a virtual machine disk, average disk utilization, total amount of data to be replicated, and
average daily data change rate.
• Detailed Planner. This mode requires you to provide capacity and utilization data for each virtual
machine you intend to protect. This data includes the number of processors, memory allocation,
the number of network adapters, the number of disks, total storage, disk utilization, and the
operating system that is running in the virtual machine.
Note that you are responsible for collecting relevant data. The workbook simply handles the calculations
based on this data. If you are using Hyper-V to host virtual machines, you can use the Microsoft
Assessment and Planning (MAP) Toolkit for Hyper-V to determine the average daily data change rate.
Deployment Planner for VMware replication to Azure
If you are considering implementing Azure Site Recovery to protect your on-premises VMware
deployment in Azure, you can use the Deployment Planner tool for VMware replication to Azure. You
can use this tool to determine network, compute, and storage requirements. Specifically, the tool
performs the following tasks:
• Compatibility assessment. This involves analyzing the configuration of VMware virtual machines
to verify whether they comply with limits applicable to Azure virtual machine. For example, this
includes the number, size, and performance characteristics of virtual disks or boot configuration
of the operating system.
• Cross-premises network bandwidth assessment. This involves estimating the network
bandwidth necessary to facilitate cross-premises data synchronization, including initial and delta
replication.
• Azure infrastructure requirements. This involves Identifying the number and type of storage
accounts and virtual machines to be provisioned in Azure.
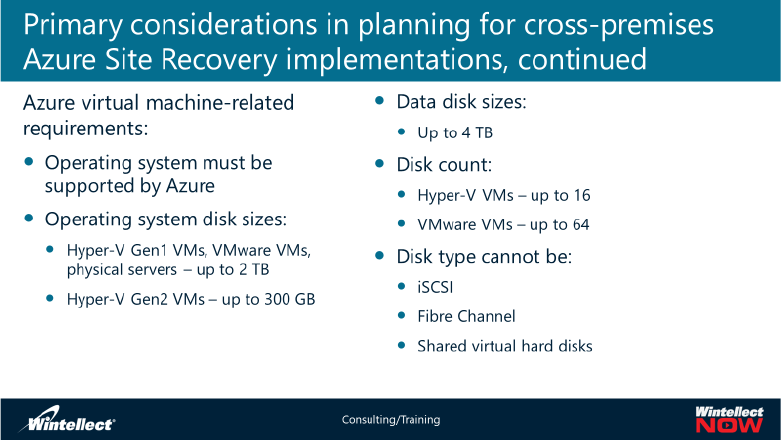
•On-premises infrastructure requirements. This involves Identifying the optimum number of
configuration and process servers.
You must install the tool on a Windows Server 2012 R2 physical computer or virtual machine with direct
connectivity to the VMware environment and to the internet. During the installation and the initial
setup, use an account that is a member of the local Administrators group and has at least read-only
permissions to the VMware vCenter server and vSphere ESXi hosts. The compute, memory, and storage
characteristics of the server should match the sizing recommendations of the configuration server.
The tool operates in three modes. During the first, you profile the existing environment by relying on
vCenter and vSphere performance counters, in a manner that minimizes any potential negative
performance impact. During the second mode, you generate reports based on the profiling data. You
can customize their output by specifying a desired RPO value prior to report generation. The third mode,
independent of the other two, allows you to evaluate available bandwidth between the on-premises
environment and the Azure region that you intend to use as your disaster recovery site.
Capacity planning for VMware replication to Azure
The information that you gather by using the Deployment Planner for VMware replication to Azure is
essential during capacity planning for your Azure Site Recovery implementation. In this process, you
must also be aware of the following considerations regarding the primary components of that
implementation:
•A single process server is capable of handling of up to 2 terabytes (TB) of replication traffic per
day. This affects the number of process servers you will need to provision. It also enforces the
limit on the amount of daily changes for an individual virtual machine that you can protect by
using Azure Site Recovery. Each process server should have a separate disk of at least 600
gigabytes (GB) that will provide a disk-based cache.
•The configuration server should reside in a location with direct network access to the virtual
machines that you intend to protect.
There are two
new tools
available to us
to assess and
migrate
VMware
virtual
machines. The
first tool,
Azure Migrate,
will be
discussed in a
separate slide
and the other
tool is the OVF template. The Open Virtualization Format (OVF) template is an industry standard
software distribution model for virtual machine templates. The configuration server for the VMware to
Azure scenario will be available as an OVF template. With the OVF template, you are ensured that all
the necessary software, except MySQL Server 5.7.20 and VMware PowerCLI 6.0, is pre-installed in the
virtual machine template, and once the template is deployed in your vCenter Server, the configuration
sever can be registered with the Azure Site Recovery services in less than 15 minutes.
Azure virtual machine-related requirements
You must ensure that your on-premises virtual machines comply with a majority of the Azure virtual
machine-specific requirements. These requirements include:
• The operating system running within each protected virtual machine must be supported by
Azure.
• The virtual machine operating system disk sizes cannot exceed 2 TB when replicating Hyper-V
Generation 1 VMs, VMware VMs, or physical servers to Azure and 300 GB when replicating
Hyper-V Generation 2 VMs to Azure (Hyper-V Generation 2 VMs will be automatically converted
to Generation 1, as long as they have no more than 300 GB operating system drives).
• The virtual machine data disk sizes cannot exceed 4 TB.
• The virtual machine data disk count cannot exceed 16 when replicating Hyper-V VMs to Azure
and 64 when replicating VMware VMs to Azure.
• The virtual machine disks cannot be Internet Small Computer System Interface (iSCSI), Fibre
Channel, or shared virtual hard disks.
Note: You have the option of excluding individual disks in scenarios that involve failover to Azure from
both VMware and Microsoft Hyper-V VMs.
Azure does not support the .vhdx disk type or the Generation 2 Hyper-V virtual machine type. Instead,
Azure virtual machines must use the .vhd disk type and the Generation 1 Hyper-V virtual machine type.
Fortunately, these limitations are not relevant when it comes to virtual machine protection. Site
Recovery is capable of automatically converting the virtual disk type and the generation of Windows
virtual machines when replicating virtual machine disks to Azure Storage.
Note: At the time of authoring this content, Site Recovery does not support Generation 2 virtual
machines that are running Linux.
Network-related requirements
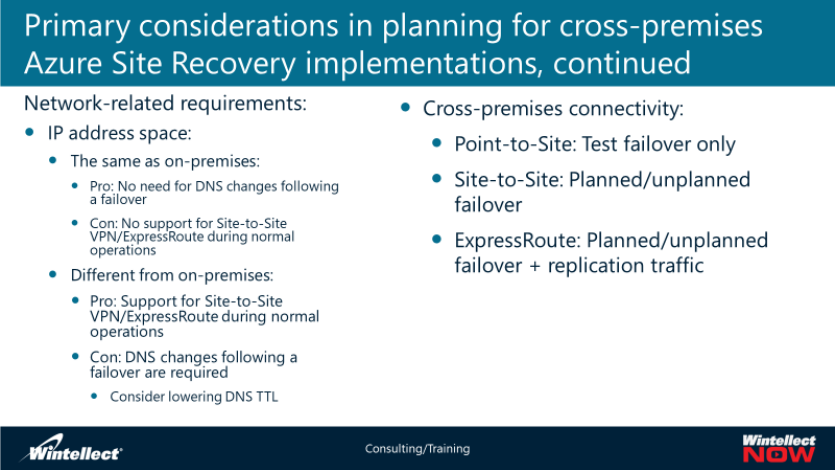
To
facilitate
different
types of
failover,
you must
consider
the
network
requirements of the workloads that you intend to protect. In addition, you should keep in mind that
these workloads must remain accessible following a planned, unplanned, or test failover. To accomplish
these objectives, you should consider the following when designing your Azure Site Recovery–based
solution:
•IP address space of the Azure virtual network hosting protected virtual machines after the
failover. You have two choices when deciding which IP address space to use:
oUse the same IP address space in the primary and the secondary site. The benefit of this
approach is that virtual machines can retain their on-premises IP addresses. This
eliminates the need to update DNS records associated with these virtual machines. Such
updates typically introduce delay during recovery. The drawback of this approach is that
you cannot establish direct connectivity via Site-to-Site VPN or ExpressRoute between
your on-premises locations and the recovery virtual network in Azure. This, in turn,
implies that you must protect at least some of the on-premises Active Directory Domain
Services domain controllers. Failover and failback of domain controllers require
additional configuration steps, which affect the recovery time.
oUse a non-overlapping IP address space in the primary and the secondary site. The
benefit of this approach is the ability to set up direct connectivity via Site-to-Site VPN or
ExpressRoute between your on-premises locations and the recovery virtual network in
Azure. This allows you, for example, to provision Azure virtual machines that are hosting
Active Directory domain controllers in the recovery site and keep the Azure virtual
machines online during normal business operations. By having these domain controllers
available, you minimize the failover time. In addition, you can perform a partial failover,
which involves provisioning only a subset of the protected virtual machines in Azure,
rather than all of them. The drawback is that the IP addresses of the protected on-
premises computers will change following a failover. To minimize the impact of these
changes, you can lower the Time-To-Live (TTL) value of the DNS records associated with
the protected computers.
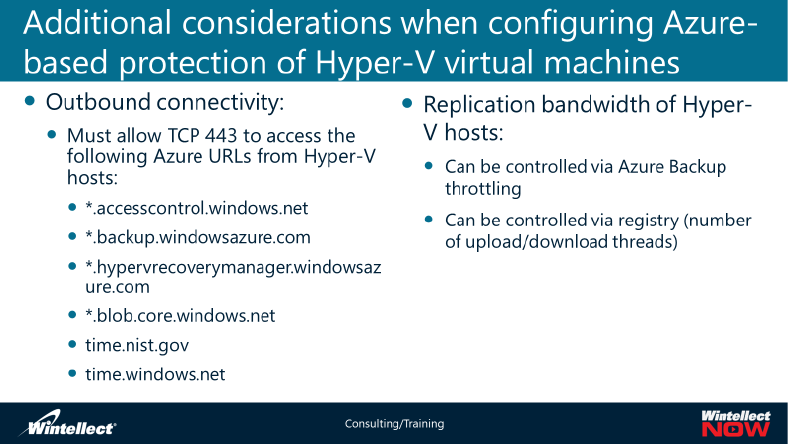
• Network connectivity between your on-premises locations and the Azure virtual network that is
hosting the recovery site. You have three choices when deciding which cross-premises network
connectivity method to use:
o Point-to-Site VPN
o Site-to-Site VPN
o ExpressRoute
Point-to-Site VPN is of limited use in this case, because it allows connectivity from individual computers
only. It might be suitable primarily for a test failover when connecting to the isolated Azure virtual
network where Site Recovery provisions replicas of the protected virtual machines. For planned and
unplanned failovers, you should consider ExpressRoute, because it offers several advantages over Site-
to-Site VPN, including the following:
• All communication and replication traffic will flow via a private connection, rather than the
Internet.
• The connection will be able to accommodate a high volume of replication traffic.
• Following a failover, on-premises users will benefit from consistent, high-bandwidth, and low-
latency connectivity to the Azure virtual network. This assumes that the ExpressRoute circuit will
remain available even if the primary site fails.
Additional considerations when configuring Azure-based protection of Hyper-V virtual
machines
When configuring Azure-based protection of Hyper-V virtual machines, the following additional
considerations apply:
• Each Hyper-V server that is hosting virtual machines that you want to protect must have
outbound connectivity to Azure via TCP port 443. Both the provider and the agent use this port.
You must allow access to the following URLs from the Hyper-V servers:
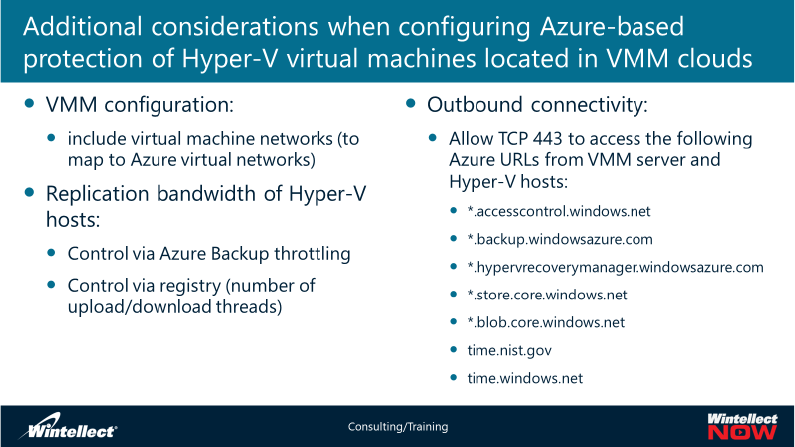
o*.accesscontrol.windows.net
o*.backup.windowsazure.com
o*.hypervrecoverymanager.windowsazure.com
o*.blob.core.windows.net
otime.nist.gov
otime.windows.net
•Depending on the outcome of your capacity planning, you might want to adjust the bandwidth
that is available to the Hyper-V replication traffic. There are two ways to accomplish this:
oThrottle bandwidth to a specific value according to the schedule you define. You can
configure this setting from the Microsoft Azure Backup Microsoft Management Console
(MMC) snap-in. In the console, you can display the Microsoft Azure Backup Properties
dialog box and, in the dialog box, switch to the Throttling tab. From there, you can set
the maximum bandwidth that is available for backup operations during work and non-
work hours. You have the option of defining what constitutes the start and end of work
hours.
oIncrease or decrease the number of threads that are dedicated to replicating virtual
disks on a per-virtual machine basis during failover and failback. This requires direct
modification of entries in the HKLM\SOFTWARE\Microsoft\Windows Azure
Backup\Replication registry key. The UploadThreadsPerVM entry controls the number
of threads dedicated to replicating the disk data. The DownloadThreadsPerVM entry
controls the number of threads when failing back from Azure.
Additional considerations when configuring Azure-based protection of Hyper-V virtual
machines located in VMM clouds
When you
are
configuring
Azure-based
protection of
Hyper-V
virtual
machines
located in
VMM clouds,
the following
additional
considerations apply:
• You must create virtual machine networks in your VMM environment. You associate virtual
machine networks with VMM logical networks, which, in turn, link to private clouds containing
protected virtual machines. Once you create virtual machine networks, you must map them to
the corresponding Azure virtual networks. This ensures that, following a failover, the network
configuration in Azure matches the one that exists in your on-premises environment. By
mapping networks, you ensure that replicas of protected virtual machines, which reside on the
same on-premises network, also reside on the same Azure virtual network. You can map
multiple virtual machine networks to a single Azure virtual network.
• You have the option to select individual VMM clouds that will appear in the Azure portal. You
can choose this option if you want to ensure that the Azure Site Recovery Provider running on
the VMM server does not upload all of your cloud metadata to the Recovery Services vault.
• If you want to ensure that Site Recovery attaches a replica of a protected virtual machine to a
specific subnet, then name the Azure virtual network subnet the same as the virtual machine
network subnet.
• The Azure Site Recovery Provider running on the VMM server must have outbound connectivity
to Azure via TCP port 443. The Azure Site Recovery Services agent running on each Hyper-V
server that is hosting the virtual machines that you want to protect also must have outbound
connectivity to Azure via TCP port 443. You must allow access to the following URLs from the
VMM server and Hyper-V servers:
o *.accesscontrol.windows.net
o *.backup.windowsazure.com
o *.hypervrecoverymanager.windowsazure.com
o *.store.core.windows.net
o *.blob.core.windows.net
o time.nist.gov
o time.windows.net
• Depending on the outcome of your capacity planning, you have the option of adjusting the
bandwidth available to the Hyper-V replication traffic on individual Hyper-V hosts. For details
regarding this option, refer to the “Additional considerations when configuring Azure-based
protection of Hyper-V virtual machines” topic in this lesson.
Additional considerations when configuring Azure-based protection of VMware virtual
machines and physical servers
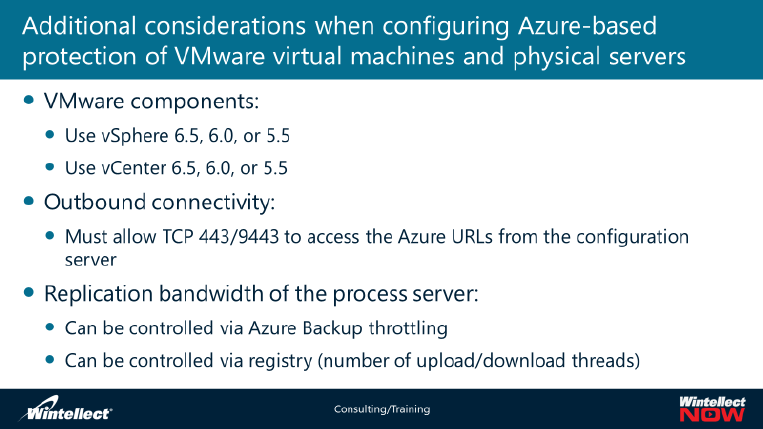
When
configuring
Azure-
based
protection
of VMware
virtual
machines
and
physical
servers,
the
following
additional
considerations apply:
•Ensure that you are using VMware vSphere 6.5, vSphere 6.0, or vSphere 5.5.
•Ensure that you are using VMware vCenter 6.5, vCenter 6.0, or vCenter 5.5 to manage vSphere
hosts.
•To use push installation of the Mobility service on the Windows virtual machine that you intend
to protect, ensure that the Windows Defender Firewall allows inbound File and Printer Sharing
and Windows Management Instrumentation traffic. For Linux virtual machines, you should
enable the Secure File Transfer Protocol subsystem and password authentication in the
sshd_config file.
•The computer hosting the configuration server component must have outbound connectivity to
Azure via TCP port 443. The computer hosting the process server component should have
outbound connectivity to Azure via TCP port 9443. You can use a different port for this purpose
if needed. Because both the process server and the configuration server components reside by
default on the configuration server, you should make sure that this server can access the
following URLs over ports 443 and 9443:
o*.accesscontrol.windows.net
o*.backup.windowsazure.com
o*.blob.core.windows.net
o*.hypervrecoverymanager.windowsazure.com
o*.store.core.windows.net
otime.nist.gov
otime.windows.net
oThe configuration server should also be able to reach
https://dev.mysql.com/get/archives/mysql-5.5/mysql-5.5.37-win32.msi over TCP port
80.
•Depending on the outcome of your capacity planning, you have the option of adjusting the
bandwidth available to the replication traffic. In this scenario, the process server handles
replication. Therefore, you can configure its Microsoft Azure Backup throttling settings or adjust
the number of upload and download threads per virtual machine by modifying its registry. For
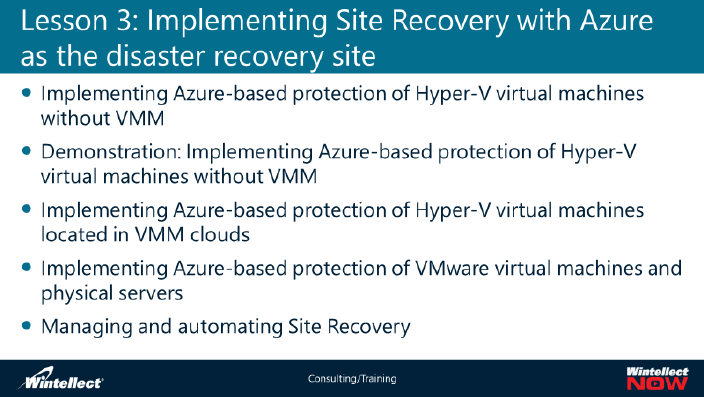
details regarding this option, refer to the additional considerations when you are configuring
Azure-based protection of Hyper-V virtual machines. The “Additional considerations when
configuring Azure-based protection of Hyper-V virtual machines” topic in this lesson lists these
considerations.
Lesson 3: Implementing Site Recovery with Azure as the disaster recovery site
In this lesson, you will learn how to implement Site Recovery with Azure as the disaster recovery site by
using the Azure portal in the following three scenarios:
• Applying Azure protection to on-premises Hyper-V VMs to Azure.
• Applying Azure protection VMware VMs, Hyper-V VMs managed by System Center VMM clouds.
• Applying Azure protection to on-premises VMware VMs and physical servers (Windows and
Linux) to Azure.
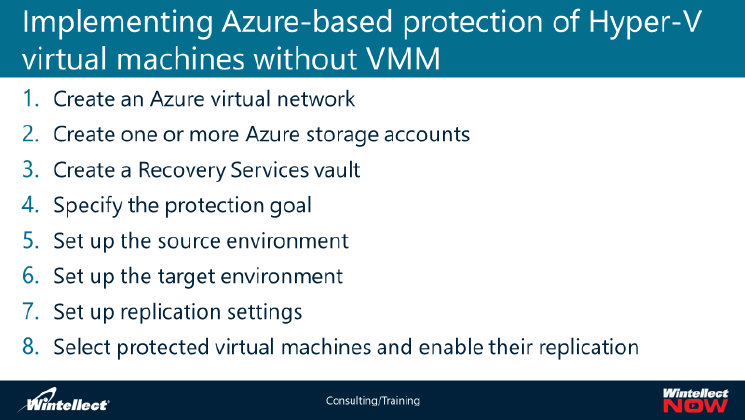
Implementing Azure-based protection of Hyper-V virtual machines without VMM
In this topic, you
will step through a
sample
implementation of
Site Recovery with
an on-premises
primary site and a
secondary site that
is residing in Azure.
Your intention is to
protect on-
premises Hyper-V
virtual machines.
In this scenario,
you are not using
System Center Virtual Machine Manager (VMM) to manage your Hyper-V hosts. Your implementation
will consist of the following tasks:
1. Creating an Azure virtual network in your Azure subscription in the Azure region that meets your
disaster recovery objectives.
2. Creating one or more Azure storage accounts in the same subscription and the same region as
the Azure virtual network.
3. Creating a Recovery Services vault in the same subscription and the same region as the storage
accounts and the virtual network.
4. Specifying the protection goal of your implementation. When using the Azure portal, this is the
first task of the Prepare Infrastructure stage, which you initiate from the Site Recovery blade.
This task involves answering the following questions:
a. Where are your machines located? Select the On-premises option.
b. Where do you want to replicate your machines? Select the To Azure option.
c. Are your machines virtualized? Select the Yes, with Hyper-V option.
d. Are you using System Center VMM to manage your Hyper-V hosts? Select the No
option.
5. Setting up the source environment. In this case, you must create a Hyper-V site, which serves as
a logical container for Hyper-V hosts or clusters of Hyper-V hosts. Once you create a site, you
must add one or more Hyper-V hosts to it. Next, download the Azure Site Recovery Provider
setup file and Recovery Services vault registration key to the Hyper-V server. Run the installation
by using the newly downloaded setup file and, when you receive a prompt, provide the vault
registration key.
Note: The Azure Site Recovery Provider setup file installs both the provider and the Recovery Services
agent.

6. Setting up the target environment. As part of this step, you must specify the post-failover
deployment model. In this walkthrough, you will choose Resource Manager, but Site Recovery
also supports the classic deployment model. At this point, you will also have a chance to verify
that you can use the virtual network and the storage accounts you created earlier to host
replicas of protected virtual machines and their disks. You have the option to create the virtual
network and storage account if this is not the case.
7. Setting up replication settings. This step involves configuring a replication policy and associating
it with the Hyper-V site you created earlier. The policy includes settings such as copy frequency,
recovery point retention, app-consistent snapshot frequency, initial replication start time, and
encryption of data stored in Azure Storage.
8. Selecting the protected virtual machines and enabling their replication. This is part of the
Replicate Applications stage. You will need to specify the source Hyper-V site that you defined
earlier. You also will need to select the Azure virtual network and the storage account you want
to use to host the replica of the protected virtual machine and its disks. You also have the option
to choose the target subnet. In addition, this step involves assigning the name to the target
virtual machine and choosing its operating system. Finally, you also must choose a replication
policy that you want to take effect in this case.
Demonstration: Implementing Azure-based protection of Hyper-V virtual machines without
VMM
In this demonstration, watch as your instructor shows how to:
• Create a Recovery Services vault.
• Specify protection goals.
• Set up the source environment.
• Set up the target environment.
• Set up replication settings.
• Configure protected virtual machines and enable their replication.
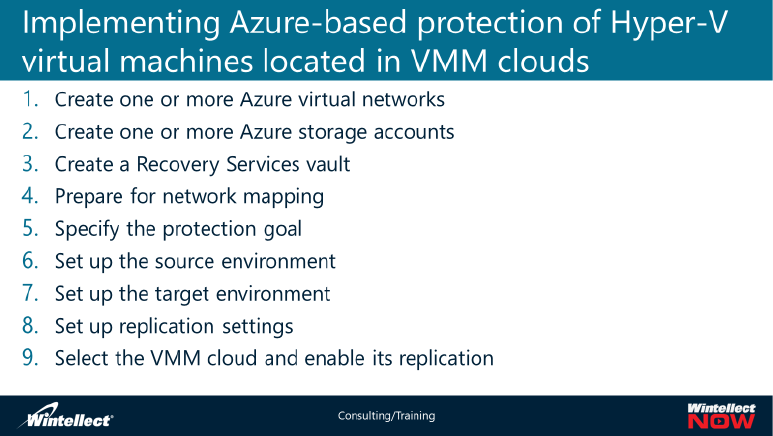
Implementing Azure-based protection of Hyper-V virtual machines located in VMM clouds
In this topic, you will step through another sample implementation of Site Recovery with an on-premises
primary site
and a
secondary site
that is residing
in Azure. In this
case, you
intend to
protect on-
premises
Hyper-V virtual
machines. In
this scenario,
you are using
System Center
Virtual Machine
Manager to
manage your Hyper-V hosts. Your implementation will consist of the following tasks:
1. Creating one or more Azure virtual networks in your Azure subscription in the Azure region that
meets your disaster recovery objectives.
2. Creating one or more Azure storage accounts in the same subscription and the same region as
the Azure virtual network.
3. Creating a Recovery Services vault in the same subscription and the same region as the storage
accounts and the virtual network.
4. Preparing for the mapping of on-premises virtual machine networks to the Azure virtual
networks. You need to make sure that all virtual machines you intend to protect are connected
to the virtual machine networks you will be mapping to the Azure virtual networks.
5. Specifying the protection goal of your implementation. When using the Azure portal, this is the
first task of the Prepare Infrastructure stage, which you initiate from the Site Recovery blade of
the Recovery Services vault. This task involves answering the following questions:
a. Where are your machines located? Select the On-premises option.
b. Where do you want to replicate your machines? Select the To Azure option.
c. Are your machines virtualized? Select the Yes, with Hyper-V option.
d. Are you using System Center VMM to manage your Hyper-V hosts? Select the Yes
option.
6. Setting up the source environment. This consists of the following steps:
a. Adding a System Center VMM server entry representing your on-premises VMM
environment and selecting the VMM cloud that is hosting the virtual machines that
you intend to protect.
b. Downloading the Azure Site Recovery Provider setup file and Recovery Services vault
registration key to the VMM server. Run the installation using the newly downloaded
setup file and, when you receive a prompt, provide the vault registration key. You will
also receive a prompt to accept or modify an SSL certificate for encryption of disks
uploaded to the Recovery Services vault. Finally, you will have the option to enable
synchronization of cloud metadata for all VMM clouds. Optionally, you can select
individual VMM clouds that you want to be visible in the Azure portal.
c. Downloading the setup file for the Azure Recovery Services agent and installing it on
each Hyper-V host in the VMM cloud that is associated with the virtual machine
network you will be mapping to the Azure virtual network.
7. Setting up the target environment. As part of this step, you must specify the post-failover
deployment model. In this walkthrough, you will choose Resource Manager, but Site Recovery
also supports the classic deployment model. At this point, you will also have a chance to verify
that you can use the virtual network and the storage account you created earlier to host replicas
of protected virtual machines and their disks. You have the option to create the virtual network
and storage accounts if this is not the case. Finally, you must also configure network mapping
between virtual machine networks and the Azure virtual network.
8. Setting up replication settings. This step involves configuring a replication policy and associating
it with the VMM cloud you selected in step 6a. The policy includes settings such as copy
frequency, recovery point retention, app-consistent snapshot frequency, initial replication start
time, and encryption of data stored in Azure Storage.
9. Selecting the VMM cloud and enabling its replication. This is part of the Replicate Applications
stage. You will need to specify the VMM cloud you selected in step 6a. You also will need to
select the Azure virtual network and the storage account you want to use to host replicas of
protected virtual machines and their disks. You also have the option to choose the target
subnet. In addition, this step involves assigning the name to the target virtual machine and
choosing its operating system. Finally, you also have to choose a replication policy that you want
to take effect in this case.
Implementing Azure-based protection of VMware virtual machines and physical servers
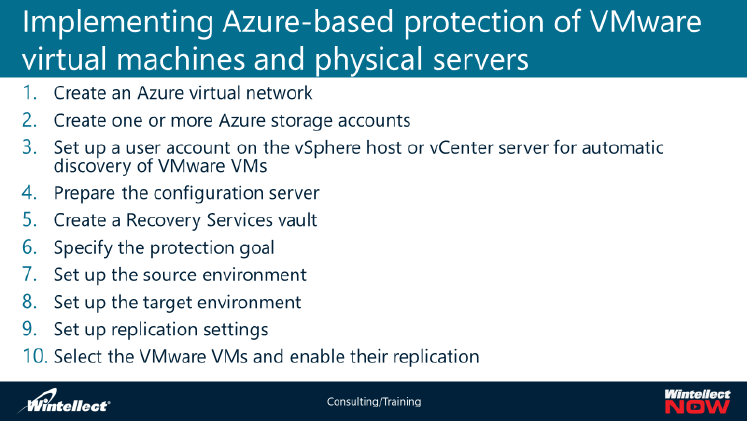
In this topic, you
will step through
yet another
sample
implementation
of Site Recovery
with an on-
premises primary
site and a
secondary site
that is residing in
Azure. In this
case, you intend
to protect on-
premises
VMware virtual machines and physical servers. In this scenario, you are using VMware vCenter to
manage your vSphere hosts. Your implementation will consist of the following tasks:
1. Creating an Azure virtual network in your Azure subscription in the Azure region that meets your
disaster recovery objectives.
2. Creating one or more Azure storage accounts in the same subscription and the same region as
the Azure virtual network.
3. Setting up a user account on the vSphere host or vCenter server to facilitate automatic discovery
of VMware virtual machines.
4. Preparing the configuration server to allow outbound access to the Azure URLs listed in the
previous lesson and installing vSphere PowerCLI 6.0.
5. Creating a Recovery Services vault in the same subscription and the same region as the storage
accounts and the virtual network.
6. Specifying the protection goal of your implementation. When using the Azure portal, this is the
first task of the Prepare Infrastructure stage, which you initiate from the Site Recovery blade of
the Recovery Services vault. This task involves answering the following questions:
a. Where are your machines located? Select the On-premises option.
b. Where do you want to replicate your machines? Select the To Azure option.
c. Are your machines virtualized? Select the Yes, with VMware vSphere Hypervisor
option.
7. Setting up the source environment. This consists of the following steps:
a. Adding the configuration server entry that is representing your on-premises
configuration server.
b. Downloading the Site Recovery Unified Setup installation file and the Recovery
Services vault registration key to the configuration server. Run the installation by using
the newly downloaded setup file and, when you receive a prompt, provide the vault
registration key. As part of the installation, you will set up an instance of MySQL Server
and specify its admin credentials. You will also be able to confirm that you intend to
use the default port TCP 9443 that the server will use for data replication. You can
modify it if needed.
c. Running CSPSConfigtool.exe on the configuration server and adding the account you
set up in step 3 that will perform automatic discovery of VMware virtual machines.
d. Adding the vCenter server and vSphere host entries that are representing your on-
premises virtualization environment in the Azure portal.
8. Setting up the target environment. As part of this step, you must specify the post-failover
deployment model. In this walkthrough, you will choose Resource Manager, but Site Recovery
also supports the classic deployment model. At this point, you will also have a chance to verify
that you can use the virtual network and the storage accounts that you created earlier to host
replicas of protected virtual machines and their disks. You can create the virtual network and
storage accounts if this is not the case.
9. Setting up replication settings. This step involves configuring a replication policy and associating
it with the configuration server you added in step 7a. The policy includes settings such as RPO
threshold, recovery point retention, and app-consistent snapshot frequency.
10. Selecting the VMware virtual machines and enabling their replication. This consists of the
following steps:
a. Installing the Mobility service on the virtual machines you intend to protect. You can
perform the installation by initiating it from the process server, either by using your
existing software deployment solution such as System Center Configuration Manager
or doing it manually.
b. Configuring Replicate Applications settings. You must specify the vCenter server or
vSphere host you selected in step 7d. In addition, you must select the process server if
you installed it on a computer other than the configuration server. You also must
select the Azure virtual network and the storage account you want to use to host
replicas of protected virtual machines and their disks. In addition, this step involves
selecting the VMware virtual machines that you want to protect. For each virtual
machine, you can designate the account that the process server will use to install the
Mobility service. You can also select disks that you want to exclude from replication
and specify the size of the replica Azure virtual machine. Finally, you also must choose
a replication policy that you want to take effect in this case.
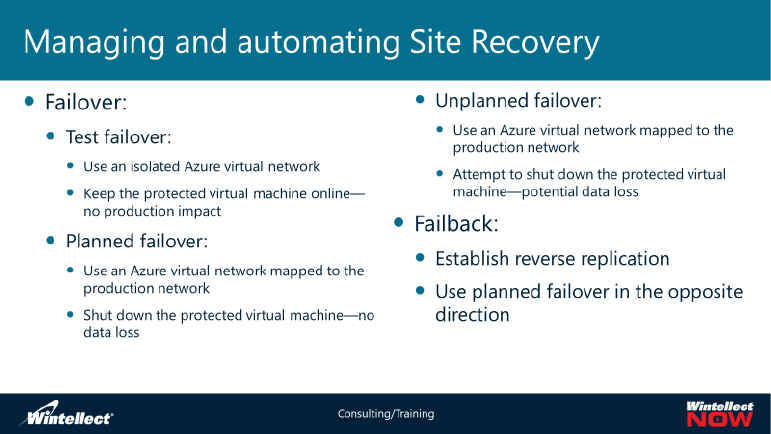
Managing and automating Site Recovery
After an on-
premises
computer
appears in the
portal with the
Protected
status, you can
perform test
failovers,
planned
failovers, or
unplanned
failovers. When
you do so, the
sequence of
events differs,
depending on the type of failover you choose:
•In case of a test failover, you specify the Azure virtual network you want to fail over to. To
prevent any possibility of impacting the production environment, this should be an isolated
network. Site Recovery provisions new Azure virtual machines in the virtual network by using
replicas of the virtual disks that are residing in Azure Storage. The protected virtual machines
stay online. After you complete your testing, Site Recovery automatically deprovisions the Azure
virtual machines.
•In case of a planned failover, Site Recovery shuts down the protected virtual machines to
prevent the possibility of data loss. Next, it provisions the corresponding Azure virtual machines
by using replicas of virtual disks residing in Azure Storage. It also places the new virtual machine
in the commit pending state. You must perform the commit action to complete the failover. The
commit removes any existing recovery points in Azure Storage.
•In case of an unplanned failover, Site Recovery provisions Azure virtual machines by using
replicas of virtual disks residing in Azure Storage. You can instruct Site Recovery to attempt to
synchronize protected virtual machines and shut them down, but, in this scenario, such an
action might not be possible. Alternatively, you can specify to use the latest recovery point
available in Azure Storage. Site Recovery will place the newly-provisioned Azure virtual
machines in the commit pending state. You must perform the commit action to complete the
failover. The commit removes any existing recovery points in Azure storage.
Note: With all three types of failover, if you enabled data encryption when you are running the Azure
Site Recovery Provider setup, you must provide the encryption certificate as part of a failover.
When performing planned or unplanned failover, once your primary site is back online, you should
protect the Azure virtual machines and establish reverse replication. This will allow you to fail back to
the on-premises location without data loss.

Recovery plans
While it is
possible to
perform failover
and failback of
individual
protected
computers, it is
more beneficial
from the
standpoint of
business
continuity to
orchestrate
disaster recovery
of multiple
computers. Site
Recovery
supports this scenario by allowing you to create recovery plans.
A recovery plan consists of one or more recovery groups, which serve as logical containers of protected
virtual machines. You arrange groups in a sequence that dictates the order in which Site Recovery
failover and failback bring the protected virtual machines online. Within this sequence, you can add pre
and post actions. Each action can represent a manual recovery step or an Azure Automation runbook. By
using Azure Automation, you have the option to fully automate your disaster recovery. You can also use
it to provision and configure additional Azure components, such as load balancers.
Site Recovery uses a context variable to pass a number of parameters to the Azure Automation runbook.
You can use these parameters to customize runbook activities. These parameters include:
• RecoveryPlanName: Name of the Site Recovery plan.
• FailoverType: Type of failover (test, planned, or unplanned).
• FailoverDirection: Direction of the failover (from the primary site to Azure or from Azure to the
primary site).
• GroupID: Identifier of a group within the recovery plan.
• VmMap. Collection of virtual machines within the group.

Azure Migrate
The Azure Migrate service assesses on-premises workloads for migration to Azure. The service assesses
the migration suitability of on-premises machines, performs performance-based sizing, and provides
cost
estimations
for running
on-premises
machines in
Azure. If
you're
contemplating
lift-and-shift
migrations, or
are in the
early
assessment
stages of
migration, this
service is for
you. After the
assessment, you can use services such as Azure Site Recovery and Azure Database Migration Service, to
migrate the machines to Azure.
Azure Migrate helps you to:
•Assess Azure readiness. Assess whether your on-premises machines are suitable for running in
Azure.
•Get size recommendations. Get size recommendations for Azure VMs based on the performance
history of on-premises VMs.
•Estimate monthly costs. Get estimated costs for running on-premises machines in Azure.
•Migrate with high confidence. Visualize dependencies of on-premises machines to create groups
of machines that you will assess and migrate together.
Current limitations
•Currently, you can only assess on-premises VMware virtual machines (VMs) for migration to
Azure VMs. The VMware VMs must be managed by vCenter Server (version 5.5, 6.0, or 6.5).
•If you want to assess Hyper-VMs and physical servers, use the Azure Site Recovery Deployment
Planner for Hyper-V, and our partner tools for physical machines.
•You can discover up to 1500 VMs in a single discovery and up to 1500 VMs in a single project.
Additionally, you can assess up to 1500 VMs in a single assessment.
•If you want to discover a larger environment, you can split the discovery and create multiple
projects. Learn more. Azure Migrate supports up to 20 projects per subscription.
•You can only create an Azure Migrate project in West Central US or East US region. The US Gov
Virginia region is projected to get Azure Migrate in the 4th quarter of 2018. This doesn't impact
your ability to plan migration to any target Azure location. The location of the migration project
is used only to store metadata discovered from the on-premises environment.
• Azure Migrate only supports managed disks for migration assessment.
Here is a longer (26 minutes), Microsoft-produced video on Azure Migrate:
Note: Do not click the link while in class. Your instructor will show the video form the main classroom
screen.
https://www.youtube.com/watch?v=pCuXyAZDB4s&t=0s&index=3&list=PLLasX02E8BPCeGEZ0FqHV0t9
wR0M9vB7c
Optional: https://azure.microsoft.com/en-us/resources/videos/migration-with-azure-migrate/
Lab: Implementing protection of on-premises Hyper-V virtual machines in Azure by using Site
Recovery
In this lab, you will implement protection of on-premises Hyper-V virtual machines in Azure by using Site
Recovery. The script for the lab can be found in the GitHub portal, under the name of Mod_5_lab.md at
the following location:
Exercise 1: Preparing your Microsoft Azure subscription for implementing Site Recovery
Before you configure your first test Site Recovery environment, you must create an Azure virtual
network, an Azure storage account, and a Recovery Services vault in your Azure subscription. In
addition, you will configure the Recovery Services vault protection goal, which defines the scenario you
intend to implement, with Hyper-V hosts on-premises and in the secondary site in Azure. These are
Azure-based prerequisites that must be in place before you can configure protection of your Hyper-V
virtual machines.
Exercise 2: Preparing a Hyper-V host for the implementation
With Azure-based prerequisites in place, it is now time for you to configure your on-premises Hyper-V
host. This involves installing the Azure Site Recovery Provider and the Azure Site Recovery Services
agent. You also must register the Hyper-V host with the Recovery Services vault.
Exercise 3: Configuring Site Recovery protection of a Hyper-V virtual machine
After you have satisfied all the prerequisites, you can configure protection of your Hyper-V virtual
machine. To accomplish this, you will first verify that the Azure virtual network and the Azure storage
account you created in the first exercise of this lab qualify to host the replica of your protected virtual
machine. Next, you will create a Site Recovery replication policy in the Recovery Services vault and
associate it with your Hyper-V host. This will finally allow you to configure and enable replication of the
Hyper-V virtual machine. With the protected virtual machine in place, you can then create a recovery
plan. Finally, to minimize the cost of your testing, you will identify and delete all the Azure resources
that you created in your test environment.
Module Review and Takeaways
Review Question
1. What can I replicate with Azure Site Recovery?
2. Why use a recovery plan?
3. How can you connect to the Azure VM after failover?
Best Practices

Use a recovery plan gathers machines into recovery groups. You can customize a plan by adding order,
instructions, and tasks to it. After a plan is defined, you can run a failover on it.
Tools
The following table lists the tools that this module references:
Tool
Use to
Where to find it
Microsoft Azure Site
Recovery Hyper-V
Provider
Set up Azure Site Recovery for
Hyper-V environments
https://www.microsoft.com/en-
us/download/details.aspx?id=45882
Site Recovery
Deployment Planner
for Hyper-V to Azure
Command-line tool for both
Hyper-V to Azure and VMware to
Azure disaster recovery scenarios.
https://aka.ms/asr-deployment-planner
Azure Migrate
Assesses on-premises workloads
for migration to Azure.
In the Azure portal, under create
resources.
Module 6: Implementing Azure Active Directory
Azure Active Directory (Azure AD) is Microsoft’s multi-tenant, cloud-based directory, and identity
management service. Azure AD combines core directory services, application access management, and
identity protection in a single solution, offering a standards-based platform that helps developers deliver
access control to their apps, based on centralized policy and rules.
All Microsoft Online business services rely on Azure AD for sign-in and other identity needs. If you
subscribe to any Microsoft Online business services (for example, Office 365 or Microsoft Azure), you
automatically get Azure AD with access to all of the Free features. Using the Azure Active Directory Free
edition, you can manage users and groups, synchronize with on-premises directories, get single sign-on
across Azure, Office 365, and thousands of popular SaaS apps like Salesforce, Workday, Concur,
DocuSign, Google Apps, Box, ServiceNow, Dropbox, and more.
In this module, you will first learn how to create and manage a new tenant for your organization. Your
new tenant represents your organization and helps you to manage a specific instance of Microsoft cloud
services for your internal and external users. You will then learn about configuring application and
resource access using the identity, authentication and authorization processes inherent in Azure AD.
Finally, you get a look at Microsoft’s full-featured Azure ADE Premium. This edition adds feature-rich
enterprise-level identity management capabilities and enables hybrid users to seamlessly access on-
premises and cloud capabilities. There are two premium versions, P1 and P2. P2 adds advanced
protection for your users and administrators to include all the capabilities of premium P1 as well is
identity protection and privilege identity management.
Lesson 1: Creating and managing Azure AD tenants
In this first lesson on Azure AD, you will learn about the features and functions of Azure AD, and how to
manage Azure AD users, groups, devices and even multiple tenants. You’ll also look at the
commonalities and differences between Azure AD business-to-business and business-to-customers.
Finally, your instructor will show you how to manage Azure AD users, groups and devices.
Overview of Azure AD
Azure Active Directory (Azure AD) provides the core directory and identity management capabilities
behind most of Microsoft’s cloud services, including:
• Azure
• Microsoft Office 365
• Microsoft Dynamics CRM Online
• Microsoft Intune
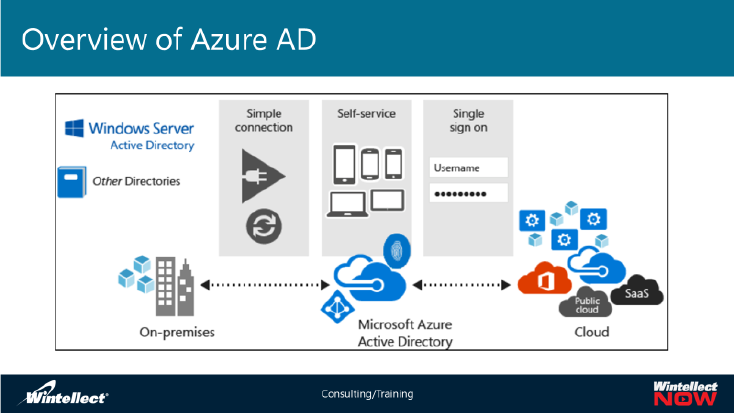
You get an Azure AD directory when you sign up for any of these Microsoft cloud services. You can
create additional
directories as
needed. For
example, you might
maintain your first
directory as a
production
directory and then
create another
directory for testing
or staging.
Also, when you sign
up for Azure, a
default Azure AD
directory is associated with your subscription. There are no costs for using Azure AD and your directories
are a free resource. There are paid Azure AD services that are licensed separately and provide additional
functionality such as company branding at sign-in, and self-service password reset. You can also create a
custom domain using a DNS name that you own instead of the default *.onmicrosoft.com domain.
What is an Azure AD tenant?
In Azure AD, a tenant is a dedicated instance of an Azure AD directory that your organization receives
when it signs up for a Microsoft cloud service such as Azure or Office 365. Each Azure AD directory is
distinct and separate from other Azure AD directories. Just like a corporate office building is a secure
asset specific to only your organization, an Azure AD directory was also designed to be a secure asset for
use by only your organization. The Azure AD architecture isolates customer data and identity
information so that users and administrators of one Azure AD directory cannot accidentally or
maliciously access data in another directory.
Benefits of Azure AD
Azure AD helps you to:
•Create and manage a single identity for each user across your entire enterprise, keeping users,
groups, and devices in sync with Azure AD Connect.
•Provide single sign-on access to your apps, including thousands of pre-integrated SaaS apps, and
to provide more secure remote access to on-premises SaaS applications using the Azure AD
Application Proxy.
•Allow application access security by enforcing rules-based Multi-Factor Authentication policies
for both on-premises and cloud apps.
•Improve user productivity with self-service password reset, and group and application access
requests using the MyApps portal.
•Take advantage of the high-availability and reliability of a worldwide, enterprise-grade, cloud-
based identity and access management solution.
Active Directory Domain Services versus Azure Active Directory Domain Services
Windows Server Active Directory Domain Services (AD DS)
Microsoft’s Active
Directory has been
around since it
debuted in
Windows 2000
Server. In Windows
Server 2008 the AD
DS server role was
established to
distinguish the
specific domain
services from other
Active Directory
functions such as
Certificate and
Federation Services. By using the AD DS server role, you can create a scalable, secure, and manageable
infrastructure for user and resource management, and you can provide support for directory-enabled
applications, such as Microsoft® Exchange Server.
AD DS reflects Microsoft's trend toward relying on standard protocols. The Lightweight Directory Access
Protocol (LDAP) is a product of the IETF (Internet Engineering Task Force). It defines how clients and
servers exchange information about a directory. LDAP version 2 and version 3 are used in AD DS.
A directory, in the most generic sense, is a comprehensive listing of objects. A phone book is a type of
directory that stores information about people, businesses, and government organizations. Phone books
typically record names, addresses, and phone numbers. AD DS is similar to a phone book in several
ways, and it is far more flexible. AD DS stores information about organizations, sites, computers, users,
shares, and just about any other network object that you can imagine. Not all objects are as similar to
each other as those stored in the phone book, so AD DS includes the ability to record different types of
information about different objects.
Security is integrated with AD DS through logon authentication and access control to resources in the
directory. With a single network logon, administrators can manage directory data and organization
throughout their network. Authorized network users can also use a single network logon to access
resources anywhere in the network. Policy-based administration eases the management of even the
most complex network.
Windows domains and Internet domains are now completely compatible. A domain name such as
mspress.microsoft.com will identify AD DS domain controllers responsible for the domain, so any client
with DNS access can locate a domain controller. AD DS clients can use DNS resolution to locate any
number of services because AD DS servers publish a list of addresses to DNS using the new features of
dynamic update. These addresses identify both the domain and the service being provided and are
published via Service Resource Records (SRV RRs).
Azure AD Domain Services
Azure AD Domain Services provides managed domain services such as domain join, group policy, LDAP,
Kerberos/NTLM authentication that are fully compatible with Windows Server Active Directory. You can
consume these domain services without the need for you to deploy, manage, and patch domain
controllers in the cloud. Azure AD Domain Services integrates with your existing Azure AD tenant, thus
making it possible for users to log in using their corporate credentials. Additionally, you can use existing
groups and user accounts to secure access to resources, thus ensuring a smoother 'lift-and-shift' of on-
premises resources to Azure Infrastructure Services. Azure AD Domain Services functionality works
seamlessly regardless of whether your Azure AD tenant is cloud only or synced with your on-premises
Active Directory.
Azure AD Domain Services for cloud-only organizations
A cloud-only Azure AD tenant (often referred to as 'managed tenants') does not have any on-premises
identity footprint. In other words, user accounts, their passwords, and group memberships are all native
to the cloud - that is, created and managed in Azure AD. Consider for a moment an organization that has
a cloud-only Azure AD tenant. The IT administrator has configured a virtual network in Azure
Infrastructure Services. Applications and server workloads are deployed in this virtual network in Azure
virtual machines. Since the organization is a cloud-only tenant, all user identities, their credentials, and
group memberships are created and managed in Azure AD.
A few salient aspects of the cloud-only managed domain that is provisioned by Azure AD Domain
Services are as follows:
•The IT administrator does not need to manage, patch, or monitor this domain or any domain
controllers for this managed domain.
•There is no need to manage AD replication for this domain. User accounts, group memberships,
and credentials from the Azure AD tenant are automatically available within this managed
domain.
•Since the domain is managed by Azure AD Domain Services, the IT administrator does not have
Domain Administrator or Enterprise Administrator privileges on this domain.
Azure AD Domain Services for hybrid organizations
Organizations with a hybrid IT infrastructure consume a mix of cloud resources and on-premises
resources. Such organizations synchronize identity information from their on-premises directory running
on AD DS to their Azure AD tenant. As hybrid organizations look to migrate more of their on-premises
applications to the cloud, especially legacy directory-aware applications, Azure AD Domain Services can
be useful to them. The organization can deploy Azure AD Connect to synchronize identity information
from their on-premises AD DS directory to their Azure AD tenant. The identity information that is
synchronized includes user accounts, their credential hashes for authentication (password sync) and
group memberships.
A few salient aspects of the hybrid organization’s managed domain that is provisioned by Azure AD
Domain Services are as follows:
• The managed domain is a stand-alone domain. It is not an extension of organization’s on-
premises domain.
• The IT administrator does not need to manage, patch, or monitor domain controllers for this
managed domain.
• There is no need to manage AD replication to this domain. User accounts, group memberships,
and credentials from the on-premises directory are synchronized to Azure AD via Azure AD
Connect. These user accounts, group memberships, and credentials are automatically available
within the managed domain.
• Since the domain is managed by Azure AD Domain Services, the IT administrator does not have
Domain Administrator or Enterprise Administrator privileges on this domain.
Comparing AD DS to Azure AD DS
With Azure AD Domain Services, you can deploy your workloads in Azure Infrastructure Services,
without having to worry about maintaining identity infrastructure in Azure. This managed service is
different from a typical Windows Server AD DS deployment that you deploy and administer on your
own. The service is easy to deploy and delivers automated health monitoring and remediation.
When comparing AD DS with Azure AD, it is important to note the following characteristics of AD DS:
• AD DS is by design single-tenant.
• AD DS is a directory service with a hierarchical X.500-based structure.
• AD DS uses Domain Name System (DNS) for locating services such as domain controllers.
• AD DS relies on protocols such as Lightweight Directory Access Protocol (LDAP) for directory
lookups and Kerberos for authentication, which were designed to operate within secure,
isolated networks.
• AD DS facilitate Group Policy Objects (GPOs)–based management.
• AD DS supports users, groups, and AD-aware applications
• AD DS supports computer objects, representing computers that join an Active Directory domain.
• AD DS supports multi-domain forests.
Although Azure AD is somewhat similar to AD DS, there are some fundamental differences between
them. The following are some of the characteristics that make Azure AD distinct:
• Azure AD is multitenant by design.
• Azure AD object hierarchy is flat, with no support for custom containers or organizational units
(OUs).
• Azure AD implementation does not rely on domain controllers.
• Azure AD supports protocols that facilitate secure communication over the Internet.
• Azure AD does not support Kerberos authentication; instead, it uses protocols such as SAML,
WS-Federation, and OpenID Connect for authentication (and OAuth for authorization).
• Azure AD does not support LDAP; instead, it relies on Graph application programming interface
(API) for directory lookups.
• Azure AD is primarily an identity and access management solution. It does not provide
management capabilities equivalent to those in AD DS. For example, it does not support GPOs,
although it integrates with device management products such as Microsoft Intune.
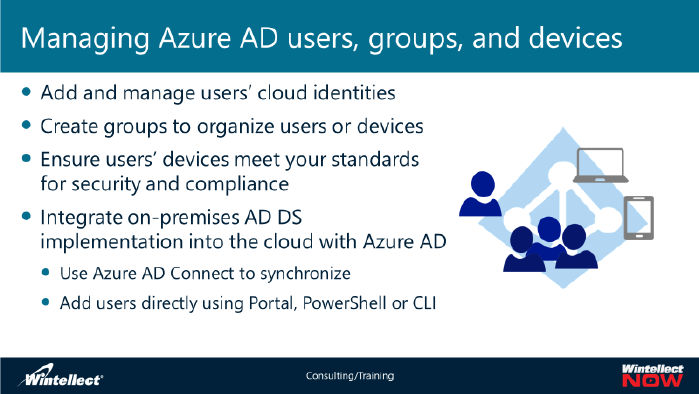
•AD DS supports users, groups, and web-based applications.
With Azure AD Domain Services, you can enjoy the following benefits:
•Simple – You can satisfy the identity needs of virtual machines deployed to Azure Infrastructure
services with a few simple clicks. You do not need to deploy and manage identity infrastructure
in Azure or setup connectivity back to your on-premises identity infrastructure.
•Integrated – Azure AD Domain Services is deeply integrated with your Azure AD tenant. You can
now use Azure AD as an integrated cloud-based enterprise directory that caters to the needs of
both your modern applications and traditional directory-aware applications.
•Compatible – Azure AD Domain Services is built on the proven enterprise grade infrastructure of
Windows Server Active Directory. Therefore, your applications can rely on a greater degree of
compatibility with Windows Server Active Directory features. Not all features available in
Windows Server AD are currently available in Azure AD Domain Services. However, available
features are compatible with the corresponding Windows Server AD features you rely on in your
on-premises infrastructure. The LDAP, Kerberos, NTLM, Group Policy, and domain join
capabilities constitute a mature offering that has been tested and refined over various Windows
Server releases.
•Cost-effective – With Azure AD Domain Services, you can avoid the infrastructure and
management burden that is associated with managing identity infrastructure to support
traditional directory-aware applications. You can move these applications to Azure
Infrastructure Services and benefit from greater savings on operational expenses.
Managing Azure AD users, groups, and devices
Azure AD provides a set of tools that can help you secure, automate, and manage your environment,
including resetting passwords, user and group management, and app requests. Azure AD can also help
you manage user-owned devices and access and control of Software as a Service (SaaS) apps. As an
Azure AD administrator, you can set up devices, users and even groups to suit your organizational needs.
You can create and
manage user and
group identities, as
well as manage
devices, using the
Azure Portal, Azure
PowerShell, and
Azure CLI 2.0.
Additionally, if you
have a Microsoft
Intune or Office 365
subscription, you
can use the
Microsoft Intune
admin console, or the Office 365 admin center, respectively to create and manage the same.
With device management in Azure AD, you can ensure that your users are accessing your resources from
devices that meet your standards for security and compliance. You can select the users who can join
devices to Azure AD. You can allow devices to be registered with Azure AD. Enrollment with Microsoft
Intune or Mobile Device Management (MDM) for Office 365 requires this registration. You can also
choose whether users are required to provide a second authentication factor to join their device to
Azure AD through multi-factor authentication (MFA). Microsoft recommends requiring multi-factor
authentication when registering a device.
You can extend your on-premises Active Directory implementation into the cloud by integrating your on-
premises directories with Azure AD through hybrid identity management. Azure AD Connect provides
this integration, giving your users a single identity and single sign-on (SSO) access to both your on-
premises resources and your cloud services, such as Office 365.
Users save time when they have a single username and password, along with a consistent experience on
every device. Users also save time by performing self-service tasks, like resetting a forgotten password
or requesting access to an application without waiting for assistance from the helpdesk.
You can create groups to organize users or devices by geographic location, department, or hardware
characteristics.
There are four ways to assign resource access rights to your users:
• Direct assignment. The resource owner directly assigns the user to the resource.
• Group assignment. The resource owner assigns an Azure AD group to the resource, which
automatically gives all of the group members access to the resource. Group membership is
managed by both the group owner and the resource owner, letting either owner add or remove
members from the group. For more information about adding or removing group membership,
see How to: Add or remove a group from another group using the Azure Active Directory portal.
• Rule-based assignment. The resource owner creates a group and uses a rule to define which
users are assigned to a specific resource. The rule is based on attributes that are assigned to
individual users. The resource owner manages the rule, determining which attributes and values
are required to allow access the resource.
• External authority assignment. Access comes from an external source, such as an on-premises
directory or a SaaS app. In this situation, the resource owner assigns a group to provide access
to the resource and then the external source manages the group members.
Users can join groups without being assigned
The group owner can let users find their own groups to join, instead of assigning them. The owner can
also set up the group to automatically accept all users that join or to require approval.
After a user requests to join a group, the request is forwarded to the group owner. If it's required, the
owner can approve the request and the user is notified of the group membership. However, if you have
multiple owners and one of them disapproves, the user is notified, but isn't added to the group.
To add a new user

You can create a new user using the Azure Active Directory.
1. Sign in to the Azure portal as a Global administrator or user administrator for the directory.
2. In the Hub menu, select Azure Active Directory, and then select Users, and then select New
user.
3. On the User blade, fill out the required information, as follows:
a. Name (required). The first and last name of the new user. For example, Mary Parker.
a. User name (required). The user name of the new user. For example,
mary@contoso.com. The domain part of the user name must use either the initial
default domain name, yourdomainname>.onmicrosoft.com, or a custom domain name,
such as contoso.com.
b. Profile. Optionally, you can add more information about the user. You can also add user
information at a later time.
c. Groups. Optionally, you can add the user to one or more existing groups. You can also
add the user to groups at a later time.
d. Directory role. Optionally, you can add the user to a directory role. You can assign the
user to be a global administrator, or to one or more of the other administrator roles in
Azure AD.
4. Copy the auto-generated password provided in the Password box. You'll need to give this
password to the user for the initial sign-in process.
5. Select Create.
The user is created and added to your Azure AD tenant.
You can also use Azure PowerShell to create an Azure AD user. For example, to create a user named Jeff
Prosise in the Wintellect.now domain, call the New-AzureADUser cmdlet with the following parameter
values:
New-AzureADUser -AccountEnabled $True -DisplayName "Jeff Prosise" -
PasswordProfile $PasswordProfile -MailNickName "Jeff" -
UserPrincipalName Jeff@Wintellect.now
You can also use Azure CLI 2.0 to do the same, as follows:
az ad user create --display-name "Jeff Prosise"
--password ”Pa55w.rd”
--user-principal-name “Jeff@wWintellect.now”
--mail-nickname “Jeff”
Azure AD Connect
If you have an environment with both Azure Active Directory (cloud) and Windows Server Active
Directory (on-premises), you can add new users by syncing the existing user account data. You use
Azure AD Connect as the Microsoft tool designed to meet and accomplish your hybrid identity goals.
This allows you to provide a common identity for your users for Office 365, Azure, and SaaS applications
integrated with Azure AD. It provides the following features:
• Synchronization - This component is responsible for creating users, groups, and other objects. It
is also responsible for making sure identity information for your on-premises users and groups is
matching the cloud. It is responsible for synchronizing password hashes with Azure AD.
• AD FS and federation integration - Federation is an optional part of Azure AD Connect and can
be used to configure a hybrid environment using an on-premises AD FS infrastructure. It also
provides AD FS management capabilities such as certificate renew and additional AD FS server
deployments.
• Pass-through Authentication - Another optional component that allows users to use the same
password on-premises and in the cloud, but doesn't require the additional infrastructure of a
federated environment
• Health Monitoring - Azure AD Connect Health can provide robust monitoring and provide a
central location in the Azure portal to view this activity.
Managing multiple Azure AD tenants
In Azure AD, a tenant is a dedicated instance of an Azure AD directory that your organization receives
when it signs up for a Microsoft cloud service such as Azure or Office 365. Each Azure AD directory is
distinct and separate from other Azure AD directories. Just like a corporate office building is a secure
asset specific to only your organization, an Azure AD directory was also designed to be a secure asset for
use by only your organization. The Azure AD architecture isolates customer data and identity
information so that users and administrators of one Azure AD directory cannot accidentally or
maliciously access data in another directory.
For the purpose of
this course, a
tenant is simply a
single Azure AD
Directory.
When you sign up
for Azure, a default
Azure AD directory
is associated with
your subscription.
There are no costs
for using Azure AD
and your
directories are a
free resource. There are paid Azure AD services that are licensed separately and provide additional
functionality such as company branding at sign-in, and self-service password reset. You can also create a
custom domain using a DNS name that you own instead of the default *.onmicrosoft.com domain.
In Azure AD, each tenant is a fully independent resource: a peer that is logically independent from the
other tenants that you manage. There is no parent-child relationship between tenants. This
independence between tenants includes resource independence, administrative independence, and
synchronization independence. Each subscription is associated with one, and only one Azure AD tenant.
However, if you have more than one Azure subscription, you can use the same Azure AD tenant for
those subscriptions as well. This means you can have a separate subscription for certain cloud services
or apps, as well as a subscription for certain Azure VMs, and give access to particular users across all
those subscriptions, eliminating the need to maintain multiple credentials for the same user. Multiple
Microsoft cloud offering subscriptions can use the same Azure AD tenant that acts as a common identity
provider. A central Azure AD tenant that contains the synchronized accounts of your on-premises
Windows Server AD provides cloud-based Identity as a Service (IDaaS) for your organization. However,
you can also create a new Azure AD tenant in a subscription.
To add an Azure AD tenant, sign in to the Azure portal as the global administrator, and then, in the hub
menu, click + Create a resource, and then in the Azure Marketplace, scroll down the list of categories
and select Identity, and then scroll back up and in the results select Azure Active Directory. On the
Create Directory blade, specify the following settings and click Create:
•Organization name: any custom name you want to assign to the new tenant
•Initial domain name: a unique, valid DNS host name in the “.onmicrosoft.com” namespace
•Country or region: the geopolitical area where the Azure AD tenant will reside.
Deleting an Azure AD tenant
Create a guest user account with the Global administrator role. Using this account, you can then delete
an Azure AD tenant if the following additional conditions are met:
•You deleted all users except the guest account you are using.
•You deleted all registered applications
•The directory is not associated with any of the cloud services such as Azure, Office 365, or Azure
AD Premium.
•No multi-factor authentication providers are linked to the directory.
To delete an Azure AD directory from the Azure portal, navigate to its blade and click Delete directory.
Review the list of requirements, verify that all of them are satisfied, and click Delete. Usually one or two
requirements will be overlooked, and the blade will present hyperlinks to detailed information where
you can learn how to fully meet that requirement.
Implementing Azure AD B2B and Azure AD B2C
Azure AD has two collaborative functions that allow you to share resources with a partner organization
or directly with consumers in one of two ways. Azure AD Business-to-Business, or Azure AD B2B, is
designed to allow partner organization’s users authentication to your resources and vice versa, while
Azure AD Business-to-Consumer, or Azure AD B2C, is designed to allow your customers authenticatable
access to selected resources.
Azure AD B2B is for businesses that want to securely share files and resources with external users so
they can collaborate. An Azure admin sets up B2B in the Azure portal, and Azure AD takes care of
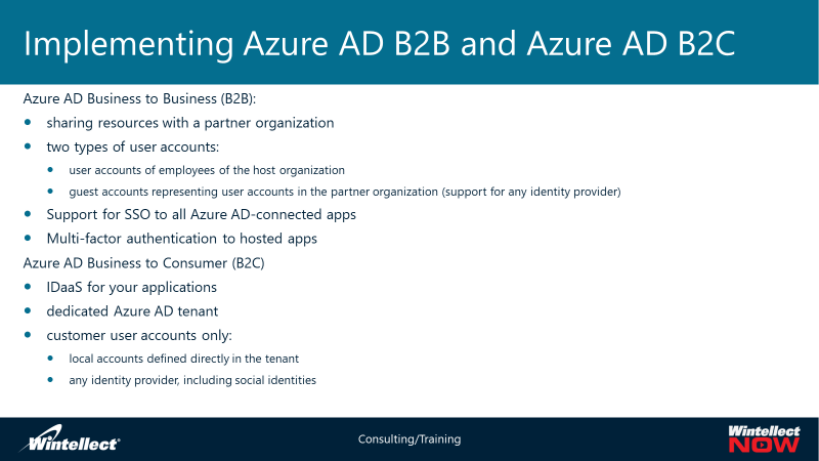
federation
between
your
business
and your
external
partner.
Users sign
in to the
shared
resources
using a
simple
invitation
and
redemption process with their work or school account, or any email account.
Azure AD B2B collaboration lets you securely share your company's applications and services with guest
users from any other organization, while maintaining control over your own corporate data. It allows
your organization to work safely and securely with external partners, large or small, even if they don't
have Azure AD or an IT department. A simple invitation and redemption process lets partners use their
own credentials to access your company's resources. Developers can use Azure AD B2B APIs to
customize the invitation process or write applications like self-service sign-up portals.
When you use the Azure AD B2B process, your partner uses their own identity management solution, so
there is no external administrative overhead for your organization.
• The partner uses their own identities and credentials; Azure AD is not required.
• You don't need to manage external accounts or passwords.
• You don't need to sync accounts or manage account lifecycles.
To get started, you Invite guest users with a simple invitation and redemption process. Guest users sign
in to your apps and services with their own work, school, or social identities. If the guest user doesn’t
have a Microsoft account or an Azure AD account, one is created for them when they redeem their
invitation. You can provide invitation via the following methods:
• Invite guest users using the email identity of their choice.
• Send a direct link to an app, or send an invitation to the guest user's own Access Panel.
• Guest users follow a few simple redemption steps to sign in.
Once these users accept your invitation, you can use policies to securely share your apps and services.
You can use authorization policies protect your corporate content. Conditional access policies, such as
multi-factor authentication, can be enforced:
• At the tenant level.
• At the application level.
• For specific guest users to protect corporate apps and data.
As an administrator, you can also add guest users to your organization in the Azure portal. This means
you create a new guest user in Azure AD, similar to how you'd add a new user. The guest user
immediately receives a customizable invitation that lets them sign in to their Access Panel. Guest users
in the directory can be assigned to apps or groups. You can even delegate guest user management to
your organization’s application owners so that they can add guest users directly to any application they
want to share, whether it's a Microsoft application or not.
• Administrators set up self-service app and group management.
• Non-administrators use their Access Panel to add guest users to applications or groups.
Azure AD B2B offers APIs and sample code to build applications that provide ways to bring your external
partners on board. You can meet your specific organization’s needs by using the B2B collaboration
invitation APIs to customize your B2B onboarding experiences, including creating self-service sign-up
portals and even use sample code Microsoft provides for a self-service portal on Github.
Azure AD B2B can easily be customized and provides a range of enhancements, including:
• Single Sign On (SSO) support to all Azure AD–connected apps that are registered in the tenant of
the host organization, including Office 365, non-Microsoft SaaS apps, and on-premises apps.
• Multi-factor authentication to hosted apps, on the tenant, app, or individual user level.
• Support for delegation, allowing designated information workers to invite partner users.
• Development of custom sign-in pages and invitation emails for partner users.
• Bulk partner user provisioning by using CSV file uploads.
Azure AD B2C is primarily for businesses and developers that create customer-facing apps. With Azure
AD B2C, developers can use Azure AD as the full-featured identity system for their application, while
letting customers sign in with an identity they already have established (like Facebook or Gmail).
Azure AD B2C is an identity management service that enables you to customize and control how
customers interact with your application. This interaction includes sign up, sign in, and managing their
profiles when customers use your applications. You have the choice of applications for iOS, Android, and
.NET, among others. Azure AD B2C enables these actions while protecting your customer identities at
the same time.
You configure an application registered with Azure AD B2C to take care of many identity management
tasks. Some examples are:
• Enable a customer to sign up to use your registered application
• Enable a signed-up customer to sign in and start using your application
• Enable a signed-up customer to edit their profile
• Enable multi-factor authentication in your application
• Enable the customer to sign up and sign in with specific identity providers
• Grant access from your application to APIs that you build
• Customize the look and feel of the sign-up and sign-in experience
• Manage single sign-on sessions for your application
Azure AD B2C supports OpenID Connect for all customer experiences. In the Azure AD B2C
implementation of OpenID Connect, your application starts the user journey by issuing authentication
requests to Azure AD B2C. The result of the request is an id_token. This security token defines the
customer's identity.
Every application that uses Azure AD B2C must be registered in an Azure AD B2C tenant using the Azure
portal. The registration process collects and assigns values to your application. These values include an
application ID that uniquely identifies the application. A redirect URI is defined that's used to direct
responses back to the application.
The interaction of every application follows a similar high-level pattern:
1. The application directs the customer to run a policy.
2. The customer completes the policy according to the policy definition.
3. The application receives a security token.
4. The application uses the security token to try to access a protected resource.
5. The resource server validates the security token to verify that access can be granted.
6. The application periodically refreshes the security token.
These steps differ slightly based on the type of application you're building.
Azure AD B2C interacts with identity providers, customers, other systems, and with the local directory in
sequence to complete an identity task. For example, sign in a customer, register a new customer, or
reset a password. The underlying platform that establishes multi-party trust and completes these steps
is called the Identity Experience Framework. This framework and a policy (also called a user journey or a
Trust Framework policy) explicitly defines the actors, the actions, the protocols, and the sequence of
steps to complete.
Azure AD B2C protects from denial-of-service and password attacks against your applications. Azure AD
B2C uses detection and mitigation techniques like SYN cookies and rate and connection limits to protect
resources against denial-of-service attacks. Mitigation is also included for brute-force password attacks
and dictionary password attacks.
Before developers configure applications to use Azure AD B2C, Azure administrators first need to create
an Azure AD B2C tenant and register your application.
Create an Azure AD B2C tenant
1. Sign in to the Azure portal.
2. Make sure that you are using the directory that contains your subscription by clicking the
Directory and subscription filter in the top menu and choosing the directory that contains it.
This is a different directory than the one that will contain your Azure AD B2C tenant.
3. Choose Create a resource in the top-left corner of the Azure portal.
4. Search for and select Active Directory B2C, and then click Create.
5. Choose Create a new Azure AD B2C Tenant, enter an organization name and initial domain
name, which is used in the tenant name, select the country (it can't be changed later), and then
click Create.
6. On the Create new B2C Tenant or Link to an exiting Tenant page, choose Link an existing Azure
AD B2C Tenant to my Azure subscription, select the tenant that you created, select your
subscription, click Create new and enter a name for the resource group that will contain the
tenant, select the location, and then click Create.
7. To start using your new tenant, make sure you are using the directory that contains your Azure
AD B2C tenant by clicking the Directory and subscription filter in the top menu and choosing
the directory that contains it.
8. The new tenant is established and developers can now configure applications to use Azure AD
B2C. Doing so is beyond the scope of this course, but for more information, see the following:
https://docs.microsoft.com/en-us/azure/active-directory-b2c/active-directory-b2c-tutorials-
web-app
Demonstration: Managing Azure AD users, groups, and devices
In this demonstration,
watch as your instructor:
•Creates a new Azure AD directory.
•Creates a new Global Administrator user account.
•Joins a Windows 10–based computer to Azure AD.
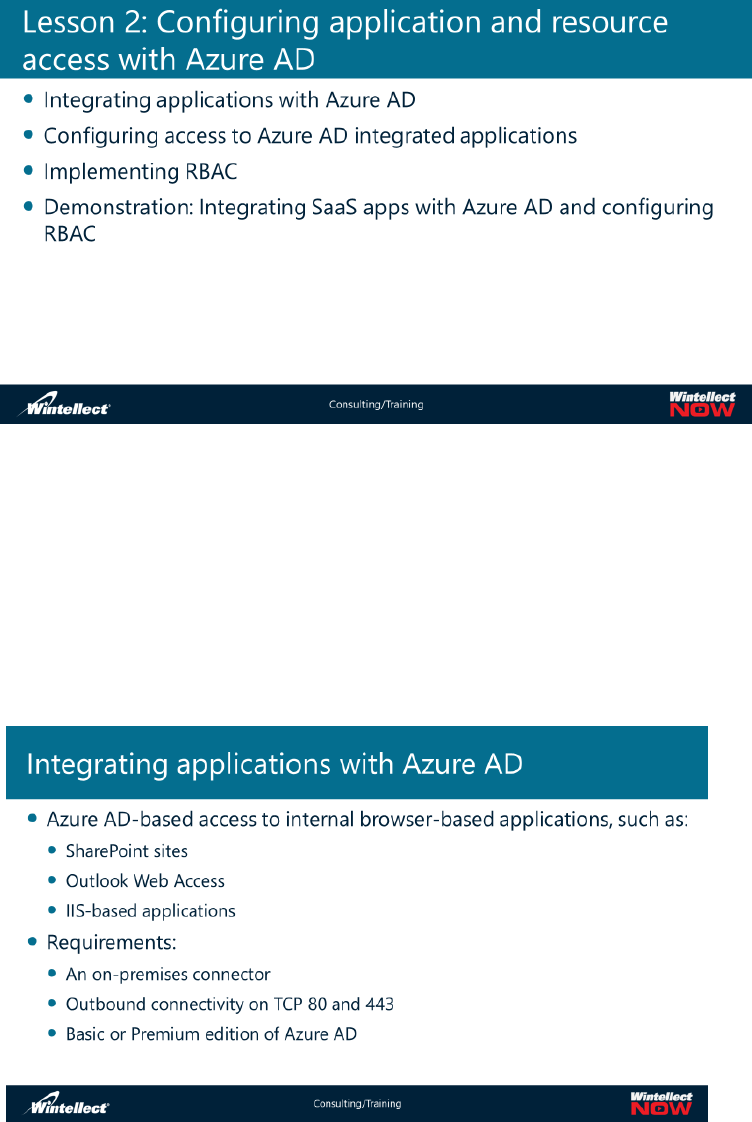
Lesson 2: Configuring application and resource access with Azure AD
There's a tradeoff between security and ease-of-access. Integrating apps with Azure Active Directory
helps you implement a good balance between the two. Using RBAC ensures users with the need to do
something have the ability to do so without adding them to too high or low an administrative category.
In this lesson, you will earn how to integrate apps and use RBAC in the Azure Active Directory.
Integrating applications with Azure AD
Azure Active Directory provides organizations with enterprise-grade identity management for cloud
applications. Azure AD integration gives your users a streamlined sign-in experience, and helps your
application conform to
IT policy.
There are several ways
for your application to
integrate with Azure
AD. Take advantage of
as many or as few of
these scenarios as is
appropriate for your
application.
• Support Azure
AD as a Way to Sign-in
to Your Application:
Your users won't have one more name and password to remember. As a developer, you'll have
one less password to store and protect. Not having to handle forgotten password resets may be
a significant savings alone. Azure AD powers sign in for some of the world's most popular cloud
applications, including Office 365 and Microsoft Azure. With hundreds of millions of users from
millions of organizations, chances are your user is already signed in to Azure AD. During sign up
for your application, Azure AD can send essential information about a user so that you can pre-
fill your sign-up form or eliminate it completely. Users can sign up for your application using
their Azure AD account via a familiar consent experience similar to those found in social media
and mobile applications. Any user can sign up and sign in to an application that is integrated
with Azure AD without requiring IT involvement.
• Browse for Users, Manage User Provisioning, and Control Access to Your Application: Use the
Graph API to help users search and browse for other people in their organization when inviting
others or granting access, instead of requiring them to type email addresses. Users can browse
using a familiar address book style interface, including viewing the details of the organizational
hierarchy. Learn more about the Graph API.
o Azure AD contains the groups that your customer is already using for email distribution
and managing access. Using the Graph API, re-use these groups instead of requiring your
customer to create and manage a separate set of groups in your application. Group
information can also be sent to your application in sign in tokens. Learn more about the
Graph API.
o Administrators and application owners in Azure AD can assign access to applications to
specific users and groups. Using the Graph API, you can read this list and use it to
control provisioning and de-provisioning of resources and access within your
application.
o Administrators and application owners can assign users and groups to roles that you
define when you register your application in Azure AD. Role information is sent to your
application in sign in tokens and can also be read using the Graph API. Learn more about
using Azure AD for authorization.
• Get Access to User's Profile, Calendar, Email, Contacts, Files, and More: Azure AD is the
authorization server for Office 365 and other Microsoft business services. If you support Azure
AD for sign in to your application or support linking your current user accounts to Azure AD user
accounts using OAuth 2.0, you can request read and write access to a user's profile, calendar,
email, contacts, files, and other information. You can seamlessly write events to user's calendar,
and read or write files to their OneDrive. Learn more about accessing the Office 365 APIs.
• Promote Your Application in the Azure and Office 365 Marketplaces: Users who search and
browse these marketplaces are already using one or more cloud services, making them qualified
cloud service customers. Learn more about promoting your application in the Azure
Marketplace.
• When users sign up for your application, it will appear in their Azure AD access panel and Office
365 app launcher. Users will be able to quickly and easily return to your application later,
improving user engagement. Learn more about the Azure AD access panel.
• Secure Device-to-Service and Service-to-Service Communication: Using Azure AD for identity
management of services and devices reduces the code you need to write and enables IT to
manage access. Services and devices can get tokens from Azure AD using OAuth and use those
tokens to access web APIs. Using Azure AD you can avoid writing complex authentication code.
Since the identities of the services and devices are stored in Azure AD, IT can manage keys and
revocation in one place instead of having to do this separately in your application.
Before integrating applications with Azure AD, it is important to know where you are and where you
want to go. The following questions are intended to help you think about your Azure AD application
integration project.
Application inventory
• Where are all of your applications? Who owns them?
• What kind of authentication do your applications require?
• Who needs access to which applications?
• Do you want to deploy a new application?
• Will you build it in-house and deploy it on an Azure compute instance?
• Will you use one that is available in the Azure Application Gallery?
User and group inventory
• Where do your user accounts reside?
• On-premises Active Directory
• Azure AD
• Within a separate application database that you own
• In unsanctioned applications
• All of the above
• What permissions and role assignments do individual users currently have? Do you need to
review their access or are you sure that your user access and role assignments are appropriate
now?
• Are groups already established in your on-premises Active Directory?
• How are your groups organized?
• Who are the group members?
• What permissions/role assignments do the groups currently have?
• Will you need to clean up user/group databases before integrating? (This is a pretty important
question. Garbage in, garbage out.)
Access management inventory
• How do you currently manage user access to applications? Does that need to change? Have you
considered other ways to manage access, such as with RBAC for example?
• Who needs access to what?
• Maybe you don't have the answers to all of these questions up front but that's okay. This guide
can help you answer some of those questions and make some informed decisions.
• Find unsanctioned cloud applications with Cloud Discovery
As mentioned above, there may be applications that haven't been managed by your organization until
now. As part of the inventory process, it is possible to find unsanctioned cloud applications.
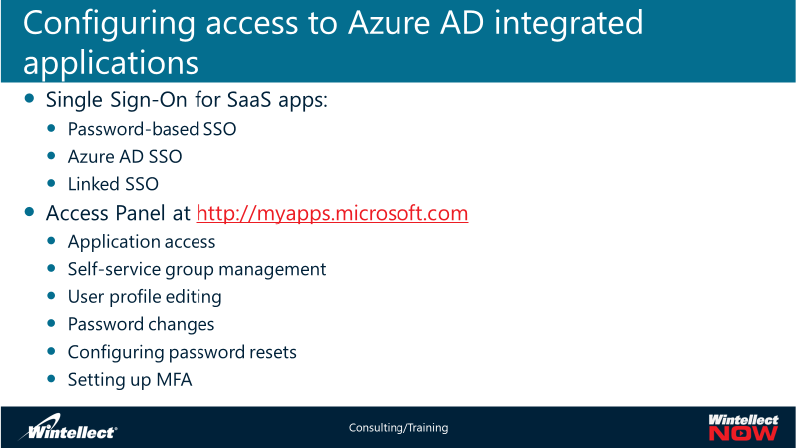
Note: For in-depth information, you can download Azure Active Directory deployment plans from
GitHub. For gallery applications, you can download deployment plans for single sign-on, conditional
access, and user provisioning through the Azure portal.
To download a deployment plan from the Azure portal:
1. Sign in to the Azure portal.
2. Select Enterprise Applications | Pick an App | Deployment Plan.
Configuring access to Azure AD integrated applications
Organizations often have hundreds of applications that users depend on to get their work done. Users
access these applications from many devices and locations. New applications are added, developed, and
sunset every day. With so many applications and access points, it is more critical than ever to use a
cloud-based
solution to
manage user
access to all
applications.
Azure AD
supports four
main
application
types that you
can add using
the Add feature
found under
Enterprise
Applications.
These include:
• Azure AD Gallery Applications – An application that has been pre-integrated for single sign-on
with Azure AD.
• Application Proxy Applications – An application running in your on-premises environment that
you want to provide secure single-sign on to externally.
• Custom-developed Applications – An application that your organization wishes to develop on
the Azure AD Application Development Platform, but that may not exist yet.
• Non-Gallery Applications – Bring your own applications! Any web link you want, or any
application that renders a username and password field, supports SAML or OpenID Connect
protocols, or supports SCIM that you wish to integrate for single sign-on with Azure AD.
Coupling Azure AD single sign-on (SSO) with conditional access policies provides high levels of security
for accessing applications. Security capabilities include cloud-scale identity protection, risk-based access
control, native multi-factor authentication, and conditional access policies. These capabilities allow for
granular control policies based on applications, or on groups that need higher levels of security.
Enabling single sign-on (SSO) across applications and Office 365 provides a superior sign in experience
for existing users by reducing or eliminating sign in prompts. The user’s environment feels more
cohesive and is less distracting without multiple prompts, or the need to manage multiple passwords.
The business group can manage and approve access through self-service and dynamic membership.
Allowing the right people in the business to manage access to an application improves the security of
the identity system.
SSO improves security. Without single sign-on, administrators need to create and update user accounts
for each individual application, which takes time. Also, users have to track multiple credentials to access
their applications. As a result, users tend to write down their passwords or use other password
management solutions, which introduce data security risks.
You can use the following three mechanisms to implement application SSO support:
• Password-based SSO with Azure AD storing credentials for each user of a password-based SSO
application. When Azure AD administrators assign a password-based SSO app to an individual
user, they can enter app credentials on the user's behalf. Alternatively, users can enter and
store credentials themselves directly from the Access Panel. In either case, when accessing a
password-based SSO app, users first rely on their Azure AD credentials to authenticate to the
Access Panel. Next, when they open an app, Azure AD transparently extracts the corresponding
app-specific stored credentials and securely relays them to its provider within the browser's
session.
• Azure AD SSO, with Azure AD leveraging federated trusts with providers of SSO applications. In
this case, an application provider relies on Azure AD to handle users’ authentication, and
accepts an Azure AD–generated authentication token when granting access to the application.
• Linked SSO, with Azure AD leveraging a federated trust between the application and an SSO
provider, established by using an existing security token service (STS) implementation such as
AD FS. This is similar to the second mechanism because it does not involve separate application
credentials. However, in this case, when users access the Access Panel application, your current
SSO solution handles their authentication requests.
To set an application’s single sign-on mode, follow these instructions:
1. Open the Azure portal and sign in as a Global Administrator or Co-admin.
2. Open the Azure Active Directory Extension by clicking All services at the top of the main left-
hand navigation menu.
3. Type in “Azure Active Directory” in the filter search box and select the Azure Active Directory
item.
4. click Enterprise Applications from the Azure Active Directory left-hand navigation menu.
5. click All Applications to view a list of all your applications.
• If you do not see the application you want show up here, use the Filter control at the top of
the All Applications List and set the Show option to All Applications.
6. Select the application for which you want to configure single sign-on.
7. Once the application loads, click Single sign-on from the application’s left-hand navigation menu.
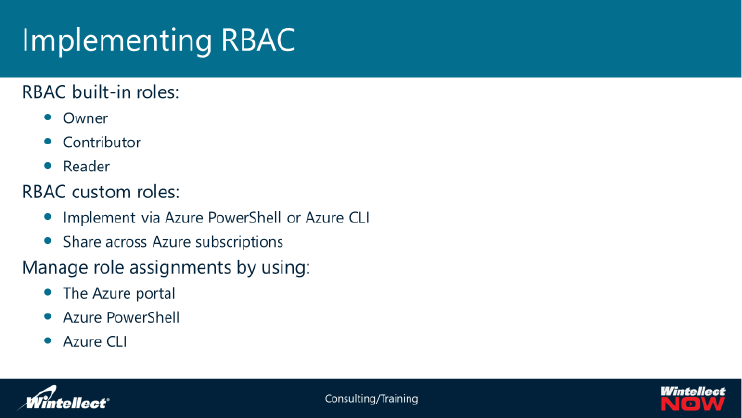
There are several ways to make Azure AD–integrated applications available to end users. The most
common approach involves using the Access Panel, which is a web-based portal accessible at
https://myapps.microsoft.com. Users sign in to the Access Panel by providing their Azure AD
credentials.
A user must successfully authenticate to view the portal interface. The portal interface contains the
applications tab, which automatically displays a list of applications to which the user is entitled. You
manage this entitlement by assigning applications to individual users or to groups of users.
Besides providing access to applications, the Access Panel also allows users to edit their profile settings,
change their password, and provide information needed for password reset. Users can also edit multi-
factor authentication settings and view their account details such as their user ID, alternative email, and
phone numbers. In addition, if you implement self-service group management, delegated users will be
able to view and modify group membership from the groups tab within the Access Panel interface.
Internet Explorer 8 and newer versions, Chrome, and Firefox all support the Azure AD Access Panel. You
can also use it on browsers that support JavaScript and CSS. To do so, you must install the Access Panel
extension software for your browser. You will be prompted to install it the first time you attempt to
start an application via the Application Access Panel interface.
Implementing RBAC
RBAC enables fine-grained access management for resources that exist in an Azure subscription. This
mechanism relies on predefined and custom-defined roles to grant or deny users and groups that reside
in Azure AD permissions necessary to conduct role-specific actions on a subscription, resource group, or
resource level.
Note: When assigning permissions via RBAC, you have to choose users and groups from the Azure AD
tenant that is associated with your subscription.
By using RBAC, you
can implement
delegated
management of
cloud resources.
For example, you
can allow your
development team
to create their own
virtual machines,
but limit virtual
networks to which
those machines can
be connected.
RBAC built-in roles
RBAC has three basic built-in roles that apply to all resource types:
• Owner. This role provides full access to all the resources and can delegate access to others.
• Contributor. This role allows you to create and manage all types of resources, without the ability
to grant these resources access to users or groups.
• Reader. This role provides view-only access to existing Azure resources.
In addition, there is a large number of resource type-specific built-in RBAC roles with predefined
permissions that further narrow access to resources. Examples of built-in, resource type-specific roles
include virtual machine contributor or SQL database contributor.
Note: To see the full list of built-in roles, refer to: http://aka.ms/Cge87w
To configure RBAC, you can use the Azure portal, Azure PowerShell, and Azure CLI. Permissions granted
through RBAC are inherited from the parent scope by child scopes. This means that the RBAC-based
permissions you assign on the subscription level will apply to all of its resource groups and resources.
Similarly, the RBAC-based permissions you assign to a resource group will apply to all of its resource
Note: The Owner role at the subscription level has permissions to subscription resources that are
equivalent to permissions of the Service administrator. However, you still must be the Service
administrator or a Co-administrator in order to sign in to the Azure classic portal. In addition, only the
Service administrator have the ability to change the association between the Azure subscription and an
Azure AD tenant.
Azure RBAC allows you to manage permissions at the management plane of Azure resources, such as
creating a SQL database, However, you cannot use RBAC for delegating management of data plane
operations within Azure resources such as creating a table within a SQL database.
If predefined built-in roles do not meet your expectations, you can create custom roles by using Azure
PowerShell or Azure CLI. Custom roles you define get stored in the Azure AD tenant associated with your
subscription, allowing you to share them across multiple subscriptions.
Managing RBAC by using the Azure portal
To manage RBAC by using the Azure portal, perform the following steps:
1. In the Azure portal, navigate to the Access control (IAM) blade of the resource, resource group,
or subscription to which you intend to grant permissions via RBAC.
2. Click + Add.
3. On the Add permissions blade, in the Role drop-down list, select the role that you want to
assign.
4. In the Select text box, type full or partial name of the user, group, or service principal to which
you want to assign the role. Alternatively, you can pick one or more entries from the list of
Azure AD identities appearing below the text box.
5. Click Save to confirm the selection.
You can remove the permission by using a similar procedure, but you cannot remove inherited
permissions at the child level.

Demonstration: Integrating SaaS apps with Azure AD and configuring RBAC
In this demonstration, you will learn how to:
• Add a directory application and configure SSO.
• Implement RBAC.
Lesson 3: Overview of Azure AD Premium
Features such as password write-back or group self-service management increase overall user
productivity and reduce administrative overhead for enterprises. These features and other, more
advanced capabilities, such as enhanced auditing, reporting, monitoring, and multi-factor authentication
for non-privileged users require Azure AD Premium licensing.
Introducing Azure AD Premium
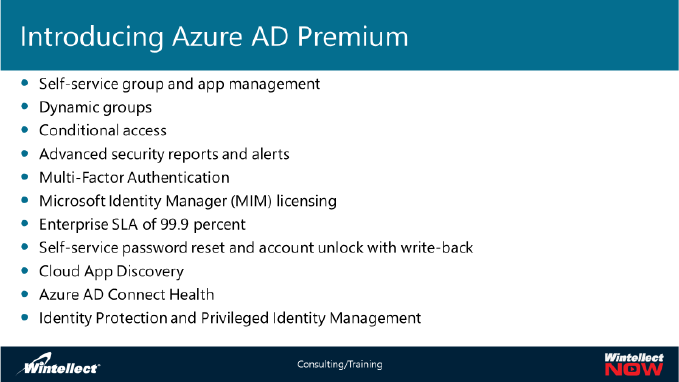
The Azure AD Premium edition provides additional functionality beyond the features available in the
Free and Basic editions.
However, this edition
introduces additional
licensing cost per user.
Microsoft provides a
free trial that covers
100 user licenses that
you can use to become
familiar with the full
functionality of the
Azure AD Premium
edition.
The following features
are available with the
Azure AD Premium edition:
• Self-service group and application management. This feature minimizes administrative overhead
by delegating permissions to create and manage Azure AD groups and to provide access to
Azure AD-registered applications. Users can create requests to join groups and obtain access to
apps. Delegated admins can approve requests, maintain group membership, and assign users to
applications.
• Dynamic groups. In addition to creating groups and assigning their members explicitly, you can
also create dynamic groups, in which membership changes occur automatically, according to the
rules you define. These rules contain Azure AD object attribute–based criteria, which determine
whether a user or a device should be a member of a particular group.
• Conditional access. With this feature, you can implement conditional access to your
applications. Conditions can include the following criteria:
o Group membership. The user must belong to a group you designate.
o Location. The user must reside in a specific location; for example, a trusted network.
o Device platform. The user must use a device running a specific operating system, such as
iOS, Android, Windows 10 Mobile, or Windows.
o Device status. The device must be compliant at the time when the user attempts access.
For example, you might want to ensure that the device is registered in Azure AD or
enrolled into your mobile device management solution.
o Risk policy. Azure AD Identity Protection determines the acceptable risk level associated
with users attempting access.
If a user or device does not meet the criteria you choose, you can block access or enforce multi-factor
authentication.
• Advanced security reports and alerts. You can monitor access to your cloud applications by
viewing detailed logs that show anomalies and inconsistent access patterns. Advanced reports
are machine learning based and help you improve access control and detect potential threats.
• Multi-Factor Authentication. Full Multi-Factor Authentication works with on-premises
applications (using VPN, RADIUS, and others), Azure, Office 365, Dynamics CRM Online, and
third-party Azure AD gallery applications. Multi-Factor Authentication is covered in more details
later in this lesson.
• Microsoft Identity Manager (MIM) licensing. MIM integrates with Azure AD Premium to provide
hybrid identity solutions. MIM can seamlessly bridge multiple on-premises authentication stores
such as AD DS, LDAP, or Oracle with Azure AD. This provides consistent end user experience
when accessing on-premises LOB applications and SaaS solutions.
• Enterprise SLA of 99.9%. You are guaranteed 99.9% availability of the Azure AD Premium
service. The same SLA applies to Azure AD Basic.
• Password reset and account unlock with writeback. Users have the ability to unlock their on-
premises accounts and reset their passwords by leveraging Azure AD functionality.
• Cloud App Discovery. This feature allows you to discover cloud-based applications used by on-
premises users. It provides you with information about usage of cloud apps, including number of
users per app, number of web requests per app, and the time spent working with each app.
Cloud App Discovery uses software agents that must be installed on users' computers. You can
deploy the agents by using Group Policy deployment or Microsoft System Center Configuration
Manager. Agents monitor cloud app access and then send collected data to the Cloud App
Discovery service by using an encrypted channel. You can view reports based on this data in the
Azure portal.
• Azure AD Connect Health. You can use this tool to gain insight into operational aspects of Azure
AD Connect, which implements directory synchronization between AD DS and Azure AD. It
collects alerts, performance counters, and usage patterns, and presents the collected data in the
Azure portal. You will learn more about Azure AD Connect in module 10 of this course.
• Azure AD Identity Protection and Privileged Identity Management (PIM). This functionality offers
enhanced control and monitoring of Azure AD privileged users. Identity Protection and
Privileged identity Management are covered in more details later in this lesson.
• Windows 10 Azure AD Join related features. The features in this category include support for
auto-enrollment into a Mobile Device Management solution, such as Microsoft Intune, self-
service BitLocker recovery, or Enterprise State Roaming.
Azure Multi-Factor Authentication
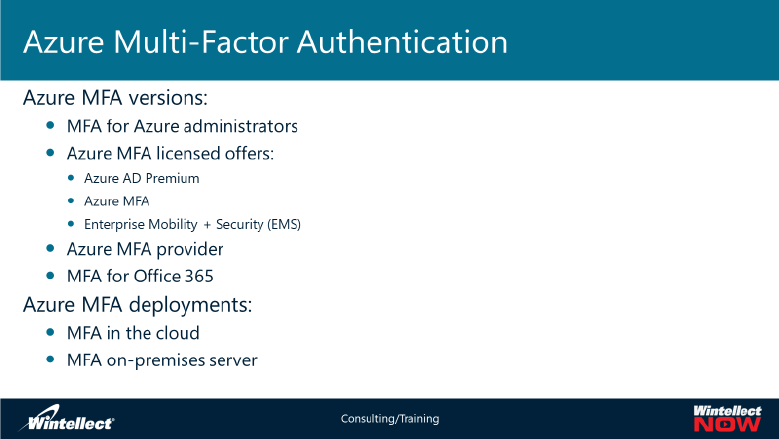
Azure Multi-Factor Authentication adds an additional security layer in the authentication process by
requiring more than one method of authentication to identify user identity. Usernames and passwords
are still required to sign in to access data and applications, but an additional access method can be
added as a second factor of authentication. Multi-factor authentication combines something that you
know, such as a
password or a
PIN, with
something that
you have, such
as your phone or
a token, and/or
something that
you are
(biometric
technologies).
You can
implement
Azure Multi-
Factor
Authentication
in several ways, based on users’ demands and the level of additional security that they need. From the
user experience standpoint, your options include:
• You can use a mobile app to provide one-time passwords or to receive push notifications from
the application
• You can authenticate via a phone call
• You can authenticate via a text message, which is very similar to the mobile app authentication
method, but push notifications or authentication codes are delivered via text messages.
• You can authenticate using a third-party OAuth token.
Depending on your licensing arrangements and the services your users access, you have the following
options to implement Azure Multi-Factor Authentication when authenticating against Azure AD:
• Complementary Multi-Factor Authentication for administrators. The Global Administrator
accounts can be protected with multi-factor authentication free of charge.
• Multi-factor authentication included in Azure AD Premium, Azure MFA, or Enterprise Mobility +
Security (EMS). These offers cover the MFA functionality for every licensed user. You simply
have to assign a license to a user and configure the corresponding MFA settings.
• Azure Multi-Factor Authentication Provider. This allows you to extend the multi-factor
authentication functionality to non-administrators without purchasing Azure AD Premium,
Azure MFA, or EMS licenses. The MFA-related charges become part of the Azure subscription
billing. You have the choice of per-authentication or per-user provider, which affects the pricing
model. The first one of them is more beneficial if you have a larger number of users who
authenticate via MFA only occasionally. The second of them will be more cost-effective if there
are few users who use MFA frequently.
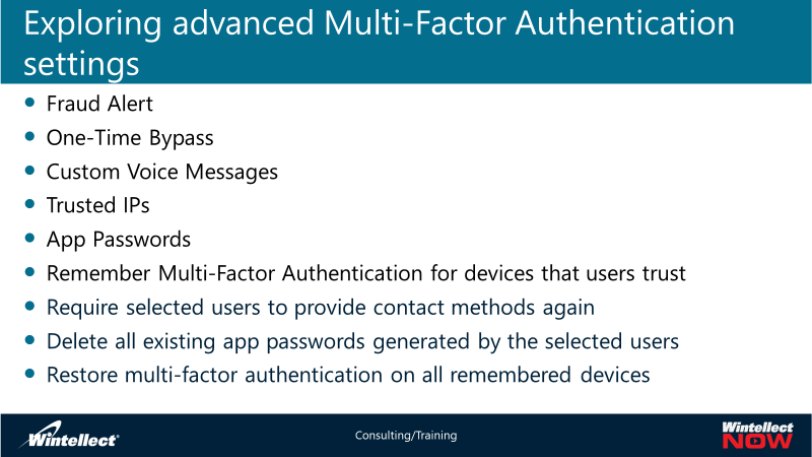
• A subset of the Azure Multi-Factor Authentication functionality is included in Office 365. Multi-
factor authentication for Office 365 does not incur additional cost besides an Office 365
subscription license. However, this works only with Office 365 applications.
Note: Only the second and the third of these options offer a number of advanced MFA features. You will
learn more about these features in the next topic of this lesson.
Another consideration when choosing the MFA approach is the location of user accounts and resources
you want to protect (on-premises or in the cloud). Based on this consideration, you can:
• Deploy Multi-factor authentication in the cloud. This is used mostly if the main goal is to secure
access to first-party Microsoft apps, SaaS apps from the Azure Marketplace, and applications
published through Azure AD Application Proxy. This option is viable as long as user accounts are
available in Azure AD. It is not relevant whether they were created in Azure AD directly or they
represent synchronized or federated AD DS users.
• Deploy Multi-factor authentication on-premises. This option is applicable when user accounts
reside in AD DS, including scenarios where the user accounts are federated with Azure AD. From
the resource standpoint, the intention is to protect remote access solutions, such as VPN or
Remote Desktop Gateway. In addition, this approach is applicable to IIS applications not
published through Azure AD App Proxy.
The implementation details depend on the version of the operating system hosting the AD FS role. With
Windows Server 2012 R2 or older, you need to install the Multi-Factor Authentication server and
configure it with an on-premises Active Directory. With Windows Server 2016, you can leverage the
Azure MFA adapter, built into the operating system.
Exploring advanced Multi-Factor Authentication settings
Azure MFA
included in
Azure AD
Premium, Azure
MFA, or
Enterprise
Mobility +
Security (EMS)
and
implemented
via Azure Multi-
Factor
Authentication
Provider offers
a number of the
following advanced features:
Fraud Alert: The Fraud Alert feature allows users to report fraudulent attempts to sign in by using their
credentials. If a user receives an unexpected multi-factor authentication request, the user can respond
with the fraud alert code (0# by default) to report an attempt to gain unauthorized access. The fraud
alert automatically blocks the authentication request. You can also enable the option to block the user's
account, so that subsequent authentication attempts are automatically denied. Additionally, it is also
possible to configure email notifications to a custom email address, facilitating notifications to
administrative or security teams. After appropriate remediation action has been taken, including
changing the user's password, an administrator can then unblock the user's account.
One-Time Bypass: One-Time Bypass is a setting that allows a user to sign in temporarily without using
Multi-Factor Authentication. The bypass expires after the specified number of seconds. This can be
useful if a user needs to use an Azure MFA protected resource or application, but is not able to access a
phone for text messaging or automated calls, or the Multi-Factor Authentication app. The default one-
time bypass period is five minutes.
Custom Voice Messages: Custom Voice Messages allow administrators to customize the messages that
Multi-Factor Authentication process uses during automated voice calls to an office phone. This replaces
standard recordings that are supplied with Multi-Factor Authentication.
Trusted IPs: Trusted IP addresses allow administrators to bypass Multi-Factor Authentication for users
who sign in from a specific location, such as the company’s local intranet. You configure this option by
specifying a range of IP addresses corresponding to this location. In federated scenarios, you have the
option of using the All Federated Users instead.
App Passwords: App Passwords allow users that have been enabled for multi-factor authentication to
use non-browser clients that do not support modern authentication to access Azure AD protected apps
or resources. Examples of such clients include, for example, Outlook 2010.
Remember Multi-Factor Authentication for devices that users trust: The Remember Multi-Factor
Authentication for devices that users trust setting allows users to suspend enforcement of Multi-Factor
Authentication for a defined period of time on a specific device. This requires at least one successful
authentication on that device. The default period of time is 14 days but you can extend it to 60 days.
In addition to the above settings, there are some user-specific MFA settings that enhance security in
case of a stolen or lost device:
Require selected users to provide contact methods again: This setting will require users to complete
the MFA registration process. This automatically invalidates the current Remember Multi-Factor
Authentication for devices that users trust and One-time bypass options.
Delete all existing app passwords generated by the selected users: This setting will invalidate existing
app password for non-browser applications which do not support modern authentication.
Restore multi-factor authentication on all remembered devices: In case a user loses a device
configured with the Remember Multi-Factor Authentication for devices that users trust, this setting
reinstates Multi-Factor Authentication for that device.

Demonstration: Configuring and using Azure AD Premium Multi-Factor Authentication
In this demonstration, watch as your Instructor demonstrates how to:
• Create a Multi-Factor Authentication provider.
• Configure fraud alerts.
• View fraud alert reports.
• Configure one-time bypass settings.
• Create a one-time bypass.
• Configure trusted IP addresses.
• Enable users to create app passwords.
Azure AD Privileged Identity Management and Identity Protection
Azure AD Privileged Identity Management facilitates identifying and controlling privileged identities and
their access to Azure AD-protected resources, including Microsoft Azure, Office 365, and Microsoft
Intune. You can use Azure AD Privileged Identity Management to discover the users who have Azure AD
administrative roles, get alerts on the usage of privilege roles, and generate reports for administrative
access. In addition, Azure AD Privileged Identity Management allows you to delegate on-demand
administrative access, minimizing risks associated with permanent access security model. You restrict
the delegation to a subset of users by designating them as eligible admins for a particular role. Eligible
admins have to request a role activation to gain corresponding privileges. Depending on your
preferences, requests might require approvals. You also have the option delegating approvals to other
users.
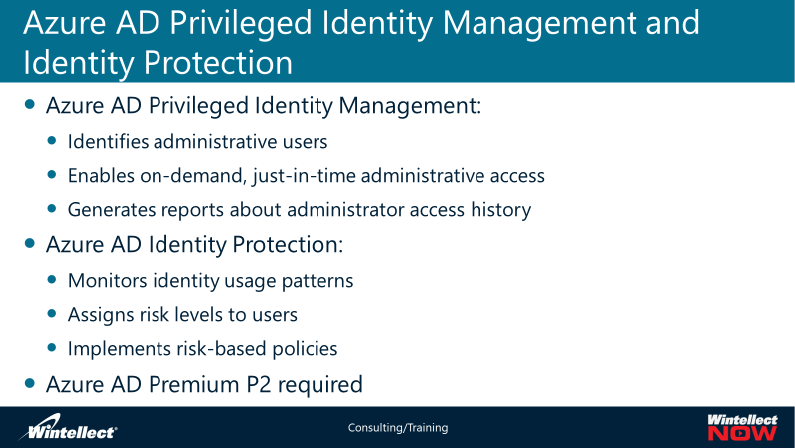
You can enable Privileged Identity Management in the Azure portal by using an account that is a Global
Administrator of the target Azure AD tenant. After you enable Privileged Identity Management, you can
use the
privileged
identity
management
dashboard to
monitor the
number of
users that
are assigned
privileged
roles, and the
number of
temporary or
permanent
administrators. You also have the option of generating reports detailing administrator access history and
configuring alerts triggered when a privileged role is assigned.
Note: Azure Privileged Identity Management does not control or monitor the usage of Service
Administrator or co-Administrators of an Azure subscription.
Azure AD Identity Protection offers a comprehensive insight into the usage of privileged identities in
your Azure AD tenant. It continuously monitors usage patterns and uses adaptive machine learning to
identify unauthorized authentication attempts. It evaluates risk events and assigns risk levels for each
user. This allows you to configure risk-based policies that mitigate potential threats. For example, if
there are two consecutive sign-in attempts from two different parts of the world by using the same user
account, a policy can block that user or temporarily enforce multi-factor authentication.
Note: Azure AD Privileged Identity Management and Identity Protection require Azure AD Premium P2.
Lab: Implementing Azure AD

In this lab you will test some of the features of Azure AD. The company wants you to control access to
third-party SaaS apps by using Azure AD users and groups. They also want you to configure SSO to these
apps and protect them by using Multi-Factor Authentication.
The script for the lab can be found in the GitHub portal, under the name of Mod_6_lab.md at the
following location:
Exercise 1: Administering Azure AD
You want to test the functionality of Azure AD by first creating a new Azure directory and enabling the
Premium functionality. You then want to create some pilot users and groups in Azure AD. You plan to
use both the Azure portal and Microsoft Azure Active Directory module for Windows PowerShell.
Exercise 2: Configuring SSO
Because Wintellect is planning to deploy cloud-based applications, and requires users to use SSO for
these applications, you now want to install and configure a test application, and then validate the SSO
experience.
Exercise 3: Configuring Multi-Factor Authentication
Because Wintellect requires applications to use Multi-Factor Authentication, you now want to configure
and test Multi-Factor Authentication for Global Administrators.
Exercise 4: Configuring SSO from a Windows 10–based computer
Wintellect has an increasing demand to provide its remote and mobile users, who are using Windows
10–based devices, with secure access to the cloud resources. The company plans to join Windows 10
devices to Azure AD in order to simplify access to cloud resources by leveraging SSO. You want to test
this functionality by joining a Windows 10–based computer to Azure AD.
Module Review and Takeaways
Review Question
1. What is the major benefit of joining Windows 10–based devices to Azure AD?
2. What would you consider to be primary differences between Azure AD and AD DS??
3. What is the requirement for Delegated Group Management in Azure AD?
Best Practices
Use RBAC to provide users and groups with permissions to Azure resources based on their job
requirements.
Tools
The following table lists the tools that this module references:
Tool
Use to
Where to find it
Azure Active Directory
PowerShell Version 2
Provides necessary Windows
PowerShell cmdlets for user
management, domain
https://aka.ms/qqxznd
management and for configuring
SSO
Microsoft Azure
Active Directory
module for Windows
PowerShell (64-bit
version)
An older version of Azure AD
module for Windows PowerShell.
Its functionality overlaps to large
extent with the functionality
provided by Azure Active
Directory PowerShell Version 2,
however, its device management
capabilities offer some unique
capabilities (such as identifying
devices registered by a given user
with a single cmdlet)
http://aka.ms/Cuedhw


NOTES

NOTES

NOTES

NOTES
