Mixbus Ardour User Manual
User Manual:
Open the PDF directly: View PDF ![]() .
.
Page Count: 517 [warning: Documents this large are best viewed by clicking the View PDF Link!]
- Table of Contents
- Introduction
- About This Manual (online version and PDF download)
- Features & Specifications
- What’s Different About Mixbus?
- Operational Differences from Other DAWs
- Installation
- Installation – Windows
- Installation – OS X
- Installation – Linux
- License Installation – All Platforms
- Using Mixbus with JACK (optional)
- CPU Usage
- Getting Started
- Mixbus Conventions & Tips
- General Conventions
- Menus and keyboard actions:
- Selections:
- Mouse wheel:
- Right-click:
- Shift+Right-click: (Delete shortcut)
- Shift+click on mixer controls: (Group Override shortcut)
- Shift+Ctrl-click: (applies to ALL tracks)
- Middle-click: (non-latching mute/solo)
- Mixer Knobs and Faders:
- Floating-Point processing:
- Master Bus Volume:
- General Conventions
- First Time Configuration
- Starting a session
- Session File Management
- Session Snapshots
- Session Templates
- Session Archive
- Audio Midi Setup Dialog
- Latency and Buffer Size
- Status Bar
- Primary Windows: Editor and Mixer
- Adding Tracks and Buses
- Track Templates
- Managing Tracks
- Audio Input & Output
- Transport (Play, Stop, etc)
- Transport Toolbar
- Transport Toolbar:
- Transport buttons:
- Transport controls are (from left to right):
- Record & Punch options:
- Monitoring options:
- Transport modes:
- Clocks
- Alerts
- Selection Clock
- Mini-Timeline The mini-timeline provides a compact and convenient way to navigate the session.
- Master bus meter
- Scripted Action Buttons
- Editor/Mixer page selection buttons
- Navigating the Editor Canvas
- Scrolling and Zooming in the Editor Window
- Transport, Markers, and Rulers
- Summary View
- Mini-Timeline
- Recording
- Audio Tracks
- Monitoring
- Loop Record
- The Click (Metronome)
- Punch Recording
- Pre-Roll Recording
- Using MIDI
- MIDI Tracks
- Adding MIDI tracks
- Recording MIDI
- MIDI Track Operations
- MIDI Filters
- Virtual Instruments
- Sending to an external MIDI device
- Multitimbral and “General MIDI”
- Step Entry
- MIDI Banks and Patches
- Adding MIDI Patch files
- Editing MIDI Regions
- Editing MIDI Notes and Controls
- Plug-ins
- Editing
- Edit Window Overview
- The Editor List
- Tracks & Buses
- Regions
- Snapshots
- Locations List
- Track Headers
- Auditioning
- Object (Region) Editing
- Editing Tools & Modes
- Range Editing
- Automation Range Editing
- Ripple Editing
- Grid Mode
- Rhythm Ferret Window
- Region Sync and Alignment
- Playlists
- Polarity Optimization
- Mixing
- Metering
- Gain Staging
- Mixer Window Overview
- Mixer Sidebar
- Signal Flow
- Mono vs Stereo
- What is the difference between mono and stereo?
- In Mixbus, what is the difference between a mono and stereo CHANNEL (i.e. TRACK)?
- How do I resolve the problem if I’m given tracks/files that don’t match my needs?
- How do I convert a mono signal to stereo?
- How do I convert a stereo signal to a mono signal?
- How do I convert a stereo track to 2 mono tracks?
- How do I convert 2 mono tracks to a stereo track?
- Mixer Strip “Switcher”
- Input Strip
- Mixbus Strip
- Master Strip
- Monitor Strip
- VCA Strip
- Mute and Solo
- Redirects: Plug-ins, Sends & Inserts…
- Processor Signal Flow
- Plug-ins
- Sends and Inserts
- Bussing
- Utility Buses
- EQs
- EQ Techniques
- Compression Techniques
- Sidechain Compression
- Mastering Techniques
- Groups
- Group Bar
- Automation
- Fader, Pan and Plug-in Automation
- Region Gain Automation
- Scripting
- Templates
- Importing Files
- Exporting Files
- Tempo, Metronome, & the Grid
- Tempo Maps
- Audio Time vs Music Time
- Menu Reference
- Session Menu
- Metadata
- Session Properties
- Clean-up
- Transport Menu
- Edit Menu
- Preferences Window
- General
- General > Translation
- Editor
- Editor > Modifiers
- Mixer
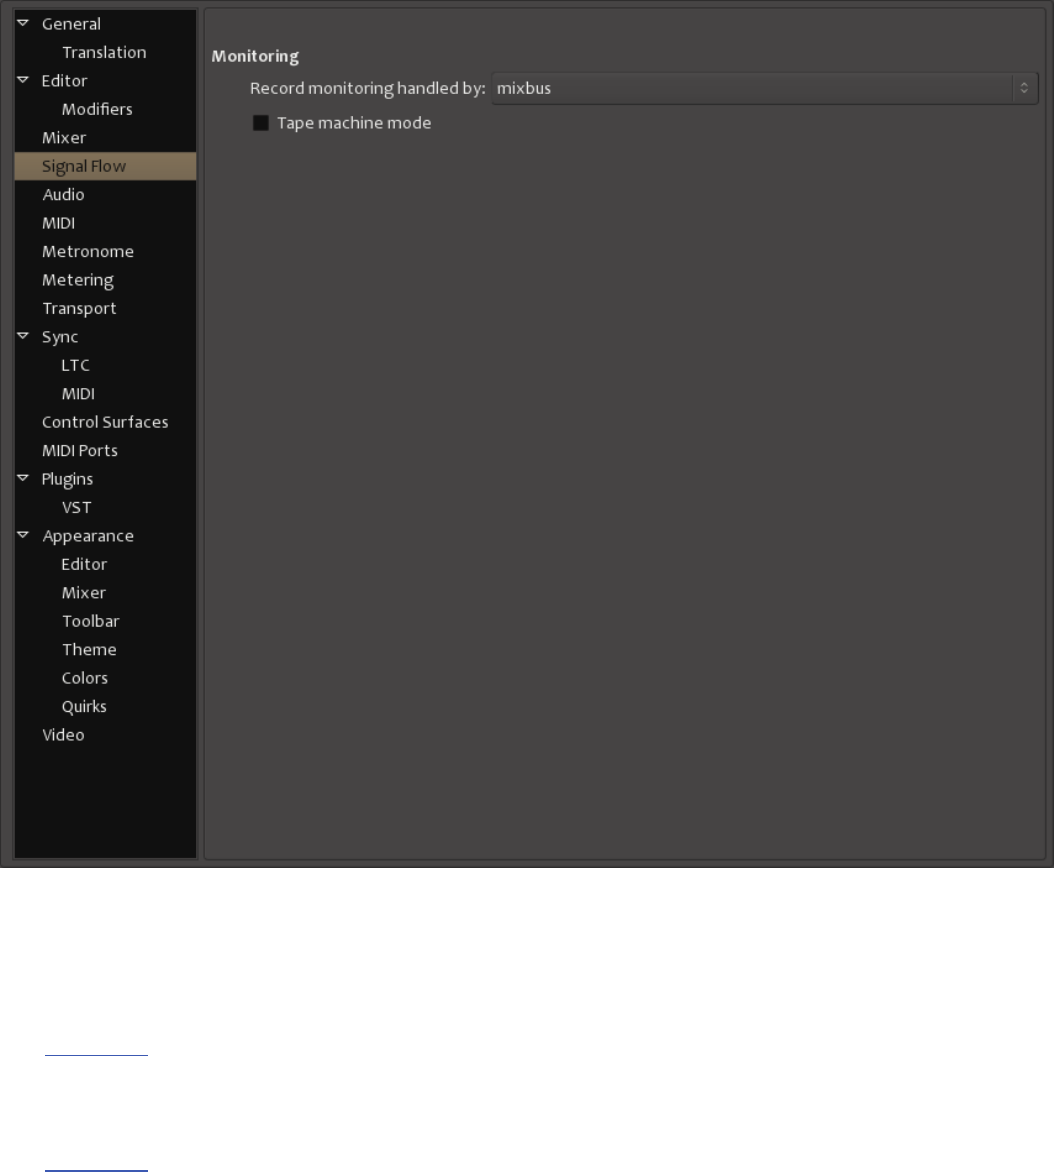
- Signal Flow
- Audio
- MIDI
- Metronome
- Metering
- Transport
- Sync
- Sync > LTC
- Sync > MIDI
- Control Surfaces
- MIDI Ports
- Plugins
- Plugins > VST
- Appearance
- Appearance > Editor
- General
- Waveforms
- Editor Meters
- Show meters in track headers This option toggles whether meters are shown in the track headers in the editor window. Disable this to hide the small meters at the right edge of track headers in the editor. Enabling this option is useful to help monitor & identify tracks as you listen, but uses more system resources.
- Limit track header meters to stereo
- MIDI Regions
- Appearance > Mixer
- Appearance > Toolbar
- Appearance > Theme
- Appearance > Colors
- Appearance > Quirks
- Video
- Appearance
- Region Menu
- Strip Silence
- Track Menu
- View Menu
- Window Menu
- Locations Window
- Audio Connections Window
- Meterbridge
- License Manager
- Help Menu
- Keyboard Shortcuts
- Using the Number Pad
- Video
- Preferences
- Clocks & Synchronization
- External Synchronization
- Transport and Timecode Sync
- External Control
- MIDI Control Surfaces
- Mackie MCU-compatible fader controllers
- Faderport
- Presonus Faderport8 and Faderport16
- Tascam US-2400
- OSC Control
- Lemur
- TouchOSC
- External Transport Control
- Included Plug-ins
- Power-User Topics
- Appendix A: Common Support Questions
- Appendix B: Known Issues
- Appendix C: Videos (Training and Tutorial)
- Quick Start Guides
- Mix Tips
- Pro Tips
- EQ Tips
- Quick Tips
- Harrison Plug-ins
- XTools for Mixbus
- Essentials Pack
- 3D Triple Delay
- Appendix D: MIDI Primer
- Contact Information
Mixbus v4
1 — Last update: 2017/12/19
Harrison Consoles
Harrison Consoles Copyright Information 2017 No part of this publication may be copied, reproduced, transmitted, stored on a
retrieval system, or translated into any language, in any form or by any means without the prior written consent of an authorized
officer of Harrison Consoles, 1024 Firestone Parkway, La Vergne, TN 37086.
Table of Contents
Introduction ................................................................................................................................................ 5
About This Manual (online version and PDF download)........................................................................... 7
Features & Specifications .......................................................................................................................... 9
What’s Different About Mixbus? ............................................................................................................ 11
Operational Differences from Other DAWs ............................................................................................ 13
Installation ................................................................................................................................................ 16
Installation – Windows ......................................................................................................................... 17
Installation – OS X ................................................................................................................................ 19
Installation – Linux ................................................................................................................................ 21
License Installation – All Platforms........................................................................................................ 23
Using Mixbus with JACK (optional)........................................................................................................ 26
CPU Usage ........................................................................................................................................... 28
Getting Started ......................................................................................................................................... 30
Mixbus Conventions & Tips ................................................................................................................... 32
First Time Configuration........................................................................................................................ 37
Starting a session ................................................................................................................................. 41
Session File Management................................................................................................................ 46
Session Snapshots .......................................................................................................................... 48
Session Templates .......................................................................................................................... 50
Session Archive............................................................................................................................... 51
Audio Midi Setup Dialog........................................................................................................................ 52
Latency and Buffer Size................................................................................................................... 55
Status Bar............................................................................................................................................. 59
Primary Windows: Editor and Mixer....................................................................................................... 61
Adding Tracks and Buses ..................................................................................................................... 66
Track Templates .............................................................................................................................. 69
Managing Tracks .................................................................................................................................. 70
Audio Input & Output............................................................................................................................. 73
Transport (Play, Stop, etc) .................................................................................................................... 78
Transport Toolbar ............................................................................................................................ 79
Navigating the Editor Canvas ................................................................................................................ 87
Scrolling and Zooming in the Editor Window .................................................................................... 89
Transport, Markers, and Rulers........................................................................................................ 93
Summary View................................................................................................................................. 97
Mini-Timeline ................................................................................................................................... 98
Recording ................................................................................................................................................. 99
Audio Tracks....................................................................................................................................... 101
Monitoring........................................................................................................................................... 102
Loop Record ....................................................................................................................................... 106
The Click (Metronome)........................................................................................................................ 107
Punch Recording ................................................................................................................................ 109
Pre-Roll Recording.............................................................................................................................. 110
Using MIDI............................................................................................................................................... 112
MIDI Tracks ........................................................................................................................................ 113
Adding MIDI tracks ........................................................................................................................ 115
Recording MIDI.............................................................................................................................. 116
MIDI Track Operations................................................................................................................... 120
MIDI Filters .................................................................................................................................... 121
Virtual Instruments .............................................................................................................................. 123
Sending to an external MIDI device..................................................................................................... 125
Multitimbral and “General MIDI” ......................................................................................................... 126
Step Entry........................................................................................................................................... 129
MIDI Banks and Patches..................................................................................................................... 130
Adding MIDI Patch files.................................................................................................................. 136
Editing MIDI Regions .......................................................................................................................... 139
Editing MIDI Notes and Controls .................................................................................................... 141
Plug-ins................................................................................................................................................... 144
Editing..................................................................................................................................................... 150
Edit Window Overview ........................................................................................................................ 151
The Editor List ............................................................................................................................... 156
Tracks & Buses ........................................................................................................................ 158
Regions.................................................................................................................................... 160
Snapshots ................................................................................................................................ 162
Locations List ........................................................................................................................... 164
Track Headers ............................................................................................................................... 165
Auditioning.......................................................................................................................................... 167
Object (Region) Editing ....................................................................................................................... 168
Editing Tools & Modes ........................................................................................................................ 174
Range Editing ..................................................................................................................................... 180
Automation Range Editing................................................................................................................... 182
Ripple Editing...................................................................................................................................... 183
Grid Mode ........................................................................................................................................... 184
Rhythm Ferret Window........................................................................................................................ 187
Region Sync and Alignment ................................................................................................................ 188
Playlists .............................................................................................................................................. 189
Polarity Optimization ........................................................................................................................... 190
Mixing ..................................................................................................................................................... 194
Metering.............................................................................................................................................. 195
Gain Staging ....................................................................................................................................... 201
Mixer Window Overview...................................................................................................................... 204
Mixer Sidebar ................................................................................................................................ 206
Signal Flow ......................................................................................................................................... 208
Mono vs Stereo ............................................................................................................................. 211
Mixer Strip “Switcher” ......................................................................................................................... 215
Input Strip ........................................................................................................................................... 217
Mixbus Strip ........................................................................................................................................ 220
Master Strip ........................................................................................................................................ 224
Monitor Strip ....................................................................................................................................... 227
VCA Strip............................................................................................................................................ 232
Mute and Solo..................................................................................................................................... 236
Redirects: Plug-ins, Sends & Inserts…................................................................................................ 241
Processor Signal Flow ................................................................................................................... 244
Plug-ins ......................................................................................................................................... 247
Sends and Inserts.......................................................................................................................... 250
Bussing............................................................................................................................................... 254
Utility Buses........................................................................................................................................ 258
EQs .................................................................................................................................................... 260
EQ Techniques .............................................................................................................................. 263
Compression Techniques.................................................................................................................... 264
Sidechain Compression ................................................................................................................. 269
Mastering Techniques......................................................................................................................... 272
Groups .................................................................................................................................................... 276
Group Bar ........................................................................................................................................... 281
Automation ............................................................................................................................................. 285
Fader, Pan and Plug-in Automation..................................................................................................... 286
Region Gain Automation ..................................................................................................................... 291
Scripting ................................................................................................................................................. 295
Templates ............................................................................................................................................... 299
Importing Files ....................................................................................................................................... 301
Exporting Files ....................................................................................................................................... 306
Tempo, Metronome, & the Grid.............................................................................................................. 317
Tempo Maps ....................................................................................................................................... 322
Audio Time vs Music Time .................................................................................................................. 324
Menu Reference...................................................................................................................................... 327
Session Menu ..................................................................................................................................... 328
Metadata ....................................................................................................................................... 329
Session Properties......................................................................................................................... 331
Clean-up........................................................................................................................................ 337
Transport Menu................................................................................................................................... 339
Edit Menu............................................................................................................................................ 342
Preferences Window...................................................................................................................... 346
Appearance.............................................................................................................................. 399
Region Menu....................................................................................................................................... 400
Strip Silence .................................................................................................................................. 404
Track Menu......................................................................................................................................... 405
View Menu .......................................................................................................................................... 406
Window Menu ..................................................................................................................................... 409
Locations Window.......................................................................................................................... 410
Audio Connections Window ........................................................................................................... 411
Meterbridge ................................................................................................................................... 412
License Manager ........................................................................................................................... 416
Help Menu .......................................................................................................................................... 417
Keyboard Shortcuts ............................................................................................................................... 418
Using the Number Pad ........................................................................................................................ 420
Video ....................................................................................................................................................... 421
Preferences............................................................................................................................................. 430
Clocks & Synchronization...................................................................................................................... 431
External Synchronization..................................................................................................................... 433
Transport and Timecode Sync............................................................................................................. 435
External Control ..................................................................................................................................... 438
MIDI Control Surfaces......................................................................................................................... 439
Mackie MCU-compatible fader controllers ........................................................................................... 440
Faderport ............................................................................................................................................ 444
Presonus Faderport8 and Faderport16................................................................................................ 446
Tascam US-2400 ................................................................................................................................ 447
OSC Control ....................................................................................................................................... 449
Lemur ............................................................................................................................................ 456
TouchOSC..................................................................................................................................... 460
External Transport Control .................................................................................................................. 462
Included Plug-ins ................................................................................................................................... 463
Power-User Topics ................................................................................................................................. 465
Appendix A: Common Support Questions ............................................................................................ 469
Appendix B: Known Issues.................................................................................................................... 472
Appendix C: Videos (Training and Tutorial).......................................................................................... 473
Quick Start Guides.............................................................................................................................. 474
Mix Tips .............................................................................................................................................. 476
Pro Tips .............................................................................................................................................. 479
EQ Tips............................................................................................................................................... 481
Quick Tips........................................................................................................................................... 482
Harrison Plug-ins ................................................................................................................................ 484
XTools for Mixbus .......................................................................................................................... 493
Essentials Pack ............................................................................................................................. 496
3D Triple Delay.............................................................................................................................. 499
Appendix D: MIDI Primer........................................................................................................................ 501
Contact Information ............................................................................................................................... 515

Introduction
Mixbus – Bringing real console mixing to the DAW
Welcome to Mixbus! Mixbus is an “analog-style console” that has been incorporated into a Digital Audio
Workstation. The Mixbus engine was developed at Harrison Consoles, where we have been designing high-
end digital and analog consoles for over 40 years.
Many great-sounding, influential, and legendary works were recorded and/or mixed on Harrison consoles,
including:
•Michael Jackson “Bad” and “Thriller” (the best-selling album of all time).
•AC/DC “Back in Black”
•Janet Jackson “Rhythm Nation”
•Queen “The Game”
•Sade “Sweetest Taboo”
•Paul Simon “Graceland”
•Supertramp “Breakfast in America”
• many more by artists such as Led Zeppelin,ABBA,U2,Madonna,Mike Oldfield, and Frank Zappa.
Harrison continues to be a major force in the ultra-high-end professional audio community. World-class
facilities like Sony Pictures use Harrison consoles to mix top-tier films.
Harrison Consoles Mixbus v4 - 1
Page 5 of 515
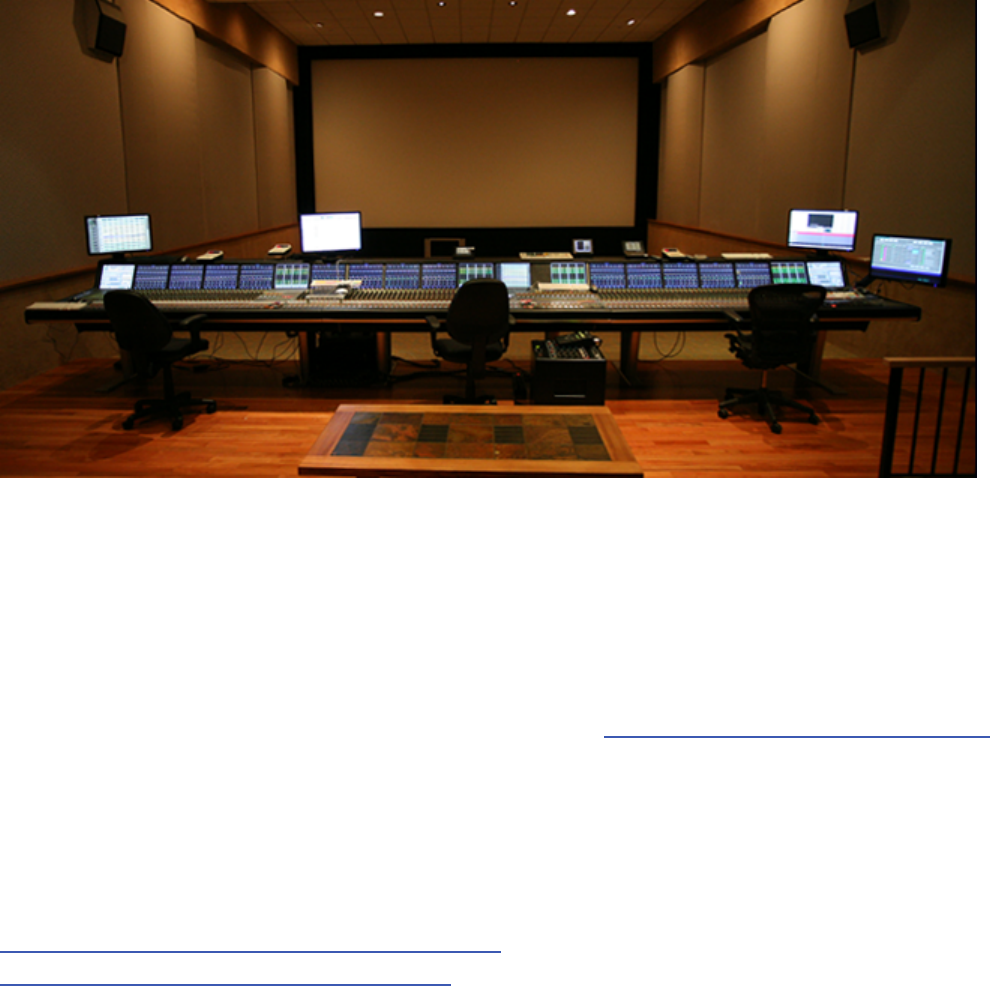
Image:
Harrison MPC4-D Console at
Sony Pictures
Sound Stage 6
Culver City, CA
For more information about Harrison, visit our website at http://www.harrisonconsoles.com.
Mixbus is not a tool for beginners. Although we strive to make Mixbus easy-to-use, digital audio editing and
mixing is a very complex topic. This document assumes that you are already comfortable with typical Digital
Audio Workstation (DAW) conventions. Additional online resources are available from the Mixbus “Help”
menu and at:
http://www.youtube.com/user/HarrisonConsoles
http://harrisonconsoles.com/mixbus/forum/
Harrison Consoles Mixbus v4 - 1
Page 6 of 515

About This Manual (online version and PDF
download)
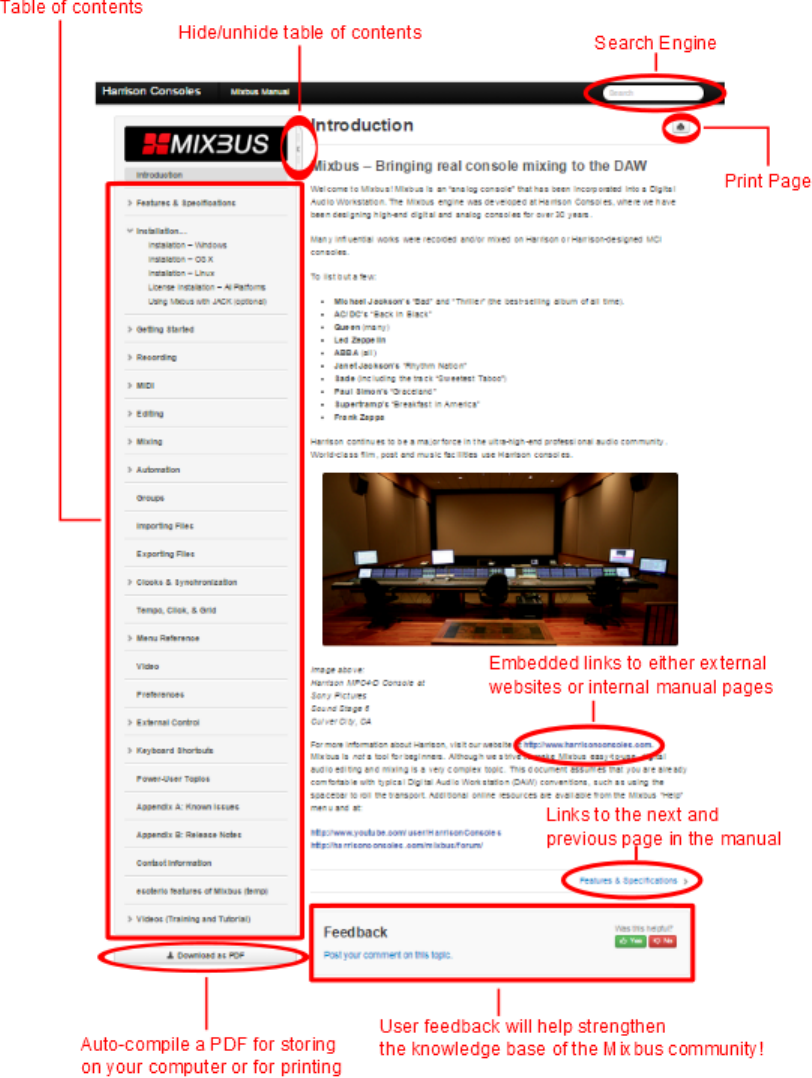
The following image will help you understand a few conventions used in the online version of the Mixbus
manual. A PDF version has been made available for download via a link in the lower left corner of the
page. Don’t forget to use the “Feedback” feature near the bottom of each page. (Feedback is intended for
manual specific items only. If you need tech support or would like to make a feature request please email us
or visit our user forum.)
Harrison Consoles Mixbus v4 - 1
Page 7 of 515
Harrison Consoles Mixbus v4 - 1
Page 8 of 515

Features & Specifications
Mixer Features:
• Mixbus uses precision DSP algorithms developed by Harrison for our world-renowned large format
digital mixing consoles. Mixbus also incorporates elements from the rich history of Harrison analog
designs. Mixbus has been optimized to provide a classic Harrison sound.
• Straightforward “what you see is what you get” mixer layout based on Harrison’s renowned 32-series
and MR series music consoles.
• Unlimited stereo or mono input channels (based on available CPU power) featuring EQ, filter,
compression, mix bus sends, and mappable plug-in controls on every channel.
• Like a hardware mixer, the DSP horsepower for EQs and compressors is preallocated. Enabling a
compressor or EQ will not increase the CPU usage of the computer.
• 8 Stereo mix buses (can be used for groups or aux buses) featuring tone control, compression, and
tape saturation.
• Stereo Master that features tone control, compression, tape saturation, and final limiting.
• K-meter on master output helps you make dynamic, polished-sounding mixes.
• Stereo phase correlation meter indicates mono-compatibility of your mix.
• Plug-in delay compensation to support effects such as parallel compression.
• Plug-ins may be pre or post fader in the channel strip signal flow.
• Comprehensive metering with peak, peak hold, and compressor gain reduction visible on every track
and bus.
• The engine is internally dithered, ramped, and gain staged so that sound quality is preserved as close
to analog as possible.
Editor/DAW Features:
• Unlimited audio, MIDI, and virtual instrument tracks.
• Every track/bus has unlimited pre- and post-fader inserts, sends, and plug-ins.
• MIDI tracks with MIDI output to external devices OR virtual instrument
• Non-destructive, non-linear editing with unlimited undo.
• Fast and intuitive audio editing with “smart” mouse editing modes.
• Dynamic automation of fader, pan, and plug-in parameters.
• Pitch/time stretching, transient detection, and varispeed playback.
• Object-oriented, per-region volume, dynamic volume, crossfade in/out, and mute functions.
• Standard file formats (BWF, WAV, WAV64, AIFF, CAF & more…).
• Supports industry standard plug-in formats and I/O devices on each supported platform.
• Transport control via Level 2 MMC or MTC (master or slave)
Harrison Consoles Mixbus v4 - 1
Page 9 of 515

• LTC (SMPTE) chase and generation
• Assign MIDI CC knobs to mixer controls with just 1 click.
General
• Refined workflow and graphics, including scaling and support for HiDPI (Retina) displays
• Multicore DSP processing allows more simultaneous tracks and plug-ins
• 64 bit builds for Mac & Windows provide extended memory for VI sample libraries
• 32 bit and 64 bit version available for all three platforms (OS-X, Windows, Linux)
• New ASIO & CoreAudio (mac) I/O engine
• Experimental support for video import and export
System Requirements:
• OS-X Intel Running 10.6.8 or newer
• Windows XP Pro or newer, 32 bit or 64 bit
• Linux system (x86 or x86-64) with working sound
• Two or more processors/cores
*See our website for the latest details on OS compatibility, plug-in compatibility, and system requirements:
http://harrisonconsoles.com/site/mixbus-sysreq.html
Harrison Consoles Mixbus v4 - 1
Page 10 of 515

What’s Different About Mixbus?
“True Analog” sound
Harrison is unique among audio companies: In 1990, we launched digitally-controlled analog consoles which
were installed at many world-class music and film mixing facilities. A few years later, digital recording and
playback became the new standard, and our customers requested a complete digital signal path in their
facilities. Harrison made a bold proposal: we would replace the existing analog processing racks with a
digital system, and leave the control surface in-place so the mix engineers could continue to work with the
same workflow and sound that they had grown used to. Of course, to make this practical we had to make
the digital engine “sound” exactly like the analog engine it was replacing.
During this process of replacing an analog console processor with a digital version, we made many
discoveries about how to make digital sound less like digital, and more like analog. We’ve been refining
these technologies for over 25 years since the launch of those first digital consoles. Harrison has made
several generations of analog and digital consoles since that time, and has been continuously improving our
DSP. This unique development path is what gives Mixbus a different sound than traditional workstations.
Analog-style Workflow
Most DAWs were first introduced in the stone-age days of computers. Processors were rated in megahertz
and memory was measured in kilobytes.
At that time, the standard tool was the studio console; it provided nearly every feature that was needed for
day-to-day recording, editing, and mixing tasks. With the addition of a few outboard boxes (such as reverbs,
delays, and maybe a final compressor ) it was possible to create a polished album.
When computers were introduced, they were unable to recreate the features of then-standard tools such as
a 48-track tape machine and console. Those early computer systems could only play back 4, 8 or 16
channels; and because CPU power was so desperately limited, you had to choose which of those channels
would be assigned an EQ. In this model, even the most basic console features had to be treated as
“outboard” gear. And so was born the “Plug-In” !
Fast-forward to the present, and you know that computers are fast enough to run hundreds of channels,
each with a half-dozen plug-ins. As a new-generation workstation, Mixbus takes advantage of today’s fast
computers to take the load off of the engineer, and return to the fun and creativity of mixing music.
Harrison Consoles Mixbus v4 - 1
Page 11 of 515
Open Source, Open Standards, Open Community
Mixbus is largely open-source and is the collaborative effort of a worldwide team including musicians,
programmers, and professional recording engineers. Many workstations provide “open” control or plugin
protocols… Mixbus goes far beyond that. Like a good piece of vintage hardware, you can open the box and
look inside. This transparency encourages Mixbus development to happen with integrity. We spend our time
on the issues that users want and need; not just items that look good in an advertisement. In the crazy world
of DAW software, it is nice to know that a sane option exists for your business or personal use.
Harrison Consoles Mixbus v4 - 1
Page 12 of 515

Operational Differences from Other DAWs
If you have some background in audio, but are new to computer recording, then you’ll find Mixbus very easy
to learn and navigate. If you are coming to Mixbus from another DAW, here are some of the conventions
that might seem different to you:
Console-like signal flow
Most DAWs allow the user to create tracks and buses, but the user is expected to assemble the tracks and
buses into a sensible signal flow. To do this, you create one or more buses as-needed, and then assign the
track output(s) to the bus inputs. If you later realize that you want another track assigned to that bus, you’ll
have to make that connection; and at the end of the day you might have lots of nearly-invisible and
arbitrarily-ordered connections all over the place!
Mixbus provides a fixed signal flow, modeled after an analog console. You don’t have to “choose” how many
buses you will need, or where they are assigned. This provides several benefits. The bus assignments/
sends are displayed in a fixed order, so you can quickly determine what channels are feeding the reverb
bus, for example. Additionally, the assignment and/or send-level to a bus can be automated.
Flexible signal flow in the channel makes lots of tasks easy!
Mixbus allows you to drag&drop the order of the plugins in the signal flow. This includes the channelstrip
inline EQ, compressor, and fader as separate elements. If you’d like to add a reverb “post fader” ( so the
reverb continues to ring-out when you turn down the volume of the instrument… ), you can do that directly in
the mixer strip. This saves you from creating a “bus” for adding effects to a single track.
Advanced users can right-click on a plugin and choose “pin connections” …. this opens up additional
possibilities ( depending on plugin capabilities) such as sidechaining, mono->stereo effects, mid-side, or
similar tasks. This is another way that Mixbus can save you from adding additional “aux buses”, with all of
their complexity and overhead, that is normally required in other DAWs.
Plug-ins are encouraged, but are not considered part of the
core workflow.
Most other DAWs serve as a “container for plug-ins”. They provide little or no signal processing or bussing,
by default. They expect third parties to develop the actual DSP processing.
Harrison Consoles Mixbus v4 - 1
Page 13 of 515
Mixbus is different! Harrison provides our own high-quality DSP processing for the channel strip EQ and
compressor. We’ve tweaked the various EQ, compressor, saturation and limiter stages to complement each
other. You may still add plug-ins if you wish, but it is no longer necessary to purchase, and choose between,
multiple plug-ins each time you want to change your sound. You can make a great mix without any plug-ins
at all!
Regions may be stacked in layers
Each audio “region” (or “clip”) is a discrete sound that exists on the timeline track, and it may have other
regions stacked above or below it – on the same track. Deleting the topmost region layer does not create a
hole; instead, you will see&hear the audio that was hidden underneath it. You might think of this like the
layers of an image editing program. Like an image editor, it is even possible to make regions “transparent”
so that the regions underneath it are still visible (or in this case, audible).
This provides 2 benefits. Firstly, it allows you to record an overdub, or part replacement, on top of an
existing track. You can then move, trim & fade (or even delete) the replacement part without having to worry
about the audio layer(s) underneath it. Secondly, you can use “transparency” to stack lots of sounds (such
as bird chirps) on a single track, and effect them together, without having to allocate multiple tracks so each
individual sounds is heard.
Region Fades are Crossfades
The start and end of each region has a “fade”, which gradually raises or lowers the volume. When you listen
to the region by itself on a track, you hear it fade from silence into the audio, and then back to silence. But if
the region is on top of another region, then something even more interesting happens: you will hear a
crossfade from the underlying region, into the top region, and then back to the underlying region. This
allows you to stack regions on top of one (or more!) regions underneath it, and set your crossfade to match
perfectly. Later, even if the underlying audio is changed, you’ll still preserve the fade of the topmost region.
Because digital audio streams don’t like abrupt changes in the audio stream, EVERY region has a start and
end fade. Mixbus’s default fades make it easier to edit with confidence that you won’t introduce a click.
Less emphasis on Tools, more emphasis on Actions
Most DAWs have a set of “tools” (or “mouse modes”) which modify how the mouse behaves. For example,
you select the “scissor” tool to make cuts, and the “trim” tool to trim region ends. In Mixbus, we have very
few tools. You can do most of your work using the “Grabber” (hand) tool. Point where you want to perform
Harrison Consoles Mixbus v4 - 1
Page 14 of 515

the action, and then use the keyboard shortcut to initiate an action such as “S” for split, or “J” to trim a
region’s start (you can also grab the edge of the region to trim it, but the keyboard actions are faster).
For more helpful details about Mixbus’s operation, please visit: Mixbus Conventions & Tips
in the Getting Started section.
*
Harrison Consoles Mixbus v4 - 1
Page 15 of 515

Installation
Platform-specific information
Mixbus works on 3 different desktop operating systems ( Mac, Windows, and Linux ). Each system has its
own conventions for installation. Rather than force the user to learn an unconventional installation
procedure, we have made Mixbus follow the conventions of the OS you are using.
• On Mac OSX, Mixbus is provided as an application “bundle” inside a DMG file. Just open the bundle,
and drag Mixbus to your Applications folder.
• On Windows, Mixbus is provided with a step-by-step installer that prompts you for the installation
location and then installs Mixbus.
• On Linux, Mixbus is provided as a zip file that, when unzipped, provides an installation script.
The following pages explain the details for installing Mixbus on various operating systems:
•Windows
•OS X
•Linux
When you first run Mixbus, you will be prompted to enter the license for your purchase. You can learn more
about that here: License Installation
Harrison Consoles Mixbus v4 - 1
Page 16 of 515
Installation – Windows
Mixbus on Windows uses the windows-standard installation process. Double-click the installer to launch the
process, and follow the directions for a “Typical” installation. This will install Mixbus to the default location.
As of v4.0, the Mixbus installer is not signed by Microsoft, so you may have to explicitly allow the installer to
run. This is normal operation.
After installation, please continue to Install the Mixbus License file
Uninstalling Mixbus: use the uninstaller provided in “ Start Menu -> Programs -> Mixbus”.
A note about “Audio Setup” on Windows:
On Windows, Mixbus will detect sound cards with a MME, WASAPI, or ASIO driver. This means that you will
likely see sound cards appear multiple times in the audio setup menus. If provided, the ASIO driver option is
preferable for stable, low-latency operation.
Many built-in desktop sound devices will not provide an “Input device” if a microphone is not physically
plugged in. If you plan to record with Mixbus, you must plug a device into the sound card’s input before you
launch the audio engine. If you would like to use Mixbus without a capture device, choose “None” for the
Input device. Mixbus does not provide a “None” option for the playback device.
If you are upgrading from an earlier version of Mixbus ( version2.x or 3.x ) it is advisable to
keep your previous version of Mixbus installed on your computer in the event you need to
revisit old sessions. It is possible that opening a session created with a previous version of
Mixbus may lose some functionality.
!
Windows systems, and particularly laptop systems, often require some system optimizations
to operate without clicks and pops. Most importantly, you should visit the System-
>Advanced settings dialog, and tell Windows to optimize for “background tasks”. This will
dramatically improve the stability of audio I/O. For laptops, we highly encourage you to
leave your laptop plugged-in, and select the high-performance CPU mode when it is
plugged-in. There are many other optimizations (such as disabling virus-checks) that may
be beneficial. You can find some of these choices here: optimizing windows for audio
recording.
!
Harrison Consoles Mixbus v4 - 1
Page 17 of 515

When you select an ASIO device, the “Buffer size” setting will be automatically changed to the current
preferred buffer size of your ASIO device (normally set in the device’s manufacturer-supplied control panel).
It is important to use the device’s preferred buffer size. Otherwise you might incur a “buffer size adaptation”
process which reduces efficiency and may affect latency (delay) through Mixbus.
Non-ASIO devices will default to a buffer size of 1024 for stable operation. Changing this setting is possible
but is unlikely to have much effect on the performance because of the Windows sound infrastructure.
A note about VST plug-ins on Windows:
After the initial installation, Mixbus will not have any knowledge about your third-party VST plugins. You
must add the path(s) to your VST plugins in the Edit->Preferences->Plug-in tab, and then initiate a “Scan”.
For more information about plugins, click here.
Continue to Download and Install the License File
Harrison Consoles Mixbus v4 - 1
Page 18 of 515
Installation – OS X
Installing Mixbus:
Mixbus provides 2 packages for Mac OSX:
64 bit ( for Intel Mac computers running 10.7 or newer )
32 bit ( for Intel Mac computers running 10.6.8 )
To install Mixbus, download and double-click the .dmg archive (Mixbus_Intel_4.0.dmg or similar). Drag the
Mixbus icon to your Applications folder (or anywhere that you like to store your applications; Mixbus doesn’t
care which folder it is started from). If you would like Mixbus to be shown in the Dock, then you should drag
Mixbus from your selected location to the Dock.
Audio Input and Output:
Mixbus can use any CoreAudio-supported interface. Many newer soundcards work without a dedicated
driver; but some older interfaces (such as the Digi 00x series) may require a special driver from the
manufacturer before they appear in the list of CoreAudio devices.
If you are upgrading from an earlier version of Mixbus (v2.x or v3.x) it is advisable to keep
your previous version of Mixbus installed on your computer in the event you need to revisit
old sessions. It is possible that opening session created with a previous version of Mixbus
may lose some functionality.
!
As of v4.0 Mixbus is not digitally signed by Apple, or sold on the Apple App Store. On
Mavericks and newer, you may have to right-click on Mixbus and choose “Open” the first
time you launch it.
!
Do NOT drag Mixbus directly from the .dmg archive to the Dock; this would create a
shortcut to the Mixbus application inside the DMG file. If you do this, then when you click
Mixbus in the dock, OS X will have to extract and mount the .dmg file before launching
Mixbus. This will make Mixbus run very slowly.
!
Harrison Consoles Mixbus v4 - 1
Page 19 of 515

Newer Mac computers have separately-clocked input (mic/line-in) and output (headphone/line-out) devices.
Prior versions of Mixbus required that you create an “Aggregate” device to combine the internal soundcard
input and output into a single device. Mixbus v3, and newer, provide a method to select separate input and
output devices without making an aggregate device; Mac will create an invisible “aggregate” for you. When
possible, it is always best to use a professional I/O card to avoid any internal sample-rate conversion that
may be performed by OSX.
You can combine multiple devices into an “Aggregate” device which provides all the I/O as if it were a single
device.. For example, you can “aggregate” 2 different 8-channel devices so that you can record 16 channels
into Mixbus. In a few cases, we have found that troublesome devices that don’t work well in Mixbus can be
improved by creating an “aggregate” device, selecting the device’s input and output for the aggregate. This
provides an extra level of separation from the device’s driver into Mixbus. To create an “Aggregate” device,
consult the Apple documentation for your version of OSX.
A note about AU plug-ins on Mac OSX:
After the initial installation, Mixbus will not have any knowledge about your third-party AU plugins. You must
visit Edit->Preferences->Plugins to scan your AU plugins and make them available in Mixbus. For more
information about plugins, click here.
To finish your installation, please continue to Download and Install the License File
Harrison Consoles Mixbus v4 - 1
Page 20 of 515
Installation – Linux
Some distro’s are designed for audio (such as Ubuntu Studio). A further list of distros is at: http://www.linux-
sound.org/distro.html. It is beyond the scope of this document to compare these distros.
Sound card (I/O) support:
Support for professional sound I/O is limited on Linux. However there are some excellent options available
at various price ranges. Normally, no driver or configuration is needed to use a sound card if it is supported
by your distro. It is important to choose a distro that has good pro-audio support.
Unfortunately, support must be determined on a per-device basis. The ALSA project provides a fairly
comprehensive list of USB, PCI, and built-in devices. There is a separate list of FireWire devices. When in
doubt, check with your distribution’s documentation, user forums, or support.
Downloading and Installing Mixbus:
After your purchase, you will receive a link to download the installation package. You must first unzip the
package using your desktop’s archive utility.
Once unzipped, a folder will appear with the installer (Mixbus_something.run). On most systems, you can
double-click the .run file in your file browser. If that doesn’t work, then you can launch Terminal, navigate to
the download directory, and run the installer manually by typing: ./Mixbus_(whatever).run
The installer will prompt you to uninstall previous versions. The installer will check the suitability of your
system for real time audio, and report any problems that it finds.
A note about Linux distributions (distros): While an expert system administrator can adapt
nearly any distro for use with Mixbus, it is easier for most users to start with a distro that is
designed for use in high-performance audio.
*
If you are upgrading from an earlier version of Mixbus (v2.x or v3.x) it is advisable to keep
your previous version Mixbus of installed on your computer in the event you need to revisit
old sessions. It is possible that opening a session created with a previous version of Mixbus
may lose some functionality.
!
Harrison Consoles Mixbus v4 - 1
Page 21 of 515
License Installation – All Platforms
License Installation
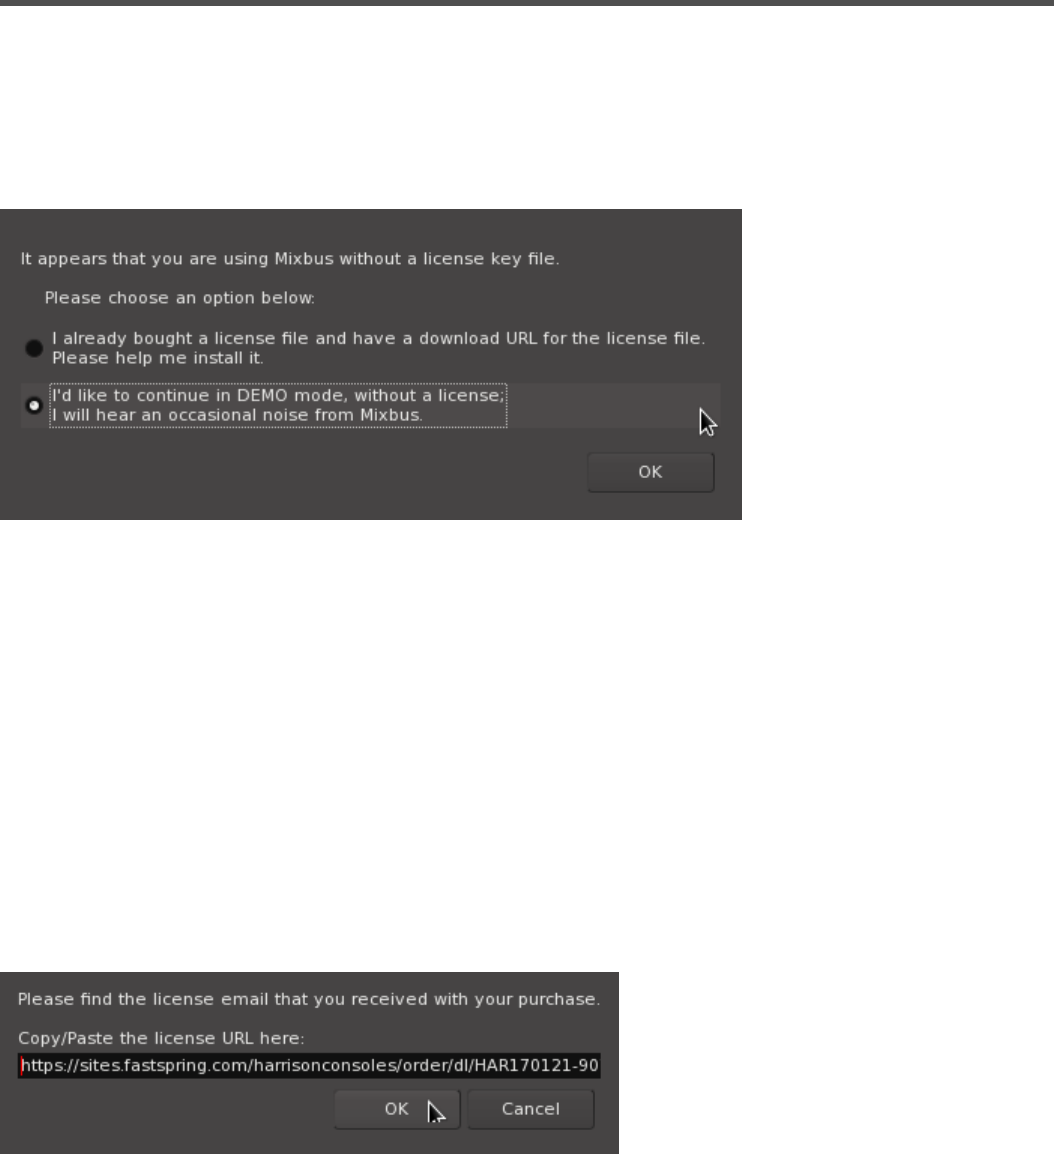
At startup, Mixbus checks to see if a license is installed. If no license has been installed, you will see the
UNLICENSED dialog:
The dialog provides 2 options:
• Install license: Click this if you have purchased a license from Harrison, and you have the emailed
license link. (the license link starts with html://…. like any web-link). This is the download link that
Mixbus will use to download and install the license file for you. If your computer does not have
internet access, then you should follow the directions for offline computers, below.
• Continue unlicensed: Click this if you want to use Mixbus in Demo mode. When un-licensed (Demo
mode), Mixbus will occasionally generate a quiet hiss ( noise ) that prevents it from being used for
final mixes. But all of the other features are fully functional.
Install the license ( for computers that have internet access ):
Harrison Consoles Mixbus v4 - 1
Page 23 of 515
Downloading and Installing the License file ( for offline computers )
When you complete your purchase through the Mixbus store, you should receive an email with a download
link for your license key.
Using an online computer, please click the license link. You should find the license file in your Downloads
folder. Save the license file to a USB stick or other media which you will transfer to the offline computer. The
file should be named exactly as it was downloaded; for example Mixbus4 license file is:
“license_key_harrison_mixbus4.txt”. Make sure to save the file and do not save the file from a text editor, or
otherwise change the contents of the file.
On the offline computer, please save the file to your HOME folder. The location of the HOME folder varies
with each OS:
• Mac OSX: your home folder is typically “Mac HD/Users/{your name}”, or open a Finder window, and in
the main menu click Go->HOME
• Windows XP: your home folder is typically “C:/Documents and Settings/{your name}”, or click your
name at the top of the Start menu
• Windows Vista and newer: your home folder is typically “C:/Users/{your name}”, or click your name at
the top of the Start menu
• Linux: your home folder is typically “/home/{your name}”
If you have additional questions about finding the HOME folder for your computer, please watch the
following videos:
Windows often hides the “.txt” extension, so make sure not to add an additional .txt at the
end of the filename. You should not have to rename or modify the file in any way, after
you’ve downloaded it.
!
Harrison Consoles Mixbus v4 - 1
Page 24 of 515
Alternative locations for the Mixbus license file:
On MacOS,Mixbus searches the following locations (first found is used):
• $HOME/Library/Application Support/harrisonconsoles/
• $HOME/.
• /usr/local/share/ (intended for multi-user institution-wide licenses)
On Windows, Mixbus searches the following locations (first found is used)
• $HOMEDRIVE$HOMEPATH
• localappdata
• $USERPROFILE
On Linux, Mixbus searches the following locations (first found is used)
• $HOME/.
• $XDG_CONFIG_HOME/harrisonconsoles/
• $HOME/.config/harrisonconsoles/
• /usr/local/share/ (intended for multi-user institution-wide licenses)
Harrison Consoles Mixbus v4 - 1
Page 25 of 515

Using Mixbus with JACK (optional)
JACK is a system service that allows for the interconnection of audio between applications. Previous
versions of Mixbus required that JACK be installed on your system. Mixbus no longer requires or expects
JACK to be installed. Mixbus uses your sound card directly via ASIO (Windows), Core Audio (Mac) or
ALSA (Linux ).
If you would like to interconnect the audio of different applications into Mixbus, then you can download and
install JACK for your system. JACK is not a Harrison product, and we cannot provide email support for
JACK users. However you will find a lot of JACK users on our forum, because JACK is a powerful utility.
JACK creates virtual audio and MIDI ports that can be connected and shared between nearly any
application on your system. If the application is JACK-aware ( i.e. it was compiled with the JACK libraries)
then it will have some additional features such as sample-accurate transport control and sync. There are
many third-party apps that can control JACK connections, save and restore your connections, or even route
the audio or MIDI using Ethernet. Mixbus is fully JACK-enabled, and it can save all the JACK connections
that are made to it. Mixbus can also use JACK as a sync source, or it can be the master sync source.
JACK control from within Mixbus is straightforward:
Harrison Consoles Mixbus v4 - 1
Page 26 of 515

When you select JACK as the Audio System, there is only one parameter: the buffer size option. Buffer size
allows you to adjust the latency of the recording system. The 256 samples shown here is equivalent to
5.8ms, which creates less latency that having a sound source 6’ away from you (sound takes about 6.6ms to
travel 6’). You can also disconnect from JACK from this window.
A full description of JACK timecode sync is beyond the scope of this manual. You can learn more about
JACK at JackAudio.org
Harrison Consoles Mixbus v4 - 1
Page 27 of 515

CPU Usage
Why does Mixbus require more CPU usage than my other DAW?
Because Mixbus is emulating the operation of an “analog console”, it requires significantly more CPU
resources than a typical DAW. Mixbus’s EQs, compressors, and other features are always active. The
benefit of this operation is that you can always confidently enable the channelstrip features without worry of
overloading your system. Once the mixer is running, it does not increase the load when you operate the
controls.
Although Mixbus requires a high CPU usage by default, it is actually quite efficient compared to other
DAWs, once you’ve added plugins equivalent to the high-quality EQ, compression, bussing, tape saturation
limiting, metering, and the other built-in features of Mixbus.
How do I increase the number of tracks or plugins that I can use?
• Increase the “buffer size” in the Audio Setup dialog
• On Windows and Linux, you must take steps to optimize your system for audio ( see our Installation
section )
• Use high quality audio devices and drivers
• And of course using a faster computer, with more CPU cores, is desirable.
General comments about computer audio performance:
The CPU meter on your computer averages the cpu usage over a very long period (perhaps one second).
In digital audio, the timing is much more sensitive. When the soundcard passes us a buffer, then we have to
wake up, process the audio buffer, and return it to the soundcard before the soundcard needs to play it out.
If we don’t wake up in time, or we don’t get finished in time, then you hear a “click” caused by the (we call
these xruns, short for over-run or under-run).
In the case of a 1024 buffer size, this has to be done within (1024/44100) 25ms, or about 1/40th of a
second.
This is complicated by the fact that it’s the OS’s job to “wake us up” and tell us that the soundcard has some
data for us. Some OS’s and drivers are better at this than others. But let’s say it takes 5ms before we are
even alerted that some data is available. We now have 20ms left to process the audio. If it takes us 10ms to
process the audio, then we are finished within 50% of the allotted time and that’s what we display in the
meter. This is a very accurate indication of your computer’s ability to process audio.
Harrison Consoles Mixbus v4 - 1
Page 28 of 515

This also explains why the selected buffersize is so critical to the DSP load. A 256-sample buffersize is
about 6ms, so if your computer sometimes waits 5ms after receiving the soundcard interrupt before it
“wakes us up”, we only have 1ms remaining to do our work.
For more information on factors impacting the performance of your computer please see this video:
CPU Performance vs. Real-Time Performance in Digital Audio Workstations
Harrison Consoles Mixbus v4 - 1
Page 29 of 515

Getting Started
Getting Started (Overview)
Mixbus is an editor that works on a document format called a Session. A session is a folder on your hard
drive that stores all of your recordings, edits, and mixer settings together. Unlike a word processor, Mixbus
does not allow you to start an empty document and then “save” it later. Instead, when you first launch
Mixbus, it will guide you through creating or selecting a session before you can start to record, import, edit
or mix your project.
A session is a collection of tracks. Use the “Add Track/Bus” dialog which can be found in the Session and
Track menus. You can also create tracks by right clicking in the gray track area under the track headers, or
by right-clicking in empty mixer-window space, or by clicking the blue “+” button in the top of the mixer
window’s left-side panel.
Alternatively, you can create new tracks by Importing existing audio from the Session-Import menu.
If you find yourself starting the same way for each session, you can create a session template which will be
available as a starting point next time you start a new session. You’ll find the list of available templates
when you create a new session. Click Session Templates to learn more.
You can save multiple snapshots of your settings inside that session. Snapshots conveniently save your
entire editing/mixing session for later recall. Saving a snapshot is instantaneous and takes up essentially no
extra disk space (snapshots all share the same audio data in the session folder). Click Snapshots to learn
more.
If you make a mistake while recording or editing, you can click “Undo” to revert your changes. Only a few
editing operations (such as adding or removing a track) cannot be undone. One of the cool features of
Mixbus is the fact that your “Undo” history for each session snapshot is stored when you save the session;
This means that you can return to a session after a few days, and still undo the last changes you made, if
you decide that they weren’t a good idea.
When you are finished, you can Export your session to an audio file using the Session->Export menu item.
The exported file can be shared online or burned to a CD.
Mixbus uses the right mouse button for many features. Try right-clicking on tracks,
regions, mute buttons, solo buttons, group panes, regions, selected ranges, markers, mixer
*
Harrison Consoles Mixbus v4 - 1
Page 30 of 515

Need Help?
Getting started with a new DAW can be a challenging task. While Mixbus shares conventions with many
other popular DAWs, it can still be a little difficult at the beginning. Rest assured that it is worth your time
and effort to learn Mixbus. For technical issues, bug reports, and feature requests, email support is available
from Harrison Consoles: mixbus@harrisonconsoles.com.
If you’d like to interact with other users of Mixbus, you can visit our forum or internet chat area. The easiest
way to find them is to select the Help menu within Mixbus. This will open your web browser to a page that
allows you to interact with other Mixbus users. If you are unable to open the Mixbus window and see these
options, just enter either of these URLs directly into your web browser:
http://harrisonconsoles.com/mixbus/forum/
http://webchat.freenode.net/?channels=ardour-mixbus
Another mechanism for support is the Ardour forums at: http://community.ardour.org/community This is a
good place to get involved with the open-source aspect of Mixbus; you can be directly involved with new
features, bug fixes, and the overall direction of the Ardour DAW.
“Once you have reached the level of a Harrison Console, you are ready for new flights of
engineering imagination. Unlimited. Unhaltered. Uninhibited by the bounds of technical
obstructions. YOU BECOME THE STUDIO. You are the living extension of the electronic link
between the perfect sound and the perfect master. You are the ultimate conductor in the universe
of recorded music” – Harrison 4032 brochure, circa 1975
redirects, clocks, the region list, and the marker bar area. Each will launch a context menu
that provides many features.
Harrison Consoles Mixbus v4 - 1
Page 31 of 515

Mixbus Conventions & Tips
General Conventions
Over 40 years, Harrison developed a methodology for our user-interfaces. We aim to make the easy things
very easy, while keeping the hard things possible. If you are going to access a feature hundreds of times
each day (like: boost the bass, or start playback), then we assign it a very prominent space. If you use a
feature only a few times a day, then we make it slightly less prominent: for example you might have to right-
click to access it. And if it’s a feature that you only access once per week or once a year, then you might
have to open a preferences dialog, or even edit a text file somewhere.
The following tips will help you navigate Mixbus fluidly. These tips generally apply throughout Mixbus and
may not be documented in the individual sections where they apply. New users should learn these
conventions quickly, in order to avoid developing “bad habits” that impede fast operation.
Menus and keyboard actions:
Mixbus follows your OS’s convention for the main menu. On Mac OSX, the main menu will appear at the top
of your monitor. On Windows, the main menu will appear on the top of the main window.
Every menu item can have a keyboard shortcut assigned to it; you will see the assigned keyboard shortcut
next to each menu item, if one is assigned. You can change the keyboard shortcuts, but if you are a new
user we suggest that you learn the existing shortcuts before making changes. The existing shorcuts have
been painstakingly developed to be easily learned, be ergonomic, and provide access to the most-used
features of Mixbus. One exception to this rule: if you are using a non-US, QWERY keyboard, then you might
find the need to remap some actions for your keyboard layout.
Keyboard shortcuts are MUCH faster than accessing the menu item; so if you find yourself using a menu
item frequently, you might consider memorizing the action.
Advanced Users: In addition to this information, advanced users might want to visit
Operational Differences and Power User Topics. If you are experienced with several other
DAWs and audio engineering conventions, these 3 pages will likely provide you with
everything you need to master Mixbus in just a few hours.
*
Harrison Consoles Mixbus v4 - 1
Page 32 of 515

Selections:
• A Mixbus “selection” can be one of:
◦ One or more Tracks ( or their equivalent Mixer Strips, in the mixer )
▪ Optionally in addition to the track selection, there can be a “time” selection on those
tracks.
◦ One or more Objects on the timeline ( Regions and/or Automation Control Points )
◦ One or more MIDI notes inside a MIDI region
◦ One or more plugins in a mixer strip
However, these selections are mutually exclusive: you can select several tracks, but you can’t select a
track and a region. This avoids some common causes of confusion. For example, if you have selected a
region in the editor, and a plugin in the mixer, then what should happen when you press “Delete”? Mixbus
prevents you from selecting unlike items to avoid this possibility. The selection might change when you
select tools. For example if you have a Range selection with the range tool, and then you switch to the
“Object” tool, the range selection will disappear. ( in the very rare case when you didn’t want this, there is an
“undo selection change” in the Edit menu )
In almost every case, a selection will be identified with a “red border” around the selected items. And in
most cases the items will change to a red color to indicate selection.
Mouse wheel:
Mixbus uses the mouse-wheel ( or 2-finger drag, on a touchpad ) extensively. Here are just a few of the
things you can do with the mouse wheel:
• Zooming the editor canvas timeline by mouse-wheeling in the ruler-bar, or anywhere by holding Ctrl. (
“Cmd” on a Mac ).
• Adjusting knob and fader values.
• Adjust the metronome volume, by mouse-wheeling on the metronome button.
• Nudge the playhead forward & backwards in the Mini-Timeline.
• Advancing a clock value (such as bars) by mouse-wheeling over the appropriate number in the clock.
The ESC (Escape) key will clear the current selection, so there will be no selected tracks,
regions, notes, or automation control points.
*
Harrison Consoles Mixbus v4 - 1
Page 33 of 515

Right-click:
Mixbus uses the right mouse button extensively. Nearly every item has a context menu that can be
accessed with a right-click. Try right-clicking on tracks, regions, mute buttons, solo buttons, group panes,
regions, selected ranges, markers, mixer redirects, clocks, the region list, and the marker bar area.
Right-click actions are those items that aren’t necessary to see hundreds of times a day, but perhaps
dozens of times in a day. So for example the Solo button is activated with a click; but if you want to “isolate”
the solo (so the channel always plays even if other channels are solo’ed), then the Solo Isolate function is
accessed from the right-click menu on the Solo button.
Shift+Right-click: (Delete shortcut)
Shift+Right-click is a shortcut to Delete objects. Some examples include regions, plugins, and automation
control points. Holding shift while right-clicking on one of those objects will delete it.
Shift+click on mixer controls: (Group Override shortcut)
When two or more channels are in a “group”, and the group has “gain” enabled, many mixer functions will
function together. For example: if you drag a fader, then the grouped channels will all move together. But if
you hold Shift when you click the fader, then only the clicked fader will move; not the grouped channels.
This is called a group override. This also applies to “momentary” mutes and solos as described below.
Shift+Ctrl-click: (applies to ALL tracks)
Holding Shift and Ctrl (Shift+Cmd for Mac users) while clicking on a track button will apply that operation to
“all” tracks. Some examples include the Mute, Solo, and Record-arm buttons. Clicking on those buttons with
Shift+Ctrl held will apply your click to ALL tracks. This is a fast way to un-solo all tracks, or to rec-arm all the
tracks in a session simultaneously. Other functions also respond to Shift+Ctrl+Click: for example if you hold
these keys while selecting the “meter point” for a channel, the menu selection will apply to all channels.
macOS users: make sure to enable the “secondary click” functionality of your touchpad, in
System Preferences, so you can access the right-click functions. Cmd+Click is NOT a right-
click!
!
Harrison Consoles Mixbus v4 - 1
Page 34 of 515

Middle-click: (non-latching mute/solo)
Clicking a Mute or Solo button with the middle mouse button will trigger a “non-latching” button push; this
means that when you release the mouse button, the solo/mute button will also release. This provides a
quick way to temporarily mute or solo a track while you hold the mouse down.
Mixer Knobs and Faders:
• When a knob is in the “default” position, the indicator is very dim. This allows you to scan the mixer
for settings that are not at default.
• Mixer strip knobs can be double-clicked to instantly return them to their default value.
• Holding Ctrl/Cmd while turning the knob provides a fine-adjust mode, while Shift+Ctrl/Cmd allows
super fine adjustments.
• Hold Shift to override any actions that might be grouped; ( see Group Override, above )
• Mixbus knobs and sliders incorporate an “in-on-change” feature. When any knob or fader is clicked
and changed, it will automatically enable the control by also setting the “in” or “on” control for that
section.
Floating-Point processing:
Mixbus uses a floating-point internal architecture, it is possible to exceed 0 dBFS (decibel full scale i.e: the
loudest sound in the digital domain) on the channel and mix bus strip meters without ill effects. For this
reason there is no colored indication of overly-loud signals on input and mix bus strips.
Master Bus Volume:
The master bus is not a “volume” knob for your speakers. The master fader level is applied to the exported
file; so if you turn it down to make your speakers quieter, you will likely make a very quiet mix, on export.
If you are not using the monitoring section built into Mixbus (Session>Properties>Monitoring tab) you will
use the volume knob provided by your computer or I/O device to control the loudness of your speakers. If
you are using the fader of the Master strip to control speaker volume, remember to set the fader to the
correct level before you export your project to a .wav file. Use the K-14 meter to verify that the export
volume is at a reasonable level.
“If you asked a hundred engineers, mixers and producers to define the “perfect console” you would
probably get a hundred answers. The answers, however, would all contain the same salient points.
The “perfect console” would have totally transparent sound, capturing the true musical quality of all
performances. It would have unlimited features, facilities, and functions. It would perform all required
tasks with a minimum of operator effort. It would be totally reliable and require no preventive or corrective
Harrison Consoles Mixbus v4 - 1
Page 35 of 515
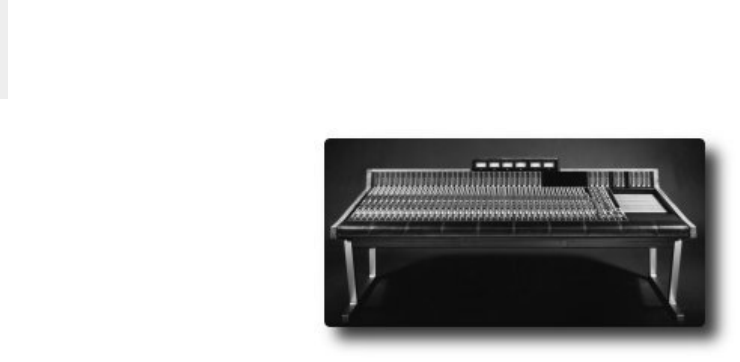
maintenance…
You can spend the rest of your life looking for the “perfect console”. You’ll never find it. You will find,
however, that we have what you need.”- Harrison MR20 brochure, circa 1982
Harrison Consoles Mixbus v4 - 1
Page 36 of 515
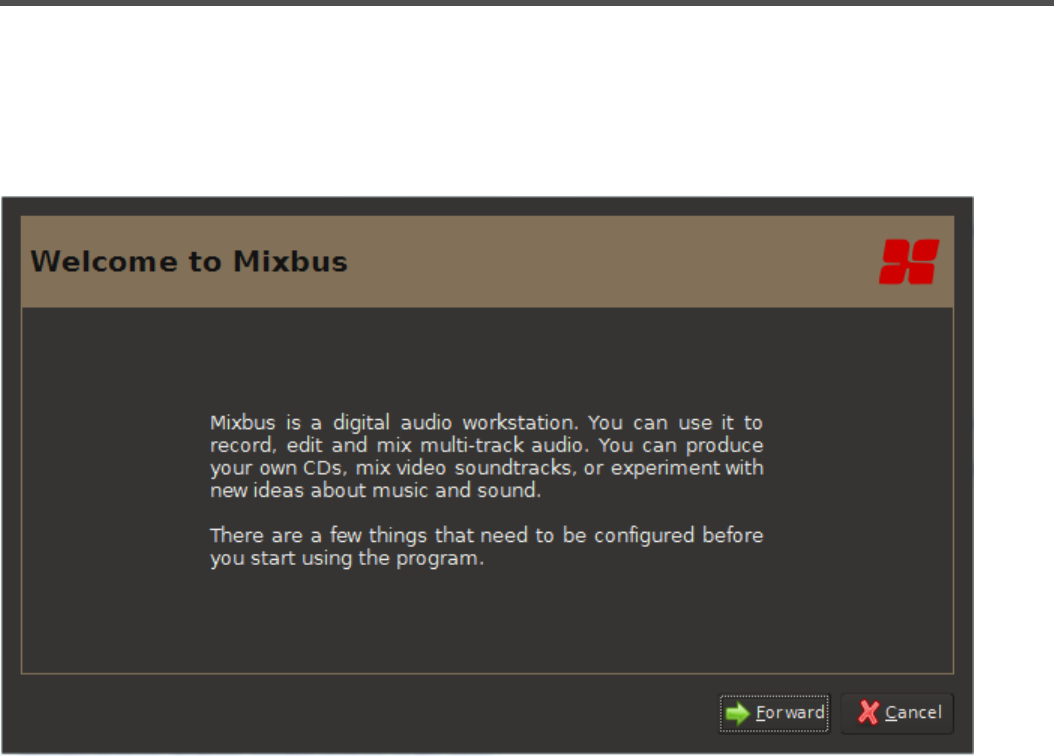
First Time Configuration
First Time Configuration Dialog boxes:
The first time you launch Mixbus on your machine, Mixbus will prompt you for a few basic setup options.
You can change these preferences later.
A welcome message will appear. Click the“Forward” button to continue
Harrison Consoles Mixbus v4 - 1
Page 37 of 515
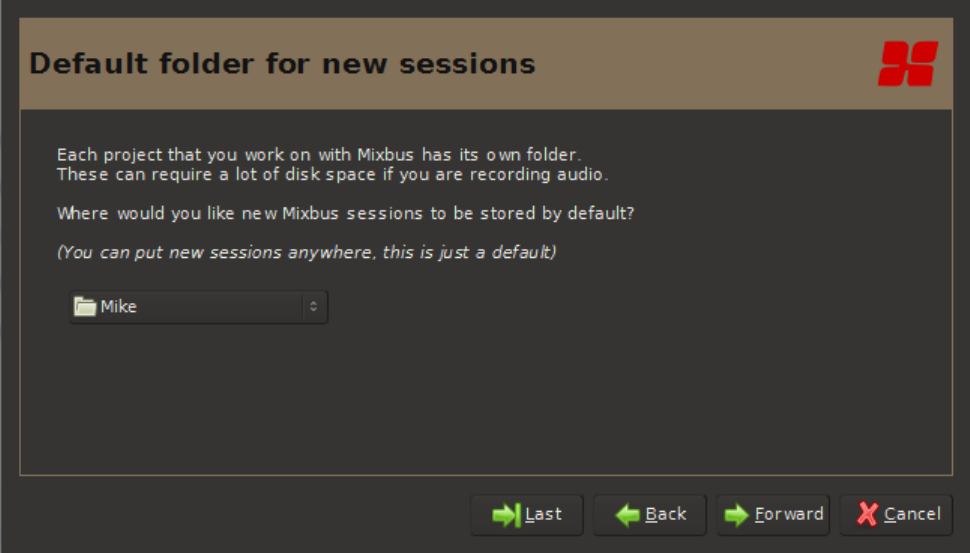
An option to change the default session folder is given. If you have a preferred hard drive you would like to
use, the dropdown box will allow you to browse to it. Choosing a drive other than the one that your OS or
the Mixbus application resides on may increase performance (this is dependent on your computer
configuration).
Harrison Consoles Mixbus v4 - 1
Page 38 of 515
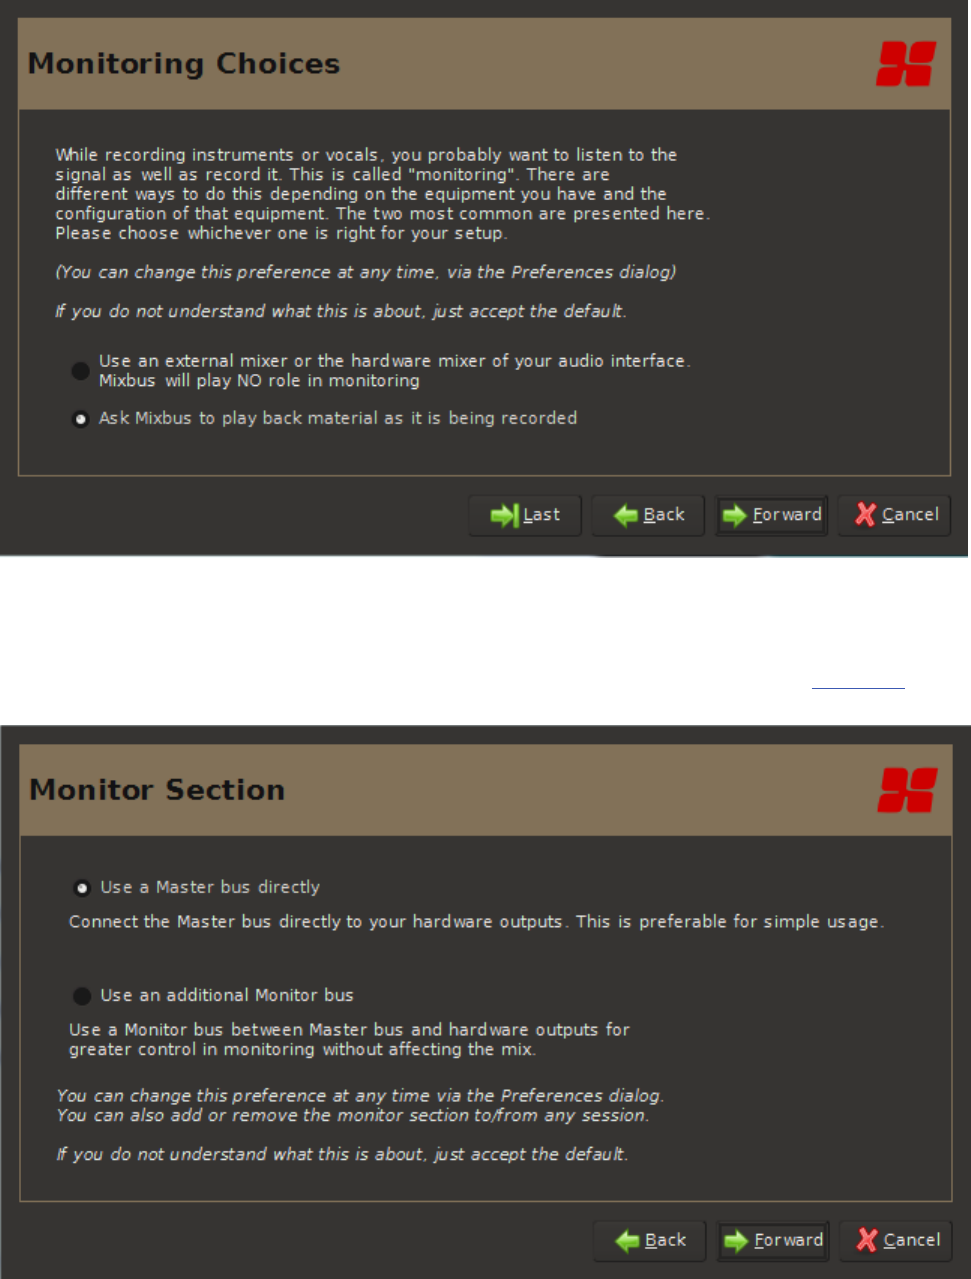
Some soundcards provide a low-latency mixer interface which can be used to monitor yourself while you are
recording. If you want to use your interface to monitor yourself, choose “hardware monitor”. Otherwise
choose “Mixbus does monitoring”. You can find more information about monitoring, click here
Harrison Consoles Mixbus v4 - 1
Page 39 of 515

The monitoring section provides an additional volume control between your master mix, and your
soundcard. You will want to enable this option if your interface doesn’t provide a monitor level knob. It also
provides some additional solo-ing features. For more on the monitoring section click here
Harrison Consoles Mixbus v4 - 1
Page 40 of 515

Starting a session
What is a Session?
A “session” is the document-type that Mixbus opens and edits.
When a new project is started Mixbus will create a session folder where it stores all information regarding
that particular project. When a session is saved and later opened, Mixbus will reload the appropriate
snapshot file so that all work previously done can be recalled. You might create a Session for your band’s
live recording, a song, or a compilation of songs for a CD.
Session setup:
3 options are given in the session setup window:
1. Open a recent session:(this list will be blank for first time users). The black window with in the dialog box
displays a list of a saved session’s name, sample rate, and bit depth.
Harrison Consoles Mixbus v4 - 1
Page 41 of 515
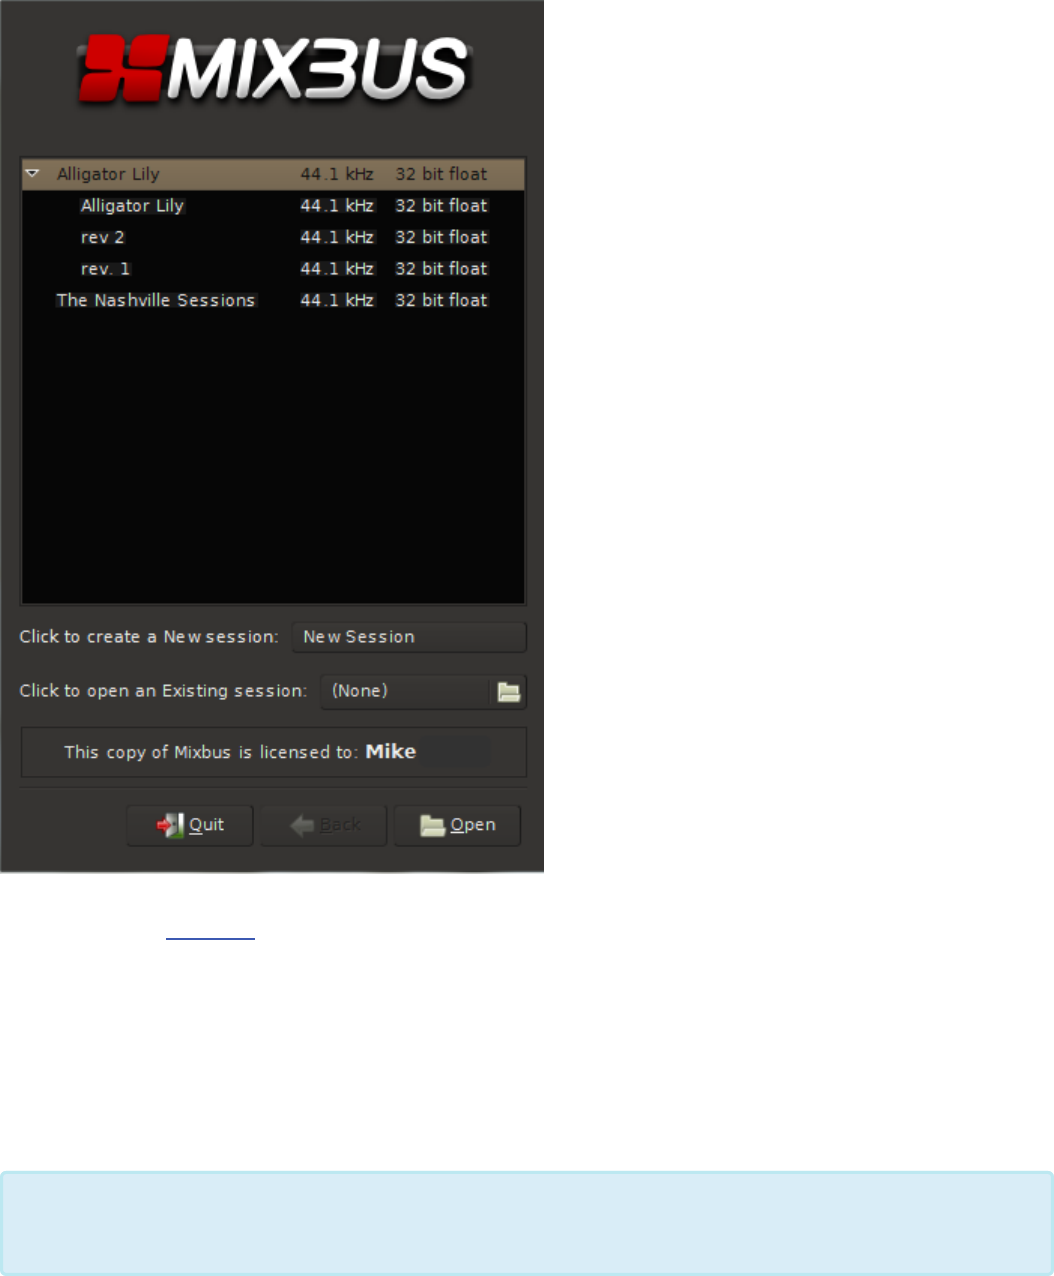
If more than one snapshot is available in the session, an arrow next to that session will appear. Notice the
arrow next to the session “Alligator Lily” but no arrow next to “The Nashville Sessions”. Clicking on the arrow
will show all snapshots available in this session. In this case the engineer chose to name the snapshots rev
1 and rev 2.
You can click on a column header to sort the session list by date or by name. Click again to reverse the sort
order ( oldest to newest, or newest to oldest ).
If you hover the mouse over a session, it will report the full path to the session folder on
your system.
*
Harrison Consoles Mixbus v4 - 1
Page 42 of 515
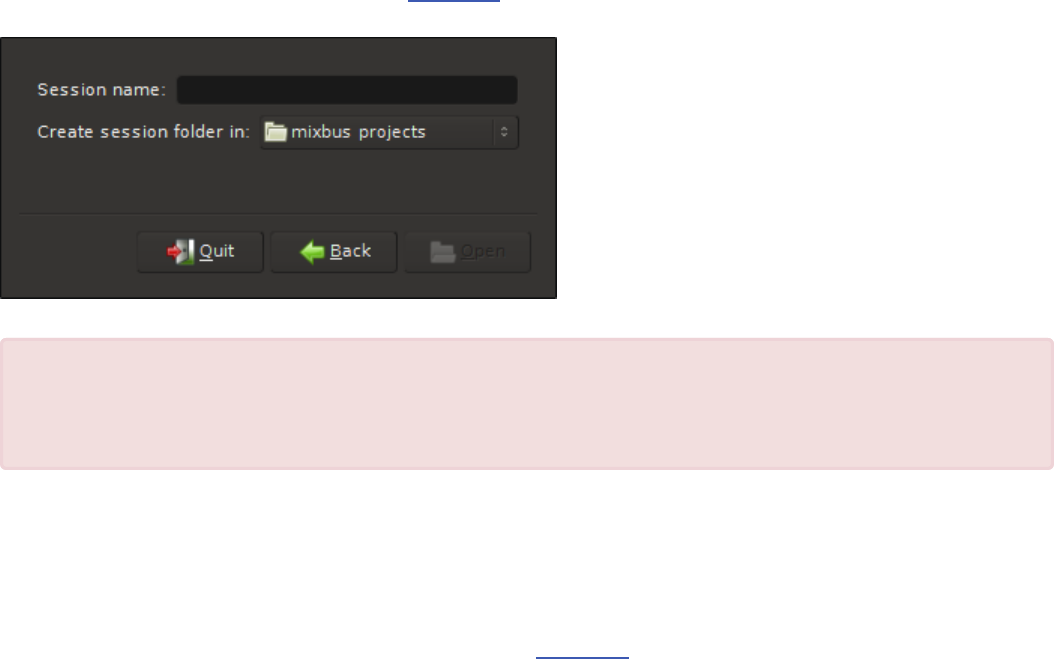
2. “Click to create a New session”: When creating a new session a dialog box will allow you to name the
session, choose a location, and choose a Template to use for the new session.
3. “Click to open an Existing session”: If a previously created session does not show up in the session
window, or if no previous sessions have been created, then you can use the browser function to locate and
open an existing session. A session file will have a file name suffix of “.ardour”. In the image below the
session file is “The Lost Sessions.ardour” and it is located on the desktop as shown by the folder tabs
across the top. For more on Session File Management click here.
A session’s sample rate is determined when it is created. You cannot change the session’s
rate after it is created. Music projects are typically created at 44.1 kHz, while most audio-
for-video projects utilize 48 kHz.
!
Harrison Consoles Mixbus v4 - 1
Page 43 of 515
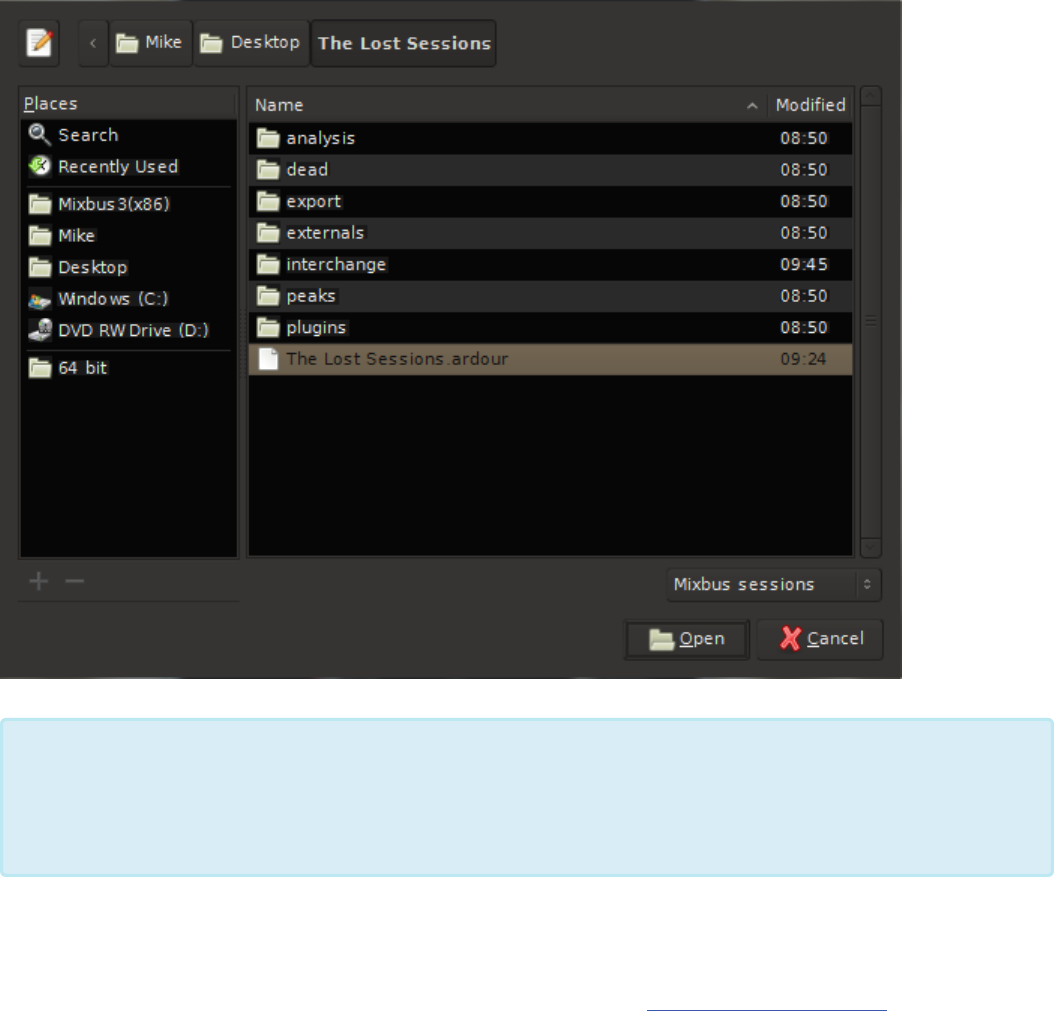
Audio Setup
After selecting a session to open, Mixbus will present you with the Audio/MIDI Setup Dialog.
If you hold Ctrl ( Cmd on Mac ) when clicking “OK”, the session will be opened in “SAFE”
mode. Mixbus will ignore the last-used playhead position and zoom; and no plugins will be
loaded. The plugins will appear as placeholders which you can edit or remove, and then re-
open the session.
*
Harrison Consoles Mixbus v4 - 1
Page 44 of 515
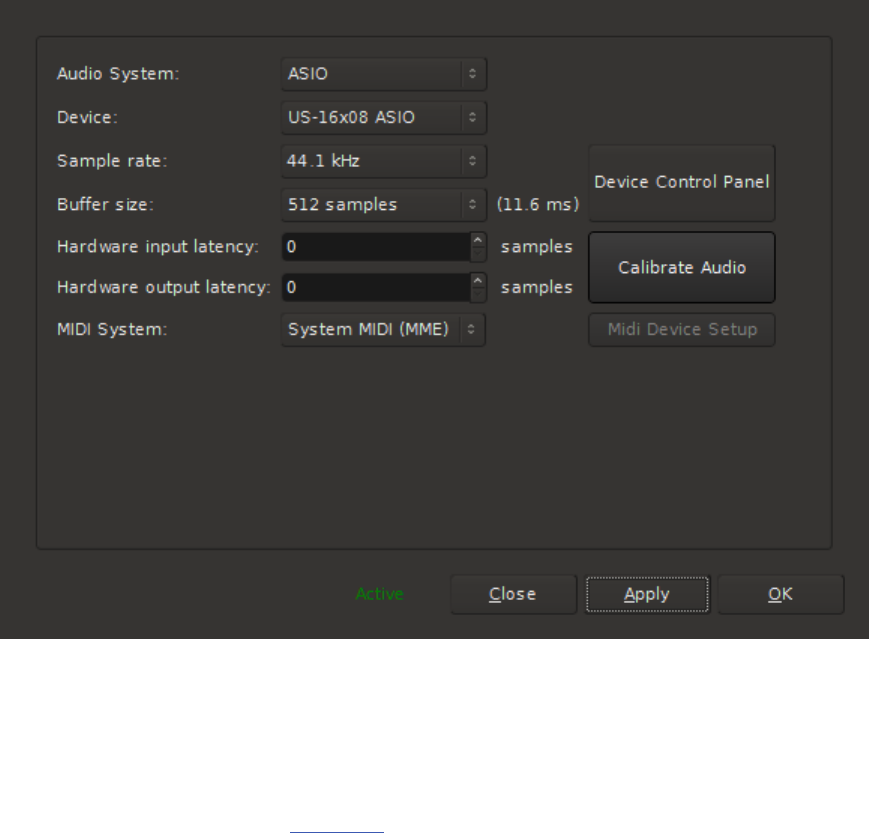
If you are opening an existing session, the audio system will be configured for that session’s sample rate.
The other settings (I/O devices, buffer sizes, etc) will be configured with your most-recently used settings.
If you are creating a new session, this is your chance to define the sample rate for the session. For more on
the Audio/MIDI setup window click here.
Harrison Consoles Mixbus v4 - 1
Page 45 of 515

Session File Management
Session Folders
Every session is stored on your disk as a folder. A session folder contains everything pertinent to the
session: Audio files (or links to them), snapshot files, the waveform display cache, your exported mixes
(unless the default location has been changed) and many other things. Deleting a session’s folder will
completely remove the session and all of its recorded audio (if any).
In the main menu “Session”, you will find several options to open a new session; or close, save and copy
the currently open session.
New: Calls up the Session Setup dialog and allows a new session to be created. This will save and close
any currently open session.
Open: Allows the user to open an already saved session. A navigation dialog will appear so that you can
locate your session.
Recent: Contains a list of recently opened session that can be opened.
Close: Exits the current session. If any changes have been made to the session a dialog box will present a
save option.
Save: Saves the current session
Save As: Saves the current session with a new name and/or new location
• Switch to newly-saved version: Closes the session you are currently working with and opens the new
session.
• Copy media to new session: All files within the interchange folder (audiofiles, midifiles, and videofiles)
will be copied to the new session/interchange folder. If this option is not checked Mixbus will refer
back to the previously named session’s interchange folder.
If you move the session folder to another location, Mixbus will no longer be able to find it,
and it won’t show your session in the “Recently Opened” list. But you can navigate to the
session folder and open one of the snapshots to re-add it to your history.
*
Harrison Consoles Mixbus v4 - 1
Page 46 of 515

• Copy external media into new session: Same as above but also moves any files that may be located
in other directories or hard drives. See topic clean-up, sub topic real world example for similar
functionality and why you may need it.
Rename: Renames the current session
Snapshot (& keep working on current version) …: Makes a copy of the opened session in its current
state for later recall. ( See: Session Snapshots )
Snapshot (& switch to new version) …: Saves a copy of the opened session in its current state with a
new name and/or location. ( See: Session Snapshots )
Save Template: Session templates are a fast way of recalling common session “layouts” such as hardware
connections, plug-ins, and number of tracks. If you find your current session is a common one, you can save
the it as a template (no audio will be saved).
Harrison Consoles Mixbus v4 - 1
Page 47 of 515

Session Snapshots
What is a session snapshot?
A “snapshot” is a file that stores the current session settings including the track layouts, audio & midi
regions, markers, tempos, faders, EQs, and plugins. Snapshots all share the same audio data in the session
folder.
Snapshots require very little disk space, so you can store snapshots for multiple mixes or edit sessions
without worry.
Using snapshots:
Snapshots are typically accessed via one of 3 methods:
1. In the main “Session” menu you can create new snapshots.
2. In the editor sidebar, you can select from a list of this session’s snapshots.
3. In the New Session dialog, you can click a triangle next to your session to display the list of snapshots
in the session.
Backup Snapshots
By default, Mixbus automatically overwrites a backup snapshot every few minutes. The backup snapshot
changes its name every hour. So there is a backup snapshot stored for every hour that you have worked on
a session; in addition to the most-recent backup file.
To recover from a “backup” file in the backup folder, you must first drag it up one level into the main
“session” folder. Then you can open it normally. If you try to open it from within the “backup” folder, it won’t
find the audio files.
Here are the steps to recover a backup snapshot from the backup folder:
1. Quit Mixbus
Each snapshot has its own persistent undo history. If you open an old snapshot and click
UNDO, you will undo the last editing operation that was applied to that snapshot.
*
Harrison Consoles Mixbus v4 - 1
Page 48 of 515
2. Open the session folder and find the “backup” subfolder.
3. Choose the last-created snapshot file ( the file ending in .ardour )
4. Copy the file up to the main session folder
5. Launch Mixbus
6. In the “recent sessions” list, you should see a triangle next to your session; click the triangle and
choose the backup snapshot.
Harrison Consoles Mixbus v4 - 1
Page 49 of 515

Session Templates
What is a Session Template?
Once you’ve created a session and set up your track routing, plug-ins, etc, you may want to reuse that setup
for a future project. A template contains everything except the actual audio and midi data: track layouts,
plug-ins, and your channelstrip EQ/Compressor/Bussing setup.
Any session can be stored as a session “template” for future sessions.
Using Session templates:
To save a template, choose Session->Save Template from the main menu, and name the template
something meaningful so you can find it in the future.
To use a template, you have to create a NEW session. In the New Session dialog, there is a list of your
templates, in addition to the factory-supplied templates.
Managing & Sharing session templates:
Session templates can be later renamed, edited, or shared using the Template Manager: see Templates
Where are my templates stored on disk?
Templates are stored in the user config area, under a folder called “templates”. You can find more details
about the user’s config folder in Power-User Topics.
Some plugins can store additional data that won’t fit in the session file. For example, a
convolution reverb might include the user-selected impulse response files. For that purpose,
there is also a “plug-ins” folder inside the template folder which stores this additional
information.
*
Harrison Consoles Mixbus v4 - 1
Page 50 of 515
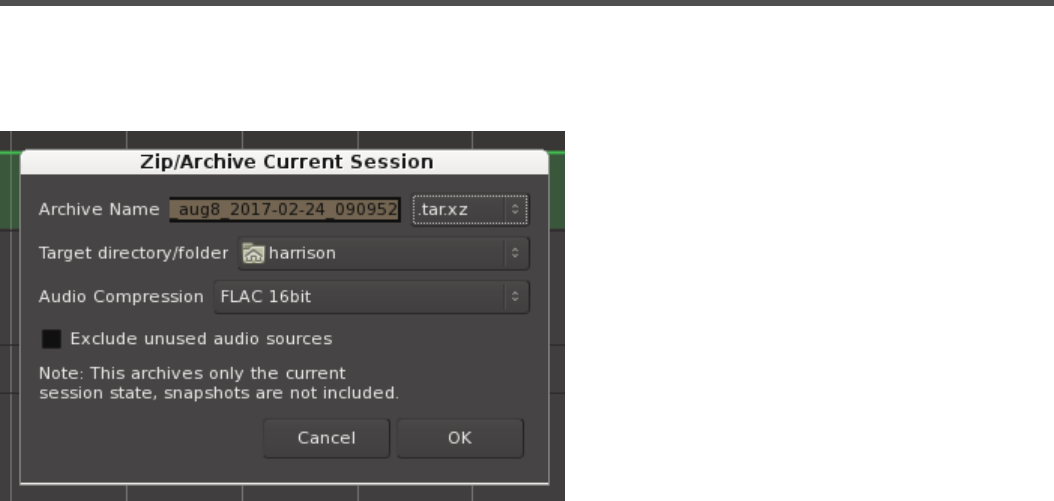
Session Archive
Using the “Archive” utiliity, you can create an “Archive” of a session snapshot which automatically
compresses the snapshot, the audio+midi files, and other necessary files into a single compressed file.
• Archive Name: the name of the resulting archive file.
• Target directory/folder: the folder where the resulting archive file.
• Audio Compression: Choose FLAC to reduce the size of the audio files using “lossless” compression.
This requires additional time for the archive process, but results in a smaller archive file. Choose 24bit
for full-quality archive, or 16bit for slightly lesser quality, and significant disk-space savings.
• Exclude unused audio sources: if this is enabled, then the archive will not include any audio or midi
files that aren’t currently in use by the snapshot. (for example: unused takes)
Harrison Consoles Mixbus v4 - 1
Page 51 of 515
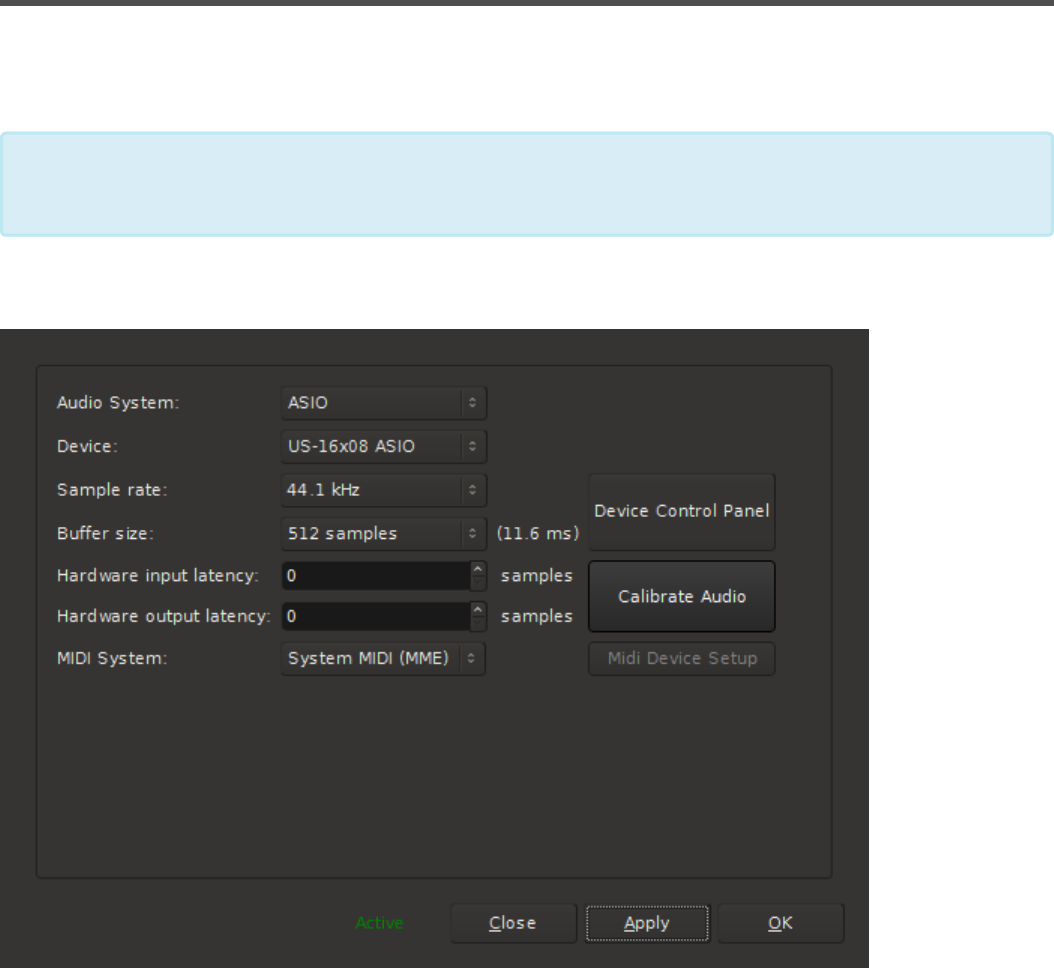
Audio Midi Setup Dialog
The Audio Midi Setup dialog appears automatically when you create a “New” session. This step allows
you to choose the session’s sample rate, as well as the soundcard settings and other details.
You can also launch the Audio Midi Setup dialog from the main menu, under “Window”.
Audio System:
The “Audio System” selection tells Mixbus which way you will connect to your devices.
• To use your audio devices on Mac OS X, select “Core Audio” (this option is only available on Mac).
• To use your audio devices on Windows, select “ASIO” (this option is only available on Windows).
The sample rate that is selected during the initial session setup cannot be changed later.
However you can later change the soundcard setup, buffersizes, and other I/O details.
*
Harrison Consoles Mixbus v4 - 1
Page 52 of 515

• To use your audio devices on Linux, select “FFADO” (for FireWire devices) or “ALSA” (these options
are only available on Linux).
• “JACK” uses the JACK server to talk with your sound card and other software on your system. It is
only available if you have already installed JACK on your system. If the JACK server is already
running, then Mixbus will connect to the JACK server. If not, then Mixbus will start the JACK server for
you (the JACK option is available on Mac, Windows and Linux). You can learn more about JACK here.
• The “Dummy” system is used for testing only. It has all the features of a real audio system, but it does
not connect to your sound card so you cannot record or play back any sound from Mixbus if you
select the Dummy system (the Dummy option may not be available on your system).
Input Device & Output Device:
• Select your preferred audio interface from the pulldown list. For best results, you should use Mixbus
with a high-quality audio interface.
• Some combinations of input & output devices will not work. Normally, you should choose the same or
similarly-named device for both input and output.
Device Control Panel:
• This opens the control panel of the audio interface that has been selected on the “Device” list.
Sample rate:
• A drop down list with all sample rates supported by your selected audio interface will be displayed.
Buffer size:
• In conjunction with sample rate, buffer size is used to control latency and to manage hardware
resources. See more here.
Hardware output latency:
• When audio is routed to outboard equipment and back to Mixbus it must undergo a conversion from
digital to analog (DAC), the time it takes for this conversion can be entered to compensate for latency
so that all audio remains time aligned (This process can be automated, see “Calibrate Audio” below).
Hardware input latency:
• When audio is routed from outboard equipment and back to Mixbus it must undergo a conversion from
analog to digital (ADC), the time it takes for this conversion can be entered to compensate for latency
so that all audio remains time aligned (This process can be automated, see “Calibrate Audio” below).
Harrison Consoles Mixbus v4 - 1
Page 53 of 515
Calibrate Audio:
• This calls up a latency measurement tool with step by step instructions on how to compensate latency
introduced by external equipment and the digital to analog, and analog to digital conversion process.
MIDI System
• This selection will default to the MIDI framework supported by your OS.
Harrison Consoles Mixbus v4 - 1
Page 54 of 515

Latency and Buffer Size
How do I choose a buffer size? And how does computer
audio (really) work?
Although Desktop computers are blindingly fast inside, they are optimized to interface with the world at
“human speed”… a user sends dozens of keyboards command every second, at best; and the screen is
updated perhaps 30-50 times per second. But audio events ( or more accurately, “samples” ) typically occur
44,100 times per second, or more! Computers are not intended to be ‘interrupted’ by the outside world this
often; and if you did, it would severely compromise the amount of work that the computer can attend to.
When a computer soundcard ( whether internal, USB, Thunderbolt, or something else ) gathers audio data
from the Analog-to-Digital converters, it can’t “wake up” the computer CPU 44,100 times per second. So it
has to “buffer” the audio for a while, and then pass this larger buffer to the computer for processing. This
buffersize can be changed by the user to balance the system’s stability and power, versus latency and
responsiveness.
If you choose too low a buffersize, you will likely encounter ‘clicks’ when your system gets busy. If you
choose too high a buffersize, then you might hear a delay through the system, or notice that the computer is
not very responsive to you.
This video by Richard Ames provides an overview of your computer’s audio system, and why the buffersize
is such an important factor in performance.
Latency
“Latency” is the amount of time it takes for digital audio to pass from the computer’s input to output. The
buffer size has a direct effect on latency: Larger buffer sizes will incur a longer latency. In many cases,
latency doesn’t matter much. If you just need to play your tracks for mixing, then a fairly large buffersize will
provide the best system stability.
Due to the nature of computers and digital audio, there will always be some latency in a DAW. Even if the
soundcard operated with no buffer ( a buffersize of “1” ) then the process of converting Analog to Digital,
and then back to Analog, will incur about 2-3 milliseconds.
If audio arrives at the output later than desired then it is considered to have high latency. If the latency is
minimal, we may not be able to perceive it. Low latency is desirable for recording, tracking, overdubbing,
Harrison Consoles Mixbus v4 - 1
Page 55 of 515
etc. But there is a lot of debate about how much latency is too much. And it varies depending on the
situation and the performers.
Buffer
A buffer is an area in the sound-card’s memory that is set aside to temporarily store digital audio. By
temporarily storing digital audio we can prevent any interruption in the flow of sound. Interruptions will be
heard as clicks and pops. We can set the size of the buffer to achieve a specific delay, usually measured in
milliseconds. The memory stores samples of audio, and the more samples that are “buffered”, the more
latency will be exhibited. Hence, the size of the buffer also determines the latency. Setting the buffer too
small can cause buffer underruns with audible pops and clicks. Setting the buffer too large might cause a
noticeable delay in the sound or operation.
in digital audio, buffer sizes are almost always defined in blocks of powers-of-2. Your soundcard driver will
define the available buffer sizes for you to choose. The most commonly available values are: 64, 128, 256,
512, 1024, and 2048.
Generally speaking, a buffer of 1024 is a good balance of stability and responsiveness when you are mixing.
That’s the default value that we choose for Mixbus. But if you are recording yourself and you want to play
through the computer, you might choose a smaller buffersize. Just be aware that you might cause pops &
clicks in your recording if you exceed the capabilities of your system.
Sample Rate Vs. Buffer size
If you choose to run at 96 or another high rate, you’ll notice 2 things:
1. Your soundcard’s buffer now “fills up” faster, and it wakes the computer more often.
2. Your computer is now processing twice as many samples, and therefore working harder.
For those 2 reasons, you will likely need to increase the buffersize when you use higher sample rates, to
maintain the same performance.
If you want to absolutely minimize the latency through Mixbus, you could choose the lowest possible latency
and the highest possible rate. This will minimize the latency from input to output. But it will likely exceed
your computer’s capabilities very quickly, and you might get clicks&pops in your recording.
Harrison Consoles Mixbus v4 - 1
Page 56 of 515

Buffer size while mixing or editing
While mixing or editing, a large buffer will prevent pops and clicks at the expense of a slightly less
responsive system. This lack of responsiveness may be evident when pressing the play button and a slight
delay occurs before audio can be heard. Many times this delay is so small you may barely notice it. So while
mixing or editing, a larger buffer is advisable. A buffersize of 1024 samples is typical.
Buffer size while recording
If monitoring through a DAW and an artist needs to listen to themselves while recording ( such as a vocalist
listening to a headphone mix ) then low latency audio will be required. Adjust the buffer size to achieve a
latency of 10 ms or so. A value of 128 samples is typical. Furthermore it is important to avoid using plugins
that cause additional latency.
Our friends over at Sound on Sound have some great information on this topic
http://www.soundonsound.com/sos/jan05/articles/pcmusician.htm
Hardware Vs. Software Monitoring
If you plan to record with Mixbus, one of the most important options is the Monitoring mode.
If you choose “Mixbus does monitoring” then:
1. Mixbus can control which channels you are hearing (subject to the Monitoring rules … see section
“Monitoring” ). So, for example, Mixbus will only “monitor” the inputs that are currently record-armed.
2. The inputs will automatically be mixed into the master output of Mixbus, so you can hear them in
context with your mix.
3. You will be able to hear any effects (eq, compression, and/or plug-ins) that are applied to the tracks.
4. HOWEVER: the signal path through your converters, Mixbus, and plug-ins can add up to a significant
latency. The latency can be minimized by using a small buffer size, and avoiding the use of plug-ins
with long latency
If you choose “Hardware does monitoring” then:
1. You will not incur the latency penalty of getting into and out-of the computer. However if your interface
or mixer uses digital signal processing, there may still be some latency.
2. You must use your external I/O controls, and/or mixing console, to build monitor mixes for your talent.
3. Mixbus cannot control which channels you are hearing. Record-arming a track in Mixbus will not
automatically route that track into the monitor mix.
Harrison Consoles Mixbus v4 - 1
Page 57 of 515

Some artists may be more sensitive to latency than others. If the artist is not performing as
expected, one thing to check is latency; even if the artist does not perceive or complain of
latency. In some anecdotal cases, singers have been bothered by the “comb filter”
(frequency cancellations) caused by a very short delay between their headphones and
internal vocal cavities. In this case you can try decreasing the latency to see if that helps.
(sometimes increasing it will also help). If the singer finds this objectionable then you should
consider a hardware-monitoring setup instead.
*
On Windows, using ASIO drivers, you must sometimes choose the buffer size from the
device’s control panel. In a few cases, Mixbus does not have control over ASIO buffer sizes.
!
Harrison Consoles Mixbus v4 - 1
Page 58 of 515

Status Bar
The status bar provides information about your Mixbus’s status including current settings and realtime
performance indicators. Right-click on the status bar to enable or disable the available displays.
• File: Audio file format setting (from Session->Properties->Media)
• TC: Time code format (from Session->Properties->Timecode)
• Audio: Sample rate / Buffer latency (from Window->Audio/MIDI Settings)
• Buffers: p (playback) and c (capture) – these numbers indicate the ability of your disk to keep up with
Mixbus’s playback and recording buffers. If either number is reduced to zero, then Mixbus will stop
playback and report an error to you.
• DSP: Time required to process an audio block / duration of the audio block, compared to the available
buffersize timing. This displays the worst-case maximum (not average).
• X: Number of xruns : an xrun ( under -run or over -run ) is caused when Mixbus cannot keep up with
your soundcard. ( see below )
Disk: Estimated remaining recording time, given the current settings and number of record-armed tracks.
Of these reports, the Xrun counter is the most important. If the xrun counter is increasing while you are
recording or playing, it means that you have exceeded the capabilities of your system, and you are likely
hearing clicks and pops.
The typical methods to minimize the CPU load are:
• increase the “buffer size” in the Audio Setup dialog
• optimize your system for audio performance; such as choosing “optimize for background tasks” in
Windows.
• use a lower sample rate, reduce the number of tracks
• reduce the number of plugins in your session.
• And of course using a faster computer, with more CPU cores, is desirable.
Harrison Consoles Mixbus v4 - 1
Page 59 of 515

The CPU meter on your computer averages the cpu usage over a very long period (perhaps one second).
In digital audio, the timing is much more sensitive. When the soundcard passes us a buffer, then we have to
wake up, process the audio buffer, and return it to the soundcard before the soundcard needs to play it out.
If we don’t wake up in time, or we don’t get finished in time, then you hear a “click” caused by the (we call
these xruns, short for over-run or under-run).
In the case of a 1024 buffer size, this has to be done within (1024/44100) 25ms, or about 1/40th of a
second.
This is complicated by the fact that it’s the OS’s job to “wake us up” and tell us that the soundcard has some
data for us. Some OS’s and drivers are better at this than others. But let’s say it takes 5ms before we are
even alerted that some data is available. We now have 20ms left to process the audio. If it takes us 10ms to
process the audio, then we are finished within 50% of the allotted time and that’s what we display in the
meter. This is a very accurate indication of your computer’s ability to process audio.
This also explains why the selected buffersize is so critical to the DSP load. A 256-sample buffersize is
about 6ms, so if your computer sometimes waits 5ms after receiving the soundcard interrupt before it
“wakes us up”, we only have 1ms remaining to do our work.
For more information on factors impacting the performance of your computer please see this video:
CPU Performance vs. Real-Time Performance in Digital Audio Workstations
Harrison Consoles Mixbus v4 - 1
Page 60 of 515
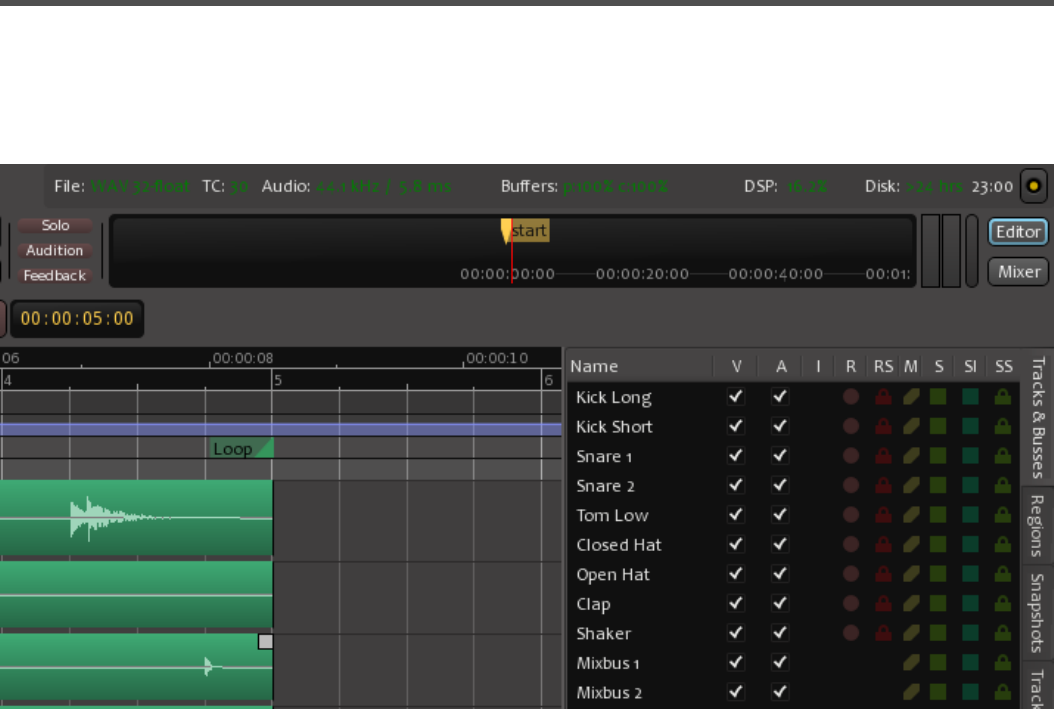
Primary Windows: Editor and Mixer
This document will reference the Editor and Mixer windows. These are the two primary windows that are
used to operate Mixbus. You can navigate between the two windows using the Editor and Mixer buttons at
the top right corner of Mixbus:
You can also detach either screen by right clicking either button and choosing the Detach option, or by
dragging either button to the desktop . This is useful in dual monitor setups.
The Transport Toolbar
The top portion of the Mixbus main window is dedicated to the transport toolbar. The transport toolbar
provides transport buttons ( Play, Stop, Rewind ), the main Clock Displays, and the mini-timeline. You may
add or remove elements from the transport toolbar in Preferences->Appearance->Toolbar. For example,
when recording you might wish to show the “Punch” and “Monitoring” controls; but then you can remove
those when need more room for the tasks of editing and mixing.
Harrison Consoles Mixbus v4 - 1
Page 61 of 515
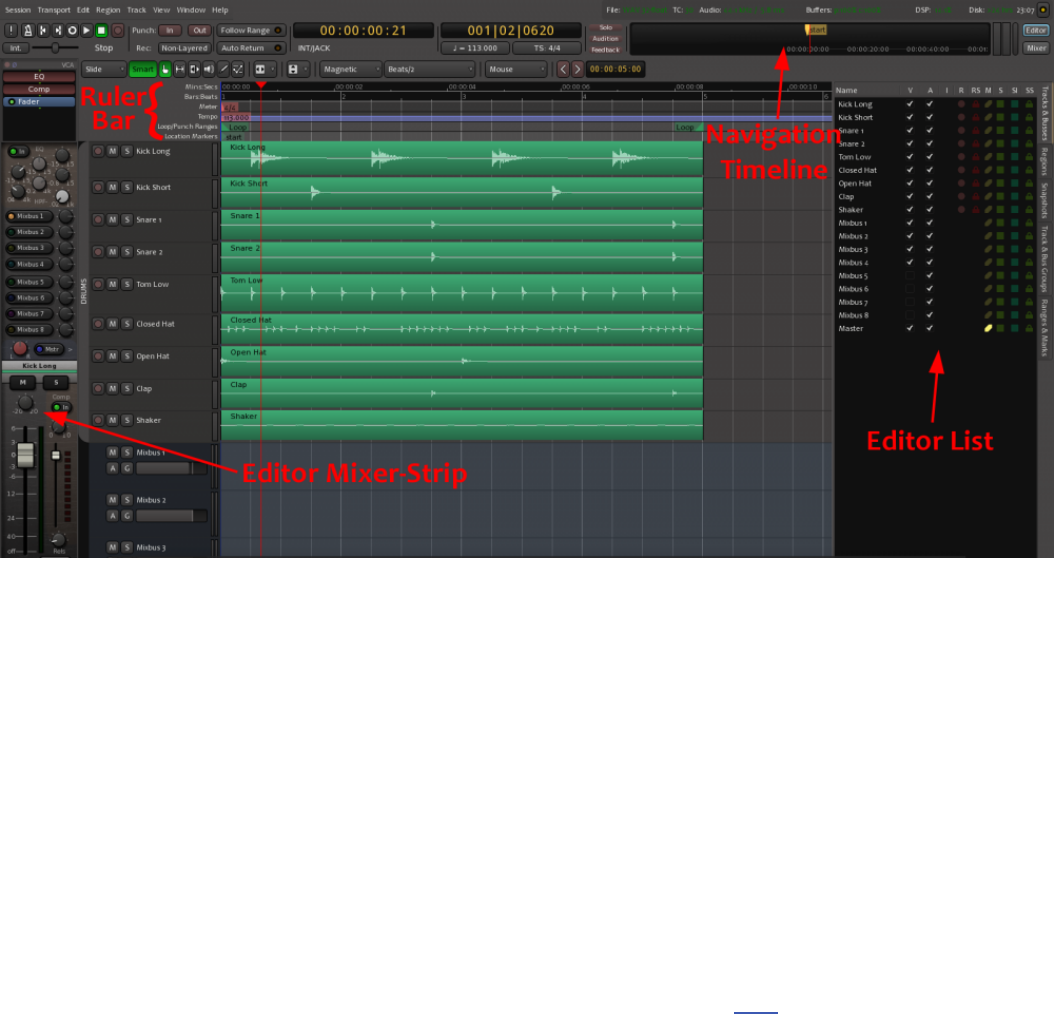
The Editor Window
When you first launch Mixbus, you will be presented with the Editor window. The editor window presents
the Audio and MIDI tracks that make up your session. You can reorder, resize, and rename the tracks from
the Editor window. Generally speaking, the Editor window provides all the features you need to edit your
arrangement, while the Mixer window allows you to balance the sounds in the arrangement so they can all
be heard.
The top of the editor screen provides the transport buttons ( play, stop, etc) as well as the main clocks
that display the location of the playhead in the session. Just below the transport buttons are the editor tools
which are used to edit your arrangement.
The top right of the editor screen provides the Mini-Timeline, which allows you to jump around the
timeline. Left click to jump to a specific place, or scroll the mouse wheel while hovering over the timeline to
jump around. You can hold down Control for finer jumping, and Control+Alt for still finer jumping. Right-
clicking on the Mini-Timeline allows you to select a time display range. If you create Location markers, they
will appear on the Mini-Timeline. You can click on a marker to jump to that location.
Just below the editing tools, you’ll see the ruler bar which helps to indicate your timeline position using
Min:Sec, timecode, samples, bars/beats, as well as providing a place to set Markers, Time Signature or
Tempo changes, and Loop and Punch ranges. Learn more about the rulers here.
Harrison Consoles Mixbus v4 - 1
Page 62 of 515

The main editor canvas shows your tracks, and any regions (audio clips) that are present.
On the right of the editor is “Editor List”. The Editor List may be shown and hidden via the “View” menu.
Learn more about the Editor list here.
On the left of the editor is the “Editor Mixer”. The Editor Mixer shows the mixer channelstrip for the
currently-selected track or bus. The Editor Mixer may be shown and hidden from within the “View” menu or
the associated keyboard shortcut (Shift+E by default).
The bottom of the editor is the Summary view. The summary view shows a light grey box that encompasses
your current view, with the entire session behind it. You can move the grey box around your session to
quickly move your view. The Summary may be shown and hidden via the “View” menu.
Mixer Window
The Mixer Window may be shown using the “Window” menu, or the keyboard shortcut (ex: Alt/Opt+M) which
toggles between the editor and mixer windows. If you have the editor and mixer windows on different
monitors (screens), then the “Toggle Editor/Mixer” shortcut does not have an effect.
When viewed in the Mixer Window, Mixbus resembles a traditional analog console. Input Channels are on
the left, while the busses and master are located on the right side.
The audio signal flow is generally left-to-right. The signal starts at the input channels (which might be live
inputs, playback tracks, MIDI tracks, or virtual instruments), progresses through the mix buses, and into the
master. The channel’s EQ, Filter, Compressor, panning, bus summing, and master bus processing are
performed inside the proprietary Harrison channel plug-in.
Harrison Consoles Mixbus v4 - 1
Page 63 of 515
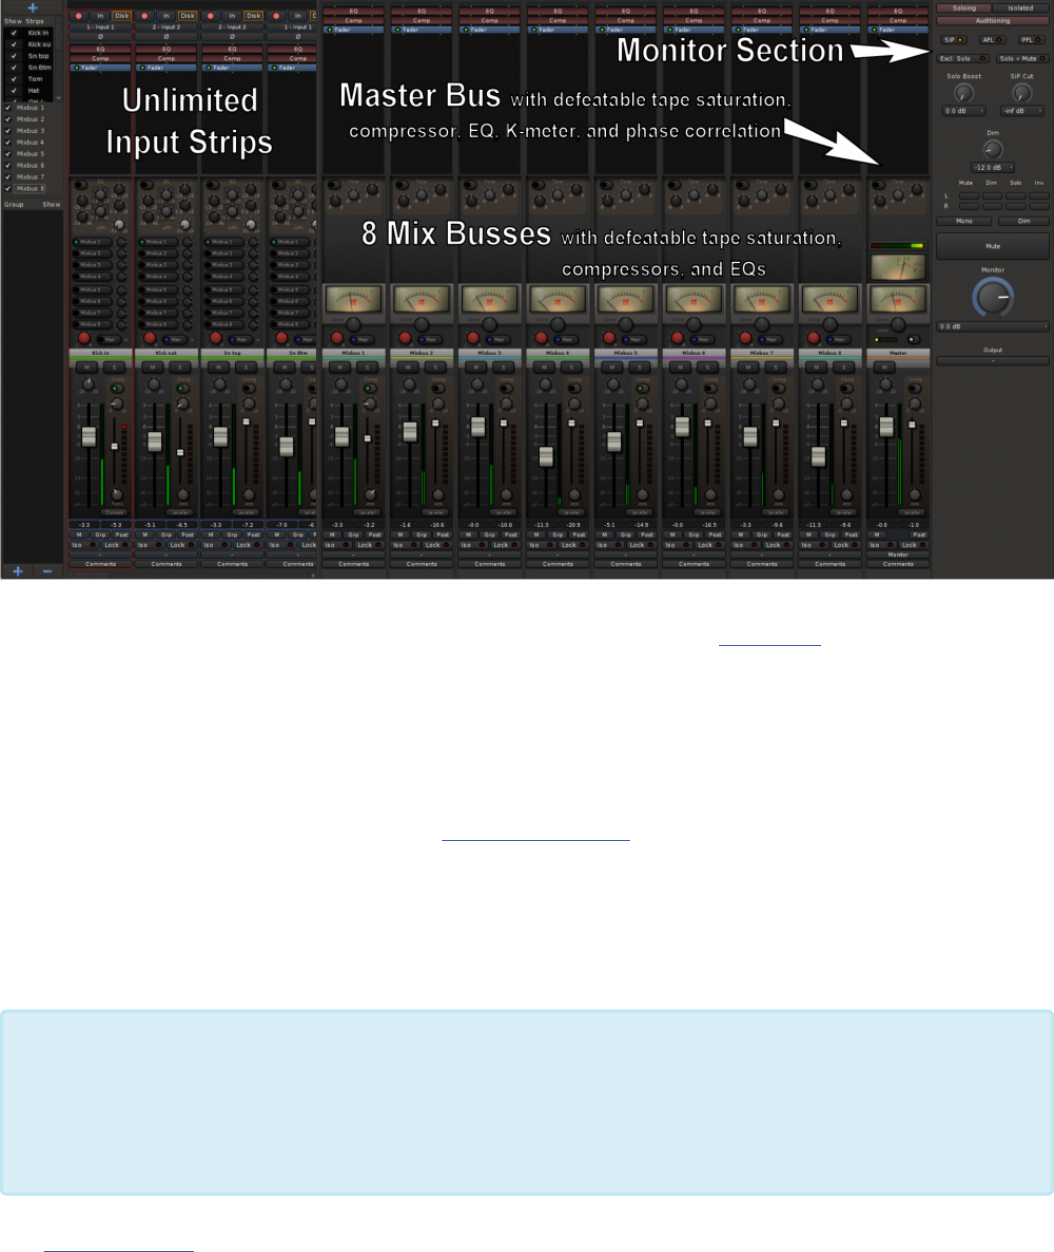
In Mixbus, like other audio workstations, each recording track has its own mixer strip. These mixer strips
resemble the input channels of a traditional analog mixing console. Input channels can be configured to be
mono or stereo and by default include all the DSP processing that makes up a real console channel. This is
the major difference between Mixbus and other DAW mixers. No time is wasted searching for and adding
the necessary high-quality mixing tools.
Just to the right of the input channels are the 8 mix bus channels. Mix bus channels are used to collect the
outputs from the input channels into groups. For example, in a typical music project, you might send the
drums to mix bus 1, the vocals to mix bus 2, instruments to mix bus 3, and use mix bus 4 as a parallel
effects bus, like reverb. This allows you to easily adjust the relative levels of these groups and apply
processing to them.
The master channel is the final mixer strip on the right. Typically, the master channel will be connected to
your monitoring system (speaker outputs). The output of the Master channel is the final output of your
You can double-click on a strip’s “name” to toggle between wide and narrow mode.
Shift+double-clicking a strip will toggle ALL of the strips together. Toggling all of the strips to
a “narrow” view will allow more channels to fit on the screen. ( NOTE: this feature is for
Mixbus only; Mixbus32C is intended to recreate the layout and operation of the 32Series
console, and you cannot change the width of the mixer strips in 32C )
*
Harrison Consoles Mixbus v4 - 1
Page 64 of 515

project i.e. your 2 track master file. This output is rendered to the final .wav file when you export the
session.
The monitor section on the far right is has been made available for those who do not have access to a
dedicated external monitoring section.
Maximize Mixer/Editor space
The “Maximize” commands can be found under menu> View. Enabling this function causes the editor
window to occupy all screen real estate. The title bar will be hidden as will the task bar. The exact behavior
of this function depends on your OS’s desktop “fullscreen” conventions. The same function is available for
the Mix window. To exit this mode uncheck Maximize Editor in Menu>View. ( if you are unable to see the
main menu, try moving your mouse to the top of the screen, and wait for the main menu to appear )
Adding Tracks and Buses >>
Harrison Consoles Mixbus v4 - 1
Page 65 of 515

Adding Tracks and Buses
Adding Tracks, Buses and VCA’s
This section describes how to add tracks, buses, and VCA channels to your session. If you wish to import
existing media, you should visit the Importing Files section.
What is the difference between Tracks, Buses and VCA’s?
Mixbus supports several kinds of objects that can appear in the editor and mixer windows:
•Audio tracks contain a sequence of audio “regions” on the timeline. Audio tracks also provide the
mixer features such as fader, panning, bussing, eq, compressor and plugins.
•MIDI tracks contain a sequence of midi regions on the timeline, so they can be recorded, edited and
played. MIDI tracks sometimes have a Virtual Instrument (VI) plugin, which converts the MIDI regions
into audio. When a VI is used on the track, MIDI tracks provide the mixer features such as fader,
panning, bussing, eq, compressor and plugins. If no VI is provided, then the MIDI data is sent directly
to an output; either to a MIDI Bus, or to an external gear.
•Audio buses are just like audio tracks, but they have no playlist of audio regions; the bus is only used
to process audio from another track or live input.
•MIDI buses are just like midi tracks, but they have no playlist of audio regions; the bus is only used to
process midi from another track or live input. Sometimes, a MIDI serves as a good location for a
single VI that is fed from multiple MIDI tracks.
•VCA channels are described here: VCA’s
There are 4 ways to open the “Add Track/Bus” dialog:
• Use the “Add Track/Bus” menu item, which can be found in the Session and Track menus.
A note about buses, and Mixbus’s mixing workflow: Unlike typical DAW workflow, where
track outputs are connected to other track(bus) inputs, the Audio Buses presented here are
not intended to be used as part of the mixer panning & summing. The “Audio Buses”
created here do not have the processing or delay compensation features of the mix busses.
We discourage the DAW-style mixing workflow for Mixbus. The point of Mixbus is to revert
to the buss-style mixing that is used in “hit-making” studios. It’s a subtle difference but very
important. Audio Buses are best suited for utilitarian tasks such as “live” inputs from an
external reverb, or headphone cue feeds.
*
Harrison Consoles Mixbus v4 - 1
Page 66 of 515
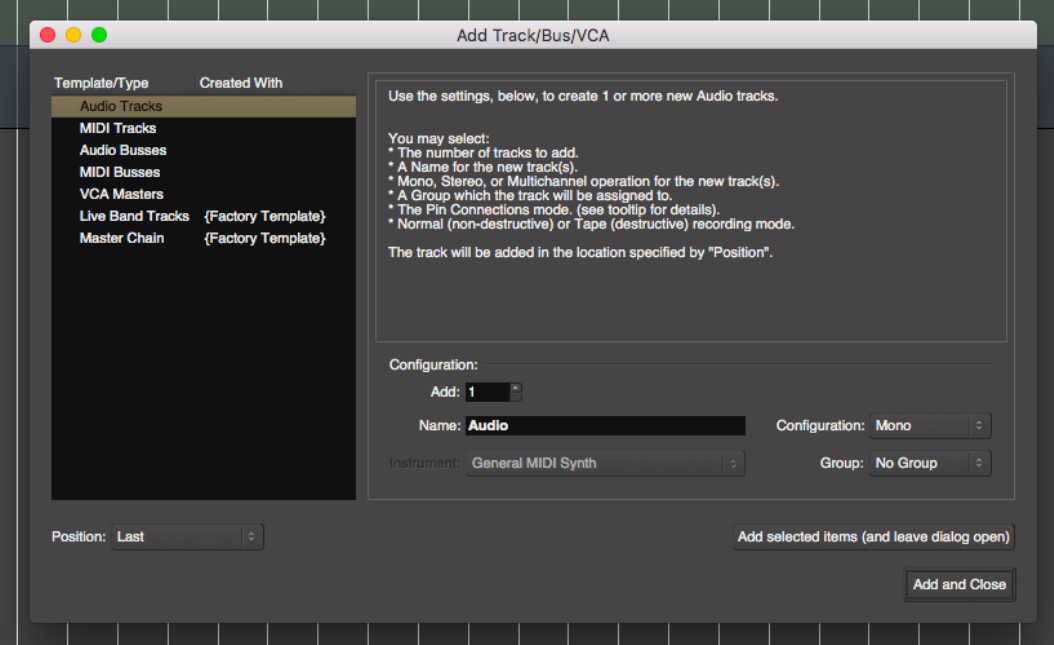
• Right-click in the empty gray area in the editing canvas.
• Right-click in the empty gray area of the mixer window.
• Clicking the blue “plus” button in the mixer’s left-side panel.
The “Add Track/Bus/VCA” dialog
The “Add Track/Bus/VCA” dialog provides a list of the track types and templates that are available to be
created.
At the top of the list, there are generic entries for New Audio Track, New MIDI Track, etc. When one of
these items is selected, some of the options below will be provided:
• Add: Multiple audio tracks can be added at one time via the “add” setting.
• Name: A custom name may be assigned to the audio track before it is added. If multiple audio tracks
are added they will be sequentially numbered.
• Configuration: ( for Audio tracks only ) Allows for stereo or mono tracks with mono being the default.
• Instrument: (for MIDI tracks only) – this allows the user to choose the VI (Virtual Instrument) that will
be inserted in the MIDI track.
Harrison Consoles Mixbus v4 - 1
Page 67 of 515

• Group: Assigns the new audio track to a group. Whether a group is selected or not you can change
the group assignment at anytime after the audio track is added.
Session Templates
If a Template is selected, instead of the generic “Add Track/Bus” selections, then you can view the
description of the template, and any unused controls are greyed-out.
Mixbus supports 2 different kinds of templates, which both appear in this list:
• Scripted Templates: these templates are developed as Lua Scripts, and can prompt the user for more
input when they are run. It is possible for users to add their own scripts. These scripts currently report
“{Factory Template}” in the Created With column.
• User Templates: these templates are created by the user, and are created when the user clicks
Session->Save As Template in the main menu. These templates report the version of Mixbus (or
Mixbus32C) that was used to create the template. It is not guaranteed that templates made in one
version of the program will work perfectly in a different version.
At the bottom of the dialog, you’ll find 3 buttons:
• Insert: Determines where in the Mix/Edit window the new audio track will be placed.
◦ Before Selection: In the Mix window this will place the new track to the left of the selected track.
In the Edit window this will place the new track above the selected track.
◦ After Selection: In the Mix window this will place the new track to the right of the selected track.
In the Edit window this will place the new track below the selected track.
◦ Last: This will place the new track in the last position in the Mix/Edit window.
• Add (and leave dialog open): this adds the selected track(s) and leaves the dialog open, so more
tracks can be added
• Add and Close: this adds the selected track(s) and closes the dialog
NOTE: You can re-order tracks anytime, using either the Editor List, or by selecting tracks
and then using the Track menu { “Move Tracks Up/Down..” } to move the selected tracks
together.
*
Harrison Consoles Mixbus v4 - 1
Page 68 of 515

Track Templates
Track templates store the settings of a track so it can be re-used in another session. Track templates store
the track’s name, plugins, and mixer settings ( such as panning, EQ, compressor, and mixbus/master sends
)
Creating Track templates:
To create a track template, right-click on the channelstrip and choose “Save as Template”
Using Track templates:
In the “New Track” dialog, you will see your saved templates, along with the factory-provided templates, in
the left column of the New Track dialog.
Managing & Sharing track templates:
Track templates can be later renamed, edited, or shared using the Template Manager: see Templates
Harrison Consoles Mixbus v4 - 1
Page 69 of 515
Managing Tracks
On the left side of the editor canvas, you’ll find the Track Headers for each track. From the track header,
you can mute, solo, or otherwise affect the track.
Mixbus provides several methods to rename and re-order your tracks to help your workflow. You can
rename and reorder tracks from the editor view or the mixer view.
The editor list is a great place to manage your tracks, because it typically shows many more tracks at the
same time, and you don’t have to scroll the main editor canvas to rename or re-order tracks.
Naming Tracks
• In the editor window, double-click on the track name to edit it. Press TAB to advance to the next track.
• In the editor list, “Track/Bus” tab, double click the track name to change it. Press TAB to advance to
the next track.
• In the mixer sidebar, right-click on the mixer-strip name, and choose “rename” from the popup menu.
Re-ordering tracks
There are 3 ways to change the order of tracks:
• In the editor window, you can select tracks by turning them red (clicking on them to select them), then
use the menu item Tracks->Move Tracks up/down (or the associated keybindings) to move the
selected tracks up and down together.
• In the editor list, you can drag and drop tracks to reorder them.
• In the mixer sidebar, you can drag and drop tracks to reorder them.
No two tracks or buses can share the same name. If you try to rename a track to something
that already exists, Mixbus will show an error dialog (when practical), or append a number
to the end of your newly named track.
*
You can’t rename a track while it is record-enabled, because the track name defines the
resulting audio wavefile name.
*
Harrison Consoles Mixbus v4 - 1
Page 70 of 515
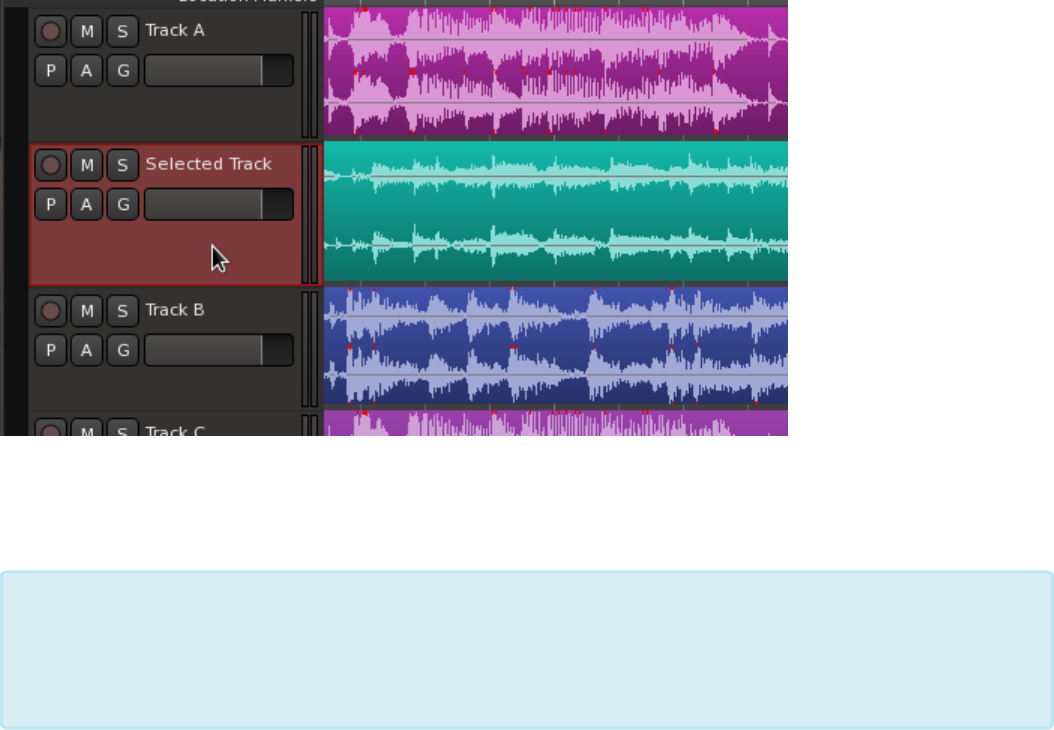
Selecting tracks
Click on the track “header” ( the area which holds the mute, solo, and track name ) to select a track. The
track should highlight, with a red border, as shown below:
When you “select” a track, Mixbus will make an effort to scroll that track into view, in both the editor and
mixer windows.
You can multi-select tracks by using standard modifier keys:
• Hold Shift while selecting to select a contiguous range of tracks.
• Cmd+Click on a track to add or remove it from an existing selection.
What can I do with selected tracks?
With tracks selected, you can perform a wide range of operations including:
Unlike some DAWs, selecting a track does not select the “regions” in the track. In Mixbus,
you select tracks and time-ranges with the Range tool, and Objects (Regions) with the
Grabber tool. Those are distinct operations and they are used for different tasks. You can’t
have both selected at once.
*
Harrison Consoles Mixbus v4 - 1
Page 71 of 515

• Call operations from the Track menu, like “Remove” or “Move Up/Down” … this will apply to all
selected tracks
• Right-click on a VCA, and choose to “assign” (or de-assign) the selected tracks to a VCA
• Right-click in the Group box, and choose “make a new group -> from selection”
• Use items in the toolbar, or the View menu, to Fit the selected tracks in the editor
Other ways to select a track:
• Clicking anywhere in a mixer strip will select the mixer strip, and this also selects the associated track
in the editor.
• Initiating a “Range” selection on a track will select the track. See: Range Editing
• Clicking on the track in the editor sidebar ( Tracks/Buses tab ) will select the track, and also scroll it
into view if it is not currently shown.
• By default, “Alt + up&down arrow keys” will advance the selection up or down through the tracks.
Harrison Consoles Mixbus v4 - 1
Page 72 of 515
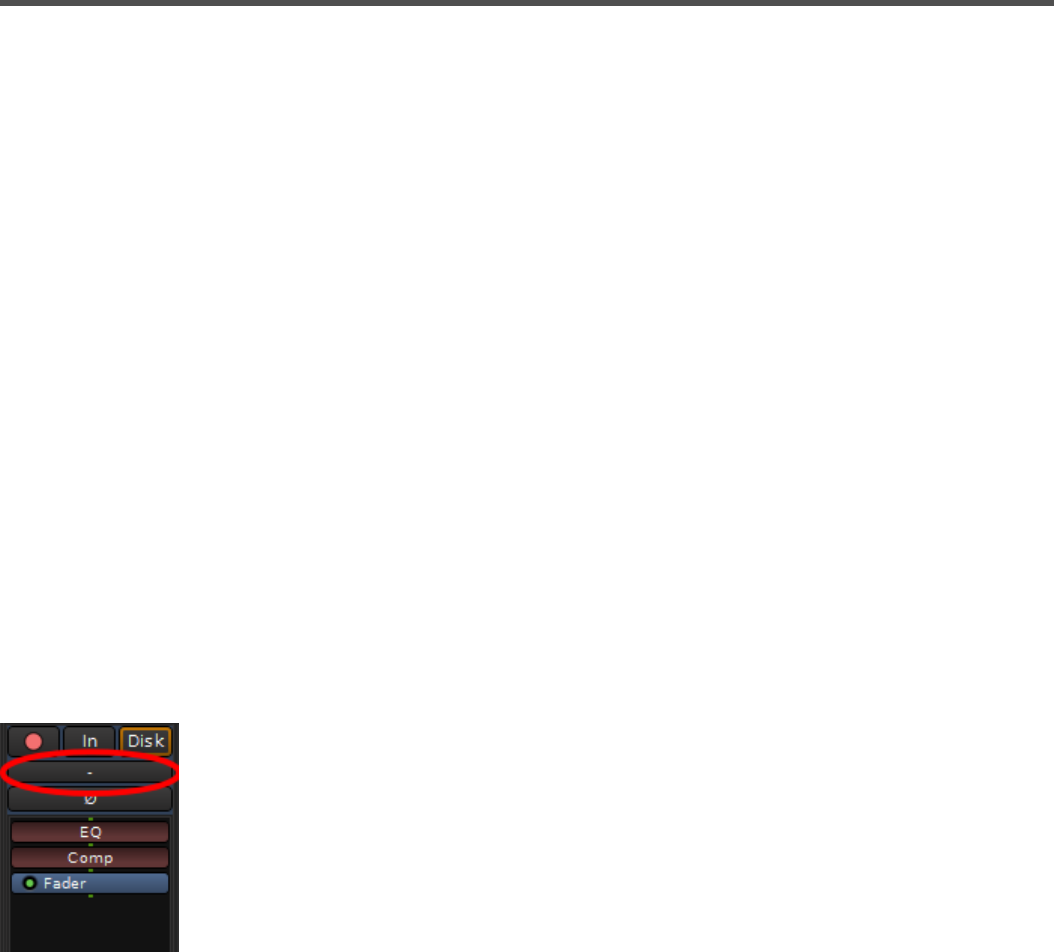
Audio Input & Output
Input
Mixbus uses an internal audio routing system to make audio connections between Mixbus, your sound I/O,
and other parts of Mixbus.
With a new session, Mixbus makes these connections:
• The master bus is connected to the first two physical output ports.
• Track/Bus inputs are assigned sequentially from the physical inputs whenever a new track/bus is
created.
• The Auditioner and the Click are connected to the first two physical output ports.
However it is possible to change any or all of these connections using buttons in the mixer strip, or Window-
>Audio Connections.
Track I/O Selections
Track inputs can also be assigned directly from the channel strip, by clicking on the “shortcut” input button
near the top of the channel strip (not to be confused with the “monitor input” button just above it labeled
“In”). Left clicking on the “shortcut” button calls up a simplified menu.
The image above shows a channel strip “shortcut” button that has no input assigned to it. If you are working
with imported audio this is fine (note: typically audio such as this is stored on a disk. Notice in the upper
right corner the the “Disk” indicator).
Harrison Consoles Mixbus v4 - 1
Page 73 of 515
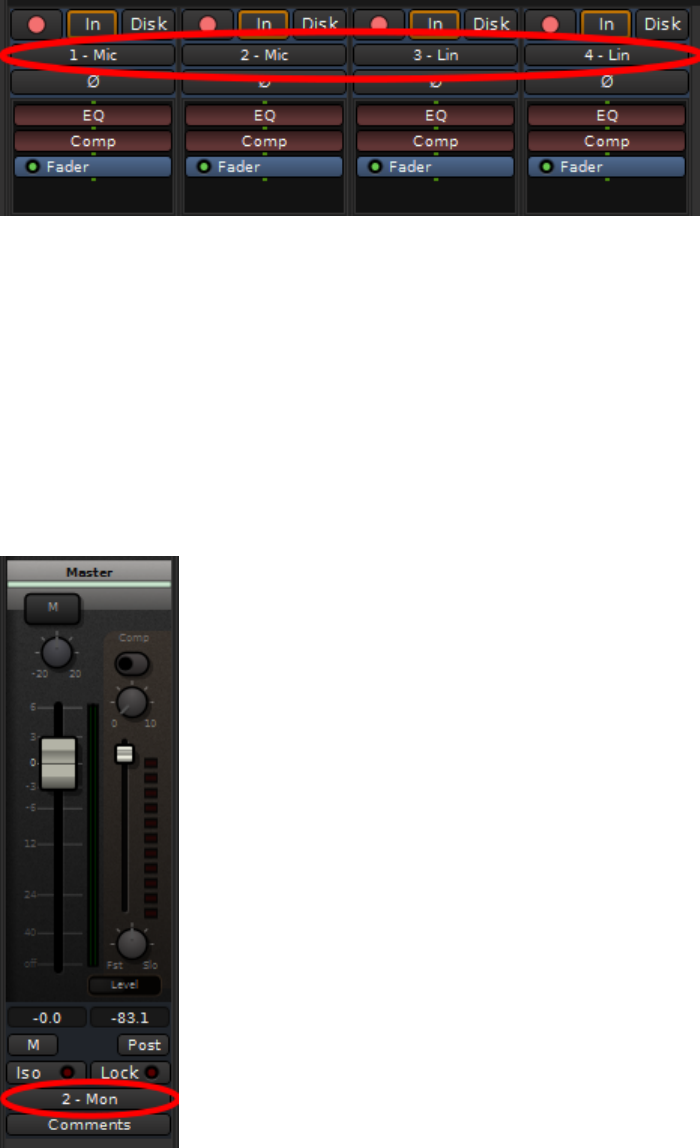
The image above shows 4 channel strips “shortcut” buttons which have been assigned inputs. Mic 1 and 2
or are on the first two channel strips and Line 3 and 4 have been assigned to the next two channels (note: in
the upper center of each channel strip the “In” indicator).
Output
For convenience, the Master Bus has an “output” button which can be used to select the ports that the
master bus output will feed. Normally, you connect the Master Bus output to your audio interface outputs.
In the above image the master bus has both of its outputs connected to the audio interface “Mon” or monitor
output.
Harrison Consoles Mixbus v4 - 1
Page 74 of 515
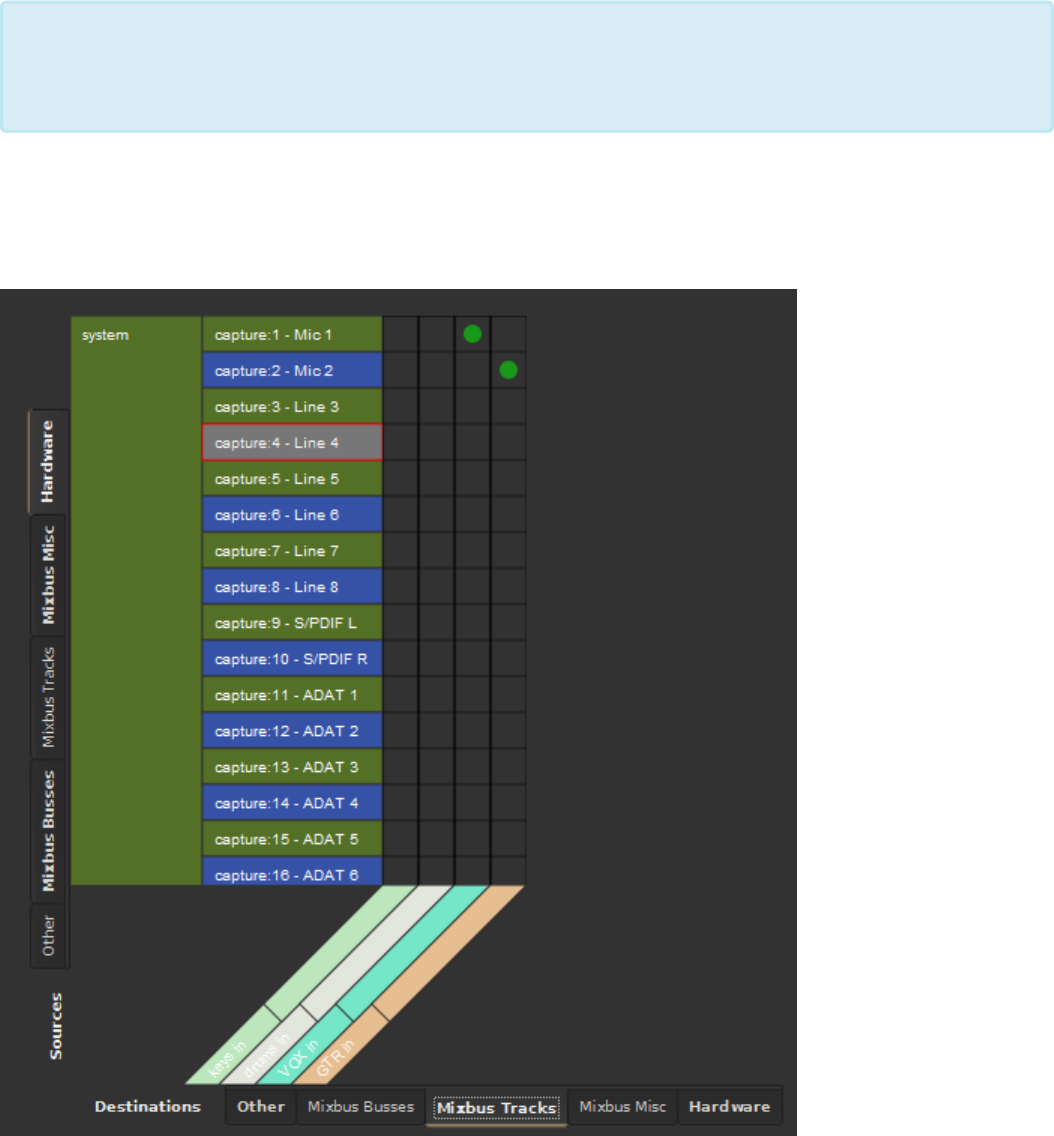
Audio Connections Manager
The Audio Connections Manager window allows you to connect any output port to the track/bus input:
In the above image an audio interface with 16 inputs is shown (viewed via the hardware tab on the left side).
The bottom tab labeled “Mixbus Tracks” shows a total of 4 tracks in the session. The green dots indicate
Mic1 is connected to the Mixbus channel strip input labeled VOX and Mic 2 is connected to the Mixbus
Note: The “shortcuts” may not display a connection until you select it from the menu. These
are provided as a quick way to override the current setting, not a method to see what the
track is connected to.
*
Harrison Consoles Mixbus v4 - 1
Page 75 of 515

channel strip input labeled GTR. The other two channels labeled keys and drums have no connections
because in this example those tracks had been recorded previously. This is an example of having drums
and keys already recorded and a vocalist and guitar player coming to the studio for an overdub session.
The image below shows the output of the Master bus. You can use the grid to connect the master bus to
your speakers, and a stereo bounce track, and any other connections:
Note: audio connections use a floating-point 32-bit format, which means that headroom is
essentially unlimited. You don’t have to worry about “clipping” the sound when routing from
one application to another. You may route a single output port to several inputs, and an
input port can be routed from several different outputs (the summing of these signals is
done automatically).
*
Harrison Consoles Mixbus v4 - 1
Page 76 of 515

Transport (Play, Stop, etc)
“Transport” is the term used to describe the motion of the playhead. Mixbus can play forwards, backwards,
and at various speeds. Furthermore, you can instantly “locate” the playhead wherever you like. All of these
functions are considered Transport functions.
Transport is a fundamental operation, so there are many different ways to control the transport:
• Buttons in the Transport Toolbar
• The Transport menu
• Keyboard Shortcuts
• Remotely, from an external device
…and probably many more!
All of the operations in the Transport Menu can be assigned to a keyboard shortcut, so
advanced users will most often use keyboard shortcuts to navigate the timeline and control
the transport. But you can use the menu actions, and the buttons in the toolbar, until you’ve
mastered the keyboard shortcuts
*
Harrison Consoles Mixbus v4 - 1
Page 78 of 515
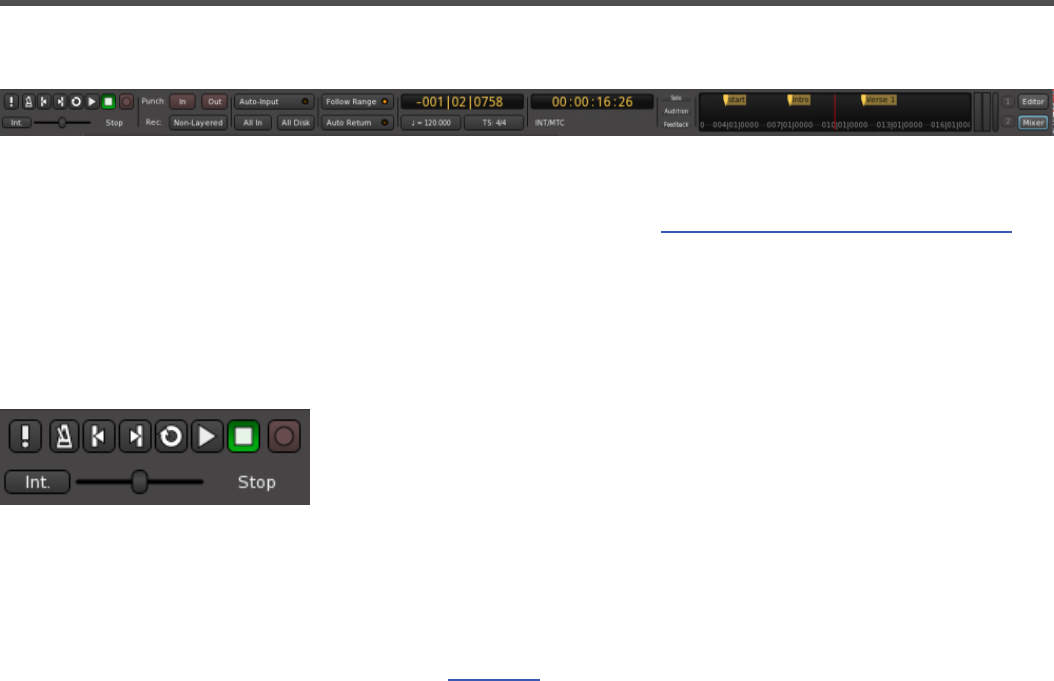
Transport Toolbar
Transport Toolbar:
The Transport Toolbar resides at the top of the main window. The transport buttons (far left) are always
available; many of the other elements can be shown or hidden from Preferences->Appearance->Toolbar
Transport buttons:
The transport buttons control the playhead’s location, speed and record-enable.
Transport controls are (from left to right):
MIDI Panic: Send note off and reset controller messages on all MIDI channels
Metronome: Enable/Disable audio click ( see The Click to learn more )
Start: Go to session’s Start marker
End: Go to session’s End marker
Loop playback: Plays loop range
Play: Activates “play”, starting from the current playhead location (shortcut: space bar)
Stop: Stops the transport (shortcut: space bar)
Record-enable: Toggles mater record-enable ( you must also have tracks rec-enabled, to record on them )
Jog/Shuttle control: Allows for increased or decreased playback speed.
Right-click to adjust the speed display, mode, and max speed settings.
• Units:
◦ Percent or Semitones.
• Mode:
◦ Sprung: control returns to center position when mouse is released.
◦ Wheel: control remains at its last location.
Harrison Consoles Mixbus v4 - 1
Page 79 of 515
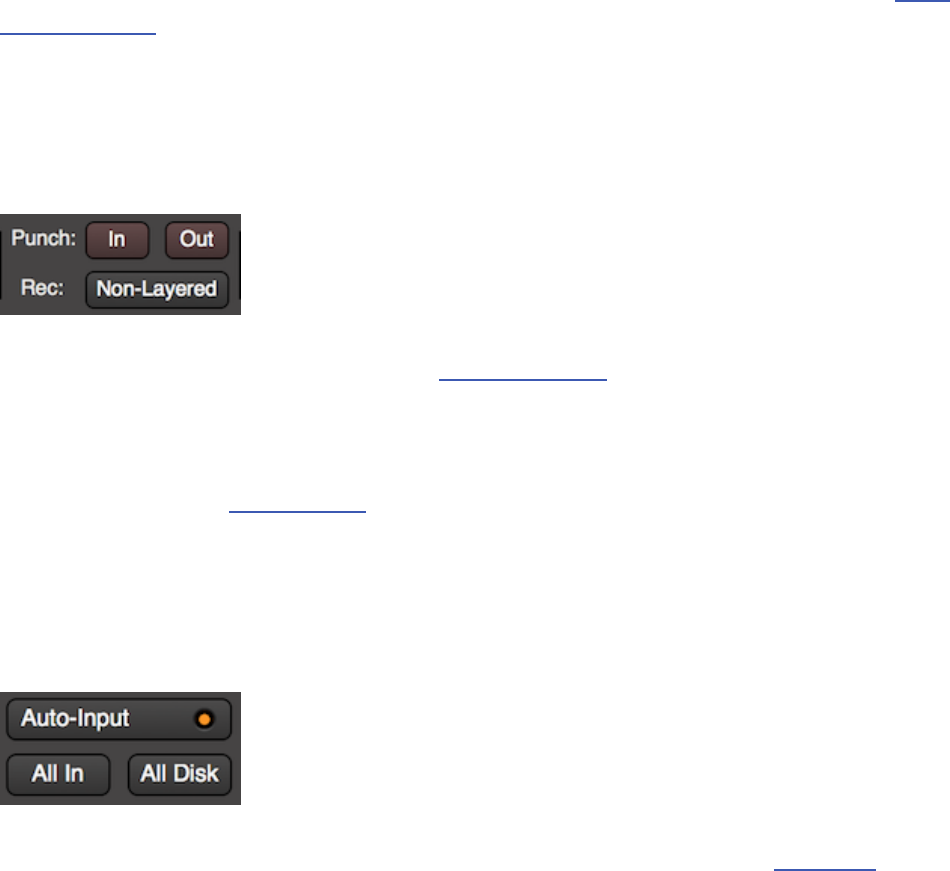
• Maximum speed:
◦ adjustable from 1.5 X to 8X of “play” speed.
Time Sync Button: This button toggles between Mixbus’s internal transport control, and synchronization to
an external device ( LTC (SMPTE), MTC (MIDI Time Code), or JACK ). To learn more, visit: Clock
Synchronization
Record & Punch options:
To enable the “recording options” section of the toolbar, visit Preferences->Appearance->Toolbar and
enable “Display Record/Punch Options”.
• “In” enables the punch-in marker ( see Punch Recording )
• “Out” enables the punch-out marker
• “Non-Layered” is a special recording mode: when a new region is recorded, then all of the regions that
existed below that range will be removed, and the last-recorded audio will be the only region in the
layer stack. See: Object Editing
Monitoring options:
To enable the “monitoring options” section of the toolbar, visit Preferences->Appearance->Toolbar and
enable “Display Monitor Options”.
• “Auto Input” toggles the status of the Auto Input mode. Learn more in the Monitoring chapter.
• “All In” implicitly forces all tracks to monitor the input, regardless of any other options or settings.
• “All Disk” implicitly forces all tracks to monitor the disk playback, regardless of any other options or
settings.
Harrison Consoles Mixbus v4 - 1
Page 80 of 515
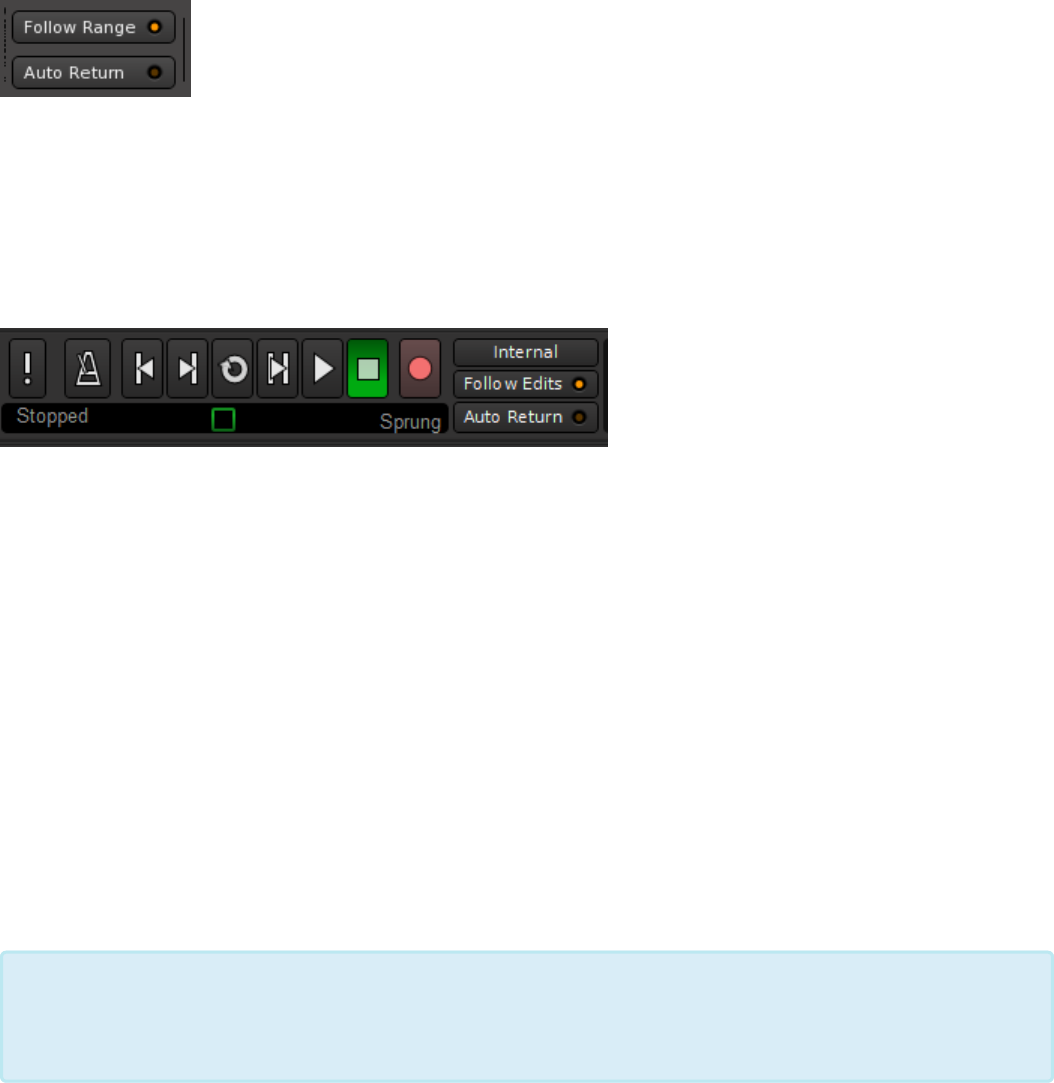
Transport modes:
The Transport toolbar has 2 mode buttons which change the behavior of the playhead:
Follow Range Mode ( previously called “Follow Edits” or “Join Playhead” )
Follow Range Mode is enabled via the horizontal button right of the transport control buttons. Follow Range
Mode automatically moves the playhead to follow the mouse when it is clicked on a track, and/or to allow
quick auditioning of the selected time range.
Behaviors with Follow Range Mode on:
• Starting playback (with the spacebar or any other means) will play the Range selection, if there is one.
• A single click in Range (or Smart-Range) mode will locate the playhead to that location.
• When a Range selection is made, the playhead will be located to the beginning of the range.
Behaviors with Follow Range Mode off:
• Editing clicks (such as object grabs or range selections) will have no effect on the playhead location.
Auto Return Mode
• If Auto Return is on, then the playhead will always return to the location where playback started.
• If Auto Return is off, then when the playhead is stopped, it will remain in the location when “stop” was
pressed.
Tip: The combination of Follow Range Mode and Auto-Return mode provide a wide variety
of possible operations. If you are familiar with another workstation’s conventions, you
should experiment with these settings to see if one of them matches your expectations.
*
Harrison Consoles Mixbus v4 - 1
Page 81 of 515
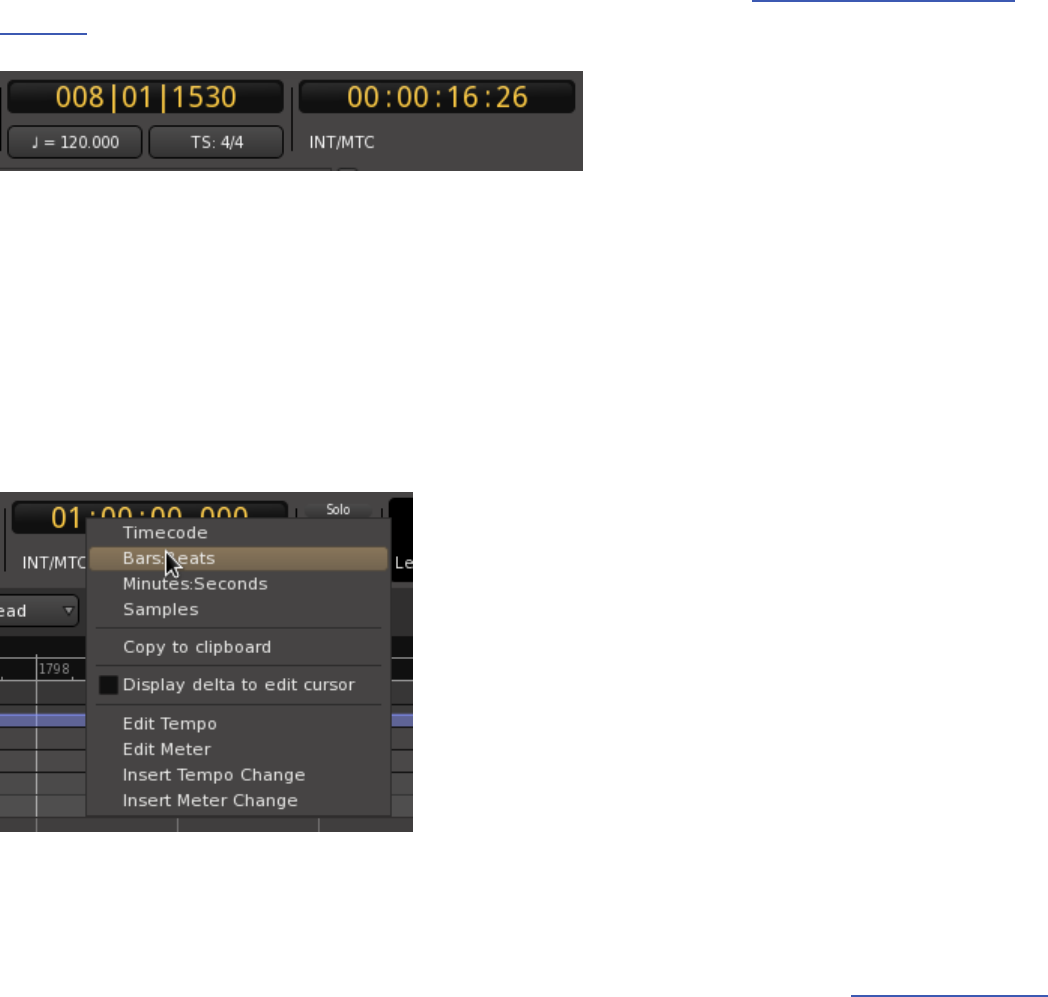
Clocks
By default, Mixbus provides 2 clocks at the top ( Note: if your screen is small, Mixbus will automatically omit
one of the clocks ). You can manually disable the secondary clock by visiting Preferences->Appearance-
>Toolbar
The clocks have identical operation, and each clock may operate in one of 4 different modes:
• Timecode
• Bars:Beats (musical time, or sometimes called BBT for Bars-Beats-Ticks)
• Minutes:Seconds
• Samples
To select a clock’s mode, you right-click on the clock to present the clock context menu:
• Copy contents to clipboard: copies the clock text to the clipboard, for pasting elsewhere
• Display Delta to Edit Cursor: when this is enabled, the clock will show the “difference” in time between
the playhead and the mouse cursor. This is a useful tool for measuring distances on the timeline.
• Tempo and Meter selections will launch the appropriate dialog. Learn more here: Tempo, Click & Grid
Harrison Consoles Mixbus v4 - 1
Page 82 of 515
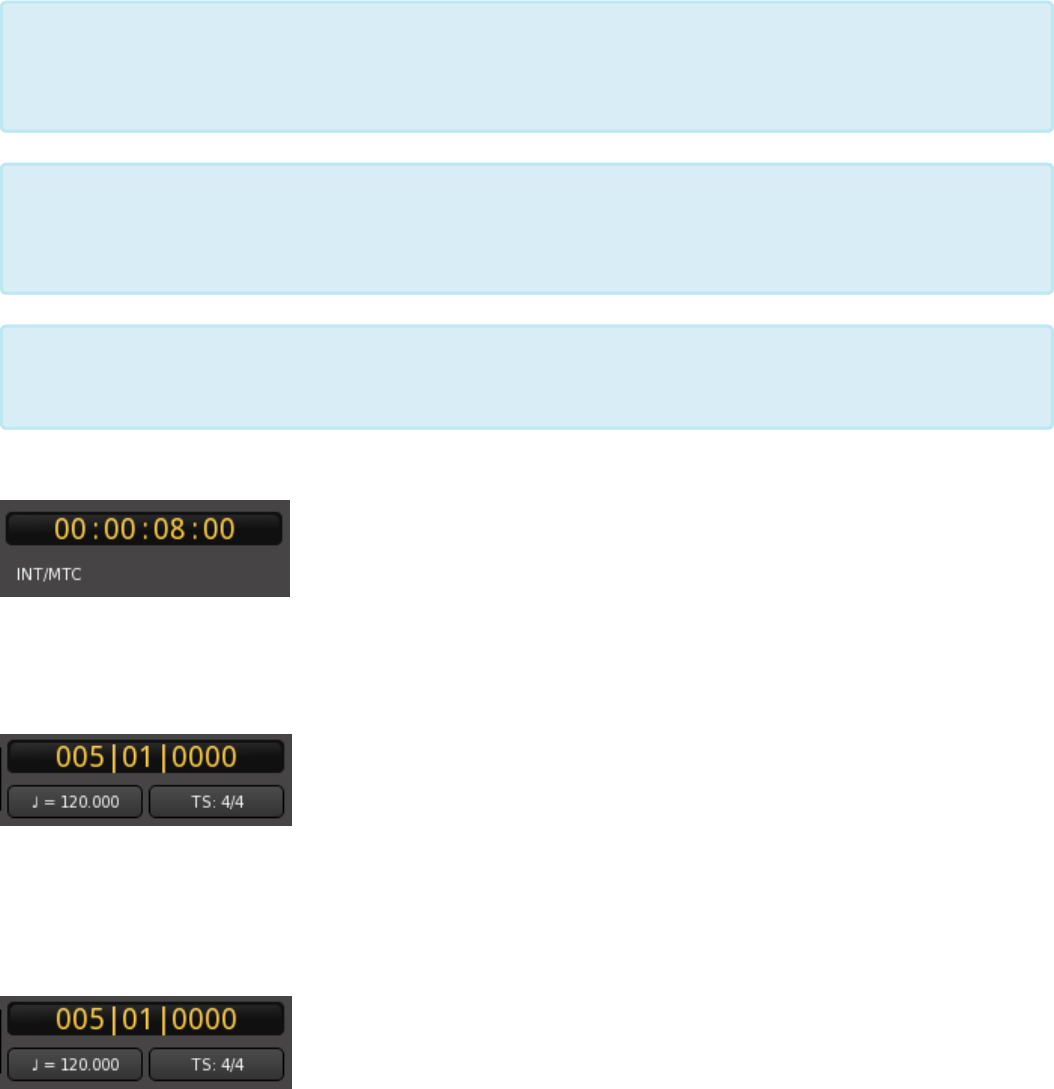
Timecode Clock Mode:
In Timecode mode, the display shows timecode in Hours, Minutes, Seconds, and Frames.
Bars:Beats Clock Mode:
In Bars:Beats mode, the clock shows position in Bars (i.e. Measures), Beats, and Ticks. “Ticks” are
sometimes called “pulses per quarter note” or PPQN, and Mixbus uses 1920 Ticks per beat.
Minutes:Seconds Clock Mode:
In Minutes:Seconds mode, Mixbus shows the position in “wall clock” time.
In all clock modes, you can use the mouse-wheel to adjust the subdivisions of the clock. For
example, in the Bars:Beats mode, you can mouse-wheel on the “Bars” value to increment or
decrement the Bar value.
*
You may also click on a clock to enter the timecode manually. In this case, a Right-to-Left
convention is used. To locate to 1-hour in the Timecode clock, you would enter “1” followed
by 7 zeroes.
*
You may also enter “relative” times, by first typing a “+” or “-” before entering the value to
offset the current clock position.
*
Harrison Consoles Mixbus v4 - 1
Page 83 of 515
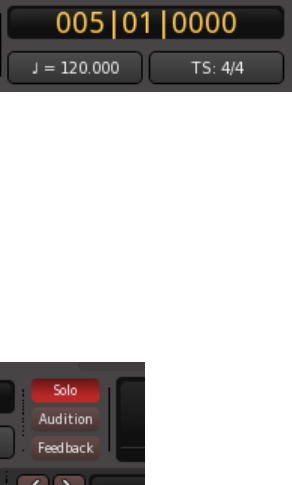
Samples Clock Mode:
In Samples mode, the clock simply displays the sample-offset from time 0.
Pull-up/down values are displayed underneath the Samples clock. To change the pullup/pulldown value for
the session, visit Session->Properties->Timecode
Alerts
These 3 buttons will blink “red” when one of the following occurs:
•Solo will blink red when any channel or bus is Solo’ed
◦ This is sometimes called the “rude solo indicator”
◦ Click the Solo button to clear all solos in the session
•Auditioning will blink red when an “audition” is occurring
◦ An “audition” is when Mixbus is playing a file directly to the speakers, bypassing the mixer
engine
◦ Auditioning can be triggered (for example) in the Import dialog, if the user chooses to audition a
file before importing it.
◦ Click the Audition button to cancel the audition.
•Feedback will blink red when Mixbus detects a feedback loop in the mixer processing order
◦ Each time the transport is “stopped”, Mixbus recalculates the latency offsets and other
information for the mixer engine
◦ If, when calculating the graph, Mixbus finds a “loop” or otherwise can’t determine the necessary
latency offsets, this button will blink
◦ If Mixbus can’t determine the engine offsets, then it will not play audio.
◦ If this happens, you should consider the last few routing assignments, and consider whether
you should revert one of your most-recent changes.
Harrison Consoles Mixbus v4 - 1
Page 84 of 515
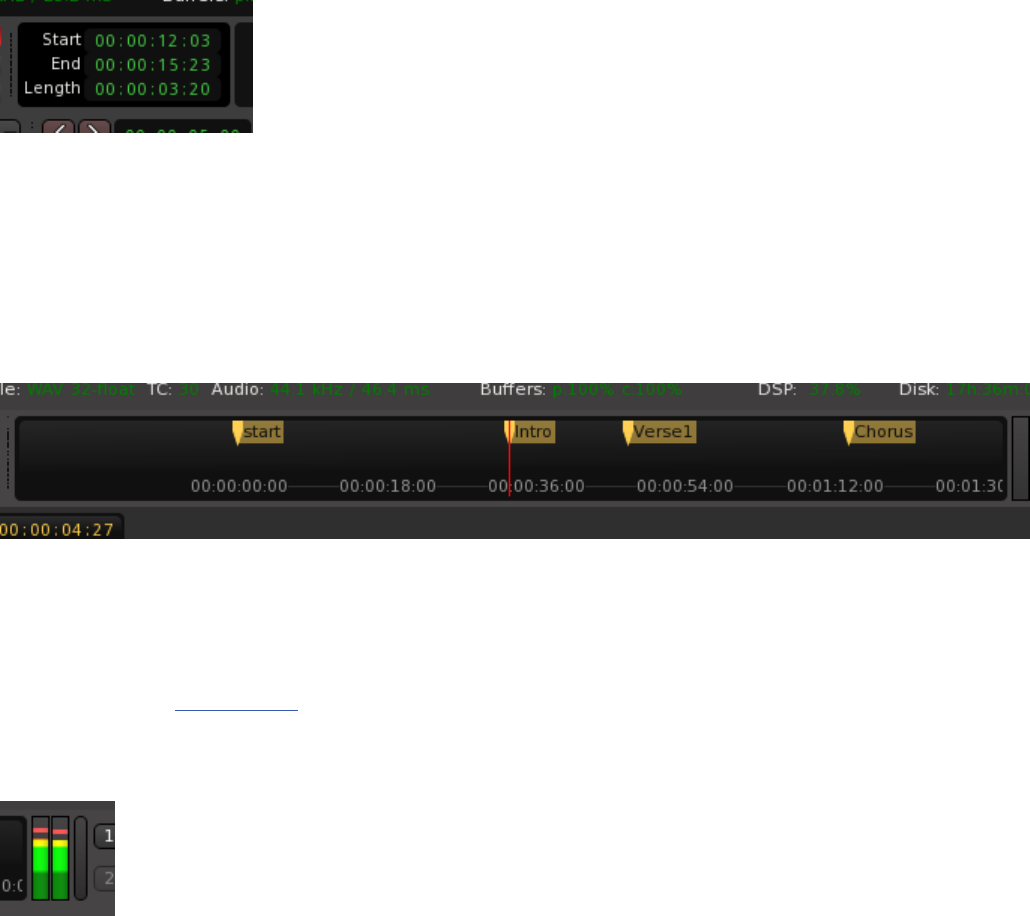
Selection Clock
By default, the selection clock is not shown. You can enable it in Preferences->Appearance->Toolbar.
If enabled, the “Selection clock” shows the start, end and length of the current selection. The selection clock
works for a “Range” selection as well as a series of Region selections.
Mini-Timeline
The mini-timeline provides a compact and convenient way to
navigate the session.
Learn more here: mini-timeline
Master bus meter
This simplified meter gives an indication of the master bus level. By default, this meter is a K-14 meter,
using the same scale as the K-14 on the master bus, but shown in a different format.
You can adjust the “scale” of this meter in Preferences->Meterbridge->Default Type for Master Bus.
The vertical button on the far right will turn “red” when clip (0dBFS) is reached on the master bus. Click the
button to clear the red indication.
Harrison Consoles Mixbus v4 - 1
Page 85 of 515
Scripted Action Buttons
By default, the Scripted Action Buttons are not shown. You can enable them, in pairs, in Preferences-
>Appearance->Toolbar.
These buttons can be used to directly trigger the “scripted actions”. Learn more in the Scripting chapter.
When a button has been assigned a scripted action, you can float your mouse over the button to display the
action(s) in a tooltip.
If an action is not assigned to a button, it will appear dim and inactive.
Editor/Mixer page selection buttons
These buttons are used to switch “tabs” between the mixer and editor pages of the main window.
You can drag the Editor or Mixer button to your desktop to detach the page into its own window.
You can right-click on these buttons to detach or re-attach the editor/mixer windows to the main interface.
Harrison Consoles Mixbus v4 - 1
Page 86 of 515

Navigating the Editor Canvas
Mixbus provides several ways to navigate the editor canvas.
Keyboard commands, buttons, the mouse-wheel (or 2-finger scroll on a touchpad ), and scrollbar-like
widgets are supported, and each method has its own strengths (and weaknesses).
Why is this so complicated?
Editing digital audio is not an easy task. Relatively few people have the interest, or need, to investigate all
the details that go into a high-end professional workstation. It’s a multi-dimensional problem with unlimited
tracks, which might be audio, midi, or even video. And it’s all changing on a timeline: a concept you won’t
find in a word processor or spreadsheet. Screen space is limited and there is a LOT of information that can
be presented.
Users have different expectations, different workflows, and different devices ( mice, touchpads, etc ). Nearly
every workstation has a different set of conventions, and if you’ve learned the conventions for one DAW,
you might expect those same conventions to work on Mixbus; but alas there is not a widely-accepted way of
working. ( the same problem occurs in image-editing and other software … there are very few conventions
that transfer from one system to another )
Furthermore, conventions that work on some software don’t apply well to an audio workstation. Consider a
scrollbar: you’ve probably found that a scrollbar works great for a spreadsheet until the number of items in
the list becomes several hundred screens worth of data; then the scrollbar jumps around too fast to be
useful. In an audio workstation, the timeline is potentially 24 hours long or more, and you can zoom in to see
a screenful of individual samples. This can require upwards of 100,000 screens of information, which
doesn’t fit well on a scrollbar.
Learning to navigate the editor canvas
The best way to learn about Mixbus’s conventions is by watching an experienced user – in person or via
video. An experienced user will navigate the timeline effortlessly, using each of the available tools for their
specific purpose.
These chapters provide an overview of the most common navigation features:
Scrolling and Zooming in the Editor Window
Harrison Consoles Mixbus v4 - 1
Page 87 of 515

Scrolling and Zooming in the Editor Window
Scrolling
The editor canvas may be scrolled up/down and left/right to display a different selection of tracks or time on
the timeline.
Vertical Scrolling
• Mouse Wheel: The primary method of vertical scrolling is the mouse scroll wheel ( or the 2-finger
drag, on a touchpad ).
• Keyboard: The up/down arrow keys will scroll the view vertically
• Selections:
◦ Alt+up/down arrow (Ctrl+arrow on a mac) will move the selection up & down, which will cause
the editor to scroll to keep the selection in view.
◦ Selecting a track header will cause the track to be scrolled fully into view.
◦ Selecting a track name in the “editor list”, or the mixer window, will cause the selected track(s)
to be scrolled into view.
• Dragging an object:
◦ Dragging a region to the top or bottom of the screen will cause the canvas view to be scrolled
• Using the Summary View: Scrolling can be accomplished by grabbing the gray box in the summary
view window and dragging it, or by clicking the arrow buttons at the left and right sides of the window.
Horizontal Scrolling:
• The primary method of horizontal scrolling is to move the Playhead ( these operations require that
“Follow Playhead” is engaged )
◦ Click and release in the ruler-bar area to locate the playhead there;
◦ Click & drag in the ruler-bar area to drag the playhead. When you approach the left or right
edge, the screen will scroll to keep it in view.
◦ The editor canvas can be scrolled horizontally by locating in the Mini-Timeline.
Harrison Consoles Mixbus v4 - 1
Page 89 of 515

◦ Various transport functions like “to start”, “to end”, or next/previous marker will move the
playhead and therefore scroll the view.
• Keyboard Shortcut: the menu item View->Scroll Timeline can be assigned a keyboard shortcut to
allow scrolling from the keyboard.
• Mouse Wheel: Hold “Shift” while turning the mouse wheel to scroll the timeline left/right.
• Mouse with side-scroll wheel ( or Touchpads with a 2-finger side-to-side drag. )
• Dragging an object:
◦ When you try to drag a region, MIDI note, or automation control point off the left or right edge of
the canvas, the screen will scroll to keep it in view.
• Using the Summary View: Scrolling can be accomplished by grabbing the gray box in the summary
view window and dragging it, or by clicking the arrow buttons at the left and right sides of the window.
Following the Playhead
In most cases, you’ll want the screen to automatically scroll sideways to keep the playhead in view. Mixbus
has 2 settings in the Transport menu which control this feature:
• Follow Playhead: when this is enabled, the screen will scroll sideways to keep the playhead visible,
each time the playhead leaves the one side of the screen, the screen will move to show it again.
• Stationary Playhead: when this is enabled, and Follow Playhead is enabled, the playhead will remain
in the center of the screen, and the waveforms will scroll underneath it.
Sometimes, you might prefer to scroll to a location, and prevent the playhead from moving your view. For
example you might zoom in very close to make an edit, and you want to remain looking in the same place
while the playhead plays over a selection. In that case, you can disable “Follow Playhead”.
Zooming
“Zooming” adjusts the scale of the timeline to show a greater or lesser portion of the timeline.
• Mouse Wheel: zooming with the Mouse Wheel is the preferred method:
◦ Hold “Ctrl” ( “Cmd” on Mac) to zoom in or out on the mouse’s location
• Zooming with the Summary view
Power-User tip: zooming with the mouse-wheel is a very fast way to horizontally navigate
the timeline. First zoom far out, until you can see the entire timeline. Then point the mouse
where you’d like to zoom, and zoom in to the desired zoom scale at the new location.
*
Harrison Consoles Mixbus v4 - 1
Page 90 of 515
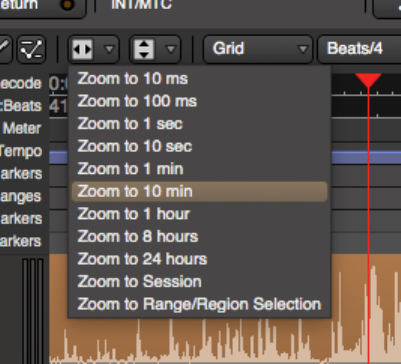
◦ Dragging up/down in the” summary view”:#summary-view will zoom the session.
• Zooming with the ruler-bar (playhead)
◦ If the option “Preferences->Editor->zoom with vertical drag in rulers” is engaged, then dragging
up/down in the ruler-bar will zoom around the playhead.
• Keyboard: + (plus) and – (minus) keys increase or decrease the zoom around the Zoom Focus. (see
below)
• Zooming on a Range
◦ Select a Range with the range tool (or smart tool) and then click “z” to fill the screen with the
selected range
• View>Zoom Menu items:
◦ Zoom to Session: Brings the entire sessions audio clips into view.
◦ Toggle Zoom State: Alternates between the last 2 zoom states
• Zoom Presets widget: this button allows the user to select from predefined zoom scales:
Zoom Focus
Menu: View>Zoom Focus
Zoom Focus provides an anchor point by which keyboard zooming occurs around. For example, some users
expect the screen to zoom towards and away from the playhead (this is the default).
Additional zoom focus options are available under View>Zoom Focus. They include:
•Left : leftmost side of the summary view is anchored
•Right : rightmost side of the summary view is anchored
•Center : center of the summary view is anchored and zooming occurs around it
•Edit Point : edit point is anchored and zooming occurs around it
Harrison Consoles Mixbus v4 - 1
Page 91 of 515
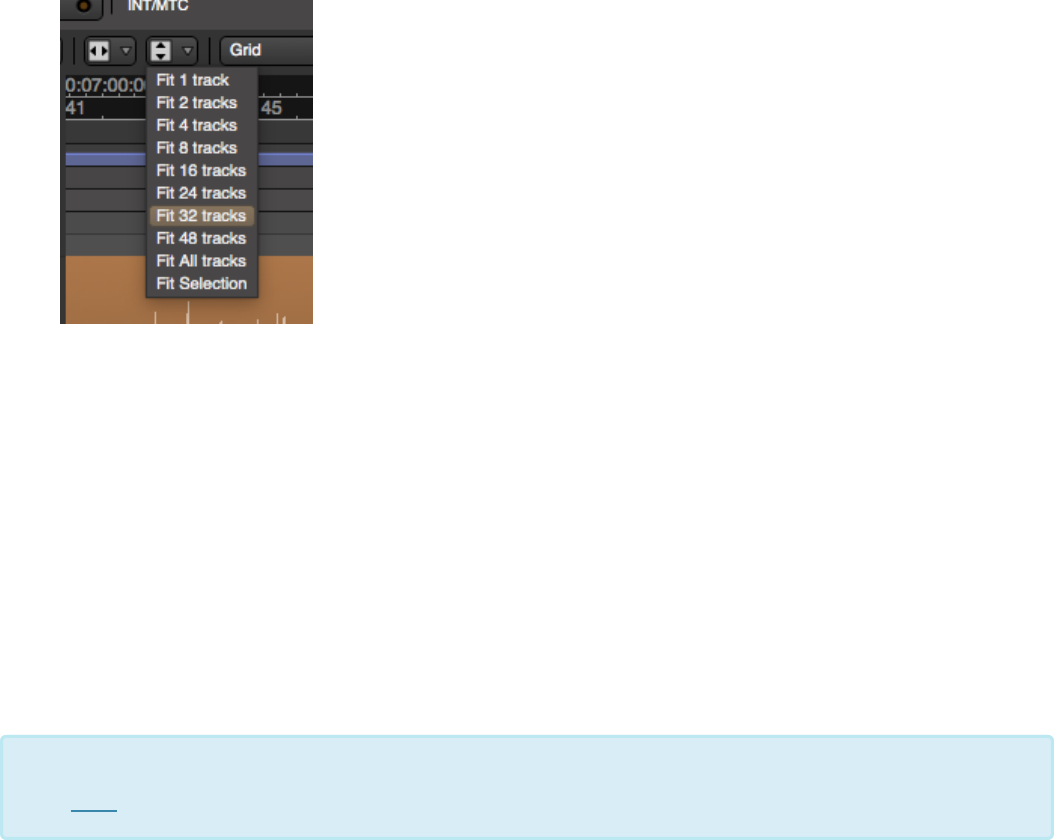
Track Size & Waveform Scale
Track Size
Track heights can be adjusted using one of several methods:
• Grab the bottom edge of a track header to adjust its height with the mouse.
• Right-click on a track header, and choose the Height submenu
• Select a track and use View->Fit ( shortcut: “F” ) to fill the screen with the track contents
• Select a track, and use Track->Height from the main menu
• Track Height presets: Use the button in the editor to select predefined track views:
Waveform scale
The waveform scale can be globally increased, so that quiet signals are more easily visible. Visit
Preferences->Appearance->Editor:
• Linear: Displays the audio waveform in a linear fashion.
• Logarithmic: Displays the audio waveform so that quiet sounds can be more easily seen on the
screen. The display is disproportionate. This setting does not change the gain of the signal, it is
strictly a visual aid.
Additional waveform display options can be found in Menu>Edit>Preferences>Editor. Click
here for more.
*
Harrison Consoles Mixbus v4 - 1
Page 92 of 515
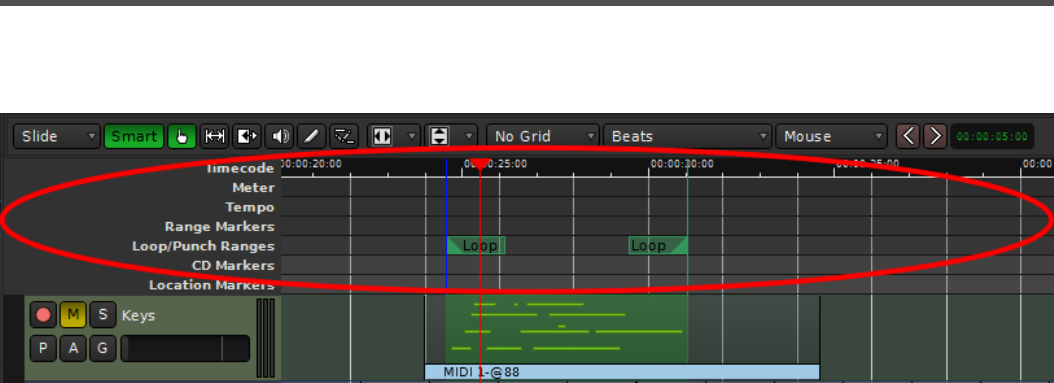
Transport, Markers, and Rulers
Ruler Bar
The ruler bar runs along the top of the edit canvas. A number of timelines can be shown via View>Rulers, or
by right clicking in the blank area just to the left of the marker labels.
Available Rulers include:
• Min:Sec : Minutes and Seconds elapsed since time “0”
• Timecode : Video timecode in SMPTE formats. Choose the display format in Session->Properties-
>Timecode.
• Samples : raw digital samples
• Bars & Beats : musical time
Harrison Consoles Mixbus v4 - 1
Page 93 of 515
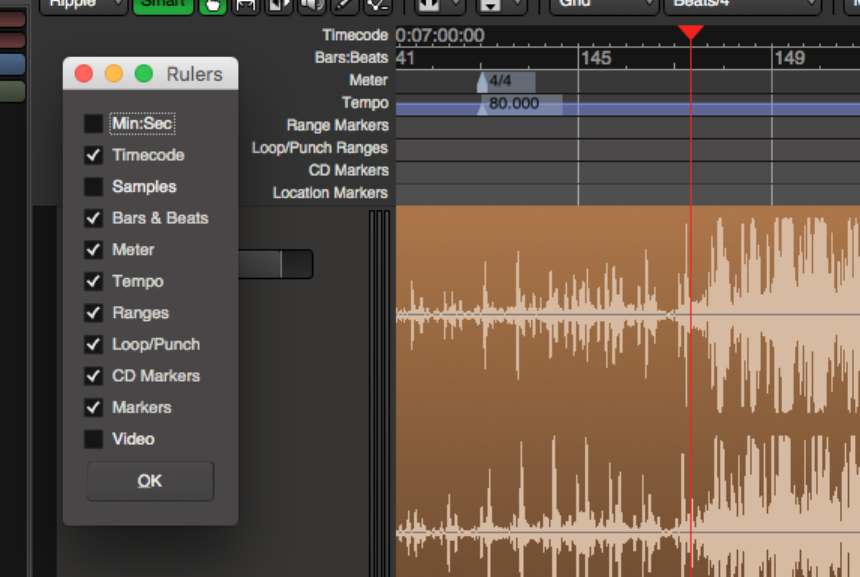
Marker bars in the ruler area
Marks can be set in the following ruler areas:
• Meter ( a meter marker initiates a new musical timebase )
• Tempo ( a tempo marker initiates a new musical tempo )
• Range Markers ( Ranges can be exported simultaneously in the Export dialog )
• Loop/Punch Ranges
• Markers ( Location markers are typically used to quickly locate to a new time in the project, such as
“verse 1” ).
• CD Markers ( CD markers are used in the Export dialog to define CD track markers )
To set a marker in any of the rulers, simply right click to pull a dialog box.
Harrison Consoles Mixbus v4 - 1
Page 94 of 515
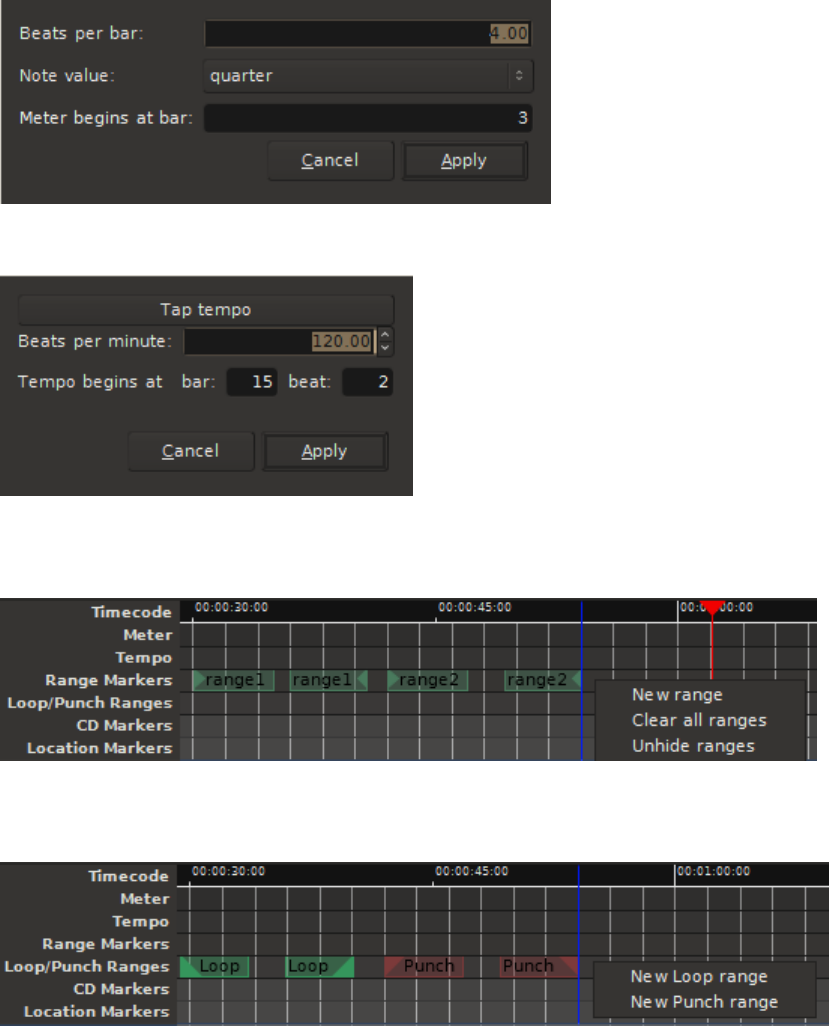
The Meter Marker:
The Tempo Marker Dialog Box:
The Range Marker Dialog Box:
The Loop/Punch Ranges Marker Dialog Box:
The CD Markers Dialog Box:
Harrison Consoles Mixbus v4 - 1
Page 95 of 515
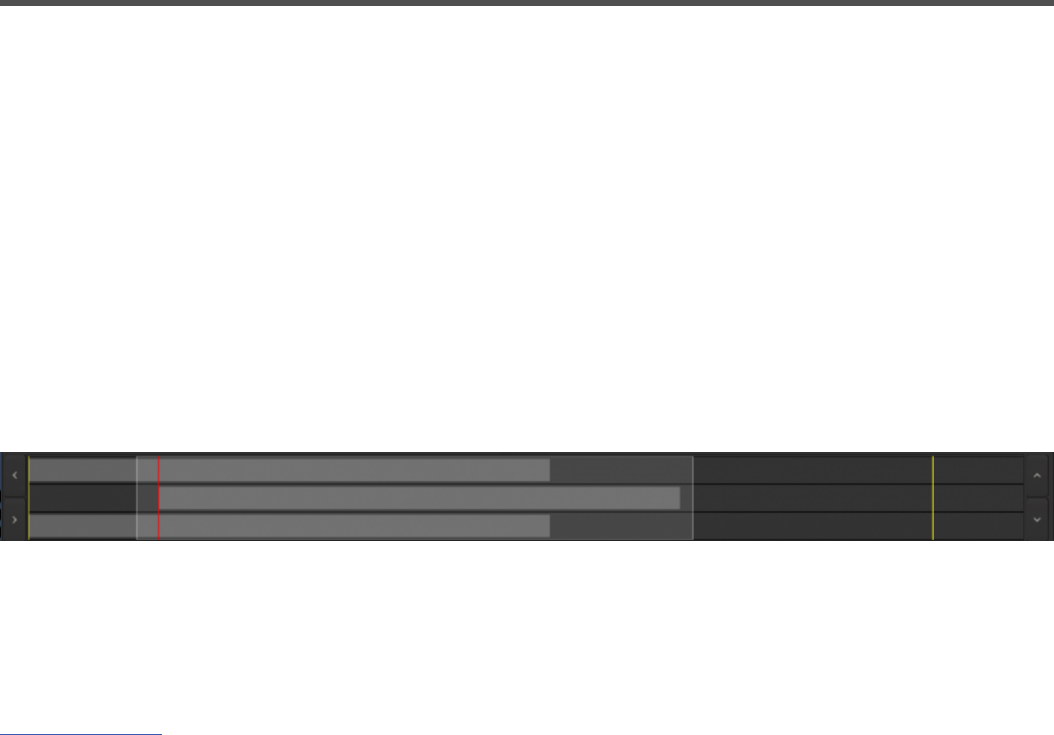
Summary View
The “Summary View”, located at the bottom of the edit window, is a condensed view of the entire session
between the “start” and “end” markers.
By default, the Summary view is not shown. But you can enable it by visiting the “View” menu.
Within the Summary view you can see a small representation for each audio/midi region on the timeline, and
a lightly shaded box that indicates your current edit canvas view. You can grab the light shaded box to pan
up, down, left, or right. And you can grab the edges of the light shaded box to stretch or shrink (zoom) in
either dimension. Additionally, arrow buttons are provided at either end of the view box for maneuvering the
shaded box if you prefer.
The height of the view box can be made larger or smaller by grabbing its top border and dragging.
In the image above three regions are shown with the shaded box fully encompassing the region contained in
track 2, indicating it will be fully visible in the edit canvas. The start of regions 1 and 3 will not be visible but
the regions ends will be.
Mini-Timeline >>
Harrison Consoles Mixbus v4 - 1
Page 97 of 515
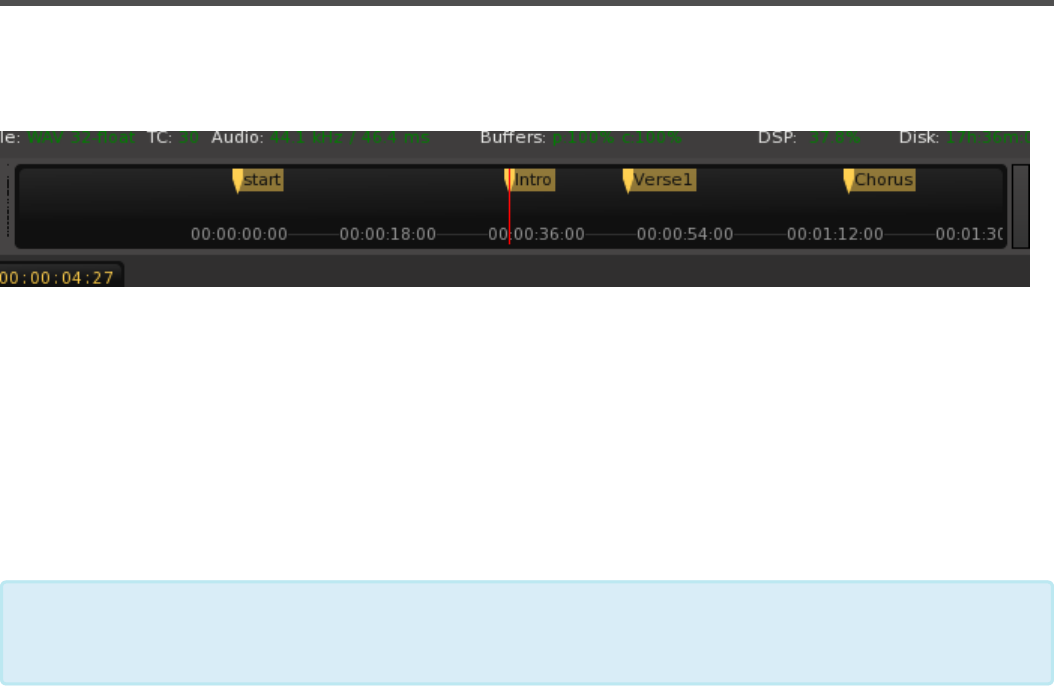
Mini-Timeline
The mini-timeline appears in the transport toolbar, and it shows a condensed view of the timeline including
markers.
One of the benefits of the mini-timeline is that the scale remains fixed, regardless of the scale of your editor
window. This allows you to zoom very close or very wide in the editor, and still view the markers and make
20- or 30-second jumps in the timeline.
Click on a marker to locate to the marker.
Click anywhere in the mini-timeline (except on a marker) to locate to that time.
Right-click anywhere on the mini-timeline to change the zoom scale between several presets.
NOTE: unlike locating from the editor, the mini-timeline does NOT apply the Grid/Snap
settings.
*
Harrison Consoles Mixbus v4 - 1
Page 98 of 515

Recording
Quick-Start for recording: following these steps to record
some audio tracks!
1. First, add one or more tracks via the main menu: Track>“Add Track or Bus”.
2. Record-arm the track by clicking the button with the red circle on the new track
3. Record-arm the transport by clicking the big button with the red circle, at the top of the main window (
both the track(s) AND the transport must be armed before anything will be recorded )
4. Now press “Play”, and you will be recording! Rewind to the beginning of the track and press “Play”
again to hear your recording.
You may arm tracks and/or the main transport anytime; so if you prefer, you can start playing first, and then
press the record buttons to start recording.
Once you’ve recorded a track, you might investigate some ways to refine your recordings further:
1. Set the tempo (optional). Click on the Tempo button (in the main Clock) to change the current tempo.
By setting the tempo, you can play the Click, and this will make editing the track much easier.
2. Change the way you hear yourself by visiting Monitoring.
3. You may choose any input to feed the track. Expose the “Input” button and choose the soundcard
input you’d like to record to this track.
4. Use “Punch Recording” to pre-select a recording range, and Mixbus will automatically punch-in the
transport Record-arm when the punch-in point is reached.
5. Use “Pre-Roll Recording” to provide some count-in before your recording actually starts.
Recording Modes:
Mixbus can record in 2 different modes:
• Layered (default) : in this mode, any new recordings will be added as regions on a “layer” atop the
existing audio regions in the track.
Harrison Consoles Mixbus v4 - 1
Page 99 of 515
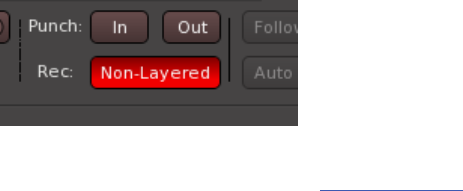
• Non-Layered: In this mode, the underlying audio will be replaced with the resulting new region.
Both modes are “non-destructive”, meaning that you can undo your changes, or re-layer and re-trim the
regions to expose the parts that were hidden.
The mode switch is provided in the transport toolbar. If you don’t see this button, visit Preferences-
>Appearance->Toolbar and enable “Record/Punch Options”
To learn more about layers, visit Region Editing
Harrison Consoles Mixbus v4 - 1
Page 100 of 515

Audio Tracks
What is a track? How do I create one?
Atrack is the fundamental building-block of a Mixbus session. You can create new tracks by creating empty
tracks ( using the New Track/Bus dialog ) or by Importing existing audio files as new tracks. Mixbus
supports audio tracks and MIDI tracks. The track type (audio or MIDI) defines what kind of data you will see
in the editor.
What is an Audio Track?
An audio track is a series of audio regions, sequenced in a Playlist, that receive the same channel
processing (the eq, compressor, plugins, panning, bussing, etc )
Each audio region (sometimes called “clip”) is representative of an audio file on disk. The region might
represent only a small part of the audio file, because you can edit the region non-destructively: this means
that whatever you do to the audio region in Mixbus, it doesn’t actually change the audio in the file.
You can record new audio into an audio track at any time. Because Mixbus is non-destructive, the previous
audio on the track will be preserved, so you can always revert to the previous recording if you want to.
How do I edit an audio track?
The track’s Playlist defines the order of audio regions (files), as well as properties such as their mute state,
volume levels, fade in/out, etc. So when you are editing a track with the editing tools, you are actually
editing a Playlist. The various editing tools and features are described in the Editing chapters:
•Object (Region) Editing
•Range Editing
Harrison Consoles Mixbus v4 - 1
Page 101 of 515
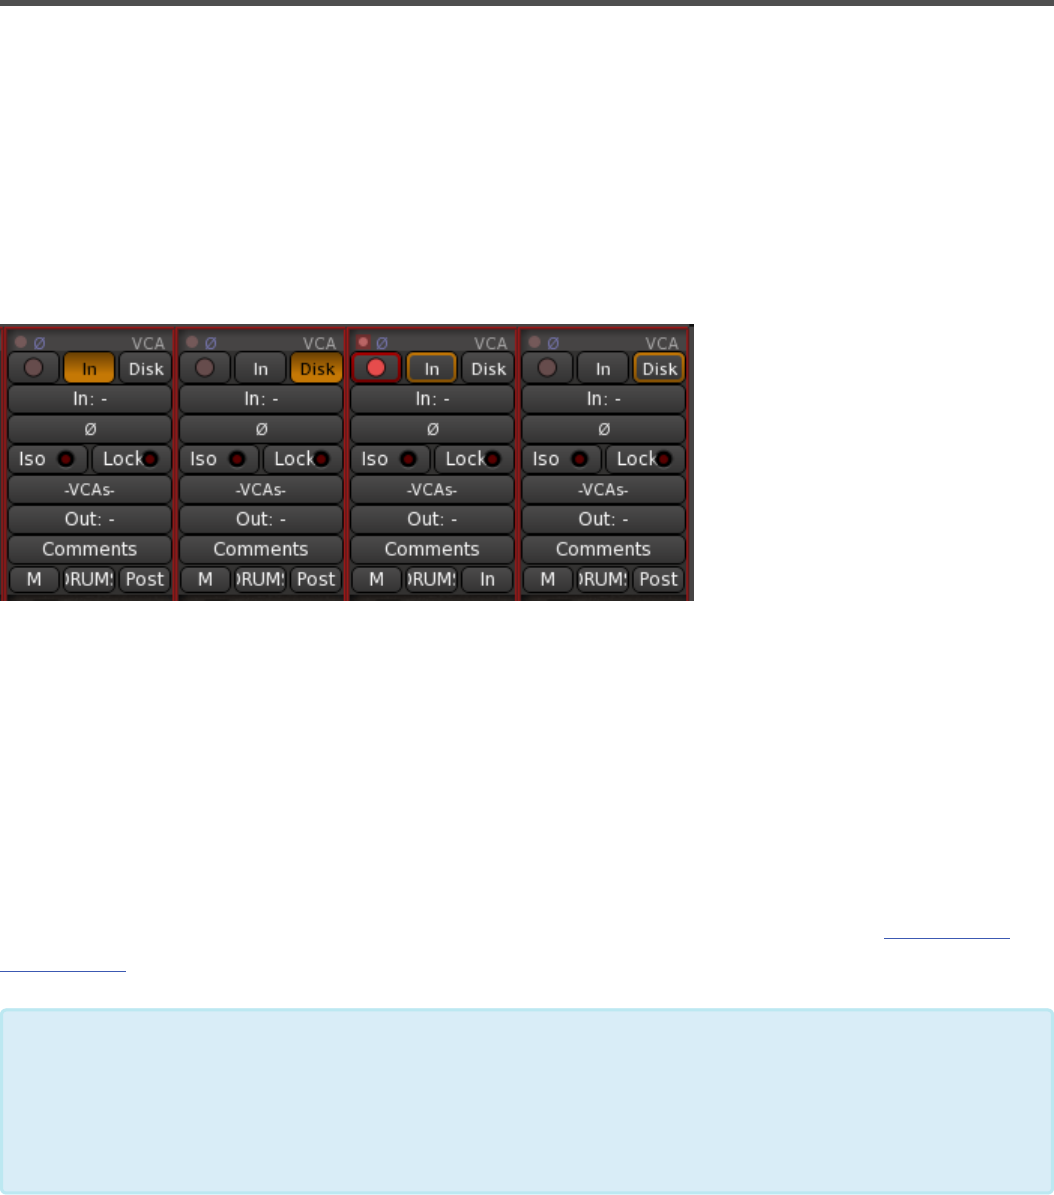
Monitoring
Monitoring
“Monitoring” is the process of hearing the prerecorded tracks (and/or hearing yourself) while the transport is
playing. There are several options that control how Mixbus will monitor the inputs of each track.
The top of each channel in the mixer, when clicked, toggles between two views: signal path (inputs, outputs,
monitoring, etc) and redirects (plugins, sends, inserts). Monitoring is controlled from the signal path view.
When the signal path is showing, you’ll find selection buttons for “In”, and “Disk” at the top of each channel:
If the “In” button is selected as in the leftmost channel above, then the input to the track will be heard. If the
“Disk” button is selected as in the second channel, then you will only hear the playback of the track. If
neither button is selected, then Mixbus will use automatic monitoring to switch between In (as shown in the
3rd channel) and Disk (as shown in the 4th, rightmost channel). Automatic monitoring is represented with an
outline around the currently-selected option.
Monitoring preferences
Mixbus has 2 global preferences that control automatic monitoring. You select the mode in Preferences-
>Signal Flow:
Audio Hardware Does Monitoring This option is best used with audio interfaces that have
the ability to monitor the inputs to the interface. Some interfaces come with a software
application to control this while others may have a knob or button on the interface to allow
direct monitoring. Other interfaces may need to be configured using the operating system’s
volume control application. In this case Mixbus will never automatically monitor the input,
*
Harrison Consoles Mixbus v4 - 1
Page 102 of 515
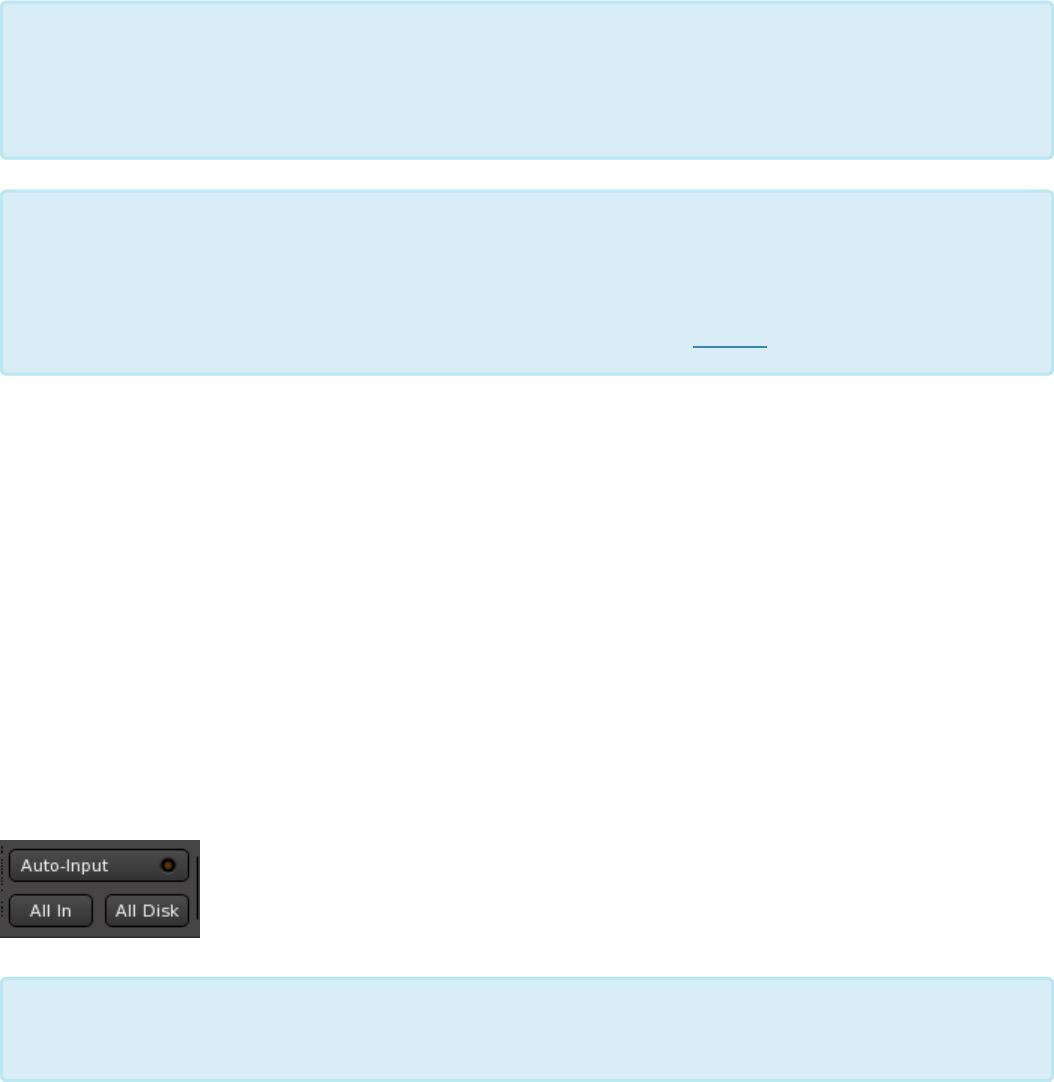
Automatic monitoring is also affected by the “Auto Input” mode, which is found in the Transport menu. “Auto
Input” is enabled by default. When Auto-input is enabled, then Mixbus will monitor tracks any time that you
are aren’t playing. This feature allows easier setup of your instrument, or communication among members of
a band, because all the live mics are passed through to the master bus output so everyone can hear them.
Finally, there is an option to enable “Tape Machine Mode”. If “Tape Machine” mode is enabled, then Mixbus
never monitors the input of an unarmed track; even if auto-input would normally cause it to monitor.
Monitoring Toolbar
In Preferences->Appearance->Toolbar, you can enable the “Monitoring Toolbar” which provides quick
access to the Auto-Input toggle, as well as buttons to globally force all unassigned tracks to Input or Disk
monitoring:
Mixbus Monitoring Modes Chart
The following chart shows how the monitoring interacts with various settings in Mixbus.
because you are going to use your hardware device to hear yourself. When Hardware
monitoring is available, it is generally a better option because it provides lower-latency
monitoring. However it does not allow you to hear the effect of Mixbus’s processing or
plugins, because you are bypassing the computer in your monitor path.
Mixbus Does Monitoring This setting is also known as “software monitoring”. With this
setting, when Mixbus is recording audio it will route the inputs of the record-enabled tracks
through the tracks instead of playing back the previously recorded audio. This is best used
on systems that work well with very low buffer sizes (128 at 44 or 48 kHz or 256 at 96 kHz).
Very small buffer sizes are used to minimize the monitoring latency.
*
If a track is already assigned to Disk or Input ( i.e. the button is colored solid ) then the
monitor toolbar will have no effect on that track.
*
Harrison Consoles Mixbus v4 - 1
Page 103 of 515

Monitor
Mode
Is The Track Rec
Enabled?
Is The Master Rec
Enable On?
Auto Input
Status
Transport
Mode Meter Monitor
Normal No No On Stop Input Input
Normal No No Off Stop Track
(silence)
Track
(silence)
Normal No No On Play Track
(Audio)
Track
(Audio)
Normal No No Off Play Track
(Audio)
Track
(Audio)
Normal No Yes On Stop Input Input
Normal No Yes Off Stop Track
(silence)
Track
(silence)
Normal No Yes On Play Track
(Audio)
Track
(Audio)
Normal No Yes Off Play Track
(Audio)
Track
(Audio)
Normal Yes No On Stop Input Input
Normal Yes No Off Stop Input Input
Normal Yes No On Play Input Track
(Audio)
Normal Yes No Off Play Input Input
Normal Yes Yes On Stop Input Input
Normal Yes Yes Off Stop Input Input
Normal Yes Yes On Play Input Input
Normal Yes Yes Off Play Input Input
Tape
Machine No No On Stop Track
(silence)
Track
(silence)
Tape
Machine No No Off Stop Track
(silence)
Track
(silence)
Tape
Machine No No On Play Track
(Audio)
Track
(Audio)
Tape
Machine No No Off Play Track
(Audio)
Track
(Audio)
Tape
Machine No Yes On Stop Track
(silence)
Track
(silence)
Harrison Consoles Mixbus v4 - 1
Page 104 of 515

Tape
Machine No Yes Off Stop Track
(silence)
Track
(silence)
Tape
Machine No Yes On Play Track
(Audio)
Track
(Audio)
Tape
Machine No Yes Off Play Track
(Audio)
Track
(Audio)
Tape
Machine Yes No On Stop Input Input
Tape
Machine Yes No Off Stop Input Input
Tape
Machine Yes No On Play Input Track
(Audio)
Tape
Machine Yes No Off Play Input Input
Tape
Machine Yes Yes On Stop Input Input
Tape
Machine Yes Yes Off Stop Input Input
Tape
Machine Yes Yes On Play Input Input
Tape
Machine Yes Yes Off Play Input Input
Harrison Consoles Mixbus v4 - 1
Page 105 of 515

The Click (Metronome)
The Metronome (or click) can be activated by toggling the Metronome button in the upper left of the edit
window, or the associated keybinding.
Enabling this function allows Mixbus to generate a click that musicians can play along to. If a song is
recorded to the “click” then editing can be eased with “snap” settings that automatically select snap to
measures, beats, or subdivisions of a beat. ( see Editing with the Grid Punch Recording >> for more details
)
Once enabled, a click sound will be produced when the transport is engaged. An audible click with an
emphasis will be produced at the first downbeat of every bar.
Right clicking on the metronome button is a shortcut to open the Preferences dialog box, where more Click
settings can be found including the specific sound and volume of the click.
Mouse-wheel (or vertical scroll, on a touch-pad) on the Metronome button as a shortcut to adjust the click’s
level.
By default, the metronome connects itself to the first 2 soundcard outputs, or into the Monitor if you are
using a monitor section.
Sometimes (particularly if you switch the “monitor” section on and off), the metronome will lose its
connection. To re-connect it, open Window->Audio Connections and restore the connection from the
metronome to your speaker outputs, like this:
If you are recording to the click, you should take care to set the tempo for the song before
you start.
*
An audio file can be substituted for the default click sound.
*
Harrison Consoles Mixbus v4 - 1
Page 107 of 515
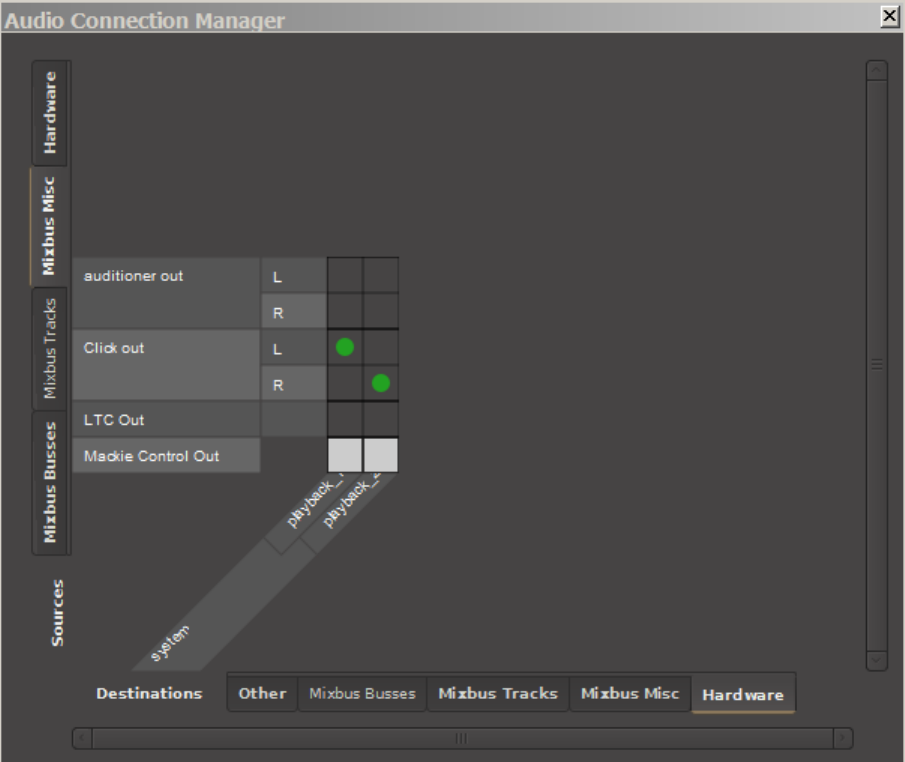
Harrison Consoles Mixbus v4 - 1
Page 108 of 515

Punch Recording
What is Punch Recording?
Punch Recording (sometimes called “Auto Punch”) is a method to let Mixbus automatically initiate recording
during a part of the timeline.
A common usage of punch recording is the case of a person recording themselves, during an instrumental
solo. The player would like to hear the audio playback up to the punch point, and then have Mixbus begin
recording automatically when the solo section is reached.
How do I punch-record?
To enable punch recording, you must define a punch-range and enable the Punch In/Out buttons:
1. Pre select a time-range to record (example: the guitar solo) by dragging the mouse in Range mode.
2. Enable the punch markers by right clicking in the range and selecting “Set punch from selection”
3. Enable the Punch In/Out buttons in the transport toolbar. (If you don’t see these, you can enable them
in Preferences->Appearance->Toolbar
4. arm the track(s) and the master record on the transport. As the transport rolls, recording will only
occur as the playhead rolls over the defined area protecting existing audio before and after the range.
• If the “In” button is enabled, then Mixbus will initiate the transport Record-arm when the punch range
is entered.
• If the “Out” button is enabled, then Mixbus will stop recording when the punch range is exited.
Combining Punch Ranges and Loop ranges
It is sometimes useful to create a Loop range that is starts a few measures before the Punch range, and
continues a few measures after it. Then when the “Loop” is initiated, you will be auto-punched with each
pass through the loop, with some pre-roll and post-roll.
It is a good idea to set your “punch” points slightly before and after the desired range; this
way you will capture slightly more audio in case you start playing slightly early or late. You
can trim the region(s) later.
*
Harrison Consoles Mixbus v4 - 1
Page 109 of 515
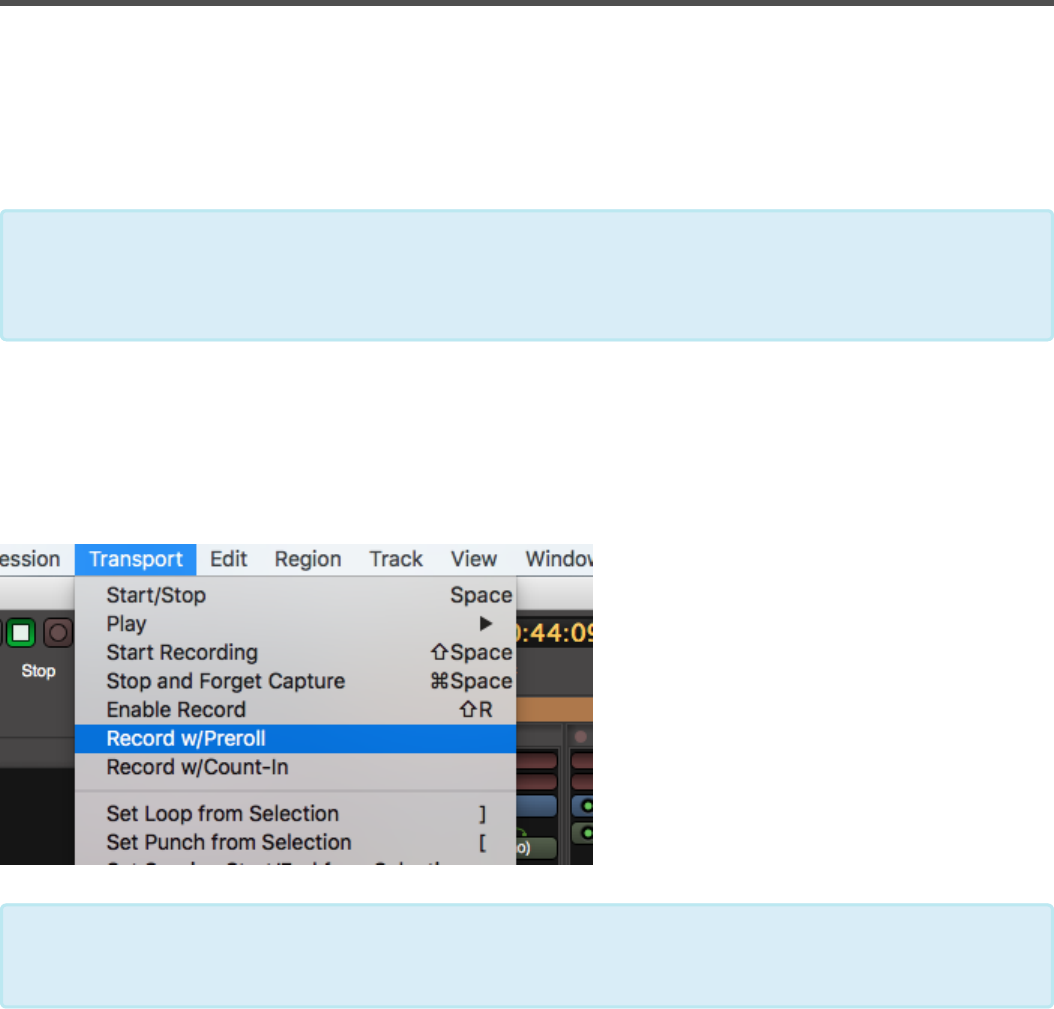
Pre-Roll Recording
What is Pre-Roll Or Count-In Recording?
These recording modes allow the user to hear some prior material, or a count-in, before recording is
initiated.
How do I Record with Pre-Roll?
Record-with-preroll is an action that may be triggered from the Transport menu ( you can also assign a
keyboard shortcut to it ).
When this action is initiated with the playhead at location “A”, Mixbus will rewind the specified preroll
amount, and play through it, before reaching the playhead location “A” where recording is to begin. The
resulting region will start at “A”, but you can trim the region back to expose more of the recording, if needed.
Another benefit of recording with pre-roll is that Mixbus is actually capturing your signal
during the count-in period. So if you start to record slightly early, you can advance the
region’s start time until your full performance is revealed.
*
You can adjust the Pre-Roll time in Preferences->Transport. You can set the pre-roll time in
either Seconds, or Bars (Measures)
*
Harrison Consoles Mixbus v4 - 1
Page 110 of 515
How do I Record with Count-In?
Record With Count-In is very similar to record-with-preroll, but there are 2 differences:
• You hear only the metronome click before recording starts, you don’t hear the previous material
• The tempo of the metronome is that of the recording start-point, not the prior material
Use Record With Count-In if you want to record at the very start of the session, so you can hear a count-in
before the music starts. Alternatively, you can use record-with-countin if you don’t want to hear the prior
material and you want to “punch-in” after a countoff of the previous tempo
Harrison Consoles Mixbus v4 - 1
Page 111 of 515

Using MIDI
What is MIDI, anyway?
MIDI is a wire-protocol that was developed in the 80’s to allow synthesizers to send musical performance
data between devices. So a MIDI keyboard can send performance data ( i.e. “notes” ) to an instrument that
actually creates the sound. It is beyond the scope of this manual to explain MIDI in detail. But a MIDI Primer
has been provided here.
What can Mixbus do with MIDI?
Here are some of the tasks that are typically implemented with MIDI:
1. Play a multitimbral MIDI file through a General MIDI instrument, as a backing track. Learn more here:
General MIDI
2. Add a Virtual instrument to a track, and record MIDI data to play through it. Learn more here: Virtual
Instruments
3. Send MIDI to an external device. Learn more in Setting up an External MIDI device
4. Arranging tracks by assembling and triggering MIDI loops and phrases.
5. Using a MIDI as a controller ( for knobs and faders ). You can learn more about that in the External
Control section
Currently Mixbus does not have a musical-staff “notation” view. That might appear in a
future version of Mixbus.
*
Harrison Consoles Mixbus v4 - 1
Page 112 of 515

MIDI Tracks
What is a track? How do I create one?
Atrack is the fundamental building-block of a Mixbus session. You can create new tracks by creating empty
tracks ( using the New Track/Bus dialog ) or by Importing existing audio files as new tracks. Mixbus
supports audio tracks and MIDI tracks. The track type (audio or MIDI) defines what kind of data you will see
in the editor.
What is a MIDI Track?
MIDI tracks are just like audio tracks, but they store MIDI performance data on the timeline, rather than
audio regions.
Otherwise, MIDI tracks are identical to audio tracks; they can have MIDI inputs and outputs, audio inputs
and outputs, plugins, and they have the full complement of Mixbus EQ/Compressor/bus sends. MIDI tracks
are intended to host virtual instrument (VI) plug-ins, which will render the MIDI data into audio which is then
available to mix within the Mixbus mixer. It is also possible to route the MIDI data directly to a MIDI
synthesizer device, and then patch the audio (if desired) back into the same MIDI track, thereby
incorporating the external device as if it were a VI.
MIDI data may be generated by importing a MIDI file, by playing a MIDI instrument into the track, or by
drawing notes with the Draw tool. Each time you draw or record MIDI notes and controls, Mixbus creates a
MIDI region with a corresponding MIDI file inside the session folder.
MIDI editing was designed to operate with the same conventions as Mixbus’s audio region editing. You can
cut, copy, move and trim MIDI regions. And your operations apply to a Playlist which can later be reverted
or changed, or even shared with other tracks.
Because MIDI data is always recorded into a MIDI file, this has some implications for MIDI
continuous control data (CC’s). You can only draw controller automation underneath an
*
Harrison Consoles Mixbus v4 - 1
Page 113 of 515

existing MIDI region. These controller moves are part of the MIDI region and will move with
it. Note that you can still write fader, EQ, plugin and other mixer-strip automation linearly on
the track, as these exist outside of the MIDI realm.
Harrison Consoles Mixbus v4 - 1
Page 114 of 515
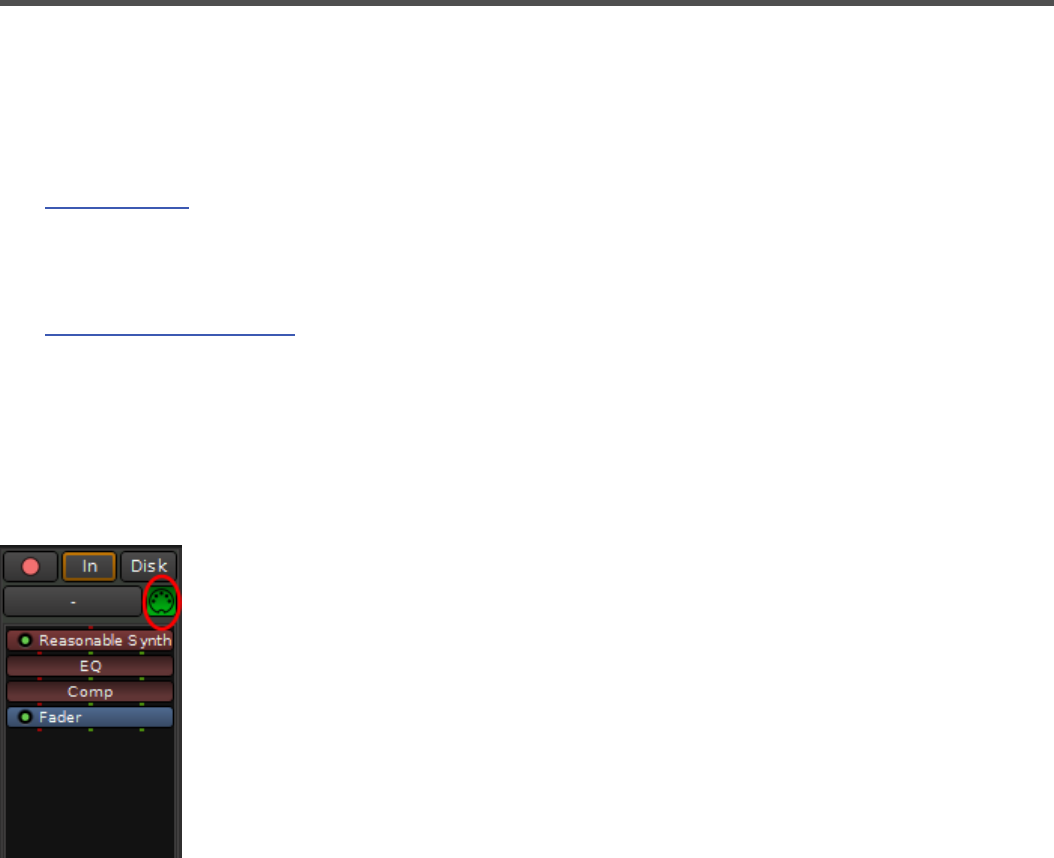
Adding MIDI tracks
Adding MIDI tracks
Importing MIDI files to a new track:
See Importing Files.
Creating a new MIDI Instrument track:
See Adding Tracks and Buses.
Listening to a MIDI track.
With MIDI tracks, it is fairly common for multiple tracks to be fed from a single MIDI keyboard or device. This
adds an additional level of complexity to the task of “monitoring” the MIDI input.
Once a MIDI track is added you will find a MIDI input Enable/Disable button near the top of the channel
strip. If you want MIDI to be delivered to the track, the MIDI Input button must be enabled for that track.
Harrison Consoles Mixbus v4 - 1
Page 115 of 515
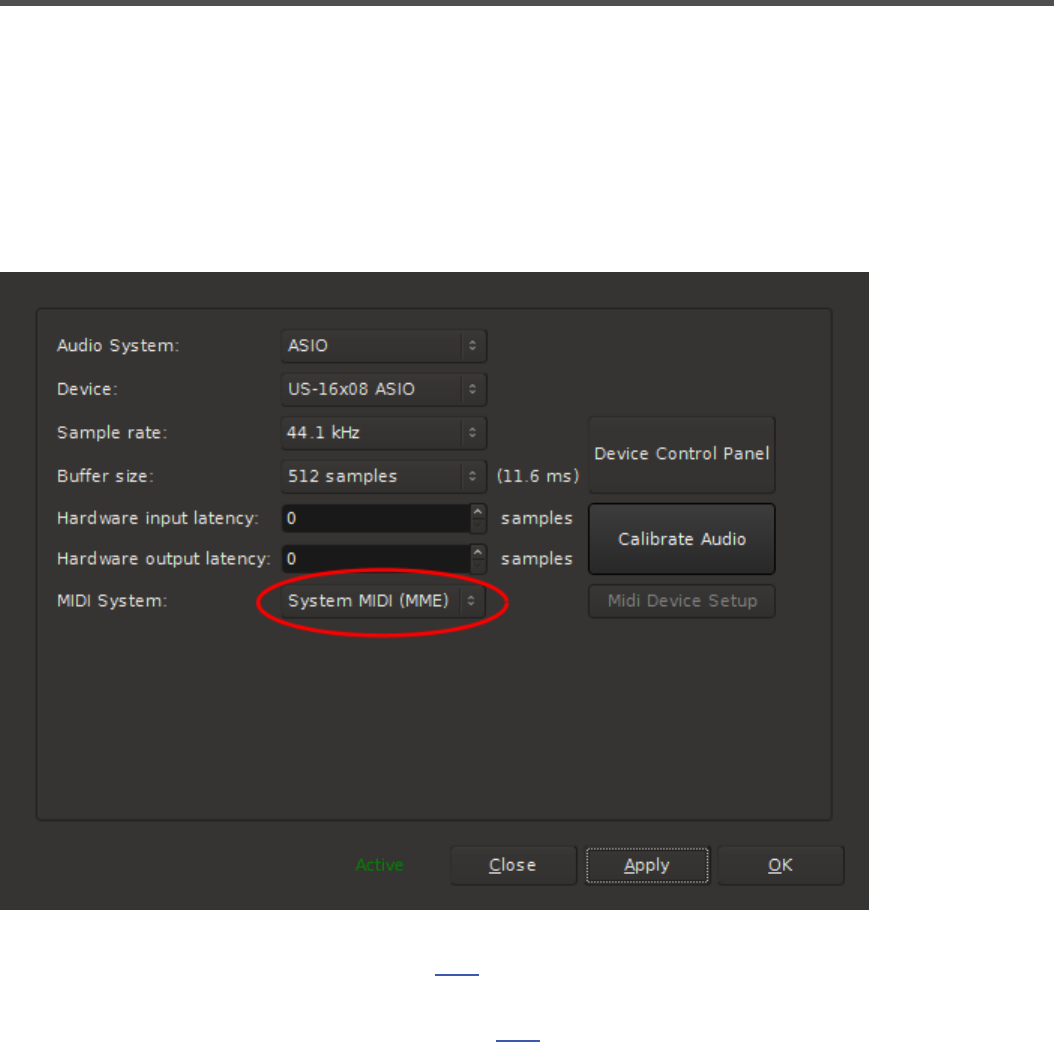
Recording MIDI
A step by step guide to record MIDI performance data.
1. Plug in your external MIDI equipment into the input of your MIDI interface or USB connector on your
computer.
2. During session set up be sure system MIDI is enabled (CoreMIDI for Mac and MME for Windows).
3. Add a MIDI track(s) to your session. Click here for more on adding tracks. By default “Reasonable Synth”
plug-in will be inserted into the redirect. You can select a different plug-in at this point or it can be changed
after the track has been created. More on Plug-ins here
Harrison Consoles Mixbus v4 - 1
Page 116 of 515
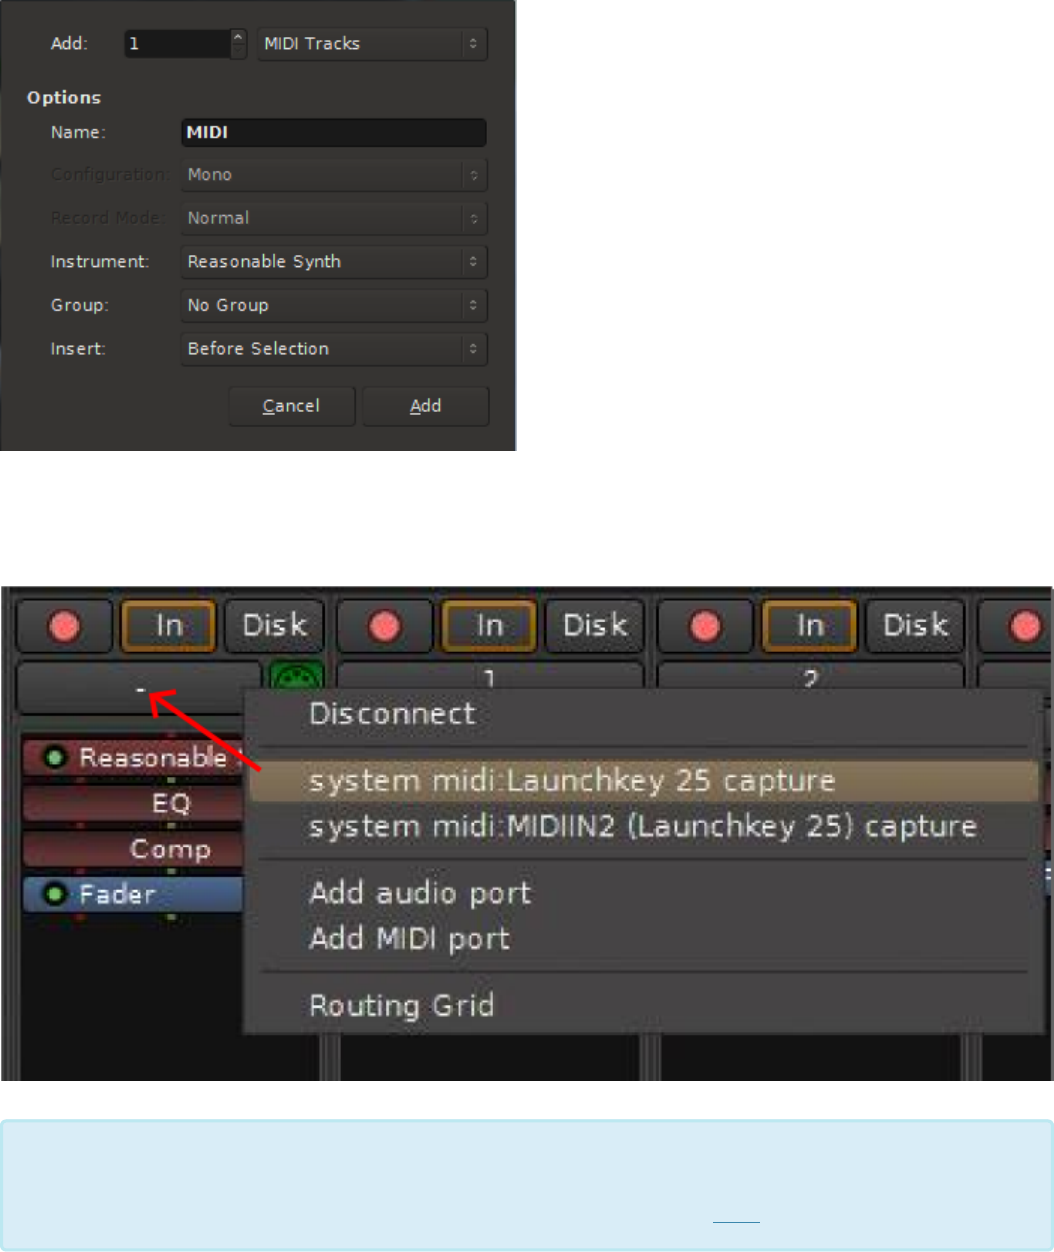
4. Route the system MIDI to the track input. In the image below the MIDI device happens to be called
“Launchkey 25 capture”. You should look for the name of your device here.
A convenient set up is to switch to the Edit window and turn on the Mixer Editor
(Menu>View>Show Editor Mixer). This way you can manage the MIDI channel strip and
view your performance as you record it. More on Editor Mixer here
*
Harrison Consoles Mixbus v4 - 1
Page 117 of 515

5. Enable MIDI input. The default is on as shown in the image below. Click on the green MIDI connector to
disable if you don’t want to hear the MIDI input.
6. Be sure to set the channel strip to monitor input.
7. Record arm the MIDI track
Harrison Consoles Mixbus v4 - 1
Page 118 of 515
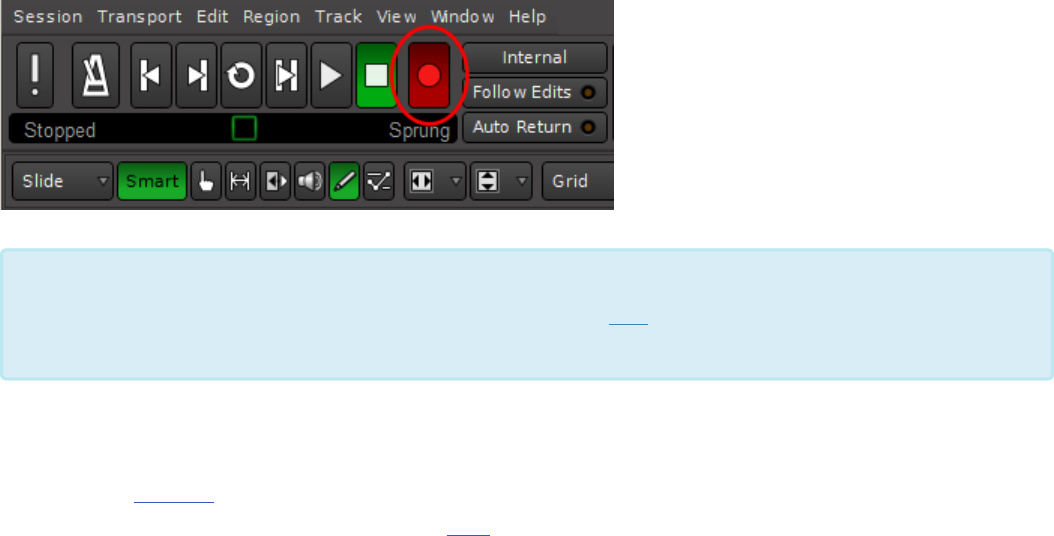
8. Record arm the master record button in the Edit window, roll the transport and record your performance.
9. Once a performance is recorded (or perhaps you have imported MIDI data to the track) you can send the
audio output to a track to be recorded (bounced). Click the output connector ( find the Output connector by
switching the switcher at the top of the mixer strip) and route the MIDI output. In this image it has been
routed to a stereo audio track (audio 7). Click here for more on recording.
Additionally you can route MIDI performance data to outboard equipment via your MIDI interface (many
audio interfaces have a MIDI interface built-in).
You can also visit “Window->MIDI Connections” to see a grid of your track outputs (on one side) and
hardware outputs (typically on the bottom right tab)
A short cut to arming the master in the edit window: rec arm the channel strip then press 3
on the number pad. This will record arm the master and roll the transport simultaneously.
This is especially useful if you are managing the session while recording yourself.
*
Harrison Consoles Mixbus v4 - 1
Page 119 of 515

MIDI Track Operations
Right-click on a MIDI Track Header to initiate a pulldown menu of actions. Many of the actions are the same
that are available in audio tracks and buses. But some items are specifically for MIDI:
Note Range:
• Show Full Range: The midi “scroomer” will be scaled to show the full range of MIDI notes 1..128
• Show Contents: The scroomer will be scaled to fit all of the existing MIDI notes in the track
Note Mode:
• Sustained: Notes will be represented as a rectangle, where the rectangle’s width displays the note
start and end.
• Percussive: Notes will be represented as a “diamond” shape, showing only the note “start”.
Percussive mode is useful when showing drum tracks and there is no “length” for each drum hit.
Channel Selector:
The MIDI Channel Selector Dialog will appear:
Select Patch:
Click the menu to send a Bank/Patch message for the selected channel. For more information, see: MIDI
Banks and Patches
Color Mode Selection:
• Meter Colors: (default) The note color indicates velocity” of the MIDI notes.
• Channel Colors: The CHANNEL of the note event will be used to color the MIDI notes
• Track Colors: All notes will be colored with the track’s color
Harrison Consoles Mixbus v4 - 1
Page 120 of 515

MIDI Filters
In addition to Virtual Instruments which accept MIDI notes and render audio, Mixbus also supports “MIDI
plugins” or MIDI filters.
What is a MIDI Filter?
A MIDI Filter is a plugin that has only MIDI I/O, and no audio I/O. A MIDI filter can change the incoming MIDI
stream ( forcing all events to a given velocity, for example ) or a MIDI Filter can generate its own MIDI
stream ( such as an arpeggiator or algorithmic-music-creation plugin )
How do I add a MIDI Filter to a track?
MIDI Filters appear in the Plugin Manager just like plugins. But by default they are not shown. To display
MIDI filters, click the small “Utils” button in the plugin manager twice, so it is highlighted & filled:
Harrison Consoles Mixbus v4 - 1
Page 121 of 515

Virtual Instruments
What is a Virtual Instrument?
Virtual Instruments (VI) are plug-ins that convert MIDI performance data (notes) into sound. Otherwise
Mixbus treats them like a normal plug-in. They can be inserted anywhere in the channel’s signal flow. This
allows you to insert a MIDI-generating plug-in, or a MIDI “filter” plug-in before the VI. But normally, you
should ensure that the VI is the first plugin at the top of the redirect list.
Mixbus supports three Virtual Instrument formats:
• VSTi (using the VST plug-in specification, the VST format has been extended to include MIDI note I/
O).
• Audio Unit Instruments – this is an Apple technology and is only supported on Mac OS X. Most
plugins on Mac are available in both AU and VST formats.
• LV2 instruments – LV2’s can be compiled for Mac, Windows and Linux. Currently there are no
commercial LV2 instruments available, except those included with Mixbus.
How do I create a Virtual Instrument track?
When you create a new MIDI track, there is a menu selection for the Instrument you would like to use on
this channel. By default, the instrument will be inserted at the top of the redirect list.
What can I do with a virtual instrument?
Just like a plugin, you may double-click on the VI to display its custom user interface.
You may add additional plugins before or after the VI. And you may drag the order of instruments and
plugins. The signal flow through a channel is shown in the redirect box; Red lines indicate the MIDI path,
and green lines indicate the audio path(s). Advanced users can investigate Pin Connections to further refine
the signal flow through the channelstrip.
It is also possible to create a MIDI track without a virtual instrument. In this case you will
likely send the MIDI output to a hardware synthesizer, and return the signal into the MIDI
track’s audio inputs (or whatever track(s) you choose). See Setting up an external MIDI
device
*
Harrison Consoles Mixbus v4 - 1
Page 123 of 515
Using a virtual instrument with multiple outputs ( such as virtual drum
instruments )
By default, Mixbus creates virtual instruments in their “stereo output” mode (or “mono” if that’s the only
option they provide). Some plugins provide multiple outputs; for example you can configure the kick drum to
appear on a separate output than the snare drum. This is a fairly complicated topic for advanced users. You
must configure the plugin’s internal settings to utilize the extra outputs, and you must connect the resulting
track outputs to additional “buses” in Mixbus. A full investigation of these options is outside the scope of this
manual. But this video provides some clues:
If you want Mixbus to prompt you for the output setup when you add the instrument, you can set this
preference in Preferences->Plugins->Instrument. Enable “Interactively configure instrument plugins on
insert”.
Feeding a virtual instrument from multiple tracks
In some cases, you might have multiple tracks with MIDI data, and you want all of the tracks to feed a single
instrument. To do this, you should create multiple MIDI tracks, with no instrument. Then create a single MIDI
“Bus” with the desired instrument. Finally, connect the MIDI outputs of the tracks to the input of the MIDI
bus. The MIDI “bus” will sum (merge) the inputs of several MIDI tracks, and provide the resulting MIDI
stream to a virtual instrument.
In most cases, the fader, EQ, and Compressor elements should come AFTER (below) the
Virtual Instrument in the channelstrip, so they can operate on the audio stream created by
the VI.
!
Note that because the VI is in the plug-in window, after the channel’s input, the input trim is
not effective on the VI. Most VI’s have their own internal volume control which can be used
as a trim.
*
Harrison Consoles Mixbus v4 - 1
Page 124 of 515
Sending to an external MIDI device
External MIDI devices
In some cases, you might prefer to send MIDI from Mixbus’s MIDI tracks to an external MIDI sound module (
“synthesizer” ) rather than use a software Virtual Instrument inside Mixbus.
How do I send my MIDI to an external device?
Click the “Switcher” at the top of the mixer strip to expose the channel’s input and output buttons. Click the
“output” button and choose the physical MIDI port that you’d like to send out to.
How do I change the sound preset (“patch”) of the external device?
See: MIDI Banks and Patches
Alternatively you can set up the MIDI patching via the main menu, Window->MIDI
Connections
*
Harrison Consoles Mixbus v4 - 1
Page 125 of 515

Multitimbral and “General MIDI”
Mixbus can record, edit and render multitimbral MIDI files, often used for backing tracks or
“sweetening” tracks to fill-out a live recording with additional instruments.
What is “Multitimbral”?
MIDI performance data ( such as notes from a MIDI file ) may be provided in up to 16 different channels on
a single MIDI connection. Typically, each of the channels represents an instrument. A channel can change
instruments anytime by sending a “patch change” message, which the receiving synth may (or may not)
respond to.
At the start of the file, a “patch change” MIDI message will typically be sent for each of the channels in use,
and these patch messages will define what instrument should be sounded on that channel … perhaps a
saxophone, guitar, or piano.
What is General MIDI?
General MIDI is an agreed-on set of patches to render performance data with a variety of common
instruments from various ethnicities. As MIDI can only send messages like “Channel 7, patch 21”, it was
found necessary to define some instruments for these generic patch messages. In this way, a .mid file that
follows the “General MIDI” specification can be reliably played in a synthesizer that is also General MIDI
compliant.
For example, it is generally agreed that drums will be played on Channel 10.
How does Mixbus implement Multitimbral and General-MIDI
synthesis?
Mixbus is optimized for high-quality mixing of audio. Support for General MIDI, multitimbral MIDI, and
backing tracks is not a high priority for us. Nevertheless, it is a feature that is sometimes desirable, and with
Mixbus v4 we have added some mechanisms to import, edit, and render multitimbral MIDI data.
It is beyond the scope of this document to describe all of the conventions that have been
developed for MIDI and Generic MIDI.
*
Harrison Consoles Mixbus v4 - 1
Page 126 of 515

Mixbus provides 2 multitimbral synths:
•a-FluidSynth, a multitimbral MIDI-capable synthesizer that loads .sf2 soundfonts.
•General MIDI Synth, a simplified version of FluidSynth that automatically loads the GeneralUser
soundfont by S. Christian Collins. GMSynth provides a very thorough implementation of the General
MIDI specifications.
What is a soundfont?
A “soundfont” is a file that contains audio samples and a “mapping” of each sample which defines the MIDI
notes it will be played. Fully-featured soundfont players, such as Fluid Synth, provide full support for many
MIDI features such as pitch-bend and modulation; as well as a built-in chorus and reverb to improve the
sometimes lackluster sounds of General MIDI.
How do I use the General MIDI Synth?
To use the General MIDI Synth, simply add a new MIDI track ( or Bus, if you intend to feed it from multiple
tracks ), and leave General MIDI Synth as the Instrument selection.
How do I choose a different patch/sound in the GeneralUser soundfont?
See: MIDI Banks and Patches
How do I use other soundfonts?
There are many Soundfont (.sf2) files online, from both commercial and “free” vendors.
You may download any .sf2 file, and use the selector menu inside a-Fluid Synth to navigate to, and load, the
desired soundfont file. Note that the quality of sound fonts can vary widely, and you might need to check the
soundfont’s documentation to learn which patches and note ranges are implemented.
Some soundfont files are optimized for General MIDI, and multitimbral operation. While other soundfonts are
intended to provide only a single instrument, or several instruments, and do not implement the General MIDI
specification. For example you can download a soundfont file that provides only a high-quality piano, a
virtual orchestra, or a vintage electronic drum machine. A full investigation of .sf2 files is outside the scope
of this manual, but you can find more information by searching the internet for “sf2” or “soundfont”.
Harrison Consoles Mixbus v4 - 1
Page 127 of 515

NOTE: while searching the internet, you might find a wide range of free soundfonts. In our
experience, the provided GeneralUser soundfont provides an excellently curated set of
drum and instrument sounds. In many cases, we’ve found that free online soundfonts are
only a subset of the patches that GeneralUser already has included. Furthermore, the
curator has made an effort to verify that every sample is freely licensed for your use. For
casual users, we highly encourage you to use the provided General MIDI Synth for free
drum and instrument libraries. Professional users might want to purchase commercial
players and libraries online from established vendors such as Kontakt, UVI, VSL…
!
Harrison Consoles Mixbus v4 - 1
Page 128 of 515
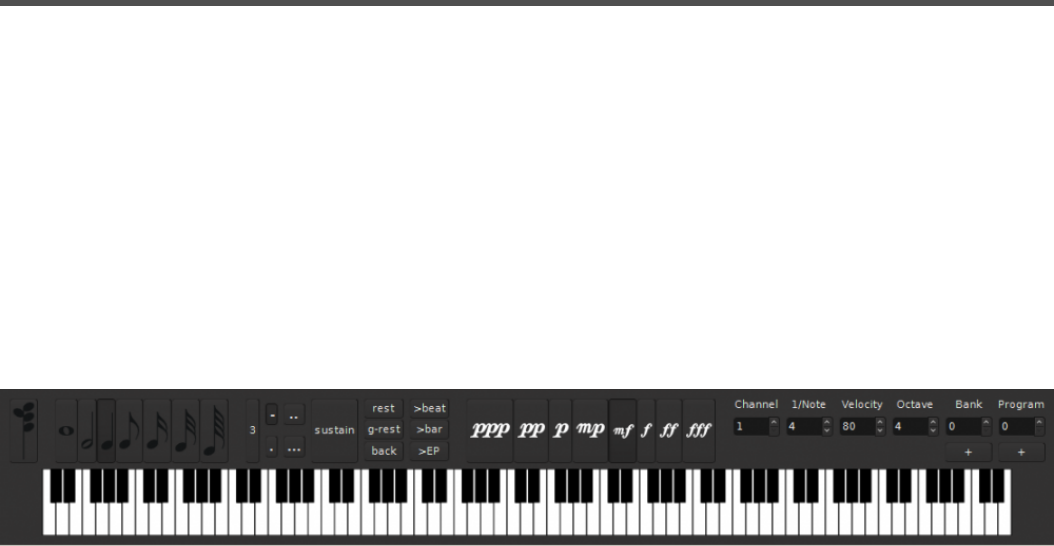
Step Entry
Step entry of MIDI data is an alternative method of entering MIDI arrangements. In step editing, you set the
length of notes, and the transport is automatically moved forward each time you play a note (or chord) on
the keyboard. This is a fast way to enter a long sequence of chord progressions or a drum pattern. Or it can
be helpful for users that are not proficient in keyboard performance, but would like to enter notes using the
keyboard.
To initiate step entry, right-click on the track’s “REC” button. A keyboard will be displayed.
Use your externally-connected keyboard to enter notes and chords; the step-entry dialog will automatically
advance the playhead with each event. This is a fast way to enter a chord progression or drum parts.
Harrison Consoles Mixbus v4 - 1
Page 129 of 515
MIDI Banks and Patches
What is a MIDI Bank or Patch?
A MIDI patch is a preset sound in a sound-generator (synthesizer). For example a keyboard might have a
patch for “piano”, and a drum machine might have a patch for “jazz drum kit”. MIDI Patches are numbered
from 1 to 128. Mixbus can send a “patch change” message to a device, to request the patch at that index.
A MIDI bank is a mechanism to access additional sets of 128 patches. Banks were added to support
devices with more than 128 sounds, or patches. Mixbus allows the user to select from 128 banks, and each
bank allows up to 128 patches.
The MIDI specification allows up to 16 “channels” on a single connection, and each channel can be
assigned a “patch” from one of the “banks”. However very few devices have a full set of banks and patches
available on all 16 channels. You must consult your device’s manual to determine what banks and patches
are supported, and how many channels can be used, and how many notes may be sounded simultaneously.
( Mixbus’s built-in synth, GMSynth, has quite a wide range of patches & banks. Learn more here: General
MIDI )
How do I audition the patches in my external MIDI synth or VI plugin?
Right-click on a MIDI track header, and you will be presented with a list of actions:
With the advent of “virtual instruments” rather than external MIDI gear, bank/patch changes
are much less common. Virtual instruments typically use their own GUI or preset
mechanism to change sounds, not MIDI events. So if you are using Virtual Instrument
plugins, you can likely ignore MIDI banks & patches.
*
Harrison Consoles Mixbus v4 - 1
Page 130 of 515
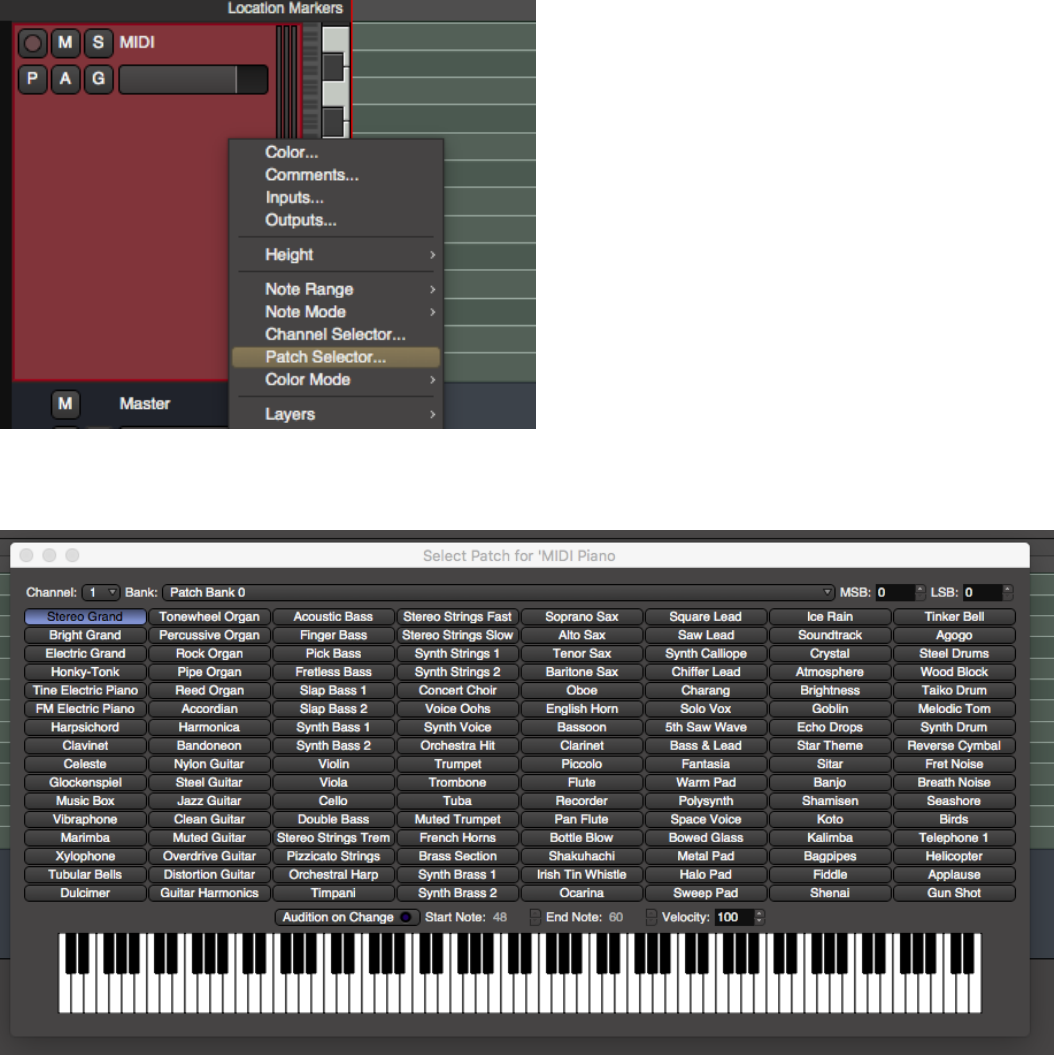
Click “Patch Selector” to launch the patch selection dialog:
The patch selector has these controls:
• Channel selection: Each Mixbus track provides 16 MIDI channels
• Bank: If a patch map is provided for the track/instrument, you’ll see a list of available banks here.
• MSB / LSB : if no patch map is provided, use these selectors to manually select the MIDI bank values
that are sent to the device.
Harrison Consoles Mixbus v4 - 1
Page 131 of 515
• Patch buttons: if a patch map is provided, the available patch names will be shown here. If no map is
provided, or if the map doesn’t specify a patchname for a position, then the button will show the patch
number. * Audition on Change: when enabled, selecting any patch will trigger a series of MIDI notes
to the synth.
• Start Note: If “Audition on Change” is active, this is the first note that is played.
• End Note: the last note that will be played.
• Velocity: select the MIDI “velocity” (loudness) of the notes sent to the plugin
• MIDI Keyboard: the keyboard can send MIDI notes directly to the instrument for auditioning ( these
notes are not recorded into the track )
Where do I specify the patch names that should appear in the patch dialog?
Mixbus’s built-in multitimbral synths ( GMSynth and a-FluidSynth ) automatically publish their patch
information to Mixbus when they are instantiated on a channel.
Other commercial plugins normally provide their own patch management inside the GUI, and do not publish
their patch settings to Mixbus.
For tracks with no plugin instrument on the track, the “External MIDI Device” menu allows the user to define
what external device is connected to the MIDI output:
Harrison Consoles Mixbus v4 - 1
Page 132 of 515
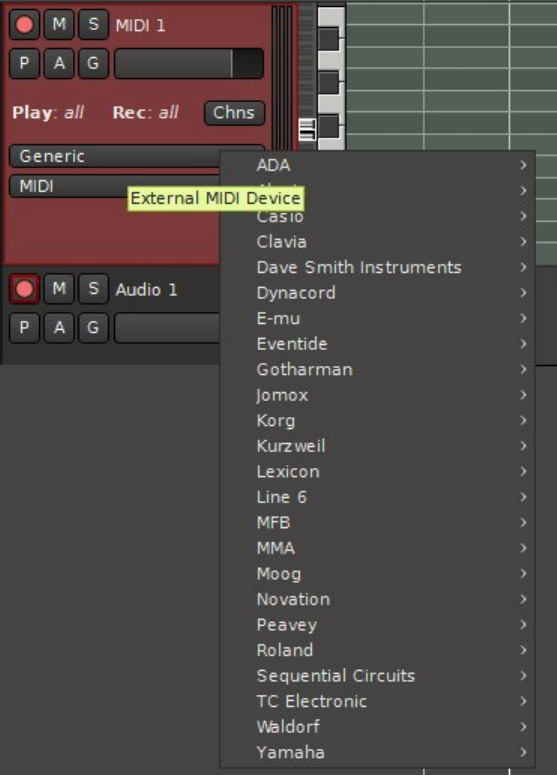
Advanced users can add additional patch maps ( .midname files ) for their device. Editing .midname files is
outside the scope of this document. Contact Mixbus support for more details.
Inserting a patch change during playback
In some cases, you might want to introduce a “patch change” during playback of a track. For example this
might be desirable to change your “violin” track to switch to the “plucked violins”, temporarily. To insert a
patch change event, right-click on a region, and choose “Insert Patch Change” from the MIDI submenu:
Harrison Consoles Mixbus v4 - 1
Page 133 of 515
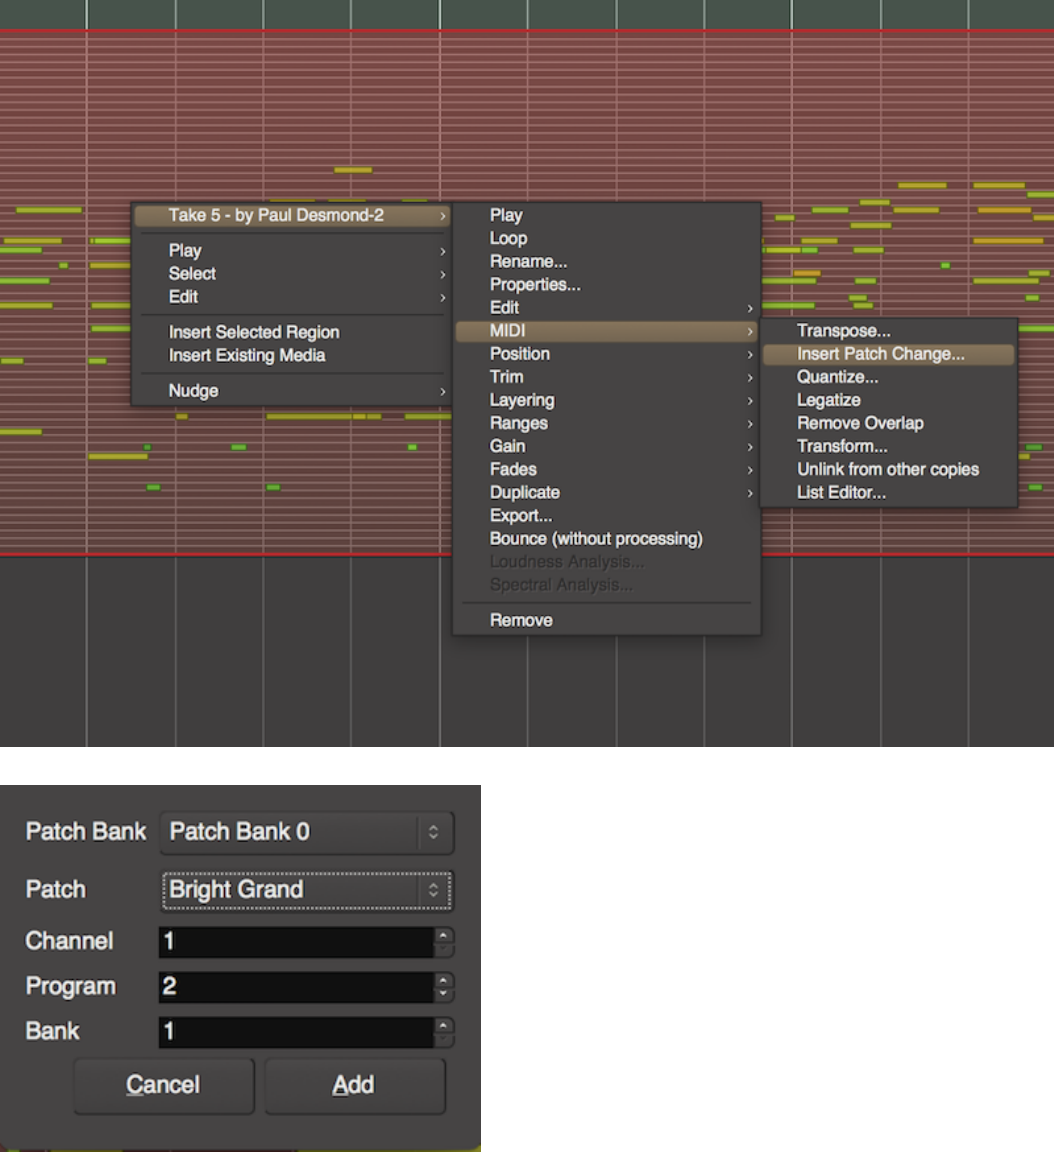
The dialog will prompt you for the bank and patch number. NOTE: if the patch doesn’t appear where you
expect it, select “Playhead” for the Edit Point, and use the playhead to define the patch change location.
Harrison Consoles Mixbus v4 - 1
Page 134 of 515

Once inserted, you can use the Edit (“E”) tool to move the patch change. Scrolling the mouse wheel over
the patch change will increment the patch number. Use the shift+right-click convention to delete a patch
change.
In the current version of Mixbus (4.2), patch changes are only sent when they are “played
through”. In other words, locating to a time after a patch change does not automatically
send the patch. This feature might be implemented in a future version.
!
Harrison Consoles Mixbus v4 - 1
Page 135 of 515
Adding MIDI Patch files
What is a .midnam file?
The .midnam file specification is defined by the MMA ( MIDI Manufacturers Association ) and is part of the
official MIDI specification, to allow interchange of a device’s patches & controller settings between different
sequencers.
You can learn more information about these files here: https://www.midi.org/specifications/item/midi-in-xml
Where are Mixbus’s .midnam files located?
The files are located in the Mixbus application folder, in a subfolder called “patchfiles”. The location of this
file varies with each operating system.
1. On MacOS, right-click on the Mixbus application, and select “Show Contents”. Then navigate to
Contents->Resources to find the patchfiles folder.
2. On Windows, Navigate to Program Files\Mixbus\.. and find the patchfiles subfolder.
How can I find a .midname file for my device?
In many cases, you can find a .midname file for your device by searching online. These files are sometimes
provided by the manufactuer. Download the file and drop it into the patchfiles subfolder. Once installed,
you’ll see the list of patches in the patch-selector.
NOTE: keep a copy of your new .midnam file, because when you re-install Mixbus, the
.midnam file in the application folder will be overwritten.
!
You can also remove unnecessary .midnam files, to reduce the size of the list in the menu.
But the .midnams will be replaced when Mixbus is reinstalled.
*
Harrison Consoles Mixbus v4 - 1
Page 136 of 515

If I can’t find an existing .midname file for my device, how do
I create one?
If you can’t find a device file online, then you can make a copy of an existing device file, and edit it
manually. The files are plain text, using the XML text format, and are fairly easy to read and edit.
1. Locate a .midnam file that is most similar to your desired device. ( such as
“Korg_Volca_Bass.midnam”, if your device is a Korg )
2. Open the file in a plain text editor: most common errors occur when the editor tries to re-save the file
in a different format.
3. Save the file with a new name. (such as, “My Korg Device.midnam”)
4. Edit the internal values of the file to meet your needs. For example, change the text of the author to
reflect your own name.
The most important parts of the file are:
The device’s manufacturer and model name:
Harrison Consoles Mixbus v4 - 1
Page 137 of 515
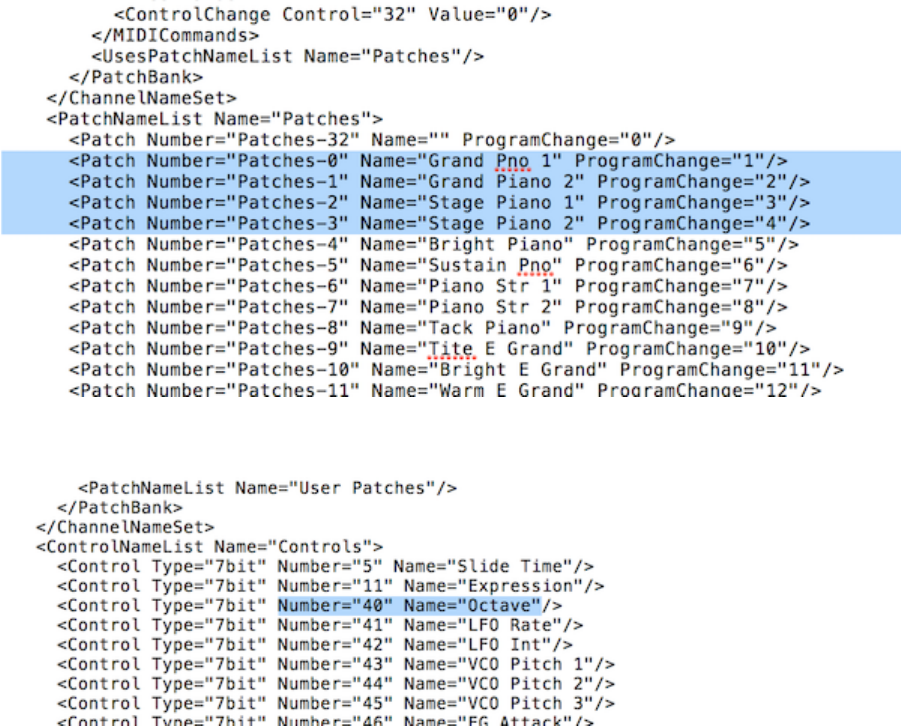
The patches that are provided in the device:
The names for the MIDI controllers (CC’s) that are supported by the device:
Harrison Consoles Mixbus v4 - 1
Page 138 of 515
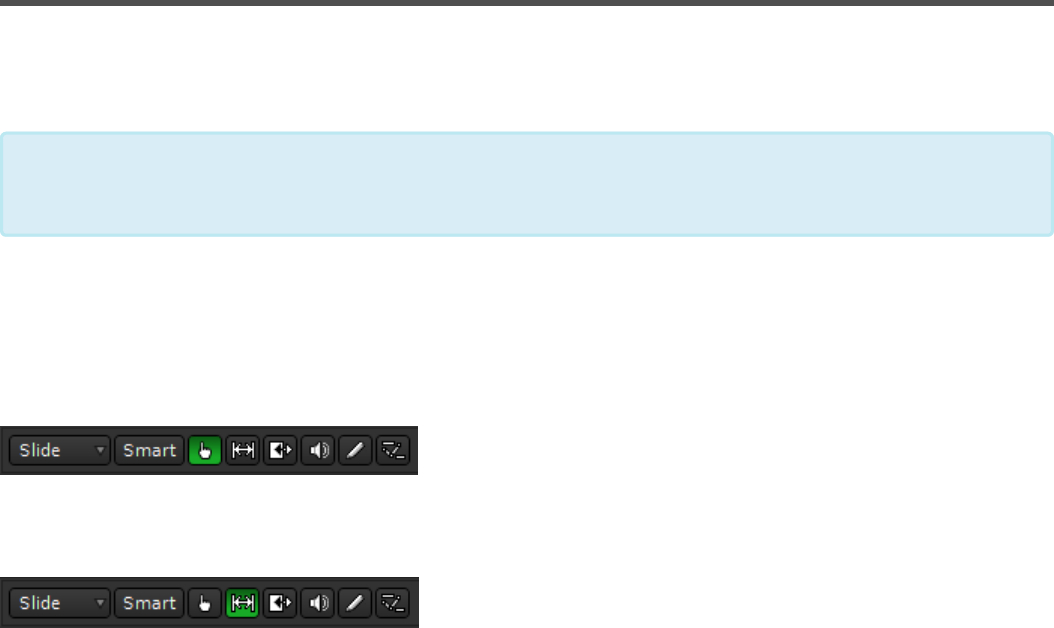
Editing MIDI Regions
A MIDI region is exactly like an audio region, except that the information inside the region is MIDI
performance data, not audio.
MIDI regions may be cut, copied, pasted, and trimmed in much the same way as audio regions. Region
editing is accomplished with the same tools: the Grabber (Hand) tool and the Range tool.
Grabber Tool
Range Tool
Editing features like the Grid, Sync Points, and Ripple Mode apply to MIDI regions just like audio regions.
There are 3 major differences with MIDI regions vs audio regions:
1. MIDI regions do not have fade in/out handles.
2. MIDI regions are “transparent”. This means that if you layer 2 regions atop each other, you will hear
the notes of the region below. This allows you to overlap regions so you can sustain one note through
the start of a new region.
3. By default, a copy of a MIDI region is a “linked” copy. So if you move the note in the source region,
the same note will be moved in the copy (and vice versa).
MIDI regions do not only contain MIDI notes; they also contain performance information such as pitch bend,
aftertouch, controllers, etc. This has one side-effect: in order to draw controls (with the Draw tool), there
MUST be an underlying region. MIDI data cannot exist on a track without an underlying MIDI file, and this is
represented by a midi region in the track. If you record MIDI data, then a region is created to hold any notes
In the same way that audio regions have underlying audio files that are actually stored on
disk, a MIDI region has a MIDI file in the session that it represents.
*
Harrison Consoles Mixbus v4 - 1
Page 139 of 515
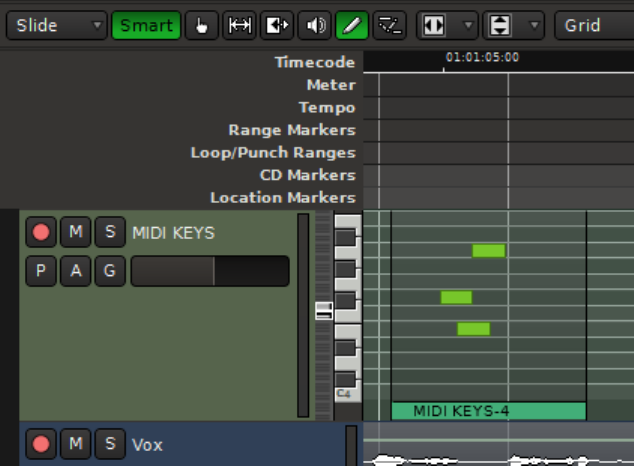
or controls that you play into the track. If you want to draw notes or controllers, you must first use the Draw
tool to drag a region, and then you can draw notes or automation into the region.
Using the Grabber (“G”) tool, you can right-click on a MIDI region and navigate to the MIDI context menu:
• Transpose – transposes all the notes by a given octave/semitone offset.
• Insert Patch Change – Inserts a patch change event in the region.
• Quantize – Quantizes the note start/ends to a defined grid.
• Legatize – Extends note ends to meet the next note’s beginning.
• Remove Overlap – After this operation, each new note onset will cut off any notes that were held on
before the new note was struck.
• Unlink from other Copies – unlinks this MIDI region from its copies. Any edits done to this region will
no longer apply to the region(s) it was copied from.
• List Editor – shows MIDI notes in a text list. Each note can be individually edited in the list.
It was a design goal of Mixbus to edit MIDI regions “just like audio regions”. To some users this is going to
feel inelegant. To others it will be a breath of fresh air.
Harrison Consoles Mixbus v4 - 1
Page 140 of 515
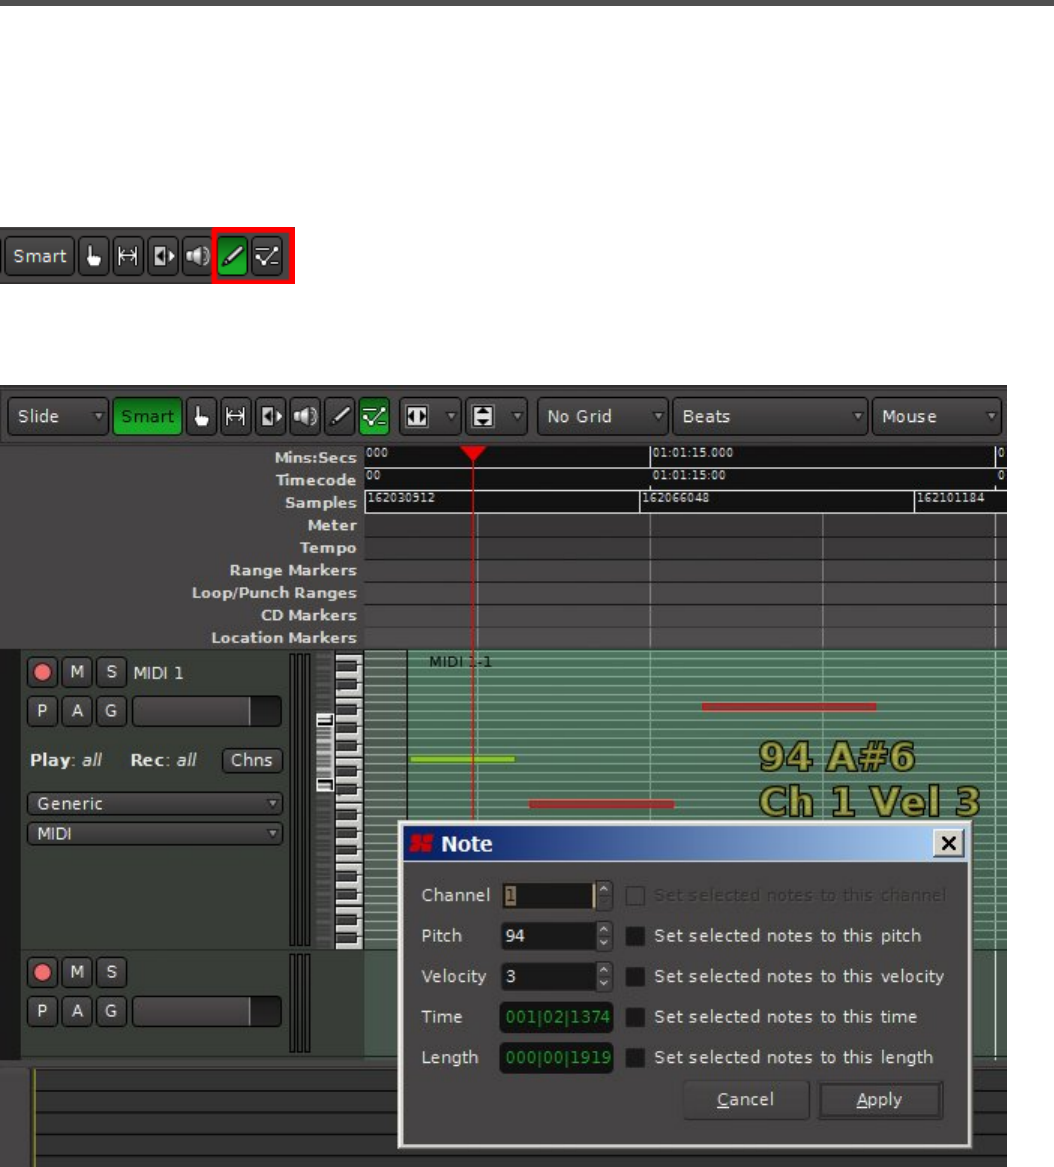
Editing MIDI Notes and Controls
MIDI notes on the piano-roll represent note velocity by color. Quiet notes (low velocity) will be dark green,
while loud notes (high velocity) will be yellow. Notes in the middle range will be bright green.
In the image below: Highlighted in green is the Draw (“pencil”) tool, and to the right is the Edit (“points and
lines”) tool. These tools are used to edit MIDI notes inside MIDI Regions.
In the image below: 2 MIDI notes have been selected for editing.
Harrison Consoles Mixbus v4 - 1
Page 141 of 515
Draw tool Edit Tool
• Click anywhere to start dragging a new MIDI
note; drag to extend the length of the note
◦ Newly-created notes get the average
“velocity” of other nearby note velocities
• Click in the middle of a note to select it ( the
note will turn red ). Ctrl+click ( Cmd+click on
Mac ) to add/remove notes from the selection
• Shift+right-click on a MIDI note to delete it
• Click the left or right edge of the MIDI note to
trim the start and end times of the note
• Click in the middle of a note to drag it
• Shift+right-click on a MIDI note to delete it
• Scroll the mouse wheel on a note to increase/
decrease the velocity
• Shift+right-click on a MIDI note to delete it
• Click in the middle of a note to select it ( the
note will turn red ). Ctrl+click ( Cmd+click on
Mac ) to add/remove notes from the selection
• Click the left or right edge of the MIDI note to
trim the start and end times of the note
• Click in the middle of a note to drag it
• Scroll the mouse wheel on a note to increase/
decrease the velocity
• Click an empty space in the region to initiate
a “box select” rectangle. With multiple notes
selected, you can:
Once a note (or multiple notes) is selected (red), you can:
• Click Backspace or Delete key to delete the selected note(s)
• Click the up/down arrows to transpose the note pitch up/down
• Point at the selected note, and use the mouse wheel to adjust all of the selected note velocities
• Right-click on a selected note to open the MIDI context menu
MIDI context menu:
• Delete – Requires one or more notes to be selected. Deletes the selected note(s)
• Edit – Operates on a single selected note. Allows changing the length, pitch, velocity, etc.
• Legatize – Operates on a multi-note selection. Extends note ends to meet the next note’s beginning.
• Quantize – Operates on one or more selected notes. Quantizes the note start/ends to a defined grid.
• Remove Overlap – After this operation, each new note onset will cut off any notes that were held on
before the new note was struck.
• Transform – Allows transforming the note pitch, velocity, and other parameters using logical
operations.
Remember, the Grab and Range tools are used to edit Regions, while Draw and Edit
operate on the contents of regions.
*
Harrison Consoles Mixbus v4 - 1
Page 142 of 515

MIDI Control (CC) Automation
MIDI Controls use the same conventions as automation, except that you can only have MIDI controller
automation inside a MIDI region. You can only click to create new control points if there is a MIDI region on
the timeline at that location.
If you want to apply these MIDI operations to all the notes in a region, you can use the
Grabber (“G”) tool, and right-click on the region(s). The MIDI submenu allows you to apply
these operations to all notes in the selected region(s), without having to select the notes
separately.
*
Harrison Consoles Mixbus v4 - 1
Page 143 of 515
Plug-ins
Plug-ins
Mixbus can load plug-ins in several formats, depending on your platform. Mixbus can only use plug-ins that
meet these criteria:
• The plug-in must be a supported format on your OS (see below)
• The plug-in must be compiled for the same platform as the Mixbus you are running. ( for example,
64bit Mixbus loads 64bit plug-ins, but not 32bit plug-ins )
A summary of plug-in support in Mixbus:
AppleTM AU plug-ins (supported on OS X only)
AU (Audio Unit) is the native (Apple-developed) plug-in format for OS X. Most commercial plug-in
developers make AU plug-ins for Mac, because this is the native format for Apple’s Garageband and Logic.
Unlike other formats, AU plug-ins normally provide a “variable” number of inputs and outputs. The host
(Mixbus) must tell the plugin how many inputs and outputs we want, and then the plugin can respond
whether that is a valid choice. This can get quite complicated. Mixbus chooses the I/O based on the number
of signal “pipes” at the insertion point of the plug-in.
Scanning of AU plugins must be initiated manually in Mixbus->Preferences->Plugins. If a plugin causes
Mixbus to crash during the “scan” procedure, then this plugin will be placed on a “blacklist” which prevents
that version of the plugin from scanning in the future.
This chapter covers the general principles of plug-ins in Mixbus. To learn about using
plugins in your mix, visit Using Plug-ins
*
It is Harrison’s intent to support every plug-in available, whether commercial or free.
However there are many reasons why a third-party addon might not work in Mixbus, or
might crash, or might behave unexpectedly. This is true of any DAW.
!
Harrison Consoles Mixbus v4 - 1
Page 144 of 515

LADSPA plug-ins (supported on all platforms)
LADSPA is the “Linux Audio Developer’s Simple Plug-in Architecture”. LADSPA plug-ins are simple to
develop and are freely available. LADSPA plug-ins do not support customized GUIs. The “generic” GUI will
provide sliders and knobs on a simple window. Being very portable, most LADSPAs are available for all
platforms (OS X, Linux, and Windows). LADSPA makes an excellent starting point for developers that want
to learn plug-in development. The quality can vary significantly, but there are a few good plug-ins available.
Mixbus can load a mono LADSPA plug-in into a stereo channel (by duplicating the plug-in and assigning the
same controls to both sides of the signal). This works well for some plug-in types (such as EQ) but less well
for compressors, which might introduce a shift in the stereo image if they aren’t truly stereo. In these cases,
you should choose a stereo LADSPA, not a mono one.
LV2 plug-ins
The successor to LADSPA, LV2 is the “next generation” open-source plug-in format. LV2 plug-ins have
several advantages over other formats. For example, plug-ins do not have to be instantiated to be scanned,
so startup is much faster and less likely to crash. For developers, LV2 is completely unencumbered by
licensing restrictions. Harrison’s bundled plug-ins currently use the LV2 format, and the same plug-ins
operate on Windows, Mac, and Linux. This allows you to share sessions with users on other platforms, and
have your sound remain unchanged.
Steinberg VST plug-ins.
VST (Virtual Studio Technology) plug-ins were developed by Steinberg TM and are the most common plug-in
format on Windows. VST plug-ins can be developed for Windows, OS X, and Linux.
VST plugins typically come in 2in/2out versions (stereo I/O). Mixbus channels are typically mono or stereo;
but the signal width can vary in the redirect sections. Mixbus will try to accommodate the audio and MIDI
“pipes” that are present in the signal flow at that location. For more details, see Processor Signal Flow.
Scanning of VST plugins must be initiated manually in Edit->Preferences->Plugins. If a plugin causes
Mixbus to crash during the “scan” procedure, then this plugin will be placed on a “blacklist” which prevents
that version of the plugin from scanning in the future.
Unlike AU and LV2, the VST specification does not specify where plugin files should be installed. When
using VST plugins, you must take note of the folder location that the installer reports. You may find it easier
to redirect the installer to one of the default locations that Mixbus uses. You can find these locations in
Preferences>Plugins>VST>Path.
Harrison Consoles Mixbus v4 - 1
Page 145 of 515
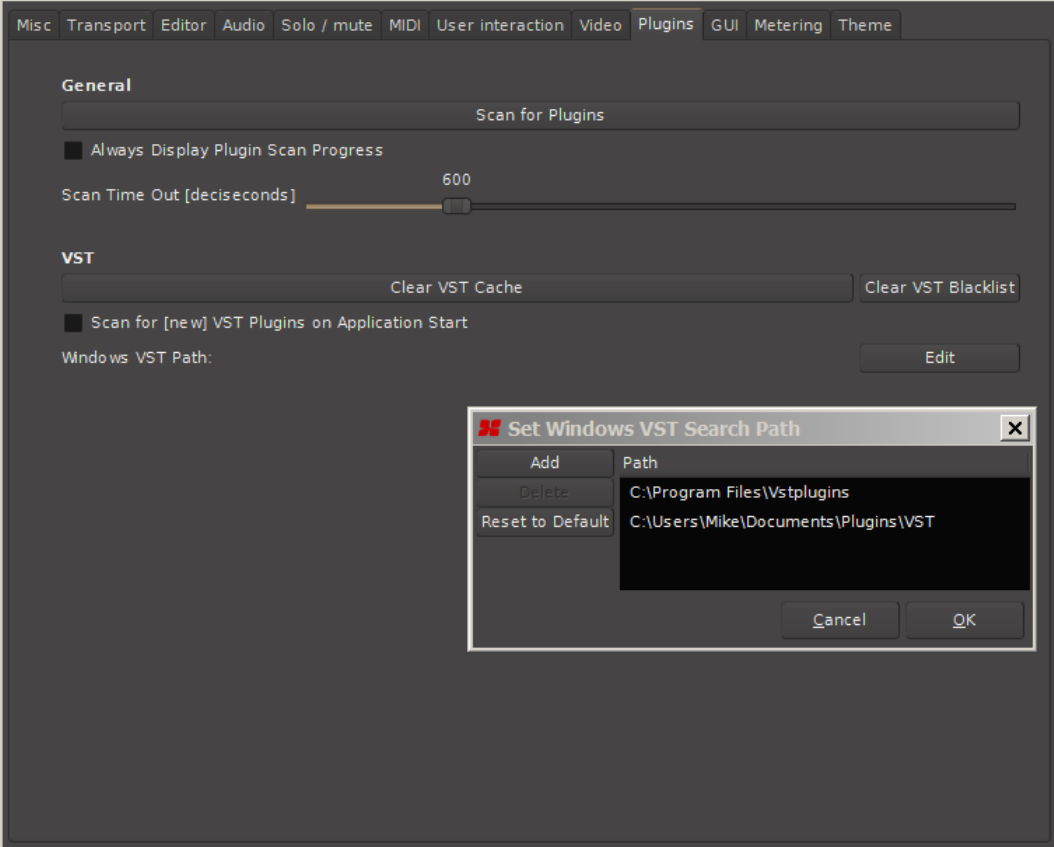
Or you can create a new folder of your liking and install all of your plug-ins there. This way Mixbus has to
scan fewer folders. For every new folder created, Mixbus has to be made aware of its existence. If you have
20 different folders, then it places a burden on the user to inform Mixbus of their locations. Simplifying the
plugins location upon installation may prove useful.
Digidesign AAX/TDM/RTAS plug-ins (no support currently).
AAX, RTAS and TDM plug-ins are proprietary formats for Pro Tools TM. Mixbus does NOT support RTAS or
TDM plug-ins. It is unlikely that Mixbus will ever support AAX, RTAS or TDM plug-ins.
Harrison Consoles Mixbus v4 - 1
Page 146 of 515

Windows DirectX plug-ins (no support currently)
The DirectX plug-in API was developed by Microsoft and is the native plug-in format for Windows. Few
professional plug-in manufacturers provide DirectX plug-ins, so Mixbus does not currently support DirectX
plug-ins.
Latency Compensation
Some plug-ins, particularly plug-ins that use hardware “accelerators” or convolution-type processing, can
cause significant latency (time delay) from the input to the output. This can cause problems if the delayed
signal is mixed with a signal that is not delayed. A long delay can cause the tracks to sound “out of time”,
while a very short delay can cause comb filtering (“phasiness”). Mixbus can automatically accommodate
plug-in and insert latencies for you. To do this, Mixbus delays the non-affected tracks to match the track with
the longest latency. Please be aware of these facts:
• Adding or bypassing a plugin can change its latency. Some plugins have internal controls (like
“lookahead”, “oversampling”, or “quality”) that change their latency.
• Latency offsets are recalculated when you “stop” the transport. So if you hear a delay or phasing
caused by plugin latency, try stopping and restarting playback.
• Tracks can accommodate “unlimited” latency by buffering the audio from disk earlier than it is needed.
• Mix buses are limited to 8192 samples of latency compensation. If the total latency of all plug-ins in a
mix bus exceeds 8192 samples, then a time offset will occur.
• “Buses” created with the Add Track/Bus dialog (we call these “utility buses”) do not support latency
compensation.
Plug-in Manager
The Plug-in Manager window provides a rich set of controls for browsing your installed plug-ins, and making
them quickly available when needed.
To access the Plug-in Manager, double click in any channel strip’s redirect box ( it’s the empty black box
near the top of a mixer strip )
Note: While we have taken care to follow the specifications for each plug-in format, plug-ins
are developed by third-party vendors. This means that Harrison cannot take responsibility
for plug-ins that don’t work as expected. Please use caution when trying a plug-in for the
first time. Verify that all the functions work as expected before committing to using a
particular plug-in in a session.
*
Harrison Consoles Mixbus v4 - 1
Page 147 of 515
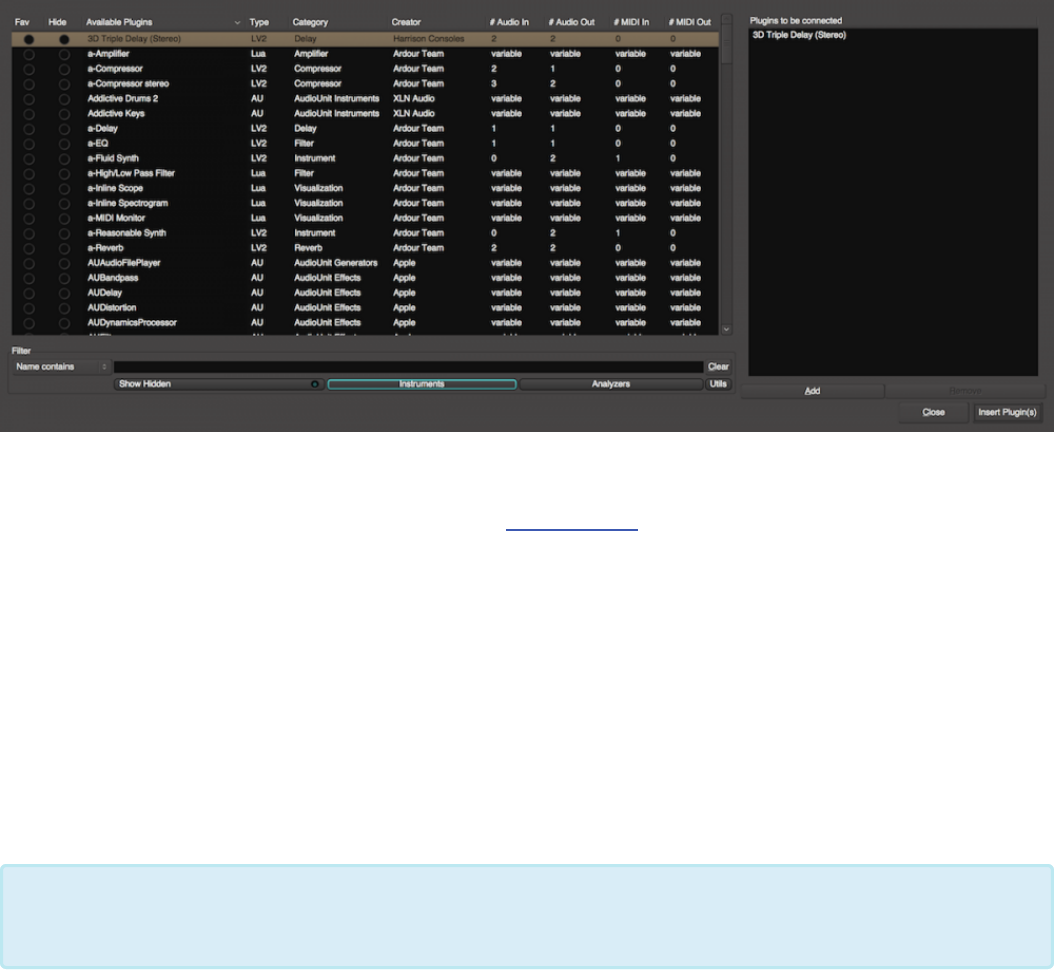
Alternatively, right-click in the redirect area, and choose “New Plugin->Plugin Manager”.
• Fav: If this column is checked, the plug-in will appear in the “favorites” shortcut in the redirect menu,
and also in the Favorites list on the top of the mixer sidebar.
• Hide: If this column is checked, the plug-in will NOT appear in the “by creator” or “by category”
shortcut menus.
• Search: the search bar allows you to instantly find plug-ins by Name, Type, Category, Author, Library,
Favorites or Hidden properties.
• Add + (plus): This will add the selected plug-in to the list. Continue adding plug-ins to the list if you’d
like to add more than one plug-in at a time.
• Remove: This will remove the selected plug-in from the list at the right side.
• Insert Plug-in(s): This will insert the list of plug-ins in the bottom pane to the mixer strip that launched
the Plug-in Manager Window.
• There are 3 “filter” buttons that control what appears in the list.
◦ Show Hidden : If this button is enabled, then plugins marked “Hidden” will appear in the list.
◦ Instruments : if this button is unlit, no instruments will appear in the list. If it is colored solidly,
ONLY instruments will appear in the list.
◦ Analyzers : if this button is unlit, no analyzers will appear in the list. If it is colored solidly, ONLY
instruments will appear in the list.
Tip: Try using the Search bar when looking for a plug-in. Just type the first few letters of the
name of your plug-in, and your plug-in will be sorted to the top window instantly.
*
Harrison Consoles Mixbus v4 - 1
Page 148 of 515

◦ Utils : if this button is unlit, no utilities will appear in the list. If it is colored solidly, ONLY
instruments will appear in the list.
Once Installed, plug-ins will be visible within the redirect box of the channel strip. Click here and here for
more information.
For information on Virtual Instruments click here.
Harrison Consoles Mixbus v4 - 1
Page 149 of 515

Editing
In Mixbus, audio and MIDI data is presented as “regions” on a timeline. All editing operations apply to the
regions. Some of the things you can do to a region: move it, trim the start/end, set the fade-in/out length,
and adjust the gain. Additionally there are many, many ways that you can manipulate those simple features
of a region to accomplish your task:
• Using editing tools, like the “Range” tool: A “range” is a selection on the timeline that can span over
multiple regions, and make cuts or moves as if they were a continuous piece of audio.
• Using editing modes, like Ripple mode: if you make a deletion or insertion using Ripple mode, then
the later regions (to the right) will respond to your moves so you don’t have to re-shuffle them if you
make cuts earlier in the session.
• Using the Edit Point: You can choose to make edits on the location of the playhead (“what you hear”)
versus the mouse (“what you point at”). Sometimes it makes more sense to edit with one point, and
sometimes it makes more sense to edit with the other. Learning when to use each mode is an
important skill to develop.
• Using the Grid: You can use the “Grid” to limit your edits so they only happen on musical times (such
as measure, or quarter notes)
Combining these techniques gives you a nearly limitless opportunity to work with regions on the timeline.
Like the tools and modes of a drawing application, you have to learn the combinations of the tools to get
your work done most efficiently.
UNDO: with all of these ways to edit, it is unavoidable that you will make mistakes. Mixbus
provides an “undo” feature that allows you to revert your changes. Perhaps more
interestingly, Mixbus supports persistent undo. Each time you save your editing session, the
“undo” information is saved alongside the session in a separate file. Upon reopening the
session, you can still “undo” the edits that happened prior to your closing it. The main
session file, and each of the snapshot files in the session folder, have their own persistent
undo storage file.
*
Harrison Consoles Mixbus v4 - 1
Page 150 of 515
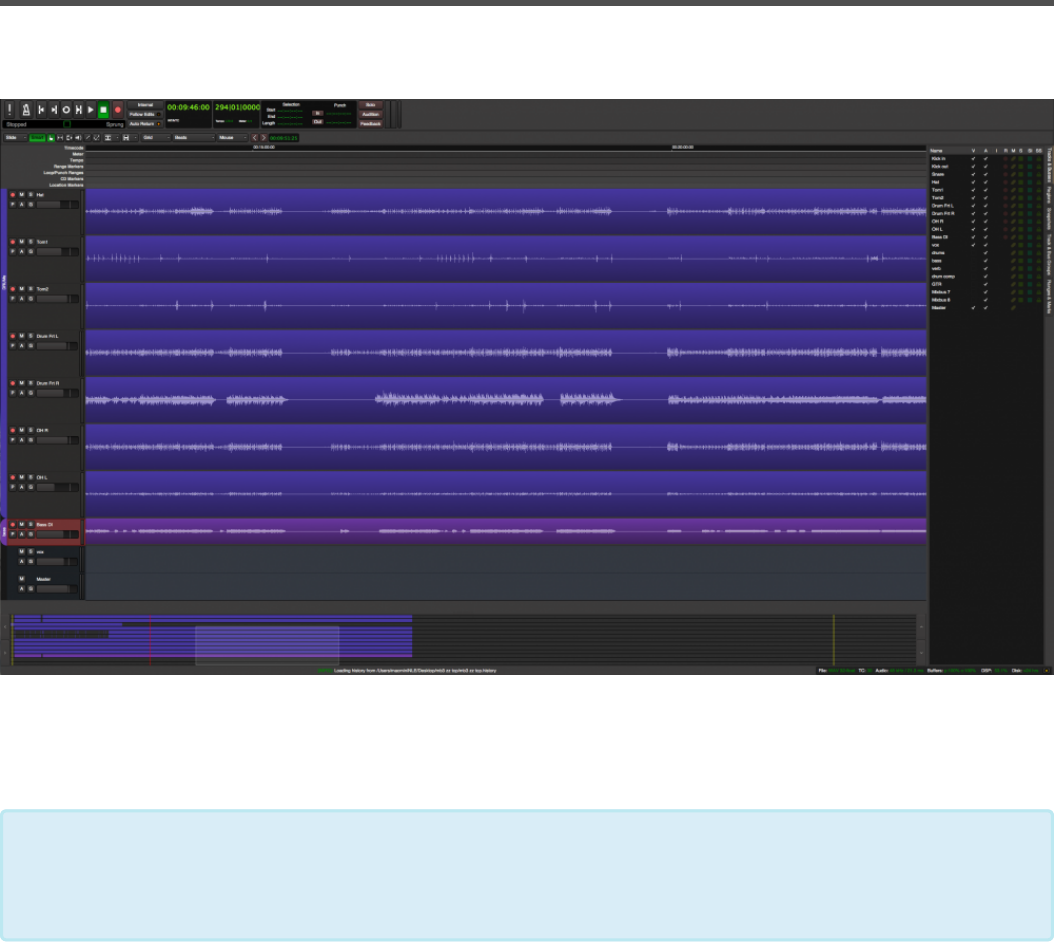
Edit Window Overview
Basic Editing Concepts
Users familiar with other DAW conventions will quickly adapt to the recording and editing features of
Mixbus.
Track Management
On the far left of the edit window, the Editor Mixer can be displayed via Menu>View>Show Editor Mixer.
The Editor Mixer is a single mixer channel strip that “follows” the selected track. To see all of the mixer
strips for the tracks and buses on one window, show the Mixer window. Alt+M ( or Ctrl+M for Mac ) toggles
between the Mixer and the Editor windows. Located near the top of the mixer strip is an Input button for
LOGIC users: you will notice that dragging a region to the blank area below the editor tracks
will automatically create a new track for the region. This is a quick way to separate out a
region and make a new track for it.
*
Harrison Consoles Mixbus v4 - 1
Page 151 of 515
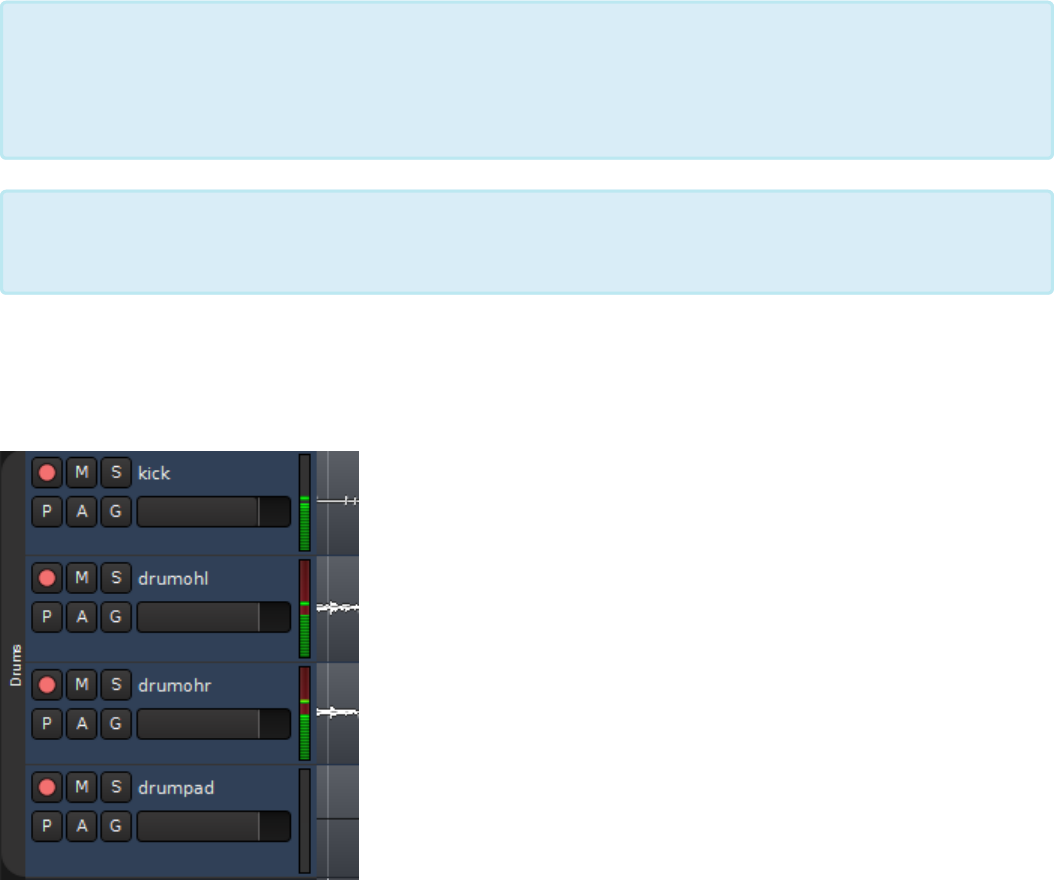
selection of the physical input that feeds the track. For example if you have 8 tracks but only a 2 input sound
card, you must route the inputs to the tracks as-needed.
The right side of the screen is a pull-out window which accommodates several different functions. Most
panels have a right-click context menu for additional features:
• Tracks/Buses – drag & drop to reorder tracks, or click to show/hide them.
• Regions – shows all of the recorded or imported regions. Drag & drop from here into the editor.
• Snapshots – Click a snapshot to recall all of the settings in the snapshot.
• Edit Groups – Click the +/- buttons to create edit groups, and enable them.
Using Tracks
To the left of the editing canvas are the track headers.
Note: Normally “snapshots” are used as backup states. You store the snapshot and
continue working on the main session. Future “save” operations will apply to the selected
session, not the snapshots. If you prefer that future “save” operations go into the newly-
created snapshot, then you will want to invoke the “Save As” command.
*
Tip: You can also select tracks in the editor and use the “Move tracks Up/Down” command
from the track menu.
*
Harrison Consoles Mixbus v4 - 1
Page 152 of 515
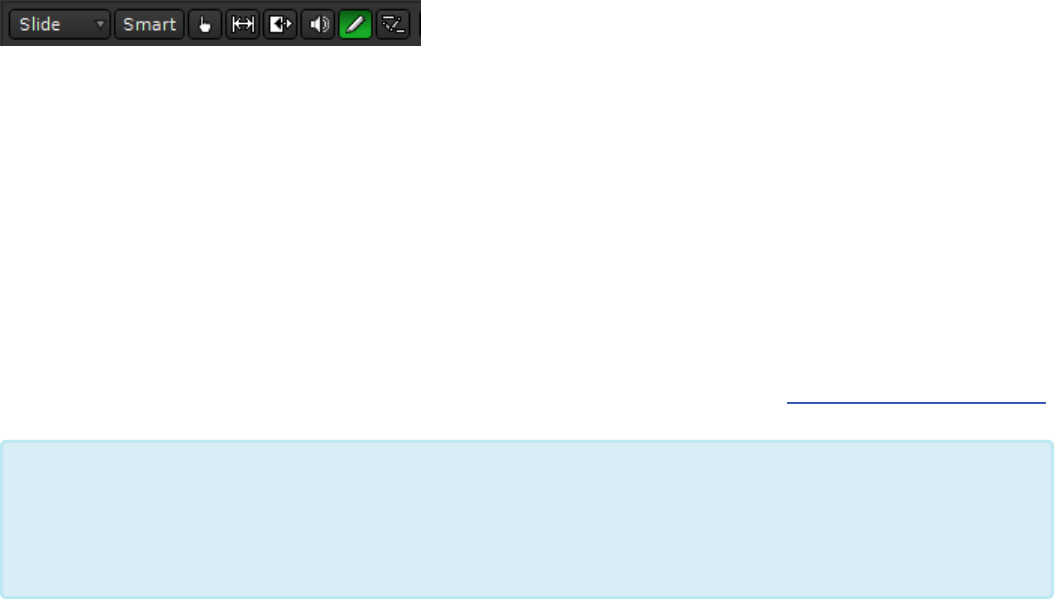
You can select or deselect a track by clicking on the empty area. You may shift-click to select a range of
tracks, or Ctrl/Cmd-click to select and deselect individual tracks. Right-clicking the empty track area will
open the track context menu. Certain functions such as mute, solo, and record-arm can be applied to ALL
tracks simultaneously by Ctrl-Alt-Shift-clicking (Cmd-Opt- Shift-click). You can manipulate multiple tracks at
once by selecting them and then using operations from the “Track” menu in the main application. Hovering
the mouse near the bottom of the header causes 2 horizontal lines to appear allowing the track to be
resized vertically.
The “P” key on each track allows selection of the track’s playlist. Playlists can be used to enable multiple
takes in a single track, or the sharing of playlist data across multiple tracks. Some users create a new
playlist for each recording “take” while others use Layers to manage takes.
Tracks also support automation of the fader, panner, and other processing parameters including those of
plug-ins. The “A” button in each track opens the automation menu which allows editing of automation data.
Each parameter has multiple dynamic automation states: Manual, Play, Write, and Touch. These control
whether dynamic automation will play back or be recorded while playing. Automation lines can be created
and edited with the Draw Mode (green box in the image below).
You may also select a Range of automation for deletion, or to raise/lower the selected range.
Groups
Tracks may be assigned to “edit groups” using the G button. When tracks are assigned to an edit group, and
the regions align exactly on the start and end times, then all changes to one track will be applied to all other
tracks in the edit group, regardless of whether the grouped tracks and regions are selected for editing. This
is very convenient for editing multitracked instruments. Another convenience is that some playlist operations
(such as “New”) will apply across the edit group. Edit groups are created and enabled in the Mixer List to the
right of the screen. To enable the Mixer List go to menu>View>Toggle Mixer List See more on Groups here.
Note: In addition to edit groups, you can create mix groups from the mixer window. Mix
groups allow the same sort of features as edit groups, but they apply to mixing functions
such as fader, mute, solo and record-arm. This is another convenient feature for
multitracked instruments.
*
Harrison Consoles Mixbus v4 - 1
Page 153 of 515
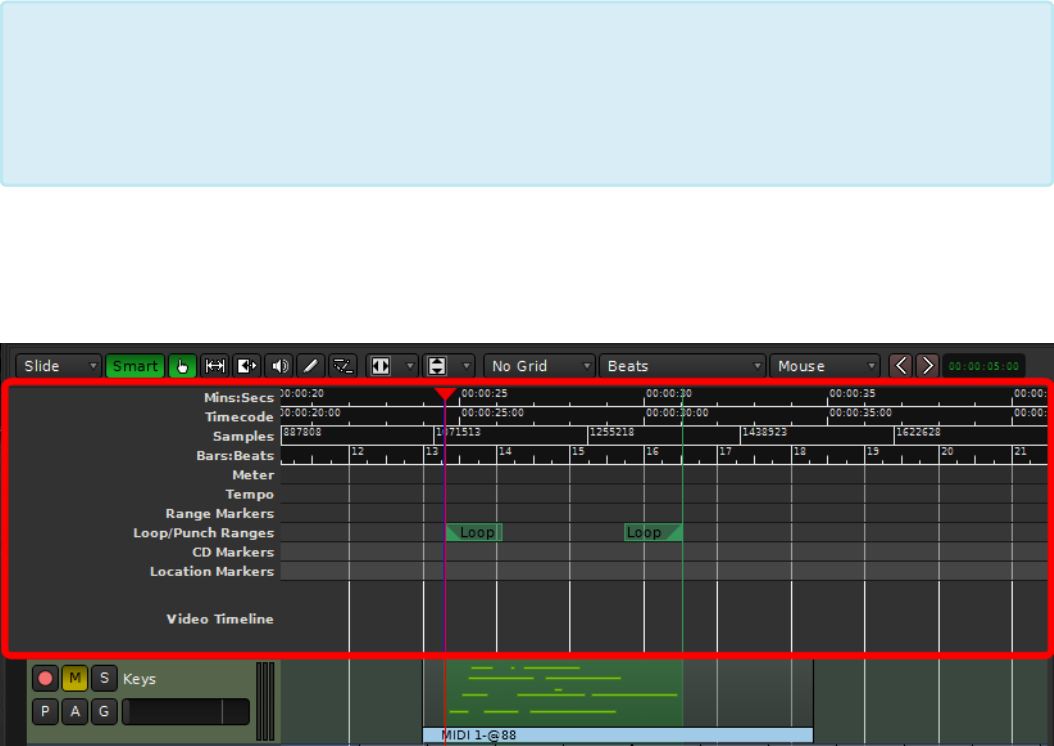
Recording, Loops and Punch Ranges
Above the recording tracks is the “ruler bar” area (highlighted by the red box in the image below).
Left-click anywhere in the ruler bars to locate the playhead. You can also locate the playhead to the current
mouse location with the “p” key. Right-clicking in each of the “ruler bar” areas will allow you to create
location markers (cue points), CD markers, tempo markers, or meter markers. Clicking and dragging in the
“range” or “loop punch” ruler bars will allow you to define song ranges, loop ranges, or punch in/out
ranges. Right-clicking on the ruler bar names will allow you to show or hide the various rulers.
Navigating in the Editor window: Zooming and Panning
The area of the editor where the regions is shown is called the “canvas”. There are several ways to navigate
(pan and zoom) the editor canvas.
Go to Menu>View>Zoom Focus to select the zoom focus. The “zoom focus” affects the operation of the
zoom buttons and the zoom key commands by changing the focal point for the zoom.
Zoom focus can be one of:
Tip: Holding “Shift” will temporarily override a mix group assignment for the fader and mute.
For example, if you have 2 tracks in a mix group, the faders will move together if you move
one. But if you would like to move a single fader without disabling the mix group, you can
hold “Shift” while you move the fader, and it will not cause the other grouped fader(s) to
move.
*
Harrison Consoles Mixbus v4 - 1
Page 154 of 515

• Left: Zoom focus is the left side of the summary view gray box.
• Right: Zoom focus is the right side of the summary view gray box.
• Center: Zoom focus is the center of the summary view gray box.
• Playhead: Zoom operations will center on the playhead.
• Mouse: Zoom operations will center on the mouse position (only makes sense when using the zoom
keyboard commands; when buttons are clicked the Playhead is used as zoom focus).
• Edit Point: When the Playhead is the Edit Point, it is used for zoom focus.
In addition, there are several scroll-wheel commands that can be used to navigate the editor canvas:
• Scroll: Scrolls vertically.
• Shift+scroll: Pan the editor canvas left/right.
• Ctrl/Cmd+scroll: Increase/decrease the zoom (note: this always uses the Mouse as zoom focus).
• Alt/Option+scroll: Increase/decrease the height of the track that is currently under the mouse.
The Transport Menu and Toolbar
Many items in the Transport Menu and Toolbar are self-explanatory. For more details click Help-
>Reference.
Harrison Consoles Mixbus v4 - 1
Page 155 of 515

The Editor List
Track and Bus Management in the Editor
Menu>View>Show Editor List
On the right side of the edit screen there is an adjustable ‘shelf’ with tabs. The Tracks/Buses tab is used to
manage tracks. You can click on the checkboxes to hide/show tracks, and you can drag/drop the tracks to
change their order.
A right-click menu provides these options:
• Hide/Show all.
• Hide/Show all tracks.
• Hide/show all buses.
• Hide/show all MIDI tracks
• Show tracks with regions under playhead (only shows the tracks that have active audio regions right
now).
Double-click on a track to jump the editor to show that track
Harrison Consoles Mixbus v4 - 1
Page 156 of 515
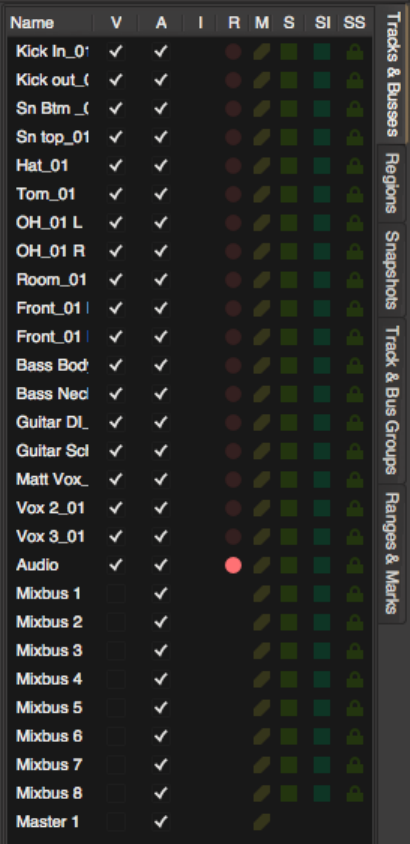
Harrison Consoles Mixbus v4 - 1
Page 157 of 515
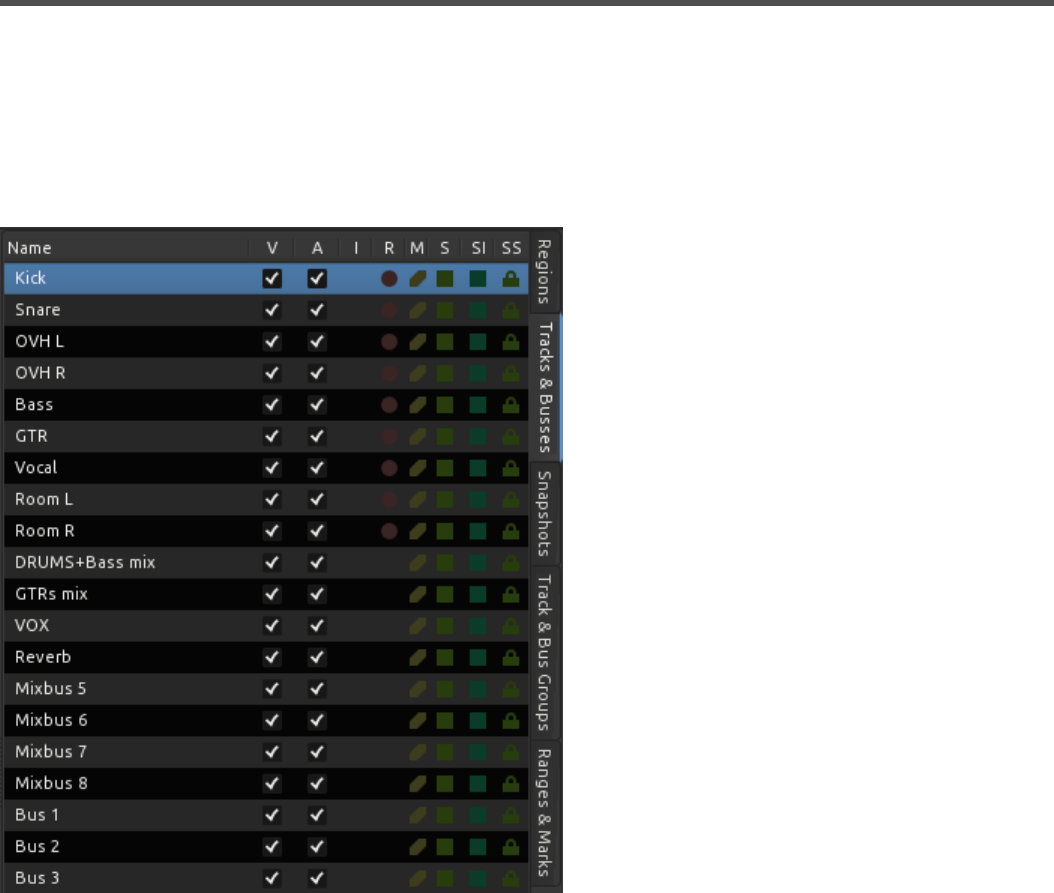
Tracks & Buses
To the rightmost side of the editor window is a slide out drawer that contains the Editor List
(Menu>View>Show Editor List).
Located on the right of the slide out drawer are tabs. Selecting the “Tracks & Busses” tab will show the
tracks and busses.
Features of The Editor List Window
• Name: Clicking on name will show that track/bus at the top of the Edit Canvas. Double click to rename
the track/bus
• V: Toggles the track or bus to Visible/Invisible in the edit canvas
• A: Toggles the track/bus to Active/Inactive
• I: MIDI input Enable/Disable
• R: Rec enabled button/indicator
Harrison Consoles Mixbus v4 - 1
Page 158 of 515

• M: Mute button/indicator
• S: Solo button/indicator
• SI: Solo Isolate button/indicator
• SS: Solo Safe Lock/Unlock
Tracks/busses can also be reordered by clicking while dragging the track to the desired location.
Right clicking anywhere within the slide out drawer calls up a context menu. “Show Tracks
With Regions Under Playhead” is a method which allows the users to quickly maximize the
editing canvas space.
*
Harrison Consoles Mixbus v4 - 1
Page 159 of 515

Regions
This shows the audio regions that have been recorded or imported into the session. The full-length audio file
is shown and the underlying “regions” are the different excerpts from it. You can grab a file, or a region
excerpt, and drag it into the timeline.
Pointing at a file shows the path to the file on your disk(s)
Right-click on a region entry to:
• audition (simply plays the wave file, outside of any context in the mix)
• hide
• Import a new file to the list (see: Import)
• Delete any regions that aren’t used in your session (see: cleanup)
For convenience, the table shows you the region’s start time, length. In the current version, these properties
cannot be modified.
It also shows properties such as muted, locked, etc. (see Object Editing) which CAN be modified.
Harrison Consoles Mixbus v4 - 1
Page 160 of 515
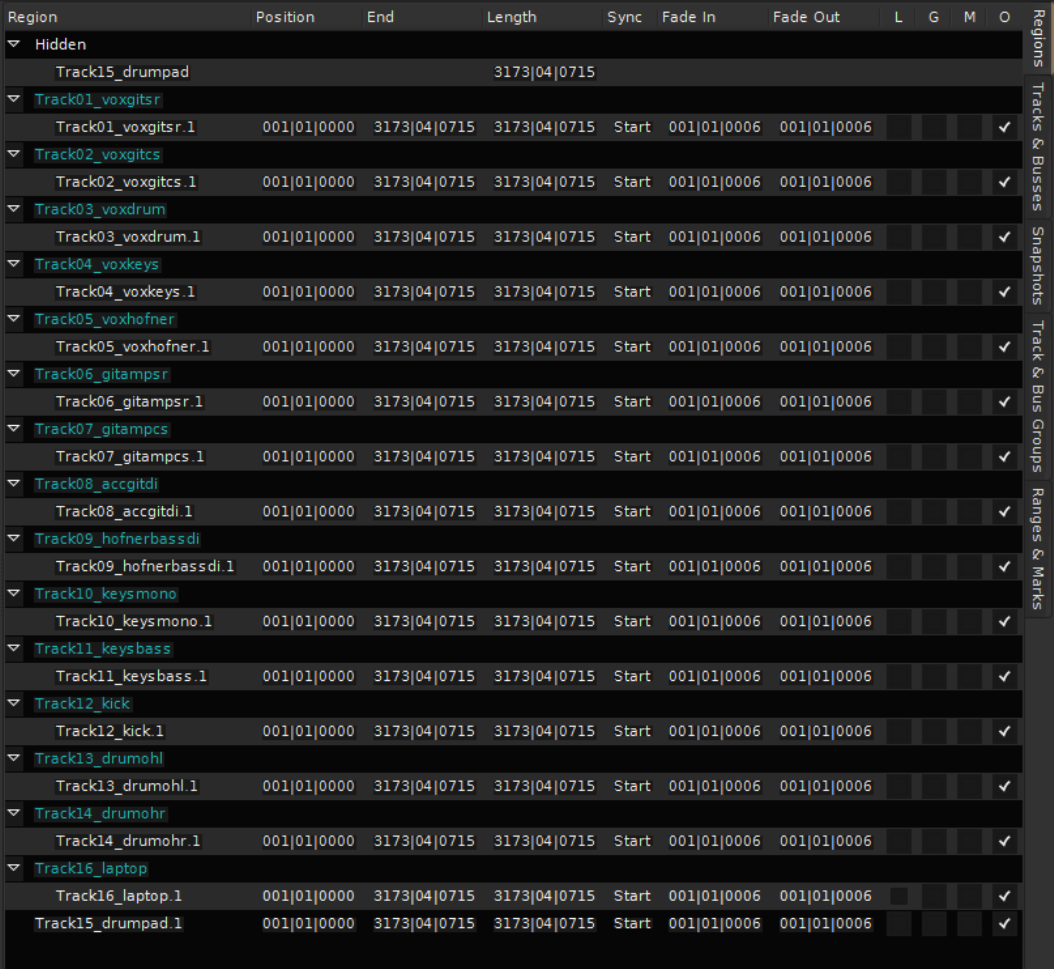
Harrison Consoles Mixbus v4 - 1
Page 161 of 515
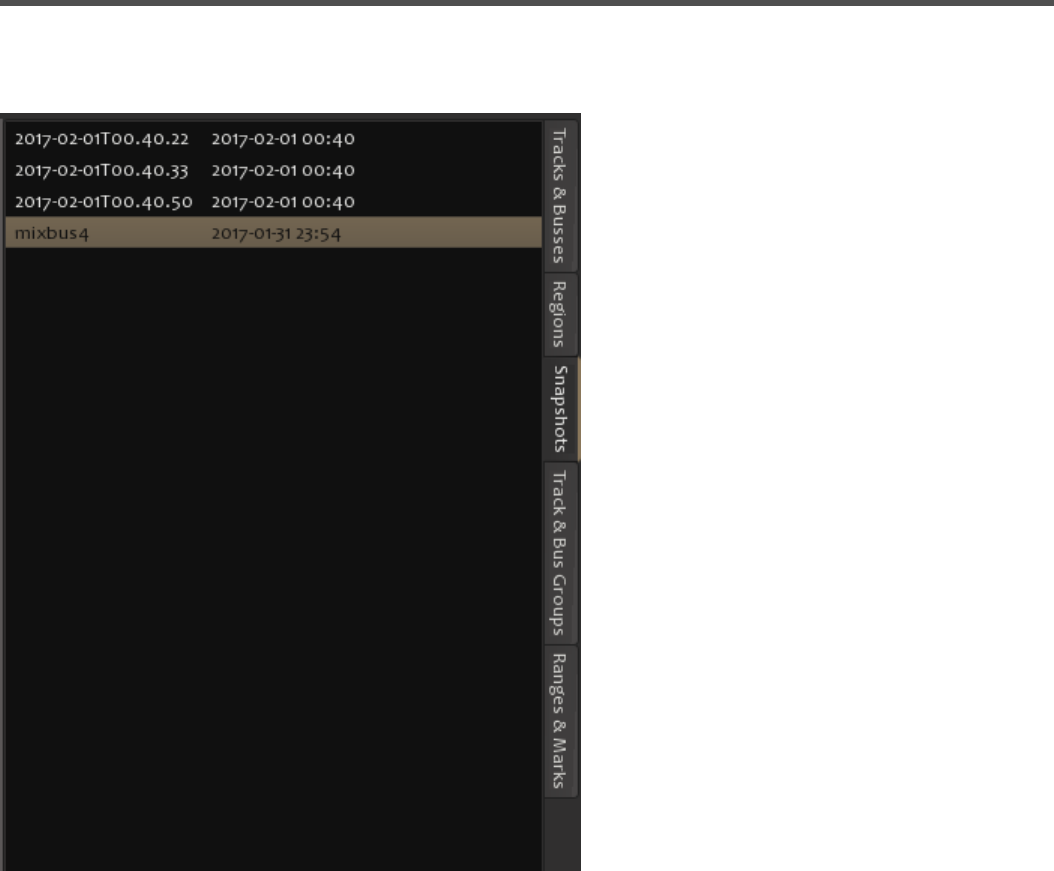
Snapshots
The snapshot list:
This lists shows the available snapshots in the current session.
A “snapshot” is a complete recall all of the track, region, mixer strip, and plug-in information.
All of the snapshots share the same session audio data; this means you can have multiple “snapshots” ( i.e.
songs, mixes, or remixes ) without recreating copies of all the audio data.
Single Click on a snapshot to switch to that snapshot.
Harrison Consoles Mixbus v4 - 1
Page 162 of 515
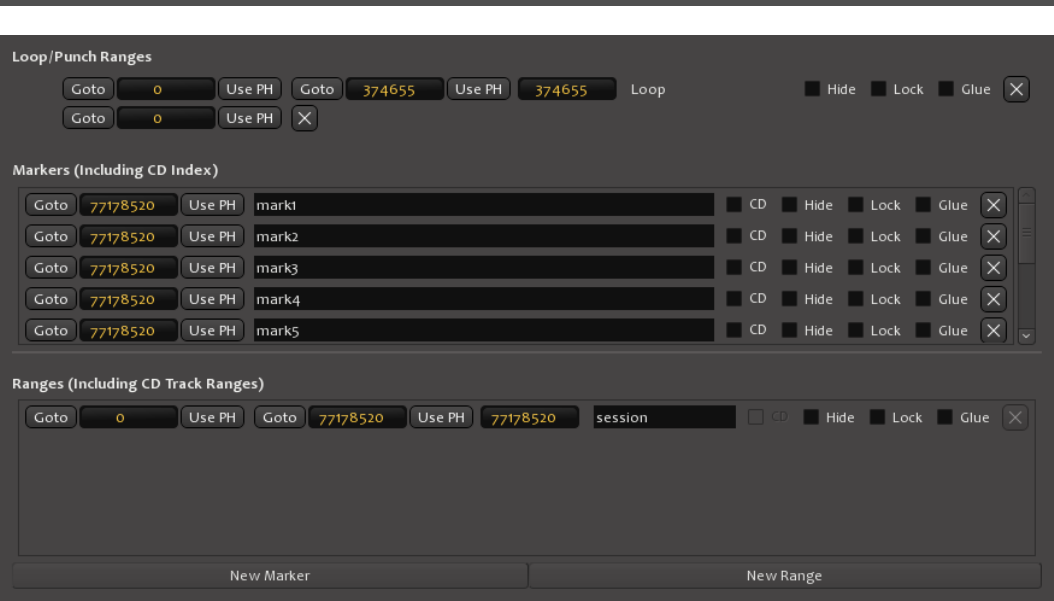
Locations List
Harrison Consoles Mixbus v4 - 1
Page 164 of 515
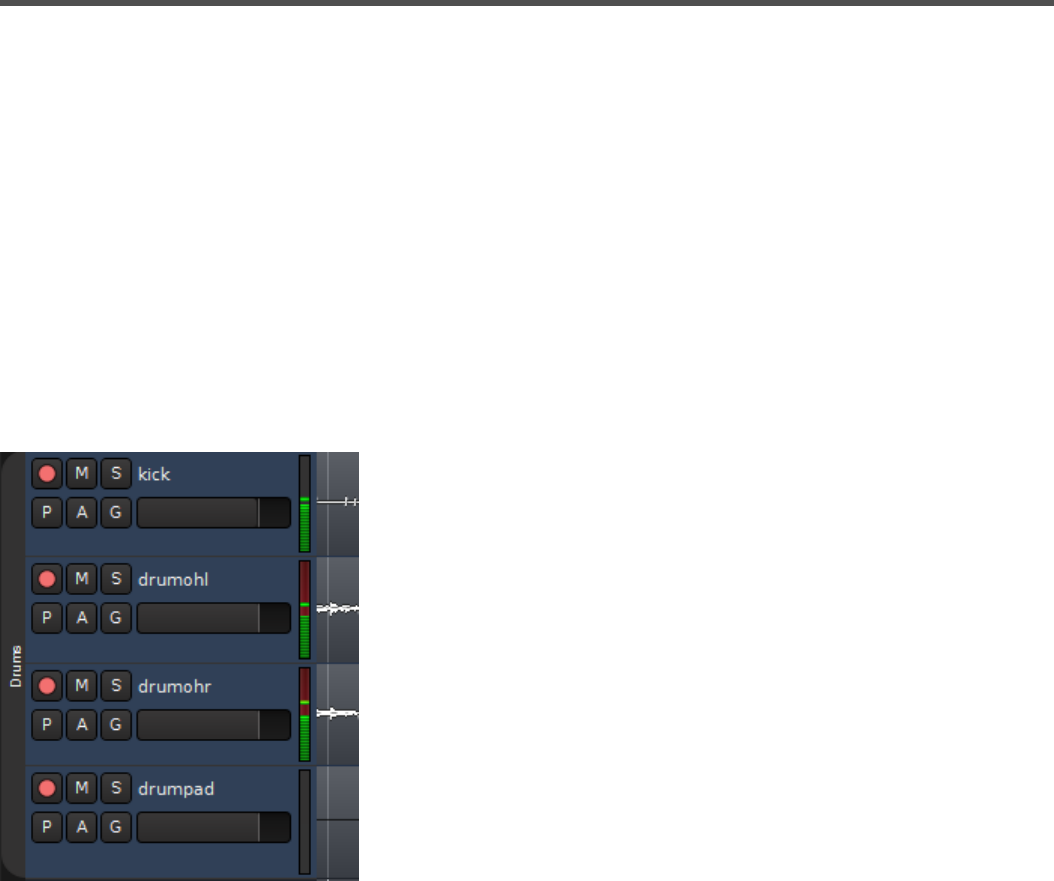
Track Headers
The “Track Header” provides quick access to key functions
Red Dot: record-arm
M: Mute Button
S: Solo Button
P: Playlist Button
A: Automation Button
G: Group Selection Button
The horizontal slider servers as a fader.
Right Clicking in the track header pulls up a context menu.
Selected tracks can be muted, solo’ed, record-armed or gain-adjusted directly from the keyboard.
Track Height
The waveform displayed in the editor canvas area can be made to appear larger or smaller by simply
hovering the cursor near the bottom of the track header. A double arrow and 2 lines will appear, at this point
click and drag the cursor downward to increase the size, or click and drag upwards to decrease the size.
Harrison Consoles Mixbus v4 - 1
Page 165 of 515

You can perform this action to multiple tracks at one time by shift clicking a range of tracks or ctrl clicking for
discontiguous selection.
Alternatively the menu item Track>Height will provide additional methods.
For additional information about track size and zoom, click here
For additional information about track reordering, naming, or selecting, click here
This action has no effect on the gain of the track, it is simply a visual aid.
*
Harrison Consoles Mixbus v4 - 1
Page 166 of 515

Auditioning
Before you can edit, you must be able to hear what you are editing. Mixbus supports 2 different kinds of
auditioning:
Auditioning a raw sound file or region with the “Auditioner
Path”:
Mixbus provides a secondary audio path called the “Auditioner”. Whenever the Auditioner path is in use, the
“Auditioning” button will blink in the top of the Editor.
Typically, you will audition files through the Import dialog. On the right side of the dialog, you will find a fader
and meter that control the level of the auditioned file.
You can also audition regions that are shown in the editor by right-clicking on the regions and choosing
“audition”. This will start playback from the beginning of the region. You may also audition the regions in the
region list, to the right of the editor window. This is useful if you have a list of often-used soundfx imported
to the session already.
By default, the “auditioner” path is routed directly the first 2 outputs of your soundcard. You can choose a
different destination for the auditioner path.
If you have a “monitor” bus enabled, then the auditioner will feed the monitor bus automatically.
Auditioning a sound in-place with the “Audition Action” in
the editor:
MIDI files, of course, must be rendered to audio before they can be auditioned. You can set
the default MIDI-file renderer (for auditioning) in Preferences->MIDI.
*
Harrison Consoles Mixbus v4 - 1
Page 167 of 515

Object (Region) Editing
Click above for video instructions.
Object (Region) Editing
The basic element of audio editing in Mixbus is the Region. Another common name for a Region is a “clip”.
A region represents an audio file (or a portion of an audio file) on disk. Regions can be moved, stacked,
trimmed, copied, deleted, and otherwise edited. The maximum length of a region is the length of the file that
it uses as a source, but it can be much shorter. A region might represent just a small segment (such as one
syllable or drum hit) from the source file. Editing or deleting a Region does not change the source file in any
way. This is called non-destructive editing. Audio regions can only exist on audio tracks. You cannot drop an
audio region onto an audio bus, or a MIDI track. Similarly, a MIDI track can only hold MIDI regions.
Harrison Consoles Mixbus v4 - 1
Page 168 of 515

Regions have several “hot spots” that can be modified using the left mouse button when in Object or Smart-
Object mode. Object edits follow the Grid selection, so operations will snap to the nearest Grid location if it
is turned on.
Move Click in the waveform area to drag the region in time or across tracks.
The fastest way to learn about region actions is to right-click on a region. This will provide
a list of operations that you can apply to the selected region(s). The items in the Region
menu (in the main application menu) may also be applied to any selected regions. If you
don’t have any regions selected, then most of the items in the Region menu will be
disabled.
*
Harrison Consoles Mixbus v4 - 1
Page 169 of 515

Start/End
Trim
Near the start/end of a region, the mouse will change to a “trim” tool, allowing you to trim
the start/end of the region.
Fade In/
Out Grab the handle in the top corner on either end to change the region’s fade.
Fade
Length
Grab the handle in the lower corner to lengthen or shorten the region’s fade time, while
leaving the endpoint of the fade fixed.
Additional mouse commands on regions include:
Middle-click
drag
Drag the region, overriding the edit mode. If the mode is Slide, then the region will be
locked in time and will only move up/down across tracks. If the edit mode is Lock,
then this will override the lock and allow the region to slide side-to-side in time
Ctrl-click drag Drag the region, while making a copy
Ctrl/Cmd-left-
click on region
start/end (slip
edit)
Slide the contents of the audio file inside the region, leaving the region
start and end times intact
right-click
anywhere in a
region
Open the Region Context menu (see below)
right-click in
the crossfade
area
Change the shape of the fade in/out
For more keyboard shortcuts view Keyboard Shortcuts
Tip: When you move/drag a range, it becomes visibly transparent. This allows you to see
the regions underneath. This sometimes helps if you are recording an overdub or replacing
one drum sound with another.
*
Tip: You can select multiple regions at the same time using Ctrl/Cmd-click or selecting them
with a rubberband box. Regions selected this way will edit together: you can move, trim, or
fade them all at the same time.
*
Tip: Combining the Trim, Fade In/Out, and Fade Length, you have complete control when
assembling a crossfade between two regions. With these operations you can find the
perfect location and length of a crossfade with a minimum of effort.
*
Harrison Consoles Mixbus v4 - 1
Page 170 of 515

Region Layers
Regions may be stacked on the same location in the timeline. This is called “layering”. Normally only the top
region is heard; it covers the audio regions below it. However there are cases where the region below can
be heard. One example is the top region’s fade-in or fade-out. Region fades operate as crossfades. If a
region is stacked on top of another region, then the region underneath will audibly “fade out”, while the
topmost region “fades in” across the length of the crossfade. The second way to hear a region below the
topmost region is if the topmost region is not *opaque *(the Opaque flag can be turned off in the Region
menu and/or the right-click Region context menu).
Region layering can be changed on-the-fly by the user. Try right-clicking on a region to change its layering.
Layering is one way to manage multiple “takes” of a performance. Each time a track is recorded, a new
region is written onto the topmost layer. But the layers underneath still exist. There are global options that
define the default behavior of crossfades and layers. While the defaults are suitable for most users,
understanding these options can be very important for advanced users (see Crossfade and Layer Modes in
Section 26.0 Mixbus Options).
You can see the stacked “takes” by right-clicking on a track header and choosing Layers->Stacked.
Mixbus can create a loop and record stacked takes. Just define your loop range, then define a “punch”
range inside it, and start rolling. Each successive recording pass will generate a layer on top of the
previously recorded regions.
Audio region fades
Every Audio Region has a fade-in and fade-out. By default, the region fade is very short, and serves to de-
click the transitions at the start and end of the region. By adjusting the region’s fade length, a more gradual
transition can be accomplished. Important: In Mixbus, each region’s fade is a crossfade with the audio below
Note: For many region operations, you don’t have to actually select the region. Just hover
the mouse over the region, and use the shortcut key. The shortcut keys are listed in the
Region menu. This is a fast way to mute/unmute regions in a session, for example.
*
Harrison Consoles Mixbus v4 - 1
Page 171 of 515

it. In other words, if the beginning of a region overlays a region(s) below it, you will hear a gradual fade from
the underlying region(s), and a fade-in of the topmost region.
You may right-click on a region’s fade-in or fade-out to choose the shape of the fade.
Deactivate: The fade is completely deactivated. The audio in the region will be heard exactly as-is.
Linear: Cuts off abruptly at lower levels. Used as a crossfade between 2 audio regions. The signals are
each -6dB attenuated at the midpoint. This is the correct crossfade to use with highly-correlated signals
(such as test tones) for a smooth transition. This mode is rarely used on “real” material because you will
hear a distinct dip in the middle of the crossfade.
Constant Power: Used as a crossfade between 2 audio regions. The signals are each attenuated -3 dB at
the midpoint. This is the correct crossfade to use when you want to smoothly fade from one sound into
another.
Symmetric: This is not mathematically correct like the Equal Power or Linear curves, but it provides a
slower fade-out at low volumes. This is sometimes useful when editing 2 entire music works together so that
the transition is more gradual.
Slow: Normally used as a region fade-in or fade-out. This curve is similar to gradually lowering a fader. It
starts very gradually but then rapidly fades to silence. It is well-suited to fading out the end of a song.
Fast: Normally used as a region fade-in or -out. The level is reduced at a constant-dB rate, so it sounds
very smooth.
Region Context Menu
The region context menu (launched by right-clicking a region) has many of the same operations as the main
Region menu. The Region context menu always operates on the single region that was right-clicked on,
while the Region menu operates on all selected tracks. Many items in the Region Menu are self-explanatory.
While it can be tempting to manipulate the crossfade shape, the location of a crossfade is
far more important than the crossfade shape. Placing a short crossfade before a loud
transient (like the downbeat of the new material) is generally the best and easiest way to
make a crossfade, and the “shape” of the fade is essentially moot.
*
NOTE: MIDI regions do not have have fades
*
Harrison Consoles Mixbus v4 - 1
Page 172 of 515

Region Gain
Every region in Mixbus has a level control (called Region Gain in some menus) that applies to the whole
region. The Region’s level can be modified by the Region menu, or from the right-click context menu:
• Increase/Decrease Region Gain (Increase is limited to +10 dB)
• Reset Region Gain to Unity
• Normalize (Raises or lowers gain so that the highest value in the region is 0 dBFS, limited to +10 dB
max gain)
The Normalize entry will say “Denormalize” if the region is already normalized. This will return the region
gain to unity.
Description of Region Properties:
• Mute
• Opaque
• Lock
• Lock to Video: this is set when a video is imported with sound. The resulting regions have the “video
lock” enabled so you can’t accidentally nudge them out of time with the video. This is separate from
the normal region Lock function. You must disable this lock before you can move the region on the
timeline.
Note: If you normalize a region, it will raise the region gain so that the waveform shown in
the region reaches 0 dBFS. If the region is extended to represent more of the underlying
audio file, this audio may reach above 0 dBFS.
*
Note: Mixbus has 5 built-in gain stages in a track: Region Gain, Region Envelope, Input
Trim, Fader, and Makeup Gain (when compressor is enabled). Each gain stage serves an
important purpose, and the combination of these stages makes it easy and fun to mix in
Mixbus.
*
Tip: Simply point the mouse at the region and use the gain up/down key to quickly adjust
region gain. You can also select multiple regions at once and then use the region gain key
commands to raise or lower all the regions simultaneously.
*
Harrison Consoles Mixbus v4 - 1
Page 173 of 515
Editing Tools & Modes
Click above for video instructions.
Edit Modes
The edit mode selector is to the far left, directly underneath the transport controls. There are 3 different
editing modes when moving regions:
circled in red in the image above, you may select:
1. Slide is the normal mode that allows regions to be moved without any limitations.
2. Lock allows trimming, fades and track shuffling, but does not allow the region to be moved in time.
3. In Ripple mode, changes to a region are “rippled” to other regions on that track in the future. For
example, deleting a Range or Region will move the regions after (to the right of) it, to the left. Thereby
closing the gap.
Editing Tools
The Edit Toolbar allows selection between several different editing tools. Each tool also has an associated
shortcut key, and can be changed via the Edit menu.
Harrison Consoles Mixbus v4 - 1
Page 174 of 515
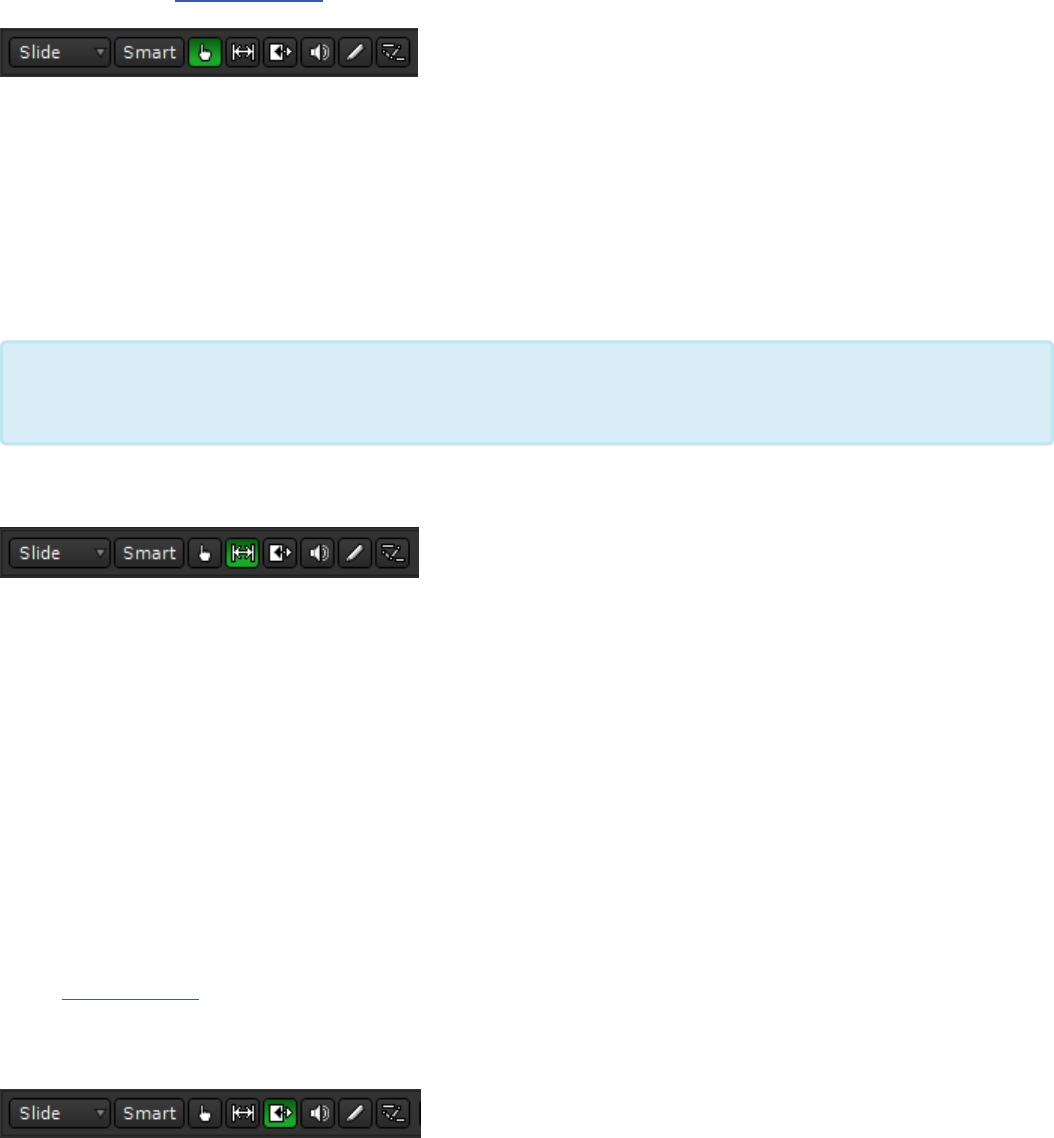
Object Tool ( see Region Editing )
The object tool appears as a “pointer finger” icon while hovering over regions. Just a few of the operations
of the Object tool include:
• Click on a region to select it for editing, or drag a region to move it.
• Click inside the colored bar at the bottom of a region to trim the start or end points.
• Click on a region’s fade-in or fade-out handle to adjust the fade length
Range Tool
The Range tool allows the user to select and drag across a range of time. The time-range can span across
multiple tracks and regions, as if the range were a contiguous piece of audio tape. Tracks that are selected
in the current range are highlighted red in the edit window. You can add or remove tracks to the selection by
clicking with the mouse.
• Drag across a range of time to create a contiguous selection.
• Grab the edges of the selection to lengthen or shorten each end of the selection.
• Right-click on the selection to launch a menu that allows looping, bouncing, exporting, consolidating,
or analyzing the selection.
• Use the functions in the Edit menu to cut/copy/paste or otherwise manipulate the selection.
( see: Range Editing for more details about the Range tool)
TimeFX Tool
The TimeFX (“stretch”) tool allows the user to stretch regions to be longer or shorter, without changing the
region’s pitch.
If the “Smart” button is selected, the Object tool will also gain many features of the Range
tool; see “Smart Editing” below for more details.
*
Harrison Consoles Mixbus v4 - 1
Page 175 of 515
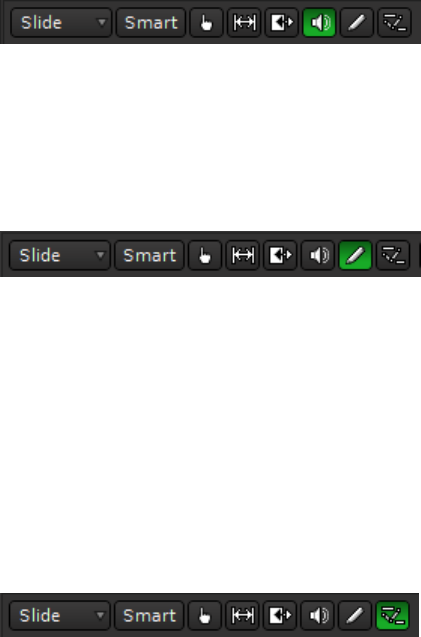
To use the TimeFX tool, drag on a region to lengthen or shorten the region. This will launch a dialog:
• Strict Linear: Click this to force Mixbus to use a simple resampling method (not typically used with
musical content).
• Contents: Choose an advanced resampling mode that best matches the sound of the region.
• Stretch/Shrink: Initiates the stretch operation.
Audition Tool
• Click on a region to hear the region through the auditioner path (this means without processing).
• Drag on a region to “scrub” the audio in the direction of mouse movement.
Draw Tool
The Draw tool allows the user to draw midi notes and automation control points.
• Click inside a MIDI region to create a MIDI note event. Drag to set the length of the note
• Click on a region to create a new gain automation point. For more details, see “Region Gain and
Automation”.
• Click on an automation track to create a new automation control point
Contents Tool
The Contents tool allows the user to edit the “internal” contents of a region. For example you can use this
tool to select midi notes inside a region and move or delete them.
• Click and drag inside an audio region to select region gain control points
• Click and drag on a MIDI note to move it
• Click and drag inside a MIDI region to select one or more MIDI events
• Click and drag inside an automation track to select automation control points, and then move or delete
them
Harrison Consoles Mixbus v4 - 1
Page 176 of 515

“Smart” Editing
When Smart Mode is engaged, the “Object” Mouse mode takes on some of the features of the Range mode.
The top-half of a track operates in range mode (allowing the user to drag-select a time range on one or
multiple tracks). The bottom-half of the track operates like Object mode, allowing the user to grab a single
region, or rubberband-select a group of regions. Other features of Object mode (such as trimming regions or
adjusting fade lengths) are still possible in this mode. The cursor will change to show either Range or Object
tools when the user transitions from the top of the track to the bottom of the track. “Smart” mode is only
lighted when the Object (hand) tool is engaged, but the Smart setting is remembered at all times.
Selection conventions
Selected items ( Regions, Tracks, MIDI Notes, Plug-ins, or Automation Control Points) will be outlined in
RED.
Selection categories ( tracks, plugins, regions) are mutually exclusive. In other words, you can only have
Region(s) or Track(s) selected at one time. For example, if you have a Region selected, and you select a
Track, then the Region will be de-selected.
A Range selection implies a single time range selection and one or more Track selections. Range and Track
selections work together, they are not mutually-exclusive. You can’t have a Range selection without a track.
A Range selection implies that one or more tracks are selected. However you CAN have one or more Tracks
selected without a time range.
This convention makes it clearer, for example, what will be deleted when you click the “Delete” key.
Pressing the ESC (Escape) key will clear all selections.
Operation Priority
When an editing operation occurs, Mixbus must determine where the operation applies. This depends on
many factors including the type of operation, the location of the Edit point, the existence of a selected
Range, and Track Selections. Most of the time Mixbus will do exactly what you expect it to. If not, then it
might be due to an unexpected operation priority. See the table below.
Delete Functions: Object (Region)
Editing Functions: Edit Point Functions: Range Editing
Functions:
Nudge
Functions:
Harrison Consoles Mixbus v4 - 1
Page 177 of 515
Example: Delete,
Backspace
Example: Mute,
Normalize, Reverse,
Transpose
Examples: Split, Trim,
Align
Examples:
Separate,
Crop,
Examples:
Nudge
Priority:
1. Any Selected
Range,
2. Any Selected
Regions,
3. The region
directly under
the mouse (even
if the region isn’t
selected), IF the
Edit Point is
“Mouse”
4. Selected Plug-
ins
5. Selected MIDI
Notes
6. Selected
Automation
Control Points
Priority:
1. Any Selected
Regions,
2. Any regions on
selected tracks
under the edit
point (even if
the regions
aren’t selected)
3. A region directly
under the
mouse (even if
the region isn’t
selected), IF the
Edit Point is
“Mouse”
Priority:
1. Any Selected
Regions at the
Edit point,
2. Any regions on
selected tracks
under the edit
point (even if the
region isn’t
selected),
3. The region
directly under
the mouse (even
if the region isn’t
selected), IF the
Edit Point is
“Mouse”
Priority:
1. The
selected
Range
Priority:
1. Any
Selected
Regions
2. The
Playhead
(if
nothing
else
selected)
The Edit Point
Functions on regions such as splitting, trimming, and pasting will happen at the currently defined edit point.
The edit point can be the mouse cursor or the playhead. Mixbus allows you to choose between the two
modes on the fly using the edit point button.
in the above image the Edit Point is set to “mouse”.
The settings for Edit Point are:
Harrison Consoles Mixbus v4 - 1
Page 178 of 515

•Playhead : Mixbus will use the Playhead position to determine the location of an edit.
•Mouse : Mixbus will use the Mouse cursor position to determine the location of an edit.
Note: In order to use the Mouse edit point, the mouse must be located inside the editing
area. This means you can’t use commands from the “menu”, because Mixbus doesn’t know
where you are trying to apply the edit. So if you want to use the Mouse as your edit point,
you’ll need to learn some of the basic editing keybindings ( such as “S” for split, and “J”/“K”
to trim the start/ends of regions)
*
Tip: Another advantage of using the mouse is that Mixbus can guess which track you want
to edit without having the track explicitly selected. In other words: in Playhead mode,
Mixbus has to know which tracks (or regions) are selected before it can edit. In Mouse
mode, if no tracks or regions are selected, then Mixbus will assume you want to edit the
region you’re currently pointing at. For these reasons, the Mouse mode can be faster for
experienced users.
*
Tip: However some users like to edit with their “ears”, and in this case choosing Playhead
as the Edit Point might be the preferred choice. Using Playhead mode, you can use your
ears to start fades, trims, and selections while the playhead is rolling. Selecting the track(s)
that you want to work on means that you can operate the editor using only the keyboard and
your ears, without referring to the screen at all!
*
Tip: In both Mouse and Playhead mode, all of the keybindings work. For example, the “,”/”.”
keybindings can be used to mark the start and end of a range selection while playing
through a section in Playhead mode.
*
Harrison Consoles Mixbus v4 - 1
Page 179 of 515
Range Editing
Click above for video instructions.
Range editing allows you to select and delete contiguous selections of times, on multiple tracks, without
worrying about the individual regions in the track. Once a range is selected, the most common operations
are:
• Delete everything inside the Range by clicking Delete or Backspace
• Cut or Copy the Range to the paste buffer
• Use the Edit menu to operate on the range
• Right-click on the Range to perform one of many tasks
• Play Range : Locates the transport to the start of the range, plays through it, and stops at the end.
• Loop Range: Sets loop makers in the ruler bar and loops the range.
• Zoom to Range: Re-sizes the canvas to accommodate the range.
• Spectral Analysis: Performs spectral analysis on the regions within the range.
• Optimize Polarity click here for more
• Move Range Start to Previous Region Boundary, etc: these functions help to fit the range to the
boundaries of nearby regions ( you can also use the Grid for this task )
The fastest way to learn about Ranges is to create a range on the timeline, and then right-
click on it. This will provide a list of features that you can accomplish with the selected
range. Most of the items in the “Edit” menu are also applicable to the selected range.
*
Harrison Consoles Mixbus v4 - 1
Page 180 of 515

• Separate : Splits the Region(s) inside the range, on each of the start/end boundaries of the Range.
• Convert to Region in Region List : Combines all the selected regions in the range, and creates a
single audio file that will appear in the Region List of the edit window.
• Select All in Range : Selects all the regions that are touched by the Range selection. ( Note: there’s
also “Edit->Select->Select all within Edit Range” which only selects the regions completely inside the
range)
• Set Loop from Selection : Sets the Loop Start/End markers to match the Range selection
• Set Punch From Selection : Sets the Punch In/Out markers to match the Range selection
• Set Session Start/End from Selection : Sets the Session Start/End markers to match the Range
selection
• Add Range Markers : Creates a new “Range Marker”, which is a persistent pair of start/end markers
that can be used to re-select later, name CD track indexes, or stored as an export range (for example,
a song in a multi-song project, or an excerpt of a song).
• Crop Region to Range : Trims the region start and end points to fit within the Range
• Fill Range with Region : Using the selected Region in the Region list, this fills the range with enough
copies of that region to fill the range.
• Consolidate Range : Removes all the region data in the Rage, and renders all the regions into a
single region (and audio file). This file incorporates all region gain setting, region gain automation, and
fade in/out settings for the included regions.
• Bounce Range to Region List : Combines all the selected regions in the range, and creates a single
audio file that will appear in the Region List of the edit window.
• Export Range… : Launches the Export Dialog with the selected range defined as the export time
Harrison Consoles Mixbus v4 - 1
Page 181 of 515

Automation Range Editing
Select a range of automation or region-gain, and drag the whole range of control points up/down.
• Click the “R” key to select the Range tool.
• Sweep a range across a Region, OR on an automation track.
• Click “D” to switch to the Draw tool.
• Click in the selected range, and drag up/down to move the automation line up/down during that time.
Harrison Consoles Mixbus v4 - 1
Page 182 of 515
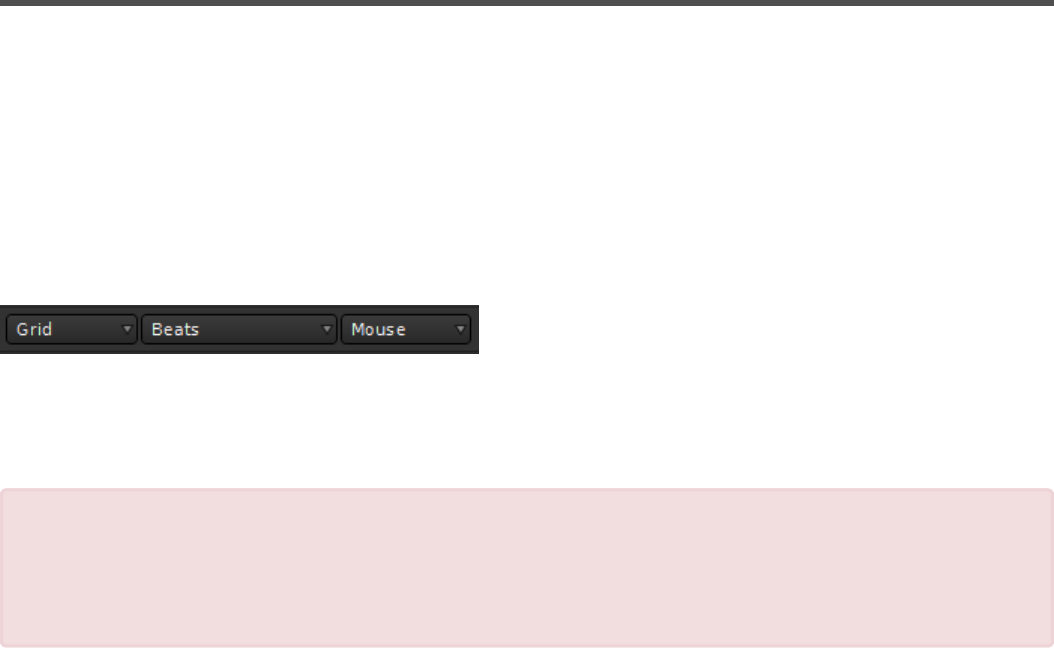
Grid Mode
What is Grid (or “Snap”) mode?
Grid mode controls how regions, playhead, and the edit cursor are applied to the canvas. If the Grid option
is enabled, then items will jump to the nearest grid mark.
For example: if the Grid is set to “beats”, then any operations such as split, paste, or range-select will
happen exactly on a beat, according to the musical timeline and tempo.
When snap mode is turned on a timing grid can be used to determine the placement of regions, playhead,
and the cursor. Various timing units can be chosen for the grid.
Available Snap Modes:
•No Grid: Timing grid is not active and movement of objects are continuous and infinite within its
range.
•Grid: Timing grid is active and all movement of objects will snap to the selected grid unit.
•Magnetic: The benefits of grid mode but less restrictive. The timing grid is active and movement of
objects will snap to the selected grid unit only when its near. This mode is often preferred over Grid
mode; because in Grid mode, items will always snap, even if it is off-screen. Whereas Magnetic snap
will only have an effect if you explicitly move near a grid point.
Region Grid versus Contents Grid.
To facilitate editing the regions (which might have No Grid) and Notes inside a MIDI region (which might
snap to a 16th note Grid), Mixbus maintains 2 different Grid settings. When you switch to a “Content Editing”
tool, like Draw or Edit, then the “Content” Grid setting will be used. When you switch to Object or Range
tool, then the overall grid setting will be selected.
The grid consist of lines running vertically in the edit canvas. If the grid is not visible, try
zooming in, or check “View->Show Measure Lines” in the main menu. Mixbus tries not to
show “too many” or “too few” grid lines depending on the zoom level; so you might find that
items snap in-between the grid lines sometimes. That’s expected behavior.
!
Harrison Consoles Mixbus v4 - 1
Page 184 of 515
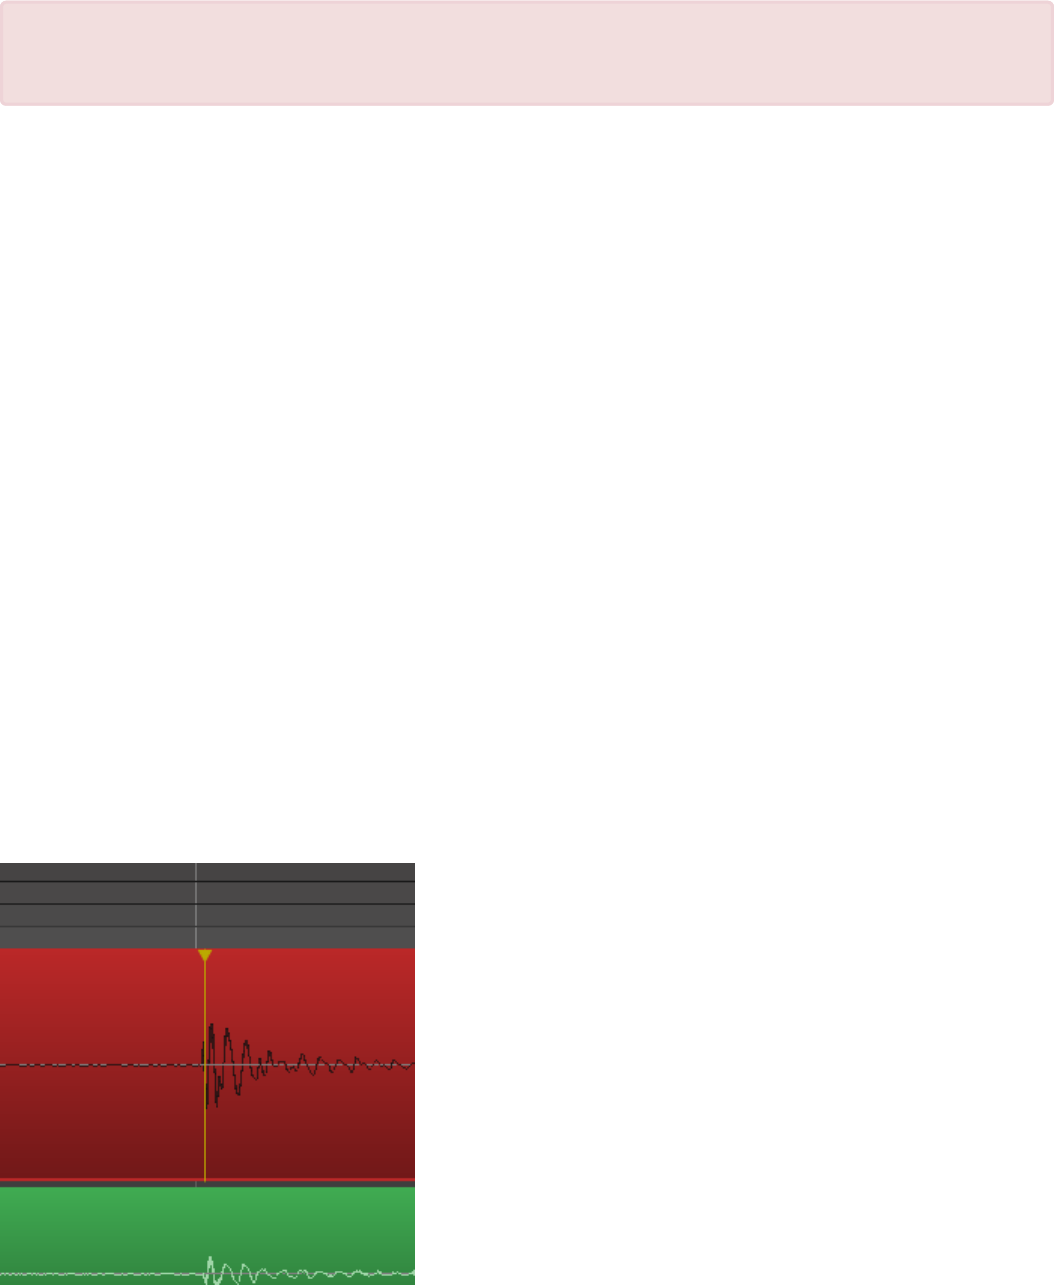
Grid override:
To temporarily disable the Grid while dragging, hold “ALT” while dragging. ( this option can be changed in
“Preferences->User Interaction”)
Relative Snap:
Sometimes you want a region to move in units of the grid ( eight-notes, quarter-notes, or whatever ), but you
want it to maintain the same offset from the grid. In this case, hold “Shift+ALT” while dragging, and the
region or note will retain it’s relative offset from the grid. ( this option can be changed in “Preferences->User
Interaction” )
Sync Point:
By default, a region’s leading edge will snap to the grid but often this edge is not relevant to musical timing.
By setting a sync point within a region (ex: on the downbeat) the region can be snapped to the grid in a
musically meaningful way.
To set a sync point:
Select the region and place the cursor where you would like the sync point. Press the “v” key and a yellow
line will appear. Now the region can be snapped to the grid using the sync point as the reference.
If the Grid setting seems to be changing arbitrarily, it’s probably because you are switching
between Region-editing and Content-editing tools. This is intended operation.
!
Harrison Consoles Mixbus v4 - 1
Page 185 of 515

To move a sync point:
Simply repeat the procedure above (there can be only one sync point per region).
To remove a sync point:
Select the track with sync point then choose: Menu>Region>Position>Remove sync. (This effectively sets
the sync point back to the beginning of the region)
Grid Units: (Menu>View>Snap to)
This setting determines the “Snap to” resolution. Two time references are available; absolute time which
refers to a fixed clock (real time), and relative time which mostly refers to music time such as meter and
tempo.
CD Frames For CD mastering. The CD Frame is the smallest data entity in the Red
book standard.
Timecode; Frames/Seconds/
Minutes The timecode duration refers back to the session settings.
Seconds/Minutes Real time units.
Beats (in fractions) Grid units consisting of fractions of a beat: 128, 64, 32, 16, 8, 7, 6, 5, 4, 3,
2.
Beats Whole beats.
Bars Whole bars.
Markers Snap to the nearest marker.
Region Starts Snap to the nearest region start (see below).
Region Ends Snap to the nearest region end.
Region Syncs Snap to the nearest region sync point.
Region Bounds Snap to the nearest region start or end.
To use Region Starts/Ends/Syncs/Bounds as “Snap to” resolutions, you must have either
• No tracks selected, which allows “Snap to” regions on any track.
• One or more tracks selected, which allows “Snap to” regions on all selected tracks.
*
Harrison Consoles Mixbus v4 - 1
Page 186 of 515

Rhythm Ferret Window
The Rhythm Ferret dialog provides a method to quickly “split” an audio region (or selection of regions)
based on events. This can be useful when separating a recorded performance into its component strikes or
notes for further editing.
• Mode: Determines whether the Ferret will trigger on percussive onsets for unpitched percussion
instruments, or note onsets (for pitched instruments).
• Threshold, Sensitivity: adjust these parameters to refine the detection of events
• Trigger gap: the shortest distance between events that the Ferret will allow. Increase this number if
you get multiple triggers on a single note.
• Analyze: displays the results of the analysis on the selected track(s).
Once you are satisfied with the points that the Ferret has chosen to split, you can click “Split on Onsets” to
automatically split the selected regions on the marks.
Harrison Consoles Mixbus v4 - 1
Page 187 of 515

Region Sync and Alignment
What is Aligning?
Aligning regions means moving one or more regions based on the edit point. An alignment operation moves
the region(s) so that some part of the region is positioned at the edit point.
For example, you can select 10 regions in the timeline, and select “Align Regions”. (typically these regions
will be on different tracks, but that’s not necessarily so) . The regions will be moved so they all start at the
same time on the timeline.
Available alignment commands include:
• Align Region starts
Selected region(s) are moved so that their start is located at the current edit point
• Align Region ends
Selected region(s) are moved so that the end is located at the current edit point
• Align Region sync points
Selected region(s) are moved so that their sync point is located at the current edit point
• Align Region starts relative
Selected region(s) are moved so that the start of the earliest region is located at the current edit point,
and all others maintain their relative position relative to that region
What is the region’s “Sync Point” ?
By default, a region’s “sync point” is the start of the region.
However, consider the case where here is some blank space at the start of a region which should not be
trimmed away, but causes the region to align incorrectly with other regions. For example, imagine the case
where a drum hit is not at the immediate edge of the region’s start, but slightly delayed after it. If you “snap”
the region to the grid, you’d like the drum hit to land perfectly on the grid, not slightly off.
By defining a region’s “sync point”, you can align and snap regions with each other sensibly, while freely
trimming the starts of the regions for crossfades and such.
You can set a region’s “sync point” by locating the playhead on the desired point, selecting the region(s),
and then using the Region menu to assign the sync location.
Harrison Consoles Mixbus v4 - 1
Page 188 of 515
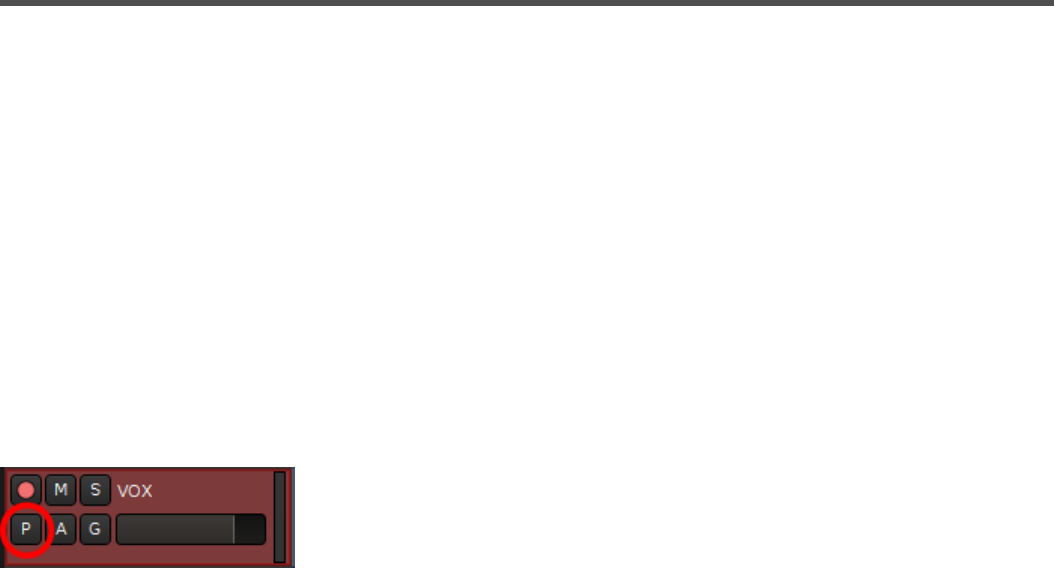
Playlists
Playlist Overview :
A track has a series of Regions on a timeline. Each Region represents a part of a sound file (or MIDI file).
The order of these regions, and additional region properties such as gain/controller curves, fades, and mute/
unmute status, are stored in the track’s playlist.
Tracks can have multiple playlists, and you can create a new playlist, copy a playlist from another track, or
link 2 tracks to use the same playlist. This provides some interesting possibilities. Some users like to use
playlists to separate the different “takes” of a tracking session. Some users like to link playlists so that the
tracks can be processed separately, but any edit on one track will be applied to the other.
Clicking the “P” button on a track header opens the Playlist menu:
Harrison Consoles Mixbus v4 - 1
Page 189 of 515

Polarity Optimization
What is Polarity Optimization?
Polarity optimization is a way to take multi microphone recordings and automatically determine the best
polarity setting for each of the tracks. The resulting analysis uses RMS level as the criteria for deciding the
“best sound”. This mathematically optimized solution saves the user from comparing the many combinations
generated by individually toggling the polarity switches of every track, in every possible combination.
Polarity optimization can be used in any situation where you have multiple microphones recording the same
source, and it is important to find the polarity switch positions that generate the best sound.
The Polarity Optimizer finds the optimum polarity setting for your tracks, and then it utilizies the channel’s
polarity invert switches within the Mixbus mixer strip to implement the optimum polarity settings. After the
Optimizer runs, you can further view and edit the polarity selections by using the mixer-strip polarity buttons.
Using Polarity Optimizer
To initiate the polarity optimizer, use the Range tool (or Smart Tool) to select a time-range. It is important to
select a period of time that represents all of the instruments being played.
Right click in the range, and choose “Optimize Polarity” from the context menu .
A mixture of mono and stereo tracks may be used in the analysis. Left/right sides of a
stereo track are treated as 2 separate mono sources.
*
Harrison Consoles Mixbus v4 - 1
Page 190 of 515
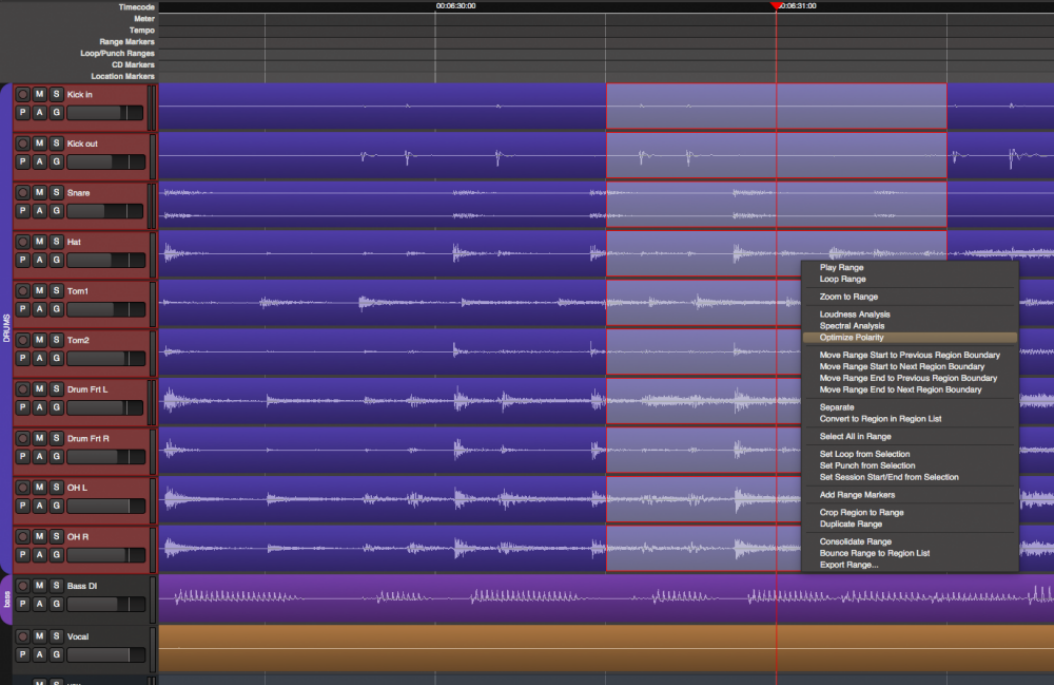
Harrison Consoles Mixbus v4 - 1
Page 191 of 515
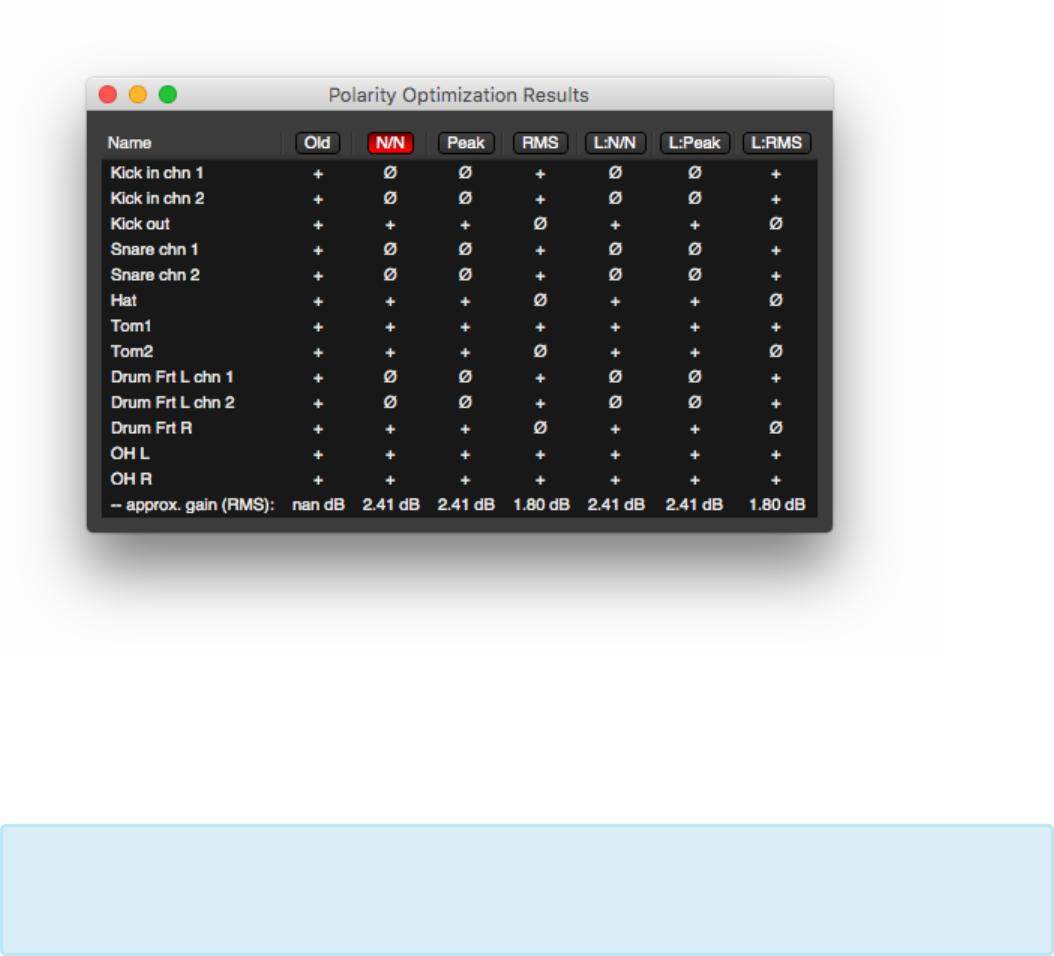
Results Dialog Box:
Preprocessing Options:
The top row of the dialog box lists the 7 preprocessing options. Click on any of these buttons and roll the
transport to audition the results. To accept the results simply close the dialog box.
Explanation of the preprocessing options:
The preprocessing options help you make sure the the optimum polarity is found.
• The “normalization” options are provided to accomodate unusually quiet or loud tracks, which cause
the tracks to be over- or under- represented. Normalization can be implemented as “peak”
normalization, or “RMS” average normalization.
The preprocessing options are applied only to the signal as it is being processed. The
processing isn’t actually applied to the tracks, it is just applied while the the Polarity
Maximizer is performing its calculations.
*
Harrison Consoles Mixbus v4 - 1
Page 192 of 515

• A low shelf boost emphasizes the low end response (+6 dB at 160 Hz) and biases the analyzer to
prefer alignment of low frequency content which may result in a more obvious low-end boost.
Optimization Results:
The Results dialog shows a grid of the selected tracks and the applied preprocessing options. The buttons
across the top can be used to set (and audition) the calculated polarity settings, for each of the selected
pre-processing modes.
• Old: The polarity of the selected tracks before Polarity Optimization was applied
• N/N: Polarity optimization applied with no emphasis, and no normalization of the tracks
• Peak: Peak normalized. Normalizes the peak volume before processing.
• RMS: RMS normalized. Normalizes the RMS volume before processing.
• L:N/N: Low emphasis, not normalized.
• L:Peak: Low emphasis, peak normalized.
• L:RMS: Low emphasis, RMS normalized.
When “Old” is selected and the transport is rolled you will audition without the results of the Polarity
Maximizer. When any other option is selected and the transport is rolling, you can audition the results of the
Polarity Maximizer with the corresponding preprocessing options applied.
In practice, you will find that most of the different preprocessing methods result in the same settings. In
most cases, you should select one of the options that has the most “agreement” with the other selections.
This indicates that the polarity settings are robust enough to apply even when subsequent level and
equalization is applied.
Track name results list:
The name of all tracks used in the analysis are listed and whether the track has had its polarity inverted as a
result of the analysis.
The underlying technology of the Polarity Maximizer was provide by Jim Davis Ph.D. MIT, 2000 Dept. of
Computer Science and Engineering at Ohio State University.
http://web.cse.ohio-state.edu/~jwdavis/
The Polarity Maximizer applies a high pass filter (DC offset removal) to attenuate signals
below 5Hz to remove it from the computation. This processing, like the processing options
listed above, is not applied to the audio tracks.
*
Harrison Consoles Mixbus v4 - 1
Page 193 of 515

Mixing
What is mixing?
“Mixing” is the process of combining multiple sounds ( usually “tracks” ) into a final, deliverable sound.
In the case of music mixing, the goals of mixing might be:
• To make the overall timbre of the mix convey the feeling that the creator has chosen.
• To make each element clearly heard, so that a listener can focus on a single instrument if s/he
wishes.
• To make the volume level consistent enough that the user isn’t required to constantly adjust the
volume knob.
Of course all of these rules are subject to the artistic wishes of the creator.
What are some mixing techniques?
Here are some of the techniques that we use to create a “mix”:
• Balance the volumes of each element (instrument) so they don’t occlude each other.
• Dynamically adjust the volume of elements to accentuate parts of interest at different times of the
piece.
• “Pan” the signals into the available speakers so they can be separated by position.
• Create a “space” around each element so they can be perceived as close or distant.
• Tweak individual elements to accentuate their desirable character, or attenuate undesirable character.
• Limit the frequency range of elements, so that more elements can be distinguished in the same
space.
You’ll find that Mixbus provides tools for all of these tasks right underneath your fingertips.
Harrison Consoles Mixbus v4 - 1
Page 194 of 515
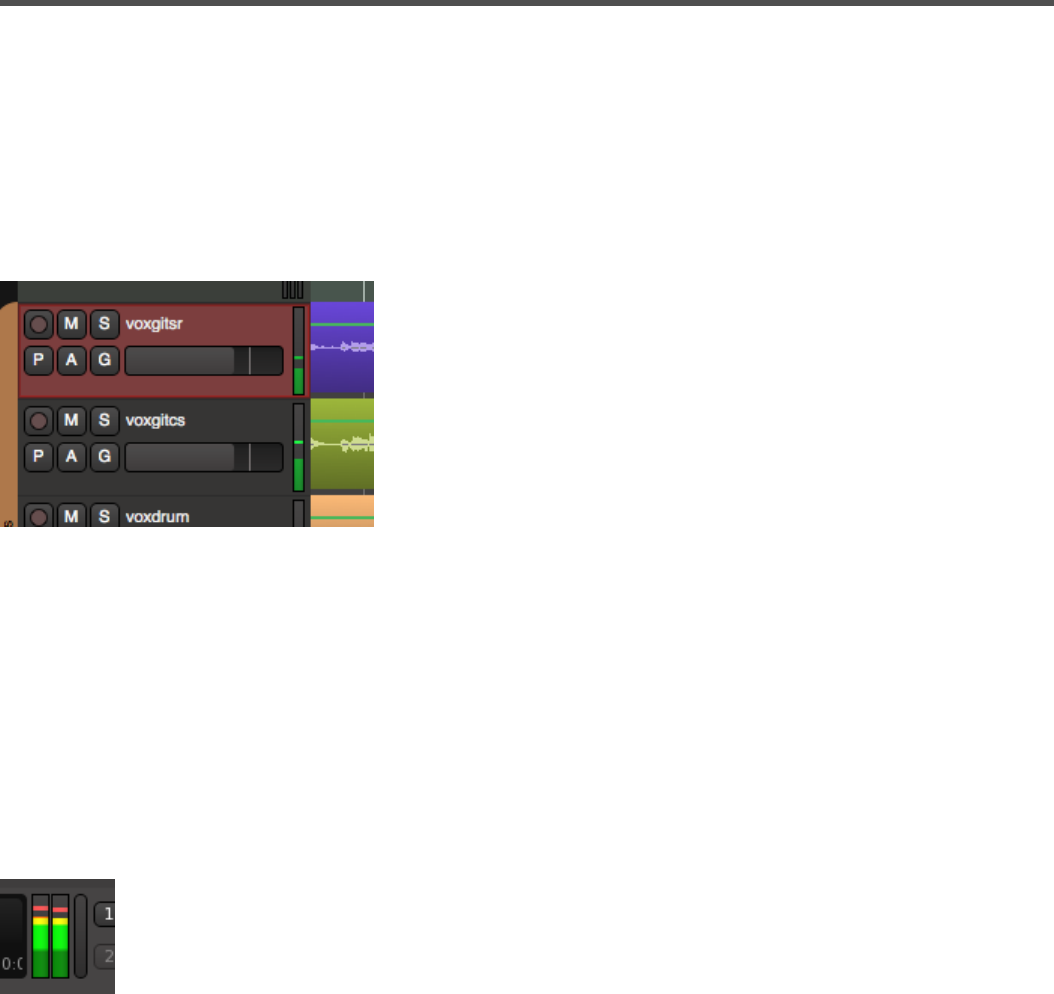
Metering
Mixbus provides a wide range of meters. Each meter is suited to its particular task.
Some DAWs try to put a lot of different scales on a single meter, and/or they expect the user to switch
modes to see different values. Mixbus provides several “different” meters in the places where they are
useful.
Track Meters
In the editor, to the right of each track’s name, you’ll find a small meter that indicates the channel’s level.
This meter grows in height when you increase the size of the track. This meter follows the settings in
“Preferences->Meterbridge->Default track meter type”. The colors for peak-hold time, among other options,
can be applied to these meters. The meter follows the selection for “meter point” in the bottom-right corner
of the associated mixer strip. When a channel is record-armed, the meter point will automatically move to
meter the channel’s input. Due to their scaling, and their location in the editor window, these meters
are well-suited to checking your recording levels while recording
Master Meter (editor toolbar)
In the top of the transport toolbar, you will find a meter indicating the master bus. This meter can be hidden
in Preferences->Appearance->Toolbar. This meter follows the settings in “Preferences->Meterbridge-
>Default meter type for master bus”. By default, Mixbus uses a K-14 meter (the same scaling that is used
for the master bus K-14 meter). In addition, there is a peak-hold indicator with adjustable decay time. The
Harrison Consoles Mixbus v4 - 1
Page 195 of 515

colors for peak-hold time, among other options, can be applied to this meter. This meter serves to provide
a condensed view of the master bus output when you are editing
Meter Bridge Window
The Meter Bridge window can be accessed from the main menu, under “Window”. The meters in this window
follow the settings in “Preferences->Meterbridge”. The colors for peak-hold time, among other options, can
Harrison Consoles Mixbus v4 - 1
Page 196 of 515
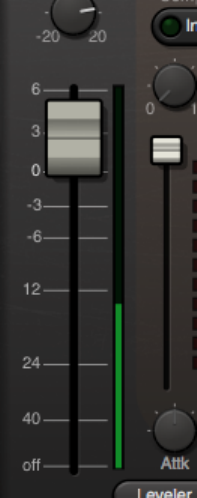
be applied to these meter. The meter-bridge is wel-suited to tracking a live band, as you can see
several high-resolution meters in a condensed view. You can also show the track rec-arms and
monitor switching from this window
Channelstrip meters
To the right of each channel’s fader, you’ll find a small meter that indicates the channel’s level. The meter
follows the selection for “meter point” in the bottom-right corner of the associated mixer strip. When a
channel is record-armed, the meter point will automatically move to meter the channel’s input. The scaling
and ballistics of these meters are fixed, so that they are directly comparable across all channels of the
mixer. The channelstrip meters are well-suited to balancing your mix. The scaling is optimized to
show the upper range ( -20dB to 0dBFS ), and it is scaled to match the fader and the compressor
threshold sliders.
Harrison Consoles Mixbus v4 - 1
Page 197 of 515
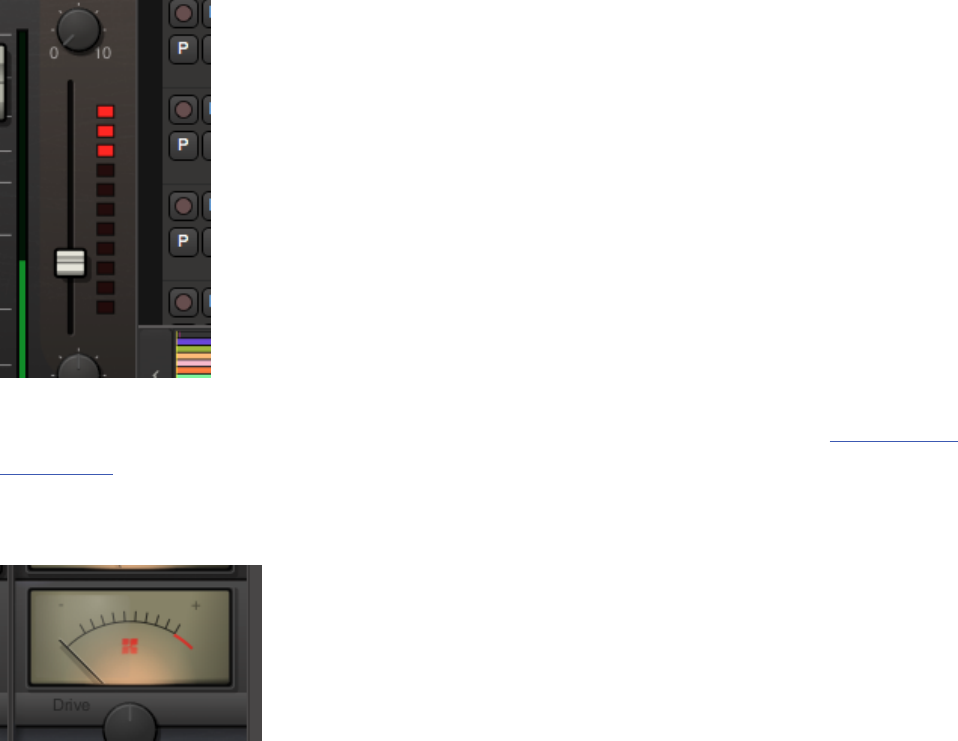
Channelstrip Compressor Gain-Reduction meter
This meter indicates the gain-reduction applied by the channelstrip compressor ( see Compression
Techniques ). Each light indicates 2dB of gain reduction.
Mixbus & Master Bus – Tape Saturation Meter
A Tape Saturation meter is provided on each mixbus, as well as the master bus. This meter indicates the
amount of distortion applied by the tape-saturation stage. If the meter is fully left, then no distortion is
applied. If the meter is fully right, then the signal is heavily distorted. You can use the “Drive” knob to adjust
the amount of tape saturation / distortion.
Harrison Consoles Mixbus v4 - 1
Page 198 of 515
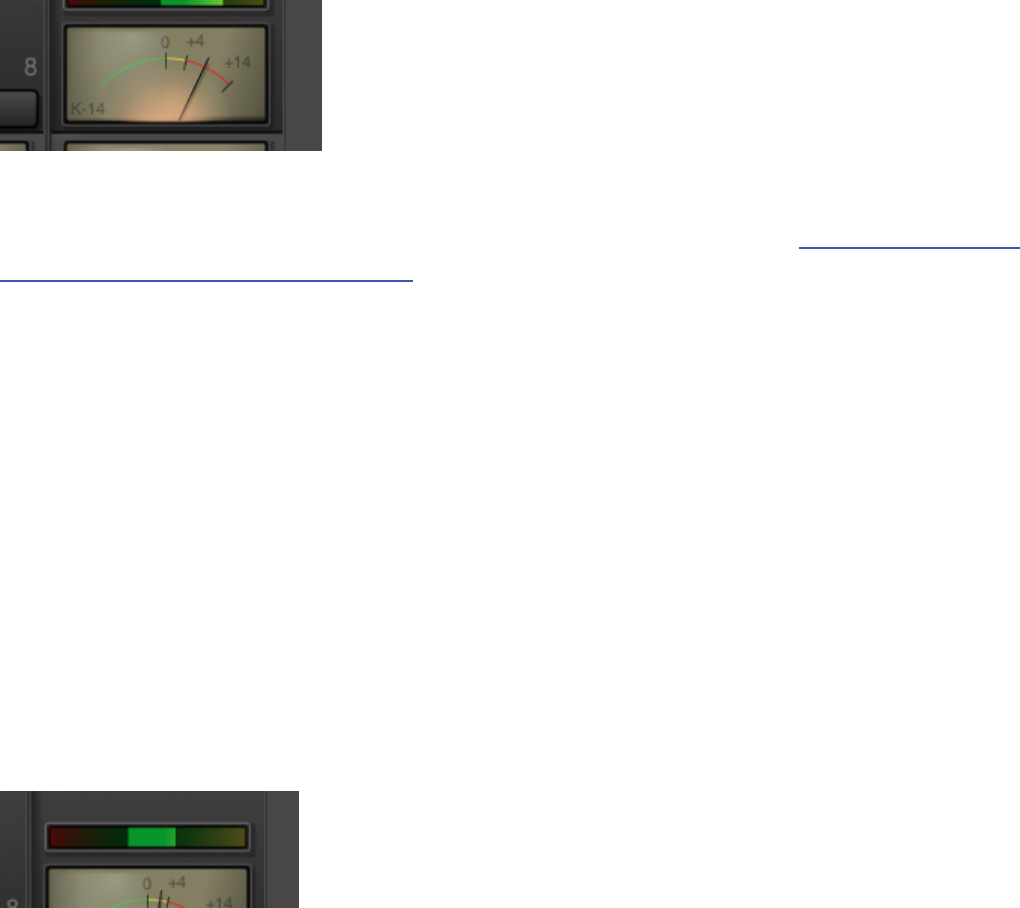
Master Bus K-14 Meter
The K-14 meter is an RMS (averaging) meter, originally specified by mastering engineer Bob Katz as a
means to compare and help control the dynamic range of pop music mixes. (see : http://www.digido.com/
how-to-make-better-recordings-part-2.html )Use this meter to monitor the perceived “loudness” of your
music mix, and compare the loudness of your mix to other mixes of the same genre
The K-Meter displays the level of the signal directly before the output of the master bus. The K-Meter comes
after the fader, EQ, plugins, and final limiter in the master bus.
If the K-14 meter indicator is straight up, at 0, this indicates that the sound’s average level is at -14dBFS.
This was selected as a good target for most pop/blues/jazz/rock recordings. At this level, a song will sound
quieter than most contemporary pop music, but when the listener turns the volume up to match, the
increased dynamic range of this mix will allow the song to sound much better than a typical pop song played
at the same volume.
Increasing the volume beyond the “0” indicator will result in a louder mix, at a cost of decreased fidelity and
impact when the user turns the volume up.
Master Bus Phase Correlation Meter
The stereo correlation meter provides an indication of the “mono compatibility”, or stereo width, of your mix.
The indicator uses a bright bar which simultaneously indicates the range of in-phase (highly correlated) and
out-of-phase (decorrelated) sounds in your mix.
• If the indicator is fully to the right, and yellow, this indicates a completely “mono” mix. (the signals in
the left and right channels are the same)
◦ many signals (such as a spoken-word recording with one microphone) should be mono.
Harrison Consoles Mixbus v4 - 1
Page 199 of 515
• If the indicator is fully to the left, and fully red, this indicates a mix that is completely “out of phase”, in
other words the left and right channels are equal, but one is inverted with respect to the other. This
almost certainly indicates a technical fault which should be investigated.
• If the indicator is largely to the right, and green, then it indicates a mix with some stereo width, but
largely mono compatible. This is optimal for pop music recordings that might be played in a variety of
playback systems.
• If the indicator is in the center, showing a range of red and green, then the mix is very wide stereo.
This is probably not optimal for pop/rock recordings, but can be acceptable for natural or orchestral
recordings. Mono compatibility of this mix is questionable.
Mono compatibility is largely defined by low frequencies. If your mix indicates poor mono compatibility ( red
bar on the left ), then you can probably solve this by reducing the number of bass instruments in the mix,
high-pass filtering any non-bass instruments, and high-pass filter any stereo effects, such as reverb, in the
mix.
Master Bus Limiter
Each segmented LED represents 1 dB of gain reduction in the Master Bus Limiter. The master bus limiter is
a brickwall, lookahead limiter that prevents the digital signal from exceeding -1dBFS. *When mixing, use this
bright yellow meter to alert you when you “would have” exceeded the -1dBFS threshold. *
Harrison Consoles Mixbus v4 - 1
Page 200 of 515
Gain Staging
Click above for video instructions.
What is Gain Staging in Digital Audio?
Digital audio represents the audio waveform as a series of numbers, each number indicating a voltage in the
electrical signal when it was converted from (or to) an analog signal. More numbers (voltage levels)
represents more accuracy in the signal’s representation. Too few numbers introduces “quantization noise”.
For our purposes, the “noise floor” of a signal is the noise level in the quietest part of the recording; this
might include noise that was picked up by the microphone, or dither noise that was used to cover up
quantization noise inherent to digital maths. If the noise floor is less than the noise in your environment,
then you won’t even notice it.
Generally speaking, 16-bits worth of numbers can recreate everything between a typical quiet-room noise
and a very loud sound (i.e.“CD quality sound”). A 24 bit number can store signals from an infinitesimally
small noise floor (lower than a very quiet studio), all the way up to a roaring jet-engine volume.
Regardless of the number of voltage steps, there will be a value that indicates “maximum volume”, and if
you exceed that value, then the system must “clip” the excessive values to the largest possible value.
Quantization noise happens whenever you represent the signal with fewer steps than you
had before. This happens quite often inside the computer, where the bit depth changes
depending on many factors. Quantization noise is slightly more offensive than “regular”
(random) noise. For these reasons, we must make sure there’s enough random noise to
cover up any quantization noise that we’ve introduced. This technique is called Dithering,
and careful use of dither is one of the reasons that Mixbus sounds great.
*
Harrison Consoles Mixbus v4 - 1
Page 201 of 515

A very short “clip” is almost always unnoticeable (just at the peak of a snare-drum hit, for example). But
sustained clipping, when the signal is significantly outside the bounds of the “real world”, creates lots of ugly
distortion that we want to avoid.
So our goal is to prevent signals from clipping, but keep them well clear of and above the noise floor. Luckily
with modern 20+ bit converters, this is very easy to do.
With modern A/D converters, we recommend that you record your signals with the peak meter never
exceeding -15 dB. This indicates that the signal was far from the clipping level when it was converted to
digital. With the increased low-level resolution of modern converters, it is not necessary to record at high
levels.
Floating-point processing
Internally, Mixbus uses a technique called floating-point math. For our purposes, this means that some extra
bits are reserved to store numbers outside the range (both louder and quieter) than the range of the analog
world. This means that it is essentially impossible to “clip” the math inside Mixbus. In practice, this means
that you can boost a signal very loud – even louder than would normally be allowed in the analog realm –
and as long as you reduce it by the same amount later, it won’t be clipped when it is heard at the output.
To this end, Mixbus provides many levels of gain adjustment which will allow you a wide range of creative
options.
Region Gain and Region Gain Curves
•Region Gain and/or Gain Automation: Increasing a region’s gain in the editor will provide:
◦ Each region has a volume setting (accessed with the Cut Gain and Boost Gain shortcuts). The
gain increase/decrease visibly affects the waveform display
◦ Region gain curves allow the gain to change through the length of the region
Channel Strip Gain stages
•Channel Input Trim: This stage is used to bring the overall level of the track to a usable level. The
trim knob is located near the fader for easy access.
•Fader: Used to achieve an overall balance of all tracks in a session. This is also a good place to
make artistic changes such as bringing an instrument forward during a solo.
•Make up gain within the In-line compressor: Make up gain is used to restore perceived level loss
during compression. If the compressor meter is hitting -3 dB during transients, a make-up gain of 1 or
2 dB may be useful. It can also be used as a fast and easy way to adjust the level post fader.
Harrison Consoles Mixbus v4 - 1
Page 202 of 515

Mix bus
•Input Trim: This knob is used to adjust the volume at the input of the master bus.
•Tape saturation: The tape saturation meter does not monitor level, rather it monitors the amount of
saturation effect. This effect will add harmonic density which can result in an increase in perceived
loudness. Turning the tape saturation knob off will allow signal to pass unaffected.
•Fader Used to achieve an overall balance of all tracks in a session.
•Make up gain within the In-line compressor Make up gain is used to restore perceived level loss
during compression. It can also be used as a fast and easy way to adjust the level post fader.
Master bus
•Input trim This knob is used to adjust the volume at the input to the master bus. This is a useful tool if
you’ve balanced the mix with the track faders, but the overall level is still too low or high.
•Tape saturation The tape saturation meter does not monitor level, rather it monitors the amount of
saturation effect. This effect will add harmonic density which can result in an increase in perceived
loudness. Turning the tape saturation knob off will allow signal to pass unaffected.
•Fader Used to achieve an overall volume of all tracks in a session.
•Make up gain within the In-line compressor Make up gain is used to restore perceived level loss
during compression. It can also be used as a fast and easy way to adjust the level post fader.
•Final Limiter The final limiter is a brickwall, lookahead limiter with a very fast attack and release. The
threshold is preset at -1 dBFS. If a signal peak is going to exceed -1 dBFS, the lookahead limiter will
reduce the volume slightly before and after the peak. Yellow indicators show gain reduction in
increments of 1 dB.
Monitor Section (if enabled)
•Attenuator provides an output level for the speakers, as well as mute and a configurable “dim”
control. Use these controls to reduce the volume in your speakers WITHOUT affecting the level of the
master bus output. For more details, visit the Monitoring Section
VCA Faders (if enabled)
• A VCA Fader can be used to adjust the level of multiple faders from one master fader. For more
details, visit the VCA Strip section.
Harrison Consoles Mixbus v4 - 1
Page 203 of 515
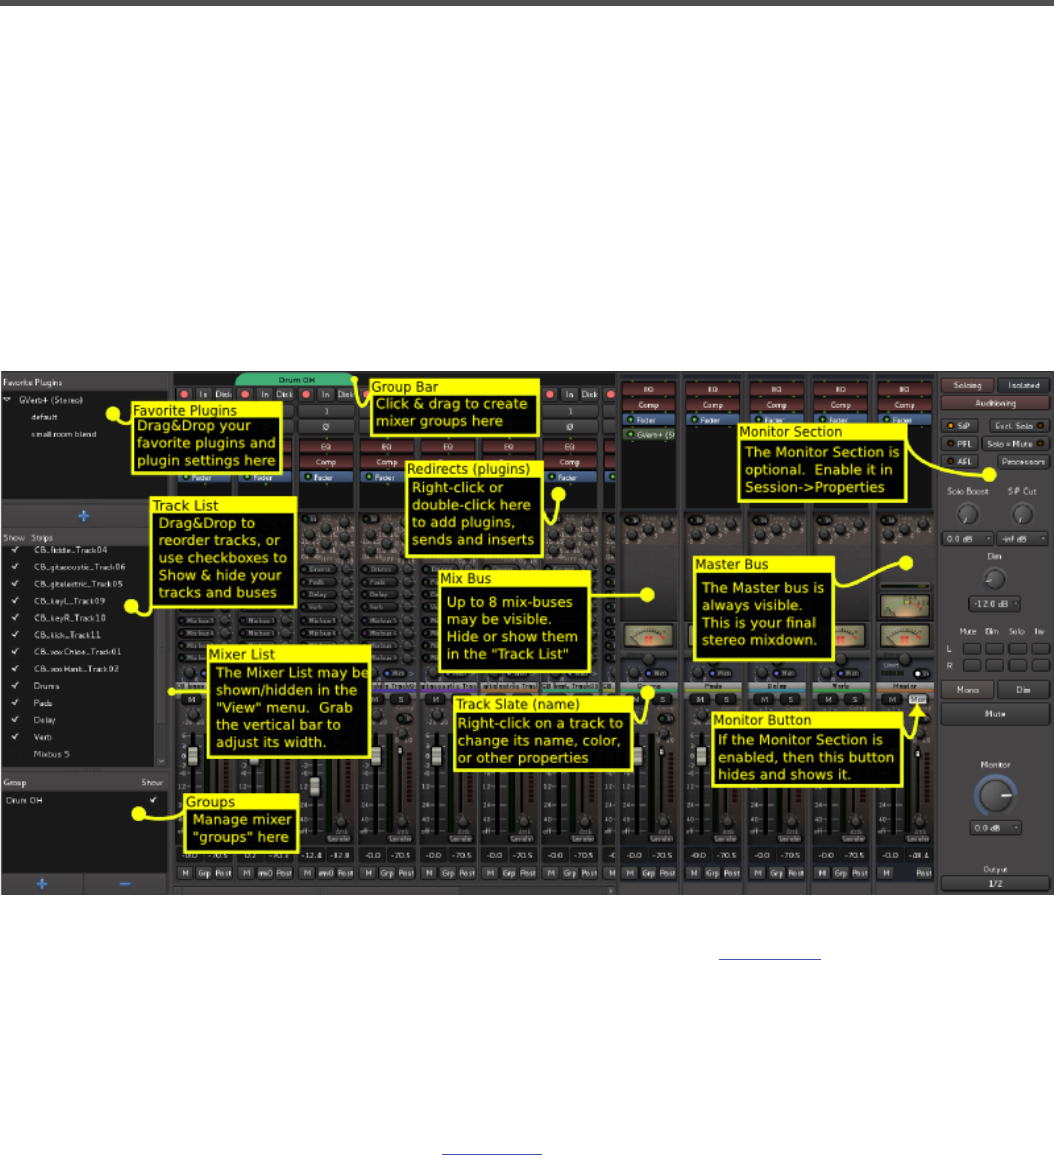
Mixer Window Overview
Mixer Strips – Inputs, Mixbuses, Master, Monitor, and VCA’s.
When viewed in the Mixer Window, Mixbus resembles a traditional analog console. Input Channels are on
the left, while the busses and master are located on the right side.
The audio signal flow is generally left-to-right. The signal starts at the input channels (which might be live
inputs or playback tracks), progresses through the mix buses, and into the master. The channel’s EQ, Filter,
Compressor, panning, bus summing, and master bus processing are performed inside the proprietary
Harrison channel plug-in.
In Mixbus, like other audio workstations, each recording track has its own mixer strip. These mixer strips
resemble the input channels of a traditional analog mixing console. Input channels can be configured to be
mono or stereo, virtual instrument or MIDI, and by default include all the DSP processing that makes up a
real console channel. This is the major difference between Mixbus and other DAW mixers. No time is
wasted searching for and adding the necessary high-quality mixing tools.
Just to the right of the input channels are the mix-buses. Mix bus channels are used to collect the outputs
from the input channels into groups. For example, in a typical music project, you might send the drums to
Harrison Consoles Mixbus v4 - 1
Page 204 of 515

mix bus 1, the vocals to mix bus 2, instruments to mix bus 3, and use mix bus 4 as a parallel effects bus,
like reverb. This allows you to easily adjust the relative levels of these groups and apply processing to them.
The master channel is the final mixer strip on the right. Often, the master channel will be connected to your
volume control, which is then connected to your speakers (or headphones). The output of the Master
channel is the final output of your project ( i.e. your 2-track master file). This output is rendered to the final
.wav file when you export the session.
The monitor section on the far right has been made available for those who do not have access to a
dedicated external monitoring section.
Finally, on the far right you will find the VCA Faders. You may create 0, 1 or unlimited VCA faders. VCA
faders may be attached to multiple channels, and they give you the ability to mute, solo, or adjust the level
of all the attached channels simultaneously.
Tip: Shift+Ctrl+Click ( Shift+Cmd+Click on Mac ) on a track’s Mute, Solo, or Rec enable to
toggle ALL the tracks in a session.
*
Tip: You can Ctrl+click (Cmd+click on Mac) on the track’s name slate, and make the track
wide or narrow. Shift+Ctrl+click (Shift+Cmd+Click on Mac) to make ALL the tracks or ALL
the buses narrow/wide.
*
Tip: You can also control the mixer page via the keyboard. Select a channel by clicking on it
with the mouse, then you can use the ‘S’ to solo, ‘M’ to mute, ‘R’ to record-arm the track.
The up/down arrow keys nudge the fader up and down, while the left/right keys scroll the
mixer left & right.
*
Harrison Consoles Mixbus v4 - 1
Page 205 of 515
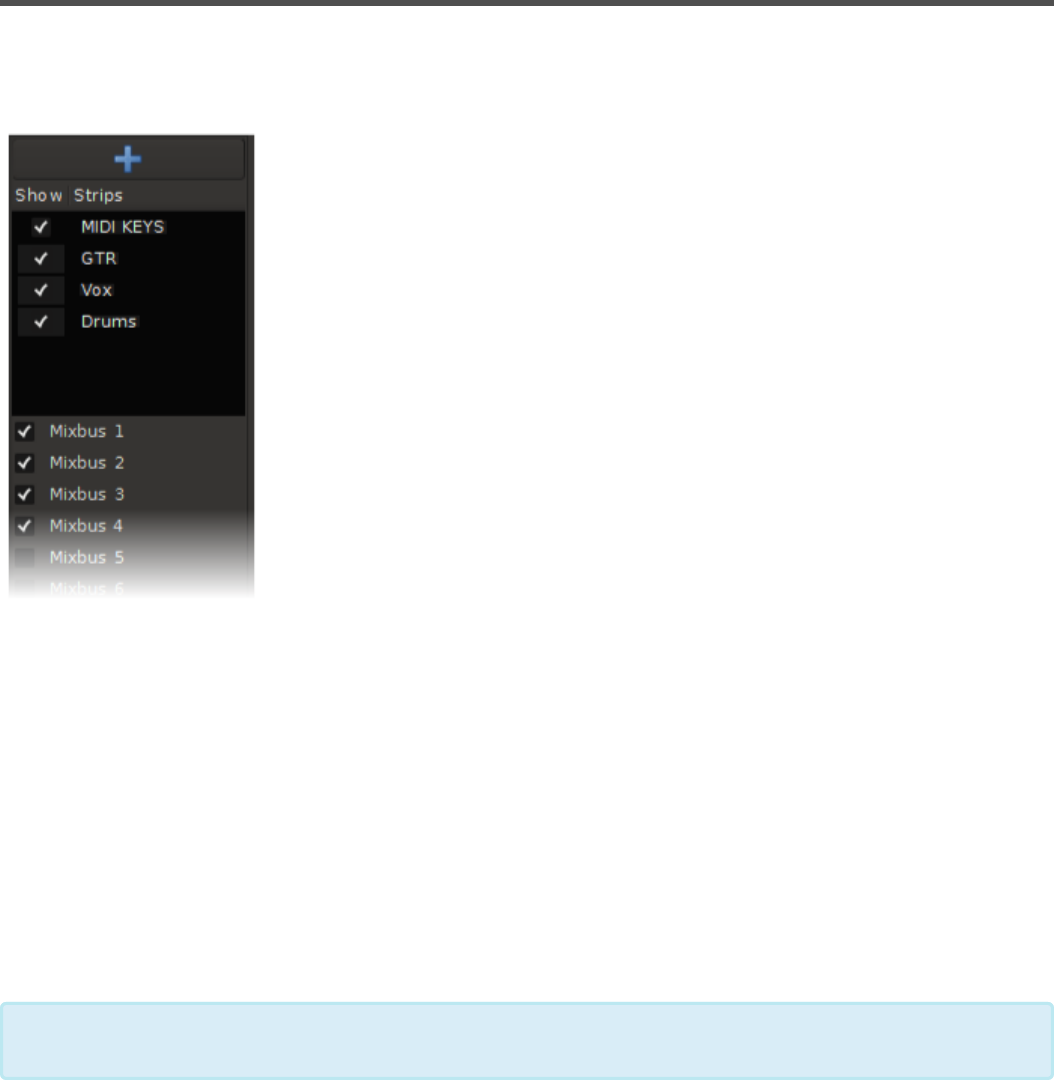
Mixer Sidebar
On the left side of the mixer window, there is a sidebar that allows you to manage your Plugin Favorites,
Tracks, and Groups.
At the top of the list is a “+” button which allows you to add a new track or bus.
The “track/bus” list shows a list of available tracks and buses.
• Click the ‘show’ box to hide or show a strip in the mixer page.
• Click and drag an item to reorder the strips in the mixer page.
A right-click menu provides these options:
• Hide/Show all.
Reordering the mixer strips will also reorder the tracks in the Editor window.
*
Harrison Consoles Mixbus v4 - 1
Page 206 of 515

• Hide/Show all tracks.
• Hide/show all buses.
• Show tracks with regions under playhead (only shows the tracks that have active audio regions right
now).
Below the track/bus area is a list of the mix buses which can be shown or hidden.
Below the mixbus area is the Group section. For more information about grouping, visit the Groups topic.
Harrison Consoles Mixbus v4 - 1
Page 207 of 515

Signal Flow
What is signal flow?
“Signal Flow” is the path that audio follows through an electronic system of wires, and/or its equivalent
inside your computer. The “signal flow” of a recording starts with the performer, and ends with the listener.
This incorporates the microphones, converters, computers, mixers, effects, amplifiers and speakers that
make up the signal path. In this manual we refer to ‘signal flow’ of Mixbus itself. The signal flow starts with
the A/D converter of your soundcard’s input, and proceeds to the D/A converter on the output. Mixbus’s
signal flow consists of input tracks, mixer-strip processors, buses, and monitor stages that execute the
various processes of recording, mixing, and exporting.
Mixbus’s signal flow
The Mixbus signal flow is modeled on an analog console.
Mixbus may have an unlimited number of mono and stereo channelstrips (Tracks). Each channelstrip may
be assigned to any of the mixbuses, and/or directly to the master bus.
In one small way, Mixbus differs from traditional mixing console: each of the mixbus assigns
have level controls, so each of the mixbuses can be used as either an “aux send/return
path” (using the level controls to adjust the send level) or a “grouping bus”, (using the hard
assign buttons with the level control at unity) depending on the user’s needs. Typically in an
analog console, a separate selection of aux sends and grouping buses are provided.
*
Harrison Consoles Mixbus v4 - 1
Page 208 of 515
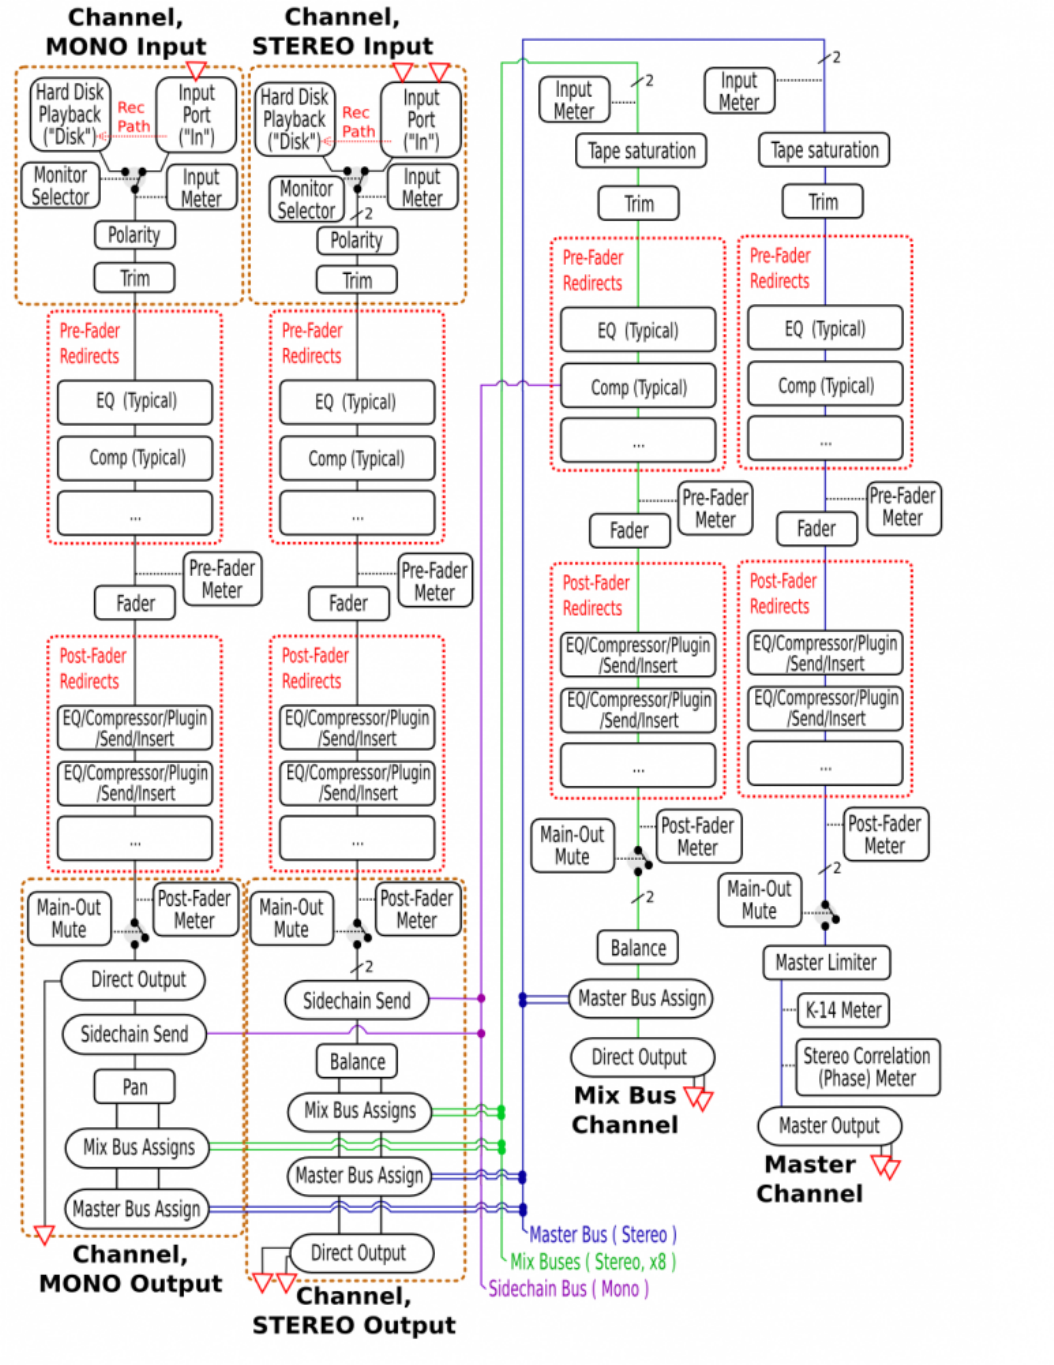
Harrison Consoles Mixbus v4 - 1
Page 209 of 515

The “redirect” areas are represented by the black box at the top of the mixer strip. Sends, Inserts and
Plugins are “redirects”, and they may be placed in any order, before or after the fader. If a redirect is above
the fader, then it is considered a pre-fader redirect.
The signal flow through each plugin may be modified with Pin Connections.
An important tip about signal flow: The Mixbus “bussing” structure (mix buses + master
bus) is stereo-only. Typically a channel has one (mono) or 2 (stereo) inputs. This defines
the channel width through the channelstrip. However, it is possible to change the channel
width via plugins. For example you can have a mono-input, stereo-output effect (such as a
chorus or autopanner effect). The last redirect (plugin) in the post-fader redirect box will
define the signal width just before it goes into the panning/bussing section. If the last plugin
has a single (mono) output channel, then the mono panner will be used. If the last plugin
has 2 (stereo) output channels, then the stereo “balance” panner will be used. If the last
plugin has 3 or more channels, then the stereo “balance” panner will be used and the
remaining channels will be ignored by Mixbus.
*
Not shown in the diagram is the Pre-Fader and Post-Fader send mutes. Sometimes when
you mute a track, you still want a Send to remain active (for a headphone feed, for
example). It is possible to disable the mute for pre- and post- fade sends separately. To
enable or disable the pre- and post-fader send mute, right-click on the Mute button in the
editor window.
*
Harrison Consoles Mixbus v4 - 1
Page 210 of 515

Mono vs Stereo
When you create a new Mixbus track (or bus), you have the option to make the track either mono or stereo.
What is the difference between mono and stereo?
Astereo signal is typically recorded with 2 (or more) microphones such that a single sound (like a drum) is
captured with both microphones; but because of their separate locations, each microphone will record the
sound with slightly different timing & reflections. It is this difference (similar to the difference detected by our
2 separate ears) that causes stereo recordings to have additional width & depth beyond simple mono left/
right “panning”.
In this document we will always use the word stereo in italics, if we mean a true recorded-in-stereo signal.
Otherwise we will use the term stereo or “stereo” (in quotes) to indicate 2-channel audio with left and right
sides.
2-channel audio is not necessarily stereo
Mixbus is designed to support 2-channel playback throughout. If you feed a true stereo signal into Mixbus,
then Mixbus (by default) will maintain the _stereo_-ness of that recording throughout the signal flow.
You can also take multiple mono signals, and “pan” them to the 2 channels (left and right) by adjusting the
level of each channel. This is sometimes called “pan-pot stereo” or even more commonly just “stereo”. But
this is not strictly a stereo signal.
2-channel files are not necessarily stereo
You might receive a file that has 2 channels (“stereo”) but in fact it does not represent a stereo signal.
For example, you might have a 2-channel file recorded with a handheld recorder. The first channel is the
host interviewer, and the second channel is the guest. In this case, the file has 2 channels but the
information is not stereo and should not be treated as such.
Some other examples might be:
• a vocal track is provided in a “stereo” file. The singer is louder in the left side. But it’s the same
(mono) signal in both tracks, just panned slightly left.
Harrison Consoles Mixbus v4 - 1
Page 211 of 515

• a snare-drum track might be provided in the upper (head) and lower (snare) mics, but this is not a
stereo signal.
• a kick-drum might be provided with “inner” and “outer” (sound hole) mics, but this is not a stereo
signal.
In Mixbus, what is the difference between a mono and stereo
CHANNEL (i.e. TRACK)?
Mono channels/tracks
Mono channels use a panner – this means that the mono signal is sent to the right and left channels
simultaneously, and then one side or the other is attenuated to make the sound appear farther to the left or
right of the stereo field.
Stereo channels/tracks
Because stereo is a special case, Mixbus’s stereo channels operate differently. A stereo channel uses a
balance knob instead of a pan knob. A balance knob preserves the left channel in the left speaker, and the
right channel to the right speaker. Then one side or the other is attenuated to “balance” the signal to the left
or right. But the left signal is never mixed into the right side, or vice versa. This preserves the stereo phase
information in the signal.
When you mix a combination of mono-panned and stereo signals into a stereo mixbus, then the mixbus
applies a “balance” control as well, and this maintains the phase relationship of the stereo signals
throughout the mix.
Mixbus also treats stereo signals differently in the channel’s compressor: it is important that the
compressor’s gain-reduction works on both left and right sides equally. This prevents the stereo image from
shifting left or right when the signal is compressed. Mixbus’s stereo channelstrip compressor does this
correctly. This is another reason that, when you have a true stereo signal, you should assign it a stereo
channelstrip. Similarly, if 2 channels are together in a file but not really “stereo”, then you should create 2
mono strips instead of a stereo one.
Some workstations (like Apple Logic) will export tracks in 2-channel (“stereo”) by default,
even if the information is exactly the same in both the left and right tracks ( i.e. center-
panned mono ). In this case, you might want to import the track as 2 mono tracks, and then
discard the redundant track from the editor.
*
Harrison Consoles Mixbus v4 - 1
Page 212 of 515
How do I resolve the problem if I’m given tracks/files that
don’t match my needs?
The easiest way to solve your mono/stereo questions is to resolve it during file “import”.
When you import a file, in the import dialog, there is a “mapping” pulldown menu which allows you to either:
a) select “one track per channel” to split selected stereo files into mono tracks.
b) select “one track per file” to import stereo files as stereo tracks.
c) select “sequence files” to import all the selected files into one track, sequentially.
d) select “merge files” to combine 2 mono files of identical length into a stereo track. ( this option ONLY
appears when 2 files of identical length are selected ).
How do I convert a mono signal to stereo?
Strictly speaking, a mono signal cannot be converted to stereo. It wasn’t recorded with stereo phase
information from a spaced pair of microphones.
However there are several ways to make the mono signal occupy both channels in a left/right “stereo” mix:
• Every mono channelstrip has a “pan” knob that allows you to pan the signal left or right.
• Insert a plugin that changes the channel’s signal from mono to stereo. Normally Mixbus uses only the
“left” side of a plugin, if you insert a stereo plugin on a mono channel. But you can right-click on a
plugin and choose “pin connections”, “add output” to split the channel into stereo for a mono-in,
stereo-out plugin.
• Assign the channel to a stereo mixbus, and apply an effect that enhances the left/right panning, such
as a reverb, haas delay, auto-panner, chorus or doubling plugin.
How do I convert a stereo signal to a mono signal?
Generally speaking, if you have a true stereo signal, you shouldn’t just sum the 2 channels together and
make a “mono” signal. The different time/phase relationship between the left and right sides will cause
frequency cancellations and other artifacts.
If you have a truly stereo signal, it is rarely necessary or desired that you would want to make it mono. One
exception might be the case where the stereo mic selection/location was poorly chosen. In this case,
perhaps the best solution is to use only the “left” side, or the “right” … whichever sounds better for your
needs.
Harrison Consoles Mixbus v4 - 1
Page 213 of 515
If you have a stereo signal and you feel you must make it mono, some solutions might be:
• Assign the stereo track to a mixbus, and use the mixbus’s width control to make the signal “mono”. (
this mono-summing happens at the top of the channelstrip, before any plugins )
• Insert a plugin that provides a stereo-width control. (optionally: right-click on the plugin and choose
“pin connections” if you want the plugin to have a single (mono) output)
How do I convert a stereo track to 2 mono tracks?
If you are “importing” a track to mix, the best way is to make this decision during the import operation.
Select the option “one track per channel”, and your stereo file will be split into 2 mono tracks which you can
manipulate separately.
If you have recorded a stereo track, and later want to split it into 2 mono tracks, you should first ask yourself
why you did this recording in stereo, at all :)
Mixbus provides a Lua script which can split a stereo track into 2 mono tracks. The stereo track’s Playlist
(including all edits) will be split into left and right components, and assigned to 2 new tracks. Each track has
the same processing applied as the source track. To access the script, click Window->Scripting->Actions-
>Stereo To Mono->Run
How do I convert 2 mono tracks to a stereo track?
If you’ve read the prior information on this page, you might understand why converting 2 mono track to
“stereo” is not as easy as it sounds. Consider the case where each of the mono channels has slightly
different plugins, EQ, edits, and other details. We can’t trivially convert 2 mono tracks into a single stereo
track.
The only sensible way to convert 2 mono tracks into stereo is to solo the 2 tracks, export the mix to stereo,
and re-import the resulting file as a stereo track. (then de-activate or remove the original mono tracks) We
might make a convenience function that does this automatically in the future.
In many cases, you don’t want to convert the tracks to stereo at all; instead you should consider making a
“group” for the 2 tracks. This will “tie the tracks together” so that selections, fader levels, colors, and other
parameters will be changed together, as if they were a single track. But you’ll still have individual panning,
plugins, EQ’s and such. Since you can’t “really” make 2 mono signals into stereo anyway, this is usually the
best choice.
Harrison Consoles Mixbus v4 - 1
Page 214 of 515

Mixer Strip “Switcher”
At the top of any mixer strip, you’ll find a “Switcher” control which allows you to switch between the
channel’s internal setup controls, and the signal flow ( plugin ) area. When the internal controls are hidden,
the “Switcher” provides an overview of the channel’s state, including Record-arm, Polarity switches, and
VCA-assigns.
The track controls vary slightly between Tracks, Buses, Mixbuses, and the Master strip. The buttons on an
Input strip include:
Shift+Click on a “switcher” to change “all” channelstrips to show the same controls. This is a
quick way to view all of your channel I/Os and other settings while preparing for your mix.
Then Shift+Click again to switch all the channels back to show the signal flow.
*
Harrison Consoles Mixbus v4 - 1
Page 215 of 515

•Record arm: Click this button to arm the track for recording. An armed track shows a red border,
which becomes solid red when recording.
•Monitor: Input : This button forces the channel to monitor it’s input. See monitoring
•Monitor: Disk : This button forces the channel to monitor it’s disk playback. See monitoring
•Input : Use this button to select the soundcard input(s) or other sources to feed this channel.
•Polarity : Click this button to invert the signal’s polarity. On a stereo channel, you will see 2 polarity
switches, one for each channel.
•Solo Isolate : If this button is enabled, then the channel will not be muted when another channel is
soloe’d.
•Solo Lock : If this button is enabled, then you cannot change the state of this channel’s solo, even
when triggered from a group or global action.
•VCA : Click this button to assign one or more VCA faders to control this channel’s fader and mute.
•Output Button : Use this button to select the soundcard output(s) or other destinations for the output
of this channel.
•Comments Button : Click this button to enter comments for the channel.
Harrison Consoles Mixbus v4 - 1
Page 216 of 515

Input Strip
The input channel strip is the fundamental element in the mixing window. This is where an audio signal is
routed, processed, and then sent to either a mix bus or the master channel. An input channel strip can be
mono or stereo.
Harrison Consoles Mixbus v4 - 1
Page 217 of 515
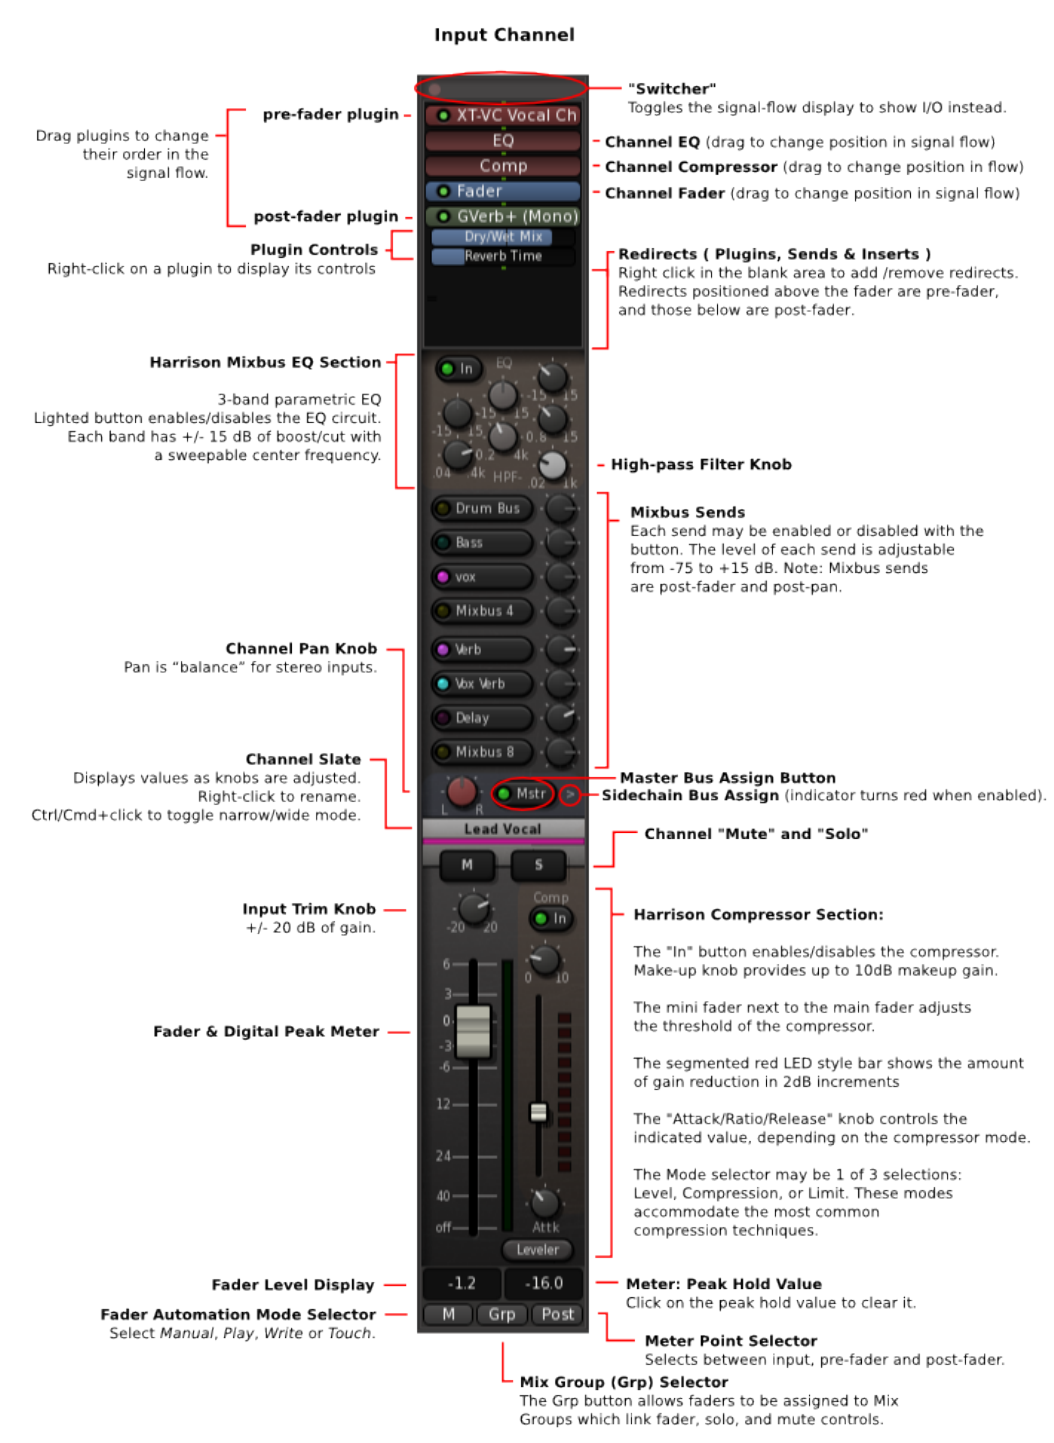
Harrison Consoles Mixbus v4 - 1
Page 218 of 515

The features of the input strip include:
• The input “switcher” – see Mixer Strip Switcher
• The redirect box – see Redirects – Plugins, Sends & Inserts
• The EQ section:
◦ EQ “IN” – Enables the EQ section ( including the High Pass Filter )
◦ 3 EQ bands, each with +/-15 dB gain, and sweepable frequencies
◦ High Pass Filter Frequency knob
• Mixbus Sends Section:
• 8 mixbus sends, each with On/Off switch, and level control
• Stereo Pan Knob
• Master Bus Assign (“Mstr”) : when this is lit, the signal will be sent directly to the Master bus (in
addition to any mixbus assignments)
• Sidechain Assign : see Sidechain Compression
• Channel Mute and Solo
• Input Trim knob : the input trim value is applied immediately after track playback, and BEFORE any
plugins in the redirect box
• Fader
• Meter : the channel meter is a digital peak-reading meter; the scale is the same as the fader and the
compressor threshold
• The Compressor Section:
◦ Comp “IN” – Enables the compressor section
◦ Makeup Gain – provides up to 10dB of Makeup Gain; this gain is only active when the
compressor is enabled
◦ Threshold – the threshold indicates when the compressor will begin working on the signal;
reduce the threshold slider to compress more
◦ Gain-Reduction meter – indicates gain reduction, in 2dB increments
◦ “Speed” & “Mode” knobs : see Compression
• Fader level : this displays the curent fader position, in dB. Click to enter a value.
• Meter peak-hold : this displays the loudest digital-peak value that has been detected by the meter. It
turns red when the value is over 0dBFS. Click to reset the value.
• Fader Automation selector : select between Manual, Play, Write, and Touch. This control only affects
the channel’s fader.
• Group selector : click this button to assign the channel to a Group ( see: Groups )
• Meter Position selector : click this button to select the meter position ( Input, Pre-Fader, Custom,
Post-Fader, Output )
Harrison Consoles Mixbus v4 - 1
Page 219 of 515

Mixbus Strip
Harrison Consoles Mixbus v4 - 1
Page 220 of 515
There are 8 “mix bus” channels. These are fed from the mix bus sends of the input channels.
Harrison Consoles Mixbus v4 - 1
Page 221 of 515
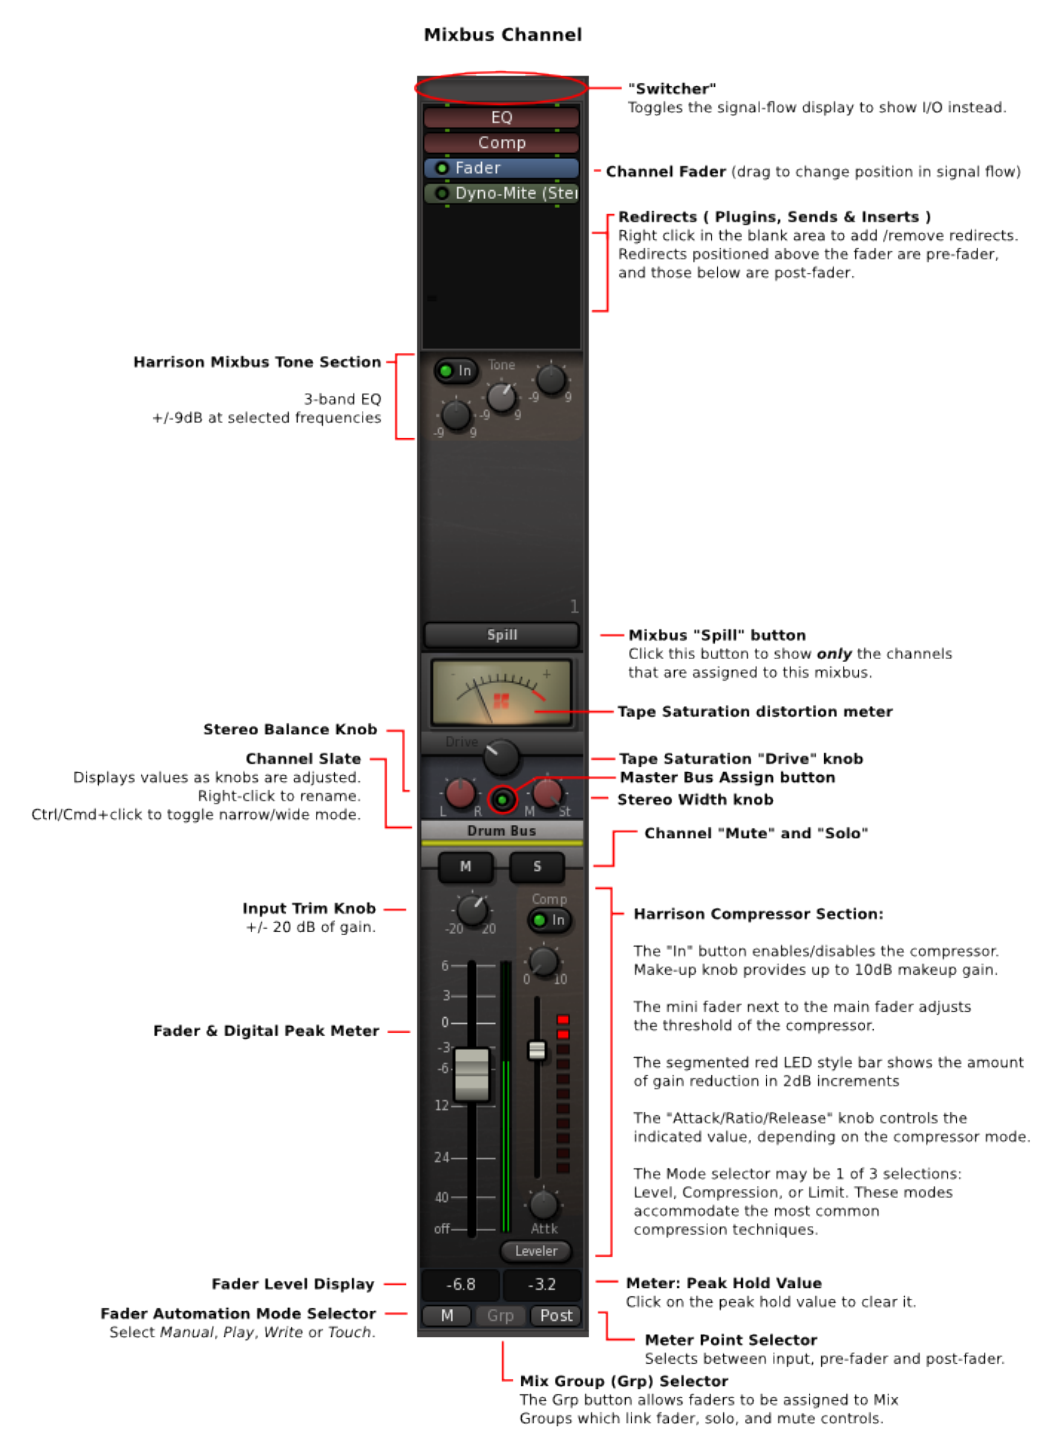
Harrison Consoles Mixbus v4 - 1
Page 222 of 515
Harrison Consoles Mixbus v4 - 1
Page 223 of 515

Master Strip
Mixbus provides a single Master channel. The Master channel provides the final output signal for listening
via speakers or exporting to wav files.
The Master channel has a built-in transparent signal limiter (with look-ahead) to avoid the distortion that
occurs in overly loud digital signals.
Harrison Consoles Mixbus v4 - 1
Page 224 of 515
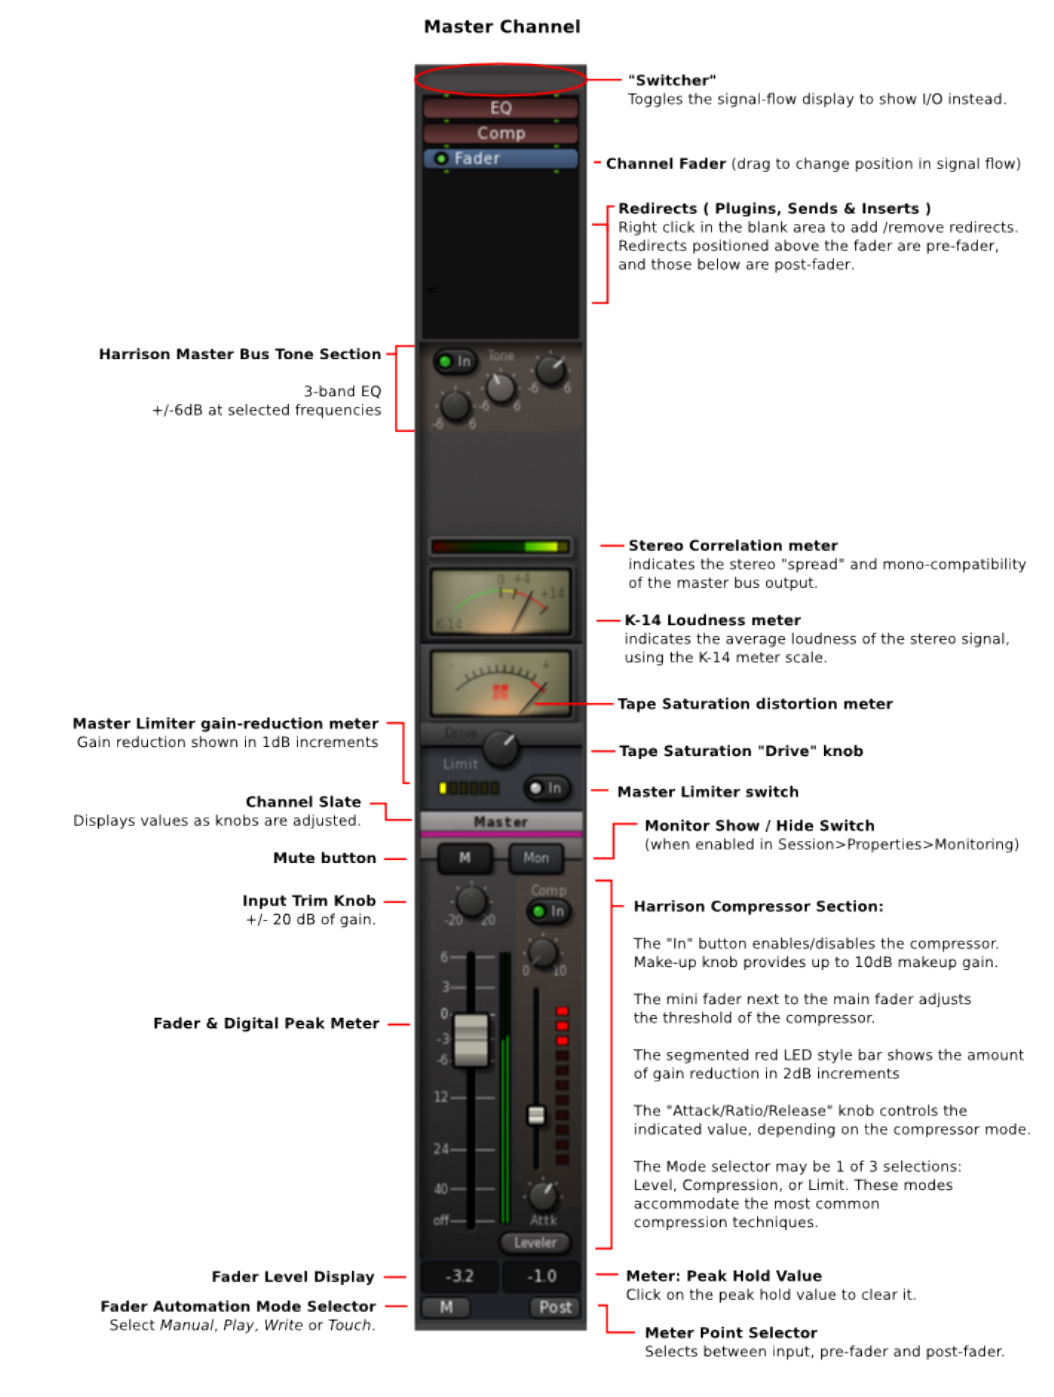
Harrison Consoles Mixbus v4 - 1
Page 225 of 515
Harrison Consoles Mixbus v4 - 1
Page 226 of 515

Monitor Strip
The “monitor section” is a signal path that may be inserted between the master bus in Mixbus and the output
of your interface, particularly useful if you do not have a good hardware monitor controller in your setup. The
Monitor Section allows you to control what you hear, without affecting the main mix which will be exported. It
is important to avoid using the master bus fader as your “volume control” while mixing, because changes to
the master fader will be applied to your final mix, which not only changes the volume of the mix, but can also
affect any post-fader processing (such as the Master Bus Limiter or the Tape Saturation on the output bus).
Instead you should use the master bus to set the level of the final mix, and use a separate volume control to
adjust your “listening level”. The Monitor section in Mixbus provides a way to do this, and more.
This “listening level” can be provided by your laptop speaker volume, your powered speaker volumes, a
mixer, or a dedicated monitoring solution. In many cases, such as mixing on-the-go with headphones and no
external gear (among many other examples), the Mixbus “monitor” section might be the preferred option for
controlling your listening volume.
The monitoring section serves these functions:
1. It provides a “volume control” that can be used to adjust your listening level, without affecting the level
of your actual mix.
2. It allows some conveniences such as “mono”-izing your mix, or muting speakers, so you can audition
your mix in mono.
3. Because the monitor path provides a separate listening path outside of the mixer, it is possible to
send Solo’ed tracks to the monitor, without affecting what is happening to the main mix. This is called
AFL or PFL soloing. (more details below)
4. It allows the insertion of plugin processors. These processors can be used for room EQ or other
corrective measures. The processors only affect the listening path, not the main mix.
5. It allows the selection of any physical output ports on your D/A converters. This can be used to switch
between alternative monitoring systems.
To enable the monitoring section, go to Session> Properties->Monitoring, and click “Use monitor section in
this session”. Once activated, the monitor section will be visible on the rightmost side of the Mix Window.
Harrison Consoles Mixbus v4 - 1
Page 227 of 515
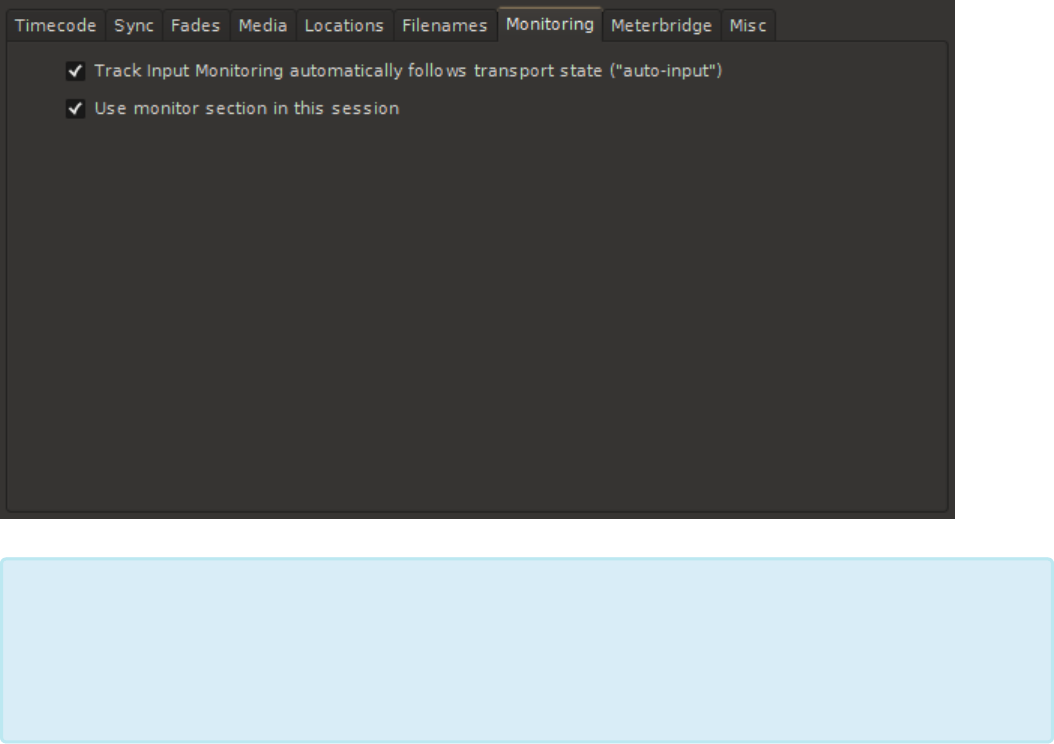
The Monitor volume knob does not adjust the volume of the Metronome ( “click”). By default,
the outputs of the click are connected directly to the first 2 outputs on your soundcard,
which typically feed your speakers directly. You can adjust the volume level of the click by
visting Preferences->Misc->Click. And you can change the outputs of the click by visiting
Window->Audio Connections.
*
Harrison Consoles Mixbus v4 - 1
Page 228 of 515
The Mixbus Monitoring Section:
Harrison Consoles Mixbus v4 - 1
Page 229 of 515
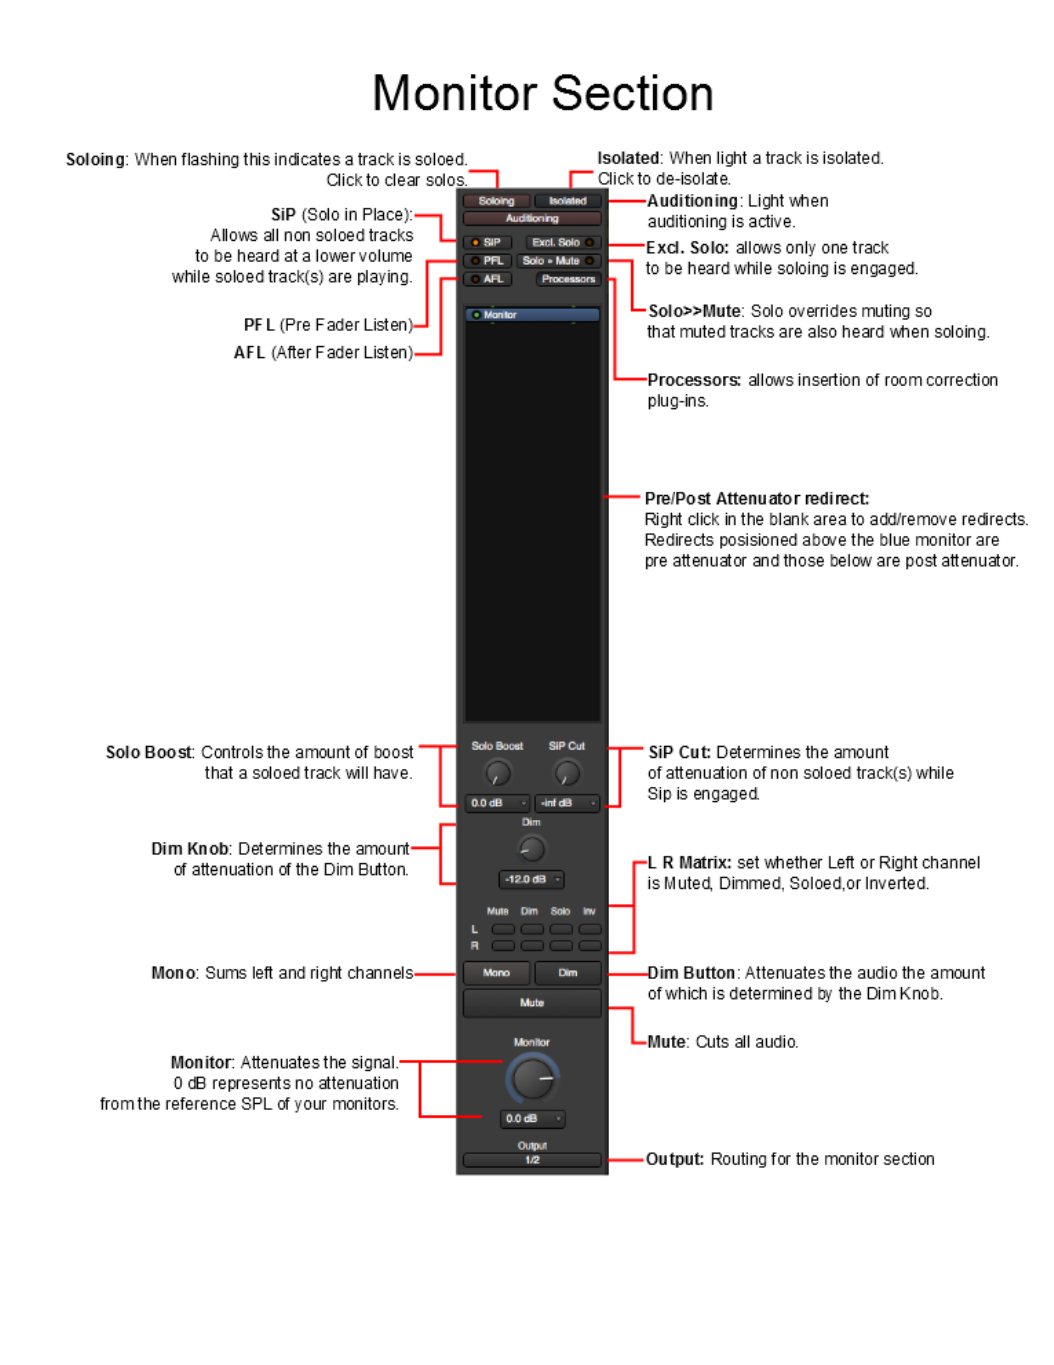
Harrison Consoles Mixbus v4 - 1
Page 230 of 515

Examining the Various Volume Controls in a Typical System
The Volume Control on Your Monitors
Usually you can find a volume control on your monitors (if they are active) or on an outboard amp (if they
are passive). This volume control is suited to calibrating your monitors to a reference SPL. Once calibrated
you can forget about this control other than periodic re-calibrations (SPL calibration of monitors is beyond
the scope of this document but much information is available on the internet).
The Audio Interface, or external Monitor Controller
Some people prefer to use a Monitor Controller to control the DAW output, as well as a few other sources,
that can also drive multiple sets of speakers and headphones. These devices have various features that
allow you to control exactly what you are listening to. Sometimes, audio interfaces can also provide this
functionality with either a hardware or software based volume control that accesses the internals of the
interface. Some are elaborate and some are simple; consult the documentation for your interface to find
details.
The Master Fader
The pitfall of using your master fader as a monitor level control:
Lets say you adjust your master fader to achieve the ideal monitoring level, and later you attenuate it to give
your ears a break. If you forget about this attenuated setting it could easily lead you to make some poor
mixing decisions later. Additionally, you may print your mix at this attenuated level (bad mix decisions and
all) and not realize it. And, the dynamic tonality of the mix can be modified if you lower the master fader and
the output “hits” the Master Bus Limiter and Tape Saturation differently, providing more or less limiting and
saturation.
Whether your monitors are calibrated to a reference SPL or not, a monitoring section is still
vitally important in achieving a consistent sound.
*
Harrison Consoles Mixbus v4 - 1
Page 231 of 515
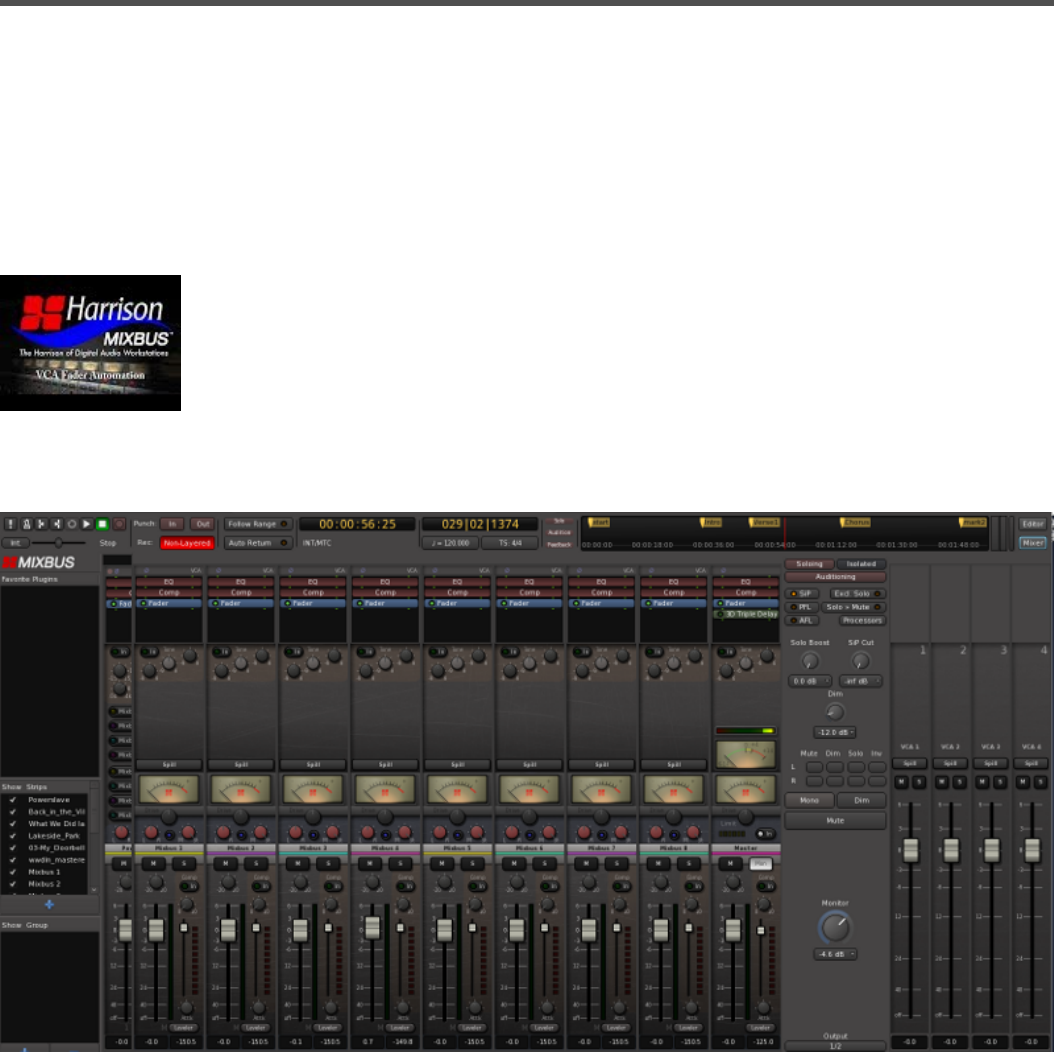
VCA Strip
What is a VCA Strip?
A VCA, or VCA Master, is similar to an input strip; it has a fader, mute and solo button; but it does not pass
audio itself. Instead, it controls the value of the mute,solo and fader of the channels that are “attached” to
it.
Watch this video to learn more about Mixbus’s VCA implementation:
In the screenshot below, 4 VCA masters are visible on the right side of the mixer:
Mixbus allows a channel to be attached to “unlimited” VCA masters. You can add VCA masters in the
“Track->Add Track/Bus” dialog from the main menu.
Harrison Consoles Mixbus v4 - 1
Page 232 of 515

Assigning a track to a VCA Master:
To assign a track to a VCA master, first click on the “switcher” at the top of the strip, to expose the VCA
assign button.
After the VCA is assigned, you will notice that the “switcher” displays a box around the VCA indicator. This
allows you to see when a track is assigned to a VCA, without opening the switcher controls.
A faster way to assign multiple tracks to a VCA is by selecting the tracks, and then right-click on the VCA
and choosing “Assign Selected Channels”
OR
Select the tracks, and then right-click in the “Group Bar”, and choose “Assign selected channels to VCA->”
Harrison Consoles Mixbus v4 - 1
Page 233 of 515

VCA Strip Operation:
The “Spill” button, when activated, will hide all channels that are NOT attached to the VCA Master. If you
have a group of channels assigned to a VCA master, this is a very quick way to display those channels in
the main mixer area. Only one “Spill” ( either VCA or Mixbus ) can be active at one time.
Right-clicking on the VCA fader strip provides these features:
Harrison Consoles Mixbus v4 - 1
Page 234 of 515
• Rename
• Color
• Assign Selected Channels
• Drop All Slaves
• Remove
Harrison Consoles Mixbus v4 - 1
Page 235 of 515
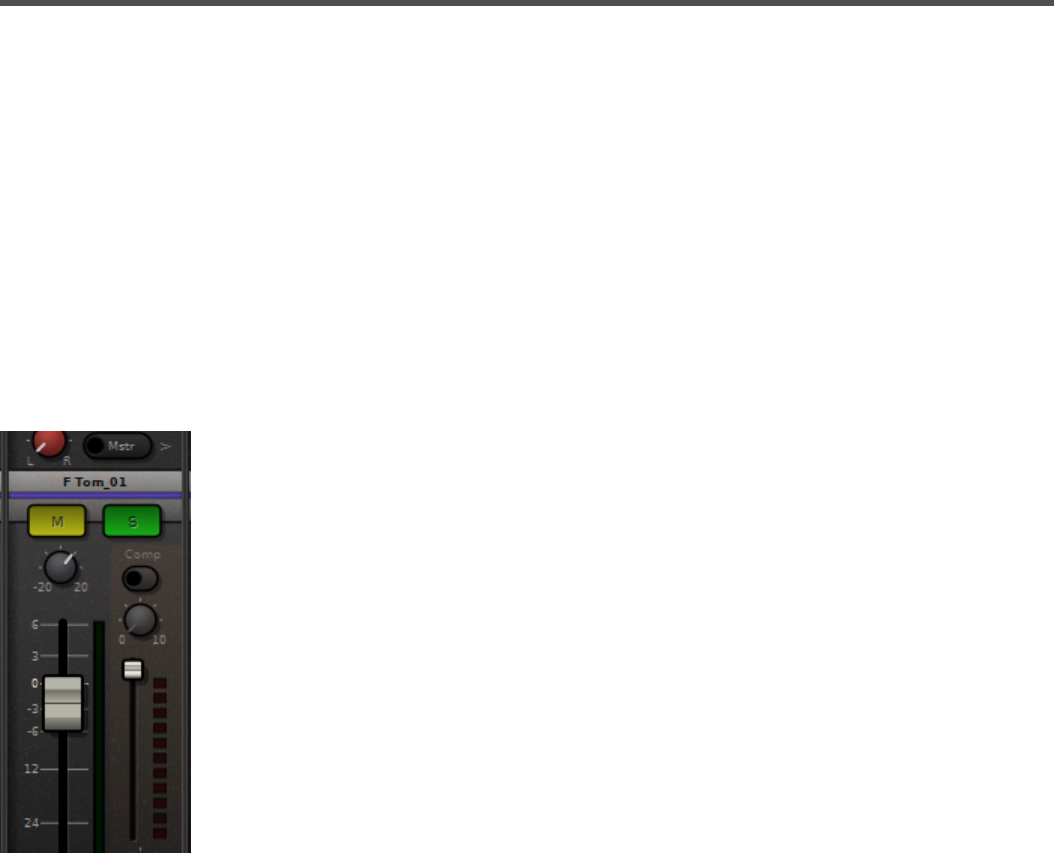
Mute and Solo
What are Mute and Solo?
The simplest explanation of Mute and Solo are:
Mute: When enabled, the mute button prevents the track from being heard.
Solo: When enabled, the solo button mutes all the tracks except this one.
….but there are many subtleties, especially for Solo, that are called upon to solve vexing problems that we
encounter as audio engineers.
Mixbus provides Mute and Solo buttons, and a wide range of options, to meet these needs.
By default, when you solo a track, the other (non-soloed) tracks are drawn with a yellow frame. This
indicates they are “implicitly muted”. ( i.e. muted by someone else )
Harrison Consoles Mixbus v4 - 1
Page 236 of 515

You can disable this “implicit mute” display in Preferences->Mixer->Solo
Harrison Consoles Mixbus v4 - 1
Page 237 of 515

Solo Operations
Exclusive Solo:
ctrl + alt + click on a Solo button (OSX: command +control + click). Normally, if more than one track/bus is
solo’d, they will all play, but this allows you to listen to only one solo’d track when more than one have been
solo’d.
On the solo/mute controls left-button (button 1) mouse clicks do the following, depending on holding these
keyboard modifiers:
• no mod: toggle solo on/off
• Primary mod (usually ‘Shift’): override track group
• Primary + Secondary modifiers (usually ‘Shift’ and ‘Ctrl’): exclusively solo this track
• Primary + Tertiary modifiers + click: apply to all
Middle-click (button 2):
• no mod. : momentary toggle (until release)
• Primary mod: assign generic MIDI. (if generic midi control surface is enabled)
Right-click (button 3) brings up a context menu:
• Solo Isolate
• Solo Safe
• Mute-points
Solo Isolate
“Solo Isolate” is a mode which prevents the channel from muting when other channels are soloed. This
mode is used, for example, on a reverb return where you’d like to always hear the reverb, even when a
channel is soloed which would normally mute this channel.
These shortcuts (group override, apply to all) are also available for other controls where
applicable (e.g meter-point,..). See Mixbus Conventions & Tips
*
Harrison Consoles Mixbus v4 - 1
Page 238 of 515
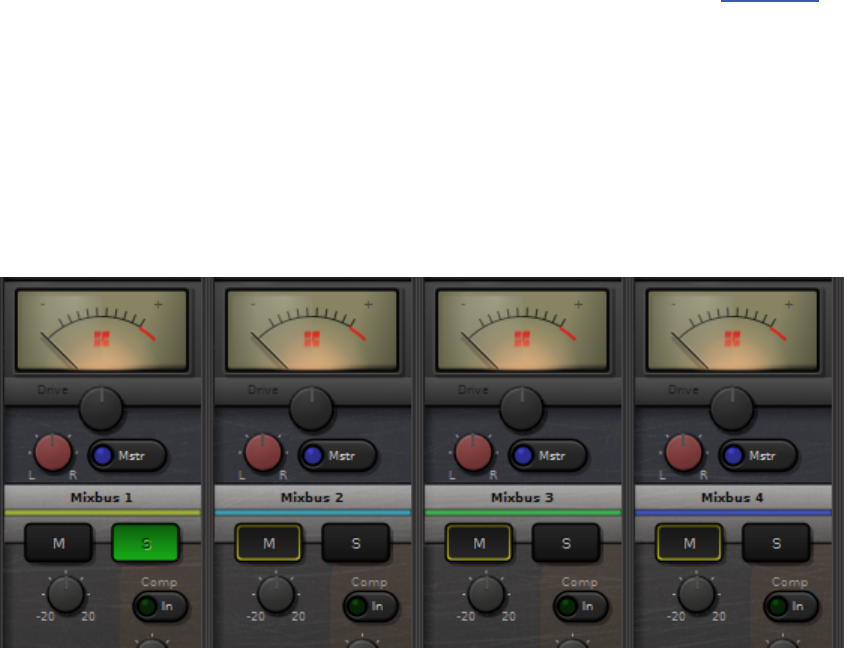
You can Ctrl-click (Cmd on Mac) on a channel to Solo isolate it. Or Right-click on a Solo button to see a
context menu with this option.
When a channel is Solo-Isolated, the word “ISO” will appear in the “switcher” area at the top of the strip.
Solo Safe
“Solo Safe”, when enabled, will “lock” the current state of the Solo button so the user cannot accidentally
change it by clicking on the Solo button. If the channel is Solo’ed, it will not be possible to un-solo the
channel by clicking the Solo button.
To activate this option, Right-click on a Solo button to see a context menu.
Solo’ing with a Monitor section
If the session has a monitor section (Session > Properties > Monitoring), there are additional controls for
Exclusive Solo, Mute/Solo overrides and Pre/After Fader Listen available. Click here for details.
Solo’ing Mixbuses
Like a real console, the mixbuses are a separate mixing stage. Imagine the 8 (12 in 32C) mixbuses are like
a second, standalone mixer. So when you solo a mixbus, the other mixbuses are “implicitly muted”. There’s
no interaction between the inputs and the mixbuses, so soloing a mixbus does not implicitly mute or solo
any tracks.
Harrison Consoles Mixbus v4 - 1
Page 239 of 515
Utility buses aren’t really a mixing stage at all; they are just a signal path where you can combine other
paths (or split them out from a multichannel plugin, for example). In this case, when you solo a utility bus
then it also has to solo all the things feeding into it. Similarly, if you solo anything, it has to make sure that
the “utility buses” that it feeds are soloed and this causes other stuff to get implicitly muted.
The best plan is to keep your signal paths simple, and you’ll get the best results. Just because you “can”
add a bunch of buses and options, doesn’t mean that you “should”.
Harrison Consoles Mixbus v4 - 1
Page 240 of 515
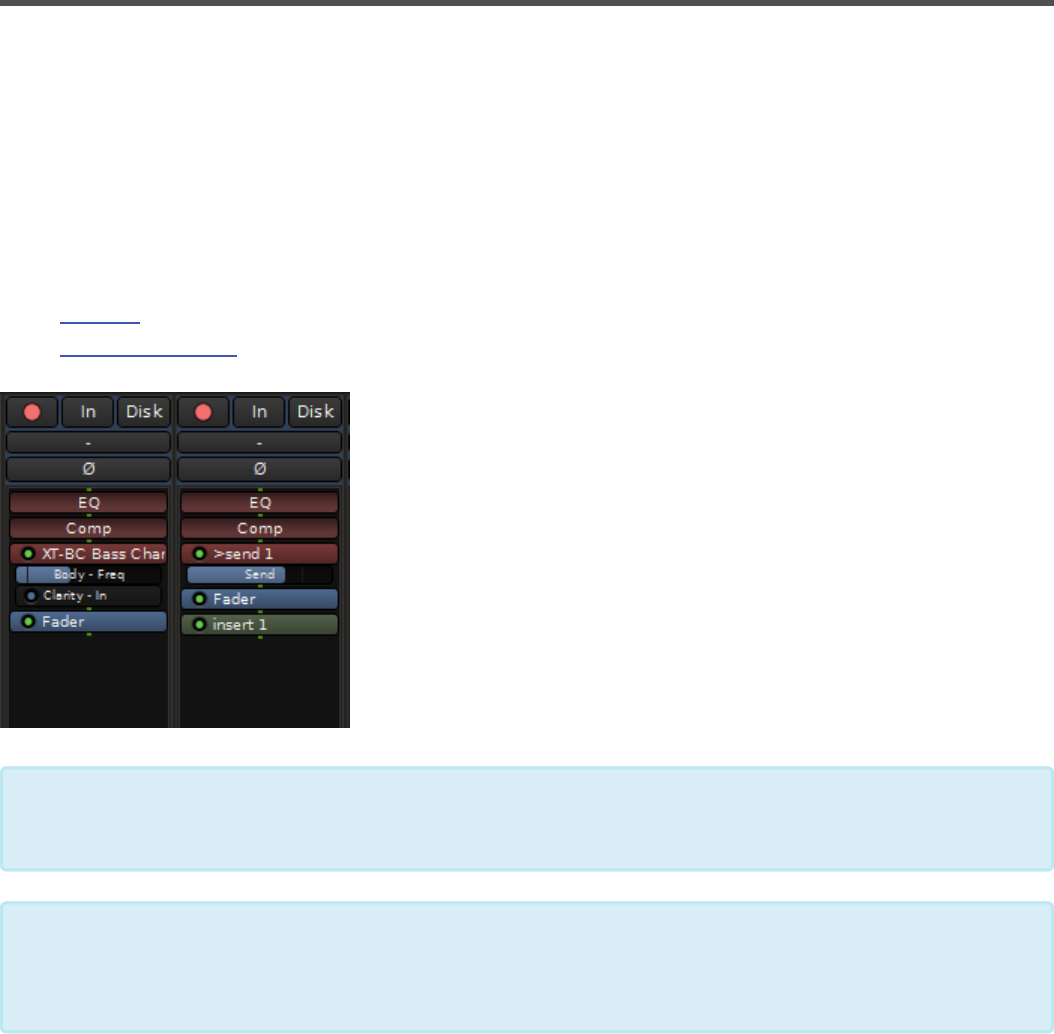
Redirects: Plug-ins, Sends & Inserts…
The black box near the top of each channel strip, mix bus, and master bus is the “redirect box”. Mixbus uses
the term “redirect” for the items that can be inserted into a channel strip: plug-ins,sends, and inserts. In
the image below, the track on the left has the “XT-BC Bass Character” plug-in, the track on the right has an
insert and a send. The XT-BC Bass Character plug-in and the send are pre-fader (because they are above
the fader entry) while the insert is post-fader. The signal flow of Mixbus is very flexible: you can order sends,
inserts, plug-ins and the fader arbitrarily (XT-BC plug-in shown are for display purposes and may not be
included).
•Plug-ins
•Sends and Inserts
Plug-in Control Sliders
Below each plug-in, you may add one or more “Plug-in Control Sliders.” Each Slider controls a single control
parameter for the plug-in it is under. You may show or hide plug-in control sliders by right-clicking on a plug-
Note: By default, plug-ins and inserts will be created pre-fader, while sends will be post-
fader. But you can drag them into any order you choose.
*
Channel strips are created preconfigured with an EQ and Compressor plug-in already
installed (the top two reddish plug-ins in the above image). Signal routing can be changed
by reordering here. The controls for these are found within the GUI of each channel strip.
*
Harrison Consoles Mixbus v4 - 1
Page 241 of 515

in and selecting “Controls.” In the above image the “XT-BC” plug-in has control sliders shown for “Body –
Freq” and “Clarity -In.”
The Redirect Menu
Right-clicking in a redirect box will launch the redirect menu. These choices are available in the menu:
• New Plug-in>
◦ Favorites: a list of favorite plug-ins, pre-selected from the Plug-in Manager (more here).
◦ Plug-in Manager: launch the Plug-in Manager (more here).
◦ By Creator: a list of plug-ins, sorted by their creator.
◦ By Category: a list of plug-ins, sorted by type (note: this is only useful for plug-in formats that
support this).
• New Insert: create a new Insert (Send and Return).
• New External Send: calls up routing matrix
• New Aux Send: create a new Send.
—————————————-
• Controls: Allows the addition of one or more “Plug-in Control Sliders” to be displayed.
—————————————-
• Clear (all): Remove all redirects from this track/bus.
• Clear (pre-fader): Remove all redirects from this track/bus pre-fader.
• Clear (post-fader): Remove all redirects from this track/bus post-fader.
—————————————-
• Cut/Copy/Paste/: Cut/Copy/Paste/ the selected redirect.
• Delete: delete the selected redirect (you can also shift-left-click any redirect to delete it).
—————————————-
• Rename: Rename the redirect (yes … even inserts and sends)
—————————————-
• Select All: Selects all redirects
• Deselect All: Deselects all redirects
—————————————-
• Activate/Deactivate All: Activate/deactivate all redirects on this track/bus.
—————————————-
• Pin Connections: Click here for details.
—————————————-
• Edit: Pop open the editor for the selected redirect (you can also double-click on any redirect to edit it).
• Edit with generic controls
Harrison Consoles Mixbus v4 - 1
Page 242 of 515
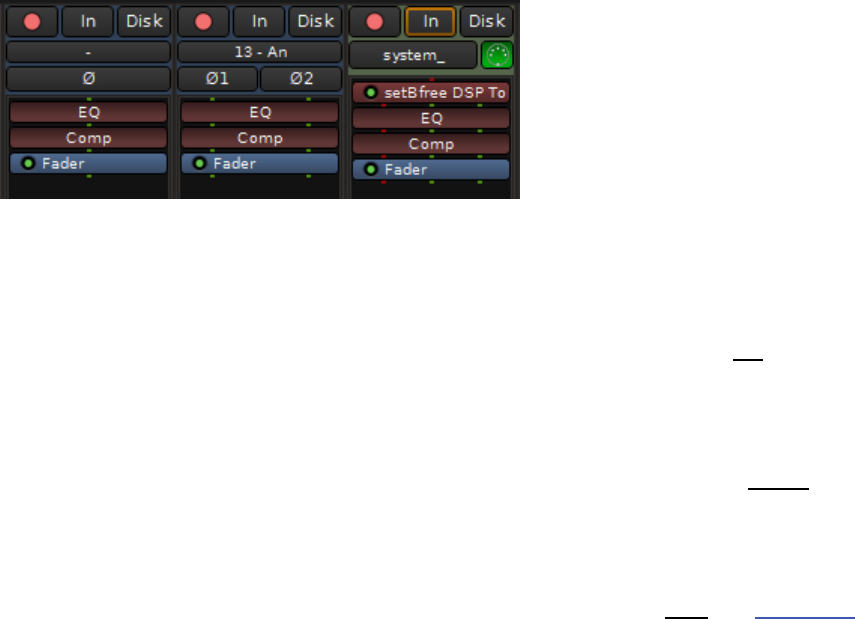
Redirect Box Signal Routing
Within the redirect box, and in between the plug-ins, are a series of green and/or red dots called “pips” that
represents the signal routing between plug-ins.
Mono audio = one green pip: In the image above the channel strip on the left is a mono audio track. A
single green pip representing one channel of audio is routed to the EQ, then to the compressor, and on to
the fader.
Stereo audio = two green pips: In the image above the channel strip in the center is a stereo audio track.
Two green pips representing two channels of audio is routed to the EQ, then to the compressor, and on to
the fader.
MIDI data = red pip(s): In the image above the channel strip on the right is a MIDI track. One red pip
representing MIDI data is entering the MIDI plug-in. The MIDI plug-in then generates audio based on that
data. In this example the audio is stereo as can be seen by two green pips passing to the EQ, on to the
compressor, and then to the fader. MIDI data is also passing thru the MIDI plug-in. The EQ, compressor,
and fader are not processing this MIDI data, just passing it thru.
Harrison Consoles Mixbus v4 - 1
Page 243 of 515
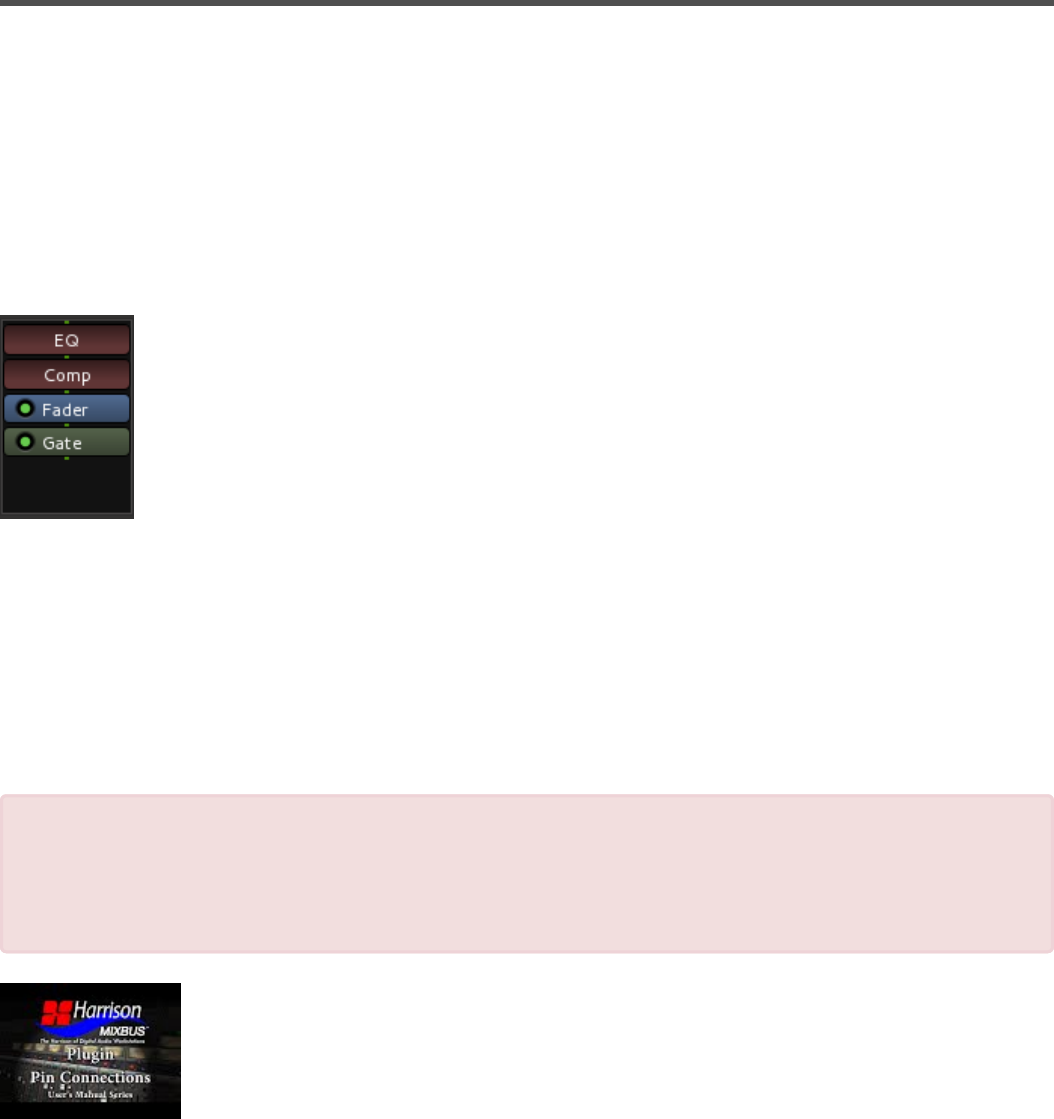
Processor Signal Flow
Signal Flow through the Processor List:
The “processor list” is the black box at the top of every Mixbus channel strip. You can imagine the
“processor list” as a container for a series of guitar-pedal processors; each processor must be connected to
the processor before and after it.
Often, the signal flow is very simple. For example, a mono track will most likely have a series of mono
effects applied. In this case, you’ll see a picture like this:
In this example, the signal is processed by the channelstrip EQ, the Compressor, the
Fader, and finally a Gate plugin. The signal flow proceeds from top to bottom, and the
green “pips” between each plugin show the audio signal connections between each
redirect.
But what happens if you want to use a plugin that has stereo I/O? Just like a guitar pedal,
you might choose to use only the left-side signal for the mono track. But there are other possibilities as well.
The plugin might have 1 input, and create a stereo output (such as an auto-panner, or reverb/delay effect).
Or the plugin might have an extra “sidechain” input to trigger a gating or compression effect. Or the plugin
might be an instrument that has 16 individual outputs for different drum sounds.
Starting with Mixbus version 3.3, the signal path between redirects is highly flexible, while also using
sensible defaults.
Sessions created with Mixbus versions before 3.3 will have tracks that preceded these
rules. For backwards-compatibility, we will load those sessions with the old rules. In some
cases you might want to use “Pin Connections” (described later on this page) to improve the
routing of those old sessions.
!
Harrison Consoles Mixbus v4 - 1
Page 244 of 515
Why is this so complicated?
Mixbus tries to do the “right thing” by default. Mono channels will get mono plugins, and stereo channels will
get stereo plugins. Virtual instruments will appear with stereo outputs, by default. But if you want to change
these settings, there are quite a lot of variables that must be considered.
There are several challenges inherent to the signal flow through a channel using plugins:
• Plugins may be drag/dropped into any order
• Some plugins can be fed a “sidechain“signal which should allow the possibility of being sourced from
any other track.
• Often you need to use a plugin in ways that it wasn’t intended (only using one side, for example)
Additionally, each of the Mixbus-supported different plugin formats provide different rules:
1) LV2 and LADSPA plugins typically have fixed I/O such as 1->1, ( 1 input, 1 output ) or 2->2
2) VST plugins typically have a fixed I/O configuration, but can be told that some signals aren’t connected.
3) AudioUnit plugins (Mac) allow the HOST to define how many connections they will have. So Mixbus can
request a mono (1->1) or stereo plugin as-needed. But the user also has the option to change the
configuration, if they want to do something unusual.
Finally Mixbus can “replicate” plugins. If you try to insert a mono plugin on a stereo strip, Mixbus will
automatically create 2 plugins, and send the controls from the first plugin to the second. This allows you to
process both sides of the stereo signal using the same settings of an EQ, for example. You can add or
remove replicated plugin instances using “Pin Management” ( see below )
Harrison Consoles Mixbus v4 - 1
Page 245 of 515
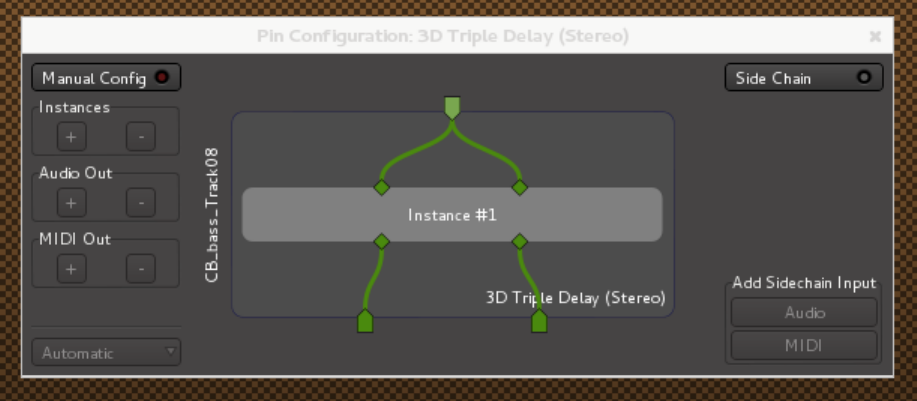
Pin Connections
Right-click on a plugin to reveal the “Pin Configuration” dialog:
By clicking on the pin connections, you may drag a connection between the channelstrip signal flow, and the
embedded plugin processor. Right-click on a pin to remove all connections to that pin.
One can also bypass plugin instances with a ‘thru’ connection by dragging an input pin directly to an output
pin. This connection is latency compensated to match the delay through the plugin.
The “Pin Configuration” dialog provides these additional features:
• Manual Config : click to enable the configuration buttons, below:
◦ Instances : increase/decrease the number of plugin instances inside the processor
◦ Audio Out : increase/decrease the number of audio outputs that the plugin can access
◦ MIDI Out : increase/decrease the number of MIDI outputs that the plugin can access
• Output presets ( virtual instruments only ) : click to choose how many outputs the instrument will
provide
• Side Chain : click to enable a sidechain input for the plugin.
◦ When Side Chain is enabled, the sidechain source may be managed with the buttons below it.
Harrison Consoles Mixbus v4 - 1
Page 246 of 515

Plug-ins
What is a Plug-In?
Plug-ins are small pieces of signal-processing software that Mixbus can load inside itself and assigned to
channels. Channels may have an unlimited number of plugins, inserts and sends on a channelstrip.
mixbus comes with a selection of Plug-Ins installed. Some are free, while others require an additional
purchase to use fully. You can learn more about Mixbus’s included plugins here.
Additional plugins may be installed on your system, and these will be provided by third-party developers.
How do I add a Plug-In to a channel?
You can add plug-ins in several ways:
• double-click in the black “redirect” area to launch the Plug-in Manager
• right-click in the black area, and choose New Plug-in, then:
◦ Favorites
◦ Plug-in Manager
◦ By Creator
◦ By Category
When you first install Mixbus, it does not recognize your third-party plug-ins. To scan your
plug-ins (and tell Mixbus to scan for plug-ins on startup in the future), please visit Mixbus-
>Preferences->Plug-ins and click the “Scan” button.
*
Harrison Consoles Mixbus v4 - 1
Page 247 of 515
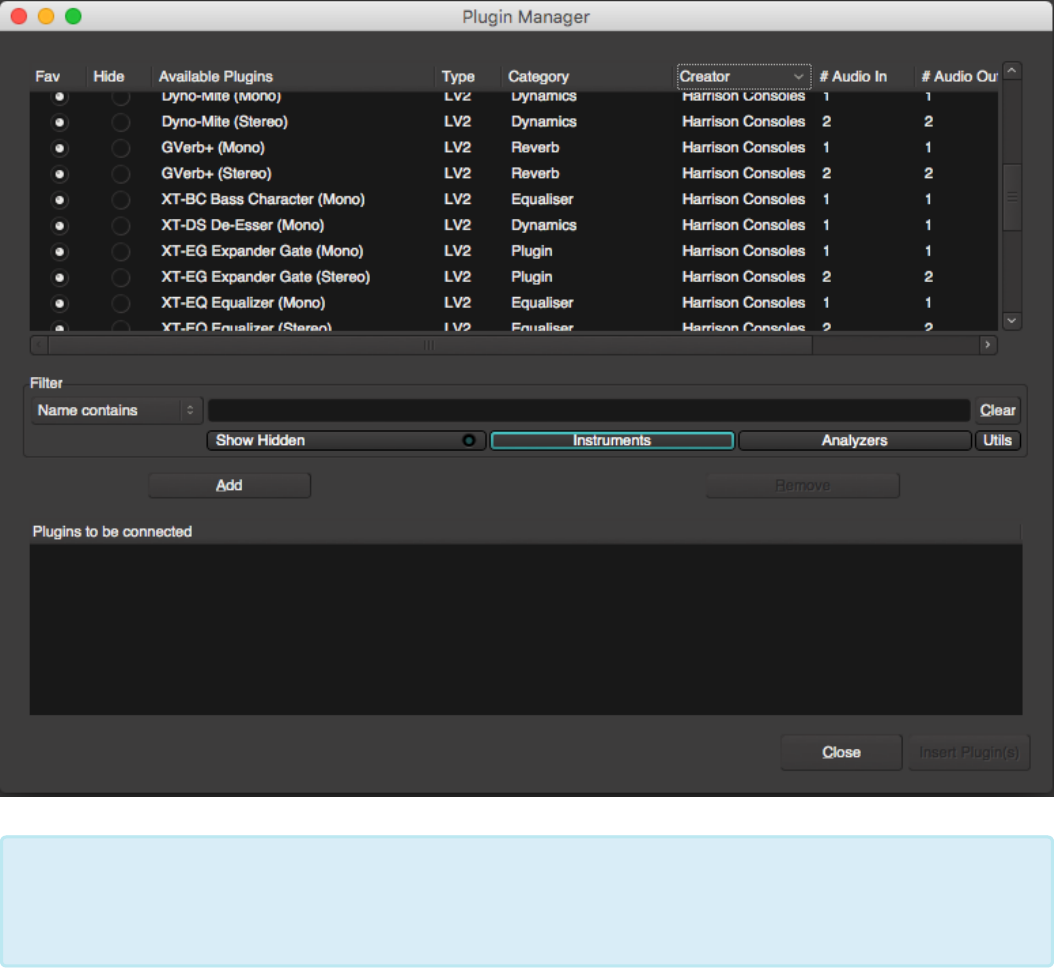
Adding, Removing, Reordering, and Disabling Plug-ins
Each plug-in is displayed as a rectangle in the redirect box. Plug-ins are red if they are pre-fader (above the
fader), and green if they are post-fader (underneath the fader)
• double-click the plug-in to show the plug-in control panel
• click the plug-in to select it ( it will turn red ). Now click “Delete” to delete it.
• click & drag the plug-in to change its order in the signal flow
• click the small green indicator on the plugin to enable/disable the plug-in
A note about categories: some plug-in formats (such as LV2) provide a very well-defined
method to categorize plug-ins. Most older formats (including VST2 and AudioUnits) do not
provide good support for categories.
*
Harrison Consoles Mixbus v4 - 1
Page 248 of 515
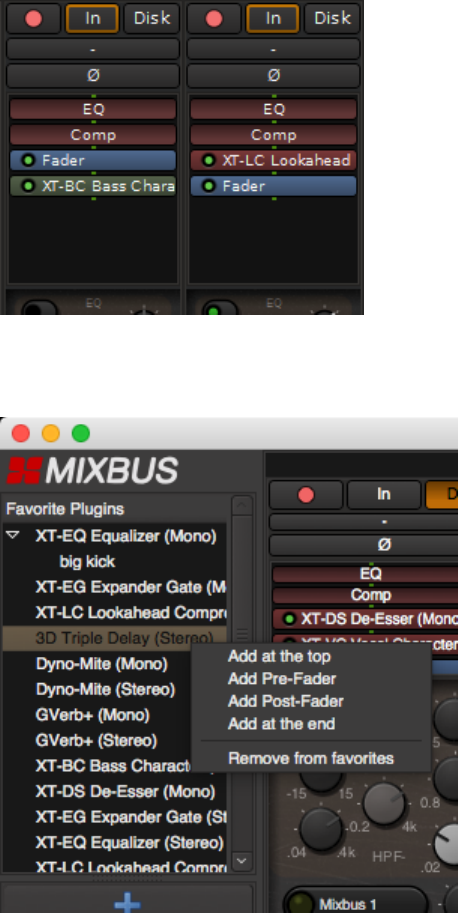
◦ (you can also middle-click on a plug-in to enable/disable it)
• right-click on a plug-in to see the plug-in context menu
• shift+right-click a plug-in to delete it
Plug-in Favorite Window
In the upper left side of the mix window is the Plug-in Favorite Window. You can drag and drop plug-ins to
and from a channel strip.
A new favorite can be save and even a preset for the plug -in can be saved and recalled from this window.
Multiple channel strips can be selected and a plug-in can be inserted.
Left clicking on a plug-in or preset name is another way of adding plug-ins to the channel strip.
Harrison Consoles Mixbus v4 - 1
Page 249 of 515
Sends and Inserts
What is a “Send”?
A “send” is a connection point that is created inline with the channel’s signal flow; it allows you to send the
signal out of the channelstrip, and into something else. You might “send” to another channel, or a plugin
sidechain, or a physical output on your soundcard.
Sends are in addition to the mixbus-send knobs in the channelstrip. They provide more flexibility ( for
example, sends can be moved “anywhere” in the channel’s signal flow, among the other plugins and sends/
inserts. ) However, they operate outside of the Harrison “True Analog” summing & panning engine. These
sends are similar to features found in other DAWs and we sometimes call these “DAW Sends” instead of
“console sends” or “console buses”.
Aux Sends
Create an “Aux send” by right-clicking in the plugin area, and choosing “new Aux Send”, then choosing the
bus you’d like to send to.
Aux sends can only be connected to the input of a “bus input strip” and cannot be sent to an external port,
such as a soundcard output.
External Sends
When a new send is created, a window for connecting the Send’s output ports will immediately appear. You
may connect a Send’s outputs to any connections available in the system.
As implemented in v4.3, “Aux Sends” from the channelstrip do not have pan/balance
controls.
!
Harrison Consoles Mixbus v4 - 1
Page 250 of 515
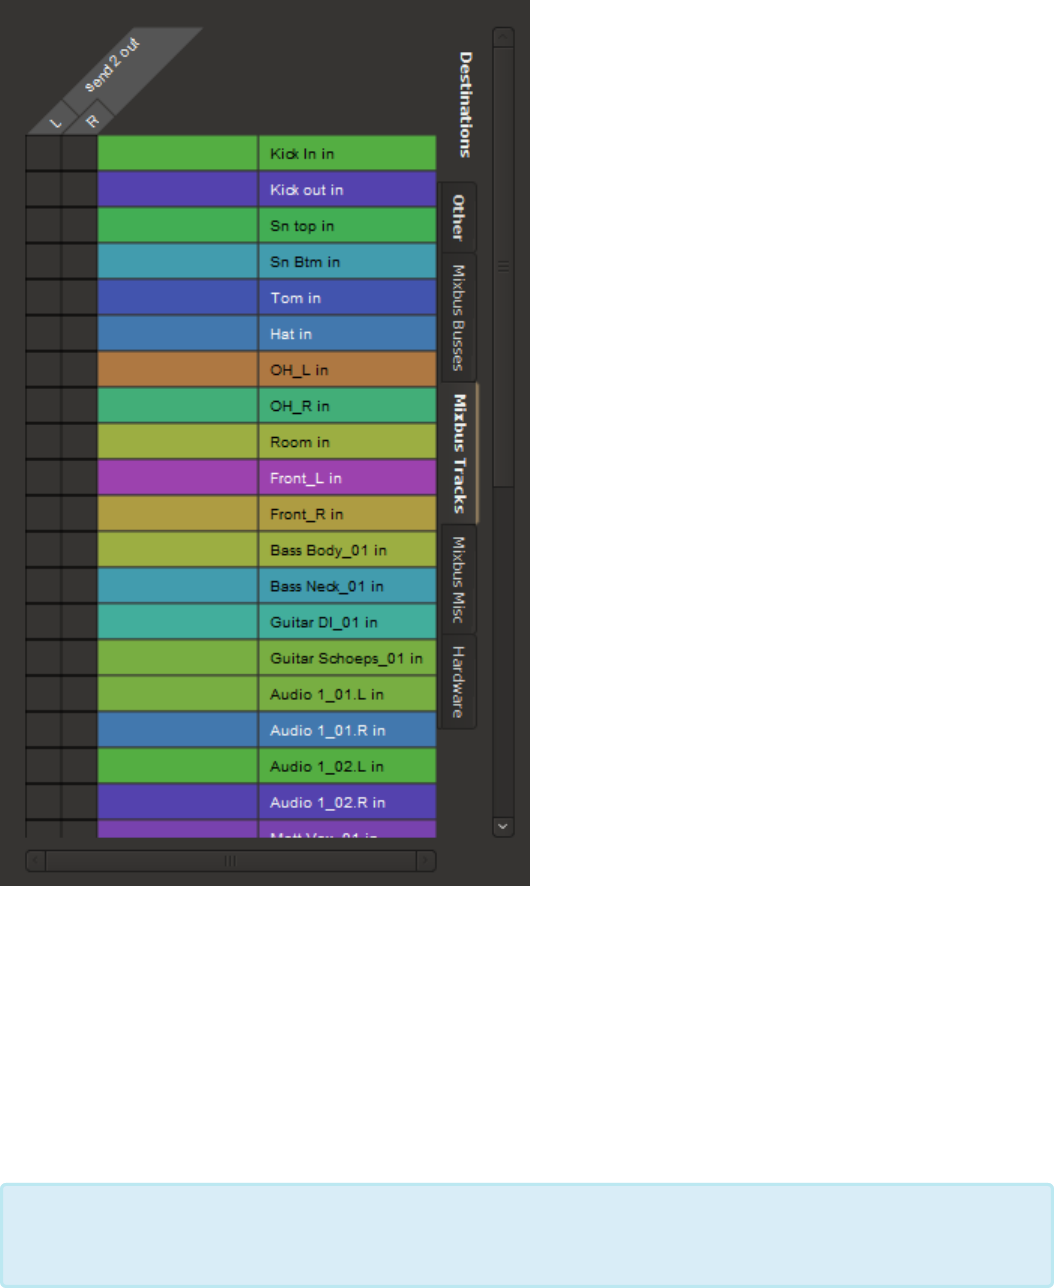
By default, Sends have no outputs and must be configured as needed. Click “add” to add ports, and connect
them to the destination that should receive the output of the send.
• Add/Remove: adds/removes a port to the send.
• Disconnect All: disconnects all ports (does not remove ports).
• Available connections: This is a list of all the available connection ports, with one tab for each
application, and one for the system sound I/O (“system”).
Note: The number of “ports” created will define the channels of the send. Sends can have 1
(mono), 2 (stereo) or more (multichannel) ports assigned.
*
Harrison Consoles Mixbus v4 - 1
Page 251 of 515
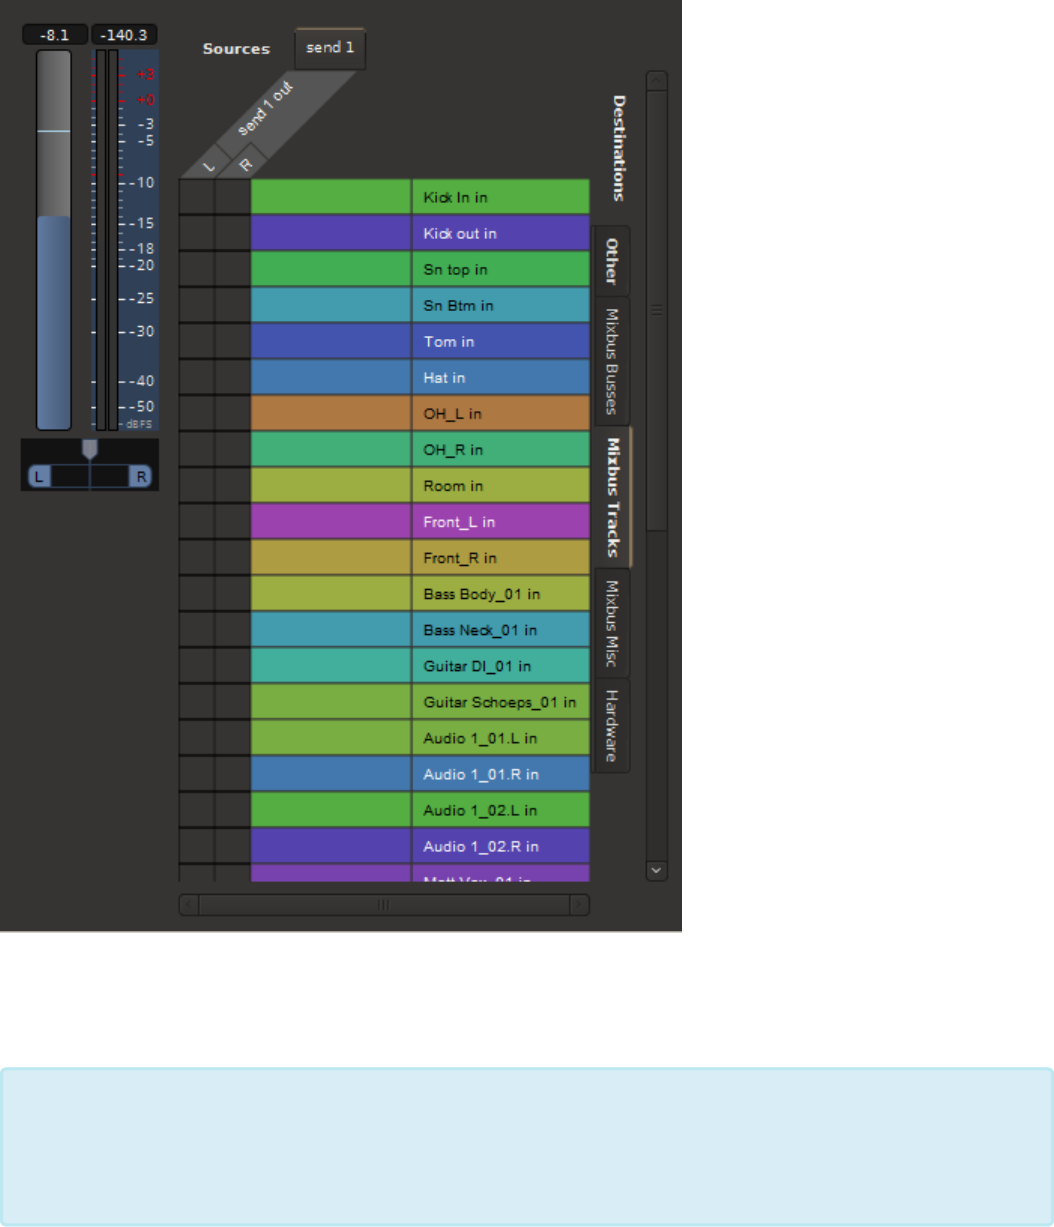
After a send has been configured, a double-click on the send will launch the Send Editor:
In addition to the output management, The Send Editor also has a volume slider and a panner (if the
number of outputs is > 1).
Sometimes when you mute a track, you still want a Send to remain active (for a headphone
feed, for example). It is possible to disable the mute for pre- and post- fade sends
separately. To enable or disable the pre- and post-fader send mute, right-click on the Mute
button in the editor window.
*
Harrison Consoles Mixbus v4 - 1
Page 252 of 515
What is an “Insert”?
An “insert” is similar to a Send, but it both sends the signal out, and then provides a method to return the
signal immediately back into the channel. The most common usage of an “insert” is to send the channelstrip
signal out of Mixbus and into a hardware device for processing. Then the insert provides a return path from
the device, so you can hear its effect. You can enable and disable the “insert” to compare the signal with
and without external processing.
Inserts
An Insert incorporates a “send” output and a “return” input. The Insert send/return allows the audio signal to
be routed out of a channel and back into it, after performing some external processing. Inserts are often
used to “patch in” a piece of outboard gear that is not available as a plug-in (just like you might do with a
patch bay on an analog console)
• Measure Latency: Once your insert is connected to an external piece of gear, then click this button to
measure the latency. If the Insert is used on a track or mix bus, this delay will be accommodated
automatically.
Outputs
• Add/Remove: adds/removes a port to the insert “send”.
• Disconnect All: disconnects all sending ports (does not remove ports).
• Available connections: This is a list of all the available connection ports, with one tab for each
application, and one for the system sound I/O (“system”).
Inputs
• Add/Remove: adds/removes a port to the insert “return”.
• Disconnect All: disconnects all return ports (does not remove ports).
• Available connections: This is a list of all the available connection ports, with one tab for each
application, and one for the system sound I/O (“system”).* Available connections: This is a list of all
the available connection ports, with one tab for each application, and one for the system sound I/O
(“system”).
Harrison Consoles Mixbus v4 - 1
Page 253 of 515
Bussing
What is a Bus?
Abus is a signal path that one or many audio signals share to arrive at a common place. In the earliest days
of analog circuitry, a “bus” was simply a wire onto which one or more signals were joined together, and then
directed to the next stage of processing.
In digital audio, the electrical wire is replaced by a value (or series of values), representing the signal as it is
incrementally “summed” from various inputs. Then this final value (or series of values) is passed to the next
processing stage.
Buses are typically used for these fundamental mixing tasks:
1. Combining multiple signals onto the “master bus”, or main mix which feeds your speakers or
headphones.
2. Making a monitor mix, similar (but not necessarily identical) to the master bus, in which an artist can
hear themselves and other musicians.
3. Combining a subset of similar signals into a subgroup or “group bus”: for example you can make a
bus that combines the drum tracks into a Drum Bus.
4. Developing a secondary (effects or aux) mix, which is then processed with an effect such as reverb.
For example you can “send” multiple signals to a single reverb effect, with varying levels.
Rather than adding a plugin to every channel, using buses can be less taxing on your
computer. Inserting a plug-in, such as a reverb, on a bus saves the need of inserting a
reverb across many individual tracks. This also ensures the plug-in applies the same effect
across all the tracks being bussed for a more coherent and realistic sound.
*
Harrison Consoles Mixbus v4 - 1
Page 254 of 515
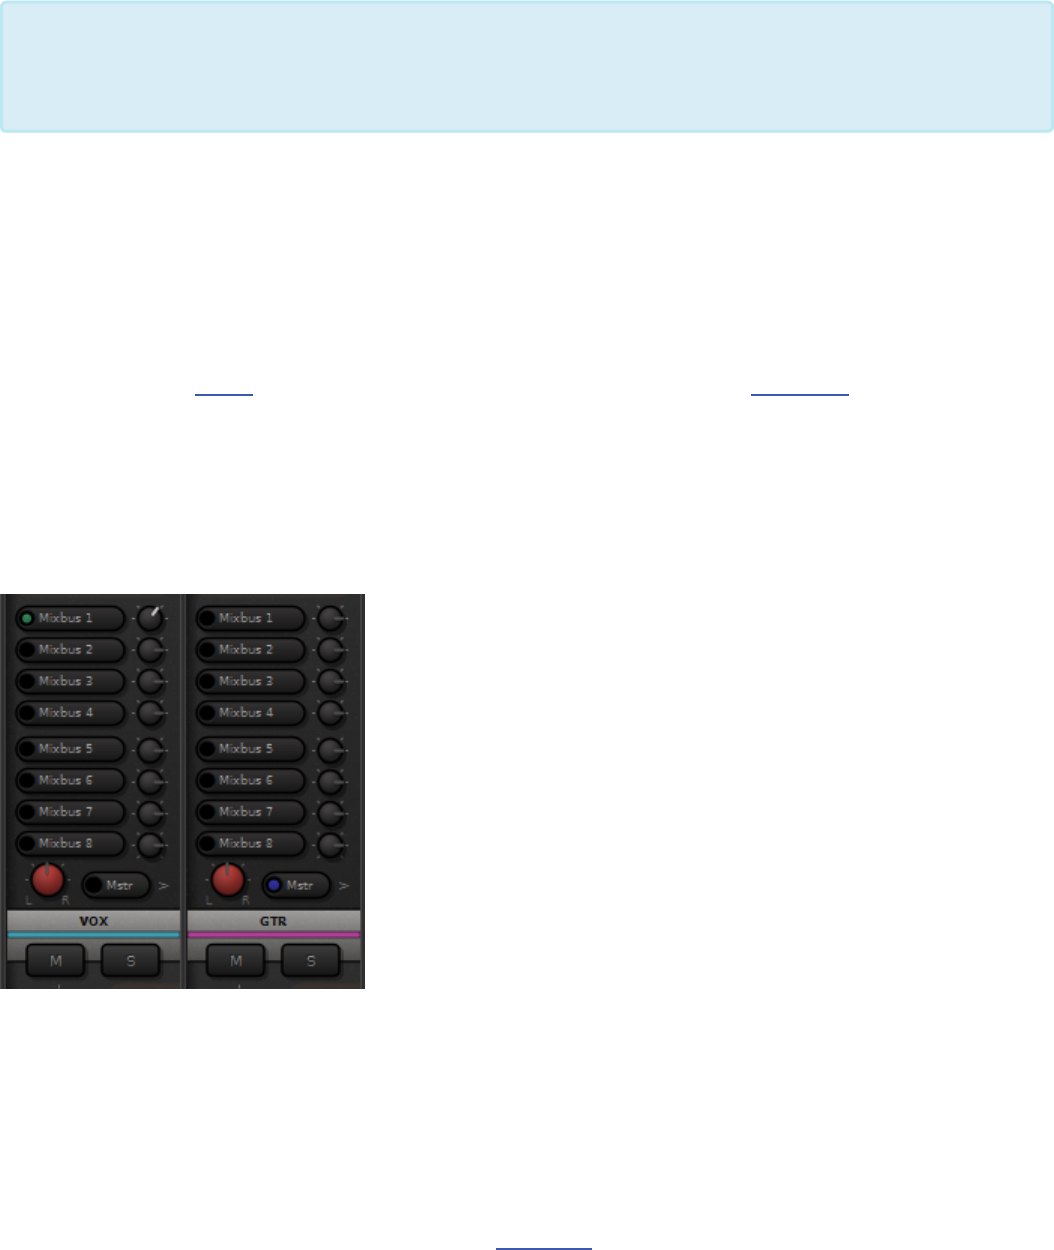
How do I use buses in Mixbus?
Mixbus has a built-in bus summing structure that is very similar to an analog mixing console.
Mixbus also has the ability to create an arbitrary number of “buses” ( some DAWs call these Aux Tracks, or
Inputs ) from the “New Track/Bus” dialog. You can connect these buses in various ways via the the channel
input, outputs, and “sends” mechanism. You can learn more about this in the Utility Bus section.
However, we encourage users to focus on the provided mixbus summing architecture, which
operates like an analog console. In most cases, this will result in the easiest, fastest, and best-
sounding operation. This bussing structure is what makes Mixbus special.
The picture below shows the Mixbus32C bus controls:
In the picture above, a Send from the track on the left, labeled VOX, has been routed to Mixbus 1 and the
gain of that send attenuated from a default of 0 dB to about -18 dB. The amount of gain or attenuation is
displayed in the slate area while making changes (in this image the slate has a label of “VOX”). The master
send on the VOX track is turned off as denoted by the absences of the blue indicator. The name of the send
is tied to the name of the mixbus (i.e. if you rename mixbus 1 it will relabel the send to reflect the change).
Mixbus provides these bussing features from each input strip:
A “bus” has no recorded audio stored in it like an audio track does. A bus serves to sum and
processes audio signals “live”. Buses do, however, have a representation in the editor
timeline, so their controls can be ‘automated’.
*
Harrison Consoles Mixbus v4 - 1
Page 255 of 515

• 8 stereo mixbus “sends” which correspond to the 8 available mixbus strips in the mixer window.
◦ Each bus has an on/off indicator, and a level control.
◦ Mixbus sends occur at the end of the processing redirect list, and therefore are post-fader and
they follow the master bus pan setting
• Master bus, with on/off indicator and stereo pan control
•Sidechain bus assignment
Utilizing a mixbus as a “Group Bus”:
To use the mixbus send as a “group bus”, you will typically click the Bus assignment button, and leave the
bus send knob at the default position of “unity” or 0dB.
For example, you might assign all of the “drum” tracks to mixbus #4, and name it “Drum Bus”. In this case,
you have a single volume control (fader), EQ, compressor, and series of plugins that can be applied to the
drum group overall.
Utilizing a mixbus as an “Effect Send”
To use the mixbus send as an “effect bus”, you will typically click the Bus assignment button, and then
adjust the “send” knob to the desired level.
For example, you might assign the snare drum to mixbus #4, where you’ve placed a reverb plugin. You can
now adjust the level of the snare in the reverb bus, as compared to other instruments that are also feeding
the reverb bus.
From an input channel, you may send to any combination of the multiple mixbuses and/or
master bus simultaneously. Latency compensation is provided in the mixer so that these
signals will reach the master bus with coherent timing.
*
By leaving the master send on and engaging a Mixbus send, you may hear both audio feeds
simultaneously. The result will be an increase in volume. For that reason, you might want to
use the “exclusive assign” shortcut, by holding Ctrl ( or Cmd on Mac ) which will assign the
channel to the desired bus, and immediately de-assign from any other buses, including the
master bus.
!
Harrison Consoles Mixbus v4 - 1
Page 256 of 515
Bussing shortcuts
• Control clicking (Command on Mac) a bus on/off will exclusively-assign the track to that bus (other
buses will be turned off, so the track ONLY goes to the selected bus)
• Shift+Control clicking on a bus will assign ALL tracks to that bus. This is a quick way to send (or
remove!) every track from a bus.
Harrison Consoles Mixbus v4 - 1
Page 257 of 515

Utility Buses
Utility Buses
Utility buses are audio channels, just like tracks, but they do not record or play back audio. Instead, they
accept audio at the input, process it, and send it to the mixing buses. ( In Pro Tools, these are called Aux
Tracks )
Setting up a Utility Bus
• Click on the +(plus) button at the top of the group box slide out drawer on the leftmost side of the mix
window and select “Busses” from the drop down menu. Name your buss if you like, review all settings,
and click the “Add” button.
• Click on the Input button to select the soundcard input, or any combination of tracks and buses that
you want to feed into the utility bus.
◦ OR, if you want to use the bus as an “aux” with a level-controlled send from each source: Right
click in the redirect box within the channel strip you wish to bus and select “New aux send”. A
list will appear with your newly created bus.
Utility Buses are provided to support DAW-like workflows, and exist “outside” of the
Harrison mix engine. These kinds of buses are good for developing headphone feeds, and
other utilitarian tasks, but they are not guaranteed to provide latency-compensation if you
use a utility bus in your mix’s signal flow.
*
Harrison Consoles Mixbus v4 - 1
Page 258 of 515
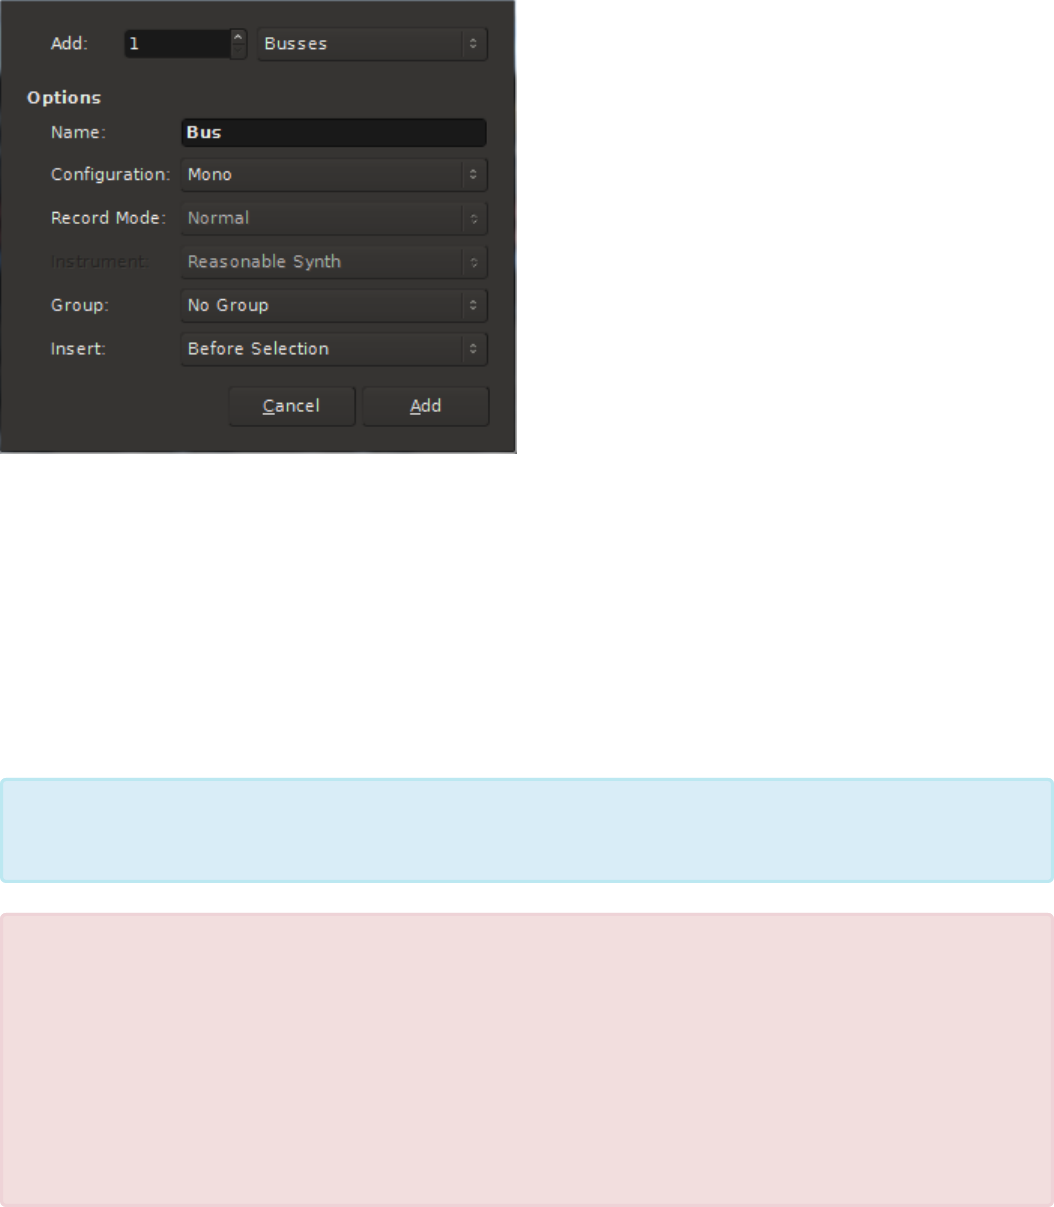
In this example 1 mono bus has been selected for addition to the session.
After creating the Utility Bus, to route audio from a channel strip to the bus, right click in the redirect box of a
channel strip and select “New Aux Send…” from the context menu.
A Send will appear in the redirect box with a gain control slider.
The context menu Send Options > Linking Panners is not available at this time.
You can delete a bus by right-clicking on it, in the editor or mixer view, and choosing “Remove”.
A utility bus, like a mix bus or master bus, has no recorded audio stored in it. A utility bus
serves to sum and processes the audio.
*
Utility Buses allow arbitrary routing ( even loops). For this reason, utility buses currently do
NOT provide latency compensation. If you add a plug-in to the utility bus, it may cause a
discernible delay if it is summed back into the “clean” signals. If you use utility buses as a
convenience to combine several signals into a single path, and you don’t also assign those
signals to a different path, then you likely won’t find the delay bothersome. Similarly, if you
use a utility bus as a “reverb” aux bus, then the slight delay caused by the plug-in latency
will probably be unnoticeable. If you want flexibility to assign signals to multiple parallel
paths, AND maintain perfect latency compensation, then you should use the provided
Mixbus “True Analog” console controls.
!
Harrison Consoles Mixbus v4 - 1
Page 259 of 515
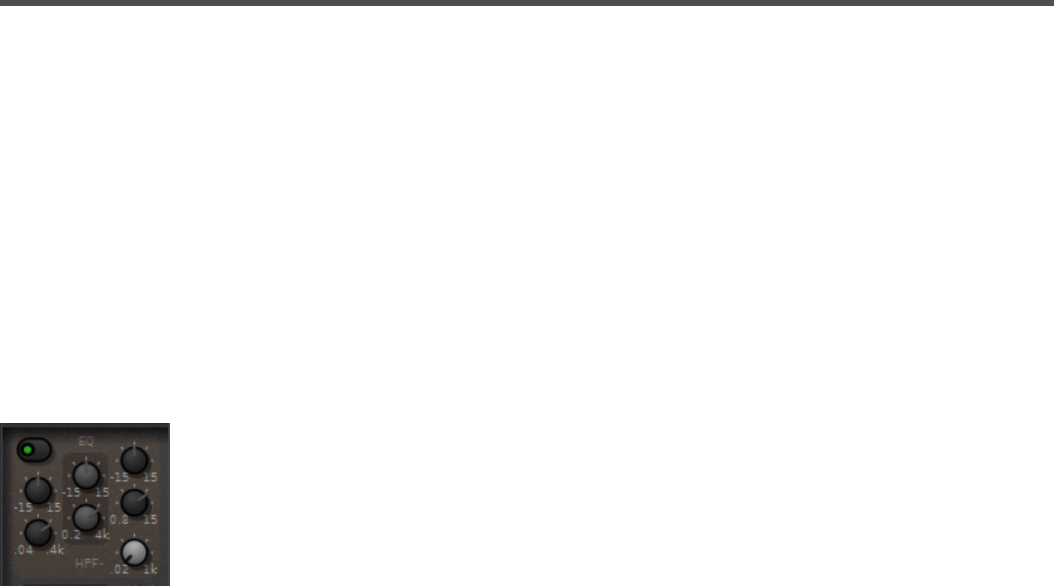
EQs
Channel Strip EQ
The Channelstrip EQ provides a very wide range of frequency and gain changes ( up to 15dB! ) to help tame
your tracks. The high and low bands are shelving filters for general tone sculpting, while the middle band is
a “proportional Q” design.
The proportional-Q design was used in the original Harrison consoles to allow an engineer to use the EQ as
either a subtle tone shaping tool, or a steep filter problem-solver, with only 2 knobs. As the gain is
progressively increased (or cut), the Q becomes progressively narrower. A typical technique is to increase
the gain to maximum, sweep the frequency to find the offending sound, and then turn the gain to minimum
to “notch” out the unwanted frequencies.
Specifications:
Gain Range +/- 15dB
Frequency Ranges (adjustable):
• HI: 800 Hz to 15,000 Hz Q=1.0 Shelf
• MID: 200 Hz to 4000 Hz Proportional-q bell
• LO: 40 Hz to 400 Hz Q=1.0 Shelf
HPF 12 dB/octave, frequency ranges 20 to 1,000 Hz
Mixbus EQ
The Mixbus EQ provides carefully chosen center frequencies, and wide tone-shaping shapes, to provide
overall tone control of the signal on the bus. The gain range is slightly lower than the channelstrip EQs, to
provide more nuanced controls.
Harrison Consoles Mixbus v4 - 1
Page 260 of 515

Specifications:
Gain Range +/- 9dB
Frequency Ranges (fixed):
• HI: 2000 Hz Q=1.0 Shelf
• MID: 800 Hz Q=0.7 Bell
• LO: 300 Hz Q=1.0 Shelf
Master Bus EQ
The Master Bus EQ provides very fine control of the final output tone. The band frequencies are carefully
chosen to address the problem areas of a typical pop music mix: very low frequencies, mid-low frequencies,
and “very high” frequencies ( leaving the primary mid-band relatively unchanged, as the reference ) The
limited gain range ( +/- 6dB ) provides for very fine adjustments.
Specifications:
Gain Range +/- 6dB
Frequency Ranges (fixed):
• HI: 4000 Hz Q=1.0 Shelf
• LO/MID 300 Hz Q=0.7 Bell
• LO 90 Hz Q=1.0 Shelf
Harrison Consoles Mixbus v4 - 1
Page 261 of 515

You can copy EQ settings from one track to another by dragging the EQ processor (in the
processor list at the top of the channelstrip) onto another channel’s EQ processor.
*
Harrison Consoles Mixbus v4 - 1
Page 262 of 515

Compression Techniques
What is a compressor?
A compressor is a device that automatically reduces the volume of a signal when it exceeds a threshold
volume level. Knob settings determine how fast it will decrease the signal, as well as how strong the effect
is. Compression can serve the technical purpose of reducing the dynamic range of a signal; or it can be
used as an artistic effect by changing the sound’s volume envelope.
Basic controls of a compressor
• Threshold: The “threshold” defines a level at which the compressor will start to activate. Signals
quieter than the threshold will not be affected by the compressor. For more dramatic compression,
drag the threshold “down” so that it overlaps more with the input meter.
• Ratio: Ratio defines the strength of the compression once the signal exceeds the threshold. With a
ratio of 10:1, exceeding the threshold by 10 dB will only result in an increase of 1 dB at the
compressor’s output.
• Attack/Release: the attack and release speed affect how fast the volume change can happen. You
can adjust these settings to avoid objectionable artifacts of the compression effect (if used for
dynamic-range control), or to accentuate the effect (if used for artistic purposes).
• Makeup gain: A compressor reduces the loudest signals of a track. Makeup gain is used to bring the
complete track back to the level before it was compressed. The makeup gain applies equally to the
loud and quiet signals, so the quiet parts are effectively made louder after compression and makeup
are applied.
Harrison Consoles Mixbus v4 - 1
Page 264 of 515
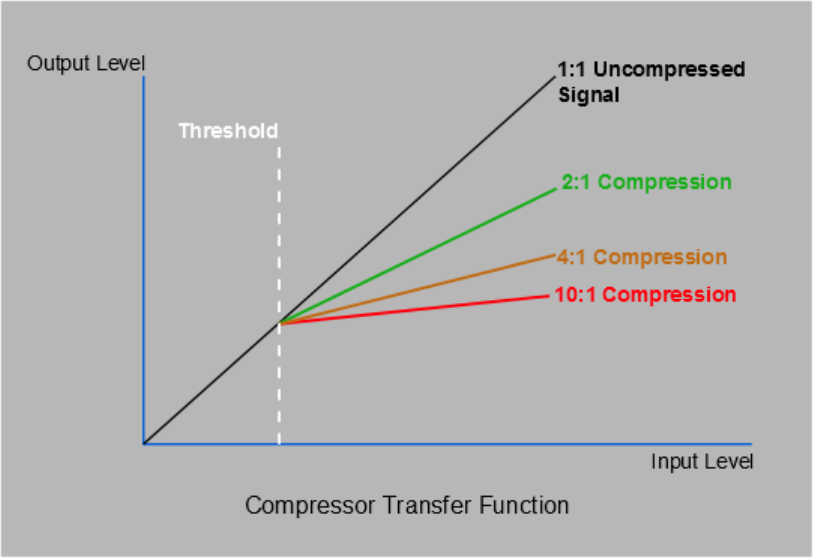
Mixbus provides a compressor on each channel strip. Each compressor has 3 modes (Leveler, Compressor,
Limiter) which can be selected. In the section below, we explain the most common compressor techniques
and how to achieve them using the Mixbus channel strip compressors.
Compression Techniques
It is commonly touted that ‘a great compressor makes everything sound better’…. but what does that mean,
and is it really true? Ignoring the crosstalk, noise, frequency-response irregularities, and distortion inherent
to these boxes, why are compressors desirable? In this section we will try to objectively evaluate why some
mixers like to use compression on their tracks. It’s worth mentioning that some of the best mixes were made
with little or no audio compression. But if we know what a compressor does, then we can make sensible
decisions whether to apply compression or not.
1. Leveling: The “leveler” mode has a very low ratio, a very fast release, and an adjustable attack (via
the “Speed” knob). Due to mic technique or other elements out of our control, sometimes a signal has
a very wide dynamic range. The “leveler” with a fast attack can be used to transparently reduce the
level of the loudest parts, so that the track has a more consistent level. Reducing the dynamic range
of our tracks can make them easier to mix, although it might rob some of the performance’s natural
dynamics. The leveler with a slow attack allows the initial sound (the first syllable of a word or phrase,
for example), to be passed through at full volume, while reducing the “body” of the sound slightly. This
Harrison Consoles Mixbus v4 - 1
Page 265 of 515
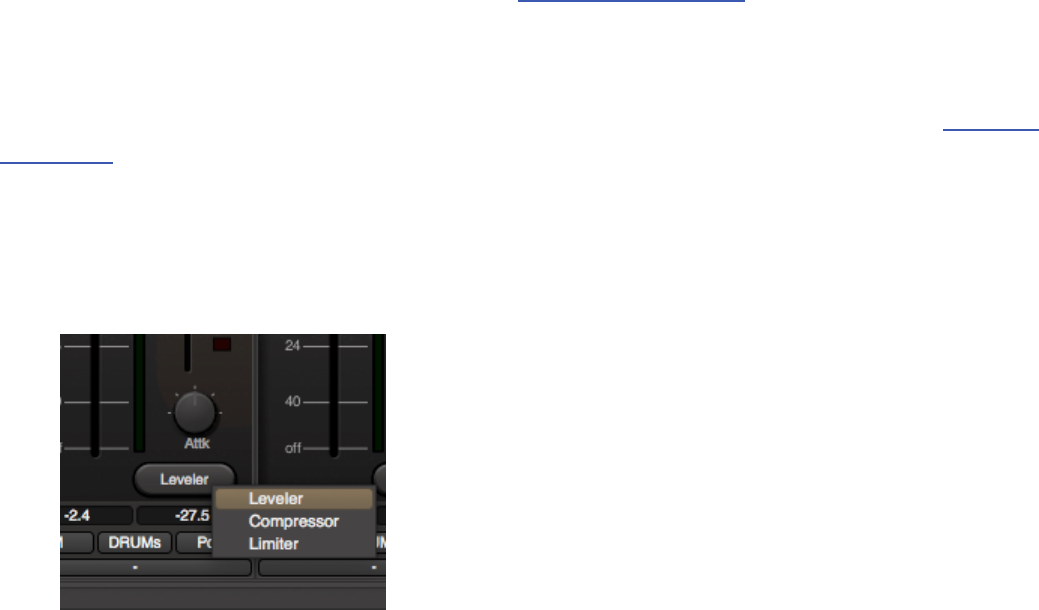
retains and enhances the character of the recording, and it can help improve intelligibility of words
and instruments in a busy mix.
2. Compression: The “compressor” mode is more aggressive than the Leveler. It has a fixed attack/
release time, and an adjustable “ratio” (compression strength). Compression dramatically reduces the
dynamic range of the signal, and it is less transparent than the leveler. Compression is a natural effect
of amps driven to their limits, or vocal shouting. Therefore our brains perceive compressed signals as
“louder”, regardless of their actual volume. Because the loud signals are brought much lower, it
makes the quiet signals sound as loud as the loud parts. This means that mouth noises, valve noises,
and other ancillary sounds will sound more pronounced. This can impart a “nearby, in-your-face”
effect.
3. Limiting: The “limiter” mode has a nearly-instant attack, and a variable release. A limiter is a very fast-
acting compressor, and these were initially designed to capture signal peaks before they were passed
on to sensitive broadcast antennas, disc-cutting lathes, or speaker systems. Limiters have a very fast
attack and a very high ratio, making them destructive to most signals. A limiter can be used to blunt
the very short peaks of drum hits, and therefore allow the overall level to be increased. It must be
used very sparingly though, or the signal will sound distorted.
The mixbus strips provide a 4th mode, “Sidech”. See Sidechain compression for more details.
In addition to the channelstrip compressor, the master bus provides a final limiter. This is a look ahead
brickwall limiter set at -1dB, and it protects your final mix from exceeding full-scale digital. The “lookahead”
feature is a delay that reduces the distortion it applies your mix, at the cost of some latency. See Mastering
Techniques for more details on how (and when) to use this limiter.
The Harrison Mixbus Compressor Modes:
1. Leveler: The attack is adjustable and the ratio/release are preset. Turning the knob clockwise
increases the attack time ( makes the attack slower ).
Harrison Consoles Mixbus v4 - 1
Page 266 of 515
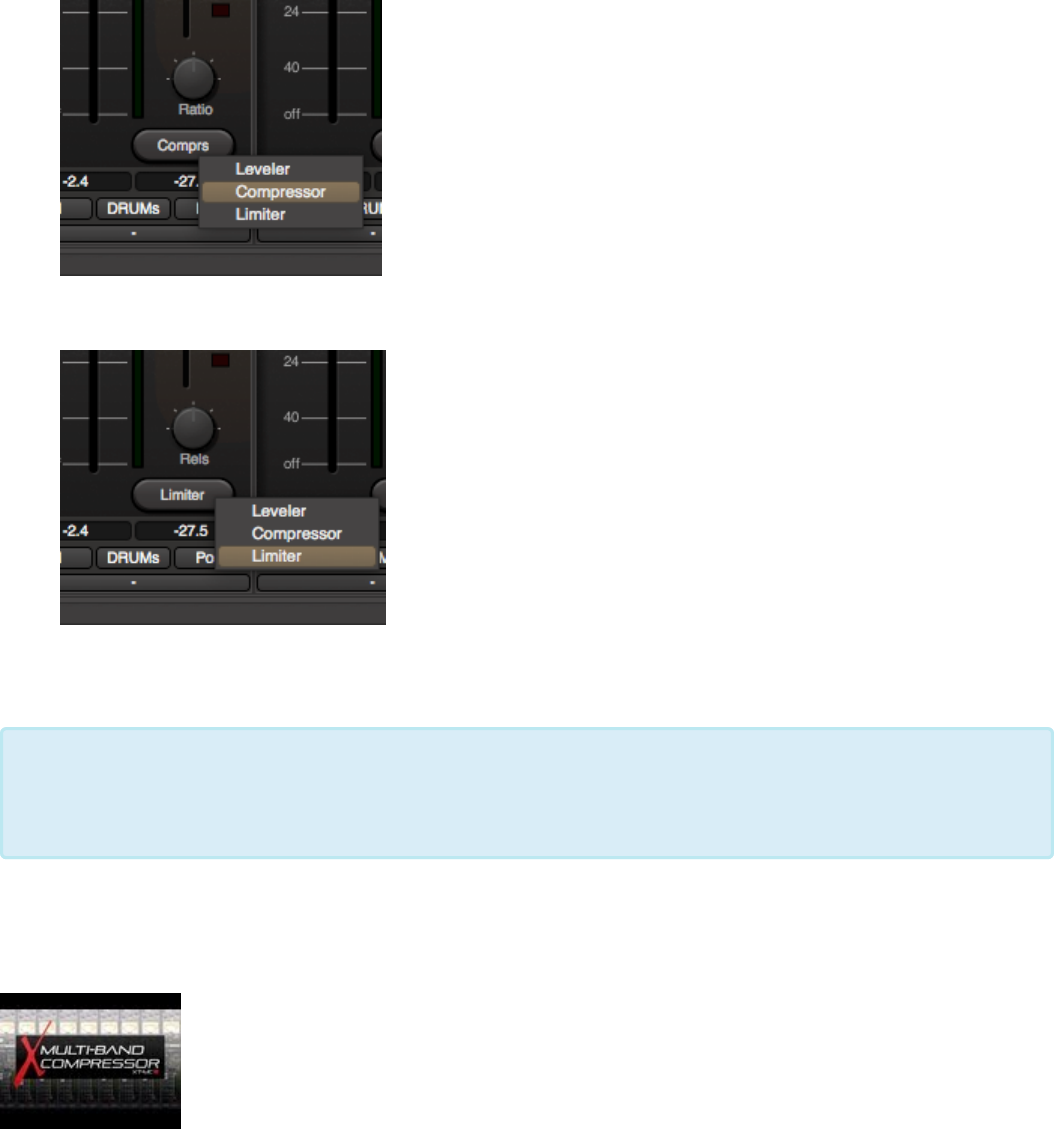
2. Compressor: The ratio is selectable and the attack/release are preset. Turning the knob clockwise
makes the ratio higher.
3. Limiter: The release is selectable and the attack/ratio are preset. Turning the knob clockwise
increases the release time ( makes the release slower ).
These 3 modes are designed to provide the most common compressor settings for music.
Additional Harrison developed compressor plug-ins and Compression
Techniques:
You can copy compressor settings from one track to another by dragging the compressor
processor (in the processor list at the top of the channelstrip) onto another channel’s
compressor processor.
*
Harrison Consoles Mixbus v4 - 1
Page 267 of 515
Sidechain Compression
What is Sidechain Compression?
Compression is an automated way of reducing a signal’s level, dependent on the signal’s own loudness.
The louder the signal is, the more the compressor will reduce it. Side-chain compression reduces the level
of the signal using a different signal to trigger the volume reduction.
In pop/rock music, this technique is sometimes used to “duck” the bass guitar on each kick-drum hit, making
the bass and kick drum sound like a single instrument. In dance/EDM styles, it is often used to generate a
“pumping” effect using the kick drum or a “ghost” kick drum track that is not actually heard. In this case the
release is set very slow; after each beat the signal slowly rises, reaching full intensity just before the next
beat.
Mixbus provides 2 different methods of sidechaining: a fast and simple built-in method, and a more
complicated method that uses 3rd-party plugins.
Simple sidechain technique using Mixbus’s built-in
Sidechain bus:
A sidechain “send” toggle is built-in to the channel strip, just to the right of the master bus assign button.
Harrison Consoles Mixbus v4 - 1
Page 269 of 515

image above: the sidechain toggle is highlighted red when active
This is the signal that gets assigned to the sidechain bus. The signal is generated at the very end of the
channelstrip; this guarantees that it incorporates all the necessary timing offsets so that any plug-in latency
on the track(s) is accommodated.
Mixbuses have a mode, “Sidechain”, which uses the signal on the sidechain bus to compress, or “duck”, the
signal on the mixbus using the onboard compressor. To guarantee time-coherence, the channel strip
compressor element should be located before (above) any plug-ins that cause latency (otherwise, the main
signal will be delayed in comparison to the sidechain send).
Multiple tracks can be assigned to the sidechain bus (their signals will be summed together). Multiple
mixbuses may pick from the sidechain bus.
Harrison Consoles Mixbus v4 - 1
Page 270 of 515
Advanced sidechain technique using third-party plugins and
the plugin pin-management dialog
This technique is much more complicated and depends greatly on the plug-ins you have available, the
quality of the plug-ins, and many other factors including the effect of latency on the signal flow. However it
does provide more flexibility; firstly you will have more compressor parameters to change, and secondly you
have more options where to place the plug-in, including other input channels or the master bus.
Harrison Consoles Mixbus v4 - 1
Page 271 of 515

Mastering Techniques
What is Mastering?
“Mastering” is the process of preparing a sound track for distribution. It might involve, but is not limited to:
• Critical listening, to verify that there are no technical errors in the final product.
• Fixing equalization problems that were caused by poor acoustics in the original production/mixing
room.
• Applying final tone control to match the overall tone of other tracks in the collection, or comparable
tracks in the same genre.
• Applying final loudness adjustments to match the level of other tracks in the collection, or comparable
tracks in the same genre.
• Sequencing of tracks into a collection ( i.e. sequencing songs on a CD ).
• Applying frequency-limiting and dynamic-range adjustments, to match the media that will be
distributed.
• Creation of metadata (such as track markers, song name(s), performance rights, etc ) for the
distribution media.
• Exporting/packaging the distributable in a format that is suitable for the next stage of duplication/
distribution.
Although many of these tasks are outside the scope of Mixbus, Mixbus provides several tools that can help
with the mastering process.
Master Bus Processing and Metering
The master bus provides a suite of processing and metering that helps achieve the overall tone and
loudness that the artist wants.
Master bus strip tone controls
The master bus provides a 3-band EQ (“tone”) control for the final output. The tone control has a fairly
limited range ( +/-6dB) for fine control. The center frequencies are optimized to solve problems that are
commonly used in the final stages of mixing:
• Low: a low-frequency shelf at 90Hz : the Low band is provided to balance the low bass content of the
track, without having to re-mix the bass instruments.
Harrison Consoles Mixbus v4 - 1
Page 272 of 515

• Low Mid: a wide bell shape at 300Hz : many instruments have strong output in the low-midrange, and
they can combine to make too much energy in this range. This range is also a site for tape-saturation
harmonics. The “Low Mid” band is provided to increase or decrease the main band of music.
• High: a high-frequency shelf at 4,000Hz : A high-frequency shelf at 4 kHz allows you to brighten the
entire track without unduly affecting individual instruments.
Master bus strip compressor
The master bus strip compressor operates like the channelstrip compressors. ( see : Compression
Techniques )
Because the master bus strip compressor is applied before the Master Limiter, this provides a chance to
level-match parts of a song (using the leveler mode), or to clip outstanding transients before they reach the
master limiter (using the limiter mode).
Typically a very small amount of compression is needed on the master bus, therefore the master bus limiter
threshold has a very different “scaling” than the channelstrip compressors. You have to pull the threshold
down much lower before it has any effect.
The order of master bus compressor, fader, and EQ may be manipulated to achieve a wide range of desired
effects before the signal is finally sent to the master bus limiter.
Master Limiter
The master bus limiter. It has no controls other than an on/off indicator.
The Master Limiter is a lookahead limiter with a very fast attack and release time. The “lookahead” is a short
delay, that allows the limiter to “look ahead” and begin reducing the gain before a loud peak occurs. This
dramatically reduces the distortion that is caused.
Each segmented LED represents 1 dB of gain reduction.
Compared to Mixbus v2, the release time of the Master Limiter has been dramatically shortened. This allows
the master limiter to operate more aggressively without noticeably lowering the volume of the track’s
average level, or pumping.
Harrison Consoles Mixbus v4 - 1
Page 273 of 515

Plug-ins
There are many plug-ins that are developed specifically for the master-bus output, for the purpose of
increasing the master output level. These may be placed in the channelstrip signal flow, and used instead
of, or in conjunction with, the Mixbus master bus processors.
Stereo Correlation (“Phase”) Meter
The stereo correlation meter provides an indication of the “mono compatibility”, or stereo width, of your mix.
The indicator uses a bright bar which simultaneously indicates the range of in-phase (highly correlated) and
out-of-phase (decorrelated) sounds in your mix.
• If the indicator is fully to the right, and yellow, this indicates a completely “mono” mix. (the signals in
the left and right channels are the same)
◦ many signals (such as a spoken-word recording with one microphone) should be mono.
• If the indicator is fully to the left, and fully red, this indicates a mix that is completely “out of phase”, in
other words the left and right channels are equal, but one is inverted with respect to the other. This
almost certainly indicates a technical fault which should be investigated.
• If the indicator is largely to the right, and green, then it indicates a mix with some stereo width, but
largely mono compatible. This is optimal for pop music recordings that might be played in a variety of
playback systems.
• If the indicator is in the center, showing a range of red and green, then the mix is very wide stereo.
This is probably not optimal for pop/rock recordings, but can be acceptable for natural or orchestral
recordings. Mono compatibility of this mix is questionable.
Mono compatibility is largely defined by low frequencies. If your mix indicates poor mono compatibility ( red
bar on the left ), then you can probably solve this by reducing the number of bass instruments in the mix,
high-pass filtering any non-bass instruments, and high-pass filter any stereo effects, such as reverb, in the
mix.
K-14 Meter
The K-14 meter is an RMS (averaging) meter, originally specified by mastering engineer Bob Katz as a
means to compare and help control the dynamic range of pop music mixes. (see : http://www.digido.com/
how-to-make-better-recordings-part-2.html )
The K-Meter displays the level of the signal directly before the output of the master bus. The K-Meter comes
after the fader, EQ, plugins, and final limiter in the master bus.
Harrison Consoles Mixbus v4 - 1
Page 274 of 515

If the K-14 meter indicator is straight up, at 0, this indicates that the sound’s average level is at -14dBFS.
This was selected as a good target for most pop/blues/jazz/rock recordings. At this level, a song will sound
quieter than most contemporary pop music, but when the listener turns the volume up to match, the
increased dynamic range of this mix will allow the song to sound much better than a typical pop song played
at the same volume.
Increasing the volume beyond the “0” indicator will result in a louder mix, at a cost of decreased fidelity and
impact when the user turns the volume up.
In the past, it was highly encouraged for mastering engineers to create music at the highest
possible average level, because this made the songs noticeably louder when they were
played adjacent to other performer’s songs on a CD or mp3 player. However, in the case of
modern radio broadcast, online channels such as YouTube, and internal processing in
iTunes and iPods, it is now likely that your music will be level-matched (based on average
loudness) with other songs. In this case, it is advantageous to mix at a lower volume, and
leave more headroom for short musical peaks which will make your mixes sound louder and
better than the more heavily-processed tracks that were popular in the early digital era.
*
Harrison Consoles Mixbus v4 - 1
Page 275 of 515

Groups
Tracks (and busses) may be assigned to a “group” which imparts some special behaviors. For example, you
might want to put the drums in a “group”; in this case, adjusting the fader on one track will apply to the
others.
What is a Group?
A group is a mechanism of connecting several tracks together when they have a strong inter-channel
relationship. By default, tracks in a group will be ‘selected’ together whenever one track is selected; they will
be edited together; they will share the same color; moving one fader will move all of the group faders; and
assigning a track to a mixbus will assign all the group’s tracks to a Mixbus.
The most common usage for “groups” is when the tracks are separate, but they actually represent a single
“recording”, such as a stereo pair, or a drum kit that was recorded live, or a 5.1 multichannel track. The
“group” helps to preserve the togetherness of the tracks.
A track can only be assigned to a single group, whereas a track can be assigned to multiple mixbuses or
VCA Faders.
A group of tracks should not be confused with a mix bus. Confusion sometimes comes from the fact that
much of the time a mix bus has more than 1 track bussed to it. Likewise, a group has more than 1 track
associated with it. However, a group of tracks will not sum their audio, but will group certain software
functionality which allows for better session organization and more efficient mixing and editing. That’s
not to say you can’t have all tracks in a group bussed to its own mix bus. It’s quite common in fact.
For instance, a session may have 6 drums tracks and after finding the right balance between those tracks
you might group them so that moving one fader moves all in that group, causing all the drum tracks to
change level. Or soloing one track in the group solos all in that group. Clicking on the group header will
disable the group allowing individual changes to the tracks, after which the group can be re-enabled.
Harrison Consoles Mixbus v4 - 1
Page 276 of 515
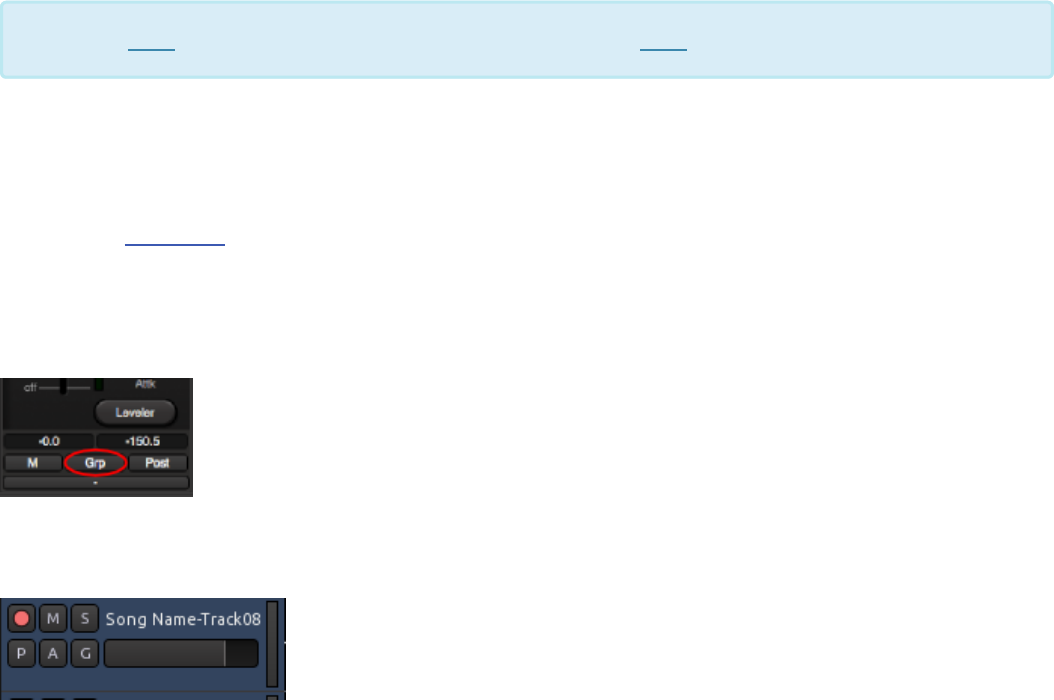
How do you create a group?
By clicking and dragging in the Group Bar, you can quickly assign multiple consecutive channels to a new
Group. See: Group Bar
A group may be created or altered by clicking on the “Grp” button below the track fader. Once the group is
named the “Grp” will be replace with the groups new name or a shortened version of it.
Alternatively, a group may be created or altered by clicking on the “G” button located in the track header.
Click here to view a video on groups and bussing, and here for a video on subgroups.
*
Harrison Consoles Mixbus v4 - 1
Page 277 of 515

Creating a group from the mixer window “Group” area.
The Group section of the mixer window, showing the +/- and Enable/Disable for each group
Here all groups that have been created for the session are listed. A check box labeled “Show” is provided.
Un-checking this box will hide a group from the edit and mix window. Hiding a group is a convenient way
of un-cluttering your sessions. Groups can also be added or deleted clicking the + or – buttons at the
bottom of the window. Clicking on the name of the group allows you to rename it.
Harrison Consoles Mixbus v4 - 1
Page 278 of 515
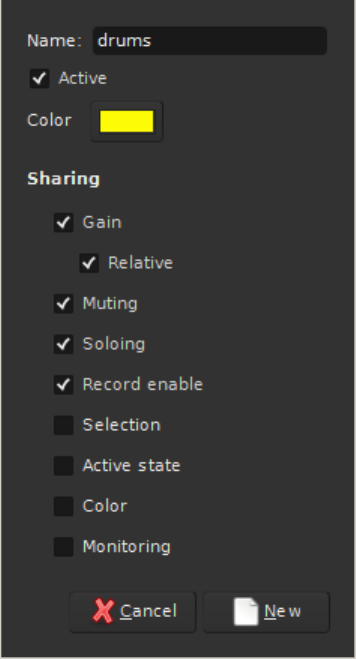
Options within a Group
Grouping tracks allows the sharing of certain functionality and the functions available within a group are
customizable. Right-clicking on a group tab calls up these options:
•Active: makes the group active/inactive
•Gain: syncs all faders to the same level
◦Relative: preserves fader differential between tracks
•Muting
•Soloing
•Record Enable
•Selection: links selections made in the editor canvas
•Active state
•Color
•Monitoring
Left-clicking on a group will enable or disable the group.
Harrison Consoles Mixbus v4 - 1
Page 279 of 515
Grouping behaviors when the “Gain” is enabled
• Dragging a fader will affect all the others in the group
◦ By default, this a “relative” move. ( the faders will retain whatever dB offset they have prior to
the move )
◦ You can disable the “relative” checkbox, and all the faders will be forced to the exact same
value, whenever you move one fader in the group
• Muting or soloing will affect all the others in the group
• Assigning or de-assigning a mixbus will affect the others in the group
Group Override
Holding “Shift” will override the group, resulting in these behaviors:
• Dragging a fader will affect only the current channel, not the others in the group
• Muting or soloing will affect only the current channel, not the others in the group
• Assigning or de-assigning a mixbus will affect only the current channel, not the others in the group
Harrison Consoles Mixbus v4 - 1
Page 280 of 515
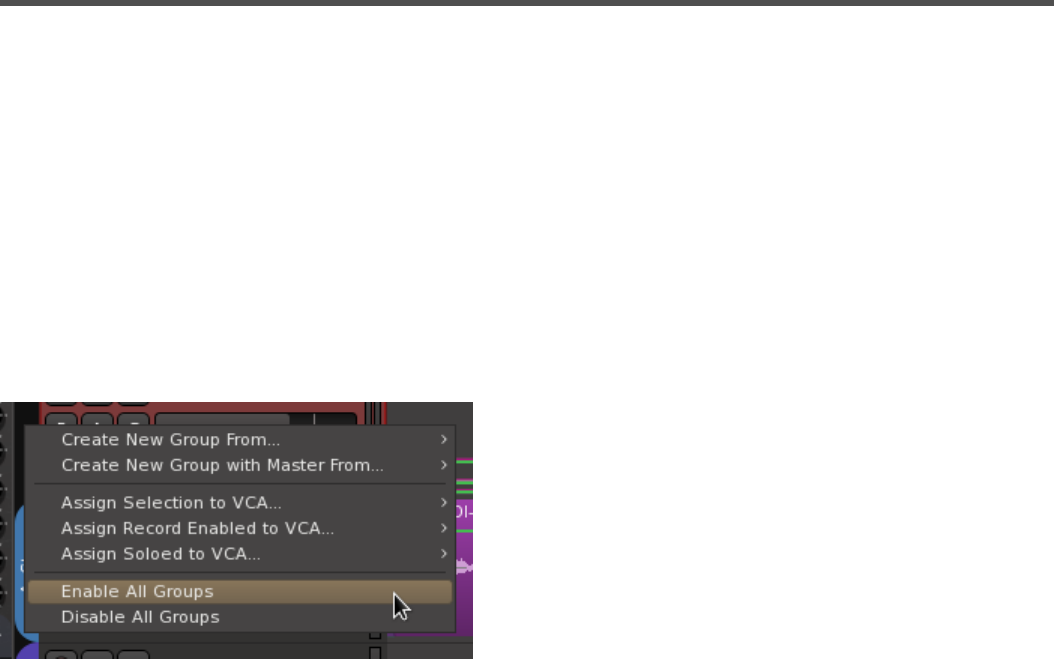
Group Bar
What is the Group Bar?
The Group Bar is an empty area to the left of the track headers (in the editor window) or above the mixer
channels (in the mixer window).
The group bar provides convenience functions to create groups from your channels, or assign them to a
grouping master bus, or assign them to a VCA master fader.
Operations from the Group Bar:
Right-click in the black (empty) group-bar area to display the Group-Bar context menu:
• Create New Group From : Select either “Selection, Record-Enabled, or Soloe’d” to create a new
Group with those channels.
• Create New Group With Master From : Select either “Selection, Record-Enabled, or Soloe’d” to create
a new Group with those channels. A new “bus” will be created, and your channels will be assigned as
the input for that bus.
• Assign Selection to VCA: The selected channel(s) will be assigned to the VCA selected from a
submenu
• Assign Record-Enabled to VCA: Any record-enabled channel(s) will be assigned to the VCA selected
from a submenu
• Assign Soloed to VCA: Any solo’ed channel(s) will be assigned to the VCA selected from a submenu
• Enable all groups
• Disable all groups
Harrison Consoles Mixbus v4 - 1
Page 281 of 515
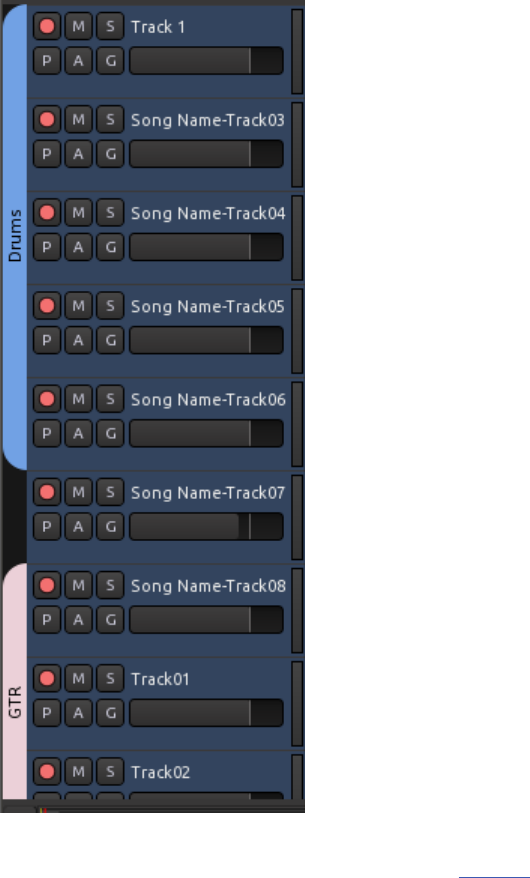
Creating an Edit Group with the Group Bar:
In the edit window, a group selection can be be made by clicking in the black bar to the left of the track
header. While holding the left click, slide the mouse vertically along-side the tracks you wish to group. Right
click on the name of the group to rename it. To add tracks to that group just left click and slide the mouse
alone-side the track you would like to add. This will create a group tab that extends the width of the tracks
assigned to that group. Many times it is convenient for a group to contain tracks adjacent to one another but
it is not absolutely necessary, a group of tracks does not have to be contiguous.
Learn more about the grouping functions here: Groups.
Right-clicking on a group tabs calls up a context menu for groups:
Harrison Consoles Mixbus v4 - 1
Page 282 of 515
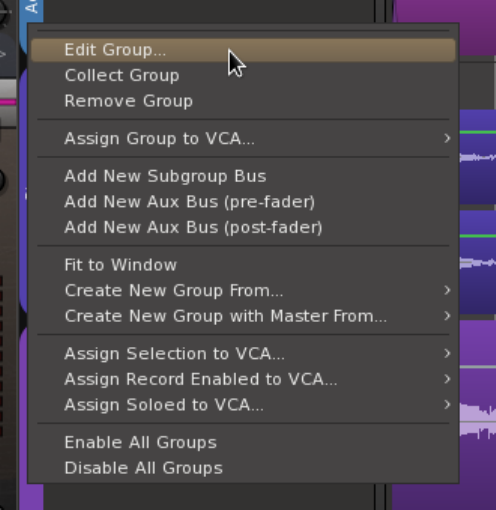
• Edit Group : launches the Group editor
• Collect Group : Moves the grouped tracks together into a contiguous series
• Remove Group : Deletes the Group (but not the tracks in it)
• Assign Group to VCA: The channel(s) in the selected group will be assigned to the VCA selected from
a submenu
• Add new Subgroup Bus : Creates a New Bus, and assigns the output(s) of the grouped tracks to it
• Add New Aux Bus (pre-fader) : Creates a New Bus, and creates a pre-fader Send to it, from each of
the grouped tracks
• Add New Aux Bus (post-fader) : Creates a New Bus, and creates a post-fader Send to it, from each of
the grouped tracks
• Fit to Window : the channel(s) in the selected group will be sized to fill the editor window (vertically)
• Create New Group From : Select either “Selection, Record-Enabled, or Soloe’d” to create a new
Group with those channels.
• Create New Group With Master From : Select either “Selection, Record-Enabled, or Soloe’d” to create
a new Group with those channels. A new “bus” will be created, and your channels will be assigned as
the input for that bus.
• Assign Selection to VCA: The selected channel(s) will be assigned to the VCA selected from a
submenu
• Assign Record-Enabled to VCA: Any record-enabled channel(s) will be assigned to the VCA selected
from a submenu
• Assign Soloed to VCA: Any solo’ed channel(s) will be assigned to the VCA selected from a submenu
• Enable all groups
Harrison Consoles Mixbus v4 - 1
Page 283 of 515

• Disable all groups
The mix-window group bar.
In the mix window, a group can be be created by dragging in the black bar above the channel strips. While
holding the left click, slide the mouse horizontally over the channel strips you wish to group. This will create
a group tab that extends the length of the tracks being assigned to that group. Many times it is convenient
for a group to contain tracks adjacent to one another but it is not absolutely necessary. You may have any
tracks in a group.
In all other ways, the Group Bar in the Mixer window operates identically to the Group Bar in the Editor
window.
Harrison Consoles Mixbus v4 - 1
Page 284 of 515
Automation
Region Gain and Automation
Mixbus has 2 separate types of automation: Region Gain Envelopes and Processor Automation.
Region Gain envelopes are often used for repair work, such as reducing unwanted breaths, accentuating
syllables, or reducing noise. The “region gain envelope” is part of the audio region, and is applied before
any other processing is applied in the mixer strip. Region Gain only adjusts the volume (level) of the region
across time.
Learn more about Region Gain automation in this video: Mixbus Gain Staging
Processor Automation is often used for creative changes such as fading elements in and out during a
song. Automation can be applied to many different mixing parameters including the input trim, fader,
panning, muting, or plug-in parameters.
Harrison Consoles Mixbus v4 - 1
Page 285 of 515
Fader, Pan and Plug-in Automation
Automation
The short video below demonstrates how to open an automation lane:
Automation is used to automatically change the setting of a knob, based on the time of the timeline. For
example you might want to increase the volume of a delay effect during the “chorus” part of a song, or
automate the master fader to make a smooth fade-out at the end of a track.
Many mixer parameters may be automated: fader, mute, pan, mix bus sends, eq, compressor, and plug-in
settings.
Real-time (“Touch”) Automation:
In Real-time automation the parameter is put into a “record” mode. While the transport is rolling, the user
moves a knob, and these moves are recorded.
In the Mixer window there is a dedicated automation button below every fader because this is a very
commonly-automated control (circled in red, below).
( this button only affects the automation mode of the fader )
Additional parameter automation can be accessed from the the track’s header: click the “A” button to view
fader and mute automation. Under “Processor Automation” are EQ parameters, Compressor parameters,
and plugin parameters. You’ll find the Pan and bus sends under “POST”.
Harrison Consoles Mixbus v4 - 1
Page 286 of 515
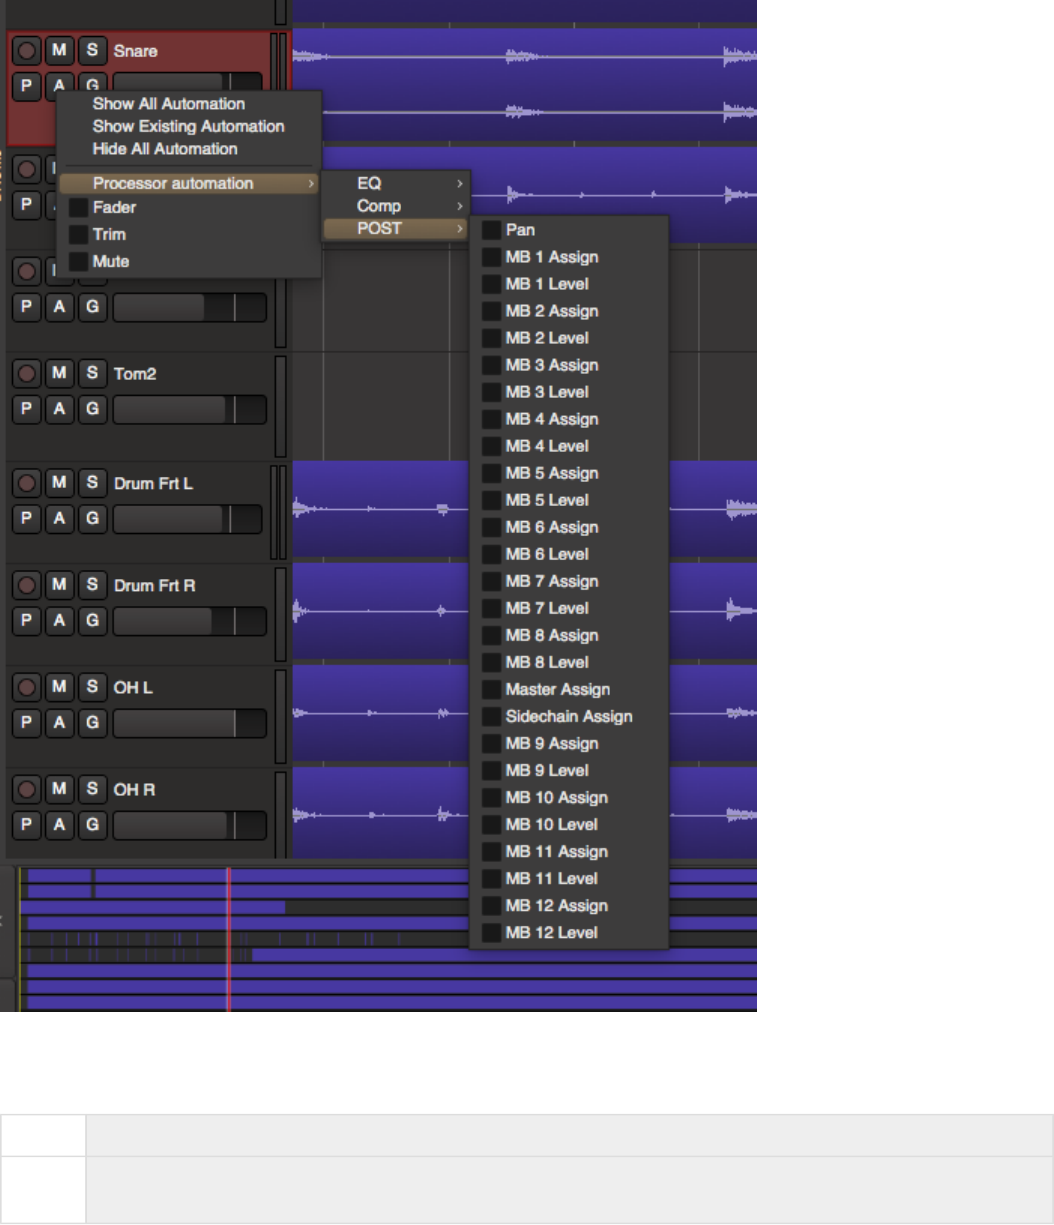
Here is a description of the modes:
Manual Automation is ignored.
Play Whenever you locate, the parameter will jump to the value that is recorded in the automation.
You cannot change the value manually.
Harrison Consoles Mixbus v4 - 1
Page 287 of 515

Write
When locating, the value will stay as it is (no playback of automation). During playback (only),
the current value will be written to automation. You can move the control manually and your
move will be written to the automation.
Touch The parameter will act like it is in Play, unless you “touch” it with the mouse. Then it will
record your moves until you release the mouse button.
The mouse wheel has a slightly different automation mechanism. When the wheel is turned, it “touches” the
parameter and begins recording the move. The automation continues to record until the transport stops.
This is sometimes called “Latch” mode.
Automation Thinning:
When automation is recorded in real time, the automation data points are “thinned” so that only enough
control-points are created to adequately capture the moves. The points will appear very sparse if the control
is moving slowly, and will be created very close together during fast moves. The aggressiveness of thinning
can be adjusted if necessary via menu Edit>Preferences>Misc.
Punching in your automation with “Touch” mode:
When you punch-in, 2 points are created: one to hold the previous value, and one to start the new changes.
Similarly, when you release the control (or stop a pass in Write mode) then 2 points are also created: one
which ends the new changes, and one to hold the previously-existing value.
Graphical Automation Editing: Automation tracks
You hide and show automation lines using the “A” button on the track header, or right-click on the track
header and select the parameter for automation.
Tip: “Write” automation is a quick way to copy settings from one place to another. Locate
the playhead while the parameter is in “play” to pick up the value you want to apply
somewhere else. Now change the mode to Write, and locate to the new place. Then play
through the desired section to apply the setting.
*
Automation is only recorded during forward playback. However it is possible to record
automation while the transport is looping! Using this feature you can audition several
different passes of the automation. When playback is stopped, the most recently-recorded
moves will be kept. For example, if you loop 3 times and then stop halfway through the
looped section, the resulting automation will be the first half of the 4th pass and the last half
of the 3rd pass.
*
Harrison Consoles Mixbus v4 - 1
Page 288 of 515

Automation appears in a separate track from the audio. Multiple automation tracks may be shown
simultaneously. If the automation track is associated with an audio track, a “ghost” of the region’s audio will
appear in the track. Buses do not show waveforms in the automation tracks.
Automation may be graphically edited using either the Draw, Grabber or the Edit (Contents) tool. The rules
for each are slightly different (and may change in the future)
Grabber tool
• Click a control point to grab it and move it
• Click a line to move the gain points on either side of the line.
• Right-click on a control point to Edit or Delete it.
Range Tool
• Drag a Range, then you can:
◦ Click Delete (or Backspace) to delete the automation in that range ( with guard points that
prevent you from adjusting data outside your range selection )
◦ Switch to the Draw tool, and drag up/down to move all the points in that range ( with guard
points )
◦ To view a demonstration, see this video clip: Region Gain editing with the Range tool. … this
technique also works with automation lanes.
Draw tool
• Click anywhere in the track to create a new control point, and connect it to the points on either side.
• Click a control point to grab it and move it. ( now it is selected so you can delete it )
• Click a line to move the gain points on either side of the line.
• Right-click on a control point to Edit or Delete it.
Edit Tool
This is a case where Mixbus is much smarter than some other DAWs you might be familiar
with. When you select a “range” of automation and delete the range, Mixbus doesn’t just
delete the automation ‘points’ inside the range. Instead, Mixbus creates a “guard point” at
the start and end of your range, and preserves the automation timeline before and after the
range selection. In other words, it only deletes the automation “inside” your range selection.
Sounds obvious, eh? But strangely that is not how some other DAWs work.
*
Harrison Consoles Mixbus v4 - 1
Page 289 of 515

• Click a control point to grab it and move it.
• Shift+right-click a control point to delete it.
• Click anywhere in the track to start a “box select”, then:
◦ Click Delete ( or Backspace ) to delete the selected points
◦ Grab one control point, and move them all together
• Right-click on a control point to Edit or Delete it.
Clicking with the Draw tool will create the first control point, and also draw a line to the very beginning of the
track.
• Click anywhere in the track to create a new control point, and connect it to the points on either side.
• Click a control point to grab it and move it.
• Click a line to move the gain points on either side of the line.
• Use the Range tool (or Object+Smart mode) to create a “range”. Now switch to the Draw tool, click
inside the range, and you can drag the entire range up/down.
Note: The Grabber tool can grab an automation point, and move them up or down, but it
can’t move their location in time.
*
Note: Using the Edit tool, you can click in empty space, and begin a “box selection” to select
multiple points at once. You can then click on a point to move them all, or you can press
Delete(or Backspace) to delete them together.
*
Note: Remember that in order for the automation to be auditioned, the parameter must be in
“Play” mode. You do NOT have to be in write or Touch mode to graphically edit the
automation though.
*
Note: Past the extents of the automation line, the “Play” value is the value of the last control
point.
*
Harrison Consoles Mixbus v4 - 1
Page 290 of 515
Region Gain Automation
Region Gain
Click above for video instructions.
Region Gain is a volume envelope that extends for the length of the region. By default, the region envelope
is “unity” (i.e. no change) across the entire region and it is hidden. To adjust region gain with the mouse,
you must use the Draw tool.
In many situations you may find it useful to turn grid mode off. Clicking on a region with the Draw tool will
cause a control point to be placed. By default, a region has 2 control points, one each at the start and end of
the region.
Tip: If you want to quickly change the gain over the entire region, then click on the region to
show the line, and then grab the line and move it up/down. This is an alternative to Region
Level.
*
Tip: This is an excellent way to tweak a syllable or reduce a section of noise, and it is often
more transparent than deleting it entirely. Also, looking through a waveshape and finding a
few of hot the spots and reducing the gain will allow the compressor to be set more
conservatively, providing a more transparent sound.
*
Harrison Consoles Mixbus v4 - 1
Page 291 of 515
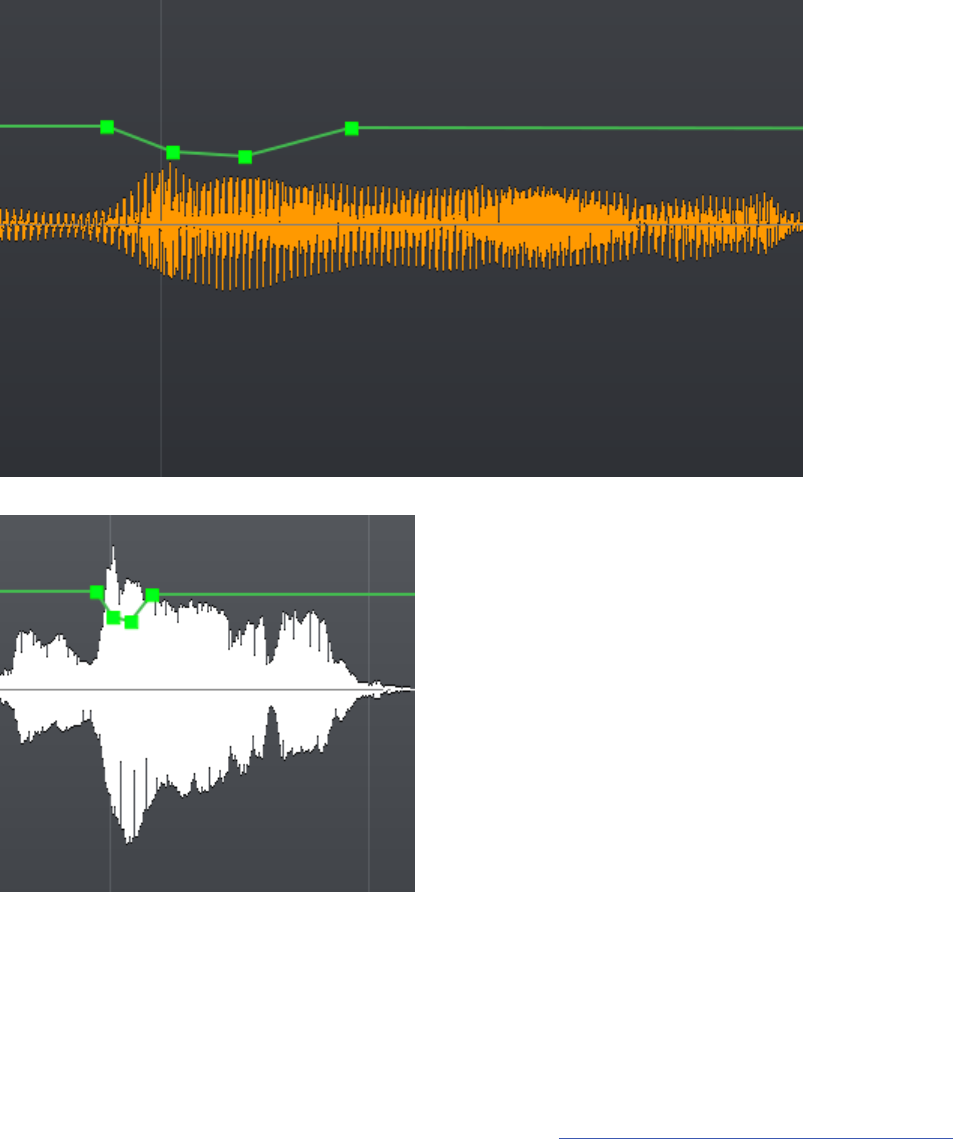
Mouse operations using the Range, Draw, and Edit tools inside a Region:
Range Tool
• Drag a Range, then you can switch to the Draw tool, and drag up/down to move all the points in that
range ( with guard points )
◦ To view a demonstration, see this video clip: Region Gain editing with the Range tool.
• Drag a Range, then click Delete to remove that range
Harrison Consoles Mixbus v4 - 1
Page 292 of 515

Draw tool
• Click anywhere in the region to create a new control point, and connect it to the points on either side.
• Click a control point to grab it and move it.
• Shift+right-click on a control point to delete it.
• Click a line to move the gain points on either side of the line.
• Right-click on a control point to Edit or Delete it.
Edit Tool
• Click a control point to grab it and move it.
• Click in empty space to make a rubberband-selection ( box selection ). This will select the enclosed
automation points which can then be moved or deleted together.
• Shift+right-click a control point to delete it.
• Right-click on a control point to Edit or Delete it.
Temporarily bypassing region gain
Menu>Region>Gain>Envelope Active
or
Right click on the region and click on the track name>Gain>Envelope Active
This is a case where Mixbus is much smarter than some other DAWs you might be familiar
with. When you select a “range” of automation and delete the range, Mixbus doesn’t just
delete the automation ‘points’ inside the range. Instead, Mixbus creates a “guard point” at
the start and end of your range, and preserves the automation timeline before and after the
range selection. In other words, it only deletes the automation “inside” your range selection.
Sounds obvious, eh? But strangely that is not how some other DAWs work.
*
Harrison Consoles Mixbus v4 - 1
Page 293 of 515
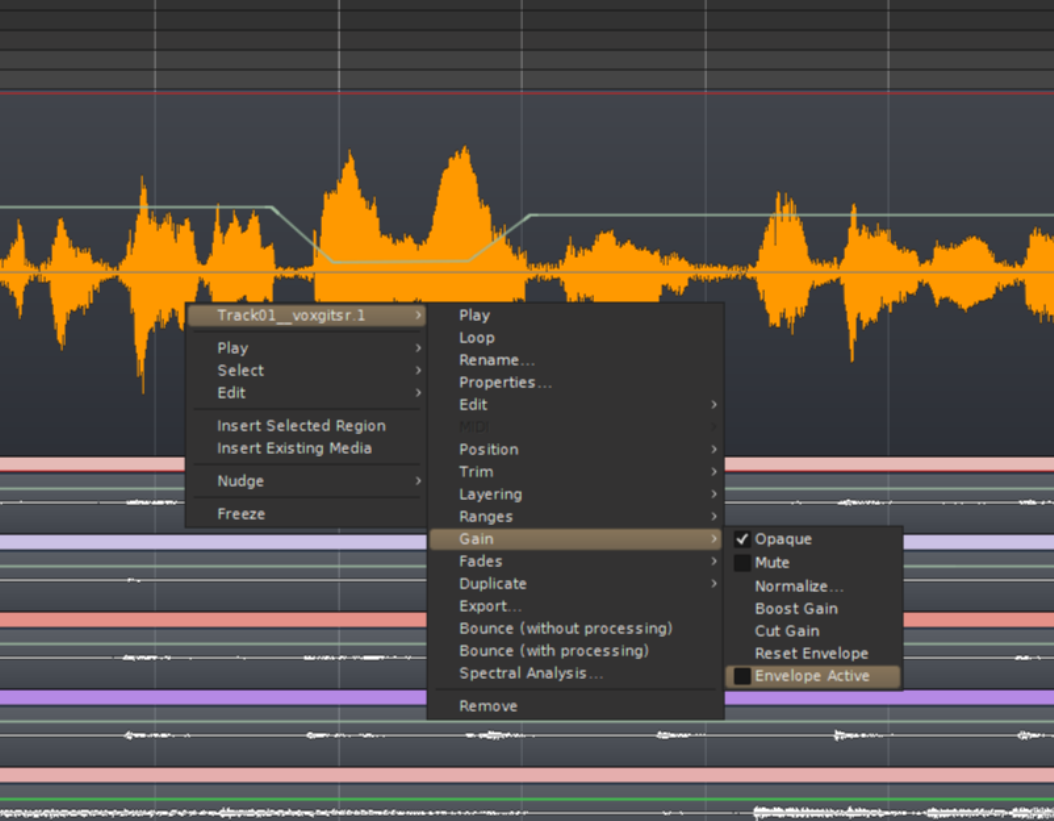
Harrison Consoles Mixbus v4 - 1
Page 294 of 515

Scripting
What is a “script”?
A “Script” is a text that follows a specific format, and operates like a small program inside the main Mixbus
program. This text (or “script”) can be typed inside Mixbus, and immediately used by Mixbus, rather than
first being “compiled” as part of Mixbus’s source code.
Mixbus can have an “unlimited” number of scripts provided by Harrison, or developed by the user.
We expect the number of provided scripts to grow quickly, as our users develop new scripting ideas.
Mixbus uses the Lua language for its scripting.
What is Lua?
Lua is a simplified programming language that is specifically designed for programs like Mixbus to use
internally.
Here is a very simple example of a Lua command:
Session:set_transport_speed (1.0)
This command would cause Mixbus to start the transport at speed 1.0. ( i.e. 100% or “Play”)
There is some additional text at the top of the script file that defines the script’s name and other details to
Mixbus.
How do I use Lua scripts?
Several example Lua scripts are provided for your use. There are 3 common ways to initiate a script.
Harrison Consoles Mixbus v4 - 1
Page 295 of 515
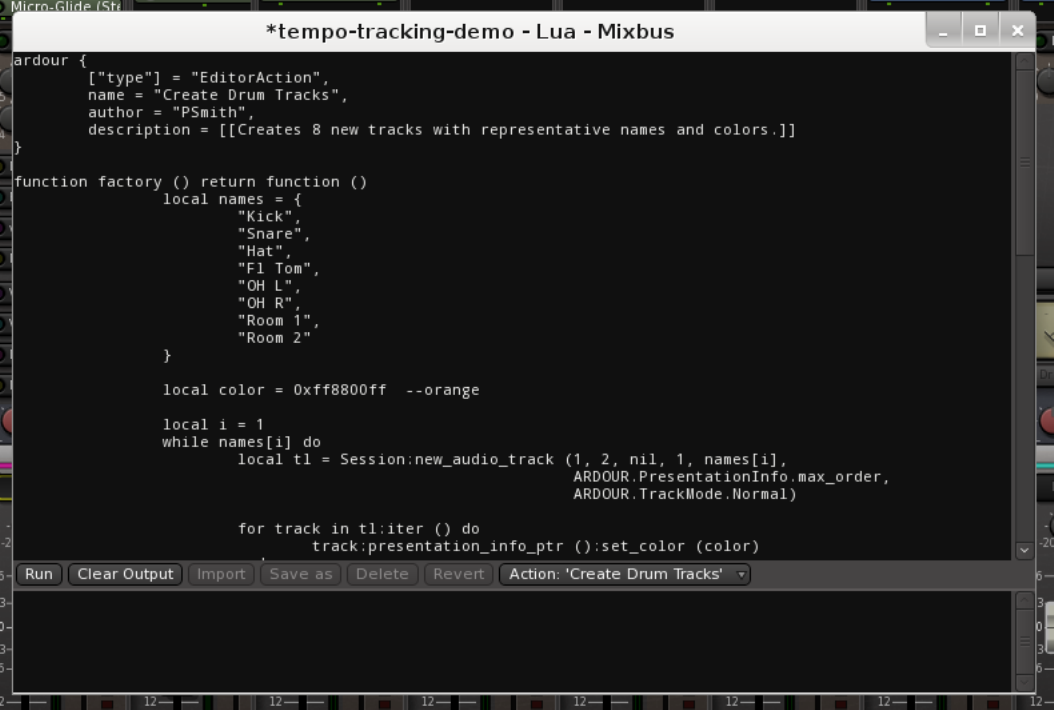
Lua scripts initiated directly from the “Scripting” window:
In Window->Scripting you can view a text editor where Lua scripts may be viewed, edited, and executed.
You may type Lua text directly into the text editor, and then initiate the script by clicking ‘Run’ in the bottom-
left corner.
In the bottom-right corner, you’ll find a menu which provides a selection of available scripts. Some of the
available Action scripts are ready-to-use. Another set of scripts, called “snippets” are provided as starting
points for your own Lua scripts. For example there are “snippets” that advance through each of the
session’s tracks.
The most common usage of scripts is to recall an existing script, and change it slightly for your immediate
needs.
For example: the “rename tracks” script will remove the text “track” from all of your tracks. But perhaps you
need to remove the word “session_song_” from all of your track names. In that case, you will load the
“rename tracks” script, but modify the text that it is removing or replacing.
Harrison Consoles Mixbus v4 - 1
Page 296 of 515
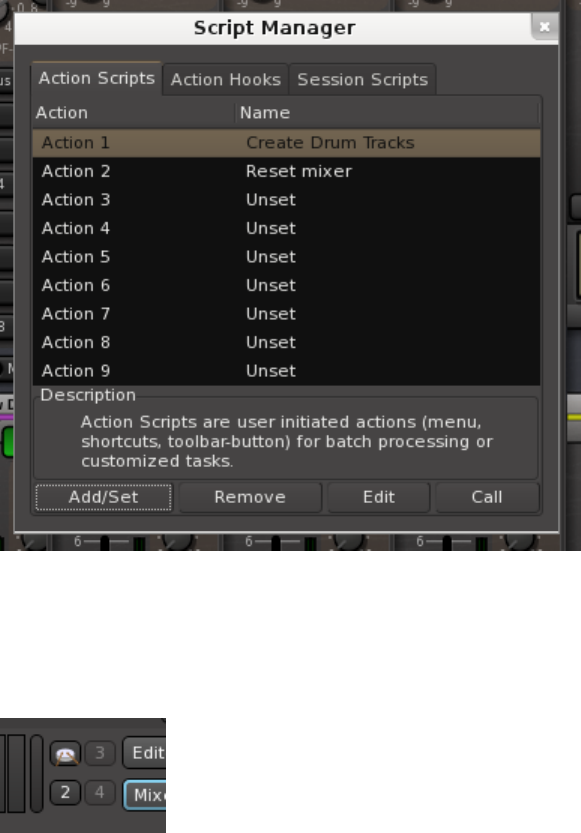
You may “save” your scripts for later recall.
Lua scripts triggered as an “action” in the toolbar, or by keyboard shortcuts:
In Edit->Script Manager, you’ll find a dialog that allows you to assign scripts to action buttons, keyboard
shortcuts, or session events:
In Preferences->Appearance->Toolbar, you can enable up to 8 action buttons, and assign a Lua script to
each of the buttons. The script can even generate its own icon, as shown here for the “create Drum Tracks”
script:
Right-click on an action button to assign an action to it. You may also assign a Lua script directly to a
keyboard shortcut.
Lua scripts triggered by Session events:
Lua cripts can be triggered by events inside the session.
Harrison Consoles Mixbus v4 - 1
Page 297 of 515

For example, a script can be triggered “when the transport is stopped”, or “when a marker is reached”.
The details of session-event scripts are currently beyond the scope of this manual.
Lua scripts as DSP Plugins:
A Lua script can be loaded as a DSP plugin. Users will find the provided Lua DSP plugins in the plugin
manager, with type “Lua”.
Developing DSP plugin scripts is beyond the scope of this manual.
Developing your own Lua scripts:
Lua Scripting is developed by the Ardour open-source community, with Harrison’s funding and support.
Developing your own Lua scripts is beyond the scope of this manual, but you can find regularly-updated
details on this page.
Harrison Consoles Mixbus v4 - 1
Page 298 of 515

Templates
Mixbus allows you to create “Session Templates” and “Track templates” to partially automate your workflow:
Session Templates
A “session template” is a file that stores all the settings for a session, except for the actual audio, midi, and
automation region data. When creating a new session in the “New Session Dialog”, you may choose to
select a template. This will restore the settings of the templated session including track layout, track names,
plugins, mixer settings, and preferences.
To create a session template, select “Save as template” from the main Session menu.
Learn more about Session Templates here: Session Templates.
Track Templates
A “track template” is a file that stores the settings for a track. When creating a new track in the “New Track
Dialog”, you may choose to select a template. This will restore the settings of the templated track.
To create a track template, right-click on the mixer strip and choose “Save as template”
Learn more about Track Templates here: Track Templates.
Scripted Templates
It is possible to create “scripts” which can automate certain tasks, and can act on further input from the user.
The Mixbus package includes examples of scripts that operate as Session and Tracks. Creating scripted
templates is beyond the scope of this manual. Contact mixbus@harrisonconsoles.com or visit the Mixbus
forum for more details.
For more details about the Lua scripting language used in Mixbus, please see Scripting
Template Manager
The Template window ( Window->Templates ) allows you to view, manage, and share your “template” files.
Both Session templates and Track templates can be shared in the Template manager window:
Harrison Consoles Mixbus v4 - 1
Page 299 of 515
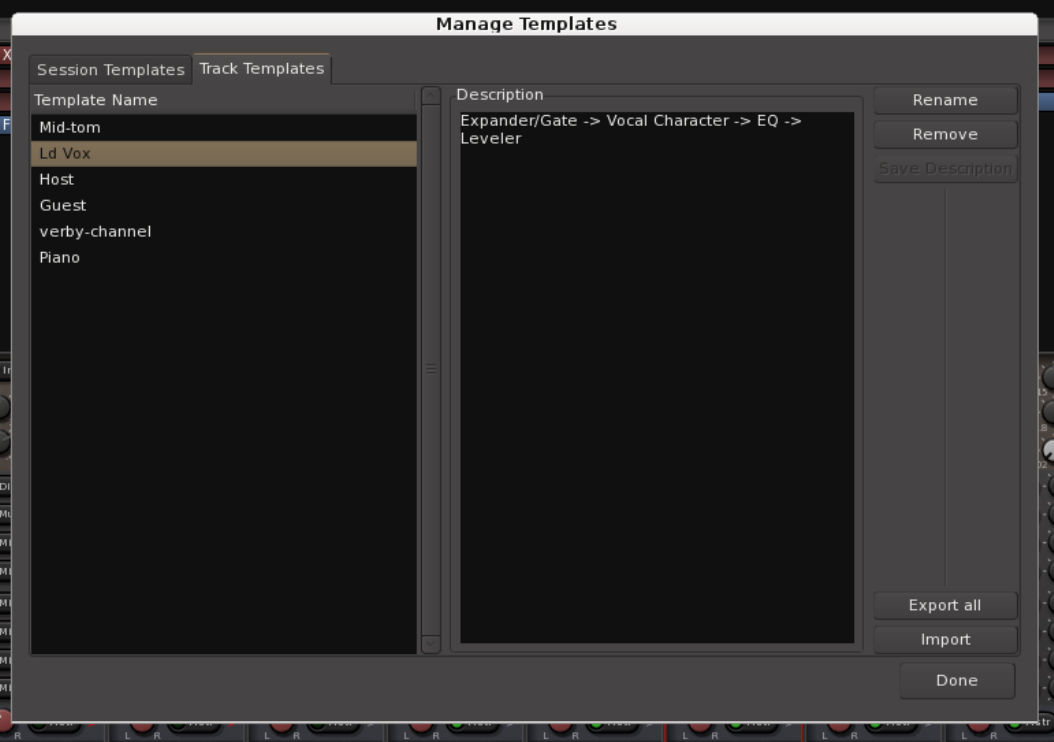
Select a template item on the left, and you can choose to Rename or Remove the selected item.
“Export All” – this creates a compressed archive file ( with the extension .tar.gz ) which includes all of your
template files. You may send this file to other users who might want to use your templates
“Import” – this button allows you to select a compressed archive file (with the extension .tar.gz) which will
then be extracted into your session and track template folder.
Harrison Consoles Mixbus v4 - 1
Page 300 of 515

Importing Files
Importing via Drag&Drop
Audio & MIDI Files may be imported to Mixbus by dragging and dropping them from a file browser into the
editor window. The file will be imported to the track where it is dragged; if you want to create a new track for
the file, then drag the file to the empty area at the bottom of the editor canvas.
Importing Audio files with the Import dialog
Using the import window (Session->Import) is a much more flexible and powerful way to import files to
Mixbus.
Harrison Consoles Mixbus v4 - 1
Page 301 of 515
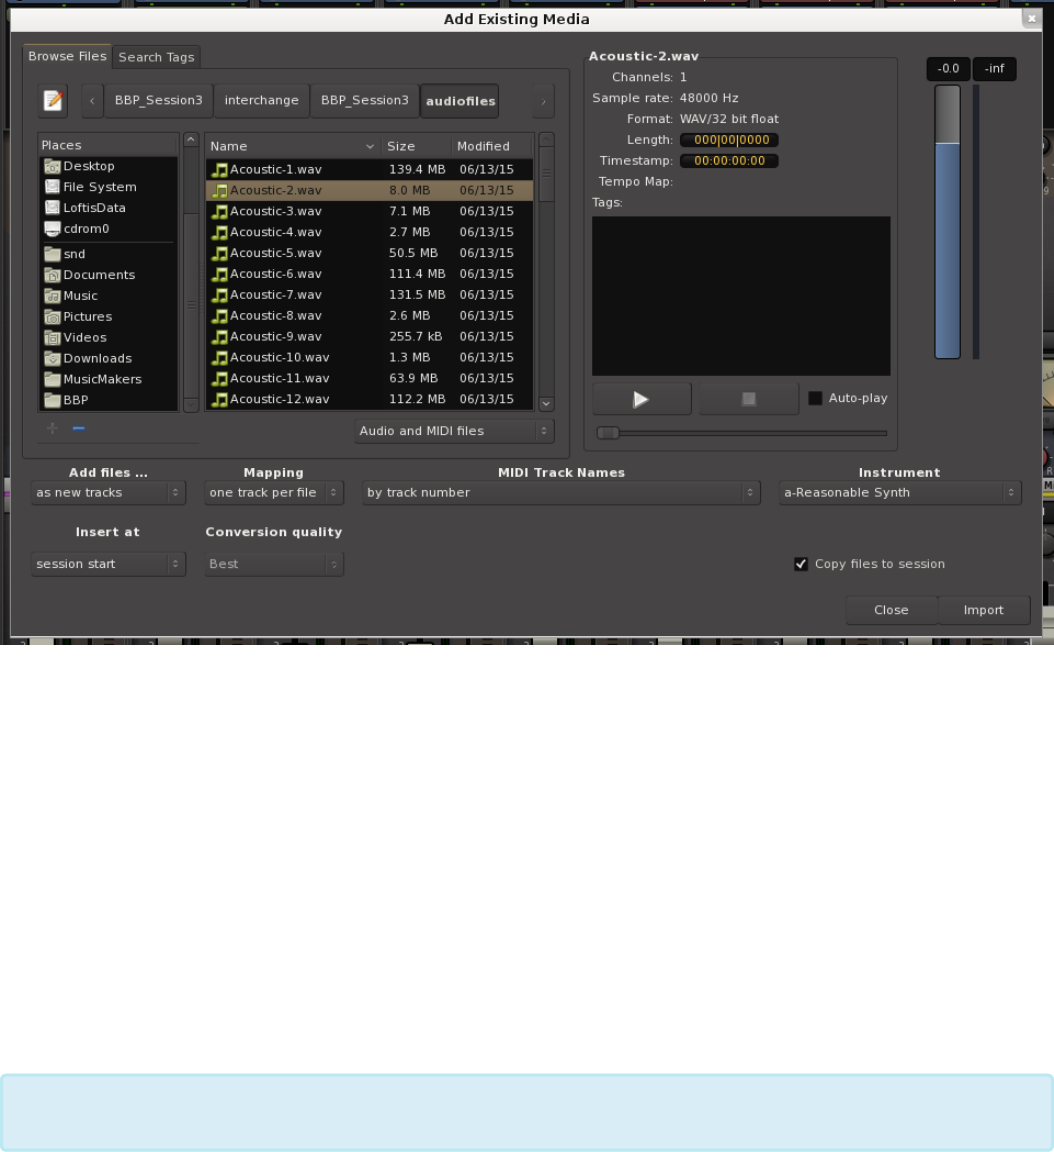
The Import dialog allows you to add existing media and has 2 tabs at the top: “Browse Files”, and “Search
Tags”.
•The Path Bar: Shows your current path and allows you to navigate back “up” the directory tree.
•The Location Bar: Allows you to directly type in the name of a file in this directory or enter the entire
path via text (the “notebook” button shows or hides the Location bar).
•Places: A list of common locations on your computer. The top two items, “Search” and “Recently
Used”, are always there. Clicking “Search” allows a text entry to search your system. Warning: This
can take a LONG time. The lower section provides shortcuts to commonly-used locations. You can
Add and Remove these locations using the buttons underneath. You can also remove or rename
locations by right-clicking on them.
The main area shows a list of files in the current directory. They can be sorted by Name, Size, or Modified
Date by clicking on the headers at the top of the columns. Underneath is a selector to show “Audio Files,
NOTE: On MacOS, your external hard drives will be found under “Volumes”.
*
Harrison Consoles Mixbus v4 - 1
Page 302 of 515

MIDI Files, Audio and MIDI Files” (files with recognized audio file extensions such as .wav), or it can show
“All Files”.
To the right of the file selector is the Sound File Information area. When a file is selected in the browser, you
get a report of the number of channels, sample rate, and in the case of broadcast wave files, the timestamp
when it was recorded. There is also an area to enter metadata “tags” for the audio files. Tagging files this
way makes it very easy to find them in the future, using the “Search Tags” tab. If a MIDI file is selected you
get a report of number of channels, Format, Length, and Timestamp.
Finally, there are options to Audition the files. You can click “Play” to play the file, Stop to stop playing, or
choose auto-play so that files automatically start playing when you click on them. By default files will play
when you double-click on them. There is also a level-fader on the right side that allows you to trim the
audition level.
Add Files …:
• As New Tracks: Each file will be imported to a new track.
• To Region List: The imported files will be imported to the region list but no tracks will be created. This
is useful if you are importing individual hits or effects into the region list, where you will use them to
replace existing sounds.
Insert at:
• Use File Timestamp: After importing the file will be located at the file’s time stamp (if it is a bwav file).
• At Edit Point: After importing the file will be located at the edit point.
• At Playhead: After importing the file will be located at the playhead location.
• At Session Start: After importing the file will be located at the session’s start marker.
Mapping:
• One Track Per File: Each file will be appear on one track. If the file is stereo, it will be a stereo track.
If there are more than 2 channels then they will be ignored.
• One Track Per Channel: Each channel of each file will appear as a track. If a file is stereo, it will be
converted to 2 mono tracks. An 8-channel wav file will be converted to 8 mono tracks.
• Sequence Files: If this option is selected, then the files will be imported to a track, and will be
imported sequentially on the timeline.
The most important buttons are underneath. These buttons control the modes that will
dictate how files are imported.
!
Harrison Consoles Mixbus v4 - 1
Page 303 of 515

• Merge Files: This option ONLY appears when 2 files of identical length are selected. “Merge files” will
load the 2 mono files as a stereo file.
MIDI Track Names:
• By track number : this will use the MIDI file’s track numbers, as the name for the newly-created
track(s)
• By Track Name : this will used the MIDI file’s embedded “track name” information to name the newly-
created track(s)
• By Instrument name : this will used the MIDI file’s embedded “instrument” information to name the
newly-created track(s)
Conversion quality:
If the file has a different sample rate than the current session, it is necessary to do sample rate conversion.
This determines the quality and it is always recommended that “Best” is used.
Instrument:
If MIDI data files are imported this option will install a basic synth plugin on those tracks called
“ReasonableSynth”. This built-in utility allows you to audition your MIDI performances without any plug-in
parameters to set incorrectly. It may be deselected and substituted with another plugin via the drop down list
or after the track has been added to the session.
Use MIDI Tempo Map:
If enabled, Mixbus will import the MIDI Tempo markers from the first selected MIDI file, and apply it to the
session’s tempo map.
Copy Files to session:
IMPORTANT!! If you want to use a file as-is, you can uncheck “Copy Files to session” box.
This saves disk space by not duplicating the file into the session. No sample-rate
conversion is performed. Your files can sound sped-up or slowed-down if their sample rate
does not match the sample rate of the session. By default, files are always copied to the
session with appropriate sample rate conversion. If “Edit> Preferences>Misc->Always Copy
Imported Files” is enabled, then this option will be grayed-out.
!
Note: If a file is “linked” into the session without being copied into the session, then the
sound won’t be available if the file is moved or deleted. For example, if the file is on a
*
Harrison Consoles Mixbus v4 - 1
Page 304 of 515

Tags:
If you have used the Tag feature to “tag” files that are used in the past, then you can use the Search Tags
tab to find those files quickly. In this case, we searched for the term “shout” which was added to the files on
the previous page. They instantly appear in the file area to be auditioned and imported.
removable hard drive then it might not be available next time the session is used. Use this
at your own risk.
Harrison Consoles Mixbus v4 - 1
Page 305 of 515

Exporting Files
Please watch the following video for an overview of exporting features in Mixbus:
Differences between Bounce, Consolidate, and Export
Mixbus has multiple ways of “rendering” audio into contiguous audio files.
Bounce
The least-used method, “Bouncing” is a way to store a drum hit or sound effect that will be reused later in
the project. A new region will be created in the region window. The bounced region will have the region’s
gain, gain curve, and fades applied to the audio. You can later drag this region back into the project
wherever you need it.
To initiate a Bounce action, right-click on a region and choose “Bounce”. A new region will appear in the
Editor List, inside the “Region” tab.
Consolidate
“Consolidate” allows you to select a time-range consisting of many regions, and create a single region on
the timeline. This can simplify future edits or exporting operations, because the various layers, gain curves,
fades, and other region properties are made into a single contiguous audio region which can be manipulated
more easily.
To initiate a Consolidate action, you will select a time-range with the Range tool (this can consist of multiple
tracks), right-click on the Range, and choose Consolidate. The regions under the selection will be
consolidated into contiguous audio regions.
Exporting
“Exporting” is used to generate one or more files, outside of the Mixbus session, in the file-location and
format that the user defines. “Exporting” is how you create the final stereo output file of a song, or a series
of songs and markers for a CD, or a video for posting on YouTube.
Harrison Consoles Mixbus v4 - 1
Page 306 of 515

There are many ways to initiate an “Export”, and Mixbus supports many, many options. A single Export
event might generate multiple files, in multiple formats, with multiple different , and with or without metadata
such as CD markers, song names, etc. Exporting is probably one of the most complicated (but powerful)
features of Mixbus.
Exporting to an Audio File
Once a mix is ready for delivery, you will need to generate a final output from Mixbus. There are several
ways to initiate an Export from Mixbus; each method helps to define the tracks that will be exported, the
start/end times of the exported file, and the format of the files to be created.
Initiating an Export
There are 5 common ways to initiate an export:
• Session>Export>Export to Audio File(s)
• Session>Export>Stem Export
• Session>Export>Export to Video File
• (Selected Region)->Right Click->Export
• (Range Selection)->Right Click Menu->Export
Export to Audio File(s)
This method initiates the most common export. The Export dialog will appear, prompting you for details such
as the exported filename and location, the file format, and the time-ranges that you would like to export.
Stem Export
This initiates an export of individual tracks. In the “Channels” tab, you may select whether to apply the
channel processing, or to leave the track contents unaffected. Each track or bus will generate a separate
audio file. If you choose multiple timespans, then you will receive a separate audio file per time span.
When choosing “Export to Audio File(s)”, Mixbus will automatically choose the master bus
output, and the session start/end markers for an export. But you can override the settings to
choose a different track output, and/or a different time span, in the Export dialog window. If
you choose multiple track outputs, then the export track will be the “sum” of the track
outputs, into a single stereo file. If you choose multiple timespans, then you will receive one
audio file per time span. This allows you to export ranges that are non-contiguous,
overlapping, or even nested.
*
Harrison Consoles Mixbus v4 - 1
Page 307 of 515

Export to Video File
This initiates an export similar to the main session export, but it generates a video file by combining the
video track with the master-bus outputs.
Region export
This simply exports the selected audio region into any format that the user chooses. This does not include
any mixer-strip or plugin effects.
Range export
This initiates an export, just like the session export, but it automatically selects the selected time-range as
the start/end times for the exported file.
Setting the format for the export:
In the Export window are 3 tabs across the top:
• File format
• Time Span
• Channels
File Format tab
The File format tab allows control of settings such as bit depth, sample rate, compression type, location to
be saved, and file name structure.
Additionally,options for generating a “Loudness Report”, as well as automated uploading to SoundCloud is
available (must first have a SoundCloud account via www.soundcloud.com).
Multiple format exporting:
Many files formats may be generated and exported at one time by clicking “+ Add another format”.
• Export Session to Audio File (the most common option): This exports the entire range from the Start
marker to the End marker.
• Export Selected Range to Audio File: This exports the current Range selection to an audio file (Note:
this can also be triggered by right-clicking on the selected range and choosing “export range”).
• Export Selected Regions to Audio File: This exports a length of time starting at the first selected
region, and continuing to the end of the last selected region.
Harrison Consoles Mixbus v4 - 1
Page 308 of 515
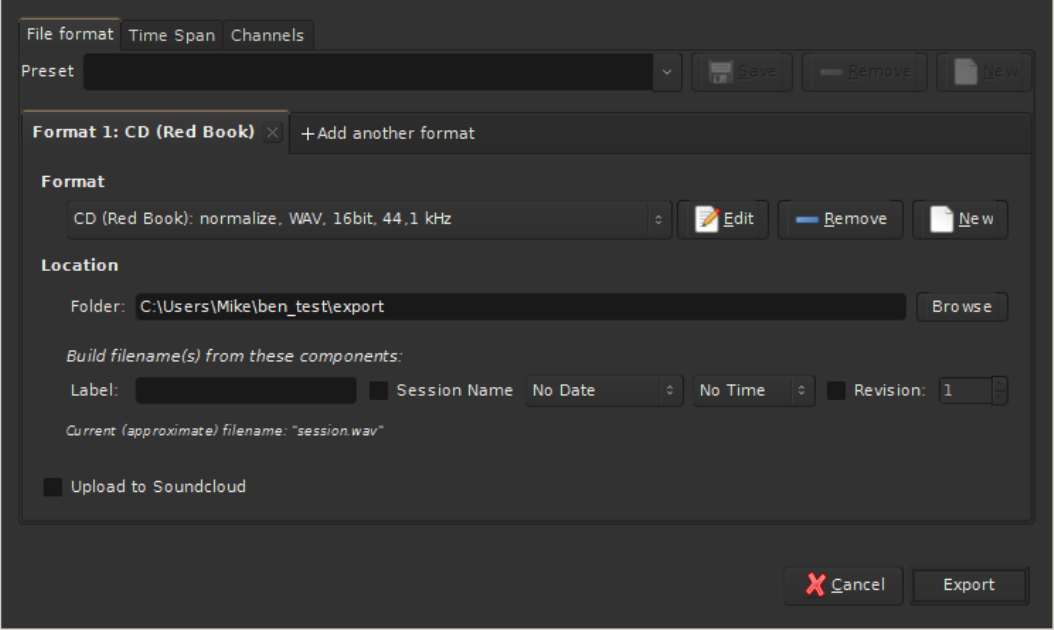
• Export Range Markers to Multiple Audio Files: This very powerful feature allows you to export several
ranges (songs) at one time. The resulting files will use the region names as the file names.
Before the export is initiated, you must choose the location and format of the exported file.
Export to File: Enter the path and file name that you wish to create. This defaults to the sessions “export”
folder. Click “Browse” to see a file browser and navigate to a different folder.
• Export Source: Under the “Channels” tab choose “Master Output” to export the master bus output of
Mixbus. additionally you can export individual tracks separately, or control the Left/Right assignment
of tracks to the file.
• Channels: Chooses whether the resulting file will be Stereo or Mono.
Once a format(s) is chosen it may be edited.
The formats are editable using this dialog box:
Harrison Consoles Mixbus v4 - 1
Page 309 of 515
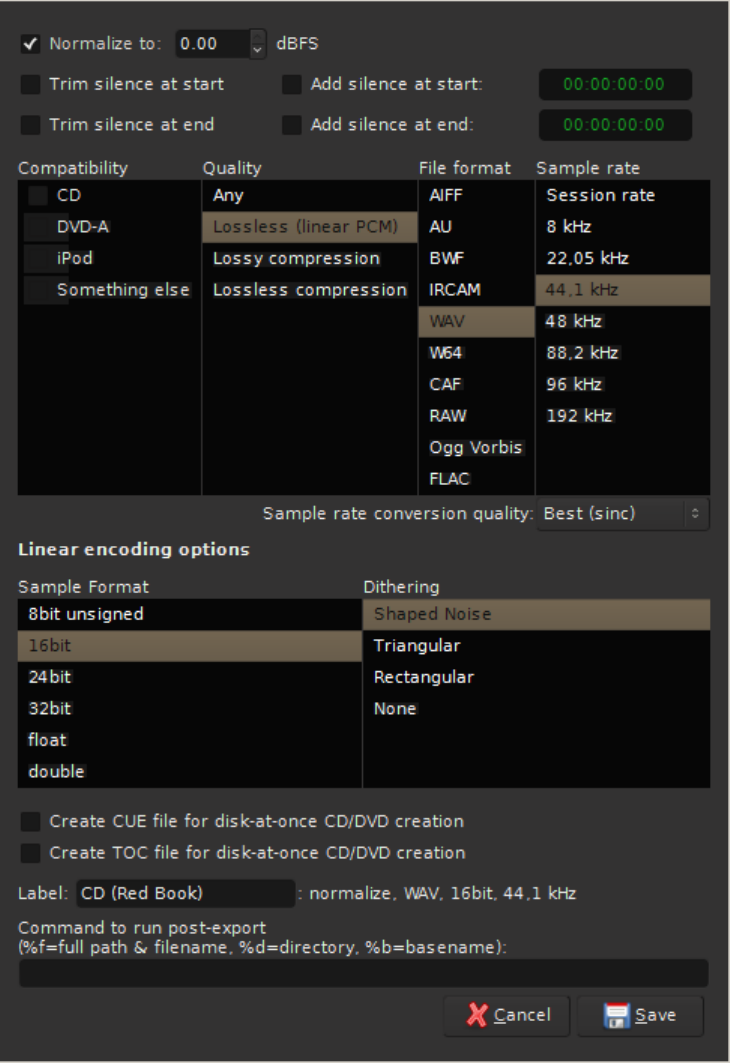
Edit Export Format Profile:
• File Format: (the list depends on the system’s available options). For CD quality,
choose WAV.
Harrison Consoles Mixbus v4 - 1
Page 310 of 515

• Sample Format: The “32-bit” setting means 32-bit integer format. This is ultra-high resolution but does
not accommodate signals over 0dBFS. The “float” setting is 32-bit floating point which accommodates
signals over 0 dBFS which is preferred in most cases. For CD quality audio choose 16-bit.
• Sample Rate: For CD-quality audio choose 44.1 kHz.
• Conversion Quality: This is only enabled if the export sample rate is not the same as the session. The
setting “best” is recommended.
• Dither Type: None, Rectangular, Shaped Noise, or Triangular. The “None” or “Shaped” settings are
recommended.
• CD Marker File Type: CUE & TOC. These file types may be utilized by CD-burning software to define
track indexes, track names, and other metadata.
If a project is intended to be published as a CD, you will want to create CD markers so Mixbus will generate
a TOC (table of contents) text file for the CD.
You can cancel an Export operation at any time by closing the dialog and/or clicking Cancel.
Time Spans tab
This tab allows you to choose one or more time-spans. Each selected time-span will be exported, using the
settings in the “Format” and “Channels” tabs. For example if you have 2 different formats chosen, and 2
different time spans, then 4 files will be created during the export.
Time-spans include:
• Session Start/End ( this is selected by default if you trigger a Session->Export to Audio File )
• Range Selection ( this is selected by default if you trigger the export by right-clicking on a Range ). If
no range is selected, then this does not appear
• Named ranges: If you have created named ranges ( for example, your session has multiple songs on
the timeline, and each is assigned a named range) then they will appear here.
Realtime Export
Use this option if your session makes use of external hardware audio processing.
Normally, Mixbus maximizes your CPU to perform the fastest-possible export. However,
some users have external devices, such as rackmount analog gear or external MIDI
synthesizers, which cannot be used at faster-than-realtime speed. In the past, we required
these users to manually create a bounce track and mixdown to it, rather than using the
*
Harrison Consoles Mixbus v4 - 1
Page 311 of 515
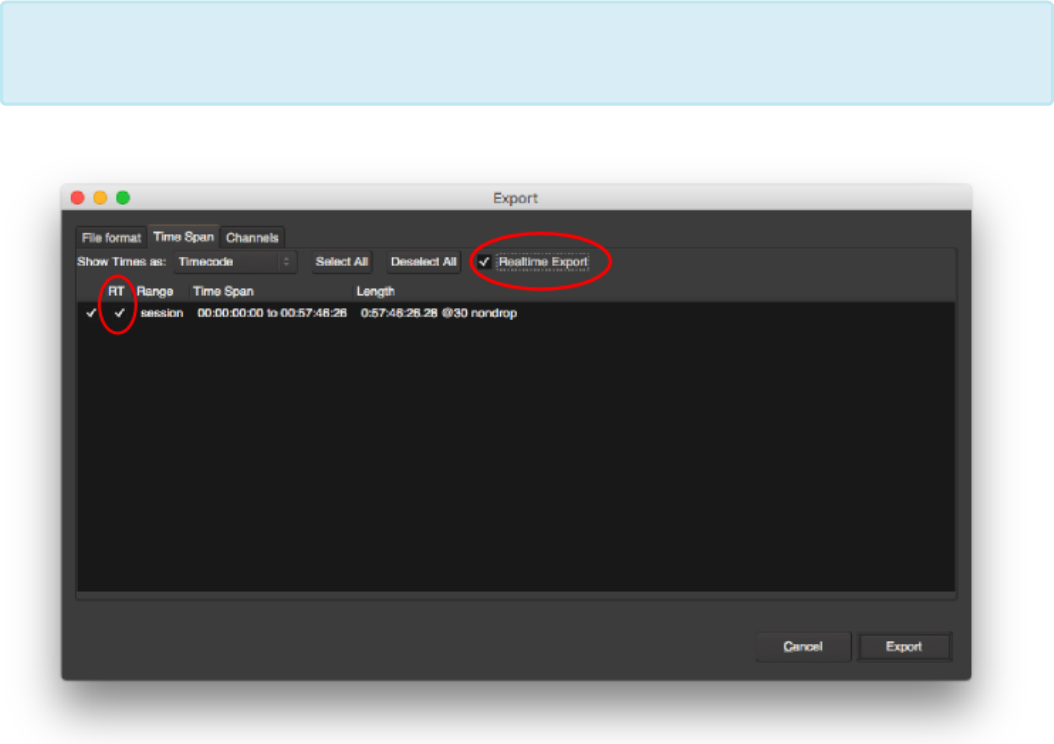
Channels Tab
The Channels tab allows the user to choose which tracks or buses will be exported. The operation is slightly
different, depending on the way the export was initiated.
When “Session->Export to Audio Files” is selected, Mixbus will select the Master bus for export. But the
user may change this selection to choose any tracks and/or buses. Mixbus will “sum” the track outputs into a
single file.
When “Session->Stem Export” is selected, Mixbus will not select any tracks or buses by default. The user
must select which tracks or buses to export. Each selected track will result in one exported file. The track’s
output is used to define the number of channels in the exported file. If a track is mono throughout, then it will
result in a mono audio file. If the track has 2 outputs (stereo) then the resulting file will be stereo.
normal Export features. Realtime Export provides all the same features as a regular export,
but it limits the engine to run in “real time” so external gear can be utilized during the export.
Harrison Consoles Mixbus v4 - 1
Page 312 of 515

The selection of the “Channels” tab is combined with the “Format” and “Time Range” tabs. If you are doing a
“stem export”, with 8 tracks selected, and 2 formats, in 2 different time spans, then this will result in 8×2×2 =
32 different files on export!
SoundCloud Export:
SoundCloud is an online service that hosts your audio files for others to browse, search, and annotate.
Uploading files to SoundCloud is an easy way to get your music posted to the Internet without having to
encode the file and transfer it to a server. For faster uploads and best quality, it is suggested that you export
files in the FLAC format before uploading to SoundCloud.
• Also Upload to SoundCloud: Enable this option to automatically upload the file to SoundCloud.com
• Make file public: The resulting SoundCloud object will be available for the public to view if this is
turned on. If not, the file will only be visible to you.
• Track Title: The name that this item will have on SoundCloud. This defaults to the session name.
• User Email: This is your user name for SoundCloud. This defaults to the User Email stored your
Metadata settings (see section 19, Metadata).
• Password: SoundCloud user password is required to upload files to SoundCloud.
The black bar at the bottom of the window is the progress indicator. The progress indicator displays the
progress of the file export as well as SoundCloud upload, if engaged. If “Also Upload to SoundCloud” is
engaged, then a browser window will open to display the file at SoundCloud.com when the upload is
completed.
When stem exporting, the user may choose whether to apply the track’s processing ( fader,
mute, eq, compressor, and plugins ) or to export the raw audio without processing.
*
Harrison Consoles Mixbus v4 - 1
Page 313 of 515
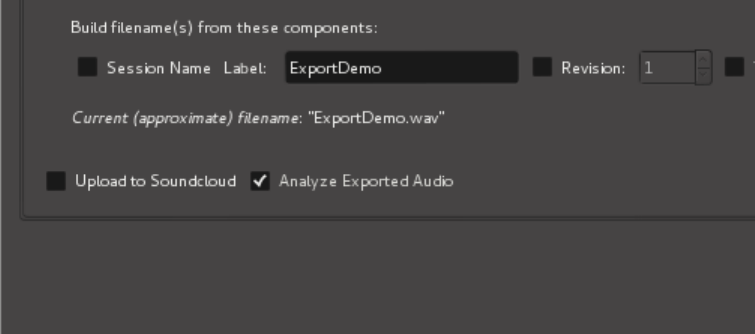
Export Analysis:
If you enable the “Export Analysis” checkbox, then Mixbus will display a summary of the exported file:
Harrison Consoles Mixbus v4 - 1
Page 314 of 515
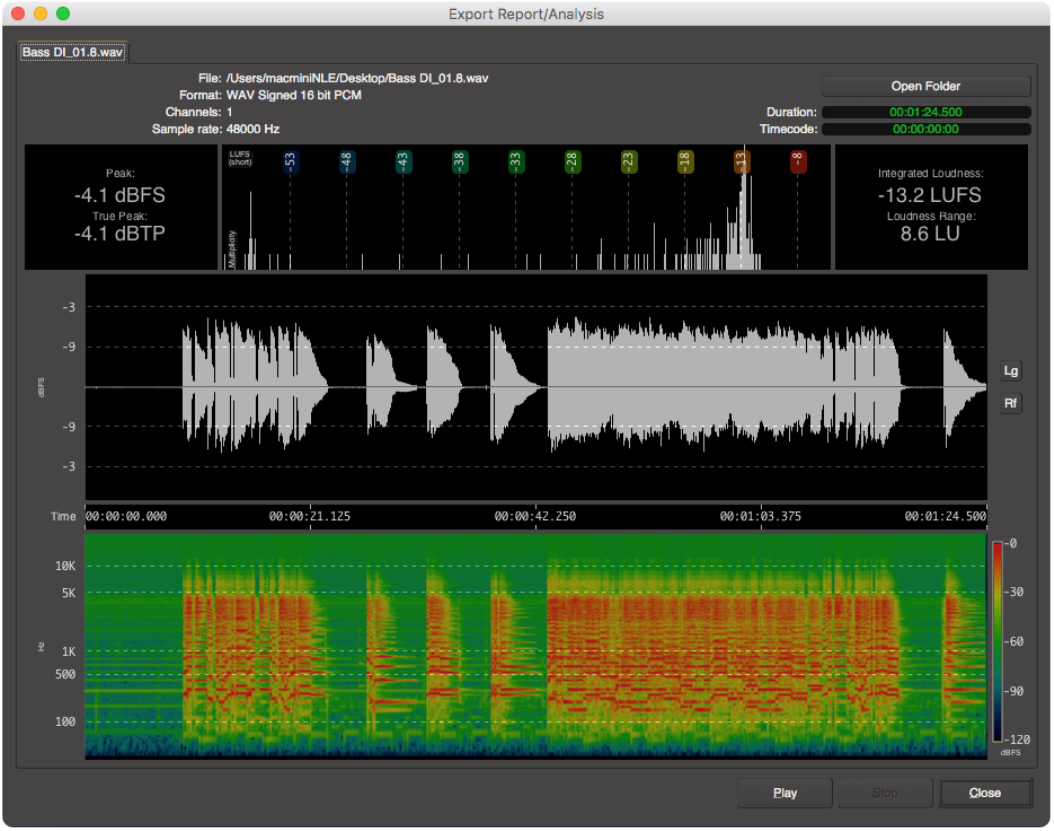
Export Report and Analysis
The Export Analysis dialog may be displayed after an export The export analysis window provides these
features:
• LUFS loudness measurement
• LU (Loudness Unit) histogram
• LU Range
• Waveform display, with peak indicators
• Peak Sample value + True Peak value
• Spectrogram view
Harrison Consoles Mixbus v4 - 1
Page 315 of 515

These tools provide you an extra level of confidence that your track sounds great and meets common
deliverable requirements for distribution and broadcast.
The following video describes the export report and analysis tool in more detail.
The following video describes how to “bounce” the master bus down to a new stereo track:
The following video describes how to export multiple ranges into separate audio files:
The following video shows the “Export” features of Mixbus v2; this additional information is still sometimes
useful for v3 users:
Harrison Consoles Mixbus v4 - 1
Page 316 of 515
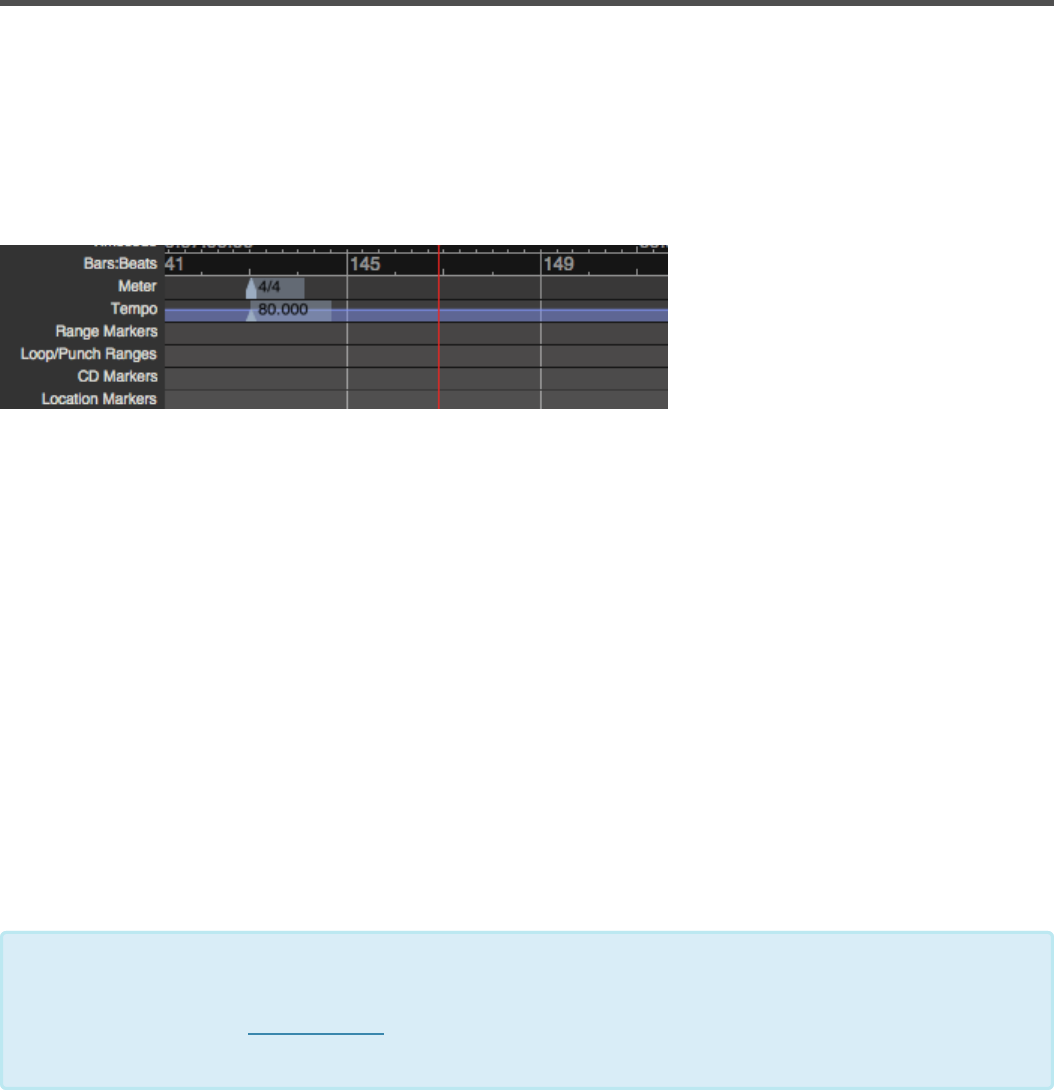
Tempo, Metronome, & the Grid
Defining a Song’s Tempo and Meter
Mixbus allows simple creation and editing of a musical time/tempo map for each session. The meter and
tempo map is controlled with the Meter and Tempo rulers. To show these rulers, right-click in the ruler area
underneath the transport buttons and check the boxes for the Meter and Tempo rulers. Alternatively, you
can use the View menu to hide/show the rulers.
Here are some reasons that you might want to set the Meter/Tempo for your song:
1. To record with a “click” or metronome to help maintain consistent time among different performers and
parts.
2. To use the Grid to facilitate editing (if the audio follows the tempo map of the song).
3. To add MIDI segments or loops, and have them follow the tempo changes.
By default, Mixbus starts with a single Tempo and Meter marker, set to 120 bpm and 4/4, respectively. If the
session has a fixed tempo (or doesn’t use tempo at all ), then it is not necessary to create additional
markers; and clicking on the Tempo button will adjust the session’s initial tempo marker.
In other cases, you may want the tempo to change at different times during the session. In this case you will
right-click on the existing markers and set the tempo to the desired tempo and time signature. Right-clicking
in the Meter/Tempo rulers allow you to create new Meter or Tempo markers.
You may select the initial Meter Marker, and move it to match the start of your song. This
allows you to align the first measure (bar) line with your song’s start. Use the tempo-
mapping tools in Tempo Maps to match the editors bar|beat clock with your natural
performance.
*
Harrison Consoles Mixbus v4 - 1
Page 317 of 515
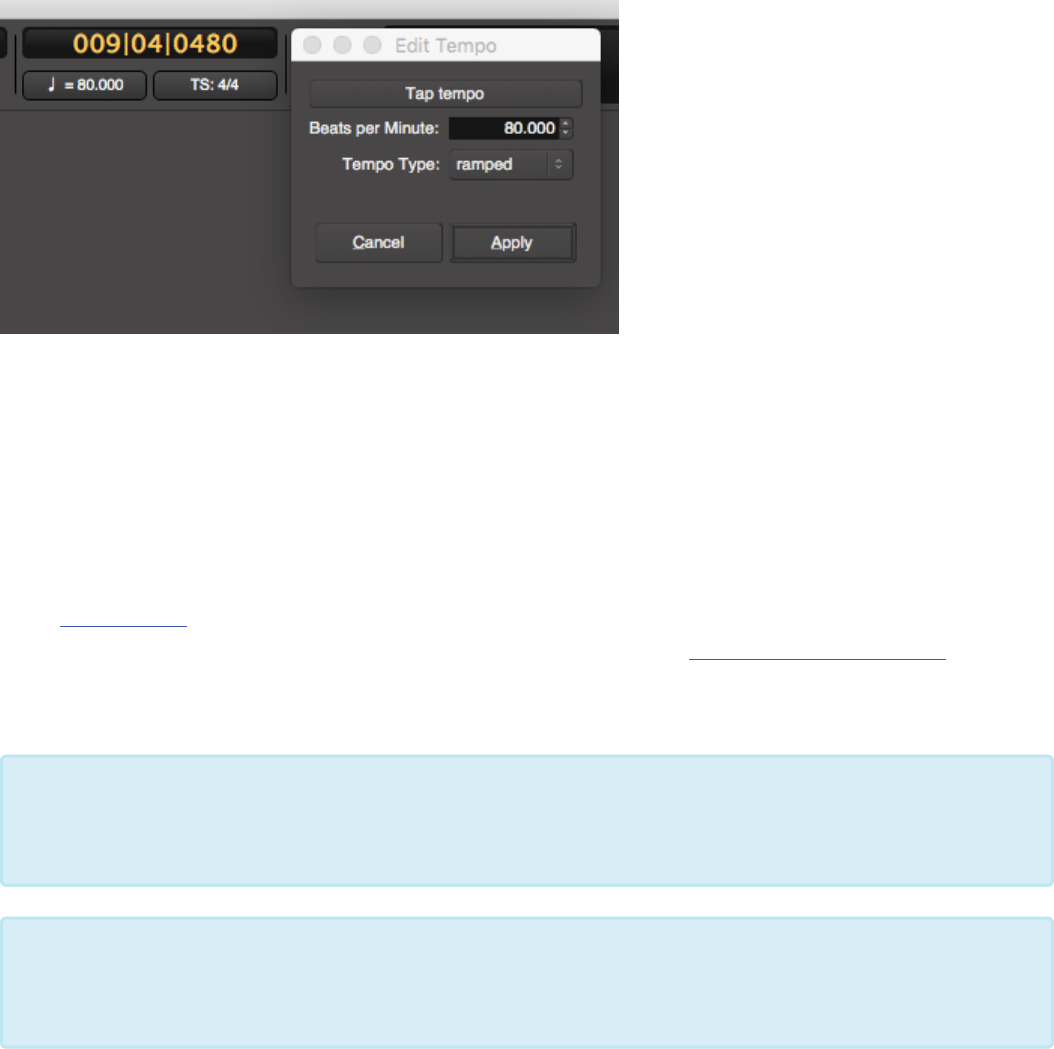
Tempo Controls
You can click on the “tempo” button underneath the clock, and this will launch the Tempo dialog:
The tempo dialog provides these options:
• Tap Tempo: click this button repeatedly to set a tempo
• Beats per Minute: type a new tempo here, or use the +/- buttons to increment the tempo
• Tempo Starts at: this indicates the measure/beat where the tempo change occurs; edit these fields if
needed.
• Tempo Type: tempo markers can be Ramped or Constant. Learn more about tempo ramps here:
Tempo Maps
• Lock Style: learn more about music-locked tempo markers here: Audio Time vs Music Time (NOTE:
the initial tempo marker is always locked to music time, so this option does not appear)
When you click the “tempo” button under the clock, you are always adjusting the most-
recently passed tempo marker (when the dialog was launched). If the song only has one
tempo marker, then you’re adjusting the global tempo.
*
Tip: Here’s an easy way to set the tempo for a song: record a portion of the song, and then
select one bar with the Range tool. Now click “Edit->Tempo->Set Tempo from Edit Range”
to set the tempo.
*
Harrison Consoles Mixbus v4 - 1
Page 318 of 515
Time Signature (Meter) Controls
You can click on the “TS” (Time Signature) button underneath the clock, and this will launch the Meter
dialog:
The tempo dialog provides these options:
• Beats Per Bar: the numerator of the time signature
• Note Value: the denominator of the time signature
• Meter Starts at Bar: this indicates the measure where the meter change occurs; edit these fields if
needed.
• Lock Style: learn more about music-locked meter markers here: Audio Time vs Music Time (NOTE:
the initial tempo marker is always locked to music time, so this option does not appear)
Using the Metronome (click)
To play a click sound during playback and recording, enable the “Metronome” button near the top-right of
the edit window:
The rate of the click is defined by the session’s Tempo and Meter rulers.
You can visit Preferences->Metronome to edit the click’s sound; or just right-click on the metronome button
to immediately view the properties.
Note: Meter changes can only occur at the beginning of a new measure..
*
Note: the first “Meter” marker may be dragged away from time 0:00. This allows you to start
the musical timeline (bar 1, beat 1) anywhere in the session. You can drag it to the start of
your song so the bar|beat readout will match your musical score.
*
You can mouse-wheel ( or 2-finger scroll, on a touchpad ) to adjust the metronome’s volume
directly from the transport window.
*
Harrison Consoles Mixbus v4 - 1
Page 319 of 515

Using the Grid
Editing with the “Grid” allows you to make edits perfectly aligned with other events. If the grid is set to
musical time (and the audio was recorded to a click) then editing can be done very quickly without zooming
in, because you know all edits will happen on a musically-sensible time. Setting the Grid to SMPTE frames
will guarantee that all edits happen in sync with the video frames, etc.
The settings for the Grid menu are:
• No Grid: No grid is applied.
• Grid: the grid is applied; any mouse move in the editing canvas will “jump” between grid locations.
Operations at the Edit Point will be snapped to the nearest grid point.
• Magnetic: When the Edit point is very near a grid location, it will snap to the location. But in-between
the locations it will remain manual (no grid).
Grid Modes
The edit point may snap to:
• Clock time (CD frames, SMPTE, Seconds, Minutes)
• Musical Time (Bars, Beats, and various subdivisions)
• Markers
• Region events (start, stop, etc.)
Tip: It is common practice to leave some time at the beginning of a song, rather than
starting from the zero indication. Some common choices are 8 measures, 1 minute, 10
minutes, or 1 hour. This allows space at the beginning of the song to add an intro, place a
sync click or test tones, or just make editing easier by allowing some unallocated space at
the beginning of the track.
*
Note: Some DAWs use the term “Snap” instead of “Grid”. We use the term “Grid” to refer to
the settings, and “snap” to refer to the operation of the Grid on the edit point.
*
“Magnetic” snap is generally preferred operation, because it allows you to zoom in close
and make small adjustments without “snapping” to something outside of your view.
*
Harrison Consoles Mixbus v4 - 1
Page 320 of 515

Note: To use Region starts/ends/syncs/bounds as snap choices, you must have either (a)
NO tracks selected, which means that Mixbus will snap to regions on any track, or (b)
several tracks selected, and Mixbus will only snap to regions on those selected tracks. If
you are moving items on a track, and only the current track is selected, then you will only be
able to snap to other regions on the same track.
*
Harrison Consoles Mixbus v4 - 1
Page 321 of 515
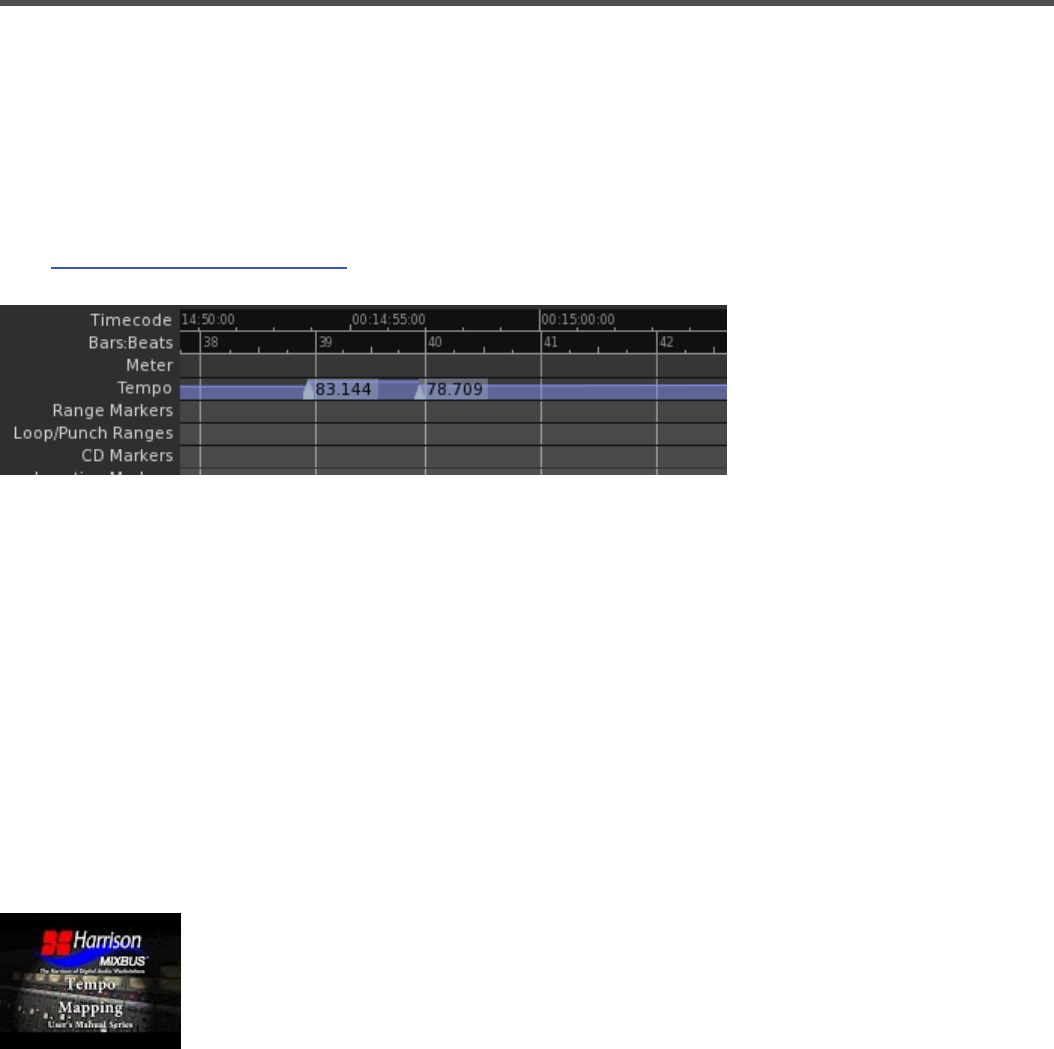
Tempo Maps
What is a Tempo Map?
By default, every Mixbus session starts with an initial Meter marker of 4/4, and an initial Tempo marker of
120 bpm.
However, the user may add additional Tempo and Meter “markers” which change the tempo on the timeline.
See: Tempo, Metronome & the Grid
Constant vs Ramped tempo markers
A “constant” tempo marker will set a steady tempo which continues until the next tempo marker is reached.
A “ramped” marker will cause the tempo to gradually change to meet the tempo value of the marker that
succeeds it. This allows you to track the natural speedup/slowdown of a live performance, or create a
natural ritardando at the end of the song. The tempo “ramp” is shown with a sloped line, indicating the
difference between the two tempos:
Creating a Tempo Map from a recorded performance.
This video demonstrates how to create a tempo ramp from a live performance:
Editing tempo markers & the tempo lane
There are several ways to manipulate the tempo markers on the tempo ruler:
Harrison Consoles Mixbus v4 - 1
Page 322 of 515

• Click & drag the tempo marker to change its location on the timeline
• Right-click on the tempo marker to change its properties
• Shift+Right-click to remove a tempo marker
• Shift+drag up/down on a tempo marker to change its tempo value
• Hold “Ctrl” (“Cmd” on Mac) while dragging a tempo marker to make a copy with the same tempo.
Additionally, you can edit the Tempo Line itself
• Shift+Click on the tempo-line between 2 tempo markers. Drag it left/right to adjust the tempo of the
previous marker.
• Shift+Ctrl-click on the tempo line to create a “pinch”. A “pinch” adjusts the tempo line between 2
markers, and adjusts them in such a way that it does not move the succeeding markers.
Importing a tempo map from MIDI
Mixbus can import a “tempo map” from an existing MIDI file. To do that, use the Import dialog to choose the
MIDI file. And enable the checkbox for “import tempo map”.
If you are unable to Shift+Drag on the Tempo Line, please visit Preferences->User
Interface->Modifiers and make sure that “Constrained Drag” is set to “Shift”.
!
MIDI files do not allow gradual “tempo ramps”. Each tempo marker in the file will indicate a
discrete change to a new tempo. For that reason, MIDI tempo changes will not be as
‘smooth’ as Mixbus’s tempo ramps.
*
Harrison Consoles Mixbus v4 - 1
Page 323 of 515

Audio Time vs Music Time
What is the difference between Audio time and Music time?
Audio time ( or “real” time ) is the length and tempo of a performance as executed and recorded. Whereas
“music” (BBT, for Bar-Beat-Tick) time is a series of arranging data (notes and rests) that can be executed
very quickly, or very slowly, and still be considered the same.
In “music” time, a quarter-note is a quarter note, regardless of tempo. MIDI consists only of arrangement
data, and so it is possible to arrange a MIDI sequence and later increase or decrease the tempo. Just like
musicians playing from a score, the arrangement’s tempo will increase, but the musical expression and
timbre will remain largely unchanged.
When recording audio, the performers are recorded in real-time subject to the players’ own tempo and
interpretation of the music. And once recorded, you cannot easily change the tempo of the recording. Once
audio is recorded, it requires quite extensive processing and manipulation to change the tempo … and even
more so if you don’t want the pitch to change as well ( i.e. the “chipmunk” effect )
The problem is that Mixbus (and other DAWs) are expected to show both MIDI and Audio data on the same
timeline. And there’s some ambiguity: one can imagine audio data (such as a single drum hit) that has no
inherent tempo, and can be considered arrangement data, and subject to tempo changes in the musical
timeline; or one can imagine a MIDI event that is related to the audio timeline and should not move if (for
example) the tempo is changed.
Why is this so hard?
Attempting to shorten or lengthen an audio performance, after it is recorded, requires the sound to be
digitally manipulated which will incur some loss of quality. Because Mixbus is intended for high-quality
editing, mixing, and mastering tasks, we have chosen to give priority to the “audio” timeline. But there are
equally valid reasons why a user might be more interested in the “music” time, and so both music and
audio-timelines must coexist.
Consider these examples:
• A live performance is recorded, and the musicians have varied widely in tempo and meter. The user
would like to develop a “grid” which follows the varying tempo, and allows editing to the “grid”, just as
if the performance were recorded strictly to a metronome. Or perhaps the user would like to add MIDI
Harrison Consoles Mixbus v4 - 1
Page 324 of 515
arrangement using a musical score editor, and these notes must somehow be synced to the
performance’s tempo.
• A MIDI performance is generated with a fixed tempo. Later, a vocal and instrumental tracks are added
to the MIDI arrangement, and these tracks are edited with crossfades to assemble the best-sounding
mix. Now the arranger would like to gradually decrease the tempo at the end of the song ( i.e.
ritardando ). The MIDI events, being tied to the Music timeline, will stretch farther apart, but will stay
in tune. But what will become of the audio regions?
• A session which mixes spoken-word sections with musical sections. During a musical portion
(implemented with MIDI), the tempo is increased, so the musical portion finishes faster than it did,
when the audio was recorded. Should the audio voiceover move left to accommodate the shorter
musical segment?
Mixbus has some mechanisms to accommodate these situations. But it can get quite complicated.
We have chosen to focus our efforts on the “audio” timeline, rather than the “music” timeline, which is more
common among those workstations that began as MIDI sequencers.
How do you use Audio Time and Musical Time?
Every item on the timeline ( regions, markers, and automation control points ) must be either connected to
the “audio” timeline, or the music timeline. If an item is attached to the musical timeline, then any changes to
the BBT (bar-beat-tick) timeline will be moved along with the musical timeline. For example, if you increase
the tempo then the regions will move to occur earlier.
If you are assembling “samples” of a kick drum alongside MIDI-sequences, then it is appropriate to attach
the regions to the musical timeline.
What are the default settings for the different timelines?
By default, audio regions use the audio timeline. You can right-click on an audio region to “glue” it to the
BBT musical timeline.
By default, MIDI regions are “glued” to the BBT timeline, while audio regions are not. You can right-click on
an audio region (or selection of region) to “glue” it to the BBT musical timeline.
Tempo markers are glued to the BBT timeline by default, but they may be unglued (and therefore attached
to the audio timeline), by right-clicking on them.
Harrison Consoles Mixbus v4 - 1
Page 325 of 515
Automation control points are attached to the audio timeline, and cannot (currently) be changed.
Known issues.
Currently, even if a MIDI region is attached to the audio timeline, and it won’t move when the tempo map is
moved; its CONTENTS will still stretch. That is not desired, so we will likely fix it in a future version.
This is complicated stuff. Investigating other DAW manuals and videos will reveal that there are no easy,
non-destructive ways to solve these issues.
So what is the preferred workflow for managing a project that
uses both the audio and BBT timelines?
Generally speaking, Mixbus is optimized to work in one of these 2 ways:
1) Record a live performance on the audio timeline, (optionally) map the tempo, and then record MIDI
instruments, but never move the tempo/BBT-map after you’ve started adding MIDI.
2) Arrange your song in MIDI, and adjust tempos/timeline as needed. Then record audio, and never again
move the tempo/BBT-map after you’ve started recording audio.
Harrison Consoles Mixbus v4 - 1
Page 326 of 515

Menu Reference
This menu reference documents selections available to the user. In many cases menu selections are self
explanatory and require no elaboration. Other items may require explanation, in which case a brief passage
will be provided. In other cases links to specific pages of this manual will be provided.
Most menu actions have an associated keyboard shortcut. You can change the default shortcuts by visiting
Window->Keyboard Shortcuts.
Why are some menu items disabled or greyed-out?
Some menu items, particularly the items in the “Edit”, “Track” and “Region” menus, will be disabled if there
is nothing selected which might apply the operation. For example, the item “Track->Remove” will only be
available if one or more tracks are selected.
Harrison Consoles Mixbus v4 - 1
Page 327 of 515

Session Menu
The Session menu provides the main functions of session management:
• New: More here
• Open: More here
• Recent: More here
• Close: More here
• Save: More here
• Save As: More here
• Rename: More here
• Snapshot (& keep working on current session): More here
• Snapshot (& switch to new version): More here
• Save Template: More here
• Archive: NEW in v4. This allows the user to store the current snapshot in a compressed format, using
only the needed audio and (optionally) converting the audio files to a lossless compressed format.
The resulting archive (zip file) can be reopened from the Mixbus “open” dialog.
• Metadata: More here
• Add Track or Bus:More here
• Import: More here
• Open Video: Will import video with audio (the audio embedded within a video can also be extracted).
See Video
• Remove Video: Removes video from the timeline but not from the session folder.
• Export: More here
• Clean-up: More here
• Properties: More here
• Quit: Saves the currently opened session and closes Mixbus.
Harrison Consoles Mixbus v4 - 1
Page 328 of 515

Metadata
Session files include “metadata” which can include information about the project including the composer(s),
engineers, etc. Metadata is stored inside the session file in a simple XML format.
The Metadata dialog is launched from the Session menu:
The User tab includes information about the primary user of Mixbus. This includes the Name, Email, Web,
Organization and Country information. This is a global setting and will be applied to future sessions. This
information is purely for convenience and for documentation purposes.
There are 3 specific ways that this information is used within Mixbus:
Email: automatically entered into the Freesound entry box in the Export dialog.
Organization: This text is stored in broadcast wave file metadata.
Country: This text is stored in broadcast wave file metadata.
Harrison Consoles Mixbus v4 - 1
Page 329 of 515
The User information is stored outside the session file and is persistent across sessions.
The remaining tabs (Track, Album, People, and School) record data that is stored in the session file. The
data is stored in an industry-standard XML format, and can be easily read and manipulated by 3rd party
applications or scripts. Contact Harrison if you are interested in further development of Mixbus metadata.
Harrison Consoles Mixbus v4 - 1
Page 330 of 515
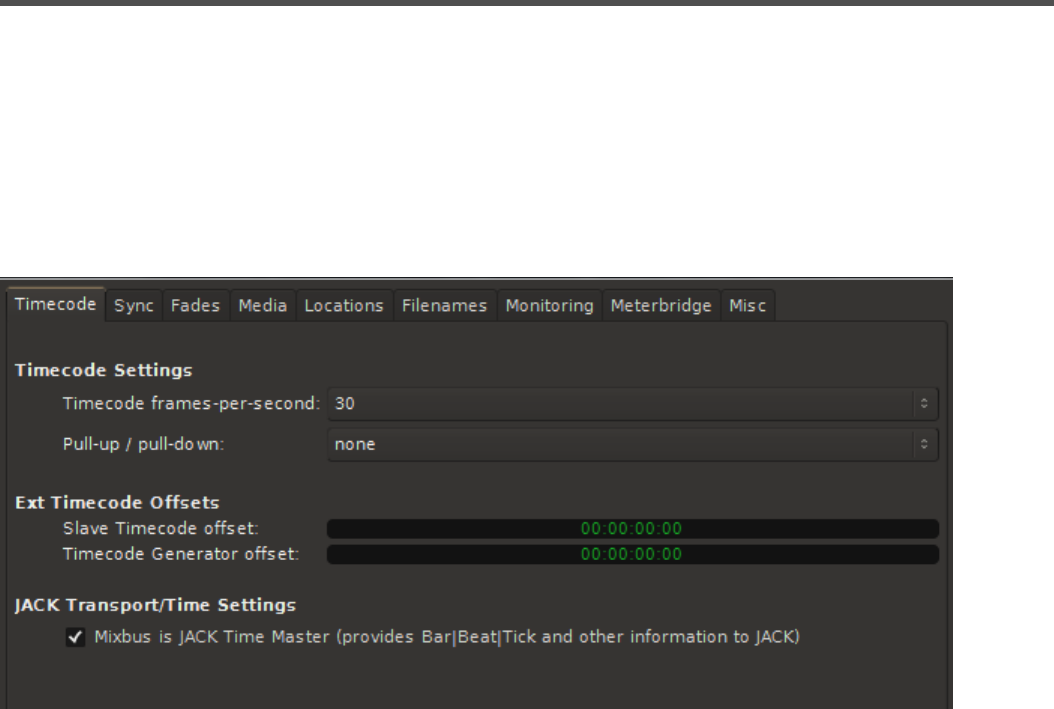
Session Properties
Session properties are settings for the currently loaded session. These are session-specific controls such as
the timecode format, audio file format, and monitoring setup for this session.
Menu Options
Timecode Tab
Harrison Consoles Mixbus v4 - 1
Page 331 of 515
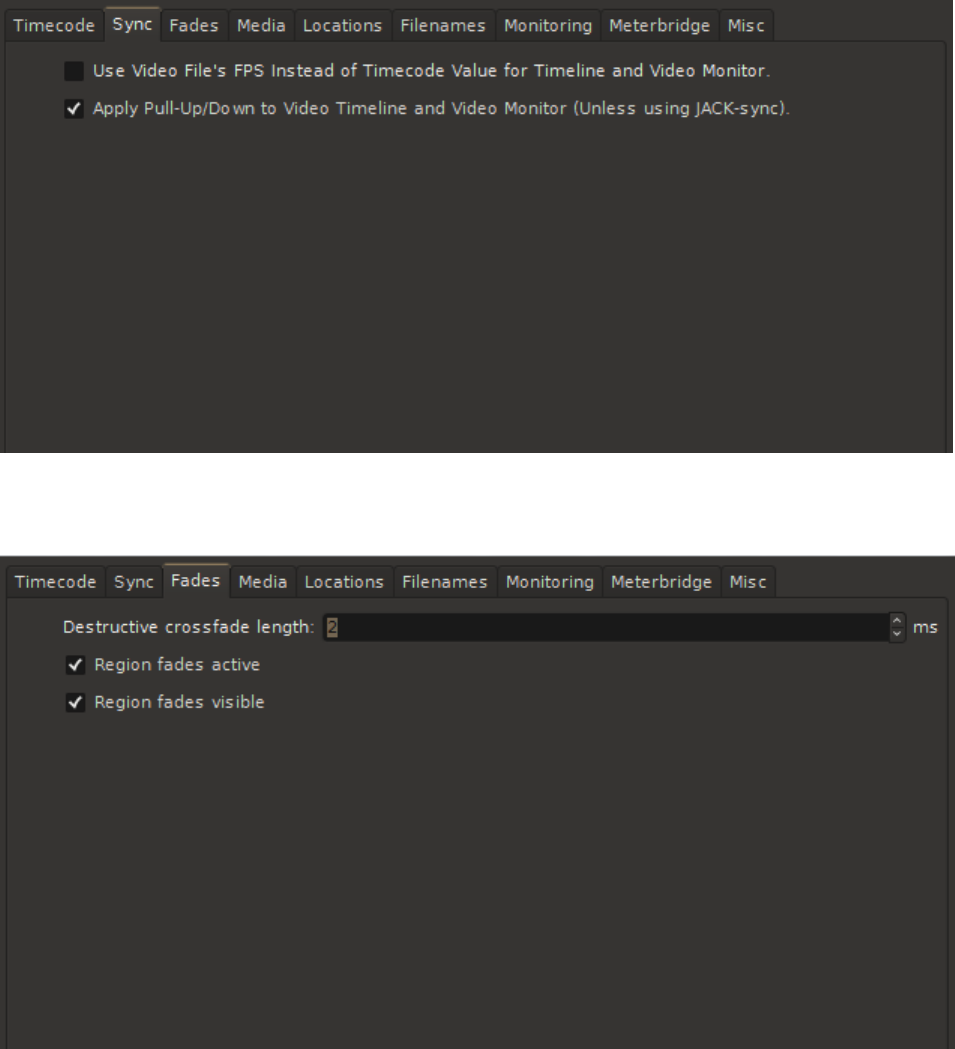
Sync Tab
Fades Tab
Harrison Consoles Mixbus v4 - 1
Page 332 of 515
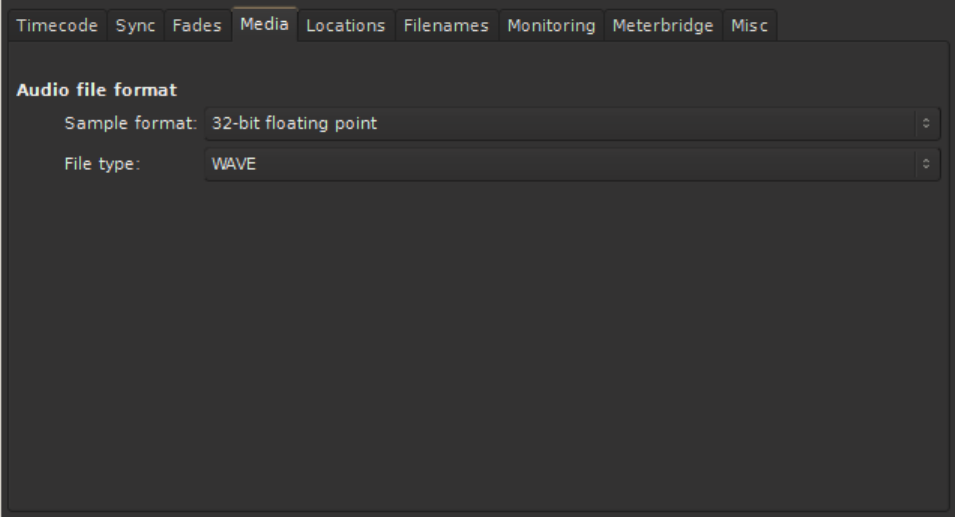
Media Tab
The audio data format that Mixbus uses internally. New audio recordings will be stored in this format, and
files will be converted to this format when imported.
• Float (floating point 32 bit) (default value) Allows extra headroom above 0 dBFS for JACK-enabled
connections and/or bounces within Mixbus.
• 24 bit: If you plan to record live sources from a A/D converter and do not use internal bouncing-to-
disk, then 24 bit will save some disk space.
• 16 bit: If working with audio sourced from a CD, this uses half the storage space of “float” option.
Audio File Format: File Type
The file type that Mixbus uses internally. New audio recordings will be stored in this format, and files will be
converted to this format when imported.
• Broadcast Wave: Industry standard .wav files with an additional time-stamp that may be used in some
software. File size is limited to 4GB.
• Wave: Industry standard PCM file. File size is limited to 4GB.
• Wav64: Industry standard PCM file. Uses 64 bit length value in the header allowing nearly limitless
recording length at any sample rate.
• CAF: Same as Wav64, but this format is only common on OS X.
Harrison Consoles Mixbus v4 - 1
Page 333 of 515
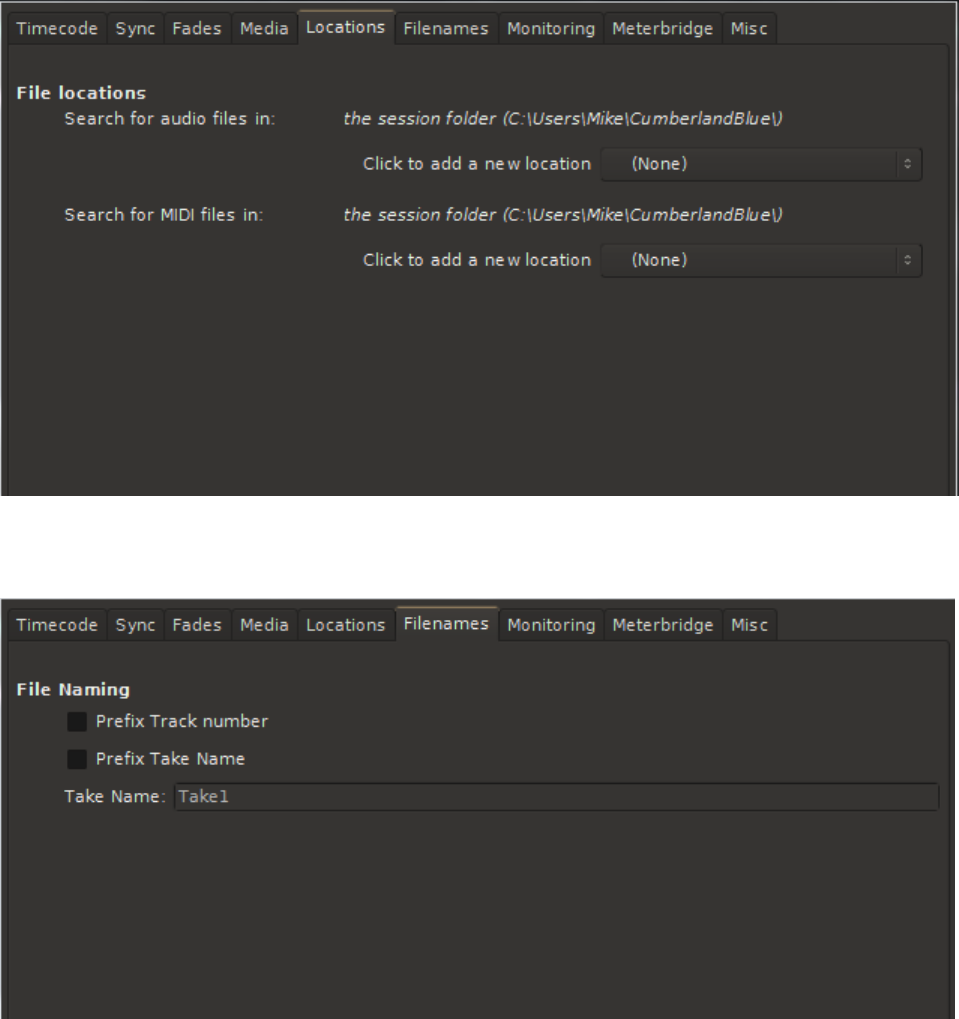
Locations Tab
Filenames Tab
Harrison Consoles Mixbus v4 - 1
Page 334 of 515
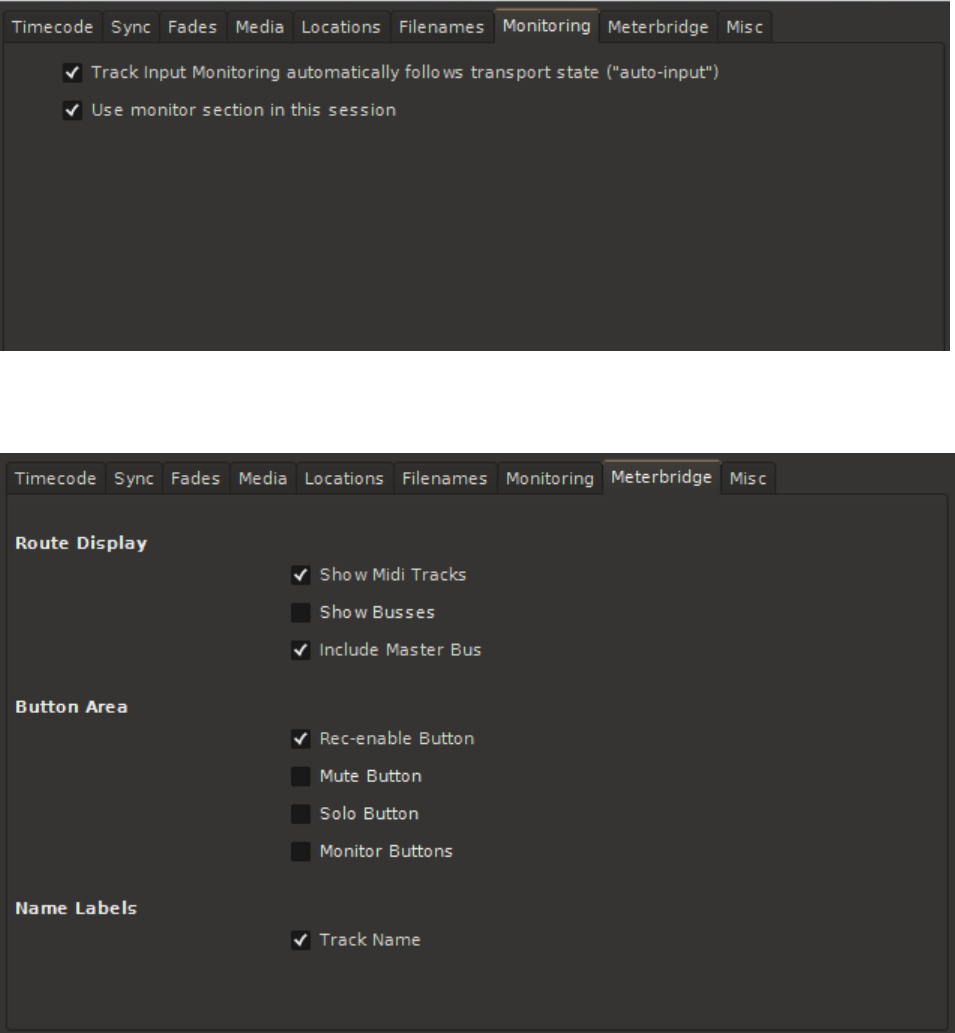
Monitoring Tab
Meterbridge Tab
Harrison Consoles Mixbus v4 - 1
Page 335 of 515
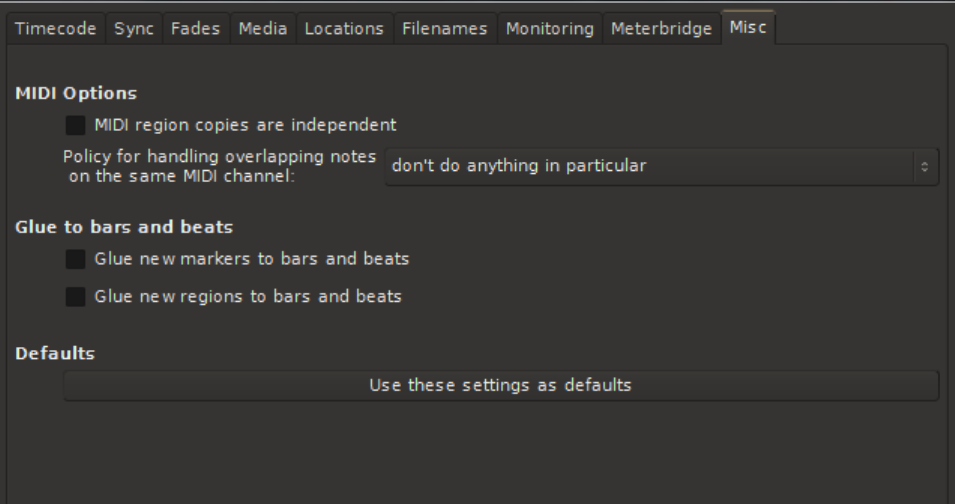
Misc Tab
Harrison Consoles Mixbus v4 - 1
Page 336 of 515
Clean-up
Bring all media into session folder:
This function will locate all audio and MIDI data that may be scattered across multiple folders, or even
multiple hard drives, and copies or moves all audio and/or MIDI associated with that session into the
session folder. Once this is done the user can be assured that the session folder will contain all the
necessary audio/MIDI in one convenient location.
A real world example:
While working with a session you may pull new material from many different locations on your hard drive,
CD drive, or network. After saving the session, Mixbus will know where to find all of these bits of audio the
next time the session is opened on that particular computer. But if your session file is on a portable hard
drive and most (but not all) of your audio files are also on that portable hard drive and you take that hard
drive to a different computer, or studio, expecting to open the session, you may be confronted with a
dialogue box indicating the session was unable to located certain audio files. Running the “Bring all media
into session folder” alleviates this problem.
The same is true for archiving of a session. If the user does not invoke the “Bring all media into session
folder” function before archiving then the archive may be incomplete.
Clean-up unused sources:
Clean-up will move all unused files to a folder labeled “dead” within the session folder. Clean-up is a
destructive operation and all undo/redo history will be lost.
Located under Session>Bring all media into session folder. This important function serves
2 purposes:
• Allows portability of sessions
• Allows for the archiving of sessions
!
It maybe useful to run the clean up function located under Session>Clean up in conjunction
with “Bring all media into session folder”. There maybe no need to transport or archive
unused material.
*
Harrison Consoles Mixbus v4 - 1
Page 337 of 515
Flush Waste Basket:
Deletes audio files located in the “dead” folder.
A note about Session Cleanup.
There are a few reasons why cleanup might not save much space:
1. Because all of the session snapshots are inside the session folder, Mixbus knows when a region is
used by a different snapshot. So it may not “clean up” as much as you expect.
2. If you recorded a very long file, but only use a very small snippet, this reference to the file will keep
the file from being cleaned up. If you “bounce” the regions (making a new, short file of exactly the
length of the region) then you might see a bigger space savings. But note that this means you can no
longer extend the fade handles for that region; there’s no longer any information left outside the
region.
Harrison Consoles Mixbus v4 - 1
Page 338 of 515

Transport Menu
• Start/Stop
• Play >
◦ Play Selection
◦ Play w/Preroll
◦ Start/Continue/Stop
◦ Play from Edit Point and Return
◦ Play Loop Range
• Start Recording
• Stop and Forget Capture: this stops the current recording, and permanently deletes any audio files
that were recorded in the current pass. This cannot be undone.
• Enable Record
• Record w/Preroll: see here for more details
• Set Loop from Selection
• Set Punch from Selection
• Set Session Start/End from Selection
• Forward
• Rewind
• Transition To Roll
• Transition To Reverse
• Playhead >
◦ Playhead to Mouse
◦ Playhead to Active Mark
◦ Center Playhead
◦ Nudge Playhead Forward
◦ Nudge Playhead Backward
◦ Move to Next Transient
◦ Move to Previous Transient
◦ Playhead to Next Grid
◦ Playhead to Previous Grid
◦ Playhead to Next Region Boundary
◦ Playhead to Previous Region Boundary
◦ Playhead to Next Region Boundary (No Track Selection)
Harrison Consoles Mixbus v4 - 1
Page 339 of 515

◦ Playhead to Previous Region Boundary (No Track Selection)
◦ Playhead to Next Region Sync
◦ Playhead to Previous Region Sync
◦ Jump to Next Mark
◦ Jump to Previous Mark
◦ Goto Zero
◦ Goto Start
◦ Goto End
◦ Goto Wall Clock
• Active Mark >
◦ To Next Region Boundary
◦ To Previous Boundary
◦ To Next Region Sync
◦ To Previous Region Sync
• Markers >
◦ Add Mark from Playhead
◦ Remove Mark at Playhead
◦ Toggle Mark at Playhead
◦ Locate to Mark 1
◦ Locate to Mark 2
◦ Locate to Mark 3
◦ Locate to Mark 4
◦ Locate to Mark 5
◦ Locate to Mark 6
◦ Locate to Mark 7
◦ Locate to Mark 8
◦ Locate to Mark 9
◦ Set Session Start from Playhead
◦ Set Session End from Playhead
• Time Master: (for JACK sync only) : when this is enabled, Mixbus will serve as master to report the
Bar|Beat|Tick information to the JACK clock
• Punch In/Out
• Punch In
• Punch Out
• Auto Input : Learn more in the Monitoring section.
• Follow Range : Learn more in the transport section.
Harrison Consoles Mixbus v4 - 1
Page 340 of 515

• Auto Play : The transport will automatically play whenever you locate the playhead to a new position.
• Auto Return: Returns playhead to last starting position, when the transport is stopped.
• Click: Toggles the Click (Metronome) sound on & off.
• Follow Playhead : The edit window will scroll to follow the playhead when the playhead reaches the
edge of the editing canvas.
• Stationary Playhead : If enabled, AND Follow Playhead is enabled, then the timeline will scroll behind
the playhead. This requires significant CPU and disk resources, so it is not recommended for large
sessions.
• Panic: Sends MIDI note off to all channels. Details here
Harrison Consoles Mixbus v4 - 1
Page 341 of 515

Edit Menu
• Undo
• Redo
• Undo Selection Change
• Redo Selection Change
• Cut
• Copy
• Paste
• Select >
◦ Select All Objects
◦ Selects All Tracks
◦ Deselect All
◦ Invert Selection
◦ Set Range to Loop Range
◦ Set Range to Punch Range
◦ Set Range to Selected Regions
◦ Select All After Edit Point
◦ Select All Before Edit Point
◦ Select All Overlapping Edit Range
◦ Select All Inside Edit Range
◦ Select All in Punch Range
◦ Select All in Loop Range
◦ Move Range Start to Previous Region Boundary
◦ Move Range Start to Next Region Boundary
◦ Move Range End to Previous Region Boundary
◦ Move Range End to Next Region Boundary
◦ Start Range
◦ Finish Range
◦ Select Next Track or Bus
◦ Select Previous Track or Bus
• Delete
• Crop: This splits regions under the selected range, and then removes all regions outside of the
selected range.
Harrison Consoles Mixbus v4 - 1
Page 342 of 515

• Split/Separate : If a “range” selection exists, the regions under the range will be split at the start and
end of the range. If no selected range exists, then the regions will be split at the edit point. Learn
more about the Edit Point here.
• Separate >
◦ Separate Under
◦ Separate Using Loop Range
◦ Separate Using Punch Range
• Align >
◦ Align Start
◦ Align Start Relative
◦ Align End
◦ Align End Relative
◦ Align Sync
◦ Align Sync Relative
• Fade >
◦ Fade Range Selection
◦ Set Fade In Length
◦ Fade In
◦ Set Fade Out Length
◦ Fade Out
• Remove Last Capture
• Edit Point >
◦ Change Edit Point
◦ Change Edit Point Including Marker
• Snap Mode >
◦ No Grid
◦ Grid
◦ Magnetic
◦ Next Snap Mode
◦ Next Snap Choice
◦ Previous Snap Choice
◦ Next Musical Snap Choice
◦ Previous Musical Snap Choice
Harrison Consoles Mixbus v4 - 1
Page 343 of 515

• Snap to >
◦ Snap to CD Frame
◦ Snap to Timecode Frame
◦ Snap to Timecode Seconds
◦ Snap to Timecode Minutes
◦ Snap to Seconds
◦ Snap to Minutes
◦ Snap to One Twenty Eighths
◦ Snap to Sixty Fourths
◦ Snap to Thirty Seconds
◦ Snap to Twenty Eighths
◦ Snap to Twenty Fourths
◦ Snap to Twentieths
◦ Snap to Sixteenths
◦ Snap to Fourteenths
◦ Snap to Twelfths
◦ Snap to Tenths
◦ Snap to Eighths
◦ Snap to Sevenths
◦ Snap to Sixths
◦ Snap to Fifths
◦ Snap to Quarters
◦ Snap to Thirds
◦ Snap to Halves
◦ Snap to Beat
◦ Snap to Bar
◦ Snap to Mark
◦ Snap to Region Start
◦ Snap to Region End
◦ Snap to Region Sync
◦ Snap to Region Boundary
• Tempo
◦ Set Tempo from Region = Bar
◦ Set Tempo from Edit Range = Bar
• Smart Object Mode: More here
• Lua Scripts
Harrison Consoles Mixbus v4 - 1
Page 344 of 515

Preferences Window
The Preferences window can be found under the menu item Mixbus->Preferences in OS X, and under the
menu item Edit->Preferences in Windows and Linux.
The preferences window is organized by category in the left hand column of the window. Some categories
have subcategories that you can navigate by clicking on them:
The Preferences window defines your global preferences, that apply to all of the sessions
on your machine. Global preferences define the way you like to work, and the way your
system is set up (such as your MIDI control surfaces or timecode sources). If you want to
change settings for a particular session, go to Session Properties.
*
Harrison Consoles Mixbus v4 - 1
Page 346 of 515
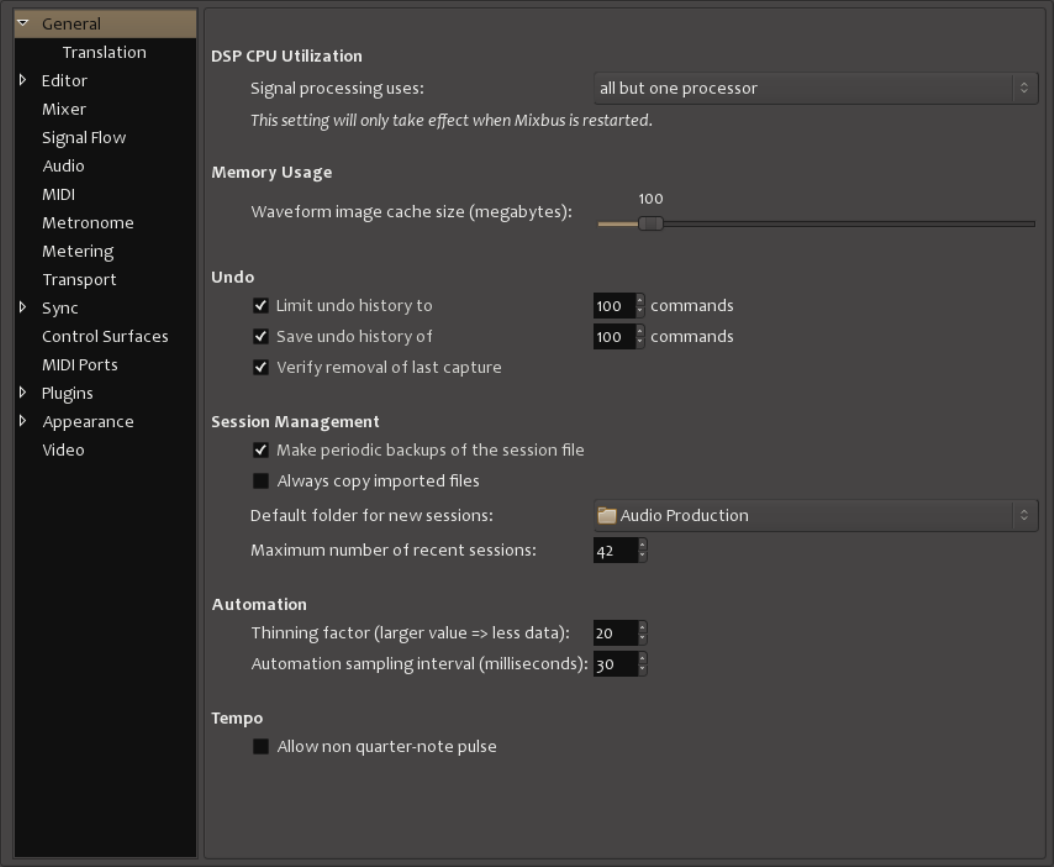
General
DSP CPU Utilization
Signal processing uses
This option defines how many “threads” Mixbus will create to process audio signals. If you use a lot of tracks
and plug-ins, then Mixbus will require significant CPU resources. This setting allows Mixbus to use multiple
processors in parallel, thereby taking advantage of modern computers with 2, 4, or more CPU cores.
Harrison Consoles Mixbus v4 - 1
Page 347 of 515
•all but one processor is the default setting. This setting reserves one processor so your computer
does not feel sluggish when Mixbus is heavily loading your CPU.
•all processors might allow Mixbus to run more tracks/plug-ins with the risk of causing other desktop
applications feeling sluggish.
Memory Usage
Waveform image cache size (megabytes)
This slider allows you to set the size, in Megabytes, of the waveform image cache. For large projects with a
lot of tracks, setting this higher may improve screen rendering times to improve performance. For smaller
projects, or for systems with smaller amounts of RAM, the cache size can be reduced.
Undo
Limit Undo History
This option should be enabled to limit the memory and disk space that Mixbus will use to store Undo
information. Select a number of operations that you’d like Mixbus to remember within a given session.
Save Undo History
This option specifies how many commands are available to undo after a session is saved and re-opened.
Previous commands from prior work on the session will still be available to undo even when a session is
first re-opened.
Verify removal of last capture
When this option is enabled, Mixbus will display a confirmation message when the “stop and remove last
capture” action is used.
Session Management
Make periodic backups of the session files
If this is enabled, Mixbus occasionally creates a date-stamped snapshot in the session’s “backup” folder.
Harrison Consoles Mixbus v4 - 1
Page 348 of 515

Always Copy Imported Files
If this is enabled, then (a) the “copy to session” checkbox will be automatically selected, and cannot be
changed. (b) Files that are drag & dropped into the session will be copied into the session, rather than
“referenced” from their existing location, wherever that may be (such as on a removable hard drive).
Default Folder for new Sessions
This option specifies the default location that appears in the New Session dialog pulldown.
Maximum Number of Recent Sessions
This option defines how many sessions will be displayed in the New Session dialog list.
Automation
Thinning factor
This option removes data points within the automation draw points. Excessive draw data may reduce
system responsiveness with little to no audio benefit. Larger numbers means more thinning, and therefore
fewer draw points but more responsiveness.
Automation sampling interval
This option determines the rate (in milliseconds) at which automation points are acquired. If the density of
automation points is too high system responsiveness may be reduced.
Tempo
Allow non-quarter note pulse:
Normally, Mixbus assumes that the “tempo” is based on quarter-note pulse. Disable this option to use a
non-quarter note pulse. For example a time-signature of 5/8 will use the eight-note pulse to meet the tempo.
Regardless of the “periodic backup” setting, Mixbus stores a “pending” file whenever you
start a new recording. This makes it very likely that, even in the case of a crash or power
outage, a recording in process can be recovered.
*
Harrison Consoles Mixbus v4 - 1
Page 349 of 515
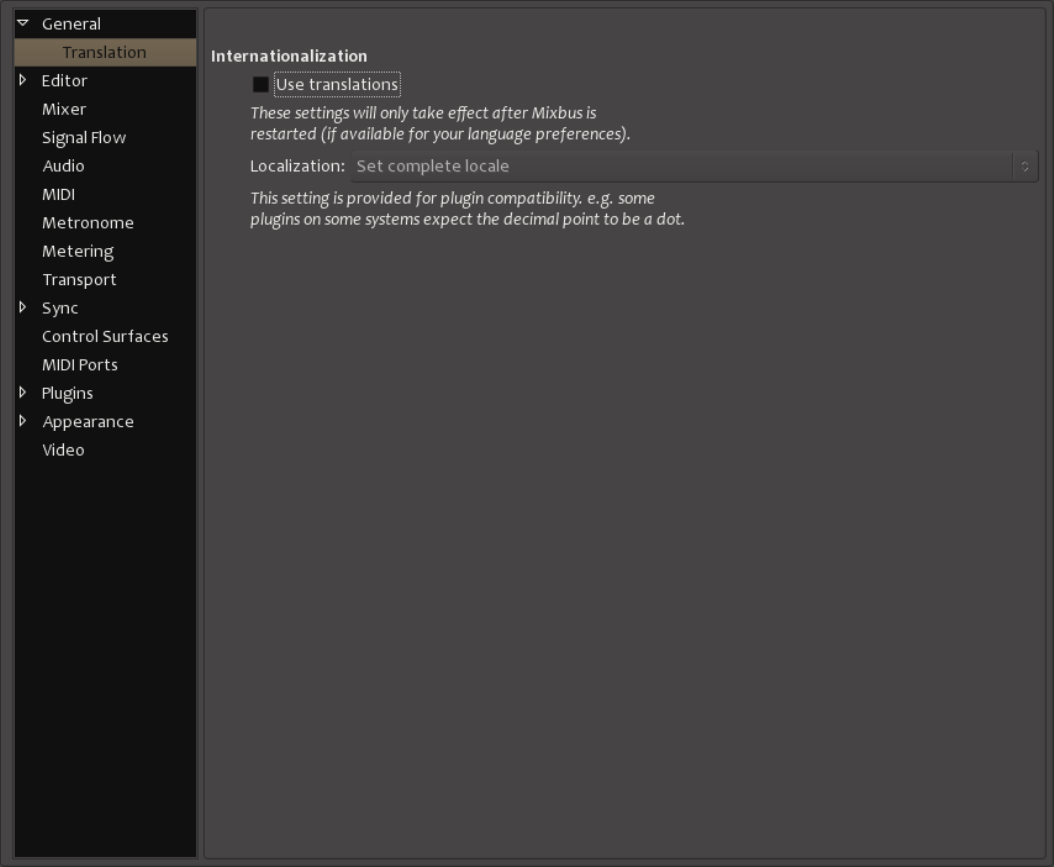
General > Translation
Internationalization
Use Translations
This option allows Mixbus to accommodate multiple languages and conventions, such as a decimal point
being . in some languages and , in others.
Harrison Consoles Mixbus v4 - 1
Page 350 of 515
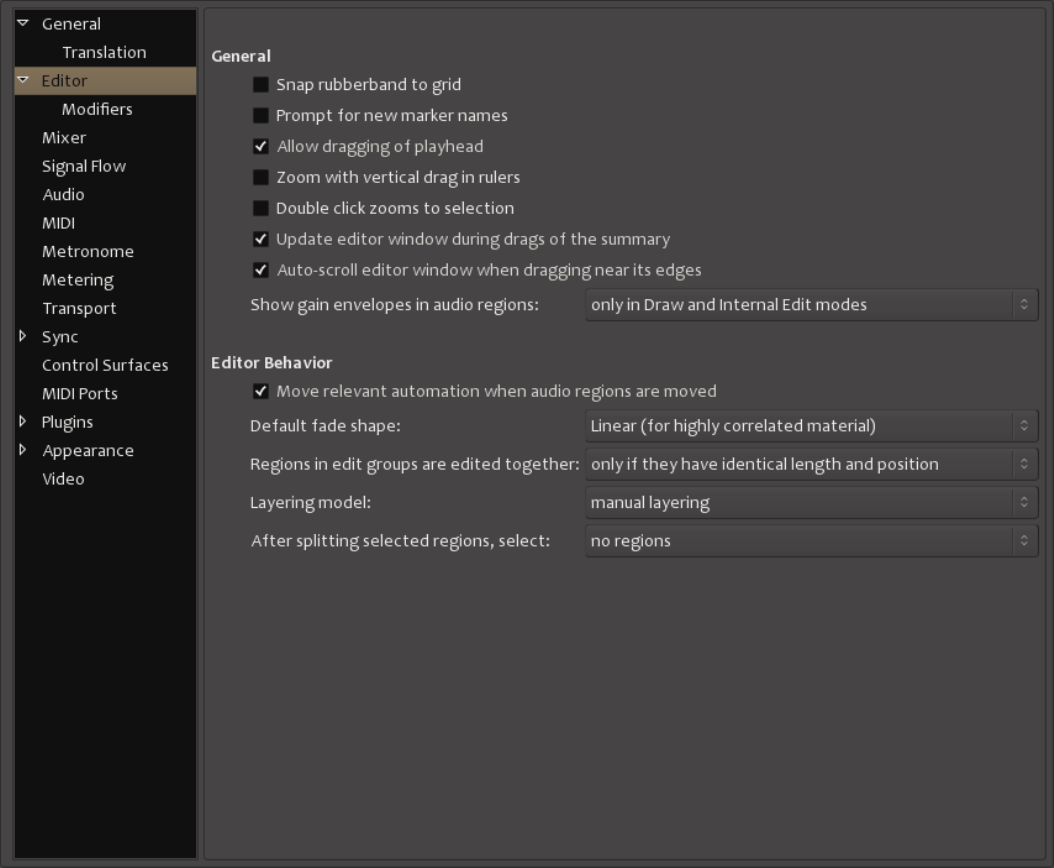
Localization
This drop-down menu allows you to set complete locale,enable only message translation, or message
translation and numeric format. This setting is provided for plugin compatibility. Some plugins on some
systems expect the decimal point to be a dot.
Editor
Snap rubberband to grid:
In the editor, when doing a “rubber-band select” ( drawing a box to select multiple regions or control points ),
the box edges will snap to the grid.
Harrison Consoles Mixbus v4 - 1
Page 351 of 515

Prompt for new marker names
When this option is enabled, creating a new marker will prompt for a name immediately. This allows you to
organize your markers from the moment you create them, but can also slow down the workflow if you are
adding several markers in real time. If you’d prefer to rename the markers later, de-select this option. You
can always rename markers later by right-clicking on them.
Allow Dragging of Playhead
(default: ON) Allows clicking on the red playhead to drag it. Disable this if you want your clicks to bypass the
playhead and click on the thing behind it.
Zoom with vertical drag in rulers
When this option is enabled, you can click and drag vertically in the ruler of the Editor to zoom in & out.
Dragging up zooms out, dragging down zooms in.
Double click zooms to selection
Enabling this option allows you to quickly zoom to whatever regions you have selected by simply double-
clicking on one of the selected regions.
Update editor window during drags of the summary
By default, when dragging the “summary” view, the editor will be updated live. If your system is unable to
redraw the editor window quickly enough, you can disable this option.
Auto-scroll editor window when dragging near its edges
When enabled: if you drag a region close to the edge of the editor, it will begin scrolling to accommodate the
move.
Show gain envelopes in audio regions
This option allows you to specify whether gain envelopes in audio regions are shown only in Draw and
Internal Edit modes only, or in all modes.
Editor Behavior
Move relevant automation when regions are moved
(default: ON) When you drag a region, this will also move any automation points that are within the region’s
bounds. NOTE: this will overwrite any existing automation in the destination location.
Harrison Consoles Mixbus v4 - 1
Page 352 of 515
Default fade shape
This option allows you to specify the default shape for crossfades, between Linear, Constant power,
Symmetric, Slow, or Fast.
Regions in Edit Groups are edited together
This option allows you to specify the behavior of grouped regions in the editor window. The grouped regions
can be edited together either only if they have identical length, position and origin (indicating that they are
likely from the same source material and have been edited in sync), or whenever they overlap in time (if a
region has any overlap with the currently-selected region, then it will move with the region).
Layering Model
This option allows you to specify the layering behavior of regions. The default is Manual Layering, where
the user is expected to manually control each region’s layer. Or, Later-is-higher defines region layering so
that later regions will be assigned a higher layer.
After splitting selected regions, select
This option allows you to specify which regions, if any, are selected after a split is performed. You can
choose from no regions selected, newly-created regions selected, or existing regions and newly-created
regions selected.
Harrison Consoles Mixbus v4 - 1
Page 353 of 515
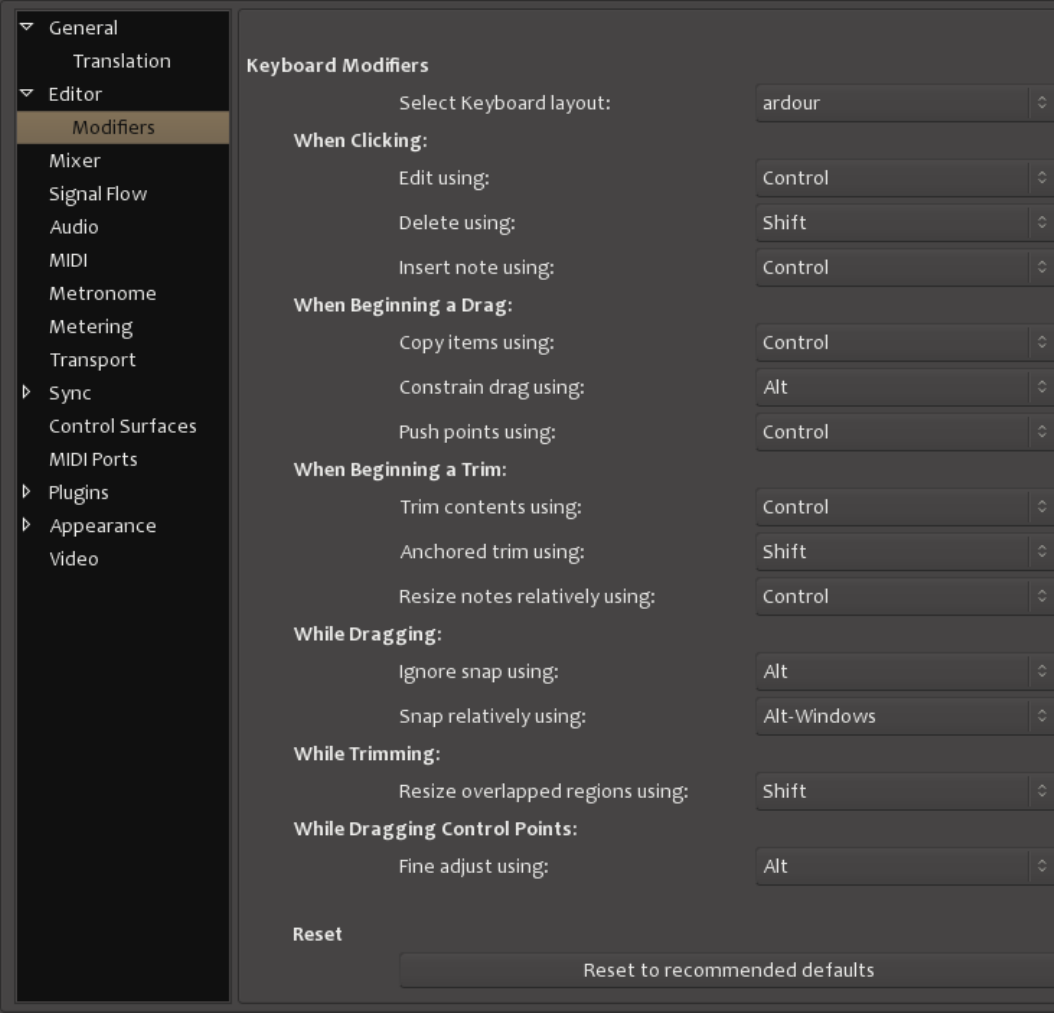
Editor > Modifiers
Keyboard Modifiers
This section allows you to change the keyboard modifiers Shift,Command,Control,Alt, as well as the
lesser-used Windows keys, and combinations thereof, when using the mouse to click, drag, and trim in the
Harrison Consoles Mixbus v4 - 1
Page 354 of 515
Editor window. Using these keyboard modifiers you can adapt Mixbus to the editing workflow you prefer.
Several parameters are offered:
Select Keyboard Layout
Currently Mixbus provides a single set of predefined keyboard shortcuts. If we later provide additional
keybindings, they will appear here.
When Clicking
You can change which modifier(s) activate Edit,Delete, and Insert Note.
When Beginning a Drag
You can change which modifier(s) activate Copy items,Constrain drag, and Push points.
When Beginning a Trim
You can change which modifier(s) activate Trim contents,Anchored trim, and Resize notes relatively.
While Dragging
You can change which modifier(s) activate Ignore snap and Snap relatively.
While Trimming
You can change which modifier(s) activate Resize overlapped regions
While Dragging Control Points
You can change which modifier(s) activate Fine adjust.
Harrison Consoles Mixbus v4 - 1
Page 355 of 515
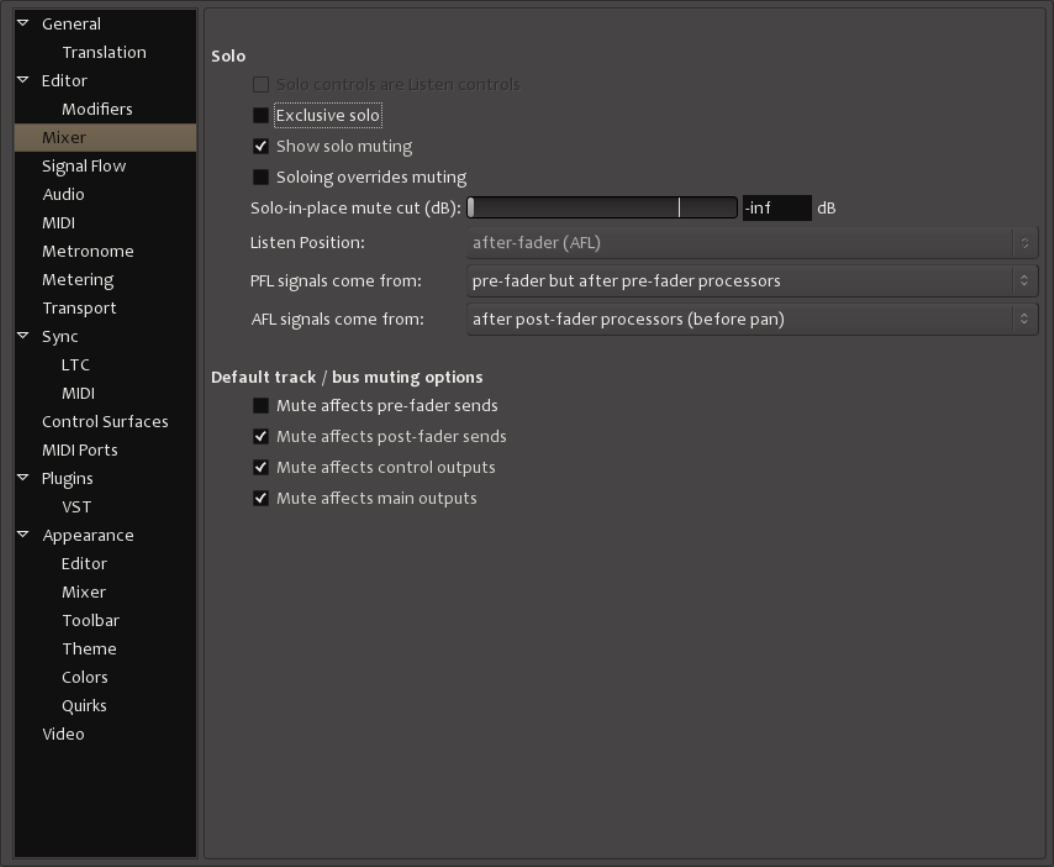
Mixer
Solo
Solo controls are Listen controls
When this is enabled, Solos will appear on the “monitor” output, but they do not mute the master bus output.
This allows the engineer to listen to a solo, without affecting the master bus output in those cases where the
master bus is being recorded “live” and should not be interrupted.
Harrison Consoles Mixbus v4 - 1
Page 356 of 515
Exclusive Solo
When this option is enabled, only one track or bus can be in solo at any given moment. If another track or
bus is selected, then it will become the only track or bus that is in solo mode.
Show solo muting
When this option is enabled, soloing one track or bus causes a yellow outline to be drawn around all the
other tracks or busses which are muted by the solo selection. Every track or bus that is not solo’ed will be
effected in this way, to remind you why the track is not audible.
Soloing overrides muting
When this option is enabled, pressing the solo button will allow the audio on that track or bus to be heard,
even if the mute button is also pressed. When this option is not enabled, then the mute button still continues
to function, even if the track is solo’ed.
Harrison Consoles Mixbus v4 - 1
Page 357 of 515
Solo-in-place mute cut (dB):
Listen Position
PFL signals come from
AFL signals come from
Default Track /bus muting options
Mute affects pre-fader sends
Mute affects post-fader sends
Mute affects control outputs
Mute affects main outputs
Signal Flow
Harrison Consoles Mixbus v4 - 1
Page 358 of 515
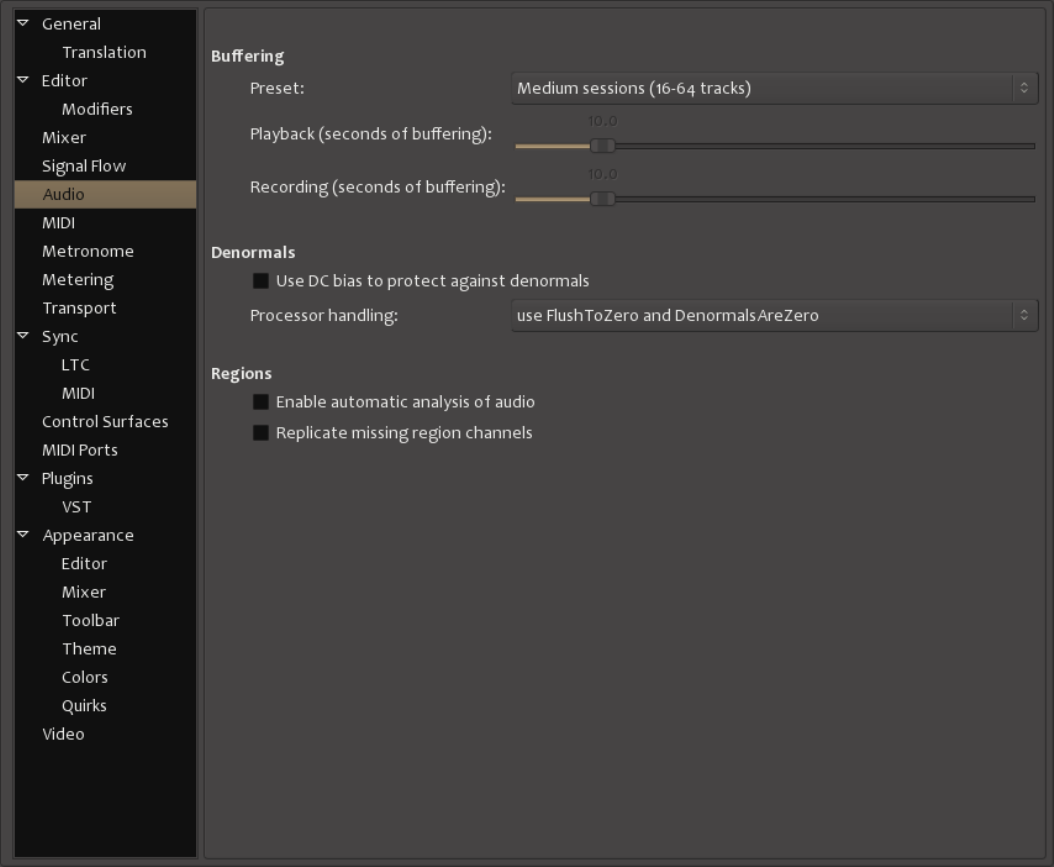
Audio
Buffering
A smaller buffer allows mixbus to load sessions and locate faster. If you receive a message like “your disk
was not able to keep up with Mixbus”, then you should increase the buffer size. If you have fewer tracks
(8-16), and/or a very fast disk (SSD), then you can use very low buffer sizes, and Mixbus will feel extremely
responsive. Generally speaking, Mac requires larger buffers than Windows and Linux.
Harrison Consoles Mixbus v4 - 1
Page 360 of 515

Preset
There are four preset options: small sessions,medium sessions,large sessions, and custom, which
allows you to set your own buffer times using the sliders for playback and recording.
Playback (seconds of buffering)
Increase this value if Mixbus reports “your disk was not able to keep up with playback”. Increasing the buffer
might cause a slight delay when Mixbus locates, because it is buffering more audio before playback can
start.
Recording (seconds of buffering)
Increase this value if Mixbus reports “your disk was not able to keep up with recording”.
Denormals
Denormals relate to 32 bit floating point processing used by Mixbus. Some plugins, when used in Mixbus,
generate “denormals” which is an invalid processor state that causes random high CPU spikes. If you
believe a plugin is generating denormals, you can enable this checkbox for the track, and see if it helps the
problem. For more on denormals click here: http://en.wikipedia.org/wiki/Denormal_number
Use DC bias to protect against denormals
This option adds a miniscule amount of DC offset to prevent the signal from reaching denormal levels. In a
few cases, plugins that cause CPU spikes can be improved by enabling this option, or one of the other
“denormal” options
Processor Handling
This option attempts to use internal CPU settings to avoid denormals. In a few cases, plugins that cause
CPU spikes can be improved by enabling this option, or one of the other “denormal” options.
Regions
Enable automatic analysis of audio
If this is enabled, Mixbus will always analyze audio (to find transients) when files are imported are recording.
This might cause imports to take longer, but it saves time when you try to “skip to next transient”
Harrison Consoles Mixbus v4 - 1
Page 361 of 515
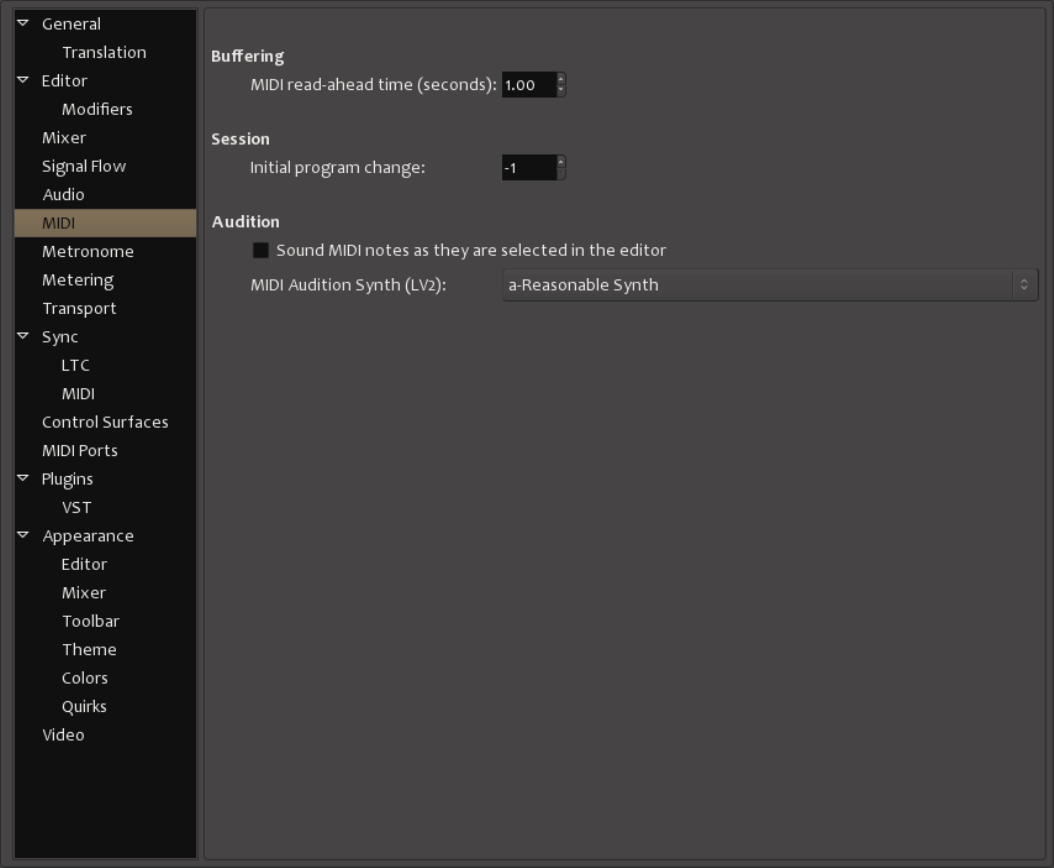
Replicate missing region channels
If you send a mono region on a stereo channel, this option will cause the mono signal to appear on both left
and right channels. If this option is disabled, then the mono region will only be heard from the left side of the
channel.
MIDI
Harrison Consoles Mixbus v4 - 1
Page 362 of 515
Buffering
MIDI read-ahead time (seconds)
Increase this value if you have very dense & complicated MIDI arrangements.
Session
Initial program change
Mixbus will send this MIDI program-change to the MMC port, when a new session is opened.
Audition
Sound MIDI notes as they are selected in the editor
When this option is enabled, clicking on a MIDI note in the editor will cause it to play.
MIDI Audition Synth (LV2)
When a midi file is auditioned ( in the Import dialog, for example ) … this defines the virtual instrument that
is used for the audition path.
Harrison Consoles Mixbus v4 - 1
Page 363 of 515
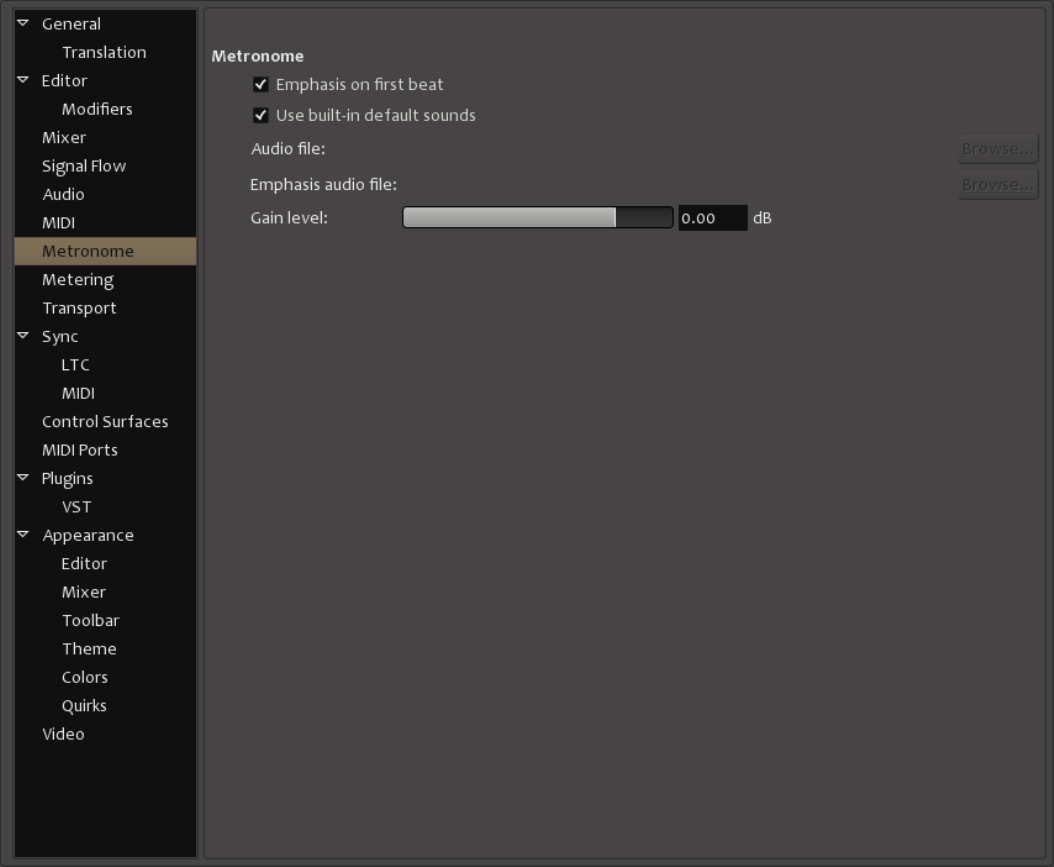
Metronome
Metronome
Emphasis on first beat
When enabled, this option uses a different tone, with a higher pitch, on the first beat of each measure to
make it easier to hear where each bar begins. When disabled, the same tone is used on each beat.
Harrison Consoles Mixbus v4 - 1
Page 364 of 515
Use built-in default sounds
Enables a simple option to automatically generate a useable click track with the metronome using built-in
default sounds. If you prefer to use your own sounds, de-select this option and load your sounds below.
Audio File
If the default sounds are disabled, browse to define the sound file for the “click” used by the metronome.
Emphasis audio file
If the default sounds are disabled, browse to define the sound file for the “emphasis click” used by the
metronome. The emphasis click occurs on the first beat of each measure.
Gain level
Adjustable from – infinity to +6 dB
Harrison Consoles Mixbus v4 - 1
Page 365 of 515
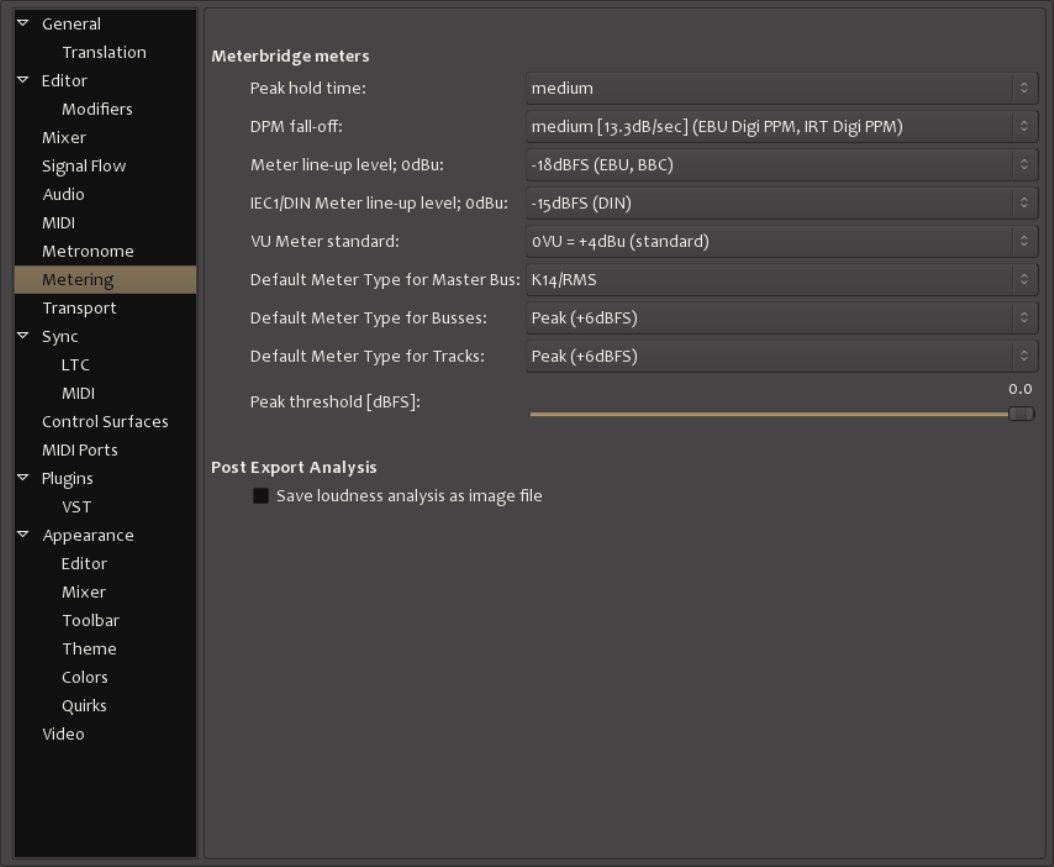
Metering
Meterbridge meters ( NOTE: these options only apply to the meters in the
Meterbridge window )
Peak Hold Time
The hold time for the peak-hold indicators. Ranges from off to short,medium, and long.
DPM fall-off
The decay rate of audio meters, ranging from Off (instant decay) to Slowest (6.6dB/sec decay rate).
Harrison Consoles Mixbus v4 - 1
Page 366 of 515
Meter line-up level; 0dBu
IEC1/DIN Meter line-up level; 0dBu
VU Meter standard
Default Meter Type for Master Bus
Default Meter Type for Busses
Default Meter Type for Tracks
Peak threshold [dBFS]
Post Export Analysis
Save loudness analysis as image file
When an “export” is performed, and the “analysis” checkbox is enabled, this option will cause Mixbus to also
save an image file of the resulting loudness analysis. This can be useful record to keep with your exported
master file.
Harrison Consoles Mixbus v4 - 1
Page 367 of 515
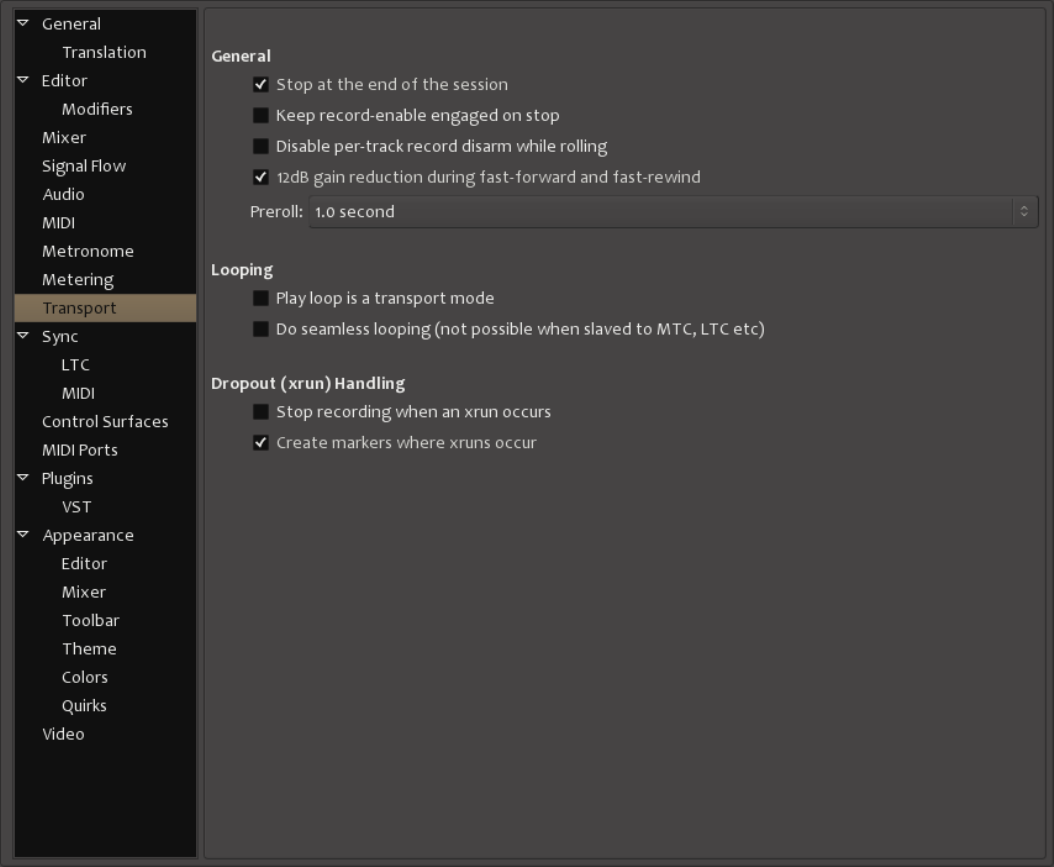
Transport
General
Stop at the end of the session
When enabled if Mixbus is not recording, it will stop the transport when it reaches the current session end
marker. When disabled Mixbus will continue to roll past the session end marker at all times.
Keep record-enable engaged on stop
To prevent accidental overwriting this is off by default.
Harrison Consoles Mixbus v4 - 1
Page 368 of 515
Disable per-track record disarm while rolling
When enabled this will prevent you from accidentally stopping specific tracks recording during a take.
12dB gain reduction during fast-forward and fast-rewind
This will prevent the unpleasant increase in perceived volume that occurs when fast forwarding or rewinding
through certain kinds of audio.
Preroll
There are several options here including Bars (1, 2, or 4), Zero (no preroll at all), and Seconds (0.1 to 2.0)
Looping
Play loop is a transport mode
When enabled the loop button does not start playback but forces playback to always play the loop. When
disabled the loop button starts playing the loop, but stop then cancels loop playback.
Do seamless looping (not possible when slaved to MTC, LTC etc)
When enabled this will loop by reading ahead and wrapping around at the loop point, preventing any need
to do a transport locate at the end of the loop. When disabled looping is done by locating back to the start of
the loop when Mixbus reaches the end which will often cause a small click or delay.
Dropout (xrun) Handling
Stop recording when an xrun occurs
A buffer xrun will produce noise. Checking this option prevents this noise from accidentally being recorded.
Create markers where xruns occur
When enabled, this option creates new markers on the timeline whenever an xrun occurs.
Harrison Consoles Mixbus v4 - 1
Page 369 of 515
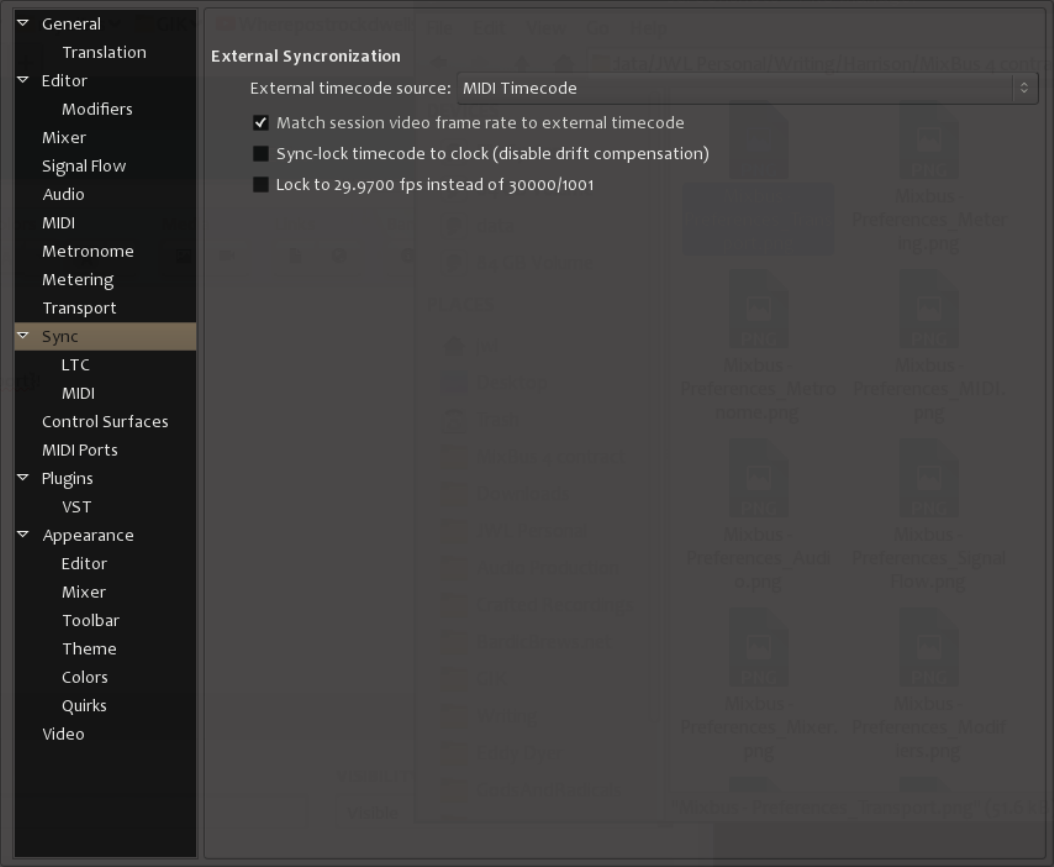
Sync
External Synchronization
External Timecode source
This controls what protocol Mixbus synchronizes to. Options are Jack, MIDI Timecode, MIDI Clock, and
LTC.
Match session video frame rate to external timecode
This option controls the value of the video frame rate while chasing an external timecode source.
Harrison Consoles Mixbus v4 - 1
Page 370 of 515
• When enabled the session video frame rate will be changed to match that of the selected external
timecode source.
• When disabled the session video frame rate will not be changed to match that of the selected external
timecode source. Instead the frame indication in the main clock will flash red and Mixbus will convert
between the external timecode standard and the session standard.
Sync-lock timecode to clock (disable drift compensation)
• When enabled Mixbus will never varispeed when slaved to external timecode. Sync Lock indicated
that the selected external timecode source shares clock-sync (Black and Burst, Wordclock, etc) with
the audio interface. This option disables drift compensation. The transport speed is fixed at 1.0.
Varispeed LTC will be ignored and cause drift.
• When disabled Mixbus will compensate for potential drift, regardless if the timecode sources share
clock sync.
Lock to 29.9700 fps instead of 30000/1001
When enabled the external timecode source is assumed to use 29.97 fps instead of 30000/1001. SMPTE
12M-1999 specifies 29.97 fps as 3000/1001. The spec further mentions that drop-frame timecode has an
accumulated error of -86 ms over a 24 hour period. Drop-frame timecode would compensate exactly for a
NTSC color frame rate of 30 * 0.9990 (i.e. 29.970000). That is not the actual rate. However, some vendors
use that rate – despite it being against the specs – because the variant of using exactly 29.97 fps has zero
timecode drift.
Harrison Consoles Mixbus v4 - 1
Page 371 of 515
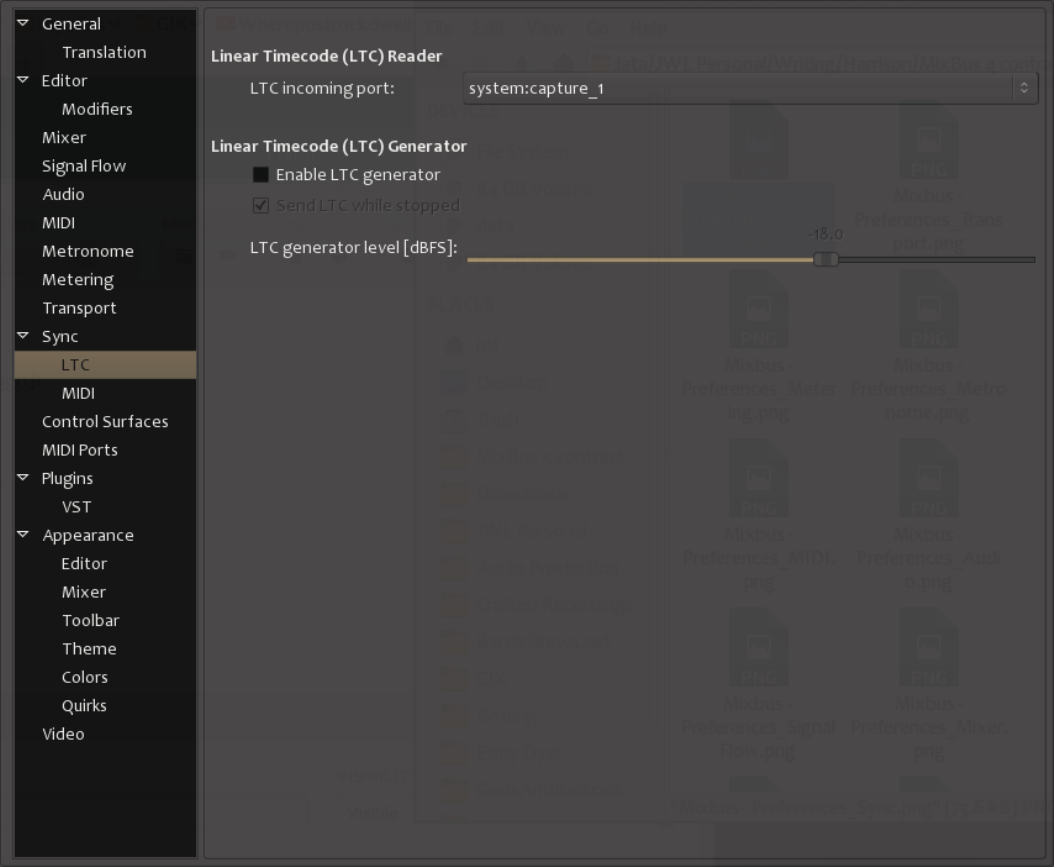
Sync > LTC
Linear Timecode (LTC) Reader
LTC incoming port:
Choose an audio input port (on your soundcard) which will be used to interpret LTC timecode.
Harrison Consoles Mixbus v4 - 1
Page 372 of 515
Linear Timecode (LTC) Generator
Enable LTC generator
When enabled, Mixbus will send LTC from the LTC port.
Send LTC while stopped
When enabled Mixbus will continue to send LTC information even when the transport (playhead) is not
moving.
LTC generator level [dbfs]
Specify the peak volume of the generated LTC signal in dBFS. A good value is 0 dBu^= -18 dBFS in an EBU
calibrated system.
Harrison Consoles Mixbus v4 - 1
Page 373 of 515
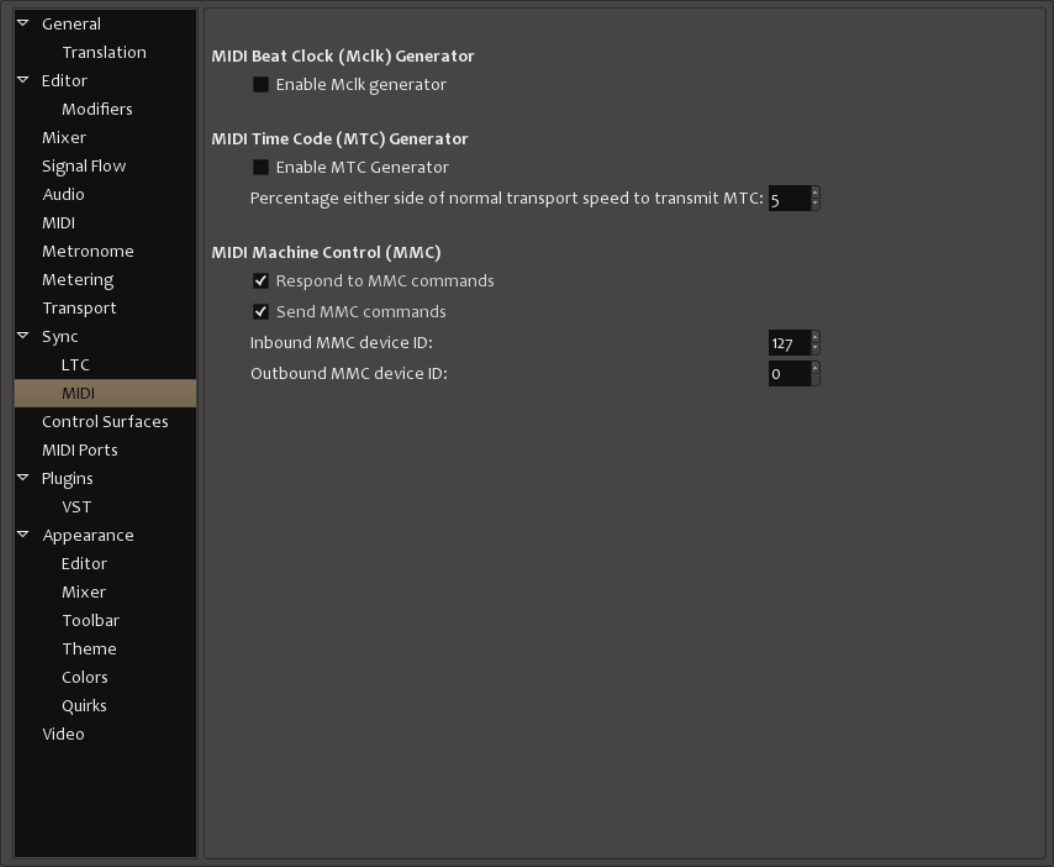
Sync > MIDI
MIDI Beat Clock (Mclk) Generator
Enable Mclk generator
When enabled, Mixbus will send MIDI Beat clock through the MTC port.
Harrison Consoles Mixbus v4 - 1
Page 374 of 515
MIDI Time code (MTC) Generator
Enable MTC Generator
When enabled, Mixbus will send MTC clock through the MTC port.
Percentage either side of normal transport speed to transmit MTC:
Some devices cannot maintain sync when playback is too fast. This option can limit the range that Mixbus
will send MTC to slaved devices.
MIDI Machine Control (MMC)
Respond to MMC commands
If enabled, Mixbus will respond to MMC ( Play, Stop, etc ) commands on the MMC MIDI port.
Send MMC commands
When enabled, Mixbus will send MMC commands via the MMC MIDI port.
Inbound MMC device ID
MMC machines can be assigned an “ID” for controlling multiple machines
Outbound MMC device ID
MMC machines can be assigned an “ID” for controlling multiple machines
Harrison Consoles Mixbus v4 - 1
Page 375 of 515
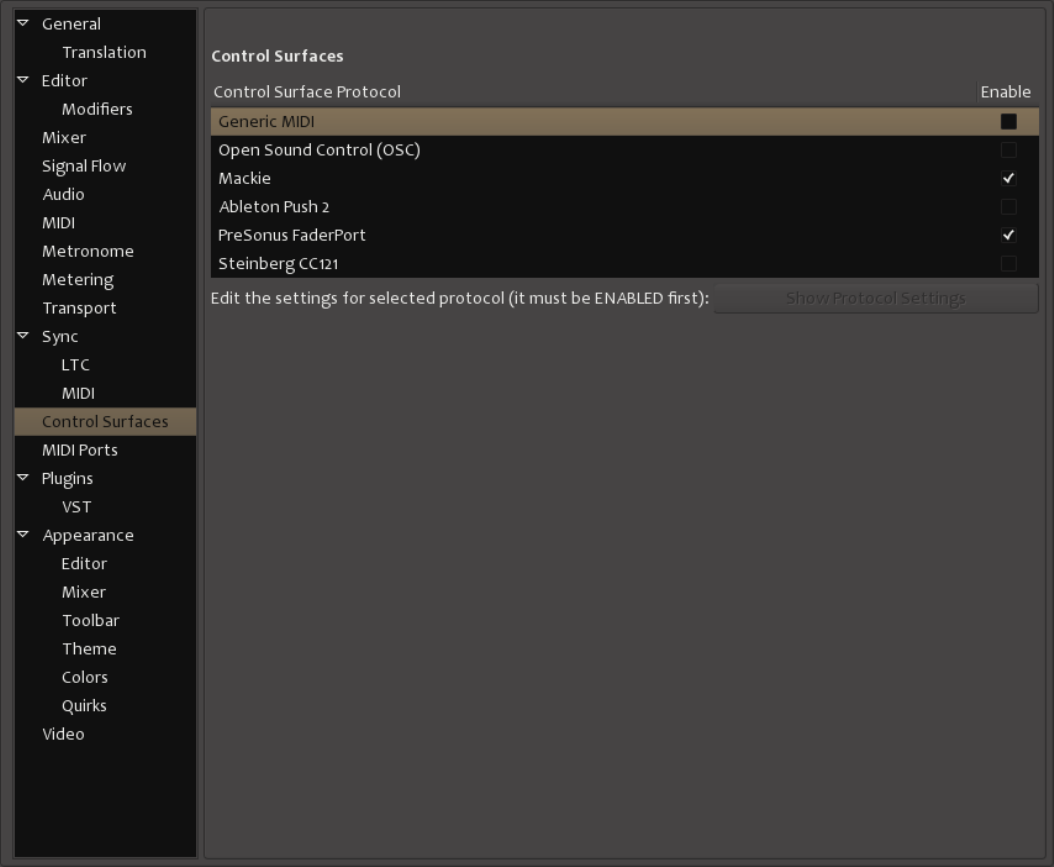
Control Surfaces
Control Surfaces
Control Surface Protocol
This option allows you to specify the Control Surface Protocol you’d like to use. Some options, like Generic
MIDI, OSC, and Mackie are common standards that may be used by a variety of control surfaces. Others,
like Ableton Push 2, PreSonus FaderPort, and Stenberg CC121 are Mixbus’ implementation of specific
controllers available. If you’d like to use one of these products, enable it here, and tweak the various options
below.
Harrison Consoles Mixbus v4 - 1
Page 376 of 515
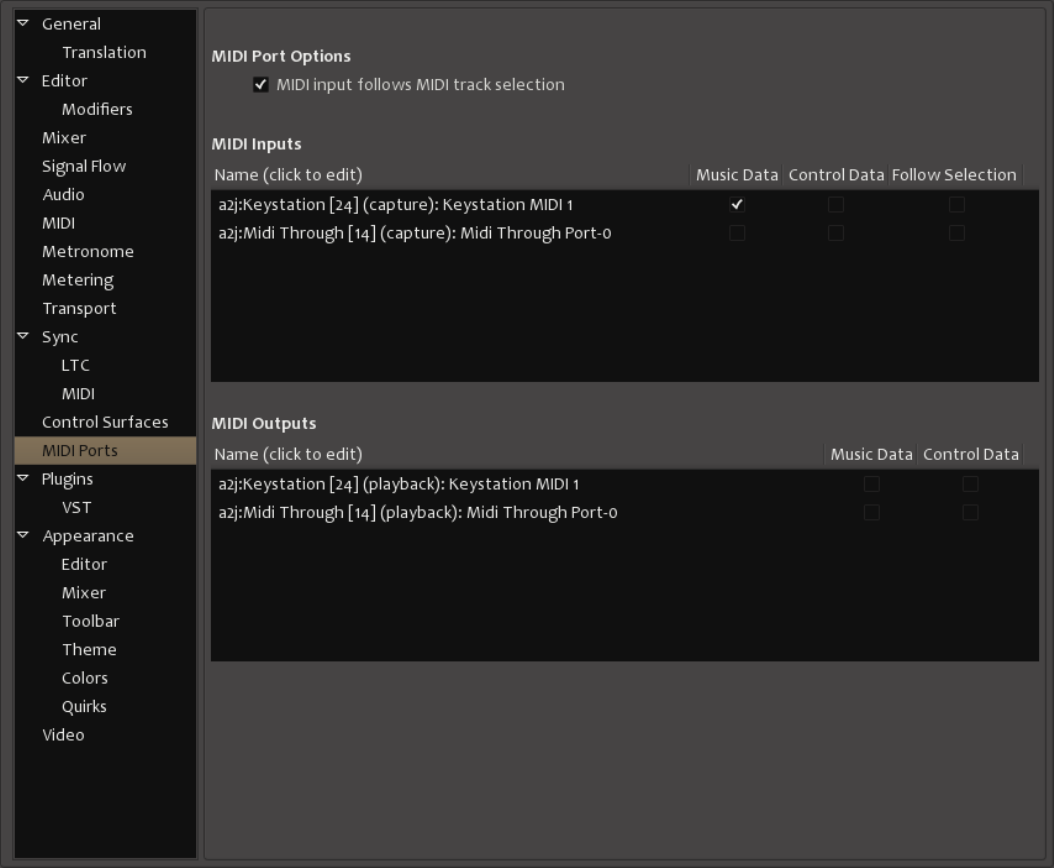
Edit the settings for selected protocol (it must be ENABLED first)
Once you have enabled a protocol above, you can edit the settings for that protocol by clicking the button,
which will launch a new dialog box.
MIDI Ports
MIDI Port Options
MIDI input follows MIDI track selection
If enabled, then MIDI will be delivered to the selected track, and no other tracks.
Harrison Consoles Mixbus v4 - 1
Page 377 of 515
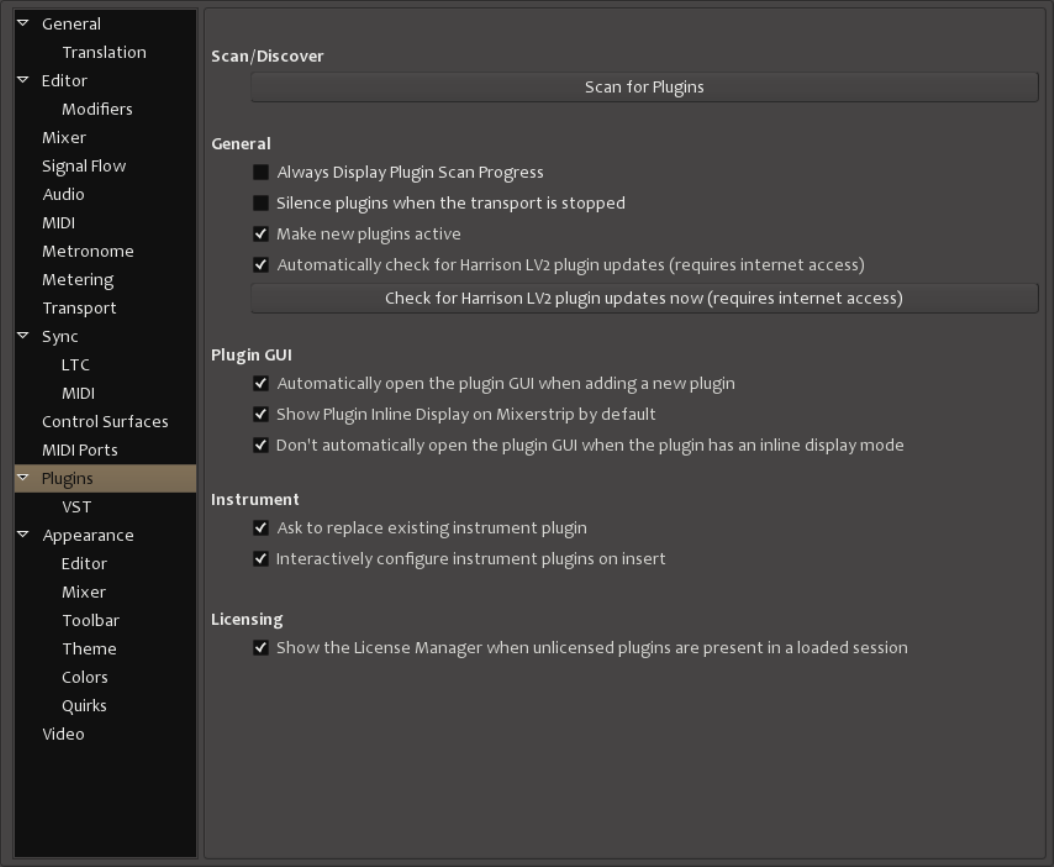
MIDI Inputs
This area allows you to enable various MIDI input devices connected to your system, and activate Music
Data,Control Data, and Follow Selection for each device.
MIDI Outputs
This area allows you to enable various MIDI output devices connected to your system, and activate Music
Data and Control Data for each device.
Plugins
Harrison Consoles Mixbus v4 - 1
Page 378 of 515
Scan/Discover
The Scan for Plugins button initiates a new scan for any new plugins you may have installed along the paths
listed in the VST path box. A pop up dialog window shows the progress of the scan operation.
General
Always Display Plugin Scan Progress
When enabled, Mixbus will display a dialog window showing each plugin being scanned. This is ON by
default.
Silence plugins when the transport is stopped
When enabled, Mixbus will stop processing plugins when the transport is stopped. This can save battery life,
but it causes effects like reverb or delay to “mute” when the transport is paused. This option is OFF by
default.
Make new plugins active
By default, Mixbus will immediately enable a plugin when it is added. If you disable this option, then newly-
added plugins will be “disabled” by default.
Automatically check for Harrison LV2 plugin updates (requires internet access)
This option, when enabled, will automatically update Harrison plugins. You can also manually update them
by clicking the provided button.
Plugin GUI
Automatically open the plugin GUI when adding a new plugin
When a new plugin is added to the strip, the plugin’s UI will be shown. This is ON by default. Note that this
only applies when a single plugin is added. If you add multiple plugins at once, the GUI will not appear
automatically.
Show Plugin inline Display on Mixerstrip by default
When a plugin with an “inline display” is added, this option will cause the inline display to be shown
automatically
Harrison Consoles Mixbus v4 - 1
Page 379 of 515
Don’t automatically open the plugin GUI when the plugin has an inline display mode
When a plugin with an “inline display” is added, this option will cause the inline display to be shown instead
of the plugins main UI.
Instrument
Ask to replace existing instrument plugin
When an instrument is added to a track that already has an instrument, Mixbus will prompt you to replace
the existing instrument. This is ON by default.
Interactively configure instrument plugins on insert
When a plugin with multi-outputs is added to a track, this option will cause Mixbus to prompt the user for the
desired channel configuration: mono, stereo, or multichannel.
Licensing
Show the License Manager when unlicensed plugins are present in a loaded session
When not enabled, you could miss that unregistered plugins are not behaving as you’d expect. Enabling this
option allows you to activate licenses quickly and easily to resume your session as soon as possible.
Harrison Consoles Mixbus v4 - 1
Page 380 of 515
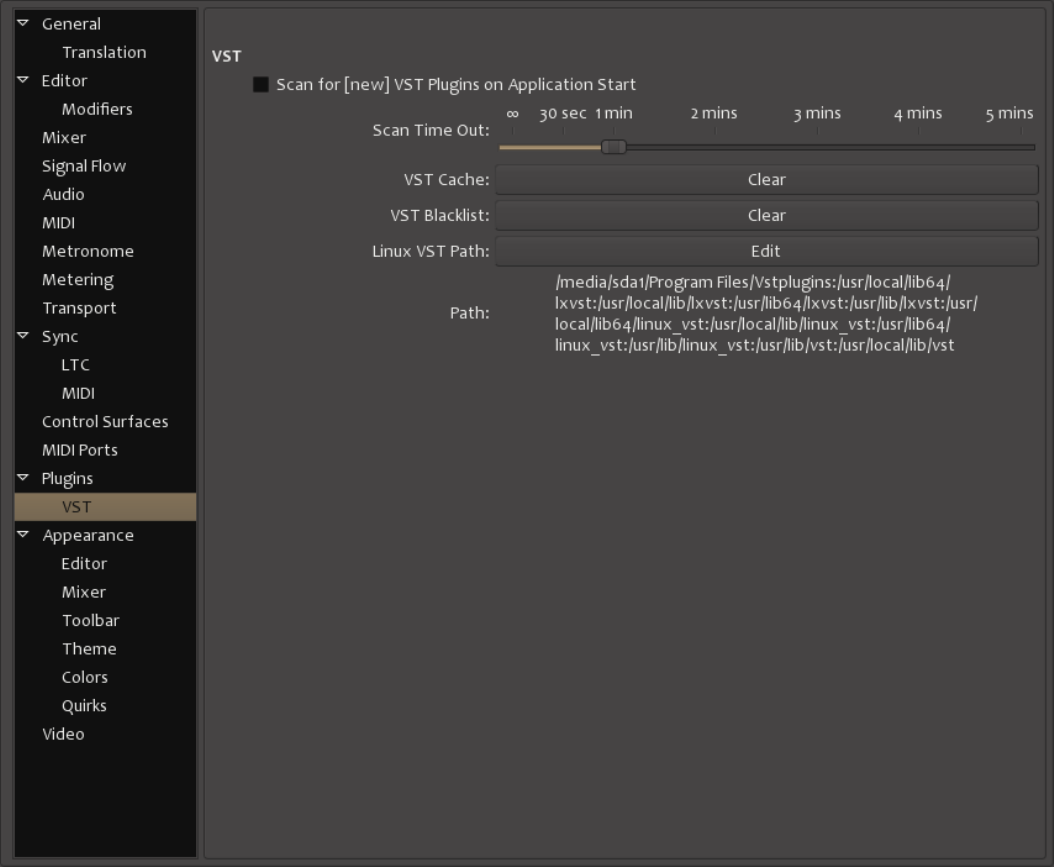
Plugins > VST
VST
Scan for [new] VST Plugins on Application Start
New VST plugins are searched, tested and added to the cache index on application start. When disabled
new plugins will only be available after triggering a ‘Scan’ manually.
Harrison Consoles Mixbus v4 - 1
Page 381 of 515
Scan Time out
If a plugin exceeds this time when scanning, this might indicate a bug in the plugin. In this case the scan will
be aborted and the plugin will be put on the “blacklist”. Plugins sometimes take a long time to scan, because
they are checking online for licensing information or updates. Adjust this value to accommodate your
plugin’s needs.
VST Cache
Clicking this button will clear the VST “cache” which is a list of plug-ins that have been scanned. Mixbus will
only load plug-ins that have been scanned and are in the cache. So clicking this button will VST plug-ins in
Mixbus until paths have been scanned.
VST Blacklist
When a plug-in crashes on scanning, it is placed in the “blacklist” and will not be scanned in the future. Click
this button to clear all blacklisted plug-ins so they can be scanned.
Linux VST Path
Clicking this button launches a dialog box that allows the user to specify which folders contain VST plug-ins.
Add opens a dialog box that allows you to add new folders. Highlight the desired folder and click “OK” to
add it to the VST path. Pressing Delete will remove the selected path from the VST scan. Restore to
Default will set the VST path to those folders that are defined as VST paths in the Windows system. This
includes paths set in the registry as well as the environment variable VST_PATH.
Path
The VST Path is a list of directories that Mixbus will use to scan for plug-ins. This path may not be directly
edited by the user, but can be cleared, added to, and set to defaults with the buttons above.
Harrison Consoles Mixbus v4 - 1
Page 382 of 515
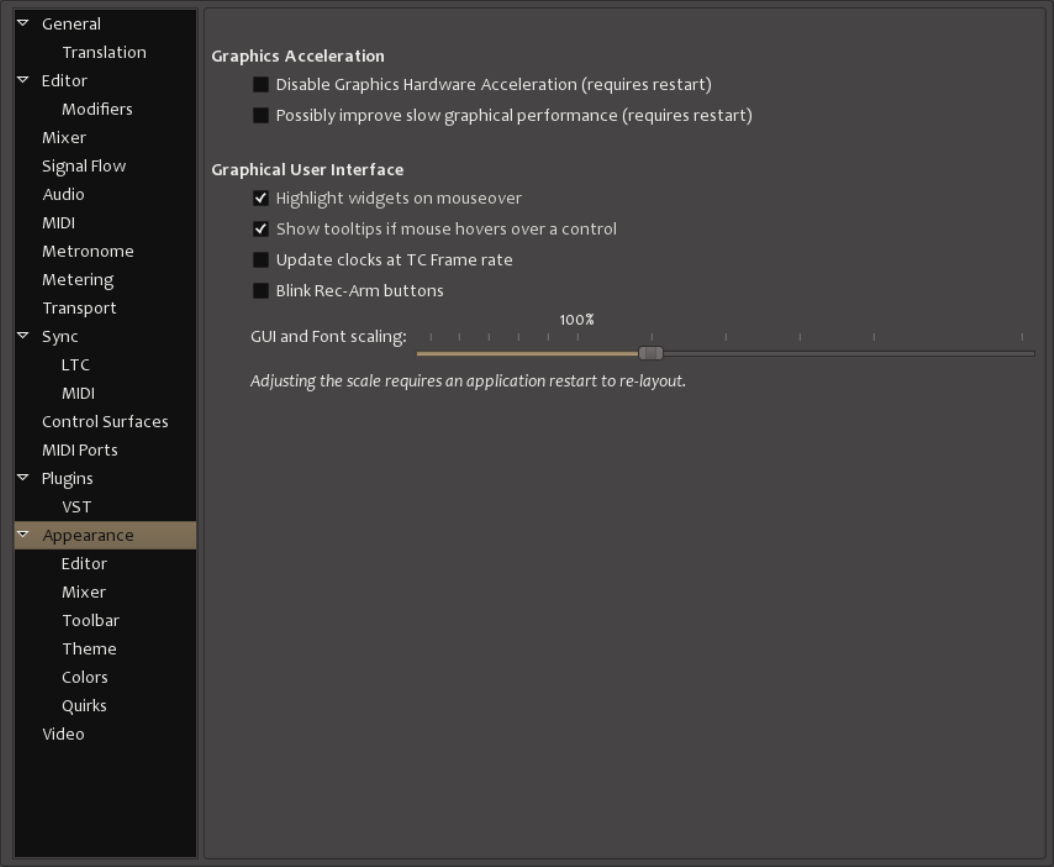
Appearance
Graphics Acceleration
Disable Graphics Hardware Acceleration (requires restart)
(this option is only available on linux) . This option can improve compatibility with older video hardware, but
might cause slower screen updates.
Possibly improve slow graphical performance (requires restart)
(this option is only available on linux) . This option can improve compatibility with some video hardware.
Harrison Consoles Mixbus v4 - 1
Page 383 of 515

Graphical User Interface
Highlight widgets on mouseover
If enabled, widgets will be “highlighted” when the mouse passes over them.
Show tooltips if mouse overs over a control
Update clocks at TC Frame rate
Normally clocks update approximately 10 times per second. This option will cause the clocks to get updated
at the selected video frame rate, for those users who need to watch the frame counter more accurately.
Blink Rec-Arm buttons
This option blinks the track rec-arm buttons; this can be a more obvious indication when a track is armed.
GUI and Font scaling
Adjust this value to increase or decrease the text used in menus, buttons, and dialogs. 100% is the default
value. Settings below 80% may be difficult to read. Adjusting the scale requires a restart, so buttons can
resize themselves to fit the new text size.
Due to the way that MacOS handles fonts (due to retina, etc), this slider does not appear on
macOS. Instead, you should visit MacOS System Preferences->Displays, and increase the
scaling.
!
Harrison Consoles Mixbus v4 - 1
Page 384 of 515
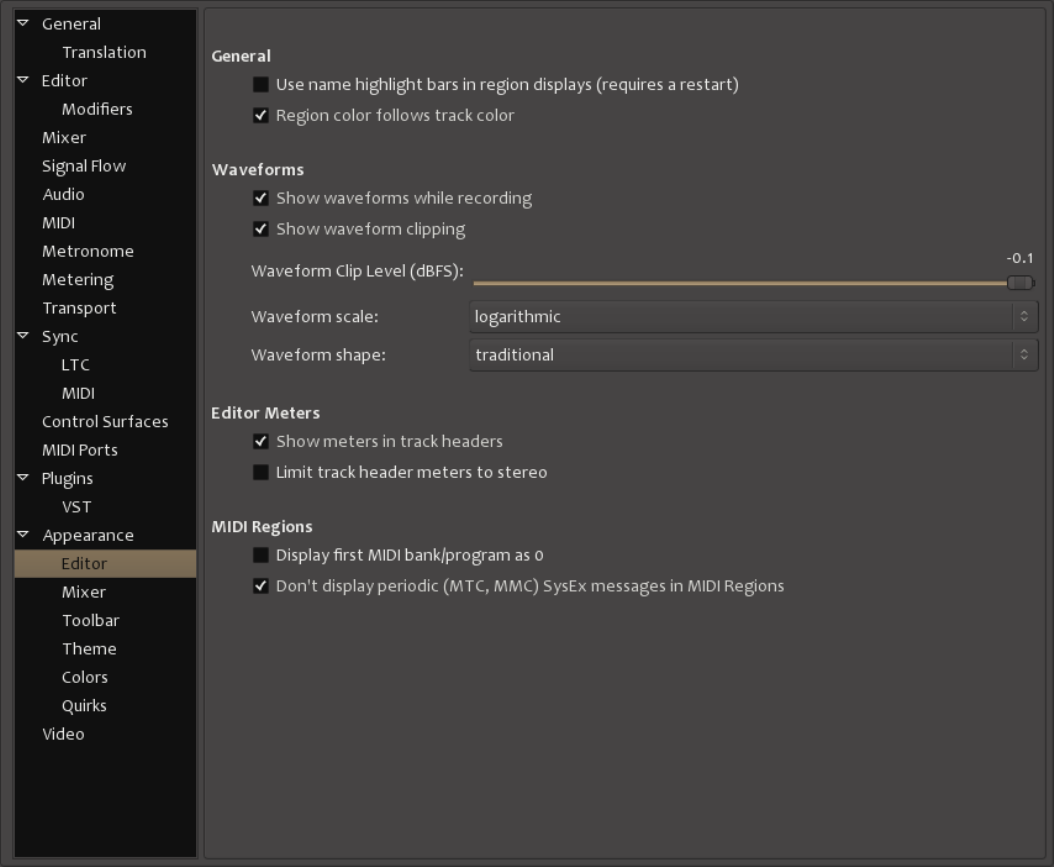
Appearance > Editor
General
Use name highlight bars in region displays
This option toggles the display of the highlight bars with names at the bottom of each region, as was default
in earlier versions of Mixbus.
Harrison Consoles Mixbus v4 - 1
Page 385 of 515
Region Color Follows Track Color
When enabled, regions are drawn the same color as the track. If disabled, all regions will be the same color,
not affected by the track’s selected color.
Waveforms
Show waveforms while recording
This option toggles whether to display region waveforms during recording. It is a useful reference, but does
use more system resources. It’s ok to leave on in most modern computers.
Show waveform clipping
This option toggles the indication of waveform clipping in the region display. If disabled, regions will not
show red indicators when a region exceeds 0dBFS.
Waveform clip level
This option gives you a horizontal fader to adjust where the waveform clip level is calculated, from 0 to
-50dBFS.
Waveform scale
This setting does not change the gain of the signal, it is strictly a visual aid that makes the waveforms
appear “fatter” with two different waveform rendering scales. The two options are:
• Linear: Displays the audio waveform in a linear fashion. This is the most common display scale in
most DAWs.
• Logarithmic: Displays the audio waveform so that quiet sounds can be more easily seen on the
screen. The display is disproportionate, giving more visual resolution to low-level signals and less
visual resolution at higher-level signals.
Waveform Shape
This setting does not change the gain of the signal, it is strictly a visual aid. The two options are:
• Traditional (Default): Waveforms are drawn around a “zero” axis in the middle of the region.
• Rectified: Waveforms are drawn with “zero” on the bottom of the region, and the wave values are
shown in an absolute-value (rectified) magnitude offset
Harrison Consoles Mixbus v4 - 1
Page 386 of 515
Editor Meters
Show meters in track headers
This option toggles whether meters are shown in the track headers in the editor window. Disable this to
hide the small meters at the right edge of track headers in the editor. Enabling this option is useful to
help monitor & identify tracks as you listen, but uses more system resources.
Limit track header meters to stereo
If this option is enabled, then Mixbus will only show stereo meters in the editor’s track header, even if the
plugin has many outputs.
MIDI Regions
Display first MIDI bank/program as 0
By default, Mixbus shows banks&programs starting with “1”. This option shows the more technically-correct
numbering starting with “0”.
Harrison Consoles Mixbus v4 - 1
Page 387 of 515
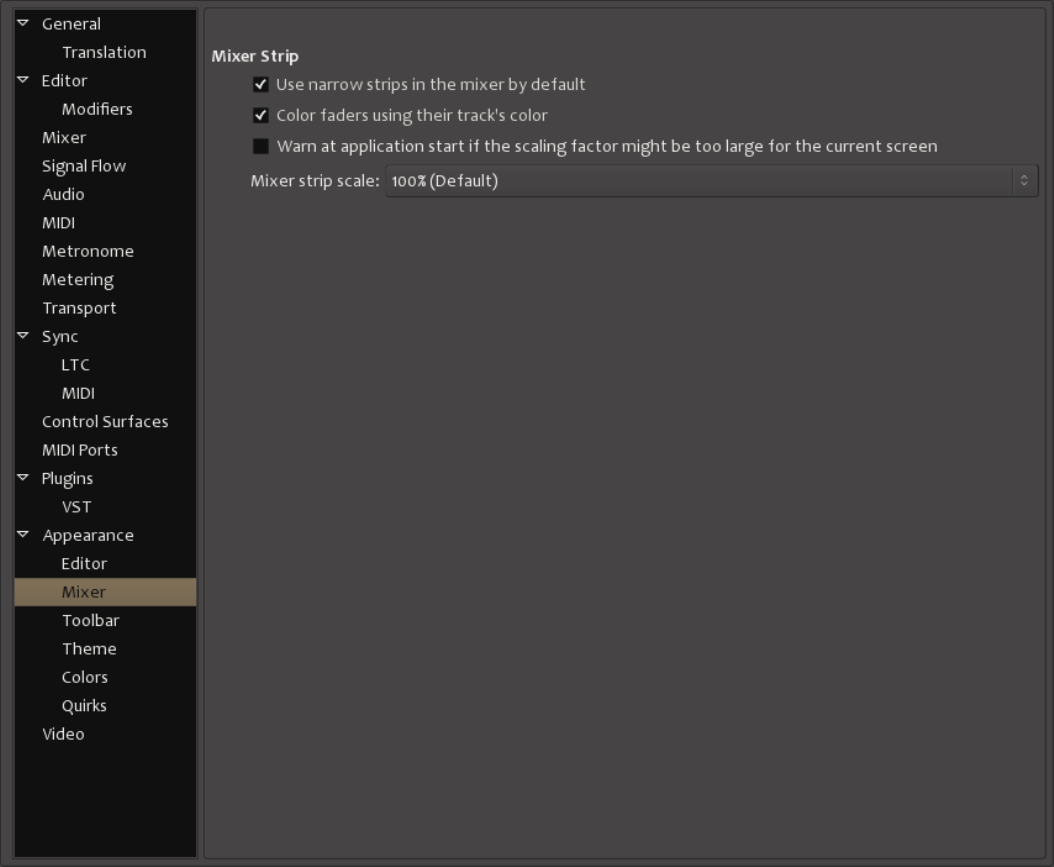
Don’t display periodic (MTC, MMC) SysEx messages in MIDI Regions
Appearance > Mixer
Mixer Strip
Use narrow strips in the mixer by default
When enabled, the mixer will default to narrow channel/bus strips, to give room for more tracks visible in the
display.
Harrison Consoles Mixbus v4 - 1
Page 388 of 515
Color faders using their track’s color
When enabled, the mixer fader “knob” will be colored in accordance with the track’s color.
Warn at application start if the scaling factor might be too large for the current screen
When enabled, this will alert you that you will not be able to view the entire screen at once because the
scaling factor (below) is set too high.
Mixer strip scale
Adjustable from 70 to 140 percent. This allows you to tweak the display of Mixbus to suit your taste at
whatever resolution you are running.
Harrison Consoles Mixbus v4 - 1
Page 389 of 515
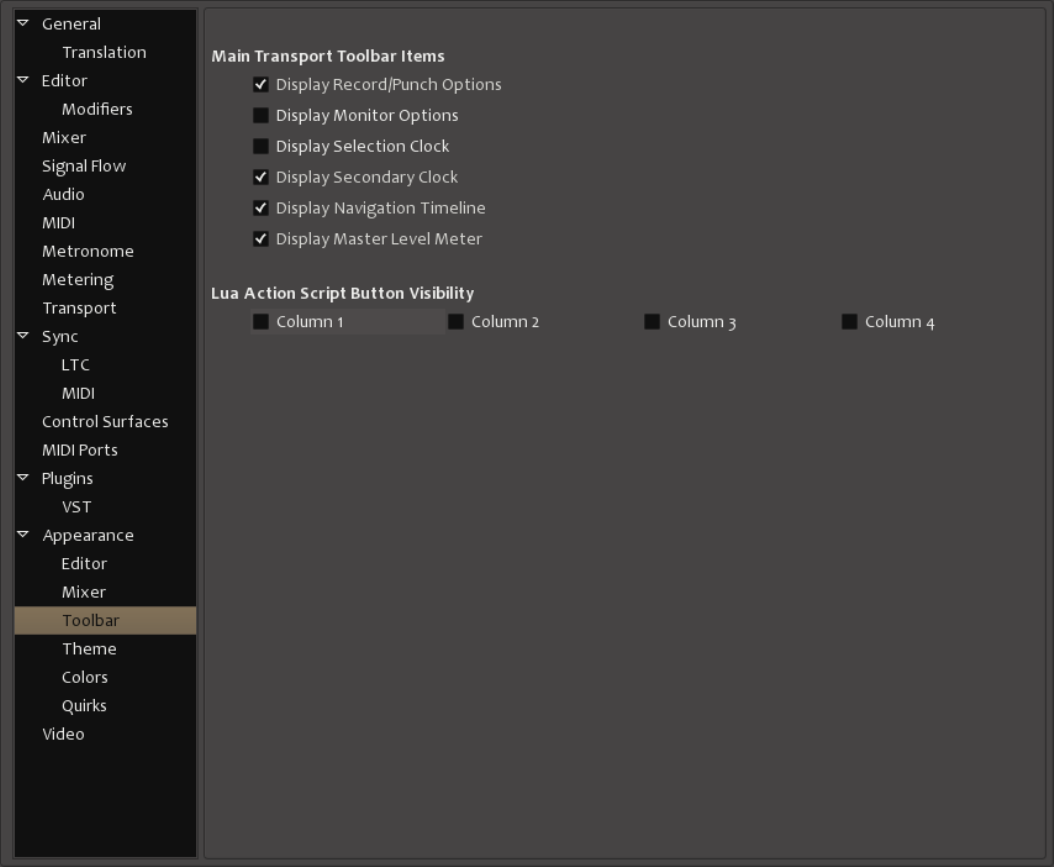
Appearance > Toolbar
Harrison Consoles Mixbus v4 - 1
Page 390 of 515
Main Transport Toolbar Items
Display Record/Punch options
Display Monitor Options
Display Selection Clock
Display Secondary Clock
Display Navigation Timeline
Display Master Level Meter
Disable this to hide the master level meter that appears in the top-right corner of the editor window.
Harrison Consoles Mixbus v4 - 1
Page 391 of 515
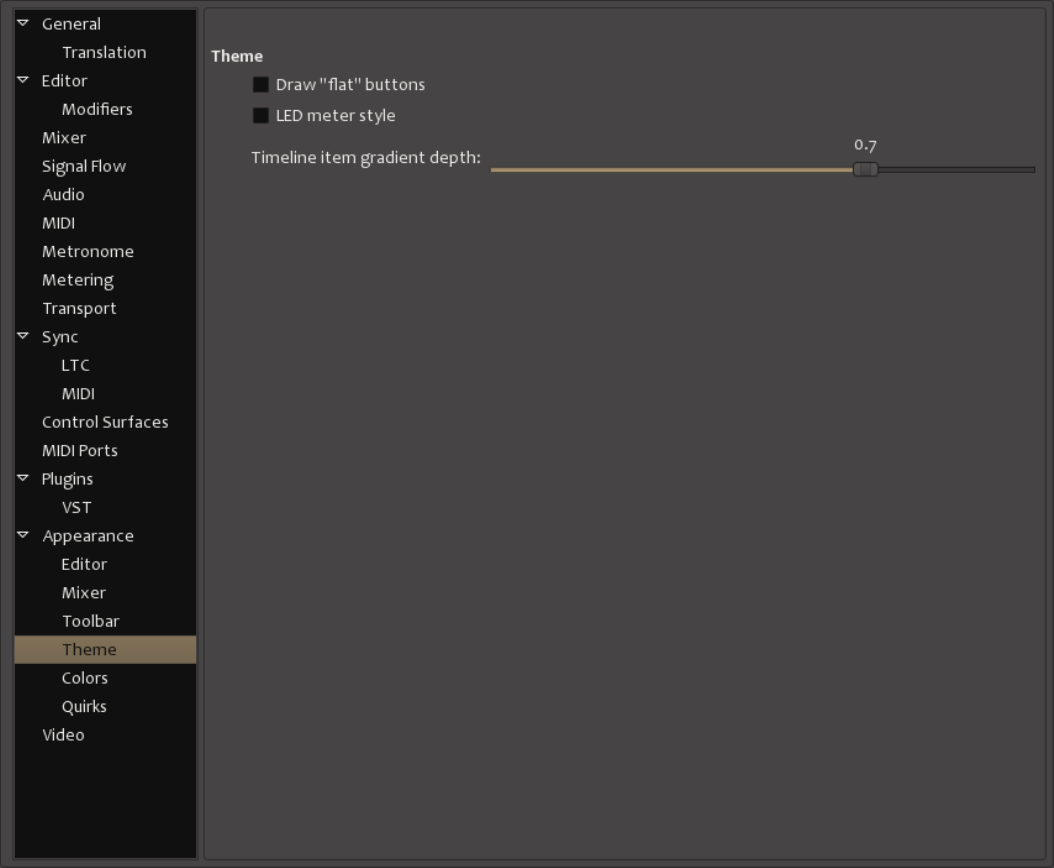
Lua Action Script Button Visibility
Appearance > Theme
Theme
Draw “flat” buttons
Removes gradients from the buttons (may result in easier viewing on some monitors).
Harrison Consoles Mixbus v4 - 1
Page 392 of 515
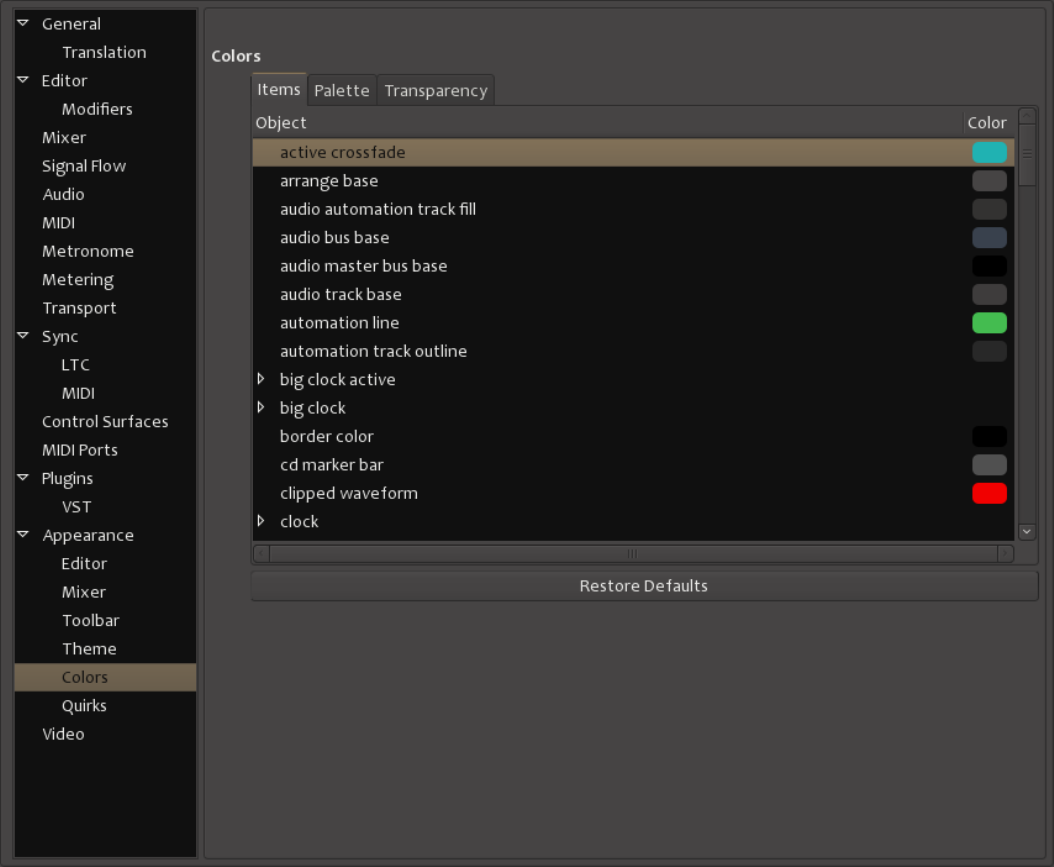
LED meter style
If this option is enabled, the meterbridge meters will appear with segmented “LED style” meters instead of a
solid bar.
Timeline item gradient depth
Defines the amount of “color gradient” applied to the audio regions in the timeline. Reducing this value will
result in a flatter, less 3d-look.
Appearance > Colors
Harrison Consoles Mixbus v4 - 1
Page 393 of 515
This window provides a way to customize every color used by Mixbus. There are three tabs.
Items
This tab lists each Object, alphabetically, and displays the color associated with that object. Click on the
color to modify.
Palette
This tab shows the color palette used by Mixbus, when selecting colors. You can click on each color to
modify it, which will become part of the new available palette.
Transparency
This tab lists everything in Mixbus that can be rendered with Transparency. Each object has a slider to
adjust the amount of transparency.
Harrison Consoles Mixbus v4 - 1
Page 394 of 515
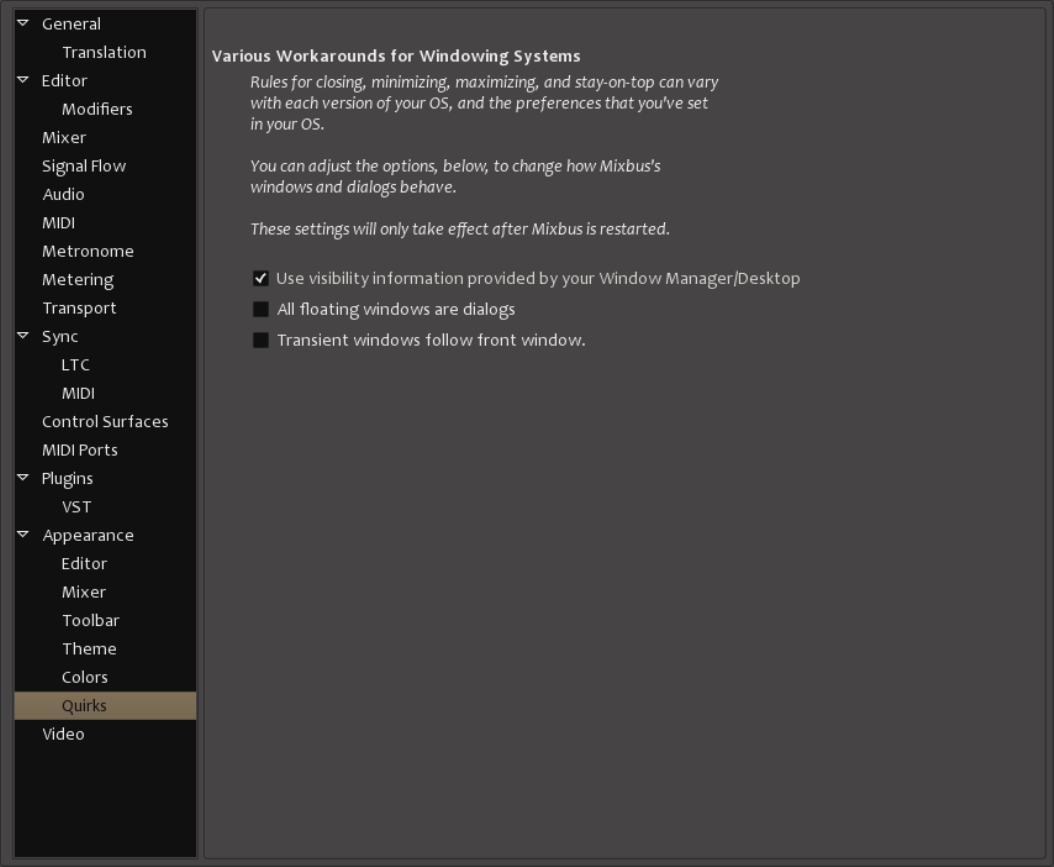
Appearance > Quirks
Various Workarounds for Windowing Systems
Rules for closing, minimizing, maximizing, and stay-on0top can vary with each version of your OS< and the
preferences that you’ve set in your OS. You can adjust the options below to change how Mixbus’s windows
and dialogs behave. These settings will only take effect after Mixbus is restarted.
Harrison Consoles Mixbus v4 - 1
Page 395 of 515
Use visibility information provided by your Window Manager/Desktop
All floating windows are dialogs
Mark all floating windows to be type “Dialog” rather than using “Utility” for some. Requires restart of Mixbus.
This can help if you find that some popup dialogs are appearing behind the main window, or otherwise not
being managed correctly by your desktop.
Transient windows follow front window
Makes transient windows follow the front window when toggling between the editor and mixer. Requires
restart of Mixbus.
Harrison Consoles Mixbus v4 - 1
Page 396 of 515
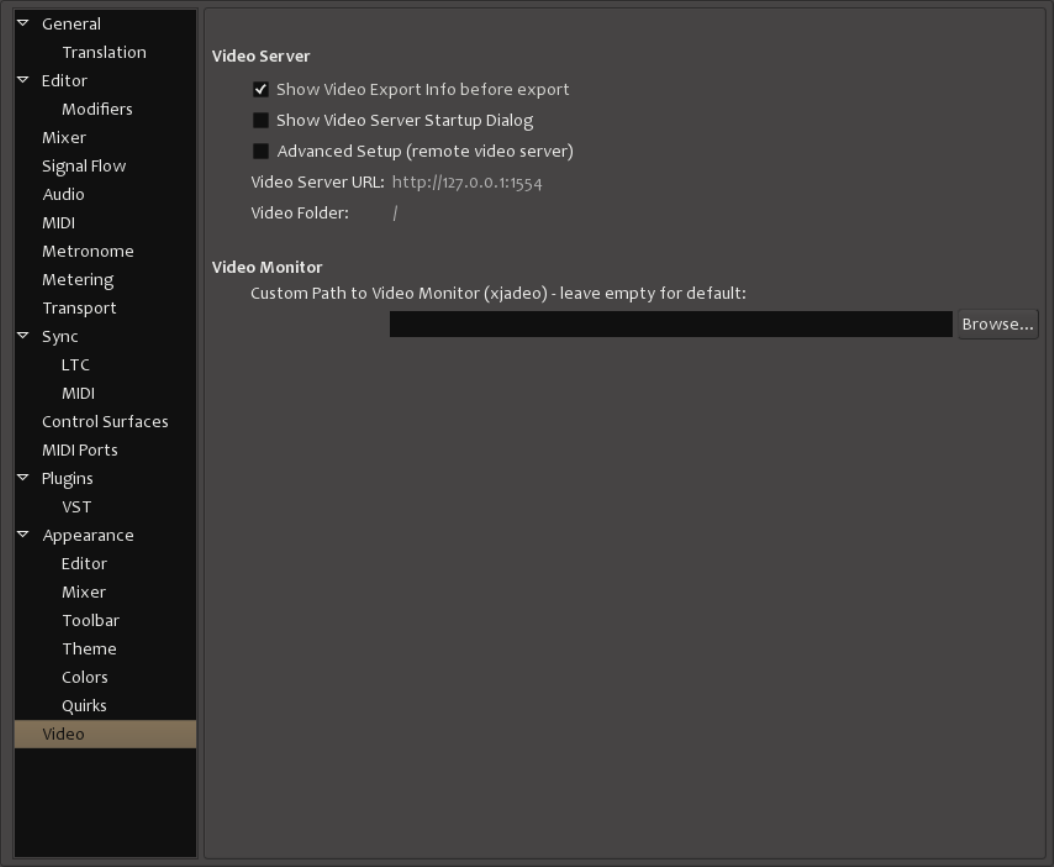
Video
Video Server
Show Video Export info before export
When enabled, an information window with details is displayed before video export dialog.
Show Video Server Startup Dialog
When enabled, the video server is never launched automatically without confirmation.
Harrison Consoles Mixbus v4 - 1
Page 397 of 515
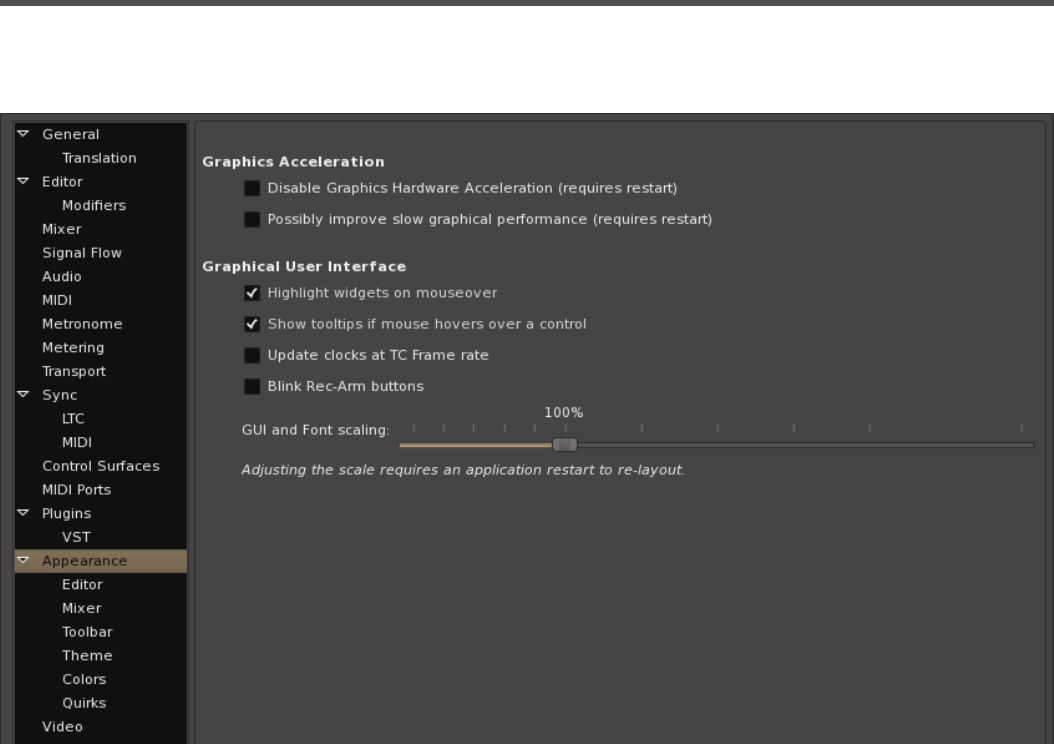
Appearance
Appearance:
Harrison Consoles Mixbus v4 - 1
Page 399 of 515

Region Menu
This menu give the user access to many editing features for regions or tracks in the canvas.
The region you intent to work with must first be selected or the menu selections with be grayed out.
Region menu includes:
• Insert Region From Region List : If a region is selected in the “Region List” (in the editor sidebar) then
this action will insert it at the Edit Point.
• Play
• Loop : sets the “Loop” range to match the region, and starts looping the transport.
• Rename : allows the user to change the name that appears in the region’s top corner.
• Properties : launches a dialog showing the region’s name, position, length, gain, and other properties.
• Loudness Analysis : Performs a loudness analysis on the region, reporting its dBFS and LUFS
loudness, as well as spectral energy
• Spectral Analysis : Performs a spectrum analysis on the selected region(s). Use this to compare the
spectrum of sound in multiple selected regions.
• Edit >
◦ Pitch Shift : initiates a dialog which allows you to shift the region’s pitch up or down, either as a
percentage or in semitones.
◦ Split at Percussion Onsets : performs a “percussive note onset” analysis, and then splits the
regions on the detected hits
◦ Make Mono Regions : splits a stereo (or multichannel) region into multiple mono regions. These
mono regions appear in the editor sidebar list, “Regions”
◦ Close Gaps : removes any space between the selected regions, creating a butt joint between
each region
◦ Place Transient : manually places a “transient” marker inside the region, at the Edit Point.
Transient markers can be used for the grid or other editing actions.
◦Rhythm Ferret
◦ Strip Silence…
select track(s) or region(s) you would like to detect silence. Batch processing possible by
selecting multiple tracks or regions. Once the analysis has completed the areas that have met
the criteria for silence will be highlighted.
▪ Threshold: This sets the audio level for detecting silence and is adjustable by 1 dBFS
increments. Any audio below the set threshold will be considered silence.
Harrison Consoles Mixbus v4 - 1
Page 400 of 515

▪ Minimum length (in milliseconds, default =1000 (1 second)): Allows control of the shortest
time period that will be considered silence.
▪ Fade Length (in samples, default =64): This setting adjusts the length of fades at the
transitions of detected silence and detected audio.
◦ Reverse : this reverses the audio region’s sound, so it plays “backwards”.
• Layering >
◦ Raise to Top : raises the selected region to the top of the layer stack.
◦ Raise
◦ Lower
◦ Lower to Bottom
• MIDI>
◦ Transpose : launches a dialog, allowing the user to transpose all MIDI notes up or down
◦ Insert Patch Change : Inserts a patch change at the Edit Point. See this section on MIDI
Patches
◦ Quantize : launches a dialog which edits the midi note start and/or end times to exact grid
locations on the music timeline.
◦ Legatize : extends the selected note(s) so the end of each note reaches the beginning of the
next note (legato)
◦ Remove Overlap : trims each MIDI note so that it ends before another note begins (portamento)
◦ Transform : launches a dialog with various MIDI operations
◦ Unlink from other copies : by default, a copied MIDI region will be “linked” to the source region.
Any change to either region will affect all copies. This action will unlink the selected region(s) so
they may be edited with no changes to the copies.
◦ List Editor : this launches a dialog that allows the user to see and edit MIDI events.
• Gain >
◦ Opaque : when disabled, the region will not obscure the regions below it; instead you will hear
the region combined with the regions below it.
◦ Mute : when enabled, the region will not play, and will be treated as if it were “transparent” to
regions below it
◦ Normalize : adjusts the selected region(s) gain to reach a specified value. ( a dialog allows you
to choose peak or rms normalization )
◦ Boost Gain : increases the region gain by 1dB
◦ Cut Gain : decrease the region gain by 1dB
◦ Reset Envelope : this resets the region’s gain envelope to “unity”
◦ Envelope Active : if unchecked, the region’s gain envelope will be ignored.
Harrison Consoles Mixbus v4 - 1
Page 401 of 515
• Position >
◦ Move to Original Position : if the file was originally recorded in Mixbus, or if it has a file
timestamp (broadcast wave file), then this action will move the selected region(s) to the original
location.
◦ Snap Position To Grid : moves the region to the nearest grid (snap) location.
◦ Lock : if enabled, the region cannot be moved on the timeline.
◦ Glue to Bars and Beats : If enabled, the region is attached to the “music” timeline. See “Audio
Time vs Music Time”:”#audio-time-vs-music-time
◦ Lock to Video : if locked to the video, then the region will move when the session’s video file is
moved on the timeline.
◦ Set Sync Position : Sets the region’s sync point to the Edit Point ( when initiated from a menu,
the sync point is always the playhead ) : see “”:#align-regions
◦ Remove Sync : Removes the region’s sync point. It will align (or snap) to the region’s start
◦ Nudge Later : moves the region by the amount shown on the “nudge” clock in the editor toolbar.
◦ Nudge Earlier
◦ Nudge Later by Capture Offset : moves the region by one buffersize; this is sometimes useful to
correct mis-aligned recordings due to soundcard latency
◦ Nudge Earlier by Capture Offset
◦ Sequence Regions : the selected regions will be sequenced in a series, with no space between
them.
• Trim >
◦ Trim Start at Edit Point : trims the selected region(s) so they start at the edit point.
◦ Trim End at Edit Point : trims the selected region(s) so they end at the edit point.
◦ Trim Loop : trims the selected region(s) to the Loop range.
◦ Trim Punch : trims the selected region(s) to the Punch range.
◦ Trim Previous : trims the selected regions to meet the previous region’s end.
◦ Trim Next : trims the selected region to meet the next region’s start.
• Ranges >
◦ Set Loop Range : Set the Loop start/end markers to this region’s start/end.
◦ Set Punch : Set the Punch start/end markers to this region’s start/end.
◦ Add Single Range Marker : create a Named Range marker corresponding to the selected
region(s)’s start/end.
◦ Add Range Marker Per Region : create a Named Range marker corresponding to each selected
region.
◦ Set Range Selection : Set the Range Selection start/end to the selected region(s)’s start/end.
• Fades >
Harrison Consoles Mixbus v4 - 1
Page 402 of 515
◦ Fade In : if unchecked, the region’s fade-in will be disabled, resulting in a hard cut (not
recommended)
◦ Fade Out : if unchecked, the region’s fade-out will be disabled, resulting in a hard cut (not
recommended)
◦ Fades : toggles the selected region(s)’s fade-in and fade-out simultaneously
• Duplicate >
◦ Duplicate : copies the region, and pastes the copy immediately at the end of this region.
◦ Multi-Duplicate : duplicates the region multiple times ( a dialog will prompt for the number of
times to duplicate )
◦ Fill Track : duplicates the region enough times to fill the region to the Session End marker.
• Export : the region can be exported (including region gain, gain envelope, and fade in/out) to a new
file, to any disk location, and in the format of the user’s choice.
• Bounce (without processing) : the region will be bounced (including region gain, gain envelope, and
fade in/out ) to a new file, which will appear in the editor sidebar Region list.
• Remove : the region is deleted.
Harrison Consoles Mixbus v4 - 1
Page 403 of 515
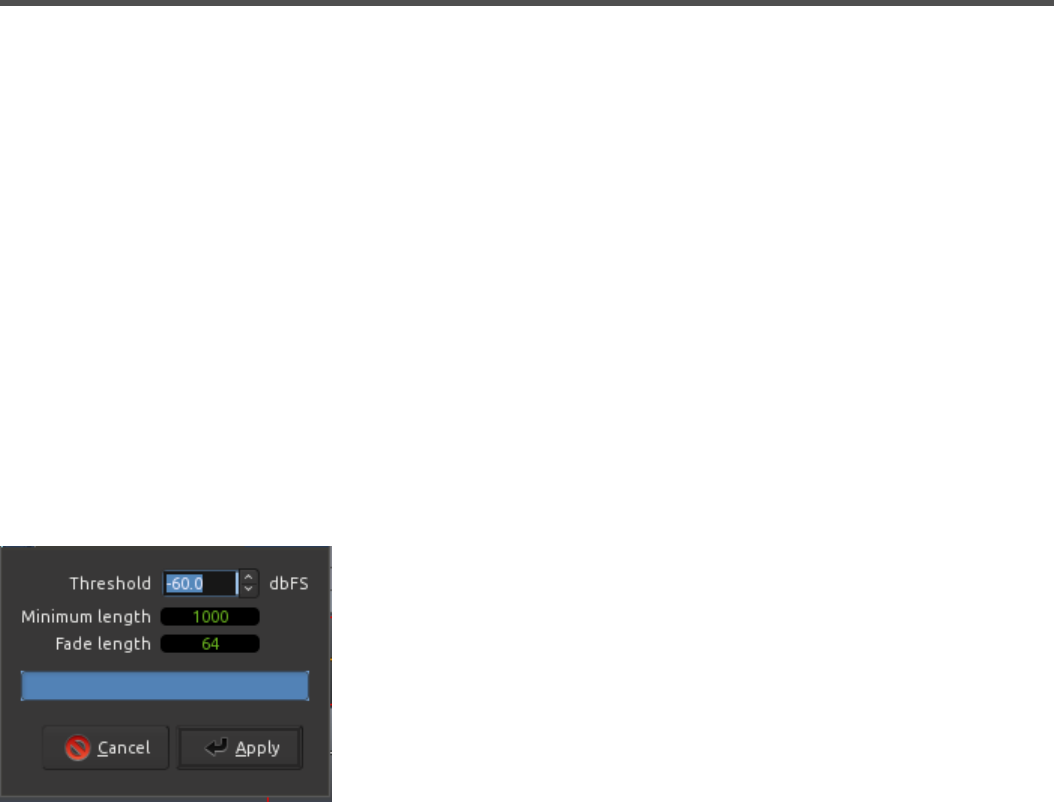
Strip Silence
The Strip Silence command can be found under Region>Edit>Strip Silence. You must first select the
track(s) or region(s) in which you would like to detect silence. Batch processing is possible by selecting
multiple track or regions. Once the Strip Silence dialogue has been opened Mixbus will begin analysis on all
selected tracks or regions (allow time based on CPU speed and track/region length). Once the analysis has
completed the areas that have been determined to contain silence will be highlighted.
There are 3 adjustments available:
•Threshold: This sets the audio level for detecting silence and is adjustable by 1 dBFS increments.
Any audio below the set threshold will be considered silence.
•Minimum length (in milliseconds, default =1000 (1 second)): Allows control of the shortest time
period that will be considered silence.
•Fade Length (in samples, default =64): This setting adjusts the length of fades at the transitions of
detected silence and detected audio.
Harrison Consoles Mixbus v4 - 1
Page 404 of 515

Track Menu
A track header must first be selected to access many of the items in this menu.
Most of these items can also be found in the track header context menu, which is accessed by right-clicking
on a track header. Generally speaking, right-clicking on a track will only affect the single track, while the
Track menu will affect all selected tracks.
• Add Track, Bus, or VCA. Learn more here.
• Import : Learn more in the Import section.
• Duplicate Tracks/Busses : creates a “duplicate” of selected Track(s), including EQ, bussing, plugins.
A dialog prompts whether to include the regions (playlist) in the duplicate tracks.
• Toggle Record Enable : toggles record enable for the selected track(s)
• Toggle Solo
• Toggle Mute
• Insert Time : Inserts blank time at the selected time, and optionally move all markers to the right.
• Remove Time: Deletes selected range and markers (from ALL tracks). Everything to the right moves
left to close the gap.
• Move Selected Tracks Up
• Move Selected Tracks Down
• Height >
◦ Fit Selection (Vertical)
◦ Largest
◦ Larger
◦ Large
◦ Normal
◦ Small
• Toggle Active : Toggles the state of all selected tracks; inactive tracks will become active, and vice-
versa. Inactive tracks utilize no CPU or disk access; they are completely disabled. This option cannot
be changed while Mixbus is playing.
• Remove
Harrison Consoles Mixbus v4 - 1
Page 405 of 515

View Menu
• Maximise Editor Space : when this is enabled, the Mixbus “editor” window will try to make itself
fullscreen. The exact behavior will differ depending on your OS version.
• Maximise Mixer Space
• Primary Clock >
◦ Focus On Clock : the primary clock will get “focus” for text entry, so you can type in a time
location.
◦ Timecode : switches the primary clock to show “Timecode” format. Learn more here.
◦ Bars & Beats
◦ Minutes & Samples
◦ Samples
• Secondary Clock >
◦ Timecode : switches the secondary clock to use “Timecode” display format. Learn more here.
◦ Bars & Beats
◦ Minutes & Samples
◦ Samples
• Zoom >
◦ Zoom In : zooms the timeline to show a smaller time interval.
◦ Zoom Out
◦ Zoom to Session : zooms the timeline to show the entire length between the Session Start and
End markers.
◦ Zoom to Selection : zooms the timeline to show the length of the selected Range, AND
vertically to show the track selection.
◦ Zoom to Selection (Horizontal) : zooms the timeline to show the length of the selected Range
◦ Fit Selection (Vertical) : zooms the editor so the track/region selection fills the vertical space of
the screen.
◦ Toggle Zoom State : reverts to the previous zoom state
◦ Expand Track Height : increases the height of all selected tracks
◦ Shrink Track Height : decreases the height of all selected tracks
• Zoom Focus >
◦ Zoom Focus Left : when this is selected, Mixbus will zoom to the “left” side of the screen. (this
only applies when using the -/+ shortcut keys)
◦ Zoom Focus Right
Harrison Consoles Mixbus v4 - 1
Page 406 of 515
◦ Zoom Focus Center
◦ Zoom Focus Playhead
◦ Zoom Focus Mouse
◦ Zoom Focus Edit Point
◦ Next Zoom Focus
• Rulers >
◦ Min:Sec
◦ Timecode
◦ Samples
◦ Bars & Beats
◦ Meter
◦ Tempo
◦ Ranges
◦ Loop/Punch
◦ CD Markers
◦ Markers
◦ Video
• Video Monitor >
◦ Original Size
◦ Letterbox
◦ Always on Top
◦ Fullscreen
◦ Timecode
◦ Frame Number
◦ Timecode & Background
• Scroll >
◦ Scroll Tracks Down
◦ Scroll Tracks Up
◦ Scroll Forward
◦ Scroll Backwards
• Views >
◦ Save View 1 : Saves the current editor “viewport” – including the timeline and track zooming.
◦ Goto View 1 : recalls the “viewport” stored in View 1
◦ Save View 2
◦ Goto View 2
Harrison Consoles Mixbus v4 - 1
Page 407 of 515

◦ Save View 3
◦ Goto View 3
◦ Save View 4
◦ Goto View 4
◦ Save View 5
◦ Goto View 5
◦ Save View 6
◦ Goto View 6
◦ Save View 7
◦ Goto View 7
◦ Save View 8
◦ Goto View 8
◦ Save View 9
◦ Goto View 9
◦ Save View 10
◦ Goto View 10
◦ Save View 11
◦ Goto View 11
◦ Save View 12
◦ Goto View 12
• Show Editor Mixer : Toggles visibility of the mixer-strip on the Edit window
• Show Editor List : Toggles visibility of the editor sidebar list, on the right side of the editor window.
• Toggle Mixer List : Toggles visibility of the mixer sidebar list, on the left side of the mixer window.
• Toggle Monitor Section visibility : Toggles the “monitor section” visibility, if one is enabled in Session-
>Properties->Monitoring.
• Show Measure Lines : shows vertical lines indicating measures and/or grid lines.
• Show Summary : Toggles the visibility of the “summary” (world) view at the bottom of the editor.
• Show Group Tabs : Toggles visibility of the “group” tabs at the top of the mixer, and the side of the
editor.
• Show Marker Lines : Toggles visibility of lines below each “marker”
Harrison Consoles Mixbus v4 - 1
Page 408 of 515

Window Menu
Click on an item to visit the topic
•Audio/MIDI Setup
•Editor
•Mixer
•Preferences
•Meterbridge
•Scripting
• Toggle Editor+Mixer : a shortcut to switch between the editor and mixer windows (or swap between
them, if they are attached to the main window)
•Locations
•Keyboard Shortcuts
• Big Clock: A scalable clock window for distance viewing. Right Click for formats.
• License Manager: Displays the status of your Mixbus and Harrison LV2 plugin licenses.
• Video Monitor: If the session has a video file loaded, this will display the video window for playback
with Mixbus’s timeline.
• MIDI Tracer: This window allows the user to view incoming and outgoing MIDI messages, for
troubleshooting
• Audio Connections: More here
• MIDI Connections: A grid that allows making MIDI connections between channels, sends, and
hardware I/O
• Log: The LOG window provides a history of warnings and errors which might be useful to troubleshoot
problems.
Harrison Consoles Mixbus v4 - 1
Page 409 of 515
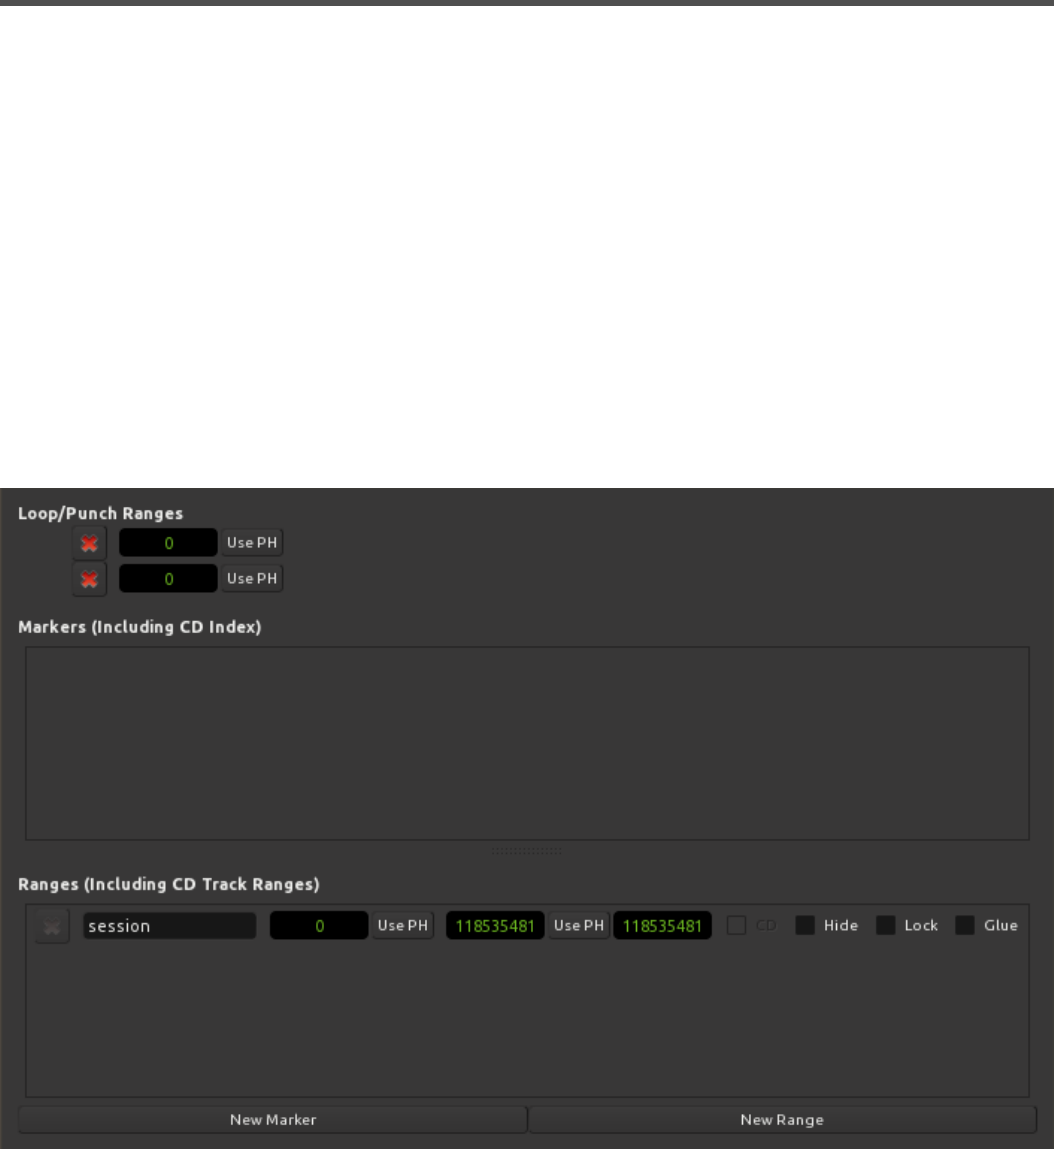
Locations Window
The Locations window provides another view of the Location Markers, Loop Range, Punch Range, Ranges,
and CD Ranges that appear on the “rulers” of the Editor window. This window allows you to see all of the
existing markers in one window with all of the parameters displayed.
• Go: Moves the Playhead to the associated Marker or the start/end of the associated Range.
• Use PH: Assign the current Playhead location to the marker or the start/end of the associated Range.
• Hidden: Markers and ranges may be shown or hidden.
• CD: For locations, this is CD Indexes. For ranges, this indicates that the range represents a CD
Track.
Items with the CD box checked will also get the ISRC, SCMS, Pre-emphasis, Performer, and Composer
entry boxes which will be incorporated into the CUE/TOC file during session export and can be imported by
CD burning software.
Harrison Consoles Mixbus v4 - 1
Page 410 of 515

Audio Connections Window
Harrison Consoles Mixbus v4 - 1
Page 411 of 515
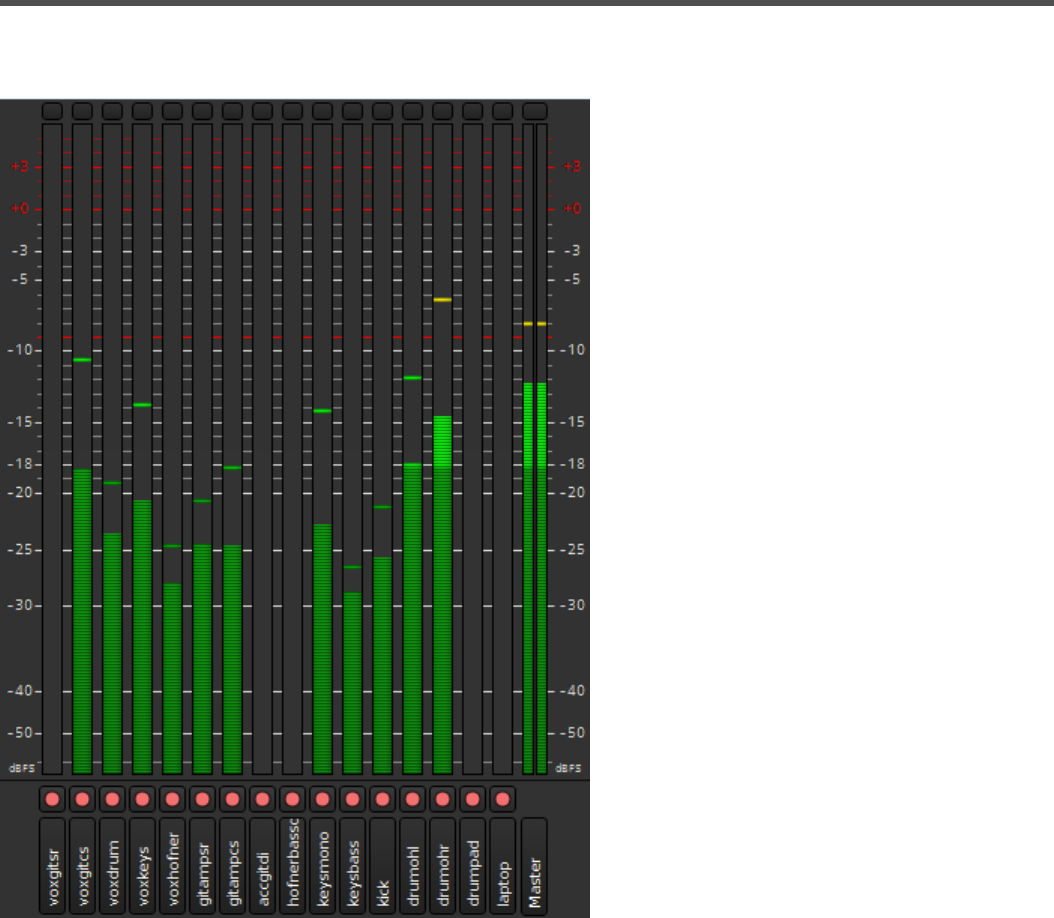
Meterbridge
The Meterbridge can be found under Window>Meterbridge and can be toggled via a check box.
The Meterbridge window is a compact and re-sizable view of all meters for all tracks, mix buses and master
bus levels available during a session. 10 metering standards are available and are user selectable by right
clicking on each meter.
Available metering:
• Peak
Harrison Consoles Mixbus v4 - 1
Page 412 of 515

• RMS + Peak
• IEC1/DIN
• IEC1/Nordic
• IEC2/BBC
• IEC2/EBU
• K20
• K14
• K12
• VU
Most users involved with music production will find Peak metering a good choice during tracking. This meter
type helps the user avoid digital clipping. This is because peak meters are calibrated to 0 dBFS (decibel full
scale). When the meter reads 0 no more bits are left to capture dynamics.
Most music production users may find Peak+RMS Metering, K Metering, or VU metering useful on the
master bus.
The 4 remaining metering standards are of the IEC type and are typically used for broadcast work and
allows for consistency of volume within the broadcast industry.
Located at the bottom of each meter is a rec-enable button. Under the rec-enable button is the track name.
Right clicking on the track name allows the user to change the height of this area. Advanced configuration
allows the addition of Solo, Mute, Monitor Playback and Monitor Input.
At the top of each meter is a button to reset peak warning indicators. You can Ctrl+left click to reset the
group or Ctrl+Shift+left click to reset all peak warning indicators.
It is possible for a recorded signal to be clipped before being digitized and displayed on a
meter. As a result, a safe level can be displayed on any meter and in any DAW. No DAW
meter will show if a signal has clipped before being digitized.
!
The K system is extremely useful and is a new standard that has gained traction. K14 is
suitable for the vast majority of music production. As the name suggest it allows for 14 dB of
headroom. K20 allows for 20 dB of dynamic headroom and is useful for less compressed
“audiophile” recordings or large movie theater soundtracks. K12 is useful for Television
broadcast etc. The K metering system has been devolved by Bob Katz.
*
Harrison Consoles Mixbus v4 - 1
Page 413 of 515
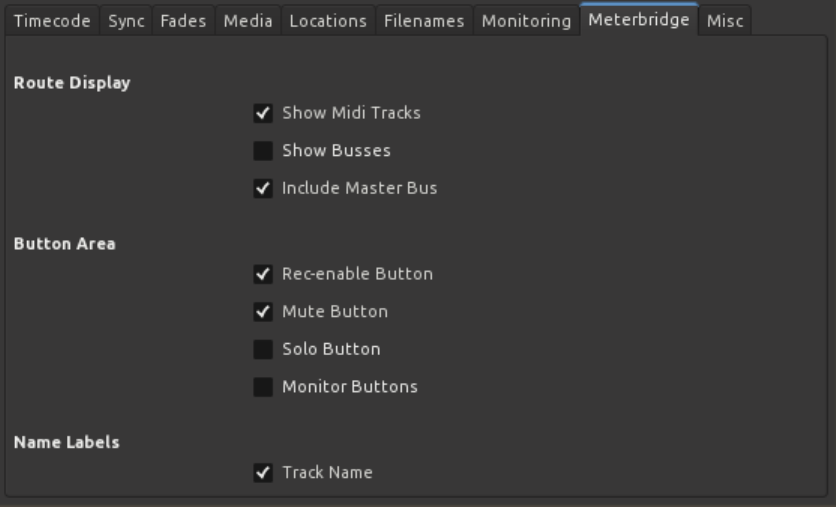
Meterbridge properties:
The Meterbridge is user customizable by going to to the menu Session>Properties>Meterbridge
Advanced configuration of the meters is available in Edit > Preferences > Metering.
Harrison Consoles Mixbus v4 - 1
Page 414 of 515
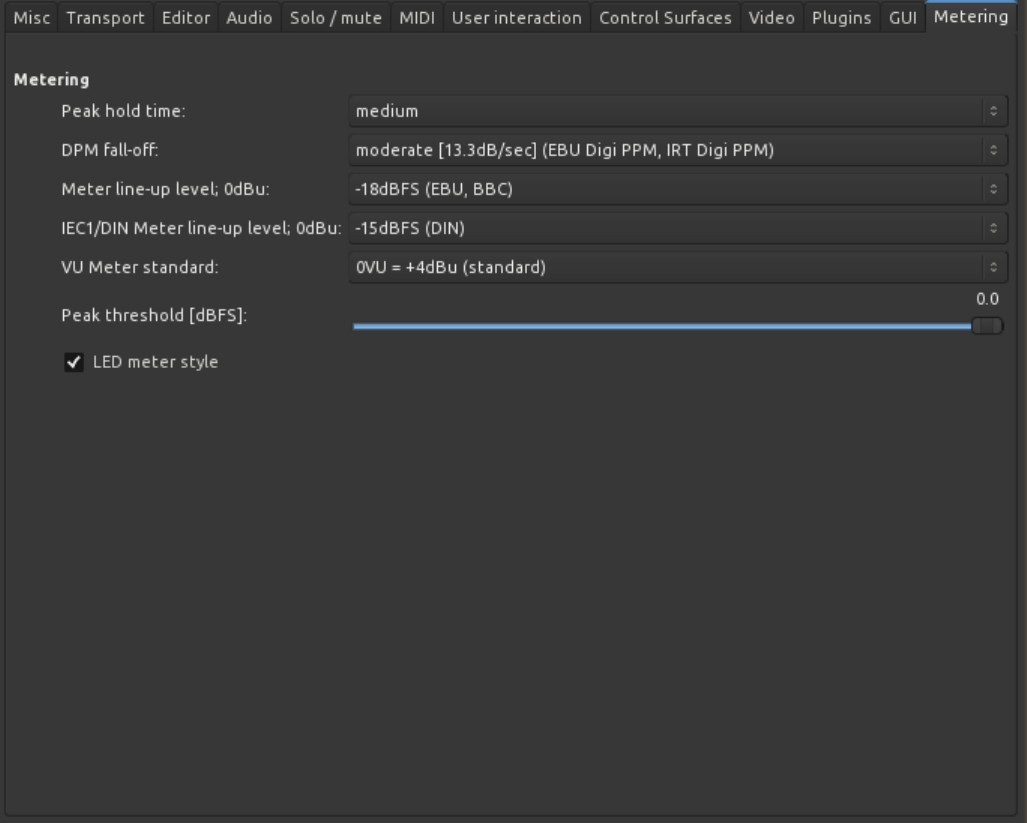
Harrison Consoles Mixbus v4 - 1
Page 415 of 515
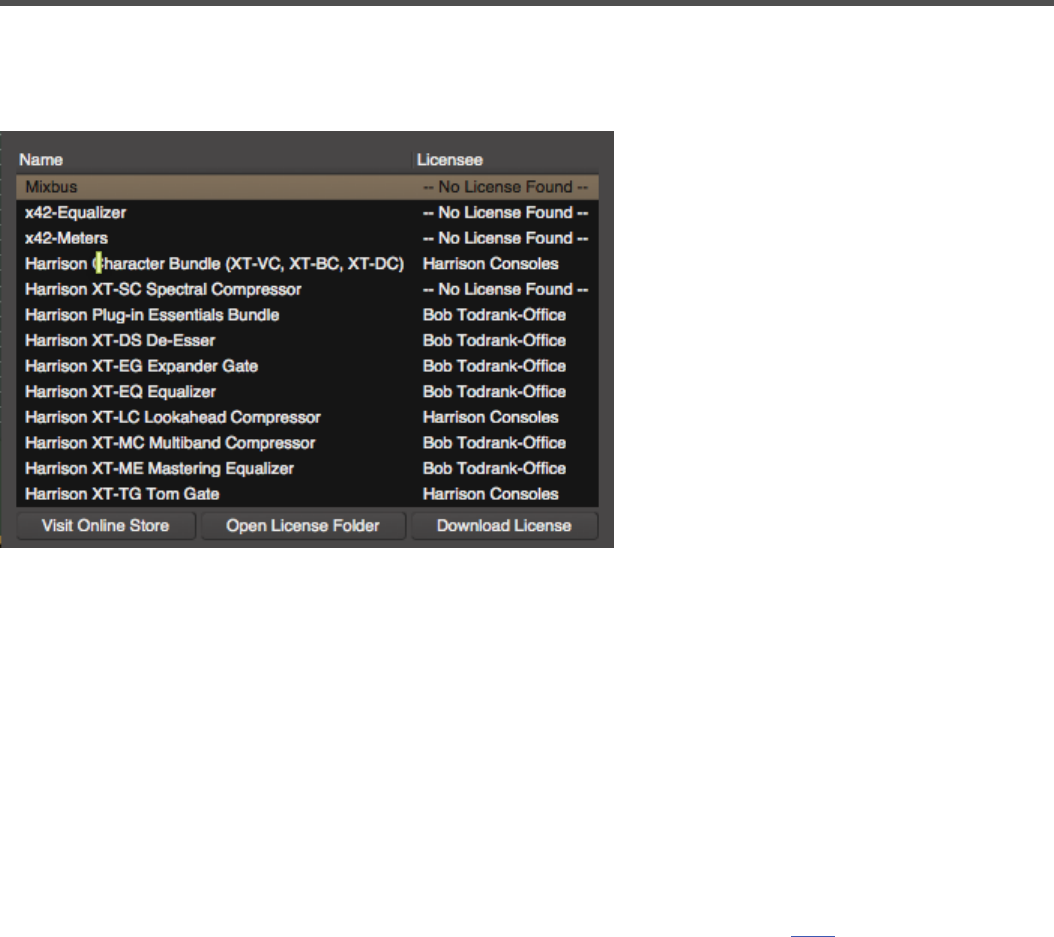
License Manager
The “License Manager” dialog allows the user to view which Harrison features are currently licensed, and it
also allows the user to download a new license once purchased.
Each of the available items is listed on the left, and if a license is installed, then the name of the licensee is
provided on the right side ( typically, you should see your own name for each product that is licensed )
Three buttons are provided to help manage licenses:
•Visit Online Store : if an unlicensed row is selected, this button will open a web-browser page where
you can purchase a license.
•Open License Folder : this will open a file-browser window with the user’s HOME folder where the
license files are stored.
•Download License : this opens a dialog. Paste any Harrison license link into the field, and Mixbus
will download and save the license file to your HOME folder. ( more details here )
Harrison Consoles Mixbus v4 - 1
Page 416 of 515

Help Menu
• About
• Manual: Links to this manual
• Videos: Links to Mixbus Instructional videos
• User Forums: Links to The Mixbus user forum
• Developer Chat: Links to IRC (Internet Relay Chat)
Harrison Consoles Mixbus v4 - 1
Page 417 of 515
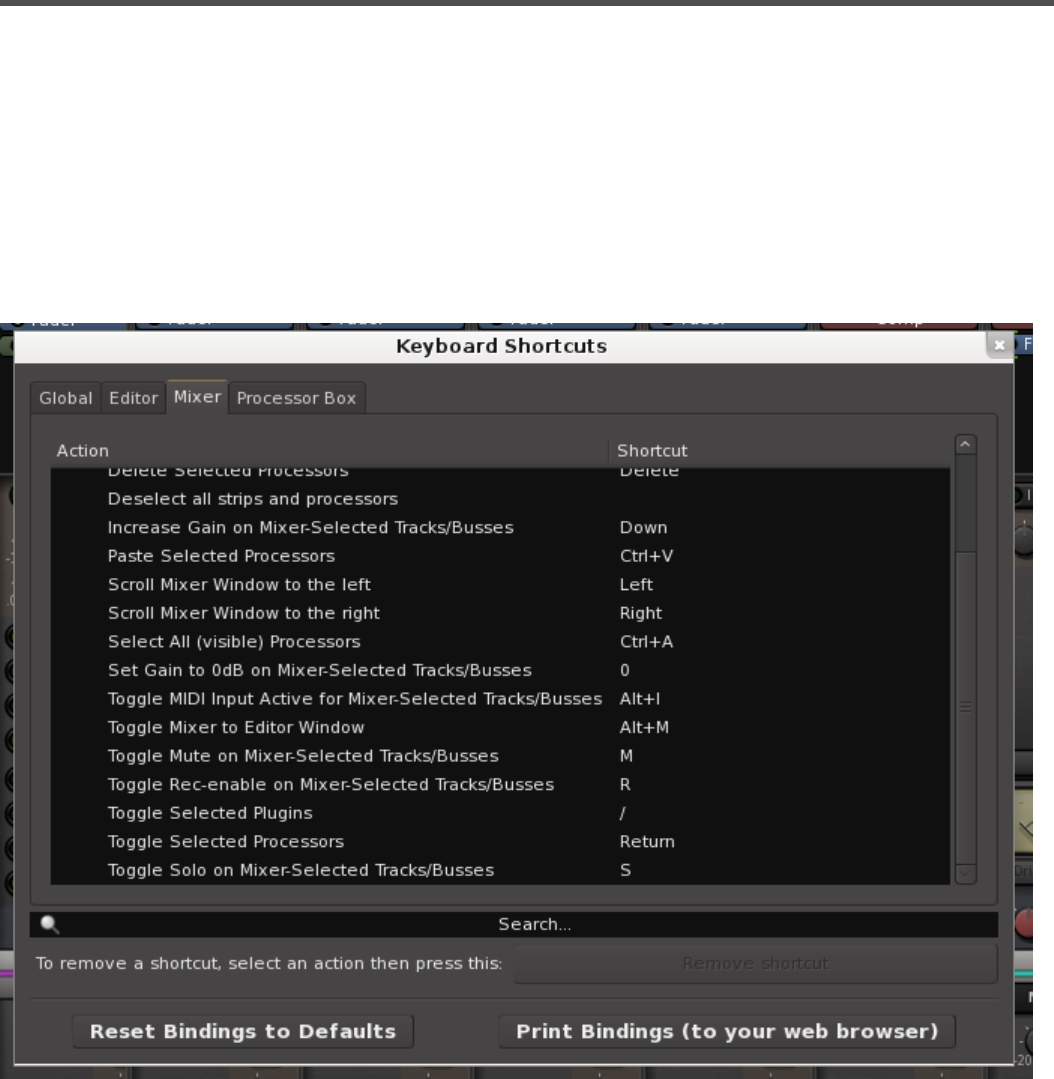
Keyboard Shortcuts
Any “action” found in the Mixbus main menu can be initiated from a keyboard “shortcut”.
By default, Mixbus provides a selection of keyboard shortcuts that provides a good balance between easy-
to-remember mnemonic actions (such as “L” for looping) and ergonomic actions for power users ( such as J
and K for trimming a region’s start/end ).
You can change the key shortcuts via Window->Keyboard Shortcuts in the main menu. If you change your
keyboard shortcuts, your shortcuts will be stored in the user preferences folder.
Harrison Consoles Mixbus v4 - 1
Page 418 of 515

Mixbus provides a set of “Global” shortcuts that work from any window. These global shortcuts generally
control the Transport (which you’ll want from any window) and the window-switching functions. The Global
shortcuts take precedence over the window shortcuts.
• Tabs : This selects between the “Global” shortcuts, and the window-specific ( Editor, Mixer, etc )
shortcuts
• Shortcut browser : Use this area to find shortcuts ( categorized by their normal menu location )
◦ To assign a shortcut: select an action with your mouse, and then press the keyboard shortcut
(with modifier) that you’d like to assign to that action
◦ If you try to assign a keyboard shortcut that is already in use, Mixbus will tell you which action is
already assigned, and prevent you from “stealing” it.
• Search bar: use this field to display only the shortcuts that match the search term. For example “play”
will hide any actions that don’t have the word “play” in their name.
• Remove Shortcut : click this to clear the currently-selected shortcut.
• Reset Bindings : click this button to reset ALL of your shortcuts to the factory defaults for your
platform ( Mac, Win or Linux )
• Print Bindings: click this to “print” a complete list of your shortcuts to a web page. ( you can then make
a hardcopy print of this page from your browser, if you like )
Viewing your keyboard shortcuts
Because keybindings change slightly between Mac and Windows, and because we are regularly adding new
features that might require keybindings, we no longer provide the keybindings in this manual. You can see
the current keybindings for any action beside the corresponding item in the main menu.
The “number pad”, which appears on some full-size keyboards, has some special behavior. You can read
more about it here: Using a Number Pad
If you’d like to print your current keyboard shortcuts, visit Window->Keyboard Shortcuts and
click the button “Print Keyboard Shortcuts”. This will open your internet browser window,
with a list of currently active keyboard shortcuts.
*
Harrison Consoles Mixbus v4 - 1
Page 419 of 515
Using the Number Pad
Many full-size keyboards provide a “number pad” on the right side.
Locating to a marker, using the number pad
To locate to a marker, click the “.” (period), then type the number of the marker ( for example, “12” ) and
then press “.” again. This will locate to the designated location marker (“12”, in this case). Markers are
designated by their location on the timeline, not by their creation time or their name. So when locating
with the number pad, jumping to “3” will always be later on the timeline than “2”, regardless of what the
markers are named.
Operating the transport from the number pad
Number Pad Action notes
0play/stop Performs just like the spacebar.
1reverse play Click again to increase the rewind speed.
2forward play Click again to increase the forward speed.
3record-roll Arms the master record button, and initiates Play.
4loop-roll Starts playing the selected loop range (if any).
5loop record
6Toggle Punch On/Off
7Toggle Metronome On/Off
8Toggle “Auto Return”
9Toggle “Follow Edits”
The remaining Number Pad keys are reserved for future use.
Harrison Consoles Mixbus v4 - 1
Page 420 of 515
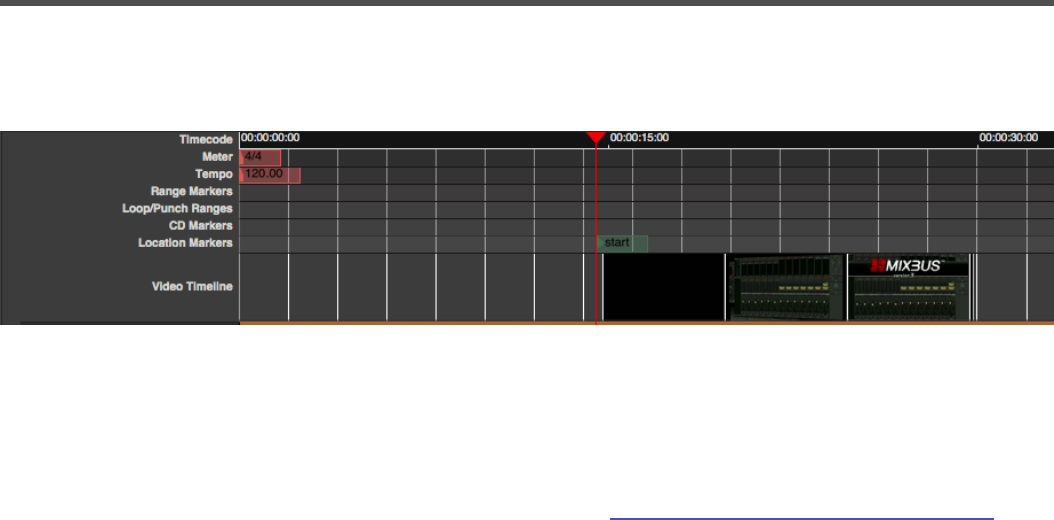
Video
Mixbus can load a (single) video file to associate with the session. The video reference is displayed in a
ruler above the editor, and (optionally) also shows moving video in a separate video window.
Mixbus does not allow editing of the video. However, you can export the video, with your audio mix, into a
new video. And you can set start & stop time for that video.
Video is largely developed by the Ardour open-source community. You can learn more about the video-
display features in the relevant sections of the Ardour manual: http://manual.ardour.org/video-timeline/
Video playback requires an external “server” called Harvid, and (optionally) an external video window.
These utilities are included in the Mixbus package, but installation steps are different for each OS:
Installation on Windows
On Windows, the Mixbus installer provides Harvid (the video server) and Jadeo (the video playback
window). To install them, select the “video tools” checkbox in the installer.
Installation on Mac
On Mac, the Mixbus application already includes Harvid (the video server). The Mixbus package provides
the Jadeo video viewer as a separate application in the DMG. If you want to use the video window, you
must drag the included XJadeo video viewer into your Application folder, so Mixbus can find it.
Installation on Linux
On Linux, the Mixbus installer provides Harvid (the video server) and Jadeo (the video playback window).
No additional steps are required.
Harrison Consoles Mixbus v4 - 1
Page 421 of 515
Video Formats Supported:
D = Demuxing supported
E = Muxing supported
• E 3g2 3GP2 (3GPP2 file format)
• E 3gp 3GP (3GPP file format)
• D 4xm 4X Technologies
• E a64 a64 – video for Commodore 64
• D aa Audible AA format files
• D aac raw ADTS AAC (Advanced Audio Coding)
• DE ac3 raw AC-3
• D act ACT Voice file format
• D adf Artworx Data Format
• D adp ADP
• E adts ADTS AAC (Advanced Audio Coding)
• DE adx CRI ADX
• D aea MD STUDIO audio
• D afc AFC
• DE aiff Audio IFF
• DE alaw PCM A-law
• D alias_pix Alias/Wavefront PIX image
• DE amr 3GPP AMR
• D anm Deluxe Paint Animation
• D apc CRYO APC
• D ape Monkey’s Audio
• DE apng Animated Portable Network Graphics
• D aqtitle AQTitle subtitles
• DE asf ASF (Advanced / Active Streaming Format)
• D asf_o ASF (Advanced / Active Streaming Format)
• E asf_stream ASF (Advanced / Active Streaming Format)
• DE ass SSA (SubStation Alpha) subtitle
• DE ast AST (Audio Stream)
• DE au Sun AU
• DE avi AVI (Audio Video Interleaved)
• E avm2 SWF (ShockWave Flash) (AVM2)
• D avr AVR (Audio Visual Research)
• D avs AVS
• D bethsoftvid Bethesda Softworks VID
Harrison Consoles Mixbus v4 - 1
Page 422 of 515
• D bfi Brute Force & Ignorance
• D bfstm BFSTM (Binary Cafe Stream)
• D bin Binary text
• D bink Bink
• DE bit G.729 BIT file format
• D bmp_pipe piped bmp sequence
• D bmv Discworld II BMV
• D boa Black Ops Audio
• D brender_pix BRender PIX image
• D brstm BRSTM (Binary Revolution Stream)
• D c93 Interplay C93
• DE caf Apple CAF (Core Audio Format)
• DE cavsvideo raw Chinese AVS (Audio Video Standard) video
• D cdg CD Graphics
• D cdxl Commodore CDXL video
• D cine Phantom Cine
• D concat Virtual concatenation script
• E crc CRC testing
• E dash DASH Muxer
• DE data raw data
• DE daud D-Cinema audio
• D dds_pipe piped dds sequence
• D dfa Chronomaster DFA
• DE dirac raw Dirac
• DE dnxhd raw DNxHD (SMPTE VC-3)
• D dpx_pipe piped dpx sequence
• D dsf DSD Stream File (DSF)
• D dsicin Delphine Software International CIN
• D dss Digital Speech Standard (DSS)
• DE dts raw DTS
• D dtshd raw DTS-HD
• DE dv DV (Digital Video)
• D dvbsub raw dvbsub
• E dvd MPEG-2 PS (DVD VOB)
• D dxa DXA
• D ea Electronic Arts Multimedia
• D ea_cdata Electronic Arts cdata
• DE eac3 raw E-AC-3
• D epaf Ensoniq Paris Audio File
Harrison Consoles Mixbus v4 - 1
Page 423 of 515
• D exr_pipe piped exr sequence
• DE f32be PCM 32-bit floating-point big-endian
• DE f32le PCM 32-bit floating-point little-endian
• E f4v F4V Adobe Flash Video
• DE f64be PCM 64-bit floating-point big-endian
• DE f64le PCM 64-bit floating-point little-endian
• DE ffm FFM (FFserver live feed)
• DE ffmetadata FFmpeg metadata in text
• D film_cpk Sega FILM / CPK
• DE filmstrip Adobe Filmstrip
• DE flac raw FLAC
• D flic FLI/FLC/FLX animation
• DE flv FLV (Flash Video)
• E framecrc framecrc testing
• E framemd5 Per-frame MD5 testing
• D frm Megalux Frame
• DE g722 raw G.722
• DE g723_1 raw G.723.1
• D g729 G.729 raw format demuxer
• DE gif GIF Animation
• D gsm raw GSM
• DE gxf GXF (General eXchange Format)
• DE h261 raw H.261
• DE h263 raw H.263
• DE h264 raw H.264 video
• E hds HDS Muxer
• DE hevc raw HEVC video
• E hls Apple HTTP Live Streaming
• D hls,applehttp Apple HTTP Live Streaming
• D hnm Cryo HNM v4
• DE ico Microsoft Windows ICO
• D idcin id Cinematic
• D idf iCE Draw File
• D iff IFF (Interchange File Format)
• DE ilbc iLBC storage
• DE image2 image2 sequence
• DE image2pipe piped image2 sequence
• D ingenient raw Ingenient MJPEG
• D ipmovie Interplay MVE
Harrison Consoles Mixbus v4 - 1
Page 424 of 515
• E ipod iPod H.264 MP4 (MPEG-4 Part 14)
• DE ircam Berkeley/IRCAM/CARL Sound Format
• E ismv ISMV/ISMA (Smooth Streaming)
• D iss Funcom ISS
• D iv8 IndigoVision 8000 video
• DE ivf On2 IVF
• D j2k_pipe piped j2k sequence
• DE jacosub JACOsub subtitle format
• D jpeg_pipe piped jpeg sequence
• D jpegls_pipe piped jpegls sequence
• D jv Bitmap Brothers JV
• DE latm LOAS/LATM
• D live_flv live RTMP FLV (Flash Video)
• D lmlm4 raw lmlm4
• D loas LOAS AudioSyncStream
• DE lrc LRC lyrics
• D lvf LVF
• D lxf VR native stream (LXF)
• DE m4v raw MPEG-4 video
• E matroska Matroska
• D matroska,webm Matroska / WebM
• E md5 MD5 testing
• D mgsts Metal Gear Solid: The Twin Snakes
• DE microdvd MicroDVD subtitle format
• DE mjpeg raw MJPEG video
• E mkvtimestamp_v2 extract pts as timecode v2 format, as defined by mkvtoolnix
• DE mlp raw MLP
• D mlv Magic Lantern Video (MLV)
• D mm American Laser Games MM
• DE mmf Yamaha SMAF
• E mov QuickTime / MOV
• D mov,mp4,m4a,3gp,3g2,mj2 QuickTime / MOV
• E mp2 MP2 (MPEG audio layer 2)
• DE mp3 MP3 (MPEG audio layer 3)
• E mp4 MP4 (MPEG-4 Part 14)
• D mpc Musepack
• D mpc8 Musepack SV8
• DE mpeg MPEG-1 Systems / MPEG program stream
• E mpeg1video raw MPEG-1 video
Harrison Consoles Mixbus v4 - 1
Page 425 of 515
• E mpeg2video raw MPEG-2 video
• DE mpegts MPEG-TS (MPEG-2 Transport Stream)
• D mpegtsraw raw MPEG-TS (MPEG-2 Transport Stream)
• D mpegvideo raw MPEG video
• DE mpjpeg MIME multipart JPEG
• D mpl2 MPL2 subtitles
• D mpsub MPlayer subtitles
• D msnwctcp MSN TCP Webcam stream
• D mtv MTV
• DE mulaw PCM mu-law
• D mv Silicon Graphics Movie
• D mvi Motion Pixels MVI
• DE mxf MXF (Material eXchange Format)
• E mxf_d10 MXF (Material eXchange Format) D-10 Mapping
• E mxf_opatom MXF (Material eXchange Format) Operational Pattern Atom
• D mxg MxPEG clip
• D nc NC camera feed
• D nistsphere NIST SPeech HEader REsources
• D nsv Nullsoft Streaming Video
• E null raw null video
• DE nut NUT
• D nuv NuppelVideo
• E oga Ogg Audio
• DE ogg Ogg
• DE oma Sony OpenMG audio
• E opus Ogg Opus
• D paf Amazing Studio Packed Animation File
• D pictor_pipe piped pictor sequence
• D pjs PJS (Phoenix Japanimation Society) subtitles
• D pmp Playstation Portable PMP
• D png_pipe piped png sequence
• E psp PSP MP4 (MPEG-4 Part 14)
• D psxstr Sony Playstation STR
• D pva TechnoTrend PVA
• D pvf PVF (Portable Voice Format)
• D qcp QCP
• D qdraw_pipe piped qdraw sequence
• D r3d REDCODE R3D
• DE rawvideo raw video
Harrison Consoles Mixbus v4 - 1
Page 426 of 515
• D realtext RealText subtitle format
• D redspark RedSpark
• D rl2 RL2
• DE rm RealMedia
• DE roq raw id RoQ
• D rpl RPL / ARMovie
• D rsd GameCube RSD
• DE rso Lego Mindstorms RSO
• DE rtp RTP output
• E rtp_mpegts RTP/mpegts output format
• DE rtsp RTSP output
• DE s16be PCM signed 16-bit big-endian
• DE s16le PCM signed 16-bit little-endian
• DE s24be PCM signed 24-bit big-endian
• DE s24le PCM signed 24-bit little-endian
• DE s32be PCM signed 32-bit big-endian
• DE s32le PCM signed 32-bit little-endian
• DE s8 PCM signed 8-bit
• D sami SAMI subtitle format
• DE sap SAP output
• D sbg SBaGen binaural beats script
• D sdp SDP
• D sdr2 SDR2
• E segment segment
• D sgi_pipe piped sgi sequence
• D shn raw Shorten
• D siff Beam Software SIFF
• E singlejpeg JPEG single image
• D sln Asterisk raw pcm
• DE smjpeg Loki SDL MJPEG
• D smk Smacker
• E smoothstreaming Smooth Streaming Muxer
• D smush LucasArts Smush
• D sol Sierra SOL
• DE sox SoX native
• DE spdif IEC 61937 (used on S/PDIF – IEC958)
• E spx Ogg Speex
• DE srt SubRip subtitle
• D stl Spruce subtitle format
Harrison Consoles Mixbus v4 - 1
Page 427 of 515
• E stream_segment,ssegment streaming segment muxer
• D subviewer SubViewer subtitle format
• D subviewer1 SubViewer v1 subtitle format
• D sunrast_pipe piped sunrast sequence
• D sup raw HDMV Presentation Graphic Stream subtitles
• E svcd MPEG-2 PS (SVCD)
• DE swf SWF (ShockWave Flash)
• D tak raw TAK
• D tedcaptions TED Talks captions
• E tee Multiple muxer tee
• D thp THP
• D tiertexseq Tiertex Limited SEQ
• D tiff_pipe piped tiff sequence
• D tmv 8088flex TMV
• DE truehd raw TrueHD
• D tta TTA (True Audio)
• D tty Tele-typewriter
• D txd Renderware TeXture Dictionary
• DE u16be PCM unsigned 16-bit big-endian
• DE u16le PCM unsigned 16-bit little-endian
• DE u24be PCM unsigned 24-bit big-endian
• DE u24le PCM unsigned 24-bit little-endian
• DE u32be PCM unsigned 32-bit big-endian
• DE u32le PCM unsigned 32-bit little-endian
• DE u8 PCM unsigned 8-bit
• E uncodedframecrc uncoded framecrc testing
• DE vc1 raw VC-1 video
• DE vc1test VC-1 test bitstream
• E vcd MPEG-1 Systems / MPEG program stream (VCD)
• D vivo Vivo
• D vmd Sierra VMD
• E vob MPEG-2 PS (VOB)
• D vobsub VobSub subtitle format
• DE voc Creative Voice
• D vplayer VPlayer subtitles
• D vqf Nippon Telegraph and Telephone Corporation (NTT) TwinVQ
• DE w64 Sony Wave64
• DE wav WAV / WAVE (Waveform Audio)
• D wc3movie Wing Commander III movie
Harrison Consoles Mixbus v4 - 1
Page 428 of 515

• E webm WebM
• E webm_chunk WebM Chunk Muxer
• DE webm_dash_manifest WebM DASH Manifest
• E webp WebP
• D webp_pipe piped webp sequence
• DE webvtt WebVTT subtitle
• D wsaud Westwood Studios audio
• D wsvqa Westwood Studios VQA
• DE wtv Windows Television (WTV)
• DE wv raw WavPack
• D xa Maxis XA
• D xbin eXtended BINary text (XBIN)
• D xmv Microsoft XMV
• D xwma Microsoft xWMA
• D yop Psygnosis YOP
• DE yuv4mpegpipe YUV4MPEG pipe
Syncing Mixbus to Non-Linear Editing software
See: (Clocks & Synchronization)
Harrison Consoles Mixbus v4 - 1
Page 429 of 515

Preferences
This page discusses the preference folder. If you would like to learn about the preference window please
visit Preference Window
Your Mixbus preferences are stored in 2 places:
Session->Properties
• This stores the preferences for the current session
• For more details see Session Properties Window
Edit->Preferences ( or Mixbus->Preferences on Mac OSX )
• This stores your global preferences which are applicable ALL sessions
• For more details, see Preferences Window
Preferences file location, and clearing the preferences:
Mixbus preferences are stored in the Mixbus preference folder. The location of the folder varies with each
OS ( Mac, Windows, or Linux )
You can clear your preferences by deleting a single file or the entire Mixbus preferences folder. If Mixbus
cannot find a preferences folder or file, it will create a new one with default contents. More details about the
Preferences folder can be found in Power-User Topics.
Harrison Consoles Mixbus v4 - 1
Page 430 of 515
Clocks & Synchronization
Clocks
Mixbus provides two clocks which display the current position of the playhead. Having 2 clocks is a
convenience: for example you can leave one clock showing “musical” time (such as bars/beats) while the
other clock shows time in hours:minutes: seconds.
Right-click on a clock to change the mode of the clock. A menu appears with the available options.
Some clock modes have smaller sub-displays which show the current meter/tempo, SMPTE format, or
sample rate (in applicable modes).
It is possible to click on a clock and directly enter a time code location directly. Pressing “Enter” will locate
the playhead to the new time.
Synchronization
Mixbus allows selection of several synchronization sources: Internal, LTC, MTC, and JACK
• Internal: The playhead position is defined by Mixbus; all transport commands come from Mixbus.
• LTC: The playhead position and transport state will be determined from incoming LTC (SMPTE)
timecode.
• MTC: The playhead position and transport state will be determined from incoming MIDI Time Code.
To learn more about clocks in the transport toolbar, visit the Transport Bar section.
*
Note: There are several other clocks in Mixbus, such as the Nudge clock and the SMPTE
offset clock. These clocks can also be set to any mode, so you can (for example) set the
nudge clock to advance in bars:beats instead of minutes:seconds.
*
Tip: you can point at a clock element (minutes, seconds, beats, or whatever) and use the
mouse-wheel (or 2-finger scroll on a touchpad) to quickly tweak the value without entering it
manually.
*
Harrison Consoles Mixbus v4 - 1
Page 431 of 515

• JACK: The playhead position and transport state will be determined from JACK. Transport commands
initiated from Mixbus will be applied to all JACK-synchronized programs. (JACK is a third party
program, and is not included with Mixbus 3, however, MB3 can utilize JACK if it is installed in your
system.)
• Time Master (JACK only): Only one JACK-synchronized program can be the “Time master”. When
JACK sync is used the timelines of the synchronized programs are located using the sample-clock
offset. Since different programs may have different tempo maps, or methods of handling musical time,
the “time master” identifies the machine that will define the musical time (bars/beats) position of the
song. This is for advanced users only.
Note: A list of JACK-aware programs is listed at: http://jackaudio.org/applications
*
Harrison Consoles Mixbus v4 - 1
Page 432 of 515

External Synchronization
Synchronization
Mixbus can synchronize to external hardware or software in three ways:
• LTC (Linear Time Code, sometimes called SMPTE)
• MTC (Midi Time Code)
• JACK
In all 3 cases, Mixbus can be the Master ( it sends the timecode to the other devices or software) or a Slave
(in which case Mixbus will “chase” the other source). In most cases, the digital workstation should be the
Master device, so Mixbus will normally be the Master. But there are cases when you need to do it the other
way, too.
Each method has different requirements and capabilities.
•LTC (sometimes called SMPTE) uses a channel of audio to encode a continuously-running timecode
position. The master device generates this signal, and the slave devices use this stream to determine
the master’s position and speed. LTC has the benefit of using everyday audio signals for sync, but the
underlying software has to be pretty smart to decode the position. Implementations vary from very
good to very bad.
•MTC is similar to LTC, but uses a MIDI channel to encode the position. It is much easier for
developers to interpret, and it uses widely available MIDI cables and connections. However it is
slightly less robust because of the decoupling between the MIDI and the audio clocks in most
computers.
•JACK allows 2 or more software applications on your computer to share their timecode position and
speed, without any audio or MID connections required by the user. JACK synchronization has several
benefits over MTC & LTC, but it is not likely to be available on most commercial software, or external
gear like a drum machine.
The “Internal/External Sync” button enables or disables external chase. If external sync is disabled, the
button shows “Internal”, and Mixbus will use its own internal clock and transport controls.
Harrison Consoles Mixbus v4 - 1
Page 433 of 515
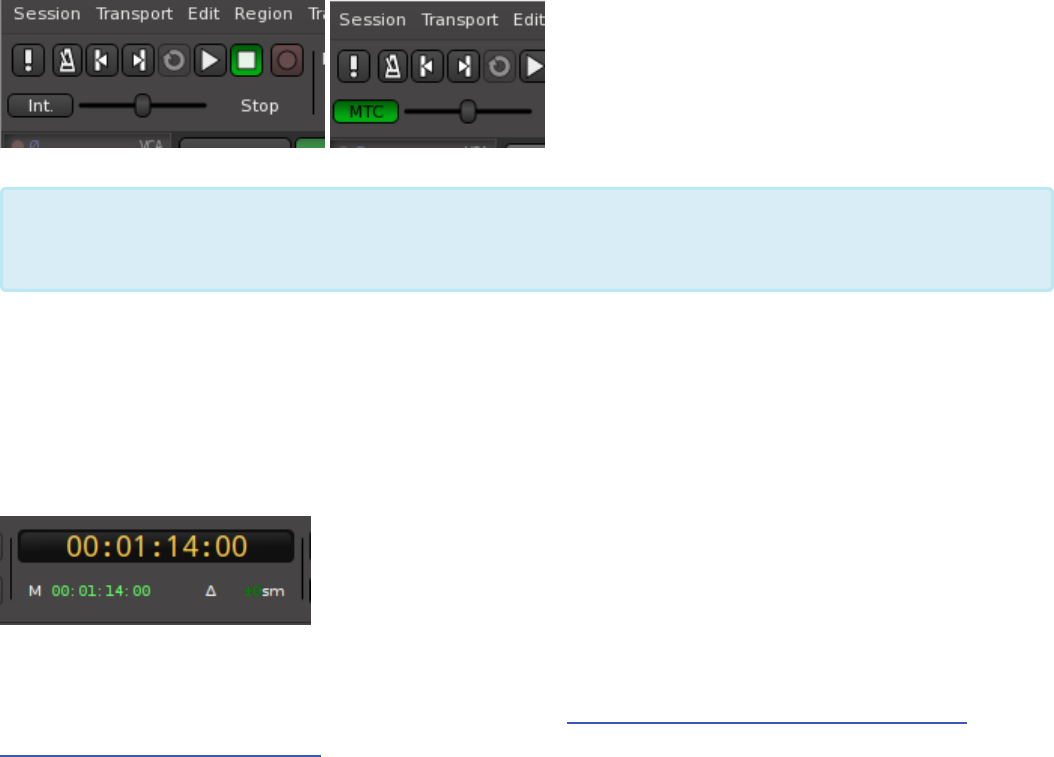
You select the synchronization source from the Preferences. Sync source is globally selected, it doesn’t
change with each session you have open. This matches most people’s needs, since most people have a
studio setup that doesn’t change depending on the session they are using.
When syncing to external timecode, you will see a display showing the current external timecode value, and
a “Delta” value indicating Mixbus’s offset from the master device:
Mixbus’s timecode sync functions are largely developed by the Ardour open-source community. For more
details, see the applicable chapters in the Ardour manual: http://manual.ardour.org/synchronization/
timecode-generators-and-slaves/
Regardless of the “Internal/External Sync” button, Mixbus always sends sync, so other
machines can follow it.
*
Harrison Consoles Mixbus v4 - 1
Page 434 of 515

Transport and Timecode Sync
External transport is composed of 2 different mechanisms:
1. Transport position ( for example: measure 4, beat 2, or SMPTE location 00:05:01.5 )
2. Transport speed ( for example: playing, stopped, or rewinding )
Methods of Transport and Timecode Sync using MIDI
MMC ( “midi machine control” ) sends commands like Play, Stop, Locate, and Rewind when they are
initiated by the master.
MTC ( “midi transport control’” ) sends a continuous stream of the master’s position. From this, the playback
speed can be derived.
Often MMC and MTC are combined in a single MIDI wire, to provide actions like “locating”, as well as
continuous transport position of the master.
It is also common to send MMC commands from multiple machines to the Master machine. in this way,
pressing the “Play” button on a remote machine can tell Mixbus to start playing. Mixbus then sends MTC
timecode to all slave machines so they sync to the master’s position.
Methods of Transport and Timecode Sync using audio
LTC ( “Linear Time Code” ) typically uses the SMPTE protocol to provide the current position, like MTC. It is
sent at a higher rate than MTC and can therefore provide more accurate time sync. LTC requires an audio
port on the master & slave devices. LTC is common among professional video equipment, but not very
prevalent among musical devices such as drum machines.
Factors that affect quality of synchronization
It is recommended that the digital recorder (usually Mixbus) is the master device, and sends a sync signal to
the slave device(s).
To maintain “perfect” sync between 2 devices, you should use digital devices that are driven by a common
master sample-rate clock. If 2 devices are using the same digital clock, then once sync is achieved, both
devices will play at the same rate. This is why it is important to use a master sample-clock when possible.
Harrison Consoles Mixbus v4 - 1
Page 435 of 515

The quality of the synchronization will be heavily dependent on the quality of the sync signal from the
master machine, and the ability of the slave machine to follow the sync signal.
MIDI input&output from a computer suffers from problems of “latency” (delay) & “Jitter” (changing delay).
This is worst with USB-connected devices which are subject to the USB protocol buffering. For this reason,
Generating an external clock from Mixbus ( Mixbus is Master )
This method is preferred when you’d like to sync an external device ( like a drum machine ) to Mixbus. This
is the most common use for MTC/MMC synchronization.
By default, Mixbus is already configured to send MTC/MMC. To send the sync signal to an external device,
the user must only connect Mixbus’s MTC+MMC ports to the appropriate MIDI wire. To do that, click on
Window->MIDI Connections. Then select “Mixbus Misc” on the left tab, and “Hardware” on the bottom tab.
Then click in the grid to make connections, as shown below:
Syncing Mixbus to an external clock ( Mixbus is Slave )
Mixbus can respond to external timecode control ( via MMC or OSC ) or timecode sync ( via MTC or
LTC/SMPTE audio )
Harrison Consoles Mixbus v4 - 1
Page 436 of 515

External Sync is initiated with the “Internal/External” sync button, to the right of the transport buttons on the
editor.
Synchronization sources and options are set in the Preferences Window
When slaved to an external clock, Mixbus uses a high quality DLL (delay-locked-loop) to stabilize the
incoming signal. This allows Mixbus to synchronize closely with an external signal, even if it has a lot of
jitter.
If the sync source uses the same digital master clock as Mixbus, then once sync is achieved, they are
guaranteed to continue playing & recording at the same rate.
If the 2 sources do NOT have the same sample-rate clock, then Mixbus’s behavior changes between
playback and recording:
1) When playing back material, Mixbus will speed up & slow down to match the incoming clock position.
2) When recording material, Mixbus will achieve sync when recording starts, and recording will continue at
the sample-clock rate, regardless of the changes in the incoming clock position.
Also see External Synchronization
Mixbus’s transport and timecode sync functions are largely developed by the Ardour open-source
community. For more details, see the applicable chapters in the Ardour manual:
•http://manual.ardour.org/synchronization/timecode-generators-and-slaves/
•http://manual.ardour.org/synchronization/overview-of-timecode-related-settings/
Harrison Consoles Mixbus v4 - 1
Page 437 of 515

External Control
Mixbus can respond to external controllers using 4 different
protocols:
Generic MIDI ( also called “MIDI Learn” )
Mixbus can accept MIDI control-messages from any MIDI-enabled device that sends CC (continuous
controller) or NRPN messages. Many MIDI keyboards include MIDI controller knobs and switches that can
be bound to Mixbus mixer-strip controls or transport controls.
Mixbus can use controls directly by using “MIDI Learn”. With this method, you tell Mixbus exactly what
control you want to adjust on-screen, and then you turn your physical controller to “assign” it to that knob.
Alternatively, you can use a pre-defined “Binding map” which preconfigures your device’s controls to work
with Mixbus. You can choose from a predefined list, or you can create your own binding file, and share it
with other Mixbus users.
Mackie Control
The “Mackie Control” protocol allows controllers with motorized faders (typically 8 or more) to control the
Mixbus mixer.
Presonus Faderport
The Presonus Faderport is an inexpensive controller with 1 motorized fader, one knob, and several buttons.
Mixbus provides a dedicated control mode for the Faderport.
OSC control
OSC ( Open Sound Control ) is a network protocol that allows you to control Mixbus from an ethernet-
connected controller.
Harrison Consoles Mixbus v4 - 1
Page 438 of 515
MIDI Control Surfaces
Generic MIDI Control
Mixbus can respond to MIDI control messages such as transport control, knobs, sliders and switches.
MIDI remote-control protocols are largely developed by the Ardour open-source community, and you can
find documentation on the Ardour website.
Mixbus uses 2 different mechanisms for MIDI control surfaces:
•MIDI Learn: http://manual.ardour.org/using-control-surfaces/midi-learn/
•MIDI Binding Maps: http://manual.ardour.org/using-control-surfaces/midi-binding-maps/
Harrison Consoles Mixbus v4 - 1
Page 439 of 515

Mackie MCU-compatible fader controllers
Mixbus supports fader controllers that use the Mackie “MCU” protocol
To use a Mackie control device, you must follow these steps:
1. Consult the device’s manual, and configure the device for “Mackie Control” protocol ( not HUI )
2. Open Preferences->Control Surfaces, and click the checkbox to enable “Mackie”
3. Double-click the Mackie line to open the configuration panel.
4. Choose your device, or the closest equivalent, from the “Device Type” list
5. Choose the MIDI input and output ports for the device
…. after step 5, the faders should immediately jump to their correct position.
Because the capabilities of fader controllers vary widely, you may find that some buttons don’t exist, or don’t
work as expected, on your device. The documentation below applies to the original Mackie MCU, and very-
similar devices such as the Behringer X-Touch.
Encoder Assign Buttons:
The Encoder Assign buttons define what the knobs above each fader do.
• Track: To use the Track controls, you must first “select” a channel using a channel Select button. The
8 knobs will switch to show the channel’s Input trim, solo isolate, solo lock, and polarity switches.
• Pan/Surround: This is the default setting. When this is selected, each channel’s knob will control its
pan. Clicking the knob will toggle the master bus assign on/off.
Harrison Consoles Mixbus v4 - 1
Page 440 of 515

• EQ: To use the EQ controls, you must first “select” a channel using a channel Select button. The 8
knobs will switch to show the selected channel’s EQ settings (this varies for channels vs mixbuses vs
master bus )
• Send: To use the Send controls, you must first “select” a channel using a channel Select button. The
8 knobs will switch to show the channel’s mixbus send levels. You can adjust the send level with a
knob, or click the send to enable/disable it. You may also click the “Flip” button to control the mixbus
send levels from the fader.
• Plug-In: this feature is currently unimplemented.
• Inst: For Mixbus, “Inst” is used to control the channel compressor. To use the Compressor controls,
you must first “select” a channel using a channel Select button. The 8 knobs will switch to show the
selected channel’s compressor settings.
Global View Buttons:
The Global View buttons select which subset of available channels will be visible on the fader surface.
• Global View : this resets the view to showing channels in sequential order, with the first available
mixer channel on the far left of the surface.
• MIDI Tracks: this shows only the MIDI (instrument) tracks on the surface. Audio tracks and buses will
be skipped over, if you adjust the Channel or Bank buttons.
• Inputs: This shows “buses” that were created with the New Track dialog. Buses are often used as live
inputs to the mixer. MIDI tracks, audio tracks, and mixbuses will be skipped over, if you adjust the
Channel or Bank buttons.
• Audio Tracks: this shows only the Audio tracks on the control surfaces. Midi tracks and buses will be
skipped over, if you adjust the Channel or Bank buttons.
• Audio Inst: This operates the same as MIDI Tracks button.
• Aux: This operates the same as the Inputs button.
• Buses: This shows the mix buses.
• Outputs: Currently unimplemented; this will show the Click (metronome), Auditioner (solo bus), and
Monitor buses in the future.
• User: This shows the first 8 channels that are “selected” in the mixer GUI. This allows you to select a
discontiguous collection of channels, and control them side-by-side on the control surface.
The EQ, Send, and Dyn (“Inst”) modes will follow the selected channel. Selecting EQ mode,
and then selecting a different channel, will continue to show the EQ knobs, but for the new
channel. This is a very nice way to advance through your channels and adjust each
channels EQ, in turn.
!
Harrison Consoles Mixbus v4 - 1
Page 441 of 515
Function Buttons:
The 8 Function buttons can be assigned any “action” ( keyboard shortcut ) in the Macke setup dialog.
Modify:
The Modify buttons are used, similar to modifiers on your keyboard, to add additional features to the Mackie
protocols. For example, Shift+Undo is “Redo”. Note that the Mackie modifier keys do NOT affect what you
are doing with the keyboard/mouse. The “Shift” key is largely used for default functions. The “Control,
Command, and Alt” buttons are reserved for users to assign their own actions.
Automation:
The Automation buttons apply to the selected track’s fader. The “Group” button currently turns automation
OFF. “Latch”, and “Trim” are currently disabled, but these features will be added in the future.
Utility:
• Save: Saves the currently-opened session snapshot
• Undo: un-does the most recent editor operation (such as a recording). Shift+Undo to “redo”.
• Cancel: Deselects all tracks and objects.
• Enter: Selects all tracks.
Transport:
• Marker: Creates a new marker. Shift+Marker deletes the marker (if one is currently under the
playhead). Marker+ffwd = next marker; Marker+rewd = last marker
• Nudge: Combined with the ffwd/rewind buttons, this will nudge the playhead forward or back.
• Cycle: This initiates a “loop” playback between the Loop markers, if you are currently playing.
Shift+cycle = use currently selected range as the Loop range.
• Drop: sometimes called “Mark In”: This uses the current playhead location to set the selection start
time. Shift+Drop = Toggle Punch IN.
• Replace: sometimes called “Mark Out”: This uses the current playhead location to set the selection
end time. Shift+Replace = Toggle Punch OUT.
• Click: this toggles the Click (metronome) on and off. Shift+Click = Set Punch range to current range
selection.
• Solo: This clears any track solo’s that are currently engaged. Shift+Solo =
• Fader Bank: this advances the faders by 8
• Channel: this advances the channels by 1
• Scrub: currently no function is assigned to this button.
• Zoom: this modifies the directional arrows and Jog Wheel to “zoom” rather than move the view.
Harrison Consoles Mixbus v4 - 1
Page 442 of 515

• Directional arrows: the directional arrows move the editor view. If the Zoom button is engaged, they
zoom the x and y axes.
• Jog Wheel: adjusting the wheel will move the playhead. If the “Zoom” button is engaged, then the
wheel zooms in&out on the timeline
The Mackie MCU protocol support is largely developed by the Ardour open-source community. To learn
more about fader controllers using the Mackie MCU protocol, please visit the Ardour manual pages:
http://manual.ardour.org/using-control-surfaces/devices-using-mackielogic-control-protocol/
The Mackie remote-control protocol talks to the Mixbus session directly, and isn’t directly
related to what you see on the screen. However it does follow the order of tracks in the
mixer page, and it does not show “hidden” tracks.
*
Mixbus does not currently support the older Mackie “HUI” protocol. Many devices provide
the “HUI” protocol because it is the only 3rd-party protocol that can be used with ProTools.
However, the HUI protocol is very limited. Nearly every device implements the newer
“Mackie Control” protocol, which provides higher-resolution faders, more buttons, and other
benefits. Mixbus uses this better protocol to talk with your device. Check your device to see
which modes it provides.
*
Harrison Consoles Mixbus v4 - 1
Page 443 of 515

Faderport
Presonus Faderport
The Presonus Faderport is a one-channel controller with a single touch-sensitive motorized fader, pan knob,
and transport controls. Mixbus has a special mode for the FaderPort which provides dedicated features for
this hardware.
When attached, the Faderport follows the selected (red-bordered) channel. You can change the selection
with the Faderport’s > and < buttons.
The Faderport has these controls:
• Fader
• Pan knob
• Mute / Solo / Rec-Arm
• Channel Select, including Output(*)
• Fader automation mode: Read, Write, Touch, Off
• Undo ( shift+Undo to redo )
• Punch : blinks when auto-punch (in or out) is enabled
• Transport Controls including Loop, Markers, and Goto Start/End, as shown.
•Mix,Proj,Trns, and User are user-assignable buttons, see below.
The “Bank” button is currently unused.
Harrison Consoles Mixbus v4 - 1
Page 444 of 515
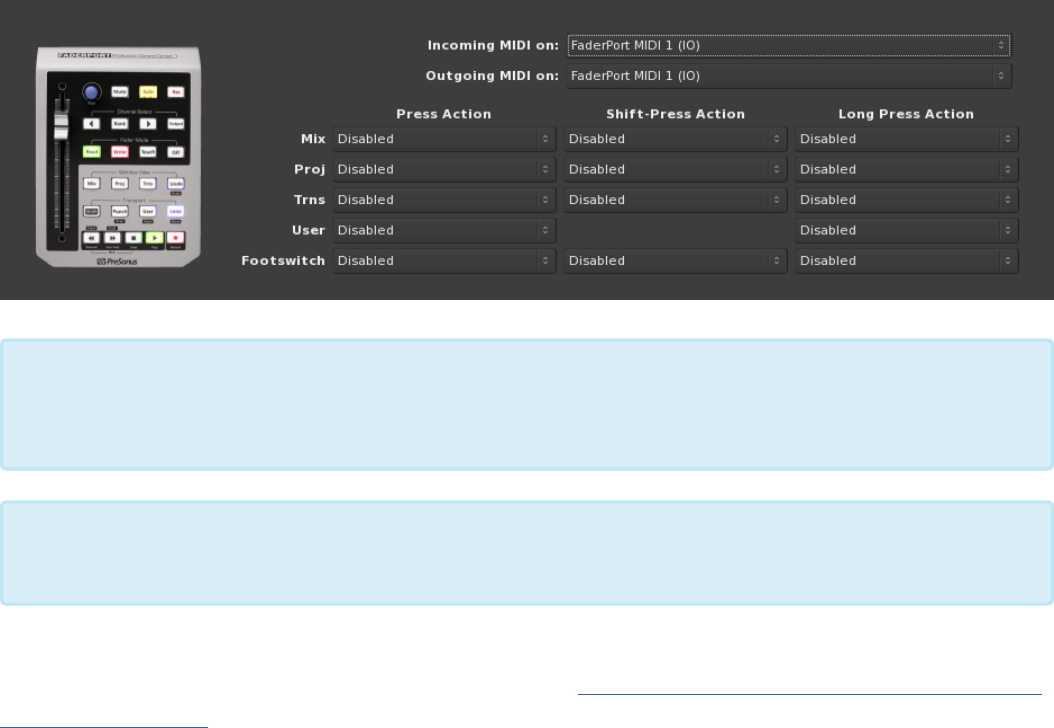
The Faderport’s control panel provides a means to assign functions to the various buttons:
Remote-control protocols are largely developed by the Ardour open-source community, and you can find
documentation about the FaderPort on the Ardour website: http://manual.ardour.org/using-control-surfaces/
Presonus_FaderPort/
Clicking the “Output” button will cause the Faderport’s fader and mute to control the Master
bus. Holding Shift+Output will cause the Faderport to control the MONITOR bus fader and
mute.
*
It is not currently possible to assign the Faderport to a VCA fader, but we expect to add this
feature immediately after v4.0.
*
Harrison Consoles Mixbus v4 - 1
Page 445 of 515
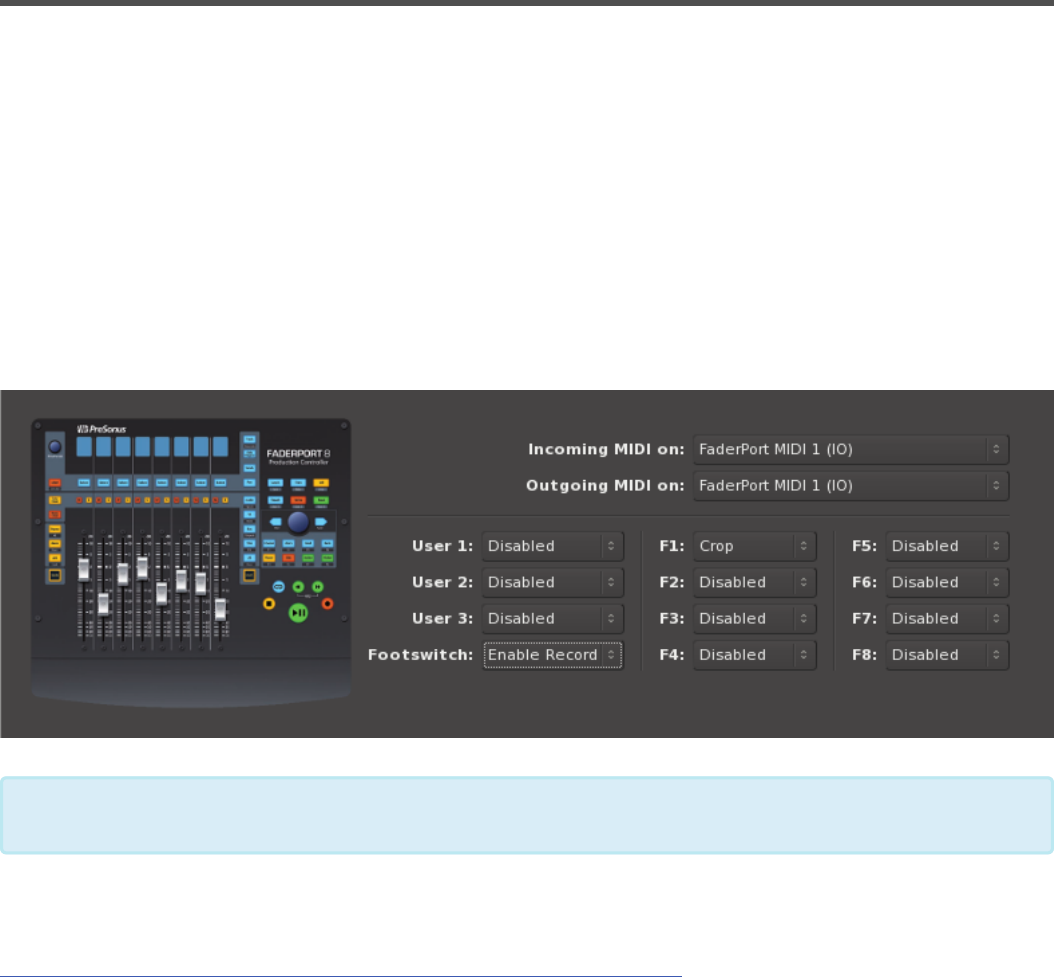
Presonus Faderport8 and Faderport16
Presonus Faderport8
The Presonus Faderport8 is an eight-channel controller with eight touch-sensitive motorized faders, a multi-
purpose encoder knob, and transport controls. Mixbus has a special mode for the FaderPort8 which
provides dedicated features for this hardware.
The Faderport8 may be used as an MCU device, but most users will prefer to use the custom “Faderport8”
mode. In this mode, the Faderport8 closely matches the behavior described in the Faderport8 manual when
controlling Presonus StudioOne. ( Presonus and StudioOne are trademarks of Presonus ).
To enable the Faderport8, visit the settings in Preferences->Control Sufaces:
Mixbus’s Faderport8 operation was funded by Harrison, and developed largely by the Ardour open-source
community. You will find up-to-date documentation for the Faderport8 operation at:
http://manual.ardour.org/using-control-surfaces/PreSonus_FaderPort8
The Faderport16 operates identically to the FP8, but it provides 16 faders.
*
Harrison Consoles Mixbus v4 - 1
Page 446 of 515

Tascam US-2400
The Tascam US-2400 was produced from roughly 2007 – 2010. It provides 24 channels, each with a fader,
mute+solo+select switches, and a knob with led indications. It also has a master section with a master
fader, transport controls, and function keys.
Connecting the US-2400:
The US-2400 provides 6 separate MIDI input and output ports. Select the 4 input and 4 output ports as
described in the control panel.
The fifth pair of ports may be used as a “Generic MIDI controller” or for some other task.
The sixth pair of ports is unused. We believe this is likely used to light the “bank indicator LEDs” on the unit,
but no documentation has been found for this feature.
To utilize the US-2400, first make sure to set the unit to mode “4”. Refer to the US-2400
manual to set modes.
*
Harrison Consoles Mixbus v4 - 1
Page 447 of 515

Operating the US-2400:
Each channelstrip provides a touch-sensitive fader, Mute, Solo, and Select switch. By default, the
channelstrip knob provides left/right pan control of the channels. When the Select switch is lit for a channel,
the channel’s parameters are mapped to the knobs.
The Master fader has 3 special-function switches:
1) Select: this selects the Master bus and assigns its controls to the knobs, like any other channel.
2) Clr Solo: this clears any soloe’d channels and buses
3) Flip: This switches the first 8 faders (or 12 for 32C) to operate as the mixbuses instead of input channels.
Global section:
Click the “Pan” button to return to default operation, showing input channels and their associated pan knobs.
The “Meter” button switches the channelstrip knobs to show the meter level of the associated channel.
The “Chan” button switches the knobs above the faders to operate as 24 generic MIDI knobs which can
send MIDI CC values.
The “Send” buttons have no operation by default. Hold “F” and press one of the 6 Send keys to activate a
Function-key action. F-key actions are configured in the control panel.
Transport controls provide rewind, play, stop and master-record enable.
Bank +/- buttons are provided to increment the faders in banks of 24.
In & Out buttons are provided to trigger “Range select start” and “Range select End” function.
Harrison Consoles Mixbus v4 - 1
Page 448 of 515

OSC Control
The OSC protocol can be used to remotely control Mixbus via Ethernet.
OSC Control provides the ability to initiate any “action” (i.e. anything that can be activated by a keybinding),
as well as direct access to editor, track and bus settings. OSC can be used to “script” events in Mixbus
using an external scripting platform. A complete description of OSC is beyond the scope of this manual.
There are 3 common programs used to remotely control Mixbus:
• TouchOSC – see Harrison’s TTC-1 Control Layout for TouchOSC
• Lemur – see Harrison’s LTI Control Layout for Lemur
• Open Stage Control
The following is a summary of the features that are available
from OSC:
• (s) denotes a string argument
• (i) denotes an integer argument
• (f) denotes a float argument
Sending this message will trigger the associated keybinding “action” in Mixbus:
• /access_action (s)
Transport Functions:
• /add_marker
• /add_marker (f)
• /access_action s
Harrison Consoles Mixbus v4 - 1
Page 449 of 515
• /loop_toggle
• /loop_toggle (f)
• /loop_location (ii)
• /goto_start
• /goto_start (f)
• /goto_end
• /goto_end (f)
• /scrub (f)
• /jog (f)
• /jog/mode (f)
• /rewind
• /rewind (f)
• /ffwd
• /ffwd (f)
• /transport_stop
• /transport_stop (f)
• /transport_play
• /transport_play (f)
• /transport_frame
• /transport_speed
• /record_enabled
• /set_transport_speed (f)
Editor functions:
• /locate (ii)
• /save_state
• /save_state (f)
• /prev_marker
• /prev_marker (f)
• /next_marker
• /next_marker (f)
• /undo
• /undo (f)
• /redo
• /redo (f)
• /toggle_punch_in
• /toggle_punch_in (f)
Harrison Consoles Mixbus v4 - 1
Page 450 of 515
• /toggle_punch_out
• /toggle_punch_out (f)
• /rec_enable_toggle
• /rec_enable_toggle (f)
• /toggle_all_rec_enables
• /toggle_all_rec_enables (f)
• /all_tracks_rec_in (f)
• /all_tracks_rec_out (f)
• /cancel_all_solos (f)
• /remove_marker
• /remove_marker (f)
• /jump_bars (f)
• /jump_seconds (f)
• /mark_in
• /mark_in (f)
• /mark_out
• /mark_out (f)
• /toggle_click
• /toggle_click (f)
• /midi_panic
• /midi_panic (f)
• /toggle_roll
• /toggle_roll (f)
• /stop_forget
• /stop_forget (f)
• /set_punch_range
• /set_punch_range (f)
• /set_loop_range
• /set_loop_range (f)
• /set_session_range
• /set_session_range (f)
• /toggle_monitor_mute
• /toggle_monitor_mute (f)
• /toggle_monitor_dim
• /toggle_monitor_dim (f)
• /toggle_monitor_mono
• /toggle_monitor_mono (f)
• /quick_snapshot_switch
• /quick_snapshot_switch (f)
Harrison Consoles Mixbus v4 - 1
Page 451 of 515
• /quick_snapshot_stay
• /quick_snapshot_stay (f)
• /fit_1_track
• /fit_1_track (f)
• /fit_2_tracks
• /fit_2_tracks (f)
• /fit_4_tracks
• /fit_4_tracks (f)
• /fit_8_tracks
• /fit_8_tracks (f)
• /fit_16_tracks
• /fit_16_tracks (f)
• /fit_32_tracks
• /fit_32_tracks (f)
• /fit_all_tracks
• /fit_all_tracks (f)
• /zoom_100_ms
• /zoom_100_ms (f)
• /zoom_1_sec
• /zoom_1_sec (f)
• /zoom_10_sec
• /zoom_10_sec (f)
• /zoom_1_min
• /zoom_1_min (f)
• /zoom_5_min
• /zoom_5_min (f)
• /zoom_10_min
• /zoom_10_min (f)
• /zoom_to_session
• /zoom_to_session (f)
• /temporal_zoom_in (f)
• /temporal_zoom_in
• /temporal_zoom_out
• /temporal_zoom_out (f)
• /scroll_up_1_track (f)
• /scroll_up_1_track
• /scroll_dn_1_track (f)
• /scroll_dn_1_track
• /scroll_up_1_page (f)
Harrison Consoles Mixbus v4 - 1
Page 452 of 515
• /scroll_up_1_page
• /scroll_dn_1_page (f)
• /scroll_dn_1_page
• /bank_up
• /bank_up (f)
• /bank_down
• /bank_down (f)
• /use_group (f)
Controls for special strips:
• /master/gain (f)
• /master/fader (f)
• /master/db_delta (f)
• /master/mute (i)
• /master/trimdB (f)
• /master/pan_stereo_position (f)
• /master/select (f)
• /monitor/gain (f)
• /monitor/fader (f)
• /monitor/db_delta (f)
• /monitor/mute (i)
• /monitor/dim (i)
• /monitor/mono (i)
Controls for the Selected strip:
• /select/recenable (i)
• /select/record_safe (i)
• /select/mute (i)
• /select/solo (i)
• /select/solo_iso (i)
• /select/solo_safe (i)
• /select/monitor_input (i)
• /select/monitor_disk (i)
• /select/polarity (i)
• /select/gain (f)
• /select/fader (f)
Harrison Consoles Mixbus v4 - 1
Page 453 of 515
• /select/db_delta (f)
• /select/trimdB (f)
• /select/pan_stereo_position (f)
• /select/pan_stereo_width (f)
• /select/send_gain (if)
• /select/send_fader (if)
• /select/send_enable (if)
• /select/master_send_enable (i)
• /select/send_page (f)
• /select/plug_page (f)
• /select/plugin (f)
• /select/expand (i)
• /select/pan_elevation_position (f)
• /select/pan_frontback_position (f)
• /select/pan_lfe_control (f)
• /select/comp_enable (f)
• /select/comp_threshold (f)
• /select/comp_speed (f)
• /select/comp_mode (f)
• /select/comp_makeup (f)
• /select/eq_enable (f)
• /select/eq_hpf/freq (f)
• /select/eq_hpf/enable (f)
• /select/eq_hpf/slope (f)
• /select/eq_lpf/freq (f)
• /select/eq_lpf/enable (f)
• /select/eq_lpf/slope (f)
• /select/eq_gain (if)
• /select/eq_freq (if)
• /select/eq_q (if)
• /select/eq_shape (if)
Track Controls:
• /strip/mute (ii)
• /strip/solo (ii)
• /strip/solo_iso (ii)
• /strip/solo_safe (ii)
Harrison Consoles Mixbus v4 - 1
Page 454 of 515
• /strip/recenable (ii)
• /strip/record_safe (ii)
• /strip/monitor_input (ii)
• /strip/monitor_disk (ii)
• /strip/expand (ii)
• /strip/select (ii)
• /strip/polarity (ii)
• /strip/gain (if)
• /strip/fader (if)
• /strip/trimdB (if)
• /strip/pan_stereo_position (if)
• /strip/pan_stereo_width (if)
• /strip/plugin/parameter (iiif)
• /strip/plugin/parameter/print (iii)
• /strip/plugin/activate (ii)
• /strip/plugin/deactivate (ii)
• /strip/send/gain (iif)
• /strip/send/fader (iif)
• /strip/send/enable (iif)
• /strip/name (is)
• /strip/sends (i)
• /strip/receives (i)
• /strip/plugin/list (i)
• /strip/plugin/descriptor (ii)
• /strip/plugin/reset (ii)
Misc:
• /refresh
• /refresh (f)
• /strip/list
• /strip/list (f)
Harrison Consoles Mixbus v4 - 1
Page 455 of 515
Lemur
What is Lemur?
Lemur is a very advanced application that lets you build custom OSC and MIDI controller interfaces using a
powerful networking protocol implemented by your favorite digital audio work stations. These interfaces
have numerous applications from live performance to writing and, now, mixing. It runs on both iOS and
Android, allowing users of both platforms to share interfaces and run in tandem.
What is the LTI Lemur Touch Interface?
“LTI” is Harrison’s Lemur interface layout, developed in-house as a remote control surface for Mixbus, using
the Lemur application.
Because the LTI uses the Lemur editor application, the Harrison LTI controller layout may be modified by
you, the end-user.
Instructions
Here are some instructions for use:
1. Purchase the Lemur application from your relevant App Store. ( Android and iOS are both supported,)
2. Install the application and make sure it runs correctly on your device
(Generally speaking, we wouldn’t recommend running the LTI on a screen lower than 1024×768)
3. Go to the Lemur downloads page and download the editor application to your computer or laptop.
4. Install the application to your computer and then open the application.
5. Download the LTI template here and then open it in the editor. It should look a lot like this:
Harrison Consoles Mixbus v4 - 1
Page 456 of 515
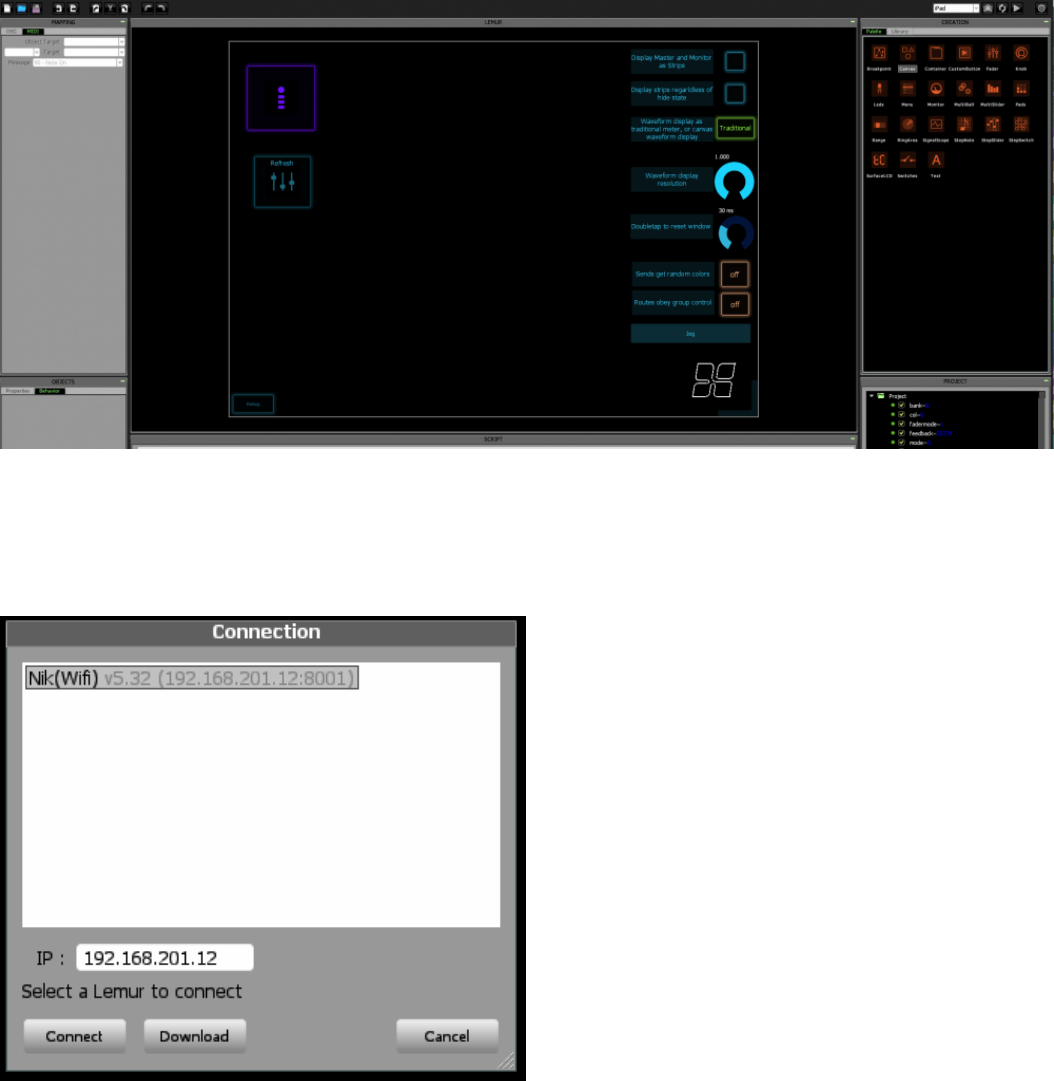
6. Open up the Lemur application on your device and then connect your device to the template editor of
your computer using the play button at the top right of the editor and then verify that it has loaded
correctly on your tablet. This works over WIFI ONLY. You should see a connection like this:
7. In Mixbus, go to Edit->Preferences->Control Surfaces and enable OSC via the check-box.
Additionally, make sure that “Port Mode:” is set to Auto Reply and not Manual Mode.
Harrison Consoles Mixbus v4 - 1
Page 457 of 515
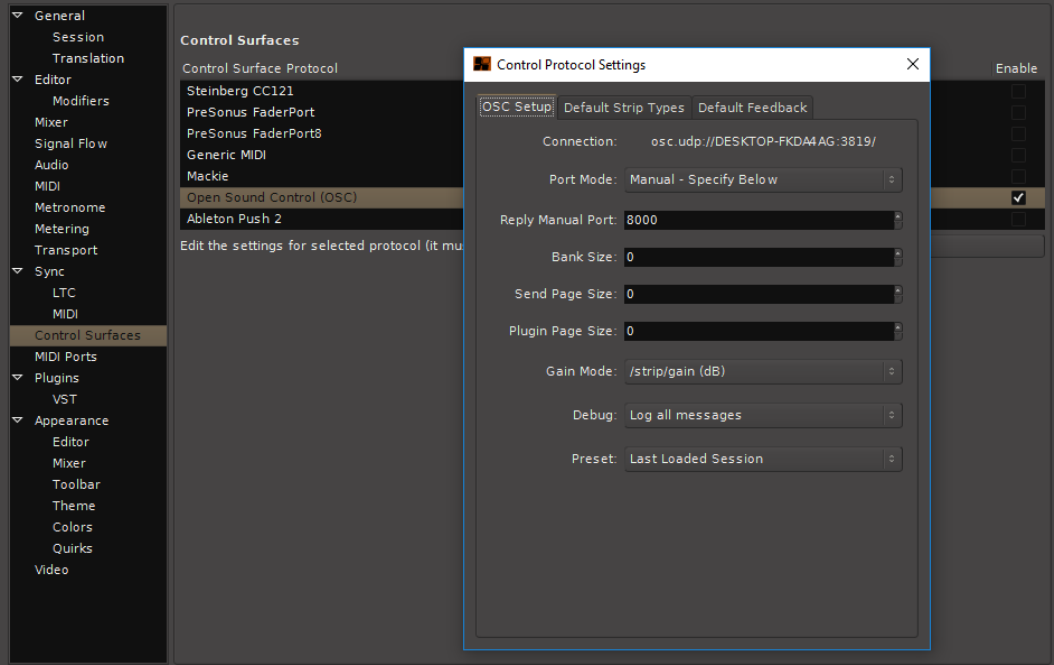
8. On your lemur application, open up the settings and make sure that OSC 0: points your computer’s
private wifi address with the port of 3819.
Harrison Consoles Mixbus v4 - 1
Page 458 of 515
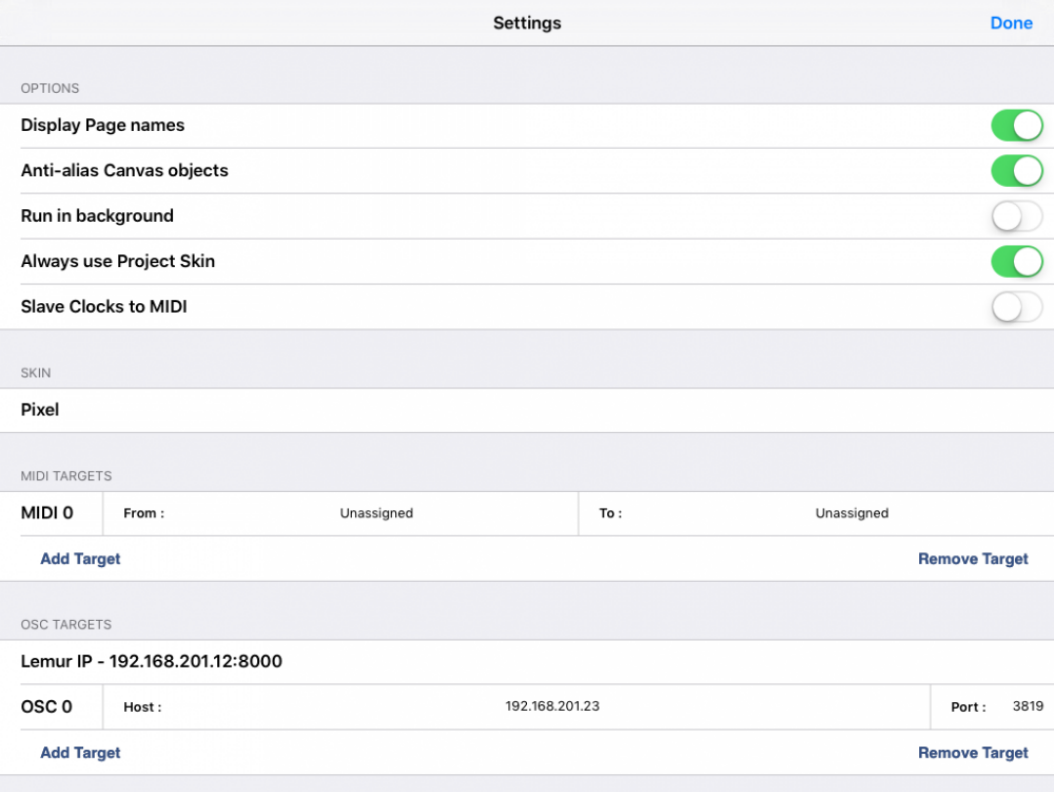
9. Finally, Press the master connect (the big purple on on the connections interface) button and you
should see the ring around the button start to flash, like a heartbeat. This indicates that Mixbus is
sending signals back to the Lemur interface.
Harrison Consoles Mixbus v4 - 1
Page 459 of 515

TouchOSC
What is TouchOSC?
TouchOSC is a remote-control application that runs on iOS and Android phones and tablets.
TouchOSC sends “Open Sound Control” messages to any receiving app. Mixbus has a rich OSC-compatible
remote control API.
TouchOSC is not developed by Harrison; it is developed by Hexler, and it has its own community forums
and website. In keeping with Mixbus’s open-ended development model, users may view, modify, and edit
the TouchOSC layout that we’ve provided for Mixbus.
If you add a great new feature to the TTC-1 layout, be sure to share it with us, and we will incorporate your
changes so other users will get the benefit as well.
What is the TTC-1 layout?
TouchOSC can load different “layouts” which define the location of the buttons and widgets, and what
messages will be sent to Mixbus over the OSC protocol. We’ve developed a layout file that allows you to
remotely control Mixbus’s transport features. Because it needs a name, we called it TTC-1, or “TouchOSC
Transport Controller #1”
Installing and launching the TTC-1 controller layout for
Mixbus:
1. Purchase the TouchOSC application from your phone/tablet App Store. ( Android and iOS are both
supported,)
2. Also download the TouchOSC editor to your Desktop computer, from the TouchOSC web site
3. Download Harrison’s TTC-1 tablet layout here: ttc-1 download
4. On your desktop computer, launch the TouchOSC editor, and “Open” the layout file.
5. In the editor, click “Sync”.
6. In the TouchOSC application (on your phone/tablet), click “Layout -> Add From Editor”.
7. You should see you computer name appear in the “Found Hosts” list.
8. Select the new layout for the TouchOSC app, and you should see the TTC-1 control panel appear.
9. Determine your computer’s IP address on the wireless network that is shared with your phone/tablet.
Harrison Consoles Mixbus v4 - 1
Page 460 of 515

External Transport Control
Transport Control
Mixbus transport (Play, Stop, Locate, etc.) can be controlled by an external input in 3 ways:
• MMC ( Midi Machine Control )
• OSC ( an Ethernet network protocol )
• JACK ( using the JACK server, if it is installed on your computer )
Mixbus’s external transport functions are largely developed by the Ardour open-source community. For more
details, see the applicable chapters in the Ardour manual: http://manual.ardour.org/synchronization/
overview-of-timecode-related-settings/
Harrison Consoles Mixbus v4 - 1
Page 462 of 515

Included Plug-ins
Mixbus is provided with several plug-ins:
Harrison plug-ins:
• Dyno-Mite ( free; fully operable )
• GVerb+ ( unlicensed demo * )
• 3D Delay ( unlicensed demo * )
• Micro-Glide ( unlicensed demo * )
• XT-EQ Equalizer( unlicensed demo * )
• XT-ME Mastering Equalizer ( unlicensed demo * )
• XT-MC Multiband Compressor ( unlicensed demo * )
• XT-BC Bass Character ( unlicensed demo * )
• XT-VC Vocal Character ( unlicensed demo * )
• XT-DC Drum Character ( unlicensed demo * )
• XT-DS De-Esser( unlicensed demo * )
• XT-EG Expander/Gate( unlicensed demo * )
• XT-LC Lookahead Compressor ( unlicensed demo * )
• XT-TG Tom-Tom Gate( unlicensed demo * )
• XT-SC Spectral Compressor ( unlicensed demo * )
*The sound of these Harrison plug-ins is fully intact without being licensed. This allows you to evaluate their
performance, and share your sessions with other Mixbus users who have not yet purchased the plugins. An
unlicensed Harrison plugin will fade to black when the control panel is opened, and will not respond to
mouse clicks after a few seconds. To enable the control panel, please purchase a license for the plugin at
http://harrisonconsoles.com/site/store-mixbus-plugins.html
Plugins provided by the Ardour open-source community:
• a-Amplifier ( free, full-functioning )
• a-Fluid Synth ( free, full-functioning )
• a-High/Low Pass Filter ( free, full-functioning )
• a-Reasonable Synth ( free, full-functioning )
• a-Delay ( free, full-functioning )
• a-Reverb ( free, full-functioning )
• a-EQ ( free, full-functioning )
• a-Compressor ( free, full-functioning )
Harrison Consoles Mixbus v4 - 1
Page 463 of 515

• a-Gate ( free, full-functioning )
• a-Inline Scope (example Lua script source-code provided)
• a-Inline Spectrogram (example Lua script source-code provided)
• a-MIDI Monitor (example Lua script source-code provided)
• a-Simple Synth (example Lua script source-code provided)
• RedZep drum instrument ( free, full-functioning )
• Black Perl drum instrument ( free, full-functioning )
• General MIDI Synth ( free, full-functioning )
These plugins, provided by the Ardour community, do not have customized control panels. Instead they use
the generic plugin controls that Mixbus provides for any plugin.
X42 partner products:
• X42 SetBfree modeled tonewheel organ ( free, full-functioning )
• X42 Whirl rotating speaker effect ( free, full-functioning )
• X42 MIDI filter plug-ins ( free, full-functioning )
• X42 Stereo Routing ( free, full-functioning )
• X42 Metering suite ( unlicensed demo )
• X42 ×42-EQ ( unlicensed demo )
Please Note. This list is subject to change at any time without notice or obligation by
Harrison Consoles.
!
Harrison Consoles Mixbus v4 - 1
Page 464 of 515
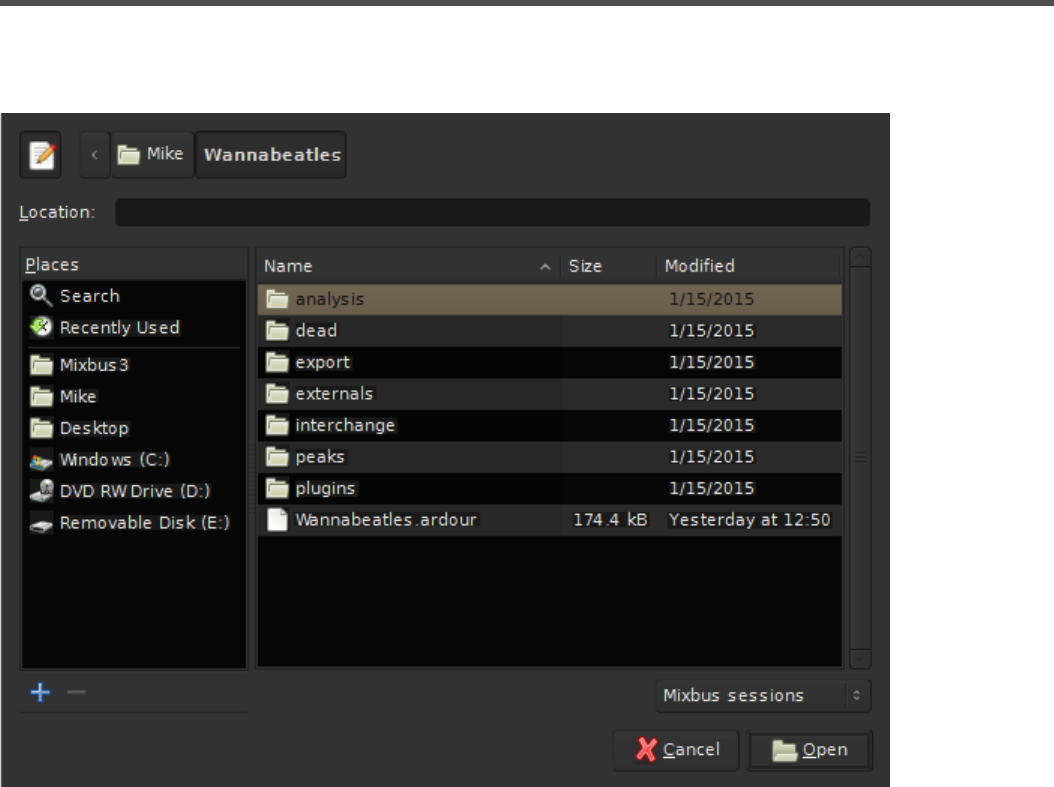
Power-User Topics
Session folder layout
Navigating to a session folder will display a series of files and folders:
• instant.xml : this file stores the most recently-used mouse mode, playhead location, and other
transitory information.
• {snapshot name}.ardour : each of these files represents a Snapshot, which stores all of the edits,
settings, and properties of a session.
• {snapshot name}.bak : backup files are occasionally generated for each snapshot
• {snapshot name}.pending : pending files snapshots that get created when an audio recording is
initiated. this allows us to recover audio data, even in the event of a crash or power outage. If a
pending file is found when Mixbus is re-launched, you will see the Crash Recovery dialog, and you
can choose to ignore or recover any lost information that was saved to the pending file.
Harrison Consoles Mixbus v4 - 1
Page 465 of 515

• {snapshot name}.history : every snapshot file has a “history” file. The history file saves the UNDO
history for that snapshot.
• analysis: This folder contains data relevant to any audio files that Mixbus has analyzed for transient-
detection and note-detection. By storing this information, Mixbus doesn’t have to re-analyze audio
when you initiate one of these functions.
• dead: This folder serves as a waste basket for unused audio. Menu>Session>Clean-up>Flush
Wastebasket: will delete audio files located in this folder. Click here for more
• export: This is the default location for exported files. Click here for more.
• externals: This folder contains a list of external files that are used in the session, but were not copied
into the session
• interchange: This folder contains imported audio, recorded audio, and MIDI files.
• peaks: Contains waveform images for display in the editor. It is safe to delete the contents of this
folder, and Mixbus will create new data when the session is re-opened.
• plug-ins: Contains plug-in settings. Some plugins (such as impulse-response based reverbs) need to
store more information than is practical in the session XML file. The extra plugin data is stored here.
Session XML file format
Mixbus session files use the industry-standard “Ardour” session file format. These files are plain human-
readable XML. Other workstations that use this format include Ardour and Waves Tracks Live.
A detailed description of the session format is beyond the scope of this manual, but here is an overview of a
session file contents:
• Config : defines the Session Properties that were chosen for this session.
• Metadata : the metadata information for the session ( personnel details, etc )
• Sources : a list of the audio and MIDI files that are used in this session
• Regions : a list of the regions (segments of an audio or MIDI file) used in the session
• Playlists : a list of playlists that are used in the session. A playlist is a sequence of regions, and their
specific settings (trim, fade, etc)
• Locations : a list of locations (markers, cd markers, region markers, loop/punch markers) that are
used in the session
• Bundles : a list of bundles ( a bundle is a group of input (or output) ports that are associated, such as
the 2 inputs of a stereo track )
• Routes : a list of “routes” ( tracks and buses ) that are used in the session. A Route has many sub-
fields:
◦ Currently selected playlist
◦ Channelstrip fader, EQ, compressor, and pan settings
Harrison Consoles Mixbus v4 - 1
Page 466 of 515

◦ Plugins used in this route
Mixbus Preferences folder
The Mixbus “preferences” folder stores all of a user’s preferences, as shown in the Preferences dialog.
The preferences folder location varies with each OS, but it is always found inside the HOME (“~”) folder:
• Mac OS X: ~/Library/Preferences/Mixbus4
• Windows: ~/AppData/Local/Mixbus4
• Linux: ~/.config/mixbus4
Inside the Preferences folder, you will find a list of files and folders:
• config : this file stores your user preferences
• instant.xml : this stores transitory information such as the last playhead location and window locations
• bindings file : this file stores your customized keybindings
• recent : this file stores the list of recently-opened sessions that is presented to you when you launch
Mixbus
• sfdb : this folder stores your metadata-info for any audio files that you’ve tagged in the Import dialog
• my-dark.colors : this file stores your personal Theme colors for the Dark theme. (Light theme is not
yet implemented)
• plug-in cache ( VST and/or AU ) : this folder stores a list of plugins that have been identified on your
computer. If you delete this folder or its contents, you will have to re-scan your plugins.
More details about the “instant.xml” file
The instant.xml file is a “semi-persistent” preferences file. It serves this purpose:
When you save a session, many of your preferences for this session are stored in the session’s local
instant.xml, and the global instant.xml. When you create a NEW session, the global instant.xml file is used
to create the new session’s instant.xml
If you delete any of these files or folders, Mixbus will recreate a new file with default settings
when it is re-launched.
*
Harrison Consoles Mixbus v4 - 1
Page 467 of 515
There are many parameters that are stored in the instant.xml file:
• Window positions ( editor, mixer, meterbridge, plugins, etc )
• Action-Buttons assigned to the buttons in the toolbar
• Control Surface settings
• Clock mode selections
• Visibility of the Editor List and Mixer List panels
• Grid (snap) options
• Playhead position & zoom scale ( some instant.xml settings like this are ignored for a new session )
• Selected mouse mode (tool) in the editor
• How the region-list is sorted ( by date, name, or whatever )
These settings do not have any effect on the session’s sound. They are not part of the session data.
A session can have multiple snapshot files, but it has only one instant.xml that is shared among all the
snapshots.
What does this mean?
• When you create a NEW session, you’ll be pleasantly surprised to see that some of your most-recent
settings ( window positions, action-button assignments ) are already set-up for you in the new
session.
• When you return to an OLD session, you’ll find the session exactly as it was when you left it. Your
more recent sessions & preferences will not be applied. The session’s instant.xml will define the
window positions, etc.
• NOTE: if you visit an old session and save it, you will overwrite your current global instant.xml, and
those settings will be used in the next NEW session. This can be a nice feature, or a big annoyance.
This behavior is a compromise that was reached after many years of discussion & feedback. We are
constantly re-visiting these issues to see which parameters should be stored globally ( in preferences ),
which in the instant.xml, and which in the settings.
Harrison Consoles Mixbus v4 - 1
Page 468 of 515

Appendix A: Common Support Questions
I purchased Mixbus, but it says it is “UNLICENSED” and I occasionally hear a burst of noise.
• Please check the Mixbus download email that arrived shortly after your purchase. The email should
include a link to your Mixbus license file, and instructions for installing it.
• For security reasons, the license links will become inactive after 7 days. To reset the license links,
please email Harrison support at: mixbus@harrisonconsoles.com Once you’ve downloaded the
license file from the link, you may store it on a backup drive or USB key for later use. Your name is
encrypted in the license file, so you should not share it with others.
• If you still have problems, please email Harrison support at: mixbus@harrisonconsoles.com
When I try to open the GVerb+ or 3D Delay, it says that the plugin is unlicensed. How do I get a
license?
• If you’ve already purchased these plugins, please check the installation email that arrived shortly after
your purchase. The email should include a link to your license file, and instructions for installing it.
• These plugins are part of the Plugin Essentials Pack which is available on our web store. The plugins
are included in the Mixbus installation, but to utilize the on-screen controls you must purchase a
separate license. The Essentials are available to all Mixbus users on all platforms ( Windows, OS X,
and Linux ) and are automatically installed as part of Mixbus. This allows you to share Mixbus
sessions with your friends and know that they will have the sound of the plugins available, even if they
haven’t purchased them! Neat, huh?
How do I show Mixbus where to find my VST plugins? ( Windows )
• In the main menu, click Window->Preferences->Plugins. Add the folder paths that point to your
plugins and click “Scan”. More Here
How do I report a crash in Mixbus? ( OS X )
• If you are using OS X and are still crashing at startup, the most likely cause is a plugin that Mixbus is
not able to scan at startup. When Mixbus reports “Mixbus has closed unexpectedly”, please click
“Generate Report”. This will open a window with the technical details of the crash report. Please copy/
paste this information into an email to mixbus@harrisonconsoles.com for support.
Harrison Consoles Mixbus v4 - 1
Page 469 of 515
How do I launch Mixbus from a command-line prompt? ( for techies only )
• Windows: cd C:\Program Files\Mixbus4\bin Mixbus4.exe
• OS X: ARDOUR_BUNDLED=1 /Applications/Mixbus4.app/Contents/MacOS/Mixbus4
• Linux: cd /opt/Mixbus4/bin ./mixbus
Where does Mixbus store its preferences?
Mixbus creates a folder with several files
• On Windows, the folder path is something like ~\AppData\Local\Mixbus4\ ( this varies with different
versions of Windows ).
• On Mac, the folder path is ~/Library/Preferences/Mixbus4
• On Linux, the folder path is ~/.ardour5
The Preferences folder contains these files, among others:
“config” stores the user’s preferences such as auto-backup and other items in the Options menu
“mixbus.bindings” stores the user’s selected keybindings (keyboard shortcuts) for menu actions
“ui.conf” stores your color, font, and other theme preferences
“announcements” stores the latest announcements from Harrison (usually this is empty unless a new
version is available)
“instant.xml” stores the user’s last-used preferences such as snap mode, mouse mode, zoom mode, etc.
“recent” lists the sessions that appear in the recently-used dialog
“sfdb” stores the metadata database which the Import dialog stores metadata about files that you’ve
“tagged” for later use.
If you delete the preference folder or any file inside it, Mixbus will create a replacement with default values
when it is next launched. Sometimes this will cause a delay at startup; for example on OS X, Mixbus will
have to re-scan the plugins when it is next launched.
Can I import Key bindings to another computer?
Yes, you have to manually copy the keybindings file from one computer to the other.
The file is found in your “preferences” folder:
~/Library/Preferences/Mixbus4 on Mac
~/AppData/Local/Mixbus4 on Windows
Harrison Consoles Mixbus v4 - 1
Page 470 of 515

Appendix B: Known Issues
• On systems with the minimum supported screen height (800 pixels for Mixbus, or 1200 pixels for
Mixbus32C), you may not be able to fit the editor or mixer window on your screen. You can visit
Preferences->Appearance and change the “mixer strip scale” to fit the mixer to your screen, but sizes
less than 100% will be compromised.
• Some third-party plug-ins may cause crashes, strange noises, or other problems. We strive to support
plug-ins as thoroughly as possible but due to the many variables (Computer platform, OS version,
Mixbus version, plug-in version, licensing mechanisms, etc.) it is not possible to guarantee that all
3rd-party plug-ins will work as expected on your system.
• On Windows, a few devices (including the Roland “Capture” series) require that you enable the
“Buffered I/O” setting. This tells Mixbus to use an alternative ASIO mode which works better on these
devices.
For more details, contact Harrison via email (mixbus@harrisonconsoles.com).
Harrison Consoles Mixbus v4 - 1
Page 472 of 515

Appendix C: Videos (Training and Tutorial)
The videos on the following pages are provided for your convenience and are a great resource for learning
more about Mixbus and Mixbus32C. Some of these videos were produced using an earlier version of
Mixbus, however the bulk of the information is still very relevant.
If you have read the manual, then some of these videos may be familiar, as some are placed throughout the
manual, others are not.
These videos and more can also be found on our YouTube page. Don’t forget to subscribe to our YouTube
channel to be alerted to our new videos coming soon!
And don’t forget our Mixbus user forum for more Mixbus information, or to just hang out and discuss how fun
and easy it is to mix with Mixbus!
Harrison Consoles Mixbus v4 - 1
Page 473 of 515
Mix Tips
Harrison’s Mix Tips Video Series. This video explains side-chaining in Mixbus 3.
Harrison’s Mix Tips Video Series. This video explains gain staging in Mixbus 3
This video demonstrates how to use grouping and bussing to enhance your session workflow within Mixbus
3.
Harrison’s Mix Tips Video Series. This video demonstrates how to create a subgroup in Harrison Mixbus
Harrison Consoles Mixbus v4 - 1
Page 476 of 515

Harrison’s Mix Tips Video Series. This video demonstrates how to set up parallel compression in Mixbus.
Harrison’s Mix Tips Video Series. This video shows off some of the mouse shortcuts available in Mixbus.
Harrison’s Mix Tips Video Series. This video tells you everything you need to know about the EQ in Mixbus.
Harrison’s Mix Tips Video Series. This video details the compressors in Mixbus.
Harrison’s Mix Tips Video Series. This video explains many different types of clipping, and how it applies to
Mixbus.
Harrison Consoles Mixbus v4 - 1
Page 477 of 515
Harrison’s Mix Tips Video Series. This video shows off the meters in Mixbus.
Harrison’s Mix Tips Video Series. This video demonstrates how to use reverb in Mixbus.
Harrison’s “Shut Up and Mix” Video. Make sure annotations are turned on so you can see all of the mixing
tips!
<< Quick Start Guides |Pro Tips >>
Harrison Consoles Mixbus v4 - 1
Page 478 of 515

Pro Tips
Episode 1 of Harrison’s Pro Tips video series for Mixbus. This video shows you how to quickly import tracks
into Mixbus, and gives an explanation of the import dialog window.
Episode 2 of Harrison’s Pro Tips video series for Mixbus. This video demonstrates all of the export options
available in Mixbus.
Episode 4 of Harrison’s Pro Tips video series. This video demonstrates how to route audio from Pro Tools
into Mixbus.This is a power user function which Harrison does not provide technical support for.
A follow-up to Harrison’s episode of Pro Tips on routing from Pro Tools into Mixbus. This video
demonstrates how to export audio tracks from Pro Tools to import into Mixbus. This is a power user function
which Harrison does not provide technical support for.
Harrison Consoles Mixbus v4 - 1
Page 479 of 515

EQ Tips
Episode 4 of Harrison’s Mix Tips Video Series. This video tells you everything you need to know about the
EQ in Mixbus.
This Quick Tip demonstrates how to use the mid-band of the EQ to notch out a problem frequency on a
track in Mixbus.
This Quick Tip demonstrates how to place your instruments in the sound field using the EQ in Mixbus.
This Quick Tip demonstrates how to create a “bump” for your bass guitar with the EQ in Mixbus. This can be
done with a HPF and a Low Shelf.
<< Pro Tips |Quick Tips >>
Harrison Consoles Mixbus v4 - 1
Page 481 of 515
Quick Tips
This short video demonstrates how to loop record.
Demonstration of basic trim, fade, delete, copy, and paste operations including Smart Mode.
An example of sidechain compression used on a vocal track with a delay. Implemented using the built-in
sidechain compression features of Harrison Mixbus.
“Ripple” audio editing in the Mixbus workstation.
A power users tip on using mutes and solos.
Harrison Consoles Mixbus v4 - 1
Page 482 of 515
This Quick Tip demonstrates how to use the mid-band of the EQ to notch out a problem frequency on a
track in Mixbus.
This Quick Tip demonstrates how to place your instruments in the sound field using the EQ in Mixbus.
This Quick Tip demonstrates how to create a “bump” for your bass guitar with the EQ in Mixbus. This can be
done with a HPF and a Low Shelf.
<< EQ Tips |Harrison Plug-ins >>
Harrison Consoles Mixbus v4 - 1
Page 483 of 515

Harrison Plug-ins
Harrison Plug-ins are included in the Mixbus download package and are functional but require a
separate license purchase to access the full user interface.
Plug-in Essentials Bundle: The Plug-in Essentials bundle includes two pieces that complete the Mixbus
puzzle – reverb (GVerb+) and delay (3D Triple Delay). Watch the video to learn more!
Character Plug-in Bundle: The Character Plug-in Bundle is a completely new DSP plug-in from Harrison’s
R&D department. The XT-BC and XT-VC are designed to musically alter the tonality and character of bass
instruments and vocalists, respectively. Watch the video to learn more!
The XT-DC drum character, the NEWEST addition to the Character Bundle, provides powerful DSP to
equalize the two different parts of a drum “hit” separately by dividing the initial attack from the remaining tail.
Threshold and attack window parameters adjustments are provided. Basic presets are provided as starting
points. The XT-DC utilizes 2 separate equalizers, the 1st dynamically tracks the initial attack while the 2nd
dynamically tracks the tail.
The XT-DC will transform the character of each drum in a kit to a much greater degree than any standard
equalizer can possibly achieve. A regular EQ operates on the attack, tail, and background noise equally.
Whereas the XT-DC applies these changes specifically to the drum attack and tail. This gives you
unprecedented access to nearly unlimited sounds from your existing drum tracks. Compared to traditional
“drum replacement” techniques, the XT-DC preserves the drummer’s natural voicing and timing.
Harrison Consoles Mixbus v4 - 1
Page 484 of 515
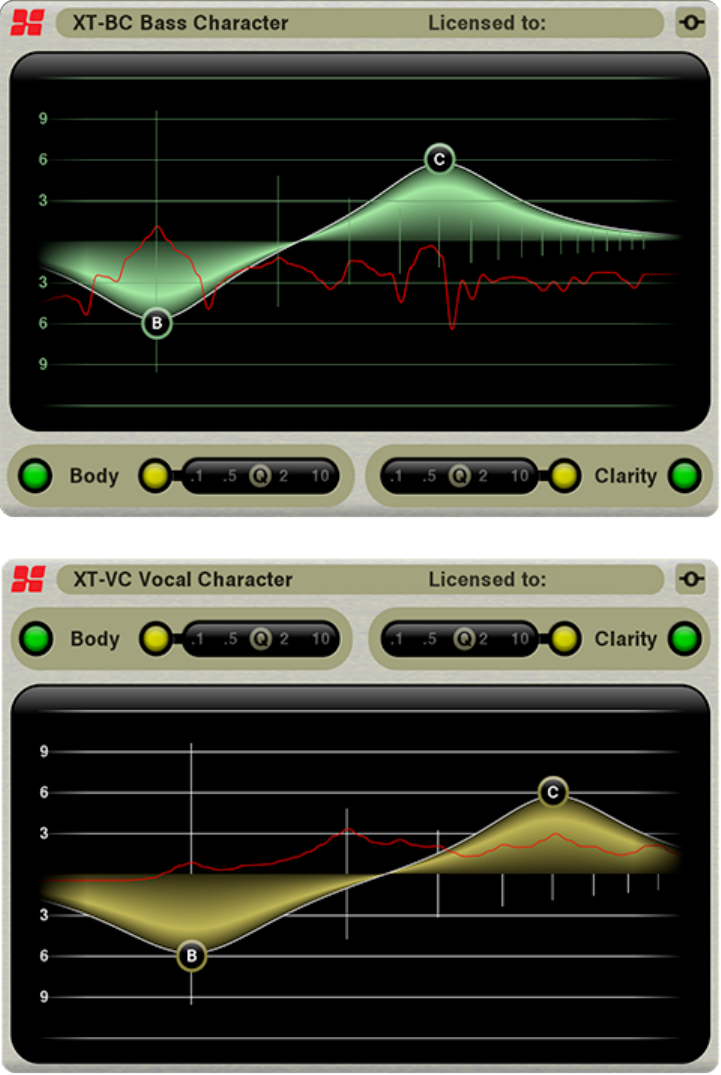
The XT-BC, XT-VC, and XT-DC feature Harrison’s world-class, workhorse DSP derived from our flagship
digital consoles. No other plug-in preserves the playability and musicality of your bass instruments like the
XT-BC; no other plug-in breathes life into your vocals like the XT-VC; and no other Plugin provides the
ability to enhance and shape the sound of each individual drum in your kit like the XT-DC!
Harrison Consoles Mixbus v4 - 1
Page 485 of 515
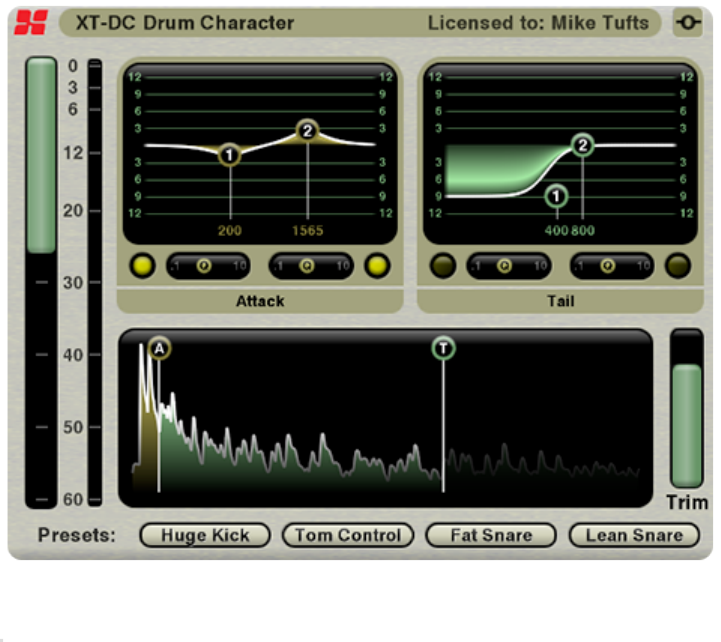
XT-DS De-Esser: The XT-DS De-Esser is Harrison’s transparent, powerful plug-in for taming excessive
sibilance of vocal tracks. It implements Harrison’s proprietary algorithm that is tuned to detect “ess” sounds,
while ignoring sounds that have energy in the “ess” band, but aren’t contributing to the sibilance of the track.
Watch the video to learn more!
Harrison Consoles Mixbus v4 - 1
Page 486 of 515
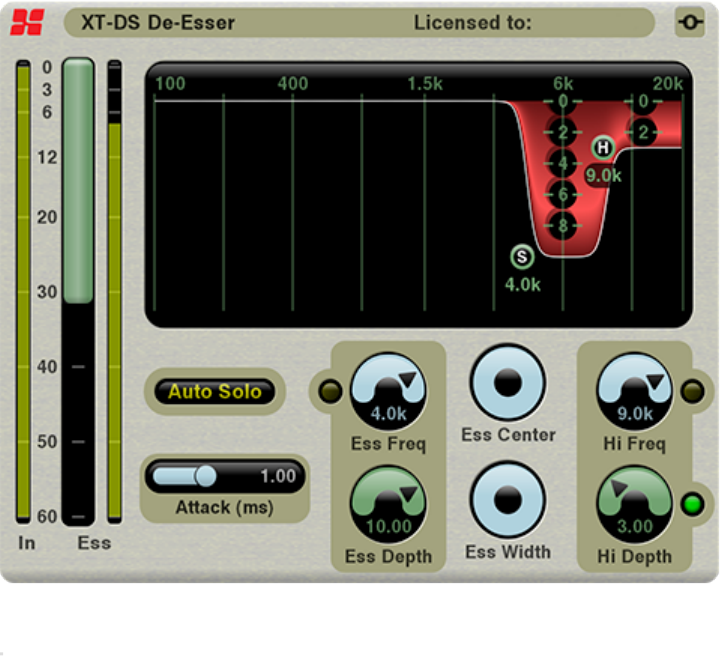
XT-EG Expander / Gate: The XT-EG Expander / Gate is Harrison’s versatile tool for gating noise, or gently
increasing the dynamic range of tracks. All of the common gate controls are accounted for – Depth, Hold,
Attack, Release – but there are also some not-so-common tools that are typically reserved for high-end
audio gear: Hysteresis, Lookahead, and Sidechain Filter. Watch the video to learn more!
Harrison Consoles Mixbus v4 - 1
Page 487 of 515
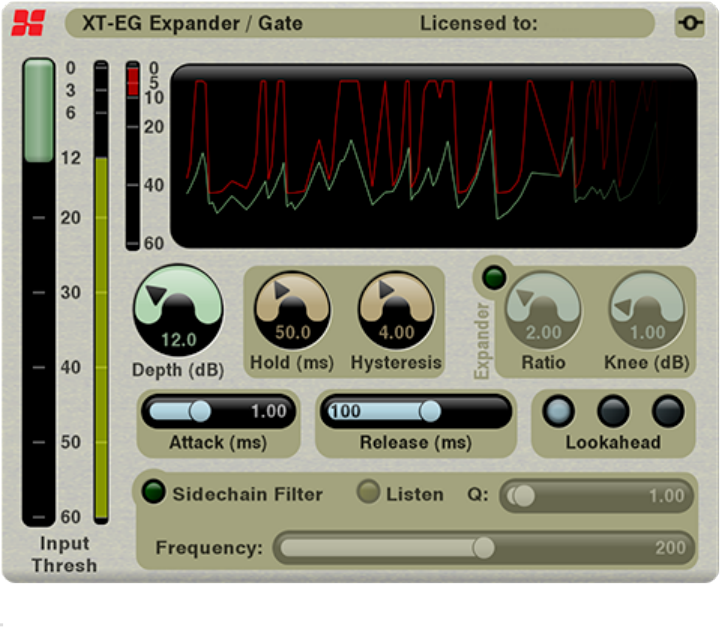
XT-EQ Equalizer: The XT-EQ Equalizer is a powerful EQ derived from the sound of Harrison digital
consoles. It allows you to draw a desired curve using 10 control bands, and features an innovative DSP
curve-match to allow “flat tops” across adjacent frequencies. Watch the video to learn more!
Harrison Consoles Mixbus v4 - 1
Page 488 of 515
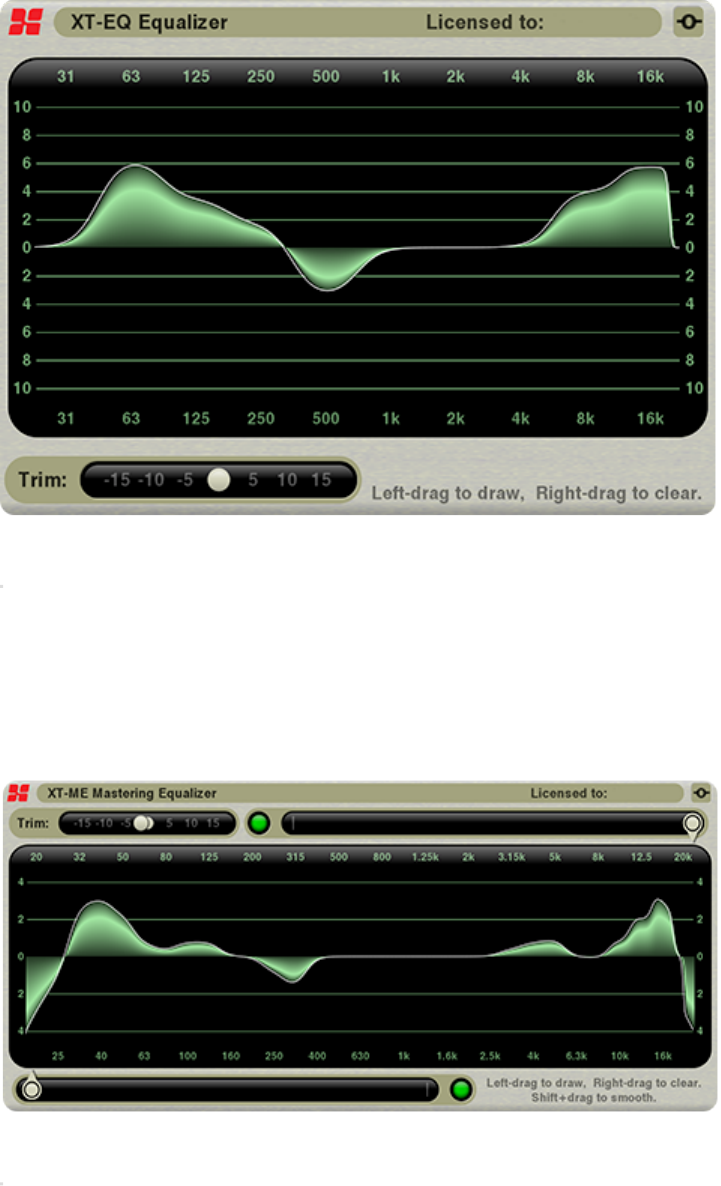
XT-ME Mastering Equalizer: The XT-ME Mastering Equalizer is a powerful, expanded EQ derived from the
sound of Harrison digital consoles. It allows you to draw a desired curve using 31 control bands, and
features an innovative DSP curve-match to allow “flat tops” across adjacent frequencies. Watch the video to
learn more!
Harrison Consoles Mixbus v4 - 1
Page 489 of 515
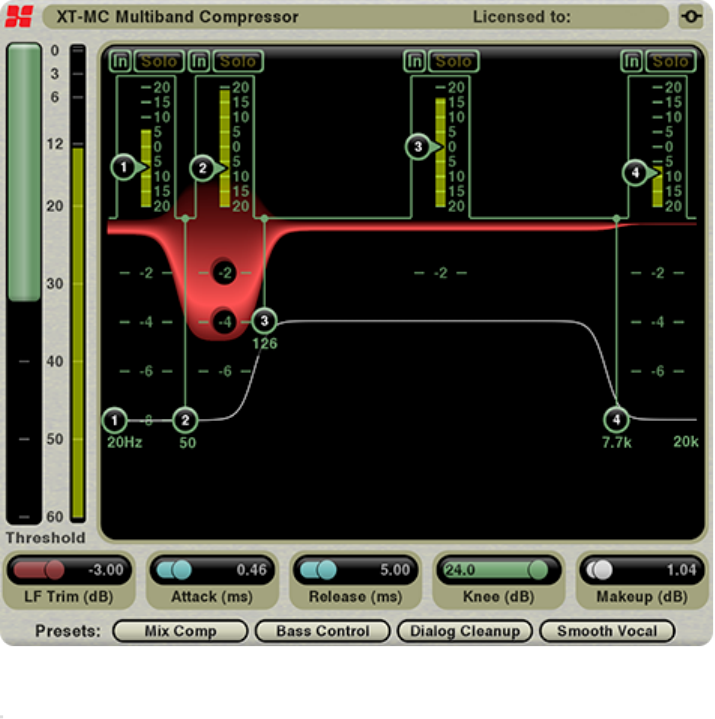
XT-MC Multi-Band Compressor: The XT-MC Multi-Band Compressor is a powerful 4-band compressor
with phase-accurate crossovers. Each band features controls for threshold, crossover frequency, and depth.
Watch the video to learn more!
XT-LC Look Ahead Compressor: The XT-LC Lookahead Compressor is a compressor that works when
others won’t. Its lookahead design, with super-fast attack and Zero-History release properties, makes it able
to do things that a regular compressor can’t match.
Harrison Consoles Mixbus v4 - 1
Page 490 of 515
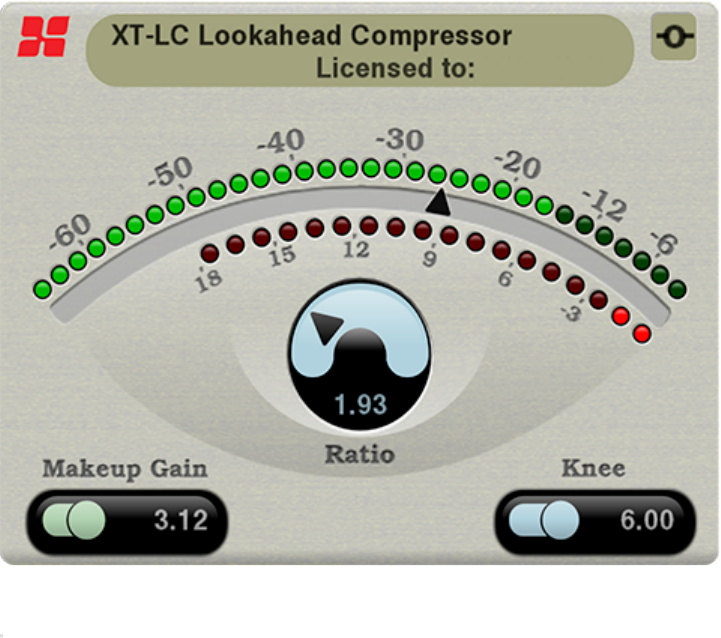
XT-TG tom tom gate: The XT-TG tom gate has the unique ability to learn the sound of your tom drums and
discriminate against the sound of the spill.
Harrison Consoles Mixbus v4 - 1
Page 491 of 515
XTools for Mixbus
Harrison Plug-ins are included in the Mixbus download package and are functional but require a separate
license purchase to access the full user interface.
XTools for Mixbus are plug-ins derived from Harrison digital console software. They provide incredible
power that was not previously available in any digital audio workstation.
A closer look at the XT-EQ Equalizer plug-in for Mixbus.
A closer look at the XT-ME Mastering Equalizer for Mixbus.
A closer look at the XT-MC Multi-Band Compressor for Mixbus.
Harrison Consoles Mixbus v4 - 1
Page 493 of 515

An in-depth look at the XT-BC Bass Character plug-in for Mixbus.
This video is an overview and sound demonstration of the XT-DS De-Esser plug-in from Harrison. This plug-
in is part of the XTools for Mixbus plug-in series for the Harrison Mixbus DAW.
This video is an overview and sound demonstration of the XT-EG Expander / Gate plug-in from Harrison.
This plug-in is part of the XTools for Mixbus plug-in series for the Harrison Mixbus DAW.
This video is an overview and sound demonstration of the XT-LC Lookahead Compressor from Harrison
(Requires MB Ver 3.2). This plug-in is part of the XTools for Mixbus plug-in series for the Harrison Mixbus
DAW.
This video is an overview and sound demonstration of the XT-DC Drum Character from Harrison (Requires
Harrison Consoles Mixbus v4 - 1
Page 494 of 515

MB Ver 3.2). The XT-DC drum character provides powerful DSP to equalize the two different parts of a drum
“hit” separately.
It utilizes 2 separate equalizers, the 1st dynamically tracks the initial attack while the 2nd dynamically tracks
the tail.
The XT-TG tom gate has the unique ability to learn the sound of your tom drums and discriminate against
the sound of the spill. This plug-in is part of the XTools for Mixbus plug-in series for the Harrison Mixbus
DAW.
<< Harrison Plug-ins |Essentials Pack >>
Harrison Consoles Mixbus v4 - 1
Page 495 of 515
Essentials Pack
Harrison Plug-ins are included in the Mixbus download package and are functional but require a separate
license purchase to access the full user interface.
The Plug-In Essentials Pack for Mixbus contains everything you need to make a polished, professional mix.
Drums demo for the GVerb+ plug-in. GVerb+ is part of the Plug-In Essentials Pack for Harrison Mixbus.
Guitar demo for the GVerb+ plug-in. GVerb+ is part of the Plug-In Essentials Pack for Harrison Mixbus.
Piano demo for the GVerb+ plug-in. GVerb+ is part of the Plug-In Essentials Pack for Harrison Mixbus.
Harrison Consoles Mixbus v4 - 1
Page 496 of 515

Vocal demo for the GVerb+ plug-in. GVerb+ is part of the Plug-In Essentials Pack for Harrison Mixbus.
Drums demo for the 3D Triple Delay plug-in. 3D Triple Delay is part of the Plug-In Essentials Pack for
Harrison Mixbus.
Guitar demo for the 3D Triple Delay plug-in. 3D Triple Delay is part of the Plug-In Essentials Pack for
Harrison Mixbus.
Drums demo for the 3D Triple Delay plug-in. 3D Triple Delay is part of the Plug-In Essentials Pack for
Harrison Mixbus.
Vocal demo for the 3D Triple Delay plug-in. 3D Triple Delay is part of the Plug-In Essentials Pack for
Harrison Mixbus.
Harrison Consoles Mixbus v4 - 1
Page 497 of 515
3D Triple Delay
Harrison Plug-ins are included in the Mixbus download package and are functional but require a separate
license purchase to access the full user interface.
Short demo of Harrison’s 3D Triple Delay plug-in for Mixbus users. This video demonstrates some of the
preset starting points available in the plug-in .. Flange, Doubling, Slapback, Ping Pong, etc.
A short demo of Harrison’s 3D Triple Delay plug-in on drums.
A short demo of Harrison’s 3D Triple Delay plug-in on guitar.
A short demo of Harrison’s 3D Triple Delay plug-in on more drums.
Harrison Consoles Mixbus v4 - 1
Page 499 of 515

Appendix D: MIDI Primer
These pages will discuss basic MIDI messages, devices, and connections. It is intended to give enough
information to get you started. Much of the information is presented in a generic way, not necessarily
directly related to Harrison Mixbus. For specific MIDI for Mixbus click here.
What Is MIDI?
Musical Instrument Digital Interface, or MIDI, is a communication protocol that was published in 1983. The
intent was to allow 2 instruments, from 2 different manufactures, to communicate with each other. One
keyboard could be played while a second connected keyboard (with tone module) could sound the same
note at the same time, doubling the performance.
It is important to know that the information being transmitted is not audio! It is “performance data” in the
form of MIDI messages such as the note played, timing, velocity, etc.
Basic MIDI Devices
1. A MIDI Controller produces and transmits MIDI messages. Controllers can take on the functionality of
keyboards or guitars, etc. They are designed to capture the performance of a musician. They do not
produce sounds of their own.
2. A MIDI Instrument, or tone module, receives MIDI data and produces an audio output. It may be
software or hardware based. A user can have one controller connected to one or more tone modules.
Additionally, in the world of Digital Audio Workstations there are “plug-in” versions called virtual
instruments (VI).
3. A unit that combines a controller and instrument in one package will be referred to as a hybrid for the
purposes of this document. The most common form of this is often referred to as keyboard
synthesizer. It can generate MIDI performance data and audio via an internal tone module.
Sometimes the internal tone module can be switched off with a command known as Local Control. (If
you seek out something called a “MIDI hybrid device” you may come up short).
4. A MIDI Sequencer is a device or software application that can record, edit, and play back MIDI
events.
A single device can implement any combination of controller, instrument, and/or sequencer features. For
example, before computer sequencers were popular, it was very common to buy a keyboard that provided
the keyboard, internal tone module, and sequencing features in one device. These are sometimes called
“arranger” keyboards.
Harrison Consoles Mixbus v4 - 1
Page 501 of 515
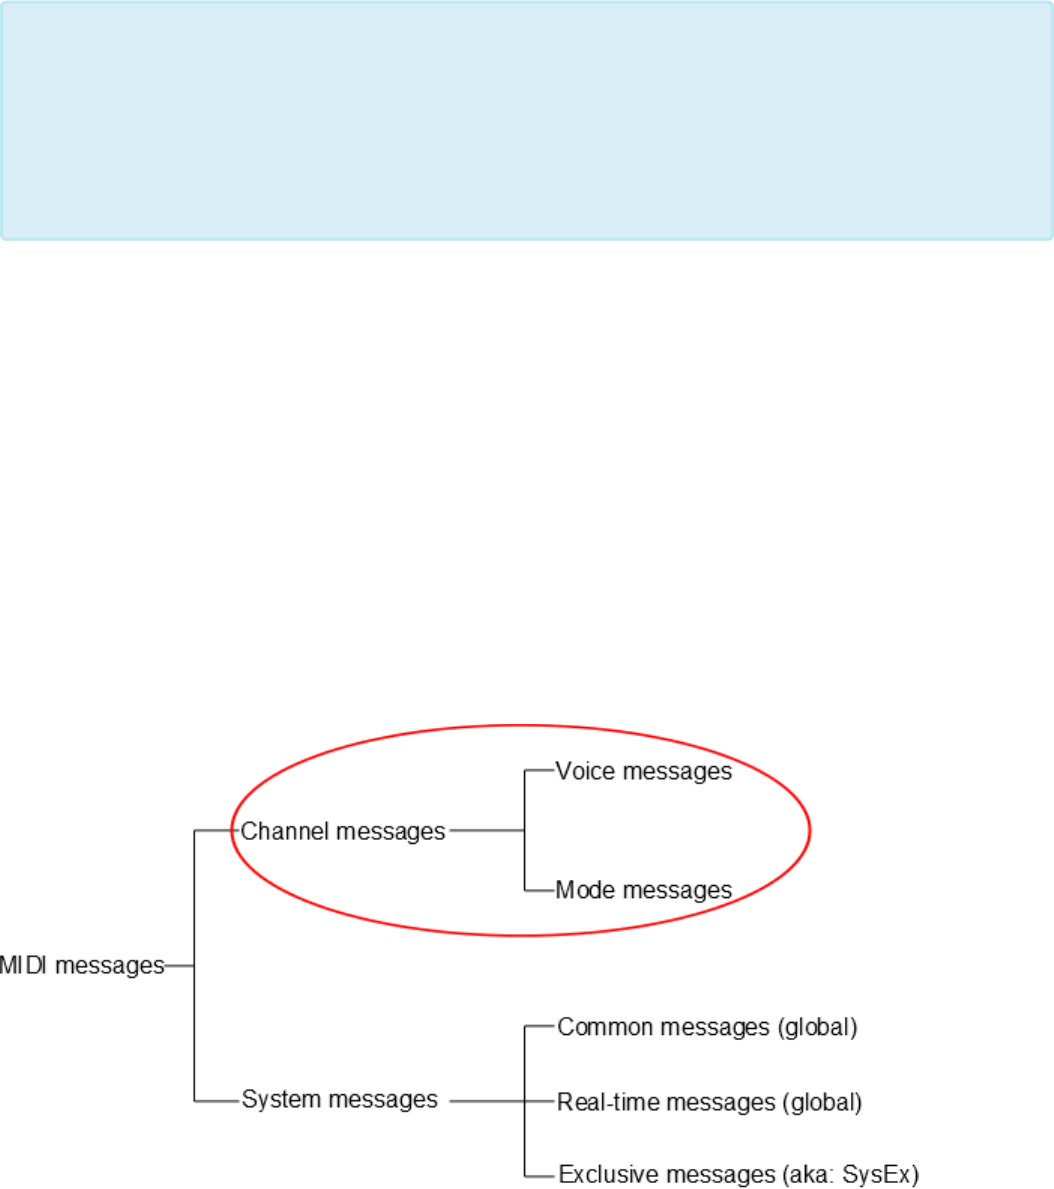
You may find tone module, tone generator, and sound engine are used interchangeably.
MIDI Messages
The MIDI language is transmitted digitally. The information carried in the messages are note on, pitch,
velocity, program change, note off, and more. There are 2 types of MIDI messages; Channel messages and
System messages. These two sub groups can be further broken down and will be explained below. These
MIDI messages are sent to other devices via a MIDI cable. More on the MIDI cable a little later.
Channels Messages: Each channel message contains a channel assignment and as a result are assigned
to specific channels rather than sent globally. With the capability to transmit (Tx) and/or receive (Rx) on 16
channels, the user is offered some flexibility. Once a channel is establish the channel messages will deliver
instructions such as Program change, Note on, Note off, and more. With this you can send performance
data from one controller, on one specific channel, so that that one or more specific MIDI instruments on the
same Rx channel responds.
When a controller and tone module are combined together, there is often a function called
“Local Control” which determines whether the keyboard will control the internal tone
module directly. If you want to use a sequencer or DAW, you might use Local Control to
disconnect the internal tone module from its keyboard. This way, when the controller sends
performance data to the computer sequencer, and the sequencer returns the data back to
the sound module, you don’t hear the notes from the sequencer and internal controller at
the same time.
*
Harrison Consoles Mixbus v4 - 1
Page 502 of 515
Voice and Mode Messages
The “Voice” portion of the channel message is the musical performance part and contains information
regarding the following:
• Note On: Identifies the note that will produce sound. The data sent is channel number, specific note
number, and key on velocity.
• Note Off: Identifies the note that will stop producing sound. The data sent is channel number, specific
note number, and key off velocity (notice that the note command has a discrete code for off and on.
More on this later).
• Polyphonic Key Pressure (Aftertouch): Some controllers have the ability to sense how much pressure
was applied. The data sent is channel number, specific note number, and key pressure. If your
controller does not have aftertouch, a default of medium pressure (64 of 128 possible) is assigned.
• Control Change: Specifies what function of the synthesizer is to be controlled. The data sent is
channel number, controller number, and controller value.
• Program Change (sometimes called Program Select): Selects the type of sound that should be
played. The data sent is channel number and program number. In the early days of MIDI, when a user
wanted a custom sound he would need to patch cables. Today this cable patching process can be
replaced with a stored file in memory, hence the name “patch”. You may also hear the terms voice or
preset. These are essentially all the same thing. You can create your own patches or the manufacture
can provide them for you. Because of the format of the MIDI message, only 128 patches would be
recallable if it wasn’t for the Bank Message. Having multiple banks of patches, provides many more to
choose from.
• Pitch Bend: Modifies, in a continuous manner, the pitch of the note being played. The data sent is
channel number and pitch bend value.
The “Modes” portion of the channel message tells the MIDI instrument how to respond when it receives the
performance part or the message.
Mode Full Name Common Name
1 Omni – On/Poly Omni
2 Omni – On/Mono no common name
3 Omni – Off/Poly Poly
4 Omni – Off/Mono Mono
Omni On/Off is used to determine the utilization of available channels. If Omni is ON then it will Tx or Rx
data on all channels. If Omni is OFF then it will Tx or Rx on just one channel.
Harrison Consoles Mixbus v4 - 1
Page 503 of 515
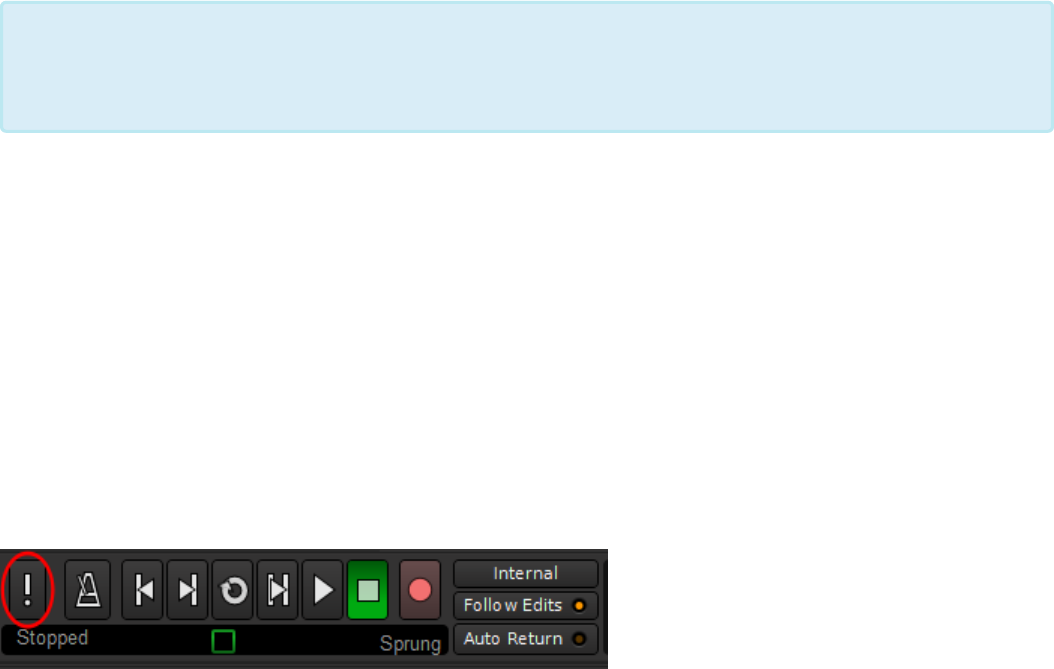
Mono/Poly tells the instrument whether to play 1 note at a time (Mono) or more than 1 note at a time (Poly).
The Mono modes are the least commonly used modes (mode 2 and 4).
Polyphonic capability is merely the ability to play 2 or more notes simultaneously. So if you want to play a 4
note chord you will need 4 note Polyphonic capability.
Multi Mode
With Multitimbral we are talking about many tones to produce a complex sound like a piano part, a violin
part, or a drum part. These are sometimes called “programs”,“patches”, or “presets”. You can have many
parts playing at once, each assigned to its own channel. Before Multitimbral there was Monotimbral, where
only one part could be played. Multitimbral can replace multiple notes with multiple programs so that we
may produce the sound of an entire band with one MIDI performance track.
16 part Multitimbral playback capability is not uncommon today. Also be aware some manufactures may call
Multi mode something different. For example, the classic Yamaha Motif refers to it as “song mode”.
There are other commands that can be invoked with a mode message, such as reset all controllers, local
control, and all notes off.
Let’s address the “All Notes Off” message. As mentioned previously, the note on/off commands are discrete
messages. So what happens if a note is turned on and for some reason the Rx equipment never gets the
message to turn the note off? The “All Notes Off” message addresses this. It sends a Note Off command
across all channels. In Mixbus there is a “MIDI Panic button” on the left side of transport section that sends
the “All Notes Off” message. The button looks like an exclamation point. How appropriate!
above: the MIDI panic button circled in red
System Messages: These messages are mostly global and as such do not carry a channel assignment.
Timbral, or timbre refers to tone quality. Timbre is how we determine the difference between
the sound a bell makes and the sound a sine wave makes. When pitch and loudness are
the same, much of the difference lies in the harmonics or timbre.
*
Harrison Consoles Mixbus v4 - 1
Page 504 of 515
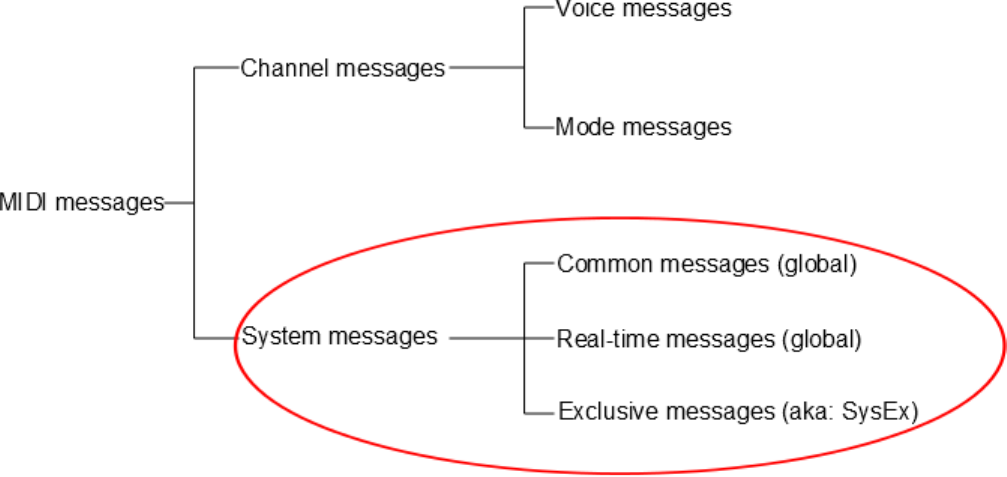
System Common Messages are for all MIDI devices in a network regardless of channel assignment. These
messages are things such as MIDI Time Code (MTC), MIDI Clock, Song Select, and Song Position Pointer.
System Real-time Messages are used for synchronization with all devices in the network that are clock
based such as sequencers and drum machines. These devices follow a tempo and need to be in sync. The
resolution of the timing is expressed as Pulses Per Quarter Note (PPQN).
System Exclusive Messages are not global. They operate more as a point to point type of operation. It’s
kind of a catch all command that allows manufactures to use it for a whole host of things. For example a
stored patch can be transmitted to and from equipment by the same manufacture. The manufacture can
register their equipment with The MIDI Manufacturers Association so that they can obtain an exclusive
SysEx ID so that only their equipment will respond to their commands. The code that one manufacturer uses
to write a patch is going to be different from another manufacturer so sending a Yamaha patch to a Roland
won’t do much good. This is because each manufacturer has their own unique way handling information
such as patches.
General MIDI (GM and GM1)
General MIDI is not actually a message but rather a standard that specifies certain functionality of MIDI
equipment. Without General MIDI, each manufacturer can assign whatever patch they wanted, to whatever
storage location they wanted. This would make it difficult to use different equipment from different
manufactures. For example, one manufacturer may have a French Horn for Bank 1 program 4, and another
manufacture may have that spot reserved for Viola. But General MIDI says that Bank 1 program 4 shall be a
Honky-tonk Piano. With this, when a command is sent from one device to another the musician can hope for
Harrison Consoles Mixbus v4 - 1
Page 505 of 515

a sound closer to their expectation. General MIDI 1 elaborated on this and added even more specifications
to the standard.
The MIDI Cable
The MIDI cable is unusual in that both ends have a 5 pin male connector.
Pin layout:
• Pin 1: Normally not used (proprietary systems may make use of)
• Pin 2: Terminated to a shield to eliminate noise
• Pin 3: Normally not used (proprietary systems may make use of)
• Pin 4 & 5: A twisted pair, and carries the 5 volt MIDI message
Sometimes this cable is called a MIDI DIN (Deutsches Institut fur Normung). The MIDI cable will carry MIDI
signals in one direction only. If you need MIDI messages to return, then you will need a second cable.
The MIDI DIN cable characteristics are:
• Unidirectional transmission
• Serial transmission
• Maximum recommended length is 50 feet (to insure reliability)
• Transmission speed is 31,250 bits per second
Harrison Consoles Mixbus v4 - 1
Page 506 of 515
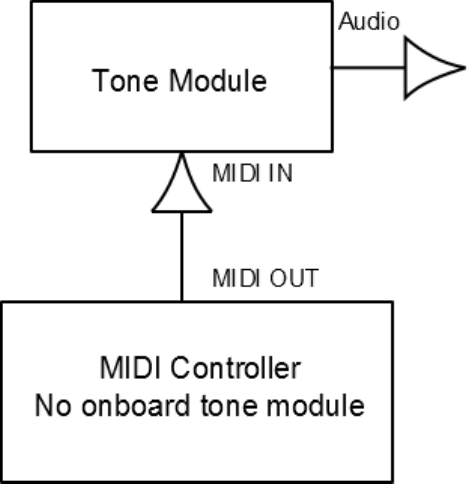
USB, FireWire, and Ethernet have become popular alternatives when connecting to computers. However, if
you need the full feature set that MIDI has to offer you will need MIDI cables.
Types of MIDI Ports
Often you will find 3 types of connections on MIDI equipment.
• MIDI out: Transmits the MIDI message
• MIDI in: Receives the MIDI message
• MIDI thru: Transmits a copy of the MIDI message found on the MIDI input (This facilitates daisy
chaining and star configurations).
MIDI Connections
Fig. 1 above: A dedicated MIDI controller is connected to a tone module. This requires a MIDI cable. A USB
or FireWire cable will not work.
Harrison Consoles Mixbus v4 - 1
Page 507 of 515

Fig. 2 above: A dedicated MIDI controller is connected to a DAW such as Mixbus via a MIDI interface.
Running a Virtual Instrument plug-in within Mixbus replaces the dedicated tone module. The audio output
from Mixbus can be routed to an internal DAC / sound card or to an external audio interface.
Harrison Consoles Mixbus v4 - 1
Page 508 of 515
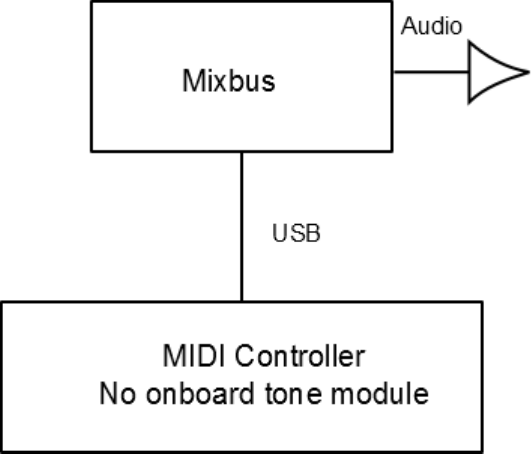
Fig. 3 above: A dedicated MIDI controller with USB MIDI out. In essence the MIDI interface is built-in to the
the controller eliminating the need for an external MIDI interface.
Harrison Consoles Mixbus v4 - 1
Page 509 of 515
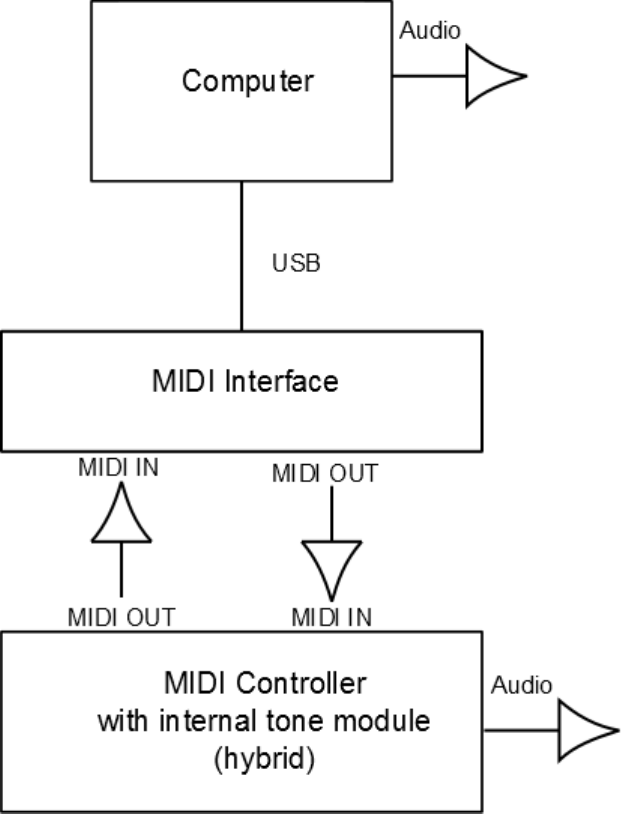
Fig. 4 above: In this example the MIDI controller has an on board tone module. Now MIDI messages can be
sent from the computer to the MIDI controller so that audio can be produced with the on board tone module.
Harrison Consoles Mixbus v4 - 1
Page 510 of 515

Fig. 5 above: This is an example of a daisy chain configuration. A dedicated controller sends MIDI
messages to the first tone module which in-turn sends a copy of the signal to the second tone module. If the
chain is carried out too far, the signal will degrade and become unreliable.
Harrison Consoles Mixbus v4 - 1
Page 511 of 515
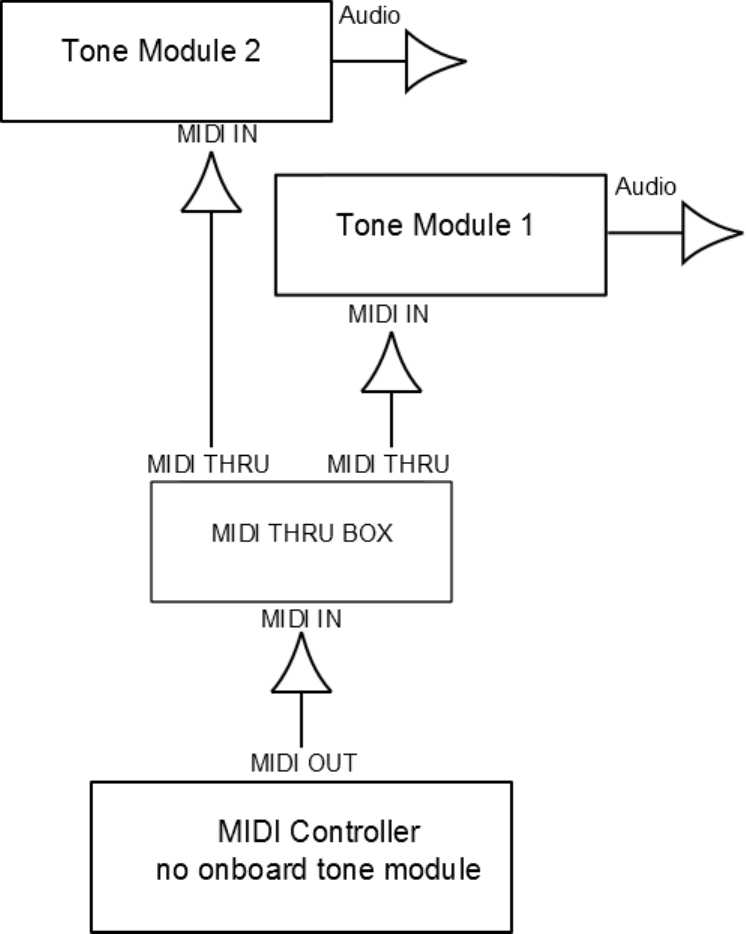
Fig. 6 above: This is an example of a star configuration. The Thru Box allows this configuration.
Connecting many tone modules to a central point causes less chance of signal degradation. The
advantages of this configuration increases with the number of devices on the network. For simplicity only 2
tone modules are shown. In practice many more may be connected causing the diagram to resemble a star
pattern as the tone modules branch out around a central point.
Harrison Consoles Mixbus v4 - 1
Page 512 of 515
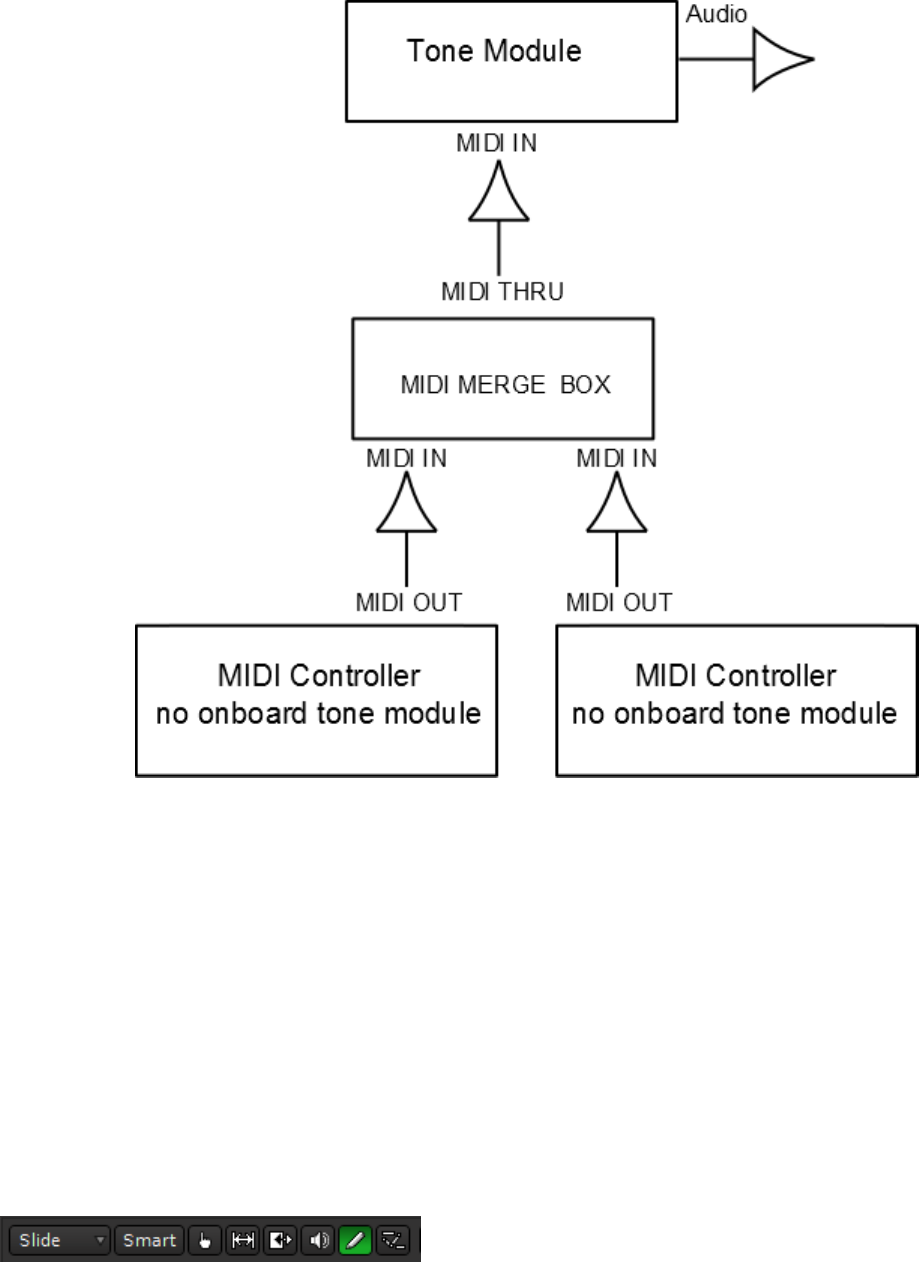
Fig. 7 above: A merge box allows 2 MIDI controllers to send MIDI messages to a single tone module. An
example of this configuration could be that one of the controllers may be a keyboard and the other controller
could be a string instrument both playing together into one tone module.
The Interface From MIDI To Mixbus
You will typically need an audio interface with MIDI I/O as in figure 2 or 4 above, or you may opt for a USB
or FireWire connection as in figure 3. Of course you will also need need a MIDI controller. Although you can
input data straight into Mixbus via the various tools provided in the software, it can be an inefficient method
for recording an entire performance. These tools are best suited for making adjustments to an already
captured performance or for step entry.
Harrison Consoles Mixbus v4 - 1
Page 513 of 515
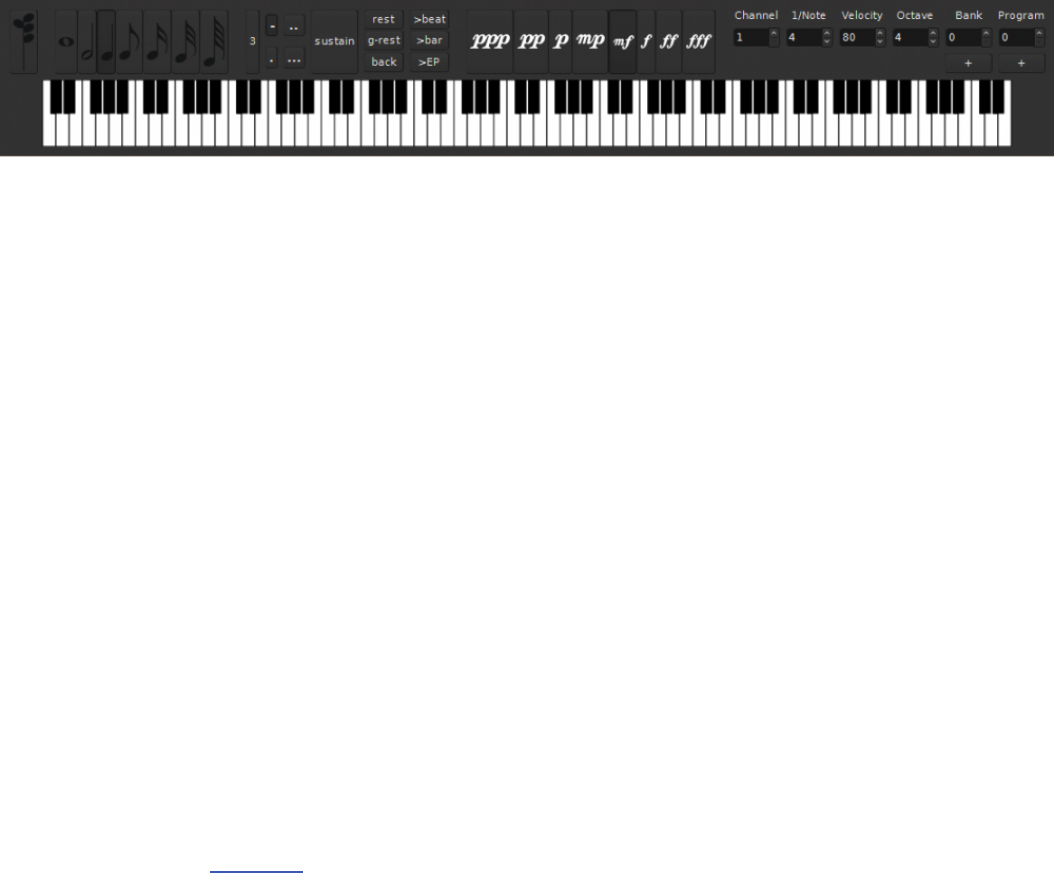
above: some of the tools offered in Mixbus
below: the on screen keyboard (right click the MIDI track rec button)
What MIDI Controller Should You Get?
Only you can decide what is best for you, but if you are new to MIDI a keyboard controller is a great choice
for general purpose use and by far the most popular because of its flexibility. You will want to consider the
number of octaves you would like the keyboard to cover. An alternative to a MIDI controller would be a
synthesizer, one that generates MIDI messages and can also contains its own tone module. But because it
can produce its own audio, it may cost more, take up more space, and be heavier. If you like the sounds a
MIDI hybrid makes, and if it has line level outputs, you can record the audio straight into Mixbus via an
audio interface as shown in figure 4 above.
Recording MIDI into Mixbus
To record a MIDI performance into Mixbus, first add a MIDI track. If you would like to hear your performance
thru Mixbus then be sure a Virtual Instrument plug-in is in the redirect box. You can use Plug-in Manager to
do this (by default a MIDI track will be created with the “Reasonable Synth” plug-in already in place).Then,
in the MIDI Connection Manager, confirm that your MIDI input device is connected to the track you wish to
record to. Record arm the track and click the master record button located in the transport section. Once the
transport rolls you will be able to record your performance. MIDI messages will now be captured into
Mixbus.
For more information click here
Harrison Consoles Mixbus v4 - 1
Page 514 of 515
Contact Information
Visit our website to see the latest news about Mixbus and plug-ins for Mixbus:
http://mixbus.harrisonconsoles.com
For Mixbus support directly from Harrison, please email:
mixbus@harrisonconsoles.com
Visit our forum to chat with other users, and find common Mixbus questions & answers:
http://mixbus.harrisonconsoles.com/forum
Chat with other Mixbus users and developers using IRC:
http://webchat.freenode.net/?channels=ardour-mixbus
Physical Address and Phone:
Harrison Consoles
1024 Firestone Parkway La Vergne, TN 37086
615-641-7200 Phone
615-641-7224 Fax
Harrison Consoles Main Website
www.harrisonconsoles.com
Harrison Consoles Mixbus v4 - 1
Page 515 of 515

