Conference 911 Installation Guide PDF NEC
NEAX2400 Conference 911 Installation Guide NEAX2400 Conference 911 Installation Guide
User Manual: PDF T E X T F I L E S
Open the PDF directly: View PDF ![]() .
.
Page Count: 82
- Chapter 1 About This Manual
- Chapter 2 Before Installation
- Chapter 3 Installing the C911 Server Software
- Chapter 4 Application Configuration
- Chapter 5 Database Requirements
- Chapter 6 Installing the C911 Client
- Chapter 7 Running the C911 Package
- Appendix A Software Limitations
- Appendix B Beeper Interface
- Appendix C Glossary

CONFERENCE 911
INSTALLATION GUIDE
NEC America, Inc.
NDA-30133-001
Revision 1.0
February, 2000
Stock # 244161
LIABILITY DISCLAIMER
NEC America, Inc. reserves the right to change the specifications,
functions, or features, at any time, without notice.
NEC America, Inc. has prepared this document for the exclusive use
of its employees and customers. The information contained herein is
the property of NEC America, Inc. and shall not be reproduced
without prior written approval from NEC America, Inc.
NEAX, Dterm, and OpenWorX are registered trademarks of NEC
Corporation.
© 2000 NEC America, Inc.
Printed in the USA
All other brand or product names are or may be trademarks or
registered trademarks of, and are used to identify products or
services of, their respective owners.
MS-DOS, Microsoft, Windows, and Windows NT are registered
trademarks of Microsoft Corporation. Microsoft Windows 95 and
Microsoft Windows 98 are trademarks of Microsoft Corporation.

NDA-30133 Revision 1.0 Page i
Conference 911 Installation Guide CONTENTS
TABLE OF CONTENTS
Page
Chapter 1 - About This Manual. . . . . . . . . . . . . . . . . . . . . . . . . . . . . . . . . . . . . . . . . . . . . 1
What is Conference 911? . . . . . . . . . . . . . . . . . . . . . . . . . . . . . . . . . . . . . . . . . . . . . . . . . . . . . . . . 1
How This Guide is Organized . . . . . . . . . . . . . . . . . . . . . . . . . . . . . . . . . . . . . . . . . . . . . . . . . . . . . 1
Using This Guide . . . . . . . . . . . . . . . . . . . . . . . . . . . . . . . . . . . . . . . . . . . . . . . . . . . . . . . . . . . . . . 2
General Conventions . . . . . . . . . . . . . . . . . . . . . . . . . . . . . . . . . . . . . . . . . . . . . . . . . . . . . . . . . . 2
Procedures. . . . . . . . . . . . . . . . . . . . . . . . . . . . . . . . . . . . . . . . . . . . . . . . . . . . . . . . . . . . . . . . . . 3
Keyboard Conventions. . . . . . . . . . . . . . . . . . . . . . . . . . . . . . . . . . . . . . . . . . . . . . . . . . . . . . . . . 3
General Key Usage. . . . . . . . . . . . . . . . . . . . . . . . . . . . . . . . . . . . . . . . . . . . . . . . . . . . . . . . . . 3
Manual Descriptions . . . . . . . . . . . . . . . . . . . . . . . . . . . . . . . . . . . . . . . . . . . . . . . . . . . . . . . . . . . . 3
Chapter 2 - Before Installation . . . . . . . . . . . . . . . . . . . . . . . . . . . . . . . . . . . . . . . . . . . . . 5
Overview of the Installation Process. . . . . . . . . . . . . . . . . . . . . . . . . . . . . . . . . . . . . . . . . . . . . . . . 5
What is Included in the C911 Package?. . . . . . . . . . . . . . . . . . . . . . . . . . . . . . . . . . . . . . . . . . . . . 6
Equipment Requirements . . . . . . . . . . . . . . . . . . . . . . . . . . . . . . . . . . . . . . . . . . . . . . . . . . . . . . . . 6
C911 Server Requirements . . . . . . . . . . . . . . . . . . . . . . . . . . . . . . . . . . . . . . . . . . . . . . . . . . . . . 6
Hardware . . . . . . . . . . . . . . . . . . . . . . . . . . . . . . . . . . . . . . . . . . . . . . . . . . . . . . . . . . . . . . . . . 6
Software . . . . . . . . . . . . . . . . . . . . . . . . . . . . . . . . . . . . . . . . . . . . . . . . . . . . . . . . . . . . . . . . . . 6
C911 Client Requirements. . . . . . . . . . . . . . . . . . . . . . . . . . . . . . . . . . . . . . . . . . . . . . . . . . . . . . 7
Hardware . . . . . . . . . . . . . . . . . . . . . . . . . . . . . . . . . . . . . . . . . . . . . . . . . . . . . . . . . . . . . . . . . 7
Software . . . . . . . . . . . . . . . . . . . . . . . . . . . . . . . . . . . . . . . . . . . . . . . . . . . . . . . . . . . . . . . . . . 7
C911 Agent Requirements. . . . . . . . . . . . . . . . . . . . . . . . . . . . . . . . . . . . . . . . . . . . . . . . . . . . . . 7
PBX Requirements . . . . . . . . . . . . . . . . . . . . . . . . . . . . . . . . . . . . . . . . . . . . . . . . . . . . . . . . . . . 7
LAN Requirements. . . . . . . . . . . . . . . . . . . . . . . . . . . . . . . . . . . . . . . . . . . . . . . . . . . . . . . . . . . . 7
MAT Assignments. . . . . . . . . . . . . . . . . . . . . . . . . . . . . . . . . . . . . . . . . . . . . . . . . . . . . . . . . . . . . . 8
General MAT Assignments . . . . . . . . . . . . . . . . . . . . . . . . . . . . . . . . . . . . . . . . . . . . . . . . . . . . . 8
ASYD - Assignment of System Data. . . . . . . . . . . . . . . . . . . . . . . . . . . . . . . . . . . . . . . . . . . . . 8
ASDT – Assignment of Station Data. . . . . . . . . . . . . . . . . . . . . . . . . . . . . . . . . . . . . . . . . . . . . 9
Configuring Direct Call Restriction . . . . . . . . . . . . . . . . . . . . . . . . . . . . . . . . . . . . . . . . . . . . . . . . 9
AKYD - Dterm Key Data Programming . . . . . . . . . . . . . . . . . . . . . . . . . . . . . . . . . . . . . . . . . . . 9
ASFC - Service Feature Restriction Class Data . . . . . . . . . . . . . . . . . . . . . . . . . . . . . . . . . . . . 9
ASCL - Assignment of Station Class Data . . . . . . . . . . . . . . . . . . . . . . . . . . . . . . . . . . . . . . . . 9
AACL - Administrative Station Class Change . . . . . . . . . . . . . . . . . . . . . . . . . . . . . . . . . . . . . 10
Chapter 3 - Installing the C911 Server Software. . . . . . . . . . . . . . . . . . . . . . . . . . . . . . 11
Installing the C911 Server Software . . . . . . . . . . . . . . . . . . . . . . . . . . . . . . . . . . . . . . . . . . . . . . . 11
Installing the Message Server. . . . . . . . . . . . . . . . . . . . . . . . . . . . . . . . . . . . . . . . . . . . . . . . . . . . 16
Installing the Beeper Interface . . . . . . . . . . . . . . . . . . . . . . . . . . . . . . . . . . . . . . . . . . . . . . . . . . . 20
Installing the C911 Client Software. . . . . . . . . . . . . . . . . . . . . . . . . . . . . . . . . . . . . . . . . . . . . . . . 24
Installing the Web Server . . . . . . . . . . . . . . . . . . . . . . . . . . . . . . . . . . . . . . . . . . . . . . . . . . . . . . . 28
Install the Java Runtime Environment . . . . . . . . . . . . . . . . . . . . . . . . . . . . . . . . . . . . . . . . . . . . . 29
Installing the C911 Serial Number and Dongle Activation Key. . . . . . . . . . . . . . . . . . . . . . . . . . . 30
Completion . . . . . . . . . . . . . . . . . . . . . . . . . . . . . . . . . . . . . . . . . . . . . . . . . . . . . . . . . . . . . . . . . . 30
Chapter 4 - Application Configuration. . . . . . . . . . . . . . . . . . . . . . . . . . . . . . . . . . . . . . 31
Before Configuring the C911 Software . . . . . . . . . . . . . . . . . . . . . . . . . . . . . . . . . . . . . . . . . . . 31
C911 Monitor Configuration . . . . . . . . . . . . . . . . . . . . . . . . . . . . . . . . . . . . . . . . . . . . . . . . . . . . . 33
Agent Server Configuration. . . . . . . . . . . . . . . . . . . . . . . . . . . . . . . . . . . . . . . . . . . . . . . . . . . . . . 36

Page ii NDA-30133 Revision 1.0
CONTENTS Conference 911 Installation Guide
Page
Chapter 5 - Database Requirements . . . . . . . . . . . . . . . . . . . . . . . . . . . . . . . . . . . . . . . 39
Overview. . . . . . . . . . . . . . . . . . . . . . . . . . . . . . . . . . . . . . . . . . . . . . . . . . . . . . . . . . . . . . . . . . . . 39
Working with the Databases. . . . . . . . . . . . . . . . . . . . . . . . . . . . . . . . . . . . . . . . . . . . . . . . . . . . . 40
About the Agent Database . . . . . . . . . . . . . . . . . . . . . . . . . . . . . . . . . . . . . . . . . . . . . . . . . . . . . . 42
Field Definitions . . . . . . . . . . . . . . . . . . . . . . . . . . . . . . . . . . . . . . . . . . . . . . . . . . . . . . . . . . . 42
About the Customer Database . . . . . . . . . . . . . . . . . . . . . . . . . . . . . . . . . . . . . . . . . . . . . . . . . . . 43
Field Definitions . . . . . . . . . . . . . . . . . . . . . . . . . . . . . . . . . . . . . . . . . . . . . . . . . . . . . . . . . . . 43
About the ALI Database . . . . . . . . . . . . . . . . . . . . . . . . . . . . . . . . . . . . . . . . . . . . . . . . . . . . . . . . 44
Field Definitions . . . . . . . . . . . . . . . . . . . . . . . . . . . . . . . . . . . . . . . . . . . . . . . . . . . . . . . . . . . 44
About the PBX Database . . . . . . . . . . . . . . . . . . . . . . . . . . . . . . . . . . . . . . . . . . . . . . . . . . . . . . . 46
Field Definitions: . . . . . . . . . . . . . . . . . . . . . . . . . . . . . . . . . . . . . . . . . . . . . . . . . . . . . . . . . . . 46
About the Pager Database . . . . . . . . . . . . . . . . . . . . . . . . . . . . . . . . . . . . . . . . . . . . . . . . . . . . . . 47
Field Definitions: . . . . . . . . . . . . . . . . . . . . . . . . . . . . . . . . . . . . . . . . . . . . . . . . . . . . . . . . . . . 47
About the Station Database . . . . . . . . . . . . . . . . . . . . . . . . . . . . . . . . . . . . . . . . . . . . . . . . . . . . . 48
Field Definitions: . . . . . . . . . . . . . . . . . . . . . . . . . . . . . . . . . . . . . . . . . . . . . . . . . . . . . . . . . . . 48
About the Trunk Database . . . . . . . . . . . . . . . . . . . . . . . . . . . . . . . . . . . . . . . . . . . . . . . . . . . . . . 49
Field Definitions . . . . . . . . . . . . . . . . . . . . . . . . . . . . . . . . . . . . . . . . . . . . . . . . . . . . . . . . . . . 49
Chapter 6 - Installing the C911 Client . . . . . . . . . . . . . . . . . . . . . . . . . . . . . . . . . . . . . . 51
Overview. . . . . . . . . . . . . . . . . . . . . . . . . . . . . . . . . . . . . . . . . . . . . . . . . . . . . . . . . . . . . . . . . . . . 51
Installing the C911 Client . . . . . . . . . . . . . . . . . . . . . . . . . . . . . . . . . . . . . . . . . . . . . . . . . . . . . . . 51
Chapter 7 - Running the C911 Package . . . . . . . . . . . . . . . . . . . . . . . . . . . . . . . . . . . . 59
Overview. . . . . . . . . . . . . . . . . . . . . . . . . . . . . . . . . . . . . . . . . . . . . . . . . . . . . . . . . . . . . . . . . . . . 59
Initializing C911 . . . . . . . . . . . . . . . . . . . . . . . . . . . . . . . . . . . . . . . . . . . . . . . . . . . . . . . . . . . . . . 59
Terminating C911 . . . . . . . . . . . . . . . . . . . . . . . . . . . . . . . . . . . . . . . . . . . . . . . . . . . . . . . . . . . . . 59
Testing C911 . . . . . . . . . . . . . . . . . . . . . . . . . . . . . . . . . . . . . . . . . . . . . . . . . . . . . . . . . . . . . . . . 60
Appendix A - Software Limitations . . . . . . . . . . . . . . . . . . . . . . . . . . . . . . . . . . . . . . . . A-1
Overview. . . . . . . . . . . . . . . . . . . . . . . . . . . . . . . . . . . . . . . . . . . . . . . . . . . . . . . . . . . . . . . . . . . A-1
Service Conditions . . . . . . . . . . . . . . . . . . . . . . . . . . . . . . . . . . . . . . . . . . . . . . . . . . . . . . . . . . . A-1
Appendix B - Beeper Interface. . . . . . . . . . . . . . . . . . . . . . . . . . . . . . . . . . . . . . . . . . . . B-1
Overview. . . . . . . . . . . . . . . . . . . . . . . . . . . . . . . . . . . . . . . . . . . . . . . . . . . . . . . . . . . . . . . . . . . B-1
Database Fields . . . . . . . . . . . . . . . . . . . . . . . . . . . . . . . . . . . . . . . . . . . . . . . . . . . . . . . . . . . . . B-1
Architecture. . . . . . . . . . . . . . . . . . . . . . . . . . . . . . . . . . . . . . . . . . . . . . . . . . . . . . . . . . . . . . . . . B-1
Using the Beeper Interface . . . . . . . . . . . . . . . . . . . . . . . . . . . . . . . . . . . . . . . . . . . . . . . . . . . . . B-3
Interface Configuration . . . . . . . . . . . . . . . . . . . . . . . . . . . . . . . . . . . . . . . . . . . . . . . . . . . . . . . . B-3
Main Menu . . . . . . . . . . . . . . . . . . . . . . . . . . . . . . . . . . . . . . . . . . . . . . . . . . . . . . . . . . . . . . . . B-4
Configuration Menu . . . . . . . . . . . . . . . . . . . . . . . . . . . . . . . . . . . . . . . . . . . . . . . . . . . . . . . . . B-4
Configuration Files . . . . . . . . . . . . . . . . . . . . . . . . . . . . . . . . . . . . . . . . . . . . . . . . . . . . . . . . B-5
Miscellaneous Parameters . . . . . . . . . . . . . . . . . . . . . . . . . . . . . . . . . . . . . . . . . . . . . . . . . . B-5
Port Parameters . . . . . . . . . . . . . . . . . . . . . . . . . . . . . . . . . . . . . . . . . . . . . . . . . . . . . . . . . . B-6
Timer Parameters . . . . . . . . . . . . . . . . . . . . . . . . . . . . . . . . . . . . . . . . . . . . . . . . . . . . . . . . . B-7
Viewing Transaction Log Files . . . . . . . . . . . . . . . . . . . . . . . . . . . . . . . . . . . . . . . . . . . . . . . B-8
Appendix C - Glossary . . . . . . . . . . . . . . . . . . . . . . . . . . . . . . . . . . . . . . . . . . . . . . . . . . C-1

NDA-30133 Revision 1.0 Page iii
Conference 911 Installation Guide FIGURES
LIST OF FIGURES
Figure Title Page
3-1 UNIX Login prompt . . . . . . . . . . . . . . . . . . . . . . . . . . . . . . . . . . . . . . . . . . . . . . . . . . . 11
3-2 APM Administration Main menu . . . . . . . . . . . . . . . . . . . . . . . . . . . . . . . . . . . . . . . . . 12
3-3 Installation Applications/Packages menu . . . . . . . . . . . . . . . . . . . . . . . . . . . . . . . . . . 12
3-4 Release Media Device menu . . . . . . . . . . . . . . . . . . . . . . . . . . . . . . . . . . . . . . . . . . . 13
3-5 Insert C911 Disk prompt . . . . . . . . . . . . . . . . . . . . . . . . . . . . . . . . . . . . . . . . . . . . . . . 13
3-6 Processing C911 Installation Files . . . . . . . . . . . . . . . . . . . . . . . . . . . . . . . . . . . . . . . 14
3-7 Root Password prompt . . . . . . . . . . . . . . . . . . . . . . . . . . . . . . . . . . . . . . . . . . . . . . . . 14
3-8 Configure Monitor prompt . . . . . . . . . . . . . . . . . . . . . . . . . . . . . . . . . . . . . . . . . . . . . . 15
3-9 APM Administration Main menu . . . . . . . . . . . . . . . . . . . . . . . . . . . . . . . . . . . . . . . . . 16
3-10 Installation Applications/Packages menu . . . . . . . . . . . . . . . . . . . . . . . . . . . . . . . . . . 16
3-11 Release Media Device menu . . . . . . . . . . . . . . . . . . . . . . . . . . . . . . . . . . . . . . . . . . . 17
3-12 Insert Message Server Disk prompt . . . . . . . . . . . . . . . . . . . . . . . . . . . . . . . . . . . . . . 17
3-13 Processing Message Server Installation Files. . . . . . . . . . . . . . . . . . . . . . . . . . . . . . . 18
3-14 Root Password prompt . . . . . . . . . . . . . . . . . . . . . . . . . . . . . . . . . . . . . . . . . . . . . . . . 18
3-15 Installing Message Server Files . . . . . . . . . . . . . . . . . . . . . . . . . . . . . . . . . . . . . . . . . 19
3-16 Message Server Installation Complete prompt . . . . . . . . . . . . . . . . . . . . . . . . . . . . . . 19
3-17 APM Administration Main menu . . . . . . . . . . . . . . . . . . . . . . . . . . . . . . . . . . . . . . . . . 20
3-18 Installation Applications/Packages menu . . . . . . . . . . . . . . . . . . . . . . . . . . . . . . . . . . 20
3-19 Release Media Device menu . . . . . . . . . . . . . . . . . . . . . . . . . . . . . . . . . . . . . . . . . . . 21
3-20 Insert Beeper Interface Disk prompt . . . . . . . . . . . . . . . . . . . . . . . . . . . . . . . . . . . . . . 21
3-21 Processing Beeper Interface Installation Files . . . . . . . . . . . . . . . . . . . . . . . . . . . . . . 22
3-22 Beeper Pre-Install Script . . . . . . . . . . . . . . . . . . . . . . . . . . . . . . . . . . . . . . . . . . . . . . . 22
3-23 Root Password prompt . . . . . . . . . . . . . . . . . . . . . . . . . . . . . . . . . . . . . . . . . . . . . . . . 23
3-24 Beeper Interface Installation Complete prompt. . . . . . . . . . . . . . . . . . . . . . . . . . . . . . 23
3-25 APM Administration Main menu . . . . . . . . . . . . . . . . . . . . . . . . . . . . . . . . . . . . . . . . . 24
3-26 Installation Applications/Packages menu . . . . . . . . . . . . . . . . . . . . . . . . . . . . . . . . . . 24
3-27 Release Media Device menu . . . . . . . . . . . . . . . . . . . . . . . . . . . . . . . . . . . . . . . . . . . 25
3-28 Insert C911 Disk prompt . . . . . . . . . . . . . . . . . . . . . . . . . . . . . . . . . . . . . . . . . . . . . . . 25
3-29 Processing C911 Installation Files . . . . . . . . . . . . . . . . . . . . . . . . . . . . . . . . . . . . . . . 26
3-30 Root Password prompt . . . . . . . . . . . . . . . . . . . . . . . . . . . . . . . . . . . . . . . . . . . . . . . . 26
3-31 C911 Client Software Installation Complete prompt . . . . . . . . . . . . . . . . . . . . . . . . . . 27
3-32 APM Administration Main menu . . . . . . . . . . . . . . . . . . . . . . . . . . . . . . . . . . . . . . . . . 29
3-33 Connect to the Web Server files subdirectory. . . . . . . . . . . . . . . . . . . . . . . . . . . . . . . 29
4-1 UNIX Login prompt . . . . . . . . . . . . . . . . . . . . . . . . . . . . . . . . . . . . . . . . . . . . . . . . . . . 31
4-2 APM Administration Main menu . . . . . . . . . . . . . . . . . . . . . . . . . . . . . . . . . . . . . . . . . 32
4-3 APM System Administration menu . . . . . . . . . . . . . . . . . . . . . . . . . . . . . . . . . . . . . . . 32
5-1 Database Creation Process . . . . . . . . . . . . . . . . . . . . . . . . . . . . . . . . . . . . . . . . . . . . 39
5-2 UNIX Login prompt . . . . . . . . . . . . . . . . . . . . . . . . . . . . . . . . . . . . . . . . . . . . . . . . . . . 40
5-3 APM Administration Main menu . . . . . . . . . . . . . . . . . . . . . . . . . . . . . . . . . . . . . . . . . 40
5-4 APM System Administration menu . . . . . . . . . . . . . . . . . . . . . . . . . . . . . . . . . . . . . . . 41
5-5 Database Administration menu . . . . . . . . . . . . . . . . . . . . . . . . . . . . . . . . . . . . . . . . . . 41
6-1 NEC UNIX OAI Applications Installation Page . . . . . . . . . . . . . . . . . . . . . . . . . . . . . . 51
6-2 Java Virtual Machine option dialog box. . . . . . . . . . . . . . . . . . . . . . . . . . . . . . . . . . . . 52
6-3 Searching for VMs dialog box . . . . . . . . . . . . . . . . . . . . . . . . . . . . . . . . . . . . . . . . . . . 53
6-4 Installing Application progress indicator . . . . . . . . . . . . . . . . . . . . . . . . . . . . . . . . . . . 54
6-5 Installation Complete. . . . . . . . . . . . . . . . . . . . . . . . . . . . . . . . . . . . . . . . . . . . . . . . . . 54

Page iv NDA-30133 Revision 1.0
FIGURES Conference 911 Installation Guide
Figure Title Page
6-6 Welcome dialog box . . . . . . . . . . . . . . . . . . . . . . . . . . . . . . . . . . . . . . . . . . . . . . . . . . 55
6-7 Choose Destination Directory dialog box . . . . . . . . . . . . . . . . . . . . . . . . . . . . . . . . . . 55
6-8 Primary Destination dialog box . . . . . . . . . . . . . . . . . . . . . . . . . . . . . . . . . . . . . . . . . . 56
6-9 Installing Files progress indicator . . . . . . . . . . . . . . . . . . . . . . . . . . . . . . . . . . . . . . . . 57
6-10 Installation Complete dialog box . . . . . . . . . . . . . . . . . . . . . . . . . . . . . . . . . . . . . . . . . 57
B-1 Beeper Connectivity . . . . . . . . . . . . . . . . . . . . . . . . . . . . . . . . . . . . . . . . . . . . . . . . . .B-2
B-2 Beeper Software Interface . . . . . . . . . . . . . . . . . . . . . . . . . . . . . . . . . . . . . . . . . . . . .B-3
B-3 Beeper Interface Administration menu . . . . . . . . . . . . . . . . . . . . . . . . . . . . . . . . . . . .B-4
B-4 Configuration menu. . . . . . . . . . . . . . . . . . . . . . . . . . . . . . . . . . . . . . . . . . . . . . . . . . .B-4
B-5 Configuration Files . . . . . . . . . . . . . . . . . . . . . . . . . . . . . . . . . . . . . . . . . . . . . . . . . . .B-5
B-6 Misc Parameters window . . . . . . . . . . . . . . . . . . . . . . . . . . . . . . . . . . . . . . . . . . . . . .B-5
B-7 Port Parameters window. . . . . . . . . . . . . . . . . . . . . . . . . . . . . . . . . . . . . . . . . . . . . . .B-6
B-8 Timer Parameters window . . . . . . . . . . . . . . . . . . . . . . . . . . . . . . . . . . . . . . . . . . . . .B-7
B-9 View Log File menu. . . . . . . . . . . . . . . . . . . . . . . . . . . . . . . . . . . . . . . . . . . . . . . . . . .B-8
B-10 Beeper Transaction Log . . . . . . . . . . . . . . . . . . . . . . . . . . . . . . . . . . . . . . . . . . . . . . .B-9

NDA-30133 Revision 1.0 Page v
Conference 911 Installation Guide TABLES
LIST OF TABLES
Table Title Page
2-1 Conference 911 (C911) Installation. . . . . . . . . . . . . . . . . . . . . . . . . . . . . . . . . . . . . . . . 5
4-1 C911 Monitor Primary Configuration Parameters . . . . . . . . . . . . . . . . . . . . . . . . . . . . 33
4-2 C911 Monitor OAI Configuration Parameters . . . . . . . . . . . . . . . . . . . . . . . . . . . . . . . 34
4-3 C911 Monitor User Defined Parameters . . . . . . . . . . . . . . . . . . . . . . . . . . . . . . . . . . . 35
4-4 C911 Agent Server Primary Configuration Parameters . . . . . . . . . . . . . . . . . . . . . . . 36
4-4 C911 Agent Server User Defined Parameters . . . . . . . . . . . . . . . . . . . . . . . . . . . . . . 37
5-1 Agent Database Description . . . . . . . . . . . . . . . . . . . . . . . . . . . . . . . . . . . . . . . . . . . . 42
5-2 Customer Database Description . . . . . . . . . . . . . . . . . . . . . . . . . . . . . . . . . . . . . . . . . 43
5-3 ALI Database Description . . . . . . . . . . . . . . . . . . . . . . . . . . . . . . . . . . . . . . . . . . . . . . 44
5-4 PBX Database Description . . . . . . . . . . . . . . . . . . . . . . . . . . . . . . . . . . . . . . . . . . . . . 46
5-5 Pager Database Description . . . . . . . . . . . . . . . . . . . . . . . . . . . . . . . . . . . . . . . . . . . . 47
5-6 Station Database Description . . . . . . . . . . . . . . . . . . . . . . . . . . . . . . . . . . . . . . . . . . . 48
5-7 Trunk Database Description . . . . . . . . . . . . . . . . . . . . . . . . . . . . . . . . . . . . . . . . . . . . 49


NDA-30133 Revision 1.0 Page 1
Conference 911 Installation Guide About This Manual
Chapter 1 About This Manual
The Conference 911 Installation Guide provides the information you need to
install and configure the Conference 911 (C911) software. This manual is based on
Revision 1.0 of the software.
What is Conference 911?
Conference 911 (C911) is an OAI application that enables telephone users, C911
agents, and emergency agencies or PSAPs (Public Safety Answering Point) to
communicate when an emergency call is placed. When an emergency call is
placed, C911 notifies the C911 agents and all designated parties of the emergency
call and allows the C911 agents to monitor and participate in the emergency calls
between telephone users and the PSAP. C911 uses the NEC Open Applications
Interface (OAI) to communicate with the NEAX2400.
The Conference 911 package consists of the C911 Server and the C911 Client:
• The C911 Server provides connectivity between the PBX, the C911 agent’s
Dterm, and the C911 Client application.
• The C911 Client application is used by C911 agents to monitor and participate
in emergency calls.
Refer to the Conference 911 User Guide for information about the operations of
the C911 Client application.
How This Guide is Organized
The chapters in this guide are as follows:
Chapter 1 - About This Manual
This chapter outlines how to use the manual, including the actual manual
organization, chapter layout, keyboard conventions, function keys, and basic
terminology for C911.
Chapter 2 - Before Installation
This chapter specifies the applications, components, and settings that must be in
place prior to the installation and configuration of the C911 application, including
the hardware and software requirements.
Chapter 3 - Installing the C911 Server Software
This chapter details the step-by-step instructions for the installation of the C911
Server.
Chapter 4 - Application Configuration
This chapter describes how to configure the applications that make up the C911
package, including step-by-step instructions.
Chapter 5 - Database Requirements
This chapter describes the databases used by C911, including a detailed description
of the fields used in each database.

Page 2 NDA-30133 Revision 1.0
About This Manual Conference 911 Installation Guide
Chapter 6 - Installing the C911 Client
This chapter details the step-by-step instructions for the installation of the C911
Client.
Chapter 7 - Running the C911 Package
This chapter details how to test, initialize, and terminate the C911 system, in
addition to the limitations of the applications.
Appendix A - Software Limitations
This appendix describes the limitations of the Conference 911 software.
Appendix B - Beeper Interface
This appendix describes the functions and features of the Beeper Interface used by
C911.
Appendix C - Glossary
This appendix gives definitions of the common terms relating to C911.
Using This Guide
This guide is designed to make the application easy to understand and simple to
use. There are examples of the screens you will see in C911, with step-by-step
instructions for the procedures you need to perform.
General
Conventions This guide uses the following type conventions:
This guide uses the following conventions for menus and shortcuts:
Item Typeface or
Convention Example
Book titles Italics Conference 911 Operations
Manual
User input, variables Boldface Enter password at the
prompt.
Menu names, Window titles,
field names Capitalized Options menu, Line Status
window, User ID field
Any screen output generated
by C911 Monospace A message that appears in a
popup window or the status
area of the screen.
Example Means
File > Workstation Choose the Workstation submenu on the
File menu.
CTRL+N Hold down the CTRL key while pressing
the “n” key
CTRL+Shift+N Hold down the CTRL key and the Shift
key while pressing the “n” key
Click
Right-click Click the left mouse button
Click the right mouse button

NDA-30133 Revision 1.0 Page 3
Conference 911 Installation Guide About This Manual
Procedures Step-by-step instructions are numbered. Simply follow the numbered steps to
perform the desired function.
Sometimes in step-by-step instructions, you will have more than one option to
complete the task. These options are presented in bulleted lists, as shown in the
following example:
1. The Fields to display group box contains the fields that are displayed in the
Directory window.
•To add a field, select it from the Employee group box, and click Add.
•To select all of the fields, click Add all.
2. Click OK.
Keyboard
Conventions General Key Usage
The general keys used throughout the C911 application are:
Manual Descriptions
Following are descriptions of the manuals referenced in the chapters of this guide:
•Applications Manager (APM) Installation Manual - Contains step-by-step
instructions for installing the software from the release media.
•Applications Manager (APM) Operations Manual - Explains how applications
like C911 are configured in the APM environment and how its databases are
created, using the entries and values provided in this guide.
•NEAX2400 System Manuals - Give very detailed explanations about the
assignments that need to be made through the Maintenance Administration
Terminal (MAT) commands on the NEAX2400.
Arrow keys Scrolls among options within a menu or field.
Backspace Erases the character to the left of the cursor.
Enter Accepts a selection or field entry.
ESC Exits the current screen or action and moves to the
previous screen or action.
Tab Moves forward through fields and options.
Shift+Tab Moves backward through fields and options.
CTRL+Tab Moves forward through tabs.
CTRL+Shift+Tab Moves backward through tabs.
ALT+ highlighted letter Moves to that screen element.

About This Manual Conference 911 Installation Guide
Page 4 NDA-30133 Revision 1.0
This Page Left Blank.

NDA-30133 Revision 1.0 Page 5
Conference 911 Installation Guide Before Installation
Chapter 2 Before Installation
Overview of the Installation Process
The installation process, including its presentation in this and other manuals, is
outlined below:
Table 2-1 Conference 911 (C911) Installation
Installation Step Section in this Guide Instructions in
Other Manuals
Before installing C911:
•Gather information on the C911 agents,
including the name and station.
•Verify that you have all the components
included in the C911 package.
•Set up sublines at each agent Dterm.
•Assign data settings on the NEAX
Maintenance Administration Terminal (MAT).
Chapter 2 - Before Installation NEAX2400 IMS
System Manuals
Install software:
•Load the C911 Server software.
•Load the C911 Client software on the server.
•Load the Message Server software.
•Load the Beeper Interface software.
Chapter 3 - Installing the C911
Server Software APM Installation
Manual
Configure application:
•Characterize the applications.
•Assign the applications’ parameters.
•Designate the facilities.
•Assign the OAI parameters.
•Assign the user-defined parameters.
Chapter 4 - Application
Configuration APM Operations
Manual
Populate the Customer, Station, Agent, ALI,
Pager, Trunk, and PBX APM databases:
•Review the master definition file.
•Review the master database file.
Chapter 5 - Database
Requirements
APM Operations
Manual
Install the C911 Client
•Install the C911 Client software.
•Configure the C911 Client.
•Initialize the C911 application.
Chapter 6 - Installing the C911
Client APM Operations
Manual

Page 6 NDA-30133 Revision 1.0
Before Installation Conference 911 Installation Guide
What is Included in the C911 Package?
C911 package should include the following:
•C911 Server Disk
•C911 Client Disks (2 disks)
•AddClient Utility Disk
•Message Server Disk
•Beeper Interface Disk
•Java (TM) 2 RunTime Environment Disk (5 disks)
•Serial Number and Activation Key for C911 OAI Application
•Conference 911 Installation Guide
•Conference 911 User Guide
Equipment Requirements
The hardware required for any OAI application includes the Private Branch
Exchange system (PBX) and the OAI Telephony Server. In order for C911 to
operate properly, your operating environment must meet the following
requirements.
C911 Server
Requirements Hardware
•UAP (User Application Processor) 1000, 2000, or 3000
•Floppy drive
•Ethernet connection to the NEAX 2400 PBX and all C911 agent workstations
•Unique IP Address
Note: (The IP Address in the UAP must be on the same address as the PBX except
for the last octel.)
•2 serial ports (if using the optional Beeper Interface); one port for a modem and
one port for the Beeper Interface
Software
•SCO UNIX OpenServer 5.x
•APM (Applications Manager) 3.x or higher
•Security dongle connected to a parallel port of the UAP. The dongle looks
similar to a null modem or DB25 gender changer.
Note: The dongle is only for this UAP and should be included with the UAP
packaging. The dongle from a different UAP will not work.
•Registration serial number for the security dongle

NDA-30133 Revision 1.0 Page 7
Conference 911 Installation Guide Before Installation
C911 Client
Requirements Hardware
•Pentium class processor
•64 Megabytes of RAM recommended; 32 Megabytes of RAM minimum
•200 Megabytes of available hard drive space
•Network Interface Card (NIC) to connect to the LAN that houses the UAP
•Sound card
•Maximum of eight C911 Client workstations
Software
•Java™ 2 Runtime Environment version 1.2 or higher
•Any operating system that is compatible with the Java™ 2 Runtime
Environment 1.2 or higher, including:
•Microsoft® Windows NT® 4.0
•Microsoft® Windows® 95
•Microsoft® Windows® 98
C911 Agent
Requirements •Dterm with a minimum 2-line 16 character display
•Optional workstation on UAP LAN for C911 Client application
PBX Requirements •NEAX2400 with HDS XH 3.x ('M' Version) software or higher with OAI-
compatible hardware and software
•Ethernet connection to the UAP
Note: A separate, isolated segment is recommended for the connection between the
PBX and the UAP. The UAP should be multi-homed with two network cards
to meet this recommendation and still achieve full client/server functionality.
LAN Requirements In order to run C911, the computer must be able to access the LAN where the PBX
is located, in addition to the following considerations:
•Ethernet connection to the PBX
•Dedicated link to the PBX on a hub that will not cause an interruption if the
rest of the LAN has problems.

Page 8 NDA-30133 Revision 1.0
Before Installation Conference 911 Installation Guide
MAT Assignments
This manual assumes that the data settings that affect the operation of all OAI
software on a system-wide basis have already been assigned on the NEAX
Maintenance Administration Terminal (MAT). Such settings include system index
values and assignment of Interface I/O port data in the Interface Processor (IP). For
more information about these settings and the MAT commands described below
for C911, refer to the OAI System Manual. This section specifies the required
commands and the values at which they are to be set.
General MAT
Assignments ASYD - Assignment of System Data
Use this command to configure the NEAX2400 MAT settings for the delivery of
“MyLine” information over CCIS. If there are no additional NEAX2400s using
CCIS, this setting is not needed.
This information must be set in the remote PBX, not the main PBX that has the
outgoing 911 trunks.
Feature: SMDR For Subline Via CCIS
System Data: 1
Index: 240
Bit: 5
0 = Subline Number (default)
1 = My Line Number/Terminal
This bit needs to be set (0x20) for the NEAX2400 to send “term id” instead of “line
id” for CCIS calls. This feature is supported in HDS J4.5 and newer.
The following settings should also be made using the ASYD command:
Feature: OAI in Service
System Data: 1
Index: 79
Bit: 6=0
Feature: SMFN notification enabled
System Data: 1
Index: 241
Bit: 2=1
Feature: SCF return error notification enabled
System Data: 1
Index: 241
Bit: 3=1

NDA-30133 Revision 1.0 Page 9
Conference 911 Installation Guide Before Installation
ASDT – Assignment of Station Data
Use this command to make station assignments for the C911 agents. The Dterm at
each agent’s workstation must be assigned a unique station number and a subline
set in off-hook suppress. Each C911 agent must have a Dterm to be notified which
station dialed 911. The C911 agent’s Dterm should also have a one subline for each
outbound 911 trunk.
Note: Sublines for C911 agents need to be in Direct Call Restriction mode. This
prevents these dedicated lines from being busy or in use when needing to
conference in to a 911 call.
•STN (Station Number)
•LENS (Line Equipment Number)
•TEC (Telephone Class)
Configuring Direct
Call Restriction It is highly recommended by NEC that you restrict direct calling on the C911
sublines, so that no one can use them internally to call that Dterm.
Sublines dedicated for C911 conferencing should have the SFI 95 Service Feature
Index 95 option set to one.
AKYD - Dterm Key Data Programming
For every Dterm which is going to be used for C911 agent, you need to assign the
sublines chosen for agents on specific keys on the Dterm, preferably the same keys
on each C911 agent Dterm.
ASFC - Service Feature Restriction Class Data
Assuming you already programmed your phones with SFC 1 Service Restriction
Class 1 option, choose an SFC set that is not being used. For example, to use SFC2,
turn on all SFIs in SFC 2 that are already turned on in SFC 1.
Use the backspace every time you assign an SFI to re-enter the same SFC, then
enter the new SFI and the “on” or “off” value.
To prevent making a call to that station, turn on SFI 95 in the SFC that you choose.
ASCL - Assignment of Station Class Data
If using a NEAX2400 for business, do the following:
1. Enter the tenant number
2. Enter the station number for each C911 agent subline.
3. Enter TEC 12 for Dterm.
4. Enter RSC 1.
5. Enter SFC 2.
This setting applies all your normal restriction along with Direct call
restriction for these sublines
6. Press Esc, then choose Yes.
The changes are saved.

Page 10 NDA-30133 Revision 1.0
Before Installation Conference 911 Installation Guide
AACL - Administrative Station Class Change
If using a NEAX2400 for hospitality, do the following:
1. Enter the tenant number
2. Enter the station number for each C911 agent subline.
3. Enter TEC 12 for Dterm.
4. Enter RSC 1.
5. Enter SFC 2.
This setting applies all your normal restriction along with Direct call
restriction for these sublines
6. Press Esc, then choose Yes.
The changes are saved.

NDA-30133 Revision 1.0 Page 11
Conference 911 Installation Guide Installing the C911 Server Software
Chapter 3 Installing the C911 Server Software
This chapter provides instructions for installing the Conference 911 (C911) Server
software. C911 includes the following applications:
•C911 Monitor - manages communications among internal processes, agent
stations, beepers, and the NEAX2400. This application is the lifeline to C911.
•C911 Agent Server - manages the agents configured to use the C911 application.
•Message Server - allows multiple C911 agents to communicate with the C911
Agent Server. All C911 agents send their requests to log on and log off as well as
receive all 911 event information when a 911 call takes place through this NEC
proprietary communications link. The C911 Agent Server will send one event, such
as “Station 1234 dialed 911” and the Message Server will send this information to
all C911 agents.
•Beeper Interface - sends information from C911 to pagers configured in the Pager
database.
Installing the C911 Server Software
To install the C911 Server software, you must use a UNIX terminal. (For more
information about the general installation process, refer to the APM Operations
Manual.)
Use the following steps to install the C911 Server software:
Figure 3-1 UNIX Login prompt
1. At the UNIX login prompt, type apmadm (and a password, if one is required) and
press Enter.
The APM Administration menu is displayed.
login: apmadm
password:

Page 12 NDA-30133 Revision 1.0
Installing the C911 Server Software Conference 911 Installation Guide
Figure 3-2 APM Administration Main menu
2. Type i at the prompt and press Enter to choose the Installation of Applications/
Packages option.
The “Enter Package to be installed” prompt is displayed.
Figure 3-3 Installation Applications/Packages menu
3. Type applications at the prompt and press Enter.
The “Enter Release Media Device” prompt is displayed:
APM Platform Release Rel3.1.2 (Feb 2, 1999)
Main Menu
APM
Debug Facilities
Halt APM System
File Archive
Installation of Applications/Packages
Configuration of UAP
Removal of Packages
Startup APM System
Manage Activation Keys
Logout
UNIX
Enter Option: [i]
APM Status: ACTIVE
NEC America APM Administration Sat - Sep 11, 1999
Installation of Applications/Packages
Available Packages are:
applications asl mtl tcpip timesync x25
Enter Package to be installed: applications
APM Status: ACTIVE
NEC America APM Administration Sat - Sep 11, 1999

NDA-30133 Revision 1.0 Page 13
Conference 911 Installation Guide Installing the C911 Server Software
Figure 3-4 Release Media Device menu
4. Type F and press Enter to choose the Floppy Disk Device.
The Installation Procedure screen is displayed, prompting you to insert the C911
installation diskette in the floppy disk device.
Figure 3-5 Insert C911 Disk prompt
5. Insert the disk labeled “C911 Server Release 3.0” into the floppy disk device and
press Enter.
The screen displays the status of the application files as they are installed.
Installation of Applications/Packages
Available Packages are:
applications asl mtl tcpip update x25
Enter Package to be installed: applications
Release Media Devices are:
(F)loppy Disk Device (C)artridge Tape Device
Enter Release Media Device: F
NEC America APM Administration Sat - Sep 11, 1999
Installation Procedure
Installing from /dev/fd0
Insert OAI Release Media #1
Enter <Return> to continue:

Page 14 NDA-30133 Revision 1.0
Installing the C911 Server Software Conference 911 Installation Guide
Figure 3-6 Processing C911 Installation Files
When all the files from the disk have been installed, the prompt “Has all the
release media been loaded [y or n]?” is displayed.
6. Type y at the prompt and press Enter.
Figure 3-7 Root Password prompt
The prompt “Password” is displayed for you to enter the root (Super User)
password.
7. Type the root password and press Enter.
The APM installation procedures begin processing the C911 installation files.
Installation Procedure
Installing from /dev/fd0
Insert OAI Release Media #1
Enter <Return> to continue:
Copying...
tar: block size = 20
x oai/app/C911/bin/agent, 69955 bytes, 137 tape blocks
Has all release media been loaded? [y or n] ? y
x oai/app/c911/bin/monitor, 259623 bytes, 508 tape blocks
x oai/app/c911/bin/report, 231124 bytes, 452 tape blocks
x oai/chksum_app, 553 bytes, 2 tape blocks
C911 Installation
Installation requires Super User (root) password.
You will need the root password.
Password:

NDA-30133 Revision 1.0 Page 15
Conference 911 Installation Guide Installing the C911 Server Software
Figure 3-8 Configure Monitor prompt
The screen indicates the status of the installation as it defines the database files
and processes the installation files. You will see messages indicating that the
databases are defined.
Note: If there is a problem with the files during C911 installation, the message
“Validation error, OAI installation failed” is displayed.
When the installation is complete, “C911 installation has completed successfully”
is displayed. Then, “Please press Enter to return to APM Administration menu.” is
displayed.
8. Press Enter.
The APM Administration Main menu is displayed.
Processing Files
Installing the Release Files
Conference 911 Installation Procedure for SCO UNIX
Transferring database definition files...
Agent Database defined.
Ali Database defined.
Customer Database defined.
PBX Database defined.
Pager Database defined.
Station Database defined.
Trunk Database defined.

Page 16 NDA-30133 Revision 1.0
Installing the C911 Server Software Conference 911 Installation Guide
Installing the Message Server
To install the Message Server software, you must use a UNIX terminal to access the
APM. (For more information about the general installation process, refer to the APM
Operations Manual.)
Use the following steps to install the Message Server software:
Figure 3-9 APM Administration Main menu
1. From the APM Administration Main menu, type i at the prompt and press Enter to
choose the Installation of Applications/Packages option.
The “Enter Package to be installed” prompt is displayed.
Figure 3-10 Installation Applications/Packages menu
APM Platform Release Rel3.1.2 (Feb 2, 1999)
Main Menu
APM
Debug Facilities
Halt APM System
File Archive
Installation of Applications/Packages
Configuration of UAP
Removal of Packages
Startup APM System
Manage Activation Keys
Logout
UNIX
Enter Option: [i]
APM Status: ACTIVE
NEC America APM Administration Sat - Sep 11, 1999
Installation of Applications/Packages
Available Packages are:
applications asl mtl tcpip timesync x25
Enter Package to be installed: applications
APM Status: ACTIVE
NEC America APM Administration Sat - Sep 11, 1999

NDA-30133 Revision 1.0 Page 17
Conference 911 Installation Guide Installing the C911 Server Software
2. Type applications at the prompt and press Enter.
The “Enter Release Media Device” prompt is displayed:
Figure 3-11 Release Media Device menu
3. Type F and press Enter to choose the Floppy Disk Device.
The Installation Procedure screen is displayed, prompting you to insert the
Message Server installation diskette in the floppy disk device.
Figure 3-12 Insert Message Server Disk prompt
4. Insert the disk labeled “Message Server Version 3.0” into the floppy disk device
and press Enter.
The screen displays the status of the application files as they are installed.
Installation of Applications/Packages
Available Packages are:
applications asl mtl tcpip update x25
Enter Package to be installed: applications
Release Media Devices are:
(F)loppy Disk Device (C)artridge Tape Device
Enter Release Media Device: F
NEC America APM Administration Sat - Sep 11, 1999
Installation Procedure
Installing from /dev/fd0
Insert OAI Release Media #1
Enter <Return> to continue:

Page 18 NDA-30133 Revision 1.0
Installing the C911 Server Software Conference 911 Installation Guide
Figure 3-13 Processing Message Server Installation Files
When all the files from the disk have been installed, the prompt “Has all the
release media been loaded [y or n]?” is displayed.
5. Type y at the prompt and press Enter.
Figure 3-14 Root Password prompt
The prompt “Password” is displayed for you to enter the root (Super User)
password.
6. Type the root password and press Enter.
The APM installation procedures begin processing the Message Server
installation files.
Installation Procedure
Installing from /dev/fd0
Insert OAI Release Media #1
Enter <Return> to continue:
Copying...
tar: block size = 20
x oai/app/msgserver/msgserver, 136780 bytes, 268 tape blocks
Has all release media been loaded? [y or n] ? y
x oai/app/msgserver/installmsgserver, 8468 bytes, 17 tape blocks
x oai/app/msgserver,I,1, 5631 bytes, 11 tape blocks
x oai/chksum_app, 113 bytes, 1 tape block
Message Server Installation
Installation requires Super User (root) password.
You will need the root password.
Password:

NDA-30133 Revision 1.0 Page 19
Conference 911 Installation Guide Installing the C911 Server Software
Figure 3-15 Installing Message Server Files
The prompt “Press enter key to re-run /etc/inittab (using “init q” command),
otherwise press CTRL-C.” is displayed.
7. Press Enter.
The screen indicates the status of the installation as the installation files are
processed.
Note: If there is a problem with the files during the Message Server installation, the
message “Validation error, OAI installation failed” is displayed.
Figure 3-16 Message Server Installation Complete prompt
When the installation is complete, “Message Server installation has completed
successfully” is displayed. Then, “Please press Enter to return to APM
Administration menu.” is displayed.
8. Press Enter.
The APM Administration Main menu is displayed.
Press enter key to re-run /etc/inittab (using “init q” command),
otherwise press CTRL-C.
Installing the Release Files
Message Server installation has completed successfully.
Please press Enter to return to APM Administration menu.

Page 20 NDA-30133 Revision 1.0
Installing the C911 Server Software Conference 911 Installation Guide
Installing the Beeper Interface
To install the Beeper Interface software, you must use a UNIX terminal to access the
APM. (For more information about the general installation process, refer to the APM
Operations Manual.)
Use the following steps to install the Beeper Interface software:
Figure 3-17 APM Administration Main menu
1. From the APM Administration Main menu, type i at the prompt and press Enter to
choose the Installation of Applications/Packages option.
The “Enter Package to be installed” prompt is displayed.
Figure 3-18 Installation Applications/Packages menu
APM Platform Release Rel3.1.2 (Feb 2, 1999)
Main Menu
APM
Debug Facilities
Halt APM System
File Archive
Installation of Applications/Packages
Configuration of UAP
Removal of Packages
Startup APM System
Manage Activation Keys
Logout
UNIX
Enter Option: [i]
APM Status: ACTIVE
NEC America APM Administration Sat - Sep 11, 1999
Installation of Applications/Packages
Available Packages are:
applications asl mtl tcpip timesync x25
Enter Package to be installed: applications
APM Status: ACTIVE
NEC America APM Administration Sat - Sep 11, 1999

NDA-30133 Revision 1.0 Page 21
Conference 911 Installation Guide Installing the C911 Server Software
2. Type applications at the prompt and press Enter.
The “Enter Release Media Device” prompt is displayed:
Figure 3-19 Release Media Device menu
3. Type F and press Enter to choose the Floppy Disk Device.
The Installation Procedure screen is displayed, prompting you to insert the Beeper
Interface installation diskette in the floppy disk device.
Figure 3-20 Insert Beeper Interface Disk prompt
4. Insert the disk labeled “Beeper Interface Version 3.3” into the floppy disk device
and press Enter.
The screen displays the status of the application files as they are installed.
Installation of Applications/Packages
Available Packages are:
applications asl mtl tcpip update x25
Enter Package to be installed: applications
Release Media Devices are:
(F)loppy Disk Device (C)artridge Tape Device
Enter Release Media Device: F
NEC America APM Administration Sat - Sep 11, 1999
Installation Procedure
Installing from /dev/fd0
Insert OAI Release Media #1
Enter <Return> to continue:

Page 22 NDA-30133 Revision 1.0
Installing the C911 Server Software Conference 911 Installation Guide
Figure 3-21 Processing Beeper Interface Installation Files
When all the files from the disk have been installed, the prompt “Has all the
release media been loaded [y or n]?” is displayed.
5. Type y at the prompt and press Enter.
The APM installation procedures begin processing the Beeper Interface
installation files.
Figure 3-22 Beeper Pre-Install Script
The prompt “Would you like to upgrade? (y or n)” is displayed.
Installation Procedure
Installing from /dev/fd0
Insert OAI Release Media #1
Enter <Return> to continue:
Copying...
tar: block size = 20
x oai/app/beeper/bin/beeper, 210876 bytes, 412 tape blocks
Has all release media been loaded? [y or n] ? y
x oai/app/beeper/bin/beeperq, 152065 bytes, 298 tape blocks
x oai/app/beeper/cfg/config, 1145 bytes, 3 tape blocks
x oai/chksum_app, 483 bytes, 1 tape block
x oai/app/beeper/cfg/version, 11 bytes, 1 tape blocks
x oai/app/beeper/install/kprofile, 18670 bytes, 37 tape blocks
x oai/app/beeper/install/bprins, 2935 bytes, 6 tape blocks
x oai/app/beeper/install/installer, 5786 bytes, 12 tape blocks
x oai/app/beeper/install/pkg.ini, 4680 bytes, 10 tape blocks
x oai/app/beeper/install/profile, 947 bytes, 2 tape blocks
x oai/app/beeper/install/S98bpradmin, 676 bytes, 2 tape blocks
x oai/app/beeper/cfg/varSplit, 140 bytes, 1 tape block
x oai/app/beeper/install/beeper.cfg, 933 bytes, 2 tape blocks
x oai/app/beeper.ins, 3521 bytes, 7 tape blocks
Beeper Pre-Install Script
Checking the system configuration.....
/oai/app/beeper/install/pkg.ini [113]: test: --
Option requires an argument
Would you like to upgrade? (y or n)

NDA-30133 Revision 1.0 Page 23
Conference 911 Installation Guide Installing the C911 Server Software
6. Type n and press Enter.
Figure 3-23 Root Password prompt
The prompt “Password” is displayed for you to enter the root (Super User)
password.
7. Type the root password and press Enter.
The Beeper Installation files are processed. The screen indicates the status of the
installation as the installation files are processed.
Note: If there is a problem with the files during the Beeper Interface installation, the
message “Validation error, OAI installation failed” is displayed.
Figure 3-24 Beeper Interface Installation Complete prompt
When the installation is complete, the prompt “Please press Enter to continue.” is
displayed.
8. Press Enter.
The APM Administration Main menu is displayed.
Beeper Installation
Installation requires Super User (root) password.
You will need the root password.
Password:
Beeper Installation
Installation requires Super User (root) password.
You will need the root password.
Password: xxxxx
Creating beeper directories...
Installing bpradm on SCO UNIX.
Press Enter to continue. [ ]

Page 24 NDA-30133 Revision 1.0
Installing the C911 Server Software Conference 911 Installation Guide
Installing the C911 Client Software
You can install the C911 Client software on the UAP to facilitate installing the software
on each C911 Client workstation. To install the C911 Client software, you must use a
UNIX terminal. (For more information about the general installation process, refer to
the APM Operations Manual.)
Use the following steps to install the C911 Client software to the UAP:
Figure 3-25 APM Administration Main menu
1. From the APM Administration menu, type i at the prompt and press Enter to choose
the Installation of Applications/Packages option.
The “Enter Package to be installed” prompt is displayed.
Figure 3-26 Installation Applications/Packages menu
APM Platform Release Rel3.1.2 (Feb 2, 1999)
Main Menu
APM
Debug Facilities
Halt APM System
File Archive
Installation of Applications/Packages
Configuration of UAP
Removal of Packages
Startup APM System
Manage Activation Keys
Logout
UNIX
Enter Option: [i]
APM Status: ACTIVE
NEC America APM Administration Sat - Sep 11, 1999
Installation of Applications/Packages
Available Packages are:
applications asl mtl tcpip timesync x25
Enter Package to be installed: applications
APM Status: ACTIVE
NEC America APM Administration Sat - Sep 11, 1999

NDA-30133 Revision 1.0 Page 25
Conference 911 Installation Guide Installing the C911 Server Software
2. Type applications at the prompt and press Enter.
The “Enter Release Media Device” prompt is displayed:
Figure 3-27 Release Media Device menu
3. Type F and press Enter to choose the Floppy Disk Device.
The Installation Procedure screen is displayed, prompting you to insert the C911
Client installation diskette in the floppy disk device.
Figure 3-28 Insert C911 Disk prompt
4. Insert the disk labeled “C911 Client Release 3.0 disk 1 of 2” into the floppy disk
device and press Enter.
The screen displays the status of the application files as they are installed from
Disk 1.
Installation of Applications/Packages
Available Packages are:
applications asl mtl tcpip update x25
Enter Package to be installed: applications
Release Media Devices are:
(F)loppy Disk Device (C)artridge Tape Device
Enter Release Media Device: F
NEC America APM Administration Sat - Sep 11, 1999
Installation Procedure
Installing from /dev/fd0
Insert OAI Release Media #1
Enter <Return> to continue:

Page 26 NDA-30133 Revision 1.0
Installing the C911 Server Software Conference 911 Installation Guide
5. When all files from Disk 1 have been installed, the prompt “Has all the release
media been loaded [Y or N]?” is displayed.
Figure 3-29 Processing C911 Installation Files
Type n at the prompt and press Enter.
6. Insert the disk labeled “C911 Client Release 3.0 disk 2 of 2” into the floppy disk
device and press Enter.
The screen displays the status of the application files as they are installed.
When all the files from Disk 2 have been installed, the prompt “Has all the release
media been loaded [y or n]?” is displayed.
7. Type y at the prompt and press Enter.
Figure 3-30 Root Password prompt
The prompt “Password” is displayed for you to enter the root (Super User)
password.
Installation Procedure
Installing from /dev/fd0
Insert OAI Release Media #1
Enter <Return> to continue:
Copying...
tar: block size = 20
x oai/app/C911/bin/client, 69955 bytes, 137 tape blocks
Has all release media been loaded [y or n] ? y
C911 Client Installation
Installation requires Super User (root) password.
You will need the root password.
Password:

NDA-30133 Revision 1.0 Page 27
Conference 911 Installation Guide Installing the C911 Server Software
8. Type the root password and press Enter.
The C911 Client Installation files are processed. The screen indicates the status of
the installation as the installation files are processed.
Figure 3-31 C911 Client Software Installation Complete prompt
Note: If there is a problem with the files during C911 Client software installation, the
message “Validation error, OAI installation failed” is displayed.
When the installation is complete, “C911 Client installation has completed
successfully” is displayed. Then, “Please press Enter to return to APM
Administration menu.” is displayed.
9. Press Enter.
The APM Administration Main menu is displayed.
C911 Client Installation
Installation requires Super User (root) password.
You will need the root password.
Password: xxxxx
Creating C911 client directories...
Installing C911 Client on SCO UNIX.
Press Enter to continue. [ ]

Page 28 NDA-30133 Revision 1.0
Installing the C911 Server Software Conference 911 Installation Guide
Installing the Web Server
The UAP with the SCO OpenServer 5 Operating System should be configured with the
Netscape FastTrack Web Server. The main web page of the Netscape FastTrack Web
Server should be set to the /oai/internet directory. OAI applications use the /oai/
internet directory to keep all of the web-based installation applications and
instructions.
Some of the earlier UAPs with the SCO OpenServer 5 do not have this setting. In this
case, a special disk is used to configure the proper directories and programs. If the
AddClient Utility disk is not included in the application package, you should request it.
If Netscape FastTrack Web Server is not configured on the UAP, install and configure
the web server from the AddClient Utility disk using the following steps:
1. Login as root and insert the AddClient Utility floppy disk.
2. At the # prompt, type cd / and press Enter to go to the root directory.
3. At the # prompt, type tar xv and press Enter to go to the root directory.
4. At the # prompt, type ksh /oai/utils/netscapeconfig and press Enter.
5. Log out.
The UAP is now ready for the installation of web-based OAI applications.

NDA-30133 Revision 1.0 Page 29
Conference 911 Installation Guide Installing the C911 Server Software
Install the Java Runtime Environment
The C911 Client and the Web Server require the Java 2 Runtime Environment. Use the
following steps to install the Java 2 Runtime Environment software:
Figure 3-32 APM Administration Main menu
1. From the APM Administration menu, type u at the prompt and press Enter to get
to the UNIX prompt.
2. At the UNIX prompt, type cd /oai/internet to connect to the web server files
subdirectory. (See “Installing the Web Server” on page 28 for more information.)
Figure 3-33 Connect to the Web Server files subdirectory
3. Insert the first disk (1 of 5) labeled “Java Runtime Environment” into the floppy
disk device and type tar -xv to extract the code from this diskette.
The files are copied.
APM Platform Release Rel3.1.2 (Feb 2, 1999)
Main Menu
APM
Debug Facilities
Halt APM System
File Archive
Installation of Applications/Packages
Configuration of UAP
Removal of Packages
Startup APM System
Manage Activation Keys
Logout
UNIX
Enter Option: [i]
APM Status: ACTIVE
NEC America APM Administration Sat - Sep 11, 1999
> cd /oai/internet

Page 30 NDA-30133 Revision 1.0
Installing the C911 Server Software Conference 911 Installation Guide
4. Insert the second disk (2 of 5) labeled “Java Runtime Environment” into the
floppy disk device and type tar -xv to extract the code from this diskette.
The “tar” command will show that this file is divided over four separate
diskettes. After tar has finished processing this disk, you will be prompted to
insert the next floppy disk.
5. When prompted, insert disk 3 and press Enter.
After tar has finished processing this disk, you will be prompted to insert the
next floppy disk.
6. When prompted, insert disk 4 and press Enter.
After tar has finished processing this disk, you will be prompted to insert the
next floppy disk.
7. When prompted, insert disk 5 and press Enter.
8. When disk 5 is finished processing, type ls -la to check the file and size.
When tar has completed you should have one executable file called
“jre1_2_2-win.exe” of approximately 5,283,296 bytes.
Installing the C911 Serial Number and Dongle Activation Key
The UAP should also have a serial number and activation key for the APM
platform. The serial number and activation key should already be installed, but you
should make sure that they are installed correctly.
1. From the APM Administration menu, type m at the prompt to select the
Manage Activation Keys option and press Enter.
The License Administration window is displayed.
2. Type a to add a new license.
3. Enter C911 for the application, then enter the serial number and activation
key for C911.
The License Manager verifies that these entries are correct for this UAP.
Make sure this C911 display shows “Verified” prior to exiting.
Completion
This completes installation of the C911 software to the UAP. For information
about configuring C911, see Chapter 4 - Application Configuration.

NDA-30133 Revision 1.0 Page 31
Conference 911 Installation Guide Application Configuration
Chapter 4 Application Configuration
This chapter contains the information that you will enter to configure C911. You
can configure the applications after installing the C911 software, as shown in
Chapter 3. (See “Installing the C911 Server Software” on page 11). C911 includes
the following applications:
•C911 Monitor - manages communications among internal processes, agent
stations, beepers, and the NEAX2400. This application is the lifeline to C911.
•C911 Agent Server - manages the agents configured to use the C911
application.
•Message Server - allows multiple C911 agents to communicate with the C911
Agent Server. All C911 agents send their requests to log on and log off as well
as receive all 911 event information when a 911 call takes place through this
NEC proprietary communications link. The C911 Agent Server will send one
event, such as “Station 1234 dialed 911) and the Message Server will send this
information to all C911 agents.
•Beeper Interface - sends information from C911 to pagers configured in the
Pager database.
Before
Configuring the
C911 Software
To configure the C911 Server software, you must log in to the APM
Administration applications on a UNIX terminal. Use the following steps to log in
to the APM Administration application:
Figure 4-1 UNIX Login prompt
1. At the UNIX login prompt, type apmadm (and a password, if one is required)
and press Enter.
The APM Administration menu is displayed.
login: apmadm
password:
Page 32 NDA-30133 Revision 1.0
Application Configuration Conference 911 Installation Guide
Figure 4-2 APM Administration Main menu
2. Type a at the prompt and press Enter to choose the APM option. Enter the
password when prompted.
The APM System Administration menu is displayed.
Figure 4-3 APM System Administration menu
3. Choose the Application Configuration option from the System
Administration menu.
Once you are in the Application Configuration mode, you can check the
parameters set up in the APM for the C911 package. For specific instructions
on what these parameters mean and how to make these entries, refer to the
APM Operations Manual.
APM Platform Release Rel3.1.2 (Feb 2, 1999)
Main Menu
APM
Debug Facilities
Halt APM System
File Archive
Installation of Applications/Packages
Configuration of UAP
Removal of Packages
Startup APM System
Manage Activation Keys
Logout
UNIX
Enter Option: [a]
APM Status: ACTIVE
NEC America APM Administration Sat - Sep 11, 1999
>
*** System Administration ***
System Configuration
Application Configuration
Database Administration
Control Options
Password Maintenance
UAP Status Administration
Operations Menu
Quit
Arrow keys to move cursor, <RET> to select, <ESC> to quit
Applications Manager Administrator Sat - Sep 11, 1999

NDA-30133 Revision 1.0 Page 33
Conference 911 Installation Guide Application Configuration
C911 Monitor Configuration
The following steps outline the process for configuring the C911 Monitor
application.
Follow these steps to verify that the C911 Monitor application is set up correctly in
the APM Application Configuration file:
1. Log in to a UNIX terminal as apmadm.
2. Choose the APM option from the APM Platform Management Menu.
3. Enter the System Administrator password at the APM password screen.
4. Choose the Application Configuration option from the System
Administration menu.
5. Choose Select.
6. On the APM Configuration Entry screen, verify that the entries shown below
are configured in the primary parameters for the C911 Monitor application.
Table 4-1 C911 Monitor Primary Configuration Parameters
Parameter Entry Definition
Application Name C911_Monitor
Specifies the name to be displayed in the APM
menus. This name is displayed however it is entered
here; lower case letters and punctuation are
acceptable; spaces are not.
Executable Filename /oai/app/c911/bin/monitor Defines the path and name of the executable file.
Group C911 Names the group to which the C911 Monitor
application is associated.
Response Mode N(otify) Indicates the action that the APM is to take with the
C911 Monitor application should a member of the
group terminate.
Initialization Batch Y(es) Indicates whether or not (Yes or No) the C911
Monitor application is to be initialized
automatically when the OAI system is initialized.
Termination Mode M(essage) Indicates how the APM is to notify the C911
Monitor application to terminate.
Standard Output /oai/log/dbg/c911mon Designates the file into which Monitor application
output is redirected.
Number of Restarts *(always) Indicates how many times the APM may restart the
C911 Monitor application after it terminates
erroneously.
Queue Key 420 Indicates the unique number of the queue that is to
be assigned to the component.

Page 34 NDA-30133 Revision 1.0
Application Configuration Conference 911 Installation Guide
7. Verify that the following NEAX2400 facilities are configured for the C911
Monitor using the Facilities command on the APM Configuration Entry
screen. (Use the instructions provided for this option in the APM Operations
Manual.)
•SCF - Switch Control Facility
•SMFN - Status Notification Facility
•SMFR - Status Request Facility
•TCFI - Terminal Control Facility
8. Verify that the following OAI Configuration parameters are configured for the
C911 Monitor application using the OAI-Conf command on the APM
Configuration Entry screen. (Use the instructions provided for this option in
the APM Operations Manual.)
Note: Italicized entries may be changed as desired.
Table 4-2 C911 Monitor OAI Configuration Parameters
Parameter Entry Definition
Database Name #1 not used Indicates the path and name of the database
containing information about C911 agent.
Database Name #2 not used Indicates the path and name of the database
containing information about C911 agent.
Timeout Value #1 60 Designates the number of minutes following an
abandonment that C911 can recover the call; 0
means no limit.
Timeout Value #2 0 Designates the number of minutes following an
abandonment that C911 can recover the call; 0
means no limit.
Tenant Number 0 Specifies the number of the tenant that C911
serves. (0 means all tenants)
Source Link Name OAI1TCP
Identifies the port on the source side of the
communication link; entry should correspond to a
link name in the APM system configuration file.
Refer to the APM Operations Manual for
information about the system configuration
option.
Destination Link Name PBX1TCPB
Identifies the port on the destination side of the
communication link; entry should correspond to a
link name in the APM system configuration file.
Refer to the APM Operations Manual for
information about the system configuration
option.
Association Recovery 15 Designates the number of seconds C911 waits
before trying to re-establish an association with
the NEAX that has been released.

NDA-30133 Revision 1.0 Page 35
Conference 911 Installation Guide Application Configuration
9. Verify that the following User Defined parameters are configured for the C911
Monitor application using the UserDefined command on the OAI
Configuration screen. (Use the instructions provided for this option in the APM
Operations Manual.)
Note: Italicized entries may be changed as desired.
Table 4-3 C911 Monitor User Defined Parameters
User Defined Entry Definition
#1 /oai/app/c911/bin/report Indicates the path and name of the process that performs the
911 event logging.
#2 /oai/log/c911 Indicates the path and name of the directory of the log files.
#3 /oai/db/cur/c9agt_m Indicates the path and name of the APM database for C911
agents
#4 /oai/db/cur/c9ali_m Indicates the path and name of the APM database for ALI
records
#5 /oai/db/cur/c9cus_m Indicates the path and name of the APM database for
customer, employee, or student records
#6 /oai/db/cur/c9pbx_m Indicates the path and name of the APM database for PBX
records
#7 /oai/db/cur/c9pgr_m Indicates the path and name of the APM database for beeper
records
#8 /oai/db/cur/c9sta_m Indicates the path and name of the APM database for all
station records
#9 /oai/db/cur/c9trk_m Indicates the path and name of the APM database for 911
trunk records
#10 Daily
Indicates whether or not the call log file is to be backed up
automatically, and if so how frequently, using the following
entries:
None Not automatic; backup must be done
manually through Administrator application.
(Default entry)
Daily Automatic backup every day for 7 days; files
named C9log.Sun through C9log.Sat; each
file saved for 7 days.
Weekly Automatic backup every week for 26 weeks;
files named C9log.w01 through C9log.w26;
each file saved for 26 weeks.
Monthly Automatic backup every month for 12
months; files named C9log.Jan through
C9log.Dec; each file saved for 12 months.
#11 1 Indicates the number of the tenant assigned to the emergency
trunks.

Page 36 NDA-30133 Revision 1.0
Application Configuration Conference 911 Installation Guide
Agent Server Configuration
The following steps outline the process for configuring the C911 Agent Server
application.
Follow these steps to verify that the C911 Agent Server application is set up
correctly in the APM Application Configuration file:
1. Log in to a UNIX terminal as apmadm.
2. Choose the APM option from the APM Platform Management Menu.
3. Enter the System Administrator password at the APM password screen.
4. Choose the Application Configuration option from the System
Administration menu.
5. Choose Select.
6. On the APM Configuration Entry screen, verify that the entries shown below
are configured in the primary parameters for the C911 Agent Server
application.
#12 15 Indicates the number of seconds between heartbeats
#13 /oai/app/beeper/cfg/config Indicates the path and name of the beeper configuration
#14 425 Indicates the message queue that receives responses from the
beeper interface.
Table 4-3 C911 Monitor User Defined Parameters
User Defined Entry Definition
Table 4-4 C911 Agent Server Primary Configuration Parameters
Parameter Entry Definition
Application Name C911_AgentServer
Specifies the name to be displayed in the APM
menus. This name is displayed however it is entered
here; lower case letters and punctuation are
acceptable; spaces are not.
Executable Filename /oai/app/c911/bin/agentserver Defines the path and name of the executable file.
Group C911 Names the group to which the C911 Agent Server
application is associated.
Response Mode N(otify) Indicates the action that the APM is to take with the
C911 Agent Server application should a member of
the group terminate.
Initialization Batch Y(es) Indicates whether or not (Yes or No) the C911
Agent Server application is to be initialized
automatically when the OAI system is initialized.
Termination Mode M(essage) Indicates how the APM is to notify the C911 Agent
Server application to terminate.

NDA-30133 Revision 1.0 Page 37
Conference 911 Installation Guide Application Configuration
7. Verify that the following User Defined parameters are configured for the C911
Agent Server application using the UserDefined command on the OAI
Configuration screen. (Use the instructions provided for this option in the APM
Operations Manual.)
Note: Italicized entries may be changed as desired.
Standard Output /oai/log/dbg/c911agt Designates the file into which the C911 Agent
Server application output is redirected.
Number of Restarts *(always) Indicates how many times the APM may restart the
C911 Agent Server application after it terminates
erroneously.
Queue Key 421 Indicates the unique number of the queue that is to
be assigned to the component.
Table 4-4 C911 Agent Server Primary Configuration Parameters
Parameter Entry Definition
Table 4-4 C911 Agent Server User Defined Parameters
User Defined Entry Definition
#1 C911_AgentServer Indicates the application name.
#2 C911_Monitor Indicates the application name.
#3 UAP2000 arena
Indicates the name of the UAP being used as a server.
To obtain the UAP name, type the following from the
UNIX prompt:
uname -X
The UAP name is listed as the Node. Enter UAP2000 in
this field.
#4 - #14 Not used

Application Configuration Conference 911 Installation Guide
Page 38 NDA-30133 Revision 1.0
This Page Left Blank.
NDA-30133 Revision 1.0 Page 39
Conference 911 Installation Guide Database Requirements
Chapter 5 Database Requirements
Overview
C911 uses seven databases that are constructed through the APM: Agent, Ali,
Customer, PBX, Pager, Station, and Trunk.
These databases are created during the C911 installation process, but they will need to
be populated. When the C911 installation process created the databases, a master
definition file was created and built for each database, as shown in Figure 5-1:
Figure 5-1 Database Creation Process
1. Create a Master Definition File: This step involves creating the master definition
file that defines the fields in the master database file. C911 creates the master
definition files for all seven databases during installation. These files should not be
changed.
2. Build a Master Database File: This step involves entering tenant-specific data
(e.g., name, account code, station, room number or building) into the master
database fields that were just defined in the master definition files in Step 1.
Note: If you have installed the C911 software as described in “Installing the C911
Server Software” on page 11, the master definition file has been created for each
of the seven databases.
Once the databases are built, deleting or changing the field definitions
may adversely affect the integrity of the database records. Do not
change the field definitions in the C911 databases!
Once the databases are built, deleting or changing the field definitions
may adversely affect the integrity of the database records. Do not
change the field definitions in the C911 databases!
Create a Master
Definition File Build a Master
Database File
Warning!
Warning!

Page 40 NDA-30133 Revision 1.0
Database Requirements Conference 911 Installation Guide
Working with the Databases
The information required for each of the seven C911 databases is provided in table
form on the following pages. Using this information alongside of the procedural
instructions provided in the APM Operations Manual, enter the Database
Administration option on the APM System Administration Menu and build the C911
databases, one at a time. Any messages displayed during these steps are addressed in
the Process and Error Messages chapter of the APM Operations Manual.
Use the following steps to build or view the C911 databases:
Figure 5-2 UNIX Login prompt
1. At the UNIX login prompt, type apmadm (and a password, if one is required) and
press Enter.
The APM Administration menu is displayed.
Figure 5-3 APM Administration Main menu
2. Type a at the prompt and press Enter to choose the APM option. Enter the password
when prompted.
login: apmadm
password:
APM Platform Release Rel3.1.2 (Feb 2, 1999)
Main Menu
APM
Debug Facilities
Halt APM System
File Archive
Installation of Applications/Packages
Configuration of UAP
Removal of Packages
Startup APM System
Manage Activation Keys
Logout
UNIX
Enter Option: [a]
APM Status: ACTIVE
NEC America APM Administration Sat - Sep 11, 1999
NDA-30133 Revision 1.0 Page 41
Conference 911 Installation Guide Database Requirements
The APM System Administration menu is displayed.
Figure 5-4 APM System Administration menu
3. Select the Database Administration option from the System Administration
menu.
The Database Administration menu is displayed.
Figure 5-5 Database Administration menu
4. Select the Build Master Database option to create a new database or view an
existing database.
This chapter contains the information about the individual C911 databases.
>
Applications Manager Administrator Sat - Sep 11, 1999
*** System Administration ***
System Configuration
Application Configuration
Database Administration
Control Options
Password Maintenance
UAP Status Administration
Operations Menu
Quit
Arrow keys to move cursor, <RET> to select, <ESC> to quit
>
*** Database Administration ***
Define Master Database Fields
Build Master Database
Specify Application Database Fields
Process Application Database
Install Application Database
Verify Application Database
List Database Relationships
Exhibit Master Database Views
Quit
Arrow keys to move cursor, <RET> to select, <ESC> to quit
Applications Manager Administrator Sat - Sep 11, 1999
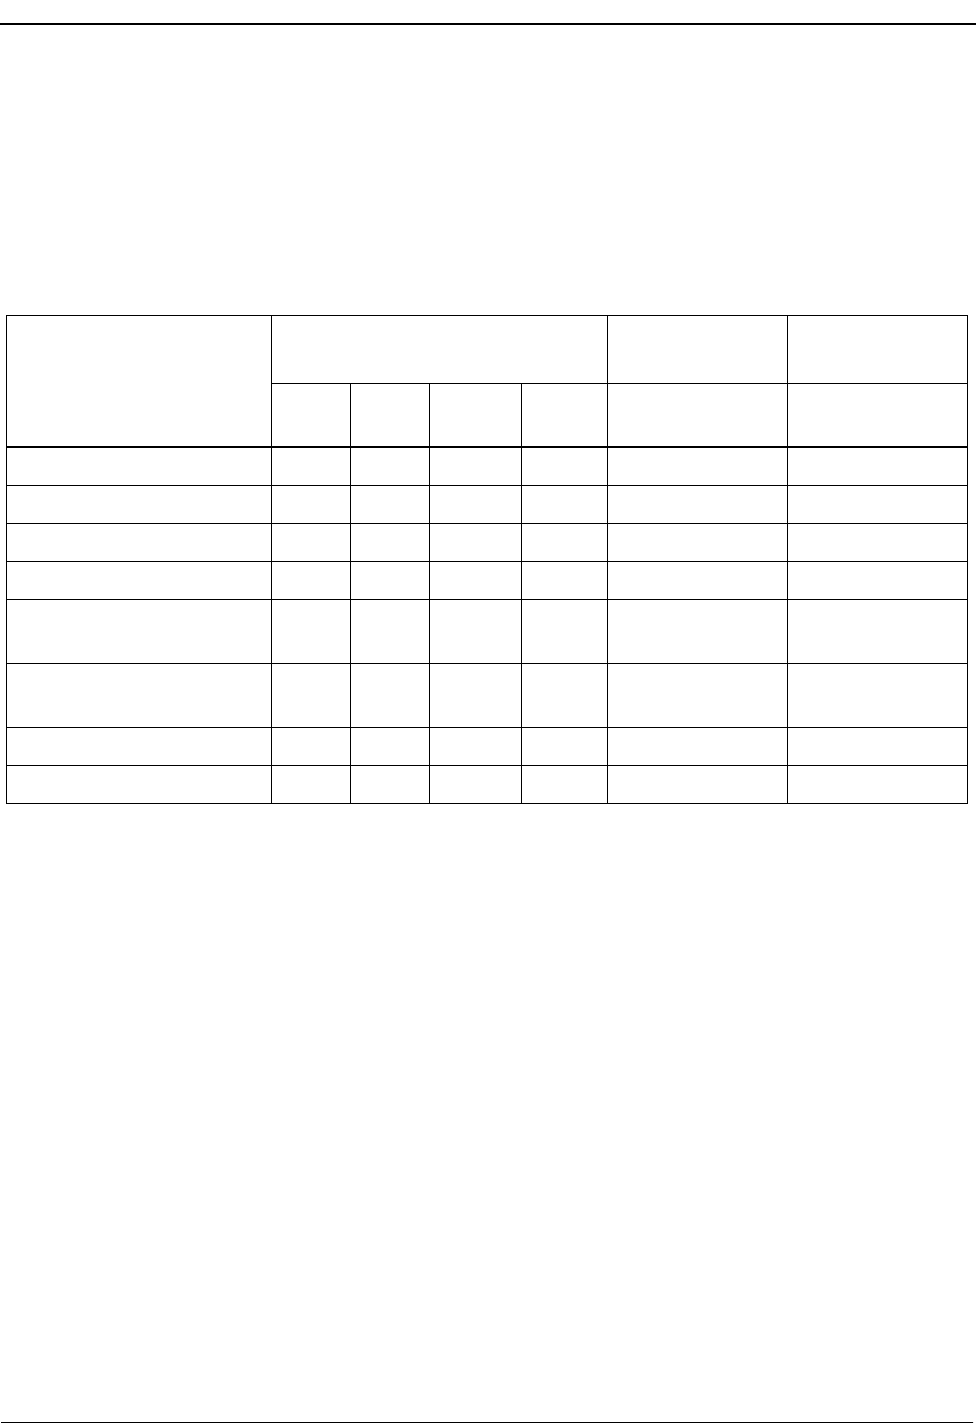
Page 42 NDA-30133 Revision 1.0
Database Requirements Conference 911 Installation Guide
About the Agent Database
This database contains information about each of the C911 agents and is sorted by
agent name. The fields in this database are defined by the user organization. The name
of the Agent Master Definition file must be c9agt_m.mdf, and the name of the Agent
Master Database file must be c9agt_m.
Field Definitions
Name
Name of the agent; up to 25 characters. This is the key field used in sorting. The
recommended form is “Last name, First initial”. This is the login name for the C911
agent.
Password
The agent’s password; up to 25 characters.
Supervisor
Name of the agent’s supervisor; up to 25 characters.
Station
The agent’s station, up to 25 characters.
Location
User-defined alphanumeric field of up to 25 characters describing the agent’s location.
Log on/off Date & Time
The agent’s last activity, either logging in or logging out. It is formatted as yyyy-mm-
dd hh:mm:ss. The server fills this field automatically.
Table 5-1 Agent Database Description
Field Description Master Definition File Application
Definition File Master Database
Type Size Min.
Value Max.
Value Data Type Typical Entry
Name A 25 ASCII Mary S.
Password A 25 ASCII 123456
Supervisor A 25 ASCII Smith, Ray
Station A 25 ASCII 7301
Location A 25 ASCII Security Office
2nd Floor
Log on/off Date and Time A 25 ASCII 1999-08-01
21:00:55
Arena Handle A 4 ASCII abcd
Status A 1 ASCII 1

NDA-30133 Revision 1.0 Page 43
Conference 911 Installation Guide Database Requirements
Arena Handle
Computer generated alphanumeric code associated with this agent used by the C911
Agent Server. The server fills this field automatically.
Status
Indicates if this agent is logged on or logged off; “0” means that the C911 agent is
logged off, and “1” means that the C911 agent is logged on. The server fills this field
automatically.
About the Customer Database
This database contains information about the telephone users, such as residents,
students, or employees. The name of the Customer Master Definition file must be
c9cus_m.mdf, and the name of the Customer Master Database file must be c9cus_m.
Field Definitions
Name
The name associated with this Customer record, up to 25 characters. This field can be
cross-referenced with the Customer Name field in the ALI database.
ID
Identifies this customer record, up to 25 characters.
Station
The station associated with this customer record, up to 25 characters. This field is cross-
referenced with the Station field in the Station database.
Table 5-2 Customer Database Description
Field
Description Master Definition File Application
Definition File Master Database
Type Size Min.
Value Max.
Value Data Type Typical Entry
Name A 25 ASCII Baker, Stan
ID A 25 ASCII 123456
Station A 25 ASCII 3456

Database Requirements Conference 911 Installation Guide
Page 44 NDA-30133 Revision 1.0
About the ALI Database
The Automatic Location Information or ALI database provides information about the
callers for the C911 agents and emergency agencies. The name of the ALI Master
Definition file must be c9ali_m.mdf, and the name of the ALI Master Database file
must be c9ali_m.
The records in the ALI database are mapped to the Station database using the Calling
Telephone number field. (See “About the Station Database” on page 48 for more
information.) Although the ALI database records are very important, these records are
not required for C911 to operate.
Field Definitions
Calling Telephone Number
Telephone number that is cross-referenced from the Calling Number field in the Station
table; numeric field of up to 10 characters.
Status
Indicates the status of this record; “A” means that this record is active and “I” means
that this record is inactive.
Table 5-3 ALI Database Description
Field Description Master Definition File Application
Definition File Master Database
Type Size Min.
Value Max.
Value Data Type Typical Entry
Calling Telephone Number N 10 Numeric 817-555-2222
Status A 1 ASCII A or I
AddressA A 25 ASCII 123 Main Street
AddressB A 25 ASCII Building A
Community A 25 ASCII Irving
State A 2 ASCII TX
Location Info A A 25 ASCII User-defined
Location InfoB A 25 ASCII User-defined
Also Rings at Address A 25 ASCII 456 Broadway
Customer Name A 25 ASCII Jones, John
Class & Type of Service A 2 ASCII
Emergency Service Number A 5 ASCII
Main Number N 10 Numeric 972-555-1111
Comments A 25 ASCII User-defined

NDA-30133 Revision 1.0 Page 45
Conference 911 Installation Guide Database Requirements
AddressA
User-defined address field of up to 25 alphanumeric characters.
AddressB
User-defined address field of up to 25 alphanumeric characters.
Community
The city where this telephone number is located; up to 25 characters.
State
The abbreviation of the state where this telephone number is located; up to 2 characters.
Location Info A
User-defined field of up to 25 alphanumeric character; describes the location of this
station.
Location Info B
User-defined field of up to 25 alphanumeric character; describes the location of this
station.
Also Rings at Address
If this number also rings at secondary address, this field list the other address; up to 25
alphanumeric characters.
Customer Name
The name of the employee, resident, guest, or occupant associated with this station; up
to 25 characters. This can be cross-referenced with the Name field in the Customer
Database.
Class & Type of Service
Code that specifies whether the phone is PBX station, cell phone, residential, private
unlisted; up to 2 digits.
Emergency Service Number
Main number associated with a company or location, assigned by NENA.
Main Number
The main number for this station; up to 10 digits.
Comments
User-defined field for miscellaneous comments; up to 25 characters.

Page 46 NDA-30133 Revision 1.0
Database Requirements Conference 911 Installation Guide
About the PBX Database
This database contains information about the PBXs in use, such as descriptions, IP
addresses, and IP ports. The name of the PBX Master Definition file must be
c9pbx_m.mdf, and the name of the PBX Master Database file must be c9pbx_m.
Field Definitions:
PBX Index
Number in the APM database that identifies this PBX, up to 2 digits ranging from 1 - 99
Description
Description of this PBX; up to 25 characters.
C911 Monitor Application
Identifies the C911 application that uses this PBX, such as C911 Monitor; up to 25
characters.
IP Address
The IP address associated with this PBX; up to 25 characters.
IP Port
The port used at the IP address associated with this PBX; up to 5 digits.
Table 5-4 PBX Database Description
Field
Description Master Definition File Application
Definition File Master Database
Type Size Min.
Value Max.
Value Data Type Typical Entry
PBX Index N 2 1 99 Short Integer 2
Description A 25 ASCII Building 1
C911 Monitor
Application A 25 ASCII C911_Monitor
IP Address A 25 ASCII 143.128.69.43
IP Port N 5 0 Short Integer 206

NDA-30133 Revision 1.0 Page 47
Conference 911 Installation Guide Database Requirements
About the Pager Database
This database contains information about the beepers configured for use with the
Beeper Interface, such as descriptions, beeper access numbers, and the last message
sent to that beeper. The name of the Pager Master Definition file must be
c9pgr_m.mdf, and the name of the Pager Master Database file must be c9pgr_m.
Field Definitions:
Pager ID
ID identifying the pager to be notified
Pager Description
Description of who carries this pager, such as “Security” or “Hotel Manager”; up to 25
characters.
Pager Access Number
Number used to access paging service; up to 25 characters.
Paging Application
The name of the APM application using this paging record; such as C911; up to 4
characters.
Last Pager Message
The last message sent to paging device, up to 25 characters. The server fills this field
automatically.
Last Pager Result
The response supplied by the paging interface, such as the page was successful; up to
25 characters. The server fills this field automatically.
Use this pager
Specifies whether or not this pager should be used; “0” means that this pager should
not be used and “1” means that this pager should be used.
Table 5-5 Pager Database Description
Field Description Master Definition File Application
Definition File Master Database
Type Size Min.
Value Max.
Value Data Type Typical Entry
Pager ID A 8 ASCII
Pager Description A 25 ASCII Security
Pager Access Number A 25 ASCII 800-555-1111
Paging Application A 4 ASCII C911
Last Pager Message A 25 ASCII 911: 7301
Last Pager Result A 25 ASCII Successful
Use this pager N 1 0 2 Short Integer 1 (means yes)

Page 48 NDA-30133 Revision 1.0
Database Requirements Conference 911 Installation Guide
About the Station Database
This database contains information about all relevant stations in the PBX. The name of
the Station Master Definition file must be c9sta_m.mdf, and the name of the Station
Master Database file must be c9sta_m.
Field Definitions:
Station
The actual station number; this is the key field used in sorting. This field is cross-
referenced with the Station field in the Customer database.
PBX Index
Identifies the PBX that controls this station; up to 2 digits. This field is cross-referenced
with the PBX Index field in the PBX database.
Tenant
The tenant number associated with this station; up to 5 digits.
Calling Number
Identifies the telephone number associated with this station; up to 10 digits. This field
is cross-referenced with Calling Telephone Number in the ALI database.
Table 5-6 Station Database Description
Field
Description Master Definition File Application
Definition File Master Database
Type Size Min.
Value Max.
Value Data Type Typical Entry
Station A 25 ASCII 3600
PBX Index N 2 0 99 Short Integer 0
Tenant N 5 0 99999 Short Integer tenant associated
in PBX Typ. 1
Calling Number N 10 0 Long Integer 972-555-1111

NDA-30133 Revision 1.0 Page 49
Conference 911 Installation Guide Database Requirements
About the Trunk Database
This database contains information about the outgoing 911 trunk. It is organized by
Station Name and configured as E9opdb. The name of the Trunk Master Definition file
must be c9trk_m.mdf, and the name of the Trunk Master Database file must be
c9trk_m.
Field Definitions
Trunk Index
Code that identifies this trunk; up to 2 digits.
PBX Index
Index for this trunk record; up to 2 digits.
Tenant Number
Identifies the tenant number associated with this trunk; up to 5 digits.
Class
Identifies the class associated with this trunk; up to 5 digits.
Table 5-7 Trunk Database Description
Field Description Master Definition File Application
Definition File Master Database
Type Size Min.
Value Max.
Value Data Type Typical Entry
Trunk Index N 2 1 99 Short Integer 2
PBX Index N 2 1 99 Long Integer 3
Tenant Number N 5 0 99999 Long Integer
Class N 5 0 99999 Long Integer
Route N 5 0 99999 Long Integer
Trunk N 5 0 99999 Long Integer
Conference Line A 25 ASCII
Calling Station A 25 ASCII
Calling Route N 5 0 99999 Long Integer
Calling Trunk N 5 0 99999 Long Integer
Agent Station on
cnf call A25 ASCII
Status-Trk, Caller
& Agent A3 ASCII
Monitor this
Trunk A1 0 2 ASCII 0 = No
1 = Yes

Page 50 NDA-30133 Revision 1.0
Database Requirements Conference 911 Installation Guide
Route
Identifies the route associated with this trunk; up to 5 digits.
Trunk
The trunk number associated with this trunk; up to 5 digits.
Conference Line
The dedicated subline used to conference with the 911 caller and the PSAP; up to 25
characters. The Conference Line should be available on every agent’s Dterm.
Calling Station
Identifies the station of party calling 911; up to 25 characters. The server automatically
fills this field.
Calling Route
Identifies the route being used by the party calling 911; up to 5 digits. The server
automatically fills this field.
Calling Trunk
Identifies the route being used by the party calling 911 for calls originating over CCIS;
up to 5 digits. The server automatically fills this field.
Agent Station on cnf call
Identifies the agent that is conferenced in to the 911 call and the PSAP; up to 25
characters. The server automatically fills this field.
Status-Trk, Caller & Agent
ASCII code that indicates the status of the parties connected to the call, such as the
connection between the PSAP and the caller is idle. The server automatically fills this
field.
Monitor this Trunk
Code that specifies whether or not this trunk is to be monitored; “0” means that this
trunk is not monitored and “1” means that this trunk is monitored.
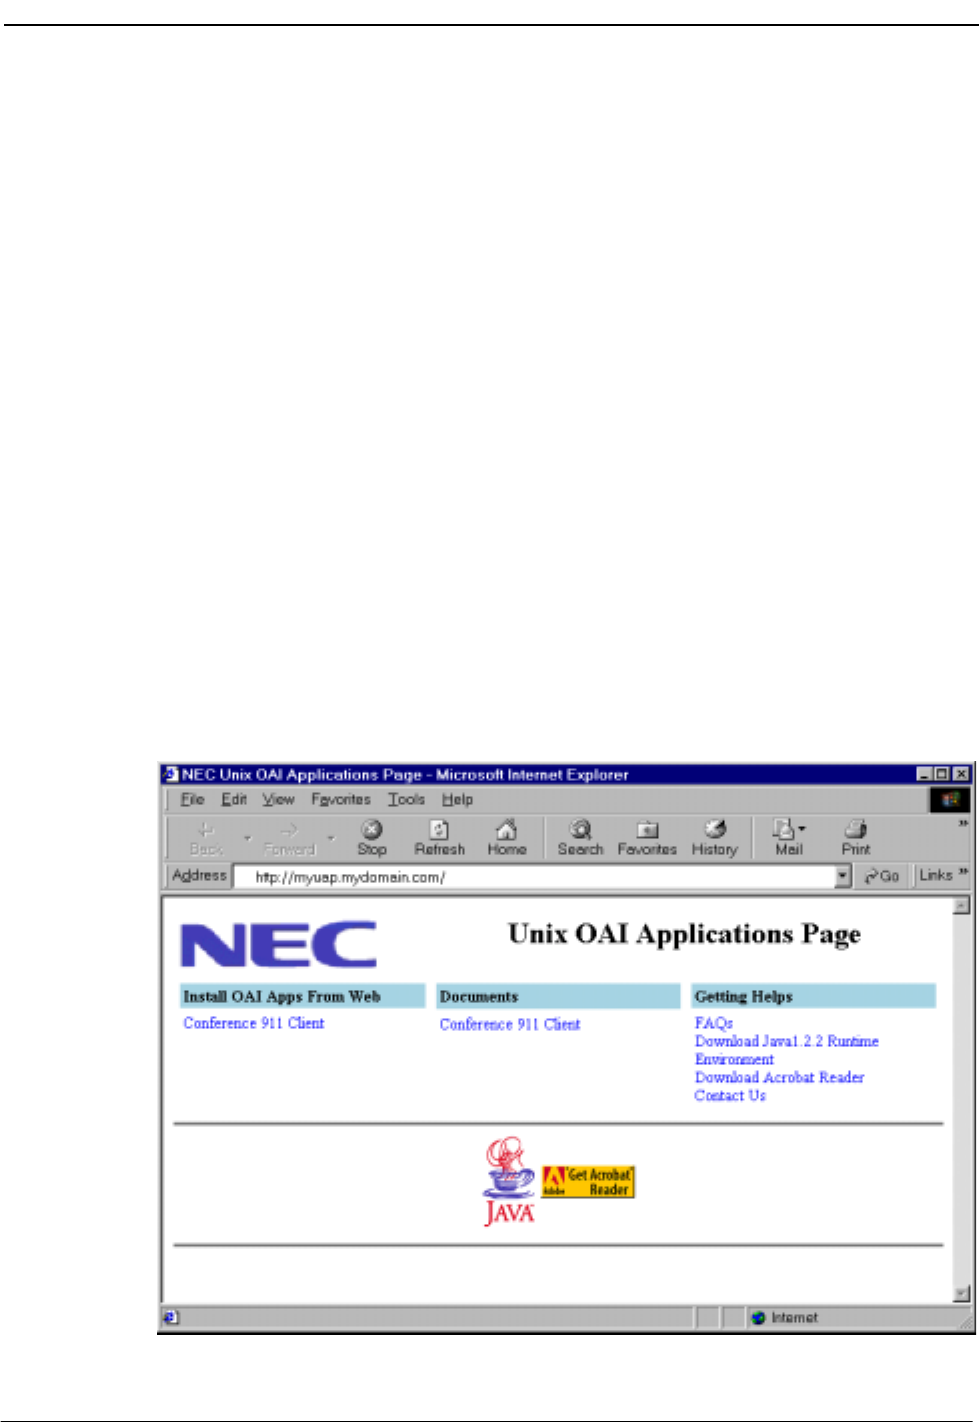
NDA-30133 Revision 1.0 Page 51
Conference 911 Installation Guide Installing the C911 Client
Chapter 6 Installing the C911 Client
Overview
This chapter provides step-by-step procedures to install and configure the C911
Client application. Descriptions and step-by-step instructions are found in the
following sections of this chapter:
The C911 Client software can be installed on the workstations used by C911 agents
to assist them in processing emergency calls. This element can be installed on any
workstation that is networked and connected to the C911 Server. For more
information about the Web Server, see “Installing the Web Server” on page 28.
Installing the C911 Client
Use the following steps to install the C911 Client software:
1. Access the NEC UNIX OAI Applications site from your web browser through
one of the following addresses:
•Enter your UAP name and your domain name. For example, if your UAP
name is “myuap” and your domain name is “mydomain.com”, then enter
“myuap.mydomain.com” to access the UNIX OAI Applications Page, as
shown in Figure 6-1.
•Enter the IP Address of your UAP. For example, enter 143.101.192.16.
Figure 6-1 NEC UNIX OAI Applications Installation Page
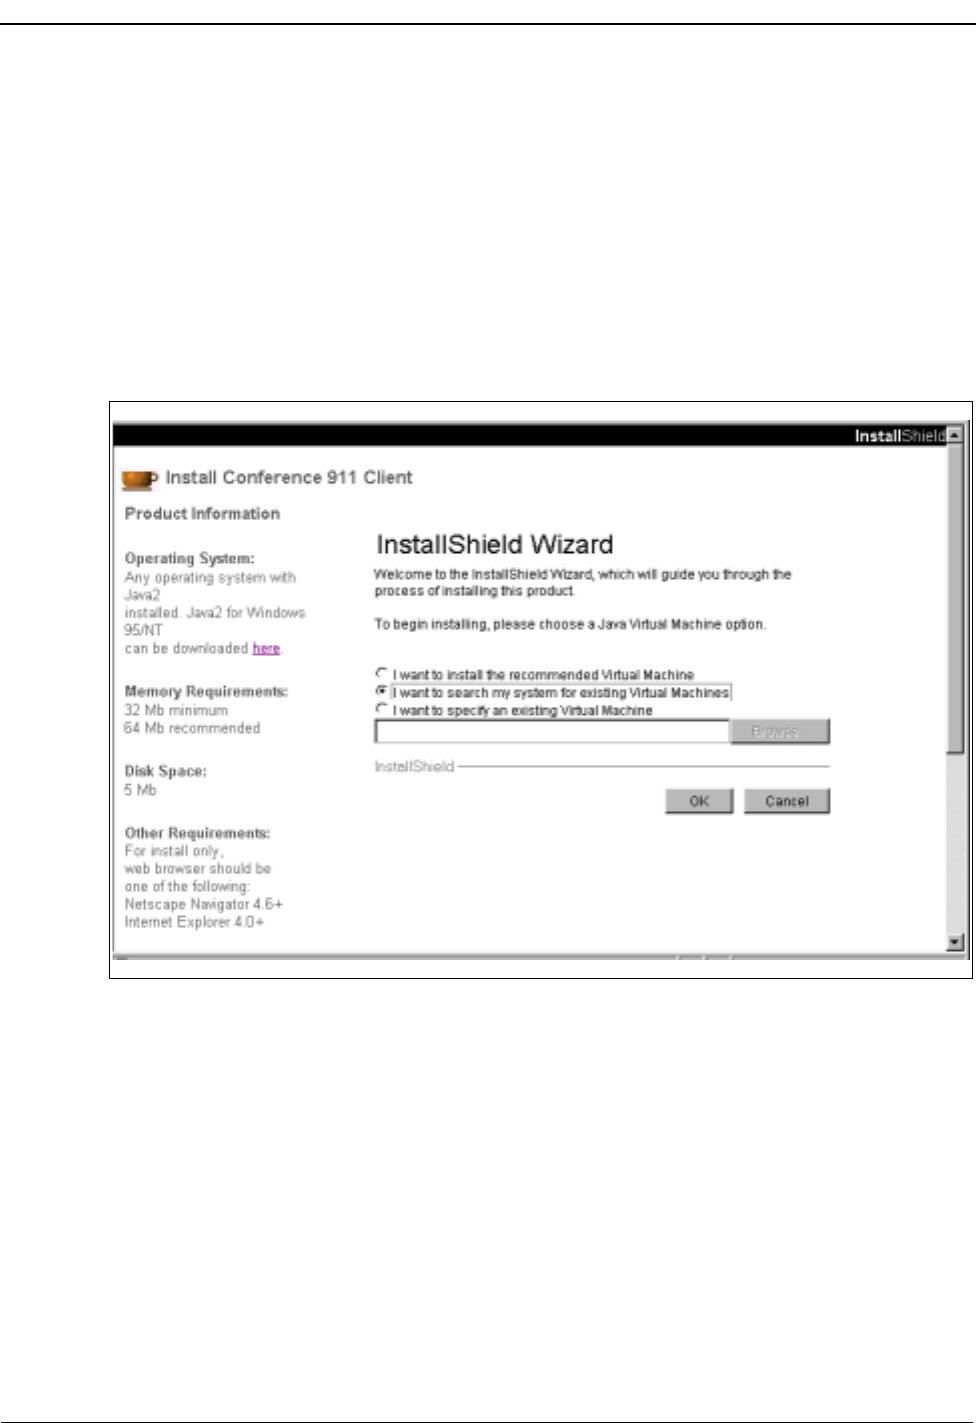
Page 52 NDA-30133 Revision 1.0
Installing the C911 Client Conference 911 Installation Guide
2. Select Download Java1.2.2 Runtime Environment from the “Getting Help”
section to install the Java Runtime Environment on your workstation.
Your browser guides you through a series of prompts to install the Java
Runtime Environment. Follow the prompts to complete the Java Runtime
Environment installation program.
After the Java Runtime Environment installation is complete, the NEC UNIX
OAI Applications Installation Page is displayed.
3. Select the Conference 911 Client from the “Install OAI Apps From Web”
section to begin installing the C911 Client.
The Java Virtual Machine option dialog box is displayed.
Figure 6-2 Java Virtual Machine option dialog box
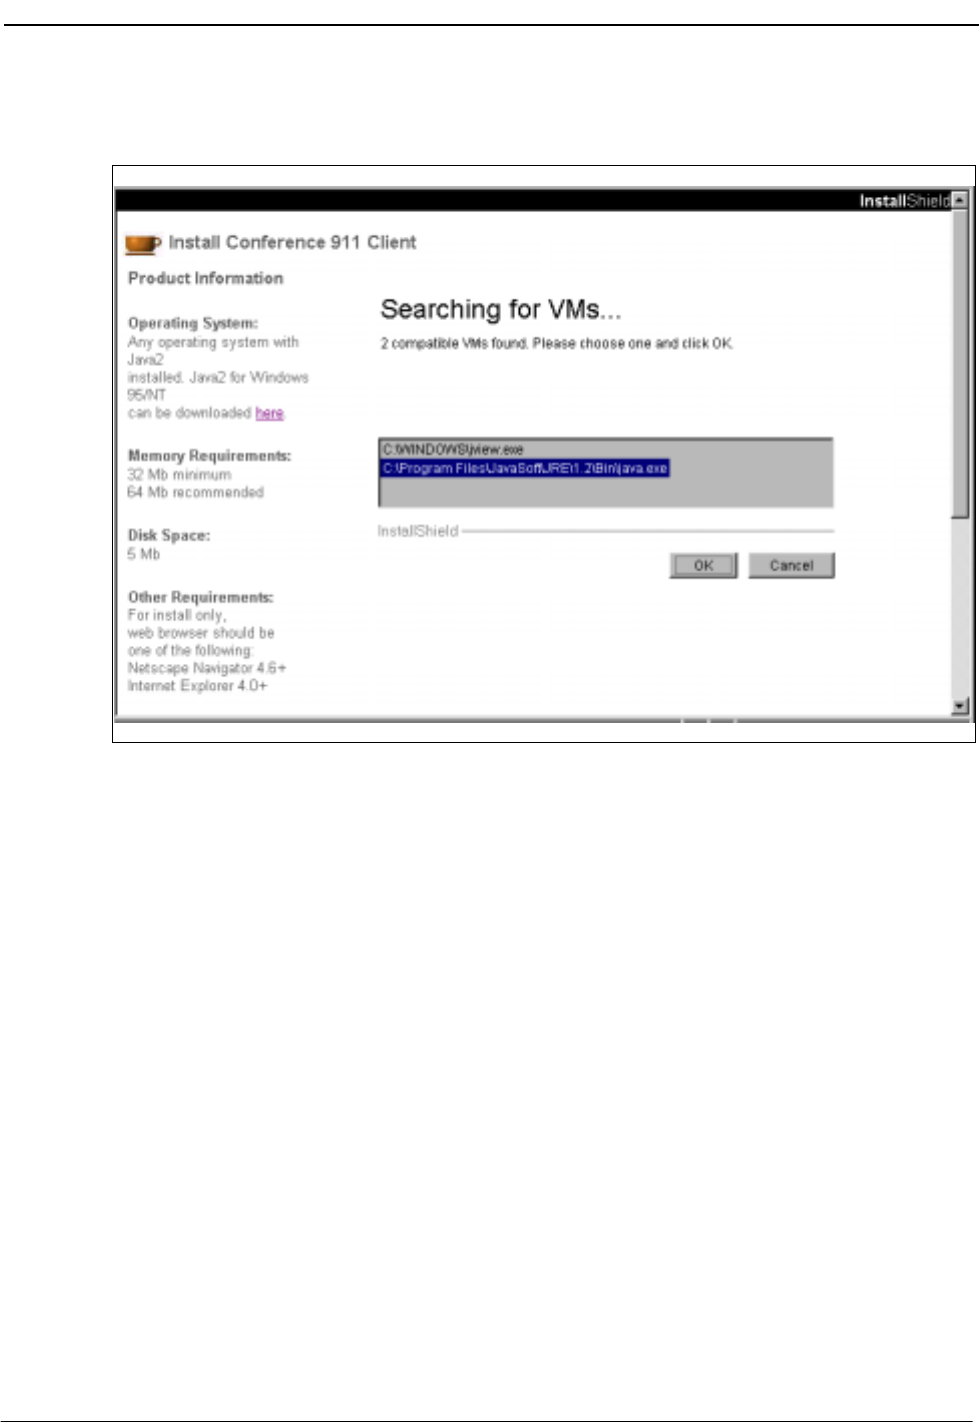
NDA-30133 Revision 1.0 Page 53
Conference 911 Installation Guide Installing the C911 Client
4. Select the I want to search my system for existing Virtual Machines option.
The Searching for VMs dialog box is displayed.
Figure 6-3 Searching for VMs dialog box
The installation program searches for installed virtual machines and displays
the installed virtual machines in the window.
Select the pathname of the Java Virtual machine, then click OK.
For example, select “c:\Program Files\JavaSoft\JRE\1.2\Bin\java.exe” to
select the pathname of the Java Virtual Machine as shown in Figure 6-3
above.
The application is installed to the default directory. A progress indicator in
the browser window indicates how much of the installation is complete, as
shown in Figure 6-4 on page 54.
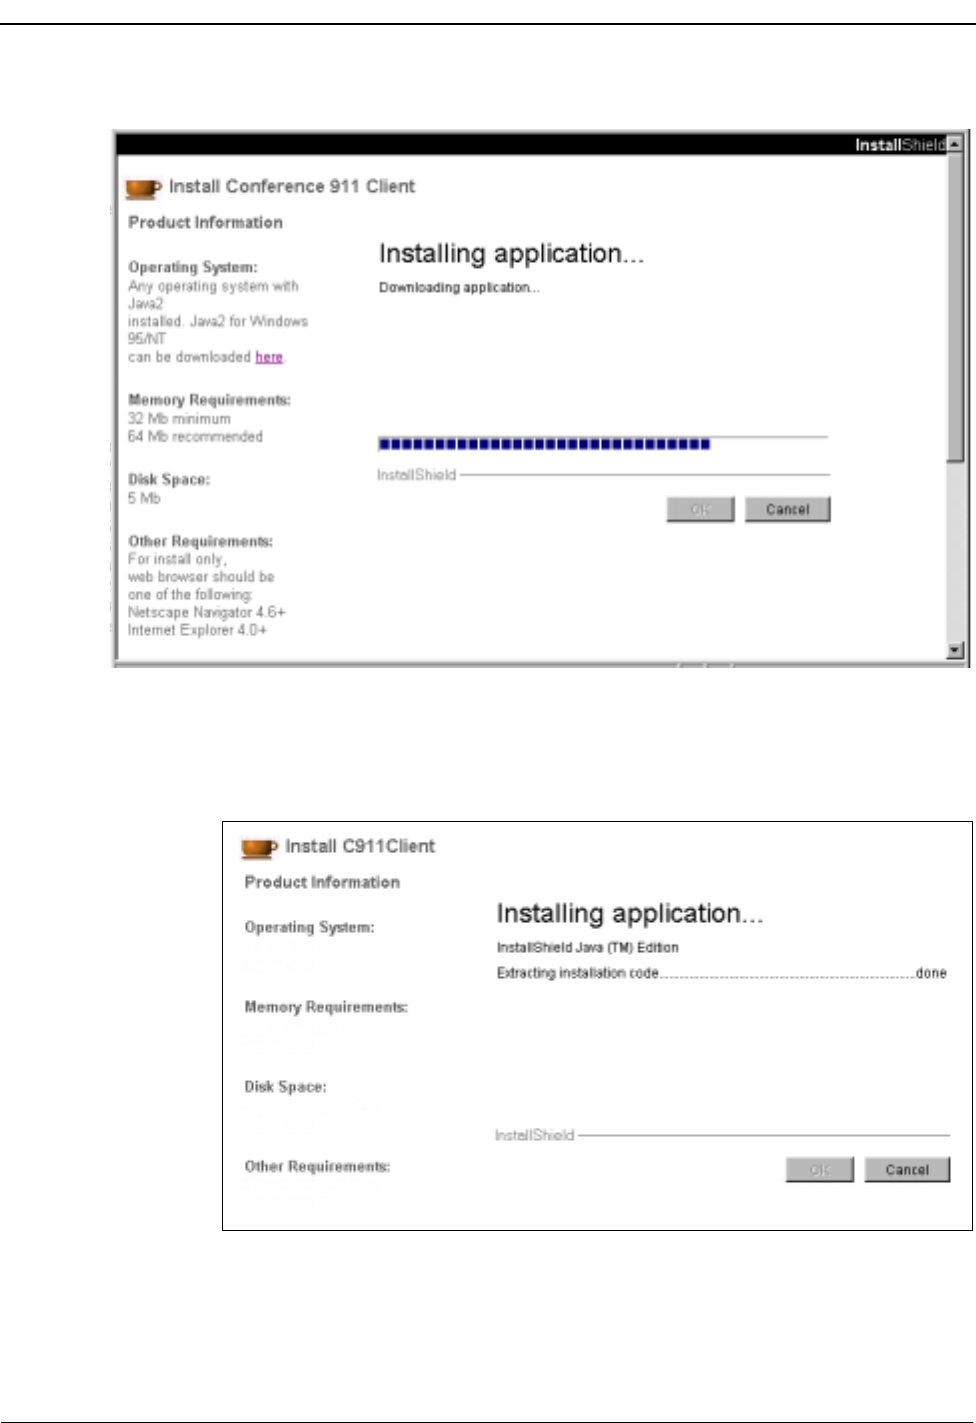

NDA-30133 Revision 1.0 Page 55
Conference 911 Installation Guide Installing the C911 Client
Figure 6-6 Welcome dialog box
6. Click Next.
The Choose Destination Directory dialog box is displayed
.
Figure 6-7 Choose Destination Directory dialog box

Page 56 NDA-30133 Revision 1.0
Installing the C911 Client Conference 911 Installation Guide
7. Do one of the following:
•Type the desired pathname in the Primary Destination Directory field, then
click Install.
•Click Browse.
The Primary Destination dialog box is displayed.
Figure 6-8 Primary Destination dialog box
Select the path from the available folders. Click OK when finished.
The dialog box closes and the Choose Destination Directory dialog box is
displayed with the pathname in the Primary Destination Directory field.
Click Install to continue.
The application is installed to the chosen directory. A progress indicator
shows how much of the installation is complete, as shown in Figure 6-4 on
page 54.
The pathname entered in the Primary Destination Directory
field should not contain spaces. For example, do not enter the
directory name “Program Files”.
Warning!
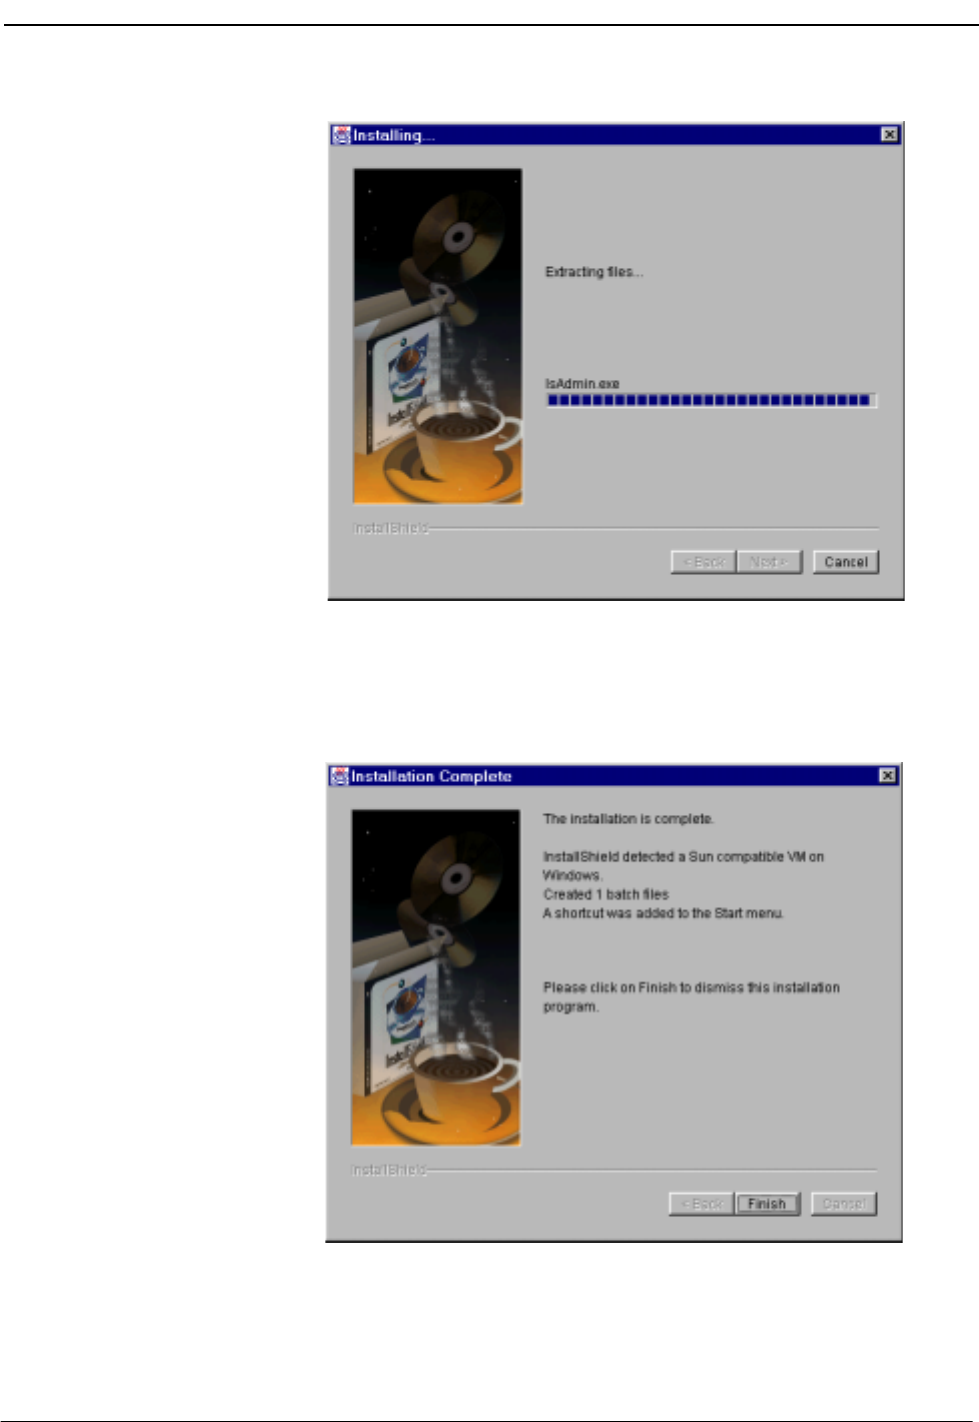
NDA-30133 Revision 1.0 Page 57
Conference 911 Installation Guide Installing the C911 Client
Figure 6-9 Installing Files progress indicator
8. When the installation program is finished, the Installation Complete dialog box
is displayed.
Figure 6-10 Installation Complete dialog box

Page 58 NDA-30133 Revision 1.0
Installing the C911 Client Conference 911 Installation Guide
9. Click Finish.
The C911 Client is now installed. Refer to the Conference 911 User Guide for more
information about the C911 Client application.

NDA-30133 Revision 1.0 Page 59
Conference 911 Installation Guide Running the C911 Package
Chapter 7 Running the C911 Package
Overview
This chapter details how to test, initialize, and terminate the C911 system, in addition
to the limitations of the applications.
Initializing C911
C911 must be initialized through the APM Operations Menu according to instructions
provided in the APM Operations Manual. Although each of the configured applications
is initialized individually, the C911 Monitor should be initialized prior to the Agent
Server. If the C911 Monitor is not running, all C911 agents are unable to log on until
the Monitor is active.
Both the Agent Server and the C911 Monitor applications are non-CRT applications
because they do not require the APM screen. These applications are initialized through
the Non-CRT Application option on the APM Operations Menu.
Note: The C911 Monitor and Agent Server applications should always remain running.
Terminating C911
Termination of any or all of the applications of C911 may be performed at any time
according to instructions provided in the APM Operations Manual. If the C911 Monitor
is terminated, all C911 agents will be notified that the “PBX Link” is down. Out of
courtesy, anyone who is going to terminate C911, the C911 Monitor, or the Agent
Server should alert users.

Page 60 NDA-30133 Revision 1.0
Running the C911 Package Conference 911 Installation Guide
Testing C911
After installing and configuring the C911 system, you should perform tests to ensure
that all C911 applications are functioning correctly.
If the main NEAX2400 is using CCIS to get to another PBX, you can set up two or three
trunks to be used for calls to a specific PBX or set of stations. The C911 Monitor
application can then monitor these trunks instead of the real 911 trunks. Using this
method, when a call is made over CCIS and these trunks are seized, this will simulate
a 911 call to the PSAP.
Listed below are some suggested test cases for verifying the functionality of C911:
1. Local station calls 911 and hangs up.
2. Local station calls 911, the PSAP answers, then the caller hangs up.
3. Local station calls 911, the PSAP answers, then the PSAP hangs up.
4. Local station calls 911, the PSAP answers, the C911 agent answers, then the caller
hangs up.
5. Local station calls 911, the PSAP answers, the C911 agent answers, then the C911
agent hangs up.
6. Local station calls 911, the PSAP answers, the C911 agent answers, then the PSAP
hangs up.
7. Local subline calls 911 and hangs up.
8. Local subline calls 911, the PSAP answers, then the caller hangs up.
9. Local subline calls 911, the PSAP answers, then the PSAP hangs up.
10. Local virtual calls 911 and hangs up.
11. Local virtual calls 911, the PSAP answers, then the caller hangs up.
12. Local virtual calls 911, the PSAP answers, then the PSAP hangs up.
13. CCIS station calls 911 and hangs up.
14. CCIS station calls 911, the PSAP answers, then the caller hangs up.
15. CCIS station calls 911, the PSAP answers, then the PSAP hangs up.
16. CCIS subline calls 911 and hangs up.
17. CCIS subline calls 911, the PSAP answers, then the caller hangs up.
18. CCIS subline calls 911, the PSAP answers, then the PSAP hangs up.
19. CCIS virtual calls 911 and hangs up.
20. CCIS virtual calls 911, the PSAP answers, then the caller hangs up.
21. CCIS virtual calls 911, the PSAP answers, then the PSAP hangs up.

NDA-30133 Revision 1.0 Page A-1
Conference 911 Installation Guide Software Limitations
Appendix A Software Limitations
Overview
This section specifies the limitations and service conditions of the Conference 911
system.
Service Conditions
The following are some service conditions found in the C-911 applications.
•Conferencing with C-911 agent is not available when an attendant console calls
911.
•Conferencing with C-911 agent is not available during a screened transfer to
911. A Screened Transfer to 911 is a scenario where a party transfers another
party to 911 number and the 911 trunk answers before the transferring party
releases. The transferring party could be a station or attendant console.
•Conferencing with C-911 agent is not available when the caller is from a remote
PBX (e.g. CCIS call to 911 trunk)
•Conferencing with C-911 agent is not available when the caller is a wireless
phone.
In all of these cases, the C-911 agent screen will show the caller status, but no
conferencing will take place.

Software Limitations Conference 911 Installation Guide
Page A-2 NDA-30133 Revision 1.0
This Page Left Blank.

NDA-30133 Revision 1.0 Page B-1
Conference 911 Installation Guide Beeper Interface
Appendix B Beeper Interface
Overview
This section specifies the features and basic operation of NEC’s alphanumeric
paging interface. The C911 application will automatically search the APM Pager
database, select a specific individual or service, and enter an alphanumeric
message that can be sent to an electronic paging device (beeper) through an
alphanumeric paging terminal. Access to voice pagers will not be provided.
The communications protocol between C911 and the alphanumeric paging
terminal will be that recommended by the Personal Communications Industry
Association, Telocator. The protocol was previously known as the Motorola/IXO
alphanumeric protocol. The Motorola/IXO protocol was adopted by Telocator in
September of 1988 as an industry standard for devices accepting input for paging
requests and is known as Telocator Alphanumeric Protocol (TAP).
The preferred access method to the paging terminal is through a serial I/O
connection. The Beeper Interface will also support connection through a modem to
a remote paging device. A beeper configuration menu will allow the input of a
modem access number, response timers, and other control parameters.
A time stamped record of each page will be saved to a log. This log can be viewed
and printed to a line printer.
Database Fields
The fields in the Pager database contain pager number information. The Pager ID
field defines a person’s pager address or Personal ID Number (PIN). The Pager
Access Number field is a phone number field that is used to dial a user’s paging
provider or to access a pager that has a discrete phone number. If the database
contains a dial number, that number will be used to place the page. If the database
only contains a Pager ID, the local paging system will be accessed if the Beeper
Interface is installed and active. (See “About the Pager Database” on page 47 for
more information.)
Note: For this release, the Pager Access Number field is not supported.
Architecture
This section provides information about the architecture of the beeper interface in
order to give you a basic understanding how the beeper interface operates.
The following diagram depicts connectivity between the NEAX2400 and the C911
Monitor application. A brief explanation of the connections is provided below.
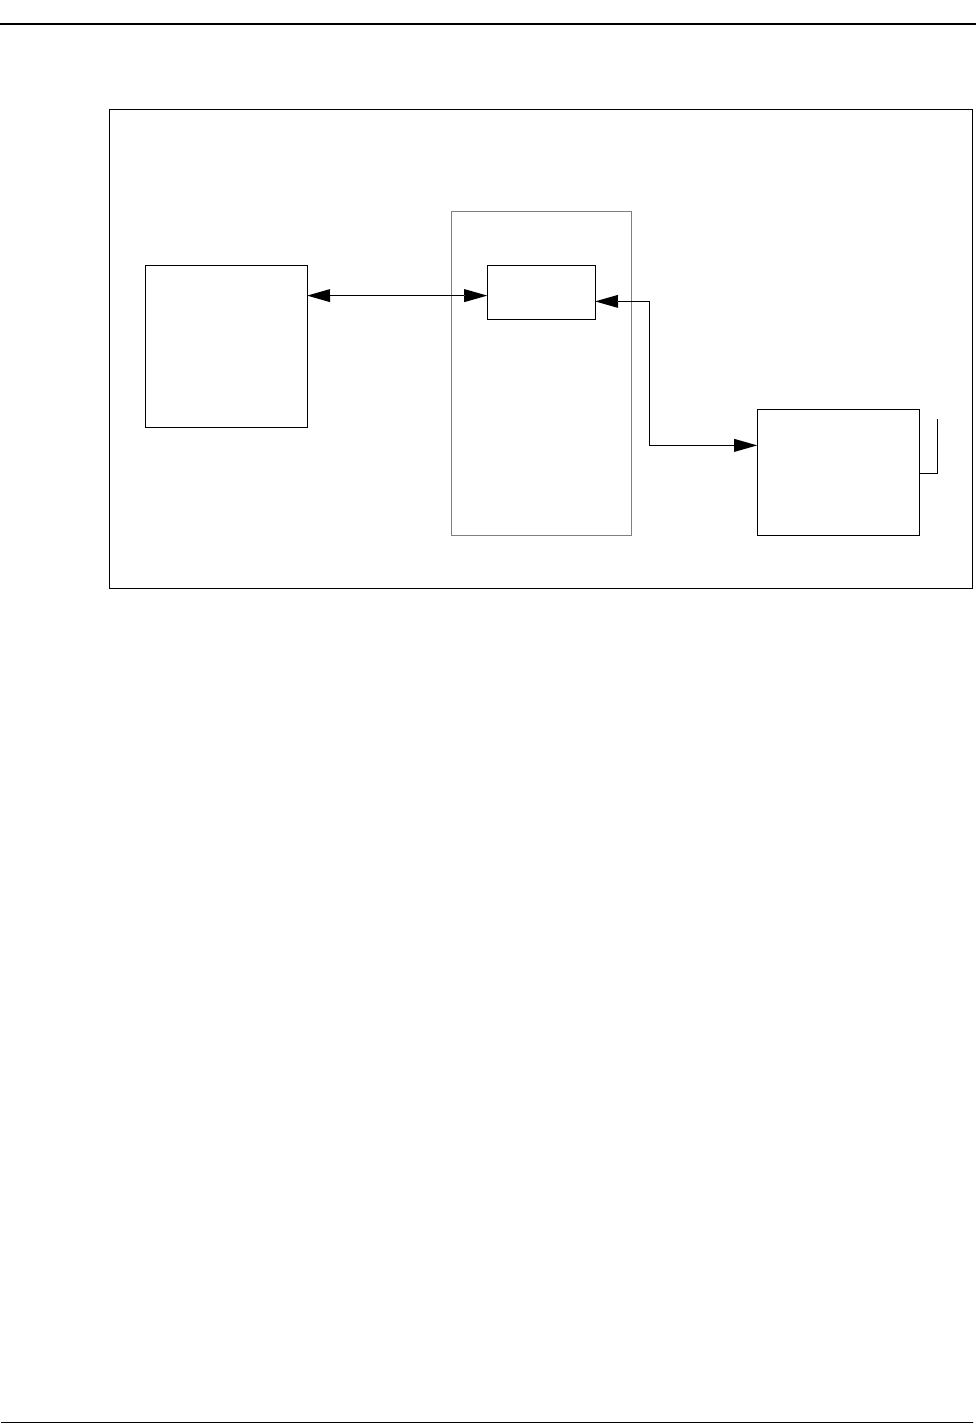
Page B-2 NDA-30133 Revision 1.0
Beeper Interface Conference 911 Installation Guide
Figure B-1 Beeper Connectivity
The OAI link is TCP/IP. The connection from the UAP out to the Paging System
is an RS-232C DTE. In most cases one of the COM ports of the UAP can be used,
otherwise, a port from a multi-port serial I/O card will be required. (The Boundless
Technologies stations have serial and parallel ports.) The paging terminal can be
any device that can be interfaced using an RS-232C and accept the Telocator
Alphanumeric Protocol (TAP) for paging requests.
NEC developed a beeper interface that can accept beeper request from a number of
applications within the UAP. The beeper software interface can be used by both
C911 and other OAI applications (such as Dterm applications) concurrently. The
beeper interface accepts IPC message from applications and communicates with
the beeper terminal on the RS-232 connection.
A basic diagram of the beeper software interface is presented below. The diagram
shows some of the basic UNIX internal’s that will be required to process a message
from an OAI application to the beeper terminal. The diagram might not be an
accurate representation of the actual software interface since some of the details
have been left out.
OAI UAP
NEAX
2400
Paging
Terminal
C911 Beeper Interface
)
)
)
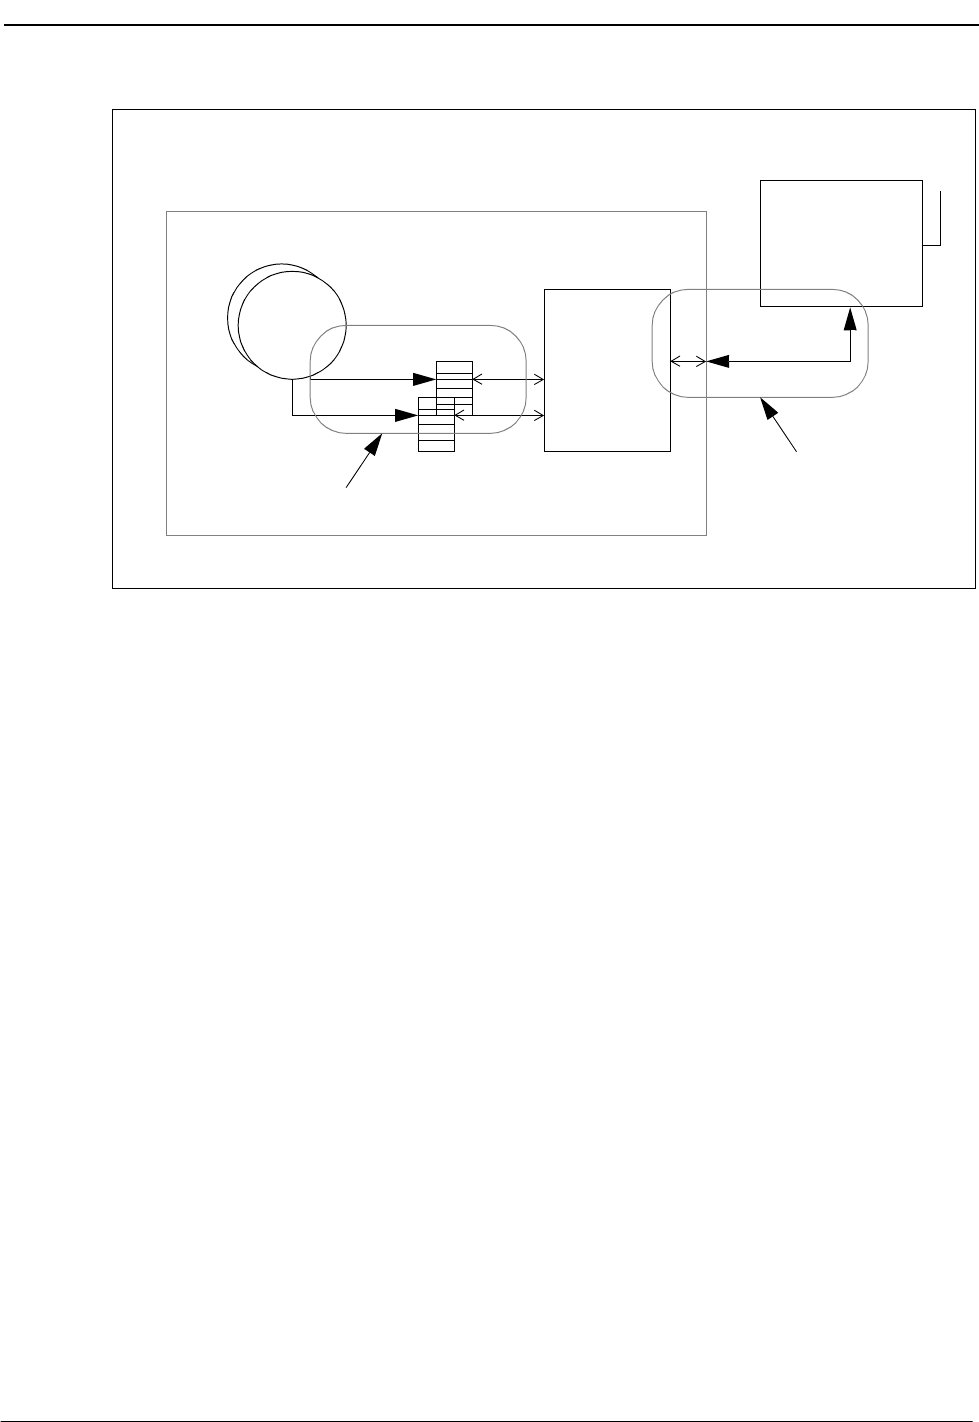
NDA-30133 Revision 1.0 Page B-3
Conference 911 Installation Guide Beeper Interface
Figure B-2 Beeper Software Interface
The NEC defined message format can be provided to other application engineers
upon request. The message format contains information that allows the beeper
interface software to accept messages from unknown applications and return
beeper status information to the application after the beeper request has been
serviced by the beeper terminal.
Using the Beeper Interface
When a 911 call is placed, the Pager table is read and the Beeper Interface informs
the appropriate party of the event via their pager.
Interface Configuration
A special UNIX user account, bpradm, allows access to configurable interface
data. This section presents most of the screens that you might need to access during
installation and support of the interface.
Paging
Terminal
Beeper Interface
)
)
)
RS-232
COM Port
IPC
Queues
Beeper
Interface
Software
TAP
message
OAI
Apps
format
NEC defined
message format

Page B-4 NDA-30133 Revision 1.0
Beeper Interface Conference 911 Installation Guide
Main Menu After logging into the UNIX system with the Beeper Administration account name
bpradm, the following menu displays.
Figure B-3 Beeper Interface Administration menu
In the figure above, the interface status is active. When the status is active, you can
start and stop the interface from this menu as well as view some of the log files and
set the interface configurable data.
Configuration
Menu Selecting Configuration displays the following menu of options:
Figure B-4 Configuration menu
Valid commands or options are indicated by the bolded, underlined letters. Each
option is discussed in detail below.
Beeper Interface Administration Menu
Interface Status: Active Version: 1.0
Options
View Log File
Erase Log File
Initialize Interface
Terminate Interface
Configuration
UNIX
Logout
Enter Option: [ ]
Interface Configuration Menu
Modify Configuration Files
Modify Misc Parameters
Modify Port Parameters
Modify Timer Parameters
Save Configuration
Quit to Main Menu
Enter Option: [ ]

NDA-30133 Revision 1.0 Page B-5
Conference 911 Installation Guide Beeper Interface
Configuration Files
To modify the configuration files enter “C” at the Enter Option prompt. All the
configuration files, will be displayed as shown in the following window:
Figure B-5 Configuration Files
You will rarely need to change this information. These files indicate the location
of configuration data.
Once the configuration file update is complete, you will be returned to the
Configuration Main Menu.
Miscellaneous Parameters
To modify the miscellaneous parameters enter “M” at the Enter Option prompt.
The window shown below will be displayed. Once you have entered the parameters
you will be returned to the Configuration Main Menu.
Figure B-6 Misc Parameters window
Enter transaction log file name
(/oai/app/beeper/log/trans.log) :
Enter beeper log file name
(/oai/app/beeper/log/beeper.log) :
Enter fifo device name
(/oai/app/beeper/beeper.fifo) :
Enter beeperq executable name
(/oai/app/beeper/bin/beeperq) :
Enter beeperq log file name
(/oai/app/beeper/log/beeperrq.log) :
Enter beeperq qkey filename
(oai/app/beeper/cfg/config) :
Enter log level value (9) :
Enter modem dial number ():
Enter pager name (PGI) :
Enter pager password (000000):

Page B-6 NDA-30133 Revision 1.0
Beeper Interface Conference 911 Installation Guide
These miscellaneous parameters are vendor specific. In most cases the default
values should work.
Port Parameters
To modify the port parameters enter “P” at the Enter Option prompt. The window
shown below will be displayed.
Figure B-7 Port Parameters window
The port parameters are also vendor specific. In most cases the default values
should work. Once you have entered the parameters you will be returned to the
Configuration Main Menu.
Enter serial port device name (/dev/tty2a) :
(9600-8-e-1)
Enter Speed of port (9600) :
Enter Data size (8/7) of port (8) :
Enter Parity (n/o/e) of port (e) :
Enter Stop Bits of port (1) :

NDA-30133 Revision 1.0 Page B-7
Conference 911 Installation Guide Beeper Interface
Timer Parameters
To modify the timer parameters enter “T” at the Enter Option prompt. The timer
parameters, will be displayed as shown in the window below.
Figure B-8 Timer Parameters window
The timer parameters relate to the TAP message format. These timing variables
might require coordination with the vendor specific beeper terminal data. Once you
have entered the parameters you will be returned to the Configuration Main
Menu.
Enter cr wait timer value (2 sec) :
Enter ID wait timer value (10 sec) :
Enter transaction wait timer value (10 sec):
Enter send wait timer value (30 sec) :
Enter cr retry value (5 times) :
Enter transaction retry valu (3 times) :

Page B-8 NDA-30133 Revision 1.0
Beeper Interface Conference 911 Installation Guide
Viewing Transaction Log Files
You can view the current transaction log by selecting View Log File option from
the main screen. Three log files are saved by the beeper interface: One traces
transaction messages between OAI application and the beeper interface, a second
traces transaction messages between the beeper interface and the beeper terminal
interface, and the third is a transaction only file. The third transaction log file will
contain the results of each beeper request received by the interface. The disposition
of each request is logged in this file - success or failure. Below is an illustration of
the View Log File Menu:
Figure B-9 View Log File menu
Select the log file that you want to view. A screen similar to the following displays.
You can use PgUp and PgDn as well as command line options that are listed across
the bottom of the display. These options are described below:
View Log File Menu
View Beeper Log File
View BeeperQ Log File
View Beeper Transaction Log File
Main Menu
Enter Option: [ ]

NDA-30133 Revision 1.0 Page B-9
Conference 911 Installation Guide Beeper Interface
Figure B-10 Beeper Transaction Log
The AutoScroll feature allows you to view the file in real-time. As new messages
are received, they display at the bottom of the screen. The other command line
options allow you to move within the file, print a screen display or the complete
file, or execute an external UNIX command.
Beeper Transaction Log Tue Sep 21 10:20 1999
BEGINNING OF DATA
08/10-14:24:35 REPLY COMPLETE [ :No error ]
08/10-16:11:56 REPLY COMPLETE [ :No error ]
08/11-13:07:52 REPLY COMPLETE [ :No error ]
END OF DATA
Search
Top
Bottom
Command
Print
AutoScroll
Quit

Beeper Interface Conference 911 Installation Guide
Page B-10 NDA-30133 Revision 1.0
This Page Left Blank.

NDA-30133 Revision 1.0 Page C-1
Conference 911 Installation Guide Glossary
Appendix C Glossary
911
The slogan for the United States is “One Nation, One Number” and “911” is that
number. The goal is to be able to dial 911 from anywhere in the United States to
request emergency service.
APM
Applications Manager. The support platform or software which resides on the UAP
and provides the user with management capabilities within the Open Applications
Interface system.
Beeper Interface
The device that will broadcast encoded information over radio frequencies to
receiving devices that can decode these transmissions.
Conference Call
Connects two callers and an agent into a 3-way conversation; adds or rings a third
party after two parties are in conversation.
Full Capcode Paging
A paging mode that allows the signaling of a beeper device by its pager address
(capcode and function digit).
IP
Interface processor. A module within the NEAX2400 which services the OAI
system.
IPC
Interprocess communication. A method used by one UNIX application process to
inform another UNIX application process within the same discrete device.
My Line
Refers to the physical station used by a caller to make a call or answer a call, as
opposed to one of the sublines that could be used for a call. The MyLine is very
important because C911 needs to know the physical location of the caller, not what
line was used. A line (subline, virtual,.) could be on several different phones in
several different areas and would not help in knowing the origin of the call.
NENA
National Emergency Number Association
OAI
Open Applications Interface. A proprietary protocol and set of routines that links
the NEAX2400 to a UAP. Programs executing on the UAP are able to monitor and
control switch features and telephones.
UAP
User Application Processor. General purpose multi-tasking computer supporting
System V UNIX and the Applications Manager running OAI.

Glossary Conference 911 Installation Guide
Page C-2 NDA-30133 Revision 1.0
This Page Left Blank.
