MCS Operations Manual (Java Edition) PDF NEC Medical Center System Java Edition
NEAX2400 Medical Center System Operations Manual (Java Edition) NEAX2400 Medical Center System Operations Manual (Java Edition)
User Manual: PDF T E X T F I L E S
Open the PDF directly: View PDF ![]() .
.
Page Count: 218 [warning: Documents this large are best viewed by clicking the View PDF Link!]
- Chapter 1 INTRODUCTION
- Chapter 2 SERVER INSTALLATION
- Introduction
- Hardware Installation
- Software Installation
- Application Configuration
- Step 1: Application Characteristics
- Step 2: Monitor Configuration
- Step 3: Server Configuration
- Step 4: Recluster Primary Configuration
- Step 5: Host Statistics Primary Configuration
- Step 6: Cleaner Primary Configuration
- Step 7: Java Services Primary Configuration
- Step 8: Mcs_Dbclean Control Options
- Step 9: Mcs_Recluster Control Options
- Step 10: Mcs_Host_ Statistics Control Options
- Database Requirements
- MAT Assignments
- Attendant Station Preparation
- Chapter 3 JAVA MCS CLIENT INSTALLATION
- Chapter 4 TELNET OPERATOR FUNCTIONS
- Chapter 5 JAVA OPERATOR FUNCTIONS
- Chapter 6 DATABASE ADMINISTRATION
- Chapter 7 SYSTEM ADMINISTRATION
- Chapter 8 CONFIGURATION MANAGEMENT
- Chapter 9 LOGIN NAME MAINTENANCE
- Chapter 10 SUPERVISOR REPORTS
- Chapter 11 PROCESS AND ERROR MESSAGES
- Chapter 12 PLATFORM MANAGEMENT
- Chapter 13 HOST INTERFACE ADMINISTRATION
- Appendix A BEEPER INTERFACE

MEDICAL CENTER SYSTEM
OPERATIONS MANUAL
(JAVA Edition)
NEC America, Inc.
NDA-30026
Revision 6
August, 2000
Stock # 241739
LIABILITY DISCLAIMER
NEC America, Inc. reserves the right to change the specifications,
functions, or features, at any time, without notice.
NEC America, Inc. has prepared this document for the exclusive use
of its employees and customers. The information contained herein is
the property of NEC America, Inc. and shall not be reproduced
without prior written approval from NEC America, Inc.
NEAX and Dtermare registered trademarks of NEC Corporation.
© 2000 NEC America, Inc.
Printed in the USA
All other brand or product names are or may be trademarks or
registered trademarks of, and are used to identify products or
services of, their respective owners.
MS-DOS, Microsoft, Windows, and Windows NT are registered
trademarks of Microsoft Corporation. Microsoft Windows 95 and
Microsoft Windows 98 are trademarks of Microsoft Corporation.

NDA-30026 Revision 6 Page i
Medical Center System Operations Manual - JAVA Edition CONTENTS
TABLE OF CONTENTS
Page
Chapter 1 - INTRODUCTION . . . . . . . . . . . . . . . . . . . . . . . . . . . . . . . . . . . . . . . . . . . . . . . 1
What is Medical Center System?. . . . . . . . . . . . . . . . . . . . . . . . . . . . . . . . . . . . . . . . . . . . . . . . 1
Telnet and JAVA Interfaces. . . . . . . . . . . . . . . . . . . . . . . . . . . . . . . . . . . . . . . . . . . . . . . . . 2
Operator Functions. . . . . . . . . . . . . . . . . . . . . . . . . . . . . . . . . . . . . . . . . . . . . . . . . . . . . . . 2
Supervisor Functions . . . . . . . . . . . . . . . . . . . . . . . . . . . . . . . . . . . . . . . . . . . . . . . . . . . . . 2
Password Security . . . . . . . . . . . . . . . . . . . . . . . . . . . . . . . . . . . . . . . . . . . . . . . . . . . . . . . 3
How to Use This Manual . . . . . . . . . . . . . . . . . . . . . . . . . . . . . . . . . . . . . . . . . . . . . . . . . . . . . . 4
Manual Organization . . . . . . . . . . . . . . . . . . . . . . . . . . . . . . . . . . . . . . . . . . . . . . . . . . . . . 4
Chapter Layout . . . . . . . . . . . . . . . . . . . . . . . . . . . . . . . . . . . . . . . . . . . . . . . . . . . . . . . . . . . . . 5
Option/Command Selection . . . . . . . . . . . . . . . . . . . . . . . . . . . . . . . . . . . . . . . . . . . . . . . . 6
Procedures . . . . . . . . . . . . . . . . . . . . . . . . . . . . . . . . . . . . . . . . . . . . . . . . . . . . . . . . . . . . . . . . 7
General Key Use . . . . . . . . . . . . . . . . . . . . . . . . . . . . . . . . . . . . . . . . . . . . . . . . . . . . . . . . . . . . 7
Chapter 2 - SERVER INSTALLATION . . . . . . . . . . . . . . . . . . . . . . . . . . . . . . . . . . . . . . . . 9
Introduction . . . . . . . . . . . . . . . . . . . . . . . . . . . . . . . . . . . . . . . . . . . . . . . . . . . . . . . . . . . . . . . . 9
Hardware Installation. . . . . . . . . . . . . . . . . . . . . . . . . . . . . . . . . . . . . . . . . . . . . . . . . . . . . . . . 11
Number Attendant Station . . . . . . . . . . . . . . . . . . . . . . . . . . . . . . . . . . . . . . . . . . . . . . . . 11
Software Installation . . . . . . . . . . . . . . . . . . . . . . . . . . . . . . . . . . . . . . . . . . . . . . . . . . . . . . . . 12
Step 1: Superuser/ Root Password . . . . . . . . . . . . . . . . . . . . . . . . . . . . . . . . . . . . . . . . . 12
Step 2: MCS Login Names. . . . . . . . . . . . . . . . . . . . . . . . . . . . . . . . . . . . . . . . . . . . . . . . 13
Step 3: MCS Installation Processing . . . . . . . . . . . . . . . . . . . . . . . . . . . . . . . . . . . . . . . . 13
Step 4: Informix Database Installation . . . . . . . . . . . . . . . . . . . . . . . . . . . . . . . . . . . . . . . 14
Step 5: Jmcmp Server Software Installation. . . . . . . . . . . . . . . . . . . . . . . . . . . . . . . . . . . 14
Step 6: Java Server/Client Component Installation . . . . . . . . . . . . . . . . . . . . . . . . . . . . . 18
Application Configuration. . . . . . . . . . . . . . . . . . . . . . . . . . . . . . . . . . . . . . . . . . . . . . . . . . . . . 19
Step 1: Application Characteristics. . . . . . . . . . . . . . . . . . . . . . . . . . . . . . . . . . . . . . . . . . 20
Step 2: Monitor Configuration. . . . . . . . . . . . . . . . . . . . . . . . . . . . . . . . . . . . . . . . . . . . . . 21
Step 3: Server Configuration . . . . . . . . . . . . . . . . . . . . . . . . . . . . . . . . . . . . . . . . . . . . . . 24
Step 4: Recluster Primary Configuration . . . . . . . . . . . . . . . . . . . . . . . . . . . . . . . . . . . . . 27
Step 5: Host Statistics Primary Configuration. . . . . . . . . . . . . . . . . . . . . . . . . . . . . . . . . . 27
Step 6: Cleaner Primary Configuration. . . . . . . . . . . . . . . . . . . . . . . . . . . . . . . . . . . . . . . 28
Step 7: Java Services Primary Configuration . . . . . . . . . . . . . . . . . . . . . . . . . . . . . . . . . . 29
Step 8: Mcs_Dbclean Control Options . . . . . . . . . . . . . . . . . . . . . . . . . . . . . . . . . . . . . . . 30
Step 9: Mcs_Recluster Control Options . . . . . . . . . . . . . . . . . . . . . . . . . . . . . . . . . . . . . . 30
Step 10: Mcs_Host_ Statistics Control Options . . . . . . . . . . . . . . . . . . . . . . . . . . . . . . . . 30
Database Requirements . . . . . . . . . . . . . . . . . . . . . . . . . . . . . . . . . . . . . . . . . . . . . . . . . . . . . 32
MCSCFG Database Information. . . . . . . . . . . . . . . . . . . . . . . . . . . . . . . . . . . . . . . . . . . . 32
MAT Assignments . . . . . . . . . . . . . . . . . . . . . . . . . . . . . . . . . . . . . . . . . . . . . . . . . . . . . . . . . . 34
Attendant Station Preparation . . . . . . . . . . . . . . . . . . . . . . . . . . . . . . . . . . . . . . . . . . . . . . . . . 35
To Configure Attendant Stations. . . . . . . . . . . . . . . . . . . . . . . . . . . . . . . . . . . . . . . . . . . . 35
Chapter 3 - JAVA MCS CLIENT INSTALLATION . . . . . . . . . . . . . . . . . . . . . . . . . . . . . . 37
Overview . . . . . . . . . . . . . . . . . . . . . . . . . . . . . . . . . . . . . . . . . . . . . . . . . . . . . . . . . . . . . . . . . 37
Installing the JAVA MCS Client . . . . . . . . . . . . . . . . . . . . . . . . . . . . . . . . . . . . . . . . . . . . . . . . 37
Chapter 4 - TELNET OPERATOR FUNCTIONS . . . . . . . . . . . . . . . . . . . . . . . . . . . . . . . 43
Login . . . . . . . . . . . . . . . . . . . . . . . . . . . . . . . . . . . . . . . . . . . . . . . . . . . . . . . . . . . . . . . . . . . . 43

CONTENTS Medical Center System Operations Manual - JAVA Edition
Page
Page ii NDA-30026 Revision 6
Screen Format. . . . . . . . . . . . . . . . . . . . . . . . . . . . . . . . . . . . . . . . . . . . . . . . . . . . . . . . . . . . . 44
Selecting Operator Functions . . . . . . . . . . . . . . . . . . . . . . . . . . . . . . . . . . . . . . . . . . . . . . . . . 45
Status Area. . . . . . . . . . . . . . . . . . . . . . . . . . . . . . . . . . . . . . . . . . . . . . . . . . . . . . . . . . . . 46
Source Area . . . . . . . . . . . . . . . . . . . . . . . . . . . . . . . . . . . . . . . . . . . . . . . . . . . . . . . . . . . 47
Destination Area. . . . . . . . . . . . . . . . . . . . . . . . . . . . . . . . . . . . . . . . . . . . . . . . . . . . . . . . 49
Directory Assistance . . . . . . . . . . . . . . . . . . . . . . . . . . . . . . . . . . . . . . . . . . . . . . . . . . . . . . . . 50
General Process. . . . . . . . . . . . . . . . . . . . . . . . . . . . . . . . . . . . . . . . . . . . . . . . . . . . . . . . 50
Hot Key. . . . . . . . . . . . . . . . . . . . . . . . . . . . . . . . . . . . . . . . . . . . . . . . . . . . . . . . . . . . . . . 51
Directory Information . . . . . . . . . . . . . . . . . . . . . . . . . . . . . . . . . . . . . . . . . . . . . . . . . . . . 51
Special Destinations. . . . . . . . . . . . . . . . . . . . . . . . . . . . . . . . . . . . . . . . . . . . . . . . . . . . . 52
Expanded Display. . . . . . . . . . . . . . . . . . . . . . . . . . . . . . . . . . . . . . . . . . . . . . . . . . . . . . . 52
Type of Transfer . . . . . . . . . . . . . . . . . . . . . . . . . . . . . . . . . . . . . . . . . . . . . . . . . . . . . . . . 52
Operator Transfer . . . . . . . . . . . . . . . . . . . . . . . . . . . . . . . . . . . . . . . . . . . . . . . . . . . . . . . 52
Transfer Failures . . . . . . . . . . . . . . . . . . . . . . . . . . . . . . . . . . . . . . . . . . . . . . . . . . . . . . . 53
Off-Line Mode. . . . . . . . . . . . . . . . . . . . . . . . . . . . . . . . . . . . . . . . . . . . . . . . . . . . . . . . . . 53
Key Function Summary . . . . . . . . . . . . . . . . . . . . . . . . . . . . . . . . . . . . . . . . . . . . . . . . . . 53
Procedure. . . . . . . . . . . . . . . . . . . . . . . . . . . . . . . . . . . . . . . . . . . . . . . . . . . . . . . . . . . . . 54
Call Park . . . . . . . . . . . . . . . . . . . . . . . . . . . . . . . . . . . . . . . . . . . . . . . . . . . . . . . . . . . . . . . . . 55
General Process. . . . . . . . . . . . . . . . . . . . . . . . . . . . . . . . . . . . . . . . . . . . . . . . . . . . . . . . 55
Park Recall . . . . . . . . . . . . . . . . . . . . . . . . . . . . . . . . . . . . . . . . . . . . . . . . . . . . . . . . . . . . 56
Cancel and Exit . . . . . . . . . . . . . . . . . . . . . . . . . . . . . . . . . . . . . . . . . . . . . . . . . . . . . . . . 56
Procedure. . . . . . . . . . . . . . . . . . . . . . . . . . . . . . . . . . . . . . . . . . . . . . . . . . . . . . . . . . . . . 56
Parked Call Retrieval. . . . . . . . . . . . . . . . . . . . . . . . . . . . . . . . . . . . . . . . . . . . . . . . . . . . . . . . 57
General Process. . . . . . . . . . . . . . . . . . . . . . . . . . . . . . . . . . . . . . . . . . . . . . . . . . . . . . . . 57
Retrieve from Idle Screen. . . . . . . . . . . . . . . . . . . . . . . . . . . . . . . . . . . . . . . . . . . . . . . . . 57
Park Call Abandon . . . . . . . . . . . . . . . . . . . . . . . . . . . . . . . . . . . . . . . . . . . . . . . . . . . . . . 58
Cancel and Exit . . . . . . . . . . . . . . . . . . . . . . . . . . . . . . . . . . . . . . . . . . . . . . . . . . . . . . . . 58
Procedure. . . . . . . . . . . . . . . . . . . . . . . . . . . . . . . . . . . . . . . . . . . . . . . . . . . . . . . . . . . . . 58
Beeper. . . . . . . . . . . . . . . . . . . . . . . . . . . . . . . . . . . . . . . . . . . . . . . . . . . . . . . . . . . . . . . . . . . 59
General Process. . . . . . . . . . . . . . . . . . . . . . . . . . . . . . . . . . . . . . . . . . . . . . . . . . . . . . . . 59
Procedure. . . . . . . . . . . . . . . . . . . . . . . . . . . . . . . . . . . . . . . . . . . . . . . . . . . . . . . . . . . . . 60
Redial . . . . . . . . . . . . . . . . . . . . . . . . . . . . . . . . . . . . . . . . . . . . . . . . . . . . . . . . . . . . . . . . . . . 61
General Process. . . . . . . . . . . . . . . . . . . . . . . . . . . . . . . . . . . . . . . . . . . . . . . . . . . . . . . . 61
Procedure. . . . . . . . . . . . . . . . . . . . . . . . . . . . . . . . . . . . . . . . . . . . . . . . . . . . . . . . . . . . . 61
Emergency . . . . . . . . . . . . . . . . . . . . . . . . . . . . . . . . . . . . . . . . . . . . . . . . . . . . . . . . . . . . . . . 62
General Process. . . . . . . . . . . . . . . . . . . . . . . . . . . . . . . . . . . . . . . . . . . . . . . . . . . . . . . . 62
Supervisor Equipment . . . . . . . . . . . . . . . . . . . . . . . . . . . . . . . . . . . . . . . . . . . . . . . . . . . 63
Supervisor Capability . . . . . . . . . . . . . . . . . . . . . . . . . . . . . . . . . . . . . . . . . . . . . . . . . . . . 63
Expanded Display. . . . . . . . . . . . . . . . . . . . . . . . . . . . . . . . . . . . . . . . . . . . . . . . . . . . . . . 63
Procedure. . . . . . . . . . . . . . . . . . . . . . . . . . . . . . . . . . . . . . . . . . . . . . . . . . . . . . . . . . . . . 63
Chapter 5 - JAVA OPERATOR FUNCTIONS . . . . . . . . . . . . . . . . . . . . . . . . . . . . . . . . . 65
Login . . . . . . . . . . . . . . . . . . . . . . . . . . . . . . . . . . . . . . . . . . . . . . . . . . . . . . . . . . . . . . . . . . . . 65
Screen Format. . . . . . . . . . . . . . . . . . . . . . . . . . . . . . . . . . . . . . . . . . . . . . . . . . . . . . . . . . . . . 66
Selecting Operator Functions . . . . . . . . . . . . . . . . . . . . . . . . . . . . . . . . . . . . . . . . . . . . . . . . . 68
Status Area. . . . . . . . . . . . . . . . . . . . . . . . . . . . . . . . . . . . . . . . . . . . . . . . . . . . . . . . . . . . 68
Source Area . . . . . . . . . . . . . . . . . . . . . . . . . . . . . . . . . . . . . . . . . . . . . . . . . . . . . . . . . . . 70
Destination Area. . . . . . . . . . . . . . . . . . . . . . . . . . . . . . . . . . . . . . . . . . . . . . . . . . . . . . . . 70
Directory Assistance . . . . . . . . . . . . . . . . . . . . . . . . . . . . . . . . . . . . . . . . . . . . . . . . . . . . . . . . 72
General Process. . . . . . . . . . . . . . . . . . . . . . . . . . . . . . . . . . . . . . . . . . . . . . . . . . . . . . . . 72

Medical Center System Operations Manual - JAVA Edition CONTENTS
Page
NDA-30026 Revision 6 Page iii
Directory Information . . . . . . . . . . . . . . . . . . . . . . . . . . . . . . . . . . . . . . . . . . . . . . . . . . . . 73
Special Destinations . . . . . . . . . . . . . . . . . . . . . . . . . . . . . . . . . . . . . . . . . . . . . . . . . . . . . 74
Expanded Display. . . . . . . . . . . . . . . . . . . . . . . . . . . . . . . . . . . . . . . . . . . . . . . . . . . . . . . 74
Type of Transfer . . . . . . . . . . . . . . . . . . . . . . . . . . . . . . . . . . . . . . . . . . . . . . . . . . . . . . . . 74
Operator Transfer . . . . . . . . . . . . . . . . . . . . . . . . . . . . . . . . . . . . . . . . . . . . . . . . . . . . . . . 74
Transfer Failures. . . . . . . . . . . . . . . . . . . . . . . . . . . . . . . . . . . . . . . . . . . . . . . . . . . . . . . . 75
Off-Line Mode. . . . . . . . . . . . . . . . . . . . . . . . . . . . . . . . . . . . . . . . . . . . . . . . . . . . . . . . . . 75
Key Function Summary . . . . . . . . . . . . . . . . . . . . . . . . . . . . . . . . . . . . . . . . . . . . . . . . . . 75
Make a Call . . . . . . . . . . . . . . . . . . . . . . . . . . . . . . . . . . . . . . . . . . . . . . . . . . . . . . . . . . . . . . . 76
Transfer a Call . . . . . . . . . . . . . . . . . . . . . . . . . . . . . . . . . . . . . . . . . . . . . . . . . . . . . . . . . . . . . 76
Park a Call . . . . . . . . . . . . . . . . . . . . . . . . . . . . . . . . . . . . . . . . . . . . . . . . . . . . . . . . . . . . . . . . 77
Park Recall . . . . . . . . . . . . . . . . . . . . . . . . . . . . . . . . . . . . . . . . . . . . . . . . . . . . . . . . . . . . 78
Retrieve Parked Call . . . . . . . . . . . . . . . . . . . . . . . . . . . . . . . . . . . . . . . . . . . . . . . . . . . . . . . . 80
Retrieve from Idle Screen. . . . . . . . . . . . . . . . . . . . . . . . . . . . . . . . . . . . . . . . . . . . . . . . . 81
Park Call Abandon . . . . . . . . . . . . . . . . . . . . . . . . . . . . . . . . . . . . . . . . . . . . . . . . . . . . . . 81
Call a Beeper. . . . . . . . . . . . . . . . . . . . . . . . . . . . . . . . . . . . . . . . . . . . . . . . . . . . . . . . . . . . . . 82
Redial . . . . . . . . . . . . . . . . . . . . . . . . . . . . . . . . . . . . . . . . . . . . . . . . . . . . . . . . . . . . . . . . . . . 83
Chapter 6 - DATABASE ADMINISTRATION . . . . . . . . . . . . . . . . . . . . . . . . . . . . . . . . . . 85
Introduction . . . . . . . . . . . . . . . . . . . . . . . . . . . . . . . . . . . . . . . . . . . . . . . . . . . . . . . . . . . . . . . 85
Types of Database Records . . . . . . . . . . . . . . . . . . . . . . . . . . . . . . . . . . . . . . . . . . . . . . . 85
Procedures . . . . . . . . . . . . . . . . . . . . . . . . . . . . . . . . . . . . . . . . . . . . . . . . . . . . . . . . . . . . 86
Extension Assignments . . . . . . . . . . . . . . . . . . . . . . . . . . . . . . . . . . . . . . . . . . . . . . . . . . 86
View Command . . . . . . . . . . . . . . . . . . . . . . . . . . . . . . . . . . . . . . . . . . . . . . . . . . . . . . . . 86
Menu Access . . . . . . . . . . . . . . . . . . . . . . . . . . . . . . . . . . . . . . . . . . . . . . . . . . . . . . . . . . 86
Screen Samples . . . . . . . . . . . . . . . . . . . . . . . . . . . . . . . . . . . . . . . . . . . . . . . . . . . . . . . . 87
Database Entry and Exit Procedure . . . . . . . . . . . . . . . . . . . . . . . . . . . . . . . . . . . . . . . . . 87
Database Procedures . . . . . . . . . . . . . . . . . . . . . . . . . . . . . . . . . . . . . . . . . . . . . . . . . . . . . . . 88
Add a Record / Admit a Patient . . . . . . . . . . . . . . . . . . . . . . . . . . . . . . . . . . . . . . . . . . . . 88
Delete a Record/ Discharge a Patient . . . . . . . . . . . . . . . . . . . . . . . . . . . . . . . . . . . . . . . 90
Modify a Record . . . . . . . . . . . . . . . . . . . . . . . . . . . . . . . . . . . . . . . . . . . . . . . . . . . . . . . . 92
View Database Records . . . . . . . . . . . . . . . . . . . . . . . . . . . . . . . . . . . . . . . . . . . . . . . . . . 94
Print Database Records . . . . . . . . . . . . . . . . . . . . . . . . . . . . . . . . . . . . . . . . . . . . . . . . . . 96
Database Record Descriptions . . . . . . . . . . . . . . . . . . . . . . . . . . . . . . . . . . . . . . . . . . . . . . . . 97
Patients. . . . . . . . . . . . . . . . . . . . . . . . . . . . . . . . . . . . . . . . . . . . . . . . . . . . . . . . . . . . . . . 97
Physicians . . . . . . . . . . . . . . . . . . . . . . . . . . . . . . . . . . . . . . . . . . . . . . . . . . . . . . . . . . . . 98
Employees . . . . . . . . . . . . . . . . . . . . . . . . . . . . . . . . . . . . . . . . . . . . . . . . . . . . . . . . . . . . 99
Attendant Stations . . . . . . . . . . . . . . . . . . . . . . . . . . . . . . . . . . . . . . . . . . . . . . . . . . . . . 100
Other Internal Extensions . . . . . . . . . . . . . . . . . . . . . . . . . . . . . . . . . . . . . . . . . . . . . . . . 100
Tests / Procedures . . . . . . . . . . . . . . . . . . . . . . . . . . . . . . . . . . . . . . . . . . . . . . . . . . . . . 101
External Numbers. . . . . . . . . . . . . . . . . . . . . . . . . . . . . . . . . . . . . . . . . . . . . . . . . . . . . . 101
Trunk Numbers. . . . . . . . . . . . . . . . . . . . . . . . . . . . . . . . . . . . . . . . . . . . . . . . . . . . . . . . 102
Beeper Codes. . . . . . . . . . . . . . . . . . . . . . . . . . . . . . . . . . . . . . . . . . . . . . . . . . . . . . . . . 102
Emergencies. . . . . . . . . . . . . . . . . . . . . . . . . . . . . . . . . . . . . . . . . . . . . . . . . . . . . . . . . . 102
Chapter 7 - SYSTEM ADMINISTRATION . . . . . . . . . . . . . . . . . . . . . . . . . . . . . . . . . . . 105
Introduction . . . . . . . . . . . . . . . . . . . . . . . . . . . . . . . . . . . . . . . . . . . . . . . . . . . . . . . . . . . . . . 105
Menu Options . . . . . . . . . . . . . . . . . . . . . . . . . . . . . . . . . . . . . . . . . . . . . . . . . . . . . . . . . 105
Procedure. . . . . . . . . . . . . . . . . . . . . . . . . . . . . . . . . . . . . . . . . . . . . . . . . . . . . . . . . . . . 106
RSC Descriptions . . . . . . . . . . . . . . . . . . . . . . . . . . . . . . . . . . . . . . . . . . . . . . . . . . . . . . . . . 107

CONTENTS Medical Center System Operations Manual - JAVA Edition
Page
Page iv NDA-30026 Revision 6
PBX Restriction Classes. . . . . . . . . . . . . . . . . . . . . . . . . . . . . . . . . . . . . . . . . . . . . . . . . 107
Other Affected Options. . . . . . . . . . . . . . . . . . . . . . . . . . . . . . . . . . . . . . . . . . . . . . . . . . 107
Procedure. . . . . . . . . . . . . . . . . . . . . . . . . . . . . . . . . . . . . . . . . . . . . . . . . . . . . . . . . . . . 108
Extension Maintenance . . . . . . . . . . . . . . . . . . . . . . . . . . . . . . . . . . . . . . . . . . . . . . . . . . . . . 109
Internal Extension Assignments . . . . . . . . . . . . . . . . . . . . . . . . . . . . . . . . . . . . . . . . . . . 109
Pop-up Window Information. . . . . . . . . . . . . . . . . . . . . . . . . . . . . . . . . . . . . . . . . . . . . . 109
Empty Fields. . . . . . . . . . . . . . . . . . . . . . . . . . . . . . . . . . . . . . . . . . . . . . . . . . . . . . . . . . 110
Range Values . . . . . . . . . . . . . . . . . . . . . . . . . . . . . . . . . . . . . . . . . . . . . . . . . . . . . . . . . 110
Common Procedure . . . . . . . . . . . . . . . . . . . . . . . . . . . . . . . . . . . . . . . . . . . . . . . . . . . . 110
View Command . . . . . . . . . . . . . . . . . . . . . . . . . . . . . . . . . . . . . . . . . . . . . . . . . . . . . . . 110
Menu Access . . . . . . . . . . . . . . . . . . . . . . . . . . . . . . . . . . . . . . . . . . . . . . . . . . . . . . . . . 110
Procedure. . . . . . . . . . . . . . . . . . . . . . . . . . . . . . . . . . . . . . . . . . . . . . . . . . . . . . . . . . . . 111
Add an Extension . . . . . . . . . . . . . . . . . . . . . . . . . . . . . . . . . . . . . . . . . . . . . . . . . . . . . . . . . 112
Assignment Sequence . . . . . . . . . . . . . . . . . . . . . . . . . . . . . . . . . . . . . . . . . . . . . . . . . . 112
Extension Record Descriptions . . . . . . . . . . . . . . . . . . . . . . . . . . . . . . . . . . . . . . . . . . . 112
Procedure. . . . . . . . . . . . . . . . . . . . . . . . . . . . . . . . . . . . . . . . . . . . . . . . . . . . . . . . . . . . 114
Delete an Extension . . . . . . . . . . . . . . . . . . . . . . . . . . . . . . . . . . . . . . . . . . . . . . . . . . . . . . . 115
Procedure. . . . . . . . . . . . . . . . . . . . . . . . . . . . . . . . . . . . . . . . . . . . . . . . . . . . . . . . . . . . 115
Modify an Extension . . . . . . . . . . . . . . . . . . . . . . . . . . . . . . . . . . . . . . . . . . . . . . . . . . . . . . . 116
Procedure. . . . . . . . . . . . . . . . . . . . . . . . . . . . . . . . . . . . . . . . . . . . . . . . . . . . . . . . . . . . 116
View Extension Records . . . . . . . . . . . . . . . . . . . . . . . . . . . . . . . . . . . . . . . . . . . . . . . . . . . . 118
Procedure. . . . . . . . . . . . . . . . . . . . . . . . . . . . . . . . . . . . . . . . . . . . . . . . . . . . . . . . . . . . 118
Print Extension Records . . . . . . . . . . . . . . . . . . . . . . . . . . . . . . . . . . . . . . . . . . . . . . . . . . . . 120
Procedure. . . . . . . . . . . . . . . . . . . . . . . . . . . . . . . . . . . . . . . . . . . . . . . . . . . . . . . . . . . . 120
Patient DID Numbers. . . . . . . . . . . . . . . . . . . . . . . . . . . . . . . . . . . . . . . . . . . . . . . . . . . . . . . 121
Transfers . . . . . . . . . . . . . . . . . . . . . . . . . . . . . . . . . . . . . . . . . . . . . . . . . . . . . . . . . . . . 121
DID Number Status . . . . . . . . . . . . . . . . . . . . . . . . . . . . . . . . . . . . . . . . . . . . . . . . . . . . 121
“Stamped” Notation . . . . . . . . . . . . . . . . . . . . . . . . . . . . . . . . . . . . . . . . . . . . . . . . . . . . 122
Procedure. . . . . . . . . . . . . . . . . . . . . . . . . . . . . . . . . . . . . . . . . . . . . . . . . . . . . . . . . . . . 122
Add Patient DID Numbers . . . . . . . . . . . . . . . . . . . . . . . . . . . . . . . . . . . . . . . . . . . . . . . 123
Delete Patient DID Numbers . . . . . . . . . . . . . . . . . . . . . . . . . . . . . . . . . . . . . . . . . . . . . 124
View Patient DID Numbers. . . . . . . . . . . . . . . . . . . . . . . . . . . . . . . . . . . . . . . . . . . . . . . 125
Print Patient DID Numbers . . . . . . . . . . . . . . . . . . . . . . . . . . . . . . . . . . . . . . . . . . . . . . . 127
Outstanding RSC Requests . . . . . . . . . . . . . . . . . . . . . . . . . . . . . . . . . . . . . . . . . . . . . . . . . 128
Outstanding RSC Database . . . . . . . . . . . . . . . . . . . . . . . . . . . . . . . . . . . . . . . . . . . . . . 128
Procedure. . . . . . . . . . . . . . . . . . . . . . . . . . . . . . . . . . . . . . . . . . . . . . . . . . . . . . . . . . . . 128
Resend an RSC Request . . . . . . . . . . . . . . . . . . . . . . . . . . . . . . . . . . . . . . . . . . . . . . . . 129
Delete an RSC Request. . . . . . . . . . . . . . . . . . . . . . . . . . . . . . . . . . . . . . . . . . . . . . . . . 130
View Outstanding RSC Requests. . . . . . . . . . . . . . . . . . . . . . . . . . . . . . . . . . . . . . . . . . 131
Print Outstanding RSC Requests. . . . . . . . . . . . . . . . . . . . . . . . . . . . . . . . . . . . . . . . . . 133
Outstanding DID Requests . . . . . . . . . . . . . . . . . . . . . . . . . . . . . . . . . . . . . . . . . . . . . . . . . . 134
Outstanding DID Database. . . . . . . . . . . . . . . . . . . . . . . . . . . . . . . . . . . . . . . . . . . . . . . 134
Display Fields . . . . . . . . . . . . . . . . . . . . . . . . . . . . . . . . . . . . . . . . . . . . . . . . . . . . . . . . . 134
Procedure. . . . . . . . . . . . . . . . . . . . . . . . . . . . . . . . . . . . . . . . . . . . . . . . . . . . . . . . . . . . 135
Resend a DID Request. . . . . . . . . . . . . . . . . . . . . . . . . . . . . . . . . . . . . . . . . . . . . . . . . . 136
Delete a DID Request. . . . . . . . . . . . . . . . . . . . . . . . . . . . . . . . . . . . . . . . . . . . . . . . . . . 137
View Outstanding DID Requests . . . . . . . . . . . . . . . . . . . . . . . . . . . . . . . . . . . . . . . . . . 138
Print Outstanding DID Requests . . . . . . . . . . . . . . . . . . . . . . . . . . . . . . . . . . . . . . . . . . 140
Chapter 8 - CONFIGURATION MANAGEMENT . . . . . . . . . . . . . . . . . . . . . . . . . . . . . . 141

Medical Center System Operations Manual - JAVA Edition CONTENTS
Page
NDA-30026 Revision 6 Page v
Displayed Parameters . . . . . . . . . . . . . . . . . . . . . . . . . . . . . . . . . . . . . . . . . . . . . . . . . . . . . . 141
Procedure . . . . . . . . . . . . . . . . . . . . . . . . . . . . . . . . . . . . . . . . . . . . . . . . . . . . . . . . . . . . . . . 142
Chapter 9 - LOGIN NAME MAINTENANCE. . . . . . . . . . . . . . . . . . . . . . . . . . . . . . . . . . 145
Option Overview . . . . . . . . . . . . . . . . . . . . . . . . . . . . . . . . . . . . . . . . . . . . . . . . . . . . . . . . . . 145
Search Function . . . . . . . . . . . . . . . . . . . . . . . . . . . . . . . . . . . . . . . . . . . . . . . . . . . . . . . . . . 146
View Function . . . . . . . . . . . . . . . . . . . . . . . . . . . . . . . . . . . . . . . . . . . . . . . . . . . . . . . . . . . . 146
Procedure . . . . . . . . . . . . . . . . . . . . . . . . . . . . . . . . . . . . . . . . . . . . . . . . . . . . . . . . . . . . . . . 146
Chapter 10 - SUPERVISOR REPORTS . . . . . . . . . . . . . . . . . . . . . . . . . . . . . . . . . . . . . 149
Date-Stamped Files. . . . . . . . . . . . . . . . . . . . . . . . . . . . . . . . . . . . . . . . . . . . . . . . . . . . . . . . 149
Operator Statistics . . . . . . . . . . . . . . . . . . . . . . . . . . . . . . . . . . . . . . . . . . . . . . . . . . . . . . . . . 150
Procedure . . . . . . . . . . . . . . . . . . . . . . . . . . . . . . . . . . . . . . . . . . . . . . . . . . . . . . . . . . . . . . . 151
Chapter 11 - PROCESS AND ERROR MESSAGES . . . . . . . . . . . . . . . . . . . . . . . . . . . 153
Chapter 12 - PLATFORM MANAGEMENT . . . . . . . . . . . . . . . . . . . . . . . . . . . . . . . . . . 165
Introduction to Platform Management . . . . . . . . . . . . . . . . . . . . . . . . . . . . . . . . . . . . . . . . . . 165
Menu Options . . . . . . . . . . . . . . . . . . . . . . . . . . . . . . . . . . . . . . . . . . . . . . . . . . . . . . . . . 165
Sequence of Option Use . . . . . . . . . . . . . . . . . . . . . . . . . . . . . . . . . . . . . . . . . . . . . . . . 166
Warning . . . . . . . . . . . . . . . . . . . . . . . . . . . . . . . . . . . . . . . . . . . . . . . . . . . . . . . . . . . . . 166
Procedure. . . . . . . . . . . . . . . . . . . . . . . . . . . . . . . . . . . . . . . . . . . . . . . . . . . . . . . . . . . . 166
Backup Database Option. . . . . . . . . . . . . . . . . . . . . . . . . . . . . . . . . . . . . . . . . . . . . . . . . . . . 167
Delay . . . . . . . . . . . . . . . . . . . . . . . . . . . . . . . . . . . . . . . . . . . . . . . . . . . . . . . . . . . . . . . 167
When to Use. . . . . . . . . . . . . . . . . . . . . . . . . . . . . . . . . . . . . . . . . . . . . . . . . . . . . . . . . . 167
Procedure. . . . . . . . . . . . . . . . . . . . . . . . . . . . . . . . . . . . . . . . . . . . . . . . . . . . . . . . . . . . 168
Create Database Option . . . . . . . . . . . . . . . . . . . . . . . . . . . . . . . . . . . . . . . . . . . . . . . . . . . . 169
When to Use. . . . . . . . . . . . . . . . . . . . . . . . . . . . . . . . . . . . . . . . . . . . . . . . . . . . . . . . . . 169
Procedure. . . . . . . . . . . . . . . . . . . . . . . . . . . . . . . . . . . . . . . . . . . . . . . . . . . . . . . . . . . . 169
Drop Database Option. . . . . . . . . . . . . . . . . . . . . . . . . . . . . . . . . . . . . . . . . . . . . . . . . . . . . . 170
Sequence . . . . . . . . . . . . . . . . . . . . . . . . . . . . . . . . . . . . . . . . . . . . . . . . . . . . . . . . . . . . 170
Procedure. . . . . . . . . . . . . . . . . . . . . . . . . . . . . . . . . . . . . . . . . . . . . . . . . . . . . . . . . . . . 170
Make Database Indexes Option . . . . . . . . . . . . . . . . . . . . . . . . . . . . . . . . . . . . . . . . . . . . . . 171
Sequence . . . . . . . . . . . . . . . . . . . . . . . . . . . . . . . . . . . . . . . . . . . . . . . . . . . . . . . . . . . . 171
Procedure. . . . . . . . . . . . . . . . . . . . . . . . . . . . . . . . . . . . . . . . . . . . . . . . . . . . . . . . . . . . 171
Erase Database Indexes Option . . . . . . . . . . . . . . . . . . . . . . . . . . . . . . . . . . . . . . . . . . . . . . 172
Sequence . . . . . . . . . . . . . . . . . . . . . . . . . . . . . . . . . . . . . . . . . . . . . . . . . . . . . . . . . . . . 172
Procedure. . . . . . . . . . . . . . . . . . . . . . . . . . . . . . . . . . . . . . . . . . . . . . . . . . . . . . . . . . . . 172
Rebuild Database Indexes Option. . . . . . . . . . . . . . . . . . . . . . . . . . . . . . . . . . . . . . . . . . . . . 173
When to Use. . . . . . . . . . . . . . . . . . . . . . . . . . . . . . . . . . . . . . . . . . . . . . . . . . . . . . . . . . 173
Procedure. . . . . . . . . . . . . . . . . . . . . . . . . . . . . . . . . . . . . . . . . . . . . . . . . . . . . . . . . . . . 173
Set Menu Colors Option . . . . . . . . . . . . . . . . . . . . . . . . . . . . . . . . . . . . . . . . . . . . . . . . . . . . 174
General Process. . . . . . . . . . . . . . . . . . . . . . . . . . . . . . . . . . . . . . . . . . . . . . . . . . . . . . . 174
Representative Screens . . . . . . . . . . . . . . . . . . . . . . . . . . . . . . . . . . . . . . . . . . . . . . . . . 175
Procedure. . . . . . . . . . . . . . . . . . . . . . . . . . . . . . . . . . . . . . . . . . . . . . . . . . . . . . . . . . . . 177
Table Record Count Option . . . . . . . . . . . . . . . . . . . . . . . . . . . . . . . . . . . . . . . . . . . . . . . . . . 178
Procedure. . . . . . . . . . . . . . . . . . . . . . . . . . . . . . . . . . . . . . . . . . . . . . . . . . . . . . . . . . . . 178
View TTY File Option. . . . . . . . . . . . . . . . . . . . . . . . . . . . . . . . . . . . . . . . . . . . . . . . . . . . . . . 179
Procedure. . . . . . . . . . . . . . . . . . . . . . . . . . . . . . . . . . . . . . . . . . . . . . . . . . . . . . . . . . . . 179

CONTENTS Medical Center System Operations Manual - JAVA Edition
Page
Page vi NDA-30026 Revision 6
FLF/RCF Download to PBX Option. . . . . . . . . . . . . . . . . . . . . . . . . . . . . . . . . . . . . . . . . . . . 180
Warning . . . . . . . . . . . . . . . . . . . . . . . . . . . . . . . . . . . . . . . . . . . . . . . . . . . . . . . . . . . . . 180
DID Numbers . . . . . . . . . . . . . . . . . . . . . . . . . . . . . . . . . . . . . . . . . . . . . . . . . . . . . . . . . 180
Effect on Database. . . . . . . . . . . . . . . . . . . . . . . . . . . . . . . . . . . . . . . . . . . . . . . . . . . . . 180
Procedure. . . . . . . . . . . . . . . . . . . . . . . . . . . . . . . . . . . . . . . . . . . . . . . . . . . . . . . . . . . . 180
Chapter 13 - HOST INTERFACE ADMINISTRATION . . . . . . . . . . . . . . . . . . . . . . . . . . 181
Introduction . . . . . . . . . . . . . . . . . . . . . . . . . . . . . . . . . . . . . . . . . . . . . . . . . . . . . . . . . . . . . . 181
Interface Status . . . . . . . . . . . . . . . . . . . . . . . . . . . . . . . . . . . . . . . . . . . . . . . . . . . . . . . 181
Version . . . . . . . . . . . . . . . . . . . . . . . . . . . . . . . . . . . . . . . . . . . . . . . . . . . . . . . . . . . . . . 181
Menu Options. . . . . . . . . . . . . . . . . . . . . . . . . . . . . . . . . . . . . . . . . . . . . . . . . . . . . . . . . 182
Procedure. . . . . . . . . . . . . . . . . . . . . . . . . . . . . . . . . . . . . . . . . . . . . . . . . . . . . . . . . . . . 182
Log File Options . . . . . . . . . . . . . . . . . . . . . . . . . . . . . . . . . . . . . . . . . . . . . . . . . . . . . . . . . . 183
Contents . . . . . . . . . . . . . . . . . . . . . . . . . . . . . . . . . . . . . . . . . . . . . . . . . . . . . . . . . . . . . 183
Real-Time Display . . . . . . . . . . . . . . . . . . . . . . . . . . . . . . . . . . . . . . . . . . . . . . . . . . . . . 183
Hard Copy Print . . . . . . . . . . . . . . . . . . . . . . . . . . . . . . . . . . . . . . . . . . . . . . . . . . . . . . . 183
View Log File Procedure . . . . . . . . . . . . . . . . . . . . . . . . . . . . . . . . . . . . . . . . . . . . . . . . 184
Erase Log File Procedure. . . . . . . . . . . . . . . . . . . . . . . . . . . . . . . . . . . . . . . . . . . . . . . . 184
Initialization and Termination Options . . . . . . . . . . . . . . . . . . . . . . . . . . . . . . . . . . . . . . . . . . 185
Initialization Procedure . . . . . . . . . . . . . . . . . . . . . . . . . . . . . . . . . . . . . . . . . . . . . . . . . . 185
Termination Procedure . . . . . . . . . . . . . . . . . . . . . . . . . . . . . . . . . . . . . . . . . . . . . . . . . . 185
Configuration Option . . . . . . . . . . . . . . . . . . . . . . . . . . . . . . . . . . . . . . . . . . . . . . . . . . . . . . . 186
Contents . . . . . . . . . . . . . . . . . . . . . . . . . . . . . . . . . . . . . . . . . . . . . . . . . . . . . . . . . . . . . 186
Procedure. . . . . . . . . . . . . . . . . . . . . . . . . . . . . . . . . . . . . . . . . . . . . . . . . . . . . . . . . . . . 187
Statistics Option. . . . . . . . . . . . . . . . . . . . . . . . . . . . . . . . . . . . . . . . . . . . . . . . . . . . . . . . . . . 189
Display Contents . . . . . . . . . . . . . . . . . . . . . . . . . . . . . . . . . . . . . . . . . . . . . . . . . . . . . . 189
Real-Time Display . . . . . . . . . . . . . . . . . . . . . . . . . . . . . . . . . . . . . . . . . . . . . . . . . . . . . 189
Hardcopy Print . . . . . . . . . . . . . . . . . . . . . . . . . . . . . . . . . . . . . . . . . . . . . . . . . . . . . . . . 189
Appendix A - BEEPER INTERFACE. . . . . . . . . . . . . . . . . . . . . . . . . . . . . . . . . . . . . . . . . 1
Overview . . . . . . . . . . . . . . . . . . . . . . . . . . . . . . . . . . . . . . . . . . . . . . . . . . . . . . . . . . . . . . . . . . 1
Database Fields . . . . . . . . . . . . . . . . . . . . . . . . . . . . . . . . . . . . . . . . . . . . . . . . . . . . . . . . . 1
Architecture . . . . . . . . . . . . . . . . . . . . . . . . . . . . . . . . . . . . . . . . . . . . . . . . . . . . . . . . . . . . . . . . 2
Using the Beeper Interface . . . . . . . . . . . . . . . . . . . . . . . . . . . . . . . . . . . . . . . . . . . . . . . . . . . . 4
Local Pager Process . . . . . . . . . . . . . . . . . . . . . . . . . . . . . . . . . . . . . . . . . . . . . . . . . . . . . 6
Dial Number Process . . . . . . . . . . . . . . . . . . . . . . . . . . . . . . . . . . . . . . . . . . . . . . . . . . . . . 8
Error and User Interface Messages . . . . . . . . . . . . . . . . . . . . . . . . . . . . . . . . . . . . . . . . . . 9
Interface Configuration . . . . . . . . . . . . . . . . . . . . . . . . . . . . . . . . . . . . . . . . . . . . . . . . . . . 10
Configuration Menu . . . . . . . . . . . . . . . . . . . . . . . . . . . . . . . . . . . . . . . . . . . . . . . . . . . . . 11

NDA-30026 Revision 6 Page vii
Medical Center System Operations Manual - JAVA Edition FIGURES
LIST OF FIGURES
Figure Title Page
1-1 Medical Center System . . . . . . . . . . . . . . . . . . . . . . . . . . . . . . . . . . . . . . . . . . . . . . . . . 1
2-1 Super User Root . . . . . . . . . . . . . . . . . . . . . . . . . . . . . . . . . . . . . . . . . . . . . . . . . . . . . 12
2-2 Example Install Screens . . . . . . . . . . . . . . . . . . . . . . . . . . . . . . . . . . . . . . . . . . . . . . . 12
2-3 MCS Installation Processing . . . . . . . . . . . . . . . . . . . . . . . . . . . . . . . . . . . . . . . . . . . . 13
2-4 Informix Setup . . . . . . . . . . . . . . . . . . . . . . . . . . . . . . . . . . . . . . . . . . . . . . . . . . . . . . . 14
2-5 Jmcmp Pre-Install - 1st Install . . . . . . . . . . . . . . . . . . . . . . . . . . . . . . . . . . . . . . . . . . . 14
2-6 Jmcmp Pre-Install - Install Options . . . . . . . . . . . . . . . . . . . . . . . . . . . . . . . . . . . . . . . 15
2-7 Jmcmp Pre-Install - Upgrade Option. . . . . . . . . . . . . . . . . . . . . . . . . . . . . . . . . . . . . . 15
2-8 Jmcmp Pre-Install - Overwrite Option . . . . . . . . . . . . . . . . . . . . . . . . . . . . . . . . . . . . . 15
2-9 Jmcmp Installation - Access to Data . . . . . . . . . . . . . . . . . . . . . . . . . . . . . . . . . . . . . . 16
2-10 Jmcmp Installation - Initial Installation. . . . . . . . . . . . . . . . . . . . . . . . . . . . . . . . . . . . . 16
2-11 Jmcmp Installation - Upgrade Installation . . . . . . . . . . . . . . . . . . . . . . . . . . . . . . . . . . 16
2-12 Jmcmp Installation - Overwrite Installation . . . . . . . . . . . . . . . . . . . . . . . . . . . . . . . . . 17
2-13 Jmcmp Installation - Overwrite APM Application Configuration . . . . . . . . . . . . . . . . . 17
2-14 Allowable Client Connections Description. . . . . . . . . . . . . . . . . . . . . . . . . . . . . . . . . . 17
2-15 Allowable Client Connections Configuration File. . . . . . . . . . . . . . . . . . . . . . . . . . . . . 18
2-16 Jmcmp Installation - Installation Complete . . . . . . . . . . . . . . . . . . . . . . . . . . . . . . . . . 18
2-17 MCS Login Screen . . . . . . . . . . . . . . . . . . . . . . . . . . . . . . . . . . . . . . . . . . . . . . . . . . . 35
3-1 NEC UNIX OAI Applications Installation Page . . . . . . . . . . . . . . . . . . . . . . . . . . . . . . 37
3-2 Java Virtual Machine option dialog box. . . . . . . . . . . . . . . . . . . . . . . . . . . . . . . . . . . . 38
3-3 Searching for VMs dialog box . . . . . . . . . . . . . . . . . . . . . . . . . . . . . . . . . . . . . . . . . . . 39
3-4 Installing Application progress indicator . . . . . . . . . . . . . . . . . . . . . . . . . . . . . . . . . . . 40
3-5 Welcome dialog box . . . . . . . . . . . . . . . . . . . . . . . . . . . . . . . . . . . . . . . . . . . . . . . . . . 40
3-6 Installing Files progress indicator . . . . . . . . . . . . . . . . . . . . . . . . . . . . . . . . . . . . . . . . 41
3-7 Installation Complete dialog box . . . . . . . . . . . . . . . . . . . . . . . . . . . . . . . . . . . . . . . . . 41
4-1 Password Entry . . . . . . . . . . . . . . . . . . . . . . . . . . . . . . . . . . . . . . . . . . . . . . . . . . . . . . 43
4-2 Screen Format. . . . . . . . . . . . . . . . . . . . . . . . . . . . . . . . . . . . . . . . . . . . . . . . . . . . . . . 44
4-3 Operator Screen . . . . . . . . . . . . . . . . . . . . . . . . . . . . . . . . . . . . . . . . . . . . . . . . . . . . . 45
4-4 Patient Caller. . . . . . . . . . . . . . . . . . . . . . . . . . . . . . . . . . . . . . . . . . . . . . . . . . . . . . . . 47
4-5 Internal Staff or Non-Patient Caller . . . . . . . . . . . . . . . . . . . . . . . . . . . . . . . . . . . . . . . 48
4-6 Incoming From an External Trunk . . . . . . . . . . . . . . . . . . . . . . . . . . . . . . . . . . . . . . . . 48
4-7 Directory Assistance . . . . . . . . . . . . . . . . . . . . . . . . . . . . . . . . . . . . . . . . . . . . . . . . . . 50
4-8 Call Park Function. . . . . . . . . . . . . . . . . . . . . . . . . . . . . . . . . . . . . . . . . . . . . . . . . . . . 55
4-9 Parked Call Retrieval. . . . . . . . . . . . . . . . . . . . . . . . . . . . . . . . . . . . . . . . . . . . . . . . . . 57
4-10 Beeper Function . . . . . . . . . . . . . . . . . . . . . . . . . . . . . . . . . . . . . . . . . . . . . . . . . . . . . 59
4-11 Redial Function . . . . . . . . . . . . . . . . . . . . . . . . . . . . . . . . . . . . . . . . . . . . . . . . . . . . . . 61
4-12 Emergency Function . . . . . . . . . . . . . . . . . . . . . . . . . . . . . . . . . . . . . . . . . . . . . . . . . . 62
5-1 Password Entry Screen. . . . . . . . . . . . . . . . . . . . . . . . . . . . . . . . . . . . . . . . . . . . . . . . 65
5-2 JAVA MCS Main Screen . . . . . . . . . . . . . . . . . . . . . . . . . . . . . . . . . . . . . . . . . . . . . . . 66
5-3 Operator Screen - Status Area . . . . . . . . . . . . . . . . . . . . . . . . . . . . . . . . . . . . . . . . . . 68
5-4 Operator Screen - Call Source Area . . . . . . . . . . . . . . . . . . . . . . . . . . . . . . . . . . . . . . 70
5-5 Operator Screen - Call Destination Area. . . . . . . . . . . . . . . . . . . . . . . . . . . . . . . . . . . 70
5-6 Operator Screen - Directory Assistance . . . . . . . . . . . . . . . . . . . . . . . . . . . . . . . . . . . 72
5-7 Park Caller Window. . . . . . . . . . . . . . . . . . . . . . . . . . . . . . . . . . . . . . . . . . . . . . . . . . . 77
5-8 Parked Caller Time-out Status . . . . . . . . . . . . . . . . . . . . . . . . . . . . . . . . . . . . . . . . . . 78
5-9 Answer a Park Recall Status. . . . . . . . . . . . . . . . . . . . . . . . . . . . . . . . . . . . . . . . . . . . 79

Page viii NDA-30026 Revision 6
FIGURES Medical Center System Operations Manual - JAVA Edition
Figure Title Page
5-10 Parked Call Retrieval Window. . . . . . . . . . . . . . . . . . . . . . . . . . . . . . . . . . . . . . . . . . . 80
5-11 Beeper Function Window . . . . . . . . . . . . . . . . . . . . . . . . . . . . . . . . . . . . . . . . . . . . . . 82
6-1 Database Administration. . . . . . . . . . . . . . . . . . . . . . . . . . . . . . . . . . . . . . . . . . . . . . . 85
6-2 Record Field and Command Line Samples . . . . . . . . . . . . . . . . . . . . . . . . . . . . . . . . 87
6-3 Add a Record/Admit a Patient. . . . . . . . . . . . . . . . . . . . . . . . . . . . . . . . . . . . . . . . . . . 88
6-4 Delete a Record/Discharge a Patient . . . . . . . . . . . . . . . . . . . . . . . . . . . . . . . . . . . . . 90
6-5 Modify a Record . . . . . . . . . . . . . . . . . . . . . . . . . . . . . . . . . . . . . . . . . . . . . . . . . . . . . 92
6-6 View Database Records . . . . . . . . . . . . . . . . . . . . . . . . . . . . . . . . . . . . . . . . . . . . . . . 94
6-7 Print Database Records . . . . . . . . . . . . . . . . . . . . . . . . . . . . . . . . . . . . . . . . . . . . . . . 96
7-1 System Administration . . . . . . . . . . . . . . . . . . . . . . . . . . . . . . . . . . . . . . . . . . . . . . . 105
7-2 Restriction Class Descriptions . . . . . . . . . . . . . . . . . . . . . . . . . . . . . . . . . . . . . . . . . 107
7-3 Extension Maintenance. . . . . . . . . . . . . . . . . . . . . . . . . . . . . . . . . . . . . . . . . . . . . . . 109
7-4 Record Field and Command Line Samples . . . . . . . . . . . . . . . . . . . . . . . . . . . . . . . .110
7-5 Add an Extension . . . . . . . . . . . . . . . . . . . . . . . . . . . . . . . . . . . . . . . . . . . . . . . . . . . .112
7-6 Delete an Extension . . . . . . . . . . . . . . . . . . . . . . . . . . . . . . . . . . . . . . . . . . . . . . . . . .115
7-7 Modify an Extension . . . . . . . . . . . . . . . . . . . . . . . . . . . . . . . . . . . . . . . . . . . . . . . . . .116
7-8 View Extension Records . . . . . . . . . . . . . . . . . . . . . . . . . . . . . . . . . . . . . . . . . . . . . . .118
7-9 Print Extension Records . . . . . . . . . . . . . . . . . . . . . . . . . . . . . . . . . . . . . . . . . . . . . . 120
7-10 Patient DID Numbers . . . . . . . . . . . . . . . . . . . . . . . . . . . . . . . . . . . . . . . . . . . . . . . . 121
7-11 Add Patient DID Numbers. . . . . . . . . . . . . . . . . . . . . . . . . . . . . . . . . . . . . . . . . . . . . 123
7-12 Delete Patient DID Numbers. . . . . . . . . . . . . . . . . . . . . . . . . . . . . . . . . . . . . . . . . . . 124
7-13 View Patient DID Numbers . . . . . . . . . . . . . . . . . . . . . . . . . . . . . . . . . . . . . . . . . . . . 125
7-14 Print Patient DID Numbers . . . . . . . . . . . . . . . . . . . . . . . . . . . . . . . . . . . . . . . . . . . . 127
7-15 Outstanding RSC Requests . . . . . . . . . . . . . . . . . . . . . . . . . . . . . . . . . . . . . . . . . . . 128
7-16 Resend Outstanding RSC Request . . . . . . . . . . . . . . . . . . . . . . . . . . . . . . . . . . . . . 129
7-17 Delete Outstanding RSC Request . . . . . . . . . . . . . . . . . . . . . . . . . . . . . . . . . . . . . . 130
7-18 View Outstanding RSC Requests . . . . . . . . . . . . . . . . . . . . . . . . . . . . . . . . . . . . . . . 131
7-19 Print Outstanding RSC Requests . . . . . . . . . . . . . . . . . . . . . . . . . . . . . . . . . . . . . . . 133
7-20 Outstanding DID Requests . . . . . . . . . . . . . . . . . . . . . . . . . . . . . . . . . . . . . . . . . . . . 134
7-21 Resend Outstanding DID Request . . . . . . . . . . . . . . . . . . . . . . . . . . . . . . . . . . . . . . 136
7-22 Delete Outstanding DID Request . . . . . . . . . . . . . . . . . . . . . . . . . . . . . . . . . . . . . . . 137
7-23 View Outstanding DID Requests. . . . . . . . . . . . . . . . . . . . . . . . . . . . . . . . . . . . . . . . 138
7-24 Print Outstanding DID Requests. . . . . . . . . . . . . . . . . . . . . . . . . . . . . . . . . . . . . . . . 140
8-1 Platform Management. . . . . . . . . . . . . . . . . . . . . . . . . . . . . . . . . . . . . . . . . . . . . . . . 141
9-1 Login Name Maintenance . . . . . . . . . . . . . . . . . . . . . . . . . . . . . . . . . . . . . . . . . . . . . 145
9-2 View Operator Login Names . . . . . . . . . . . . . . . . . . . . . . . . . . . . . . . . . . . . . . . . . . . 148
10-1 Supervisor Reports . . . . . . . . . . . . . . . . . . . . . . . . . . . . . . . . . . . . . . . . . . . . . . . . . . 149
12-1 Platform Management. . . . . . . . . . . . . . . . . . . . . . . . . . . . . . . . . . . . . . . . . . . . . . . . 165
12-2 Backup Database . . . . . . . . . . . . . . . . . . . . . . . . . . . . . . . . . . . . . . . . . . . . . . . . . . . 167
12-3 Create Database. . . . . . . . . . . . . . . . . . . . . . . . . . . . . . . . . . . . . . . . . . . . . . . . . . . . 169
12-4 Drop Database . . . . . . . . . . . . . . . . . . . . . . . . . . . . . . . . . . . . . . . . . . . . . . . . . . . . . 170
12-5 Make Database Indexes . . . . . . . . . . . . . . . . . . . . . . . . . . . . . . . . . . . . . . . . . . . . . . 171
12-6 Erase MCS Database Indexes . . . . . . . . . . . . . . . . . . . . . . . . . . . . . . . . . . . . . . . . . 172
12-7 Rebuild Database Indexes . . . . . . . . . . . . . . . . . . . . . . . . . . . . . . . . . . . . . . . . . . . . 173
12-8 Set Menu Colors . . . . . . . . . . . . . . . . . . . . . . . . . . . . . . . . . . . . . . . . . . . . . . . . . . . . 174
12-9 Database Table Record Count . . . . . . . . . . . . . . . . . . . . . . . . . . . . . . . . . . . . . . . . . 178
12-10 View TTY File . . . . . . . . . . . . . . . . . . . . . . . . . . . . . . . . . . . . . . . . . . . . . . . . . . . . . . 179

NDA-30026 Revision 6 Page ix
Medical Center System Operations Manual - JAVA Edition FIGURES
Figure Title Page
12-11 FLF/RCF Download to PBX . . . . . . . . . . . . . . . . . . . . . . . . . . . . . . . . . . . . . . . . . . . 180
13-1 Host Interface Administration . . . . . . . . . . . . . . . . . . . . . . . . . . . . . . . . . . . . . . . . . . 181
13-2 Interface Log File. . . . . . . . . . . . . . . . . . . . . . . . . . . . . . . . . . . . . . . . . . . . . . . . . . . . 183
13-3 Interface Initialization/Termination. . . . . . . . . . . . . . . . . . . . . . . . . . . . . . . . . . . . . . . 185
13-4 Interface Configuration File . . . . . . . . . . . . . . . . . . . . . . . . . . . . . . . . . . . . . . . . . . . . 186
13-5 Interface Statistics. . . . . . . . . . . . . . . . . . . . . . . . . . . . . . . . . . . . . . . . . . . . . . . . . . . 189
A-1 Beeper Connectivity . . . . . . . . . . . . . . . . . . . . . . . . . . . . . . . . . . . . . . . . . . . . . . . . . . . 2
A-2 Beeper Software Interface. . . . . . . . . . . . . . . . . . . . . . . . . . . . . . . . . . . . . . . . . . . . . . . 3
A-3 Console Screen. . . . . . . . . . . . . . . . . . . . . . . . . . . . . . . . . . . . . . . . . . . . . . . . . . . . . . . 4
A-4 Database Beeper Number Display . . . . . . . . . . . . . . . . . . . . . . . . . . . . . . . . . . . . . . . . 5
A-5 Local Pager Message Screen. . . . . . . . . . . . . . . . . . . . . . . . . . . . . . . . . . . . . . . . . . . . 6
A-6 Pager Message Error . . . . . . . . . . . . . . . . . . . . . . . . . . . . . . . . . . . . . . . . . . . . . . . . . . 7
A-7 Beeper Codes Screen. . . . . . . . . . . . . . . . . . . . . . . . . . . . . . . . . . . . . . . . . . . . . . . . . . 8
A-8 Beeper Interface Administration Menu . . . . . . . . . . . . . . . . . . . . . . . . . . . . . . . . . . . . 10
A-9 Configuration Menu. . . . . . . . . . . . . . . . . . . . . . . . . . . . . . . . . . . . . . . . . . . . . . . . . . . 11
A-10 Configuration Files . . . . . . . . . . . . . . . . . . . . . . . . . . . . . . . . . . . . . . . . . . . . . . . . . . . 11
A-11 Misc Parameters Window . . . . . . . . . . . . . . . . . . . . . . . . . . . . . . . . . . . . . . . . . . . . . . 12
A-12 Port Parameters Window . . . . . . . . . . . . . . . . . . . . . . . . . . . . . . . . . . . . . . . . . . . . . . 13
A-13 Timer Parameters Window . . . . . . . . . . . . . . . . . . . . . . . . . . . . . . . . . . . . . . . . . . . . . 13
A-14 View Log File Menu. . . . . . . . . . . . . . . . . . . . . . . . . . . . . . . . . . . . . . . . . . . . . . . . . . . 14
A-15 Beeper Transaction Log . . . . . . . . . . . . . . . . . . . . . . . . . . . . . . . . . . . . . . . . . . . . . . . 15

Page x NDA-30026 Revision 6
FIGURES Medical Center System Operations Manual - JAVA Edition
This Page Left Blank.
NDA-30026 Revision 6 Page 1
Medical Center System Operations Manual - JAVA Edition INTRODUCTION
Chapter 1 INTRODUCTION
What is Medical Center System?
The Medical Center System (MCS) provides enhanced operator functions and call
handling for a medical center environment. MCS combines the NEC Advanced
Attendant Console with a general purpose computer equipped with a UNIX
System V operating environment, the NEC Applications Manager support
platform, and a comprehensive package of software components.
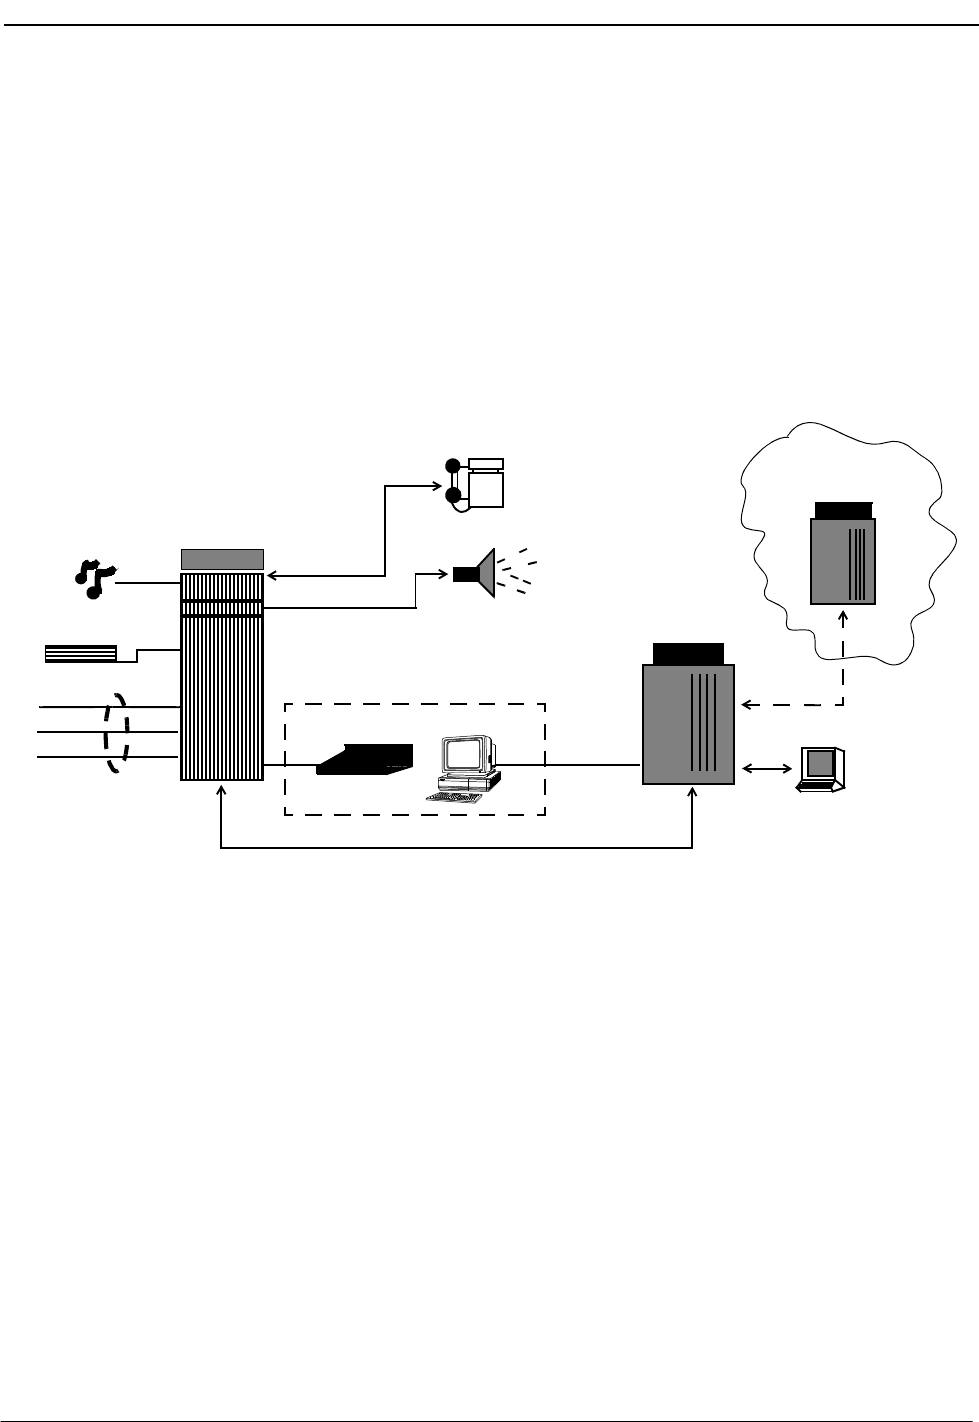
MCS operates with a SN716 Attendant Console. The illustration below (Figure 1-
1) shows the MCS components in a typical configuration:
Figure 1-1 Medical Center System
MCS provides enhanced functionality by using the NEC Open Applications
Interface (OAI) communication pathway between the UAP computer and the
NEAX2400 PBX system. The PBX and UAP utilize standard TCP/IP network
media for communication allowing flexible deployment options.
The MCS JAVA Edition (MCS-JE) includes a JAVA based client Graphical User
Interface (GUI) that can be installed on any PC Workstation that supports Sun
Microsystems JAVA Virtual Machine (JVM) Release 1.1.7 or greater. The MCS-
JE client installation provides a compatible JVM runtime for Microsoft Windows
9x.
MCS-JE also supports previous MCS customers that do not use PC Workstations
to connect to the MCS UAP. The MCS-JE software components can be configured
with either PC Workstations and existing attendant console stations. This
capability provides a choice for the customer of how and when to upgrade.
Computer
Paging System
Internal Station
OAI Connection (TCP/IP Network)
APM &
NEAX2400 IMS
Trunk
Announcement
Music
MCS
Lines
Attendant Console Station
Applications
Remote Computer
Trunk
Hospital or other
UAP
TCP/IP
Network
Optional
Network
SN716
PBX
PC Workstation

Page 2 NDA-30026 Revision 6
INTRODUCTION Medical Center System Operations Manual - JAVA Edition
Telnet and JAVA
Interfaces The MCS-JE supports both JAVA GUI and the character based Telnet terminal
session interfaces. The JAVA GUI is available for operator features and functions.
Database administration between the PC Workstation (client) and the MCS UAP
uses the character based Telnet interface.
To use the character based interface, a third-party terminal emulation program that
supports the Telnet session protocols must be installed on the PC Workstation. The
standard MS Windows Telnet program is NOT recommended as it does not
adequately support colors and cursor positioning. Other commercial terminal
emulation programs that support Telnet sessions such as PowerTerm or SCO
TermVision are suggested.
Operator
Functions MCS provides up to 16 medical center operators with an on-screen display of caller
information and an interactive screen for caller assistance using the functions:
•Directory Assistance – Provides information retrieval from a computer
database and directs incoming calls to their destinations. The database contains
patient, staff, and other information that is designed for either stand-alone use
or for interactive transactions with a remote database server.
•Park/Page Retrieval – Allows the operator to transfer an incoming call to an
announcement trunk or to a monitored number for later retrieval.
•Beeper Connection – Displays a database listing of beeper assignments.
Automatic call placement and manual entry of message codes is supported.
Alphanumeric beeper messaging is supported with an add-on beeper interface
package.
•Redial Caller – Automatically attempts to reestablish connection with the most
previous internal extension.
•Emergency Response – Displays a database of emergency response teams and
agencies for operator selection, and automatically places the chosen call.
Supervisor
Functions MCS provides supervisory functions using password security access for the
management of the MCS resources used by MCS operator functions. The
Supervisor may perform the following functions by accessing the menu items
listed below:
•Database Administration – Add, delete, modify, view, and print the large
variety of database records that are required by MCS operator functions.
•System Administration – Make extension assignments, including the types of
restrictions that affect their use, and direct inward dialing numbers controlled
by MCS.
•Configuration Management – Modify or print configuration parameters that
affect processing of time-outs and the Operator Functions display fields.
•Login Maintenance – Manage the MCS login and password security system as
well as to activate specific operators.

NDA-30026 Revision 6 Page 3
Medical Center System Operations Manual - JAVA Edition INTRODUCTION
•Supervisor Reports – View and print statistical reports generated from
operator call processing activity.
Note: The initial release of MCS-JE does not support JAVA GUI interfaces for all su-
pervisory functions. Where not supported, the Telnet session interface will be
used.
In addition to these menu-driven capabilities, the supervisor can respond to an
operator emergency alert by silently monitoring an ongoing conversation between
a caller and an operator.
Password Security The MCS menu system serves up to 16 operators and one supervisor. Operators can
be configured with operator functions or with operator and database management
capabilities. If operators are not configured for access to database functions,
entering the operator password on the login screen automatically displays an
Operator Functions screen.
The supervisor can access all operator functions as well as database, configuration,
login name, and report management options. Authorized access by the supervisor
displays the full MCS Main Menu.

Page 4 NDA-30026 Revision 6
INTRODUCTION Medical Center System Operations Manual - JAVA Edition
How to Use This Manual
Manual
Organization This manual is organized around the MCS Main Menu illustrated in Chapter 3 for
the Telnet interface and Chapter 4 for the JAVA GUI interface. The later chapters
describe these Main Menu features and functions. Refer to the following chapters
to install, configure, and operate MCS-JE:
•Chapter 2, “SERVER INSTALLATION”
•This chapter addresses the server hardware and software installation of MCS as
well as the necessary configuration files, databases, and other data and
equipment assignments that are required by MCS.
•Chapter 3, “JAVA MCS CLIENT INSTALLATION”
If using the JAVA GUI, this describes the procedure to install the MCS-JE JAVA
GUI on a PC Workstation.
•Chapter 4, “TELNET OPERATOR FUNCTIONS”
This provides an illustrated reference and procedural guide to all of the
functions provided to MCS operators using the Telnet protocol interface.
•Chapter 5, “JAVA OPERATOR FUNCTIONS”
This chapter provide an illustrated reference and procedural guide to all of the
functions provided to MCS operators using the JAVA GUI.
•Chapter 6, “DATABASE ADMINISTRATION”
This chapter describes the procedures to manage the various types of database
records used by MCS.
•Chapter 7, “SYSTEM ADMINISTRATION”
This describes phone equipment numbers (e.g., extensions and trunk numbers)
and the necessary assignments associated to them.
•Chapter 8, “CONFIGURATION MANAGEMENT”
This chapter describes configuration parameters that affect MCS operation and
that can be modified by the supervisor as necessary.
•Chapter 9, “LOGIN NAME MAINTENANCE”
This describes the procedures for a supervisor to manage the login name and
password security system.
•Chapter 10, “SUPERVISOR REPORTS”
This chapter describes the procedures for the supervisor with information on
how to view call processing statistics by operator on a daily basis.

NDA-30026 Revision 6 Page 5
Medical Center System Operations Manual - JAVA Edition INTRODUCTION
•Chapter 11, “PROCESS AND ERROR MESSAGES”
This chapter presents an alphabetical list of the messages that might appear
throughout MCS screen operations with a brief description of their meaning and
recovery measures, if appropriate.
•Chapter 12, “PLATFORM MANAGEMENT”
This chapter provides illustrated instructions for performing various tasks in
support of MCS functions, including backing up the database on tape, managing
the database indexes, resetting the colors seen on the MCS screens, and
displaying MCS records and terminal assignments.
•Chapter 13, “HOST INTERFACE ADMINISTRATION”
This chapter describes the options that are available for managing the
communication interface between the MCS and the hospital information
system, including log file access, initialization and termination of the interface,
and configuration and statistical data.
•Appendix A, “BEEPER INTERFACE”
This appendix describes the features and basic operation of NEC’s MCS
alphanumeric paging interface.
Chapter Layout
When using MCS, you can often choose a Main Menu option to display either a
second-level menu of options (e.g., choose the System Administration option on
the Main Menu to display the System Administration menu) or a new series of
commands (e.g., Add, Delete, Modify). The chapters in this manual follow the
same organization in that each second-level menu option or command is presented
as a separate section.
Each multi-level chapter begins with an overview that describes the entire chapter
and the options discussed within the chapter. Each section includes an illustration
of the screen(s) or window(s) associated with the procedure, information related to
performance of the procedure, and step-by-step instructions.
Some graphics illustrate the progression among a group of related screens.
Medical Center System Supervisor Tue Aug 17 09:02 am
*** Main Menu ***
Database Administration
System Administration
Operator Functions
*** MCS System Administration ***
RSC DEscriptions
Extension Maintenance
Patient DID Numbers
*** Extension Maintenance ***
(3)
(1)
(2)
Patient Room Extensions
Attendant Console Extensions
Nurse Station Extensions

Page 6 NDA-30026 Revision 6
INTRODUCTION Medical Center System Operations Manual - JAVA Edition
The numbers in parentheses beside each screen graphic represent the number of the
screen in the progression. These numbers are referenced in the procedural
instructions, where applicable, to help you associate the action with the appropriate
screen. In the illustration above, the Extension Main ten ace screen (3) displays
after you select System Administration from the Main Menu (1) and Extension
Maintenance from the MCS System Administration screen (2).
Option/Command
Selection Commands can be selected in either of two ways that are configurable through the
Configuration Management option on the MCS Main Menu. Either you type the
first letter of the command to immediately implement that command, or you type
the first letter of the command followed by the Enter key. Instructions provided in
this manual are all based upon entry of the first letter. When the first letter of a
command or menu options has been used for another option on that screen, the next
unused letter in the word is highlighted for use.

NDA-30026 Revision 6 Page 7
Medical Center System Operations Manual - JAVA Edition INTRODUCTION
Procedures
Each section includes step-by-step instructions on how to select and move to the
required screen and how to perform the available actions. The procedures are
presented in a two-column layout. The left column contains the action to be taken.
The right column contains the results of that action. Where there are field entries
to be made on the screen, this manual provides field names in the left column and
corresponding field definitions in the right column.
General Key Use
Throughout MCS, the following keys generally perform the actions described
below.
Note: Clear notation is made wherever other key or key combinations apply or these do
not.
Enter –Accepts a selection or field entry.
Esc –Generally exits the current screen or action to the last
screen or action.
Arrow keys –Move the cursor in the direction shown.
Space bar –Selects an option when more than one is available in a
field; serves to toggle among scrolled or side-by-side
options in a field.
Backspace –Erases any data in a field.
Tab –Expands a data record to expose more information or
provide other options that can be selected.
Action Result
On the Main Menu, type s to select the
System Administration option. (1) The System Administration menu
displays. (2)
On the System Administration menu,
type e to select the Extension
Maintenance option.
The Extension Maintenance menu
displays. (3)

INTRODUCTION Medical Center System Operations Manual - JAVA Edition
Page 8 NDA-30026 Revision 6
This Page Left Blank.

NDA-30026 Revision 6 Page 9
Medical Center System Operations Manual - JAVA Edition SERVER INSTALLATION
Chapter 2 SERVER INSTALLATION
Introduction
This chapter provides a step-by-step description of the installation and setup of
Medical Center System (MCS). The following steps must be taken before MCS can
be installed:
1. The OAI/APM system must be installed on the SCO UNIX system.
2. The Informix Dynamic Server (IDS) Workgroup Edition Version 7.30 must be
installed on the SCO UNIX system.
Note: A system obtained through NEC CNG Division will normally have been precon-
figured with these requirements. If reinstalling or upgrading a system, the install-
er should contact NEC to obtain the system staging procedures.
The installation and setup of MCS involves the following procedure. Perform the
installation in this sequence and refer to the listed sections for detailed instructions:
1. Hardware Installation on page 11
Each attendant station consists of an NEC Advanced Attendant Console and a
CRT. This section presents the attendant setup for each station and discusses
how the hardware configurations are used to determine software characteristics.
2. Software Installation on page 12
This section discusses installation and configuration of the MCS software
components of the UAP.
3. Application Configuration on page 19
MCS is internally supported by the Applications Manager (APM) and must
therefore be set up in the APM environment. This section presents a detailed
description of the required setup. Use the instructions provided in the APM
Operations Manual to make the entries contained in this section.
4. Database Requirements on page 32
MCS provides two default APM databases that are loaded during software
installation. One of these databases can be changed through the APM Database
Administration option. This section defines the fields and entries in this
database. Use the instructions provided in the APM Operations Manual to make
any required changes to the database presented in this section.
5. MAT Assignments on page 34
Specific data settings must be assigned at the NEAX2400 Maintenance
Administration Terminal (MAT) before MCS will function. This section
specifies the necessary commands and the values to which they are to be set.
6. Attendant Station Preparation on page 35
Attendant stations are set up via the MCS Main Menu. Enter from the UNIX
login prompt during this step.

Page 10 NDA-30026 Revision 6
SERVER INSTALLATION Medical Center System Operations Manual - JAVA Edition
7. Extension Installation
After the installation is performed as outlined in Steps 1 through 6, the extensions
must be added to the Informix database. Each extension is assigned through the
Extension Maintenance option, entered from the System Administration option on
the MCS Main Menu.
Note: In some cases, sequence is important in the assignment process. We recommend a re-
view of Chapter 7, “SYSTEM ADMINISTRATION” before beginning these assign-
ments.
The Applications Manager Operations Manual provides detailed instructions for using
the APM menus and for completing the data entry screens shown in this manual.
NEAX2400 IMS System manuals provide the procedures for making the data
assignments at the NEAX MAT.

NDA-30026 Revision 6 Page 11
Medical Center System Operations Manual - JAVA Edition SERVER INSTALLATION
Hardware Installation
The hardware configuration of each attendant station determines the software
characteristics for the attendant configuration in JAVA MCS. Each MCS attendant
station consists of an NEC Advanced Attendant Console and a PC Workstation, and
each is identified by the following unique characteristics:
Attendant ID: An attendant console equipment number for each particular station
ranging from 1 to 16.
Extension: A unique extension assigned to the attendant console on the PBX.
Number
Attendant
Station
Number each attendant station with a unique value between 1 and 16, and label each
with its assigned Attendant ID. The easiest method is to make the station Attendant ID
match the logical ID of each attendant console as it is assigned on the NEAX
Maintenance Administration Terminal. (Refer to MAT Assignments on page 34 for
more information.)

Page 12 NDA-30026 Revision 6
SERVER INSTALLATION Medical Center System Operations Manual - JAVA Edition
Software Installation
This section discusses the installation of MCS software from the release media and
describes the required MCS software configurations. Before beginning this section, be
sure to install the UNIX operating system, including the raw partition required for
Informix, and the Applications Manager platform. Refer to the instructions provided
with each of these software packages for more information.
Installation of MCS software is initiated from the Applications Manager (APM)
Platform Maintenance Main Menu. To display this menu, type the login apmadm at
the UNIX prompt and press Enter. When prompted, type the assigned password and
press Enter. Using instructions in the APM Operations Manual, select and implement
the Installation of Applications/Packages option from this menu to load MCS
software from release media. As the installation process executes, follow the steps
described below as they correspond to the screen display, and make entries as
indicated. Required input is shown in boldface type.
Step 1:
Superuser/
Root Password
Type the password for the root login and press Enter to continue. If you type an invalid
password, the message “Error entering root password. Installation failed” displays, the
installation cancels, and you must restart the installation.
Figure 2-1 Super User Root
After entering a valid root password, the MCS user account installation will quickly
display several screens as the install process continues. Some example screens are
shown below:
Figure 2-2 Example Install Screens
MCS Installation
Installation requires Super User (root) privileges.
Password: <root password> <Enter>
NOTE: To re-run this script login as ‘apmadm’ get to ‘Unix’
and execute the following command ‘/oai/install/mcs.ins’.
su root:
Installing 16 mcs network users on SCO UNIX.
User (mcs1) installed.
User (mcs2) installed.
User (mcs3) installed.
User (mcs4) installed.
Deleting password for user: mcs1
Last successful password change for mcs1: NEVER
Deleting password for user: mcs2
Last successful password change for mcs2: NEVER
NDA-30026 Revision 6 Page 13
Medical Center System Operations Manual - JAVA Edition SERVER INSTALLATION
Step 2: MCS
Login Names The mcs and mcsadm login names are installed with the same user ID. (The default is
4001.) Any change in the user ID value must be made for both login names, since they
both use the same user ID value. Press Enter at each user ID prompt to accept the
default value. A warning message displays when the 4001 user is being installed. Type
‘y’ and press Enter at the warning prompt and continue the installation. The
installation should default through this section. If another user is using the assigned ID,
you will need to select another ID by adding one to the default until it can be assigned.
Step 3: MCS
Installation
Processing
The installation script performs several steps after you enter the login name.
Information about these steps displays as they are performed. None of these steps
require input. This process includes the following actions:
•Entering boot-up commands into UNIX boot-up sequence.
•Installing all remaining MCS files and directories as well as MCS host directories
and executables.
•Entering MCS crontab information.
At the prompt, type ‘y’ and press Enter to continue the installation.
Figure 2-3 MCS Installation Processing
.
.
.
Installing MCS system boot sequence...
mcs crontabs entries complete...
Installing gettydefs entry for MCS.
Installing MCS directories and executables...
Continue with installation of Mcs/Informix Database (y/n) [ ]

Page 14 NDA-30026 Revision 6
SERVER INSTALLATION Medical Center System Operations Manual - JAVA Edition
Step 4: Informix
Database
Installation
The figure below shows a normal execution of the Informix setup and includes the
required input for each prompt. Type y and press Enter if this is the first time this
installation is being performed.
The informix user must not have a password, as described in the APM Informix
Installation section. If the informix user does have a password, this step will fail.
Required input is shown in boldface type.
Figure 2-4 Informix Setup
The APM Main Menu displays. Select the Logout option from the Main Menu.
Step 5: Jmcmp
Server
Software
Installation
JMCMP Pre-Install
This installs the Java JMCMP server software. The JMCMP Pre-Install step of the
installation checks for previous installed versions of JMCMP Server. If no previous
versions exist, the following is displayed: Press Enter to continue.
Figure 2-5 Jmcmp Pre-Install - 1st Install
Please Enter su/informix Password: <Enter>
MCS Informix Database Installation
.
.
.
Creating Mcs database: [mcsdb].
Mcs database [mcsdb] created.
MCS Informix database created.
Do the Mcs Database Indexes already exist? (y/n) n <Enter>
.
.
.
Building Mcs database indexes: [mcsdb].
Mcs database [mcsdb] indexes built.
..
.
MCS Installation Complete.
Creating MCS Informix database...
Does the Mcs Database already exist? (y/n) n <Enter>
Bringing Informix Database Engine On-line...
JMCMP Server Pre-Install
Checking the system configuration....
JMCMP Server Pre-Install Complete
Press "Enter" to Continue Installation:

NDA-30026 Revision 6 Page 15
Medical Center System Operations Manual - JAVA Edition SERVER INSTALLATION
Step 5: Jmcmp
Server
Software
Installation
(Cont)
However, if a previous version is detected, an option is given to either upgrade (leaving
configured data alone), overwrite (completely overwrite all Jmcmp data), or abort the
installation. Enter ‘u’, ‘o’, or ‘a’ to upgrade, overwrite, or abort the installation and
then press Enter.
Figure 2-6 Jmcmp Pre-Install - Install Options
If the upgrade option is chosen, the following is displayed: Press Enter to continue
Figure 2-7 Jmcmp Pre-Install - Upgrade Option
If the overwrite option is chosen, the following is displayed: Press Enter to continue
Figure 2-8 Jmcmp Pre-Install - Overwrite Option
JMCMP Server Pre-Install
Checking the system configuration....
JMCMP Server Ver1.0 Currently Installed
Do you wish to upgrade, overwrite the existing
JMCMP Server Installation or Abort? (u/o/a):
Saving Current JMCMP Server Applications and Configurations
To insure access to data please login as root
Login: root
Password:
Adjusting directory access ... Done.
JMCMP Server Pre-Install Complete
Press "Enter" to Continue Installation:
Overwriting Existing JMCMP Server Installation
To insure access to data please login as root
Login: root
Password:
Adjusting directory access ... Done.
JMCMP Server Pre-Install Complete
Press "Enter" to Continue Installation:

Page 16 NDA-30026 Revision 6
SERVER INSTALLATION Medical Center System Operations Manual - JAVA Edition
Step 5: Jmcmp
Server
Software
Installation
(Cont)
JMCMP Install
After the Pre-Install phase of installation, the following is displayed:
Figure 2-9 Jmcmp Installation - Access to Data
Enter the root password and press Enter to allow proper access to configuration data.
If this is a first install of Jmcmp Server, the following is displayed:
Figure 2-10 Jmcmp Installation - Initial Installation
If the upgrade option is selected, as described in Figure 2-6, “Jmcmp Pre-Install - Install
Options” on page 15, the Jmcmp Server application, the following is displayed:
Figure 2-11 Jmcmp Installation - Upgrade Installation
Pressing Enter installs the new applications, and then restores all configuration data
from the previous installation. For the ‘Upgrade’ option, no other configuration is
needed, and installation is complete.
Installation requires Super User (root) privileges.
NOTE: To re-run this script login as ’apmadm’ get to ’Unix’
and execute the following command ’/oai/install/jmcmpServer.ins’.
su root
Password:
Initial JMCMP Server Install
Unpacking Install JMCMP Server Ver1.0.
Upgrading JMCMP Server Ver1.0 to Ver1.1
Unpacking Upgrade JMCMP Server Ver1.0
Installation Complete
Hit "Enter" to continue:

NDA-30026 Revision 6 Page 17
Medical Center System Operations Manual - JAVA Edition SERVER INSTALLATION
Step 5: Jmcmp
Server
Software
Installation
(Cont)
If overwrite the existing installation is selected, the following is displayed:
Figure 2-12 Jmcmp Installation - Overwrite Installation
This installs the new applications, plus sets all configuration data to default values. If
the Jmcmp Server was previously installed, the APM application “JmcmpConnServer”
may already be configured. If so, the following is displayed:
Figure 2-13 Jmcmp Installation - Overwrite APM Application Configuration
To keep the same configuration parameters for the APM application
“JmcmpConnServer”, type ‘n’ and press Enter. To set the configuration parameters to
default values, which must be modified later, type ‘y’and press Enter.
If this is an “Initial” installation, or if overwriting the existing installation, the
allowable client connections to the Jmcmp Server must be defined. The following is
displayed:
Figure 2-14 Allowable Client Connections Description
Overwriting JMCMP Server Ver1.0
Unpacking Install JMCMP Server Ver1.0.
Application "JmcmpConnServer" is already configured.
Do you wish to overwrite current configuration
data with the new default data? (y/n)
JMCMP Server Connection ID Configuration
For each Java Client connection, an identifier must be
defined. The identifier can be either:
(a) A fully qualified host name, or a hostname that can be
resolved on the Server machine.
(e.g., "clientmachine.domain.com")
(b) The 32-bit IP address of the client machine.
(e.g., "123.45.678.901")
(c) The 48-bit MAC address (Ethernet address) of the client’s
Network Interface Card.
(e.g. 00:20:af:9c:5a:b3)
Do you wish to edit the JMCMP Server Connection ID configuration
file at this time (vi editor) ? (y/n)
NOTE: To exit the vi editor without saving, enter ":q!"
(Hit Enter to continue)

Page 18 NDA-30026 Revision 6
SERVER INSTALLATION Medical Center System Operations Manual - JAVA Edition
Step 5: Jmcmp
Server
Software
Installation
(Cont)
Entering ‘y’ and pressing Enter starts up the ‘vi’ editor, allowing modifications to the
User Address Mapping File:
Figure 2-15 Allowable Client Connections Configuration File
For each client position, enter the hostname, IP address, or MAC address of the client
machine. When the installation is complete, the following is displayed:
Figure 2-16 Jmcmp Installation - Installation Complete
Step 6: Java
Server/Client
Component
Installation
A Java software component must be installed on the server to enable communication
with Java clients. This installation is initiated from the Applications Manager (APM)
Platform Maintenance Main Menu. To display this menu, type the login apmadm at
the UNIX prompt and press Enter. When prompted, type the assigned password and
press Enter. Using instructions in the APM Operations Manual, select and implement
the Installation of Applications/Packages option from this menu to load this software
component from release media. When all release media has been loaded, the
installation of this component is complete. No further setup is required for this
component.
#
# User Address Mapping File
#
# In
# POS Use Address
# --- --- ------------------
01 0 localhost
02 0
03 0
04 0
05 0
06 0
07 0
08 0
09 0
10 0
11 0
12 0
13 0
14 0
15 0
16 0
NEC America Inc JmcmpConnServer Ver1.0 Installation Wed - Aug 25, 1999
Installation Complete
Hit "Enter" to continue:

NDA-30026 Revision 6 Page 19
Medical Center System Operations Manual - JAVA Edition SERVER INSTALLATION
Application Configuration
MCS is internally supported by the APM and must be configured in the APM
environment.
MCS uses an autoconfiguration utility program to automatically configure some MCS
settings for the APM platform. This program utility runs upon installation. If the utility
runs successfully, specific adjustments can be made to the application parameters,
depending on site requirements.
Note: If an error occurs during installation, you can try to run the autoconfig program again
or you can enter the information into the APM manually using the information pro-
vided in this chapter.
After the autoconfiguration utility has run successfully, the initialization time settings
for the database processing applications must now be configured. Configuring these
settings is described in three steps ( on page 28, Step 9: Mcs_Recluster Control Options
on page 30, Step 10: Mcs_Host_ Statistics Control Options on page 30) in the
following pages.
MCS is configured into the APM system using the Add command on the Application
Configuration screen. To access the Application Configuration option, use the
following steps:
1. Type the System Administrator password at the APM password screen.
2. Select the Application Configuration option from the System Administration
menu.
This section contains the data that should be entered to the configuration file for MCS.
The following components must be configured:
Monitor –Controls call parking and retrieval, restrictions, and DID number
management.
Server –Controls source caller data displayed on the attendant consoles,
directory assistance, and beeper functions. You may need to set up
more than one server, depending on the server ratio and the
number of attendants. (Refer to the Server Ratio section in
Database Requirements on page 32.)
Recluster –Periodically reclusters Informix system tables for more efficient
processing of the database. You must schedule this component
under Control Options on the APM Operations Menu in order for
it to function automatically.
Host Statistics –Periodically creates a log that contains the count of records
received from the Hospital Information System, including
admissions, discharges, and transfers. All error transactions will
appear in the log. You can display the log file from the Statistics
option on the MCS Administration Menu (login: mcsadm).

Page 20 NDA-30026 Revision 6
SERVER INSTALLATION Medical Center System Operations Manual - JAVA Edition
Cleaner –Periodically cleans out any records of patients that have been
discharged. It also makes available DID numbers that have been
offered but not assigned to an admitted patient after a set amount
of time. You must schedule this component under Control Options
on the APM Operations Menu in order for it to function
automatically.
Java Services –Controls the Java graphical user interface between the host server
and the Java client workstations. All component parameters are
automatically configured at installation.
For instructions on what these parameters mean and how to make these entries, refer to
the APM Operations Manual.
Step 1:
Application
Characteristics
To add MCS to the APM Application Configuration file, set up each of its components
exactly as follows:
Parameter Definitions:
OAI Application –Whether (Yes or No) this component communicates with
the NEAX2400 using OAI processes.
CRT Application –Whether (Yes or No) this component runs on the same
screen as the APM, rendering the APM temporarily
inaccessible.
Communication Queue –Whether (Yes or No) this non-OAI application needs an
IPC queue to communicate with other processes.
Parameter Monitor Server Cleaner Recluster Host
Statistics JAVA
Services
OAI ApplicationYYNNNN
CRT ApplicationNNNNNN
Communication
Queue NNNNNN
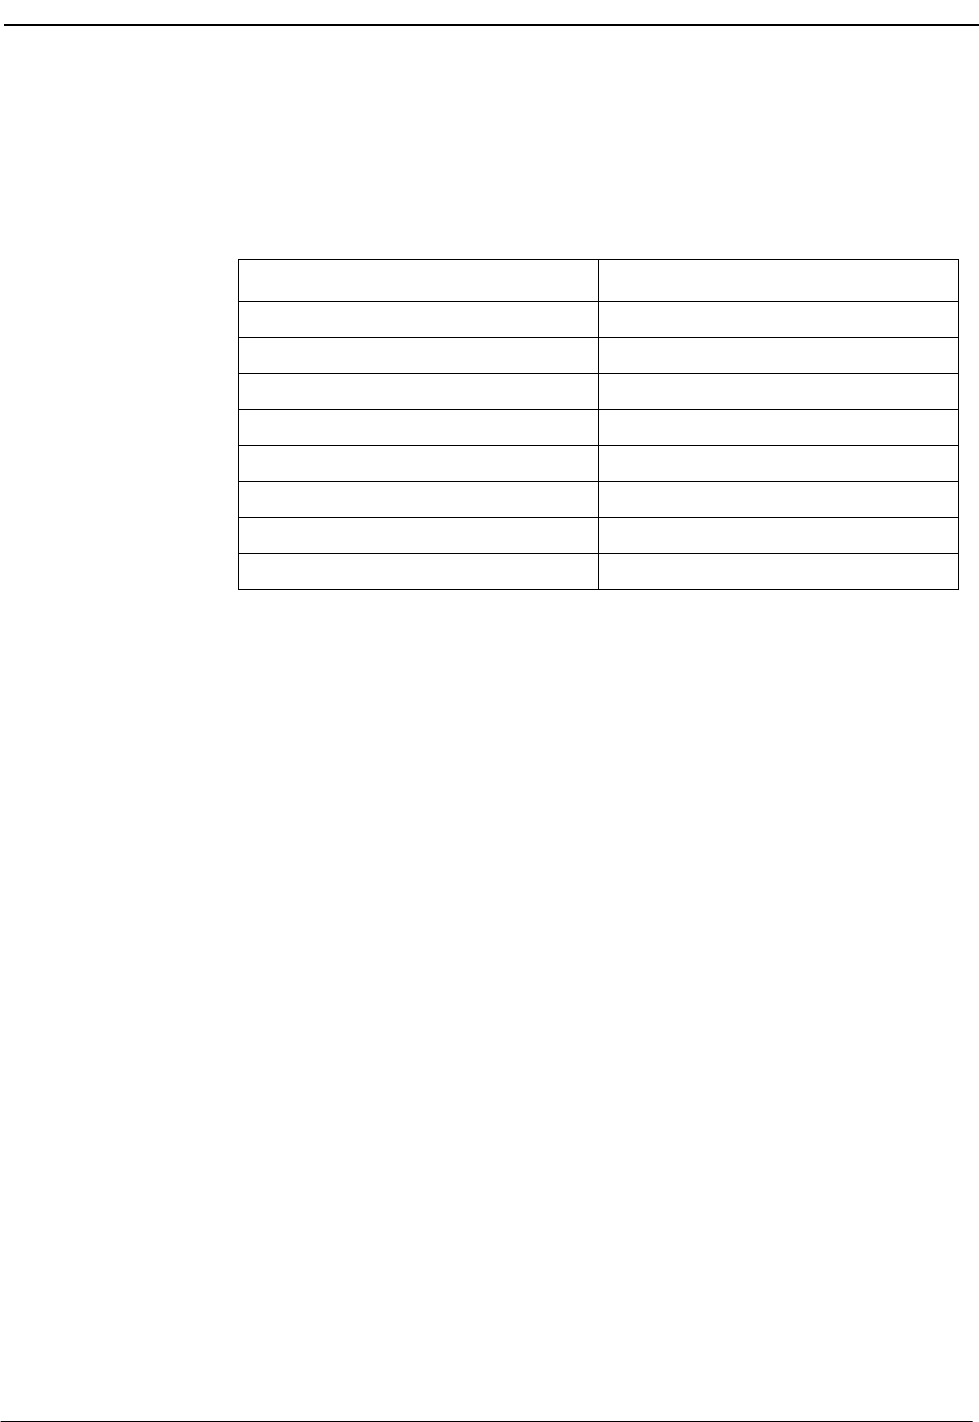
NDA-30026 Revision 6 Page 21
Medical Center System Operations Manual - JAVA Edition SERVER INSTALLATION
Step 2: Monitor
Configuration Primary Configuration Parameters
On the APM Configuration Entry screen, make entries for each parameter shown
below. The application name for the server is a derivation of the name configured in
the Server Base Name field of the mcscfg database. For parameters shown with an
asterisk (*) in the table below, make the entries exactly as shown. The other parameter
entries are shown with sample entries that may be changed to meet site requirements.
Parameter Definitions:
Application Name –The name displayed in the APM menus. This name is
displayed as it is entered here. You can use lowercase
letters and punctuation but not spaces.
Executable Filename* –The path name of the executable file.
Group* –The group to which the component is tied.
Response Mode* –The action that the APM is to take with the
component if a member of the group terminates.
Initialization Batch –Whether (Yes or No) the component is to be
initialized automatically when the OAI system is
initialized.
Termination Mode* –How the APM is to notify the component to
terminate.
Standard Output –The file into which component output is redirected.
Number of Restarts –How many times the APM may restart the component
after it terminates in error.
Facilities
According to instructions in the APM Operations Manual, name the following
NEAX2400 facilities for the designated components using the Facilities command on
the APM Configuration Entry screen:
FLF Free Location SMFN Status Notification (N)
RCF Restriction Control SMFR Status Request (R)
SCF Switch Control
Parameter Monitor
Application Name Mcs_Monitor
Executable Filename* /oai/app/mcs/bin/mccdmn
Group* MCS
Response Mode* N(otify)
Initialization Batch N(o)
Termination Mode* M(essage)
Standard Output /dev/null
Number of Restarts *

Page 22 NDA-30026 Revision 6
SERVER INSTALLATION Medical Center System Operations Manual - JAVA Edition
Step 2: Monitor
Configuration
(Cont)
OAI Configuration
Use the OAI-Conf command on the APM Configuration Entry screen to make the
necessary parameter entries. For parameters shown with an asterisk (*) in the table
below, make entries exactly as shown. The other parameters are shown with sample
entries that may be changed to meet site requirements. Use the instructions provided
for this option in the APM Operations Manual:
Parameter Entry Description
Database Name #1* /oai/db/cur/Mcscfg The path name of the database
containing setup information.
Database Name #2* /oai/db/cur/Mcsfile All the directory and file names
needed by the MCS.
Timeout Value #1 10 How many seconds to wait before
trying to place a call again on an
ANT.
Timeout Value #2 5 Not Used
Tenant Number
1
Tenant for the conversation
monitoring extension, attendant
consoles, announcement and
dictation trunks, and the parking
monitored number.
Source Link Name
OAI1TCP
Port on the source side of the
communication link. Entry
should match a link name in the
APM system configuration file.
Destination Link Name
PBX1TCP
Port on the destination side of the
communication link. Entry
should match a link name in the
APM system configuration file.
Association Recovery
40
Number of seconds Mcs_Monitor
waits before trying to reestablish
an association with the NEAX
that has been released.

NDA-30026 Revision 6 Page 23
Medical Center System Operations Manual - JAVA Edition SERVER INSTALLATION
Step 2: Monitor
Configuration
(Cont)
User-Defined Parameters
Make the additional parameter entries exactly as shown below through the
UserDefined command on the OAI Configuration screen.
User Defined # Entry Description
15Number of seconds to wait for a response
from an attendant console before assuming
that communication with it is not working.
2600 Number of seconds between handshakes
between the monitor and the attendant
consoles.
3 15 Number of seconds that the attendant
console has to respond to a handshake with
the monitor before it is considered disabled.
4600 Number of seconds between checks of
Server function by the monitor.
50# The operator to which all parked calls are
recalled when the monitor is initialized.
6 5 Maximum number of Server restarts.
7 Priority access code used for multiple recall.
8100 Maximum number of records to be retrieved
in any one database search.
9
37121
Error code that is returned from the PBX
indicating that the attendant is idle. Type
37125 for NEAX version J.4.02 or lower.
Type 37121 for NEAX version J.4.10 or
higher.
10
37122
On the MMG, the error code that is returned
from the PBX indicating locked attendant
memory. Leave this field blank for any other
PBX version.
11 2Number of times MCS is to retry after
receiving error code 37122.
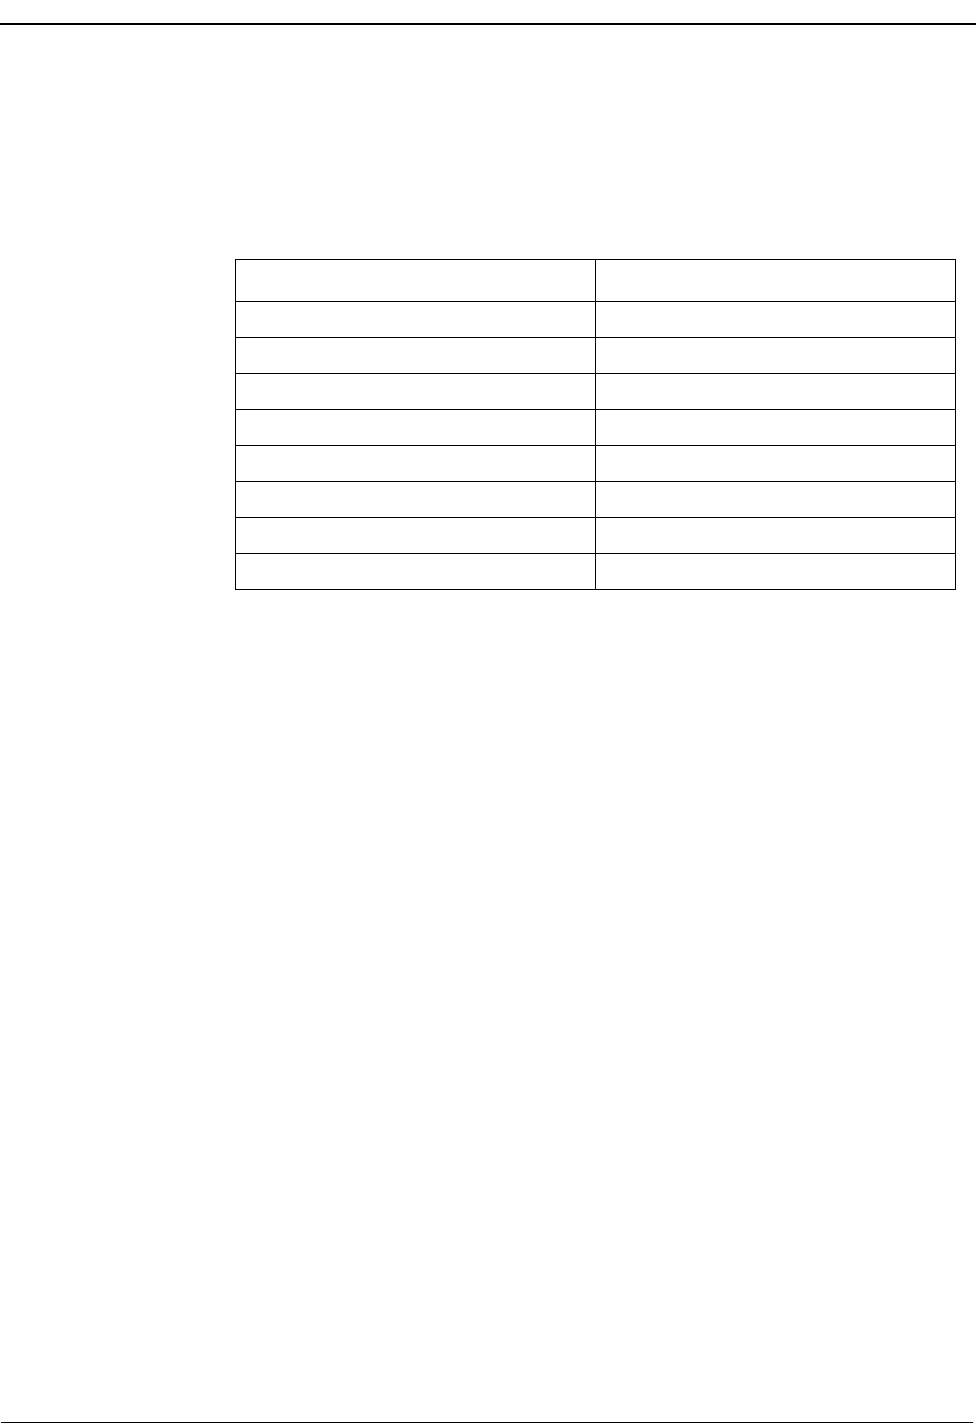
Page 24 NDA-30026 Revision 6
SERVER INSTALLATION Medical Center System Operations Manual - JAVA Edition
Step 3: Server
Configuration Primary Configuration Parameters
On the APM Configuration Entry screen, make entries for each parameter shown
below. The application name for the server is a derivation of the name configured in
the Server Base Name field of the mcscfg database. For parameters shown with an
asterisk (*) in the table below, make the entries exactly as shown. The other parameters
are shown with sample entries that may be changed to meet site requirements.
For information on parameter definitions, see page 21.
Facilities
According to instructions in the APM Operations Manual, name the following
NEAX2400 facilities for the designated components using the Facilities command on
the APM Configuration Entry screen:
SCF Switch Control SMFN Status Notification (N)
SMFR Status Request (R)
Parameter Server
Application Name Mcs_Server1
Executable Filename* /oai/app/mcs/bin/mccsrv
Group* MCS
Response Mode* I(gnore)
Initialization Batch N(o)
Termination Mode* M(essage)
Standard Output /dev/null
Number of Restarts 0

NDA-30026 Revision 6 Page 25
Medical Center System Operations Manual - JAVA Edition SERVER INSTALLATION
Step 3: Server
Configuration
(Cont)
OAI Configuration
Use the OAI-Conf command on the APM Configuration Entry screen to make the
necessary parameter entries. For parameters shown with an asterisk (*) in the table
below, make entries exactly as shown. The other parameters are shown with sample
entries that may be changed to meet site requirements. Use the instructions provided
for this option in the APM Operations Manual:
Parameter Entry Description
Database Name #1* /oai/db/cur/mcscfg Path name of the database
containing setup information.
Database Name #2* /oai/db/cur/mcsfile All the directory and file
names needed by the MCS.
Timeout Value #1
5
Number of seconds to wait for
a response from an attendant
console before assuming that
communication with it is not
working.
Timeout Value #2 60 Number of seconds to wait
before clearing lit LEDs after
placing an emergency alert.
Tenant Number
1
Tenant for the conversation
monitoring extension,
attendant consoles,
announcement and dictation
trunks, and the parking
monitored number.
Source Link Name
OAI1TCP
Port on the source side of the
communication link. Entry
should match a link name in
the APM system
configuration file.
Destination Link Name
PBX1TCP
Port on the destination side of
the communication link. Entry
should match a link name in
the APM system
configuration file.
Association Recovery
40
Number of seconds the
monitor waits before trying to
reestablish an association with
the NEAX.

Page 26 NDA-30026 Revision 6
SERVER INSTALLATION Medical Center System Operations Manual - JAVA Edition
Step 3: Server
Configuration
(Cont)
User-Defined Parameters
Make the additional parameter entries exactly as shown below through the
UserDefined command on the OAI Configuration screen.
User Defined # Entry Description
1 Dictation trunk number for conversation
monitoring. If no dictation trunk is to be
used, leave this field blank.
2Mcs
_Monitor Monitor component logical name.
3 10 Call kind field that shows priority
notification on the PBX.
4 3276 Number of the MCS shared memory key.
5 3276 Number of the MCS semaphore key.
6 If set to a value, this field enables the
checking of a Dterm for do-not-disturb status
prior to call routing.
7
3
Enables MCS to process multiple recalls.
Set to 3 for J.4.02 or earlier PBX firmware
versions, 11 for later versions without
multiple recall, or 19 for later versions with
multiple recall.
8
37122
On the MMG, the error code that is returned
from the PBX indicating locked attendant
memory. Leave this field blank for any other
PBX version.
92Number of times MCS is to retry after
receiving error code 37122.
10 /oai/app/mcs/
menus/
Mserver.cfg
Configured by MCS application
NDA-30026 Revision 6 Page 27
Medical Center System Operations Manual - JAVA Edition SERVER INSTALLATION
Step 4:
Recluster
Primary
Configuration
On the APM Configuration Entry screen, make entries for each parameter shown
below. The application name for the server is a derivation of the name configured in
the Server Base Name field of the mcscfg database. For parameters shown with an
asterisk (*) in the table below, make the entries exactly as shown. The other parameters
are shown with sample entries that may be changed to meet site requirements.
For information on parameter definitions, see page 21.
Step 5: Host
Statistics
Primary
Configuration
On the APM Configuration Entry screen, make entries for each parameter shown
below. The application name for the server is a derivation of the name configured in
the Server Base Name field of the mcscfg database. For parameters shown with an
asterisk (*) in the table below, make the entries exactly as shown. The other parameters
are shown with sample entries that may be changed to meet site requirements.
Note: These parameters are initially configured by the MCS host interface.
For information on parameter definitions, see page 21.
Parameter Recluster Entry
Application Name Mcs_ReclusterTables
Executable Filename* /oai/app/mcs/etc/update
Group*
Response Mode* I(gnore)
Initialization Batch N(o)
Termination Mode* K(ill)
Standard Output /dev/null
Number of Restarts 0
Parameter Host Statistics_ Entry
Application Name Mcs_Host_Statistics
Executable Filename* /oai/app/mcs/host/bin/hoststats
Group*
Response Mode* I(gnore)
Initialization Batch N(o)
Termination Mode* K(ill)
Standard Output /dev/null
Number of Restarts 0
Page 28 NDA-30026 Revision 6
SERVER INSTALLATION Medical Center System Operations Manual - JAVA Edition
Step 6: Cleaner
Primary
Configuration
On the APM Configuration Entry screen, make entries for each parameter shown
below. The application name for the server is a derivation of the name configured in
the Server Base Name field of the mcscfg database. For parameters shown with an
asterisk (*) in the table below, make the entries exactly as shown. The other parameters
are shown with sample entries that may be changed to meet site requirements.
For information on parameter definitions, see page 21.
User-Defined Parameters
Parameter Cleaner Entry
Application Name Mcs_Dbclean
Executable Filename* /oai/app/mcs/bin/dbclean
Group*
Response Mode* I(gnore)
Initialization Batch N(o)
Termination Mode* K(ill)
Standard Output /dev/null
Number of Restarts 0
User Defined # Entry Description
1 138 Discharge record release time in hours.
(Records for discharged patients are
removed from the database after the defined
number of hours.)
2 72 DID number release time in minutes.
(DID numbers for discharged patients are
deleted from database after the defined
number of minutes.)
NDA-30026 Revision 6 Page 29
Medical Center System Operations Manual - JAVA Edition SERVER INSTALLATION
Step 7: Java
Services
Primary
Configuration
The APM configuration parameters are automatically set during the Java MCMP
Server installation. Some of the user-defined parameters may need to be modified to
reflect the installation site’s configuration.
User-Defined Parameters
Parameter Entry
OAI Application N
CRT Application N
Communication Queue N
Application Name JmcmpConnServer
Executable Filename /oai/app/mcs/bin/jmcmpConnServ
Group JMCMP
Response Mode Ignore
Initialization Batch Y
Termination Mode T
Standard Output /dev/null
Number of Restarts 5
User Defined # Default Value Description
1
2030
(Do not change this
value unless this port
number conflicts with
another listening port.)
JMCMP Server Port -
This is the TCP I/P port number
on which JMCMP Server is
listening.
2
/oai/app/mcs/bin/
jmcmp
(Do not change unless
this application has
been renamed.)
JMCMP Application Path -
This defines the absolute path of
the JMCMP process spawned by
the JMCMP Server when a
connection is made.

SERVER INSTALLATION Medical Center System Operations Manual - JAVA Edition
Page 30 NDA-30026 Revision 6
Step 8:
Mcs_Dbclean
Control
Options
From the APM Administration Menu, select Control Options. When the Control
Options screen displays, select the Applications command. Then, select Mcs_Dbclean
and set up the schedule for its execution, as illustrated in the following example:
Initialize:
Minute (0-59): 1
Hour of Day (0-23): 0
Day of Month (1-31): *
Month of Year (1-12): *
Day of Week (0-6): *
When you have entered these choices, select Quit and then type Y to save the data. The
Applications menu redisplays.
Mcs_Dbclean automatically ends processing when it has cleaned up the database.
Step 9:
Mcs_Recluster
Control
Options
From the APM Administration Menu, select Control Options. When the Control
Options screen displays, select the Applications command. Then, select
Mcs_Recluster and set up the schedule for its execution, as the sample shows below:
Initialize:
Minute (0-59): 5
Hour of Day (0-23): 0
Day of Month (1-31): *
Month of Year (1-12): *
Day of Week (0-6): *
When you have entered these choices, select Quit and then type Y to save the data. The
Applications menu redisplays.
Mcs_Recluster automatically ends processing when it has reclustered the database.
Step 10:
Mcs_Host_
Statistics
Control
Options
From the APM Administration Menu, select Control Options. When the Control
Options screen displays, select the Applications command. Then, select
Mcs_Host_Statistics and set up the schedule for its execution, as illustrated in the
following example:
Initialize:
Minute (0-59): 10
Hour of Day (0-23): 0
Day of Month (1-31): *
Month of Year (1-12): *
Day of Week (0-6): *
When you have entered these choices, select Quit and then type Y to save the data. The
Applications menu redisplays.
Mcs_Host_Statistics automatically ends processing when it has generated the
statistics.


SERVER INSTALLATION Medical Center System Operations Manual - JAVA Edition
Page 32 NDA-30026 Revision 6
Database Requirements
MCS requires two APM databases that were installed with default values when the
software was loaded from the release media. Only one (mcscfg) can be modified. The
other database (mcsfile) should not be changed at all without first consulting technical
support. You can change the mcscfg database through the Database Administration
option on the APM System Administration Menu.
The contents of the mcscfg database are described below. Using instructions provided
in the APM Operations Manual, enter the APM System Administration Menu and
change mcscfg database entries as required through the Database Administration
option. Any messages displayed during these steps are described in the Process and
Error Messages chapter of the APM Operations Manual.
Note: Remember to process and install mcscfg after any of the following field information
has been changed through the Build Master Database option.
MCSCFG
Database
Information
Remember to configure each additional Server (i.e., Application Configuration.)
Server Base Name = Mcs_Server#
The name of the Server component. The # marks the position of the actual number
of the Server process.
Server Ratio = 8
The number of attendants that can be served by any one Server component. This is
the default value. Given that there are 16 attendants at most, there should be at least
two Server components configured (Mcs_Server1 and Mcs_Server2).
Max Number of MCMP’s = 16
The maximum number of attendants this system can handle. Changing this value
has no effect. The maximum is always 16.
Conversation Monitoring # = 7207
The extension number of the Dterm used during a Supervisor Alert operation to
silently monitor an attendant conversation. If conversation monitoring is not used,
this field should be left blank.
Parking Number = 7000
The OAI monitored number assigned to MCS. It can be defined on the PBX MAT
using the command AMNO. The default value should be changed to a monitored
number defined on the PBX. This value must be assigned correctly or the MCS will
not go on-line.
Announcement Message # = 0
The number of the announcement trunk (ANT) as configured on the PBX to which
all parked calls are to be parked. If an ANT is not to be used, this field should be set
to 0.
Park Call Timeout = 60 seconds
MCS checks the call parking queue periodically. Any call parked for longer than
this period of time is recalled.
Note: The caller could stay parked approximately 30 to 45 seconds longer than the Park
Call Timeout since the database checks are periodic, to avoid excessive system loads.

SERVER INSTALLATION Medical Center System Operations Manual - JAVA Edition
Page 33 NDA-30026 Revision 6
Park Abandon Timeout = 1800
The amount of time that park records remain in the MCS database after the party
has been recalled or released. This time period is also measured in seconds and is
checked in the same way as the Park Call Timeout.
Recall Timeout = 90
This value is used by MCS to determine if a call answered by an attendant has been
recalled by the PBX. This value should be adjusted according to the value
configured in the PBX for recalls. It should be roughly equal to the amount of time
set up for recalls in the PBX plus the amount of time it takes an attendant to answer
the recall.
MCMP Queue Maximum = 10
The maximum number of messages allowed on the MCS IPC queue at any given
time. Do not change this value without first consulting an NEC representative.
MCMP Queue Load = 5
The maximum number of messages that can be outstanding for an attendant process
at any given time.
MCMP Queue Key = 9009
The IPC queue used by the MCS attendant processes.
Max Stations in Recall List = 100
The maximum number of stations that can be in the circular recall list maintained
by the MCS. This variable directly affects IPC shared memory structures used by
the MCS. It should not be changed while the MCS system is running. Do not change
this value without first consulting an NEC representative.
Max Trunks in Recall List = 200
The maximum number of trunks that are stored in the circular recall list maintained
by the MCS. This variable directly affects IPC shared memory structures used by
the MCS. It should not be changed while the system is running. Do not change this
value without first consulting an NEC representative.
This completes the database support in the APM. Now go to MAT Assignments on
page 34 to make the necessary MAT assignments.

SERVER INSTALLATION Medical Center System Operations Manual - JAVA Edition
Page 34 NDA-30026 Revision 6
MAT Assignments
This guide assumes that data settings that affect the operation of all OAI software on a
system-wide basis have already been assigned on the NEAX Maintenance
Administration Terminal (MAT). Such settings include system index values and
assignment of Interface I/O Port Data in the Interface Processor (IP). For more
information about these system data settings and the MAT commands described below,
refer to the OAI Module Installation Manual for the NEAX2400 IMS.
AMNO – Assignment of Monitored Number
MCS uses one OAI Monitored Number for use in parking calls. Failure to assign
this number correctly prevents the MCS from establishing communication with the
PBX.
ASAT – Assignment of Attendant Data
Each MCS attendant console must be assigned a unique station number. For
instance, ATT #1 may have 3100, ATT #2 may have 3101, etc. Use this command
to assign a number to each advanced attendant console.
This completes the MAT assignments. Now go to Attendant Station Preparation on
page 35 to configure the Attendant Stations.

SERVER INSTALLATION Medical Center System Operations Manual - JAVA Edition
Page 35 NDA-30026 Revision 6
Attendant Station Preparation
To Configure
Attendant
Stations
From one of the configured terminals, log into the MCS by entering the login name mcs
at the SCO UNIX login prompt and press Enter. The following screen displays from
which you can enter the MCS Main Menu:
Figure 2-17 MCS Login Screen
Press <Enter> for the position data. The following error prompt will display at the
bottom of the screen:
Enter Offline Maintenance Mode? (Y/N)
At the prompt, enter Y and press <Enter>.
Type MCS in the Login Name field and MCS in the Password field to log in as the
supervisor. When the MCS Main Menu displays, perform the following tasks in the
order shown:
1. Select the System Administration option, then the Extension Maintenance op-
tion, and then the Attendant Console Extensions option. This sequence displays
the Attendant Console Extensions data entry screen for input. Add the extension
numbers that have been assigned to the attendant consoles through the ASAT com-
mand at the NEAX MAT.
After all of the attendant console extensions have been entered, exit to the MCS Main
Menu. Select the Database Administration option and then the Attendant Stations
option, displaying the Attendant Station data entry screen for input of a configuration
for each attendant. Each record requires the attendant ID (1-16), the extension just
configured for that attendant (via the MAT and System Administration option), and the
name of the terminal used by that station. Note that when entering terminal names, /
dev/ preceded the name.
Medical Center System
*** NEC Proprietary ***
Tue Aug 17 09:02 am
Login Name:
Password:
<Enter> to accept, <Esc> to quit
Position:

SERVER INSTALLATION Medical Center System Operations Manual - JAVA Edition
Page 36 NDA-30026 Revision 6
This Page Left Blank.
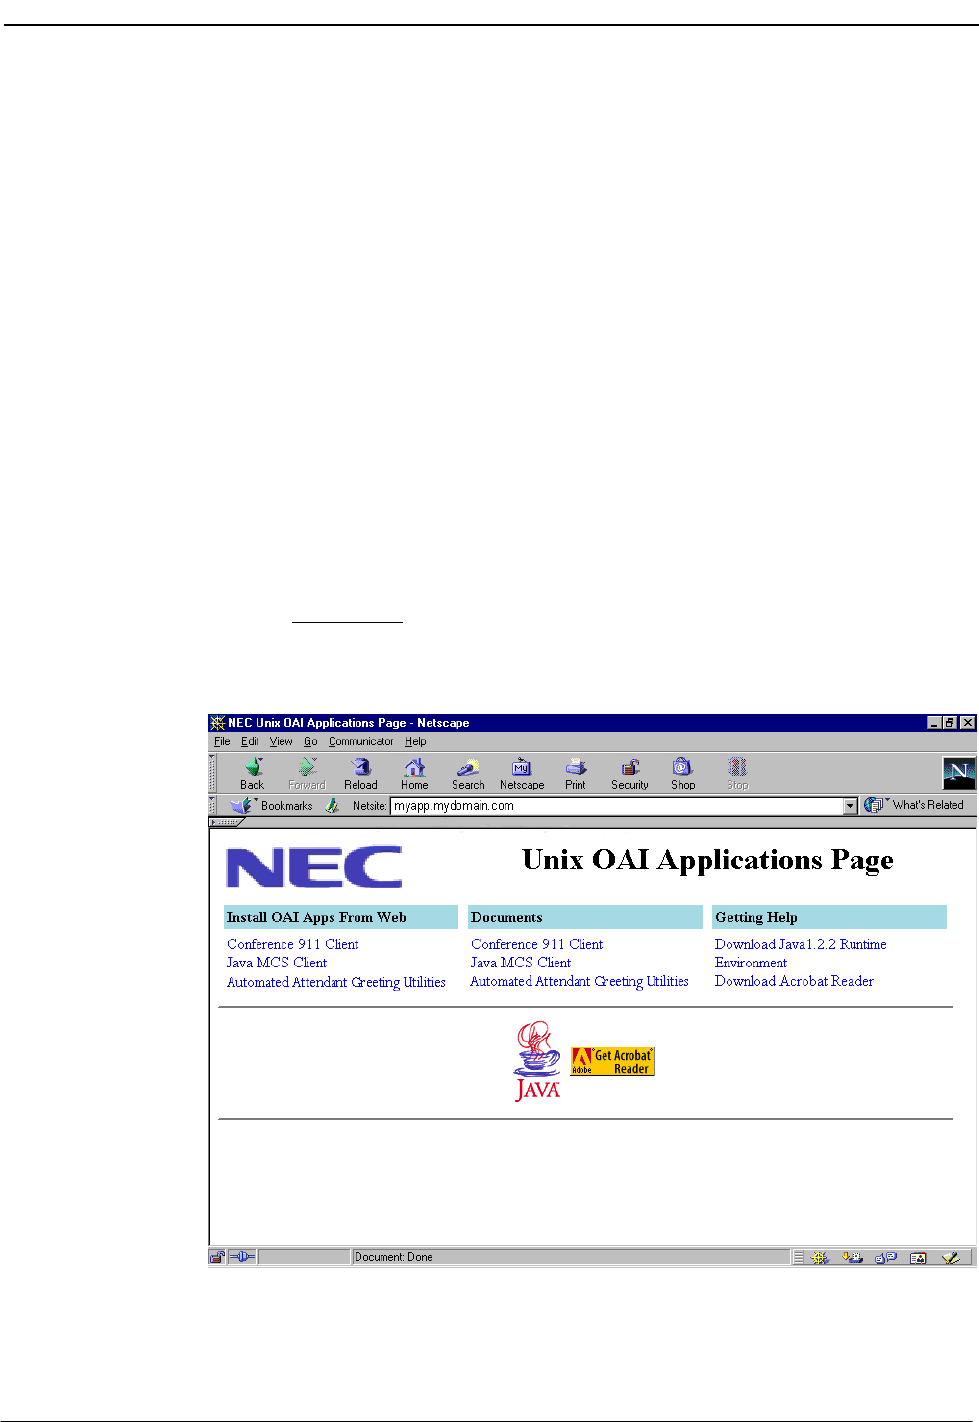
NDA-30026 Revision 6 Page 37
Medical Center System Operations Manual - JAVA Edition JAVA MCS CLIENT INSTALLATION
Chapter 3 JAVA MCS CLIENT INSTALLATION
Overview
This chapter provides step-by-step procedures to install and configure the JAVA
MCS Client application. Descriptions and step-by-step instructions are found in the
following sections of this chapter:
The JAVA MCS Client software can be installed on the workstations used by
JAVA MCS agents to assist them in processing calls. This element can be installed
on any workstation that is networked and connected to the JAVA MCS Server.
Installing the JAVA MCS Client
Use the following steps to install the JAVA MCS Client software:
1. Access the NEC UNIX OAI Applications site from your web browser. The
address for your NEC UNIX OAI Application site consists of your UAP name
and your domain name.
For example, if your UAP name is “myuap” and your domain name is
“mydomain.com”, then enter “myuap.mydomain.com” to access the UNIX
OAI Applications Page, as shown in Figure 3-1.
Figure 3-1 NEC UNIX OAI Applications Installation Page
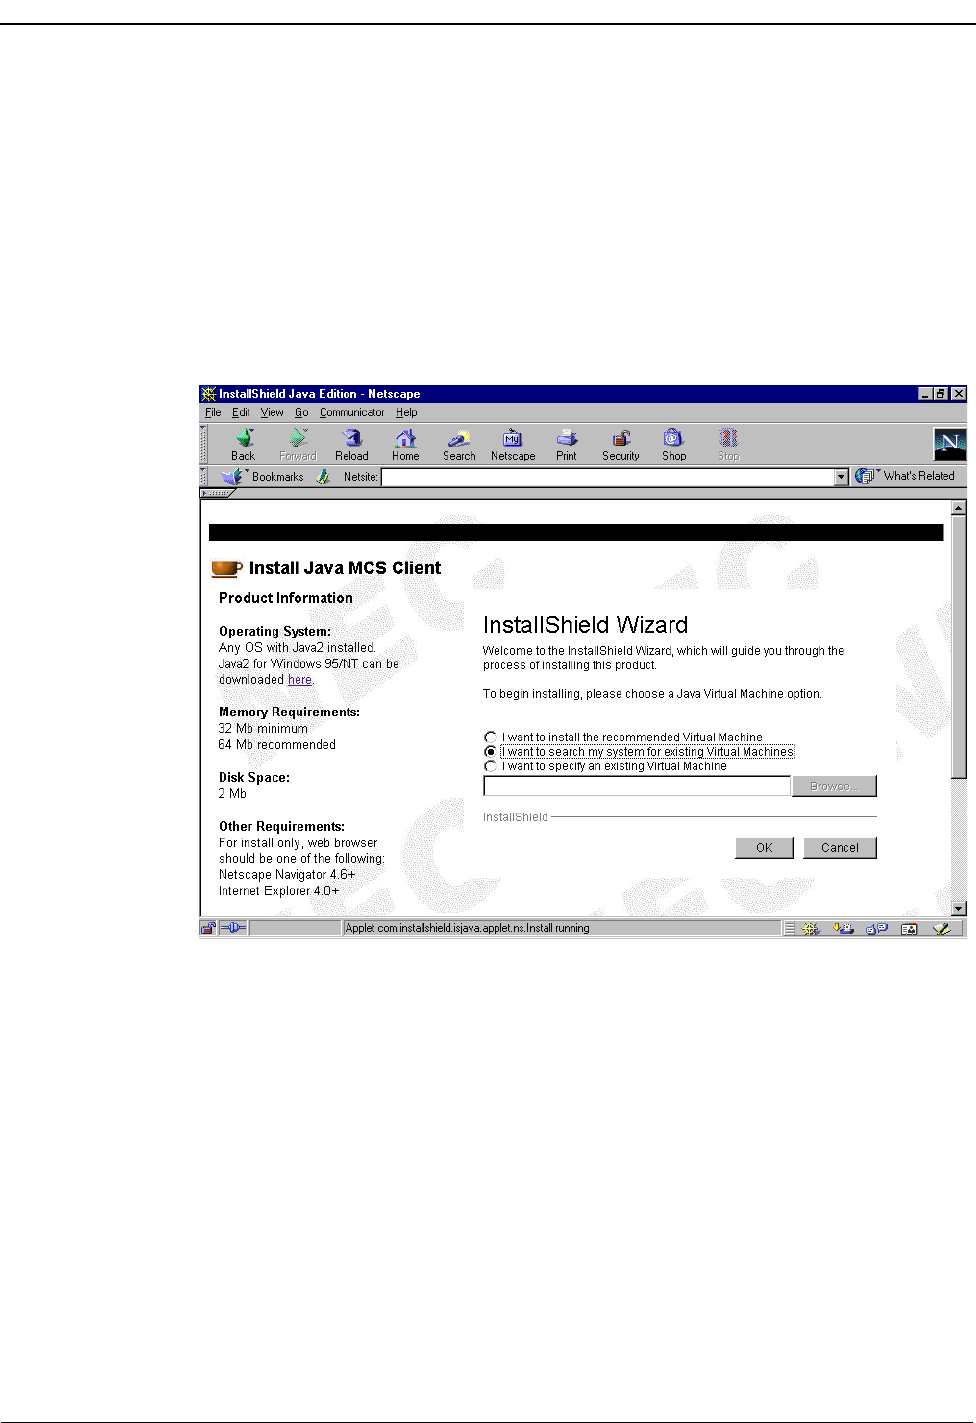
Page 38 NDA-30026 Revision 6
JAVA MCS CLIENT INSTALLATION Medical Center System Operations Manual - JAVA Edition
2. Select Download Java1.2.2 Runtime Environment from the “Getting Help”
section to install the Java Runtime Environment on your workstation. Follow
the prompt to install the Java Runtime Environment. Run the program from its
current location, then select Yes. After the Java Runtime Environment
installation is complete, the NEC UNIX OAI Applications Installation Page
(Figure 3-1) is again displayed.
3. Select the JAVA MCS Client from the “Install OAI Apps From Web” section
to begin installing the JAVA MCS Client. A security warning message will
display, click Yes to continue. The Java Virtual Machine option dialog box
(Figure 3-2) is displayed.
Figure 3-2 Java Virtual Machine option dialog box
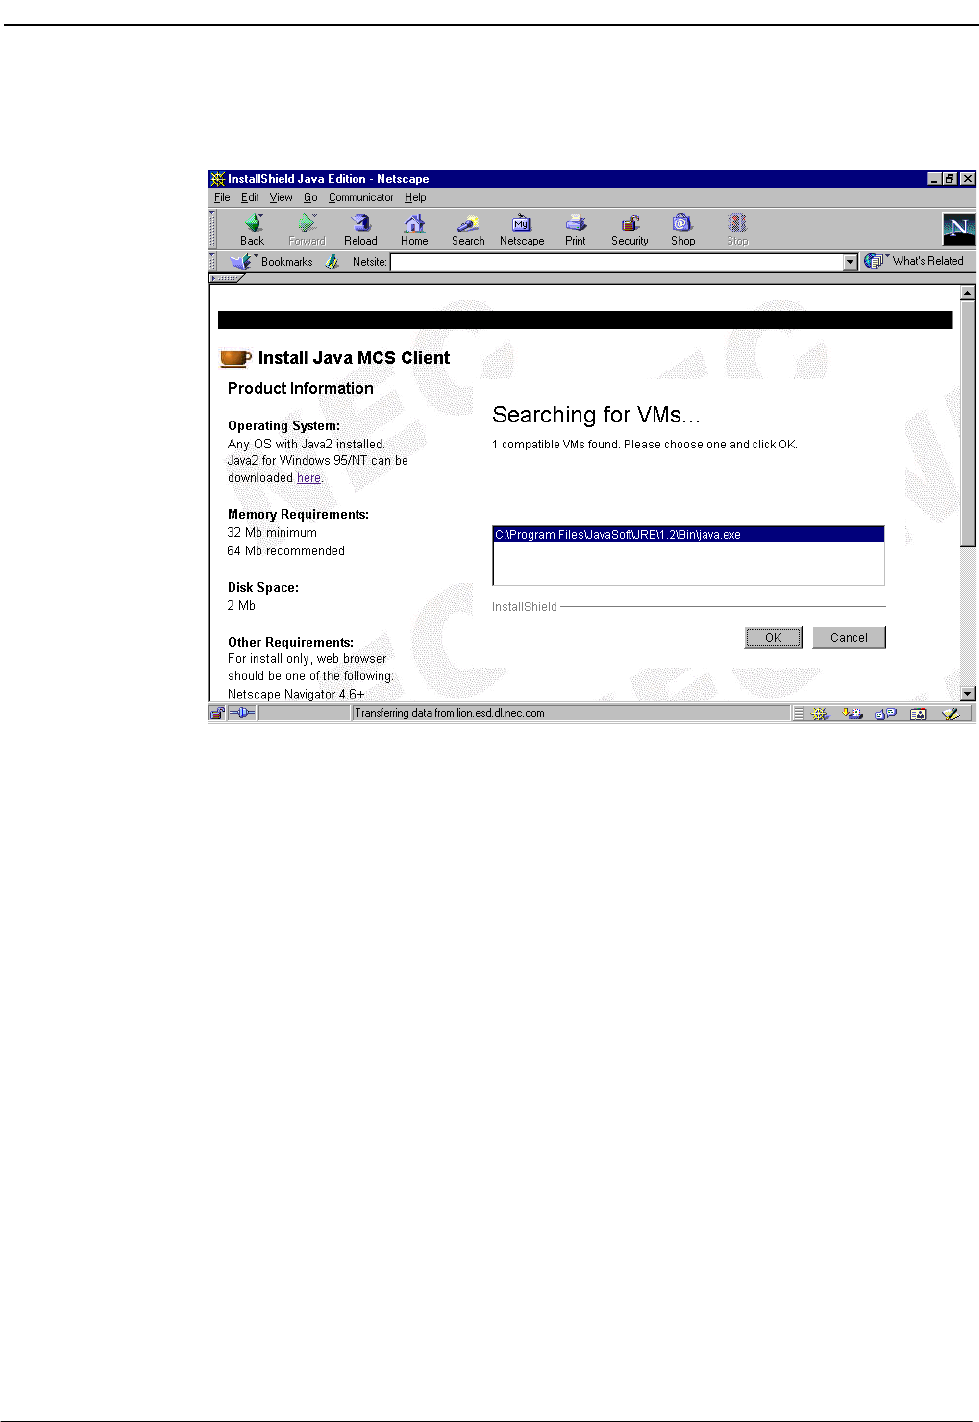
NDA-30026 Revision 6 Page 39
Medical Center System Operations Manual - JAVA Edition JAVA MCS CLIENT INSTALLATION
4. Select the I want to search my system for existing Virtual Machines option.
The Searching for VMs dialog box (Figure 3-3) is displayed.
Figure 3-3 Searching for VMs dialog box
The installation program searches for installed virtual machines and displays
the installed virtual machines in the window.
Select the virtual machine, then click OK.
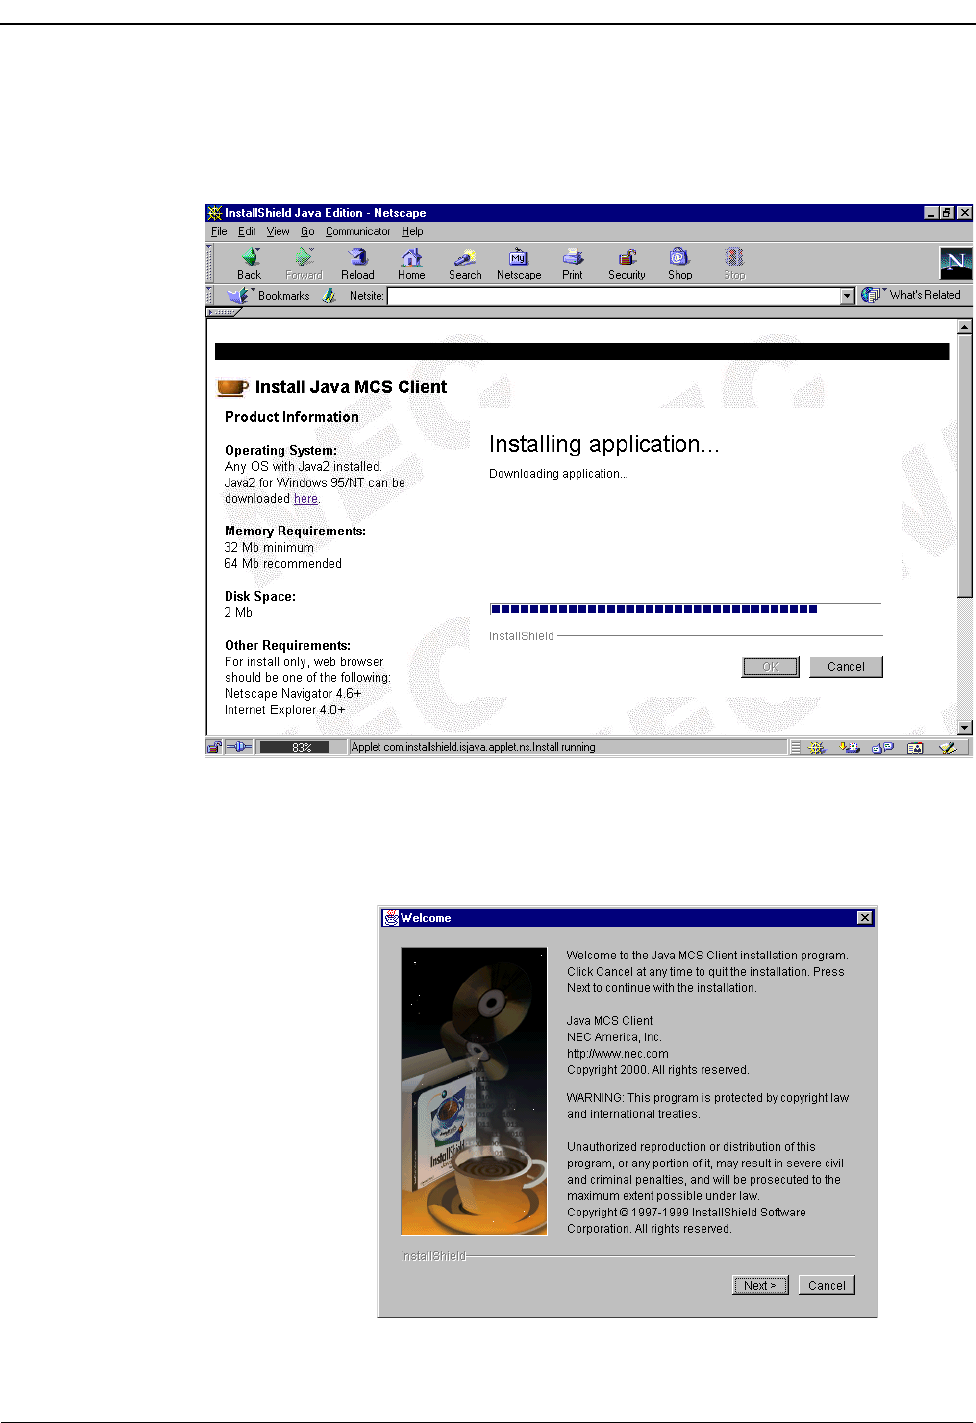
Page 40 NDA-30026 Revision 6
JAVA MCS CLIENT INSTALLATION Medical Center System Operations Manual - JAVA Edition
The application is installed to the default directory. A progress indicator in
the browser window indicates how much of the installation is complete, as
shown in Figure 3-4.
Figure 3-4 Installing Application progress indicator
5. When the virtual machine installation is done, click OK. The Welcome dialog
box (Figure 3-5) is displayed.
Figure 3-5 Welcome dialog box
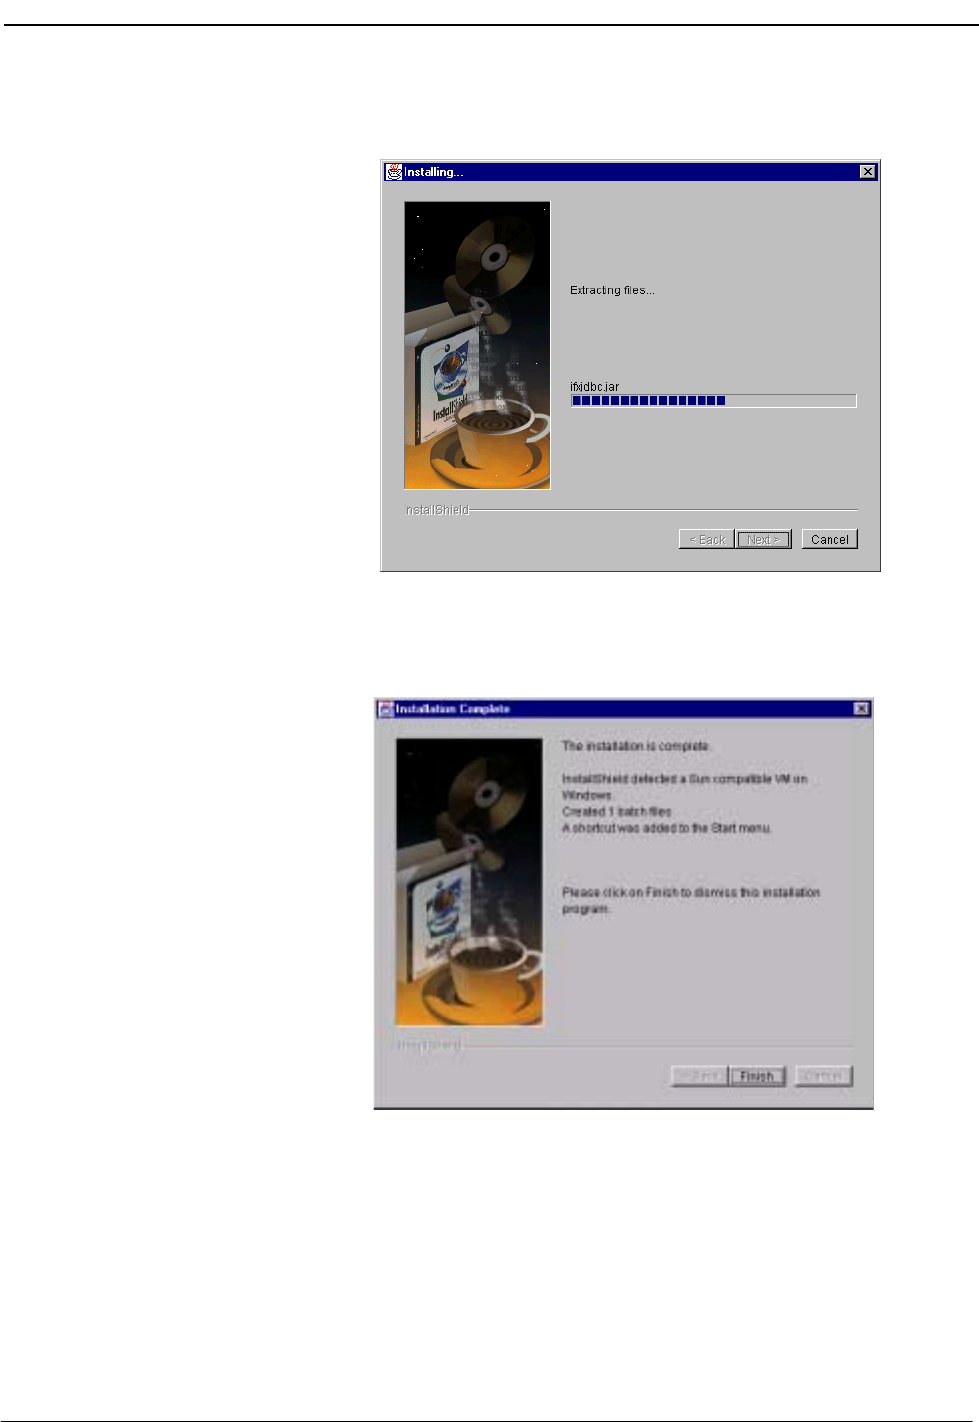
NDA-30026 Revision 6 Page 41
Medical Center System Operations Manual - JAVA Edition JAVA MCS CLIENT INSTALLATION
6. Click Next to start the installation. A progress indicator shows how much of
the installation is complete, as shown in Figure 3-6.
Figure 3-6 Installing Files progress indicator
7. When the installation program is finished, the Installation Complete dialog box
(Figure 3-7) is displayed.
Figure 3-7 Installation Complete dialog box
8. Click Finish and close your browser window. The JAVA MCS Client is now in-
stalled. Refer to the MCS (JAVA Edition) User Guide for more information
about the JAVA MCS Client application.

JAVA MCS CLIENT INSTALLATION Medical Center System Operations Manual - JAVA Edition
Page 42 NDA-30026 Revision 6
This Page Left Blank.

NDA-30026 Revision 6 Page 43
Medical Center System Operations Manual - JAVA Edition TELNET OPERATOR FUNCTIONS
Chapter 4 TELNET OPERATOR FUNCTIONS
Login
An operator or supervisor must login by entering MCS at the UNIX prompt. This
login displays the MCS password entry screen where access security is
implemented.
Figure 4-1 Password Entry
*** NEC Proprietary ***
Login Name:
Medical Center System
Password:
Tue Aug 17 09:02 am
<Enter> to accept, <Esc> to quit
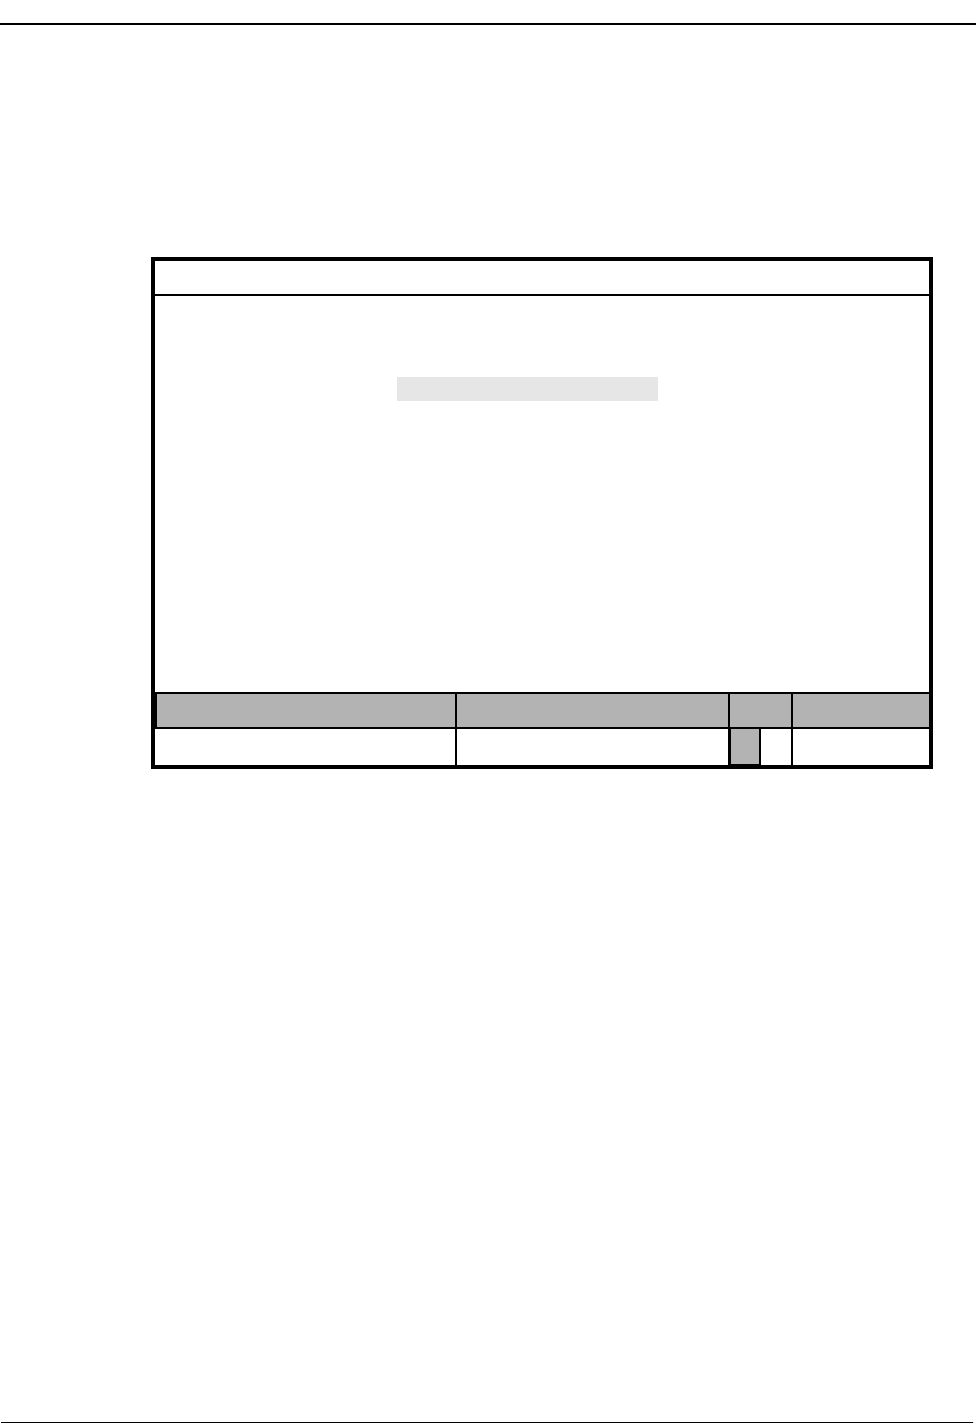
Page 44 NDA-30026 Revision 6
TELNET OPERATOR FUNCTIONS Medical Center System Operations Manual - JAVA Edition
Screen Format
The MCS Telnet Main Menu is illustrated below in Figure 4-2. The screen parts that
are common to all levels of the menu hierarchy are identified in the figure and are
described below:
Figure 4-2 Screen Format
(a) Header – The top line contains the name of the menu system (Medical Center
System), identification of the attendant console (in this case, Supervisor), and a time
and date notation that is periodically updated. This line remains the same no matter
what kind of changes take place in the rest of the screen.
(b) Interactive Window – This is the working area of the screen in which several
different formats are displayed, including lists of choices, data input windows, and
information displays. When the Operator Functions option is selected from the
Main Menu, this area is further divided into multiple areas for Source Caller and
Destination information.
(c) Command Line – Some menus contain action choices in this area of the screen
(Arrow keys to move cursor, <Enter> to select, <Esc> to quit). Other menus display
a set of available commands (e.g., DirAsst, Park, Join/Rtrv, Beeper, Redial, Emerg,
Clear, and Quit commands on the Operator Functions screen).
(d) Status Area – The bottom area of the screen contains labeled areas in which
information about the attendant, status of the current call, the type of transfer in
effect, and the current MCS system status displays.
(d)
(c)
(a)
MCS Status
Attendant Status
Medical Center System
Call Status Trnfr
S
Supervisor Tue Aug 17 09:02 am
D
*** Main Menu ***
Database Administration
System Administration
Configuration Management
Login Name Maintenance
Quit
Arrow keys to move cursor, <Enter> to select, <Esc> to quit
Supervisor Reports
Operator Functions
(b)
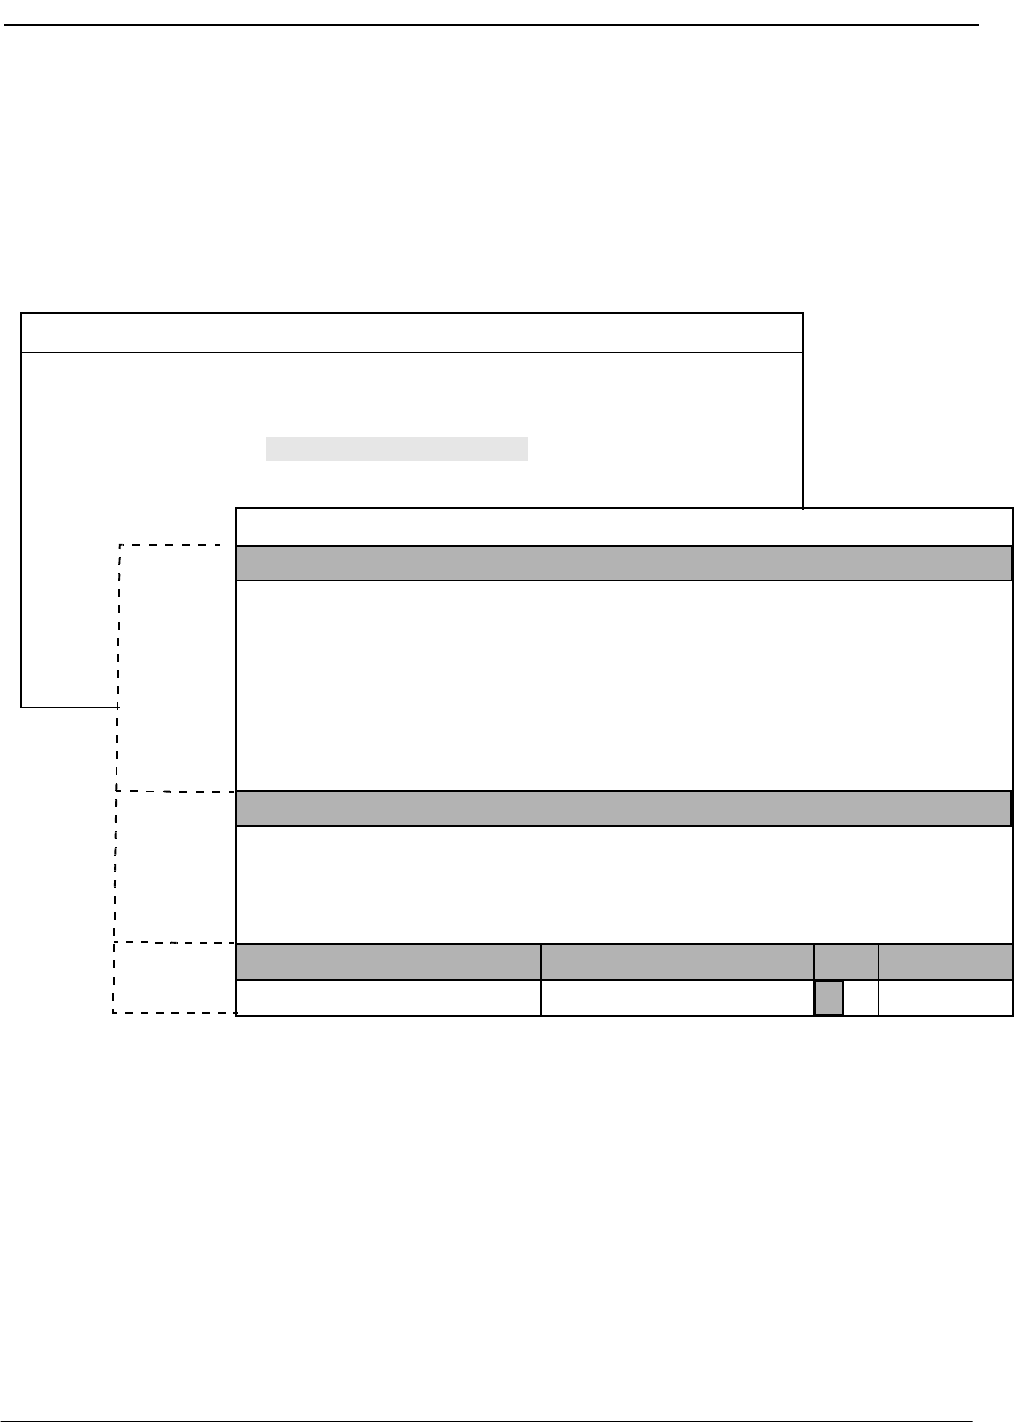
NDA-30026 Revision 6 Page 45
Medical Center System Operations Manual - JAVA Edition TELNET OPERATOR FUNCTIONS
Selecting Operator Functions
Select the Operator Functions option from the MCS Main Menu to display the
Operator screen, making MCS call processing functions accessible to the operator. If
the operator is not set up for database capabilities, type the operator password at the
login prompt to display the Operator screen directly.
Figure 4-3 Operator Screen
On the Operator screen, the interactive window is divided into the Destination and
Source areas. The Status area at the bottom of the screen shows the status of MCS
operator functions. These areas are discussed below, as they relate to operator activity.
Destination
Status
Source
DirAsst
(1)
Medical Center System Attendant - 1 Tue Aug 17 09:02 am
*** Main Menu ***
Database Administration
Quit
Operator Functions
(2)
On-line
MCS Status
Attendant Status
Medical Center System
Call Status Trnfr
Source Name
Attendant-1 Tue Aug 17 09:02 am
Ext DID Room
D
Bed Age Sx Admit Dsch
Destination Name
Area
Area
Area
Park Join/Rtrv Beeper Redial Emerg Clear Quit
S
Unit
Ext DID Room Bed Age Sx Admit DschUnit

Page 46 NDA-30026 Revision 6
TELNET OPERATOR FUNCTIONS Medical Center System Operations Manual - JAVA Edition
Status Area The following sections in the status area display information about the current call
processing environment.
MCS Status Window
This window in the bottom right corner of the screen displays the operational status of
the MCS system. Whenever there is a change in status, the new status notation replaces
the old, and a beep is sounded on the CRT. Any of the following notations can be
displayed:
On-line: The OAI that enables communication between the attendant console and
the CRT is initialized; the MCS and NEAX2400 are in full
communication, with all screen functions available; and call events at this
station are now being monitored. This is the normal status when the user
enters the Operator Functions option.
Dir off: The Directory Assistance, beeper, and emergency functions are not
operational, but Park/Retrieve is available.
Park off: The Park/Retrieve functions are not operational, but Directory Assistance
and the other command functions are available.
Off-line: The OAI is not initialized, so the attendant console is operating
independently of the MCS CRT. In this status, the operator can perform
directory searches and message operations but not automated call
processing. Therefore, all call placement functions must take place
through the attendant console. When OAI functions are restored, the Off-
line notation is replaced with a message showing a change in status, and
the CRT beeps once. Operations can then be carried out normally with the
degree of automated call placement shown by the new status.
Attendant Status Window
This window on the bottom left corner of the screen is reserved for real-time messages
that relate directly to attendant-to-attendant communications. For instance, when a call
is transferred between attendants, this area displays the message “Call transfer from
Att-3”. This area also displays attendant supervisor alerts and error conditions that
require special attention. Messages in this area clarify any events that affect the
attendant console and communications among the attendants.
Call Status Window
The Call Status Window displays messages about all current call events. For example,
an incoming call from an extension with more than one patient in the room generates a
message here. The message “Extension Busy” shows an attempt to perform a Directory
Assistance transfer to an off-hook extension.

NDA-30026 Revision 6 Page 47
Medical Center System Operations Manual - JAVA Edition TELNET OPERATOR FUNCTIONS
Trnfr Window
This window at the bottom right of the screen allows operators to toggle between the
following types of transfers:
Screened (S): Places the source caller on hold with music while the operator call is
being placed to the destination number. The operator hears a ring-back
tone (RBT) while the destination station phone is ringing. The operator
is connected to the destination station when it is answered. Thereafter
the operator may use the SRC, DST, TALK, CNCL, or Release keys to
manipulate the call.
Direct (D): Causes the source caller to hear a RBT while the destination station
phone is ringing. The operator is automatically disconnected from both
parties, and the source caller is directly connected to the destination
party without operator screening of the transfer.
The default transfer type is configurable through the Configuration Management
option on the Supervisor Main Menu. The type of transfer currently in effect is
highlighted.
Source Area When the attendant console is on-line, MCS monitors all incoming calls. As each
incoming call is answered, MCS automatically performs a database search for the
dialed number. If the number is found, any information associated with it in the
database displays in the Source area of the screen. When more than one person is
assigned to an extension, a message showing the number of additional people is
displayed in the Call Status window. Pressing the down-arrow key displays the next
person in the list and the up-arrow key displays the previous person. The kind of
information that is displayed depends upon the source of the call, as described below.
Patient
When an operator answers a call from a patient, information about the calling patient
automatically displays below the Source Name label line if patient room extensions are
available in the database. (See Figure 4-4.) Two more lines of Source information can
be set up through the Configuration Management option on the Supervisor Main
Menu.
Figure 4-4 Patient Caller
Taylor, Frederick
On-line
MCS Status
Attendant Status Call Status Trnfr
S
Source Name
D
Visitors:
Comment:
2201 A2220 1 62 M 08-15
Yes
No solids until 08-17.
Ext DID Room Bed Age Sx Admit DschUnit
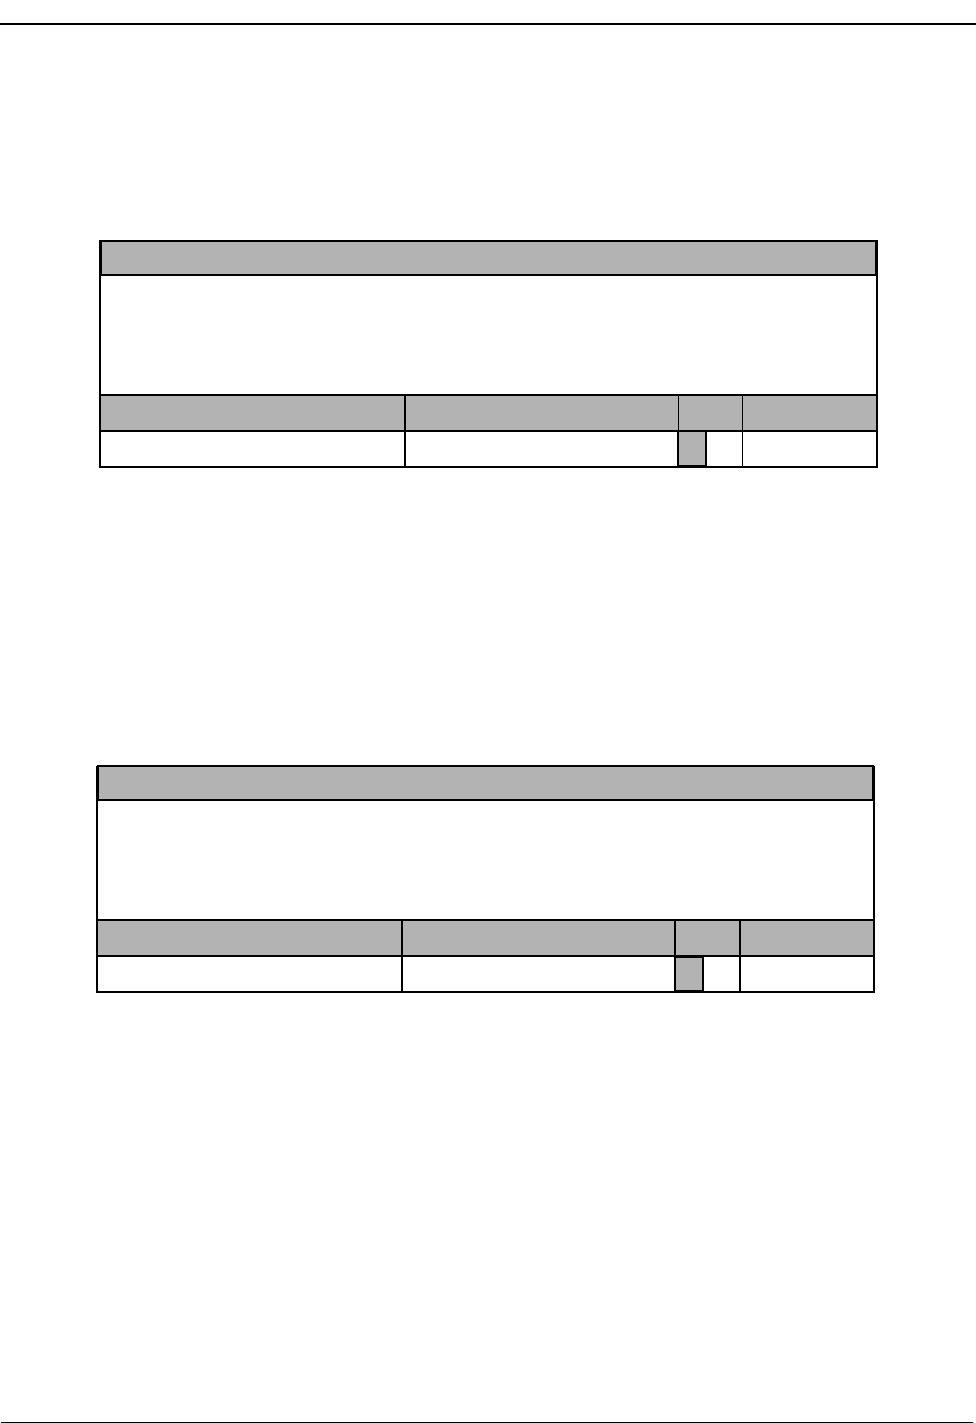
Page 48 NDA-30026 Revision 6
TELNET OPERATOR FUNCTIONS Medical Center System Operations Manual - JAVA Edition
Staff or Non-Patient
Figure 4-5 below shows Caller information for non-patient or internal staff extensions.
The comment field consists of up to two lines of information, as set up through the
Configuration Management option on the Supervisor Main Menu.
Figure 4-5 Internal Staff or Non-Patient Caller
External
Figure 4-6 shows how trunk and route information on an incoming call from an external
source is displayed. If a name for this particular trunk number has been entered in the
database or if source number information is received for the call, it is also shown under
Trunk Name. Each trunk listing contains one note field and up to two comment lines.
Figure 4-6 Incoming From an External Trunk
X-ray Department
On-line
MCS Status
Attendant Status Call Status Trnfr
S
Source Name Ext Dept Room
D
Unit Note
Comment: Only accessible after hours with security card.
Comment: Located on 2East.
3042 X-ray 321 3 Radiologist on-call 24 hrs/day.
Information
On-line
MCS Status
Attendant Status Call Status Trnfr
S
Trunk Name Trunk Number
D
Note
Comment: Never give out patient’s home phone or address.
Comment: Transfer to main desk if needed.
3000 Detour north parking lot Friday.

NDA-30026 Revision 6 Page 49
Medical Center System Operations Manual - JAVA Edition TELNET OPERATOR FUNCTIONS
Destination
Area The destination area of the Operator screen changes as necessary to display information
and to prompt for entry of the data that is necessary to complete a call transaction. The
command line contains the actions that can be taken. The remainder of this chapter
provides descriptions and step-by-step instructions on how to use each of these actions.
Each action is discussed in a separate section, as noted below:
Directory Assistance –Search the database for destination information and then
transfer internal, external, and attendant calls to the
selected destinations. (See page 50.)
Call Park –Place a call on an announcement trunk or a monitored
number for paging purposes. (See page 55.)
Parked Call Retrieval –Communicate with a previously parked call.
(See page 57.)
Beeper –Contact a beeper-holder with a coded message.
(See page 59.)
Redial –Use this command during Idle status to automatically dial
the station that most recently called the operator.
(See page 61.)
Emergency –Select a supervisor or an expert from a displayed menu to
contact in case of emergency. (See page 62.)
Clear –This command removes all entries to the Destination and
Source areas.
Note:This command is not discussed further in this chapter.

Page 50 NDA-30026 Revision 6
TELNET OPERATOR FUNCTIONS Medical Center System Operations Manual - JAVA Edition
Directory Assistance
Use the DirAsst command to access the MCS directory assistance database to identify
the destination of a call. This command can be selected from the Operator Screen when
it is in idle status or while the operator is connected to a source caller.
Figure 4-7 Directory Assistance
General
Process When a call is answered, the Source Name area automatically displays any information
available on that calling number. Selection of the DirAsst command displays a prompt
for a name or a room number to be used as a database search pattern. You can enter all
or part of the name or number. MCS displays a list of matches from which the desired
destination can be selected and the call transferred.
Note: Pressing Enter on a blank field at the name or room prompt displays the full list of
destinations in the database.
Taylor, Frederick 2201 A2 220 1 62 M 08-15
DirAsst Park Rtrv Beeper Redial Emerg Clear Quit
On-line
MCS Status
Attendant Status
Medical Center System
Call Status Trnfr
S
Source Name
Attendant-1 Tue Aug 17 09:02 am
Ext Dept Room
D
Bed Age Sx Adm Dsch
Destination Name
Visitors: Yes
Comment: No solids until 08-17.
Enter Name or Room:
Up/Down Arrows to select, <Enter> to transfer, <tab> to expand, <Esc> to quit
More
Atkinson, Kimberly
Atley, Mike
Atmondson, Darlene
Attison, Gary
2394
Atworth, Mark
Atworth, Barbara
<Enter> to search, <Esc> to return to command line
Enter Name or Room: At
(1)
(2)
(3)
Atherby, Jim
Destination Name
247 125F
08-13
2394 247 243F
08-13
2375 436 234M
08-16
2347 241 147M
08-15
2419 210 242F
08-15
68 M08-10 08-12
At
2303 345 214M
08-16
Ext DID Room Bed Age Sx Admit DschUnit
Ext DID Room Bed Age Sx Admit DschUnit
4E
2E
2N
2E
3E
2E

NDA-30026 Revision 6 Page 51
Medical Center System Operations Manual - JAVA Edition TELNET OPERATOR FUNCTIONS
Hot Key Instead of entering the name or room number, the operator may press the MCS Hot Key
to replace the command line with the following options. The hot key is a period (.) by
default.
Selection of one of the options leads to a more specific search. For instance, selection
of the Patients option allows the attendant to search only among the Patient database
records. Internal refers to all extensions within the hospital phone system that are not
assigned to patients, doctors, employees, or test/procedures. External refers to all
telephone numbers that lie outside of the hospital phone system. Master refers to the
full list, including the information available through all other command options.
To change the MCS Hot Key, select the Configuration Management option from the
MCS main menu. If you enter the ampersand character (@) as the hot key character,
the sub-directory look-up screen automatically appears after the Directory function is
activated.
Directory
Information Directory Assistance information that is displayed in the Destination window consists
of the following fields from the database:
Destination –A name from the database that matches the pattern entered
at the prompt; may be the names.
Name –Name of patients, internal departments, non-patient
extensions, external locations, or other attendants.
Ext –The phone extension tied to the displayed name.
Note: No extension is displayed for patients in rooms without phones. An asterisk appears
next to an extension of a patient who has not contracted for phone service or whose
presence is confidential. To expand the record and display the reason for the ‘*’ ,
press the Tab key. Patients whose presence is confidential are displayed in a different
foreground color or, on monochrome terminals, blink.
Dept –The medical department in which the assigned room is
located.
Room –The number of the room to which the patient has been
assigned.
The Ext., Dept., Room, and Bed fields are empty in the display when a patient has been
discharged. When patient names are displayed, the following fields are also included
in the Destination window:
Bed –The number of the bed to which the patient has been
assigned.
Age –The three-digit age of the patient.
Note: If the patient is months or days old, the third character is either an “m” or a “d” re-
spectively -- for example, 100, 34, 12m or 1d.
Pat’sDoc’sEmploy’sIntrnl Extrnl Tests Master

Page 52 NDA-30026 Revision 6
TELNET OPERATOR FUNCTIONS Medical Center System Operations Manual - JAVA Edition
Sex –The gender of the patient.
Adm –Date that the patient was admitted to the hospital, in the
format mm/dd.
Dsch –Date that the patient was discharged from the hospital, in
the format mm/dd.
Special
Destinations Some destination names that are displayed from the database appear differently from
the others in the list. These names are of patients to whom calls are generally not to be
transferred. These “special” destinations are described below:
1. Extension preceded by an *: A patient who has either not paid for phone service or
wishes to have no phone calls but is in a room that contains a phone. The expanded
version of this record shows whether the patient wants to keep the number confiden-
tial or did not contract for phone service.
2. Extension field blank: If a patient has been assigned a DID, the extension number
does not display. If no extension or DID is displayed, the room cannot receive calls.
3. Record is highlighted: A patient who has expired. This patient listing will have an
x next to the Ext field.
Note:The highlighting options are selected by the user.
Expanded
Display
Type of
Transfer Use the left- and right-arrow keys to select between direct or screened transfer. In a
direct transfer, press Enter to transfer the source caller to the extension that is currently
selected. This will release the operator and clear the Operator screen. In a screened
transfer, place the source caller on hold, and connect to the destination. The operator
can stay on the line as long as desired, but must release, cancel, or join the call manually
via the attendant console. Operator release causes the source and destination parties to
be connected.
Operator
Transfer Any time a call is transferred between two operators, the source information shown on
the original operator’s screen is transferred to the recipient operator when the call is
answered. A message that is displayed in the Attendant Status window shows when the
transfer has taken place.
Press the tab key while a record in the list is highlighted to display any additional
arrow keys move the cursor within the window.
information available about the selection. Enter and Esc are used to exit the window, and

NDA-30026 Revision 6 Page 53
Medical Center System Operations Manual - JAVA Edition TELNET OPERATOR FUNCTIONS
Transfer
Failures Transfers to patients that have been discharged will always fail. Transfers also fail if
the destination station is busy or set to Do Not Disturb. If a transfer fails, the Call Status
window displays an error message, and the search list remains displayed.
Off-Line Mode If the OAI connection between the attendant console and the CRT is down for any
reason, the Directory Assistance functions perform as usual, except that when you
press Enter to transfer a call, a message displays showing that the system is off-line,
and the call is not transferred. The system displays the destination number information,
but the call must be placed manually via the actual console. The destination menu is
only cleared by selection of the Clear command. Once the OAI is reestablished, all
functions return to normal.
Key Function
Summary Below is a list of the typical functions of the support keys:
Enter –Begins the designated action (e.g., search or transfer).
Up/down arrows –Moves the highlight up and down the list for selection
purposes; also scrolls the list up and down for display on
the screen.
Right/left arrows –Select the type of transfer (i.e., direct or screened).
Esc –Returns the cursor to the previous position (e.g., from
displayed search results back to name or number prompt).
Tab –Opens a window display of additional information about
the current selection.
Hot Key –When pressed while at the “Enter Name or Room” prompt
during Directory Assistance, replaces the command line
with options for specific directory searches.

Page 54 NDA-30026 Revision 6
TELNET OPERATOR FUNCTIONS Medical Center System Operations Manual - JAVA Edition
Procedure Although possible destinations of a call may vary (i.e., a patient, physician, location, or
test), the following procedure for transferring a call is the same for all destinations:
Action Result
After an incoming call is answered and
source information displays, type d to
select the DirAsst command. (1)
The “Enter Name or Room:” prompt
displays and highlights for data entry. (2)
Type all or part of the name or room number
to be called and press Enter. To display all
names and their room numbers, press Enter
on the blank entry field.
All of the matching records in the database
display. (3)
If desired destination is displayed in list:
Using the up- and down-arrow keys, move
the highlight to the desired name or number.
If more than one screen full of names are
found, press the down arrow to scroll the
list upwards and the up arrow to scroll the
list downwards. Press Enter to begin
transfer of the call to the chosen destination.
Expand Current Selection: Press the Tab
key to display any additional information
available about the current selection in a
window that is positioned over the list.
(Press the Enter, up or down arrows, or Esc
key to exit the expansion window.)
The transfer begins, according to the type of
transfer shown in the Trnfr Window:
•Direct – the attendant console and
screen are automatically released from
the call and cleared of all information
concerning it.
•Screened – the call must be manually
released, joined, or cancelled. If the call
is cancelled or joined, the source
information stays on the screen until a
new source caller displays or you select
the Clear command.
If desired destination is not displayed in
list:
Begin entering data to append to the
existing pattern, or press Ctrl w to erase the
existing entry. Type a new search pattern
and press Enter.
Use the up- and down-arrow keys as
described above to select the destination,
and press Enter to transfer the call.
All of the matching records in the database
display.
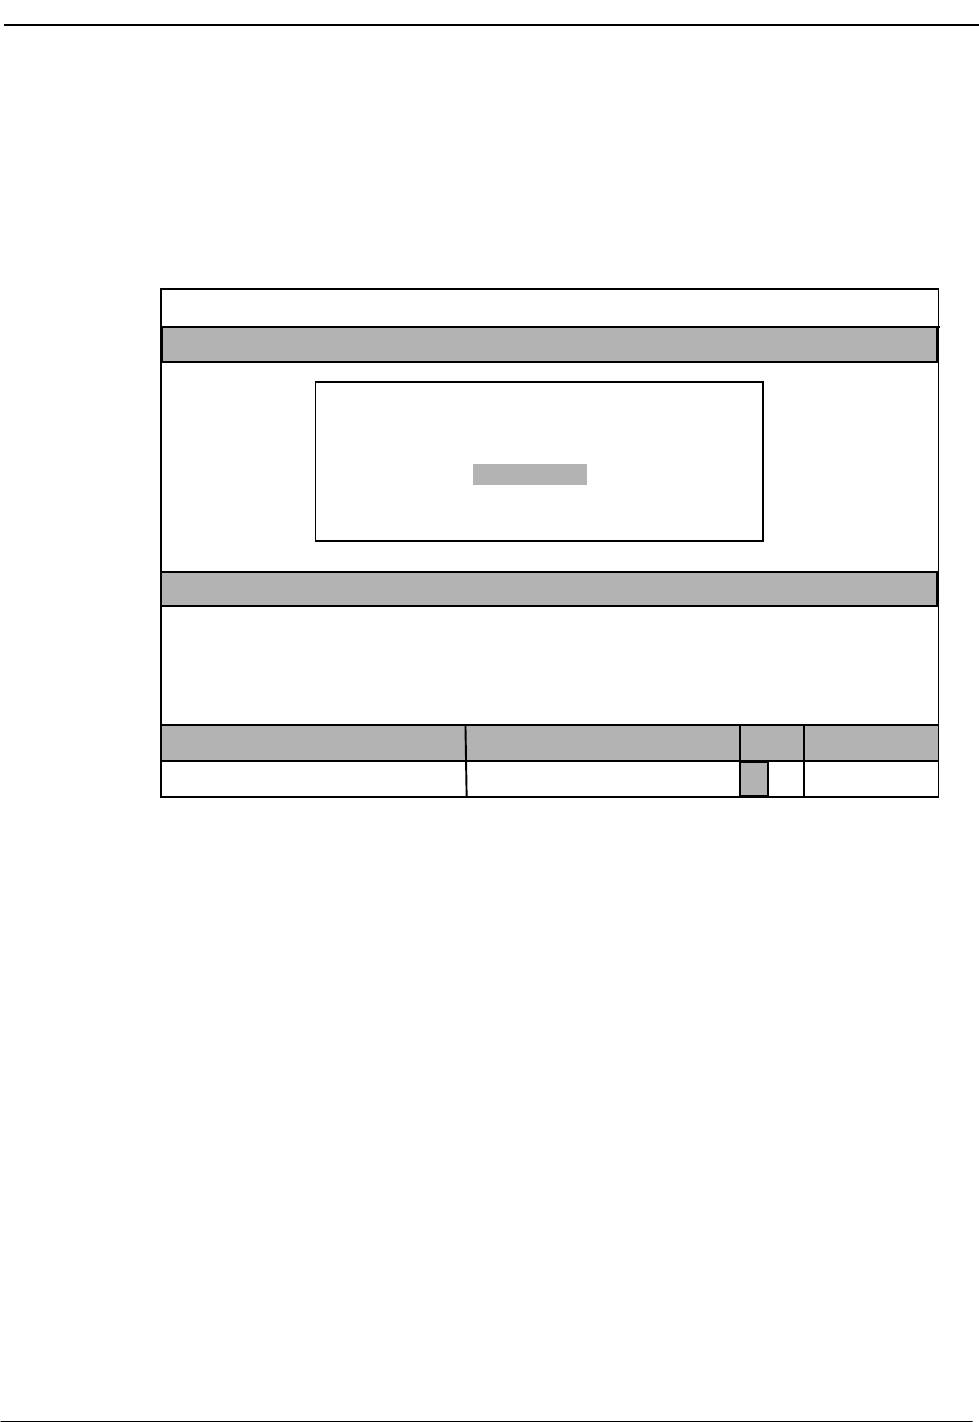
NDA-30026 Revision 6 Page 55
Medical Center System Operations Manual - JAVA Edition TELNET OPERATOR FUNCTIONS
Call Park
Use the Park command to place a source call on an announcement trunk or a monitored
number for paging purposes. Activating the Park command from the Operator Screen
displays the Call Parking window. Remember, the Source area of the screen contains
information about the caller.
Figure 4-8 Call Park Function
General
Process To park an incoming call select the Park command, enter the name of the party to be
paged, and press Enter. The cursor moves to the Parked Name field and can be
changed if required. If the field does not need to be changed, press Enter. The cursor
moves to the Park Method field and the configured default park method is highlighted.
Press the Space Bar to change the park method, or press Enter to select the default
method. The attendant is released to either page the called party or receive the next
incoming call. The name of the party being paged is entered as the call identifier. If the
Directory Assistance window is open, press Esc to return to the command line and then
select the Park command.
The Meet_Me Page park method displays a station number that the Paged party must
dial to be connected with the party being parked. This method removes the attendant
from the park connection process. The Operator Assist method requires the Paged party
to call the attendant. With this method, the attendant must find and connect the paged
and parked parties manually.
Page Name:
*** Call Parking ***
Parked Name:
<Enter> to park, <Esc> to quit
On-line
MCS Status
Attendant Status
Medical Center System
Call Status Trnfr
S
Attendant-1 Tue Aug 17 09:02 am
D
Visitors: Yes
Comment: No solids until 08-17.
Taylor, Frederick
Park Method: Meet_Me Page Operator Assist
Destination Name Ext DID Room Bed Age Sx Admit DschUnit
Taylor, Frederick
Source Name
2201 A2220 1 62 M 08-15
Ext DID Room Bed Age Sx Admit DschUnit

Page 56 NDA-30026 Revision 6
TELNET OPERATOR FUNCTIONS Medical Center System Operations Manual - JAVA Edition
Park Recall If the Park Recall feature is activated during MCS installation, the attendant who
originally parked a call is notified when a parked call times out. MCS automatically
transfers the parked call from the monitored number or announcement trunk back to the
original attendant, and beeps the CRT once. The message “Parked Call Time-out [#]”
flashes in the Attendant Status window until the call is either answered or abandoned.
When the call is answered, the Call Window displays a message showing that it is a
recall.
If another parked call for the same attendant times out during this process, another beep
is sounded and the number in the brackets of the message increases by one. The calls
are returned to the attendant and are answered in a first-come, first-serve order. The
message remains on display until all timed-out parked calls have either abandoned or
been answered. Any other messages that must be displayed in the Attendant Status
window replace the time-out message temporarily, but the time-out message returns in
blinking display when the other messages clear. If the original attendant is no longer
on-line, the next on-line attendant is notified of the timed-out parked call.
Cancel and Exit Pressing the Esc key at any time cancels the call park function and returns control to
the display from which the Call Parking window was opened. However, escaping the
Call Parking window, however, does not release the source caller. The release must be
done from the attendant console.
Procedure
Action Result
After an incoming call is answered and
source information displays, type p to
select the Park command.
The Call Parking window displays.
Type the name to be paged and press Enter.
Note: Use the Up/Down arrows to move as
necessary between the two fields in
the Call Parking window.
If the call is from an internal extension:
The source caller is parked on an
announcement trunk, information about the
parked call is placed in the database, and
the operator screen is released and cleared.
If the call is from an external number:
The cursor is placed in the Parked Name
field for data entry. A new entry can be
made to the field, any name already
displayed can remain, or the field can be
left blank. Press Enter to accept the field as
displayed, park the source caller, and clear
the screen.
Select a park method, either Meet_Me Page
or Operator Assist. The Meet_Me Page park method displays a
station number that the Paged party must
dial to be connected with the parked party.
With the Operator Assist method, the
Paged party must call the attendant, and the
attendant connects the parties manually.
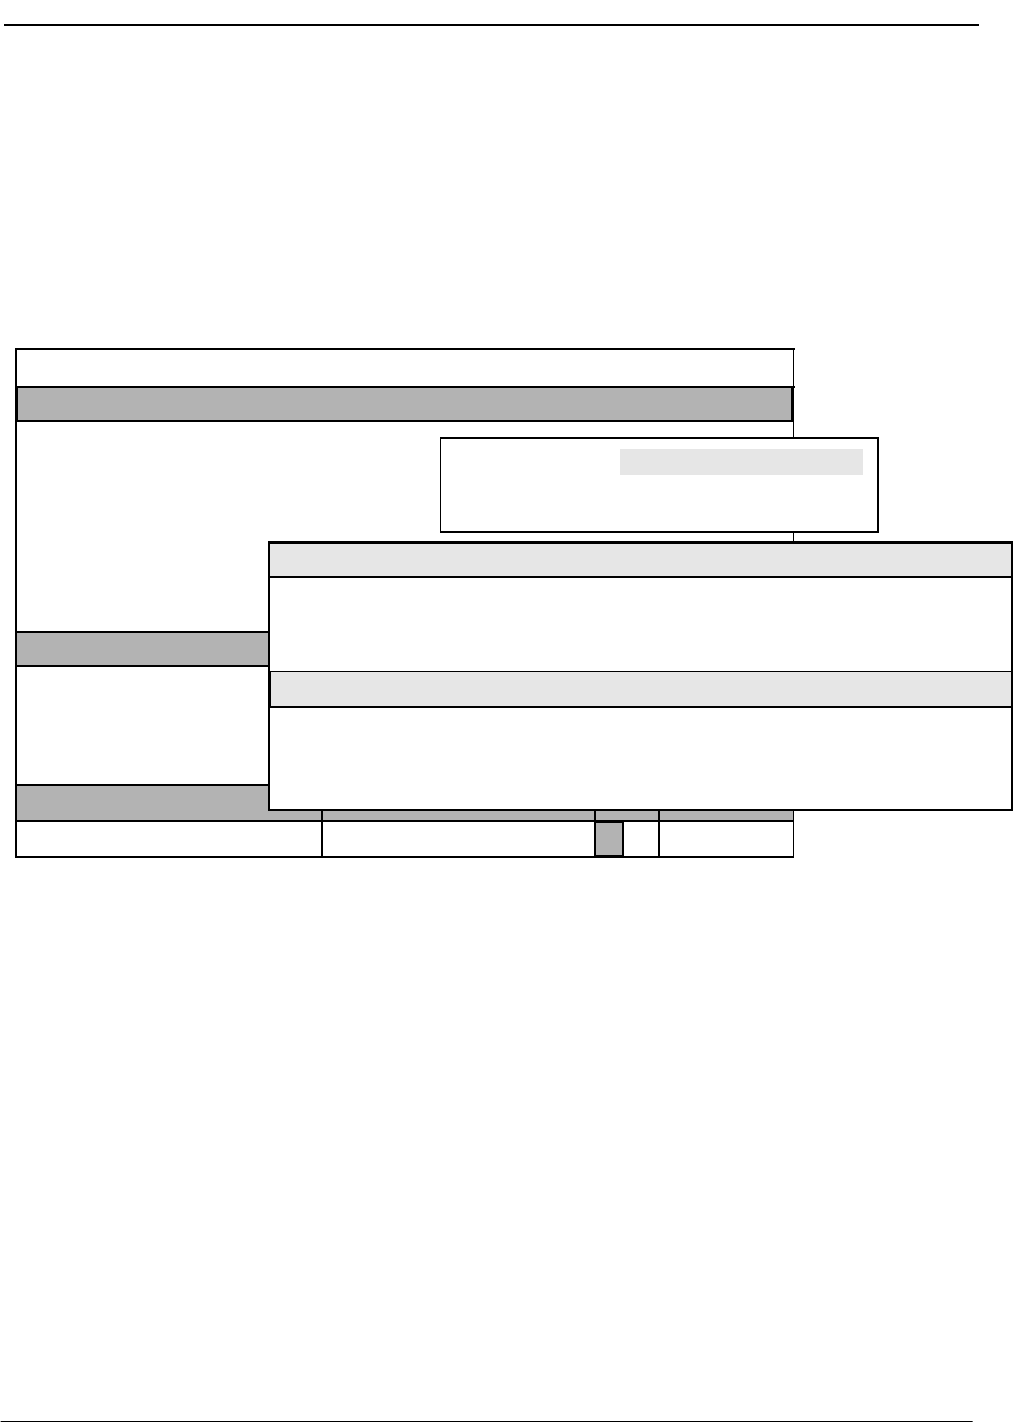
NDA-30026 Revision 6 Page 57
Medical Center System Operations Manual - JAVA Edition TELNET OPERATOR FUNCTIONS
Parked Call Retrieval
Use the Join/Rtrv command to communicate with a previously parked caller.
Selection of the Join/Rtrv command from the Operator Screen displays Park Retrieval
information in the destination area and information about the station used by the paged
caller in the Source area.
Figure 4-9 Parked Call Retrieval
General
Process To retrieve a parked call, select the Join/Rtrv command and enter the name of the
paged party at the displayed prompt. MCS searches among the parked calls for the
paged party and displays an alphabetical listing of matches. (Press Enter on a blank
prompt field to display the entire list of parked calls.) Select the name from among
those displayed in alphabetical order to begin the transfer.
Retrieve from
Idle Screen The procedure for retrieving a parked call from an idle screen (no incoming call) is the
same as from a screen displaying source caller information on an incoming call.
However, after the operator presses Enter, the caller is routed to either the attendant
requesting the park retrieve or to the priority key, depending upon how MCS was
configured during installation. The attendant then answers the call.
On-line
MCS Status
Attendant Status
Medical Center System
Call Status Trnfr
S
Source Name
Attendant-1 Tue Aug 17 09:02 am
Extension Room
D
Note
Paged Parked PgNo Status Att
Lobby House Phone 12 30421 00002 Next to security station
Comment: Mostly used in emergencies. Enter Paged Name: Tal
Up/Down Arrows to select, <Enter> to retrieve, <Esc> to quit
Allen, Chris
Bright, Mical
Green, Mrs.
Miller
Milke, Kim Collins, Joanna
<Enter> to search, <Esc> to return to command line
Enter Paged Name: Tal
(1)
(2)
(3)
Paged
Smith, Terry
Talbot, Lisa
Rault, Jeremy 1:20 4
:15 2
:45 1
:05 1
2:05 2
1:40 5
Parked PgNO Time Att
Time
Status
RLS

Page 58 NDA-30026 Revision 6
TELNET OPERATOR FUNCTIONS Medical Center System Operations Manual - JAVA Edition
Park Call
Abandon If a call is abandoned while it is parked, it still appears in the list of parked calls for a
preset amount of time. When the Park Retrieval function is activated, the display of any
call that has abandoned includes a time notation in the Time field that shows when the
party abandoned the call, and the Status field displays RLS. MCS automatically
removes the call listing from the display after a time-out. As long as the list is on
display, the deleted call remains on the list. When the list is exited and displayed again,
the call no longer appears on the list.
With Meet_Me Page park method, the paged party will be connected with the operator
if the parked party abandons before being connected with the paged party.
Cancel and Exit Press the Esc key at any time to cancel the call park retrieval function and return control
to the display from which the retrieval was begun. If the operator exits the Call Park
Retrieval window using the Esc key, the paged caller is not released. The release must
be done from the attendant console.
Procedure
Action Result
After an incoming call is answered and
source information displays, type j to select
the Join/Rtrv command. (1)
The “Enter Paged Name:” prompt displays
and highlights for data entry. (2)
Type part or all of the name of the paged
party and press Enter. To display all names
and their room numbers, press Enter when
the blank entry field is highlighted.
All of the matching extensions in the
database display. (3)
Using the up- and down-arrow keys, move
the highlight to the desired name. If more
than one screen full of names are found,
press the down- arrow key to scroll the list
upwards and the up- arrow key to scroll the
list downwards. Press Enter to begin
transferring the call.
The join is begun according to the type of
transfer shown in the Trnfr Window.
•If Direct, the attendant console and
screen are automatically released from
the call and cleared of all information
about it.
•If Screened, the parked and paged
parties are connected only when the call
is manually released via the attendant
console.
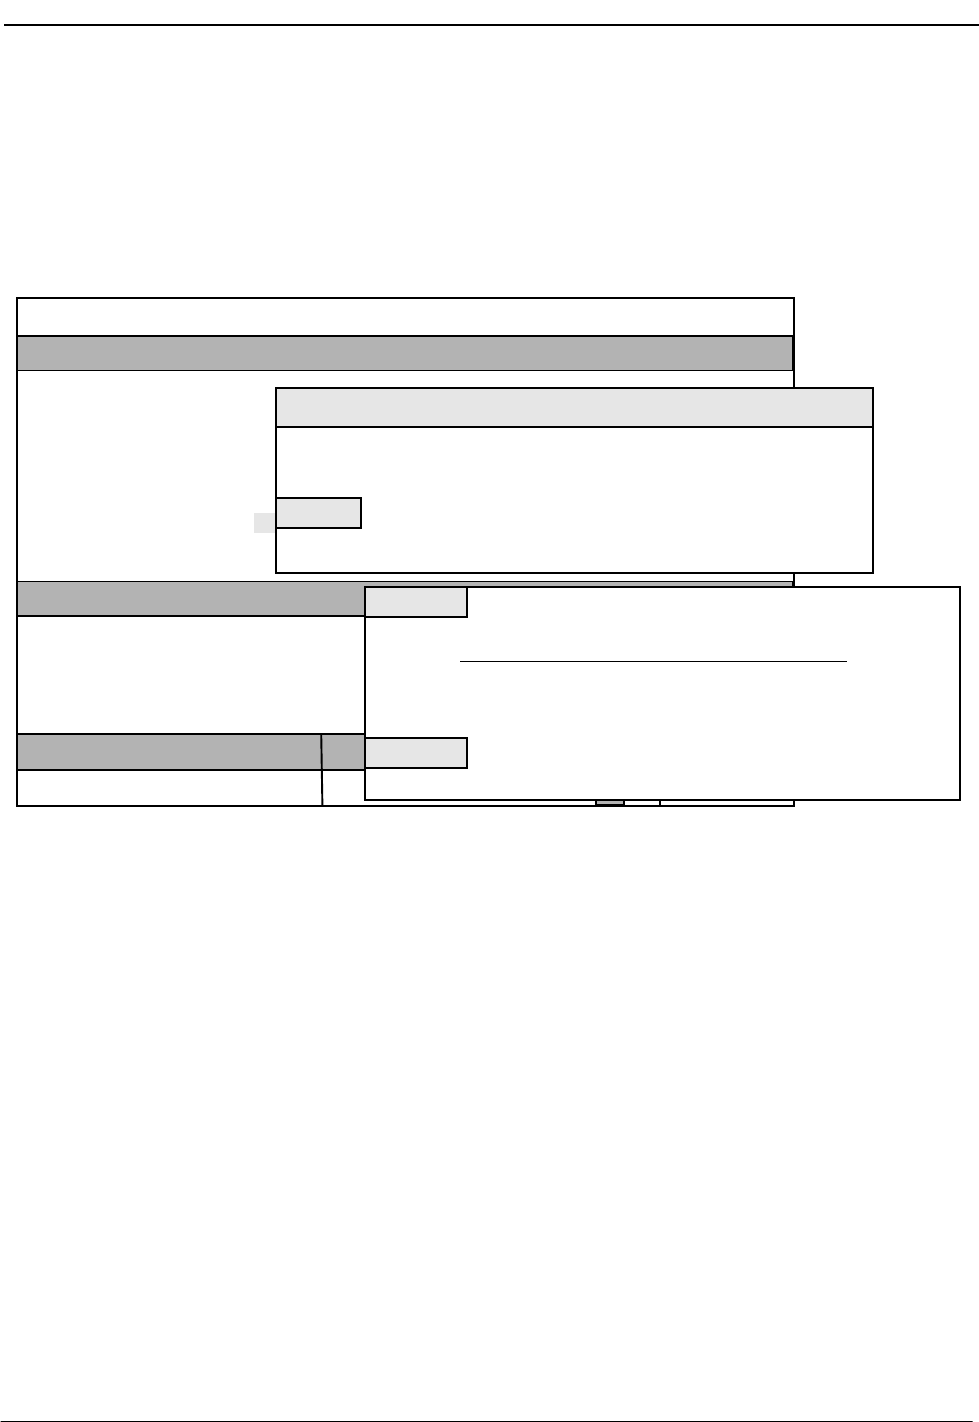
NDA-30026 Revision 6 Page 59
Medical Center System Operations Manual - JAVA Edition TELNET OPERATOR FUNCTIONS
Beeper
Use the Beeper command to place a call to a specified beeper number and to display
codes that can be manually entered once a connection is established with the beeper
holder.
Figure 4-10 Beeper Function
General
Process When you select the Beeper command, a prompt displays for the name of the person
to be beeped. When you type all or part of the name at the prompt, a list of names
displays with the beeper number associated to each name. Use the arrow keys to
position the highlight on the desired beeper and press Enter to attempt the call. If the
beeper call is successful, a list of codes representing various call types displays on the
screen. Type the code that describes the purpose of the beep and press Enter. Press Esc
to exit the screen.
Taylor, Frederick 2201 A2 220 1 62 M 08-15
<Enter> to search, <Esc> to return to command line
On-line
MCS Status
Attendant Status
Medical Center System
Call Status Trnfr
S
Source Name
Attendant-1 Tue Aug 17 09:02 am
City, St Room
D
Bed Age Sx Adm Dsch
Destination Name City, St Extension Room Status Date
Visitors: Yes
Comment: No solids until 08-17.
Enter Person to Beep: Enter Person to Beep:
Beeper Code Name Beeper Code
*** Beeper Codes ***
DownPage
Saunders, Dr. Paul
Person
Jones, Dr. Wayne
Teague, Harold
Lee, Steve
Bottom
Up/Down Arrows to move, <Enter> to call, <Esc> to quit
Top of File
End of File
Blue Alert
Call Clinic
Call Office
Call Home
(1)
(2)
(3)
2222
3333
4444
5555
UpPage Search Top Bottom Print Quit
3462
7834
9435
Beeper No.
1235

Page 60 NDA-30026 Revision 6
TELNET OPERATOR FUNCTIONS Medical Center System Operations Manual - JAVA Edition
Procedure
Action Result
Type b to select the Beeper command. The “Enter Person to Beep:” prompt
displays and highlights for data entry. (1)
Type part or all of the name of the person to
be beeped and press Enter. To display all
names and associated room numbers, press
Enter when the blank entry field
highlights.
All of the matching extensions in the
database display. (2)
Using the up- and down-arrow keys, move
the highlight to the desired name. Then,
manually call the selected beeper number
and press Enter.
The beeper code list displays, containing
codes and their definitions. (3)
Use the DownPage command to move
forward one page, the UpPage command to
move back one page, the Top command to
move to the beginning of the display, and
the Bottom command to move to the end of
the display.
Search the Display: Type s to select the
Search command and press Enter. Then
type the desired pattern and again press
Enter.
Print the Display: Type p to select the Print
command. To print the entire file of codes,
type f and press Enter. To print only the
current screen display, type s and press
Enter. Press Esc to cancel the print request
and return to the previous command line.
All occurrences of the pattern shown on
that page highlight in the display.
The printing is performed and the display
command line returns.
To exit the Beeper Code list, type q (quit). The Operator screen displays.
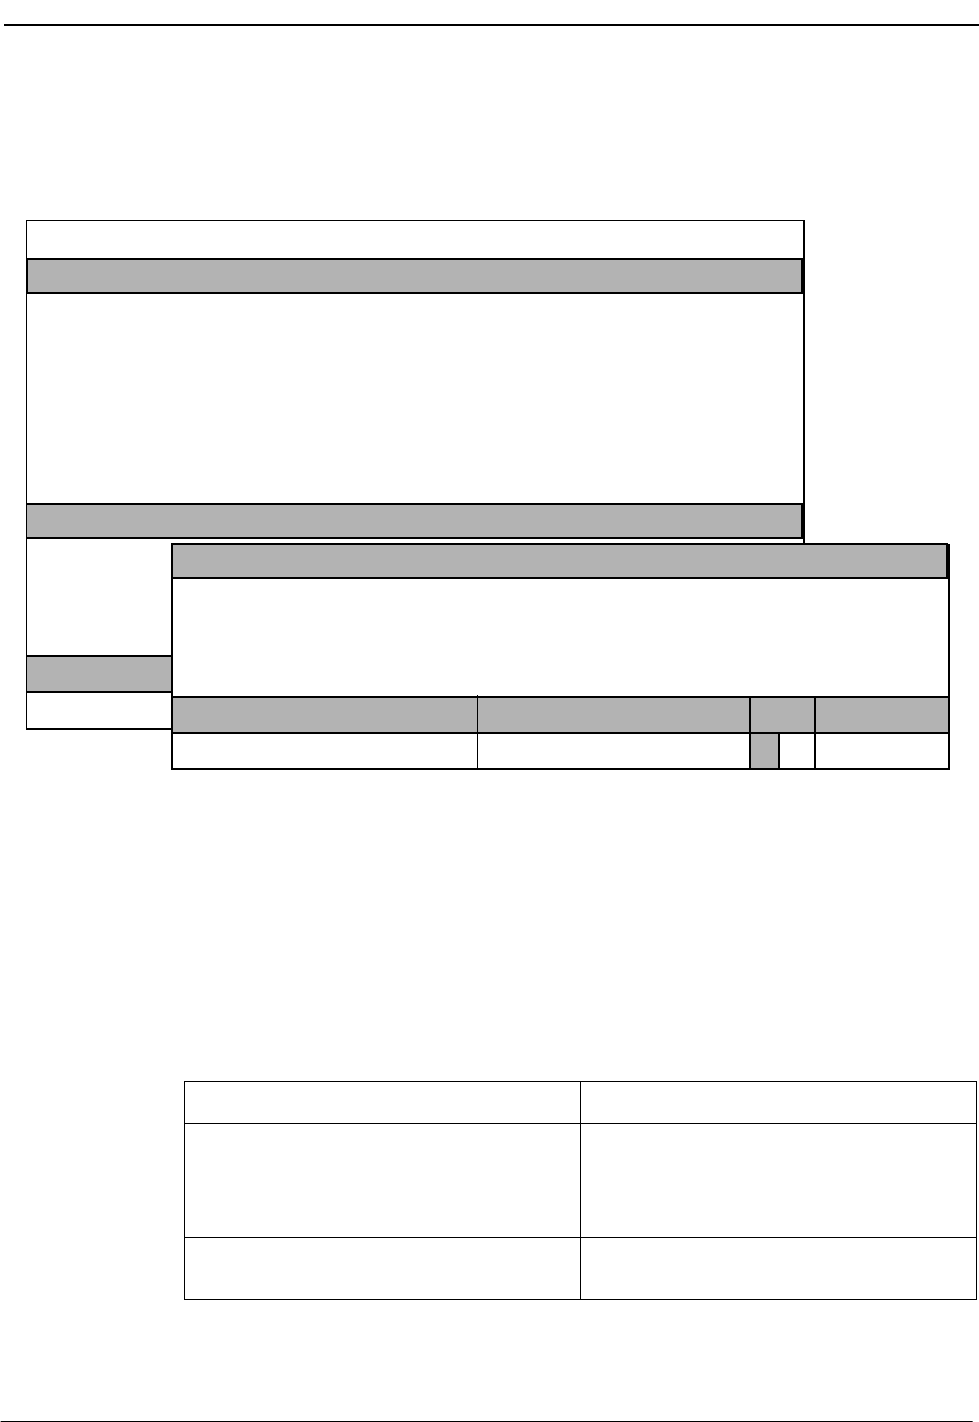
NDA-30026 Revision 6 Page 61
Medical Center System Operations Manual - JAVA Edition TELNET OPERATOR FUNCTIONS
Redial
Use the Redial command to place a call to the last caller received by the attendant.
Figure 4-11 Redial Function
General
Process An operator may activate the Redial function any time the station is idle (not connected
to a caller). The MCS maintains a record of the last incoming call for this purpose. If
the called extension is busy or the attendant console is connected with another party
when this function is selected, the operation fails, and an error message displays.
Procedure
On-line
MCS Status
Attendant Status
Medical Center System
Call Status Trnfr
S
Source Name
Attendant-1 Tue Aug 17 09:02 am
Ext Dept Room
D
Bed Age Sx Adm Dsch
(1)
(2)
On-line
MCS Status
Attendant Status Call Status Trnfr
S
D
Visitors: Yes
Comment: No solids until 08-17.
DirAsst Park Join/Rtrv Beeper Redial Emerg Clear Quit
Destination Name Ext DID Room Bed Age Sx Admit DschUnit
Taylor, Frederick
Source Name
2201 A2220 1 62 M 08-15
Ext DID Room Bed Age Sx Admit DschUnit
Action Result
Type e to select the Redial command. (1) Connection is made to the last caller
received by the attendant. If connection is
successful, information about that caller is
displayed in the Source Name area. (2)
Refer to the instructions corresponding to
the service that is requested by the caller.
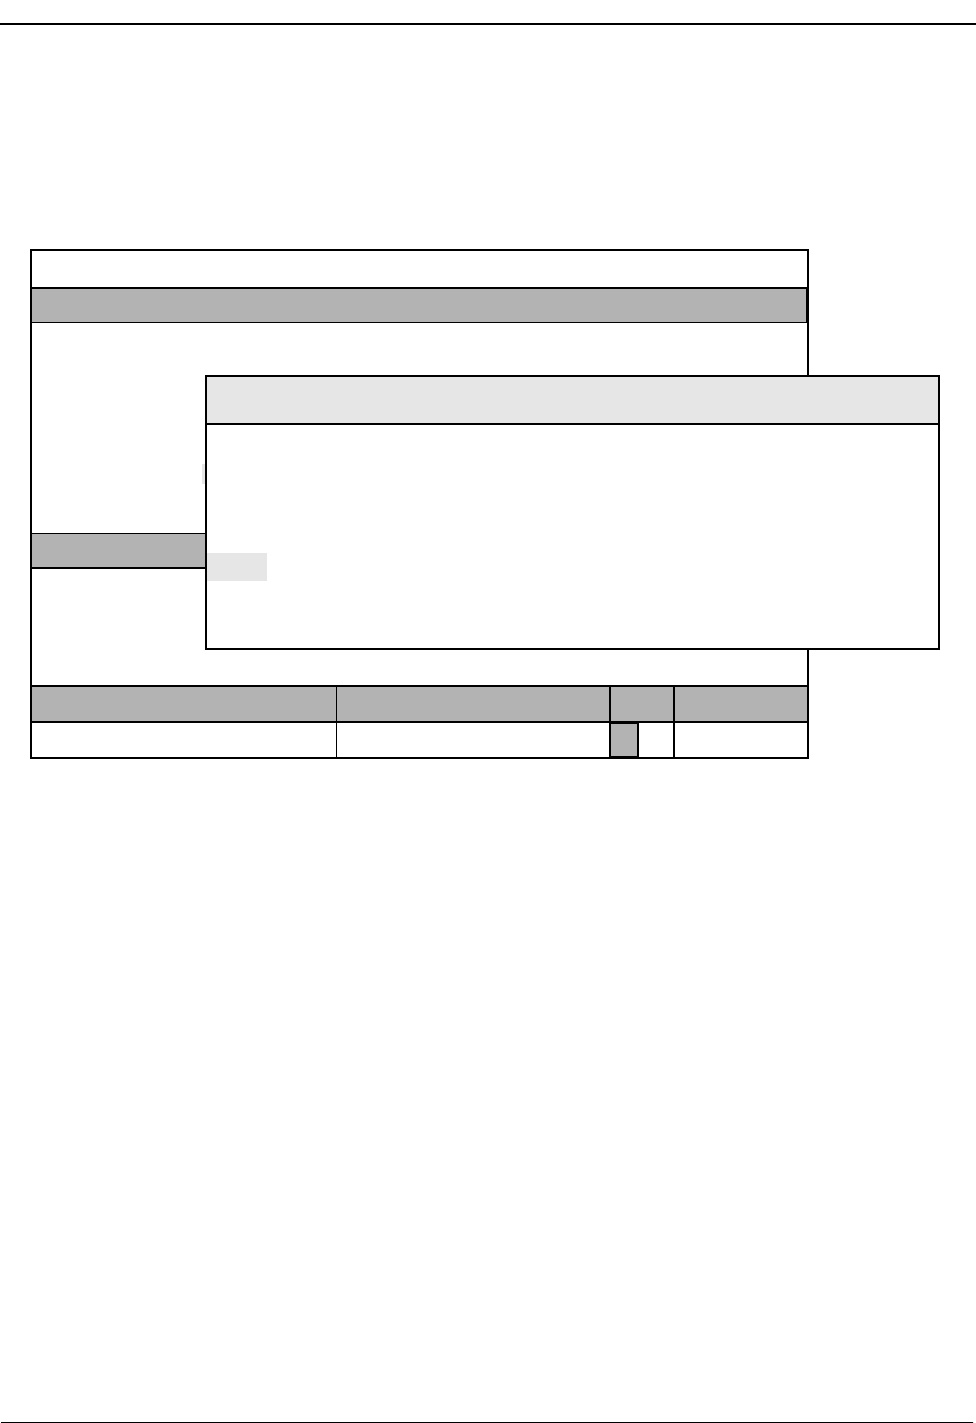
Page 62 NDA-30026 Revision 6
TELNET OPERATOR FUNCTIONS Medical Center System Operations Manual - JAVA Edition
Emergency
Use the Emerg command to contact either a “specialist” or the supervisor while
connected to a source caller.
Figure 4-12 Emergency Function
General Process You can activate the Emergency function any time during interaction with a source
caller. When activated, the Emergency function displays a prompt for a brief name
or description of the presenting problem. The matches from a directory of
emergencies display when you enter a name or description. From this displayed
directory, select either the problem shown and the extension(s) associated with it
or the supervisor entry. The results of these selections are described below:
Problem: MCS attempts a conference call to the extension shown for the
selected problem. If the extension is busy, the alternate extension is
called. A three-way conference call is automatically established when
the specialist answers the call.
Supervisor: An alert message (e.g., Att3 Supervisor Alert) is broadcast in the
Attendant Status window at all active stations, and the Supervisor
Dterm rings. Silent monitoring of the call begins when the supervisor
answers, and the attendant is notified that the supervisor is listening to
the call. At the same time, the supervisor’s CRT displays the same
source and destination information currently displayed on the alerting
attendant’s CRT.
Enter Problem:
<Enter> to search, <Esc> to return to command line
On-line
MCS Status
Attendant Status
Medical Center System
Call Status Trnfr
S
Source Name
Attendant-1 Tue Aug 17 09:02 am
Ext Dept Room
D
Bed Age Sx Adm Dsch
Problem Extension Alternate Note
Up/Down Arrows to select, <Enter> to transfer, <tab> to expand, <Esc> to quit
Enter Problem:
(1)
(2)
Can’t breathe
Problem
Bleeding from wound
Advice
Chest pain
Beginning of Labor
1002
1834
1641
1242
Check passageway
Lie down, breathe slowly; ambulance
Check timing; call OB
Hold for Poison Control; ID substance
Immobilize, come to ER
Poison ingestion
Supervisor
Suspected broken bone
6000
3990
1354
More
1837
1642
1245
3576
3991
1352
Extension Alternate
1213 Tourniquet/pressure/cold; come to ER

NDA-30026 Revision 6 Page 63
Medical Center System Operations Manual - JAVA Edition TELNET OPERATOR FUNCTIONS
Supervisor
Equipment The station from which the supervisor monitors calls must be equipped with a
Dterm V. The Dterm can be configured to ring automatically whether or not the
supervisor is logged in. When the Dterm is configured to ring automatically,
conversation monitoring begins as soon as the phone is answered.
Supervisor
Capability If the supervisor is already connected to a call when monitoring is enabled, the
source information on the alerting attendant console is not displayed until the
supervisor releases the call. The MCS can also be set up to have all monitored calls
connected to a dictation trunk that begins recording at the same time that the call
monitoring begins.
Expanded Display
Procedure
Press the tab key while a record in the displayed list is highlighted. This will display
any more information available about this selection in a window positioned over the
list. Use the arrow keys to move within the window. Use the Enter and Esc keys to
exit the window.
Action Result
Type m to select the Emerg command. The “Enter Problem:” prompt displays and
highlights for data entry. (1)
Type the problem and press Enter. To
display all names and associated room
numbers, press Enter when the cursor is on
the blank entry field.
All of the matching problems in the
database display. (2)
For an emergency problem:
Using the up- and down-arrow keys, move
the highlight to the appropriate problem and
press Enter.
A call is begun to the extension tied to the
problem. (OAI key lamps blink and a chime
rings.) When the call is answered, the
specialist joins the emergency call, making
it a three-way conference call.

Page 64 NDA-30026 Revision 6
TELNET OPERATOR FUNCTIONS Medical Center System Operations Manual - JAVA Edition
Action Result
For a supervisor alert:
Using the up- and down-arrow keys, move
the highlight to the supervisor record and
press Enter.
The supervisor can stop listening in on (and
recording) the conversation at any time by
hanging up.
The Attendant Status window of all stations
displays a supervisor alert notation. If set up
to do so, the supervisor’s Dterm
automatically rings.
As soon as the supervisor answers the
ringing Dterm:
1) The supervisor connects to the
initiating operator’s call in silent
monitoring mode.
2) The message “Supervisor Monitoring”
displays in the initiating operator’s
Attendant Status window.
3) The supervisor’s Dterm LCD displays
the message “Monitoring Att ##”.
4) The source and destination information
displays on both the attendant and
supervisor CRT.
Release the call manually. If no other
incoming call displays, use the Clear
command to remove the previous call
information from the screen.
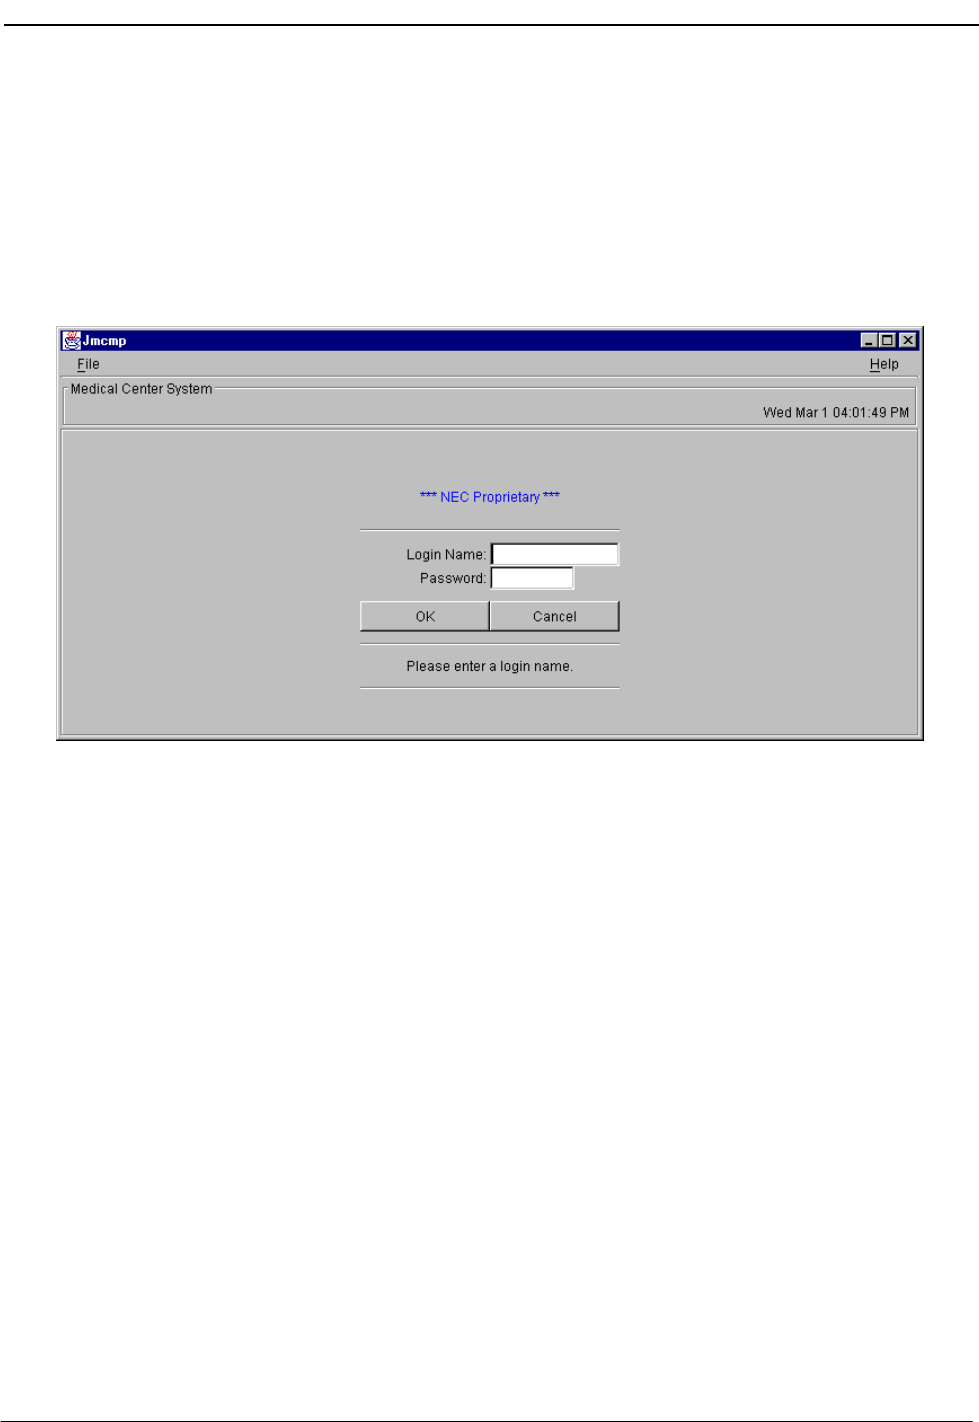
NDA-30026 Revision 6 Page 65
Medical Center System Operations Manual - JAVA Edition JAVA OPERATOR FUNCTIONS
Chapter 5 JAVA OPERATOR FUNCTIONS
Login
1. From the workstation desktop, double-click the JAVA Client icon to start the
JAVA MCS application. The Password Entry screen (Figure 5-1) will be dis-
played.
Figure 5-1 Password Entry Screen
2. Enter your assigned operator or supervisor login name in the Login Name field.
(If you do not have an assigned name, see your system administrator.)
3. Enter your password in the Password field, and select the OK button. (If you
do not have a password, see your system administrator.) The JAVA MCS main
screen (Figure 5-2) will be displayed.
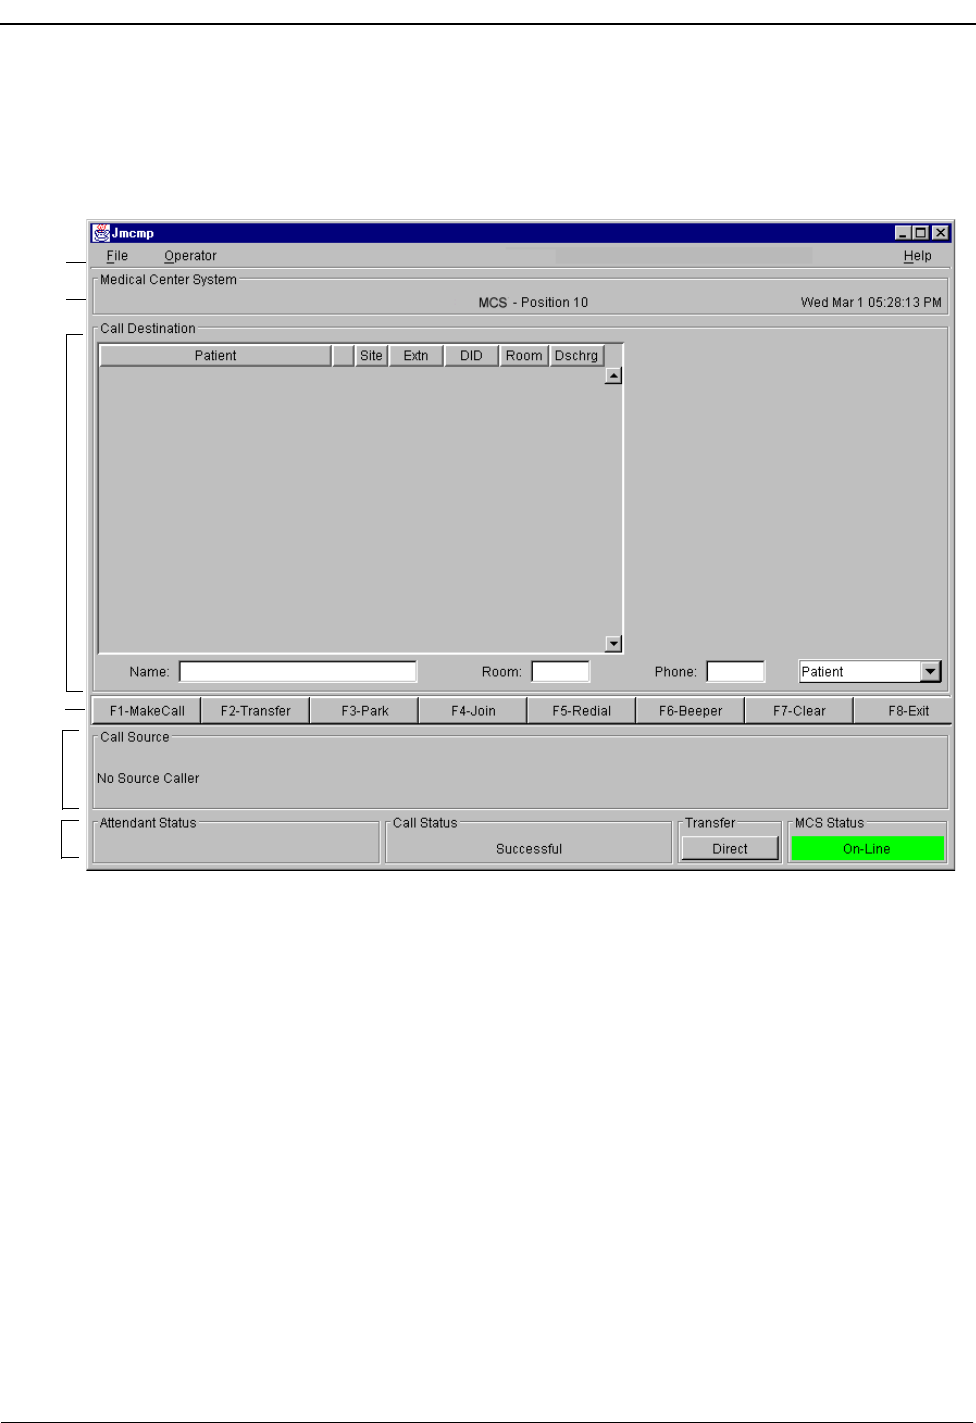
Page 66 NDA-30026 Revision 6
JAVA OPERATOR FUNCTIONS Medical Center System Operations Manual - JAVA Edition
Screen Format
The JAVA MCS main screen is illustrated below (Figure 5-2). The major screen
components are identified in the figure and described below.
Figure 5-2 JAVA MCS Main Screen
Screen Components
(A) Menu Bar – Provides access to operator, directory database and administra-
tor functions.
(B) Header – Displays the name of the application (Medical Center System),
identification of the workstation position, and the current system time and
date.
(C) Call Destination Panel – Directory list and detailed information of selected
destination caller.
(D) Tool Bar/Command Buttons – Command buttons (also showing keyboard
Hot Key) to select the operator functions.
(A)
(B)
(C)
(D)
(E)
(F)

NDA-30026 Revision 6 Page 67
Medical Center System Operations Manual - JAVA Edition JAVA OPERATOR FUNCTIONS
(E) Call Source Information Panel – This panel displays source caller infor-
mation including status of the current call and any transfer information.
(F) Status Panel - Displays the Attendant status, current call status, type of
transfer and current MCS system status.
These panels and associated functions are further described in the follow-
ing sections of this manual.
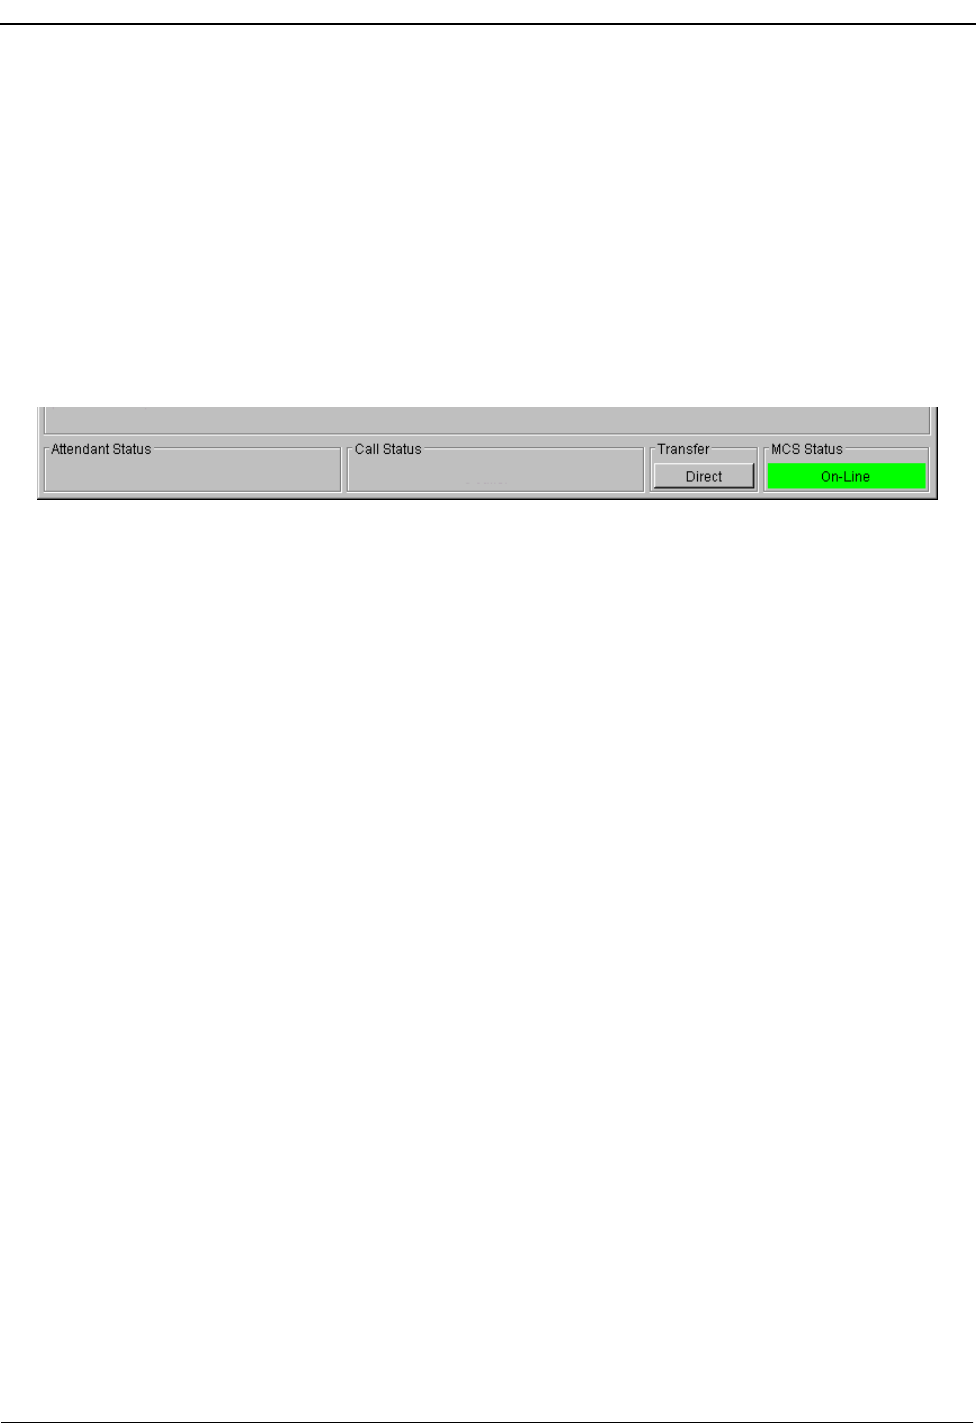
Page 68 NDA-30026 Revision 6
JAVA OPERATOR FUNCTIONS Medical Center System Operations Manual - JAVA Edition
Selecting Operator Functions
After user login, the JAVA MCS Operator screen is displayed (Figure 5-2). Access
to Administration functions are dependant on the privileges of the user. The
Operator screen is divided into Status, Call Source and Call Destination areas.
These are described in the following sections.
Status Area The Operator screen Status Area displays information about the attendant, current
call processing and the MCS system. A detail of the Operator screen Status Area is
shown below (Figure 5-3):
Figure 5-3 Operator Screen - Status Area
Attendant Status Window
This window on the bottom left corner of the screen is reserved for real-time
messages that relate directly to attendant-to-attendant communications. For
instance, when a call is transferred between attendants, this area displays the
message “Call transfer from Att-3”. This area also displays attendant supervisor
alerts and error conditions that require special attention. Messages in this area
clarify any events that affect the attendant console and communications among the
attendants.
Call Status Window
The Call Status Window displays messages about all current call events. For
example, an incoming call from an extension with more than one patient in the
room generates a message here. The message “Extension Busy” shows an attempt
to perform a Directory Assistance transfer to an off-hook extension.
Transfer Window
This window at the bottom right of the screen allows operators to toggle between
the following types of transfers:
Screened (S): Places the source caller on hold with music while the operator call
is being placed to the destination number. The operator hears a
ring-back tone (RBT) while the destination station phone is
ringing. The operator is connected to the destination station when
it is answered. Thereafter the operator may use the SRC, DST,
TALK, CNCL, or Release keys on the console to manipulate the
call.

NDA-30026 Revision 6 Page 69
Medical Center System Operations Manual - JAVA Edition JAVA OPERATOR FUNCTIONS
Direct (D): Causes the source caller to hear a RBT while the destination station
phone is ringing. The operator is automatically disconnected from
both parties, and the source caller is directly connected to the
destination party without operator screening of the transfer.
The default transfer type is configurable through the Configuration Management
option on the Supervisor Main Menu. The type of transfer currently in effect is
highlighted.
MCS Status Window
This window in the bottom right corner of the screen displays the operational status
of the MCS system. Whenever there is a change in status, the new status notation
replaces the old, and a beep is sounded on the CRT. Any of the following notations
can be displayed:
On-line: The OAI that enables communication between the attendant console
and the UAP is initialized; the MCS and NEAX2400 are in full
communication, with all screen functions available; and call events at
this station are now being monitored. This is the normal status when
the user enters the Operator Functions option.
Dir off: The Directory Assistance, beeper, and emergency functions are not
operational, but Park/Retrieve is available.
Park off: The Park/Retrieve functions are not operational, but Directory
Assistance and the other command functions are available.
Off-line: The OAI is not initialized, so the attendant console is operating
independently of the PBX. In this status, the operator can perform
directory searches and message operations but not automated call
processing. Therefore, all call placement functions must take place
manually through the attendant console. When OAI functions are
restored, the Off-line notation is replaced with a message showing a
change in status, and the CRT beeps once. Operations can then be
carried out normally with the degree of automated call placement
shown by the new status.
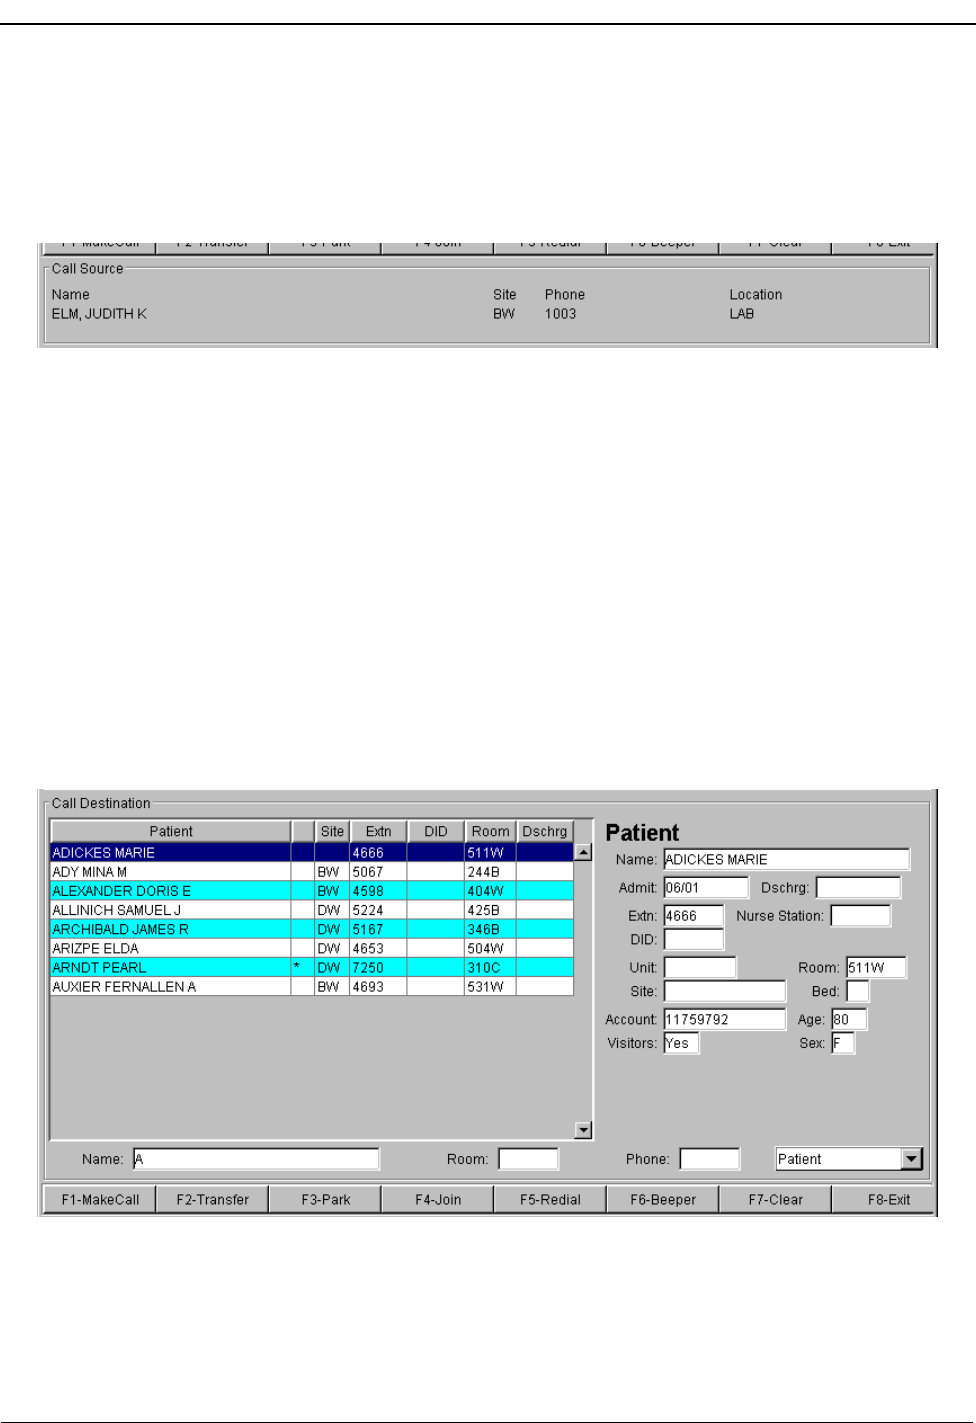
Page 70 NDA-30026 Revision 6
JAVA OPERATOR FUNCTIONS Medical Center System Operations Manual - JAVA Edition
Source Area When the attendant console is on-line, MCS monitors all incoming calls. As each
incoming call is answered, MCS automatically performs a database search for the
dialed number. If the number is found, any information associated with it in the
database displays in the Source area (Figure 5-4) of the screen.
Figure 5-4 Operator Screen - Call Source Area
When more than one person is assigned to an extension, a message showing the
number of additional people is displayed in the Call Status window. Pressing the
down-arrow key displays the next person in the list and the up-arrow key displays
the previous person. The kind of information that is displayed depends upon the
source of the call.
Destination Area The Destination area (Figure 5-5) of the Operator screen changes as necessary to
display information and to prompt for entry of the data that is necessary to
complete a call transaction. The command line contains the actions that can be
taken.
Figure 5-5 Operator Screen - Call Destination Area

NDA-30026 Revision 6 Page 71
Medical Center System Operations Manual - JAVA Edition JAVA OPERATOR FUNCTIONS
The remainder of this chapter provides descriptions and step-by-step instructions
on how to use each of these actions. Each action is discussed in a separate section,
as noted below:
Directory Assistance –Search the database for destination information and
then transfer internal, external, and attendant calls to
the selected destinations. (See page 72.)
Make Call –Attempt to place a call from the attendant console to
the selected directory entry.
Transfer –After receiving a call at the attendant console, the
attendant can transfer the call to a selected destination
directory entry.
Call Park –Place a call on an announcement trunk or a monitored
number for paging purposes. (See page 77.)
Parked Call Retrieval –Communicate with a previously parked call.
(See page 80.)
Beeper –Contact a beeper-holder with a coded message.
(See page 82.)
Redial –Use this command during Idle status to automatically
dial the station that most recently called the operator.
(See page 83.)
Clear –This command removes all entries to the Destination
and Source areas.
Note:This command is not discussed further in this chap-
ter.

Page 72 NDA-30026 Revision 6
JAVA OPERATOR FUNCTIONS Medical Center System Operations Manual - JAVA Edition
Directory Assistance
The directory assistance options (Figure 5-6) allow the operator to locate a specific
destination entry in a database directory.
Figure 5-6 Operator Screen - Directory Assistance
General Process The operator can select a specific directory type (Patient, Doctor, Employee,
Internal, External and Master) from a pull-down menu (see Figure 5-6). The Call
Destination area display will change depending on the type of directory selected.
The selected directory can be further searched by moving the cursor to the Name,
Room or Phone fields where specific information can be entered. All or any part
of the name or number can be entered. Following a search, use the UP and DOWN
arrow keys to select a specific directory entry.
When a specific entry is selected, the operator can then make a call or transfer a
source call to the selected destination entry. With a pending source call, pressing
the ENTER key on a selected destination entry will transfer the call.

NDA-30026 Revision 6 Page 73
Medical Center System Operations Manual - JAVA Edition JAVA OPERATOR FUNCTIONS
Directory
Information Directory Assistance information displayed in the Destination area is dependent on
the type of directory selected. A listing for a selected directory or directory search
is displayed in the left of the Destination area (see Figure 5-6). When an entry is
selected, further information detail for the entry is shown on the right of the
Destination area. The various information fields in the directory listings are defined
below:
Patient Directory
•Patient –The Patient’s name.
•Site –Abbreviation for a facility site or location of the patient room.
•Extn –The phone extension number of the patient room.
Note: The Extn field is empty in the display when a patient has been discharged. No
extension is displayed for patients in rooms without phones. An asterisk appears
next to an extension of a patient who has not contracted for phone service or is
restricted. Patients whose presence is confidential are displayed in a different
foreground color, and may also display a ‘C’ in the column after the name. (Also
see “Special Destinations” on page 74.)
•DID –The Direct Inward Dialed number of the patient.
•Room –The room number assigned to the patient.
•Dschrg –Date that the patient was discharged, in the format mm/dd.
Doctor Directory
•Physician –The physician’s name.
•Site –Abbreviation for a facility site or location of the doctor.
•Office –The phone number of the doctor’s office.
Employee Directory
•Employee –The employee’s name.
•Site –Abbreviation for a facility site or location of the employee.
•Extn –The phone extension number assigned to the employee.
Internal Directory
•Internal –The name of an Internal department, group, function, service,
or other person within the facility.
•Site –Abbreviation for a facility site or location of the Internal entry.
•Extn –The phone extension number of the Internal entry.

Page 74 NDA-30026 Revision 6
JAVA OPERATOR FUNCTIONS Medical Center System Operations Manual - JAVA Edition
External Directory
•External –The name of an External (outside the medical facility) entry.
(For example: These could be any outside companies, service
providers, equipment service, other medical facilities, outside
emergency numbers, etc.)
•Phone –The phone number of the External entry.
Master Directory
The Master directory lists all database directory entries.
•Name –The name for the specific entry.
•Phone –The phone or extension number for the entry.
•Site –Abbreviation for a facility site or location of the entry.
•Type –The type of directory entry (Patient, Doctor, Employee, Inter-
nal or External.
Special
Destinations Some destination names that are displayed from the database appear differently
from the others in the list. These names are of patients to whom calls are generally
not to be transferred. These “special” destinations are described below:
•Extension preceded by an *: A patient who has either not paid for phone service
or wishes to have no phone calls but is in a room that contains a phone. The
expanded version of this record shows whether the patient wants to keep the
number confidential or did not contract for phone service.
•Extension field blank: If a patient has been assigned a DID, the extension
number does not display. If no extension or DID is displayed, the room cannot
receive calls.
•Record is highlighted: If a patient has expired, an ‘X’ will be displayed in the
column to the right of the name column. A Confidential patient will have a ‘C’
displayed in this column.
Expanded Display The Expanded display is always shown in the right Destination area when a record
entry is selected.
Type of Transfer Use the left- and right-arrow keys to select between direct or screened transfer. In
a direct transfer, press Enter to transfer the source caller to the extension that is
currently selected. This will release the operator and clear the Operator screen. In
a screened transfer, place the source caller on hold, and connect to the destination.
The operator can stay on the line as long as desired, but must release, cancel, or join
the call manually via the attendant console. Operator release causes the source and
destination parties to be connected.
Operator Transfer Any time a call is transferred between two operators, the source information shown
on the original operator’s screen is transferred to the recipient operator when the
call is answered. A message that is displayed in the Attendant Status window
shows when the transfer has taken place.

NDA-30026 Revision 6 Page 75
Medical Center System Operations Manual - JAVA Edition JAVA OPERATOR FUNCTIONS
Transfer Failures Transfers to patients that have been discharged will always fail. Transfers also fail
if the destination station is busy or set to Do Not Disturb. If a transfer fails, the Call
Status window displays an error message, and the search list remains displayed.
Off-Line Mode If the OAI connection between the attendant console and the PBX is down for any
reason, the Directory Assistance functions perform as usual, except that when you
press Enter to transfer a call, a message displays showing that the system is off-
line, and the call is not transferred. The system displays the destination number
information, but the call must be placed manually via the actual console. The
destination menu is only cleared by selection of the Clear command. Once the OAI
is reestablished, all functions return to normal.
Key Function
Summary Below is a list of the typical functions of the support keys:
Enter –Begins the designated action (e.g., search or transfer).
Up/down arrows –Moves the highlight up and down the list for selection
purposes; also scrolls the list up and down for display
on the screen.
Right/left arrows –Select the type of transfer (i.e., direct or screened).
Esc –Returns the cursor to the previous position (e.g., from
displayed search results back to name or number
prompt).
Tab –Moves cursor to the next field.
F1-F8 screen buttons –Call processing command buttons. (These functions
are described in the following sections.)

Page 76 NDA-30026 Revision 6
JAVA OPERATOR FUNCTIONS Medical Center System Operations Manual - JAVA Edition
Make a Call
Originate a call from this attendant position. Follow the steps below to Make a Call.
1. Use the Directory Assistance feature to select a specific destination for the call.
Select a specific directory type and then select the specific entry, from the di-
rectory listing, for the call destination.
2. Press the ENTER key (or select the F1-Make Call screen command button) to
make a call to the selected destination. View the status of the call in the Call Sta-
tus area at the bottom of the screen.
Transfer a Call
Transfer an incoming call to a destination number. Follow the steps below to
Transfer a call.
1. An incoming source call is answered and any specific source information will
be displayed in the screen Call Source area.
2. Use the Directory Assistance feature to select a specific destination for the call.
Select a directory type and then select the specific entry for the call destination.
3. Press the ENTER key (or select the F2-Transfer screen command button) to
transfer the call to the selected destination. View the status of the call in the Call
Status area at the bottom of the screen.
Transfer Type
Any transfer starts according to the type of transfer shown in the Transfer field area
at the bottom of the screen.
•Direct - The attendant console and screen are automatically released
from the call and cleared of all information concerning the
call.
•Screen - The call must be manually released, joined or cancelled. If the
call is cancelled or joined, the source information will contin-
ue to be displayed until a new source call is received or the
F7-Clear command button is selected.
Select the button in the transfer status area to toggle between these two options as
needed.
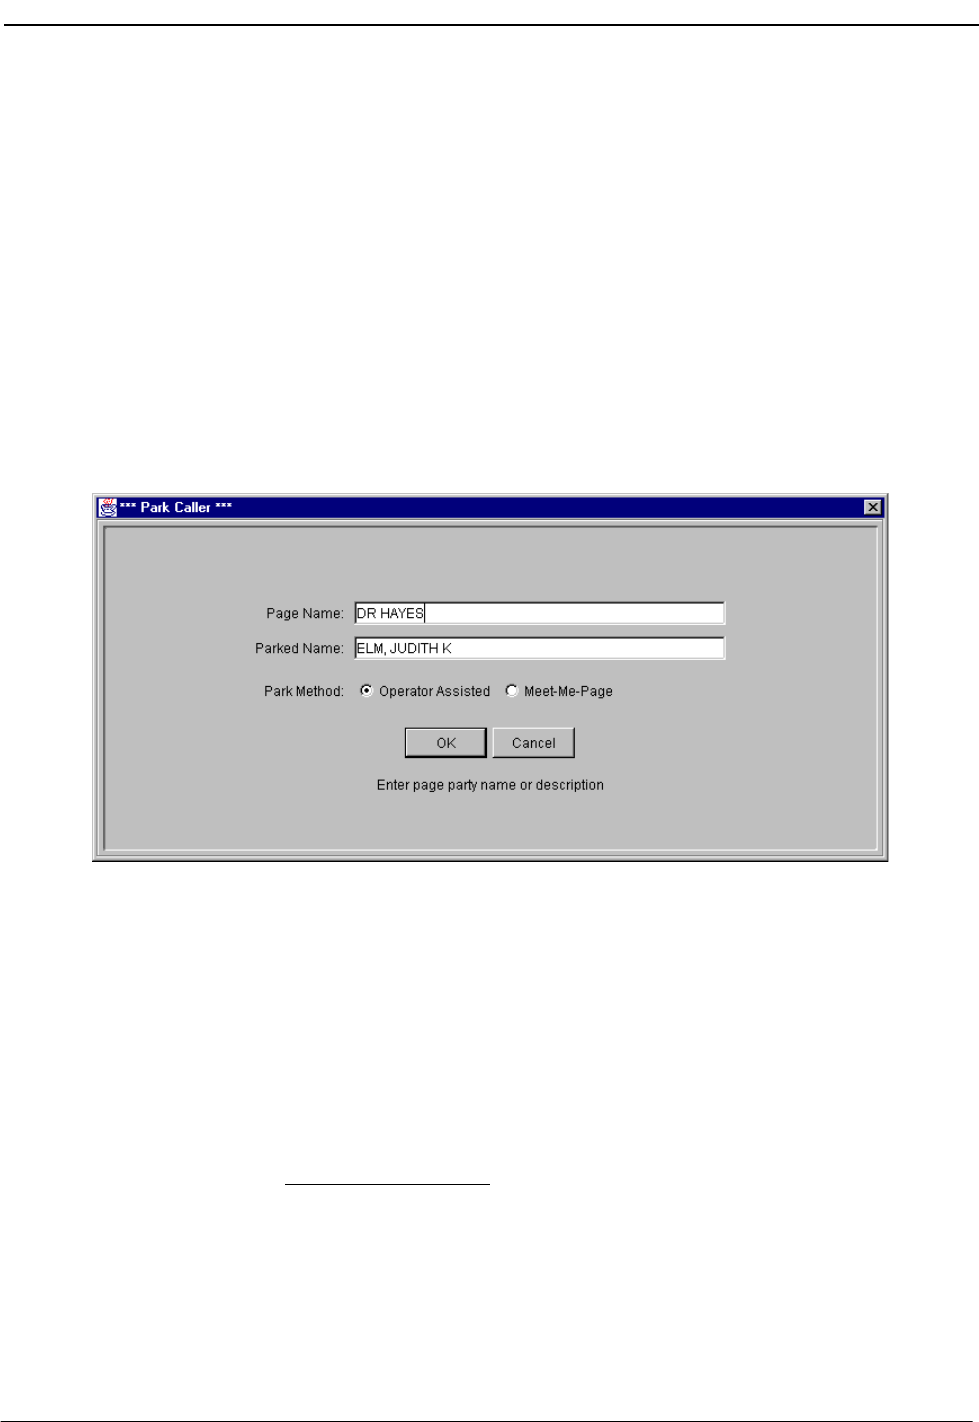
NDA-30026 Revision 6 Page 77
Medical Center System Operations Manual - JAVA Edition JAVA OPERATOR FUNCTIONS
Park a Call
Use the Park command to place a source call on an announcement trunk or a
monitored number queue for paging purposes. Follow the steps below to park a
call.
1. An incoming source call is answered and any specific source information will
be displayed in the screen Call Source area.
2. Select the F3-Park screen command button. The Park Caller window (Figure
5-7) will be displayed.
Note: This Call Park function can be canceled at anytime by pressing the Esc key, or
selecting the Cancel button on the Park Caller window. The source call must still
be processed.
Figure 5-7 Park Caller Window
3. At the Park Caller window, enter the name of the party that will be paged in the
Page Name field. This page name becomes the call identifier in the database.
Press Enter to continue.
4. A name may already be displayed in the Parked Name field. If the source caller
is listed in the database, their name will be displayed here. Press Enter to accept
the displayed name or change the name as needed and then press Enter.
If no name is displayed, a name can be entered or this field can be left blank.
Add a name and press Enter, or press Enter to continue with no name.
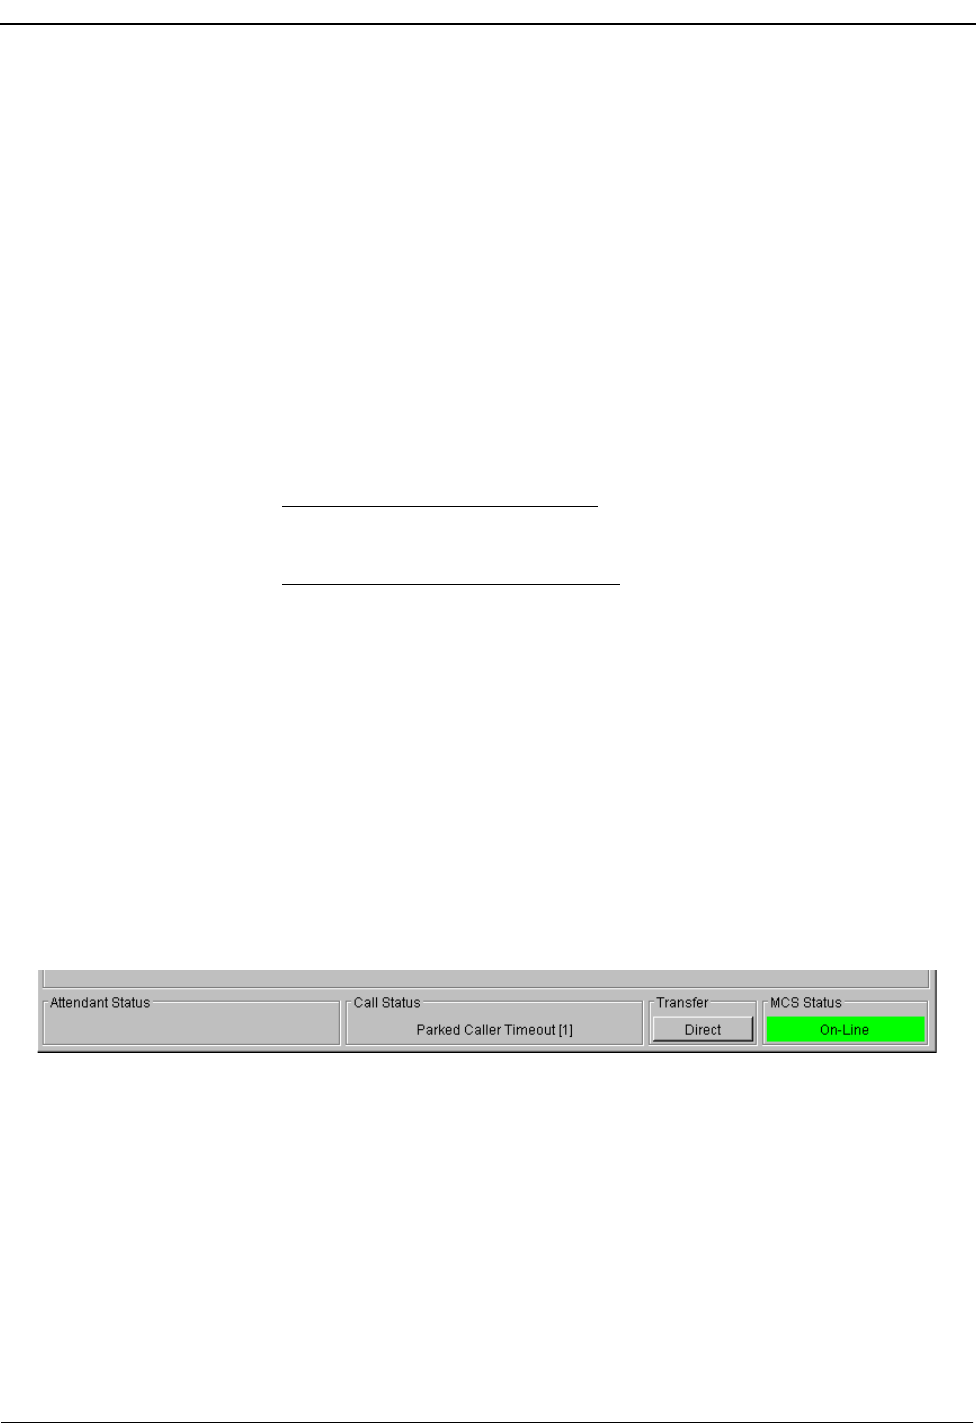
Page 78 NDA-30026 Revision 6
JAVA OPERATOR FUNCTIONS Medical Center System Operations Manual - JAVA Edition
5. The Park Method option shows two methods of parking a call. The Operator
Assist method (default) requires the Paged party to call the attendant. The atten-
dant must find and connect the paged and parked parties manually.
The Meet_Me Page method uses a system station number (Orbit) that the Paged
party must dial to be connected directly with the party being parked. This meth-
od removes the attendant from the park connection process.
Press Enter to select the default method (Operator Assist), or select Meet_Me
Page and press Enter.
6. Select the OK button to park the call. The call is parked and information on the
call is placed in the database.
If Operator Assist method was used, the attendant can now page the party in-
structing them to call the operator, etc.
If the Meet_Me Page method was used, the station (Orbit) number assigned for
this parked call is displayed in the Attendant Status area. The attendant can now
page the party instructing them to call this station (Orbit) number.
Note: This Orbit number is displayed on the Parked Call Retrieval screen (Figure 5-
10). Refer to the later section on Parked Call Retrieval.
Park Recall If the Park Recall feature is configured, the attendant who originally parked a call
is notified when a parked call times out. MCS automatically transfers the parked
call from the monitored number or announcement trunk back to the original
attendant, and beeps the attendant once. A message is displayed in the Call Status
window indicating the time-out (Figure 5-8).
Figure 5-8 Parked Caller Time-out Status
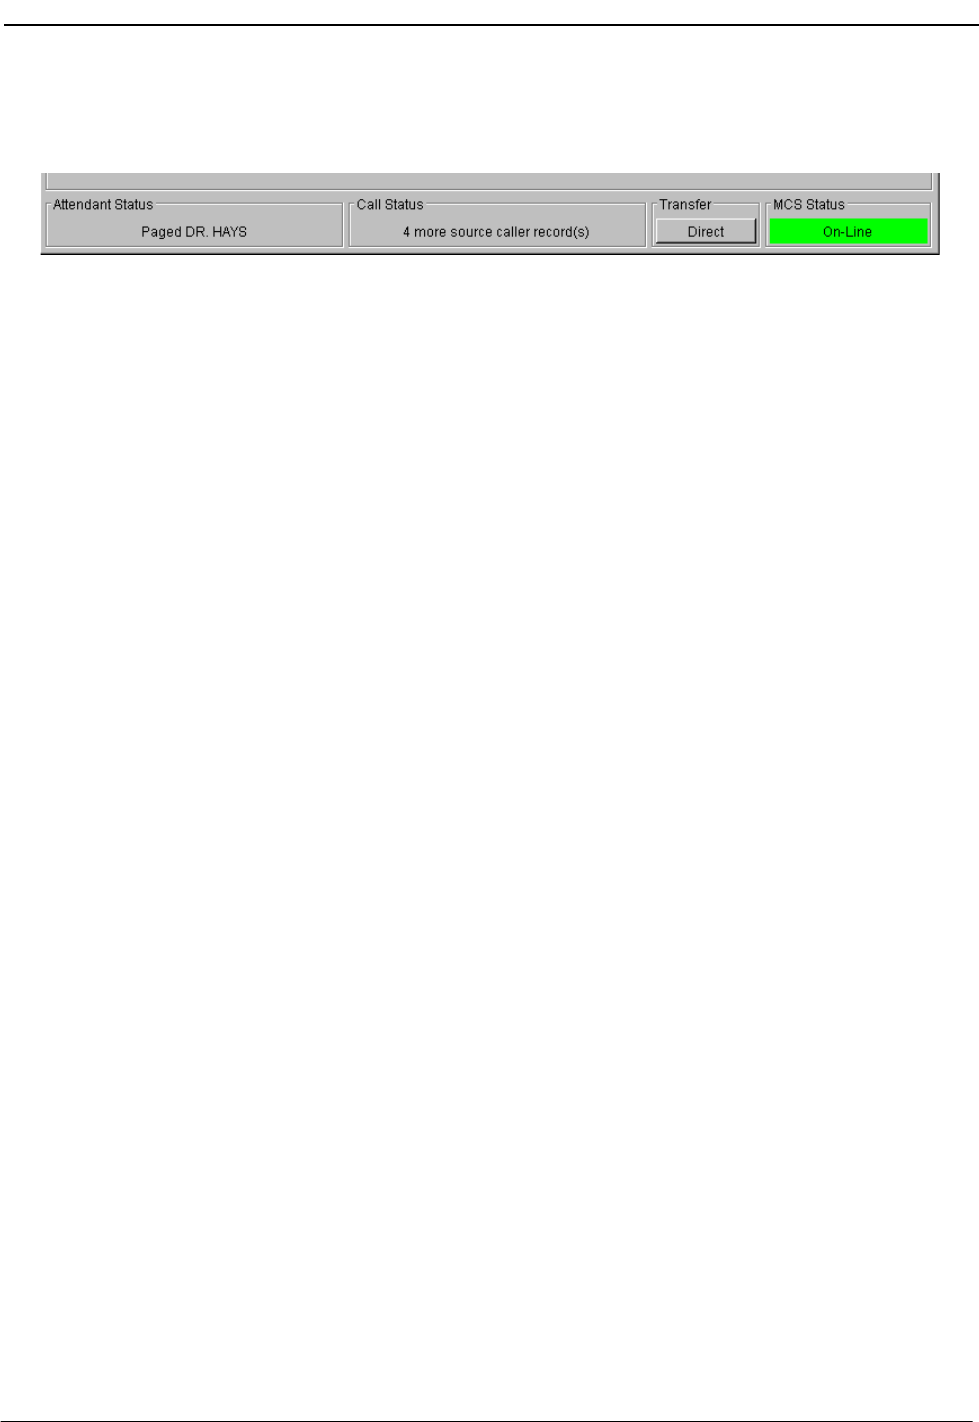
NDA-30026 Revision 6 Page 79
Medical Center System Operations Manual - JAVA Edition JAVA OPERATOR FUNCTIONS
When the call is answered, the Attendant Status window displays a message
showing that it is a recall (Figure 5-9).
Figure 5-9 Answer a Park Recall Status
If another parked call for the same attendant times out during this process, another
beep is sounded and the number in the brackets of the message increases by one.
The calls are returned to the attendant and are answered in a first-come, first-serve
order. The message remains displayed until all timed-out parked calls are answered
or been abandoned. Any other messages displayed in the Call Status window will
temporarily replace the time-out message. However, the time-out message returns
(blinking) when any other messages clear. If the original attendant is no longer on-
line, the next on-line attendant is notified of the timed-out parked call(s).

Page 80 NDA-30026 Revision 6
JAVA OPERATOR FUNCTIONS Medical Center System Operations Manual - JAVA Edition
Retrieve Parked Call
1. To retrieve a previously parked call, select the F-4 Join screen command but-
ton. The Call Destination area will now show a window of all calls currently
parked in the system (Figure 5-10).
Note: This Call Park Retrieve function can be canceled at anytime by pressing the Esc
key, or selecting the F7-Clear screen command button. The source call must still
be processed.
Note: If the operator exits the Call Park Retrieval window using the Esc key, the paged
caller is not released. The release must be done from the attendant console.
Figure 5-10 Parked Call Retrieval Window
This window displays all Parked Caller information including the Paged name,
the name of the Parked caller and the current Status of the parked call. The
Orbit number is the Meet-Me Page station number assigned for the parked call.
The Release Time shows the time that the source caller abandoned the call, the
Duration indicates how long the call has been parked, and the Parked By field
shows which attendant originally parked the call.

NDA-30026 Revision 6 Page 81
Medical Center System Operations Manual - JAVA Edition JAVA OPERATOR FUNCTIONS
2. From the window, select the specific parked call to retrieve (or enter a name in
the Paged Name query field at the bottom of the Parked Call window to select
the call) and press Enter. The parked call will be transferred to the attendant.
The parked call status will now show talking to the attendant. The attendant can
now process the call as needed.
Retrieve from Idle
Screen The procedure for retrieving a parked call from an idle screen (no incoming call) is
the same as from a screen displaying source caller information on an incoming call.
However, after the operator presses Enter, the caller is routed to either the
attendant requesting the parked caller retrieve or to the priority key, depending
upon how MCS was configured during installation. The attendant then answers the
call.
Park Call Abandon If a call is abandoned while it is parked, it still appears in the list of parked calls for
a preset amount of time. The display window of parked calls will show a time
notation in the Release Time field that shows when the party abandoned the call,
and the Status field will display Abandoned. MCS automatically removes the call
listing from the display after a preset time-out. As long as the window is displayed,
the deleted call remains on the list. The abandoned call will be cleared when the
display is cleared back to the directory.
With the Meet_Me Page park method, the paged party will be connected with the
operator if the parked party abandons before being connected with the paged party.
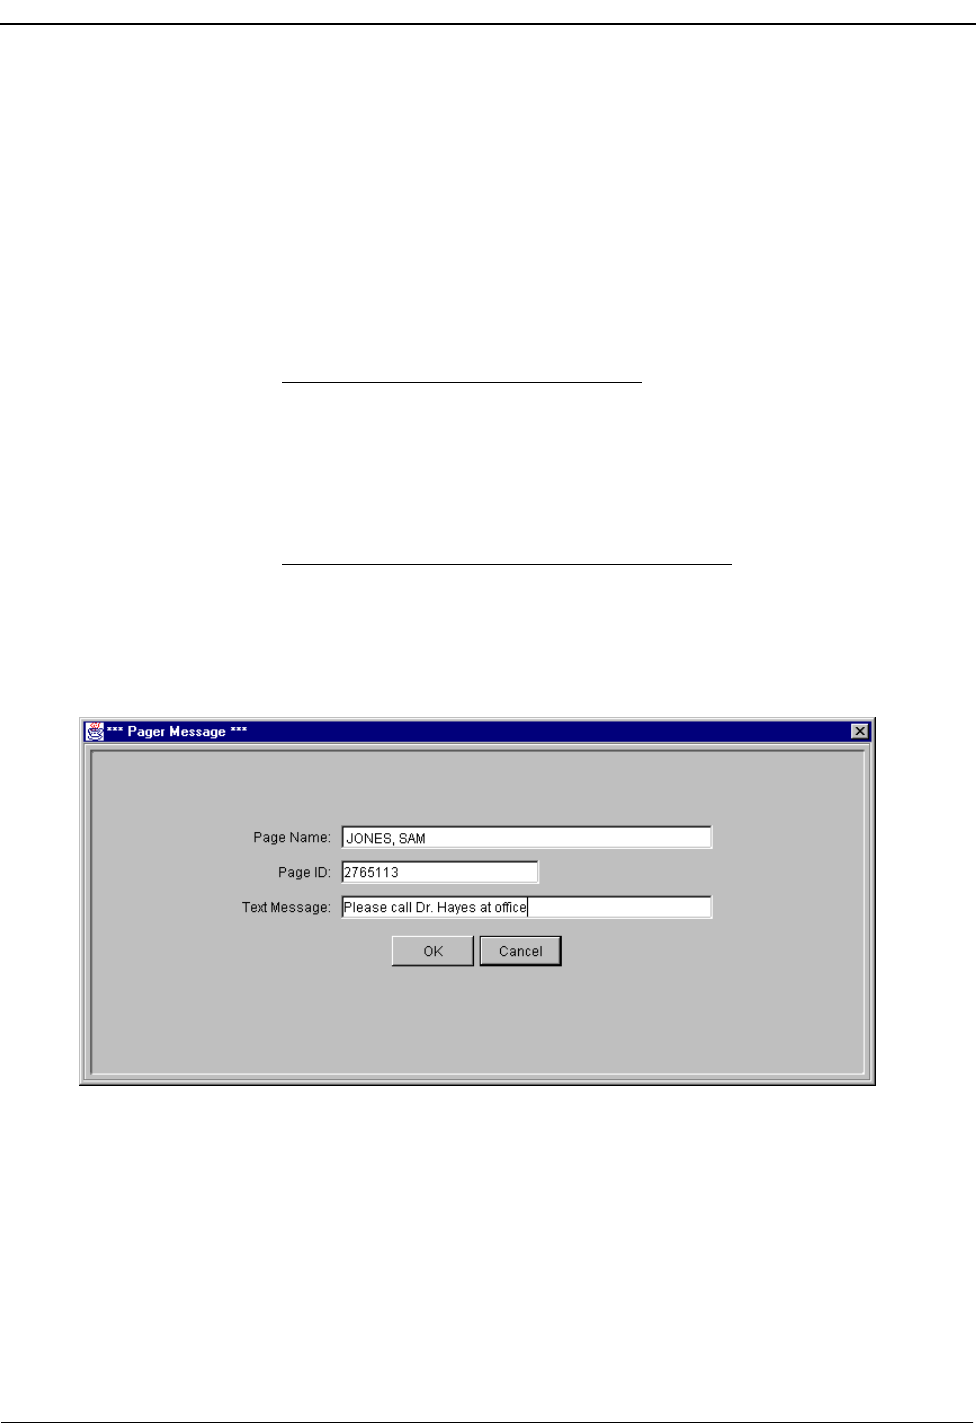
Page 82 NDA-30026 Revision 6
JAVA OPERATOR FUNCTIONS Medical Center System Operations Manual - JAVA Edition
Call a Beeper
Use the Beeper command to place a call to a specified beeper (pager) number. This
function allows alpha-numeric message input for a pager. Follow the steps below
to call a beeper.
1. Use the Directory Assistance feature to select a specific destination entry to
beep. Select the directory type and then select the specific entry for the person
to beep.
2. With a destination selected, select the F6-Beeper screen command button.
If the selected destination has a Beeper #, a Make Call operation will place a
call to the Beeper # (phone #) if the attendant console is idle. If the attendant has
received a caller, a Transfer operation will be initiated to transfer the caller to
the Beeper #. (If the attendant console is off-line, the call must be dialed manu-
ally. This manual dial status will be displayed in the Call Status area at the bot-
tom of the screen.)
If the selected destination does not have a Beeper #, but only has a Beeper ID,
the Pager Message window (Figure 5-11) will be displayed.
Note: This Beeper function can be canceled at anytime by pressing the Esc key, or se-
lecting the Cancel button on the Pager Message window.
Figure 5-11 Beeper Function Window
3. From the Pager Message window, a text message can be entered in the Text Mes-
sage field. This message will display on a text messaging pager.
4. Select the OK button to make the call to the selected beeper/pager.

NDA-30026 Revision 6 Page 83
Medical Center System Operations Manual - JAVA Edition JAVA OPERATOR FUNCTIONS
Redial
Use the Redial command to place a call to the last caller received by the attendant.
JAVA MCS maintains a record of the last incoming call for this purpose. An
attendant can activate the Redial function anytime the attendant station is idle (not
connected with a caller). Follow the steps below:
1. Select the F6-Redial screen command button. A call will be placed from the at-
tendant to the last call received by this attendant.
If the called extension is busy or the attendant console is connected with another
party when this function is selected, the call operation fails, and an error mes-
sage will be displayed in the Call Status area.
2. Communicate with the last caller as needed.

JAVA OPERATOR FUNCTIONS Medical Center System Operations Manual - JAVA Edition
Page 84 NDA-30026 Revision 6
This Page Left Blank.
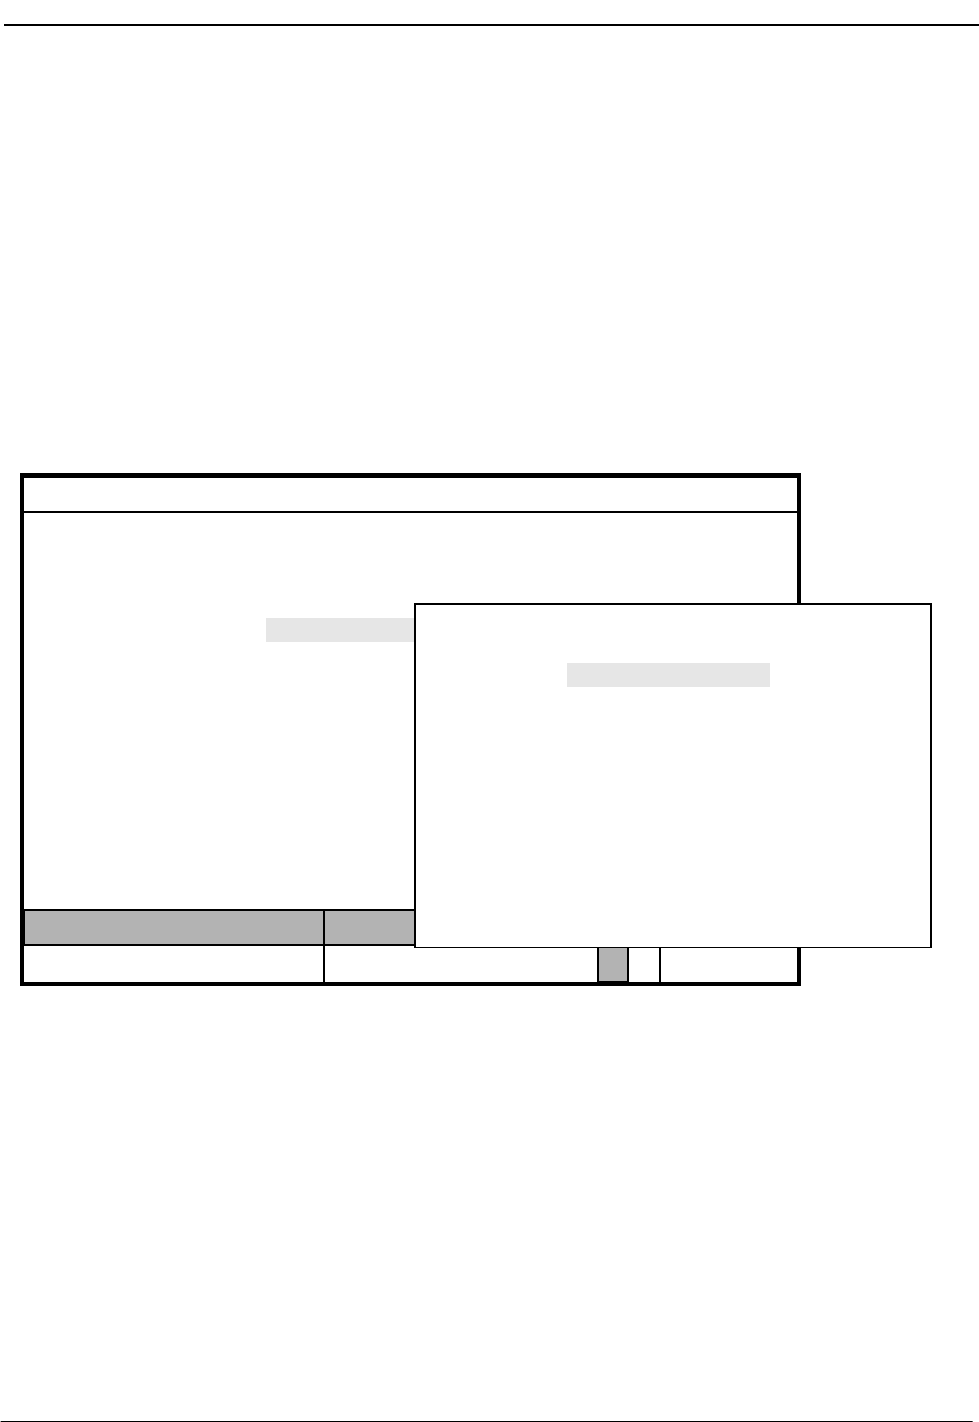
NDA-30026 Revision 6 Page 85
Medical Center System Operations Manual - JAVA Edition DATABASE ADMINISTRATION
Chapter 6 DATABASE ADMINISTRATION
Introduction
Use the Database Administration option on the Main Menu to add, modify,
delete, view, and/or print MCS database records.
Note: Before extensions can be entered to the database records through this option, the
extensions must be inserted into MCS through the Main Menu System Adminis-
tration option. (Refer to Chapter 7 SYSTEM ADMINISTRATION, RCS Descrip-
tions for more details.)
Figure 6-1 Database Administration
Types of Database
Records The MCS Database Maintenance menu reflects the different kinds of records with
which MCS provides the variety of data used by the operator during call
processing. In response to operator activity, MCS pulls records from the database
to display source caller data, results of Directory Assistance searches, and
expanded versions of displayed items. To accommodate this data, the database
contains different types of records. For instance, the data entered and stored for
patients differs from the data entered and stored for physicians or for hospital
services.
MCS Status
Attendant Status
Medical Center System
Call Status Trnfr
S
Supervisor Tue Aug 17 09:02 am
D
*** Main Menu ***
System Administration
Configuration Management
Login Name Maintenance
Quit
Arrow keys to move cursor, <Enter> to select, <Esc> to quit
Supervisor Reports
Operator Functions
Database Administration
(1)
(2)
*** MCS Database Maintenance ***
Patients
Physicians
Employees
Attendant Stations
Other Internal Extensions
Tests/Procedures
External Numbers
Trunk Numbers
Beeper Codes
Emergencies
Quit
Arrow keys to move cursor, <Enter> to select, <Esc> to quit
Off-line

Page 86 NDA-30026 Revision 6
DATABASE ADMINISTRATION Medical Center System Operations Manual - JAVA Edition
Procedures The steps by which data is entered, deleted, changed, viewed, and/or printed are the
same regardless of what kind of data is being handled. The fields and expected
entries differ, but the procedures are the same. Note slight differences, such as
patients are admitted (using the Admit command), whereas all other types of
records are added (using the Add command). This chapter provides steps for
handling the data in the database in this section and then describes the different
types of records that the database can contain in Database Procedures on page 88.
Extension
Assignments Internal hospital extensions must first be assigned through the Extension
Maintenance option before patient, physician, employee, and other assignments
can be made to them. (See Chapter 7 SYSTEM ADMINISTRATION, RCS Descriptions
for more information on assigning internal hospital extensions.) Extension
Maintenance records identify the internal extensions that have been assigned on the
PBX Maintenance Administration Terminal (MAT) by the type of phone (e.g.,
patient room, nursing station, or attendant console), their location, and, for some,
their default restriction class.
Although MCS assignments to the extensions may change (i.e., patients,
employees, etc.), changes to these basic Extension Maintenance records should be
rare and probably required only by changes that are made at the MAT.
View Command A View command makes it possible to display a selection, or range, of records. A
beginning pattern and an ending pattern specify the range. The pattern can be either
a partial or full entry of a number or word, according to the type of record selected
from the MCS Database Maintenance menu. When you select the View command,
a pop-up window prompts for the key by which the records are to be retrieved and
displayed.
Menu Access The Supervisor is always authorized to enter this menu option. An Operator can
enter it only if access is authorized through the Configuration Management
option on the Main Menu.

NDA-30026 Revision 6 Page 87
Medical Center System Operations Manual DATABASE ADMINISTRATION
Screen
Samples Figure 4-2 shows several of the database records for which the procedures on the
following pages apply:
Figure 6-2 Record Field and Command Line Samples
Database Entry
and Exit
Procedure
*** Patients ***
Name:
Account Number:
Room Number:
Bed Number:
DID Number:
Age:
Sex:
Address:
City:
State:
Visitors:
Phone Service:
Special:
Comment:
Admit Discharge Modify View Print Quit
*** Physicians ***
Name:
Beeper Number:
Office Phone Number:
Note:
Specialty:
Associate Name:
Associate Phone Number:
Car Phone Number:
Home Phone Number:
Add Delete Modify View
*** Tests/Procedures ***
Name:
Extension:
Note:
Comment:
Comment:
Add Delete Modify
*** Emergencies ***
Name:
Extension:
Alternate Extension:
Advice:
Add Delete Modify View Print Quit
Action Result
On the MCS Main Menu, type d to select
the Database Administration option. The MCS Database Maintenance menu
displays the types of database records.
To select the desired type of database
record, type the highlighted letter.
Note: In most cases, the highlighted letter is
the first letter of the word. When the
word begins with a letter that has
been used before, the second or even
third letter may be highlighted.
The fields of the selected record type and a
new command line display. (Figure 6-2)
Refer to the following pages for
descriptions of each function provided by
the new command line.
To exit the MCS Database Maintenance
menu, type q (quit). The MCS Main Menu displays.
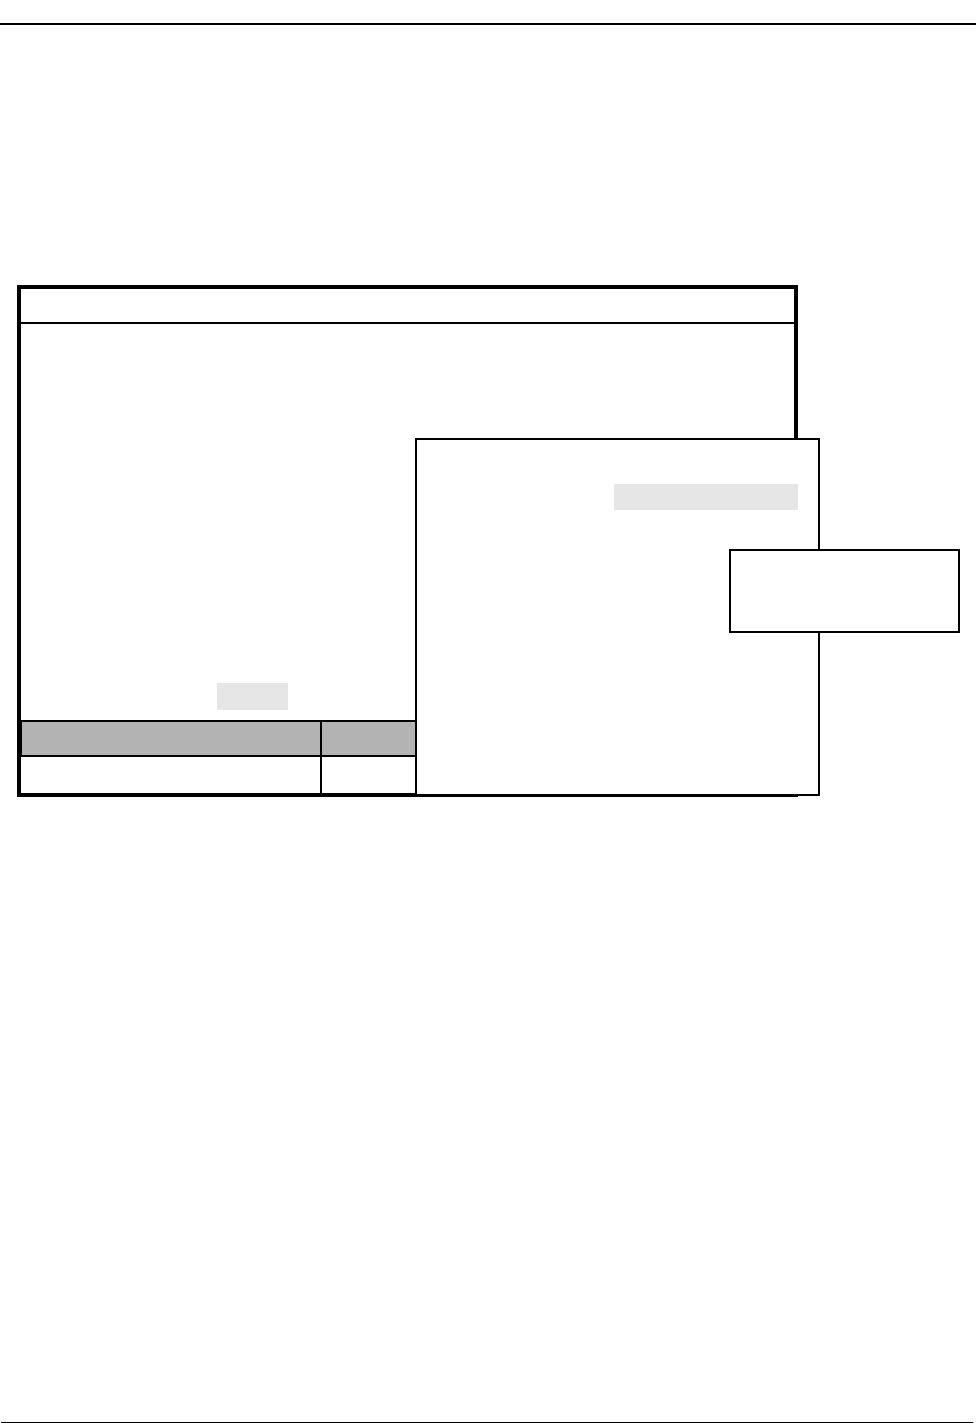
Page 88 NDA-30026 Revision 6
DATABASE ADMINISTRATION Medical Center System Operations Manual - JAVA Edition
Database Procedures
Add a Record /
Admit a Patient Use this procedure to add a new record of the type selected or to admit a new
patient to the database.
Figure 6-3 Add a Record/Admit a Patient
Effect of Data Entry
Patient admissions occur immediately and are stamped with the current date. If a
patient is admitted with a DID number, this number is turned on as soon as the data
entered to these screens is saved.
Pop-up Windows
On several record types, after identification of the room/bed and/or extension
number, a pop-up window displays data that has previously been assigned to the
extension number through the Extension Maintenance option on the MCS System
Administration menu. This data is for display only; it cannot be changed through
any action in these database screens.
Empty Fields
Not all of the fields in a record require an entry. However, the record is considered
complete only when you press Enter in every field, regardless of whether or not
you have made an entry in that field. Pressing the Esc key before completing a full
record erases any data entered up to that point.
Name:
MCS Status
Attendant Status
Medical Center System
Call Status Trnfr
S
Supervisor Tue Aug 17 09:02 am
D
*** Patients ***
Account Number:
Room Number:
Bed Number:
DID Number:
Age:
Sex:
Address:
City:
State:
Visitors:
Phone Service:
Special:
Comment:
Admit Discharge Modify View Print
Extension:
(1)
(2)
Enter (Esc) to return to command line
5062
Nursing Unit: A1
Nurse Station: 5000
Name:
Account Number:
Room Number:
Bed Number:
DID Number:
Age:
Sex:
Address:
City:
State:
Visitors:
Phone Service:
Special:
Comment:
*** Patients ***

NDA-30026 Revision 6 Page 89
Medical Center System Operations Manual DATABASE ADMINISTRATION
Manual Entry
Patient data is usually obtained when the patient is admitted to the hospital and sent to
the MCS database from the Hospital Data System (HIS). Use this menu option when
patient data must be added manually to the database.
Error Message
If any error occurs while attempting to add the new record to the database, an error
message appears in the Attendant Status window.
Procedure
Action Result
Type a to select the Add (or Admit, if
adding a patient record) command. The first field highlights for data entry. (2)
Type data into each field, according to the
field definitions in Database Procedures on
page 88, and press Enter after each entry.
(In fields that provide choices, use the space
bar to toggle among the options.)
The message “Do you want to insert this?
(Y/N)” displays.
Type Y and press Enter to confirm the
addition. Type N and press Enter to cancel
it.
If the addition is confirmed, the word
“Inserted” displays under Attendant Status.
“Record not inserted” displays if the
addition was cancelled. The cursor is
positioned on the command line.
Type q (quit) to exit a particular type of
record. The MCS Database Maintenance menu of
record types displays.
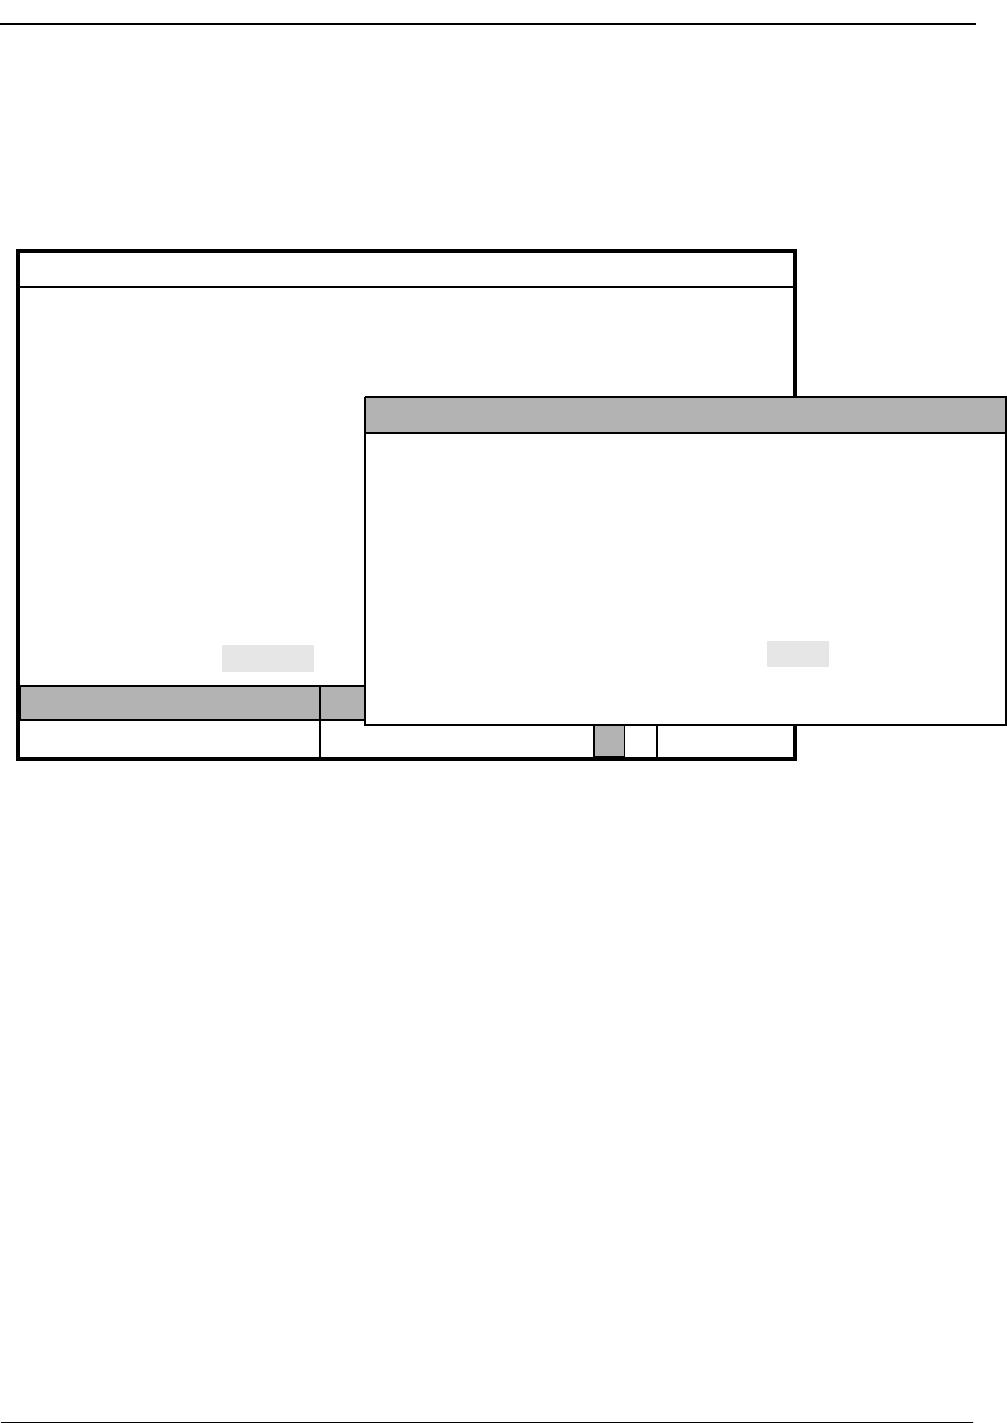
Page 90 NDA-30026 Revision 6
DATABASE ADMINISTRATION Medical Center System Operations Manual - JAVA Edition
Delete a Record/
Discharge a
Patient
Use this procedure to delete a record of the type selected or to discharge a patient
from the database.
Figure 6-4 Delete a Record/Discharge a Patient
Effect of Discharge on DID
When a patient with a DID number is discharged, MCS notifies the PBX to route
that DID number to the configured discharged patient as configured in Chapter 8
CONFIGURATION MANAGEMENT. After the discharge time has expired, the
record will be removed from the database.
Error Messages
An error message appears in the Attendant Status window if any error occurs while
attempting to add the new record to the database.
Service Unavailable
If an attempt to change a DID number to the configured destination or to change
the patient’s extension from having phone service to not having phone service is
unsuccessful, the message “Service Unavailable” appears in the Attendant Status
Window. This message shows that the PBX did not receive the change. The
unsuccessful change is recorded in the Outstanding RSC or DID database.
Name:
MCS Status
Attendant Status
Medical Center System
Call Status Trnfr
S
Supervisor Tue Aug 17 09:02 am
D
*** Patients ***
Account Number:
Room Number:
Bed Number:
DID Number:
Age:
Sex:
Address:
City:
State:
Visitors:
Phone Service:
Special:
Comment:
Admit Discharge Modify View Print
Off-line
Enter Name or Number:
<Enter> to search, <Esc> to return to command line
(1)
(2)
Name Ext Unit Room Bed Age Sx Adm Dsch

NDA-30026 Revision 6 Page 91
Medical Center System Operations Manual DATABASE ADMINISTRATION
Procedure
Action Result
Type d to select the Delete (or Discharge if
deleting a patient record) command. (1) A name or number entry field displays at
the bottom of the screen, and a highlighted
heading displays at the top of the screen. (2)
Type part or all of the name or number and
press Enter. To display all the matching
records, press Enter on the blank entry
field.
All of the matching names or numbers in
the database display.
Using the arrow keys, move the highlight to
the desired name or number and press
Enter.
The field entries display. The message “Do
you want to delete this? (Y/N)” displays
below.
Type Y and press Enter to confirm the
deletion/discharge. Type N and press Enter
to cancel it.
If deletion is confirmed, the word
“Modified” displays under Attendant
Status. “Not deleted” or “Not discharged”
displays if the deletion/discharge was
cancelled. The cursor is positioned on the
command line.
Type q (quit) to exit a particular type of
record. The MCS Database Maintenance menu of
record types displays.
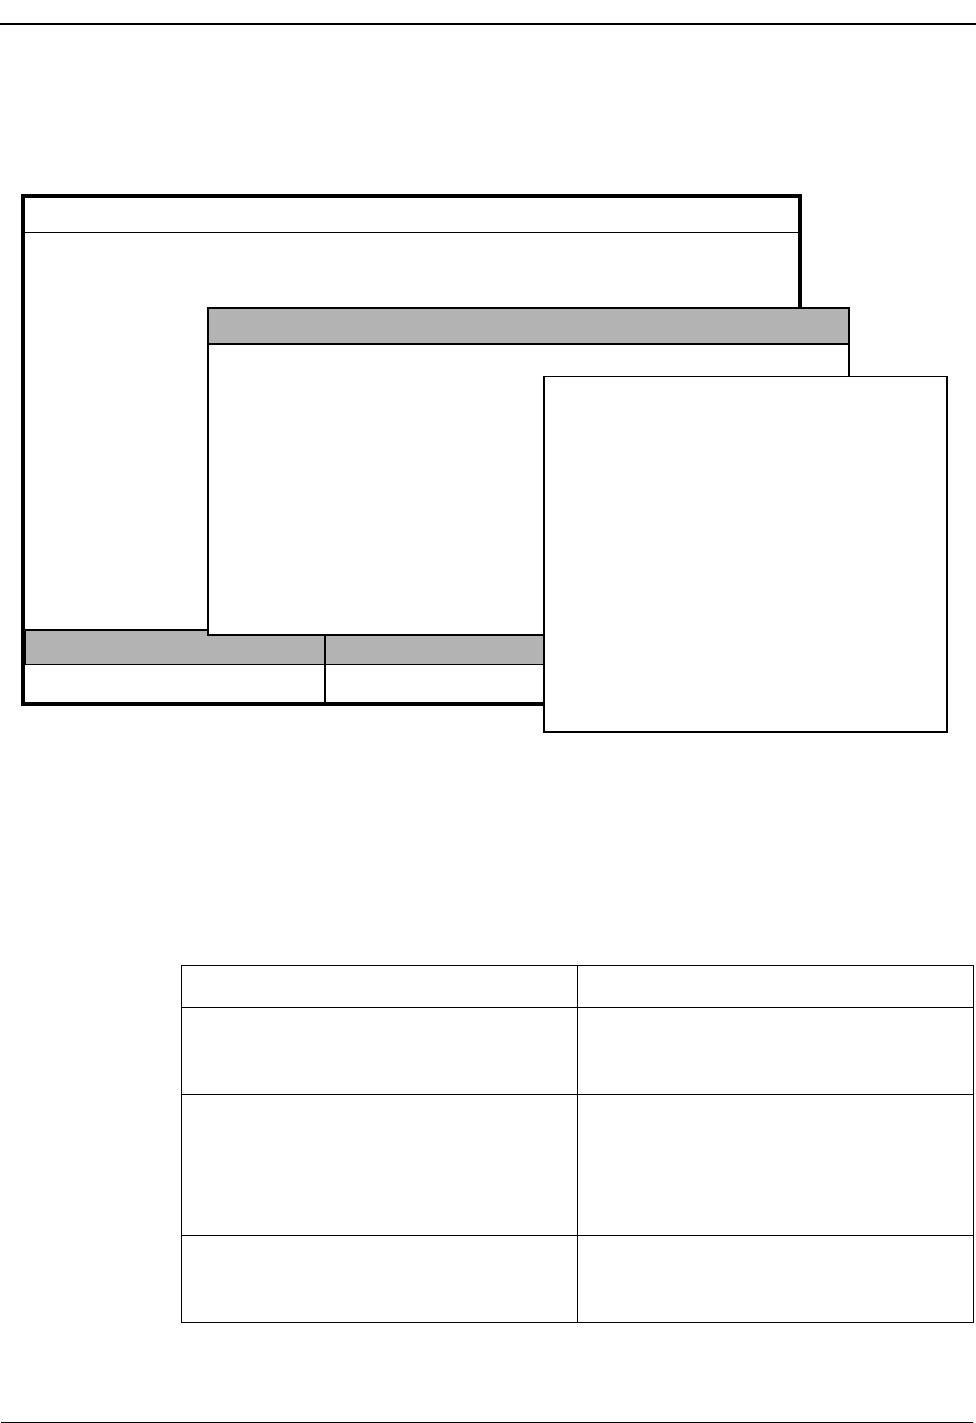
Page 92 NDA-30026 Revision 6
DATABASE ADMINISTRATION Medical Center System Operations Manual - JAVA Edition
Modify a Record Use this procedure to make changes to the field entries of a particular database
record.
Figure 6-5 Modify a Record
External Numbers
To modify or search for external numbers, enter them exactly as they appear in the
database, including parentheses and dashes.
Procedure
Name:
MCS Status
Attendant Status
Medical Center System
Call Status Trnfr
S
Supervisor Tue Aug 17 09:02 am
D
*** Patients ***
Room:
Bed Number (0-2):
Account Number:
DID Number:
Age:
Sex:
Address:
City:
State:
Visitors:
Phone Service:
Comment:
Special:
Admit Discharge Modify View Print
Off-line
Enter Name or Number:
<Enter> to search, <Esc> to return to command line
(1)
(2)
Name Ext Unit Room Bed Age Sx Adm Dsch
Enter (Esc) to return to command line
Name:
Account Number:
Room Number:
Bed Number:
DID Number:
Age:
Sex:
Address:
City:
State:
Visitors:
Phone Service:
Special:
Comment:
*** Patients ***
Atherby, Jim
29813-003
138
2
51210
39
M
724 Harwild Drive
Belair
North Dakota
Yes
None
(3)
Action Result
Type m to select the Modify command. (1) A name or number entry field displays at
the bottom of the screen, and a highlighted
heading displays at the top of the screen. (2)
Type part or all of the name or number of
the record to be changed and press Enter.
To display all names or numbers, press
Enter when the blank entry field is
highlighted.
All the matching names or numbers in the
database display.
Using the arrow keys, move the highlight to
the desired name or number and press
Enter.
The contents of the selected record display.
(3)

NDA-30026 Revision 6 Page 93
Medical Center System Operations Manual DATABASE ADMINISTRATION
Action Result
Use the arrow keys to move among the
fields, the backspace key to erase existing
data, and the space bar to toggle among
options within a field. Type new data where
required and press Enter after each entry.
The message “Do you want to save
changes? (Y/N)” displays.
Type Y and press Enter to save the change.
Type N and press Enter to cancel it. If the save is confirmed, the word
“Modified” displays under Attendant
Status. “Record not modified” displays if
the modification was cancelled. The cursor
is positioned on the command line.
Type q (quit) to exit a particular type of
record. The MCS Database Maintenance menu of
record types displays.
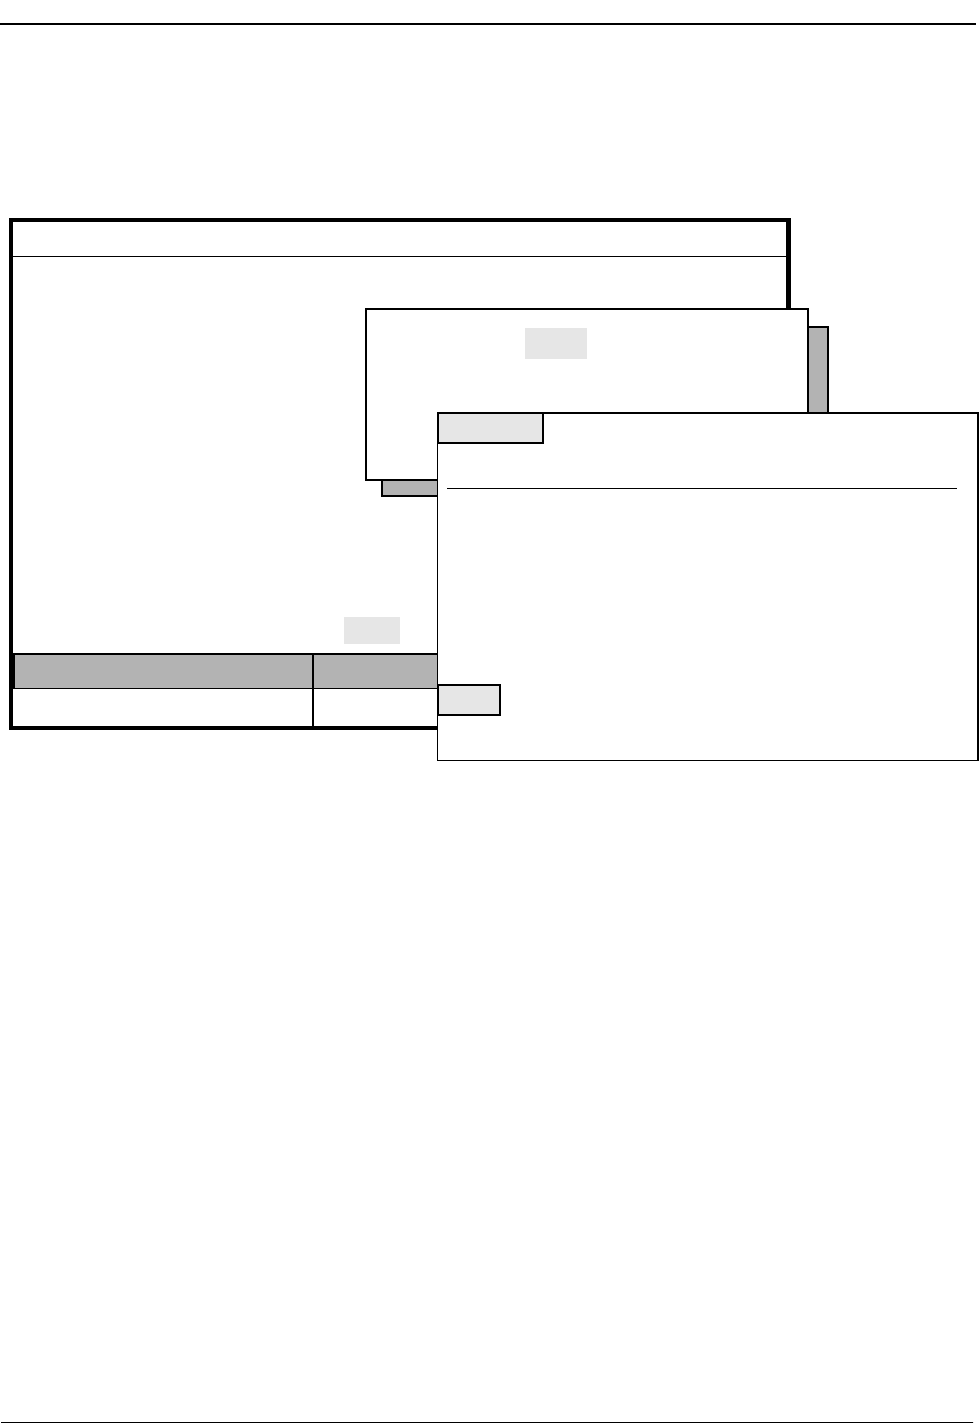
Page 94 NDA-30026 Revision 6
DATABASE ADMINISTRATION Medical Center System Operations Manual - JAVA Edition
View Database
Records Use this procedure to display selected database records for on-screen viewing or
printing.
Figure 6-6 View Database Records
Range Values
The first digit of the beginning value must be smaller than the first digit of the
ending search value when specifying the range of records to be viewed. For
instance, if you enter 41 as the beginning value and 299 as the ending value, the
search will fail because 4 is greater than 2.
Name:
MCS Status
Attendant Status
Medical Center System
Call Status Trnfr
S
Supervisor Tue Aug 17 09:02 am
D
*** Patients ***
Account Number:
Room Number:
Bed Number:
DID Number:
Age:
Sex:
Address:
City:
State:
Visitors:
Phone Service:
Special:
Comment:
Admit Discharge Modify View Print
Off-line
(1)
(2)
(3)
Key: Name Room
Starting Key:
Ending Key:
<Enter> to begin, <Esc> to Return to Command LIne
Top of File *** Patients ***
Destination Name Ext Unit Rm Bd Age Sx Admt Dschr
Robertson, Shirley 2301 2E 225 1 49 F 08-15
Visitors: Yes
Account Number:
Nurse Station:
DID Number:
Phone Service:
Comment:
Special:
Robertson, Thomas 2285 4S 429 2 35 M 08-17
Visitors:
More
DownPage UpPage Search Top Bottom Print Quit
910893783
2100
7171
Local Calls Only
Does not want flowers in room.
Yes
Address: 123 Street Ct., Irving, TX

NDA-30026 Revision 6 Page 95
Medical Center System Operations Manual DATABASE ADMINISTRATION
Procedure
Action Result
Type v to select the View command. (1) A window prompts for the key used to
search the database and the beginning and
ending pattern of records to be displayed.
(2)
To show the range of records to be viewed,
type the first record value and press Enter,
and type the last value and press Enter.
All records within the range shown are
displayed. (3)
Use the DownPage command to move
forward one page, the UpPage command to
move back one page, the Top command to
move to the beginning of the display, and
the Bottom command to move to the end of
the display.
Search the Display: Type s to select the
Search command. At the prompt, type the
desired pattern and press Enter.
Print the Display: Type p to select the Print
command. At the prompt, type f to print the
whole file or s to print the screen and press
Enter.
All occurrences of the given pattern on that
page highlight.
There is a pause while the material is sent to
the printer. Then, the command line is
returned.
To exit the display, type q (quit). The data entry screen of the current record
type displays again, and the cursor is
positioned on the command line.
Type q (quit) to exit a particular type of
record. The MCS Database Maintenance menu
displays.
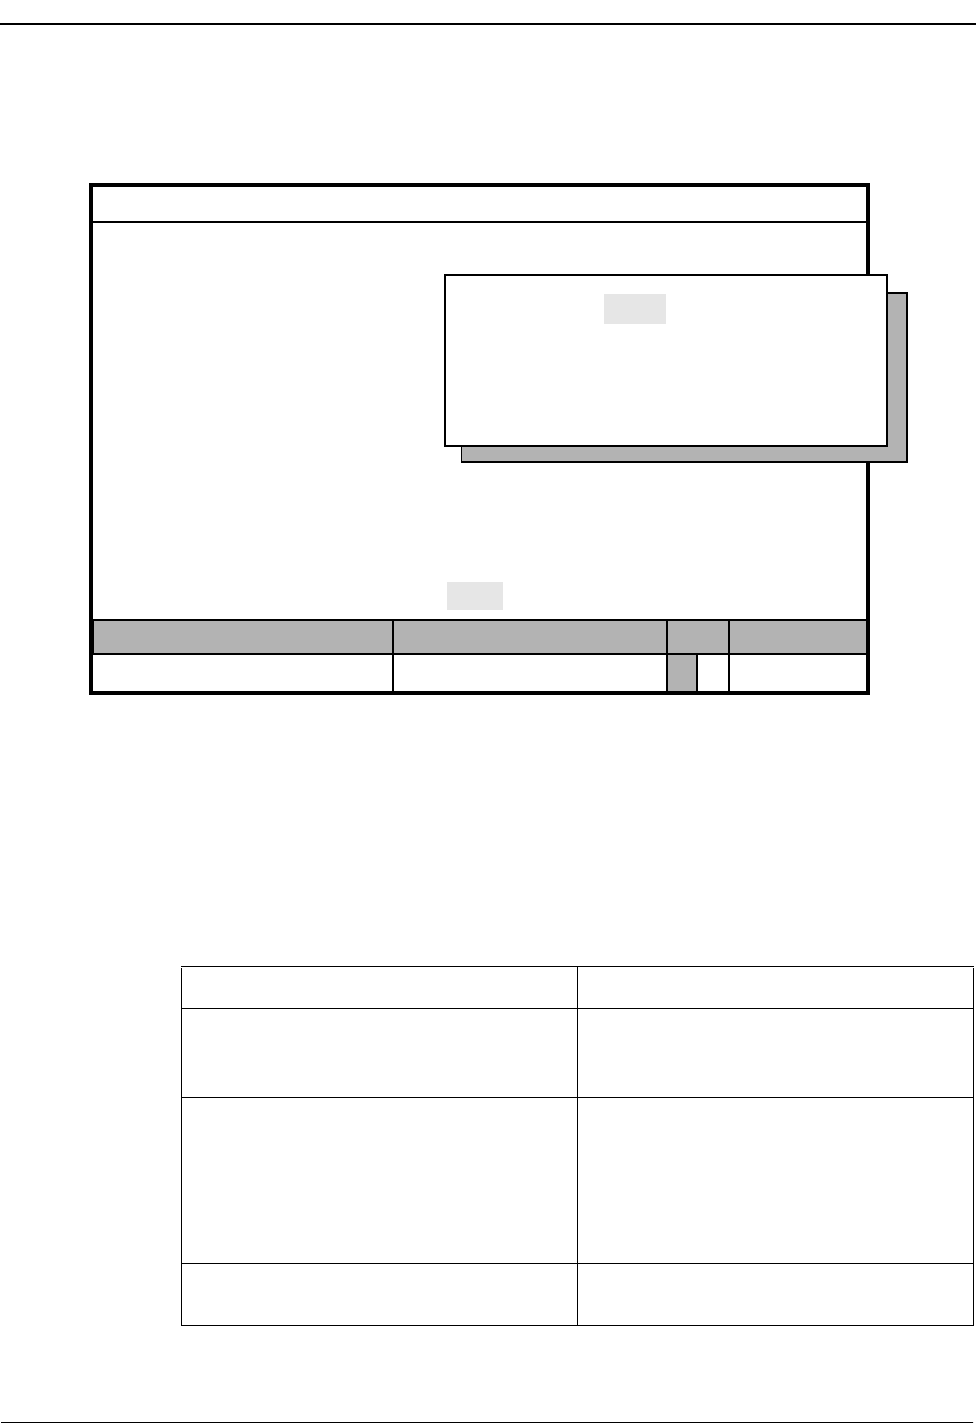
Page 96 NDA-30026 Revision 6
DATABASE ADMINISTRATION Medical Center System Operations Manual - JAVA Edition
Print Database
Records Use this procedure to print all or part of the records of a selected type.
Figure 6-7 Print Database Records
Range Values
The first digit of the beginning value must be smaller than the first digit of the
ending value when specifying the range of records to be printed. For instance, if
you enter 41 as the beginning value and 299 as the ending value, the search will fail
because 4 is greater than 2.
Procedure
Name:
MCS Status
Attendant Status
Medical Center System
Call Status Trnfr
S
Supervisor Tue Aug 17 09:02 am
D
*** Patients ***
Account Number:
Room Number:
Bed Number:
DID Number:
Age:
Sex:
Address:
City:
State:
Visitors:
Phone Service:
Special:
Comment:
Admit Discharge Modify View Print Quit
Off-line
Key: Name Room
Starting Key:
Ending Key:
<Enter> to begin, <Esc> to Return to Command LIne
Action Result
Type p to select the Print command. (1) A window displays prompts for the search
key and the starting and ending values, or
keys, for the search range.
Using the space bar, toggle between the
displayed keys. Press Enter to select the
desired key. To show the range of records to
be printed, type the first record value and
press Enter, and type the last value and
press Enter.
All records within the range shown are sent
to the printer and the cursor is positioned on
the command line.
Type q (quit) to exit a particular type of
record. The MCS Database Maintenance menu of
record types displays.

NDA-30026 Revision 6 Page 97
Medical Center System Operations Manual DATABASE ADMINISTRATION
Database Record Descriptions
The kinds of records that can be accessed through the MCS Database Maintenance
menu are listed below. Also listed are field definitions and the additional data displayed
in a pop-up window from related assignments through the Extension Maintenance
option.
Patients Normally, patient data comes from the Hospital Information System (HIS) and is added
to the system when the patient is admitted. However, patient information can be added
manually to the database using this record type, if required. Select the Patient option
to display the following fields for data entry:
Name A 30-character, unique patient name, generally in the
form last, first initial.
Room The four-digit number of the room to which the patient
has been assigned. The first character must be numeric if
Directory Assistance searches by room number are to be
made available through Operator Functions.
Bed The one-digit number of the bed in the room to which the
patient has been assigned. Valid values: A-Z, 0-9.
Note: After data is entered in these first three fields, a pop-up window displays the following
data that has been assigned through the Extension Maintenance option:
Extension - The phone extension associated with the assigned room and bed.
Unit - The medical unit in which the assigned room is located.
Nurse Station - The extension of the nursing station that is responsible for the room.
Account No. The patient’s account number, consisting of up to ten
characters. This number must be unique.
DID Number The five-digit Direct Inward Dialing number used for
calling the patient directly from outside the hospital
without going through the operator.
Age The three-digit age of the patient. If the patient is months
or days old, the third character is either an m or a d
respectively (e.g., 100, 30, 12m, 1d). An entry is required
in this field.
Sex The gender of the patient. Use the space bar to toggle
between M(ale) and F(emale). The default is M.
Address The street address of the patient, up to 30 alphanumeric
characters.
City The city in which the patient lives, up to 15 alphanumeric
characters.
State The two-character abbreviation of the state in which the
patient lives.

Page 98 NDA-30026 Revision 6
DATABASE ADMINISTRATION Medical Center System Operations Manual - JAVA Edition
Visitors An entry that indicates whether the patient is
accepting visitors. Use the space bar to toggle
between the two options: yes and no. The default is
Yes.
Phone Service A choice between the entries made to the Restriction
for Patients with no Srv and the Restriction for
Patient Phone Service fields in the Configuration
Management option on the MCS Main Menu. Use the
space bar to toggle between the two options.
Comment An open field consisting of up to 40 characters for any
required patient information.
Special One of the following reasons why calls to this patient
should not be attempted. (Use arrow keys or the space
bar to move among options, and press Enter to accept
the selection.)
Not Applicable–Does not apply to this patient; calls
are permitted.
Confidential –The patient does not want others to
know he/she is there.
No Phone Service–The patient has not contracted for
phone service.
Deceased –The patient is deceased.
Physicians Select the Physician option to display the following fields for data entry:
Name A 30-character physician’s name.
Pager Dial Number The number for the long-distance pocket pager carried by
the physician listed in the Name field. This number is
dialed when the operator selects this entry from the
Beeper function. The outgoing trunk access code
must be included. This number contain up to 15 digits.
Pager ID The logical or local pager ID number for the pager device
assigned to the individual or group. Use the word
None if a local pager ID number is not available.
Office Phone The office telephone number for the physician listed in the
Name field, up to 15 digits.
Note A 15-character area for data displayed under Operator
Functions for this physician when the Directory
Assistance feature is used (e.g., the hours at which the
physician can be reached at the office phone number).
Specialty The primary area of medicine in which this physician
practices, up to 10 characters.

NDA-30026 Revision 6 Page 99
Medical Center System Operations Manual DATABASE ADMINISTRATION
Associate Name The name of the back-up physician to be called if the named
physician cannot be reached, up to 30 characters.
Associate Phone The telephone number (external or internal) at which the
back-up physician can be reached, up to 15 digits.
Car Phone The named physician’s car phone number, up to 15
digits.
Home Phone The named physician’s home phone number, up to 15
digits.
Employees This kind of record contains the following fields for all employees that are not already
included in the Physician database:
Name A 30-character employee name.
Extension The phone number assigned to the employee, up to five
digits.
Pager Dial Number The on-site or long-distance pager number for dialing the
pager carried by the employee, up to 15 digits.
Note: This number is not called through the "Beeper" function only.
Pager ID The logical or local pager ID number for the pager device
assigned to the individual or group. Use the word None
if a local pager ID number is not available.
Note: After data is entered in these first two fields, a pop-up window displays data assigned
to this extension through the Extension Maintenance option:
Department – Department to which this extension is assigned. Displayed under Op-
erator Functions on the primary line of a directory lookup.
Room – Room in which this extension is located. Under Operator Functions, it dis-
plays when the record is expanded or when the record is shown in the Source Caller
window.
Restriction – Level of restriction associated with this extension, set up under the RSC
Description option on the MCS System Administration Menu. Under Operator Func-
tions it displays when the record is expanded.
Note A 15-character area for data that displays under Operator
Functions for this employee when the Directory
Assistance feature is used (e.g., the employee’s work
schedule).
Home Phone Number The employee’s home telephone number as displayed
under Operator Functions only if the record is expanded,
up to 15 digits.

Page 100 NDA-30026 Revision 6
DATABASE ADMINISTRATION Medical Center System Operations Manual - JAVA Edition
Comment An area of 40 characters made available for any data
required for this employee. This displays under
Operator Functions only if the record is expanded.
Attendant Stations Selecting this option allows the supervisor to set up an attendant terminal or station
and displays the following fields for that purpose:
Attendant ID The number that represents this attendant console.
MCS converts this number to the attendant notation
defined under the Configuration Management option
(i.e., Att#), displays it in the Directory Assistance
database, and uses it in attendant transfers.
Extension The extension number defined for this attendant
console. This extension must not have been assigned
to another attendant but must have been previously
defined through the NEAX Maintenance
Administration Terminal.
Note: After entry of the extension, a pop-up window displays the Department and Room
information that has been associated with the extension through the Extension
Maintenance option. (Extensions that correspond to attendant stations do not
have restrictions.)
Device The name of this attendant’s CRT device. This
number corresponds directly to the communication
port (tty) on the computer to which this attendant
CRT is connected. Each device can be assigned to
only one attendant.
Other Internal
Extensions This kind of record contains extensions and data for general locations within the
hospital such as cafeterias, gift shops, break rooms, and waiting rooms. Extensions
assigned to these locations may also be found in other records, but their primary
location is defined here. When a call comes from one of these locations, the
following fields are displayed in the Source Caller window:
Name The name of an internal location or entity, up to 30
characters. Examples: gift shop, cafeteria, medical
conference room, or pharmacy.
Extension The five-digit extension number assigned to this
location or entity.
Note: After entry of the name and extension, a pop-up window displays the Department,
Room, and default Restriction information that has been associated to the exten-
sion through the Extension Maintenance option. (The Restriction can only be
viewed when the record is expanded.)
Note A 15-character area for data displayed for this
location or entity when the Directory Assistance
feature is used under Operator Functions.

NDA-30026 Revision 6 Page 101
Medical Center System Operations Manual - JAVA Edition DATABASE ADMINISTRATION
Comments (2) Two areas of 40 characters each made available for data
required for this location or entity. This displays under
Operator Functions only if the record is expanded or
when a call is originated from this extension.
Tests /
Procedures This option is used to identify the names of tests and medical procedures scheduled by
callers and the extension by which each test or procedure can be scheduled. Records
entered through this option never appear in the Source Caller window but are most
likely already entered in the Other Internal Extensions database. Selection of this
option displays the following fields:
Name The name of the test or procedure, up to 30 characters.
Extension The extension through which a caller can schedule the
test or procedure or obtain information about it.
Note: After you enter the test/procedure name and extension number, a pop-up window dis-
plays the department, room, and default restriction data tied to the extension through
the Extension Maintenance option.
Note A 15-character area for data displayed for this test or
procedure when the Directory Assistance feature is used
under Operator Functions.
Comments(2) Two areas of 40 characters each made available for
information required for this test or procedure. This
information displays when the record is expanded in
Directory Assistance under Operator Functions.
External
Numbers This option is used to identify telephone numbers that are outside of the hospital PBX
system. Select this option to display the following fields for data entry:
Name The unique name associated with this location or entity,
up to 15 characters. Examples: City Police, Medical
Examiner, or Independent Laboratory.
Number The telephone number for this location, consisting of up
to 15 characters and entered with parentheses and dashes
as needed to separate the number components. The
number must be preceded with the outgoing trunk access
code. Example: (214) 555-1212.
Note A 15-character area for data displayed for this selection
when the Directory Assistance feature is used under
Operator Functions.
Comments (2) Two areas of 40 characters each for data required for this
location or number that displays when the record is
expanded in Directory Assistance under Operator
Functions.

Page 102 NDA-30026 Revision 6
DATABASE ADMINISTRATION Medical Center System Operations Manual - JAVA Edition
Trunk Numbers This option is used to assign in MCS the numbers by which incoming trunks are
identified in the PBX configuration (and retrieved from the database). However, even
an unassigned trunk number can be displayed in the Source Caller window, since it is
provided by the PBX. Select the Trunk Numbers option to display the following fields
for data entry:
Trunk Number The number configured for this incoming trunk at the
PBX MAT.
Trunk Name The unique name by which an incoming trunk is known,
up to 15 characters. Examples: Metro or 800
Note A 15-character area for data displayed for this location or
entity when the Directory Assistance feature is used
under Operator Functions.
Comments (2) Two areas of 40 characters each for whatever data may
be required for this incoming trunk.
Beeper Codes After an operator pages a physician or employee by beeper dial number, the operator
manually enters a code number that gives the reason for the page. The Beeper Codes
option is used to tie reasons for paging by beeper with these manually entered code
numbers. Select this option to display the following fields for data entry:
Code Name The reason why the operator is paging the beeper holder,
up to 30 characters.
Code Number The number to be entered manually by the operator to
give the purpose of the page.
Emergencies The emergency records give the operator primary and alternate extensions for
incoming emergency calls. This option is also used to identify primary and alternate
extensions by which a supervisor can be alerted to monitor an on-going operator
conversation. Select this option to display the following fields for data entry:
Problem A description of an emergency situation or a supervisor
notation, up to 30 characters. To make the supervisor
conversation monitoring feature available to operators, at
least one of these records must be completed with the
word Supervisor entered in this field.
Extension The primary extension number to be contacted for a
certain emergency or to alert the given supervisor for
conversation monitoring, up to five digits.
Note: After entry of the extension and then again after entry of the alternate extension, a
pop-up window displays the department, room, and default restriction data that has
been tied to that extension through the Extension Maintenance option.

NDA-30026 Revision 6 Page 103
Medical Center System Operations Manual - JAVA Edition DATABASE ADMINISTRATION
Alternate Extension The alternate extension to be contacted if the primary
extension number is busy, up to five digits. No alternate
extension is accepted on a Supervisor record.
Note Any data that might be helpful for the operator to have
while connected to the emergency caller, up to 25
characters.

DATABASE ADMINISTRATION Medical Center System Operations Manual - JAVA Edition
Page 104 NDA-30026 Revision 6
This Page Left Blank.
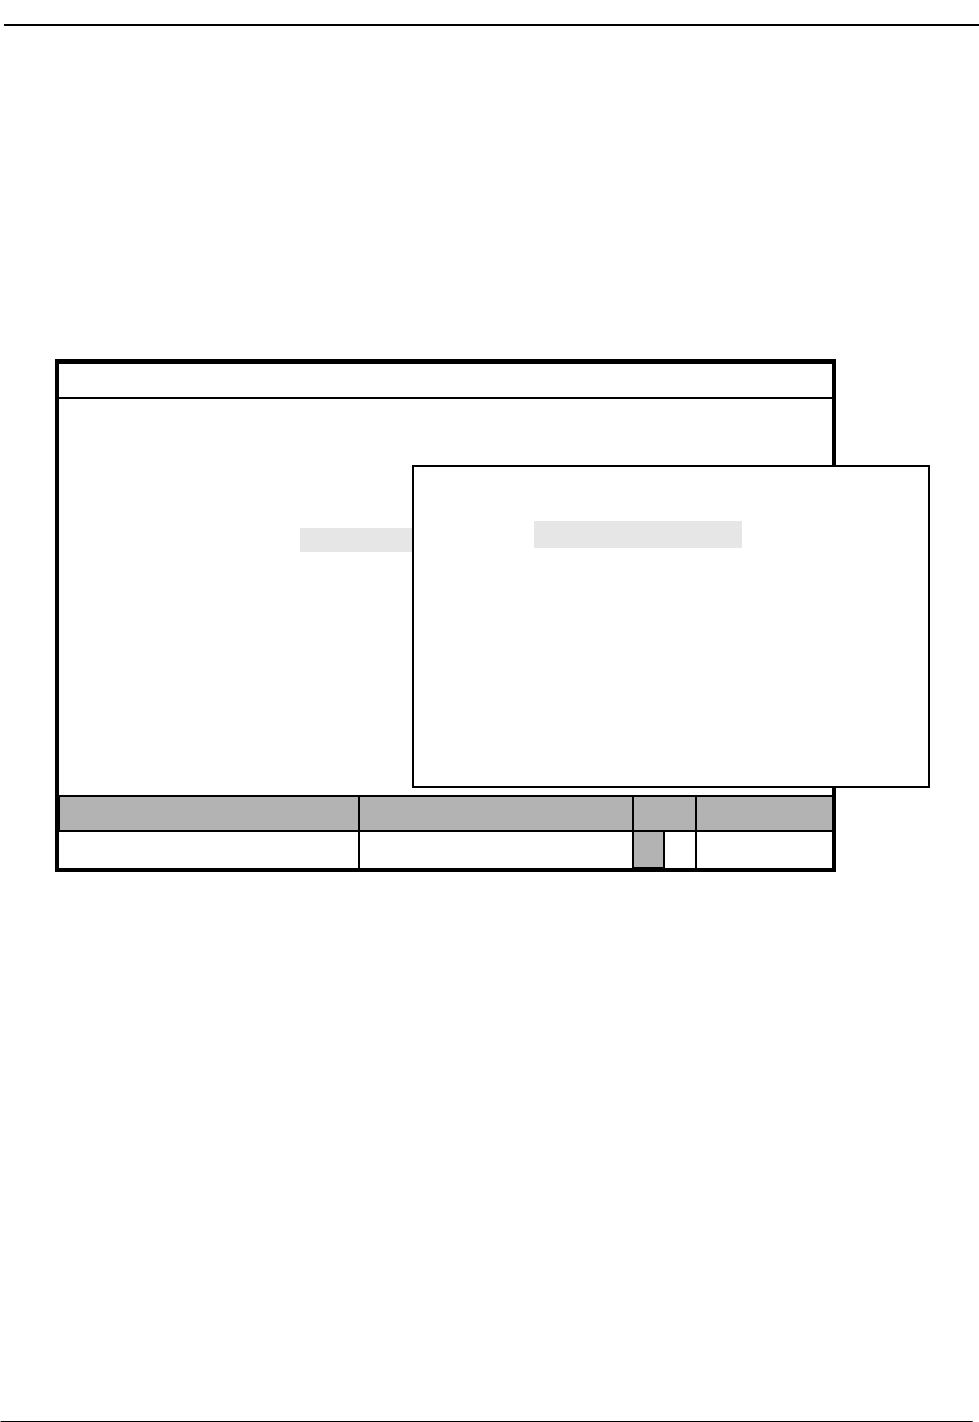
NDA-30026 Revision 6 Page 105
Medical Center System Operations Manual - JAVA Edition SYSTEM ADMINISTRATION
Chapter 7 SYSTEM ADMINISTRATION
Introduction
Use the System Administration option on the Main Menu to alter and view
system-specific data such as hospital extensions, valid patient direct-inward-dial
(DID) numbers, restriction classes, and any outstanding restriction or DID
changes.
Figure 7-1 System Administration
Menu Options The System Administration menu provides access to the following options:
RSC Descriptions Attribute the same meanings to MCS restriction
classes as those assigned at the PBX Maintenance
Administration Terminal.
Extension Maintenance Add, alter, print, or view extension data to match
the PBX MAT data.
Patient DID Numbers Add, delete, view, or print DID numbers for MCS
use with patients.
Outstanding RSC Requests Manage RSC requests that could not be acted on
before and were placed in this file as a result.
Outstanding DID Requests Manage DID requests that could not be acted on
before and were placed in this file as a result.
(1)
MCS Status
Attendant Status
Medical Center System
Call Status Trnfr
S
Supervisor Tue Aug 17 09:02 am
D
*** Main Menu ***
Database Administration
Configuration Management
Login Name Maintenance
Quit
Arrow keys to move cursor, <Enter> to select, <Esc> to quit
Supervisor Reports
Operator Functions
(2)
System Administration
Off-line
*** MCS System Administration ***
Arrow keys to move cursor, <Enter> to select, <Esc> to quit
RSC Descriptions
Patient DID Numbers
Extension Maintenance
Outstanding RSC Requests
Outstanding DID Requests
Quit
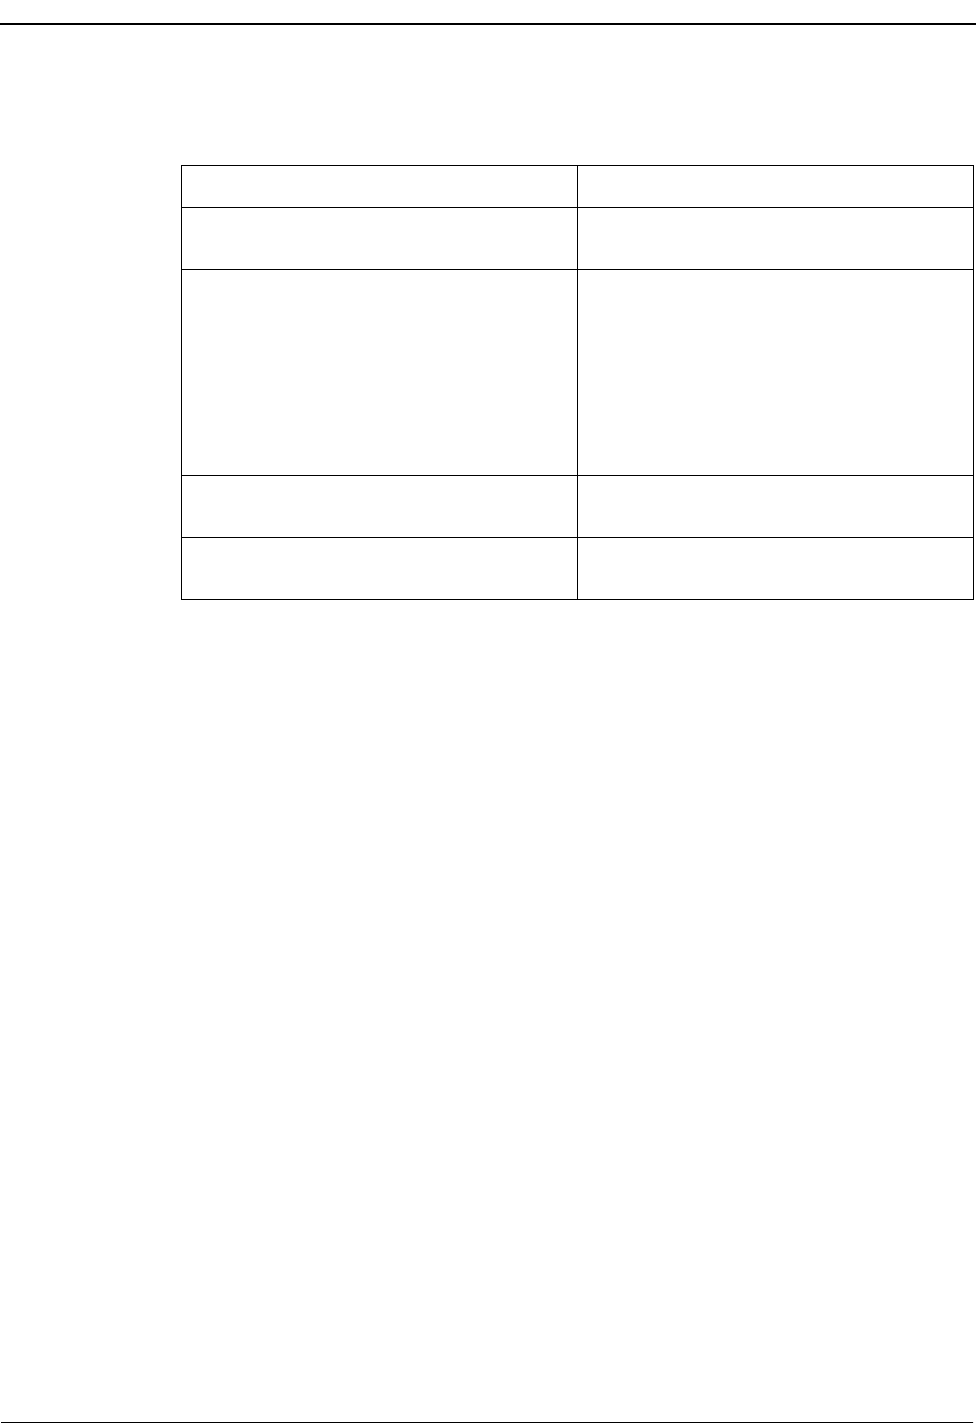
Page 106 NDA-30026 Revision 6
SYSTEM ADMINISTRATION Medical Center System Operations Manual - JAVA Edition
Procedure
Action Result
On the MCS Main Menu, type s to select
the System Administration option. The MCS System Administration menu
displays.
To select the desired menu option, type the
highlighted letter.
Note: In most cases, the highlighted letter is
the first letter of the word. When the
word begins with a letter that has
been used before, the second or even
third letter may be highlighted.
Refer to the following pages for
descriptions of each menu option.
To exit the System Administration option,
type q (quit). The MCS Main Menu displays.

NDA-30026 Revision 6 Page 107
Medical Center System Operations Manual - JAVA Edition SYSTEM ADMINISTRATION
RSC Descriptions
Use the RSC Descriptions option on the MCS System Administration menu to assign
the same meaning to the MCS restriction classes as those assigned at the PBX.
Figure 7-2 Restriction Class Descriptions
PBX Restriction
Classes The NEAX PBX contains 16 restriction classes that are numbered from 0 to 15. They
are defined by the PBX administrator via the Maintenance Administration Terminal
(MAT). These class definitions can be whatever is required by the site(s) served by the
PBX. For instance, RSC 4 might mean unrestricted calling privileges at one site but
mean disable a telephone at another site. MCS must know what the valid PBX
restrictions are to prevent changing an extension’s restrictions to a value that is not
understood by the PBX. Use this option to assign to MCS the restriction classes
assigned at the PBX MAT.
Other Affected
Options The RSC descriptions assigned through this option are used elsewhere in MCS. The
Extension Maintenance option displays them as choices during restriction
assignment. The Configuration Management option displays them as choices during
the assignment of restrictions for patients who have phone service.
(1)
MCS Status
Attendant Status
Medical Center System
Call Status Trnfr
S
Supervisor Tue Aug 17 09:02 am
D
Arrow keys to move cursor, <Enter> to select, <Esc> to quit
(2)
Off-line
*** MCS System Administration ***
RSC Descriptions
Patient DID Numbers
Extension Maintenance
Outstanding RSC Requests
Outstanding DID Requests
Quit
*** Restriction Class Descriptions ***
RSC 8:Disabled-0RSC 0: Local-8-PIT
RSC 1:
RSC 2:
RSC 3:
RSC 4:
RSC 5:
RSC 6:
RSC 7:
Local-1-Pitt
Local-2-WATS
Local-4-NY
Local-5-TIE
Local-6-DDD
RSC 9:
RSC 10:
RSC 11:
RSC 12:
RSC 13:
RSC 14:
RSC 15:
Unrestricted
Discharged
Internal only
PhoneService
Local
Local-14-TIE
Local-Down
Modify Print Quit

Page 108 NDA-30026 Revision 6
SYSTEM ADMINISTRATION Medical Center System Operations Manual - JAVA Edition
Procedure
Action Result
On the MCS System Administration menu,
type r to select the RSC Descriptions
option. (1)
The Restriction Class Descriptions screen
displays. (2)
To Modify RSC Descriptions:
Type m to select the Modify command.
Press Enter to move to the RSC description
that is to be changed, and use the backspace
key to erase any existing description. Type
the new description and press Enter.
Repeat this procedure until all required
RSC descriptions are changed.
Type Y and press Enter to save any
changes. Type N and press Enter to cancel
them.
The description of the first restriction class
highlights for changes.
The message “Do you want to save
changes? (Y/N)” displays.
If the changes are confirmed, the word
“Modified” displays in the Attendant Status
Window to show that the change has been
inserted into the database.
“Record not modified” displays if the
change was cancelled. The cursor is
positioned on the command line.
To Print RSC Descriptions:
Type p to select the Print command. The screen is sent to the printer and the
word “Done” displays in the Attendant
Status Window.
Type q (quit) to exit the Restriction Class
Descriptions display. The MCS System Administration menu
displays.
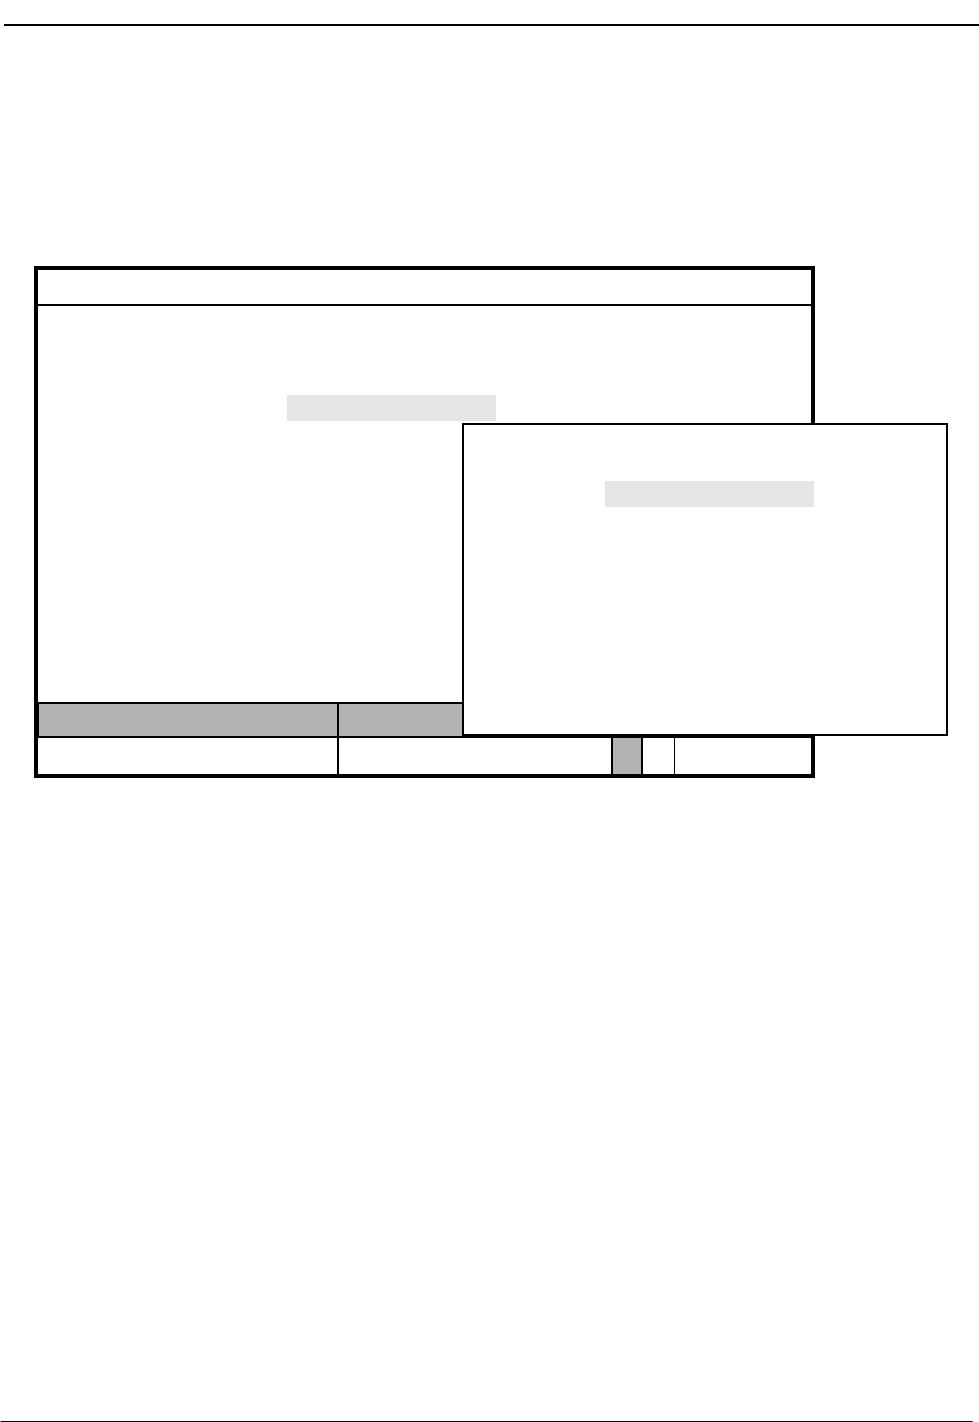
NDA-30026 Revision 6 Page 109
Medical Center System Operations Manual - JAVA Edition SYSTEM ADMINISTRATION
Extension Maintenance
Use the Extension Maintenance option on the MCS Database Maintenance menu to
add, modify, delete, view, and/or print extension assignment records. All MCS-
supported extensions must first be assigned through this option.
Figure 7-3 Extension Maintenance
Internal
Extension
Assignments
Assign all internal hospital extensions through this option before making other
assignments (e.g., patient, physician, employee) to them. These Extension
Maintenance records identify the internal extensions that have been assigned on the
PBX Maintenance Administration Terminal (MAT) by the type of phone (e.g., patient
room, nursing station), their tenant, their location, and, for some, their default
restriction class. Although MCS assignments to the extensions may change (i.e.,
patients, employees), changes to these basic Extension Maintenance records should be
rare and probably required only by changes at the MAT.
Pop-up Window
Information When an extension number is entered in some options on the MCS Database
Maintenance menu, a pop-up window displays basic location and restriction data
known about that extension through the Extension Maintenance option. (Exception:
The restriction data displayed in the pop-up window is assigned through the RSC
Descriptions option on the MCS System Administration menu. Refer to “Introduction”
on page 105 for more information.)
MCS Status
Attendant Status
Medical Center System
Call Status Trnfr
S
Supervisor Tue Aug 17 09:02 am
D
Arrow keys to move cursor, <Enter> to select, <Esc> to quit
Off-line
*** MCS System Administration ***
RSC Descriptions
Patient DID Numbers
Extension Maintenance
Outstanding RSC Requests
Outstanding DID Requests
Quit
Arrow keys to move cursor, <Enter> to select, <Esc> to quit
*** Extension Maintenance ***
Patient Room Extensions
Nurse Station Extensions
Attendant Console Extensions
Other Extensions
Quit
(1)
(2)

Page 110 NDA-30026 Revision 6
SYSTEM ADMINISTRATION Medical Center System Operations Manual - JAVA Edition
Empty Fields Not all of the fields in a record require an entry. However, the record is considered
complete only when you press Enter after each field highlights, regardless of whether
you have made an entry in that field. Pressing the Esc key before completing a full
record erases any data entered up to that point.
Range Values The first digit of the beginning value must be smaller than the first digit of the ending
value when specifying the range of records to be printed. For instance, if you enter 41
as the beginning value and 299 as the ending value, the search will fail because 4 is
greater than 2.
Common
Procedure Although the information required in the database differs from one kind of extension
to another (e.g., from patient room to attendant console extensions), the procedures by
which information is entered, deleted, changed, viewed, and/or printed are the same.
This section provides one set of procedures for handling Extension Maintenance
information in the database. The different types of records that the database can contain
are described by their fields under the procedure “Add an Extension” on page 112.
View Command The View command allows you to display a selection, or range, of extension records.
The range is specified by a beginning pattern and an ending pattern. The pattern can be
either a partial or full entry of a number or word which differs according to the type of
record selected from the MCS Extension Maintenance menu. When you select the
View command, a pop-up window prompts for the keys by which the records are to be
retrieved and displayed.
Menu Access The Supervisor is always authorized to enter this menu option. An Operator can enter
it only if such access is authorized through the Configuration Management option on
the Main Menu.
Figure 7-4 Record Field and Command Line Samples
*** Patient Room Extensions ***
Extension:
Room Number:
Bed Number:
Nursing Unit:
Default Restriction:
Tenant Number:
Add Delete Modify View Print Quit
*** Attendant Console Extensions ***
Extension:
Department:
Room Number:
Tenant Number:
Add Delete Modify View
*** Nurse Station Extensions ***
Add Delete Modify
*** Other Extensions ***
Add Delete Modify View Print Quit
Extension:
Department:
Room Number:
Default Restriction:
Nursing Unit:
Tenant Number:
Extension:
Department:
Room Number:
Default Restriction:
Tenant Number:

NDA-30026 Revision 6 Page 111
Medical Center System Operations Manual - JAVA Edition SYSTEM ADMINISTRATION
Procedure
Action Result
On the MCS System Administration menu,
type e to select the Extension Maintenance
option.
The Extension Maintenance menu displays
the types of extensions.
Refer to the following pages for
descriptions of each type of extension
record.
To exit the Extension Maintenance menu,
type q (quit). The MCS System Administration menu
displays.

Page 112 NDA-30026 Revision 6
SYSTEM ADMINISTRATION Medical Center System Operations Manual - JAVA Edition
Add an Extension
Use this procedure to add a new extension record of the type selected to the database.
Figure 7-5 Add an Extension
Assignment
Sequence An extension cannot be assigned to a unit until the unit has been assigned through the
Nurse Station Extension option on the Extension Maintenance menu.
Extension
Record
Descriptions
Each of the extension record types is described below:
•Patient Room Extension: This type of extension is assigned to a bed in a room on a
specific unit that is under the responsibility of one nurses’ station. This information
does not change frequently, but it must be kept current and accurately reflect
extension assignments made at the PBX MAT. Patient Room Extension assignments
require the following field information:
Extension The extension number itself, up to 5 digits. This number
must be unique.
Room Number The number of the room to which the extension is
assigned, up to 4 characters (letters or numbers).
Bed Number The number of the bed to which the extension is
assigned. This number can be only one digit. Bed 0
indicates a private room.
(1)
MCS Status
Attendant Status
Medical Center System
Call Status Trnfr
S
Supervisor Tue Aug 17 09:02 am
D
(2)
Add Delete Modify View Print Quit
*** Other Extensions ***
Extension:
Department:
Room Number:
Default Restriction:
Tenant Number:
*** Other Extensions ***
Enter (Esc) to Return to Command Line
Extension:
Department:
Room Number:
Default Restriction:
Tenant Number:

NDA-30026 Revision 6 Page 113
Medical Center System Operations Manual - JAVA Edition SYSTEM ADMINISTRATION
Unit The ward or location of the room containing the
extension, up to 4 characters.
Note: This Unit must have been previously associated to a nursing station under the Nurse
Station Extensions option.
Default Restriction The restriction class that is restored to the extension
when a patient is discharged from the room. You can
scroll through the possible entries for this field by
pressing the space bar. These entries correspond to those
set up in the Configuration Management option on the
Main Menu.
Tenant Number The tenant number assigned for this extension at the
PBX.
•Attendant Console Extensions: These extensions may belong to specific
departments, or they may be located in one or more rooms. Selection of this option
displays the following fields for data entry:
Extension The number being assigned to the attendant console. This
number must be unique and can contain up to 5
characters.
Department The name or number of the department in which the
attendant console is located, up to 4 characters. This field
may be left blank if not applicable.
Room Number The number of the room to which the extension is
assigned, up to 4 characters (letters or numbers).
Tenant Number The tenant number assigned for this extension at the
PBX.
•Nurse Station Extensions: It is assumed that each unit has only one nursing station
assigned to it, and that, when a patient is admitted and assigned to a room on a unit,
the nursing station extension corresponding to that unit is applicable. Selection of
this option displays the following fields for data entry:
Extension The number being assigned to the nursing station, up to 5
digits. This number must be unique.
Department The name or number of the department in which the
nursing station is located, up to 4 characters. This field
may be left blank if not applicable.
Room Number The number of the room to which the extension is
assigned. This field must begin with a number and can
contain up to 4 characters.
Default Restriction The restriction class of the extension. You can scroll
through the possible entries for this field by pressing the
space bar. These entries correspond to those set up in the
Configuration Management option on the Main Menu.

Page 114 NDA-30026 Revision 6
SYSTEM ADMINISTRATION Medical Center System Operations Manual - JAVA Edition
Unit The ward or area for which this nursing station is
responsible, up to 4 characters.
Tenant Number The tenant number assigned for this extension at the
PBX.
•Other Extensions: This option is used to make assignments for all extensions that
are to be supported by MCS, except patient room, attendant console, and nursing
station extensions. Such extensions might be later assigned to specific tests and
procedures or to other locations such as conference rooms, gift shops, or cafeterias.
Selection of this option displays the following fields for data entry:
Extension The phone number being assigned, up to 5 digits. This
number must be unique.
Department The name or number of the department in which the
extension is located, up to 4 characters. This field may be
left blank if not applicable.
Room Number The number of the room to which the extension is
assigned, up to 4 characters (letters or numbers).
Default Restriction The restriction class of the extension. You can scroll
through the possible entries for this field by pressing the
space bar. These entries correspond to those set up in the
Configuration Management option on the Main Menu.
Tenant Number The tenant number assigned for this extension at the
PBX.
Procedure
Action Result
Type a to select the Add command. (1) The first field highlights for data entry. (2)
Type data to each field according to the
field definition, and press Enter after each
entry.
Note 1: The entry in the first field must be
unique, but the remaining fields are
open entry.
Note 2: In fields that provide choices, use the
space bar to toggle among the op-
tions.
The message “Do you want to insert this?
(Y/N)” displays.
Type Y and press Enter to confirm the
addition; type N and press Enter to cancel
it.
If confirmed, the word “Inserted” displays
in the Attendant Status Window. “Record
not inserted” displays if the addition was
cancelled. The cursor is positioned on the
command line.
To exit the record type, type q (quit). The Extension Maintenance menu displays.
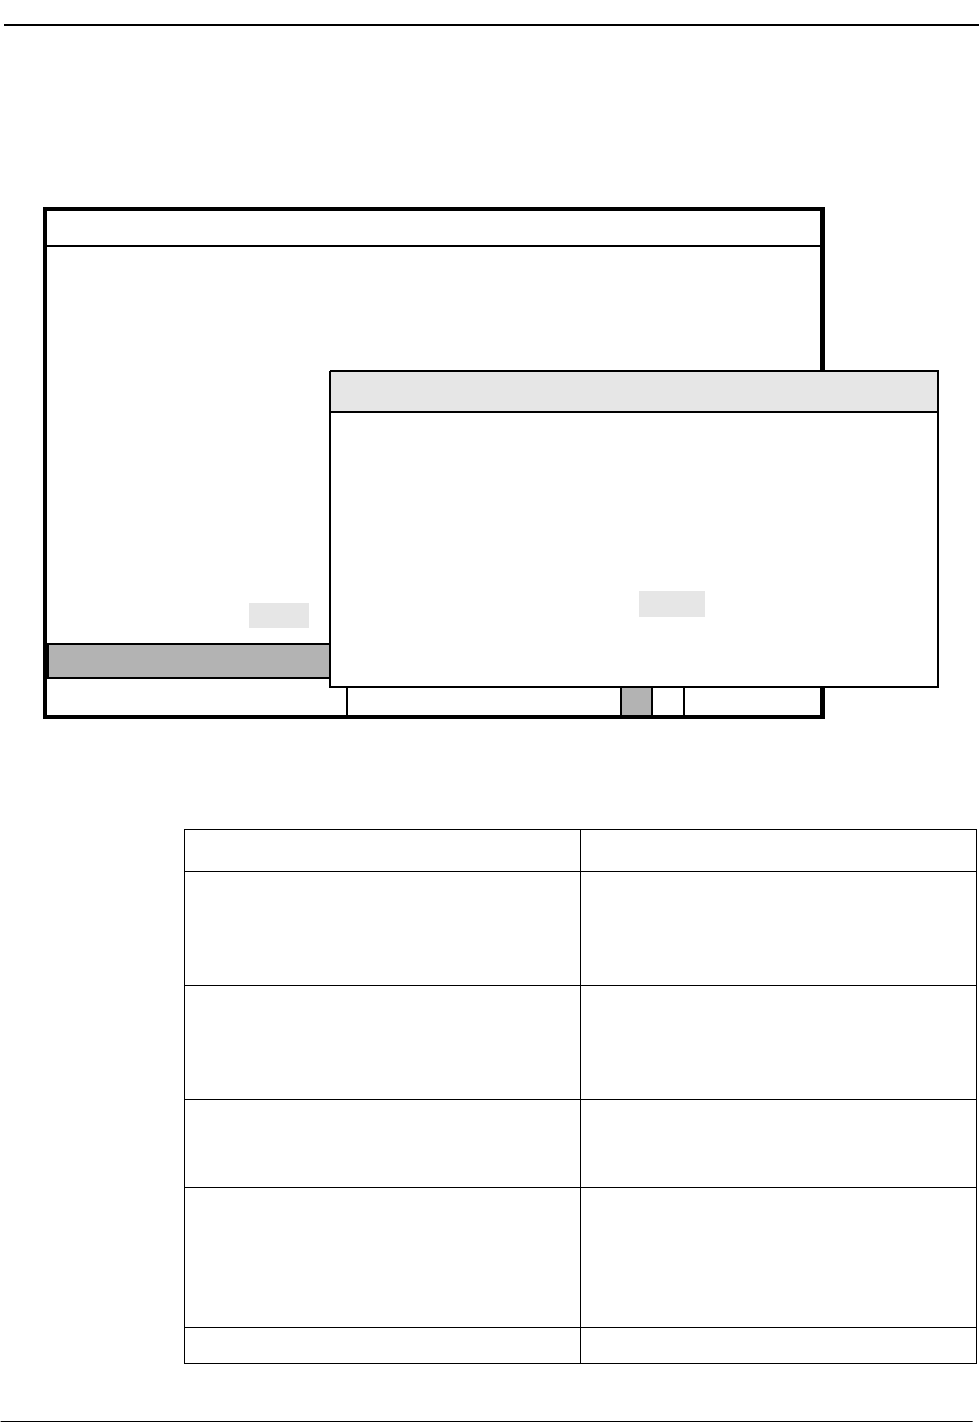
NDA-30026 Revision 6 Page 115
Medical Center System Operations Manual - JAVA Edition SYSTEM ADMINISTRATION
Delete an Extension
Use this procedure to delete an extension record of the type selected from the database.
Figure 7-6 Delete an Extension
Procedure
(1)
MCS Status
Attendant Status
Medical Center System
Call Status Trnfr
S
Supervisor Tue Aug 17 09:02 am
D
(2)
Add Delete Modify View Print Quit
*** Other Extensions ***
Extension:
Department:
Room Number:
Default Restriction:
Enter Extension:
<Enter> to search, <Esc> to return to command line
Ext Dept Unit Room Bed D_RSC Tenant
Action Result
Type d to select the Delete command. (1) An extension entry field displays at the
bottom of the screen, and a highlighted
extension heading displays at the top of the
screen. (2)
Type all or part of the extension number to
be deleted and press Enter. To display all
extension numbers, press Enter on the
blank extension entry field.
All of the matching extensions in the
database display.
Using the arrow keys, move the highlight to
the extension to be deleted and press Enter. The field entries display and the message
“Do you want to delete this? (Y/N)”
displays at the bottom of the screen.
Type Y and press Enter to confirm the
deletion; type N and press Enter to cancel
it.
If confirmed, the word “Deleted” displays
in the Attendant Status Window. “Record
not deleted” displays if the deletion was
cancelled. The cursor is positioned on the
command line.
To exit the record type, type q (quit). The Extension Maintenance menu displays.
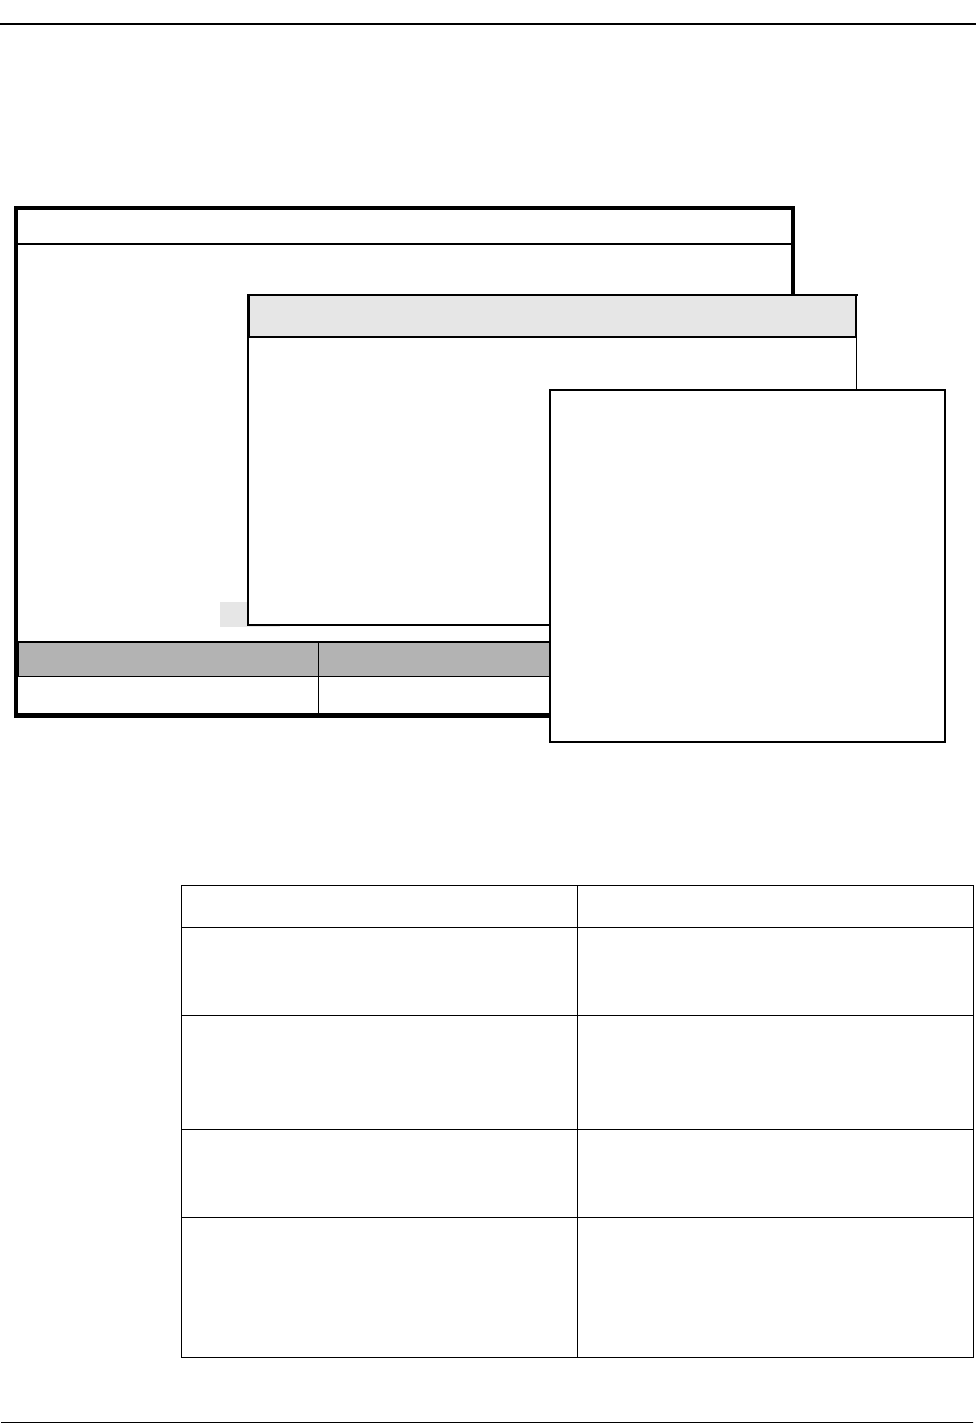
Page 116 NDA-30026 Revision 6
SYSTEM ADMINISTRATION Medical Center System Operations Manual - JAVA Edition
Modify an Extension
Use this procedure to make changes to the field entries of a particular extension record.
Figure 7-7 Modify an Extension
Procedure
(1)
MCS Status
Attendant Status
Medical Center System
Call Status Trnfr
S
Supervisor Tue Aug 17 09:02 am
D
(2)
Add Delete Modify View Print Quit
*** Other Extensions ***
Extension:
Department:
Room Number:
Default Restriction:
Enter Extension:
<Enter> to search, <Esc> to return to command line
Ext Dept Unit Room Bed D_RSC Tenant
*** Other Extensions ***
Extension:
Room Number:
Bed Number (0-2):
Default Restriction:
Tenant Number:
Unit:
1011
101
2
A1
Local-1
1
Enter (Esc) to Return to Command Line
(3)
Action Result
Type m to select the Modify command. (1) An extension entry field displays at the
bottom of the screen, and a highlighted
heading displays at the top of the screen. (2)
Type all or part of the extension and press
Enter. To display all extensions, press
Enter when the cursor is on the blank entry
field.
All the matching extensions in the database
display.
Use the arrow keys to move the highlight to
the desired name or number and press
Enter.
The contents of the selected record display.
(3)
Use the arrow keys to move among the
fields, the backspace key to erase existing
data, and the space bar to toggle among
options within a field. Type new data where
required and press Enter after each entry.
The message “Do you want to save
changes? (Y/N)” displays.

NDA-30026 Revision 6 Page 117
Medical Center System Operations Manual - JAVA Edition SYSTEM ADMINISTRATION
Action Result
Type Y and press Enter to save the
changes. Type N and press Enter to cancel
them.
The word “Modified” displays in the
Attendant Status Window. “Record not
modified” displays if the change was
cancelled. The cursor is positioned on the
command line.
To exit the record type, type q (quit). The Extension Maintenance menu displays.
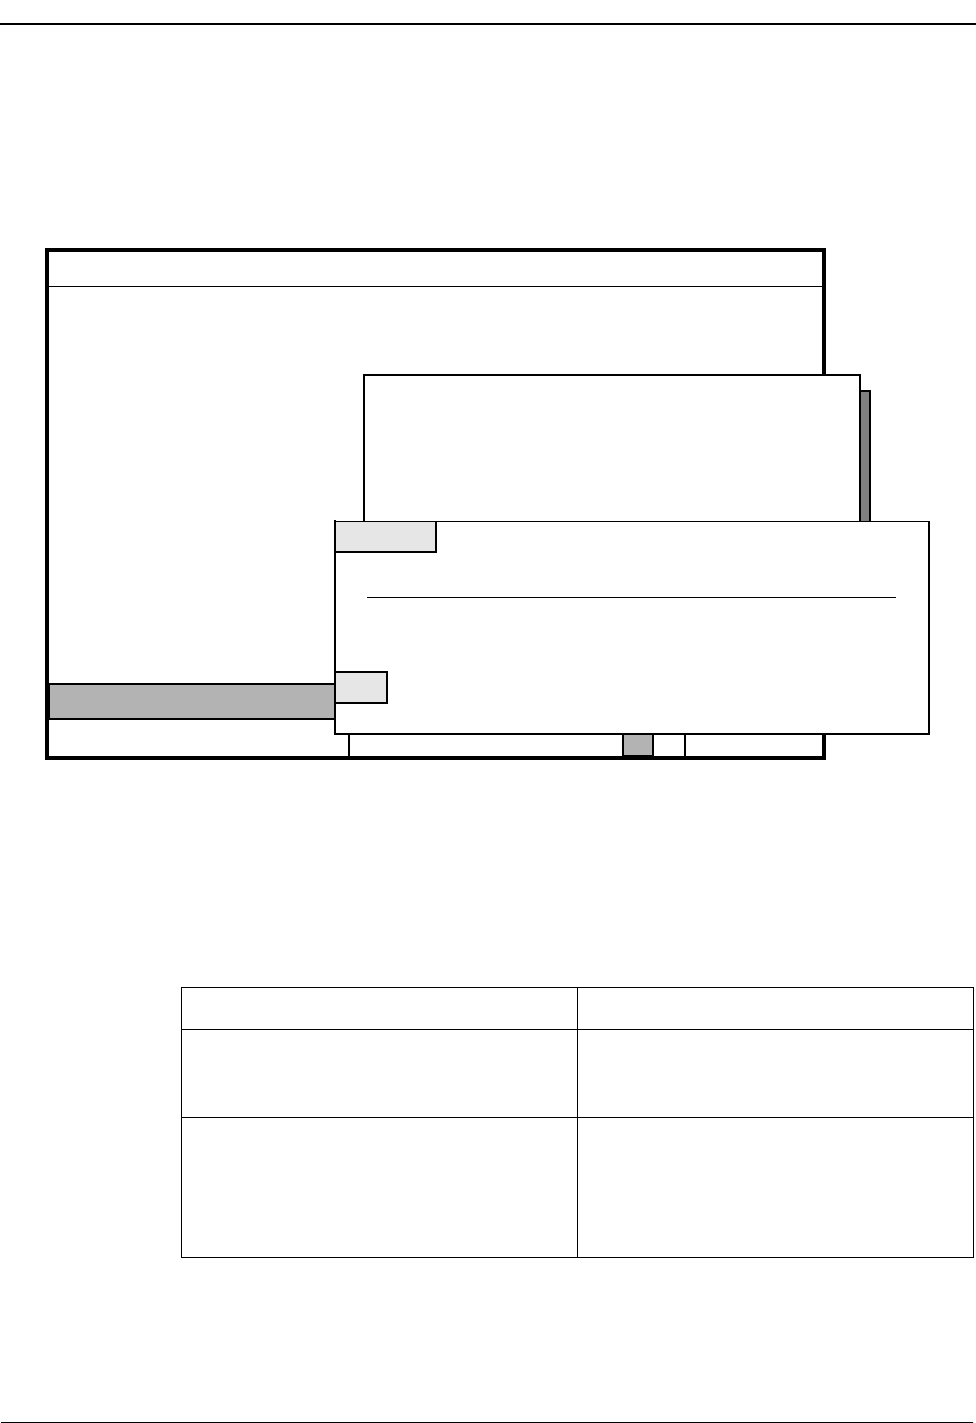
Page 118 NDA-30026 Revision 6
SYSTEM ADMINISTRATION Medical Center System Operations Manual - JAVA Edition
View Extension Records
Use this procedure to display selected database records for on-screen viewing or
printing.
Figure 7-8 View Extension Records
Procedure
MCS Status
Attendant Status
Medical Center System
Call Status Trnfr
S
Supervisor Tue Aug 17 09:02 am
D
Add Delete Modify View Print Quit
*** Other Extensions ***
Extension:
Department:
Room Number:
Default Restriction:
(1)
(2)
(3)
Key: Extension Room
<Enter> to begin, <Esc> to Return to Command Line
Starting Key:
Ending Key:
Ext Dept Unit Room Bed D_RSC Tenant
*** Patient Room Extensions ***
DownPage UpPage Search Top Bottom Print Quit
Top of File
More
1011 A1
1012
1021
1022
101
A1
A1
A1
1
101
102
102
Local-1
2
1
2
1
Local-1
Local-1
Local-1
1
1
1
Action Result
Type v to select the View command. (1) A window requests the search key and the
starting and ending values for the search
range. (2)
Using the space bar, toggle between the
displayed search keys and press Enter to
select the desired key. Type the first record
value and press Enter, and then the last and
press Enter.
All records within the given range display
for on-screen viewing. (3)

NDA-30026 Revision 6 Page 119
Medical Center System Operations Manual - JAVA Edition SYSTEM ADMINISTRATION
Action Result
Use the DownPage command to move
forward one page, the UpPage command to
move back one page, the Top command to
move to the beginning of the display, and
the Bottom command to move to the end of
the display.
Search the Display: Type s to select the
Search command. At the prompt, type the
desired pattern and press Enter.
Print the Display: Type p to select the Print
command. At the prompt, type f to print the
whole file or s to print the screen and press
Enter.
All of the occurrences of the pattern on that
page are highlighted.
There is a pause while the material is sent to
the printer. Then the command line returns.
To exit the display, type q (quit). The data entry screen of the current record
type redisplays, and the cursor is positioned
on the command line.
Type q (quit) to exit a particular type of
record. The Extension Maintenance menu displays.
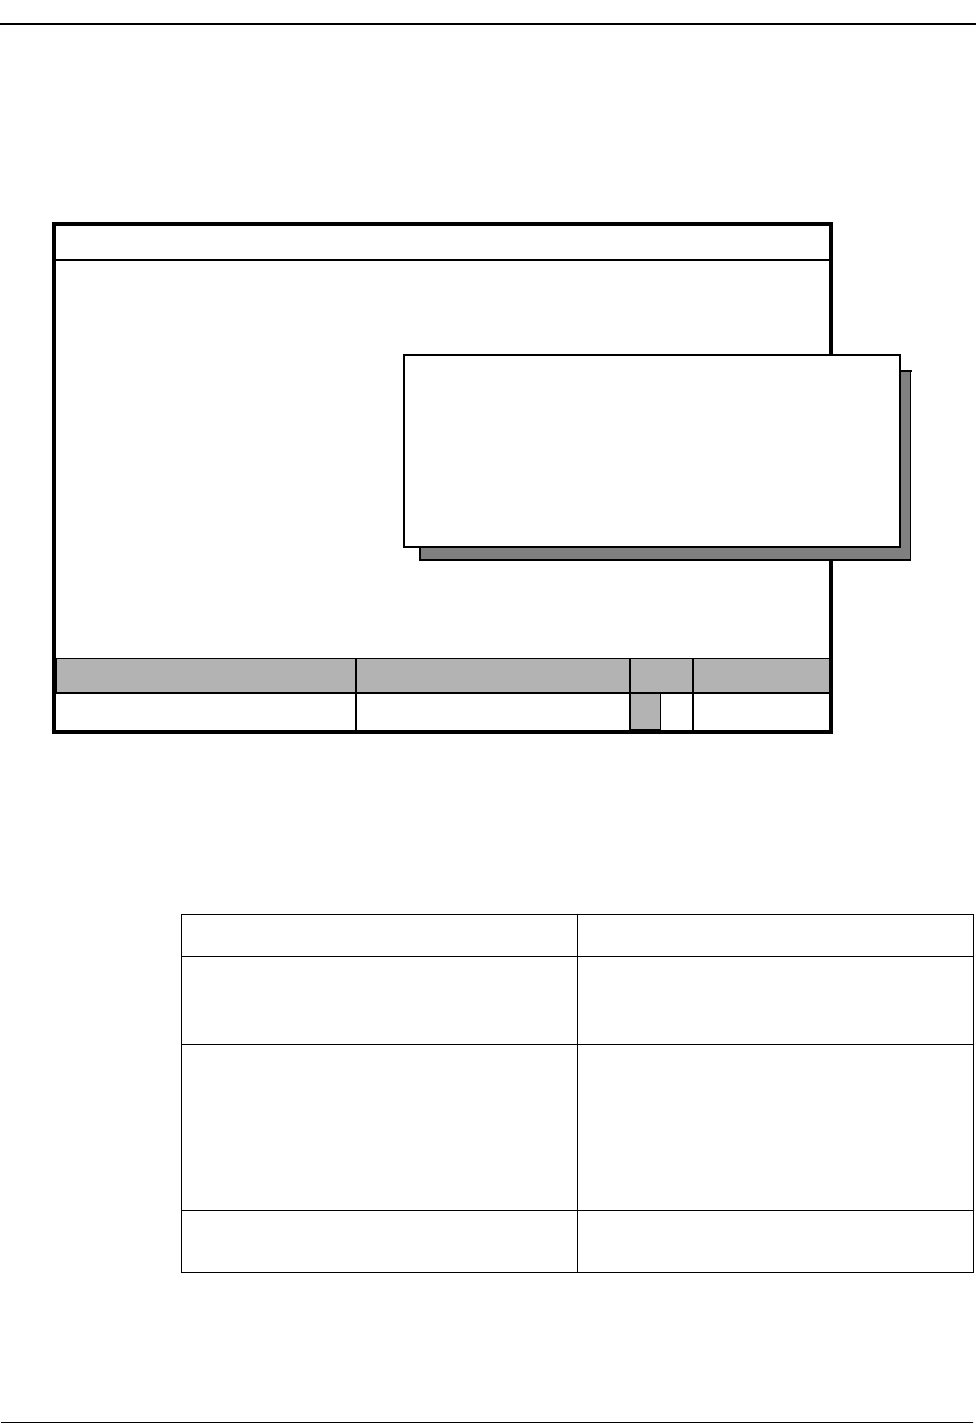
Page 120 NDA-30026 Revision 6
SYSTEM ADMINISTRATION Medical Center System Operations Manual - JAVA Edition
Print Extension Records
Use this procedure to print all or part of the records of a selected type.
Figure 7-9 Print Extension Records
Procedure
MCS Status
Attendant Status
Medical Center System
Call Status Trnfr
S
Supervisor Tue Aug 17 09:02 am
D
Add Delete Modify View Print Quit
*** Patient Room Extensions ***
Extension:
Room Number:
Bed Number (0-2):
Unit: Key: Extension Room
<Enter> to begin, <Esc> to Return to Command Line
Starting Key:
Ending Key:
Off-line
Default Restriction:
Tenant:
Action Result
Type p to select the Print command. A window displays with prompts for the
search key and the starting and ending
values, or keys, for the search range.
Using the space bar, toggle between the
displayed keys and press Enter to select the
desired key. To show the range of records to
be printed, type the first record value and
press Enter, and type the last and press
Enter.
All records lying within the indicated range
are sent to the printer and the cursor is
positioned on the command line.
Type q (quit) to exit a particular type of
record. The Extension Maintenance menu displays.
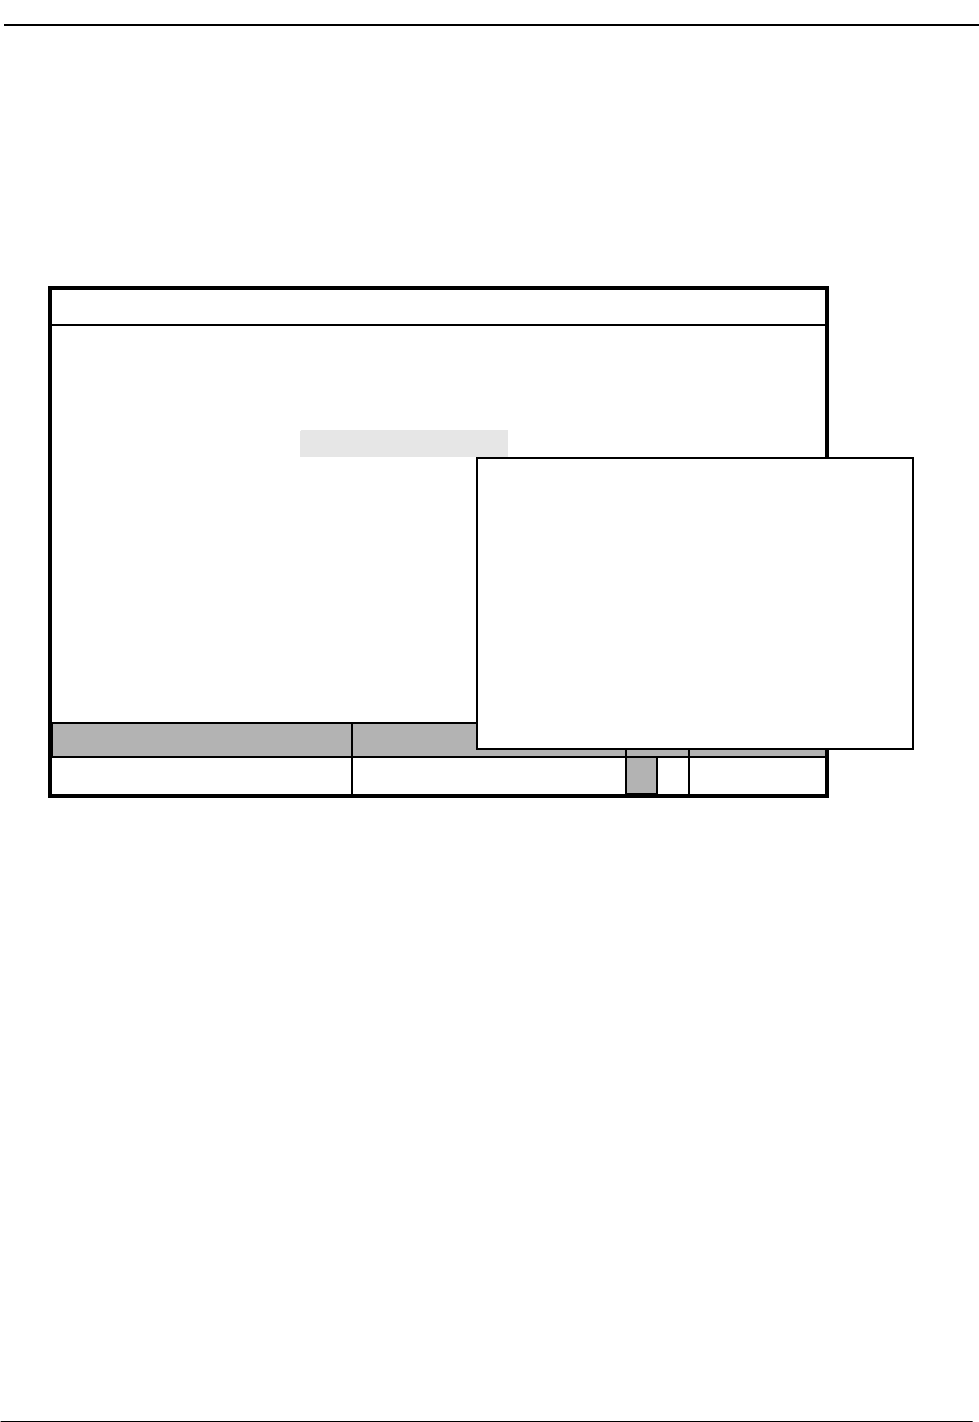
NDA-30026 Revision 6 Page 121
Medical Center System Operations Manual - JAVA Edition SYSTEM ADMINISTRATION
Patient DID Numbers
Use the Patient DID Numbers option on the MCS System Administration menu to
assign Direct-Inward-Dial (DID) numbers to patients so that callers can ring a patient’s
phone directly, without operator intervention.
Figure 7-10 Patient DID Numbers
Transfers As patients are moved to different locations within the hospital, their individually-
assigned DID number follows them, making it possible for relatives, friends, and other
callers to contact them without having to track their movements.
DID Number
Status Once entered to MCS through the Add command, DID numbers can be in any one of
the following states:
Available The DID number has been entered successfully to MCS and is
available for assignment to an incoming patient.
Offered The DID number is entered to the record of an incoming
patient. When in this state, a DID number should not be
assigned to another patient. The length of time that a number
can remain in this status is designated through a configuration
parameter.
MCS Status
Attendant Status
Medical Center System
Call Status Trnfr
S
Supervisor Tue Aug 17 09:02 am
D
Arrow keys to move cursor, <Enter> to select, <Esc> to quit
*** MCS System Administration ***
RSC Descriptions
Extension Maintenance
Outstanding RSC Requests
Outstanding DID Requests
Quit
Patient DID Numbers
Off-line
*** Patient DID Numbers ***
(1)
(2)
DID Number:
State:
Stamped:
Add Delete View Print Quit

Page 122 NDA-30026 Revision 6
SYSTEM ADMINISTRATION Medical Center System Operations Manual - JAVA Edition
Pending The offered DID number has not been activated by the PBX.
Once the patient record with the offered DID number
assignment arrives from the HIS or is saved on the MCS
menus, MCS attempts to send a message to the PBX to
activate the DID number. If for any reason this message fails,
the request is placed in the database of outstanding DID
requests, and the DID number is considered to be in a Pending
state. The number remains in this state until the message to the
PBX successfully activates it or it is deleted from the DID
database.
Active The offered DID number has been activated at the PBX and is
in effect for a patient. The DID number remains active until
the patient is discharged, at which time it is again considered
available.
“Stamped”
Notation Under the View command, each DID number with a status other than Available has an
entry under the Stamped heading. This notation indicates the date and time at which the
DID number last changed from one status to another.
Procedure
Action Result
On the MCS System Administration menu,
type p to select the Patient DID option. The Patient DID Numbers screen displays
with data entry fields.
Refer to the following pages for
descriptions of each command on the
Patient DID Numbers screen.
To exit the Patient DID Numbers screen,
type q (quit). The MCS System Administration menu
displays.
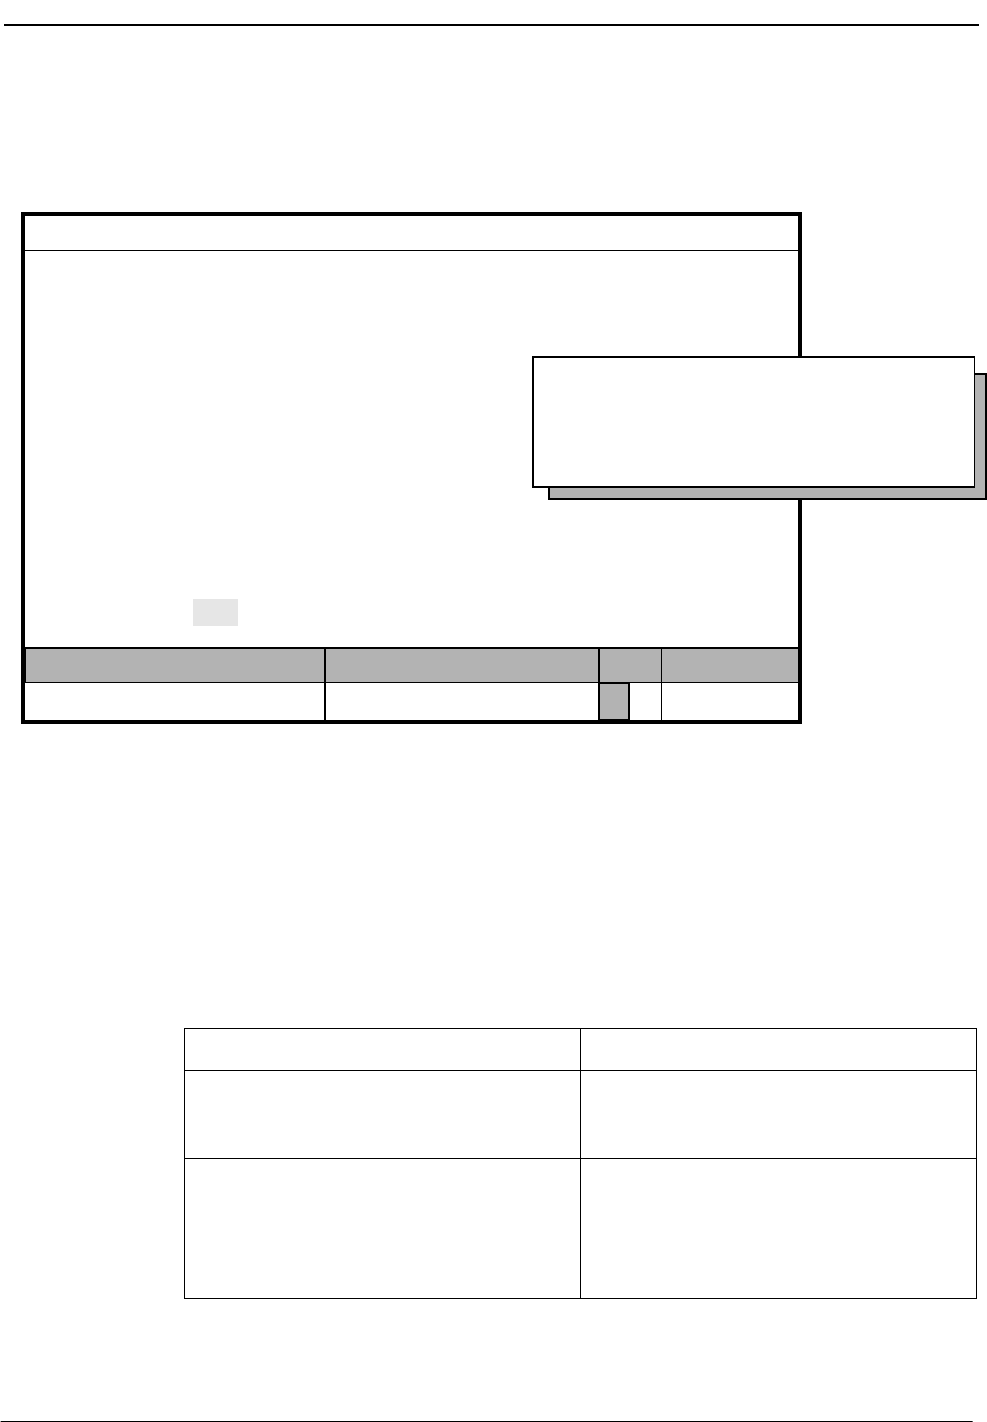
NDA-30026 Revision 6 Page 123
Medical Center System Operations Manual - JAVA Edition SYSTEM ADMINISTRATION
Add Patient DID
Numbers Use the Add command on the Patient DID Number screen to add DID numbers to the
MCS database.
Figure 7-11 Add Patient DID Numbers
Assignment Process
During this assignment process, the supervisor indicates the range of DID numbers to
be added to MCS. Unique numbers within the range are added. Any number within the
indicated range that already exists in MCS is not added.
Procedure
MCS Status
Attendant Status
Medical Center System
Call Status Trnfr
S
Supervisor Tue Aug 17 09:02 am
DOff-line
*** Patient DID Numbers ***
DID Number:
State:
Stamped:
Add Delete View Print Quit
Starting Key:
Ending Key:
<Enter> to begin, <Esc> to Return to Command LIne
Action Result
Type a to select the Add command. A window displays with prompts for the
starting key and ending key for valid DID
numbers.
Type the first new DID number to be added
and press Enter, and type the last new DID
number to be added and press Enter.
At the command line, the notation “Added
<DID Number>” displays each number
within the given range as it is added and
placed in available status. Then, the cursor
is positioned on the command line.
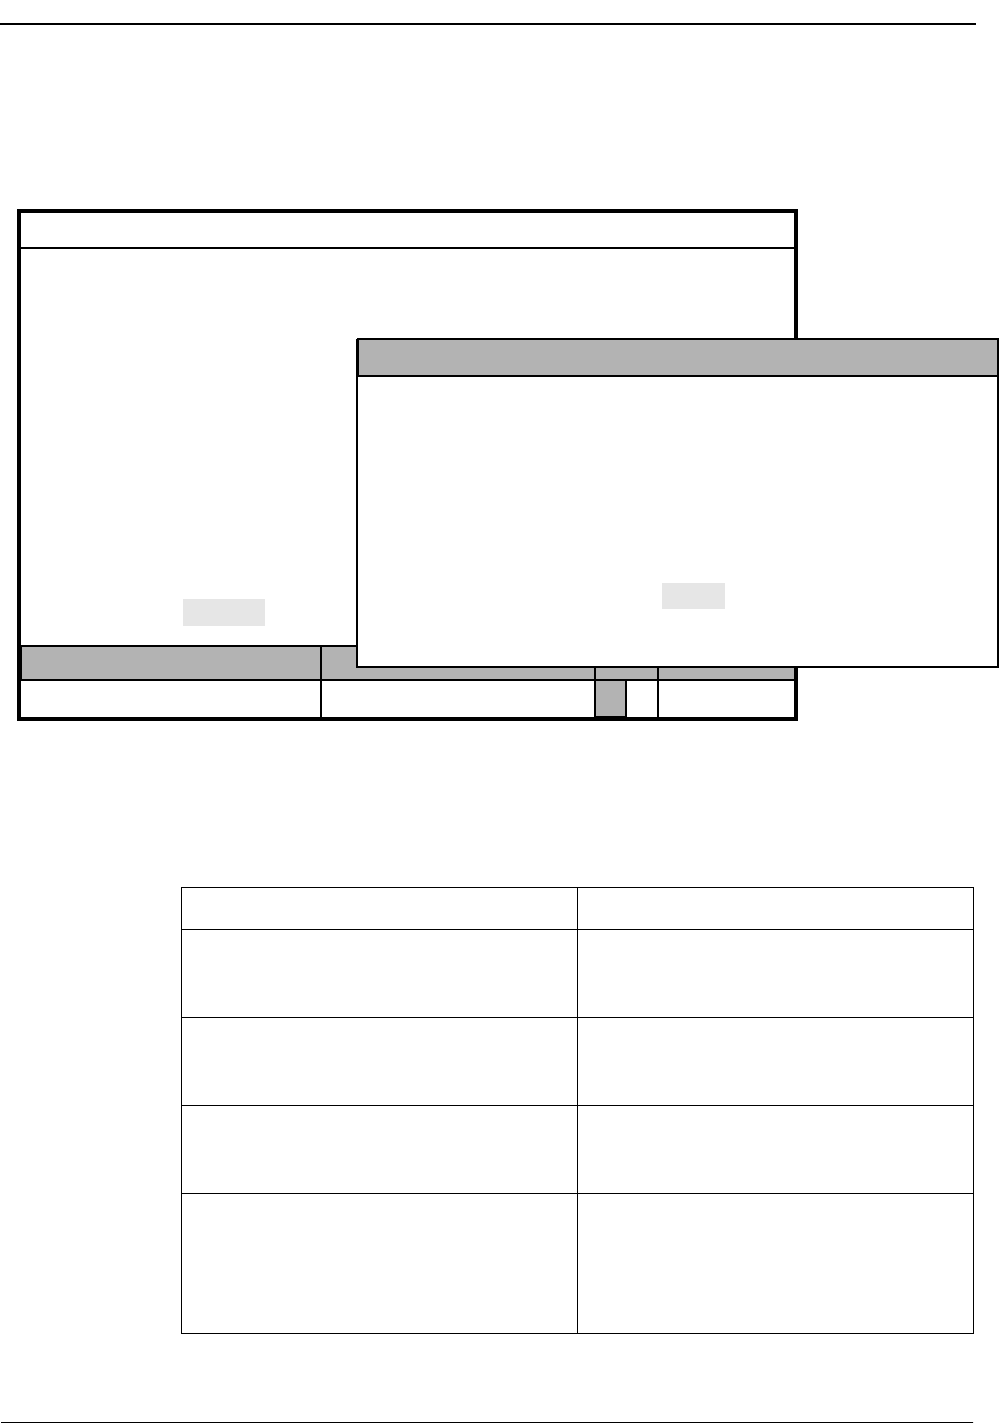
Page 124 NDA-30026 Revision 6
SYSTEM ADMINISTRATION Medical Center System Operations Manual - JAVA Edition
Delete Patient
DID Numbers Use the Delete command on the Patient DID Number screen to remove DID numbers
from the MCS database.
Figure 7-12 Delete Patient DID Numbers
Procedure
MCS Status
Attendant Status
Medical Center System
Call Status Trnfr
S
Supervisor Tue Aug 17 09:02 am
DOff-line
*** Patient DID Numbers ***
DID Number:
State:
Stamped:
Add Delete View Print Quit
Enter DID Number:
<Enter> to search, <Esc> to return to command line
Did Number Status Stamped
(1)
(2)
Action Result
Type d to select the Delete command. (1) A DID number entry field displays at the
bottom of the screen, and a highlighted
heading displays at the top of the screen. (2)
Type the DID number and press Enter. To
display all the DID numbers, press Enter
when the cursor is on the blank entry field.
All of the matching names or numbers in
the database display.
Using the arrow keys, move the highlight to
the desired name or number and press
Enter.
The field entries display and the message
“Do you want to delete this? (Y/N)”
displays at the bottom of the screen.
Type Y and press Enter to confirm the
deletion. Type N and press Enter to cancel
it.
If the deletion is confirmed, the word
“Deleted” displays in the Attendant Status
Window. “Record not deleted” displays if
the deletion was cancelled. The cursor is
positioned on the command line.
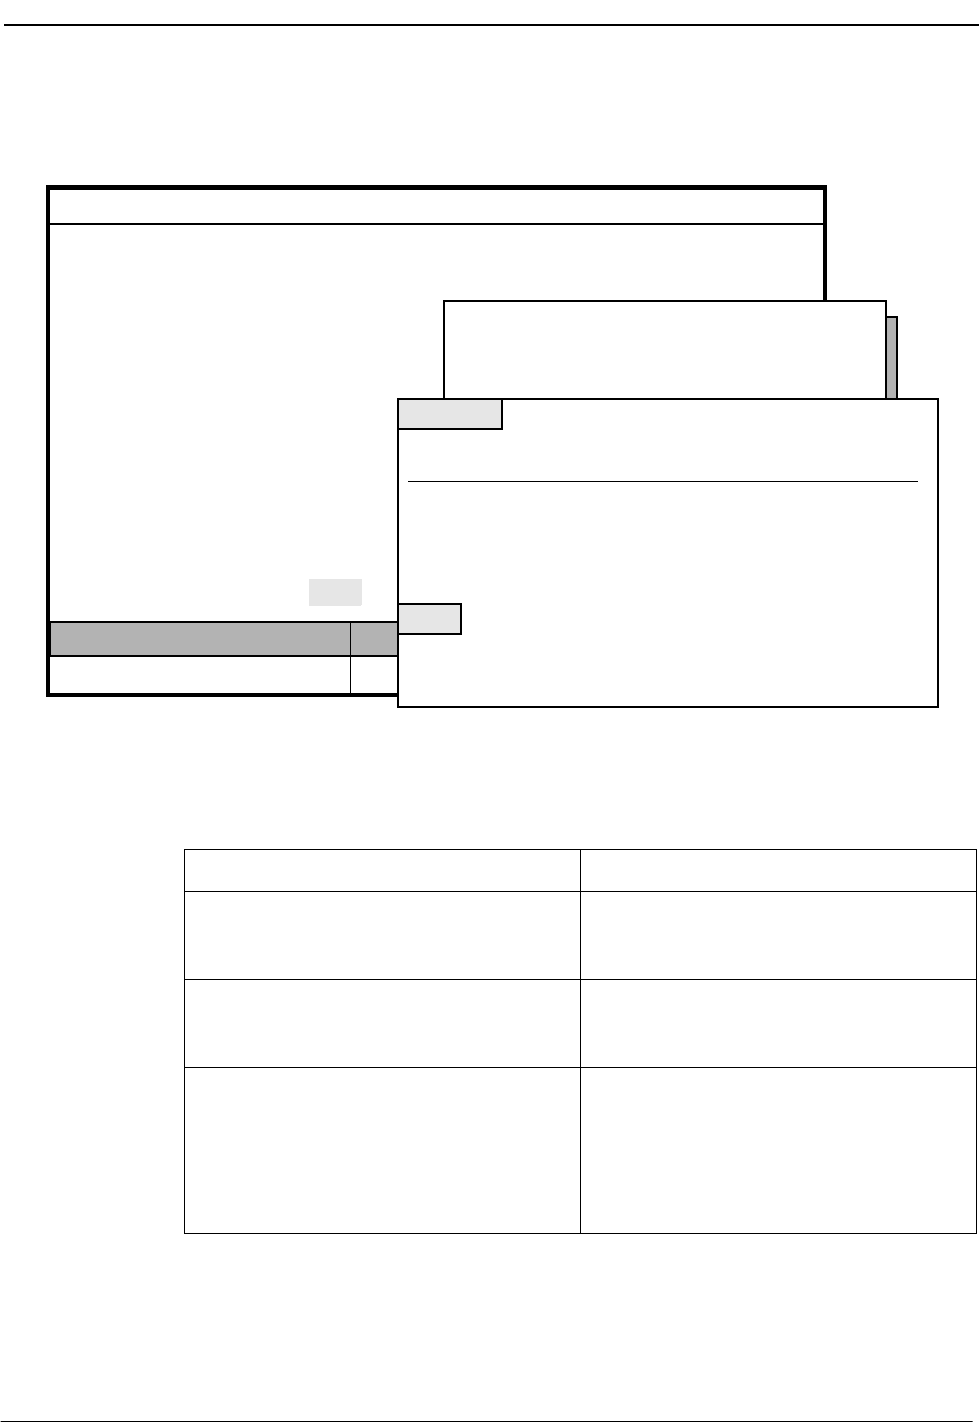
NDA-30026 Revision 6 Page 125
Medical Center System Operations Manual - JAVA Edition SYSTEM ADMINISTRATION
View Patient
DID Numbers Use the View command on the Patient DID Number screen to display DID numbers for
on-screen viewing or printing.
Figure 7-13 View Patient DID Numbers
Procedure
MCS Status
Attendant Status
Medical Center System
Call Status Trnfr
S
Supervisor Tue Aug 17 09:02 am
DOff-line
*** Patient DID Numbers ***
DID Number:
State:
Stamped:
Add Delete View Print Quit
Starting Key:
Ending Key:
<Enter> to begin, <Esc> to Return to Command LIne
Top of File *** Patient DID Numbers ***
Did Number Status Stamped
3511
More
DownPage UpPage Search Top Bottom Print Quit
Offered 08/10 10:16a
3512
3513
3514
3515
3516
Offered
Available
Available
Pending
Active
08/17 08:12a
08/14 08:21p
08/18 10:34a
(1)
(2)
(3)
Action Result
Type v to select the View command. (1) A window displays with prompts for the
starting and ending keys for the search
range. (2)
To specify the range of records to be
viewed, type the first record value and press
Enter, and type the last and press Enter.
All records lying within the given range
display. (3)
Use the DownPage command to move
forward one page, the UpPage command to
move back one page, the Top command to
move to the beginning of the display, and
the Bottom command to move to the end of
the display.

Page 126 NDA-30026 Revision 6
SYSTEM ADMINISTRATION Medical Center System Operations Manual - JAVA Edition
Action Result
Search the Display: Type s to select the
Search command. At the prompt, type the
desired pattern and press Enter.
Print the Display: Type p to select the Print
command. At the prompt, type f to print the
whole file or s to print the screen and press
Enter.
All records of the given pattern on that page
highlight.
There is a pause while the material is sent to
the printer. Then, the command line returns.
To exit the display, type q (quit). The Patient DID Numbers screen
redisplays, and the cursor is positioned on
the command line.
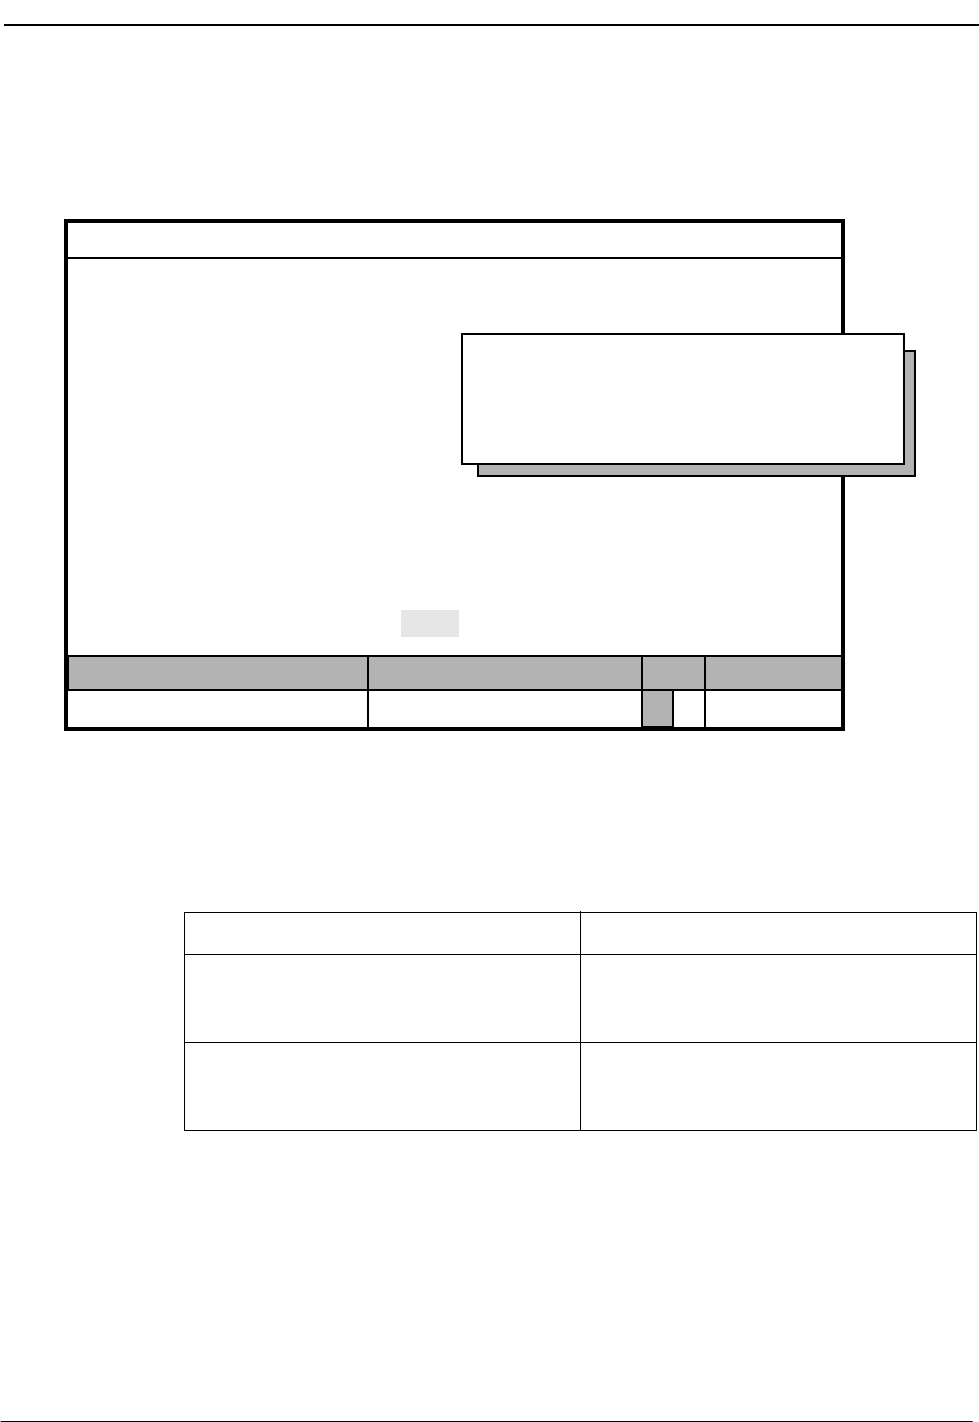
NDA-30026 Revision 6 Page 127
Medical Center System Operations Manual - JAVA Edition SYSTEM ADMINISTRATION
Print Patient
DID Numbers Use the Print command on the Patient DID Number screen to print all or part of the
Patient DID Numbers in the database.
Figure 7-14 Print Patient DID Numbers
Procedure
MCS Status
Attendant Status
Medical Center System
Call Status Trnfr
S
Supervisor Tue Aug 17 09:02 am
DOff-line
*** Patient DID Numbers ***
DID Number:
State:
Stamped:
Add Delete View Print Quit
Starting Key:
Ending Key:
<Enter> to begin, <Esc> to Return to Command LIne
Action Result
Type p to select the Print command. A window displays with prompts for the
starting and ending keys for the search
range.
To specify the range of records to be
printed, type the first record value and press
Enter, and type the last and press Enter.
All records within the given range are sent
to the printer, and the cursor is positioned
on the command line.
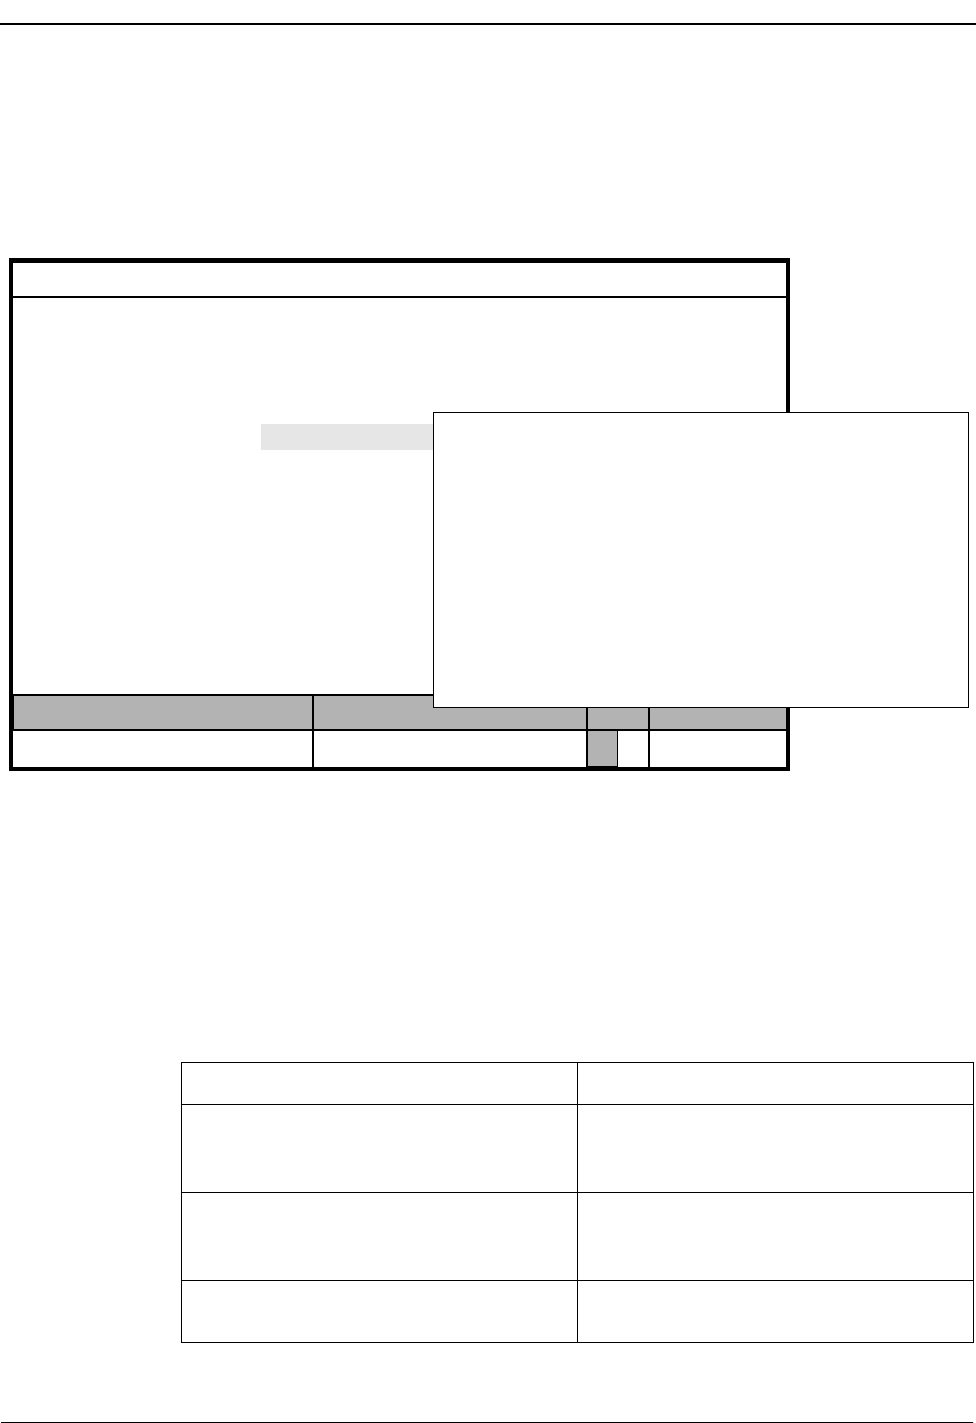
Page 128 NDA-30026 Revision 6
SYSTEM ADMINISTRATION Medical Center System Operations Manual - JAVA Edition
Outstanding RSC Requests
Use the Outstanding RSC Requests option on the MCS System Administration menu
to manage RSC requests that were previously sent unsuccessfully to the PBX and were
entered into the database of outstanding RSC requests as a result.
Figure 7-15 Outstanding RSC Requests
Outstanding
RSC Database If an error occurs during an attempt to send a restriction class message to the PBX, the
RSC message is entered automatically into the database of outstanding RSC requests.
These outstanding requests remain in this database until the supervisor indicates their
disposition through this option.
Procedure
MCS Status
Attendant Status
Medical Center System
Call Status Trnfr
S
Supervisor Tue Aug 17 09:02 am
D
Arrow keys to move cursor, <Enter> to select, <Esc> to quit
*** MCS System Administration ***
RSC Descriptions
Extension Maintenance
Outstanding RSC Requests
Outstanding DID Requests
Quit
Patient DID Numbers
Off-line
(1)
(2)
*** Outstanding RSC Requests ***
Extension:
Restriction:
Resend Delete View Print Quit
:
Stamped:
Action Result
On the MCS System Administration menu,
type o to select the Outstanding RSC
Requests option.
The Outstanding RSC Request screen
displays.
Refer to the following pages for
descriptions of each command on the
Outstanding RSC Requests screen.
To exit the Outstanding RSC Requests
screen, type q (quit). The MCS System Administration menu
displays.
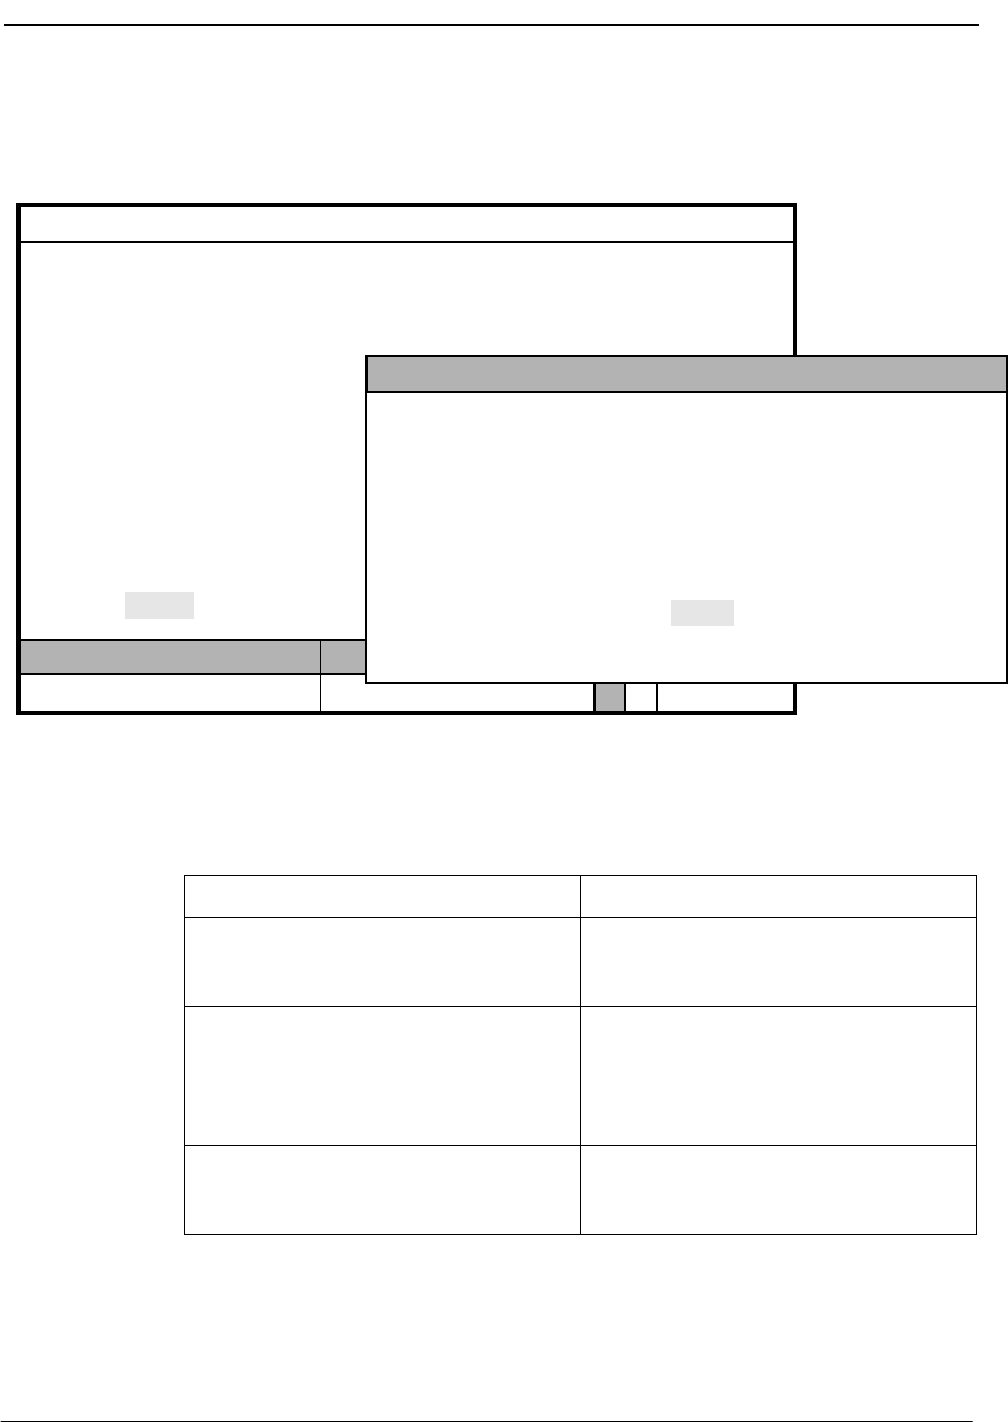
NDA-30026 Revision 6 Page 129
Medical Center System Operations Manual - JAVA Edition SYSTEM ADMINISTRATION
Resend an RSC
Request Use the Resend command on the Outstanding RSC Requests screen to send an
outstanding restriction class message to the PBX that could not be sent previously.
Figure 7-16 Resend Outstanding RSC Request
Procedure
MCS Status
Attendant Status
Medical Center System
Call Status Trnfr
S
Supervisor Tue Aug 17 09:02 am
DOff-line
*** Outstanding RSC Requests ***
Extension:
Restriction:
Stamped:
Resend Delete View Print Quit
Enter Extension:
<Enter> to search, <Esc> to return to command line
Extension Rstr Stamped
(1)
(2)
Action Result
Type r to select the Resend command. (1) An extension number entry field displays at
the bottom of the screen, and a highlighted
heading displays at the top of the screen. (2)
Type part or all of the extension number for
which the RSC request was originally sent
to the PBX. To display all the outstanding
RSC requests, press Enter when the cursor
is on the blank entry field.
The matching extensions display.
Using the arrow keys, move the highlight to
the desired extension and press Enter to
resend the RSC request to the PBX.
The RSC request is sent, the Outstanding
RSC Request screen displays, and the
cursor is positioned on the command line.
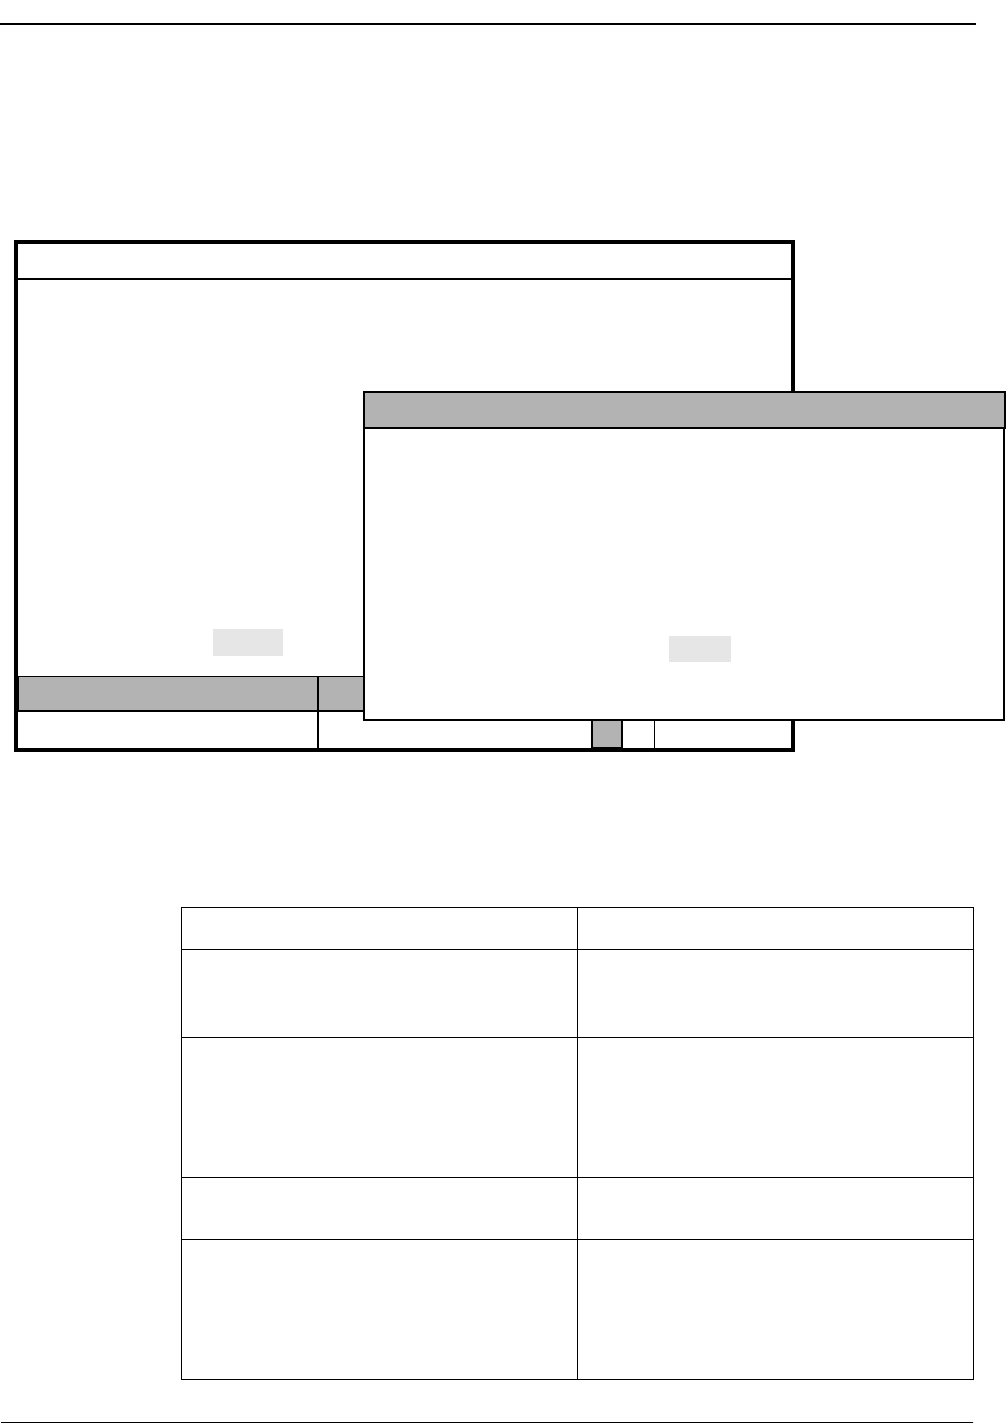
Page 130 NDA-30026 Revision 6
SYSTEM ADMINISTRATION Medical Center System Operations Manual - JAVA Edition
Delete an RSC
Request Use the Delete command on the Outstanding RSC Requests screen to remove an RSC
request from the outstanding RSC file.
Note: Use this command if you have removed the extension.
Figure 7-17 Delete Outstanding RSC Request
Procedure
MCS Status
Attendant Status
Medical Center System
Call Status Trnfr
S
Supervisor Tue Aug 17 09:02 am
DOff-line
*** Outstanding RSC Requests ***
Extension:
Restriction:
Stamped:
Resend Delete View Print Quit
Enter Extension:
<Enter> to search, <Esc> to return to command line
Extension Rstr Stamped
(1)
(2)
Action Result
Type d to select the Delete command. (1) An extension number entry field displays at
the bottom of the screen, and a highlighted
heading displays at the top of the screen. (2)
Type all or part of the extension number for
which the RSC request was originally sent
to the PBX. To display all of the
outstanding RSC requests, press Enter on
the blank entry field.
The matching extensions display.
Using the arrow keys, move the highlight to
the desired extension and press Enter.The message “Do you want to delete this?
(Y/N)” displays at the bottom of the screen.
Type Y and press Enter to confirm the
deletion; type N and press Enter to cancel
it.
If the deletion is confirmed, the word
“Deleted” displays in the Attendant Status
Window. “Record not deleted” displays if
the deletion was cancelled. The cursor is
positioned on the command line.
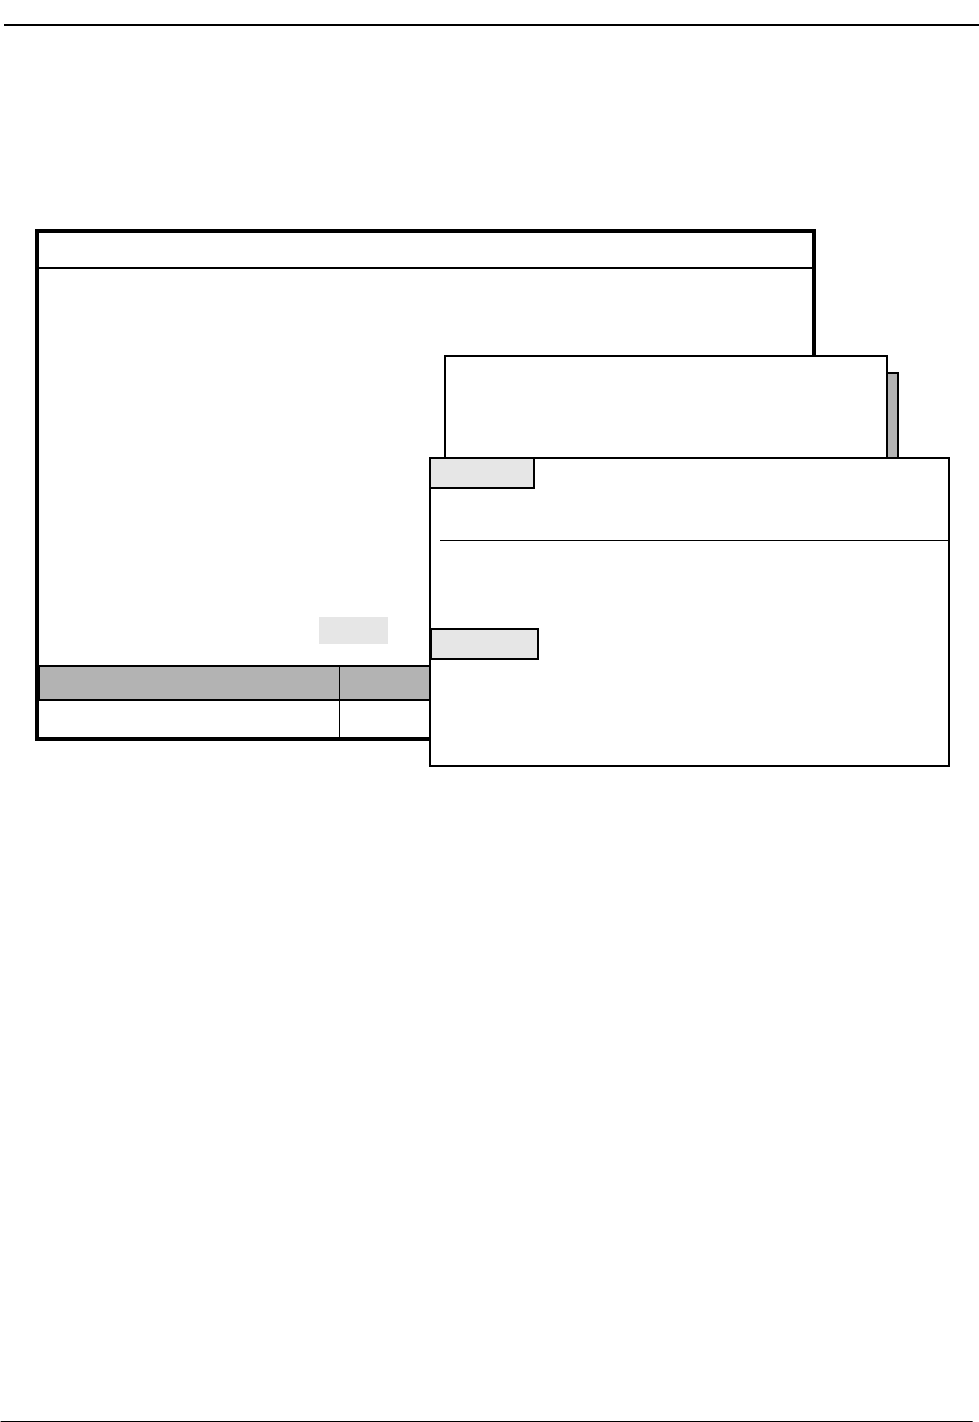
NDA-30026 Revision 6 Page 131
Medical Center System Operations Manual - JAVA Edition SYSTEM ADMINISTRATION
View
Outstanding
RSC Requests
Use the View command on the Outstanding RSC Requests screen to display
outstanding RSC requests for on-screen viewing or printing.
Figure 7-18 View Outstanding RSC Requests
MCS Status
Attendant Status
Medical Center System
Call Status Trnfr
S
Supervisor Tue Aug 17 09:02 am
DOff-line
*** Outstanding RSC Requests ***
Extension:
Restriction:
Stamped:
Resend Delete View Print Quit
(1)
(2)
Starting Key:
Ending Key:
<Enter> to begin, <Esc> to Return to Command LIne
Top of File *** Outstanding RSC Requests ***
Extension Rstr Stamped
3601
End of File
DownPage UpPage Search Top Bottom Print Quit
12 08/10 10:16a
3688
3692
10
12
08/17 08:12a
(3)
08/15 11:16p

Page 132 NDA-30026 Revision 6
SYSTEM ADMINISTRATION Medical Center System Operations Manual - JAVA Edition
Procedure
Action Result
Type v to select the View command. (1) A window displays prompts for the starting
and ending keys for the search range. (2)
Type the starting extension number and the
ending extension number, pressing Enter
after each.
All records within the given range display.
Use the DownPage command to move
forward one page, the UpPage command to
move back one page, the Top command to
move to the beginning of the display, and
the Bottom command to move to the end of
the display.
Search the Display: Type s to select the
Search command. At the prompt, type the
desired pattern and press Enter.
Print the Display: Type p to select the Print
command. At the prompt, type f to print the
whole file or s to print the screen and press
Enter.
All occurrences of the given pattern on that
page are highlighted.
There is a pause while the material is sent to
the printer. Then the cursor is positioned on
the command line.
To exit the Outstanding RSC Request
display, type q (quit). The Outstanding RSC Requests screen
displays, and the cursor is positioned on the
command line.
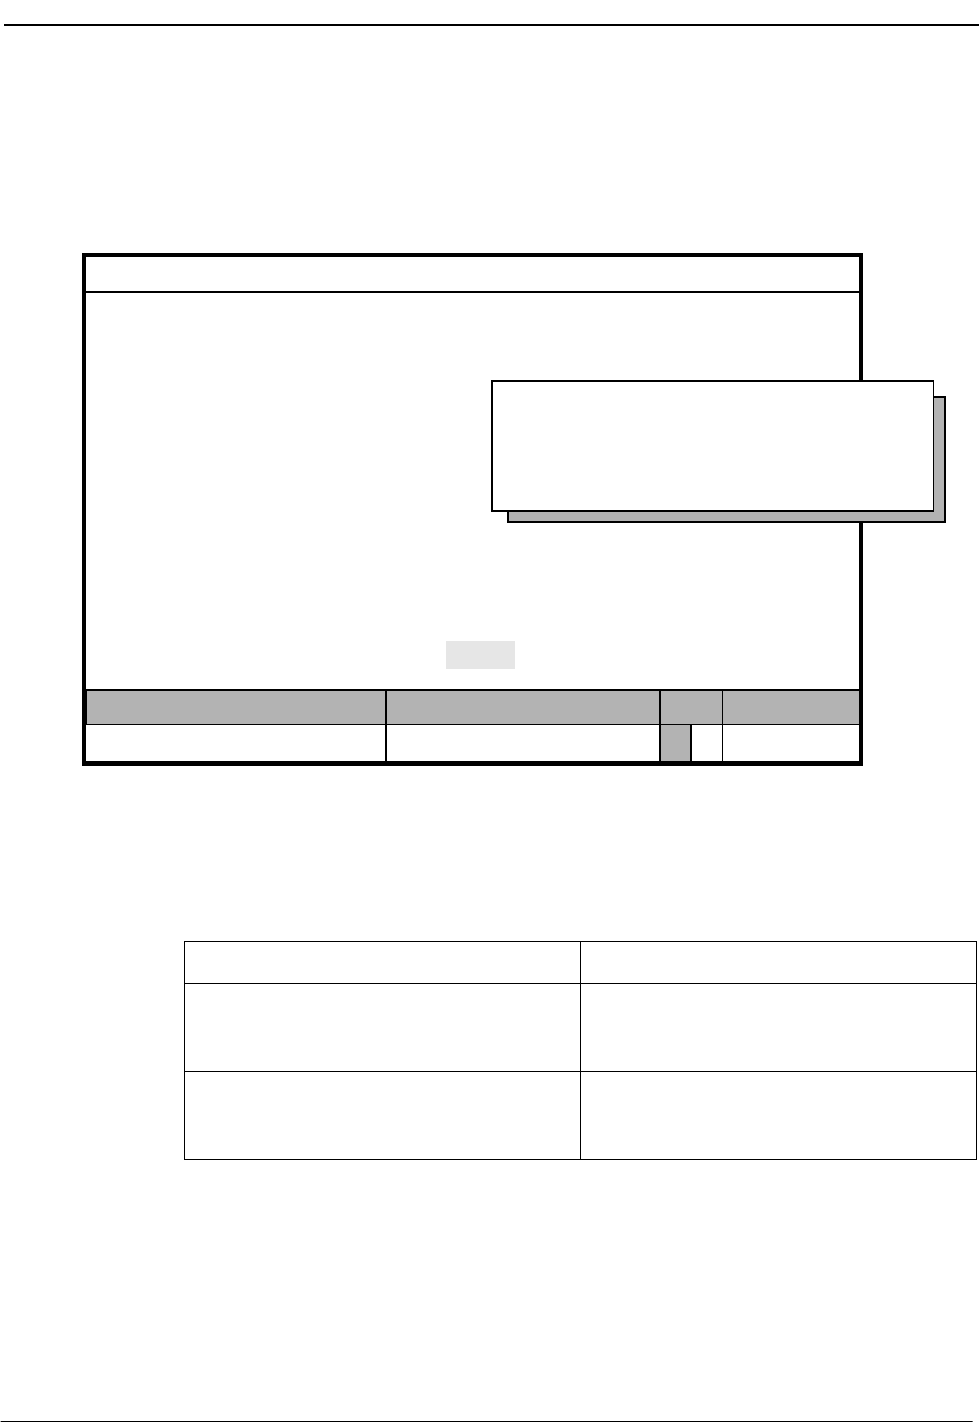
NDA-30026 Revision 6 Page 133
Medical Center System Operations Manual - JAVA Edition SYSTEM ADMINISTRATION
Print
Outstanding
RSC Requests
Use the Print command on the Outstanding RSC Request screen to print all or part of
the outstanding RSC requests in the database.
Figure 7-19 Print Outstanding RSC Requests
Procedure
MCS Status
Attendant Status
Medical Center System
Call Status Trnfr
S
Supervisor Tue Aug 17 09:02 am
DOff-line
*** Outstanding RSC Requests ***
Extension:
Restriction:
Stamped:
Resend Delete View Print Quit
Starting Key:
Ending Key:
<Enter> to begin, <Esc> to Return to Command LIne
Action Result
Type p to select the Print command. A window displays with prompts for the
starting and ending keys for the search
range.
Type the first record value and press Enter,
and type the last and press Enter.All records within the given range are sent
to the printer, and the cursor is positioned
on the command line.
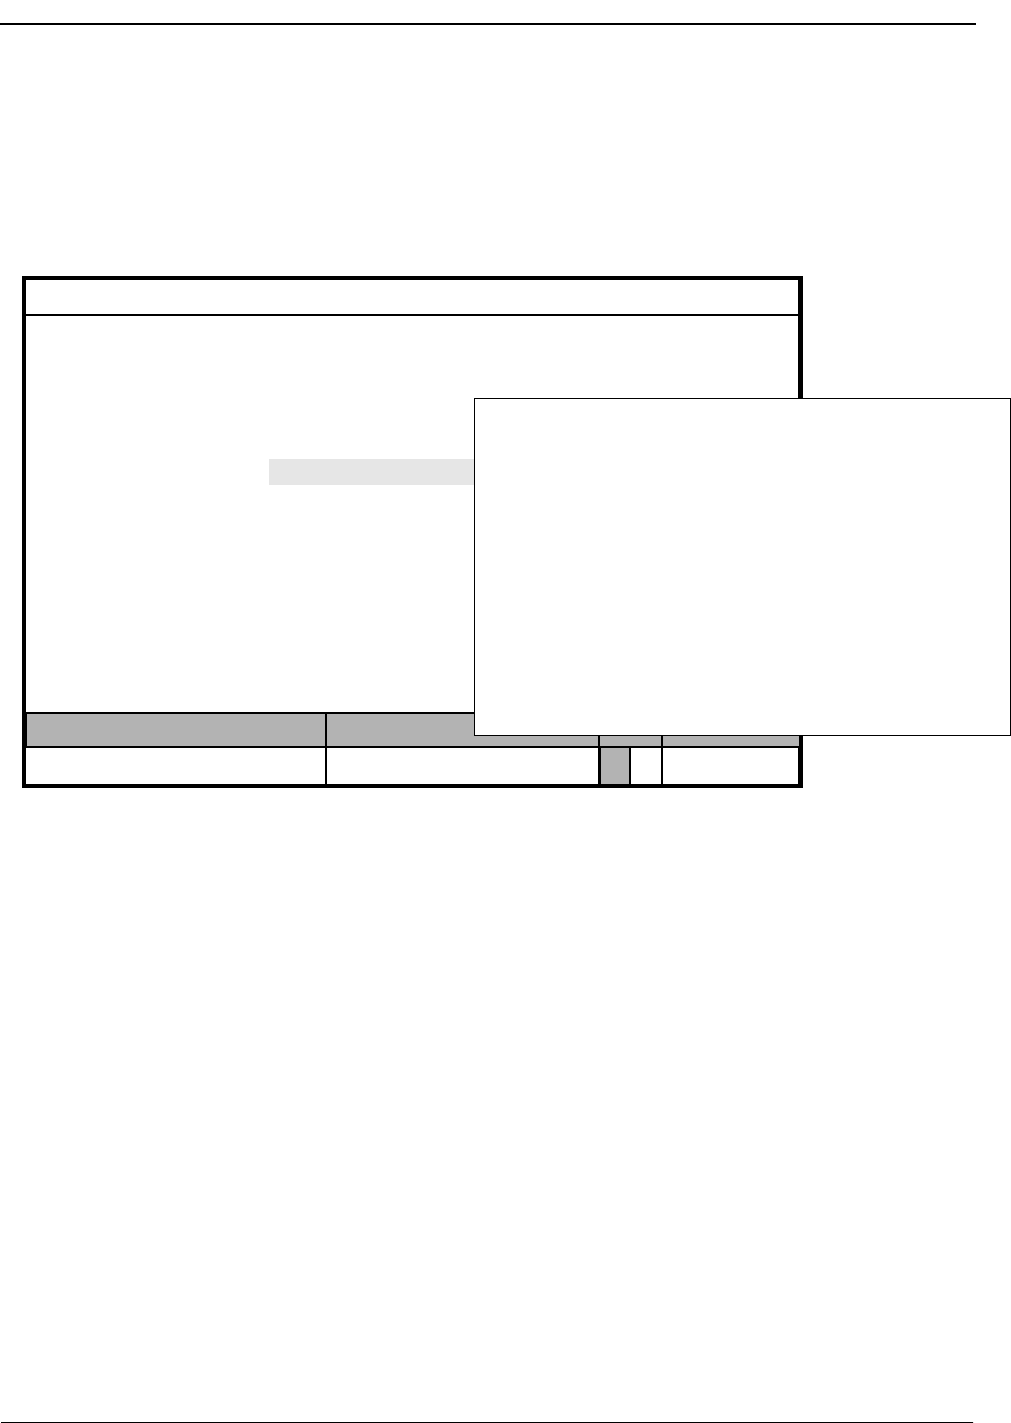
Page 134 NDA-30026 Revision 6
SYSTEM ADMINISTRATION Medical Center System Operations Manual - JAVA Edition
Outstanding DID Requests
Use the Outstanding DID Requests option on the MCS System Administration menu
to manage DID requests that were unsuccessfully sent to the PBX and were entered into
the database of outstanding DID requests as a result.
Figure 7-20 Outstanding DID Requests
Outstanding
DID Database If an error occurs when a message about a DID change is sent to the PBX, the message
is entered automatically into the database of outstanding DID requests. These
outstanding requests remain in this database until the supervisor indicates their
disposition through this option.
Display Fields The records in the DID display show whether the DID number involved in the
transaction is to be made available for future use (removed) or is to remain active. This
table reflects the Logical/Physical table used by the PBX. There are two sets of DID
numbers and two sets of extensions listed per entry. The first set indicates where the
DID number is to be routed, and the second set indicates what happens to the old
extension, such as restoring it to a discharged restriction and clearing the patient’s DID
from its table.
MCS Status
Attendant Status
Medical Center System
Call Status Trnfr
S
Supervisor Tue Aug 17 09:02 am
D
Arrow keys to move cursor, <Enter> to select, <Esc> to quit
*** MCS System Administration ***
RSC Descriptions
Extension Maintenance
Outstanding RSC Requests
Outstanding DID Requests
Quit
Patient DID Numbers
Off-line
(1)
(2)
*** Outstanding DID Requests ***
DID Number:
Extension:
Resend Delete View Print Quit
:
Restriction:
Extension:
DID Number:
Restriction:
Remove DID:
Stamped:

NDA-30026 Revision 6 Page 135
Medical Center System Operations Manual - JAVA Edition SYSTEM ADMINISTRATION
Procedure
Action Result
On the MCS System Administration menu,
type u to select the Outstanding DID
Requests option.
The Outstanding DID Requests screen
displays.
Refer to the following pages for a
description of each command on the
Outstanding DID Requests screen.
To exit the Outstanding DID Requests
screen, type q (quit). The MCS System Administration menu
displays.
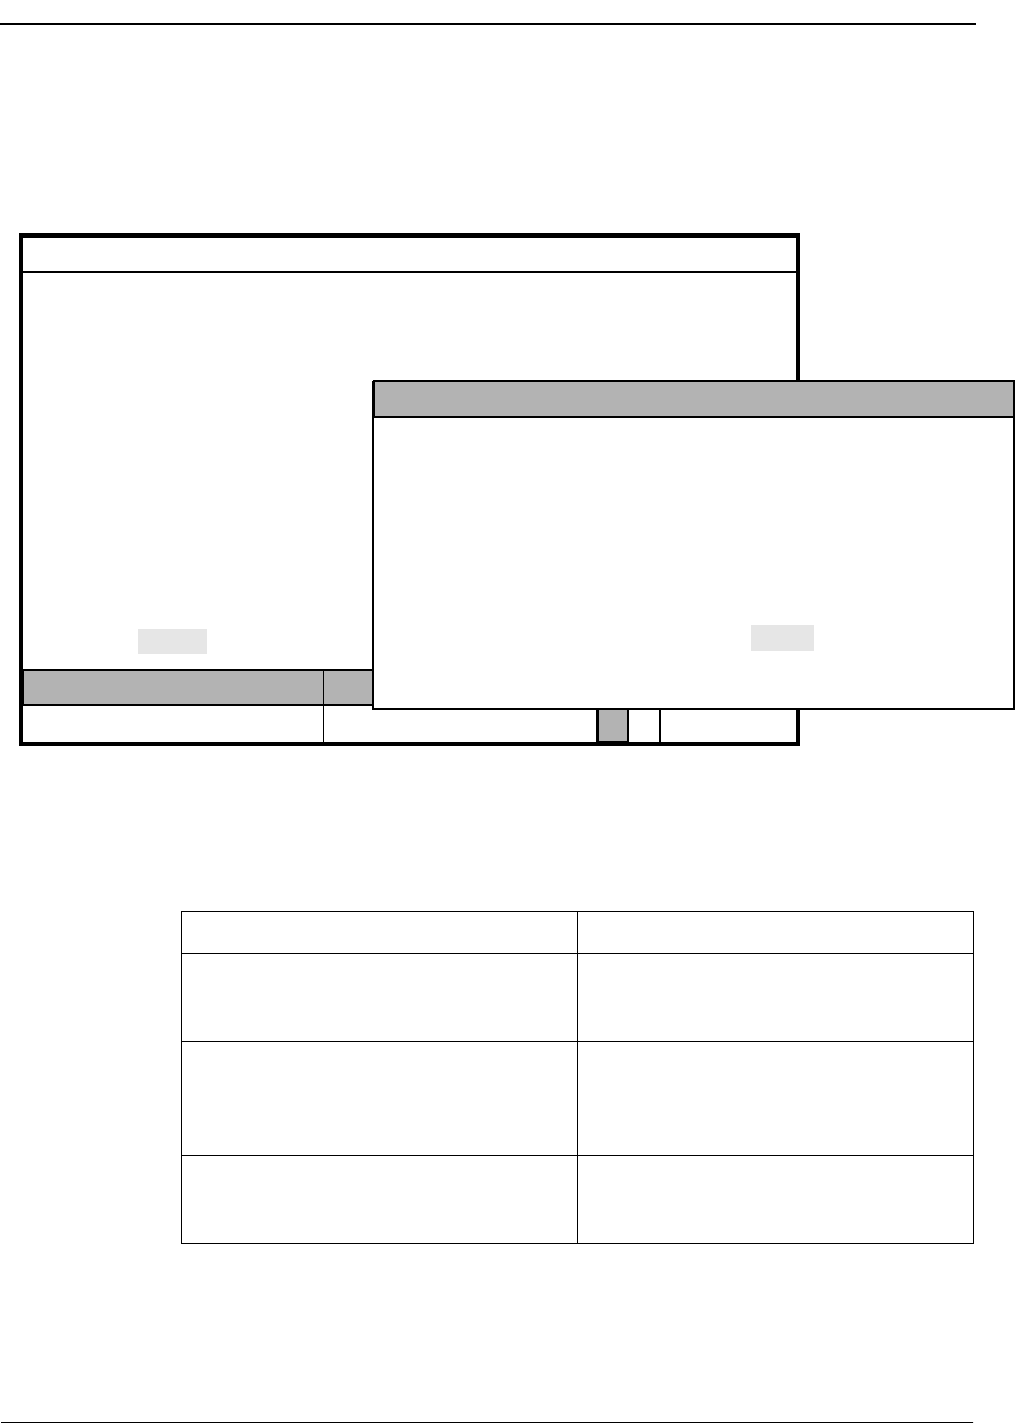
Page 136 NDA-30026 Revision 6
SYSTEM ADMINISTRATION Medical Center System Operations Manual - JAVA Edition
Resend a DID
Request Use the Resend command on the Outstanding DID Requests screen to send an
outstanding DID message to the PBX that could not be sent previously.
Figure 7-21 Resend Outstanding DID Request
Procedure
MCS Status
Attendant Status
Medical Center System
Call Status Trnfr
S
Supervisor Tue Aug 17 09:02 am
DOff-line
(1)
(2)
*** Outstanding DID Requests ***
DID Number:
Extension:
:
Restriction:
Extension:
DID Number:
Restriction:
Remove DID:
Stamped:
Resend Delete View Print Quit Enter DID Number:
<Enter> to search, <Esc> to return to command line
DID Ext Rstr Ext DID Rstr Remove Stamped
Action Result
Press Enter to select the Resend command.
(1) An extension number entry field displays at
the bottom of the screen, and a highlighted
heading displays at the top of the screen. (2)
Type the DID number in the entry field and
press Enter. To display all the outstanding
DID requests, press Enter when the cursor
is on the blank entry field.
The matching DID requests display.
Using the arrow keys, move the highlight to
the desired DID request. Press Enter to
resend the request to the PBX.
The DID request is sent, the Outstanding
DID Requests screen displays, and the
cursor is positioned on the command line.
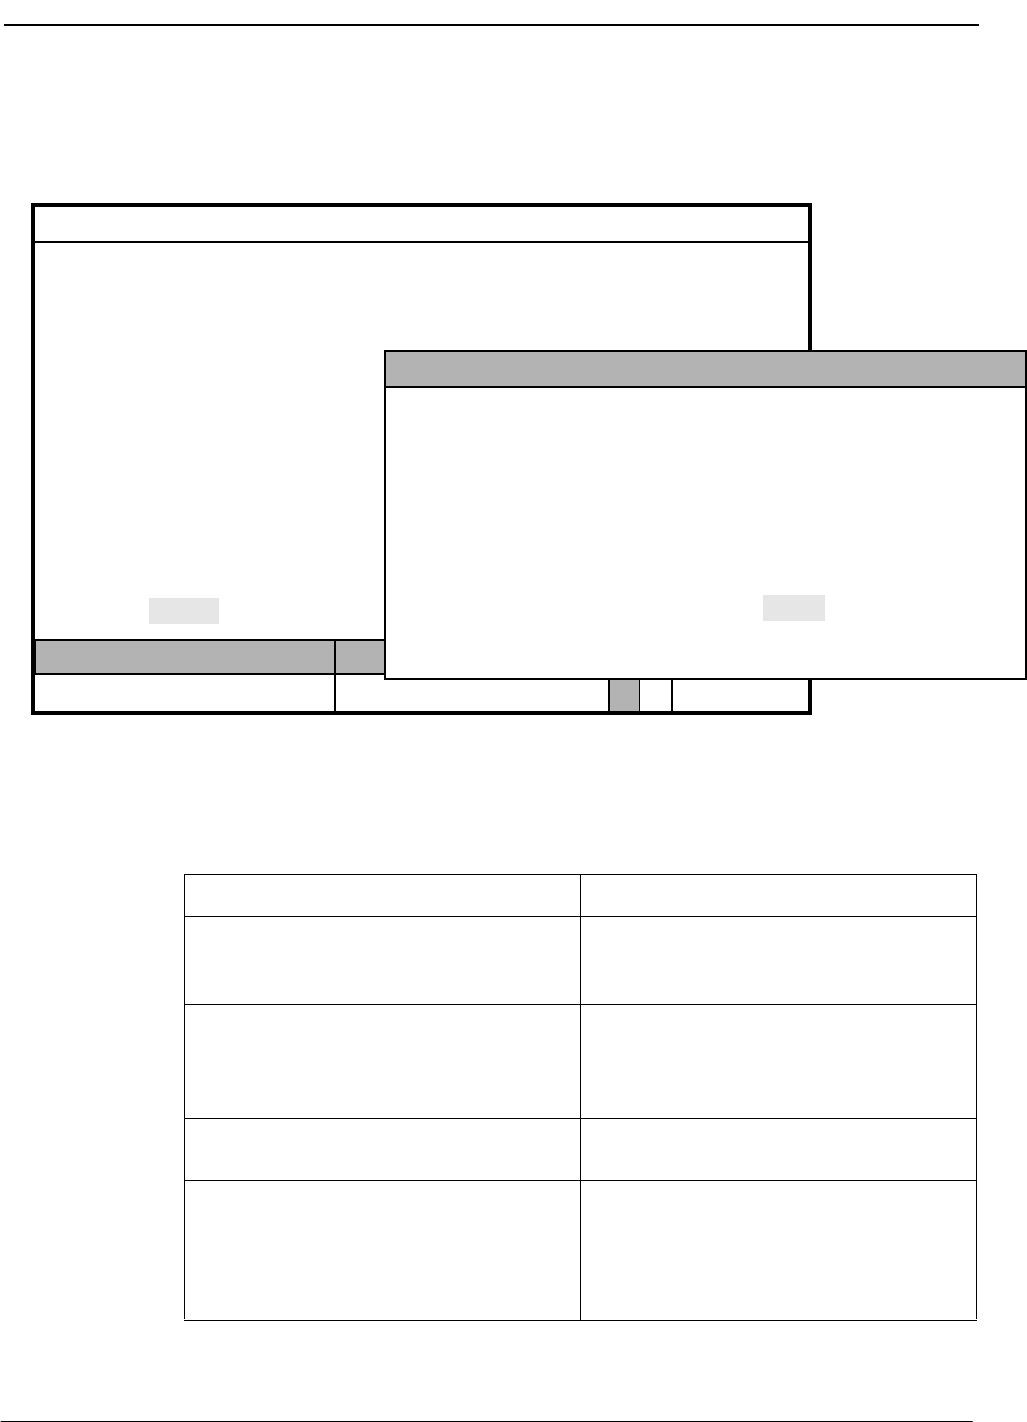
NDA-30026 Revision 6 Page 137
Medical Center System Operations Manual - JAVA Edition SYSTEM ADMINISTRATION
Delete a DID
Request Use the Delete command on the Outstanding DID Requests screen to remove a
DID request from the file of outstanding DID requests.
Figure 7-22 Delete Outstanding DID Request
Procedure
MCS Status
Attendant Status
Medical Center System
Call Status Trnfr
S
Supervisor Tue Aug 17 09:02 am
DOff-line
(1)
(2)
*** Outstanding DID Requests ***
DID Number:
Extension:
:
Restriction:
Extension:
DID Number:
Restriction:
Remove DID:
Stamped:
Resend Delete View Print Quit Enter DID Number:
<Enter> to search, <Esc> to return to command line
DID Ext Rstr Ext DID Rstr Remove Stamped
Action Result
Type d to select the Delete command. (1) An extension number entry field displays at
the bottom of the screen, and a highlighted
heading displays at the top of the screen. (2)
Type the DID number to the entry field and
press Enter. To display all the outstanding
DID requests, press Enter when the cursor
is on the blank entry field.
The matching DID requests display.
Using the arrow keys, move the highlight to
the desired DID request and press Enter.The message “Do you want to delete this?
(Y/N)” displays at the bottom of the screen.
Type Y and press Enter to confirm the
deletion. Type N and press Enter to cancel
it.
If deletion is confirmed, the word
“Deleted” displays in the Attendant Status
Window. “Record not deleted” displays if
the deletion was cancelled. The cursor is
positioned on the command line.
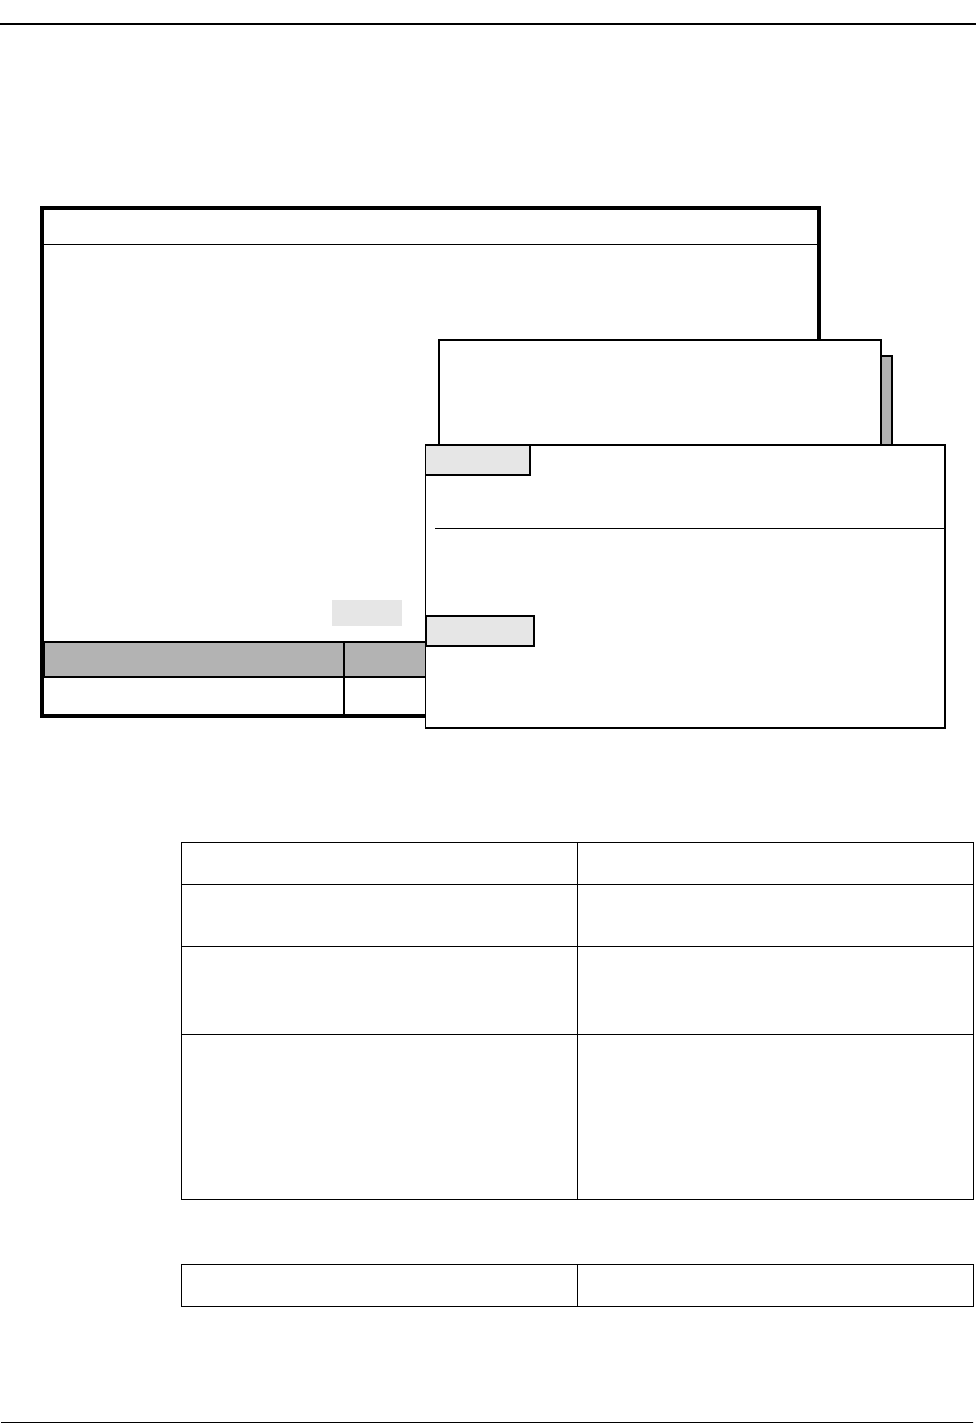
Page 138 NDA-30026 Revision 6
SYSTEM ADMINISTRATION Medical Center System Operations Manual - JAVA Edition
View Outstanding
DID Requests Use the View command on the Outstanding DID Requests screen to display
outstanding DID requests for viewing or printing.
Figure 7-23 View Outstanding DID Requests
Procedure
MCS Status
Attendant Status
Medical Center System
Call Status Trnfr
S
Supervisor Tue Aug 17 09:02 am
DOff-line
(1)
(2)
*** Outstanding DID Requests ***
DID Number:
Extension:
:
Restriction:
Extension:
DID Number:
Restriction:
Remove DID:
Stamped:
Resend Delete View Print Quit
(3)
Starting Key:
Ending Key:
<Enter> to begin, <Esc> to Return to Command LIne
Top of File *** Outstanding DID Requests ***
DID Ext Rstr Ext DID Rstr Remove Stamped
4601
End of File
DownPage UpPage Search Top Bottom Print Quit
12 08/10 10:16a
4688
4692
10
12 08/17 08:12a
08/15 11:16p
12
10
12
3300
3644
3045
3300
3644
3692
4601
4633
4692
No
Yes
Yes
Action Result
Type v to select the View command. (1) A window displays prompts for the starting
and ending keys for the search range. (2)
Type the starting extension number and the
ending extension number, pressing Enter
after each.
All records within the given range display
for viewing.
Use the DownPage command to move
forward one page, the UpPage command to
move back one page, the Top command to
move to the beginning of the display, and
the Bottom command to move to the end of
the display.
Action Result

NDA-30026 Revision 6 Page 139
Medical Center System Operations Manual - JAVA Edition SYSTEM ADMINISTRATION
Search the Display: Type s to select the
Search command. At the prompt, type the
desired pattern and press Enter.
Print the Display: Type p to select the Print
command. At the prompt, type f to print the
whole file or s to print the screen and press
Enter.
All occurrences of the given pattern on that
page highlight.
There is a pause while the material is sent to
the printer. Then the cursor is positioned on
the command line.
To exit the Outstanding DID Request
display, type q (quit). The Outstanding DID Requests screen
displays, and the cursor is positioned on the
command line.
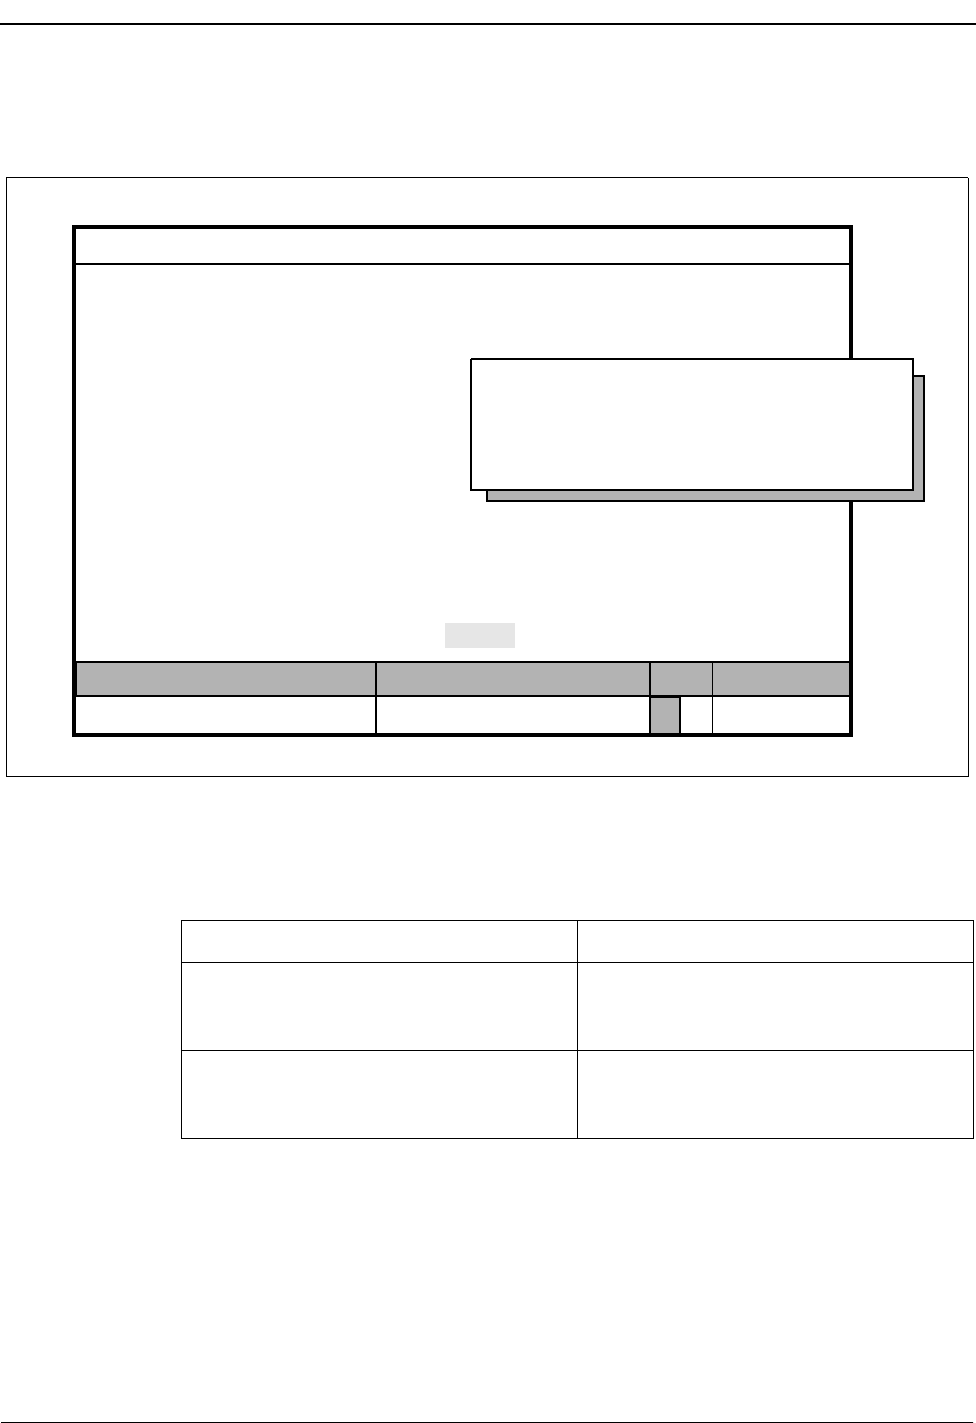
Page 140 NDA-30026 Revision 6
SYSTEM ADMINISTRATION Medical Center System Operations Manual - JAVA Edition
Print Outstanding
DID Requests Use the Print command on the Outstanding DID Request screen to print all or part
of the outstanding DID requests in the database.
Figure 7-24 Print Outstanding DID Requests
Procedure
MCS Status
Attendant Status
Medical Center System
Call Status Trnfr
S
Supervisor Tue Aug 17 09:02 am
DOff-line
*** Outstanding DID Requests ***
DID Number:
Extension:
:
Restriction:
Extension:
DID Number:
Restriction:
Remove DID:
Stamped:
Resend Delete View Print Quit
Starting Key:
Ending Key:
<Enter> to begin, <Esc> to Return to Command LIne
Action Result
Type p to select the Print command. A window displays with prompts for the
starting and ending keys for the search
range.
Type the first record value and press Enter,
and type the last and press Enter.All records within the given range are sent
to the printer, and the cursor is positioned
on the command line.
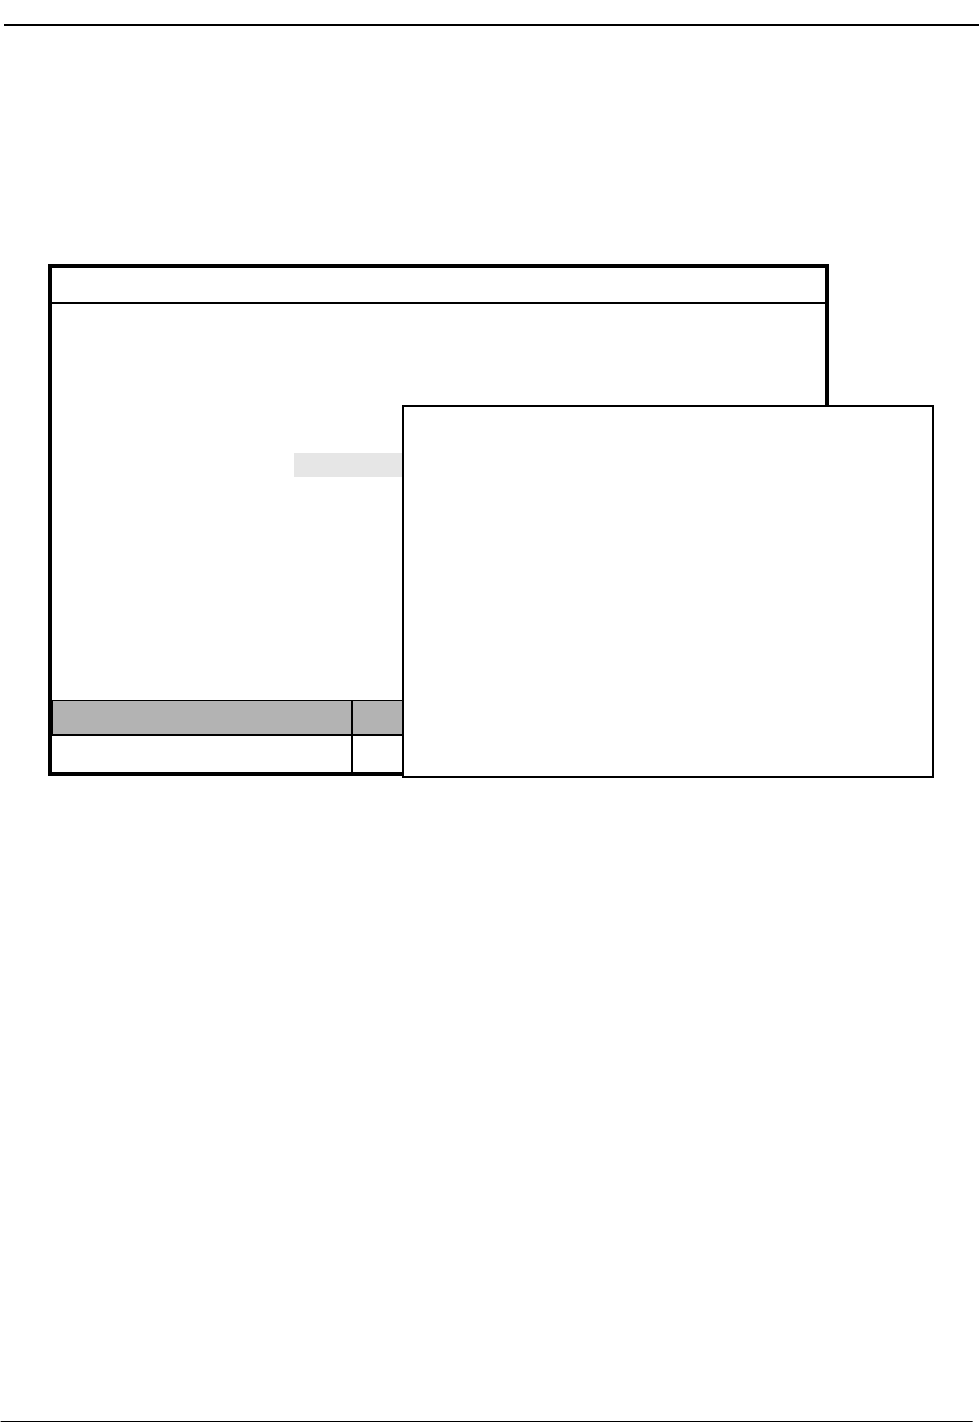
NDA-30026 Revision 6 Page 141
Medical Center System Operations Manual - JAVA Edition CONFIGURATION MANAGEMENT
Chapter 8 CONFIGURATION MANAGEMENT
Use the Configuration Management option on the Main Menu to change or print
configuration parameters that are under supervisor control.
Figure 8-1 Platform Management
Displayed Parameters
These configuration parameters give the supervisor some choices in managing the
system. The supervisor can alter aspects of operator functions and the operator
screen display. Figure 8-1 contains the default values entered during installation of
the MCS. Enter a zero value in a time-out field to turn off the timer.
(1)
MCS Status
Attendant Status
Medical Center System
Call Status Trnfr
S
Supervisor Tue Aug 17 09:02 am
D
*** Main Menu ***
Database Administration
System Administration
Login Name Maintenance
Quit
Arrow keys to move cursor, <Enter> to select, <Esc> to quit
Supervisor Reports
Operator Functions (2)
Off-line
Configuration Management
*** Configuration Management ***
Discharges Removed (hours): 72
DID Dest. for Discharged Patients:
Restriction for Patients with no Srv:
Restriction for Patient Phone Service:
Att Name Label (include ’#’):
Default Transfer Type:
Patient Room Displayed Field #1:
Patient Room Displayed Field #1:
Operator Database Access:
Max Records from Queries:
Hot Key to Sub-directories:
One Key Stroke to Execute Commands:
Oper access to Confidential Patients:
0
Local-3
Local-1
ATT#
Direct
Account_Number
Nurse_Station
No
40
Yes
Yes
Modify Print Quit

Page 142 NDA-30026 Revision 6
CONFIGURATION MANAGEMENT Medical Center System Operations Manual - JAVA Edition
Procedure
Action Result
On the MCS Main Menu, type c to select
the Configuration Management option. The Configuration Management screen
displays.
To Change the Parameters:
Type m to select the Modify command. Use
the arrow keys to move among fields and
press Enter after each entry to change the
fields, as described below:
Field Name
Discharges Removed Definition
Amount of time in hours that a patient room
record remains in the MCS database once it
has been changed to a status of Discharged.
When this timeout occurs, MCS
automatically removes the record from the
database. This timeout also affects DID
numbers that have been offered but for
which there has not been a patient record to
change their status to Pending or Active.
DID Dest. for Discharged Patients The number that is called when calls arrive
for discharged patients who still have DIDs.
Restriction for Patient with no Srv The description of the RSC value to which
the phone is set for a patient who has not
contracted for phone service. The value
described here is found through the RSC
Description option on the MCS System
Administration menu.
Restriction for Patient Phone Service The description of the RSC value to which
patient phone service is set. The value
corresponding to this description is found
through the RSC Description option on the
MCS System Administration menu.
Att Name Label Name by which all attendant stations are
known. The name can be anything as long
as it contains a # sign that MCS replaces
with the attendant number.
Note: The name of the supervisor station is
static and does not need to be set here.
Default Transfer Type Default type of transfer displayed on the
screen and performed through the Directory
Assistance window. (Direct or screen)

NDA-30026 Revision 6 Page 143
Medical Center System Operations Manual - JAVA Edition CONFIGURATION MANAGEMENT
Action Result
To Change the Parameters: (Cont)
Field Name
Patient Room Displayed Field (1 & 2) Definition
The fields displayed in the two extra lines in
the Source Caller window from among all
of the fields in the patient room record.
When the cursor is moved to this field, a
pop-up window displays a list of fields that
may be selected for the Source Caller
window. Use the space bar to position the
highlight on the desired field and press
Enter to select it.
Operator Database Option Whether an operator is allowed access to
the Database Administration option from
the MCS Main Menu, using the following
options:
Yes: Type an operator password to
display the MCS Main Menu.
No: Type an operator password to
display the Operator Functions
screen without passing through
the MCS Main Menu first.
Max Records from Queries The largest number of records that are ever
displayed for the entered pattern when a
search has been performed. This value is
used to prevent accidental searches of the
whole database that might take several
minutes.
Hot Key to Sub-directories The key that the operator can type as the
first character of the name or room in the
Directory Assistance lookup to display a
list of the sub-directories, or types of
records, in the database. Select a specific
type of record for a faster and more efficient
search.
Note: The character @ will cause the sub-
directory look-up screen to appear
immediately after the Directory func-
tion is activated.

Page 144 NDA-30026 Revision 6
CONFIGURATION MANAGEMENT Medical Center System Operations Manual - JAVA Edition
Action Result
To Change the Parameters: (Cont)
Field Name
One Key Stroke to Execute Commands Definition
Whether choice of menu options and
commands is made by pressing the
highlighted letter only (Yes) or by pressing
the highlighted letter and then pressing
Enter (No).
Oper access to Confidential Patients Whether operators may view the listings of
confidential patients when using Directory
Assistance.
To Print the Parameters:
Type p to select the Print command. The displayed parameters are sent to the
printer configured for the MCS.
To exit the display, press Esc to return to the
command line and type q (quit). The MCS Main Menu displays.
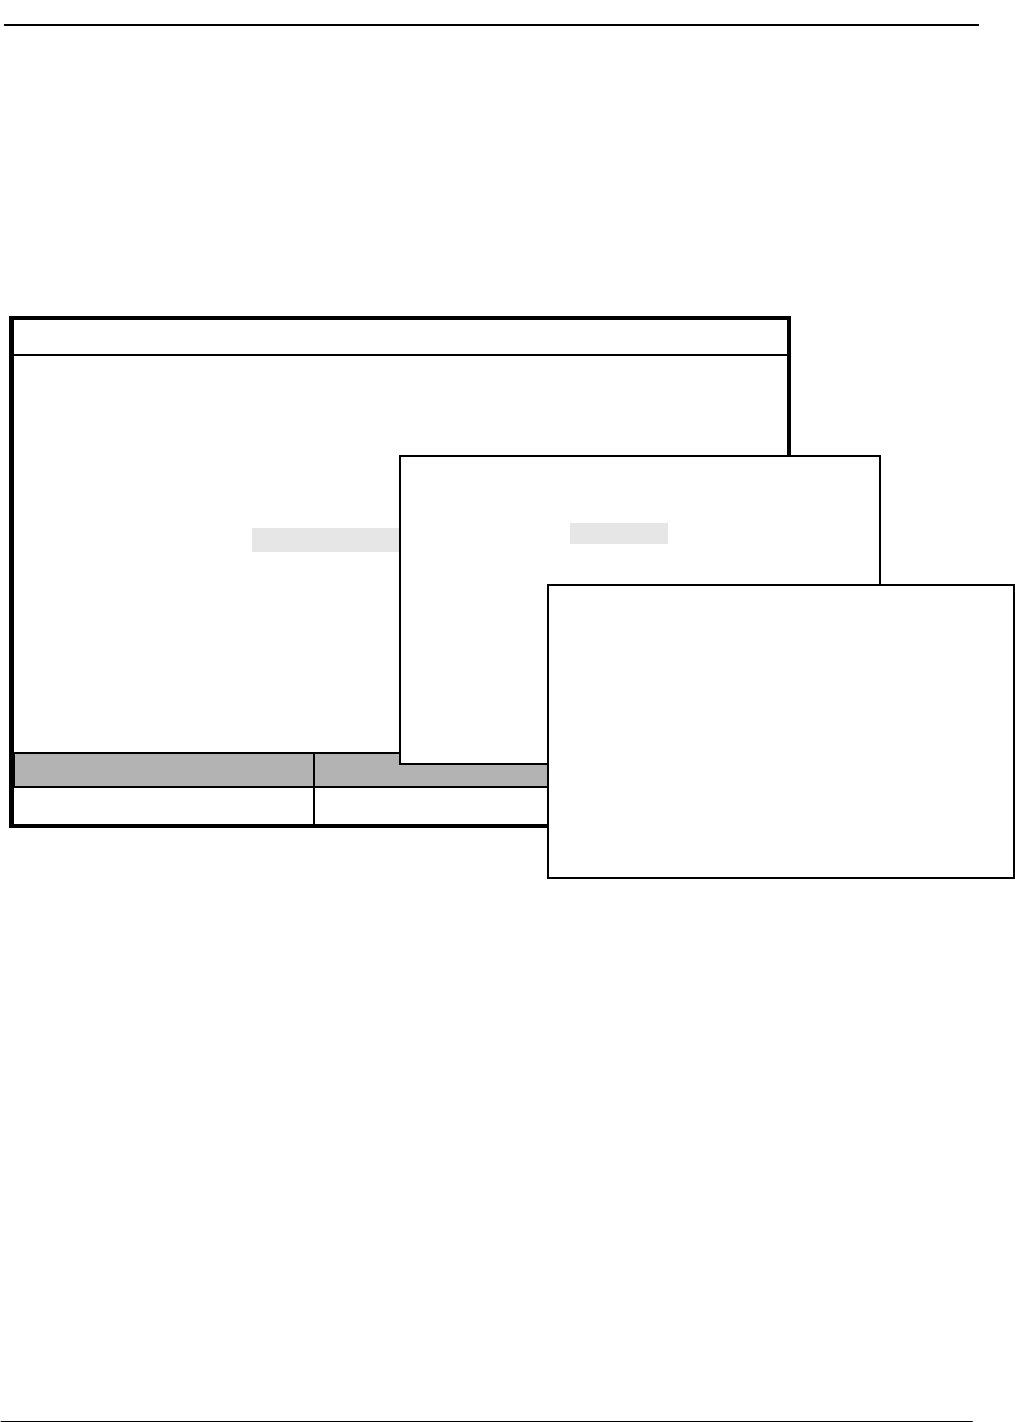
NDA-30026 Revision 6 Page 145
Medical Center System Operations Manual - JAVA Edition LOGIN NAME MAINTENANCE
Chapter 9 LOGIN NAME MAINTENANCE
Use the Login Name Management option on the MCS Main Menu to add, delete,
and modify login names and passwords and to print and view operator names.
Login names are used when generating all reports in the MCS.
Figure 9-1 Login Name Maintenance
Option Overview
You can use this option to alter names and/or passwords for the operators and the
supervisor. Select the Operator option to display prompts for the operator name
and the password for that operator. Select the Supervisor option to display
prompts for entry of the supervisor name and the password for the supervisor. All
internal MCS operator names and passwords must be entered via this option. Any
number of operator names can be added, deleted, changed, viewed, and printed.
However, only one supervisor login name and password may exist at any time.
MCS is installed with a default supervisor login name and password; thus, the only
commands available on the Supervisor Login Name screen are Modify and Quit.
Both of the supervisor commands function in the same manner as they do on the
Operator Login Name screen.
MCS Status
Attendant Status
Medical Center System
Call Status Trnfr
S
Supervisor Tue Aug 17 09:02 am
D
*** Main Menu ***
Database Administration
System Administration
Quit
Arrow keys to move cursor, <Enter> to select, <Esc> to quit
Supervisor Reports
Operator Functions
Off-line
Configuration Management
Login Name Maintenance
*** Login Name Maintenance ***
(1)
(2)
(3)
Operator
Supervisor
Quit
Arrow keys to move cursor, <Ret> to select, <Esc> to quit
*** Operator Login Names ***
Operator Name:
Password:
Add Delete Modify View Print Quit

Page 146 NDA-30026 Revision 6
LOGIN NAME MAINTENANCE Medical Center System Operations Manual - JAVA Edition
Search Function
Unlike other search functions in MCS, the operator name must be entered in full. MCS
does not retrieve and display operator names from partial entries.
View Function
The View command displays a list of all current attendant login names that are stored
in MCS. This list can also be printed.
Procedure
The following procedure describes both operator and supervisor login name functions.
Remember, while operator login names can be added, deleted, changed, viewed, or
printed, the single supervisor login name can only be changed, as shown in the
procedure below.
Action Result
On the MCS Main Menu, type l to select the
Login Name Maintenance option. The Login Name Maintenance screen
displays for selection of operator or
supervisor login name.
Type the highlighted letter of the desired
option. The login name screen for the chosen
option displays. If you selected Operator,
the command line displays options to add,
delete, modify, view, or print. If you
selected Supervisor, the command line
displays only the option to modify.
To Add an Operator
Type a to select the Add command.
Type the full name or number of the new
operator (up to eight alphanumeric
characters) and press Enter. Then, type the
password (up to ten alphanumeric
characters) and press Enter.
Type Y and press Enter to save the operator
addition. Type N to cancel it.
The cursor is positioned on the Operator
Name field.
The message “Do you want to insert this?
(Y/N)” displays.
The notation “Inserted” or “Record not
inserted” displays under Attendant Status.
The cursor is positioned on the command
line.

NDA-30026 Revision 6 Page 147
Medical Center System Operations Manual - JAVA Edition LOGIN NAME MAINTENANCE
Action Result
To Delete an Operator
Type d to select the Delete command.
Type the name or number of the operator to
be deleted from the database and press
Enter.
Type Y and press Enter to confirm the
deletion. Type N and press Enter to cancel
it.
The cursor is positioned on the Operator
Name field.
The message “Do you want to delete this?
(Y/N)” displays.
The notation “Deleted” or “Record not
deleted” displays under Attendant Status
and the cursor is positioned on the
command line.
To Change an Operator or Supervisor
Login
Type m to select the Modify command.
Type the full name or number of the
operator whose login is to be changed and
press Enter.
Make a new entry to the password field as
required and press Enter.
Type Y(es) to save the changes or N(o) to
cancel the changes. Press Enter after either
entry.
The cursor is positioned on the Operator
Name field.
If the entry is valid, the cursor moves to the
password field for data entry.
A message displays on the command line
for confirmation before saving the changes.
To View All Operator Login Names
Type v to select the View command.
Use the DownPage command to move
forward through the pages, the UpPage
command to move back through the pages,
the Top command to move directly to the
beginning of the list, and the Bottom
command to move directly to the end of the
list.
The Operator Login Names screen displays
the list of operators by name.

Page 148 NDA-30026 Revision 6
LOGIN NAME MAINTENANCE Medical Center System Operations Manual - JAVA Edition
Figure 9-2 View Operator Login Names
Action Result
Search the Display: Type s to select the
Search command. At the prompt, type the
full name or number of the desired operator
and press Enter.
Print the Display: Type p to select the Print
command. At the prompt on the command
line, type f to print the whole file or s to
print just the screen and press Enter.
The display is moved as necessary to show
the desired name or number in highlight.
There is a pause while the file or screen is
sent to the printer. The cursor is positioned
on the command line.
To Print the Displayed Login Name and
Password
Type p to select the Print command. The Operator Name and Password
currently displayed is sent to the printer.
To exit the Operator Login Names screen,
type q (quit). The Login Name Maintenance screen
displays and the cursor is positioned on the
command line.
To exit the Login Name Maintenance
screen, type q (quit). The MCS Main Menu displays.
*** Operator Login Names ***
DownPage UpPage Search Top Bottom Print Quit
Top of File
End of File
amy
john
terry

NDA-30026 Revision 6 Page 149
Medical Center System Operations Manual - JAVA Edition SUPERVISOR REPORTS
Chapter 10 SUPERVISOR REPORTS
Use the Supervisor Reports option on the MCS Main Menu to view daily
statistics on operator activity. Error messages are added to the end of each day’s
file for easy access and display.
Figure 10-1 Supervisor Reports
Date-Stamped Files
Select this option to display a menu of date-stamped files for viewing. The dates
show the period of time covered by the statistics in the file. Each night at midnight
the statistics gathered since the previous night at midnight are saved in a file named
with the month and day of those statistics. For example, the statistics gathered from
August 15 at midnight until August 16 at midnight are stored in a file named 08.16.
The current day’s statistics are not available for viewing until midnight, when they
are formatted and stored. These files are stored in the system for two weeks after
their date-stamp. Then, they are automatically deleted.
MCS Status
Attendant Status
Medical Center System
Call Status Trnfr
S
Supervisor Tue Aug 17 09:02 am
D
*** Main Menu ***
Database Administration
System Administration
Configuration Management
Login Name Maintenance
Quit
Arrow keys to move cursor, <Enter> to select, <Esc> to quit
Operator Functions
Off-line
Supervisor Reports
*** Supervisor Reports ***
(1)
(2)
>error log
08.16
08.15
08.14
08.13
08.12
08.11
08.10
08.09
<SHF>d next page, <SHF>u previous page,
(3)
Top of File *** Operator Statistics Report ***
08/16
More
Operator Login Logout Answered Answered Assist Park Rtrv
amy 09:00a 12:00p
Internal External Dir
232 555 123 23 21
john
julie
01:04p 03:00p
4h55
12:00p 01:00p
01:55p 06:66p
5h05
12:13a 02:00a
02:23a 04:14a
04:30a 06:02a
5h10
322
554
132
412
544
101
12
54
167
403
958
145
683
828
123
72
115
310
234
357
16
317
333
52
9
32
93
55 50
78 71
3 3
66 62
69 65
87 72
13 7
23 17
123 96
DownPage UpPage Top Bottom Search Print Quit

Page 150 NDA-30026 Revision 6
SUPERVISOR REPORTS Medical Center System Operations Manual - JAVA Edition
Operator Statistics
When a report is chosen for viewing, the following statistics are displayed for each
operator:
Login The time that the operator logged into the MCS and the
Operator Functions screen.
Logout The time that the operator logged out of the Operator
Functions screen.
Internal Answered The number of internal calls answered by the operator while
in On-Line or Park-off status.
External Answered The number of external calls answered by an operator while in
On-Line or Park-off status.
Dir. Assist The total number of directory assistance transfers performed
by this operator.
Park The total number of calls parked by this operator.
Rtrv. The total number of parked calls retrieved and connected to
the paged party by this operator.
Totals are shown, by operator, for logged-in time and for the remaining columns.

NDA-30026 Revision 6 Page 151
Medical Center System Operations Manual - JAVA Edition SUPERVISOR REPORTS
Procedure
Action Result
On the MCS main Menu, type u to select
the Supervisor Reports option. (1) The Supervisor Reports screen displays a
list of dates, each representing a daily report
of operator activity. (2)
Select the desired report date and press
Enter.The report displays. (3)
Use the DownPage command to move
forward through the pages, the UpPage
command to move back through the pages,
the Top command to move directly to the
beginning of the display, and the Bottom
command to move directly to the end of the
display.
Search the Display: Type s to select the
Search command. Type a pattern of letters
and/or numbers that contains up to eight
characters. Then press Enter.
Print the Display: Type p to select the Print
command. At the prompt on the command
line, type f to print the whole file or s to
print just the screen and press Enter.
To exit the selected report display, type q to
select the Quit command.
Every occurrence of the pattern highlights
in the displayed report.
There is a pause while the file or screen is
sent to the printer, and the cursor is
positioned on the command line.
The Supervisor Reports menu displays.
To exit the Supervisor Reports menu, press
Esc.The MCS Main Menu displays.

SUPERVISOR REPORTS Medical Center System Operations Manual - JAVA Edition
Page 152 NDA-30026 Revision 6
This Page Left Blank.

NDA-30026 Revision 6 Page 153
Medical Center System Operations Manual - JAVA Edition PROCESS AND ERROR MESSAGES
Chapter 11 PROCESS AND ERROR MESSAGES
This chapter contains a listing of the messages that may be displayed throughout
MCS. A brief description follows each message. Some include required recovery
maneuvers.
– – – – – – – – – – – – – – – – – – – – – – – – – – – – –
# more source caller record(s). attwinmsg
More source callers are associated with this extension. Press up- and down-
arrow keys to view the list.
<Extension> is using RSC <RSC value>,
description has been restored. attwinmsg
MCS tried to clear the description of a restriction that is being used for an
extension.
A record already exists for this group and time. Ioerr
It is not possible to schedule two changes at the same time for the same group.
Account field cannot be empty. attwinmsg
An attempt has been made to leave the account field blank.
Account number is not unique. attwinmsg
A patient has already been assigned this account number. Use another.
Age is all numeric or it ends in ‘m’ or ‘d’.attwinmsg
Do not leave the age field blank. Use the pound sign (#) followed by an ‘m’ for
months or ‘d’ for days, if needed.
Alert from <attendant #>. attwinmsg
This message is displayed on the supervisor’s console, before its Dterm is
answered, after an operator has given a supervisor alert.
Alerting the supervisor. attwinmsg
This message confirms that the supervisor is being alerted.
Apinform erred on server, see APM log. errmsg
An attempt to get OAI application information has failed. Refer to the APM
error log through the APM Operations Menu.
APM send error. Cmnerr
The administrator should check the APM log to see that the Monitor and Server
components are both initialized.
Apmsend error, see APM log records. errmsg
An error occurred while a message was being sent to an OAI application. Refer
to the APM error log on the APM Operations Menu. (This is displayed as
“Apmsend error, see APM log records” in the error log. Refer to the APM error
log through the APM Operations Menu.)

Page 154 NDA-30026 Revision 6
PROCESS AND ERROR MESSAGES Medical Center System Operations Manual - JAVA Edition
Attempting to call <extension>.
This message displays the extension number when a call is being attempted.
Attendant Id must be between 1 and <Id Limit>. attwinmsg
This message gives the range within which the attendant ID number must fall. This
means that the entered ID is outside the range.
Attendant name must be unique. DBermsg
This name has already been entered. Someone may have added it before it was
added here.
Bed must be between 0 and 2. attwinmsg
Entered bed number is not acceptable. 0 means private; 1 and 2 mean semi-private
room.
Bed not entered for rooms without extensions. attwinmsg
This is a reminder that if a room is entered without an extension, no bed is to be
entered.
Calling <extension>. attwinmsg
The listed extension has been successfully re-dialed.
Calling beeper. attwinmsg
The beeper has been called.
Calling emergency number. attwinmsg
After an emergency notification, the number to the selected emergency team or
agency is being called.
Cannot assign another bed to a private room. attwinmsg
An attempt has been made to add a bed assignment to a room that already has a bed
‘0’, meaning a private room.
Cannot assign bed 0 to a non-private room. attwinmsg
An attempt has been made to assign a ‘0’ bed to a room that has previously been
assigned as non-private.
Cannot delete a DID group assigned within a DID schedule. Ioerr
Removing a DID group with a corresponding schedule is prohibited. Remove the
scheduled changes for this DID group, and then retry.
Cannot delete an RSC group if it used within an RSC schedule. Ioerr
Removing an RSC group with a corresponding schedule is prohibited. Remove the
scheduled changes for this RSC group, and then retry.
Cannot park another attendant. attwinmsg
MCS does not support parking of an attendant by a fellow attendant.
Checking that RSC <RSC value> is not being used, one moment. attwinmsg
This is a status message that is displayed while changing an RSC description.

NDA-30026 Revision 6 Page 155
Medical Center System Operations Manual - JAVA Edition PROCESS AND ERROR MESSAGES
Complete attwinmsg
Directory assistance or call parking succeeded.
Complete, but cannot release you. attwinmsg
Manually press release or cancel.
Conversation monitoring ended. attwinmsg
The supervisor who was monitoring the conversation hung up the Dterm and is no
longer monitoring.
Database Errors: errmsg
The following errors occur in the database. The administrator should look in the
MCS error log for the exact 9000 or 10000 level error. If it is in the 10000 level, the
last 3 digits are the Informix error code. The first phrase below is the manner in
which the message is displayed, and the second phrase is the second is the manner
in which they are referred to in the error log. Each of these error statements are listed
elsewhere alphabetically.
Operator Screen Display Error Log Display
Error putting request in database. Error creating MCS database [MCSdb].
Error inserting record. Error inserting a record into the database.
DB error when finding attendant. Error when finding attendant in database.
DB error when finding beep code. Error when finding beeper code in database.
Database deletion error. Error deleting a record from the database.
Directory database lookup error. Error when doing directory lookup in database.
Error locking a record in the db. Error locking a record in the database.
Error unlocking database record. Fatal error unlocking database record.
Error matching an RSC in the db. Error matching an RSC in the database.
Database error modifying record. Error modifying a record in the database.
Err finding name of paged party. Error when finding recalled park record in db.
Error querying the database. Error querying the database.
DB error when finding source clr. Error when finding source caller in database.
DB error when finding trunk. Error when finding trunk in database.
Wrong type returned from dblookup. Error in type returned from database lookup.
Error building MCS database indexes [MCSdb].
Error droppng MCS database indexes [MCSdb].
Error rebuilding MCS database indexes [MCSdb].
Database deletion error. errmsg
See “Database Errors.”
Database error modifying record. errmsg
See “Database Errors.”
Date must be in form <mm/dd>. attwinmsg
Expected form is mm/dd.

Page 156 NDA-30026 Revision 6
PROCESS AND ERROR MESSAGES Medical Center System Operations Manual - JAVA Edition
Day is out of range. attwinmsg
The entered day is not in the month; try again.
DB error when finding attendant. errmsg
See “Database Errors.”
DB error when finding beep code. errmsg
See “Database Errors.”
DB error when finding source clr. errmsg
See “Database Errors.”
DB error when finding trunk. errmsg
See “Database Errors.”
DID group does not exist. DBermsg
An attempt has been made to schedule something (DID/RSC change) for a group or
time index that does not exist.
DID is already in use. attwinmsg
This DID number is not being used by a patient, even though it has been entered for
a patient.
DID is not available for use. attwinmsg
This DID number has not been allocated for use, even though it has been entered for
a patient.
DID must be all numeric. attwinmsg
An attempt has been made to enter a DID that was not all numeric.
DID number does not exist. attwinmsg
This DID number is not in the pool; ask the administrator to add it if it is a valid
number.
DID number no longer available. errmsg
This DID is currently in use by another patient or waiting for the configured time to
be put back into the available pool.
Directory database lookup error. errmsg
See “Database Errors.”
Directory service not available. errmsg
The attempt to get the OAI application information failed. Refer to the APM error
log through the APM Operations Menu. (Displayed as “Apinform errored on server,
see APM log.” in error log; refer to APM error log through the APM Operations
Menu.)
Emergency station is ringing. attwinmsg
This message is displayed after an emergency notification.
Err finding name of paged party./

NDA-30026 Revision 6 Page 157
Medical Center System Operations Manual - JAVA Edition PROCESS AND ERROR MESSAGES
Error when finding recalled park record in db. errmsg
See “Database Errors.”
Errno > sys_nerr. Cmnerr
UNIX error message is too large to print its corresponding text.
Error building MCS database indexes [MCSdb]. errmsg
See “Database Errors.”
Error checking use of RSC <RSC value>,
description has been restored. attwinmsg
A problem occurred while checking a blanked out RSC description; the previous
non-blank description has been restored.
Error creating MCS database [MCSdb]. errmsg
See “Database Errors.”
Error deleting a record from the database. errmsg
See “Database Errors.”
Error droppng MCS database indexes [MCSdb]. errmsg
See “Database Errors.”
Error in file size expected. Cmnerr
This circumstance is unlikely to occur. If it does, look at the MCS error log for the
filename.
Error in menu command. errmsg
An error occurred while the application was trying to implement a menu command
such as displaying a file.
Error in multiple screen program errmsg
Ask the administrator to make sure that a file exists for this terminal so that screen
switching is possible. (Displayed as “Error initializing multiple screen program in
errlog.” in errlog; refer to APM error log through the APM Operations Menu.)
Error in type returned from database lookup. errmsg
See “Database Errors.“
Error inserting a record into the database. errmsg
See “Database Errors.”
Error locking a record in the db. /
Error locking a record in the database. errmsg
See “Database Errors.”
Error matching an RSC in the db /
Error matching an RSC in the database. errmsg
See “Database Errors.”

Page 158 NDA-30026 Revision 6
PROCESS AND ERROR MESSAGES Medical Center System Operations Manual - JAVA Edition
Error modifying a record in the database. errmsg
See “Database Errors.”
Error putting request in database. (DID) errmsg
An outstanding DID record has been inserted into the database so that when the
Mcs_Monitor component is initialized, a request will be made to the PBX. See
“Database Errors.”
Error putting request in database. (RSC) errmsg
An outstanding restriction class change has been inserted into the database so that
when Mcs_Monitor is initialized, it will send a request to the PBX. See “Database
Errors.”
Error querying the database./ Error querying the database. errmsg
See “Database Errors.”
Error rebuilding MCS database indexes [mcsdb]. errmsg
See “Database Errors.”
Error unlocking database record. errmsg
See “Database Errors.”
Error when doing directory lookup in database errmsg
See “Database Errors.”
Error when finding attendant in database. errmsg
See “Database Errors.”
Error when finding beeper code in database. errmsg
See “Database Errors.”
Error when finding source caller in database. errmsg
See “Database Errors.”
Error when finding trunk in database. errmsg
See “Database Errors.”
Extension does not exist or is a patient ext. attwinmsg
When employee records, internal records, etc., are entered, the entered extension is
either already assigned as a patient extension or does not exist.
Extension is already a(n) <record type>. attwinmsg
When an extension record is entered, the extension is already assigned elsewhere.
Extension is not an Att. Console Extension. attwinmsg
An attempt has been made to assign an extension to an attendant when it has not
been assigned as an attendant extension.
Fatal error unlocking database record. errmsg
See “Database Errors.”

NDA-30026 Revision 6 Page 159
Medical Center System Operations Manual - JAVA Edition PROCESS AND ERROR MESSAGES
First character cannot be a space or null. attwinmsg
The operator must do something other than insert blanks or press RETURN.
Going off-line due to error. errmsg
The application went off line because an outstanding sequence was found. Ask the
administrator to check the UNIX queues.
Invalid deletion, extension currently assigned to user. DBermsg
User (i.e., patient, employee, etc.) must be deleted before the extension assigned to
that user can be deleted.
Invalid deletion, DID group currently assigned in schedule. DBermsg
Delete the group index from the schedule, and then retry.
Invalid deletion, RSC group currently assigned in schedule. DBermsg
Delete the group index from the schedule, and then retry.
Invalid deletion, Time index currently assigned in schedule. DBermsg
Delete the time index from the schedule, and then retry.
Invalid extension for directory entry. DBermsg
An attempt has been made to add an employee, patient, etc. with an extension that
no longer exists.
Invalid Login Name. attwinmsg
Try again, perhaps typing in upper- or lowercase letters.
Invalid Password. attwinmsg
Try again; check with the administrator about the password.
Joining parked and paged parties. attwinmsg
An attempt is being made to retrieve requested parked and paged parties.
Minor error when receiving data. errmsg
Part of the incoming message did not match what MCS expected in the message.
This is a minor problem that will not interrupt processing; keep going.
Monitoring <attendant>. attwinmsg
The attendant number on the monitoring supervisor’s station when an operator alert
is successful and the supervisor Dterm is answered.
Month must be 01 to 12. attwinmsg
Entered month lies outside of the number of months in the year.
No caller from which to take msg. attwinmsg
The Message function has been selected when no incoming call has been answered.
No color capabilities available. errmsg
The terminal type (vt100, etc.) does not support color.

Page 160 NDA-30026 Revision 6
PROCESS AND ERROR MESSAGES Medical Center System Operations Manual - JAVA Edition
No members in group. Cmnerr
Regardless of the scheduled change, this group has no members. It is probably best
to delete the scheduled change.
No Patient Extension for this room. attwinmsg
If there should be, ask the administrator to add the patient extension; otherwise,
continue input without filling in a bed.
No Patient Extension for this room and bed. attwinmsg
A patient extension exists for this room, but not for this bed.
No server available. Cmnerr
An attendant attempted to go on-line when the maximum number of attendants were
already logged on.
No source caller for monitoring. attwinmsg
The supervisor monitoring function has been attempted when no incoming call has
been answered.
No source caller for parking. attwinmsg
The Parking function has been attempted when no incoming call has been answered.
No statistics records to format. errmsg
There are no statistics yet from which to format records.
No such group. Cmnerr
An RSC/DID schedule has an unknown group assigned; this circumstance is
unlikely to occur.
Park service not available. attwinmsg
Directory assistance, beeper, emergency services are still available.
Park service unavailable. Cmnerr
Communication with the PBX is down.
Parked call time-out [#]. attwinmsg
The number of callers rerouted to this attendant because they have been parked
beyond the time configured for parked calls.
Parking caller. attwinmsg
The caller is being parked as shown.
Patient discharged can’t transfr. attwinmsg
An attempt was made to transfer a caller to a patient who has been discharged.
Patient extension must be unique. DBermsg
This extension has been used; someone may have added this extension before it was
added here.

NDA-30026 Revision 6 Page 161
Medical Center System Operations Manual - JAVA Edition PROCESS AND ERROR MESSAGES
Query max exceeded. Cmnerr
If this is a problem, increase the maximum value through the MCS Configuration
Management Menu.
Recall list is full. Cmnerr
Check MCS configuration database on APM and increase recall list parameters,
have operators log off, terminate MCS_Monitor and MCS_Server components,
remove configured MCS shared memory, and reinitialize.
Record does not exist. DBermsg
This record is not in the database.
Record exists, to make changes use modify. attwinmsg
An attempt was made to add a record that according to its key field already exists.
The record can only be changed or the screen exited and the field re-entered.
Resetting parked time-out number. errmsg
The application did not find an empty park time-out slot. This problem is not major
and will not interrupt processing; keep going.
Restoring DID, no longer valid. attwinmsg
The DID number entered for a patient was offered, but has since been used by
someone else.
Restoring DID, problem locking it. attwinmsg
The DID number is may not be unique, or there may be a database problem. Try
again. Ask the administrator to check log for database error description.
Restoring DID, problem modifying it. attwinmsg
There is a database problem; try again. Ask the administrator to check the log for a
database error description.
Room already in use for a patient extension. attwinmsg
An attempt has been made to add a patient extension to a room that is already used
for another patient extension.
Room already used for a non-patient extension. attwinmsg
An attempt has been made to insert a room for a patient extension that is already
being used for a non-patient station such as an attendant, a nursing unit, etc.
Room and bed already used for an extension. attwinmsg
An attempt has been made to add a patient extension with a room and bed that are
already assigned to another patient extension.
RSC group does not exist. DBermsg
An attempt has been made to schedule something (DID/RSC change) for a group or
time index that does not exist.
Source caller cannot have msgs. attwinmsg
An attempt has been made to take a message for a non-patient party.

Page 162 NDA-30026 Revision 6
PROCESS AND ERROR MESSAGES Medical Center System Operations Manual - JAVA Edition
Supervisor emergencies ignore alternate extension. attwinmsg
To enter an emergency record for supervisor alerts, no second extension is needed
(or used).
Supervisor is not logged in. attwinmsg
The message tells the operator who began a supervisor alert that although the
supervisor Dterm is ringing, the supervisor is not logged onto an attendant console.
Supervisor now monitoring convrs. attwinmsg
This message tells the operator who began a supervisor alert that the supervisor has
answered and is monitoring the conversation.
Time index does not exist. DBermsg
An attempt has been made to schedule something (DID/RSC change) for a group or
time index that does not exist.
Time index must be between 1 and <index limit>. Ioerr
The entered index is out of range; try again.
The unit must be one configured as a nurse’s station extension. DBermsg
Someone may have deleted the nurse’s station extension for this unit on another
console before it was saved here.
The unit must be unique for each nurse’s station extension. DBermsg
This extension seems to already have an assigned unit; perhaps one was added just
before this one.
The room and bed must be unique. DBermsg
An attempt has been made to add a patient extension whose room and bed are being
used by another.
The <character entered> cannot be the first character. attwinmsg
The pound sign (#) cannot be the first character entered for the attendant label or
name in the Configuration Management Menu.
This bed is not available. attwinmsg
An attempt has been made to assign a patient to a room with a bed that is already in
use.
This number must be greater than zero. attwinmsg
Try again with a larger number.
This room already has max allowed extensions. attwinmsg
An attempt has been made to add a patient extension to a room that has already been
assigned its maximum allowed extension(s), such as 1 for private room.
This room does not have any available beds. attwinmsg
An attempt has been made to assign a patient to a room whose beds are already
assigned.

NDA-30026 Revision 6 Page 163
Medical Center System Operations Manual - JAVA Edition PROCESS AND ERROR MESSAGES
This tty not configured. errmsg
Ask the administrator to change the tty (terminal) file in the MCS directory to
include this tty.
Too many entries in database. Cmnerr
More than one RSC/DID group has been found in the database. This is unlikely
to occur.
Transferring caller. attwinmsg
The caller is being transferred.
Transferred from an attendant. attwinmsg
The call just answered is an interposition attendant transfer.
Unit already exists for a nurse station extension. attwinmsg
While a nursing station extension was being added, an attempt was made to
enter a unit that is already being used for another nursing extension.
Unit not assigned for a nurse station extension. attwinmsg
An assignment has been made to a unit that has not been assigned as a unit. If
it is a valid unit, ask the administrator to add a unique ‘master’ extension for
this nursing unit.
Wrong type returned from dblookup. Errmsg
See “Database Errors.”
You ARE the supervisor. attwinmsg
This is a reminder for any supervisor who begins a supervisor alert.
You have not been called by extn. attwinmsg
The Redial function has been selected when there has been no released
incoming call during this on-line session.
You must call beeper manually. attwinmsg
This is not an on-line feature. Manually dial the beeper number on the console.
You must include a # somewhere in the label. attwinmsg
Each attendant name or label must include the pound sign (#) for MCS
recognition.
You must transfer call manually. attwinmsg
This transfer is not handled on-line. Manually dial the number on the console.
Your held party just hung up. attwinmsg
A party who was on hold has hung up.

PROCESS AND ERROR MESSAGES Medical Center System Operations Manual - JAVA Edition
Page 164 NDA-30026 Revision 6
This Page Left Blank.

NDA-30026 Revision 6 Page 165
Medical Center System Operations Manual - JAVA Edition PLATFORM MANAGEMENT
Chapter 12 PLATFORM MANAGEMENT
Introduction to Platform Management
When you enter the mcsadm login name, the MCS Platform Management Menu
displays with the options that are described below:
Figure 12-1 Platform Management
Menu Options The MCS Platform Management Menu provides the following options described
below:
Backup Database Makes a backup copy of database assignments on
tape; first in sequence of database options.
Create Database Creates new database fields according to MCS
instructions.
Drop Database Removes the entire MCS database. WARNING:
Do not use this option before backing up the
database on tape through the Backup Database
option.
Make Database Indexes Recreates the order by which the database records
are stored.
Erase Database Indexes Erases the order in which the database records are
stored and sorted.
Rebuild Database Indexes Rebuilds the database indexes to improve
efficiency in database access and searches.
Set Menu Colors Resets the color of all screens in the MCS and
related applications.
Table Record Count Lists the internal MCS tables. For each, display a
count of its records.
MCS Platform Management Menu
Backup Database
Create Database
Drop Database
Make Database Indexes
Erase Database Indexes
Rebuild Database Indexes
Set Menu Colors
Table Record Count
View Tty File
FLF/RCF Download to PBX
UNIX
Logout
Options
Enter Option: [ ]

Page 166 NDA-30026 Revision 6
PLATFORM MANAGEMENT Medical Center System Operations Manual - JAVA Edition
View Tty File Displays what tty is tied to each attendant console
extension.
FLF/RCF Download to PBX Restores patient extensions, phone service, DID
numbers, and patient restriction information to the
PBX if there is a PBX failure.
UNIX Positions the cursor at the UNIX prompt. This option
is not explained further in this manual. Refer to a
UNIX reference guide.
Sequence of
Option Use In circumstances other than a response to a system failure, the sequence for database
options is as follows:
1. Back up the database.
2. Drop the database.
3. Create the database.
4. Use the Make Database Indexes option.
5. Using an Informix guide, retrieve the backup copy from the tape.
Warning NEVER drop the database before backing it up, or the database will be lost.
Procedure
Action Result
At the login prompt, type mcsadm and
press Enter.The MCS Platform Management Menu
displays.
Refer to the following pages for
information and instructions for using each
menu option.
To exit the MCS Platform Management
Menu, type l (for Logout) and press Enter.The Login prompt redisplays.

NDA-30026 Revision 6 Page 167
Medical Center System Operations Manual - JAVA Edition PLATFORM MANAGEMENT
Backup Database Option
Use the Backup Database option on the MCS Platform Management Menu to store a
backup copy of the MCS database on tape.
Figure 12-2 Backup Database
Delay MCS must lock the database while this backup is being performed. No one can access
information in the database during this time. Therefore, we recommend that you
perform backups during low-traffic times only.
When to Use This option should be used in the following three instances:
•To back up the basic MCS system after it has been installed and only relatively
permanent database and extension assignments have been made.
•Thereafter, when patients have been introduced to the system and many changes are
being made to the database, such as patient admissions or discharges and changes
to employee or physician extension assignments.
•Before every use of the Drop Database option.
Retrieval
If a back-up copy of the database must be retrieved (e.g., in the case of a system failure),
consult the Informix database retrieval procedures. The Backup MCS Database screen
names the full path and filename of the backup database stored for use with this
procedure.
MCS Platform Management Menu
Options
Backup Database
Create Database
Drop Database
Make Database Indexes
Erase Database Indexes
Rebuild Database Indexes
Set Menu Colors
Table Record Count
View Tty File
FLF/RCF Download to PBX
UNIX
Logout
Enter Option: [ b ]
Backup MCS Database
Data will be ’unloaded’ to /oai/app/mcs/backup
Are you sure (y/n): y <Enter>
Please wait . . .
Press Enter to continue.
Access Informix (dbaccess)

Page 168 NDA-30026 Revision 6
PLATFORM MANAGEMENT Medical Center System Operations Manual - JAVA Edition
Procedure
Action Result
On the MCS Platform Management Menu,
type b at the prompt and press Enter. (1) The Backup MCS Database screen displays
with important information about the
backup. (2)
Write the time and date on the tape as
shown, and place a tape in the drive. To
perform the backup, type y at the prompt
and press Enter.
If a tape is in the tape drive, the backup is
performed. If not, the backup is cancelled.
In either case, the message “Press Enter to
continue” displays.
Press Enter. The MCS Platform Management Menu
redisplays.

NDA-30026 Revision 6 Page 169
Medical Center System Operations Manual - JAVA Edition PLATFORM MANAGEMENT
Create Database Option
Use the Create Database option on the MCS Platform Management Menu to create
new database fields according to MCS instructions.
Figure 12-3 Create Database
When to Use This option should only be used in the event of system failure or after using the Drop
Database option. Once the new database fields are created through this option, use the
Make Database Indexes option to identify the order in which the records in the
database are stored. Then, if desired, consult an Informix guide to retrieve data from
the backup tape that was made before you used the Drop Database option.
Procedure
MCS Platform Management Menu
Options
Backup Database
Create Database
Drop Database
Make Database Indexes
Erase Database Indexes
Rebuild Database Indexes
Set Menu Colors
Table Record Count
View Tty File
FLF/RCF Download to PBX
UNIX
Logout
Enter Option: [ c ]
Create MCS Database
Creating MCS database . . .
Press Enter to continue.
Action Result
On the MCS Platform Management Menu,
type c at the prompt and press Enter. (1) The Create MCS Database screen displays
while the database is being created. After
the database is created, the message “Press
Enter to continue” displays. (2)
Press Enter. The MCS Platform Management Menu
redisplays.
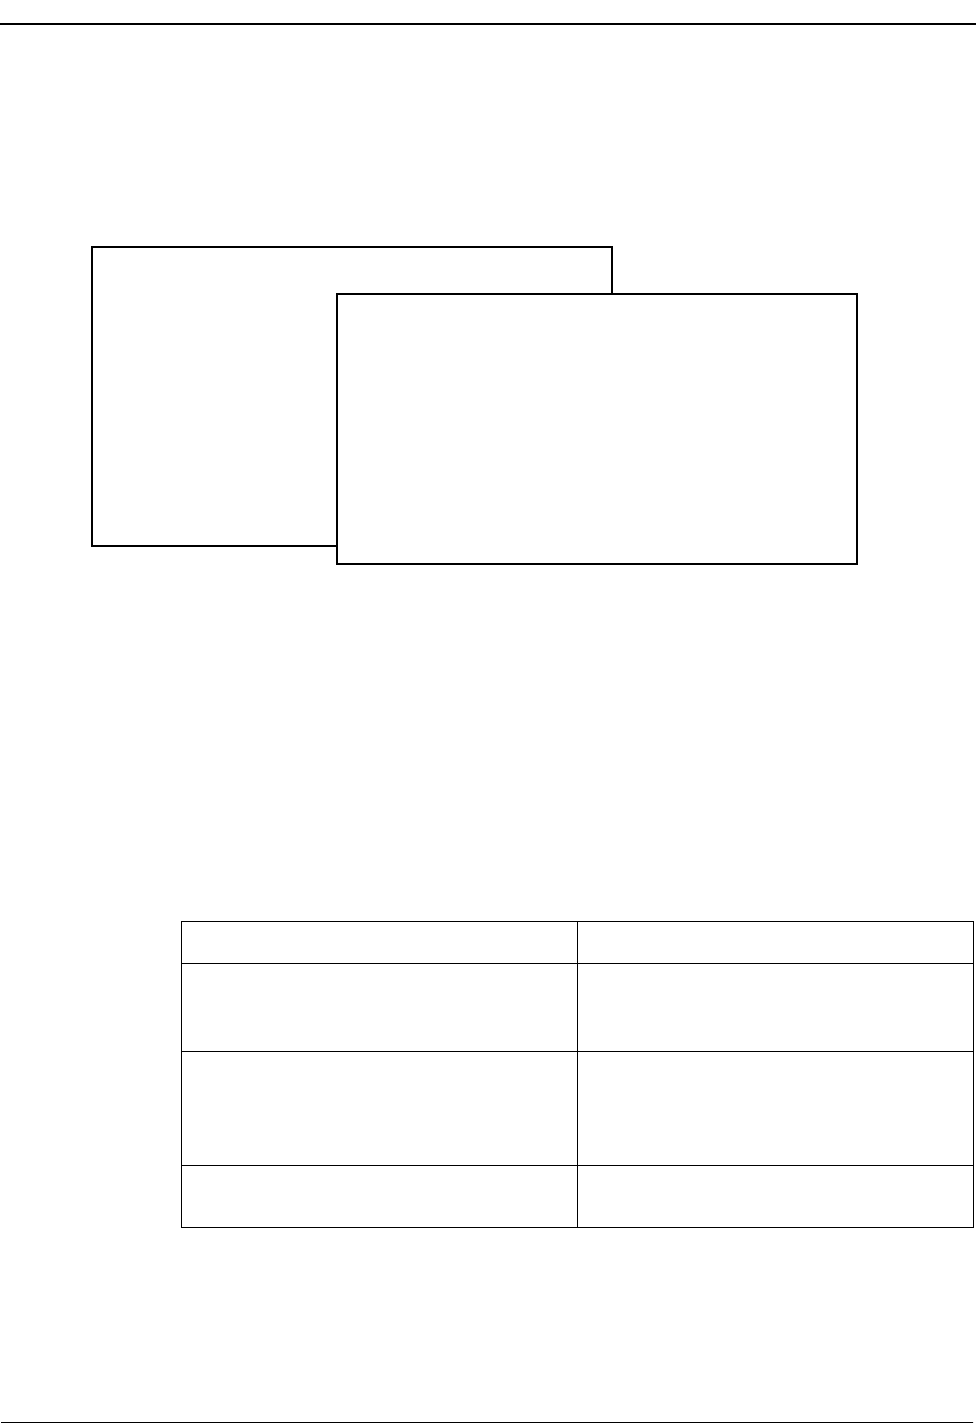
Page 170 NDA-30026 Revision 6
PLATFORM MANAGEMENT Medical Center System Operations Manual - JAVA Edition
Drop Database Option
Use the Drop Database option on the MCS Platform Management Menu to remove
the entire MCS database. WARNING: Do not use this option before backing up the
database on tape through the Backup Database option.
Figure 12-4 Drop Database
Sequence The Drop MCS Database screen removes all data now stored in MCS, including all
extension user assignments for patients, physicians, employees, and internal locations.
Use the Backup Database option first to store a copy of the database on tape. Then,
drop the database with this option, create new database fields with the Create
Database option, identify the order of record storage with the Make Database Indexes
option, and retrieve the stored database copy from the tape.
Procedure
MCS Platform Management Menu
Options
Backup Database
Create Database
Drop Database
Make Database Indexes
Erase Database Indexes
Rebuild Database Indexes
Set Menu Colors
Table Record Count
View Tty File
FLF/RCF Download to PBX
UNIX
Logout
Enter Option: [ d ]
Drop MCS Database
Dropping the MCS database will cause all data currently
Are you sure (y/n): y <Enter>
Dropping MCS Database . . .
Press Enter to continue.
stored to be destroyed.
Action Result
On the MCS Platform Management Menu,
type d at the prompt and press Enter. (1) The Drop MCS Database screen displays
with a warning and a confirmation prompt.
(2)
At the confirmation prompt, type y to delete
the database or n to cancel the deletion, and
press Enter.
If the deletion is confirmed, a message
shows when the database is being dropped.
The message “Press Enter to continue”
displays when you can exit the screen.
Press Enter. The MCS Platform Management Menu
redisplays.
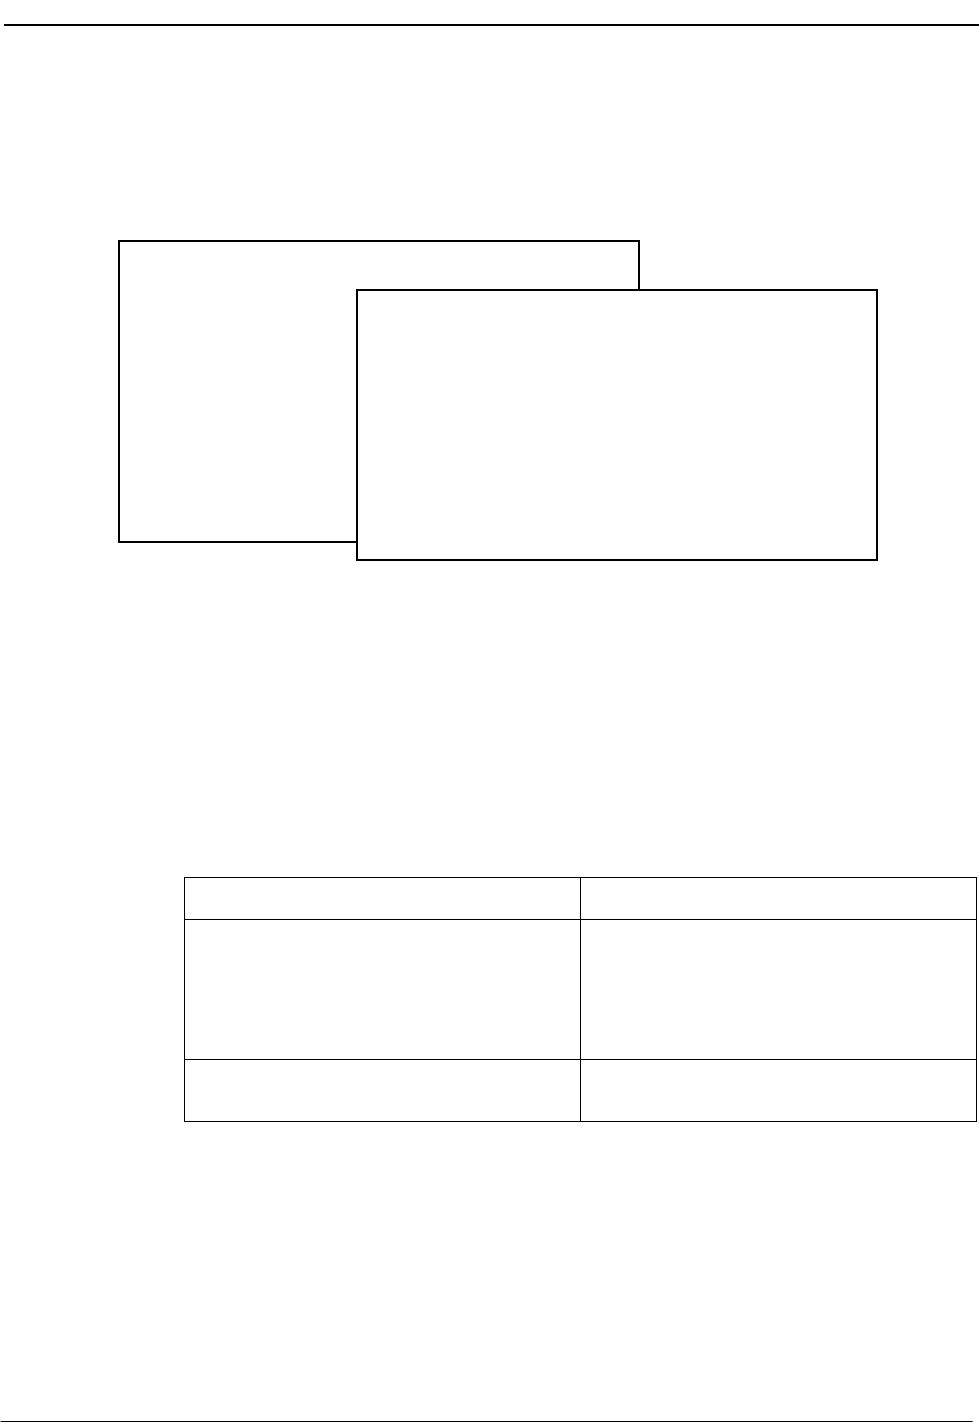
NDA-30026 Revision 6 Page 171
Medical Center System Operations Manual - JAVA Edition PLATFORM MANAGEMENT
Make Database Indexes Option
Use the Make Database Indexes option on the MCS Platform Management Menu to
recreate the order in which the database records are stored.
Figure 12-5 Make Database Indexes
Sequence Once the Create Database option defines the fields of the new database according to
MCS instructions, the Make Database Indexes option marks the fields that are to be
used as indexes, setting the order in which records are stored and sorted during lookups.
After you use these two options, you can re-enter data to the database or retrieve data
from a backup tape.
Procedure
MCS Platform Management Menu
Options
Backup Database
Create Database
Drop Database
Make Database Indexes
Erase Database Indexes
Rebuild Database Indexes
Set Menu Colors
Table Record Count
View Tty File
FLF/RCF Download to PBX
UNIX
Logout
Enter Option: [ m ]
Make MCS Database Indexes
Making MCS database indexes . . .
Press Enter to continue.
Action Result
On the MCS Platform Management Menu,
type m at the prompt and press Enter. (1) The Make MCS Database Indexes screen
displays while the database indexes are
being made. After the indexes are made, the
message “Press Enter to continue” displays.
(2)
Press Enter. The MCS Platform Management Menu
redisplays.
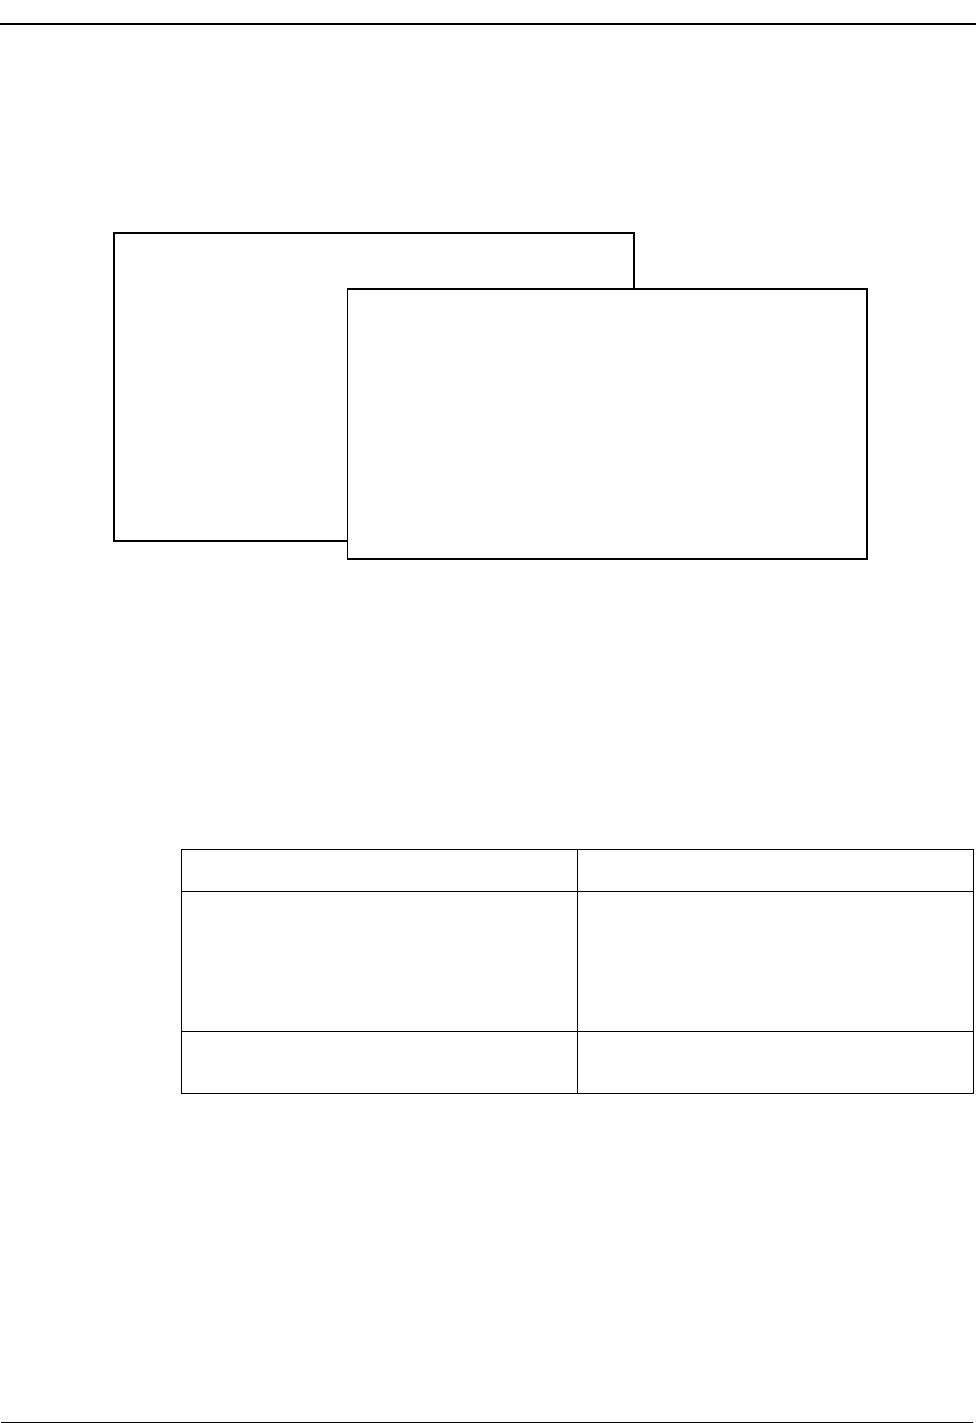
Page 172 NDA-30026 Revision 6
PLATFORM MANAGEMENT Medical Center System Operations Manual - JAVA Edition
Erase Database Indexes Option
Use the Erase Database Indexes option on the MCS Platform Management Menu to
erase the order in which the database records are stored and sorted.
Figure 12-6 Erase MCS Database Indexes
Sequence Use of this option should be rare. Any time the Indexes are erased, you need to use the
Make Database Indexes option to re-make them.
Procedure
MCS Platform Management Menu
Options
Backup Database
Create Database
Drop Database
Make Database Indexes
Erase Database Indexes
Rebuild Database Indexes
Set Menu Colors
Table Record Count
View Tty File
FLF/RCF Download to PBX
UNIX
Logout
Enter Option: [ e ]
Erase MCS Database Indexes
Erasing MCS database indexes . . .
Press Enter to continue.
Action Result
On the MCS Platform Management Menu,
type e at the prompt and press Enter. (1) The Erase MCS Database Indexes screen
displays and shows that the database
indexes are being erased. After the indexes
are erased the message “Press Enter to
continue” displays. (2)
Press Enter. The MCS Platform Management Menu
redisplays.

NDA-30026 Revision 6 Page 173
Medical Center System Operations Manual - JAVA Edition PLATFORM MANAGEMENT
Rebuild Database Indexes Option
Use the Rebuild Database Indexes option on the MCS Platform Management Menu
to restructure the database indexes to improve efficiency in database access and
searches.
Figure 12-7 Rebuild Database Indexes
When to Use This option can be used anytime that operator lookups from the attendant screen seem
to be taking too long, lowering operator efficiency.
Procedure
MCS Platform Management Menu
Options
Backup Database
Create Database
Drop Database
Make Database Indexes
Erase Database Indexes
Rebuild Database Indexes
Set Menu Colors
Table Record Count
View Tty File
FLF/RCF Download to PBX
UNIX
Logout
Enter Option: [ r ]
Rebuild MCS Database Indexes
Rebuilding MCS database indexes . . .
Press Enter to continue.
Action Result
On the MCS Platform Management Menu,
type r at the prompt and press Enter. (1) The Rebuild MCS Database Indexes screen
displays and shows that the database
indexes are being rebuilt. After the indexes
are rebuilt, the message “Press Enter to
continue” displays. (2)
Press Enter. The MCS Platform Management Menu
redisplays.

Page 174 NDA-30026 Revision 6
PLATFORM MANAGEMENT Medical Center System Operations Manual - JAVA Edition
Set Menu Colors Option
Use the Set Menu Colors option on the MCS Platform Management Menu to
reconfigure the color of all screens within the MCS.
Figure 12-8 Set Menu Colors
General
Process This option brings great versatility to the process of “coloring” the MCS screens. For
the most part, every screen contains items, and the coloring of each item can be
controlled according to its foreground and its background. The item foreground is
typically the words that are displayed, such as a menu option, a prompt for data entry,
or a column title. The background of each item is simply a space around those words
that may or may not be visible, depending upon its color. If its color contrasts at all with
other adjacent screen item backgrounds, it is visible; if not, it is not visible.
Samples of MCS screens are shown on the left of screen (2) in Figure 12-8 and a multi-
page list of all MCS screen items is shown to the right. Each item is listed twice: Once
for its foreground color selection (fore) and again for its background color selection
(back). To the right of each item, a colored square displays the currently selected and
implemented color. When you move the cursor to an item, a row of colored squares
displays to the right of that item with an X on the current selection. Make changes to
the color of an item by using the arrow keys to move the X to a different color. As a
change is made to this right-hand item list, the corresponding sample screen(s) to the
left change(s).
MCS Platform Management Menu
Options
Backup Database
Create Database
Drop Database
Make Database Indexes
Erase Database Indexes
Rebuild Database Indexes
Set Menu Colors
Table Record Count
View Tty File
FLF/RCF Download to PBX
UNIX
Logout
Enter Option: [ s ]
SCREEN SCREEN
SCREEN
SAMPLE SAMPLE
#1
(Data Entry
Screen)
#2
(Menu)
SAMPLE
#3
(Operator
Functions)
SCREEN
SAMPLE
#4
(Pop-Up
Window)
COLOR SELECTION
Title–fore:
Title–back:
Prompt Title–fore:
Prompt Title–back:
Prompts–fore:
Prompts–back:
Inputs–fore:
Inputs–back:
Input selected–fore:
Input selected–back:
Input message–fore:
Input message–back:
Options Title–fore:
Options Title–back:
Options–fore:
Options–back:
Options message–fore:
Options message–back:
Change Next_pg Prev_pg Quit
(1) (2)
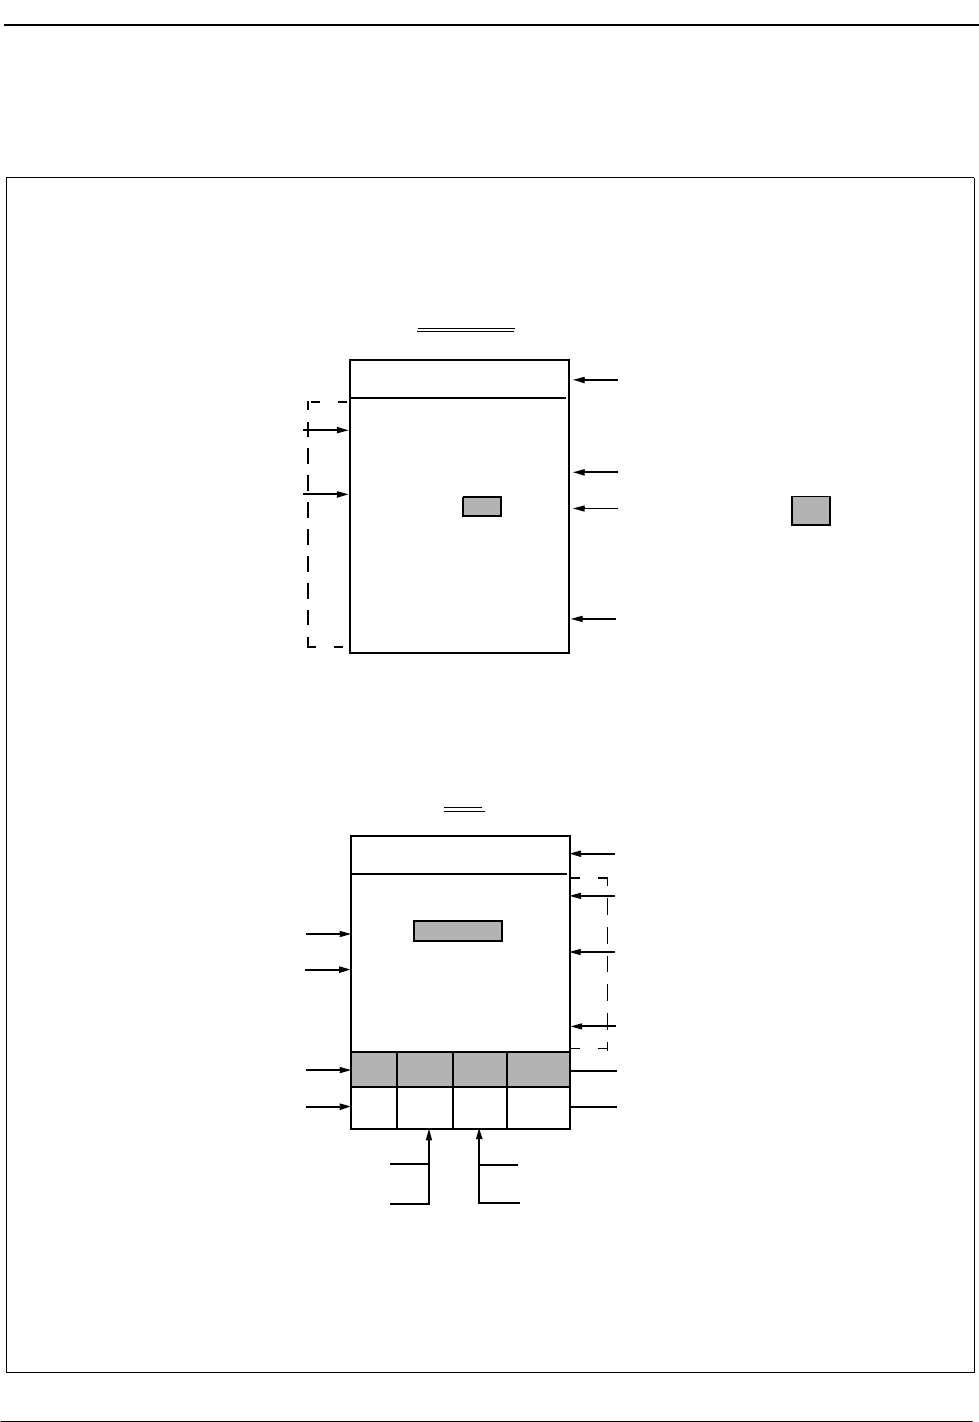
NDA-30026 Revision 6 Page 175
Medical Center System Operations Manual - JAVA Edition PLATFORM MANAGEMENT
Representative
Screens The screens represented in Figure 12-8 are shown in more detail below with labels
marking the items from the right-hand list for which they demonstrate color changes:
)
MCS Time Title
Prompt Title
Inputs (e.g., xxx)
Input selected (e.g. xxx )
Prompts (e.g., Name, Ext.)
(Note: Background
marked by
*** Patient Input ***
Name: xxx
Ext: xxx
Room: xxx
Dsch: xxx
<Enter> to accept Input message
Screen #2 in Figure 10-8
Menu
MCS Time
Option selected
Title
Option key letter
(i.e., D, Q)
Att Status Title
Att Status
* Main Menu *
Operator
Database
Quit
<Enter> to select
Options Title
Options (Note: Background
marked by .)
alr bsy D On
Options message
MCS Status Title
MCS Status
Trnfr Status Title
Trnfr Status
Call Status Title
Call Status
Screen #1 in Figure 10-8
Data Entry
Att Call Trnfr MCS
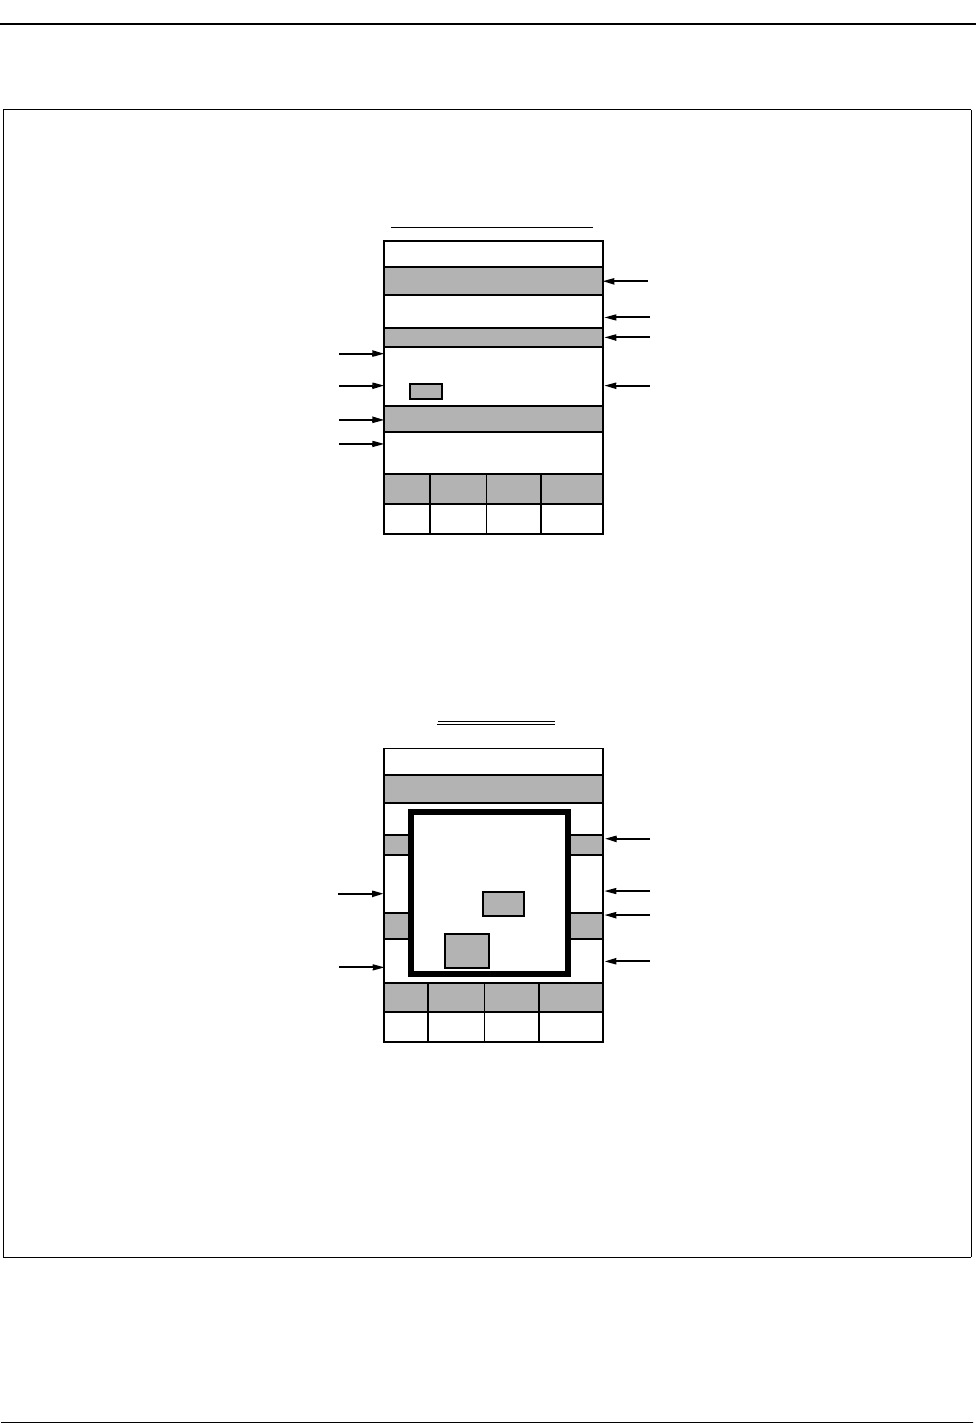
Page 176 NDA-30026 Revision 6
PLATFORM MANAGEMENT Medical Center System Operations Manual - JAVA Edition
MCS Time
Dest Ext Rm
John 3820 42
Mary 3821 27
Jeff 3822 18
Dir Prk Pge
Fred 3800 12
Att Call Trnfr MCS
alr bsy D On
Src Ext Rm
Screen #3 in Figure 10-8
Operator Function Screen
Special Dest
Command selected
Source Title
Source Info
Dest Title
Destination
Selected Destination
Command line (and)
Command key letter (in bold)
MCS Time
Dest Ext Rm
John 3820 42
Mary 3821 27
Jeff *3822 18
Dir Prk Pge
Src Ext Rm
Fred 3800 12
Att Call Trnfr MCS
alr bsy D On
(Note: Changes made to Title, Att Status Title, Att Status, Call Status Title, Call Status, Xfer Status
Title, Xfer Status, MCS Status Title, and MCS Status items in both foreground and background are also
reflected on this screen.)
Screen #4 in Figure 10-8
Prompts pop up
(Message pop up =Not Shown)
Command chosen
Title pop up
Input pop up
Selected pop up
Commands pop up (and)
Cmd key pop up (in bold)
(Note: Changes made to screen items on the Operator Function screen are reflected
the pop-up window.)
Msg Take
To: xxx
From: xxx
Nxt Prv
Pop–Up Windows
in this screen, behind

NDA-30026 Revision 6 Page 177
Medical Center System Operations Manual - JAVA Edition PLATFORM MANAGEMENT
Procedure
Action Result
On the MCS Platform Management Menu,
type s at the prompt and press Enter. (1) The Set Menu Colors screen displays. (2)
Press Enter to select the Change
command. Color choices display to the right of the first
screen item under the Color Selection
heading. The cursor and an X are positioned
on the current color selection.
Use the arrow keys or space bar to move the
cursor and the X to the color you want and
press Enter.
The screen(s) to the left on which the item
displays shows the change in color, and the
cursor is positioned on the next screen item
in the Color Selection list.
Make all desired changes to the foreground
and background of every MCS screen item,
as described above. Use Esc to return to the
first Color Selection page of items. Use the
Next-pg and Prev-pg commands to move
among the Color Selection pages of items.
When all changes are completed, type q and
press Enter to exit the Set Menu Colors
option.
The MCS Platform Management Menu
redisplays.
On the Administration Main Menu, type m
at the prompt and press Enter. (1) The menu colors screen displays. (2)
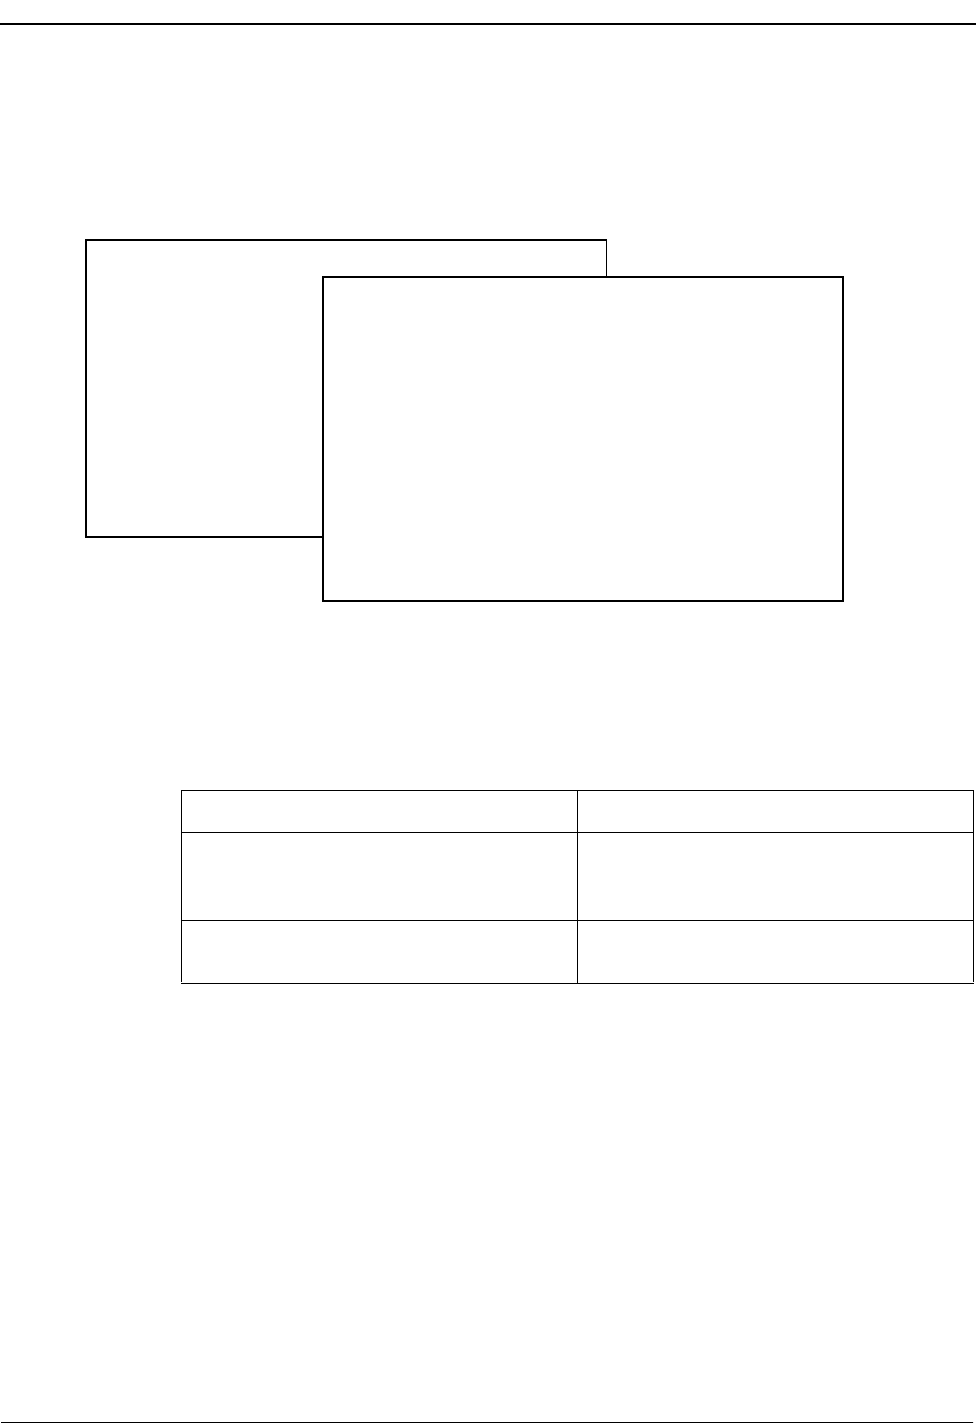
Page 178 NDA-30026 Revision 6
PLATFORM MANAGEMENT Medical Center System Operations Manual - JAVA Edition
Table Record Count Option
Use the Table Record Count option on the MCS Platform Management Menu to list
the internal MCS tables and to display a count of the records each table contains.
Figure 12-9 Database Table Record Count
Procedure
MCS Platform Management Menu
Options
Backup Database
Create Database
Drop Database
Make Database Indexes
Erase Database Indexes
Rebuild Database Indexes
Set Menu Colors
Table Record Count
View Tty File
FLF/RCF Download to PBX
UNIX
Logout
Enter Option: [ t ]
MCS Database Table Record Count
attendant ............ (6)
beeper ............... (257)
.
.
did_group ..............(5)
did_number ............ (0)
.
.
employee .............. (1022)
extension ............. (1865)
.
.
patient (758)
physician ............. (246)
.
.
Total number of records (6678)
(1)
(2)
Action Result
On the MCS Platform Management Menu,
type t at the prompt and press Enter. (1) The MCS Database Table Record Count
screen displays. (2) After the listing, a total
number of records displays.
To exit the MCS Database Table Record
Count screen, press Enter.The MCS Platform Management Menu
redisplays.
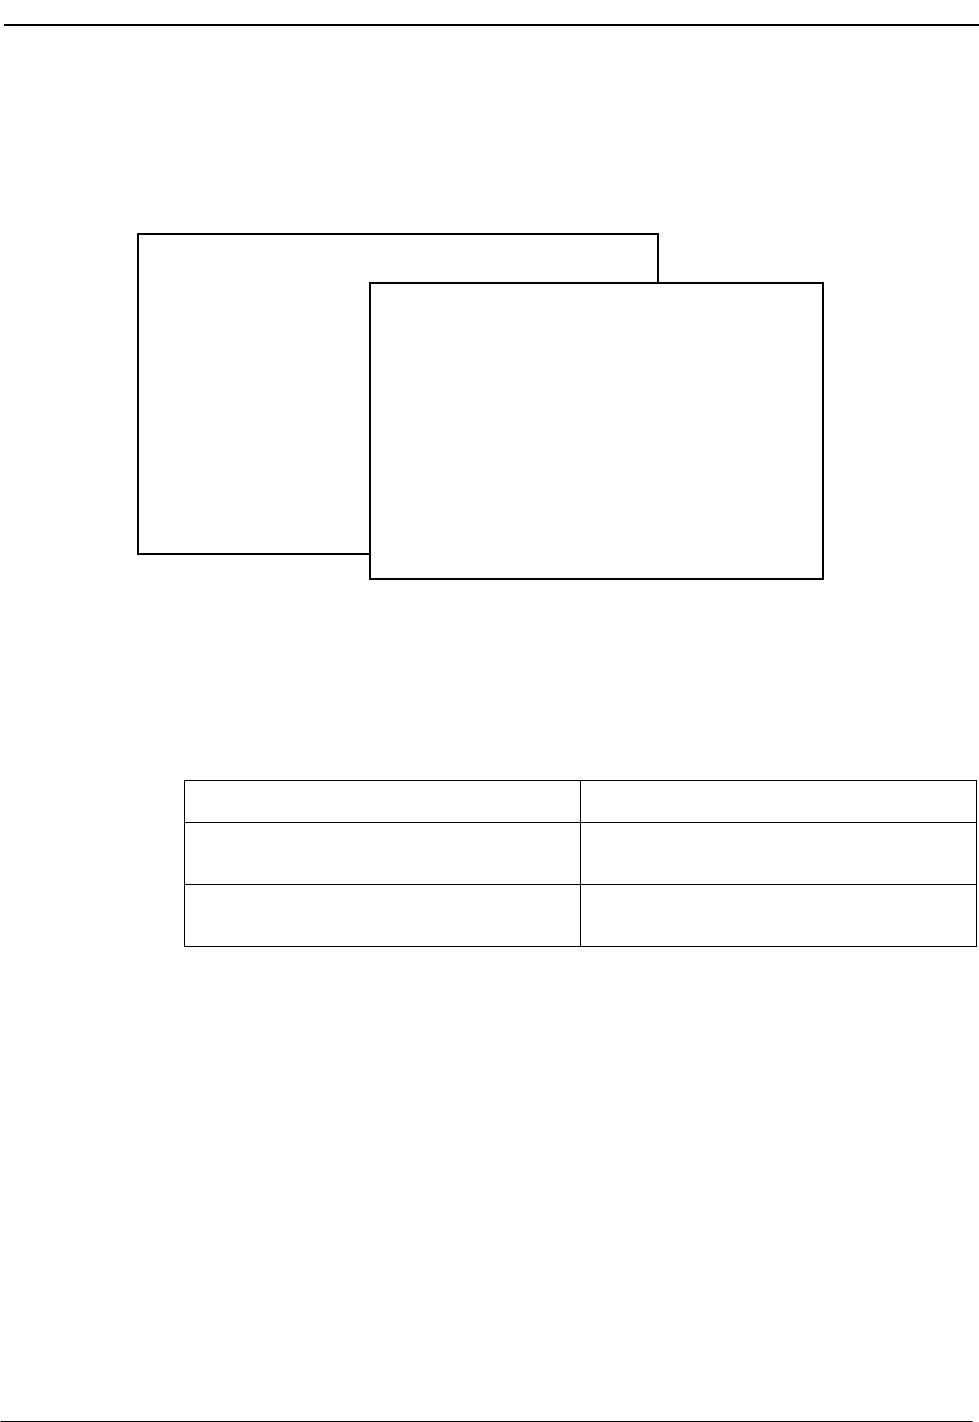
NDA-30026 Revision 6 Page 179
Medical Center System Operations Manual - JAVA Edition PLATFORM MANAGEMENT
View TTY File Option
Use the View Tty File option on the MCS Platform Management Menu to display what
tty is associated with each attendant console extension.
Figure 12-10 View TTY File
Procedure
MCS Platform Management Menu
Options
Backup Database
Create Database
Drop Database
Make Database Indexes
Erase Database Indexes
Rebuild Database Indexes
Set Menu Colors
Table Record Count
View Tty File
FLF/RCF Download to PBX
UNIX
Logout
MCS Tty File
1 3997 /dev/ttyn1a
2 3996 /dev/tyn1b
3 3997 /dev/ttyn1c
4 3997 /dev/ttyn1d
5 3997 /dev/ttyn1e
7 3997 /dev/ttyn1f
8 3997 /dev/tty01
9 3997 /dev/ttyp06
10 3997 /dev/ttyp07
Enter Option: [ v ]
(1)
(2)
Action Result
On the MCS Platform Management Menu,
type v at the prompt and press Enter. (1) The MCS Tty File displays. (2)
To exit the MCS Tty File display, press
Enter.The MCS Platform Management Menu
redisplays.

Page 180 NDA-30026 Revision 6
PLATFORM MANAGEMENT Medical Center System Operations Manual - JAVA Edition
FLF/RCF Download to PBX Option
Use the FLF/RCF Download to PBX option on the MCS Platform Management Menu
to restore PBX patient extensions, phone service, DID numbers, and patient restriction
information in the event of PBX failure.
Figure 12-11 FLF/RCF Download to PBX
Warning Downloading will delete patients who have been moved and will reset all staff
restrictions to the default value.
DID Numbers Only DID numbers that are stamped with an active status by the database are
downloaded to the PBX. When a DID number is active, it has been received by the PBX
and is implemented. If there was a patient move between the time that the DID number
was implemented by the PBX and the PBX failure, the downloaded DID number will
not be accurate.
Effect on
Database Downloading the database to the PBX slows down response to operator lookups, but
not as much as backing up the database.
Procedure
MCS Platform Management Menu
Options
Backup Database
Create Database
Drop Database
Make Database Indexes
Erase Database Indexes
Rebuild Database Indexes
Set Menu Colors
Table Record Count
View Tty File
FLF/RCF Download to PBX
UNIX
Logout
FLF/RCF Download to PBX
Downloading will destroy moved
patients and reset staff restrictions
to default.
Are you sure (y/n): y <Enter>
Downloading . . .
Press Enter to continue.
(1)
(2)
Enter Option: [ f ]
Action Result
On the MCS Platform Management Menu,
type f at the prompt and press Enter. (1) The FLF/RCF Download to PBX screen
displays. (2)
To exit the FLF/RCF Download to PBX
screen, press Enter.The MCS Platform Management Menu
redisplays.

NDA-30026 Revision 6 Page 181
Medical Center System Operations Manual HOST INTERFACE ADMINISTRATION
Chapter 13 HOST INTERFACE ADMINISTRATION
Introduction
The MCS Host Interface Administration Menu provides options for managing the
communication interface between the MCS and the HIS systems. This menu displays
when you enter hostadm at the UNIX login prompt.
Figure 13-1 Host Interface Administration
Interface Status The interface can either be idle or active. If it is idle, it is not able to receive messages
from the HIS. If it is active, the interface is receiving messages and is otherwise
interacting normally with the HIS. Administration Menu options can be accessed when
the interface is in either state.
Version MCS now communicates only over a serial line in asynchronous mode.
MCS Host Interface Administration Menu
Interface Status: IdleVersion: Asynchronous – 1.0
Options
View Log File
Erase Log File
Initialize Interface
Terminate Interface
Configuration
Statistics
UNIX
Logout
Enter Option: [ ]

Page 182 NDA-30026 Revision 6
HOST INTERFACE ADMINISTRATION Medical Center System Operations Manual - JAVA Edition
Menu Options The Host Interface Administration Menu provides these menu options:
Procedure
Option Task Section in Chapter
View Log File Select and display the current message
files that show activity on the host
interface.
“Log File Options” on page 183
Erase Log File Remove the current log file from the
system. “Log File Options” on page 183
Initialize Interface Start up the host interface, allowing
communication between the MCS and
the HIS systems.
“Initialization and Termination
Options” on page 185
Terminate Interface Stop host interface message exchange,
discontinuing any communication
between the MCS and the HIS systems.
“Initialization and Termination
Options” on page 185
Configuration Change or accept default configuration
values that govern communication
across the interface.
“Configuration Option” on page
186
Statistics Display any selected time-stamped file
containing statistics by category of
input.
“Statistics Option” on page 189
Action Result
At the UNIX login, type hostadm and press
Enter.The MCS Host Interface Administration
Menu displays.
Refer to the following pages for
information and instructions in the use of
each menu option.
To exit the MCS Host Interface
Administration Menu, type l (for Logout)
and press Enter.
The UNIX login prompt redisplays.
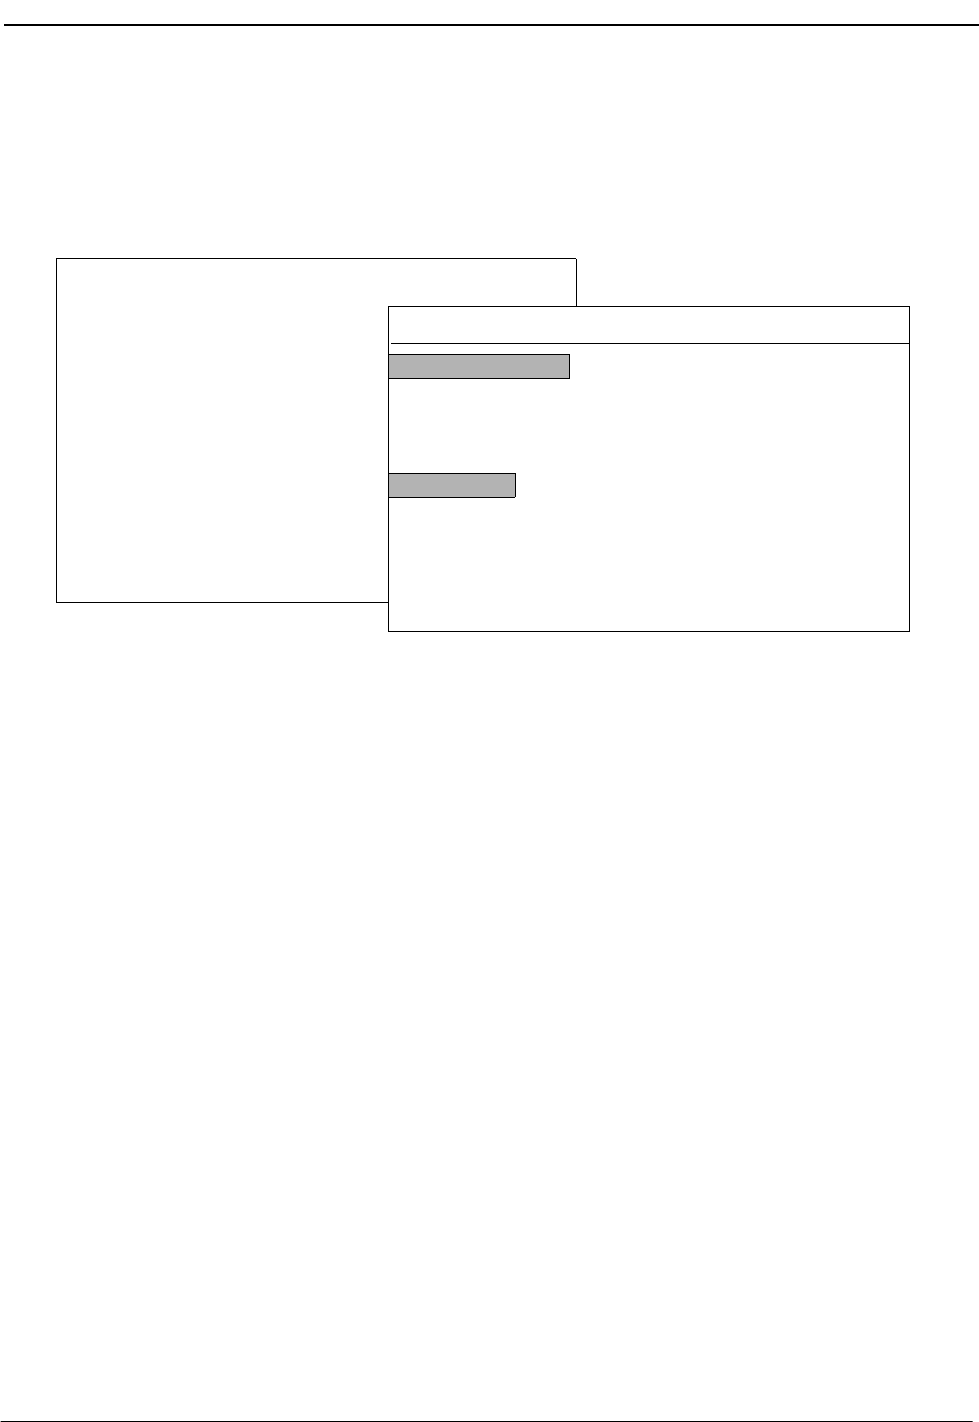
NDA-30026 Revision 6 Page 183
Medical Center System Operations Manual - JAVA Edition HOST INTERFACE ADMINISTRATION
Log File Options
The Log File options on the MCS Host Interface Administration Menu allow you to
display the log file for on-screen viewing or printing and to erase the contents of the log
file. This section discusses these two options.
Figure 13-2 Interface Log File
Contents The Log File contains messages about processes completed, transactions in progress,
and other activities on the interface. The messages are date and time stamped
(e.g., 08/16/08:45:10) and listed in chronological order, based upon arrival to the log
file.
Real-Time
Display The Log File display reflects real-time activity in the file when it is in AutoScroll
mode. When the cursor is positioned on the AutoScroll command, press the Enter key
to toggle the mode on and off. In AutoScroll mode, the notation A–S appears in the
bottom right-hand corner of the screen and new messages are scrolled onto the screen
as they occur.
Hard Copy Print The Print command allows you to make hard-copy snapshots of either the current
screen or the entire file contents.
WARNING: Use of the Erase Log File option removes all data from the log file and
requires confirmation before the actual deletion is performed.
MCS Host Interface Administration Menu
Interface Status: IdleVersion: Asynchronous – 1.0
View Log File
Erase Log File
Initialize Interface
Terminate Interface
Configuration
Statistics
UNIX
Logout
Enter Option: [ v ]
Options MCS Host Interface Log Tue Aug 17 09:02 am
BEGINNING OF DATA
END OF DATA
08/16/08:45:10:Changing directories.
08/16/08:45:11:Opening channel.
08/16/08:56:25:ERR 100: open failed: dev /dev/ttynla, errno 13
Search Top Bottom Command Print AutoScroll Quit

Page 184 NDA-30026 Revision 6
HOST INTERFACE ADMINISTRATION Medical Center System Operations Manual - JAVA Edition
View Log File
Procedure
Erase Log File
Procedure
Action Result
On the MCS Host Interface Administration
Menu, type v at the prompt and press Enter.
(1)
The Log File displays and the cursor is
positioned on the AutoScroll command.(2)
If desired, press Enter to turn on the
AutoScroll mode. The notation A–S displays in the bottom
right-hand corner of the screen.
Use the Top command to move to the
beginning of the display and the Bottom
command to move to the end of the display.
To Search the Display: Type s to select the
Search command and press Enter. At the
prompt, type the desired pattern and press
Enter.
All occurrences of the given pattern on that
page highlight.
To Print the Display: Type p to select the
Print command and press Enter. At the
prompt, type f to print the whole file or s to
print the screen and press Enter. (Press Esc
to return the cursor to the command line,
cancelling the print request.)
There is a pause while the file or screen is
sent to the printer. Then the command line
is returned.
To Work at UNIX Level: Select the
Command choice on the command line and
press Enter. The message “Enter UNIX command and
press Enter” displays, and the cursor is
positioned on a UNIX prompt.
To exit the display, type q to select the Quit
command and press Enter twice. The MCS Host Interface Administration
Menu displays.
Action Result
On the MCS Host Interface Administration
Menu, type e at the prompt and press Enter.
(1)
A message displayed under the Menu states
that erasing the Log File will cause all data
in the log file to be deleted and requests
confirmation.
Type y and press Enter to delete the Log
File and all data in it. Type n and press
Enter to cancel the deletion. Press Enter a
second time.
The MCS Host Interface Administration
Menu displays.

NDA-30026 Revision 6 Page 185
Medical Center System Operations Manual - JAVA Edition HOST INTERFACE ADMINISTRATION
Initialization and Termination Options
The Initialization and Termination options on the MCS Host Interface
Administration Menu are used to start and stop the host interface, controlling
communication between the MCS and the HIS systems.
Figure 13-3 Interface Initialization/Termination
Initialization
Procedure
Termination
Procedure
MCS Host Interface Administration Menu
Interface Status: IdleVersion: Asynchronous – 1.0
Options
Erase Log File
Initialize Interface
Terminate Interface
Configuration
Statistics
UNIX
Logout
Enter Option: [ i ]
Action Result
On the MCS Host Interface Administration
Menu, type i at the prompt and press Enter.
(1)
The message “Initialize Interface” displays
to show that the interface has been
initialized as requested.
Press Enter. The MCS Host Interface Administration
Menu displays.
Action Result
On the MCS Host Interface Administration
Menu, type t at the prompt and press Enter.
(1)
The message “Terminate Interface, Are you
sure (y/n):” displays for confirmation
before the termination is actually
performed.
Type y and press Enter to continue with the
termination. Type n and press Enter to
cancel the termination.
The message “Interface has been
terminated” displays.
Press Enter. The MCS Host Interface Administration
Menu displays.

Page 186 NDA-30026 Revision 6
HOST INTERFACE ADMINISTRATION Medical Center System Operations Manual - JAVA Edition
Configuration Option
Use the Configuration option on the MCS Host Interface Administration Menu to
change or accept default configuration values which govern communication across the
interface.
Figure 13-4 Interface Configuration File
Contents The Configuration File contains parameters for which entries bring the host and the
MCS into communication. In some cases, entries on one side of the link must be
compatible with entries on the other side of the link. The parameters display one at a
time for data entry with the default entry shown in parentheses.
MCS Host Interface Administration Menu
Interface Status: IdleVersion: Asynchronous – 1.0
Options
View Log File
Erase Log File
Initialize Interface
Terminate Interface
Configuration
Statistics
UNIX
Logout
Enter Option: [ c ]
MCS Host Interface Configuration
Enter the new configuration value or just
press Enter to accept the current value.
Enter response time value (90 sec):

NDA-30026 Revision 6 Page 187
Medical Center System Operations Manual - JAVA Edition HOST INTERFACE ADMINISTRATION
Procedure
Action Result
On the MCS Host Interface Administration
Menu, type c at the prompt and press Enter.
(1)
The Configuration File displays. (2)
In each field, either press Enter to accept
the default value shown in parentheses or
type a new value to the field and press
Enter, according to the field definitions
below:
Field Name
Response timer value Definition
The amount of time MCS waits for an
acknowledgment from HIS before
resending the requested data; default = 90
sec.
Master synchronization timer value (30
sec) The length of time that HIS waits for an
acknowledgment or data-bearing message
from MCS before assuming that
communication is down between the two.
Slave synchronization timer value (180 sec) The length of time that MCS will wait for a
heartbeat or data-bearing message from the
host before assuming that communication
is down between the two.
Message request response timer value (30
sec) In a two-way link, if MCS has asked the
host to download messages, this is the
amount of time that MCS waits for those
messages.
Host link semaphore key value The key of the semaphore used to control
access to the host link; default = 2734.
Logging level The level of detail at which information is
recorded in the log file; default = 1 (error
message only). Valid values include 1, 3, 5,
and 7, where 7 is extensive tracing that is
recommended for problem-solving only.
Host link shared memory key value The semaphore key used to control access
to the host link shared memory; default =
2734.

Page 188 NDA-30026 Revision 6
HOST INTERFACE ADMINISTRATION Medical Center System Operations Manual - JAVA Edition
Action Result
Field Name
Number of times to send a negative
acknowledgment
Definition
The number of times MCS will send a
negative acknowledgment to the host
within the configured response time period
before it stops sending one; default = 3.
Host interface working directory The full path and filename of the host
interface working directory; default = /oai/
app/mcs/host/bin.
Logging and statistics directory The full path and filename of the directory
for the logging and statistical files; default
= /oai/app/mcs/host/log.
Modem dial out telephone number ( ) The telephone number used to establish
connection with the HIS system if the host
interface is connected by modem.
Slave TTY port device The name of the port device on the MCS
designated terminal; default = /dev/ttynla.
Line mode The line mode and speed, to match that of
the host, from the selection displayed above
the entry field; default = 1 (9600B, 8-N-1).
After the last field, press Enter, the
message “Update Completed” displays.
Press Enter. The MCS Host Interface Administration
Menu displays.
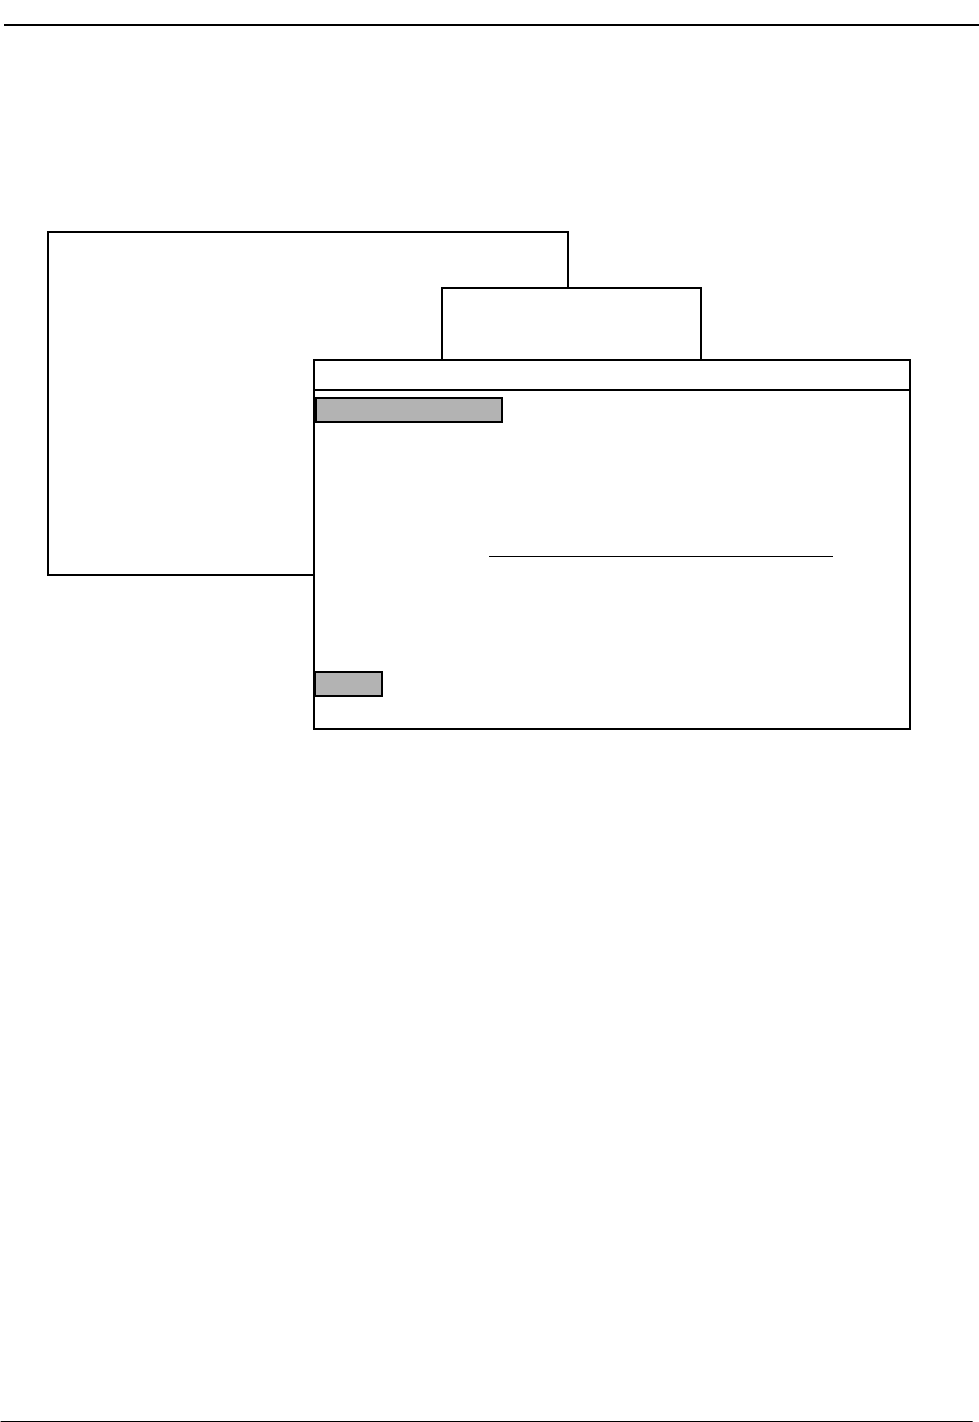
NDA-30026 Revision 6 Page 189
Medical Center System Operations Manual - JAVA Edition HOST INTERFACE ADMINISTRATION
Statistics Option
Use the Statistics option on the MCS Host Interface Administration Menu to display
any selected time-stamped file containing statistics by category of input.
Figure 13-5 Interface Statistics
Display
Contents The fields in the display (e.g., Preadmit with Testing, Newborn Admission, etc.) are
derived from the types of records that are sent from the host and defined for the host
during its installation. The APM automatically opens new host statistics files and then
removes them after one week.
Real-Time
Display The Statistics display reflects real-time activity in the file when it is in AutoScroll
mode. When the cursor is positioned on the AutoScroll command, press the Enter key
to toggle the mode on and off. In AutoScroll mode, the notation A–S appears in the
bottom right-hand corner of the screen and new messages are scrolled onto the screen
as they occur. These new messages are appended to the file.
Note: The Current Time and Last Report notations show when the respective reports (i.e.
last and current) are generated.
Hardcopy Print The Print command enables you to make hardcopy snapshots of either the current
screen or the entire file contents.
MCS Host Interface Administration Menu
Interface Status: Idle Version: Asynchronous – 1.0
Options
View Log File
Erase Log File
Initialize Interface
Terminate Interface
Configuration
Statistics
UNIX
Logout
Enter Option: [ s ]
Host Statistics Files
07.31–09:52 08.01–10:25
/oai/app/mcs/host/log/07.31–09:52 Tue Aug 17 09:02 am
BEGINNING OF DATA
MORE
MCS Host Interface Statistics
Last Report: 07/27/12:31:56
Current Time: 07/31/09:52:20
CASE NAME – NUMBER NUMBER RECEIVED
Preadmit with Testing – 01: 5
Newborn Admission – 02: 3
Routine Admission – 03: 45
Preadmit with Testing Admission – 04: 0
Emergency Room Registration – 05: 37
Nonrecurring Outpatient Registration – 06: 32
Search Top Bottom Command Print AutoScroll Quit

HOST INTERFACE ADMINISTRATION Medical Center System Operations Manual - JAVA Edition
Page 190 NDA-30026 Revision 6
This Page Left Blank.

NDA-30026 Revision 6 Appendix Page 1
Medical Center System Operations Manual - JAVA Edition
Appendix A BEEPER INTERFACE
Overview
This section specifies the features and basic operation of NEC’s Medical
Controller System alphanumeric paging interface. The MCS offers multiple
databases that can be used to make and join callers to hospital staff and services.
The MCS Beeper Interface (MCS/BI) will provide the operator with a facility to
search the MCS database, select a specific individual or service, and enter an
alphanumeric message that can be sent to an electronic paging device (beeper)
through an alphanumeric paging terminal. Access to voice pagers will not be
provided.
The communications protocol between the MCS and the alphanumeric paging
terminal will be that recommended by the Personal Communications Industry
Association, Telocator. The protocol was previously known as the Motorola/IXO
alphanumeric protocol. The Motorola/IXO protocol was adopted by Telocator in
September of 1988 as an industry standard for devices accepting input for paging
requests and is known as Telocator Alphanumeric Protocol (TAP).
The preferred access method to the paging terminal is through a serial I/O
connection. The MCS/BI will also support connection through a modem to a
remote paging device. A beeper configuration menu will allow the input of a
modem access number, response timers, and other control parameters.
A list of pre-defined messages that are commonly sent can be accessed by the
operator. The operator can also enter a specific message at the input prompt when
required. The pre-defined messages can be modified.
A time stamped record of each page will be saved to a log. This log can be viewed
and printed to a line printer.
Database Fields Two fields in the MCS database contain pager number information. The Pager Id
field defines a person’s pager address or Personal ID Number (PIN). The second
field, Pager Dial Number, is a phone number field that is used to dial a user’s
paging provider or to access a pager that has a discrete phone number. If the
database contains a dial number, that number will be used to place a call from the
ATT Console. If the database only contains a pager id, the local paging system will
be accessed if the MCS Beeper Interface is installed and active.

Appendix Page 2 NDA-30026 Revision 6
Medical Center System Operations Manual - JAVA Edition
Architecture
This section provides information about the architecture of the beeper interface in
order to give you a basic understanding how the beeper interface operates.
The following diagram depicts connectivity between the NEAX2400, the MCS,
and a Hospital Information System (HIS). A brief explanation of the connections
is provided below.
Figure A-1 Beeper Connectivity
The OAI link is either X.25 or TCP/IP. The HIS interface is an RS-232C DTE-to-
DTE full-duplex connection or a TCP/IP network interface. The connection
between the UAP and Attendant Consoles varies on the type of console equipment.
For example, the SunRiver VGA stations require DB-9 with pins 2 and 4 not used.
The connection from the UAP out to the Paging System is an RS-232C DTE. In
most cases one of the COM ports of the UAP can be used, otherwise, a port from
a multi-port serial I/O card will be required. (The SunRiver stations have serial and
parallel ports.) The paging terminal can be any device that can be interfaced using
an RS-232C and accept the Telocator Alphanumeric Protocol (TAP) for paging
requests.
NEC developed a beeper interface that can accept beeper request from a number of
application users within the UAP. The beeper software interface can be used by
both the MCS and other OAI applications (i.e. Dterm applications) concurrently.
The beeper interface accepts IPC message from applications and communicates
with the beeper terminal on the RS-232 connection.
HIS
OAI
MCS
Att
Console
UAP
Hospital
Information
System
NEAX
2400
Interface
Interface
Paging
Terminal
MCS
)
)
)
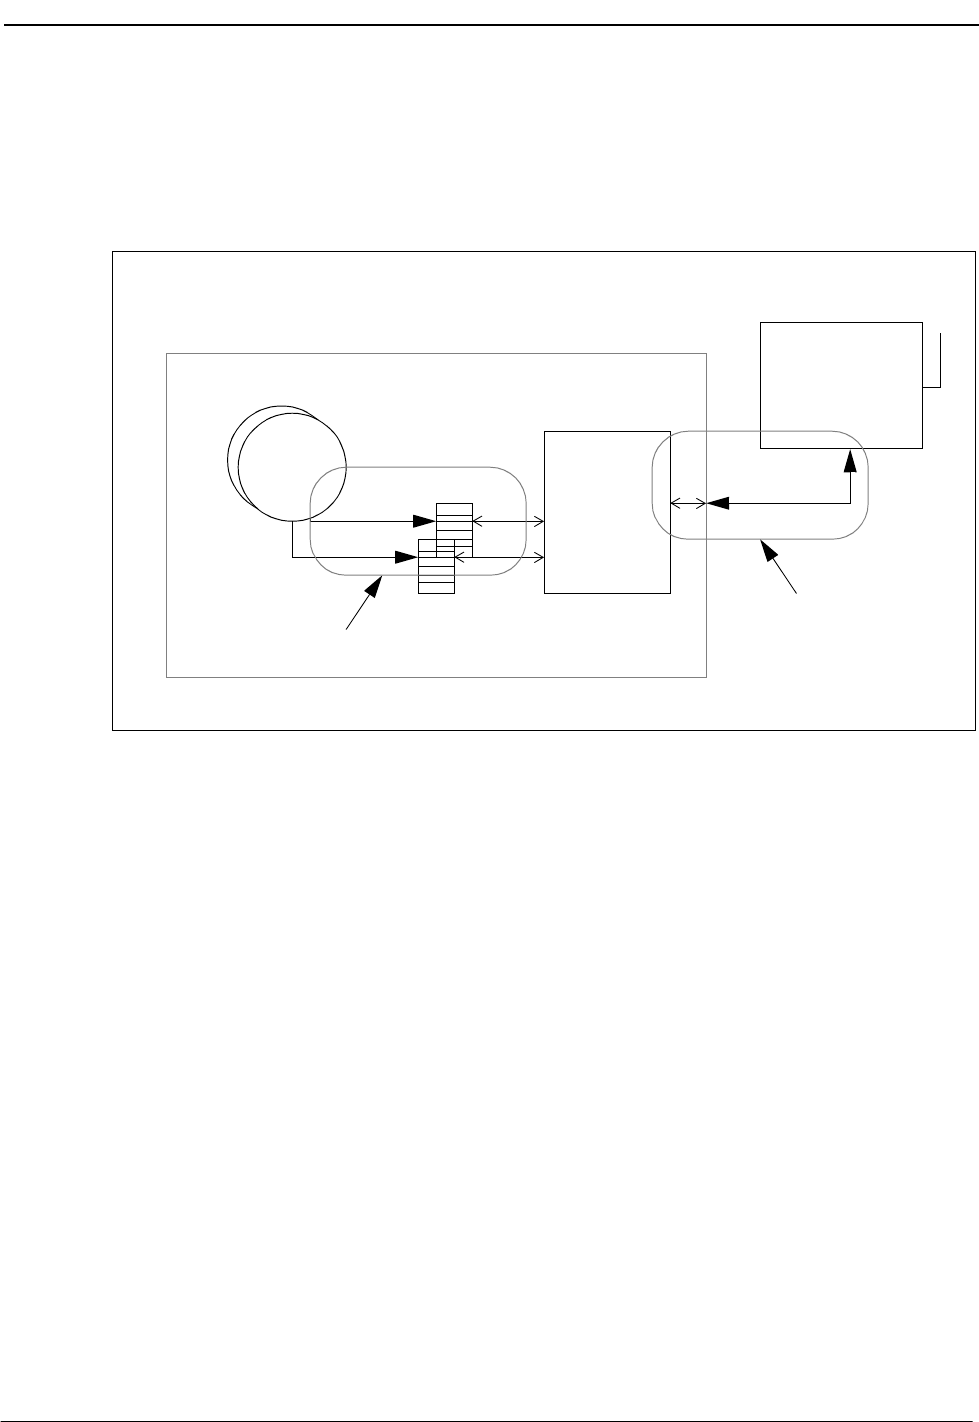
NDA-30026 Revision 6 Appendix Page 3
Medical Center System Operations Manual - JAVA Edition
A basic diagram of the beeper software interface is presented below. The diagram
shows some of the basic UNIX internal’s that will be required to process a message
from an OAI application to the beeper terminal. The diagram might not be an
accurate representation of the actual software interface since some of the details
have been left out.
Figure A-2 Beeper Software Interface
The NEC defined message format can be provided to other application engineers
upon request. The message format contains information that allows the beeper
interface software to accept messages from unknown applications and return
beeper status information to the application after the beeper request has been
serviced by the beeper terminal.
Paging
Terminal
Beeper Interface
)
)
)
RS-232
COM Port
IPC
Queues
Beeper
Interface
Software
TAP
message
OAI
Apps
format
NEC defined
message format

Appendix Page 4 NDA-30026 Revision 6
Medical Center System Operations Manual - JAVA Edition
Using the Beeper Interface
To launch the Beeper function, press B on the console keyboard or use the arrow
keys to select the Beeper command and press Enter while the main operator menu
is displayed. (All operator functions are launched from the main menu.) The
command line is replaced with a prompt for you to enter the name of the person to
receive a beeper page.
Figure A-3 Console Screen
Enter the name of the person to receive the page, and press Enter. If you press
Enter without typing characters at the Enter Name prompt, the MCS attempts to
select all of the names in the database that have a beeper number assigned.
Currently, Physician and Employee records are the only records that contain a
beeper number field.It is suggested that you enter at least one character of the name
to be paged in order to limit the length of the database search.
An example of the results of a database look-up is shown in Figure A-4 on page 5.
Medical Center System Tue Aug 17 09:02 amATT2
On-Line
Call Status MCS Status
Attendant Status
DS
Trnfr
RtrvDirAsst QuitPark EmergRedial ClearBeeper
Source Name Ext DID AdmitRoom Age DschSxBed
Destination Name Ext DID AdmitRoom Age DschSxBed
Unit
Unit
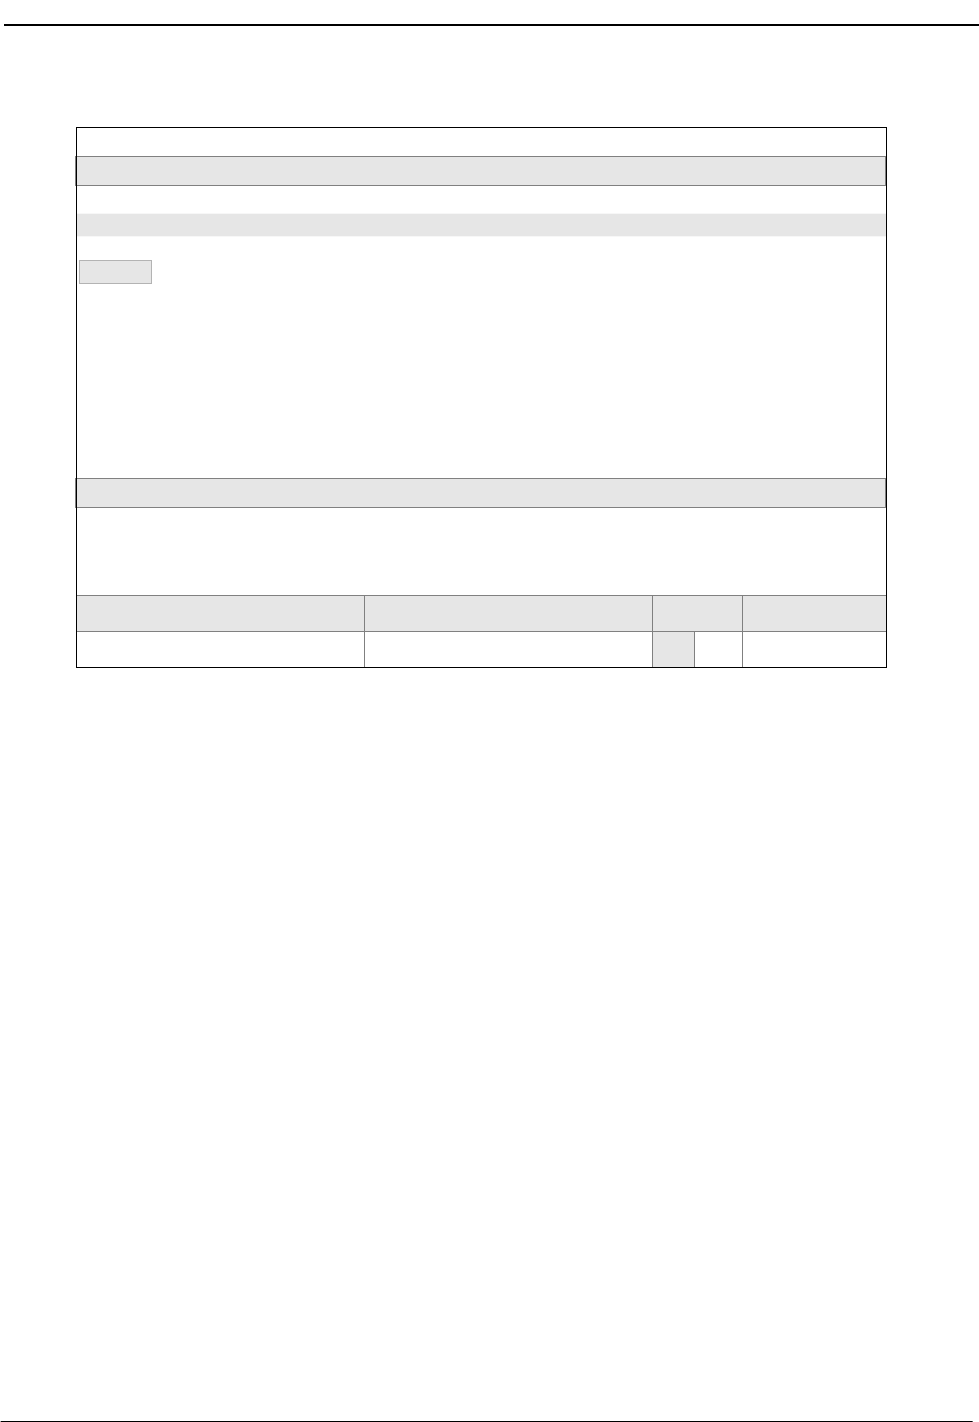
NDA-30026 Revision 6 Appendix Page 5
Medical Center System Operations Manual - JAVA Edition
Figure A-4 Database Beeper Number Display
If more than one record is selected from the database, you must use the arrow keys
to highlight the proper entry. To select the entry, press Enter. To return to the Enter
Person prompt where you can change or add letters to the name look-up, type the
desired character.
If the selected entry does not contain a dial number (e.g., Betty Batena in the
example above), a screen similar to the one displayed in Figure A-5 on page 6
appears. The MCS processing of this type of call event is described in “Local Pager
Process” on page 6.
If the selected entry does contain a dial number (e.g., John Baker in the example
above), the MCS attempts to dial the number displayed in the pager dial number
field. The processing of this type of call event is described in “Dial Number
Process” on page 8.
Medical Center System Tue Aug 17 09:02 amATT2
On-Line
Call Status MCS Status
Attendant Status
DS
Trnfr
Enter Person to Beep: BA
Source Name Ext DID AdmitRoom Age DschSxBed
Person Pager Id
Unit
Up/Down Arrows to move, <Enter> to select, <Esc> to quit
BAKER, JOHN, L. 27010
BATENA, BETTY 10345
BAWATER, NICHOLAS 00123
Pager Dial Number
Bottom
91800-759-7243
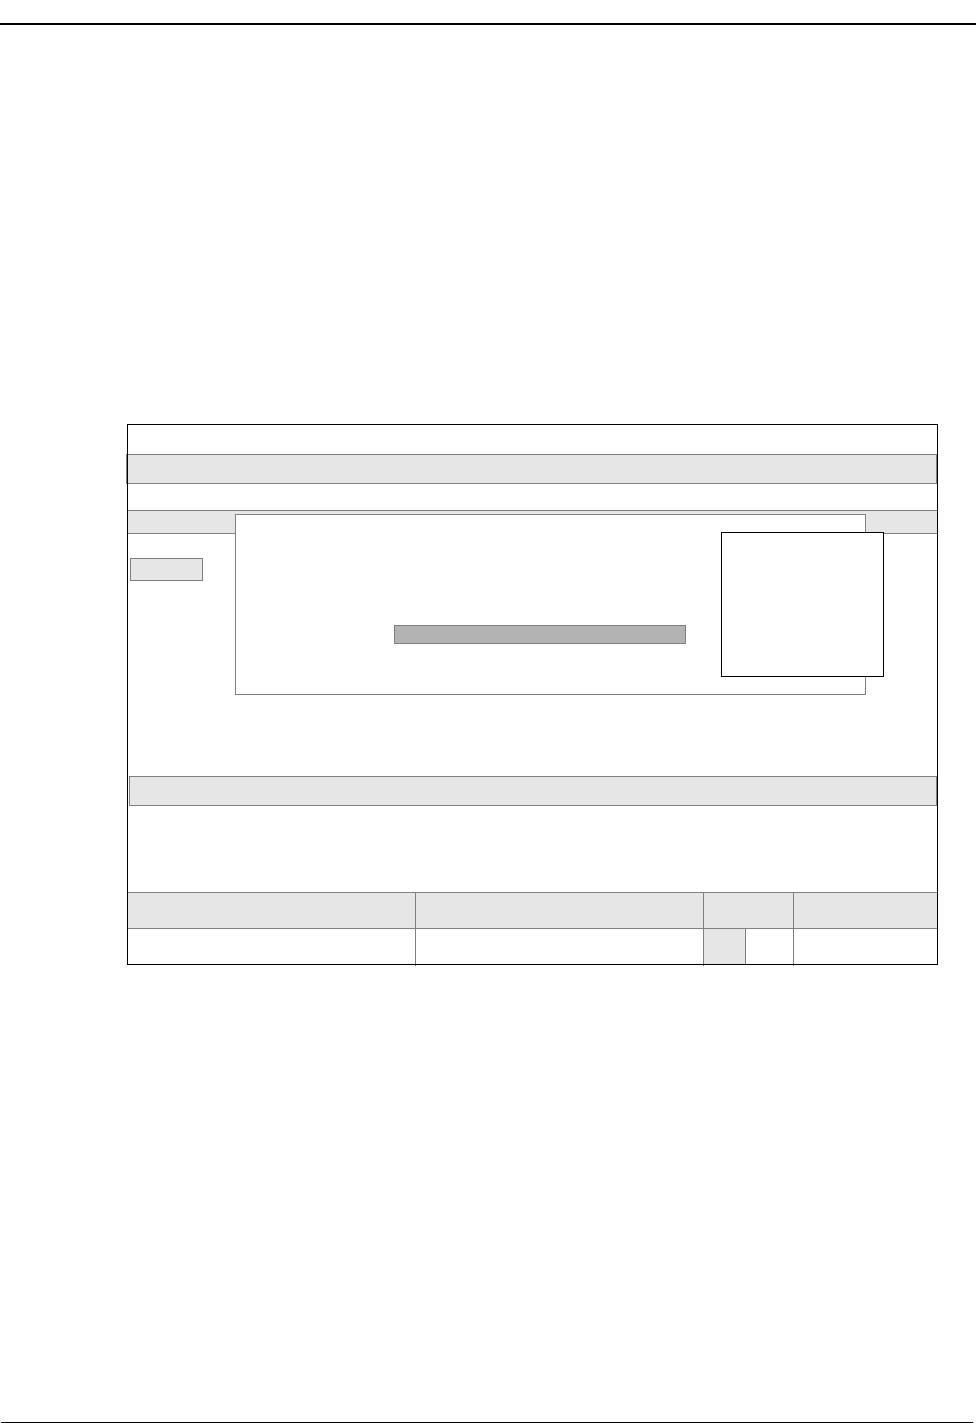
Appendix Page 6 NDA-30026 Revision 6
Medical Center System Operations Manual - JAVA Edition
Local Pager
Process Local pager records are those that have a pager ID but do not have a dial number.
If you selected a local pager from the display list, follow the information provided
in this section. For information about records that contain a dial number, see “Dial
Number Process” on page 8.
The local page feature requires a connection to a local paging terminal system and
interface software. If the paging system interface software is not installed or not
active, an error message displays in the Attendant Status field at the bottom of the
screen when you attempt to use this option.
Figure A-5 below illustrates the Pager Message screen that appears after you select
a local pager record from the look-up screen illustrated in Figure A-4 on page 5.
Figure A-5 Local Pager Message Screen
From the Pager Message pop-up screen, you can enter a text message to be sent to
the displayed pager entry.
You can enter your own message or select site definable canned message text or
both. To display a list of canned message text as illustrated in Figure A-5, expand
the display. You can usually expand the display by pressing Tab. To scroll through
the list, press any of the following keys: Tab, Space Bar, UpArrow, and
DownArrow. Press Enter to select the highlighted message. To exit the input
screens and return to the Enter Person to Beep prompt, press Esc. Pressing almost
any other key (e.g., BackSpace or Delete) returns you to the Text Message prompt.
From the Text Message prompt, press Enter to accept the current text message.
BAKER, JOHN, L. 27010
BATENA, BETTY 10345
BAWATER, NICHOLAS 00123
Bottom
Medical Center System Tue Aug 17 09:02 amATT2
On-Line
Call Status MCS Status
Attendant Status
DS
Trnfr
Enter Person to Beep: BA
Source Name Ext DID AdmitRoom Age DschSxBed
Person Pager Id
Unit
Up/Down Arrows to move, <Enter> to select, <Esc> to quit
Pager Dial Number
*** Pager Message ***
Page Name:
Pager Id:
Text Message:
BATENA, BETTY
10345
91800-759-7243
Call Operator
Code BLUE
Code RED
Code YELLOW
Code WHITE
Call Patient
Call Office
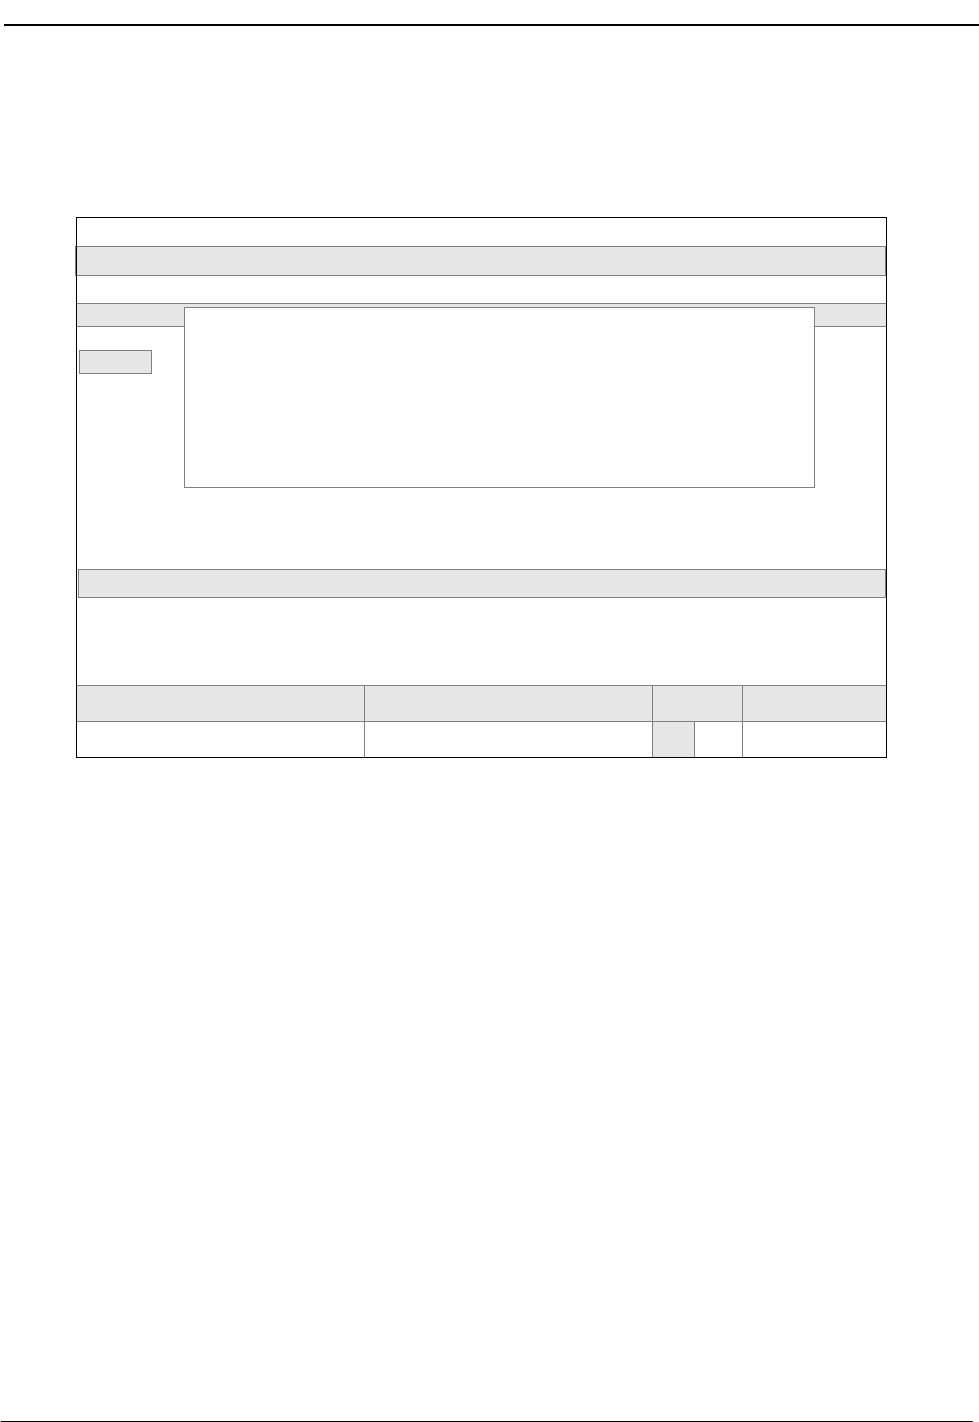
NDA-30026 Revision 6 Appendix Page 7
Medical Center System Operations Manual - JAVA Edition
A beeper interface message is sent to the local beeper interface. If the interface is
not accepting messages, an error message will display at the bottom of the Pager
Message screen.
Figure A-6 Pager Message Error
BAKER, JOHN, L. 27010
BATENA, BETTY 10345
BAWATER, NICHOLAS 00123
Bottom
Medical Center System Tue Aug 17 09:02 amATT2
On-Line
Call Status MCS Status
Attendant Status
DS
Trnfr
Enter Person to Beep: BA
Source Name Ext DID AdmitRoom Age DschSxBed
Person Pager Id
Unit
Up/Down Arrows to move, <Enter> to select, <Esc> to quit
Pager Dial Number
*** Pager Message ***
Page Name:
Pager Id:
Text Message:
BATENA, BETTY
10345
91800-759-7243
555-1212
Waiting for confirmation response... _
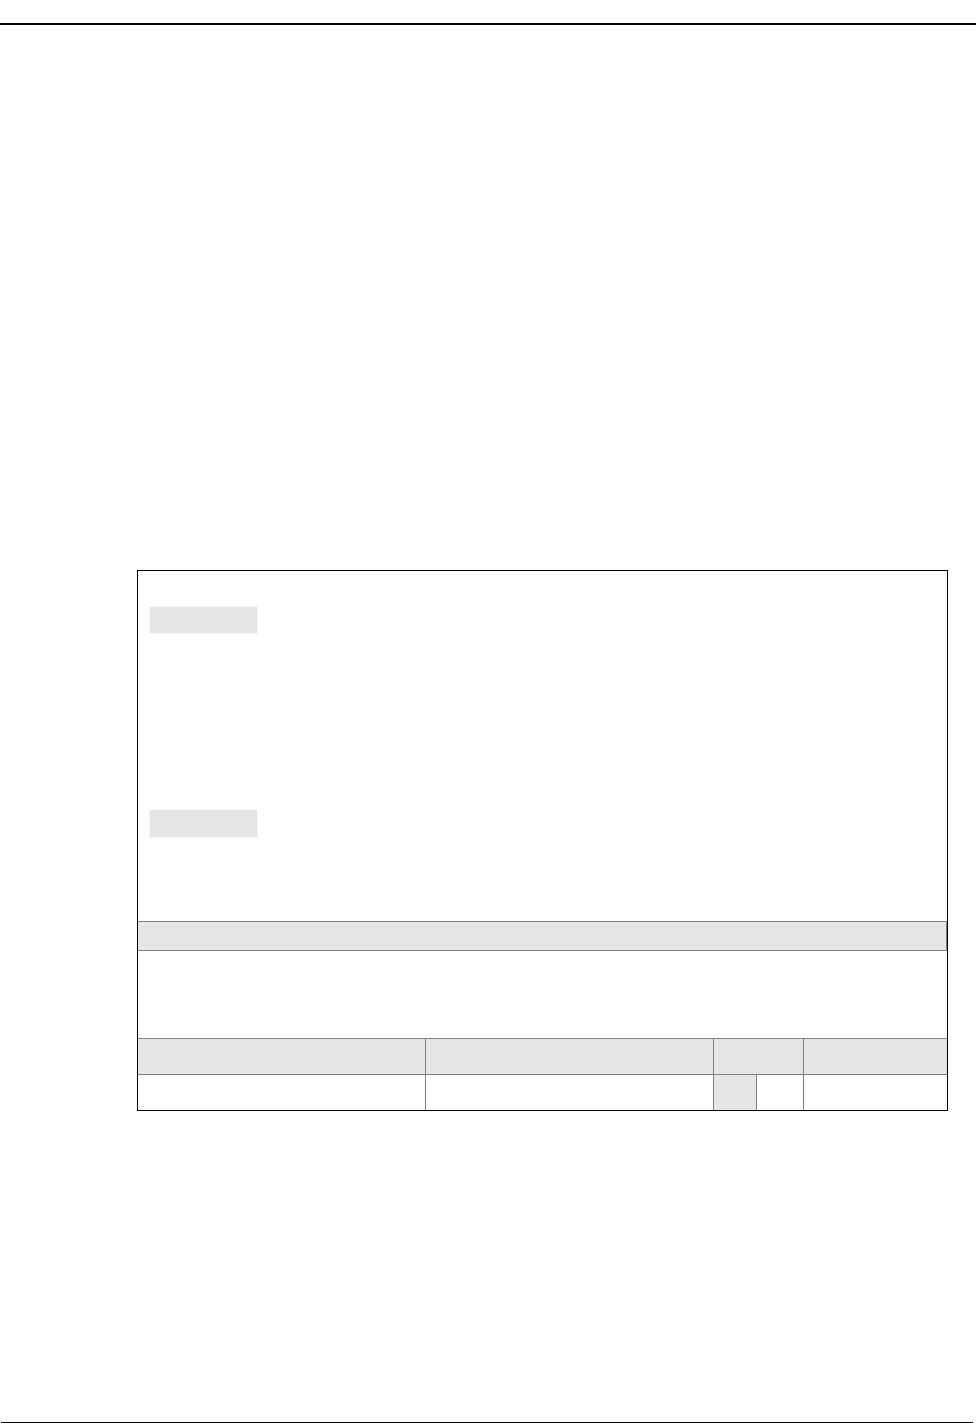
Appendix Page 8 NDA-30026 Revision 6
Medical Center System Operations Manual - JAVA Edition
Dial Number
Process This section describes the processing of a database entry that contains a dial
number. If you selected an entry that contain a dial number from the display list
illustrated in Figure A-4 on page 5, follow the information provided in this section.
For information about records that do not contain a dial number, see “Local Pager
Process” on page 6.
An entry that has a dial number can also have a pager id. This dial number feature
has been kept for customers that currently use it. The MCS will attempt to place a
call from the ATT console using the NEAX2400 OAI make call command. The
number should contain the required access code data, etc., to place a call as if it
were being dialed manually from the ATT console.
After placing a call, the MCS queries the beeper code table of the database. If there
are any codes in the table, a list of these beeper codes display. (See Figure A-7.)
The beeper code entries consist of a description field and a numeric code field.
These numeric codes can be used to describe an event to the person being paged.
You can use the commands listed at the bottom of the scroll window to move
within the beeper code display.
Figure A-7 Beeper Codes Screen
You will need to complete the rest of the paging process manually. Some Wide-
Area paging systems require a Personal Id Number (PIN) to identify the person to
receive the page. After you enter a PIN, you must enter a numeric code. These steps
are separated by either tones or voice prompts.
After placing the call and displaying the beeper code screen you can return to the
main operations menu by pressing Esc. If the MCS is unable to place the call an
error message will display in the Call Status field at the bottom of the screen.
Medical Center System Tue Aug 17 09:02 amATT2
On-Line
Call Status MCS Status
Attendant Status
DS
Trnfr
Source Name Ext DID AdmitRoom Age DschSxBed Unit
DownPage
Top of File *** Beeper Codes ***
Beeper Code Name
******************************************************************************
BOSKY, FRANK - CALL OFFICE
Beeper Code
End of File
4444
UpPage Search Top Bottom Print Quit
BOSKY, FRANK - CALL HOSPITAL 6666
BLUE, CODE 99977

NDA-30026 Revision 6 Appendix Page 9
Medical Center System Operations Manual - JAVA Edition
Error and User
Interface
Messages
This section contains a list of error messages that might appear during some beeper
operations.
•Beeper Interface Not Installed - The beeper interface software that would
handle the communications between UAP Applications and the local beeper
terminal is either not installed or has not been installed properly.
•Beeper Interface Offline - The beeper terminal is not communicating with the
beeper interface software or in not active. First check that the beeper interface
is active, then check the physical connection between the UAP’s
communication port and the beeper terminal’s communication port. If the error
continues to occur, check the beeper interface configuration, and ensure that the
communication device port is accurate.
•Queue Status Error [x] - While attempting to send an IPC message to the beeper
interface, a message queue error occurred. The value [x] is the system error that
occurred. This error occurs very infrequently. However, in the event that this
error does occur, take note of the error number, and contact the site technician.
Restarting the beeper interface and/or the MCS menu process should correct
this error condition.
•Unable to send beeper message - The MCS menu process was unable to send
an IPC message to the beeper interface. This error is usually a result of the
beeper interface terminating abnormally. Make sure that the beeper interface
software is active. If the software is active, this message indicates that other
message interface problems are occurring in the system. Check the APM error
log.
•Failure: Timed Out - The MCS menu process timed-out waiting for a response
from the beeper interface software. If the beeper interface appears to be active
and this message occurs frequently, you need to increase the response timer.
•Failure: Out-of-service - The beeper interface timed-out waiting for an
acknowledgment from the beeper terminal. If the beeper terminal appears to be
functioning properly and the error occurs frequently, you need to increase the
response timer between the beeper interface software and the beeper terminal.

Appendix Page 10 NDA-30026 Revision 6
Medical Center System Operations Manual - JAVA Edition
Interface
Configuration A special UNIX user account, bpradm, allows access to configurable interface
data. This section presents most of the screens that you might need to access during
installation and support of the interface.
Main Menu
After logging into the UNIX system with the user account name bpradm, the
following menu displays.
Figure A-8 Beeper Interface Administration Menu
In the figure above, the interface status is active. When the status is active, you can
start and stop the interface from this menu as well as view some of the log files and
set the interface configurable data.
Beeper Interface Administration Menu
Interface Status: Active Version: 1.0
Options
View Log File
Erase Log File
Initialize Interface
Terminate Interface
Configuration
UNIX
Logout

NDA-30026 Revision 6 Appendix Page 11
Medical Center System Operations Manual - JAVA Edition
Configuration
Menu Selecting Configuration displays the following menu of options:
Figure A-9 Configuration Menu
Valid commands or options are indicated by the bold underlined letters. Each
option is discussed in detail below.
Configuration Files
To modify the configuration files enter “C” at the Enter Option prompt. All the
configuration files, will be displayed as shown in the following window:
Figure A-10 Configuration Files
You will rarely need to change this information. These files indicate the location
of configuration data.
Interface Configuration Menu
Modify Configuration Files
Modify Misc Parameters
Modify Port Parameters
Modify Timer Parameters
Save Configuration
Quit to Main Menu
Enter Option: [ ]
Enter transaction log file name
(/oai/app/beeper/log/trans.log) :
Enter beeper log file name
(/oai/app/beeper/log/beeper.log) :
Enter fifo device name
(/oai/app/beeper/beeper.fifo) :
Enter beeperq executable name
(/oai/app/beeper/bin/beeperq) :
Enter beeperq log file name
(/oai/app/beeper/log/beeperrq.log) :
Enter beeperq qkey filename
(oai/app/beeper/cfg/config) :

Appendix Page 12 NDA-30026 Revision 6
Medical Center System Operations Manual - JAVA Edition
Once the configuration file update is complete, you will be returned to the
Configuration Main Menu.
Miscellaneous Parameters
To modify the miscellaneous parameters enter “M” at the Enter Option prompt.
The window shown below will be displayed. Once you have entered the parameters
you will be returned to the Configuration Main Menu.
Figure A-11 Misc Parameters Window
These miscellaneous parameters are vendor specific. In most cases the default
values should work.
Enter log level value (9) :
Enter modem dial number ():
Enter pager name (PGI) :
Enter pager password (000000):

NDA-30026 Revision 6 Appendix Page 13
Medical Center System Operations Manual - JAVA Edition
Port Parameters
To modify the port parameters enter “P” at the Enter Option prompt. The window
shown below will be displayed.
Figure A-12 Port Parameters Window
The port parameters are also vendor specific. In most cases the default values
should work. Once you have entered the parameters you will be returned to the
Configuration Main Menu.
Timer Parameters
To modify the timer parameters enter “T” at the Enter Option prompt. The timer
parameters, will be displayed as shown in the window below.
Figure A-13 Timer Parameters Window
Enter serial port device name (/dev/tty2a) :
(9600-8-e-1)
Enter Speed of port (9600) :
Enter Data size (8/7) of port (8) :
Enter Parity (n/o/e) of port (e) :
Enter Stop Bits of port (1) :
Enter cr wait timer value (2 sec) :
Enter ID wait timer value (10 sec) :
Enter transaction wait timer value (10 sec):
Enter send wait timer value (30 sec) :
Enter cr retry value (5 times) :
Enter transaction retry valu (3 times) :

Appendix Page 14 NDA-30026 Revision 6
Medical Center System Operations Manual - JAVA Edition
The timer parameters relate to the TAP message format. These timing variables
might require coordination with the vendor specific beeper terminal data. Once you
have entered the parameters you will be returned to the Configuration Main
Menu.
Viewing Transaction Log Files
You can view the current transaction log by selecting View Log File option from
the main screen. Three log files are saved by the beeper interface: One traces
transaction messages between OAI application and the beeper interface, a second
traces transaction messages between the beeper interface and the beeper terminal
interface, and the third is a transaction only file. The third transaction log file will
contain the results of each beeper request received by the interface. The disposition
of each request is logged in this file - success or failure. Below is an illustration of
the View Log File Menu:
Figure A-14 View Log File Menu
View Log File Menu
View Beeper Log File
View BeeperQ Log File
View Beeper Transaction Log File
Main Menu
Enter Option: [ ]

NDA-30026 Revision 6 Appendix Page 15
Medical Center System Operations Manual - JAVA Edition
Select the log file that you want to view. A screen similar to the following displays.
You can use PgUp and PgDn as well as command line options that are listed across
the bottom of the display. These options are described below:
Figure A-15 Beeper Transaction Log
The AutoScroll feature allows you to view the file in real-time. As new messages
are received, they display at the bottom of the screen. The other command line
options allow you to move within the file, print a screen display or the complete
file, or execute an external UNIX command.
Beeper Transaction Log Tue Aug 22 1
BEGINNING OF DATA
08/10-14:24:35 REPLY COMPLETE [ :No error ]
08/10-16:11:56 REPLY COMPLETE [ :No error ]
08/11-13:07:52 REPLY COMPLETE [ :No error ]
END OF DATA
Search Top Bottom Command Print AutoScroll

Medical Center System Operations Manual - JAVA Edition
Appendix Page 16 NDA-30026 Revision 6
This Page Left Blank.
