OM35768U
User Manual: 2001 Toyota 4Runner Owners Manual | SERVICE MANUAL OWNERS
Open the PDF directly: View PDF  .
.
Page Count: 301 [warning: Documents this large are best viewed by clicking the View PDF Link!]
- Toyota 2001 4Runner Owner's Manual (OM35768U)
- Foreword
- 1. OPERATION OF INSTRUMENTS ANDCONTROLS
- 1-1 Overview of instruments and controls
- 1-2 Keys and Doors
- 1-3 Seats, Seat belts, Steering wheel and Mirrors
- 1-4 Lights, Wipers and Defogger
- 1-5 Gauges, Meters and Service reminder indicators
- 1-6 Ignition switch, Transmission and Parking brake
- 1-7 Car audio system
- 1-8 Air conditioning system
- 1-9 Other equipment
- 2. INFORMATION BEFORE DRIVING YOURTOYOTA
- 3. STARTING AND DRIVING
- 4. IN CASE OF AN EMERGENCY
- 5. CORROSION PREVENTION ANDAPPEARANCE CARE
- 6. VEHICLE MAINTENANCE AND CARE
- 7. DO−IT−YOURSELF MAINTENANCE
- 8. SPECIFICATIONS
- 9. REPORTING SAFETY DEFECTS FOR U.S.OWNERS AND UNIFORM TIRE QUALITYGRADING
- Gas station information
’01 4Runner_U (L/O 0008)
i
2001 4RUNNER (OM35768U)
Foreword
Welcome to the growing group of value−conscious people who drive Toyotas. We
are proud of the advanced engineering and quality construction of each vehicle we
build.
This Owner’s Manual explains the operation of your new Toyota. Please read
it thoroughly and have all the occupants follow the instructions carefully.
Doing so will help you enjoy many years of safe and trouble−free motoring.
For important information about this manual and your Toyota, read the follow-
ing pages carefully.
When it comes to service, remember that your Toyota dealer knows your vehicle
best and is interested in your complete satisfaction. He will provide quality mainte-
nance and any other assistance you may require.
Please leave this Owner’s Manual in this vehicle at the time of resale. The next
owner will need this information also.
All information and specifications in this manual are current at the time of printing.
However, because of Toyota’s policy of continual product improvement, we reserve
the right to make changes at any time without notice.
Please note that this manual applies to all models and explains all equipment,
including options. Therefore, you may find some explanations for equipment
not installed on your vehicle.
©2000 TOYOTA MOTOR CORPORATION
All rights reserved. This material may not be reproduced or copied, in whole or in
part, without the written permission of Toyota Motor Corporation.
’01 4Runner_U (L/O 0008)
ii 2001 4RUNNER (OM35768U)
Important information about this manual
Safety and vehicle damage warnings
Throughout this manual, you will see safety and vehicle dam-
age warnings. You must follow these warnings carefully to
avoid possible injury or damage.
The types of warnings, what they look like, and how they are
used in this manual are explained as follows:
CAUTION
This is a warning against something which may cause
injury to people if the warning is ignored. You are
informed about what you must or must not do in
order to avoid or reduce the risk to yourself and other
people.
NOTICE
This is a warning against something which may cause
damage to the vehicle or its equipment if the warning
is ignored. You are informed about what you must or
must not do in order to avoid or reduce the risk of
damage to your vehicle and its equipment.
Safety symbol
When you see the safety symbol
shown above, it means: Do not...";
Do not do this"; or Do not let this
happen".

’01 4Runner_U (L/O 0008)
iii 2001 4RUNNER (OM35768U)
Important information about your Toyota
New vehicle warranty
Your new vehicle is covered by the following Toyota
limited warranties:
New vehicle warranty
Emission control systems warranty
Others
For further information, please refer to the Owner’s
Warranty Information Booklet" or Owner’s Manual
Supplement".
Your responsibility for maintenance
It is the owner’s responsibility to make sure that the
specified maintenance is performed. Section 6 gives de-
tails of these maintenance requirements. Also included
in Section 6 is general maintenance. For scheduled
maintenance information, please refer to the Scheduled
Maintenance Guide" or Owner’s Manual Supplement".
Accessories, spare parts and
modification of your Toyota
A wide variety of non−genuine spare parts and accesso-
ries for Toyota vehicles are currently available in the
market. You should know that Toyota does not warrant
these products and is not responsible for their perfor-
mance, repair, or replacement, or for any damage they
may cause to, or adverse effect they may have on,
your Toyota vehicle.
This vehicle should not be modified with non−genuine
Toyota products. Modification with non−genuine Toyota
products could affect its performance, safety or durabili-
ty, and may even violate governmental regulations. In
addition, damage or performance problems resulting from
the modification may not be covered under warranty.

’01 4Runner_U (L/O 0008)
iv 2001 4RUNNER (OM35768U)
Spark ignition system of your
Toyota
The spark ignition system in your Toyota meets all re-
quirements of the Canadian Interference−Causing Equip-
ment Standard.
Installation of a mobile
two−way radio system
As the installation of a mobile two−way radio system in
your vehicle could affect electronic systems such as
multiport fuel injection system/sequential multiport fuel
injection system, traction control system (two−wheel
drive models)/active traction control system (four−wheel
drive models), vehicle skid control system, cruise control
system, anti−lock brake system, electronic throttle con-
trol system, SRS airbag system and seat belt preten-
sioner system, be sure to check with your Toyota dealer
for precautionary measures or special instructions re-
garding installation.

’01 4Runner_U (L/O 0008)
v2001 4RUNNER (OM35768U)
Scrapping of your Toyota
The SRS airbag and seat belt pretensioner devices in
your Toyota contain explosive chemicals. If the vehicle
is scrapped with the airbags and pretensioners left as
they are, it may cause an accident such as fire. Be
sure to have the systems of the SRS airbag and seat
belt pretensioner removed and disposed of by a qualified
service shop or by your Toyota dealer before you dis-
pose of your vehicle.
On−pavement and off−road
driving tips
This vehicle belongs to the utility vehicle class. Utility
vehicles have a significantly higher rollover rate than
other types of vehicles. This vehicle will handle and
maneuver differently from an ordinary passenger car be-
cause it is designed for off−road use also. In addition,
this vehicle has a higher ground clearance and center of
gravity than that of an ordinary passenger car. This
vehicle design feature causes this type of vehicle to be
more likely to rollover. Failure to operate this vehicle
correctly may result in loss of control, accidents or
vehicle rollover causing death or serious injury. Be sure
to read Off−road vehicle precautions" in Section 2 and
Off−road driving precautions" in Section 3.

’01 4Runner_U (L/O 0008)
vi 2001 4RUNNER (OM35768U)

’01 4Runner_U (L/O 0008)
1
2001 4RUNNER (OM35768U)
OPERATION OF INSTRUMENTS AND
CONTROLS
Overview of instruments and controls
Instrument panel overview 2. . . . . . . . . . . . . . . . . . . . . . . . . . . . . . . . . . . . .
Instrument cluster overview 5. . . . . . . . . . . . . . . . . . . . . . . . . . . . . . . . . . . .
Indicator symbols on the instrument panel 6. . . . . . . . . . . . . . . . . . . . . . .
SECTION 1− 1
’01 4Runner_U (L/O 0008)
22001 4RUNNER (OM35768U)
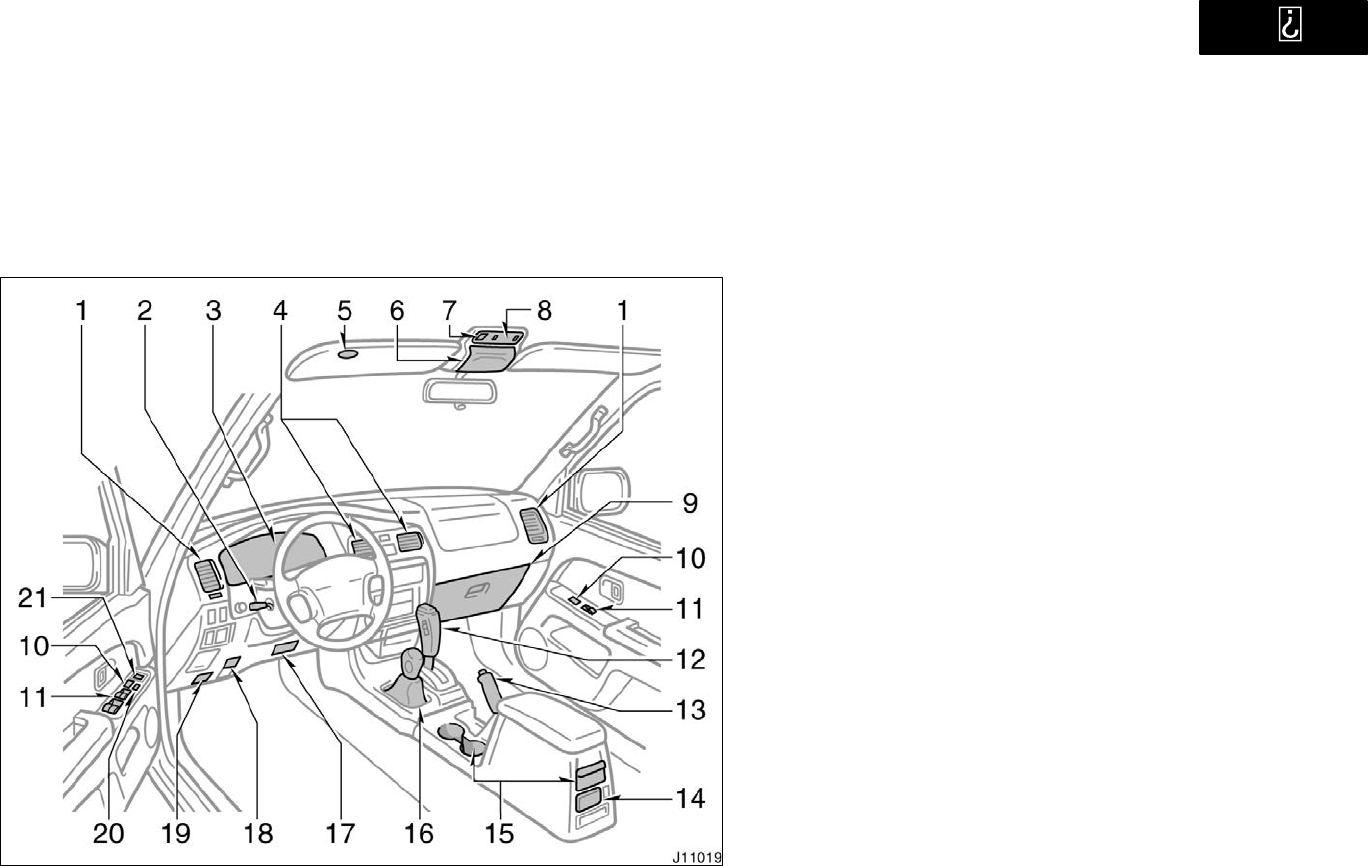
Instrument panel overview
1. Side vents
2. Tilt steering lock release lever
3. Instrument cluster
4. Center vents
5. Garage door opener
6. Garage door opener box or auxiliary
box
7. Electric moon roof switch
8. Personal lights
9. Glove box
10. Power door lock switches
11. Power window switches
12. Automatic transmission selector lever
13. Parking brake lever
14. Ashtray
15. Cup holders
16. Front drive control lever
17. Lower vent
18. Hood lock release lever
19. Fuel filler door opener
20. Window lock switch
21. Power rear view mirror control switches
(with power windows)
’01 4Runner_U (L/O 0008)
3
2001 4RUNNER (OM35768U)
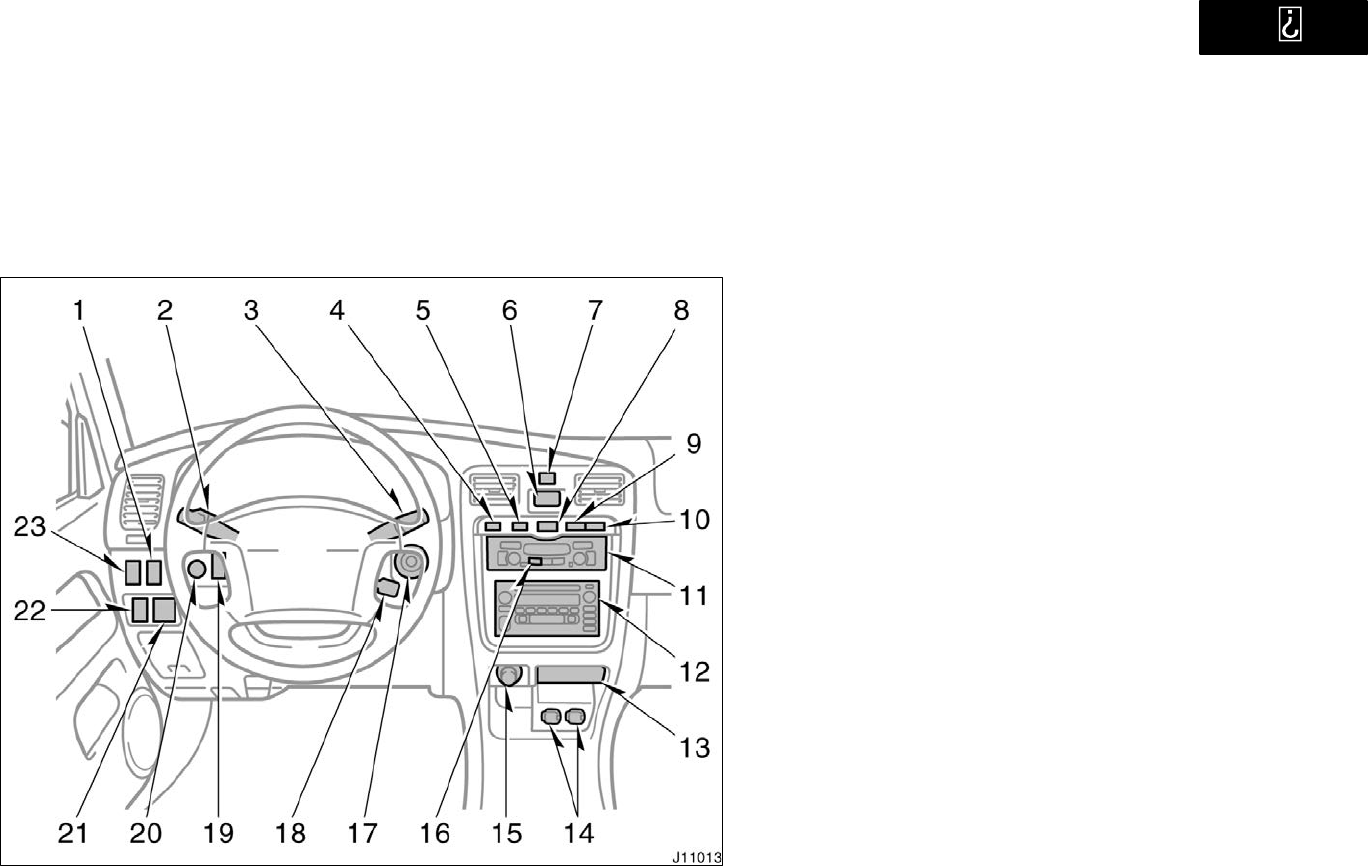
1. Seat heater switch (for passenger)
2. Headlight and turn signal switch, and
front fog light switch
3. Wiper and washer switches
4. Back window and rear view mirror
defoggers switch
5. Driving pattern selector button
6. Clock
7. Emergency flasher switch
8. Power back window switch
9. Theft deterrent system/Engine
immobiliser system indicator light
10. Front passenger’s seat belt reminder
light
11. Air conditioning controls
12. Car audio
13. Ashtray
14. Power outlets
15. Cigarette lighter
16. OUT/T" (outside temperature) button
17. Ignition switch
18. Cruise control switch
19. Center differential lock switch
20. Instrument panel light control knob
21. Power rear view mirror control switch
(without power windows)

’01 4Runner_U (L/O 0008)
42001 4RUNNER (OM35768U)
22. Traction control off switch
23. Seat heater switch (for driver) or
Power back window lock switch
’01 4Runner_U (L/O 0008)
5
2001 4RUNNER (OM35768U)
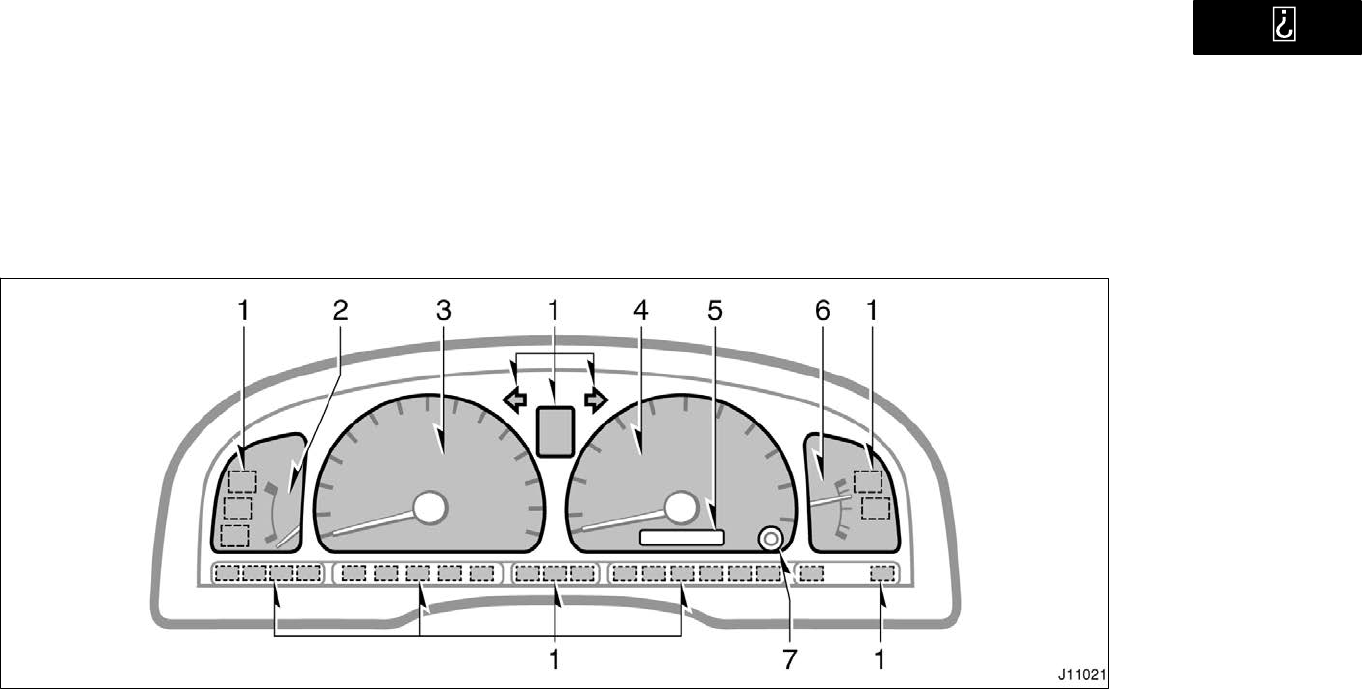
Instrument cluster overview
1. Service reminder indicators and
indicator lights
2. Engine coolant temperature gauge
3. Tachometer
4. Speedometer
5. Odometer and two trip meters
6. Fuel gauge
7. Trip meter reset knob
’01 4Runner_U (L/O 0008)
62001 4RUNNER (OM35768U)
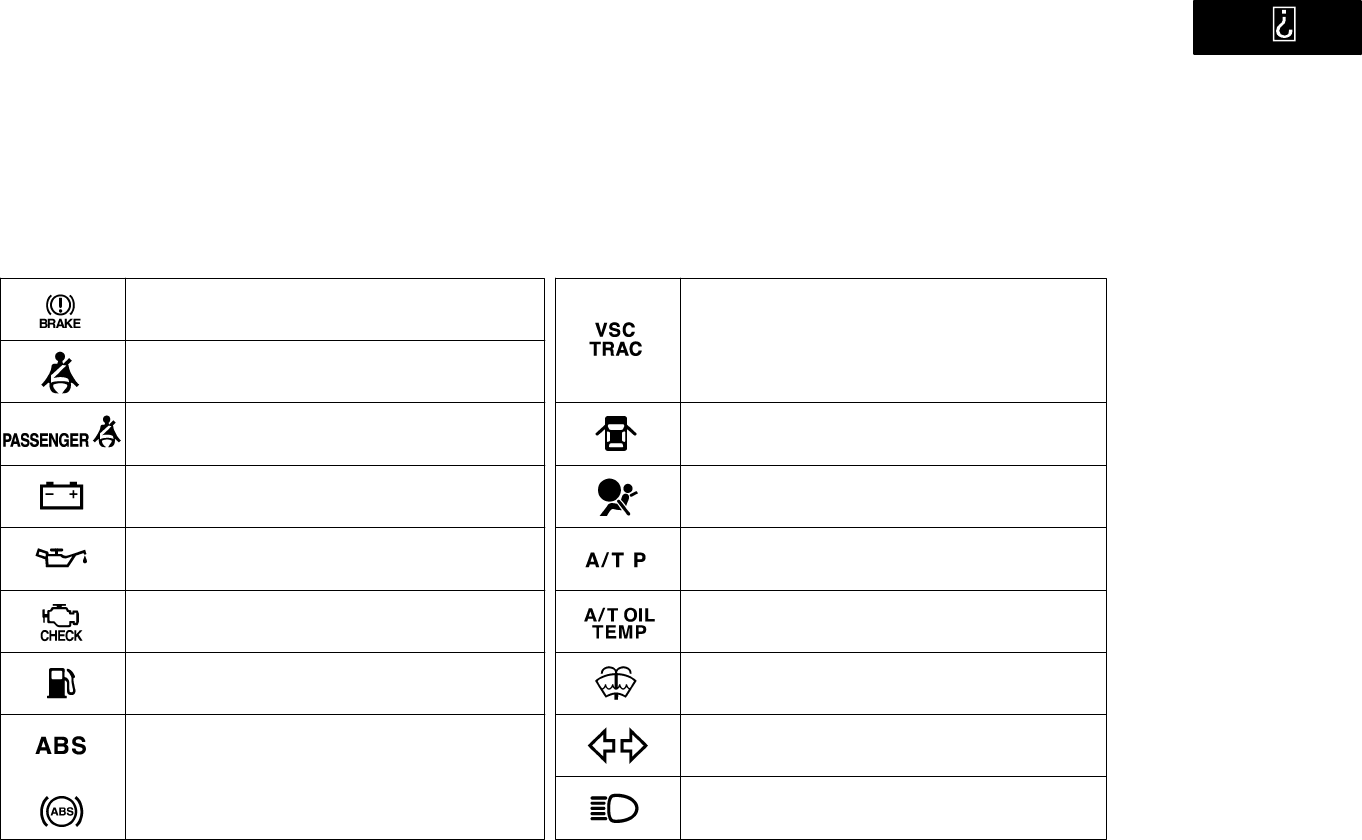
Indicator symbols on the instrument panel
or
Driver’s seat belt reminder light∗1
Low oil pressure warning light∗1
Low fuel level warning light∗1
Brake system warning light∗1
Malfunction indicator lamp∗1
Discharge warning light∗1
Anti−lock brake system warning light∗1
Automatic transmission fluid temperature
warning light∗1
SRS warning light∗1
Unengaged Park" warning light∗1
Open door warning light∗1
Low windshield washer fluid level warning
light∗1
Headlight high beam indicator light
Turn signal indicator lights
Front passenger’s seat belt reminder light∗1
Vehicle skid control system and traction control
system (two−wheel drive models) or active
traction control system (four−wheel drive models)
warning light∗1
’01 4Runner_U (L/O 0008)
7
2001 4RUNNER (OM35768U)
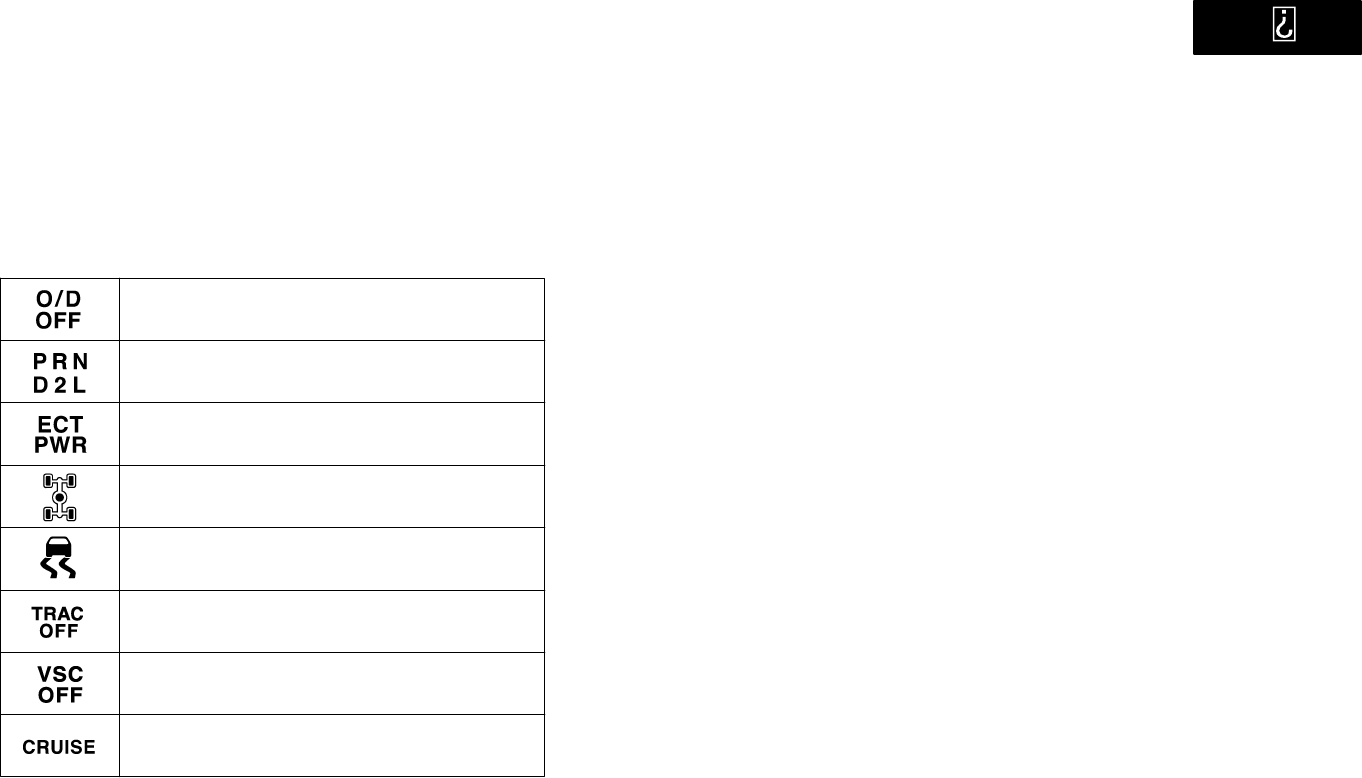
Cruise control indicator light∗2
Driving pattern (PWR" mode) indicator light
∗1: For details, see Service reminder indicators and warning
buzzers" in Section 1−5.
∗2: If this light flashes, see Cruise control" in Section 1−6.
Four−wheel drive and center differential lock
indicator lights
Automatic transmission indicator lights
Traction control system off indicator light∗1
(two−wheel drive models)
Vehicle skid control system off indicator light∗1
(four−wheel drive models)
Slip indicator light
Overdrive−off indicator light

’01 4Runner_U (L/O 0008)
82001 4RUNNER (OM35768U)

’01 4Runner_U (L/O 0008)
9
2001 4RUNNER (OM35768U)
OPERATION OF INSTRUMENTS AND
CONTROLS
Keys and Doors
Keys 10. . . . . . . . . . . . . . . . . . . . . . . . . . . . . . . . . . . . . . . . . . . . . . . . . . . . . . .
Engine immobiliser system 13. . . . . . . . . . . . . . . . . . . . . . . . . . . . . . . . . . .
Side doors 14. . . . . . . . . . . . . . . . . . . . . . . . . . . . . . . . . . . . . . . . . . . . . . . . . .
Power windows 22. . . . . . . . . . . . . . . . . . . . . . . . . . . . . . . . . . . . . . . . . . . . . .
Power back window 24. . . . . . . . . . . . . . . . . . . . . . . . . . . . . . . . . . . . . . . . . .
Back door 26. . . . . . . . . . . . . . . . . . . . . . . . . . . . . . . . . . . . . . . . . . . . . . . . . . .
Hood 28. . . . . . . . . . . . . . . . . . . . . . . . . . . . . . . . . . . . . . . . . . . . . . . . . . . . . . .
Theft deterrent system 29. . . . . . . . . . . . . . . . . . . . . . . . . . . . . . . . . . . . . . .
Fuel tank cap 31. . . . . . . . . . . . . . . . . . . . . . . . . . . . . . . . . . . . . . . . . . . . . . .
Electric moon roof 32. . . . . . . . . . . . . . . . . . . . . . . . . . . . . . . . . . . . . . . . . . .
SECTION 1− 2
’01 4Runner_U (L/O 0008)
10 2001 4RUNNER (OM35768U)
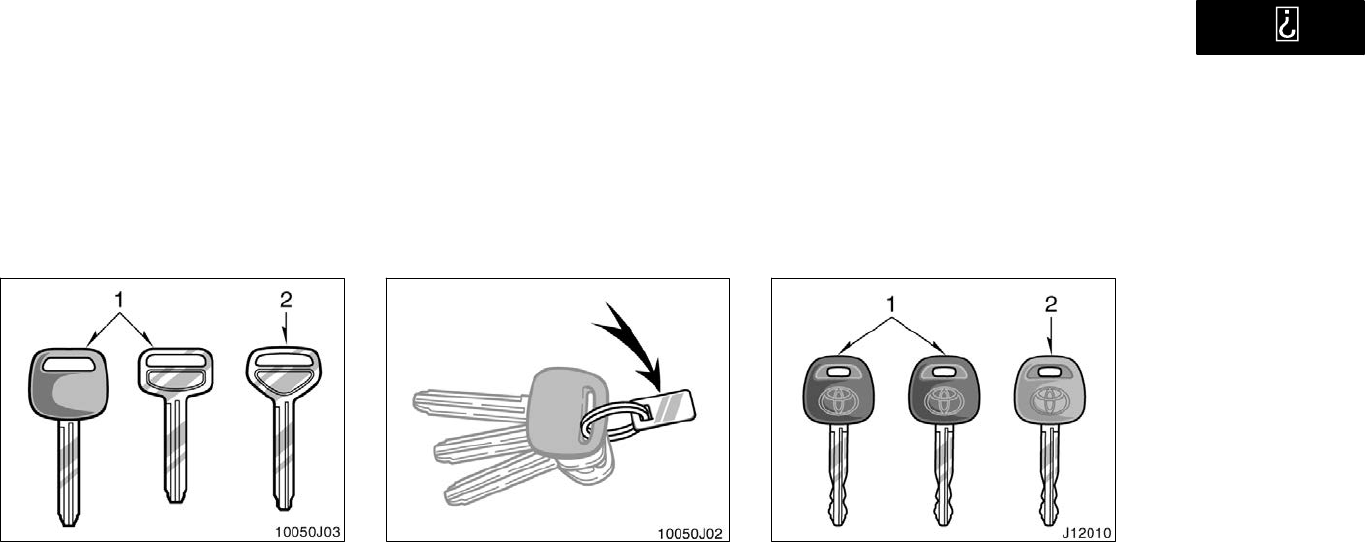
Your vehicle is supplied with two kinds
of keys.
1. Master keyThis key works in every
lock.
2. Sub keyThis key will not work in the
glove box.
To protect things locked in the glove box
when you have your vehicle parked, leave
the sub key with the attendant.
Since the doors can be locked without a
key, you should always carry a spare
master key in case you accidentally lock
your keys inside the vehicle.
KEY NUMBER PLATE
Your key number is shown on the plate.
Keep the plate in a safe place such as
your wallet, not in the vehicle.
If you should lose your keys or if you
need additional keys, duplicates can be
made by a Toyota dealer using the key
number.
We recommend you to write down the key
number and keep it in safe place.
Your vehicle is supplied with the two
kinds of keys.
1. Master key (black)This key works in
every lock. Your Toyota dealer will
need it to make you a new key with
built−in transponder chip.
2. Sub key (gray)This key does not
work in the glove box.
A transponder chip for engine immobiliser
system has been filled in the head of the
master and sub keys. These chips are
needed to enable the system to function
correctly, so be careful not to lose these
keys. If you make your own duplicate key,
you will not be able to cancel the system
or start the engine.
Keys
(without engine immobiliser
system)
Keys
(with engine immobiliser
system)
’01 4Runner_U (L/O 0008)
11
2001 4RUNNER (OM35768U)
To protect things locked in the glove box
when you have your vehicle parked, leave
the sub key with the attendant.
Since the side doors can be locked with-
out a key, you should always carry a
spare master key in case you accidentally
lock your keys inside the vehicle.
For information on use of the wireless
remote control key, see Side doors" in
this section.
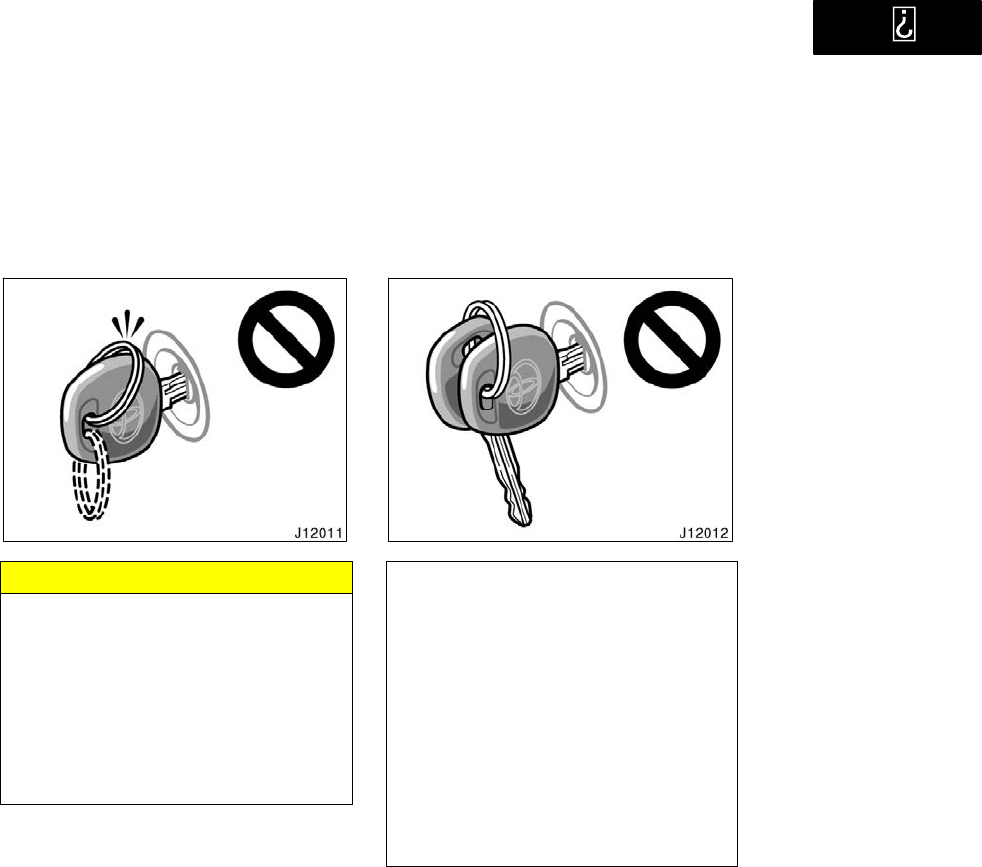
NOTICE
When using a key containing a trans-
ponder chip, observe the following
precautions:
zWhen starting the engine, do not
use the key with a key ring resting
on the key grip and do not press
the key ring against the key grip.
Otherwise the engine may not start,
or may stop soon after it starts.
zWhen starting the engine, do not
use the key with other transponder
keys around (including keys of oth-
er vehicles) and do not press other
key plates against the key grip.
Otherwise the engine may not start,
or may stop soon after it starts. If
this happens, remove the key once
and then insert it again after taking
off other transponder keys (includ-
ing keys of other vehicles) from the
ring or while gripping or covering
them with your hand to start the
engine.
’01 4Runner_U (L/O 0008)
12 2001 4RUNNER (OM35768U)
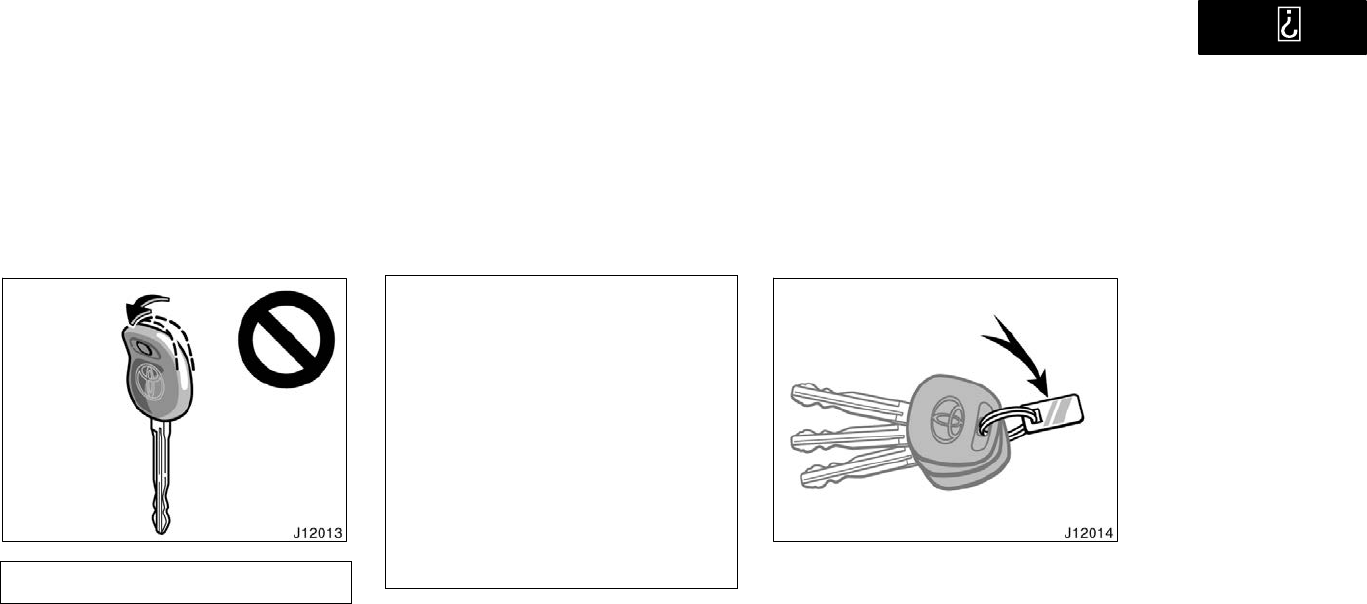
zDo not bend the key grip.
zDo not cover the key grip with any
material that cuts off electromagnet-
ic waves.
zDo not knock the key hard against
other objects.
zDo not leave the key exposed to
high temperatures for a long period,
such as on the dashboard and hood
under the direct sunlight.
zDo not put the key in water or
wash it in an ultrasonic washer.
zDo not use the key with electromag-
netic materials. KEY NUMBER PLATE
Your key number is shown on the plate.
Keep the plate in a safe place such as
your wallet, not in the vehicle.
If you should lose your keys or if you
need additional keys, duplicates can be
made by a Toyota dealer using the key
number.
We recommend you to write down the key
number and keep it in safe place.
’01 4Runner_U (L/O 0008)
13
2001 4RUNNER (OM35768U)
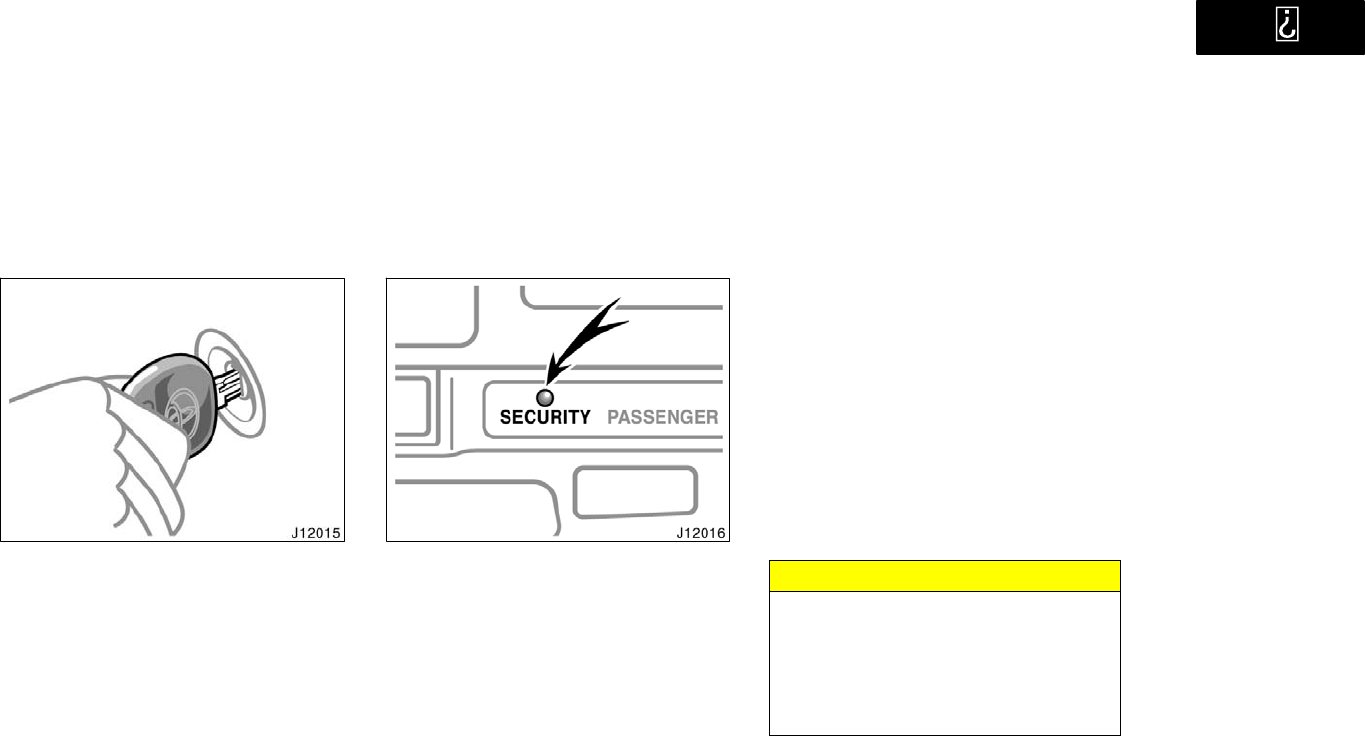
Engine immobiliser system
The engine immobiliser system is a
theft prevention system. When you in-
sert the key in the ignition switch, the
transponder chip in the key’s head
transmits an electronic code to the ve-
hicle. The engine will start, only when
the electronic code in the chip corre-
sponds to the registered ID code for
the vehicle.
The system is automatically set when the
key is removed from the ignition switch.
The indicator light will start flashing to
show the system is set.
If either of the following indicator condi-
tions occurs, contact your Toyota dealer.
The indicator light stays on except
when the theft deterrent system is set-
ting or activating. (See Theft deterrent
system".)
The indicator light does not start flash-
ing when the key is removed from the
ignition switch.
The indicator light flashes unsteady.
Inserting the registered key in the ignition
switch automatically cancels the system,
which enables the engine to start. The
indicator light will go off.
For your Toyota dealer to make you a
new key with built−in transponder chip,
your dealer will need your key number
and master key. However, there is a limit
to the number of additional keys your
Toyota dealer can make for you.
If you make your own duplicate key,
you will not be able to cancel the sys-
tem or start the engine.
NOTICE
Do not modify, remove or disas-
semble the engine immobiliser sys-
tem. If any unauthorized changes or
modifications are made, the proper
operation of the system cannot be
guaranteed.
’01 4Runner_U (L/O 0008)
14 2001 4RUNNER (OM35768U)
For vehicles sold in U.S.A.
FCC ID: MOZ RI−4BTY
MADE IN JAPAN
This device complies with Part 15 of the
FCC Rules. Operation is subject to the
following two conditions:
(1) This device may not cause harmful
interference, and (2) this device must
accept any interference received, includ-
ing interference that may cause unde-
sired operation.
CAUTION
Changes or modifications not ex-
pressly approved by the party respon-
sible for compliance could void the
user’s authority to operate the equip-
ment.
For vehicles sold in Canada
This device complies with RSS−210 of
Industry Canada. Operation is subject to
the following two conditions:
(1) This device may not cause interfer-
ence, and (2) this device must accept
any interference, including interference
that may cause undesired operation of
the device.
Side doors
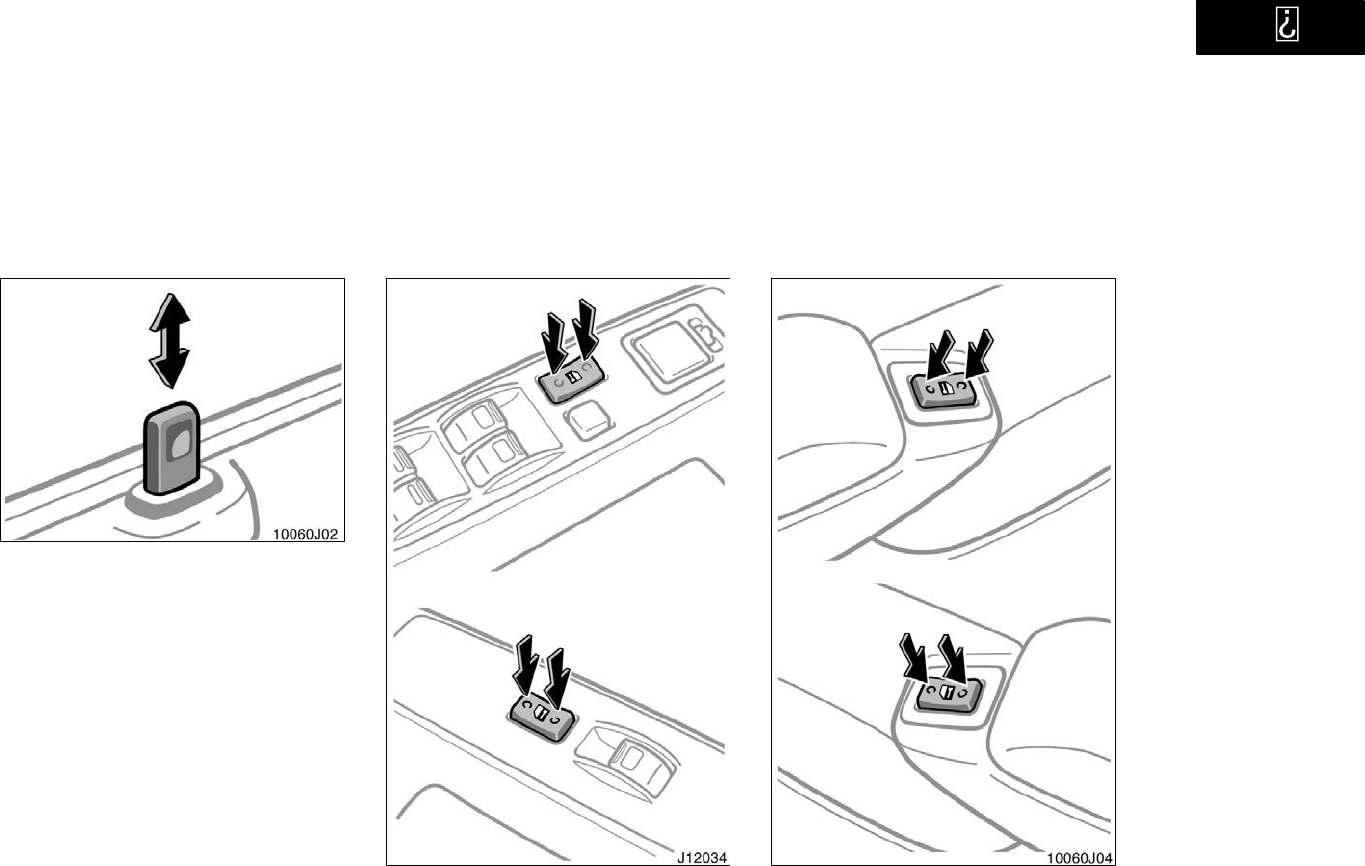
LOCKING AND UNLOCKING WITH KEY
Insert the key into the keyhole and turn
it.
To lock: Turn the key forward.
To unlock: Turn the key backward.
Vehicles with power door lock system
All the doors lock and unlock simulta-
neously with either front door. In the driv-
er’s door lock, turning the key once will
unlock the driver’s door and twice in suc-
cession will unlock all the doors simulta-
neously.
’01 4Runner_U (L/O 0008)
15
2001 4RUNNER (OM35768U)
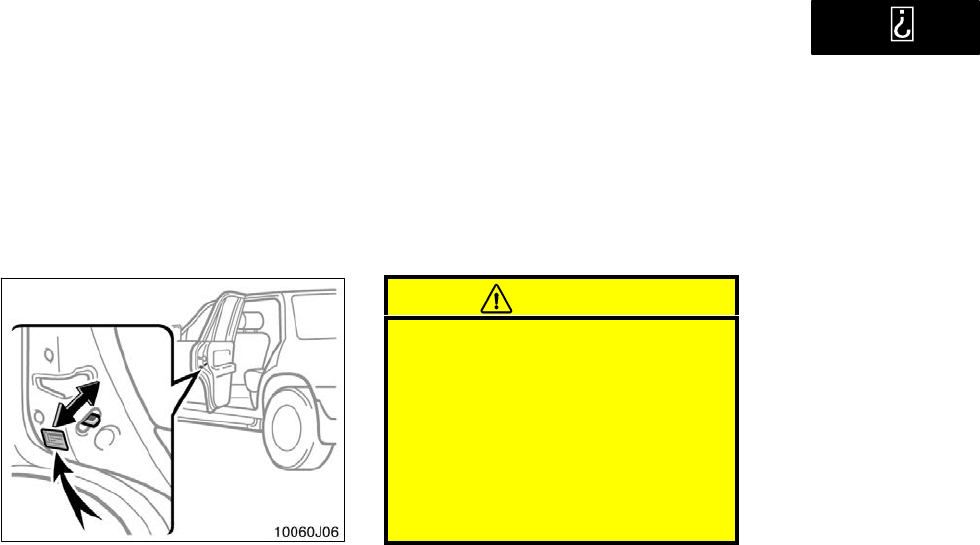
LOCKING AND UNLOCKING WITH
INSIDE LOCK BUTTON
Move the lock button.
To lock: Push the button downward.
To unlock: Pull the button upward.
Closing the door with the lock button
pushed in will also lock the door. Be care-
ful not to lock your keys in the vehicle.
Vehicles with power door lock sys-
temThe front doors cannot be locked if
you leave the key in the ignition switch.
Driver’s side
Front passenger’s side
With power windows
Front passenger’s side
Driver’s side
Without power windows
’01 4Runner_U (L/O 0008)
16 2001 4RUNNER (OM35768U)
LOCKING AND UNLOCKING WITH
POWER DOOR LOCK SWITCH
Push the switch.
To lock: Push the switch on the front side.
To unlock: Push the switch on the rear
side.
All the doors lock or unlock simultaneous-
ly.
When the front side doors are locked from
the outside or locked with the wireless
remote control transmitter, the power door
lock switch will not work until either front
door is unlocked with the key, lock knob,
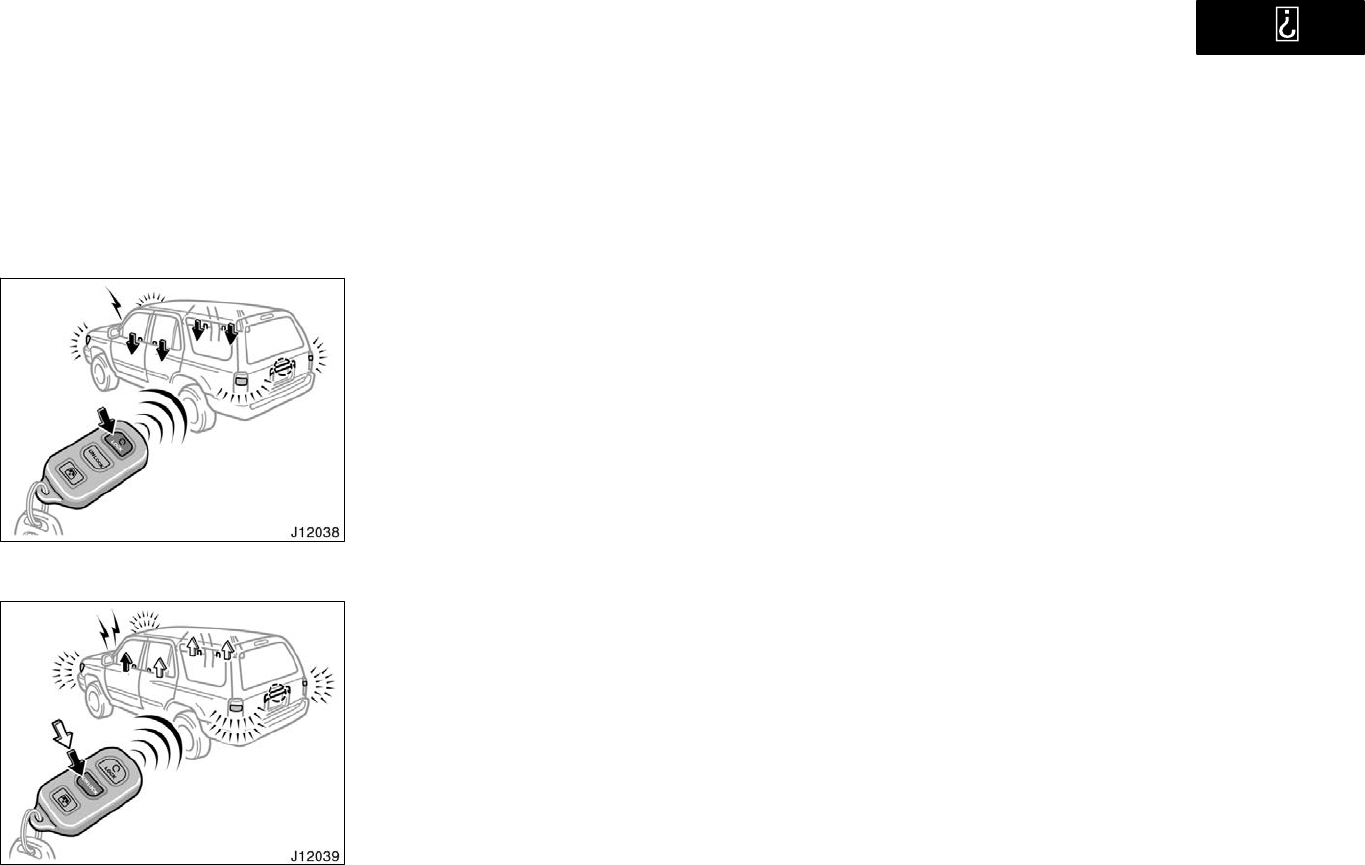
or wireless remote control transmitter. REAR DOOR CHILD−PROTECTORS
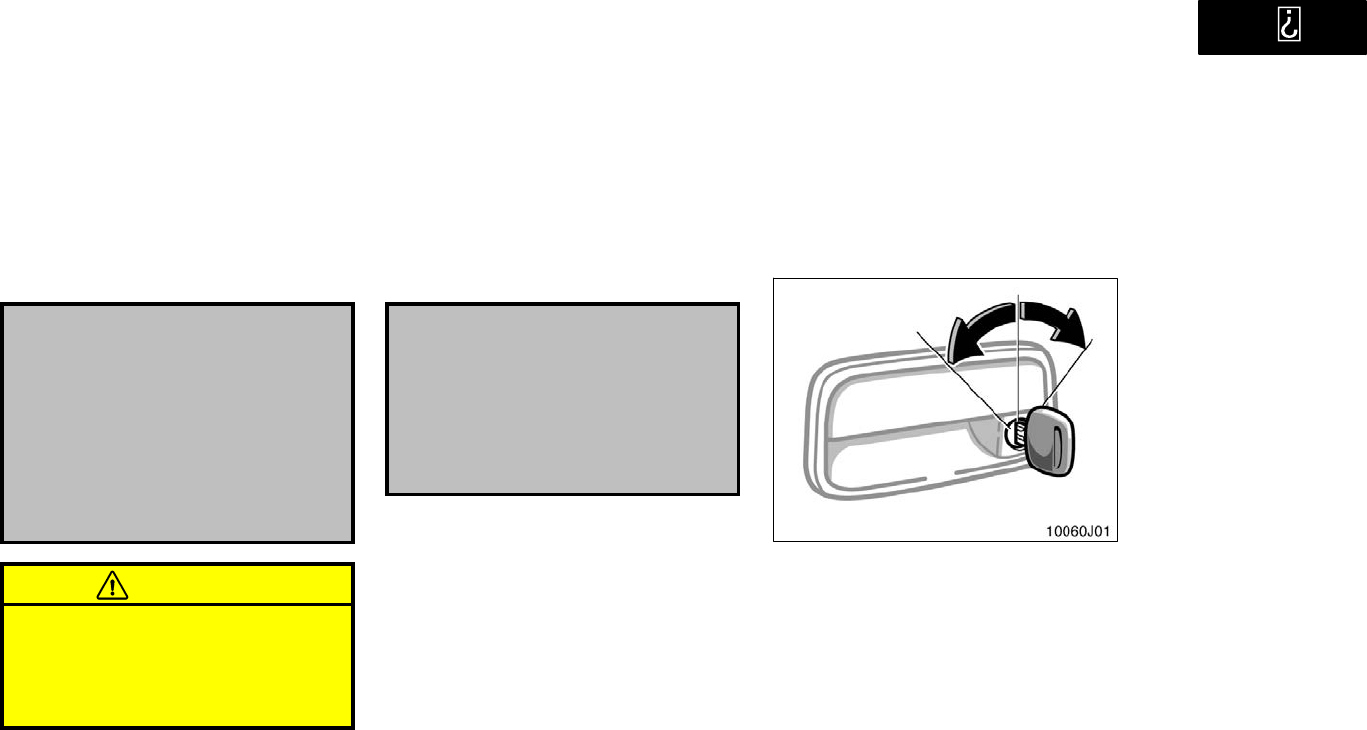
Move the lock lever to the LOCK"
position as shown on the label.
This feature allows you to lock a rear
door so it can be opened from the outside
only, not from inside. We recommend us-
ing this feature whenever small children
are in the vehicle.
CAUTION
Before driving, be sure that the doors
are closed and locked, especially
when small children are in the ve-
hicle. Along with the proper use of
seat belts, locking the doors helps
prevent the driver and passengers
from being thrown out from the ve-
hicle during an accident. It also helps
prevent the doors from being opened
unintentionally.
’01 4Runner_U (L/O 0008)
17
2001 4RUNNER (OM35768U)
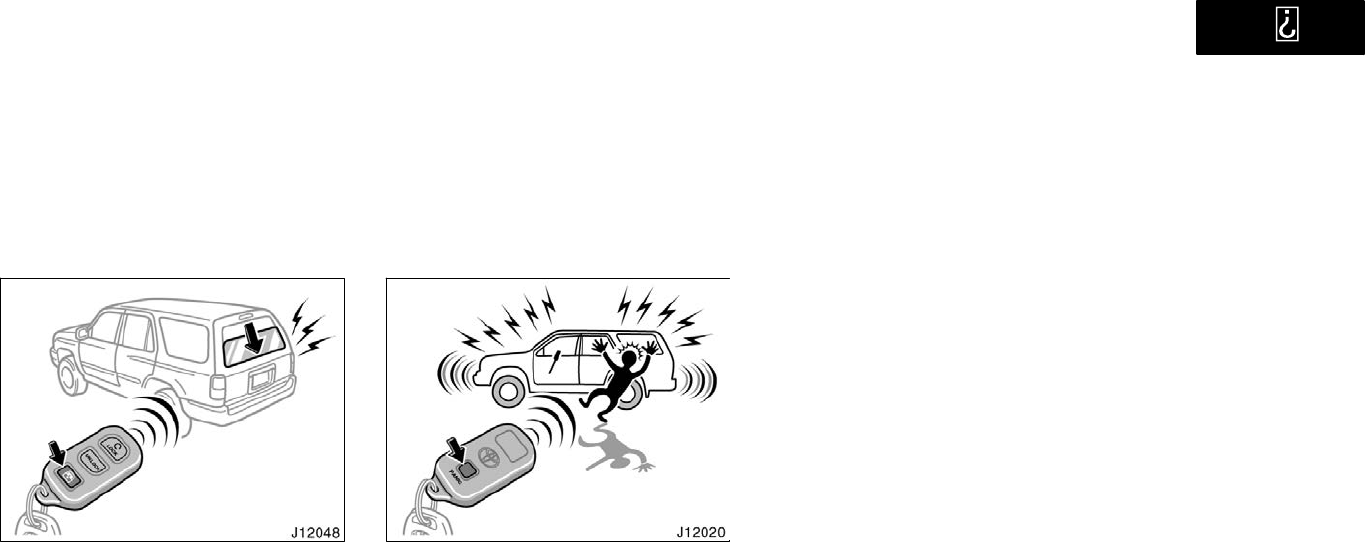
Wireless remote control
Locking operation
Unlocking operation
Your vehicle has a wireless remote con-
trol system that can lock or unlock all
the side doors and back door from a
distance within approximately 1 m (3
ft.) of the vehicle.
LOCKING AND UNLOCKING THE SIDE
DOORS AND BACK DOOR
To lock and unlock all the side doors
and back door, push the switches slow-
ly and securely.
To lock: Push the LOCK" switch. All the
side doors and back door are locked si-
multaneously. At this time one beep will
be heard, and the parking lights and tail
lights flash once.
Check to see that all the side doors and
back door are securely locked.
If any of the side doors or back door is
not securely closed, locking cannot be
performed by the LOCK" switch and a
beep will sound continuously for 10 sec-
onds. However, if the key is in the igni-
tion, a beep will not sound.
To stop the buzzer, close all the doors
securely or push the UNLOCK" switch.
To unlock: Push the UNLOCK" switch
once to unlock the driver’s door alone.
Pushing the switch twice within 3 seconds
unlocks all the side doors and back door
simultaneously. Each time the UNLOCK"
switch is pushed, two beeps will be heard,
and the parking lights and tail lights flash
twice.
You have 30 seconds to open a door after
using the wireless remote unlock feature.
If a door is not opened by then, all the
side doors and back door will be automati-
cally locked again.
If the LOCK" or UNLOCK" switch is kept
pressed in, the locking or unlocking opera-
tion is not repeated. Release the button
and then push again.
The volume of beep sound can be
changed. Contact your Toyota dealer for
details if you require it.
’01 4Runner_U (L/O 0008)
18 2001 4RUNNER (OM35768U)
OPENING THE BACK WINDOW
To open the back window, push the
back window open switch of the trans-
mitter for about 1 second. The window
will fully open.
At this time, you can hear a beep.
If the ignition switch is in the ON" posi-
tion, the back window cannot be opened
by the back window open switch.
To open the back window with the master
key, see Power back window" in this sec-
tion.
The volume of beep sound can be
changed. Contact your Toyota dealer for
details if you require it.
PANIC" SWITCH
Pushing the PANIC" switch blows the
horn intermittently and flashes the
headlights and tail lights.
The PANIC" switch is used to deter ve-
hicle theft when you witness anyone at-
tempting to break into or damage your
vehicle.
The alarm will last for one minute. To stop
alarm midway, push the PANIC" or
UNLOCK" switch, or unlock any side door
or back door with key. You can also stop
the alarm by turning the ignition key from
LOCK" to the ON" position.
The PANIC" mode does not work when
the ignition key is in the ON" position.
WIRELESS REMOTE CONTROL
TRANSMITTER
The wireless remote control transmitter is
an electronic component. Observe the fol-
lowing instructions in order not to cause
damage to the transmitter.
Do not leave the transmitter on places
where the temperature becomes high
such as on the dashboard.
Do not disassemble it.
Avoid knocking it hard against other
objects or dropping it.
Avoid putting it in water.
You can use up to 4 wireless remote con-
trol transmitters for the same vehicle.
Contact your Toyota dealer for detailed
information.
’01 4Runner_U (L/O 0008)
19
2001 4RUNNER (OM35768U)
If the wireless remote control transmitter
does not actuate the doors or operate
from a normal distance:
Check for closeness to a radio trans-
mitter such as a radio station or an
airport which can interfere with normal
operation of the transmitter.
The battery may have been consumed.
Check the battery in the transmitter. To
replace the battery, see following
REPLACING THE BATTERY".
If you lose your wireless remote control
transmitter, contact your Toyota dealer as
soon as possible to avoid the possibility
of theft, or an accident.
For vehicles sold in U.S.A.
This device complies with Part 15 of the
FCC Rules. Operation is subject to the
following two conditions:
(1) This device may not cause harmful
interference, and (2) this device must
accept any interference received, includ-
ing interference that may cause unde-
sired operation.
NOTICE:
This equipment has been tested and
found to comply with the limits for a
Class B digital device, pursuant to Part
15 of the FCC Rules. These limits are
designed to provide reasonable protec-
tion against harmful interference in a
residential installation. This equipment
generates, uses and can radiate radio
frequency energy and, if not installed
and used in accordance with the instruc-
tions, may cause harmful interference to
radio communications. However, there is
no guarantee that interference will not
occur in a particular installation. If this
equipment does cause harmful interfer-
ence to radio or television reception,
which can be determined by turning the
equipment off and on, the user is en-
couraged to try to correct the interfer-
ence by one or more of the following
measures:
’01 4Runner_U (L/O 0008)
20 2001 4RUNNER (OM35768U)
Reorient or relocate the receiving an-
tenna.
Increase the separation between the
equipment and receiver.
Connect the equipment into an outlet
on a circuit different from that to
which the receiver is connected.
Consult the dealer or an experienced
radio / TV technician for help.
FCC WARNING:
Changes or modifications not ex-
pressly approved by the party respon-
sible for compliance could void the
user’s authority to operate the equip-
ment.
For vehicles sold in Canada
Operation is subject to the following two
conditions:
(1) this device may not cause interfer-
ence, and (2) this device must accept
any interference, including interference
that may cause undesired operation of
the device.
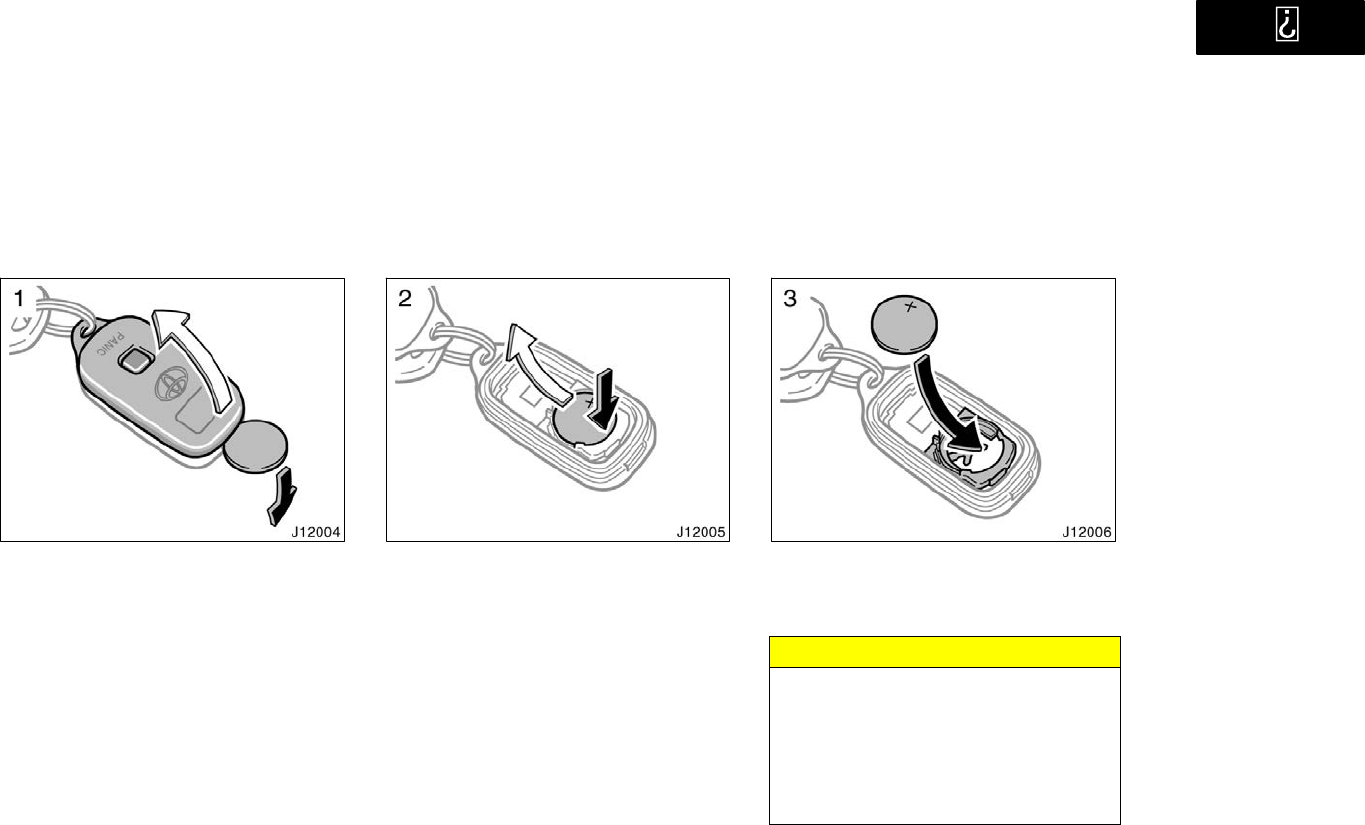
REPLACING THE BATTERY
For replacement, use a lithium battery
CR2016 and a special screwdriver.
CAUTION
Special care should be taken that
small children do not swallow the re-
moved battery or components.
NOTICE
When replacing the transmitter bat-
tery, be careful not to lose the com-
ponents.
Replace the battery by the following pro-
cedures:
’01 4Runner_U (L/O 0008)
21
2001 4RUNNER (OM35768U)
1. Using a coin or equivalent, open the
transmitter case.
2. Remove the discharged transmitter bat-
tery.
3. Put new transmitter battery with posi-
tive (+) side up.
Close the transmitter case securely.
NOTICE
zMake sure the positive side and
negative side of the transmitter bat-
tery should be faced correctly.
zBe careful that dust or oils do not
adhere to the transmitter case.
zClose the transmitter case securely.
’01 4Runner_U (L/O 0008)
22 2001 4RUNNER (OM35768U)
After replacing battery, check that the
transmitter operates properly. If the trans-
mitter still does not operate properly, con-
tact your Toyota dealer.
If you lose your transmitter, contact your
Toyota dealer as soon as possible to
avoid the possibility of theft, or an acci-
dent. (See If you lose your wireless re-
mote control transmitter" in Section 4.)
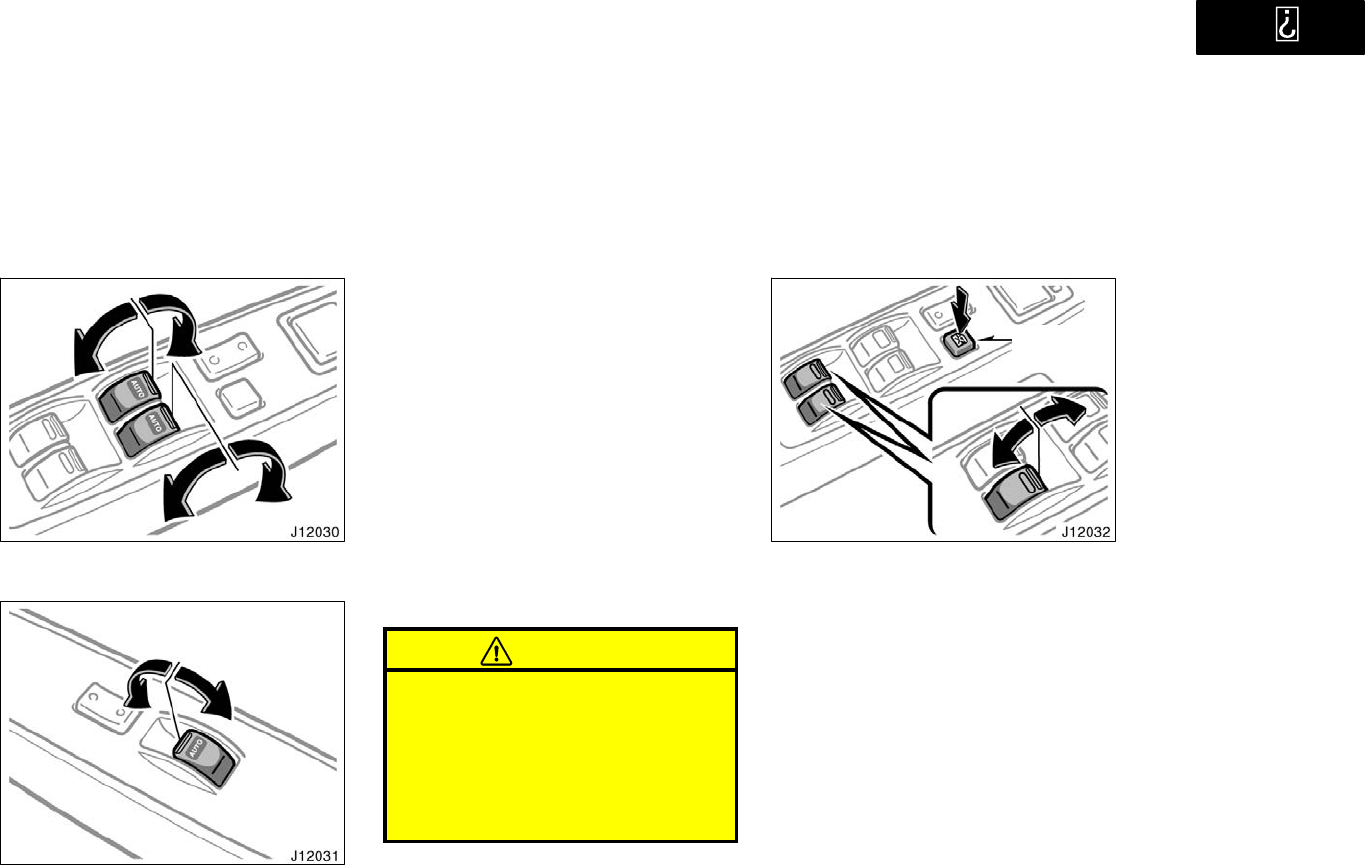
Power windows
Window lock
switch
Driver’s door switches
Front passenger’s door switch
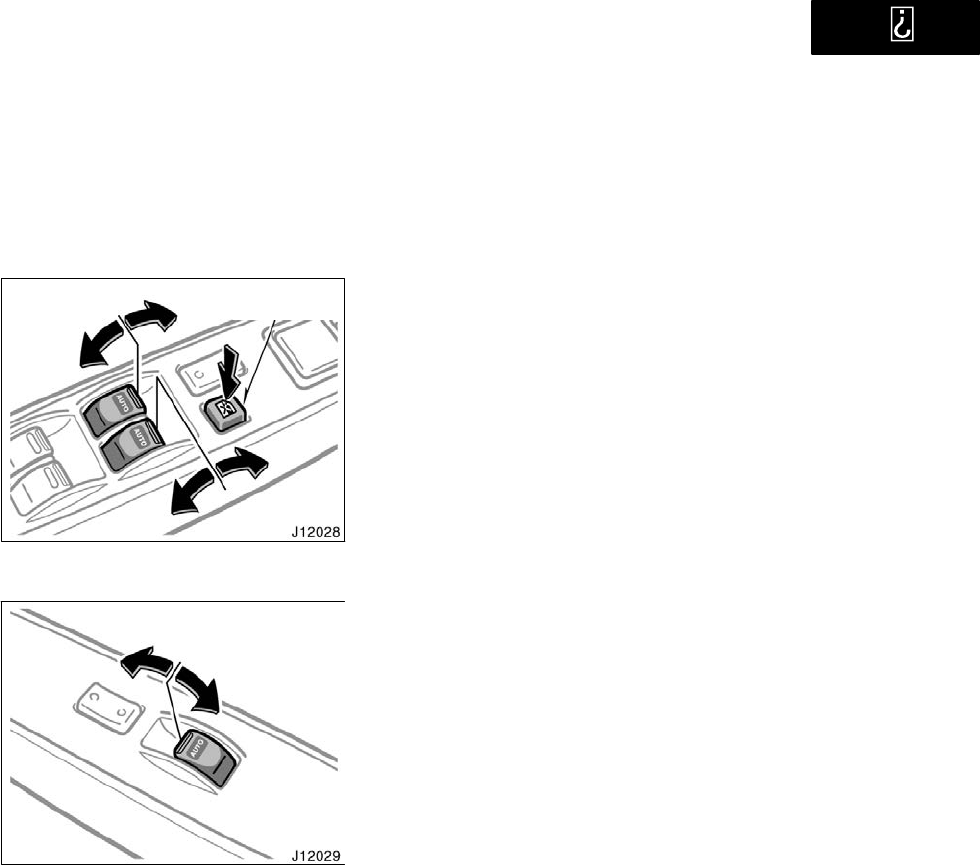
The windows can be operated with the
switch on each side door.
The power windows work when the ignition
switch is in the ON" position.
Key off operation: If both front side
doors are closed, they work for 43 se-
conds even after the ignition switch is
turned off. They stop working when either
front side door is opened.
OPERATING THE DRIVER’S AND FRONT
PASSENGER’S WINDOWS
Use the switches on the driver’s door
and front passenger’s door.
Normal operation: The window moves as
long as you hold the switch.
To open: Lightly push down the switch.
To close: Lightly pull up the switch.
If you push in the window lock switch on
the driver’s door, the front passengers’
window cannot be operated.
’01 4Runner_U (L/O 0008)
23
2001 4RUNNER (OM35768U)
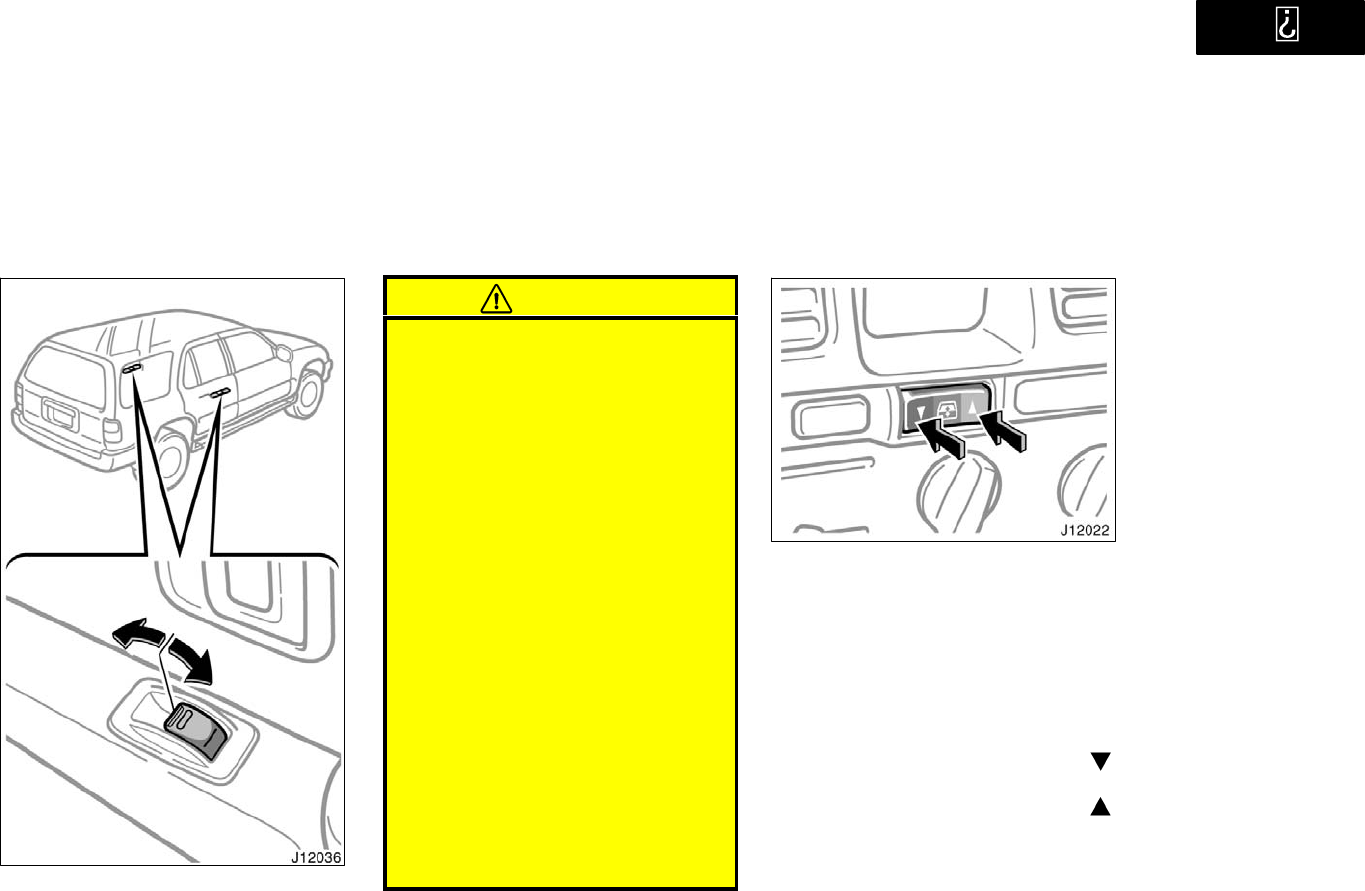
Driver’s door switches
Front passenger’s door switch
Automatic operation: Push the switch
completely down or pull it completely up,
and then release it. The window will fully
open or close. To stop the window part-
way, lightly move the switch in the oppo-
site direction and then release it.
If you push in the window lock switch on
the driver’s door, the front passengers’
window cannot be operated.
Jam protection function: During automat-
ic closing operation, the window stops and
opens half way if something gets caught
between the window and window frame.
If the window receives a strong impact,
this function may work even if nothing is
caught.
CAUTION
Never try jamming any part of your
body to make the jam protection
function work intentionally.
The jam protection function may
not work if something gets caught
just before the window is fully
closed.
Window
lock switch
Driver’s door switches
OPERATING THE REAR PASSENGERS’
WINDOWS
Use the switch on each rear passen-
ger’s door or the switches on the driv-
er’s door that control each rear passen-
ger’s windows.
The window moves as long as you hold
the switch.
To open: Push down the switch.
To close: Pull up the switch.
If you push in the window lock switch on
the driver’s door, the rear passengers’
windows cannot be operated.
’01 4Runner_U (L/O 0008)
24 2001 4RUNNER (OM35768U)
Rear passengers’ door switches
CAUTION
To avoid serious personal injury, you
must do the following.
Always make sure the heads, hands
and other parts of the bodies of all
occupants are kept completely in-
side the vehicle before you close
the power windows. If someone’s
neck, head or hands gets caught in
a closing window, it could result in
a serious injury. When anyone
closes the power windows, make
sure that he/she operates the win-
dows safely.
When small children are in the ve-
hicle, never let them use the power
window switches without supervi-
sion. Use the window lock switch to
prevent them from making unex-
pected use of the switches.
Never leave small children alone in
the vehicle, especially with the igni-
tion key still inserted. They could
use the power window switches and
get trapped in a window. Unat-
tended children can be involved in
serious accidents.
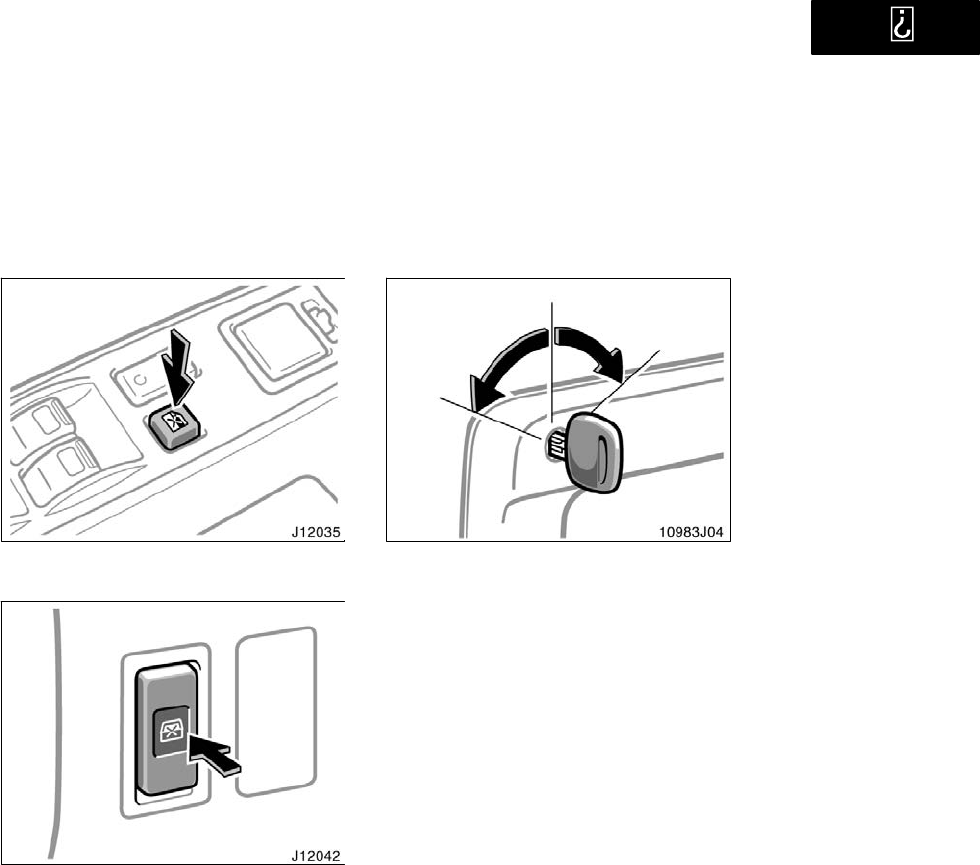
Power back window
The back window can be operated with
the inner switch on the center console
or outer switch on the back door.
OPERATING FROM INSIDE
The ignition key must be in the ON" posi-
tion.
The back window moves as long as you
hold the inner switch.
To open: Push the switch on the "
side.
To close: Push the switch on the "
side.
’01 4Runner_U (L/O 0008)
25
2001 4RUNNER (OM35768U)
You can also open the back window when
the back window wiper is working. At that
time, the wiper stops working until the
window is closed again.
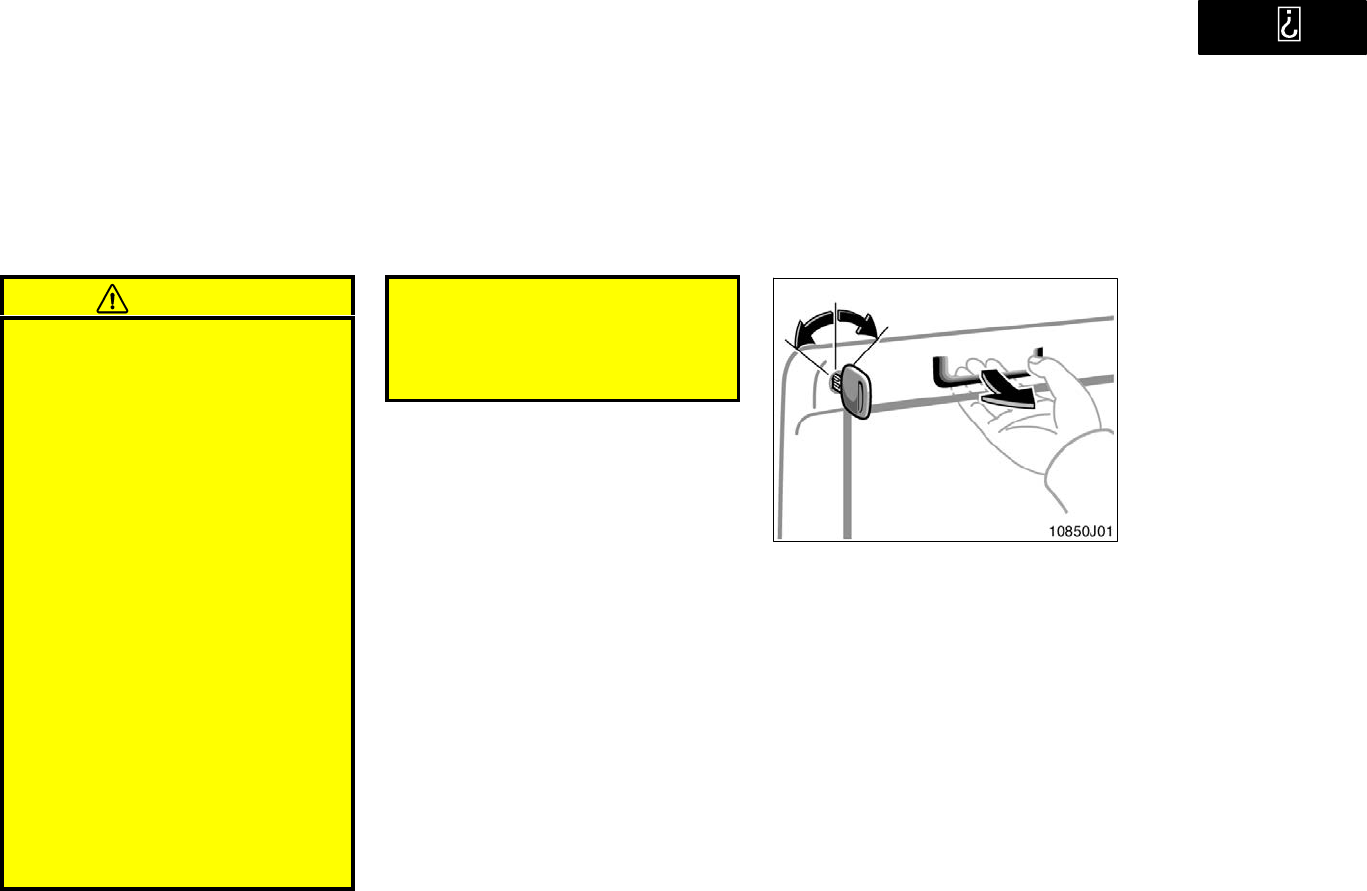
If you push in the window lock switch on
the driver’s door (with power windows) or
on the instrument panel (without power
windows), the back window cannot be op-
erated.
With power windows (driver’s door)
Without power windows
(instrument panel)
OPERATING FROM OUTSIDE
After turning and holding the key for a few
seconds, the back window will move as
far as holding the key.
To open: Turn the key counterclockwise.
To close: Turn the key clockwise.
You can also open the back window when
the back window wiper is working. At the
time, the wiper stops working until the
window is closed again.
’01 4Runner_U (L/O 0008)
26 2001 4RUNNER (OM35768U)
CAUTION
To avoid serious personal injury, you
must do the following.
Always make sure the heads, hands
and other parts of the bodies of all
occupants are kept completely in-
side the vehicle before you close
the power back window. If some-
one’s neck, head or hands gets
caught in a closing window, it
could result in a serious injury.
When anyone closes the power
back window, make sure that he/she
operates the window safely.
When small children are in the ve-
hicle, never let them use the power
back window switch without super-
vision. Use the window lock switch
to prevent them from making unex-
pected use of the switch.
Never leave small children alone in
the vehicle, especially with the igni-
tion key still inserted. They could
use the power back window switch
and get trapped in a window. Unat-
tended children can be involved in
serious accidents.
Keep the back window closed while
driving. This not only keeps the
luggage from being thrown out but
also prevents exhaust gases from
entering the vehicle.
Vehicles with wireless remote control sys-
temTo open the back window with the
wireless remote control transmitter, see
Wireless remote control" in this section.
Back door
LOCKING AND UNLOCKING WITH KEY
Insert the key into the keyhole and turn
it.
To lock: Turn the key clockwise.
To unlock: Turn the key counterclockwise.
To open the back door, pull the lever.
The back door will be controlled by oper-
ating the power door lock switch.
’01 4Runner_U (L/O 0008)
27
2001 4RUNNER (OM35768U)
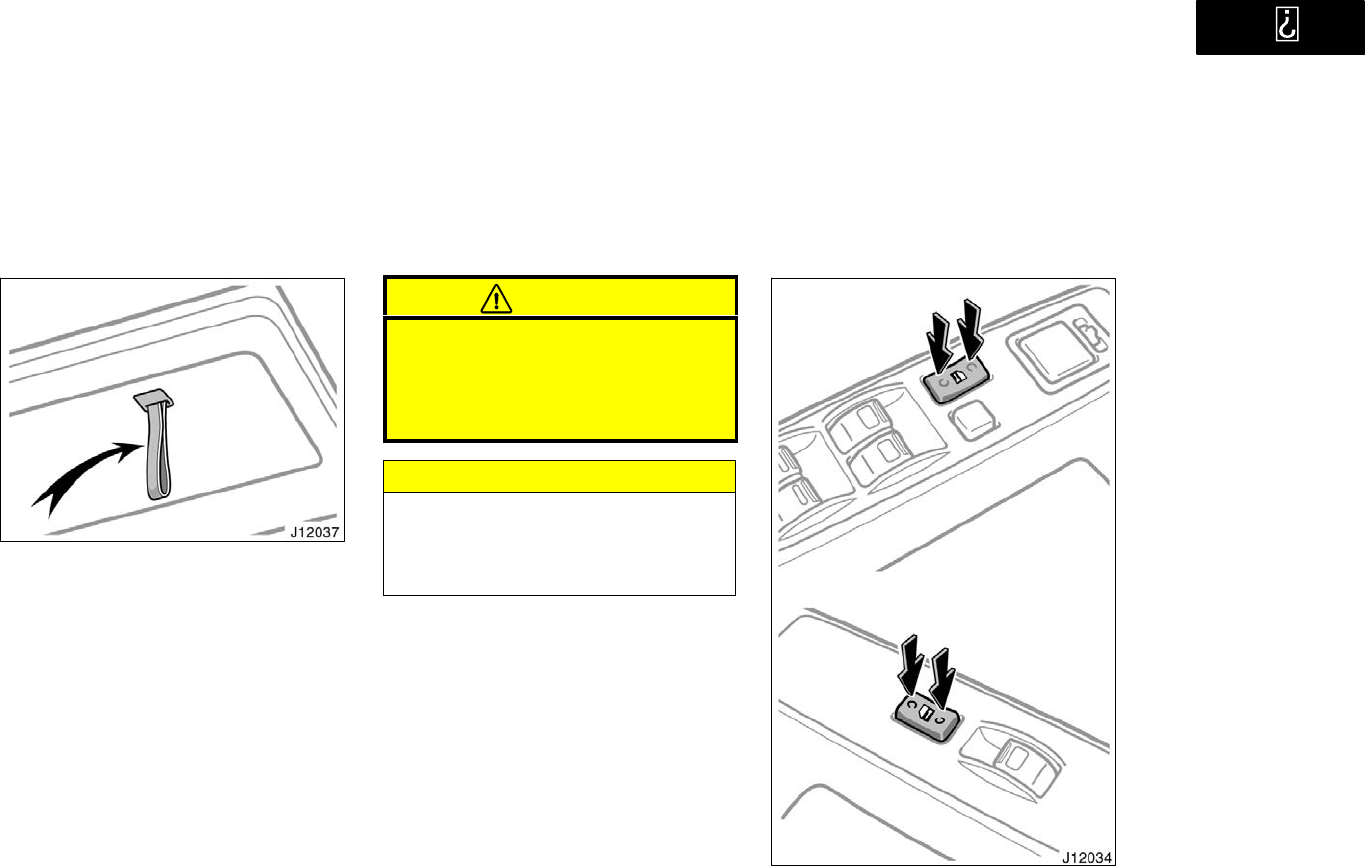
When closing the back door, use the
inside strap for easier reach to the
back door.
To close the back door, lower it and press
down on it. After closing the back door,
try pulling it up to make sure it is secure-
ly closed.
See Luggage stowage precautions" in
Section 2 for precautions in loading lug-
gage.
CAUTION
Keep the back window and back door
closed while driving. This not only
keeps the luggage from being thrown
out but also prevents exhaust gases
from entering the vehicle.
NOTICE
To prevent damage to the back door
dampers, do not apply any force,
paint or let any other foreign matter
on them.
Driver’s side
Front passenger’s side
With power windows
’01 4Runner_U (L/O 0008)
28 2001 4RUNNER (OM35768U)
Front passenger’s side
Driver’s side
Without power windows
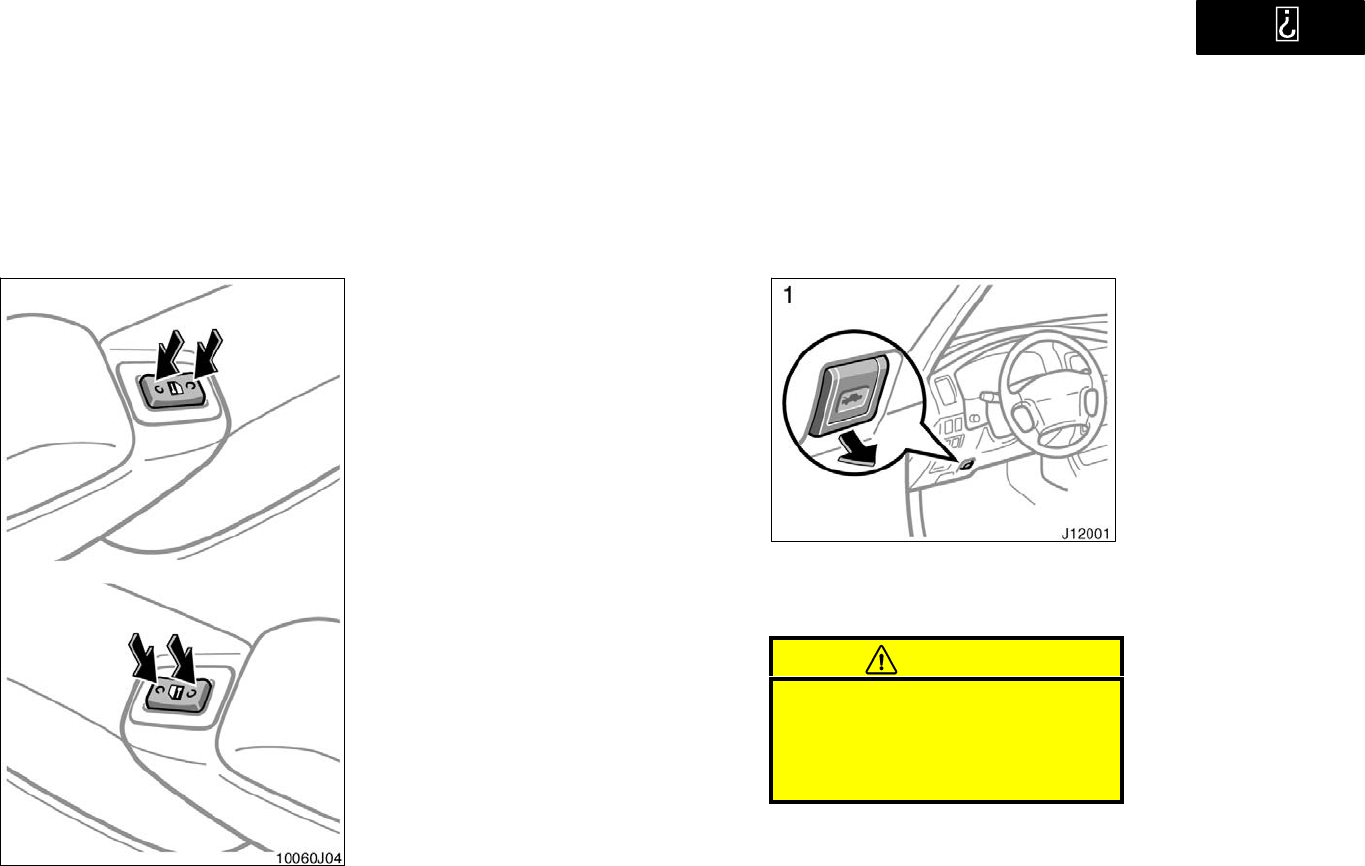
LOCKING AND UNLOCKING WITH
POWER BACK DOOR LOCK SWITCH
Push the switch.
To lock: Push the switch on the front side.
To unlock: Push the switch on the rear
side.
Operating the power door lock switch si-
multaneously locks or unlocks the back
door (see Side doors" in this section).
Vehicles with wireless remote control sys-
temTo lock or unlock the back door, see
Wireless remote control" in this section.
Hood
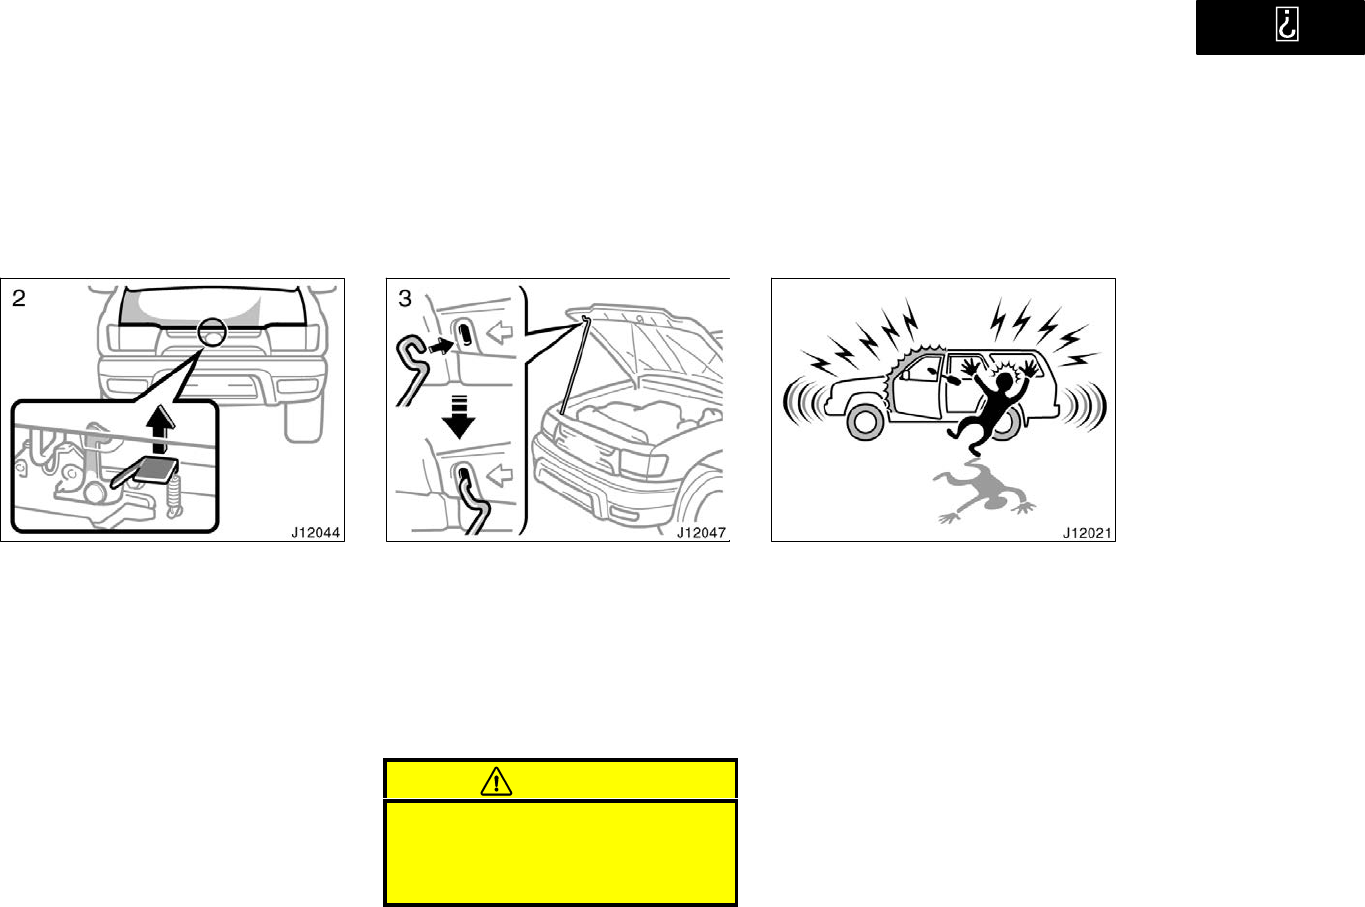
To open the hood:
1. Pull the hood lock release lever. The
hood will spring up slightly.
CAUTION
Before driving, be sure that the hood
is closed and securely locked. Other-
wise, the hood may open unexpected-
ly while driving and an accident may
occur.
’01 4Runner_U (L/O 0008)
29
2001 4RUNNER (OM35768U)
2. In front of the vehicle, pull up the
auxiliary catch lever and lift the
hood.
3. Hold the hood open by inserting the
support rod into the slot.
Before closing the hood, check to see that
you have not forgotten any tools, rags,
etc. and return the support rod to its
clipthis prevents rattles. Then lower the
hood make sure it locks into place. If
necessary, press down gently on the front
edge to lock it.
CAUTION
After inserting the support rod into
the slot, make sure the rod supports
the hood security from falling down
on to your head or body.
Theft deterrent system
To deter the vehicle theft, the system
is designed to give an alarm if any of
the side doors, back door or hood is
forcibly unlocked or opened or the bat-
tery terminal is disconnected and then
reconnected when the vehicle is locked.
The alarm blows the horn intermittently
and flashes the headlights and tail lights.
’01 4Runner_U (L/O 0008)
30 2001 4RUNNER (OM35768U)
SETTING THE SYSTEM
1. Turn the ignition key to the LOCK"
position and remove it.
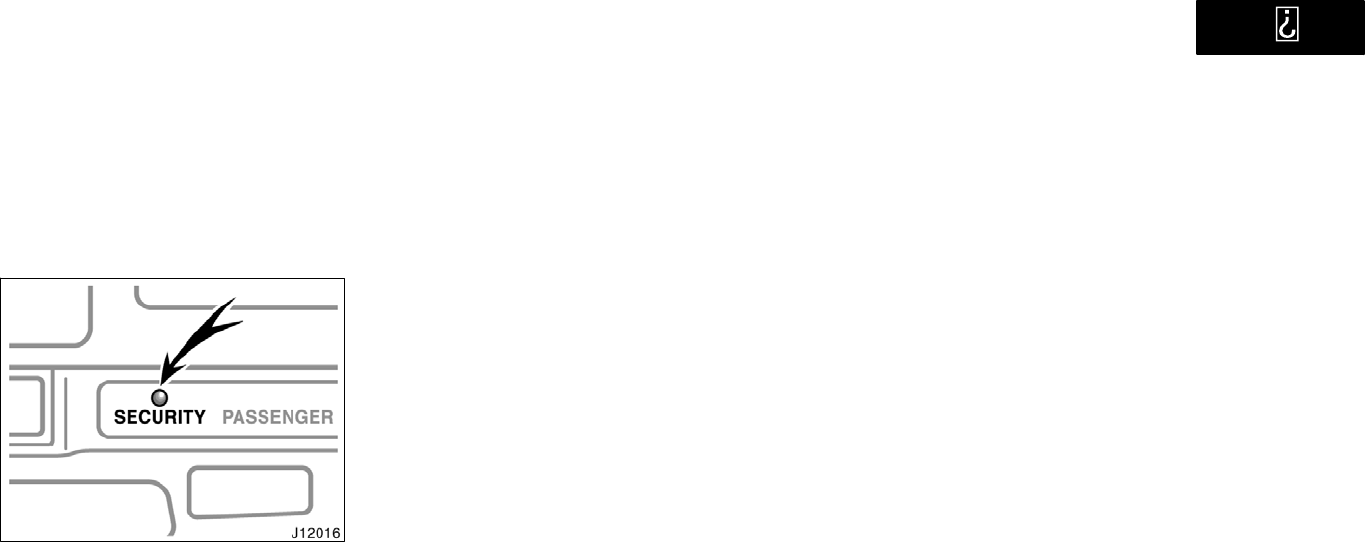
The indicator light will start flashing when
the key is removed from the ignition
switch. (See Engine immobiliser system"
for details.)
2. Have all passengers get out of the
vehicle.
3. Close and lock all the side doors, back
door and hood.
The indicator light will come on when all
the side doors, back door and hood are
closed and locked.
The system will automatically be set after
30 seconds. When the system is set, the
indicator light will start flashing again.
4. After making sure the indicator light
starts flashing, you may leave the ve-
hicle.
Never leave anyone in the vehicle when
you set the system, because unlocking
from the inside will activate the system.
WHEN THE SYSTEM IS SET
Activating the system
The system will give the alarm under the
following conditions:
If any of the side doors is unlocked or
opened without the key or wireless re-
mote control transmitter, or if the back
door or hood is forcibly opened.
If the battery terminal is disconnected
and then reconnected.
The indicator light will come on when the
system is activated.
If the alarm has been activated and the
key is not in the ignition switch, all the
side doors and back door will re−lock au-
tomatically.
After one minute, the alarm will automati-
cally stop and the indicator light will starts
flashing again.
Reactivating the alarm
Once set, the system automatically resets
the alarm after the alarm stops.
The alarm will activate again under the
same circumstances described in
Activating the system".
Stopping the alarm
The alarm will be stopped by the following
three ways:
Turn the ignition key from the LOCK"
to ON" position.
Unlock any of the side doors or back
door with the key or wireless remote
control transmitter.
These ways cancel the system at the
same time.
’01 4Runner_U (L/O 0008)
31
2001 4RUNNER (OM35768U)
TESTING THE SYSTEM
1. Open all the windows.
2. Set the system as described above.
The side doors and back door should
be locked with the key or wireless re-
mote control transmitter. Be sure to
wait until the indicator light goes off or
starts flashing.
3. Unlock any side door from the inside.
The system should activate the alarm.
4. Stopping the alarm as described above.
5. Repeat this operation for the other
doors and hood. When testing on the
hood, also check that the system is
activated when the battery terminal is
disconnected and then reconnected.
If the system does not work properly,
have it checked by your Toyota dealer.
Fuel tank cap
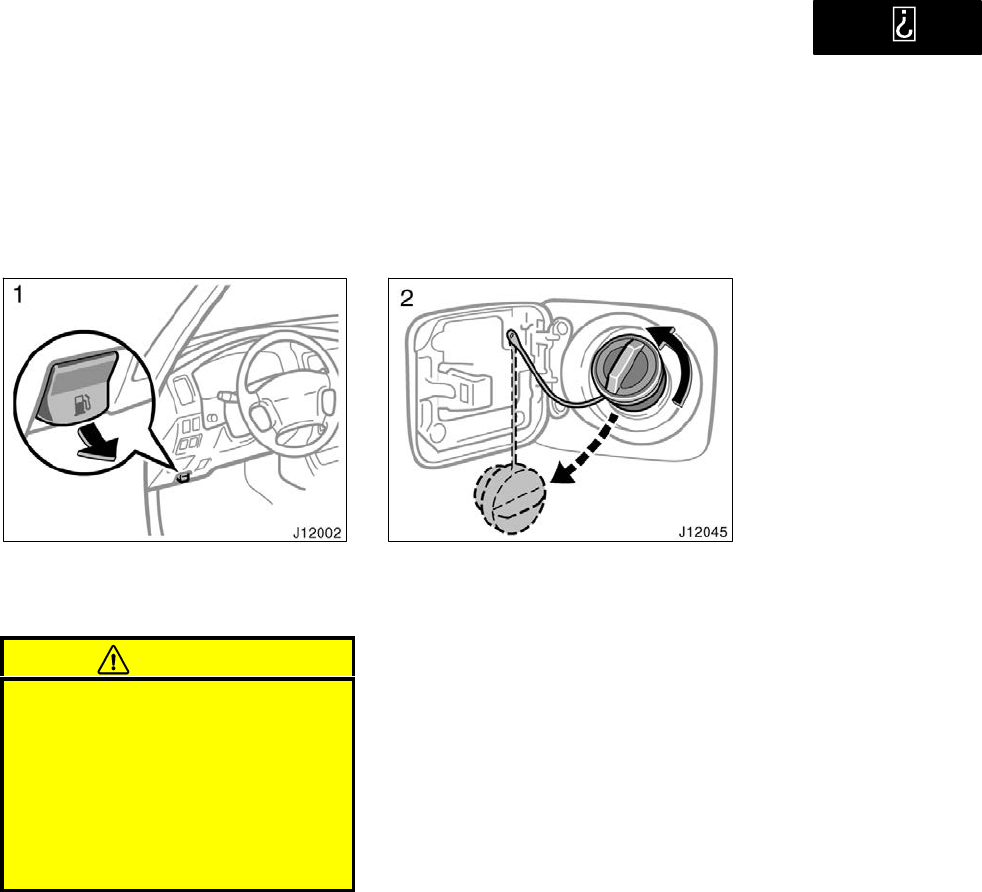
1. To open the fuel filler door, pull the
lever.
When refueling, turn off the engine.
CAUTION
Do not smoke, cause sparks or al-
low open flames when refueling.
The fumes are flammable.
When opening the cap, do not re-
move the cap quickly. In hot weath-
er, fuel under pressure could cause
injury by spraying out of the filler
neck if the cap is suddenly re-
moved.
2. To remove the fuel tank cap, turn
the cap slowly counterclockwise,
then pause slightly before removing
it.
It is not unusual to hear a slight swoosh
when the cap is opened. When installing,
turn the cap clockwise till you hear a
click.
If the cap is not tightened securely, the
malfunction indicator lamp comes on.
Make sure the cap is tightened securely.
The indicator lamp goes off after driving
several times. If the indicator lamp does
not go off, contact your Toyota dealer as
soon as possible.
’01 4Runner_U (L/O 0008)
32 2001 4RUNNER (OM35768U)
CAUTION
Make sure the cap is tightened se-
curely to prevent fuel spillage in
case of an accident.
Use only a genuine Toyota fuel tank
cap for replacement. It is designed
to regulate fuel tank pressure.
Electric moon roof
Sliding operation
Tilting operation
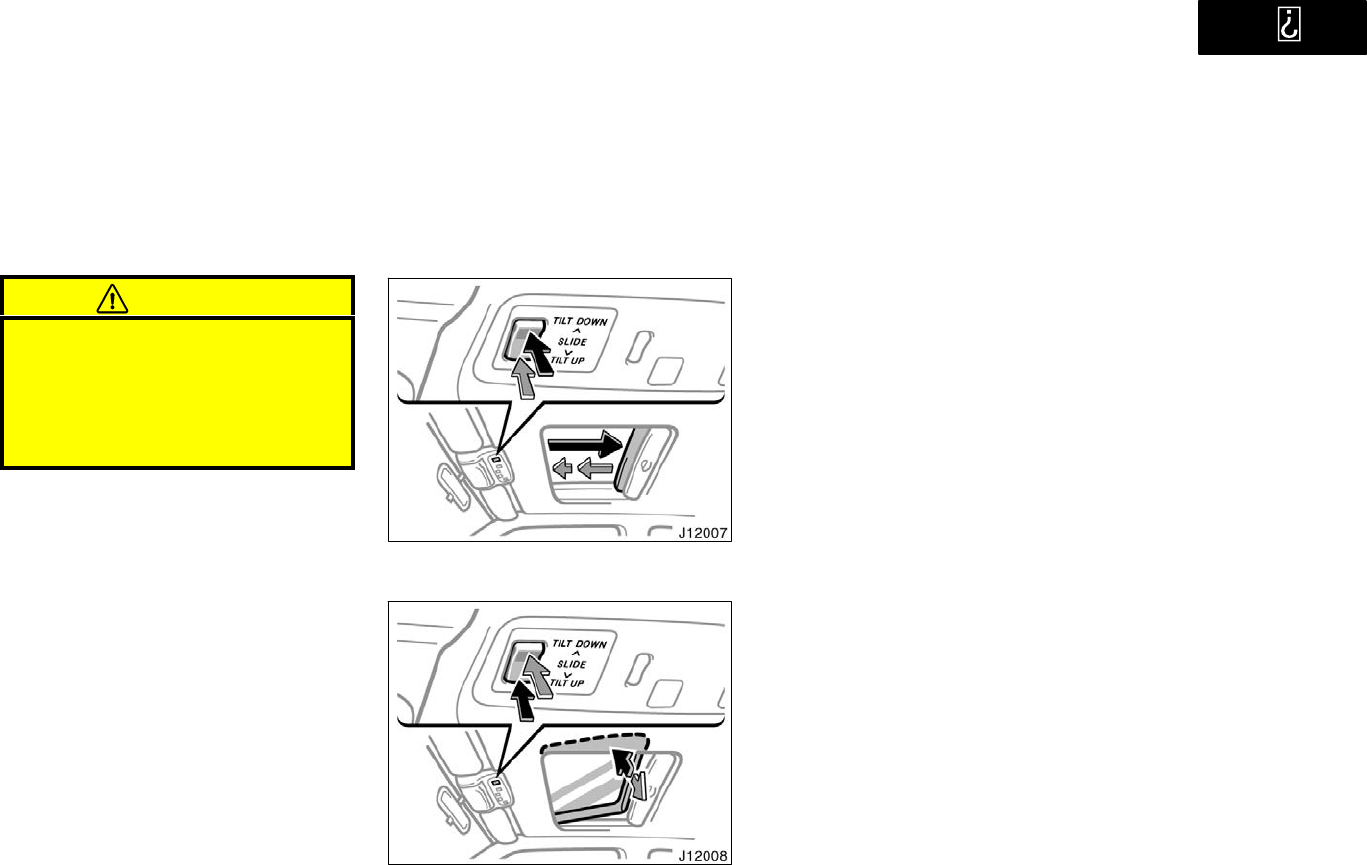
To operate the moon roof, use the
switch beside the personal lights.
The moon roof works when the ignition
switch is in the ON" position.
Key off operation
If all the doors are closed, it works for 43
seconds even after the ignition switch is
turned off. It stops working when any of
the doors is opened.
Sun shade operation
The sun shade can be opened or closed
by hand.
Sliding operation
To open: Push the switch on the Ɯ" side.
The roof will fully open. To stop the roof
partway, push the switch on the Ɲ" side.
The sun shade will be opened together
with the roof.
To close: Push the switch on the Ɲ"
side.
As a precaution when closing, the roof
stops at the three−quarters closed position
before fully closing. Therefore, release the
switch and then push it again to close it
completely.
’01 4Runner_U (L/O 0008)
33
2001 4RUNNER (OM35768U)
Tilting operation
To tilt up: Push the switch on the TILT
UP" side.
To lower: Push the switch on the TILT
DOWN" side.
You may stop the moon roof at any de-
sired position. The roof will move while
the switch is being pushed and stop when
released.
CAUTION
To avoid serious personal injury, you
must do the following.
While the vehicle is moving, always
keep the heads, hands and other
parts of the bodies of all occupants
away from the roof opening. Other-
wise, they could be seriously in-
jured if the vehicle stops suddenly
or if the vehicle is involved in an
accident.
Always make sure nobody places
his/her head, hands and other parts
of the body in the roof opening be-
fore you close the roof. If some-
one’s neck, head or hands gets
caught in the closing roof, it could
result in a serious injury. When
anyone closes the roof, first make
sure it is safe to do so.
Never leave small children alone in
the vehicle, especially with the igni-
tion key still inserted. They could
use the moon roof switches and get
trapped in the roof opening. Unat-
tended children can be involved in
serious accidents.
Never sit on top of the vehicle
around the roof opening.

’01 4Runner_U (L/O 0008)
34 2001 4RUNNER (OM35768U)

’01 4Runner_U (L/O 0008)
35
2001 4RUNNER (OM35768U)
OPERATION OF INSTRUMENTS AND
CONTROLS
Seats, Seat belts, Steering wheel and Mirrors
Seats 36. . . . . . . . . . . . . . . . . . . . . . . . . . . . . . . . . . . . . . . . . . . . . . . . . . . . . .
Front seats 36. . . . . . . . . . . . . . . . . . . . . . . . . . . . . . . . . . . . . . . . . . . . . . . . .
Fold−down rear seats 39. . . . . . . . . . . . . . . . . . . . . . . . . . . . . . . . . . . . . . . .
Flattening seatbacks 40. . . . . . . . . . . . . . . . . . . . . . . . . . . . . . . . . . . . . . . . .
Seat heaters 41. . . . . . . . . . . . . . . . . . . . . . . . . . . . . . . . . . . . . . . . . . . . . . . .
Head restraints 42. . . . . . . . . . . . . . . . . . . . . . . . . . . . . . . . . . . . . . . . . . . . . .
Seat belts 43. . . . . . . . . . . . . . . . . . . . . . . . . . . . . . . . . . . . . . . . . . . . . . . . . . .
SRS driver and front passenger airbags 52. . . . . . . . . . . . . . . . . . . . . . . .
Child restraint 59. . . . . . . . . . . . . . . . . . . . . . . . . . . . . . . . . . . . . . . . . . . . . . .
Tilt steering wheel 78. . . . . . . . . . . . . . . . . . . . . . . . . . . . . . . . . . . . . . . . . . .
Outside rear view mirrors 78. . . . . . . . . . . . . . . . . . . . . . . . . . . . . . . . . . . . .
Anti−glare inside rear view mirror 80. . . . . . . . . . . . . . . . . . . . . . . . . . . . . .
Sun visors 81. . . . . . . . . . . . . . . . . . . . . . . . . . . . . . . . . . . . . . . . . . . . . . . . . .
SECTION 1− 3
’01 4Runner_U (L/O 0008)
36 2001 4RUNNER (OM35768U)
Seats
While the vehicle is being driven, all ve-
hicle occupants should have the seatback
upright, sit well back in the seat and prop-
erly wear the seat belts provided.
CAUTION
Do not drive the vehicle unless the
occupants are properly seated. Do
not allow sitting on top of a
folded−down seatback, or in the
luggage compartment. Persons not
properly seated and/or properly re-
strained by seat belts can be se-
verely injured in the event of emer-
gency braking or a collision.
During driving, do not allow pas-
sengers to stand up or move
around between seats. Severe inju-
ries can occur in the event of emer-
gency braking or a collision.
Adjust the driver’s seat so that the foot
pedals, steering wheel and instrument
panel controls are within easy reach of
the driver.
CAUTION
Adjustments should not be made
while the vehicle is moving, as the
seat may unexpectedly move and
cause the driver to lose control of
the vehicle.
When adjusting the seat, be careful
not to hit the seat against a pas-
senger or luggage.
After adjusting the seat position,
try sliding it forward and backward
to make sure it is locked in posi-
tion.
After adjusting the seatback, exert
body pressure to make sure it is
locked in position.
Do not put objects under the seats
as they may interfere with the seat−
lock mechanism or unexpectedly
push up the seat position adjusting
lever; the seat may suddenly move,
causing the driver to lose control of
the vehicle.
While adjusting the seat, do not put
your hands under the seat or near
the moving parts. You may catch
and injure your hands or fingers.
Front seats
Seat adjustment
precautions
’01 4Runner_U (L/O 0008)
37
2001 4RUNNER (OM35768U)
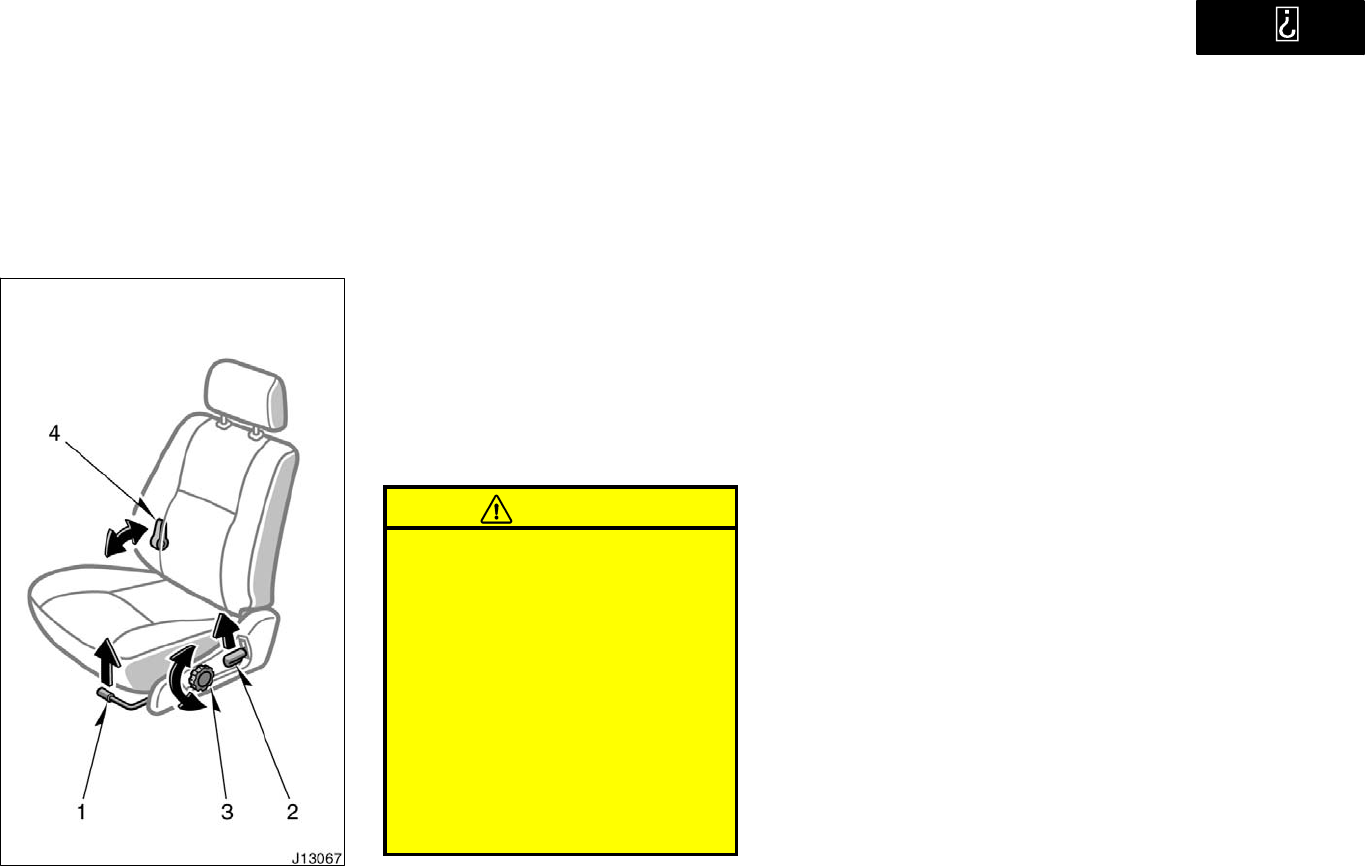
1. SEAT POSITION ADJUSTING LEVER
Pull the lever up. Then slide the seat
to the desired position with slight body
pressure and release the lever.
2. SEATBACK ANGLE ADJUSTING
LEVER
Lean forward and pull the lever up.
Then lean back to the desired angle
and release the lever.
CAUTION
To reduce the risk of sliding under
the lap belt during a collision, avoid
reclining the seatback any more than
needed. The seat belts provide maxi-
mum protection in a frontal or rear
collision when the driver and the pas-
senger are sitting up straight and
well back in the seats. If you are
reclined, the lap belt may slide past
your hips and apply restraint forces
directly to the abdomen. Therefore, in
the event of a frontal collision, the
risk of personal injury may increase
with increasing recline of the seat-
back.
3. SEAT CUSHION ANGLE ADJUSTING
KNOB
Turn the knob either way.
4. SEAT LUMBAR SUPPORT
ADJUSTING LEVER
Pull the lever forward or backward.
Adjusting front seats
(manual seat)
’01 4Runner_U (L/O 0008)
38 2001 4RUNNER (OM35768U)
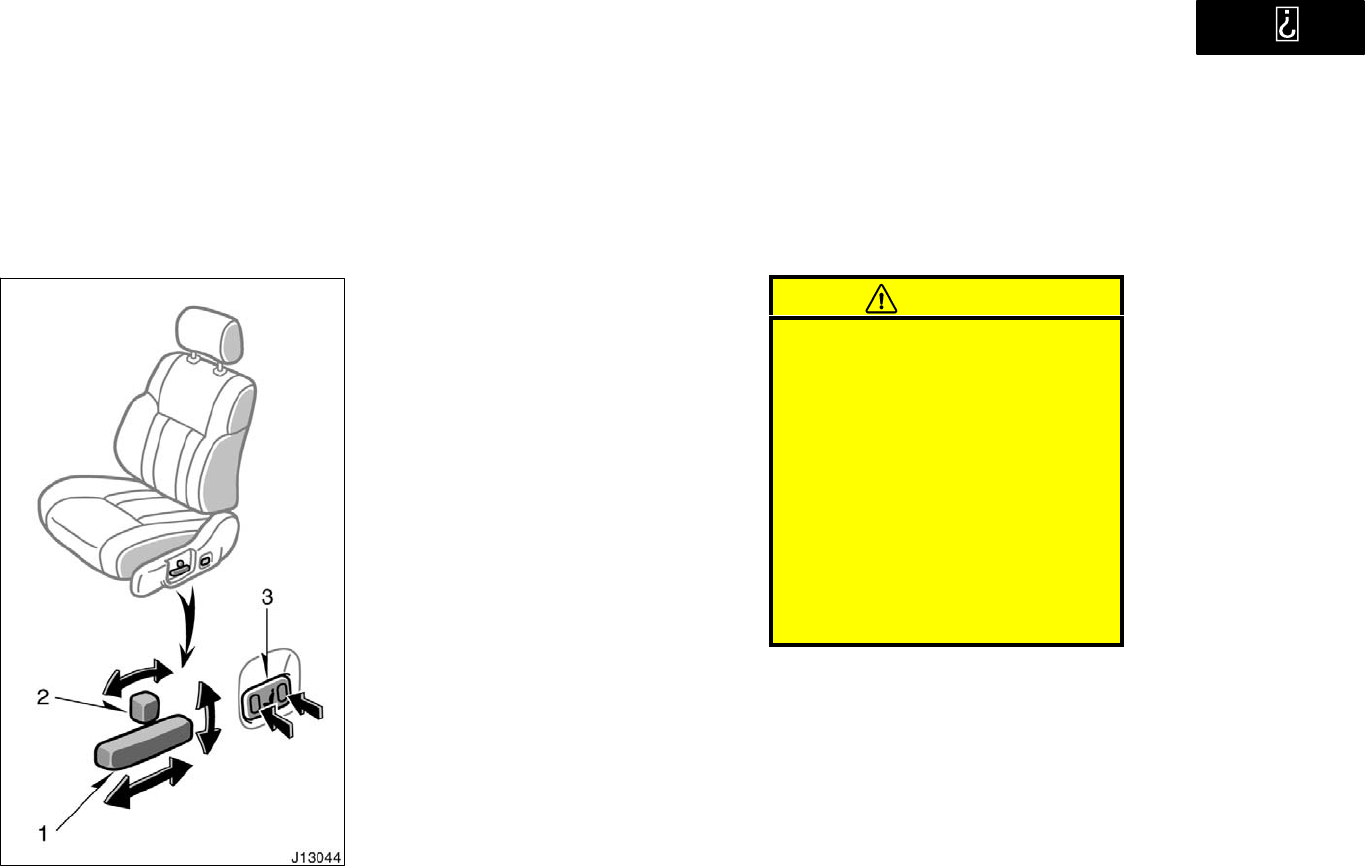
1. SEAT POSITION AND SEAT CUSHION
ANGLE ADJUSTING SWITCH
Move the control switch in the desired
direction.
Releasing the switch will stop the seat at
that position.
Do not place anything under the front
seats. It might interfere with the seat−lock
mechanism.
2. SEATBACK ANGLE ADJUSTING
SWITCH
Move the control switch in the desired
direction.
Releasing the switch will stop the seat-
back at that position.
CAUTION
To reduce the risk of sliding under
the lap belt during a collision, avoid
reclining the seatback any more than
needed. The seat belts provide maxi-
mum protection in a frontal or rear
collision when the driver and the pas-
senger are sitting up straight and
well back in the seats. If you are
reclined, the lap belt may slide past
your hips and apply restraint forces
directly to the abdomen. Therefore, in
the event of a frontal collision, the
risk of personal injury may increase
with increasing recline of the seat-
back.
3. SEAT LUMBAR SUPPORT
ADJUSTING SWITCH
Push the control switch in the desired
direction.
Releasing the switch will stop the seat-
back at that position.
Adjusting front seats
(power seat)
’01 4Runner_U (L/O 0008)
39
2001 4RUNNER (OM35768U)
Fold−down rear seats
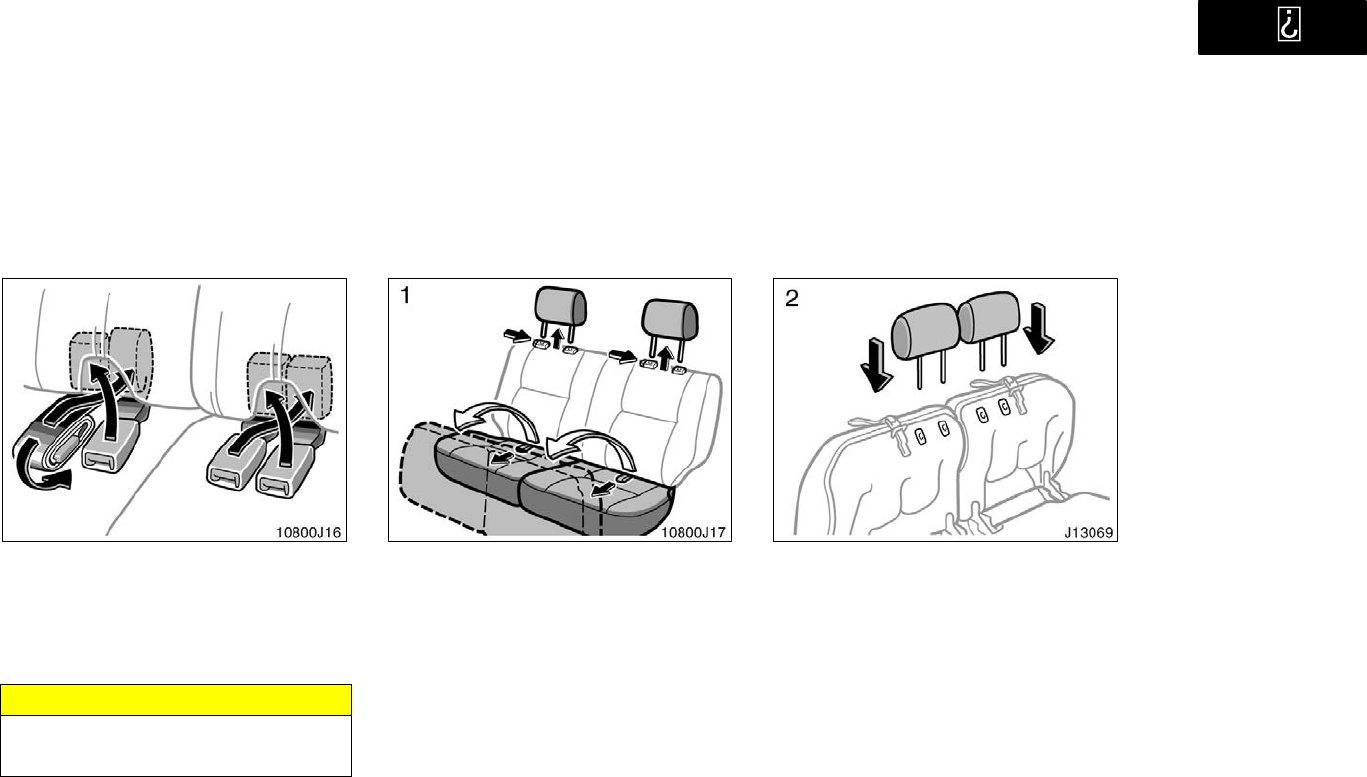
BEFORE FOLD−DOWN REAR SEAT
Stow the rear seat belt and buckles as
shown in the illustration.
This prevents the belt and buckles from
falling out when you fold the seatback.
NOTICE
The seat belt and buckles must be
stowed before you fold the seatback.
1. Swing the bottom cushion up by
pulling the lock release strap, and
remove the head restraint.
It is hinged at the front edge, so just lift
it up.
If desired, each bottom cushion may be
swung up separately.
2. Store the head restraints in the head
restraint retaining holes in the bot-
tom cushion.
’01 4Runner_U (L/O 0008)
40 2001 4RUNNER (OM35768U)
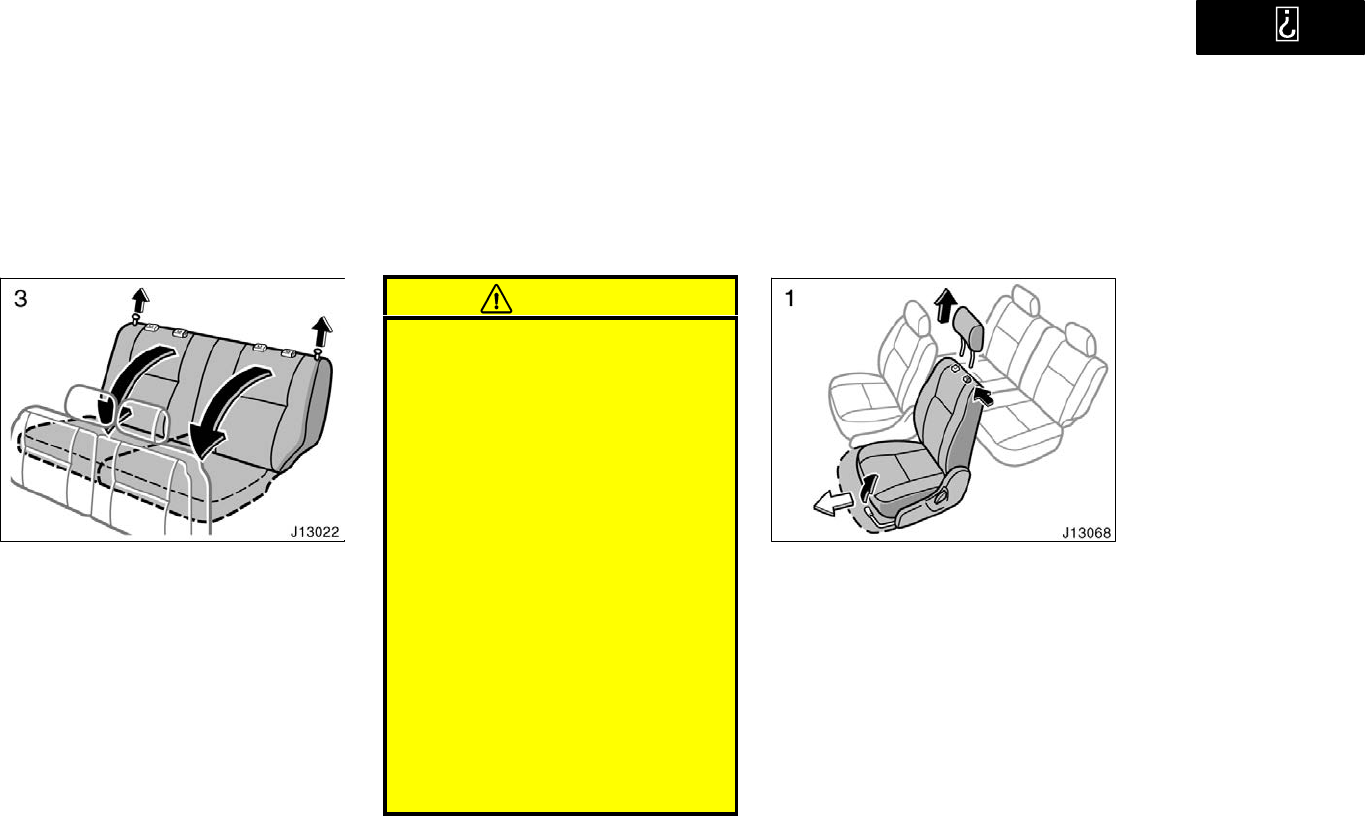
3. Unlock the seatback and fold it
down.
This will enlarge the luggage compartment
as far as the raised seat cushion. See
Luggage stowage precautions" in Section
2 for precautions in loading luggage.
If desired, each seatback may be folded
separately.
CAUTION
When returning the seats to their
original position:
Make sure the seat belts are not
twisted or caught in the seatback
and are arranged in their proper
position and are ready to use.
Make sure the seatback is securely
locked by pushing forward and rear-
ward on the top of the seatback.
Failure to do so will prevent seat
belt from operating properly. Be
certain to replace the head re-
straints.
Make sure the bottom cushion is
securely locked by trying to pull up
the edge of the cushion near the
lock release straps.
Do not forget to pull out the buckle
of the side seatbelts and center
seatbelt and arranged them in their
proper position and are ready to
use.
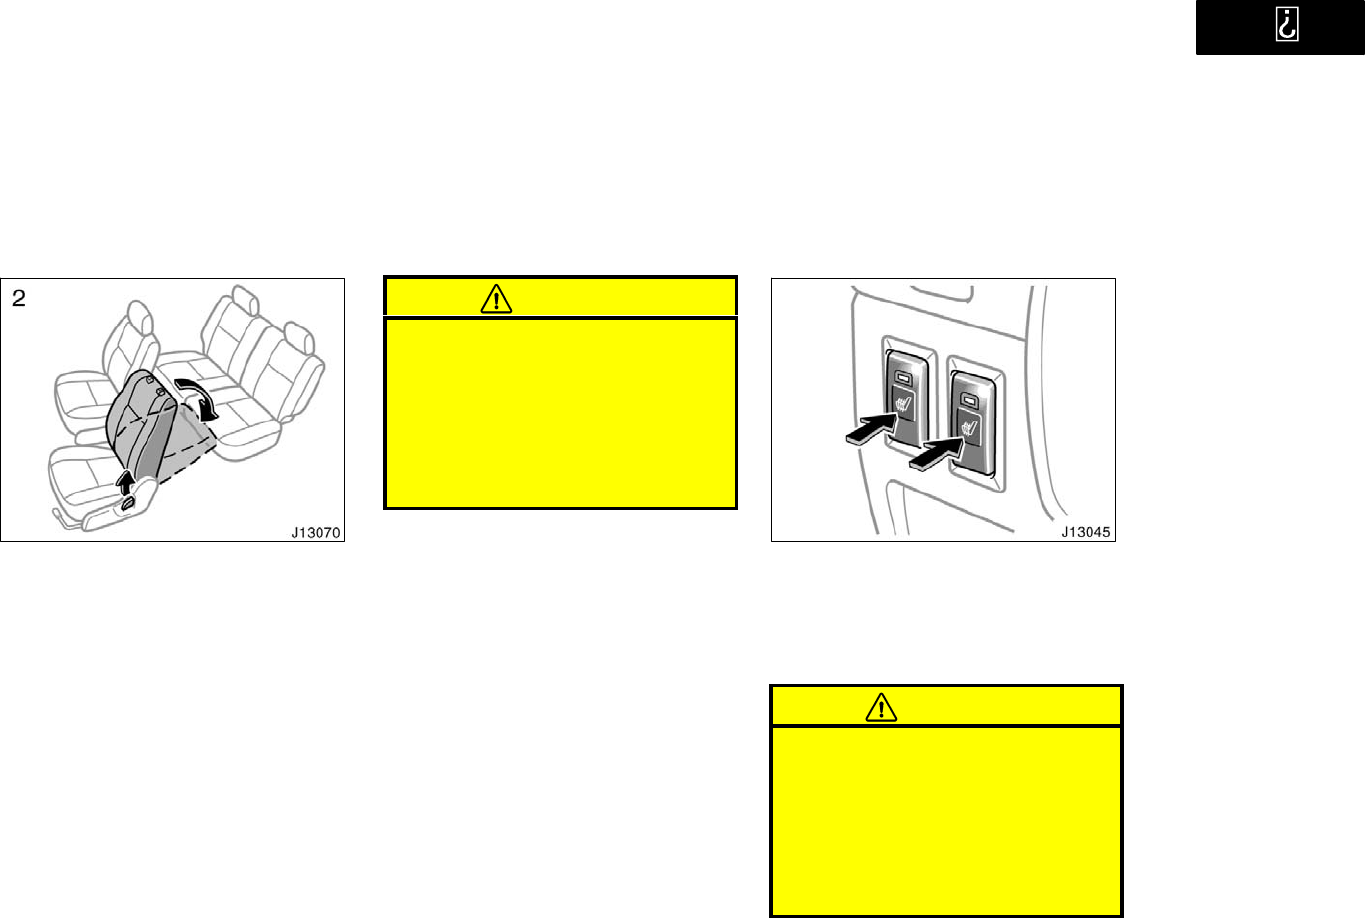
To flatten the seatback, do the follow-
ings.
1. Remove the head restraint and slide
the seat further forward than the
front−most lock position.
Flattening seatbacks
(manual seat)
’01 4Runner_U (L/O 0008)
41
2001 4RUNNER (OM35768U)
2. Pull the lock release lever up, then
push down the seatback.
When returning the seatback upright, be
careful not to make yourself hit by the
seatback which will bound with consid-
erable spring force.
After returning the seat to its original
position, be certain to replace the head
restraint.
CAUTION
Do not allow passengers to ride on
the flattened seat while driving; use
the seat in the normal position.
After putting back the seat, try
pushing the seat and seatback for-
ward and rearward to make sure it
is secured in place. Be certain to
replace head restraint.
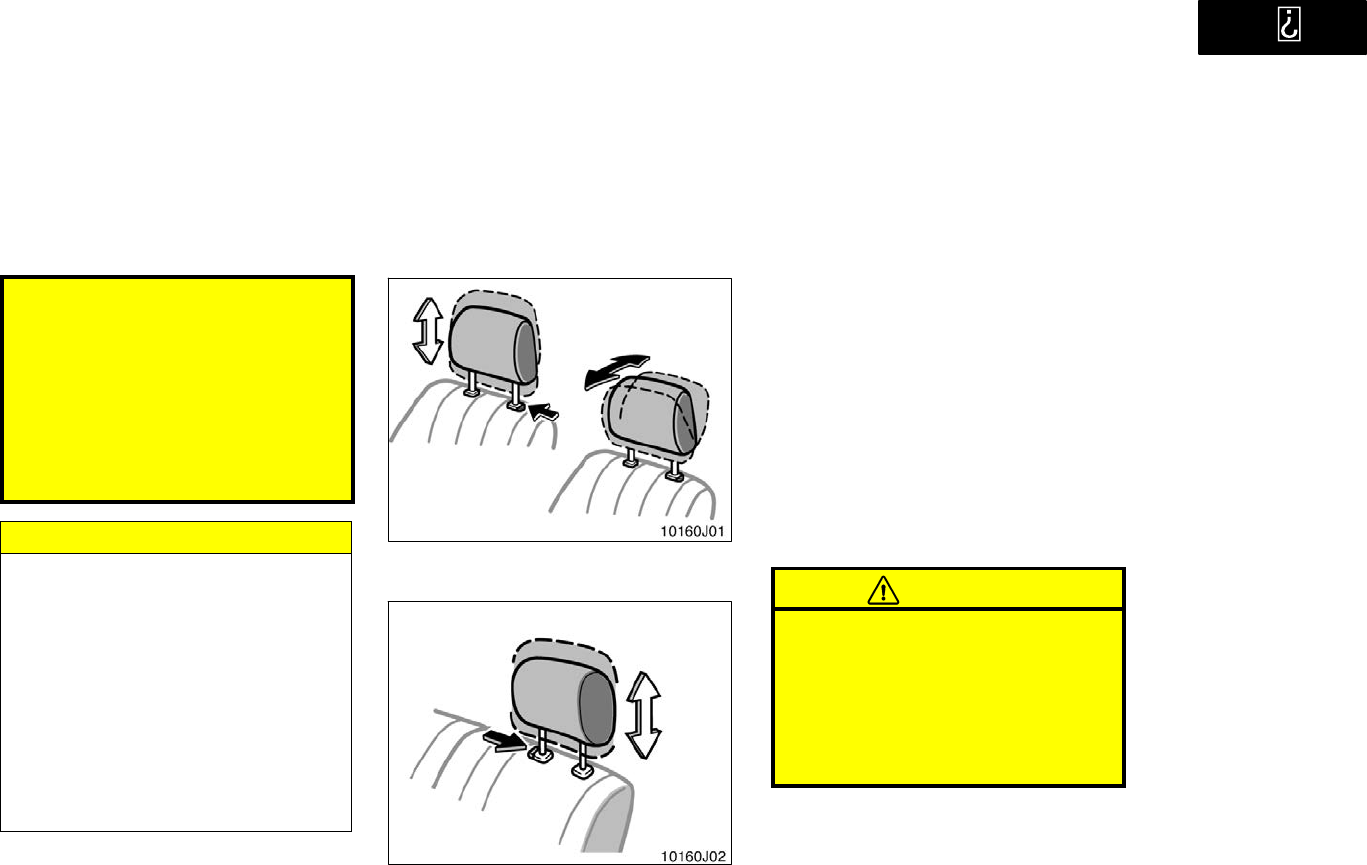
Seat heaters
To turn on the seat heater, push the
switch.
The key must be in the ON" position.
Push the switch once again to turn the
seat heater off.
CAUTION
Occupants must use caution when op-
erating the seat heater because it
may make them feel too hot or cause
burns at low temperatures (erythema,
varicella). Use extra caution for;
Babies, small children, elderly per-
sons, sick persons or handicapped
persons
’01 4Runner_U (L/O 0008)
42 2001 4RUNNER (OM35768U)
Persons who have delicate skin
Persons who are exhausted
Persons who have taken alcohol or
drugs which induce sleep (sleeping
drug, cold remedy, etc.)
To prevent the seat overheating, do
not use the seat heater with a blan-
ket, cushion, or other insulating ob-
jects which cover the seat.
NOTICE
zDo not put unevenly weighed ob-
jects on the seat and do not stick
sharp objects (needles, nails, etc.)
into the seat.
zWhen cleaning the seats, do not
use organic substances (paint thin-
ner, benzine, alcohol, gasoline,
etc.). They may damage the heater
and seat surface.
zTo prevent the battery from being
discharged, turn the switch on
when the engine is running.
Head restraints
Front
Rear
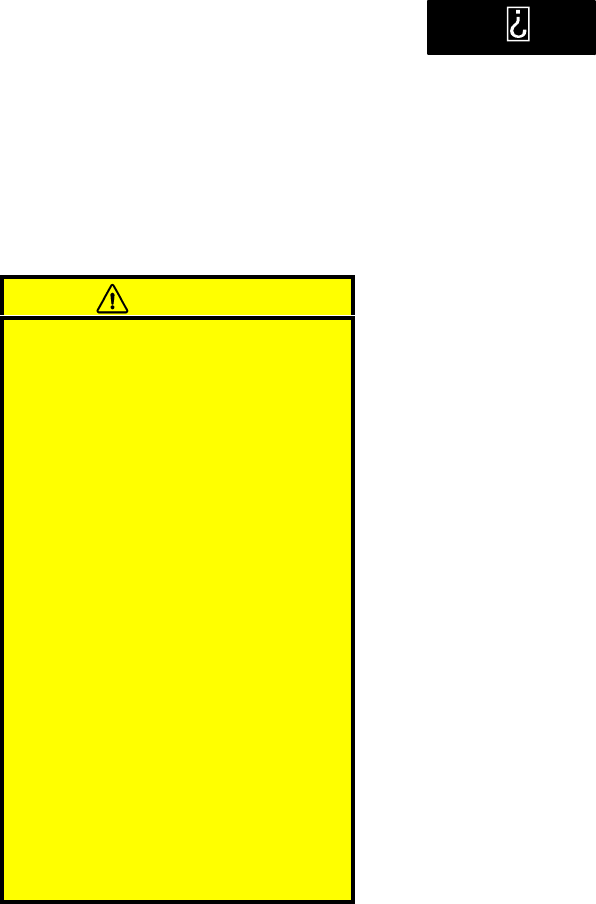
For your safety and comfort, adjust the
head restraint before driving.
To raise: Pull it up.
To lower: Push it down while pressing the
lock release button.
On some models, you can also move the
head restraint forward or backward. If
such adjustment is desired, pull or push
the head restraint.
The head restraint is most effective when
it is close to your head. Therefore, using
a cushion on the seatback is not recom-
mended.
CAUTION
Adjust the center of the head re-
straint so that it is closet to the
top of your ears.
After adjusting the head restraint,
make sure it is locked in position.
Do not drive with the head re-
straints removed.
’01 4Runner_U (L/O 0008)
43
2001 4RUNNER (OM35768U)
Toyota strongly urges that the driver and
passengers in the vehicle be properly re-
strained at all times with the seat belts
provided. Failure to do so could increase
the chance of injury and/or the severity of
injury in accidents.
Child. Use a child restraint system ap-
propriate for the child until the child be-
comes large enough to properly wear the
vehicle’s seat belts. See Child restraint"
for details.
If a child is too large for a child restraint
system, the child should sit in the rear
seat and must be restrained using the
vehicle’s seat belt. According to accident
statistics, the child is safer when properly
restrained in the rear seat than in the
front seat.
If a child must sit in the front seat, the
seat belts should be worn properly. If an
accident occurs and the seat belts are not
worn properly, the force of the rapid infla-
tion of the airbag may cause death or
serious injury to the child.
Do not allow the child to stand up or
kneel on either rear or front seats. An
unrestrained child could suffer serious in-
jury or death during emergency braking or
a collision. Also do not let the child sit on
your lap. It does not provide sufficient
restraint.
Pregnant woman. Toyota recommends the
use of a seat belt. Ask your doctor for
specific recommendations. The lap belt
should be worn securely and as low as
possible over the hips and not on the
waist.
Injured person. Toyota recommends the
use of a seat belt. Depending on the inju-
ry, first check with your doctor for specific
recommendation.
CAUTION
Persons should ride in their seats
properly wearing their seat belts
whenever the vehicle is moving.
Otherwise, they are much more likely
to suffer serious bodily injury or
death in the event of sudden braking
or a collision.
When using the seat belts, observe
the following:
Use the belt for only one person at
a time. Do not use a single belt for
two or more peopleeven children.
Avoid reclining the seatbacks too
much. The seat belts provide maxi-
mum protection when the seatbacks
are in the upright position. (Refer
to the seat adjustment instructions.)
Be careful not to damage the belt
webbing or hardware. Take care that
they do not get caught or pinched
in the seat or side doors.
Inspect the belt system periodically.
Check for cuts, fraying, and loose
parts. Damaged parts should be re-
placed. Do not disassemble or
modify the system.
Seat belts
Seat belt precautions
’01 4Runner_U (L/O 0008)
44 2001 4RUNNER (OM35768U)
Keep the belts clean and dry. If
they need cleaning, use a mild soap
solution or lukewarm water. Never
use bleach, dye, or abrasive clean-
ersthey may severely weaken the
belts. (See Cleaning the interior"
in Section 5.)
Replace the belt assembly (includ-
ing bolts) if it has been used in a
severe impact. The entire assembly
should be replaced even if damage
is not obvious.
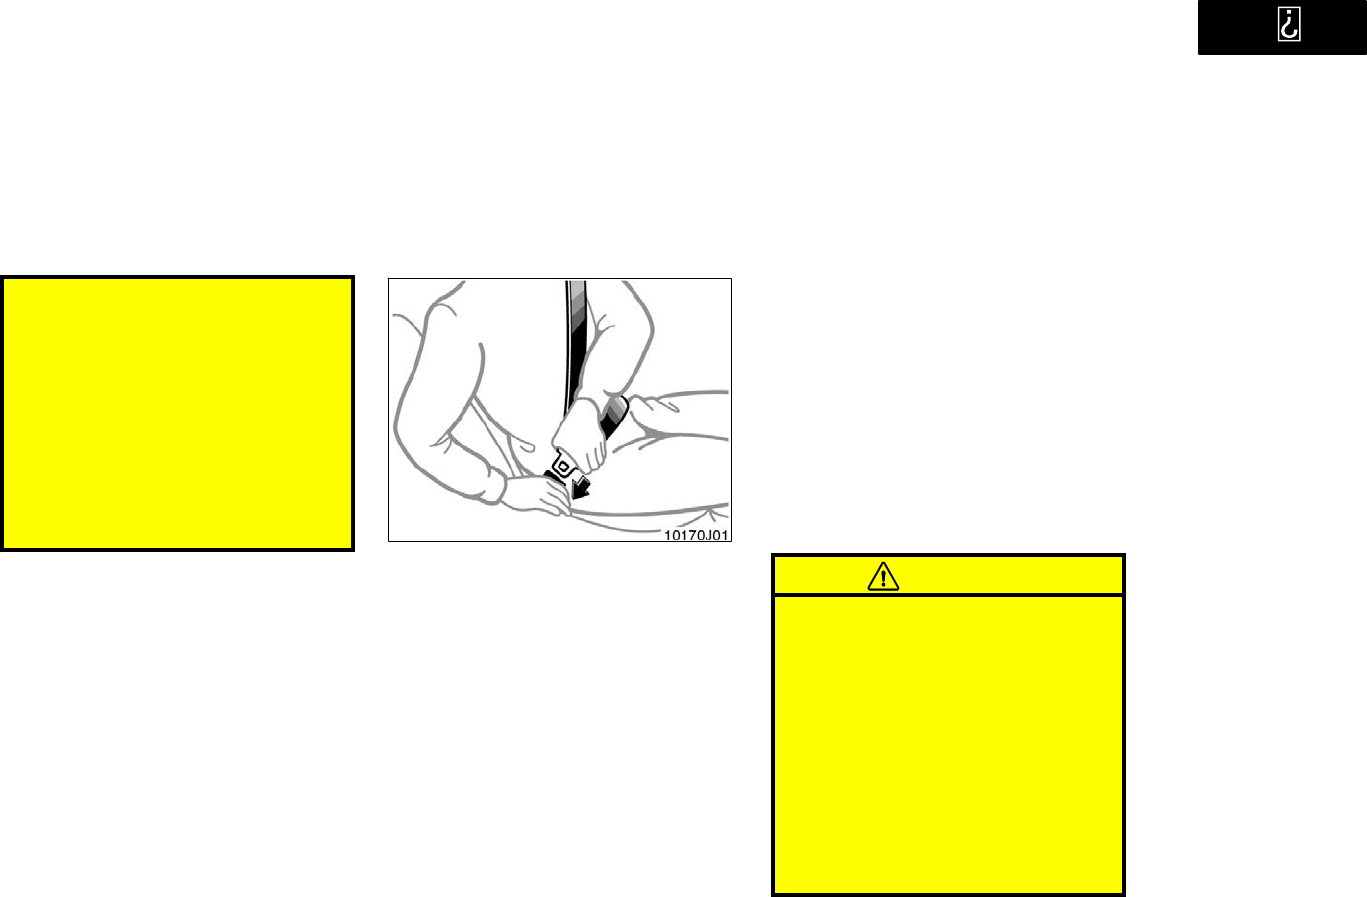
Adjust the seat as needed (front seats
only) and sit up straight and well back
in the seat. To fasten your belt, pull it
out of the retractor and insert the tab
into the buckle.
You will hear a click when the tab locks
into the buckle.
The seat belt length automatically adjusts
to your size and the seat position.
The retractor will lock the belt during a
sudden stop or on impact. It also may
lock if you lean forward too quickly. A
slow, easy motion will allow the belt to
extend, and you can move around freely.
If the seat belt cannot be pulled out of the
retractor, firmly pull the belt and release
it. You will then be able to smoothly pull
the belt out of the retractor.
When a passenger’s shoulder belt is com-
pletely extended and is then retracted
even slightly, the belt is locked in that
position and cannot be extended. This fea-
ture is used to hold the child restraint
system securely. (For details, see Child
restraint" in this section.) To free the belt
again, fully retract the belt and then pull
the belt out once more.
CAUTION
After inserting the tab, make sure
the tab and buckle are locked and
that the belt is not twisted.
Do not insert coins, clips, etc. in
the buckle as this may prevent you
from properly latching the tab and
buckle.
If the seat belt does not function
normally, immediately contact your
Toyota dealer. Do not use the seat
until the seat belt is fixed. It cannot
protect an adult occupant or your
child from injury.
Front and rear outside seat
belts
’01 4Runner_U (L/O 0008)
45
2001 4RUNNER (OM35768U)
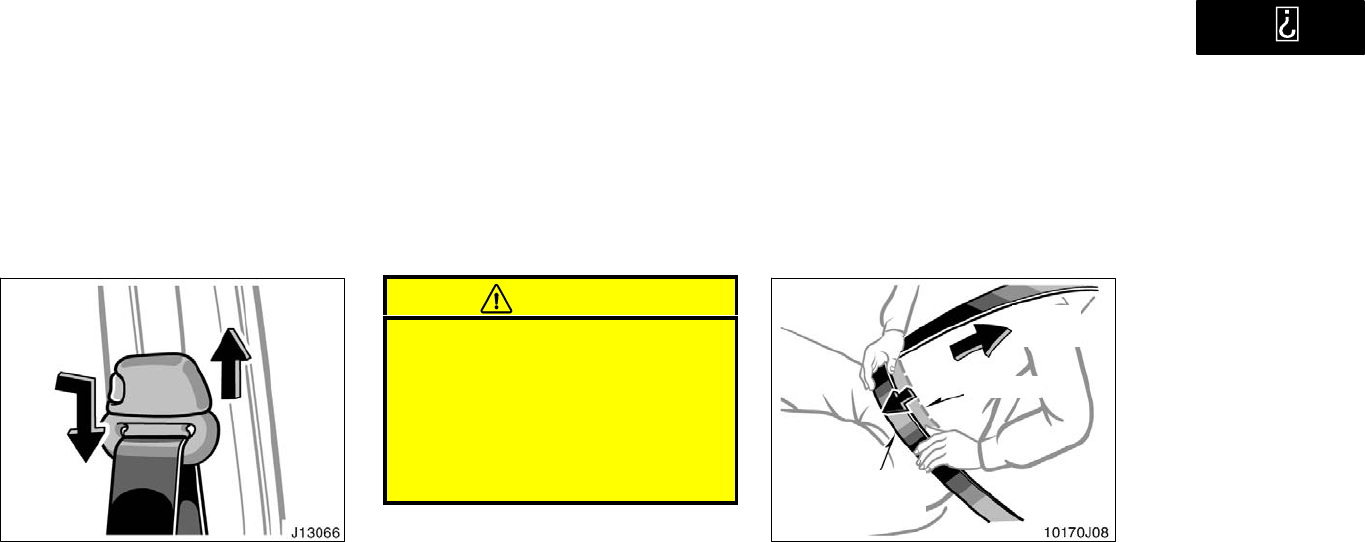
Seat belts with an adjustable shoulder
anchor
Adjust the shoulder anchor position to
your size.
To raise: Slide the anchor up.
To lower: Push in the lock release button
and slide the anchor down.
After adjustment make sure the anchor is
locked in position.
CAUTION
Always make sure the shoulder belt
is positioned across the center of
your shoulder. The belt should be
kept away from your neck, but not
falling off your shoulder. Failure to
do so could reduce the amount of
protection in an accident and cause
serious injuries in a collision.
Tak e u p
slack
Too h igh
Keep as low on
hips as possible
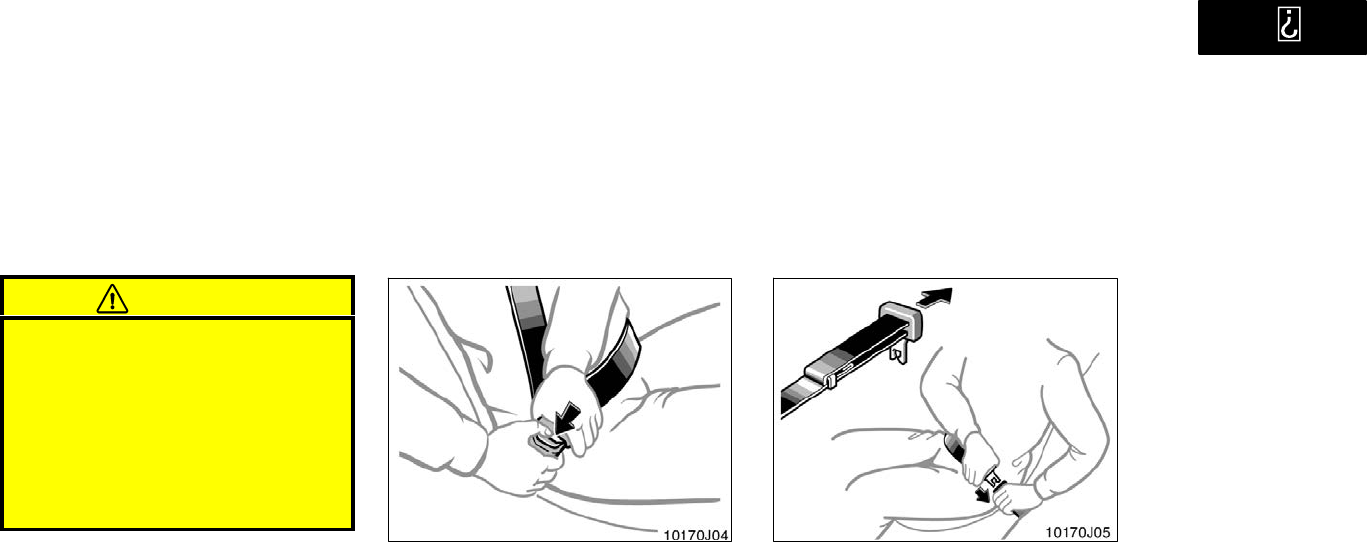
Adjust the position of the lap and
shoulder belts.
Position the lap belt as low as possible
on your hipsnot on your waist, then ad-
just it to a snug fit by pulling the shoulder
portion upward through the latch plate.
’01 4Runner_U (L/O 0008)
46 2001 4RUNNER (OM35768U)
CAUTION
High−positioned lap belts and
loose−fitting belts both could cause
serious injuries due to sliding un-
der the lap belt during a collision
or other unintended result. Keep
the lap belt positioned as low on
hips as possible.
For your safety, do not place the
shoulder belt under your arm.
To release the belt, press the buckle−re-
lease button and allow the belt to re-
tract.
If the belt does not retract smoothly, pull
it out and check for kinks or twists. Then
make sure it remains untwisted as it re-
tracts.
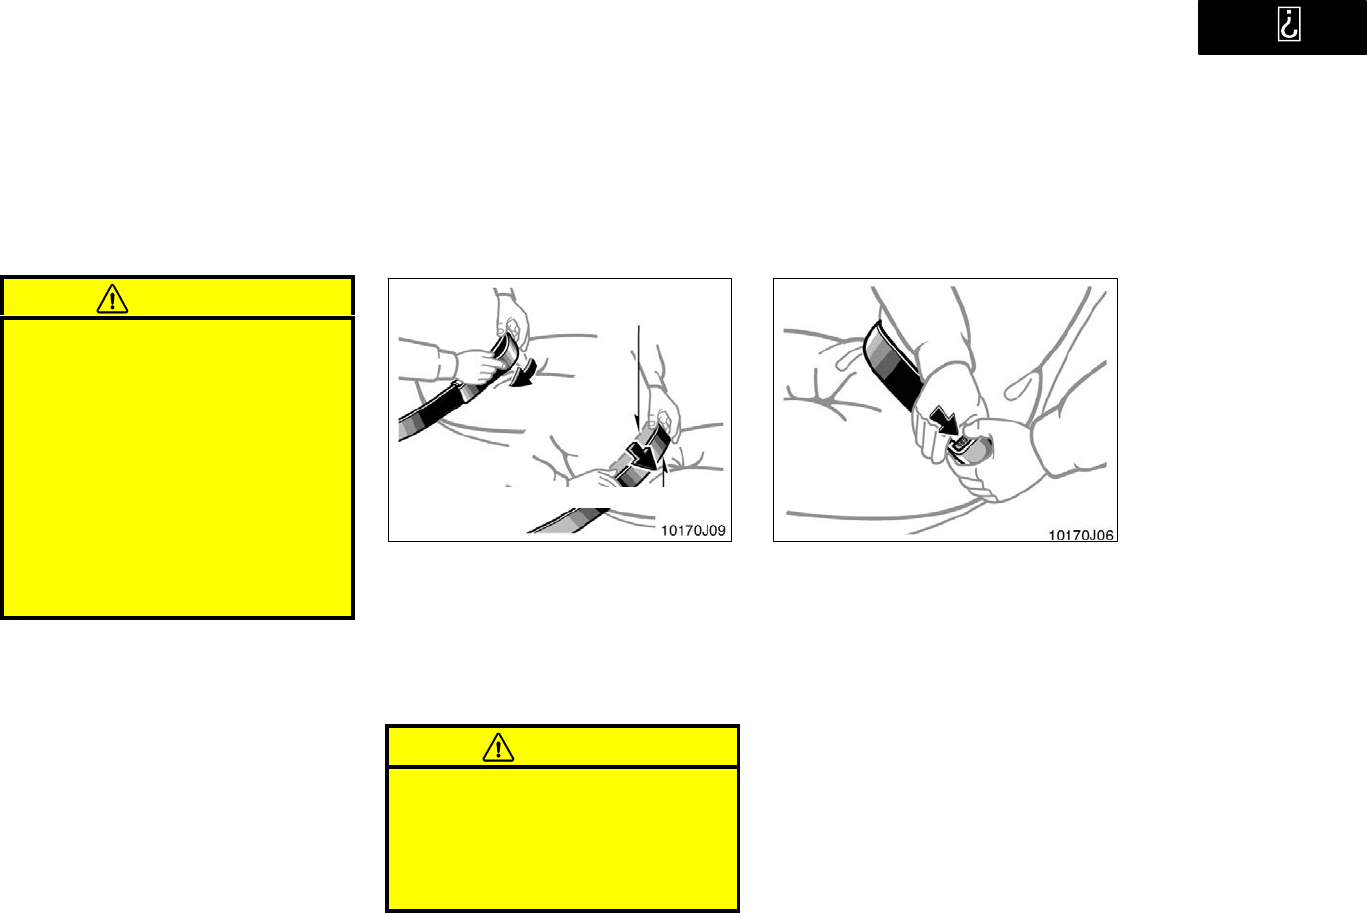
Rear center seat belt
Lengthen
Sit up straight and well back in the
seat. To fasten your belt, insert the tab
into the buckle.
You will hear a click when the tab locks
into the buckle.
If the belt is not long enough for you, hold
the tab at a right angle to the belt and
pull on the tab.
’01 4Runner_U (L/O 0008)
47
2001 4RUNNER (OM35768U)
CAUTION
After inserting the tab, make sure
the tab and buckle are locked and
that the belt is not twisted.
Do not insert coins, clips, etc. in
the buckle as this may prevent you
from properly latching the tab and
buckle.
If the seat belt does not function
normally, immediately contact your
Toyota dealer. Do not use the seat
until the seat belt is fixed. It cannot
protect an adult occupant or your
child from injury.
Too h i g h
Adjust to a
snug fit
Keep as low on hips as possible
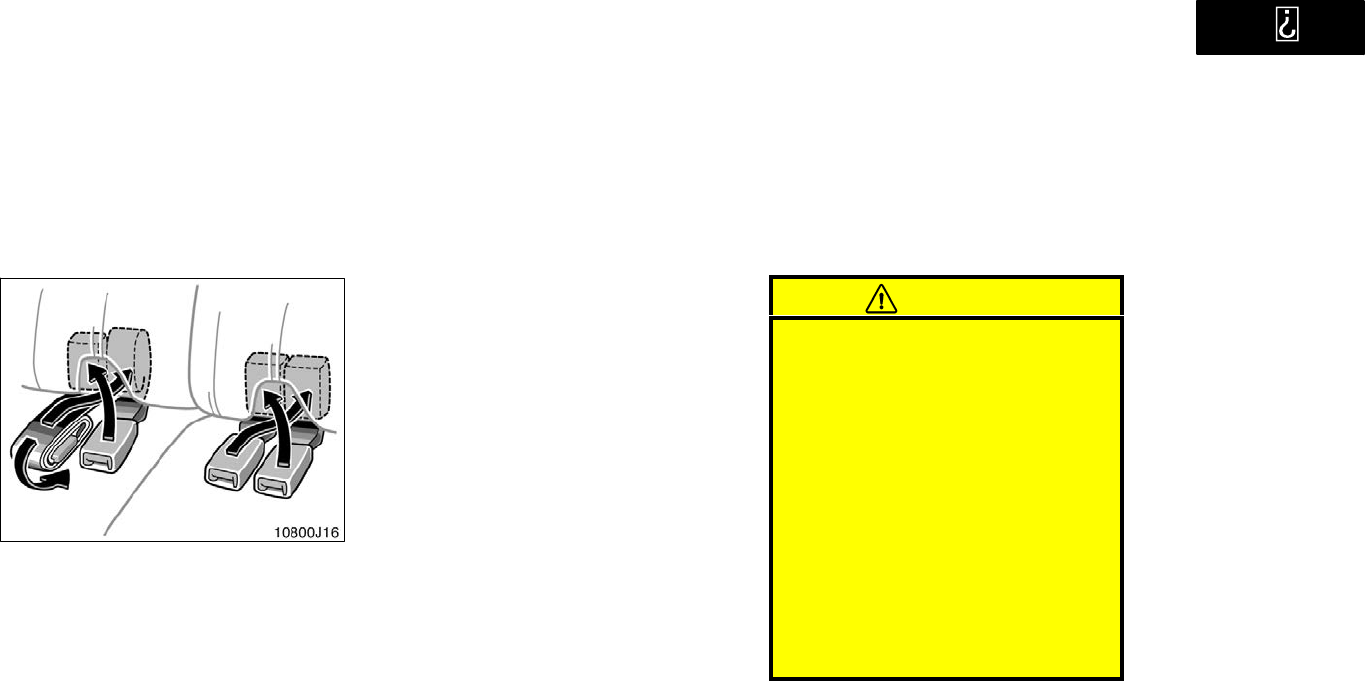
Remove excess length of the belt and
adjust the belt position.
To shorten the belt, pull the free end of
the belt.
Position the lap belt as low as possible
on your hipsnot on your waist, then ad-
just it to a snug fit.
CAUTION
High−positioned and loose−fitting lap
belts could cause serious injuries due
to sliding under the lap belt during a
collision or other unintended result.
Keep the lap belt positioned as low
on hips as possible.
To release the belt, press the buckle−re-
lease button.
’01 4Runner_U (L/O 0008)
48 2001 4RUNNER (OM35768U)
The rear seat belt and buckles can be
stowed when not in use.
Seat belt and buckles must be stowed
before you fold the seat back. (See Fold−
down rear seats" in this section.)
Seat belt extender
If your seat belt cannot be fastened se-
curely because it is not long enough, a
personalized seat belt extender is avail-
able from your Toyota dealer free of
charge.
Please contact your local Toyota dealer so
that the dealer can order the proper re-
quired length for the extender. Bring the
heaviest coat you expect to wear for prop-
er measurement and selection of length.
Additional ordering information is available
at your Toyota dealer.
CAUTION
When using the seat belt extender,
observe the following. Failure to fol-
low these instructions could result in
less effectiveness of the seat belt re-
straint system in case of vehicle acci-
dent, increasing the chance of per-
sonal injury.
Never use the seat belt extender if
you can fasten the seat belt without
it.
Remember that the extender pro-
vided for you may not be safe when
used on a different vehicle, or for
another person or at a different
seating position than the one origi-
nally intended for.
Stowing rear seat belt
and buckles
’01 4Runner_U (L/O 0008)
49
2001 4RUNNER (OM35768U)
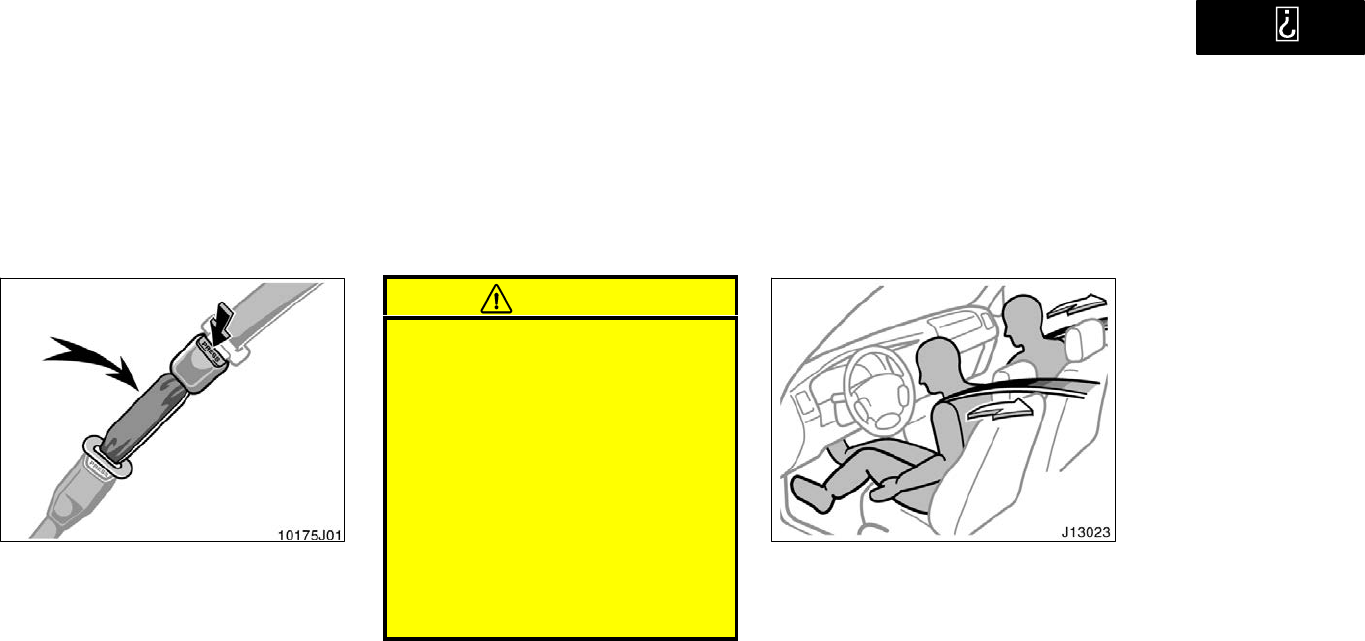
To connect the extender to the seat
belt, insert the tab into the seat belt
buckle so that the PRESS" signs on
the buckle−release buttons of the ex-
tender and the seat belt are both facing
outward as shown.
You will hear a click when the tab locks
into the buckle.
When releasing the seat belt, press on
the buckle−release button on the extender,
not on the seat belt. This helps prevent
damage to the vehicle interior and extend-
er itself.
When not in use, remove the extender
and store in the vehicle for future use.
CAUTION
After inserting the tab, make sure
the tab and buckle are locked and
that the seat belt extender is not
twisted.
Do not insert coins, clips, etc. in
the buckle as this may prevent you
from properly latching the tab and
buckle.
If the seat belt does not function
normally, immediately contact your
Toyota dealer. Do not use the seat
until the seat belt is fixed. It cannot
protect an adult occupant or your
child from injury.
Front seat belt pretensioners
The driver and front passenger’s seat
belt pretensioners are designed to be
activated in response to a severe fron-
tal impact.
When the airbag sensor detects the shock
of a severe frontal impact, the front seat
belts are quickly drawn back in by the
retractors so that the belts snugly restrain
the front seat occupants.
The front seat belt pretensioners are acti-
vated even with no passenger in the front
seat.
Collisions occurring at certain speeds and
angles may cause the seat belt preten-
sioners and SRS airbags not to operate
all together.
’01 4Runner_U (L/O 0008)
50 2001 4RUNNER (OM35768U)
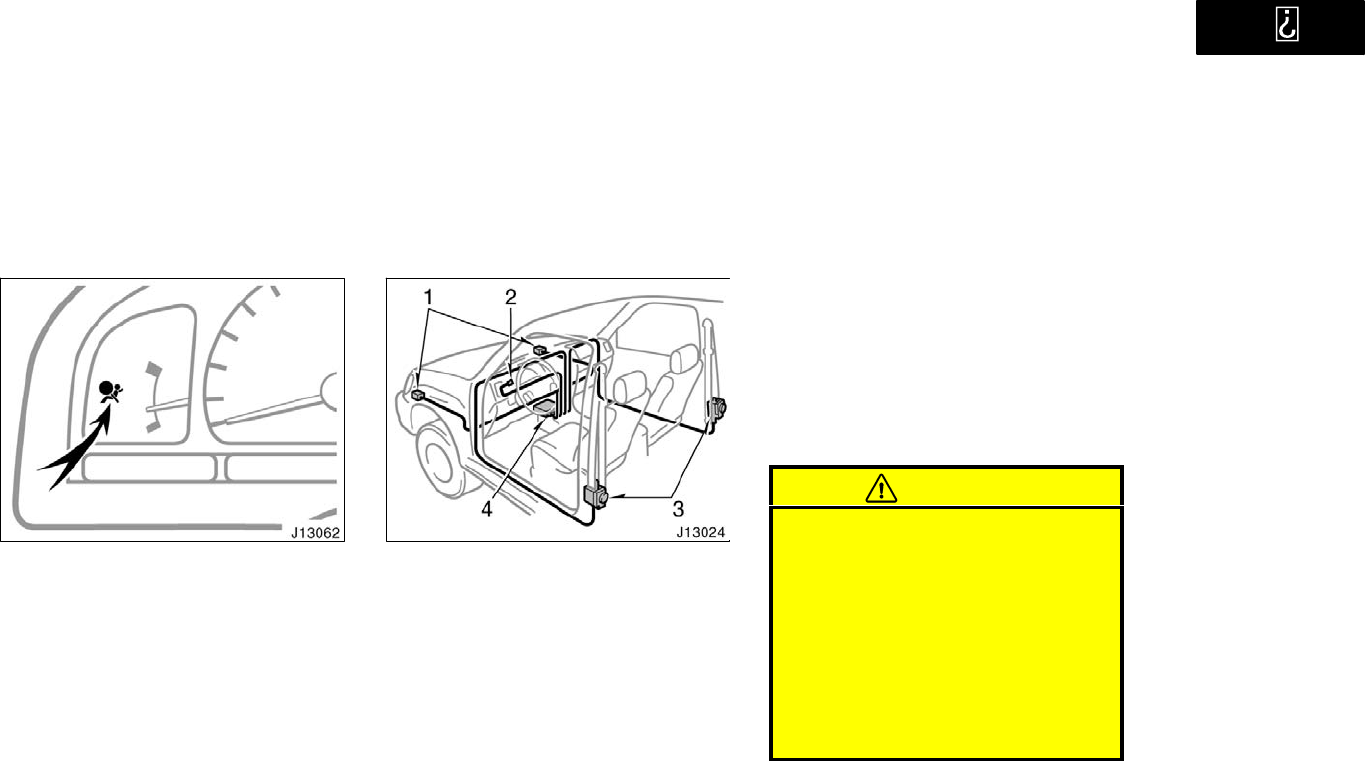
This indicator comes on when the igni-
tion key is turned to the ON" position.
It goes off after about 6 seconds. This
means the front seat belt pretensioners
are operating properly.
This warning light system monitors the
airbag sensor assembly, front airbag sen-
sors, front seat belt pretensioner assem-
blies, warning light, inflators, interconnect-
ing wiring and power sources. (For details,
see Service reminder indicators and
warning buzzers" in Section 1−5.)
The front seat belt pretensioner system
mainly consists of the following compo-
nents and their locations are shown in the
illustration.
1. Front airbag sensors
2. SRS warning light
3. Front seat belt pretensioner assemblies
4. Airbag sensor assembly
The front seat belt pretensioners are con-
trolled by the airbag sensor assembly. The
airbag sensor assembly consists of a saf-
ing sensor and airbag sensor.
When the front seat belt pretensioners are
activated, an operating noise may be
heard and a small amount of smoke−like
gas may be released. This gas is harm-
less and does not indicate that a fire is
occurring.
Once the front seat belt pretensioners
have been activated, the seat belt retrac-
tors remain locked.
CAUTION
Do not modify, remove, strike or open
the front seat belt pretensioner as-
semblies, airbag sensor or surround-
ing area or wiring. Doing any of
these may cause sudden operation of
the front seat belt pretensioners or
disable the system, which could re-
sult in death or serious injury.
Failure to follow these instructions
can result in death or serious inju-
ries.
’01 4Runner_U (L/O 0008)
51
2001 4RUNNER (OM35768U)
NOTICE
Do not perform any of the following
changes without consulting your
Toyota dealer. Such changes can
interfere with proper operation of the
front seat belt pretensioners in some
cases.
zInstallation of electronic devices
such as a mobile two−way radio,
cassette tape player or compact
disc player
zRepairs on or near the front seat
belt retractor assemblies
zModification of the suspension sys-
tem
zModification of the front end struc-
ture
zAttachment of a grille guard (bull
bar, kangaroo bar, etc.), snowplow,
winches or any other equipment to
the front end
zRepairs made on or near the front
fenders, front end structure or con-
sole
This front seat belt pretensioner system
has a service reminder indicator to inform
the driver of operating problems. If any of
the following conditions occurs, this
indicates a malfunction of the airbags or
pretensioners. Contact your Toyota dealer
as soon as possible to service the
vehicle.
The light does not come on when the
ignition key is turned to the ON" posi-
tion, or the light remains on.
The light comes on or flashes while
driving.
If either front seat belt does not retract
or cannot be pulled out due to a mal-
function or activation of the relevant
front seat belt pretensioner.
In the following cases, contact your Toyota
dealer as soon as possible:
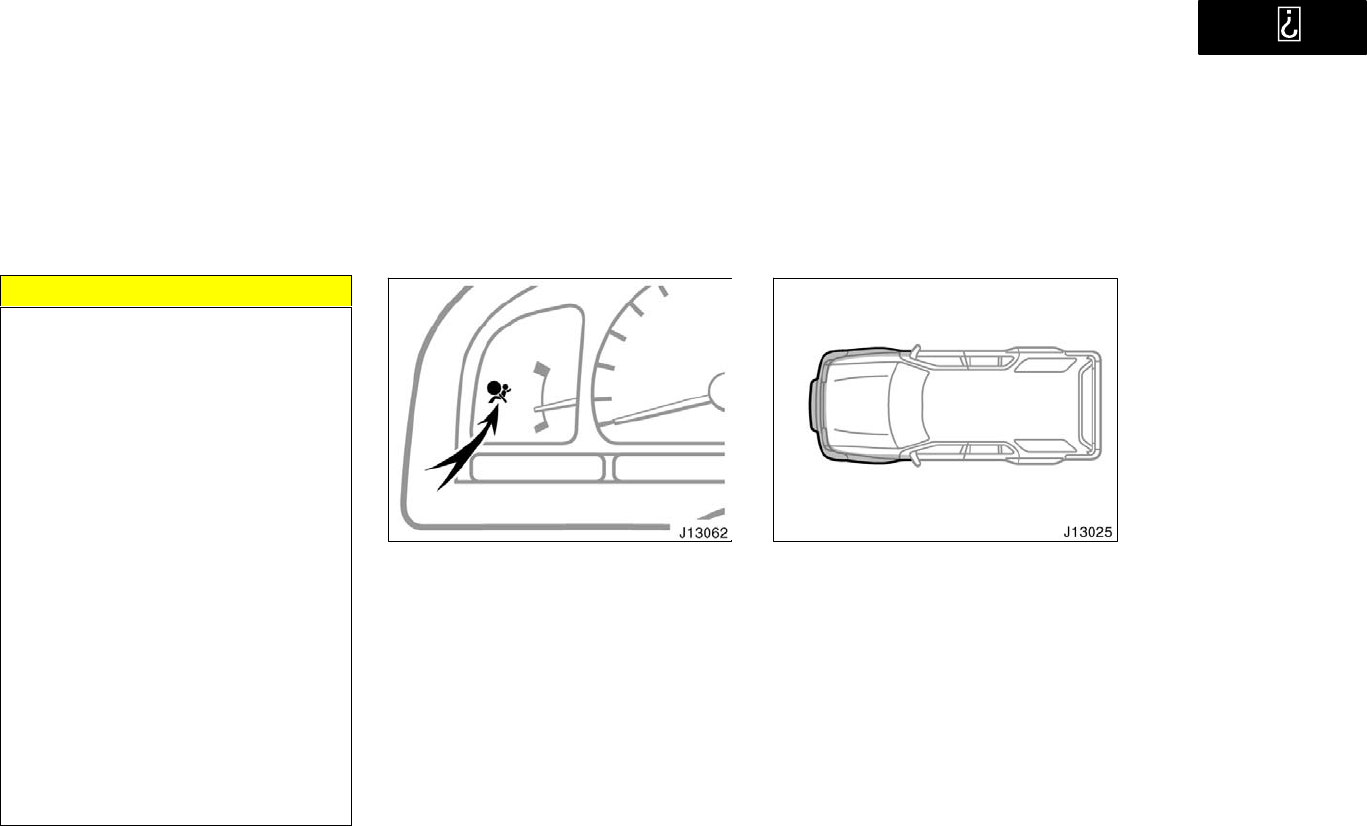
The front part of the vehicle (shaded
in the illustration) was involved in an
accident that was not severe enough to
cause the front seat belt pretensioners
to operate.
Either front seat belt pretensioner as-
sembly or surrounding area is
scratched, cracked, or otherwise dam-
aged.
’01 4Runner_U (L/O 0008)
52 2001 4RUNNER (OM35768U)
The SRS (Supplemental Restraint Sys-
tem) airbags are designed to provide
further protection for the driver and
front passenger in addition to the pri-
mary safety protection provided by the
seat belts.
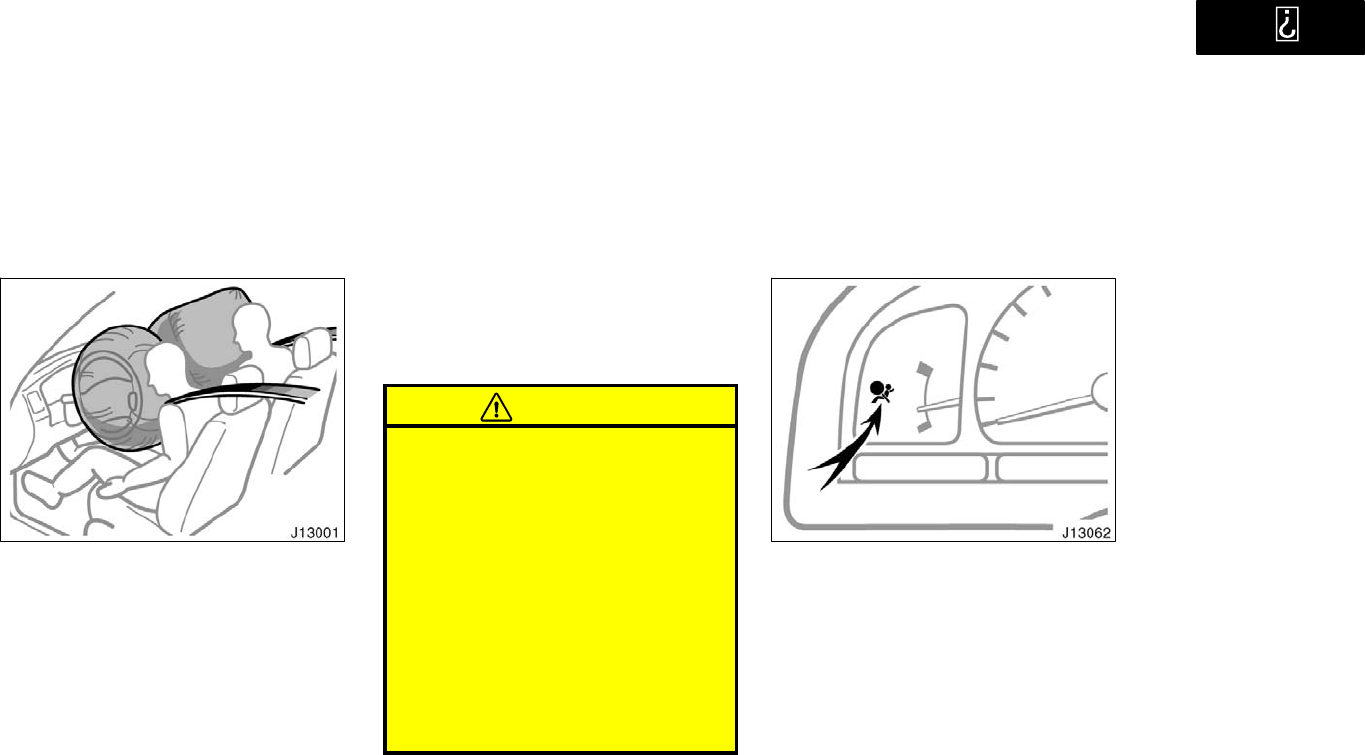
In response to a severe frontal impact,
the SRS airbags work together with the
seat belts to help reduce injury by inflat-
ing. The SRS airbags help to reduce inju-
ries mainly to the driver’s or front passen-
ger’s head or chest caused by directly
hitting the steering wheel or dashboard.
The front passenger airbag is activated
even with no passenger in the front seat.
Be sure to wear your seat belt properly.
Your vehicle is equipped with a crash
sensing and diagnostic module, which will
record the use of the seat belt restraint
system by the driver and the front pas-
senger when the SRS airbags are inflated.
CAUTION
A driver or front passenger too close
to the steering wheel or dashboard
during airbag deployment can be
killed or seriously injured. Toyota
strongly recommends that:
The driver sit as far back as pos-
sible from the steering wheel while
still maintaining control of the ve-
hicle.
The front passenger sit as far back
as possible from the dashboard.
All vehicle occupants be properly
restrained using the available seat
belts.
This indicator comes on when the igni-
tion key is turned to the ON" position.
It goes off after about 6 seconds. This
means the SRS airbags are operating
properly.
This warning light system monitors the
airbag sensor assembly, front airbag sen-
sors, front seat belt pretensioner assem-
blies, inflators, warning light, interconnect-
ing wiring and power sources. (For details,
see Service reminder indicators and
warning buzzers" in Section 1−5.)
SRS driver and front
passenger airbags
’01 4Runner_U (L/O 0008)
53
2001 4RUNNER (OM35768U)
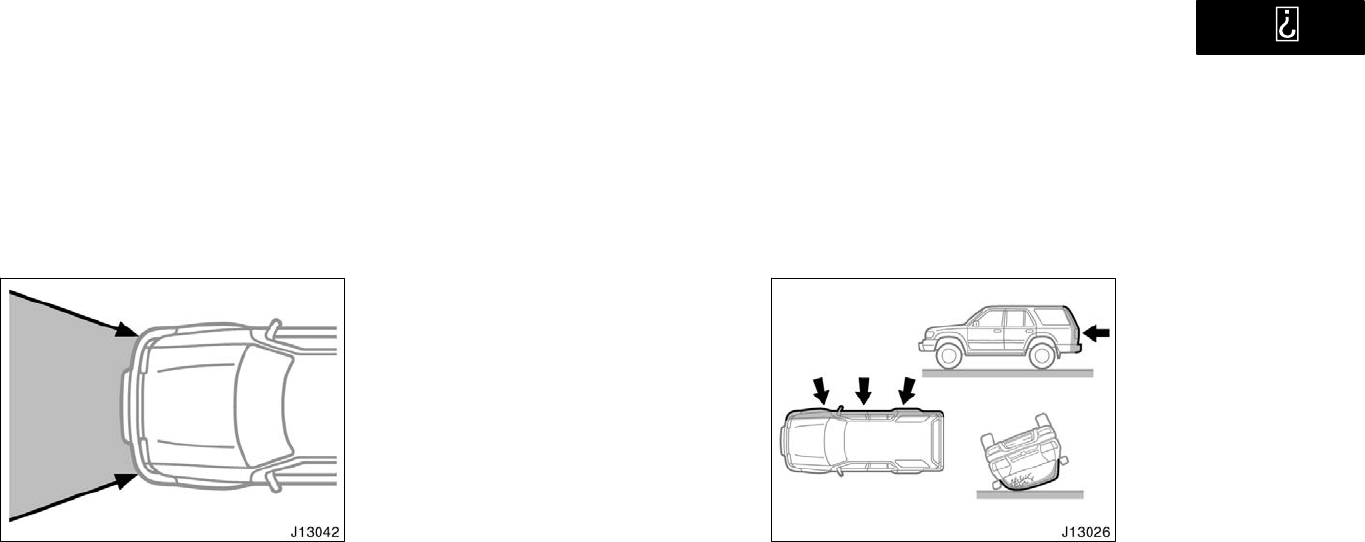
The SRS airbag system is designed to
activate in response to a severe frontal
impact within the shaded area between
the arrows in the illustration.
The SRS airbags will deploy if the severi-
ty of the impact is above the designed
threshold level, comparable to an approxi-
mate 25 km/h (15 mph) collision when
impacting straight into a fixed barrier that
does not move or deform.
If the severity of the impact is below the
above threshold level, the SRS airbags
may not deploy.
However, this threshold velocity will be
considerably higher if the vehicle strikes
an object, such as a parked vehicle or
sign pole, which can move or deform on
impact, or if it is involved in an underride
collision (e.g. a collision in which the nose
of the vehicle underrides", or goes under,
the bed of a truck, etc.).
It is possible that in some collisions at the
lower zone of airbag sensor detection and
activation the SRS airbags and seat belt
pretensioners will not operate all together.
For the safety of all occupants, always
wear your seat belts properly.
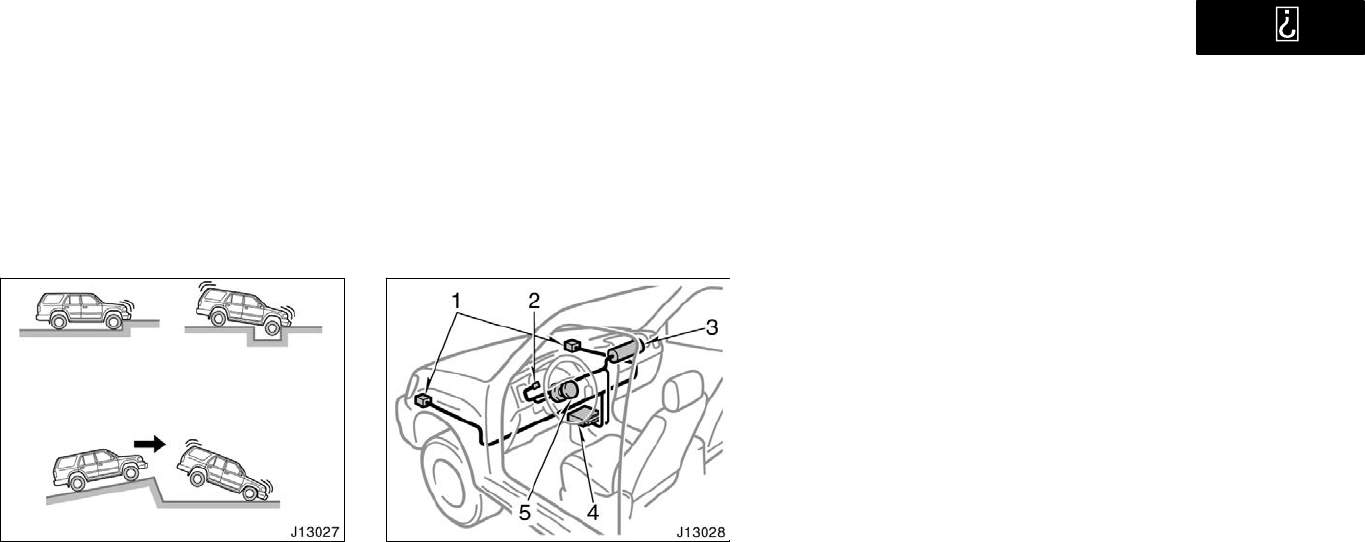
Collision from the rear
Collision from the side
Vehicle rollover
The SRS airbags are not designed to
inflate if the vehicle is involved in a
side or rear collision, if it rolls over, or
if it is involved in a low−speed frontal
collision.
’01 4Runner_U (L/O 0008)
54 2001 4RUNNER (OM35768U)
Hitting a curb,
edge of pavement
or hard material
Falling into or
jumping over a
deep hole
Landing hard or vehicle falling
The SRS airbags may deploy if a seri-
ous impact occurs to the underside of
your vehicle. Some examples are shown
in the illustration.
The SRS airbag system consists mainly of
the following components, and their loca-
tions are shown in the illustration.
1. Front airbag sensors
2. SRS warning light
3. Airbag module for front passenger
(airbag and inflator)
4. Airbag sensor assembly
5. Airbag module for driver
(airbag and inflator)
The airbag sensor assembly consists of a
safing sensor and airbag sensor.
In a severe frontal impact, the sensors
detect deceleration and the system trig-
gers the airbag inflators. Then a chemical
reaction in the inflators quickly fills the
airbags with non−toxic gas to help restrain
the forward motion of the occupants.
When the airbags inflate, they produce a
fairly loud noise and release some smoke
and residue along with non−toxic gas. This
does not indicate a fire. This gas is nor-
mally harmless; however, for those who
have delicate skin, it may cause a minor
skin irritation. Be sure to wash off any
residue as soon as possible to prevent
any potential skin irritation.
Deployment of the airbags happens in a
fraction of a second, so the airbags must
inflate with considerable force. While the
system is designed to reduce serious inju-
ries, it may also cause minor burns or
abrasions and swelling.
Parts of the airbag module (steering wheel
hub, dashboard) may be hot for several
minutes, but the airbags themselves will
not be hot. The airbags are designed to
inflate only once.
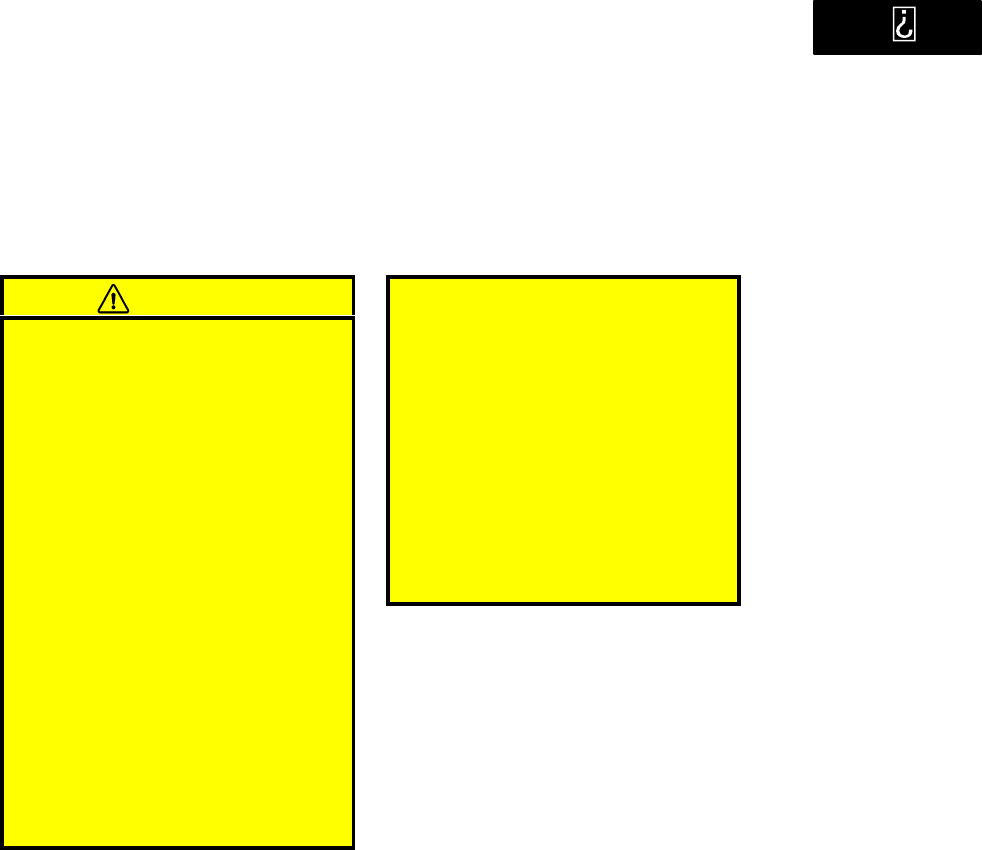
’01 4Runner_U (L/O 0008)
55
2001 4RUNNER (OM35768U)
A crash severe enough to inflate the air-
bags may break the windshield as the
vehicle buckles. In vehicles with a pas-
senger airbag the windshield may also be
damaged by absorbing some of the force
of the inflating airbag.
CAUTION
The SRS airbag system is designed
only as a supplement to the prima-
ry protection of the driver side and
front passenger side seat belt sys-
tems. The front seat occupants can
be killed or seriously injured by the
inflating airbags if they do not wear
the available seat belts properly.
During sudden braking just before
a collision, an unrestrained driver
or front passenger can move for-
ward into direct contact with or
close proximity to the airbag which
may then deploy during the colli-
sion. To ensure maximum protection
in an accident, the driver and all
passengers in the vehicle must
wear their seat belts properly. Wear-
ing a seat belt properly during an
accident reduces the chances of
death or serious injury or being
thrown out of the vehicle. For
instructions and precautions con-
cerning the seat belt system, see
Seat belts" in this section.
Improperly seated and/or restrained
infants and children can be killed
or seriously injured by the deploy-
ing airbag. An infant or child who
is too small to use a seat belt
should be properly secured using a
child restraint system. Toyota
strongly recommends that all in-
fants and children be placed in the
rear seat of the vehicle and proper-
ly restrained. The rear seat is the
safest for infants and children. For
instructions concerning the installa-
tion of a child restraint system, see
Child restraint" in this section.
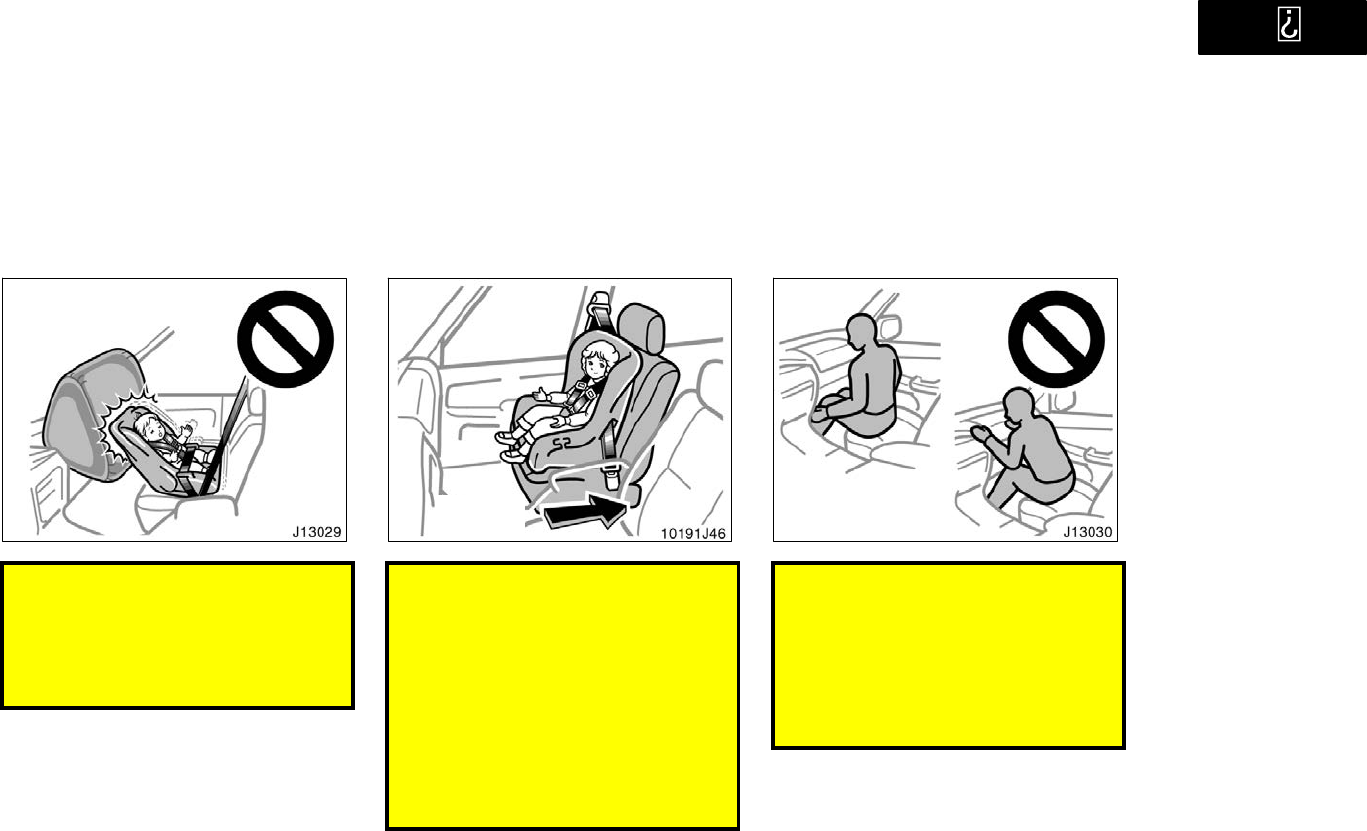
’01 4Runner_U (L/O 0008)
56 2001 4RUNNER (OM35768U)
Never put a rear−facing child re-
straint system in the front passen-
ger seat because the force of the
rapid inflation of the front passen-
ger airbag can cause death or seri-
ous injury to the child.
Move seat
fully back
A forward−facing child restraint sys-
tem should be allowed to be put on
the front passenger seat only when
it is unavoidable. Always move the
seat as far back as possible, be-
cause the force of the deploying
front passenger airbag could cause
death or serious injury to the child.
For instructions concerning the
installation of a child restraint sys-
tem, see Child restraint" in this
section.
Do not sit on the edge of the seat
or lean over the dashboard when
the vehicle is in use. The airbags
inflate with considerable speed and
force; you may be killed or serious-
ly injured. Sit up straight and well
back in the seat, and always use
your seat belt properly.
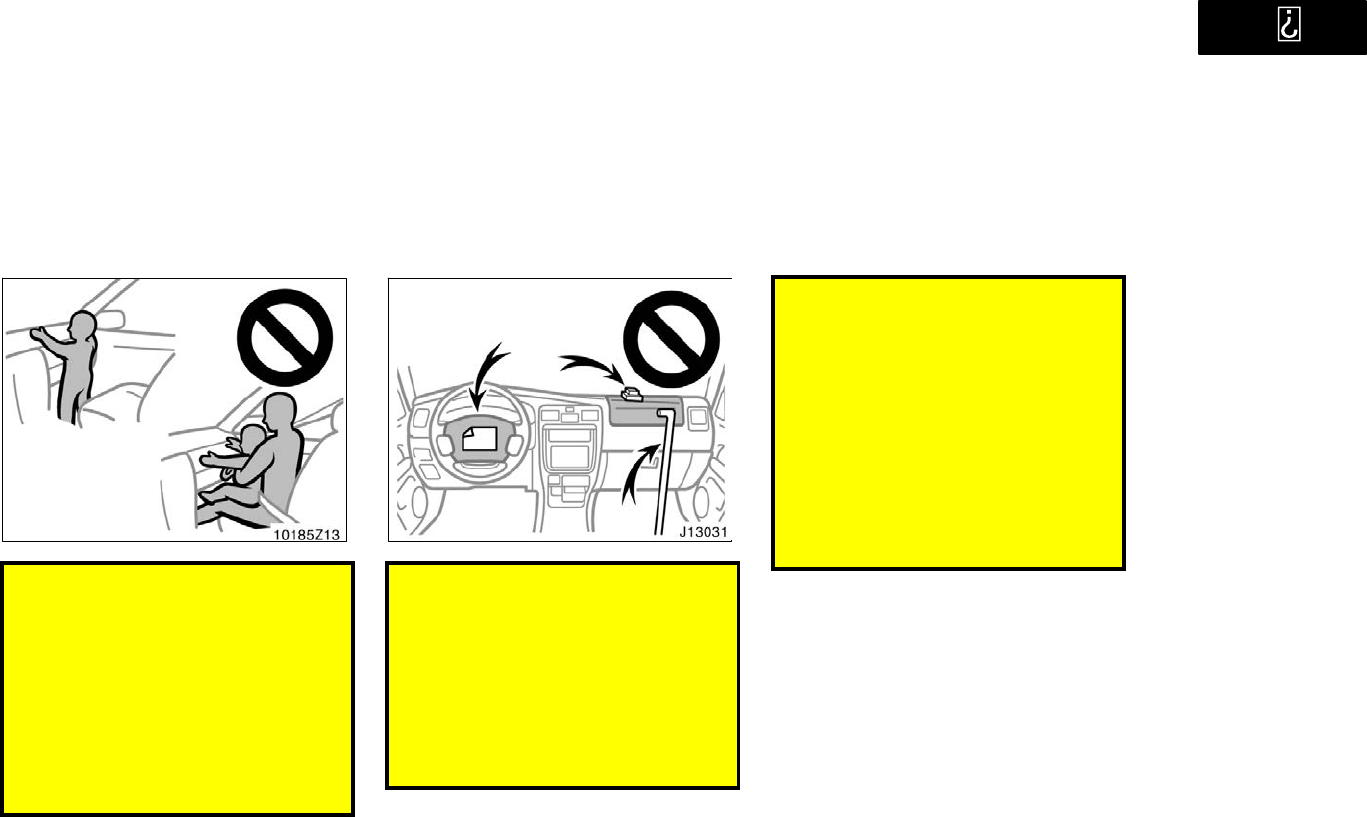
’01 4Runner_U (L/O 0008)
57
2001 4RUNNER (OM35768U)
Do not allow a child to stand up,
or to kneel on the front passenger
seat. The airbag inflates with con-
siderable speed and force; the child
may be killed or seriously injured.
Do not hold a child on your lap or
in your arms. Use a child restraint
system in the rear seat. For instruc-
tions concerning the installation of
a child restraint system, see Child
restraint" in this section.
Do not put objects or your pets on
or in front of the dashboard or
steering wheel pad that houses the
airbag system. They might restrict
inflation or cause death or serious
injury as they are projected rear-
ward by the force of deploying air-
bags. Likewise, the driver and front
passenger should not hold things in
their arms or on their knees.
Do not modify or remove any wir-
ing. Do not modify, remove, strike
or open any components such as
the steering wheel pad, steering
wheel, column cover, front passen-
ger airbag cover, front passenger
airbag or airbag sensor assembly.
Doing any of these may cause sud-
den SRS airbag inflation or disable
the system, which could result in
death or serious injury.
Failure to follow these instructions
can result in death or serious injury.
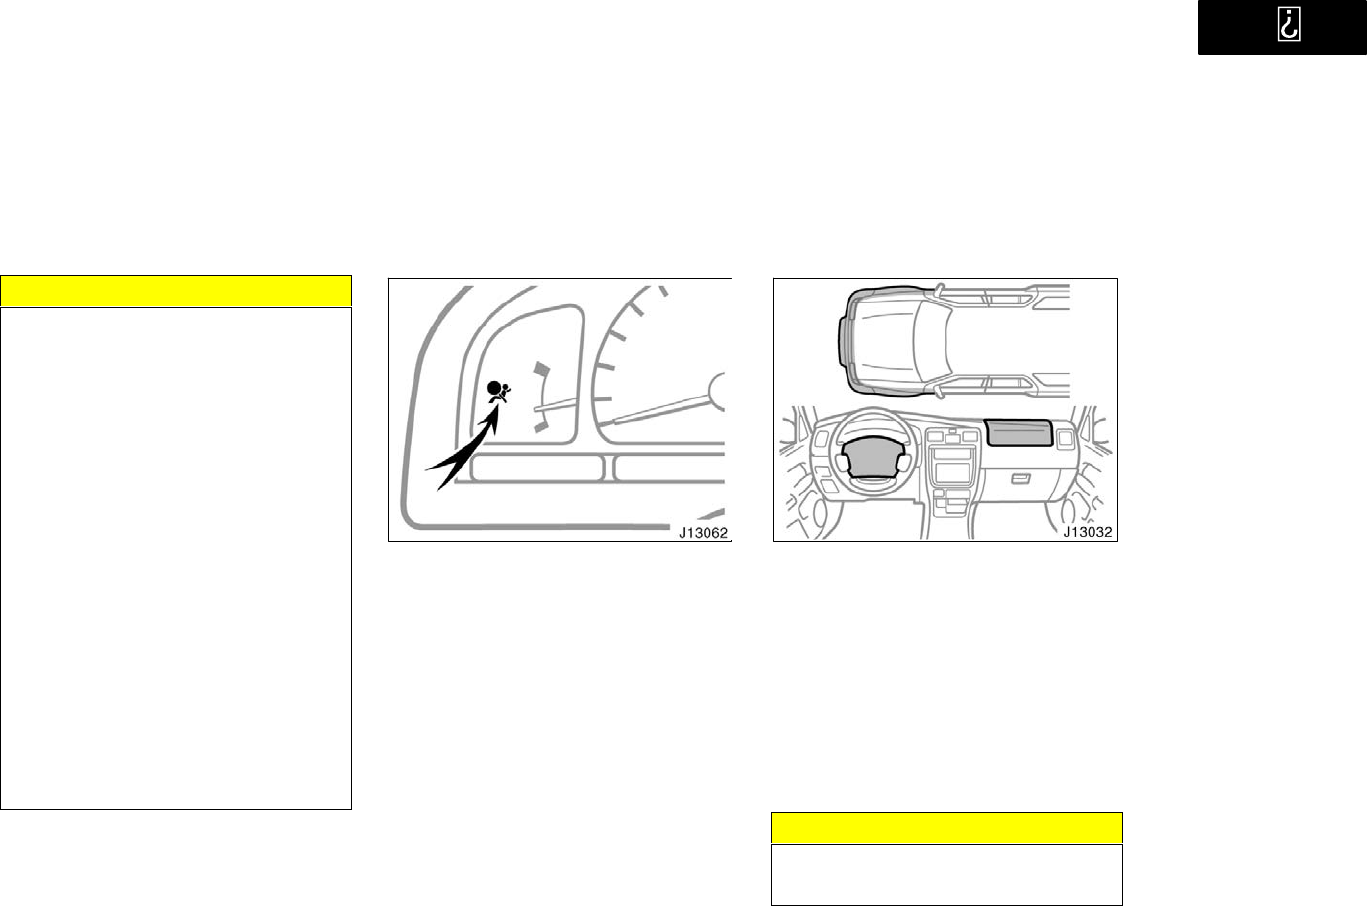
’01 4Runner_U (L/O 0008)
58 2001 4RUNNER (OM35768U)
NOTICE
Do not perform any of the following
changes without consulting your
Toyota dealer. Such changes can in-
terfere with proper operation of the
SRS airbag system in some cases.
zInstallation of electronic devices
such as a mobile two−way radio,
cassette tape player or compact
disc player
zModification of the suspension sys-
tem
zModification of the front end struc-
ture
zAttachment of a grille guard (bull
bar, kangaroo bar, etc.), snowplow,
winches or any other equipment to
the front end
zRepairs made on or near the front
fenders, front end structure, con-
sole, steering column, steering
wheel or dashboard near the front
passenger airbag
This SRS airbag system has a service
reminder indicator to inform the driver of
operating problems. If either of the follow-
ing conditions occurs, this indicates a mal-
function of the airbags. Contact your
Toyota dealer as soon as possible to ser-
vice the vehicle.
The light does not come on when the
ignition key is turned to the ON" posi-
tion, or the light remains on.
The light comes on while driving.
In the following cases, contact your Toyota
dealer as soon as possible:
The SRS airbags have been inflated.
The front part of the vehicle (shaded
in the illustration) was involved in an
accident that was not severe enough to
cause the SRS airbags to inflate.
The pad section of the steering wheel
or front passenger airbag cover
(shaded in the illustration) is scratched,
cracked, or otherwise damaged.
NOTICE
Do not disconnect the battery cables
before contacting your Toyota dealer.
’01 4Runner_U (L/O 0008)
59
2001 4RUNNER (OM35768U)
Toyota strongly urges the use of child
restraint systems for children small
enough to use them.
The laws of all fifty states in the U.S.A.
and Canada now require the use of a
child restraint system.
Your vehicle conforms to SAE J1819.
If a child is too large for a child restraint
system, the child should sit in the rear
seat and must be restrained using the
vehicle’s seat belt. See Seat belts" for
details.
CAUTION
For effective protection in automo-
bile accidents and sudden stops,
child must be properly restrained
using a seat belt or child restraint
system depending on the age and
size of the child. Holding a child in
your arms is not a substitute for a
child restraint system. In an acci-
dent, the child can be crushed
against the windshield, or between
you and the vehicle’s interior.
Toyota strongly urges use of a
proper child restraint system which
conforms to the size of the child,
and is put on the rear seat. Accord-
ing to accident statistics, the child
is safer when properly restrained in
the rear seat than in the front seat.
Never put a rear−facing child re-
straint system on the front seat. In
the event of an accident, the force
of the rapid inflation of the airbag
can cause death or serious injury if
a rear−facing child restraint system
is put on the front seat.
Unless it is unavoidable, do not put
a forward−facing child restraint sys-
tem on the front seat.
A forward−facing child restraint sys-
tem should be put on the front seat
only when it is unavoidable. Always
move the seat as far back as pos-
sible, because the force of the de-
ploying airbag could cause death or
serious injury to the child.
Make sure that you have complied
with all installation instructions pro-
vided by the child restraint
manufacturer and that the system is
properly secured.
Child restraint system
A child restraint system for a small
child or baby must itself be properly
restrained on the seat with either the
lap belt or the lap portion of the lap/
shoulder belt. You must carefully con-
sult the manufacturer’s instructions
which accompany the child restraint
system.
To provide proper restraint, use a child
restraint system following the manufactur-
er’s instructions about the appropriate age
and size of the child for the child restraint
system.
Install the child restraint system correctly
following the instructions provided by its
manufacturer of the system. General
directions are also provided under the fol-
lowing illustrations.
The child restraint system should be
installed on the rear seat. According to
accident statistics, the child is safer when
properly restrained in the rear seat than
in the front seat.
Child restraint
Child restraint precautions
’01 4Runner_U (L/O 0008)
60 2001 4RUNNER (OM35768U)
CAUTION
Never put a rear−facing child re-
straint system on the front seat. In
the event of an accident, the force
of the rapid inflation of the airbag
can cause death or serious injury if
a rear−facing child restraint system
is put on the front seat.
Unless it is unavoidable, do not put
a forward−facing child restraint sys-
tem on the front seat.
A forward−facing child restraint sys-
tem should be put on the front seat
only when it is unavoidable. Always
move the seat as far back as pos-
sible, because the force of the de-
ploying airbag could cause death or
serious injury to the child.
After installing the child restraint
system, make sure it is secured in
place following the manufacturer’s
instructions. If it is not restrained
securely, it may cause death or se-
rious injury to the child in the
event of a sudden stop or accident.
When not using the child restraint system,
keep it secured with the seat belt or place
it somewhere other than the passenger
compartment. This will prevent it from in-
juring passengers in the event of a sud-
den stop or accident.
Child restraint systems are classified into
the following 3 types depending on the
child’s age and size.
(A) Infant seat
(B) Convertible seat
(C) Booster seat
Install the child restraint system following
the instructions provided by its manufac-
turer.
Types of child restraint
system
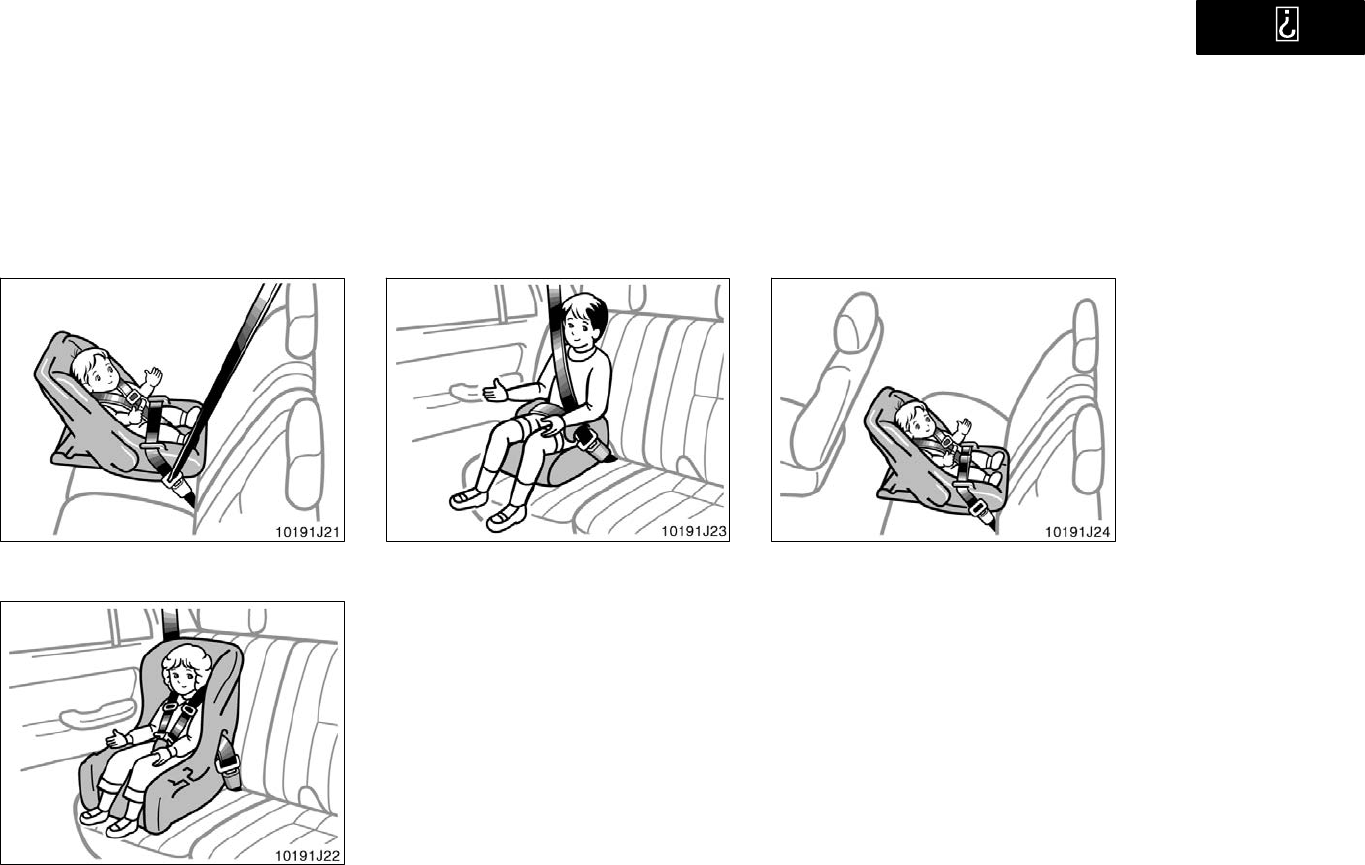
’01 4Runner_U (L/O 0008)
61
2001 4RUNNER (OM35768U)
(A) Infant seat
(B) Convertible seat
(C) Booster seat (A) INFANT SEAT INSTALLATION
An infant seat is used in rear−facing
position only.
Installation with 2−point
type seat belt
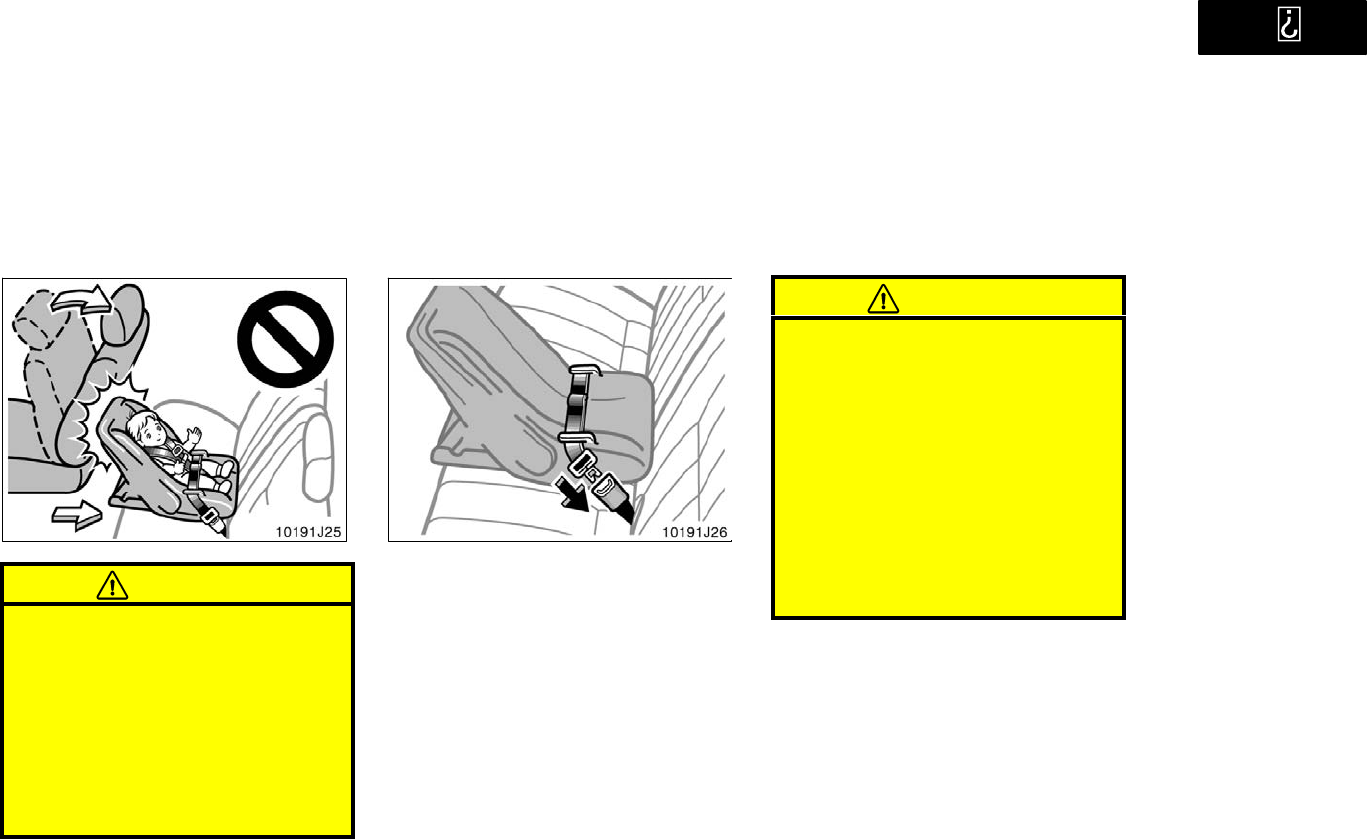
’01 4Runner_U (L/O 0008)
62 2001 4RUNNER (OM35768U)
CAUTION
Do not put a rear−facing child re-
straint system on the rear seat if it
interferes with the lock mechanism
of the front seats. This can cause
severe injury to the child and front
passenger in case of sudden brak-
ing or a collision.
If your driving position is not satis-
factory, install the child restraint
system at another position.
1. Run the center lap belt through or
around the infant seat following the
instructions provided by its manufactur-
er and insert the tab into the buckle
taking care not to twist the lap belt.
CAUTION
After inserting the tab, make sure
the tab and buckle are locked and
that the lap belt is not twisted.
Do not insert coins, clips, etc. in
the buckle as this may prevent you
from properly latching the tab and
buckle.
If the seat belt does not function
normally, it cannot protect your
child from injury. Contact your
Toyota dealer immediately. Do not
use the seat until the seat belt is
fixed.
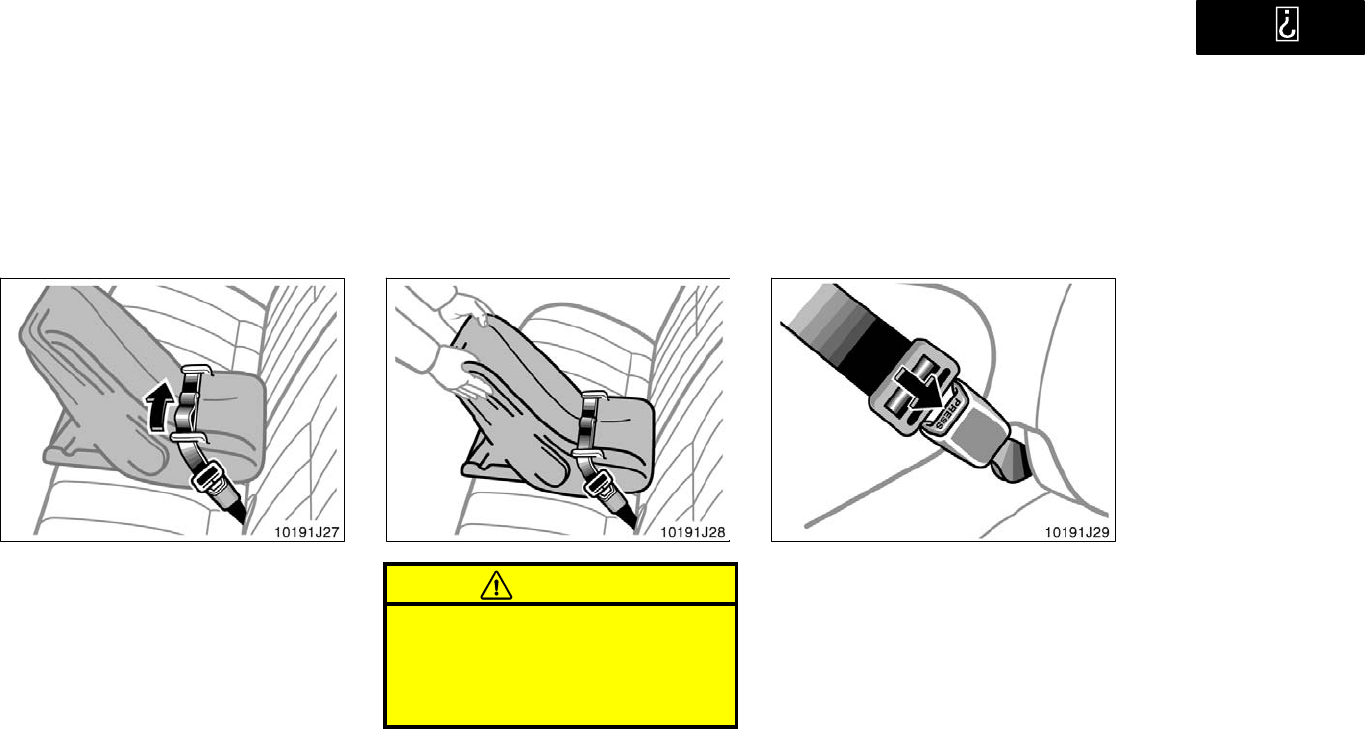
’01 4Runner_U (L/O 0008)
63
2001 4RUNNER (OM35768U)
2. While pressing the infant seat firmly
against the seat cushion and seatback,
tighten the lap belt by pulling its free
end to hold the infant seat securely.
CAUTION
Push and pull the child restraint sys-
tem in different directions to be sure
it is secure. Follow all the installation
instructions provided by its manufac-
turer.
3. To remove the infant seat, press the
buckle−release button.
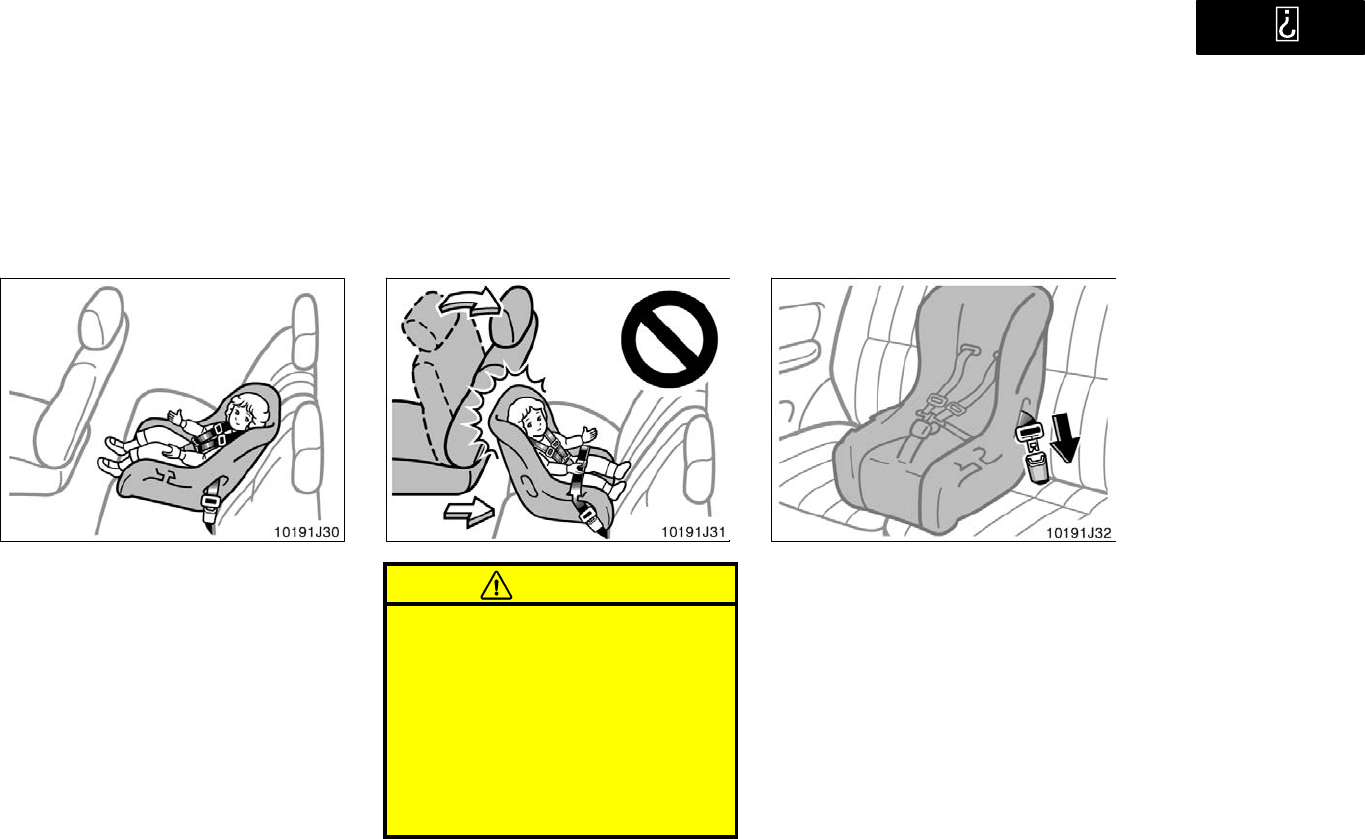
’01 4Runner_U (L/O 0008)
64 2001 4RUNNER (OM35768U)
(B) CONVERTIBLE SEAT INSTALLATION
A convertible seat is used in forward−
facing or rear−facing position depend-
ing on the child’s age and size. When
installing, follow the manufacturer’s
instructions about the applicable child’s
age and size as well as direction for
installing of the child restraint system.
CAUTION
Do not put a rear−facing child re-
straint system on the rear seat if it
interferes with the lock mechanism
of the front seats. This can cause
severe injury to the child and front
passenger in case of sudden brak-
ing or a collision.
If your driving position is not satis-
factory, install the child restraint
system at another position.
1. Run the center lap belt through or
around the convertible seat following
the instructions provided by its
manufacturer and insert the tab into
the buckle taking care not to twist the
lap belt.
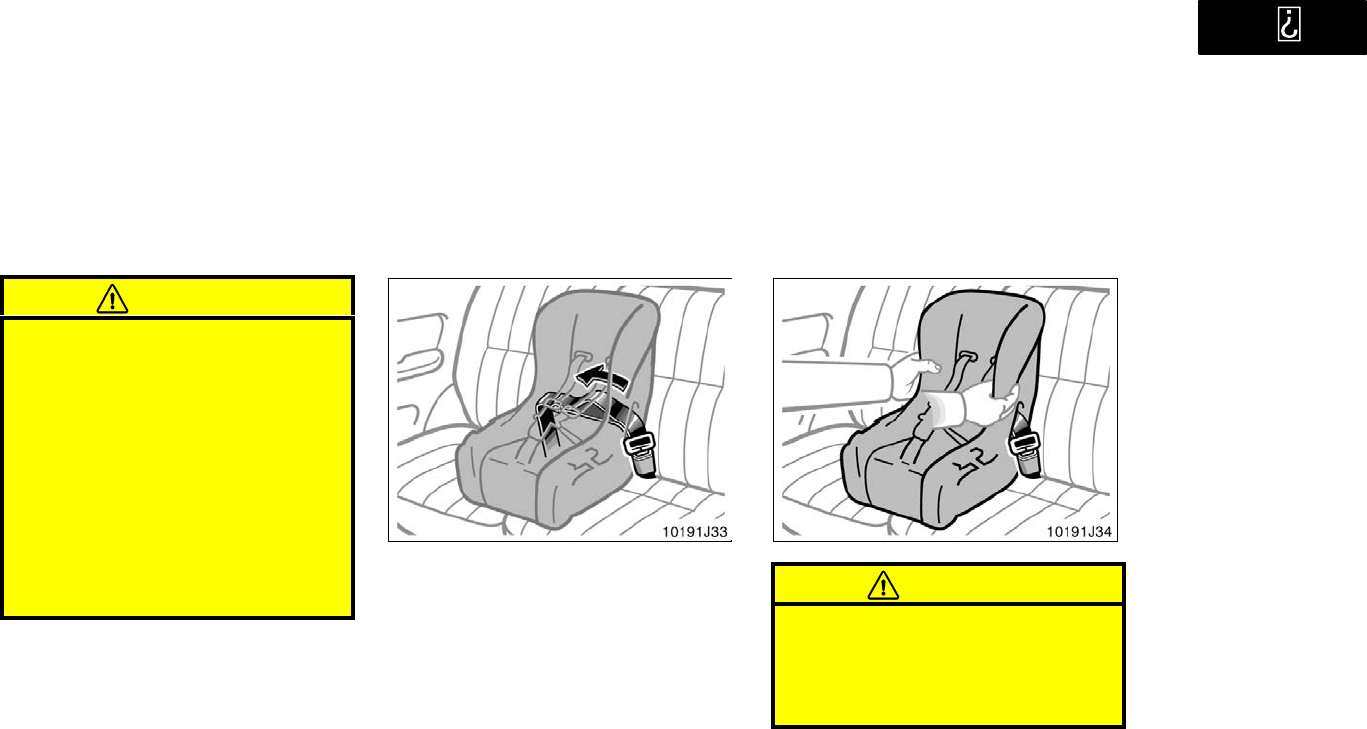
’01 4Runner_U (L/O 0008)
65
2001 4RUNNER (OM35768U)
CAUTION
After inserting the tab, make sure
the tab and buckle are locked and
that the lap belt is not twisted.
Do not insert coins, clips, etc. in
the buckle as this may prevent you
from properly latching the tab and
buckle.
If the seat belt does not function
normally, it cannot protect your
child from injury. Contact your
Toyota dealer immediately. Do not
use the seat until the seat belt is
fixed.
2. While pressing the convertible seat
firmly against the seat cushion and
seatback, tighten the lap belt by pulling
its free end to hold the convertible seat
securely.
CAUTION
Push and pull the child restraint sys-
tem in different directions to be sure
it is secure. Follow all the installation
instructions provided by its manufac-
turer.
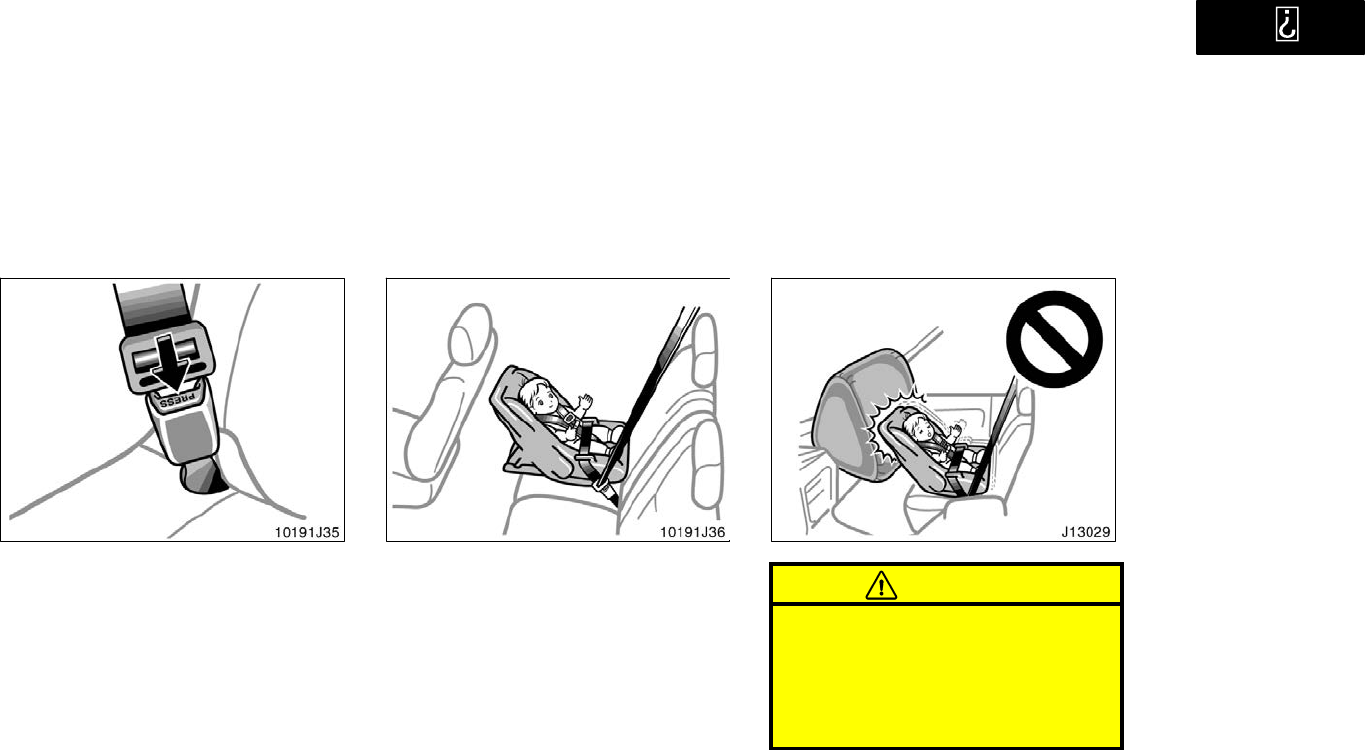
’01 4Runner_U (L/O 0008)
66 2001 4RUNNER (OM35768U)
3. To remove the convertible seat, press
the buckle−release button.
(A) INFANT SEAT INSTALLATION
An infant seat is used in rear−facing
position only.
CAUTION
Never put a rear−facing child re-
straint system in the front passen-
ger seat because the force of the
rapid inflation of the front passen-
ger airbag can cause death or seri-
ous injury to the child.
Installation with 3−point
type seat belt
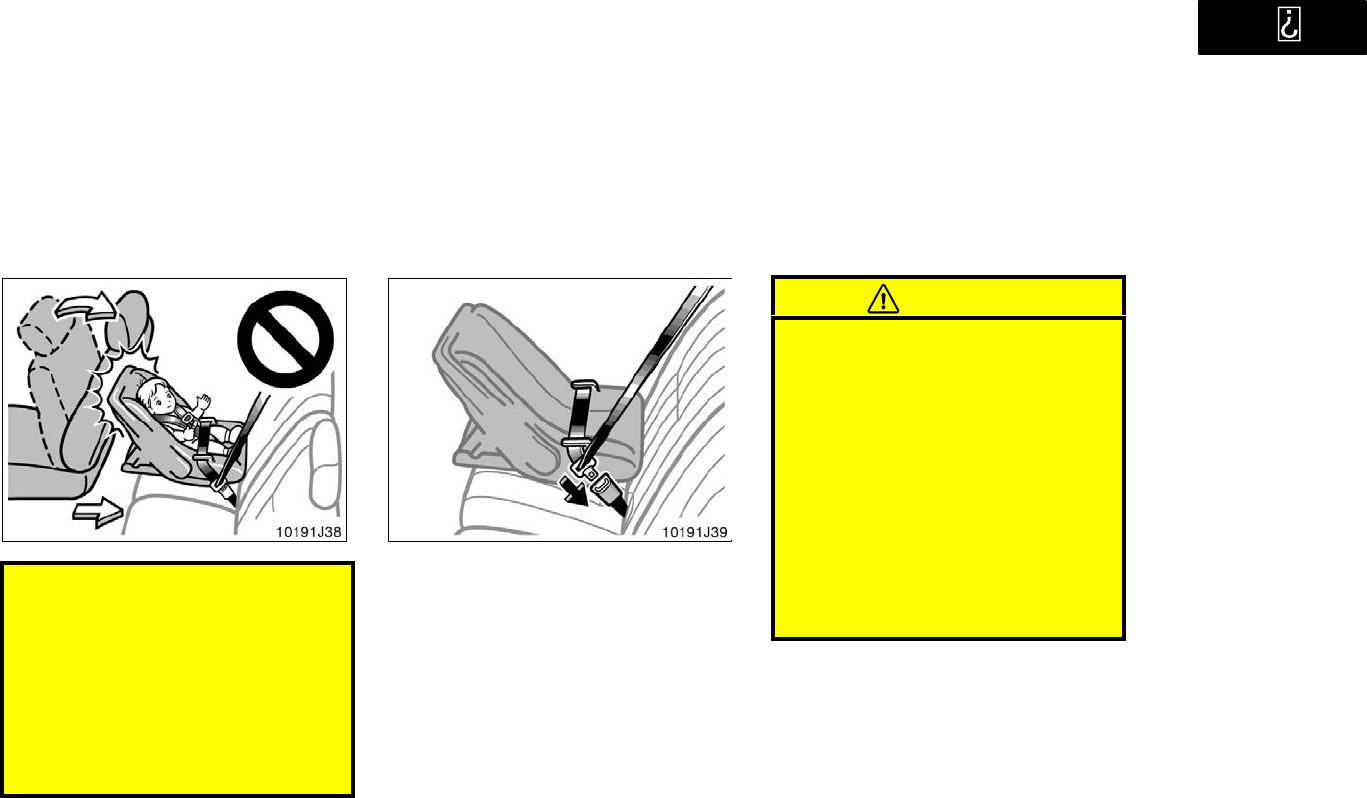
’01 4Runner_U (L/O 0008)
67
2001 4RUNNER (OM35768U)
Do not put a rear−facing child re-
straint system in the rear seat if it
interferes with the lock mechanism
of the front seats. This can cause
severe injury to the child and front
passenger in case of sudden brak-
ing or a collision.
If your driving position is not satis-
factory, do not install the child re-
straint system on the left seat.
1. Run the lap and shoulder belt through
or around the infant seat following the
instructions provided by its manufactur-
er and insert the tab into the buckle
taking care not to twist the belt. Keep
the lap portion of the belt tight.
CAUTION
After inserting the tab, make sure
the tab and buckle are locked and
that the lap and shoulder portions
of the belt are not twisted.
Do not insert coins, clips, etc. in
the buckle as this may prevent you
from properly latching the tab and
buckle.
If the seat belt does not function
normally, it cannot protect your
child from injury. Contact your
Toyota dealer immediately. Do not
use the seat until the seat belt is
fixed.
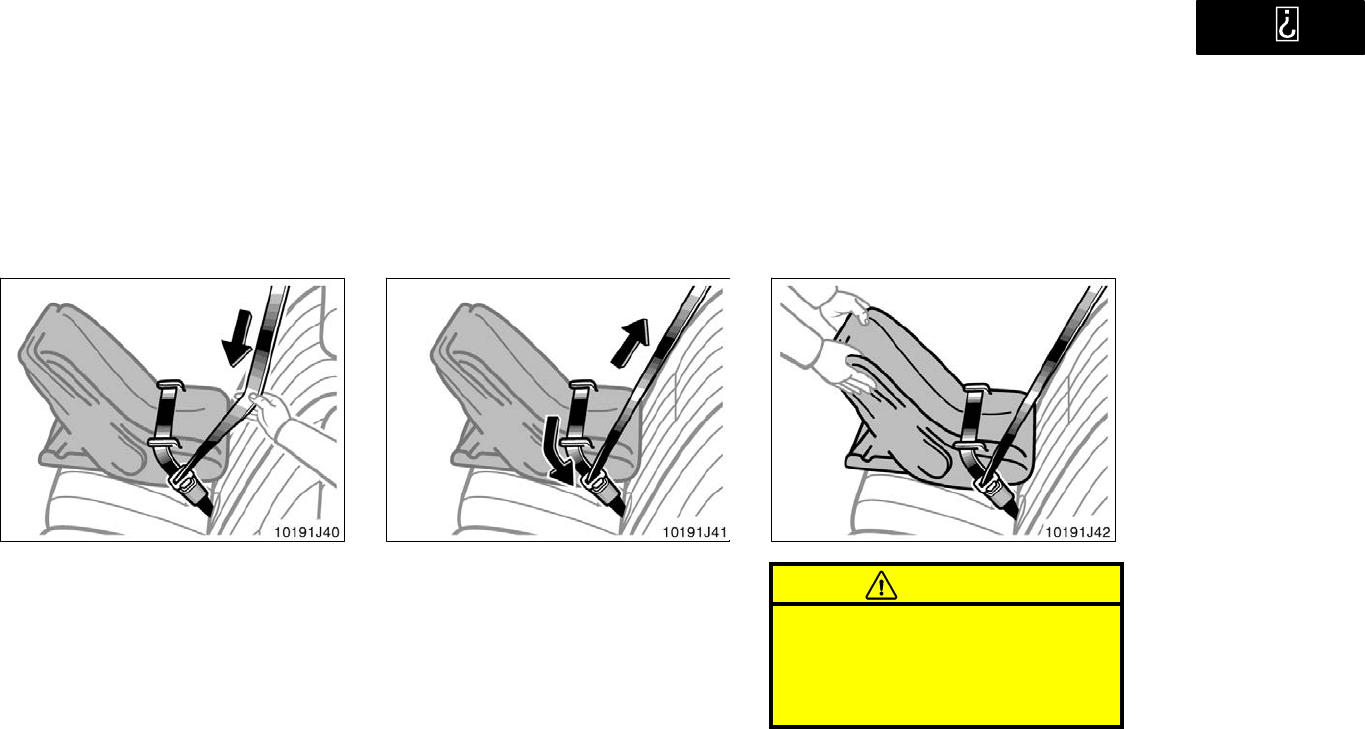
’01 4Runner_U (L/O 0008)
68 2001 4RUNNER (OM35768U)
2. Fully extend the shoulder belt to put it
in the lock mode. When the belt is
then retracted even slightly, it cannot
be extended.
To hold the infant seat securely, make
sure the belt is in the lock mode before
letting the belt retract.
3. While pressing the infant seat firmly
against the seat cushion and seatback,
let the shoulder belt retract as far as
it will go to hold the infant seat secure-
ly.
CAUTION
Push and pull the child restraint sys-
tem in different directions to be sure
it is secure. Follow all the installation
instructions provided by its manufac-
turer.
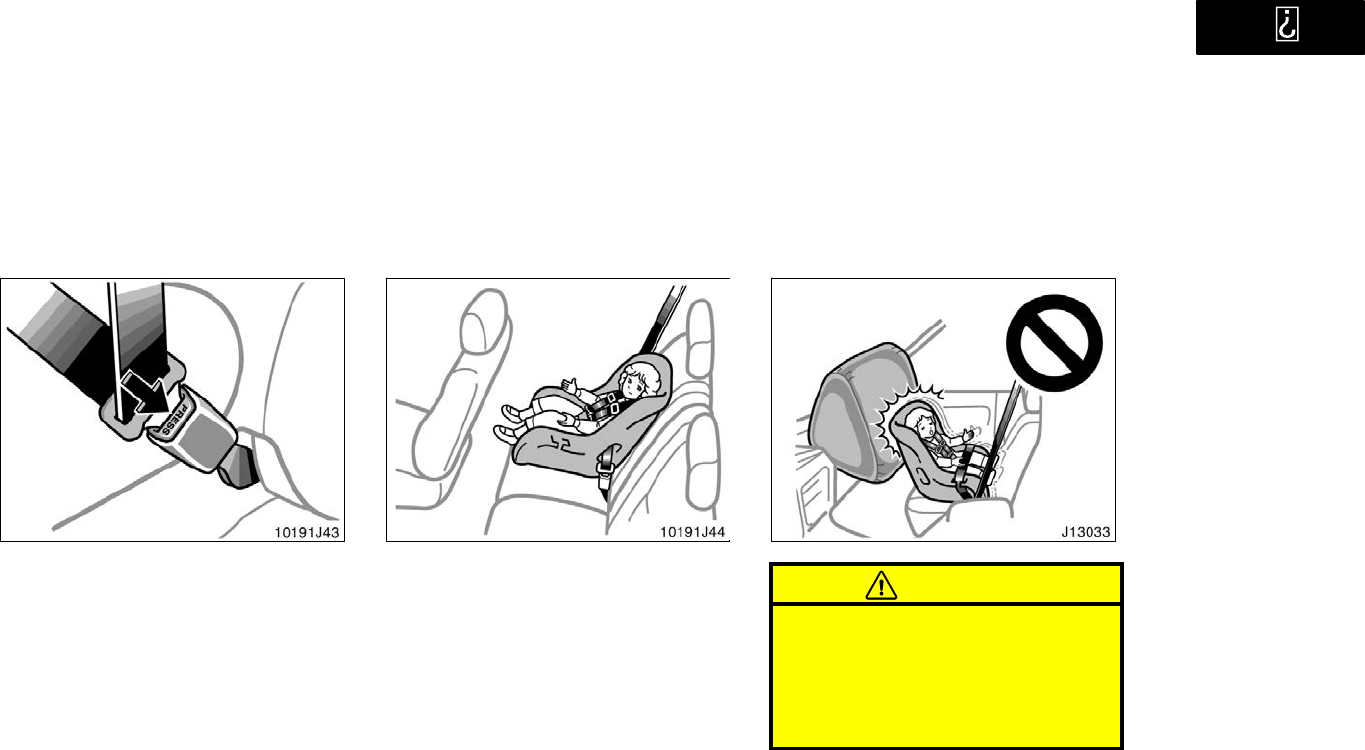
’01 4Runner_U (L/O 0008)
69
2001 4RUNNER (OM35768U)
4. To remove the infant seat, press the
buckle−release button and allow the
belt to retract completely. The belt will
move freely again and be ready to
work for an adult or older child passen-
ger.
(B) CONVERTIBLE SEAT INSTALLATION
A convertible seat is used in forward−
facing and rear−facing position depend-
ing on the child’s age and size. When
installing, follow the manufacturer’s in-
structions about the applicable child’s
age and size as well as directions for
installing a child restraint system.
CAUTION
Never put a rear−facing child re-
straint system in the front passen-
ger seat because the force of the
rapid inflation of the front passen-
ger airbag can cause death or seri-
ous injury to the child.
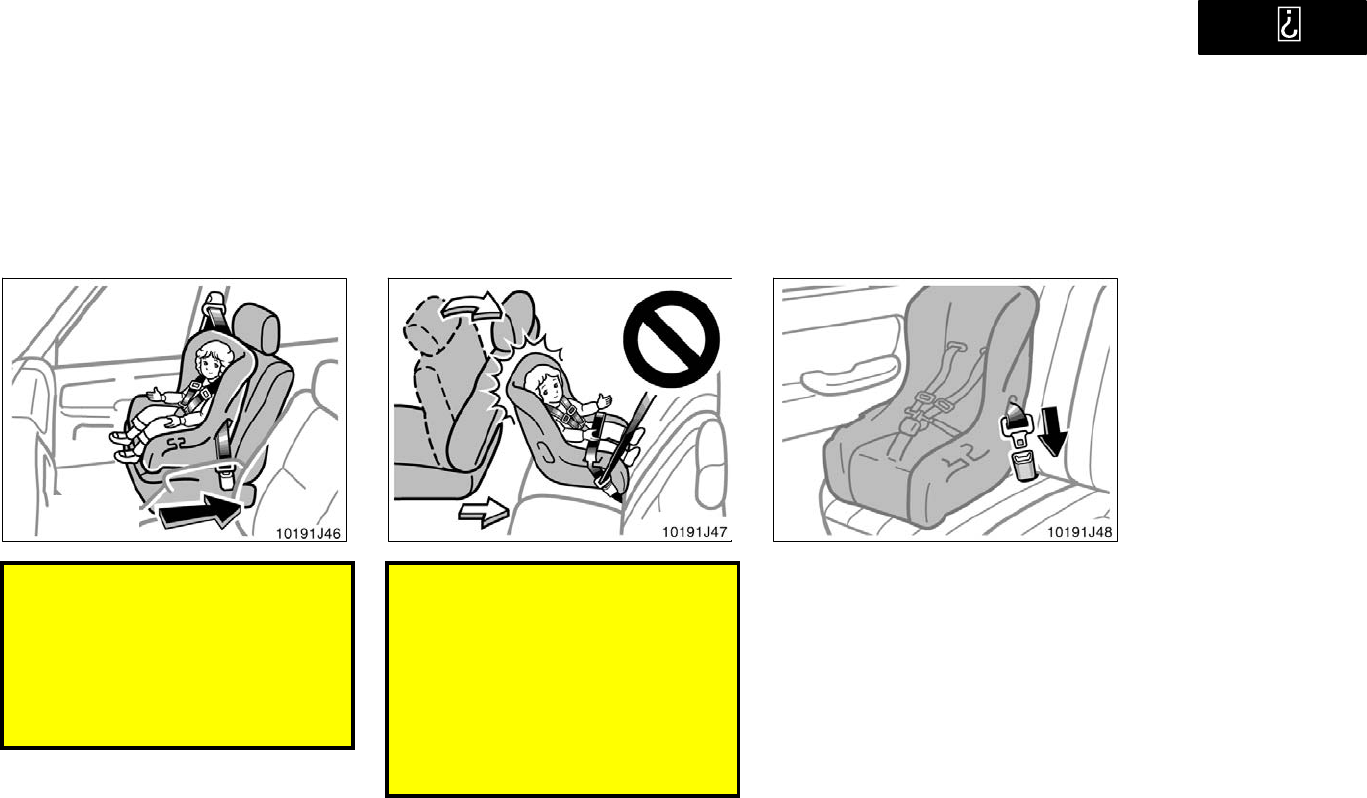
’01 4Runner_U (L/O 0008)
70 2001 4RUNNER (OM35768U)
Move seat
fully back
A forward−facing child restraint sys-
tem should be allowed to be put on
the front passenger seat only when
it is unavoidable. Always move the
seat as far back as possible, be-
cause the force of the deploying
front passenger airbag could cause
death or serious injury to the child.
Do not put a rear−facing child re-
straint system in the rear seat if it
interferes with the lock mechanism
of the front seats. This can cause
severe injury to the child and front
passenger in case of sudden brak-
ing or a collision.
If your driving position is not satis-
factory, do not install the child re-
straint system on the left seat.
1. Run the lap and shoulder belt through
or around the convertible seat following
the instructions provided by its
manufacturer and insert the tab into
the buckle taking care not to twist the
belt. Keep the lap portion of the belt
tight.
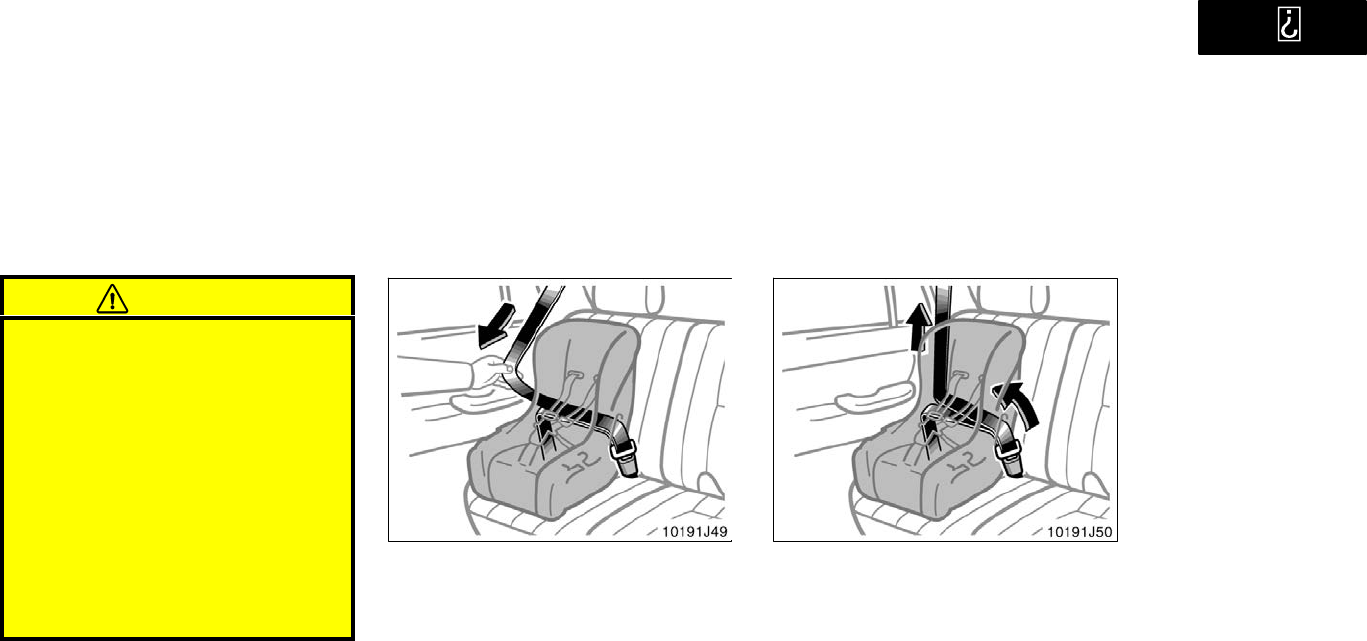
’01 4Runner_U (L/O 0008)
71
2001 4RUNNER (OM35768U)
CAUTION
After inserting the tab, make sure
the tab and buckle are locked and
that the lap and shoulder portions
of the belt are not twisted.
Do not insert coins, clips, etc. in
the buckle as this may prevent you
from properly latching the tab and
buckle.
If the seat belt does not function
normally, it cannot protect your
child from injury. Contact your
Toyota dealer immediately. Do not
use the seat until the seat belt is
fixed.
2. Fully extend the shoulder belt to put it
in the lock mode. When the belt is
then retracted slightly, it cannot be ex-
tended.
To hold the convertible seat securely,
make sure the belt is in the lock mode
before letting the belt retract.
3. While pressing the convertible seat
firmly against the seat cushion and
seatback, let the shoulder belt retract
as far as it will go to hold the convert-
ible seat securely.
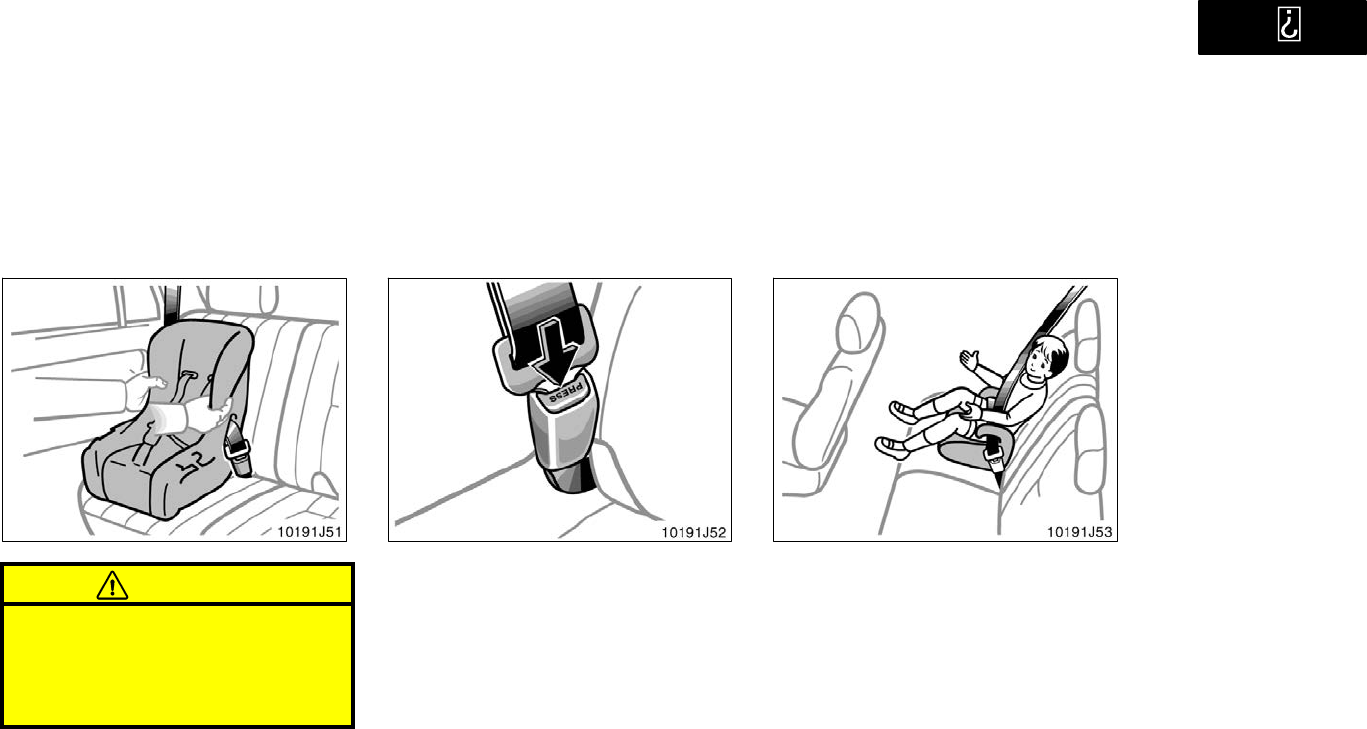
’01 4Runner_U (L/O 0008)
72 2001 4RUNNER (OM35768U)
CAUTION
Push and pull the child restraint sys-
tem in different directions to be sure
it is secure. Follow all the installation
instructions provided by its manufac-
turer.
4. To remove the convertible seat, press
the buckle−release button and allow the
belt to retract completely. The belt will
move freely again and be ready to
work for an adult or older child passen-
ger.
(C) BOOSTER SEAT INSTALLATION
A booster seat is used in forward−fac-
ing position only.
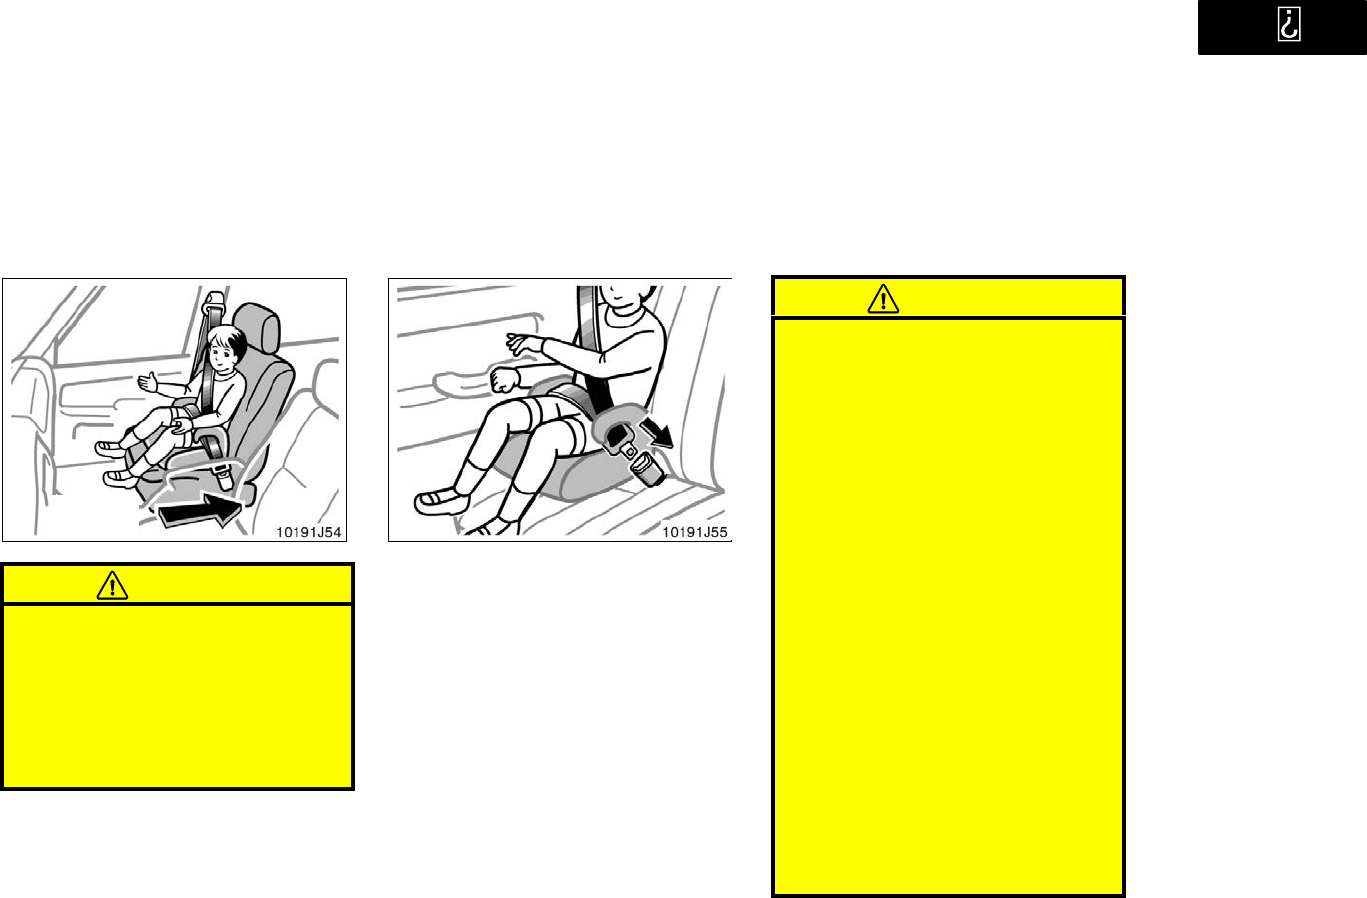
’01 4Runner_U (L/O 0008)
73
2001 4RUNNER (OM35768U)
Move seat
fully back
CAUTION
A forward−facing child restraint sys-
tem should be allowed to be put on
the front passenger seat only when it
is unavoidable. Always move the seat
as far back as possible, because the
force of the deploying front passen-
ger airbag could cause death or seri-
ous injury to the child.
1. Sit the child on a booster seat. Run
the lap and shoulder belt through or
around the booster seat and child fol-
lowing the instructions provided by its
manufacturer and insert the tab into
the buckle taking care not to twist the
belt.
Make sure the shoulder belt is correctly
across the child’s shoulder and that the
lap belt is positioned as low as possible
on child’s hips. See Seat belts" for de-
tails.
CAUTION
Always make sure the shoulder belt
is positioned across the center of
child’s shoulder. The belt should be
kept away from child’s neck, but
not falling off child’s shoulder. Fail-
ure to do so could reduce the
amount of protection in an accident
and cause serious injuries in a col-
lision.
Both high−positioned lap belts and
loose−fitting belts could cause seri-
ous injuries due to sliding under
the lap belt during a collision or
other unintended result. Keep the
lap belt positioned as low on a
child’s hips as possible.
For child’s safety, do not place the
shoulder belt under child’s arm.
After inserting the tab, make sure
the tab and buckle are locked and
that the lap and shoulder portions
of the belt are not twisted.
Do not insert coins, clips, etc. in
the buckle as this may prevent your
child from properly latching the tab
and buckle.
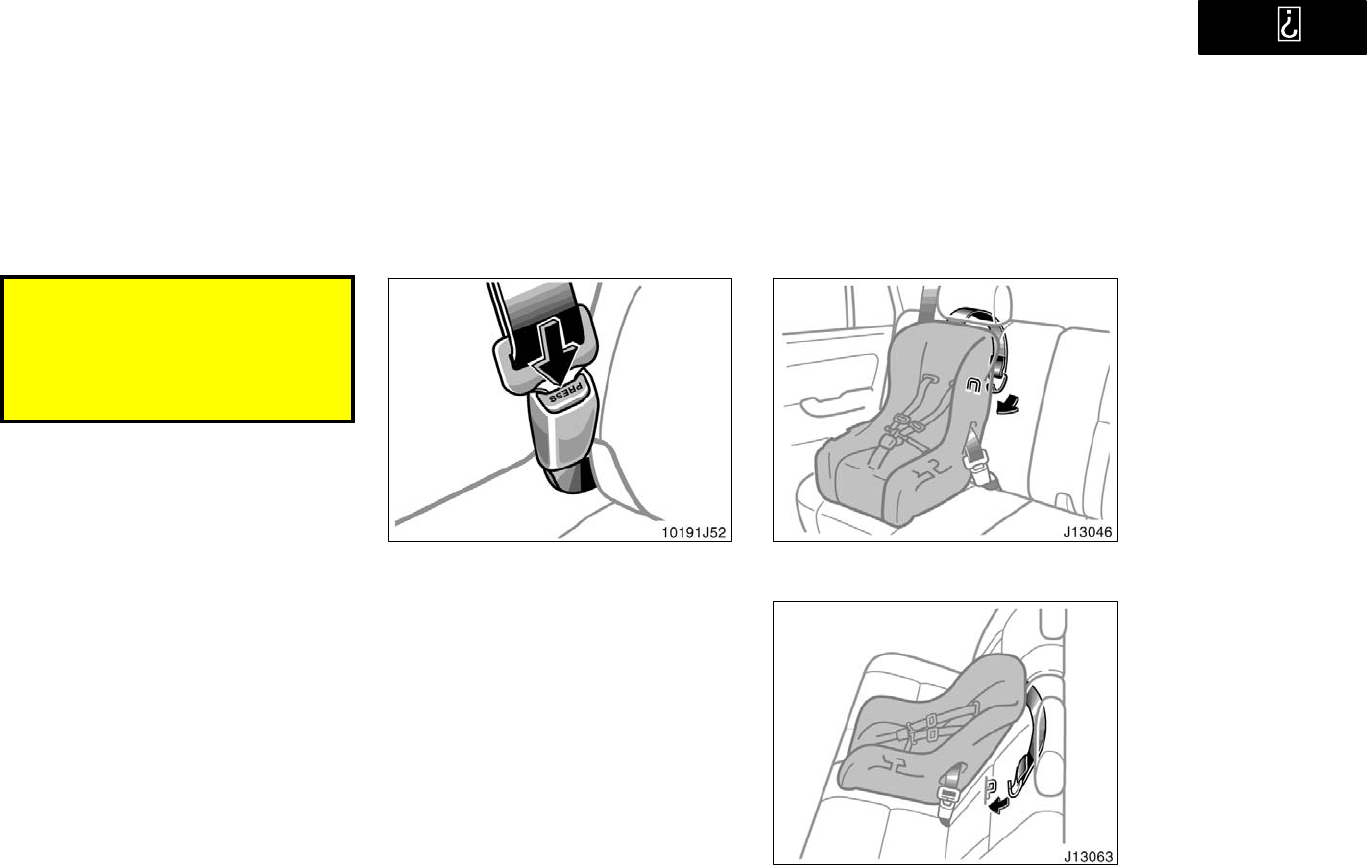
’01 4Runner_U (L/O 0008)
74 2001 4RUNNER (OM35768U)
If the seat belt does not function
normally, it cannot protect your
child from injury. Contact your
Toyota dealer immediately. Do not
use the seat until the seat belt is
fixed.
2. To remove the child restraint system,
press the buckle−release button and al-
low the belt to retract.
Using a top strap
Outside position
Center position
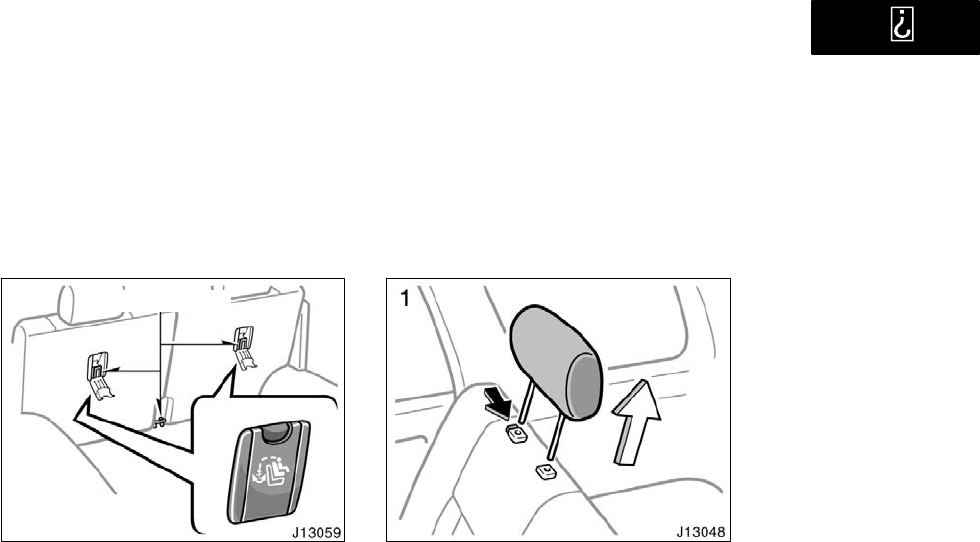
’01 4Runner_U (L/O 0008)
75
2001 4RUNNER (OM35768U)
Follow the procedure below for a child
restraint system that requires the use
of a top strap.
Anchor brackets
Symbol
Use the anchor bracket on the back of the
rear seatback to attach the top strap.
Anchor brackets are installed for each
rear seating position.
This symbol indicates the location of user
ready tether anchorage.
TO USE OUTSIDE ANCHOR BRACKET:
1. Remove the head restraint.
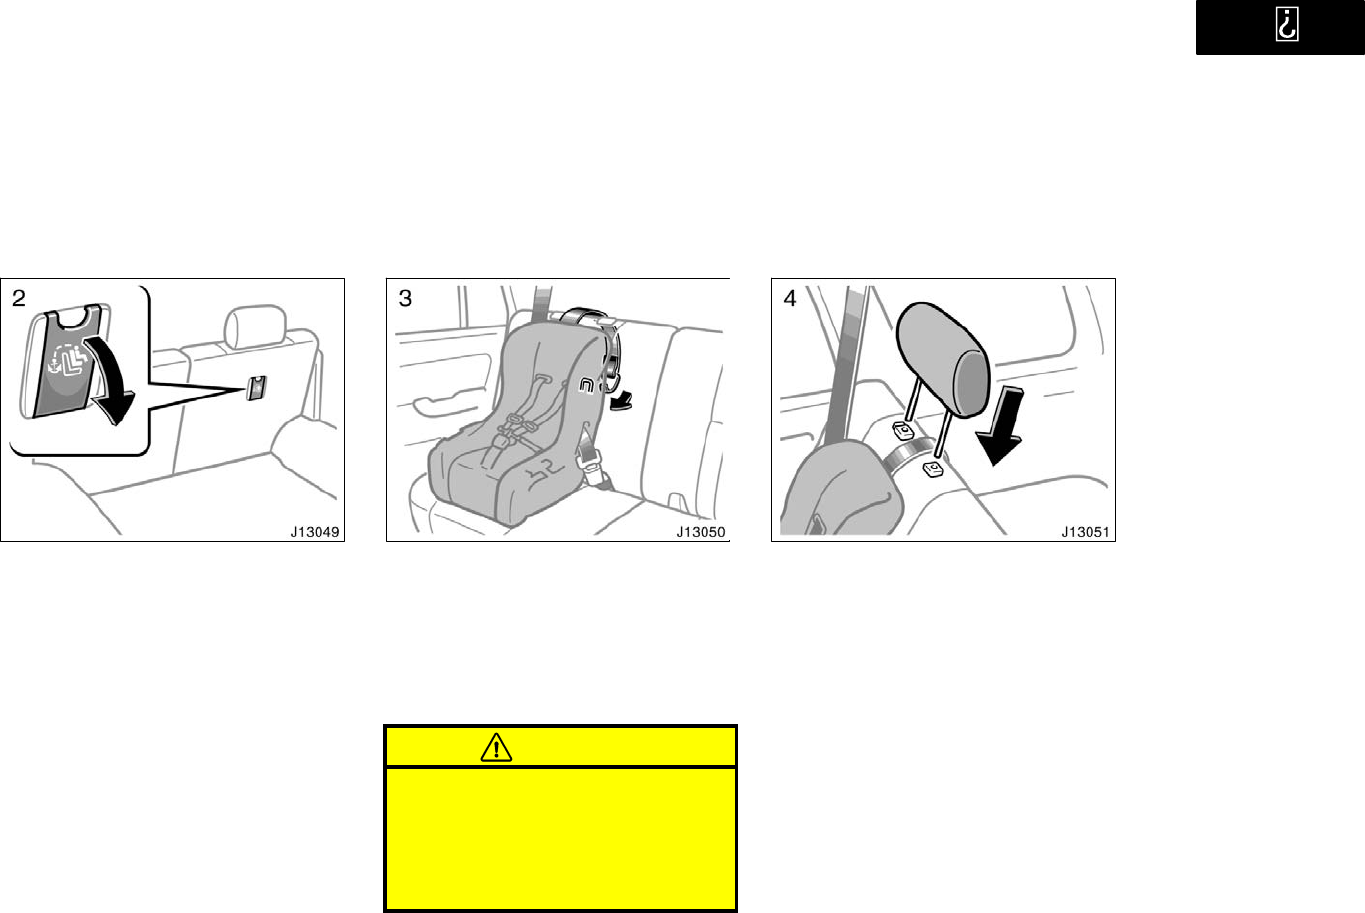
’01 4Runner_U (L/O 0008)
76 2001 4RUNNER (OM35768U)
2. Open the anchor bracket cover with
the symbol mark shown in the il-
lustration.
3. Fix the child restraint system with
the seat belt.
Latch the hook onto the anchor
bracket and tighten the top strap.
For instructions to install the child re-
straint system, see Child restraint" in this
section.
CAUTION
Make sure the top strap is securely
latched, and check that the child re-
straint system is secure by pushing
and pulling it in different directions.
Follow all the installation instructions
provided by its manufacturer.
4. Replace the head restraint.
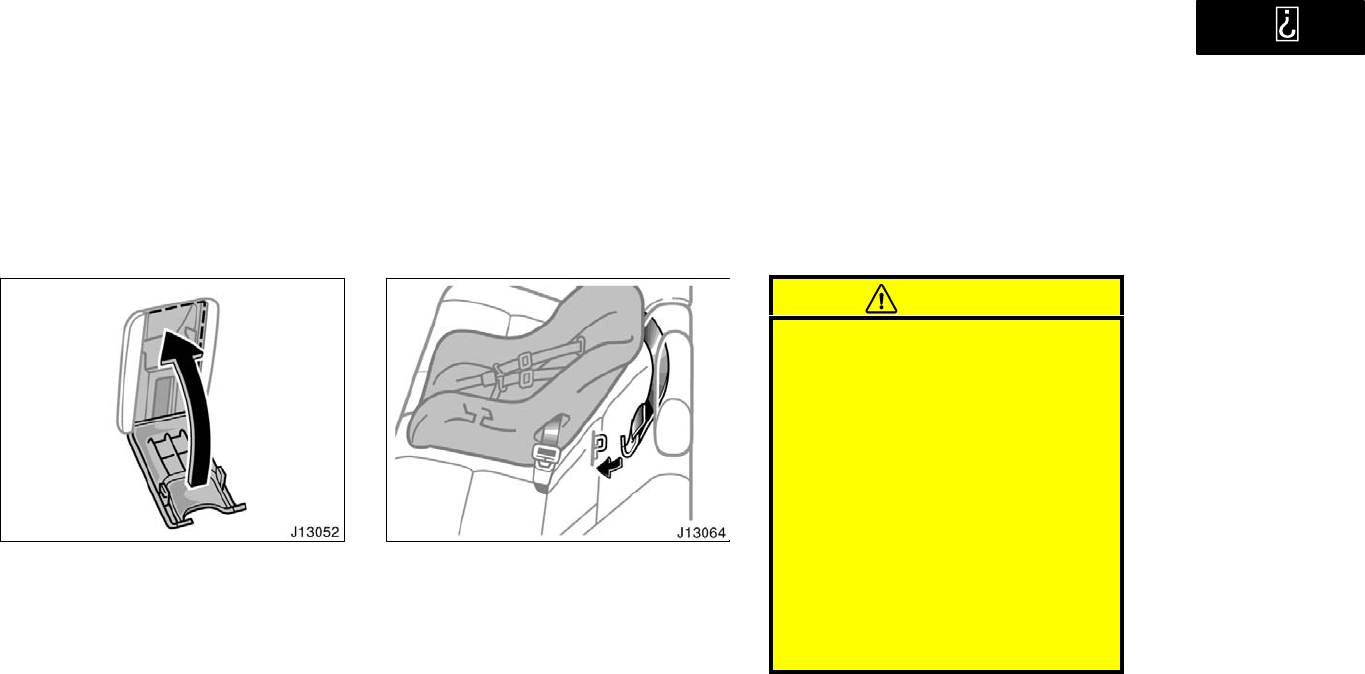
’01 4Runner_U (L/O 0008)
77
2001 4RUNNER (OM35768U)
Be sure to close all covers when the an-
chor bracket is not in use.
TO USE CENTER ANCHOR BRACKET:
Fix the child restraint system with the
seat belt. Run the top strap through
between both seatbacks.
Latch the hook onto the anchor bracket
and tighten the top strap.
For instructions to install the child re-
straint system, see Child restraint" in this
section.
CAUTION
When you use the center anchor
bracket, make sure the top strap
runs through between both seat-
backs and tighten it. The top strap
on seatback could cause death or
serious injury due to abnormal
moving of the child restraint system
in case of sudden braking or a col-
lision.
Make sure the top strap is securely
latched, and check that the child
restraint system is secure by push-
ing and pulling it in different direc-
tions. Follow all the installation in-
structions provided by its manufac-
turer.
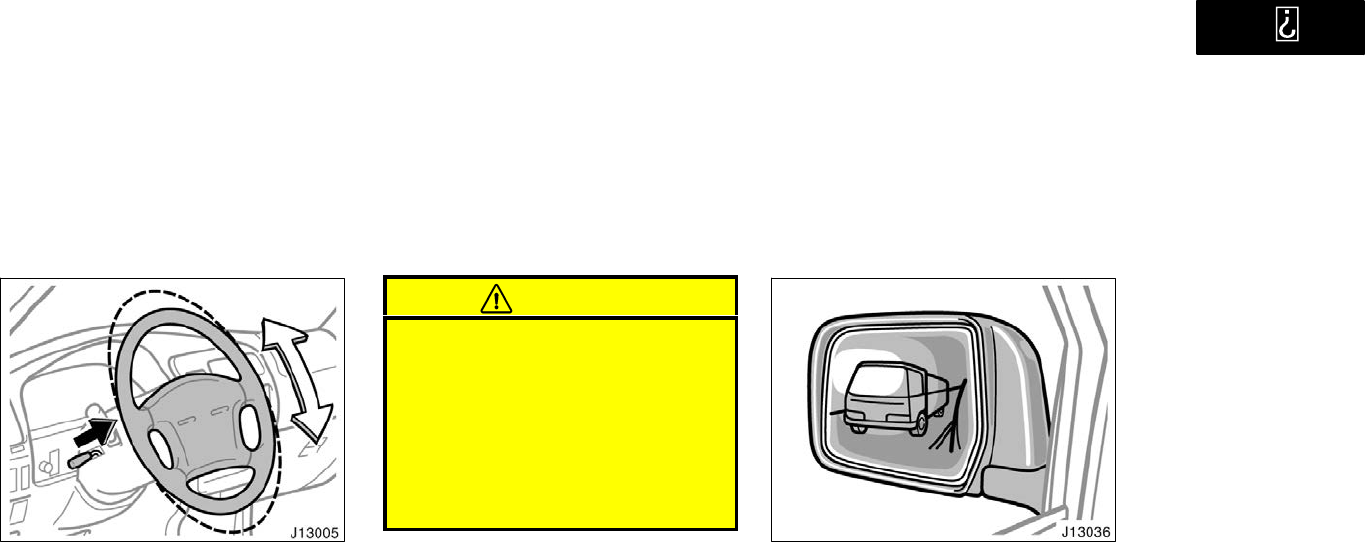
’01 4Runner_U (L/O 0008)
78 2001 4RUNNER (OM35768U)
Tilt steering wheel
To change the steering wheel angle,
hold the steering wheel, pull the lock
release lever toward you, tilt the steer-
ing wheel to the desired angle and re-
turn the lever to its original position.
When the steering wheel is in a low posi-
tion, it will spring up as you release the
lock release lever.
CAUTION
Do not adjust the steering wheel
while the vehicle is moving. It may
cause the driver to mishandle the
vehicle and an accident may occur
resulting in death or serious inju-
ries.
After adjusting the steering wheel,
try moving it up and down to make
sure it is locked in position.
Outside rear view mirrors
Adjust the mirror so that you can see
the side of your vehicle in the mirror.
Be careful when judging the size or dis-
tance of any object seen in the outside
rear view mirror on the passenger’s side.
It is a convex mirror with a curved sur-
face. Any object seen in a convex mirror
will look smaller and farther away than
when seen in a flat mirror.
On some models, when you push the
back window defogger switch, the heater
panels in the outside rear view mirrors will
quickly clear the surface. To turn on the
back window defogger, see Back window
and outside rear view mirror defoggers" in
Section 1−4.
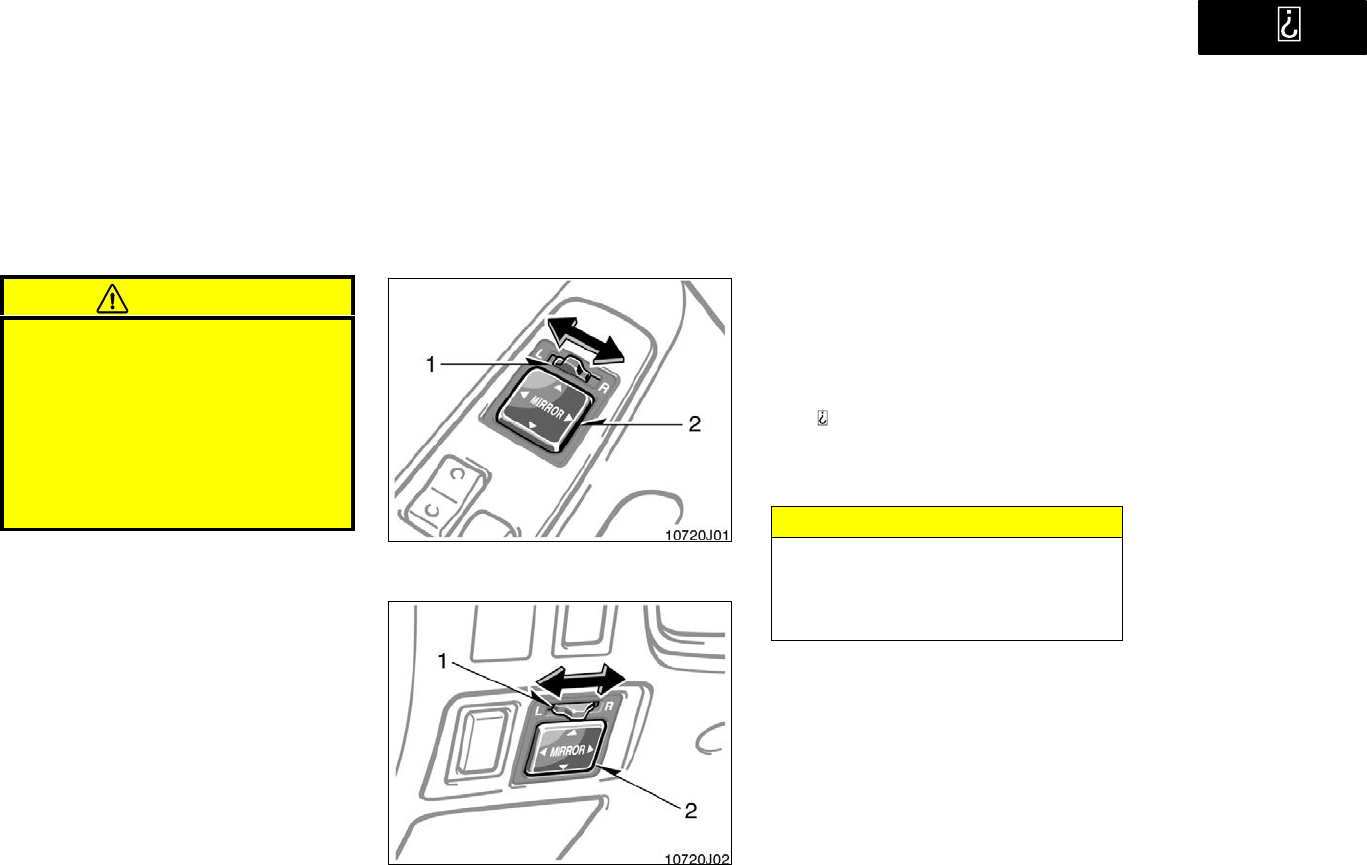
’01 4Runner_U (L/O 0008)
79
2001 4RUNNER (OM35768U)
CAUTION
Do not adjust the mirror while the
vehicle is moving. It may cause the
driver to mishandle the vehicle and
an accident may occur resulting in
death or serious injuries.
On some models, since the mirror
surfaces can get hot, keep your
hands off them when the defogger
switch is on.
With power windows (door armrest)
Without power windows
(instrument panel)
To adjust a mirror, use the switches.
1. Master switchTo select the mirror to
be adjusted
Place the switch at L" (left) or R"
(right).
2. Control switchTo move the mir-
ror Push the switch in the desired
direction.
Mirror can be adjusted when key is in the
ACC" or ON" position.
NOTICE
If ice should jam the mirror, do not
operate the control or scrape the mir-
ror face. Use a spray de−icer to free
the mirror.
Power Rear view mirror
control
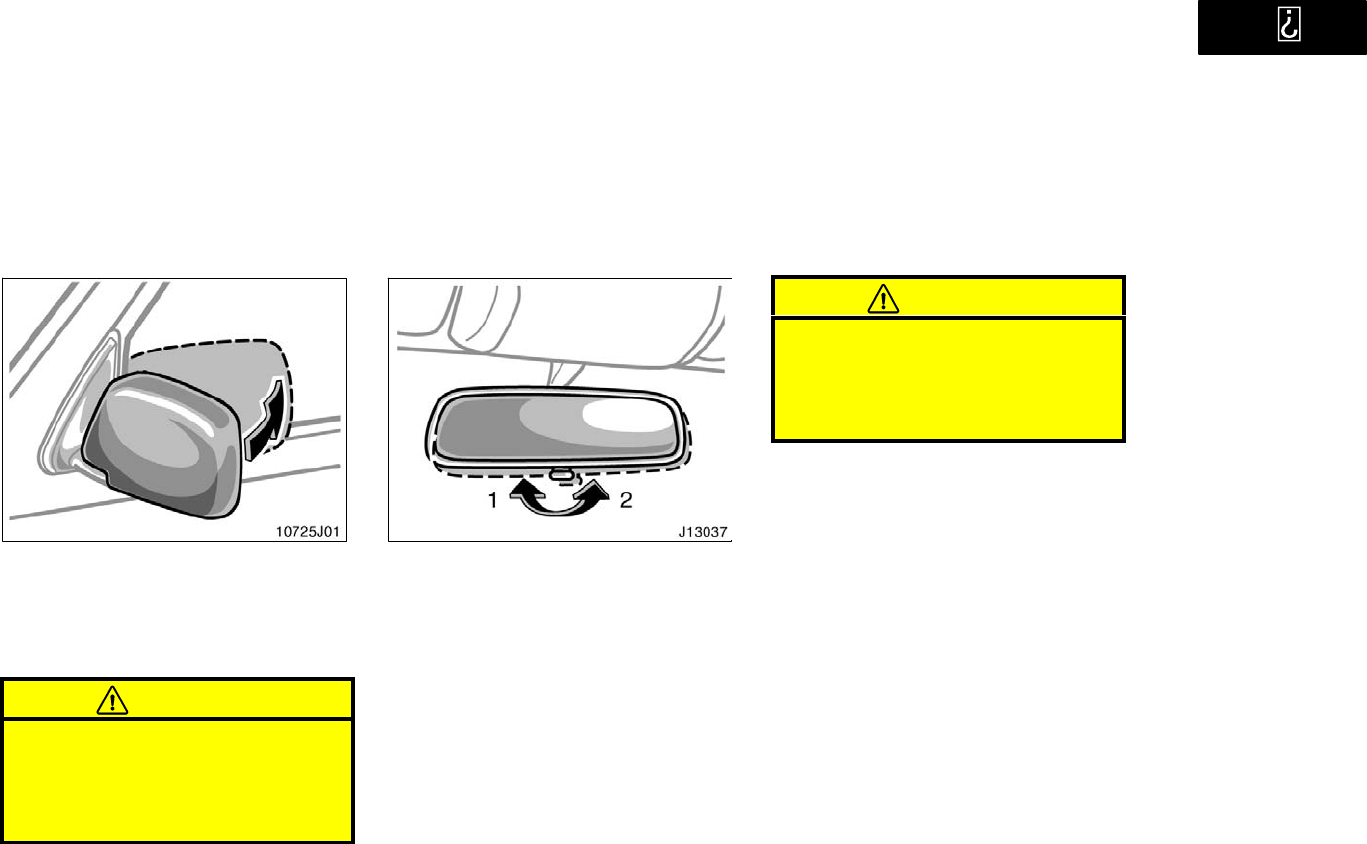
’01 4Runner_U (L/O 0008)
80 2001 4RUNNER (OM35768U)
Folding rear view mirrors
The rear view mirrors can be folded
backward for parking in restricted
areas.
To fold the rear view mirror, push back-
ward.
CAUTION
Do not drive with the mirrors folded
backward. Both the driver and pas-
senger side rear view mirrors must
be extended and properly adjusted
before driving.
Adjust the mirror so that you can just
see the rear of your vehicle in the mir-
ror.
To reduce glare from the headlights of
the vehicle behind you during night
driving, operate the lever on the lower
edge of the mirror.
Daylight drivingLever at position 1
The reflection in the mirror has greater
clarity at this position.
Night drivingLever at position 2
Remember that by reducing glare you also
lose some rear view clarity.
CAUTION
Do not adjust the mirror while the
vehicle is moving. It may cause the
driver to mishandle the vehicle and
an accident may occur resulting in
death or serious injuries.
Anti−glare inside rear view
mirror
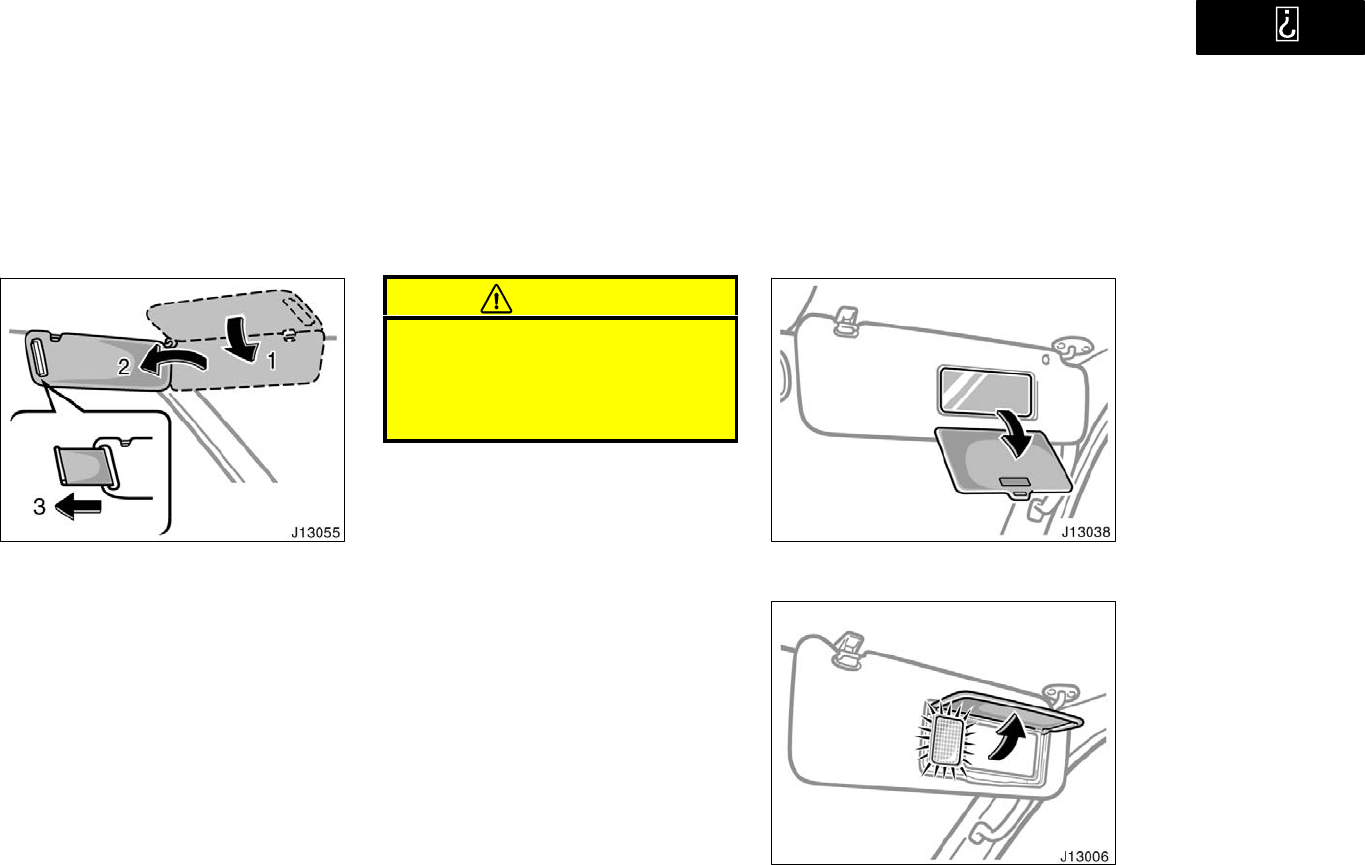
’01 4Runner_U (L/O 0008)
81
2001 4RUNNER (OM35768U)
Sun visors
To block out glare, move the sun visor.
To block out glare from the frontSwing
down the sun visor (position 1).
To block out glare from the sideSwing
down the sun visor, remove it from the
hook and swing it to the lateral side (posi-
tion 2).
If glare comes from obliquely behind you,
extend the plate at the end of the visor
(to position 3).
CAUTION
Do not extend the plate at the end of
the sun visor when the visor is in the
position 1. It can cover the anti−glare
inside rear view mirror and obstruct
the rear view.
Vanity mirrors
Type A
Type B

’01 4Runner_U (L/O 0008)
82 2001 4RUNNER (OM35768U)
To use the vanity mirrors, swing down
the sun visor and open the cover.
Type B onlyThe vanity light comes on
when you open the cover.

’01 4Runner_U (L/O 0008)
83
2001 4RUNNER (OM35768U)
OPERATION OF INSTRUMENTS AND
CONTROLS
Lights, Wipers and Defogger
Headlights and turn signals 84. . . . . . . . . . . . . . . . . . . . . . . . . . . . . . . . . . .
Emergency flashers 85. . . . . . . . . . . . . . . . . . . . . . . . . . . . . . . . . . . . . . . . . .
Instrument panel light control 86. . . . . . . . . . . . . . . . . . . . . . . . . . . . . . . . .
Front fog lights 86. . . . . . . . . . . . . . . . . . . . . . . . . . . . . . . . . . . . . . . . . . . . . .
Interior light 86. . . . . . . . . . . . . . . . . . . . . . . . . . . . . . . . . . . . . . . . . . . . . . . . .
Personal lights 87. . . . . . . . . . . . . . . . . . . . . . . . . . . . . . . . . . . . . . . . . . . . . .
Luggage compartment light 87. . . . . . . . . . . . . . . . . . . . . . . . . . . . . . . . . . .
Ignition switch light 88. . . . . . . . . . . . . . . . . . . . . . . . . . . . . . . . . . . . . . . . . .
Windshield wipers and washer 88. . . . . . . . . . . . . . . . . . . . . . . . . . . . . . . .
Back window wiper and washer 89. . . . . . . . . . . . . . . . . . . . . . . . . . . . . . .
Back window and outside rear view mirror defoggers 90. . . . . . . . . . . .
SECTION 1− 4
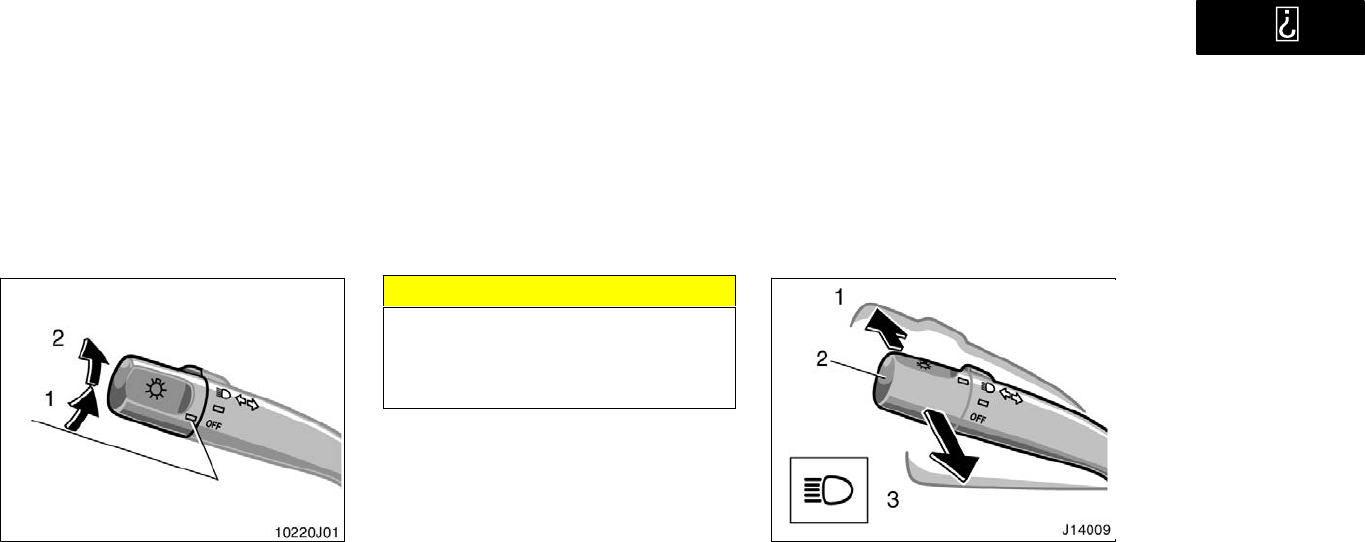
’01 4Runner_U (L/O 0008)
84 2001 4RUNNER (OM35768U)
Headlights and turn signals
HEADLIGHTS
To turn on the following lights: Twist
the headlight/turn signal lever knob.
Position 1Parking, tail, license plate,
side marker and instrument panel lights
Position 2Headlights and all of the
above
The lights automatically turn off when the
driver’s door is opened with the ignition
switch turned off. To turn them on again,
turn the key to the ON" position or actu-
ate the headlight switch. If you are going
to park for over one week, make sure the
headlight switch is off.
NOTICE
To prevent the battery from being dis-
charged, do not leave the lights on
for a long period when the engine is
not running.
Daytime running light system (on some
models)
The headlights turn on when the parking
brake is released with the engine started,
even with the light switch in the OFF"
position. They will not go off until the
ignition switch is turned off.
To turn on the other exterior lights and
instrument panel lights, twist the knob to
the position 1.
Under the daytime running light system,
the headlights turn on at reduced intensity.
Twist the knob to the position 2 to turn
to full intensity for driving at night.
High−Low beamsFor high beams, turn
the headlights on and push the lever away
from you (position 1). Pull the lever to-
ward you (position 2) for low beams.
The headlight high beam indicator light
(blue light) on the instrument panel will
tell you that the high beams are on.
Flashing the high beam headlights
(position 3)Pull the lever all the way
back. The high beam headlights turn off
when you release the lever.
You can flash the high beam headlights
with the knob turned to OFF".
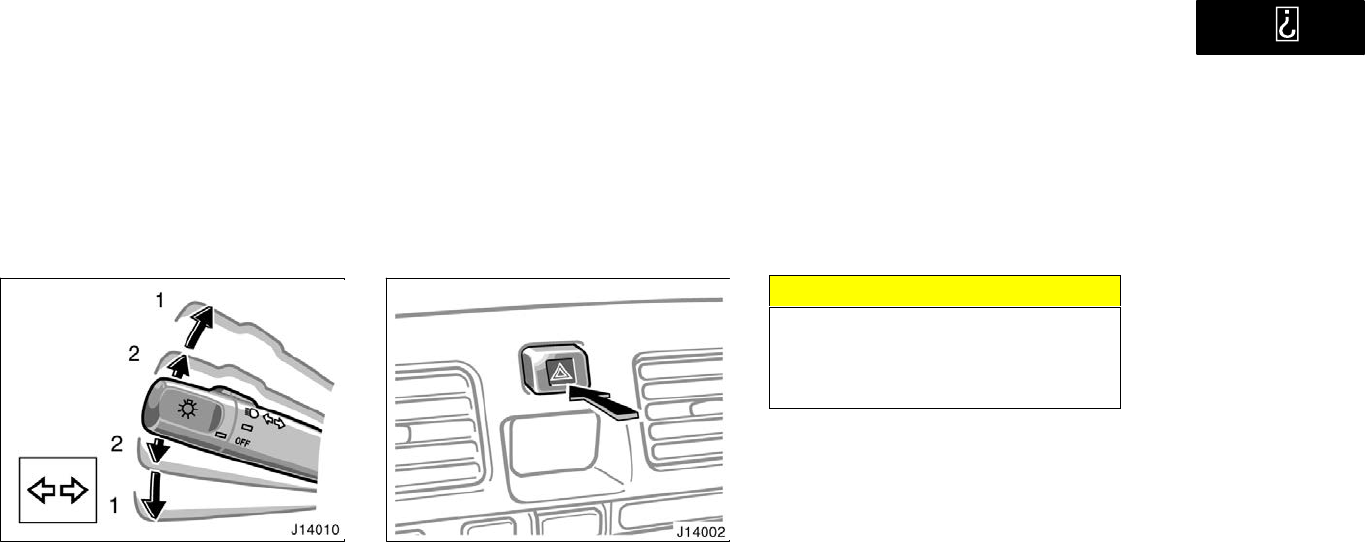
’01 4Runner_U (L/O 0008)
85
2001 4RUNNER (OM35768U)
TURN SIGNALS
To signal a turn, push the headlight/
turn signal lever up or down to position
1.
The key must be in the ON" position.
The lever automatically returns after you
make a turn, but you may have to return
it by hand after you change lanes.
To signal a lane change, move the lever
up or down to the pressure point (position
2) and hold it.
If the turn signal indicator lights (green
lights) on the instrument panel flash faster
than normal, a front or rear turn signal
bulb is burned out.
Emergency flashers
To turn on the emergency flashers,
push the switch.
All the turn signal lights will flash. To turn
them off, push the switch once again.
Turn on the emergency flashers to warn
other drivers if your vehicle must be
stopped where it might be a traffic hazard.
Always pull as far off the road as pos-
sible.
The turn signal light switch will not work
when the emergency flashers are operat-
ing.
NOTICE
To prevent the battery from being dis-
charged, do not leave the switch on
longer than necessary when the en-
gine is not running.
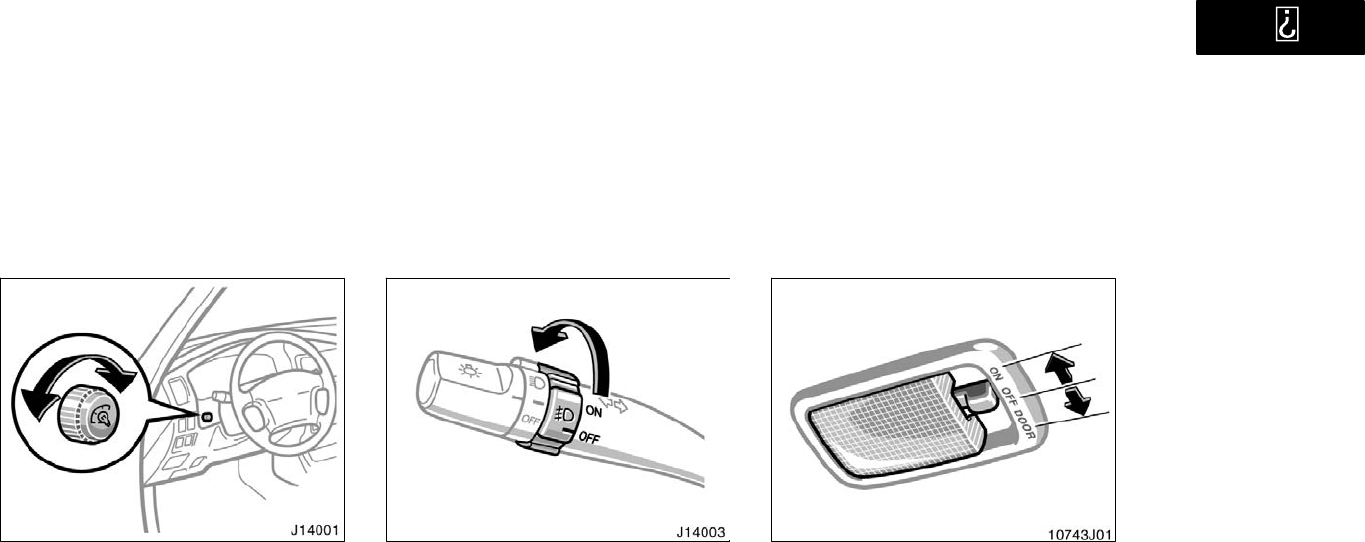
’01 4Runner_U (L/O 0008)
86 2001 4RUNNER (OM35768U)
Instrument panel light control
To adjust the brightness of the instru-
ment panel lights, turn the knob.
Front fog lights
To turn on the front fog lights, twist
the band of the headlight and turn sig-
nal switch lever. They will come on
only when the headlights are on low
beam.
Interior light
To turn on the interior light, slide the
switch.
The interior light switch has the following
positions:
ON"Keeps the light on all the time.
OFF"Turns the light off.
DOOR"Turns the light on when any of
the side door is opened. The light goes
off when all the side doors are closed.
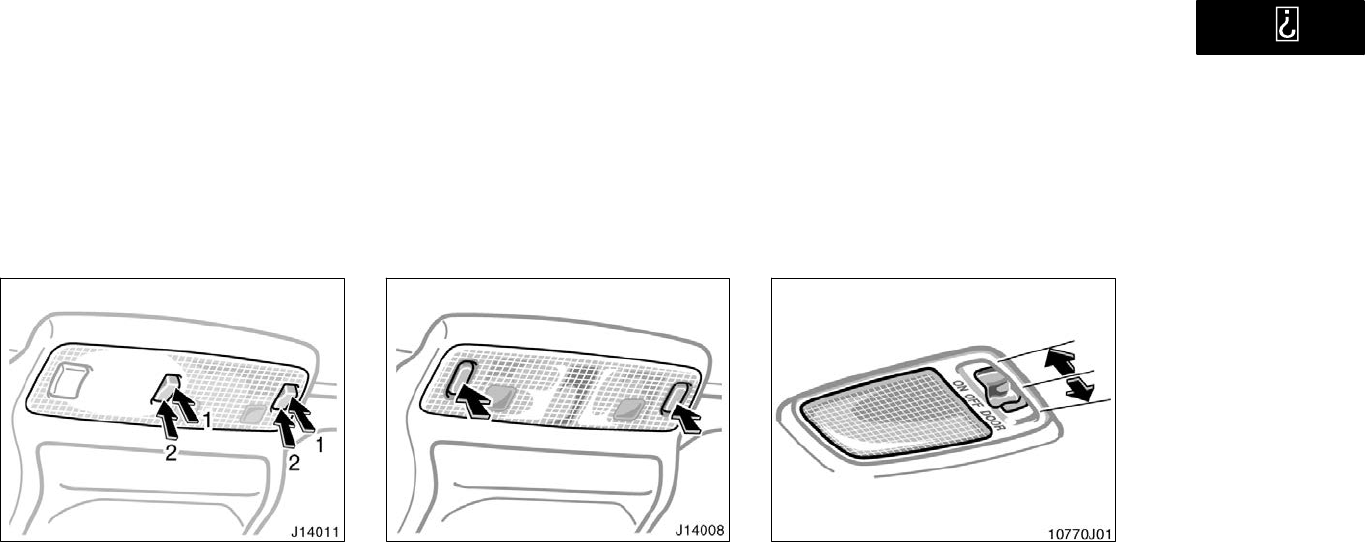
’01 4Runner_U (L/O 0008)
87
2001 4RUNNER (OM35768U)
To turn on the personal light, push the
switch on 1 side. To turn the light off,
push the switch on 2 side.
To turn on the personal light, push the
switch. To turn the lights off, push the
switch once again.
Luggage compartment light
To turn on the luggage compartment
light, slide the switch.
The luggage compartment light switch has
the following positions:
ON"Keeps the light on all the time.
OFF"Turns the light off.
DOOR"Turns the light on when the
back door is opened. The light goes off
when the back door is closed.
Personal lights
(with moon roof)
Personal lights
(without moon roof)
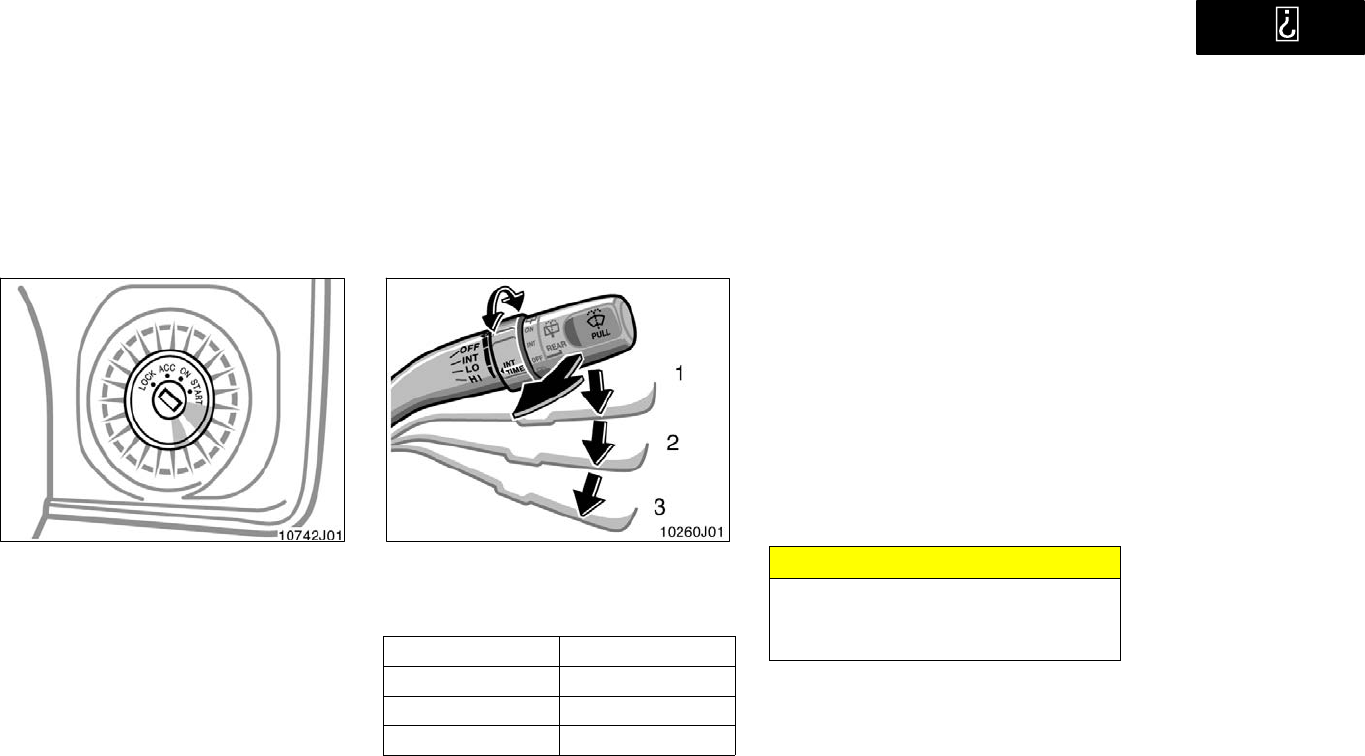
’01 4Runner_U (L/O 0008)
88 2001 4RUNNER (OM35768U)
Ignition switch light
For easy access to the ignition switch,
the ignition switch light comes on when
the driver’s door is opened.
The light remains on for some time after
driver’s door is closed.
To turn on the windshield wipers, move
the lever to the desired setting.
The key must be in the ON" position.
Lever position Speed setting
Position 1 Intermittent
Position 2 Slow
Position 3 Fast
The INT TIME" band lets you adjust the
wiping time interval when the wiper lever
is in the intermittent position (position 1).
Twist the band upward to increase the
time between sweeps, and downward to
decrease it.
To squirt washer fluid, pull the lever
toward you.
If the windshield wipers are off, they will
operate a couple of times after the washer
squirts.
For instructions on adding washer fluid,
see Adding washer fluid" in Section 7−3.
In freezing weather, warm the windshield
with the defroster before using the washer.
This will help prevent the washer fluid
from freezing on your windshield, which
can block your vision.
NOTICE
Do not operate the wipers if the wind-
shield is dry. It may scratch the
glass.
Windshield wipers and
washer (intermittent type)
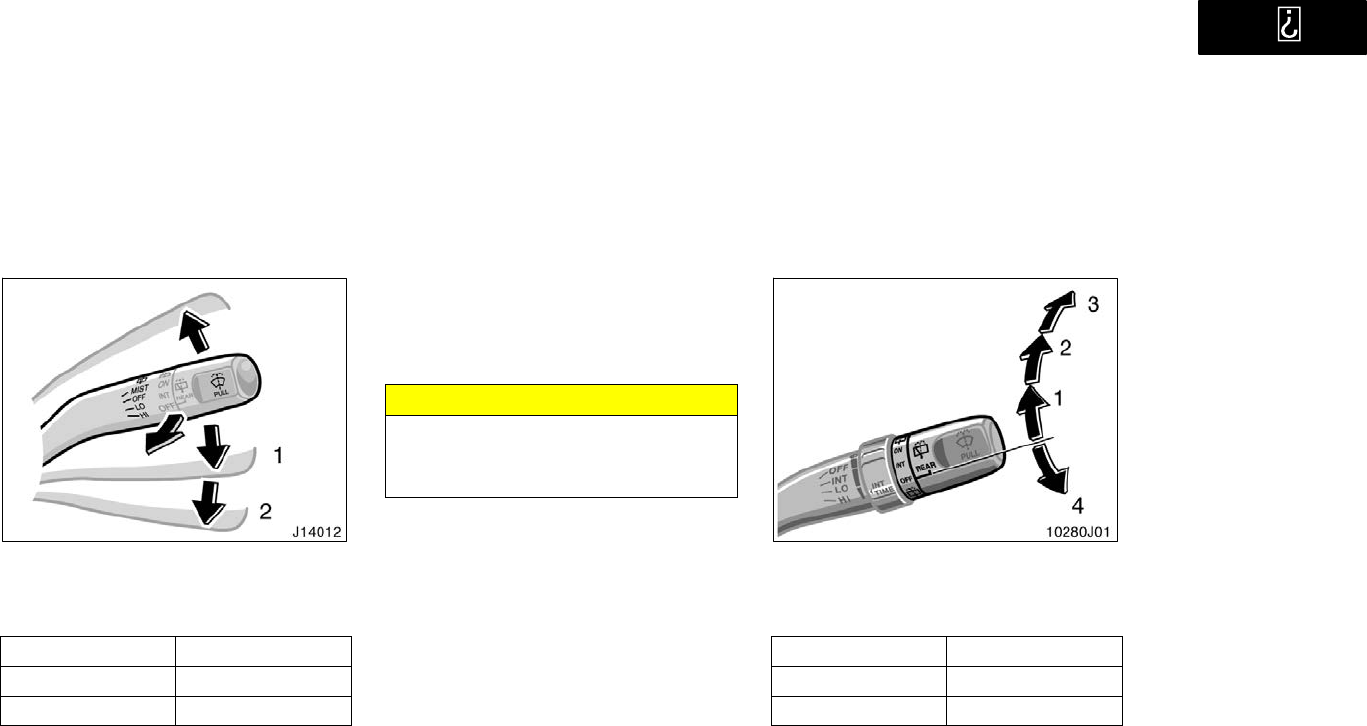
’01 4Runner_U (L/O 0008)
89
2001 4RUNNER (OM35768U)
To turn on the windshield wipers, move
the lever to the desired setting.
The key must be in the ON" position.
Lever position Speed setting
Position 1 Slow
Position 2 Fast
For a single sweep of the windshield,
push the lever up and release it.
To squirt washer fluid, pull the lever
toward you.
For instructions on adding washer fluid,
see Adding washer fluid" in Section 7−3.
In freezing weather, warm the windshield
with the defroster before using the washer.
This will help prevent the washer fluid
from freezing on your windshield, which
can block your vision.
NOTICE
Do not operate the wipers if the wind-
shield is dry. It may scratch the
glass.
Back window wiper and washer
To turn on the back window wiper, twist
the lever knob upward.
The key must be in the ON" position.
Lever position Speed setting
Position 1 Intermittent
Position 2 Normal
To squirt washer fluid on the back window,
twist the knob upward or downward as far
as it will go (position 3 or 4). The knob
automatically returns from these positions
after you release it.
For instructions on adding washer fluid,
see Adding washer fluid" in Section 7−3.
Windshield wipers and
washer (mist type)
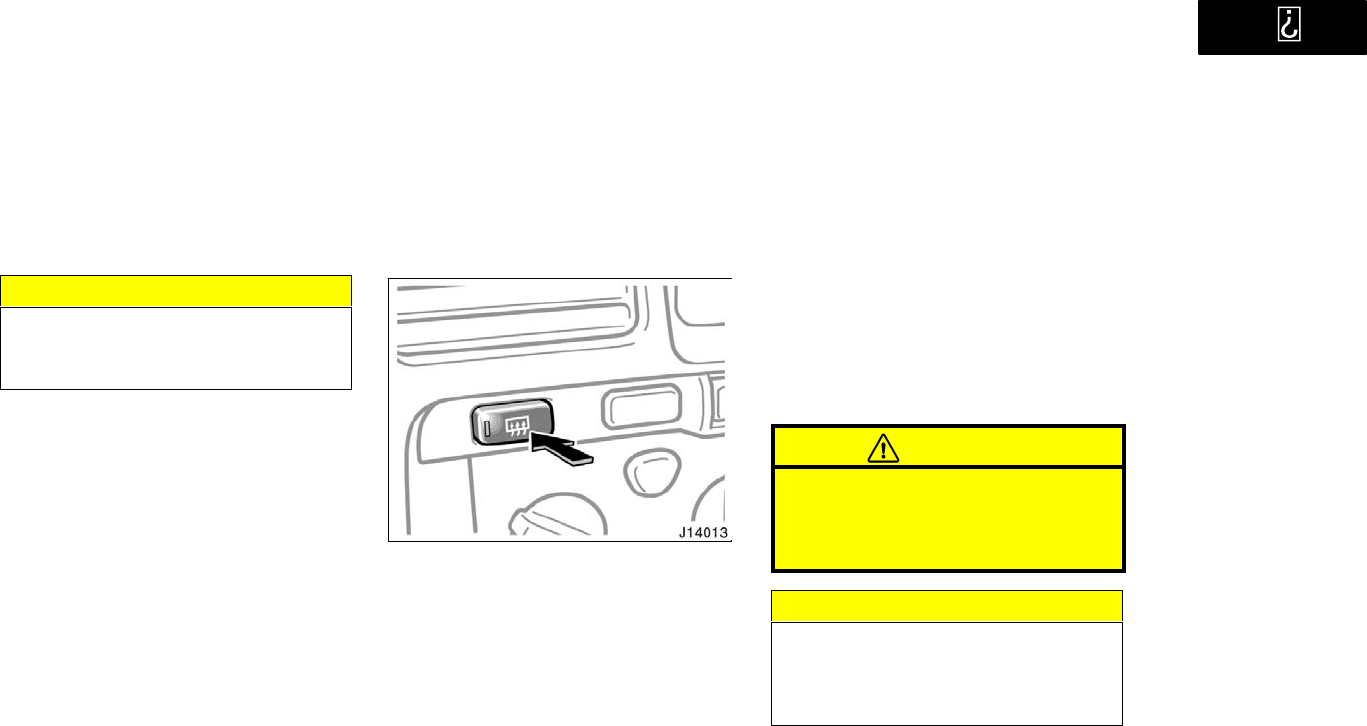
’01 4Runner_U (L/O 0008)
90 2001 4RUNNER (OM35768U)
NOTICE
Do not operate the back window wip-
er if the back window is dry. It may
scratch the glass.
To defog or defrost the back window,
push the switch with the back window
closed.
The key must be in the ON" position.
The thin heater wires on the inside of the
back window will quickly clear the surface.
An indicator light will illuminate to indicate
the defogger is operating.
On some models, heater panels in the
outside rear view mirrors will also quickly
clear the surfaces.
Push the switch once again to turn the
defogger off.
The system will automatically shut off af-
ter the defoggers have operated about 15
minutes.
Make sure you turn the defoggers off
when the surfaces are clear. Leaving the
defoggers on for a long time could cause
the battery to discharge, especially during
stop−and−go driving. The defoggers are
not designed for drying rain water or for
melting snow.
CAUTION
On some models, since the mirror
surfaces can get hot, keep your
hands off them when the defogger
switch is on.
NOTICE
When cleaning the inside of the back
window, be careful not to scratch or
damage the heater wires or connec-
tors.
Back window and outside rear
view mirror defoggers

’01 4Runner_U (L/O 0008)
91
2001 4RUNNER (OM35768U)
OPERATION OF INSTRUMENTS AND
CONTROLS
Gauges, Meters and Service reminder indicators
Fuel gauge 92. . . . . . . . . . . . . . . . . . . . . . . . . . . . . . . . . . . . . . . . . . . . . . . . .
Engine coolant temperature gauge 92. . . . . . . . . . . . . . . . . . . . . . . . . . . .
Tachometer 93. . . . . . . . . . . . . . . . . . . . . . . . . . . . . . . . . . . . . . . . . . . . . . . . .
Odometer and two trip meters 93. . . . . . . . . . . . . . . . . . . . . . . . . . . . . . . . .
Service reminder indicators and warning buzzers 94. . . . . . . . . . . . . . .
SECTION 1− 5
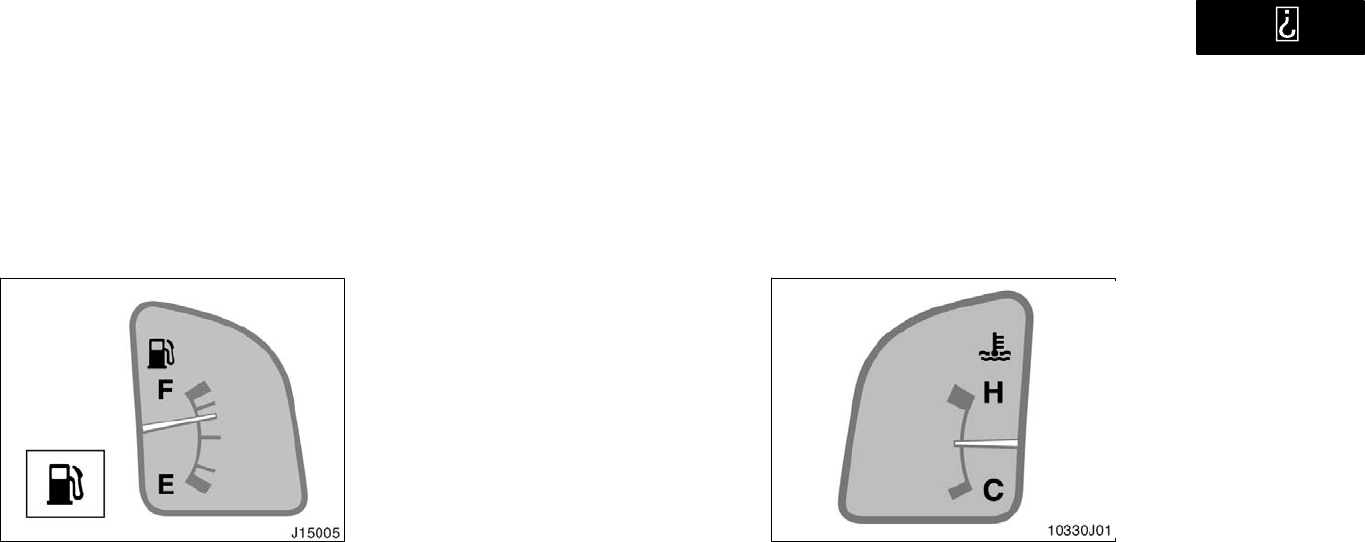
’01 4Runner_U (L/O 0008)
92 2001 4RUNNER (OM35768U)
Fuel gauge
The gauge works when the ignition
switch is on and indicates the approxi-
mate quantity of fuel remaining in the
tank.
Nearly fullNeedle at F"
Nearly emptyNeedle at E"
It is a good idea to keep the tank over
1/4 full.
If the fuel level approaches E" or the low
fuel level warning light comes on, fill the
fuel tank as soon as possible.
On inclines or curves, due to the move-
ment of fuel in the tank, the fuel gauge
needle may fluctuate or the low fuel level
warning light may come on earlier than
usual.
If the fuel tank is completely empty, the
malfunction indicator lamp comes on. Fill
the fuel tank immediately.
The indicator lamp goes off after driving
several times. If the indicator lamp does
not go off, contact your Toyota dealer as
soon as possible.
The gauge indicates the engine coolant
temperature when the ignition switch is
on. The engine operating temperature
will vary with changes in weather and
engine load.
If the needle moves into the red zone,
your engine is too hot. If your vehicle
overheats, stop your vehicle and allow the
engine to cool.
Your vehicle may overheat during severe
operating conditions, such as:
Driving up a long hill on a hot day.
Reducing speed or stopping after high
speed driving.
Engine coolant temperature
gauge
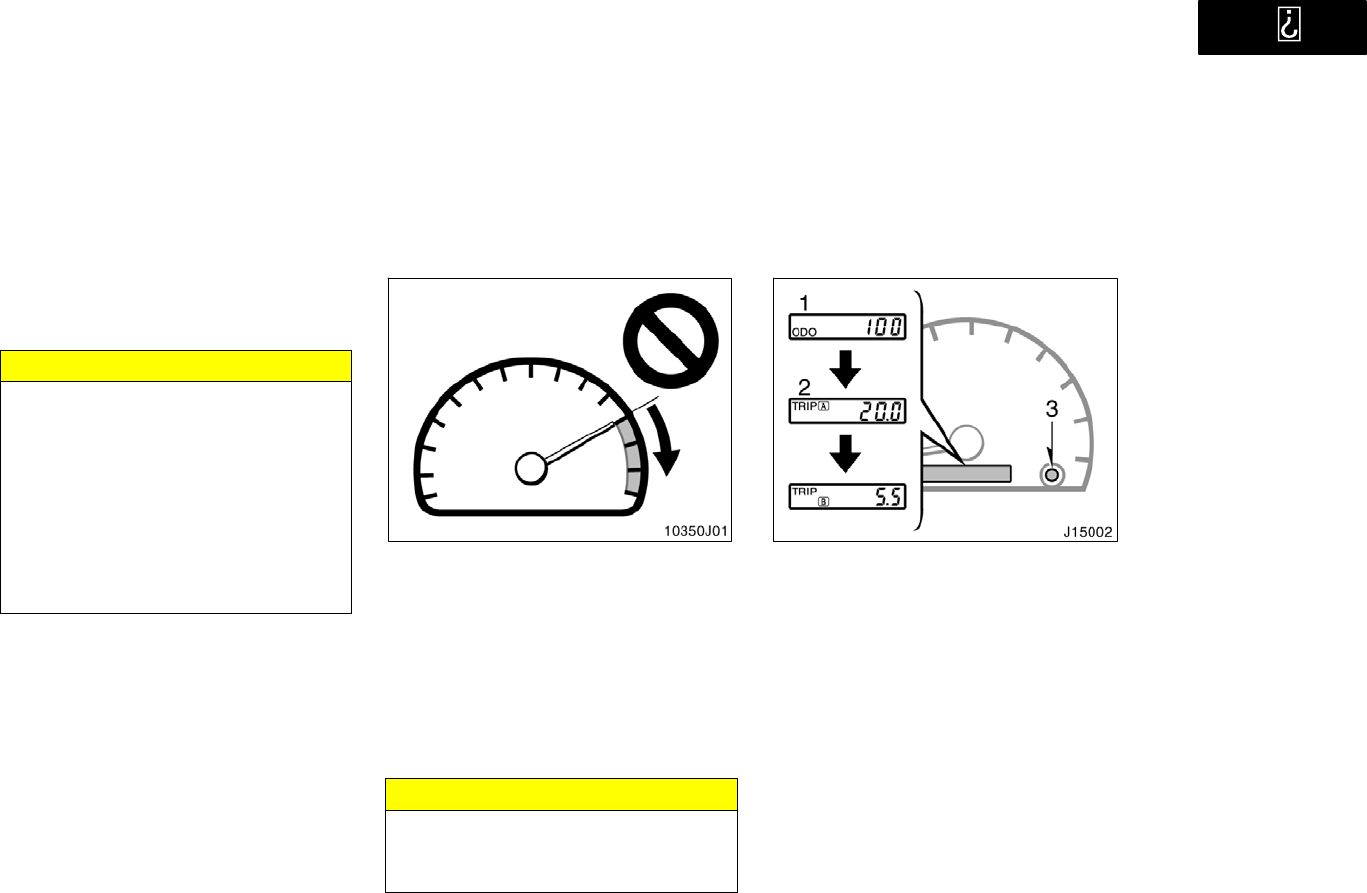
’01 4Runner_U (L/O 0008)
93
2001 4RUNNER (OM35768U)
Idling for a long period with the air
conditioning on in stop−and−go traffic.
Towing a trailer.
NOTICE
zDo not remove the thermostat in
the engine cooling system as this
may cause the engine to overheat.
The thermostat is designed to con-
trol the flow of coolant to keep the
temperature of the engine within
the specified operating range.
zDo not continue driving with an
overheated engine. See If your ve-
hicle overheats" in Section 4.
Tachometer
The tachometer indicates engine speed
in thousands of rpm (revolutions per
minute). Use it while driving to select
correct shift points and to prevent en-
gine lugging and over−revving.
Driving with the engine running too fast
causes excessive engine wear and poor
fuel economy. Remember, in most cases
the slower the engine speed, the greater
the fuel economy.
NOTICE
Do not let the indicator needle get
into the red zone. This may cause
severe engine damage.
Odometer and two trip meters
This meter displays the odometer and
two trip meters.
1. OdometerShows the total distance
the vehicle has been driven.
2. Two trip metersShow two different
distances independently driven since
the last time each trip meter was set
to zero.
You can use one trip meter to calculate
the fuel economy and the other to
measure the distance on each trip. All
trip meter data is cancelled if the elec-
trical power source is disconnected.
3. Trip meter reset knobResets the two
trip meters to zero, and also change
the meter display.
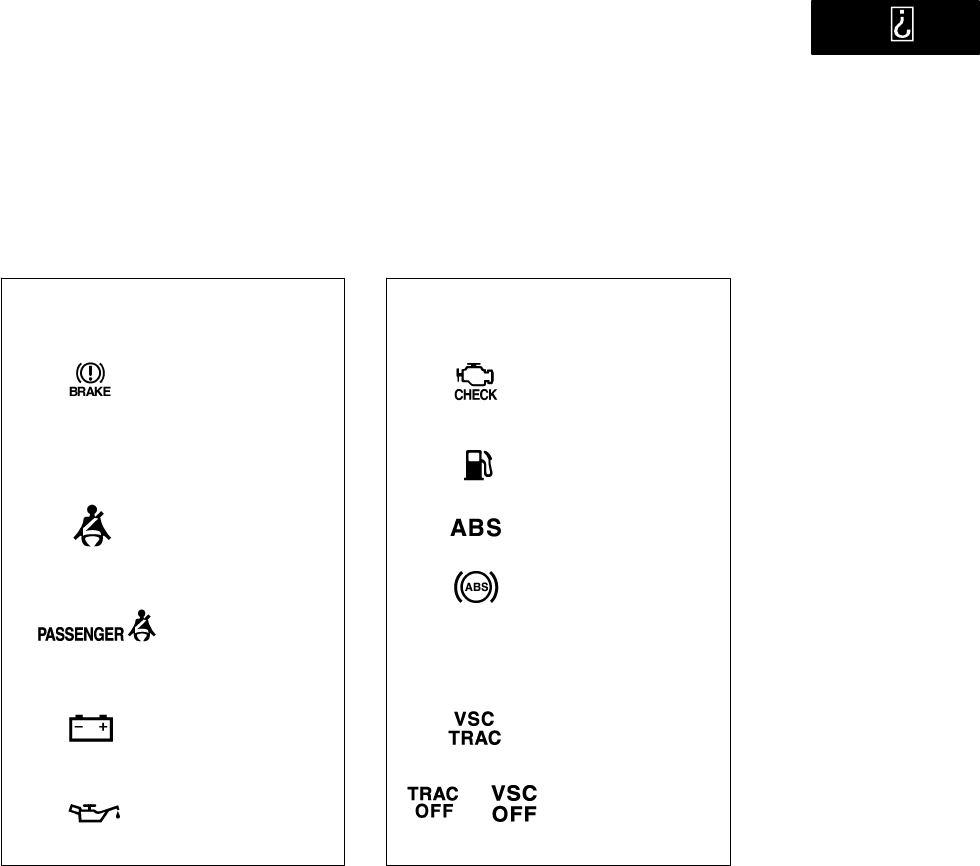
’01 4Runner_U (L/O 0008)
94 2001 4RUNNER (OM35768U)
To change the meter display, quickly
push and release the knob. The meter
display changes in the order from the
odometer to trip meter A to trip meter
B, then back to the odometer each
time you push.
To reset the trip meter A to zero, dis-
play the meter A reading, then push
and hold the knob until the meter is
set to zero. The same process can be
applied for resetting the trip meter B.
If the indicator or
buzzer comes on...
(a) If parking brake is
off, stop
immediately and
contact Toyota
dealer.
(b) Fasten driver’s
seat belt.
(d) Stop and check.
(e) Stop and check.
(indicator and buzzer)
Do this.
(c) Fasten front
passenger’s seat
belt.
(h) Take vehicle to
Toyota dealer.
If brake system
warning light is
also on, stop
immediately and
contact Toyota
dealer.
If the indicator or
buzzer comes on...
Do this.
or
(g) Fill up tank.
(f) Take vehicle to
Toyota dealer.
(i) Take vehicle to
Toyota dealer.
or
and
Service reminder indicators
and warning buzzers
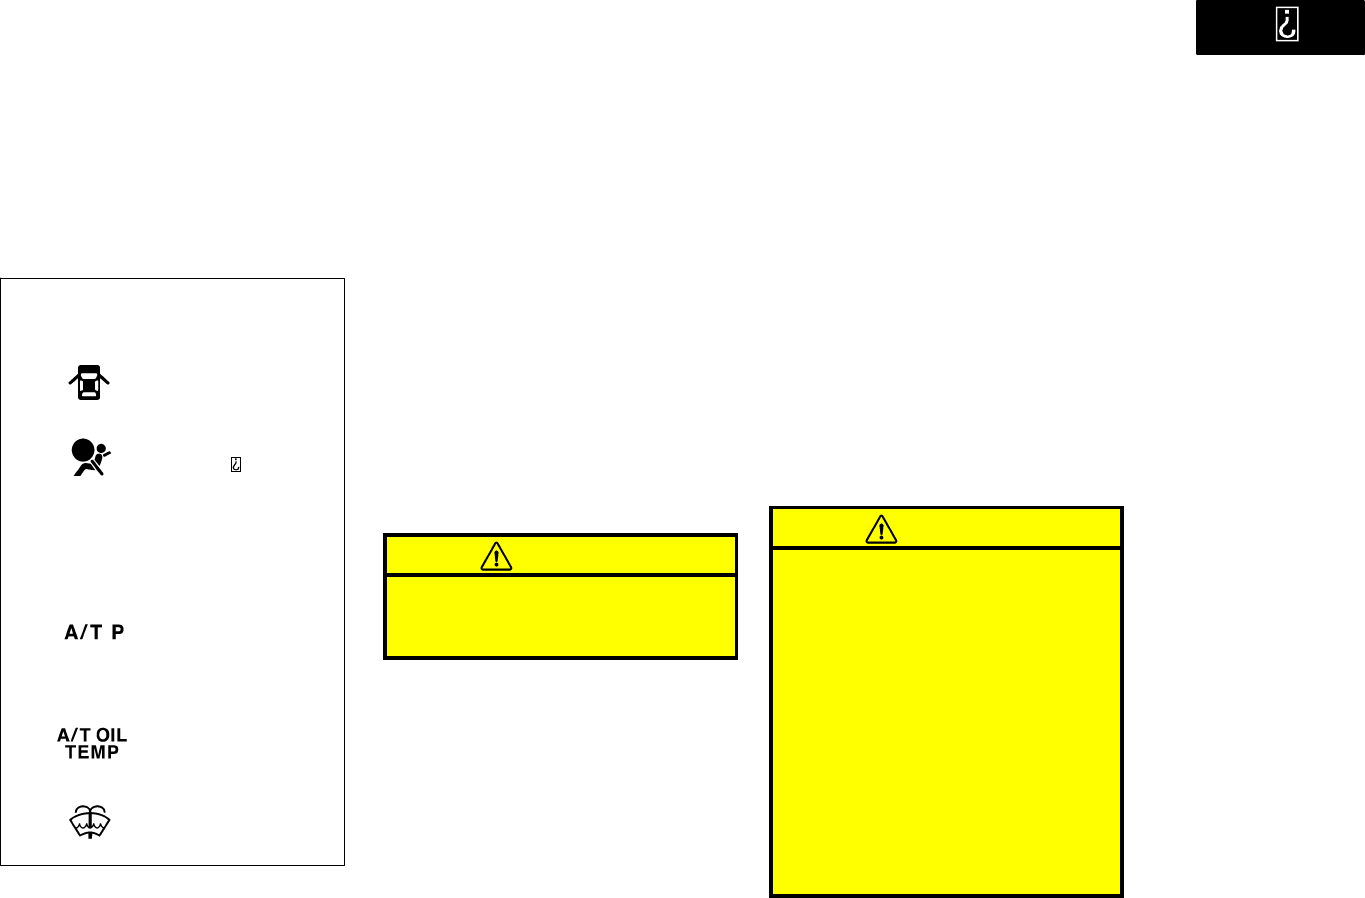
’01 4Runner_U (L/O 0008)
95
2001 4RUNNER (OM35768U)
(m) Shift front drive
control lever out of
N".
(n) Stop and check.
(o) Add washer fluid.
If the indicator or
buzzer comes on...
Do this.
(l) Remove key.Key reminder
buzzer
(k) Take vehicle to
To y ot a d ealer
immediately.
(j) Close all doors.
(a) Brake System Warning Light and
buzzer
This light comes on in the following cases
when the ignition key is in the ON" posi-
tion.
When the parking brake is applied...
This light comes on for a few seconds
when the ignition key is turned to the
ON" position on even after the parking
brake is released.
When the brake fluid level is low...
CAUTION
It is dangerous to continue driving
normally when the brake fluid level is
low.
When the hydraulic brake booster
fails...
If the hydraulic booster causes a problem
resulting in poor braking performance, the
warning light comes on and buzzer sounds
continuously.
Have your vehicle checked at your
Toyota dealer in the following cases:
The light does not come on even if the
parking brake is applied when the igni-
tion key is in the ON" position.
The light does not come on even if the
ignition key is turned on with the park-
ing brake released.
A warning light turning on briefly during
operation does not indicate a problem.
CAUTION
If any of the following conditions oc-
curs, immediately stop your vehicle at
a safe place and contact your Toyota
dealer.
The light does not turn off even
after the parking brake is released
while the engine is running.
The warning buzzer comes on to-
gether with the warning light.
In either case, this can indicate that
the brakes may not work properly
and your stopping distance will be-
come longer. Depress the brake
pedal firmly and bring the vehicle
to an immediate stop.

’01 4Runner_U (L/O 0008)
96 2001 4RUNNER (OM35768U)
The brake system warning light re-
mains on together with the ABS"
warning light.
In this case, not only the anti−lock
brake system will fail but also the
vehicle will become extremely un-
stable during braking.
Any of the following conditions may oc-
cur, but do not indicate the malfunc-
tion:
The light may stay on for about 60
seconds after the ignition key is turned
to the ON" position. It is normal if it
turns off after a while.
Depressing the brake pedal repeatedly
may turn on the warning light and
buzzer. It is normal if the light turns off
and the buzzer stops sounding after a
few seconds.
You may hear a small sound in the
engine compartment after the engine is
started or the brake pedal is depressed
repeatedly. This is a pump pulsating
sound of the brake system, and it is
not a malfunction.
(b) Driver’s Seat Belt Reminder Light
and Buzzer
This light and buzzer remind you to
buckle up the driver’s seat belt.
Once the ignition key is turned to ON" or
START", the reminder light flashes and
buzzer come on if the driver’s seat belt
is not fastened. Unless the driver fastens
the belt, the light keeps on flashing and
the buzzer sounds for about 4 to 8 se-
conds.
(c) Front Passenger’s Seat Belt Re-
minder Light
This light reminds you to buckle up the
front passenger’s seat belt.
Once the ignition key is turned to ON" or
START", the reminder light flashes if a
passenger sits in the front passenger seat
and does not fasten the seat belt. Unless
the front passenger fastens the belt, the
light stays flashing.
If luggage load is placed on the front
passenger seat, depending on its weight
and how it is placed on the seat, built−in
sensors in the seat cushion may detect
the pressure, causing the reminder light to
come on.
(d) Discharge Warning Light
This light warns that the battery is being
discharged.
If it comes on while you are driving, there
is a problem somewhere in the charging
system.
The engine ignition will continue to oper-
ate, however, until the battery is dis-
charged. Turn off the air conditioning,
blower, radio, etc., and drive directly to
the nearest Toyota dealer or repair shop.
NOTICE
Do not continue driving if the engine
drive belt is broken or loose.

’01 4Runner_U (L/O 0008)
97
2001 4RUNNER (OM35768U)
(e) Low Oil Pressure Warning Light
This light warns that the engine oil pres-
sure is too low.
If it flickers or stays on while you are
driving, pull off the road to a safe place
and stop the engine immediately. Call a
Toyota dealer or qualified repair shop for
assistance.
The light may occasionally flicker when
the engine is idling or it may come on
briefly after a hard stop. There is no
cause for concern if it then goes out when
the engine is accelerated slightly.
The light may come on when the oil level
is extremely low. It is not designed to
indicate low oil level, and the oil level
must be checked using the level dipstick.
NOTICE
Do not drive the vehicle with the
warning light oneven for one block.
It may ruin the engine.
(f) Malfunction Indicator Lamp
This lamp comes on in the following
cases.
a. The fuel tank is completely empty.
(See Fuel gauge" in this section for
instructions.)
b. The fuel tank cap is not tightened se-
curely. (See Fuel tank cap" in Section
1−2 for instructions.)
c. There is a problem somewhere in your
engine, automatic transmission electri-
cal system or electronic throttle control
system.
If it comes on while you are driving in
case c, have your vehicle checked/re-
paired by your Toyota dealer as soon as
possible.
If this lamp comes on and the engine
speed does not increase with the acceler-
ator pedal depressed down to about the
middle position, there may be a problem
somewhere in your electronic throttle con-
trol system. At this time, if you depress
the accelerator pedal more firmly and
slowly, you can drive your vehicle at low
speeds. Have your vehicle checked by
your Toyota dealer as soon as possible.
Even if the abnormality of the electronic
throttle control system is corrected during
low speed driving, the system may not be
recovered until the engine is stopped and
the ignition key is turned to ACC" or
LOCK" position.
(g) Low Fuel Level Warning Light
This light comes on when the fuel level
in the tank becomes nearly empty. Fill up
the tank as soon as possible.
On inclines or curves, due to the move-
ment of fuel in the tank, the low fuel level
warning light may come on earlier than
usual.
’01 4Runner_U (L/O 0008)
98 2001 4RUNNER (OM35768U)
(h) ABS" Warning Light
The light comes on when the ignition key
is turned to the ON" position. If the anti−
lock brake system and the brake assist
system work properly, the light turns off
after a few seconds. Thereafter, if either
of the systems malfunctions, the light
comes on again.
When the ABS" warning light is on (and
the brake system warning light is off), the
anti−lock brake system, the brake assist
system, the traction control system (two−
wheel drive vehicles), the active traction
control system (four−wheel drive vehicles)
and the vehicle skid control system do not
operate, but the brake system still oper-
ates conventionally.
When the ABS" warning light is on (and
the brake system warning light is off), the
anti−lock brake system does not operate
so that the wheels could lock up during
a sudden braking or braking on slippery
road surfaces.
If either of the following conditions oc-
curs, this indicates a malfunction some-
where in the parts monitored by the
warning light system. Contact your To-
yota dealer as soon as possible to ser-
vice the vehicle.
The light does not come on when the
ignition key is turned to the ON" posi-
tion, or remains on.
The light comes on while you are dri-
ving.
A warning light turning on briefly during
operation does not indicate a problem.
CAUTION
If the ABS" warning light remains on
together with the brake system warn-
ing light, immediately stop your ve-
hicle at a safe place and contact your
Toyota dealer.
In this case, not only the anti−lock
brake system will fail but also the
vehicle will become extremely unsta-
ble during braking.
Either of the following conditions may
occur, but do not indicate the malfunc-
tion:
The light may stay on for about 60
seconds after the ignition key is turned
to the ON" position. It is normal if it
turns off after a while.
Depressing the brake pedal repeatedly
may turn on the light. It is normal if it
turns off after a few seconds.
(i) Vehicle Skid Control System and
Traction Control System (two−wheel
drive models) or Active Traction
Control System (four−wheel drive
models) Warning Lights
These lights warn that there is a problem
somewhere in the vehicle skid control sys-
tem and traction control system (two−
wheel drive models) or active traction con-
trol system (four−wheel drive models).
’01 4Runner_U (L/O 0008)
99
2001 4RUNNER (OM35768U)
If the VSC/TRAC" warning light and
TRAC OFF" (two−wheel drive models) or
VSC OFF" (four−wheel drive models) indi-
cator light come on, have your vehicle
checked by Toyota dealer as soon as pos-
sible. However, there is no problem when
the VSC/TRAC" warning light comes on
when the brake actuator temperature be-
comes high. (For details, see Traction
control system" and Active traction con-
trol" in Section 1−6.)
The lights will come on when the ignition
key turned to ON", and will go off after
a few seconds.
The lights may come on for 60 seconds
after the ignition key is turned to the ON"
position. It is normal if they go out after
a while.
Depressing the brake pedal repeatedly
may turn on the lights. It is normal if they
go out after a few seconds.
When the VSC/TRAC" warning light and
TRAC OFF" (two−wheel drive models) or
VSC OFF" (four−wheel drive models) indi-
cator light come on the vehicle skid sys-
tem and/or traction control system (two−
wheel drive models) or active traction
control system (four−wheel drive models)
do not operate, but there is no problem
to continue your driving.
(j) Open Door Warning Light
This light remains on until all the doors
and back door are completely closed.
(k) SRS Warning Light
This light will come on when the igni-
tion key is turned to the ON" position.
After about 6 seconds, the light will go
off. This means the system of the air-
bag and front seat belt pretensioner are
operating properly.
The warning light system monitors the air-
bag sensor assembly, front airbag sen-
sors, front seat belt pretensioner assem-
blies, inflators, warning light,
interconnecting wiring and power sources.
If either of the following conditions occurs,
this indicates a malfunction somewhere in
the parts monitored by the warning light
system. Contact your Toyota dealer as
soon as possible to service the vehicle.
The light does not come on when the
ignition key is turned to the ON" posi-
tion or remains on.
The light comes on or flashes while
driving.
(l) Key Reminder Buzzer
This buzzer reminds you to remove the
key when you open the driver’s door with
the ignition key in the ACC" or LOCK"
position.
(m) Unengaged Park" Warning
Light ( four−wheel drive vehicles)
This light warns that the transmission
Park" mechanism is not engaged. If the
front drive control lever is in the N" posi-
tion while the selector lever is in the P"
position, the transmission will disengage
and the wheels will not lock.
CAUTION
To restore the park function, shift the
front drive control lever out of N",
or the vehicle can move.

’01 4Runner_U (L/O 0008)
100 2001 4RUNNER (OM35768U)
(n) Automatic Transmission Fluid
Temperature Warning Light
This light warns that the automatic trans-
mission fluid temperature is too high.
If this light comes on while you are driv-
ing, slow down and pull off the road. Stop
the vehicle at a safe place and put the
selector lever in P". With the engine id-
ling, wait until the light goes off. If the
light goes off, you may start the vehicle
again. If the light does not go off, call a
Toyota dealer or qualified repair shop for
assistance.
NOTICE
Continued driving with the warning
light on may damage the automatic
transmission.
(o) Low windshield Washer Fluid Level
Warning Light (Canada)
The light warns that the windshield washer
fluid level is too low. Add washer fluid at
your earliest opportunity. (For instructions,
see Adding washer fluid" in Section 7−3.)
CHECKING SERVICE REMINDER
INDICATORS (except the low fuel level
warning light and low windshield
washer fluid level warning light)
1. Apply the parking brake.
2. Open one of the side doors or back
door.
The open door warning light should
come on.
3. Close the door.
The open door warning light should go
off.
4. Turn the ignition key to ON", but do
not start the engine.
All the service reminder indicators ex-
cept the open door warning light should
come on. The ABS" and VSC/TRAC"
warning lights, TRAC OFF" (two−wheel
drive models) or VSC OFF" (four−
wheel drive models) indicator light and
slip indicator light go off after a few
seconds. The SRS warning light goes
off after about 6 seconds.
There may be the case that the ABS"
warning light (brake assist system
warning light), VSC/TRAC" warning
light and TRAC OFF" (two−wheel drive
models) or VSC OFF" (four−wheel
drive models) indicator light stay on for
about 60 seconds after the ignition key
is turned to the ON" position. It is
normal if they go out after a while.
If any service reminder indicator or warn-
ing buzzer does not function as described
above, either the bulb is burned out or the
circuit is in need of repair. Have it
checked by your Toyota dealer as soon as
possible.

’01 4Runner_U (L/O 0008)
101
2001 4RUNNER (OM35768U)
OPERATION OF INSTRUMENTS AND
CONTROLS
Ignition switch, Transmission and Parking brake
Ignition switch with steering lock 102. . . . . . . . . . . . . . . . . . . . . . . . . . . . . .
Automatic transmission 103. . . . . . . . . . . . . . . . . . . . . . . . . . . . . . . . . . . . .
Four−wheel drive system 113. . . . . . . . . . . . . . . . . . . . . . . . . . . . . . . . . . . .
Traction control system 117. . . . . . . . . . . . . . . . . . . . . . . . . . . . . . . . . . . . . .
Active traction control system 120. . . . . . . . . . . . . . . . . . . . . . . . . . . . . . . .
Vehicle skid control system 122. . . . . . . . . . . . . . . . . . . . . . . . . . . . . . . . . .
Parking brake 124. . . . . . . . . . . . . . . . . . . . . . . . . . . . . . . . . . . . . . . . . . . . . .
Cruise control 125. . . . . . . . . . . . . . . . . . . . . . . . . . . . . . . . . . . . . . . . . . . . . .
SECTION 1− 6
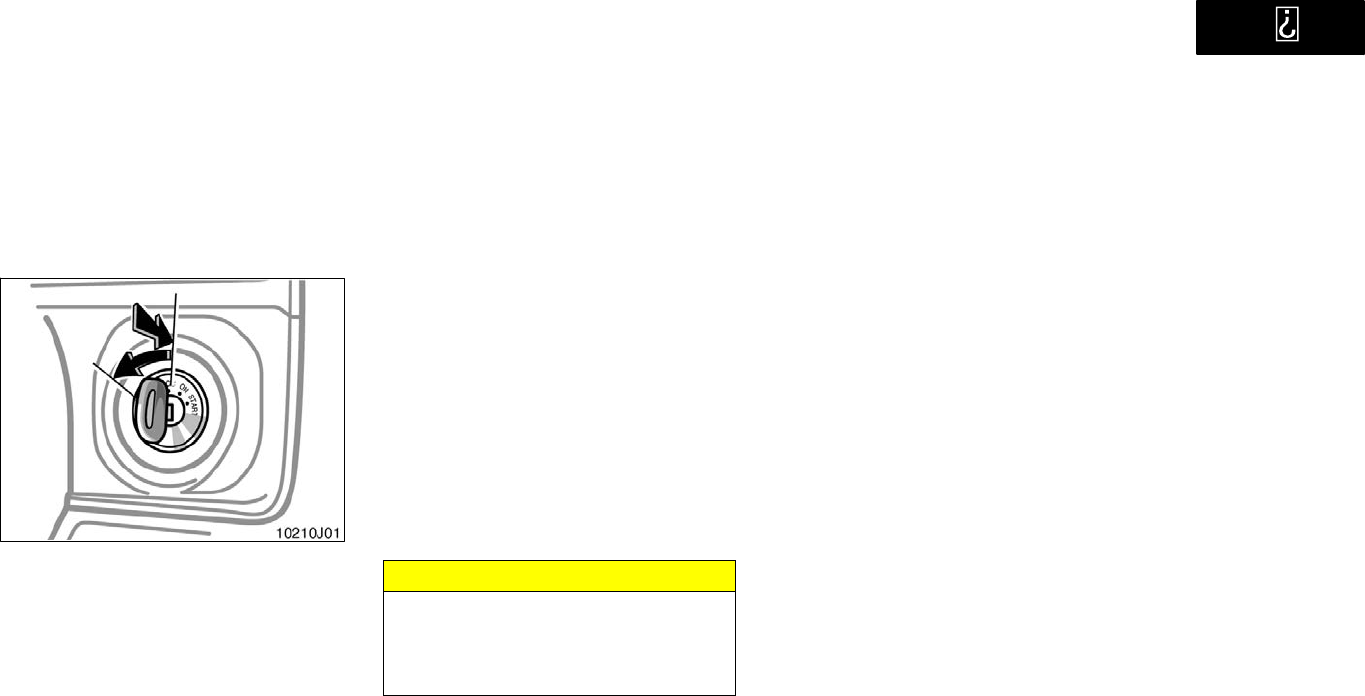
’01 4Runner_U (L/O 0008)
102 2001 4RUNNER (OM35768U)
START"Starter motor on. The key
will return to the ON" position when
released.
For starting tips, see Section 3.
ON"Engine on and all accessories
on.
This is the normal driving position.
ACC"Accessories such as the radio
operate, but the engine is off.
If you leave the key in the ACC" or
LOCK" position and open the driver’s
door, a buzzer will remind you to remove
the key.
LOCK"Engine is off and the steering
wheel is locked. The key can be re-
moved only at this position.
You must shift the selector lever into the
P" position before turning the key from
ACC" to the LOCK" position.
Vehicles with engine immobiliser system
Once you remove the key, the engine im-
mobiliser system is automatically set. (See
Engine immobiliser system" in Section
1−2.)
When starting the engine, the key may
seem stuck at the LOCK" position. To
free it, first be sure the key is pushed all
the way in, and then rock the steering
wheel slightly while turning the key gently.
NOTICE
Do not leave the key in the ON"
position if the engine is not running.
The battery will discharge and the
ignition could be damaged.
Ignition switch with steering
lock
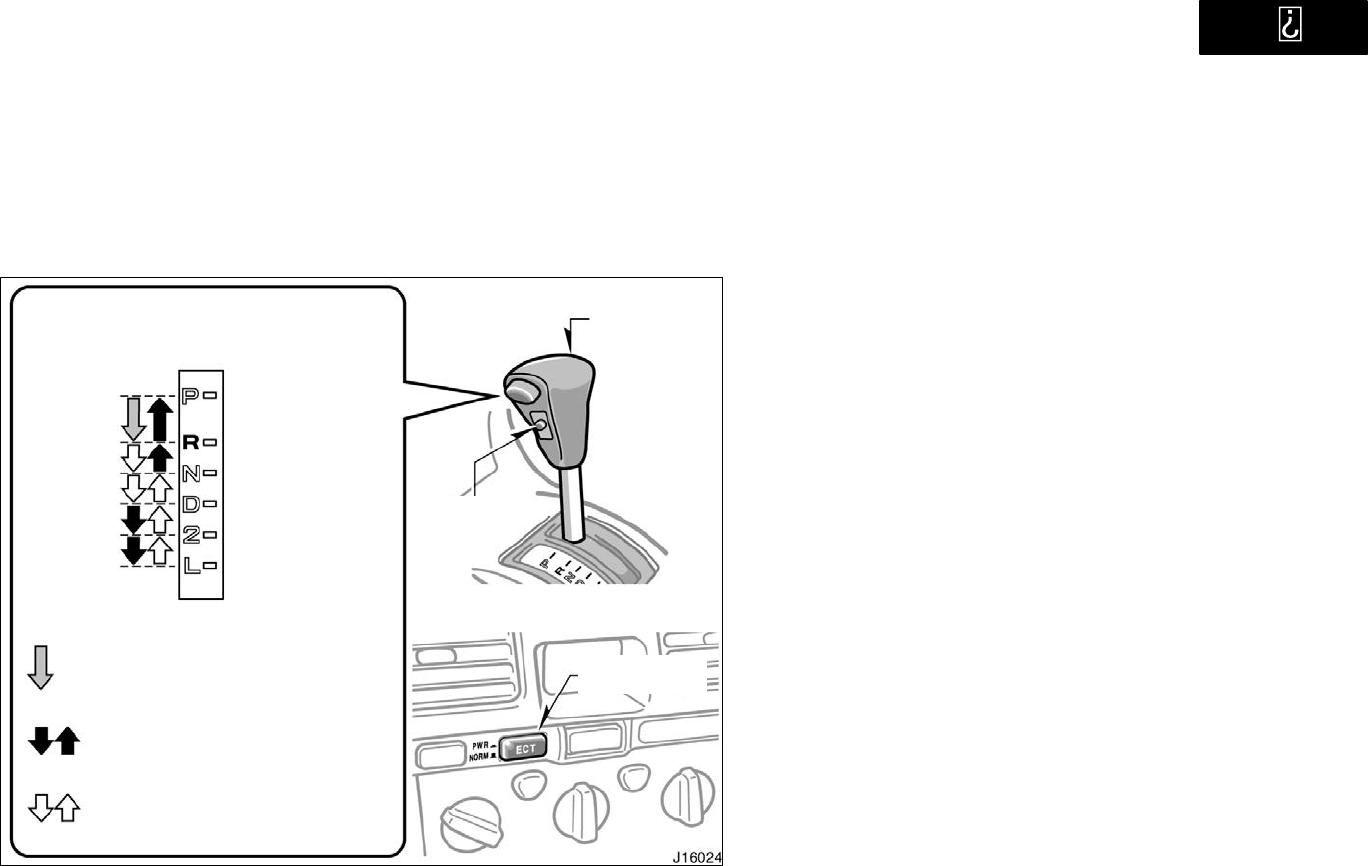
’01 4Runner_U (L/O 0008)
103
2001 4RUNNER (OM35768U)
Your automatic transmission has a shift
lock system to minimize the possibility of
incorrect operation. This means you can
only shift out of P" position when the
brake pedal is depressed (with the ignition
switch in ON" position and the lock re-
lease button depressed).
(a) Selector lever
The shift position is also displayed on the
instrument cluster.
P: Parking, engine starting and
key removal
R: Reverse
N: Neutral
D: Normal driving (with overdrive on)
2: Stronger engine braking
L: Maximum engine braking
Automatic transmission
Two−wheel drive models
Lock release button
To prevent misshifting
With the brake pedal depressed,
shift while holding the lock release
button in. (The ignition switch must
be in ON" position.)
Shift while holding the lock
release button in.
Shift normally.
Selector lever
Overdrive switch
Driving pattern
selector button
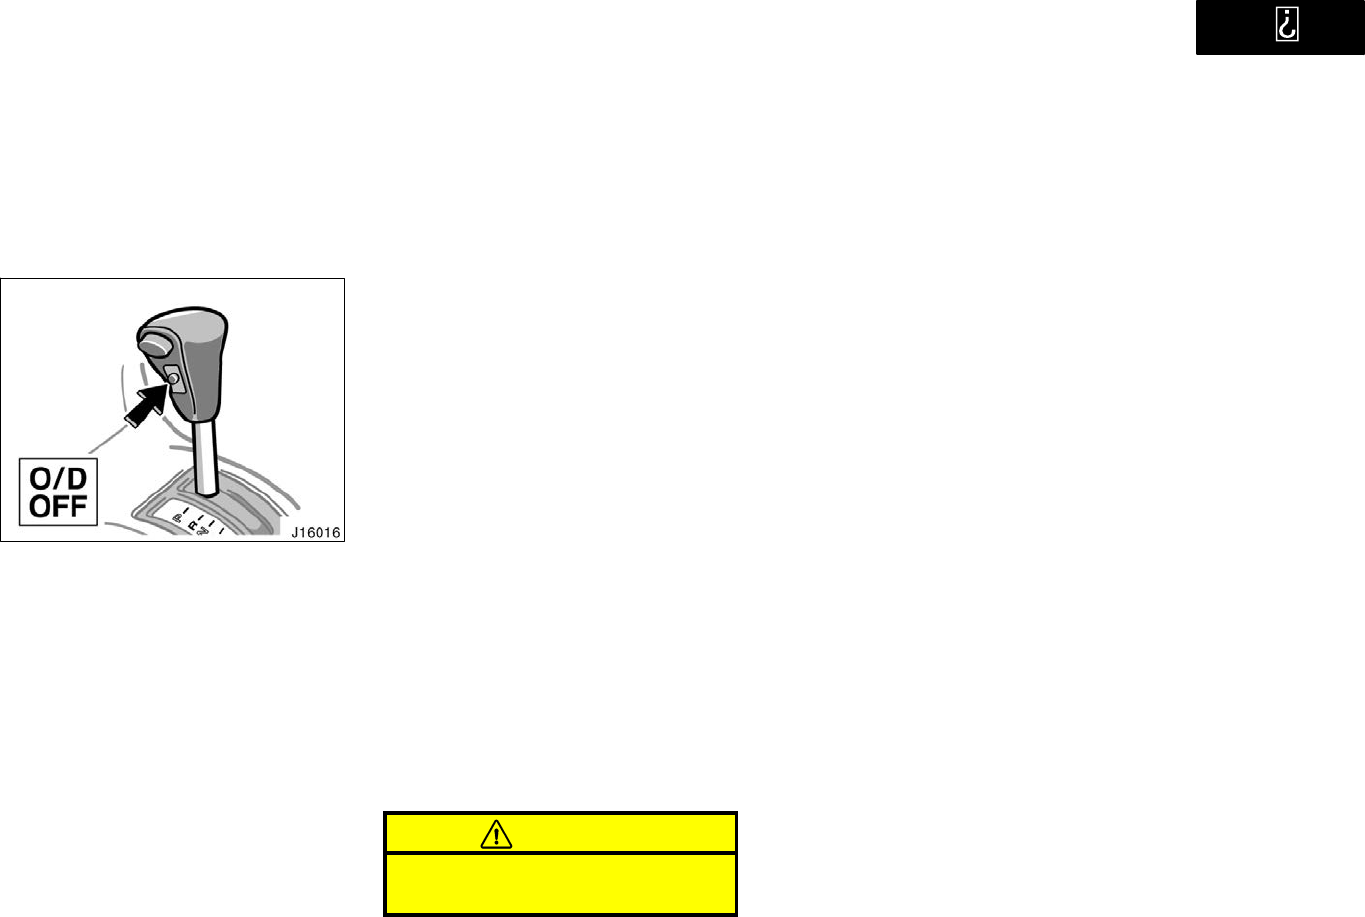
’01 4Runner_U (L/O 0008)
104 2001 4RUNNER (OM35768U)
(b) Overdrive switch
You can select either third gear (with
overdrive off) or fourth gear (with over-
drive on) by pushing this switch.
To turn the overdrive off, push the switch.
The O/D OFF" indicator light should come
on. To turn the overdrive on again, push
the switch again. The O/D OFF" indicator
light should go off.
Always drive your vehicle with the over-
drive on for better fuel economy and
quieter driving.
If the engine is turned off when the over-
drive is off and restarted, the overdrive
will be on automatically.
Vehicles with cruise controlWhen the
cruise control is being used, even if you
downshift the transmission by pushing and
releasing the overdrive switch, engine
braking will not be enabled because the
cruise control is not cancelled.
For ways to decrease the vehicle speed,
see Cruise control" in this section.
(c) Normal driving
1. Start the engine as instructed in How
to start the engine" in Section 3. The
transmission must be in P" or N".
2. With your foot holding down the brake
pedal, shift the selector lever to D".
When the lever is in the D" position, the
automatic transmission system will select
the most suitable gear for running condi-
tions such as normal cruising, hill climb-
ing, hard towing, etc.
Always turn the overdrive on for better
fuel economy and quieter driving. If the
engine coolant temperature is low, the
transmission will not shift into the over-
drive gear even with the overdrive on.
CAUTION
Never put your foot on the accelera-
tor pedal while shifting.
3. Release the parking brake and brake
pedal. Depress the accelerator pedal
slowly for smooth starting.
(d) Using engine braking
To use engine braking, you can downshift
the transmission as follows:
Push the overdrive switch. The O/D
OFF" indicator light will come on and
the transmission will downshift to third
gear.
Shift into the 2" position. The trans-
mission will downshift to second gear
when the vehicle speed drops down to
or lower than 119 km/h (73 mph), and
stronger engine braking will be en-
abled.
Shift into the L" position. The trans-
mission will downshift to first gear
When the vehicle speed drops down to
or lower than 58 km/h (36 mph), and
maximum engine braking will be en-
abled.
’01 4Runner_U (L/O 0008)
105
2001 4RUNNER (OM35768U)
Vehicles with cruise controlWhen the
cruise control is being used, even if you
downshift the transmission by pushing and
releasing the overdrive switch, engine
braking will not be enabled because the
cruise control is not cancelled.
For ways to decrease the vehicle speed,
see Cruise control" in this section.
CAUTION
Be careful when downshifting on a
slippery surface. Abrupt shifting
could cause the vehicle to spin or
skid.
(e) Using 2" and L" positions
The 2" and L" positions are used for
strong engine braking as described pre-
viously.
With the selector lever in 2" or L", you
can start the vehicle in motion as with the
lever in D".
With the selector lever in 2", the vehicle
will start in first gear and automatically
shift to second gear.
With the selector lever in L", the trans-
mission is engaged in first gear.
NOTICE
zBe careful not to over−rev the en-
gine. Watch the tachometer to keep
engine rpm from going into the red
zone. The approximate maximum al-
lowable speed for each position is
given below for your reference:
2" 120 km/h (74 mph). . . . . . . . . . . .
L" 65 km/h (40 mph). . . . . . . . . . . .
zDo not continue hill climbing or
hard towing for a long time in the
2" or L" position. This may cause
severe automatic transmission dam-
age from overheating. To prevent
such damage, D" position should
be used in hill climbing or hard
towing.
(f) Backing up
1. Bring the vehicle to a complete stop.
2. With the brake pedal held down with
your foot, shift the selector lever to the
R" position.
NOTICE
Never shift into reverse while the ve-
hicle is moving.
(g) Parking
1. Bring the vehicle to a complete stop.
2. Pull the parking brake lever up fully to
securely apply the parking brake.
3. With the brake pedal pressed down,
shift the selector lever to the P" posi-
tion.
CAUTION
Never attempt to move the selector
lever into P" position under any cir-
cumstances while the vehicle is mov-
ing. Serious mechanical damage and
loss of vehicle control may result.
(h) Good driving practice
If the transmission repeatedly shifts up
and down between third gear and over-
drive when climbing a gentle slope, the
overdrive should be turned off. Be sure
to turn the switch on immediately after-
ward.
When towing a trailer, in order to main-
tain engine braking efficiency, do not
use overdrive.
’01 4Runner_U (L/O 0008)
106 2001 4RUNNER (OM35768U)
CAUTION
Always keep your foot on the brake
pedal while stopped with the engine
running. This prevents the vehicle
from creeping.
NOTICE
Do not hold the vehicle on an up-
grade with the accelerator pedal. It
can cause the transmission to over-
heat. Always use the brake pedal or
parking brake.
(i) Rocking your vehicle if stuck
CAUTION
If your vehicle becomes stuck in
snow, mud, sand, etc., then you may
attempt to rock the vehicle free by
moving it forward and backward. Do
not attempt this procedure if people
or objects are anywhere near the ve-
hicle. During the rocking operation
the vehicle may suddenly move for-
ward or backward as it becomes un-
stuck, causing injury or damage to
nearby people or objects.
NOTICE
If you rock your vehicle, observe the
following precautions to prevent dam-
age to the transmission and other
parts.
zDo not depress the accelerator ped-
al while shifting the selector lever
or before the transmission is com-
pletely shifted to forward or reverse
gear.
zDo not race the engine and avoid
spinning the wheels.
zIf your vehicle remains stuck after
rocking the vehicle several times,
consider other ways such as tow-
ing.
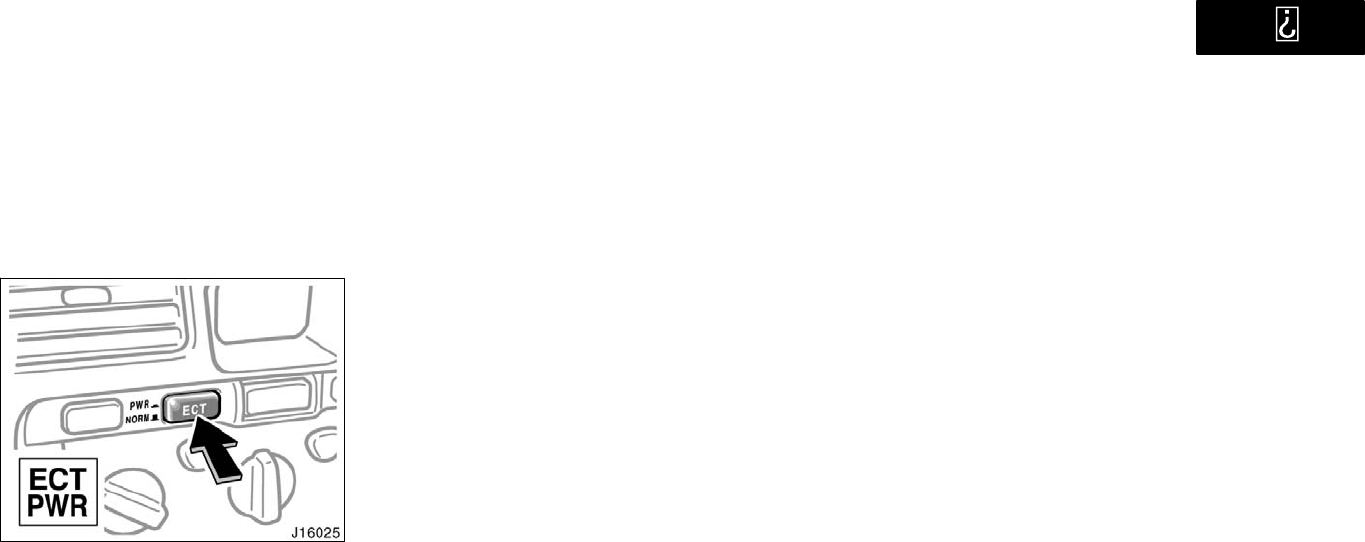
’01 4Runner_U (L/O 0008)
107
2001 4RUNNER (OM35768U)
(j) Driving in PWR" (Power) mode
In the PWR" mode, the transmission is
shifted up and down at a higher vehicle
speed than in the NORM" (Normal) mode
and a more powerful acceleration is
achieved. To set the PWR" mode, push
in the driving pattern selector button. The
PWR" mode indicator light comes on.
For ordinary driving, Toyota recommends
using the NORM" mode to improve fuel
economy.
(k) If you cannot shift the selector le-
ver out of P" position
If you cannot shift the selector lever from
the P" position even though the brake
pedal is depressed, use the shift lock
override button. For instructions, see If
you cannot shift automatic transmission
selector lever" in Section 4.
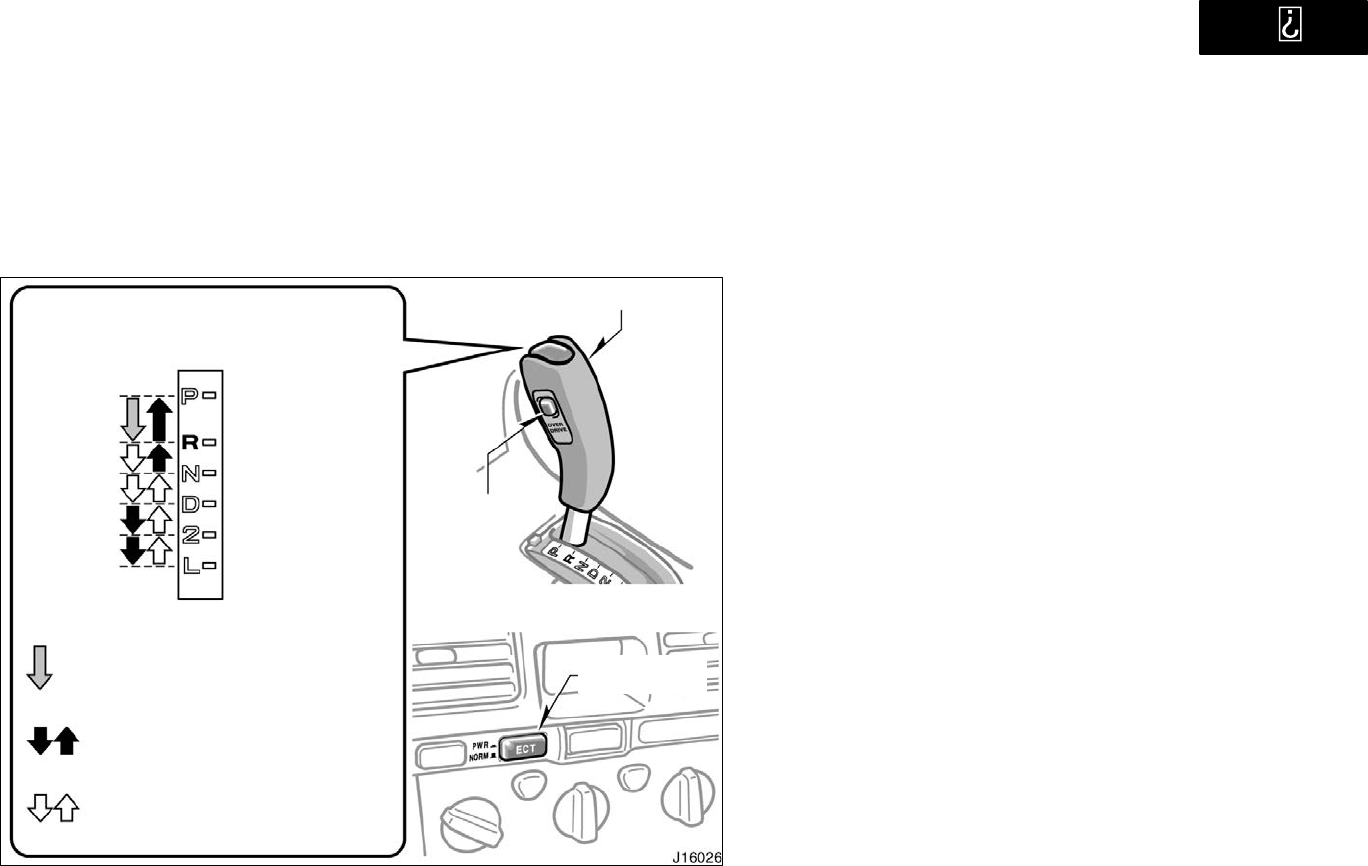
’01 4Runner_U (L/O 0008)
108 2001 4RUNNER (OM35768U)
Your automatic transmission has a shift
lock system to minimize the possibility of
incorrect operation. This means you can
only shift out of P" position when the
brake pedal is depressed (with the ignition
switch in ON" position and the lock re-
lease button depressed).
(a) Selector lever
The shift position is also displayed on the
instrument cluster.
P: Parking, engine starting and
key removal
R: Reverse
N: Neutral
D: Normal driving (with overdrive on)
2: Stronger engine braking
L: Maximum engine braking
Four−wheel drive models
Lock release button
To prevent misshifting
With the brake pedal depressed,
shift while holding the lock release
button in. (The ignition switch must
be in ON" position.)
Shift while holding the lock
release button in.
Shift normally.
Selector lever
Overdrive switch
Driving pattern
selector button
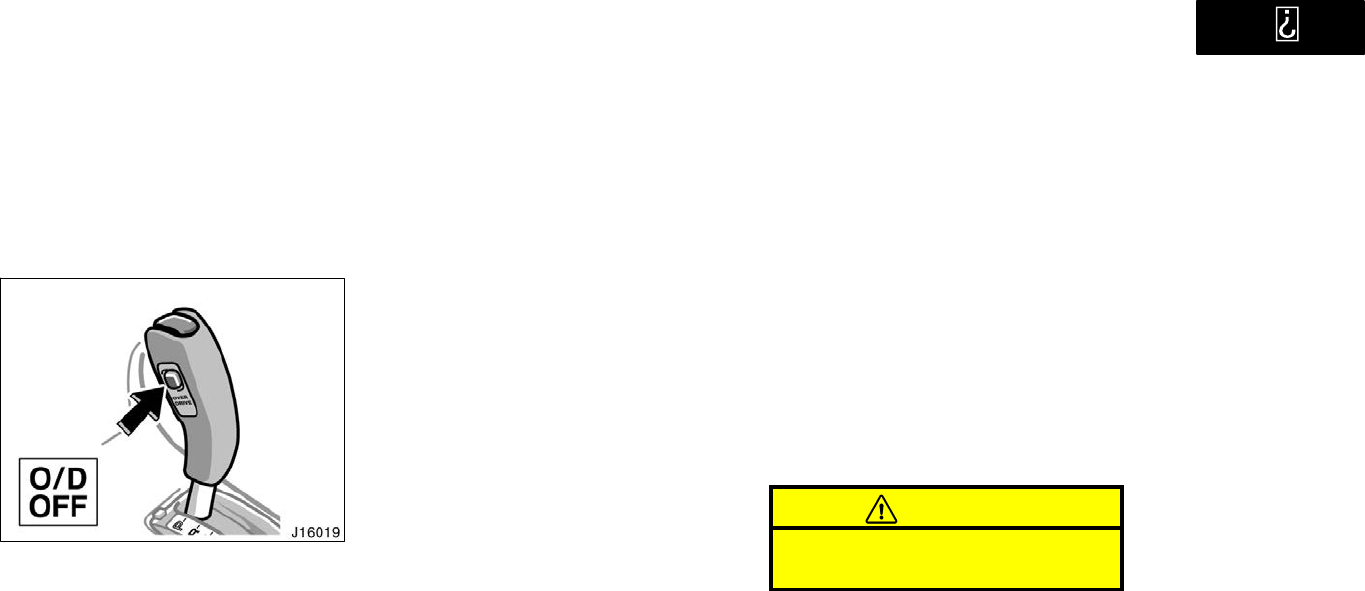
’01 4Runner_U (L/O 0008)
109
2001 4RUNNER (OM35768U)
(b) Overdrive switch
You can select either third gear (with
overdrive off) or fourth gear (with over-
drive on) by pushing this switch.
To turn the overdrive off, push the switch.
The O/D OFF" indicator light should come
on. To turn the overdrive on again, push
the switch again. The O/D OFF" indicator
light should go off.
Always drive your vehicle with the over-
drive on for better fuel economy and
quieter driving.
If the engine is turned off when the over-
drive is off and restarted, the overdrive
will be on automatically.
Vehicles with cruise controlWhen the
cruise control is being used, even if you
downshift the transmission by pushing and
releasing the overdrive switch, engine
braking will not be enabled because the
cruise control is not cancelled.
For ways to decrease the vehicle speed,
see Cruise control" in this section.
(c) Normal driving
1. Start the engine as instructed in How
to start the engine" in Section 3. The
transmission must be in P" or N".
When the front drive control lever is in
L4" (low−speed position, four−wheel
drive), the driving pattern selector setting
has no effect on gear shift timing. (See
Four−wheel drive system" in this section
for information of the front drive control
lever.)
2. With your foot holding down the brake
pedal, shift the selector lever to D".
When the lever is in the D" position, the
automatic transmission system will select
the most suitable gear for running condi-
tions such as normal cruising, hill climb-
ing, hard towing, etc.
Always turn the overdrive on for better
fuel economy and quieter driving. If the
engine coolant temperature is low or when
the front drive control lever is in L4"
(low−speed position, four−wheel drive), the
transmission will not shift into the over-
drive gear even with the overdrive on.
(See Four−wheel drive system" in this
section for information of the front drive
control lever.)
CAUTION
Never put your foot on the accelera-
tor pedal while shifting.
3. Release the parking brake and brake
pedal. Depress the accelerator pedal
slowly for smooth starting.
(d) Using engine braking
To use engine braking, you can downshift
the transmission as follows:
Push the overdrive switch. The O/D
OFF" indicator light will come on and
the transmission will downshift to third
gear.
’01 4Runner_U (L/O 0008)
110 2001 4RUNNER (OM35768U)
Shift into the 2" position. The trans-
mission will downshift to second gear
when the vehicle speed drops down to
or lower than the following speed, and
stronger engine braking will be en-
abled.
Front drive control lever in H"
114km/h(70mph)
Front drive control lever in L4"
41km/h(25mph)
Shift into the L" position. The trans-
mission will downshift to first gear
when the vehicle speed drops down to
or lower than the following speed, and
maximum engine braking will be en-
abled.
Front drive control lever in H"
55km/h(34mph)
Front drive control lever in L4"
12km/h(7mph)
Vehicles with cruise controlWhen the
cruise control is being used, even if you
downshift the transmission by pushing and
releasing the overdrive switch, engine
braking will not be enabled because the
cruise control is not cancelled.
For ways to decrease the vehicle speed,
see Cruise control" in this section.
CAUTION
Be careful when downshifting on a
slippery surface. Abrupt shifting
could cause the vehicle to spin or
skid.
(e) Using the 2" and L", positions
The 2" and L" positions are used for
strong engine braking as described pre-
viously.
With the selector lever in 2" or L", you
can start the vehicle in motion as with the
lever in D".
With the selector lever in 2", the vehicle
will start in first gear and automatically
shift to second gear.
With the selector lever in L", the trans-
mission is engaged in first gear.
NOTICE
zBe careful not to over−rev the en-
gine. Watch the tachometer to keep
engine rpm from going into the red
zone. The approximate maximum al-
lowable speed for each position is
given above for your reference:
Front drive control lever in H"
2" 118km/h (73 mph). . . . . . . . . . . . .
L" 64km/h (40 mph). . . . . . . . . . . . .
Front drive control lever in L4"
2" 46 km/h (28 mph). . . . . . . . . . . .
L" 25 km/h (15 mph). . . . . . . . . . . .
’01 4Runner_U (L/O 0008)
111
2001 4RUNNER (OM35768U)
zDo not continue hill climbing or
hard towing for a long time in the
2" or L" position. This may cause
severe automatic transmission dam-
age from overheating. To prevent
such damage, D" position should
be used in hill climbing or hard
towing.
(f) Backing up
1. Bring the vehicle to a complete stop.
2. With the brake pedal held down with
your foot, shift the selector lever to the
R" position.
NOTICE
Never shift into reverse while the ve-
hicle is moving.
(g) Parking
1. Bring the vehicle to a complete stop.
2. Pull the parking brake lever fully to
securely apply the parking brake.
3. With the brake pedal pressed down,
shift the selector lever to the P" posi-
tion.
CAUTION
Never attempt to move the selector
lever into P" position under any cir-
cumstances while the vehicle is mov-
ing. Serious mechanical damage and
loss of vehicle control may result.
(h) Good driving practice
If the transmission repeatedly shifts up
and down between third gear and over-
drive when climbing a gentle slope, the
overdrive should be turned off. Be sure
to turn the switch on immediately after-
ward.
When towing a trailer, in order to main-
tain engine braking efficiency, do not
use overdrive.
CAUTION
Always keep your foot on the brake
pedal while stopped with the engine
running. This prevents the vehicle
from creeping.
NOTICE
Do not hold the vehicle on an up-
grade with the accelerator pedal. It
can cause the transmission to over-
heat. Always use the brake pedal or
parking brake.
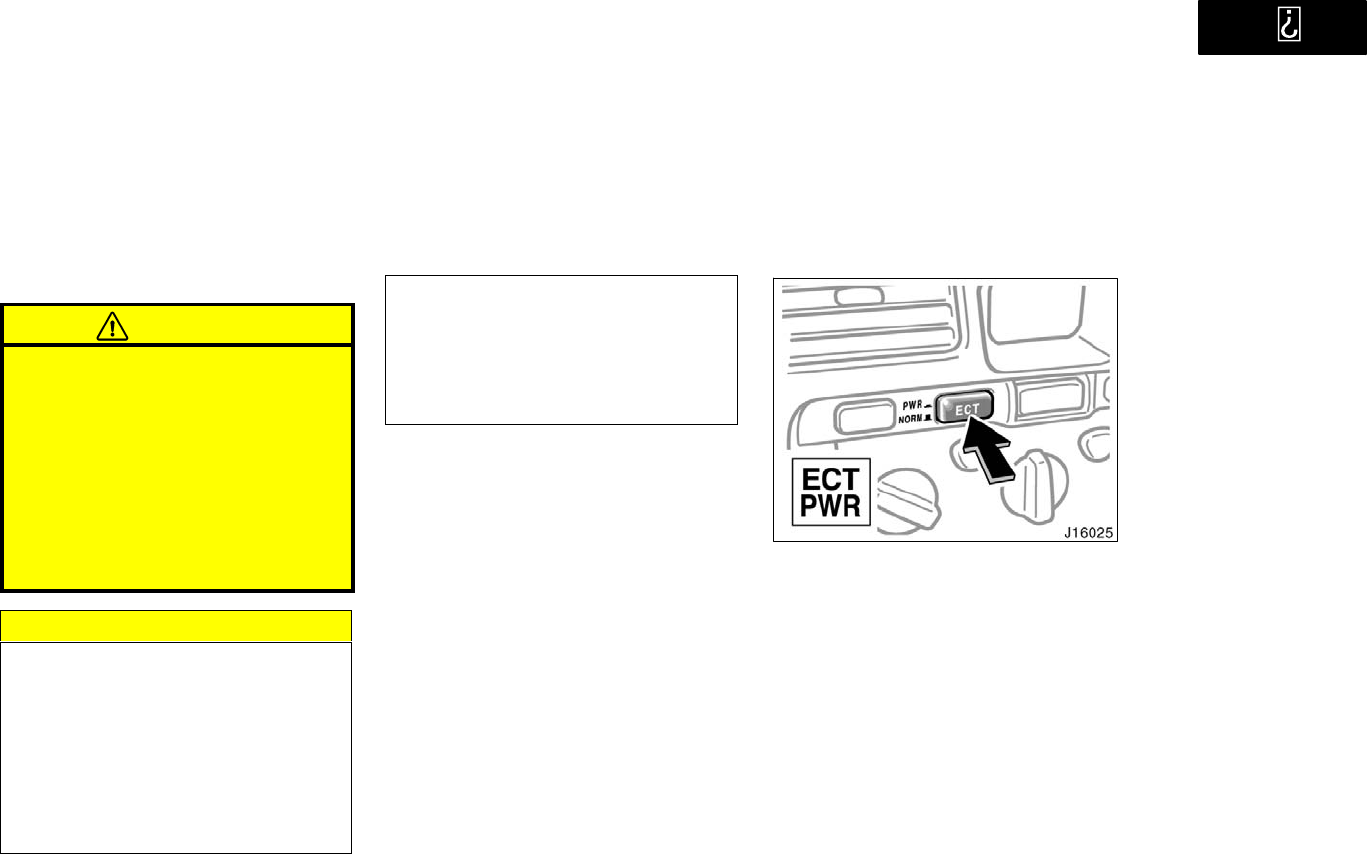
’01 4Runner_U (L/O 0008)
112 2001 4RUNNER (OM35768U)
(i) Rocking your vehicle if stuck
CAUTION
If your vehicle becomes stuck in
snow, mud, sand, etc., then you may
attempt to rock the vehicle free by
moving it forward and backward. Do
not attempt this procedure if people
or objects are anywhere near the ve-
hicle. During the rocking operation
the vehicle may suddenly move for-
ward or backward as it becomes un-
stuck, causing injury or damage to
nearby people or objects.
NOTICE
If you rock your vehicle, observe the
following precautions to prevent dam-
age to the transmission and other
parts.
zDo not depress the accelerator ped-
al while shifting the selector lever
or before the transmission is com-
pletely shifted to forward or reverse
gear.
zDo not race the engine and avoid
spinning the wheels.
zIf your vehicle remains stuck after
rocking the vehicle several times,
consider other ways such as tow-
ing.
(j) Driving in PWR" (Power) mode
In the PWR" mode, the transmission is
shifted up and down at a higher vehicle
speed than in the NORM"(Normal) mode
and a more powerful acceleration is
achieved. To set the PWR" mode, push
in the driving pattern selector button. The
PWR" mode indicator light comes on.
For ordinary driving, Toyota recommends
using the NORM" mode to improve fuel
economy.
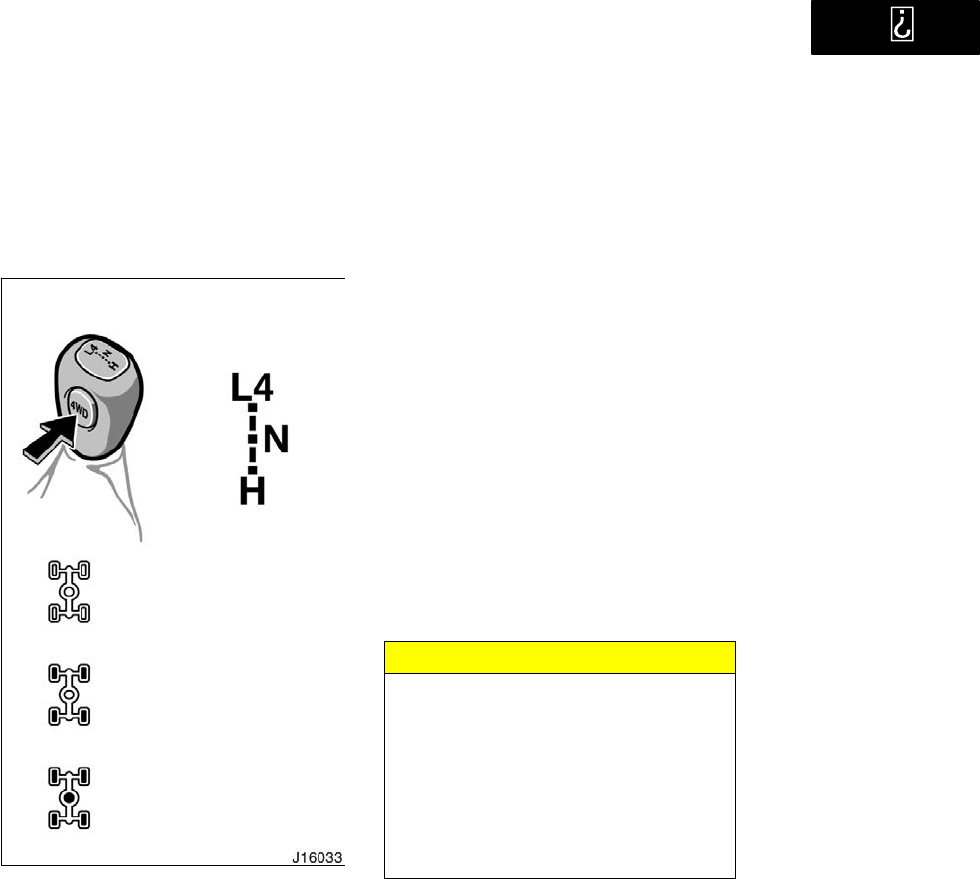
’01 4Runner_U (L/O 0008)
113
2001 4RUNNER (OM35768U)
(k) If you cannot shift the selector le-
ver out of P" position
If you cannot shift the selector lever from
the P" position even though the brake
pedal is depressed, use the shift lock
override lever. For instructions, see If you
cannot shift automatic transmission selec-
tor lever" in Section 4.
H" (2WD) MODE
H" (4WD) MODE (center
differential unlock), L4"
MODE (center differential
unlock) or N" MODE
H" (4WD) MODE (center
differential lock), L4"
MODE (center differential
lock) or N" MODE
Use the front drive control lever, 4WD"
button and center differential lock
switch to select the transfer and center
differential modes.
The H" and L4" position of the front
drive control lever provide either lock or
unlock the mode of the center differential.
Use the center differential lock system if
your wheels get stuck in a ditch, or when
you are driving on a slippery or bumpy
surface. When the center differential is
locked, the vehicle skid control system is
automatically turned off and the center dif-
ferential lock and VSC OFF" indicator
lights come on because the function that
controls engine performance interferes
with the process of freeing your wheels.
NOTICE
As soon as the center differential lock
switch is turned on, the VSC OFF"
indicator light comes on. After the
wheels are out of the ditch or off the
slippery or bumpy surface, turn the
center differential lock switch off.
Make sure that the center differential
lock indicator light and VSC OFF"
indicator light turn off.
Four−wheel drive system
(a) Front drive control

’01 4Runner_U (L/O 0008)
114 2001 4RUNNER (OM35768U)
H" mode (high speed position, two−
wheel drive): Front drive control lever at
H", 4WD" button left out
Use this for normal driving on dry hard−
surfaced roads. This position gives greater
economy, quietest ride and least wear and
better vehicle control.
H" mode (high speed position, four−
wheel drive, center differential un-
locked): Front drive control lever at H",
4WD" button push in, center differential
lock switch left out
Use this for normal driving on all types of
roads, from dry hard−surfaced roads to
wet, icy or snow−covered roads. This
position provides greater traction than
two−wheel drive.
H" (high speed position, four−wheel
drive, center differential locked): Lever
at H", 4WD" button pushed in center
differential lock switch pushed in
Use this for greater traction when you
experience a loss of power, such as
wheel slipping, in the center differential
unlock mode.
N" mode (neutral position): Front drive
control lever at N"
No power is delivered to the wheels. The
vehicle must be stopped.
L4" (low speed position, four−wheel
drive, center differential unlocked):
Front drive control lever at L4", center
differential lock switch left out
Use this for maximum power and traction.
Use this for climbing steep hills, off−road
driving, and hard pulling in sand or mud.
In this mode, the braking feeling that oc-
curs when the wheels are negotiating a
sharp corner is further reduced than in the
L4" (low position, four−wheel drive, center
differential locked) mode.
The transmission automatically shifts up
from second gear in this mode. This sys-
tem is effective when starting your vehicle
in sand, mud, ice or snow. (However, the
transmission system may shift up from
first gear when the vehicle starts too
quickly.)
L4" mode (low speed position, four−
wheel drive, center differential locked):
Front drive control lever at L4", center
differential lock switch push in
Use this for maximum power and traction.
Use this for hard pulling in situations the
vehicle cannot negotiate even in the L4"
(low speed position, four−wheel drive, cen-
ter differential unlocked) mode. Also, using
this mode when driving down steep off−
road inclines will help contribute to in-
creased vehicle stability.
Four−wheel drive and center differential
lock indicator lights show which transfer
and center differential mode the vehicle is
in. Note that the differential is not still
locked as long as the indicator light re-
mains off.
When the shifting has not been completed
within 3 seconds after the shifting opera-
tion, the indicator flashes. If the indicator
light does not go off when you push out
the center differential lock button, drive
straight ahead while accelerating or decel-
erating, or drive in reverse. If the indicator
flashes even if doing so, contact your
Toyota dealer as soon as possible. There
may be a trouble in the center differential
lock system.
See (c) Shifting procedure" for further in-
structions.

’01 4Runner_U (L/O 0008)
115
2001 4RUNNER (OM35768U)
Advice for driving on slippery roads in
L4" (low speed position) mode
If you shift the front drive control lever to
L4" and the automatic transmission lever
to 2" when you drive in steep off−road
areas, the output of the brake can be
controlled effectively by the active traction
control system, which assists the driver to
control the driving power of 4 wheels.
Use the L" position of the automatic
transmission lever for maximum power
and traction when your wheels get stuck
or when you drive down a steep incline.
In the following cases, the output of the
brake can be controlled by the active trac-
tion control system if the engine speed is
under 3000 rpm (normally engine speed is
under 3000 rpm when the wheels get un-
stuck).
The front drive control lever in the L4"
position and the automatic transmission
lever in the L" position or the automat-
ic transmission lever in the D" or 2"
with the transmission downshifting to
the first gear
The front drive control lever in the L4"
position and the automatic transmission
lever in the R" position
(As for the automatic transmission lever
positions, see Automatic transmission" in
this section.)
The A.D.D. can be engaged or disen-
gaged by the shifting operations des-
cribed in (c) Shifting procedure".
You should drive in four−wheel drive for
at least 16 km (10 miles) each month.
This will assure that the front drive com-
ponents are lubricated.
(b) A.D.D. (automatic
disconnecting differential)
’01 4Runner_U (L/O 0008)
116 2001 4RUNNER (OM35768U)
(c) Shifting procedure
SHIFTING BETWEEN H" (2WD) MODE
AND H" (4WD) MODE
To shift from H" (2WD) mode to H"
(4WD) mode, reduce your speed to less
than 100 km/h (62 mph) and push in the
4WD" button.
If the indicator light flashes when you
push in the 4WD" button, drive straight
ahead while accelerating or decelerating.
If the indicator light flashes and the buzz-
er sounds when you push in the 4WD"
button, reduce your speed or stop the
vehicle and reset.
CAUTION
Never push the 4WD" button if
wheels are slipping. Stop the slipping
or spinning before shifting.
To shift from H" (4WD) mode to H"
(2WD) mode, push the 4WD" button
again to turn it off.
This can be done at any vehicle speed.
If the indicator light flashes when you
push in the 4WD" button, drive straight
ahead while accelerating or decelerating,
or drive in reverse.
SHIFTING BETWEEN H" (4WD,
UNLOCKED) AND H" (4WD LOCKED)
To shift from H" (4WD, UNLOCKED) to
H" (4WD, LOCKED), push in the center
differential lock switch.
If the indicator light flashes when you
push in the center differential lock switch,
drive straight ahead while accelerating or
decelerating.
If the indicator light flashes and the buzz-
er sounds when you push in the center
differential lock switch, reduce your speed
or stop the vehicle and reset.
CAUTION
Never push the center differential
lock button if wheels are slipping.
Stop the slipping or spinning before
shifting.
NOTICE
Do not drive on a dry paved surface
in H" (4WD, LOCKED) mode. This
may damage the locking mechanism
and the drive system.
To shift from H" (4WD LOCKED) to
H" (4WD UNLOCKED), left out the cen-
ter differential lock switch.
This can be done at any vehicle speed.
If the indicator light flashes when you left
out the center differential lock switch,
drive straight ahead while accelerating or
decelerating, or drive in reverse.
SHIFTING BETWEEN H" AND L4"
Stop the vehicle and put the transmission
in N". With your foot holding down the
brake pedal, move the front drive control
lever.
If the indicator light flashes when you
move the front drive control lever, drive
straight ahead while accelerating or decel-
erating.
CAUTION
Never move the front drive control
lever if wheels are slipping. Stop the
slipping or spinning before shifting.
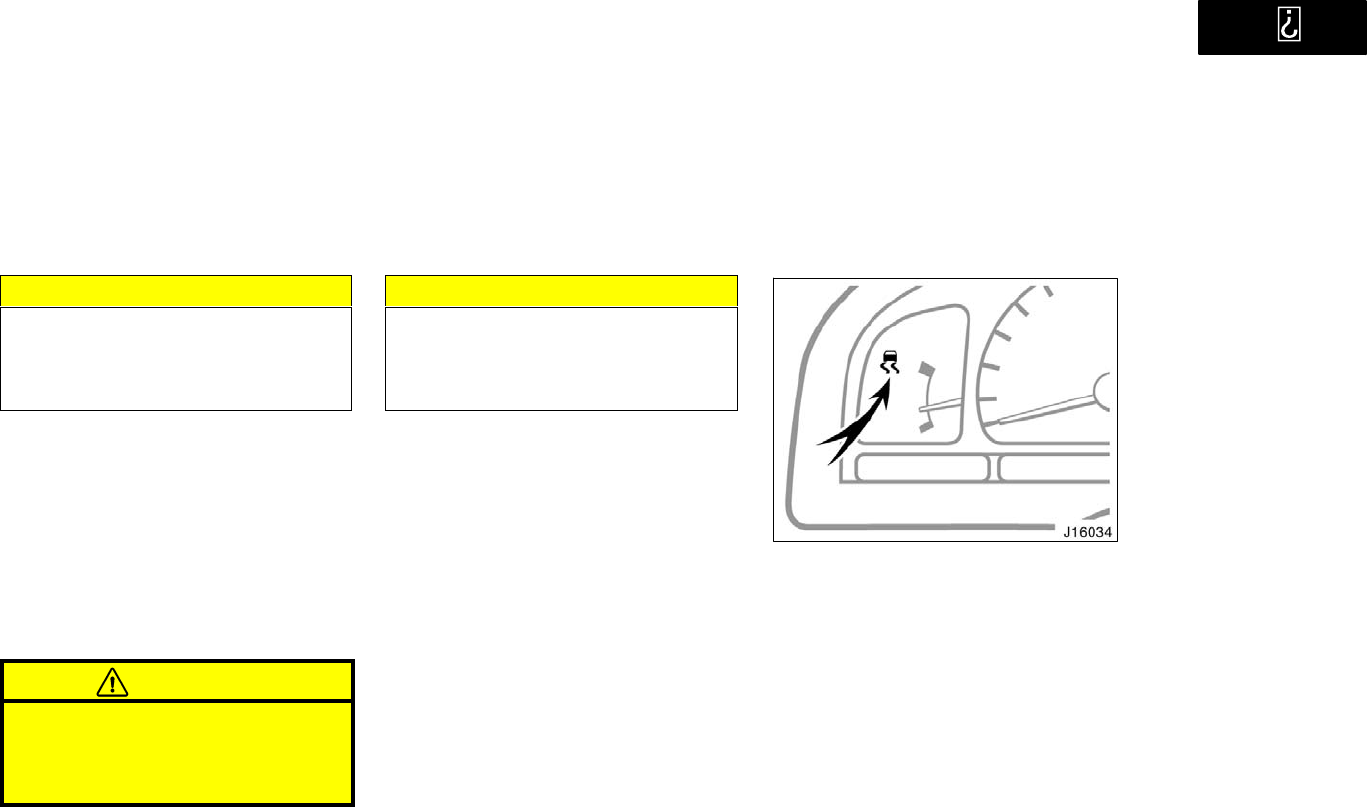
’01 4Runner_U (L/O 0008)
117
2001 4RUNNER (OM35768U)
NOTICE
Do not drive on a dry paved surface
in L4" (LOCKED) mode. This may
damage the locking mechanism and
the drive system.
SHIFTING BETWEEN L4" (UNLOCKED)
AND L4" (LOCKED)
To shift between unlock and lock
modes in L", push the center differential
lock switch.
This can be done at any vehicle speed.
If the indicator light flashes when you
push the center differential lock switch,
drive straight ahead while accelerating or
decelerating.
CAUTION
Never push the center differential
lock switch if wheels are slipping.
Stop the slipping or spinning before
shifting.
NOTICE
Do not drive on a dry paved surface
in L4" (LOCKED) mode. This may
damage the locking mechanism and
the drive system.
The traction control system automatical-
ly helps control the spinning of rear
wheels which may occur when acceler-
ating on slippery road surfaces, by con-
trolling the output of the brake and en-
gine. Thus, the system assists driver to
control the driving power of rear
wheels.
When you turn the ignition switch on, the
traction control system always turns on
automatically, and the slip indicator light
will come on. The indicator lights will go
off after about a few seconds.
If the slip indicator lights is left on after
the ignition is turned on, have your ve-
hicle checked by your Toyota dealer as
soon as possible.
Traction control system
(two−wheel drive models)
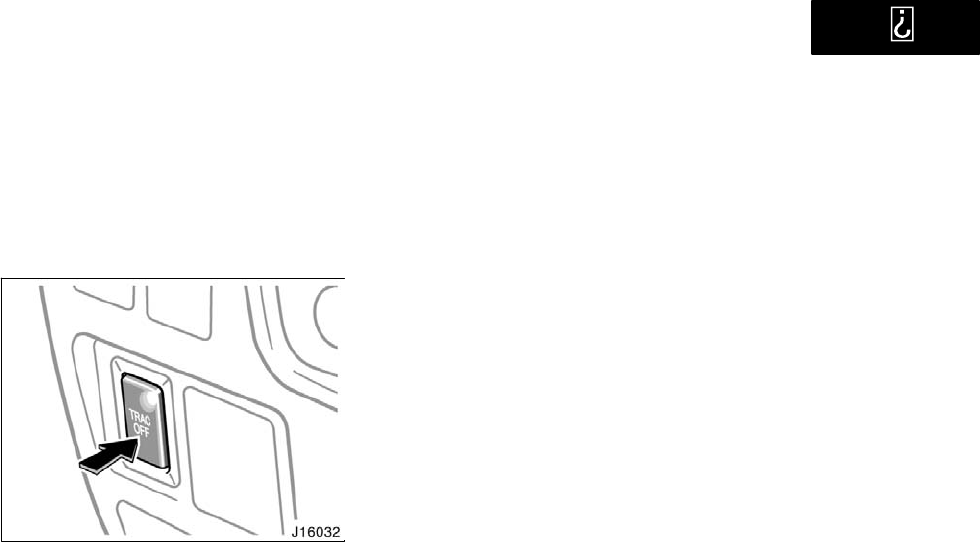
’01 4Runner_U (L/O 0008)
118 2001 4RUNNER (OM35768U)
Leave the system on during ordinary driv-
ing so that it can operate when needed.
When traction control is applied, the slip
indicator light blinks.
You may hear a sound in the engine
compartment for a few seconds when the
engine is started or just after the vehicle
is started. This means that the traction
control system is in the self−check mode,
and does not indicate malfunction. When
the traction control system is operating,
you may feel vibration or noise of your
vehicle, caused by operation of the
brakes. This indicates the system is func-
tioning properly.
When getting the vehicle out of mud or
new snow, etc. the traction control system
will help operate to prevent the wheels
from spinning.
You can turn off the traction control
system by pushing the TRAC OFF"
switch. The TRAC OFF" indicator light
will come on. Pushing the TRAC OFF"
switch a second time turns on the trac-
tion control system again and the
TRAC OFF" indicator light will go off.
The traction control system will automati-
cally go on, and the TRAC OFF" indicator
light will go off when you drive over 30
km/h (19 mph) even if the TRAC OFF"
switch is pushed to cancel the traction
control system.
If your wheels get stuck in a ditch or
when you are driving on a slippery or
bumpy surface, turn off the traction control
system because its function that controls
engine performance interferes with the
process of freeing your wheels.
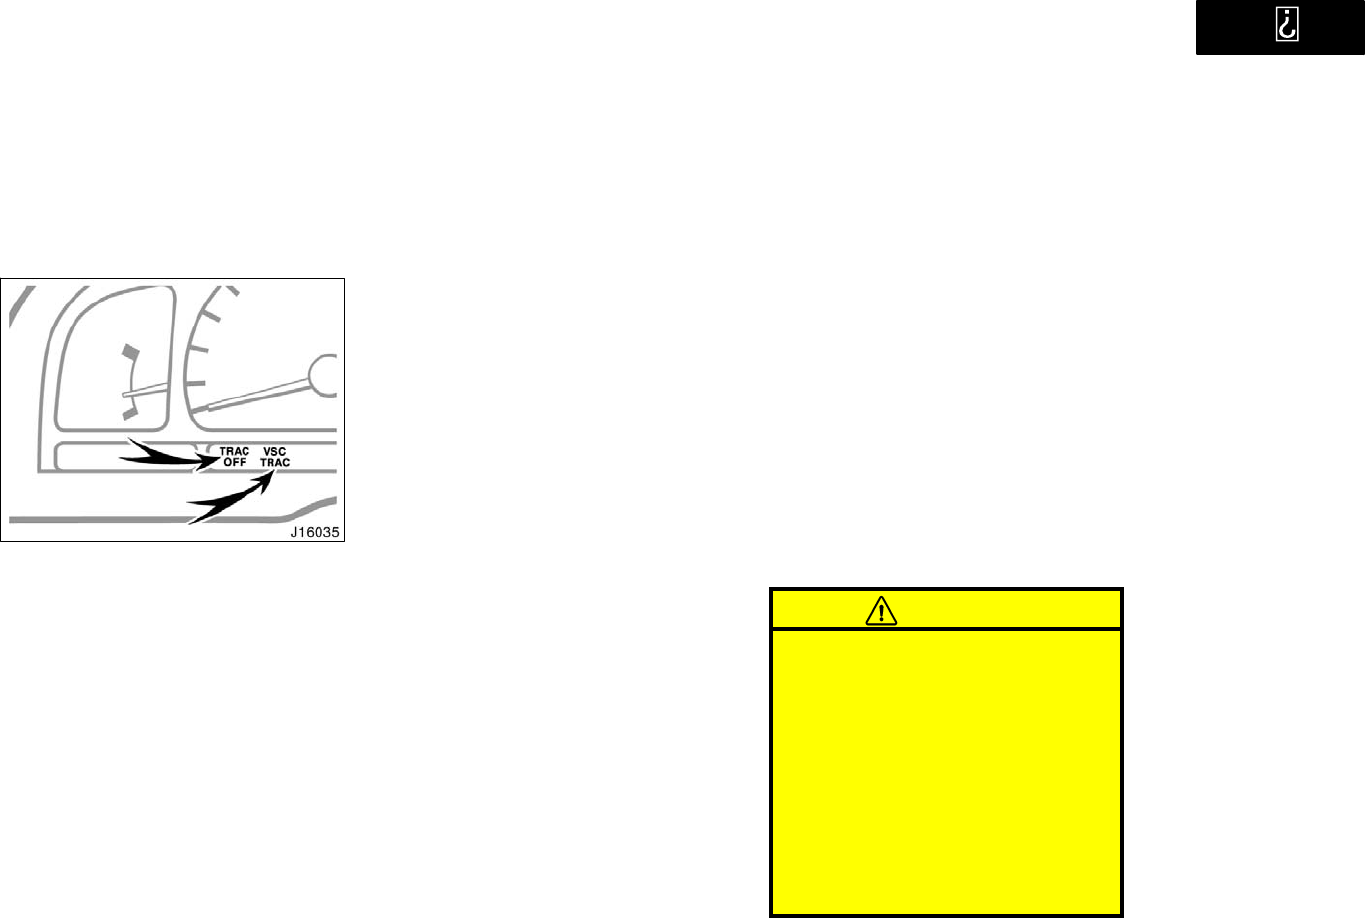
’01 4Runner_U (L/O 0008)
119
2001 4RUNNER (OM35768U)
Traction control system failure warning
These lights warn that when there is a
problem somewhere in the traction control
system.
If the TRAC OFF" indicator light and
VSC/TRAC" warning light come on, have
your vehicle checked by Toyota dealer as
soon as possible.
The lights will come on when the ignition
key is turned to ON", and will go off after
about a few seconds.
The lights may come on for 60 seconds
after the ignition key is turned to the ON"
position. It is normal if they go out after
a while.
Depressing the brake pedal repeatedly
may turn on the TRAC OFF" indicator
light and VSC/TRAC" warning light. It is
normal if it goes out after a few seconds.
The brake actuator temperature increases
during continuous operation of the traction
control system or vehicle skid control sys-
tem such as on slippery roads. If the
brake actuator temperature becomes too
high while the traction control system or
vehicle skid control system is operating,
a buzzer will start to sound intermittently
to indicate that the traction control system
can no longer operate. In this case, imme-
diately stop your vehicle at a safe place.
If the system continues to operate, the
buzzer sound changes from intermittent to
continuous. (The continuous buzzer
sounds for about 3 seconds.) At the time
the VSC/TRAC" warning light will come
on and the traction control system tempo-
rarily stops operating in order to protect
the brake actuator. (Although the traction
control system does not operate, there is
no problem to continue your driving.) The
system will be automatically restored after
a short time and the VSC/TRAC" warning
light goes out.
When the VSC/TRAC" warning light and
TRAC OFF" indicator light come on the
traction control system does not operate,
but there is no problem to continue your
driving.
In the following cases, contact your Toyota
dealer:
The VSC/TRAC" warning light and
TRAC OFF" indicator light do not
come on after the ignition is turned to
on.
The VSC/TRAC" warning light TRAC
OFF" indicator light are left on after the
ignition is turned to on.
CAUTION
Under certain slippery road condi-
tions, full traction of the vehicle and
power to the rear wheels can not be
maintained, even though the traction
control system is in operation. Do not
drive the vehicle under any speed or
maneuvering conditions which will
cause the vehicle to lose traction. In
situations where the road surface is
covered with ice or snow, your ve-
hicle should be fitted with snow tires
or tire chains. Always drive at ap-
propriate and cautious pace.
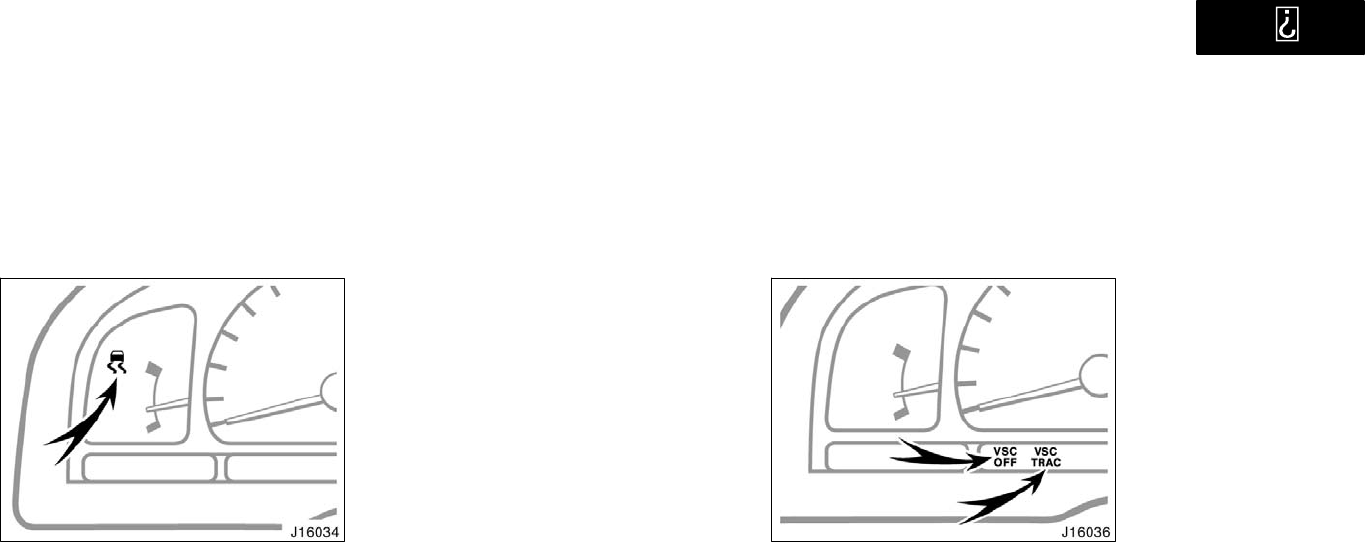
’01 4Runner_U (L/O 0008)
120 2001 4RUNNER (OM35768U)
The active traction control system auto-
matically helps control the spinning of
4 wheels (four−wheel drive mode) or
rear wheels (two−wheel drive mode)
which may occur when accelerating on
slippery road surfaces, by controlling
the output of the brake and engine.
Thus, the system assists driver to con-
trol the driving power of 4 wheels
(four−wheel drive mode) or rear wheels
(two−wheel drive mode).
When you turn the ignition switch on, the
active traction control system always turns
on automatically, and the slip indicator
light will come on. The indicator lights will
go off after about a few seconds.
If the slip indicator light is left on after
the ignition is turn on, have your vehicle
checked by your Toyota dealer as soon as
possible.
When the active traction control is ap-
plied, the slip indicator light blinks.
You may hear a sound in the engine
compartment for a few seconds when the
engine is started or just after the vehicle
is started. This means that the active
traction control system is in the self−
check mode, and does not indicate mal-
function. When the traction control system
is operating, you may feel vibration or
noise of your vehicle, caused by operation
of the brakes. This indicates the system
is functioning properly.
When getting the vehicle out of mud or
new snow, etc. the active traction control
system will help operate to prevent the
wheels from spinning.
Active traction control system failure
warning
These lights warn that when there is a
problem somewhere in the active traction
control system.
If the VSC OFF" indicator light and VSC/
TRAC" warning light come on, have your
vehicle checked by Toyota dealer as soon
as possible.
The lights will come on when the ignition
key is turned to ON", and will go off after
about a few seconds.
The lights may come on for 60 seconds
after the ignition key is turned to the ON"
position. It is normal if they go out after
a while.
Active traction control
system
(four−wheel drive models)
’01 4Runner_U (L/O 0008)
121
2001 4RUNNER (OM35768U)
Depressing the brake pedal repeatedly
may turn on the VSC OFF" indicator light
and VSC/TRAC" warning light. It is nor-
mal if it goes out after a few seconds.
The brake actuator temperature increases
during continuous operation of the active
traction control system or vehicle skid
control system such as on slippery roads.
If the brake actuator temperature becomes
too high while the active traction control
system or vehicle skid control system is
operating, a buzzer will start to sound
intermittently to indicate that the active
traction control system can no longer op-
erate. In this case, immediately stop your
vehicle at a safe place. If the system
continues to operate, the buzzer sound
changes from intermittent to continuous.
(The continuous buzzer sounds for about
3 seconds.) At the time, the VSC/TRAC"
warning light will come on and the active
traction control system temporarily stops
operating in order to protect the brake
actuator. (Although the active traction con-
trol system does not operate, there is no
problem to continue your driving.) The
system will be automatically restored after
a short time and the VSC/TRAC" warning
light goes out.
When the VSC/TRAC" warning light and
VSC OFF" indicator light come on the
active traction control system does not
operate, but there is no problem to contin-
ue your driving.
In the following cases, contact your Toyota
dealer:
The VSC/TRAC" warning light and
VSC OFF" indicator light do not come
on after the ignition is turned to on.
The VSC/TRAC" warning light and
VSC OFF" indicator light are left on
after the ignition is turned to on.
CAUTION
Under certain slippery road condi-
tions, full traction of the vehicle and
power to the 4 wheels (four−wheel
drive mode) or rear wheels (two−
wheel drive mode) can not be main-
tained, even though the traction con-
trol system is in operation. Do not
drive the vehicle under any speed or
maneuvering conditions which will
cause the vehicle to lose traction. In
situations where the road surface is
covered with ice or snow, your ve-
hicle should be fitted with snow tires
or tire chains. Always drive at ap-
propriate and cautious pace.
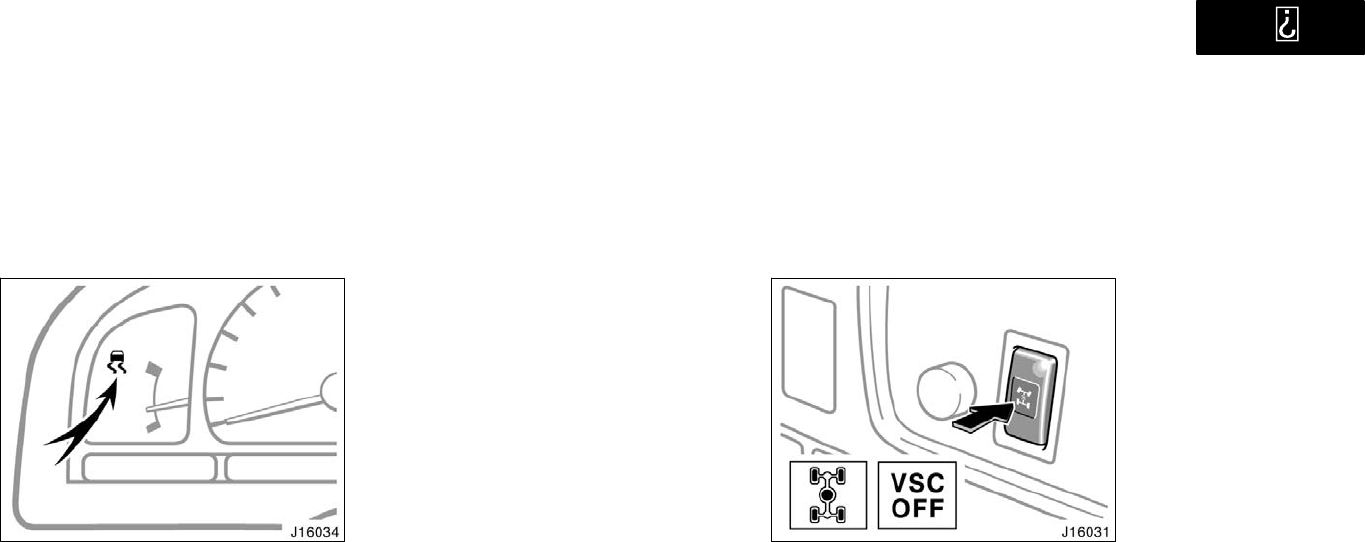
’01 4Runner_U (L/O 0008)
122 2001 4RUNNER (OM35768U)
Vehicle skid control system
The vehicle skid control system helps
to provide comprehensive control of the
systems such as anti−lock brakes, trac-
tion control, engine control, etc. This
system automatically controls the out-
put of the brakes or engine to help
prevent the vehicle from skidding under
adverse condition.
When you turn the ignition switch on, the
slip indicator light will come on. The slip
indicator light will go off after about a few
seconds.
If the slip indicator light is left on after
the ignition is tuned on, have your vehicle
checked by your Toyota dealer as soon as
possible.
If the vehicles is going to skid during
driving, the slip indicator light flashes and
an alarm sounds intermittently.
The vehicle skid control activates when
the vehicle speed is more than 15 km/h
(9 mph).
You may hear a sound in the engine
compartment for a few seconds when the
engine is started or just after the vehicle
is started. This means that the vehicle
stability control is in the self−check mode
and does not indicate a malfunction.
Four−wheel drive models only
This switch can function only when the
four−wheel drive system is selected.
You can turn off the vehicle skid con-
trol system by pushing the center dif-
ferential lock switch. The VSC OFF"
and center differential lock indicator
lights will come on. Pushing the center
differential lock switch a second time
turns on the system again. The VSC
OFF" and center differential lock indica-
tor lights will go off.
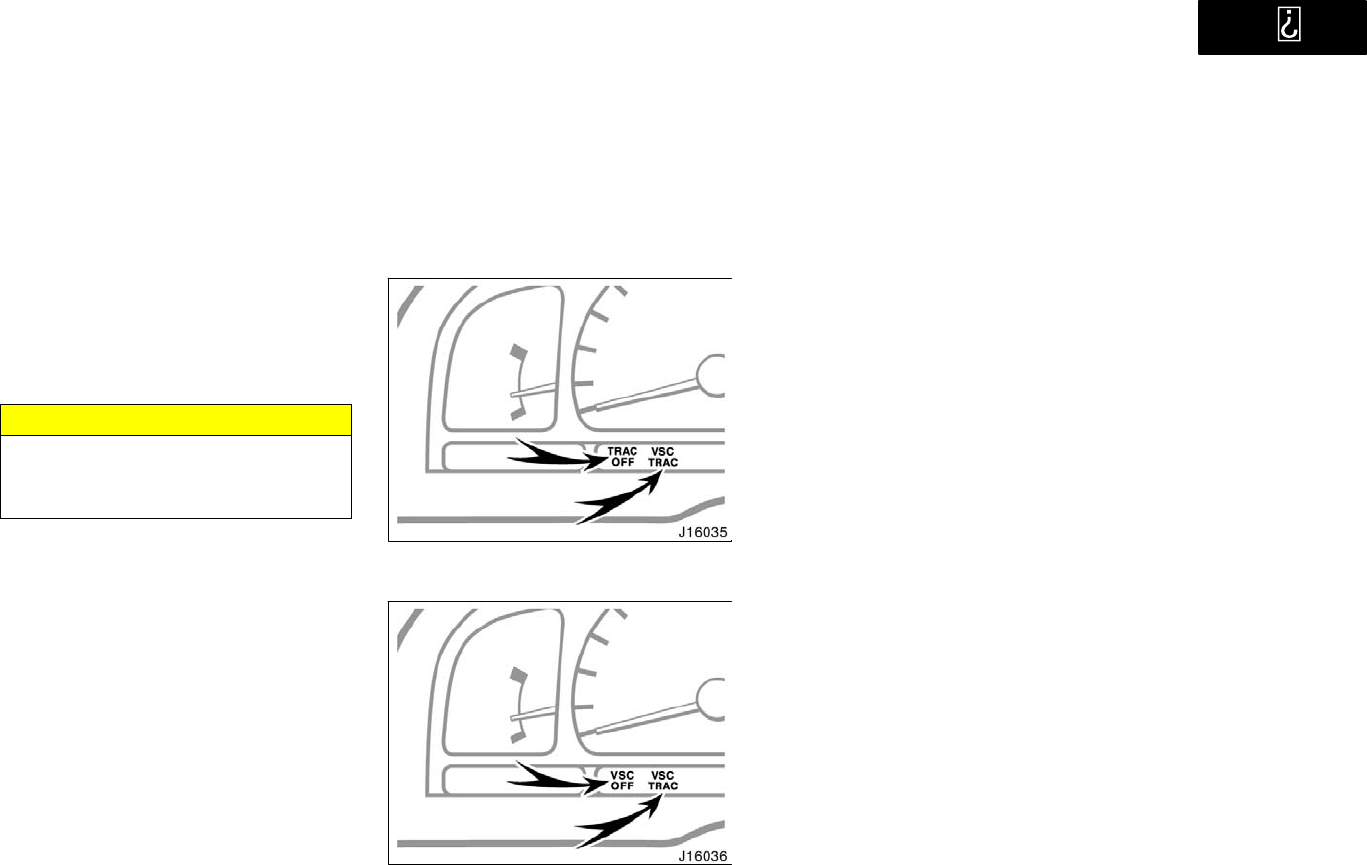
’01 4Runner_U (L/O 0008)
123
2001 4RUNNER (OM35768U)
If your wheels get stuck in a ditch or
when you are driving on severe off road
and sand, turn off the vehicle skid control
system because its function that controls
engine performance interferes with the
process of freeing your wheels.
NOTICE
Make sure that the center differential
lock indicator light goes off before
normal driving.
Two−wheel drive models
Four−wheel drive models
Vehicle skid control system failure
warning
These lights warn that when there is a
problem somewhere in the vehicle skid
control system, traction control system
(two−wheel drive models), active traction
control system (four−wheel drive models).
If the VSC/TRAC" warning light and
TRAC OFF" (two−wheel drive models) or
VSC OFF" (four−wheel drive models) indi-
cator light come on, have your vehicle
checked by Toyota dealer as soon as pos-
sible. However, it is no problem that the
VSC/TRAC" warning light comes on when
the brake actuator temperature becomes
high. (For details, see Traction control
system" and Active traction control sys-
tem" in this section.)
The VSC/TRAC" warning light and TRAC
OFF" (two−wheel drive models) or VSC
OFF" (four−wheel drive models) indicator
light will come on when the ignition key
is turned to ON", and will go off after
about a few seconds.
The lights may come on for 60 seconds
after the ignition key is turned to the ON"
position. It is normal if they go out after
a while.
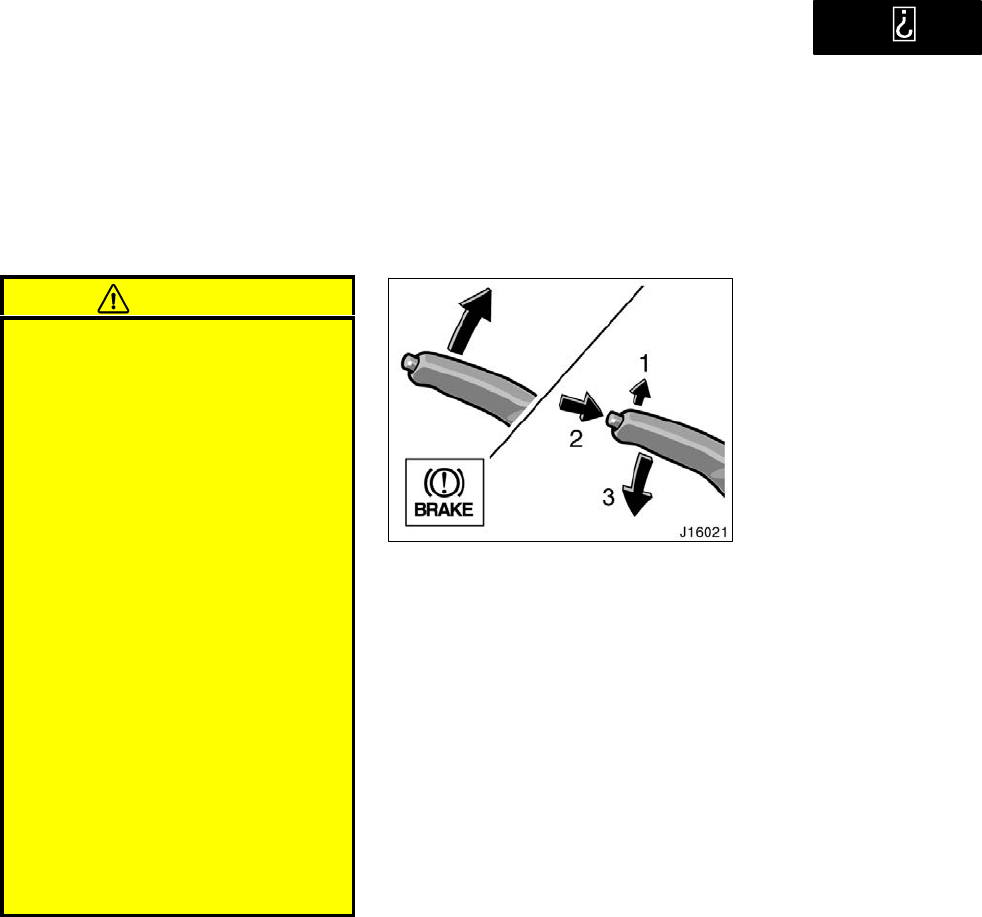
’01 4Runner_U (L/O 0008)
124 2001 4RUNNER (OM35768U)
Depressing the brake pedal repeatedly
may turn on VSC/TRAC" warning light
and TRAC OFF" (two−wheel drive mod-
els) or VSC OFF" (four−wheel drive mod-
els) indicator light. It is normal if they go
out after a few seconds.
When the VSC/TRAC" warning light and
TRAC OFF" (two−wheel drive models) or
VSC OFF" (four−wheel drive models) indi-
cator light come on, the vehicle skid con-
trol system does not operate, but there is
no problem to continue your driving.
In the following cases, contact your Toyota
dealer:
The VSC/TRAC" warning light and
TRAC OFF" (two−wheel drive models)
or VSC OFF" (four−wheel drive mod-
els) indicator light do not come on af-
ter the ignition is turned to on.
The VSC/TRAC" warning light and
TRAC OFF" (two−wheel drive models)
or VSC OFF" (four−wheel drive mod-
els) indicator light are left on after the
ignition is turned to on.
CAUTION
Active traction control system, ve-
hicle skid control system and anti−
lock brake system are electronic
systems designed to help the driver
maintain control under adverse con-
ditions. They are not a substitute
for safe driving practices. Factors
including speed, road conditions
and driver steering input can all af-
fect whether active traction control
system, vehicle skid control system
and anti−lock brake system will be
effective in preventing a loss of
control. Always keep safety driving
in mind. If the slip indicator light
flashes, sounding an alarm, special
care should be taken while driving.
Only use tires of specified size. The
size, manufacture, brand and tread
pattern for all 4 tires should be the
same. If you use the tires other
than specified, or different type or
size, the vehicle skid control sys-
tem may not function correctly.
When replacing the tires or wheels,
contact your Toyota dealer. (See
Checking and replacing tires" in
Section 7−2.)
Parking brake
When parking, firmly apply the parking
brake to avoid inadvertent creeping.
To set: Pull up the lever. For better hold-
ing power, first depress the brake pedal
and hold it while setting the parking
brake.
To release: Pull up the lever slightly (1),
press the lock release button (2), and low-
er (3).
To remind you that the parking brake is
set, the parking brake reminder light in
the instrument panel remains on until you
release the parking brake.
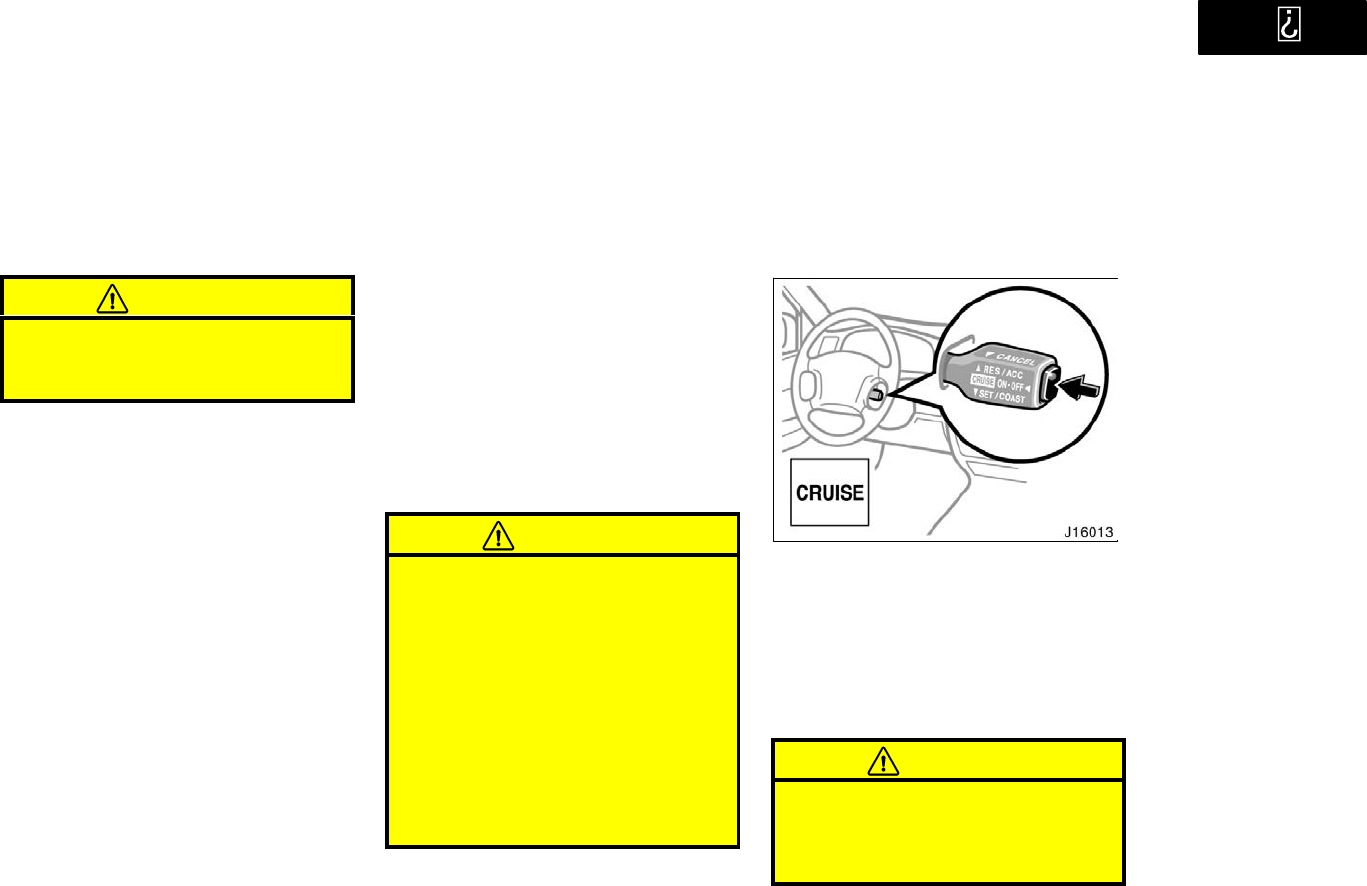
’01 4Runner_U (L/O 0008)
125
2001 4RUNNER (OM35768U)
CAUTION
Before driving, be sure the parking
brake is fully released and the park-
ing brake reminder light is off.
Cruise control
The cruise control allows you to cruise
the vehicle at a desired speed over 40
km/h (25 mph) even with your foot off
the accelerator pedal.
Your cruising speed can be maintained up
or down grades within the limits of engine
performance, although a slight speed
change may occur when driving up or
down the grades. On steeper hills, a
greater speed change will occur so it is
better to drive without the cruise control.
CAUTION
To help maintain maximum control
of your vehicle, do not use the
cruise control when driving in
heavy or varying traffic, or on slip-
pery (rainy, icy or snow−covered) or
winding roads.
Avoid vehicle speed increases when
driving downhill. If the vehicle
speed is too fast in relation to the
cruise control set speed, cancel the
cruise control then downshift the
transmission to use engine braking
to slow down.
TURNING ON THE SYSTEM
To operate the cruise control, press the
CRUISE ON−OFF" button. This turns the
system on. The indicator light in the
instrument panel shows that you can now
set the vehicle at a desired cruising
speed. Another press will turn the system
completely off.
CAUTION
To avoid accidental cruise control en-
gagement, keep the CRUISE ON−
OFF" switch off when not using the
cruise control.
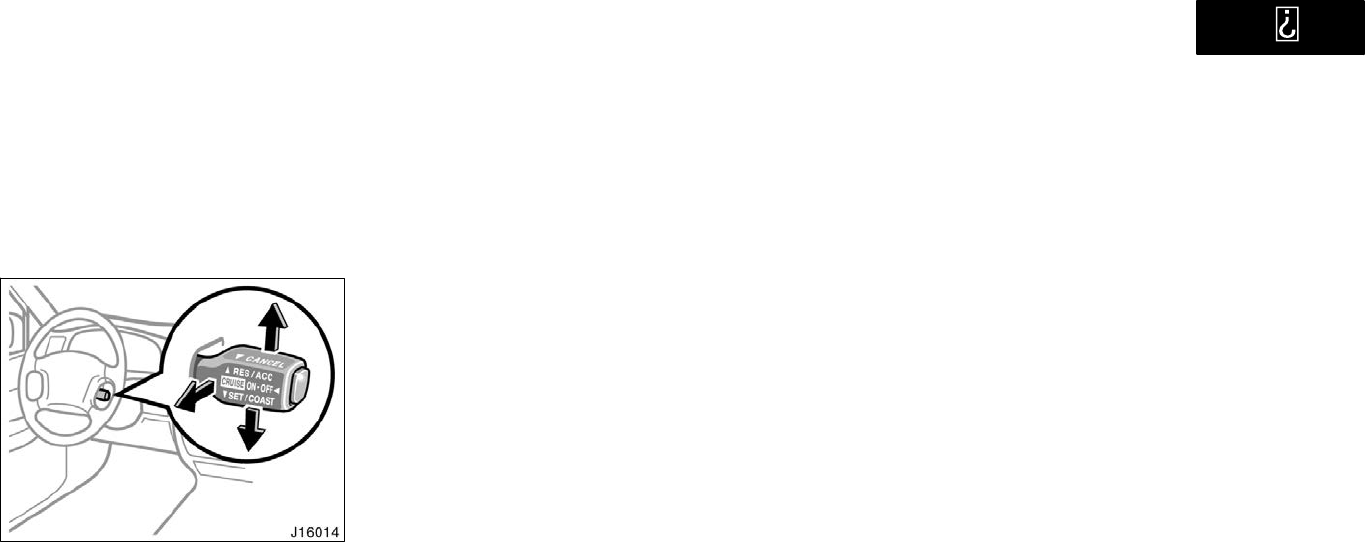
’01 4Runner_U (L/O 0008)
126 2001 4RUNNER (OM35768U)
SETTING AT A DESIRED SPEED
The transmission must be in D" before
you set the cruise control speed.
Bring your vehicle to the desired speed,
push the lever down in the SET/COAST"
direction and release it. This sets the ve-
hicle at that speed. If the speed is not
satisfactory, tap the lever up for a faster
speed, or tap it down for a slower speed.
Each tap changes the set speed by 1.6
km/h (1.0 mph). You can now take your
foot off the accelerator pedal.
If you need accelerationfor example,
when passingdepress the accelerator
pedal enough for the vehicle to exceed
the set speed. When you release it, the
vehicle will return to the speed set prior
to the acceleration.
CANCELLING THE PRESET SPEED
You can cancel the preset speed by:
a. Pulling the lever in the CANCEL"
direction and releasing it.
b. Depressing the brake pedal.
If the vehicle speed falls below about 40
km/h (25 mph), the preset speed will auto-
matically cancel out.
If the vehicle speed drops 16 km/h (10
mph) below the preset speed, the preset
speed will also automatically cancel out.
If the preset speed automatically cancels
out other than for the above cases, have
your vehicle checked by your Toyota deal-
er at the earliest opportunity.
RESETTING TO A FASTER SPEED
Push the lever up in the RES/ACC" direc-
tion and hold it. Release the lever when
the desired speed is attained. While the
lever is held up, the vehicle will gradually
gain speed.
However, a faster way to reset is to ac-
celerate the vehicle and then push the
lever down in the SET/COAST" direction.
RESETTING TO A SLOWER SPEED
Push the lever down in the SET/COAST"
direction and hold it. Release the lever
when the desired speed is attained. While
the lever is held down, the vehicle speed
will gradually decrease.
However, a faster way to reset is to de-
press the brake pedal and then push the
lever down in the SET/COAST" direction.
Even if you turn off the overdrive switch,
with the cruise control on, engine braking
will not be applied because the cruise
control is not cancelled. To decrease the
vehicle speed, reset to a slower speed
with the cruise control lever or depress
the brake pedal. If you use the brake
pedal, cruise control is cancelled.

’01 4Runner_U (L/O 0008)
127
2001 4RUNNER (OM35768U)
RESUMING THE PRESET SPEED
If the preset speed is cancelled by pulling
the control lever or by depressing the
brake pedal or clutch pedal, pushing the
lever up in the RES/ACC" direction will
restore the speed set prior to cancellation.
However, once the vehicle speed falls be-
low about 40 km/h (25 mph), the preset
speed will not be resumed.
CRUISE CONTROL FAILURE WARNING
If the CRUISE" indicator light in the
instrument cluster flashes when using the
cruise control, press the CRUISE ON−
OFF" button to turn the system off and
then press it again to turn it on.
If any of the following conditions then oc-
curs, there is some trouble in the cruise
control system.
The indicator light does not come on.
The indicator light flashes again.
The indicator light goes out after it
comes on.
If this is the case, contact your Toyota
dealer and have your vehicle inspected.

’01 4Runner_U (L/O 0008)
128 2001 4RUNNER (OM35768U)

’01 4Runner_U (L/O 0008)
129
2001 4RUNNER (OM35768U)
OPERATION OF INSTRUMENTS AND
CONTROLS
Car audio system
Reference 130. . . . . . . . . . . . . . . . . . . . . . . . . . . . . . . . . . . . . . . . . . . . . . . . .
Using your audio system 131. . . . . . . . . . . . . . . . . . . . . . . . . . . . . . . . . . . .
Car audio system operating hints 152. . . . . . . . . . . . . . . . . . . . . . . . . . . . .
SECTION 1− 7
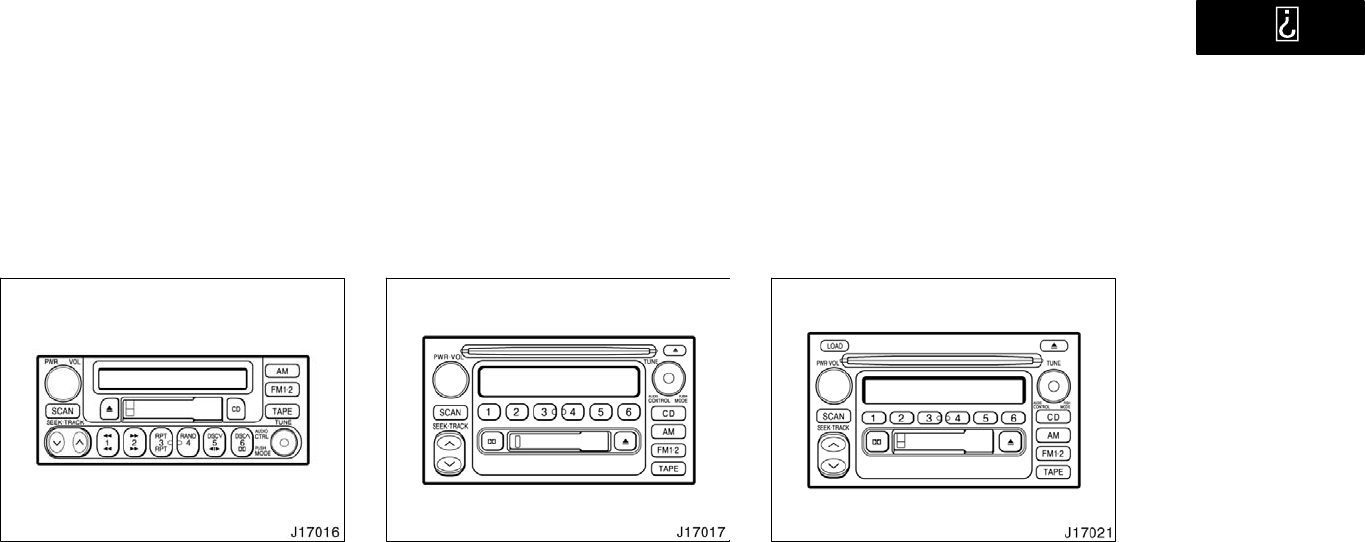
’01 4Runner_U (L/O 0008)
130 2001 4RUNNER (OM35768U)
Reference
Type 1: AM·FM ETR radio/cassette player
(with compact disc auto changer control-
ler)
Type 2: AM·FM ETR radio/cassette player
compact disc player (with compact disc
auto changer controller)
Type 3: AM·FM ETR radio/cassette player/
compact disc auto changer
’01 4Runner_U (L/O 0008)
131
2001 4RUNNER (OM35768U)
This section describes some of the basic
features on Toyota audio systems. Some
information may not pertain to your sys-
tem.
Your audio system works when the ignition
key is in the ACC" or ON" position.
TURNING THE SYSTEM ON AND OFF
Push PWR·VOL" or PWR/VOL" to turn
the audio system on and off.
Push AM", FM1·2", TAPE" or CD" to
turn on that function without pushing
PWR·VOL" or PWR/VOL".
You can turn on each player by inserting
a cassette tape or compact disc.
You can turn off each player by ejecting
the cassette tape or compact disc. If the
audio system was previously off, then the
entire audio system will be turned off
when you eject the cassette tape or com-
pact disc. If the another function was pre-
viously playing, it will come on again.
SWITCHING BETWEEN FUNCTIONS
Push AM", FM1·2", TAPE" or CD" if the
system is already on but you want to
switch from one function to another.
TONE AND BALANCE
For details about your system’s tone and
balance controls, see the description of
your own system.
Tone
How good an audio program sounds to
you is largely determined by the mix of
the treble, midrange, and bass levels. In
fact, different kinds of music and vocal
programs usually sound better with differ-
ent mixes of treble, midrange, and bass.
Balance
A good balance of the left and right stereo
channels and of the front and rear sound
levels is also important.
Keep in mind that if you are listening to
a stereo recording or broadcast, changing
the right/left balance will increase the vol-
ume of one group of sounds while de-
creasing the volume of another.
YOUR RADIO ANTENNA
Your vehicle has a mast type antenna.
Detachable antenna
To remove an detachable antenna, careful-
ly turn it counterclockwise.
NOTICE
To prevent damage to the antenna,
make sure it is removed before driv-
ing your Toyota through an automatic
car wash.
Power antenna
To lower a power antenna, turn off the
audio system by pushing PWR·VOL" or
PWR/VOL", or turn the ignition key to
LOCK".
The power antenna automatically retracts
when the radio mode is switched off to
turn on the cassette tape player.
NOTICE
To prevent damage to the antenna,
make sure it is retracted before driv-
ing your Toyota through an automatic
car wash.
Using your audio system
Some basics

’01 4Runner_U (L/O 0008)
132 2001 4RUNNER (OM35768U)
YOUR CASSETTE PLAYER
When you insert a cassette, the exposed
tape should be to the right.
NOTICE
Do not oil any part of the player and
do not insert anything other than cas-
sette tapes into the slot, or the tape
player may be damaged.
YOUR COMPACT DISC PLAYER
When you insert a disc, gently push it in
with the label side up. (The player will
automatically eject a disc if the label side
is down.) The compact disc player will
play from track 1 through the end of the
disc. Then it will play from track 1 again.
NOTICE
Never try to disassemble or oil any
part of the compact disc player. Do
not insert anything except a compact
disc into the slot.
The player is intended for use with 12 cm
(4.7 in.) discs only.
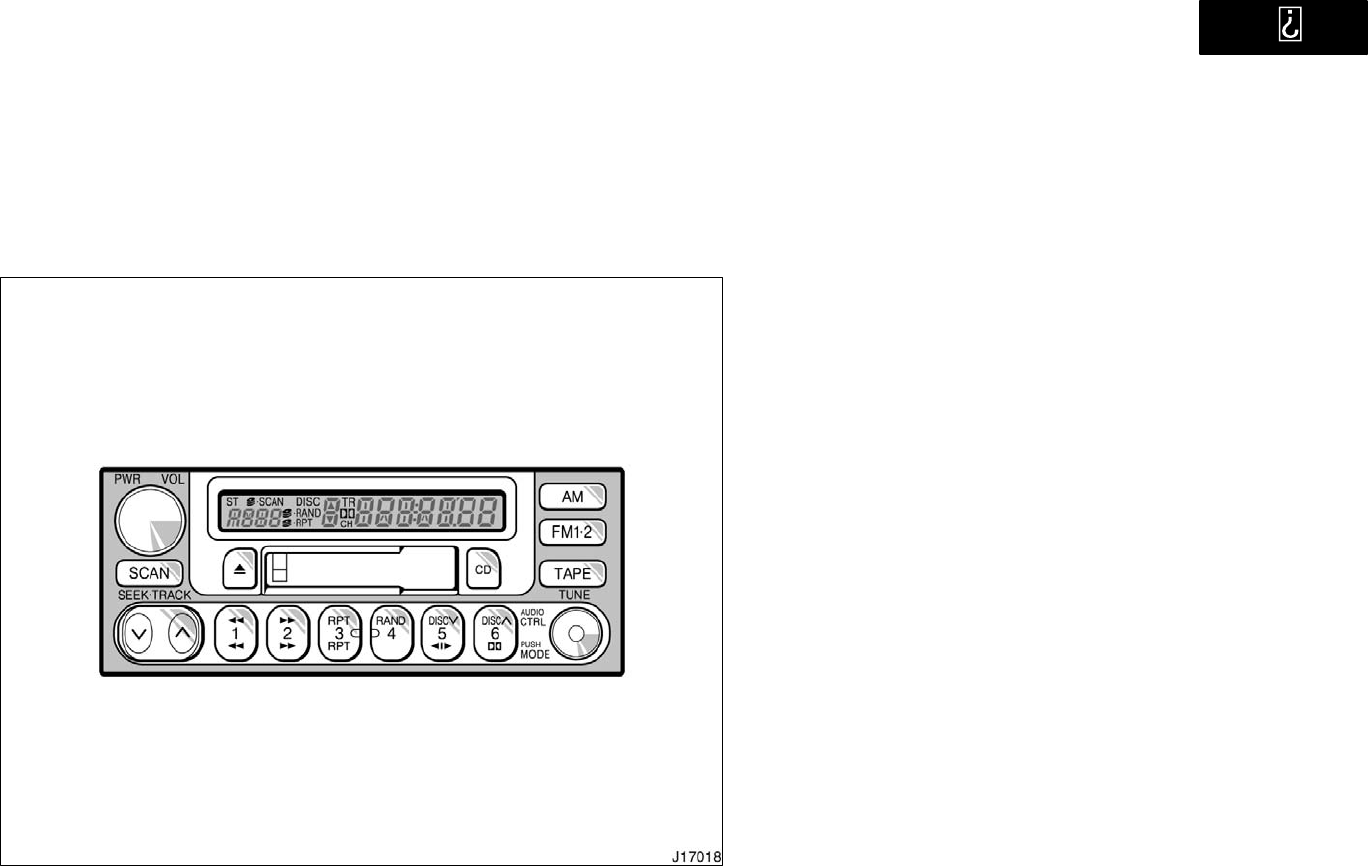
’01 4Runner_U (L/O 0008)
133
2001 4RUNNER (OM35768U)
Details of specific buttons, controls, and
features are described in the alphabetical
listing that follows.
Controls and features
Type 1

’01 4Runner_U (L/O 0008)
134 2001 4RUNNER (OM35768U)
1 2 3 4 5 6 (Preset buttons)
These buttons are used to preset and
tune in radio stations.
To preset a station to a button: Tune in
the desired station (see TUNE" knob or
SEEK" button). Push and hold down the
button until you hear a beepthis will set
the station to the button. The button num-
ber will appear on the display.
To tune in to a preset station: Push the
button for the station you want. The but-
ton number and station frequency will ap-
pear on the display.
These systems can store one AM and two
FM stations for each button (The display
will show AM", FM1" or FM2" when you
push AM" FM1·2").
(Eject button)
Push the cassette tape eject button to
eject a cassette. Push the compact disc
eject button to eject a compact disc.
After you turn the ignition to LOCK", you
will be able to eject a cassette or disc but
you will not be able to reinsert it.
(Program)
Push " to select the other side of a
cassette tape. The display indicates which
side is currently selected ( " indicates
top side, " indicates bottom side).
Auto−reverse feature: After the cassette
player reaches the end of a tape side, it
automatically reverses and begins to play
the other side. This is true whether the
cassette was playing or fast forwarding.
(Reverse/Fast forward buttons)
Cassette Player
Push the fast forward button to fast for-
ward a cassette tape. FF" will appear on
the display. Push the reverse button to
rewind a tape. REW" will appear on the
display.
To stop the tape while it is fast forward-
ing, push the fast forward button or
TAPE"; to stop the tape while it is re-
winding, push the reverse button or
TAPE".
If a tape side rewinds completely, the cas-
sette player will stop and then play that
same side. If a tape fast forwards com-
pletely, the cassette player will play the
other side of the tape, using the auto−re-
verse feature.
Compact Disc Player
If you want to fast forward or reverse
through a compact disc track, push and
hold in the fast forward or reverse button.
When you release the button, the compact
disc player will resume playing.
AM
Push AM" to turn on the radio and select
the AM band. AM" will appear on the
display.
If the audio system is off, you can turn
on the radio by pushing AM". Also, push
AM" to switch from cassette or compact
disc operation to radio operation.
CTRL / MODE (Audio control and mode
adjustment)
Manual tone adjustment function
This knob is used to adjust the tone
manually.
For low−pitch tone adjustment, push
CTRL / MODE" repeatedly until BAS"
appears on the display. Then turn the
knob to suit your preference.
The display will show the range from
BAS −5" to BAS 5".

’01 4Runner_U (L/O 0008)
135
2001 4RUNNER (OM35768U)
For high−pitch tone adjustment, push
CTRL / MODE" repeatedly until TRE"
appears on the display. Then turn the
knob to suit your preference.
The display will show the range from
TRE −5" to TRE 5".
Sound balance adjustment function
This knob is also used to adjust the
sound balance between the front and rear,
and the right and left speakers.
For front/rear adjustment, push CTRL /
MODE" repeatedly until FAd" appears on
the display. Then turn the knob to adjust
the front/rear balance.
The display will show the range from
FAd−F7" to FAd−R7".
For left/right adjustment, push CTRL /
MODE" repeatedly until BAL" appears on
the display. Then turn the knob to adjust
the left/right balance.
The display will show the range from
BAL−L7" to BAL−R7".
CD (Compact Disc)
Push CD" to switch from radio or cas-
sette operation to compact disc operation.
If the audio system is off, you can turn
on the compact disc player by pushing
CD". In both cases, a disc must already
be loaded in the player.
When the audio is set into compact disc
operation, the display shows the track or,
track and disc number currently being
played. Each time you push CD", the
system changes to the automatic changer.
If the player malfunctions, your audio sys-
tem will display one of the six following
error messages.
If WAIT" appears on the display, it indi-
cates that the inside of the player unit
may be too hot due to the very high ambi-
ent temperature. Remove the disc or mag-
azine from the player and allow the player
to cool down.
If Err 1" appears on the display, it
indicates the disc is dirty, damaged, or it
was inserted up−side down. Clean the
disc or insert it correctly.
If Err 2" appears on the display, it
indicates no disc is loaded inside the
magazine. Insert a disc.
If Err 3" or Err 4" appears on the
display, it indicates there is a trouble in-
side the system. Eject the disc or maga-
zine. Set the disc or magazine again.
If OPEn" appears on the display, it
indicates the compact disc auto changer
lid is open. Close the compact disc auto
changer lid.
If the malfunction is not rectified, take
your vehicle to your Toyota dealer.
DISC ƝƜ
Compact disc auto changer only
By using this button, you can select a
disc you wish to listen to.
Push either side of the button until the
number of the disc you want to listen to
appears on the display.
DolbyB NR∗
If you are listening to a tape that was
recorded with Dolby B Noise Reduction,
push the button marked with the double−D
symbol. The double−D symbol will appear
on the display. Push the button again to
turn off Dolby B NR.
The Dolby NR mode reduces tape noise
by about 10 dB. For best sound reproduc-
tion, play your tapes with this button on
or off according to the mode used for
recording the tape.

’01 4Runner_U (L/O 0008)
136 2001 4RUNNER (OM35768U)
∗: Dolby noise reduction manufactured under license from
Dolby Laboratories Licensing Corporation. DOLBY" and the
double D symbol are trademarks of Dolby Laboratories
Licensing Corporation.
FM1·2
Push FM1·2" to turn on the radio and
select the FM band. FM1" or FM2" will
appear on the display. This system allows
you to set twelve FM stations, two for
each button.
If the audio system is off, you can turn
on the radio by pushing FM1·2". Also,
push FM1·2" to switch from cassette or
compact disc operation to radio operation.
PWR/VOL (Power/Volume)
Push PWR/VOL" to turn the audio system
on and off. Turn PWR/VOL" to adjust the
volume.
RAND (Random)
There are two random featuresyou can
either listen to the tracks on all the com-
pact discs in the magazine in random or-
der, or only listen to the tracks on a
specific compact disc in random order.
To randomly play the tracks on a disc:
Quickly push and release RAND". RAND"
will appear on the display. The disc you
are listening to will play in random order.
If you hear a beep, you held the button
too long, and the player will play all the
tracks in the magazine in random order.
To turn off the random feature, push
RAND" again.
Compact disc auto changer only
To randomly play all the tracks in the
magazine:
Push and hold RAND" until you hear a
beep. ·RAND" will appear on the dis-
play and the player will perform all the
tracks on all the discs in the magazine in
random order. To turn off the random fea-
ture, push RAND" again.
RPT (Repeat)
Cassette Player
Push RPT" while the track is playing.
RPT" will appear on the display. When
the track ends, it will automatically be
rewound and replayed. This process will
be continued until you push the button
again to turn off the repeat feature.
There must be at least 3 seconds of blank
space between tracks in order for the re-
peat feature to work correctly.
Compact Disc Player
There are two repeat featuresyou can
either replay a disc track or a whole com-
pact disc.
Repeating a track:
Quickly push and release RPT" while the
track is playing. RPT" will appear on the
display. If you hear a beep, you held the
button too long, and the player will repeat
the whole disc. When the track ends, it
will automatically be replayed. This pro-
cess will be continued until you push the
button again to turn off the repeat feature.
Compact disc auto changer only
Repeating a disc:
Push and hold RPT" until you hear a
beep. ·RPT" will appear on the dis-
play. The player will repeat all the tracks
on the disc you are listening to. When the
disc ends, the player will automatically go
back to the top track of the disc and
replay. This process will be continued until
you push the button again to turn off the
repeat feature.

’01 4Runner_U (L/O 0008)
137
2001 4RUNNER (OM35768U)
SCAN
Radio
You can either scan all the frequencies on
a band or scan only the preset stations
for that band.
To scan the preset stations:
Push and hold SCAN" until you hear a
beep. The radio will tune in the next pres-
et station up the band, stay there for 5
seconds, and then move to the next pre-
set station. To select a station, push
SCAN" again.
To scan all the frequencies:
Quickly push and release SCAN". If you
hear a beep, you held the button too long,
and the radio will scan the preset sta-
tions. The radio will find the next station
up the station band, stay there for 5 se-
conds, and then scan again. To select a
station, push SCAN" again.
Compact disc player
There are two scan featuresyou can ei-
ther scan the tracks on a specific disc or
scan the first tracks of all the discs in the
magazine.
Scanning the tracks on a disc:
Quickly push and release SCAN". SCAN"
will appear on the display and the player
will scan all the tracks on the disc you
are listening to. If you hear a beep, you
held the button too long, and the player
will scan the first track of all the discs in
the magazine. To select a track, push
SCAN" again. If the player scanned all
the tracks on the disc, it will stop scan-
ning.
Compact disc auto changer only
Scanning the first track of all the discs in
the magazine:
Push SCAN" until you hear a beep.
·SCAN" will appear on the display
and the player will perform the first track
of the next disc. To select a disc, push
the SCAN" again. If the player has
scanned all the discs, it will stop scan-
ning.
SEEK (Seeking)
Radio
In the seek mode, the radio finds and
plays the next station up or down the
station band.
To seek a station, quickly push and re-
lease the Ɯ" or Ɲ" under the SEEK".
Do this again to find another station.
Cassette Player
By using this button, you can skip up or
down to a different track.
You can skip up to nine tracks at a time.
Push the up or down side of the button.
FF 1" or REW 1" will appear on the
display.
Next, push either side of the track button
until the number on the display reaches
the number of tracks you want to skip. If
you push the button ten times, the skip
feature will be turned off.
When counting the number of tracks you
want to rewind, remember to count the
current track as well. For example, if you
want to rewind to a song that is two be-
fore the song you are listening to, push
on the down side of the button until REW
3" appears on the display.
If you have pushed the track button more
than you wanted to, push the other side
of the button. The track number will be
reduced.
The track number you select is not valid
if it is higher than the number of tracks
remaining on the current cassette side.
After the beginning of the tape is
reached, the player will automatically
start playing the same side.

’01 4Runner_U (L/O 0008)
138 2001 4RUNNER (OM35768U)
After the end of the tape is reached,
the player will automatically reverse
sides and start playing the other side.
There must be at least 3 seconds of blank
space between tracks for the track button
to work correctly. In addition, the feature
may not work well with some spoken
word, live, or classical recordings.
ST (Stereo reception) display
Your radio automatically changes to stereo
reception when a stereo broadcast is re-
ceived. ST" appears on the display. If the
signal becomes weak, the radio reduces
the amount of channel separation to prev-
ent the weak signal from creating noise.
If the signal becomes extremely weak, the
radio switches from stereo to mono recep-
tion.
TAPE
Push TAPE" to switch from radio or com-
pact disc operation to cassette operation.
If the audio system is off, you can turn
on the cassette player by pushing TAPE".
In both cases, a cassette must already be
loaded in the player.
TRACK (Track up/down button):
Compact disc player
By using this button, you can skip up or
down to a different track.
Push either side of the track button until
the number of the track you want to listen
to appears on the display. If you want to
return to the beginning of the current
track, push the down side of the button
one time, quickly.
TUNE (Tuning)
Your Toyota has an electronic tuning radio
(ETR). Turn the knob clockwise to step up
the frequency. Turn the knob counterclock-
wise to step down the frequency.
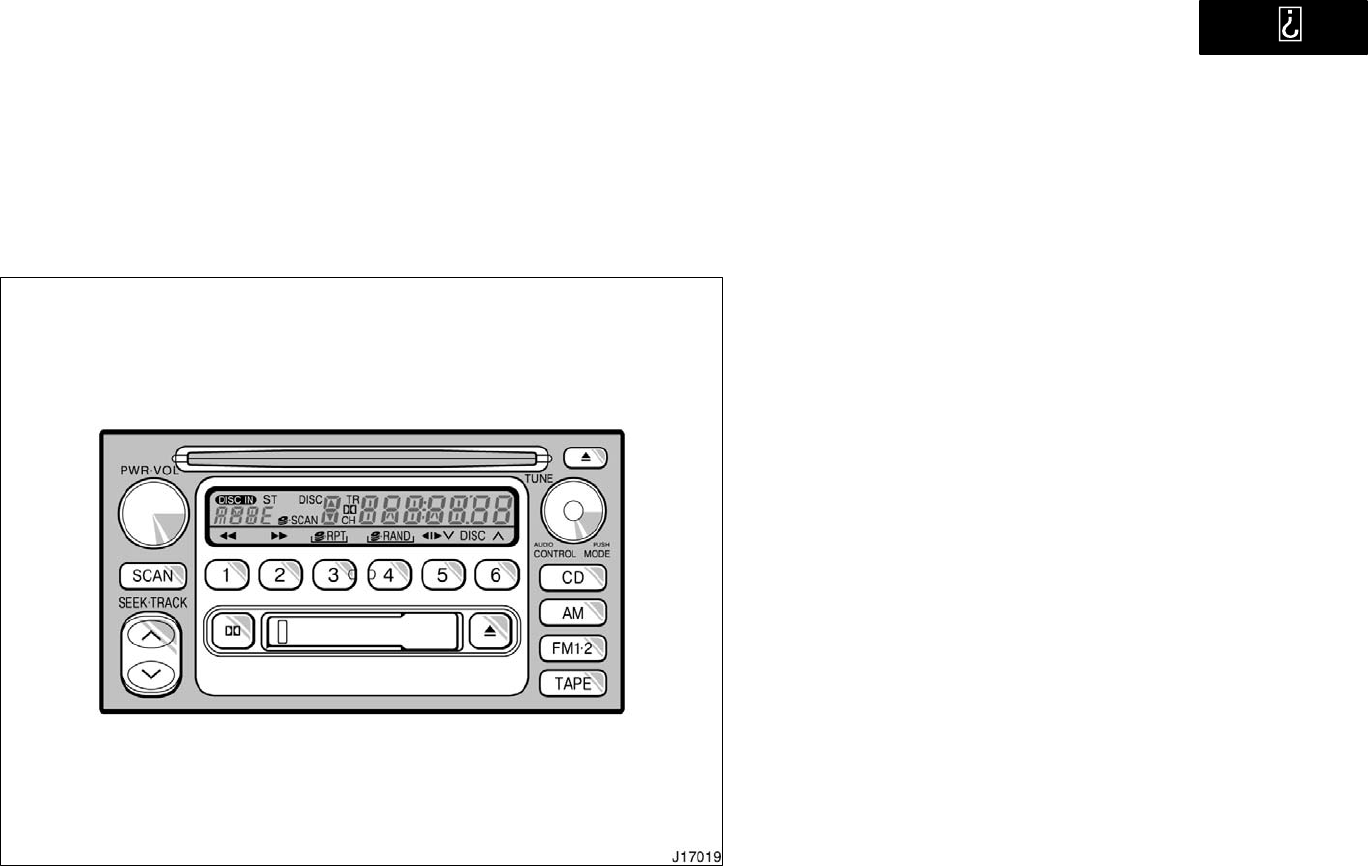
’01 4Runner_U (L/O 0008)
139
2001 4RUNNER (OM35768U)
Details of specific buttons, controls, and
features are described in the alphabetical
listing that follows.
Type 2

’01 4Runner_U (L/O 0008)
140 2001 4RUNNER (OM35768U)
1 2 3 4 5 6 (Preset buttons)
These buttons are used to preset and
tune in radio stations.
To preset a station to a button: Tune in
the desired station (see TUNE" knob or
SEEK" button). Push and hold down the
button until you hear a beepthis will set
the station to the button. The button num-
ber will appear on the display.
To tune in to a preset station: Push the
button for the station you want. The but-
ton number and station frequency will ap-
pear on the display.
These systems can store one AM and two
FM stations for each button (The display
will show AM", FM1" or FM2" when you
push AM" FM1·2").
(Eject button)
Push the cassette tape eject button to
eject a cassette. Push the compact disc
eject button to eject a compact disc.
After you turn the ignition to LOCK", you
will be able to eject a cassette or disc but
you will not be able to reinsert it.
(Program)
Push " to select the other side of a
cassette tape. The display indicates which
side is currently selected ( " indicates
top side, " indicates bottom side).
Auto−reverse feature: After the cassette
player reaches the end of a tape side, it
automatically reverses and begins to play
the other side. This is true whether the
cassette was playing or fast forwarding.
(Reverse/Fast forward buttons)
Cassette Player
Push the fast forward button to fast for-
ward a cassette tape. FF" will appear on
the display. Push the reverse button to
rewind a tape. REW" will appear on the
display.
To stop the tape while it is fast forward-
ing, push the fast forward button or
TAPE"; to stop the tape while it is re-
winding, push the reverse button or
TAPE".
If a tape side rewinds completely, the cas-
sette player will stop and then play that
same side. If a tape fast forwards com-
pletely, the cassette player will play the
other side of the tape, using the auto−re-
verse feature.
Compact Disc Player
If you want to fast forward or reverse
through a compact disc track, push and
hold in the fast forward or reverse button.
When you release the button, the compact
disc player will resume playing.
AM
Push AM" to turn on the radio and select
the AM band. AM" will appear on the
display.
If the audio system is off, you can turn
on the radio by pushing AM". Also, push
AM" to switch from cassette or compact
disc operation to radio operation.

’01 4Runner_U (L/O 0008)
141
2001 4RUNNER (OM35768U)
CONTROL / MODE (Audio control and
mode adjustment)
Manual tone adjustment function
This knob is used to adjust the tone
manually.
For low−pitch tone adjustment, push
CONTROL / MODE" repeatedly until
BAS" appears on the display. Then turn
the knob to suit your preference.
The display will show the range from
BAS −5" to BAS 5".
For middle−pitch tone adjustment, push
CONTROL / MODE" repeatedly until MId"
appears on the display. Then turn the
knob to suit your preference.
The display will show the range from MId
−5" to MId 5".
For high−pitch tone adjustment, push
CONTROL / MODE" repeatedly until
TRE" appears on the display. Then turn
the knob to suit your preference.
The display will show the range from
TRE −5" to TRE 5".
Sound balance adjustment function
This knob is also used to adjust the
sound balance between the front and rear,
and the right and left speakers.
For front/rear adjustment, push CONTROL
/ MODE" repeatedly until FAd" appears
on the display. Then turn the knob to
adjust the front/rear balance.
The display will show the range from
FAd−F7" to FAd−R7".
For left/right adjustment, push CONTROL
/ MODE" repeatedly until BAL" appears
on the display. Then turn the knob to
adjust the left/right balance.
The display will show the range from
BAL−L7" to BAL−R7".
CD (Compact Disc)
Push CD" to switch from radio or cas-
sette operation to compact disc operation.
If the audio system is off, you can turn
on the compact disc player by pushing
CD". In both cases, a disc must already
be loaded in the player.
When the audio is set into compact disc
operation, the display shows the track or,
track and disc number currently being
played. Each time you push CD", the
system changes to the automatic changer.
If the player malfunctions, your audio sys-
tem will display one of the six following
error messages.
If WAIT" appears on the display, it indi-
cates that the inside of the player unit
may be too hot due to the very high ambi-
ent temperature. Remove the disc or mag-
azine from the player and allow the player
to cool down.
If Err 1" appears on the display, it
indicates the disc is dirty, damaged, or it
was inserted up−side down. Clean the
disc or insert it correctly.
If Err 2" appears on the display, it
indicates no disc is loaded inside the
magazine. Insert a disc.
If Err 3" or Err 4" appears on the
display, it indicates there is a trouble in-
side the system. Eject the disc or maga-
zine. Set the disc or magazine again.
If OPEn" appears on the display, it
indicates the compact disc auto changer
lid is open. Close the compact disc auto
changer lid.
If the malfunction is not rectified, take
your vehicle to your Toyota dealer.
’01 4Runner_U (L/O 0008)
142 2001 4RUNNER (OM35768U)
DISC ƝƜ
Compact disc auto changer only
By using this button, you can select a
disc you wish to listen to.
Push either side of the button until the
number of the disc you want to listen to
appears on the display.
DolbyB NR∗
If you are listening to a tape that was
recorded with Dolby B Noise Reduction,
push the button marked with the double−D
symbol. The double−D symbol will appear
on the display. Push the button again to
turn off Dolby B NR.
The Dolby NR mode reduces tape noise
by about 10 dB. For best sound reproduc-
tion, play your tapes with this button on
or off according to the mode used for
recording the tape.
∗: Dolby noise reduction manufactured under license from
Dolby Laboratories Licensing Corporation. DOLBY" and the
double D symbol are trademarks of Dolby Laboratories
Licensing Corporation.
FM1·2
Push FM1·2" to turn on the radio and
select the FM band. FM1" or FM2" will
appear on the display. This system allows
you to set twelve FM stations, two for
each button.
If the audio system is off, you can turn
on the radio by pushing FM1·2". Also,
push FM1·2" to switch from cassette or
compact disc operation to radio operation.
PWR·VOL (Power and Volume)
Push PWR·VOL" to turn the audio system
on and off. Turn PWR·VOL" to adjust the
volume.
RAND (Random)
There are two random featuresyou can
either listen to the tracks on all the com-
pact discs in the magazine in random or-
der, or only listen to the tracks on a
specific compact disc in random order.
To randomly play the tracks on a disc:
Quickly push and release ". "
will appear on the display. The disc you
are listening to will play in random order.
If you hear a beep, you held the button
too long, and the player will play all the
tracks in the magazine in random order.
To turn off the random feature, push this
button again.
Compact disc auto changer only
To randomly play all the tracks in the
magazine:
Push and hold " until you hear a
beep. " will appear on the dis-
play and the player will perform all the
tracks on all the discs in the magazine in
random order. To turn off the random fea-
ture, push this button again.
RPT (Repeat)
Cassette Player
Push " while the track is playing.
" will appear on the display. When
the track ends, it will automatically be
rewound and replayed. This process will
be continued until you push the button
again to turn off the repeat feature.
There must be at least 3 seconds of blank
space between tracks in order for the re-
peat feature to work correctly.
’01 4Runner_U (L/O 0008)
143
2001 4RUNNER (OM35768U)
Compact Disc Player
There are two repeat featuresYou can
either replay a disc track or a whole com-
pact disc.
Repeating a track:
Quickly push and release " while the
track is playing. " will appear on the
display. If you hear a beep, you held the
button too long, and the player will repeat
the whole disc. When the track ends, it
will automatically be replayed. This pro-
cess will be continued until you push the
button again to turn off the repeat feature.
Compact disc auto changer only
Repeating a disc:
Push and hold " until you hear a
beep. " will appear on the display.
The player will repeat all the tracks on the
disc you are listening to. When the disc
ends, the player will automatically go back
to the top track of the disc and replay.
This process will be continued until you
push the button again to turn off the re-
peat feature.
SCAN
Radio
You can either scan all the frequencies on
a band or scan only the preset stations
for that band.
To scan the preset stations:
Push and hold SCAN" until you hear a
beep. The radio will tune in the next pres-
et station up the band, stay there for 5
seconds, and then move to the next pre-
set station. To select a station, push
SCAN" again.
To scan all the frequencies:
Quickly push and release SCAN". If you
hear a beep, you held the button too long,
and the radio will scan the preset sta-
tions. The radio will find the next station
up the station band, stay there for 5 se-
conds, and then scan again. To select a
station, push SCAN" again.
Compact disc player
There are two scan featuresyou can ei-
ther scan the tracks on a specific disc or
scan the first tracks of all the discs in the
magazine.
Scanning the tracks on a disc:
Quickly push and release SCAN". SCAN"
will appear on the display and the player
will scan all the tracks on the disc you
are listening to. If you hear a beep, you
held the button too long, and the player
will scan the first track of all the discs in
the magazine. To select a track, push
SCAN" again. If the player scanned all
the tracks on the disc, it will stop scan-
ning.
Compact disc auto changer only
Scanning the first track of all the discs in
the magazine:
Push SCAN" until you hear a beep.
·SCAN" will appear on the display
and the player will perform the first track
of the next disc. To select a disc, push
the SCAN" again. If the player has
scanned all the discs, it will stop scan-
ning.

’01 4Runner_U (L/O 0008)
144 2001 4RUNNER (OM35768U)
SEEK (Seeking)
Radio
In the seek mode, the radio finds and
plays the next station up or down the
station band.
To seek a station, quickly push and re-
lease the Ɯ" or Ɲ" under the SEEK".
Do this again to find another station.
Cassette Player
By using this button, you can skip up or
down to a different track.
You can skip up to nine tracks at a time.
Push the up or down side of the button.
FF 1" or REW 1" will appear on the
display.
Next, push either side of the track button
until the number on the display reaches
the number of tracks you want to skip. If
you push the button ten times, the skip
feature will be turned off.
When counting the number of tracks you
want to rewind, remember to count the
current track as well. For example, if you
want to rewind to a song that is two be-
fore the song you are listening to, push
on the down side of the button until REW
3" appears on the display.
If you have pushed the track button more
than you wanted to, push the other side
of the button. The track number will be
reduced.
The track number you select is not valid
if it is higher than the number of tracks
remaining on the current cassette side.
After the beginning of the tape is
reached, the player will automatically
start playing the same side.
After the end of the tape is reached,
the player will automatically reverse
sides and start playing the other side.
There must be at least 3 seconds of blank
space between tracks for the track button
to work correctly. In addition, the feature
may not work well with some spoken
word, live, or classical recordings.
ST (Stereo reception) display
Your radio automatically changes to stereo
reception when a stereo broadcast is re-
ceived. ST" appears on the display. If the
signal becomes weak, the radio reduces
the amount of channel separation to prev-
ent the weak signal from creating noise.
If the signal becomes extremely weak, the
radio switches from stereo to mono recep-
tion.
TAPE
Push TAPE" to switch from radio or com-
pact disc operation to cassette operation.
If the audio system is off, you can turn
on the cassette player by pushing TAPE".
In both cases, a cassette must already be
loaded in the player.
TRACK (Track up/down button):
Compact disc player
By using this button, you can skip up or
down to a different track.
Push either side of the track button until
the number of the track you want to listen
to appears on the display. If you want to
return to the beginning of the current
track, push the down side of the button
one time, quickly.
TUNE (Tuning)
Your Toyota has an electronic tuning radio
(ETR). Turn the knob clockwise to step up
the frequency. Turn the knob counterclock-
wise to step down the frequency.
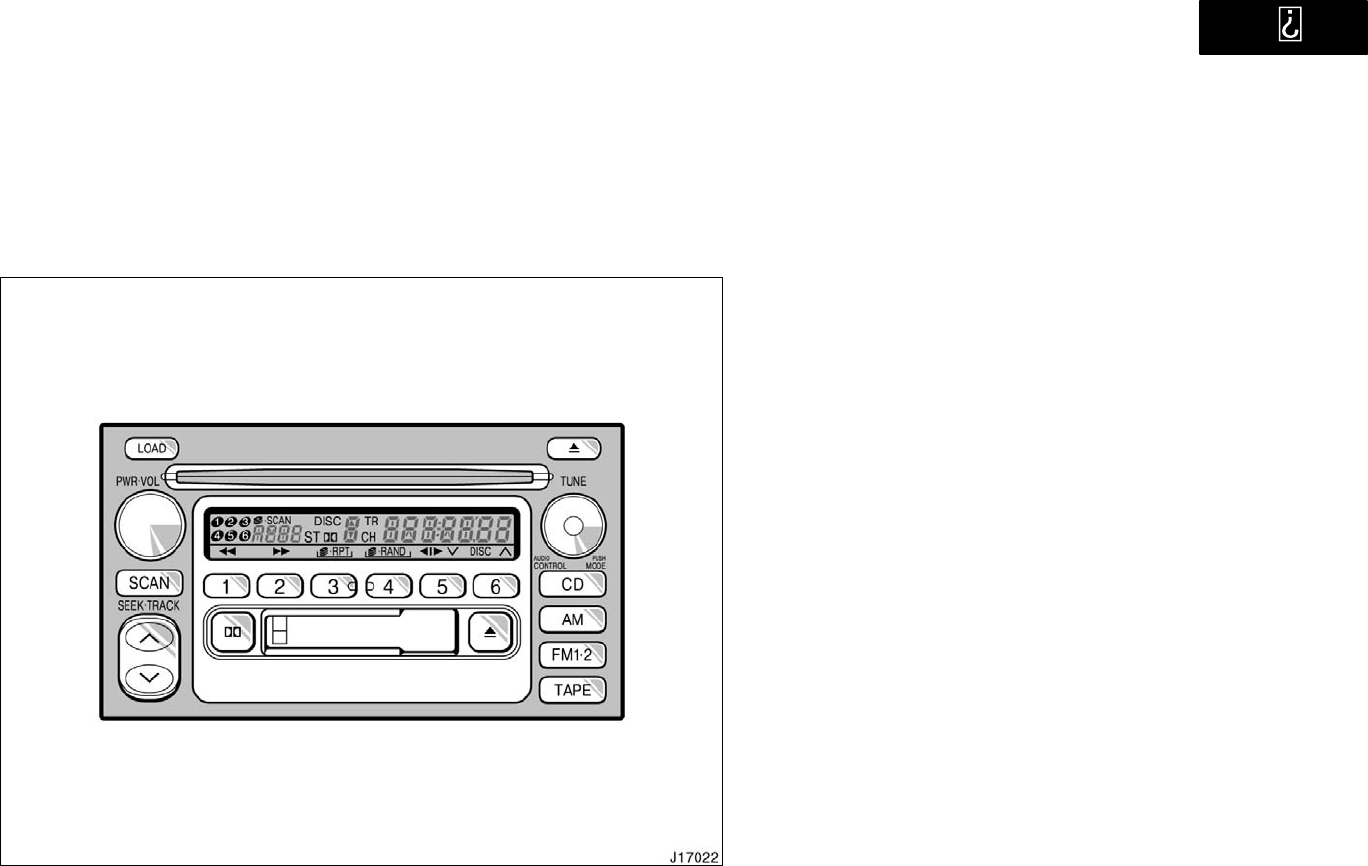
’01 4Runner_U (L/O 0008)
145
2001 4RUNNER (OM35768U)
Details of specific buttons, controls, and
features are described in the alphabetical
listing that follows.
Type 3
’01 4Runner_U (L/O 0008)
146 2001 4RUNNER (OM35768U)
1 2 3 4 5 6 (Preset buttons)
These buttons are used to preset and
tune in radio stations.
To preset a station to a button: Tune in
the desired station (see TUNE" knob or
SEEK" button). Push and hold down the
button until you hear a beepthis will set
the station to the button. The button num-
ber will appear on the display.
To tune in to a preset station: Push the
button for the station you want. The but-
ton number and station frequency will ap-
pear on the display.
These systems can store one AM and two
FM stations for each button (The display
will show AM", FM1" or FM2" when you
push AM" FM1·2").
(Eject button)
Cassette tape
Push the cassette tape eject button to
eject a cassette.
After you turn the ignition to LOCK", you
will be able to eject a cassette, but you
will not be able to reinsert it.
Compact disc
To eject one compact disc only: Push and
release the compact disc eject button. If
you hold the button too long (if the audio
system is on at this time, you hear a
beep.), the mechanism will change to the
mode for ejecting all the discs loaded in
the changer. You can also eject any spe-
cific one of the discs loaded in the chang-
er as follows:
1. Push either side of the DISC" button
until the number of the disc you want
to eject is displayed.
2. Push and release the compact disc
eject button.
To eject all the discs loaded in the chang-
er: Push and hold the compact disc eject
button (until you hear a beep when the
audio system is on). The last compact
disc played before pushing the button will
be ejected first. If a disc is left in the slot
for a long time, the function to eject all
the discs will be automatically cancelled.
After you turn the ignition to LOCK", you
will be able to eject one compact disc
only or all the discs loaded in the chang-
er, but you will not be able to reinsert it
or them.
(Program)
Push " to select the other side of a
cassette tape. The display indicates which
side is currently selected ( " indicates
top side, " indicates bottom side).
Auto−reverse feature: After the cassette
player reaches the end of a tape side, it
automatically reverses and begins to play
the other side. This is true whether the
cassette was playing or fast forwarding.
(Reverse/Fast forward buttons)
Cassette Player
Push the fast forward button to fast for-
ward a cassette tape. FF" will appear on
the display. Push the reverse button to
rewind a tape. REW" will appear on the
display.
To stop the tape while it is fast forward-
ing, push the fast forward button or
TAPE"; to stop the tape while it is re-
winding, push the reverse button or
TAPE".

’01 4Runner_U (L/O 0008)
147
2001 4RUNNER (OM35768U)
If a tape side rewinds completely, the cas-
sette player will stop and then play that
same side. If a tape fast forwards com-
pletely, the cassette player will play the
other side of the tape, using the auto−re-
verse feature.
Compact Disc Player
If you want to fast forward or reverse
through a compact disc track, push and
hold in the fast forward or reverse button.
When you release the button, the compact
disc player will resume playing.
AM
Push AM" to turn on the radio and select
the AM band. AM" will appear on the
display.
If the audio system is off, you can turn
on the radio by pushing AM". Also, push
AM" to switch from cassette or compact
disc operation to radio operation.
CONTROL / MODE (Audio control and
mode adjustment)
Manual tone adjustment function
This knob is used to adjust the tone
manually.
For low−pitch tone adjustment, push
CONTROL / MODE" repeatedly until
BAS" appears on the display. Then turn
the knob to suit your preference.
The display will show the range from
BAS −5" to BAS 5".
For middle−pitch tone adjustment, push
CONTROL / MODE" repeatedly until MId"
appears on the display. Then turn the
knob to suit your preference.
The display will show the range from MId
−5" to MId 5".
For high−pitch tone adjustment, push
CONTROL / MODE" repeatedly until
TRE" appears on the display. Then turn
the knob to suit your preference.
The display will show the range from
TRE −5" to TRE 5".
Sound balance adjustment function
This knob is also used to adjust the
sound balance between the front and rear,
and the right and left speakers.
For front/rear adjustment, push CONTROL
/ MODE" repeatedly until FAd" appears
on the display. Then turn the knob to
adjust the front/rear balance.
The display will show the range from
FAd−F7" to FAd−R7".
For left/right adjustment, push CONTROL
/ MODE" repeatedly until BAL" appears
on the display. Then turn the knob to
adjust the left/right balance.
The display will show the range from
BAL−L7" to BAL−R7".
CD (Compact Disc)
Push CD" to switch from radio or cas-
sette operation to compact disc operation.
If the audio system is off, you can turn
on the compact disc player by pushing
CD". In both cases, a disc must already
be loaded in the player.
When the audio is set into compact disc
operation, the display shows the track or,
track and disc number currently being
played.
If the player or another unit equipped with
the player malfunctions, your audio system
will display one of the six following error
messages.

’01 4Runner_U (L/O 0008)
148 2001 4RUNNER (OM35768U)
If WAIT" appears on the display, it indi-
cates that the inside of the player unit
may be too hot due to the very high ambi-
ent temperature. Remove the disc or mag-
azine from the player and allow the player
to cool down.
If Err 1" appears on the display, it
indicates the disc is dirty, damaged, or it
was inserted up−side down. Clean the
disc or insert it correctly.
If Err 2" appears on the display, it
indicates no disc is loaded inside the
magazine. Insert a disc.
If Err 3" or Err 4" appears on the
display, it indicates there is a trouble in-
side the system. Eject the disc or maga-
zine. Set the disc or magazine again.
If OPEn" appears on the display, it
indicates the compact disc auto changer
lid is open. Close the compact disc auto
changer lid.
If the malfunction is not rectified, take
your vehicle to your Toyota dealer.
DISC ƝƜ
By using this button, you can select a
disc you wish to listen to.
Push either side of the button until the
number of the disc you want to listen to
appears on the display.
DolbyB NR∗
If you are listening to a tape that was
recorded with Dolby B Noise Reduction,
push the button marked with the double−D
symbol. The double−D symbol will appear
on the display. Push the button again to
turn off Dolby B NR.
The Dolby NR mode reduces tape noise
by about 10 dB. For best sound reproduc-
tion, play your tapes with this button on
or off according to the mode used for
recording the tape.
∗: Dolby noise reduction manufactured under license from
Dolby Laboratories Licensing Corporation. DOLBY" and the
double D symbol are trademarks of Dolby Laboratories
Licensing Corporation.
FM1·2
Push FM1·2" to turn on the radio and
select the FM band. FM1" or FM2" will
appear on the display. This system allows
you to set twelve FM stations, two for
each button.
If the audio system is off, you can turn
on the radio by pushing FM1·2". Also,
push FM1·2" to switch from cassette or
compact disc operation to radio operation.
LOAD
This button is used to load the compact
discs in the compact disc auto changer
which is integrated with the radio and cas-
sette player. This compact disc auto
changer can store up to 6 discs.
The key must be in the ACC" or ON"
position.
Loading one compact disc only
To load one compact disc only, quickly
push and release the button. If you hold
the button too long (if the audio system
is on at this time, you hear a beep.), the
mechanism will change to the mode for
loading multiple compact discs. After
pushing the button, insert a compact disc.
At this time, the indicators on both sides
of the slot are flashing. After the disc is
loaded, the shutter of the slot will close
and the indicators will stop flashing.
If no compact disc is inserted, the shutter
will close after 15 seconds.
’01 4Runner_U (L/O 0008)
149
2001 4RUNNER (OM35768U)
Loading multiple compact discs
To load multiple compact discs, push and
hold (until you hear a beep when the au-
dio system is on). After pushing the but-
ton, insert the first compact disc. At this
time, the indicators on both sides of the
slot are flashing. After the disc is loaded,
the shutter of the slot will close and the
indicators will stop flashing. After a few
seconds, the shutter will automatically
open again so the next disc can be in-
serted. The same process can be applied
for loading the rest of the discs.
If no compact disc is inserted, the shutter
will close after 15 seconds.
PWR·VOL (Power and Volume)
Push PWR·VOL" to turn the audio system
on and off. Turn PWR·VOL" to adjust the
volume.
RAND (Random)
There are two random featuresyou can
either listen to the tracks on all the com-
pact discs in the magazine in random or-
der, or only listen to the tracks on a
specific compact disc in random order.
To randomly play the tracks on a disc:
Quickly push and release ". "
will appear on the display. The disc you
are listening to will play in random order.
If you hear a beep, you held the button
too long, and the player will play all the
tracks in the magazine in random order.
To turn off the random feature, push this
button again.
To randomly play all the tracks in the
magazine:
Push and hold " until you hear a
beep. " will appear on the dis-
play and the player will perform all the
tracks on all the discs in the magazine in
random order. To turn off the random fea-
ture, push this button again.
RPT (Repeat)
Cassette Player
Push " while the track is playing.
" will appear on the display. When
the track ends, it will automatically be
rewound and replayed. This process will
be continued until you push the button
again to turn off the repeat feature.
There must be at least 3 seconds of blank
space between tracks in order for the re-
peat feature to work correctly.
Compact Disc Player
There are two repeat featuresYou can
either replay a disc track or a whole com-
pact disc.
Repeating a track:
Quickly push and release " while the
track is playing. " will appear on the
display. If you hear a beep, you held the
button too long, and the player will repeat
the whole disc. When the track ends, it
will automatically be replayed. This pro-
cess will be continued until you push the
button again to turn off the repeat feature.
’01 4Runner_U (L/O 0008)
150 2001 4RUNNER (OM35768U)
Repeating a disc:
Push and hold " until you hear a
beep. " will appear on the display.
The player will repeat all the tracks on the
disc you are listening to. When the disc
ends, the player will automatically go back
to the top track of the disc and replay.
This process will be continued until you
push the button again to turn off the re-
peat feature.
SCAN
Radio
You can either scan all the frequencies on
a band or scan only the preset stations
for that band.
To scan the preset stations:
Push and hold SCAN" until you hear a
beep. The radio will tune in the next pres-
et station up the band, stay there for 5
seconds, and then move to the next pre-
set station. To select a station, push
SCAN" again.
To scan all the frequencies:
Quickly push and release SCAN". If you
hear a beep, you held the button too long,
and the radio will scan the preset sta-
tions. The radio will find the next station
up the station band, stay there for 5 se-
conds, and then scan again. To select a
station, push SCAN" again.
Compact disc player
There are two scan featuresyou can ei-
ther scan the tracks on a specific disc or
scan the first tracks of all the discs in the
magazine.
Scanning the tracks on a disc:
Quickly push and release SCAN". SCAN"
will appear on the display and the player
will scan all the tracks on the disc you
are listening to. If you hear a beep, you
held the button too long, and the player
will scan the first track of all the discs in
the magazine. To select a track, push
SCAN" again. If the player scanned all
the tracks on the disc, it will stop scan-
ning.
Scanning the first track of all the discs in
the magazine:
Push SCAN" until you hear a beep.
·SCAN" will appear on the display
and the player will perform the first track
of the next disc. To select a disc, push
the SCAN" again. If the player has
scanned all the discs, it will stop scan-
ning.
SEEK (Seeking)
Radio
In the seek mode, the radio finds and
plays the next station up or down the
station band.
To seek a station, quickly push and re-
lease the Ɯ" or Ɲ" under the SEEK".
Do this again to find another station.
Cassette Player
By using this button, you can skip up or
down to a different track.
You can skip up to nine tracks at a time.
Push the up or down side of the button.
FF 1" or REW 1" will appear on the
display.

’01 4Runner_U (L/O 0008)
151
2001 4RUNNER (OM35768U)
Next, push either side of the track button
until the number on the display reaches
the number of tracks you want to skip. If
you push the button ten times, the skip
feature will be turned off.
When counting the number of tracks you
want to rewind, remember to count the
current track as well. For example, if you
want to rewind to a song that is two be-
fore the song you are listening to, push
on the down side of the button until REW
3" appears on the display.
If you have pushed the track button more
than you wanted to, push the other side
of the button. The track number will be
reduced.
The track number you select is not valid
if it is higher than the number of tracks
remaining on the current cassette side.
After the beginning of the tape is
reached, the player will automatically
start playing the same side.
After the end of the tape is reached,
the player will automatically reverse
sides and start playing the other side.
There must be at least 3 seconds of blank
space between tracks for the track button
to work correctly. In addition, the feature
may not work well with some spoken
word, live, or classical recordings.
ST (Stereo reception) display
Your radio automatically changes to stereo
reception when a stereo broadcast is re-
ceived. ST" appears on the display. If the
signal becomes weak, the radio reduces
the amount of channel separation to prev-
ent the weak signal from creating noise.
If the signal becomes extremely weak, the
radio switches from stereo to mono recep-
tion.
TAPE
Push TAPE" to switch from radio or com-
pact disc operation to cassette operation.
If the audio system is off, you can turn
on the cassette player by pushing TAPE".
In both cases, a cassette must already be
loaded in the player.
TRACK (Track up/down button):
Compact disc player
By using this button, you can skip up or
down to a different track.
Push either side of the track button until
the number of the track you want to listen
to appears on the display. If you want to
return to the beginning of the current
track, push the down side of the button
one time, quickly.
TUNE (Tuning)
Your Toyota has an electronic tuning radio
(ETR). Turn the knob clockwise to step up
the frequency. Turn the knob counterclock-
wise to step down the frequency.

’01 4Runner_U (L/O 0008)
152 2001 4RUNNER (OM35768U)
NOTICE
To ensure the correct audio system
operation:
zBe careful not to spill beverages
over the audio system.
zDo not put anything other than a
cassette tape or Compact Disc into
the slot.
zThe use of cellular phone inside or
near the vehicle may cause a noise
from the speakers of the audio sys-
tem which you are listening to.
However, this does not indicate a
malfunction.
RADIO RECEPTION
Usually, a problem with radio reception
does not mean there is a problem with
your radioit is just the normal result of
conditions outside the vehicle.
For example, nearby buildings and terrain
can interfere with FM reception. Power
lines or telephone wires can interfere with
AM signals. And of course, radio signals
have a limited range. The farther you are
from a station, the weaker its signal will
be. In addition, reception conditions
change constantly as your vehicle moves.
Here are some common reception prob-
lems that probably do not indicate a prob-
lem with your radio:
FM
Fading and drifting stationsGenerally, the
effective range of FM is about 40 km (25
miles). Once outside this range, you may
notice fading and drifting, which increase
with the distance from the radio transmit-
ter. They are often accompanied by distor-
tion.
Multi−pathFM signals are reflective,
making it possible for two signals to reach
your antenna at the same time. If this
happens, the signals will cancel each oth-
er out, causing a momentary flutter or
loss of reception.
Static and flutteringThese occur when
signals are blocked by buildings, trees, or
other large objects. Increasing the bass
level may reduce static and fluttering.
Station swappingIf the FM signal you
are listening to is interrupted or weak-
ened, and there is another strong station
nearby on the FM band, your radio may
tune in the second station until the origi-
nal signal can be picked up again.
AM
FadingAM broadcasts are reflected by
the upper atmosphereespecially at night.
These reflected signals can interfere with
those received directly from the radio sta-
tion, causing the radio station to sound
alternately strong and weak.
Station interferenceWhen a reflected sig-
nal and a signal received directly from a
radio station are very nearly the same
frequency, they can interfere with each
other, making it difficult to hear the broad-
cast.
StaticAM is easily affected by external
sources of electrical noise, such as high
tension power lines, lightening, or electri-
cal motors. This results in static.
CARING FOR YOUR CASSETTE PLAYER
AND TAPES
For the best performance for your cas-
sette player and tapes:
Clean the tape head and other parts regu-
larly.
A dirty tape head or tape path can
decrease sound quality and tangle your
cassette tapes. The easiest way to
clean them is by using a cleaning tape.
(A wet type is recommended.)
Car audio system operating
hints
’01 4Runner_U (L/O 0008)
153
2001 4RUNNER (OM35768U)
Use high−quality cassettes.
Low−quality cassette tapes can cause
many problems, including poor sound,
inconsistent playing speed, and
constant auto−reversing. They can also
get stuck or tangled in the cassette
player.
Do not use a cassette if it has been
damaged or tangled or if its label is
peeling off.
Do not leave a cassette in the player
if you are not listening to it, especially
if it is hot outside.
Store cassettes in their cases and out
of direct sunlight.
Avoid using cassettes with a total play-
ing time longer than 100 minutes (50
minutes per side). The tape used in
these cassettes is thin and could get
stuck or tangled in the cassette player.
CARING FOR YOUR COMPACT DISC
PLAYER AND DISCS
Use only compact discs labeled as
shown. CD−R (CD−Recordable),
CD−RW (CD−Re−writable) and personal
computer use CD−ROMs may not be
playable on your compact disc player.
Your compact disc player is intended
for use with 12 cm (4.7 in.) discs only.
Extremely high temperatures can keep
your compact disc player from working.
On hot days, use the air conditioning
to cool the vehicle interior before you
listen to a disc.
Bumpy roads or other vibrations may
make your compact disc player skip.
If moisture gets into your compact disc
player, you may not hear any sound
even though your compact disc player
appears to be working. Remove the
disc from the player and wait until it
dries.
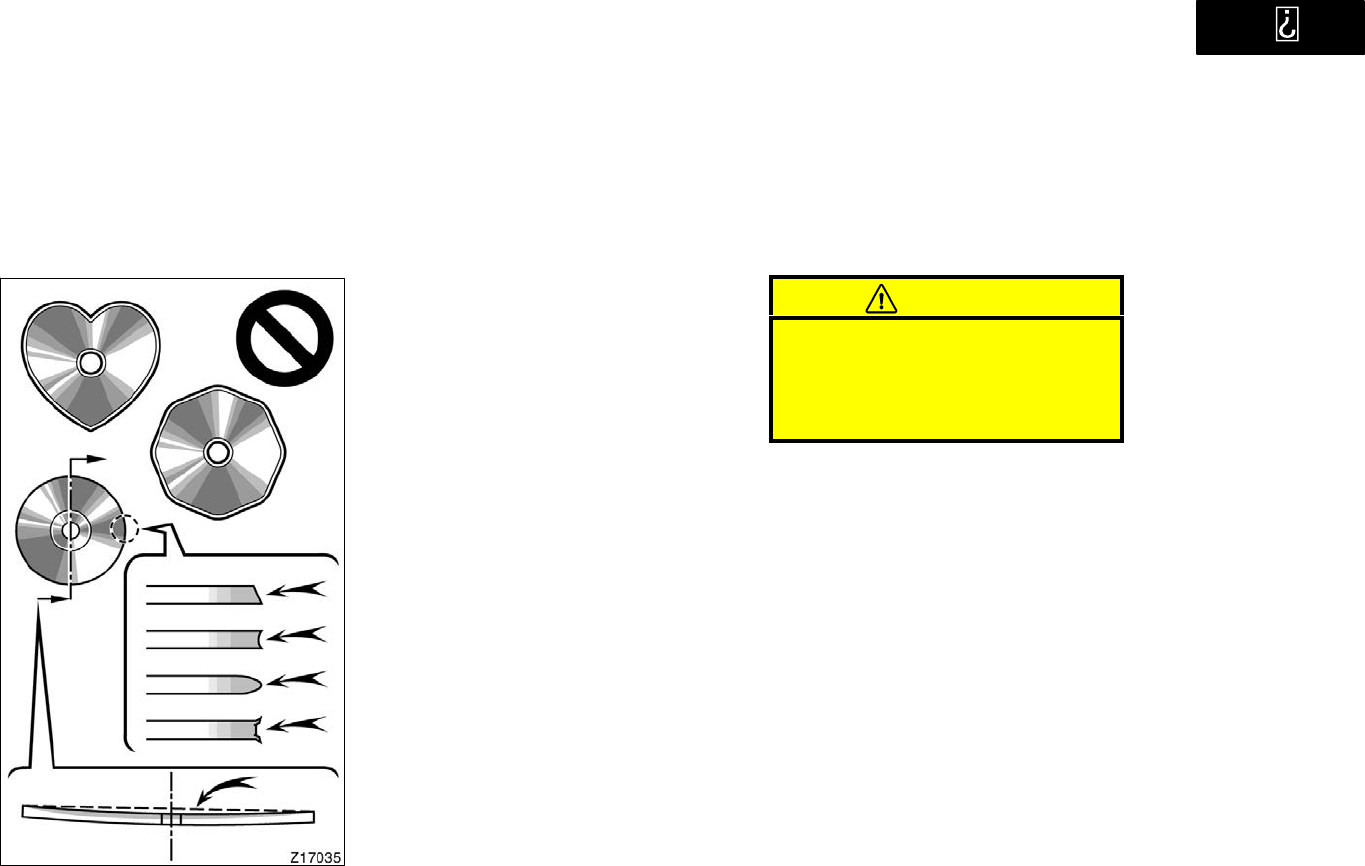
’01 4Runner_U (L/O 0008)
154 2001 4RUNNER (OM35768U)
Your compact disc player cannot play
special shaped or low−quality compact
discs such as those shown here. Do
not use them as the player could be
damaged.
Handle compact discs carefully, espe-
cially when you are inserting them.
Hold them on the edge and do not
bend them. Avoid getting fingerprints
on them, particularly on the shiny side.
Dirt, scrapes, warping, pin holes, or
other disc damage could cause the
player to skip or to repeat a section of
a track. (To see a pin hole, hold the
disc up to the light.)
Remove discs from the compact disc
player when you are not listening to
them. Store them in their plastic cases
away from moisture, heat, and direct
sunlight.
To clean a compact disc: Wipe it with a
soft, lint−free cloth that has been damp-
ened with water. Wipe in a straight line
from the center to the edge of the disc
(not in circles). Dry it with another soft,
lint−free cloth. Do not use a conventional
record cleaner or anti−static device.
CAUTION
Compact disc players use an invisible
laser beam which could cause hazard-
ous radiation exposure if directed
outside the unit. Be sure to operate
the player correctly.

’01 4Runner_U (L/O 0008)
155
2001 4RUNNER (OM35768U)
OPERATION OF INSTRUMENTS AND
CONTROLS
Air conditioning system
Manual air conditioning system
Controls 156. . . . . . . . . . . . . . . . . . . . . . . . . . . . . . . . . . . . . . . . . . . . . . . . .
Air flow selector settings 159. . . . . . . . . . . . . . . . . . . . . . . . . . . . . . . . . .
Operating tips 159. . . . . . . . . . . . . . . . . . . . . . . . . . . . . . . . . . . . . . . . . . .
Automatic air conditioning system
Controls 162. . . . . . . . . . . . . . . . . . . . . . . . . . . . . . . . . . . . . . . . . . . . . . . . .
Air flow selector settings 166. . . . . . . . . . . . . . . . . . . . . . . . . . . . . . . . . .
Operating tips 166. . . . . . . . . . . . . . . . . . . . . . . . . . . . . . . . . . . . . . . . . . .
Instrument panel vents 169. . . . . . . . . . . . . . . . . . . . . . . . . . . . . . . . . . . . . .
Rear heater system 171. . . . . . . . . . . . . . . . . . . . . . . . . . . . . . . . . . . . . . . . .
SECTION 1− 8
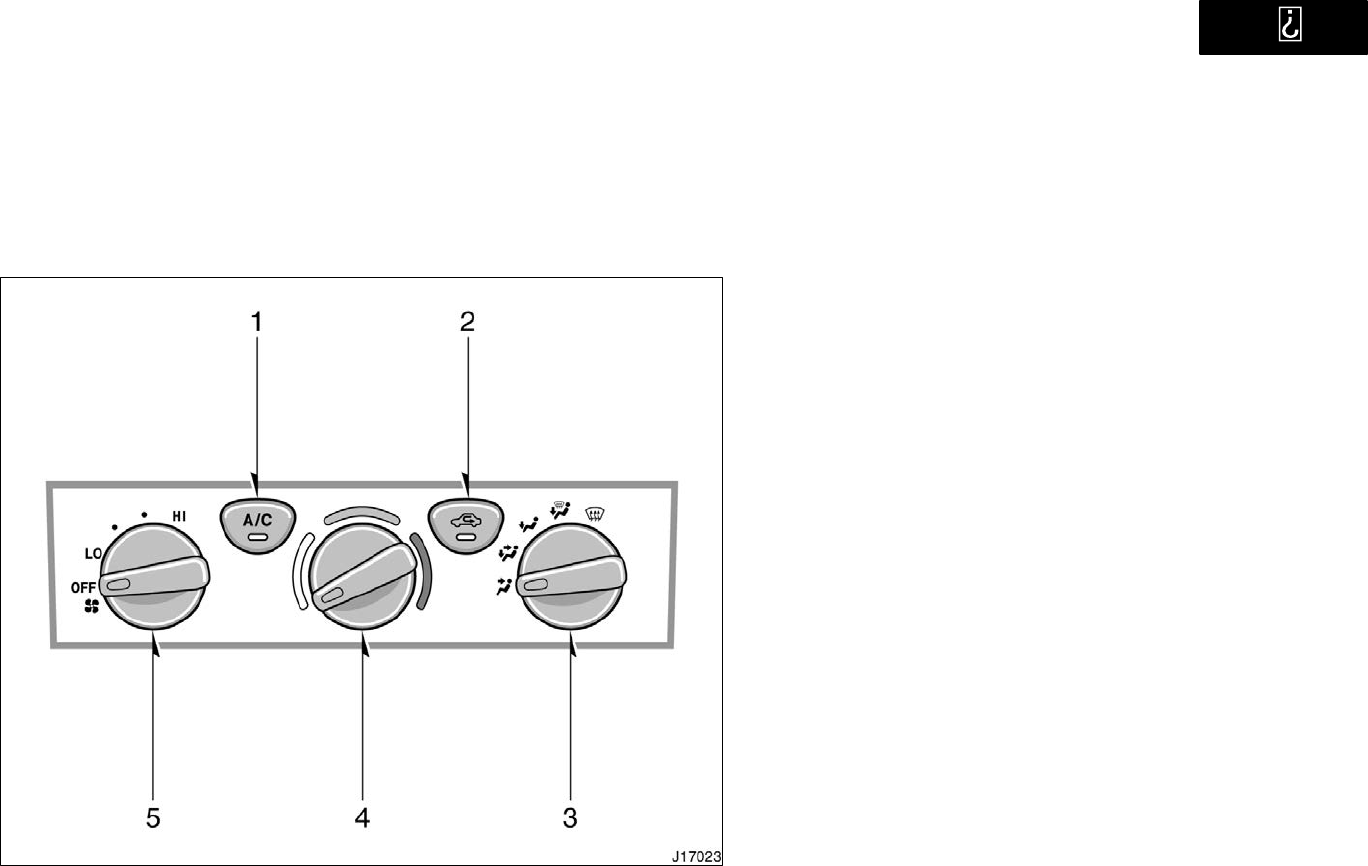
’01 4Runner_U (L/O 0008)
156 2001 4RUNNER (OM35768U)
1. A/C" Button (on some models)
2. Air Intake Selector
3. Air Flow Selector
4. Temperature Selector
5. Fan Speed Selector
Manual air conditioning system
Controls
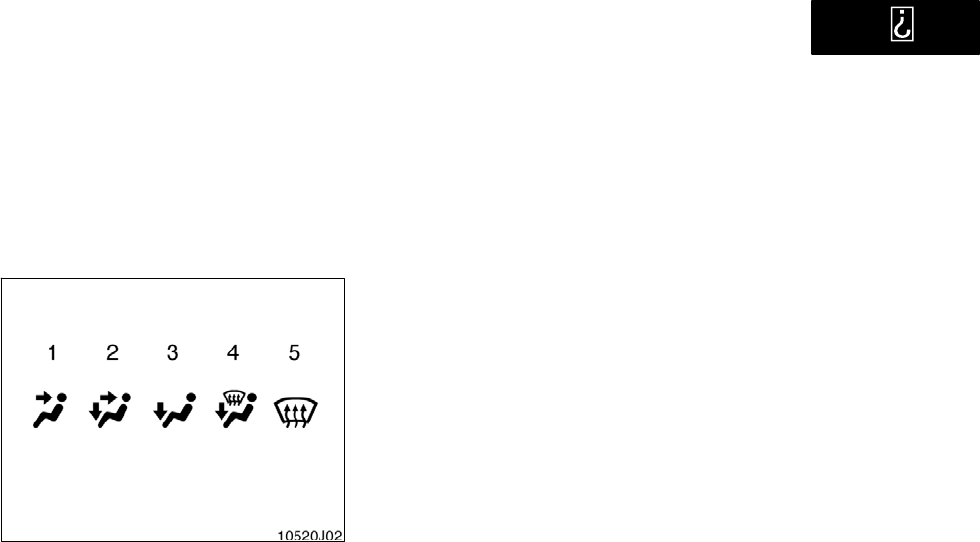
’01 4Runner_U (L/O 0008)
157
2001 4RUNNER (OM35768U)
Fan speed selector
Move the knob to adjust the fan speedto
the right to increase, to the left to de-
crease.
Temperature selector
Move the knob to adjust the tempera-
tureto the right to warm, to the left to
cool.
Air flow selector
Move the knob to select the vents used
for air flow.
1. PanelAir flows mainly from the
instrument panel vents.
2. Bi−levelAir flows from both the floor
vents and the instrument panel vents.
3. FloorAir flows mainly from the floor
vents.
It is recommended to close the lower
vent. For details about it, see Instru-
ment panel vents" in this section.
4. Floor/WindshieldAir flows mainly
from the floor vents and windshield
vents.
Turning the air flow selector to the
floor/windshield position turns on the
defogging function with the purpose of
clearing the front view.
This position allows the air intake to
select FRESH automatically. This is to
clean up the front view more quickly.
If you want to return the setting to
RECIRCULATE mode, press the air in-
take selector button once again.
Vehicle with A/C" button
Press the A/C" button for dehumidified
heating or cooling. This setting clears
the front view more quickly.
It is recommended to close the lower
vent. For details about it, see Instru-
ment panel vents" in this section.
5. WindshieldAir flows mainly from the
windshield vents.
Turning the air flow selector to the
windshield position turns on the defog-
ging function with the purpose of clear-
ing the front view.
This position allows the air intake to
select FRESH automatically. This is to
clean up the front view more quickly.
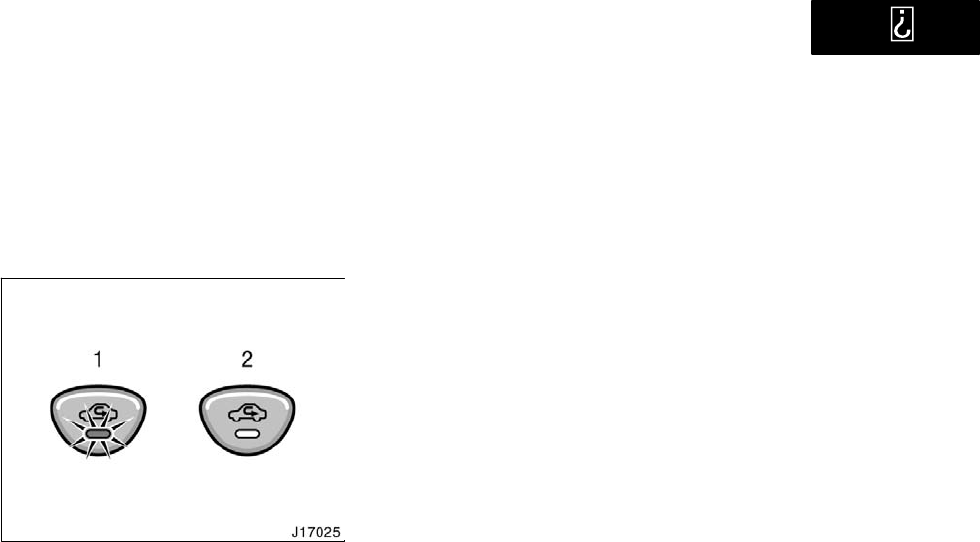
’01 4Runner_U (L/O 0008)
158 2001 4RUNNER (OM35768U)
If you want to return the setting to
RECIRCULATE mode, press the air in-
take selector button once again.
Vehicle with A/C" button
Press the A/C" button for dehumidified
heating or cooling. This setting clears
the front view more quickly.
It is recommended to close the lower
vent. For details about it, see Instru-
ment panel vents" in this section.
For details about air flow selector settings,
see the illustration after A/C" button.
Air intake selector
Press the button to select the air source.
1. RecirculateRecirculates the air inside
the vehicle.
2. FreshDraws outside air into the sys-
tem.
To prevent fogging up of the windshield,
the air intake mode may change automati-
cally to FRESH depending on the condi-
tion of the air conditioning system.
A/C" button
To turn on the air conditioning, press the
A/C" button. The A/C" button indicator
will come on. To turn the air conditioning
off, press the button again.
If the A/C" button indicator flashes, there
is a problem in the air conditioning system
and the air conditioning automatically
shuts off. If this happens, take your ve-
hicle to a Toyota dealer for service.
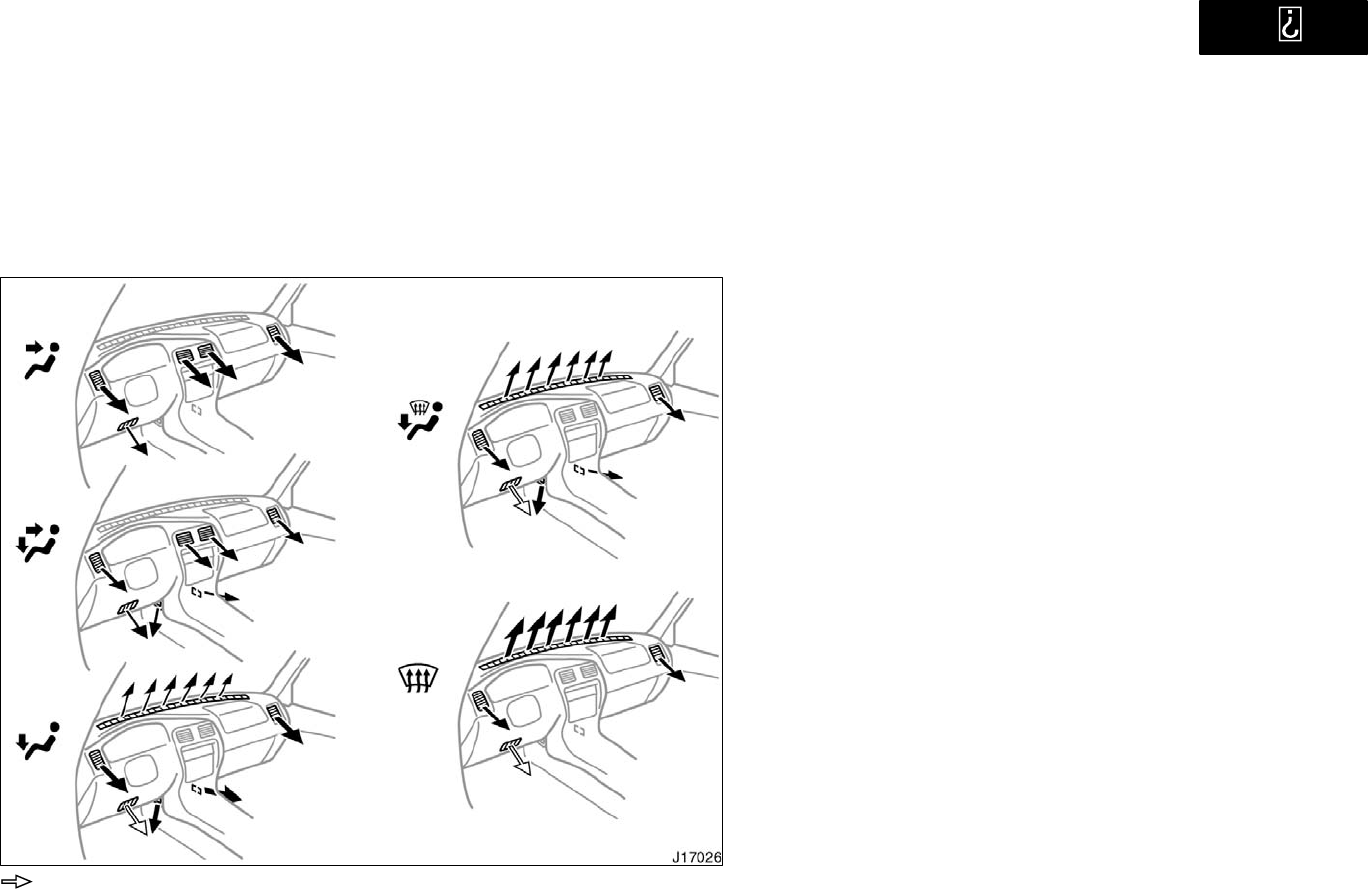
’01 4Runner_U (L/O 0008)
159
2001 4RUNNER (OM35768U)
Operating tips
To cool off your Toyota after it has
been parked in the hot sun, drive with
the windows open for a few minutes.
This vents the hot air, allowing the air
conditioning to cool the interior more
quickly.
Make sure the air intake grilles in front
of the windshield are not blocked (by
leaves or snow, for example).
On humid days, do not blow cold air
on the windshield. The windshield could
fog up because of the difference in air
temperature on the inside and outside
of the windshield.
Keep the area under the front seats
clear to allow air to circulate through-
out the vehicle.
On cold days, turn the fan speed se-
lector to HI" for a minute to help clear
the intake ducts of snow or moisture.
This can reduce the amount of fogging
on the windows.
When driving on dusty roads, close all
windows. If dust thrown up by the ve-
hicle is still drawn into the vehicle after
closing the windows, it is recommended
that the air intake selector be set to
FRESH and the fan speed selector to
any setting except OFF".
Air flow selector settings
: See Instrument panel vents" in this section.

’01 4Runner_U (L/O 0008)
160 2001 4RUNNER (OM35768U)
If following another vehicle on a dusty
road, or driving in windy and dusty
conditions, it is recommended that the
air intake selector be temporarily set to
RECIRCULATE, which will close off the
outside passage and prevent outside
air and dust from entering the vehicle
interior.
Heating
For best results, set controls to:
Fan speedAny setting except OFF"
TemperatureTo w ar d s WARM
(red zone)
Air intakeFRESH (outside air)
Air flowFLOOR
Lower ventCLOSED
Air conditioningOFF
For quick heating, select recirculated
air for a few minutes. To keep the
windows from fogging, select fresh af-
ter the vehicle interior has been
warmed.
Press the A/C" button on for dehumidi-
fied heating.
Choose floor/windshield air flow to heat
the vehicle interior while defrosting or
defogging the windshield.
Air conditioning
For best results, set controls to:
Fan speedAny setting except OFF"
TemperatureTo w ar d s COLD
(blue zone)
Air intakeFRESH (outside air)
Air flowPANEL
Air conditioningON
For quick cooling, move the air intake
selector to recirculate for a few min-
utes.
Ventilation
For best results, set controls to:
Fan speedAny setting except OFF"
TemperatureTo w ar d s COLD
(blue zone)
Air intakeFRESH (outside air)
Air flowPANEL
Air conditioningOFF

’01 4Runner_U (L/O 0008)
161
2001 4RUNNER (OM35768U)
Defogging
The inside of the windshield
For best results, set controls to:
Fan speedAny setting except OFF"
TemperatureTo w a r d s WARM
(red zone) to heat;
COLD (blue zone)
to cool
Air intakeFRESH (outside air)
Air flowWINDSHIELD
Lower ventCLOSED
Turning the air flow selector to the wind-
shield or floor/windshield position turns on
the defogging function with the purpose of
clearing the front view.
When turning the air flow selector to wind-
shield or floor/windshield position, the air
intake selects FRESH automatically. This
is to clean up the front view more quickly.
If you want to return the setting to RE-
CIRCULATE mode, press the air intake
selector button once again.
Vehicles with A/C" button
Press the A/C" button for dehumidified
heating or cooling. This setting clears the
front view more quickly.
On humid days, do not blow cold air
on the windshieldthe difference be-
tween the outside and inside tempera-
tures could make the fogging worse.
Defrosting
The outside of the windshield
For best results, set controls to:
Fan speedAny setting except OFF"
TemperatureTo w a r d s WARM
(red zone)
Air intakeFRESH (outside air)
Air flowWINDSHIELD
Lower ventCLOSED
Turning the air flow selector to the wind-
shield or floor/windshield position turns on
the defrosting function with the purpose of
clearing the front view.
When turning the air flow selector to wind-
shield or floor/windshield position, the air
intake selects FRESH automatically. This
is to clean up the front view more quickly.
If you want to return the setting to RE-
CIRCULATE mode, press the air intake
selector button once again.
Vehicles with A/C" button
Press the A/C" button for dehumidified
heating. This setting clears the front view
more quickly.
To heat the vehicle interior while de-
frosting the windshield, choose floor/
windshield air flow.
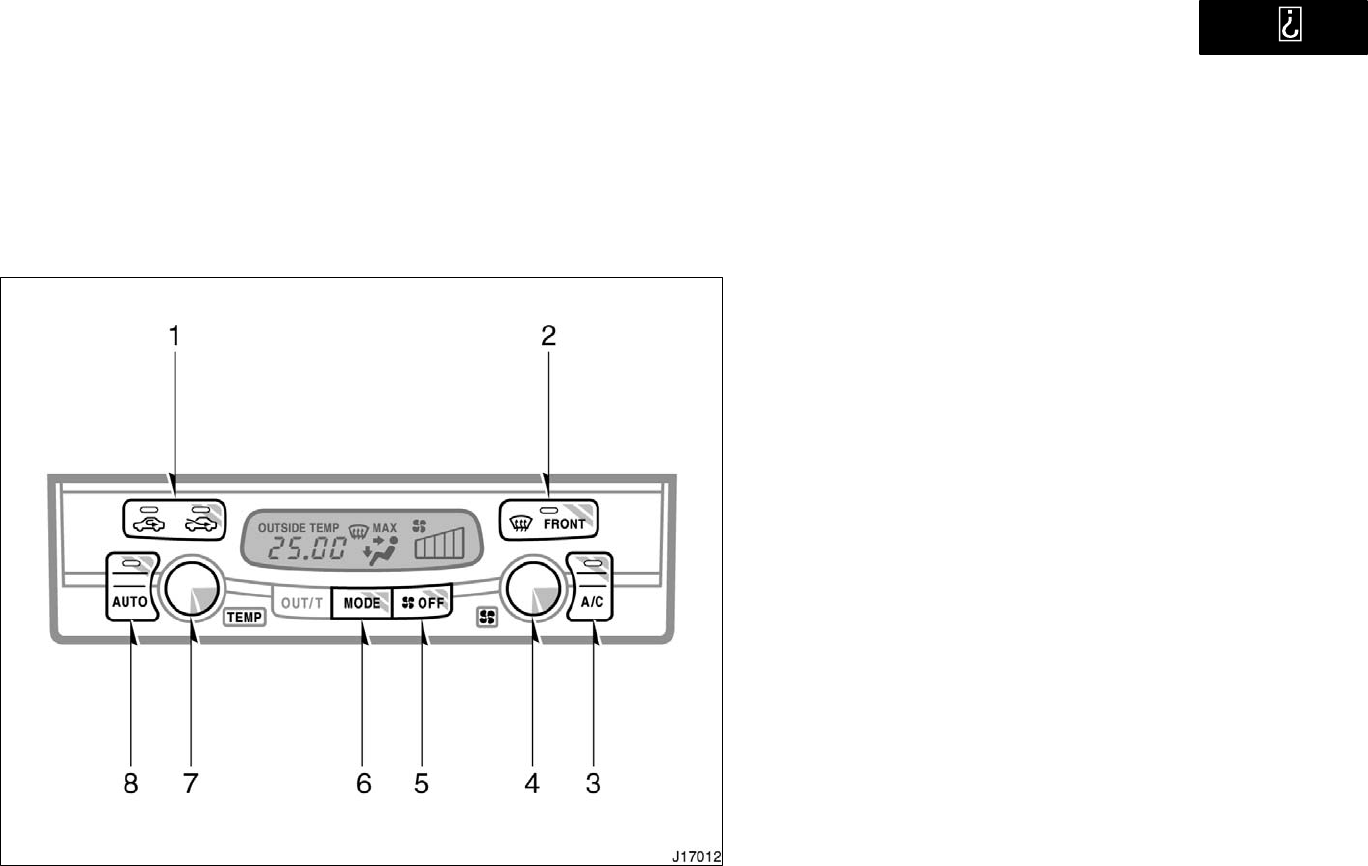
’01 4Runner_U (L/O 0008)
162 2001 4RUNNER (OM35768U)
1. Air Intake Selector
2. Windshield Air Flow Button
3. A/C" Button
4. Fan Speed Selector
5. OFF" Button
6. MODE" Button (air flow selector)
7. Temperature Selector
8. AUTO" Button
Automatic air conditioning system
Controls
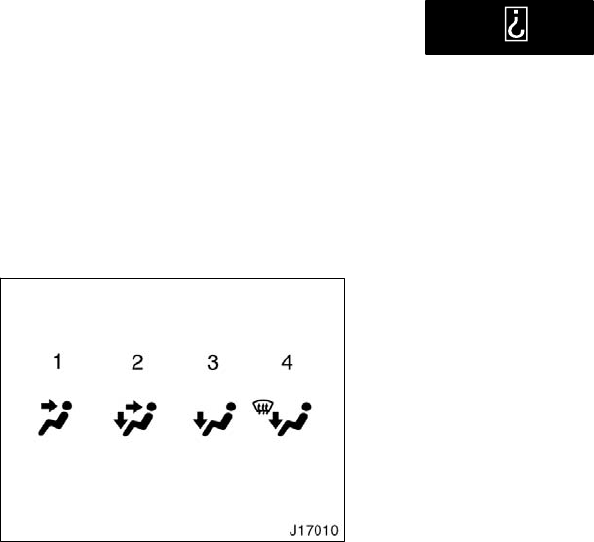
’01 4Runner_U (L/O 0008)
163
2001 4RUNNER (OM35768U)
AUTO" button
For automatic operation of the air condi-
tioning, press the AUTO" button. An indi-
cator light will illuminate to show that the
automatic operation mode has been se-
lected.
In the automatic operation mode, the air
conditioning selects the most suitable fan
speed, air flow, air intake and on−off of
the air conditioning according to the tem-
perature.
When you adjust the temperature selector
button to maximum cooling, a MAX
COLD" message will appear on the display
and the air intake mode will be automati-
cally changed to RECIRCULATE.
You may use manual controls if you want
to select your own settings.
To turn off the automatic operation, press
the OFF" button.
Fan speed selector
Turn the knob to adjust the fan speed.
In automatic operation, you do not have
to adjust the fan speed unless you desire
another fan speed mode.
Temperature selector
Turn the knob to adjust the temperatu-
reto the right to warm, to the left to
cool.
OFF" button
Push the button to turn off the air condi-
tioning system.
Air flow selector, MODE" button
Press the button to select the vents used
for air flow.
In automatic operation, you do not have
to select the air flow unless you desire
another air flow mode.
1. PanelAir flows mainly from the
instrument panel vents.
2. Bi−levelAir flows from both the floor
vents and the instrument panel vents.
3. FloorAir flows mainly from the floor
vents.
It is recommended to close the lower
vent. For details about it, see Instru-
ment panel vents" in this section.
’01 4Runner_U (L/O 0008)
164 2001 4RUNNER (OM35768U)
4. Floor/WindshieldAir flows mainly
from the floor vents and windshield
vents.
It is recommended to close the lower
vent. For details about it, see Instru-
ment panel vents" in this section.
For details about air flow selector settings,
see the illustration after A/C" button.
Windshield air flow button
When this button is pressed, air flows
mainly from the windshield vents and the
FRESH mode is automatically set. This
setting clears the front view more quickly.
If you want to return the setting to RE-
CIRCULATE mode, press the air intake
selector button once again.
Pressing the button once again returns the
air flow mode to the last one used.
Pressing the windshield air flow button
turns on the defroster−linked air condition-
ing. At this time, the A/C" button indicator
comes on regardless of whether or not the
A/C" button is pressed in. This is to
clean up the front view more quickly.
To turn off the air conditioning alone,
press the A/C" button once again.
When the A/C" button is not pressed in,
pressing another air flow button turns off
the air conditioning.
For details about air flow selector settings,
see the illustration after A/C" button.
For further information for removing frost
and fog, see Instrument panel vents" in
this section.
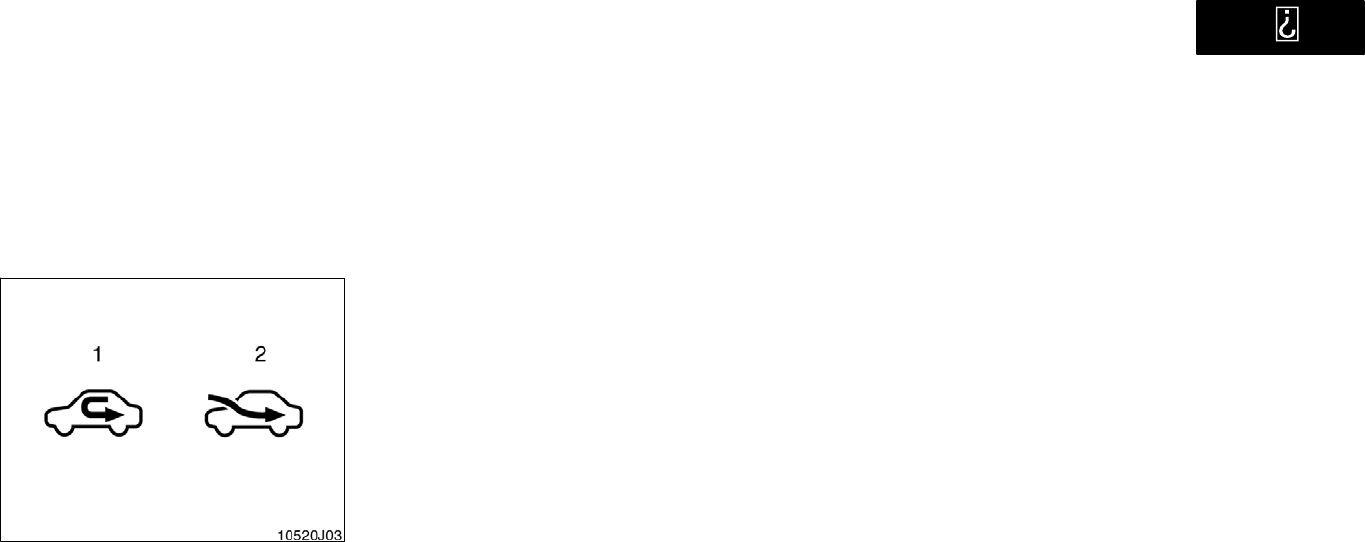
’01 4Runner_U (L/O 0008)
165
2001 4RUNNER (OM35768U)
Air intake selector
Press the button to select the air source.
1. RecirculateRecirculates the air inside
the vehicle.
2. FreshDraws outside air into the sys-
tem.
If the engine coolant temperature becomes
extremely high, RECIRCULATE mode will
automatically be selected. This is not a
malfunction. When the engine coolant tem-
perature is lowered, the previous mode
will resume.
To prevent fogging up of the windshield,
the air intake mode may change automati-
cally to FRESH depending on the condi-
tion of the air conditioning system.
A/C" button
To turn on the air conditioning, press the
A/C" button. The A/C" button indicator
will come on. To turn the air conditioning
off, press the button again.
If the A/C" button indicator flashes, there
is a problem in the air conditioning system
and the air conditioning automatically
shuts off. If this happens, take your ve-
hicle to a Toyota dealer for service.
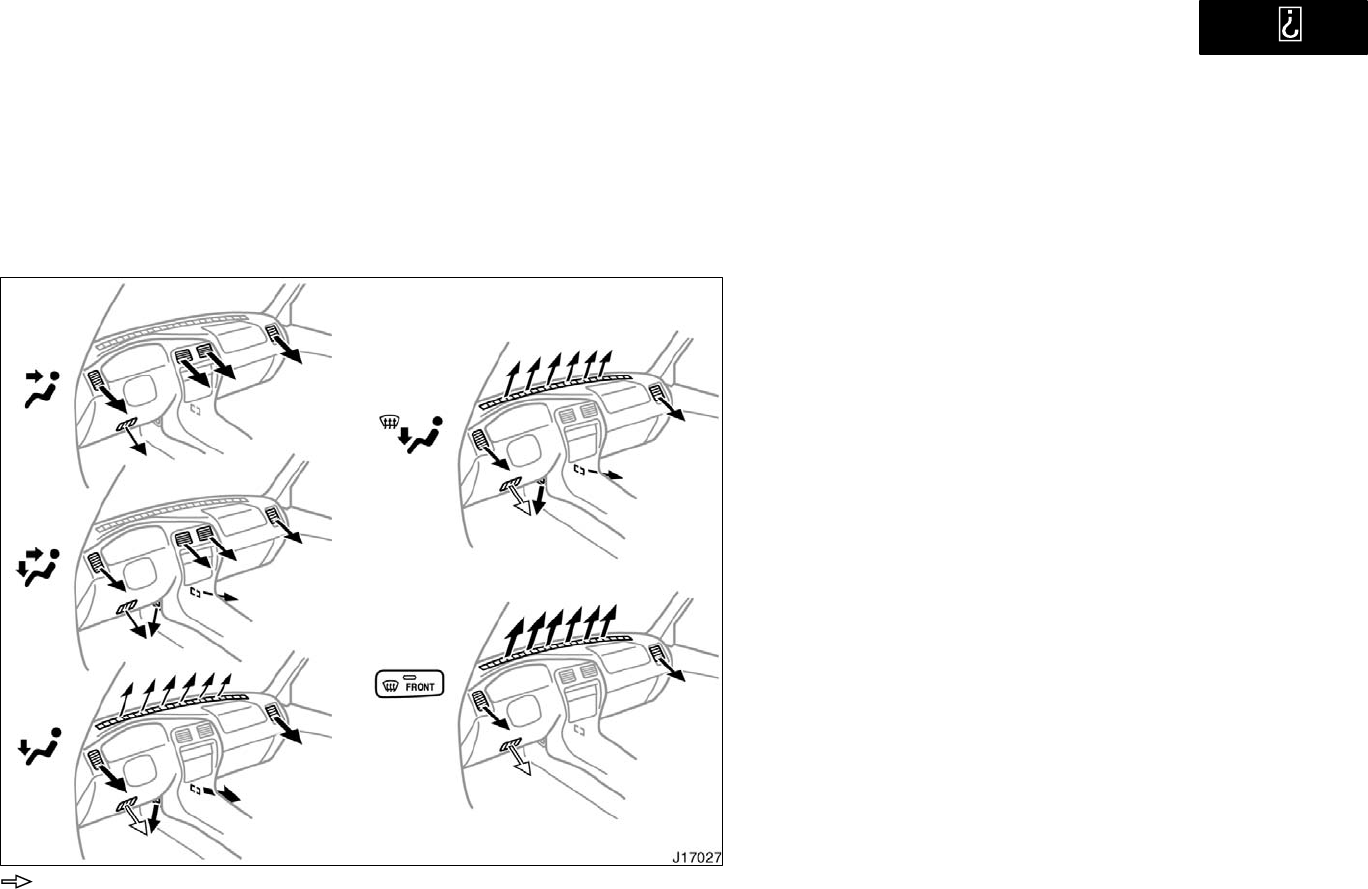
’01 4Runner_U (L/O 0008)
166 2001 4RUNNER (OM35768U)
Operating tips
To cool off your Toyota after it has
been parked in the hot sun, drive with
the windows open for a few minutes.
This vents the hot air, allowing the air
conditioning to cool the interior more
quickly.
Make sure the air intake grilles in front
of the windshield are not blocked (by
leaves or snow, for example).
On humid days, do not blow cold air
on the windshield. The windshield could
fog up because of the difference in air
temperature on the inside and outside
of the windshield.
Keep the area under the front seats
clear to allow air to circulate through-
out the vehicle.
On cold days, push the fan speed se-
lector to adjust the fan speed high for
a minute to help clear the intake ducts
of snow or moisture. This can reduce
the amount of fogging on the windows.
When driving on dusty roads, close all
windows. If dust thrown up by the ve-
hicle is still drawn into the vehicle after
closing the windows, it is recommended
that the air intake selector be set to
FRESH and the fan speed to any set-
ting except OFF".
Air flow selector settings
: See Instrument panel vents" in this section.
’01 4Runner_U (L/O 0008)
167
2001 4RUNNER (OM35768U)
If following another vehicle on a dusty
road, or driving in windy and dusty
conditions, it is recommended that the
air intake selector be temporarily set to
RECIRCULATE, which will close off the
outside passage and prevent outside
air and dust from entering the vehicle
interior.
Heating
For best results, set controls to:
For automatic operation
Press in the AUTO" button.
TemperatureTo the desired
temperature
Air conditioningOFF
For manual operation
Fan speedTo the desired fan speed
TemperatureTo w ar d s WARM
(to the right)
Air intakeFRESH (outside air)
Air flowFLOOR
Lower ventCLOSED
Air conditioningOFF
For quick heating, select recirculated
air for a few minutes. To keep the
windows from fogging, select fresh af-
ter the vehicle interior has been
warmed.
Press the A/C" button on for dehumidi-
fied heating.
Choose floor/windshield air flow to heat
the vehicle interior while defrosting or
defogging the windshield.
Air conditioning
For best results, set controls to:
For automatic operation
Press in the AUTO" button.
TemperatureTo the desired
temperature
Air conditioningON
For manual operation
Fan speedTo the desired fan speed
TemperatureTo w ar d s COLD
(to the left)
Air intakeFRESH (outside air)
Air flowPANEL
Air conditioningON
For quick cooling, select recirculated
air for a few minutes.

’01 4Runner_U (L/O 0008)
168 2001 4RUNNER (OM35768U)
Ventilation
For best results, set controls to:
For automatic operation
Press in the AUTO" button.
TemperatureTo w ar d s COLD
(to the left)
Air conditioningOFF
For manual operation
Fan speedTo the desired fan speed
TemperatureTo w ar d s COLD
(to the left)
Air intakeFRESH (outside air)
Air flowPANEL
Air conditioningOFF
Defogging and defrosting
The inside of the windshield
For best results, set controls to:
For automatic operation
TemperatureTo w ar d s WARM
(to the right) to heat;
COLD (to the left)
to cool
Air intakeFRESH (outside air)
Air flowWINDSHIELD
Lower ventCLOSED
For manual operation
Fan speedTo the desired fan speed
TemperatureTo w ar d s WARM
(to the right) to heat;
COLD (to the left)
to cool
Air intakeFRESH (outside air)
Air flowWINDSHIELD
Lower ventCLOSED
When pressing the windshield air flow but-
ton, the air intake selects FRESH auto-
matically. This is to clean up the front
view more quickly.
If you want to return the setting to RE-
CIRCULATE mode, press the air intake
selector button once again.
Pressing the windshield air flow button
turns on the defroster−linked air condition-
ing. At this time, the A/C" button indicator
comes on regardless of whether or not the
A/C" button is pressed in. This is to
clean up the front view more quickly.
To turn off the air conditioning alone,
press the A/C" button once again.
When the A/C" button is not pressed in,
pressing another air flow button turns off
the air conditioning.
On humid days, do not blow cold air
on the windshieldthe difference be-
tween the outside and inside tempera-
tures could make the fogging worse.
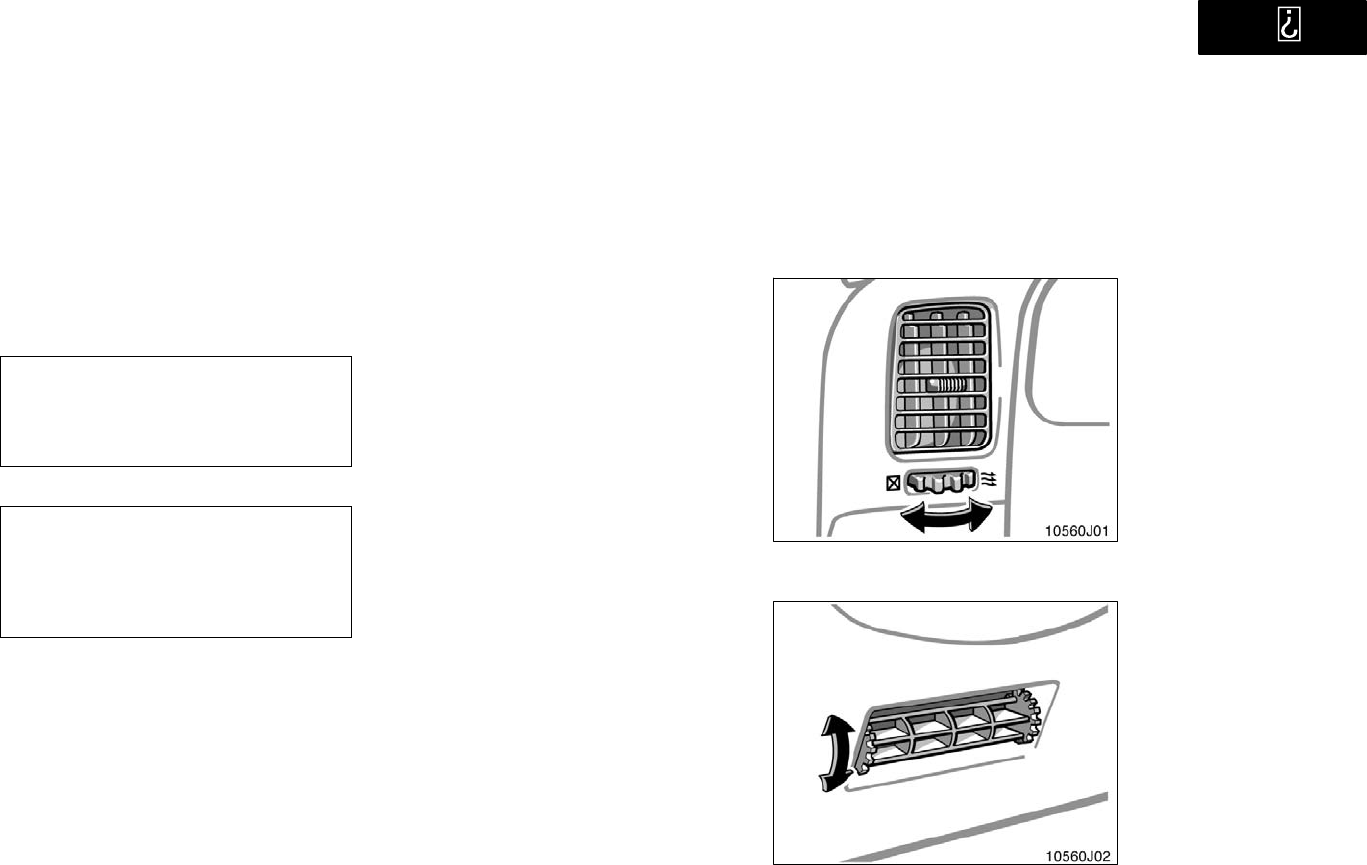
’01 4Runner_U (L/O 0008)
169
2001 4RUNNER (OM35768U)
The outside of the windshield
For best results, set controls to:
For automatic operation
TemperatureTo w ar d s WARM
(to the right)
Air intakeFRESH (outside air)
Air flowWINDSHIELD
Lower ventCLOSED
For manual operation
Fan speedTo the desired fan speed
TemperatureTo w ar d s WARM
(to the right)
Air intakeFRESH (outside air)
Air flowWINDSHIELD
Lower ventCLOSED
When pressing the windshield air flow but-
ton, the air intake selects FRESH auto-
matically. This is to clean up the front
view more quickly.
If you want to return the setting to RE-
CIRCULATE mode, press the air intake
selector button once again.
Pressing the windshield button turns on
the defroster−linked air conditioning. At
this time, the A/C" button indicator comes
on regardless of whether or not the A/C"
button is pressed in. This is to clean up
the front view more quickly.
To turn off the air conditioning alone,
press the A/C" button once again.
When the A/C" button is not pressed in,
pressing another air flow button turns off
the air conditioning.
To heat the vehicle interior while de-
frosting the windshield, choose
floor/windshield air flow.
Instrument panel vents
Side vents
Lower vent

’01 4Runner_U (L/O 0008)
170 2001 4RUNNER (OM35768U)
If air flow control is not satisfactory, check
the instrument panel vents. The instrument
panel vents may be opened or closed as
shown.
For removing frost or fog, it is recom-
mended to close the lower vent when you
push the windshield air flow button or us-
ing the Floor", Floor/windshield" or
Windshield" mode.
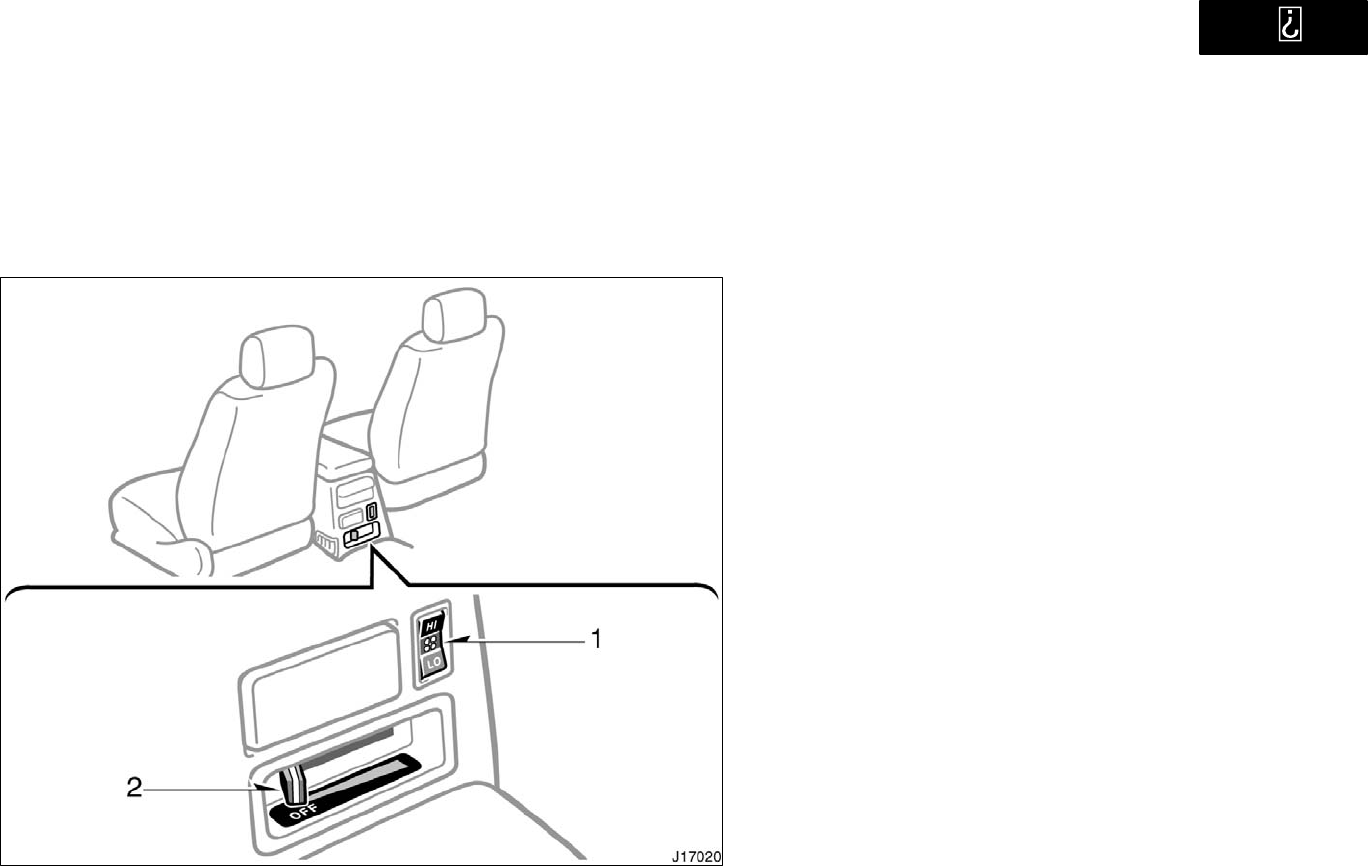
’01 4Runner_U (L/O 0008)
171
2001 4RUNNER (OM35768U)
Rear heater system
1. Fan Speed Selector
2. Temperature Selector
Fan speed selector
Push the switch toward HI" or LO".
Temperature selector
Place the lever anywhere except the
OFF" position.

’01 4Runner_U (L/O 0008)
172 2001 4RUNNER (OM35768U)

’01 4Runner_U (L/O 0008)
173
2001 4RUNNER (OM35768U)
OPERATION OF INSTRUMENTS AND
CONTROLS
Other equipment
Clock 174. . . . . . . . . . . . . . . . . . . . . . . . . . . . . . . . . . . . . . . . . . . . . . . . . . . . . .
Thermometer 174. . . . . . . . . . . . . . . . . . . . . . . . . . . . . . . . . . . . . . . . . . . . . .
Cigarette lighter and ashtrays 175. . . . . . . . . . . . . . . . . . . . . . . . . . . . . . . .
Power outlets 176. . . . . . . . . . . . . . . . . . . . . . . . . . . . . . . . . . . . . . . . . . . . . .
Glove box 176. . . . . . . . . . . . . . . . . . . . . . . . . . . . . . . . . . . . . . . . . . . . . . . . . .
Garage door opener 177. . . . . . . . . . . . . . . . . . . . . . . . . . . . . . . . . . . . . . . .
Garage door opener box 180. . . . . . . . . . . . . . . . . . . . . . . . . . . . . . . . . . . .
Auxiliary box 182. . . . . . . . . . . . . . . . . . . . . . . . . . . . . . . . . . . . . . . . . . . . . . .
Warning reflector holder 183. . . . . . . . . . . . . . . . . . . . . . . . . . . . . . . . . . . . .
Rear console box 184. . . . . . . . . . . . . . . . . . . . . . . . . . . . . . . . . . . . . . . . . . .
Card holder 185. . . . . . . . . . . . . . . . . . . . . . . . . . . . . . . . . . . . . . . . . . . . . . . .
Front cup holders 185. . . . . . . . . . . . . . . . . . . . . . . . . . . . . . . . . . . . . . . . . . .
Rear cup holders 186. . . . . . . . . . . . . . . . . . . . . . . . . . . . . . . . . . . . . . . . . . .
Tie−down hooks 187. . . . . . . . . . . . . . . . . . . . . . . . . . . . . . . . . . . . . . . . . . . .
Luggage cover 187. . . . . . . . . . . . . . . . . . . . . . . . . . . . . . . . . . . . . . . . . . . . .
Floor mat 188. . . . . . . . . . . . . . . . . . . . . . . . . . . . . . . . . . . . . . . . . . . . . . . . . .
SECTION 1− 9
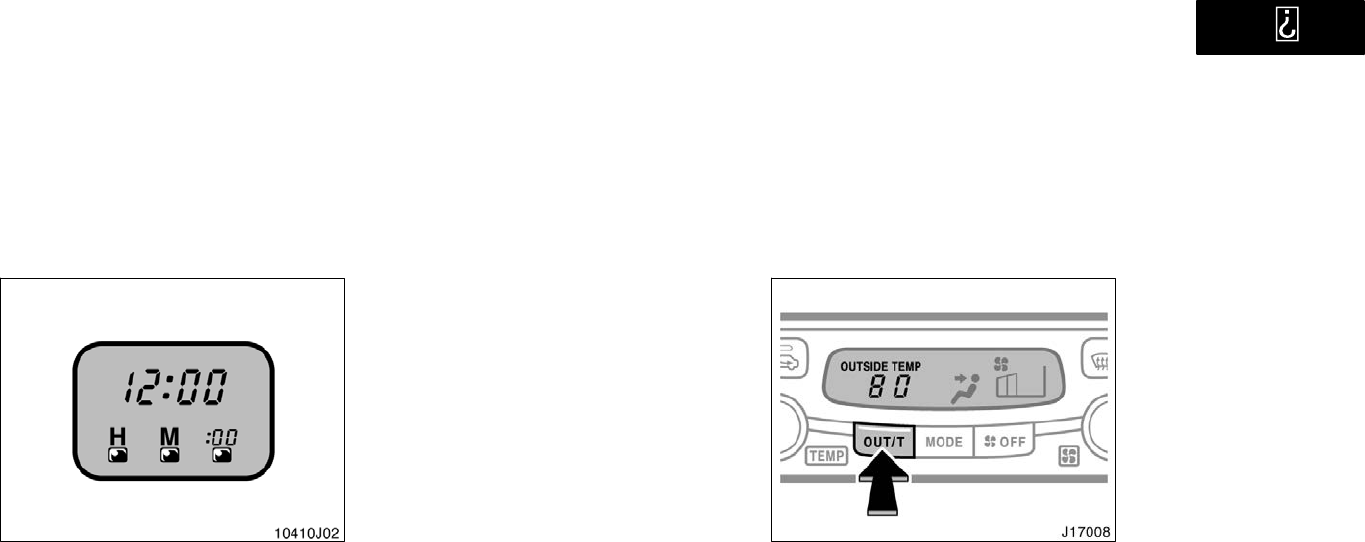
’01 4Runner_U (L/O 0008)
174 2001 4RUNNER (OM35768U)
Clock
The digital clock indicates the time.
The key must be in the ACC" or ON"
position.
To reset the hour: Push the H" button.
To reset the minutes: Push the M" button.
If quick adjustment to a full hour is de-
sired, push the :00" button.
For example, if the :00" button is de-
pressed when the time is between
1:011:29, the time will change to 1:00.
If the time is between 1:301:59, the
time will change to 2:00.
If the electrical power source has been
disconnected from the clock, the time dis-
play will automatically be set to 1:00 (one
o’clock).
When the instrument panel lights are
turned on, the brightness of the time in-
dication will be reduced.
Thermometer
The thermometer indicates the outside
air temperature when you push the
OUT/T" button.
The key must be in the ON" position.
Pushing the button once again or turning
the temperature selector will turn off the
display.
When the air conditioning system is on,
pushing the button once indicates the out-
side temperature and a second time
changes the display back to the air condi-
tioning temperature.
Also, turning the temperature selector
while the outside temperature is indicated
changes the display to the air conditioning
temperature.
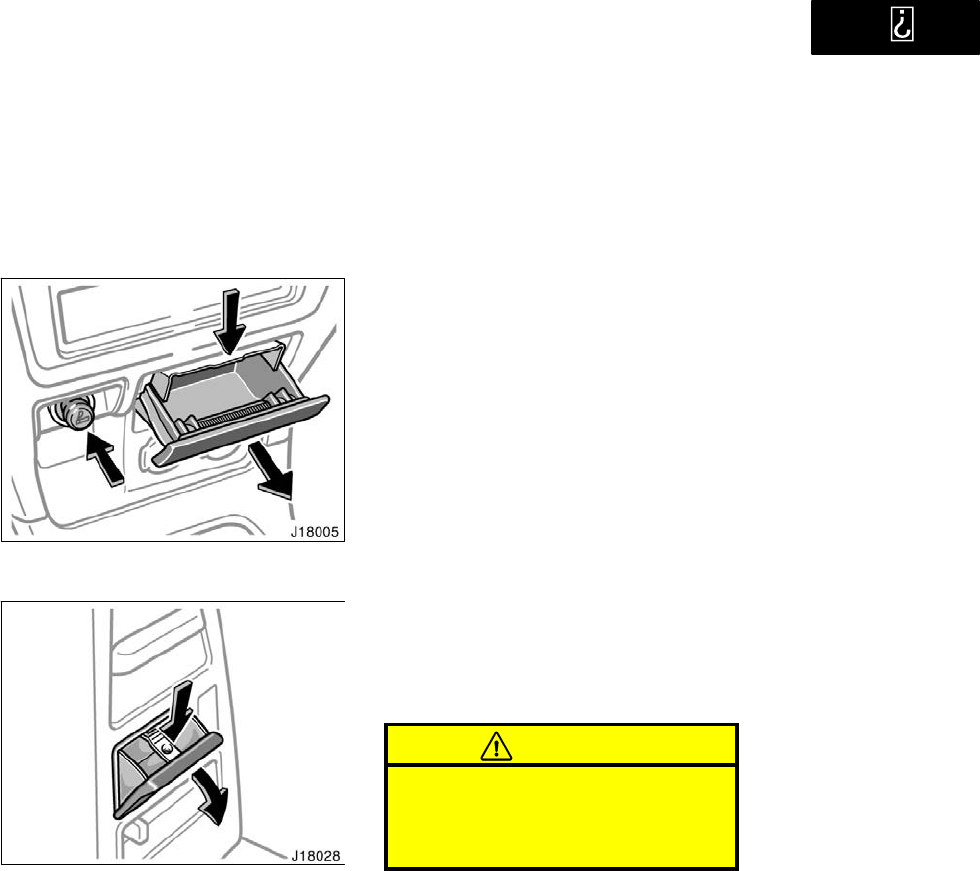
’01 4Runner_U (L/O 0008)
175
2001 4RUNNER (OM35768U)
The vehicles sold in U.S.A., the tempera-
ture is indicated in degrees Fahrenheit,
while the vehicles sold in Canada, the
temperature is indicated in degrees Centi-
grade.
Cigarette lighter and ashtrays
Cigarette lighter and front ashtray
Rear ashtray
CIGARETTE LIGHTER
To use the cigarette lighter, press it in.
When it becomes heated, it automatical-
ly pops out ready for use.
If the engine is not running, the key must
be in the ACC" position.
Do not hold the cigarette lighter pressed
in.
Use a Toyota genuine cigarette lighter or
equivalent for replacement.
ASHTRAY
To use the ashtray, pull it out.
When finished with your cigarette, thor-
oughly extinguish it in the ashtray to pre-
vent other cigarette butts from catching
fire. After using the ashtray, push it back
in completely.
To remove the ashtray, press down on the
lock spring plate and pull out.
CAUTION
To reduce the chance of injury in
case of an accident or sudden stop
while driving, always push the ash-
tray back in completely after using.
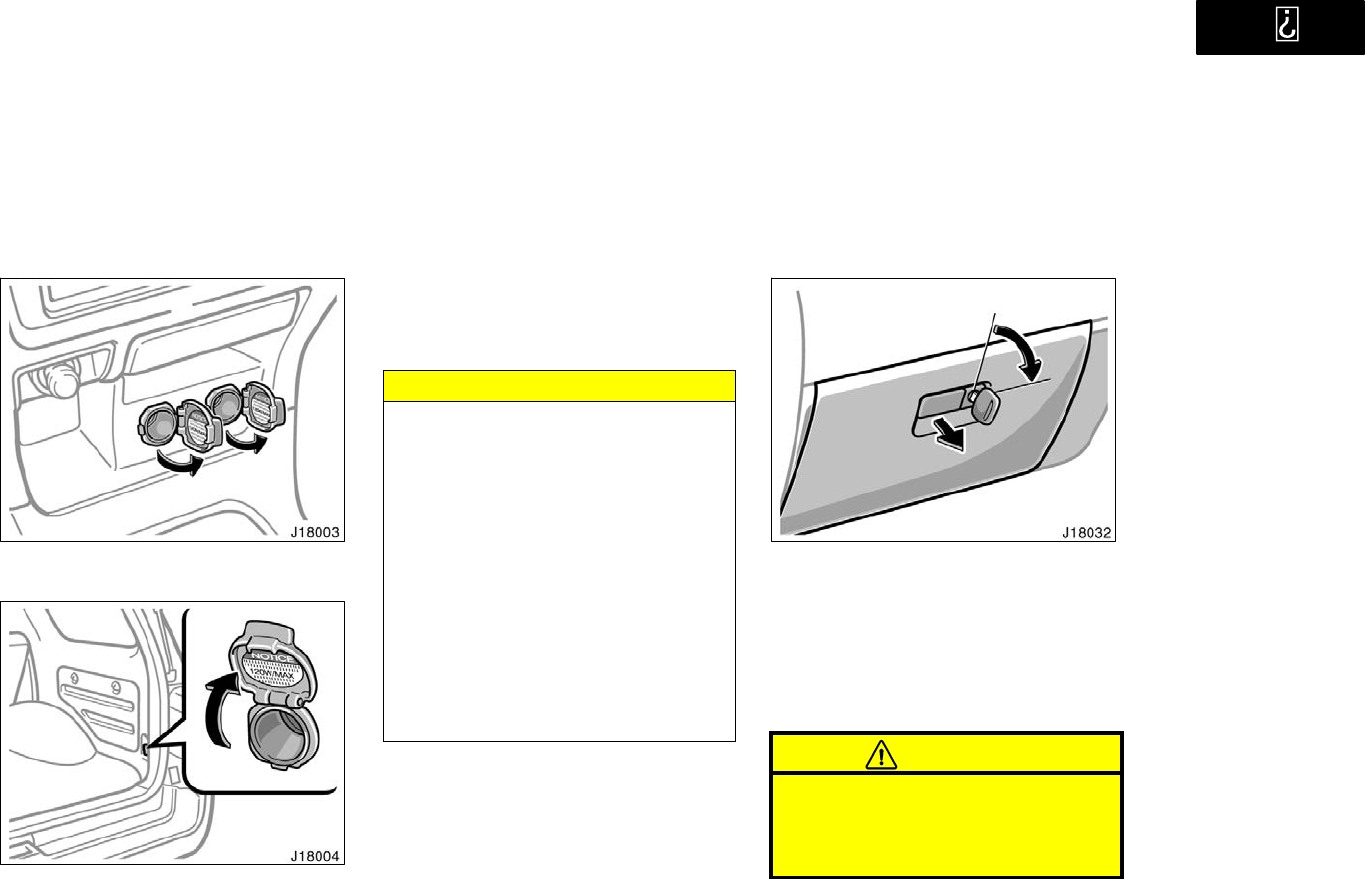
’01 4Runner_U (L/O 0008)
176 2001 4RUNNER (OM35768U)
Power outlets
Instrument panel
Luggage compartment
The power outlets are designed for
power supply for car accessories.
The key must be in the ACC" or ON"
position for the power outlet to be used.
NOTICE
zTo prevent the fuse from being
blown, do not use the electricity
over the total vehicle capacity of
12V/120W.
zTo prevent the battery from being
discharged, do not use the power
outlets longer than necessary when
the engine is not running.
zClose the power outlet lids when
the power outlets are not in use.
Inserting a foreign object other than
the appropriate plug that fits the
outlet, or allowing any liquid into
the outlet may cause electrical fail-
ure or short circuits.
Glove box
To use the glove box, do this.
To open: Pull the lever.
On some models, the glove box light will
come on when the glove box is open with
the instrument panel lights on.
To lock: Insert the master key and turn it
clockwise.
CAUTION
To reduce the chance of injury in
case of an accident or a sudden stop,
always keep the glove box door
closed while driving.
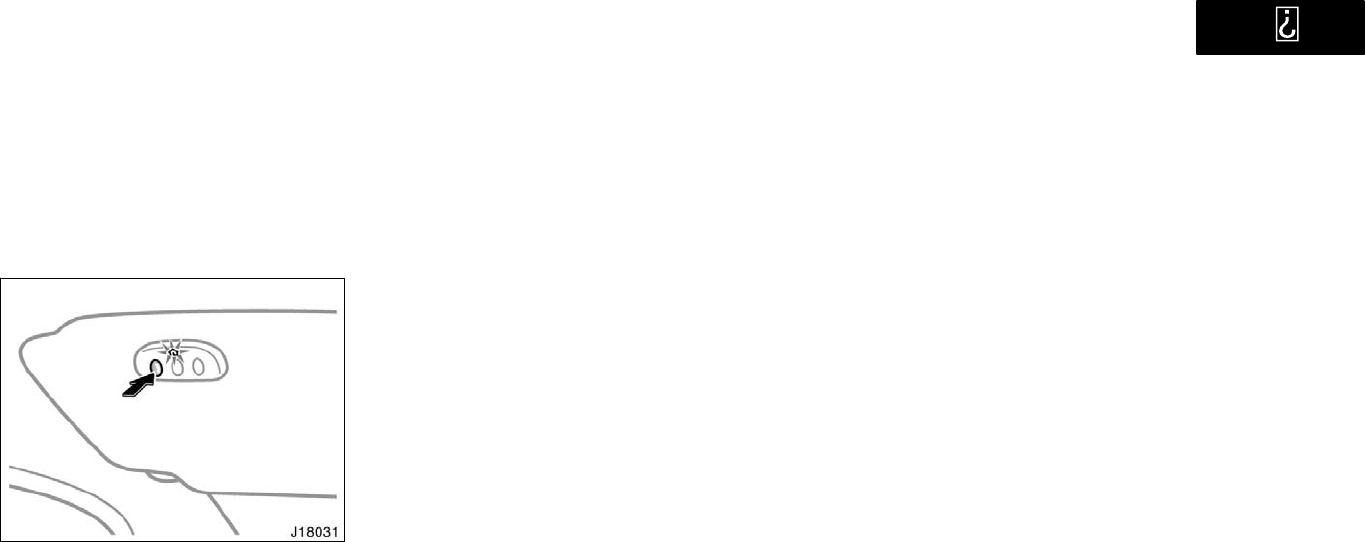
’01 4Runner_U (L/O 0008)
177
2001 4RUNNER (OM35768U)
Garage door opener
The garage door opener (HomeLink
Universal Transceiver) is manufactured
under license from HomeLink and can
be programmed to operate garage
doors, gates, entry doors, door locks,
home lighting systems, and security
systems, etc.
(a) Programming the HomeLink
The HomeLink in your vehicle has 3
buttons and you can store one program
for each button.
To ensure correct programming into the
HomeLink, install a new battery in the
hand−held transmitter prior to program-
ming.
The battery side of the hand−held trans-
mitter must be pointed away from the
HomeLink during the programming pro-
cess.
For Canadian users, follow the procedure
in Programming an entrance gate/Pro-
gramming all devices in the Canadian
market".
1. Decide which of 3 HomeLink buttons
you want to program.
2. Place your hand−held garage transmit-
ter 25 to 75 mm (1 to 3 in.) away from
the surface of the HomeLink.
Keep the indicator light on the HomeLink
in view while programming.
3. Simultaneously press and hold the
hand−held garage transmitter button
along with the selected HomeLink but-
ton.
4. When the indicator light on the
HomeLink changes from a slow to a
rapid flash after 20 seconds, you can
release both buttons.
5. Test the operation of the HomeLink by
pressing the newly programmed button.
If programming a garage door opener,
check to see if the garage door opens
and closes.
If the garage door does not operate, iden-
tify if your garage transmitter is of the
Rolling Code" type. Press and hold the
programmed HomeLink button. The ga-
rage door has the rolling code feature if
the indicator light (on the HomeLink)
flashes rapidly and then remains lit after
2 seconds. If your garage transmitter is
the Rolling Code" type, proceed to the
heading Programming a rolling code sys-
tem".
6. Repeat steps 2 through 5 for each re-
maining HomeLink button to program
another device.

’01 4Runner_U (L/O 0008)
178 2001 4RUNNER (OM35768U)
Programming a rolling code system
If your device is Rolling Code"
equipped, it is necessary to follow
steps 1 through 4 under the heading
Programming the HomeLink" before
proceeding with the steps listed below.
1. Locate the training" button on the ceil-
ing mounted garage door opener motor.
The exact location and color of the
button may vary by brand of garage
door opener. Refer to the owner’s
guide supplied by the garage door
opener manufacturer for the location of
this training" button.
2. Press the training" button on the ceil-
ing mounted garage door opener motor.
Following this step, you have 30 seconds
in which to initiate step 3 below.
3. Press and release the vehicle’s pro-
grammed HomeLink button twice. The
garage door may open. If the door
does open, the programming process is
complete. If the door does not open,
press and release the button a third
time. This third press and release will
complete the programming process by
opening the garage door.
The ceiling mounted garage door opener
motor should now recognize the
HomeLink unit and be able activate the
garage door up/down.
4. Repeat steps 1 through 3 for each re-
maining HomeLink button to program
another rolling code system.
Programming an entrance gate/Program-
ming all devices in the Canadian market
1. Decide which of the 3 HomeLink but-
tons you want to program.
2. Place your hand−held gate/device
transmitter 25 to 75 mm (1 to 3 in.)
away from the surface of the
HomeLink.
Keep the indicator light on the HomeLink
in view while programming.
3. Press and hold the selected
HomeLink button.
4. Continuously press and release (cycle)
the hand−held gate/device transmitter
button every two seconds until step 5
is complete.
5. When the indicator light on the
HomeLink changes from a slow to a
rapid flash after 20 seconds, you can
release both buttons.
6. Test the operation of the HomeLink by
pressing the newly programmed button.
Check to see if the gate/device oper-
ates correctly.
7. Repeat steps 1 through 6 for each re-
maining HomeLink button to program
another device.
Programming other devices
To program other devices such as home
security systems, home door locks or
lighting, contact your authorized Toyota
dealer for assistance.
Reprogramming a button
Individual HomeLink buttons cannot be
erased, however, to reprogram a single
button, follow the procedure Programming
the HomeLink".
(b) Operating the HomeLink
To operate the HomeLink, press the
appropriate HomeLink button to activate
the programmed device. The HomeLink
indicator light should come on. The
HomeLink continues to send the signal
for up to 20 seconds as long as the
button is pressed.
’01 4Runner_U (L/O 0008)
179
2001 4RUNNER (OM35768U)
(c) Erasing the entire HomeLink
memory (all three programs)
To erase all previously programmed codes
at one time, press and hold down the 2
outside buttons for 20 seconds until the
indicator light flashes.
If you sell your vehicle, be sure to erase
the programs stored in the HomeLink
memory.
CAUTION
When programming the HomeLink
Universal Transceiver, you may be
operating a garage door or other
device. Make sure people and ob-
jects are out of the way of the ga-
rage door or other device to pre-
vent potential harm or damage.
Do not use this HomeLink Univer-
sal Transceiver with any garage
door opener that lacks the safety
stop and reverse feature as re-
quired by federal safety standards.
(This includes any garage door
opener model manufactured before
April 1, 1982.) A garage door open-
er, which cannot detect an object,
signaling the door to stop and re-
verse, does not meet current feder-
al safety standards. Using a garage
door opener without these features
increases risk of serious injury or
death.
This device complies with Part 15 of the
FCC Rules and with RSS−210 of the
Industry Canada. Operation is subject to
the following two conditions: (1) This
device may not cause harmful interfer-
ence, and (2) this device must accept
any interference that may be received,
including interference that may cause
undersired operation.
WARNING: This transmitter has been
tested and complies with FCC and
Industry Canada rules. Changes or
modifications not expressly approved
by the party responsible for com-
pliance could void the user’s author-
ity to operate the device.
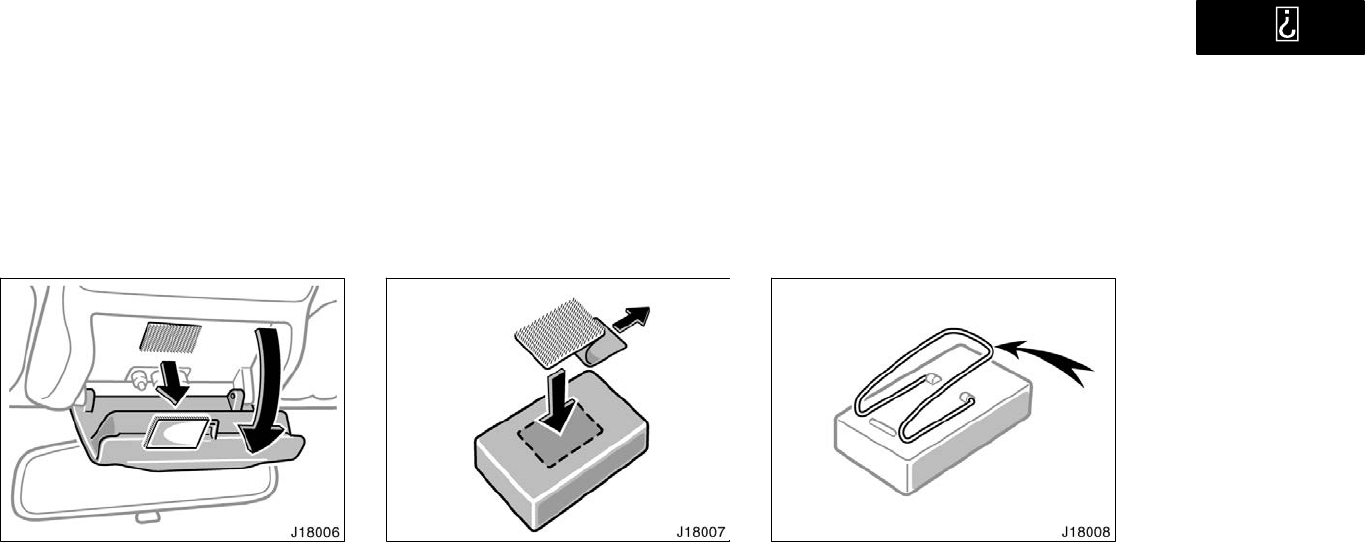
’01 4Runner_U (L/O 0008)
180 2001 4RUNNER (OM35768U)
Garage door opener box
The box is designed to store a garage
door opener transmitter.
Open the cover and remove the Velcro
loop.
Remove the paper strip covering the adhe-
sive on back side of loop and adhere loop
to back side of the transmitter near cen-
ter.
Please note if transmitter has wire clip for
sun visor, this clip must be removed prior
to adhesion of the Velcro.
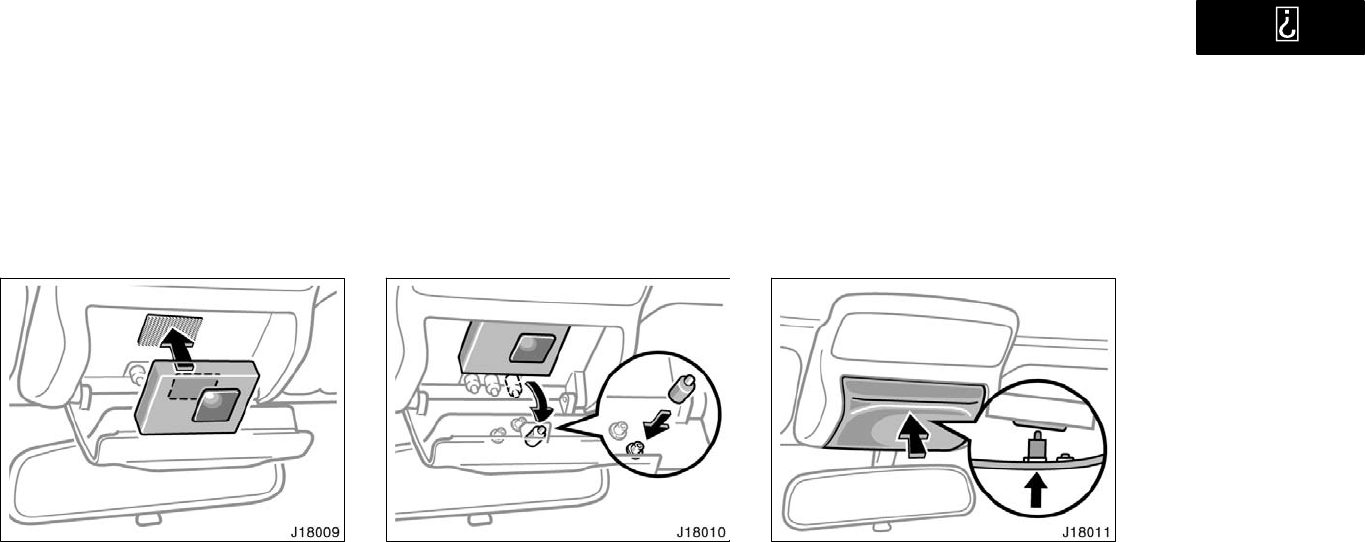
’01 4Runner_U (L/O 0008)
181
2001 4RUNNER (OM35768U)
Place the transmitter with Velcro loop fac-
ing inside of box into the box. Make sure
the transmitter button is located above
button pins.
Remove spacers from the box. Place the
largest spacer on the pin that would be
below transmitter button when the cover is
closed. Close the cover.
When the garage door opener transmitter
is properly installed, you can operate the
transmitter by pushing the cover.
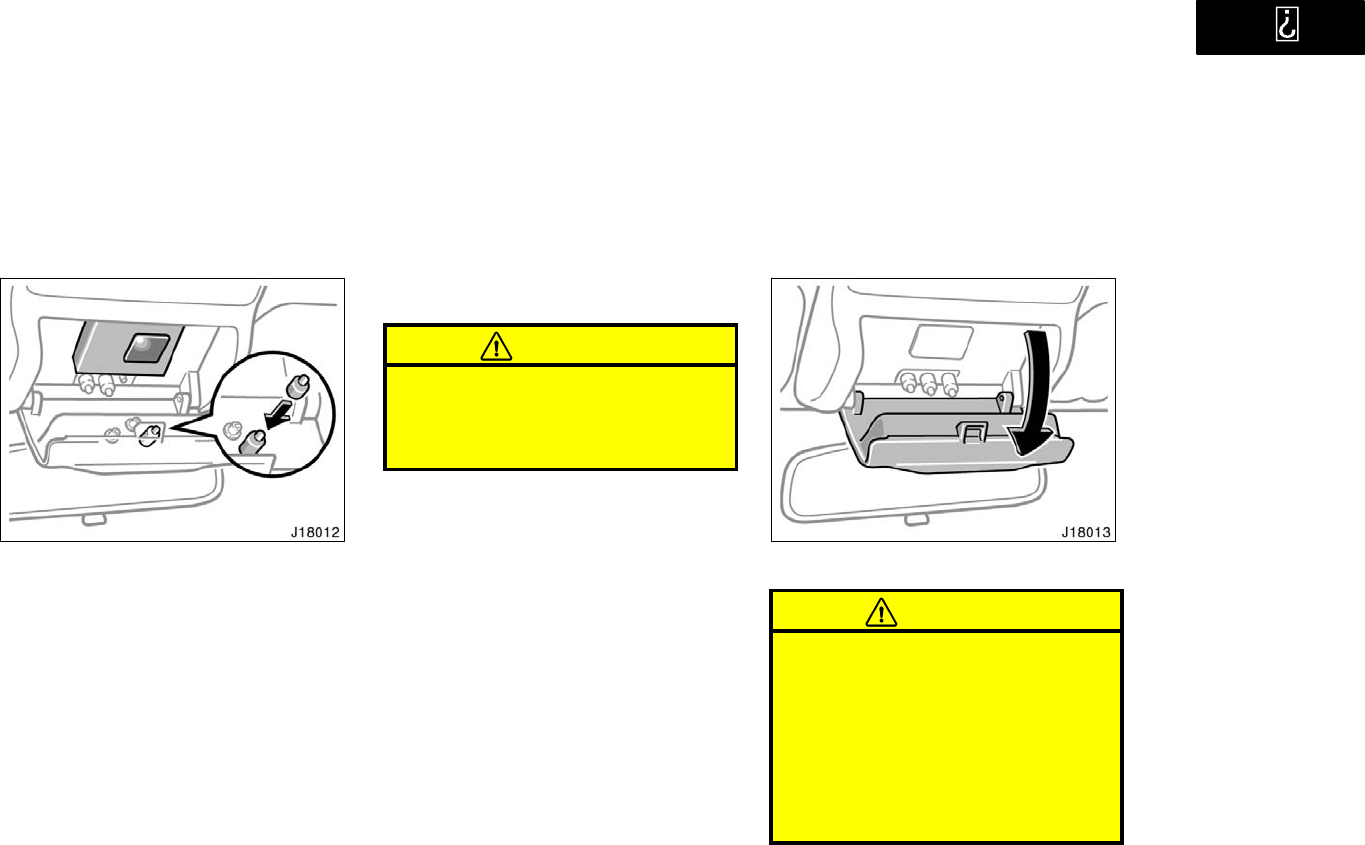
’01 4Runner_U (L/O 0008)
182 2001 4RUNNER (OM35768U)
If the spacer does not contact with your
garage door opener transmitter:
Check to see if spacer is on correct
pin.
Attach another spacer to the top of
original spacer. Check operation. If re-
quired, continue add spacers until con-
tact is achieved.
If the transmitter is clattering during driv-
ing, fill in a piece of felt or pad to prevent
the transmitter from clattering.
Put the remained spacers back in its
place.
CAUTION
To reduce the chance of injury in
case of an accident or a sudden stop,
always keep the garage door opener
box closed while driving.
Auxiliary box (type A)
To use the box, open the lid.
CAUTION
To reduce the chance of injury in
case of an accident or a sudden
stop, always keep the box closed
while driving.
Do not place any object heavier
than approximately 50 g (0.11 lb.) in
it. Heavier objects may cause the
box to open and contents to fly out
resulting in injuries.
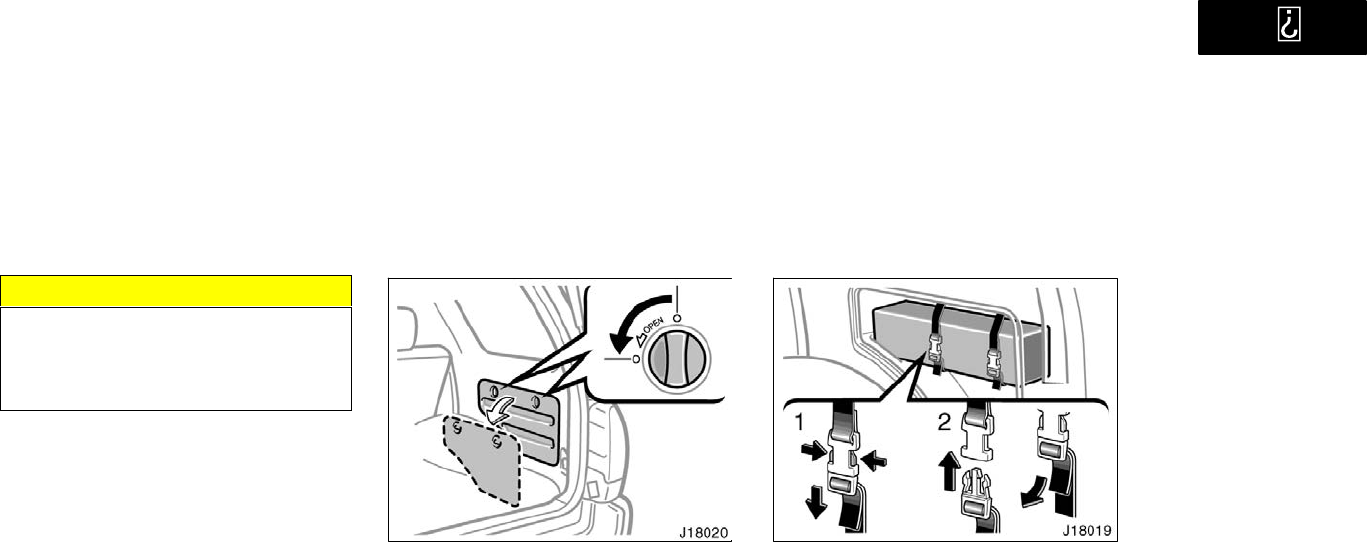
’01 4Runner_U (L/O 0008)
183
2001 4RUNNER (OM35768U)
NOTICE
In hot weather, inside of the vehicle
becomes very hot. Do not leave any-
thing flammable or deformable such
as a lighter, the glasses, etc. inside.
Auxiliary box (type B)
To open the box, turn the two knobs.
Warning reflector holder
The auxiliary box is equipped with two
straps to hold the warning reflector.
Although the warning reflector itself is not
included as an original equipment, this
auxiliary box can be used to store the
warning reflector.
Hold the warning reflector kit with the
straps.
1. To release: Push in both sides of the
buckle as shown in the illustration.
2. To tighten: Connect the buckle, then
pull on the belt.
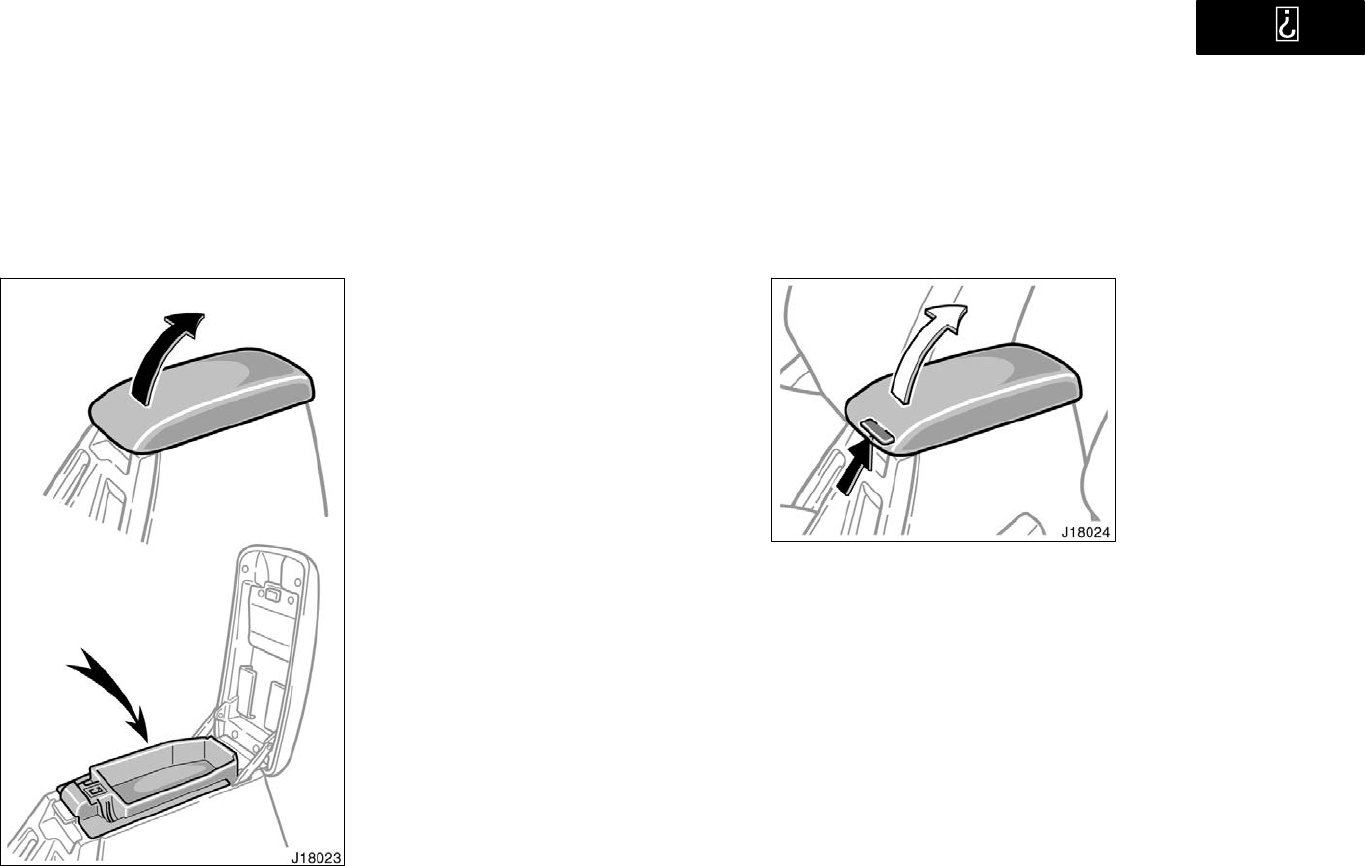
’01 4Runner_U (L/O 0008)
184 2001 4RUNNER (OM35768U)
Rear console box
UPPER TRAY
To access the upper tray, raise the con-
sole box lid without touching the lock
release lever.
CONSOLE BOX
To access the rear console box, pull up
the lock release lever while raising the
rear console box lid.
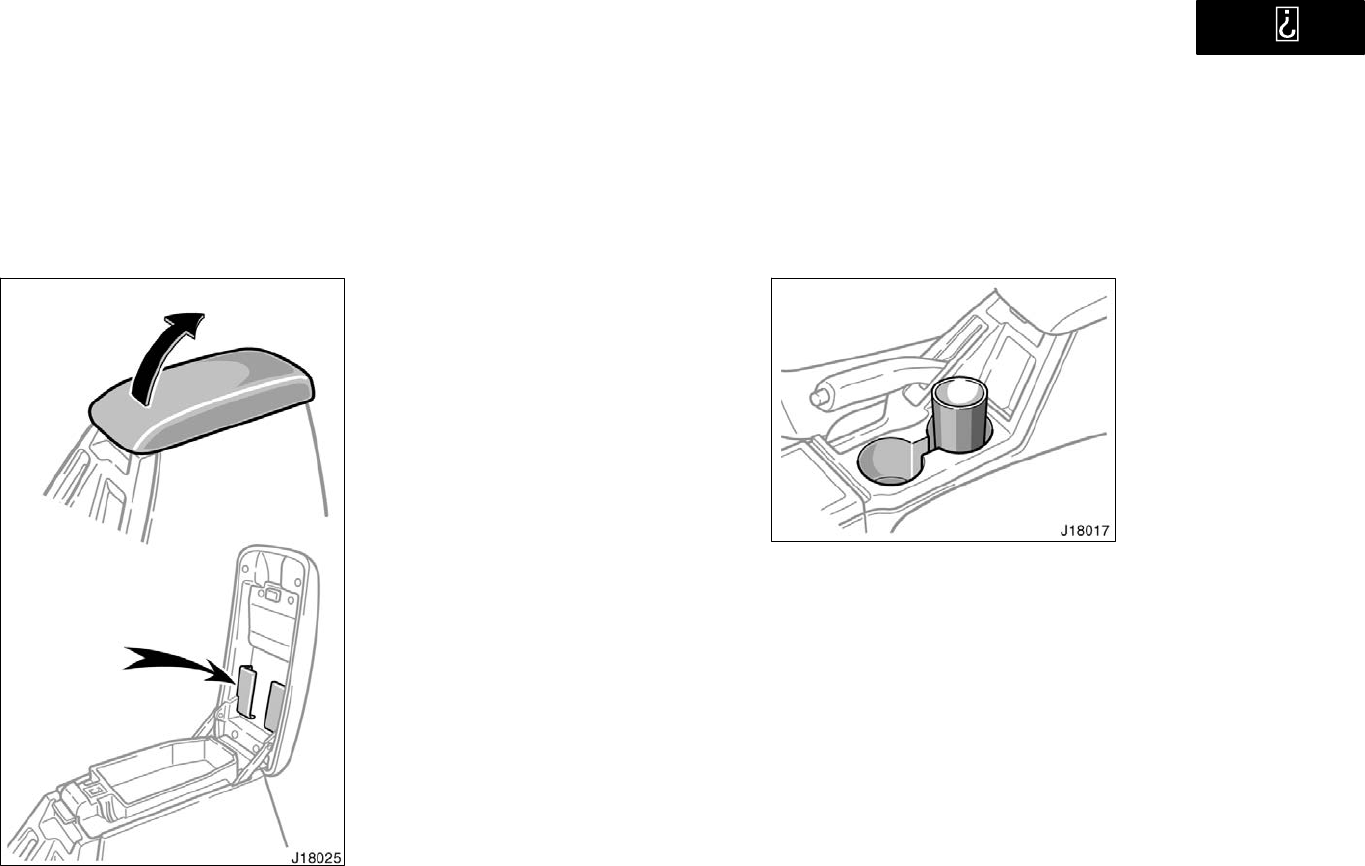
’01 4Runner_U (L/O 0008)
185
2001 4RUNNER (OM35768U)
Card holder
There is a card holder on the inside of
the rear console box lid.
To use the card holder, raise the console
box lid without touching the lock release
lever.
Front cup holders
The cup holders are designed for hold-
ing cups or drink−cans securely.
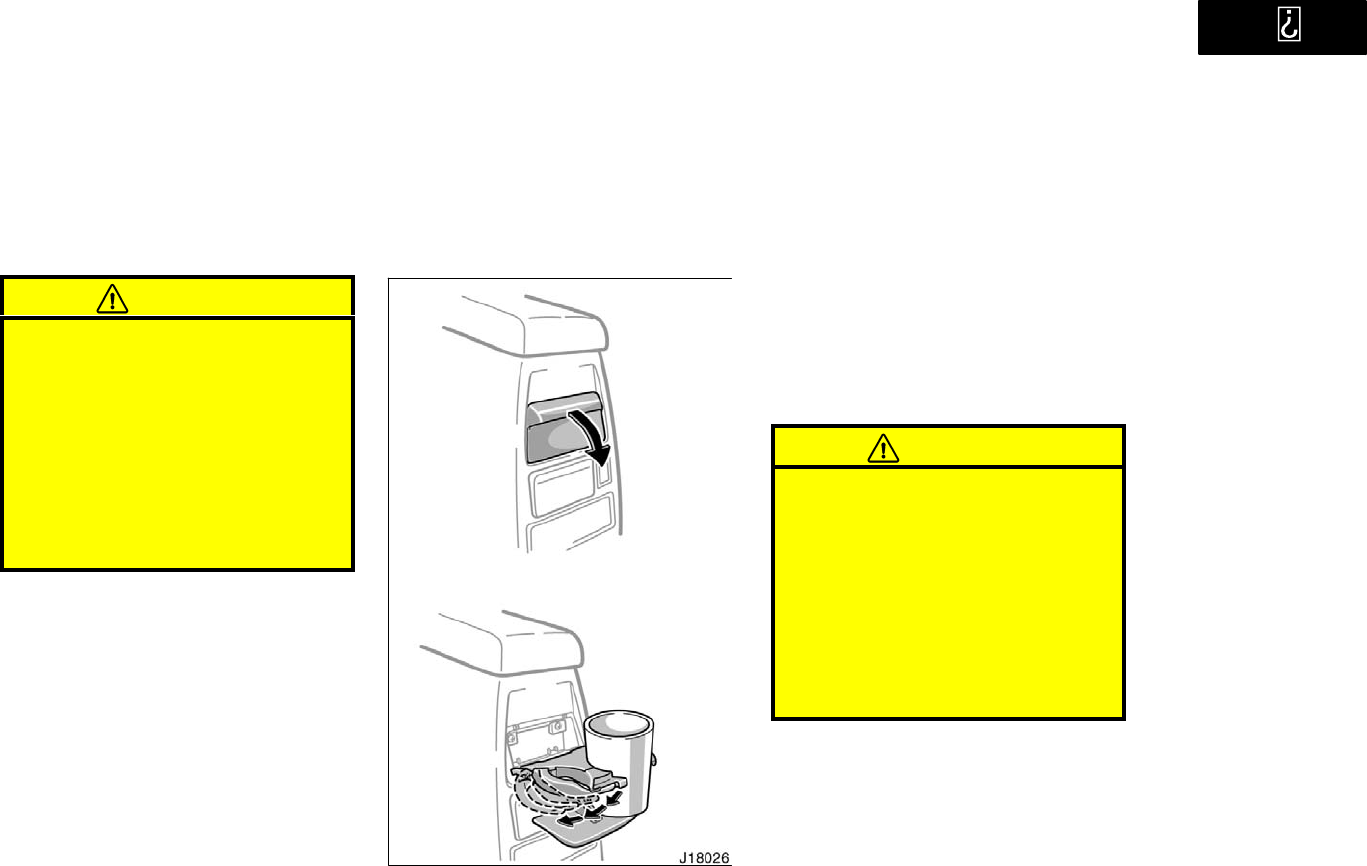
’01 4Runner_U (L/O 0008)
186 2001 4RUNNER (OM35768U)
CAUTION
Do not place anything else other
than cups or drink−cans on the cup
holder, as such items may be
thrown about in the compartment
and possibly injure people in the
vehicle during sudden braking or in
an accident.
To reduce the chance of injury in
case of an accident or a sudden
stop while driving, keep the cup
holder closed when it is not in use.
Rear cup holders
The cup holders are designed for hold-
ing cups or drink−cans securely.
USING REAR CUP HOLDERS
To use the rear cup holders, pull out
the rear cup holder lid.
You can select from 3 arm positions.
CAUTION
Do not place anything else other
than cups or drink−cans on the cup
holder, as such items may be
thrown about in the compartment
and possibly injure people in the
vehicle during sudden braking or in
an accident.
To reduce the chance of injury in
case of an accident or a sudden
stop while driving, keep the cup
holder closed when it is not in use.
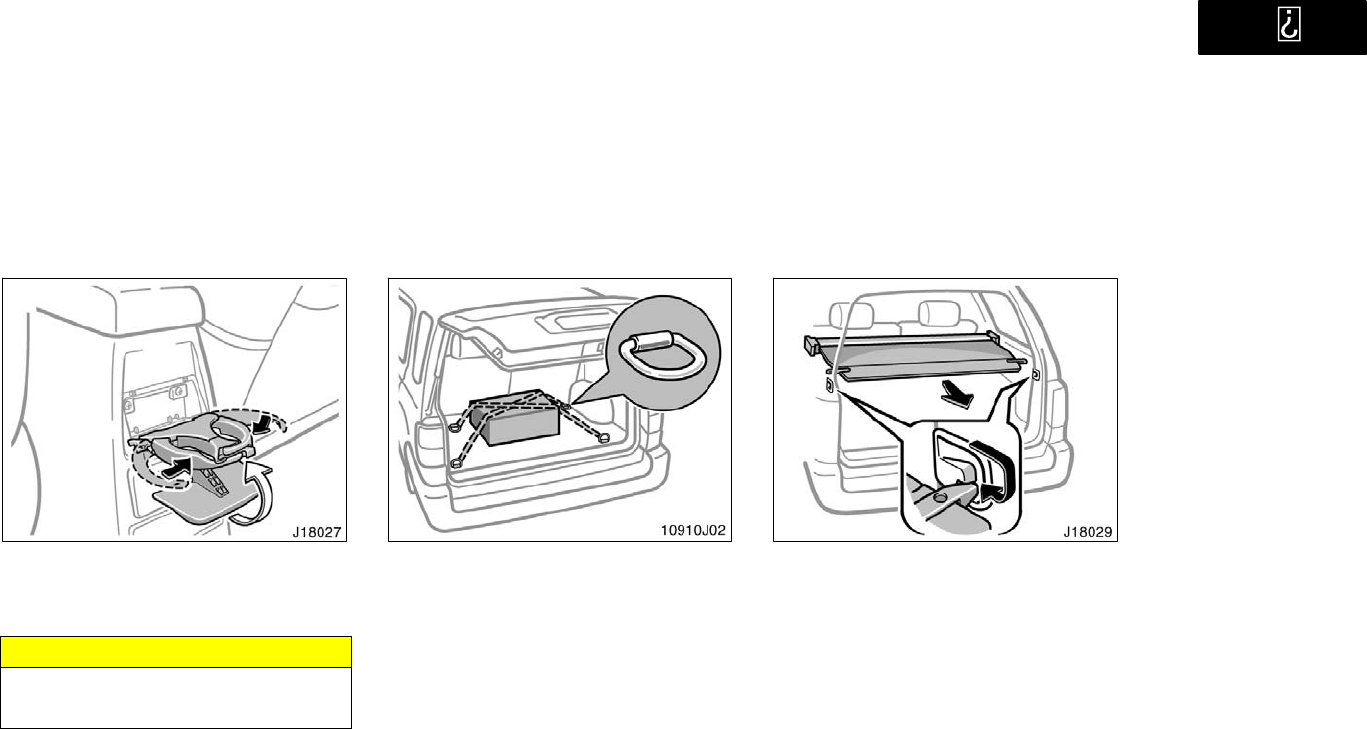
’01 4Runner_U (L/O 0008)
187
2001 4RUNNER (OM35768U)
CLOSING REAR CUP HOLDER LID
To close the rear cup holder lid, re-
place the arms and pull up the lid.
NOTICE
Be sure to replace the arms before
closing the rear cup holder lid.
Tie−down hooks
To secure your luggage, use the tie−
down hooks as shown above.
See Luggage stowage precautions" in
Section 2 for precautions in loading lug-
gage.
Luggage cover
To use the luggage cover, pull it out of
the retractor and hook it to the an-
chors.
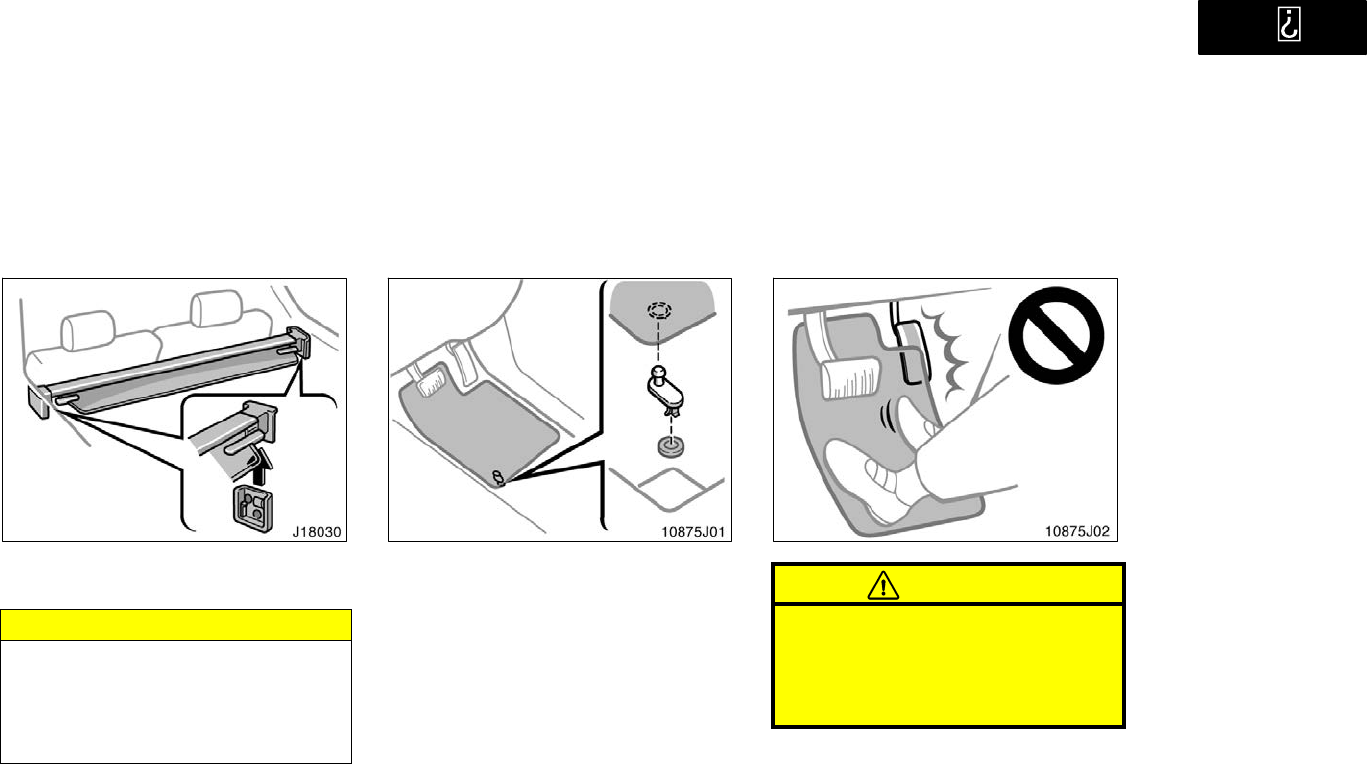
’01 4Runner_U (L/O 0008)
188 2001 4RUNNER (OM35768U)
To remove the luggage cover, retract
and lift it up.
NOTICE
As the plastic parts used on both
ends of the luggage cover may break
if exposed to a shock, take care not
to hit or knock them when attaching,
detaching or storing the cover.
Floor mat
Use a floor mat of the correct size.
If the floor carpet and floor mat have a
hole, then it is designed for use with a
locking clip. Fix the floor mat with locking
clip into the hole in the floor carpet.
CAUTION
Make sure the floor mat is properly
placed on the floor carpet. If the floor
mat slips and interferes with the
movement of the pedals during driv-
ing, it may cause an accident.

’01 4Runner_U (L/O 0008)
189
2001 4RUNNER (OM35768U)
INFORMATION BEFORE DRIVING YOUR
TOYOTA
Off−road vehicle precautions 190. . . . . . . . . . . . . . . . . . . . . . . . . . . . . . . . .
Break−in period 191. . . . . . . . . . . . . . . . . . . . . . . . . . . . . . . . . . . . . . . . . . . .
Fuel 191. . . . . . . . . . . . . . . . . . . . . . . . . . . . . . . . . . . . . . . . . . . . . . . . . . . . . . .
Operation in foreign countries 193. . . . . . . . . . . . . . . . . . . . . . . . . . . . . . . .
Three−way catalytic converter 194. . . . . . . . . . . . . . . . . . . . . . . . . . . . . . .
Engine exhaust cautions 195. . . . . . . . . . . . . . . . . . . . . . . . . . . . . . . . . . . .
Facts about engine oil consumption 195. . . . . . . . . . . . . . . . . . . . . . . . . .
Twin ground electrode spark plugs 196. . . . . . . . . . . . . . . . . . . . . . . . . . .
Brake system 197. . . . . . . . . . . . . . . . . . . . . . . . . . . . . . . . . . . . . . . . . . . . . .
Brake pad wear limit indicators 200. . . . . . . . . . . . . . . . . . . . . . . . . . . . . . .
Luggage stowage precautions 201. . . . . . . . . . . . . . . . . . . . . . . . . . . . . . .
Your Toyota’s identification 201. . . . . . . . . . . . . . . . . . . . . . . . . . . . . . . . . .
Theft prevention labels 202. . . . . . . . . . . . . . . . . . . . . . . . . . . . . . . . . . . . . .
Suspension and chassis 203. . . . . . . . . . . . . . . . . . . . . . . . . . . . . . . . . . . .
Types of tires 203. . . . . . . . . . . . . . . . . . . . . . . . . . . . . . . . . . . . . . . . . . . . . . .
SECTION 2
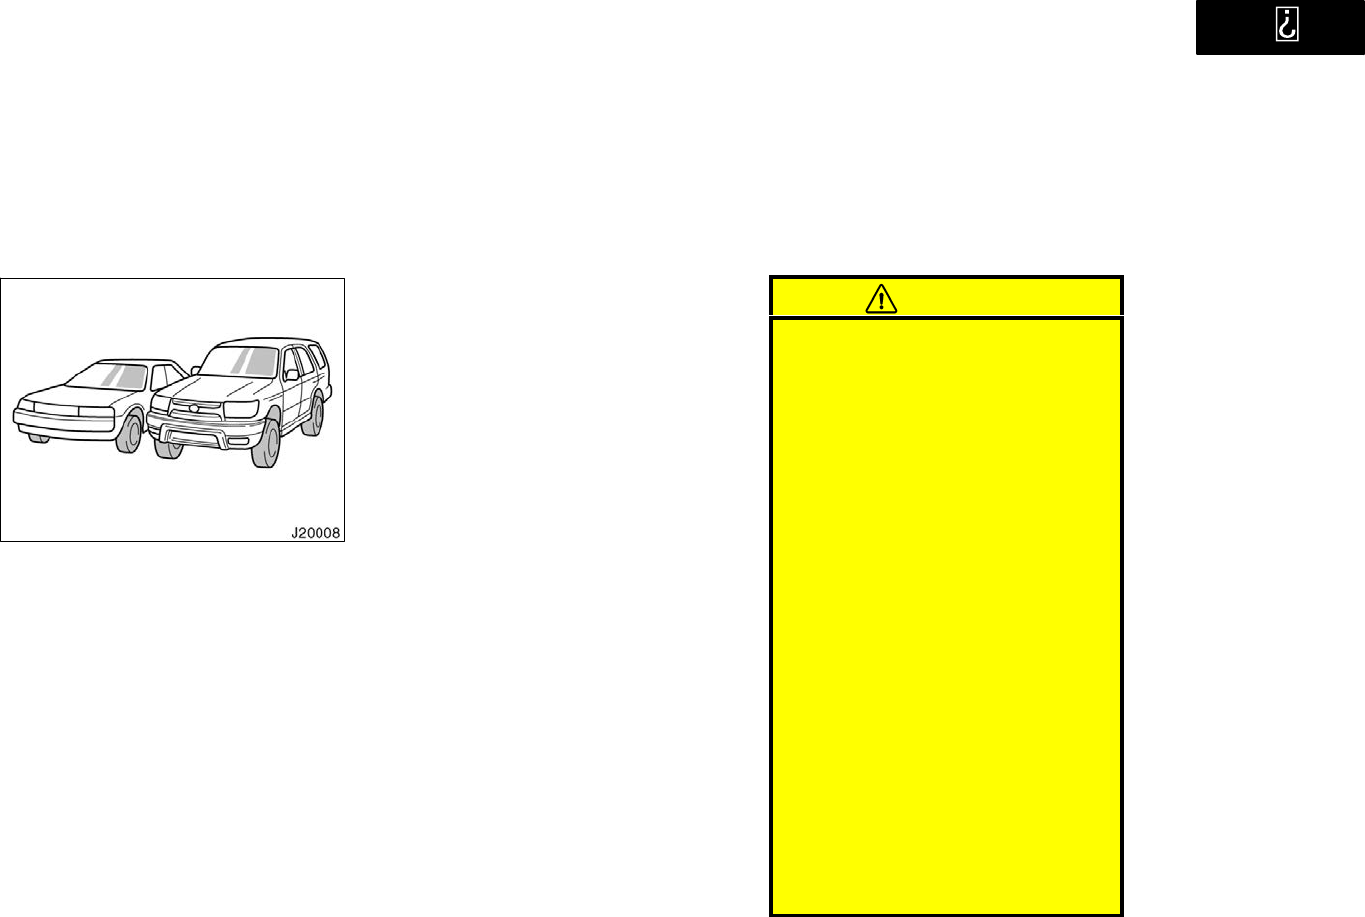
’01 4Runner_U (L/O 0008)
190 2001 4RUNNER (OM35768U)
Off−road vehicle precautions
This vehicle belongs to the utility ve-
hicle class, which has higher ground
clearance and narrower tread in relation
to the height of its center of gravity to
make it capable of performing in a wide
variety of off−road applications. Specific
design characteristics give it a higher
center of gravity than ordinary passen-
ger cars. This vehicle design feature
causes this type of vehicle to be more
likely to rollover. And, utility vehicles
have a significantly higher rollover rate
than other types of vehicles. An advan-
tage of the higher ground clearance is
a better view of the road allowing you
to anticipate problems. It is not de-
signed for cornering at the same
speeds as ordinary passenger cars any
more than low−slung sports cars de-
signed to perform satisfactorily under
off−road conditions. Therefore, sharp
turns at excessive speeds may cause
rollover.
CAUTION
Always observe the following precau-
tions to minimize the risk of serious
personal injury or damage to your ve-
hicle:
In a rollover crash, an unbelted per-
son is significantly more likely to
die than a person wearing a seat
belt. Therefore, the driver and all
passengers should fasten their seat
belts whenever the vehicle is mov-
ing.
Avoid sharp turns or abrupt maneu-
vers, if at all possible. Failure to
operate this vehicle correctly may
result in loss of control or vehicle
rollover causing death or serious
injury.
Avoid loading any items on the roof
that will raise the vehicle’s center
of gravity.
Always slow down in gusty cross-
winds. Because of its profile and
higher center of gravity, your ve-
hicle is more sensitive to side
winds than an ordinary passenger
car. Slowing down will allow you to
have better control.
’01 4Runner_U (L/O 0008)
191
2001 4RUNNER (OM35768U)
When driving off−road or in rugged
terrain, do not drive at excessive
speeds, jump, make sharp turns,
strike objects, etc. This may cause
loss of control or vehicle rollover
causing death or serious injury. You
are also risking expensive damage
to your vehicle’s suspension and
chassis.
Do not drive horizontally across
steep slopes. Driving straight up or
straight down is preferred. Your ve-
hicle (or any similar off−road ve-
hicle) can tip over sideways much
more easily than forward or back-
ward.
Break−in period
Drive gently and avoid high speeds.
Your vehicle does not need an elaborate
break−in. But following a few simple tips
for the first 1600 km (1000 miles) can add
to the future economy and long life of
your vehicle:
Do not drive over 88 km/h (55 mph).
Run the engine at moderate speed be-
tween 2000 and 4000 rpm.
Avoid full−throttle starts.
Try to avoid hard stops during the first
300 km (200 miles).
Do not drive for a long time at any
single speed, either fast or slow.
Do not tow a trailer during the first
800km (500miles).
Fuel
FUEL TYPE
Your new vehicle must use only un-
leaded gasoline.
To help prevent gas station mix−ups, your
Toyota has a smaller fuel tank opening.
The special nozzle on pumps with un-
leaded fuel will fit it, but the larger stan-
dard nozzle on pumps with leaded gas will
not.
At a minimum, the gasoline you use
should meet the specifications of ASTM
D4814 in the U.S.A. and CGSB 3.5−M93
in Canada.
NOTICE
Do not use leaded gasoline. Use of
leaded gasoline will cause the three−
way catalytic converter to lose its ef-
fectiveness and the emission control
system to function improperly. Also,
this can increase maintenance costs.

’01 4Runner_U (L/O 0008)
192 2001 4RUNNER (OM35768U)
OCTANE RATING
Select Octane Rating 87 (Research Oc-
tane Number 91) or higher.
Use of unleaded gasoline with an octane
rating or research octane number lower
than stated above will cause persistent
heavy knocking. If it is severe, this will
lead to engine damage.
If your engine knocks...
If you detect heavy knocking even when
using the recommended fuel, or if you
hear steady knocking while holding a
steady speed on level roads, consult your
Toyota dealer.
However, now and then, you may notice
light knocking for a short time while accel-
erating or driving up hills. This is no need
of concern.
GASOLINE CONTAINING DETERGENT
ADDITIVES
Toyota recommends the use of gasoline
that contains detergent additives to
avoid build−up of engine deposits.
However, all gasoline sold in the U.S.
contains detergent additives to keep clean
and/or clean intake systems.
QUALITY GASOLINE
Automotive manufacturers in the U.S.,
Europe and Japan have developed a
specification for quality fuel named
World−Wide Fuel Charter (WWFC) that
is expected to be applied world wide.
The WWFC consists of three categories
that depend on required emission lev-
els. In the U.S., category 3 has been
adopted. The WWFC improves air quali-
ty by providing for better emissions in
vehicle fleets, and customer satisfaction
through better vehicle performance.
CLEANER BURNING GASOLINE
Cleaner burning gasoline, including re-
formulated gasoline that contains oxy-
genates such as ethanol or MTBE is
available in many areas.
Toyota recommends the use of cleaner
burning gasoline and appropriately blended
reformulated gasoline. These types of gas-
oline provide excellent vehicle perfor-
mance, reduce vehicle emissions, and im-
prove air quality.
OXYGENATES IN GASOLINE
Toyota allows the use of oxygenate
blended gasoline where the oxygenate
content is up to 10% ethanol or 15%
MTBE. If you use gasohol in your
Toyota, be sure that it has an octane
rating no lower than 87.
Toyota does not recommend the use of
gasoline containing methanol.
SULFUR IN GASOLINE
If your vehicle is certified to California
Emission Regulations, the vehicle is de-
signed to operate on California cleaner
burning gasoline (CBG) that contains
lower sulfur. If you cannot use Califor-
nia CBG, your emission control system
may suffer damage and turn on the
Malfunction Indicator Lamp.
If the malfunction is caused by the type
of fuel used, repairs may not be covered
by your warranty.
GASOLINE CONTAINING MMT
Some gasoline contain an octane en-
hancing additive called MMT (Methylcy-
clopentadienyl Manganese Tricarbonyl).

’01 4Runner_U (L/O 0008)
193
2001 4RUNNER (OM35768U)
Toyota does not recommend the use of
gasoline that contains MMT. If fuel con-
taining MMT is used, your emission con-
trol system may be adversely affected.
The Malfunction Indicator Lamp on the in-
strument cluster may come on. If this hap-
pens, contact your Toyota dealer for ser-
vice.
GASOLINE QUALITY
In a very few cases, you may experience
driveability problems caused by the partic-
ular gasoline that you are using. If you
continue to have unacceptable driveability,
try changing gasoline brands. If this does
not rectify your problem, then consult your
Toyota dealer.
NOTICE
zDo not use gasohol other than
stated above. It will cause fuel sys-
tem damage or vehicle performance
problems.
zIf driveability problems occur (poor
hot starting, vaporizing, engine
knock, etc.), discontinue the use.
zTake care not to spill gasohol dur-
ing refueling. Gasohol may cause
paint damage.
FUEL TANK CAPACITY
70 L (18.5 gal., 15.4 Imp. gal.)
Operation in foreign countries
If you plan to drive your Toyota in
another country...
First, comply with the vehicle registration
laws.
Second, confirm the availability of the cor-
rect fuel (unleaded and minimum octane
number).
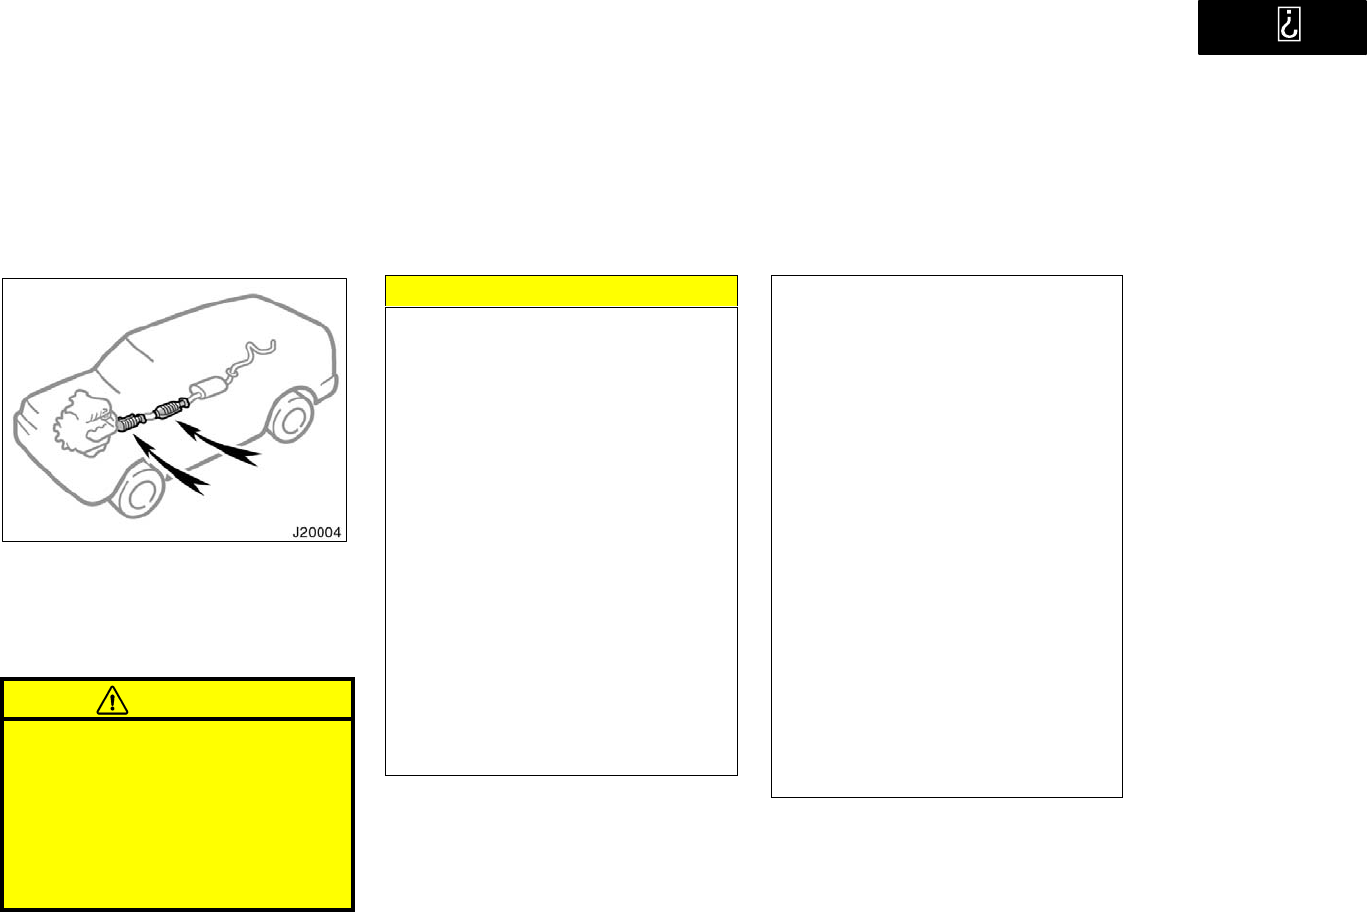
’01 4Runner_U (L/O 0008)
194 2001 4RUNNER (OM35768U)
Three−way catalytic converter
The three−way catalytic converter is an
emission control device installed in the
exhaust system.
The purpose is to reduce pollutants in the
exhaust gas.
CAUTION
Keep people and combustible mate-
rials away from the exhaust pipe
while the engine is running. The
exhaust gas is very hot.
Do not drive, idle or park your ve-
hicle over anything that might burn
easily such as grass, leaves, paper
or rags.
NOTICE
A large amount of unburned gases
flowing into the three−way catalytic
converter may cause it to overheat
and create a fire hazard. To prevent
this and other damage, observe the
following precautions:
zUse only unleaded gasoline.
zDo not drive with an extremely low
fuel level; running out of fuel could
cause the engine to misfire, creat-
ing an excessive load on the three−
way catalytic converter.
zDo not allow the engine to run at
idle speed for more than 20 min-
utes.
zAvoid racing the engine.
zDo not push−start or pull−start your
vehicle.
zDo not turn off the ignition while
the vehicle is moving.
zKeep your engine in good running
order. Malfunctions in the engine
electrical system, electronic ignition
system/distributor ignition system
or fuel systems could cause an ex-
tremely high three−way catalytic
converter temperature.
zIf the engine becomes difficult to
start or stalls frequently, take your
vehicle in for a check−up as soon
as possible. Remember, your Toyota
dealer knows your vehicle and its
three−way catalytic converter sys-
tem best.
zTo ensure that the three−way cata-
lytic converter and the entire emis-
sion control system operate proper-
ly, your vehicle must receive the
periodic inspections required by the
Toyota Maintenance Schedule. For
scheduled maintenance information,
refer to the Scheduled Maintenance
Guide" or Owner’s Manual Supple-
ment".

’01 4Runner_U (L/O 0008)
195
2001 4RUNNER (OM35768U)
Engine exhaust cautions
CAUTION
Avoid inhaling the engine exhaust.
It contains carbon monoxide, which
is a colorless and odorless gas. It
can cause unconsciousness or even
death.
Make sure the exhaust system has
no holes or loose connections. The
system should be checked from
time to time. If you hit something,
or notice a change in the sound of
the exhaust, have the system
checked immediately.
Do not run the engine in a garage
or enclosed area except for the
time needed to drive the vehicle in
or out. The exhaust gases cannot
escape, making this a particularly
dangerous situation.
Do not remain for a long time in a
parked vehicle with the engine run-
ning. If it is unavoidable, however,
do so only in an unconfined area
and adjust the heating or cooling
system to force outside air into the
vehicle.
Keep the back door and back win-
dow closed while driving. An open
or unsealed back door and back
window, may cause exhaust gases
to be drawn into the vehicle.
To allow proper operation of your
vehicle’s ventilation system, keep
the inlet grilles in front of the wind-
shield clear of snow, leaves, or oth-
er obstructions.
If you smell exhaust fumes in the
vehicle, drive with the windows
open and the back door and back
window closed. Have the cause im-
mediately located and corrected.
FUNCTIONS OF ENGINE OIL
Engine oil has the primary functions of
lubricating and cooling the inside of the
engine, and plays a major role in main-
taining the engine in proper working order.
ENGINE OIL CONSUMPTION
It is normal that an engine should con-
sume some engine oil during normal
engine operation. The causes of oil
consumption in a normal engine are as
follows.
Oil is used to lubricate pistons, piston
rings and cylinders. A thin film of oil
is left on the cylinder wall when a pis-
ton moves downwards in the cylinder.
High negative pressure generated when
the vehicle is decelerating sucks some
of this oil into the combustion chamber.
This oil as well as some part of the oil
film left on the cylinder wall is burned
by the high temperature combustion
gases during the combustion process.
Facts about engine oil
consumption
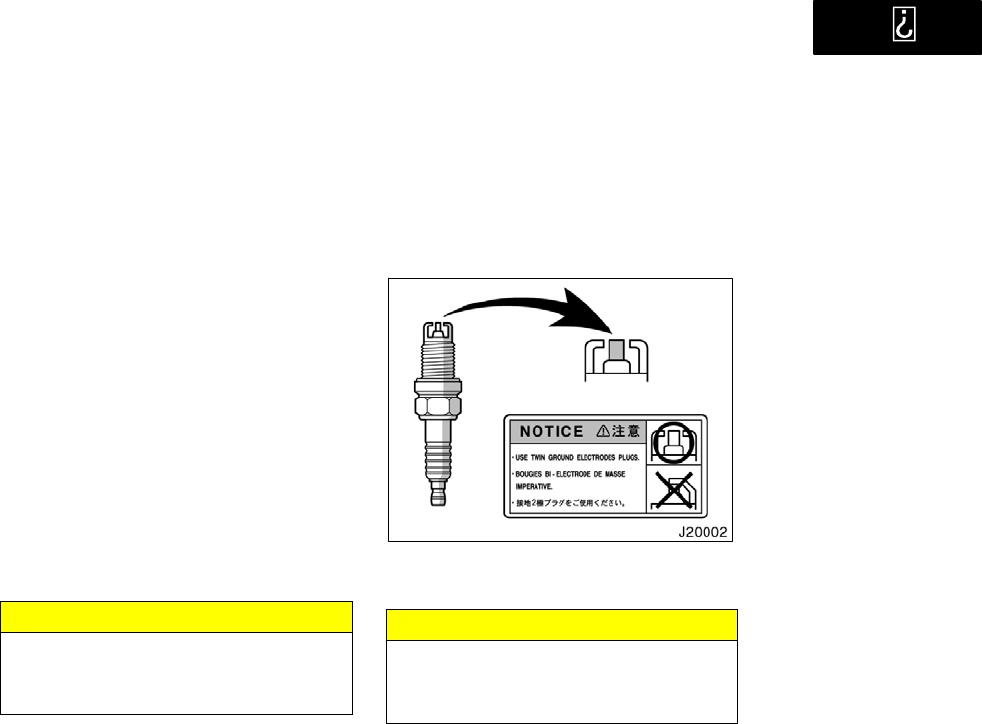
’01 4Runner_U (L/O 0008)
196 2001 4RUNNER (OM35768U)
Oil is also used to lubricate the stems
of the intake valves. Some of this oil
is sucked into the combustion chamber
together with the intake air and is
burned along with the fuel. High tem-
perature exhaust gases also burn the
oil used to lubricate the exhaust valve
stems.
The amount of engine oil consumed de-
pends on the viscosity of the oil, the
quality of the oil and the conditions the
vehicle is driven under.
More oil is consumed by high−speed driv-
ing and frequent acceleration and decel-
eration.
A new engine consumes more oil, since
its pistons, piston rings and cylinder walls
have not become conditioned.
When judging the amount of oil con-
sumption, note that the oil may become
diluted and make it difficult to judge
the true level accurately.
As an example, if a vehicle is used for
repeated short trips, and consumes a nor-
mal amount of oil, the dipstick may not
show any drop in the oil level at all, even
after 1000 km (600 miles) or more. This
is because the oil is gradually becoming
diluted with fuel or moisture, making it
appear that the oil level has not changed.
The diluting ingredients evaporate out
when the vehicle is then driven at high
speeds, as on an expressway, making it
appear that oil is excessively consumed
after driving at high speeds.
IMPORTANCE OF ENGINE OIL LEVEL
CHECK
One of the most important points in prop-
er vehicle maintenance is to keep the en-
gine oil at the optimum level so that oil
function will not be impaired. Therefore, it
is essential that the oil level be checked
regularly. Toyota recommends that the oil
level be checked every time you refuel
the vehicle.
NOTICE
Failure to check the oil level regularly
could lead to serious engine trouble
due to insufficient oil.
For detailed information on oil level check,
see Checking the engine oil level" in Sec-
tion 7−2.
Your engine is fitted with twin ground
electrode spark plugs.
NOTICE
Use only twin ground electrode spark
plugs and do not adjust gaps for your
engine performance.
Twin ground electrode spark
plugs
’01 4Runner_U (L/O 0008)
197
2001 4RUNNER (OM35768U)
Brake system
This brake system has 2 independent hy-
draulic circuits. If either circuit should fail,
the other will still work. However, the ped-
al will be harder to press, and your stop-
ping distance will be longer. Also, the
brake system warning light may come on.
CAUTION
Do not drive your vehicle with only a
single brake system. Have your
brakes fixed immediately.
BRAKE BOOSTER
The brake booster uses brake fluid pres-
surized by the pump to power−assist the
brakes. If the brake booster fails during
driving, the brake system warning light
comes on and buzzer sounds continuous-
ly. In this case, the brakes may not work
properly. If they do not work well, depress
the brake pedal firmly. If the brake system
warning light comes on, immediately stop
your vehicle and contact your Toyota deal-
er.
The brake system warning light may stay
on for about 60 seconds after the ignition
key is turned to the ON" position. It is
normal if the light turns off after a while.
Depressing the brake pedal repeatedly
may turn on the brake system warning
light and buzzer. It is normal if the light
turns off and the buzzer stops sounding
after a few seconds.
You may hear a small sound in the engine
compartment after the engine is started or
the brake pedal is depressed repeatedly.
This is a pump pulsating sound of the
brake system, and it is not a malfunction.
CAUTION
Do not pump the brake pedal if the
engine stalls. Each push on the
pedal uses up your brake fluid
pressure reserve.
Even if the power assist is com-
pletely lost, the brakes will still
work. But you will have to push the
pedal hard, much harder than nor-
mal. And your braking distance will
be longer.
ANTI−LOCK BRAKE SYSTEM
(with ABS" warning light)
The anti−lock brake system is designed
to help prevent lock−up of the wheels
during a sudden braking or braking on
slippery road surfaces. This assists in
providing directional stability and steer-
ing performance of the vehicle under
these circumstances.
Effective way to press the ABS brake
pedal: When the anti−lock brake system
function is in action, you may feel the
brake pedal pulsating and hear a noise.
In this situation, to let the anti−lock
brake system work for you, just hold the
brake pedal down more firmly. Do not
pump the brake in a panic stop. This
will result in reduced braking performan-
ce.
The anti−lock brake system becomes op-
erative after the vehicle has accelerated
to a speed in excess of approximately 10
km/h (6 mph). It stops operating when the
vehicle decelerates to a speed below
approximately 5 km/h (3 mph).
’01 4Runner_U (L/O 0008)
198 2001 4RUNNER (OM35768U)
Depressing the brake pedal on slippery
road surfaces such as on the manhole
cover, the steel plate under the construc-
tion, joints in the bridge, etc. on a rainy
day tends to activate the anti−lock brake
system.
You may hear a click or motor sound in
the engine compartment for a few seconds
when the engine is started or just after
the vehicle is started. This means that the
anti−lock brake system is in the self−
check mode, and does not indicate a mal-
function.
When the anti−lock brake system is ac-
tivated, the following conditions may
occur. They do not indicate a malfunc-
tion of the system:
You may hear the anti−lock brake sys-
tem operating and feel the brake pedal
pulsating and the vibrations of the ve-
hicle body and steering wheel. You
may also hear the motor sound in the
engine compartment even after the ve-
hicle is stopped.
At the end of the anti−lock brake sys-
tem activation, the brake pedal may
move a little forward.
CAUTION
Do not overestimate the anti−lock
brake system: Although the anti−lock
brake system assists in providing ve-
hicle control, it is still important to
drive with all due care and maintain
a moderate speed and safe distance
from the vehicle in front of you, be-
cause there are limits to the vehicle
stability and effectiveness of steering
wheel operation even with the anti−
lock brake system on.
If tires grip performance exceeds its
capability, or if hydroplaning occurs
during high speed driving in the rain,
the anti−lock brake system does not
provide vehicle control.
Anti−lock brake system is not de-
signed to shorten the stopping dis-
tance: Always drive at the moderate
speed and maintain a safe distance
from the vehicle in front of you.
Compared with vehicles without an
anti−lock brake system, your vehicle
may require a longer stopping dis-
tance in the following cases:
Driving on rough, gravel or snow−
covered roads.
Driving with tire chains installed.
Driving over the steps such as the
joints on the road.
Driving on roads where the road
surface is pitted or has other differ-
ences in surface height.
Install all 4 tires of specified size at
appropriate pressure: The anti−lock
brake system detects vehicle speeds
using the speed sensors for respec-
tive wheels’ turning speeds. The use
of tires other than specified may fail
to detect the accurate turning speed
resulting in a longer stopping dis-
tance.
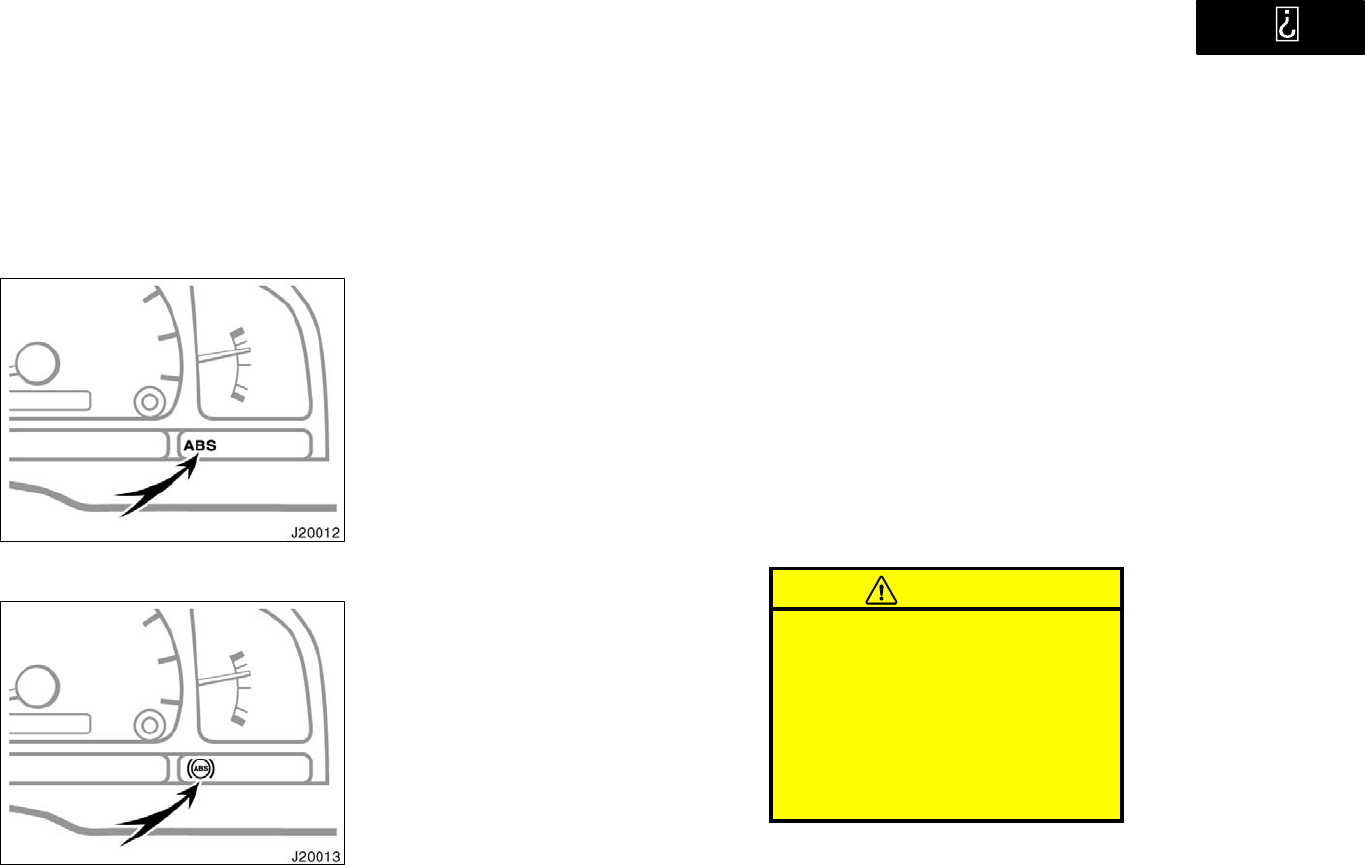
’01 4Runner_U (L/O 0008)
199
2001 4RUNNER (OM35768U)
Type A
Type B
ABS" warning light
The light comes on when the ignition key
is turned to the ON" position. If the anti−
lock brake system and the brake assist
system work properly, the light turns off
after a few seconds. Thereafter, if either
of the systems malfunctions, the light
comes on again.
When the ABS" warning light is on (and
the brake system warning light is off), the
anti−lock brake system, the brake assist
system, the traction control system (two−
wheel drive vehicles), the active traction
control system (four−wheel drive vehicles)
and the vehicle skid control system do not
operate, but the brake system still oper-
ates conventionally.
When the ABS" warning light is on (and
the brake system warning light is off), the
anti−lock brake system does not operate
so that the wheels could lock up during
a sudden braking or braking on slippery
road surfaces.
TRC" or VSC/TRAC" warning light may
come on with the ABS" warning light
(brake assist system warning light) when
there is a malfunction somewhere in the
anti−lock brake system (brake assist sys-
tem).
If either of the following conditions oc-
curs, this indicates a malfunction some-
where in the parts monitored by the
warning light system. Contact your To-
yota dealer as soon as possible to ser-
vice the vehicle.
The light does not come on when the
ignition key is turned to the ON" posi-
tion, or remains on.
The light comes on while you are dri-
ving.
A warning light turning on briefly during
operation does not indicate a problem.
CAUTION
If the ABS" warning light remains on
together with the brake system warn-
ing light, immediately stop your ve-
hicle at a safe place and contact your
Toyota dealer.
In this case, not only the anti−lock
brake system will fail but also the
vehicle will become extremely unsta-
ble during braking.
’01 4Runner_U (L/O 0008)
200 2001 4RUNNER (OM35768U)
Either of the following conditions do
not indicate the malfunction.
The light may stay on for about 60
seconds after the ignition key is turned
to the ON" position. It is normal if it
turns off after a while.
Depressing the brake pedal repeatedly
may turn on the light. It is normal if it
turns off after a few seconds.
BRAKE ASSIST SYSTEM
When you slam the brakes on, the
brake assist system judges as an emer-
gency stop and provides more powerful
braking for a driver who cannot hold
down the brake pedal firmly.
When you slam the brakes on, more pow-
erful braking will be applied. At this time,
you may hear a sound in the engine
compartment and feel the vibrations of the
brake pedal. This does not indicate a mal-
function.
The brake assist system becomes opera-
tive after the vehicle has accelerated to
a speed in excess of approximately 10
km/h (6 mph). It stops operating when the
vehicle decelerates to a speed below
approximately 5 km/h (3 mph).
For an explanation of this system’s warn-
ing light, see Service reminder indicators
and warning buzzers" in Section 1−5.
Brake pad wear limit indicators
The brake pad wear limit indicators on
your disc brakes give a warning noise
when the brake pads are worn to where
replacement is required.
If you hear a squealing or scraping noise
while driving, have the brake pads
checked and replaced by your Toyota
dealer as soon as possible. Expensive ro-
tor damage can result if the pads are not
replaced when necessary.
’01 4Runner_U (L/O 0008)
201
2001 4RUNNER (OM35768U)
Luggage stowage precautions
When stowing luggage or cargo in the
vehicle, observe the following:
Put luggage or cargo in the luggage
compartment when at all possible. Be
sure all items are secured in place.
Be careful to keep the vehicle bal-
anced. Locating the weight as far for-
ward as possible helps maintain bal-
ance.
For better fuel economy, do not carry
unneeded weight.
CAUTION
To prevent luggage or packages
from sliding forward during braking,
do not stack anything in the lug-
gage compartment higher than the
seatbacks. Keep luggage or pack-
ages low, as close to the floor as
possible.
Do not place anything on the flat-
tened seat or it may slide forward
during braking.
Never allow anyone to ride in the
luggage compartment. It is not de-
signed for passengers. They should
ride in their seats with their seat
belts properly fastened. Otherwise,
they are much more likely to suffer
serious bodily injury, in the event
of sudden braking or a collision.
Do not place anything on the lug-
gage cover. Such items may be
thrown about and possibly injure
people in the vehicle during sudden
braking or an accident. Secure all
items in a safe place.
Do not drive with objects left on
top of the instrument panel. They
may interfere with the driver’s field
of view. Or they may move during
sharp vehicle acceleration or turn-
ing, and impair the driver’s control
of the vehicle. In an accident they
may injure the vehicle occupants.
NOTICE
Do not load the vehicle beyond the
vehicle capacity weight specified in
Section 8.
The vehicle identification number (VIN)
is the legal identifier for your vehicle.
This number is on the left top of the
instrument panel, and can be seen
through the windshield from outside.
This is the primary identification number
for your Toyota. It is used in registering
the ownership of your vehicle.
Your Toyota’s identification
Vehicle identification
number
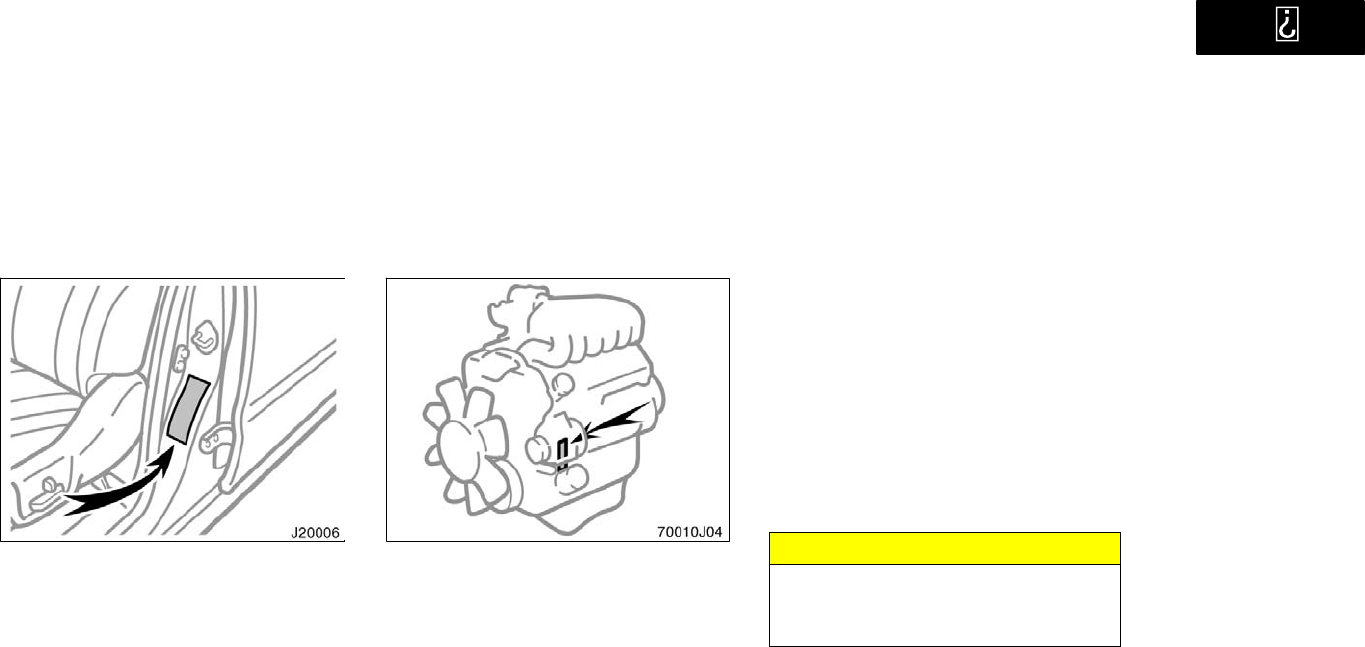
’01 4Runner_U (L/O 0008)
202 2001 4RUNNER (OM35768U)
The vehicle identification number (VIN) is
also on the Certification Label.
Engine number
The engine number is stamped on the
engine block as shown.
Your new vehicle carries theft preven-
tion labels which are approximately 56
mm (2.20 in.) by 16 mm (0.63 in.).
The purpose of these labels is to reduce
the incidence of vehicle thefts by facilitat-
ing the tracing and recovery of parts from
stolen vehicles. The label is designed so
that once it is applied to a surface, any
attempt to remove it will result in destroy-
ing the integrity of the label. Transferring
these labels intact from one part to anoth-
er, will be impossible.
NOTICE
You should not attempt to remove the
theft prevention labels as it may vio-
late certain state or federal laws.
Theft prevention labels
(except for Canada)
’01 4Runner_U (L/O 0008)
203
2001 4RUNNER (OM35768U)
Suspension and chassis
CAUTION
Do not modify the suspension/chassis
with lift kits, spacers, springs, etc. It
can cause dangerous handling charac-
teristics resulting in loss of control.
Types of tires
Determine what kind of tires your ve-
hicle is originally equipped with.
1. Summer tires
Summer tires are high−speed capability
tires best suited to highway driving under
dry conditions.
Since summer tires do not have the same
traction performance as snow tires, sum-
mer tires are inadequate for driving on
snow−covered or icy roads. For driving on
snow−covered or icy roads, we recom-
mend using snow tires. If installing snow
tires, be sure to replace all four tires.
2. All season tires
All season tires are designed to provide
better traction in snow and to be adequate
for driving in most winter conditions, as
well as for use all year round.
All season tires, however, do not have
adequate traction performance compared
with snow tires in heavy or loose snow.
Also, all season tires fall short in accel-
eration and handling performance
compared with summer tires in highway
driving.
CAUTION
Do not mix summer and all season
tires on your vehicle as this can
cause dangerous handling charac-
teristics, resulting in loss of con-
trol.
Do not use tire other than the
manufacturer’s designated tires, and
never mix tires or wheels of the
sizes different from the originals.

’01 4Runner_U (L/O 0008)
204 2001 4RUNNER (OM35768U)

’01 4Runner_U (L/O 0008)
205
2001 4RUNNER (OM35768U)
STARTING AND DRIVING
Before starting the engine 206. . . . . . . . . . . . . . . . . . . . . . . . . . . . . . . . . . .
How to start the engine 206. . . . . . . . . . . . . . . . . . . . . . . . . . . . . . . . . . . . . .
Tips for driving in various conditions 207. . . . . . . . . . . . . . . . . . . . . . . . . .
Off−road driving precautions 208. . . . . . . . . . . . . . . . . . . . . . . . . . . . . . . . .
Winter driving tips 210. . . . . . . . . . . . . . . . . . . . . . . . . . . . . . . . . . . . . . . . . .
Dinghy towing 211. . . . . . . . . . . . . . . . . . . . . . . . . . . . . . . . . . . . . . . . . . . . . .
Trailer towing 211. . . . . . . . . . . . . . . . . . . . . . . . . . . . . . . . . . . . . . . . . . . . . .
How to save fuel and make your vehicle last longer, too 217. . . . . . . . .
SECTION 3

’01 4Runner_U (L/O 0008)
206 2001 4RUNNER (OM35768U)
Before starting the engine
1. Check the area around the vehicle be-
fore entering it.
2. Adjust seat position, seatback angle,
seat cushion angle, head restraint
height and steering wheel angle.
3. Adjust the inside and outside rear view
mirrors.
4. Lock all doors.
5. Fasten seat belts.
1. Apply the parking brake firmly.
2. Turn off unnecessary lights and acces-
sories.
3. Put the selector lever in P". If you
need to restart the engine while the
vehicle is moving, put the selector le-
ver in N". A starter safety device will
prevent the starter from operating if the
selector lever is in any drive position.
4. Depress the brake pedal and hold it to
the floor until driving off.
(b) Starting the engine
Before starting the engine, be sure to fol-
low the instructions in (a) Before crank-
ing".
Normal starting procedure
The multiport fuel injection system/sequen-
tial multiport fuel injection system in your
engine automatically controls the proper
air−fuel mixture for starting. You can start
a cold or hot engine as follows:
1. With your foot off the accelerator ped-
al, crank the engine by turning the key
to START". Release it when the en-
gine starts.
2. After the engine runs for about 10 se-
conds, you are ready to drive.
If the weather is below freezing, let the
engine warm up for a few minutes before
driving.
If the engine stalls...
Simply restart it, using the correct proce-
dure given in normal starting.
If the engine will not start...
See If your vehicle will not start" in Sec-
tion 4.
How to start the engine
(a) Before cranking
’01 4Runner_U (L/O 0008)
207
2001 4RUNNER (OM35768U)
NOTICE
zDo not crank for more than 30 se-
conds at a time. This may overheat
the starter and wiring systems.
zDo not race a cold engine.
zIf the engine becomes difficult to
start or stalls frequently, have the
engine checked immediately.
Always slow down in gusty crosswinds.
This will allow you much better control.
Drive slowly onto curbs and, if pos-
sible, at a right angle. Avoid driving
onto high, sharp−edged objects and
other road hazards. Failure to do so
can lead to severe tire damage result-
ing in tire bursts.
When parking on a hill, turn the front
wheels until they touch the curb so
that the vehicle will not roll. Apply the
parking brake, and place the transmis-
sion in P". If necessary, block the
wheels.
Washing your vehicle or driving through
deep water may get the brakes wet. To
see whether they are wet, check that
there is no traffic near you, and then
press the pedal lightly. If you do not
feel a normal braking force, the brakes
are probably wet. To dry them, drive
the vehicle cautiously while lightly
pressing the brake pedal with the park-
ing brake applied. If they still do not
work safely, pull to the side of the road
and call a Toyota dealer for assistance.
Four−wheel drive modelsToyota rec-
ommends not using four−wheel drive on
dry hard−surfaced roads, because four−
wheel driving will cause unnecessary
noise and wear, and poor fuel econo-
my.
Four−wheel drive modelsIn cold tem-
peratures, noise may occur when driv-
ing in two−wheel drive before the trans-
fer is warmed up. Therefore, first drive
in four−wheel drive until the transfer is
warmed up.
CAUTION
Before driving off, make sure that
the parking brake is fully released
and the parking brake reminder
light is off.
Do not leave your vehicle unat-
tended while the engine is running.
Do not rest your foot on the brake
pedal while driving. It can cause
dangerous overheating, needless
wear, and poor fuel economy.
Tips for driving in various
conditions

’01 4Runner_U (L/O 0008)
208 2001 4RUNNER (OM35768U)
To drive down a long or steep hill,
reduce your speed and downshift.
Remember, if you ride the brakes
excessively, they may overheat and
not work properly.
Be careful when accelerating, up-
shifting, downshifting or braking on
a slippery surface. Sudden accelera-
tion or engine braking, could cause
the vehicle to spin or skid.
Do not drive in excess of the speed
limit. Even if the legal speed limit
permits it, do not drive over 140
km/h (85 mph) unless your vehicle
has high−speed capability tires.
Driving over 140 km/h (85 mph) may
result in tire failure, loss of control
and possible injury. Be sure to con-
sult a tire dealer to determine
whether the tires on your vehicle
are high−speed capability tires or
not before driving at such speeds.
Do not continue normal driving
when the brakes are wet. If they are
wet, your vehicle will require a
longer stopping distance, and it
may pull to one side when the
brakes are applied. Also, the park-
ing brake will not hold the vehicle
securely.
Off−road driving precautions
When driving your vehicle off−road, please
observe the following precautions to en-
sure your driving enjoyment and to help
prevent the closure of areas to off−road
vehicles.
a. Drive your vehicle only in areas where
off−road vehicles are permitted to travel.
b. Respect private property. Get owner’s
permission before entering private proper-
ty.
c. Do not enter areas that are closed.
Honor gates, barriers and signs that re-
strict travel.
d. Stay on established roads. When condi-
tions are wet, driving techniques should
be changed or travel delayed to prevent
damage to roads.
For owners in U.S. mainland, Hawaii and
Puerto Rico:
To obtain additional information pertaining
to driving your vehicle off−road, consult
the following organizations.
State and Local Parks and Recreation
Departments
State Motor Vehicle Bureau
Recreational Vehicle Clubs
U.S. Forest Service and Bureau of
Land Management
’01 4Runner_U (L/O 0008)
209
2001 4RUNNER (OM35768U)
CAUTION
Always observe the following precau-
tions to minimize the risk of serious
personal injury or damage to your ve-
hicle:
Drive carefully when off the road.
Do not take unnecessary risks by
driving in dangerous places.
Do not grip the steering wheel
spokes when driving off−road. A
bad bump could jerk the wheel and
injure your hands. Keep both hands
and especially your thumbs on the
outside of the rim.
Always check your brakes for effec-
tiveness immediately after driving in
sand, mud, water or snow.
After driving through tall grass,
mud, rock, sand, rivers, etc., check
that there is no grass, bush, paper,
rags, stone, sand, etc. adhering or
trapped on the underbody. Clear off
any such matter from the under-
body. If the vehicle is used with
these materials trapped or adhering
to the underbody, a breakdown or
fire could occur.
In a rollover crash, an unbelted per-
son is significantly more likely to
die than a person wearing a seat
belt. Therefore, the driver and all
passengers should fasten their seat
belts whenever the vehicle is mov-
ing.
When driving off−road or in rugged
terrain, do not drive at excessive
speeds, jump, make sharp turns,
strike objects, etc. This may cause
loss of control or vehicle rollover
causing death or serious injury. You
are also risking expensive damage
to your vehicle’s suspension and
chassis.
NOTICE
zIf driving through water, such as
when crossing shallow streams,
first check the depth of the water
and the bottom of the river bed for
firmness. Drive slowly and avoid
deep water.
zTake all necessary safety measures
to ensure that water damage to the
engine or other components does
not occur.
Water entering the engine air intake
will cause severe engine damage.
Water can wash the grease from
wheel bearings, causing rusting and
premature failure, and may also en-
ter the differentials, transmission
and transfer case, reducing the gear
oil’s lubricating qualities.
zSand and mud that has accumulated
in brake drums and around brake
discs may affect braking efficiency
and may damage brake system com-
ponents.
zAlways perform a maintenance in-
spection after each day of off−road
driving that has taken you through
rough terrain, sand, mud, or water.
For scheduled maintenance informa-
tion, refer to the Scheduled Main-
tenance Guide" or Owner’s Manual
Supplement".

’01 4Runner_U (L/O 0008)
210 2001 4RUNNER (OM35768U)
Winter driving tips
Make sure you have a proper freeze
protection of engine coolant.
Your coolant must contain ethylene−glycol
type coolant for a proper corrosion
protection of aluminum components. Use
TOYOTA Long Life Coolant" or equivalent.
See Section 7−2 for details about coolant
type selection.
NOTICE
Do not use alcohol type antifreeze or
plain water alone.
When it is extremely cold, we recommend
to use 60% solution for your Toyota, to
provide protection down to about −50C
(−58F). Do not use more than 70% solu-
tion for better coolant performance.
Check the condition of the battery and
cables.
Cold temperatures reduce the capacity of
any battery, so it must be in top shape
to provide enough power for winter start-
ing. Section 7−3 tells you how to visually
inspect the battery. Your Toyota dealer
and most service stations will be pleased
to check the level of charge.
Make sure the engine oil viscosity is
suitable for the cold weather.
See Section 7−2 for recommended viscos-
ity. Leaving a heavy summer oil in your
vehicle during winter months may cause
harder starting. If you are not sure about
which oil to use, call your Toyota dealer
he will be pleased to help.
Keep the door locks from freezing.
Squirt lock de−icer or glycerine into the
locks to keep them from freezing.
Use a washer fluid containing an anti-
freeze solution.
This product is available at your Toyota
dealer and most auto parts stores. Follow
the manufacturer’s directions for how
much to mix with water.
NOTICE
Do not use engine antifreeze or any
other substitute because it may dam-
age your vehicle’s paint.
Do not use your parking brake when
there is a possibility it could freeze.
When parking, put the transmission into
P" and block the front wheels. Do not
use the parking brake, or snow or water
accumulated in and around the parking
brake mechanism may freeze, making it
hard to release.
Keep ice and snow from accumulating
under the fenders.
Ice and snow built up under your fenders
can make steering difficult. During bad
winter driving, stop and check under the
fenders occasionally.
Depending on where you are driving,
we recommend you carry some emer-
gency equipment.
Some of the things you might put in the
vehicle are tire chains, window scraper,
bag of sand or salt, flares, small shovel,
jumper cables, etc.
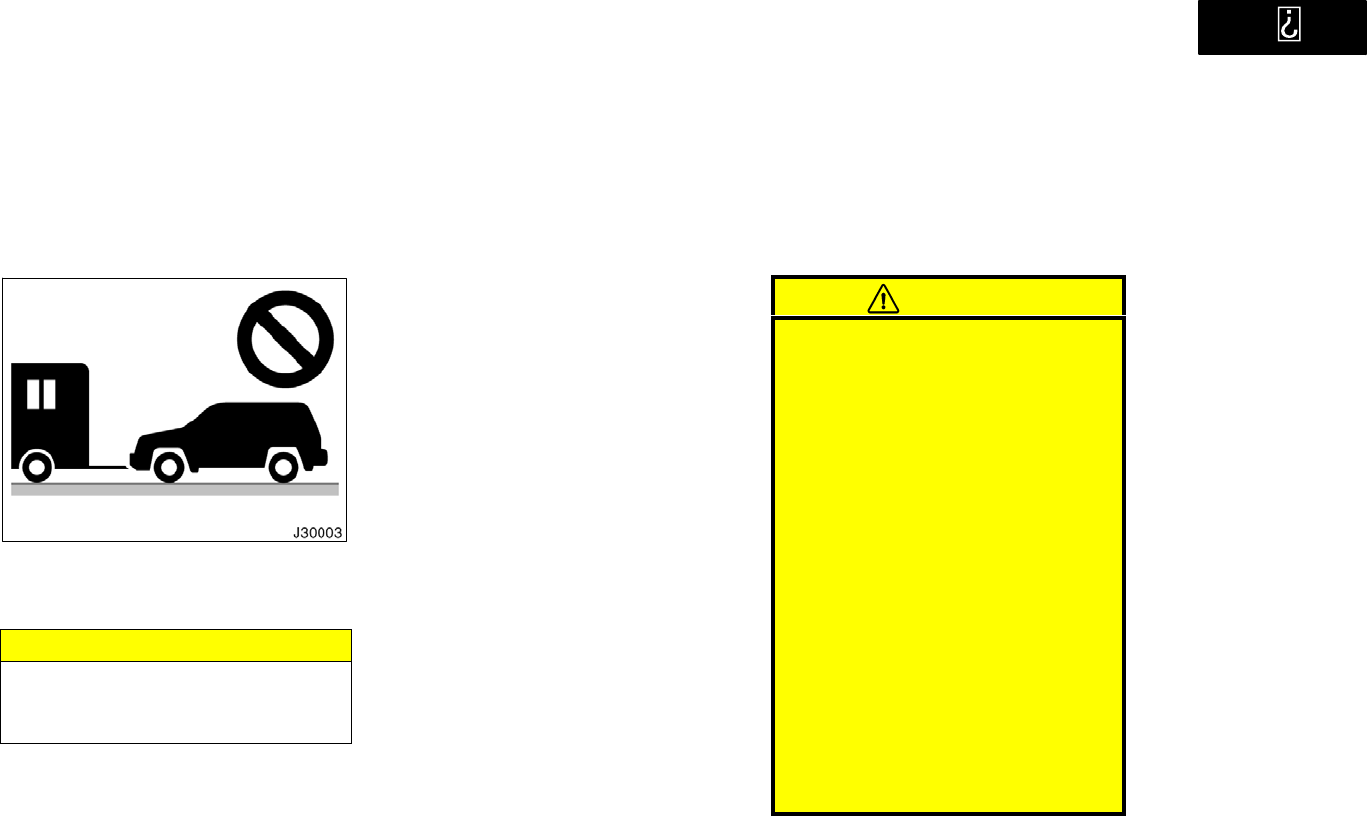
’01 4Runner_U (L/O 0008)
211
2001 4RUNNER (OM35768U)
Dinghy towing
Your vehicle is not designed to be
dinghy towed (with four wheels on the
ground) behind a motorhome.
NOTICE
Do not tow your vehicle with four
wheels on the ground. This may
cause serious damage to your vehicle.
Trailer towing
Your vehicle is designed primarily as a
passenger−and−load−carrying vehicle. Tow-
ing a trailer will have an adverse effect on
handling, performance, braking, durability
and driving economy (fuel consumption,
etc.). Your safety and satisfaction depend
on the proper use of correct equipment
and cautious driving habits. For your safe-
ty and the safety of others, you must not
overload your vehicle or trailer. Ask your
local Toyota dealer for further details be-
fore towing.
WEIGHT LIMITS
Before towing, make sure the total trail-
er weight, gross combination weight,
gross vehicle weight, gross axle weight
and trailer tongue load are all within
the limits.
The total trailer weight and tongue load
can be measured with platform scales
found at a highway weighing station, build-
ing supply company, trucking company,
junk yard, etc.
CAUTION
The maximum gross trailer weight
(trailer weight plus cargo weight)
must never exceed 2267 kg (5000
lb.).
If towing a trailer and cargo weigh-
ing over 907kg (2000lb.), it is
necessary to use a sway control
device with sufficient capacity. The
combination of the gross trailer
weight added to the total weight of
the vehicle, occupants and vehicle
cargo must never exceed a total of
the following.
Two−wheel drive models
3992 kg (8800 lb.)
Four−wheel drive models
4173 kg (9200 lb.)
Exceeding the maximum weight of
the trailer, the vehicle, or the ve-
hicle and trailer combination, can
cause an accident resulting in seri-
ous personal injuries.
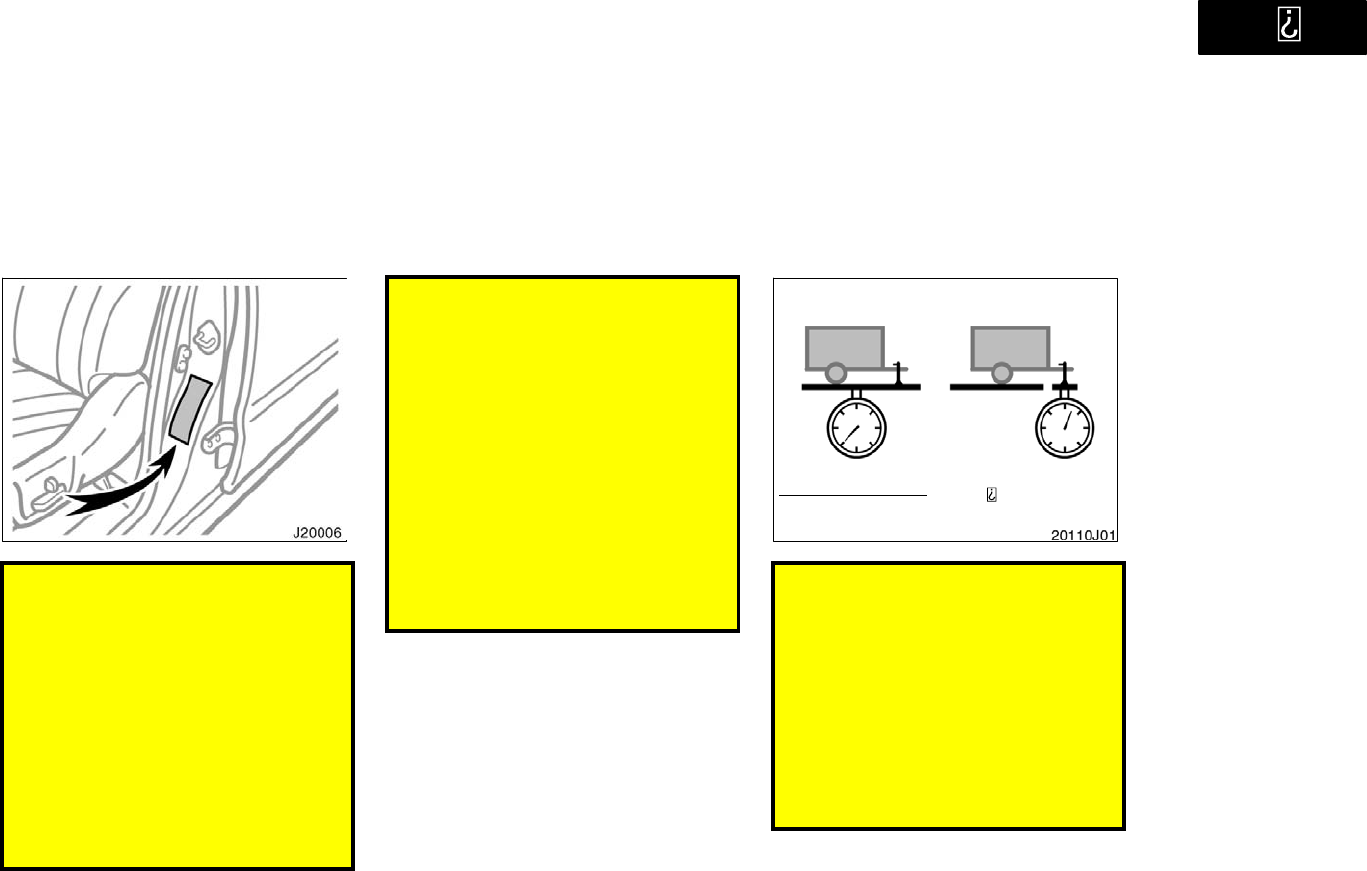
’01 4Runner_U (L/O 0008)
212 2001 4RUNNER (OM35768U)
Trailer hitch assemblies have differ-
ent weight capacities established by
the hitch manufacturer. Even though
the vehicle may be physically capa-
ble of towing a higher weight, the
operator must determine the maxi-
mum weight rating of the particular
hitch assembly and never exceed
the maximum weight rating speci-
fied for the trailer−hitch. Exceeding
the maximum weight rating set by
the trailer hitch manufacturer can
cause an accident resulting in seri-
ous personal injuries.
The gross vehicle weight must not
exceed the Gross Vehicle Weight
Rating (GVWR) indicated on the
Certification Label. The gross vehi-
cle weight is the sum of weights of
the unloaded vehicle, driver, pas-
sengers, luggage, hitch and trailer
tongue load. It also includes the
weight of any special equipment
installed on your vehicle.
The load on either the front or rear
axle resulting from distribution of
the gross vehicle weight on both
axles must not exceed the Gross
Axle Weight Rating (GAWR) listed
on the Certification Label.
Total trailer weight Tongue load
Tongue load
Total trailer weight
100 15% (∗1) or
9 to 11%
(∗2)
The trailer cargo load should be
distributed so that the tongue load
is 15% for weight distributing hitch
(∗1) or 9 to 11% for weight carrying
hitch (∗2) of the total trailer weight,
not exceeding the maximum of 226
kg (500 lb.). Never load the trailer
with more weight in the back than
in the front. About 60% of the trail-
er load should be in the front half
of the trailer and the remaining 40%
in the rear.
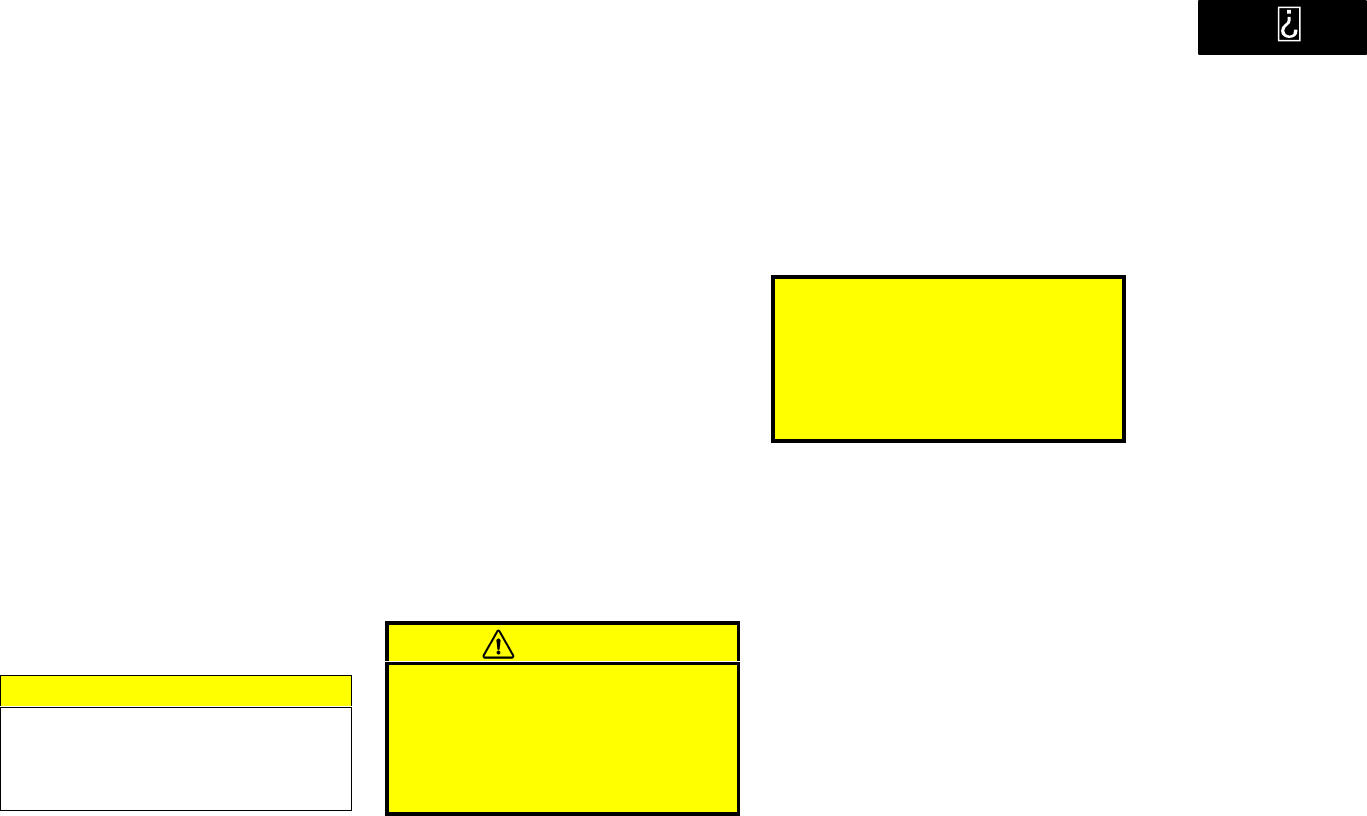
’01 4Runner_U (L/O 0008)
213
2001 4RUNNER (OM35768U)
HITCHES
Use only a hitch recommended by the
hitch manufacturer and the one which
conforms to the total trailer weight
requirement.
The hitch must be bolted securely to
the vehicle frame and installed accord-
ing to the hitch manufacturer’s instruc-
tions.
The hitch ball and king pin should have
a light coat of grease.
Toyota recommends removing the hitch
when not towing to prevent injury and/
or damage due to the hitch in event of
a rear end collision. After removal of
the hitch, seal the installation area to
prevent entry of exhaust fumes and
mud.
NOTICE
Do not use an axle−mounting hitch as
it may cause damage to the axle
housing, wheel bearings, wheels and
or tires.
BRAKES AND SAFETY CHAINS
Toyota recommends trailers with
brakes that conform to any applica-
ble federal and state/provincial regu-
lations.
A safety chain must always be used
between the towing vehicle and the
trailer. Leave sufficient slack in the
chain for turns. The chain should
cross under the trailer tongue to
prevent the tongue from dropping to
the ground in case it becomes dam-
aged or separated. For correct safety
chain procedures, follow the hitch or
trailer manufacturer’s recommenda-
tions.
CAUTION
If the total trailer weight exceeds
453 kg (1000 lb.), trailer brakes are
required.
Never tap into your vehicle’s hy-
draulic system as it would lower its
braking effectiveness.
Never tow a trailer without using a
safety chain securely attached to
both the trailer and the vehicle. If
damage occurs to the coupling unit
or hitch ball, there is danger of the
trailer wandering over into another
lane.
TIRES
Ensure that your vehicle’s tires are
properly inflated. See Section 7−2 for
instructions.
The trailer tires should be inflated to
the pressure recommended by the trail-
er manufacturer in respect to the total
trailer weight.
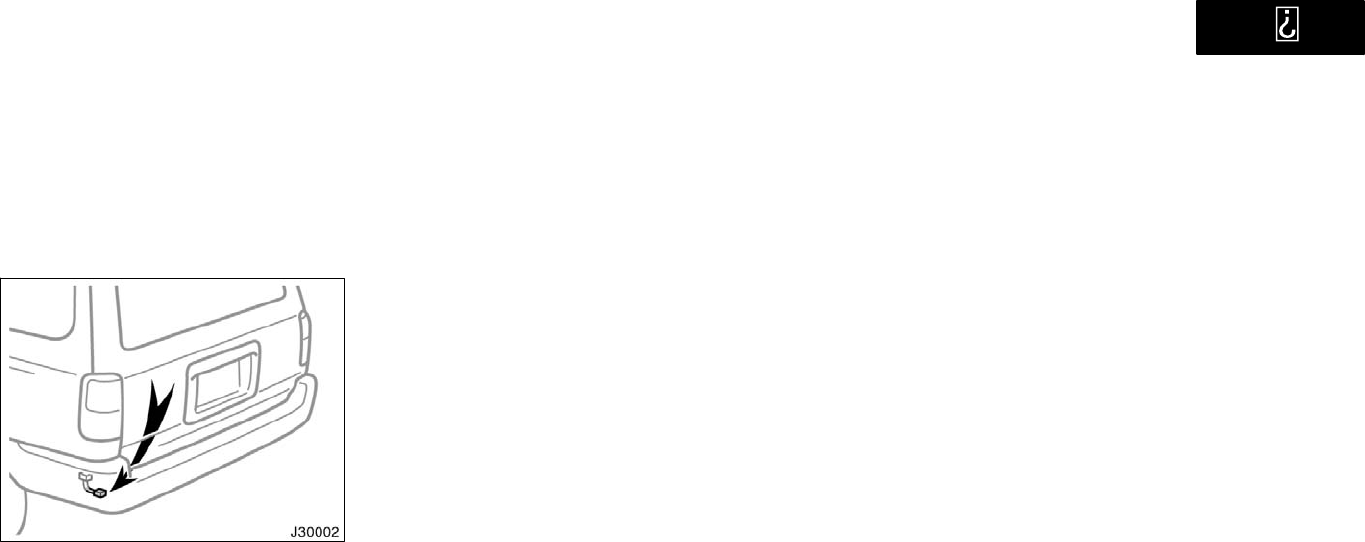
’01 4Runner_U (L/O 0008)
214 2001 4RUNNER (OM35768U)
TRAILER LIGHTS
Your vehicle is equipped with a wire
harness stored in the rear end under
body. Some models are fitted with a
socket for trailer lights under the rear
bumper. Use either of them to connect
and operate the trailer lights. However,
the trailer lights must comply with fed-
eral, state/provincial and local regula-
tions. See your local recreational ve-
hicle dealer or rental agency for the
correct type of wiring and relays for
your trailer. Check for correct operation
of the turn signals and stop lights each
time you hitch up. Direct splicing may
damage your vehicle’s electrical system
and cause a malfunction of your lights.
BREAK−IN SCHEDULE
Toyota recommends that you do not
tow a trailer with a new vehicle or a
vehicle with any new power train com-
ponent (engine, transmission, differen-
tial, wheel bearing, etc.) for the first
800 km (500 miles) of driving.
MAINTENANCE
If you tow a trailer, your vehicle will
require more frequent maintenance due
to the additional load. For this informa-
tion, please refer to the scheduled
maintenance information in the Sched-
uled Maintenance Guide" or Owner’s
Manual Supplement".
Retighten all fixing bolts of the towing
ball and bracket after approximately
1000 km (600 miles) of trailer driving.
PRE−TOWING SAFETY CHECK
Check that your vehicle remains level
when a loaded or unloaded trailer is
hitched. Do not drive if the vehicle has
an abnormal nose−up or nose−down
condition, and check for improper
tongue load, overload, worn suspension
or other possible causes.
Make sure the trailer cargo is securely
loaded so that it cannot shift.
Check that your rear view mirrors con-
form to any applicable federal, state/
provincial or local regulations. If not,
install the rear view mirrors required
for towing purpose.

’01 4Runner_U (L/O 0008)
215
2001 4RUNNER (OM35768U)
TRAILER TOWING TIPS
When towing a trailer, your vehicle will
handle differently than when not tow-
ing. The three main causes of vehicle−
trailer accidents are driver error, exces-
sive speed and improper trailer loading.
Keep these in mind when towing:
Before starting out, check operation of
the lights and all vehicle−trailer connec-
tions. After driving a short distance,
stop and recheck the lights and con-
nections. Before actually towing a trail-
er, practice turning, stopping and back-
ing with a trailer in an area away from
traffic until you learn the feel.
Backing with a trailer is difficult and
requires practice. Grip the bottom of
the steering wheel and move your hand
to the left to move the trailer to the
left. Move your hand to the right to
move the trailer to the right. (This pro-
cedure is generally opposite to that
when backing without a trailer). Also,
just turn the steering wheel a little at
a time, avoiding sharp or prolonged
turning. Have someone guide you when
backing to reduce the risk of an acci-
dent.
Because stopping distance may be in-
creased, vehicle−to−vehicle distance
should be increased when towing a
trailer. For each 16 km/h (10 mph) of
speed, allow at least one vehicle and
trailer length between you and the ve-
hicle ahead. Avoid sudden braking as
you may skid, resulting in jackknifing
and loss of control. This is especially
true on wet or slippery surfaces.
Avoid jerky starts or sudden accelera-
tion.
Avoid jerky steering and sharp turns.
The trailer could hit your vehicle in a
tight turn. Slow down before making a
turn to avoid the necessity of sudden
braking.
Remember that when making a turn,
the trailer wheels will be closer than
the vehicle wheels to the inside of the
turn. Therefore, compensate for this by
making a larger than normal turning
radius with your vehicle.
Crosswinds and rough roads will ad-
versely affect handling of your vehicle
and trailer, causing sway. Pay attention
to the rear from time to time to pre-
pare yourself for being passed by large
trucks or buses, which may cause your
vehicle and trailer to sway. If swaying
happens, firmly grip the steering wheel
and reduce speed immediately but
gradually. Never increase speed. Steer
straight ahead. If you make no extreme
correction with the steering or brakes,
the vehicle and trailer will stabilize.
Be careful when passing other ve-
hicles. Passing requires considerable
distance. After passing a vehicle, do
not forget the length of your trailer and
be sure you have plenty of room befo-
re changing lanes.
In order to maintain engine braking effi-
ciency, do not use overdrive.
Because of the added load of the trail-
er, your vehicle’s engine may overheat
on hot days (at temperatures over
30C [85F]) when going up a long or
steep grade with a trailer. If the engine
coolant temperature gauge indicates
overheating, immediately turn off the air
conditioning (if in use), pull off the road
and stop in a safe spot. Refer to If
your vehicle overheats" in Section 4.
’01 4Runner_U (L/O 0008)
216 2001 4RUNNER (OM35768U)
Always place wheel blocks under both
the vehicle and trailer wheels when
parking. Apply the parking brake firmly.
Put the transmission in P". Avoid park-
ing on a slope with a trailer, but if it
cannot be avoided, do so only after
performing the following:
1. Apply the brakes and hold.
2. Have someone place wheel blocks un-
der both the vehicle and trailer wheels.
3. When the wheel blocks are in place,
release your brakes slowly until the
blocks absorb the load.
4. Apply the parking brake firmly.
5. Shift into P" and turn off the engine.
When restarting out after parking on a
slope:
1. With the transmission in P" position,
start the engine. Be sure to keep the
brake pedal depressed.
2. Shift into gear.
3. Release the parking brake and brake
pedal and slowly pull or back away
from the wheel blocks. Stop and apply
your brakes.
4. Have someone retrieve the blocks.
CAUTION
Do not exceed 72 km/h (45 mph) or
the posted towing speed limit,
whichever is lower. Because insta-
bility (swaying) of a towing vehicle−
trailer combination usually in-
creases as the speed increases, ex-
ceeding 72 km/h (45 mph) may
cause loss of control.
Slow down and downshift before
descending steep or long downhill
grades. Do not make sudden down-
shifts.
Avoid holding the brake pedal down
too long or too frequently. This
could cause the brakes to overheat
and result in reduced braking effi-
ciency.

’01 4Runner_U (L/O 0008)
217
2001 4RUNNER (OM35768U)
Getting more kilometers/mileage from a
liter/gallon of fuel is easyjust take it
easy. It will help make your vehicle last
longer, too. Here are some specific tips
on how to save money on both fuel and
repairs:
Keep your tires inflated at the cor-
rect pressure. Underinflation causes
tire wear and wastes fuel. See Section
7−2 for instructions.
Do not carry unneeded weight in
your vehicle. Excess weight puts a
heavier load on the engine, causing
greater fuel consumption.
Avoid lengthy warm−up idling. Once
the engine is running smoothly, begin
drivingbut gently. Remember, howev-
er, that on cold winter days this may
take a little longer.
Keep the automatic transmission
overdrive turned on when engine
braking is not required. Driving with
the overdrive off will reduce the fuel
economy. (For details, see Automatic
transmission" in Section 1−6.)
Accelerate slowly and smoothly.
Avoid jackrabbit starts. Get into high
gear as quickly as possible.
Avoid long engine idling. If you have
a long wait and you are not in traffic,
it is better to turn off the engine and
start again later.
Avoid engine lugging or over−rev-
ving. Use a gear position suitable for
the road on which you are travelling.
Avoid continuous speeding up and
slowing down. Stop−and−go driving
wastes fuel.
Avoid unnecessary stopping and
braking. Maintain a steady pace. Try
to time the traffic signals so you only
need to stop as little as possible or
take advantage of through streets to
avoid traffic lights. Keep a proper dis-
tance from other vehicles to avoid sud-
den braking. This will also reduce wear
on your brakes.
Avoid heavy traffic or traffic jams
whenever possible.
Do not rest your foot on the brake
pedal. This causes premature wear,
overheating and poor fuel economy.
Maintain a moderate speed on high-
ways. The faster you drive, the greater
the fuel consumption. By reducing your
speed, you will cut down on fuel con-
sumption.
Keep the front wheels in proper
alignment. Avoid hitting the curb and
slow down on rough roads. Improper
alignment not only causes faster tire
wear but also puts an extra load on
the engine, which, in turn, wastes fuel.
Keep the bottom of your vehicle free
from mud, etc. This not only lessens
weight but also helps prevent corro-
sion.
Keep your vehicle tuned−up and in
top shape. A dirty air cleaner, improp-
er valve clearance, dirty plugs, dirty oil
and grease,brakes not adjusted, etc. all
lower engine performance and contrib-
ute to poor fuel economy. For longer
life of all parts and lower operating
costs, keep all maintenance work on
schedule, and if you often drive under
severe conditions, see that your vehicle
receives more frequent maintenance.
(For scheduled maintenance informa-
tion, please refer to the Scheduled
Maintenance Guide" or Owner’s Manu-
al Supplement").
How to save fuel and make
your vehicle last longer, too
’01 4Runner_U (L/O 0008)
218 2001 4RUNNER (OM35768U)
CAUTION
Never turn off the engine to coast
down hills. Your power steering and
brake booster will not function with-
out the engine running. Also, the
emission control system operates
properly only when the engine is run-
ning.

’01 4Runner_U (L/O 0008)
219
2001 4RUNNER (OM35768U)
IN CASE OF AN EMERGENCY
If your vehicle will not start 220. . . . . . . . . . . . . . . . . . . . . . . . . . . . . . . . . . .
If your engine stalls while driving 223. . . . . . . . . . . . . . . . . . . . . . . . . . . . .
If your vehicle overheats 223. . . . . . . . . . . . . . . . . . . . . . . . . . . . . . . . . . . .
If you have a flat tire 224. . . . . . . . . . . . . . . . . . . . . . . . . . . . . . . . . . . . . . . . .
If your vehicle needs to be towed 231. . . . . . . . . . . . . . . . . . . . . . . . . . . . .
If you cannot shift automatic transmission selector lever 236. . . . . . . .
If you lose your keys 238. . . . . . . . . . . . . . . . . . . . . . . . . . . . . . . . . . . . . . . .
If you lose your wireless remote control transmitter 238. . . . . . . . . . . . .
SECTION 4

’01 4Runner_U (L/O 0008)
220 2001 4RUNNER (OM35768U)
Before making these checks, make sure
you have followed the correct starting
procedure given in How to start the
engine" in Section 3 and that you have
sufficient fuel. If your vehicle is equipped
with the engine immobiliser system, also
check whether the other keys will start the
engine. If they work, your key may be
broken. Have the key checked at your
Toyota dealer. If none of your keys work,
the system is possibly broken. Call your
Toyota dealer. (See Keys (with engine
immobiliser system)" in Section 1−2.)
If the engine is not turning over or is
turning over too slowly
1. Check that the battery terminals are
tight and clean.
2. If the battery terminals are O.K., switch
on the interior light.
3. If the light is out, dim or goes out
when the starter is cranked, the battery
is discharged. You may try jump start-
ing. See (c) Jump starting" for further
instructions.
If the light is O.K., but the engine still will
not start, it needs adjustment or repair.
Call a Toyota dealer or qualified repair
shop.
NOTICE
Do not pull− or push−start the ve-
hicle. It may damage the vehicle or
cause a collision when the engine
starts. Also the three−way catalytic
converter may overheat and become a
fire hazard.
If the engine turns over at its normal
speed but will not start
1. The engine may be flooded because of
repeated cranking. See (b) Starting a
flooded engine" for further instructions.
2. If the engine still will not start, it needs
adjustment or repair. Call a Toyota
dealer or qualified repair shop.
(b) Starting a flooded engine
If the engine will not start, your engine
may be flooded because of repeated
cranking.
If this happens, turn the key to START"
with the accelerator pedal held down.
Keep the key and accelerator pedal in
these position for 15 seconds and release
them. Then try starting the engine with
your foot off the accelerator pedal.
If the engine does not start after 15 se-
conds of cranking, release the key, wait
a few minutes and try again.
If the engine still will not start, it needs
adjustment or repair. Call a Toyota dealer
or qualified repair shop for assistance.
NOTICE
Do not crank for more than 30 se-
conds at a time. This may overheat
the starter and wiring systems.
If your vehicle will not start
(a) Simple checks
’01 4Runner_U (L/O 0008)
221
2001 4RUNNER (OM35768U)
(c) Jump starting
To avoid serious personal injury and
damage to your vehicle which might re-
sult from battery explosion, acid burns,
electrical burns, or damaged electronic
components, these instructions must be
followed precisely.
If you are unsure about how to follow this
procedure, we strongly recommend that
you seek the help of a competent me-
chanic or towing service.
CAUTION
Batteries contain sulfuric acid
which is poisonous and corrosive.
Wear protective safety glasses when
jump starting, and avoid spilling
acid on your skin, clothing, or ve-
hicle.
If you should accidentally get acid
on yourself or in your eyes, remove
any contaminated clothing and flush
the affected area with water imme-
diately. Then get immediate medical
attention. If possible, continue to
apply water with a sponge or cloth
while en route to the medical office.
The gas normally produced by a
battery will explode if a flame or
spark is brought near. Use only
standardized jumper cables and do
not smoke or light a match while
jump starting.
NOTICE
The battery used for boosting must
be 12 V. Do not jump start unless you
are sure that the booster battery is
correct.
JUMP STARTING PROCEDURE
1. If the booster battery is installed in
another vehicle, make sure the vehicles
are not touching. Turn off all unneces-
sary lights and accessories.
2. If required, remove all the vent plugs
from the booster and discharged batter-
ies. Lay a cloth over the open vents
on the batteries. (This helps reduce the
explosion hazard, personal injuries and
burns.)
3. If the engine in the vehicle with the
booster battery is not running, start it
and let it run for a few minutes. During
jump starting run the engine at about
2000 rpm with the accelerator pedal
lightly depressed.
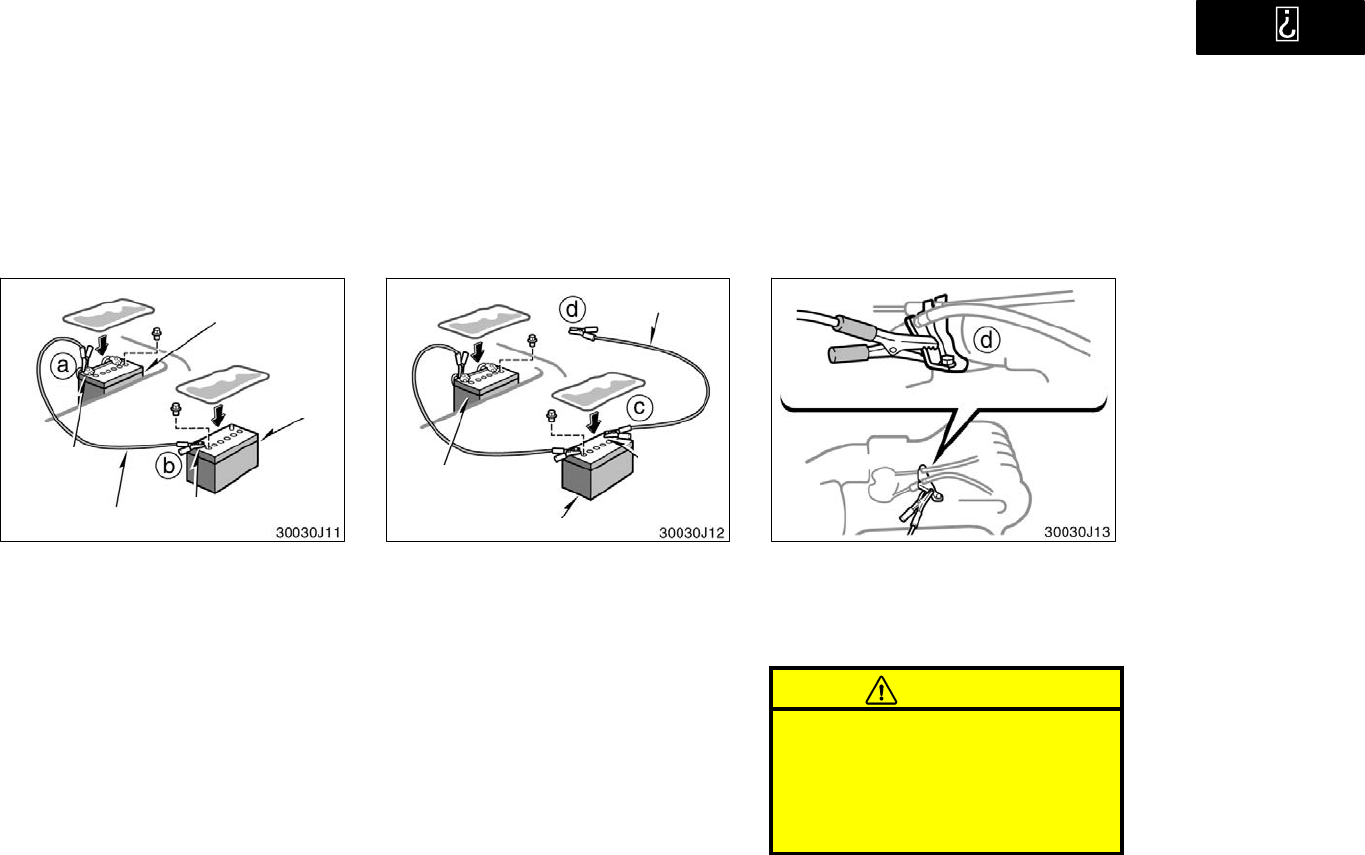
’01 4Runner_U (L/O 0008)
222 2001 4RUNNER (OM35768U)
Positive
terminal
(+" mark)
Booster
battery
Positive terminal
(+" mark)
Jumper cable
Discharged
battery
4. Make the cable connections in the or-
der a, b, c, d.
a. Connect the clamp of the positive
(red) jumper cable to the positive (+)
terminal on the discharged battery.
b. Connect the clamp at the other end
of the positive (red) jumper cable to
the positive (+) terminal on the booster
battery.
Discharged
battery
Jumper cable
Booster battery
Negative
terminal
(−" mark)
c. Connect the clamp of the negative
(black) jumper cable to the negative (−)
terminal on the booster battery.
d. Connect the clamp at the other end
of the negative (black) jumper cable to
a solid, stationary, unpainted, metallic
point of the vehicle with the discharged
battery.
The recommended connecting point is
shown in the following illustration:
Connecting point
Do not connect it to or near any part
that moves when the engine is
cranked.
CAUTION
When making the connections, to
avoid serious injury, do not lean over
the battery or accidentally let the
jumper cables or clamps touch any-
thing except the correct battery termi-
nals or the ground.
’01 4Runner_U (L/O 0008)
223
2001 4RUNNER (OM35768U)
5. Start your engine in the normal way.
After starting, run it at about 2000 rpm
for several minutes with the accelerator
pedal lightly depressed.
6. Carefully disconnect the cables in the
exact reverse order: the negative cable
and then the positive cable.
7. Carefully dispose of the battery cover
clothsthey may now contain sulfuric
acid.
8. If removed, replace all the battery vent
plugs.
If the cause of your battery discharging is
not apparent (for example, lights left on),
you should have it checked.
If your engine stalls while driving...
1. Reduce your speed gradually, keeping
a straight line. Move cautiously off the
road to a safe place.
2. Turn on your emergency flashers.
3. Try starting the engine again.
If the engine will not start, see If your
vehicle will not start".
CAUTION
If the engine is not running, the pow-
er assist for the brakes and steering
will not work so steering and braking
will be much harder than usual.
If your vehicle overheats
If your engine coolant temperature
gauge indicates overheating, if you ex-
perience a loss of power, or if you hear
a loud knocking or pinging noise, the
engine has probably overheated. You
should follow this procedure...
1. Pull safely off the road, stop the ve-
hicle and turn on your emergency
flashers. Put the transmission in P"
and apply the parking brake. Turn off
the air conditioning if it is being used.
2. If coolant or steam is boiling out of the
radiator or reservoir, stop the engine.
Wait until the steam subsides before
opening the hood. If there is no coolant
boiling over or steam, leave the engine
running.
CAUTION
To help avoid personal injury, keep
the hood closed until there is no
steam. Escaping steam or coolant is
a sign of very high pressure.
If your engine stalls while
driving
’01 4Runner_U (L/O 0008)
224 2001 4RUNNER (OM35768U)
3. Visually check to see if the engine
drive belt (fan belt) is broken or loose.
Look for obvious coolant leaks from the
radiator, hoses, and under the vehicle.
However, note that water draining from
the air conditioning is normal if it has
been used.
CAUTION
When the engine is running, keep
hands and clothing away from the
moving fan and engine drive belts.
4. If the engine drive belt is broken or the
coolant is leaking, stop the engine im-
mediately. Call a Toyota dealer for as-
sistance.
5. If the engine drive belt is O.K. and
there are no obvious leaks, you may
help the engine cool down more quickly
by running it at about 1500 rpm for a
few minutes with the accelerator pedal
lightly depressed.
6. Check the coolant reservoir. If it is dry,
add coolant to the reservoir while the
engine is running. Fill it about half full.
CAUTION
Do not attempt to remove the radiator
cap when the engine and radiator are
hot. Serious injury could result from
scalding hot fluid and steam blown
out under pressure.
7. After the engine coolant temperature
has cooled to normal, again check the
coolant level in the reservoir. If neces-
sary, bring it up to half full again. Seri-
ous coolant loss indicates a leak in the
system. You should have it checked as
soon as possible at your Toyota dealer.
If you have a flat tire
1. Reduce your speed gradually, keeping
a straight line. Move cautiously off the
road to a safe place well away from
the traffic. Avoid stopping on the center
divider of a highway. Park on a level
spot with firm ground.
2. Stop the engine and turn on your
emergency flashers.
3. Firmly set the parking brake and put
the transmission in P".
4. Have everyone get out of the vehicle
on the side away from traffic.
5. Read the following instructions thor-
oughly.
CAUTION
When jacking, be sure to observe the
following to reduce the possibility of
personal injury:
Follow jacking instructions.
Do not put any part of your body
under the vehicle supported by the
jack. Personal injury may occur.
Do not start or run the engine while
your vehicle is supported by the
jack.
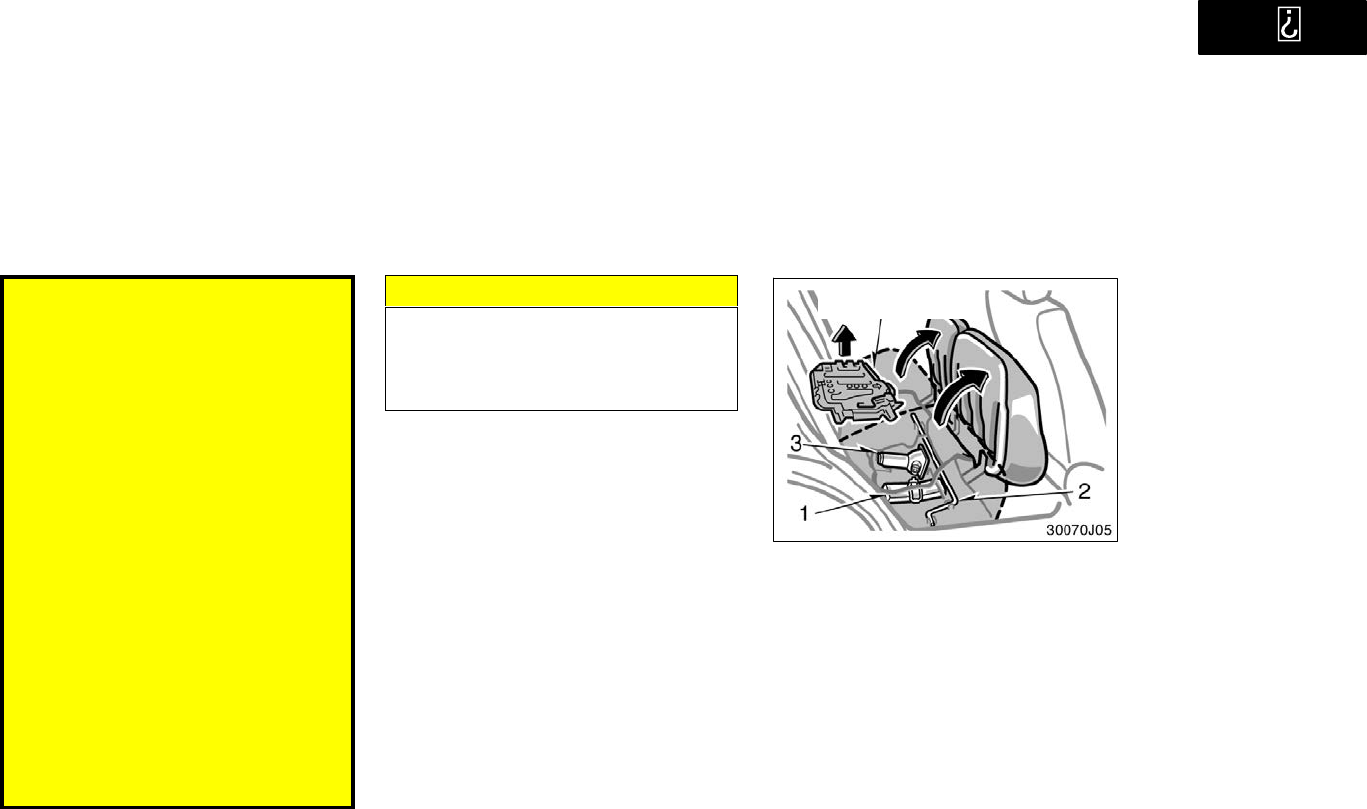
’01 4Runner_U (L/O 0008)
225
2001 4RUNNER (OM35768U)
Stop the vehicle on a level firm
ground, firmly set the parking brake
and put the transmission in P".
Block the wheel diagonally opposite
to the one being changed if neces-
sary.
Make sure to set the jack properly
in the jack point. Raising the ve-
hicle with jack improperly posi-
tioned will damage the vehicle or
may allow the vehicle to fall off the
jack and cause personal injury.
Never get under the vehicle when
the vehicle is supported by the jack
alone.
Use the jack only for lifting your
vehicle during wheel changing.
Do not raise the vehicle with some-
one in the vehicle.
When raising the vehicle, do not
put an object on or under the jack.
Raise the vehicle only high enough
to remove and change the tire.
NOTICE
Do not continue driving with a de-
flated tire. Driving even a short dis-
tance can damage a tire and wheel
beyond repair.
Required tools and spare tire
Cover
(on some models)
1. Get the required tools and spare
tire.
1. Tool bag
2. Jack handle
3. Jack
To prepare yourself for an emergency, you
should familiarize yourself with the use of
the jack, each of the tools and their stor-
age locations.
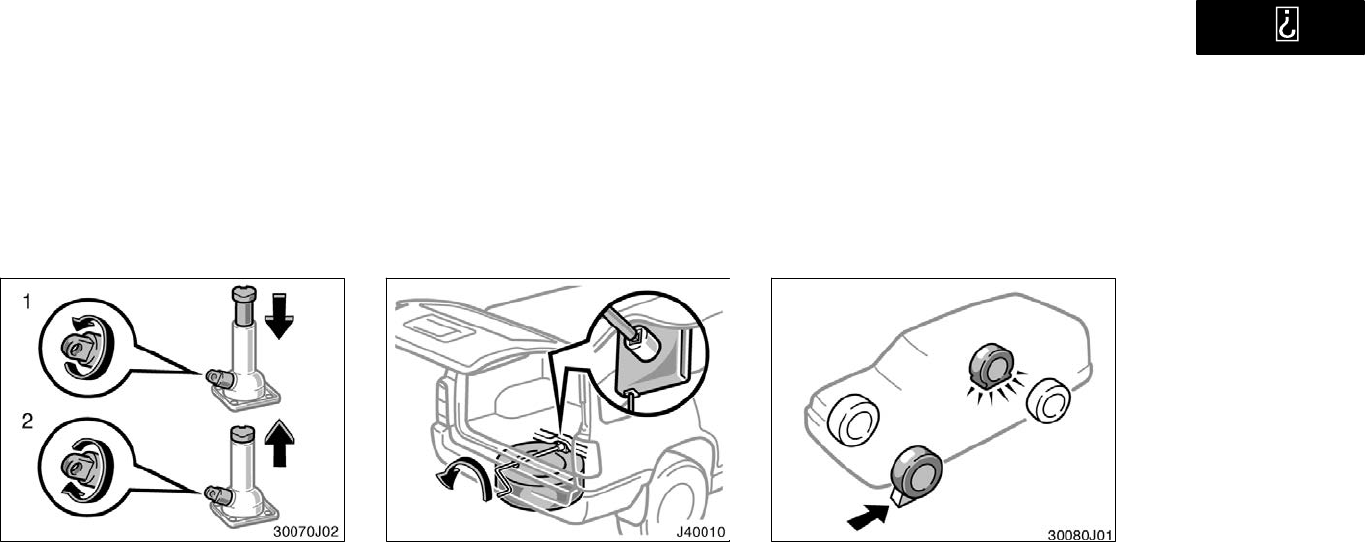
’01 4Runner_U (L/O 0008)
226 2001 4RUNNER (OM35768U)
Turn the jack joint by hand.
To remove: Turn the joint in direction 1
until the jack is free.
To store: Turn the joint in direction 2 until
the jack is firmly secured to prevent it
flying forward during a collision or sudden
braking.
To remove the spare tire:
1. Insert the end of the jack handle into
the lowering screw and turn it counter-
clockwise.
2. After the tire is lowered completely to
the ground, remove the holding brack-
et.
When storing the spare tire, put it in place
with the outer side of the wheel facing up.
Then secure the tire, taking care that the
tire goes straight up without catching on
any other part, to prevent it from flying
forward during a collision or sudden brak-
ing.
Blocking the wheel
2. Block the wheel diagonally opposite
the flat tire to keep the vehicle from
rolling when it is jacked up.
When blocking the wheel, place a wheel
block from the front for the front wheels
or from the rear for the rear wheels.
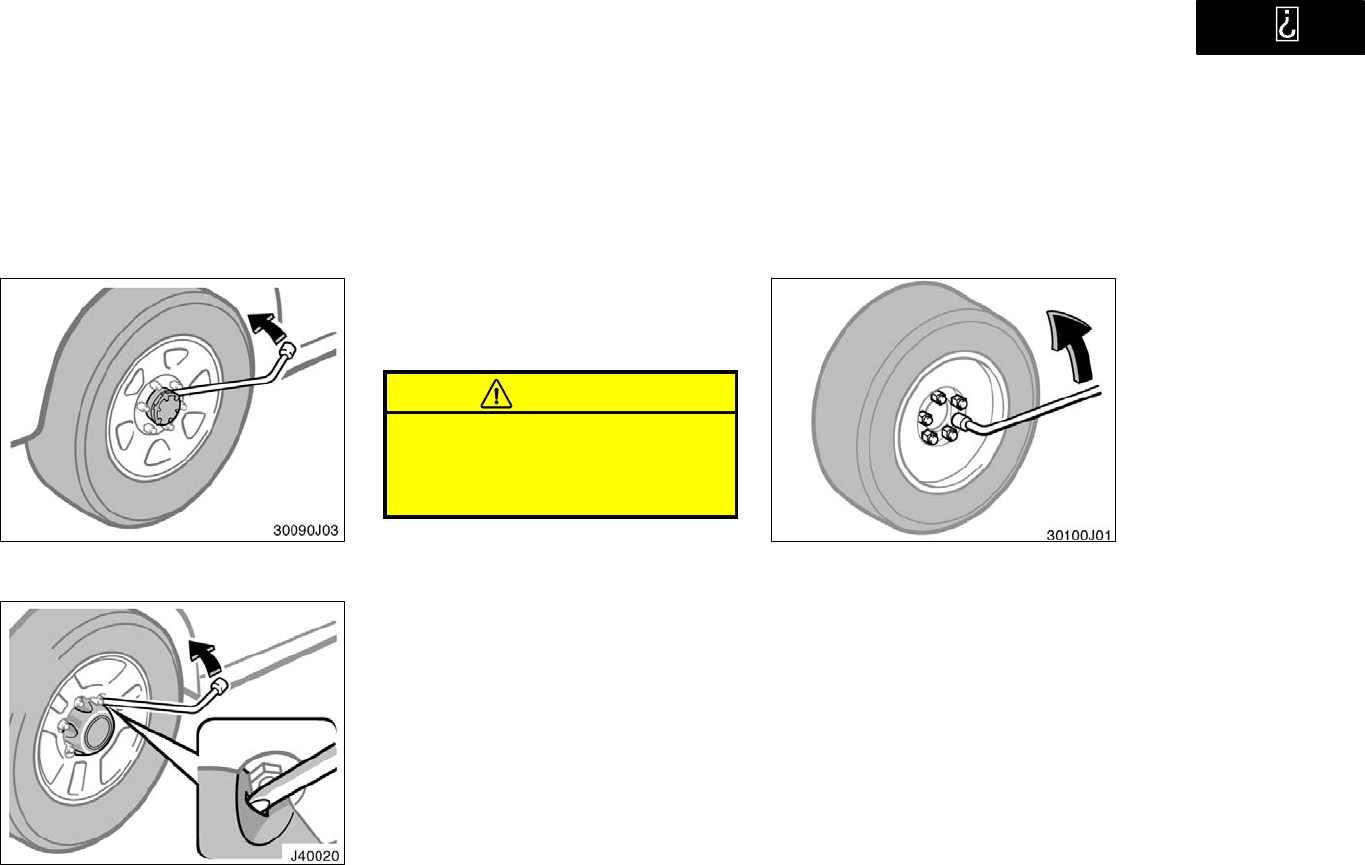
’01 4Runner_U (L/O 0008)
227
2001 4RUNNER (OM35768U)
Removing wheel ornament
Steel wheels
Aluminum wheels
3. Remove the wheel ornament.
Pry off the wheel ornament, using the
beveled end of the wheel nut wrench as
shown.
CAUTION
Do not try to pull off the ornament by
hand. Take due care in handling the
ornament to avoid unexpected person-
al injury.
Loosening wheel nuts
4. Loosen all the wheel nuts.
Always loosen the wheel nuts before rais-
ing the vehicle.
Turn the wheel nuts counterclockwise to
loosen. To get maximum leverage, fit the
wrench to the nut so that the handle is
on the right side, as shown above. Grab
the wrench near the end of the handle
and pull up on the handle. Be careful that
the wrench does not slip off the nut.
Do not remove the nuts yetjust unscrew
them about one−half turn.
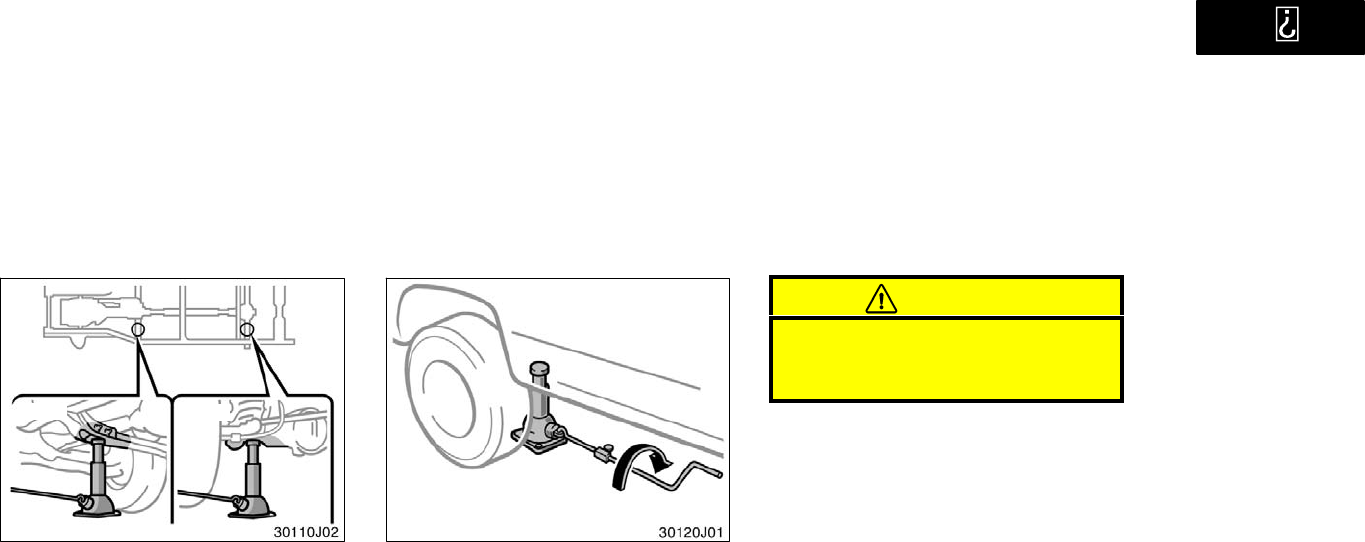
’01 4Runner_U (L/O 0008)
228 2001 4RUNNER (OM35768U)
Positioning the jack
Front Rear
5. Position the jack at the correct jack
point as shown.
Make sure the jack is positioned on a
level and solid place.
Raising your vehicle
6. After making sure that no one is in
the vehicle, raise it high enough so
that the spare tire can be installed.
Remember you will need more ground
clearance when putting on the spare tire
than when removing the flat tire.
To raise the vehicle, insert the jack handle
extension in to the jack (it is a loose fit)
and turn it clockwise with the handle,
making sure the handle remains firmly
fitted onto the jack handle extension. As
the jack touches the vehicle and begins
to fit, double−check that it is properly
positioned.
CAUTION
Never get under the vehicle when the
vehicle is supported by the jack
alone.
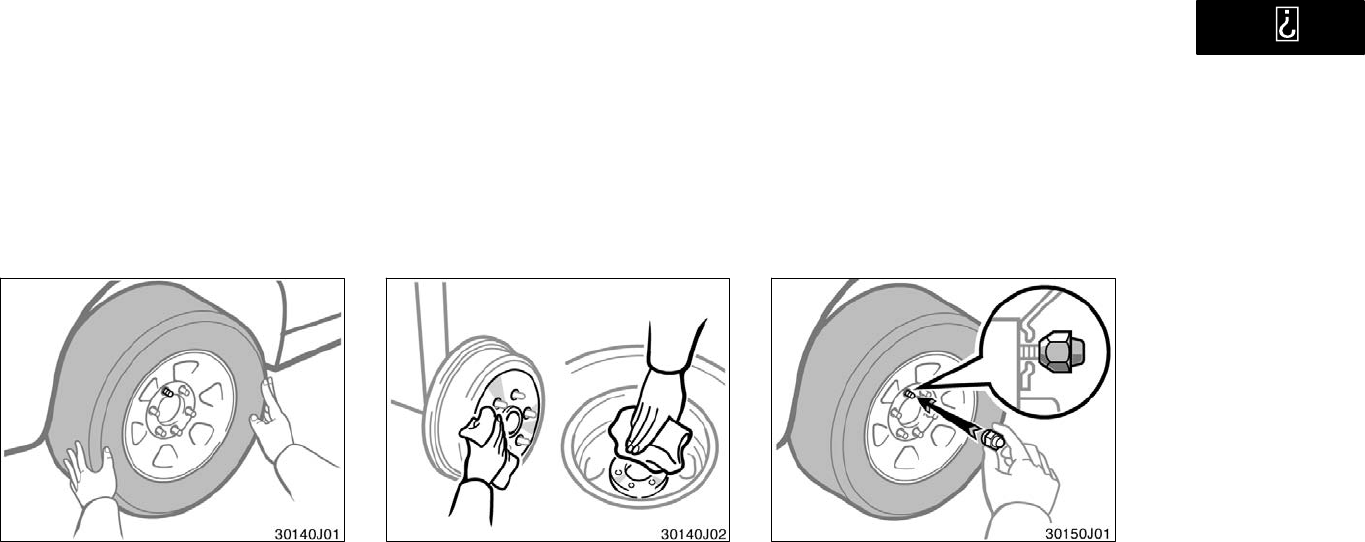
’01 4Runner_U (L/O 0008)
229
2001 4RUNNER (OM35768U)
Changing wheels
7. Remove the wheel nuts and change
tires.
Lift the flat tire straight off and put it
aside.
Roll the spare wheel into position and
align the holes in the wheel with the bolts.
Then lift up the wheel and get at least the
top bolt started through its hole. Wiggle
the tire and press it back over the other
bolts.
Before putting on wheels, remove any cor-
rosion on the mounting surfaces with a
wire brush or such. Installation of wheels
without good metal−to−metal contact at the
mounting surface can cause wheel nuts to
loosen and eventually cause a wheel to
come off while driving. Therefore after the
first 1600 km (1000 miles), check to see
that the wheel nuts are tight.
Reinstalling wheel nuts
8. Reinstall all the wheel nuts finger
tight.
Reinstall the wheel nuts (tapered end in-
ward) and tighten them as much as you
can by hand. Press back on the tire back
and see if you can tighten them more.
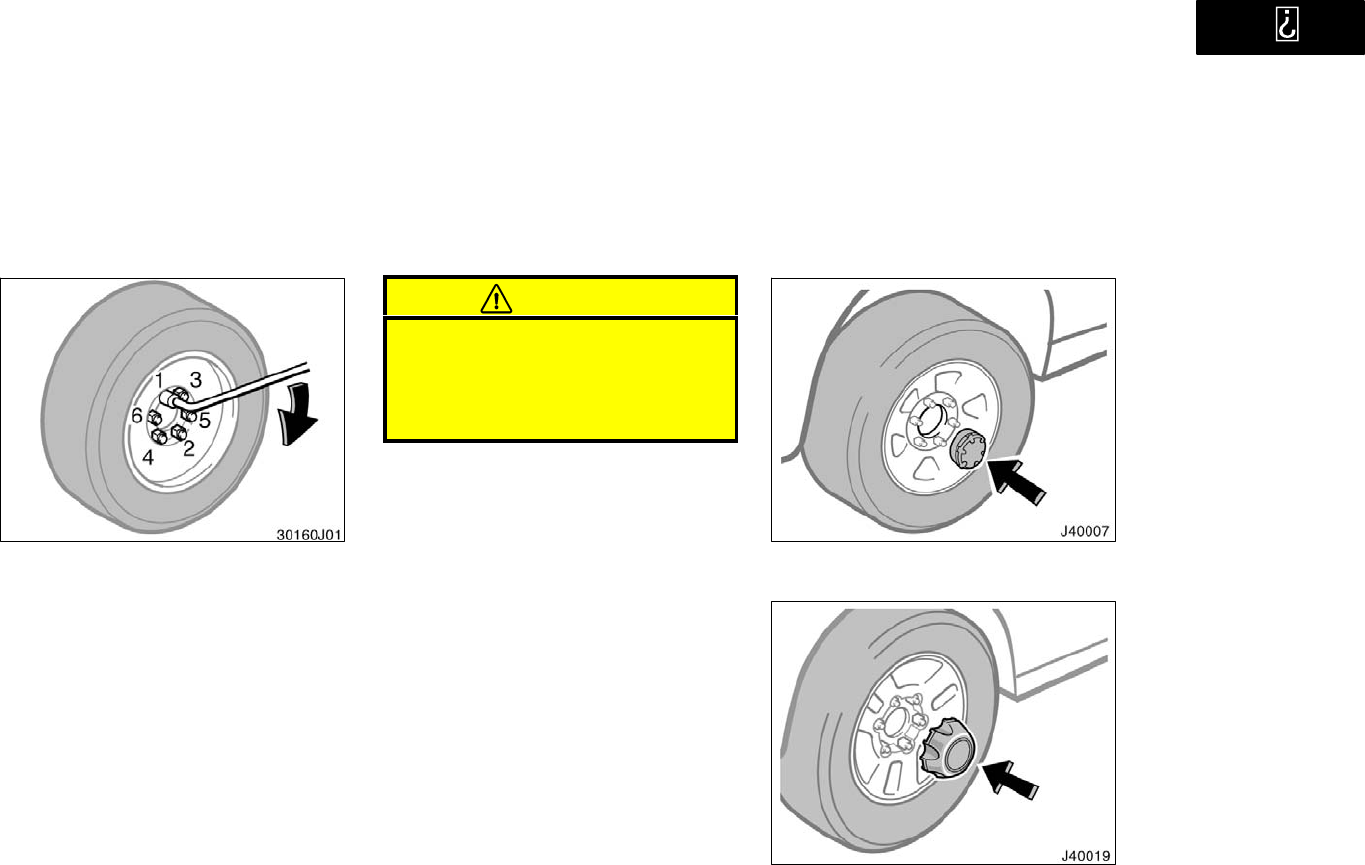
’01 4Runner_U (L/O 0008)
230 2001 4RUNNER (OM35768U)
Lowering your vehicle
9. Lower the vehicle completely and
tighten the wheel nuts.
Turn the jack handle extension counter-
clockwise with handle to lower the vehicle,
making sure the handle remains firmly
fitted onto the jack handle extension.
Use only the wheel nut wrench and turn
it clockwise to tighten the nuts. Do not
use other tools or any additional leverage
other than your hands, such as a hammer,
pipe or your foot. Make sure the wrench
is securely engaged over the nut.
Tighten each nut a little at a time in the
order shown. Repeat the process until all
the nuts are tight.
CAUTION
When lowering the vehicle, make sure
all portions of your body and all oth-
er persons around will not be injured
as the vehicle is lowered to the
ground.
Reinstalling wheel ornament
Steel wheels
Aluminum wheels
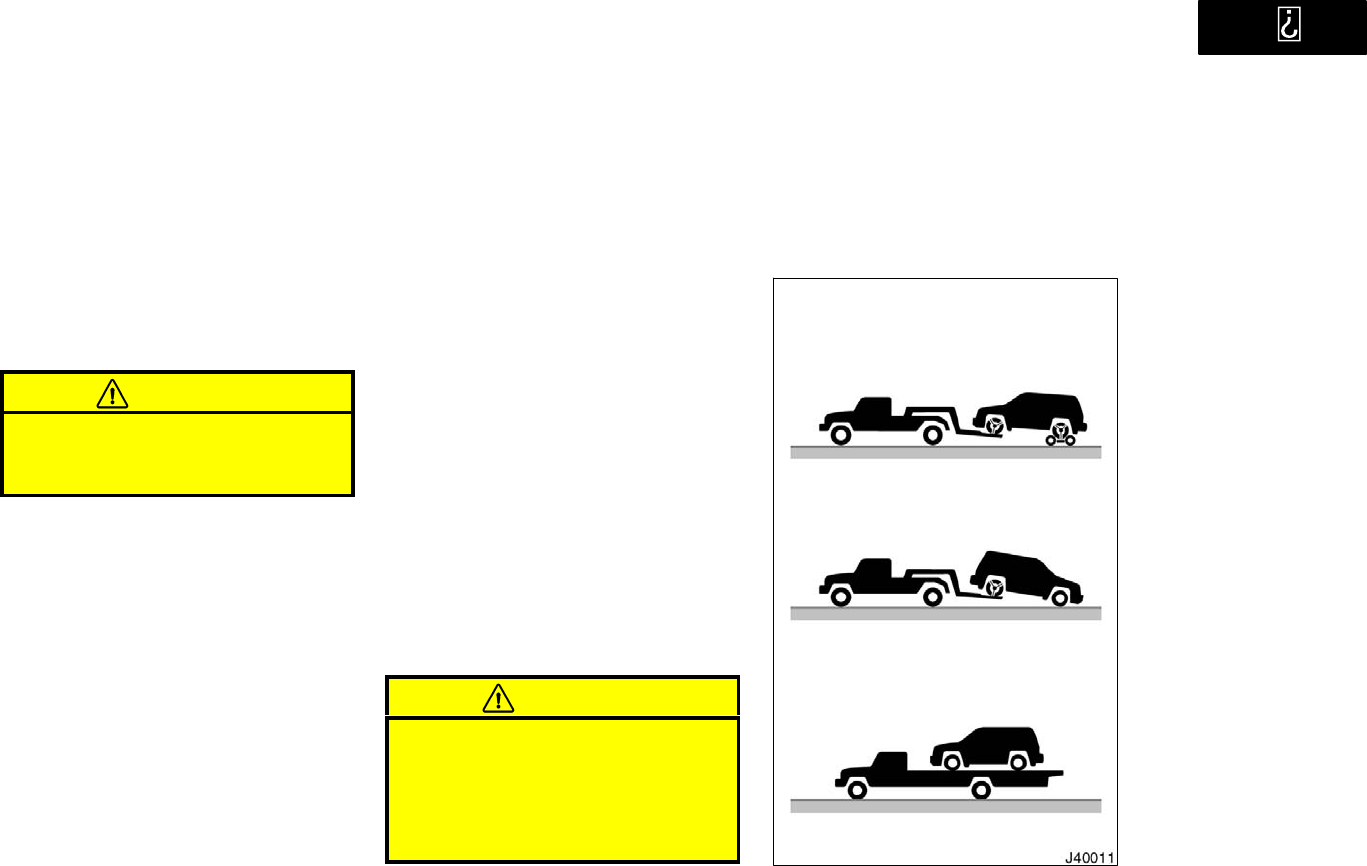
’01 4Runner_U (L/O 0008)
231
2001 4RUNNER (OM35768U)
10. Reinstall the wheel ornament.
Put the wheel ornament into position and
then tap it firmly with the side or heel of
your hand to snap it into place.
CAUTION
Take due care in handling the orna-
ment to avoid unexpected personal
injury.
After changing wheels
11. Check the air pressure of the re-
placed tire.
Adjust the air pressure to the specification
designated in Section 8. If the pressure is
lower, drive slowly to the nearest service
station and fill to the correct pressure.
Do not forget to reinstall the tire inflation
valve cap as dirt and moisture could get
into the valve core and possibly cause air
leakage. If the cap is missing, have a new
one put on as soon as possible.
12. Restow all the tools, jack and flat
tire securely.
As soon after changing wheels as pos-
sible, tighten the wheel nuts to the torque
specified in Section 8 with a torque
wrench. Have a technician repair the flat
tire.
CAUTION
Before driving, make sure all the
tools, jack and flat tire are securely
in place in their storage location to
reduce the possibility of personal in-
jury during a collision or sudden
braking.
(a) Towing with wheel lift type truck
From front
From rear
(b) Using flat bed truck
Two−wheel drive models
If your vehicle needs to be
towed
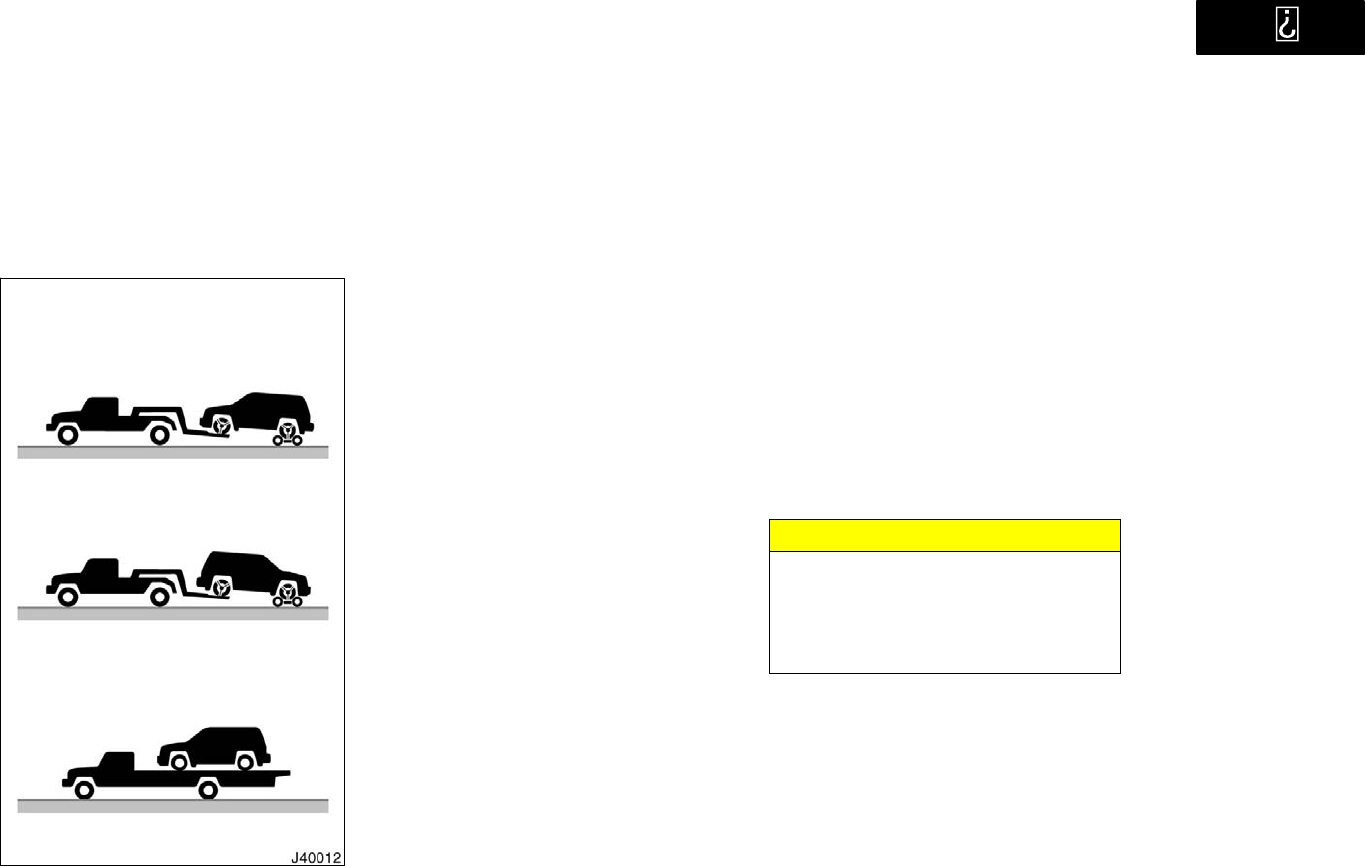
’01 4Runner_U (L/O 0008)
232 2001 4RUNNER (OM35768U)
(a) Towing with wheel lift type truck
From front
From rear
(b) Using flat bed truck
Four−wheel drive models
If towing is necessary, we recom-
mended you to have it done by your
Toyota dealer or a commercial tow
truck service. In consultation with them,
have your vehicle towed using either (a)
or (b).
Only when you cannot receive a towing
service from a Toyota dealer or com-
mercial tow truck service, tow your ve-
hicle carefully in accordance with the
instructions given in Emergency tow-
ing" in this section.
Proper equipment will help ensure that
your vehicle is not damaged while being
towed. Commercial operators are generally
aware of the state/provincial and local
laws pertaining to towing.
Your vehicle can be damaged if it is
towed incorrectly. Although most operators
know the correct procedure, it is possible
to make a mistake. To avoid damage to
your vehicle, make sure the following pre-
cautions are observed. If necessary, show
this page to the tow truck driver.
TOWING PRECAUTIONS:
Use a safety chain system for all towing,
and abide by the state/provincial and local
laws. The wheels and axle on the ground
must be in good condition. If they are
damaged, use a towing dolly.
Two−wheel drive models
(a) Towing with wheel lift type truck
From front
Use a towing dolly under the rear wheels.
NOTICE
Never tow a vehicle with an automatic
transmission from the front with the
rear wheels on the ground, as this
may cause serious damage to the
transmission.
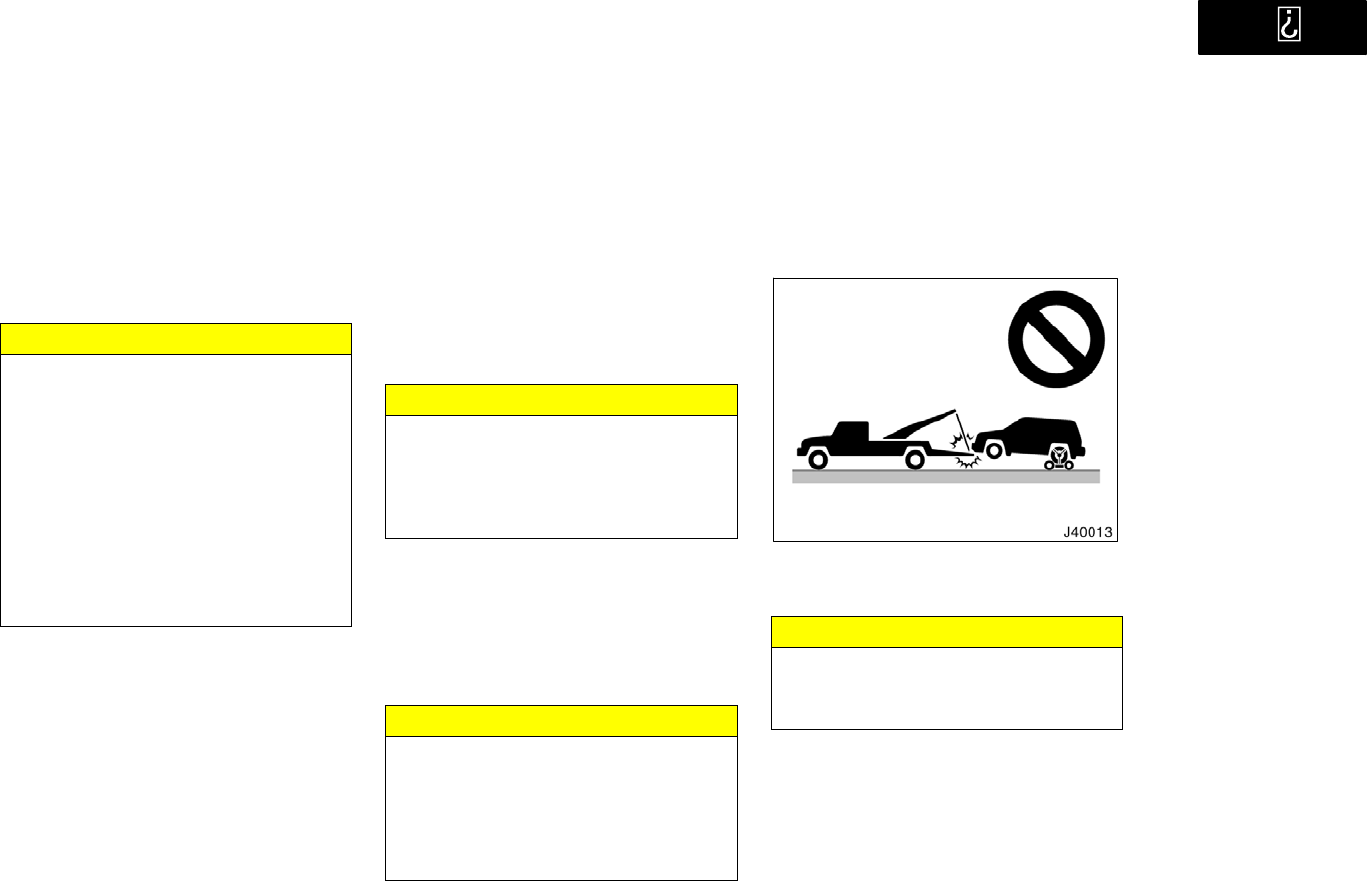
’01 4Runner_U (L/O 0008)
233
2001 4RUNNER (OM35768U)
From rearPlace the ignition key in the
ACC" position.
NOTICE
zWhen lifting wheels, take care to
ensure adequate ground clearance
for towing at the opposite end of
the raised vehicle. Otherwise, the
bumper and/or underbody of the
towed vehicle will be damaged dur-
ing towing.
zDo not tow with the key removed or
in the LOCK" position, as the
steering lock mechanism is not
strong enough to hold the front
wheels straight while towing.
(b) Using flat bed truck
Four−wheel drive models
(a) Towing with wheel lift type truck
From front
Use a towing dolly under the rear wheels.
NOTICE
Never tow a vehicle with an automatic
transmission from the front with the
rear wheels on the ground, as this
may cause serious damage to the
transmission.
From rearWe recommend using a tow-
ing dolly under the front wheels. If you do
not use a towing dolly, place the ignition
key in the ACC" position, put the trans-
mission in N" and the transfer in H"
mode (high speed position, two−wheel
drive).
NOTICE
Do not tow with the key removed or
in the LOCK" position when towing
from the rear without a towing dolly.
The steering lock mechanism is not
strong enough to hold the front
wheels straight.
(b) Using flat bed truck
(c) Towing with sling type truck
All models
(c) Towing with sling type truck
NOTICE
Do not tow with sling type truck, ei-
ther from the front or rear. This may
cause body damage.
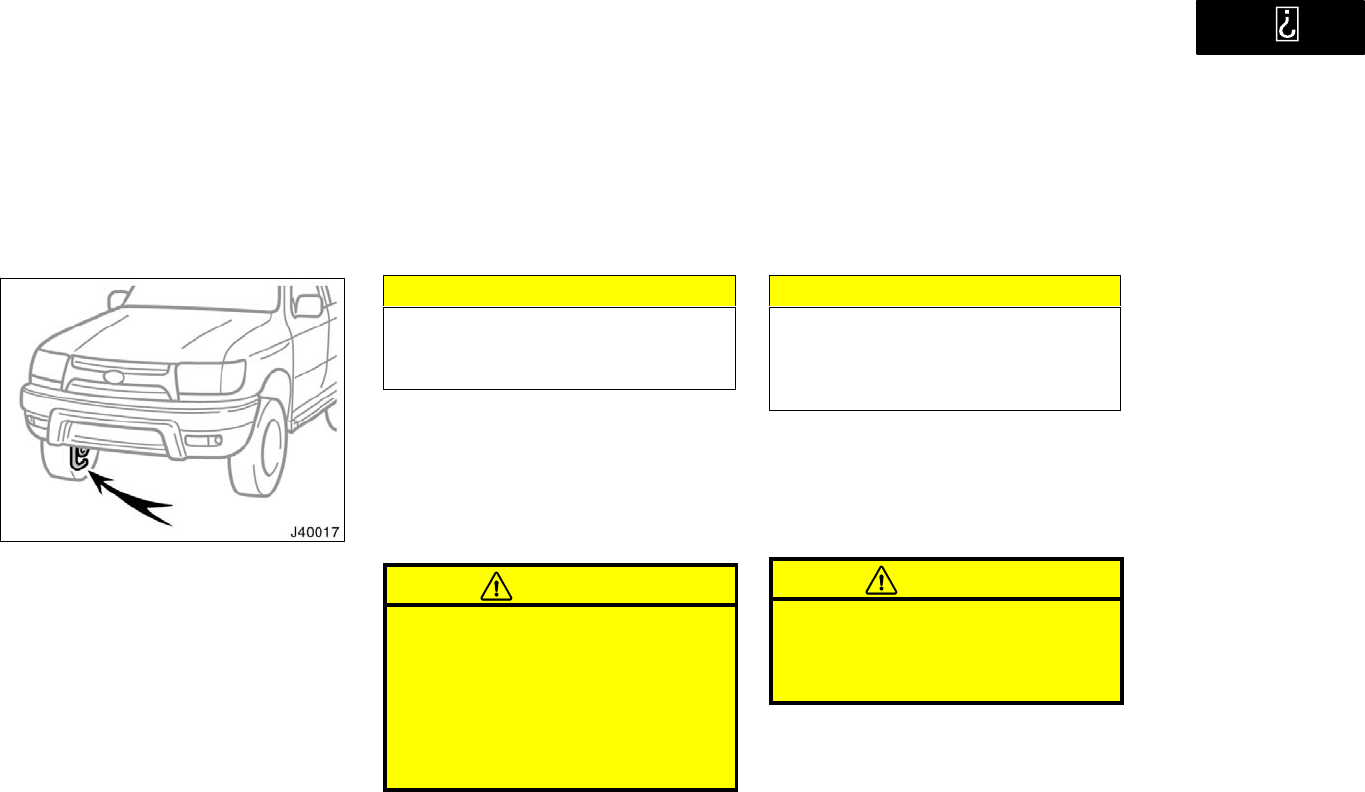
’01 4Runner_U (L/O 0008)
234 2001 4RUNNER (OM35768U)
Emergency towing
If towing is necessary, we recommend
you to have it done by your Toyota
dealer or a commercial tow truck ser-
vice.
If towing service is not available in an
emergency, your vehicle may be tempo-
rarily towed by a cable or chain se-
cured to the emergency towing hook.
Use extreme caution when towing ve-
hicles.
Four−wheel drive modelsBefore towing,
remove the towing hook cover in front of
the emergency towing hook. By doing this,
it prevents the towing cable from damag-
ing the bumper. See Removing towing
hook cover for emergency towing" for in-
structions.
NOTICE
Only use specified towing hook;
otherwise your vehicle may be dam-
aged.
A driver must be in the vehicle to steer
it and operate the brakes.
Towing in this manner may be done only
on hard−surfaced roads for a short dis-
tance and at low speeds. Also, the
wheels, axles, drive train, steering and
brakes must all be in good condition.
CAUTION
Use extreme caution when towing ve-
hicles. Avoid sudden starts or erratic
driving maneuvers which would place
excessive stress on the emergency
towing hook and towing cable or
chain. The hook and towing cable or
chain may break and cause serious
injury or damage.
NOTICE
Use only a cable or chain specifically
intended for use in towing vehicles.
Securely fasten the cable or chain to
the towing hook provided.
Before towing, release the parking brake
and put the transmission in N" and the
transfer in H" mode (high speed position,
two−wheel drive). The key must be in
ACC" (engine off) or ON" (engine run-
ning).
CAUTION
If the engine is not running, the pow-
er assist for the brakes and steering
will not work so steering and braking
will be much harder than usual.
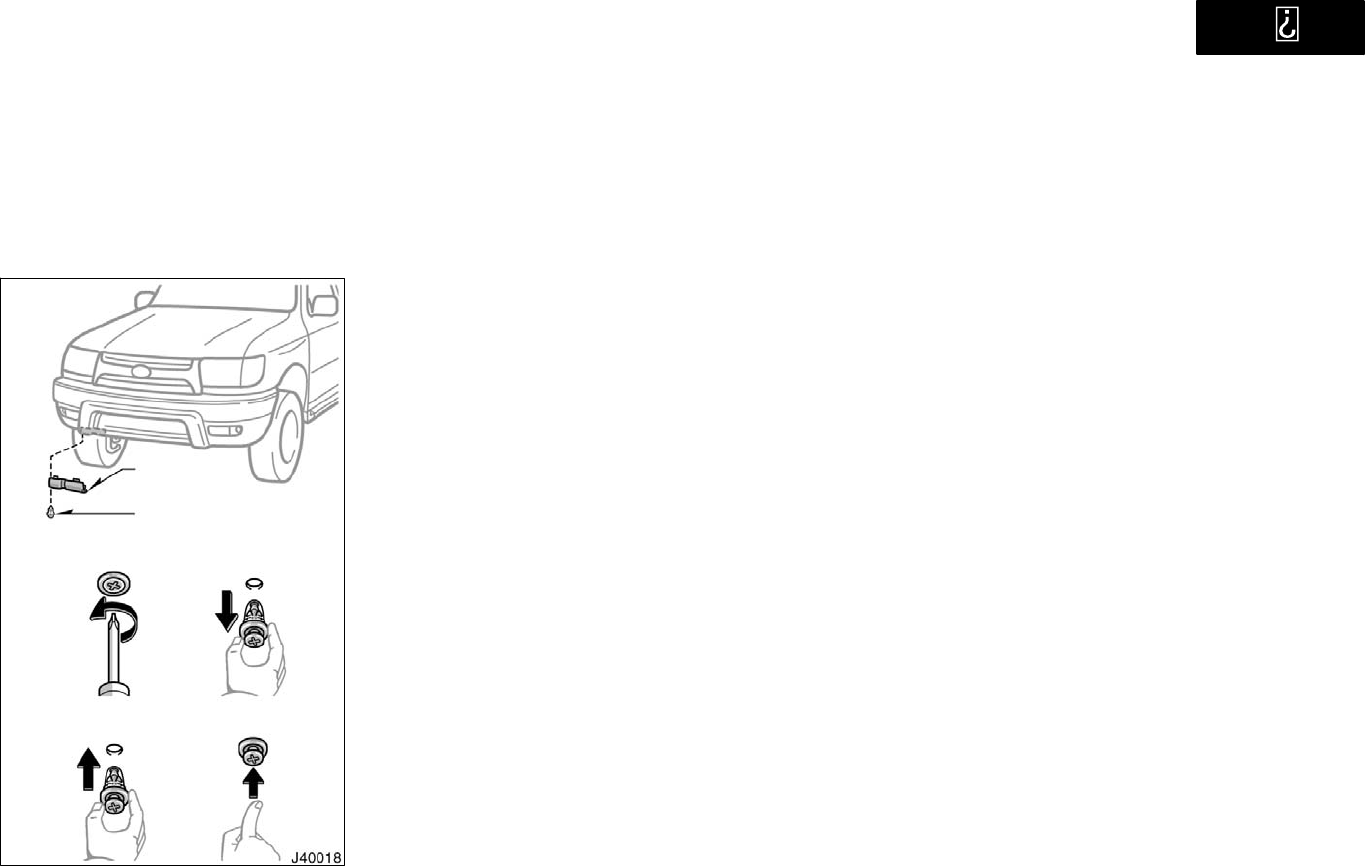
’01 4Runner_U (L/O 0008)
235
2001 4RUNNER (OM35768U)
Towing hook
cover
Clip
Removing clip
Installing clip
1. Use a Phillips−head screwdriver and
remove the clip.
2. Unhook the towing hook cover.
Before emergency towing, check that
the hook is not broken or damaged and
that the installation bolts are not loose.
Fasten the towing cable or chain se-
curely to the hook.
Do not jerk the hook. Apply steady and
even force.
To avoid damaging the hook, do not
pull from the side or at a vertical
angle. Always pull straight ahead.
Removing towing hook
cover for emergency towing
(four−wheel drive models)
Emergency towing hook
precautions
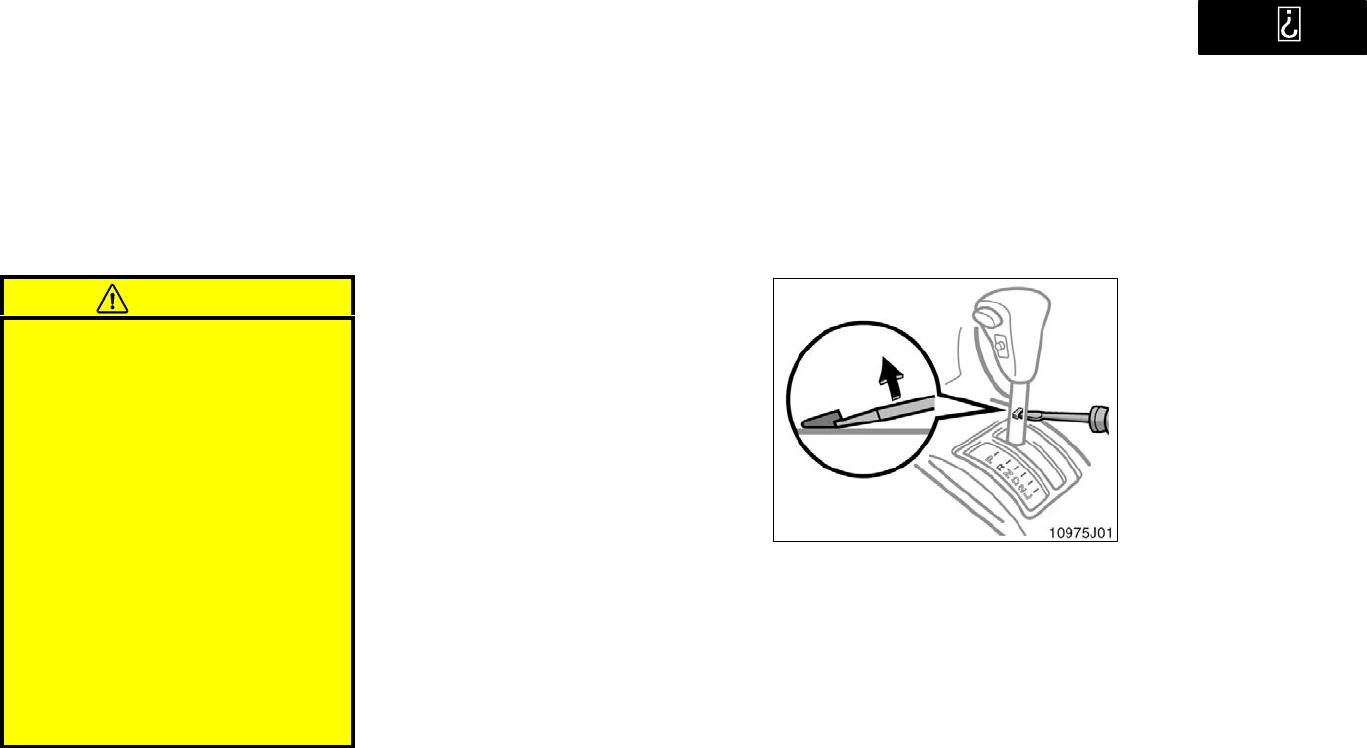
’01 4Runner_U (L/O 0008)
236 2001 4RUNNER (OM35768U)
CAUTION
If the emergency towing hook is used
to get out when your vehicle becomes
struck in mud, sand or other condi-
tion from which the vehicle cannot be
driven out under its own power, make
sure to observe the precautions men-
tioned below. Otherwise, excessive
stress will be put on the hook and
the towing cable or chain may break,
causing serious injury or damage.
If the towing vehicle can hardly
move, do not forcibly continue the
towing. Contact your Toyota dealer
or a commercial tow truck service
for assistance.
Tow the vehicle as straight ahead
as possible.
Keep away from the vehicle during
towing.
The following methods are effective to
get out when your vehicle is struck in
mud, sand or other condition from
which the vehicle cannot be driven out
under its own power. Use extreme cau-
tion when towing vehicles. In addition,
keep away from the vehicles and towing
cable or chain when towing.
Remove the soil and sand in the front
and the back of the tires.
Place a stone or wood under the tires.
If you cannot shift the selector lever
out of P" position to other positions
even though the brake pedal is de-
pressed, use the shift lock override but-
ton as follows:
1. Turn the ignition key to LOCK"
position. Make sure the parking
brake is set.
2. Pry up the cover with a flat−bladed
screwdriver or equivalent.
Tips for towing a stuck
vehicle
If you cannot shift automatic
transmission selector lever
(two−wheel drive models)
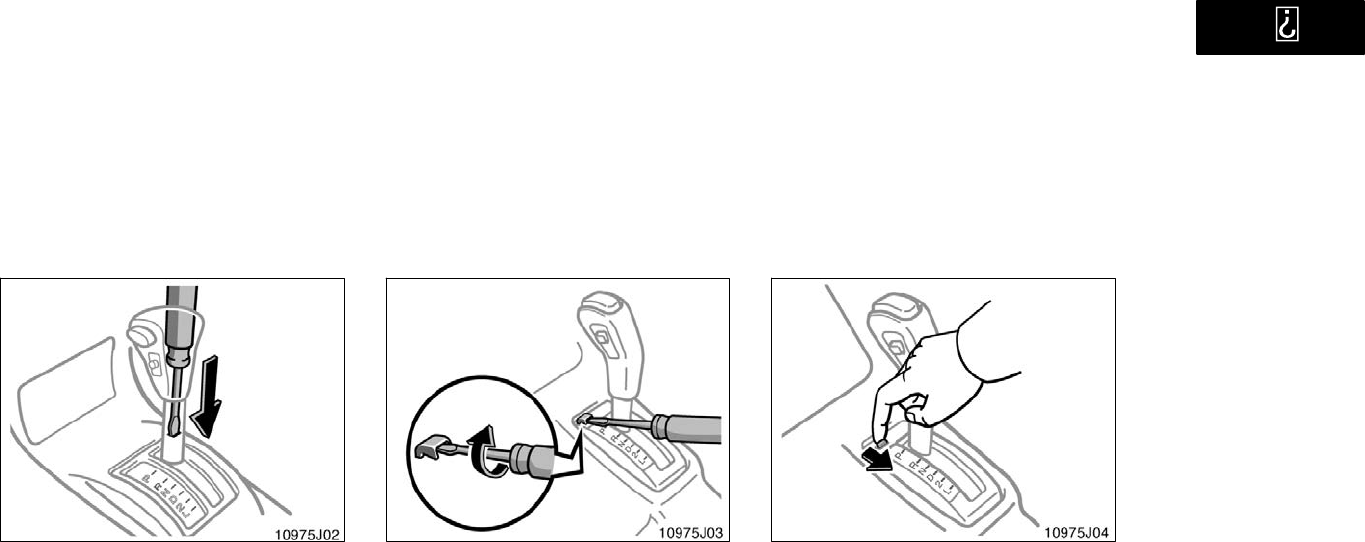
’01 4Runner_U (L/O 0008)
237
2001 4RUNNER (OM35768U)
3. Insert the screwdriver or equivalent
into the hole to push down the shift
lock override button. You can shift
out of P" position only while push-
ing the button.
4. Shift into N" position.
5. Insert the cover.
6. Start the engine. For your safety,
keep the brake pedal depressed.
Be sure to have the system checked by
your Toyota dealer as soon as possible.
If you cannot shift the selector lever
out of P" position to other positions
even though the brake pedal is de-
pressed, use the shift lock override but-
ton as follows:
1. Turn the ignition key to LOCK"
position. Make sure the parking
brake is set.
2. Pry up the cover with a flat−bladed
screwdriver or equivalent.
3. Insert your finger into the hole to
move the shift lock overdrive lever
backward. You can shift out of P"
position only while holding back the
lever.
4. Shift into N" position.
5. Insert the cover.
6. Start the engine. For your safety,
keep the brake pedal depressed.
Be sure to have the system checked by
your Toyota dealer as soon as possible.
If you cannot shift automatic
transmission selector lever
(four−wheel drive models)

’01 4Runner_U (L/O 0008)
238 2001 4RUNNER (OM35768U)
If you lose your keys
Many Toyota dealers can make a new
key if you can give them the key num-
ber. If your vehicle is equipped with the
engine immobiliser system, the dealer
will also need your master key.
Vehicles with engine immobiliser system
Even if you lose only one key, contact
your Toyota dealer to make a new key. If
you lose all your master keys, you cannot
make new keys; the whole engine immobi-
liser system must be replaced.
See the suggestion given in Keys" in
Section 1−2.
If your keys are locked in the vehicle and
you cannot get a duplicate, many Toyota
dealers can still open the door for you,
using their special tools. If you must
break a window to get in, we suggest
breaking the smallest side window be-
cause it is the least expensive to replace.
Be extremely cautious to avoid cuts from
the glass.
Please contact your nearest Toyota
dealer and you can purchase a new
wireless remote control transmitter.
Have the registered identification numbers
of your transmitters deleted from your ve-
hicle by your Toyota dealer as soon as
possible to avoid the possibility of theft or
an accident. Then, have the identification
number of your new transmitter registered.
At the same time, you must bring all of
the remaining transmitters to have them
registered again as well.
If you lose your wireless
remote control transmitter

’01 4Runner_U (L/O 0008)
239
2001 4RUNNER (OM35768U)
CORROSION PREVENTION AND
APPEARANCE CARE
Protecting your Toyota from corrosion 240. . . . . . . . . . . . . . . . . . . . . . . . .
Washing and waxing your Toyota 241. . . . . . . . . . . . . . . . . . . . . . . . . . . . .
Cleaning the interior 242. . . . . . . . . . . . . . . . . . . . . . . . . . . . . . . . . . . . . . . .
SECTION 5

’01 4Runner_U (L/O 0008)
240 2001 4RUNNER (OM35768U)
Toyota, through its diligent research, de-
sign and use of the most advanced
technology available, has done its part to
help prevent corrosion and has provided
you with the finest quality vehicle
construction. Now, it is up to you. Proper
care of your Toyota can help ensure long−
term corrosion prevention.
The most common causes of corrosion
to your vehicle are:
The accumulation of road salt, dirt and
moisture in hard−to−reach areas under
the vehicle.
Chipping of paint, or undercoating
caused by minor accidents or by
stones and gravel.
Care is especially important if you live
in particular areas or operate your ve-
hicle under certain environmental condi-
tions:
Road salt or dust control chemicals will
accelerate corrosion, as will the pres-
ence of salt in the air near the sea−
coast or in areas of industrial pollution.
High humidity accelerates corrosion es-
pecially when temperatures range just
above the freezing point.
Wetness or dampness to certain parts
of your vehicle for an extended period
of time, may cause corrosion even
though other parts of the vehicle may
be dry.
High ambient temperatures can cause
corrosion to those components of the
vehicle which are prevented from
quick−drying due to lack of proper ven-
tilation.
The above signifies the necessity to keep
your vehicle, particularly the underside, as
clean as possible and to repair any dam-
age to paint or protective coatings as
soon as possible.
To help prevent corrosion on your
Toyota, follow these guidelines:
Wash your vehicle frequently. It is, of
course, necessary to keep your vehicle
clean by regular washing, but to prevent
corrosion, the following points should be
observed:
If you drive on salted roads in the
winter or if you live near the ocean,
you should hose off the undercarriage
at least once a month to minimize cor-
rosion.
High pressure water or steam is effec-
tive for cleaning the vehicle’s underside
and wheel housings. Pay particular
attention to these areas as it is difficult
to see all the mud and dirt. It will do
more harm than good to simply wet the
mud and debris without removing them.
The lower edge of doors, rocker panels
and frame members have drain holes
which should not be allowed to clog
with dirt as trapped water in these
areas can cause corrosion.
Wash the underside of the vehicle thor-
oughly when winter is over.
See Washing and waxing your Toyota" for
more tips.
Check the condition of your vehicle’s
paint and trim. If you find any chips or
scratches in the paint, touch them up im-
mediately to prevent corrosion from start-
ing. If the chips or scratches have gone
through the bare metal, have a qualified
body shop make the repair.
Protecting your Toyota
from corrosion
’01 4Runner_U (L/O 0008)
241
2001 4RUNNER (OM35768U)
Check the interior of your vehicle. Wa-
ter and dirt can accumulate under the
floor mats and could cause corrosion. Oc-
casionally check under the mats to make
sure the area is dry. Be particularly care-
ful when transporting chemicals, cleans-
ers, fertilizers, salt, etc; these should be
transported in proper containers. If a spill
or leak should occur, immediately clean
and dry the area.
Use mud shields on your wheels. If you
drive on salted or gravel roads, mud
shields help protect your vehicle. Full−size
shields, which come as near to the ground
as possible, are the best. We recommend
that the fittings and the area where the
shields are installed be treated to resist
corrosion. Your Toyota dealer will be
happy to assist in supplying and installing
the shields if they are recommended for
your area.
Keep your vehicle in a well ventilated
garage or a roofed place. Do not park
your vehicle in a damp, poorly venti-
lated garage. If you wash your vehicle in
the garage, or if you drive it in covered
with water or snow, your garage may be
so damp it will cause corrosion. Even if
your garage is heated, a wet vehicle can
corrode if the ventilation is poor.
Washing your Toyota
Keep your vehicle clean by regular
washing.
The following cases may cause weakness
to the paint or corrosion to the body and
parts. Wash your vehicle as soon as pos-
sible.
When driving in a coastal area
When driving on a road sprinkled with
antifreeze
When having coal tar, tree sap, bird
droppings and carcass of an insect
When driving in the areas where there
is a lot of smoke, soot, dust, iron dust
and chemical substance
When the vehicle becomes remarkably
dirty with dust and mud
Hand−washing your Toyota
Work in the shade and wait until the
vehicle body is not hot to the touch.
CAUTION
When cleaning under floor or chassis,
be careful not to injure your hands.
1. Rinse off loose dirt with a hose. Re-
move any mud or road salt from the
underside of the vehicle or in the
wheel wells.
2. Wash with a mild car−wash soap,
mixed according to the manufacturer’s
instructions. Use a soft cotton mitt and
keep it wet by dipping it frequently into
the wash water. Do not rub hardlet
the soap and water remove the dirt.
Plastic wheel ornaments: The plastic
wheel ornaments are damaged easily by
organic substances. If any organic sub-
stances splashes an ornament, be sure to
wash it off with water and check if the
ornament is damaged.
CAUTION
Do not attach the heavily damaged
plastic wheel ornament. It may fly off
the wheel and cause accidents while
the vehicle is moving.
Aluminum wheels: Use only a mild soap
or neutral detergent.
Road tar: Remove with turpentine or
cleaners that are marked safe for painted
surfaces.
Washing and waxing your
Toyota
’01 4Runner_U (L/O 0008)
242 2001 4RUNNER (OM35768U)
NOTICE
Do not use organic substances (gaso-
line, kerosene, benzine or strong sol-
vents), which may be toxic or cause
damage.
3. Rinse thoroughlydried soap can
cause streaking. In hot weather you
may need to rinse each section right
after you wash it.
4. To prevent water spots, dry the vehicle
using a clean soft cotton towel. Do not
rub or press hardyou might scratch
the paint.
Automatic car wash
Your vehicle may be washed in an auto-
matic car wash, but remember that the
paint can be scratched by some type of
brushes, unfiltered washing water, or the
washing process itself. Scratching reduces
paint durability and gloss, especially on
darker colors. The manager of the car
wash should be able to advise you wheth-
er the process is safe for the paint on
your vehicle.
NOTICE
To prevent damage to the antenna,
make sure it is retracted before driv-
ing your Toyota through an automatic
car wash. On models with detachable
antenna, remove the antenna before
using an automatic car wash.
Waxing your Toyota
Polishing and waxing is recommended
to maintain the original beauty of your
Toyota’s finish.
Once a month or if the vehicle surface
does not repel water well, apply wax.
1. Always wash and dry the vehicle be-
fore you begin waxing, even if you are
using a combined cleaner and wax.
2. Use a good quality polish and wax. If
the finish has become extremely weath-
ered, use a car−cleaning polish, fol-
lowed by a separate wax. Carefully fol-
low the manufacturer’s instructions and
precautions. Be sure to polish and wax
the chrome trim as well as the paint.
3. Wax the vehicle again when water
does not bead but remains on the sur-
face in large patches.
Cleaning the interior
CAUTION
Do not wash the vehicle floor with
water, or allow water to get onto the
floor when cleaning the vehicle interi-
or or exterior. Water may get into
audio components or other electrical
components above or under the floor
carpet (or mat) and cause a malfunc-
tion; and it may cause body corro-
sion.
Vinyl interior
The vinyl upholstery may be easily
cleaned with a mild soap or detergent
and water.
First vacuum over the upholstery to re-
move loose dirt. Then, using a sponge or
soft cloth, apply the soap solution to the
vinyl. After allowing it to soak in for a few
minutes to loosen the dirt, remove the dirt
and wipe off the soap with a clean damp
cloth. If all the dirt does not come off,
repeat the procedure. Commercial foam-
ing−type vinyl cleaners are also available
which work well. Follow the manufacturer’s
instructions.

’01 4Runner_U (L/O 0008)
243
2001 4RUNNER (OM35768U)
NOTICE
Do not use solvent, thinner, gasoline
or window cleaner on the interior.
Carpets
Use a good foam−type shampoo to
clean the carpets.
Begin by vacuuming thoroughly to remove
as much dirt as possible. Several types of
foam cleaners are available; some are in
aerosol cans and others are powders or
liquids which you mix with water to pro-
duce a foam. To shampoo the carpets,
use a sponge or brush to apply the foam.
Rub in overlapping circles.
Do not apply waterthe best results are
obtained by keeping the carpet as dry as
possible. Read the shampoo instructions
and follow them closely.
Seat belts
The seat belts may be cleaned with
mild soap and water or with lukewarm
water.
Use a cloth or sponge. As you are clean-
ing, check the belts for excessive wear,
fraying, or cuts.
NOTICE
zDo not use dye or bleach on the
beltsit may weaken them.
zDo not use the belts until they be-
come dry.
Windows
The windows may be cleaned with any
household window cleaner.
NOTICE
When cleaning the inside of the rear
window, be careful not to scratch or
damage the heater wires or connec-
tors.
Air conditioning control panel, car au-
dio, instrument panel, console panel,
and switches
Use a soft damp cloth for cleaning.
Soak a clean soft cloth in water or luke-
warm water then lightly wipe off dirt.
NOTICE
zDo not use organic substances (sol-
vents, kerosene, alcohol, gasoline,
etc.) or alkaline or acidic solutions.
These chemicals can cause discol-
oring, staining or peeling of the
surface.
zIf you use cleaners or polishing
agents, make sure their ingredients
do not include the substances men-
tioned above.
zIf you use a liquid car freshener, do
not apill the liquid onto the ve-
hicle’s interior surfaces. It may con-
tain the ingredients mentioned
above. Immediately clean any spill
using the method mentioned above.
Leather Interior
The leather upholstery may be cleaned
with neutral detergent for wool.
Remove dirt using a soft cloth dampened
with 5% solution of neutral detergent for
wool. Then thoroughly wipe off all traces
of detergent with a clean damp cloth.

’01 4Runner_U (L/O 0008)
244 2001 4RUNNER (OM35768U)
After cleaning or whenever any part of the
leather gets wet, dry with a soft clean
cloth. Allow the leather to dry in a venti-
lated shaded area.
NOTICE
zIf a stain should fail to come out
with a neutral detergent, apply a
cleaner that does not contain an
organic solvent.
zNever use organic substances such
as benzine, alcohol or gasoline, or
alkaline or acid solutions for clean-
ing the leather as these could
cause discoloring.
zUse of a nylon brush or synthetic
fiber cloth, etc. may scratch the
fine grained surface of the leather.
zMildew may develop on soiled leath-
er upholstery. Be especially careful
to avoid oil spots. Try to keep your
upholstery always clean.
zLong exposure to direct sunlight
may cause the leather surface to
harden and shrink. Keep your ve-
hicle in a shaded area, especially in
the summer.
zThe interior of your vehicle is apt
to heat up on hot summer days, so
avoid placing on the upholstery
items made of vinyl or plastic or
containing wax as these tend to
stick to leather when warm.
zImproper cleaning of the leather up-
holstery could result in discolor-
ation or staining.
If you have any questions about the
cleaning of your Toyota, your local
Toyota dealer will be pleased to answer
them.

’01 4Runner_U (L/O 0008)
245
2001 4RUNNER (OM35768U)
VEHICLE MAINTENANCE AND CARE
Maintenance requirements 246. . . . . . . . . . . . . . . . . . . . . . . . . . . . . . . . . .
General maintenance 247. . . . . . . . . . . . . . . . . . . . . . . . . . . . . . . . . . . . . . .
Does your vehicle need repairing? 249. . . . . . . . . . . . . . . . . . . . . . . . . . . .
For scheduled maintenance information, please refer to the Sched-
uled Maintenance Guide" or Owner’s Manual Supplement".
SECTION 6

’01 4Runner_U (L/O 0008)
246 2001 4RUNNER (OM35768U)
Maintenance requirements
Your Toyota vehicle has been designed for
fewer maintenance requirements with long-
er service intervals to save both your time
and money. However, each regular mainte-
nance, as well as day−to−day care, is
more important than ever before to ensure
smooth, and trouble−free, safe, and eco-
nomical drivings.
It is the owner’s responsibility to make
sure the specified maintenance, including
general maintenance service, is performed.
Note that both the new vehicle and emis-
sion control system warranties specify that
proper maintenance and care must be per-
formed. See Owner’s Warranty Informa-
tion Booklet" or Owner’s Manual Supple-
ment" for complete warranty information.
General maintenance
General maintenance items are those day−
to−day care practices that are important to
your vehicle for proper operation. It is the
owner’s responsibility to ensure that the
general maintenance items are performed
regularly.
These checks or inspections can be done
either by yourself or a qualified technician,
or if you prefer, your Toyota dealer will be
pleased to do them at a nominal cost.
Scheduled maintenance
The scheduled maintenance items listed in
the Scheduled Maintenance Guide" or
Owner’s Manual Supplement" are those
required to be serviced at regular inter-
vals.
For details of your maintenance schedule,
read the Scheduled Maintenance Guide"
or Owner’s Manual Supplement".
It is recommended that any replacement
parts used for maintenance or for the
repair of the emission control system
be Toyota supplied.
The owner may elect to use non−Toyota
supplied parts for replacement pur-
poses without invalidating the emission
control system warranty. However, use
of replacement parts which are not of
equivalent quality may impair the effec-
tiveness of the emission control sys-
tems.
You may also elect to have mainte-
nance, replacement, or repair of the
emission control devices and system
performed by any automotive repair es-
tablishment or individual without invali-
dating this warranty. See Owner’s War-
ranty Information Booklet" or Owner’s
Manual Supplement" for complete war-
ranty information.
Where to go for service?
Toyota technicians are well−trained spe-
cialists and are kept up to date with the
latest service information through technical
bulletins, service tips, and in−dealership
training programs. They learn to work on
Toyotas before they work on your vehicle,
rather than while they are working on it.
You can be confident that your Toyota
dealer’s service department performs the
best job to meet the maintenance require-
ments on your vehiclereliably and eco-
nomically.
Your copy of the repair order is proof that
all required maintenance has been per-
formed for warranty coverage. And if any
problems should arise with your vehicle
while under warranty, your Toyota dealer
will promptly take care of it. Again, be
sure to keep a copy of the repair order
for any service performed on your Toyota.
What about do−it−yourself maintenance?
Many of the maintenance items are easy
to do yourself if you have a little mechani-
cal ability and a few basic automotive
tools. Simple instructions for how to per-
form them are presented in Section 7.
’01 4Runner_U (L/O 0008)
247
2001 4RUNNER (OM35768U)
If you are a skilled do−it−yourself mechan-
ic, the Toyota service manuals are recom-
mended. Please be aware that do−it−your-
self maintenance can affect your warranty
coverage. See Owner’s Warranty Informa-
tion Booklet" or Owner’s Manual Supple-
ment" for the details.
General maintenance
Listed below are the general maintenance
items that should be performed as fre-
quently as specified. In addition to check-
ing the items listed, if you notice any
unusual noise, smell or vibration, you
should investigate the cause or take your
vehicle to your Toyota dealer or a quali-
fied service shop immediately. It is recom-
mended that any problem you notice be
brought to the attention of your dealer or
the qualified service shop for their advice.
CAUTION
Make these checks only where ade-
quate ventilation can be obtained if
you run the engine.
OUTSIDE THE VEHICLE
Items listed below should be performed
from time to time, unless otherwise
specified.
Tire pressure
Check the pressure with a gauge every
two weeks, or at least once a month. See
Section 7−2 for additional information.
Tire surface and wheel nuts
Check the tires carefully for cuts, damage
or excessive wear. See Section 7−2 for
additional information. When checking the
tires, make sure no nuts are missing, and
check the nuts for looseness. Tighten
them if necessary.
Tire rotation
Rotate the tires according to the mainte-
nance schedule. (For scheduled mainte-
nance information, please refer to the sep-
arate Scheduled Maintenance Guide" or
Owner’s Manual Supplement".). See Sec-
tion 7−2 for additional information.
Fluid leaks
Check underneath for leaking fuel, oil, wa-
ter or other fluid after the vehicle has
been parked for a while. If you smell fuel
fumes or notice any leak, have the cause
found and corrected immediately.
Doors and engine hood
Check that all doors including back door
operate smoothly and all latches lock se-
curely. Make sure the engine hood sec-
ondary latch secures the hood from open-
ing when the primary latch is released.

’01 4Runner_U (L/O 0008)
248 2001 4RUNNER (OM35768U)
INSIDE THE VEHICLE
Items listed below should be checked
regularly, e.g. while performing periodic
services, cleaning the vehicle, etc.
Lights
Make sure the headlights, stop lights, tail
lights, turn signal lights, and other lights
are all working. Check headlight aim.
Service reminder indicators and warning
buzzers
Check that all service reminder indicators
and warning buzzers function properly.
Steering wheel
Check that it has the specified free play.
Be alert for changes in steering condition,
such as hard steering or strange noise.
Seats
Check that all seat controls such as seat
adjusters, seatback recliner, etc. operate
smoothly and that all latches lock securely
in any position. Check that the head re-
straint move up and down smoothly and
that the locks hold securely in any latched
position. For folding−down rear seatbacks
and swing−up rear seat cushions, check
that the latches lock securely.
Seat belts
Check that the seat belt system such as
buckles, retractors and anchors operate
properly and smoothly. Make sure the belt
webbing is not cut, frayed, worn or dam-
aged.
Accelerator pedal
Check the pedal for smooth operation and
uneven pedal effort or catching.
Brake pedal
Check the pedal for smooth operation and
that the pedal has the proper clearance.
Check the brake booster function.
Brakes
At a safe place, check that the brakes do
not pull to one side when applied.
Parking brake
Check that the lever has the proper travel
and that, on a safe incline, your vehicle
is held securely with only the parking
brake applied.
Automatic transmission Park" mecha-
nism
Check the lock release button of the se-
lector lever for proper and smooth opera-
tion. On a safe incline, check that your
vehicle is held securely with the selector
lever in P" position and all brakes re-
leased.
IN THE ENGINE COMPARTMENT
Items listed below should be checked
from time to time, e.g. each time when
refueling.
Washer fluid
Make sure there is sufficient fluid in the
tank. See Section 7−3 for additional in-
formation.
Engine coolant level
Make sure the coolant level is between
the F" and L" lines on the see−through
reservoir when the engine is cold. See
Section 7−2 for additional information.
Battery electrolyte level
Your Toyota has a maintenance free bat-
tery. You do not have to add distilled wa-
ter. See Section 7−3 for additional in-
formation.
’01 4Runner_U (L/O 0008)
249
2001 4RUNNER (OM35768U)
Brake fluid level
Make sure the brake fluid level is correct.
See Section 7−2 for additional information.
Engine oil level
Check the level on the dipstick with the
engine turned off and the vehicle parked
on a level spot. See Section 7−2 for addi-
tional information.
Power steering fluid level
Check the level through the reservoir. The
level should be in the HOT" or COLD"
range depending on the fluid temperature.
See Section 7−2 for additional information.
Exhaust system
If you notice any change in the sound of
the exhaust or smell exhaust fumes, have
the cause located and corrected immedi-
ately. (See engine exhaust cautions in
Section 2.)
Be on the alert for changes in perfor-
mance, sounds, and visual tip−offs that
indicate service is needed. Some impor-
tant clues are as follows:
Engine missing, stumbling, or pinging
Appreciable loss of power
Strange engine noises
A leak under the vehicle (however, wa-
ter dripping from the air conditioning
after use is normal.)
Change in exhaust sound (This may
indicate a dangerous carbon monoxide
leak. Drive with the windows open and
have the exhaust system checked im-
mediately.)
Flat−looking tire; excessive tire squeal
when cornering; uneven tire wear
Vehicle pulls to one side when driving
straight on a level road
Strange noises related to suspension
movement
Loss of brake effectiveness; spongy
feeling brake or clutch pedal; pedal al-
most touches floor; vehicle pulls to one
side when braking
Engine coolant temperature continually
higher than normal
If you notice any of these clues, take your
vehicle to your Toyota dealer as soon as
possible. It probably needs adjustment or
repair.
CAUTION
Do not continue driving with the ve-
hicle unchecked. It could result in se-
rious vehicle damage and possibly
personal injury.
Does your vehicle need
repairing?

’01 4Runner_U (L/O 0008)
250 2001 4RUNNER (OM35768U)

’01 4Runner_U (L/O 0008)
251
2001 4RUNNER (OM35768U)
DO−IT−YOURSELF MAINTENANCE
Introduction
Engine compartment overview 252. . . . . . . . . . . . . . . . . . . . . . . . . . . . . . .
Fuse locations 253. . . . . . . . . . . . . . . . . . . . . . . . . . . . . . . . . . . . . . . . . . . . .
Do−it−yourself service precautions 253. . . . . . . . . . . . . . . . . . . . . . . . . . .
Parts and tools 255. . . . . . . . . . . . . . . . . . . . . . . . . . . . . . . . . . . . . . . . . . . . .
SECTION 7− 1
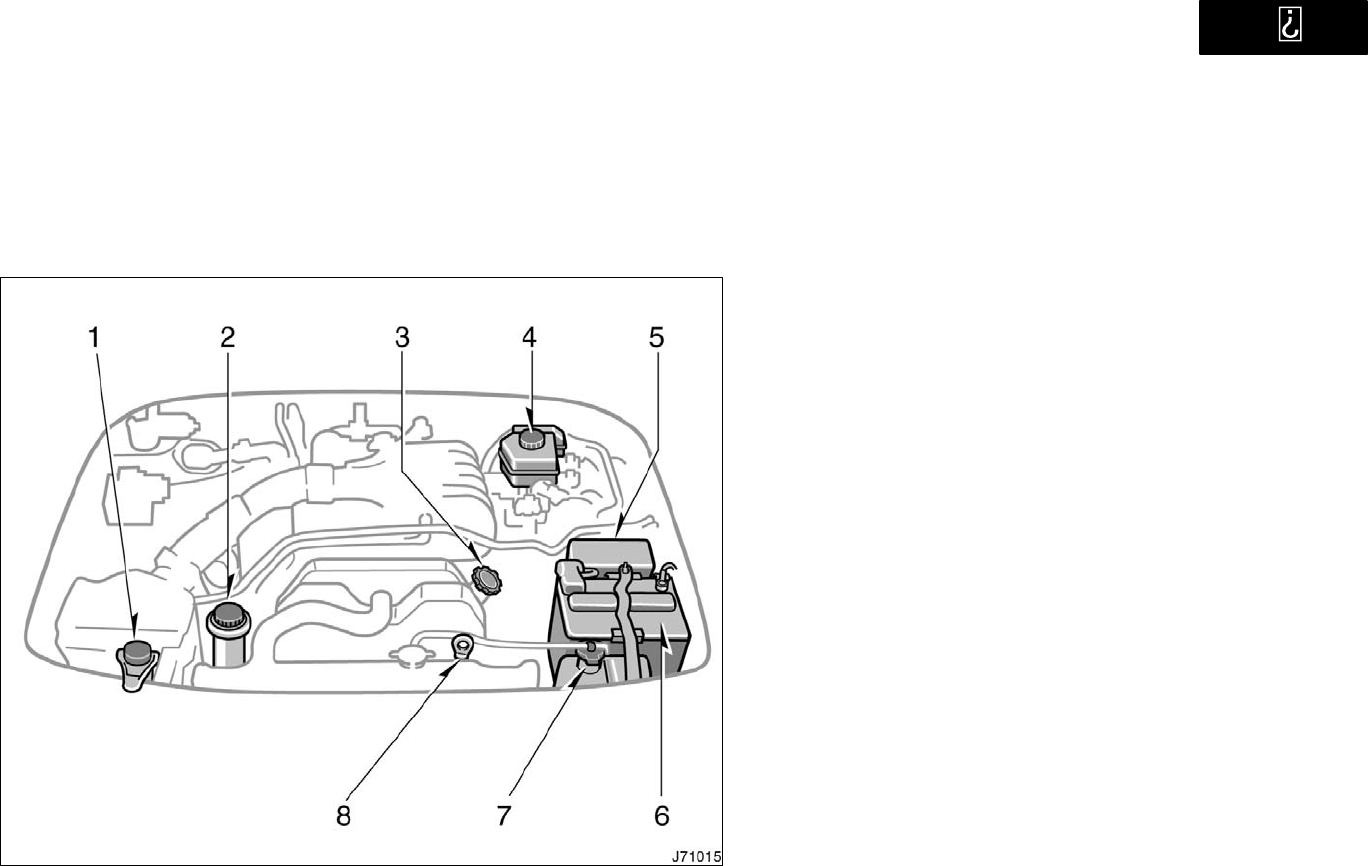
’01 4Runner_U (L/O 0008)
252 2001 4RUNNER (OM35768U)
Engine compartment overview
1. Windshield and back window
washer fluid tank
2. Power steering fluid reservoir
3. Engine oil filler cap
4. Brake fluid reservoir
5. Fuse block
6. Battery
7. Engine coolant reservoir
8. Engine oil level dipstick
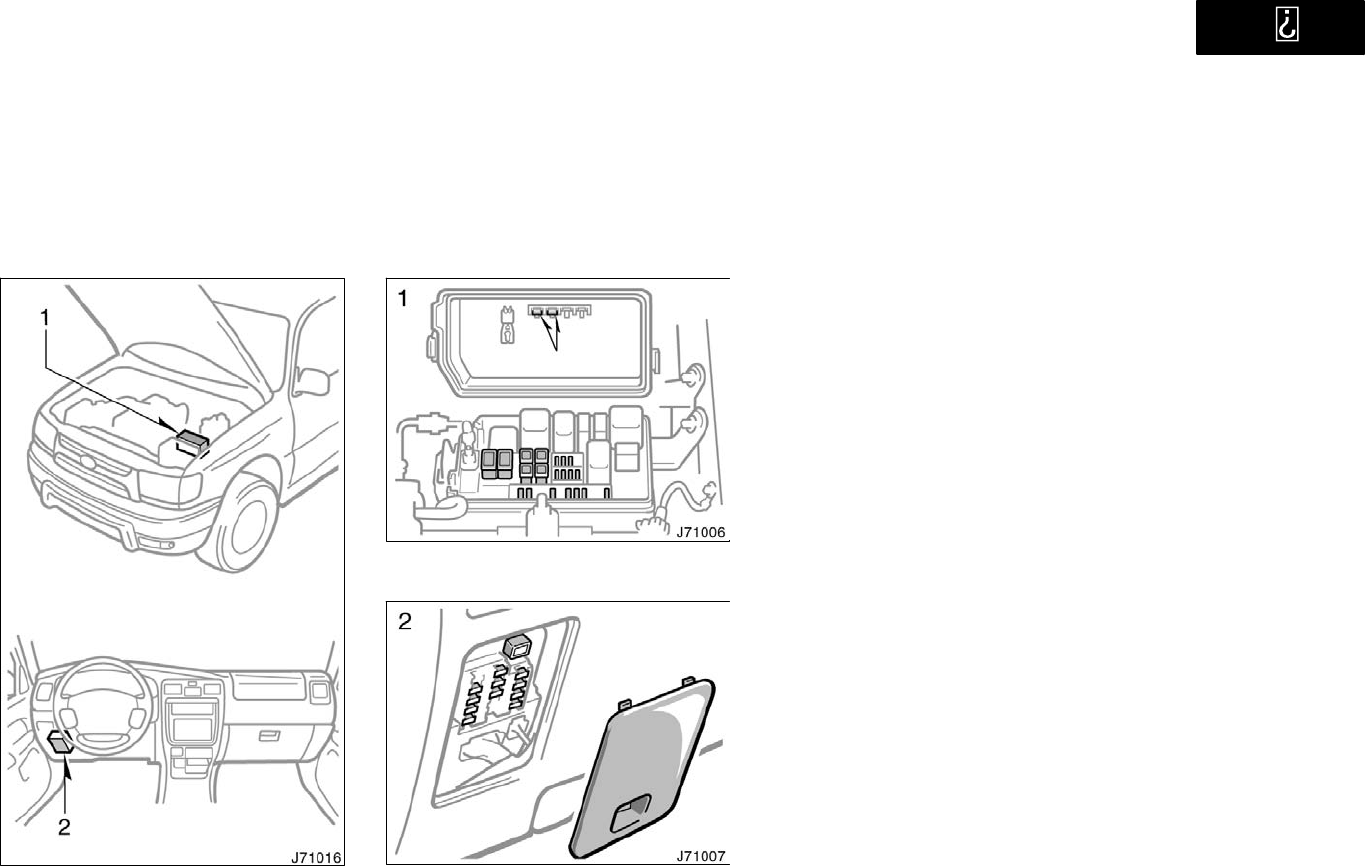
’01 4Runner_U (L/O 0008)
253
2001 4RUNNER (OM35768U)
Fuse locations
Spare fuses
If you perform maintenance by yourself,
be sure to follow the correct procedure
given in this section.
You should be aware that improper or in-
complete servicing may result in operating
problems.
Performing do−it−yourself maintenance
during the warranty period may affect your
warranty coverage. Read the separate
Toyota Warranty statement for details and
suggestions.
This section gives instructions only for
those items that are relatively easy for an
owner to perform. As explained in Section
6, there are still a number of items that
must be done by a qualified technician
with special tools.
For information on tools and parts for do−
it−yourself maintenance, see Parts and
tools".
Utmost care should be taken when work-
ing on your vehicle to prevent accidental
injury. Here are a few precautions that
you should be especially careful to ob-
serve:
Do−it−yourself service
precautions
’01 4Runner_U (L/O 0008)
254 2001 4RUNNER (OM35768U)
CAUTION
When the engine is running, keep
hands, clothing, and tools away
from the moving fan and engine
drive belts. (Removing rings,
watches, and ties is advisable.)
Right after driving, the engine
compartmentthe engine, radiator,
exhaust manifold, power steering
fluid reservoir and spark plug
boots, etc.will be hot. So be care-
ful not to touch them. Oil, fluids
and spark plugs may also be hot.
If the engine is hot, do not remove
the radiator cap or loosen the drain
plugs to prevent burning yourself.
Do not smoke, cause sparks or al-
low open flames around fuel or the
battery. Their fumes are flammable.
Be extremely cautious when work-
ing on the battery. It contains poi-
sonous and corrosive sulfuric acid.
Do not get under your vehicle with
just the body jack supporting it. Al-
ways use automotive jack stands or
other solid supports.
Use eye protection whenever you
work on or under your vehicle
where you may be exposed to flying
or falling material, fluid spray, etc.
Used engine oil contains potentially
harmful contaminants which may
cause skin disorders such as in-
flammation or skin cancer, so care
should be taken to avoid prolonged
and repeated contact with it. To re-
move used engine oil from your
skin, wash thoroughly with soap
and water.
Do not leave used oil within the
reach of children.
Dispose of used oil and filter only
in a safe and acceptable manner.
Do not dispose of used oil and fil-
ter in household trash, in sewers or
onto the ground. Call your dealer or
a service station for information
concerning recycling or disposal.
NOTICE
zRemember that battery and ignition
cables carry high currents or volt-
ages. Be careful of accidentally
causing a short circuit.
zAdd only demineralized or distilled
water to fill the radiator. And if you
spill some of the coolant, be sure
to wash it off with water to prevent
it from damaging the parts or paint.
zDo not allow dirt or anything else
to fall through the spark plug holes.
zDo not pry the outer electrode of a
spark plug against the center elec-
trode.
zUse only spark plugs of the speci-
fied type. Using other types will
cause engine damage, loss of per-
formance or radio noise.
zDo not overfill automatic transmis-
sion fluid, or the transmission
could be damaged.

’01 4Runner_U (L/O 0008)
255
2001 4RUNNER (OM35768U)
zDo not drive with the air cleaner
filter removed, or excessive engine
wear could result. Also backfiring
could cause a fire in the engine
compartment.
zBe careful not to scratch the glass
surface with the wiper frame.
zWhen closing the engine hood,
check to see that you have not for-
gotten any tools, rags, etc.
Parts and tools
Here is a list of parts and tools you will
need on performing do−it−yourself mainte-
nance. Remember all Toyota parts are de-
signed in metric sizes, so your tools must
be metric.
Checking the engine oil level
Parts (if level is low):
Engine oil API grade SJ,
Energy−Conserving" or ILSAC
multigrade having viscosity proper for
your climate
Tools:
Rag or paper towel
Funnel (only for adding oil)
Checking the engine coolant level
Parts (if level is low):
TOYOTA Long Life Coolant" or equiva-
lent
See Section 7−2 for details about cool-
ant type selection.
Demineralized or distilled water
Tools:
Funnel (only for adding coolant)
Checking brake fluid
Parts (if level is low):
SAE J1703 or FMVSS No.116 DOT 3
brake fluid
Tools:
Rag or paper towel
Funnel (only for adding fluid)
Checking power steering fluid
Parts (if level is low):
Automatic transmission fluid
DEXRONII or III
Tools:
Rag or paper towel
Funnel (only for adding fluid)
Checking battery condition
Tools:
Warm water
Baking soda
Grease
Conventional wrench (for terminal
clamp bolts)
Checking and replacing fuses
Parts (if replacement is necessary):
Fuse with same amperage rating as
original
Tools:
Conventional wrench (for instrument
lower panel nut)

’01 4Runner_U (L/O 0008)
256 2001 4RUNNER (OM35768U)
Adding washer fluid
Parts:
Water
Washer fluid containing antifreeze
(for winter use)
Tools:
Funnel
Replacing light bulbs
Parts:
Bulb with same number and wattage
rating as original (See charts in Re-
placing light bulbs" in Section 7−3.)
Tools:
Screwdriver

’01 4Runner_U (L/O 0008)
1
2001 4RUNNER (OM35768U)
DO−IT−YOURSELF MAINTENANCE
Engine and Chassis
Checking the engine oil level 2. . . . . . . . . . . . . . . . . . . . . . . . . . . . . . . . . . .
Checking the engine coolant level 3. . . . . . . . . . . . . . . . . . . . . . . . . . . . . .
Checking brake fluid 4. . . . . . . . . . . . . . . . . . . . . . . . . . . . . . . . . . . . . . . . . .
Checking power steering fluid 5. . . . . . . . . . . . . . . . . . . . . . . . . . . . . . . . . .
Checking tire pressure 6. . . . . . . . . . . . . . . . . . . . . . . . . . . . . . . . . . . . . . . .
Checking and replacing tires 7. . . . . . . . . . . . . . . . . . . . . . . . . . . . . . . . . . .
Rotating tires 8. . . . . . . . . . . . . . . . . . . . . . . . . . . . . . . . . . . . . . . . . . . . . . . . .
Installing snow tires and chains 9. . . . . . . . . . . . . . . . . . . . . . . . . . . . . . . .
Replacing wheels 10. . . . . . . . . . . . . . . . . . . . . . . . . . . . . . . . . . . . . . . . . . . .
Aluminum wheel precautions 11. . . . . . . . . . . . . . . . . . . . . . . . . . . . . . . . .
SECTION 7− 2
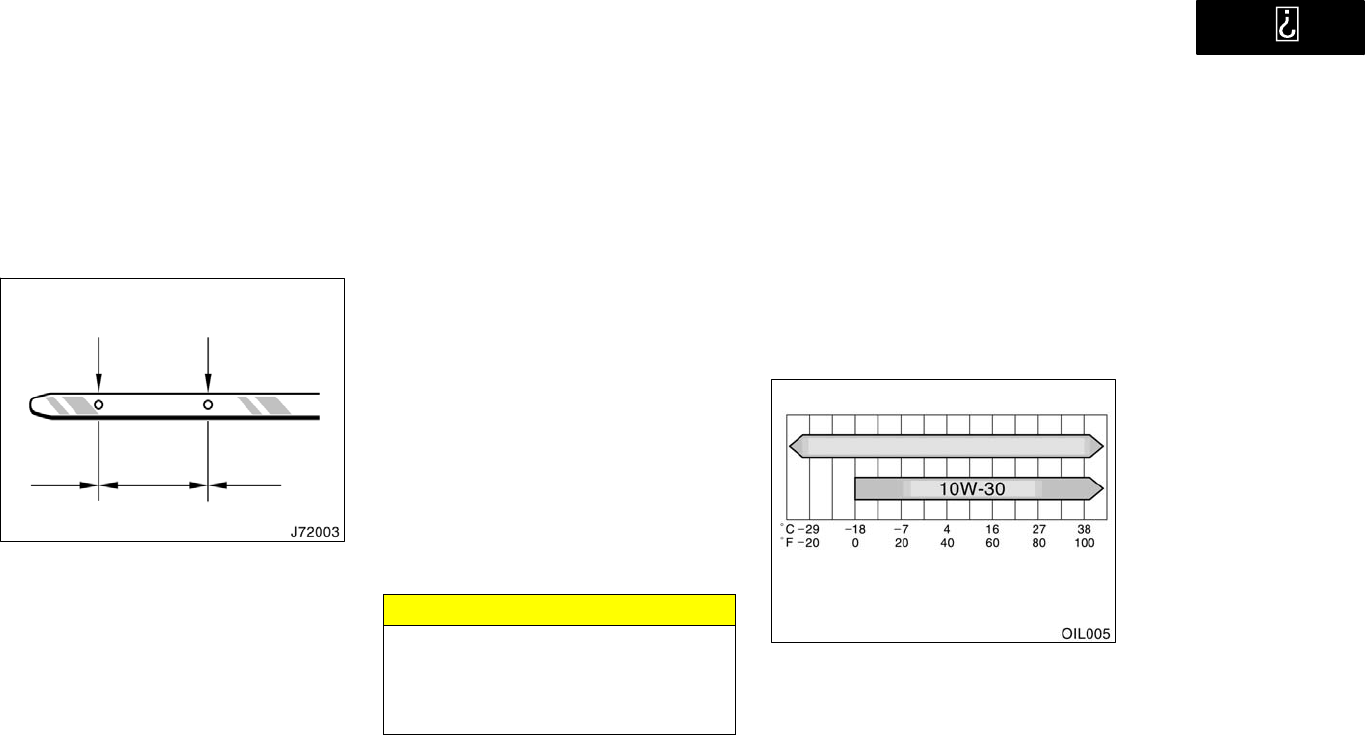
’01 4Runner_U (L/O 0008)
22001 4RUNNER (OM35768U)
Checking the engine oil level
Low level Full level
Add oil O.K. Too full
With the engine at operating tempera-
ture and turned off, check the oil level
on the dipstick.
1. To get a true reading, the vehicle
should be on a level spot. After turning
off the engine, wait a few minutes for
the oil to drain back into the bottom of
the engine.
2. Pull out the dipstick, and wipe it clean
with a rag.
3. Reinsert the dipstickpush it in as far
as it will go, or the reading will not be
correct.
4. Pull the dipstick out and look at the oil
level on the end.
If the oil level is below or only slightly
above the low level, add engine oil of
the same type as already in the engine.
Remove the oil filler cap and add engine
oil in small quantities at a time, checking
the dipstick.
The approximate quantity of oil needed to
fill between the low level and the full level
on the dipstick is indicated below for ref-
erence.
When the level reaches within the correct
range, install the filler cap hand−tight.
Oil quantity, L (qt., lmp. qt.):
1.2(1.3,1.1)
NOTICE
zAvoid overfilling, or the engine
could be damaged.
zCheck the oil level on the dipstick
once again after adding the oil.
ENGINE OIL SELECTION
Use API grade SJ, Energy−Conserving"
or ILSAC multigrade engine oil.
Recommended viscosity (SAE):
5W-30 Preferred
Temperature range anticipated before
next oil change
SAE 5W−30 is the best choice for your
vehicle, for good fuel economy and
good starting in cold weather.
If you use SAE 10W−30 engine oil in
extremely low temperatures, the engine
may become difficult to start, so SAE
5W−30 engine oil is recommended.
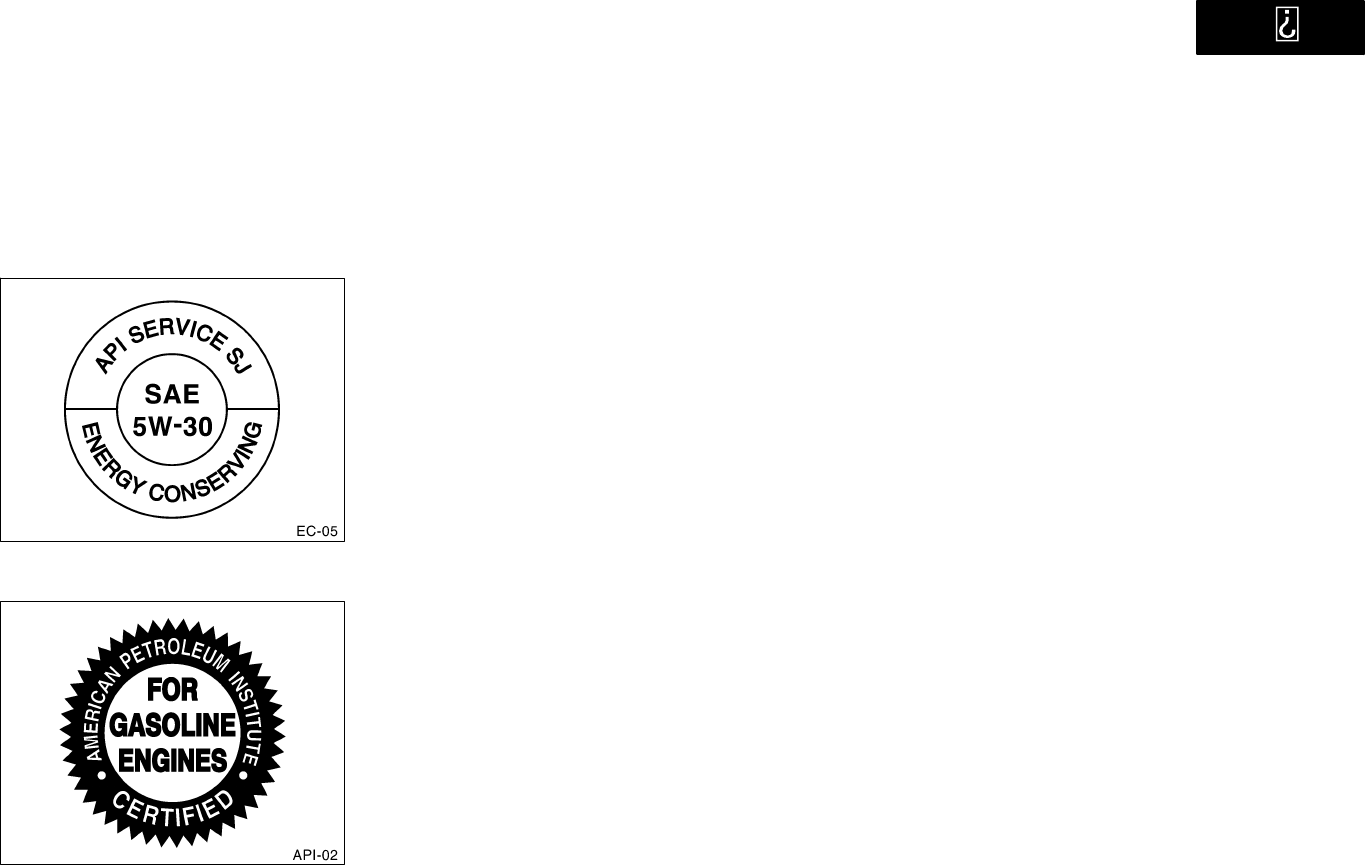
’01 4Runner_U (L/O 0008)
3
2001 4RUNNER (OM35768U)
API service symbol
ILSAC certification mark
Oil identification marks
Either or both API registered marks are
added to some oil containers to help
you select the oil you should use.
The API Service Symbol is located any-
where on the outside of the container.
The top portion of the label shows the oil
quality by API (American Petroleum Insti-
tute) designations such as SJ. The center
portion of the label shows the SAE viscos-
ity grade such as SAE 5W−30. Energy−
Conserving" shown in the lower portion,
indicates that the oil has fuel−saving ca-
pabilities.
The ILSAC (International Lubricant Stan-
dardization and Approval Committee) Certi-
fication Mark is displayed on the front of
the container.
Look at the see−through coolant reser-
voir when the engine is cold. The cool-
ant level is satisfactory if it is between
the F" and L" lines on the reservoir.
If the level is low, add ethylene−glycol
type coolant for a proper corrosion
protection of aluminum components.
The coolant level in the reservoir will vary
with engine temperature. However, if the
level is on or below the L" line, add
coolant. Bring the level up to the F" line.
Always use ethylene−glycol type coolant
for a proper corrosion protection of alumi-
num components. See information in the
next column.
If the coolant level drops within a short
time after replenishing, there may be a
leak in the system. Visually check the
radiator, hoses, radiator cap and drain
cock and water pump.
If you can find no leak, have your Toyota
dealer test the cap pressure and check
for leaks in the cooling system.
Checking the engine coolant
level
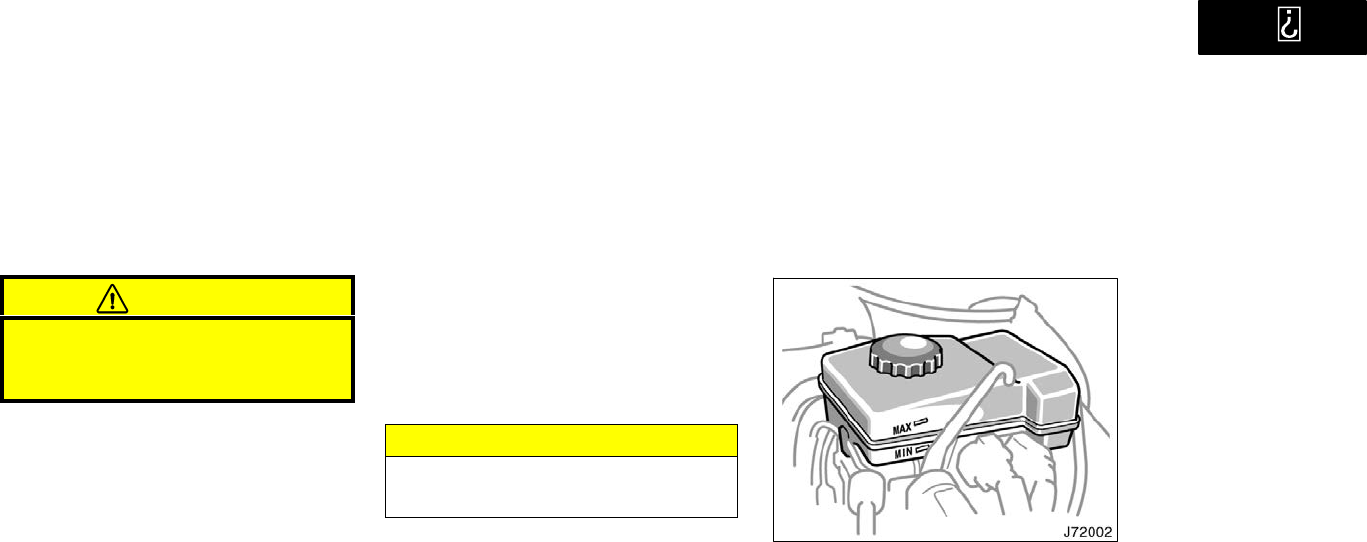
’01 4Runner_U (L/O 0008)
42001 4RUNNER (OM35768U)
CAUTION
To prevent burning yourself, do not
remove the radiator cap when the en-
gine is hot.
Coolant type selection
Use of improper coolants may damage
your engine cooling system. Your coolant
must contain ethylene−glycol type coolant
for a proper corrosion protection of your
engine that contains aluminum
components. Use TOYOTA Long Life
Coolant" or equivalent.
In addition to preventing freezing and
subsequent damage to the engine, this
type of coolant will also prevent corrosion.
Further supplemental inhibitors or additives
are neither needed nor recommended.
Read the coolant container for information
on freeze protection. Follow the manufac-
turer’s directions for how much to mix
with plain water (preferably demineralized
water or distilled water). The total capacity
of the cooling system is given in Section
8.
We recommend to use 50% solution for
your Toyota, to provide protection down to
about −35C (−31F). When it is extreme-
ly cold, to provide protection down to
about −50C (−58F), 60% solution is rec-
ommended. Do not use more than 70%
solution for better coolant performance.
NOTICE
Do not use alcohol type antifreeze or
plain water alone.
Checking brake fluid
To check the fluid level, simply look at
the see−through reservoir. The level
should be between the MAX" and
MIN" lines on the reservoir.
It is normal for the brake fluid level to go
down slightly as the brake pads wear or
when the fluid level in the accumulator is
high.
If the reservoir needs frequent refilling, it
may indicate a serious mechanical prob-
lem.
If the level is low, add SAE J1703 or
FMVSS No.116 DOT 3 brake fluid to the
brake reservoir.
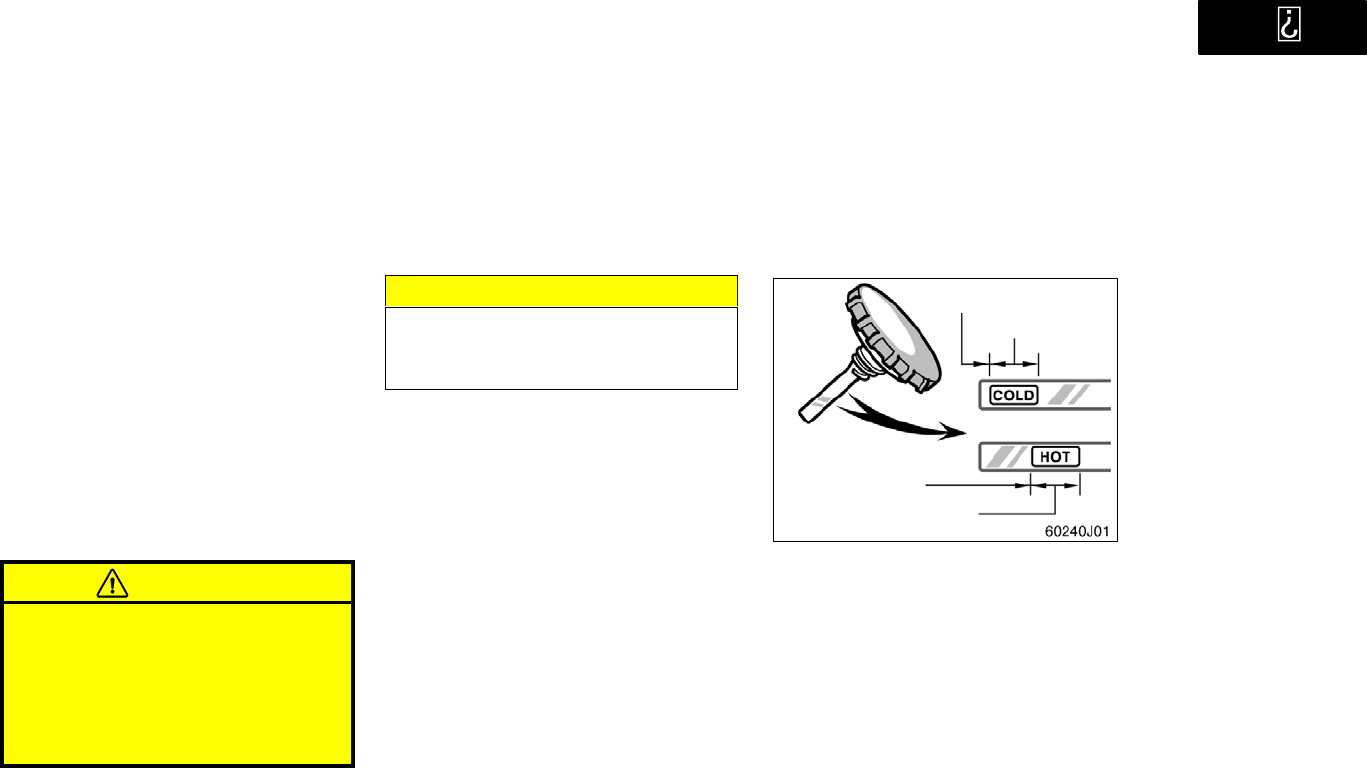
’01 4Runner_U (L/O 0008)
5
2001 4RUNNER (OM35768U)
Refilling brake fluid:
1. Turn the ignition switch off.
2. Depress the brake pedal more than 40
times.
3. Remove the reservoir cover by hand.
Add brake fluid up to the MAX" line.
If you do not follow the procedure above,
the reservoir may overflow.
Use only newly opened brake fluid. Once
opened, brake fluid absorbs moisture from
the air, and excess moisture can cause a
dangerous loss of braking.
CAUTION
Take care when filling the reservoir
because brake fluid can harm your
eyes and damage painted surfaces. If
fluid gets in your eyes, flush your
eyes with clean water immediately. If
you still feel uncomfortable with your
eyes, go to the doctor.
NOTICE
If you spill the fluid, be sure to wash
it off with water to prevent it from
damaging the parts or paint.
Checking power steering fluid
If cold add
If cold O.K.
If hot add
If hot O.K.
Check the fluid level on the dipstick. If
necessary, add automatic transmission
fluid DEXRONII or III.
If the vehicle has been driven around 80
km/h (50 mph) for 20 minutes (a little
more in frigid temperatures), the fluid is
hot (60C80C or 140F175F). You
may also check the level when the fluid
is cold (about room temperature,
10C30C or 50F85F) if the engine
has not been run for about five hours.
a. Clean all dirt from outside of the reser-
voir tank.
b. Remove the reservoir cap by turning it
counterclockwise and wipe the dipstick
clean.
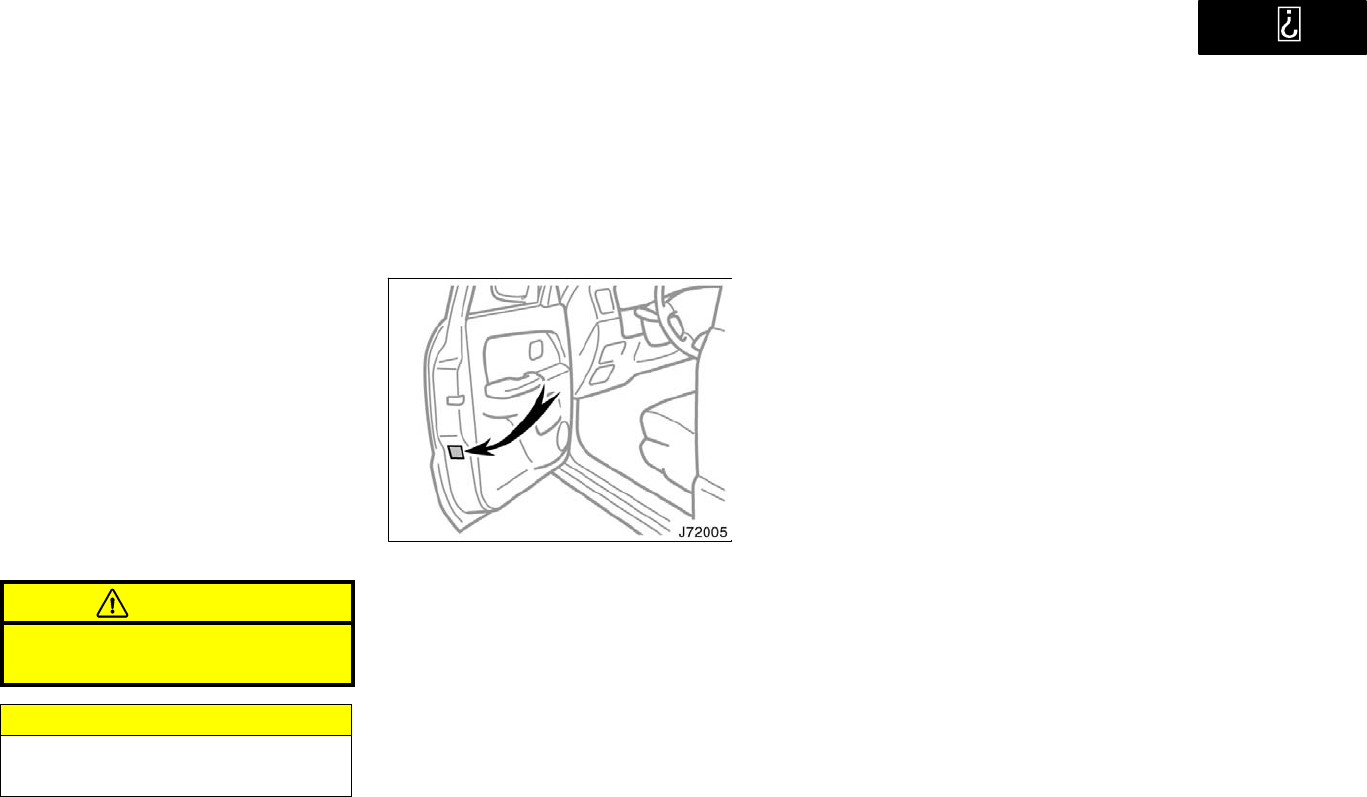
’01 4Runner_U (L/O 0008)
62001 4RUNNER (OM35768U)
c. Reinstall the reservoir cap.
d. Remove the reservoir cap again and
look at the fluid level. If the fluid is cold,
the level should be in the COLD" range
on the dipstick. Similarly, if it is hot, the
fluid level should be in the HOT" range.
If the level is at the low side of either
range, add automatic transmission fluid
DEXRONII or III to bring the level within
the range.
e. After replacing the reservoir cap, visu-
ally check the steering box case, vane
pump and hose connections for leaks or
damage.
CAUTION
The reservoir tank may be hot so be
careful not to burn yourself.
NOTICE
Avoid overfilling, or the power steer-
ing could be damaged.
Checking tire pressure
Keep your tire pressures at the proper
level.
The recommended cold tire pressures, tire
size and the vehicle capacity weight are
given in Section 8. The recommended tire
pressures and tire size are also on the
tire pressure label as shown.
You should check the tire pressures every
two weeks, or at least once a month. And
do not forget the spare!
Incorrect tire pressure can reduce tire
life and make your vehicle less safe to
drive.
Low tire pressure results in excessive
wear, poor handling, reduced fuel econo-
my, and the possibility of blowouts from
overheated tires. Also, low tire pressure
can cause poor sealing of the tire bead.
If the tire pressure is excessively low,
there is the possibility of wheel deforma-
tion and/or tire separation.
High tire pressure produces a harsh ride,
handling problems, excessive wear at the
center of the tire tread, and a greater
possibility of tire damage from road haz-
ards.
If a tire frequently needs refilling, have it
checked by your Toyota dealer.
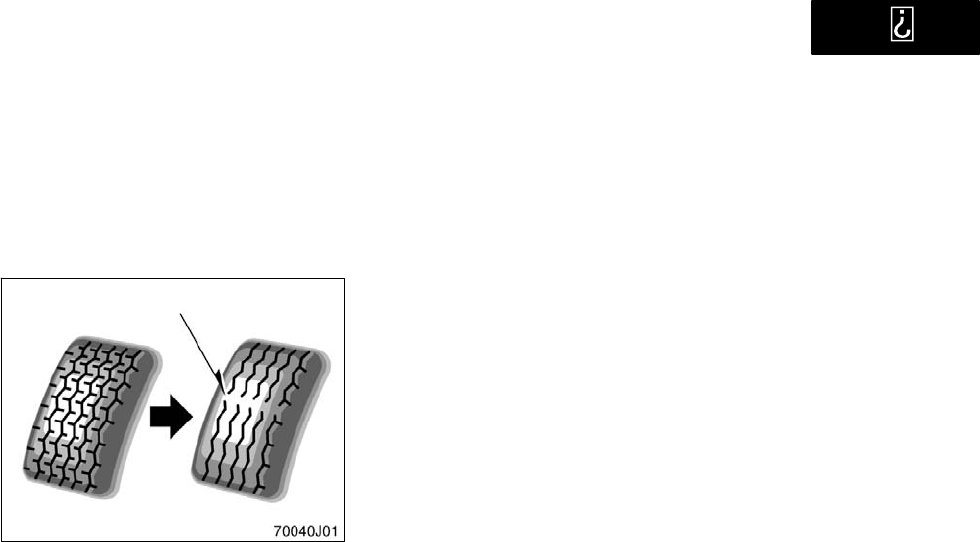
’01 4Runner_U (L/O 0008)
7
2001 4RUNNER (OM35768U)
The following instructions for checking
tire pressure should be observed:
The pressure should be checked only
when the tires are cold. If your ve-
hicle has been packed for at least 3
hours and has not been driven for
more than 1.5 km or 1 mile since, you
will get an accurate cold tire pressure
reading.
Always use a tire pressure gauge.
The appearance of a tire can be mis-
leading. Besides, tire pressures that
are even just a few pounds off can
degrade ride and handling.
Do not bleed or reduce tire pressure
after driving. It is normal for the tire
pressure to be higher after driving.
Never exceed the vehicle capacity
weight. The passenger and luggage
weight should be located so that the
vehicle is balanced.
Be sure to reinstall the tire inflation
valve caps. Without the valve caps,
dirt or moisture could get into the valve
core and cause air leakage. If the caps
have been lost, have new ones put on
as soon as possible.
Checking and replacing tires
Tread wear indicator
CHECKING YOUR TIRES
Check the tire tread for the tread wear
indicators. If the indicators show, re-
place the tires.
The tires on your Toyota have built−in
tread wear indicators to help you know
when the tires need replacement. When
the tread depth wears to 1.6 mm (0.06
in.) or less, the indicators will appear. If
you can see the indicators in two or more
adjacent grooves, the tire should be re-
placed. The lower the tread, the higher
the risk of skidding.
The effectiveness of snow tires is lost
if the tread wears down below 4 mm
(0.16 in.).
Check the tires regularly for damage
such as cuts, splits and cracks. If any
damage is found, consult with a techni-
cian and have the tire repaired or re-
placed.
Even if the damage does not appear seri-
ous, a qualified technician should examine
the damage. Objects which have pene-
trated the tire may have caused internal
damage.
Any tires which are over 6 years old
must be checked by a qualified techni-
cian even if damage is not obvious.
Tires deteriorate with age even if they
have never or seldom been used.
This also applies to the spare tire and
tires stored for future use.
REPLACING YOUR TIRES
When replacing a tire, use only the
same size and construction as original-
ly installed and with the same or great-
er load capacity.
Using any other size or type of tire may
seriously affect handling, ride, speedome-
ter/odometer calibration, ground clearance,
and clearance between the body and tires
or snow chains.
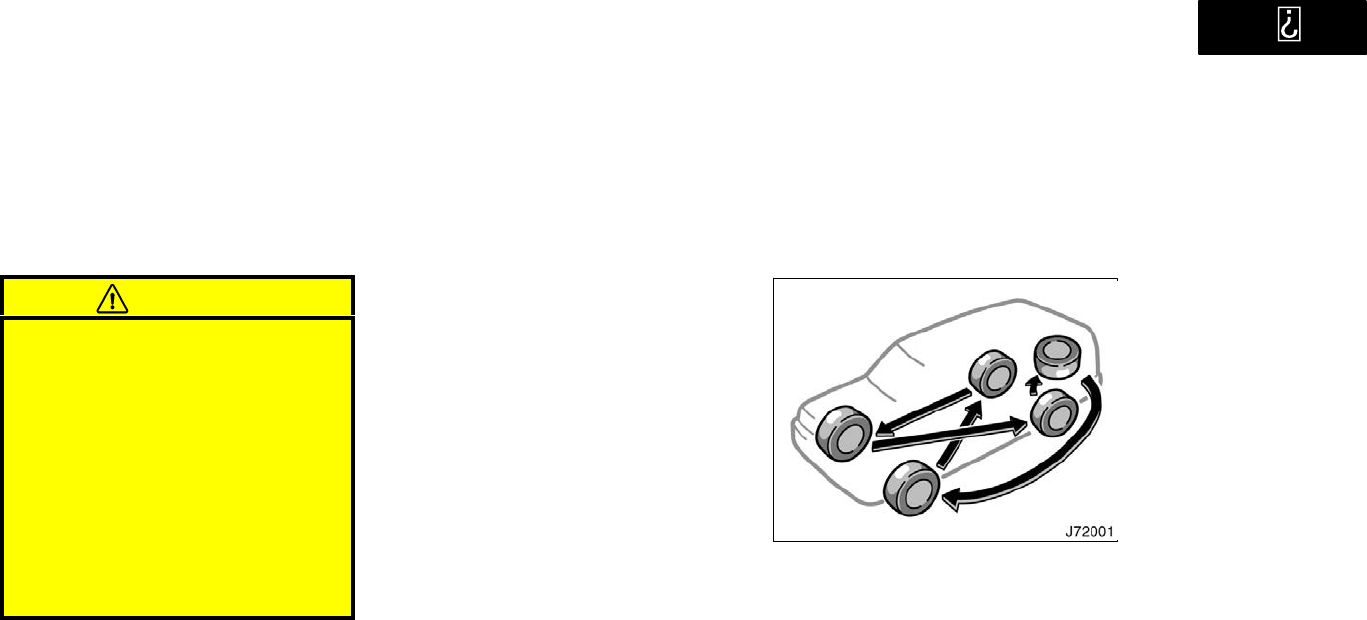
’01 4Runner_U (L/O 0008)
82001 4RUNNER (OM35768U)
CAUTION
Do not mix radial, bias belted, or
bias−ply tires on your vehicle. It
can cause dangerous handling char-
acteristics, resulting in loss of con-
trol.
Do not use tires or wheels other
than the manufacture’s recom-
mended size.
Do not use tires of different brands,
sizes and constructions. This may
damage the drive system and pre-
vent the vehicle skid control system
from functioning correctly.
Toyota recommends all four tires, or at
least both front or rear tires be re-
placed as a set.
See If you have a flat tire" in Section 4
for tire change procedure.
When a tire is replaced, the wheel
should always be balanced.
An unbalanced wheel may affect vehicle
handling and tire life. Wheels can get out
of balance with regular use and should
therefore be balanced occasionally.
When replacing a tubeless tire, the air
valve should also be replaced with a
new one.
Rotating tires
To equalize the wear and help extend
tire life, Toyota recommends that you
rotate your tires according to the main-
tenance schedule. (For scheduled main-
tenance information, please refer to the
Scheduled Maintenance Guide" or
Owner’s Manual Supplement".) Howev-
er, the most appropriate timing for tire
rotation may vary according to your
driving habits and road surface condi-
tions.
See If you have a flat tire" in Section 4
for tire change procedure.
’01 4Runner_U (L/O 0008)
9
2001 4RUNNER (OM35768U)
When rotating tires, check for uneven
wear and damage. Abnormal wear is usu-
ally caused by incorrect tire pressure, im-
proper wheel alignment, out−of−balance
wheels, or severe braking.
WHEN TO USE SNOW TIRES OR
CHAINS
Snow tires or chains are recommended
when driving on snow or ice.
On wet or dry roads, conventional tires
provide better traction than snow tires.
SNOW TIRE SELECTION
If you need snow tires, select the same
size, construction and load capacity as
the original tires on your Toyota.
Do not use tires other than those men-
tioned above. Do not install studded tires
without first checking local regulations for
possible restrictions.
SNOW TIRE INSTALLATION
Snow tires should be installed on all
wheels.
Installing snow tires on the front wheels
only can lead to an excessive difference
in road grip capability between the front
and rear tires which could cause loss of
vehicle control.
When storing removed tires, you should
store them in a cool dry place.
Mark the direction of rotation and be sure
to install them in the same direction when
replacing.
CAUTION
Do not drive with the snow tires
incorrectly inflated.
Never drive over 120 km/h (75 mph)
with any type of snow tires.
TIRE CHAIN SELECTION
Use the tire chains of correct size.
Regulations regarding the use of tire
chains vary according to location or
type of road, so always check them
before installing chains.
CHAIN INSTALLATION
Install the chains on the rear tires as
tightly as possible. Do not use tire
chains on the front tires. Retighten
chains after driving 0.51.0 km
(1/41/2 mile).
When installing chains on your tires, care-
fully follow the instructions of the chain
manufacturer.
If wheel covers are used, they will be
scratched by the chain band, so remove
the covers before putting on the chains.
Installing snow tires and
chains
’01 4Runner_U (L/O 0008)
10 2001 4RUNNER (OM35768U)
CAUTION
Do not exceed 50 km/h (30 mph) or
the chain manufacturer’s recom-
mended speed limit, whichever is
lower.
Drive carefully avoiding bumps,
holes, and sharp turns, which may
cause the vehicle to bounce.
Avoid sharp turns or locked−wheel
braking, as use of chains may ad-
versely affect vehicle handling.
When driving with chains installed,
be sure to drive carefully. Slow
down before entering the curves to
avoid losing control of the vehicle.
Otherwise an accident may occur.
Replacing wheels
WHEN TO REPLACE YOUR WHEELS
If you have wheel damage such as
bending, cracks or heavy corrosion, the
wheel should be replaced.
If you fail to replace damaged wheels, the
tire may slip off the wheel or cause loss
of handling control.
WHEEL SELECTION
When replacing wheels, care should be
taken to ensure that the wheels are re-
placed by ones with the same load ca-
pacity, diameter, rim width, and offset.
Correct replacement wheels are available
at your Toyota dealer.
A wheel of a different size or type may
adversely affect handling, wheel and bear-
ing life, brake cooling, speedometer/odom-
eter calibration, stopping ability, headlight
aim, bumper height, vehicle ground clear-
ance, and tire or snow chain clearance to
the body and chassis.
Replacement with used wheels is not rec-
ommended as they may have been sub-
jected to rough treatment or high mileage
and could fail without warning. Also, bent
wheels which have been straightened may
have structural damage and therefore
should not be used. Never use an inner
tube in a leaking wheel which is designed
for a tubeless tire.

’01 4Runner_U (L/O 0008)
11
2001 4RUNNER (OM35768U)
Aluminum wheel precautions
When installing aluminum wheels,
check that the wheel nuts are tight
after driving your vehicle the first 1600
km (1000 miles).
If you have rotated, repaired or
changed your tires, check that the
wheel nuts are still tight after driving
1600 km (1000 miles).
When using tire chains, be careful not
to damage the aluminum wheels.
Use only the Toyota wheel nuts and
wrench designed for your aluminum
wheels.
When balancing your wheels, use only
Toyota balance weights or equivalent
and a plastic or rubber hammer.
As with any wheel, periodically check
your aluminum wheels for damage. If
damaged, replace immediately.

’01 4Runner_U (L/O 0008)
12 2001 4RUNNER (OM35768U)

’01 4Runner_U (L/O 0008)
257
2001 4RUNNER (OM35768U)
DO−IT−YOURSELF MAINTENANCE
Electrical components
Checking battery condition 258. . . . . . . . . . . . . . . . . . . . . . . . . . . . . . . . . .
Battery recharging precautions 259. . . . . . . . . . . . . . . . . . . . . . . . . . . . . . .
Checking and replacing fuses 260. . . . . . . . . . . . . . . . . . . . . . . . . . . . . . . .
Adding washer fluid 261. . . . . . . . . . . . . . . . . . . . . . . . . . . . . . . . . . . . . . . . .
Replacing light bulbs 262. . . . . . . . . . . . . . . . . . . . . . . . . . . . . . . . . . . . . . . .
SECTION 7− 3
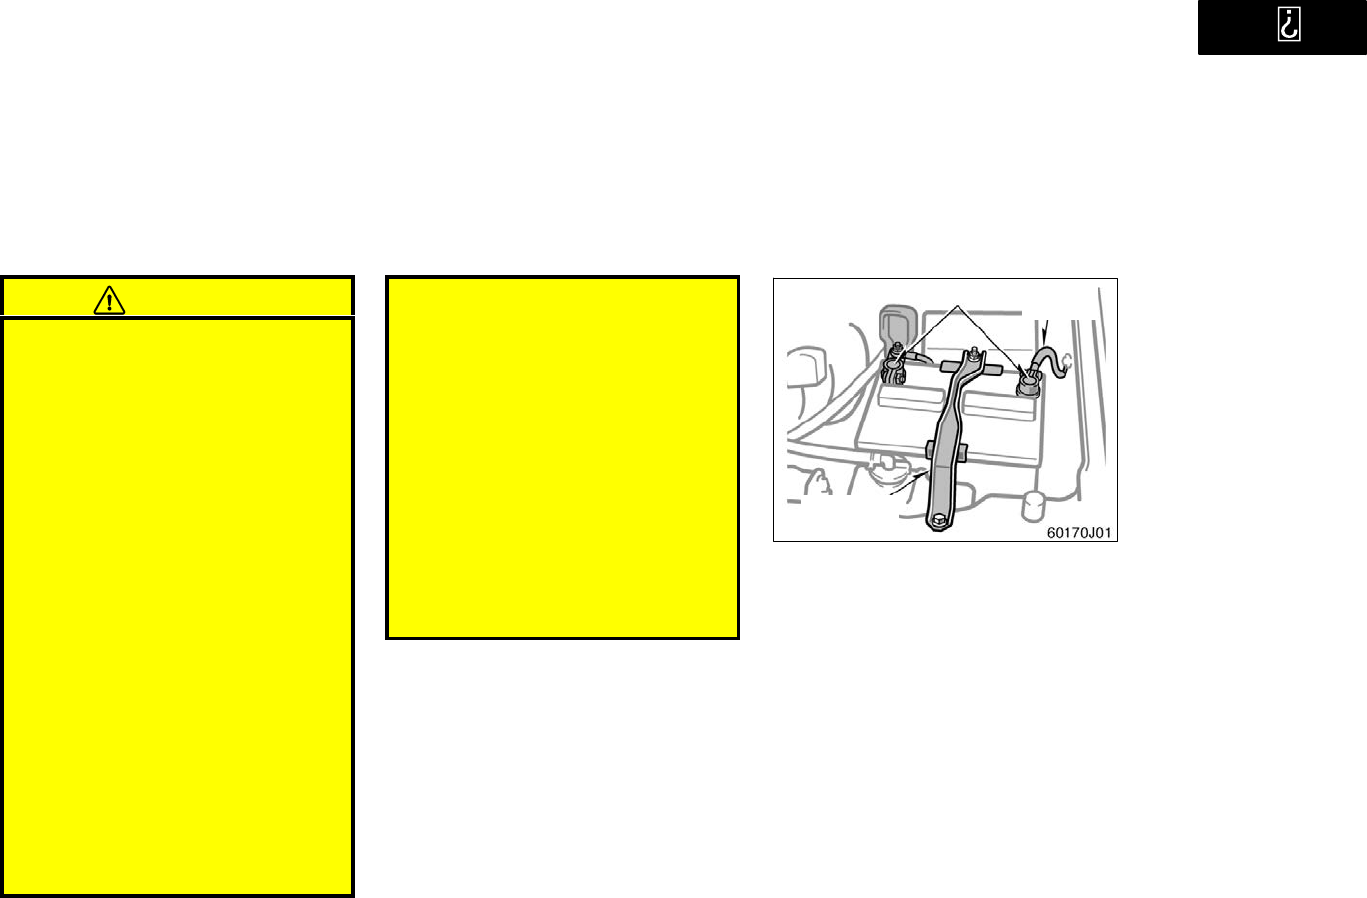
’01 4Runner_U (L/O 0008)
258 2001 4RUNNER (OM35768U)
CAUTION
BATTERY PRECAUTIONS
The battery produces flammable and
explosive hydrogen gas.
Do not cause a spark from the bat-
tery with tools.
Do not smoke or light a match near
the battery.
The electrolyte contains poisonous
and corrosive sulfuric acid.
Avoid contact with eyes, skin or
clothes.
Never ingest electrolyte.
Wear protective safety glasses when
working near the battery.
Keep children away from the bat-
tery.
EMERGENCY MEASURES
If electrolyte gets in your eyes,
flush your eyes with clean water
immediately and get immediate
medical attention. If possible, con-
tinue to apply water with a sponge
or cloth while en route to the medi-
cal office.
If electrolyte gets on your skin,
thoroughly wash the contact area. If
you feel pain or burning, get medi-
cal attention immediately.
If electrolyte gets on your clothes,
there is a possibility of its soaking
through to your skin, so immediate-
ly take off the exposed clothing and
follow the procedure above, if nec-
essary.
If you accidentally swallow electro-
lyte, drink a large quantity of water
or milk. Follow with milk of magne-
sia, beaten raw egg or vegetable
oil. Then go immediately for emer-
gency help.
Checking battery exterior
Terminals Ground
cable
Hold−down
clamp
Check the battery for corroded or loose
terminal connections, cracks, or loose
hold−down clamp.
a. If the battery is corroded, wash it off
with a solution of warm water and bak-
ing soda. Coat the outside of the termi-
nals with grease to prevent further cor-
rosion.
b. If the terminal connections are loose,
tighten their clamp nutsbut do not
overtighten.
c. Tighten the hold−down clamp only
enough to keep the battery firmly in
place. Overtightening may damage the
battery case.
Checking battery condition
Precautions
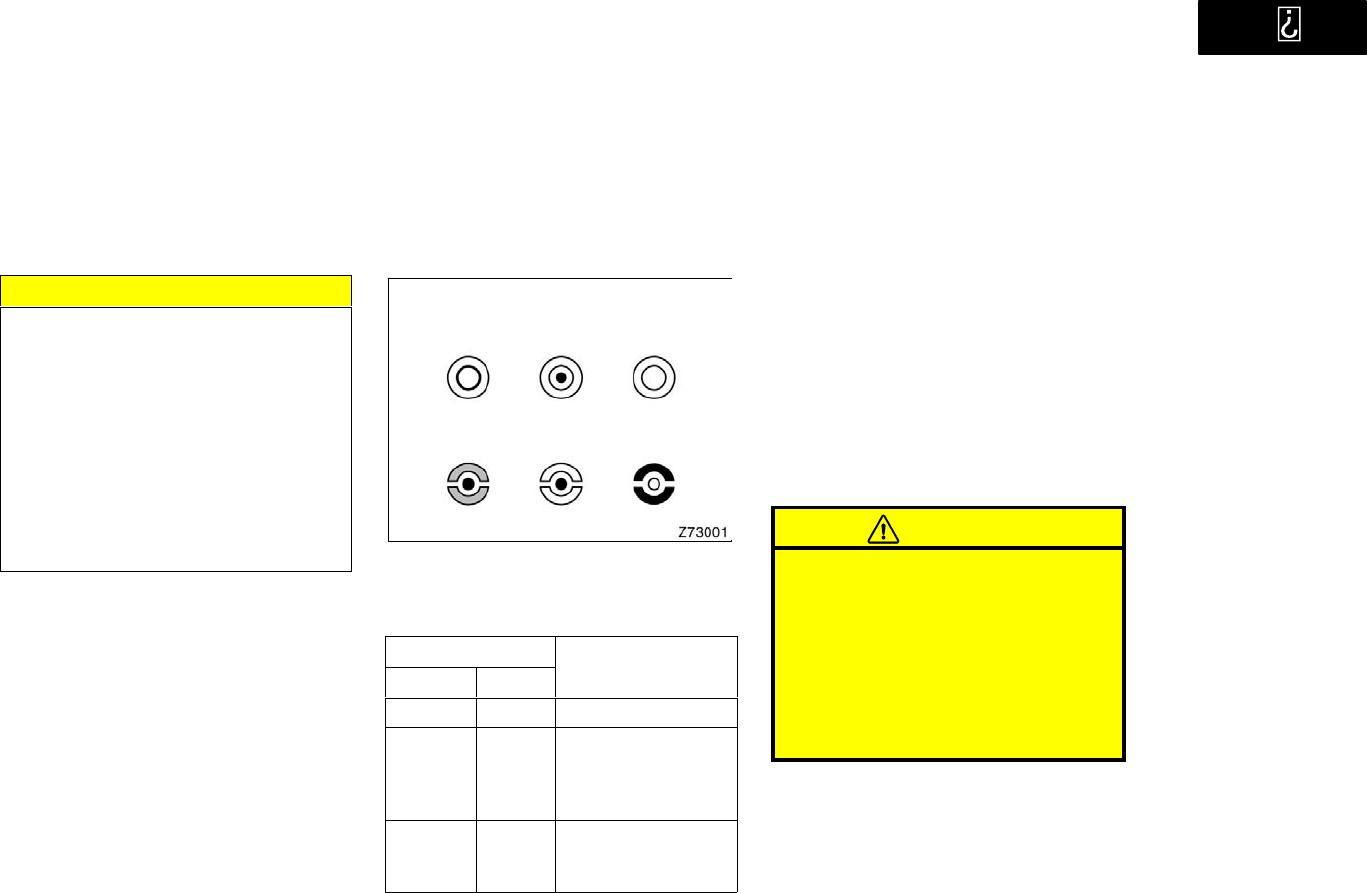
’01 4Runner_U (L/O 0008)
259
2001 4RUNNER (OM35768U)
NOTICE
zBe sure the engine and all accesso-
ries are off before performing main-
tenance.
zWhen checking the battery, remove
the ground cable from the negative
terminal (−" mark) first and rein-
stall it last.
zBe careful not to cause a short cir-
cuit with tools.
zTake care no solution gets into the
battery when washing it.
Checking battery fluid
Type A
Green Dark
Clear or
light yellow
Type B
Blue White Red
CHECKING BY HYDROMETER
Check the battery condition by the
hydrometer color.
Hydrometer color Condition
Type A Type B
Green Blue Good
Dark White
Charging necessary.
Have battery
checked by your
Toyota dealer.
Clear or
light
yellow
Red
Have battery
checked by your
Toyota dealer.
Battery recharging precautions
During recharging, the battery is pro-
ducing hydrogen gas.
Therefore, before recharging:
1. If recharging with the battery installed
on the vehicle, be sure to disconnect
the ground cable.
2. Be sure the power switch on the re-
charger is off when connecting the
charger cables to the battery and when
disconnecting them.
CAUTION
Always charge the battery in an un-
confined area. Do not charge the
battery in a garage or closed room
where there is not sufficient ventila-
tion.
Only do a slow charge (5 A or
less). Charging at a quicker rate is
dangerous. The battery may ex-
plode, causing personal injuries.
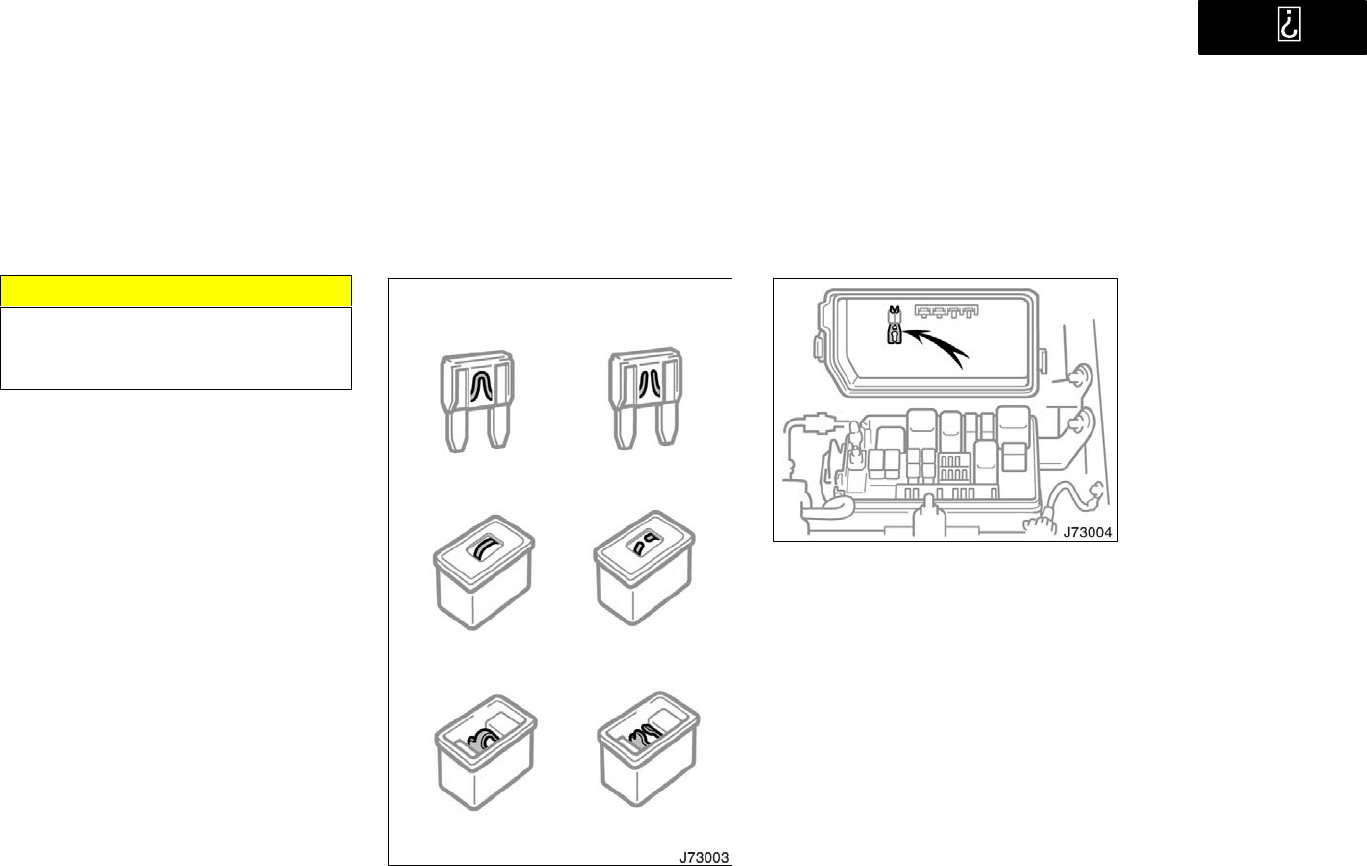
’01 4Runner_U (L/O 0008)
260 2001 4RUNNER (OM35768U)
NOTICE
Never recharge the battery while the
engine is running. Also, be sure all
accessories are turned off.
Checking and replacing fuses
Type A
Type B
Type C
Good
Good
Good
Blown
Blown
Blown
If the headlights or other electrical
components do not work, check the
fuses. If any of the fuses are blown,
they must be replaced.
See Fuse locations" in Section 7−1 for
locations of the fuses.
Turn the ignition switch and inoperative
component off. Pull a suspected fuse
straight out and check it.
Determine which fuse may be causing the
problem. The lid of the fuse box shows
the name of the circuit for each fuse. See
Section 8 of this manual for the functions
controlled by each circuit.
’01 4Runner_U (L/O 0008)
261
2001 4RUNNER (OM35768U)
Type A fuses can be pulled out by using
the pull−out tool. The location of the pull−
out tool is shown in the illustration.
If you are not sure whether the fuse has
blown, try replacing the suspected fuse
with one that you know is good.
If the fuse has blown, push a new fuse
into the clip.
Only install a fuse with the amperage rat-
ing designated on the fuse box lid.
If you do not have a spare fuse, in an
emergency you can pull out the PWR
OUTLET" or A.C" fuse, which may be
dispensable for normal driving, and use it
if its amperage rating is the same.
If you cannot use one of the same amper-
age, use one that is lower, but as close
as possible to the rating. If the amperage
is lower than that specified, the fuse
might blow out again but this does not
indicate anything wrong. Be sure to get
the correct fuse as soon as possible and
return the substitute to its original clip.
It is a good idea to purchase a set of
spare fuses and keep them in your ve-
hicle for emergencies.
If the new fuse immediately blows out,
there is a problem with the electrical sys-
tem. Have your Toyota dealer correct it as
soon as possible.
CAUTION
Never use a fuse with a higher am-
perage rating, or any other object, in
place of a fuse. This may cause ex-
tensive damage and possibly a fire.
Adding washer fluid
If any washer does not work, the wash-
er tank may be empty. Add washer
fluid.
You may use plain water as washer fluid.
However, in cold areas where tempera-
tures range below freezing point, use
washer fluid containing antifreeze. This
product is available at your Toyota dealer
and most auto parts stores. Follow the
manufacturer’s directions for how much to
mix with water.
NOTICE
Do not use engine antifreeze or any
other substitute because it may dam-
age your vehicle’s paint.
’01 4Runner_U (L/O 0008)
262 2001 4RUNNER (OM35768U)
Replacing light bulbs
The following illustrations show how to
gain access to the bulbs. When replacing
a bulb, make sure the ignition switch and
light switch are off. Use bulbs with the
wattage ratings given in the table.
CAUTION
Halogen bulbs have pressurized gas
inside and require special handling.
They can burst or shatter if scratched
or dropped. Hold a bulb only by its
plastic or metal case. Do not touch
the glass part of a bulb with bare
hands.
NOTICE
Only use a bulb of the listed type.
The inside of the lens of exterior lights
such as headlights may temporarily fog up
when the lens becomes wet in the rain or
in a car wash. This is not a problem
because the fogging is caused by the
temperature difference between the outside
and inside of the lens, just like the
windshield fogged up in the rain. However,
if there is a large drop of water on the
inside of the lens, or if there is water
pooled inside the light, contact your
Toyota dealer.
Light bulbs Bulb
No. WType
Headlights 60/55 A
Front fog lights 55 B
Parking and front
side marker lights 5 C
Front turn signal
lights 21 C
Rear turn signal
lights 21 D
Stop/tail lights 21/5 C
Back−up lights 18 C
License plate light 5 C
High mounted
stoplight 921 18 C
Interior light 8 E
Personal lights 8 E
Glove box light 1.4 C
Luggage
compartment light 8 E
A: HB2 halogen bulbs
B: H3 halogen bulbs
C: Wedge base bulbs (clear)
D: Wedge base bulbs (amber)
E: Double end bulbs
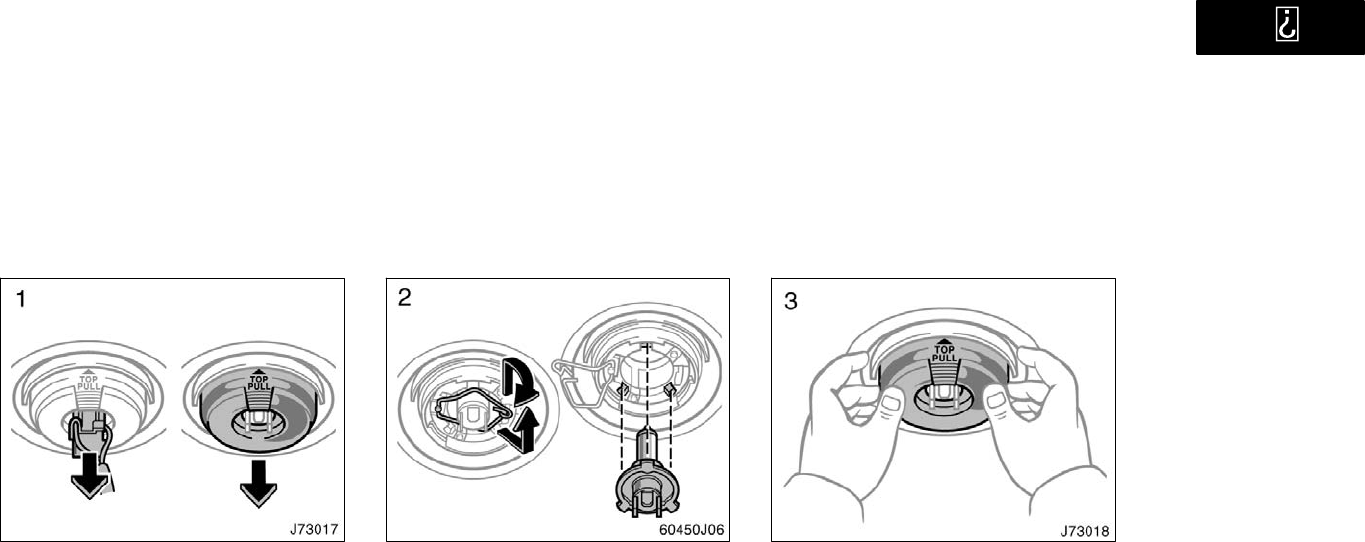
’01 4Runner_U (L/O 0008)
263
2001 4RUNNER (OM35768U)
Headlights
1. Open the hood. Unplug the connec-
tor. Remove the rubber cover.
If the connector is tight, wiggle it.
2. Release the bulb retaining spring
and remove the bulb. Install a new
bulb and the bulb retaining spring.
To install a bulb, align the tabs of the
bulb with the cutouts of the mounting
hole.
3. Install the rubber cover with the
TOP" mark upward, and snuggle on
the boss. Insert the connector.
Make sure the rubber cover fits snugly on
the connector and the headlight body.
Aiming is not necessary after replacing
the bulb. When aiming adjustment is nec-
essary, contact your Toyota dealer.
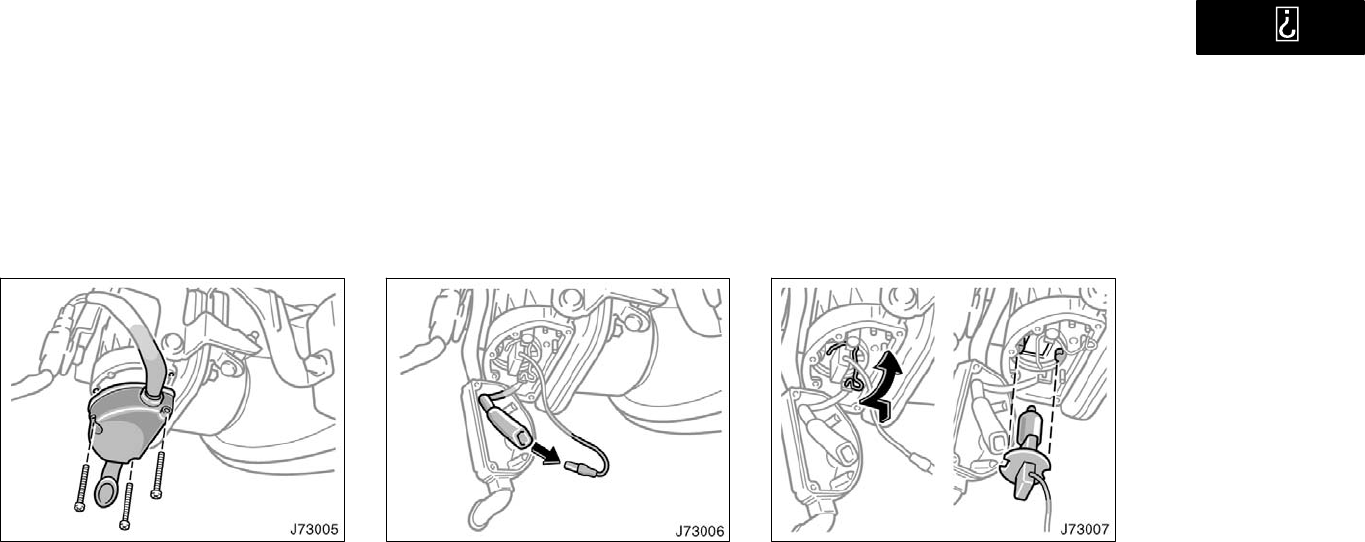
’01 4Runner_U (L/O 0008)
264 2001 4RUNNER (OM35768U)
Front fog lights
1. Loosen the cover retaining screws
and remove the cover.
2. Lift up the soft casing and discon-
nect the cords.
3. Release the bulb retaining spring
and remove the bulb. Install a new
bulb and the bulb retaining spring.
To install the bulb, align the cutouts of the
bulb with the protrusions of the mounting
hole.
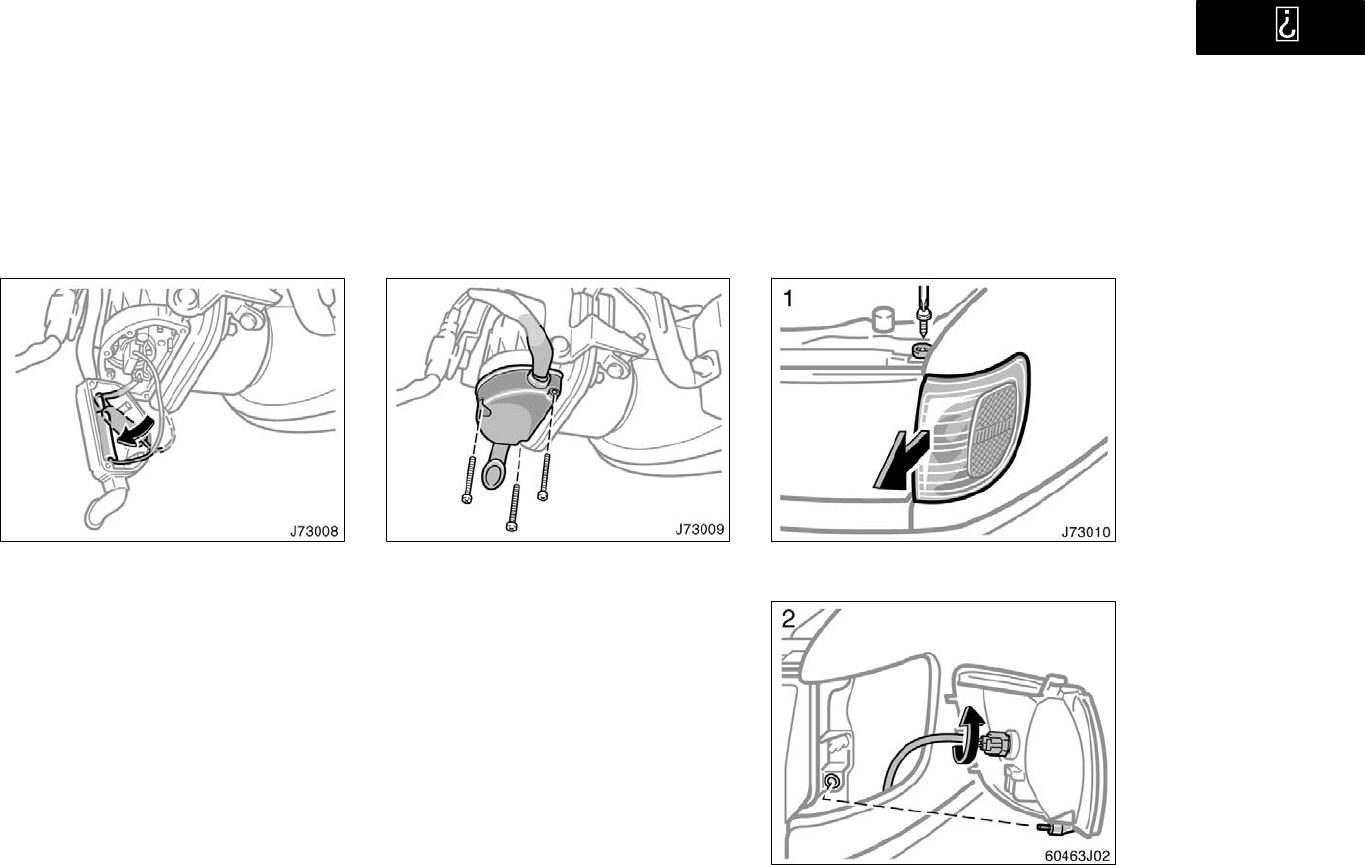
’01 4Runner_U (L/O 0008)
265
2001 4RUNNER (OM35768U)
4. Connect the cord and put the soft
casing into the cover.
5. Install the cover with the retaining
screws.
Aiming is not necessary after replacing
the bulb. When aiming adjustment is nec-
essary, contact your Toyota dealer.
Use a Phillips−head screwdriver.
Parking and front side
marker lights
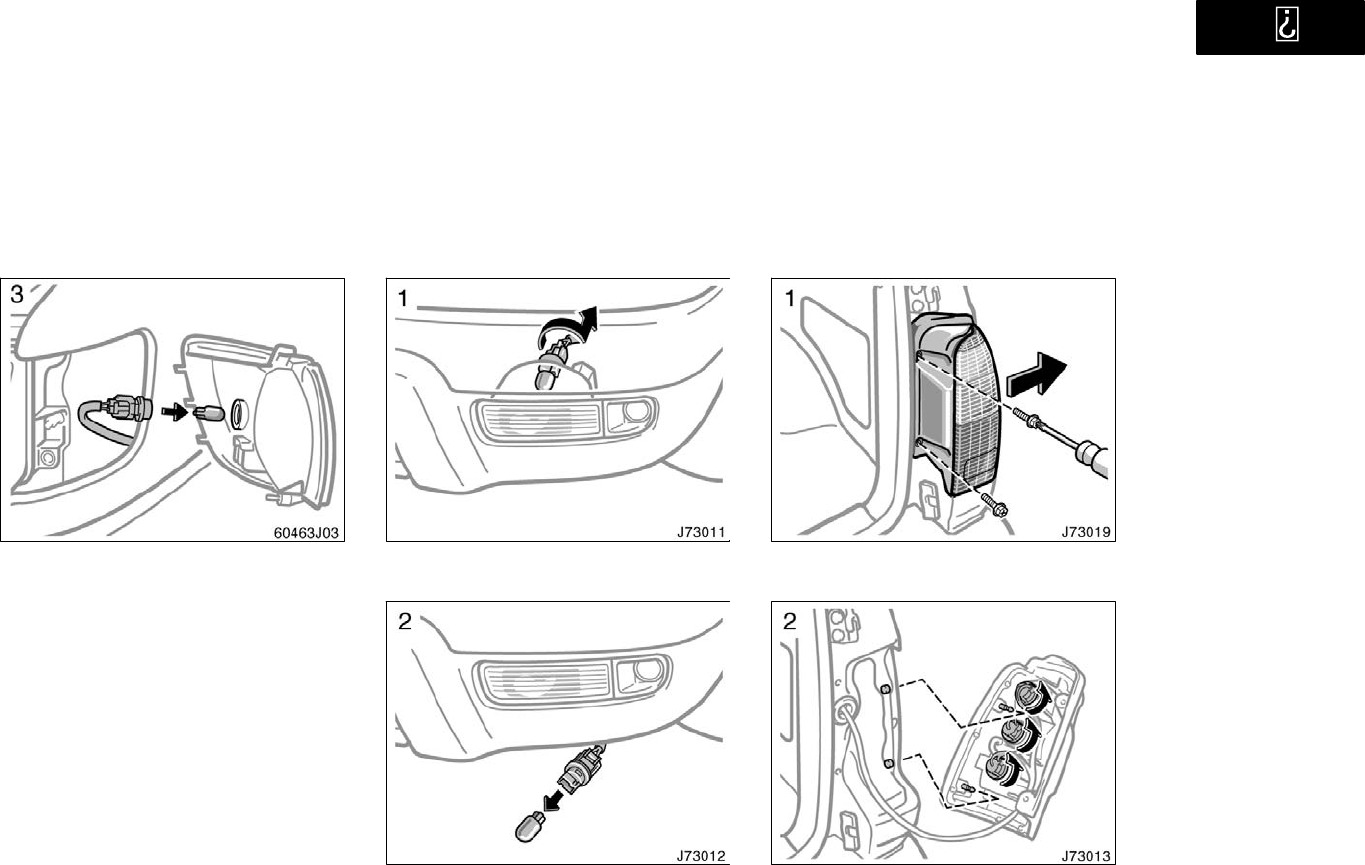
’01 4Runner_U (L/O 0008)
266 2001 4RUNNER (OM35768U)
Front turn signal lights
Use a Phillips−head screwdriver.
Rear turn signal, stop/tail,
and back−up lights
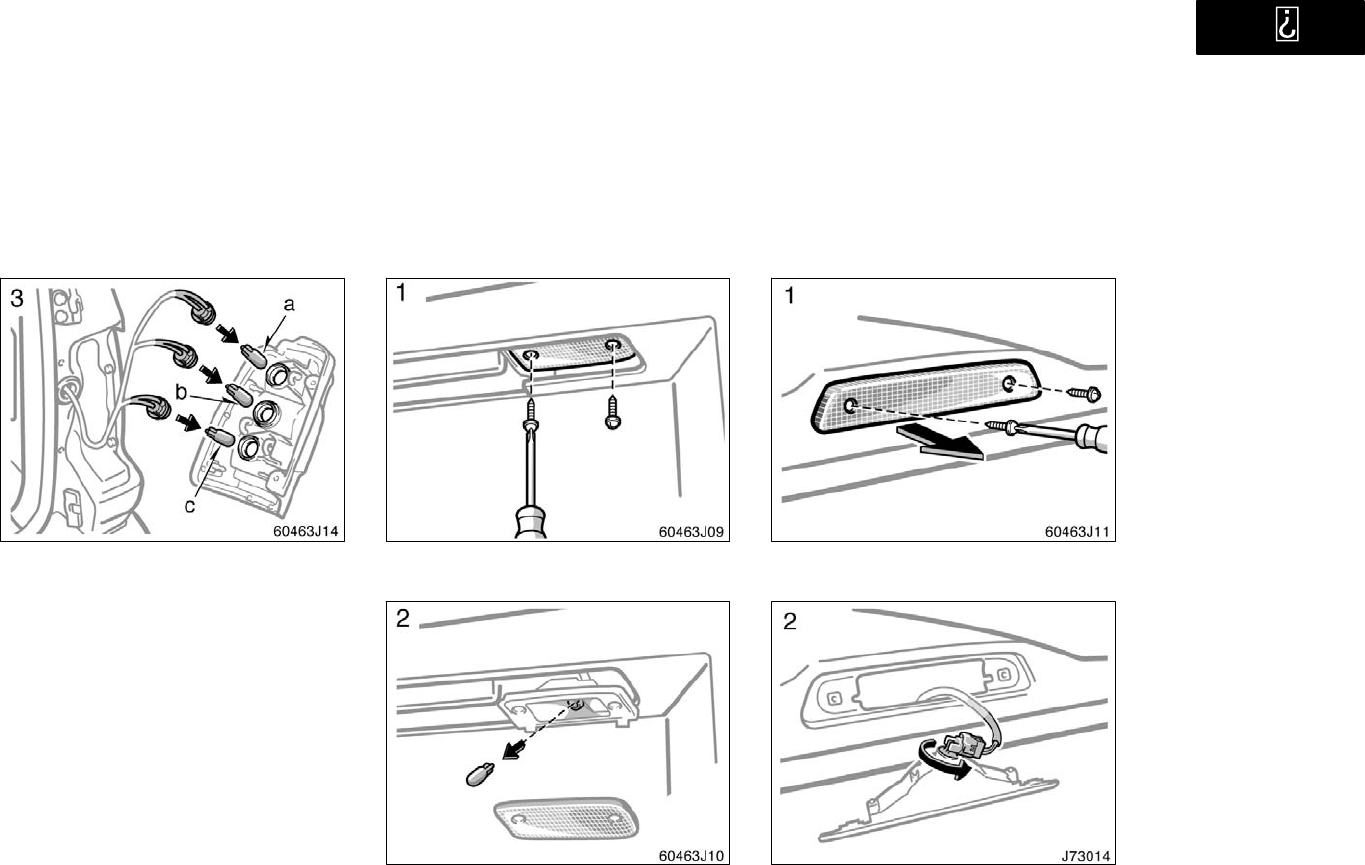
’01 4Runner_U (L/O 0008)
267
2001 4RUNNER (OM35768U)
a: Back−up light
b: Rear turn signal lights
c: Stop/tail light
License plate lights
Use a Phillips−head screwdriver.
High mounted stoplight
Use a Phillips−head screwdriver.
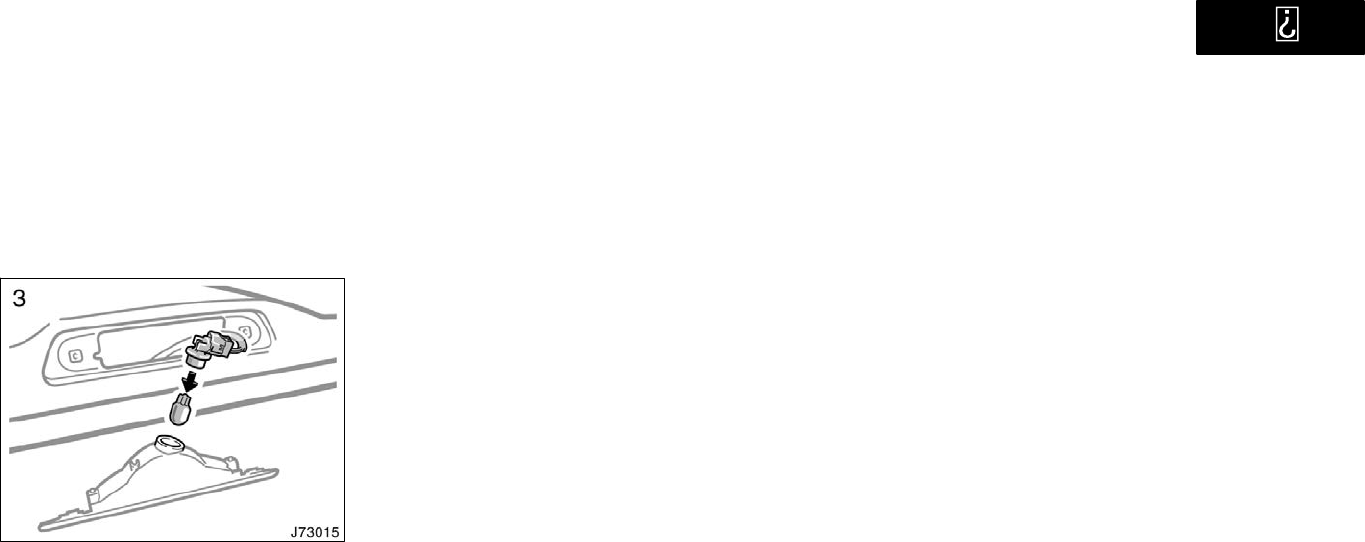
’01 4Runner_U (L/O 0008)
268 2001 4RUNNER (OM35768U)

’01 4Runner_U (L/O 0008)
269
2001 4RUNNER (OM35768U)
SPECIFICATIONS
Dimensions and weight 270. . . . . . . . . . . . . . . . . . . . . . . . . . . . . . . . . . . . . .
Engine 270. . . . . . . . . . . . . . . . . . . . . . . . . . . . . . . . . . . . . . . . . . . . . . . . . . . .
Fuel 271. . . . . . . . . . . . . . . . . . . . . . . . . . . . . . . . . . . . . . . . . . . . . . . . . . . . . . .
Service specifications 271. . . . . . . . . . . . . . . . . . . . . . . . . . . . . . . . . . . . . . .
Tires 274. . . . . . . . . . . . . . . . . . . . . . . . . . . . . . . . . . . . . . . . . . . . . . . . . . . . . .
Fuses 274. . . . . . . . . . . . . . . . . . . . . . . . . . . . . . . . . . . . . . . . . . . . . . . . . . . . .
SECTION 8

’01 4Runner_U (L/O 0008)
270 2001 4RUNNER (OM35768U)
Dimensions and weight Engine
Model: 5VZ−FE
Type:
6 cylinder V type 4 cycle, gasoline
Bore and stroke, mm (in.):
93.5 82.0(3.68 3.23)
Displacement, cm3 (cu. in.):
3378(206.1)
mm (in.)
P265/70R 16 tire
Without wheel
opening extension
With wheel
opening extension
P225/75R 15 tire
Overall length 4655(183.3) 4655(183.3) 4655(183.3)
Overall width 1690(66.5) 1730(68.1) 1800(70.9)
Overall height 1715(67.5)∗1740(68.5)∗1740(68.5)∗
Wheelbase 2675(105.3) 2675(105.3) 2675(105.3)
Front tread 1505(59.3) 1505(59.3) 1505(59.3)
Rear tread 1495(58.9) 1510(59.5) 1510(59.5)
Cargo weight rating kg (lb.):
113(250)
∗: Unladen vehicle
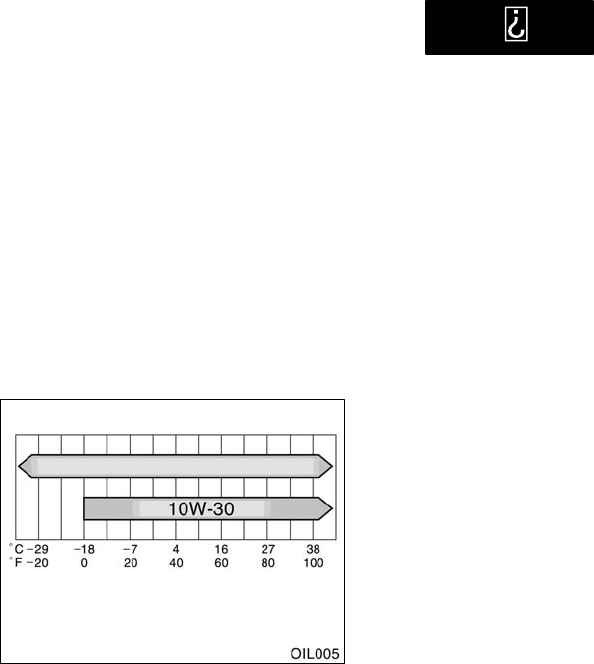
’01 4Runner_U (L/O 0008)
271
2001 4RUNNER (OM35768U)
Fuel
Fuel type:
Unleaded gasoline, Octane Rating 87
(Research Octane Number 91) or higher
Fuel tank capacity, L (gal., Imp. gal.):
70(18.5,15.4)
Service specifications
ENGINE
Valve clearance (engine cold), mm (in.):
Intake 0.130.23(0.0060.009)
Exhaust 0.270.37(0.0110.014)
Spark plug type:
DENSO K16TR11
NGK BKR5EKB−11
Spark plug gap, mm (in.):
1.1(0.043)
Drive belt tension measured with Bor-
roughs drive belt tension gauge No.
BT−33−73F (used belt), Ibf:
Generator belt
100"20
Air conditioning compressor belt
100"20
Power steering pump belt
100 +20
−15
ENGINE LUBRICATION
Oil capacity (drain and refill),
L (qt., Imp. qt.):
With filter 5.2(5.5,4.6)
Without filter 4.9(5.2,4.3)
Oil grade:
API grade SJ, Energy−Conserving" or
ILSAC multigrade engine oil is recom-
mended.
Recommended oil viscosity (SAE):
5W-30 Preferred
Temperature range anticipated before
next oil change

’01 4Runner_U (L/O 0008)
272 2001 4RUNNER (OM35768U)
COOLING SYSTEM
Total capacity, L (qt., Imp. qt.):
With rear heater 9.0(9.5,7.9)
Without rear heater 8.0(8.5,7.0)
Coolant type:
TOYOTA Long Life Coolant" or equiva-
lent
With ethylene−glycol type coolant for a
proper corrosion protection of aluminum
components
Do not use alcohol type antifreeze or
plain water alone.
BATTERY
Open voltage∗ at 20C (68F):
12.612.8 V Fully charged
12.212.4 V Half charged
11.812.0 V Discharged
∗: Voltage that is checked 20 minutes af-
ter the key is removed with all the
lights turned off
Charging rates:
5 A max.
AUTOMATIC TRANSMISSION
Fluid capacity (drain and refill),
L (qt., Imp. qt.):
Two−wheel drive models
Up to 1.6(1.7,1.4)
Four−wheel drive models
Up to 2.0(2.1,1.8)
Fluid type:
Automatic transmission fluid D−II or
DEXRONIII (DEXRONII)
TRANSFER
Oil capacity, L (qt., Imp. qt.):
1.2(1.3,1.1)
Oil type:
Gear oil API GL−4 or GL−5
Recommended oil viscosity:
SAE 75W−90
DIFFERENTIAL
Oil capacity, L (qt., Imp. qt.):
Two−wheel drive models
2.75(2.9,2.4)
Four−wheel drive models
Front
1.15(1.2,1.0)
Rear
With center differential lock system
2.75(2.9,2.4)
Without center differential lock sys-
tem
2.45(2.6,2.2)
Oil type:
Hypoid gear oil API GL−5
Recommended oil viscosity:
Front
SAE 75W−90
Rear
Above −18C (0F)
SAE 90
Below −18C (0F)
SAE 80W or 80W−90

’01 4Runner_U (L/O 0008)
273
2001 4RUNNER (OM35768U)
CHASSIS LUBRICATION
Propeller shafts:
Spiders
Lithium base chassis grease, NLGI
No.2
Slide yoke and double cardan joint
Molybdenum−disulfide lithium base
chassis grease, NLGI No.2
BRAKES
Minimum pedal clearance when depressed
with the force of 490 N (50 kgf, 110 lbf)
with the engine running, mm (in.):
40(1.6)
Pedal free play, mm (in.):
16(0.040.24)
Pad wear limit, mm (in.):
1.0(0.04)
Lining wear limit, mm (in.):
1.0(0.04)
Parking brake adjustment when pulled with
the force of 196 N (20 kgf, 44 lbf):
79 clicks
Fluid type:
SAE J1703 or FMVSS No.116 DOT 3
STEERING
Wheel free play:
Less than 30 mm (1.2 in.)
Power steering fluid type:
Automatic transmission fluid DEXRONII
or III
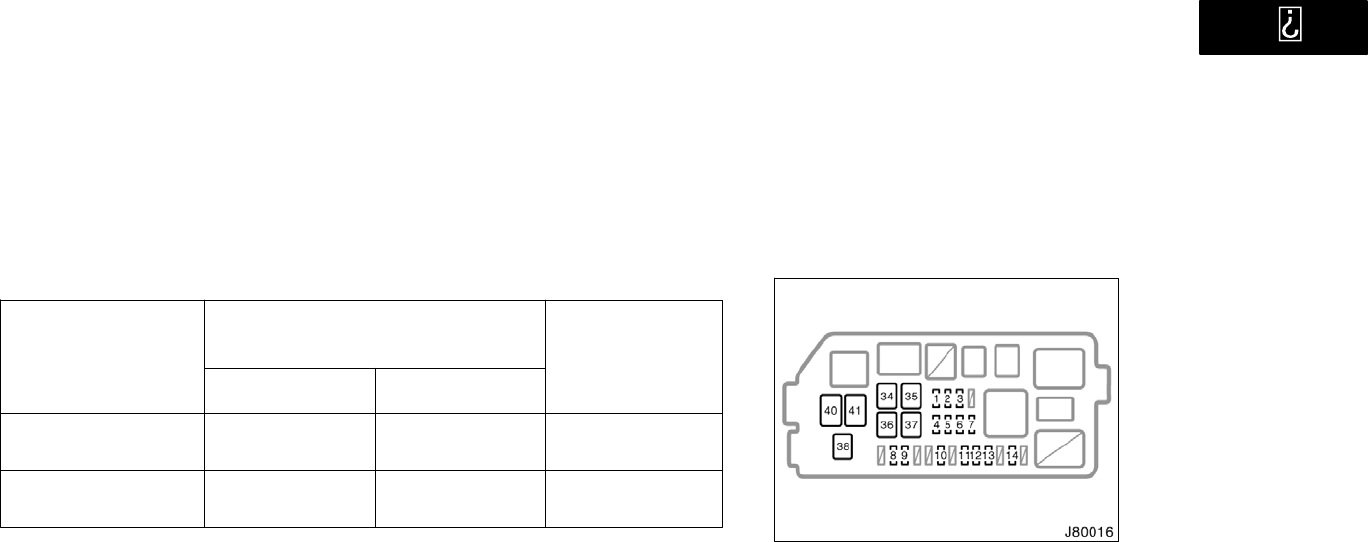
’01 4Runner_U (L/O 0008)
274 2001 4RUNNER (OM35768U)
Tires Fuses
Engine compartment
(without daytime running light system)
Fuses (type A)
1. ALT−S 7.5 A: Charging system
2. PWR OUTLET 15 A: Power outlets
3. RR HTR 10 A: Rear air conditioning
system
4. MPX−B 15 A: Power back window,
back door lock, back window wiper,
open door warning (back door), power
door lock control system, back window
defogger, horns, theft deterrent system
Tire size
Tire pressure
kPa (kgf/cm2 or bar, psi)
Front Rear
P265/70R16
P225/75R15
220(2.2,32) 220(2.2,32)
200(2.0,29) 200(2.0,29)
Wheel size
7J 16∗1
7JJ 16∗2
7J 15∗1
7JJ 15∗2
NOTE: For a complete information on tires (e.g. replacing tires or replacing
wheels), see Checking tire pressure" through Aluminum wheel precautions"
in Section 7−2.
Wheel nut torque, N⋅m (kgf⋅m, ft⋅lbf):
110(11.5,83)
∗1: Vehicles with steel wheels
∗2: Vehicles with aluminum wheels
Tire size, pressure and wheel size:
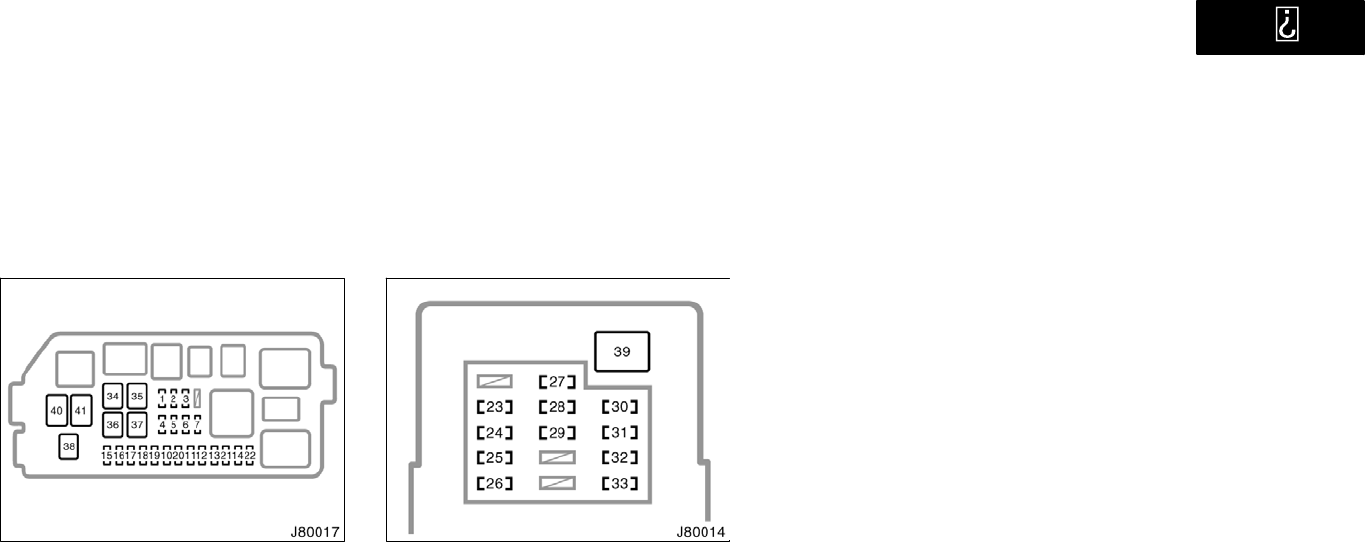
’01 4Runner_U (L/O 0008)
275
2001 4RUNNER (OM35768U)
Engine compartment
(with daytime running light system)
5. DOME 15 A: Interior lights, personal
lights, luggage compartment light,
clock, car audio system, gauges and
meters, ignition switch light, vanity mir-
ror light, daytime running light
6. OBD 7.5 A: On−board diagnosis sys-
tem
7. EFI 20 A: Multiport fuel injection sys-
tem/sequential multiport fuel injection
system
8. HEAD(RH) 10 A: Right−hand headlight,
gauges and meters
9. HEAD(LH) 10 A: Left−hand headlight
Instrument panel
10. TAIL 10 A: Tail lights, license plate
lights, instrument panel lights
11. A.C 10 A: Air conditioning system
12. MIR HTR 10 A: Outside rear view mir-
ror heaters
13. DEFOG 15 A: Back window defogger
14. ETCS 15 A: Multiport fuel injection
system/sequential multiport fuel injec-
tion system
15. DRL 7.5 A: Daytime running light sys-
tem
16. HEAD (HI RH) 10 A: Right−hand head-
light (high beam), gauges and meters
17. HEAD (HI LH) 10 A: Left−hand head-
light (high beam)
18. HEAD (LO RH) 10 A: Right−hand
headlight (low beam)
19. HEAD (LO LH) 10 A: Left−hand head-
light (low beam)
20. TOWING 25 A: Trailer lights (back−up
lights, rear turn signal lights, stop/tail
lights)
21. SEAT HTR 20 A: Seat heater
22. FOG 15 A: Front fog lights
23. ECU−IG 10 A: Cruise control system,
anti−lock brake system, vehicle skid
control system, SRS airbag system,
electronically controlled automatic
transmission system, power antenna,
power window, electric moon roof, pow-
er back window, back window defogger,
back window wiper
24. TURN 10 A: Turn signals lights, emer-
gency flashers
25. WIPER 25 A: Windshield wipers and
washer, power door lock control sys-
tem, back window defogger, horns,
theft deterrent system
26. 4WD 20 A: A.D.D. control system,
four−wheel drive control system, center
differential lock system

’01 4Runner_U (L/O 0008)
276 2001 4RUNNER (OM35768U)
27. ACC 15 A: Car audio system, power
antenna, clock, power rear view mirror
control, cigarette lighter, seat belt pre-
tensioners, electronically controlled au-
tomatic transmission system, power
outlets, theft deterrent system
28. GAUGE 10 A: Gauges and meters,
back window defogger, daytime running
light system, air conditioning system,
cruise control system, center differen-
tial lock system, electronically con-
trolled automatic transmission, back−up
lights
29. IGN 10 A: SRS airbag system, seat
belt pretensioners, multiport fuel injec-
tion system/sequential multiport fuel in-
jection system, discharge warning light,
vehicle skid control system
30. ECU−B 7.5 A: Gauges and meters, air
conditioning system
31. HORN,HAZ 15 A: Horns, emergency
flashers
32. STA 7.5 A: Starting system
33. STOP 10 A: Stop lights, high−mounted
stoplight
Fuses (type B)
34. HEATER 50 A: Air conditioning system,
all components in A.C" fuse
35. AM1 40 A: Starting system, all compo-
nents in ACC", GAUGE", TURN",
ECU−IG", WIPER" and 4WD" fuses
36. J/B 50 A: All components in POWER",
HORN,HAZ", STOP" and ECU−B"
fuses
37. AM2 30 A: Starting system, multiport
fuel injection system/sequential multi-
port fuel injection system, all compo-
nents in STA" and IGN" fuses
38. ABS2 40 A: Anti−lock brake system,
active traction control system, vehicle
skid control system
39. POWER 30 A: Power window, power
back window, electric moon roof, power
seat, back door lock
Fuses (type C)
40. ABS 60 A: Anti−lock brake system
41. ALT 120 A: Charging system, all com-
ponents in AM1", HEATER", TAIL",
RR HTR", ALT−S", DEFOG", MIR
HTR" and ACC" fuses

’01 4Runner_U (L/O 0008)
277
2001 4RUNNER (OM35768U)
REPORTING SAFETY DEFECTS FOR U.S.
OWNERS AND UNIFORM TIRE QUALITY
GRADING
Reporting safety defects for U.S. owners 278. . . . . . . . . . . . . . . . . . . . . .
Uniform tire quality grading 278. . . . . . . . . . . . . . . . . . . . . . . . . . . . . . . . . .
SECTION 9

’01 4Runner_U (L/O 0008)
278 2001 4RUNNER (OM35768U)
If you believe that your vehicle
has a defect which could cause a
crash or could cause injury or
death, you should immediately in-
form the National Highway Traffic
Safety Administration (NHTSA) in
addition to notifying Toyota Motor
Sales, U.S.A., Inc.
(Toll−free: 1−800−331−4331).
If NHTSA receives similar com-
plaints, it may open an investiga-
tion, and if it finds that a safety
defect exists in a group of ve-
hicles, it may order a recall and
remedy campaign. However,
NHTSA cannot become involved
in individual problems between
you, your dealer, or Toyota Motor
Sales, U.S.A., Inc.
To contact NHTSA, you may ei-
ther call the Auto Safety Hotline
toll−free at 1−800−424−9393 (or
366−0123 in Washington, D.C.
area) or write to: NHTSA, U.S.
Department of Transportation,
Washington, D.C. 20590. You can
also obtain other information about
motor vehicle safety from the Hot-
line.
Uniform tire quality grading
This information has been prepared in ac-
cordance with regulations issued by the
National Highway Traffic Safety Adminis-
tration of the U.S. Department of Trans-
portation. It provides the purchasers and/
or prospective purchasers of Toyota
vehicles with information on uniform tire
quality grading.
Your Toyota dealer will help answer any
questions you may have as you read this
information.
DOT quality gradesAll passenger car
tires must conform to Federal Safety
Requirements in addition to these
grades. Quality grades can be found
where applicable on the tire sidewall
between tread shoulder and maximum
section width. For example: Treadwear
200 Traction AA Temperature A
Reporting safety defects
for U.S. owners

’01 4Runner_U (L/O 0008)
279
2001 4RUNNER (OM35768U)
TreadwearThe treadwear grade is a
comparative rating based on the wear rate
of the tire when tested under controlled
conditions on a specified government test
course. For example, a tire graded 150
would wear one and a half (1−1/2) times
as well on the government course as a
tire graded 100. The relative performance
of tires depends upon the actual condi-
tions of their use, however, and may de-
part significantly from the norm due to
variations in driving habits, service prac-
tices and differences in road characteris-
tics and climate.
Traction AA, A, B, CThe traction
grades, from highest to lowest, are AA, A,
B, and C, and they represent the tire’s
ability to stop on wet pavement as mea-
sured under controlled conditions on spe-
cified government test surfaces of asphalt
and concrete. A tire marked C may have
poor traction performance.
Warning: The traction grade assigned to
this tire is based on braking (straight
ahead) traction tests and does not include
cornering (turning) traction.
Temperature A, B, CThe temperature
grades are A (the highest), B, and C,
representing the tire’s resistance to the
generation of heat and its ability to dissi-
pate heat when tested under controlled
conditions on a specified indoor laboratory
test wheel. Sustained high temperature
can cause the material of the tire to de-
generate and reduce tire life, and exces-
sive temperature can lead to sudden tire
failure. The grade C corresponds to a lev-
el of performance which all passenger car
tires must meet under the Federal Motor
Vehicle Safety Standard No.109. Grades B
and A represent higher levels of perfor-
mance on the laboratory test wheel than
the minimum required by law.
Warning: The temperature grades for this
tire are established for a tire that is prop-
erly inflated and not overloaded. Exces-
sive speed, underinflation, or excessive
loading, either separately or in combina-
tion, can cause heat buildup and possible
tire failure.

’01 4Runner_U (L/O 0008)
280 2001 4RUNNER (OM35768U)
’01 4Runner_U (L/O 0008)
2001 4RUNNER (OM35768U)
B
Publication No. OM35768U
Part No. 01999-35768
Printed in Japan 01−0008−00
4 ( U)
Quick index
If a service reminder indicator or warning buzzer comes on 94. . . . . . . . . .
If your vehicle will not start 220. . . . . . . . . . . . . . . . . . . . . . . . . . . . . . . . . . . . . . . .
If your engine stalls while driving 223. . . . . . . . . . . . . . . . . . . . . . . . . . . . . . . . . . .
If your vehicle overheats 223. . . . . . . . . . . . . . . . . . . . . . . . . . . . . . . . . . . . . . . . . . .
If you have a flat tire 224. . . . . . . . . . . . . . . . . . . . . . . . . . . . . . . . . . . . . . . . . . . . . .
If your vehicle needs to be towed 231. . . . . . . . . . . . . . . . . . . . . . . . . . . . . . . . . .
Tips for driving during break−in period 191. . . . . . . . . . . . . . . . . . . . . . . . . . . . . .
How to start the engine 206. . . . . . . . . . . . . . . . . . . . . . . . . . . . . . . . . . . . . . . . . . . .
General maintenance 247. . . . . . . . . . . . . . . . . . . . . . . . . . . . . . . . . . . . . . . . . . . . . . .
Complete index NO TAG. . . . . . . . . . . . . . . . . . . . . . . . . . . . . . . . . . . . . . . . . . . . . . . .
Gas station information
Fuel type:
UNLEADED gasoline, Octane Rating 87 (Research Octane Number 91)
or higher
See page 191 for detailed information.
Fuel tank capacity:
70 L (18.5 gal., 15.4 lmp. gal.)
Engine oil:
API grade SJ, Energy−Conserving" or ILSAC multigrade engine oil is
recommended.
See page 2 for detailed information.
Tire information: See pages 6 through 11.
Tire pressure: See page 274.
U−5
’01 4Runner_U (L/O 0008)
2001 4RUNNER (OM35768U)
You should know as much about the quality and
importance of proper maintenance of your new
vehicle as the people who built it.
The Toyota authorized Repair Manual
tells you how to maintain your vehicle and
enables you to correctly perform your own
maintenance.
The best way to keep your new vehicle in top
running order is to maintain it properly from
the moment you drive it off the showroom
floor.
The Toyota authorized Repair Manual is
packed with literally everything you need to
know to perform your own maintenance in
virtually every area of your new vehicle.

’01 4Runner_U (L/O 0008)
2001 4RUNNER (OM35768U)
Where to obtain the
Repair Manual
The repair manual for 4Runner, written in Eng-
lish, may be purchased as applicable from any
Toyota dealer.
Pub. Name: 2001 4Runner Repair Manual
Pub. No.: RM796U1 (Maintenance, Preparation,
Service specifications and Diagnostics)
RM796U2 (Engine, Chassis and Body)
Maintenance procedures for the engine,
chassis, body, electrical system, and more,
are clearly explained and illustrated.
Periodic maintenance and tune−up
Periodic maintenance and tune−up helps to pre-
vent small problems from growing into larger ones lat-
er on. The repair manual outlines exactly what main-
tenance is required and clearly explains how to do the
work yourself step−by−step.
Areas covered include such things as spark plug re-
placement, valve clearance adjustment and engine oil
and filter replacement.
