OWF Developer's Guide
User Manual:
Open the PDF directly: View PDF ![]() .
.
Page Count: 94

OWF Developer's Guide
DOD GOSS
Exported on Oct 16, 2018
DOD GOSS – OWF Developer's Guide
Table of Contents – 2
Table of Contents
1 Introduction .......................................................................................................................... 6
1.1 Objectives ........................................................................................................................... 6
1.2 Document Scope & Warning .............................................................................................. 6
1.2.1 Terminology Changes ................................................................................................................... 6
1.3 Related Documents ............................................................................................................ 6
1.4 Source Code Examples ...................................................................................................... 7
1.5 File Accessibility For Configuration and Development ....................................................... 7
2 Creating an App Component .............................................................................................. 8
2.1 Overview ............................................................................................................................. 8
2.2 Walkthrough ....................................................................................................................... 8
2.3 Additional Considerations ................................................................................................. 10
2.3.1 Utility JS API ............................................................................................................................... 10
2.3.2 Best Practices ............................................................................................................................. 11
2.3.3 OWF Bundled JavaScript ............................................................................................................ 11
2.3.4 Debug Version of the OWF Bundled JavaScript ......................................................................... 12
2.3.5 OWF Bundled JavaScript and Dojo............................................................................................. 12
3 Adding an App Component to OWF ................................................................................. 13
3.1 Overview ........................................................................................................................... 13
3.2 Walkthrough ..................................................................................................................... 13
3.2.1 Creating Descriptor Files for App Components ........................................................................... 13
3.2.2 Sharing Descriptor Files .............................................................................................................. 14
4 Adding the Eventing API to an App Component ............................................................ 15
4.1 Overview ........................................................................................................................... 15
4.2 Walkthrough ..................................................................................................................... 15
4.3 Additional Considerations ................................................................................................. 21
4.3.1 Channel Conventions .................................................................................................................. 21
4.3.2 Required Includes ....................................................................................................................... 21
4.3.3 Payload Conventions - Data Encoding and RESTful Eventing ................................................... 21
4.3.4 Eventing Browser Limitations ...................................................................................................... 22
4.3.5 Eventing API Enhancements ...................................................................................................... 23
5 Adding the Preferences API to an App Component ....................................................... 24
5.1 Overview ........................................................................................................................... 24
5.2 Walkthrough ..................................................................................................................... 25
5.3 Additional Considerations ................................................................................................. 28
5.3.1 Browser Based Cross Domain Data Transfer ............................................................................. 28
5.3.2 Required Includes ....................................................................................................................... 28
5.3.3 Payload Conventions – JSON/REST Data Encoding .................................................................. 28
6 Adding Logging to the App Component .......................................................................... 30
6.1 Overview ........................................................................................................................... 30
6.2 Walkthrough ..................................................................................................................... 30
6.3 Additional Considerations ................................................................................................. 31
6.3.1 Logging Levels ............................................................................................................................ 31
6.3.2 Load Time Logging ..................................................................................................................... 32
7 Widget Launcher API ......................................................................................................... 33
7.1 Overview ........................................................................................................................... 33
7.2 Walkthrough ..................................................................................................................... 33
7.3 Additional Considerations ................................................................................................. 35
7.3.1 Required Includes ....................................................................................................................... 35
7.3.2 Alternative Ways to Find a App Component’s GUID ................................................................... 36
7.3.3 Using Regular Expression to change an App Component’s Title ................................................ 36
8 Drag and Drop API ............................................................................................................. 38
8.1 Overview ........................................................................................................................... 38
8.2 Walkthrough ..................................................................................................................... 38
8.3 Additional Considerations ................................................................................................. 40
8.3.1 Required Includes ....................................................................................................................... 40
DOD GOSS – OWF Developer's Guide
Table of Contents – 3
8.3.2 Drag and Drop API Enhancements ............................................................................................. 40
9 Widget State API ................................................................................................................ 42
9.1 Overview ........................................................................................................................... 42
9.2 Adding the Event Monitor App Component to OWF ........................................................ 42
9.3 Walkthrough for Listening to App Component Events ..................................................... 42
9.4 Additional Widget State API Functions ............................................................................. 44
9.4.1 Register a State Event ................................................................................................................ 44
9.4.2 Unregister a State Event ............................................................................................................. 45
9.4.3 Retrieve a List of Registered Events for an App Component ...................................................... 45
9.4.4 Retrieve the Current State of an App Component ....................................................................... 46
9.5 Additional Considerations ................................................................................................. 46
9.5.1 Required Includes ....................................................................................................................... 46
9.5.2 Discussion of State Events ......................................................................................................... 46
10 Widget Chrome API ........................................................................................................ 49
10.1 Overview ....................................................................................................................... 49
10.2 Walkthrough .................................................................................................................. 49
10.3 Button Configuration ..................................................................................................... 51
10.4 Menu Configuration ....................................................................................................... 54
10.5 Grouping Menu Items ................................................................................................... 57
10.6 Changing the App Component’s Title ........................................................................... 58
10.7 Additional Considerations ............................................................................................. 58
10.7.1 Using the Widget State API with the Widget Chrome API ........................................................... 58
10.7.2 Required Includes ....................................................................................................................... 59
11 Widget Theme ................................................................................................................. 60
11.1 Overview ....................................................................................................................... 60
11.2 Walkthrough .................................................................................................................. 60
11.3 Additional Considerations ............................................................................................. 61
11.3.1 Accessing Theme Information from JavaScript ........................................................................... 61
12 Widget Intents API .......................................................................................................... 62
12.1 Overview ....................................................................................................................... 62
12.2 Walkthrough: Requirements for Intents ........................................................................ 62
12.3 Additional Capabilities ................................................................................................... 64
12.3.1 WidgetProxy on Ready ............................................................................................................... 64
12.3.2 Intent Launching Data ................................................................................................................. 65
12.3.3 Send an Intent to a known set of app components ..................................................................... 65
12.4 Additional Considerations ............................................................................................. 66
12.4.1 Recommended Intents Data Type Conventions .......................................................................... 66
13 Point-to-Point (Remote Procedure Call) API................................................................ 67
13.1 Color Server Example App Component ........................................................................ 67
13.2 Color Client Example App Component ......................................................................... 68
14 Example App Components ............................................................................................ 70
14.1 HTML Examples ........................................................................................................... 70
14.1.1 Technologies ............................................................................................................................... 70
14.1.2 Building/Compilation ................................................................................................................... 71
14.2 GWT Example ............................................................................................................... 71
14.2.1 Technologies ............................................................................................................................... 71
14.2.2 Building/Compilation ................................................................................................................... 71
14.2.3 Known Issues .............................................................................................................................. 72
14.3 .NET Example ............................................................................................................... 72
14.3.1 Technologies ............................................................................................................................... 72
14.3.2 Building/Compilation ................................................................................................................... 73
14.3.3 Known Issues .............................................................................................................................. 73
14.4 FLEX Example .............................................................................................................. 73
14.4.1 Technologies ............................................................................................................................... 74
14.4.2 Building/Compilation ................................................................................................................... 74
14.4.3 Supporting Drag and Drop in Flex Widgets ................................................................................. 76
14.4.4 Known Issues .............................................................................................................................. 80
14.5 Silverlight Example ....................................................................................................... 82
14.5.1 Technologies ............................................................................................................................... 82
14.5.2 Building/Compilation ................................................................................................................... 82
DOD GOSS – OWF Developer's Guide
Table of Contents – 4
14.5.3 Known Issues .............................................................................................................................. 83
14.6 Java Applet Example .................................................................................................... 83
14.6.1 Technologies ............................................................................................................................... 83
14.6.2 Building/Compilation ................................................................................................................... 83
14.6.3 Known Issues .............................................................................................................................. 84
15 Additional Walkthroughs ............................................................................................... 85
15.1 Overview - Adding the Widget Launcher ...................................................................... 85
15.2 Walkthrough - Simple Widget Launching ...................................................................... 85
15.3 Walkthrough - Dynamic Widget Launching ................................................................... 87
16 Appendix A JVM Compatability .................................................................................... 90
17 Appendix B Supported Browsers ................................................................................. 91
18 Appendix C Known Issues ............................................................................................ 92
18.1 User Interface Issues .................................................................................................... 92
18.2 Widget Technology Issues ............................................................................................ 92
18.3 Database Issues ........................................................................................................... 92
19 OWF-DG: Software Dependency Versions .................................................................. 93
19.1 Back-end ....................................................................................................................... 93
19.2 Front-end....................................................................................................................... 93
DOD GOSS – OWF Developer's Guide
Introduction – 5
DOD GOSS – OWF Developer's Guide
Introduction – 6
1 Introduction
1.1 Objectives
The purpose of this guide is to explain how to create a simple application component (app
component) or integrate an existing app component into the OZONE Widget Framework (OWF).
1.2 Document Scope & Warning
This guide is written for software developers who want to change an existing application into an
OWF-compatible App Component(s) or understand the APIs available to them for building App
Components.
WARNING: Some of the APIs are out-of-date in this document. If you run into problems,
reference the sourcecode or contact the OZONE Development Team. After the forthcoming
redesign, this document will be revised to reflect the most useful and accurate APIs.
1.2.1 Terminology Changes
Previous versions of OWF use the term “widget” to refer to a light-weight, single-purpose
application that provides a summary or limited view of a larger application. To follow
nomenclature used for mobile devices, OWF has since updated its terminology in the
application user interface and documentation. OWF now refers to widgets as “app components”
and “dashboards” are now “applications.” The OWF backend does not follow this naming
convention and still references “widget(s)” and “dashboard(s)” in the code.
1.3 Related Documents
Document
Purpose
User's Guide
Understanding the OWF user interface; adding, deleting, modifying app
components and using intents; accessing and using the Store; creating,
deleting, adding, switching, modifying app pages; using applications;
defining accessibility features such as high-contrast themes
Administrator's
Guide
Understanding administrative tools: adding, deleting, and editing app
components, users, groups, applications; creating default content for users,
groups and group dashboards
Developer's
Guide
Creating app components and descriptor files; integrating app
components into OWF; app component upgrade instructions; walkthroughs
for creating app components; adding intents, descriptor URLs, preference API
to app components; logging and launching API
Configuration
Guide
Overview of basic architecture and security; OWF installation instructions;
instructions for modifying default settings; database set up and logging
guidance; framework and theme customization instructions; OWF upgrade
instructions; directions for adding and deleting help content
Quick Start
Guide
Walkthrough of basic OWF functions such as using applications; instructions
for setting up a local instance of OWF, unpacking the OWF Bundle and
installing security certificates; Truststore/Keystor

DOD GOSS – OWF Developer's Guide
Introduction – 7
1.4 Source Code Examples
All of the code examples listed in this document can be found in the owf.war. When unpacked
or unzipped, the bundle will contain a /owf-sample-widgets.zip which contains .zip files of
example app components with source code built in different technology stacks. The examples
included in the distribution are detailed in section 14: Example App Components.
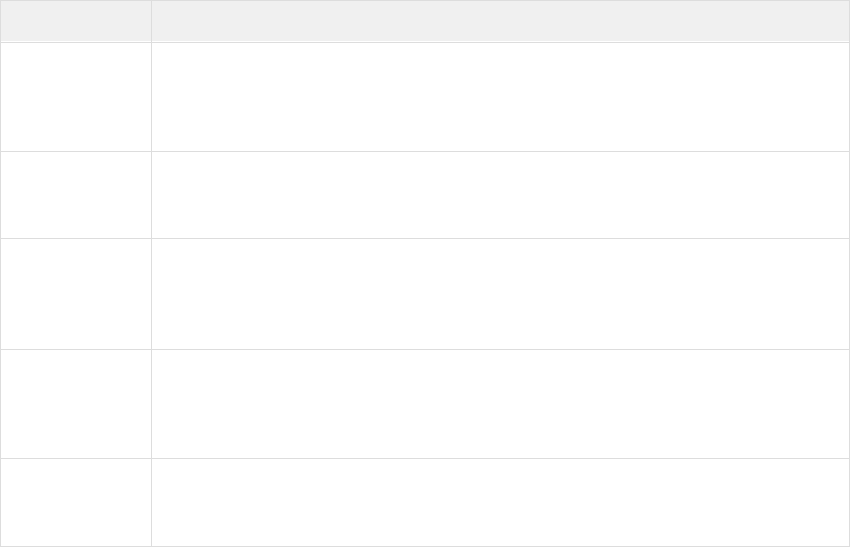
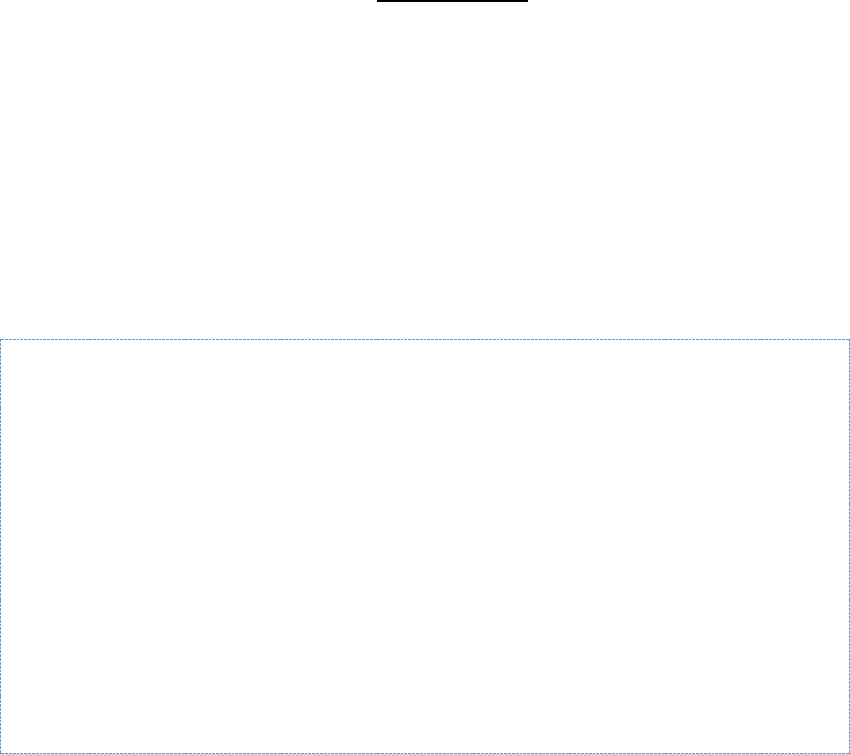
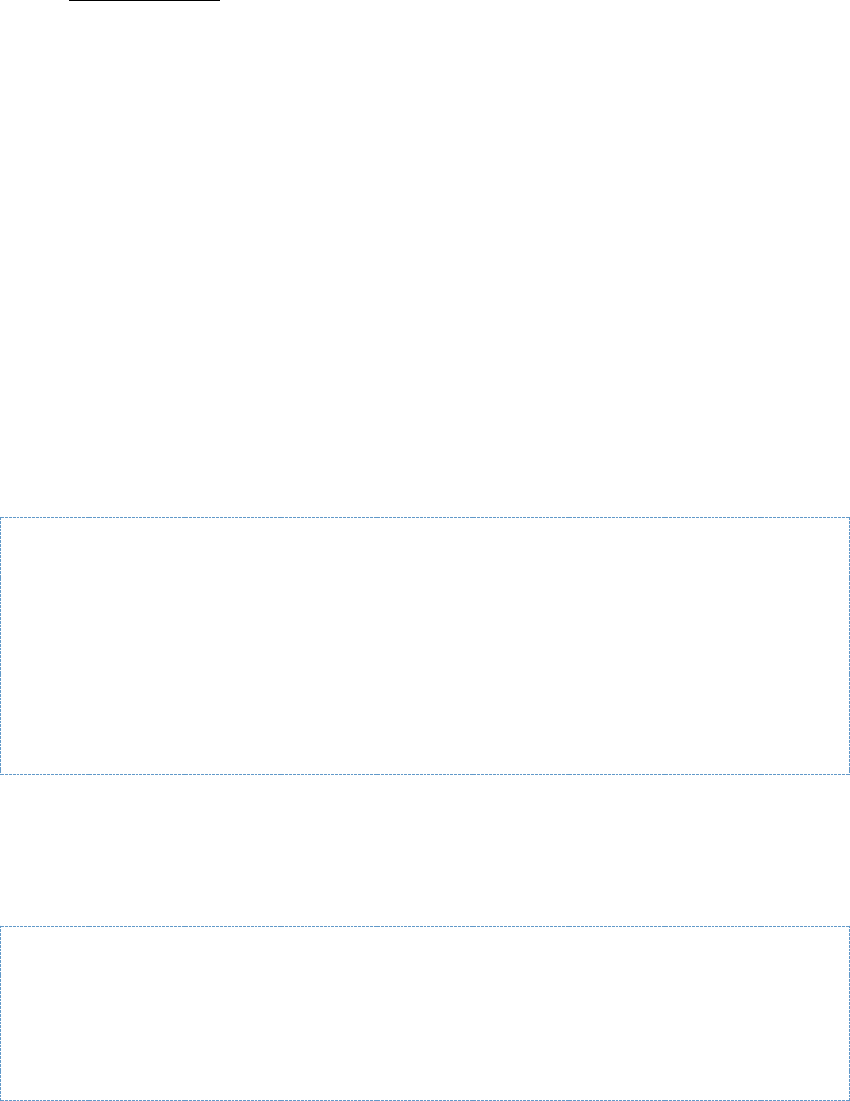
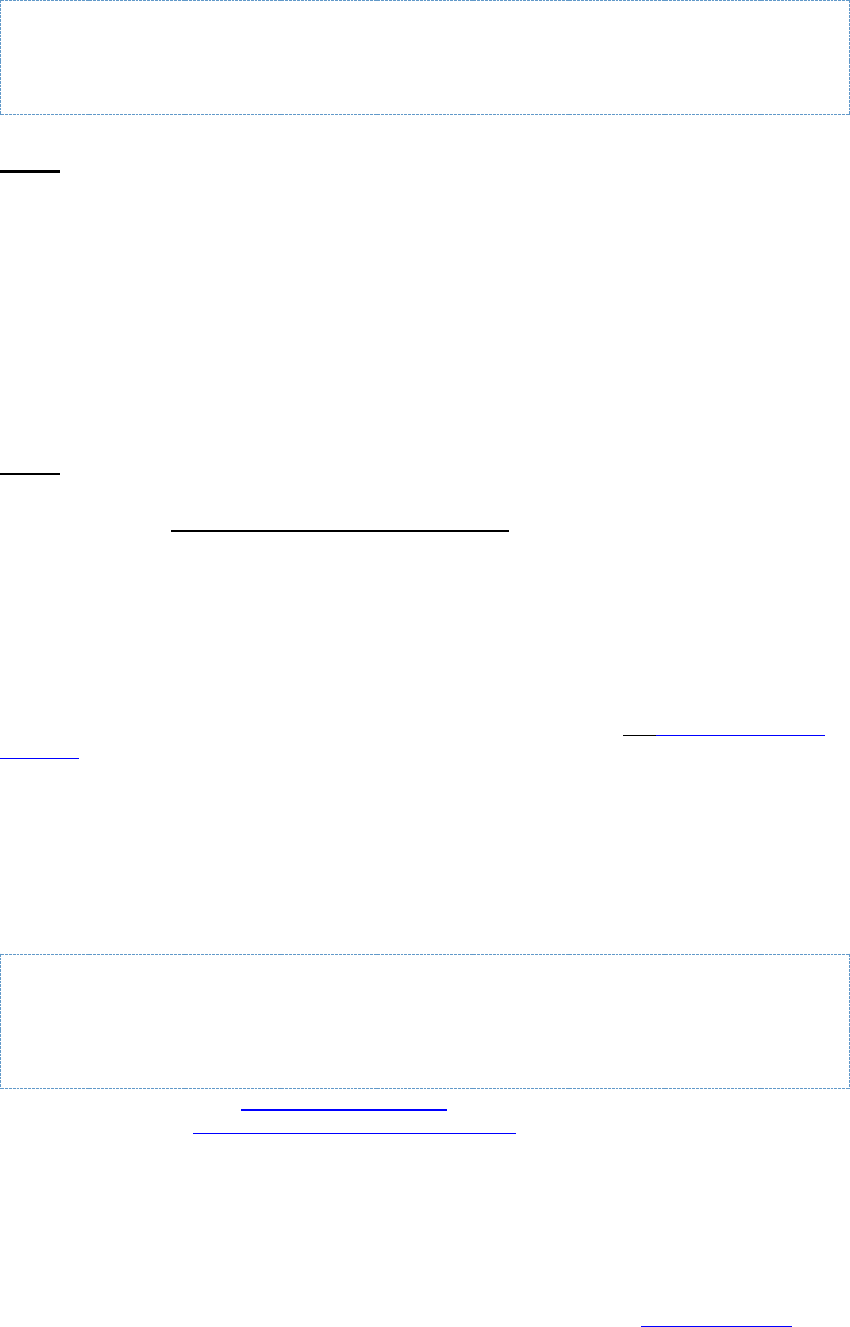
1.5 File Accessibility For Configuration and Development
In addition to often-modified files found in the /etc directory, OWF now delivers critical API
related files outside the .war file for easy accessibility, as well. The directory structure is as
follows:
Figure 1: Configuration and Development File Locations
Within the highlighted folder structure, you will find the following:
• /etc/docs – JavaScript API documentation
• /etc/tools – Executable files for the creation of certificates and theme bundles
• /etc/widgets/css – Stylesheet with implemented drag and drop feedback
• /etc/widgets/descriptor – Template for an app component descriptor file
• /etc/widget/flash-dragAndDrop -DragAndDropSupport.as that enables drag and drop in
flash/flex widgets
• /etc/widget/images – Images required for drag and drop feedback
• etc/widget/js – contains the following:
• owf-widget-debug.js (OWF API for development)
• owf-widget-min.js (OWF API for production)
• dojo-1.5.0-windowname-only (required for Preferences API to work; previously located in
the javascript directory)
• eventing (required for Eventing API to work in IE7; previously located in the JavaScript
directory)

DOD GOSS – OWF Developer's Guide
Creating an App Component – 8
2 Creating an App Component
2.1 Overview
OWF App Components (previously known as OWF Widgets) are lightweight Web applications
wrapped with a metadata definition that provide a description to the framework of how the
component should load. The app component metadata definition contains a number of fields
including a URL, Default Name, Default Height and Default Width properties.
OWF provides a suite of APIs that enable the developer to extend their Web application through
the use of inter-widget communication, user preferences and internationalization.Each API is
written in JavaScript so that app components can be built in a large variety of Web
technologies.
Three key factors to keep in mind when creating an App Component are:
• OWF supports and encourages a decentralized deployment model. App Components are
not required to be deployed on the same server as OWF and can be distributed throughout
the enterprise.
• OWF is Web-technology agnostic. App Components can be written in the JavaScript
capable technology of the developer’s choice. OWF enabled applications have been built in
varied technologies such as JavaScript (Dojo), Java (JSPs, GWT, JSF, Groovy, Grails),
.NET (ASP.NET, C# .NET), Scripting Languages (PHP, Perl, Ruby on Rails), and Rich UI
Frameworks/Plugins (Flex, Silverlight, Google Earth Plugin, Java Applets).
• OWF 6.0 added a DOCTYPE to the main page and thus became the first version of OWF to
render in Standards Mode. In most browsers, app components will not be affected, as they
will still be rendered in the mode to which they would otherwise default. However, in IE9,
the rendering mode of child iframes (which is what app components are) is affected by the
rendering mode of the parent page. Therefore, app components that do not have a
DOCTYPE, and which would expect to be rendered in quirks mode, will instead be
rendered in standards mode in IE9. This may impact the appearance of some app
components. Note: This is an issue existing in IE9 and not OWF.
• To support Internet Explorer 10 and higher, the location that hosts App Component
descriptor files must be Cross-origin resource sharing (CORS) enabled. Usually, the Web
app used to create the App Component also serves as the host for the descriptor file. The
method used to configure CORS support will vary based on the type of Web app platform
used. For backwards compatibility, the format of the descriptor file itself is unchanged. The
template is located in etc/widget/descriptor within the OWF bundle.
This document assumes that the reader has a development background and is familiar with
their chosen technology stack. The walkthrough found throughout this document will focus on
building a simple HTML/JavaScript Web application deployed to a Java Application Server.
2.2 Walkthrough
This walkthrough explains the process of creating a simple Announcing Clock App Component
using HTML and JavaScript, bundling the widget into a Web Application Archive (.war) file, and
deploying that .war file to a server.
Note: All samples can be found in owf-sample-widgets.zip released with the OWF bundle.
Step 1: Create the proper directory structure
All Web applications use a standard hierarchy of subdirectories and special files. The root of the
hierarchy defines the document root of the Web Application. In this walkthrough, the root
directory will be the webapp directory. Accordingly, create a directory named webapp. (OWF
ships with a webapp directory under \src\main in all the OWF Sample Widget’s folders.)

DOD GOSS – OWF Developer's Guide
Creating an App Component – 9
All files under the webapp directory can be served to the client, except for files under the special
directory WEB-INF. Under the webapp directory create a directory named WEB-INF. The WEB-
INF directory houses files that are integral to the running of the Web application, but are not
directly accessible from a discrete URL.
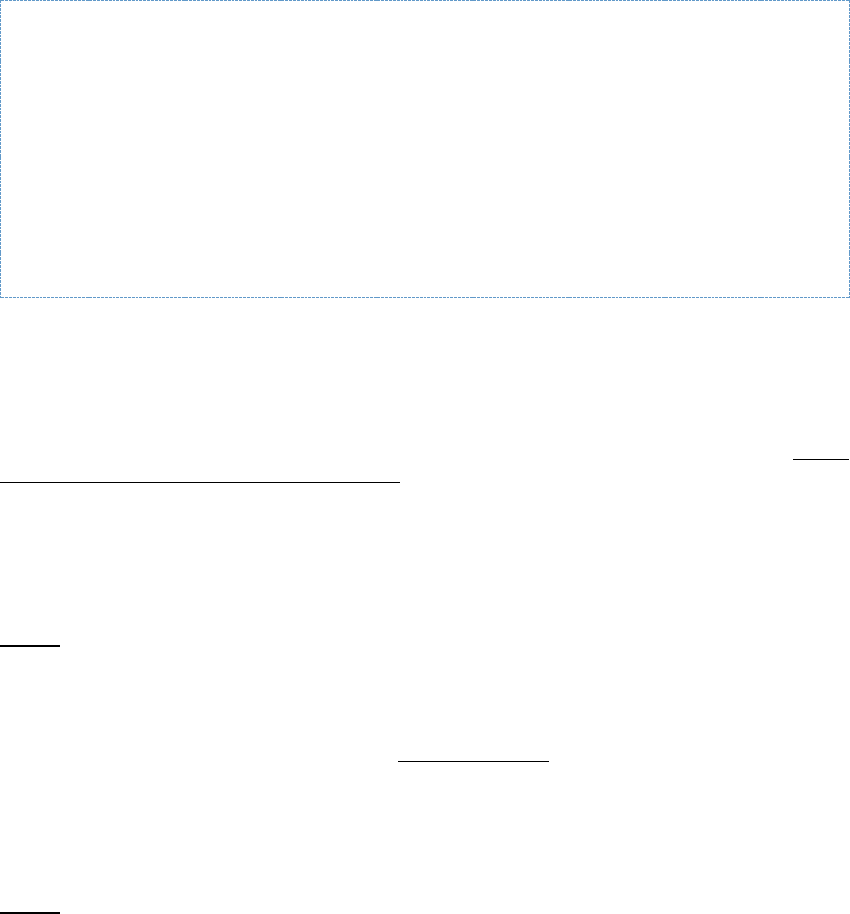
Next, create a new file called web.xml in the WEB-INF directory. The web.xml is the Web
application deployment descriptor that configures the Web application.
Copy and paste the following code into the web.xml file:
<?xml version="1.0" encoding="UTF-8"?>
<web-app version="2.4" xmlns="http://java.sun.com/xml/ns/j2ee"
xmlns:xsi="http://www.w3.org/2001/XMLSchema-instance"
xsi:schemaLocation="http://java.sun.com/xml/ns/j2ee
http://java.sun.com/xml/ns/j2ee/web-app_2_4.xsd">
<display-name>Simple Announcing Clock Widget</display-name>
</web-app>
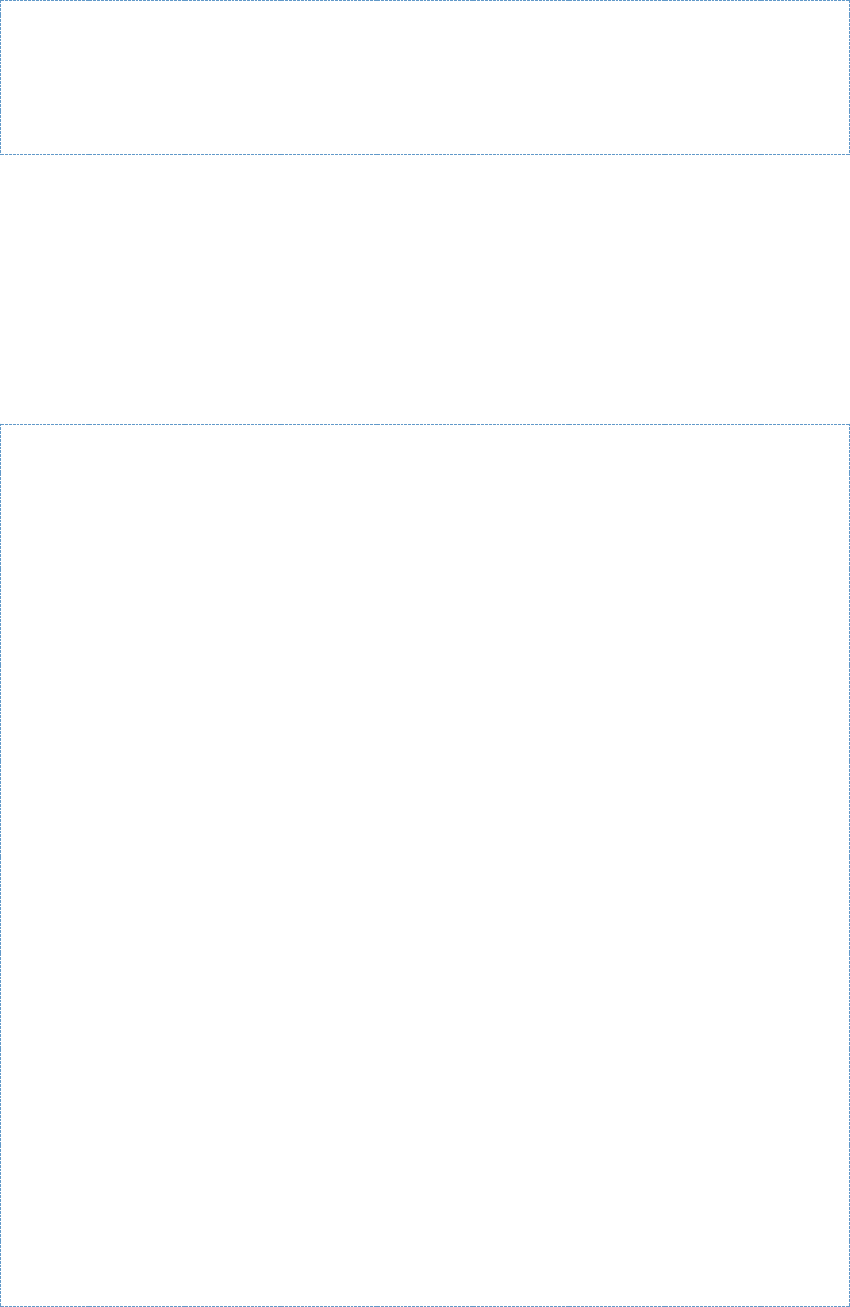
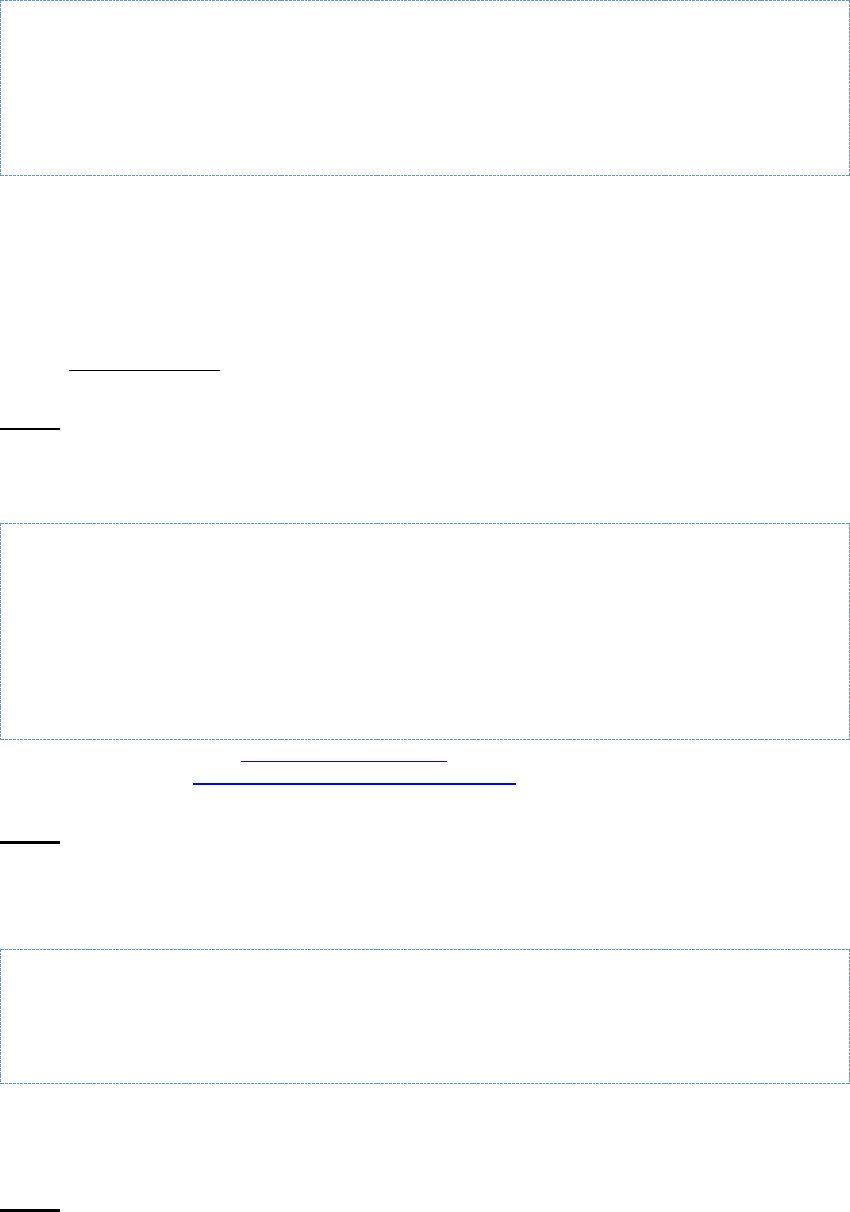
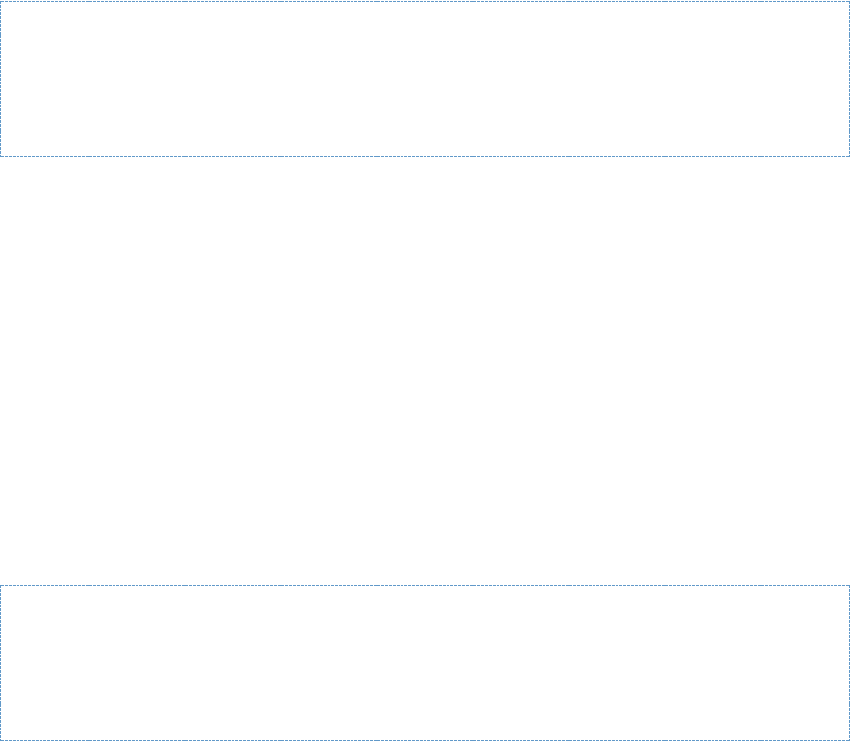
The directory structure should read as follows:
Figure 2: Directory Structure
Step 2: Create the Simple Announcing Clock App Component
OWF ships with sample file found in AnnouncingClock.html which is located in the OWF Sample
Widgets bundle under the following directory:
html-widget.zip\src\main\webapp\clock.
To create the AnnouncingClock.html file in the webapp directory instead of using the sample
that ships with OWF, copy and paste the following code into the AnnouncingClock.html file:
<html>
<head>
<script type="text/javascript">
function updateClock ( )
{
var currentTime = new Date ( );
var currentHours = currentTime.getHours ( );
var currentMinutes = currentTime.getMinutes ( );
var currentSeconds = currentTime.getSeconds ( );
// Pad the minutes and seconds with leading zeros, if required
currentMinutes = ( currentMinutes < 10 ? "0" : "" ) +
currentMinutes;
currentSeconds = ( currentSeconds < 10 ? "0" : "" ) +
currentSeconds;
// Choose either "AM" or "PM" as appropriate
var timeOfDay = ( currentHours < 12 ) ? "AM" : "PM";
// Convert the hours component to 12-hour format if needed
currentHours = ( currentHours > 12 ) ? currentHours - 12 :
currentHours;
// Convert an hours component of "0" to "12"
currentHours = ( currentHours == 0 ) ? 12 : currentHours;
// Compose the string for display
var currentTimeString = currentHours + ":" + currentMinutes +
":" + currentSeconds + " " + timeOfDay;
DOD GOSS – OWF Developer's Guide
Creating an App Component – 10
// Update the time display
document.getElementById("clock").firstChild.nodeValue =
currentTimeString; }
</script>
</head>
<body onload="updateClock(); setInterval('updateClock()', 1000 )">
The time is: <span id='clock'> </span>
</body>
</html>
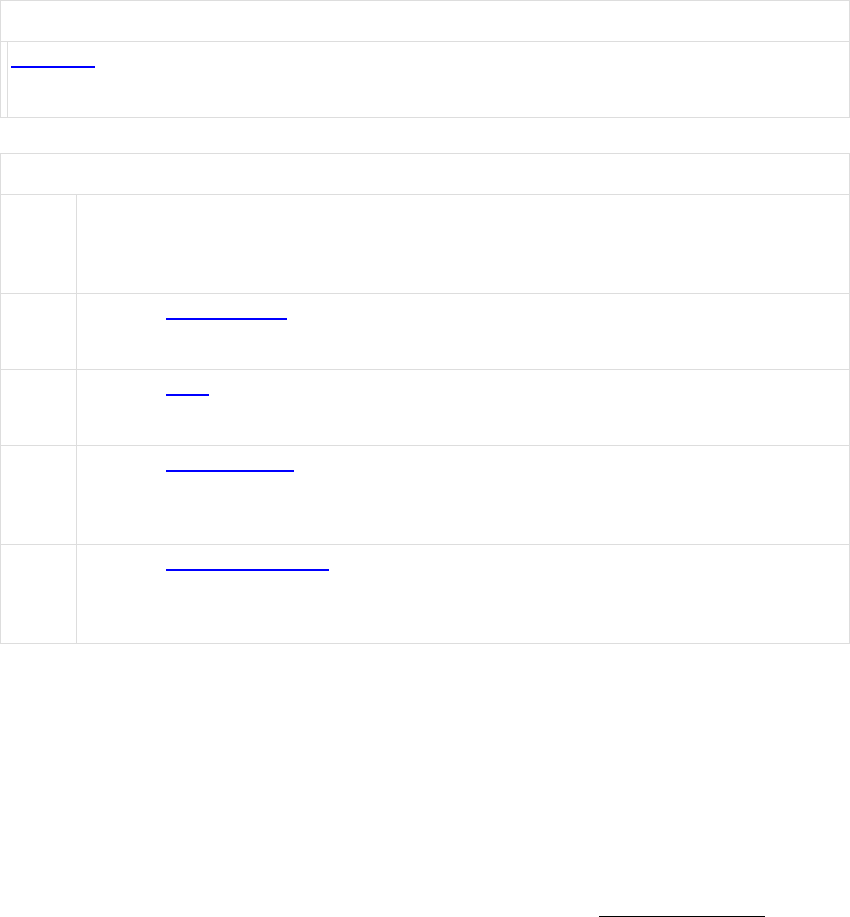
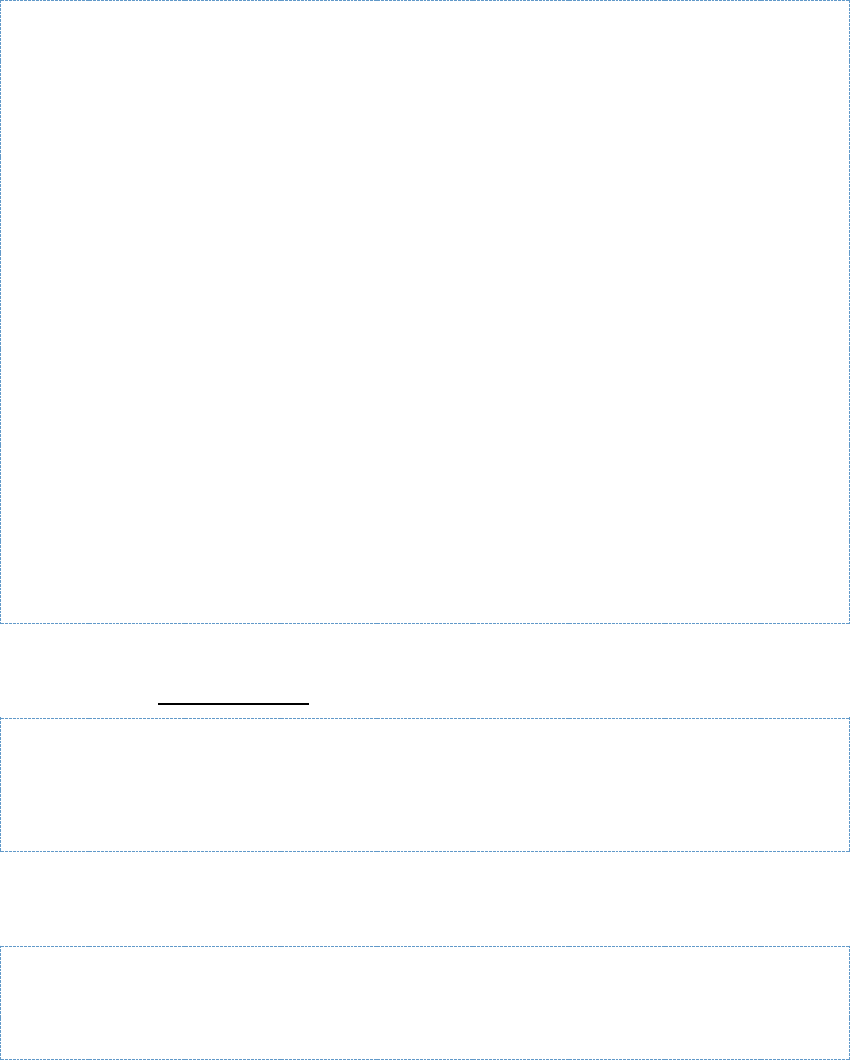
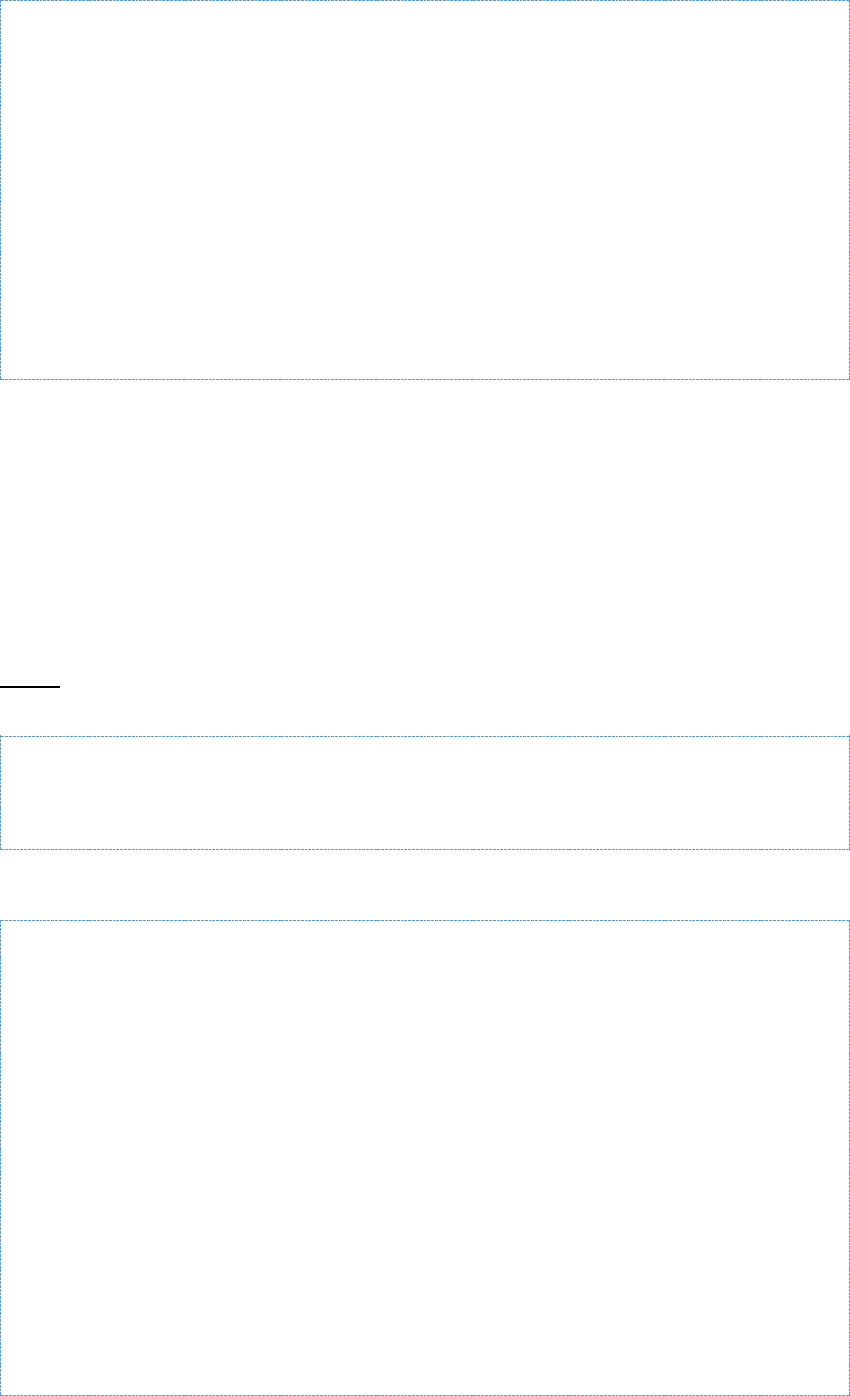
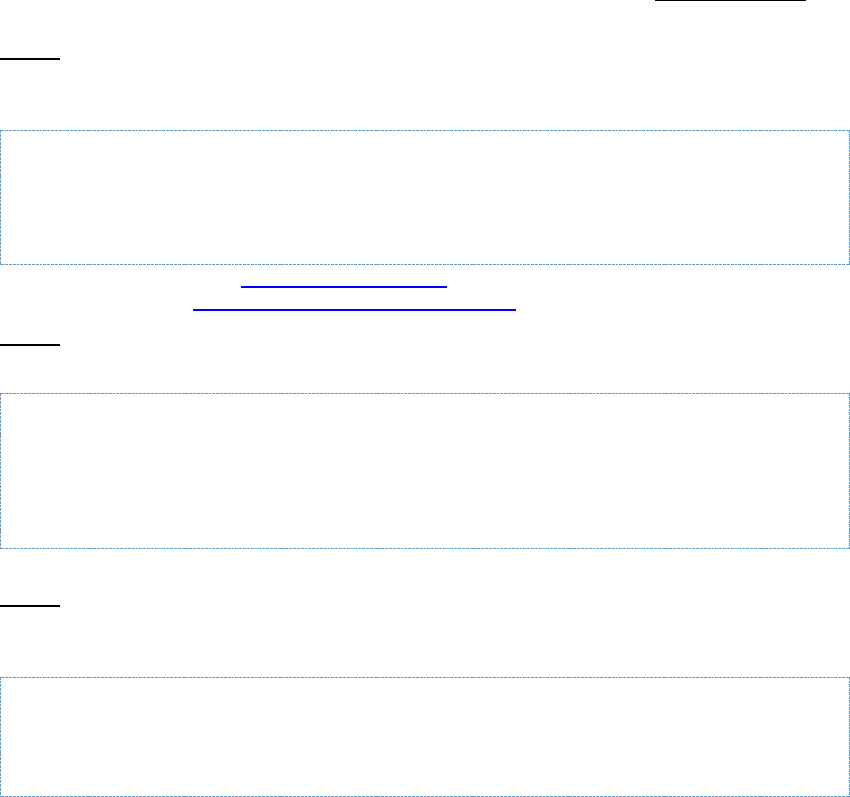
With the addition of the .html file, the directory structure should now read as follows:
Figure 3: Directory Structure with AnnouncingClock.html File
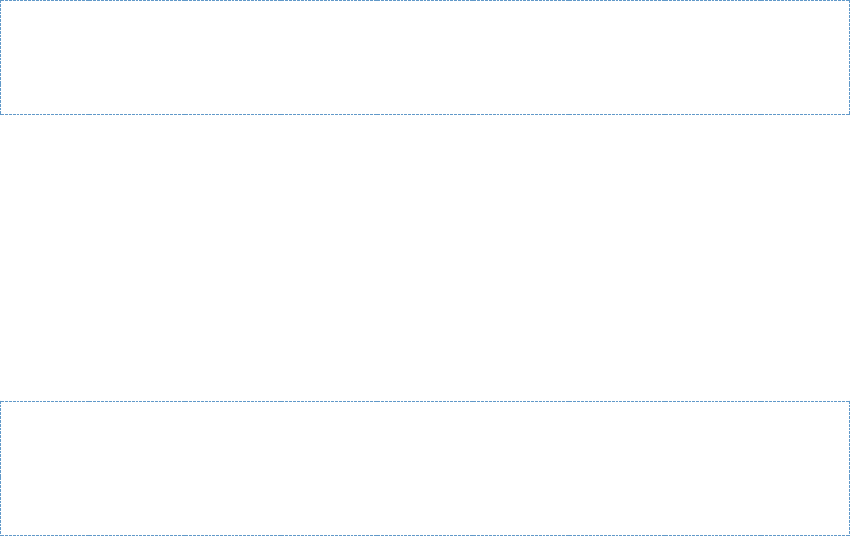
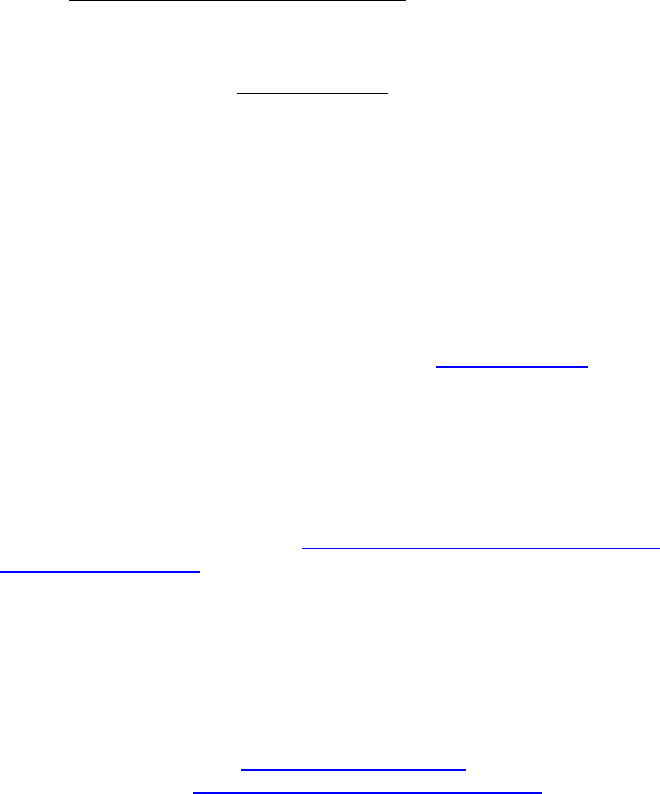
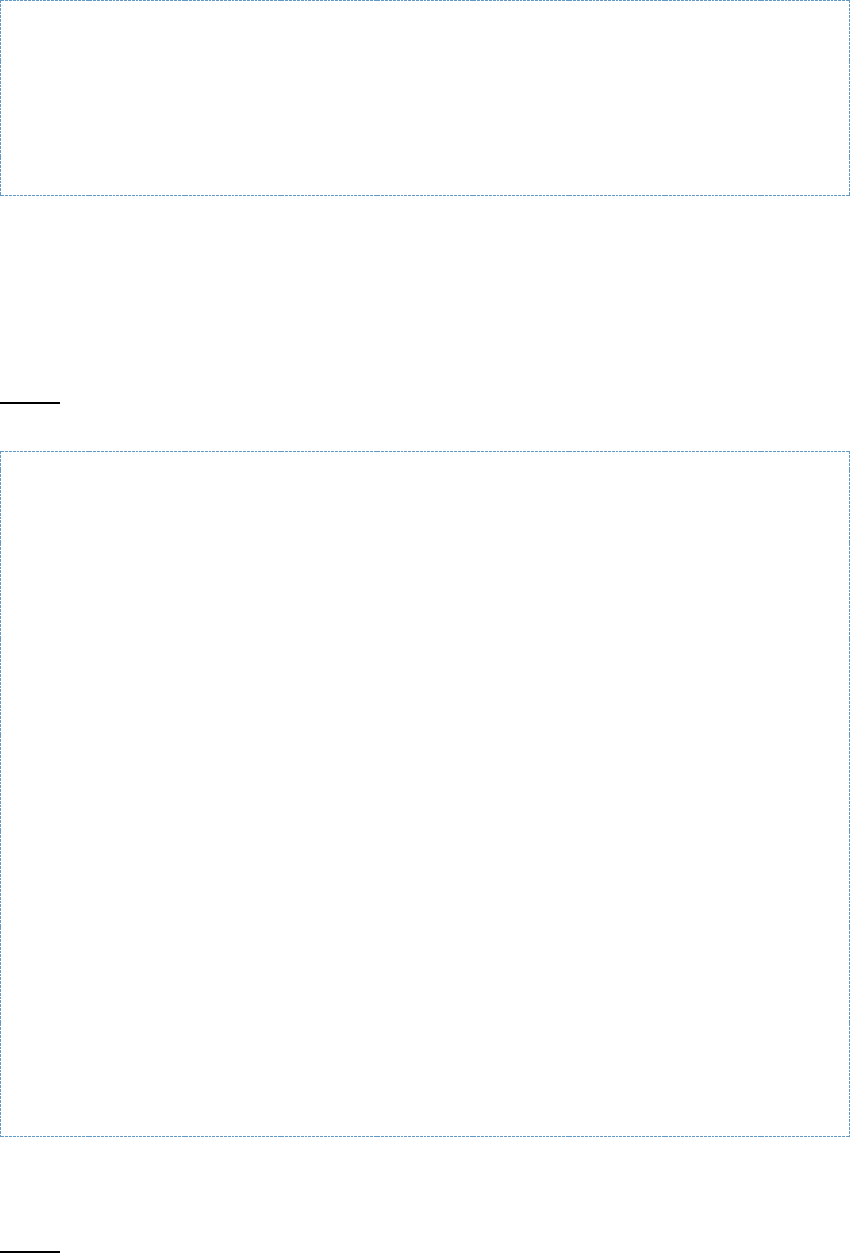
When opened in a browser, the Announcing Clock App Component should look similar to Figure
4: Simple Announcing Clock App Component, shown below.
Note: Use URL http(s)://servername.port/DIRECTORYFROMSTEP_2/announcing-
clock/AnnouncingClock.html.
Figure 4: Simple Announcing Clock App Component
Step 3: Create a .war file
A .war file is a Web application compressed into a single file. While directories and files can be
copied directly onto the Web server, it is easier and more common to use a .war file.
To create the .war file for the Announcing Clock App Component, open a command prompt and
navigate to the \webapp directory created in 2.2: Walkthrough. From the directory, the following
command should be run:
jar cvf announcing-clock.war .
Note: The command path must contain a JDK bin folder. For example: path=C:\Program
Files\Java\jdk1.6.0_18\bin;%PATH%
Step 4: Deploy the .war file to the Server
The deployment method used depends on the Web application server. For the prepackaged
OWF Tomcat server, the process is as simple as copying the .war file into the tomcat\webapps
directory on the Web application server. In the event that a particular application server has
different requirements, the appropriate Java application server documentation should be
consulted for information on how the .war file should be deployed.
2.3 Additional Considerations
2.3.1 Utility JS API
The JavaScript Utility API is provided to allow the developer to determine whether or not the
app component is running inside OWF. This is useful if the app component needs to render
differently or has different defaults depending on whether or not it is running internal or external
to OWF. For instance, if an app component is supposed to turn on logging when running inside
OWF, the developer can use the JavaScript Utility API to determine this.
Note: In some previous versions of OWF, an app component launched outside of OWF would
spawn an error in an alert window. Now, an app component can be launched and used outside
OWF. And while certain features, both specific and critical to OWF, such as the launch of
DOD GOSS – OWF Developer's Guide
Creating an App Component – 11
security alert windows, preferences and eventing will not operate outside OWF, the error alert
window will not launch, provided the app component URL is NOT appended with “owf=true”.
Moreover, APIs can often throw exceptions which can make an app component fail to load.
While originally defined in js\util\widget_utils.js, the interface object now resides within the
Ozone.util namespace. The entire namespace has been included in the OWF Widget JS
bundles (both debug and min) for convenience.
Namespace Summary
OWF.Util
This method informs a widget developer if their widget is running in a Container, like OWF.
Method Summary
<static>
OWF.Util.cloneDashboard()
Clones dashboard and returns a dashboard cfg object that can be used to create new
dashboards.
<static>
OWF.Util.getFlashApp(id)
This method returns flash/flex dom element from dom.
<static>
OWF.Util.guid()
Returns a globally unique identifier (guid).
<static>
OWF.Util.isInContainer()
This method informs a widget developer if their widget is running in a Container, like
OWF
<static>
OWF.Util.isRunningInOWF()
This method informs a widget developer if their widget is running from the OWF or
from a direct URL call.
2.3.2 Best Practices
Due to the complexity of the OWF APIs, a widget’s ability to signal that it is ready to
communicate with other widgets provides a helpful tool for developers. This ready signal is
typically sent after the Web app has subscribed to channels, registered RPC functions and
Intents, etc. Starting with OWF 6, there is a standard way for widgets to signal this ready status.
To signal that it is ready, a widget calls OWF.notifyWidgetReady() after it is finished setting up
any communication mechanisms. The OWF Development Team recommends that any widget
that uses OWF APIs makes the call. However, widgets that use the Widget Intents API’s receive
method must make this call.
2.3.3 OWF Bundled JavaScript
All required OWF JavaScript is minified and bundled into one JavaScript file, found in
tomcat\webapps\owf\public\js\owf-widget.min.js. This shields developers from future
changes or upgrades to the underlying JavaScript files.
There are multiple ways that developers can reference the owf-widget.min.js file from their app
components. One way is to hard-code a link to the file residing on a specific OWF. This has the
disadvantage of tying the app component to a particular OWF instance. Another option is to
include a copy of owf-widget.min.js with the app component itself, and to use a relative URL to
reference it. This makes the app component independent of any particular OWF instance, but
DOD GOSS – OWF Developer's Guide
Creating an App Component – 12
ties the app component to a specific version of the owf-widget.min.js file. If there is a version
mismatch between this file and the OWF version where the app component is run, then
problems could arise.
The recommended way to include the owf-widget.min.js file into an app component is to
create the script reference dynamically so that it always refers to the copy of owf-widget.min.js
on the OWF server where the app component is currently running. The dynamic reference can
be generated either server-side or client-side. To generate it server-side, use the "Referer" [sic]
HTTP header, which will contain the URL of the main OWF page when the app component is
launched. To retrieve the URL of the OWF instance for the app component's client-side code,
use the following JavaScript:
JSON.parse(window.name).preferenceLocation.split('/prefs')[0];
Note: The code example above uses the JSON object, which is not available by default in IE7. If
IE7 support is needed, modify the code to use a different JSON parser or include the json2
JavaScript library in your application.
2.3.4 Debug Version of the OWF Bundled JavaScript
A debug version of OWF Bundled JavaScript is also provided. Developers can find owf-widget-
debug.js and owf-widget-min.js in tomcat\webapps\owf.war\js-min. The files are not
minified and are useful for debugging. The version of OWF Bundled JavaScript may be included
from the location below:
<script type="text/javascript"
src="https://servername:port/owf/static/js/owf-widget-debug.js"></script>
Note: As a best practice, the developer should include the owf-widget-debug.js file into an app
component by dynamically referencing the copy of owf-widget-debug.js on the OWF server
where the app component is currently running; this helps make the app component less
dependent on a specific OWF instance.
2.3.5 OWF Bundled JavaScript and Dojo
The OWF bundled JavaScript file includes a custom build of the Dojo JavaScript Toolkit. This
custom build of Dojo remaps dojo to owfdojo. This allows app component developers to include
their own version of Dojo using the default dojo namespace. It is not recommended that
developers use owfdojo as it may be removed in a future release.

DOD GOSS – OWF Developer's Guide
Adding an App Component to OWF – 13
3 Adding an App Component to OWF
3.1 Overview
OWF provides a App Component Manager, located by clicking the Administration link in the
drop-down User Menu (you must be an OWF administrator to see the Administration link) and
then click App Components. Administrators can use this manager to create app component
descriptor files and add app component definitions to OWF. The manager allows an
administrator to complete the app component definition or edit the descriptor URL in the user
interface, then OWF maps the app component to users in the system. Once a app component
definition has been created and mapped to a user, it will then be added to the user’s App
Components menu or toolbar depending on the app component type.
Due to the fact that an app component definition actually points to the URL of a lightweight Web
application, an administrator is not required to update app component definitions unless the
location of the app component changes.
3.2 Walkthrough
3.2.1 Creating Descriptor Files for App Components
Developers can save the App Component information in the descriptor file and then share that
file with administrators. This allows administrators to import data instead of typing entries for
each field. The administrator simply enters a URL and the app component's information is
automatically retrieved from a descriptor file that a developer maintains. Administrators can
change properties in the app component’s definition once it has been added to OWF. However,
an administrator’s changes will only affect their deployment of OWF, unless the administrator
exports those changes to the Web-accessible location where the descriptor URLs are stored.
Descriptor URLs offer several benefits. They reduce the risk of typing errors when entering app
component data into the OWF interface. They allow for several installations of OWF to easily
share app component information via the descriptor file. In addition, descriptor files can contain
a universal name which is a developer-generated, custom identifier that can be used to identify
the app component across multiple OWF instances.
• To support Internet Explorer 10 and higher, the location that hosts App Component
descriptor files must be CORS enabled. Usually, the Web app used to create the App
Component also serves as the host for the descriptor file. The method used to configure
CORS support will vary based on the type of Web app platform used. For backwards
compatibility, the format of the descriptor file itself is unchanged. The template is located in
etc/widget/descriptor within the OWF bundle.
To create an app component descriptor URL, follow these instructions:
1) Sign in to OWF as an administrator.
2) Click the Administration link, located on the drop-down User Menu on the toolbar to open the
Administration Tools. Select App Components to open the App Components Manager.
3) Click Create to open the App Component Editor.
4) Click “Don’t have a descriptor URL?”
Populate the mandatory fields in the definition and click Apply.
Note: For more information about specific entry fields, please see the Administrator’s Guide.
5) OPTIONAL: Add the capability to send intents. An Intent is simply an object describing an
action and a data type. Sending an Intent should be tied to a user-generated action such as

DOD GOSS – OWF Developer's Guide
Adding an App Component to OWF – 14
clicking a button or link. (If the app component does not require an intent, skip this step.)
Developers should use the App Component Editor to add and edit intents.
a) To add an intent, select the Intents tab in the App Component Editor and click Create.
b) Populate the following fields:
i. Action - The Action should be a verb describing what the user is trying to do (i.e. plot, pan,
zoom, view, graph, etc.).
Note: Intents are NOT case sensitive.
ii. Data Type - The Data Type is an object containing the data that the intent is sending. It
describes what type of data is being acted upon. The data type format is described in 12.4.1:
Recommended Intents Data Type Conventions.
The format of the data depends solely on how the sending or receiving widget is expecting to
use the data. For example, “application/vnd.owf.sample.price” tells the NYSE App Component’s
how to display price.
iii. Send – Checked by default, this field identifies if the app component can send intents.
iv. Receive –This field identifies if the widget can receive intents.
c) Click OK.
6) Return to the App Component Manager:
a) Select the new App Component.
b) Click the split Edit button, then select Export from the drop-down menu.
7) Enter a File Name (this will be the name of the HTML descriptor file) and click OK.
8) Save the file to a Web-accessible location like a directory where app component data is
stored.
9) Return to the OWF user interface and open the App Component Manager. Select the new
app component, and click Edit.
10) From the App Component Editor, enter the new Descriptor URL location, click Load, then,
click Apply.
Note: From the App Component Editor, administrators can edit the app component descriptor
URL. However, those changes will not change the “master” copy of the descriptor unless they
replace the descriptor file stored at the Web-accessible location referenced above.
3.2.2 Sharing Descriptor Files
There are two ways to share app component descriptors:
a) Export the file – To obtain an exportable HTML file, select the widget in the Widget
Manager, click the split edit button and select Export. Exporting the widget descriptor URL only
sends a copy of the file. The administrator will not receive future updates to that file that is
stored on the Web-accessible location.
b) Share the descriptor location - Sending a link to the app component descriptor file that is
stored on a Web-accessible location will enable the administrator to receive updates to the app
component descriptor URL by clicking Load, then Apply in the App Component Editor.
DOD GOSS – OWF Developer's Guide
Adding the Eventing API to an App Component – 15
4 Adding the Eventing API to an App Component
4.1 Overview
In order to create rich, interactive and integrated presentation-tier workflows, app components
must be able to communicate with each other; one method to do this is via the Eventing, or
Publish-Subscribe, API. The Eventing Framework is a client-side browser communication
mechanism that allows app components to communicate with each other by using an
asynchronous publish-subscribe messaging system.
App Components have the ability to send and receive data on named channels. All widgets can
be built so they can publish messages to any channel, just as all widgets can be built to
subscribe to any channel at any time.
There are two main components to the Eventing Framework. First is the supporting
infrastructure within each application that routes messages. This piece is already implemented
by OWF, and is mentioned only to explain how the Eventing infrastructure works. Second, and
of more direct interest to developers, is the infrastructure available to each widget, detailed
below.
4.2 Walkthrough
This walkthrough will go through the process of creating a new widget called SecondTracker.
The new widget will use the Eventing API to track how many seconds the Announcing Clock
Widget has been running. See the section 2.2: Walkthrough section for more information on the
proposed directory structure.
Note: The full code can be found in SecondTracker.html located in the OWF Sample Widgets
bundle under the\html-widgets.zip\src\main\webapp\clock.
1) Copy relay file
From the unzipped bundle, go to the \etc\widget\js\eventing folder, and copy the file
rpc_relay.uncompressed.html. Paste it into the owf-server-bundle\samples\html-
widget\src\main\webapp folder.
Note: This is necessary for Internet Explorer 7 support.
2) Create the SecondTracker Widget
In the webapp folder, create a file called SecondTracker.html. Copy and paste the following
code into the file:
<html>
<head>
<title>Second Tracker</title>
</head>
<body>
<div class="widgetContents">
<div class="panel-header">
Second Tracker
</div>
<div class="panel-body">
<table class="messagePanel">
<tr>
<td width="50%">Current Time:</td>
<td> <span id="currentTime"></span><br/> </td>
</tr>
<tr>
<td width="50%">Connection Uptime (s):</td>

DOD GOSS – OWF Developer's Guide
Adding the Eventing API to an App Component – 16
<td> <span id='minutesOnline'>0</span> </td>
</tr>
<tr>
<td width="50%"> Received on channel: </td>
<td> <span id="channelName"></span> </td>
</tr>
</table>
<div id="tracker-error-panel" class="error-panel">
<span id="error"></span>
</div>
</div>
</div></body>
</html>
3) Import the JavaScript files
To add the Eventing API to the widget, include the event manager script and its dependencies.
To do this, copy and paste the following script tags into the head of the SecondTracker.html file:
<script type="text/javascript"
src="https://servername:port/owf/static/js/owf-widget.min.js"></script>
Replace all occurrences of https://servername:port with the name of the server where OWF is
running, for example, https://www.yourcompany.com:8443.
Note: The owf-widget-min.js file may be replaced with the debug version and may be hosted
locally. Refer to the section 2.3.2: Best Practices in its entirety for more details on owf-minified
files.
4) Add code that uses the Eventing API to subscribe to a channel
Copy and paste the following code into the head of the SecondTracker.html file:
<script type="text/javascript">
//The location is assumed to be at
/<context>/js/eventing/rpc_relay.uncompressed.html if it is not set
OWF.relayFile = '/owf-sample-
html/js/eventing/rpc_relay.uncompressed.html';
function trackerInit() {
document.getElementById('currentTime').innerHTML = new Date();
var launchConfig = OWF.Launcher.getLaunchData();
if(!launchConfig) {
// Not launched
document.getElementById("error").innerHTML = "Widget was
launched manually";
document.getElementById("tracker-error-panel").style.display
= 'block';
// Receive clock broadcast in a default manner
OWF.Eventing.subscribe(“ClockChannel”, this.update);
}
else {
// We are expecting the channel to listen on to be passed in

DOD GOSS – OWF Developer's Guide
Adding the Eventing API to an App Component – 17
dynamically.
// Update it on the page
var launchConfigJson = OWF.Util.parseJson(launchConfig);
var channelToUse = launchConfigJson.channel;
document.getElementById("channelName").innerHTML =
channelToUse;
// intialize the time clock on the page.
document.getElementById('currentTime').innerHTML = new
Date();
// Make sure we do not see the error panel
document.getElementById("tracker-error-panel").style.display
= 'none';
OWF.Eventing.subscribe(channelToUse, this.update);
}
}
/**
* The function called every time a message is received on the
eventing channel
*/
var update = function(sender, msg) {
var count =
parseInt(document.getElementById('minutesOnline').innerHTML);
count = count +1;
document.getElementById('minutesOnline').innerHTML = count;
document.getElementById('currentTime').innerHTML = msg;
};
owfdojo.addOnLoad(function() {
OWF.ready(trackerInit);
});
</script>
The code above performs several functions:
a) The relayFile is configured by setting OWF.relayFile to the location of the file. (In the above
example owf-sample-html is assumed to be the root context.) The developer must replace
/owf-sample-html/js/eventing with the correct relative location of the
rpc_relay.uncompressed.html file (see the note below for more information).
Note: Pay attention to the OWF relay file argument. In order to work correctly, the relay file
must be specified with full location details, but without a fully qualified path. In the case
where the relay is residing at http://server/path/relay.html, the path used must be from the
context root of the local widget. In this case, it would be /path/relay.html. Do not include the
protocol.
Within the first method, trackerInit, the widget subscribes to the channel ClockChannel,
passing in its update function. To do this, include additional logic that determines if
SecondTracker was launched using the WidgetLaunch API. Please see 7: Widget Launcher API
for additional details.
b) The second method, update, serves as a callback for the Eventing framework. Whenever a
message is broadcast on the channel that the update function was subscribed to (in this case,
ClockChannel), the function will be invoked. All Eventing callback functions should take two
arguments - sender and message. When the update function is fired, the count is incremented,
and the innerHTML of the currentTime span is updated to reflect the message sent by the clock.
DOD GOSS – OWF Developer's Guide
Adding the Eventing API to an App Component – 18
c) The third method contains code to be executed when the page loads.
OWF.ready is called when the page loads by the line below:
owfdojo.addOnLoad(function() {
OWF.ready(trackerInit);
});
Opening the SecondTracker widget (http(s)://servername:port/announcing-
clock/SecondTraker.html) in a browser should look similar to the following figure.
Figure 5: SecondTracker Widget
5) Update the Announcing Clock Widget to use the Eventing API to publish to a channel
The AnnouncingClock must be updated to publish messages on the expected channel.
Replace the code in the AnnouncingClock.html file with the following:
<html>
<head>
<title>Announcing Tracker</title>
// This line includes the debug API included in the AnnouncingClock’s
sample webapp directory.
// In a production environment and an OWF bundle, owf-widget-debug.js
is located in the
// /owf/js-min directory.
<script type="text/javascript" src="../static/js/owf-widget-
debug.js"></script>
<script type="text/javascript">
//The location is assumed to be at
/<context>/static/js/eventing/rpc_relay.uncompressed.html if it is not
set
OWF.relayFile = '/owf-sample-
html/js/eventing/rpc_relay.uncompressed.html';
var logger = OWF.Log.getDefaultLogger();
var appender = logger.getEffectiveAppenders()[0];
// Enable logging
appender.setThreshold(log4javascript.Level.INFO);
OWF.Log.setEnabled(false);
function updateClock() {
var currentTime = new Date ( );
var currentHours = currentTime.getHours ( );
var currentMinutes = currentTime.getMinutes ( );
var currentSeconds = currentTime.getSeconds ( );
// Pad the minutes and seconds with leading zeros, if required
currentMinutes = ( currentMinutes < 10 ? "0" : "" ) +

DOD GOSS – OWF Developer's Guide
Adding the Eventing API to an App Component – 19
currentMinutes;
currentSeconds = ( currentSeconds < 10 ? "0" : "" ) +
currentSeconds;
// Choose either "AM" or "PM" as appropriate
var timeOfDay = ( currentHours < 12 ) ? "AM" : "PM";
// Convert the hours component to 12-hour format if needed
currentHours = ( currentHours > 12 ) ? currentHours - 12 :
currentHours;
// Convert an hours component of "0" to "12"
currentHours = ( currentHours == 0 ) ? 12 : currentHours;
// Compose the string for display
var currentTimeString = currentHours + ":" + currentMinutes +
":" + currentSeconds + " " + timeOfDay;
// Update the time display
document.getElementById("clock").firstChild.nodeValue =
currentTimeString;
OWF.Eventing.publish("ClockChannel", currentTimeString);
// Log a message
if (currentSeconds % 10 == 0) {
logger.debug(currentTimeString);
}
}
function initPage() {
updateClock();
msg = 'Running in OWF: ' +
(OWF.Util.isRunningInOWF()?"Yes":"No");
document.getElementById("message-panel").innerHTML = msg;
document.getElementById("message-panel").style.display =
'block';
setInterval('updateClock()', 1000 )
}
owfdojo.addOnLoad(function() {
OWF.ready(initPage);
});
</script>
</head>
<body>
<div class="widgetContents">
<div class="panel-header">
Announcing Clock
</div>
DOD GOSS – OWF Developer's Guide
Adding the Eventing API to an App Component – 20
<div id="error-panel" class="error-panel">
</div>
<div class="panel-body">
<div class="clock-frame">
<span id="clock"> </span>
</div>
</div>
<div class="button-panel">
</div>
<div id="message-panel" class="message-panel">
</div>
</div>
</body>
</html>
Notice, that the following JavaScript has been added into the head of the AnnouncingClock.html
file created in the 2.2: Walkthrough:
<script type="text/javascript" src="../static/js/owf-widget-
debug.js"></script>
Note: In production environments, owf-widget-debug.js is found in the js-min directory.
The updateClock function has been modified to publish the current time. See the code snippet
below:
OWF.Eventing.publish("ClockChannel", currentTimeString);
Once complete, any widget that subscribes to ClockChannel will receive messages broadcast
from this widget. Once this widget is closed, the broadcast will stop.
The full code can be found in AnnouncingClock_Eventing.html located in the OWF Sample
Widgets bundle under the \html-widgets.zip\src\main\webapp\clock directory.
6) Deploy changes
To implement the changes, deploy the SecondTracker.html and the modified
AnnouncingClock.html files to the Web application server. (The deployment method used
depends on the Web application server. Usually it can be done by re-bundling the .war file with
the new SecondTracker.html and AnnouncingClock.html files and then copying the .war file into
the \webapps directory on the Web application server. See the Web application server
documentation for information on the best practices for deploying changes.)
DOD GOSS – OWF Developer's Guide
Adding the Eventing API to an App Component – 21
7) Add the SecondTracker and Announcing Clock Widgets to OWF
For the Eventing to function correctly, add the SecondTracker.html and the modified
AnnouncingClock.html files to OWF via the OWF Admin page. For details on how to do this, see
section 3: Adding an App Component to OWF.
8) Testing the SecondTracker and Announcing Clock Widgets in OWF
To launch and test the newly modified widgets, deploy them on OWF. For details, please see
the walkthrough in section 3.2: Walkthrough.
4.3 Additional Considerations
4.3.1 Channel Conventions
It is important to use a unique channel name so widgets are not accidentally published or
subscribed to a pre-existing channel. One approach is to use a hierarchical naming pattern with
the levels of the hierarchy separated by a dot (.). To form a unique channel, prefix the channel
name with a customer domain name reversing the component order. For example, if developing
a widget for a company with the domain name of mycompany.com, the channel name’s prefix
would be com.mycompany. From that point, naming conventions for an individual’s organization
can be used to complete the channel name.
4.3.2 Required Includes
Here is the complete list of scripts needed to successfully use the Eventing API:
<script type="text/javascript" src="https://servername:port/owf/static/js/owf-
widget.min.js"></script>
<script type="text/javascript">
//The location is assumed to be at /<context>/static/js/eventing/rpc_relay.uncompressed.html if
it is not set
//OWF.relayFile = '/<context>/static/js/eventing/rpc_relay.uncompressed.html';
</script>
Replace all occurrences of https://servername:port with the name of the server where OWF is
running, for example, https://www.yourcompany.com:8443. Replace all occurrences of
<context> with the root context of your Web application
4.3.3 Payload Conventions - Data Encoding and RESTful Eventing
It is acceptable to directly encode the data broadcasted on Eventing channels as a simple
string. This approach works when sending only a single variable. While a flat string would
require the least amount of overhead, it leads to rigid code in the data, especially if the
complexity of the sent data increases, because the code that parses the string may not be
flexible. In that case, refactoring the message payload may break contract with established
listening widgets.
Sending JSON objects with the data directly embedded is an approach that leads to
considerably more flexible code. This process allows for the adding of additional data without
having to recode widgets that may not have been updated to communicate with the most
current version of the broadcasting widget.
While simple strings and JSON objects will work well for many use cases, there are two
situations in which widget developers can run into issues:
a) The information that is being sent has potential security concerns.

DOD GOSS – OWF Developer's Guide
Adding the Eventing API to an App Component – 22
b) The size of information to be passed is large (such as a data set with hundreds of rows).
Sending large quantities of information across the client browser can cause memory and
performance issues.
The solution in both cases is to send a reference to the information rather than the information
itself. The standardized best practice for sending said information is to send a REST URI
encoded as a JSON object that contains the correct way to look up this information. The JSON
object would then be parsed by the receiving widget and acted upon appropriately.
Currently, the standardized JSON object has only one field, dataURI. Later versions of this
standard may contain additional fields. Adhering to this standard will ensure that other OWF
compliant widgets will be able to communicate effectively.
A sample JSON object with a REST URI is described below:
{
dataURI: ‘https://server/restful/path/to/object’
}
For a widget to make information available to other OWF widgets, by exposing a REST API, it is
important to guarantee that REST information will be accessible via cross-domain through AJAX
calls. By default, many browsers will prevent such a call from succeeding and therefore
developers must take explicit steps to make their application function correctly.
The recommended approach is to use the relatively recent Cross-Origin Resource Sharing
(CORS) standard, which allows the browser and the server to cooperate in a way which safely
allows cross origin calls to succeed. See the official CORS specification for details:
http://www.w3.org/TR/cors/ .
One downside to CORS is that it is not supported by older browsers such as Internet Explorer 7.
If you wish to support these browsers, the recommended approach is to use Dojo’s
window.name technique. The Dojo windowname library is already included with OWF as it is the
solution that OWF uses to make cross-domain AJAX calls to the Preference API.
More details can be found about the window.name technique here:
http://www.sitepen.com/blog/2008/07/22/windowname-transport/
Two additional techniques that developers may wish to take into consideration are:
• JSONP, details of which can be found here:
http://bob.pythonmac.org/archives/2005/12/05/remote-json-jsonp/
• Subspace, details of which can be found here: http://www2007.org/papers/paper801.pdf
4.3.4 Eventing Browser Limitations
Microsoft Internet Explorer 7 has a maximum URL length of 2,083 characters.
See the the Microsoft knowledge base article for more information
http://support.microsoft.com/kb/208427.
In versions of OWF prior to OWF 5, this limit on the URL would also limit the maximum size of
the eventing message payload in Internet Explorer 7. However, in OWF 5 upgrades were made
to allow more than 2,000 characters to be sent. This was accomplished by breaking up the large
messages into smaller chunks each less than 2000 characters in size and sending each chunk
individually. This approach allows larger messages to be sent at the cost of performance. It is
still recommeneded to follow guidelines in section 4.3.3: Payload Conventions - Data Encoding
and RESTful Eventing due to the concerns described in that section.
DOD GOSS – OWF Developer's Guide
Adding the Eventing API to an App Component – 23
4.3.5 Eventing API Enhancements
OWF automatically enables Eventing and Drag and Drop. By automatically enabling Eventing,
an app componet in a floating window (like the Desktop or Tabbed application layouts) activates
when a user clicks inside it. Without Eventing, users would have to click once to focus the app
component and then click a second time to activate it. Eventing also activates Drag and Drop
indicators. For example, an app component will activate when a user drags the mouse over it.
DOD GOSS – OWF Developer's Guide
Adding the Preferences API to an App Component – 24
5 Adding the Preferences API to an App Component
5.1 Overview
The OWF Preference JavaScript API provides a convenient mechanism for the developer to
store user specific data to the OWF database. A user preference is simply a string value that is
uniquely mapped to a user, name and namespace combination. In the walkthrough below, a
military time checkbox will be added to the Announcing Clock app component developed in the
section 2.2: Walkthrough. The state of this check box, whether it has been checked or not, is
stored in a user preference. The following is a screenshot of this preference taken from OWF’s
Preference dialog:
Figure 6: Preferences Dialog
The namespace should use a hierarchical naming pattern to avoid a naming collision with other
widgets. The value can be any string value including JSON.
The preference API comprises the following:
• getUserPreference({namespace: 'namepace', name:'name', onSuccess:onSuccess,
onFailure:onFailure});
• setUserPreference({namespace: 'namespace',name: ' name', value: 'value',
onSuccess:onSuccess, onFailure:onFailure});
• deleteUserPreference({namespace: 'namepace', name:'name', onSuccess:onSuccess,
onFailure:onFailure});
Each of these methods communicates with the server asynchronously and therefore requires
the use of callback functions to provide the results of the requested operation.
For all three methods, the onSuccess callback should be a callback function that expects one
argument to be passed in: a JSON object of the following structure:
{ "value":"true",
"path":"militaryTime",
"user":
{
"userId":"testAdmin1"
},
"namespace":"com.mycompany.AnnouncingClock"
}
In getUserPreference, this is the preference retrieved. In setUserPreference, this is the
preference object to be created. And in deleteUserPreference, this is the object deleted.
If an object is not found on a getUserPreference, a different JSON object is returned to the
onSuccess function, which looks like this:
{
preference: null,
success: true
}
DOD GOSS – OWF Developer's Guide
Adding the Preferences API to an App Component – 25
If an error occurs, such as a 500: Internal Server Error, the onFailure callback is executed. It is
passes two arguments, as follows:
function onFailure(errorMessage,statusCode){
alert('Error ' + errorMessage);
alert(statusCode);
}
errorMessage is a String describing the issue, while errorCode is a numeric code indicating the
HTTP error code returned by the server.
5.2 Walkthrough
This walkthrough will expand on the AnnouncingClock.html app component created in the
section 2.2: Walkthrough, by adding a “Military Time” checkbox whose state is stored in the
OWF database using the OWF preference JavaScript API.
Step 1: Add the Required Libraries
The following JavaScript libraries must be added to the AnnouncingClock.html and are required
for the proper execution of the OWF Preference JavaScript API. Add the following script
statements right after the opening head tag:
<script type="text/javascript"
src="https://servername:port/owf/static/js/owf-widget.min.js"></script>
<script type="text/javascript">
owfdojo.config.dojoBlankHtmlUrl = '../static/vendor/dojo-1.5.0-
windowname-only/dojo/resources/blank.html';
</script>
Replace all occurrences of https://servername:port with the name of the server where OWF is
running, for example, https://www.yourcompany.com:8443. Additionally, be sure to verify that
the windowname library paths point to the local installation.
Step 2: Add the Military Time Checkbox
Add the HTML markup for the check box inside the body tag after <span
id='clock'> </span> (the clock span tag) in the AnnouncingClock.html file:
<br>Use Military Time:<input id="checkboxMilitaryTime" type="checkBox"
onClick="militaryTimeCheckboxChanged(this.checked);"/>
The onClick event will be used to save the state of the check box.
Step 3: Persist the Checkbox State
Add the following code within the script tag:
DOD GOSS – OWF Developer's Guide
Adding the Preferences API to an App Component – 26
function onSetFailure(error,status) {
console.log("Got an error updating preferences! Status Code: " +
status
+ ". Error message: " + error);
};
function militaryTimeCheckboxChanged(checkedState) {
this.militaryTime = checkedState;
OWF.Preferences.setUserPreference(
{namespace:'com.mycompany.AnnouncingClock',
name:'militaryTime',
value:checkedState,
onSuccess:function(){},
onFailure:onSetFailure});
}
OWF.Preferences.setUserPreference will create or update the following preferences:
• A namespace of ‘com.mycompany.AnnouncingClock’
• A name of ‘militaryTime’
• A value of either true or false depending on whether or not the military time checkbox is
checked
• The callback function is executed if the user preference is successfully stored in the
database. Since no action is required under a successful completion in this walkthrough, we
are passing a no-op function.
• The onFailure callback function that will log the error message if an error occurs.
Step 4: Initialize the Checkbox with the Saved State
Change the body’s onload event to clockInit():
<body onload="clockInit(); setInterval('updateClock()', 1000 )">
Add the following code within the script tag:
function onGetFailure(error,status) {
if (status != 404) {
console.log("Got an error getting preferences! Status Code: "
+ status + ". Error message: " + error);
}
}
function onGetMilitaryTimeSuccess(pref){
if (pref.value == 'true'){
this.militaryTime = true;
document.getElementById('checkboxMilitaryTime').checked = true;
}
else{
this.militaryTime = false;
document.getElementById('checkboxMilitaryTime').checked = false;
}
updateClock();
}
function clockInit (){
OWF.Preferences.getUserPreference(
DOD GOSS – OWF Developer's Guide
Adding the Preferences API to an App Component – 27
{namespace:'com.mycompany.AnnouncingClock',
name:'militaryTime',
onSuccess:onGetMilitaryTimeSuccess,
onFailure:onGetFailure});
}
The body’s onload event calls the clockInit method which retrieves the user’s
com.mycompany.AnnouncingClock.militaryTime preference asynchronously. After successfully
retrieving the user preference, the getUserPreference method invokes the
onGetMilitaryTimeSuccess callback function passing the retrieved preference object. The value
is read from the preference object and is used to update the state of the checkbox in the
Document Object Model (DOM).
Step 5: Update the Time Display to Accommodate Military Time
Replace the updateClock function with the following:
function updateClock ( ){
var currentTime = new Date ( );
var currentHours = currentTime.getHours ( );
var currentMinutes = currentTime.getMinutes ( );
var currentSeconds = currentTime.getSeconds ( );
// Pad the minutes and seconds with leading zeros, if required
currentMinutes = ( currentMinutes < 10 ? "0" : "" ) + currentMinutes;
currentSeconds = ( currentSeconds < 10 ? "0" : "" ) + currentSeconds;
var timeOfDay = '';
// Convert the hours component to 12-hour format if needed
if (!this.militaryTime)
{
// Choose either "AM" or "PM" as appropriate
timeOfDay = ( currentHours < 12 ) ? "AM" : "PM";
currentHours = ( currentHours > 12 ) ? currentHours - 12 :
currentHours;
// Convert an hours component of "0" to "12"
currentHours = ( currentHours == 0 ) ? 12 : currentHours;
}
// Compose the string for display
var currentTimeString = currentHours + ":" + currentMinutes + ":" +
currentSeconds + " " + timeOfDay;
// Update the time display
document.getElementById("clock").firstChild.nodeValue =
currentTimeString;
}
The current time will now be displayed in either regular or military time depending on the state
of the military time checkbox.
Step 6: Create a .war File
A .war file is a Web application compressed into one file. While directories and files can be
copied directly onto the Web server, it is easier, and more common to use a .war file.
To create the .war file for the announcing clock widget, open a command prompt and navigate
to the webapp directory. Then run the following command:
DOD GOSS – OWF Developer's Guide
Adding the Preferences API to an App Component – 28
jar cvf announcing-clock.war .
Step 7: Deploy the .war File to the Server
The deployment method used depends on the Web application server. Usually it is as simple as
copying the .war file into the webapps directory on the Web application server. See the specific
Web application server documentation for information on the best practices for deploying
changes.
The app component should now look like this:
Figure 7: Announcing Clock Widget With Preferences API
The code for this walkthrough can be found in AnnouncingClock_Preference.html located in the
OWF bundle under the samples\html-widgets.zip\src\main\webapp\clock directory.
Step 8: Testing the SecondTracker and Announcing Clock Widgets in OWF
To launch and test the newly modified widgets, they must be deployed to OWF. For details,
please see section 3: Adding an App Component to OWF.
5.3 Additional Considerations
5.3.1 Browser Based Cross Domain Data Transfer
The OWF Preference JavaScript API uses Dojo’s windowname transport to access the OWF
application server from externally hosted widgets. See a discussion of the Dojo window name
transport.
The windowname transport is distributed within the OWF bundle and is located in the
\javascript\dojo-1.5.0-windowname-only directory. However, it is no longer necessary to include
these JavaScript files explicitly because they are included in the owf-widget-min.js bundle.
5.3.2 Required Includes
Here is the complete list of scripts needed to successfully use the preference API:
<script type="text/javascript"
src="https://servername:port/owf/static/js/owf-widget.min.js"></script>
Replace all occurrences of https://servername:port with the name of the server where OWF is
running, for example, https://www.yourcompany.com:8443. Additionally, be sure to verify that
the windowname library paths point to the local installation.
5.3.3 Payload Conventions – JSON/REST Data Encoding
In order to avoid name collisions with user preferences defined by other widgets, always use a
hierarchical naming pattern with the levels of the hierarchy separated by a dot (.). To form a
unique namespace, prefix the internet domain name, reversing the component order. For
example, if developing a widget for a company with the domain name of mycompany.com then
the namespace prefix would be com.mycompany. From that point, organizational naming
conventions can be applied to the rest of the namespace.
DOD GOSS – OWF Developer's Guide
Adding the Preferences API to an App Component – 29
To store several pieces of information, multiple user preferences can be created. As an
alternative, they can be aggregated into one logical object, converted into a JSON string, and
stored into one user preference. For example, consider storing a user’s first, middle and last
name. Using the first option would require the use of the following three user preferences:
1) com.mycompany.widget.firstName
2) com.mycompany.widget.middleName
3) com.mycompany.widget.lastName
Using the second option would require just one user preference using the following JSON
string:
{“firstName” : “John”,
“middleName” : “Quincy”,
“lastName” : “Adams” }
While simple strings and JSON objects will work well for many use cases, there are two
situations in which widget developers can run into issues:
a) The information that is being sent has potential security concerns.
b) The size of information to be passed is large (such as a data set with hundreds of rows).
Sending large quantities of information across the client browser can cause memory and
performance issues.
The solution in both cases is to send a reference to the information rather than the information
itself. The standardized best practice for sending said information is to send a REST URI
encoded as a JSON object that contains the correct way to look this information up. This object
would then be parsed by the receiving widget and acted upon appropriately.
Currently, the standardized JSON object has only one field, dataURI. Later versions of this
standard may contain additional fields. Adhering to this standard will ensure that other OWF
compliant widgets will be able to communicate effectively.
A sample JSON object with a REST URI is described below:
{
dataURI: ‘https://server/restful/path/to/object’
}
DOD GOSS – OWF Developer's Guide
Adding Logging to the App Component – 30
6 Adding Logging to the App Component
6.1 Overview
OWF supports diagnostic and error logging at a number of logging levels. While testing app
components in development, the log window can display log messages that have been output
by the application. As mentioned, this capability is intended to be used for developers in building
and testing their app components and is not recommended for end-users in a production
environment. Many browsers provide their own logging support. Adding the OWF logging to
your widgets is ideal when testing app components in Internet Explorer 7, which does not
provide logging support.
Figure 8: Log Window Screen
Note: In order to see the log4 JavaScript popup window, be sure to set the browser in use to
allow popups for the duration of the debugging session.
6.2 Walkthrough
This walkthrough will go through the process of enabling OWF console logging and adding log
messages to the Announcing Clock app component initially created in the 2.2: Walkthrough of
this document.
Step 1: Import the Proper JavaScript Files
OWF uses the JavaScript file log4javascript.js to handle logging. To include the capability in the
app component, add the following script tags to the head of the AnnouncingClock.html file.
<script type="text/javascript"
src="https://servername:port/owf/static/js/owf-widget.min.js"></script>
Replace all occurrences of https://servername:port with the name of the server where OWF is
running, for example, https://www.yourcompany.com:8443.
Step 2: Define the Logger
To define the logger, add the following script to the head of the AnnouncingClock.html file:
<script type="text/javascript">
var logger = OWF.Log.getDefaultLogger();
</script>
Step 3: Override Default OWF Log Settings
By default, logging is disabled throughout OWF. To enable logging, add the following code to
the script in the previous step:
Ozone.log.setEnabled(true);
var appender = logger.getEffectiveAppenders()[0];
appender.setThreshold(log4javascript.Level.INFO);
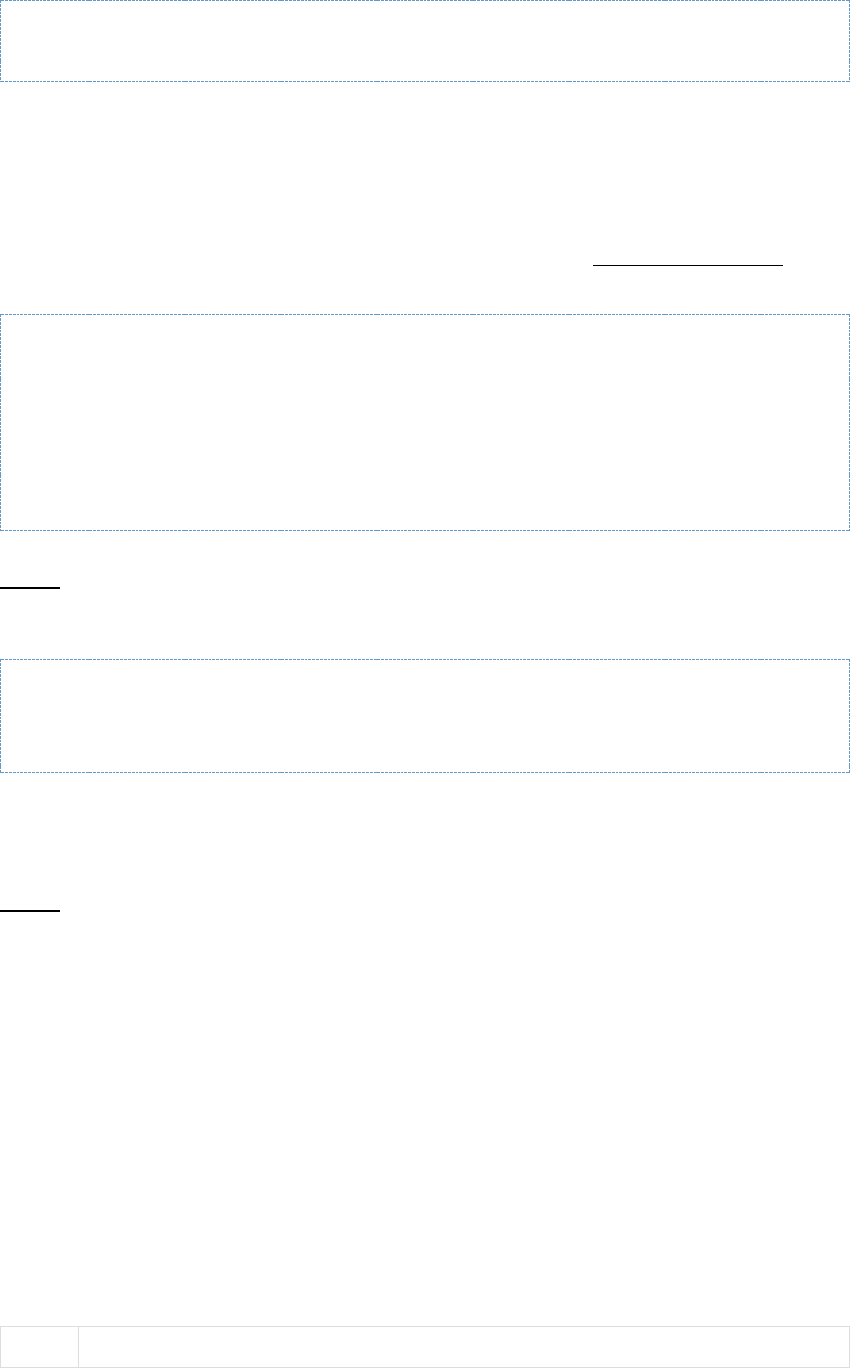
DOD GOSS – OWF Developer's Guide
Adding Logging to the App Component – 31
The method OWF.Log.setEnabled(true) is defined in the log.js file that was imported in Step 1.
It is this method which turns on the logging functionality.
The log messages will be written to the appender, which in this case is a pop-up window that
launches within OWF. The setThreshold method is defined in the log4javascript.js file that was
imported in Step 1 of this overview, and is responsible for setting the logging level. There are six
levels of logging. These levels are described in the table in section 6.3.1: Logging Levels.
The logging script is shown below in its entirety:
<script type="text/javascript">
var logger = OWF.Log.getDefaultLogger();
OWF.Log.setEnabled(true);
var appender = logger.getEffectiveAppenders()[0];
appender.setThreshold(log4javascript.Level.INFO);
</script>
Step 4: Add Log Message to the App Component
To actually display a log message in the Announcing Clock App Component, add the following
code to the JavaScript in the AnnouncingClock.html file:
logger.<logLevel>(<logMessage>);
Be sure that the <logLevel> is the log level described in the previous step and <logMessage> is
the message to be printed out.
The full code for this walkthrough can be found in AnnouncingClock_Logging.html located in the
OWF sample widgets bundle in the \html-widgets.zip\src\main\webapp\clock directory.
Step 5: Deploy Changes
The modified AnnouncingClock.html file must be deployed to the Web application server in
order for the changes to take effect. The deployment method used depends on the Web
application server being used. Usually the process is as simple as copying the .war file into the
webapps directory on the Web application server. In the event that a particular application
server has different requirements, the appropriate Java application server documentation
should be consulted for information on how the .war file should be deployed.
6.3 Additional Considerations
6.3.1 Logging Levels
There are six levels of logging. These levels are described in the table below:
Table 2: Log Levels
Level
Purpose
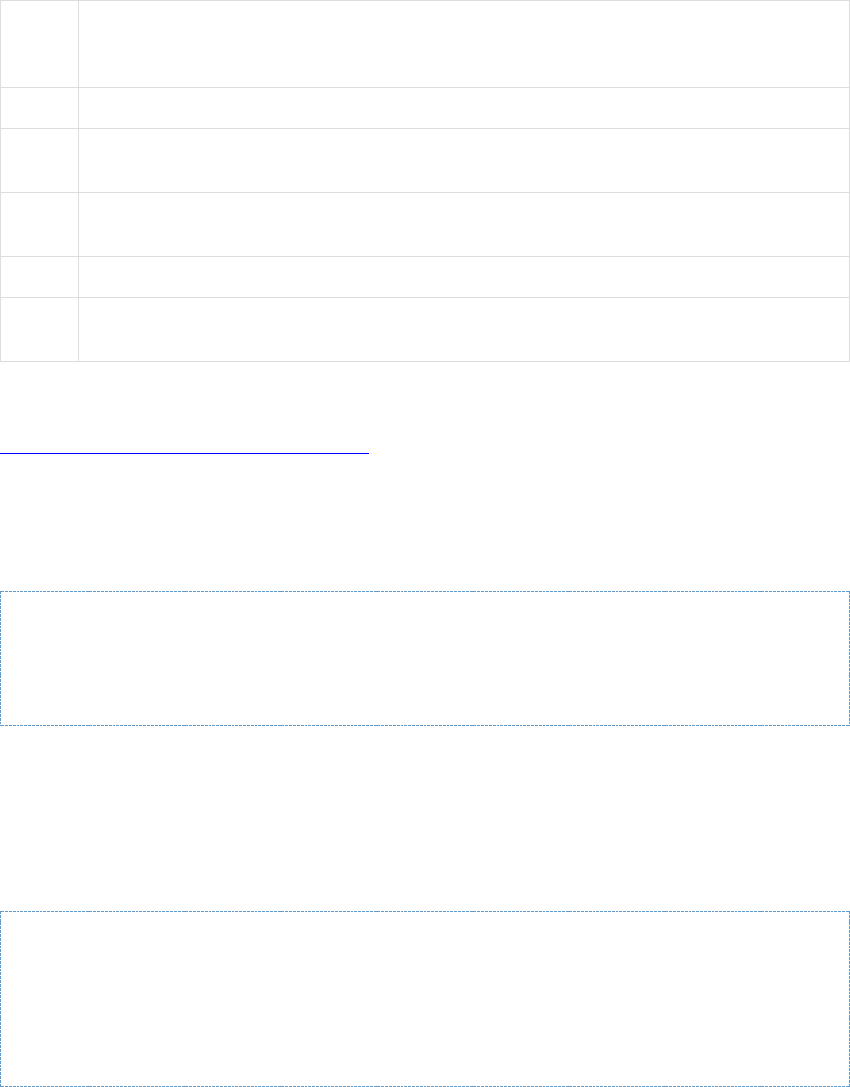
DOD GOSS – OWF Developer's Guide
Adding Logging to the App Component – 32
TRACE
Indicates a level of logging which depicts program flow. For example, Entry/Exit of
functions along with loop or condition statements. In general, this is used for tracking
down specific problems, but may be removed once the problem has been solved.
DEBUG
Outputs information that may be useful to developers running the application.
INFO
Outputs information that may be useful for Users and may be helpful in tracking down
issues with a deployed system.
WARN
Displays error conditions that can be successfully handled and do not cause the
application to perform unexpectedly.
ERROR
Displays errors that prevent the application from executing in a successful fashion.
FATAL
Displays conditions that cause the application from failing to load or are about to
cause the application to cease operating.
For more information about the format of the log messages visit:
http://log4javascript.org/docs/manual.html.
6.3.2 Load Time Logging
To record the time it takes for an app component to open, OWF ships with the parameters
sendWidgetLoadTimesToServer and publishWidgetLoadTimes set to “true:”
sendWidgetLoadTimesToServer: true
publishWidgetLoadTimes: true
The two parameters are located in application.yml in the \tomcat\webapps\owf\WEB-
INF\classes folder of OWF bundle. They operate separately. The publishWidgetLoadTimes
parameter writes to the Widget Log widget automatically. For the
sendWidgetLoadTimesToServer to record data on the server in \tomcat\logs\ozone-
widgeting-framework.log, the log level value in \tomcat\lib\owf-override-log4j.xml must be
set to “info.” See the following example:
<root>
<level value="info" />
<appender-ref ref="owf-async" />
</root>
Note: To increase performance, OWF ships with the root log level set to “error.”
To stop recording the load time in either location, change “true” to “false” and redeploy
application.yml.
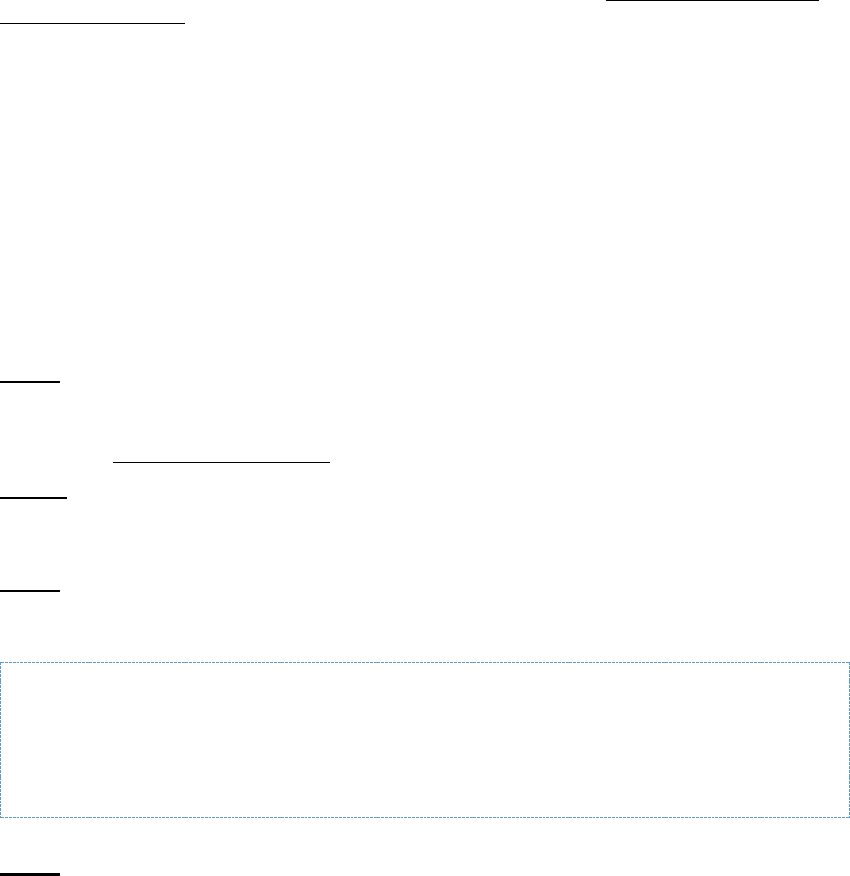
DOD GOSS – OWF Developer's Guide
Widget Launcher API – 33
7 Widget Launcher API
7.1 Overview
The Widget Launcher API allows one app component to send data to another app component. It
is possible that one of the app components sending or receiving the data does not have a user
interface. Those app components can be configured as background app components (explained
in the OWF Administrator’s Guide).
This walkthrough will go through the process of using the Widget Launcher API by describing
Channel Listener and Channel Shouter app component behavior. Channel Listener and
Channel Shouter are example app components included with OWF. In the walkthrough below,
Channel Listener and Channel Shouter app components work together to demonstrate both the
Eventing and the Widget Launcher APIs. The app component launching functionality is
commented out by default. For this walkthrough, uncomment that section of the code.
Note: An additional Widget Launcher exercise is available in section 15.1: Overview - Adding
the Widget Launcher.
Channel Listener allows the user to subscribe to channels by entering the channel name into a
text box and pressing the button on the widget. The widget will then display any messages
which are broadcast on the channels to which it is subscribed. Channel Shouter allows the user
to publish messages to specific channels by entering both the name of a specific channel as
well as the message text into text boxes and pressing the button.
To demonstrate the Widget Launcher API, if a user only has a Channel Shouter on their
application, any message sent by the Channel Shouter will launch the Channel Listener. Once
launched, the Channel Listener will be listening to the same channel and display the messages
which get broadcast by the Channel Shouter.
7.2 Walkthrough
Step 1: Import the Correct JavaScript Files
The ChannelListener.gsp and ChannelShouter.gsp use the maximum JavaScript import list.
However, the minimum required include list needed to use the Widget Launcher API is
described in 7.3.1: Required Includes.
Step 2:
The Widget Launcher API funcationality is commented out by default. To use the sample,
include the code in ChannelShouter.gsp.
Step 3: Wrap the JavaScript that requires the WidgetLauncher API in the OWF.ready
function
The Widget Launcher API requires the use of Eventing. See ChannelShouter.gsp for example:
…
OWF.ready(shoutInit);
…
Step 4: Get the ID for the App Component to be Launched
To launch an app component, the developer must know the app component’s GUID. This
walkthrough determines the app component’s GUID by querying the preferences API using the
“findWidgets” function shown below. This function retrieves a list of all app components that a
user has access to, including app component names and GUIDs. If the name of the app

DOD GOSS – OWF Developer's Guide
Widget Launcher API – 34
component is known, it is therefore easy to find the appropriate GUID, which can then be saved
as a preference. The following code is searching for a app component named Channel Listener.
…
var scope = this;
shoutInit = owfdojo.hitch(this, function() {
OWF.Preferences.findWidgets({
searchParams: {
widgetName: ‘Channel Listener’
},
onSuccess: function(result) {
scope.guid = result[0].id;
},
onFailure: function(err) { /* No op */
} });
…
See section 7.3.2: Alternative Ways to Find a App Component’s GUID for alternative ways to
find a widget’s GUID.
Step 5: Add Code to Launch the App Component
To launch the app component, use the launch function on the OWF.Launcher object that was
created as a result of OWF.ready. The launch function takes a JavaScript configuration object
which has four attributes: “guid”, “launchOnlyIfClosed”, “title” and “data”.
• “guid” is the unique ID of the widget to be opened.
• “LaunchOnlyIfClosed” is a Boolean flag which decides if a new widget should always be
opened (false) or if the widget to be opened is already present on an application, to simply
restore said app component (true).
• “title” is a string that will replace the widget’s title when launched.
• “data” is a string representing an initial set of data to be sent only if a new widget is opened.
The data which is going to be sent must be passed as a string. In the example below, the
data to be sent is a JavaScript object with two attributes – channel and message. Next,
this object must be converted into a JSON string. This is accomplished by using the
OWF.Util.toString utility function.
Note: If the widget to be launched is already in an OWF application, the “data” will not be sent.
In the code shown below, the app component to be launched is Channel Listener.
shout = owfdojo.hitch(this, function () {
var channel = document.getElementById('InputChannel').value;
var message = document.getElementById('InputMessage').value;
if (channel != null && channel != ‘’) {
…
if (scope.guid != null && typeopf scope.guid ==
‘string’) {
var data = {
channel: channel,
message: message
};
Var dataString = OWF.Util.toString(data);
OWF.Launcher.launch({
guid: scope.guid,
launchOnlyIfClosed: true,
title: 'Channel Listener Launched',
data: dataString
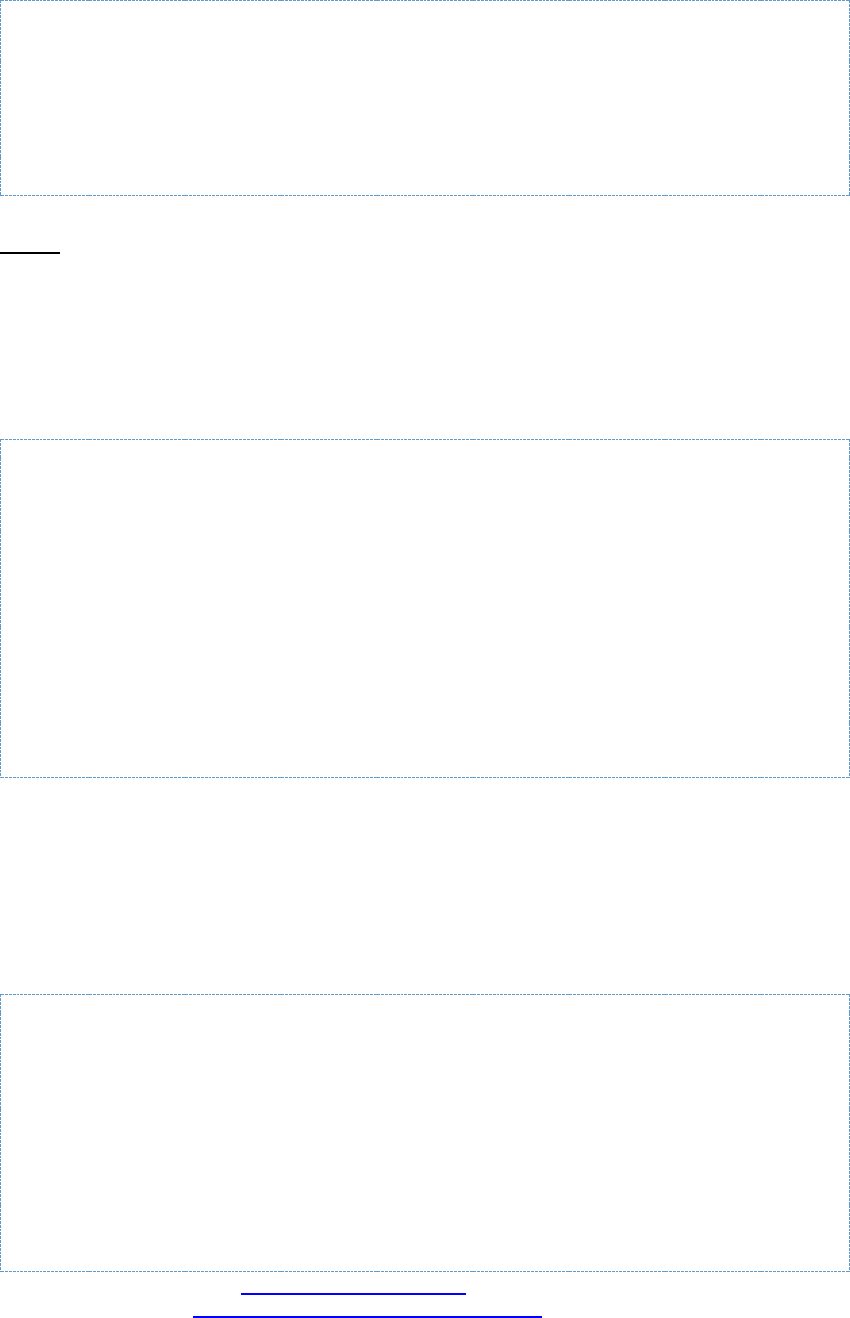
DOD GOSS – OWF Developer's Guide
Widget Launcher API – 35
}, function(response)
…
}
}
}
Step 6: Retrieve the Initial Data Inside the Launched App Component
Once an app component has been launched, the app component may need to retrieve the initial
set of data from the previous step. This is accomplished by using the
OWF.Launcher.getLaunchData() function. This function will return the initial data from the
previous step. In the ChannelListenerPanel.js code sample below, the data retrieved is a JSON
string. This string is then parsed into a JavaScript object by using the OWF.Util.parseJson
function. In ChannelListenerPanel.js the initial data sent is a channel to start listening on
(data.channel), and an initial message to display on that channel (data.message).
…
render: function() {
var launchConfig = OWF.Launcher.getLaunchData();
if (launchConfig != null) {
var data = OWF.Util.parseJson(launchConfig);
if (data != null) {
scope.subscribeToChannel(data.channel);
scope.addToGrid(null,data.message,data.channel);
}
}
},
…
7.3 Additional Considerations
7.3.1 Required Includes
Here is the complete list of scripts needed to successfully use this API:
<script type="text/javascript"
src="https://servername:port/owf/static/js/owf-widget.min.js"></script>
<script type="text/javascript">
//The location is assumed to be at
/<context>/static/js/eventing/rpc_relay.uncompressed.html if it is not
set
//OWF.relayFile =
'/<context>/static/js/eventing/rpc_relay.uncompressed.html';
</script>
Replace all occurrences of https://servername:port with the name of the server where OWF is
running, for example, https://www.yourcompany.com:8443. Replace all occurrences of
<context> with the root context of your Web application.

DOD GOSS – OWF Developer's Guide
Widget Launcher API – 36
7.3.2 Alternative Ways to Find a App Component’s GUID
7.3.2.1 Storing an App Component’s GUID as a Preference
An alternative way to determine which app component to launch is to store the GUID as a
preference in the database using the Preference API. The OWF Administration tools can be
used to find the GUID of any app component. For the Channel Shouter/Channel Listener
example, Channel Listener’s GUID can be found by editing the Channel Listener App
Component using the App Component Editor. This will bring up a dialog that displays the GUID.
The GUID should be saved under a newly created preference. The app component can then
retrieve that GUID and save it to a local variable to be used later.
…
var scope = this;
shoutInit = owfdojo.hitch(this, function() {
OWF.Preferences.getUserPreference({
namespace: 'owf.widget.ChannelShouter,
name: 'guid_to_launch',
onSuccess: function(result) {
scope.guid = result.value;
},
onFailure: function(err) { /* No op */
}
});
…
7.3.2.2 Using the Universal Name to Find an App Component
Another way to determine which app component to launch is to search using its Universal
Name. This can be done by querying the preferences API using the “getWidget” function and
passing to it the app component’s Universal Name. This retrieves the specified app
component’s configuration details, including its GUID.
…
var scope = this;
shoutInit = owfdojo.hitch(this, function() {
OWF.Preferences.getWidget({
universalName: 'org.owfwebsite.owf.examples.NYSE',
onSuccess: function(result) {
scope.guid = result.guid;
},
onFailure: function(err) { /* No op */
}
});
…
Note: A widget’s Universal Name is defined in its descriptor file. See section 3.2.1: Creating
Descriptor Files for App Components for details on descriptor files.
7.3.3 Using Regular Expression to change an App Component’s
Title
The launchWidget function also accepts a titleRegex property. This property will be used as a
replacement regular expression to alter the title. This allows the current app component title to
be changed in complex ways. The example below appends text to the widget’s title when it is
launched.

DOD GOSS – OWF Developer's Guide
Widget Launcher API – 37
…
OWF.Launcher.launch({
guid: this.guid_EditCopyWidget,
//$1 represents the existing title. the value of newtitle will be
appended
title: '$1 - ' + newtitle,
//this regex matches all text in the existing title and captures it
into a group
titleRegex: /(.*)/,
launchOnlyIfClosed: false,
data: dataString
}, this.launchFailureHandler);
…

DOD GOSS – OWF Developer's Guide
Drag and Drop API – 38
8 Drag and Drop API
8.1 Overview
This walkthrough will go through the process of using the Drag and Drop API by describing
Channel Listener and Channel Shouter app component behavior. Channel Listener and
Channel Shouter are example app components included with OWF. In the walkthrough below,
Channel Listener and Channel Shouter widgets work together to demonstrate both the
Eventing, Widget Launcher and Drag and Drop APIs.
As shown in the image below, Channel Shouter has an icon next to the Channel text box, which
has been highlighted in red for the purposes of documentation. If a channel name (in this
instance, “Test”) is entered in the text box, clicking and dragging the icon will initiate a drag of
the channel name. A floating drag indicator will appear next to the mouse while the mouse
button is depressed - this is represented by the red circle with the minus sign in it, in the
Channel Shouter Widget. Additionally, the Active Channels table in the Channel Listener Widget
will be highlighted during a drag operation. This indicates a channel may be dropped on it. Once
the mouse is over the Active Channels table (the red-lined turquoise rectangle in the Channel
Listener window, below) the drag indicator will change and indicate the channel may be
dropped. Once a channel name is dropped, the Channel Listener Widget will subscribe to the
channel and add it to the Active Channels table. Now a user may use the Channel Shouter
Widget to send text to the Channel Listener on the entered channel.
Figure 9: Drag and Drop
8.2 Walkthrough
Step 1: Import the Proper JavaScript Files
The ChannelListener.gsp and ChannelShouter.gsp use the maximum JavaScript import list.
However, the minimum required include list needed to use the Widget Drag and Drop API is
described in section 8.3.1: Required Includes.
Step 2: Attach an "onmousedown" Listener to Start the Drag Operation
To start a drag operation, a mouse down listener must be attached to a DOM node in the
widget. The Channel Shouter example, this DOM node is the icon next to the Channel text box.
In the ChannelShouter example uses dojo to bind a listener to the mousedown event (owfdojo is
an alias for dojo). Other JavaScript libraries have similar syntax to attach listeners or callback
functions. Additionally a listener may be set directly to the "onmousedown" attribute of the
DOM node.
In the mousedown listener, execute the doStartDrag function. Pass to this function an object
which contains a label for the drag indicator, as well as the data to be sent on a successful drop.
See ChannelShouter.gsp, below for example:
…
shoutInit = owfdojo.hitch(this, function() {
…
//add handler to text field for dragging
owfdojo.connect(document.getElementById('dragSource'),'onmousedown',this,
function(e) {
e.preventDefault();
var data = document.getElementById('InputChannel').value;
if (data != null && data != '') {
OWF.DragAndDrop.startDrag({
dragDropLabel: data,
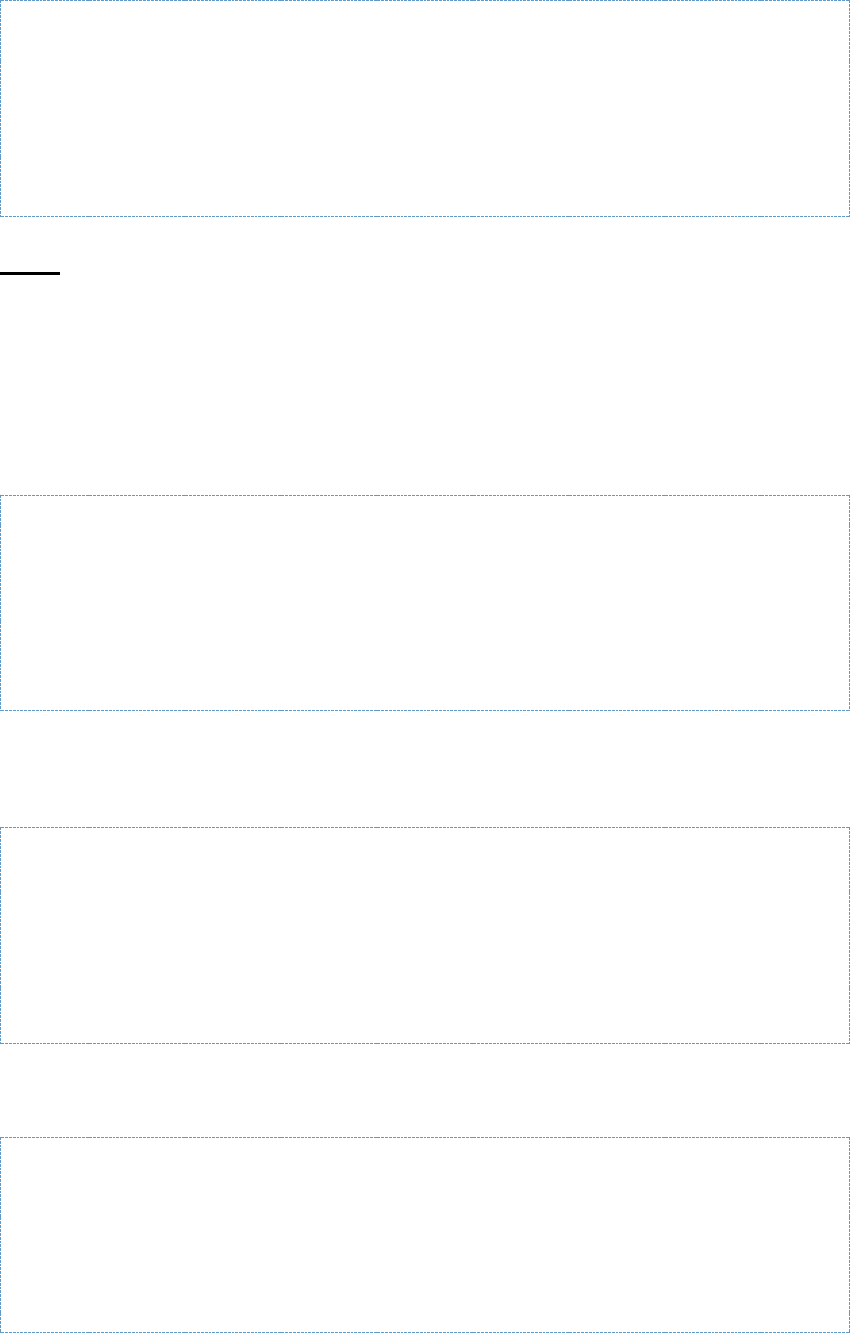
DOD GOSS – OWF Developer's Guide
Drag and Drop API – 39
dragDropData: data
});
}
});
});
…
Step 3: Update Channel Listener to respond to Drag and Drop
Choose a DOM node to be a Drop Zone—an area that accepts a drop. In the Channel Listener,
the Drop Zone is the Active Channels Table.
Next, update Channel Listener to respond to Drag and Drop Events. WidgetDragAndDrop
object allows added callback functions that respond to three events: dragStart, dragStop and
drop. The dragStart event is fired whenever a drag is initiated. This was done in
ChannelShouter by calling the doStartDrag function in the mousedown listener. Channel
Listener responds to the dragStart by highlighting the Active Channels table to show that it is a
drop location.
…
OWF.DragAndDrop.onDragStart(function() {
cmp.dragging = true;
cmp.getView().addCls('ddOver');
});
…
dragStop is fired when a drag stops. This happens when the mouse button is released inside or
outside a widget. In Channel Listener if a dragStop event occurs, the Active Channels table
stops highlighting.
…
OWF.DragAndDrop.onDragStop(function() {
cmp.dragging = false;
cmp.getView().removeCls('ddOver');
});
…
drop is fired when a Drag and Drop operation is successful. The callback assigned to this event
will be executed with the data originally passed to the doStartDrag function.
…
OWF.DragAndDrop.onDrop(function(msg) {
this.subscribeToChannel(msg.dragDropData, false);
}, this);
…
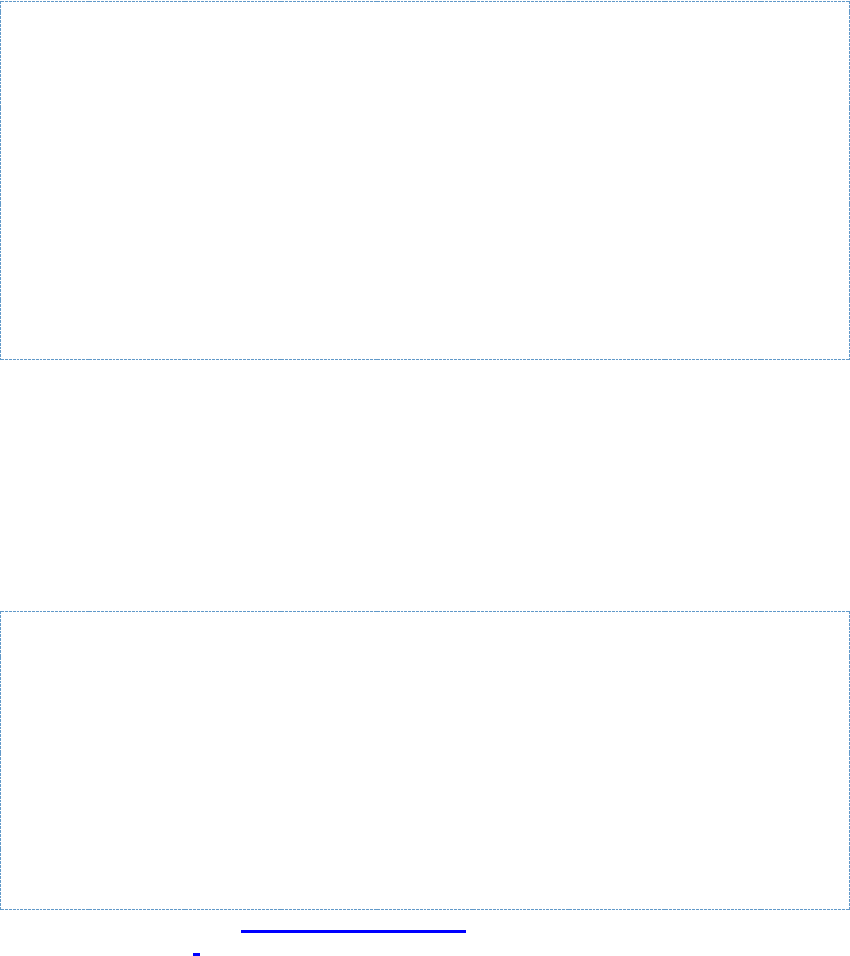
DOD GOSS – OWF Developer's Guide
Drag and Drop API – 40
And finally, the drag indicator needs to change once the mouse is over the Drop Zone. This is
accomplished by adding mouseover and mouseout listeners to the drop zone. Each listener will
call setDropEnabled enabling and disabling whether the drag indicator shows whether a drop is
allowed.
…
var view = cmp.getView();
view.el.on('mouseover', function(e, t, o) {
if (cmp.dragging) {
OWF.DragAndDrop.setDropEnabled(true);
}
}, this);
view.el.on('mouseout', function(e, t, o) {
if (cmp.dragging) {
OWF.DragAndDrop.setDropEnabled(false);
}
}, this);
…
8.3 Additional Considerations
8.3.1 Required Includes
Here is the complete list of scripts needed to successfully use this API:
<link href="../css/dragAndDrop.css" rel="stylesheet" type="text/css">
<script type="text/javascript"
src="https://servername:port/owf/static/js/owf-widget.min.js"></script>
<script type="text/javascript">
//The location is assumed to be at
/<context>/static/js/eventing/rpc_relay.uncompressed.html if it is not
set
//OWF.relayFile =
'/<context>/static/js/eventing/rpc_relay.uncompressed.html';
</script>
Replace all occurrences of https://servername:port with the name of the server where OWF is
running, for example, `. Replace all occurrences of <context> with the root context of your Web
application.
Note: The dragAndDrop.css file (enabled for all widgets) can be found at the following location:
tomcat\webapps\owf.war\css\dragAndDrop.css
8.3.2 Drag and Drop API Enhancements
The following enhancements have been added to the Drag and Drop API:
• addCallback function supports multiple callbacks for the same event. This makes it easier to
support multiple drop zones.
• addDropZoneHandler function to support multiple drop zones

DOD GOSS – OWF Developer's Guide
Drag and Drop API – 41
• By including the dragAndDrop.css during the import of the OWF widget JavaScript bundle,
widgets render a drag indicator during a drag. For information about includes, see section
8.3.1: Required Includes.
Note: Older versions of OWF limit eventing messages to 2,000 characters while using Internet
Explorer 7. This limitation was removed in OWF 5 However, for app components to receive
larger messages, they must use updated OWF 5 widget JavaScript files and RPC Relay file that
are equip to receive larger messages.
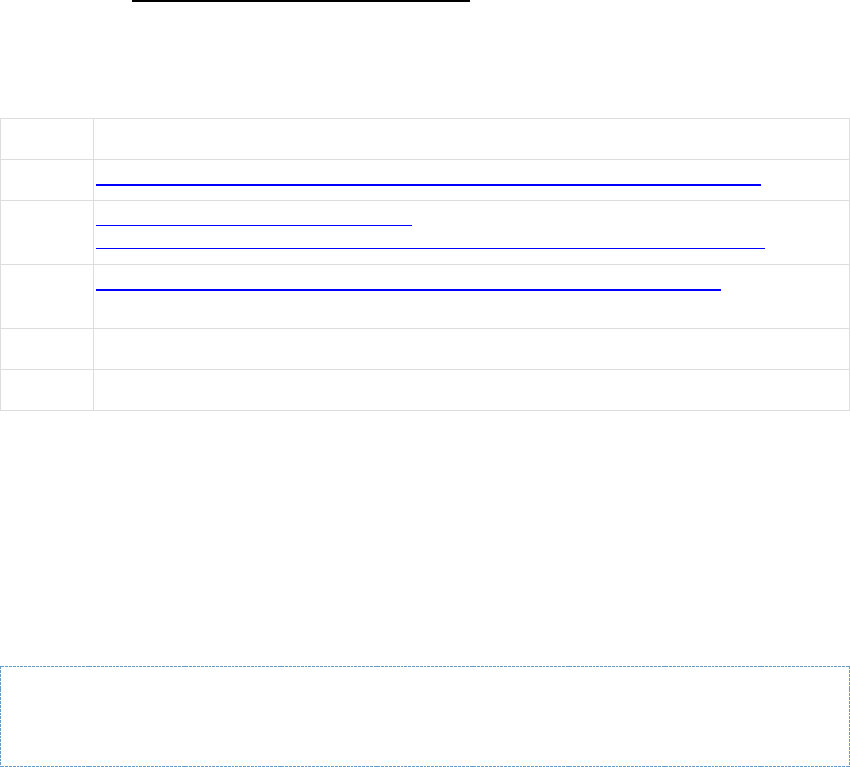
DOD GOSS – OWF Developer's Guide
Widget State API – 42
9 Widget State API
9.1 Overview
This walkthrough will discuss the process of using the Widget State API by describing the Event
Monitor example widget behavior. The Widget State API (and Event Monitor Widget, included
with OWF) allows an app component to be notified whenever various events occur to itself or to
other app components. The app component then has the opportunity to react to/interact with the
event. Some events that may be responded to include resize events, minimize events, close
events, etc. The Widget State API also allows the developer to query the state of a given app
component at any time.
To illustrate and provide a coding example for the Widget State API, we have created the Event
Monitor, a sample app component that uses the Widget State API. Event Monitor allows the
user to select specific state events to listen to or override. The app component will then display
the timestamps associated with the captured events. Additionally, for events which are
overridden, the user will be prompted to either close the app component or cancel the override.
Information about the state of the app component is displayed and updated every time a
registered event occurs.
9.2 Adding the Event Monitor App Component to OWF
Follow section 3: Adding an App Component to OWF to create app component definitions which
point to EventMonitor.html. Then, assign the app component to a user, and apply the app
component to one of the user’s applications. Use the following data for app component
definitions:
Table 3: Event Monitor App Component Definition Text
Definition
Data Input Field
URL
https://owf-server:port/owf/examples/walkthrough/widget/EventMonitor.html
Large
Icon
http://owf-server:port/widget-server-
name:port/owf/examples/walkthrough/images/event_monitor_blue_icon.png
Small
Icon
http://widget-server-name:port/StockWatcher/images/stockwatchsm.gif
Width
500
Height
500
9.3 Walkthrough for Listening to App Component Events
The following steps will explain how to listen to app component events:
1) Import the Proper JavaScript Files
The EventMonitor.html uses the minified OWF bundle, which can be included from the location
below:
<script type="text/javascript"
src="https://servername:port/owf/static/js/owf-widget.min.js"></script>
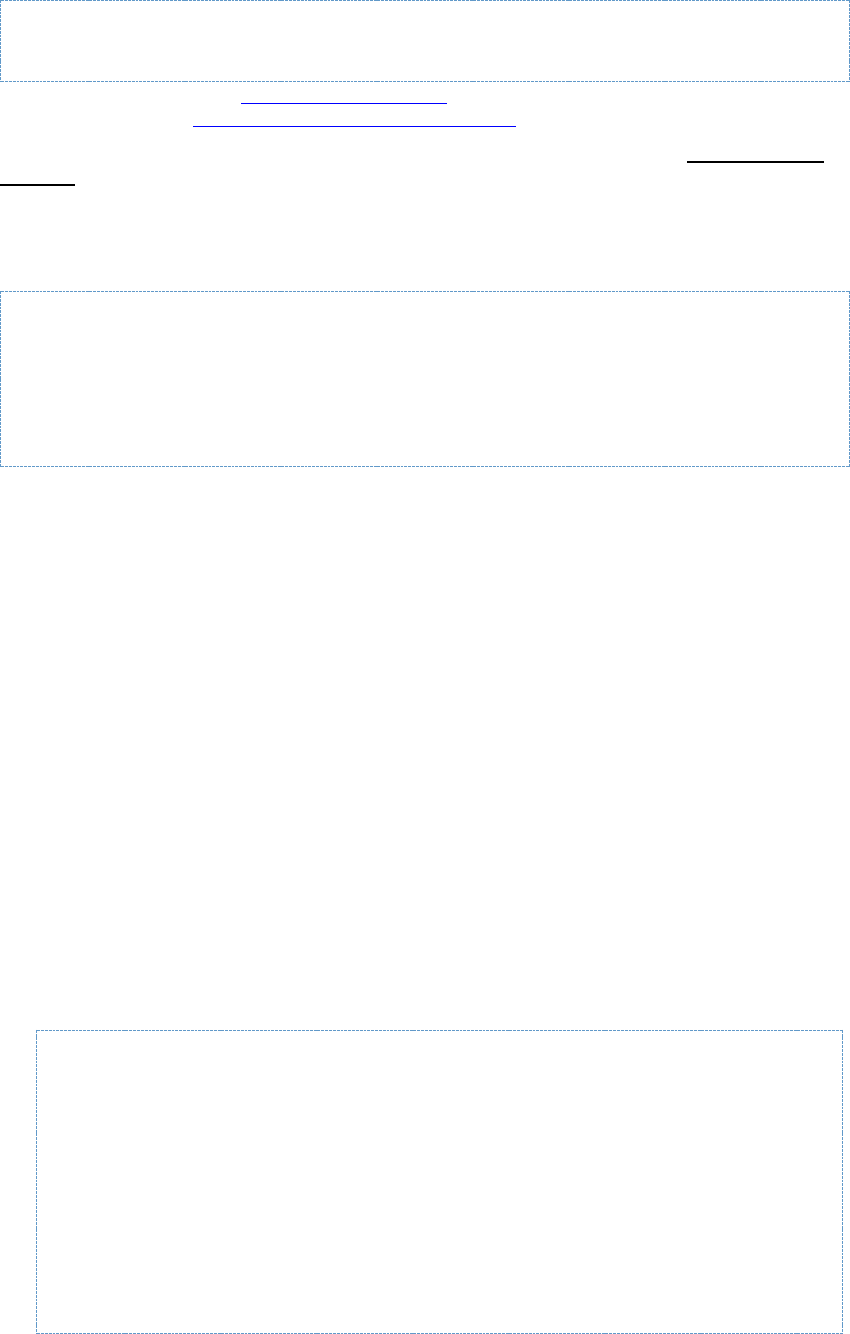
DOD GOSS – OWF Developer's Guide
Widget State API – 43
Replace all occurrences of https://servername:port with the name of the server where OWF is
running, for example, https://www.yourcompany.com:8443.
For more information about the Widget State API’s requirements, see section 9.5.1: Required
Includes.
2) Add Code to Initialize Eventing
The Widget State API requires the use of Eventing. To instantiate a WidgetState JavaScript
object, first create the Widget Eventing Object. See EventMonitor.html for example:
…
eventMonitor.widgetEventingController =
Ozone.eventing.Widget.getInstance();
…
3) Create the Widget State Object
Before beginning to monitor the app component state, a new Widget State object must be
created. The WidgetState object must be initialized with a JSON object. This object may contain
up to five attributes: widgetEventingController, autoInit, widgetGuid, stateChannel, and
onStateEventReceived. (Not all five attributes are required.)
• widgetEventingController is the Widget Eventing Object created in Step 2. This is a
mandatory attribute. It is used to facilitate the two-way communication between OWF app
components and the OWF framework.
• autoInit is a Boolean flag which decides whether or not to automatically start listening to the
state channel. This attribute is optional and defaults to true.
• widgetGuid is the unique ID of the app component to be monitored. This attribute is optional
and defaults to the app component in which the Widget State object was created.
• stateChannel specifies the name of the channel on which to send and receive events. This
attribute is optional and defaults to _WIDGET_STATE_CHANNEL_ + <widgetGuid>.
• onStateEventReceived is a callback function that performs a specific function with the event
that it receives. This is the function that gets called when app component events fire. So,
not including this function means that nothing will happen when events fire. This may be
desirable if the only thing the Widget State API is being used for is to query state, rather
than listening to events.
…
eventMonitor.widgetEventingController =
Ozone.eventing.Widget.getInstance();
eventMonitor.widgetState = Ozone.state.WidgetState.getInstance({
widgetEventingController:
eventMonitor.widgetEventingController,
autoInit: true,
onStateEventReceived:
handleStateEvent
});
…
4) Define Callback for When Events Are Received
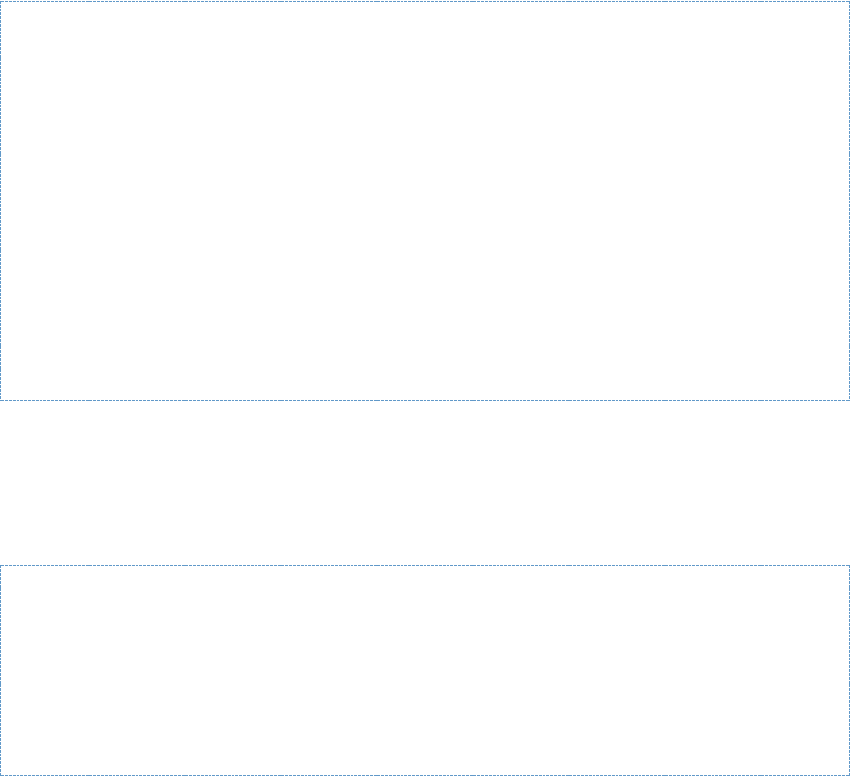
DOD GOSS – OWF Developer's Guide
Widget State API – 44
The onStateEventReceived callback (defined in Step 3) will be passed two parameters: sender
and msg. sender is the id of the iframe that sent the event, or “..” if the event came from the
OWF Framework. msg is the specific information about the fired event. It will be a JSON object
which has two attributes: eventName and eventKey. EventName is the name of the event fired.
eventKey is a unique id that is assigned to events.
Note: The callback is not provided with any information about the app component. To get the
current state of the app component, use the getWidgetState method of the WidgetState
object.
9.4 Additional Widget State API Functions
9.4.1 Register a State Event
To begin monitoring specific state events, the events must be registered. The WidgetState
object provides two methods for registering events:
• addStateEventListeners—allows the app component to begin listening to specified events.
• addStateEventOverrides—allows the user to stop the event and perform the
WidgetState.onStateEventReceived callback instead.
Both methods take a JSON object that has two attributes: events and callback. events is an
array of event names to be registered. This is an optional attribute and defaults to all events.
callback is a callback function that does something once the event has been successfully
registered; it is not the functions that is called when the event itself fires.
…
eventMonitor.widgetState.addStateEventListeners({
events: [event],
callback: function() {
…
}
});
…
eventMonitor.widgetState.addStateEventOverrides({
events: [event],
callback: function() {
…
}
});
…
“Overriding a State Event” is optional ways to register a state event.
• Overriding a State Event
Code can be added, such that when state events are overridden, the
WidgetState.onStateEventReceived callback function can do something with the event.
…
var continueEvent = confirm ("Event overridden. Would you like to close
this widget?");
if (continueEvent) {
// remove listener override to prevent looping
eventMonitor.widgetState.removeStateEventOverrides({
events: ['beforeclose'],
callback: function() {

DOD GOSS – OWF Developer's Guide
Widget State API – 45
// close widget in callback
this.widgetState.closeWidget();
}
});
}
Note: It is possible to have more than one thing occur as a result of an event. This feature,
called EventChain, requires that things occur sequentially. In a complex JavaScript
environment like OWF, more than one element of the page can participate in the change. This
example shows overriding the beforeclose event to confirm whether or not to close the widget.
When firing an event to perform an action on the widget, always unregister the event first to
prevent looping. The event can be re-registered later.
9.4.2 Unregister a State Event
To stop monitoring state events, the events must be unregistered. The WidgetState object
provides two methods for unregistering events:
• removeStateEventListeners - allows a widget to stop listening to specified events.
• removeStateEventOverrides - allows the user to stop overriding events.
Both methods take a JSON object that has two attributes: events and callback. events is an
array of event names to unregister. This is an optional attribute and defaults to all events.
callback is a callback function that does something specific with the event once it has been
unregistered.
…
eventMonitor.widgetState.removeStateEventListeners({
events: [event],
callback: function() {
…
}
});
…
eventMonitor.widgetState.removeStateEventOverrides({
events: [event],
callback: function() {
…
}
});
9.4.3 Retrieve a List of Registered Events for an App Component
The WidgetState object provides a method called getRegisteredStateEvents that returns an
array of events to which the app component may subscribe.
…
eventMonitor.registeredEvents =
eventMonitor.widgetState.getRegisteredStateEvents({
callback: function(events) {
for (var i = 0; i < events.length; i++) {
…
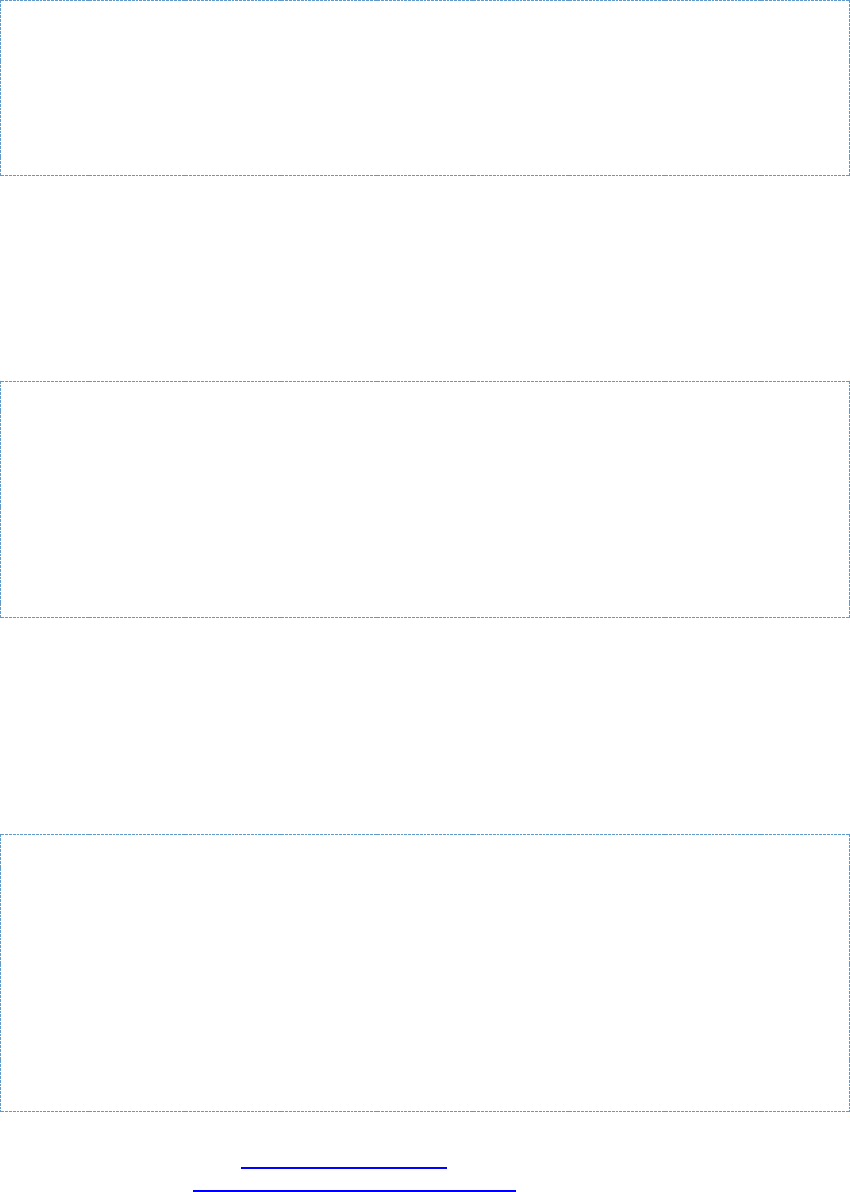
DOD GOSS – OWF Developer's Guide
Widget State API – 46
}
}
});
…
9.4.4 Retrieve the Current State of an App Component
The WidgetState object provides a method called getWidgetState that returns a JSON object
describing the current state of the app component. This is useful because when events are
received, only the eventName is passed. Therefore, this method must be used to determine
what state attributes, if any, may have changed.
…
var currentState = eventMonitor.widgetState.getWidgetState({
callback: function(state) {
…
}
});
…
9.5 Additional Considerations
9.5.1 Required Includes
Here is the complete list of scripts needed to successfully use the Widget State API:
<script type="text/javascript"
src="https://servername:port/owf/static/js/owf-widget.min.js"></script>
<script type="text/javascript">
//The location is assumed to be at
/<context>/static/js/eventing/rpc_relay.uncompressed.html if it is not
set
//Ozone.eventing.Widget.widgetRelayURL =
'/<context>/static/js/eventing/rpc_relay.uncompressed.html';
</script>
Replace all occurrences of https://servername:port with the name of the server where OWF is
running, for example, https://www.yourcompany.com:8443. Replace all occurrences of
<context> with the root context of your Web application.
9.5.2 Discussion of State Events
The table below lists the common state event names and their descriptions.
Table 4: Widget State Events

DOD GOSS – OWF Developer's Guide
Widget State API – 47
Event Name
Description
activate
Fires after the app component has been visually activated.
add
Fires after a component has been added to the app component.
added
Fires after a component has been added to the app component (same as
add).
afterlayout
Fires when the components in the app component are arranged by the
associated layout manager.
afterrender
Fires after the app component has been rendered, postprocessed by any
afterRender method defined for the app component, and, if stateful, after
state has been restored.
beforeactivate
Fires before the app component is visually activated.
beforeadd
Fires before any Ext.Component is added or inserted into the app
component.
beforeclose
Fires before the app component is closed.
beforecollapse*
Fires before the app component is collapsed. (Portal layout only)
beforedeactivate
Fires before the app component is visually deactivated.
beforedestroy
Fires before the app component is destroyed.
beforeexpand*
Fires before the app component is expanded. (Accordion and Portal layouts
only)
beforehide
Fires before the app component is hidden.
beforeremove
Fires before any Ext.Component is removed from the app component.
beforerender
Fires before the app component is rendered.
beforeshow
Fires before the app component is shown.
beforestaterestore
Fires before the app component state is restored.
beforestatesave*
Fires before the app component state is saved. This happens when the app
component attributes change (i.e. changes size or position, expands,
collapses, is maximized or minimized, or when the title is changed).
bodyresize*
Fires after the app component has been resized.
close
Fires after the app component has been closed. This event is only useful if
an app component is monitoring another app component’s events.
collapse*
Fires after the app component is collapsed. (Accordion and Portal layouts
only)
deactivate*
Fires after the app component has been visually deactivated.
destroy
Fires after the app component has been destroyed. This event is only useful
if a app component is monitoring another app component’s events.
disable
Fires after the app component has been disabled.
drag*
Fires while the app component is being dragged. This event fires constantly
during the drag so it is not recommended to use it. A better alternative is to
use the dragstart and dragend events.

DOD GOSS – OWF Developer's Guide
Widget State API – 48
Event Name
Description
dragend*
Fires after the app component has been dragged.
dragstart*
Fires after the app component has started to be dragged.
enable
Fires after the app component has been enabled.
expand*
Fires after the app component has been expanded. (Accordion and Portal
layouts only)
hide
Fires after the app component has been hidden.
iconchange
Fires after the app component icon class has been set or changed.
maximize
Fires after the app component has been maximized.
minimize
Fires after the app component has been minimized.
move*
Fires after the app component has been moved.
remove
Fires after an Ext.Component has been removed from the app component.
removed
Fires after an Ext.Component has been removed from the app component.
render
Fires after the app component markup has been rendered.
resize*
Fires after the app component has been resized.
restore
Fires after the app component has been restored.
show
Fires after a hidden app component has been shown.
staterestore*
Fires after the app component state has been restored.
statesave*
Fires after the app component state has been saved. This happens when
the app component attributes change (i.e. changes size or position,
expands, collapses, is maximized or minimized, or when the title is
changed).
titlechange*
Fires after the app component title has been changed.
Note: The events marked with an asterisk (*) should usually be coupled with the
getWidgetState method of the WidgetState object to be more useful.
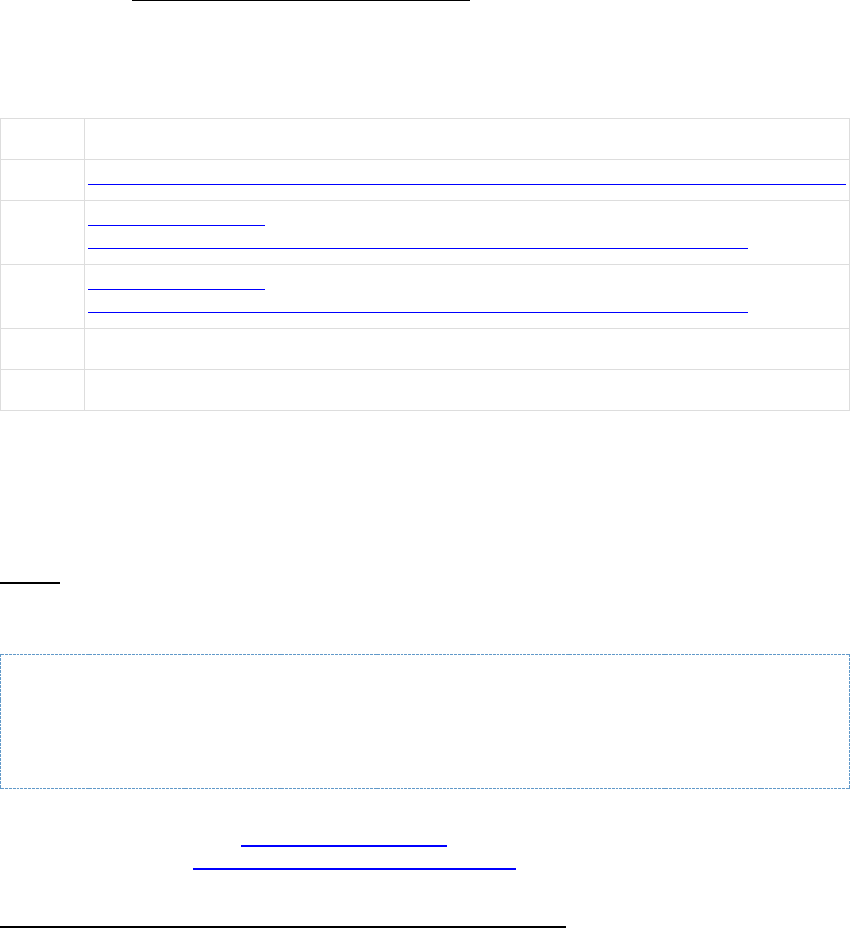
DOD GOSS – OWF Developer's Guide
Widget Chrome API – 49
10 Widget Chrome API
10.1 Overview
This walkthrough will address the Widget Chrome API. For the purposes of this document,
“chrome” refers to the visible frame which often surrounds a window or Web pages, as seen in
the image below:
Figure 10: Widget Chrome Example
The OWF Bundle includes an example app component that uses the Widget Chrome API. The
example widget adds buttons and a menubar to the chrome upon opening. Developers can
configure the buttons and menubar by modifying the widgetChromeData.js file found in
/tomcat/webapps/owf/examples/walkthrough/widgets. Normally, an app component should
not use an external JavaScript file for this information. However, as a training tool, this Widget
Chrome example allows developers to add buttons and menus to the app component’s chrome.
Follow section 3: Adding an App Component to OWF to create a app component definition
which points to WidgetChrome.gsp. Then, assign the app component to a user and apply the
app component to one of the user’s applications. Use the following data for the app component
definition:
Table 5: Data for Widget Chrome API
Label
Data Input
URL
http://widget-server-name:port/owf/examples/walkthrough/widgets/WidgetChrome.gsp
Large
Icon
http://widget-server-
name:port/owf/examples/walkthrough/images/chromeWiget_blue_icon.png
Small
Icon
http://widget-server-
name:port/owf/examples/walkthrough/images/chromeWiget_blue_icon.png
Width
540
Height
440
Note: App Components added to a fit pane layout will not have chrome. Therefore, functionality
added to app component chrome buttons and menus will not be accessible in that layout.
10.2 Walkthrough
Step 1: Import the Proper JavaScript Files
The WidgetChrome.gsp uses the minified OWF bundle, which can be included from the location
below:
<script type="text/javascript"
src="https://servername:port/owf/static/js/owf-widget.min.js"></script>
Replace all occurrences of https://servername:port with the name of the server where OWF is
running, for example, https://www.yourcompany.com:8443.
The minimum required include list needed to use the Widget Chrome API is described in section
10.7.1: Using the Widget State API with the Widget Chrome API.
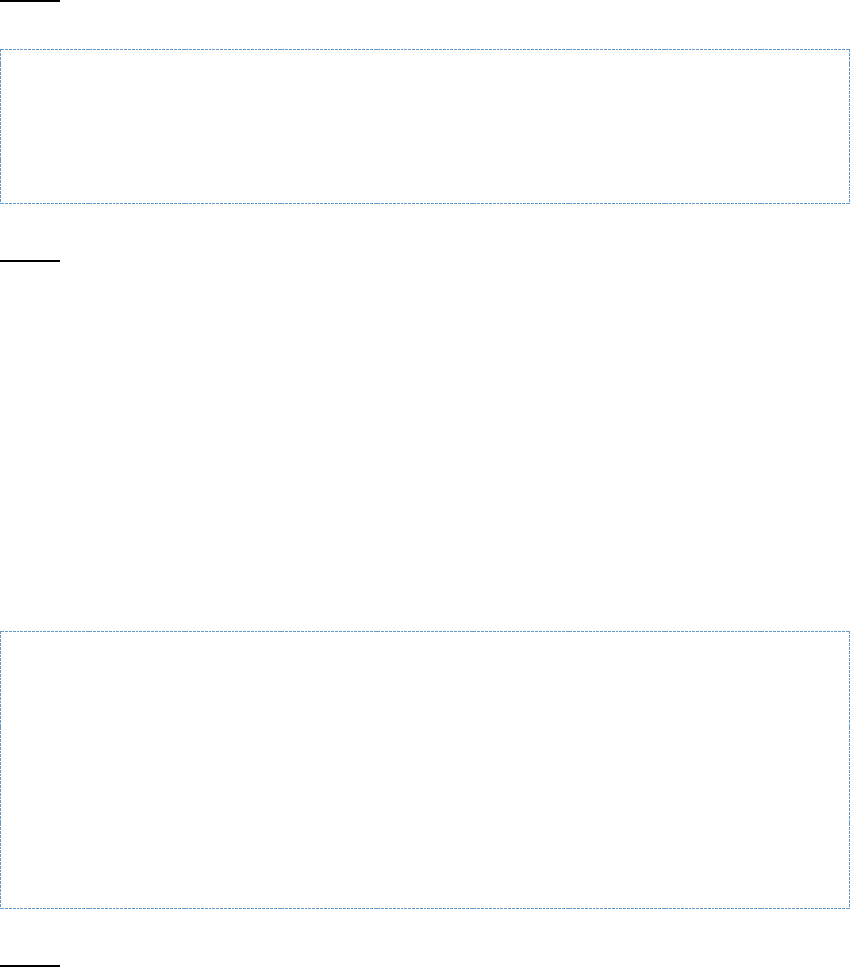
DOD GOSS – OWF Developer's Guide
Widget Chrome API – 50
Step 2: Wait until OWF APIs are ready
The Widget Chrome API cannot be used until the OWF.ready callback has fired.
…
OWF.ready(init);
…
Step 3: Add a Button
The Widget Chrome API has functions which allow for the adding or removing of buttons on the
app component chrome. To modify the chrome, simply call these functions with a proper
configuration object:
• addHeaderButtons—adds buttons to the right of the standard chrome buttons
• insertHeaderButtons—adds buttons to any position in the button area (defaults to the left of
the standard chrome buttons)
• updateHeaderButtons—updates any previously added buttons specified
• removeHeaderButtons—removes any previously added buttons specified
• listHeaderButtons—lists previously added buttons
• isModified—allows the developer to determine if the widget chrome has been modified
For example, see the insertHeaderButtons usage below.
…
OWF.Chrome.insertHeaderButtons({items:[{
type: 'gear',
itemId:'gear',
handler: function(sender, data) {
Ext.Msg.alert('Utility', 'Utility Button Pressed');
}}]
});
…
Step 4: Add a Menu
The Widget Chrome API can add and remove menus on a menubar that starts under the app
component title. To apply, use the correct configuration object:
• addHeaderMenus—adds menus to a menubar beneath the widget chrome
• insertHeaderMenus—adds menus to any position on the menubar
• updateHeaderMenus—updates any previously added menus specified
• removeHeaderMenus—removes any previously added menus specified
• listHeaderMenus—lists all previously added menus
• isModified—allows the developer to determine if the widget chrome has been modified
For example, see the insertHeaderMenus usage below.
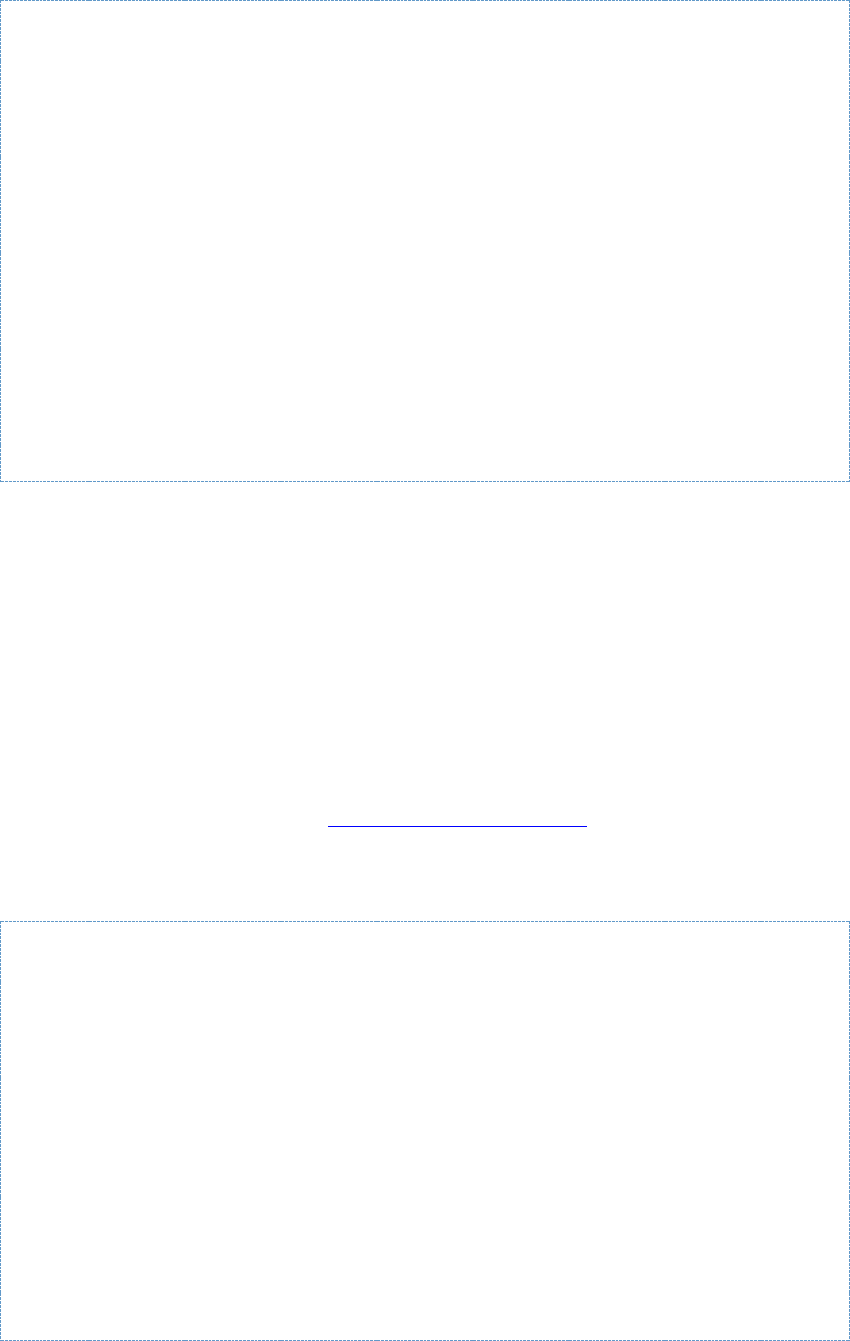
DOD GOSS – OWF Developer's Guide
Widget Chrome API – 51
…
OWF.Chrome.insertHeaderButtons({
items:[{
itemId:'menu1',
icon: './static/themes/common/images/skin/exclamation.png',
text: 'Menu 1',
menu: {
items: [{
itemId:'menu1_menuItem1',
icon: './static/themes/common/images/skin/exclamation.png',
text: 'Menu Item 1',
handler: function(sender, data) {
alert('You clicked Menu Item 1 from Menu 1.');
}
}]
}
}]
});
…
10.3 Button Configuration
The addHeaderButtons, insertHeaderButtons, updateHeaderButtons, and
removeHeaderButtons functions take a configuration object as a parameter. This configuration
object allows the developer to define one or more buttons.
The structure of this button configuration is very similar to buttons in general ExtJS
development. See the code block below for a simple example. The button example uses built in
ExtJS button types. The example below is of the type ‘gear’, which means a standard gear icon
will be used. There are several standard types which are defined by ExtJS. Each type has a
corresponding image which is appropriately styled and sized for the current theme. For a
complete list of types please see the ExtJS 4.x API documentation.
NOTE: If you are creating your own software developer kit (SDK), web application builder or
website builder based on Sencha Ext JS, Sencha GXT, or Sencha Touch, then you need an
OEM agreement with Sencha.
{
//this item’s array is required. It allows you to pass one more button
configurations
items: [{
//gear is a standard ext tool type. It has a standard icon
type: 'gear',
//required – itemId - this must be unique among all buttons
itemId:'gear',
//handler function for when the button is pressed.
handler: function(sender, data) {
alert('Utility', 'Utility Button Pressed');
}
}]
}

DOD GOSS – OWF Developer's Guide
Widget Chrome API – 52
To define a button with a custom image, set the icon property to the URL of the image.
{
items: [
{
xtype: 'widgettool',
icon: './static/themes/owf-ext-theme/resources/themes/images/owf-
ext/skin/information.png',
itemId:'help',
handler: function(sender, data) {
alert('About', 'About Button Pressed');
}
}
]
}
The ‘widgettool’ xtype does not allow text or a tooltip to be added to the button. To define a
button with text or a tooltip use the ‘button’ xtype.
{
items: [
{
xtype: 'button',
icon: './static/themes/owf-ext-theme/resources/themes/images/owf-
ext/skin/exclamation.png',
text: 'Alert',
itemId:'alert',
tooltip: {
text: '<b>Alert!</b>'
},
handler: function(sender, data) {
alert('Alert', 'Alert Button Pressed'); }
}
]
}
Below is a full description of all the fields supported in a button configuration.
{
//this items array is required it allows you to pass one more button
configurations
items: [
{
//required - itemId this must be unique among all buttons
itemId:'alert',
//optional – widgettool (default), button
xtype: 'button',
//optional – if xtype is ‘widgettool’ type defines a standard ExtJS
icon
type: ‘help’,
//optional – if the xtype is ‘widgettool’ the type property will
determine the icon
icon: './themes/owf-ext-theme/resources/themes/images/owf-
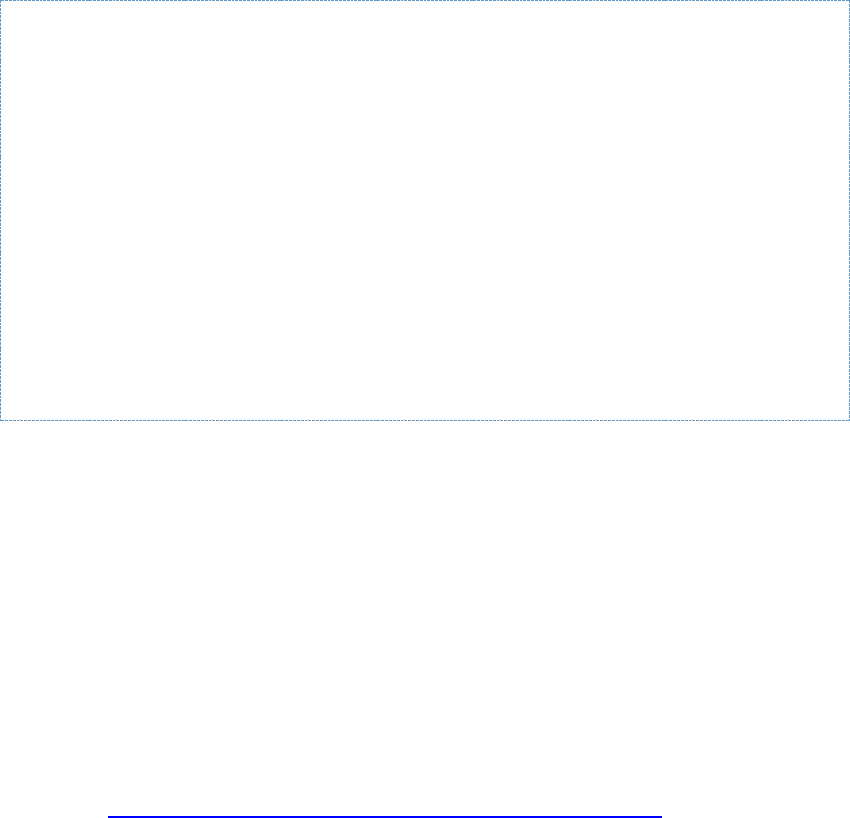
DOD GOSS – OWF Developer's Guide
Widget Chrome API – 53
ext/skin/exclamation.png',
//optional – text to display. Text is only displayed for ‘button’ xtype
text: 'Alert',
//optional tooltip – only displays for ‘button’ xtype
tooltip: {
text: '<b>Alert!</b>'
},
//optional handler for when the button is clicked
handler: function(sender, data) {
Ext.Msg.alert('Alert', 'Alert Button Pressed');
}
}
]
}
• itemId
o itemId is a unique id among all buttons that are added. It is a required property. It is
used for identification and defines the internal Eventing channel which is used to
execute the handlerfunction. If itemId is not unique this may result in duplicate
buttons which may not be able to be removed properly.
• xtype
o xtype is an ExtJS property used to determine the component to create. Currently
the Widget Chrome API only supports two xtype values: ‘button’ and ‘widgettool’.
xtype is an optional field, if it is omitted ‘widgettool’ is used.
• type
o Used only for ‘widgettool’ buttons. It determines the standard icon to be used. For
a complete list of types please see the ExtJS 4.x API documentation,
http://docs.sencha.com/ext-js/4-0/#/api/Ext.panel.Tool-cfg-type
• icon
o This property defines the URL of the image to be used for the button. If the URL is a
relative path, it will be relative to the/owf context. This is useful if the desired image
is hosted by the OWF Web server. Otherwise a fully qualified URL should be used.
If type is being used to determine the image, the icon property is optional.
• text
o This property defines text to appear alongside the button. This property is only used
if the xtype is ‘button’. ‘widgettool’ will not show text.
• tooltip
o This property defines an ExtJS tooltip. It has two important sub properties, title and
text. tooltip is only used when the xtype is ‘button’.
• handler
o The handler attribute defines a function to be executed when the button is pressed.
This function is executed using Widget Eventing API from inside the widget. The
internal channel name used is the itemId attribute. This function’s parameter list
contains the standard parameters for an Eventing callback function.
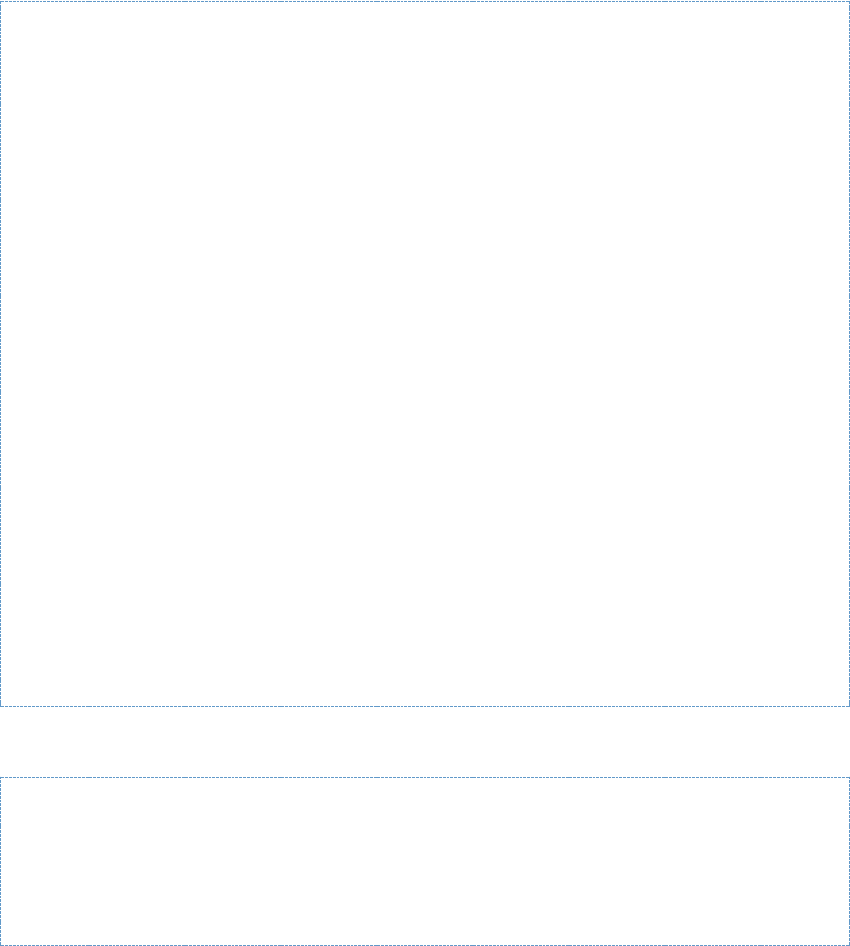
DOD GOSS – OWF Developer's Guide
Widget Chrome API – 54
10.4 Menu Configuration
The following functions pass in a configuration object as a parameter to define one or more
menus:
• addHeaderMenus
• insertHeaderMenus
• updateHeaderMenus
• removeHeaderMenus
The structure of this menu configuration is very similar to menu buttons in general ExtJS
development.
NOTE: If you are creating your own software developer kit (SDK), web application builder or
website builder based on Sencha Ext JS, Sencha GXT, or Sencha Touch, then you need an
OEM agreement with Sencha.
See the code block below for a simple menu example:
{
//this item’s array is required. It allows you to pass one more menu
configurations
items: [{
//required – id that is unique among all menus, sub-menus, and menu
items
itemId:'menu1',
//optional – text to display on as the menu label
text: 'Menu 1',
//required – menu configuration
menu: {
// required - array of menu item configurations
items: [{
//required – id that is unique among all menus, sub-menus, and menu
items
itemId:'menuItem1',
//optional – text to display as the menu item label
text: 'Menu Item 1',
//optional – function to be executed when menu item is clicked
handler: function(sender, data) {
alert('Alert', Menu Item 1 Selected');
}
}]
}
}]
}
To define a menu with a custom image, set the icon property to the URL of the image.
{
items: [{
itemId:'menu1',
text: 'Menu 1',
menu: {
items: [{
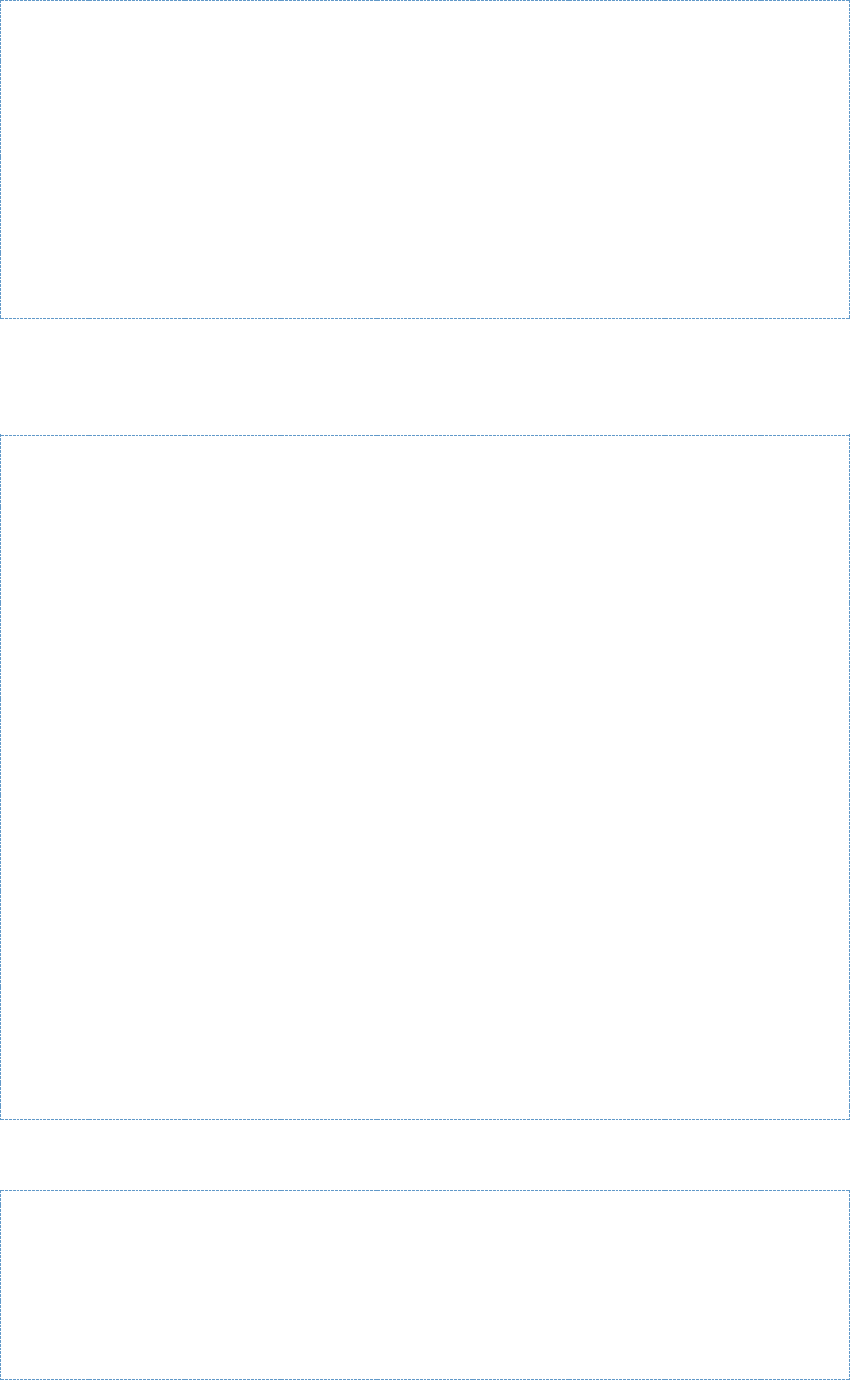
DOD GOSS – OWF Developer's Guide
Widget Chrome API – 55
itemId:'menuItem1',
icon: './static/themes/owf-ext-theme/resources/themes/images/owf-
ext/skin/exclamation.png',
text: 'Menu Item 1',
handler: function(sender, data) {
alert('Alert', Menu Item 1 Selected');
}
}]
}
}]
}
OWF allows menus on the app component chrome to have an infinite number of sub-menus. To
define a menu with a sub-menu, simply replace the handler attribute of the menu item
configuration with a menu configuration object.
{
items: [{
itemId:'menu1',
text: 'Menu 1',
menu: {
items: [{
itemId:'menuItem1',
icon: './static/themes/owf-ext-theme/resources/themes/images/owf-
ext/skin/exclamation.png',
text: 'Menu Item 1',
menu: {
itemId:'submenu1',
icon: './static/themes/owf-ext-theme/resources/themes/images/owf-
ext/skin/exclamation.png',
text: 'Sub-menu 1',
items: [{
itemId:'submenuItem1',
icon: './static/themes/owf-ext-
theme/resources/themes/images/owf-ext/skin/exclamation.png',
text: 'Sub-menu Item 1',
handler: function(sender, data) {
alert('Alert', Sub-menu Item 1 Selected');
}
}]
}
}]
}
}]
}
Below is a full description of all the fields supported in a menu configuration.
{
//this items array is required it allows you to pass one more menu
configurations
items: [
{
//required – id that is unique among all menus, sub-menus, and menu
items

DOD GOSS – OWF Developer's Guide
Widget Chrome API – 56
itemId:'menu1',
//optional – URL of icon to appear to the left of the menu text
icon: './static/themes/owf-ext-theme/resources/themes/images/owf-
ext/skin/exclamation.png',
//optional – text to display as the menu label
text: Menu 1,
//required – menu configuration
menu: {
// required - array of menu item configurations
items: [{
//required – id that is unique among all menus, sub-menus, and menu
items
itemId:'menuItem1',
//optional – text to display as the menu item label
text: 'Menu Item 1',
//optional – function to be executed when menu item is clicked
handler: function(sender, data) {
alert('Alert', Menu Item 1 Selected');
}
}]
}
}
]
}
• itemId
o itemId is a unique id among all menus, sub-menus, and menu items that are
added. It is a required property for all menus, sub-menus, and menu items that are
added. It is used for identification and defines the internal Eventing channel which is
used to execute the handler function. If itemId is not unique the handler may not
execute properly.
• icon
o This property defines the URL of the image to be used for the menu. It is an
optional property for all menus, sub-menus, and menu items that are added. If the
URL is a relative path, it will be relative to the /owf context. This is useful if the
desired image is hosted by the OWF Web server. Otherwise a fully qualified URL
should be used.
• text
o This property defines text to appear as the menu label. While this property is
optional for all menus, sub-menus, and menu items that are added, it is suggested
that either this or the icon property or both be specified.
• menu
o This property defines an ExtJS menu configuration. It has one important sub
property, items. items is an array of ExtJS menu item configurations. In addition to
the itemId, icon, and textproperties described above, the items included in the
items array have two important sub properties, handler and menu. Either handler
or menu should be specified for each menu item, but not both.
• handler

DOD GOSS – OWF Developer's Guide
Widget Chrome API – 57
o The handler attribute defines a function to be executed when the menu item is
pressed. This function is executed using Widget Eventing API from inside the
widget. The internal channel name used is the itemId attribute. This function’s
parameter list contains the standard parameters for an Eventing callback function.
10.5 Grouping Menu Items
ExtJS provides a menu separator to divide logical groups of menu items.
NOTE: If you are creating your own software developer kit (SDK), web application builder or
website builder based on Sencha Ext JS, Sencha GXT, or Sencha Touch, then you need an
OEM agreement with Sencha.
There are two ways to add a separator bar to a menu; Insert ‘-‘ or the following configuration
into the items array:
{
xtype: 'menuItem1'
}
The following code block shows a sample menu configuration that includes
two menu separator bars.
{
items: [{
itemId:'menu1',
text: 'Menu 1',
menu: {
items: [{
itemId:'menuItem1',
icon: './static/themes/owf-ext-theme/resources/themes/images/owf-
ext/skin/exclamation.png',
text: 'Menu Item 1',
handler: function(sender, data) {
alert('Alert', Menu Item 1 Selected');
}
},{
itemId:'menuItem2',
icon: './static/themes/owf-ext-theme/resources/themes/images/owf-
ext/skin/exclamation.png',
text: 'Menu Item 2',
handler: function(sender, data) {
alert('Alert', Menu Item 2 Selected');
}
},{
xtype: ‘menuseparator’ // add a menu separator
},{
},{
itemId:'menuItem3',
icon: './static/themes/owf-ext-theme/resources/themes/images/owf-
ext/skin/exclamation.png',
text: 'Menu Item 3',
handler: function(sender, data) {
alert('Alert', Menu Item 3 Selected');
}
},
‘-‘, // add a menu separator
{
itemId:'menuItem4',
icon: './static/themes/owf-ext-theme/resources/themes/images/owf-
ext/skin/exclamation.png',
text: 'Menu Item 4',
handler: function(sender, data) {
alert('Alert', Menu Item 4 Selected');

DOD GOSS – OWF Developer's Guide
Widget Chrome API – 58
}
}]
}
}]
}
10.6 Changing the App Component’s Title
OWF.Chrome.getTitle({
callback: function(msg) {
//msg will always be a json string
var res = Ozone.util.parseJson(msg);
if (res.success) {
var alert = Ext.Msg.show({
title: 'Get Title',
msg: res.title,
buttons: Ext.Msg.OK,
closable: false,
modal: true
});
}
}
});
To set the app component’s title see the example below:
OWF.Chrome.setTitle({
title: text,
callback: function (msg) {
//msg will always be a json string
var res = Ozone.util.parseJson(msg);
if (res.success) {
//confirm res.title has changed or do something else
}
}
});
10.7 Additional Considerations
10.7.1 Using the Widget State API with the Widget Chrome API
Custom buttons and menus added to the app component may be clicked at any time. This
includes times when a app component is hidden, collapsed or minimized. This may cause
issues for handler functions which are executed when the button/menu is pressed. If a handler
function displays new visual content, it’s possible that the function will result in an error, or the
new visual content will be rendered incorrectly. To avoid this issue, it’s recommended to use the
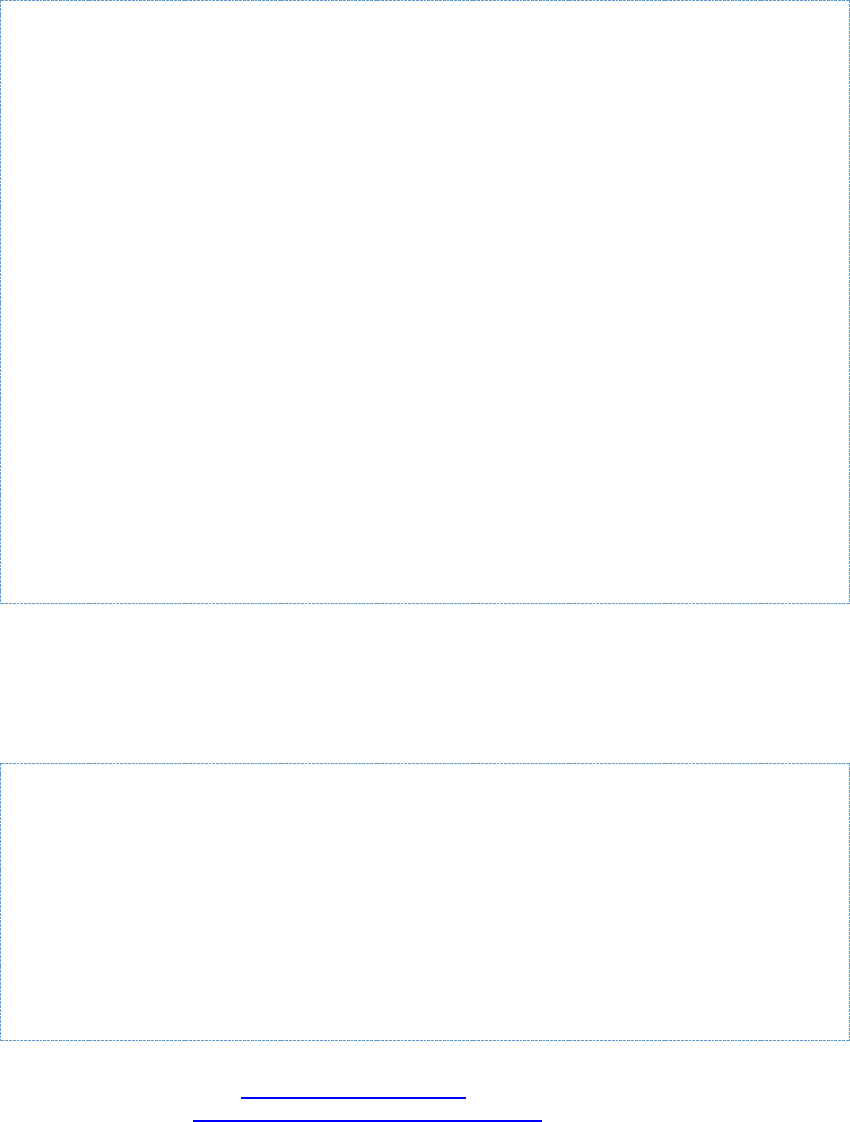
DOD GOSS – OWF Developer's Guide
Widget Chrome API – 59
Widget Chrome API and the Widget State API together. Using the Widget State API will allow
the app component to recognize whether it is visible or not. See code below for an example:
{
xtype: 'button',
//path to an image to use. this path should either be fully qualified
or relative to the /owf
icon: './static/themes/owf-ext-theme/resources/themes/images/owf-
ext/skin/exclamation.png',
text: 'Alert',
itemId:'alert',
tooltip: {
text: '<b>Alert!</b>'
},
handler: function(sender, data) {
//widgetState is an already instantiated WidgetState Obj
if (widgetState) {
widgetState.getWidgetState({
callback: function(state) {
//check if the widget is visible
if (!state.collapsed && !state.minimized && state.active) {
//render visual content here
}
}
});
}
}
}
10.7.2 Required Includes
The following code block is the complete list of scripts needed to successfully use the Widget
Chrome API:
<script type="text/javascript"
src="https://servername:port/owf/static/js/owf-widget.min.js"></script>
<script type="text/javascript">
//The location is assumed to be at
/<context>/static/js/eventing/rpc_relay.uncompressed.html if it is not
set
//OWF.relayFile =
'/<context>/static/js/eventing/rpc_relay.uncompressed.html';
</script>
Replace all occurrences of https://servername:port with the name of the server where OWF is
running, for example, https://www.yourcompany.com:8443. Replace all occurrences of
<context> with the root context of your Web application.
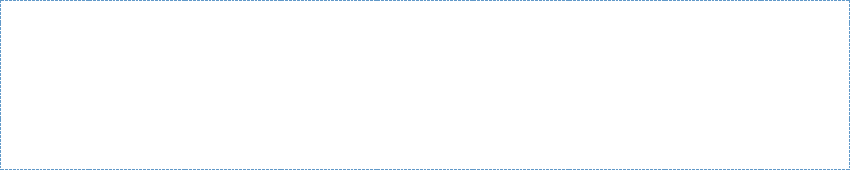
DOD GOSS – OWF Developer's Guide
Widget Theme – 60
11 Widget Theme
11.1 Overview
This walkthrough uses the Channel Listener example to explain app component theming. It
describes how Channel Listener responds to the current OWF Themes: Cobalt, Oxygen and
Carbon.
Sample app components that ship with OWF respond to the user’s current OWF theme.
However, this section explains how a developer can customize their own app components to
match the default themes used in OWF.
Figure 11: Toolbar and Channel Listener - Cobalt Theme
Figure 12: Toolbar and Channel Listener - Oxygen Theme
Figure 13: Toolbar and Channel Listener - Carbon Theme
An app component’s implementation determines how its user interface must change to match
the OWF themes. Developers using standard HTML/JavaScript app components should create
CSS stylesheets that match OWF themes and use logic to decide which CSS stylesheet to
include. This is the approach taken in the Channel Listener example in the next section.
Important points:
• The name, contrastType, and fontSize of the current themes are appended to the widget’s
URL as themeName, themeContrast and themeFontSize.
• The value for themeContrast will be one of the following choices:
o standard – regular theme
o black-on-white – indicates the use of high contrast colors: black on top of white
o white-on-black – indicates the use of high contrast colors: white on top of black
• The themeFontSize will be an integer indicating the font size of the OWF theme in pixels.
11.2 Walkthrough
When modifying their own app component: Developers should add logic to their app component
on either the server of the client that includes the correct CSS based on the current OWF
Theme.
To copy an example from the product:
Go to the unpacked owf.war and locate ChannelListener.gsp in the
tomcat\webapps\owf\examples\walkthrough\widgets folder.
Note: Notice that ChannelListener is implemented as a GSP file. It allows the Web server to
change the included CSS file depending on the OWF theme. In this scenario ChannelListener
has a specifically named CSS file for each possible OWF theme.
<html>
<head>
<title>Channel Listener</title>
<g:if test="${params.themeName != null && params.themeName != ''}
">
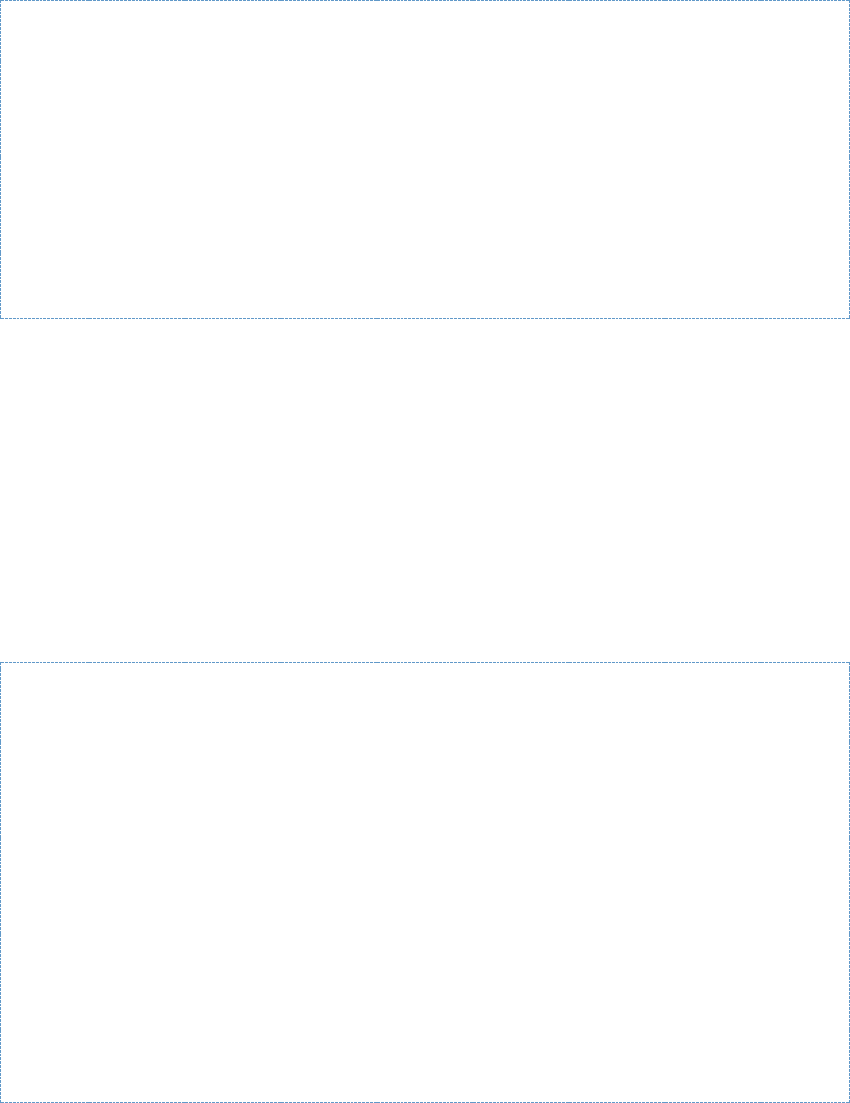
DOD GOSS – OWF Developer's Guide
Widget Theme – 61
<link rel='stylesheet' type='text/css'
href='../../../static/themes/${params.themeName}.theme/css/${params.theme
Name}.css' />
</g:if>
<g:else>
<link href="../../../static/js-lib/ext-4.0.7/resources/css/ext-
all.css" rel="stylesheet" type="text/css">
<link href="../../../static/css/dragAndDrop.css" rel="stylesheet"
type="text/css">
</g:else>
…
If an app component includes themes separate from the default OWF themes use the other
theme’s themeContrast and themeFontSize attributes to decide which theme the app
component should use. If the available app component themes do not match the current OWF
theme, make sure the app component has a default theme.
11.3 Additional Considerations
11.3.1 Accessing Theme Information from JavaScript
It is also possible to use JavaScript to find the get information about the current theme. See the
example below:
var themeInfo = OWF.getCurrentTheme();
/* themeInfo looks like:
* {
* //name of the theme
* name: 'theme-name',
*
* //describes color contrast of the theme. This may be one of 3
values:
* // 'standard' (colors provide no special contrast)
* // 'black-on-white' (black on white color contrast)
* // 'white-on-black' (white on black color contrast)
* contrast: 'black-on-white',
*
* //this field is a number of the fontSize in pixels
* fontSize: 12
* }
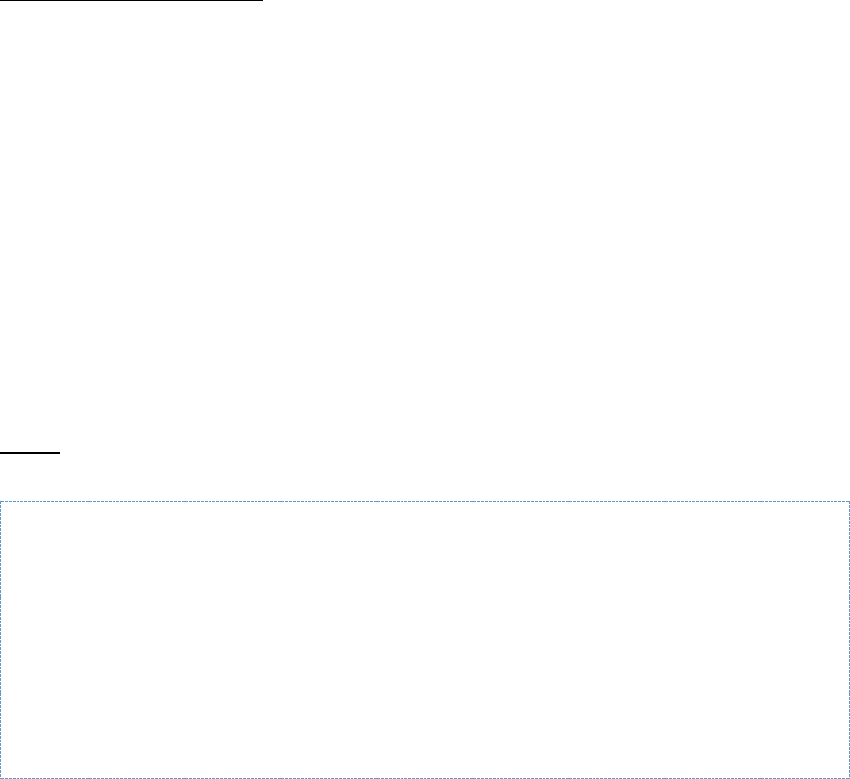
DOD GOSS – OWF Developer's Guide
Widget Intents API – 62
12 Widget Intents API
12.1 Overview
The Widget Intents API allows app components to tell the OWF container information about the
data they can send and receive. The container then uses this information to allow users to
select which app components they want to use together.
This walkthrough will go through the process of using the Widget Intents API by describing the
Intents behavior in the following three sample app components with associated intents:
• NYSE - displays data from the New York Stock Exchange.
• HTML Viewer - displays HTML (or text) in tabs.
• Stock Chart - plots current stock prices on a graph.
In the following walkthrough, these three app components work together to demonstrate the
Widget Intents API.
To demonstrate the Widget Intents API:
1) Sign in to the OWF Interface and open the NYSE app component.
2) Click a company name. A menu will open. It will display only app components that include
viewing html/text intents. (Developers can bypass this step with the instructions found in section
12.3.2: Intent Launching Data.)
3) Launch the HTML Viewer app component. Information about the selected company will
appear in a tab.
4) To graph data, go back to the NYSE app component and select a checkbox to the left of a
company name.
5) Click the “View Current Prices” button at the bottom of the app component, this action sends
out a request for any app components that can receive graphing intents. A menu appears
displaying all possible app components.
6) Click the Stock Chart app component. Information about the selected company will appear on
the chart.
12.2 Walkthrough: Requirements for Intents
This section explains the necessary requirements for using intents:
Step 1: Import the correct JavaScript files
The following list of scripts are required to use the Widget Intents API:
<script type="text/javascript"
src="https://servername:port/owf/static/js/owf-widget.min.js"></script>
<script type="text/javascript">
//The location is assumed to be at
/<context>/sattic/js/eventing/rpc_relay.uncompressed.html if it is not
set
//OWF.relayFile =
'/<context>/static/js/eventing/rpc_relay.uncompressed.html';
</script>
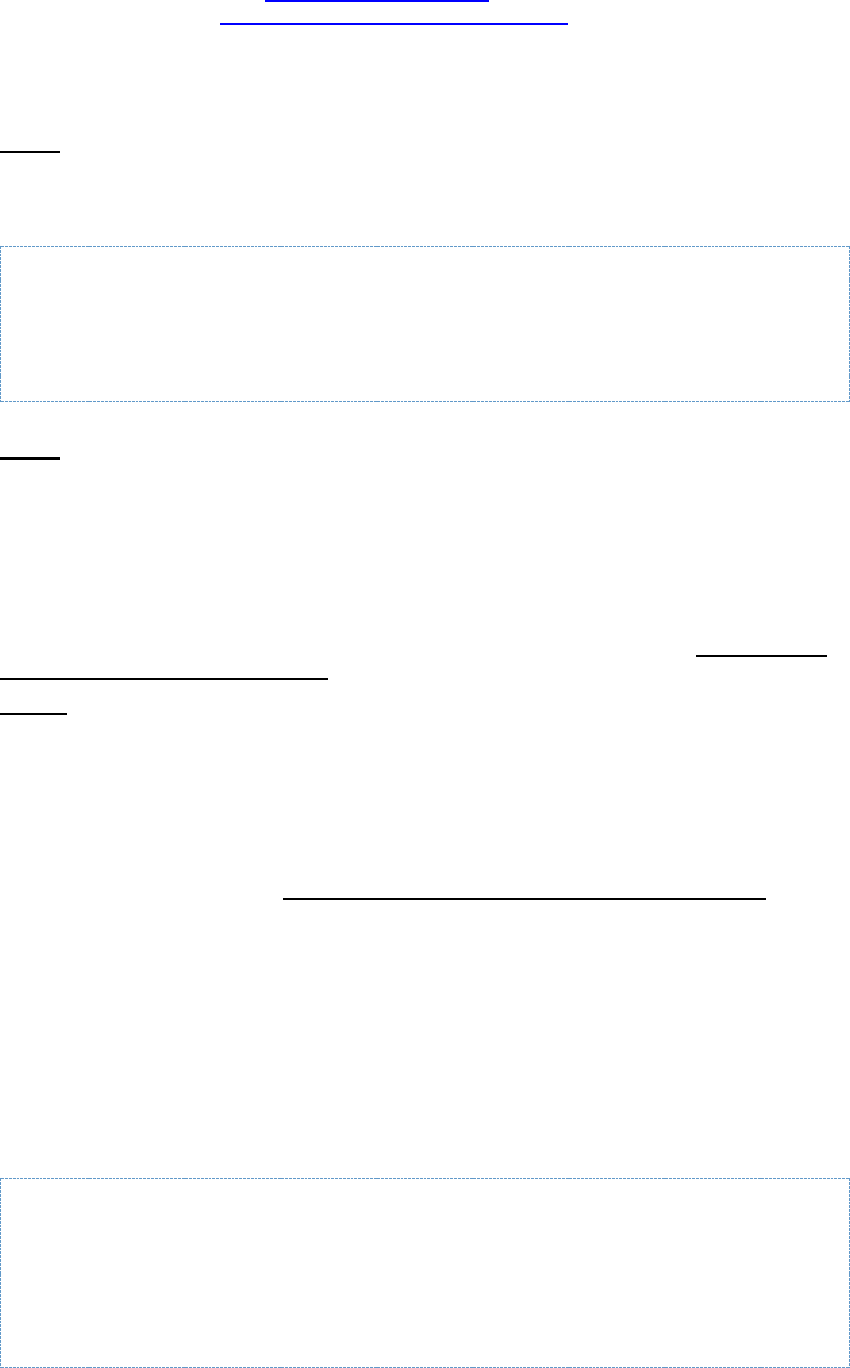
DOD GOSS – OWF Developer's Guide
Widget Intents API – 63
1) Replace all occurrences of https://servername:port with the name of the server where OWF
is running. For example, https://www.yourcompany.com:8443.
2) Replace all occurrences of <context> with the root context of the Web application.
The previous scripts handle intents functionality. The NYSE.gsp, HTMLViewer.gsp, and
StockChart.gsp use several additional JavaScript files to showcase their functionality.
Step 2: Wrap the JavaScript that requires the Widget Intents API in the OWF.ready
function
The Widget Intents API requires the OWF APIs to be ready for use. For an example, see
NYSE.gsp:
…
OWF.ready(init);
…
Step 3: Sign in to OWF to edit the app component
To edit an app component:
1) Sign in to OWF interface as an administrator.
2) Click Administration on the drop-down User Menu in the toolbar.
3) Select App Components to open the App Component Manager.
4) Click an app component and click edit. The App Component Editor will open. From the App
Component Editor, administrators can add, edit or remove intents, see section 3.2.1: Creating
Descriptor Files for App Components.
Step 4: Set up an app component to send and receive intents
Sending an Intent should be tied to a user-generated action such as clicking a button or link.
The handler for that action should call the OWF.Intents.startActivity method. This method
takes three arguments:
1) The first argument is an Intent. An Intent is simply an object describing an action and a data
type. The action should be a verb describing what the user is trying to do (i.e. plot, pan, zoom,
view, graph, etc.). The data type should describe what type of data is being acted upon. The
data type format is described in 12.4.1: Recommended Intents Data Type Conventions. Also,
the Store ships with a few default data types as a means to provide standard metadata for the
intents established in this section.
2) The second argument is an object containing the data that the intent is sending. The
format of the data depends solely on how the receiving app component is expecting to receive
it.
3) The third argument is a callback function that is executed once the receiving app
component is selected. This callback will receive information about the receiving app
component. That information can be used to access the receiving app component directly.
The example below displays an intent that graphs a stock price. Once a receiving app
component is selected, the graph is continuously updated with fluctuating stock prices.
…
OWF.Intents.startActivity(
{
action:'Graph',
dataType:'application/vnd.owf.sample.price'
},
{
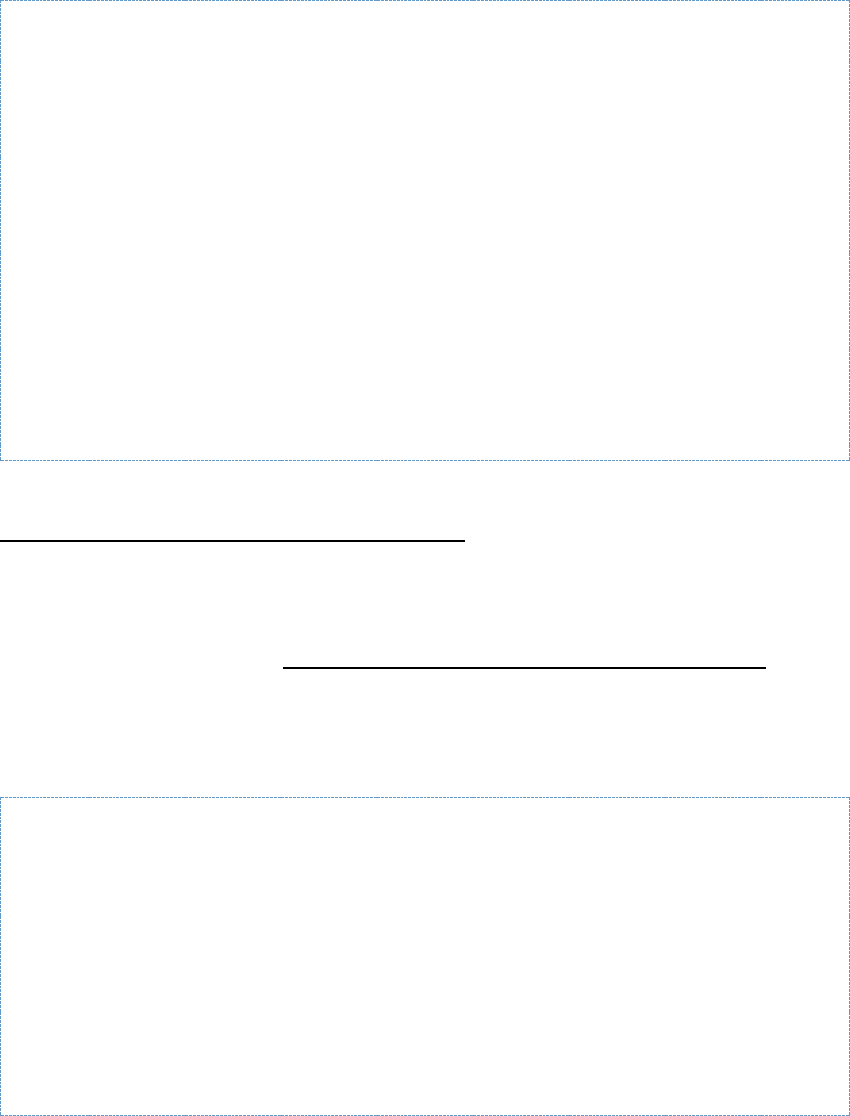
DOD GOSS – OWF Developer's Guide
Widget Intents API – 64
data: data
},
function (dest) {
//dest is an array of destination widget proxies
if (dest.length > 0) {
Ext.Array.each(dest, function(datum, index, dataRef) {
var json = Ext.JSON.decode(datum.id);
var widgetId = json.id;
var proxy = datum.id;
if (_tm) { _tm.reset(widgetId, proxy, symbols) ;}
});
}
else {
// alert('Intent was canceled');
}
}
);
…
Use the App Component Editor in the user interface to add, edit or remove intents, see section
3.2.1: Creating Descriptor Files for App Components. Any app component can receive an Intent
by calling the OWF.Intents.receive method. This method takes two arguments:
1) The first argument is an Intent. An Intent is simply an object describing an action and a data
type. The action should be a verb describing what the user is trying to do (i.e. plot, pan, zoom,
view, graph, etc.). The data type should describe what type of data is being acted upon. The
data type format is described in 12.4.1: Recommended Intents Data Type Conventions.
2) The second argument, a function that is executed once an Intent is received, receives
information about the sending app component. That information can be used to directly access
the “sending app component”. It will also receive the intent and the data.
The example below uses Intents to plot a stock price on the graph:
…
OWF.Intents.receive(
{
action: 'Graph',
dataType: 'application/vnd.owf.sample.price'
},
function (sender, intent, data) {
doPlot(data.data);
}
);
…
12.3 Additional Capabilities
12.3.1 WidgetProxy on Ready
WidgetProxy objects have an onReady method which tells the caller if the app component that
is represented by the proxy is ready to communicate [i.e., If it has called
OWF.notifyWidgetReady()]. The onReady method takes a callback function as its only
parameter. If the app component represented by the proxy is already ready, the callback is fired
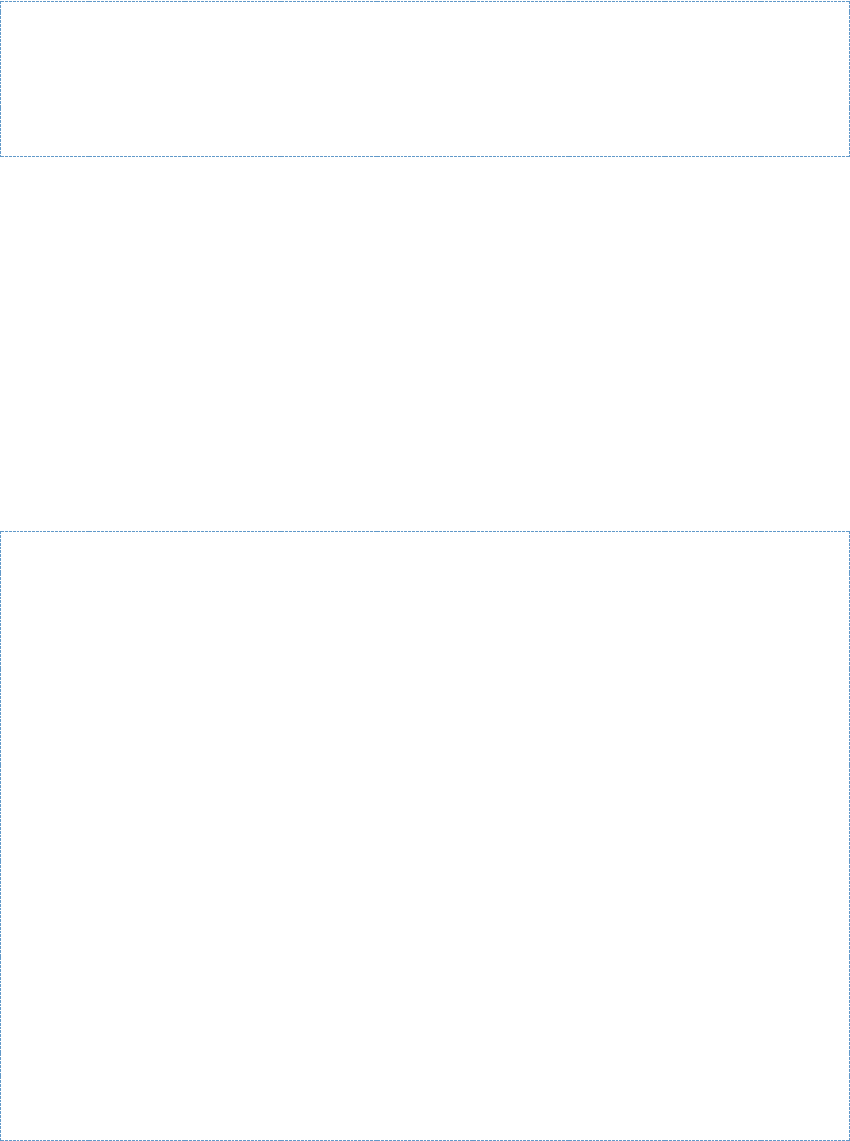
DOD GOSS – OWF Developer's Guide
Widget Intents API – 65
immediately. Otherwise, it is fired once the represented app component calls
notifyWidgetReady. Also, WidgetProxy objects have a boolean isReady property that states
whether they are ready.
Example onReady code:
var widgetProxy = OWF.RPC.getWidgetProxy(id);
widgetProxy.onReady(function() { console.log("Other widget is ready!");
});
12.3.2 Intent Launching Data
To identify if an app component was launched using an intent, use the Widget Launcher API. If
the app component was launched by an intent, the function OWF.Launcher.getLaunchData()
will return a JSON string with the value intents:true as its launch data.
12.3.3 Send an Intent to a known set of app components
The Intents API may be used to directly send an Intent to a set of app components without
requiring a user to select where they want to send their data. The startActivity function accepts
a destination array of WidgetProxy objects. If this array is specified the intent will be sent only
to those app components. WidgetProxies may be obtained by using the Widget RPC API or by
using a previous startActivity call. Example code:
…
Var dest = //Array of Widget Proxies obtained earlier
OWF.Intents.startActivity(
{
action:'Graph',
dataType:'application/vnd.owf.sample.price'
},
{
data: data
},
function (dest) {
//dest is an array of destination widget proxies
if (dest.length > 0) {
Ext.Array.each(dest, function(datum, index, dataRef) {
var json = Ext.JSON.decode(datum.id);
var widgetId = json.id;
var proxy = datum.id;
if (_tm) { _tm.reset(widgetId, proxy, symbols) ;}
});
}
else {
// alert('Intent was canceled');
}
},
dest
);
…

DOD GOSS – OWF Developer's Guide
Widget Intents API – 66
12.4 Additional Considerations
12.4.1 Recommended Intents Data Type Conventions
Data types are stored as strings in the database. However, the success of Intents relies heavily
on the ability to share data types between app components. To facilitate this, OWF follows the
MIME type naming conventions as recognized by the Internet Assigned Numbers Authority
(IANA) and Webintents.org. All OWF developers should use the data types provided by these
organizations to create their own intents. It is also strongly recommended that custom MIME
types use the application/vnd.owf.<datatype> naming convention.
Also, the Store allows developers to create standard Intent Actions and DataTypes that will
pass from App Components in the Store to OWF. These Actions and DataTypes serve as
metadata placeholders for the intents developers create.
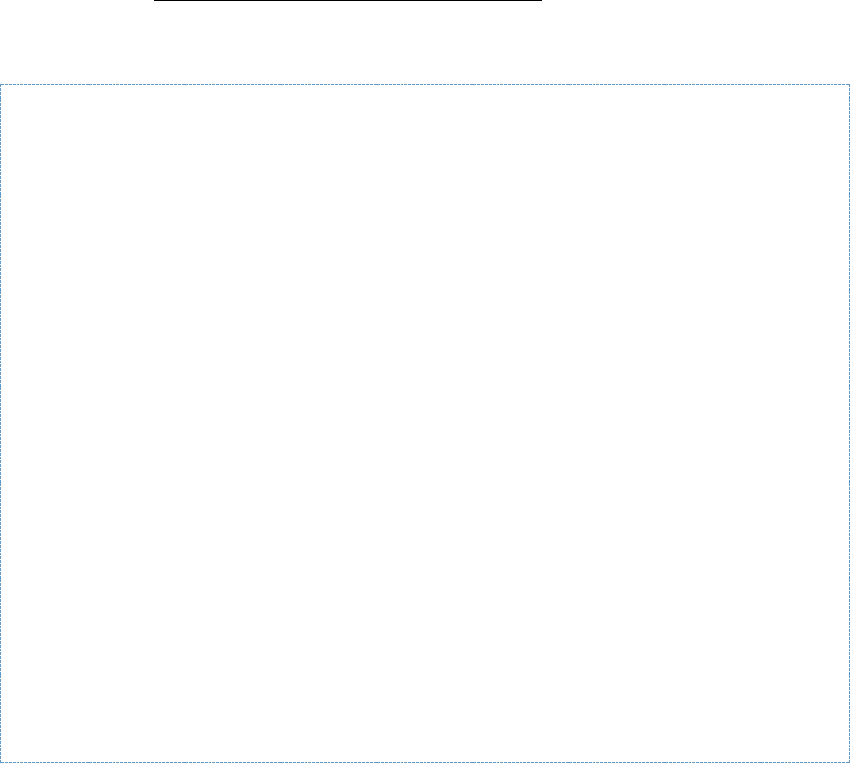
DOD GOSS – OWF Developer's Guide
Point-to-Point (Remote Procedure Call) API – 67
13 Point-to-Point (Remote Procedure Call) API
OWF ships with the Color Server and Color Client example app components to demonstrate the
Remote Procedure Call (RPC) API. The RPC API is different from a publication-subscribe API,
which allows app components to globally publish messages or subscribe to a subset of globally
published messages from any app component. In contrast, RPC follows a client/server model
where communication is point-to-point between app components and therefore cannot be
received by any app component other than the intended target.
In OWF, the RPC API enables a (client) app component to send a request message, or function
call, to a (server) app component configured to perform the request. This process is facilitated
by the client app component calling a widget proxy object (getWidgetProxy), which exposes the
server app component's registered functions and allows direct messages to be sent.
13.1 Color Server Example App Component
Figure 14: Color Server App Component
The Color Server App Component performs two functions, each shown in the code block which
follows. The getColors()function returns a list of all supported colors. The second function,
changeColor(color), can change the background color. On load of this widget, both functions
are registered via the OWF.RPC.registerFunctions function, enabling them to be called
remotely. In the example below, they are be called by a user from the Color Client Widget
shown in section 13.2: Color Client Example App Component.
The code for the Color Server Widget is shown below:
<html>
<head>
<meta http-equiv="Content-Type" content="text/html; charset=UTF-8">
<title>Color Server</title>
<p:javascript src="owf-widget" />
<script type='text/javascript'>
function getColors() {
return ['Red','Blue','Yellow'];
}
function changeColor(color) {
var b = owfdojo.body();
b.style.backgroundColor = color;
return true;
}
OWF.ready(function() {
OWF.RPC.registerFunctions([
{
name: 'getColors',
fn: getColors
}, {
name: 'changeColor',
fn: changeColor
}
]);
});
</script>
</head>
<body>

DOD GOSS – OWF Developer's Guide
Point-to-Point (Remote Procedure Call) API – 68
<h1>Color Server</h1>
</body>
</html>
13.2 Color Client Example App Component
Figure 15: Color Client Widget
The Color Client widget contains a button that, when clicked, calls the Color Server’s
getColors() function to populate the adjacent dropdown list with the colors supported by Figure
14: Color Server App Component. When a user selects a color from the dropdown menu , the
client calls the server’s changeColor() method to change the server widget’s background color.
The function is wrapped inside the OWF.RPC.getWidgetProxy() function to obtain a reference
to the remote server endpoint.
The code for the Color Client Widget is shown below:
<html>
<head>
<meta http-equiv="Content-Type" content="text/html; charset=UTF-8">
<title>Color Client</title>
<p:javascript src="owf-widget" />
<script type='text/javascript'>
function getColorList() {
OWF.getOpenedWidgets(function(widgetList) {
var widgetId;
if (widgetList != null) {
for (var i = 0; i < widgetList.length; i++) {
if (widgetList[i].id != null &&
widgetList[i].name.match(/^.*Color Server.*$/) != null) {
widgetId = widgetList[i].id;
break;
}
}
if (widgetId != null) {
OWF.RPC.getWidgetProxy(widgetId, function(widget)
{
widget.getColors(function(result) {
var selColors = owfdojo.byId('colors');
if (selColors) {
owfdojo.forEach(selColors.options,
function(data) {
selColors.remove(selColors.length
- 1);
});
owfdojo.forEach(result,
function(data) {
var option =
owfdojo.create('option');
option.text = data;
option.value = data
if (!selColors.contains(option))
{
selColors.add(option);
}
});
}

DOD GOSS – OWF Developer's Guide
Point-to-Point (Remote Procedure Call) API – 69
});
});
} else {
alert('Missing Color Server!');
}
}
});
}
function changeColor(color) {
OWF.getOpenedWidgets(function(widgetList) {
var widgetId;
if (widgetList != null) {
for (var i = 0; i < widgetList.length; i++) {
if (widgetList[i].id != null &&
widgetList[i].name.match(/^.*Color Server.*$/) != null) {
widgetId = widgetList[i].id;
break;
}
}
if (widgetId != null) {
OWF.RPC.getWidgetProxy(widgetId, function(widget)
{
widget.changeColor(color);
});
} else {
alert('Missing Color Server!');
}
}
});
}
</script>
</head>
<body>
<h1>Color Client</h1>
<button type="button" onclick="getColorList()">List Colors</button>
<select id="colors" onclick="changeColor(this.value)"></select>
<div>
</div>
</body>
</html>

DOD GOSS – OWF Developer's Guide
Example App Components – 70
14 Example App Components
OWF ships with a ZIP file of app components examples that employ various Web technologies
(OWF-sample-widgets-7.15.0.zip). These can be used as a starting point for integrating a
variety of Web applications into the OWF framework.
14.1 HTML Examples
There are seven simple HTML examples that were collectively designed to act as a progressive
walkthrough within this guide and OWF. These example app components are described in the
table below:
Table 6: HTML Example App Components
File
Purpose
AnnouncingClock.html
This example is a simple updating clock.
AnnouncingClock_Eventing.html
This example broadcasts the time on a specified
channel.
AnnouncingClock_Launcher.html
This example adds usage of the Launching API to
the Announcing Clock, allowing the clock to launch
the SecondTracker.
AnnouncingClock_DynamicLauncher.html
This example builds on
AnnouncingClock_Launcher.html by using a
dynamic title-based lookup in order to determine
which app component to launch.
AnnouncingClock_Logging.html
This example prints periodic logging messages to a
logging popup window.
AnnouncingClock_Preference.html
This example adds an option to display the clock in
military time and saves this preference to the OWF
database.
SecondTracker.html
This example receives and displays the time
broadcasted by the AnnouncingClock_Eventing.html
widget by listening to a specified channel.
SecondTracker_Launched.html
This example builds on SecondTracker.html by
adding support for receiving launchData. It is meant
to be used with AnnouncingClock_Launcher.html
and AnnouncingClock_DynamicLauncher.html
14.1.1 Technologies
No additional software is required; the Announcing Clock app component can be hosted in any
Web server.
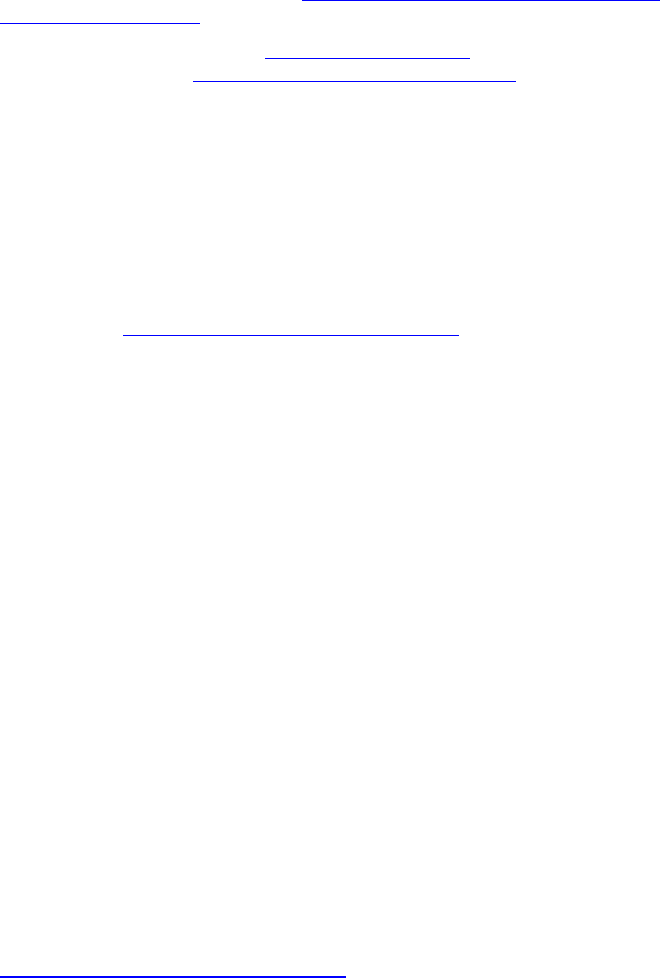
DOD GOSS – OWF Developer's Guide
Example App Components – 71
14.1.2 Building/Compilation
An ANT build script is provided with the sample HTML app component (ANT must be installed
to execute this script.) The build script creates the owf-sample-html.war file that can be
deployed on the Web server. To build the owf-sample-html.war:
1) Extract /html-widgets.zip into a new directory.
2) Open a command prompt and navigate to the directory created in Step 1.
3) Type ANT. The resulting owf-sample-html.war file will be in the target directory and can be
deployed to the app component server.
4) The app components consist of several HTML pages that can be dropped anywhere on a
Web server. By default, the widgets look for the framework JavaScript files on localhost.
Accordingly, change their paths to reflect the actual location of the OWF server:
<script type="text/javascript" src="https://servername:port/owf/static/js/owf-
widget.min.js"></script>
5) Replace all occurrences of https://servername:port with the name of the server where OWF is
running, for example, https://www.yourcompany.com:8443. Additionally, be sure to verify that
the windowname library paths point to the local installation.
Additionally, the AnnouncingClockEventing.html, SecondTracker.html and
AnnouncingClockAdvanced.html files instantiate the Ozone.eventing.widget object, which takes
a path as an argument. The path used must be from the context root of the local widget.
14.2 GWT Example
The GWT sample demonstrates how a Google Web Toolkit widget can be integrated in OWF.
The standard GWT stockwatcher tutorial application has been modified so that it can perform
the following:
• When adding and removing stocks, it will broadcast a message on the stockwatcher
channel.
• Persist all the current stocks into one User Preference named STOCK_LIST.
• On initial load, retrieve User Preference named STOCK_LIST if available for user and load
symbols into grid.
14.2.1 Technologies
• A Java JDK installation of 1.7 or higher.
• GWT 1.6 (tested with GWT 1.6.4.).
• Apache ANT 1.7 or higher OR the latest version of Eclipse with the GWT toolkit plugin.
• A Java Servlet container such as Tomcat, Jetty or JBoss.
14.2.2 Building/Compilation
In order to build the GWT sample widget, execute the following steps:
1) Extract /gwt-widget.zip into a new directory.
2) Ensure that the Environment Variable GWT_HOME is set to the correct location— the
installation of GWT.
Note: Directions on how to add an environment variable for Windows XP is available at
http://support.microsoft.com/kb/310519.
3) Open a command prompt and navigate to the directory created in Step 1.

DOD GOSS – OWF Developer's Guide
Example App Components – 72
4) Modify the location of the source in the StockWatcher.html file to reflect the actual location of
the OWF server:
<script type="text/javascript" language="javascript" src="https://localhost:8443/owf/static/js/owf-
widget-debug.js"></script>
5) Type ANT. The resulting StockWatcher.war file will be in the target directory and can be
deployed to the widget server.
6) By default, the widget looks for the framework JavaScripts on localhost. Replace all
occurrences of https://servername:port with the name of the server where OWF is running, for
example, https://www.yourcompany.com:8443.
To test that the widget properly publishes data, do the following:
1) Follow the section 3: Adding an App Component to OWF walkthrough to create app
component definitions which point to stockwatcher.html, assign the app component to a user,
and then apply the app component to one of the user’s applications. Use the following data for
app component definitions:
Table 7: Data for GWT App Component Definition
Definition
Data Input
URL
http://widget-server-name:port/StockWatcher/StockWatcher.html
Large Icon
http://widget-server-name:port/StockWatcher/images/stockwatch.gif
Small Icon
http://widget-server-name:port/StockWatcher/images/stockwatchsm.gif
Width
500
Height
500
2) Enter the OWF and select the application which contains the app components mentioned in
the steps above.
3) Launch the Listener Widget and the StockWatcher .NET Widget.
4) Add the “stockwatcher” channel to the Listener Widget. Do not include the quotations.
5) When stocks are added or removed from the widget, the listener will display the appropriate
information.
14.2.3 Known Issues
There are no known issues at this time.
14.3 .NET Example
The .NET sample app component demonstrates how a simple .NET-based Web application can
be integrated into OWF. It consists of a Web page for adding eventing channels and a Web
service for storing received messages.
14.3.1 Technologies
The following is required to build/deploy this example:
• Visual Studio 2008
• ASP.Net 3.5 or higher.
• Microsoft IIS or the built-in Web server bundled in Visual Studio 2008
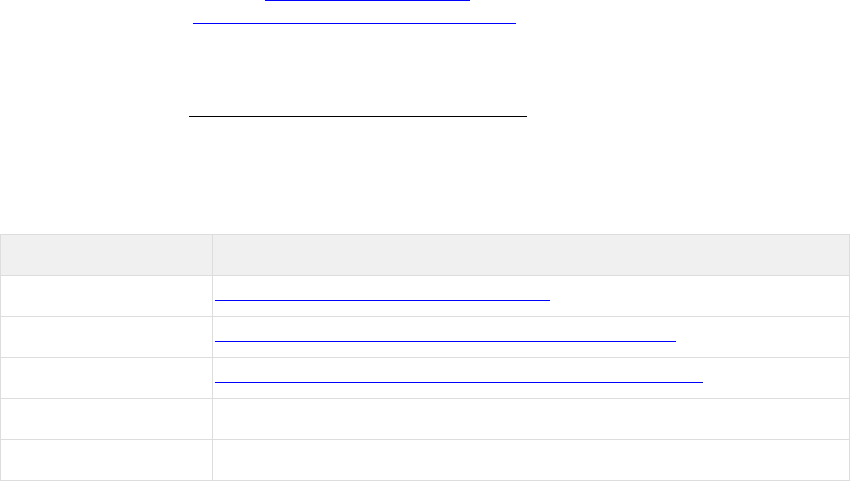
DOD GOSS – OWF Developer's Guide
Example App Components – 73
14.3.2 Building/Compilation
This example is packaged as a Visual Studio solution (*.sln).
1) Open the solution file and use Visual Studio to run and debug the application.By default, it
will try to pick up OWF scripts on localhost.
2) Change the location of the source to reflect the actual location of the OWF server.
Accordingly the location of the source must be modified in the Default.aspx file to reflect the
actual location of the OWF server:
< script type="text/javascript" src="https://localhost:8443/owf/static/js/config/config.js"></script>
<script type="text/javascript" src="https://localhost:8443/owf/static/js/util/error.js"></script>
<script type="text/javascript" language="javascript" src="https://localhost:8443/owf/static/js/owf-
widget.min.js"></script>
3) Replace all occurrences of https://servername:port with the name of the server where OWF is
running, for example, https://www.yourcompany.com:8443. Additionally, be sure to verify that
the windowname library paths point to the local installation.
Test the app component works properly:
1) Follow the section 3: Adding an App Component to OWF walkthrough to create app
component definitions which point to Default.aspx, assign the widget to a user, and then apply
the widget to one of the user’s applications. Use the following data for app component
definitions:
Table 8: Data for .NET Widget Definition
Definition
Data Input Field
URL
http://localhost:80/dotnet/Default.aspx
Large Image URL
http://localhost:80/dotnet/images/channelListener.gif
Small Image URL
http://localhost:80/dotnet/images/channelListenersm.gif
Width
500
Height
500
2) Enter the OWF and select the application that contains the app component mentioned in the
steps above.
3) Launch the Channel Shouter App Component and the Default.aspx App Component
mentioned above.
4) Assign a channel to the Shouter and add it to the Default.aspx App Component.
5) Broadcast a message with the Shouter, then search for a word from said message with the
Default.aspx widget. The message should appear in the search results of Default.aspx.
14.3.3 Known Issues
When a .NET widget is added to an application which is being viewed in Internet Explorer, a
debug message which reads "Failed Target Prefs Error: Timeout", is displayed. The OWF team
is aware of this issue and will be addressing it in a future release.
14.4 FLEX Example
The Flex sample app components demonstrate how .SWF files built using the Adobe Flex
framework can be integrated into OWF. It consists of two independent app components – the
Flex Pan Widget and the Direct Widget.
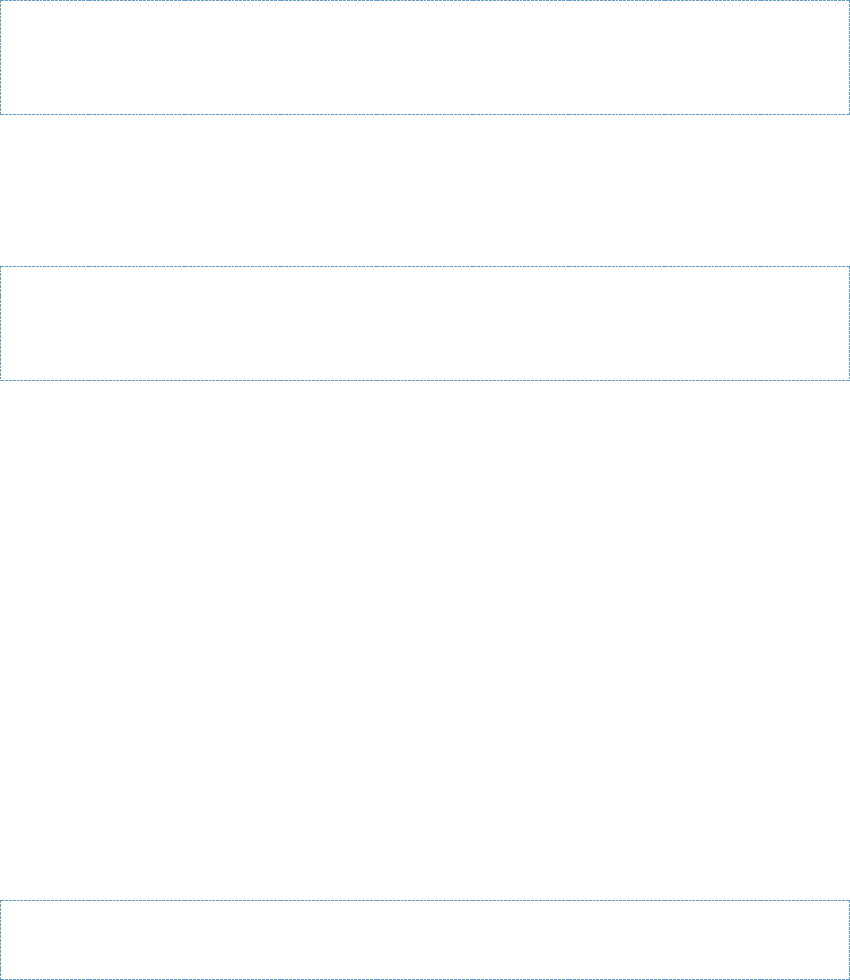
DOD GOSS – OWF Developer's Guide
Example App Components – 74
The Flex Pan Widget demonstrates the integration of a Flex Rich Internet Application with OWF.
The application displays a large image of the Earth and allows users to zoom and scroll around
the image. The Flex Pan Widget exposes eventing interfaces to control pan and zoom control.
The Flex Pan Widget subscribes to the "map.command" channel for the following messages:
• zoomIn
• zoomOut
• panUp
• panDown
• panLeft
• panRight
The Flex Pan Widget publishes to the "map.mouse" channel for mouse coordinates in the
format:
{ absX : 100, absY : 110, localX : 200, localY : 500 }
The abs coordinates are relative to the map image and local coordinates are relative to the
widget's window.
The Flex Pan Widget subscribes to the “map.marker” channel for messages that post markers
on the map image. The format for a “map.marker” message is:
{ x: 100, y: 200 }
This event payload will put a map marker at 100, 200 on the map. Markers are persisted to the
database using the Preferences API.
The Flex Direct Widget connects to the Flex Pan Widget via the eventing mechanism to control
the panning and zooming. It also displays the current mouse position.
14.4.1 Technologies
The following is required to build/deploy this example:
• A Java JDK installation of 1.7 or higher.
• Flex SDK 3.4 or 3.5
• A J2EE container such as Tomcat, Jetty or JBoss.
14.4.2 Building/Compilation
1) Extract \flex-widget.zip into a new directory.
2) Open build.xml and set the FLEX_HOME property.
For example:
<property name="FLEX_HOME" value="C:\Development\Flex" />
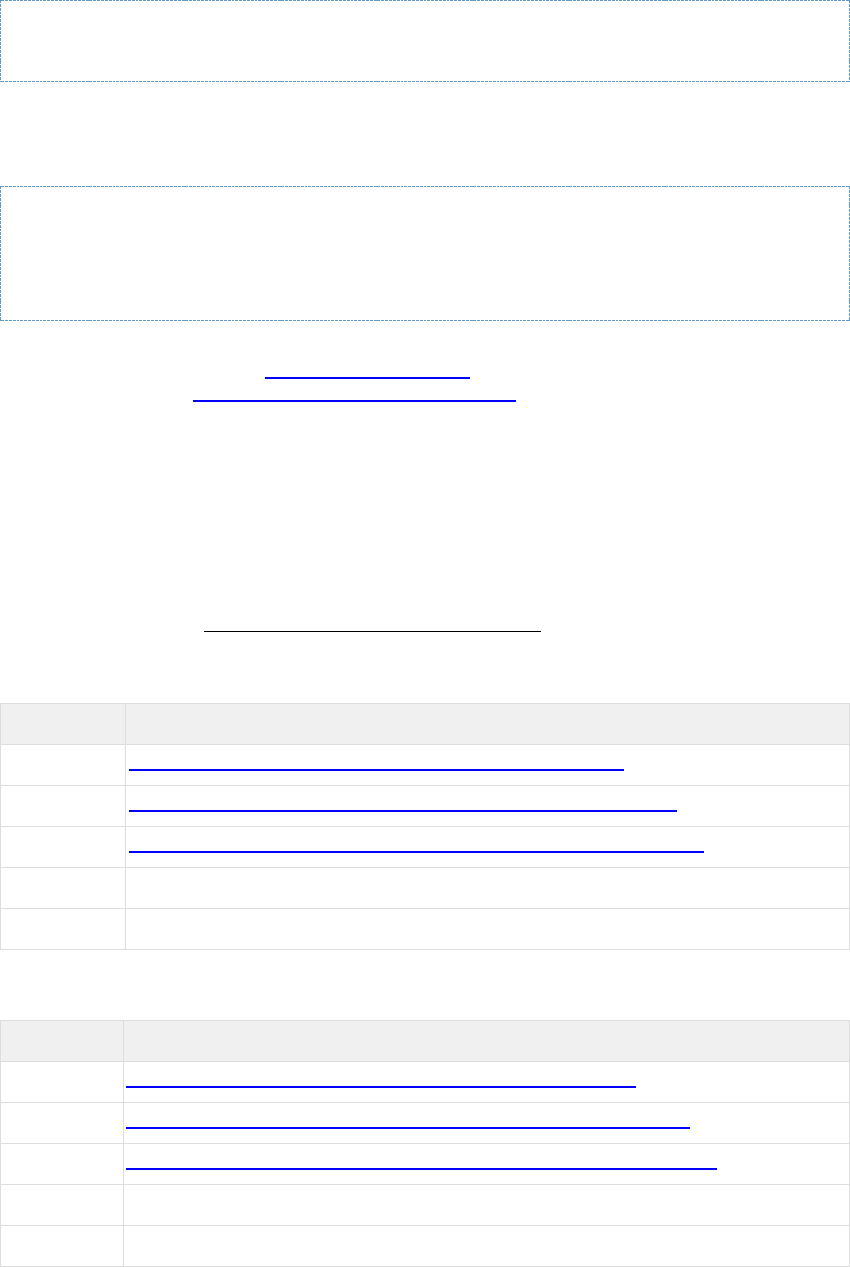
DOD GOSS – OWF Developer's Guide
Example App Components – 75
By default, the widget looks for the framework JavaScripts on localhost. The location of the
source must be modified in both the src/main/webapp/direct.html and the
src/main/resources/custom-template/templates/html-templates/express-installation-with-
history/index.template.html files to reflect the actual location of the OWF server:
<script type="text/javascript" language="javascript"
src="https://localhost:8443/owf/static/js/owf-widget.min.js"></script>
3) Replace all occurrences of https://servername:port with the name of the server where OWF is
running, for example, https://www.yourcompany.com:8443. Additionally, be sure to verify that
the windowname library paths point to the local installation. Moreover, the
src/main/webapp/direct.html and src/main/resources/custom-template/templates/html-
templates/express-installation-with-history/index.template.html instantiate the
Ozone.eventing.widget object, which takes the path to the RPC relay file as an argument. The
path used must be from the context root of the local widget.
4) Open a command prompt and navigate to the directory created in Step 1.
5) Type ANT. The resulting owf-sample-flex.war file will be in the target directory and can be
deployed to the widget server. To test that these widgets work properly together, follow the
walkthrough in section 3: Adding an App Component to OWF to create widget definitions which
point to pan.html, and then assign and apply the widget using the following widget definitions.
Table 9: Flex Pan Widget Definition Text
Definition
Data Input Field
URL
http://widget-server-name:port/owf-sample-flex/pan.html
Large Icon
http://widget-server-name:port/owf-sample-flex/images/pan.gif
Small Icon
http://widget-server-name:port/owf-sample-flex/images/pansm.gif
Width
800
Height
400
Repeat step 1 for the direct.html widget. Use the following data for widget definitions:
Table 10: Flex Monitor Direct Widget Definition Text
Definition
Data Input Field
URL
http://widget-server-name:port/owf-sample-flex/direct.html
Large Icon
http://widget-server-name:port/owf-sample-flex/images/direct.gif
Small Icon
http://widget-server-name:port/owf-sample-flex/images/directsm.gif
Width
300
Height
305
Launch both widgets and use the functions on each widget to see how navigational commands
and locations are shared between the two widgets.
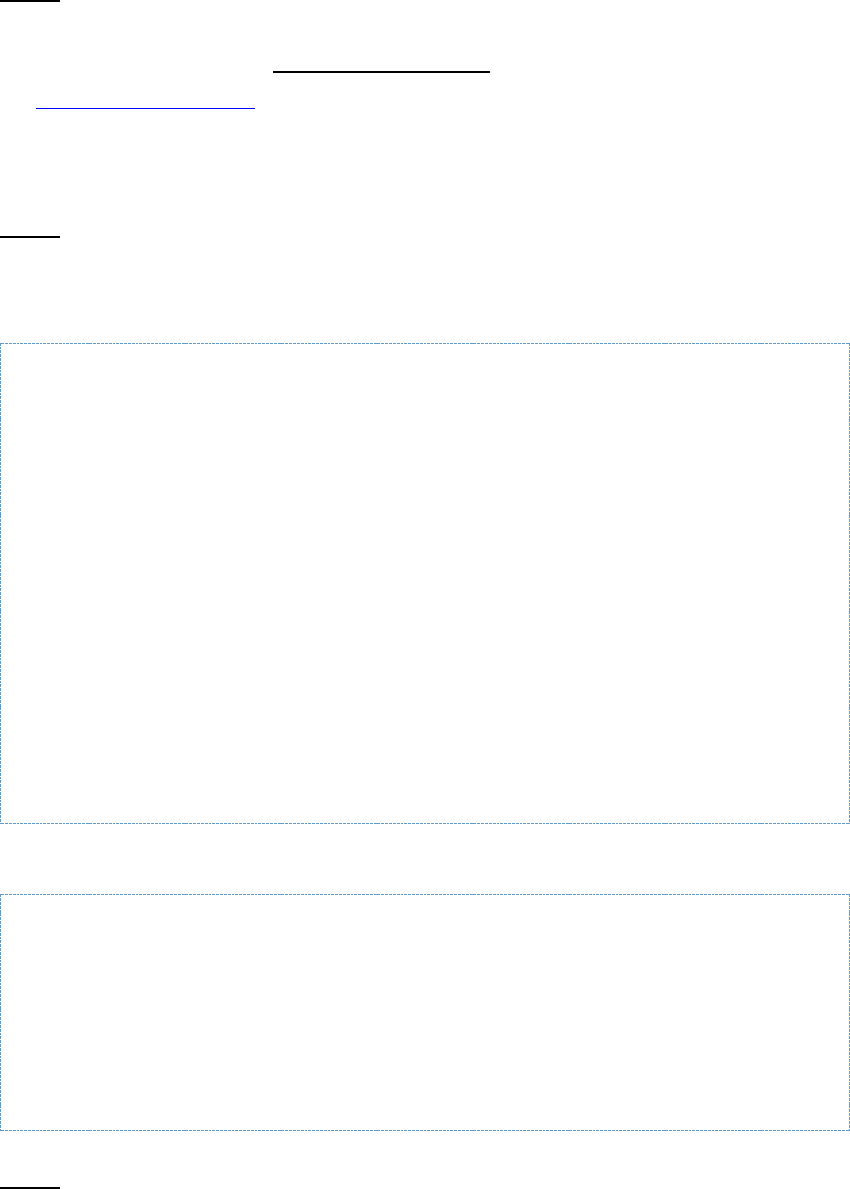
DOD GOSS – OWF Developer's Guide
Example App Components – 76
14.4.3 Supporting Drag and Drop in Flex Widgets
This walkthrough uses Flex Channel Listener and Flex Channel Shouter example widget
behavior to explain the Widget Drag and Drop API.
Note: This guide assumes developers understand how to develop Flex applications using
Adobe Flash Builder and are using the Flex Channel Listener and Flex Channel Shouter sample
widgets that are included with OWF.
Step 1: Import Required Files
This includes:
• Files mentioned in section 8.3.1: Required Includes
• DragAndDropSupport.as action script file that enables drag and drop in Flex widgets.
a) Find it in the etc/widget/flash-dragAndDrop/ozone/owf/dd/DragAndDropSupport directory.
b) Copy the etc/widget/flash-dragAndDrop/ozone directory to the flex-channel-shouter/src and
flex-channel-listener/src directory.
Step 2: Enable Flex Drag and Drop Support
Create an instance of DragAndDropSupport class when the applicationComplete event fires.
Set the wmode of Flex app to "`".
Example listener.mxml and shouter.mxml:
<s:Application xmlns:fx="http://ns.adobe.com/mxml/2009"
xmlns:s="library://ns.adobe.com/flex/spark"
xmlns:mx="library://ns.adobe.com/flex/mx"
minWidth="400" minHeight="400"
applicationComplete="
applicationCompleteHandler(event)">
<fx:Script>
<
DOD GOSS – OWF Developer's Guide
Example App Components – 77
Register the widget to Drag and Drop API by calling OWF.DragAndDrop.setFlashWidgetId
method and passing the id of the app.
<script>
OWF.ready(function() {
OWF.DragAndDrop.setFlashWidgetId("${application}");
});
...
</script>
Step 4: Attach Flex "mouseDown" Listener to Drag Operation
To start a drag operation, a mouse down listener must be attached to a Flex Component:
• In the Flex Channel Shouter example, it is the "Drag" button.
• In the "mouseDown" listener, execute the public javascript fuction, startDrag, using Flex's
ExternalInterface. startDrag function in turn calls OWF.DragAndDrop.startDrag which starts
the drag and notifies other widgets that a drag has been started in a widget.
index.template.html:
<script>
OWF.ready(function() {
OWF.DragAndDrop.setFlashWidgetId("${application}");
});
function startDrag(channel) {
OWF.DragAndDrop.startDrag({
dragDropLabel: channel,
dragDropData: channel
});
}
...
</script>
shouter.mxml:
<fx:Script>
<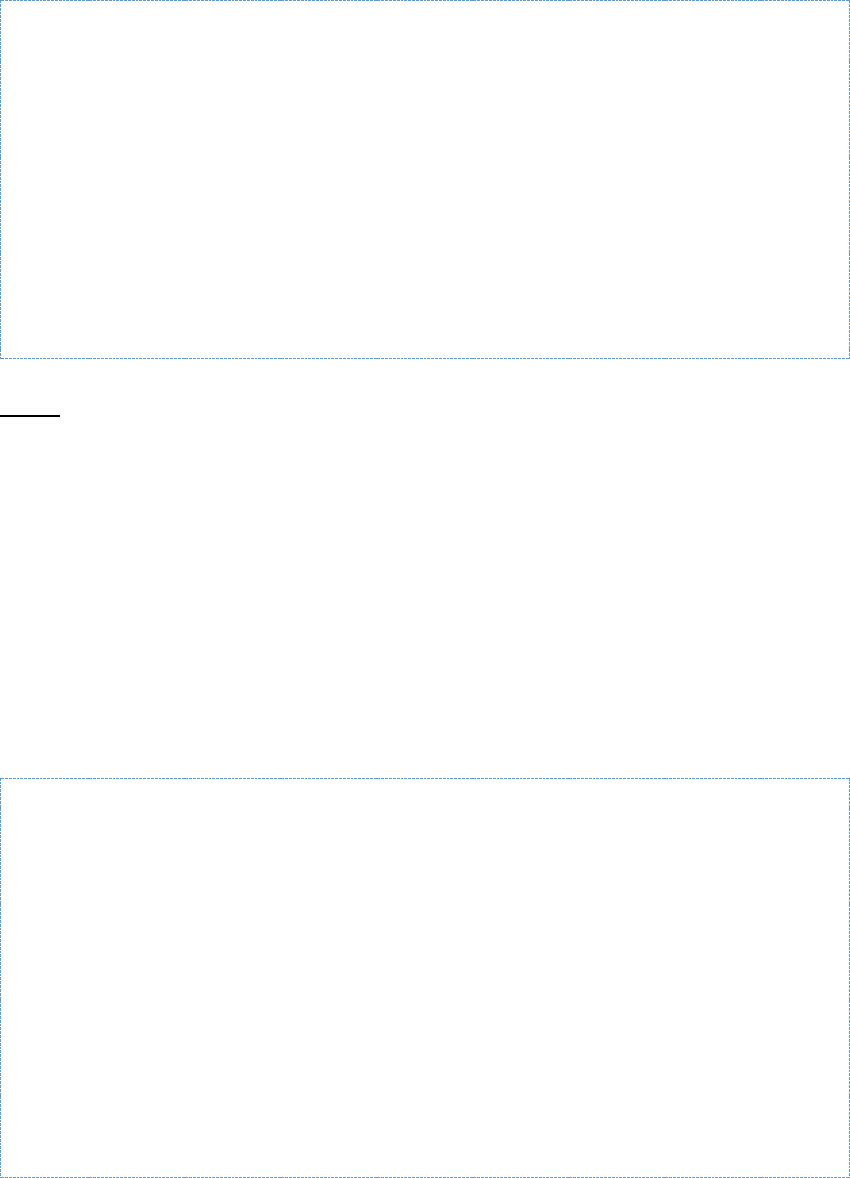
DOD GOSS – OWF Developer's Guide
Example App Components – 78
ExternalInterface.call('startDrag',
channel_name.text);
}
...
]]>
</fx:Script>
...
<s:Button label="Drag"
mouseDown="button1_mouseDownHandler(event)"/>
...
Step 5: Respond to Drag and Drop Events
Choose a Flex component to be a Drop Zone (an area that accepts a drop).
Note: In the Flex Channel Listener, the Drop Zone is the List Panel below the "Add Channel"
and "Remove Channel" buttons.
Drag and Drop API allows callback functions that respond to three events: dragStart, dragStop,
and drop.
• The dragStart event is fired whenever a drag is initiated. This was done in Flex Channel
Shouter by calling the startDrag function in the mousedown listener.
Flex Channel Listener responds to the dragStart by highlighting the Drop Zone to show that
it is a drop location.In dragStart callback, execute the onDragStart function which is
exposed by the Flex Widget. Also, execute the updateInteractiveObjects method which is
exposed by the DragAndDropSupport class. This is a required step to make drag and
drop work as expected in Flex widgets:
index.template.html:
<script>
OWF.ready(function() {
...
OWF.DragAndDrop.onDragStart(function(msg) {
OWF.Util.getFlashApp().onDragStart();
OWF.Util.getFlashApp().updateInteractiveObjects();
});
...
});
</script>
listener.mxml:
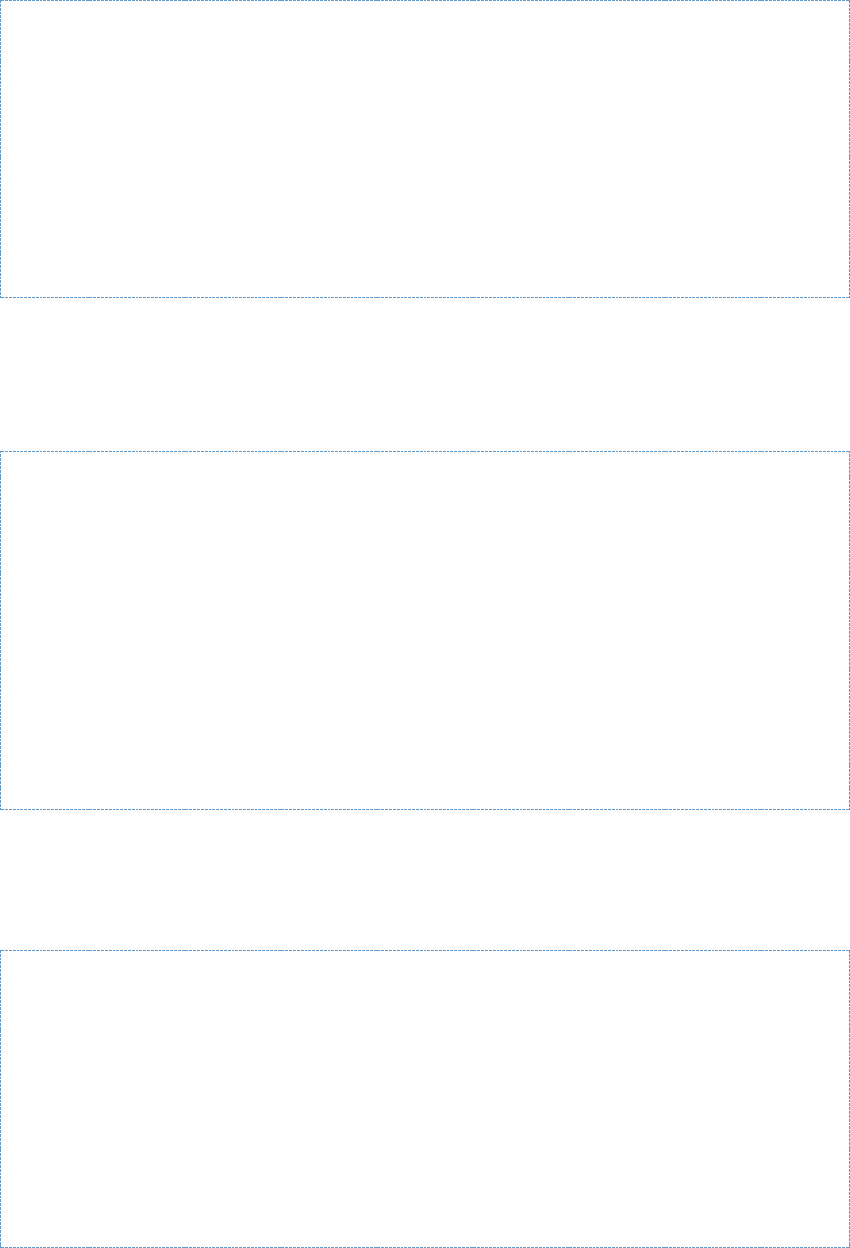
DOD GOSS – OWF Developer's Guide
Example App Components – 79
protected function applicationCompleteHandler(event:FlexEvent):void {
...
// expose onDragStart so that it can be called from JavaScript
ExternalInterface.addCallback('onDragStart', function():void {
channelsBG = "0x00adef";
});
...
}
• Like the name implies, dragStop fires when a drag stops. This happens when a user
releases the mouse button inside or outside a widget. In Flex Channel Listener, the
highlighted Drop Zone will stop highlighting if a dragStop occurs.
index.template.html:
<script>
OWF.ready(function() {
...
OWF.DragAndDrop.onDropStop(function() {
OWF.Util.getFlashApp().onDragStop();
});
...
});
</script>
listener.mxml:
protected function applicationCompleteHandler(event:FlexEvent):void {
...
// expose onDragStop so that it can be called from JavaScript
ExternalInterface.addCallback('onDragStop', function():void {
channelsBG = "0xffffff";
});
...
}
• A drop fire when a Drag and Drop operation is successful. The callback assigned to this
event executes with the data originally passed to the startDrag function.
index.template.html:
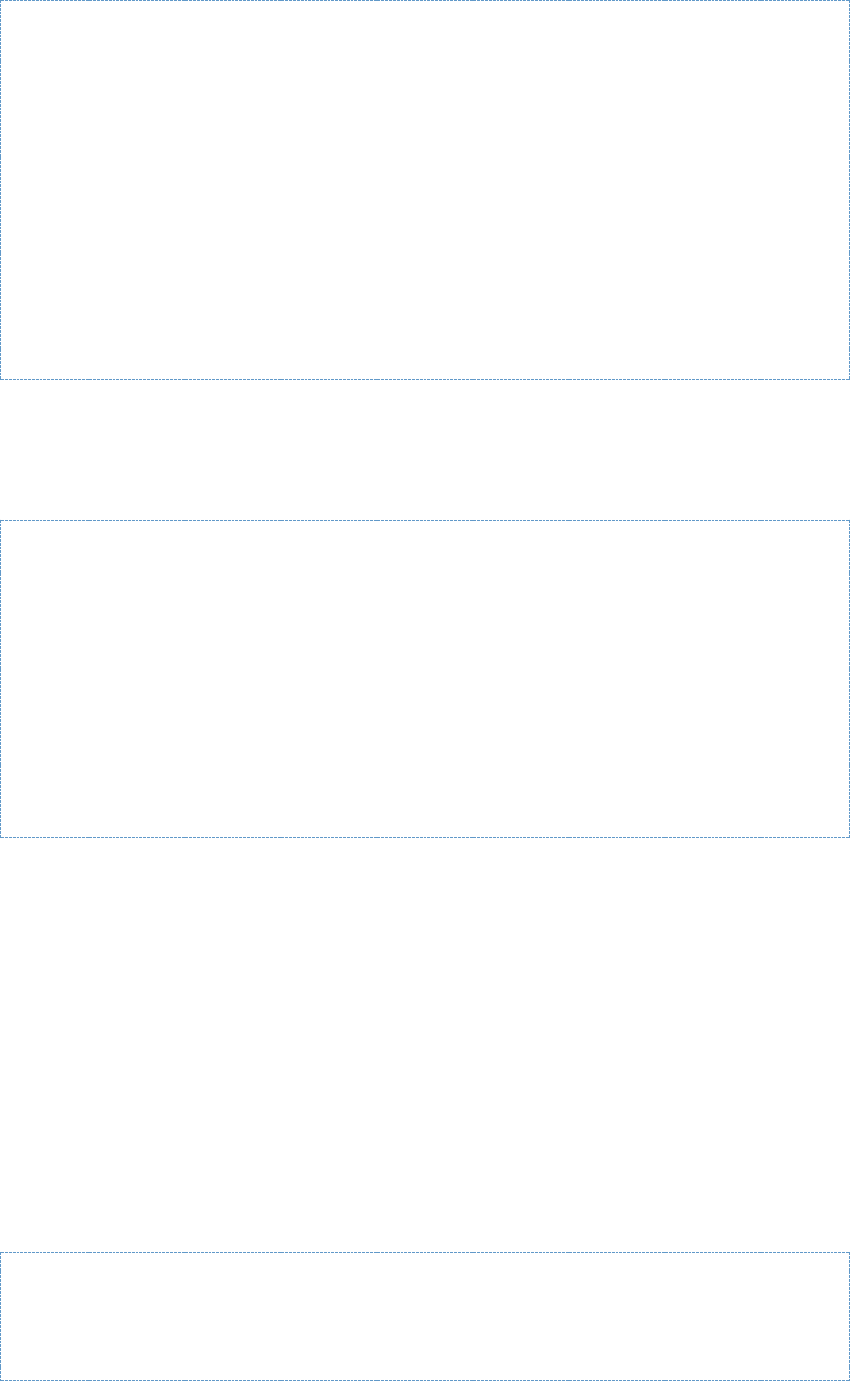
DOD GOSS – OWF Developer's Guide
Example App Components – 80
<script>
OWF.ready(function() {
...
OWF.DragAndDrop.onDrop(function() {
OWF.Util.getFlashApp().onDrop(msg.dragDropData);
});
...
});
</script>
listener.mxml:
protected function applicationCompleteHandler(event:FlexEvent):void {
...
// expose onDrop so that it can be called from JavaScript
ExternalInterface.addCallback('onDrop', onDropReceive);
...
}
public function onDropReceive(data:Object):void {
listenToChannel(data as String);
}
14.4.4 Known Issues
Flex has a known issue with DHTML and z-index ordering. The default wmode for Flex is
“window”. It also allows for two other options; transparent and opaque. In order for Flex widgets
to adhere to the proper z-index ordering the wmode must be set to something other than the
default.
To reduce the impact of the z-index issue, the OWF team added a useShims property to
application.yml. To turn it on, change the parameter to true.
Flex widgets may use a JavaScript file named history.js. This JavaScript file may throw a
JavaScript error in Internet Explorer when a Flex widget is launched. To fix this replace the code
below with code in the following section.
Existing code:
history.js – before changes:
…
var _initialize = function () {
if (browser.ie)
{
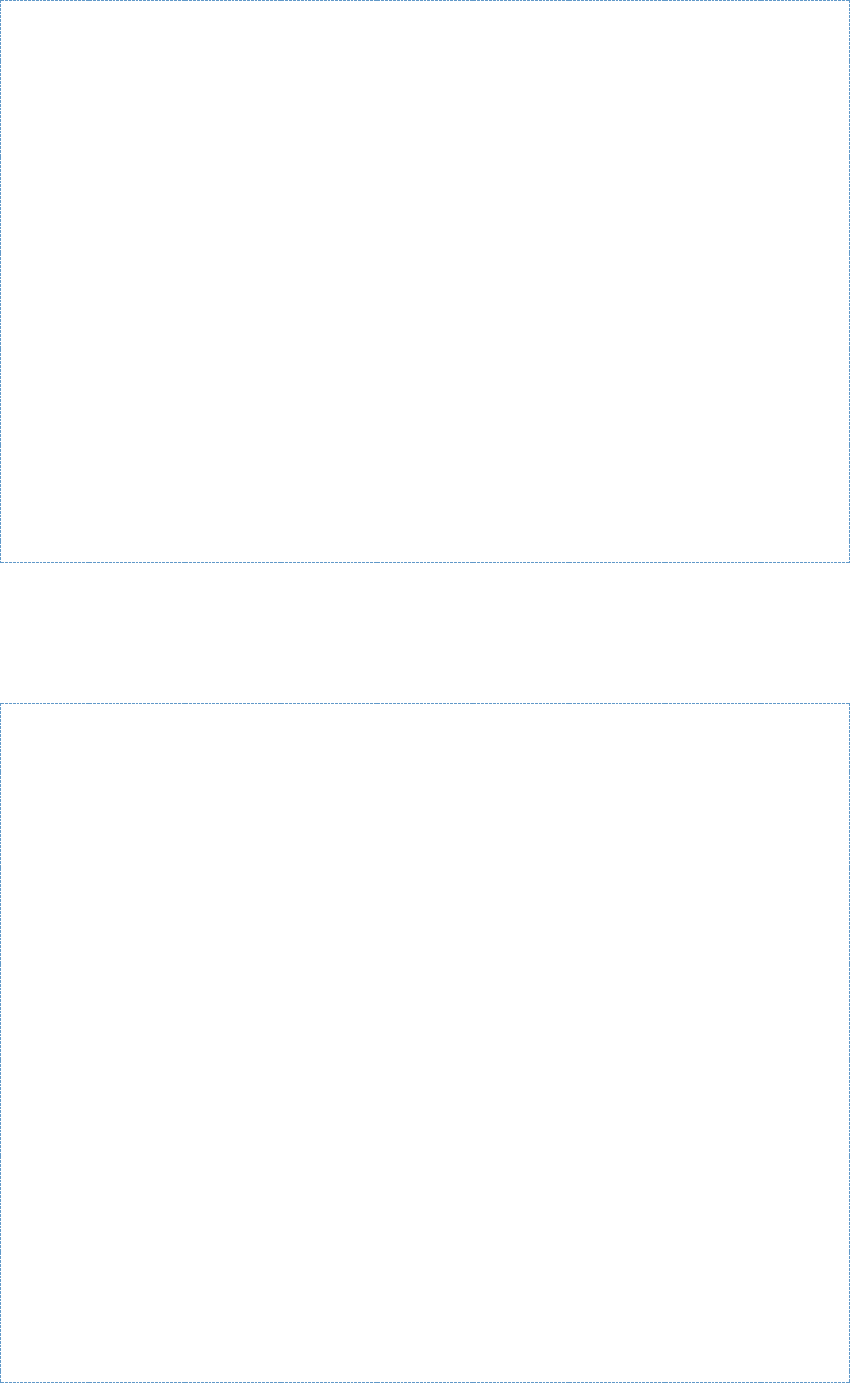
DOD GOSS – OWF Developer's Guide
Example App Components – 81
var scripts = document.getElementsByTagName('script');
for (var i = 0, s; s = scripts[i]; i++) {
if (s.src.indexOf("history.js") > -1) {
var iframe_location = (new
String(s.src)).replace("history.js", "historyFrame.html");
}
}
historyFrameSourcePrefix = iframe_location + "?";
var src = historyFrameSourcePrefix;
var iframe = document.createElement("iframe");
iframe.id = 'ie_historyFrame';
iframe.name = 'ie_historyFrame';
//iframe.src = historyFrameSourcePrefix;
try {
document.body.appendChild(iframe);
} catch(e) {
setTimeout(function() {
document.body.appendChild(iframe);
}, 0);
}
}
…
Replacement code:
history.js – after changes:
…
var _initialize = function () {
if (browser.ie)
{
var scripts = document.getElementsByTagName('script');
for (var i = 0, s; s = scripts[i]; i++) {
if (s.src.indexOf("history.js") > -1) {
var iframe_location = (new
String(s.src)).replace("history.js", "historyFrame.html");
}
}
historyFrameSourcePrefix = iframe_location + "?";
var src = historyFrameSourcePrefix;
var iframe = document.createElement("iframe");
iframe.id = 'ie_historyFrame';
iframe.name = 'ie_historyFrame';
//iframe.src = historyFrameSourcePrefix;
try {
document.body.appendChild(iframe);
} catch(e) {
var intervalId = setInterval(function() {
var error = false;
try {
document.body.appendChild(iframe);
}
catch(e) {
error = true;
}
if (!error) {
clearInterval(intervalId);

DOD GOSS – OWF Developer's Guide
Example App Components – 82
}
}, 10);
}
}
…
14.5 Silverlight Example
The Silverlight example shows how an ASP.Net/Silverlight Website can be incorporated into
OWF as a widget. It consists of four panes that are accessible via the menu at the bottom of the
widget:
• The first pane contains a shouter that allows the sending of messages to other widgets
within the framework.
• The second is a listener that can register eventing channels to listen on, which also keeps a
running record of all messages received.
• The third pane uses Silverlight charting to track the frequency of the messages within the
registered channels.
• The fourth pane uses the Preference Server API to store the user’s preferred visualization
method for the third pane (pie chart or bar chart).
14.5.1 Technologies
The following is required to build/deploy this example:
• Visual Studio 2008 SP1
• ASP.Net 3.5 or higher
• Silverlight 2 Toolkit
• Microsoft IIS or the built-in Web server bundled in Visual Studio 2008
Note: This example was built using the Silverlight 2 Toolkit released July 2009. Earlier versions
may not have all the necessary references and thus, additional configurations may be needed
for the widget to run.
14.5.2 Building/Compilation
The Silverlight example is packaged as a Visual Studio solution (*.sln) and, as per Microsoft-
suggested practice, consists of two projects (*.prj). One contains the Website and the other is
the Silverlight code.
1) Open the solution file and use Visual Studio to run and debug the application. By default, it
will try to pick up OWF scripts on localhost.
2) Change the OWFSilverlightDemoTestPage.aspx and the OWFSilverlightDemoTestPage.html
files to reflect the local OWF server:
<script type="text/javascript" language="javascript"
src="https://localhost:8443/owf/static/js/owf-widget.min.js"></script>
DOD GOSS – OWF Developer's Guide
Example App Components – 83
3) Replace all occurrences of https://servername:port with the name of the server where OWF is
running, for example, https://www.yourcompany.com:8443. Additionally, be sure to verify that
the windowname library paths point to the local installation.
14.5.3 Known Issues
The Silverlight example uses components from the freely available SilverlightContrib.DLL. A
copy of the library is bundled with the example.
In Windows, browsers can display a browser-hosted Silverlight content area in either a
windowed mode or a windowless mode. The default is a windowed mode. This property can be
set only as an initialization parameter and is read-only for all other access models. In
windowless mode, the Silverlight plugin does not have its own rendering window. Instead, the
plugin content is displayed directly by the browser window. This enables Silverlight content to
visually overlap and blend with HTML content if the plugin and its content both specify
background transparency. HTML content can also be displayed on top of Silverlight content in
windowless mode. If a Silverlight widget is still rendering incorrectly, please see C.2: Widget
Technology Issues for more details. In Macintosh environments, there is no windowed mode.
The mode is always windowless regardless of the Windowless setting.
14.6 Java Applet Example
The applet example demonstrates how a Java applet could be implemented as a widget within
OWF. It takes Michael Keating’s MyChessViewer, an applet that reads and animates a chess
.PGN file, and incorporates it into the framework. It has been modified to do the following:
• Broadcast each forward move selected on a channel named “mychess”.
• Store the current position in the game to the Preference Service.
After deploying the widget to OWF, the sample Channel Listener widget can be used to monitor
the “mychess” channel. Clicking on the next button within the applet will send a message about
the move. Coming back to the widget after closing the browser will return it to the last move
performed.
14.6.1 Technologies
The following is required to build/deploy this example:
• A JDK installation of 1.6 or higher.
• Apache ANT 1.7 or higher.
• A Web server such as Apache or IIS.
14.6.2 Building/Compilation
1) Extract \java-applet-widget.zip into a new directory.
2) Replace all occurrences of https://servername:port with the name of the server where OWF is
running, for example, https://www.yourcompany.com:8443. Additionally, be sure to verify that
the windowname library paths point to the local installation.
3) Open a command prompt and navigate to the directory created in Step 1.
4) Type ant. The resulting owf-sample-applet.war file will be in the target directory and can be
deployed to the app component server.
5) By default, the app component looks for the framework JavaScripts on localhost. Accordingly,
change the location of the source in the \java-applet-widget\src\main\webapp\widget.jsp file to
reflect the actual location of the OWF server:
DOD GOSS – OWF Developer's Guide
Example App Components – 84
<script type="text/javascript"
src="https://localhost:8443/owf/js/static/config/config.js"></script>
<script type="text/javascript"
src="https://localhost:8443/owf/js/static/util/error.js"></script>
<script type="text/javascript" language="javascript"
src="https://localhost:8443/owf/static/js/owf-widget.min.js"></script>
To test that the app component properly publishes data, do the following:
1) Follow the steps in the section 3: Adding an App Component to OWF, in order to create
widget definitions which point to widget.jsp, assign the widget to a user, and then apply the
widget to one of the user’s applications. Use the following widget definitions:
Table 11: JavaApplet Widget Definition Text
Definition
Data Input Field
URL
http://widget-server-name:port/owf-sample-applet/widget.jsp
Large Icon
http://widget-server-name:port/owf-sample-applet/images/chess.gif
Small Icon
http://widget-server-name:port/owf-sample-applet/images/white-queen.gif
Width
670
Height
655
2) Enter OWF and select the application which contains the widgets mentioned in the steps
above.
3) Launch the Listener Widget and the Chessboard Widget created in Step 1.
4) Add the “mychess” channel to the Listener Widget. Do not include the quotations.
5) As moves are applied to the chess game, the listener will display the appropriate information.
14.6.3 Known Issues
The applet needs to access the browser's JavaScript object, which requires some additional
security. The easiest way to accomplish this is to sign the .jar. The security directory contains a
keystore and a DOS batch file to create a new one. During the build process, this keystore is
used to sign the .jar file. The first time the applet is run, the user will be prompted to trust the
test certificate. Allowing it will avoid further prompting.
The classes needed to access the JavaScript object are part of the normal Sun JDK in the
plugin.jar. For simplicity, the .jar has been copied into this project's lib directory from the Java
JDK v1.6.0_07. Verify that the plugin.jar exists on the classpath when using a custom
deployment scenario.
There is a documented issue with Java applets not obeying proper z-indexing, the effect being
that an applet will appear on top of everything else in the widget framework:
http://bugs.sun.com/bugdatabase/view_bug.do;jsessionid=6a434ce1408465ffffffff87e84af5d233
a32?bug_id=6646289.
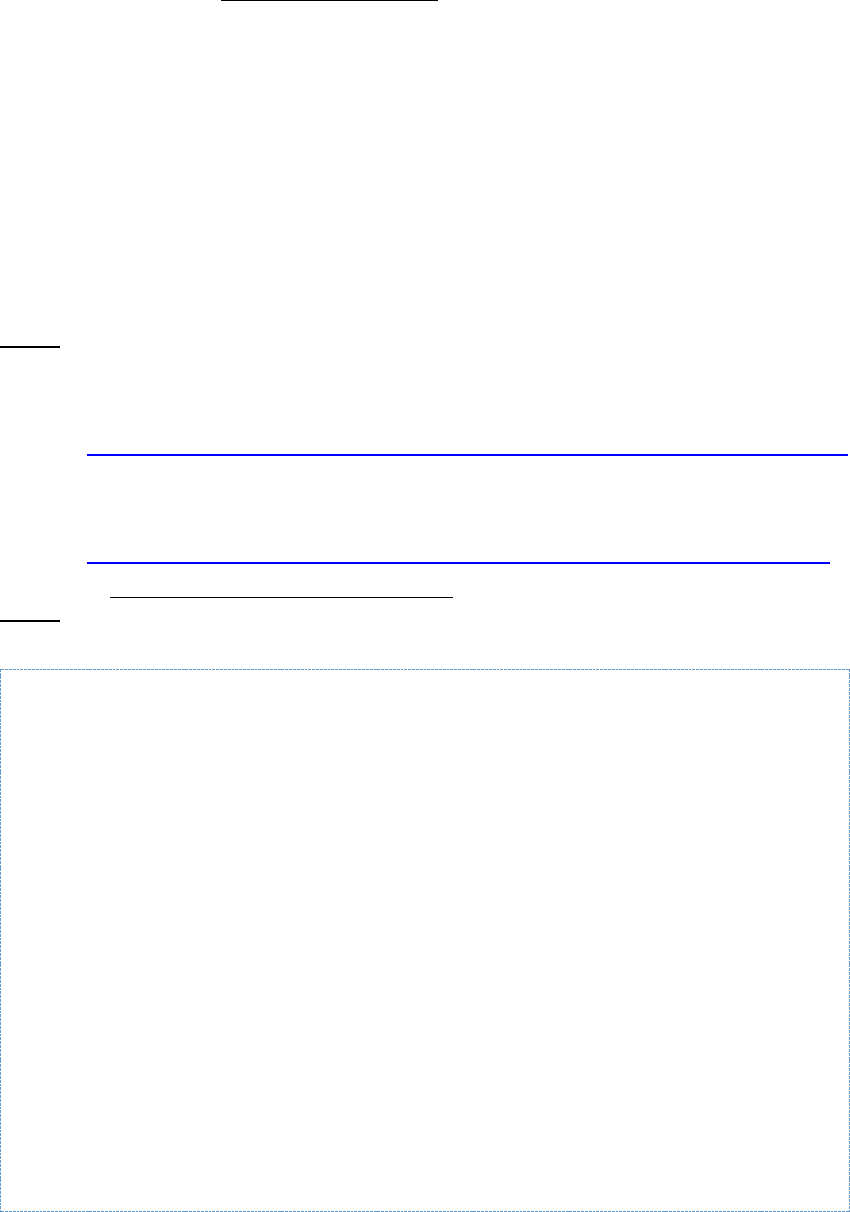
DOD GOSS – OWF Developer's Guide
Additional Walkthroughs – 85
15 Additional Walkthroughs
15.1 Overview - Adding the Widget Launcher
Note: Please see section 7: Widget Launcher API for additional information on the primary
Widget Launcher exercise.
The supplemental walkthrough will examine and explain how the "Announcing Clock Launcher"
and "Second Tracker (Launched Version)" work together. The "Announcing Clock Launcher"
will launch "Second Tracker (Launched Version)" and pass to it the name of a channel which
"Second Tracker" will then subscribe to and listen for a time-based “seconds” updates.
A third widget has capabilities which lends itself to this exercise, and that is the "Announcing
Clock Dynamic Launcher". It dynamically looks up the GUID of "Second Tracker (Launched
Version)" by using the Preferences API.
15.2 Walkthrough - Simple Widget Launching
Step 1: Add Two New Widgets
a) Name the first widget “Announcing Clock Launcher”
• Filename: AnnouncingClock_Launcher.html
• URL: https://localhost:844:/announcing-clock/clock/AnnouncingClock_Launcher.html
b) Name the second widget “Second Tracker (Launched Version)”
• Filename: SecondTracker_Launched.html
• URL: https://localhost:8443/announcing-clock/clock/SecondTracker_Launched.html
See section 3: Adding an App Component to OWF for directions on adding a widget to OWF.
Step 2: Examine the Function "launchSecondTracker"
function launchSecondTracker()
{
// data to be passed to the widget that is launched.
var data = {
channel: CHANNEL_NAME
};
var dataString = OWF.Util.toString(data);
// Launch the other widget!
OWF.Launcher.launch(
{
guid: "cb71a25d-d435-4770-ab0f-f33d7db31812", // the guid of the
widget to launch
launchOnlyIfClosed: true, //if true will only launch the widget if
it is not already
opened.
data: dataString // initial launch config data to be passed to
// a widget only if the widget is opened. this must be a string!
},
callbackOnLaunch
);
}
DOD GOSS – OWF Developer's Guide
Additional Walkthroughs – 86
Note the bold (and highlighted) GUID, cb71a25d-d435-4770-ab0f-f33d7db31812. That GUID
needs to be correct so that the Launching API can identify the widget to launch, i.e. "Second
Tracker (Launched Version).”
Note: In addition to using the GUID to launch a widget, the Universal Name of the widget can be
used as well. Viewing a widget list or Widget Editor and “turning on” the Universal Name column
will display all of the Universal Names for all widgets that have them. See the OWF
Administrator’s Guide for more details.
The bold (and highlighted) OWF.Launcher.launch text is the actual function call to the
Launching API's launch function which launches the "SecondTracker (Launched version)"
Widget.
The bold (and highlighted) // data to be passed text is the note which precedes the payload of
data that is being sent to the launched widget. The payload exists as a JSON object which has
been encoded as a string.
The bold (and highlighted) callbackOnLaunch text is a parameter which is passed to the
launch function. The value of the parameter is a function that gets called when the launch is
complete, regardless of whether the launch, regardless of whether the launch failed or was a
success. Said callback should be formed as follows:
/**
* A callback function that gets called after the widget launcher has
tried to launch the
* new widget and either succeeded or failed.
*/
function callbackOnLaunch (resultJson)
{
var launchResultsMessage = "";
if(resultJson.error)
{
// if there was an error, print that out on the launching widget
launchResultsMessage += ("Launch Error " + resultJson.message);
}
if(resultJson.newWidgetLaunched)
{
// if the new widget was launched, say so
launchResultsMessage += ("New Widget Launched, instance's unique id is "
+ resultJson.uniqueId);
}
else
{
// if the new widget was not launched, say so and explain why not
launchResultsMessage += ("New Widget Not Launched: " +
resultJson.message +
" The existing widget instance's unqiue id is " +
resultJson.uniqueId);
}
document.getElementById("launchResults").firstChild.nodeValue =
launchResultsMessage;
}
It is clear how the above function takes the JSON object returned in the function parameter and
does something with it; in this specific instance, it displays a status to the user and tells the user
what has happened.
Step 3: Examine "SecondTracker_Launched.html"
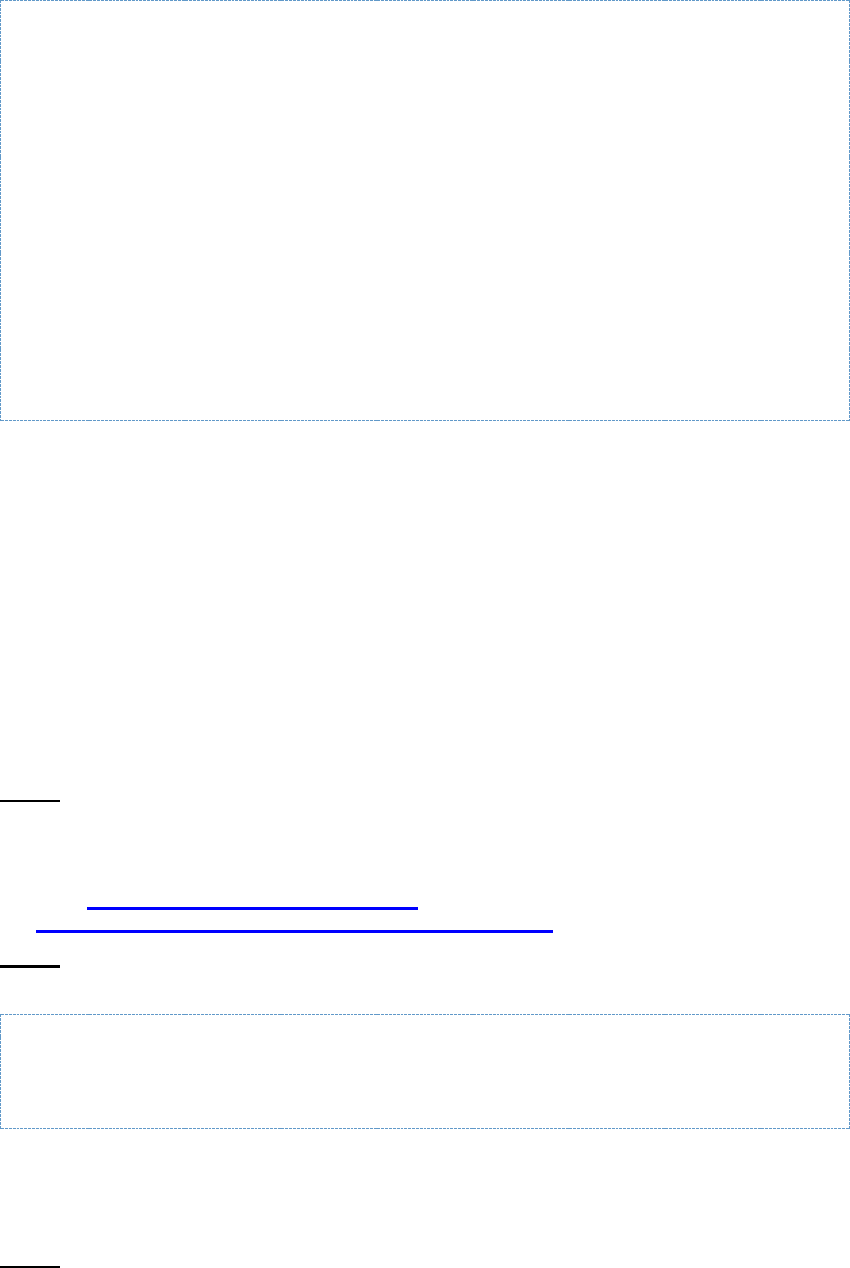
DOD GOSS – OWF Developer's Guide
Additional Walkthroughs – 87
// this widget expects to be launched. See what data was sent!
var launchConfig = OWF.Launcher.getLaunchData();
if(launchConfig == null)
{
document.getElementById("error").innerHTML = "<font color='red'>ERROR:
This widget must be launched from 'Announcing Clock Launcher' to work.
Close it and launch it from 'Announcing Clock Launcher.'</font><p/>";
}
else
{
var launchConfigJson = OWF.Util.parseJson(launchConfig);
// we are expecting the channel to listen on to be passed in
dynamically.
// update it on the page
var channelToUse = launchConfigJson.channel;
The bold (and highlighted) var launchConfig = OWF.Launcher.getLaunchData() text shows this
function retrieving the launch configuration from the widget launching API.
The bold (and highlighted) if(launchConfig... text checks to see whether the retrieved payload
was null. If null, an error will be displayed. The payload would be null, for example if the user
had launched the Second Tracker (Launched Version) Widget from the Favorites Menu, rather
than having it be launched by another widget.
In the bold (and highlighted) else text, the widget parses the payload which has been passed to
it, turns it into a JSON object, and retrieves the channel name.
15.3 Walkthrough - Dynamic Widget Launching
Step 1: Add a New Widget
a) Name the widget “Announcing Clock Dynamic Launcher”
• Filename: AnnouncingClock_DynamicLauncher.html
• URL: https://localhost:8443/announcing-
clock/clock/AnnouncingClock_DynamicLauncher.html.
Step 2: Examine the Widget
var WIDGET_TO_LAUNCH = "Second Tracker (Launched Version)"
The line of text above displays the exact name of the Widget that “Announcing Clock Dynamic
Launcher” is going to be looking for so that it can be launched.
Step 3: Examine the functions of “Announcing Clock Dynamic Launcher”
In the text below is the function which allows the Widget to search for the GUID is display. This
function displays where the Widget is searching for the GUID of the Widget to launch:
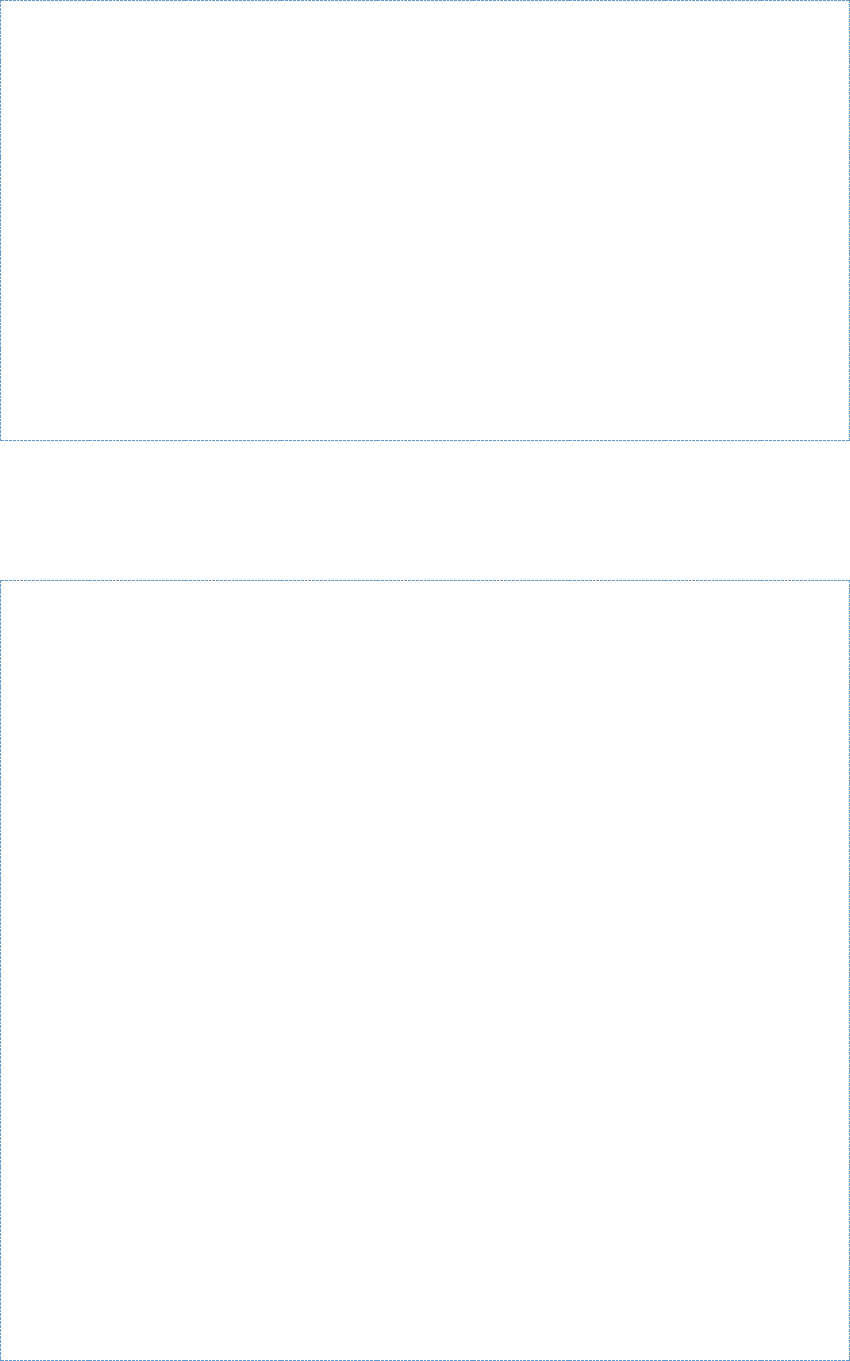
DOD GOSS – OWF Developer's Guide
Additional Walkthroughs – 88
/**
* This function starts the launch of the second tracker by
* querying the OWF pref server for the GUID of the second tracker.
*
**/
function lookupSecondTracker()
{
// get the guid of the widget to launch
var searchConfig = {
searchParams: { widgetName: WIDGET_TO_LAUNCH },
onSuccess: launchSecondTracker,
onFailure: failWidgetLookupError
};
OWF.Preferences.findWidgets(searchConfig);
}
In the bold (and highlighted) “searchParams” text, widgetName has been hard coded. The bold
(and highlighted) “onSuccess” and “onFailure” above show the two callbacks which can be
passed. These are the individual functions which get called on those events. On success, it
simply launches the second tracker:
/**
* This function launches the second tracker. It's called as a
callback from
* findWidgets on a successful query.
*/
function launchSecondTracker(findResultsResponseJSON)
{
// get guid
if(findResultsResponseJSON.length == 0)
{
// no result was found, so the looked up widget name doesn't
exist
failWidgetLookupError("Widget was not found in user profile.
User may not have access.");
}
else
{
var guidOfWidgetToLaunch = findResultsResponseJSON[0].path;
// data to be passed to the widget that is launched.
var data = {
channel: CHANNEL_NAME
};
var dataString = OWF.Util.toString(data);
// Launch the other widget!
OWF.Launcher.launch (
{
guid: guidOfWidgetToLaunch, // the guid of the widget to
launch
launchOnlyIfClosed: true, //if true will only launch the
widget if it is not already opened.
data: dataString // initial launch config data to be passed
to
// a widget only if the widget is opened. this must be a string!
},
callbackOnLaunch
);

DOD GOSS – OWF Developer's Guide
Additional Walkthroughs – 89
}
}
On failure, it prints an error message:
/**
* When the findWidget call fails for some reason, this error
handling function
* displays an error message on the widget
*/
function failWidgetLookupError(widgetLookupErrorMessage)
{
document.getElementById("launchResults").firstChild.nodeValue =
"Launching Failed because this widget was unable to look up the
widget called " +
WIDGET_TO_LAUNCH + ". Are you sure the widget exists under that
name? Error Message: " +
widgetLookupErrorMessage;
DOD GOSS – OWF Developer's Guide
Appendix A JVM Compatability – 90
16 Appendix A JVM Compatability
The Oracle and OpenJDK JVMs 1.8 are supported.
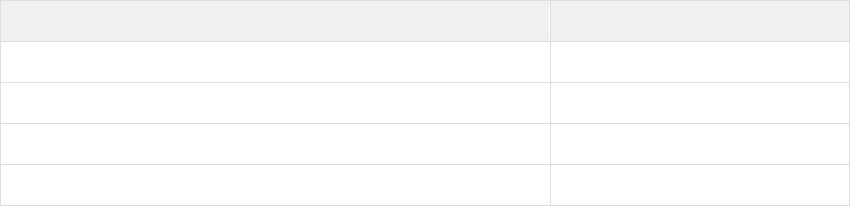
DOD GOSS – OWF Developer's Guide
Appendix B Supported Browsers – 91
17 Appendix B Supported Browsers
OWF is tested against the following browsers:
Table 12: Tested Browsers
Browser
Versions
Internet Explorer
11
Firefox
57
Chrome
43
Edge
38

DOD GOSS – OWF Developer's Guide
Appendix C Known Issues – 92
18 Appendix C Known Issues
18.1 User Interface Issues
Changes in screen resolution may render app components un-viewable.
The positioning of the app components is absolute. This means that when changing from a
larger monitor to a smaller monitor, or when changing from a higher screen resolution to a lower
screen resolution, some floating windows may be either partially or fully off the viewable region
of the screen. Currently there is no remedy for this issue. As a workaround, close the app
component. Then, re-add it from the App Components Menu. This will reset its position and
therefore, render it viewable again.
18.2 Widget Technology Issues
Java Applet Widgets always sit on top of other widgets (z-index issue).
There is a documented issue with Java applets not obeying proper z-indexing; the effect being
that an applet will appear over everything else in OWF:
http://bugs.sun.com/bugdatabase/view_bug.do;jsessionid=6a434ce1408465ffffffff87e84af5d233
a32?bug_id=6646289
Flex Widgets always sit on top of other widgets (z-index issue).
Flex has a known issue with DHTML and z-index ordering. The default wmode for flex is
window with two other options; transparent and opaque. In order for Flex Widgets to adhere to
the proper z-index ordering the wmode must be set to something other than the default.
Silverlight Widgets always sit on top of other widgets (z-index issue).
Silverlight has a known issue with DHTML and z-index ordering. The default windowless mode
for Silverlight is false. In order for Silverlight widgets to adhere to the proper z-index ordering the
windowless mode must be set to true.
Google Earth Plugin Widgets always sit on top of other widgets (z-index issue).
The Google Earth browser plugin currently does not conform to the normal z-index rules of html.
This will cause the plugin to remain on top of any other floating windows that may be on the
screen. If using this plugin, it is recommended not to utilize it in the desktop layout. It can be
used in any of the other static layouts but windows launched from the toolbars may be rendered
unreachable by the plugin.
18.3 Database Issues
Oracle scripts should be executed via the SQL*Plus command line.
There have been reported issues using Oracle's browser-based administration console to
upload and run the OWF create and update scripts. Stray characters are getting inserted into
the database, causing JSON parsing errors at runtime. Executing the scripts through the
SQL*Plus command line utility eliminates this issue.

DOD GOSS – OWF Developer's Guide
OWF-DG: Software Dependency Versions – 93
19 OWF-DG: Software Dependency Versions
19.1 Back-end
Component
OWF
v7.17.2.0-
RC1
Latest Version
as of 2018-01-
31
Notes
Groovy
2.4.13
2.4.13
Grails
3.3.2
3.3.2
Spring
4.3.12*
4.3.14
* Grails supported version
Spring
Security
4.2.3
4.2.4*
* Update released after RC-1
Hibernate
5.1.9*
5.2.12
* Grails supported version
Liquibase
n/a*
3.5.3
* Removed for RC1, to be re-added before
GA
19.2 Front-end
Component
OWF
v7.17.2.0-
RC1
Latest Version
as of 2018-01-
31
Notes
ExtJS
4.0.7*
6.5.1
* Not upgraded due to scope and licensing
issues
Shindig*
1.0.x
2.5.2
* Not upgraded; no longer supported
Backbone.js
1.3.3
1.3.3
Require.js
2.3.5
2.3.5
Bootstrap
2.3.2*
4.0.0
* Not upgraded due to scope
Dojo
1.5.0*
1.13
* Not upgraded due to scope
Handlebars
4.0.11
4.0.11
jQuery
3.2.1
3.3.1*
* Update released after RC-1
jQuery
dotdotdot
3.0.5
3.2.1
jQuery UI
1.12.1
1.12.1
bxslider
4.1.1*
4.2.12
* Not upgraded due to scope
lodash
4.17.4
4.17.4
log4javascript
1.4.13
1.4.13
pNotify
1.2.0*
3.2.1
* Not upgraded due to scope
Underscore
1.8.3
1.8.3
DOD GOSS – OWF Developer's Guide
OWF-DG: Software Dependency Versions – 94
