1 Explorer Pro Front Cover English.P65 Ohaus EP214 Balance User Manual 80250955
User Manual: Ohaus EP214 balance user manual 80250955
Open the PDF directly: View PDF ![]() .
.
Page Count: 44
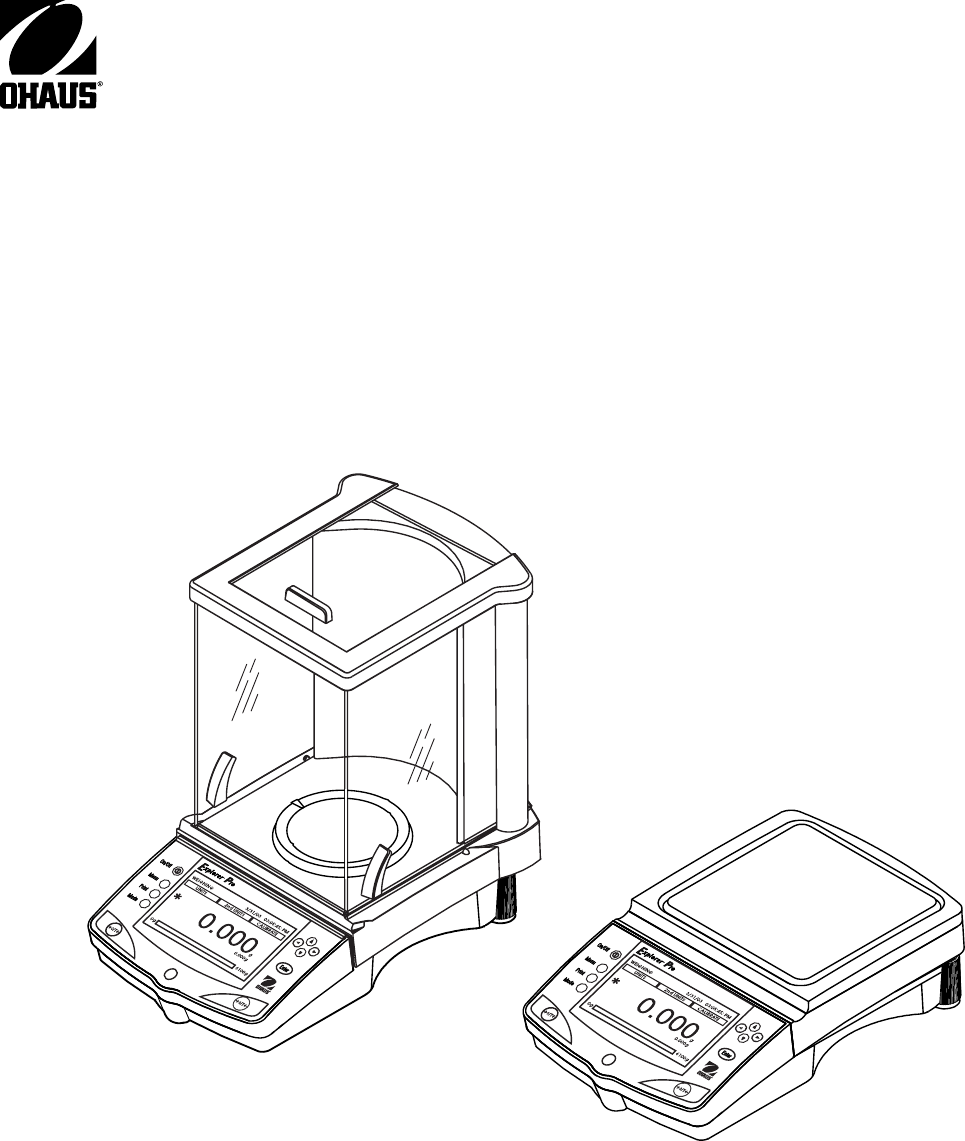
Explorer Pro
Instruction Manual
Balance models: EP64,EP64C, EP64CN, EP64CM, EP114, EP114C, EP114CN, EP114CM, EP164, EP214, EP214C, EP214CN, EP214CM, EP214D, EP214DC,
EP214DCN, EP214DCM, EP213, EP213N, EP213C, EP213CN, EP213CM, EP413, EP413N, EP413C, EP413CN, EP413CM, EP513CM, EP613, EP613C,
EP613CN, EP613CM, EP413D, EP413DN, EP413DC, EP413DCN, EP413DCM, EP612, EP612N, EP612C, EP612CN, EP612CM, EP1502, EP2102, EP2102N,
EP2102C, EP2102CN, EP2102CM, EP4102, EP4102N, EP4102C, EP4102CN, EP4102CM, EP6102, EP6102N, EP6102C, EP6102CN, EP6102CM, EP4102D,
EP4102DN, EP4102DC, EP4102DC, EP4102DCM, EP410, EP4101N, EP4101C, EP4101CN, EP4101CM, EP6101, EP6101N, EP6101C, EP6101CN,
EP6101CM, EP810, EP8101N, EP8101C, EP8101CN, EP8101CM, EPG114, EPG114C, EPG2102, EPG2102C, EPG213, EPG213C, EPG214, EPG214C,
EPG214D, EPG214DC, EPG4101, EPG4101C, EPG4102, EPG4102C, EPG4102D, EPG4102DC, EPG413, EPG413C, EPG413C, EPG413D, EPG413DC,
EPG6101, EPG6101C, EPG6101C, EPG6102, EPG6102C, EPG612, EPG612C, EPG613, EPG613C, EPG64, EPG64C, EPG8101, EPG8101C
Declaration of Conformity
The undersigned, representing the following manufacturer
Ohaus Corporation
19A Chapin Road
PO Box 2033
Pine Brook, NJ 07058 USA
hereby declares that the following products are in conformity with the EEC directives listed below (including any and all modifications).
ISO 9001 Registration for Ohaus Corporation.
Ohaus Corporation, USA, was examined and evaluated in 1994 by the Bureau Veritas Quality Interna-
tional, BVQI, and was awarded ISO 9001 registration. This certifies that Ohaus Corporation, USA, has a quality system that conforms with the international
standards for quality management and quality assurance (ISO 9000 series). Repeat audits are carried out by BVQI at intervals to check that the quality
system is operated in the proper manner.
T2914
xx
xx= year CE affixed
Ted Xia
President
Ohaus Corporation
Pine Brook, NJ USA
Date: July 29, 2003
Marked with: Directive Standard
Gekennzeichnet mit: Richtlinie Norm
Munis de la mention: Directive Norme
Contrassegnati con la Directiva Norma
marcatura:
Con el distintivo: Direttiva Norma
EU 73/23/EEC IEC 1010 -1:1990 + A1: 92 + A2: 95
Low Voltage
Niederspannung
Basse tension
Baja tensión
Bassa tensione
EU 89/336/EEC
Electromagnetic compatibility
Elektromagnetische
Verträglichkeit
Compatibilité électromagnétique
Compatibilidad electromagnética
Compatibilità elettromagnetica
EU 90/384
NAWI
FNSW
BFNA
PBNA
BFNA
EN45501:1992
Non-automatic weighing instruments
Nichtautomatische Wiegevorrichtungen
Instruments de pesage à fonctionnement non automatique
Instrumentos de pesaje de funcionamiento no automático
Strumenti per pesare a funzionamento non automatico
Safety requirements for electrical equipment for measurement,
control and laboratory use Part 1: General requirements
Sicherheitsbestimmungen für elektrische Meß-, Steuer-, Regel- und
Laborgeräte Teil 1: Allgemeine Anforderungen
Règles de sécurité pour appareils électriques de mesurage, de
régulation et de laboratoire Partie 1: Prescriptions générales
Requisitos de seguridad de equipos eléctricos de medida, control y
uso en laboratorio Parte 1: Requisitos generales
Prescrizioni di sicurezza per apparecchi elettrici di misura, controllo e
per utilizzo in laboratorio Parte 1: Prescrizioni generali
EN61326: 1997 + A1: 1998
Electrical equipment for measurement, control and laboratory use
(Class B)
Elektrische Betriebsmittel für Leittechnik und Laboreinsatz EMV-
Anforderungen (Class B)
Matériels électriques de mesure, de commande et de laboratoire
Prescriptions relatives à la CEM (Class B)
Equipo eléctrico de medida, control y uso en laboratorio Requisitos
de compatibilidad electromagnética (Class B)
Apparecchi elettrici di misura, controllo e laboratorio Prescrizioni
di compatibilità elettromagnetica (Class B)
Urs Müller
General Manager
Ohaus Europe
Greifensee, Switzerland

Additional Standards
CAN/CSA-C22.2 No. 1010.1-92; UL Std. No. 3101-1
Safety requirements for Electrical Equip. for measurement, Control and Laboratory Use, Part 1; General Requirements
FCC, Part 15, class A Emission
AS/NZS4251.1 AS/NZS4252.1 Emission and Immunity
FCC
Note: This equipment has been tested and found to comply with the limits for a Class A digital device, pursuant to Part 15 of the FCC Rules. These limits are
designed to provide reasonable protection against harmful interference when the equipment is operated in a commercial environment. This equipment generates,
uses, and can radiate radio frequency energy and, if not installed and used in accordance with the instruction manual, may cause harmful interference to radio
communications. Operation of this equipment in a residential area is likely to cause harmful interference in which case the user will be required to correct the
interference at his own expense.
This Class A digital apparatus complies with Canadian ICES-003.
Cet appareil numérique de la classe A est conforme à la norme NMB-003 du Canada
N13123

Explorer Pro EN-1
TABLE OF CONTENTS
1. INTRODUCTION ...................................................................................................................................... EN-3
1.1 Description ........................................................................................................................................... EN-3
1.2 Features ............................................................................................................................................... EN-3
1.3 Safety Precautions ................................................................................................................................. EN-3
2. INSTALLATION ....................................................................................................................................... EN-3
2.1 Unpacking ............................................................................................................................................ EN-3
2.2 Installing Components ............................................................................................................................ EN-4
2.2.1 Platform Installation .................................................................................................................... EN-4
2.2.2 Windshield Installation ................................................................................................................ EN-4
2.2.3 Weigh Below Preparation ............................................................................................................. EN-4
2.3. Selecting the Location ............................................................................................................................ EN-5
2.3.1 Balance Location ........................................................................................................................ EN-5
2.3.2 Leveling the Balance ................................................................................................................... EN-5
2.4 Connecting Power and Communications .................................................................................................. EN-6
2.4.1 AC Adapter Installation ................................................................................................................. EN-6
2.4.2 RS232 Interface .......................................................................................................................... EN-6
2.4.3 Initial Calibration ......................................................................................................................... EN-7
3. OPERATION .............................................................................................................................................. EN-8
3.1 Overview of Controls .............................................................................................................................. EN-8
3.2 Overview of Display Indicator ................................................................................................................ EN-10
3.3 Menu ................................................................................................................................................. EN-11
3.3.1 Menu Structure ......................................................................................................................... EN-11
3.3.2 Navigation ............................................................................................................................... EN-11
3.3.3 Turning On the Balance ............................................................................................................. EN-11
3.4 Applications ........................................................................................................................................ EN-12
3.4.1 Weighing ................................................................................................................................. EN-12
3.4.2 Parts Counting .......................................................................................................................... EN-13
3.4.3 Percent Weighing ...................................................................................................................... EN-17
3.4.4 Animal Weighing ...................................................................................................................... EN-19
3.4.5 Check Weighing ....................................................................................................................... EN-20
3.4.6 Gross/Net/Tare Weighing ........................................................................................................... EN-21
3.4.7 Filling ...................................................................................................................................... EN-22
3.5 Balance Settings .................................................................................................................................. EN-23
3.5.1 Calibration ............................................................................................................................... EN-23
3.5.2 Balance Options ....................................................................................................................... EN-24
3.5.3 Readout ................................................................................................................................... EN-25
3.5.4 Application Modes .................................................................................................................... EN-26
3.5.5 Units ........................................................................................................................................ EN-26

EN-2 Explorer Pro
TABLE OF CONTENTS (Cont.)
3.5.6 Interface .................................................................................................................................. EN-27
3.5.7 Print Options ........................................................................................................................... EN-28
3.5.8 GLP Print Options ..................................................................................................................... EN-28
3.5.9 Lockout .................................................................................................................................. EN-29
3.5.10 Factory reset ............................................................................................................................ EN-29
3.9.11 LFT Legal for Trade ................................................................................................................... EN-30
3.5.12 Hardware Lock Switch .............................................................................................................. EN-30
3.5.13 Sealing the Balance ................................................................................................................. EN-30
3.6 Printing Data ....................................................................................................................................... EN-30
4. CARE AND MAINTENANCE ........................................................................................................................ EN-31
4.1 Cleaning ............................................................................................................................................. EN-31
4.2 Troubleshooting................................................................................................................................... EN-31
4.3 Error Codes List ................................................................................................................................... EN-32
4.4 Service Information .............................................................................................................................. EN-33
4.5 Replacement Parts ............................................................................................................................... EN-33
4.6 Accessories......................................................................................................................................... EN-33
5. TECHNICAL DATA ...................................................................................................................................... EN-34
5.1 RS232 Commands .............................................................................................................................. EN-34
5.2 Specifications ...................................................................................................................................... EN-35
Explorer Pro EN-3
1. INTRODUCTION
1.1 Description
Thank you for deciding to purchase an Explorer Pro®
Balance from Ohaus. Explorer® Pros software design allows
direct access to 7 application modes and all menus. The backlit
dot matrix display, is capable displaying either limited or multiple
data fields at each application. Explorer® Pros optional AutoCal
automatically calibrates the balance due to temperature changes
that may affect calibration. Panel controls and soft key functions
on the display clearly indicate functions and data. Operation is
extremely simplified, you enter a menu, select an item, modify
the item according to menu selections and exit.
Capacities from 62 grams to 8,100 grams are available. Legal
for Trade versions are also available.
To ensure you make full use of the possibilities offered by your
Explorer® Pro balance, we advise you to read through these
operating instructions.
1.2 Features
Ready to weigh without complicated setup
3 soft keys are application mode specific.
Operating languages include English, Spanish, French,
German and Italian.
Simplified menu navigation and balance setup.
Capacity Bar guide and Fill bar guide.
Flexibility to display either simple weighing results or
more advanced results including piece count, average piece
weight, sample size, tare weight, weight, under and over.
Dot Matrix display with backlight
Weighing, Parts Counting, Animal Weighing, Percent
Weighing, Check Weighing, Gross/Net/Tare Weighing and
Filling.
1.3 Safety Precautions
Please follow the safety precautions as listed.
CAUTION:
Do not operate the balance around corrosive fumes.
Only use the adapter provided with the balance.
Do not try to service the Explorer® Pro balance.
2. INSTALLATION
2.1 Unpacking
Open the package and remove the instrument and the
accessories. Check the completeness of the delivery. The
following accessories are part of the standard equipment of your
new Explorer® Pro balance.
Pan 3.5, 90mm Round - Analytical 62g, 110g, 162g, 210g,
210/100g
Pan 4.7", 120mm Round - Precision 210g 410g, 510, 610g,
410/100g
Pan 6.8", 152mm Square (0.01 g units) - Precision 610g,
1500g, 2100g, 4100g, 6100g, 4100/1000g
Pan 8", 203mm Square (0.1 g units) - Precision* 6100g,
4100g, 8100g
Draft Shield - Analytical 62g, 110g, 162g, 210g, 210/100g
Draft Shield (0.001g units)- Precision 210g 410g, 610g,
410/100g
Wind Shield (0.01g Units) - Precision 610g, 1550g, 2100g,
4100g, 6100g, 4100/1000g
* 4100 g, 6100 g and 8100 g balances with internal calibration
are equipped with a 6" Pan and Windshield.
The following items are supplied with all balances:
AC Power Adapter, Instruction Manual, Warranty Card, In Use
Cover
Remove packing material from the instrument.
Check the instrument for transport damage. Immediately
inform your Ohaus dealer if you have complaints or parts
are missing.
Store all parts of the packaging. This packaging
guarantees the best possible protection for the transport of your
instrument.
EN-4 Explorer Pro
2.2 Installing Components
2.2.1 Platform Installation
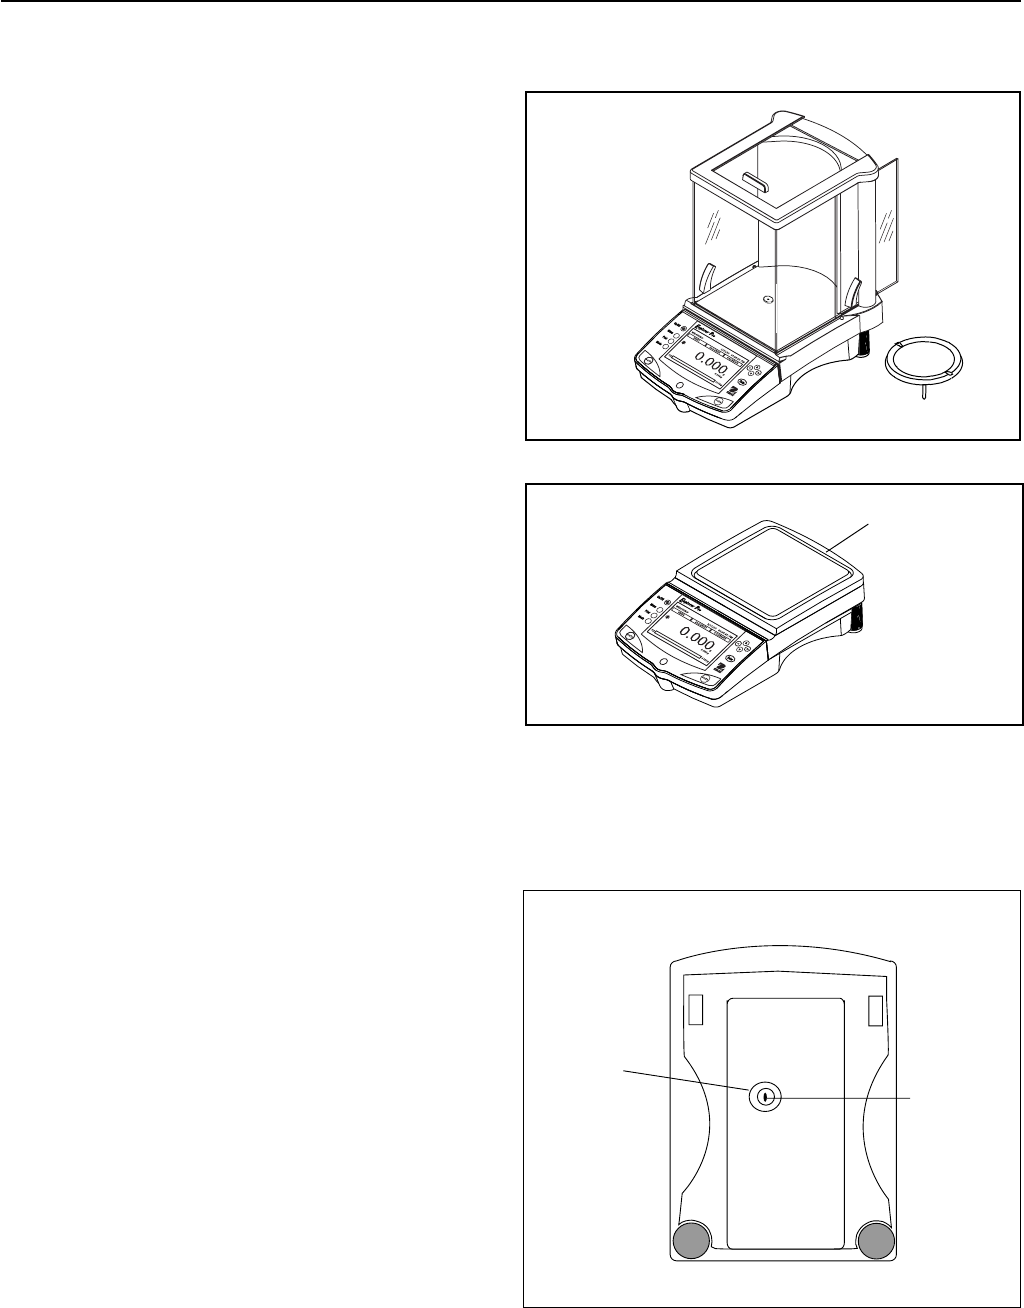
Balances are shipped with the pan not installed. On balances
equipped with a draft shield, slide open the side door and insert
the pan into the center hole.
Wind Shield
2.2.2 Windshield Installation
On 610 g to 6100 g balances with 0.01 g resolution, a wind-
shield is required to reduce the possibility of air currents from
disturbing the pan. When the windshield is in place, air currents
are deflected up over the pan. Make sure the windshield is firmly
snapped into place.
NOTE: 4100 g, 6100 g and 8100 g balances with internal
calibration are equipped with a 6" Pan and Windshield.
2.2.3 Weigh Below Preparation
The Explorer Pro balance is equipped with a weigh below hook
at the bottom of the balance. To use this feature, remove the
protective cover underneath the balance. See illustration for
location. The balance can be supported using lab jacks or any
other convenient method. Make sure the balance is level and
secure. Apply power and operate the balance. Attach items to be
weighed to the hook underneath the balance.
BOTTOM OF BALANCE
WEIGH BELOW
HOOK LOCATION
REMOVE
PROTECTIVE
COVER.
WEIGH BELOW
HOOK IS INSIDE OF
BALANCE.
Explorer Pro EN-5
2.3 Selecting the Location
2.3.1 Balance Location
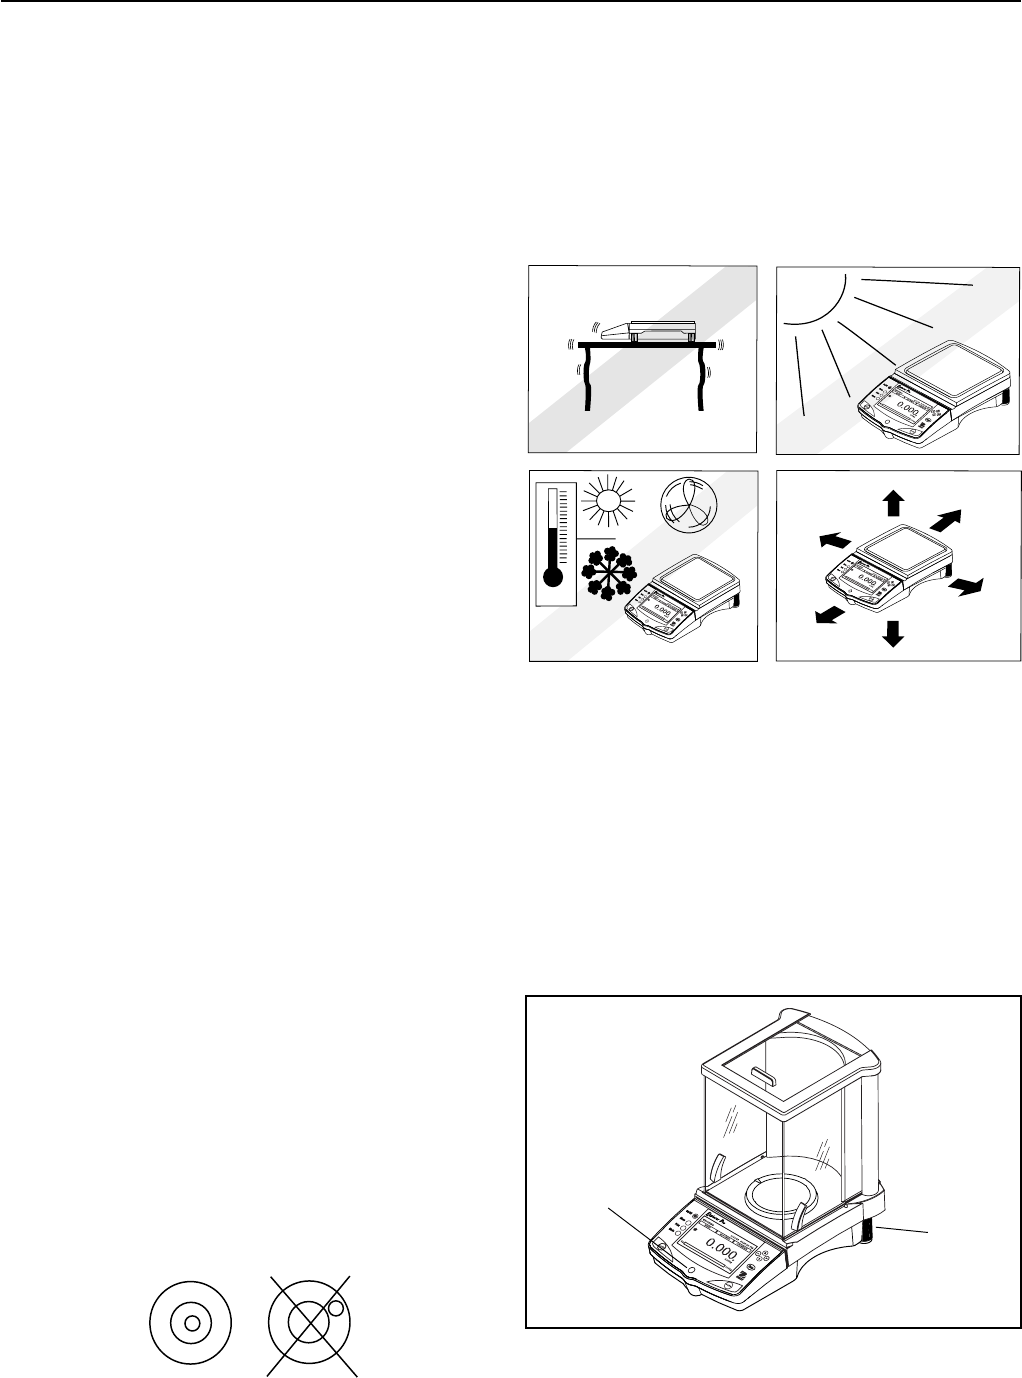
The balance should always be used in an environment which is
free from excessive air currents, corrosives, vibration, and
temperature or humidity extremes. These factors will affect
displayed weight readings.
DO NOT install the balance:
Next to open windows or doors causing drafts or rapid
temperature changes.
Near air conditioning or heat vents.
Near vibrating, rotating or reciprocating equipment.
Near magnetic fields or equipment that generates magnetic
fields.
On an unlevel work surface.
Allow sufficient space around the instrument for ease of
operation and keep away from radiating heat sources.
2.3.2 Leveling the Balance
Exact horizontal positioning and stable installation are
prerequisites for repeatable results. To compensate for small
irregularities or inclinations at the location, the instrument can
be leveled.
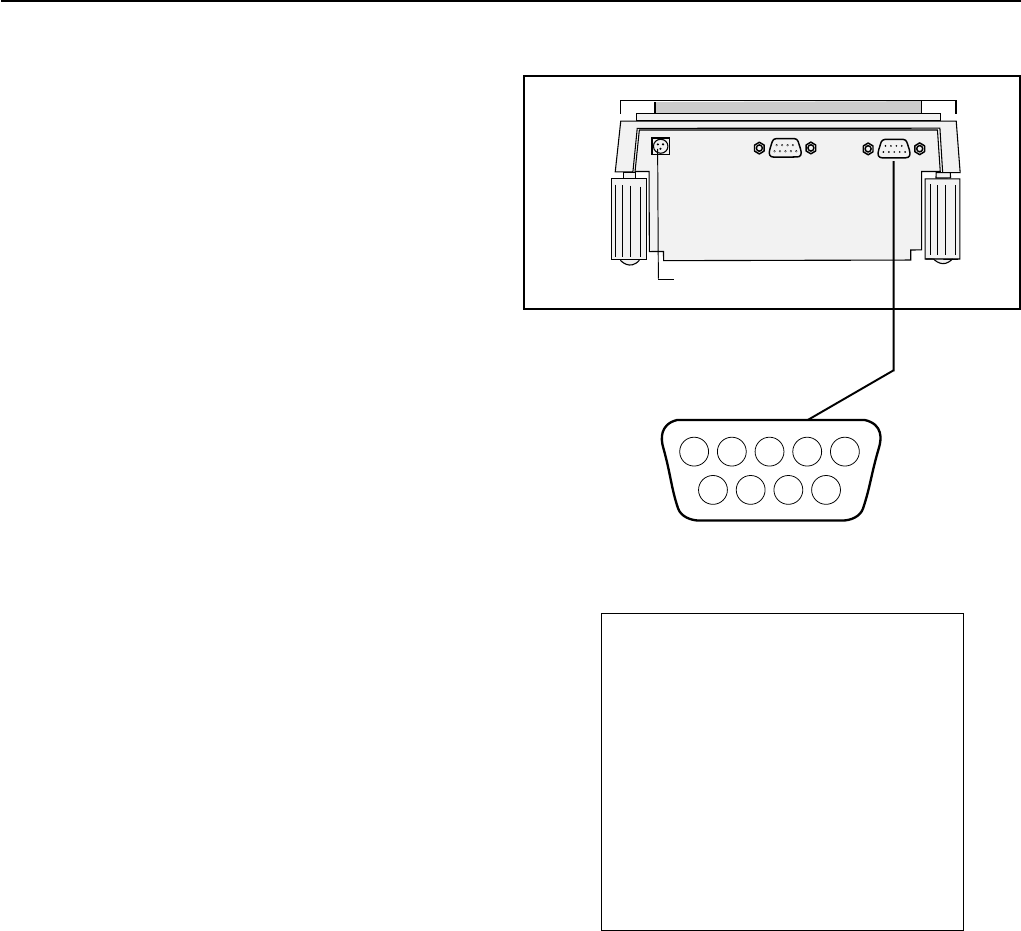
For exact horizontal positioning, the balance is equipped with a
level indicator located at the front on the control panel and two
leveling feet located at the rear of the balance.
Position the balance in the intended operating location. Adjust
the leveling feet at the rear of the balance until the air bubble in
the indicator is centered.
NOTE: The instrument should be leveled each time its location is
changed.
Leveling Indicator
Leveling
Foot
Correct Incorrect
EN-6 Explorer Pro
2.4 Connecting Power and Communications
2.4.1 AC Adapter Installation
Connect the AC Adapter supplied to the three pin connector located
at the rear of the balance.
The balance is now ready for operation.
AC Adapter Connection
Rear of Balance
2.4.2 RS232 Interface
Explorer Pro balances are equipped with a bidirectional RS232
compatible interface for communication with serial printers and
computers. When the balance is connected directly to a printer,
displayed data can be output at any time by simply pressing the
Print button, or by using the Auto Print feature. Connecting the
balance to a computer enables you to operate the balance from
the computer, as well as receive data such as displayed weight,
weighing mode, stability status, etc.
The following sections describe the hardware and software
provided with the balance
Hardware
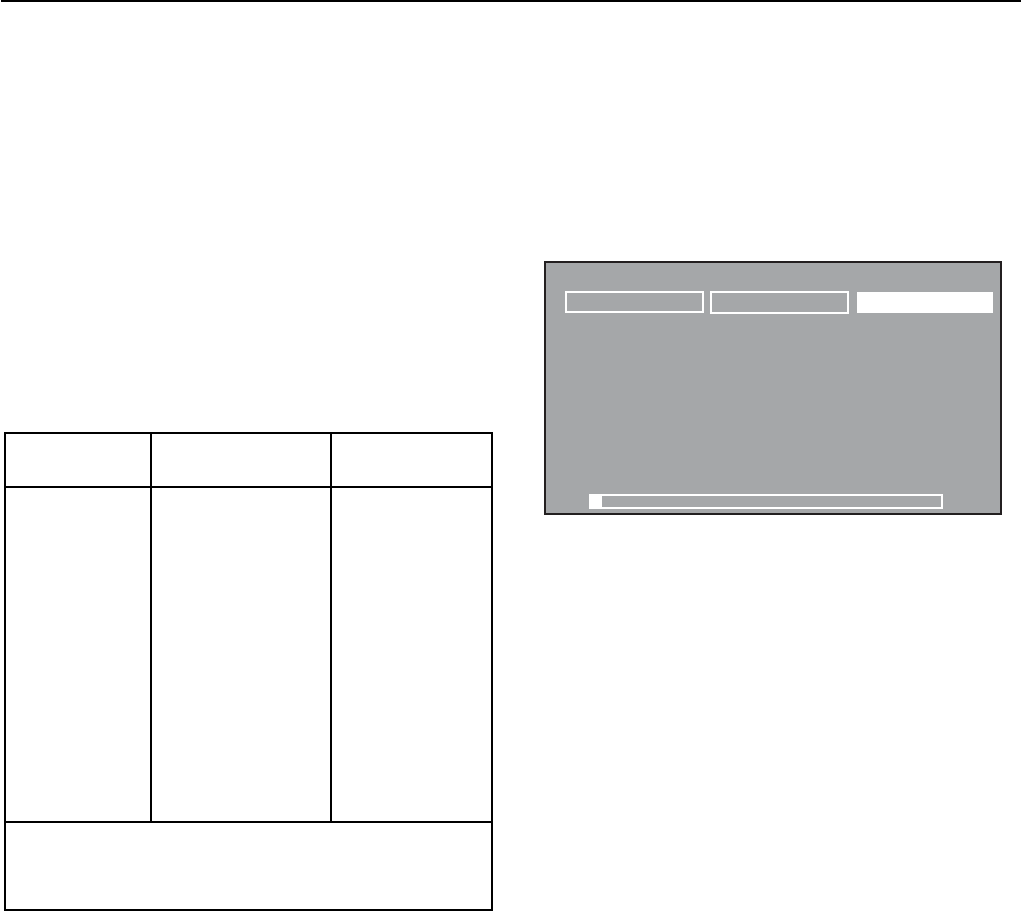
On the rear of the balance, the right-hand, 9-pin male subminiature
D connector is provided for interfacing to other devices. The
pinout and pin connections are shown in the adjacent illustration.
Refer to paragraph 3.5.6 for setup.
The balance is equipped with hardware handshaking, it will not
output any data unless pin 5 (CTS) is held in a high state (+3 to
+15 V dc). Interfaces not utilizing the CTS handshake may tie pin
5 to pin 6 to defeat it.
Output Formats
Data output can be initiated in one of three ways: 1) By pressing
PRINT; 2) Using the Auto Print feature; 3) Sending a print
command (P) from a computer.
Additional information is located in Section 5, Technical Data
which contains the RS232 Command Table.
1 N/C
2 Data Out (TXD)
3 Data In (RXD)
4N/C
5 Clear To Send (CTS)
6 Data Terminal Ready (DTR)
7 Ground
8 Request To Send (RTS)
9N/C
12345
6789
Male Connector
Explorer Pro EN-7
2.4.3 Initial Calibration
Calibration Masses
Calibration masses are required if the balance is not equipped
with internal calibration. Before beginning calibration, make sure
masses are available. If you begin calibration and realize
calibration masses are not available, exit the menu. The balance
will retain previously stored calibration data. Calibration should
be performed as necessary to ensure accurate weighing. Masses
required to perform the procedures are listed in the following table.
NOTE: Any of the calibration modes can be terminated at any
time by pressing the Menu button.
CALIBRATION MASSES
LINEARITY SPAN ONLY
CAPACITY MASSES MASSES
62 g 20g/50 g 50 g
162 g 50g/150 g 150 g
110 g 50g/100 g 100 g
210 g 100g/200 g 200 g
410 g 200g/400 g 400 g
510g/610 g 200g/500 g 500 g
1550 g 500g/1500 g 1500 g
2100 g 1000g/2000 g 2000 g
4100 g 2000g/4000 g 4000 g
6100 g 2000g/5000 g 5000 g
8100 g 4000g/8000 g 8000 g
It is recommended that masses must meet or exceed ASTM
Class 1 Tolerance. Calibration masses are available as
accessories.
Calibrating from the Weighing Screen
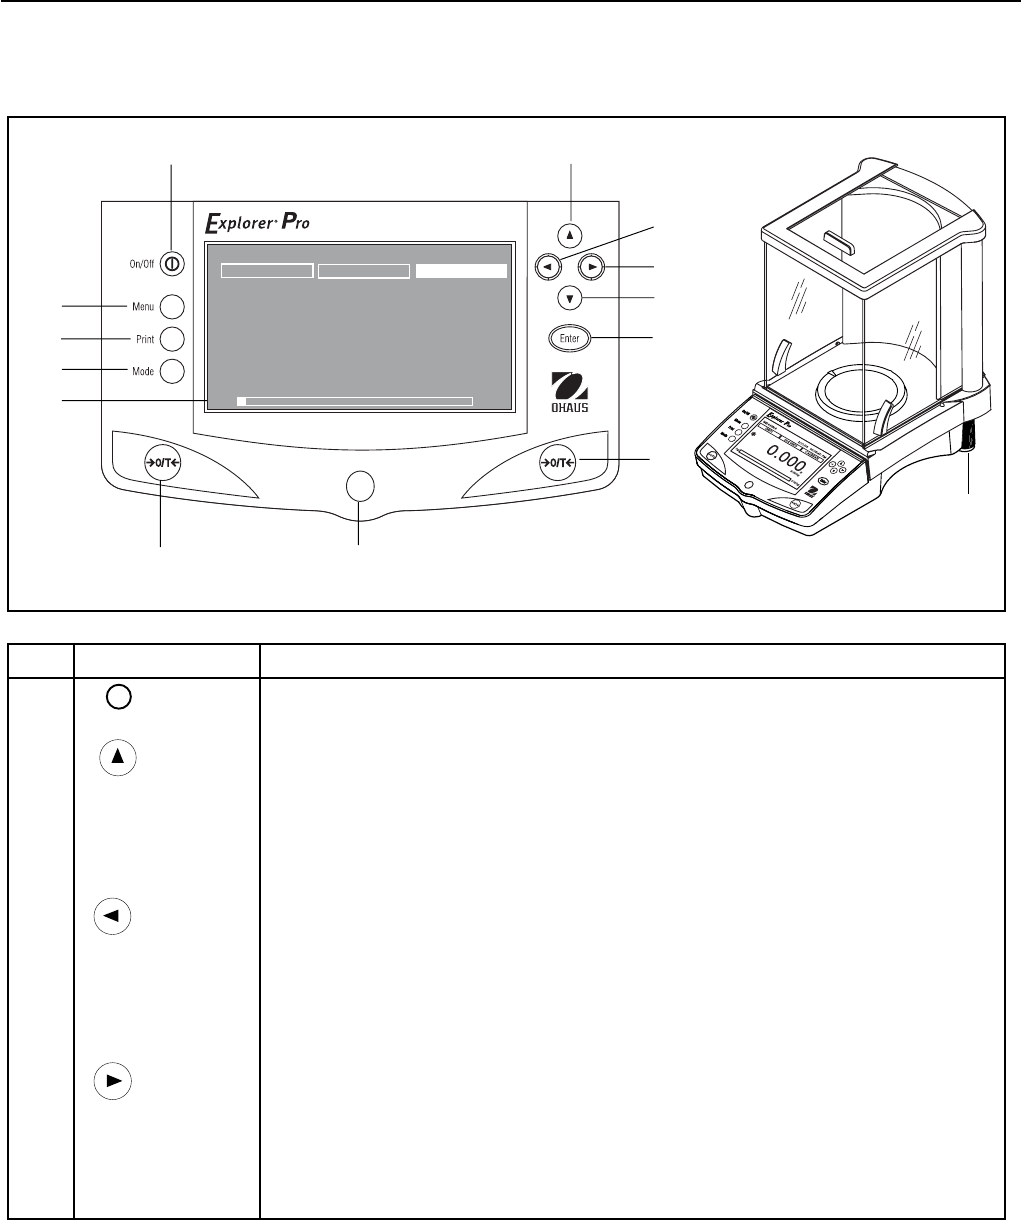
When the balance is first turned on, three soft keys appear on
the weighing screen. The CALIBRATE soft key is highlighted.
This permits calibration immediately without entering the
CALIBRATION menu. On balances equipped with internal
calibration, the balance automatically calibrates. On balances
that do not have internal calibration, an external mass is required.
WEIGHING 01/01/03 03:05:45: PM
UNITS 2nd UNITS CALIBRATE
0.00g
*
0.00g
0g 6100g
Press the Enter button with the CALIBRATE soft key highlighted.
On balances that do not have internal calibration, a message
appears on screen indicating the mass value to be placed on the
pan and also indicates other values of masses that can be used.
Place the required mass on the pan and press the Enter button.
The balance performs a span calibration.
EN-8 Explorer Pro
3 OPERATION
3.1 Overview of Controls
9
10
7
No. Designation Function
1 I Power On/ Off button.
2 button When pressed in Menu mode, single press moves menu selection bar in an up direction and
highlights the activated field or changes the settings of a selected field in increasing order.
When at an alphanumeric field, then the number or letter is incremented.
3 button When pressed in Menu mode, single press moves the cursor within a alphanumeric field
to the left (example date 07/02/2003). Selection does not wrap at end.
In application mode, single press moves to the next soft key selection to the left.
4 button When pressed in Menu mode, single press moves the cursor within a alphanumeric field
to the right (example date 07/02/2003). Selection does not wrap at end.
In application mode, single press moves to the next soft key selection to the right.
12
3
4
5
6
7
8
9
10
12
13
11
14
WEIGHING 01/01/03 03:05:45: PM
UNITS 2nd UNITS CALIBRATE
0.00
g
*
0.00g
0g 6100g
Explorer Pro EN-9
5 button When pressed In Menu mode, single press moves menu selection bar in a down direction
and highlights the selected field or changes the settings of a selected field in decreasing
order.
When at an alphanumeric field, then the number or letter is decremented.
6Enter button When pressed in application modes, functions as an Enter button to accept Soft-key selection.
When pressed in menu, functions as an Accept button for accepting and saving
parameter of selected items.
7 & 9 >O/T< buttons When pressed, performs tare function or zero function.
8 Spirit Level Provides a leveling indication for the balance.
10 LCD Display Backlit LCD display provides all necessary indications for operation.
11 Mode button When pressed, causes the balance to cycle through all active application modes.
12 Print button When pressed in any application mode, causes a print function to occur.
13 Menu button When pressed in any application mode, will bring up the Menu screen. Pressing the button
within a Menu screen will return to the application mode.
14 Feet Two adjustable feet used to level the balance.
No. Designation Function
EN-10 Explorer Pro
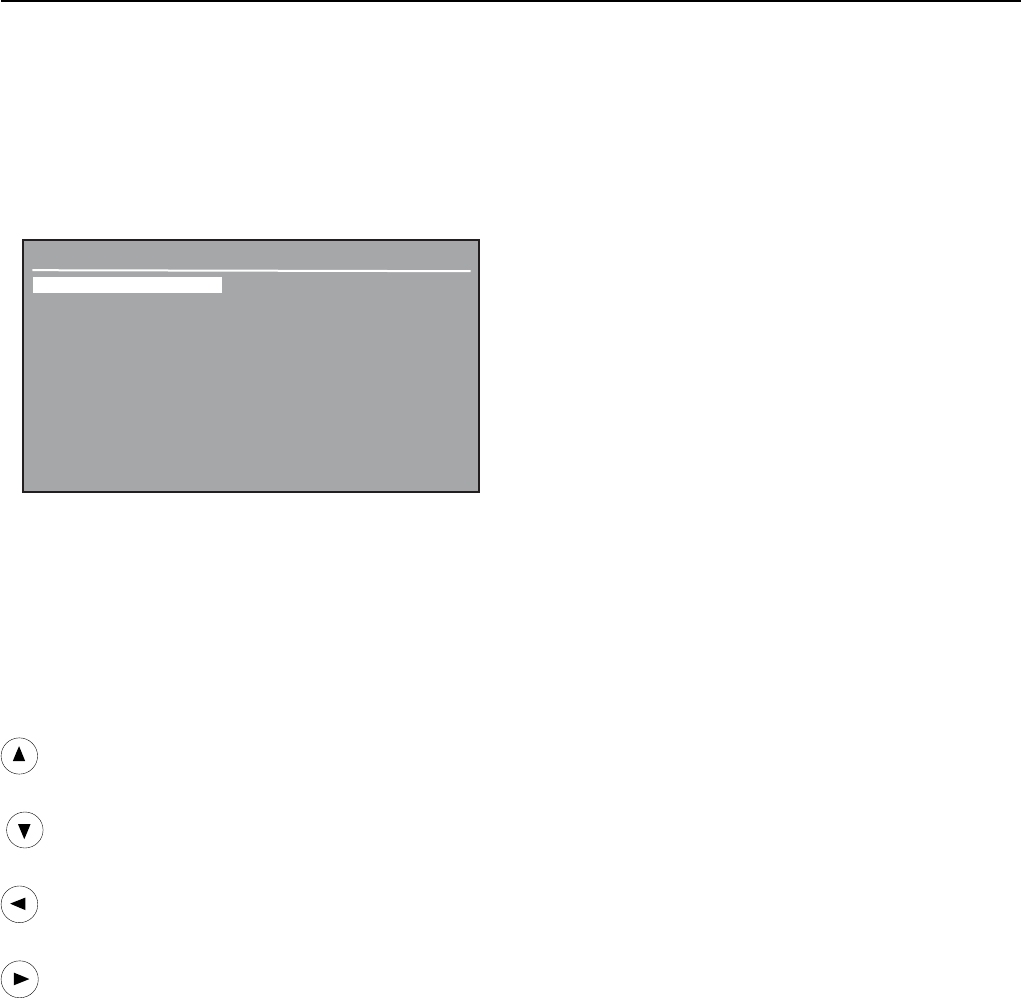
3.2 Overview of Display Indicator
WEIGHING 01/01/03 03:05:45: PM
UNITS 2nd UNITS CALIBRATE
Message Line
200.0000dwt
*
-
Result Line Result Line
Result Line Result Line
Result Line Result Line
0g 6100g
>0<
1 Application Indicates the active application by function.
2 Date Indicates current date when properly set.
3 Time Indicates current time when properly set.
4 Soft Keys Three Soft-keys are displayed in the upper display area. Depending on the application mode
selected, the functionality changes. A Soft-key can be selected by using the left and right
arrow buttons. Pressing the Enter button on a highlighted soft-key will activate the
function.
5 Message Line Contains instructional messages.
6 Numerical Display Indicates primary weight/load.
7 Unit of measure Indicates active unit of measure.
8 Result Lines 1-6 Six lines that contain balance results.
9 Capacity Indicates full balance capacity.
10 Bar Graph Shaded area indicates capacity used for, under, accept, over for check weighing application,
or target values for filling application.
11 ->0<- Indicates center of zero (only active in legal for trade).
12 Indicates negative value.
13 Stability indicator.
No. Designation Function
12
3
4
5
6
7
8
9
10
11
12
13
-
*
Explorer Pro EN-11
3.3 Menu
3.3.1 Menu Structure
The Explorer Pro balance utilizes a menu structure that permits
entering various menus by using a dedicated Menu button.
Pressing the Menu button allows access to additional sub menus.
See illustration below.
MENU
Calibration
Balance Options
Readout
Application Modes
Units
Interface
Print Options
GLP Print Options
Lockout
Factory Reset
Exit
3.3.2 Navigation
When the balance is first turned on, the main weighing screen is
displayed. To enter the menu and to change parameters, the
following controls are used:
Menu button - When pressed, enters the Menu.
Enter button- When pressed, accepts the menu field selections.
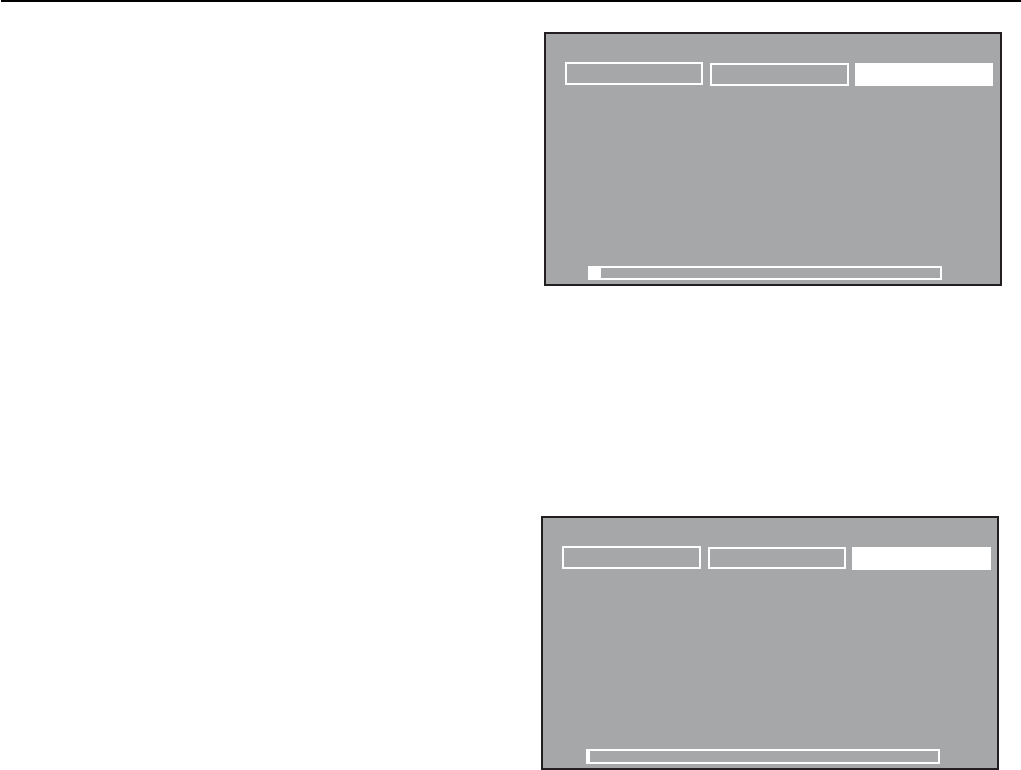
- Scrolls up through the menus.
-Scrolls down through the menus.
- Moves the cursor within the field to the left.
- Moves the cursor within the field to the right.
There are two ways to exit the Menu; one is to scroll to Exit and
press the Enter button, the other is to press the Menu button. All
changes will be saved.
To select a highlighted menu, press the Enter button. Each menu
item contains a display that allows setting balance parameters
to individual requirements. These are described in detail in section
3.5 Balance Settings.
Section 3.5.1 describes Calibration procedures and section 3.4
describes the Applications.
3.3.3 Turning on the Balance
The Explorer Pro balance is ready to operate after the installation
procedures are performed. When the balance is first turned on
and it completes its checks, it can be used to weigh or tare
materials without setting the menus.
It is recommended that you read this manual carefully and set
the balance to operate to your specific applications before using.
Power On/Off
To turn the balance ON, press the On/Off button. To turn OFF,
press the button again.
Stabilization
Before initially using the balance, allow time for it to adjust to its
new environment. The balance only requires to be plugged in to
warm up.
Recommended warm up period is twenty (20) minutes. Analytical
Class I balances require at least 2 hours.
The internal circuits of the balance are powered whenever it is
plugged into a power source.

EN-12 Explorer Pro
3.4 Applications
The Explorer Pro balance contains Weighing, Parts Counting,
Animal Weighing, Percent Weighing, Check Weighing, G/N/T and
Filling applications. Before using any of these applications, they
must be turned on first before they can be accessed. A choice
can be made to turn on or off as many of these applications as
required. The balance default setting has the weighing mode
turned on and all other modes are off.
To select applications to be turned on or off, press the Menu
button and using the arrow buttons, scroll to Application Modes,
then press the Enter button.
MENU
Calibration
Balance Options
Readout
Application Modes
Units
Interface
Print Options
GLP Print Options
Lockout
Factory Reset
Exit
APPLICATION MODES
Weighing : On
Parts Counting : Off
Animal Weighing : Off
Percent Weighing : Off
Check Weighing : Off
G/N/T : Off
Filling : Off
Exit
By pressing the Enter button and using the arrow buttons, each
item on the Application Modes screen can be turned on or off.
When finished, press the Menu button, the balance returns to
weighing mode. All settings are saved.
To use any of the modes that have been turned on, press the
Mode button repeatedly to cycle through all of the application
modes.
3.4.1 Weighing
The Explorer Pro balance is shipped with grams only enabled.
The balance can be used immediately after calibration has been
performed. When the balance is to be used with other units of
measure, the desired unit must be enabled.
USE
Zero the balance. Place objects or material to be weighed on the
pan. Example indicates a 200 gram weight on a 6100g balance.
Wait for the stability indicator to appear before reading the weight.
WEIGHING 01/01/03 03:05:45: PM
UNITS 2nd UNITS CALIBRATE
200.00g
*
0.00g
0g 6100g
WEIGHING WITH A CONTAINER
With no load on the pan, zero the balance.
Place an empty container on the pan. Its weight is displayed.
Tare the balance. The containers weight is stored in memory.
Add material to the container. As material is added, its net weight
is displayed.
Removing the container and material from the pan will cause the
balance to display the containers weight as a negative number.
The tared container weight will remain in memory until the balance
is zeroed again or the balance is turned off.
Explorer Pro EN-13
ADJUSTMENTS
Three soft-keys at the top of the display screen labeled UNITS,
2nd UNITS and CALIBRATE are accessed by using the arrow
buttons and selected by pressing the Enter button.
CALIBRATE
When the CALIBRATE soft key is highlighted, and the Enter button
is pressed, calibration can be performed.
2ND UNITS
When 2nd UNITS is highlighted, each press of the Enter button
cycles through the measuring units that are turned On in the
Units menu. The last option when cycling through the units is
Off.
UNITS
When UNITS is selected and highlighted, each press of the Enter
button cycles through the measuring units that are On and will
appear adjacent to the large numerals.
3.4.2 Parts Counting
The three different Parts Counting modes can be selected, Count,
Check or Fill in the Parts Counting Setup. Each mode is described
separately.
USE
PARTS COUNTING
In the Parts Counting mode, the balance displays the quantity of
parts you place on the pan. Since the balance determines the
quantity based on the average weight of a single part, all parts
must be reasonably uniform in weight.
The balance has a default setting of 10 pieces. This permits
starting parts counting immediately without setting up the balance.
The following display indicates the first time operation of parts
counting.
PARTS COUNTING 01/01/03 03:05:45 PM
SAMPLE SIZE SETUP NEW COUNT
Add 10 Pieces, Press Enter
0.00 g
0g 6100g
APW: 0.00g
Sample Size: 10
Tare: 0.00g
Tare the balance if required. With the NEW COUNT soft key
highlighted, press the Enter button. Place 10 pieces on the pan
as instructed by the blinking text on the display. Press the Enter
button.
The display now indicates the Average Piece Weight (APW) and
the sample size.
PARTS COUNTING 01/01/03 03:05:45 PM
SAMPLE SIZE SETUP NEW COUNT
20.00 g
0g 6100g
APW: 2.00g
Sample Size: 10
Tare: 0.00g
10
Pcs
*
ADJUSTMENTS
The Parts Counting display contains three soft keys at the top of
the screen SAMPLE SIZE, SETUP and NEW COUNT.
NEW COUNT
When NEW COUNT soft key is selected, follow the screen
instructions Add 10 Pieces, Press Enter . After pressing the
Enter button, the balance calculates the APW and the display
indicates the number of pieces.
SETUP
Select the SETUP soft key and press the Enter button. The PARTS
COUNTING SETUP is shown.
Place parts to be counted on the pan. Balance displays number
of pieces.
EN-14 Explorer Pro
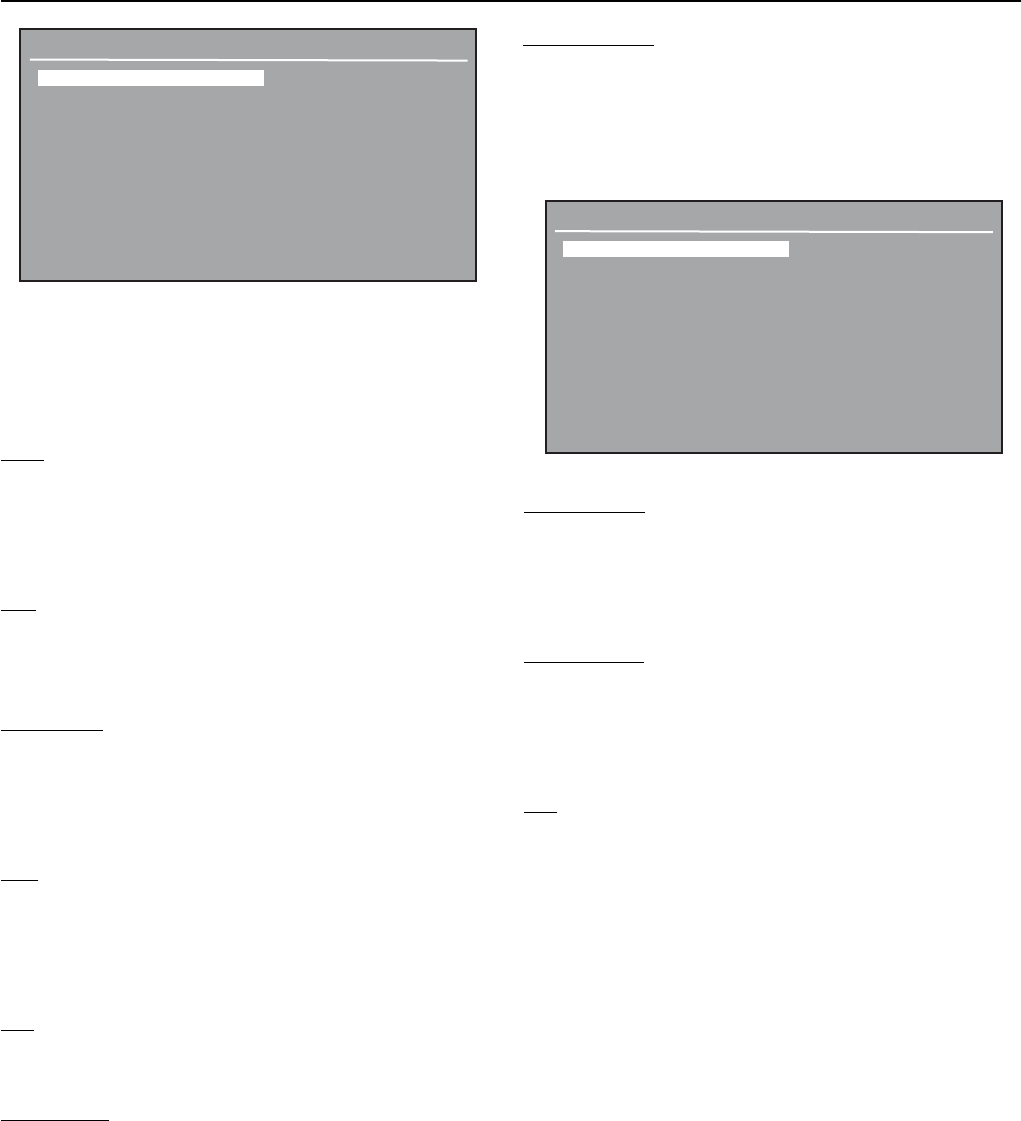
PARTS COUNTING SETUP
Mode : Count
Unit : g
Sample Size : 10
APW : Off
Tare : 0.00
Auto Optimize : Off
Display Settings : Custom
Size/APW Key : Unlocked
New Count Key : Unlocked
Exit
Using the arrow keys and Enter button, each item on the display
can be entered and modified as required. The following
information describes each entry on the screen.
Mode: Count, Check, Fill (default is Count)
Three different modes are available, Count, Check or Fill. The
applications for Check and Fill are described in detail after this
section.
Unit: g, kg, etc. (default is g)
Cycles through all units turned On in the Units menu. Units can
be set active (On) in the UNITS menu.
Sample Size : 0-99 (default is 10)
Defines the amount of pieces used to calculate APW (average
piece weight). Setting the sample size will force the APW field to
Off and change the APW soft key to SAMPLE SIZE.
APW: 0-999999999 (default is Off)
Defines the average piece weight. Setting the APW will force the
Sample Size field to Off and change the SAMPLE SIZE soft key to
APW.
Tare: 0-99999999 (default is 0)
Defines the weight of the container being used.
Auto Optimize: On,Off (default is Off)
Selecting Auto Optimize On will recalculate the APW value
automatically during the parts counting process up to double the
amount of parts. For higher quantities, the APW will not be
recalculated. During the auto optimization process, the message
Auto Optimizing, Please wait will be displayed in the message
bar on the screen.
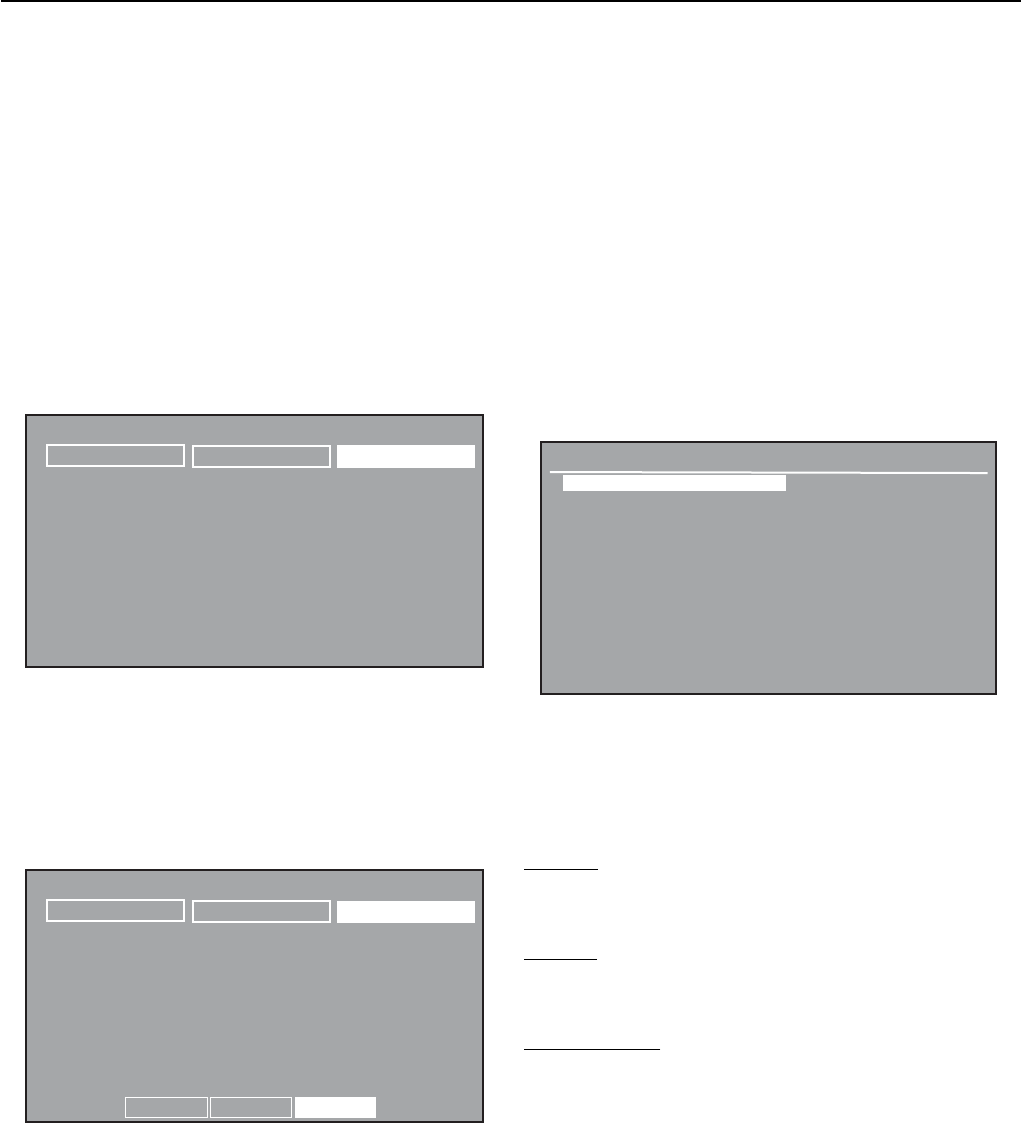
DISPLAY SETTINGS
APW : On
Sample Size : On
Tare : On
Weight : On
Exit
Size/APW Key: Unlocked, Locked (default is Unlocked)
Allows locking and unlocking the soft key function in the Parts
Counting screen. If locked, the message Key Is Locked will be
displayed in the message bar.
New Count Key: Unlocked, Locked (default is Unlocked)
Allows locking and unlocking the soft key function in the Parts
Counting screen. If locked, the message Key Is Locked will be
displayed in the message bar.
Exit:
When selected, balance returns to the Parts Counting Mode.
SAMPLE SIZE/APW
With SAMPLE SIZE soft key highlighted,press the Enter button.
The PARTS COUNTING display is shown with the value of the
sample size highlighted. Using the arrow buttons and the Enter
button, the sample size value can be changed.
After the Enter button is pressed, and a new sample size has
been entered, remove the sample and place parts to be counted
on the balance using the new sample size.
APW
With the APW soft key highlighted, press the Enter button. The
APW is highlighted at the lower left of the screen. Using the
arrow buttons and the Enter button, the APW value can be
changed.
Display Settings: Custom, Default (default is Default)
Selecting Display Settings to Custom will bring up the DISPLAY
SETTINGS screen that will allow individual display items to be
turned on or off. Selecting Exit will return balance to previous
screen.
Explorer Pro EN-15
USE
PARTS COUNTING-CHECK
This feature permits establishing a set quantity of pieces as a
criteria for similar items that can be quickly checked against the
sample. In the Parts Counting Check mode, the displayed data
includes, present count (Pcs), APW, Sample Size, Tare, Weight
and a bar graph indicating UNDER, ACCEPT (blinking) and OVER
.
Refer back to Parts Counting, enter the PARTS COUNTING SETUP
menu and change Mode to Check.
The balance is now in the PC CHECK mode.
PC CHECK 01/01/03 03:05:45 PM
SAMPLE SIZE SETUP NEW COUNT
Add 10 Pieces, Press Enter
0.00 g
APW: 0.00g
Sample Size: 10 Under: 5
Tare: 0.00g Over: 10
The balance indicates to add 10 pieces and has an Under value
of 5 and an Over value of 10 set up as default values and an
average piece weight has not been set. Place 10 pieces on the
pan and press the Enter button.
PC CHECK 01/01/03 03:05:45 PM
SAMPLE SIZE SETUP NEW COUNT
20.00 g
APW: 2.00g
Sample Size: 10 Under: 5
Tare: 0.00g Over: 10
10
Pcs
*
Under Accept Over
An average piece weight has been set by placing the pieces on
the pan. To use the PC Check, the Over and Under values must
be set as well as other display setup parameters. Refer to
adjustments and set the balance parameters to fit specific
requirements.
ADJUSTMENTS
The PC Check display contains three soft keys at the top of the
screen SAMPLE SIZE, SETUP and NEW COUNT.
NEW COUNT
When NEW COUNT soft key is selected, follow the screen
instructions Add 10 Pieces, Press Enter . After pressing the
Enter button, the balance calculates the APW and the display
indicates the number of pieces.
SETUP
Using the left arrow key, select SETUP soft key and press the
Enter button. The PARTS COUNTING SETUP is shown.
PARTS COUNTING SETUP
Mode : Check
Unit : g
Sample Size : 10
APW : Off
Tare : 0.00
Auto Optimize : Off
Over : 10
Under : 5
Display Settings : Custom
Size/APW Key : Unlocked
New Count Key : Unlocked
Exit
Two additional entries have been added to the PARTS COUNTING
SETUP, they are Over and Under. Refer to the Adjustments section
of parts counting for a description of all other settings.
Over 10: 0-9999 (default is 10)
Defines the over limit in pieces.
Under 5: 0-9999 (default is 5)
Defines the under limit in pieces.
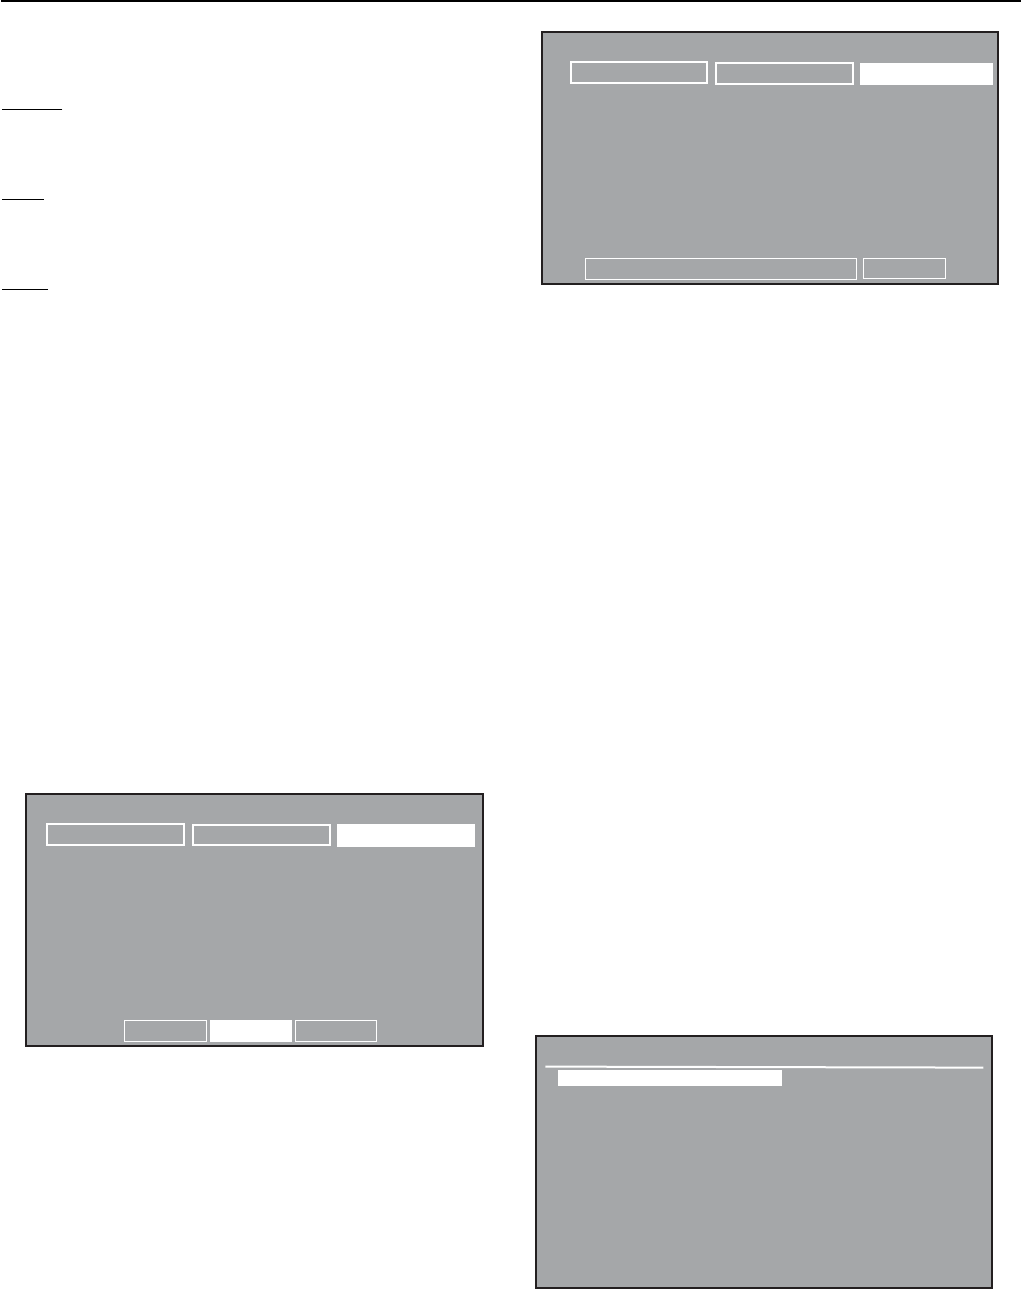
Display Settings: Custom, Default (default is Default)
Selecting Display Settings to Custom will bring up the DISPLAY
SETTINGS screen that will allow individual display items to be
turned on or off. Sample Size, Tare, Weight are described under
parts counting Display Settings.
EN-16 Explorer Pro
Three new entries Weight, Over and Under appear on this screen.
Selecting Exit will return balance to previous screen.
Weight: On,Off (default is On)
Can be turned on or off.
Over: On, Off (default is On)
Can be turned on or off.
Under: On, Off (default is On)
Can be turned on or off.
SAMPLE SIZE/APW
Select SAMPLE SIZE soft key and enter the sample size desired.
APW
With the APW soft key highlighted, press the Enter button. The
APW is highlighted at the lower left of the screen. Using the
arrow buttons and the Enter button, the APW value can be
changed. Follow screen instructions and place sample on pan.
Remove the sample and place items on pan. In the following
example, the sample size was 10, the APW was 5.00g, the
under value was set at 99 and the over value was set at 101.
The acceptable value was 100 pieces.
PC CHECK 01/01/03 03:05:45 PM
SAMPLE SIZE SETUP NEW COUNT
500.00 g
APW: 5.00g
Sample Size: 10 Under: 99
Tare: 0.00g Over: 101
100
Pcs
*
Under
Accept Over
USE
PARTS COUNTING-FILL
This feature permits establishing a set quantity of pieces that can
be shown as a percentage when pieces are added. A split bar
display indicates 0% to 90% on the first bar and 90% to 110%
on the second bar.
Refer back to Parts Counting, enter the PARTS COUNTING SETUP
menu and change Mode to Fill.
The balance is now in the PC FILLING mode.
PC FILLING 01/01/03 03:05:45 PM
SAMPLE SIZE SETUP NEW COUNT
0.00 g
APW: 2.00g
Sample Size: 10 Target: 100
Tare: 0.00g Diff: -100
0
Pcs
*
0% 50% 90% 110%
100%
NOTE: The values appearing on the screen initially are from
previous entries in parts counting.
Placing an item on the pan at this time will only respond to the
previous settings for sample size and APW.
To use PC FILLING, the sample size and other parameters must
be set first. Refer to adjustments and set the balance parameters
to fit specific requirements.
ADJUSTMENTS
The PC FILLING display contains three soft keys at the top of the
screen SAMPLE SIZE, SETUP and NEW COUNT.
NEW COUNT
When NEW COUNT soft key is selected, follow the screen
instructions Add 10 Pieces, Press Enter is displayed After
pressing the Enter button, the balance calculates the APW and
the display indicates the number of pieces.
SETUP
Select SETUP soft key and press the Enter button. The PARTS
COUNTING SETUP is shown.
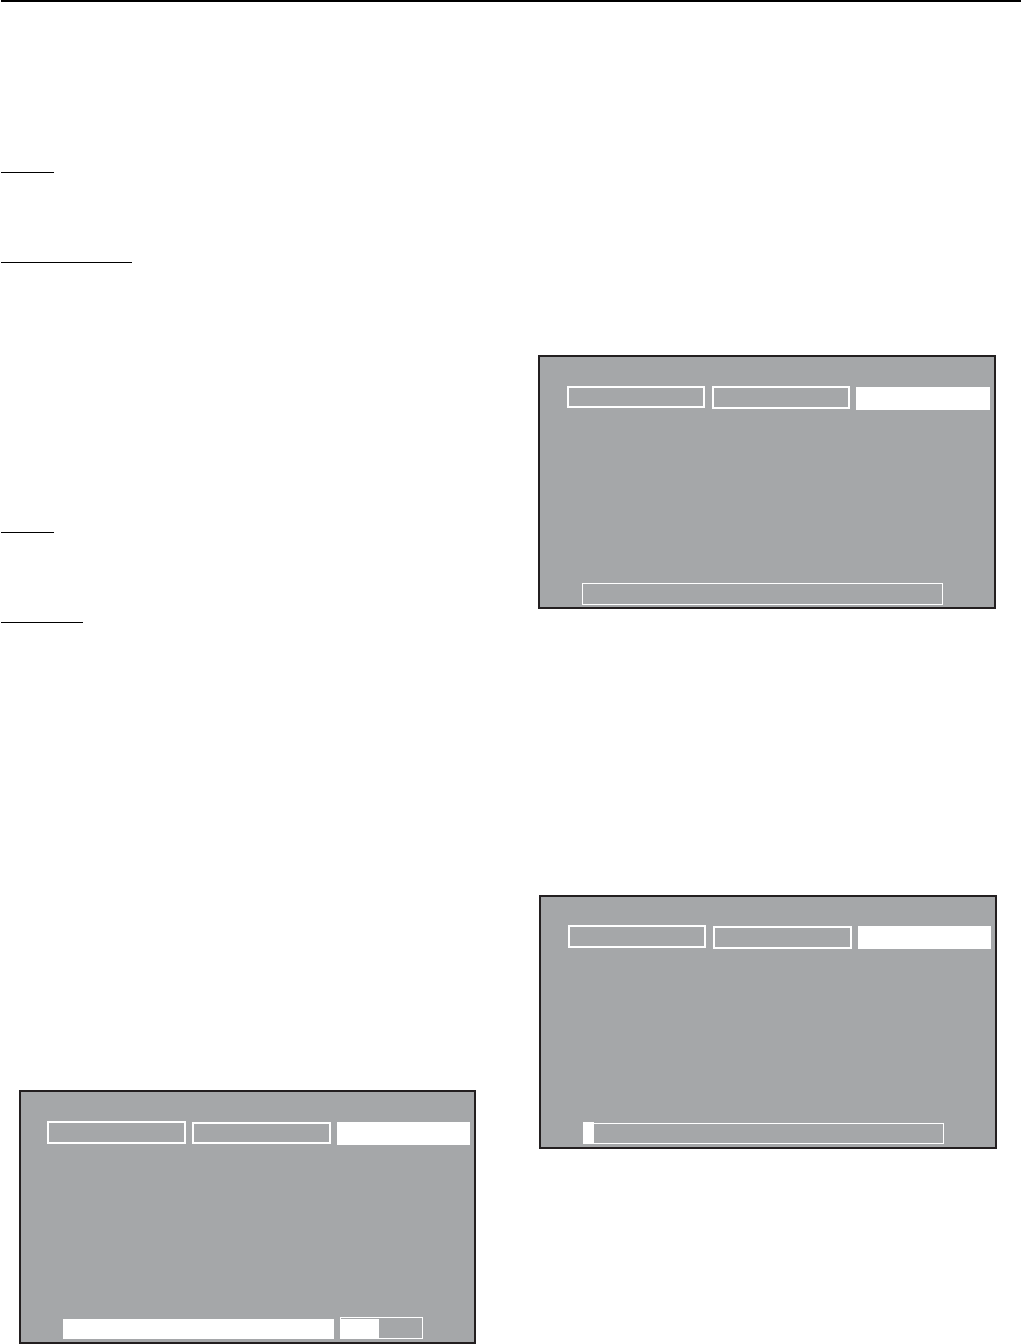
PARTS COUNTING SETUP
Mode : Fill
Unit : g
Sample Size : 10
APW : Off
Tare : 0.00
Auto Optimize : Off
Target :1000
Display Settings : Default
Size/APW Key : Unlocked
New Count Key : Unlocked
Exit
Explorer Pro EN-17
One additional entry has been added to the PARTS COUNTING
SETUP, that is Target. Refer to the Adjustments section of parts
counting for a description of all other settings.
Target: 0-9999 (default is 1000)
Defines the target pieces for the 100% limit.
Display Settings: Custom, Default (default is Default)
Selecting Display Settings to Custom will bring up the DISPLAY
SETTINGS screen that will allow individual display items to be
turned on or off. APW, Sample Size, Tare, Weight are described
under parts counting Display Settings.
Two new entries Target and Difference appear on this screen.
Selecting Exit will return balance to previous screen.
Target: On, Off (default is On)
Can be turned on or off.
Difference: On, Off (default is On)
Can be turned on or off.
SAMPLE SIZE/APW
Select SAMPLE SIZE soft key and enter the sample size desired.
APW
With the APW soft key highlighted, press the Enter button. The
APW is highlighted at the lower left of the screen. Using the
arrow buttons and the Enter button, the APW value can be
changed. Follow screen instructions and place sample on pan.
Remove the sample and add items on pan until 100% is
highlighted at the bottom of the screen as shown. In the following
example, the sample size was 10, the APW was 2.00g, the Target
value was set at 100 pieces.
PC FILLING 01/01/03 03:05:45 PM
SAMPLE SIZE SETUP NEW COUNT
200.00 g
APW: 2.00g
Sample Size: 10 Target: 100
Tare: 0.00g Diff: 0
100
Pcs
*
0% 50% 90% 110%
100%
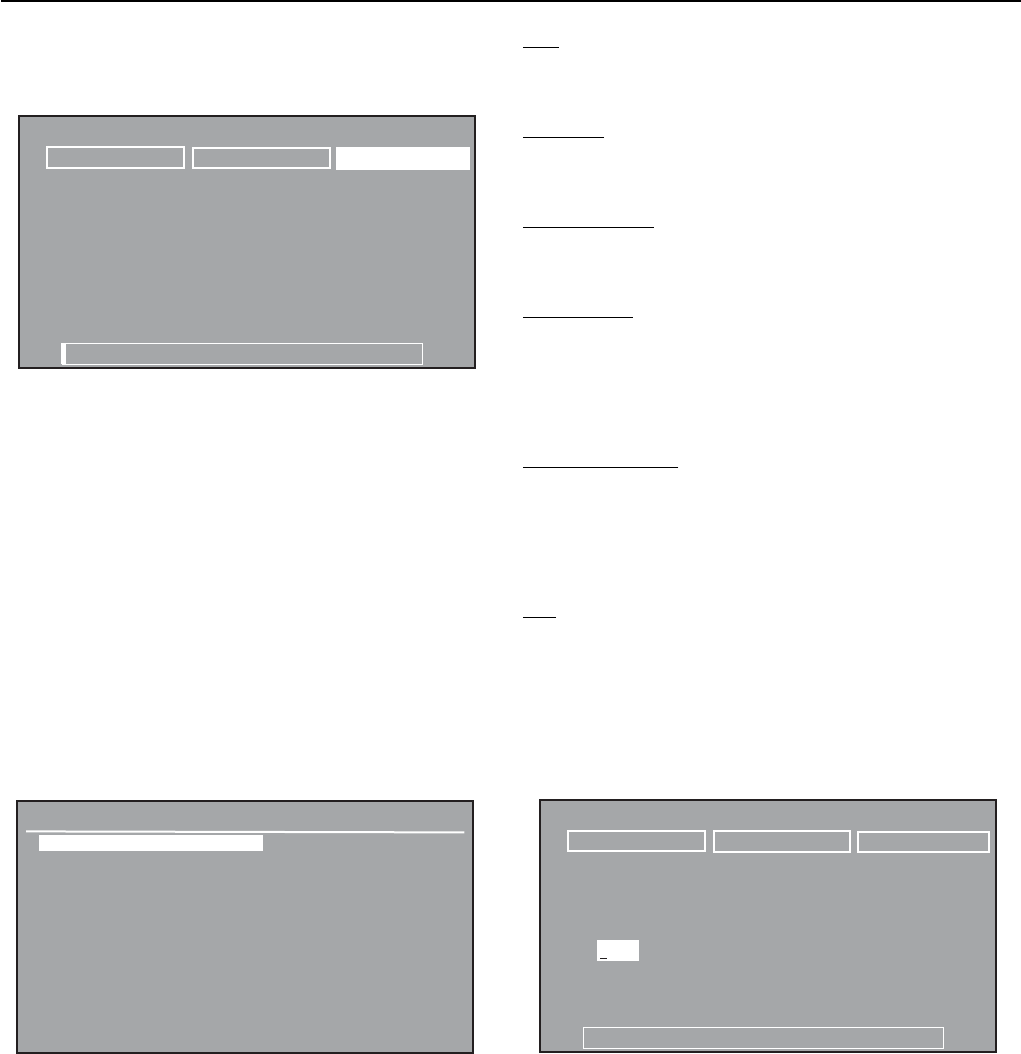
3.4.3 Percent Weighing
Percent weighing allows placing a reference load on the balance,
then view other loads as a percentage of the reference. The load
placed on the pan as a reference is displayed as 100%.
Subsequent loads are displayed as a percentage of the reference
are limited. The maximum limit is the capacity of the balance.
The minimum limit is 100d. The display data includes reference
weight in unit of measurement, difference value in percent,
difference value in measuring unit and a bar graph indicating
present used capacity of the balance.
PERCENT WEIGHING 01/01/03 03:05:45 PM
REFERENCE SETUP NEW REF
0.00 g
Ref: 0.00g
Diff: 0.00 %
Diff: 0.00g
*
0g 6100
g
Add Reference Weight, Press Enter
USE
PERCENT WEIGHING
With the NEW REF soft key highlighted, press the Enter button.
Place the reference weight on the pan and press the Enter button
again. The sample shown indicates a 200g weight was placed
on the pan.
PERCENT WEIGHING 01/01/03 03:05:45 PM
REFERENCE SETUP NEW REF
200.00 g
Ref: 200.00g
Diff: 0.00 %
Diff: 0.00g
*
0g 6100
g
Add Reference Weight, Press Enter
100.00
%
EN-18 Explorer Pro
The reference weight is removed and a second weight is placed
on the pan. The example illustrates a 50 g weight.
PERCENT WEIGHING 01/01/03 03:05:45 PM
REFERENCE SETUP NEW REF
50.00 g
Ref: 200.00g
Diff: -75.00 %
Diff: -150.00g
*
0g 6100
g
25.00
%
ADJUSTMENTS
The PERCENT WEIGHING display contains three soft keys at the
top of the screen REFERENCE, SETUP and NEW REF.
NEW REF
When NEW REF soft key is selected, follow the screen instructions
Add Reference Weight, Press Enter. This establishes a new
reference weight.
SETUP
Select SETUP soft key and press the Enter button. The PERCENT
WEIGHING SETUP display is shown.
PERCENT WEIGHING SETUP
Unit : g
Reference : 0.00
Display Settings : Custom
Reference Key : Unlocked
New Reference Key : Unlocked
Exit
Unit: g, kg, etc...(default g)
Cycles through all units turned On in the Units menu.
Reference: 0-99999999 (default is 10)
Defines the reference weight at 100%.
Display Settings: Custom, Default (default is Default)
Allows setting the display settings On or Off.
Reference Key: Locked, Unlocked (default is Unlocked)
Allows locking or unlocking the REFERENCE soft key in the percent
Weighing screen. Message Key is locked when Locked is
selected.
New Reference Key: Locked, Unlocked (default is Unlocked)
Allows locking or unlocking the NEW REF soft key in the Percent
Weighing screen. Message Key is locked when Locked is
selected.
Exit:
When selected, balance returns to the Percent Weighing Mode.
REFERENCE
Select REFERENCE soft key and press the Enter button. The
display screen changes with Ref field highlighted. Reference
weight can be specified.
PERCENT WEIGHING 01/01/03 03:05:45 PM
REFERENCE SETUP NEW REF
0.00 g
*
0g 6100
g
Ref: 0.00
Diff:
Diff:

Explorer Pro EN-19
3.4.4 Animal Weighing
Animal weighing permits you to weigh small animals and filters
out animal movements. Choices of manual, semi automatic
and automatic operation is possible.
The display data includes the filtered weight of the animal in
selected unit of measurement, and unfiltered weight of the animal
in 2nd unit of measurement, filter level, mode of operation and a
bar graph indicating present used capacity of the balance.
ANIMAL WEIGHING 01/01/03 03:05:45 PM
FILTER SETUP START
0.00 g
Filter: Low
Mode: Manual
0g 6100
g
Place animal, Press Enter
ADJUSTMENTS
The ANIMAL WEIGHING display contains three soft keys at the
top of the screen FILTER, SETUP and START/CLEAR .
START/CLEAR
Select the START soft key and press the enter button to start the
animal weighing process. The soft key is changed to CLEAR and
allows the weight to be cleared when the Enter button is pressed.
SETUP
Select SETUP soft key and press the Enter button. The ANIMAL
WEIGHING SETUP display is shown.
USE
ANIMAL WEIGHING
Place the animal on the pan. With the START soft key highlighted,
press the Enter button. The display performs a count down to
average out the weight. The weight is indicated as shown and
remains on the display.
ANIMAL WEIGHING 01/01/03 03:05:45 PM
FILTER SETUP CLEAR
2038.73 g
Filter: Low
Mode: Manual
0g 6100
g
* 2038.73
g
Remove the animal from the pan. With the CLEAR soft key
highlighted, press the Enter button to clear the weight. The balance
is now ready for another measurement. To change the mode of
operation from manual to semi automatic or automatic and
change filtering levels, refer to Adjustments.
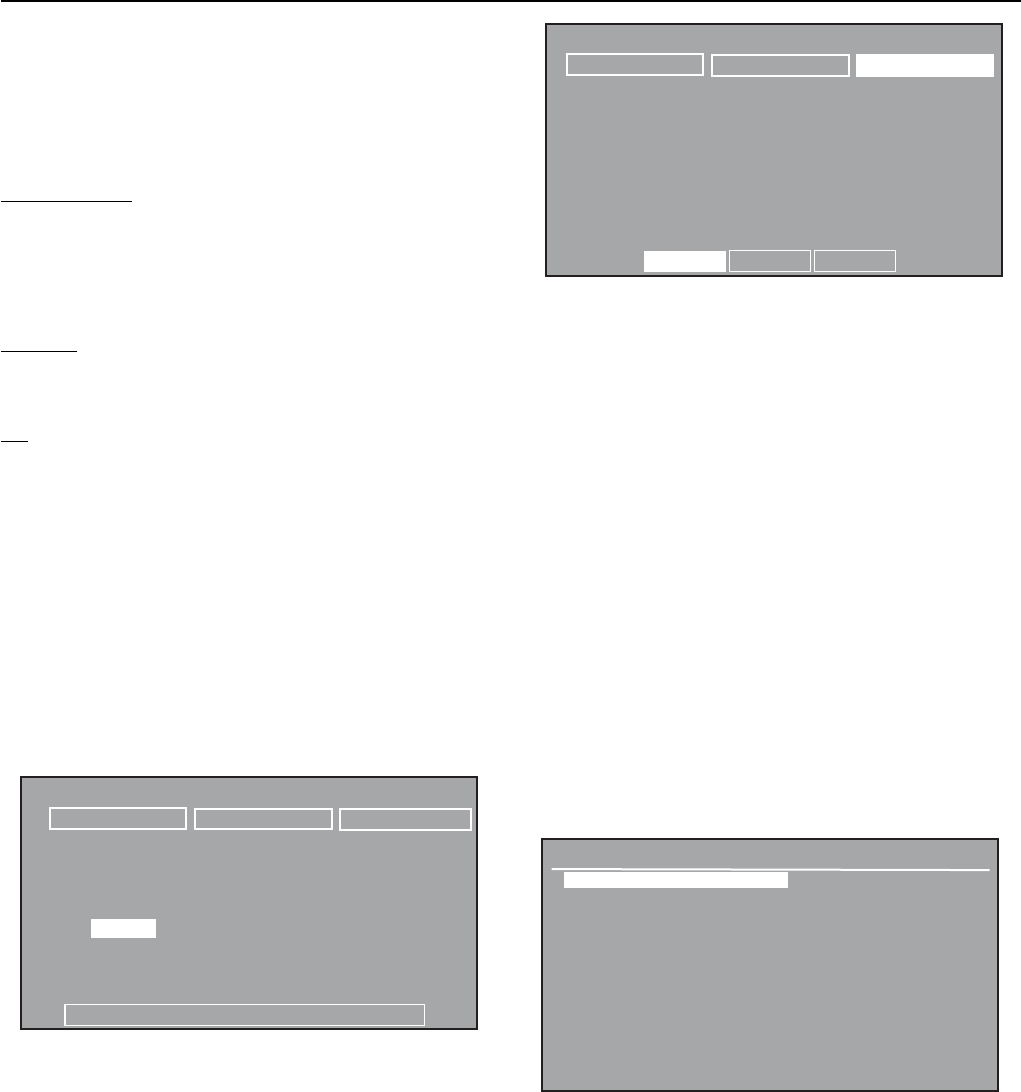
ANIMAL WEIGHING SETUP
Unit : g
2nd Unit : g
Filter : Low
Mode : Manual
Display Settings : Custom
Filter Key : Unlocked
Exit
Unit: g, kg, etc...(default is g)
Cycles through all units turned on in the Units menu.
2nd Unit: g, kg, etc...(default is g)
Cycles through all units turned on in the Units menu.
Filter: Low, Medium, High (default is Low)
Can be set one of three filtering levels. A higher level filter will
provide more accurate measurement.
Mode: Manual, Semi, Auto (default is Manual)
One of three modes can be set.
Manual Mode
Weighing process starts manually. After placing animal on pan
with soft key START highlighted, press the Enter button. Screen
display retains reading and is manually cleared by pressing the
Enter button when soft key CLEAR is highlighted.
Semi Automatic mode
Weighing process starts automatically as soon as the animal is
placed on the pan. When the animal is removed, the display
retains the weight reading. The balance must be cleared manually
by pressing the Enter button.
EN-20 Explorer Pro
ANIMAL WEIGHING 01/01/03 03:05:45 PM
FILTER SETUP START
0.00 g
0g 6100
g
*
Filter: Low
Mode: Manual
3.4.5 Check Weighing
Check weighing is used when items are checked against preset
balance parameters. This feature permits you to weigh an item,
set balance parameters such as the over weight, target weight
and under weight. A bar graph at the bottom of the Check
Weighing screen indicates UNDER, ACCEPT and OVER for items
being checked.
CHECK WEIGHING 01/01/03 03:05:45 PM
UNITS SETUP CALIBRATE
Over: 15.00 g
Target: 10.00 g Diff: -10.00 g
Under: 5.00 g Diff: -100.00 %
O.00
g
*
Under Accept Over
USE
CHECK WEIGHING
Before using the Check Weighing feature, the Over, Target and
Under limits must be set.
ADJUSTMENTS
The CHECK WEIGHING display contains three soft keys at the top
of the screen UNITS, SETUP and CALIBRATE.
CALIBRATE
When the CALIBRATE soft key is highlighted, an internal span or
span calibration can be performed depending upon the model.
Press the Enter button. Refer to Balance Setting, paragraph 3.5.
SETUP
Select the SETUP soft key and press the Enter button. The CHECK
WEIGHING SETUP display is shown.
Automatic Mode
Weighing process starts automatically as soon as the animal is
placed on the pan. The weight is displayed until the animal is
removed. The balance is ready for another animal weighing.
Display Settings: Custom, Default (default is Default)
Setting the display to Custom allows individual items Filter, Mode,
2nd weight to be turned on or off. In the default setting, all items
are turned on.
Filter Key: Locked, Unlocked (default is Unlocked)
This feature allows to lock or unlock the Soft key function.
Exit
When selected, returns to Animal Weighing mode.
FILTER
Select FILTER soft key and press the Enter button. The display is
shown with the Filter: Low highlighted. Pressing the up or down
arrow buttons, either Low, Medium or High can be selected, then
press the Enter button. Low is the default setting. Display is
shown. After selection is made, the screen display returns to an
Animal Weighing Mode. A higher filter level will provide a more
accurate measurement.
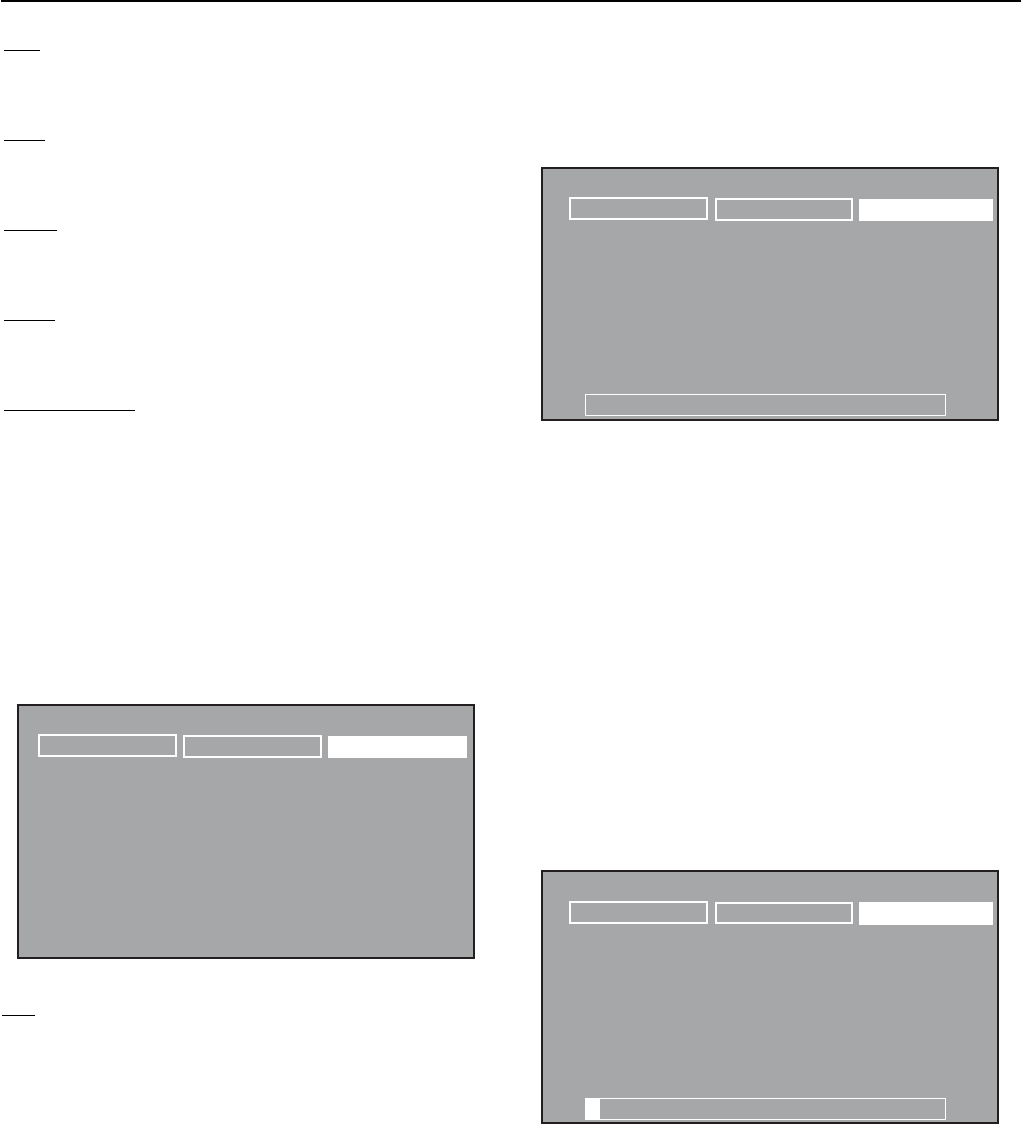
CHECK WEIGHING SETUP
Unit : g
Over : 15.00
Target : 10.00
Under : 5.00
Display Settings : Custom
Exit
Explorer Pro EN-21
Unit: g, kg, etc...(default is g)
Cycles through all units turned On in the Units menu.
Over: 0-99999999 (default is 15)
Defines over limit value.
Target: 0-99999999 (default is 10).
Defines target value.
Under: 0-99999999 (default is 5)
Defines under limit value.
Display Settings: Custom, Default (default is Default)
Setting the display to Custom allows individual items Over, Target,
Under, Difference, Difference % to be turned On or Off. In the
default setting, all items are turned on. Additionally, the item
reading can be set to weight or message. Default is Weight.
Reading allows a choice of either weight readings to be displayed
in large numeral or message that displays OVER, ACCEPT and
UNDER in large letters. Display below indicates message format.
CHECK WEIGHING 01/01/03 03:05:45 P
M
UNITS SETUP CALIBRATE
Over: 15.00 g
Target: 10.00 g Diff: -10.00 g
Under: 5.00 g Diff: -100.00 %
UNDER
0.00g
*
Exit:
When selected, returns to Check Weighing mode.
UNITS
When the UNITS soft key is highlighted, each press of the Enter
button cycles through the measuring units that are On.
3.4.6 Gross / Net / Tare Weighing
Gross/Net/Tare (G/N/T) application allows to display Gross
(sample plus container weight), NET (sample weight) and TARE
(container weight) simultaneously.
G/N/T WEIGHING 01/01/03 03:05:45 PM
UNITS 2nd UNITS TARE
0.00 g
Gross: 0.00 g
Net: 0.00 g
Tare: 0.00 g
0g 6100
g
* 0.00
g
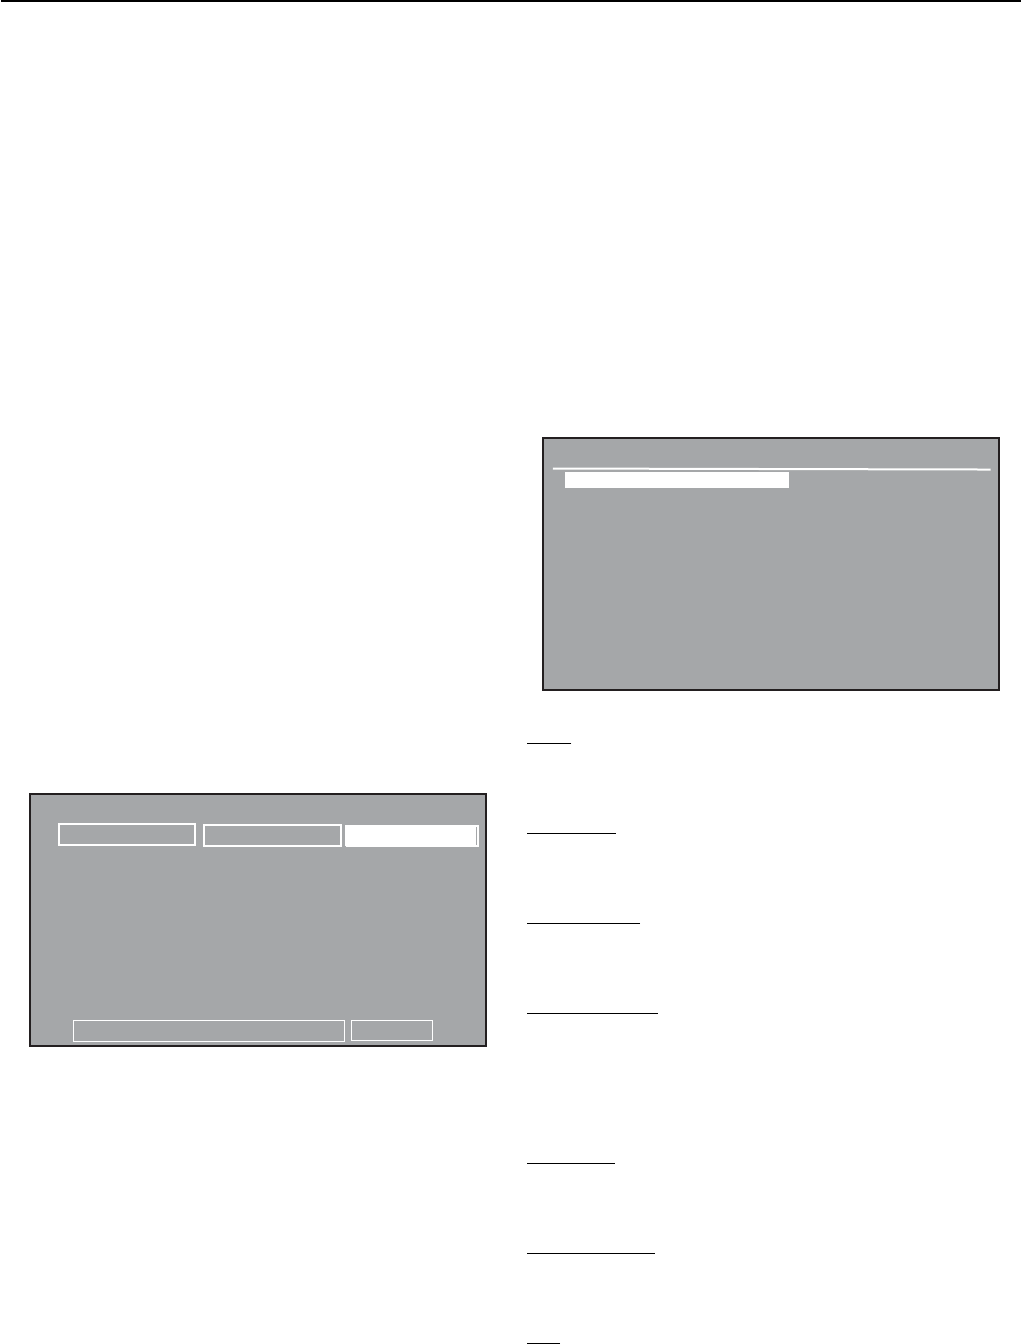
USE
G/N/T WEIGHING
Press the O/T button to zero the balance. In this application, the
O/T button functions as a Zero and not as a Tare.
Place a container on the pan. With the TARE soft key highlighted,
press the Enter button. The containers weight is stored in memory
in the balance. Place the material in the container. The balance
immediately displays the Gross, Net and Tare weights. The net
weight is displayed as large numerals. Example shown represents
a container weight of 50g and material of 200g. The gross
weight is displayed as 250g. Before a new container is used,
zero the balance by using the O/T button.
G/N/T WEIGHING 01/01/03 03:05:45 PM
UNITS 2nd UNITS TARE
200.00 g
Gross: 250.00 g
Net: 200.00 g
Tare: 50.00 g
0g 6100
g
* 200.00
g
EN-22 Explorer Pro
ADJUSTMENTS
The G/N/T WEIGHING display contains three soft keys at the top
of the screen UNITS, 2nd UNITS and TARE.
TARE
When the TARE soft key is selected, pressing the Enter button will
store the current display reading as the tare value.
2nd UNITS
When 2nd UNITS soft key is highlighted, each press of the Enter
button changes the measuring units that are on and will appear
under the large numerals. The last option when cycling through
the units is Off.
UNITS
When the UNITS soft key is highlighted, each press of the Enter
button cycles through all active measuring units on the Gross,
Net and Tare displays.
3.4.7 Filling
Filling permits entering a target reference weight. Material can be
placed on the pan and by monitoring the Difference weight and
the bar display, an accurate fill can be achieved. A split bar
display indicates 0% to 90% on the first bar and 90% to 110%
on the second bar.
FILLING 01/01/03 03:05:45 PM
TARGET SETUP NEW TARGET
0.00 g
Target: 50.00 g
Diff: -50.00 g
Pct: 0%
0.00
g
*
0% 50% 90% 110%
100%
ADJUSTMENTS
The FILLING display contains three soft keys at the top of the
screen TARGET, SETUP and NEW TARGET.
NEW TARGET
With the NEW TARGET soft key highlighted, press the Enter button.
Follow display instructions to Add Target Weight, Press Enter.
This establishes a new target weight and is displayed on the
screen.
SETUP
When SETUP soft Key is highlighted, press the Enter button. The
FILLING SETUP display is shown.
FILLING SETUP
Unit : g
2 nd unit : g
Target Weight : 0000
Display Settings : Custom
Target Key : Unlocked
New Target Key : Unlocked
Exit
Units: g, kg, etc...(default is g)
Cycles through all units turned On in the Units menu.
2nd UNITS: g, kg, etc...(default is g)
Cycles through all units turned On in the Units menu.
Target Weight: 0-99999999 (default is 0)
Allows entering a specific target filling weight.
Display Settings: Custom, Default (default is Default)
Setting the display to Custom allows individual items Target
Weight, Difference, Percent, 2nd weight to be turned On or Off. In
the default setting, all items are turned on.
Target Key: Locked, Unlocked (default is Unlocked)
This feature allows to lock or unlock the soft key function.
New Target Key: Locked, Unlocked (default is Unlocked)
This feature allows to lock or unlock the soft key function.
Exit:
When selected, balance returns to the Filling Mode.
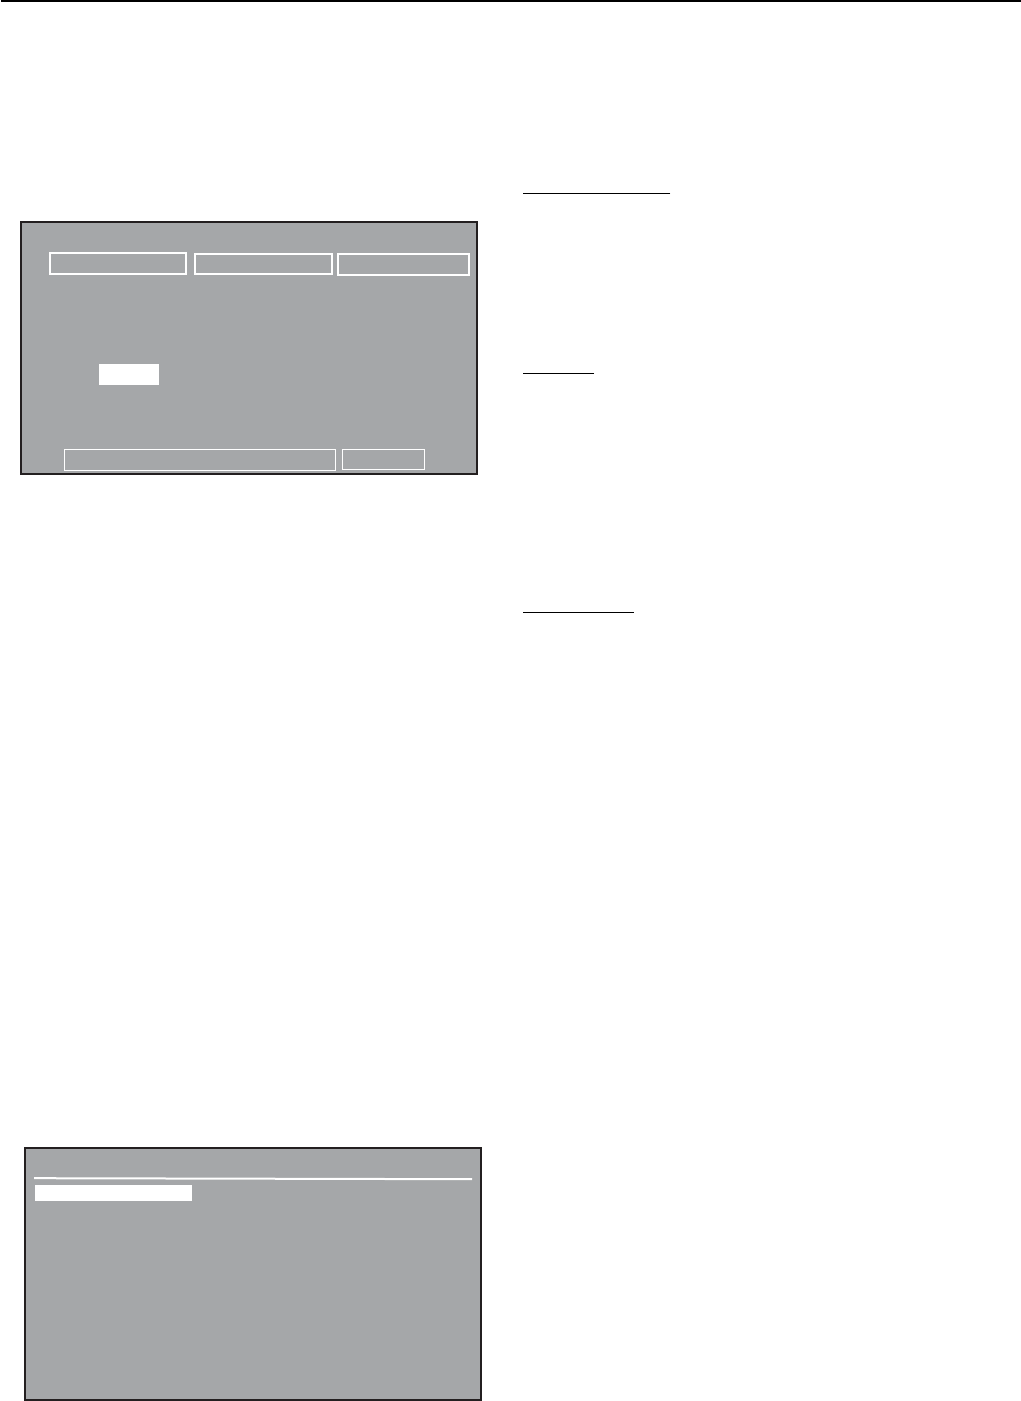
USE
FILLING
A sample (target weight) is placed on the pan and the Enter
button is pressed. The balance stores this weight as shown on
the display as Target. The sample is removed from the pan and
the material is added to the pan. The display provides Target
Weight, Difference weight, Percentage and the split bar at the
bottom of the screen displays the percentage of the sample
compared against the target weight. When a container is used,
zero the balance before placing the actual sample on the pan.
See Adjustments to set other balance parameters.
Explorer Pro EN-23
TARGET
With the TARGET soft key highlighted, press the Enter button.
The FILLING display is shown with the value of the Target
highlighted. Using the arrow buttons and the Enter button, the
Target value can be changed.
FILLING 01/01/03 03:05:45 PM
TARGET SETUP NEW TARGET
0.00 g
0.00
g
*
0% 50% 90% 110%
100%
Target: 0.00 g
Diff: -0.00 g
3.5 Balance Settings
The Explorer Pro balance contains ten submenus that are
accessible from the Menu. The submenus are Calibration, Balance
Options, Readout, Application Modes, Units, Interface, Print
Options, GLP Print Options, Lockout and Factory Reset.
Each of the submenus contain settings that will affect the operation
of the balance. Please review all submenus settings to obtain
the best performance from the balance. Make the necessary
settings to suit specific needs.
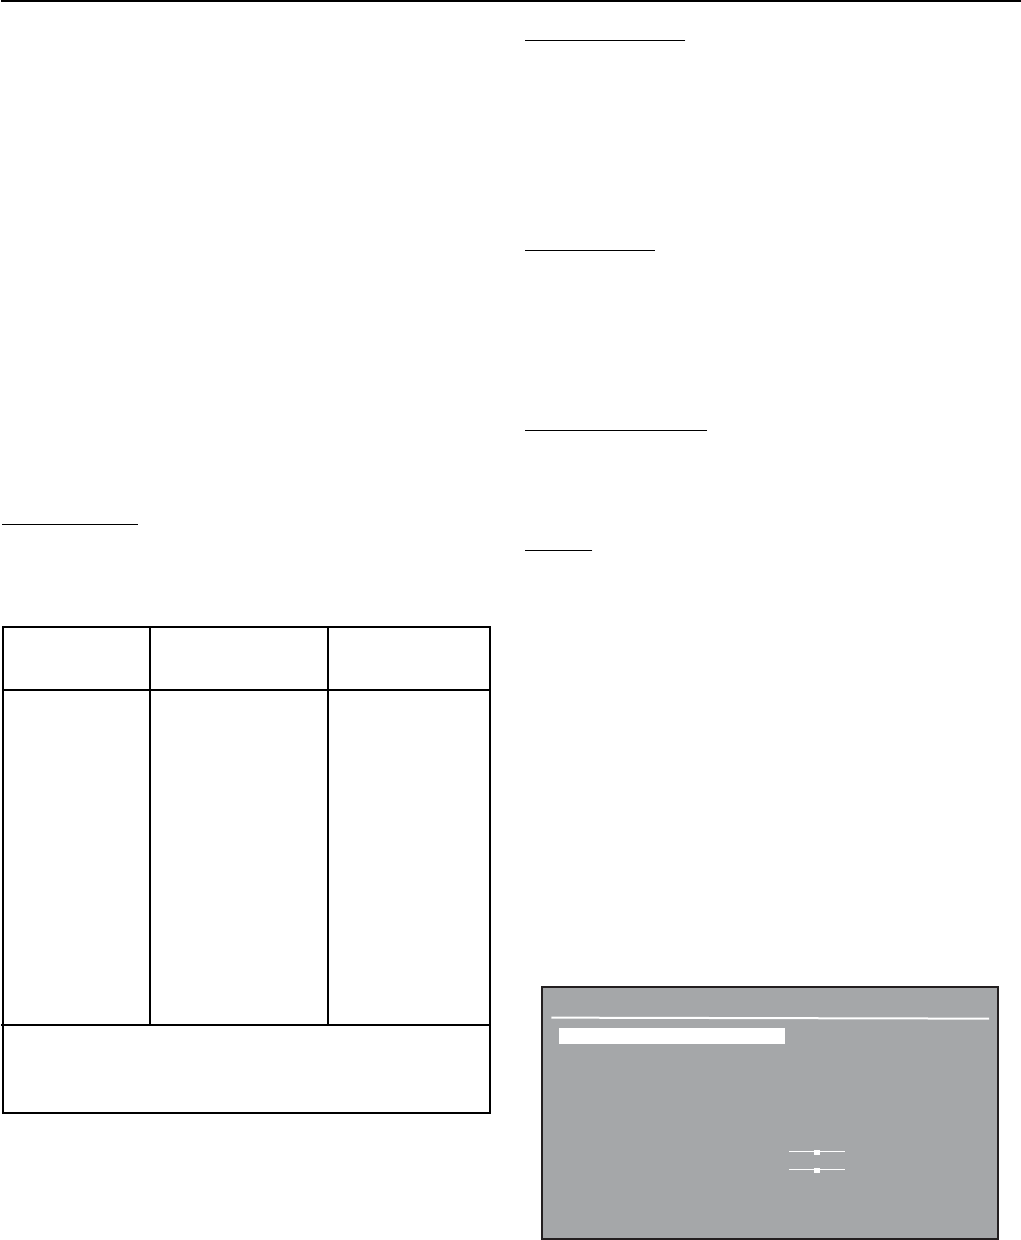
3.5.1 Calibration
Press the Menu button and select CALIBRATION. Press the enter
button, the CALIBRATION screen is displayed. Explorer Pro
balances offers a choice of five calibration methods: Internal
Calibration, Autocal Calibration, Span Calibration, Linearity
Calibration and User Calibration,
Linearity, Span and User calibration are disabled for Type
Approved/LFT balances Class II and Class III.
Internal Calibration
On Explorer Pro balances equipped with internal calibration,
calibration is accomplished using the internal calibration mass.
Internal calibration can be performed at any time providing the
balance has warmed up to operating temperature and is level.
AutoCal: On, Off (default is On)
Explorer Pro balances equipped with internal calibration also
contain AutoCal. When AutoCal is set ON, the balance performs
a self calibration when a measured predefined delta temperature
change occurs. After calibration, the display returns to the last
application mode. Environmental conditions must be met for the
AutoCal to be successfully completed.
AutoCal Delta: -100 - +100 (default is 0)
Explorer Pro balances equipped with internal calibration also
contain AutoCal Delta. AutoCal Delta allows the internal calibration
mass value to be adjusted. This permits calibrating the balance
using an external mass which is traceable to a certified standard.
Perform the internal calibration procedure. After the calibration is
completed, zero the balance.
Place a certified mass equal to the span calibration value of the
balance.
IMPORTANT !
DO NOT DISTURB THE BALANCE
DURING CALIBRATION.
CALIBRATION
Internal
AutoCal : Off
AutoCal Delta (d): 0
Span
Linearity
User
User Cal Weight (g): 500.00
Cal Test
Exit
EN-24 Explorer Pro
Linearity Calibration:
Linearity calibration utilizes three calibration points, one at zero
load and two at specified calibration masses. This method
minimizes deviation between actual and displayed weights within
the balance's weighing range. After calibration, the display returns
to the last application mode.
User Calibration:
User calibration is used when it is desired to calibrate the balance
using a user defined mass. The user defined mass value has to
be entered in the User Cal Weight. After calibration, the display
returns to the last application mode.
User Calibration Weight: 25%-100% of capacity (default is Span)
Defines the mass value for User calaibration. The user calibration
may now be done with the mass selected.
Cal Test:
Calibration test feature allows a check of a known calibration
mass against the last stored calibration information in the balance.
The display indicates the difference in weight between calibration
mass placed on the pan and the previous weight value which
was stored in the balance. After Cal Test, the display returns to to
the last application mode.
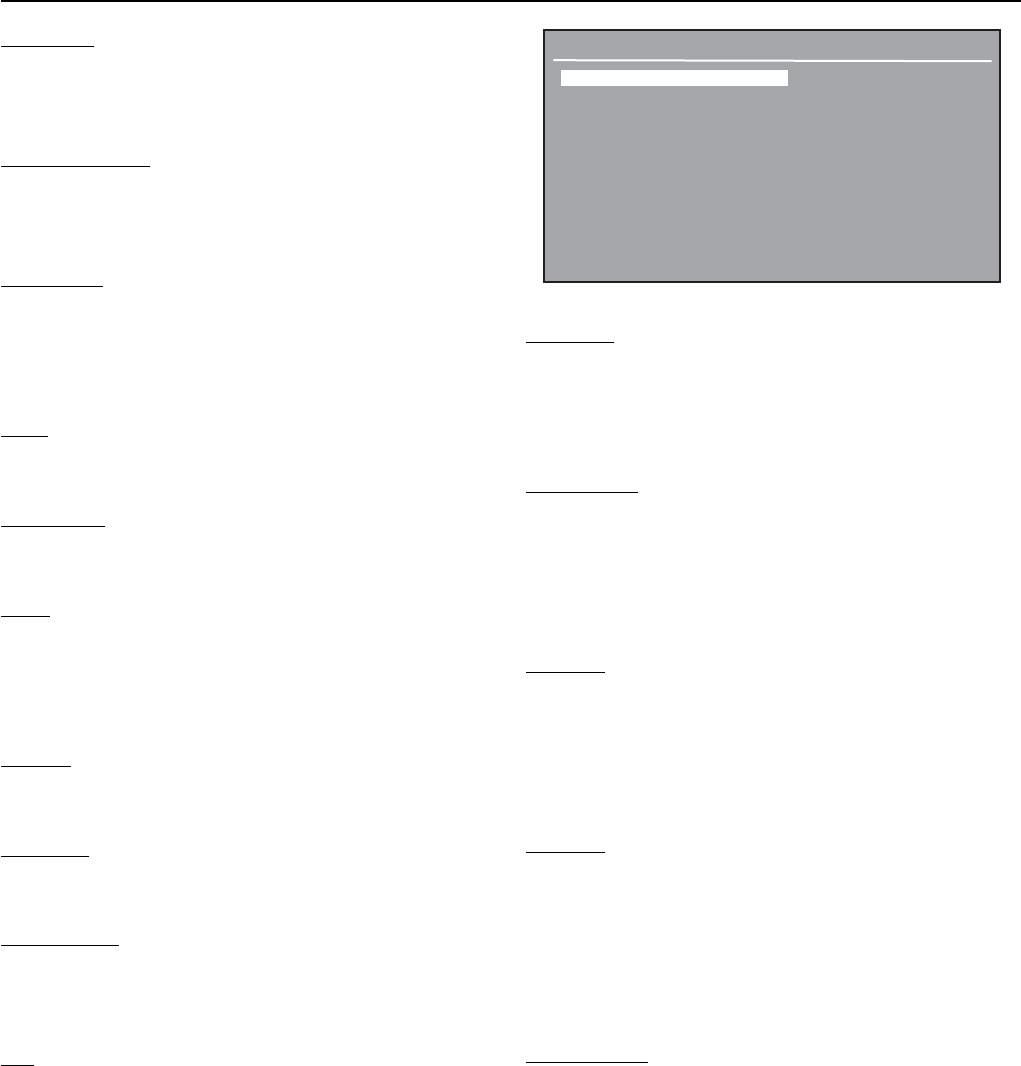
3.5.2 Balance Options
Press the Menu button, and select Balance Options.
Press the Enter button. The BALANCE OPTIONS screen is
displayed.
Recalibrate using internal calibration. After calibration, place the
certified mass on the pan and see if the mass agrees with the
displayed value. If not, repeat procedure until internal calibration
reading agrees with the certified mass.
Span Calibration:
Span calibration utilizes two calibration points, one at zero load
and the other at specified full span. See following table.
Compare the reading on the balance to the expected weight being
used. If the reading is above the expected weight, the delta entered
in digits is negative. If the reading is below the expected weight,
the delta entered in digits is positive.
See following example:
Actual Weight Reading: 200.0014
Expected Weight Reading: 200.0000
Delta Weight (d): 0.0014
Delta weight in Digits: -14
CALIBRATION MASSES
LINEARITY SPAN ONLY
CAPACITY MASSES MASSES
62 g 20g/50 g 50 g
162 g 50g/150 g 150 g
110 g 50g/100 g 100 g
210 g 100g/200 g 200 g
410 g 200g/400 g 400 g
510g/610 g 200g/500 g 500 g
1550 g 500g/1500 g 1500 g
2100 g 1000g/2000 g 2000 g
4100 g 2000g/4000 g 4000 g
6100 g 2000g/5000 g 5000 g
8100 g 4000g/8000 g 8000 g
It is recommended that masses must meet or exceed ASTM
Class 1 Tolerance. Calibration masses are available as
accessories.
Additional calibration values to be used are shown on the display
screen. The best accuracy is achieved using the mass closest
to the full span value. After calibration, the display returns to the
last application mode.
BALANCE OPTIONS
Language : English
Display Date/Time : Date/Time
Date Format : DD/MM/YY
Date : 00/00/00
Time Format : 12 Hour
Time : 00:00:00
Contrast :
Brightness :
Audible Signal : Off
Exit
Explorer Pro EN-25
Languages: English, Spanish, etc...(default is English)
Allows the selection of English, Spanish, French, German or Italian
as the operating language to be displayed.
Display Date/Time: Time, date, etc...(default is Date/Time)
Allows display selection of Time, Date, Date/Time or Off in the
upper right-hand corner of the Application Mode screen.
Date Format: MM/DD/YY, YY/MM/DD, ETC...(default is MM/DD/
YY)
Allows setting of one of six date formats: MM/DD/YY,
YY/MM/DD , DD/MM/YY, DD/YY/MM, MM/YY/DD or YY/DD/MM.
Date: OO/00/00 (default is none)
Allows setting the present date.
Time Format: 12 Hour, 24 hour(default is 12 Hour)
Allows setting the time format of either 12 hours or 24 hours.
Time: 00:00:00 (default is none)
Allows setting the present time of hours, minutes and AM/PM.
Valid numbers change with time format from 1->12 to 0->23.
When in 24 hour mode, no AM/PM flag appears.
Contrast:
Allows adjusting the contrast level of the display.
Brightness:
Allows adjusting the brightness level of the display.
Audible Signal: On, Off (default is Off)
With audible signal set On, each button press will generate a
tone.
Exit:
When selected, returns to previous screen.
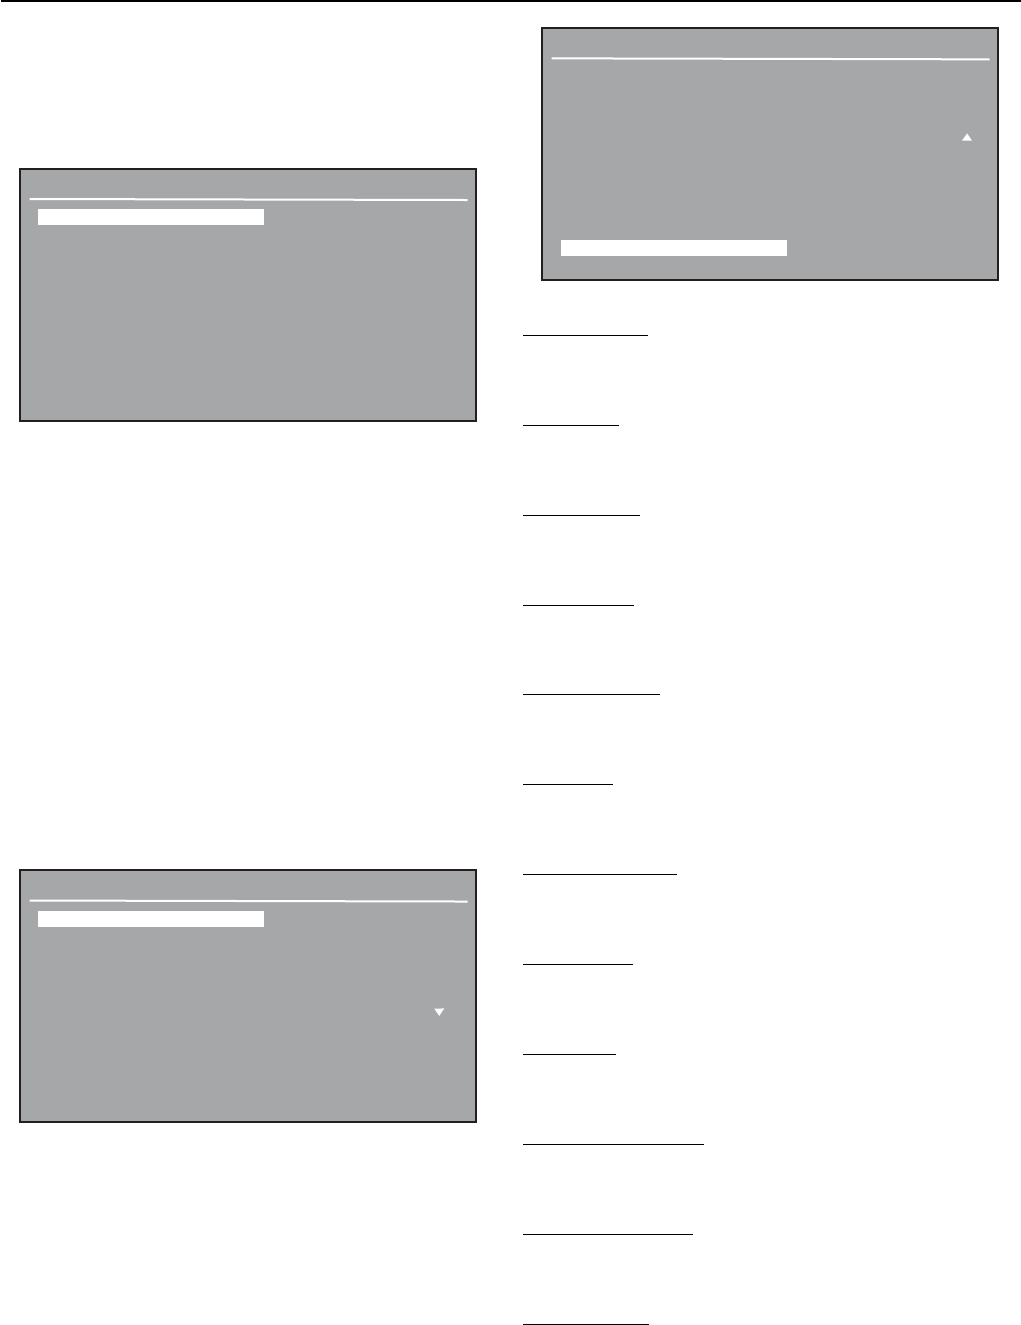
3.5.3 Readout
Press the Menu button, and select Readout.
Press the Enter button. The READOUT screen is displayed.
READOUT
Filter Level : Medium
Stability Level (d) : 1.0
Auto Zero (d) : 0.5
Auto Tare : Off
Legal for Trade : Off
Exit
Filter Level: Low, Medium, High (default is Medium)
Sets the balance reading averaging level to a value of Low,
Medium or High. A higher filter level will provide a more repeatable
measurement.
Stability Level: 0.5, 1.0, etc... (default is 1.0)
Sets the balance stability level for the stability indicator to either
0.5, 1.0, 2.0 or 5.0. A 0.5 setting is equivalent to end result of
.5 display digit. A 5.0 setting is equivalent to end result of 5
display digits.
Auto Zero: Off, 0.5, etc... (default is 0.5)
Sets the balance auto zero level to either Off, 0.5, 1.0, 2.0 or
5.0. Auto Zero tracking compensates for the drift at zero load.
0.5d means 0.5 display digit drift compensation per second.
5.0d means 5 display digit drift compensation per second.
Auto Tare: On, Off (default is Off)
Sets the Auto Tare function to On or Off. This feature provides
auto tare in all application modes. When Auto Tare is On, the
balance waits for the container/load to be placed on the pan and
automatically tares it. This function is repeated for each new
container/load.
Legal for Trade: On, Off (default is Off)
Sets the Legal for Trade (LFT) function either On or Off. Refer to
paragraph paragraph 3.5.11 for additional information.
EN-26 Explorer Pro
All application modes are displayed on this screen. Each mode
may be set on or off. These modes are cycled through when the
Mode button is pressed.
3.5.5 Units
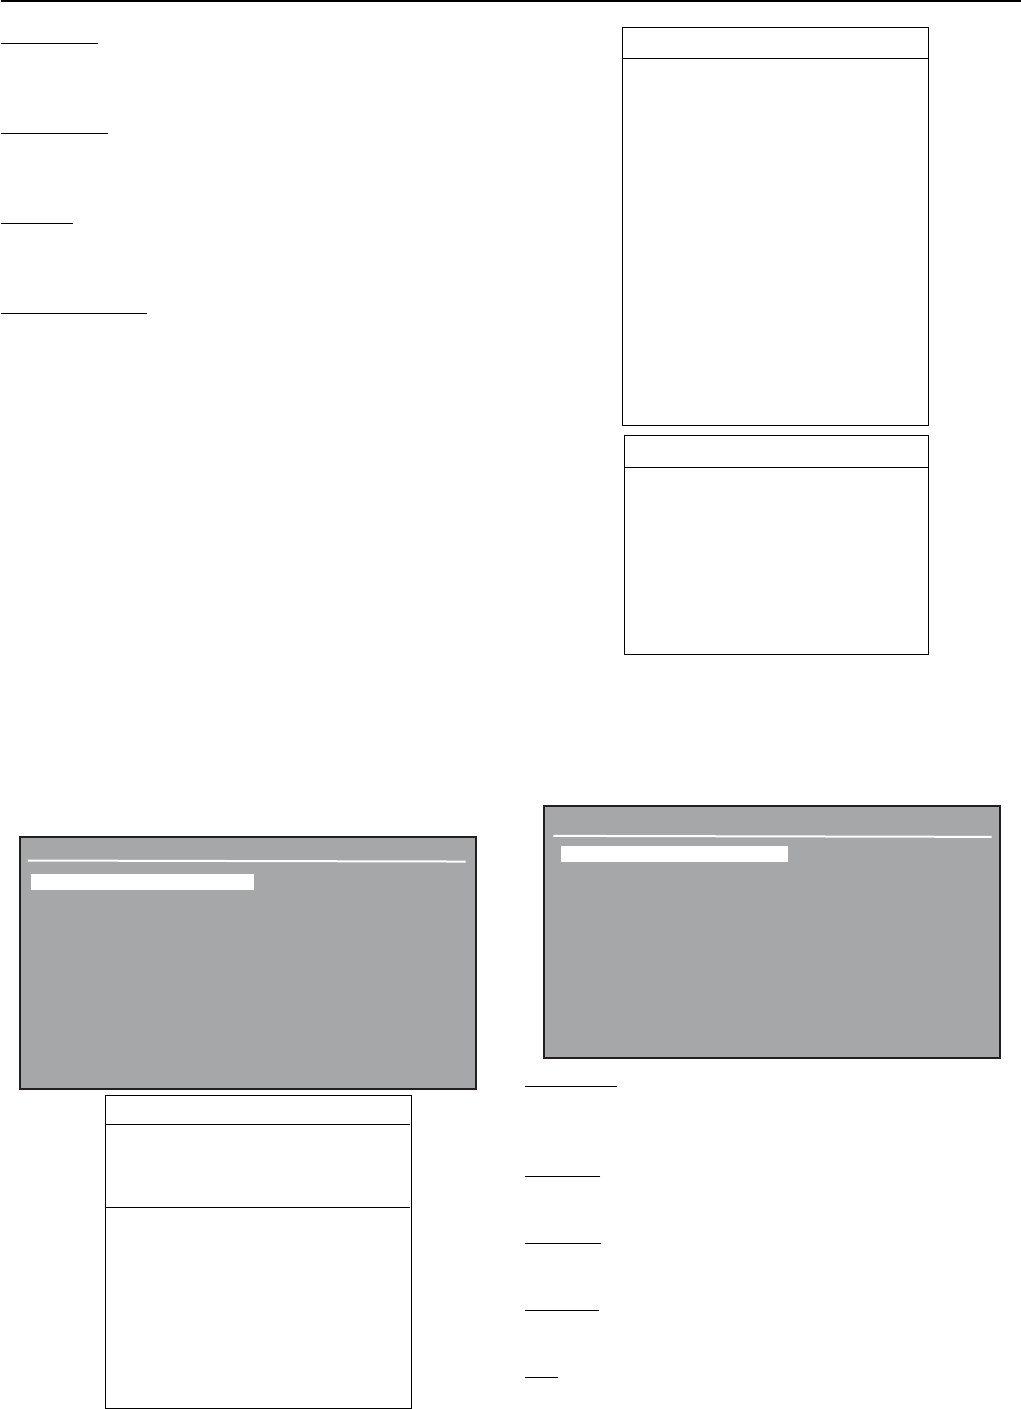
Press the Menu button, and select Units. The UNITS screen is
displayed and displays a list of the available weighing units.
Depending on the model, some units are not available.
In some models, the number of units contained in the balance
exceeds the screen capacity. In order to view all units, the down
arrow must be pressed repeatedly to view all available units.
UNITS
Milligram (mg) : Off
Gram : On
Kilogram : Off
Oz avdp (oz) : Off
Pound avdp (lb) : Off
Carat (ct) : Off
Penny weight (dwt) : Off
Troy OZ (ozt) : Off
Grain (GN) : Off
HK Tael (Hkt) : Off
SG Tael (SGt) : Off
ROC Tael (ROt) : Off
Scroll down using arrow button to view remaining units.
3.5.4 Application Modes
Press the Menu button, and select Application Modes.
Press the Enter button APPLICATION MODES screen is displayed.
APPLICATION MODES
Weighing : On
Parts Counting : Off
Animal Weighing : Off
Percent Weighing : Off
Check Weighing : Off
G/N/T : Off
Filling : Off
Exit
UNITS
Carat (ct) : Off
Penny weight (dwt) : Off
Troy OZ (ozt) : Off
Grain (GN) : Off
HK Tael (Hkt) : Off
SG Tael (SGt) : Off
ROC Tael (ROt) : Off
Newton (N) : Off
Momme (m) : Off
Tical (ti) : Off
Custom (Cst) : Off
Exit
Milligram (mg): On, Off (default is Off)
Unit (mg) = g x 1000, displayed readability by 1.
Gram (mg): On, Off (default is On)
Unit (g) = g x 1, displayed readability by 1.
Kilogram (kg): On, Off (default is Off)
Unit (kg) = g x .001, displayed readability by 1.
OZ avdp (oz): On, Off (default is Off)
Unit Ounces (oz) = g x .002204623, displayed readability by 5.
Pound avdp (lb): On, Off (default is Off)
Unit Pounds (lb) = g x .03527396, displayed readability by 5.
Carats (ct): On, Off (default is Off)
Unit (ct) = g x 5, displayed readability by 5.
Pennyweight (dwt): On, Off (default is Off)
Unit (dwt) = g x .6430149, displayed readability by 1.
Troy OZ (ozt): On, Off (default is Off)
Unit (ozt) = g x .03215075, displayed readability by 5.
Grain (GN): On, Off (default is Off)
Unit (GN) = g x 15.43236, displayed readability by 2.
Hong Kong Tael (HKt): On, Off (default is Off)
Unit (HKt) = g x 0.02671725, displayed readability by 5.
Singapore Tael (SGt): On, Off (default is Off)
Unit (SGt) = g x 0.02645547, displayed readability by 5.
ROC Tael (ROt): On, Off (default is Off)
Unit (ROt) = g x 0.02666667, displayed readability by 5.
Explorer Pro EN-27
Newton (N): On, Off (default is Off)
Unit (N) = g x 0.00980665, displayed readability by 1.
MOMME (m): On, Off (default is Off)
Unit (m) = g x 0.2666667, displayed readability by 5.
Tical (ti): On, Off (default is Off)
Unit (ti) = g x 0.0612395, displayed readability by 1.
Custom Unit (Cst): On, Off (default is Off)
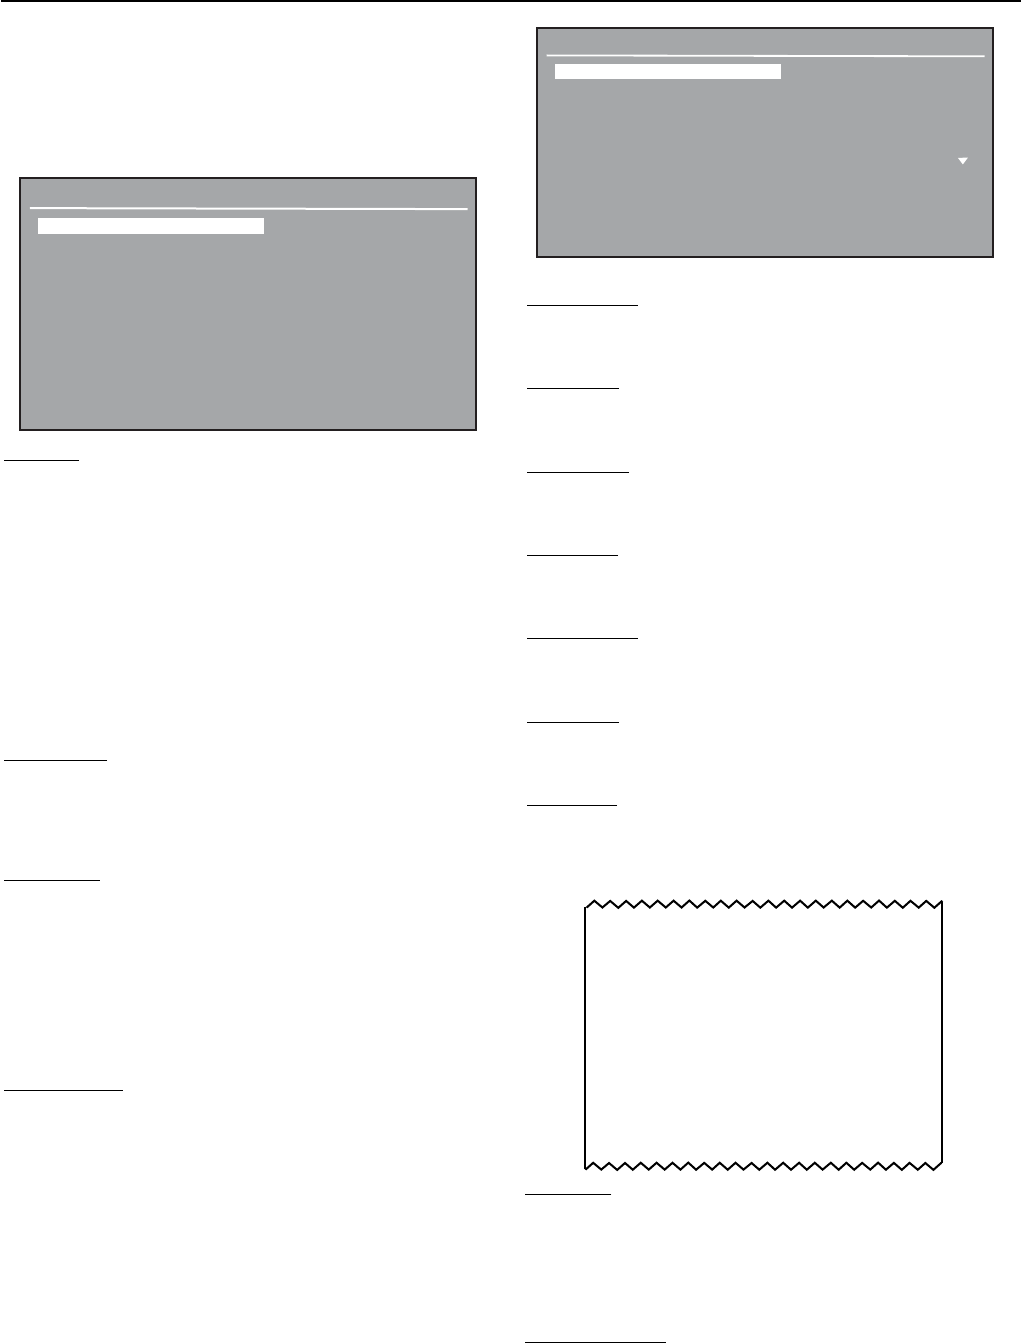
When the Custom Unit is set On, the CUSTOM UNIT screen will
appear.
This feature can be used to create a custom weighing unit. It
permits entering a conversion factor which the balance will use
to convert grams to the desired unit of measure.
Conversion Factor x Grams = Custom Unit
Unit (Cst) = g x user set custom factor, displayed resolution can
not exceed resolution in gram.
Conversion factors are expressed in scientific notation
and entered into the balance in three parts:
Mantissa (0.1 and 1.999999)
Exponent (10E)
Least Significant Digit (LSD)
CUSTOM UNIT
Factor : 1.0
Exponents : E1
LSD : 1
Exit
SCIENTIFIC NOTATION
Mantissa
Between
Conv. 0.1 and Exponent Man- Exp.
Factor 1.999999 tissa (10E)
123.4 = .1234 x 1000 =.1234 x 103
12.34 = .1234 x 100 = .1234 x 102
1.234 = .1234 x 10 = .1234 x 101
.1234 = .1234 x 1 = .1234 x 100
.01234 = .1234 x .1 = .1234 x 10-1
.001234 = .1234 x .01 = .1234 x 10-2
.000123 = .123 x .001 = .123 x 10-3
EXPONENTS
E-3 Moves decimal point 3
places to the left.
E-2 Moves decimal point 2
places to the left.
E-1 Moves decimal point 1
place to the left.
E0 Leaves decimal point in
normal position.
E1 Moves decimal point 1
place to the right.
E2 Moves decimal point 2
places to the right.
E3 Moves decimal point 3
places to the right.
LSDs
LSD .5 Adds one decimal place
display counts by 5s.
LSD 1 Display counts by 1s.
LSD 2 Display counts by 2s.
LSD 5 Display counts by 5s.
LSD 10 Display counts by 10s.
LSD 100 Display counts by 100s.
3.5.6 Interface
Press the Menu button, and select Interface.
Press the Enter button, The INTERFACE screen is displayed.
INTERFACE
Baud Rate : 2400
Parity : None
Data Bits : 7
Stop Bits : 2
Exit
Baud Rate: 300, 1200, etc...(default is 2400)
Baud Rate is selectable between 300, 1200, 2400, 4800 or
9600 BPS.
Parity Bit: None, Odd, Even (default is None)
Parity Bit is selectable between None, Odd or Even.
Data Bits: 7, 8 (default is 7)
Data Bits is selectable between 7 or 8 data bits.
Stop Bits: 1, 2 (default is 2)
Stop Bits is selectable between 1 or 2 stop bits.
Exit:
Will return to previous display.
EN-28 Explorer Pro
3.5.7 Print Options
Press the Menu button, and select Print Options.
Press the Enter button PRINT OPTIONS screen is displayed.
PRINT OPTIONS
Auto Print : Off
Print Interval : Off
Stable Data : Off
Numeric Data : Off
Exit
Auto Print: Off, interval, etc... (default is Off)
When enabled, the Auto Print feature causes the balance to
automatically output display data in one of three ways:
continuously, at user specified time intervals, or upon stability.
OFF Turns off the auto print feature.
Interval Provides a user specified printing interval
Stable Provides printed data each time a stable
reading is achieved.
Continuous Outputs data continuously.
Print Interval: 1-3600 (default is 1)
When Auto Print is set to Interval, a specified printing interval
between 1 and 3600 seconds can be set.
Stable Data: Load, Load & Zero (default is Load)
When Auto Print is set to Stable, an option of Load or Load &
Zero can be set.
Load Will print stable load data only.
Load & Zero Will print stable load data and stable zero
data.
Numeric Data: On, Off (default is Off)
When set On, will print numeric data.
3.5.8 GLP Print Options
GLP stands for Good Laboratory Practice. The GLP Print Options
enables the printing of a Date & Time, Balance ID, Project Name,
User Name, Calibration, Reference, Application Mode and Result
lines. Press the Menu button, and select GLP Print Options.
Press the Enter button GLP PRINT OPTIONS screen is displayed.
GLP PRINT OPTIONS
Project Name : OHAUS
User Name : OHAUS
Date & Time : Off
Balance ID : Off
Project Name : Off
User Name : Off
Calibration : Off
Reference : Off
Application Mode : Off
Result Line 1 : Off
Result Line 2 : Off
Result Line 3 : Off
Project Name: (default is OHAUS)
A project name of up to 8 characters may be entered.
User Name: (default is OHAUS)
A user name of up to 8 characters may be entered.
Date & Time: On, Off (default is Off)
When set On, will output date and time.
Balance ID: On, Off (default is Off)
When set On, will output Balance ID.
Project Name: On, Off (default is Off)
When set On, will output project name.
User Name: On, Off (default is Off)
When set On, will output User name.
Calibration: On, Off (default is Off)
When set On, prints out the calibration data after the completion
of every calibration process. See sample of span calibration.
---------------SPAN CAL--------------
Cal: 400.000 g
Old:399.445 g
Diff:-0.555 g
Wt. ref______________________
Name_______________________
-----------------END--------------------
Reference: On, Off (default is Off)
When the Reference function is set ON, it will output the value of
weight used as a reference in either Percent Weighing mode or
Parts Counting mode.
Application Mode: On, Off (Default is Off)
When set to On, the Application name will be printed during a
print operation.
SAMPLE PRINTOUT
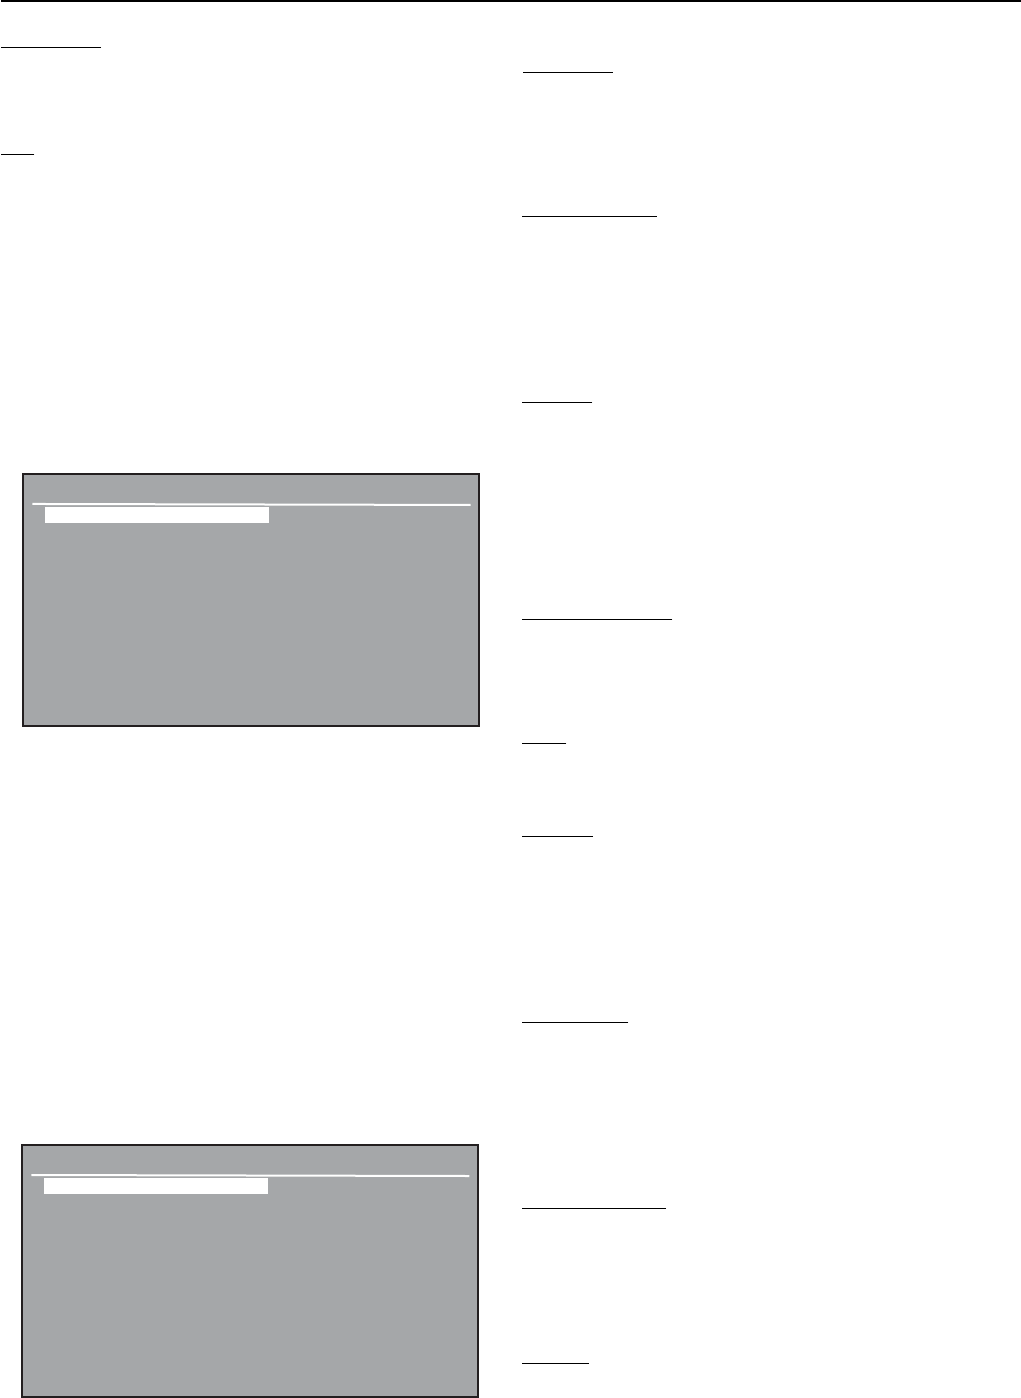
Explorer Pro EN-29
3.5.9 Lockout
Provides the capability to lock the Menu settings individually to
protect selected parameters against modifications. Locked means
the items can be viewed but not changed.
Press the Menu button, and select Lockout.
Press the Enter button LOCKOUT screen is displayed.
LOCKOUT
Calibration : Unlocked
Balance Options : Unlocked
Readout : Unlocked
Application Setup : Unlocked
Application Modes : Unlocked
Units : Unlocked
Interface : Unlocked
Print Options : Unlocked
GLP Print Options : Unlocked
Factory Reset : Unlocked
Exit
FACTORY RESET
Calibration : No
Balance Options : No
Readout : No
Application Modes : No
Units : No
Interface : No
Print Options : No
GLP Print Options : No
Lockout : No
Global Reset : No
Accept Changes : No
Balance Options:
Language: English
Display Date/Time: Date/Time
Date Format: MM/DD/YY
Time Format: 12 Hour
Readout:
Filter Level: Medium
Stability Level (d): 1.0
Auto Zero (d): 0.5
Auto Tare: Off
Legal for Trade: Off
Application Modes:
Weighing: On
All others Off
Units:
Grams On, all others Off.
Interface:
Baud Rate: 2400
Parity: None
Data Bits: 7
Stop Bits: 2
Print Options:
Auto Print: Off
Print Interval: Off
Stable Data: Off
Numeric Data: Off
GLP Print Options:
Balance ID=OHAUS
User Name = OHAUS
All others Off
Lockout:
All Unlocked
The default setting for all items on the LOCKOUT screen are
Unlocked.
3.5.10 Factory Reset
The FACTORY RESET allows parameters to be set to the default
values. Each menu item can be reset by setting to Yes. After
accepting the changes, the balance will reset the selected menus
items. Global Reset will change all menus to a factory setting in
one step.
Press the Menu button, and select Factory Reset.
Press the Enter button FACTORY RESET screen is displayed.
The balance default parameters are listed as follows:
Calibration:
Auto Cal: On (Internal calibration models only)
Autocal delta: 0 (Internal calibration models only)
User Cal weight = Span weight
Result Lines: On, Off (Default is Off)
Each of the six Result Lines can be set independently. When set
to On, the Result Line information will be printed
Exit:
When selected, returns to previous menu.
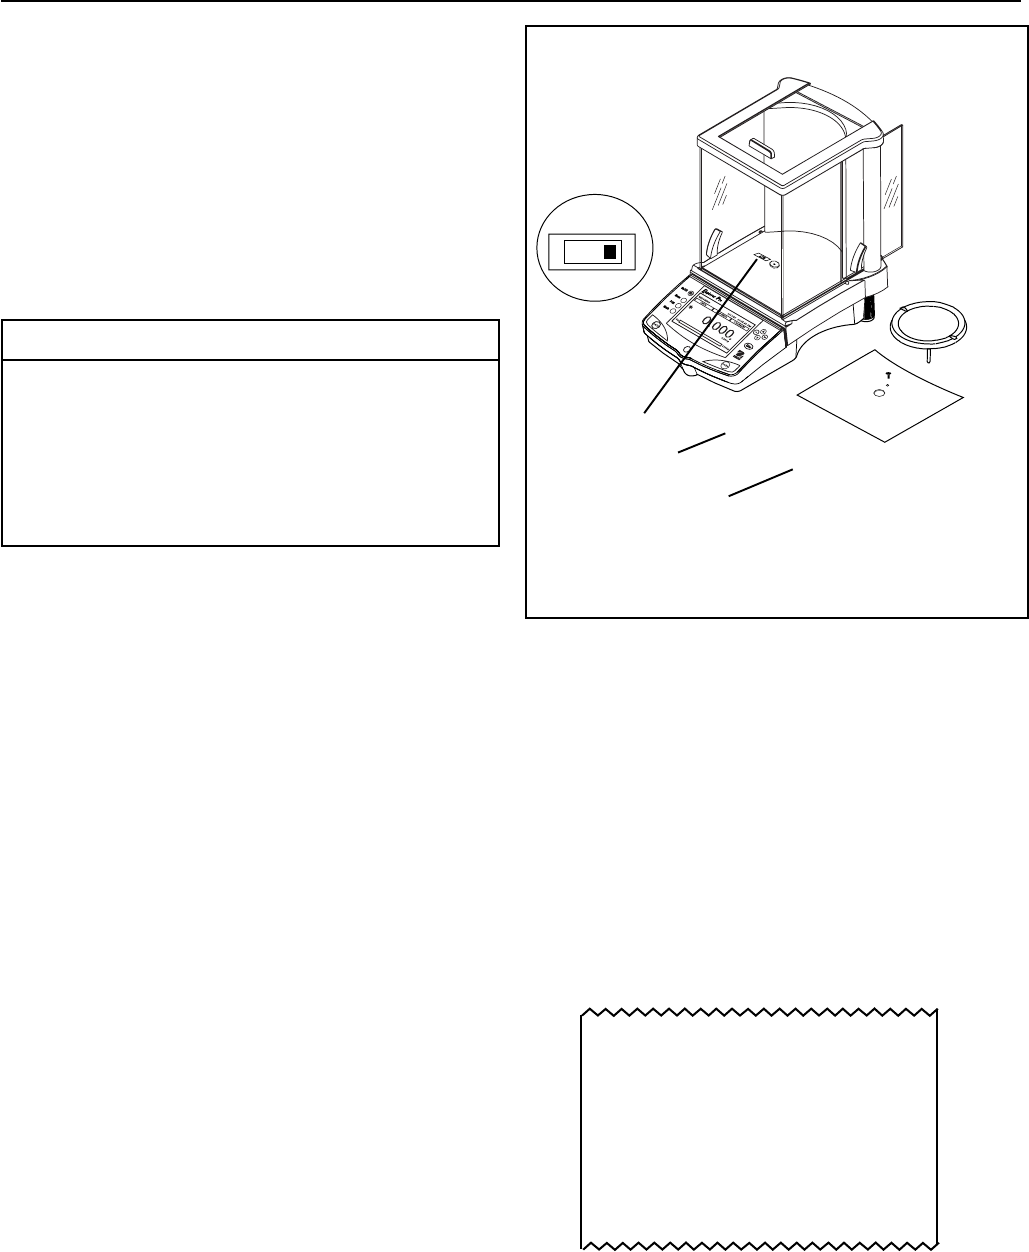
EN-30 Explorer Pro
3.5.11 LFT Legal for Trade
Legal for Trade (LFT) is a software controlled option which can
be set ON in the Readout menu. When LFT is set ON, certain
items in the Calibration, Readout and Print menus are
automatically preset and locked to permit the balance to operate
in a legal for trade application and works in conjunction with a
Lockswitch. Default setting is OFF. See default table.
LFT DEFAULT TABLE
When the balance is first turned ON and LFT has been previously
set ON, the initial display will indicate that LFT is ON.
The last digit on the weighing display will be highlighted in white
and is used to indicate the auxiliary digit.
Depending upon country regulations, additional settings will have
to be locked. Before sealing the balance, check with your local
Weights and Measure official.
LFT and Lockswitch Default Value
Balance Menu
Readout
Stability Level Locked to 1
Auto Zero Limited to OFF & 0.5
Auto Cal Locked to ON
Print Current Settings Balance will only output stable data.
3.5.12 Hardware Lockswitch
Access to the various menus can be disabled setting the Lock-
switch located on the PC board inside the balance to locked
position. The Lockswitch locks out all menus which have been
set to LOCKED. The default setting for the Lockswitch is UNLOCKED.
3.5.13 Sealing the Balance
Certified balances have a securing sticker and additional labeling
applied at the factory. When subsequent verification is carried
out, they can be sealed either with a lead seal and wire, or with a
new securing sticker.
Switch Plate
Lead Seal
or
Securing Sticker
Example of Sealing Method
3.6 Printing Data
Printing data requires that the Interface menu, Print Options and
GLP Print Options are set properly.
Pressing the Print button will initiate printing each time it is
pressed.
Sample printout is shown below with GLP Options turned on.
Lockswitch shown in
Locked Position
Sealing Screw
SAMPLE PRINTOUT
DATE: 19/02/03
09:56:16
9.989g
Ref:
Balance id:000001B9A925
Project Name:OHAUS
User Name: OHAUS
Explorer Pro EN-31
PROBABLE CAUSE(S)
Power cord not plugged in or properly
connected to balance.
Balance was not tared before weighing.
Balance out of level.
Balance not properly calibrated.
Desired unit not enabled.
Desired application mode is not enabled.
Menu locked.
Interface parameters not properly set up.
Incorrect cable being used.
Cable connections.
Vibration on table surface.
Balance not tared.
Internal calibration not adjusted properly.
4. CARE AND MAINTENANCE
4.1 Cleaning
To keep the balance operating properly, the housing and pan should be kept clean and free from foreign material. If necessary, a
cloth dampened with a mild detergent may be used. Keep calibration masses in a safe dry place.
4.2 Troubleshooting
SYMPTOM
Unit will not turn on.
Incorrect weight reading.
Cannot display weight in desired unit.
Cannot access desired application.
Unable to change menu settings.
RS232 interface not working.
Unstable readings.
Error message display.
Incorrect calibration
REMEDY
Check power cord connections.
Press >O/T< with no weight on the
pan, then weigh item.
Adjust leveling feet.
Recalibrate correctly.
Enable units in Units menu.
Enable desired application in
Application Modes menu.
Verify that Lockswitch is in the Off
position, unlock menu in the
Lockout menu.
Verify interface settings in RS232
menu correspond to those of
peripheral device.
Refer to Accessory list for proper
cable.
Check cable connections are
installed properly. Check correct
cable end is plugged into the
balance.
Check environmental conditions.
Close draft shield doors.
Change averaging level to a higher
setting or place balance on a stable
surface
See Error Codes list.
Tare the balance.
Perform calibration adjustments.

EN-32 Explorer Pro
4.3 Error Codes List
Error Codes List
The following list describes the various error codes that can appear on the display and the suggested remedy.
Data Errors
1.0 Transient error (hardware error, probably static discharge). If error persists, the balance must be
serviced.
1.1 Balance temperature transducer hardware error.
1.2 No data from main board.
Tare Errors
2.0 Balance is unable to stabilize within time limit after taring. Environment is too hostile or balance needs
recalibration.
Calibration Errors
3.0 Incorrect or no calibration mass used for calibration. Recalibrate with correct masses.
RS232 Errors
4.4 RS232 buffer is full.
User Errors
7.0 User entry out of bounds.
7.2 Number outside of display capacity.
Over-Under Load Errors
8.0 Hardware error causing an internal weight signal which is too low. Check if pan is off. If not, the balance
must be serviced.
8.1 Hardware error caused by an internal weight signal which is too high. Check load on the pan which may
be excessive. If error persists, the balance must be serviced.
8.2 Power-on load out of specification (LFT only)
8.3 Rated capacity exceeded. Remove excessive weight from pan.
8.4 Underload condition on balance. Check that the proper pan is installed.
8.5 Auto Cal weight internal sensor indicated its weight on the pan.
CheckSum Errors
9.1 Bad factory checksum. If error persists, have the balance serviced.
9.2 Bad factory checksum. If error persists, have the balance serviced.
9.3 Bad factory checksum. If error persists, have the balance serviced.
9.4 Auto Cal data failed checksum. This failure will disable access to the Auto Cal feature (if installed).
9.5 Factory calibration data failed checksum.
9.6 Bad program checksum.
9.7 Bad CMOS checksum.
9.8 User calibration data failed checksum.
9.9 Factory temperature compensation data failed checksum.

Explorer Pro EN-33
4.4 Service Information
If the Troubleshooting section does not resolve or describe your problem, you will need to contact an authorized Ohaus Service
Agent. For Service assistance in the United States, please call Aftermarket, Ohaus Corporation toll-free at (800) 526-0659. An
Ohaus Product Service Specialist will be available to help you. Global contact addresses and phone numbers are accessible on
www.ohaus.com.
4.5 Replacement Parts
Description U.S. Part No. Global Part No.
Power Pack, 100/120 V ac US Plug (Cord set part of power pack) 490202-010 21202536
Power Pack, (Cord set required for UK, European and Australian) 490203-010 21202537
Cord Set, 230 V ac, UK Plug 76448-00 89405
Cord Set, 230 V ac, European Plug 76212-00 87925
Cord Set, 230 V ac, Australian plug 76199-01 88751
In-Use Display Cover Kit 80850042
4.6 Accessories
Description
Calibration Masses - ASTM Class 1 Tolerance:
20 g 49024-11 80780022
50 g 49054-11 80730028
100 g 49015-11 80780020
200 g 49025-11 80780023
500 g 49055-11 80780029
1 kg 49016-11 80780021
2 kg 49026-11 80780024
4 kg 49046-11 80780027
Security Device 470004-01 80850043
Density Determination Kit 470007-01 80850045
Auxiliary Display Kit (Table Mount) 470009-01 80850048
RS232 Interface Cable, Blunt end (user defined) AS017-01 80850013
RS232 Interface Cable, IBM® - PC 25 Pin AS017-02 80850014
RS232 Interface Cable, (connects impact printer) 80500570
RS232 Interface Cable, IBM® - PC 9 Pin AS017-09 80850015
RS232 Interface Cable, Apple® llGS/Macintosh AS017-10 80850072
Printer SF42
Printer Cable 80500570
EN-34 Explorer Pro
Command
Character Description
CBegin span calibration
xD Set 1 second print delay (set x = 0 for OFF, or x = 1 for ON)
PM Application mode.
xFL Set Averaging Filter Level 1= Low, 2= Medium, 3= High
LBegin linearity calibration
PPrint displayed weight (stable or unstable)
TSame as pressing Tare key.
PV Version: print name, software revision and LFT ON (if LFT is set ON)
xAL Set Auto-Zero level to x. x = 0 for OFF, x = 1 for 0.5d, x=2 for 1.0d, x=3 for 2.0d, x=4 for
5.0d.
Esc R Resets Setup and Print menus to factory defaults
On Turns balance on
Off Turns balance off
x% Set % reference weight (x) in current unit
x# Set PC reference weight (x) in current unit
P# Print PC reference weight
P% Print percent reference weight
xM Set current Application mode to x. x = 1 for Weighing, x = 2 for Parts Counting, x = 3 for
Animal Weighing, x = 4 for Percent Weighing, x = 5 for Check Weighing, x = 6 for G/N/T,
x = 7 for Filling
xAW Set Animal Weigh Level to x. x = 1 for LOW, x = 2 for MEDIUM, x = 3 for HIGH.
xAM Set animal mode. Where x is 1=Manual, 2=Semi and 3=Auto
SAW Start Animal cycle.
xT Download Tare value in current unit. Sending 0T clears tare.
PID Print current user ID string
xID Program user ID string. 1-8 characters
AC Abort calibration
xUC Set user defined weight
UC Initiate user calibration
IC Initiate internal calibration
PTIME Print current time
mm/dd/yyDATE Set date
hh:mm:ssTIME Set time
PDATE Print current date
5. TECHNICAL DATA
5.1 RS232 Commands
Field: Weight Unit Stab CR LF
Length: Max 9 5 1 1 1
Explorer Pro EN-35
5.2 Specifications
Capacity (g) 62 110 210 100/210 *
Readability (mg) 0.1 0.1/1
Repeatability (Std. dev.) (mg) 0.1 0.1/0.5
Linearity (mg) (+) 0.2 (+) 0.2/0.5
Weighing units *** gram, milligram, ounce, ounce troy, carat, pennyweight, Hong Kong Tael, Singapore Tael, Taiwan Tael,
mommes, grain, tical, Newton, custom
Application modes Weighing, Parts Counting, Animal Weighing, Check Weighing, Percent Weighing, Filling, Gross-Net-Tare
Weighing
Features RS232 Port, Auxillary Display Port, GLP Protocol, Selectable Language, Display Text, Selectable Displayed
Information Settings, Selectable Environmental Settings, Selectable Auto-Print Settings, Integral Weigh
Below Hook, Contrast and Brightness Control, Protective In-Use cover
Tare range Full capacity by subtraction
Stabilization time (s) 4
Calibration External / Internal
Display Type LCD Dot Matrix w/CCFL Backlight
Display Size (in/cm) 2.5 x 4.7 / 64 x 120
Operating temperature range: Non LFT w/internal calibration 10°C to 40° C / 50°F to 104° F
w/o internal calibration 10°C to 30°C / 50°F to 86° F
Power requirements External Adapter, 100 -120 VAC 150mA, 220 - 240 VAC 100mA, 50/60 Hz
Plug configuration for US, Euro, UK, Japan & Australia
Draft shield (in/cm) 10.2/25.9
(free height above platform)
Pan size (in/cm) 3.5 / 9. diameter
Dimensions (WxHxD) (in/cm) 8.5 x 13.5 x 14.5 / 21.5 x 35.5 x 37
Net Weight (lb/kg) 12.5 / 5.7
Net Weight (lb/kg) InCal Models 14.8 / 6.7
Analytical Balances
Admissible Ambient Conditions
Use only in closed rooms
Ambient Temperature range: 5 ºC to 40 ºC
Atmospheric humidity: 80% rh @ to 30 ºC
Voltage fluctuations: 15% +10%
Installation category: II
Pollution degree: 2
Power supply voltage: 12 VAC, 50/60 Hz or 12 VDC, 1A
* Moveable FineRange TM
*** Units availability is country dependent.
EN-36 Explorer Pro
Capacity (g) 210 410 510 610 100/410* 610 1500 2100 4100 6100 1000/4100* 4100** 6100** 8100**
Readability (g) 0.001 0.001/0.01 0.01 0.01/0.1 0.1
Repeatability (Std. dev.) (g) 0.0005 0.0015 0.0005/0.005 0.005 0.01 0.01/0.05 0.05
Linearity (g) (+)0.002 (+)0.002/0.005 (+)0.02 (+)0.04 (+)0.02/0.05 (+)0.1
Weighing units*** gram, milligram, kilogram, pound, ounce, ounce troy, carat, pennyweight, Hong Kong Tael, Singapore
Tael, Taiwan Tael, mommes, grain, tical, Newton, custom
Application modes Weighing, Parts Counting, Animal Weighing, Check Weighing, Percent Weighing, Filling, Gross-Net-Tare
Weighing
Features RS232 Port, Auxillary Display Port, GLP Protocol, Selectable Language, Display Text, Selectable Displayed
Information Settings, Selectable Environmental Settings, Selectable Auto-Print Settings, Integral Weigh
Below Hook, Contrast and Brightness Control, Protective In-Use cover
Tare range Full capacity by subtraction
Stabilization time (s) 3
Operating temperature range: Non LFT w/internal calibration 10°C to 40°C / 50°F to 104° F
All others 10°C to 30°C / 50°F to 86°F
Calibration External / Internal
Power requirements External Adapter, 100 -120 VAC 150mA, 220 - 240 VAC 100mA, 50/60 Hz
Plug configuration for US, Euro, UK, Japan & Australia
Draft shield (in/cm) 10.2/25.9 None
(free height above platform)
Display Type LCD Dot Matrix w/CCFL Backlight
Display size (in/mm) 2.5 x 4.7 / 64 x 120
Pan size (in/cm) 4.7/12 Dia. 6.8 x 6.8/17.2 x 17.2 w/windshield 8 x 8/ 20.3 x 20.3 **
Dimensions (WxHxD) (in/cm) 8.5x13.5x14.5/21.5x35.5x37 8.5 x 4 x 14.5/21.5 x 10.1 x 37
Net Weight (lb/kg) 12.5 / 5.7 8.4 / 3.8 10/4.5 8.4 / 3.8 10 / 4.5
Net Weight (lb/kg) InCal Models 14.8 / 6.7 10 / 4.5 15.5/7 10 / 4.5 15.5 / 7
Precision Balances
* Moveable FineRange TM
** Balances with Auto Cal are equipped with a 6.8 in. x 6.8 in. / 17.2 cm x 17.2 cm Pan and Windshield.
*** Units availability is country dependent.
LIMITED WARRANTY
Ohaus products are warranted against defects in materials and workmanship from the date of delivery through the duration of the
warranty period. During the warranty period Ohaus will repair, or, at its option, replace any component(s) that proves to be
defective at no charge, provided that the product is returned, freight prepaid, to Ohaus.
This warranty does not apply if the product has been damaged by accident or misuse, exposed to radioactive or corrosive
materials, has foreign material penetrating to the inside of the product, or as a result of service or modification by other than
Ohaus. In lieu of a properly returned warranty registration card, the warranty period shall begin on the date of shipment to the
authorized dealer. No other express or implied warranty is given by Ohaus Corporation. Ohaus Corporation shall not be liable for
any consequential damages.
As warranty legislation differs from state to state and country to country, please contact Ohaus or your local Ohaus dealer for
further details.

Explorer Pro EN-37
A
AC Adapter Installation 6
Accessories 33
Admissible Ambient Conditions 35
Admissible ambient conditions 35
Ambient Temperature rang 35
Analytical Balances 35
Animal Weighing 19
Application Modes 26
Applications 12
APW 14, 16
Atmospheric humidity 35
Audible Signal 25
Auto Print 28
Auto Tare 25
Auto Zero 25
AutoCal 23
AutoCal Delta 23
Average Piece Weight 13
B
Balance ID 28
Balance Location 5
Balance Options 24
Balance Settings 23
Baud Rate 27
Brightness 25
C
Cal Test 24
CALIBRATE 13, 20
Calibrating from the Weighing Screen 7
Calibration 23, 28, 29
CALIBRATION MASSES 7, 24
Calibration Masses 7
Cannot access desired application 31
Cannot display weight in desired unit 31
CAPACITY 7
Capacity 35
CARE AND MAINTENANCE 31
CHECK WEIGHING 20
Check Weighing 20
Cleaning 31
Connecting Power and Communications 6
Contrast 25
Cord Set 33
Custom Unit (Cst) 27
D
Data Bits 27
Date 25
Date & Time 28
Date Format 25
Density Determination Kit 33
Description 3
Display Date/Time 25
E
Error Codes List 32
Error message display 31
Example of Sealing Method 30
EXPONENTS 27
F
Factory Reset 29
Features 3
FILLING 22
Filling 22
FILTER 20
Filter Level 25
G
G/N/T WEIGHING 21
Global Part No. 33
GLP Print Options 28
Gross / Net / Tare Weighing 21
H
Hardware 6
Hardware Lockswitch 30
I
In-Use Display Cover Kit 33
Incorrect calibration 31
Incorrect weight reading 31
Initial Calibration 7
INSTALLATION 3
Installation category 35
Installing Components 4
Interface 27
Internal Calibration 23
INTRODUCTION 3
L
Languages 25
LCD Display 9
Lead Seal 30
Legal for Trade 25
Leveling the Balance 5
LFT DEFAULT TABLE 30
LFT Legal for Trade 30
LIMITED WARRANTY 37
Linearity Calibration 24
Lockout 29
Index

EN-38 Explorer Pro
M
Menu 11
Menu Structure 11
N
Navigation 11
NEW COUNT 13
New Count Key 14
NEW REF 18
Numeric Data 28
O
OPERATION 8
Output Formats 6
Overview of Controls 8
Overview of Display Indicator 10
P
Parity Bit 27
PARTS COUNTING 13
Parts Counting 13
PARTS COUNTING-CHECK 15
PARTS COUNTING-FILL 16
PC CHECK 15
PC FILLING 16
PERCENT WEIGHING 17, 18
Percent Weighing 17
Platform Installation 4
Pollution degree 35
Power On/Off 11
Power Pack 33
Power supply voltage 35
Precision Balances 36
Print Interval 28
Print Options 28
Printer 33
Printer Cable 33
Printing Data 30
Project Name 28
R
Rear of Balance 6
REFERENCE 18
Reference 28
Replacement Parts 33
Replacement parts 33
RS232 Commands 34
RS232 Interface 6
RS232 Interface Cable 33
RS232 interface not working 31
S
Safety Precautions 3
SAMPLE PRINTOUT 30
SAMPLE SIZE 13
SAMPLE SIZE/APW 14, 16, 17
SCIENTIFIC NOTATION 27
Sealing Screw 30
Sealing the Balance 30
Security Device 33
Selecting the Location 5
Service Information 33
SETUP 13
Size/APW Key 14
Span Calibration 24
Specifications 35
Stability Level 25
Stabilization 11
Stable Data 28
Stop Bits 27
Switch Plate 30
T
TECHNICAL DATA 34
Time 25
Time Format 25
Troubleshooting 31
Turning on the Balance 11
U
U.S. Part No. 33
Unable to change menu settings 31
Unit will not turn on 31
Units 26
Unpacking 3
Unstable readings 31
User Calibration 24
User Calibration Weight 24
User Name 28
V
Voltage fluctuations 35
W
Warranty 36
Weigh Below Preparation 4
Weighing 12
Weighing with a Container 12
Windshield Installation 4
Z
Zero the balance 12
Index

Explorer Pro EN-39

EN-40 Explorer Pro
Ohaus Corporation
19A Chapin Road,
P.O. Box 2033
Pine Brook, NJ 07058, USA
Tel: (973) 377-9000,
Fax: (973) 593-0359
With offices worldwide.
www. ohaus.com
PN 80250955 A © Ohaus Corporation 2003 all rights reserved.
*80250955*