Oracle Solaris 11 Advanced System Administration Ed 3 (Student Guide Volume 1)
User Manual:
Open the PDF directly: View PDF ![]() .
.
Page Count: 480 [warning: Documents this large are best viewed by clicking the View PDF Link!]
- Oracle Solaris 11 Advanced System Administration - Student Guide - Volume I
- Table of Contents
- Preface
- Lesson 1: Introduction
- Lesson 2: Managing the Image Packaging System (IPS) and Packages
- Objectives
- Workflow Orientation
- Lesson Agenda
- Importance of Working with a Plan
- Planning for IPS and Package Management
- Identifying IPS Server System Requirements
- Planning for Boot Environment Management
- Implementing the IPS and Package Management Plan
- Quiz
- Lesson Agenda
- Configuring a Local IPS Package Repository
- Creating a ZFS File System to Hold the Repository
- Obtaining Software Packages from the Oracle Solaris Download Site
- Making the Repository File Contents Available
- Configuring the Repository Server Service
- Starting the Repository Service
- Setting the Local IPS Publisher
- Testing IPS on the Local Server
- Practice 2-1 Overview: Configuring a Local IPS Package Repository
- Lesson Agenda
- Configuring Network Client Access to the Local IPS Server
- Determining the Client Host and Domain Names
- Checking Network Connectivity
- Setting the Local IPS Publisher
- Testing Client Access to the Local IPS Server
- Practice 2-2 Overview: Configuring Network Client Access to the Local IPS Server
- Lesson Agenda
- Introducing Signed Packages
- Installing Signed Packages
- Identifying Image Properties for Signed Packages
- Configuring Image Properties for Signed Packages
- Identifying Publisher Properties for Signed Packages
- Configuring Publisher Properties for Signed Packages
- Quiz
- Introducing Variants and Facets
- Displaying and Changing Variants and Facets
- Managing Package History
- Lesson Agenda
- Managing Package Publishers
- Displaying Publisher Information
- Specifying Publisher Rankings
- Specifying Publisher Stickiness
- Setting the Publisher Search Order
- Disabling and Enabling a Publisher
- Changing a Publisher Origin URI
- Quiz
- Lesson Agenda
- Managing Multiple Boot Environments
- Listing the Boot Environments on the System
- Mounting an Inactive Boot Environment
- Installing a Package on an Inactive
- Uninstalling a Package on an Inactive
- Unmounting an Inactive Boot Environment
- Creating a Backup of a Boot Environment
- Creating a Boot Environment from an Existing Backup
- Practice 2-3 Overview: Managing Multiple Boot Environments
- Summary
- Lesson 3: Installing Oracle Solaris 11 on Multiple Hosts
- Objectives
- Workflow Orientation
- Lesson Agenda
- Reviewing Your Company’s Plan for an Oracle Solaris 11 Implementation
- Planning for an Oracle Solaris 11 AI Installation
- Automated Installation: Overview
- Automated Installation Process
- How the AI Works
- Quiz
- Lesson Agenda
- Installing Oracle Solaris 11 by Using the AI
- Reviewing AI Installation Server Requirements
- Verifying AI Install Server Software Requirements
- Verifying the Static IP Address
- Verifying That DNS Is Operational
- Verifying That IPS Is Available Locally
- Verifying That the DHCP Server Is Enabled
- Practice 3-1 Overview: Verifying System AI Requirements (Optional)
- Configuring the AI Install Server
- Enabling the DNS Multicast Service
- Installing the AI Installation Tools
- Setting Up the AI Boot Image
- Configuring an AI Install Service
- Verifying the netmasks File Configuration
- Creating an AI Install Service with an ISC DHCP Server Setup
- Creating an AI Install Service Without a DHCP Setup
- Note About the AI SMF Service
- Adding a Client to the AI Install Service
- AI Manifest
- Identifying the Types of AI Manifests
- Reviewing the Default AI Manifest (default.xml)
- System Configuration Profiles (SC Profiles)
- Adding an SC Profile to an Install Service
- Creating a Custom AI Manifest
- Selecting the AI Manifest
- Criteria File: Examples
- Adding Installation Criteria to an AI Manifest
- Practice 3-2 Overview: Configuring the AI Server
- Configuring the Client System
- Identifying Client System Requirements
- Using Secure Shell to Remotely Monitor an Installation
- Implementing the Configuration
- Reviewing Client Installation Messages
- Practice 3-3: Deploying the OS on the Network Client
- Lesson Agenda
- Introducing the Distribution Constructor
- Identifying System Requirements for Using the Distribution Constructor
- Using Distribution Constructor Manifest Files
- Building an Image
- Quiz
- Summary
- Lesson 4: Managing Business Application Data
- Objectives
- Workflow Orientation
- Lesson Agenda
- Planning for Data Storage Configuration and Backup
- Determining Storage Pool Requirements
- Mirrored Storage Pool Data Redundancy Features
- Mirrored Storage Pool Configuration
- Self-Healing Data
- Dynamic Striping
- Dynamic Striping in a Mirrored Pool
- Determining File System Requirements
- Identifying Your Data Backup and Restore Strategy
- Determining Ways to Save Data Storage Space
- Implementing the Data Storage Configuration and Backup Plan
- Quiz
- Lesson Agenda
- Managing Data Redundancy with Mirrored Storage Pools
- Creating a Mirrored Storage Pool
- Adding Log Devices to a Storage Pool
- Adding Cache Devices to a Storage Pool
- Managing Devices in ZFS Storage Pools
- Adding Devices to a Storage Pool
- Attaching Devices to a Storage Pool
- Taking Devices Offline in a Storage Pool
- Detaching Devices from a Storage Pool
- Bringing Devices Online in a Storage Pool
- Replacing Devices in a Storage Pool
- Designating Hot Spares in a Storage Pool
- Removing Hot Spares in a Storage Pool
- Practice 4-1 Overview: Managing Data Redundancy with a ZFS Mirrored Pool
- Lesson Agenda
- Backing Up and Recovering Data with ZFS Snapshots
- Creating and Destroying a ZFS Snapshot
- Holding a ZFS Snapshot
- Renaming a ZFS Snapshot
- Displaying a ZFS Snapshot
- Snapshot Space Accounting
- Rolling Back a ZFS Snapshot
- Identifying ZFS Snapshot Differences
- Creating and Destroying a ZFS Clone
- Replacing a ZFS File System with a ZFS Clone
- Sending ZFS Snapshot Data
- Receiving ZFS Snapshot Data
- Remote Replication of ZFS Snapshot Data
- Practices 4-2 and 4-3 Overview: Using ZFS Snapshots for Backup and Recovery and Using a ZFS Clone
- Lesson Agenda
- Managing Data Storage Space with ZFS File System Properties
- Setting ZFS Properties
- Inheriting ZFS Properties
- Querying ZFS Properties
- Mounting and Sharing ZFS File Systems
- Overriding Default ZFS Mount Points
- Introducing the mountpoint Property
- Automatic Mount Point Behavior
- Legacy Mount Point Behavior
- Managing Legacy Mount Points
- share.nfs Property: Introduction
- Setting the share.nfs Property
- Unsharing ZFS File Systems
- Sharing ZFS File Systems
- Setting ZFS Quotas and Reservations
- Introducing the quota
- Setting Quotas for ZFS File Systems
- Setting a User Quota on a ZFS File System
- Setting a Group Quota on ZFS File System
- Displaying User and Group Space Usage
- Identifying User and Group Space Usage
- Removing User and Group Quotas
- Identifying Reservation Restrictions
- Setting Space Reservation on a Data Set and Snapshot
- Setting Space Reservation on a Data Set
- Displaying Reservation Values
- Practice 4-4 Overview: Configuring ZFS Properties
- Lesson Agenda
- Troubleshooting ZFS Failures
- Identifying Problems in ZFS
- Troubleshooting in ZFS: Overview
- Basic Recovery Process
- Configuring syslog for FMD Messages
- Determining Problems in a ZFS Storage Pool
- Interpreting zpool status Output
- Determining Problems in a ZFS Storage Pool
- Repairing a Damaged ZFS Configuration
- Repairing a Missing Device
- Reattaching a Device
- Repairing a Missing Device
- Repairing a Damaged Device
- Determining the Cause of Device Failure
- Clearing Transient Errors
- Replacing a Device in a ZFS Storage Pool
- Viewing Resilvering Status
- Scrubbing
- Repairing Damaged Data
- Data Corruption: Overview
- Identifying the Type of Data Corruption
- Repairing a Corrupted File or Directory
- Repairing ZFS Storage Pool–Wide Damage
- Practice 4-5 Overview: Troubleshooting ZFS Failures
- Summary
- Lesson 5: Configuring Network and Traffic Failover
- Objectives
- Workflow Orientation
- Lesson Agenda
- Planning for Network and Traffic Failover
- Configuring a Host For TCP/IP
- Configuring Network Services
- Reactive Network Configuration
- Network File System Servers and Clients
- Network Performance Concepts
- Link Aggregation
- Load Balancing and Aggregation Policies
- Aggregation Modes and Switches
- IPMP: Introduction
- IPMP Components
- Comparing Link Aggregation and IPMP
- Implementing the Network and Traffic Failover Plan
- Quiz
- Lesson Agenda
- Configuring Systems on a Local Network
- Configuring a Physical Network Interface Manually
- Configuring a Physical Network Interface Manually: Example
- Deleting a Physical Network Interface Manually
- Deleting a Physical Network Interface Manually: Example
- Displaying TCP/IP Network Information
- Displaying the Status of Network Interfaces
- Displaying the Routing Table
- Capturing Packets from the Network
- Lesson Agenda
- Configuring a Reactive Network
- Creating a Network Configuration Profile
- Creating a Location Profile
- Listing a Location Profile
- Modifying Profiles
- Listing Reactive Network Profiles
- Enabling and Disabling Reactive Network Profiles
- Displaying Profile States
- Displaying Profiles and Their Auxiliary States
- Creating a Backup of a Profile
- Removing Reactive Network Profiles
- Practice 5-1 Overview: Managing a Reactive Network
- Lesson Agenda
- Configuring Network File System (NFS)
- Configuring the NFS Server
- Checking the NFS Services Status
- Configuring the NFS Client
- Selecting a Different Version of NFS on a Server
- Enabling the Automounter
- Displaying NFS Server and Client Statistics
- Practice 5-2 Overview: Configuring the Network File System
- Lesson Agenda
- Preparing for Link Aggregation
- Creating Link Aggregation
- Modifying Link Aggregation
- Deleting Link Aggregation
- Practice 5-3 Overview: Configuring a Link Aggregation
- Lesson Agenda
- Configuring an IPMP Group
- Creating an IPMP Group
- Adding IP Addresses to an IPMP Group
- Moving an Interface from One IPMP Group to Another Group
- Deleting or Disabling an IPMP Group
- Lesson Agenda
- Implementing Link Failover by Using IPMP
- Configuring an Active-Active IPMP Group
- Assigning Test Addresses
- Configuring an Active-Standby IPMP Group
- Lesson Agenda
- Monitoring an IPMP Group
- Displaying IPMP Group Information
- Obtaining IPMP Address Information
- Verifying IPMP Interface Information
- Obtaining Probe Target Information
- Checking Probe Information
- Practice 5-4 Overview: Configuring IPMP
- Summary
- Lesson 6: Configuring Zones and the Virtual Network
- Objectives
- Workflow Orientation
- Lesson Agenda
- Planning for a Virtual Network and Zones
- Network Virtualization and Virtual Networks
- Virtual Network Components
- Introducing Zone Configuration by Using VNICs
- Allocating System Resources to a Zone
- Managing System Resource Allocation to a Zone
- Resource Pool Allocation
- How Resource Pools Work
- Memory Resource Capping
- Specifying Resource Capping Within a Zone
- Implementing Controls on Network Resources
- Managing Virtual Network Resources by Using Flows
- Creating Flows and Selecting Flow Properties
- Implementing the Virtual Network and Zones Plan
- Quiz
- Lesson Agenda
- Creating a Virtual Network
- Creating a Virtual Network Switch
- Creating the Virtual Network Interfaces
- Displaying the Virtual Network Configuration
- The Virtual Network Configuration So Far
- Quiz
- Practice 6-1 Overview: Creating an Oracle Solaris 11 Virtual Network
- Lesson Agenda
- Configuring Zones to Use VNICs
- Zone Configuration Process: Overview
- Planning the Zone Strategy
- Creating a ZFS File System for Zones in rpool
- Configuring the Zone
- Verifying
- Displaying a Zone Configuration
- Verifying That a Zone Is in configured State
- Gathering Information for the System Configuration Profile
- Creating the System Configuration Profile
- Installing the Zone
- Booting the Zone
- Checking the Virtual Network Configuration in a Zone
- Verifying That a Zone’s Virtual Network Interface Connection Is Operational
- Virtual Network Configuration
- Removing the Virtual Network Without Removing the Zones
- Verifying the State of the Configured Zones
- Halting the Exclusive IP Zones
- Verifying That the Zones Have Been Halted
- Listing the VNICs That Were Configured for the Halted Zones
- Deleting the VNICs
- Quiz
- Practice 6-2: Creating Two Zones by Using VNICs
- Lesson Agenda
- Allocating and Managing System Resources in a Zone
- Allocating and Managing CPU Resources with Resource Pools
- Enabling Services for Resource Pools
- Configuring a Persistent Resource Pool
- Displaying the Resource Pool Configuration File
- Modifying the Resource Pool Configuration File
- Displaying and Committing the Modified Resource Pool Configuration File
- Displaying the Resource Pool Configuration That Is Currently in Use
- Displaying all Active Resource Pools
- Binding the Zone to a Persistent Resource Pool
- Listing the Current State of the Zones
- Allocating the Pool to the Zone and Confirming the Allocation
- Rebooting the Zone to Activate the Resource Pool Binding
- Confirming the Availability of the Resource Pool
- Removing the Resource Pool Configuration
- Removing the Pool Configuration from the Zone
- Rebooting the Zone
- Checking the Resource Pool Configuration for the Zone
- Deleting the Resource Pool
- Displaying all Active Resource Pools
- Allocating and Managing Physical Memory Resources with Resource Capping
- Practice 6-3 Overview: Allocating Resources to Zones
- Lesson Agenda
- Managing Resources on the Virtual Network
- Determining the Configured VNIC States
- Creating and Adding a Flow
- Displaying Flow Controls
- Setting Flow Properties
- Displaying Flow Control Properties
- Setting a Priority Property
- Practices 6-4 and 6-5 Overview: Managing the Virtual Network Data Flow and Removing Part of the Virtual Network
- Summary

Oracle Solaris 11 Advanced
System Administration
Student Guide - Volume I
D72965GC30
Edition 3.0
March 2013
D81023
Cicero Ronaldo (ciceroฺronaldo@gmailฺcom) has a non-transferable
license to use this Student Guideฺ
Unauthorized reproduction or distribution prohibitedฺ Copyright© 2014, Oracle and/or its affiliatesฺ

Copyright © 2013, Oracle and/or its affiliates. All rights reserved.
Disclaimer
This document contains proprietary information and is protected by copyright and
other intellectual property laws. You may copy and print this document solely for your
own use in an Oracle training course. The document may not be modified or altered
in any way. Except where your use constitutes "fair use" under copyright law, you
may not use, share, download, upload, copy, print, display, perform, reproduce,
publish, license, post, transmit, or distribute this document in whole or in part without
the express authorization of Oracle.
The information contained in this document is subject to change without notice. If you
find any problems in the document, please report them in writing to: Oracle University,
500 Oracle Parkway, Redwood Shores, California 94065 USA. This document is not
warranted to be error-free.
Restricted Rights Notice
If this documentation is delivered to the United States Government or anyone using
the documentation on behalf of the United States Government, the following notice is
applicable:
U.S. GOVERNMENT RIGHTS
The U.S. Government’s rights to use, modify, reproduce, release, perform, display, or
disclose these training materials are restricted by the terms of the applicable Oracle
license agreement and/or the applicable U.S. Government contract.
Trademark Notice
Oracle and Java are registered trademarks of Oracle and/or its affiliates. Other names
may be trademarks of their respective owners.
Author
Vijetha M Malkai
Technical Contributors
and Reviewers
Tammy Shannon
Anies Rahman
Rosemary Martinak
Editors
Malavika Jinka
Aju Kumar
Smita Kommini
Graphic Designer
Seema Bopaiah
Publishers
Jayanthy Keshavamurthy
Veena Narasimhan
Cicero Ronaldo (ciceroฺronaldo@gmailฺcom) has a non-transferable
license to use this Student Guideฺ
Unauthorized reproduction or distribution prohibitedฺ Copyright© 2014, Oracle and/or its affiliatesฺ

iii
Contents
Preface
1 Introduction
Overview 1-2
Course Goals 1-3
Course Agenda: Day 1 1-4
Course Agenda: Day 2 1-5
Course Agenda: Day 3 1-6
Course Agenda: Day 4 1-7
Course Agenda: Day 5 1-8
Introductions 1-9
Your Learning Center 1-10
Your Lab Environment 1-11
2 Managing the Image Packaging System (IPS) and Packages
Objectives 2-2
Workflow Orientation 2-3
Lesson Agenda 2-4
Importance of Working with a Plan 2-5
Planning for IPS and Package Management 2-6
Identifying IPS Server System Requirements 2-7
Planning for Boot Environment Management 2-8
Implementing the IPS and Package Management Plan 2-9
Quiz 2-10
Lesson Agenda 2-12
Configuring a Local IPS Package Repository 2-13
Creating a ZFS File System to Hold the Repository 2-14
Obtaining Software Packages from the Oracle Solaris Download Site 2-15
Making the Repository File Contents Available 2-16
Configuring the Repository Server Service 2-18
Starting the Repository Service 2-19
Setting the Local IPS Publisher 2-20
Testing IPS on the Local Server 2-21
Practice 2-1 Overview: Configuring a Local IPS Package Repository 2-22
Lesson Agenda 2-23
Cicero Ronaldo (ciceroฺronaldo@gmailฺcom) has a non-transferable
license to use this Student Guideฺ
Unauthorized reproduction or distribution prohibitedฺ Copyright© 2014, Oracle and/or its affiliatesฺ

iv
Configuring Network Client Access to the Local IPS Server 2-24
Determining the Client Host and Domain Names 2-25
Checking Network Connectivity 2-26
Setting the Local IPS Publisher 2-27
Testing Client Access to the Local IPS Server 2-28
Practice 2-2 Overview: Configuring Network Client Access to the Local IPS
Server 2-29
Lesson Agenda 2-30
Introducing Signed Packages 2-31
Installing Signed Packages 2-32
Identifying Image Properties for Signed Packages 2-33
Configuring Image Properties for Signed Packages 2-35
Identifying Publisher Properties for Signed Packages 2-36
Configuring Publisher Properties for Signed Packages 2-37
Quiz 2-38
Introducing Variants and Facets 2-40
Displaying and Changing Variants and Facets 2-41
Managing Package History 2-42
Lesson Agenda 2-43
Managing Package Publishers 2-44
Displaying Publisher Information 2-45
Specifying Publisher Rankings 2-46
Specifying Publisher Stickiness 2-47
Setting the Publisher Search Order 2-48
Disabling and Enabling a Publisher 2-49
Changing a Publisher Origin URI 2-50
Quiz 2-51
Lesson Agenda 2-53
Managing Multiple Boot Environments 2-54
Listing the Boot Environments on the System 2-55
Mounting an Inactive Boot Environment 2-56
Installing a Package on an Inactive, Mounted Boot Environment 2-57
Uninstalling a Package on an Inactive, Mounted Boot Environment 2-58
Unmounting an Inactive Boot Environment 2-59
Creating a Backup of a Boot Environment 2-60
Creating a Boot Environment from an Existing Backup 2-61
Practice 2-3 Overview: Managing Multiple Boot Environments 2-62
Summary 2-63
3 Installing Oracle Solaris 11 on Multiple Hosts
Objectives 3-2
Cicero Ronaldo (ciceroฺronaldo@gmailฺcom) has a non-transferable
license to use this Student Guideฺ
Unauthorized reproduction or distribution prohibitedฺ Copyright© 2014, Oracle and/or its affiliatesฺ

v
Workflow Orientation 3-3
Lesson Agenda 3-4
Reviewing Your Company’s Plan for an Oracle Solaris 11 Implementation 3-5
Planning for an Oracle Solaris 11 AI Installation 3-6
Automated Installation: Overview 3-7
Automated Installation Process 3-8
How the AI Works 3-9
Quiz 3-10
Lesson Agenda 3-11
Installing Oracle Solaris 11 by Using the AI 3-12
Reviewing AI Installation Server Requirements 3-13
Verifying AI Install Server Software Requirements 3-14
Verifying the Static IP Address 3-15
Verifying That DNS Is Operational 3-16
Verifying That IPS Is Available Locally 3-17
Verifying That the DHCP Server Is Enabled 3-18
Practice 3-1 Overview: Verifying System AI Requirements (Optional) 3-19
Configuring the AI Install Server 3-20
Enabling the DNS Multicast Service 3-21
Installing the AI Installation Tools 3-22
Setting Up the AI Boot Image 3-23
Configuring an AI Install Service 3-24
Verifying the netmasks File Configuration 3-25
Creating an AI Install Service with an ISC DHCP Server Setup 3-26
Creating an AI Install Service Without a DHCP Setup 3-28
Note About the AI SMF Service 3-29
Adding a Client to the AI Install Service 3-30
AI Manifest 3-31
Identifying the Types of AI Manifests 3-32
Reviewing the Default AI Manifest (default.xml) 3-33
System Configuration Profiles (SC Profiles) 3-34
Adding an SC Profile to an Install Service 3-38
Creating a Custom AI Manifest 3-39
Selecting the AI Manifest 3-40
Criteria File: Examples 3-42
Adding Installation Criteria to an AI Manifest 3-43
Practice 3-2 Overview: Configuring the AI Server 3-44
Configuring the Client System 3-45
Identifying Client System Requirements 3-46
Using Secure Shell to Remotely Monitor an Installation 3-47
Implementing the Configuration 3-48
Cicero Ronaldo (ciceroฺronaldo@gmailฺcom) has a non-transferable
license to use this Student Guideฺ
Unauthorized reproduction or distribution prohibitedฺ Copyright© 2014, Oracle and/or its affiliatesฺ

vi
Reviewing Client Installation Messages 3-49
Practice 3-3: Deploying the OS on the Network Client 3-51
Lesson Agenda 3-52
Introducing the Distribution Constructor 3-53
Identifying System Requirements for Using the Distribution Constructor 3-54
Using Distribution Constructor Manifest Files 3-55
Building an Image 3-56
Quiz 3-57
Summary 3-60
4 Managing Business Application Data
Objectives 4-2
Workflow Orientation 4-3
Lesson Agenda 4-4
Planning for Data Storage Configuration and Backup 4-5
Determining Storage Pool Requirements 4-6
Mirrored Storage Pool Data Redundancy Features 4-7
Mirrored Storage Pool Configuration 4-8
Self-Healing Data 4-9
Dynamic Striping 4-10
Dynamic Striping in a Mirrored Pool 4-11
Determining File System Requirements 4-12
Identifying Your Data Backup and Restore Strategy 4-13
Determining Ways to Save Data Storage Space 4-14
Implementing the Data Storage Configuration and Backup Plan 4-15
Quiz 4-16
Lesson Agenda 4-18
Managing Data Redundancy with Mirrored Storage Pools 4-19
Creating a Mirrored Storage Pool 4-20
Adding Log Devices to a Storage Pool 4-21
Adding Cache Devices to a Storage Pool 4-22
Managing Devices in ZFS Storage Pools 4-23
Adding Devices to a Storage Pool 4-24
Attaching Devices to a Storage Pool 4-25
Taking Devices Offline in a Storage Pool 4-27
Detaching Devices from a Storage Pool 4-28
Bringing Devices Online in a Storage Pool 4-29
Replacing Devices in a Storage Pool 4-30
Designating Hot Spares in a Storage Pool 4-31
Removing Hot Spares in a Storage Pool 4-35
Practice 4-1 Overview: Managing Data Redundancy with a ZFS Mirrored Pool 4-36
Cicero Ronaldo (ciceroฺronaldo@gmailฺcom) has a non-transferable
license to use this Student Guideฺ
Unauthorized reproduction or distribution prohibitedฺ Copyright© 2014, Oracle and/or its affiliatesฺ

vii
Lesson Agenda 4-37
Backing Up and Recovering Data with ZFS Snapshots 4-38
Creating and Destroying a ZFS Snapshot 4-39
Holding a ZFS Snapshot 4-40
Renaming a ZFS Snapshot 4-46
Displaying a ZFS Snapshot 4-48
Snapshot Space Accounting 4-51
Rolling Back a ZFS Snapshot 4-53
Identifying ZFS Snapshot Differences 4-54
Creating and Destroying a ZFS Clone 4-56
Replacing a ZFS File System with a ZFS Clone 4-57
Sending ZFS Snapshot Data 4-60
Receiving ZFS Snapshot Data 4-62
Remote Replication of ZFS Snapshot Data 4-65
Practices 4-2 and 4-3 Overview: Using ZFS Snapshots for Backup and Recovery
and Using a ZFS Clone 4-66
Lesson Agenda 4-67
Managing Data Storage Space with ZFS File System Properties 4-68
Setting ZFS Properties 4-69
Inheriting ZFS Properties 4-70
Querying ZFS Properties 4-74
Mounting and Sharing ZFS File Systems 4-80
Overriding Default ZFS Mount Points 4-81
Introducing the mountpoint Property 4-82
Automatic Mount Point Behavior 4-83
Legacy Mount Point Behavior 4-84
Managing Legacy Mount Points 4-85
share.nfs Property: Introduction 4-86
Setting the share.nfs Property 4-87
Unsharing ZFS File Systems 4-88
Sharing ZFS File Systems 4-89
Setting ZFS Quotas and Reservations 4-90
Introducing the quota, reservation, refquota, and used Properties 4-91
Setting Quotas for ZFS File Systems 4-92
Setting a User Quota on a ZFS File System 4-94
Setting a Group Quota on ZFS File System 4-95
Displaying User and Group Space Usage 4-96
Identifying User and Group Space Usage 4-97
Removing User and Group Quotas 4-98
Identifying Reservation Restrictions 4-99
Setting Space Reservation on a Data Set and Snapshot 4-100
Cicero Ronaldo (ciceroฺronaldo@gmailฺcom) has a non-transferable
license to use this Student Guideฺ
Unauthorized reproduction or distribution prohibitedฺ Copyright© 2014, Oracle and/or its affiliatesฺ

viii
Setting Space Reservation on a Data Set 4-101
Displaying Reservation Values 4-102
Practice 4-4 Overview: Configuring ZFS Properties 4-103
Lesson Agenda 4-104
Troubleshooting ZFS Failures 4-105
Identifying Problems in ZFS 4-106
Troubleshooting in ZFS: Overview 4-107
Basic Recovery Process 4-108
Configuring syslog for FMD Messages 4-109
Determining Problems in a ZFS Storage Pool 4-110
Interpreting zpool status Output 4-111
Determining Problems in a ZFS Storage Pool 4-114
Repairing a Damaged ZFS Configuration 4-115
Repairing a Missing Device 4-116
Reattaching a Device 4-118
Repairing a Missing Device 4-119
Repairing a Damaged Device 4-120
Determining the Cause of Device Failure 4-121
Clearing Transient Errors 4-124
Replacing a Device in a ZFS Storage Pool 4-125
Viewing Resilvering Status 4-127
Scrubbing 4-128
Repairing Damaged Data 4-129
Data Corruption: Overview 4-130
Identifying the Type of Data Corruption 4-131
Repairing a Corrupted File or Directory 4-133
Repairing ZFS Storage Pool–Wide Damage 4-134
Practice 4-5 Overview: Troubleshooting ZFS Failures 4-135
Summary 4-136
5 Configuring Network and Traffic Failover
Objectives 5-2
Workflow Orientation 5-3
Lesson Agenda 5-4
Planning for Network and Traffic Failover 5-5
Configuring a Host For TCP/IP 5-6
Configuring Network Services 5-7
Reactive Network Configuration 5-8
Network File System Servers and Clients 5-9
Network Performance Concepts 5-10
Link Aggregation 5-11
Cicero Ronaldo (ciceroฺronaldo@gmailฺcom) has a non-transferable
license to use this Student Guideฺ
Unauthorized reproduction or distribution prohibitedฺ Copyright© 2014, Oracle and/or its affiliatesฺ

ix
Load Balancing and Aggregation Policies 5-12
Aggregation Modes and Switches 5-13
IPMP: Introduction 5-14
IPMP Components 5-16
Comparing Link Aggregation and IPMP 5-18
Implementing the Network and Traffic Failover Plan 5-19
Quiz 5-20
Lesson Agenda 5-24
Configuring Systems on a Local Network 5-25
Configuring a Physical Network Interface Manually 5-26
Configuring a Physical Network Interface Manually: Example 5-27
Deleting a Physical Network Interface Manually 5-28
Deleting a Physical Network Interface Manually: Example 5-29
Displaying TCP/IP Network Information 5-30
Displaying the Status of Network Interfaces 5-31
Displaying the Routing Table 5-32
Capturing Packets from the Network 5-33
Lesson Agenda 5-34
Configuring a Reactive Network 5-35
Creating a Network Configuration Profile 5-36
Creating a Location Profile 5-37
Listing a Location Profile 5-38
Modifying Profiles 5-39
Listing Reactive Network Profiles 5-40
Enabling and Disabling Reactive Network Profiles 5-41
Displaying Profile States 5-42
Displaying Profiles and Their Auxiliary States 5-43
Creating a Backup of a Profile 5-44
Removing Reactive Network Profiles 5-45
Practice 5-1 Overview: Managing a Reactive Network 5-46
Lesson Agenda 5-47
Configuring Network File System (NFS) 5-48
Configuring the NFS Server 5-49
Checking the NFS Services Status 5-50
Configuring the NFS Client 5-51
Selecting a Different Version of NFS on a Server 5-52
Enabling the Automounter 5-53
Displaying NFS Server and Client Statistics 5-54
Practice 5-2 Overview: Configuring the Network File System 5-55
Lesson Agenda 5-56
Preparing for Link Aggregation 5-57
Cicero Ronaldo (ciceroฺronaldo@gmailฺcom) has a non-transferable
license to use this Student Guideฺ
Unauthorized reproduction or distribution prohibitedฺ Copyright© 2014, Oracle and/or its affiliatesฺ

x
Creating Link Aggregation 5-58
Modifying Link Aggregation 5-59
Deleting Link Aggregation 5-60
Practice 5-3 Overview: Configuring a Link Aggregation 5-61
Lesson Agenda 5-62
Configuring an IPMP Group 5-63
Creating an IPMP Group 5-64
Adding IP Addresses to an IPMP Group 5-65
Moving an Interface from One IPMP Group to Another Group 5-66
Deleting or Disabling an IPMP Group 5-67
Lesson Agenda 5-68
Implementing Link Failover by Using IPMP 5-69
Configuring an Active-Active IPMP Group 5-70
Assigning Test Addresses 5-71
Configuring an Active-Standby IPMP Group 5-72
Lesson Agenda 5-73
Monitoring an IPMP Group 5-74
Displaying IPMP Group Information 5-75
Obtaining IPMP Address Information 5-76
Verifying IPMP Interface Information 5-77
Obtaining Probe Target Information 5-78
Checking Probe Information 5-79
Practice 5-4 Overview: Configuring IPMP 5-80
Summary 5-81
6 Configuring Zones and the Virtual Network
Objectives 6-2
Workflow Orientation 6-3
Lesson Agenda 6-4
Planning for a Virtual Network and Zones 6-5
Network Virtualization and Virtual Networks 6-6
Virtual Network Components 6-7
Introducing Zone Configuration by Using VNICs 6-8
Allocating System Resources to a Zone 6-9
Managing System Resource Allocation to a Zone 6-10
Resource Pool Allocation 6-12
How Resource Pools Work 6-13
Memory Resource Capping 6-14
Specifying Resource Capping Within a Zone 6-15
Implementing Controls on Network Resources 6-16
Managing Virtual Network Resources by Using Flows 6-17
Cicero Ronaldo (ciceroฺronaldo@gmailฺcom) has a non-transferable
license to use this Student Guideฺ
Unauthorized reproduction or distribution prohibitedฺ Copyright© 2014, Oracle and/or its affiliatesฺ

xi
Creating Flows and Selecting Flow Properties 6-18
Implementing the Virtual Network and Zones Plan 6-19
Quiz 6-20
Lesson Agenda 6-23
Creating a Virtual Network 6-24
Creating a Virtual Network Switch 6-25
Creating the Virtual Network Interfaces 6-26
Displaying the Virtual Network Configuration 6-27
The Virtual Network Configuration So Far 6-28
Quiz 6-29
Practice 6-1 Overview: Creating an Oracle Solaris 11 Virtual Network 6-31
Lesson Agenda 6-32
Configuring Zones to Use VNICs 6-33
Zone Configuration Process: Overview 6-34
Planning the Zone Strategy 6-35
Creating a ZFS File System for Zones in rpool 6-36
Configuring the Zone 6-37
Verifying, Committing, and Exiting the New Zone Configuration 6-39
Displaying a Zone Configuration 6-40
Verifying That a Zone Is in configured State 6-42
Gathering Information for the System Configuration Profile 6-43
Creating the System Configuration Profile 6-44
Installing the Zone 6-45
Booting the Zone 6-46
Checking the Virtual Network Configuration in a Zone 6-47
Verifying That a Zone’s Virtual Network Interface Connection Is Operational 6-48
Virtual Network Configuration 6-49
Removing the Virtual Network Without Removing the Zones 6-50
Verifying the State of the Configured Zones 6-51
Halting the Exclusive IP Zones 6-52
Verifying That the Zones Have Been Halted 6-53
Listing the VNICs That Were Configured for the Halted Zones 6-54
Deleting the VNICs 6-55
Quiz 6-56
Practice 6-2: Creating Two Zones by Using VNICs 6-59
Lesson Agenda 6-60
Allocating and Managing System Resources in a Zone 6-61
Allocating and Managing CPU Resources with Resource Pools 6-62
Enabling Services for Resource Pools 6-63
Configuring a Persistent Resource Pool 6-64
Displaying the Resource Pool Configuration File 6-65
Cicero Ronaldo (ciceroฺronaldo@gmailฺcom) has a non-transferable
license to use this Student Guideฺ
Unauthorized reproduction or distribution prohibitedฺ Copyright© 2014, Oracle and/or its affiliatesฺ

xii
Modifying the Resource Pool Configuration File 6-67
Displaying and Committing the Modified Resource Pool Configuration File 6-69
Displaying the Resource Pool Configuration That Is Currently in Use 6-72
Displaying all Active Resource Pools 6-73
Binding the Zone to a Persistent Resource Pool 6-75
Listing the Current State of the Zones 6-76
Allocating the Pool to the Zone and Confirming the Allocation 6-77
Rebooting the Zone to Activate the Resource Pool Binding 6-78
Confirming the Availability of the Resource Pool 6-79
Removing the Resource Pool Configuration 6-81
Removing the Pool Configuration from the Zone 6-82
Rebooting the Zone 6-83
Checking the Resource Pool Configuration for the Zone 6-84
Deleting the Resource Pool 6-86
Displaying all Active Resource Pools 6-87
Allocating and Managing Physical Memory Resources with Resource Capping 6-88
Practice 6-3 Overview: Allocating Resources to Zones 6-89
Lesson Agenda 6-90
Managing Resources on the Virtual Network 6-91
Determining the Configured VNIC States 6-92
Creating and Adding a Flow 6-93
Displaying Flow Controls 6-94
Setting Flow Properties 6-95
Displaying Flow Control Properties 6-96
Setting a Priority Property 6-97
Practices 6-4 and 6-5 Overview: Managing the Virtual Network Data Flow and
Removing Part of the Virtual Network 6-98
Summary 6-99
7 Managing Services and Service Properties
Objectives 7-2
Workflow Orientation 7-3
Lesson Agenda 7-4
Planning for Services Configuration 7-5
SMF Advanced Features 7-6
SMF Profiles 7-7
SMF Profile: Example 7-8
When SMF Profiles Are Applied 7-9
SMF Manifests 7-10
SMF Manifest: Example 7-12
Service Configuration Repository 7-16
Cicero Ronaldo (ciceroฺronaldo@gmailฺcom) has a non-transferable
license to use this Student Guideฺ
Unauthorized reproduction or distribution prohibitedฺ Copyright© 2014, Oracle and/or its affiliatesฺ

xiii
SMF Administrative Layers 7-17
Introducing SMF Repository Backups 7-19
Introducing SMF Repository Snapshots 7-20
Creating New Service Scripts 7-21
Implementing the Services Administration Plan 7-22
Quiz 7-23
Lesson Agenda 7-27
Configuring SMF Services 7-28
Creating and Exporting a Service 7-29
Creating and Exporting a Service: Example 7-30
Creating and Importing a Service: Example 7-33
Creating and Exporting a Service: Example 7-34
Modifying a Service’s Manifest 7-35
Modifying a Service’s Manifest: Example 7-36
Changing an Environment Variable for a Service 7-37
Changing an Environment Variable for a Service: Example 7-38
Changing a Property for an inetd-Controlled Service 7-39
Changing a Property for an inetd-Controlled Service: Example 7-40
Creating and Applying an SMF Profile 7-43
Creating and Applying an SMF Profile: Example 7-45
Changing Services and Their Configurations by Using the netservices
Command 7-46
Practice 7-1 and Practice 7-2 Overview: Configuring SMF Services and Working with
Service Profiles 7-47
Lesson Agenda 7-48
Troubleshooting SMF Services 7-49
Debugging a Service That Is Not Starting 7-50
Restoring a Service in Maintenance State 7-52
Restoring a Service in Maintenance State: Example 7-53
Reverting to an SMF Snapshot 7-55
Reverting to an SMF Snapshot: Example 7-56
Configuration Repository Failed Integrity Check Process 7-57
Repairing a Corrupt Repository 7-58
Repairing a Corrupt Repository: Example 7-61
Debugging the Services During a System Boot 7-63
Addressing system/filesystem/local:default Service Failures During Boot 7-64
Practice 7-3 Overview: Restoring and Recovering a Service 7-65
Summary 7-66
8 Configuring Privileges and Role-Based Access Control
Objectives 8-2
Cicero Ronaldo (ciceroฺronaldo@gmailฺcom) has a non-transferable
license to use this Student Guideฺ
Unauthorized reproduction or distribution prohibitedฺ Copyright© 2014, Oracle and/or its affiliatesฺ

xiv
Workflow Orientation 8-3
Lesson Agenda 8-4
Planning for User Privileges and Roles Assignments 8-5
Process Rights Management and Privileges 8-6
Displaying Privilege Descriptions 8-7
Implementing Privileges 8-8
Role-Based Access Control (RBAC) 8-10
Roles 8-11
Rights Profile 8-12
Basic Solaris User Rights Profile 8-13
Interpreting the /etc/security/policy.conf File 8-14
Authorizations and Privileges 8-15
Security Attributes 8-16
Key RBAC Files 8-17
Interpreting the user_attr File 8-18
Interpreting the auth_attr File 8-19
Interpreting the exec_attr File 8-21
Interpreting the prof_attr File 8-23
Relationship Among the Four RBAC Files 8-25
Profile Shells 8-27
Implementing the Assigning User Privileges and Roles Plan 8-28
Quiz 8-29
Lesson Agenda 8-33
Configuring and Managing Privileges 8-34
Examining Process Privileges 8-35
Determining the Privileges Available to the Shell 8-36
Determining the Process Privileges to a Shell 8-38
Determining the Privileges on a Process 8-39
Displaying the Description of a Privilege 8-40
Managing User Privileges 8-41
Determining the Privileges Directly Assigned to You 8-42
Determining the Privileged Commands That You Can Use 8-43
Assigning Privileges to a User or Role 8-44
Limiting Privileges of a User or Role 8-45
Determining Privileges Needed by a Program Using the ppriv Debugging
Command 8-46
Using the ppriv Debugging Command to Examine Privilege Use in a Profile
Shell 8-47
Using the truss Command to Examine Privilege Use in a Regular Shell 8-48
Practice 8-1 Overview: Delegating Privileges to Users and Processes 8-49
Lesson Agenda 8-50
Cicero Ronaldo (ciceroฺronaldo@gmailฺcom) has a non-transferable
license to use this Student Guideฺ
Unauthorized reproduction or distribution prohibitedฺ Copyright© 2014, Oracle and/or its affiliatesฺ

xv
Configuring and Using RBAC 8-51
Creating a Role 8-52
Creating a Rights Profile 8-54
Creating a Rights Profile: Example 8-55
Cloning and Modifying a Rights Profile 8-56
Creating or Changing a Rights Profile: Example 8-57
Assigning a Rights Profile to a Role 8-58
Assigning a Role to a User 8-59
Assigning a Role to a User: Example 8-60
Assuming a Role 8-61
Restricting an Administrator to Explicitly Assigned Rights 8-62
Assigning the Rights Profile to a User 8-63
Delegating an Authorization to a User 8-64
Delegating an Authorization to a User: Example 8-65
Assigning Authorization to a Role 8-66
Modifying a System-wide RBAC Policy 8-67
Practice 8-2 Overview: Configuring Role-Based Access Control 8-68
Summary 8-69
9 Securing System Resources by Using Oracle Solaris Auditing
Objectives 9-2
Workflow Orientation 9-3
Lesson Agenda 9-4
Planning for Oracle Solaris Auditing 9-5
Oracle Solaris Auditing 9-6
Interpreting the /etc/security/audit_event File 9-10
Event Types 9-12
Interpreting the /etc/security/audit_class File 9-13
Displaying the /etc/security/audit_class File 9-15
Audit Class Preselection 9-17
Audit Records and Audit Tokens 9-18
Audit Plug-in Modules 9-20
Storing and Managing the Audit Trail 9-21
Audit Remote Server (ARS) 9-22
Audit Policies 9-23
Implementing the Oracle Solaris Auditing Plan 9-24
Quiz 9-25
Lesson Agenda 9-31
Configuring Oracle Solaris Auditing 9-32
Configuring the Audit Service 9-33
Determining Audit Service Defaults 9-34
Cicero Ronaldo (ciceroฺronaldo@gmailฺcom) has a non-transferable
license to use this Student Guideฺ
Unauthorized reproduction or distribution prohibitedฺ Copyright© 2014, Oracle and/or its affiliatesฺ

xvi
Determining Audit Service Defaults: Example 9-35
Preselecting Audit Classes 9-37
Configuring a User’s Audit Characteristics 9-38
Modifying the Audit Policy 9-40
Modifying the Audit Policy: Example 9-41
Specifying the Audit Warning Destination Email 9-42
Adding an Audit Class 9-43
Changing an Audit Event’s Class Membership 9-44
Configuring Audit Logs 9-45
Creating ZFS File Systems for Audit Files 9-46
Allocating Audit Space for the Audit Trail 9-47
Sending Audit Files to a Remote Repository 9-48
Configuring the System Log as the Audit Message Destination 9-49
Configuring the Audit Service in Zones 9-50
Configuring All Zones Identically for Auditing 9-51
Configuring All Zones Identically for Auditing: Example 9-52
Specifying Per-Zone Auditing 9-53
Specifying Per-Zone Auditing: Example 9-54
Lesson Agenda 9-55
Administering the Audit Service 9-56
Enabling the Audit Service 9-57
Disabling the Audit Service 9-58
Refreshing the Audit Service 9-59
Practice 9-1 Overview: Configuring and Administering Oracle Solaris Auditing 9-60
Lesson Agenda 9-61
Managing Audit Records on Local Systems 9-62
Displaying Audit Record Definitions 9-63
Merging Audit Files 9-64
Selecting Audit Events to Examine 9-66
Viewing Contents of Binary Audit Files 9-67
Practice 9-2 Overview: Managing Audit Records on Local Systems 9-68
Summary 9-69
10 Managing Processes and Priorities
Objectives 10-2
Workflow Orientation 10-3
Lesson Agenda 10-4
Planning Process Execution in an Appropriate Scheduling Class 10-5
Process Scheduler 10-6
Process Priority 10-7
Process Scheduling Classes 10-8
Cicero Ronaldo (ciceroฺronaldo@gmailฺcom) has a non-transferable
license to use this Student Guideฺ
Unauthorized reproduction or distribution prohibitedฺ Copyright© 2014, Oracle and/or its affiliatesฺ

xvii
Priority Ranges for Scheduling Classes 10-9
Combining FSS with Other Scheduling Classes 10-10
Using CPU Shares with the FSS 10-12
Scheduling Class on a System with Zones Installed 10-14
Implementing the Process Execution in an Appropriate Scheduling Class
Plan 10-15
Quiz 10-16
Lesson Agenda 10-20
Managing Process Scheduling Priority 10-21
Displaying Processes with the top Command 10-22
Displaying Process Class Information 10-24
Determining the Global Priority of a Process 10-25
Designating a Process Priority 10-27
Modifying a Process Priority 10-29
Lesson Agenda 10-30
Configuring the Fair Share Scheduler (FSS) 10-31
Making FSS the Default Scheduling Class 10-32
Manually Moving Processes from Other Classes into the FSS Class 10-33
Manually Moving the init Process into the FSS Class 10-35
Manually Moving a Project’s Processes into the FSS Class 10-36
Tuning Scheduler Parameters 10-37
Practice 10-1 Overview: Modifying Process Scheduling Priority 10-38
Lesson Agenda 10-39
Managing the Scheduling Class of Zones 10-40
Configuring CPU Shares Configuration in a Non-Global Zone 10-41
Configuring CPU Shares in a Non-Global Zone: Example 10-42
Measuring CPU Performance in the Zones 10-43
Assigning CPU Shares to the Global Zone 10-44
Removing the CPU Shares Configuration from a Zone 10-45
Removing the CPU Shares Configuration from a Zone: Example 10-46
Practice 10-2 Overview: Configuring FSS in an Oracle Solaris Zone 10-47
Summary 10-48
11 Evaluating System Resources
Objectives 11-2
Workflow Orientation 11-3
Lesson Agenda 11-4
Planning for Resource Allocation and System Performance Evaluation 11-5
Resource Management 11-6
Resource Management Control Mechanisms 11-7
Projects and Tasks 11-9
Cicero Ronaldo (ciceroฺronaldo@gmailฺcom) has a non-transferable
license to use this Student Guideฺ
Unauthorized reproduction or distribution prohibitedฺ Copyright© 2014, Oracle and/or its affiliatesฺ

xviii
Project/Task/Process Relationship 11-10
Resource Controls 11-11
Resource Control Values 11-12
Privilege Levels of Resource Controls 11-13
Enforcing Multiple Resource Controls 11-14
Setting Resource Controls 11-15
Default /etc/project File 11-16
Setting Zone-Wide Resource Controls 11-18
Monitoring Resource Consumption 11-19
Implementing the Resource Allocation and System Performance Evaluation
Plan 11-20
Quiz 11-21
Lesson Agenda 11-26
Configuring and Administering System Resources 11-27
Administering Projects and Tasks 11-28
Displaying the Default Projects in the System 11-29
Default /etc/project File 11-30
Defining a Project 11-31
Obtaining Project Membership Information 11-32
Modifying a Project 11-33
Adding Attributes and Attribute Values to a Project 11-34
Substituting Attributes and Attribute Values for a Project 11-35
Removing Attributes or Attribute Values from a Project 11-36
Displaying Currently Running Processes and Projects 11-37
Creating a New Task 11-38
Moving a Running Process into a New Task 11-39
Deleting a Project 11-40
Administering Resource Controls and Attributes 11-41
Displaying the Default Resource Controls 11-42
Displaying Current Resource Control Settings 11-43
Displaying Information About a Given Resource Control 11-44
Enabling Global Resource Control Monitoring 11-45
Practice 11-1 Overview: Managing Resource Controls in Global and Non-Global
Zones 11-46
Lesson Agenda 11-47
Monitoring System Performance 11-48
Displaying Virtual Memory Statistics and Information 11-49
Displaying Virtual Memory Statistics 11-50
Displaying System Event Information 11-52
Displaying Swapping Statistics 11-53
Displaying Disk Usage Information 11-54
Cicero Ronaldo (ciceroฺronaldo@gmailฺcom) has a non-transferable
license to use this Student Guideฺ
Unauthorized reproduction or distribution prohibitedฺ Copyright© 2014, Oracle and/or its affiliatesฺ

xix
Displaying General Disk Usage Information 11-55
Displaying Disk Space Information 11-56
Monitoring System Activities 11-57
Checking File Access Operation Statistics 11-58
Checking Buffer Activity 11-59
Checking System Call Statistics 11-60
Checking Disk Activity 11-61
Checking Unused Memory 11-62
Setting Up Automatic Data Collection 11-63
System Monitoring Commands: Summary 11-64
Practice 11-2 Overview: Evaluating System Performance Levels 11-65
Summary 11-66
12 Monitoring and Troubleshooting Software Failures
Objectives 12-2
Workflow Orientation 12-3
Lesson Agenda 12-4
Planning System Messaging and Diagnostic Facilities Implementation 12-5
Configuring the /etc/syslog.conf File 12-6
Stopping and Starting the syslogd Daemon 12-8
TCP Tracing 12-9
TCP Tracing: Example 12-10
Logger Command 12-11
/etc/dumpadm.conf File 12-13
/etc/coreadm.conf File 12-15
Core File Paths 12-17
Implementing the System Messaging and Diagnostic Facilities Implementation
Plan 12-18
Quiz 12-19
Lesson Agenda 12-23
Configuring System Messaging 12-24
Setting Up Message Routing 12-25
Setting Up Message Routing: Example 12-26
Logging a Message by Using TCP Trace 12-27
Monitoring a syslog File in Real Time 12-28
Practice 12-1 Overview: Setting Up System Messaging 12-29
Lesson Agenda 12-30
Configuring System Crash Facilities 12-31
Displaying the Current Crash Dump Configuration 12-32
Modifying the Crash Dump Configuration 12-33
Saving the Crash Dump File 12-35
Cicero Ronaldo (ciceroฺronaldo@gmailฺcom) has a non-transferable
license to use this Student Guideฺ
Unauthorized reproduction or distribution prohibitedฺ Copyright© 2014, Oracle and/or its affiliatesฺ

xx
Uncompressing the Crash Dump File 12-36
Displaying the Crash Dump File Contents 12-37
Displaying the Crash Dump File Contents: Example 12-38
Lesson Agenda 12-39
Configuring Dump Facilities for Business Application Failure 12-40
Displaying the Current Core Dump Configuration 12-41
Modifying the Core Dump Configuration 12-42
Setting a Core File Name Pattern 12-44
Enabling a Core File Path 12-45
Displaying the Contents of the Core Dump File 12-46
Displaying the Core Dump File Contents: Example 12-47
Practice 12-2 Overview: Configuring System and Application Crash Facilities 12-48
Summary 12-49
Cicero Ronaldo (ciceroฺronaldo@gmailฺcom) has a non-transferable
license to use this Student Guideฺ
Unauthorized reproduction or distribution prohibitedฺ Copyright© 2014, Oracle and/or its affiliatesฺ

Preface
Cicero Ronaldo (ciceroฺronaldo@gmailฺcom) has a non-transferable
license to use this Student Guideฺ
Unauthorized reproduction or distribution prohibitedฺ Copyright© 2014, Oracle and/or its affiliatesฺ

Cicero Ronaldo (ciceroฺronaldo@gmailฺcom) has a non-transferable
license to use this Student Guideฺ
Unauthorized reproduction or distribution prohibitedฺ Copyright© 2014, Oracle and/or its affiliatesฺ

Profile
Before You Begin This Course
Before you begin this course, you should be able to perform basic Oracle Solaris 11
system administration tasks.
How This Course Is Organized
Oracle Solaris 11 Advanced System Administration is an instructor-led course
featuring lectures and hands-on exercises. Online demonstrations and written
practice sessions reinforce the concepts and skills that are introduced.
Cicero Ronaldo (ciceroฺronaldo@gmailฺcom) has a non-transferable
license to use this Student Guideฺ
Unauthorized reproduction or distribution prohibitedฺ Copyright© 2014, Oracle and/or its affiliatesฺ

Related Publications
Oracle Publications
Additional Publications
•System release bulletins
• Installation and user’s guides
•read.me files
•International Oracle User’s Group (IOUG) articles
•Oracle Magazine
Cicero Ronaldo (ciceroฺronaldo@gmailฺcom) has a non-transferable
license to use this Student Guideฺ
Unauthorized reproduction or distribution prohibitedฺ Copyright© 2014, Oracle and/or its affiliatesฺ

Typographic Conventions
The following two lists explain Oracle University typographical conventions for
words that appear within regular text or within code samples.
1. Typographic Conventions for Words Within Regular Text
Convention Object or Term Example
Courier New User input; Use the SELECT command to view
commands; information stored in the LAST_NAME
column, table, and column of the EMPLOYEES table.
schema names;
functions; Enter 300.
PL/SQL objects;
paths Log in as scott
Initial cap Triggers; Assign a When-Validate-Item trigger to
user interface object the ORD block.
names, such as
button names Click the Cancel button.
Italic Titles of For more information on the subject see
courses and Oracle SQL Reference
manuals; Manual
emphasized
words or phrases; Do not save changes to the database.
placeholders or
variables Enter hostname, where
hostname is the host on which the
password is to be changed.
Quotation marks Lesson or module This subject is covered in Lesson 3,
titles referenced “Working with Objects.”
within a course
Cicero Ronaldo (ciceroฺronaldo@gmailฺcom) has a non-transferable
license to use this Student Guideฺ
Unauthorized reproduction or distribution prohibitedฺ Copyright© 2014, Oracle and/or its affiliatesฺ

2. Typographic Conventions for Words Within Code Samples
Convention Object or Term Example
Uppercase Commands, SELECT employee_id
functions FROM employees;
Lowercase, Syntax variables CREATE ROLE role;
italic
Initial cap Forms triggers Form module: ORD
Trigger level: S_ITEM.QUANTITY
item
Trigger name: When-Validate-Item
. . .
Lowercase Column names, . . .
table names, OG_ACTIVATE_LAYER
filenames, (OG_GET_LAYER ('prod_pie_layer'))
PL/SQL objects . . .
SELECT last_name
FROM employees;
Bold Text that must CREATE USER scott
be entered by a IDENTIFIED BY tiger;
user
Cicero Ronaldo (ciceroฺronaldo@gmailฺcom) has a non-transferable
license to use this Student Guideฺ
Unauthorized reproduction or distribution prohibitedฺ Copyright© 2014, Oracle and/or its affiliatesฺ

It d ti
I
n
t
ro
d
uc
ti
on
Copyright © 2013, Oracle and/or its affiliates. All rights reserved.
Cicero Ronaldo (ciceroฺronaldo@gmailฺcom) has a non-transferable
license to use this Student Guideฺ
Unauthorized reproduction or distribution prohibitedฺ Copyright© 2014, Oracle and/or its affiliatesฺ

Overview
•Course goals
•Course agenda
•Introductions
•
Your learning center
•
Your
learning
center
•Your lab environment
Welcome to the Oracle Solaris 11 Advanced System Administration course. This course is
designed to teach more advanced skills to system administrators who are able to perform
basic Oracle Solaris 11 system administration tasks.
Copyright © 2013, Oracle and/or its affiliates. All rights reserved.
Oracle Solaris 11 Advanced System Administration 1 - 2
Cicero Ronaldo (ciceroฺronaldo@gmailฺcom) has a non-transferable
license to use this Student Guideฺ
Unauthorized reproduction or distribution prohibitedฺ Copyright© 2014, Oracle and/or its affiliatesฺ

Course Goals
The goals of this course are to:
•Enable you to perform advanced Oracle Solaris 11 system
administration tasks successfully and efficiently
•
Present tasks that cover a variety of advanced system
Present
tasks
that
cover
a
variety
of
advanced
system
administration responsibilities:
–OS installation by using AI
–IPS and package management
–Network, zones, and RBAC configuration
Business applications services and process management
–
Business
applications
,
services
,
and
process
management
–System evaluation, monitoring, and troubleshooting
•Provide numerous and meaningful practice opportunities
Copyright © 2013, Oracle and/or its affiliates. All rights reserved.
Oracle Solaris 11 Advanced System Administration 1 - 3
Cicero Ronaldo (ciceroฺronaldo@gmailฺcom) has a non-transferable
license to use this Student Guideฺ
Unauthorized reproduction or distribution prohibitedฺ Copyright© 2014, Oracle and/or its affiliatesฺ

Course Agenda: Day 1
•Lesson 1: Introduction
•Lesson 2: Managing the Image Packaging System (IPS)
and Packages
–
Configuring a Local IPS Package Repository
Configuring
a
Local
IPS
Package
Repository
–Managing Packages and Package Publishers
•Lesson 3: Installing Oracle Solaris 11 on Multiple Hosts
–Planning for an Oracle Solaris 11 OS Installation by Using
the Automated Installer
Oracle Solaris 11 Advanced System Administration consists of five days of lecture and
practices.
On the first day, in addition to the Course Introduction, you cover Lesson 2. You learn how to
Copyright © 2013, Oracle and/or its affiliates. All rights reserved.
On
the
first
day,
in
addition
to
the
Course
Introduction,
you
cover
Lesson
2.
You
learn
how
to
configure a local IPS repository, as well as how to perform advanced package management
and how to manage package publishers.
You also start Lesson 3, in which you learn how to plan for an Oracle Solaris 11 installation by
using the Automated Installer (AI).
Note: Each lesson begins with a discussion of how to plan for a specific task.
Oracle Solaris 11 Advanced System Administration 1 - 4
Cicero Ronaldo (ciceroฺronaldo@gmailฺcom) has a non-transferable
license to use this Student Guideฺ
Unauthorized reproduction or distribution prohibitedฺ Copyright© 2014, Oracle and/or its affiliatesฺ

Course Agenda: Day 2
•Lesson 3: Installing Oracle Solaris 11 on Multiple Hosts
(continued)
–Installing Oracle Solaris 11 by Using the Automated Installer
–
Confi
g
urin
g
Oracle Solaris Ima
g
es
gg g
•Lesson 4: Managing Business Application Data
–Planning for Data Storage Configuration and Backup
–Managing Data Redundancy with Mirrored Storage Pools
–Backing Up and Recovering Data with ZFS Snapshots
Managing Data Storage Space with ZFS File System
–
Managing
Data
Storage
Space
with
ZFS
File
System
Properties
On the second day, you conclude Lesson 3 by looking at how to perform the automated
installation. You also learn how to configure Oracle Solaris images. As part of Lesson 3, you
perform an automated installation.
Copyright © 2013, Oracle and/or its affiliates. All rights reserved.
Lesson 4 is about managing business application data. You begin this lesson with a
discussion of how to plan for data storage configuration and backup, and then look at how to
manage data redundancy with mirrored ZFS storage pools. You then learn how to perform
more advanced ZFS tasks, such as backing up and recovering data with ZFS snapshots and
managing data storage space with ZFS file system properties.
Oracle Solaris 11 Advanced System Administration 1 - 5
Cicero Ronaldo (ciceroฺronaldo@gmailฺcom) has a non-transferable
license to use this Student Guideฺ
Unauthorized reproduction or distribution prohibitedฺ Copyright© 2014, Oracle and/or its affiliatesฺ

Course Agenda: Day 3
•Lesson 4: Managing Business Application Data
(continued)
–Troubleshooting ZFS Failures
•
Lesson 5: Configuring Network and Traffic Failover
Lesson
5:
Configuring
Network
and
Traffic
Failover
–Configuring Systems on a Local Network
–Configuring a reactive network, NFS, and Link Aggregation
–Using IPMP
•Lesson 6: Configuring Zones and the Virtual Network
Cfi i VitlNt kC t
–
C
on
fi
gur
i
ng
Vi
r
t
ua
l
N
e
t
wor
k
C
omponen
t
s
–Configuring Zones with VNICs
–Allocating System Resources to Zones
On the third day, you conclude Lesson 4 by learning about how to troubleshoot ZFS failures.
You then cover two more lessons.
In Lesson 5, you configure network and traffic failover. You learn how to configure systems on
Copyright © 2013, Oracle and/or its affiliates. All rights reserved.
In
Lesson
5,
you
configure
network
and
traffic
failover.
You
learn
how
to
configure
systems
on
a local network and how to configure a reactive network, Network File System (NFS), and link
aggregation. You also focus on how to use IP multi-pathing (IPMP).
As part of each lesson, you apply what you have learned in a series of hands-on practices.
Lesson 6 is about configuring zones and the virtual network. You are introduced to the
components of a virtual network and you learn how to configure those components. You also
learn how to configure zones with virtual network interfaces (VNICs) and how to allocate
system resources to zones.
Oracle Solaris 11 Advanced System Administration 1 - 6
Cicero Ronaldo (ciceroฺronaldo@gmailฺcom) has a non-transferable
license to use this Student Guideฺ
Unauthorized reproduction or distribution prohibitedฺ Copyright© 2014, Oracle and/or its affiliatesฺ

Course Agenda: Day 4
•Lesson 7: Managing Services and Service Properties
–Configuring SMF Services
–Troubleshooting SMF Services
•
Lesson 8: Configuring Privileges and Role
-
Based Access
Lesson
8:
Configuring
Privileges
and
Role
Based
Access
Control
–Configuring and Managing Privileges
–Configuring and Using RBAC
•Lesson 9: Securing System Resources by Using Oracle
Solaris Auditing
Solaris
Auditing
–Configuring Oracle Solaris Auditing
–Administering Oracle Solaris Auditing
On the fourth day, you cover Lessons 7, 8, and 9.
Lesson 7 focuses on the Service Management Facility (SMF) services, where you learn how
to configure and troubleshoot SMF services.
Copyright © 2013, Oracle and/or its affiliates. All rights reserved.
to
configure
and
troubleshoot
SMF
services.
Lesson 8 is about setting up and maintaining privileges and role-based access control
(RBAC). You learn how to configure and manage privileges, as well as how to configure and
use RBAC.
Lesson 9 is about securing system resources by using Oracle Solaris Auditing. You learn how
to configure the audit services and audit logs, as well as how to administer the audit services
and how to manage audit records.
As with the previous lessons, you practice each of the tasks presented in these two lessons.
Oracle Solaris 11 Advanced System Administration 1 - 7
Cicero Ronaldo (ciceroฺronaldo@gmailฺcom) has a non-transferable
license to use this Student Guideฺ
Unauthorized reproduction or distribution prohibitedฺ Copyright© 2014, Oracle and/or its affiliatesฺ

Course Agenda: Day 5
•Lesson 10: Managing Processes and Priorities
–Managing System Processes
–Managing Process Scheduling Priority
–
Managing the Scheduling Class of a Zone
Managing
the
Scheduling
Class
of
a
Zone
–Monitoring and Configuring the FSS
•Lesson 11: Evaluating System Resources
–Configuring System Resources
–Monitoring System Performance
L12MitidTblhtiSft
•
L
esson
12
:
M
on
it
or
i
ng an
d
T
rou
bl
es
h
oo
ti
ng
S
o
ft
ware
Failures
–Configuring System Messaging
–Configuring System Crash and Core Dump Facilities
On the fifth and final day, you cover the last three lessons.
In Lesson 10, you learn how to manage processes and priorities. You learn how to manage
system processes, process scheduling priority, and the scheduling class of a zone. You also
Copyright © 2013, Oracle and/or its affiliates. All rights reserved.
system
processes,
process
scheduling
priority,
and
the
scheduling
class
of
a
zone.
You
also
look at how to monitor and configure the Fair Share Scheduler (FSS).
In Lesson 11, you learn how to configure system resources and monitor system performance.
In Lesson 12, you learn how to configure system messaging and configure system crash and
core dump facilities.
Note: The class starts at 9 AM and ends at 5 PM each day. There are several short breaks
throughout the day, with an hour for lunch.
throughout
the
day,
with
an
hour
for
lunch.
Oracle Solaris 11 Advanced System Administration 1 - 8
Cicero Ronaldo (ciceroฺronaldo@gmailฺcom) has a non-transferable
license to use this Student Guideฺ
Unauthorized reproduction or distribution prohibitedฺ Copyright© 2014, Oracle and/or its affiliatesฺ

Introductions
•Name
•Company affiliation
•Title, function, and job responsibility
•
Experience related to the topics presented in this course
•
Experience
related
to
the
topics
presented
in
this
course
•Reasons for enrolling in this course
•Expectations for this course
Copyright © 2013, Oracle and/or its affiliates. All rights reserved.
Oracle Solaris 11 Advanced System Administration 1 - 9
Cicero Ronaldo (ciceroฺronaldo@gmailฺcom) has a non-transferable
license to use this Student Guideฺ
Unauthorized reproduction or distribution prohibitedฺ Copyright© 2014, Oracle and/or its affiliatesฺ

Your Learning Center
•Logistics
–Restrooms
–Break rooms and designated smoking areas
•
Cafeterias and restaurants in the area
Cafeterias
and
restaurants
in
the
area
•Emergency evacuation procedures
•Instructor contact information
•Cell phone usage
•Online course attendance confirmation form
Copyright © 2013, Oracle and/or its affiliates. All rights reserved.
Oracle Solaris 11 Advanced System Administration 1 - 10
Cicero Ronaldo (ciceroฺronaldo@gmailฺcom) has a non-transferable
license to use this Student Guideฺ
Unauthorized reproduction or distribution prohibitedฺ Copyright© 2014, Oracle and/or its affiliatesฺ
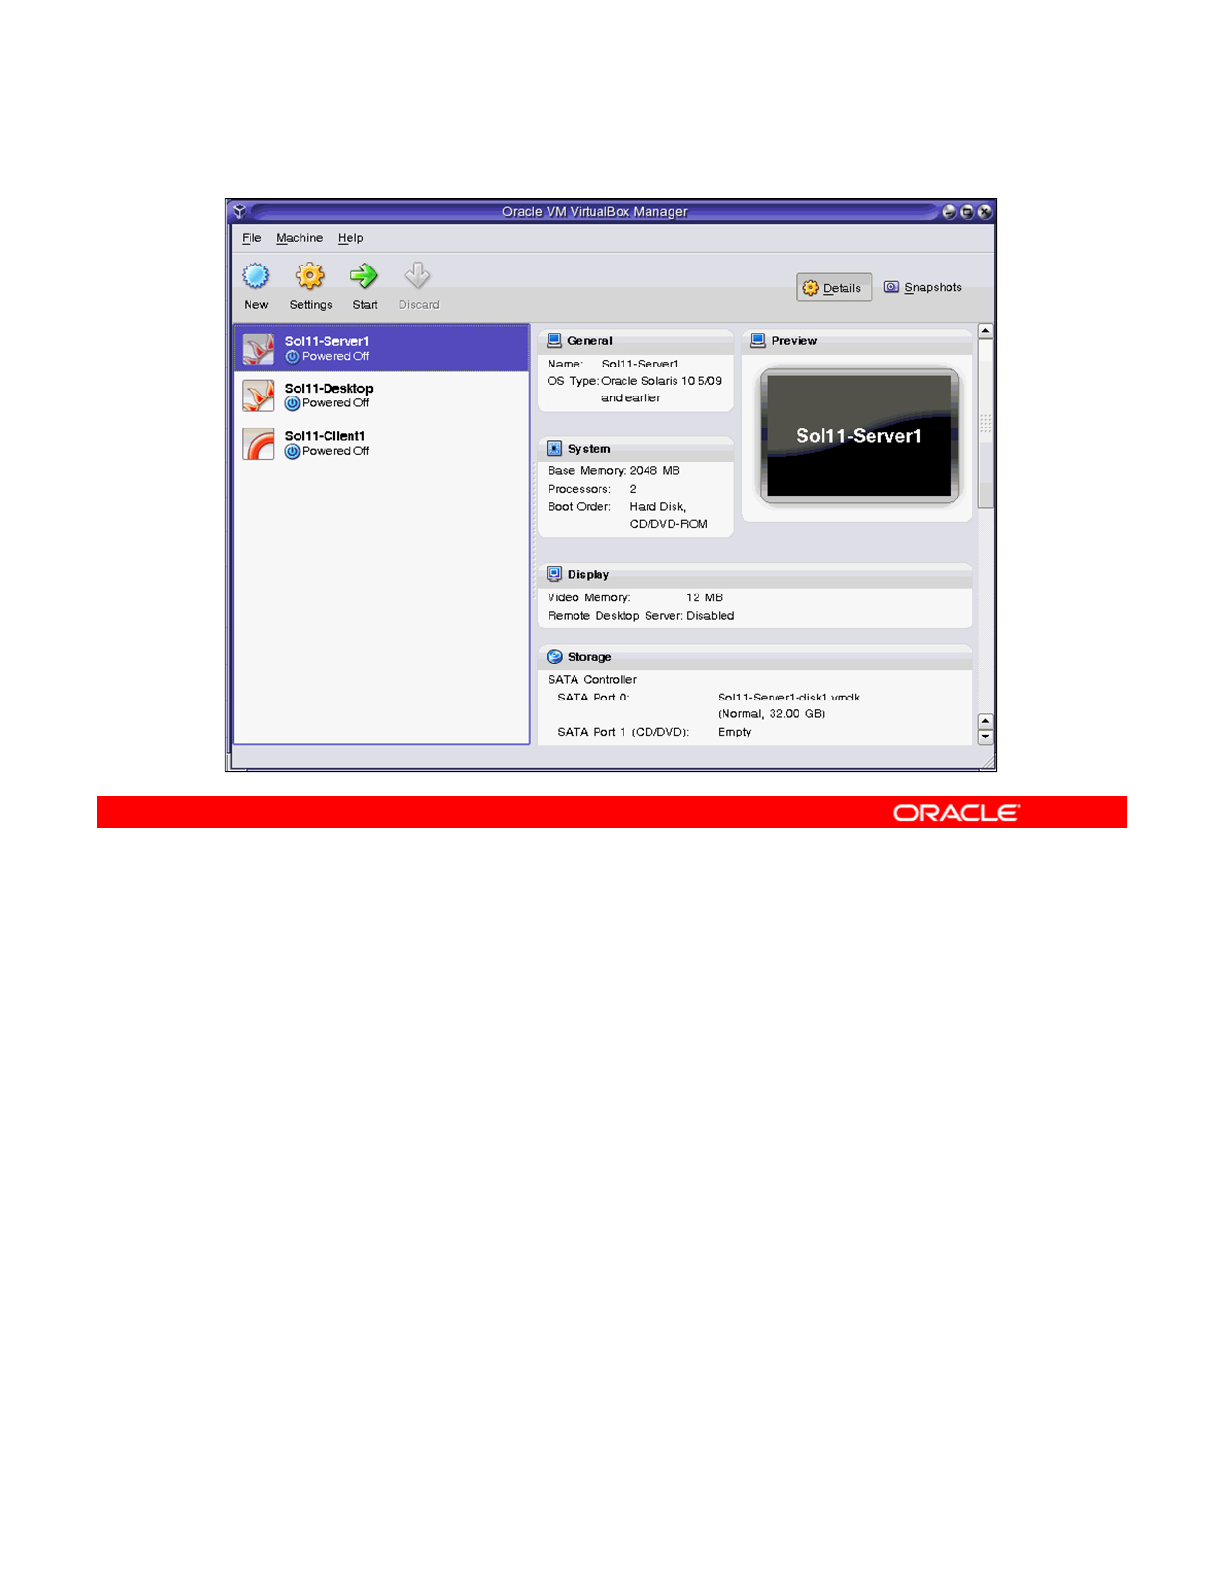
Your Lab Environment
As part of each lesson, you practice, in a lab environment, what you learned during the
lecture. The lab environment that you use in this course is based on the Oracle VM VirtualBox
virtualization software (an example of which is shown in the slide). VirtualBox is a cross-
Copyright © 2013, Oracle and/or its affiliates. All rights reserved.
platform virtualization application. It extends the capabilities of your existing computer so that
it can run multiple operating systems (inside multiple virtual machines) simultaneously.
Open your Activity Guide to “Practices for Lesson 1: Introduction.” Your instructor will walk
you through the material, and you will have a chance to familiarize yourself with the lab
environment configuration and setup.
Oracle Solaris 11 Advanced System Administration 1 - 11
Cicero Ronaldo (ciceroฺronaldo@gmailฺcom) has a non-transferable
license to use this Student Guideฺ
Unauthorized reproduction or distribution prohibitedฺ Copyright© 2014, Oracle and/or its affiliatesฺ

Cicero Ronaldo (ciceroฺronaldo@gmailฺcom) has a non-transferable
license to use this Student Guideฺ
Unauthorized reproduction or distribution prohibitedฺ Copyright© 2014, Oracle and/or its affiliatesฺ

M i th I P k i S t (IPS)
M
anag
i
ng
th
e
I
mage
P
ac
k
ag
i
ng
S
ys
t
em
(IPS)
and Packages
Copyright © 2013, Oracle and/or its affiliates. All rights reserved.
Cicero Ronaldo (ciceroฺronaldo@gmailฺcom) has a non-transferable
license to use this Student Guideฺ
Unauthorized reproduction or distribution prohibitedฺ Copyright© 2014, Oracle and/or its affiliatesฺ

Objectives
After completing this lesson, you should be able to:
•Implement a plan for the Image Packaging System (IPS)
and package management
•
Configure a local IPS package repository
Configure
a
local
IPS
package
repository
•Configure network client access to a local IPS server
•Manage signed packages and package properties
•Manage package publishers
•Manage multiple boot environments
Copyright © 2013, Oracle and/or its affiliates. All rights reserved.
Oracle Solaris 11 Advanced System Administration 2 - 2
Cicero Ronaldo (ciceroฺronaldo@gmailฺcom) has a non-transferable
license to use this Student Guideฺ
Unauthorized reproduction or distribution prohibitedฺ Copyright© 2014, Oracle and/or its affiliatesฺ
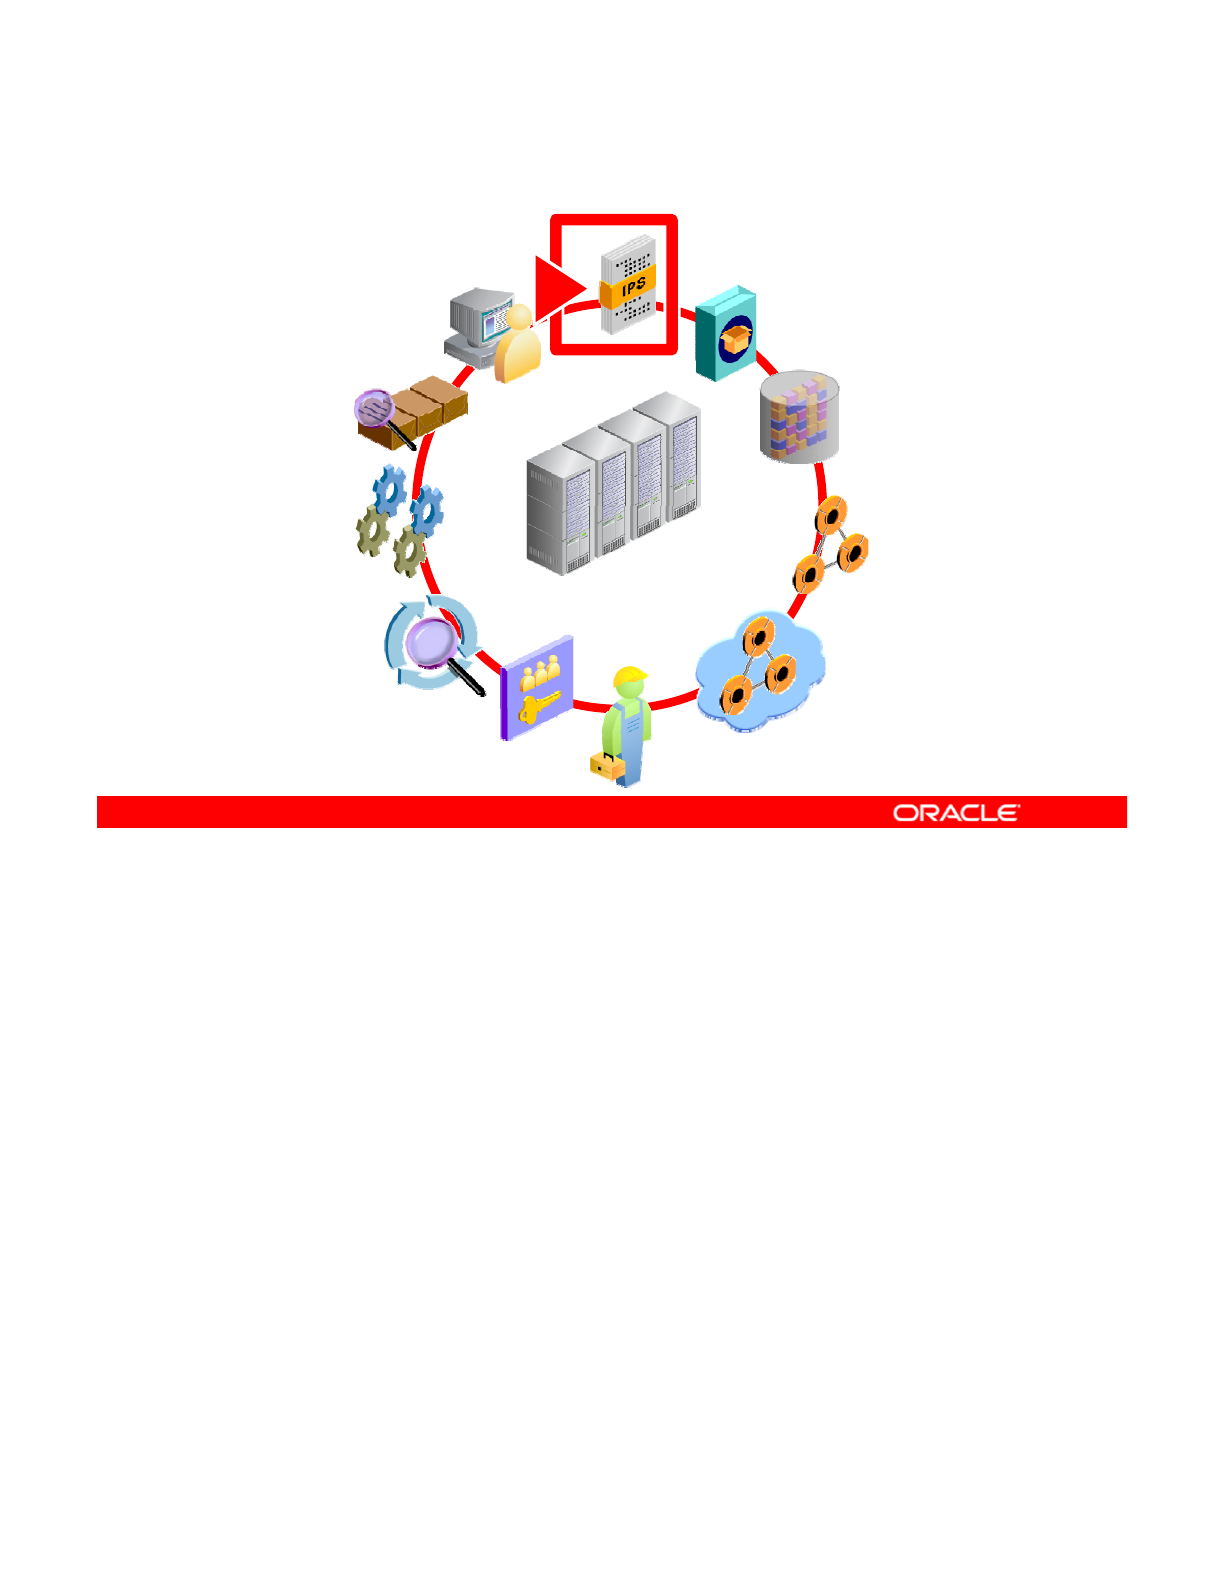
Workflow Orientation
IPS
AI INSTALL
IPS
DATA
RESOURCE
MONITORING
DATA
STORAGE
NETWORK
CONFIGURATION
PROCESSES
RESOURCE
EVALUATION
ENTERPRISE
DATA CENTER
SERVICES
PRIVILEGES
AUDITING
DATA
CENTER
NETWORK
VIRTUALIZATION
This course presents each of the primary system administration tasks in the context of a
workflow. Use the graphic shown in the slide at the beginning of each lesson to orient yourself
in the workflow environment. You look at why certain tasks precede or follow other tasks and
Copyright © 2013, Oracle and/or its affiliates. All rights reserved.
the importance of each task as it pertains to the system administrator’s job.
As indicated in the graphic, you start with how to manage the Image Packaging System (IPS)
to facilitate software package installation and updates, as well as how to manage business
application data in a data storage environment, followed by installation. You then continue
with network and zones configuration, followed by how to configure and manage services and
privileges. After that, you look at how to use Oracle Solaris auditing, manage processes and
priorities and evaluate system resources Your final tasks are monitoring and troubleshooting
priorities
,
and
evaluate
system
resources
.
Your
final
tasks
are
monitoring
and
troubleshooting
system failures.
The IPS provides you with a comprehensive delivery framework that spans the complete
software life cycle, addressing software installation, updates, system upgrades, and the
removal of software packages. From the perspective of keeping system software up to date,
the IPS framework greatly simplifies software maintenance, application service availability,
and data center security.
In this lesson, you learn how to set up a local IPS repository and manage it.
Oracle Solaris 11 Advanced System Administration 2 - 3
Cicero Ronaldo (ciceroฺronaldo@gmailฺcom) has a non-transferable
license to use this Student Guideฺ
Unauthorized reproduction or distribution prohibitedฺ Copyright© 2014, Oracle and/or its affiliatesฺ

Lesson Agenda
•Planning for IPS and Package Management
• Configuring a Local IPS Package Repository
• Configuring Network Client Access to the Local IPS Server
•
Managing
Signed Packages and Package
Properties
•
Managing
Signed
Packages
and
Package
Properties
• Managing Package Publishers
• Managing Multiple Boot Environments
Copyright © 2013, Oracle and/or its affiliates. All rights reserved.
Oracle Solaris 11 Advanced System Administration 2 - 4
Cicero Ronaldo (ciceroฺronaldo@gmailฺcom) has a non-transferable
license to use this Student Guideฺ
Unauthorized reproduction or distribution prohibitedฺ Copyright© 2014, Oracle and/or its affiliatesฺ

Importance of Working with a Plan
Implementing tasks in accordance with a plan ensures that the
tasks are:
•Assigned to the appropriate personnel
•
Completed as required
Completed
as
required
•Completed on schedule
Regardless of the type of task you are performing, you should execute the task based on a
plan, especially for key tasks such as installation. In a large data center environment where
system administration responsibilities are distributed among multiple administrators, it is even
Copyright © 2013, Oracle and/or its affiliates. All rights reserved.
more important that you understand what your responsibilities are, and why and when you
perform them. Often, you will be given directions or a plan by a senior member and asked to
execute that plan. In some data centers, the plan is referred to as a “run book.”
In this course, you are given a plan at the start of each major task, and then you are asked to
implement the task as outlined in the plan.
Oracle Solaris 11 Advanced System Administration 2 - 5
Cicero Ronaldo (ciceroฺronaldo@gmailฺcom) has a non-transferable
license to use this Student Guideฺ
Unauthorized reproduction or distribution prohibitedฺ Copyright© 2014, Oracle and/or its affiliatesฺ
Planning for IPS and Package Management
•As part of the Oracle Solaris 11 implementation plan, your
company wants to set up a local IPS repository.
•A local IPS repository provides the following benefits:
–
Performance
Performance
–Security
–Replication
Oracle’s
Default
Repository
Server
Local
Repository
CLI: pkg (1)
Desktop: Package Manager
Update Manager
Client
As with many companies, your company is concerned about performance and security. In
preparation for the Oracle Solaris 11 implementation, the Server Implementation team has
been asked to set up a local IPS repository as part of the operating system test environment.
Copyright © 2013, Oracle and/or its affiliates. All rights reserved.
A local IPS repository provides the following benefits to the company:
•Performance: Having a local package repository provides client access to packages at
local network speeds.
•Security: You might not want your client systems to have access to the Internet.
•Replication: You want to make sure that an installation that you perform next year is
exactl
y
the same as the installation
y
ou perform toda
y
.
yyy
Oracle Solaris 11 Advanced System Administration 2 - 6
Cicero Ronaldo (ciceroฺronaldo@gmailฺcom) has a non-transferable
license to use this Student Guideฺ
Unauthorized reproduction or distribution prohibitedฺ Copyright© 2014, Oracle and/or its affiliatesฺ
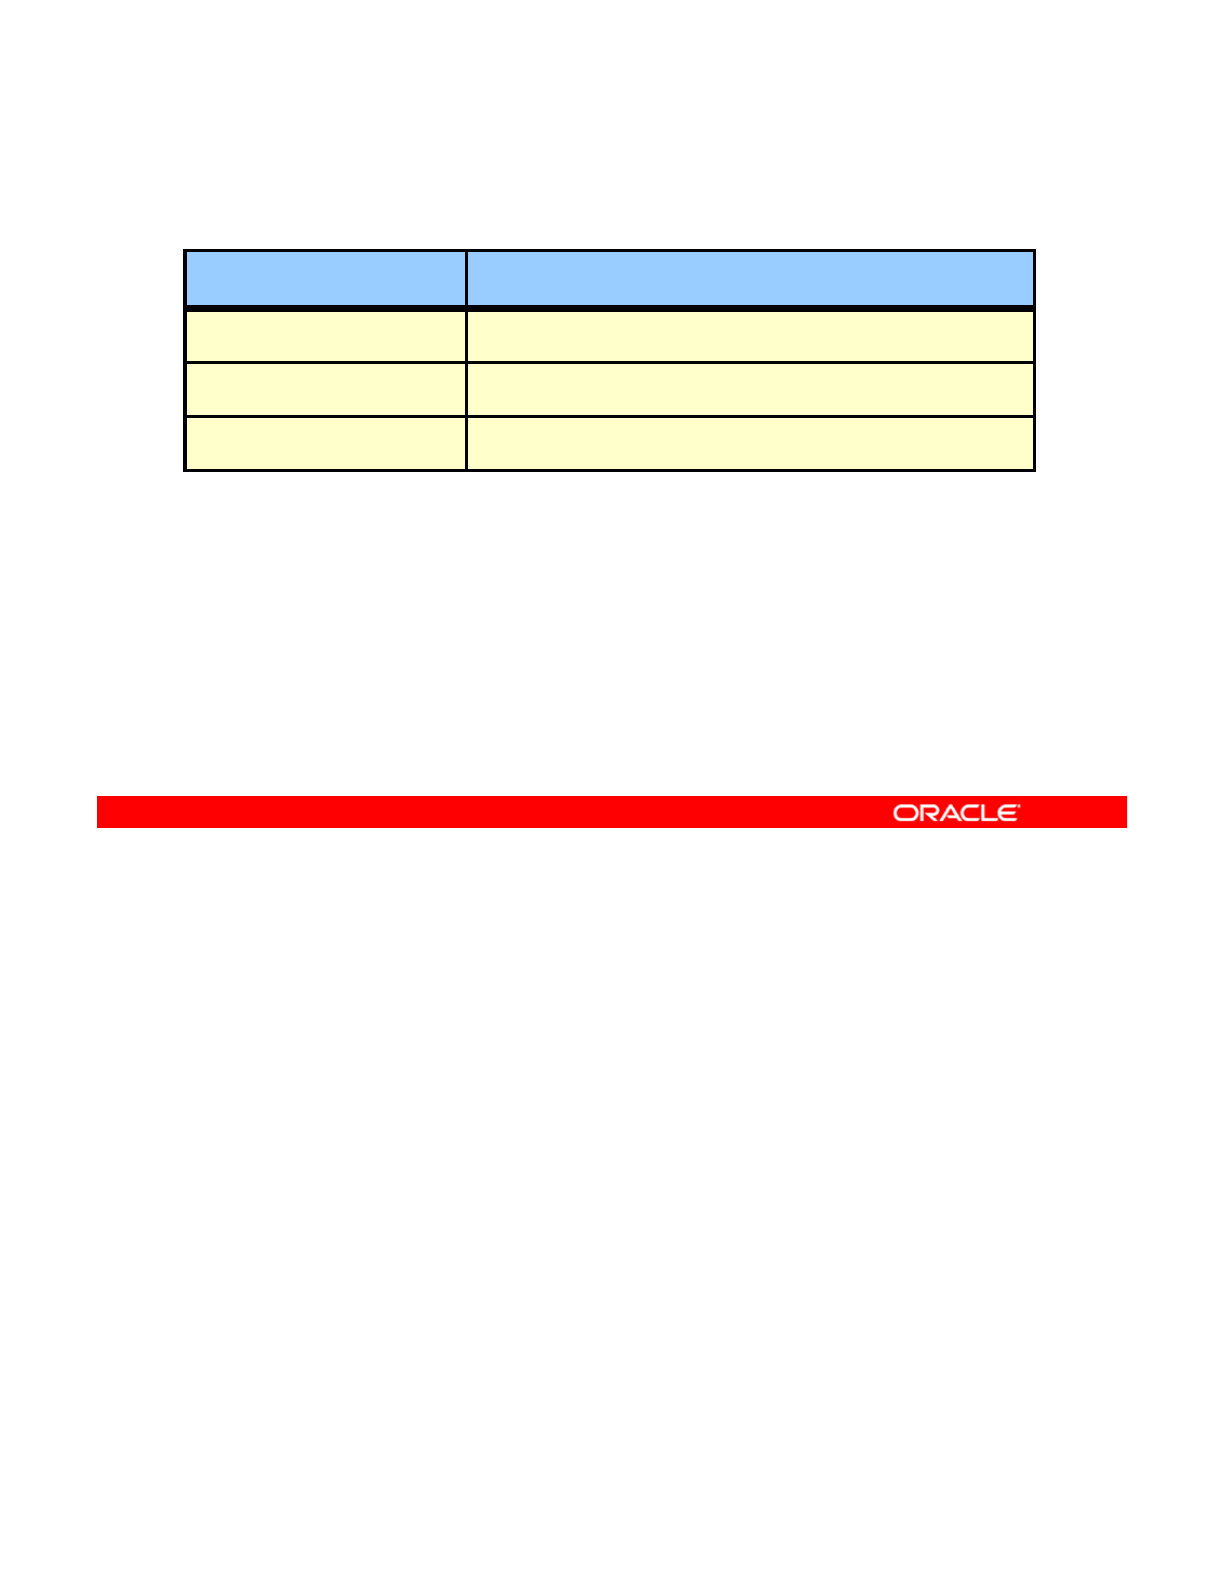
Identifying IPS Server System Requirements
Hardware/Software Requirement
System x86 or SPARC
Operating system Oracle Solaris 11
Disk space 13 GB of free space
The other members of your team have selected the system to host the local IPS repository
based on the system requirements shown in the slide. They have also selected the client
systems that will be networked to the local IPS server to verify that the IPS is functioning
Copyright © 2013, Oracle and/or its affiliates. All rights reserved.
correctly.
Oracle Solaris 11 Advanced System Administration 2 - 7
Cicero Ronaldo (ciceroฺronaldo@gmailฺcom) has a non-transferable
license to use this Student Guideฺ
Unauthorized reproduction or distribution prohibitedฺ Copyright© 2014, Oracle and/or its affiliatesฺ
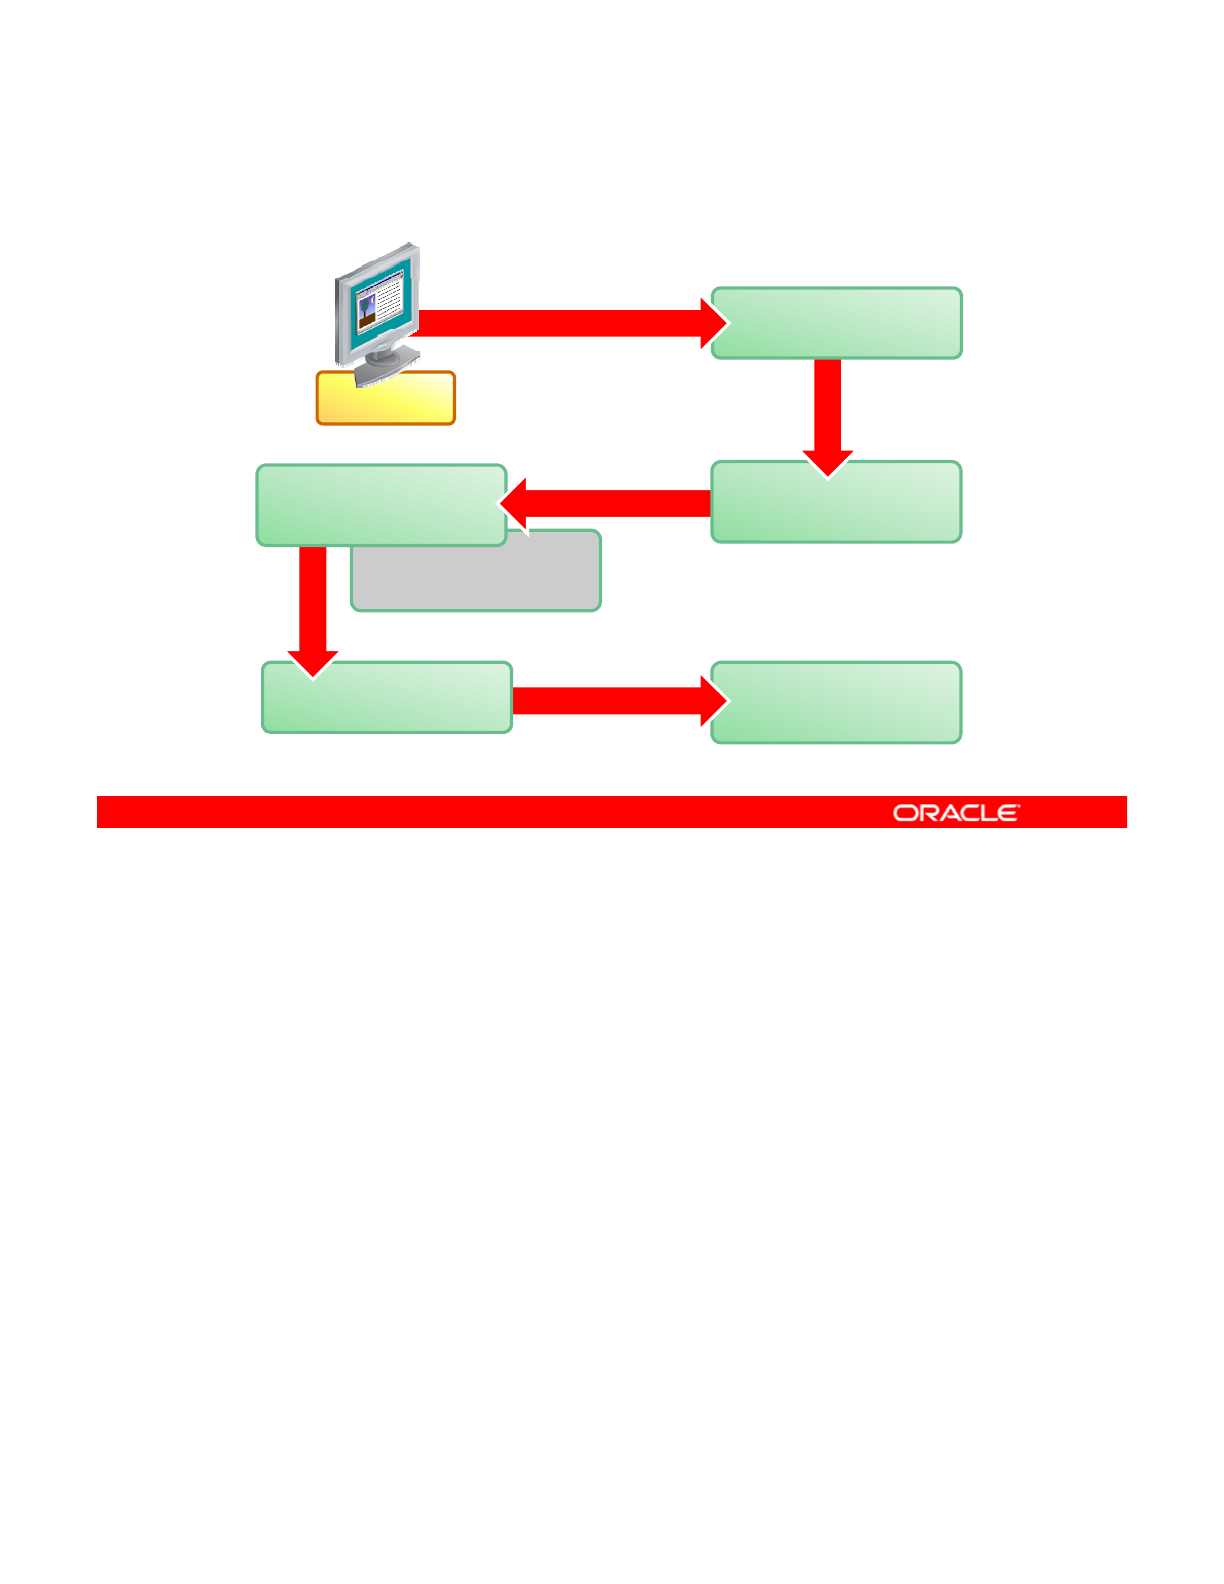
Planning for Boot Environment Management
Client
beadm /
Package Manager
Inactive Boot
Environment
Current Boot
Environment
New Boot
Environment
Client
activate
create
Backup Boot
Environment
beadm
backup
In addition to setting up a local IPS repository, your company wants you to test the Oracle
Solaris 11 boot environment (BE) technology. Given your company’s service-level
agreements, having multiple BEs to manage and maintain operating system images will be a
Copyright © 2013, Oracle and/or its affiliates. All rights reserved.
critical part of the system administrator’s day-to-day tasks in the new Oracle Solaris 11
environment. The BEs play an important role in the company’s data backup strategy.
The part of the plan that you will help to implement requires testing of the BE creation and
backup functionality by using the beadm command, Package Manager, and the ZFS snapshot
functionality.
Note: From having taken the Oracle Solaris 11 System Administration course (or from your
th
j b i ) h ld b f ili ith b i BE d i i t ti d ith b th
own on-
th
e-
j
o
b
exper
i
ence
)
, you s
h
ou
ld
b
e
f
am
ili
ar w
ith
b
as
i
c
BE
a
d
m
i
n
i
s
t
ra
ti
on an
d
w
ith
b
o
th
the beadm command and the Package Management GUI. In this course, you build on these
basic skills by learning how to manually create a new and complete BE based on the current
BE, as well as how to create a snapshot of the BE that will be used as a backup.
Oracle Solaris 11 Advanced System Administration 2 - 8
Cicero Ronaldo (ciceroฺronaldo@gmailฺcom) has a non-transferable
license to use this Student Guideฺ
Unauthorized reproduction or distribution prohibitedฺ Copyright© 2014, Oracle and/or its affiliatesฺ

Implementing the IPS and
Package Management Plan
Package
Management
Plan
Your assignment is to:
•Configure a local IPS package repository
•Configure network client access to the local IPS server
•
Test the BE creation and backup functionality
•
Test
the
BE
creation
and
backup
functionality
As a member of the Server Implementation team, you have the task of configuring the local
IPS repository on an x86 system. After configuring the repository, your next task is to
configure network client access to the IPS server for the client systems in the test
Copyright © 2013, Oracle and/or its affiliates. All rights reserved.
environment. Finally, you ensure that the repository server is functioning as it should by
running a series of package-management commands from one of the client systems.
After you verify that the local IPS repository is functioning correctly, you test the Oracle
Solaris 11 BE technology by creating both new and backup BEs.
You learn how to configure the local IPS repository in the next few slides.
Oracle Solaris 11 Advanced System Administration 2 - 9
Cicero Ronaldo (ciceroฺronaldo@gmailฺcom) has a non-transferable
license to use this Student Guideฺ
Unauthorized reproduction or distribution prohibitedฺ Copyright© 2014, Oracle and/or its affiliatesฺ

Quiz
What benefits does a local IPS repository provide?
a. Greater capacity for more packages in the repository
b. Automatically created backup BEs
c
Increased performance for package retrieval
c
.
Increased
performance
for
package
retrieval
Answer: c
Copyright © 2013, Oracle and/or its affiliates. All rights reserved.
Oracle Solaris 11 Advanced System Administration 2 - 10
Cicero Ronaldo (ciceroฺronaldo@gmailฺcom) has a non-transferable
license to use this Student Guideฺ
Unauthorized reproduction or distribution prohibitedฺ Copyright© 2014, Oracle and/or its affiliatesฺ

Quiz
Which utility is used to manage BEs in Oracle Solaris 11?
a. luupgrade
b. beadm
c
BE Manager
c
.
BE
Manager
Answer: b
Copyright © 2013, Oracle and/or its affiliates. All rights reserved.
Oracle Solaris 11 Advanced System Administration 2 - 11
Cicero Ronaldo (ciceroฺronaldo@gmailฺcom) has a non-transferable
license to use this Student Guideฺ
Unauthorized reproduction or distribution prohibitedฺ Copyright© 2014, Oracle and/or its affiliatesฺ

Lesson Agenda
• Planning for IPS and Package Management
•Configuring a Local IPS Package Repository
• Configuring Network Client Access to the Local IPS Server
•
Managing Signed Packages and Package
Properties
•
Managing
Signed
Packages
and
Package
Properties
• Managing Package Publishers
• Managing Multiple Boot Environments
You know that the company’s plan is to manage the IPS by using a local IPS repository. So
you should now look at what you need to do to configure a local IPS package repository on
one of your local systems.
Copyright © 2013, Oracle and/or its affiliates. All rights reserved.
Oracle Solaris 11 Advanced System Administration 2 - 12
Cicero Ronaldo (ciceroฺronaldo@gmailฺcom) has a non-transferable
license to use this Student Guideฺ
Unauthorized reproduction or distribution prohibitedฺ Copyright© 2014, Oracle and/or its affiliatesฺ

Configuring a Local IPS Package Repository
Required tasks:
1. Creating a ZFS file system to hold the repository
2. Obtaining software packages from the Oracle Solaris
download site
download
site
3. Making the contents of the repository available
4. Configuring the repository server service
5. Starting the repository service
6. Setting the local IPS publisher
7. Testing IPS on the local server
To configure a local IPS package repository, you must complete the tasks shown in the slide,
which are covered in this section.
Copyright © 2013, Oracle and/or its affiliates. All rights reserved.
Oracle Solaris 11 Advanced System Administration 2 - 13
Cicero Ronaldo (ciceroฺronaldo@gmailฺcom) has a non-transferable
license to use this Student Guideฺ
Unauthorized reproduction or distribution prohibitedฺ Copyright© 2014, Oracle and/or its affiliatesฺ

Creating a ZFS File System
to Hold the Repository
to
Hold
the
Repository
Create a ZFS file system for the local package repository in the
root pool.
# zfs create rpool/export/IPS
# zfs list
NAME USED AVAIL REFER MOUNTPOINT
rpool 9.94G 21.3G 39K /rpool
rpool/ROOT 2.13G 21.3G 31K legacy
rpool/ROOT/solaris 2.13G 21.3G 1.58G /
rpool/ROOT/solaris/var 507M 21.3G 505M /var
r
p
ool
/
dum
p
1.03G 21.3G 1.00G -
p/p
rpool/export 5.74G 21.3G 33K /export
rpool/export/IPS 5.74G 21.3G 5.74G /export/IPS
rpool/export/home 212K 21.3G 37K /export/home
rpool/export/home/oracle 34K 21.3G 34K
/export/home/oracle
rpool/swap 1.03G 21.3G 1.00G -
Your first task is to create a ZFS file system for your local package repository. Using a
separate ZFS file system for your repository enables you to:
•
Ac
hi
e
v
e
bette
r
pe
rf
o
rm
a
n
ce
Copyright © 2013, Oracle and/or its affiliates. All rights reserved.
c e e bette pe o a ce
•Set separate file system characteristics
•Recover specified file systems
A recommended practice is to create the new ZFS file system within rpool. You can then run
the zfs list command to verify that the file system is created, as shown in the example in
the slide.
Oracle Solaris 11 Advanced System Administration 2 - 14
Cicero Ronaldo (ciceroฺronaldo@gmailฺcom) has a non-transferable
license to use this Student Guideฺ
Unauthorized reproduction or distribution prohibitedฺ Copyright© 2014, Oracle and/or its affiliatesฺ

Obtaining Software Packages from
the Oracle Solaris Download Site
the
Oracle
Solaris
Download
Site
1. Go to the Oracle Solaris download site:
http://www.oracle.com/technetwork/server-storage/solaris11/downloads/index.html
2. Download the Oracle Solaris 11 Repository Image:
–
Download Part A SPARC, x86
(
3.3 GB
)
()
–Download Part B SPARC, x86 (3.1 GB)
3. Copy the files to the ZFS repository file system.
4. Uncompress the files.
5. Concatenate the files.
# unzip sol-11_1-repo-full.iso-a.zip
# unzip sol-11_1-repo-full.iso-b.zip
# cat sol-11_1-repo-full.iso-a sol-11-1-repo-full.iso-b > sol-
11_1-repo-full.iso
# ls /export/IPS
sol-11_1-repo-full.iso
After you have created the ZFS file system to hold your local package repository, you are
ready to download the Oracle Solaris 11 Repository Image from the Oracle Solaris download
site: http://www.oracle.com/technetwork/server-storage/solaris11/downloads/index.html.
Copyright © 2013, Oracle and/or its affiliates. All rights reserved.
The repository image provides you with a complete archive of software packages to allow you
to set up a local network IPS repository that client systems can connect to.
The repository image is divided into two files:
•Download Part A SPARC, x86 (3.3 GB)
•Download Part B SPARC, x86 (3.1 GB)
Copy both files to the ZFS repository file system uncompress them and concatenate them
Copy
both
files
to
the
ZFS
repository
file
system
,
uncompress
them
,
and
concatenate
them
,
as shown in the example in the slide. You can then run the ls command for the ZFS file
system to see the concatenated ISO file.
Oracle Solaris 11 Advanced System Administration 2 - 15
Cicero Ronaldo (ciceroฺronaldo@gmailฺcom) has a non-transferable
license to use this Student Guideฺ
Unauthorized reproduction or distribution prohibitedฺ Copyright© 2014, Oracle and/or its affiliatesฺ

Making the Repository File Contents Available
Make the contents of the repository .iso file available to the
depot server.
# lofiadm –a sol-11_1-repo-full.iso
# mount
F hsfs /dev/lofi/1 /mnt
#
mount
–
F
hsfs
/dev/lofi/1
/mnt
# rsync –aP /mnt/repo /export/IPS
After the concatenated repository ISO image is in the ZFS repository file system, you need to
make the contents of the file system available to the depot server (pkg.depotd), as shown in
the example in the slide.
Copyright © 2013, Oracle and/or its affiliates. All rights reserved.
Note: A depot server is a collection of one or more package repositories. The depot server is
typically run as a service on the system by pkg.depotd(1m). The pkg.depotd service is
managed by the service management facility, smf(5), under the service identifier:
svc:/application/pkg/server.
To perform this task, you use the lofiadm -a command, which enables you to associate a
file with a block device (in this example, the block device is /dev/lofi/1). The file can then
b dth hthbl kd i Thii fl h thfil ti i f fil
b
e accesse
d
th
roug
h
th
e
bl
oc
k
d
ev
i
ce.
Thi
s
i
s use
f
u
l
w
h
en
th
e
fil
e con
t
a
i
ns an
i
mage o
f
a
fil
e
system (for example, the repository ISO image), because you can then use the block device
with normal system utilities for mounting, checking, or repairing the file system.
Note: A block device is a storage device that supports the reading and writing of data in fixed-
sized blocks.
Oracle Solaris 11 Advanced System Administration 2 - 16
Cicero Ronaldo (ciceroฺronaldo@gmailฺcom) has a non-transferable
license to use this Student Guideฺ
Unauthorized reproduction or distribution prohibitedฺ Copyright© 2014, Oracle and/or its affiliatesฺ

Next you mount the device by using the mount -F hsfs command. The -F option specifies
the file system type on which to operate. In this example, the file system type is specified as
an ISO 9660 file system (hsfs). The High Sierra file system, hsfs, is a draft predecessor to ISO
9660, so the name reflects the file system’s history.
Finally, run the rsync program. This program enables you to transfer only the differences
between the two sets of files across local disks, directories, or network connection very
quickly.
Note: Be sure to specify /mnt/repo and not /mnt/repo/ if you want to copy the repo
directory and not just the files and subdirectories in the repo directory. For more information
about the rsync command, see the rsync(1) man page.
The package repository is very large (approximately 6 GB). Depending on the speed of your
host machine, the rsync program will take about two to three hours to complete.
Oracle Solaris 11 Advanced System Administration 2 - 17
Cicero Ronaldo (ciceroฺronaldo@gmailฺcom) has a non-transferable
license to use this Student Guideฺ
Unauthorized reproduction or distribution prohibitedฺ Copyright© 2014, Oracle and/or its affiliatesฺ

Configuring the Repository Server Service
Use the SMF svccfg command to configure the repository
server service.
# svccfg –s application/pkg/server setprop pkg/inst_root=/export/IPS/repo
# svccfg –s application/pkg/server setprop pkg/readonly=true
# svcprop -p pkg/inst_root application/pkg/server
/export/IPS/repo
You now configure the repository server service by using the SMF svccfg -s command, as
shown in the example in the slide.
In the first command, the
-
s
option specifies the start method for the service and associates
Copyright © 2013, Oracle and/or its affiliates. All rights reserved.
In
the
first
command,
the
s
option
specifies
the
start
method
for
the
service
and
associates
the local repository file system as the application package server. The setprop
subcommand sets the name property of the pkg property to the ZFS file system where the
repository files reside.
The second svccfg -s command specifies that the read-only property should be set to
true.
You can verify that the local repository file system is now specified as the package server by
using the svcprop -p command, as shown in the example. The svcprop utility with the
-p option prints values of properties in the service configuration repository.
Note: As an alternative, you can also use an NFS share for your IPS repository, as the
following example commands show:
# zfs set share.nfs=on /export/IPS name=repoSolaris11,path/export/IPS,prot=nfs
# dfshares s11-ss
RESOURCE SERVER ACCESS TRANSPORT
RESOURCE
SERVER
ACCESS
TRANSPORT
solaris:/export/IPS solaris - -
Oracle Solaris 11 Advanced System Administration 2 - 18
Cicero Ronaldo (ciceroฺronaldo@gmailฺcom) has a non-transferable
license to use this Student Guideฺ
Unauthorized reproduction or distribution prohibitedฺ Copyright© 2014, Oracle and/or its affiliatesฺ

Starting the Repository Service
Use the SMF svcadm command to start the repository service.
# svcadm refresh application/pkg/server
# svcadm enable application/pkg/server
#
svcs application/pkg/server
Use the pkgrepo refresh command to refresh the package
repository
#
svcs
application/pkg/server
STATE STIME FMRI
online 17:00:56 svc:/application/pkg/server:default
repository
.
#pkgrepo refresh –s /export/IPS/repo
After you have the repository server service configured, you can start it by using the SMF
svcadm command. You first refresh the service and then enable it, as shown in the example
in the slide. You can verify that the service is enabled by running the svcs
Copyright © 2013, Oracle and/or its affiliates. All rights reserved.
application/pkg/server command.
Also keep in mind that when you create a new package repository, you must refresh the
repository catalog by using the pkgrepo refresh command so that the package search
operations work correctly.
Oracle Solaris 11 Advanced System Administration 2 - 19
Cicero Ronaldo (ciceroฺronaldo@gmailฺcom) has a non-transferable
license to use this Student Guideฺ
Unauthorized reproduction or distribution prohibitedฺ Copyright© 2014, Oracle and/or its affiliatesฺ

Setting the Local IPS Publisher
Use the pkg set-publisher command to set the publisher to
the local IPS repository.
#pkg publisher
PUBLISHER TYPE STATUS URI
solaris origin online http://pkg.oracle.com/solaris/release
# pkg set-publisher –G ‘*’ –g http://server.mydomain.com/ solaris
# pkg publisher
PUBLISHER TYPE STATUS URI
solaris origin online http://server.mydomain.com/
The default publisher for Oracle Solaris 11 systems is solaris, and the default origin for that
publisher is http://pkg.oracle.com/solaris/release. The publisher’s origin is identified by its
universal resource identifier (URI). This is the location of a machine or resource on the
Copyright © 2013, Oracle and/or its affiliates. All rights reserved.
Internet.
To enable your clients to retrieve packages from your local repository, you need to reset the
origin for the solaris publisher (as shown in this example) for each client.
The uppercase -G option with the pkg set-publisher command specifies the origin of the
publisher to be removed. The -g option specifies the origin of the publisher to be added. In
the example, you are removing the origin for the solaris publisher and adding the origin for
a
li
publisher that is on the local IPS server (http://server mydomain com/)
a
so
l
ar
i
s
publisher
that
is
on
the
local
IPS
server
(http://server
.
mydomain
.
com/)
.
Oracle Solaris 11 Advanced System Administration 2 - 20
Cicero Ronaldo (ciceroฺronaldo@gmailฺcom) has a non-transferable
license to use this Student Guideฺ
Unauthorized reproduction or distribution prohibitedฺ Copyright© 2014, Oracle and/or its affiliatesฺ

Testing IPS on the Local Server
You can test that your IPS server is set up correctly by
searching for a package.
# pkg search entire
INDEX ACTION VALUE PACKAGE
kfi
li/ i k/ i
p
k
g.
f
mr
i
set so
l
ar
i
s
/
ent
i
re p
k
g:
/
ent
i
re@0.5.11-0.175.1.0.0.24.2
Your final IPS server configuration task is to test that the server is set up correctly. You can
do this by searching for a package. In this example, you are looking for the entire package.
If the search returns the package information, your local IPS server has been configured
Copyright © 2013, Oracle and/or its affiliates. All rights reserved.
correctly.
Oracle Solaris 11 Advanced System Administration 2 - 21
Cicero Ronaldo (ciceroฺronaldo@gmailฺcom) has a non-transferable
license to use this Student Guideฺ
Unauthorized reproduction or distribution prohibitedฺ Copyright© 2014, Oracle and/or its affiliatesฺ

Practice 2-1 Overview:
Configuring a Local IPS Package Repository
Configuring
a
Local
IPS
Package
Repository
This practice covers the following topics:
•Verifying that the /export/IPS file system has been
configured on the system
•
Determining whether the IPS service is available
Determining
whether
the
IPS
service
is
available
•Setting up the application/pkg/server service
•Refreshing the package repository
•Adding a new publisher
•Testing IPS on the local server
The practices for this lesson are designed to reinforce the concepts that have been presented
in the lecture portion. These practices cover the following tasks:
•Pr
act
i
ce
2-1:
Co
nfi
gu
rin
g
a
l
oca
l IP
S
pac
k
age
r
epos
i
to
r
y
Copyright © 2013, Oracle and/or its affiliates. All rights reserved.
act ce
Co gu g a oca S pac age epos to y
•Practice 2-2: Configuring network client access to the local IPS server
•Practice 2-3: Managing multiple boot environments
You will find Practice 2-1 in your Activity Guide. This practice should take about 45 minutes to
complete.
Oracle Solaris 11 Advanced System Administration 2 - 22
Cicero Ronaldo (ciceroฺronaldo@gmailฺcom) has a non-transferable
license to use this Student Guideฺ
Unauthorized reproduction or distribution prohibitedฺ Copyright© 2014, Oracle and/or its affiliatesฺ

Lesson Agenda
• Planning for IPS and Package Management
• Configuring a Local IPS Package Repository
•Configuring Network Client Access to the Local IPS
Server
Server
• Managing Signed Packages and Package Properties
• Managing Package Publishers
• Managing Multiple Boot Environments
Copyright © 2013, Oracle and/or its affiliates. All rights reserved.
Oracle Solaris 11 Advanced System Administration 2 - 23
Cicero Ronaldo (ciceroฺronaldo@gmailฺcom) has a non-transferable
license to use this Student Guideฺ
Unauthorized reproduction or distribution prohibitedฺ Copyright© 2014, Oracle and/or its affiliatesฺ

Configuring Network Client Access
to the Local IPS Server
to
the
Local
IPS
Server
This section covers the following topics:
•Determining the client host and domain names
•Checking network connectivity
•
Setting the local IPS publisher
•
Setting
the
local
IPS
publisher
•Testing client access to the local IPS server
Copyright © 2013, Oracle and/or its affiliates. All rights reserved.
Oracle Solaris 11 Advanced System Administration 2 - 24
Cicero Ronaldo (ciceroฺronaldo@gmailฺcom) has a non-transferable
license to use this Student Guideฺ
Unauthorized reproduction or distribution prohibitedฺ Copyright© 2014, Oracle and/or its affiliatesฺ

Determining the Client Host and Domain Names
Use hostname and domainname to identify the client
machine.
# hostname
client1
client1
# domainname
mydomain.com
Your first task is to identify the client machine’s host and domain names. To do this, run the
hostname and domainname commands, as shown in the slide.
Copyright © 2013, Oracle and/or its affiliates. All rights reserved.
Oracle Solaris 11 Advanced System Administration 2 - 25
Cicero Ronaldo (ciceroฺronaldo@gmailฺcom) has a non-transferable
license to use this Student Guideฺ
Unauthorized reproduction or distribution prohibitedฺ Copyright© 2014, Oracle and/or its affiliatesฺ

Checking Network Connectivity
Verify DNS service access and connectivity with the local IPS
server.
# nslookup server
Server:
192.168.0.100
Server:
192.168.0.100
Address: 192.168.0.100#53
Name: server.mydomain.com
Address: 192.168.0.100
# ping server
server is alive
Next, you want to verify that the client machine can access DNS services and that it can
connect to the local IPS server.
First, run the
nslookup
command with the name of the local IPS server. In the example in
Copyright © 2013, Oracle and/or its affiliates. All rights reserved.
First,
run
the
nslookup
command
with
the
name
of
the
local
IPS
server.
In
the
example
in
the slide, the local IPS server host name is server.
Then verify that the client can talk with the local IPS server by running the ping command, as
shown in the example.
Oracle Solaris 11 Advanced System Administration 2 - 26
Cicero Ronaldo (ciceroฺronaldo@gmailฺcom) has a non-transferable
license to use this Student Guideฺ
Unauthorized reproduction or distribution prohibitedฺ Copyright© 2014, Oracle and/or its affiliatesฺ

Setting the Local IPS Publisher
Use the pkg set-publisher command to set the publisher to
the local IPS repository.
#pkg publisher
PUBLISHER TYPE STATUS URI
solaris origin online http://pkg.oracle.com/solaris/release
# pkg set-publisher –G ‘*’ –g http://server.mydomain.com/ solaris
# pkg publisher
PUBLISHER TYPE STATUS URI
solaris origin online http://server.mydomain.com/
After you have verified network connectivity between the client and the local IPS server, you
need to set the publisher to the local IPS publisher, just as you did when you configured the
local IPS server.
Copyright © 2013, Oracle and/or its affiliates. All rights reserved.
First, check the current publisher. Next, set the publisher to the local IPS repository, and then
verify that the publisher is now the local IPS publisher.
Make a note of the local publisher’s URI; you will need it to complete the next task.
Oracle Solaris 11 Advanced System Administration 2 - 27
Cicero Ronaldo (ciceroฺronaldo@gmailฺcom) has a non-transferable
license to use this Student Guideฺ
Unauthorized reproduction or distribution prohibitedฺ Copyright© 2014, Oracle and/or its affiliatesฺ
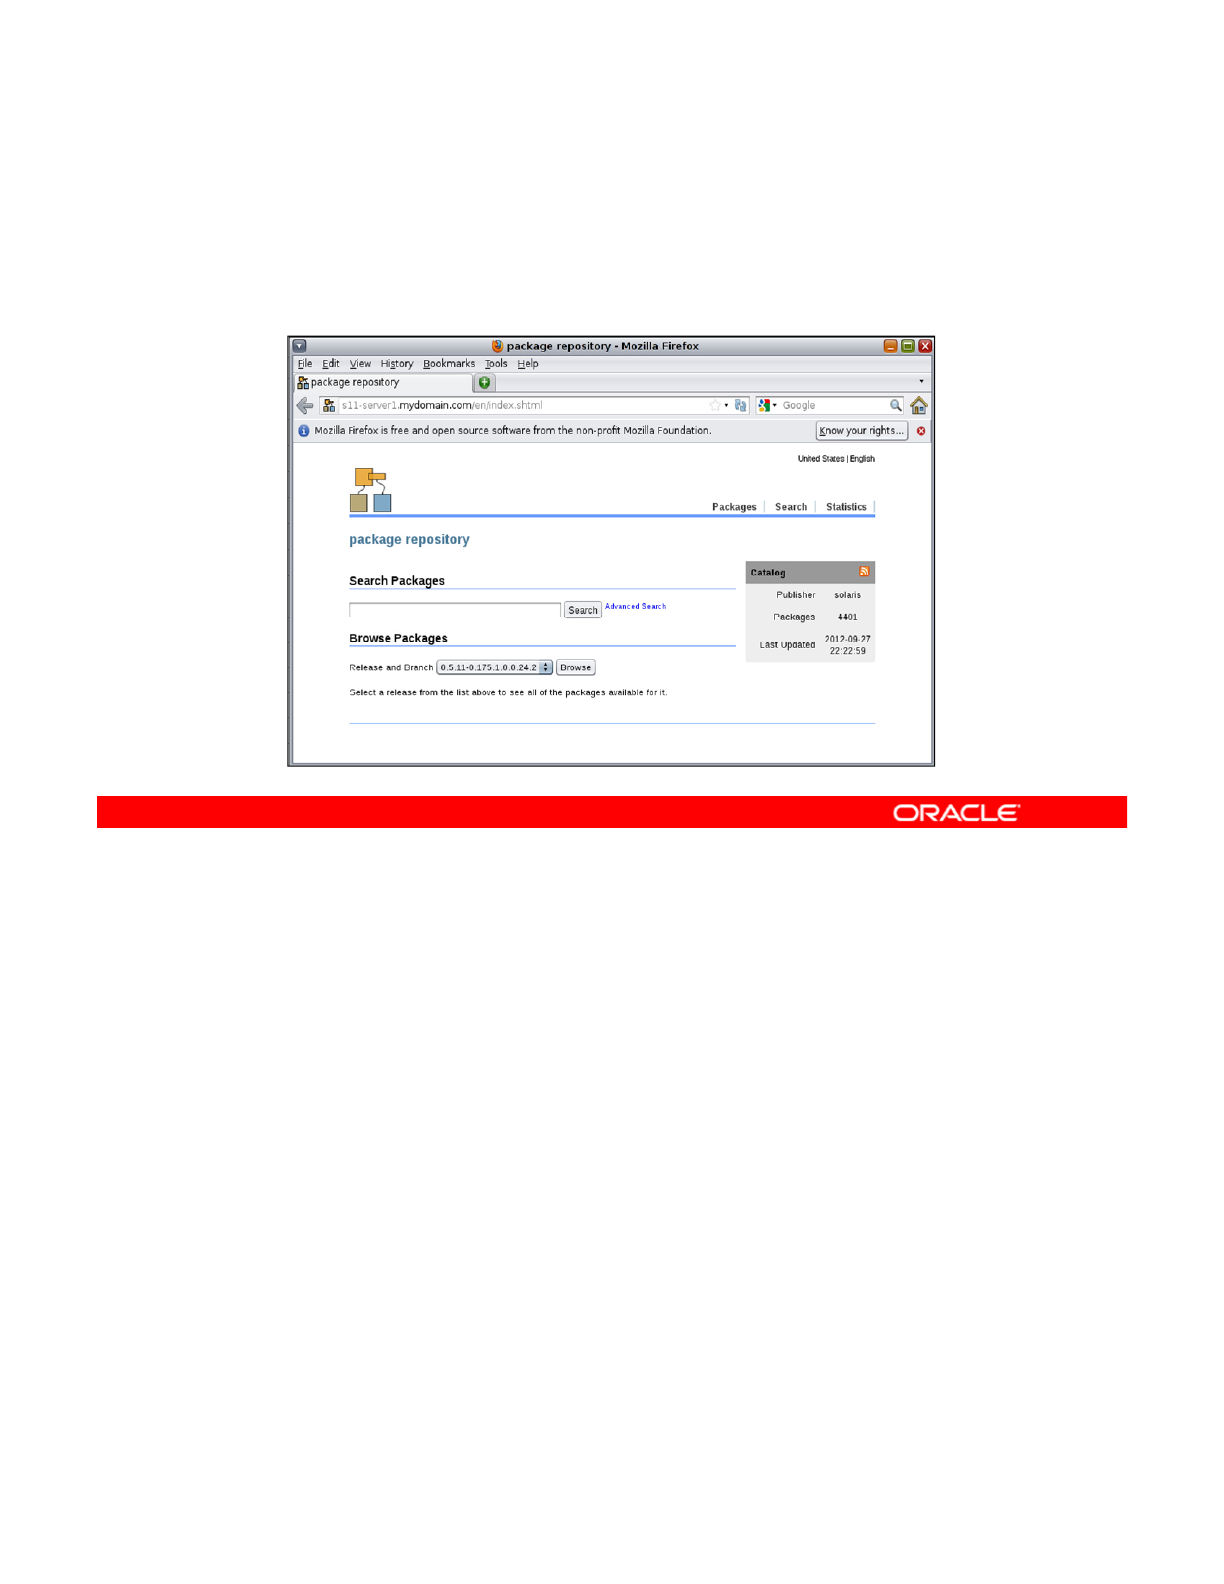
Testing Client Access to the Local IPS Server
To test client access to the IPS server, open the local publisher
URI in a browser.
The final task is to test the client machine’s access to the local IPS server. To do this, open
the local publisher’s URI in a browser. If a page is returned that reads “package repository,”
you have successfully configured the client’s access to the IPS server. You can now use your
Copyright © 2013, Oracle and/or its affiliates. All rights reserved.
local IPS repository to manage your company’s software package needs.
Note: In this example, the URI would be http://s11-server1.mydomain.com.
Oracle Solaris 11 Advanced System Administration 2 - 28
Cicero Ronaldo (ciceroฺronaldo@gmailฺcom) has a non-transferable
license to use this Student Guideฺ
Unauthorized reproduction or distribution prohibitedฺ Copyright© 2014, Oracle and/or its affiliatesฺ

Practice 2-2 Overview: Configuring Network
Client Access to the Local IPS Server
Client
Access
to
the
Local
IPS
Server
This practice covers the following topics:
•Verifying connectivity between the client and the IPS
server
•Removing and adding publishers
•Testing client access to the IPS server
•Searching for packages by using the package repository
browser
This practice should take about 15 minutes to complete.
Copyright © 2013, Oracle and/or its affiliates. All rights reserved.
Oracle Solaris 11 Advanced System Administration 2 - 29
Cicero Ronaldo (ciceroฺronaldo@gmailฺcom) has a non-transferable
license to use this Student Guideฺ
Unauthorized reproduction or distribution prohibitedฺ Copyright© 2014, Oracle and/or its affiliatesฺ

Lesson Agenda
• Planning for IPS and Package Management
• Configuring a Local IPS Package Repository
• Configuring Network Client Access to the Local IPS Server
•
Managing Signed Packages and Package
Properties
•
Managing
Signed
Packages
and
Package
Properties
• Managing Package Publishers
• Managing Multiple Boot Environments
You have set up your local package repository and verified that the client systems can access
it. You are now ready to manage the packages that you get from the repository. Because you
already know how to perform basic package management tasks (such as installing, updating,
Copyright © 2013, Oracle and/or its affiliates. All rights reserved.
and displaying package information), this topic focuses on how to manage signed packages
and package properties. You are introduced to variants and facets, and you learn how to view
and purge operation history.
Oracle Solaris 11 Advanced System Administration 2 - 30
Cicero Ronaldo (ciceroฺronaldo@gmailฺcom) has a non-transferable
license to use this Student Guideฺ
Unauthorized reproduction or distribution prohibitedฺ Copyright© 2014, Oracle and/or its affiliatesฺ

Introducing Signed Packages
Signed packages contain digital signatures that verify that:
•The package came from the entity who signed it
•The entity signed the package
•
The package has not been modified
•
The
package
has
not
been
modified
•The entity is trusted
Digital
Unsigned Signed
Signature
Software packages can be signed or unsigned. A signed package is identical to an unsigned
package, except that it has a digital signature that verifies the following:
•Th
e
pac
k
age
ca
m
e
fr
o
m
t
h
e
e
n
t
i
ty
wh
o
s
i
g
n
ed
i
t
.
Copyright © 2013, Oracle and/or its affiliates. All rights reserved.
e pac age ca e o t e e t ty o s g ed t
•The entity indeed signed it.
•The package has not been modified since the entity signed it.
•The entity who signed it is a trusted entity.
In other words, a signed package provides the reassurance that the package is secure and,
therefore, safe to download and install on your system.
Oracle Solaris 11 Advanced System Administration 2 - 31
Cicero Ronaldo (ciceroฺronaldo@gmailฺcom) has a non-transferable
license to use this Student Guideฺ
Unauthorized reproduction or distribution prohibitedฺ Copyright© 2014, Oracle and/or its affiliatesฺ

Installing Signed Packages
•Configuring image properties for signed packages
•Configuring publisher properties for signed packages
Before you can install signed packages on your system, you must set specific properties on
both the image and the publisher.
Copyright © 2013, Oracle and/or its affiliates. All rights reserved.
Oracle Solaris 11 Advanced System Administration 2 - 32
Cicero Ronaldo (ciceroฺronaldo@gmailฺcom) has a non-transferable
license to use this Student Guideฺ
Unauthorized reproduction or distribution prohibitedฺ Copyright© 2014, Oracle and/or its affiliatesฺ

Identifying Image Properties for Signed Packages
•signature-policy: Determines what checks will be
performed on manifests when you install a package into
the operating system image
–ignore
–verify
–require-signatures
–require-names
•signature-required-names: Defines names that must
be seen as common names of certificates while validating
be
seen
as
common
names
of
certificates
while
validating
the signatures of a package
•trust-anchor-directory: Identifies the path name of
the directory that contains the trust anchors for the image
You can set three image properties for signed packages. These are signature-policy,
signature-required-names, and trust-anchor-directory.
The
signature
-
policy
property, along with one of its values, determines the checks that
Copyright © 2013, Oracle and/or its affiliates. All rights reserved.
The
signature
policy
property,
along
with
one
of
its
values,
determines
the
checks
that
are performed on manifests when installing a package into the operating system image. You
can use the following values with this property:
•ignore: Directs the image to ignore signatures for all manifests
•verify: Directs the image to verify that all manifests with signatures are validly signed,
but does not require all installed packages to be signed
•require-signatures: Directs the image to require that all newly installed packages
have at least one valid signature
Note: The pkg fix and pkg verify commands also present a warning if an installed
package does not have a valid signature.
•require-names: Directs the image not only to require that all newly installed packages
have at least one valid signature (as with the require-signatures property) but also
to require that the strings listed in the signature-required-names image property
appear as common names of the certificates used to verify the chains of trust of the
appear
as
common
names
of
the
certificates
used
to
verify
the
chains
of
trust
of
the
signatures
Oracle Solaris 11 Advanced System Administration 2 - 33
Cicero Ronaldo (ciceroฺronaldo@gmailฺcom) has a non-transferable
license to use this Student Guideฺ
Unauthorized reproduction or distribution prohibitedฺ Copyright© 2014, Oracle and/or its affiliatesฺ

The next property, signature-required-names, defines a list of names that must be seen
as common names of certificates while validating the signatures of a package. It is used only
when the signature policy is require-names.
The last
p
ro
p
ert
y,
trust-anchor-director
y
,
identifies the
p
ath name of the director
y
that
pp y,
y
,p y
contains the trust anchors for the image. This path is relative to the operating system image.
The final policy that is applied to a package depends on the combination of image policy and
publisher policy. The combination will be at least as strict as the stricter of the two policies
taken individually.
Oracle Solaris 11 Advanced System Administration 2 - 34
Cicero Ronaldo (ciceroฺronaldo@gmailฺcom) has a non-transferable
license to use this Student Guideฺ
Unauthorized reproduction or distribution prohibitedฺ Copyright© 2014, Oracle and/or its affiliatesฺ

Configuring Image Properties
for Signed Packages
for
Signed
Packages
Use pkg with the following subcommands to configure package
signature properties for an image:
•set-property
•
add
-
property
-
value
add
property
value
•remove-property-value
•unset-property
Examples:
#
pkg set
property signature
policy verify
#
pkg
set
-
property
signature
-
policy
verify
# pkg add-property-value signature-require-names trustedname
# pkg remove-property-value signature-require-names trustedname
# pkg unset-property signature-policy
To configure the image properties for signed packages, you use the pkg command with the
list of subcommands presented in the slide. As you can see from the list of subcommands,
you can set, add, remove, and unset properties.
Copyright © 2013, Oracle and/or its affiliates. All rights reserved.
Under “Examples” in the slide, the first command shows how to configure an image to verify
all signed packages by setting the verify value for the signature-policy property.
The second command is an example of how to add the string trustedname to the image’s
list of common names that must be seen in a signature’s chain of trust for it to be considered
valid.
The third command is an example of how to remove the string trustedname from the
image’s list of common names.
The fourth command shows how to restore the signature-policy property to its default
value.
Oracle Solaris 11 Advanced System Administration 2 - 35
Cicero Ronaldo (ciceroฺronaldo@gmailฺcom) has a non-transferable
license to use this Student Guideฺ
Unauthorized reproduction or distribution prohibitedฺ Copyright© 2014, Oracle and/or its affiliatesฺ

Identifying Publisher Properties
for Signed Packages
for
Signed
Packages
•signature-policy: Determines the checks that will be
performed on manifests when installing a package into the
image from a specified publisher
•si
g
nature-re
q
uired-names: Defines names that must
g
q
be seen as common names of certificates while validating
the signatures of a package from a specified publisher
There are two publisher properties that you can set to use signed packages from a specific
publisher: signature-policy and signature-required-names.
The
signature
-
policy
property is identical to the function of the
signature
-
policy
Copyright © 2013, Oracle and/or its affiliates. All rights reserved.
The
signature
policy
property
is
identical
to
the
function
of
the
signature
policy
image property, except that this property applies only to packages from a specified publisher.
The signature-required-names property is identical to the function of the signature-
required-names image property, except that this property applies only to packages from a
specified publisher.
Oracle Solaris 11 Advanced System Administration 2 - 36
Cicero Ronaldo (ciceroฺronaldo@gmailฺcom) has a non-transferable
license to use this Student Guideฺ
Unauthorized reproduction or distribution prohibitedฺ Copyright© 2014, Oracle and/or its affiliatesฺ

Configuring Publisher Properties
for Signed Packages
for
Signed
Packages
Use pkg set-publisher with the following subcommands to
configure package signature properties for a publisher:
•--set-property
•--
add
-
property
-
value
add
property
value
•--remove-property-value
•--unset-property
Examples:
# pkg set-publisher --set-property signature-policy=require-
signatures whoisit com
signatures
whoisit
.
com
# pkg set-publisher --add-property-value signature-require-
names=trustedname whoisit.com
# pkg set-publisher --remove-property-value signature-require-
names=trustedname whoisit.com
# pkg set-publisher --unset-property signature-policy
whoisit.com
To configure publisher properties for signed packages, you use the pkg set publisher
command with the list of subcommands presented in the slide. As with image properties, you
can set, add, remove, and unset properties. Note that the subcommands are the same as
Copyright © 2013, Oracle and/or its affiliates. All rights reserved.
those used for configuring image properties, with one exception: each subcommand is
preceded by a double dash (--).
Under “Examples” in the slide, the first command shows how to configure an operating
system image to require that all packages installed from the publisher whoisit.com must be
signed.
The second command is an example of how to add the string trustedname to the
hiit
publisher
’
s list of common names that must be seen in a signature
’
s chain of
w
h
o
i
s
it
.co
m
publisher s
list
of
common
names
that
must
be
seen
in
a
signature s
chain
of
trust for it to be considered valid.
The third command is an example of how to remove the string trustedname from the
whoisit.com publisher’s list of common names.
The fourth command shows how to unset the signature-policy property that requires that
all packages installed from the publisher whoisit.com must be signed.
Oracle Solaris 11 Advanced System Administration 2 - 37
Cicero Ronaldo (ciceroฺronaldo@gmailฺcom) has a non-transferable
license to use this Student Guideฺ
Unauthorized reproduction or distribution prohibitedฺ Copyright© 2014, Oracle and/or its affiliatesฺ

Quiz
Which command enables you to configure your current image
to ensure that all manifests with signatures are validly signed?
a. # pkg set-property signature-policy verify
b
# pkg set
-
property signature
-
policy
b
.
#
pkg
set
property
signature
policy
require-names
c. # pkg set-property signature-policy
require-signature
Answer: a
Copyright © 2013, Oracle and/or its affiliates. All rights reserved.
Oracle Solaris 11 Advanced System Administration 2 - 38
Cicero Ronaldo (ciceroฺronaldo@gmailฺcom) has a non-transferable
license to use this Student Guideฺ
Unauthorized reproduction or distribution prohibitedฺ Copyright© 2014, Oracle and/or its affiliatesฺ

Quiz
What pkg subcommand or option of the set-publisher
subcommand is used to configure publisher properties for
signed packages?
a. set-
p
ro
p
ert
y
pp y
b. set-publisher
c. set-publisher property
d. --set-publisher
Answer: b
Copyright © 2013, Oracle and/or its affiliates. All rights reserved.
Oracle Solaris 11 Advanced System Administration 2 - 39
Cicero Ronaldo (ciceroฺronaldo@gmailฺcom) has a non-transferable
license to use this Student Guideฺ
Unauthorized reproduction or distribution prohibitedฺ Copyright© 2014, Oracle and/or its affiliatesฺ

Introducing Variants and Facets
•Variant: Mutually exclusive component of a package
–Appears as a tag on IPS actions
–Affects whether an IPS action is installable
•
Facet:
Optional component of a package
Facet:
Optional
component
of
a
package
–Appears as a tag on IPS actions
–Affects whether an IPS action is installable
Another way that the IPS allows you to manage your packages, regardless of whether they
are signed or unsigned, is through the use of variants and facets. A variant is a mutually
exclusive component of a package, such as architecture. Variants appear as tags on IPS
Copyright © 2013, Oracle and/or its affiliates. All rights reserved.
actions and affect whether that action is installable. If an action has any variant tags, all
variant tags must match the selection criteria to install the action.
Note: An action is defined in the IPS as an installable object, such as a file, directory, link, or
dependency. Actions are described in the manifest of a package. Every action consists
primarily of its name and a key attribute. Together, these refer to a unique object as it follows
a version history.
Af ti ti l t f k h l l F t t
A
f
ace
t
i
s an op
ti
ona
l
componen
t
o
f
a pac
k
age, suc
h
as a
l
oca
l
e.
F
ace
t
s appear as
t
ags on
IPS actions and affect whether that action is installable. If an action has any facet tags, at
least one facet tag must match the selection criteria to install the action.
Oracle Solaris 11 Advanced System Administration 2 - 40
Cicero Ronaldo (ciceroฺronaldo@gmailฺcom) has a non-transferable
license to use this Student Guideฺ
Unauthorized reproduction or distribution prohibitedฺ Copyright© 2014, Oracle and/or its affiliatesฺ

Displaying and Changing Variants and Facets
Variants
•To display the values of all variants, use pkg variant.
•To display specific variants, use pkg variant
variant spec
variant
_
spec
.
•To change a variant, use pkg change-variant
--accept variant_spec=instance.
Facets
•To display the current values of all facets defined in the
ti
k
f
curren
t
i
mage, use p
k
g
f
acet.
•To display specific facets, use pkg facet facet_spec.
•To change the current value of a facet, use pkg change-
facet --accept facet_spec=True|False|None.
You can display and change the current values for both variants and facets. To display the
values of all the variants of an image, you can use the pkg variant command. To display
specific variants, use the pkg variant command with a variant specification
Copyright © 2013, Oracle and/or its affiliates. All rights reserved.
(variant_spec). You can specify multiple variant specifications.
To change a specific variant, use the pkg change-variant command, followed by
––accept and the variant specification (variant_spec=instance). If you want to see
what will change without actually implementing the change, you can use the -n option as in
this example: # pkg change-variant -n --accept variant.debug=false.
To display all the facets in the current image, use pkg facet. To display specific facets, use
the
k
ft
command with a facet specification (
ft
) You can specify multiple
the
p
k
g
f
ace
t
command
with
a
facet
specification
(
f
ace
t
_spec
)
.
You
can
specify
multiple
facet specifications. To change a specific facet, use the pkg change-facet command,
followed by ––accept (to automatically accept all package licenses without interruption to
the update process) and the facet specification (facet_spec=True|False|None). Again,
you can use the -n option to see what changes will occur without actually making the change.
Oracle Solaris 11 Advanced System Administration 2 - 41
Cicero Ronaldo (ciceroฺronaldo@gmailฺcom) has a non-transferable
license to use this Student Guideฺ
Unauthorized reproduction or distribution prohibitedฺ Copyright© 2014, Oracle and/or its affiliatesฺ

Managing Package History
•To view package history, run pkg history.
•To view more verbose package history information, run
pkg history -l.
•
To specify the number of the most recent package history
To
specify
the
number
of
the
most
recent
package
history
operations to display, use the -n option.
•To display log records for a comma-separated list of
timestamps, use the –t option.
•To purge package history, run pkg purge-history.
$pkg history
START OPERATION CLIENT OUTCOME
2012-09-19T20:12:54 update-publisher transfer module Succeeded
2012-09-19T20:12:54 refresh-publishers transfer module Succeeded
2012-09-19T19:47:54 install transfer module Succeeded
# pkg purge-history
IPS has a pkg history command that enables you to see all the package operations that
have been performed on an image, as shown in the example in the slide.
Use the
-
l
option if you want to display more information, including the outcome of the
Copyright © 2013, Oracle and/or its affiliates. All rights reserved.
Use
the
l
option
if
you
want
to
display
more
information,
including
the
outcome
of
the
command, the time the command completed, the version and name of the client used, the
name of the user who performed the operation, and any errors encountered while executing
the command.
If you want to display only the most recent operations, use the -n option to specify the
number of operations that you want to view by.
To display log records for a comma-separated list of time stamps, use the -t option and a
hyphen (-) between a start and finish time stamp. The keyword now can be used as an alias
for the current time.
Use the pkg purge-history command to purge the history. However, you need root
privileges to perform this action.
For more information, see man pkg(1).
Oracle Solaris 11 Advanced System Administration 2 - 42
Cicero Ronaldo (ciceroฺronaldo@gmailฺcom) has a non-transferable
license to use this Student Guideฺ
Unauthorized reproduction or distribution prohibitedฺ Copyright© 2014, Oracle and/or its affiliatesฺ

Lesson Agenda
• Planning for IPS and Package Management
• Configuring a Local IPS Package Repository
• Configuring Network Client Access to the Local IPS Server
•
Managing Signed Packages and Package
Properties
•
Managing
Signed
Packages
and
Package
Properties
•Managing Package Publishers
• Managing Multiple Boot Environments
You will recall having set the publisher when you configured both the local IPS server and the
client machines, and when you configured the publisher properties for signed packages. In
this topic, you take a brief look at the other management tasks that you can perform on
Copyright © 2013, Oracle and/or its affiliates. All rights reserved.
package publishers.
Oracle Solaris 11 Advanced System Administration 2 - 43
Cicero Ronaldo (ciceroฺronaldo@gmailฺcom) has a non-transferable
license to use this Student Guideฺ
Unauthorized reproduction or distribution prohibitedฺ Copyright© 2014, Oracle and/or its affiliatesฺ

Managing Package Publishers
This section covers the following topics:
•Displaying publisher information
•Specifying publisher stickiness
•
Setting the publisher search order
•
Setting
the
publisher
search
order
•Disabling or enabling a publisher
•Changing a publisher origin URI
You already know how to perform several of the package publisher management tasks.
You know how to display the current publisher (pkg publisher), add a publisher (pkg set-
publisher -g), and remove a publisher (pkg set-publisher -G).
Copyright © 2013, Oracle and/or its affiliates. All rights reserved.
The additional tasks listed in the slide are covered in this section.
Oracle Solaris 11 Advanced System Administration 2 - 44
Cicero Ronaldo (ciceroฺronaldo@gmailฺcom) has a non-transferable
license to use this Student Guideฺ
Unauthorized reproduction or distribution prohibitedฺ Copyright© 2014, Oracle and/or its affiliatesฺ

Displaying Publisher Information
•To display only the highest-ranked publisher in the search
order, run pkg publisher -P.
$ pkg publisher -P
PUBLISHER TYPE STATUS URI
// / /
•To display information about a specific publisher,
run pkg publisher publisher_name.
solaris origin online http:
//
pkg.oracle.com
/
solaris
/
release
$ pkg publisher solaris
P blisher solaris
P
u
blisher
:
solaris
Alias:
Origin URI: http://pkg.oracle.com/solaris/release
SSL Key: None
SSL Cert: None
Client UUID: ddee2130-0292-11e2-b9e5-80144f013e20
Catalog Updated: September 27, 2012 10:22:59 PM
Enabled: Yes
If you are interested in seeing information only about the highest-ranked publisher in the
search order, you can run the pkg publisher command with the uppercase -P option, as
shown in the first example in the slide. You can see the publisher name, type, status, and
Copyright © 2013, Oracle and/or its affiliates. All rights reserved.
URI.
If you have multiple publishers and you want to see information about a particular publisher,
you can use the pkg publisher command with the publisher name. As shown in the second
example, this command displays the publisher’s name, an alias if one has been assigned, the
origin URI, the publisher’s SSL keys and certificates information if there are any, the client’s
universally unique identifier (UUID), the date the publisher’s catalog was last updated, and
whether the publisher is enabled
whether
the
publisher
is
enabled
.
Note: For information about specifying SSL keys and certificates for a publisher, see the
Image Packaging System man pages.
Oracle Solaris 11 Advanced System Administration 2 - 45
Cicero Ronaldo (ciceroฺronaldo@gmailฺcom) has a non-transferable
license to use this Student Guideฺ
Unauthorized reproduction or distribution prohibitedฺ Copyright© 2014, Oracle and/or its affiliatesฺ

Specifying Publisher Rankings
To set a publisher to be the highest-ranked publisher in the
search order, run pkg set-publisher -P publisher_name
or the --search-first option.
# pkg publisher
PUBLISHER TYPE STATUS URI
solaris origin online http://server.mydomain.com
whoisit.com (non-sticky) origin online http://pkg.example.com/release
# pkg set-publisher -P whoisit.com
# pkg publisher
PUBLISHER TYPE STATUS URI
whoisit.com ori
g
in online htt
p://p
k
g
.exam
p
le.com
/
release
g p://p g p /
solaris (non-sticky) origin online http://server.mydomain.com
As you may recall, when you first looked at the publisher information while configuring the
local IPS server, the publisher was the default solaris publisher from Oracle. You then
removed the default publisher origin for the solaris publisher and added a new origin to it.
Copyright © 2013, Oracle and/or its affiliates. All rights reserved.
The solaris publisher then became the highest-ranked publisher in the search order
(primarily because it was the only publisher at that point).
Assume that you have since added several publishers to your local IPS server and you want
to specify a different publisher as the highest-ranked publisher. To make this change, you use
the -P option with the pkg set-publisher command, followed by the publisher’s name, as
shown in the example, where you make the whoisit.com publisher the highest-ranked
publisher Note how the specified publisher moves to the top of the search order when you
publisher
.
Note
how
the
specified
publisher
moves
to
the
top
of
the
search
order
when
you
run the pkg publisher command again. (The “non-sticky” specification is discussed on the
next page.)
Note: You can specify the -P option when you add a publisher or when you modify an
existing publisher. Also, you can choose to use the --search-first option to search the
higher-ranked publisher.
Oracle Solaris 11 Advanced System Administration 2 - 46
Cicero Ronaldo (ciceroฺronaldo@gmailฺcom) has a non-transferable
license to use this Student Guideฺ
Unauthorized reproduction or distribution prohibitedฺ Copyright© 2014, Oracle and/or its affiliatesฺ

Specifying Publisher Stickiness
To make a publisher sticky, run pkg set-publisher
--sticky publisher_name.
# pkg set-publisher --sticky example.com
To make a publisher non-sticky, run pkg set-publisher
--non-sticky publisher_name.
# pkg set-publisher --non-sticky example.com
To make sure that a package that was installed from one publisher cannot be updated by
another publisher, you can make the publisher “sticky.” To do this, you use the pkg set-
publisher --sticky command, followed by the publisher’s name (as shown in the first
Copyright © 2013, Oracle and/or its affiliates. All rights reserved.
example in the slide). A newly added publisher is sticky by default.
Conversely, if you want to allow a package that was installed from one publisher to be
updated by another publisher (that is, so that publishers that are ranked higher than the
specified publisher can provide updates to packages originally installed from the specified
publisher), you can use the pkg set-publisher command with the --non-sticky option
(as shown in the second example).
Oracle Solaris 11 Advanced System Administration 2 - 47
Cicero Ronaldo (ciceroฺronaldo@gmailฺcom) has a non-transferable
license to use this Student Guideฺ
Unauthorized reproduction or distribution prohibitedฺ Copyright© 2014, Oracle and/or its affiliatesฺ

Setting the Publisher Search Order
To move a publisher higher in the search order, run pkg set-
publisher --search-before publisher_name
publisher_name.
To move a publisher lower in the search order, run pkg set-
publisher --search-after publisher_name
publisher_name.
# pkg set-publisher -–search-before example1.com example2.com
# pkg set-publisher -–search-after example1.com example2.com
The publisher search order is used to find packages to install. The publisher search order is
also used to find packages to update if the publisher that the package was originally installed
from is non-sticky.
Copyright © 2013, Oracle and/or its affiliates. All rights reserved.
The high ranked publisher is first in the search order. A newly added publisher is last in the
search order by default.
To move a publisher higher in the search order, use the pkg set-publisher --search-
before command, followed by the name of the publisher that you want to be demoted in the
search order, and then the name of the publisher that you want to be promoted in the search
order (as shown in the first example in the slide).
To move a publisher lower in the search order, use the pkg set-publisher --search-
after command, followed by the name of the publisher that you want to be searched first,
and then the name of the publisher that you want to be searched thereafter (as shown in the
second example).
Oracle Solaris 11 Advanced System Administration 2 - 48
Cicero Ronaldo (ciceroฺronaldo@gmailฺcom) has a non-transferable
license to use this Student Guideฺ
Unauthorized reproduction or distribution prohibitedฺ Copyright© 2014, Oracle and/or its affiliatesฺ

Disabling and Enabling a Publisher
To disable a publisher, run pkg set-publisher -d
publisher_name.
# pkg set-publisher –d solaris.com
To enable a publisher, run pkg set-publisher –e
publisher_name.
# pkg set-publisher –e solaris.com
There may be times when you need to disable a publisher temporarily. Suppose you have a
planned server or network outage. To minimize client down time to other publishers, you
decide to temporarily disable your publisher. After the planned down-time window is past, you
Copyright © 2013, Oracle and/or its affiliates. All rights reserved.
can enable the publisher again.
To disable a publisher, use the pkg set-publisher command with the -d option, followed
by the publisher’s name, as shown in the first example in the slide. A disabled publisher is not
used in package operations, such as list and install. However, you can still modify the
properties of a disabled publisher.
Note: The highest-ranked publisher cannot be disabled.
Use the -e option with the pkg set-publisher command to enable a publisher, as shown
in the second example.
Note: To see the disabled or enabled status of a publisher, you can run the pkg publisher
command with the publisher’s name.
Oracle Solaris 11 Advanced System Administration 2 - 49
Cicero Ronaldo (ciceroฺronaldo@gmailฺcom) has a non-transferable
license to use this Student Guideฺ
Unauthorized reproduction or distribution prohibitedฺ Copyright© 2014, Oracle and/or its affiliatesฺ

Changing a Publisher Origin URI
To change a publisher origin URI, run pkg set-publisher
-g newpublisher_URI -G oldpublisher_URI
newpublisher.
# pkg set-publisher -g http://pkg.example.com/support \
-G http://pkg.example.com/release solaris
There may be times when you want or need to change a publisher’s origin URI. For example,
you want to switch pkg.example.com/release to pkg.example.com/support. The
command to change a publisher’s origin URI is very similar to the command that you used to
Copyright © 2013, Oracle and/or its affiliates. All rights reserved.
add a new publisher to the local IPS server and remove the default solaris publisher. To
change the origin URI for a publisher, you add the new URI by using the -g option and
remove the old URI by using the -G option, as shown in the example in the slide.
Oracle Solaris 11 Advanced System Administration 2 - 50
Cicero Ronaldo (ciceroฺronaldo@gmailฺcom) has a non-transferable
license to use this Student Guideฺ
Unauthorized reproduction or distribution prohibitedฺ Copyright© 2014, Oracle and/or its affiliatesฺ

Quiz
You want to set mypublisher.com as the highest-ranked
publisher for your local IPS repository. Which command would
you use to execute this task?
a.
p
k
g
p
ublisher –P m
yp
ublisher.com
pgp
yp
b. pkg publisher –n mypublisher.com
c. pkg set-publisher -P mypublisher.com
d. pkg set-publisher -e mypublisher.com
Answer: c
Copyright © 2013, Oracle and/or its affiliates. All rights reserved.
Oracle Solaris 11 Advanced System Administration 2 - 51
Cicero Ronaldo (ciceroฺronaldo@gmailฺcom) has a non-transferable
license to use this Student Guideฺ
Unauthorized reproduction or distribution prohibitedฺ Copyright© 2014, Oracle and/or its affiliatesฺ

Quiz
You have three publishers listed in the following order:
mypublisher.com (the highest-ranked publisher), solaris,
and whoisit. For search-order purposes, you want to move
the whoisit publisher before the solaris publisher. Which
command would you use to execute this task?
a. pkg set-publisher --search-before solaris
whoisit
b. pkg set-publisher --search-after solaris
whoisit
c. pkg set-publisher --search-before whoisit
solaris
Answer: a
Copyright © 2013, Oracle and/or its affiliates. All rights reserved.
Oracle Solaris 11 Advanced System Administration 2 - 52
Cicero Ronaldo (ciceroฺronaldo@gmailฺcom) has a non-transferable
license to use this Student Guideฺ
Unauthorized reproduction or distribution prohibitedฺ Copyright© 2014, Oracle and/or its affiliatesฺ

Lesson Agenda
• Planning for IPS and Package Management
• Configuring a Local IPS Package Repository
• Configuring Network Client Access to the Local IPS Server
•
Managing Signed Packages and Package
Properties
•
Managing
Signed
Packages
and
Package
Properties
• Managing Package Publishers
•Managing Multiple Boot Environments
As a system administrator, an important part of your job is to manage multiple boot
environments (BEs), which includes making a backup of the BEs. You learn how to do this in
the next few slides.
Copyright © 2013, Oracle and/or its affiliates. All rights reserved.
Oracle Solaris 11 Advanced System Administration 2 - 53
Cicero Ronaldo (ciceroฺronaldo@gmailฺcom) has a non-transferable
license to use this Student Guideฺ
Unauthorized reproduction or distribution prohibitedฺ Copyright© 2014, Oracle and/or its affiliatesฺ

Managing Multiple Boot Environments
This section covers the following topics:
•Mounting an inactive boot environment
•Installing a package on an inactive, mounted boot
environment
environment
•Uninstalling a package on an inactive, mounted boot
environment
•Unmounting an inactive boot environment
•Creating a snapshot of a boot environment
•Creating a boot environment from an existing snapshot
Managing multiple boot environments is part of a system administrator’s responsibility. Being
able to create multiple BEs not only provides you with a full backup of your operating system
image but also gives you the flexibility to create other BEs in which to install and test new
Copyright © 2013, Oracle and/or its affiliates. All rights reserved.
packages with your current applications before introducing them into the production
environment.
Oracle Solaris 11 Advanced System Administration 2 - 54
Cicero Ronaldo (ciceroฺronaldo@gmailฺcom) has a non-transferable
license to use this Student Guideฺ
Unauthorized reproduction or distribution prohibitedฺ Copyright© 2014, Oracle and/or its affiliatesฺ

Listing the Boot Environments on the System
To list the boot environments on a system, run beadm list.
# beadm list
BE Active Mountpoint Space Policy Created
-- ------ ---------- ----- ------ -------
solaris NR / 2.38G static 2012-11-08 03:50
solaris-1 - - 169.0K static 2012-12-10 22:14
As you know, before you make any changes to the boot environments on your system, the
first thing that you should do is to determine the boot environments that exist on the system
by running the beadm list command, as shown in the example in the slide.
Copyright © 2013, Oracle and/or its affiliates. All rights reserved.
The environment presented here has two BEs, with the active or current BE being the
solaris BE.
Oracle Solaris 11 Advanced System Administration 2 - 55
Cicero Ronaldo (ciceroฺronaldo@gmailฺcom) has a non-transferable
license to use this Student Guideฺ
Unauthorized reproduction or distribution prohibitedฺ Copyright© 2014, Oracle and/or its affiliatesฺ

Mounting an Inactive Boot Environment
To mount an inactive boot environment, run beadm mount
beName mountpoint.
# beadm mount solaris-1 /solaris-1
#
beadm list
#
beadm
list
BE Active Mountpoint Space Policy Created
-- ------ ---------- ----- ------ -------
solaris NR / 2.38G static 2012-11-08 03:50
solaris-1 - /solaris-1 169.01M static 2012-12-10 22:14
Suppose that you have been asked to install and test several new packages on the operating
system. You do not want to impact the production environment, so you decide to mount an
existing inactive BE that is a copy of the existing active BE and use that for testing. To do this,
Copyright © 2013, Oracle and/or its affiliates. All rights reserved.
you must first mount the inactive BE.
To mount an existing inactive BE, you must run the beadm mount command followed by the
name of the inactive BE and the location of the mount point, as shown in the example in the
slide, where you are mounting the solaris-1 inactive BE to /solaris-1.
Note: If the directory for the mount point does not exist, the beadm utility creates the directory
and then mounts the boot environment on that directory. If the boot environment is already
mounted the
bd
t
command fails and does not remount the boot environment at the
mounted
,
the
b
ea
dm
moun
t
command
fails
and
does
not
remount
the
boot
environment
at
the
newly specified location.
To verify that the inactive BE is mounted, run the beadm list command again, as shown in
the example. As you can see, the boot environment is mounted but remains inactive.
Oracle Solaris 11 Advanced System Administration 2 - 56
Cicero Ronaldo (ciceroฺronaldo@gmailฺcom) has a non-transferable
license to use this Student Guideฺ
Unauthorized reproduction or distribution prohibitedฺ Copyright© 2014, Oracle and/or its affiliatesฺ

Installing a Package on an Inactive,
Mounted Boot Environment
Mounted
Boot
Environment
To install a package on an inactive boot environment,
run pkg –R mountpoint install packagename.
# pkg –R /solaris-1 install newpkg
Creating plan...
Packages to install: 1
Create boot environment: No
Create backup boot environment: No
DOWNLOAD PKGS FILES XFER(MB) SPEED
Completed 1/1 3/3 0.1/0.1 43.8k/s
PHASE ITEMS
I t lli ti 19/19
I
ns
t
a
lli
ng new ac
ti
ons
19/19
Updating package state database Done
Updating image state Done
Creating fast lookup database Done
After verifying that the inactive BE is mounted, you can install one or more packages by using
the pkg install command with the uppercase -R option, the mount point location, and the
package name, as shown in the example in the slide.
Copyright © 2013, Oracle and/or its affiliates. All rights reserved.
Note: The uppercase -R option specifies an alternate root to be used to identify the specific
packages to be installed or updated.
Oracle Solaris 11 Advanced System Administration 2 - 57
Cicero Ronaldo (ciceroฺronaldo@gmailฺcom) has a non-transferable
license to use this Student Guideฺ
Unauthorized reproduction or distribution prohibitedฺ Copyright© 2014, Oracle and/or its affiliatesฺ

Uninstalling a Package on an Inactive,
Mounted Boot Environment
Mounted
Boot
Environment
To uninstall a package on an inactive boot environment,
run pkg –R mountpoint uninstall packagename.
# pkg –R /solaris-1 uninstall newpkg
If you want to uninstall a package from an inactive mounted boot environment, the command
is basically the same as that for the installation. But instead of using pkg install, you use
pkg uninstall with the uppercase -R option, the mount point location, and the package
Copyright © 2013, Oracle and/or its affiliates. All rights reserved.
name, as shown in the example in the slide.
Oracle Solaris 11 Advanced System Administration 2 - 58
Cicero Ronaldo (ciceroฺronaldo@gmailฺcom) has a non-transferable
license to use this Student Guideฺ
Unauthorized reproduction or distribution prohibitedฺ Copyright© 2014, Oracle and/or its affiliatesฺ

Unmounting an Inactive Boot Environment
To unmount an inactive boot environment,
run beadm unmount beName.
# beadm unmount solaris-1
#
beadm list
#
BE Active Mountpoint Space Policy Created
-- ------ ---------- ----- ------ -------
solaris NR / 2.38G static 2012-11-08 03:50
solaris-1 - - 170.01M static 2012-12-10 22:14
Before you reboot the BE, you must unmount it. To unmount an inactive BE, run the beadm
unmount command, followed by the name of the inactive BE, as shown in the example in the
slide.
Copyright © 2013, Oracle and/or its affiliates. All rights reserved.
Note: You cannot unmount the BE that is currently booted.
To verify that the inactive BE is unmounted, run the beadm list command again, as shown
in the example. As you can see, the boot environment is now unmounted.
From this point, you can activate the inactive boot environment by using the beadm
activate command, and then reboot the system.
Oracle Solaris 11 Advanced System Administration 2 - 59
Cicero Ronaldo (ciceroฺronaldo@gmailฺcom) has a non-transferable
license to use this Student Guideฺ
Unauthorized reproduction or distribution prohibitedฺ Copyright© 2014, Oracle and/or its affiliatesฺ

Creating a Backup of a Boot Environment
To create a backup of the boot environment,
run beadm create BEname@snapshotdescription.
# beadm create solaris@backup
# beadm list –a solaris
BE/Dataset/Snapshot Active Mountpoint Space Policy Created
------------------- ------ ---------- ----- ------ -------
solaris
rpool/ROOT/solaris NR / 2.27G static 2012-10-29 11:32
rpool/ROOT/solaris/var - /var 112.37M static 2012-10-29 11:32
rpool/ROOT/solaris/var@2012-10-29-12:17:23 - - 760.5K static 2012-10-29 17:47
rpool/ROOT/solaris/var@backup - - 24.0K static 2012-10-29 18:06
rpool/ROOT/solaris/var@install - - 18.86M static 2012-10-29 11:37
rpool/ROOT/solaris@2012-10-29-12:17:23 - - 50.27M static 2012-10-29 17:47
rpool/ROOT/solaris@backup - - 0 static 2012-10-29 18:06
r
p
ool
/
ROOT
/
solaris@install - - 53.28M static 2012-10-29 11:37
p/ /
To create a backup of the boot environment, use the beadm create command followed by
the BE name and a backup description. In the example in the slide, you are creating a backup
of the solaris BE.
Copyright © 2013, Oracle and/or its affiliates. All rights reserved.
To verify that the backup was created, you can run beadm list -a followed by the BE name,
as shown in the example.
Oracle Solaris 11 Advanced System Administration 2 - 60
Cicero Ronaldo (ciceroฺronaldo@gmailฺcom) has a non-transferable
license to use this Student Guideฺ
Unauthorized reproduction or distribution prohibitedฺ Copyright© 2014, Oracle and/or its affiliatesฺ

Creating a Boot Environment
from an Existing Backup
from
an
Existing
Backup
To create a boot environment from an existing backup, run
beadm create -e BEname@snapshotdescription
beName.
#
bd t
li@bk li
2
#
b
ea
d
m crea
t
e –e so
l
ar
i
s
@b
ac
k
up so
l
ar
i
s-
2
# beadm list
BE Active Mountpoint Space Policy Created
-- ------ ---------- ----- ------ -------
solaris NR / 2.38G static 2012-11-08 03:50
solaris-1 - - 170.01M static 2012-12-10 22:14
solaris-2 - - 28.0K static 2012-12-10 22:59
# beadm activate solaris-2
#
beadm list
#
beadm
list
BE Active Mountpoint Space Policy Created
-- ------ ---------- ----- ------ -------
solaris N / 2.38G static 2012-11-08 03:50
solaris-1 - - 170.01M static 2012-12-10 22:14
solaris-2 R - 28.0K static 2012-12-10 22:59
# init 6
A backup of a boot environment is not bootable. However, you can create a new boot
environment from an existing backup, and then activate and boot the new boot environment.
To create a boot environment from a backup, use the
beadm
create
-
e
command followed
Copyright © 2013, Oracle and/or its affiliates. All rights reserved.
To
create
a
boot
environment
from
a
backup,
use
the
beadm
create
e
command
followed
by the backup description and a new BE name. In the example in the slide, you are creating a
new BE called solaris-2 from the backup solaris@backup.
To verify that the backup was created, run beadm list (as shown in the example). You can
see that solaris-2 is created.
To make the new BE the current boot environment, you must activate it and then reboot the
system, as shown in the example. Note that if you run the beadm list command again, you
can see that solaris-2 is now the BE that is active on reboot as designated by the Rin the
Active column.
Oracle Solaris 11 Advanced System Administration 2 - 61
Cicero Ronaldo (ciceroฺronaldo@gmailฺcom) has a non-transferable
license to use this Student Guideฺ
Unauthorized reproduction or distribution prohibitedฺ Copyright© 2014, Oracle and/or its affiliatesฺ

Practice 2-3 Overview:
Managing Multiple Boot Environments
Managing
Multiple
Boot
Environments
This practice covers the following topics:
•Creating a new full BE based on the current BE
•Mounting and updating an inactive BE
•
Creating a snapshot of a BE
•
Creating
a
snapshot
of
a
BE
•Deleting a BE
•Renaming a BE
This practice should take about 30 minutes to complete.
Copyright © 2013, Oracle and/or its affiliates. All rights reserved.
Oracle Solaris 11 Advanced System Administration 2 - 62
Cicero Ronaldo (ciceroฺronaldo@gmailฺcom) has a non-transferable
license to use this Student Guideฺ
Unauthorized reproduction or distribution prohibitedฺ Copyright© 2014, Oracle and/or its affiliatesฺ

Summary
In this lesson, you should have learned how to:
•Implement a plan for the Image Packaging System (IPS)
and package management
•
Configure a local IPS package repository
Configure
a
local
IPS
package
repository
•Configure network client access to a local IPS server
•Manage signed packages and package properties
•Manage package publishers
•Manage multiple boot environments
Copyright © 2013, Oracle and/or its affiliates. All rights reserved.
Oracle Solaris 11 Advanced System Administration 2 - 63
Cicero Ronaldo (ciceroฺronaldo@gmailฺcom) has a non-transferable
license to use this Student Guideฺ
Unauthorized reproduction or distribution prohibitedฺ Copyright© 2014, Oracle and/or its affiliatesฺ

Cicero Ronaldo (ciceroฺronaldo@gmailฺcom) has a non-transferable
license to use this Student Guideฺ
Unauthorized reproduction or distribution prohibitedฺ Copyright© 2014, Oracle and/or its affiliatesฺ

I tlli O lSli11 MltilH t
I
ns
t
a
lli
ng
O
rac
l
e
S
o
l
ar
i
s
11
on
M
u
lti
p
l
e
H
os
t
s
Copyright © 2013, Oracle and/or its affiliates. All rights reserved.
Cicero Ronaldo (ciceroฺronaldo@gmailฺcom) has a non-transferable
license to use this Student Guideฺ
Unauthorized reproduction or distribution prohibitedฺ Copyright© 2014, Oracle and/or its affiliatesฺ

Objectives
After completing this lesson, you should be able to:
•Implement a plan for an Oracle Solaris 11 operating
system installation
•
Install the Oracle Solaris 11 operating system by using the
Install
the
Oracle
Solaris
11
operating
system
by
using
the
Automated Installer
•Verify an Oracle Solaris 11 operating system installation
•Build an Oracle Solaris image by using the distribution
constructor
This lesson explains how to perform an installation of the Oracle Solaris 11 operating system
on multiple hosts by using the Automated Installer (AI).
It begins by discussing the importance of planning for the OS installation, including an
Copyright © 2013, Oracle and/or its affiliates. All rights reserved.
It
begins
by
discussing
the
importance
of
planning
for
the
OS
installation,
including
an
introduction to the automated installation method.
Next, you focus on how to install Oracle Solaris 11 by using the automated installation
method, and then how to verify the installation.
The lesson concludes by discussing how to build an Oracle Solaris image for distribution by
using a technology called the “distribution constructor.”
Oracle Solaris 11 Advanced System Administration 3 - 2
Cicero Ronaldo (ciceroฺronaldo@gmailฺcom) has a non-transferable
license to use this Student Guideฺ
Unauthorized reproduction or distribution prohibitedฺ Copyright© 2014, Oracle and/or its affiliatesฺ
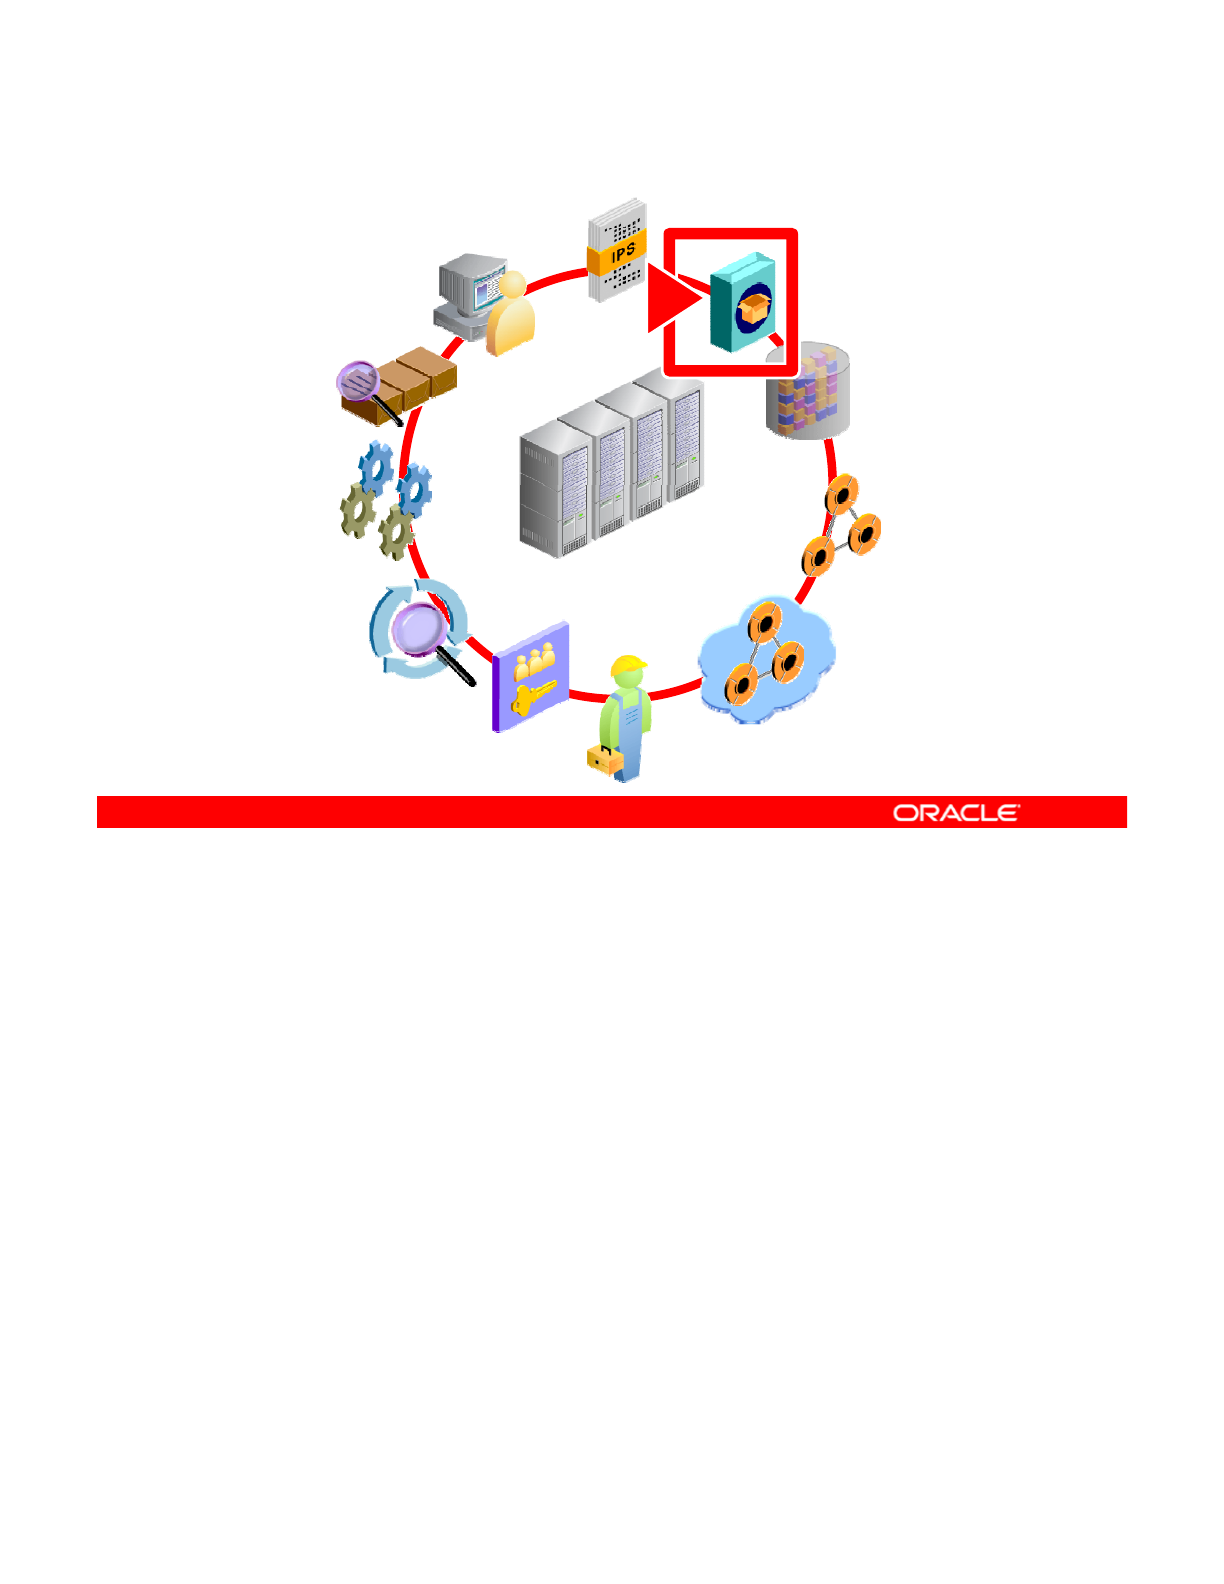
Workflow Orientation
AI INSTALL
IPS
DATA
STORAGE
RESOURCE
EVALUATION
MONITORING
STORAGE
NETWORK
CONFIGURATION
PROCESSES
EVALUATION
ENTERPRISE
DATA CENTER
SERVICES
PRIVILEGES
AUDITING
NETWORK
VIRTUALIZATION
Before you begin the lesson, take a moment to orient yourself in the job workflow. So far, you
have successfully set up a local IPS repository. The Automated Installer (AI) requires client
access to this IPS software package repository to install the OS on multiple client systems in
Copyright © 2013, Oracle and/or its affiliates. All rights reserved.
a network. The AI enables you to perform a hands-free installation of both SPARC and x86
systems.
Oracle Solaris 11 Advanced System Administration 3 - 3
Cicero Ronaldo (ciceroฺronaldo@gmailฺcom) has a non-transferable
license to use this Student Guideฺ
Unauthorized reproduction or distribution prohibitedฺ Copyright© 2014, Oracle and/or its affiliatesฺ

Lesson Agenda
•Planning for Oracle Solaris 11 Operating System
Installations by Using the Automated Installer
• Installing Oracle Solaris 11 by Using the Automated
Installe
r
• Building an Oracle Solaris Image
Copyright © 2013, Oracle and/or its affiliates. All rights reserved.
Oracle Solaris 11 Advanced System Administration 3 - 4
Cicero Ronaldo (ciceroฺronaldo@gmailฺcom) has a non-transferable
license to use this Student Guideฺ
Unauthorized reproduction or distribution prohibitedฺ Copyright© 2014, Oracle and/or its affiliatesฺ

Reviewing Your Company’s Plan for an
Oracle Solaris 11 Implementation
Oracle
Solaris
11
Implementation
Implementation plan review:
•Update all Solaris x86/64 machines to Oracle Solaris 11.
•Use the Automated Installer (AI) to install the operating
system
system
.
–Allows flexible configuration for disk layout, users,
provisioning of zones, and software selection
–Supports unattended installation on multiple machines
–Saves significant installation time
•
Evaluate by using distribution constructor for future Solaris
•
Evaluate
by
using
distribution
constructor
for
future
Solaris
image deployments.
You may recall from the introductory practice orientation that your company is planning to
upgrade all its Solaris x86/64 machines to Oracle Solaris 11. As part of that planning effort,
the company tests Oracle Solaris 11 functionality. After reviewing the installation method
Copyright © 2013, Oracle and/or its affiliates. All rights reserved.
options for Oracle Solaris 11 (LiveCD, text installer, and Automated Installer), the planning
committee decides that, because of the number of machines that your company needs to
upgrade, the Automated Installer (AI) will be used to perform the installation.
The benefit of using the AI is that you can install and configure the operating system ISO on
one server (either x86 or SPARC) and do not have to replicate the same installation effort on
other hosts. The AI provides you with flexible configuration for disk layout, users, provisioning
of zones and software selection
Using AI the operating system can be installed on client
of
zones
,
and
software
selection
.
Using
AI
,
the
operating
system
can
be
installed
on
client
hosts unattended and without any manual intervention. This method saves significant
installation time and, therefore, is used widely in the industry.
In addition, the team also wants to evaluate using the distribution constructor for deploying
Solaris images.
Oracle Solaris 11 Advanced System Administration 3 - 5
Cicero Ronaldo (ciceroฺronaldo@gmailฺcom) has a non-transferable
license to use this Student Guideฺ
Unauthorized reproduction or distribution prohibitedฺ Copyright© 2014, Oracle and/or its affiliatesฺ

Planning for an Oracle Solaris 11 AI Installation
The AI installation testing activities include:
•Identifying AI requirements
•Configuring the AI installation server
•
Configuring the client system
•
Configuring
the
client
system
•Implementing the configuration
•Verifying the installation
As part of the Server Implementation team, you are responsible for completing many of the
AI installation testing activities, including those listed in the slide.
Note:
Another team has been assigned the responsibility of evaluating the use of the
Copyright © 2013, Oracle and/or its affiliates. All rights reserved.
Note:
Another
team
has
been
assigned
the
responsibility
of
evaluating
the
use
of
the
distribution constructor. However, you will be given an overview later in this lesson of how
Solaris images are built by using the distribution constructor.
Oracle Solaris 11 Advanced System Administration 3 - 6
Cicero Ronaldo (ciceroฺronaldo@gmailฺcom) has a non-transferable
license to use this Student Guideฺ
Unauthorized reproduction or distribution prohibitedฺ Copyright© 2014, Oracle and/or its affiliatesฺ

Automated Installation: Overview
•The AI automates the installation of the OS on one or more
SPARC and x86 systems over a network.
•The installations differ in architecture, software packages,
disk ca
p
acit
y,
network confi
g
uration
,
and other
py, g ,
parameters.
•Automated installation requires the following components:
–AI server: Provides the install service that contains the
installation instructions for the client system
–
Client system to be installed:
Accesses the IP address
Client
system
to
be
installed:
Accesses
the
IP
address
information from the DHCP server
–DHCP server: Provides the initial IP addresses and boot
information
–IPS repository: Provides the software packages that are
identified in the AI manifest file to the client system
The Automated Installer is used to automate the installation of the Oracle Solaris 11 OS on
one or more SPARC and x86 systems over a network. The installations can differ in
architecture, software packages installed, disk capacity, network configuration, and other
Copyright © 2013, Oracle and/or its affiliates. All rights reserved.
parameters.
For an automated installation to run, the components presented in the slide are required.
Oracle Solaris 11 Advanced System Administration 3 - 7
Cicero Ronaldo (ciceroฺronaldo@gmailฺcom) has a non-transferable
license to use this Student Guideฺ
Unauthorized reproduction or distribution prohibitedฺ Copyright© 2014, Oracle and/or its affiliatesฺ
Automated Installation Process
Install Service
Manifests
AI Server
M M M
...
Boot Image
IPS
Repository
DHCP
Server
31
2
The graphic in the slide illustrates the automated installation process:
1. A client system boots and gets IP and boot information from the DHCP server.
2
The client contacts an install service on the AI server and accesses the boot image and
Copyright © 2013, Oracle and/or its affiliates. All rights reserved.
2
.
The
client
contacts
an
install
service
on
the
AI
server
and
accesses
the
boot
image
and
the AI manifest that contains the installation instructions.
3. The client is installed with the operating system, pulling packages from the IPS
repository that is specified in the installation instructions.
Oracle Solaris 11 Advanced System Administration 3 - 8
Cicero Ronaldo (ciceroฺronaldo@gmailฺcom) has a non-transferable
license to use this Student Guideฺ
Unauthorized reproduction or distribution prohibitedฺ Copyright© 2014, Oracle and/or its affiliatesฺ
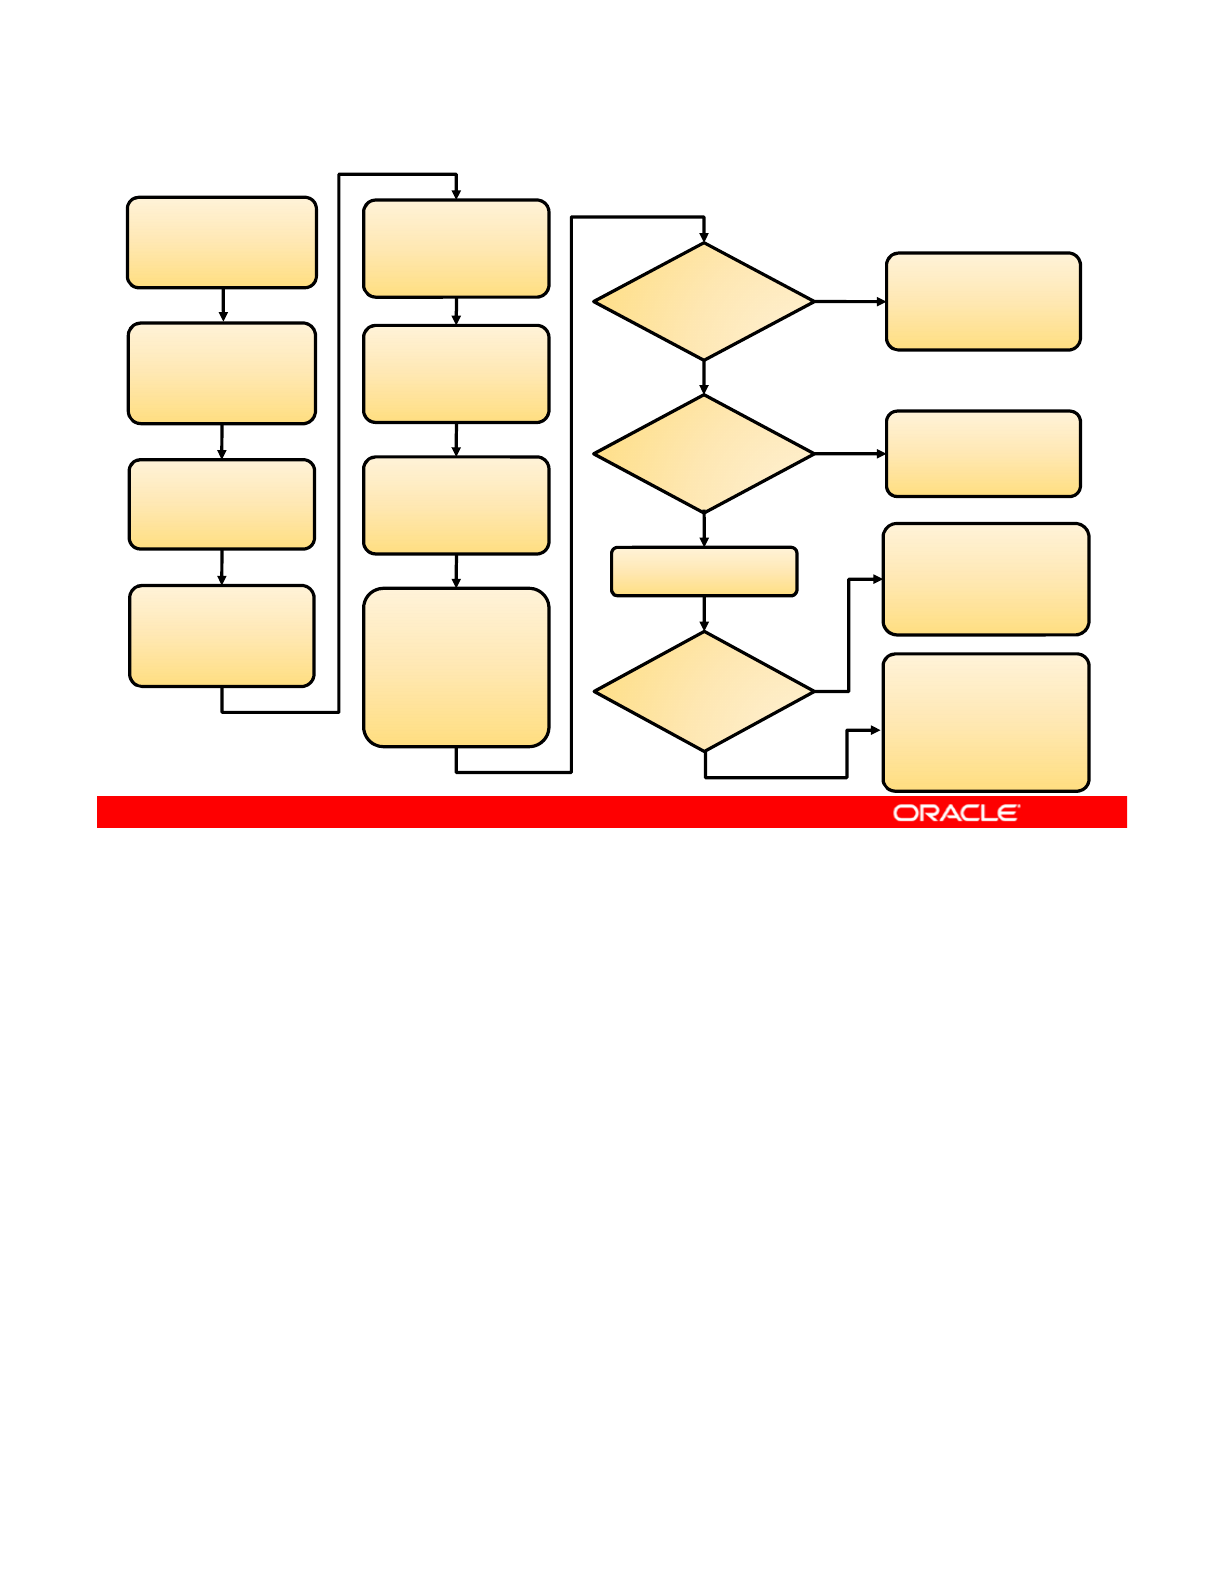
How the AI Works
Boot client from
network.
Client contacts DHCP
server, gets IP
address and location
Client uses HTTP to
download installation
programs from AI
image.
Client identifies
installation services
and chooses
Installation
successful?
User examines logs
and error messages
and determines
course of action.
No
Yes
of boot program.
Client gets boot
program and loads it.
matching service.
Client contacts
installation service
and gets installation
manifest.
Automatic
reboot set in
manifest?
System reboots.
User can examine logs
and reboot manually.
No
Yes Hands-free client
configuration; uses SC
profiles determined by
iik dih
Client downloads
boot archive and
loads kernel.
Automated installer
installs client from
IPS repository
specified in manifest
and configures
system for use.
SC profiles
determined
for client?
Yes
cr
i
ter
i
a
k
eywor
d
s
i
n t
h
e
AI service
No
Hands-on client system
configuration; uses the
administrator’s
responses in the
interactive system
configuration tool
Suppose that you have set up an installation server with one or more installation services.
You have customized the installation specifications for the installation services to suit your
needs. Now you are ready to install the Oracle Solaris 11 OS on the client systems on the
Copyright © 2013, Oracle and/or its affiliates. All rights reserved.
network. You need only to boot the client; the process runs to completion without further input
from you.
The flowchart in the slide illustrates how a client system is installed. The client browses for
available installation services, seeking a service where the installation criteria in the service’s
manifest file matches the characteristics of the client system. When a match is found, the
installation is performed on the client system by using a boot image, and the manifest and SC
profile specifications provided by the install service
profile
specifications
provided
by
the
install
service
.
Oracle Solaris 11 Advanced System Administration 3 - 9
Cicero Ronaldo (ciceroฺronaldo@gmailฺcom) has a non-transferable
license to use this Student Guideฺ
Unauthorized reproduction or distribution prohibitedฺ Copyright© 2014, Oracle and/or its affiliatesฺ

Quiz
Which AI component provides installation instructions to the
client system?
a. AI server
b
DHCP server
b
.
DHCP
server
c. IPS repository
Answer: a
Copyright © 2013, Oracle and/or its affiliates. All rights reserved.
Oracle Solaris 11 Advanced System Administration 3 - 10
Cicero Ronaldo (ciceroฺronaldo@gmailฺcom) has a non-transferable
license to use this Student Guideฺ
Unauthorized reproduction or distribution prohibitedฺ Copyright© 2014, Oracle and/or its affiliatesฺ

Lesson Agenda
• Planning for Oracle Solaris 11 Operating System
Installations by Using the Automated Installer
•Installing Oracle Solaris 11 by Using the Automated
Installer
• Building a Solaris Image
Copyright © 2013, Oracle and/or its affiliates. All rights reserved.
Oracle Solaris 11 Advanced System Administration 3 - 11
Cicero Ronaldo (ciceroฺronaldo@gmailฺcom) has a non-transferable
license to use this Student Guideฺ
Unauthorized reproduction or distribution prohibitedฺ Copyright© 2014, Oracle and/or its affiliatesฺ

Installing Oracle Solaris 11 by Using the AI
This section covers the following topics:
•Reviewing AI installation server requirements
•Configuring an AI installation server
•
Configuring the client system
•
Configuring
the
client
system
•Implementing the configuration
•Verifying the installation
Copyright © 2013, Oracle and/or its affiliates. All rights reserved.
Oracle Solaris 11 Advanced System Administration 3 - 12
Cicero Ronaldo (ciceroฺronaldo@gmailฺcom) has a non-transferable
license to use this Student Guideฺ
Unauthorized reproduction or distribution prohibitedฺ Copyright© 2014, Oracle and/or its affiliatesฺ
Reviewing AI Installation Server Requirements
Hardware Requirement
Disk space Approximately 0.75 GB additional disk space for each
AI installation service after Oracle Solaris 11 OS has
been installed
Memory Recommended minimum: 1 GB
Software Requirement
Operating system Oracle Solaris 11 must be installed.
IP address A static IP address must be used.
Router The default route must be set.
DHCP DHCP must be set up.
IPS repository The repository must be set up locally.
Before you start to configure a server as your AI installation server, you must check whether
the server meets the minimum hardware and software requirements to be an AI server.
Starting with the hardware requirements, you must allow additional disk space for each AI
Copyright © 2013, Oracle and/or its affiliates. All rights reserved.
Starting
with
the
hardware
requirements,
you
must
allow
additional
disk
space
for
each
AI
installation service that you need. The disk space requirement presented in the slide is in
addition to the disk space that you need for the Oracle Solaris 11 operating system. The
minimum requirement to operate an AI installation server is 1 GB of memory.
To meet the AI installation server software requirements, you must have the Oracle Solaris 11
release installed. You also need to configure the AI server to use a static IP address. If the
reactive network configurations are currently being used, it can be configured for static IP
dd i
AI li t l DHCP t bt i th i i iti l IP dd d b t fil Y
a
dd
ress
i
ng.
AI
c
li
en
t
s re
l
y on
DHCP
t
o o
bt
a
i
n
th
e
i
r
i
n
iti
a
l
IP
a
dd
resses an
d
b
oo
t
fil
es.
Y
ou can
configure the AI server to be the DHCP server by using the installadm command, or you
can use a DHCP server that is already set up in this network.
A local IPS repository needs to be properly configured on your AI server to install the Oracle
Solaris 11 OS on multiple network clients.
Oracle Solaris 11 Advanced System Administration 3 - 13
Cicero Ronaldo (ciceroฺronaldo@gmailฺcom) has a non-transferable
license to use this Student Guideฺ
Unauthorized reproduction or distribution prohibitedฺ Copyright© 2014, Oracle and/or its affiliatesฺ

Verifying AI Install Server Software Requirements
Check the following to verify that the server is ready to be
configured as an AI server:
•Static IP address configuration
•
Operational DNS
Operational
DNS
•IPS configured and available from the AI server
•Enabled DHCP server
Assume now that you have selected the server that you want to use as your AI server and
that it meets the AI installation server disk space and memory hardware requirements.
You have installed the Oracle Solaris 11 operating system and are now ready to verify that
Copyright © 2013, Oracle and/or its affiliates. All rights reserved.
You
have
installed
the
Oracle
Solaris
11
operating
system
and
are
now
ready
to
verify
that
the server meets the remaining software requirements. You do this by performing a series of
checks. You ensure that the system has been configured with a static IP address and that the
DNS is operational. You also ensure that an IPS repository and an IPS service are properly
configured and available locally from this AI server. Finally, you ensure that DHCP server is
enabled.
Oracle Solaris 11 Advanced System Administration 3 - 14
Cicero Ronaldo (ciceroฺronaldo@gmailฺcom) has a non-transferable
license to use this Student Guideฺ
Unauthorized reproduction or distribution prohibitedฺ Copyright© 2014, Oracle and/or its affiliatesฺ
Verifying the Static IP Address
To verify that the operating system is configured with a static
IP address, run svcs network/physical, followed by ipadm
show-addr.
# svcs network/physical:default
STATE STIME FMRI
online 15:02:57 svc:/network/physical:default
# ipadm show-addr
ADDROBJ TYPE STATE ADDR
…
/ik /
net0
/
v4 stat
i
c o
k
192.168.0.112
/
24
…
#
To verify that the operating system is configured with a static IP address (that is, an IP
address that has been created manually and not dynamically through the reactive network
configuration or DHCP, for example), you first run the svcs network/physical:default
Copyright © 2013, Oracle and/or its affiliates. All rights reserved.
command to verify that the physical network connection has been manually configured. In the
example, you can see that the network that has been set up manually is online.
Next, you run the ipadm show-addr command to see the IP address information. In the
example, you can see that you have a static network connection for IP address
192.168.0.112/24, and that the state of the connection is ok.
Oracle Solaris 11 Advanced System Administration 3 - 15
Cicero Ronaldo (ciceroฺronaldo@gmailฺcom) has a non-transferable
license to use this Student Guideฺ
Unauthorized reproduction or distribution prohibitedฺ Copyright© 2014, Oracle and/or its affiliatesฺ

Verifying That DNS Is Operational
To verify that the DNS is operational, run nslookup server
domain name
.
# nslookup server1.mydomain.com
Server: 192.168.0.100
Address: 192.168.0.100#53
Name: server1.mydomain.com
Address: 192.168.0.100
Next, you want to check that the DNS is operational. To verify this, run the nslookup
command followed by the server’s domain name. In the example, you can tell from the output
that the DNS is operational on this server.
Copyright © 2013, Oracle and/or its affiliates. All rights reserved.
Oracle Solaris 11 Advanced System Administration 3 - 16
Cicero Ronaldo (ciceroฺronaldo@gmailฺcom) has a non-transferable
license to use this Student Guideฺ
Unauthorized reproduction or distribution prohibitedฺ Copyright© 2014, Oracle and/or its affiliatesฺ
Verifying That IPS Is Available Locally
To verify that the correct local IPS repository is available to
your server, run pkg publisher
.
# pkg publisher
To test IPS on the local server by searching for the entire
package, run pkg search entire.
PUBLISHER TYPE STATUS URI
solaris origin online http://server1.mydomain.com
#
khi
#
p
k
g searc
h
ent
i
re
INDEX ACTION VALUE PACKAGE
pkg.fmri set solaris/entire pkg:/entire@0.5.11-0.175.1.0.0.24.2
For AI to work properly, it needs the Image Packaging System (IPS) to be configured correctly
and to be available from the AI server. To verify that a local IPS repository is available to the
AI server, run the pkg publisher command and verify its URI.
Copyright © 2013, Oracle and/or its affiliates. All rights reserved.
To test that the IPS service is available, search for a given package by using the pkg search
command. Searching for a package is a quick way of determining whether the IPS service is
available. Refer to the lesson titled “Managing the Image Packaging System (IPS) and
Packages,” which covers IPS-related tasks in greater detail.
Oracle Solaris 11 Advanced System Administration 3 - 17
Cicero Ronaldo (ciceroฺronaldo@gmailฺcom) has a non-transferable
license to use this Student Guideฺ
Unauthorized reproduction or distribution prohibitedฺ Copyright© 2014, Oracle and/or its affiliatesฺ

Verifying That the DHCP Server Is Enabled
To verify that the DCHP server is enabled, run svcs -a |
grep dhcp
.
# svcs -a | grep dhcp
disabled
0:37:40
svc:/network/dhcp/relay:ipv6
disabled
0:37:40
svc:/network/dhcp/relay:ipv6
disabled 0:37:40 svc:/network/dhcp/server:ipv6
disabled 0:37:40 svc:/network/dhcp/relay:ipv4
online 1:05:06 svc:/network/dhcp/server:ipv4
The final check that you must make to verify that the server is ready to be configured as an AI
server is to make sure that the DHCP server is up and running. To do this, you run the svcs
–a | grep dhcp command, as shown in the example. The DHCP server should be in the
Copyright © 2013, Oracle and/or its affiliates. All rights reserved.
enabled state.
Oracle Solaris 11 Advanced System Administration 3 - 18
Cicero Ronaldo (ciceroฺronaldo@gmailฺcom) has a non-transferable
license to use this Student Guideฺ
Unauthorized reproduction or distribution prohibitedฺ Copyright© 2014, Oracle and/or its affiliatesฺ

Practice 3-1 Overview:
Verifying System AI Requirements (Optional)
Verifying
System
AI
Requirements
(Optional)
This practice takes you through the steps for checking the
existing version of Oracle Solaris 11 to verify the system
requirements for the AI installation.
Note: This
p
ractice is o
p
tional and needs to be com
p
leted onl
y
pp p
y
if you have not completed the Practice 2 tasks.
The practices for this lesson are designed to reinforce the concepts that have been presented
in the lecture portion. These practices cover the following tasks:
•Pr
act
i
ce
3
-1: V
e
rif
y
in
g
AI
syste
m r
equ
ir
e
m
e
n
ts
(opt
i
o
n
a
l
)
Copyright © 2013, Oracle and/or its affiliates. All rights reserved.
act ce 3
e y g syste equ e e ts (opt o a )
•Practice 3-2: Configuring the AI server
•Practice 3-3: Deploying the OS on the network client
Practice 3-1 should take you about 15 minutes to complete.
Oracle Solaris 11 Advanced System Administration 3 - 19
Cicero Ronaldo (ciceroฺronaldo@gmailฺcom) has a non-transferable
license to use this Student Guideฺ
Unauthorized reproduction or distribution prohibitedฺ Copyright© 2014, Oracle and/or its affiliatesฺ

Configuring the AI Install Server
1. Enable the DNS multicast service.
2. Create a directory for the AI service.
3. Verify the netmasks file configuration.
4
Create an AI installation service:
4
.
Create
an
AI
installation
service:
–With a DHCP setup
–Without a DHCP setup
5. Review the default installation instructions.
6. Add installation criteria to an AI service.
After verifying that the server meets the AI software requirements, you are ready to configure
the AI install server. As discussed in the topic on planning for the installation, the AI server is
used to store an AI install image and contains the AI service. The AI service specifies the
Copyright © 2013, Oracle and/or its affiliates. All rights reserved.
installation instructions for installing the Oracle Solaris 11 OS on a client. To set up the AI
install server, you must complete the steps listed in the slide.
Oracle Solaris 11 Advanced System Administration 3 - 20
Cicero Ronaldo (ciceroฺronaldo@gmailฺcom) has a non-transferable
license to use this Student Guideฺ
Unauthorized reproduction or distribution prohibitedฺ Copyright© 2014, Oracle and/or its affiliatesฺ

Enabling the DNS Multicast Service
To enable the DNS multicast service, run svcadm enable
svc:/network/dns/multicast
.
# svcadm enable svc:/network/dns/multicast
# svcs network/dns/multicast
STATE STIME FMRI
online 1:32:27 svc:/network/dns/multicast:default
As part of configuring the AI install server, you want to ensure that the DNS multicast service
is enabled. To enable the DNS multicast service (svc:/network/dns/multicast) on the
AI server, run the following command:
Copyright © 2013, Oracle and/or its affiliates. All rights reserved.
# svcadm enable svc:/network/dns/multicast:default
You can then verify that the service is enabled by running the svcs
network/dns/multicast command as shown in the code example. As you can see in the
output, the DNS multicast service is now online.
Oracle Solaris 11 Advanced System Administration 3 - 21
Cicero Ronaldo (ciceroฺronaldo@gmailฺcom) has a non-transferable
license to use this Student Guideฺ
Unauthorized reproduction or distribution prohibitedฺ Copyright© 2014, Oracle and/or its affiliatesฺ

Installing the AI Installation Tools
To install the AI installation tools, run pkg install
install/installadm.
# pkg install install/installadm
After enabling the DNS multicast service, your next task is to download the AI installation
tools package.
Note:
In this course, you do not perform this step in the practice; it is already done for you.
Copyright © 2013, Oracle and/or its affiliates. All rights reserved.
Note:
In
this
course,
you
do
not
perform
this
step
in
the
practice;
it
is
already
done
for
you.
This package (the install/installadm package) contains the installadm utility that
enables you to perform the following:
•Create and enable install services.
•Set up and update a DHCP server.
•Add custom client installation and configuration instructions.
•
Set criteria for clients to use custom installation and configuration instructions
•
Set
criteria
for
clients
to
use
custom
installation
and
configuration
instructions
.
To install the AI installation tools, run the following command:
# pkg install install/installadm
In this example, by default, the install/installadm package is being downloaded from
the preferred publisher, which, on this system (as you might recall), is the solaris publisher.
Note: In the Oracle Solaris 11.1 release, installadm supports three new options to improve
fl ibili f d i i h i i f i ll i i
fl
ex
ibili
ty
f
or a
d
m
i
n
i
strators w
h
o ma
i
nta
i
n a set o
f
i
nsta
ll
at
i
on serv
i
ces: update-service,
update-profile, and set-service. For information, refer to the installadm (1M) man
page.
Oracle Solaris 11 Advanced System Administration 3 - 22
Cicero Ronaldo (ciceroฺronaldo@gmailฺcom) has a non-transferable
license to use this Student Guideฺ
Unauthorized reproduction or distribution prohibitedฺ Copyright© 2014, Oracle and/or its affiliatesฺ
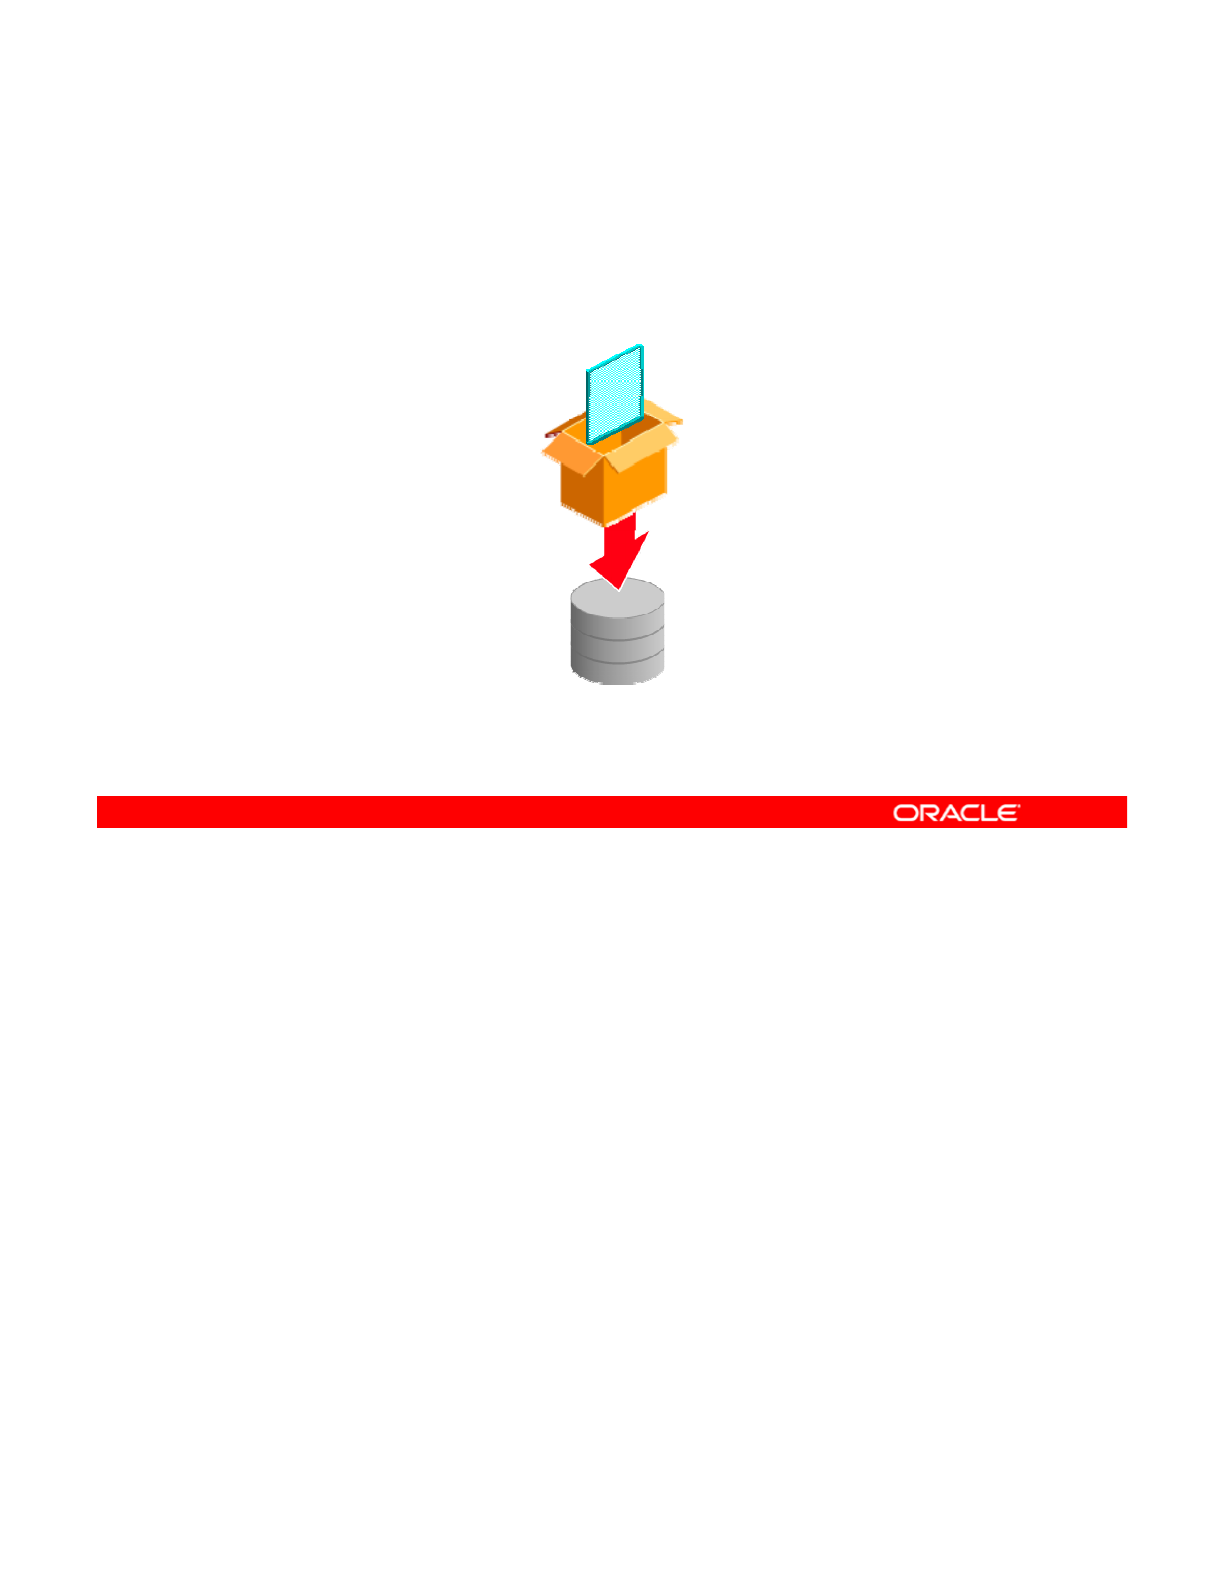
Setting Up the AI Boot Image
Download the AI boot image from:
http://www.oracle.com/technetwork/server-storage/solaris11/downloads/index.html
BOOT
IMAGE
Note: The AI ISO image must be the same version as the
Oracle Solaris OS that you plan to install on the client.
Next, you set up the AI boot image. AI uses this boot image to boot the client.
Note: In this course, you do not perform this step in the practice; it is already done for you.
To download the AI boot image go to the following site:
Copyright © 2013, Oracle and/or its affiliates. All rights reserved.
To
download
the
AI
boot
image
,
go
to
the
following
site:
http://www.oracle.com/technetwork/server-storage/solaris11/downloads/index.html
Be sure to download the Automated Install image and not the LiveCD image or the text install
image to the ZFS root pool file system that you created earlier.
The AI ISO image must be the same version as the Oracle Solaris OS that you plan to install
on the client.
Conversely, download the Oracle Solaris 11 SPARC Automated Install image for SPARC
clients or the Oracle Solaris 11 x86 Automated Install image for x86 clients. For x86, be sure
to download the .iso file and not the .usb file. The .usb file is not suitable for creating an
install service.
Oracle Solaris 11 Advanced System Administration 3 - 23
Cicero Ronaldo (ciceroฺronaldo@gmailฺcom) has a non-transferable
license to use this Student Guideฺ
Unauthorized reproduction or distribution prohibitedฺ Copyright© 2014, Oracle and/or its affiliatesฺ
Configuring an AI Install Service
The AI install service:
•Associates an install image with a named install service
•Enables client systems to use the install service name to
find the correct install image
find
the
correct
install
image
•Is associated with only one boot image
•Can be created with or without a DHCP setup
INSTALL
IMAGE
ClientInstall Service
IMAGE
You are now ready to configure the AI install service.
The AI install service associates an install image with a named install service. Client systems
use the install service name to find the correct install image.
Copyright © 2013, Oracle and/or its affiliates. All rights reserved.
use
the
install
service
name
to
find
the
correct
install
image.
An AI install server can have multiple install services. Each install service is associated with
only one boot image. To install both SPARC and x86 clients, for example, you need one
install service with a SPARC boot image and a second install service with an x86 boot image.
You can create an AI install service with or without a DHCP setup. The process is the same
for both x86 and SPARC clients.
Note:
Oracle Solaris 11.1 has added support for a new set of role
-
based authentication
Note:
Oracle
Solaris
11.1
has
added
support
for
a
new
set
of
role
based
authentication
control (RBAC) profiles and authorizations for managing the Automated Install service,
including the profile Install Service Management. If you have the Install Service Management
rights profile, you can use the pfexec command to create install services and add system
configuration profiles to an install service.
Oracle Solaris 11 Advanced System Administration 3 - 24
Cicero Ronaldo (ciceroฺronaldo@gmailฺcom) has a non-transferable
license to use this Student Guideฺ
Unauthorized reproduction or distribution prohibitedฺ Copyright© 2014, Oracle and/or its affiliatesฺ

Verifying the netmasks File Configuration
To verify the netmasks file configuration, run getent
netmasks IP_Address.
# getent netmasks 192.168.0.0
If a network mask entry for the local subnet does not exist in
/etc/netmasks, update the file.
# vi /etc/netmasks
…
192 168 0 0 255 255 255 0
192
.
168
.
0
.
0
255
.
255
.
255
.
0
Before you create the AI service, you first need to verify that the netmasks file configuration
for the DHCP service has been configured correctly. To do this, use the getent netmasks
command followed by the IP address, as shown in the first example in the slide.
Copyright © 2013, Oracle and/or its affiliates. All rights reserved.
DHCP requires that the network mask for the local subnet should be configured in the
/etc/netmasks file. If an entry does not exist, you must update the netmasks file now, as
shown in the second example.
Oracle Solaris 11 Advanced System Administration 3 - 25
Cicero Ronaldo (ciceroฺronaldo@gmailฺcom) has a non-transferable
license to use this Student Guideฺ
Unauthorized reproduction or distribution prohibitedฺ Copyright© 2014, Oracle and/or its affiliatesฺ

Creating an AI Install Service
with an ISC DHCP Server Setup
with
an
ISC
DHCP
Server
Setup
To create an AI install service with ISC DHCP server setup, run
installadm create-service, followed by the service
name, the path to the ISO image, the IP address range, and the
path to where the ISO image should be unpacked.
# installadm create-service -n basic_ai \
-s /opt/ora/course_files/sol-11_1-ai-x86.iso \
-i 192.168.0.130 -c 5 -d /export/ai/basic_ai
Creating service from: /opt/ora/course_files/sol-11_1-ai-x86.iso
Setting up the image ...
Creating service: basic_ai
Image path: /export/ai/basic_ai
<output omitted>
# installadm list
Service Name Alias Of Status Arch Image Path
------------ -------- ------ ---- ----------
basic_ai - on x86 /export/ai/basic_ai
default-i386 basic_ai on x86 /export/ai/basic_ai
To create the AI install service with an ISC DHCP server setup, use the installadm
create-service command as shown in the example.
Note:
In this example, the DHCP service is already set up on the server and you are only
Copyright © 2013, Oracle and/or its affiliates. All rights reserved.
Note:
In
this
example,
the
DHCP
service
is
already
set
up
on
the
server
and
you
are
only
updating the DHCP with the new IP addresses for the named AI service.
As part of the installadm create-service command, you want to:
•Use the -n option to specify the service name (as shown in the code example)
•Use the -s option to specify the path to the AI ISO image file that is to be used to create
the service (as shown in the example)
•
Update the ISC DHCP server with the new IP addresses for the named AI service
Update
the
ISC
DHCP
server
with
the
new
IP
addresses
for
the
named
AI
service
.
In this example, the install service serves five IP addresses (-c), starting from
192.168.0.130 (-i).
•Specify the path where you want the AI ISO image unpacked. The path where the ISO
image is unpacked is also called the target or net image. In this example, you unpack
the AI ISO image in /export/ai/basic_ai.
Note: When you create the AI install service, its directory is automatically created for you.
Oracle Solaris 11 Advanced System Administration 3 - 26
Cicero Ronaldo (ciceroฺronaldo@gmailฺcom) has a non-transferable
license to use this Student Guideฺ
Unauthorized reproduction or distribution prohibitedฺ Copyright© 2014, Oracle and/or its affiliatesฺ

During the service creation process, the system displays a number of messages that verify
the creation of the target image, the DHCP server setup, the creation of the network table,
and the copy of the boot file. An example of the output is provided here:
Creating service: basic
_
ai
_
Setting up the target image at /export/ai/basic_ai ...
Refreshing install services
Creating default-i386 alias.
Setting the default PXE bootfile in the local DHCP configuration to
'default-i386/boot/grub/pxegrub'
Refreshing install services
Refreshing
install
services
You can verify your AI install service creation by using the installadm list command as
shown in the second example.
To remove an AI install service, use installadm delete-service svcname.
Note: You can also create the x86 AI install service from the net IPS package
pkg:/install-image/solaris-auto-install instead of an ISO. The following
command illustrates doing so without any options specified:
command
illustrates
doing
so
without
any
options
specified:
# installadm create-service -n basic_ai -y
Creating service from: pkg:/install-image/solaris-auto-install
Download: install-image/solaris-auto-install ... Done
Install Phase ... Done
Package State Update Phase ... Done
I Stt Udt Ph D
I
mage
St
a
t
e
U
p
d
a
t
e
Ph
ase ...
D
one
Reading Existing Index ... Done
Indexing Packages ... Done
Creating service: default_ai
Image path: /export/auto_install/default_ai
<output omitted>
Oracle Solaris 11 Advanced System Administration 3 - 27
Cicero Ronaldo (ciceroฺronaldo@gmailฺcom) has a non-transferable
license to use this Student Guideฺ
Unauthorized reproduction or distribution prohibitedฺ Copyright© 2014, Oracle and/or its affiliatesฺ

Creating an AI Install Service
Without a DHCP Setup
Without
a
DHCP
Setup
To create an AI install service without a DHCP setup, run
installadm create-service, followed by the service
name, the path to the ISO image, and the path to where the
ISO image should be unpacked.
# installadm create-service -n s11-sparc \
-s /var/tmp/images/sparc/sol-11_1-ai-sparc.iso -d /install/images/s11-sparc
Creating service: s11-sparc
Setting up the target image at /install/images/s11-sparc ...
Service discovery fallback mechanism set up
Creating SPARC configuration file
Refreshing install services
Creating default
sparc alias
Creating
default
-
sparc
alias
.
No local DHCP configuration found. This service is the default alias
for all SPARC clients. If not already in place, the following should be added to the DHCP
configuration:
Boot file : http://10.80.238.5:5555/cgi-bin/wanboot-cgi
Service discovery fallback mechanism set up
Creating SPARC configuration file
Refreshing install services
Now, you look at how to create an AI install service without a DHCP setup. In this example,
an AI install service is being set up for a SPARC client. DHCP is already set up on a different
server or will be set up later.
Copyright © 2013, Oracle and/or its affiliates. All rights reserved.
Again, you use the installadm create-service command, followed by the service
name, the path to the ISO image, and the path to where the ISO image should be unpacked.
If the create-service command does not detect DHCP on the AI install server, the
command output displays instructions for adding the boot file information to the DHCP
configuration table, dhcptab(4). For more information about how to create the DHCP
macro, see Installing Oracle Solaris 11 Systems.
Oracle Solaris 11 Advanced System Administration 3 - 28
Cicero Ronaldo (ciceroฺronaldo@gmailฺcom) has a non-transferable
license to use this Student Guideฺ
Unauthorized reproduction or distribution prohibitedฺ Copyright© 2014, Oracle and/or its affiliatesฺ

Note About the AI SMF Service
•Represents the overall state of the AI server application
and all the install services
•Is enabled when installadm create-service is run
# svcadm enable svc:/system/install/server:default
To enable the AI SMF service manually:
To disable the AI SMF service manually:
# svcadm disable svc:/system/install/server:default
On the AI server, the SMF service svc:/system/install/server:default represents
the overall state of the AI server application and all the install services.
The AI SMF service is enabled when you run the
installadm
create
-
service
command.
Copyright © 2013, Oracle and/or its affiliates. All rights reserved.
The
AI
SMF
service
is
enabled
when
you
run
the
installadm
create
service
command.
The AI SMF service is also enabled when you run any other installadm command that
affects the existing install services.
You can manually enable and disable the AI SMF service by running the commands shown in
the examples in the slide. However, you should not disable the AI SMF service if any AI install
service is still enabled.
Oracle Solaris 11 Advanced System Administration 3 - 29
Cicero Ronaldo (ciceroฺronaldo@gmailฺcom) has a non-transferable
license to use this Student Guideฺ
Unauthorized reproduction or distribution prohibitedฺ Copyright© 2014, Oracle and/or its affiliatesฺ

Adding a Client to the AI Install Service
To add a client to the AI install service, run installadm
create-client -c, followed by the client MAC address and
the AI install service name.
# installadm create-client -e 08:00:27:85:C7:D6 -n basic_ai
# installadm list -c
Service Name Client Address Arch Image Path
------------ -------------- ---- ----------
basic_ai 08:00:27:85:C7:D6 i386 /export/ai/default_ai
After creating the AI install service and setting up DHCP, you are ready to add the client to the
AI install service. To do this, use the installadm create-client command, followed by
the client MAC address (specified by the -e option) and the AI install service name (specified
Copyright © 2013, Oracle and/or its affiliates. All rights reserved.
by the -n option), as shown in the example. This command tells a client exactly which install
service to use.
Note: A client can be associated with only one install service.
You can use the installadm list command with the -c option to verify that the client was
added to the AI install service, as shown in the code example.
To delete a client from an install service, use installadm delete-client, followed by the
client MAC address.
Oracle Solaris 11 Advanced System Administration 3 - 30
Cicero Ronaldo (ciceroฺronaldo@gmailฺcom) has a non-transferable
license to use this Student Guideฺ
Unauthorized reproduction or distribution prohibitedฺ Copyright© 2014, Oracle and/or its affiliatesฺ

AI Manifest
•Part of the AI install service
•XML file that contains installation and configuration
instructions for one or more clients
•
Default manifest included in each boot image
Default
manifest
included
in
each
boot
image
•Unpacked along with other files in the image
As was discussed in the topic on planning for the installation, the AI install service provides
installation and configuration instructions that can be used for one or more clients. These
instructions are contained in an XML file called an AI manifest.
Copyright © 2013, Oracle and/or its affiliates. All rights reserved.
Each boot image includes a default AI manifest that can be used for clients of any install
service that is created by using this boot image.
The manifest is unpacked along with the other files in the image.
Oracle Solaris 11 Advanced System Administration 3 - 31
Cicero Ronaldo (ciceroฺronaldo@gmailฺcom) has a non-transferable
license to use this Student Guideฺ
Unauthorized reproduction or distribution prohibitedฺ Copyright© 2014, Oracle and/or its affiliatesฺ

Identifying the Types of AI Manifests
•Default AI manifest: Is an installation manifest that has no
criteria associated with it
•Custom AI manifest: Provides installation criteria for a
s
p
ecific client
p
•Criteria file: Allows client-specific installation instructions
to be associated with AI services
AI has three types of manifests:
•Default AI manifest: A default AI manifest is an installation manifest that has no criteria
assoc
i
ated
wi
t
h i
t
. Th
e
de
f
au
l
t
AI m
a
nif
est
i
s
used
by
c
li
e
n
ts
wh
e
n n
o
ot
h
e
r in
sta
ll
at
i
o
n
Copyright © 2013, Oracle and/or its affiliates. All rights reserved.
assoc ated t t e de au t a est s used by c e ts e o ot e sta at o
manifest’s criteria match the client.
•Custom AI manifest: To perform different installations on different clients by using the
same install image, you provide customized AI manifests for that install service. Clients
that do not match the criteria specified to use any custom manifest are installed by using
the instructions in the default manifest.
•Criteria file: The criteria file allows you to associate client-specific installation
i t ti ith AI i Wh th li t t h th it i th t ifi d f
i
ns
t
ruc
ti
ons w
ith
AI
serv
i
ces.
Wh
en
th
e c
li
en
t
ma
t
c
h
es
th
e cr
it
er
i
a
th
a
t
are spec
ifi
e
d
f
or a
criteria file, the client uses the associated manifest.
You now take a closer look at each manifest type, beginning with the default AI manifest.
Oracle Solaris 11 Advanced System Administration 3 - 32
Cicero Ronaldo (ciceroฺronaldo@gmailฺcom) has a non-transferable
license to use this Student Guideฺ
Unauthorized reproduction or distribution prohibitedฺ Copyright© 2014, Oracle and/or its affiliatesฺ

Reviewing the Default AI Manifest (default.xml)
<?xml version="1.0" encoding="UTF-8"?>
<!-- Copyright (c) 2008, 2012, Oracle and/or its affiliates. All rights reserved. -->
<!DOCTYPE auto_install SYSTEM "file:///usr/share/install/ai.dtd.1">
<auto_install>
<ai_instance name="default">
<target>
<logical>
<zpool name="rpool" is_root="true">
<filesystem name="export" mountpoint="/export"/>
<filesystem name="export/home"/>
<be name="solaris"
/
>
/
</zpool>
</logical>
</target>
<software type="IPS">
<destination> <!—Specify locales to install-->
</destination>
<source>
<publisher name="solaris">
<origin name="http://pkg.oracle.com/solaris/release"/>
/publisher
<
/publisher
>
</source>
(XML comments omitted)
<software_data action="install">
<name>pkg:/entire@0.5.11-0.175.1</name>
<name>pkg:/group/system/solaris-large-server</name>
</software_data>
</software>
</ai_instance>
</auto_install>
The default.xml file of the default AI manifest provides a generic configuration that is
applicable to most clients. You want to review this default manifest to determine whether it
meets the needs of all the clients that use an install service based on this image.
Copyright © 2013, Oracle and/or its affiliates. All rights reserved.
This slide shows the default.xml file. The <software> block defines the location of the
IPS origin as well as the software packages to install and uninstall. The entire package is
required so that the system is updated coherently when it is patched or upgraded in the future;
it should not be removed during or after system installation. The solaris-large-server
package is a group package of tools and device drivers that you might want in most
environments that you install. This package installs many network and storage drivers, Python
libraries Perl and much more
libraries
,
Perl
,
and
much
more
.
Oracle Solaris 11 Advanced System Administration 3 - 33
Cicero Ronaldo (ciceroฺronaldo@gmailฺcom) has a non-transferable
license to use this Student Guideฺ
Unauthorized reproduction or distribution prohibitedฺ Copyright© 2014, Oracle and/or its affiliatesฺ

?l i '10'?
System Configuration Profiles (SC Profiles)
<
?
xm
l
vers
i
on=
'1
.
0'?
>
<!--
Copyright (c) 2011, Oracle and/or its affiliates. All rights reserved.
-->
(comments omitted)
<!DOCTYPE service_bundle SYSTEM "/usr/share/lib/xml/dtd/service_bundle.dtd.1">
<service_bundle type="profile" name=“sysconfig">
<service version=“1” type=“service” name="system/config-user“>
<instance enabled="true“name="default">
<property_group name="root_account">
<propval type=“astring” name="password" value="encrypted_password"/>
<propval type=“astring” name="type" value="role"/>
</property_group>
<property_group type=“application” name="user_account">
<propval type=“astring” name="login" value="jack"/>
<propval type=“astring” name="password" value="9Nd/cwBcNWFZg"/>
<propval type=“count” name="gid" value='10'/>
<
p
ro
p
val t
yp
e=“astrin
g
” name="descri
p
tion" value="default user"/>
pp yp g p
_
<propval type=“astring” name="type" value="normal"/>
<propval type=“astring” name="shell" value="/usr/bin/bash"/>
<propval type=“astring” name="roles" value="root"/>
<propval type=“astring” name="profiles" value="System Administrator"/>
</property_group>
</instance>
</service>
This slide shows the beginning of a sample SC profile. Here you see the setup for the initial
user (default is Jack) and the root role setup. A simple method for setting passwords is to
copy the passwords from the /etc/shadow file of the user records and add that information
Copyright © 2013, Oracle and/or its affiliates. All rights reserved.
into the password values in the profile.
Note: The system configuration profile (SC profile) specifies client system configuration as a
set of configuration parameters in the form of an SMF profile. The SC profile sets SMF
properties for appropriate SMF (Service Management Facility) services.
An SMF profile that contains the system configuration is applied during the first boot of the
system after installation. The SMF services that are responsible for particular configuration
th SMF ti d fi th t di l
areas process
th
e
SMF
proper
ti
es an
d
con
fi
gure
th
e sys
t
em accor
di
ng
l
y.
You can specify configuration of anything that is configurable via smf(5) properties. For
example, the SC profile can configure a root account, an initial user, keyboard layout, terminal
type, an IPv4 network interface (static or DHCP) and default route, an IPv6 network interface
(static or addrconf) and default route, and DNS (nameserver list, search list, and domain).
You can specify multiple sets of system configuration instructions (SC profiles) for each install
service Multiple SC profiles can be associated with each client
service
.
Multiple
SC
profiles
can
be
associated
with
each
client
.
Oracle Solaris 11 Advanced System Administration 3 - 34
Cicero Ronaldo (ciceroฺronaldo@gmailฺcom) has a non-transferable
license to use this Student Guideฺ
Unauthorized reproduction or distribution prohibitedฺ Copyright© 2014, Oracle and/or its affiliatesฺ

System Configuration Profiles (SC Profiles)
<service version="1" type=“service” name="system/identity">
<instance enabled="true" name="node">
<property_group type=“application” name="config">
<propval type=“astring” name="nodename" value="solaris"/>
</property_group>
</instance>
</service>
<service version=“1” type=“service” name=“system/console-login“>
<instance enabled=“true” name=“default”>
<property_group type=“application” name="ttymon">
<propval type=“astring” name="terminal_type" value="sun"/>
</property_group>
</instance>
</service>
<service version=“1” type=service” name=“system/keymap” version=“1”>
<instance enabled=“true” name=“default”>
<property_group type=“system” name=“keymap”>
<propval type=“astring” name=“layout” value=“US-English”/>
</property_group>
</instance>
</service>
In the example shown in the slide, you can see the type tags for the nodename, console
terminal type, and keyboard.
Copyright © 2013, Oracle and/or its affiliates. All rights reserved.
Oracle Solaris 11 Advanced System Administration 3 - 35
Cicero Ronaldo (ciceroฺronaldo@gmailฺcom) has a non-transferable
license to use this Student Guideฺ
Unauthorized reproduction or distribution prohibitedฺ Copyright© 2014, Oracle and/or its affiliatesฺ

System Configuration Profiles (SC Profiles)
<service version=“1” type=“service” name=“system/timezone”>
<instance enabled=“true” name=“default”>
<property_group type=“application” name=“timezone”>
<propval type=“astring” name=“localtime” value=“UTC”/>
</property_group>
</instance>
</service>
<service version=“1” type=“service” name=“system/environment”>
<instance enabled=“true” name=“default”>
<property_group type=“application” name=“environment”>
<propval type=“astring” name=“LANG” value=“en_US.UTF-8”/>
</property_group>
</instance>
</service>
In this section, you see the time zone and the locale type tags.
Copyright © 2013, Oracle and/or its affiliates. All rights reserved.
Oracle Solaris 11 Advanced System Administration 3 - 36
Cicero Ronaldo (ciceroฺronaldo@gmailฺcom) has a non-transferable
license to use this Student Guideฺ
Unauthorized reproduction or distribution prohibitedฺ Copyright© 2014, Oracle and/or its affiliatesฺ

System Configuration Profiles (SC Profiles)
<service version=“1” type=“service” name=“network/physical” >
<instance enabled=“true” name="default">
<property_group type=“application” name=“netcfg”>
<propval type=“astring” name=“active_ncp” value=“Automatic”/>
</property_group>
<
/
instance>
/
</service>
</service_bundle>
The final portion of the file sets up key mapping and network configuration, which are invoked
by network configuration profiles (NCPs). NCPs can be set to Active or DefaultFixed,
respectively, depending on whether the network configuration should be automatic or manual.
Copyright © 2013, Oracle and/or its affiliates. All rights reserved.
Another option is being able to configure so that an interactive system configuration tool is
launched during the first reboot of an installed system. Note that, in this example, the active
NCP is set to “Automatic.”
Now that you are more familiar with the contents of the default.xml file and SC profiles,
you will look at what you must do to use this file and create a custom AI manifest to perform
different installations on different clients by using the same install image.
Oracle Solaris 11 Advanced System Administration 3 - 37
Cicero Ronaldo (ciceroฺronaldo@gmailฺcom) has a non-transferable
license to use this Student Guideฺ
Unauthorized reproduction or distribution prohibitedฺ Copyright© 2014, Oracle and/or its affiliatesฺ

Adding an SC Profile to an Install Service
Use the installadm create-profile command to add the
profile_filename SC profile to the svcname install service.
#
installadm create-
p
rofile -n svcnam
e
-f
p
rofile filenam
e
Use the installadm validate command to validate SC
profiles for syntactic correctness.
#
p
p
_
# installadm validate -n svcname -p profile_name
Multiple SC profiles can be specified in one create-profile command because a single
client can use multiple SC profiles. The same client selection criteria, or overlapping criteria,
or no criteria can be specified for multiple profiles. When no criteria are specified, the profile is
Copyright © 2013, Oracle and/or its affiliates. All rights reserved.
used by all clients that use this install service.
You can use the installadm create-profile command to add the profile_filename SC
profile to the svcname install service.
Note: By adding the -c option followed by a criteria range to the create-profile
command, you can specify client selection criteria on the command line.
To validate that an SC profile is syntactically correct, you can use the install validate –n
svcname command, as shown in the second example in the slide. The -p option is used to
validate profiles that have already been added to the svcname install service by using the
create-profile subcommand.
Note: You can use the -P option followed by profile_name to validate profiles that have not
been added to the install service. profile_filename is a full path name to the file.
Oracle Solaris 11 Advanced System Administration 3 - 38
Cicero Ronaldo (ciceroฺronaldo@gmailฺcom) has a non-transferable
license to use this Student Guideฺ
Unauthorized reproduction or distribution prohibitedฺ Copyright© 2014, Oracle and/or its affiliatesฺ

Creating a Custom AI Manifest
To create and apply a custom AI manifest, perform the
following steps:
1. Create a directory to store your manifest files.
2
Copy the
default xml
file to the
basic ai xml
file
2
.
Copy
the
default
.
xml
file
to
the
basic
_
ai
.
xml
file
.
3. Modify the basic_ai.xml file.
4. Add the new custom AI manifest to the appropriate AI
install service.
5. Add the criteria file to associate the client host.
To create and apply a custom AI manifest, you first create a directory to store your manifest
files: /var/tmp/manifests.
Then you copy the default AI manifest to the
/var/tmp/manifests/basic ai.xml
file.
Copyright © 2013, Oracle and/or its affiliates. All rights reserved.
Then
you
copy
the
default
AI
manifest
to
the
/var/tmp/manifests/basic
_
ai.xml
file.
A copy of the default.xml file is located at
/export/ai/basic_ai/auto_install/manifest/default.xml or in the AI install
image at <AI Image Dir>/auto_install/default.xml, where <AI Image Dir> is the
directory reported in the installadm list output.
Next you modify the basic_ai.xml file. Be sure to reference the Oracle Solaris 11 AI
documentation for how to add tags and values to the new manifest file.
Note: There are tag requirements for every AI manifest, with options to add more tags.
For example, every manifest must have the following:
•Unique manifest name
•At least one IPS package repository specified
•The entire package installed
For more information about the optional tags, such as the <target> and <add drivers>
tags and examples on how to use them see the Oracle Solaris AI documentation
tags
,
and
examples
on
how
to
use
them
,
see
the
Oracle
Solaris
AI
documentation
.
When you finish your modifications, you can add the new custom AI manifest to the
appropriate install service. You need to specify the criteria that define the clients that should
use these installation instructions.
Oracle Solaris 11 Advanced System Administration 3 - 39
Cicero Ronaldo (ciceroฺronaldo@gmailฺcom) has a non-transferable
license to use this Student Guideฺ
Unauthorized reproduction or distribution prohibitedฺ Copyright© 2014, Oracle and/or its affiliatesฺ

Selecting the AI Manifest
•The criteria file associates installation instructions with the
client.
•The AI manifest selection algorithm is as follows:
–
The client does not match the criteria for any manifest: The
The
client
does
not
match
the
criteria
for
any
manifest:
The
client uses the default manifest.
–The client matches the criteria for a single manifest: The
client uses that manifest.
–The client matches the criteria for multiple manifests: The
criteria are evaluated based on ordering.
•The criteria file uses multiple non-overlapping criteria.
Suppose that you have created an AI manifest. You can now create specific installation
instructions by client type by using a criteria file. The criteria file allows you to associate client-
specific installation instructions with AI services. When the client matches the criteria that are
Copyright © 2013, Oracle and/or its affiliates. All rights reserved.
specified for a criteria file, the client uses that manifest.
An AI manifest is selected for a client according to the following algorithm:
•If custom manifests are defined for this install service but the client does not match the
criteria for any manifest, the client uses the default manifest.
•If the client matches the criteria that are specified for a single manifest, the client uses
that manifest.
Oracle Solaris 11 Advanced System Administration 3 - 40
Cicero Ronaldo (ciceroฺronaldo@gmailฺcom) has a non-transferable
license to use this Student Guideฺ
Unauthorized reproduction or distribution prohibitedฺ Copyright© 2014, Oracle and/or its affiliatesฺ

• If client characteristics match multiple manifests, the client characteristics are evaluated
in the following order:
-mac
-
ipv4
ipv4
-platform
-arch
-cpu
-network
-mem
-zonename
-hostname
For example, if one criteria specification matches the client’s MAC address and another
criteria specification matches the same client’s IP address, the manifest associated with
the MAC address criteria specification is used, because mac is higher priority for
selection than ipv4.
For more information about selection criteria see the section titled
“
Selection Criteria
”
in
For
more
information
about
selection
criteria
,
see
the
section
titled
Selection
Criteria
in
Installing Oracle Solaris 11 Systems.
Oracle Solaris 11 Advanced System Administration 3 - 41
Cicero Ronaldo (ciceroฺronaldo@gmailฺcom) has a non-transferable
license to use this Student Guideฺ
Unauthorized reproduction or distribution prohibitedฺ Copyright© 2014, Oracle and/or its affiliatesฺ
Criteria File: Examples
it i if t fil
•arch cr
it
er
i
a man
if
es
t
fil
e:
<ai_criteria_manifest>
<ai_criteria name="arch">
<value>i86pc</value>
</ai_criteria>
</ai_criteria_manifest>
•mac criteria manifest file:
<ai_criteria_manifest>
<ai_criteria name=“mac">
<value>0:14:4F:20:53:94</value>
</ai_criteria>
</ai_criteria_manifest>
•ipv4 criteria manifest file:
<ai_criteria_manifest>
<ai_criteria name=“ipv4">
<value>192.168.0.114</value>
</ai_criteria>
</ai_criteria_manifest>
The slide shows examples of the arch, mac, and ipv4 criteria files.
Copyright © 2013, Oracle and/or its affiliates. All rights reserved.
Oracle Solaris 11 Advanced System Administration 3 - 42
Cicero Ronaldo (ciceroฺronaldo@gmailฺcom) has a non-transferable
license to use this Student Guideฺ
Unauthorized reproduction or distribution prohibitedฺ Copyright© 2014, Oracle and/or its affiliatesฺ

Adding Installation Criteria to an AI Manifest
To create a manifest for a service and associate it with
installation criteria, run installadm create-manifest,
followed by the service name, the manifest’s file path name,
and the criteria file’s path name.
# installadm create-manifest –n basic_ai \
-f /var/tmp/manifests/basic_ai.xml \
-C /var/tmp/manifests/criteria_ai.xml
# installadm list -m
Service Name Manifest Status
------------ -------- ------
basic_ai basic_ai
orig_default Default
default-i386 orig_default Default
# installadm list -m -n basic_ai
Manifest Status Criteria
-------- ------ --------
basic_ai mac = 08:00:27:85:C7:D6
orig_default Default None
Suppose that you have created both a new custom AI manifest and a criteria file that specifies
the MAC installation criteria. To add the installation criteria to the AI manifest, use the
installadm create-manifest command, followed by the AI service name using the -n
Copyright © 2013, Oracle and/or its affiliates. All rights reserved.
option, the -f option and the path name of the custom AI manifest file, and the -C option and
the path name of the criteria file.
In this example, when a client meets the criteria identified in the criteria_ai.xml criteria
file, basic_ai.xml is applied to that client.
To verify that the manifests have been added to the AI service, use the installadm list -
mcommand, as shown in the example in the slide. First, you run the command to list the
i d th f th t if t d th th d i
serv
i
ce name an
d
th
e name o
f
th
e cus
t
om man
if
es
t
, an
d
th
en you run
th
e comman
d
aga
i
n
with the service name to see the installation criteria associated with that manifest.
Note: You can also specify the criteria on the command line, as in the following example:
# installadm create-manifest -n basic_ai \
-f /var/tmp/manifests/basic_ai.xml \
-c mac=08:00:27:85:C7:D6-08:00:27:85:C7:D7
You can also use set-criteria to modify the criteria after the manifest has been created.
Oracle Solaris 11 Advanced System Administration 3 - 43
Cicero Ronaldo (ciceroฺronaldo@gmailฺcom) has a non-transferable
license to use this Student Guideฺ
Unauthorized reproduction or distribution prohibitedฺ Copyright© 2014, Oracle and/or its affiliatesฺ

Practice 3-2 Overview:
Configuring the AI Server
Configuring
the
AI
Server
This practice covers the following topics:
•Enabling the DNS multicast service
•Verifying the netmasks file configuration
•
Creating an AI install service with a DHCP setup
•
Creating
an
AI
install
service
with
a
DHCP
setup
•Adding installation criteria to an AI service
•Creating a directory to store the AI manifest files
•Modifying the AI manifest files
This practice should take about 1.5 hours to complete.
Copyright © 2013, Oracle and/or its affiliates. All rights reserved.
Oracle Solaris 11 Advanced System Administration 3 - 44
Cicero Ronaldo (ciceroฺronaldo@gmailฺcom) has a non-transferable
license to use this Student Guideฺ
Unauthorized reproduction or distribution prohibitedฺ Copyright© 2014, Oracle and/or its affiliatesฺ

Configuring the Client System
This section covers the following topics:
•Identifying the client system requirements
•Using Secure Shell to remotely monitor an installation
After completing the install server configuration management tasks, you are ready to
configure the client system. First, you must identify the client system requirements. After
identifying the requirements, you create a customer system configuration (SC) profile. You
Copyright © 2013, Oracle and/or its affiliates. All rights reserved.
use Secure Shell to monitor the installation remotely, and then you review the client
installation messages to verify that the installation went smoothly.
Oracle Solaris 11 Advanced System Administration 3 - 45
Cicero Ronaldo (ciceroฺronaldo@gmailฺcom) has a non-transferable
license to use this Student Guideฺ
Unauthorized reproduction or distribution prohibitedฺ Copyright© 2014, Oracle and/or its affiliatesฺ

Identifying Client System Requirements
Client System Requirement
Disk space Recommended minimum: 13 GB
Memory Recommended minimum: 1 GB
Architectures • X86: 64-bit only
• SPARC: Oracle Solaris M-series and T-series systems
only
Network access
• DHCP server that provides network configuration information
• AI install server
• IPS repository that contains the packages to be installed on the
client system
client
system
Additional SPARC client system requirements:
•WAN boot support
•Firmware that includes the current version of the OBP that
contains the latest WAN boot support
For automated installation over the network, SPARC and x86 client systems must meet the
requirements listed in the table in the slide. Any system that meets these requirements can be
used as an AI install client, including laptops, desktops, virtual machines, and enterprise
Copyright © 2013, Oracle and/or its affiliates. All rights reserved.
servers.
There are two additional SPARC client system requirements: WAN boot support and firmware
that has been updated to include the current version of the Open Boot PROM (OBP) that
contains the latest WAN boot support.
Note: The recommended minimums are subject to change with the final release of the
software. See the release notes for final disk space and memory recommendations.
Oracle Solaris 11 Advanced System Administration 3 - 46
Cicero Ronaldo (ciceroฺronaldo@gmailฺcom) has a non-transferable
license to use this Student Guideฺ
Unauthorized reproduction or distribution prohibitedฺ Copyright© 2014, Oracle and/or its affiliatesฺ

Using Secure Shell to Remotely
Monitor an Installation
Monitor
an
Installation
•For x86 client installations, the
menu.lst
file is located in:
–/etc/netboot/menu.lst.01MAC_address if
installadm create-client was used
–/etc/netboot/<service
_
name>/menu.lst if
_
installadm create-client was not used
•For SPARC client installations, system.conf and
wanboot.conf are in:
–/etc/netboot/<service_name>
For the default-s
p
arc service
,
s
y
mlinks to these files
p
,y
are in /etc/netboot.
You can remotely monitor an installation in progress by using Secure Shell. You can do this
by setting the livessh option to enable in the installation configuration file. After enabling
access, you can log in to the AI client by using jack for both the username and password.
Copyright © 2013, Oracle and/or its affiliates. All rights reserved.
For x86 client systems, the menu.lst configuration file is created in the /etc/netboot/
directory with one of the following file name formats:
•If you used the installadm create-client command, the file name is
/etc/netboot/menu.lst.01MAC_address, where MAC_address is the MAC
address that was specified in the installadm create-client command.
•If you did not use the installadm create-client command, the file name is
// /
i
h
i
ithi tll
/
etc
/
netboot
/
<serv
i
ce_nam
e
>menu.lst, w
h
ere serv
i
ce_nam
e
i
s
th
e
i
ns
t
a
ll
service name that was specified in the installadm create-service command.
For SPARC client systems, the system.conf and wanboot.conf files are located in
/etc/netboot/<service_name> if you have created an install service by using the
installadm create-service command. For the default-sparc service, symlinks to
these files are in /etc/netboot.
Oracle Solaris 11 Advanced System Administration 3 - 47
Cicero Ronaldo (ciceroฺronaldo@gmailฺcom) has a non-transferable
license to use this Student Guideฺ
Unauthorized reproduction or distribution prohibitedฺ Copyright© 2014, Oracle and/or its affiliatesฺ

Implementing the Configuration
•To boot a SPARC client and start an installation, use the
following command from the OBP prompt:
OK boot net:dhcp - install
•
To boot an x86 client from the network from the GNU
To
boot
an
x86
client
from
the
network
,
from
the
GNU
GRUB menu, select the Oracle Solaris 11 11/11
Text Installer and command line boot option.
When you set up your install server, you created at least one install service for each client
architecture and each version of the Oracle Solaris OS that you plan to install. When you
created each install service, you created customized installation instructions and post-
Copyright © 2013, Oracle and/or its affiliates. All rights reserved.
installation configuration instructions for different clients as needed. You are now ready to
implement the configuration. To start the automated installation, you only need to boot the
client.
The boot instructions for the SPARC and x86 clients are presented in the slide. Provide the
configuration information when prompted.
Note: If you select the second install option shown in the GRUB menu, the AI installation
tt t ti ll
s
t
ar
t
s au
t
oma
ti
ca
ll
y.
Oracle Solaris 11 Advanced System Administration 3 - 48
Cicero Ronaldo (ciceroฺronaldo@gmailฺcom) has a non-transferable
license to use this Student Guideฺ
Unauthorized reproduction or distribution prohibitedฺ Copyright© 2014, Oracle and/or its affiliatesฺ

Reviewing Client Installation Messages
If the client install is successful, you see the following:
•Automated Installation started message
Automated Installation started
The progress of the Automated Installation will be output to
•Automated Installation succeeded message
the console
Detailed logging is in the logfile at
/system/volatile/install_log
Press RETURN to get a login prompt at any time.
Automated Installation finished successfully
The system can be rebooted now
Please refer to the /system/volatile/install_log file for
details
After reboot it will be located at
/var/sadm/system/logs/install_log
If the client is able to successfully boot and download the install files, you see the
“Automated Installation started” message. You can log in as the root user with
the password solaris to monitor the progress of the installation via the installation log, by
Copyright © 2013, Oracle and/or its affiliates. All rights reserved.
using tail -f /system/volatile/install_log.
Note: To stop the tail –f command, press Ctrl + C.
After the installation has completed successfully, you see the “Automated Installation
finished successfully” message. You have the option of rebooting at this time. The
client does not automatically reboot after a successful installation. You do, however, have the
option of setting up an automatic reboot in the AI manifest. To enable the automatic reboot,
you set the
tbt
attribute of the
ii t
tag to
t
To reboot manually
you
set
the
au
t
o_re
b
oo
t
attribute
of
the
<a
i
_
i
ns
t
ance>
tag
to
t
rue.
To
reboot
manually
,
run the init 6 command.
If a client installation fails, there are several actions that you can take based on the kind of
errors you see:
•Check the installation logs located at /system/volatile/install_log.
•Check the connection to the IPS repository. If a client cannot resolve the name of the
IPS repository during installation an error is generated For this type of error see if the
IPS
repository
during
installation
,
an
error
is
generated
.
For
this
type
of
error
,
see
if
the
client can ping the repository. If you get no response, you may have a connectivity
problem. If the ping comes back as not having recognized the host, you may have a
DNS problem.
Oracle Solaris 11 Advanced System Administration 3 - 49
Cicero Ronaldo (ciceroฺronaldo@gmailฺcom) has a non-transferable
license to use this Student Guideฺ
Unauthorized reproduction or distribution prohibitedฺ Copyright© 2014, Oracle and/or its affiliatesฺ

•Check whether DNS is configured on your client. You can do this by verifying that a non-
empty /etc/resolv.conf file exists. If this file does not exist or is empty, check that
your DHCP server is providing the DNS server information to the client by running
/sbin/dhcpinfo DNSserv. If this command returns nothing, the DHCP server is not
set up properly. You need to contact your DHCP administrator to correct the problem.
•Check client boot errors. There are a number of possible causes for networking boot
errors to occur on both SPARC and x86 systems, such as timing out issues or boot load
failures. For more information about the types of errors that may occur and the possible
causes of these errors, as well as suggested solutions, see Installing Oracle Solaris 11
Systems.
Oracle Solaris 11 Advanced System Administration 3 - 50
Cicero Ronaldo (ciceroฺronaldo@gmailฺcom) has a non-transferable
license to use this Student Guideฺ
Unauthorized reproduction or distribution prohibitedฺ Copyright© 2014, Oracle and/or its affiliatesฺ

Practice 3-3:
Deploying the OS on the Network Client
Deploying
the
OS
on
the
Network
Client
This practice covers deploying the Oracle Solaris 11 operating
system on a network client.
This practice should take about 45 minutes to complete.
Copyright © 2013, Oracle and/or its affiliates. All rights reserved.
Oracle Solaris 11 Advanced System Administration 3 - 51
Cicero Ronaldo (ciceroฺronaldo@gmailฺcom) has a non-transferable
license to use this Student Guideฺ
Unauthorized reproduction or distribution prohibitedฺ Copyright© 2014, Oracle and/or its affiliatesฺ

Lesson Agenda
• Planning for Oracle Solaris 11 Operating System
Installations by Using the Automated Installer
• Installing Oracle Solaris 11 by Using the Automated
Installe
r
•Building an Oracle Solaris Image
This topic briefly covers how to build an Oracle Solaris image by using a technology called the
“distribution constructor.”
Copyright © 2013, Oracle and/or its affiliates. All rights reserved.
Oracle Solaris 11 Advanced System Administration 3 - 52
Cicero Ronaldo (ciceroฺronaldo@gmailฺcom) has a non-transferable
license to use this Student Guideฺ
Unauthorized reproduction or distribution prohibitedฺ Copyright© 2014, Oracle and/or its affiliatesฺ

Introducing the Distribution Constructor
•Is a command-line tool that is used to build:
–Preconfigured custom Oracle Solaris images
–An ISO image based on the XML manifest file
•
Allows creation of the following Oracle Solaris image types
:
Allows
creation
of
the
following
Oracle
Solaris
image
types
:
–x86 or SPARC Oracle Solaris text installer image
–Oracle Solaris x86 live CD image
–x86 or SPARC ISO Image for Automated Installations
–x86 Oracle Solaris Virtual Machine
I ditibtdi th ditibti
tt k hih
•
I
s
di
s
t
r
ib
u
t
e
d
i
n
th
e
di
s
t
r
ib
u
ti
on-cons
t
ruc
t
or pac
k
age, w
hi
c
h
contains:
–The distro_const command-line utility and its files
–Sample manifest files
The distribution constructor is a command-line tool for building preconfigured Oracle Solaris
images. These images can be used to install the Oracle Solaris software on individual
systems and multiple systems that run the Oracle Solaris 11 operating system.
Copyright © 2013, Oracle and/or its affiliates. All rights reserved.
The distribution constructor takes an XML manifest file as input and builds an ISO image that
is based on the parameters specified in the manifest file.
Using the distribution constructor, you can create the following types of Oracle Solaris
images:
• x86 or SPARC Oracle Solaris text installer image
• Oracle Solaris x86 live CD ima
g
e
g
• x86 or SPARC ISO Image for Automated Installations
The distribution constructor is distributed in the distribution-constructor package. The
distribution-constructor package contains the distro_const command-line utility for
building custom Oracle Solaris images. It also contains sample manifest files that are used to
build the various image types.
Oracle Solaris 11 Advanced System Administration 3 - 53
Cicero Ronaldo (ciceroฺronaldo@gmailฺcom) has a non-transferable
license to use this Student Guideฺ
Unauthorized reproduction or distribution prohibitedฺ Copyright© 2014, Oracle and/or its affiliatesฺ
Identifying System Requirements for
Using the Distribution Constructor
Using
the
Distribution
Constructor
Requirement Description
Disk space Recommended minimum: 8 GB
Oracle Solaris release • SPARC or x86 Oracle Solaris 11 operating system
(OS) must be installed.
• Network access to the IPS repositories specified in
the manifest file is required.
• SPARC images can be created only on a SPARC
system.
• X86 images can be created only on an x86 system.
• The Oracle Solaris release version must match the
l i f th i t b b ilt ith th
re
l
ease vers
i
on o
f
th
e
i
mage
t
o
b
e
b
u
ilt
w
ith
th
e
distribution constructor.
Required packages The distribution-constructor package must be
installed.
This slide shows the system requirements to use the distribution constructor. The
recommended minimum disk space for the distribution constructor workspace is 8 GB.
You must have the SPARC or x86 Oracle Solaris 11 operating system (OS) installed on your
Copyright © 2013, Oracle and/or its affiliates. All rights reserved.
You
must
have
the
SPARC
or
x86
Oracle
Solaris
11
operating
system
(OS)
installed
on
your
system. Your installed Oracle Solaris system must have network access. Because the
distribution constructor accesses the Image Packaging System (IPS) repositories that are
available on the network to retrieve packages for the ISO image, you must have network
access to the repositories that you specify in the manifest file. When using the distribution
constructor, you can create SPARC images only on a SPARC system. And you can create
x86 images only on an x86 system. In addition, the Oracle Solaris release version on your
system must be the same as the release version of the image that you use with the
system
must
be
the
same
as
the
release
version
of
the
image
that
you
use
with
the
distribution constructor.
Note: To run the distribution constructor on your system, you must assume the root role by
executing the su - command.
You must have the distribution-constructor package installed on your system.
Note: You can use the Package Manager tool to install the required package, or you can use
IPS commands to install this package:
IPS
commands
to
install
this
package:
# pkg install distribution-constructor
Oracle Solaris 11 Advanced System Administration 3 - 54
Cicero Ronaldo (ciceroฺronaldo@gmailฺcom) has a non-transferable
license to use this Student Guideฺ
Unauthorized reproduction or distribution prohibitedฺ Copyright© 2014, Oracle and/or its affiliatesฺ

Using Distribution Constructor Manifest Files
Manifest File Manifest Type Description
dc_text_x86.xml x86 text installer ISO image Used to create an ISO image that you can
boot to initiate a text installation of the
Oracle Solaris OS on x86 machines
dc text s
p
arc.xml
SPARC text installer ISO
Used to create an ISO image that you can
__
p
SPARC
text
installer
ISO
image
Used
to
create
an
ISO
image
that
you
can
boot to initiate a text installation of the
Oracle Solaris OS on SPARC machines
dc_livecd.xml x86 live CD ISO image Used to create an ISO image that is
comparable to the Oracle Solaris live CD
dc_ai_sparc.xml SPARC AI ISO image Used to create a SPARC AI ISO image for
automated installations of the Oracle
Solaris OS to SPARC clients
dc_ai_x86.xml x86 AI ISO image Used to create an x86 AI ISO image for
automated installations of the Oracle
Solaris OS to x86 clients
This slide lists the default manifest files that are shipped with the distribution-constructor
package. After you install the distribution-constructor package, you can locate these manifest
files in the /usr/share/distro_const directory.
Copyright © 2013, Oracle and/or its affiliates. All rights reserved.
You can create your own custom scripts. If you do create new scripts, you must edit the
manifest files to point to these new scripts. See Creating a Custom Oracle Solaris 11
Installation Image for more information about creating custom scripts.
Note: To see the list of checkpoints, you can run:
# distro_const build -l manifest
Oracle Solaris 11 Advanced System Administration 3 - 55
Cicero Ronaldo (ciceroฺronaldo@gmailฺcom) has a non-transferable
license to use this Student Guideฺ
Unauthorized reproduction or distribution prohibitedฺ Copyright© 2014, Oracle and/or its affiliatesฺ

Building an Image
•The build can be performed in one step:
–distro_const build manifest
•Checkpointing is enabled by default.
•
The build can be stopped and resumed at a specific
•
The
build
can
be
stopped
and
resumed
at
a
specific
checkpoint (step):
–distro_const build -p step manifest
–distro_const build -r step manifest
You can build an OS in one step or in stages. To build an image in one step, use the
distro_const build manifest command without any options. manifest is the name of
the manifest file that you want to use as the blueprint for your image.
Copyright © 2013, Oracle and/or its affiliates. All rights reserved.
To build an image in stages, use the options provided in the distro_const command to
stop and restart the build process at various steps in the image generation process. This
approach enables you to check and debug your selection of files, packages, and scripts for
the image that is being built. This process of stopping and restarting during the build process
is called checkpointing, and it is enabled by default in the manifest file.
To stop and resume at a specific checkpoint, use the following commands:
di b ild
if
•
di
stro_const
b
u
ild
-p step man
if
es
t
•distro_const build -r step manifest
Oracle Solaris 11 Advanced System Administration 3 - 56
Cicero Ronaldo (ciceroฺronaldo@gmailฺcom) has a non-transferable
license to use this Student Guideฺ
Unauthorized reproduction or distribution prohibitedฺ Copyright© 2014, Oracle and/or its affiliatesฺ

Quiz
The distribution constructor is used to create only Oracle
Solaris SPARC text installer images.
a. True
b
False
b
.
False
Answer: b
Copyright © 2013, Oracle and/or its affiliates. All rights reserved.
Oracle Solaris 11 Advanced System Administration 3 - 57
Cicero Ronaldo (ciceroฺronaldo@gmailฺcom) has a non-transferable
license to use this Student Guideฺ
Unauthorized reproduction or distribution prohibitedฺ Copyright© 2014, Oracle and/or its affiliatesฺ

Quiz
Which command enables you to build an OS image in one
step?
a. distro_const
b
distro const build
b
.
distro
_
const
build
c. distro_const build manifest
Answer: c
Copyright © 2013, Oracle and/or its affiliates. All rights reserved.
Oracle Solaris 11 Advanced System Administration 3 - 58
Cicero Ronaldo (ciceroฺronaldo@gmailฺcom) has a non-transferable
license to use this Student Guideฺ
Unauthorized reproduction or distribution prohibitedฺ Copyright© 2014, Oracle and/or its affiliatesฺ

Quiz
The process of stopping and restarting during the image build
process is called ________.
a. checking
b
checkpointing
b
.
checkpointing
c. spotcheck
Answer: b
Copyright © 2013, Oracle and/or its affiliates. All rights reserved.
Oracle Solaris 11 Advanced System Administration 3 - 59
Cicero Ronaldo (ciceroฺronaldo@gmailฺcom) has a non-transferable
license to use this Student Guideฺ
Unauthorized reproduction or distribution prohibitedฺ Copyright© 2014, Oracle and/or its affiliatesฺ

Summary
In this lesson, you should have learned how to:
•Implement a plan for an Oracle Solaris 11 operating
system installation
•
Install the Oracle Solaris 11 operating system by using the
Install
the
Oracle
Solaris
11
operating
system
by
using
the
Automated Installer
•Verify an Oracle Solaris 11 operating system installation
•Build an Oracle Solaris image by using the distribution
constructor
In this lesson, you learned how to set up an AI server and use the Automated Installer to
install the Oracle Solaris 11 OS on multiple hosts in accordance with an operating system
installation plan.
Copyright © 2013, Oracle and/or its affiliates. All rights reserved.
You then learned how to build a Solaris image by using the distribution constructor.
Oracle Solaris 11 Advanced System Administration 3 - 60
Cicero Ronaldo (ciceroฺronaldo@gmailฺcom) has a non-transferable
license to use this Student Guideฺ
Unauthorized reproduction or distribution prohibitedฺ Copyright© 2014, Oracle and/or its affiliatesฺ

MiBi AlitiDt
M
anag
i
ng
B
us
i
ness
A
pp
li
ca
ti
on
D
a
t
a
Copyright © 2013, Oracle and/or its affiliates. All rights reserved.
Cicero Ronaldo (ciceroฺronaldo@gmailฺcom) has a non-transferable
license to use this Student Guideฺ
Unauthorized reproduction or distribution prohibitedฺ Copyright© 2014, Oracle and/or its affiliatesฺ

Objectives
After completing this lesson, you should be able to:
•Implement a plan for data storage configuration and
backup
•
Manage data redundancy with a mirrored storage pool
Manage
data
redundancy
with
a
mirrored
storage
pool
•Configure data backup and restore by using ZFS
snapshots
•Manage data storage space by using ZFS file system
properties
T bl h t ZFS i
•
T
rou
bl
es
h
oo
t
ZFS
i
ssues
This lesson discusses how to use the many powerful features of ZFS to manage your
business application data.
Copyright © 2013, Oracle and/or its affiliates. All rights reserved.
Oracle Solaris 11 Advanced System Administration 4 - 2
Cicero Ronaldo (ciceroฺronaldo@gmailฺcom) has a non-transferable
license to use this Student Guideฺ
Unauthorized reproduction or distribution prohibitedฺ Copyright© 2014, Oracle and/or its affiliatesฺ
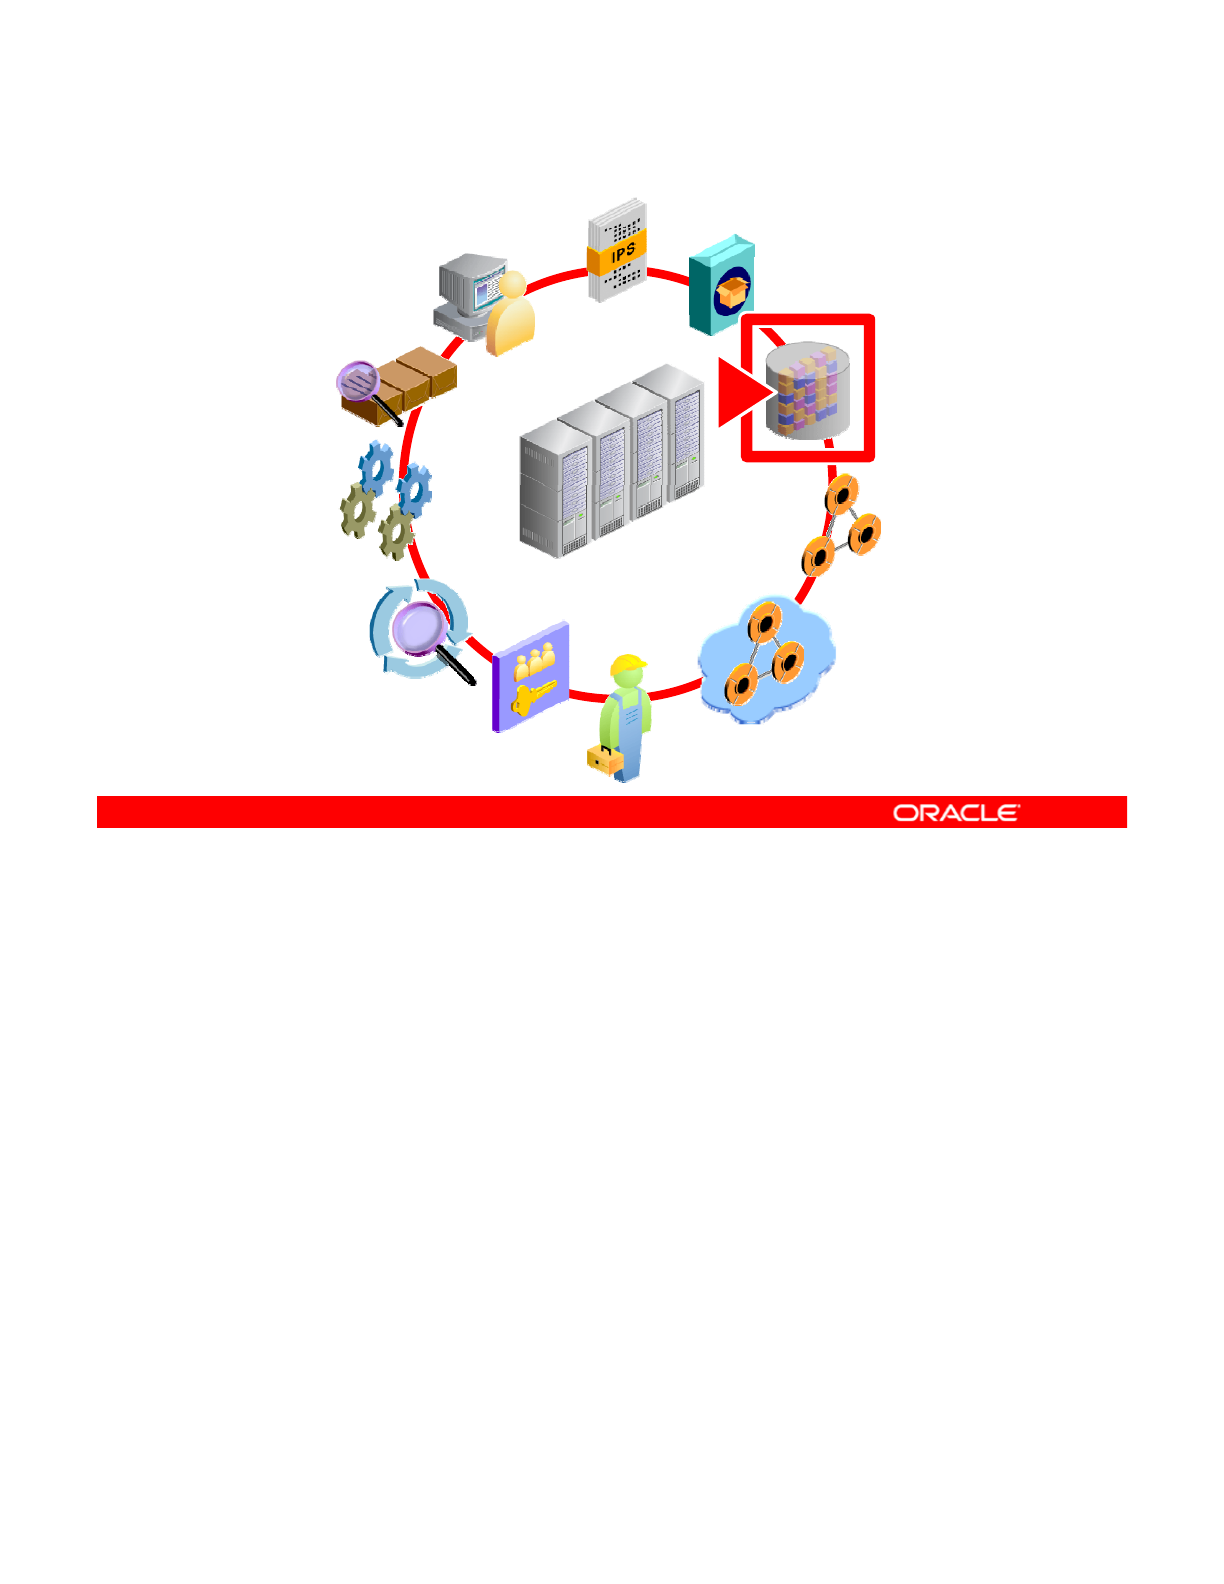
Workflow Orientation
AI INSTALL
IPS
DATA
STORAGE
RESOURCE
EVALUATION
MONITORING
STORAGE
NETWORK
CONFIGURATION
PROCESSES
EVALUATION
ENTERPRISE
DATA CENTER
SERVICES
PRIVILEGES
AUDITING
NETWORK
VIRTUALIZATION
Before you begin the lesson, take a moment to orient yourself in the job workflow. You have
successfully installed the operating system by using AI and you have created a local IPS
repository. Your next task is to set up and manage storage for your company’s business
Copyright © 2013, Oracle and/or its affiliates. All rights reserved.
application data, such as customer and product information. Providing an environment in
which data is readily accessible while at the same time secure is an important aspect of a
system administrator’s day-to-day responsibilities.
Oracle Solaris 11 Advanced System Administration 4 - 3
Cicero Ronaldo (ciceroฺronaldo@gmailฺcom) has a non-transferable
license to use this Student Guideฺ
Unauthorized reproduction or distribution prohibitedฺ Copyright© 2014, Oracle and/or its affiliatesฺ

Lesson Agenda
•Planning for Data Storage Configuration and Backup
• Managing Data Redundancy with Mirrored Storage Pools
• Backing Up and Recovering Data with ZFS Snapshots
•
Managing Data Storage Space with ZFS File System
•
Managing
Data
Storage
Space
with
ZFS
File
System
Properties
• Troubleshooting ZFS Failures
Copyright © 2013, Oracle and/or its affiliates. All rights reserved.
Oracle Solaris 11 Advanced System Administration 4 - 4
Cicero Ronaldo (ciceroฺronaldo@gmailฺcom) has a non-transferable
license to use this Student Guideฺ
Unauthorized reproduction or distribution prohibitedฺ Copyright© 2014, Oracle and/or its affiliatesฺ

Planning for Data Storage
Configuration and Backup
Configuration
and
Backup
•Ensure that critical business application data is protected,
backed up, recoverable, and accessible.
•The decision has been made to support the business
a
pp
lications b
y
:
pp y
–Providing data redundancy by using mirrored storage pools
–Setting up file systems to store the data
–Backing up the file systems by using snapshots
–Minimizing storage space by using the ZFS file system
com
p
ression
p
ro
p
ert
y
p
pp y
As part of the Oracle Solaris 11 implementation plan, your company wants to ensure that its
critical application data is protected, backed up regularly, and easily recoverable. At the same
time, your company wants to ensure that the data remains highly accessible to its users. And,
Copyright © 2013, Oracle and/or its affiliates. All rights reserved.
where possible, it wants to minimize data storage space requirements. The implementation
planning committee has decided to use the power and flexibility of ZFS to meet these
objectives by:
•Providing data redundancy by using mirrored storage pools
•Setting up file systems to store the data
•Backing up the file systems that store the data by using the ZFS snapshot technology
•Minimizing the amount of file system space that is needed to store the data by using the
ZFS compression property
Oracle Solaris 11 Advanced System Administration 4 - 5
Cicero Ronaldo (ciceroฺronaldo@gmailฺcom) has a non-transferable
license to use this Student Guideฺ
Unauthorized reproduction or distribution prohibitedฺ Copyright© 2014, Oracle and/or its affiliatesฺ

Determining Storage Pool Requirements
As part of planning, the following storage pool requirements
should be identified:
•Devices
–
Disks that are at least 128 MB in size
Disks
that
are
at
least
128
MB
in
size
–Not in use by other parts of the operating system
–Individual slices on a preformatted disk or entire disks
formatted as a single, large slice
–Use of log and cache devices for improved performance
•
Level of data redundancy option
•
Level
of
data
redundancy
option
–Non-redundant (striped) configurations
–Mirrored
–RAID-Z
Before setting up the data storage environment, the ZFS storage pool requirements need to
be identified. First, the devices that will be used to store the company’s data need to be
identified. The devices that are selected must meet the following criteria:
Copyright © 2013, Oracle and/or its affiliates. All rights reserved.
•They must be disks that are at least 128 MB in size.
•They must not be in use by other parts of the operating system.
•The devices can be individual slices on a preformatted disk, or they can be entire disks
that ZFS formats as a single, large slice.
•You also want to decide whether to include cache and log devices in the storage pool or
not. Because ZFS processes synchronous transactions by allocating space from the
main storage pool, having a separate device for the intent log on a Solid State Drive
(SSD) or a dedicated disk may improve performance for some workloads. Cache
devices provide an additional layer of caching between the main memory and disk.
Using cache devices provides the greatest performance improvement for random read-
workloads of mostly static content.
The level of redundancy is another storage requirement that should be addressed during
planning The level of redundancy determines the types of hardware failures the pool can
planning
.
The
level
of
redundancy
determines
the
types
of
hardware
failures
the
pool
can
withstand. ZFS supports non-redundant (striped) configurations, as well as mirroring and
RAID-Z (a variation on RAID-5 and RAID-6). As you know, your company has decided to use
mirrored storage pools.
Oracle Solaris 11 Advanced System Administration 4 - 6
Cicero Ronaldo (ciceroฺronaldo@gmailฺcom) has a non-transferable
license to use this Student Guideฺ
Unauthorized reproduction or distribution prohibitedฺ Copyright© 2014, Oracle and/or its affiliatesฺ

Mirrored Storage Pool Data Redundancy Features
•Data redundancy features
–Mirrored storage pool configuration options
–Self-healing data
•
Dynamic striping
Dynamic
striping
In ZFS, a mirrored storage pool provides data redundancy through its configuration options
and self-healing data features. ZFS also supports dynamic striping in a mirrored storage pool.
Copyright © 2013, Oracle and/or its affiliates. All rights reserved.
Oracle Solaris 11 Advanced System Administration 4 - 7
Cicero Ronaldo (ciceroฺronaldo@gmailฺcom) has a non-transferable
license to use this Student Guideฺ
Unauthorized reproduction or distribution prohibitedฺ Copyright© 2014, Oracle and/or its affiliatesฺ
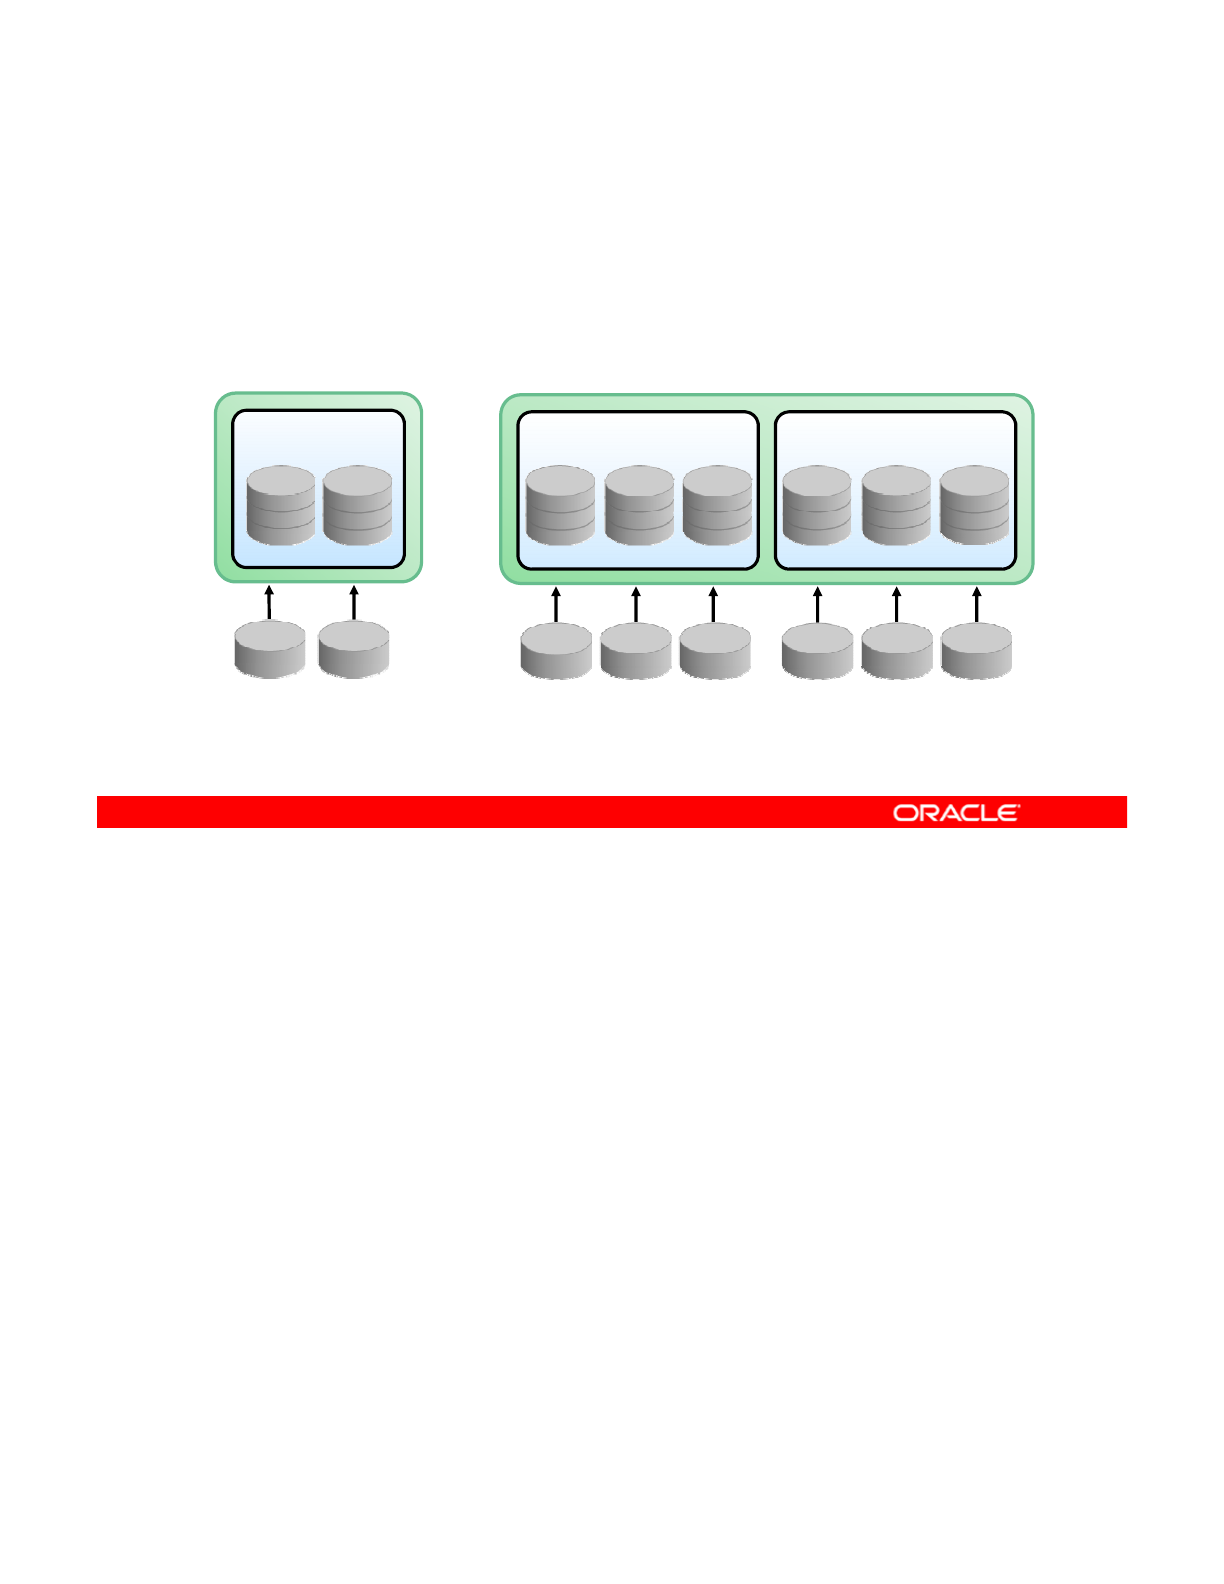
Mirrored Storage Pool Configuration
•At least two disks are required.
•Many disks can be used.
•Multiple mirrors can be created in each pool.
Mirror Device Mirror DeviceMirror Device
Simple Mirrored
Configuration Complex Mirrored Configuration
c1t0d0 c2t0d0 c1t0d0 c2t0d0 c3t0d0 c4t0d0 c5t0d0 c6t0d0
A mirrored storage pool configuration requires at least two disks, preferably on separate
controllers. Many disks can be used in a mirrored configuration. In addition, you can create
multiple mirrors in each pool.
Copyright © 2013, Oracle and/or its affiliates. All rights reserved.
The graphic on the left shows an example of a simple mirrored configuration. The storage
pool contains one mirror with two disks. In this example, you can lose only one disk before
you start losing data.
An example of a more complex mirrored configuration is shown in the graphic on the right.
Here the storage pool contains two mirrors with three disks each.
With the more complex mirrored configuration example, you can lose up to two disks in each
mirror and not lose any data.
Oracle Solaris 11 Advanced System Administration 4 - 8
Cicero Ronaldo (ciceroฺronaldo@gmailฺcom) has a non-transferable
license to use this Student Guideฺ
Unauthorized reproduction or distribution prohibitedฺ Copyright© 2014, Oracle and/or its affiliatesฺ

Self-Healing Data
•This is supported in a mirrored or RAID-Z configuration.
•When a bad data block is detected:
–Correct data is fetched from another replicated copy
–
Bad data is repaired by replacement with the good copy
–
Bad
data
is
repaired
by
replacement
with
the
good
copy
ZFS provides for self-healing data in a mirrored or RAID-Z configuration. When a bad data
block is detected, not only does ZFS fetch the correct data from another replicated copy, but it
also repairs the bad data by replacing it with the good copy.
Copyright © 2013, Oracle and/or its affiliates. All rights reserved.
Oracle Solaris 11 Advanced System Administration 4 - 9
Cicero Ronaldo (ciceroฺronaldo@gmailฺcom) has a non-transferable
license to use this Student Guideฺ
Unauthorized reproduction or distribution prohibitedฺ Copyright© 2014, Oracle and/or its affiliatesฺ

Dynamic Striping
•Data is dynamically striped across all top-level virtual
devices.
•Data placement is done at write time.
•
When a new virtual device is added data is gradually
When
a
new
virtual
device
is
added
,
data
is
gradually
allocated to the new device.
Note: Although ZFS supports combining different
types of virtual devices within the same pool, the
recommended practice is to use top
level virtual
recommended
practice
is
to
use
top
-
level
virtual
devices of the same type with the same redundancy
level in each virtual device.
ZFS dynamically stripes data across all top-level virtual devices. The decision about where to
place data is done at write time, so no fixed-width stripes are created at allocation time. When
new virtual devices are added to a pool, ZFS gradually allocates data to the new device to
Copyright © 2013, Oracle and/or its affiliates. All rights reserved.
maintain performance and space allocation policies.
Note: Although ZFS supports combining different types of virtual devices within the same
pool, this practice is not recommended. This is because your fault tolerance is only as good
as your worst virtual device. The recommended practice is to use top-level virtual devices of
the same type with the same redundancy level in each virtual device.
Oracle Solaris 11 Advanced System Administration 4 - 10
Cicero Ronaldo (ciceroฺronaldo@gmailฺcom) has a non-transferable
license to use this Student Guideฺ
Unauthorized reproduction or distribution prohibitedฺ Copyright© 2014, Oracle and/or its affiliatesฺ
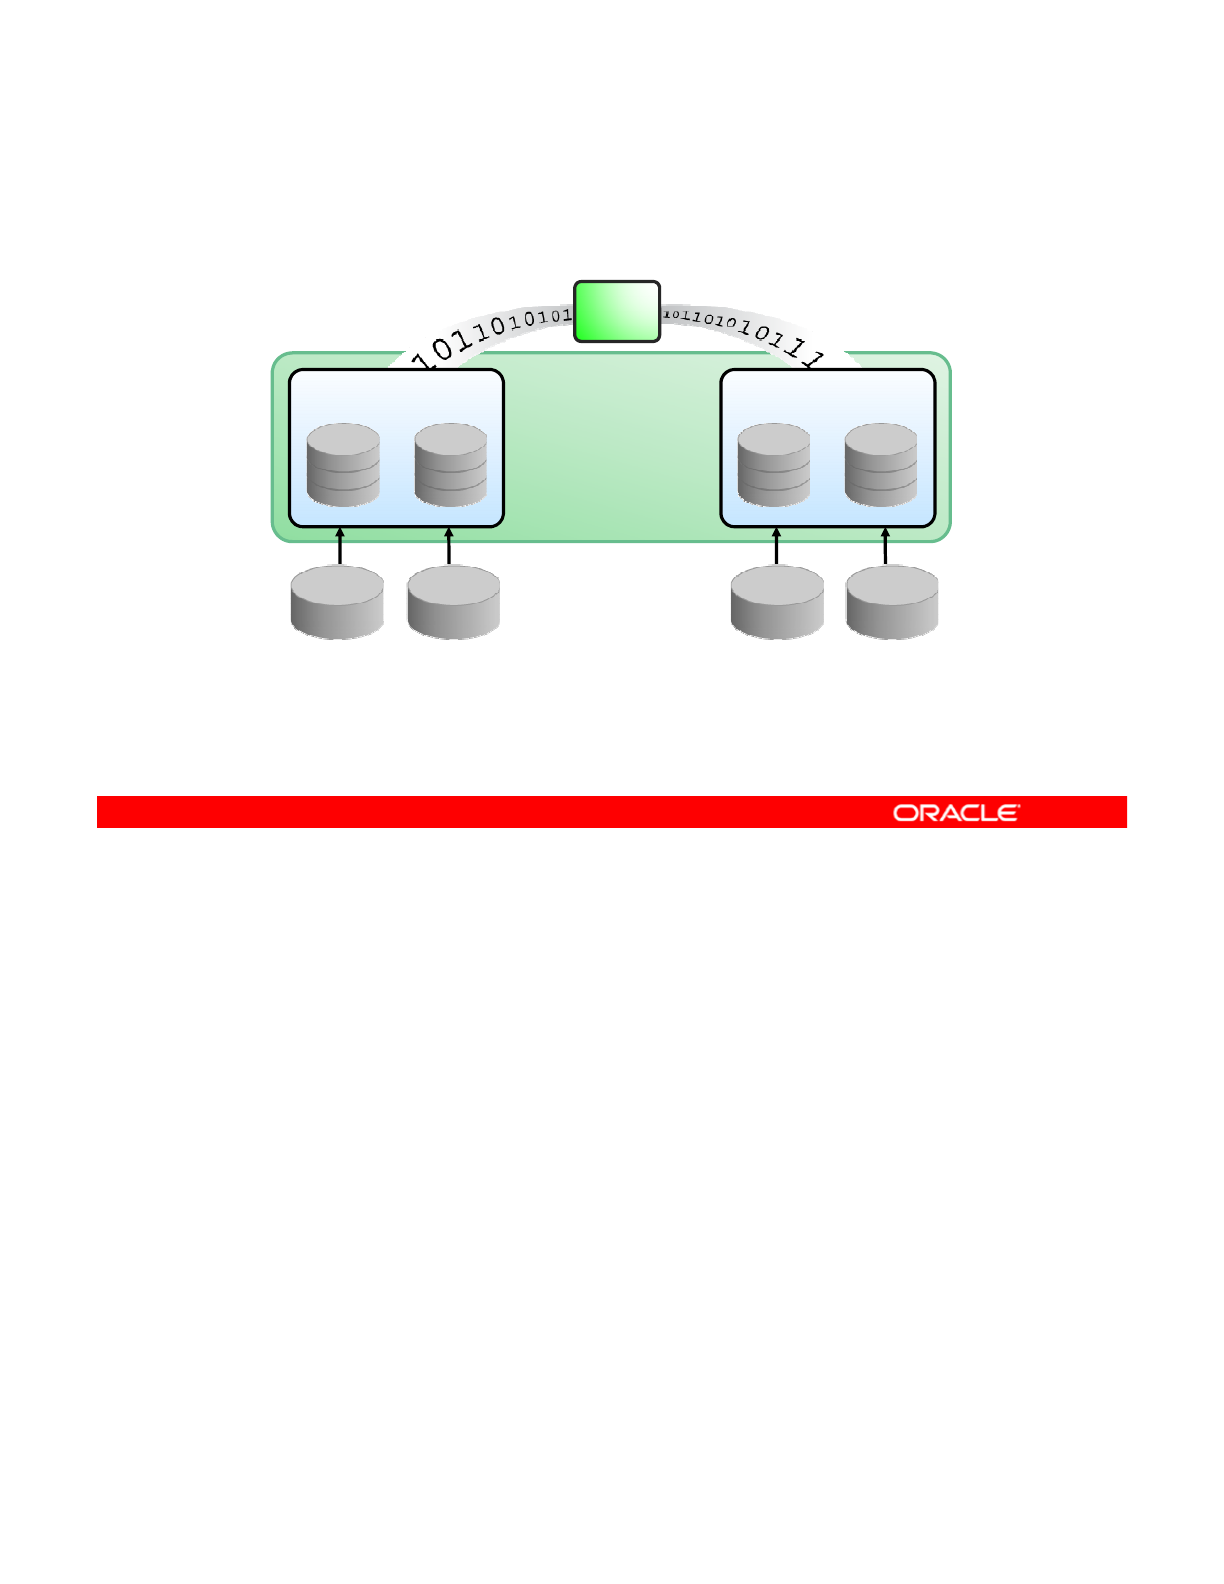
Dynamic Striping in a Mirrored Pool
Stripe 1
Mirror Device
Stripe 2
Mirror Device
Data
Mirror
Device
Mirror
Device
Mirrored Devices
36 GB 36 GB 36 GB 36 GB
The graphic in the slide shows how data is striped across mirrored top-level virtual devices. In
this configuration, you have two top-level mirrored virtual devices, each containing two disks
of 36 GB. This configuration provides data redundancy. You can lose a disk in either mirrored
Copyright © 2013, Oracle and/or its affiliates. All rights reserved.
set and still not suffer any loss of data.
Note: A virtual device is a logical device in a pool that can be disks, disk slices, or files. A
pool can have any number of virtual devices at the top of the configuration, known as top-level
virtual devices or top-level vdevs. You can configure these virtual devices to stand alone
within a pool (referred to as an unreplicated or non-redundant configuration) or combine them
into a mirror or RAID-Z virtual device to provide data redundancy. Disks, disk slices, or files
that are used in pools outside of mirrors and RAID
-
Z virtual devices function as top
-
level
that
are
used
in
pools
outside
of
mirrors
and
RAID
Z
virtual
devices
function
as
top
level
virtual devices themselves.
Oracle Solaris 11 Advanced System Administration 4 - 11
Cicero Ronaldo (ciceroฺronaldo@gmailฺcom) has a non-transferable
license to use this Student Guideฺ
Unauthorized reproduction or distribution prohibitedฺ Copyright© 2014, Oracle and/or its affiliatesฺ

Determining File System Requirements
•Determine how to set up your file systems to:
–Store business application data efficiently
–Facilitate data backup and restore operations
•
One recommended approach is to:
One
recommended
approach
is
to:
–Create one file system for the main application
–Create sub–file systems for each of the sub-applications
•This approach ensures the ease of:
–Backing up the entire file system
Bki thdt hfth b
fil t
–
B
ac
ki
ng up
th
e
d
a
t
a on eac
h
o
f
th
e su
b
–
fil
e sys
t
ems
–Restoring the entire file system
–Setting file system properties at the highest level and having
sub–file systems inherit the property values
After the storage pool requirements have been identified, the next thing that needs to be
determined is the file system requirements. Generally, you create a file system for each
business application that is running on the system. Within that file system, you create sub–file
Copyright © 2013, Oracle and/or its affiliates. All rights reserved.
systems to support each of the main application’s sub-applications. For example, suppose
that your company uses the Oracle Customer Relationship Management (CRM) application.
To support this application, you create a file system in your mirrored storage pool for this
application. You then create sub–file systems for each of the Oracle CRM sub-applications,
such as Finance, Marketing, and HR.
The benefits of this approach are that because one business application can be stored in one
file system the file system can be backed up easily in one command by creating a ZFS
file
system
,
the
file
system
can
be
backed
up
easily
in
one
command
by
creating
a
ZFS
snapshot. In addition, every application can have its data backed up separately. Conversely,
when you need to restore the entire file system (that is, the whole application), you can do so
easily with one command by using the ZFS rollback snapshot feature.
Other benefits of this approach are that ZFS file system properties can be managed at the
highest level and sub–file systems can inherit the property values.
Oracle Solaris 11 Advanced System Administration 4 - 12
Cicero Ronaldo (ciceroฺronaldo@gmailฺcom) has a non-transferable
license to use this Student Guideฺ
Unauthorized reproduction or distribution prohibitedฺ Copyright© 2014, Oracle and/or its affiliatesฺ

Identifying Your Data Backup
and Restore Strategy
and
Restore
Strategy
As part of planning, you should identify your data backup and
restore strategy:
•Use ZFS snapshots to create file system backups.
•
Use send and receive commands to save incremental
Use
send
and
receive
commands
to
save
incremental
changes between snapshots or for remote replication.
As you just saw, your data backup and restore strategy should be a part of your file system
layout requirements discussion. Your strategy should clearly indicate how you intend to back
up and restore application data. Having a strategy in place for backing up and restoring critical
Copyright © 2013, Oracle and/or its affiliates. All rights reserved.
application data is crucial to the success of any company.
Through its snapshot technology, ZFS provides a fast and easy way to not only back up data
but also to recover data. Knowing how snapshots work and how they consume space as they
change is important when you formulate your backup and restore strategy. Your strategy
should also include naming conventions for snapshots, how often snapshots are taken, and
how they are maintained. You will be able to create initial backups of your file systems by
using snapshots For backing up data you use the ZFS send/receive functionality that allows
using
snapshots
.
For
backing
up
data
,
you
use
the
ZFS
send/receive
functionality
that
allows
you to save incremental changes between snapshots or to replicate a ZFS file system in a
remote location. You can copy the file system from one system to another system. You learn
how to use the send/receive functionality later in this lesson.
Oracle Solaris 11 Advanced System Administration 4 - 13
Cicero Ronaldo (ciceroฺronaldo@gmailฺcom) has a non-transferable
license to use this Student Guideฺ
Unauthorized reproduction or distribution prohibitedฺ Copyright© 2014, Oracle and/or its affiliatesฺ

Determining Ways to Save Data Storage Space
As part of planning, you should determine ways to save data
storage space.
ZFS offers a file system compression property that:
•
Is used to enable or disable compression for a file system
Is
used
to
enable
or
disable
compression
for
a
file
system
•Compresses only new data on an existing file system if it is
enabled after file system creation
Many companies are concerned about having enough space to store their data. Finding ways
to minimize the amount of data storage space used in the data storage environment is always
a challenge. Fortunately, ZFS offers a file system compression property that you can use to
Copyright © 2013, Oracle and/or its affiliates. All rights reserved.
enable or disable compression for a file system. Enabling compression on a file system with
existing data compresses only new data. Existing data remains uncompressed.
You learn how to use this property later in this lesson.
Oracle Solaris 11 Advanced System Administration 4 - 14
Cicero Ronaldo (ciceroฺronaldo@gmailฺcom) has a non-transferable
license to use this Student Guideฺ
Unauthorized reproduction or distribution prohibitedฺ Copyright© 2014, Oracle and/or its affiliatesฺ

Implementing the Data Storage
Configuration and Backup Plan
Configuration
and
Backup
Plan
Your assignment is to:
•Configure and test the functionality of
a mirrored storage pool
•
Create snapshots of the file systems
Create
snapshots
of
the
file
systems
within the mirrored storage pool to
use as backups
•Set and test the ZFS compression
property on the file systems
•
Troubleshoot ZFS device and data
•
Troubleshoot
ZFS
device
and
data
issues
Now that you have a better understanding of what is involved in planning for data storage
configuration and backup, you are ready to receive your assignment. Your assignment
consists of three tasks. The first task is to configure a mirrored storage pool. You then create
Copyright © 2013, Oracle and/or its affiliates. All rights reserved.
snapshots of the file systems within the pool to use as backups. You also set the ZFS
compression property on the file systems to test how to best minimize the amount of data
storage space that your business application data is using. Finally, you troubleshoot several
ZFS failures related to device and data issues.
In the next section, you learn how to accomplish the first task, which is to configure a mirrored
storage pool.
Oracle Solaris 11 Advanced System Administration 4 - 15
Cicero Ronaldo (ciceroฺronaldo@gmailฺcom) has a non-transferable
license to use this Student Guideฺ
Unauthorized reproduction or distribution prohibitedฺ Copyright© 2014, Oracle and/or its affiliatesฺ

Quiz
ZFS supports data redundancy in a mirrored storage pool
configuration, but it does not support dynamic striping in a
mirrored storage pool configuration.
a. True
b. False
Answer: b
Copyright © 2013, Oracle and/or its affiliates. All rights reserved.
Oracle Solaris 11 Advanced System Administration 4 - 16
Cicero Ronaldo (ciceroฺronaldo@gmailฺcom) has a non-transferable
license to use this Student Guideฺ
Unauthorized reproduction or distribution prohibitedฺ Copyright© 2014, Oracle and/or its affiliatesฺ

Quiz
ZFS enables you to minimize the amount of data storage space
used within a storage pool by using a file system property
called ______________.
a. minimize
b. restrictsize
c. compressratio
d. compression
Answer: d
Copyright © 2013, Oracle and/or its affiliates. All rights reserved.
Oracle Solaris 11 Advanced System Administration 4 - 17
Cicero Ronaldo (ciceroฺronaldo@gmailฺcom) has a non-transferable
license to use this Student Guideฺ
Unauthorized reproduction or distribution prohibitedฺ Copyright© 2014, Oracle and/or its affiliatesฺ

Lesson Agenda
• Planning for Data Storage Configuration and Backup
•Managing Data Redundancy with Mirrored Storage
Pools
•
Backing Up and Recovering Data with ZFS Snapshots
Backing
Up
and
Recovering
Data
with
ZFS
Snapshots
• Managing Data Storage Space with ZFS File System
Properties
You know how the company wants to store its data assets. Now you learn how to configure
the data storage environment to ensure data redundancy.
Copyright © 2013, Oracle and/or its affiliates. All rights reserved.
Oracle Solaris 11 Advanced System Administration 4 - 18
Cicero Ronaldo (ciceroฺronaldo@gmailฺcom) has a non-transferable
license to use this Student Guideฺ
Unauthorized reproduction or distribution prohibitedฺ Copyright© 2014, Oracle and/or its affiliatesฺ

Managing Data Redundancy with
Mirrored Storage Pools
Mirrored
Storage
Pools
This section covers the following topics:
•Creating a mirrored storage pool
•Adding log and cache devices to a storage pool
•
Managing devices in a ZFS storage pool
•
Managing
devices
in
a
ZFS
storage
pool
Copyright © 2013, Oracle and/or its affiliates. All rights reserved.
Oracle Solaris 11 Advanced System Administration 4 - 19
Cicero Ronaldo (ciceroฺronaldo@gmailฺcom) has a non-transferable
license to use this Student Guideฺ
Unauthorized reproduction or distribution prohibitedฺ Copyright© 2014, Oracle and/or its affiliatesฺ
Creating a Mirrored Storage Pool
To create a new ZFS mirrored storage pool, use zpool
create followed by the pool name, the mirror keyword, and
the storage devices that will compose the mirror.
Data is:
•Dynamically striped across both mirrors
•Redundant between each disk within a mirror
# zpool create hrpool mirror c1t0d0 c2t0d0 mirror c3t0d0 c4t0d0
To create a mirrored storage pool, you use the zpool create command followed by the pool
name, the mirror keyword, and the storage devices that will compose the mirror. Multiple
mirrors can be specified by repeating the mirror keyword on the command line.
Copyright © 2013, Oracle and/or its affiliates. All rights reserved.
The command shown in the example creates a pool called hrpool with two 2-way mirrors.
The first mirror contains the devices c1t0d0 and c2t0d0, and the second mirror contains the
devices c3t0d0 and c4t0d0.
Data is dynamically striped across both mirrors, with data being redundant between each disk
within a mirror.
Oracle Solaris 11 Advanced System Administration 4 - 20
Cicero Ronaldo (ciceroฺronaldo@gmailฺcom) has a non-transferable
license to use this Student Guideฺ
Unauthorized reproduction or distribution prohibitedฺ Copyright© 2014, Oracle and/or its affiliatesฺ

Adding Log Devices to a Storage Pool
A log device:
•Can be added as part of, or after, pool creation
•Can be removed
•
Is designated by the keyword
log
•
Is
designated
by
the
keyword
log
# zpool create datapool mirror c1t1d0 c1t2d0 log mirror
c1t5d0 c1t8d0
You can specify a separate log device when a pool is created or add it after the pool is
created. You can also remove a log device from a pool. The keyword log is used to
designate a device as the log device.
Copyright © 2013, Oracle and/or its affiliates. All rights reserved.
In the code example in the slide, a mirrored storage pool called datapool is created that
consists of two virtual devices. The first virtual device contains the disks c1t1d0 and
c1t2d0. The second virtual device, which is the log device, contains the disks c1t5d0 and
c1t8d0.
Oracle Solaris 11 Advanced System Administration 4 - 21
Cicero Ronaldo (ciceroฺronaldo@gmailฺcom) has a non-transferable
license to use this Student Guideฺ
Unauthorized reproduction or distribution prohibitedฺ Copyright© 2014, Oracle and/or its affiliatesฺ

Adding Cache Devices to a Storage Pool
•Can be added as part of, or after, pool creation
•Can be removed
•Cannot be mirrored or be a part of a RAID-Z configuration
•
Are designated with the keyword
cache
•
Are
designated
with
the
keyword
cache
Note: You can monitor cache statistics with zpool iostat.
# zpool create appool mirror c0t2d0 c0t4d0 cache c0t0d0
You can create a storage pool with one or more cache devices to cache storage pool data.
You can remove cache devices from the pool after the pool is created. However, cache
devices cannot be mirrored or be part of a RAID-Z configuration. The keyword cache is used
Copyright © 2013, Oracle and/or its affiliates. All rights reserved.
to designate a cache device.
In the code example in the slide, a mirrored pool called appool is created that consists of two
disks: c0t2d0 and c0t4d0. By using the keyword cache, you have designated the device
c0t0d0 in the pool for the cache.
Note: Cache statistics can be monitored by using the zpool iostat command.
Oracle Solaris 11 Advanced System Administration 4 - 22
Cicero Ronaldo (ciceroฺronaldo@gmailฺcom) has a non-transferable
license to use this Student Guideฺ
Unauthorized reproduction or distribution prohibitedฺ Copyright© 2014, Oracle and/or its affiliatesฺ

Managing Devices in ZFS Storage Pools
The tasks that you can perform with the devices in a pool
include:
•Adding top-level virtual devices
•
Attaching and detaching devices
Attaching
and
detaching
devices
•Taking a device offline
•Bringing a device online
•Designating hot spares
After you have created a pool, there are several tasks that you can perform to manage the
physical devices within the pool, such as adding top-level virtual devices, attaching and
detaching devices, taking a device offline, bringing a device online, and designating hot
Copyright © 2013, Oracle and/or its affiliates. All rights reserved.
spares.
You now take a closer look at each of these tasks, beginning with how to add a device to a
storage pool.
Oracle Solaris 11 Advanced System Administration 4 - 23
Cicero Ronaldo (ciceroฺronaldo@gmailฺcom) has a non-transferable
license to use this Student Guideฺ
Unauthorized reproduction or distribution prohibitedฺ Copyright© 2014, Oracle and/or its affiliatesฺ

Adding Devices to a Storage Pool
To add a new virtual device to a pool, use the zpool add
command.
# zpool add appool mirror c2t1d0 c2t2d0
By adding a new top-level virtual device, space is:
•Dynamically added to the pool
•Immediately available to all the data sets within the pool
Note: A data set is a generic name for the following ZFS
entities: file systems, snapshots, or volumes.
To add a new virtual device to a pool, use the zpool add command. By adding a new top-
level virtual device, space is dynamically added to the pool. This space is immediately
available to all the data sets within the pool.
Copyright © 2013, Oracle and/or its affiliates. All rights reserved.
Note: A data set is a generic name for the following ZFS entities: file systems, snapshots, or
volumes.
In the code example in the slide, you are adding a mirrored device to an existing pool called
appool. The mirror consists of two disks: c2t1d0 and c2t2d0.
Note: Use zpool status to determine the disks that are currently configured for a storage
pool. Then, before adding a device to the pool, you must execute the format command to
identify any additional disks configured in the system.
Oracle Solaris 11 Advanced System Administration 4 - 24
Cicero Ronaldo (ciceroฺronaldo@gmailฺcom) has a non-transferable
license to use this Student Guideฺ
Unauthorized reproduction or distribution prohibitedฺ Copyright© 2014, Oracle and/or its affiliatesฺ

Attaching Devices to a Storage Pool
To attach a new device to an existing mirrored or non-mirrored
pool, use the zpool attach command.
#
z
p
ool attach a
pp
ool c1t1d0 c2t1d0
#
ppp
You can use the zpool attach command to attach a new device to an existing mirrored or
non-mirrored virtual device (vdev). With this command, you can transform a two-way mirrored
configuration into a three-way mirrored configuration, for example, or convert a non-redundant
Copyright © 2013, Oracle and/or its affiliates. All rights reserved.
storage pool into a redundant storage pool.
In the example in the slide, a new device, c2t1d0, is being attached to an existing device,
c1t1d0, to create either a mirrored pool or a three-way mirror in an already mirrored pool.
Oracle Solaris 11 Advanced System Administration 4 - 25
Cicero Ronaldo (ciceroฺronaldo@gmailฺcom) has a non-transferable
license to use this Student Guideฺ
Unauthorized reproduction or distribution prohibitedฺ Copyright© 2014, Oracle and/or its affiliatesฺ
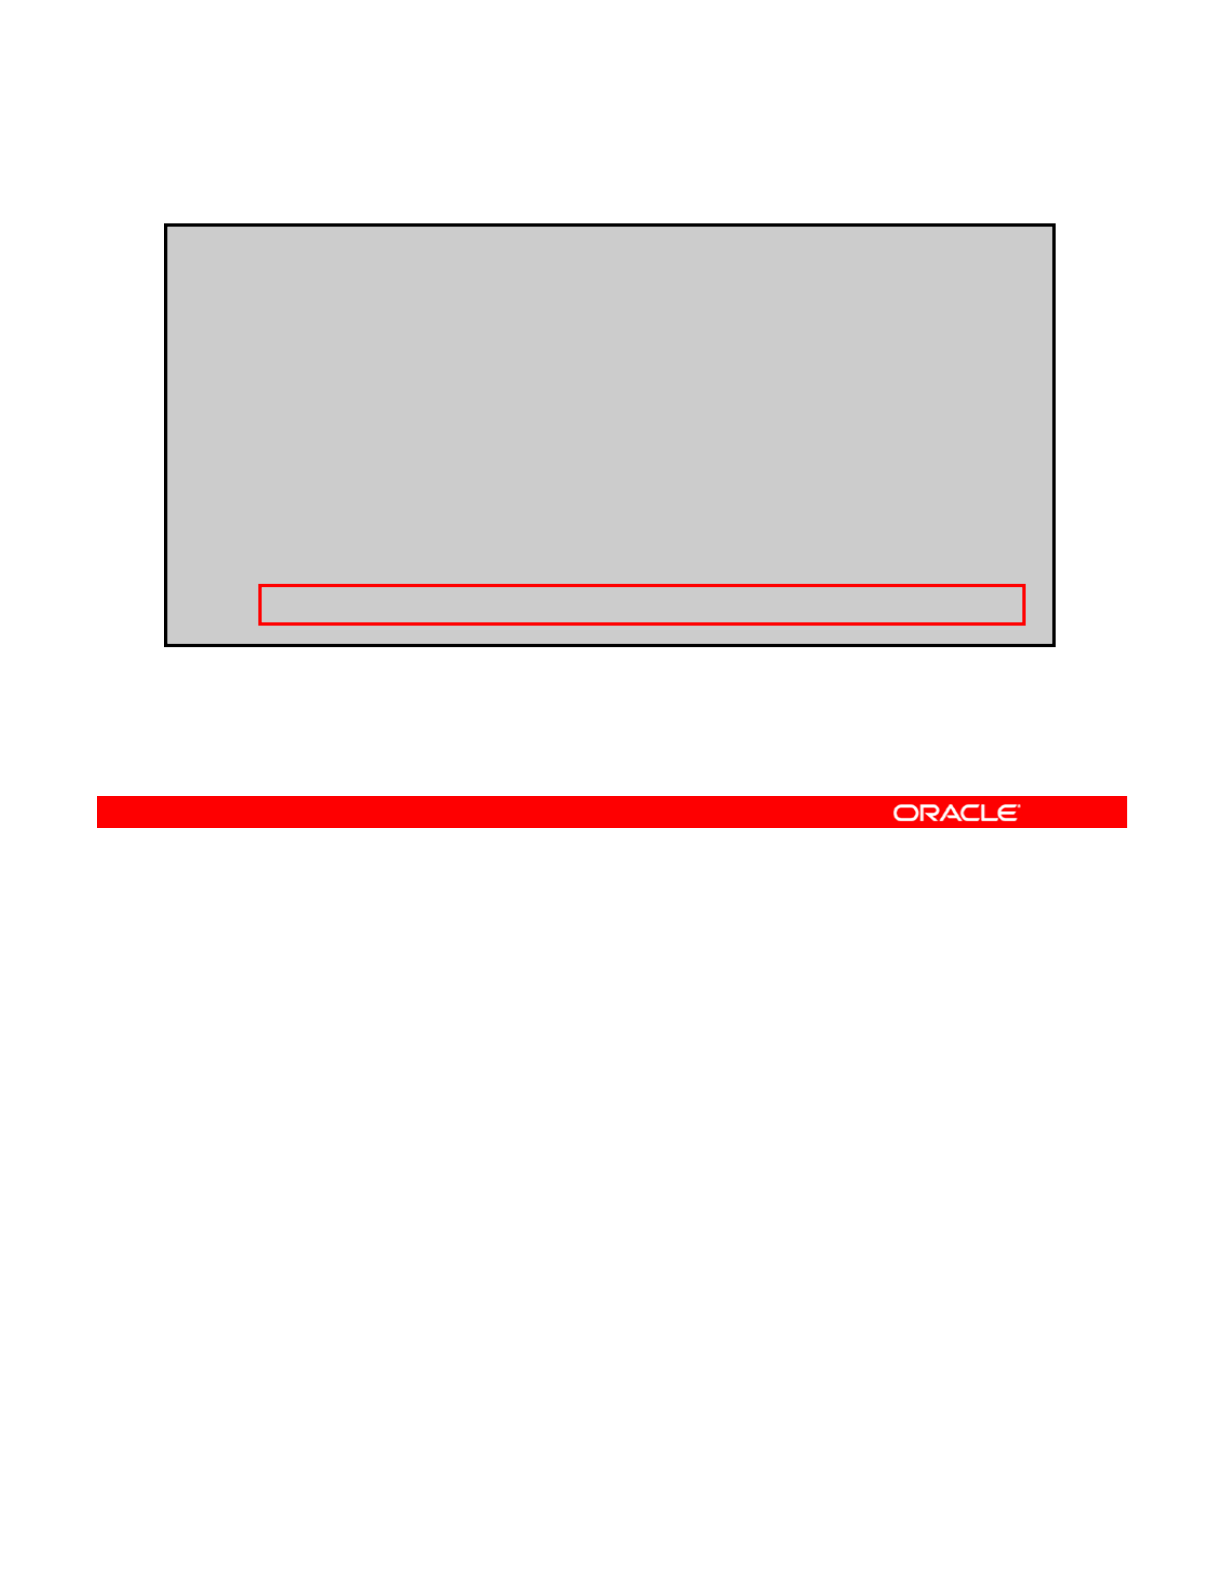
Attaching Devices to a Storage Pool
# zpool attach appool c1t1d0 c2t1d0
# zpool status
pool: appool
state: ONLINE
scrub: resilver completed after 0h0m with 0 errors on Tue Dec
13 14:11:33 2011
config:
NAME STATE READ WRITE CKSUM
appool ONLINE 0 0 0
mirror-0 ONLINE 0 0 0
c0t1d0 ONLINE 0 0 0
c1t1d0 ONLINE 0 0 0
2t1d0
ONLINE
0
0
0735Kild
Resilvering: The process of transferring data from one device
to another device
c
2t1d0
ONLINE
0
0
0
73
.
5K
res
il
vere
d
You can run the zpool status command to verify that the device is attached successfully.
In the example in the slide, you can see that the c2t1d0 device has been attached to the
mirrored pool named appool. You can also see that the new device has already been
Copyright © 2013, Oracle and/or its affiliates. All rights reserved.
resilvered. In ZFS, the new device begins to resilver immediately.
Note: Resilvering is the process of transferring data from one device to another device.
Oracle Solaris 11 Advanced System Administration 4 - 26
Cicero Ronaldo (ciceroฺronaldo@gmailฺcom) has a non-transferable
license to use this Student Guideฺ
Unauthorized reproduction or distribution prohibitedฺ Copyright© 2014, Oracle and/or its affiliatesฺ

Taking Devices Offline in a Storage Pool
To take a device offline, use zpool offline followed by the
pool name and the device name.
# zpool offline hrpool c1t0d0
b i i d i 1 0d0 ffli
When a device is offline:
•ZFS does not send it any requests
•It remains offline after a system reboot
b
r
i
ng
i
ng
d
ev
i
ce c
1
t
0d0
o
ffli
ne
Note: Use zpool offline -t to take a device offline
temporarily.
•It is not detached from the storage pool
When hardware is unreliable or not functioning properly, ZFS continues to read or write data
to the device, assuming that the condition is only temporary. If the condition is not temporary,
you can instruct ZFS to ignore the device by taking it offline. You can take a device offline by
Copyright © 2013, Oracle and/or its affiliates. All rights reserved.
using the zpool offline command followed by the pool name and the device name. In the
code example in the slide, the c1t0d0 device is taken offline. This device is located in the
pool named hrpool.
When a device is taken offline, ZFS does not send any requests to that device.
By default, the offline state is persistent; consequently, the device remains offline even after
the system is rebooted. If you want to take a device offline temporarily and have it
automatically returned to the
ONLINE
state after the system is rebooted use the
l
automatically
returned
to
the
ONLINE
state
after
the
system
is
rebooted
,
use
the
zpoo
l
offline -t command instead.
When a device is taken offline, it is not detached from the storage pool. This means that you
cannot use the device in another pool.
Oracle Solaris 11 Advanced System Administration 4 - 27
Cicero Ronaldo (ciceroฺronaldo@gmailฺcom) has a non-transferable
license to use this Student Guideฺ
Unauthorized reproduction or distribution prohibitedฺ Copyright© 2014, Oracle and/or its affiliatesฺ

Detaching Devices from a Storage Pool
To detach a device from a mirrored storage pool, use the
zpool detach command.
# zpool detach appool c2t1d0
Note: This operation is refused if there are no other valid
replicas of the data.
To detach a device from a mirrored storage pool, you can use the zpool detach command.
Note: The device should already be offline.
For example if you want to detach the
c2t1d0
device that you just attached to the mirrored
Copyright © 2013, Oracle and/or its affiliates. All rights reserved.
For
example
,
if
you
want
to
detach
the
c2t1d0
device
that
you
just
attached
to
the
mirrored
pool appool, you can do so by entering the command zpool detach appool c2t1d0 as
shown in the code example. You can verify that the device has been detached by running the
zpool status command again.
Note: This operation is refused if there are no other valid replicas of the data.
Oracle Solaris 11 Advanced System Administration 4 - 28
Cicero Ronaldo (ciceroฺronaldo@gmailฺcom) has a non-transferable
license to use this Student Guideฺ
Unauthorized reproduction or distribution prohibitedฺ Copyright© 2014, Oracle and/or its affiliatesฺ

Bringing Devices Online in a Storage Pool
To bring a device online, use zpool online followed by the
pool name and the device name.
# zpool online hrpool c1t0d0
b i i d i 1 0d0 li
When a device is brought back online, data that was added to
the storage pool while the device was offline resilvers to the
device.
Nt
Yt
l
li
tl dik
b
r
i
ng
i
ng
d
ev
i
ce c
1
t
0d0
on
li
ne
N
o
t
e:
Y
ou canno
t
use zpoo
l
on
li
ne
t
o rep
l
ace a
di
s
k
.
To bring back a device online, use the zpool online command followed by the pool name
and the device name.
Data that was added to a storage pool when a device was offline resilvers to the device after it
Copyright © 2013, Oracle and/or its affiliates. All rights reserved.
Data
that
was
added
to
a
storage
pool
when
a
device
was
offline
resilvers
to
the
device
after
it
is brought back online.
Note: You cannot use device onlining to replace a disk. If you take a device offline, replace
the drive, and try to bring it online, it remains in the faulted state.
Oracle Solaris 11 Advanced System Administration 4 - 29
Cicero Ronaldo (ciceroฺronaldo@gmailฺcom) has a non-transferable
license to use this Student Guideฺ
Unauthorized reproduction or distribution prohibitedฺ Copyright© 2014, Oracle and/or its affiliatesฺ

Replacing Devices in a Storage Pool
To replace a failed device with another device in the same
location, use zpool replace followed by the pool name and
the device name.
.
If the device is in a different location, specify both devices.
# zpool replace hrpool c1t1d0
#
llhl d d
Note: The replacement device must be greater than or equal to
the minimum size of all the devices in the configuration.
#
zpoo
l
rep
l
ace
h
rpoo
l
c1t1
d
0 c1t2
d
0
There are two reasons why you may want or need to replace a device. You may want to
replace a device with a larger device, or you may need to replace a failing or failed device.
To replace a device, use the
zpool
replace
command followed by the pool name and the
Copyright © 2013, Oracle and/or its affiliates. All rights reserved.
To
replace
a
device,
use
the
zpool
replace
command
followed
by
the
pool
name
and
the
device name.
If you are physically replacing a device with another device in the same location in a
redundant pool, you need to identify only the replaced device. ZFS recognizes that it is a
different disk in the same location. In the first example in the slide, you are replacing disk
c1t1d0 in the pool named hrpool.
If you are replacing a device in a storage pool with a disk in a different location, you must
specify both devices. This is shown in the second example, where you are replacing disk
c1t1d0 in the pool named hrpool with disk c1t2d0.
Note: For the replacement operation to be successful, the replacement device must be
greater than or equal to the minimum size of all the devices in a mirror or RAID-Z
configuration.
Oracle Solaris 11 Advanced System Administration 4 - 30
Cicero Ronaldo (ciceroฺronaldo@gmailฺcom) has a non-transferable
license to use this Student Guideฺ
Unauthorized reproduction or distribution prohibitedฺ Copyright© 2014, Oracle and/or its affiliatesฺ

Designating Hot Spares in a Storage Pool
With the ZFS hot spares feature, you can:
•Identify disks to replace a failed or faulted device in one or
more storage pools
•
Designate these devices as hot spares:
Designate
these
devices
as
hot
spares:
–When you create the pool (zpool create)
–After you have created a pool (zpool add)
Note: The designated device must be equal to or larger
than the size of the largest disk in the pool.
Aft f il d d i h b l d d il d th
Aft
er a
f
a
il
e
d
d
ev
i
ce
h
as
b
een rep
l
ace
d
an
d
res
il
vere
d
,
th
e
spare is automatically detached and made available.
An in-progress spare replacement can be canceled.
If the faulted device is detached, the spare assumes its place
and is removed from the spare’s list of all active pools.
The ZFS hot spares feature enables you to identify disks that can be used to replace a failed
or faulted device in one or more storage pools. Designating a device as a hot spare means
that the device is not an active device in a pool, but if an active device in the pool fails, the hot
Copyright © 2013, Oracle and/or its affiliates. All rights reserved.
spare automatically replaces the failed device.
You can designate devices as hot spares with the zpool create command when you are
creating a pool or with the zpool add command if the pool has already been created.
Note: The device or devices that you designate as a spares must be equal to or larger than
the size of the largest disk in the pool.
After a failed device has been replaced and resilvered, the spare is automatically detached
and made available. An in-progress spare replacement can be canceled by detaching the
spare. If the original faulted device is detached, the spare assumes its place in the
configuration and is removed from the spare’s list of all active pools.
You now look at some examples of how to designate hot spares, beginning with how to
designate a hot spare when you are creating a pool.
Oracle Solaris 11 Advanced System Administration 4 - 31
Cicero Ronaldo (ciceroฺronaldo@gmailฺcom) has a non-transferable
license to use this Student Guideฺ
Unauthorized reproduction or distribution prohibitedฺ Copyright© 2014, Oracle and/or its affiliatesฺ
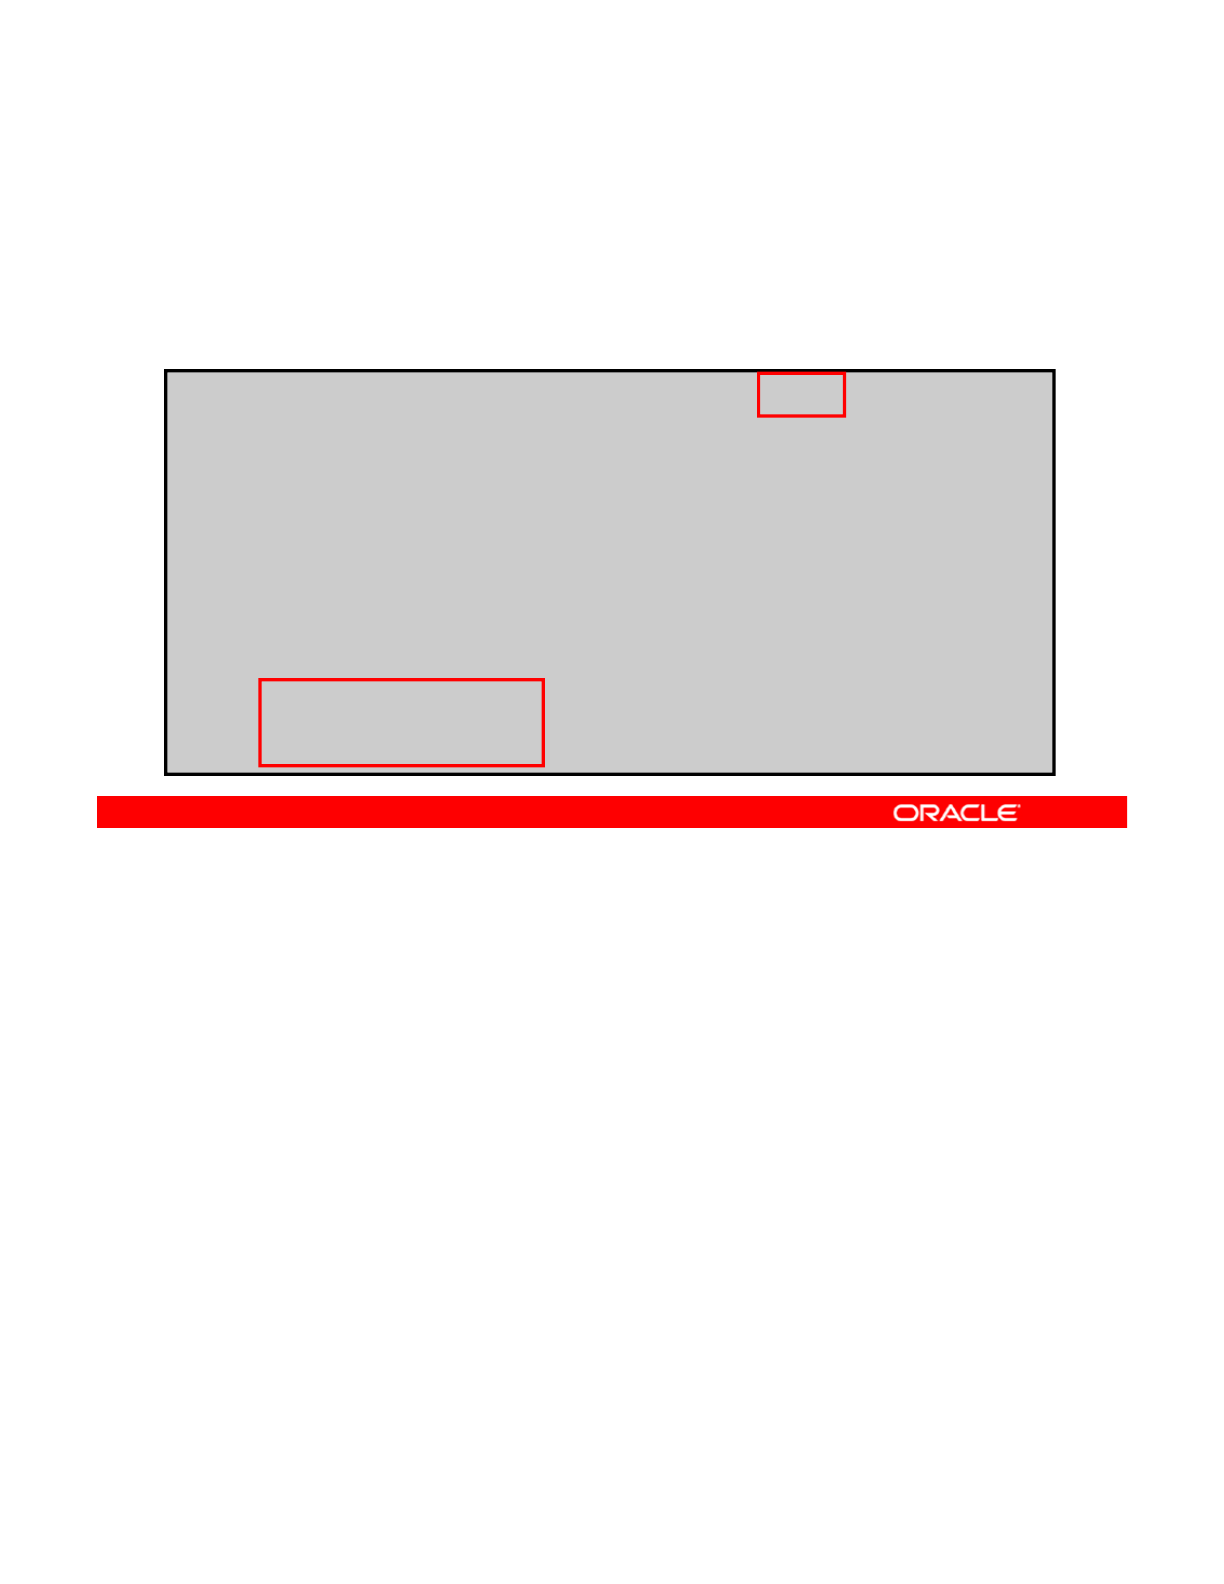
Designating Hot Spares in a Storage Pool
To designate hot spares to a pool that you are creating, use
zpool create followed by the pool name, the configuration,
the keyword spare, and the names of the spares.
#
zpool create appool mirror c1t1d0 c2t1d0 spare c1t2d0 c2t2d0
#
zpool
create
appool
mirror
c1t1d0
c2t1d0
spare
c1t2d0
c2t2d0
# zpool status appool
pool: appool
state: ONLINE
scrub: none requested
config:
NAME STATE READ WRITE CKSUM
a
pp
ool ONLINE 0 0 0
pp
mirror-0 ONLINE 0 0 0
c1t1d0 ONLINE 0 0 0
c2t1d0 ONLINE 0 0 0
spares
c1t2d0 AVAIL
c2t2d0 AVAIL
To designate hot spares to a pool that you are creating, use zpool create followed by the
pool name, the configuration, the keyword spare, and the names of the spares. In the
example in the slide, a pool called appool is being created. Within this pool is a mirror that
Copyright © 2013, Oracle and/or its affiliates. All rights reserved.
contains two disks: c1t1d0 and c2t1d0. Two spares, c1t2d0 and c2t2d0, have been
designated.
If you look at the status of appool, you can see that the spares are part of the pool and that
they have a status of available.
In this scenario, if either or both of the mirrored disks were to fail, ZFS automatically replaces
them with one or both of the available spares.
Now you look at how to add spares to an existing pool.
Oracle Solaris 11 Advanced System Administration 4 - 32
Cicero Ronaldo (ciceroฺronaldo@gmailฺcom) has a non-transferable
license to use this Student Guideฺ
Unauthorized reproduction or distribution prohibitedฺ Copyright© 2014, Oracle and/or its affiliatesฺ

Designating Hot Spares in a Storage Pool
To add hot spares to an existing pool, use zpool add followed
by the pool name, the keyword spare, and the name of the hot
spares.
#
zpool add appool spare c1t3d0 c2t3d0
#
zpool
add
appool
spare
c1t3d0
c2t3d0
# zpool status appool
pool: appool
state: ONLINE
scrub: none requested
config:
NAME STATE READ WRITE CKSUM
a
pp
ool ONLINE 0 0 0
pp
mirror-0 ONLINE 0 0 0
c1t1d0 ONLINE 0 0 0
c2t1d0 ONLINE 0 0 0
spares
c1t3d0 AVAIL
c2t3d0 AVAIL
To designate hot spares by adding them to a pool after the pool is created, use the zpool
add command followed by the pool name, the keyword spare, and the name of the disks that
you want to designate as hot spares.
Copyright © 2013, Oracle and/or its affiliates. All rights reserved.
In the example in the slide, you have designated disks c1t3d0 and c2t3d0 as the spares
and are adding them to the pool named appool.
Then, you run the zpool status command for the pool to verify that the spares have been
added successfully and they have. Notice that both spares have a status of available
(AVAIL).
Again, as you saw in the previous example, if either or both of the mirrored disks were to fail,
ZFS automatically replaces them with one or both of the available spares.
Next, you look at an example in which one of the active devices in appool has faulted and
ZFS has automatically replaced the faulted device with one of the available spares.
Oracle Solaris 11 Advanced System Administration 4 - 33
Cicero Ronaldo (ciceroฺronaldo@gmailฺcom) has a non-transferable
license to use this Student Guideฺ
Unauthorized reproduction or distribution prohibitedฺ Copyright© 2014, Oracle and/or its affiliatesฺ
Designating Hot Spares in a Storage Pool
Example of a hot spare replacing a faulted device:
# zpool status appool
pool: appool
state: DEGRADED
status: One or more devices could not be opened. Sufficient replicas
iiiii
ex
i
st for the pool to cont
i
nue funct
i
on
i
ng
i
n a degraded state.
action: Attach the missing device and online it using 'zpool online'.
see: http://www.sun.com/msg/ZFS-8000-2Q
scrub: resilvered completed 0h12m with 0 errors on Tue Dec 13 14:16:04
2011
config:
NAME STATE READ WRITE CKSUM
appool DEGRADED 0 0 0
mirror
0
DEGRADED
0
0
0
mirror
-
0
DEGRADED
0
0
0
c1t1d0 ONLINE 0 0 0
spare-1 UNAVAIL 0 0 0
c2t1d0 UNAVAIL 0 0 0 cannot open
c1t3d0 ONLINE 0 0 0 58.5K resilvered
spares
c1t3d0 INUSE currently in use
c2t3d0 AVAIL
In this example, disk c2t1d0 has faulted and is replaced automatically by the hot spare
c1t3d0, which has been resilvered and now appears as an active device in the mirrored
pool. Notice also that the status of the hot spare c1t3d0 has changed from available (AVAIL)
Copyright © 2013, Oracle and/or its affiliates. All rights reserved.
to in use (INUSE).
Next, you look at how to return a hot spare to the spares set after a failed device is replaced
and is back online.
Oracle Solaris 11 Advanced System Administration 4 - 34
Cicero Ronaldo (ciceroฺronaldo@gmailฺcom) has a non-transferable
license to use this Student Guideฺ
Unauthorized reproduction or distribution prohibitedฺ Copyright© 2014, Oracle and/or its affiliatesฺ

Removing Hot Spares in a Storage Pool
To remove a hot spare, use zpool remove followed by the
pool name and the name of the hot spare.
# zpool remove appool c1t2d0
# zpool status appool
pool: appool
(output omitted)
spares
c1t3d0 AVAIL
Note: You cannot remove a hot spare if it is currently being
used by the storage pool as an active device.
To remove a hot spare from a storage pool, use the zpool remove command followed by the
pool name and the name of the hot spare. In this example, you are removing the hot spare
c1t2d0 from the pool named appool, leaving just one hot spare in the pool: c1t3d0.
Copyright © 2013, Oracle and/or its affiliates. All rights reserved.
As you can see in this example, after it is removed, the hot spare no longer appears in the
spares set.
Note: You cannot remove a hot spare if it is being used by the storage pool as an active
device.
Oracle Solaris 11 Advanced System Administration 4 - 35
Cicero Ronaldo (ciceroฺronaldo@gmailฺcom) has a non-transferable
license to use this Student Guideฺ
Unauthorized reproduction or distribution prohibitedฺ Copyright© 2014, Oracle and/or its affiliatesฺ

Practice 4-1 Overview:
Managing Data Redundancy with a ZFS Mirrored Pool
Managing
Data
Redundancy
with
a
ZFS
Mirrored
Pool
This practice covers the following topics:
•Creating ZFS mirrored pools
•Adding disks to a ZFS storage pool
•
Adding a cache device to a ZFS storage pool
•
Adding
a
cache
device
to
a
ZFS
storage
pool
•Destroying a ZFS storage pool
The practices for this lesson are designed to reinforce the concepts that have been presented
in the lecture portion. These practices cover the following tasks:
•Pr
act
i
ce
4-1: M
a
n
ag
in
g
data
r
edu
n
da
n
cy
wi
t
h
a
ZF
S
mirr
o
r
ed
poo
l
Copyright © 2013, Oracle and/or its affiliates. All rights reserved.
act ce
a ag g data edu da cy t a S o ed poo
•Practice 4-2: Using ZFS snapshots for backup and recovery
•Practice 4-3: Using a ZFS clone
•Practice 4-4: Configuring ZFS properties
•Practice 4-5: Troubleshooting ZFS failures
Practice 4-1 should take about 30 minutes to complete.
Oracle Solaris 11 Advanced System Administration 4 - 36
Cicero Ronaldo (ciceroฺronaldo@gmailฺcom) has a non-transferable
license to use this Student Guideฺ
Unauthorized reproduction or distribution prohibitedฺ Copyright© 2014, Oracle and/or its affiliatesฺ

Lesson Agenda
• Planning for Data Storage Configuration and Backup
• Managing Data Redundancy with Mirrored Storage Pools
•Backing Up and Recovering Data with ZFS Snapshots
•
Managing Data Storage Space with ZFS File System
•
Managing
Data
Storage
Space
with
ZFS
File
System
Properties
• Troubleshooting ZFS Failures
Copyright © 2013, Oracle and/or its affiliates. All rights reserved.
Oracle Solaris 11 Advanced System Administration 4 - 37
Cicero Ronaldo (ciceroฺronaldo@gmailฺcom) has a non-transferable
license to use this Student Guideฺ
Unauthorized reproduction or distribution prohibitedฺ Copyright© 2014, Oracle and/or its affiliatesฺ

Backing Up and Recovering Data
with ZFS Snapshots
with
ZFS
Snapshots
This section covers the following topics:
•Creating and destroying ZFS snapshots
•Holding ZFS snapshots
•
Renaming displaying and rolling back ZFS snapshots
•
Renaming
,
displaying
,
and
rolling
back
ZFS
snapshots
•Determining ZFS snapshot differences
•Creating and destroying ZFS clones
•Sending and receiving ZFS snapshot data
Copyright © 2013, Oracle and/or its affiliates. All rights reserved.
Oracle Solaris 11 Advanced System Administration 4 - 38
Cicero Ronaldo (ciceroฺronaldo@gmailฺcom) has a non-transferable
license to use this Student Guideฺ
Unauthorized reproduction or distribution prohibitedฺ Copyright© 2014, Oracle and/or its affiliatesฺ

Creating and Destroying a ZFS Snapshot
To create a snapshot, use zfs snapshot followed by the
snapshot name.
# zfs snapshot hrpool/home/qarpt@friday
To destroy a snapshot, use zfs destroy followed by the
snapshot name.
# zfs destroy hrpool/home/qarpt@friday
You can use the zfs snapshot command to create a snapshot, which takes as its only
argument the name of the snapshot that you want to create.
In the example in the slide, you are creating a snapshot of
hrpool/home/qarpt
that is
Copyright © 2013, Oracle and/or its affiliates. All rights reserved.
In
the
example
in
the
slide,
you
are
creating
a
snapshot
of
hrpool/home/qarpt
that
is
named friday.
Note: To create a recursive snapshot, use zfs snapshot -r and the snapshot name (for
example, zfs snapshot -r hrpool/home@now).
To destroy a ZFS snapshot, use the zfs destroy command followed by the snapshot name.
In the example in the slide, you are destroying the snapshot named
hrpool/home/qarpt@friday.
There are several things that you must keep in mind when attempting to destroy a ZFS
snapshot.
•A data set cannot be destroyed if snapshots of the data set exist.
•If clones have been created from a snapshot, they must be destroyed before the
snapshot can be destroyed.
Now
y
ou take a look at how to hold ZFS sna
p
shots.
yp
Oracle Solaris 11 Advanced System Administration 4 - 39
Cicero Ronaldo (ciceroฺronaldo@gmailฺcom) has a non-transferable
license to use this Student Guideฺ
Unauthorized reproduction or distribution prohibitedฺ Copyright© 2014, Oracle and/or its affiliatesฺ

Holding a ZFS Snapshot
•The snapshot hold feature:
–Prevents a snapshot from being destroyed by using zfs
destroy
–
A
llows a sna
p
shot with clones to be deleted
p
endin
g
the
ppg
removal of the last clone by using zfs destroy -d
•The snapshot user-reference count:
–Is initialized to zero
–Increases by one whenever a hold is put on the snapshot
–
Decreases by one whenever a hold is released
Decreases
by
one
whenever
a
hold
is
released
–Must be at zero before the snapshot can be destroyed
Remote replication of ZFS data sets can result in different automatic snapshot policies on the
two sides of a replication pair. For example, the sending side may want to keep five
snapshots at one-minute intervals, whereas the receiving side may want to keep 10
Copyright © 2013, Oracle and/or its affiliates. All rights reserved.
snapshots at one-minute intervals. This can result in the older snapshots being destroyed
inadvertently by zfs receive because they no longer exist on the sending side. The ZFS
snapshot hold feature addresses this issue. Holding a snapshot (zfs hold) prevents it from
being destroyed. If a hold exists on a snapshot, you will not be able to destroy it by using the
zfs destroy command. You will look at the two options that you have for destroying a held
snapshot in the following slides.
In addition the snapshot hold feature allows a snapshot with clones to be deleted pending the
In
addition
,
the
snapshot
hold
feature
allows
a
snapshot
with
clones
to
be
deleted
pending
the
removal of the last clone by using the zfs destroy -d command. You take a closer look at
how this is done in subsequent slides.
Each snapshot has an associated user-reference count, which is initialized to zero. This count
increases by one whenever there is a hold on the snapshot and decreases by one whenever
the hold is released. As discussed, a snapshot can be destroyed only if it has no clones. In
the Oracle Solaris 11 release, the snapshot must also have a zero user-reference count
bf it b d t d
b
e
f
ore
it
can
b
e
d
es
t
roye
d
.
Oracle Solaris 11 Advanced System Administration 4 - 40
Cicero Ronaldo (ciceroฺronaldo@gmailฺcom) has a non-transferable
license to use this Student Guideฺ
Unauthorized reproduction or distribution prohibitedฺ Copyright© 2014, Oracle and/or its affiliatesฺ

Holding a ZFS Snapshot
To hold a snapshot or set of snapshots, use zfs hold keep
followed by the snapshot name.
# zfs hold keep hrpool/home/report@snap1
To recursively hold the snapshots of all descendant file
systems, use zfs hold with –r, followed by keep and the
snapshot name.
# zfs hold –r keep hrpool/home@now
Note: Each snapshot has its own tag namespace, and tags
must be unique within that space. keep is only a tag.
To hold a snapshot or set of snapshots, use the zfs hold keep command followed by the
snapshot name. In the first example, a hold tag (keep) is being put on
hrpool/home/report@snap1.
Copyright © 2013, Oracle and/or its affiliates. All rights reserved.
You can use the -r option with the zfs hold command and the keep hold tag to recursively
hold the snapshots of all descendant file systems, as shown in the second example. Here,
you are holding the snapshots of all the descendant file systems of hrpool/home@now.
Note: Each snapshot has its own tag namespace, and tags must be unique within that space.
In this example, keep is a user-defined tag.
Oracle Solaris 11 Advanced System Administration 4 - 41
Cicero Ronaldo (ciceroฺronaldo@gmailฺcom) has a non-transferable
license to use this Student Guideฺ
Unauthorized reproduction or distribution prohibitedฺ Copyright© 2014, Oracle and/or its affiliatesฺ

Holding a ZFS Snapshot
To display a list of held snapshots, use zfs holds followed by
the snapshot name.
# zfs holds hrpool/home@now
NAME TAG TIMESTAMP
To display a recursive list of held snapshots, use zfs holds
with –r, followed by the snapshot name.
NAME
TAG
TIMESTAMP
hrpool/home@now keep Mon Dec 10 12:40:12 2012
# zfs holds -r hrpool/home@now
NAME TAG TIMESTAMP
hrpool/home/report@now keep Mon Dec 10 12:40:12 2012
hrpool/home/jjones@now keep Mon Dec 10 12:40:12 2012
hrpool/home@now keep Mon Dec 10 12:40:12 2012
You can use the zfs holds command followed by the snapshot name to display a list of held
snapshots. In the first example, snapshot holds are being displayed for hrpool/home@now.
Notice that the output returns the name of the snapshot, the tag name (in this case, keep),
Copyright © 2013, Oracle and/or its affiliates. All rights reserved.
and the time stamp.
You can use the -r option with the zfs holds command and the snapshot name to get a
recursive list, as illustrated in the second example.
Oracle Solaris 11 Advanced System Administration 4 - 42
Cicero Ronaldo (ciceroฺronaldo@gmailฺcom) has a non-transferable
license to use this Student Guideฺ
Unauthorized reproduction or distribution prohibitedฺ Copyright© 2014, Oracle and/or its affiliatesฺ

Holding a ZFS Snapshot
Two options to destroy a held ZFS snapshot:
1. Use zfs destroy –d, followed by the snapshot name,
and then release the snapshot hold, which removes the
sna
p
shot.
p
2. Release the held snapshot, and then destroy it by using
zfs destroy.
To release a held snapshot or set of snapshots, use zfs
release –r followed by keep and the snapshot name.
Note: –r enables a recursive release of the hold.
# zfs release -r keep hrpool/home@now
As mentioned before, if a hold exists on a snapshot, you will not be able to destroy it by using
the zfs destroy command. To destroy the snapshot, you have two options:
•You can destro
y
the held sna
p
shot b
y
usin
g
the zfs destro
y
-d command followed b
y
Copyright © 2013, Oracle and/or its affiliates. All rights reserved.
ypyg
y
y
the snapshot name, and then release the snapshot hold, which removes the snapshot.
•You can release the snapshot and then destroy it by using the zfs destroy command
without the -d option.
Note: If a held snapshot has associated clones, you must destroy the clones first before you
can destroy the held snapshot.
To release a hold on a sna
p
shot or set of sna
p
shots, use the zfs release command with
pp
the -r option, followed by the hold tag keep and the snapshot name. -r enables a recursive
release of the hold and is optional. In the example in the slide, you are releasing the recursive
hold on the hrpool/home@now snapshot.
This snapshot can be destroyed if all the holds have been released.
Oracle Solaris 11 Advanced System Administration 4 - 43
Cicero Ronaldo (ciceroฺronaldo@gmailฺcom) has a non-transferable
license to use this Student Guideฺ
Unauthorized reproduction or distribution prohibitedฺ Copyright© 2014, Oracle and/or its affiliatesฺ

Holding a ZFS Snapshot
Snapshot hold properties:
•defer_destroy: Set to on if the snapshot has been
marked for deferred destruction by using the zfs
destro
y
-d command.
y
•Userrefs: Set to the number of holds on the snapshot.
The snapshot hold information is identified through two properties:
•The defer_destroy property is on if the snapshot has been marked for deferred
destruction b
y
usin
g
the zfs destro
y
-d command. Otherwise
,
the
p
ro
p
ert
y
is off.
Copyright © 2013, Oracle and/or its affiliates. All rights reserved.
yg
y
,ppy
•The userrefs property is set to the number of holds on this snapshot, which is also
referred to as the user-reference count.
Oracle Solaris 11 Advanced System Administration 4 - 44
Cicero Ronaldo (ciceroฺronaldo@gmailฺcom) has a non-transferable
license to use this Student Guideฺ
Unauthorized reproduction or distribution prohibitedฺ Copyright© 2014, Oracle and/or its affiliatesฺ

Holding a ZFS Snapshot
To view the ZFS snapshot hold properties, use zfs get -r
defer_destroy,userrefs followed by the file system
name.
#
ft
df d t f h l/h
#
z
f
s ge
t
-r
d
e
f
er_
d
es
t
roy,userre
f
s
h
rpoo
l/h
ome
NAME PROPERTY VALUE SOURCE
hrpool defer_destroy - -
hrpool userrefs - -
hrpool/home defer_destroy - -
hrpool/home userrefs - -
hrpool/home/report@now defer_destroy off -
hrpool/home/report@now userrefs
1
-
hrpool/home/report@now
userrefs
1
hrpool/home/jjones@now defer_destroy off -
hrpool/home/jjones@now userrefs 1 -
hrpool/home@now defer_destroy off -
hrpool/home@now userrefs 1 -
You can view these properties by using the zfs get -r command followed by the comma-
separated property name and the file system name.
In the example in the slide, the
defer destroy
and
userrefs
properties for
Copyright © 2013, Oracle and/or its affiliates. All rights reserved.
In
the
example
in
the
slide,
the
defer
_
destroy
and
userrefs
properties
for
hrpool/home are displayed. As you can see from the output, each of the @now snapshots
has the defer_destroy property set to off, which is the default, and a value of 1for the
userrefs property, which indicates that each of these snapshots has one hold on it.
Oracle Solaris 11 Advanced System Administration 4 - 45
Cicero Ronaldo (ciceroฺronaldo@gmailฺcom) has a non-transferable
license to use this Student Guideฺ
Unauthorized reproduction or distribution prohibitedฺ Copyright© 2014, Oracle and/or its affiliatesฺ

Renaming a ZFS Snapshot
To rename a snapshot, use zfs rename followed by the
snapshot name.
# zfs rename hrpool/home/report@121011 hrpool/home/report@today
Note: Snapshots must be renamed within the same pool and
data set from which they were created.
You can rename a snapshot by using the zfs rename command followed by the snapshot
name. In the example in the slide, the snapshot report@121011that resides in
hrpool/home is renamed to report@today.
Copyright © 2013, Oracle and/or its affiliates. All rights reserved.
Note: Snapshots must be renamed within the same pool and data set from which they were
created.
Oracle Solaris 11 Advanced System Administration 4 - 46
Cicero Ronaldo (ciceroฺronaldo@gmailฺcom) has a non-transferable
license to use this Student Guideฺ
Unauthorized reproduction or distribution prohibitedฺ Copyright© 2014, Oracle and/or its affiliatesฺ
Renaming a ZFS Snapshot
To recursively rename snapshots, use zfs rename –r
followed by the snapshot name.
# zfs list
NAME
USED
AVAIL REFER
MOUNTPOINT
NAME
USED
AVAIL
REFER
MOUNTPOINT
users 270K 16.5G 22K /users
users/home 76K 16.5G 22K /users/home
users/home@yesterday 0 - 22K -
users/home/jjones 18K 16.5G 18K /users/home/jjones
users/home/jjones@yesterday 0 - 18K -
# zfs rename -r users/home@yesterday @2daysago
# zfs list -r users/home
NAME USED
A
VAIL REFER MOUNTPOINT
users/home 76K 16.5G 22K /users/home
users/home@2daysago 0 - 22K -
users/home/jjones 18K 16.5G 18K /users/home/jjones
users/home/jjones@2daysago 0 - 18K -
You can recursively rename snapshots with the zfs rename -r command followed by the
snapshot name.
In the example in the slide, only those snapshots that are named
@yesterday
are renamed
Copyright © 2013, Oracle and/or its affiliates. All rights reserved.
In
the
example
in
the
slide,
only
those
snapshots
that
are
named
@yesterday
are
renamed
to @2daysago.
You can see a before-and-after picture with the list of file systems before the zfs rename -r
command is run in the first half of the example, and then the change that has occurred in the
second half of the example. In short, any snapshot with the @yesterday name was changed
to @2daysago after the rename command was run.
Next, you look at how to display and access ZFS snapshots.
Oracle Solaris 11 Advanced System Administration 4 - 47
Cicero Ronaldo (ciceroฺronaldo@gmailฺcom) has a non-transferable
license to use this Student Guideฺ
Unauthorized reproduction or distribution prohibitedฺ Copyright© 2014, Oracle and/or its affiliatesฺ

Displaying a ZFS Snapshot
To display only snapshots, use zfs list -t snapshot.
# zfs list –t snapshot
NAME USED AVAIL REFER MOUNTPOINT
hrpool/home/qarpt@tuesday 18K - 21K -
//
The listsnapshots pool property is:
•Used to enable or disable the display of snapshots
•Disabled b
y
default
hrpool
/
home
/
qarpt@wednesday 19K - 280K -
hrpool/home/qarpt@thursday 0 - 538K -
y
•Enabled by using zpool set listsnapshot=on
<poolname>
You can use the zfs list -t snapshot command to display snapshots as shown in this
example.
You can enable or disable the display of snapshot listings in the
zfs
list
output by using
Copyright © 2013, Oracle and/or its affiliates. All rights reserved.
You
can
enable
or
disable
the
display
of
snapshot
listings
in
the
zfs
list
output
by
using
the listsnapshots pool property. This property is disabled by default.
To enable this property, use zpool set listsnapshots=on, followed by the pool name.
Note: If you disable this property, you must use the zfs list -t snapshot command to
display snapshot information.
Oracle Solaris 11 Advanced System Administration 4 - 48
Cicero Ronaldo (ciceroฺronaldo@gmailฺcom) has a non-transferable
license to use this Student Guideฺ
Unauthorized reproduction or distribution prohibitedฺ Copyright© 2014, Oracle and/or its affiliatesฺ

Displaying a ZFS Snapshot
To list the snapshots created for a specific file system, enter
zfslist-r-tsnapshotfollowed by the file system name.
# zfs list -r -t snapshot -o name,creation hrpool/home
NAME
CREATION
NAME
CREATION
hrpool/home/qarpt@tuesday Tue Dec 11 10:03 2012
hrpool/home/qarpt@wednesday Wed Dec 12 10:03 2012
hrpool/home/qarpt@thursday Thu Dec 13 10:03 2012
hrpool/home/bonus@now Fri Dec 14 11:04 2012
You can list the snapshots that were created for a particular file system by using the zfs
list command with the -r and -t snapshot options, followed by the file system name.
In the example in the slide, the snapshots created for the file system
hrpool/home
are
Copyright © 2013, Oracle and/or its affiliates. All rights reserved.
In
the
example
in
the
slide,
the
snapshots
created
for
the
file
system
hrpool/home
are
listed. This information is displayed by using the name and creation properties.
Oracle Solaris 11 Advanced System Administration 4 - 49
Cicero Ronaldo (ciceroฺronaldo@gmailฺcom) has a non-transferable
license to use this Student Guideฺ
Unauthorized reproduction or distribution prohibitedฺ Copyright© 2014, Oracle and/or its affiliatesฺ

Displaying a ZFS Snapshot
The snapshots of file systems are accessible in the .zfs/
snapshot directory within the root of the file system.
# ls /home/qarpt/.zfs/snapshot
tuesday wednesday thursday
The snapshots of file systems are accessible in the .zfs/snapshot directory within the root
of the file system. For example, if hrpool/home/qarpt is mounted on /home/qarpt, the
hrpool/home/qarpt@thursday snapshot data is accessible in the
Copyright © 2013, Oracle and/or its affiliates. All rights reserved.
/home/qarpt/.zfs/snapshot/thursday directory, as shown in the example in the slide.
Now you take a quick look at snapshot space accounting.
Oracle Solaris 11 Advanced System Administration 4 - 50
Cicero Ronaldo (ciceroฺronaldo@gmailฺcom) has a non-transferable
license to use this Student Guideฺ
Unauthorized reproduction or distribution prohibitedฺ Copyright© 2014, Oracle and/or its affiliatesฺ

Snapshot Space Accounting
•When a snapshot is created, its space is:
–Initially shared between the snapshot and the file system
–Possibly shared with previous snapshots
•
As the file system changes the previously shared space:
As
the
file
system
changes
,
the
previously
shared
space:
–Becomes unique to the snapshot
–Is counted in the snapshot’s used property
•Deleting snapshots can increase the amount of space that
is unique for use by other snapshots.
Note
The al e for a snapshot’s space
fd
propert
Note
:
The
v
al
u
e
for
a
snapshot’s
space
re
f
erence
d
propert
y
is the same as that for the file system when the snapshot was
created.
When a snapshot is created, its space is initially shared between the snapshot and the file
system, and possibly with previous snapshots.
As the file system changes, space that was previously shared becomes unique to the
Copyright © 2013, Oracle and/or its affiliates. All rights reserved.
As
the
file
system
changes,
space
that
was
previously
shared
becomes
unique
to
the
snapshot, and thus is counted in the snapshot’s used property.
Additionally, deleting snapshots can increase the amount of space that is unique for use by
other snapshots.
Note: The value for a snapshot’s space referenced property is the same as that for the file
system when the snapshot was created.
Oracle Solaris 11 Advanced System Administration 4 - 51
Cicero Ronaldo (ciceroฺronaldo@gmailฺcom) has a non-transferable
license to use this Student Guideฺ
Unauthorized reproduction or distribution prohibitedฺ Copyright© 2014, Oracle and/or its affiliatesฺ

Snapshot Space Accounting
To display the amount of space consumed by snapshots and
descendant file systems, use zfs list -o space.
$ zfs list -o space -r rpool
NAME AVAIL USED USEDSNAP USEDDS USEDREFRESERV USEDCHILD
NAME
AVAIL
USED
USEDSNAP
USEDDS
USEDREFRESERV
USEDCHILD
rpool 59.1G 7.84G 21K 109K 0 7.84G
rpool@snap1 - 21K - - - -
rpool/ROOT 59.1G 4.78G 0 31K 0 4.78G
rpool/ROOT@snap1 - 0 - - - -
rpool/ROOT/solaris1 59.1G 4.78G 15.6M 4.76G 0 0
rpool/ROOT/solaris1@snap1 - 15.6M - - - -
rpool/dump 59.1G 1.00G 16K 1.00G 0 0
rpool/dump@snap1 - 16K - - - -
rpool/export 59.1G 99K 18K 32K 0 49K
l/ t@ 1
18K
rpoo
l/
expor
t@
snap
1
-
18K
- - - -
rpool/export/home 59.1G 49K 18K 31K 0 0
rpool/export/home@snap1 - 18K - - - -
rpool/swap 61.2G 2.06G 0 16K 2.06G 0
rpool/swap@snap1 - 0 - - - -
You can display the amount of space that is consumed by snapshots and descendant file
systems by using the zfs list -o space command (as in the slide example).
From this output, you can see the amount of space that is:
Copyright © 2013, Oracle and/or its affiliates. All rights reserved.
From
this
output,
you
can
see
the
amount
of
space
that
is:
•Available on each file system
•Being used
•Being consumed by snapshots of each data set (USEDSNAP)
•Being used by the data set itself (USEDDS)
•Being used by a refreservation set on the data set (USED REFRESERV)
B i d b th hild f thi d t t (
USEDCHILD
)
•
B
e
i
ng use
d
b
y
th
e c
hild
ren o
f
thi
s
d
a
t
a se
t
(
USEDCHILD
)
Now you look at how to roll back a ZFS snapshot.
Oracle Solaris 11 Advanced System Administration 4 - 52
Cicero Ronaldo (ciceroฺronaldo@gmailฺcom) has a non-transferable
license to use this Student Guideฺ
Unauthorized reproduction or distribution prohibitedฺ Copyright© 2014, Oracle and/or its affiliatesฺ

Rolling Back a ZFS Snapshot
To discard all the changes made since a specific snapshot,
enter zfs rollback followed by the snapshot name.
# zfs rollback hrpool/home/qarpt@thursday
By default, zfs rollback rolls back only to the most recent
snapshot.
To destroy more recent snapshots, enter zfs rollback
with –r, followed by the snapshot name.
# zfs rollback -r hrpool/home/qarpt@tuesday
You can use the zfs rollback command followed by the snapshot name to discard all the
changes made since a specific snapshot.
The
zfs
rollback
command causes the file system to revert to its state at the time the
Copyright © 2013, Oracle and/or its affiliates. All rights reserved.
The
zfs
rollback
command
causes
the
file
system
to
revert
to
its
state
at
the
time
the
snapshot was taken.
In the example in the slide, the hrpool/home/qarpt file system is rolled back to the
thursday snapshot.
By default, the zfs rollback command cannot roll back to a snapshot other than the most
recent snapshot.
To roll back to an earlier snapshot, you must destroy all intermediate snapshots. To do this,
To
roll
back
to
an
earlier
snapshot,
you
must
destroy
all
intermediate
snapshots.
To
do
this,
you must specify the -r option with the zfs rollback command followed by the snapshot
name, as shown in the second example. Here, the hrpool/home/qarpt file system is rolled
back to the tuesday snapshot. For this operation to take place, the wednesday and
thursday snapshots must be destroyed.
Now that you have an idea of how to work with ZFS snapshots, you turn your attention to ZFS
clones.
Oracle Solaris 11 Advanced System Administration 4 - 53
Cicero Ronaldo (ciceroฺronaldo@gmailฺcom) has a non-transferable
license to use this Student Guideฺ
Unauthorized reproduction or distribution prohibitedฺ Copyright© 2014, Oracle and/or its affiliatesฺ

Identifying ZFS Snapshot Differences
To determine ZFS snapshot differences, use zfs diff
followed by the snapshot names.
# zfs snapshot datapool/hrdata@before
#
touch /datapool/hrdata/newfile
#
touch
/datapool/hrdata/newfile
# zfs snapshot datapool/hrdata@after
# zfs list -r -t snapshot -o name,creation
NAME CREATION
datapool/hrdata@before Thu Dec 13 14:54 2012
datapool/hrdata@after Thu Dec 13 14:59 2012
rpool/ROOT/solaris@install Tue Dec 18 22:33 2012
# zfs diff datapool/hrdata@before datapool/hrdata@after
M /datapool/hrdata/
+ /datapool/hrdata/newfile
#
To determine the differences between ZFS snapshots, you can use the zfs diff command.
The output of this command provides a high-level description of the differences between a
snapshot and a descendant data set. The descendant can be either a snapshot of the data
Copyright © 2013, Oracle and/or its affiliates. All rights reserved.
set or the current data set. For each file that has undergone a change between the original
snapshot and the descendant, the type of change is described along with the name of the file.
In the case of a rename, both the old and new names are shown. The type of change follows
any time stamp displayed and is described with a single character. The definition of each of
these characters is provided in the next slide.
In the example, a before snapshot of the datapool/hrdata ZFS file system was taken.
A new file (
newfile
) was then created in /
datapool/hrdata
Then another snapshot
A
new
file
(
newfile
)
was
then
created
in
/
datapool/hrdata
.
Then
another
snapshot
(after) of the same ZFS file system was taken. The zfs list command is used to list the
snapshots based on name and creation date. The zfs diff command is then run to
determine the differences between the before and after snapshots. The Min the zfs
diff command output indicates that the /datapool/hrdata/ directory has been modified,
and the +indicates that a file /datapool/hrdata/newfile exists in the later snapshot.
Oracle Solaris 11 Advanced System Administration 4 - 54
Cicero Ronaldo (ciceroฺronaldo@gmailฺcom) has a non-transferable
license to use this Student Guideฺ
Unauthorized reproduction or distribution prohibitedฺ Copyright© 2014, Oracle and/or its affiliatesฺ

Identifying ZFS Snapshot Differences
File or Directory Change Identifier
File or directory is modified, or file or directory link has changed. M
Fil di i i h ld h b i h
Fil
e or
di
rectory
i
s present
i
n t
h
e o
ld
er snaps
h
ot
b
ut not
i
n t
h
e newer
snapshot.
-
File or directory is present in the newer snapshot but not in the older
snapshot.
+
File or directory is renamed. R
The table in this slide summarizes the file or directory changes that are identified by the zfs
diff command. For more information about the zfs diff command, see zfs(1M).
Copyright © 2013, Oracle and/or its affiliates. All rights reserved.
Oracle Solaris 11 Advanced System Administration 4 - 55
Cicero Ronaldo (ciceroฺronaldo@gmailฺcom) has a non-transferable
license to use this Student Guideฺ
Unauthorized reproduction or distribution prohibitedฺ Copyright© 2014, Oracle and/or its affiliatesฺ

Creating and Destroying a ZFS Clone
To create a clone, enter zfs clone followed by the snapshot
name from which the clone is to be created, and the name of
the new file system or volume.
To destroy a clone, use zfs destroy followed by the clone
name.
# zfs snapshot hrpool/ws/gate@yesterday
# zfs clone hrpool/ws/gate@yesterday hrpool/home/qarpt/summary
# zfs destroy hrpool/home/qarpt/summary
Now you switch your focus to ZFS clones, beginning with a brief review of how to create and
destroy ZFS clones.
To create a clone, use the
zfs
clone
command, specifying the snapshot from which to
Copyright © 2013, Oracle and/or its affiliates. All rights reserved.
To
create
a
clone,
use
the
zfs
clone
command,
specifying
the
snapshot
from
which
to
create the clone and the name of the new file system or volume.
In the example in the slide, a clone named hrpool/home/qarpt/summary is created with
the same initial contents as the snapshot hrpool/ws/gate@yesterday.
The new file system or volume can be located anywhere in the ZFS hierarchy.
The type of the new data set (for example, file system or volume) is the same as the snapshot
from which the clone was created.
from
which
the
clone
was
created.
Note: You cannot create a clone of a file system in a pool that is different from where the
original file system snapshot resides.
To destroy a ZFS clone, use the zfs destroy command followed by the clone name. In the
example in the slide, the clone named hrpool/home/qarpt/summary is destroyed.
Remember that clones must be destroyed before the parent snapshot can be destroyed.
Now you look at how to replace a ZFS file system with a ZFS clone
Now
you
look
at
how
to
replace
a
ZFS
file
system
with
a
ZFS
clone
.
Oracle Solaris 11 Advanced System Administration 4 - 56
Cicero Ronaldo (ciceroฺronaldo@gmailฺcom) has a non-transferable
license to use this Student Guideฺ
Unauthorized reproduction or distribution prohibitedฺ Copyright© 2014, Oracle and/or its affiliatesฺ

Replacing a ZFS File System with a ZFS Clone
With the clone replacement process, you can:
•Clone and replace file systems so that the original file
system becomes the clone of the newly created file system
•
Destroy the file system from which the clone was originally
Destroy
the
file
system
from
which
the
clone
was
originally
created
Note: Without clone promotion, you cannot destroy the original
file system of active clones.
ZFS uses a process called clone replacement (or promotion), which enables you to replace
an active ZFS file system with a clone of that file system. This process facilitates the ability to
clone and replace file systems so that the original file system becomes the clone of the newly
Copyright © 2013, Oracle and/or its affiliates. All rights reserved.
created file system. In addition, this process makes it possible to destroy the file system from
which the clone was originally created.
Note: Without clone promotion, you cannot destroy the original file system of active clones.
This feature is good to have if, for some reason, you absolutely need to modify production
data. (Under normal circumstances, you would not use this method. Instead, you would
introduce the modifications through databases and other tools.) To accommodate this special
it ti t l f th fil t ’ h t Thi l i thi b t f
s
it
ua
ti
on, crea
t
e a c
l
one
f
rom
th
e
fil
e sys
t
em
’
s snaps
h
o
t
.
Thi
s c
l
one
i
s no
thi
ng
b
u
t
a copy o
f
the production file system; however, it is writeable and editable. So now a programmer (or
system administrator) can open it like any other file system, modify the data and, considering
it as a newer copy of the file system, overlay the production file system with it. Because you
do not want to modify production data directly, being able to use clones is useful.
Oracle Solaris 11 Advanced System Administration 4 - 57
Cicero Ronaldo (ciceroฺronaldo@gmailฺcom) has a non-transferable
license to use this Student Guideฺ
Unauthorized reproduction or distribution prohibitedฺ Copyright© 2014, Oracle and/or its affiliatesฺ
Replacing a ZFS File System with a ZFS Clone
To replace an active ZFS file system with a clone of that file
system, use zfs promote followed by the clone name.
# zfs snapshot hrpool/reviews/q4@today
# zfs clone hr
p
ool
/
reviews
/q
4@toda
y
hr
p
ool
/
reviews
/q
4sum
p/ /q yp/ /q
# zfs list -r hrpool/reviews
NAME USED AVAIL REFER MOUNTPOINT
hrpool/reviews 314K 8.24G 25.5K /hrpool/reviews
hrpool/reviews/q4 288K 8.24G 288K /hrpool/reviews/q4
hrpool/reviews/q4@today 0 - 288K -
hrpool/reviews/q4sum 0 8.24G 288K /hrpool/reviews/q4sum
# zfs promote hrpool/reviews/q4sum
# zfs list -r hrpool/reviews
NAME USED AVAIL REFER MOUNTPOINT
hrpool/reviews 316K 8.24G 27.5K /hrpool/reviews
hrpool/reviews/q4 0 8.24G 288K /hrpool/reviews/q4
hrpool/reviews/q4sum 288K 8.24G 288K /hrpool/reviews/q4sum
hrpool/reviews/q4@today 0 - 288K -
The clone replacement process is a two-step operation. First, you replace an active ZFS file
system by promoting the clone.
In the first example, you can see from the
zfs
list
output that the
hrpool/reviews/q4
Copyright © 2013, Oracle and/or its affiliates. All rights reserved.
In
the
first
example,
you
can
see
from
the
zfs
list
output
that
the
hrpool/reviews/q4
file system has been cloned by using the hrpool/review/q4@today snapshot.
In the second example, the original hrpool/reviews/q4 file system is replaced with the
cloned file system, hrpool/reviews/q4sum, by promoting the clone.
In the zfs list output, you can see that the storage used by the original q4 file system has
been replaced with the q4sum file system.
Oracle Solaris 11 Advanced System Administration 4 - 58
Cicero Ronaldo (ciceroฺronaldo@gmailฺcom) has a non-transferable
license to use this Student Guideฺ
Unauthorized reproduction or distribution prohibitedฺ Copyright© 2014, Oracle and/or its affiliatesฺ
Replacing a ZFS File System with a ZFS Clone
To rename the promoted file systems to the original name, use
zfs rename followed by the current file system name and a
new file system name.
# zfs rename hrpool/reviews/q4 hrpool/review/q4legacy
# zfs rename hrpool/reviews/q4sum hrpool/reviews/q4
# zfs list -r hrpool/reviews
NAME USED AVAIL REFER MOUNTPOINT
hrpool/reviews 316K 8.24G 27.5K /hrpool/reviews
hrpool/reviews/q4 288K 8.24G 288K /hrpool/reviews/q4
hrpool/reviews/q4@today 0 - 288K -
hrpool/reviews/q4legacy 0 8.24G 288K /hrpool/reviews/q4legacy
After you have replaced the original ZFS file system with the clone, you will want to complete
the second and final step of the process by renaming the file systems.
To do this, use the
zfs
rename
command followed by the current file system name and a
Copyright © 2013, Oracle and/or its affiliates. All rights reserved.
To
do
this,
use
the
zfs
rename
command
followed
by
the
current
file
system
name
and
a
new file system name.
In the example in the slide, you renamed the original hrpool/reviews/q4 file system to
hrpool/reviews/q4legacy and the original clone file system, hrpool/reviews/q4sum,
to hrpool/reviews/q4, which was the name of the original file system.
In the zfs list output, you can see that the name changes have taken effect.
The original file system and snapshot can be deleted.
The
original
file
system
and
snapshot
can
be
deleted.
Now you turn your attention to the last topic in this lesson: sending and receiving ZFS data. It
begins by discussing how to send ZFS data.
Oracle Solaris 11 Advanced System Administration 4 - 59
Cicero Ronaldo (ciceroฺronaldo@gmailฺcom) has a non-transferable
license to use this Student Guideฺ
Unauthorized reproduction or distribution prohibitedฺ Copyright© 2014, Oracle and/or its affiliatesฺ

Sending ZFS Snapshot Data
The zfs send command:
•Is used to send ZFS snapshot data for backup purposes
•Sends a copy of a snapshot to another pool:
Onthesamesystem
–
On
the
same
system
–On a different system
•Creates a stream representation of a snapshot that is
written to standard output
–By default, a full stream is generated.
Th t t b di t d t fil t diff t t
–
Th
e ou
t
pu
t
can
b
e re
di
rec
t
e
d
t
o a
fil
e,
t
o a
diff
eren
t
sys
t
em,
or to a device.
You can send your ZFS snapshot data by using the zfs send command. With this command,
you can send a copy of a snapshot to another pool on the same system or to a pool on a
different system that is used to store backup data.
Copyright © 2013, Oracle and/or its affiliates. All rights reserved.
The zfs send command creates a stream representation of a snapshot that is written to
standard output. By default, a full stream is generated. You can redirect the output to a file, to
a different system, or to a device (for example, a mag tape).
Oracle Solaris 11 Advanced System Administration 4 - 60
Cicero Ronaldo (ciceroฺronaldo@gmailฺcom) has a non-transferable
license to use this Student Guideฺ
Unauthorized reproduction or distribution prohibitedฺ Copyright© 2014, Oracle and/or its affiliatesฺ

Sending ZFS Snapshot Data
To send a ZFS snapshot, enter zfs send followed by the
snapshot name and destination.
# zfs send hrpool/data@snap1
To send incremental ZFS snapshot data, use zfs send –i.
# zfs send -i hrpool/data@snap1 hrpool/data@snap2
To send a ZFS snapshot, use the zfs send command followed by the snapshot name and
destination, as shown in the first example.
You can also send incremental data by using the
-
i
option with the
zfs
send
command, as
Copyright © 2013, Oracle and/or its affiliates. All rights reserved.
You
can
also
send
incremental
data
by
using
the
i
option
with
the
zfs
send
command,
as
shown in the second example.
Note that the first argument is the earlier snapshot (snap1) and the second argument is the
later snapshot (snap2).
Now you look at how to receive ZFS snapshot data.
Oracle Solaris 11 Advanced System Administration 4 - 61
Cicero Ronaldo (ciceroฺronaldo@gmailฺcom) has a non-transferable
license to use this Student Guideฺ
Unauthorized reproduction or distribution prohibitedฺ Copyright© 2014, Oracle and/or its affiliatesฺ

Receiving ZFS Snapshot Data
The zfs receive command:
•Is used to receive ZFS snapshot data
•Receives the snapshot from:
Another pool:
–
Another
pool:
—
On the same system
—
On a different system
–A file or device
•Creates a snapshot whose contents are specified in the
stream that is provided on standard input
stream
that
is
provided
on
standard
input
•Has an alias, recv
Note: If a full stream is received, a new file system is created
as well.
You can receive ZFS data by using the zfs receive command. This command receives
snapshot data from another pool on the same system or from another pool on a different
system. It can also receive snapshot data from a file or device.
Copyright © 2013, Oracle and/or its affiliates. All rights reserved.
The zfs receive command creates a snapshot whose contents are specified in the stream
that is provided on standard input.
Note: If a full stream is received, a new file system is created as well.
Oracle Solaris 11 Advanced System Administration 4 - 62
Cicero Ronaldo (ciceroฺronaldo@gmailฺcom) has a non-transferable
license to use this Student Guideฺ
Unauthorized reproduction or distribution prohibitedฺ Copyright© 2014, Oracle and/or its affiliatesฺ

Receiving ZFS Snapshot Data
Keep the following key points in mind when you receive a file
system snapshot:
•The snapshot and the file system are received.
•
The file system and all the descendant file systems are
The
file
system
and
all
the
descendant
file
systems
are
unmounted.
•The file systems are inaccessible while they are being
received.
•The original file system to be received must not exist while
it is being transferred
it
is
being
transferred
.
•If a conflicting file system name exists, zfs rename can
be used to rename the file system.
Copyright © 2013, Oracle and/or its affiliates. All rights reserved.
Oracle Solaris 11 Advanced System Administration 4 - 63
Cicero Ronaldo (ciceroฺronaldo@gmailฺcom) has a non-transferable
license to use this Student Guideฺ
Unauthorized reproduction or distribution prohibitedฺ Copyright© 2014, Oracle and/or its affiliatesฺ

Receiving ZFS Snapshot Data
To receive a ZFS file system snapshot, use zfs receive
followed by the snapshot name and the location from which you
want to retrieve the file system.
# zfs send hrpool/jobdesc@1215 > /bkups/jobdesc.121511
# zfs receive hrpool/jobdesc2@today < /bkups/jobdesc.121511
# zfs rename hrpool/jobdesc hrpool/jobdesc.old
# zfs rename hrpool/jobdesc2 hrpool/jobdesc
To receive a ZFS file system snapshot, use the zfs receive command followed by the
snapshot name and the location from which you want to retrieve the file system.
In the example in the slide, the
hrpool/jobdesc@0930
snapshot of the
hrpool/jobdesc
Copyright © 2013, Oracle and/or its affiliates. All rights reserved.
In
the
example
in
the
slide,
the
hrpool/jobdesc@0930
snapshot
of
the
hrpool/jobdesc
file system is sent to the destination backup system called /bkups/jobdesc.093011.
Next, the hrpool/jobdesc2@today snapshot of the hrpool/jobdesc2 file system is
retrieved from the backup system. Then the hrpool/jobdesc file system is renamed to
hrpool/jobdesc.old and the hrpool/jobdesc2 file system is renamed to
hrpool/jobdesc.
Oracle Solaris 11 Advanced System Administration 4 - 64
Cicero Ronaldo (ciceroฺronaldo@gmailฺcom) has a non-transferable
license to use this Student Guideฺ
Unauthorized reproduction or distribution prohibitedฺ Copyright© 2014, Oracle and/or its affiliatesฺ

Remote Replication of ZFS Snapshot Data
To remotely copy snapshot data from one system to another
system, use zfs send and zfs receive.
# zfs send hrpool/report@today | ssh newsys zfs recv sandbox/restfs
You can use the zfs send and zfs receive commands to remotely copy (replicate) a
snapshot stream representation from one system to another system.
In the example in the slide, the
hrpool/report@today
snapshot data is sent, and it is
Copyright © 2013, Oracle and/or its affiliates. All rights reserved.
In
the
example
in
the
slide,
the
hrpool/report@today
snapshot
data
is
sent,
and
it
is
received in the sandbox/restfs file system. This command also creates a restfs@today
snapshot on the newsys system. In this example, the user has been configured to use ssh
on the remote system.
ZFS also supports sending and receiving complex snapshot streams. For more information
about remote replication of ZFS snapshot data and about sending and receiving ZFS data in
general, see the appropriate sections of Oracle Solaris Administration: ZFS File Systems.
Oracle Solaris 11 Advanced System Administration 4 - 65
Cicero Ronaldo (ciceroฺronaldo@gmailฺcom) has a non-transferable
license to use this Student Guideฺ
Unauthorized reproduction or distribution prohibitedฺ Copyright© 2014, Oracle and/or its affiliatesฺ

Practices 4-2 and 4-3 Overview:
Using ZFS Snapshots for Backup and Recovery
Using
ZFS
Snapshots
for
Backup
and
Recovery
and Using a ZFS Clone
These practices cover the following topics:
•Creating and destroying ZFS snapshots
•
Rolling back ZFS snapshots
•
Rolling
back
ZFS
snapshots
•Restoring ZFS snapshots
•Sending and receiving ZFS snapshot data
•Creating and destroying ZFS clones
These practices should take about one hour to complete.
Copyright © 2013, Oracle and/or its affiliates. All rights reserved.
Oracle Solaris 11 Advanced System Administration 4 - 66
Cicero Ronaldo (ciceroฺronaldo@gmailฺcom) has a non-transferable
license to use this Student Guideฺ
Unauthorized reproduction or distribution prohibitedฺ Copyright© 2014, Oracle and/or its affiliatesฺ

Lesson Agenda
• Planning for Data Storage Configuration and Backup
• Managing Data Redundancy with Mirrored Storage Pools
• Backing Up and Recovering Data with ZFS Snapshots
•
Managing Data Storage Space with ZFS File System
•
Managing
Data
Storage
Space
with
ZFS
File
System
Properties
• Troubleshooting ZFS Failures
Copyright © 2013, Oracle and/or its affiliates. All rights reserved.
Oracle Solaris 11 Advanced System Administration 4 - 67
Cicero Ronaldo (ciceroฺronaldo@gmailฺcom) has a non-transferable
license to use this Student Guideฺ
Unauthorized reproduction or distribution prohibitedฺ Copyright© 2014, Oracle and/or its affiliatesฺ

Managing Data Storage Space
with ZFS File System Properties
with
ZFS
File
System
Properties
This section covers the following topics:
•Setting ZFS properties
•Inheriting ZFS properties
•
Querying ZFS properties
•
Querying
ZFS
properties
•Mounting and sharing ZFS file systems
•Setting ZFS quotas and reservations
Copyright © 2013, Oracle and/or its affiliates. All rights reserved.
Oracle Solaris 11 Advanced System Administration 4 - 68
Cicero Ronaldo (ciceroฺronaldo@gmailฺcom) has a non-transferable
license to use this Student Guideฺ
Unauthorized reproduction or distribution prohibitedฺ Copyright© 2014, Oracle and/or its affiliatesฺ

Setting ZFS Properties
To modify any settable data set property, use zfs set followed
by property=value and the data set name.
# zfs set atime=off hrpool/home
Note: Only one property can be set or modified during each
zfs set invocation.
You can also set a property during the creation of a data set by
using zfs create.
# zfs create -o atime=off hrpool/home
To modify any settable data set property, use the zfs set command followed by
property=value and a data set name. In the example in the slide, the atime property is
set to off for hrpool/home.
Copyright © 2013, Oracle and/or its affiliates. All rights reserved.
Note: Only one property can be set or modified during each zfs set invocation.
You can also use the zfs create command to set properties when you are creating the file
system. In this example, you are setting the atime property to off as you create the file
system hrpool/home.
Now you look at how ZFS property inheritance works.
Oracle Solaris 11 Advanced System Administration 4 - 69
Cicero Ronaldo (ciceroฺronaldo@gmailฺcom) has a non-transferable
license to use this Student Guideฺ
Unauthorized reproduction or distribution prohibitedฺ Copyright© 2014, Oracle and/or its affiliatesฺ
Inheriting ZFS Properties
•All settable properties inherit their values from their
parents.
•All inheritable properties have an associated source.
S
f
S
ource Value De
f
inition
default
The property setting was not inherited or set locally.
local
The property was explicitly set on the data set by using the
zfs set command.
inherited from
dataset-name
The property was inherited from the named ancestor.
All settable properties, except for quotas and reservation properties, inherit their values from
their parents.
All inheritable properties have an associated source. The source indicates how a property
Copyright © 2013, Oracle and/or its affiliates. All rights reserved.
All
inheritable
properties
have
an
associated
source.
The
source
indicates
how
a
property
was obtained. The source of a property can have the following values:
•default: The property setting was not inherited or set locally. This source is a result of
no ancestor having the property as source local.
•local: The property was explicitly set on the data set by using the zfs set command
•inherited from dataset-name: The property was inherited from the named ancestor
If no ancestor has an explicit value set for an inherited property the default value for the
If
no
ancestor
has
an
explicit
value
set
for
an
inherited
property
,
the
default
value
for
the
property is used.
Oracle Solaris 11 Advanced System Administration 4 - 70
Cicero Ronaldo (ciceroฺronaldo@gmailฺcom) has a non-transferable
license to use this Student Guideฺ
Unauthorized reproduction or distribution prohibitedฺ Copyright© 2014, Oracle and/or its affiliatesฺ

Inheriting ZFS Properties
# zfs list
NAME USED AVAIL REFER MOUNTPOINT
datapool 176K 1.95G 23K /export/share
datapool/software 65K 1.95G 23K /export/share/software
datapool/software/solaris 42K 1.95G 21K /export/share/software/solaris
datapool/software/solaris/ar 21K 1.95G 21K /export/share/software/solaris/ar
# zfs get -r compression datapool
NAME PROPERTY VALUE SOURCE
datapool compression off default
datapool/software compression off default
datapool/software/solaris compression off default
data
p
ool
/
software
/
solaris
/
ar com
p
ression off default
p/ / /
p
You now walk through an example of how ZFS property inheritance works.
First, you run the zfs list command to see the file system hierarchy, as shown in the first
output in the slide.
Copyright © 2013, Oracle and/or its affiliates. All rights reserved.
output
in
the
slide.
Next, you run the zfs get -r command for the compression property, as shown in the
second output. Here you can see that the compression property is set to off, which is the
default, for all the file systems.
Oracle Solaris 11 Advanced System Administration 4 - 71
Cicero Ronaldo (ciceroฺronaldo@gmailฺcom) has a non-transferable
license to use this Student Guideฺ
Unauthorized reproduction or distribution prohibitedฺ Copyright© 2014, Oracle and/or its affiliatesฺ
Inheriting ZFS Properties
# zfs set compression=on datapool/software/solaris
# zfs get -r compression datapool
NAME PROPERTY VALUE SOURCE
datapool compression off default
datapool/software compression off default
datapool/software/solaris compression on local
datapool/software/solaris/ar compression on inherited from datapool/software/solaris
Next, you set the compression property to on for the datapool/software/solaris file
system.
If you run the
zfs
get
-
r
compression
command for
datapool
, you can see how the
Copyright © 2013, Oracle and/or its affiliates. All rights reserved.
If
you
run
the
zfs
get
r
compression
command
for
datapool
,
you
can
see
how
the
child file system inherits the ZFS property. Note that the compression value for
datapool/software/solaris is now set to on and the SOURCE has changed from
default to local.
You can also see how datapool/software/solaris/ar has inherited the compression
property value of on from its parent file system.
Oracle Solaris 11 Advanced System Administration 4 - 72
Cicero Ronaldo (ciceroฺronaldo@gmailฺcom) has a non-transferable
license to use this Student Guideฺ
Unauthorized reproduction or distribution prohibitedฺ Copyright© 2014, Oracle and/or its affiliatesฺ
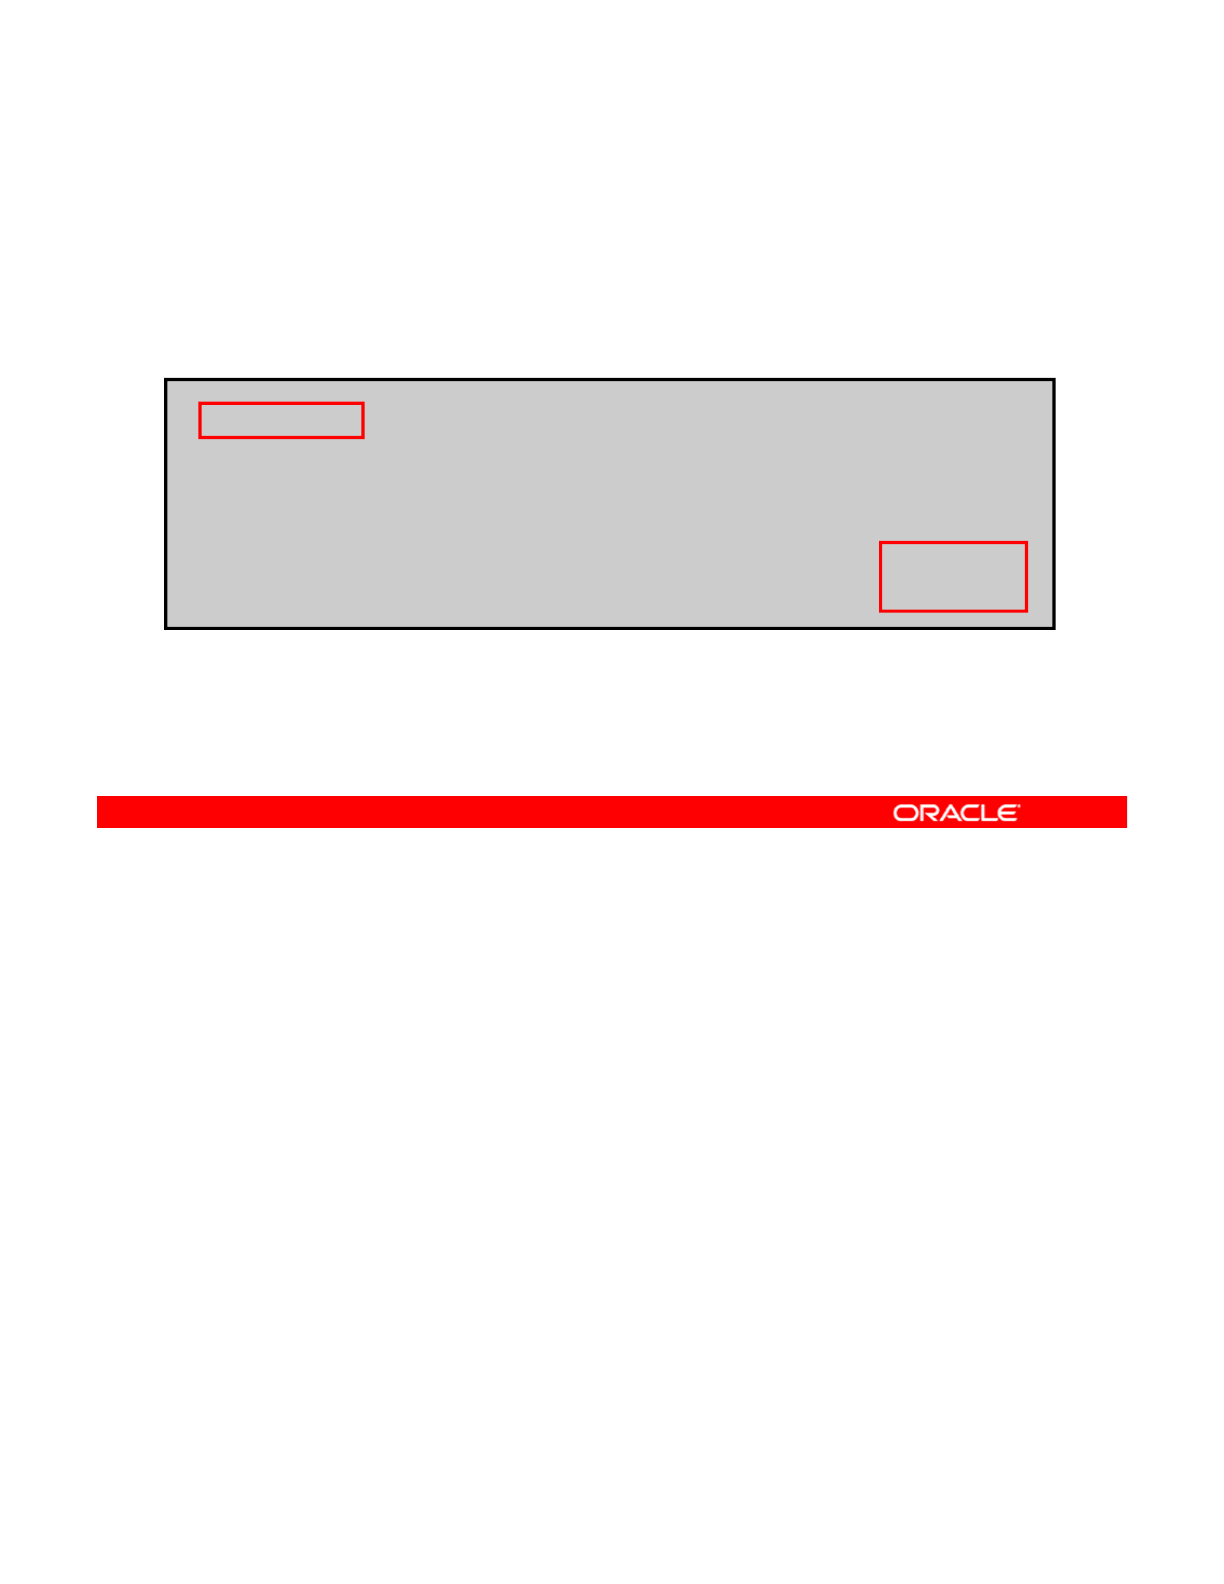
Inheriting ZFS Properties
To clear a property setting and have the setting inherited from
the parent, use zfs inherit followed by the property name
and the system file name path.
#zfs inherit compression datapool/software/solaris
# zfs get -r compression datapool
NAME PROPERTY VALUE SOURCE
datapool compression off default
datapool/software compression off default
datapool/software/solaris compression off default
data
p
ool
/
software
/
solaris
/
ar com
p
ression off default
p/ //p
If you want to return the datapool/software/solaris file system’s compression value to
off, you can do so by using the zfs inherit command. This command clears a property
setting, thereby causing the setting to be inherited from the parent.
Copyright © 2013, Oracle and/or its affiliates. All rights reserved.
In the example in the slide, zfs inherit is used to unset the compression property,
thereby causing the property to inherit the default setting of off. Because neither datapool
nor datapool/software has the compression property set locally, the default value is
used. If both datapool and datapool/software have compression on, the value set in
the most immediate ancestor is used.
Now you look at how to query ZFS properties.
Oracle Solaris 11 Advanced System Administration 4 - 73
Cicero Ronaldo (ciceroฺronaldo@gmailฺcom) has a non-transferable
license to use this Student Guideฺ
Unauthorized reproduction or distribution prohibitedฺ Copyright© 2014, Oracle and/or its affiliatesฺ

Querying ZFS Properties
You can query property values with:
•zfs list
•zfs get
Complex queries
–
Complex
queries
–Scripting
–Any data set property
The simplest way to query property values is by using the zfs list command. However, for
complex queries and for scripting, you can use the zfs get command to obtain more detailed
information in a customized format. The zfs list command is covered in detail in the Oracle
Copyright © 2013, Oracle and/or its affiliates. All rights reserved.
Solaris 11 System Administration course. This course focuses on using the zfs get
command for querying ZFS properties.
Oracle Solaris 11 Advanced System Administration 4 - 74
Cicero Ronaldo (ciceroฺronaldo@gmailฺcom) has a non-transferable
license to use this Student Guideฺ
Unauthorized reproduction or distribution prohibitedฺ Copyright© 2014, Oracle and/or its affiliatesฺ

Querying ZFS Properties
To retrieve any data set property, use zfs get followed by the
property name and the data set name.
# zfs
g
et checksum hr
p
ool/ws
gp
NAME PROPERTY VALUE SOURCE
hrpool/ws checksum on default
You can use the zfs get command to retrieve any data set property, followed by the property
name and the data set name. In the example in the slide, the zfs get command is used to
retrieve the checksum property value for hrpool/ws. As you can see, the VALUE is set to
Copyright © 2013, Oracle and/or its affiliates. All rights reserved.
on and the SOURCE is default.
Oracle Solaris 11 Advanced System Administration 4 - 75
Cicero Ronaldo (ciceroฺronaldo@gmailฺcom) has a non-transferable
license to use this Student Guideฺ
Unauthorized reproduction or distribution prohibitedฺ Copyright© 2014, Oracle and/or its affiliatesฺ
Querying ZFS Properties
The source values in zfs get are shown in the following table:
Source Value Definition
default
The property setting was not inherited or set locally.
local
The property was explicitly set on the data set by using the
zfs set command.
inherited from
dataset-name
The property was inherited from the named ancestor.
t
This property value was set by using the
f
t
t
emporary
This
property
value
was
set
by
using
the
z
f
smoun
t
-o
option and is valid only for the lifetime of the mount.
-(none)
This property is a read-only property. Its value is generated
by ZFS.
In addition to the default, local, and inherited from data set–name source values that
you have already seen, you may see two other source values in the zfs get output:
•tem
p
orar
y
: Is set b
y
usin
g
the zfs mount -o o
p
tion and is valid onl
y
for the lifetime of
Copyright © 2013, Oracle and/or its affiliates. All rights reserved.
py
yg
py
the mount
•- (none: Is a read-only property with a value that is generated by ZFS
Oracle Solaris 11 Advanced System Administration 4 - 76
Cicero Ronaldo (ciceroฺronaldo@gmailฺcom) has a non-transferable
license to use this Student Guideฺ
Unauthorized reproduction or distribution prohibitedฺ Copyright© 2014, Oracle and/or its affiliatesฺ
Querying ZFS Properties
To retrieve all properties for the specified data set, use
zfs get all followed by the data set name.
# zfs get all hrpool
NAME
PROPERTY
VALUE
SOURCE
NAME
PROPERTY
VALUE
SOURCE
hrpool type filesystem -
hrpool creation Tue Dec 18 9:33 2012 -
hrpool used 72K -
hrpool available 66.9G -
<output omitted>
You can use the special all keyword to retrieve all data set properties. The example in the
slide uses the all keyword to retrieve all existing data set properties for the hrpool file
system.
Copyright © 2013, Oracle and/or its affiliates. All rights reserved.
Oracle Solaris 11 Advanced System Administration 4 - 77
Cicero Ronaldo (ciceroฺronaldo@gmailฺcom) has a non-transferable
license to use this Student Guideฺ
Unauthorized reproduction or distribution prohibitedฺ Copyright© 2014, Oracle and/or its affiliatesฺ
Querying ZFS Properties
To specify the property types to display, use zfs get –s
followed by the source value and the data set name.
# zfs get -s local all hrpool
NAME
PROPERTY
VALUE
SOURCE
With the -s option, you can:
•Specify the desired source types with a comma-separated
list
NAME
PROPERTY
VALUE
SOURCE
hrpool compression on local
•Use the following source types: default, local,
inherited, temporary, and none
You can use the -s option with the zfs get command to specify, by source value, the type of
properties to display.
This option takes a comma
-
separated list that indicates the desired source types. Only
Copyright © 2013, Oracle and/or its affiliates. All rights reserved.
This
option
takes
a
comma
separated
list
that
indicates
the
desired
source
types.
Only
properties with the specified source type are displayed. The valid source types are default,
local, inherited, temporary, and none.
In the example in the slide, you have specified to show all properties with a local source
value for the file system hrpool. Only the compression property met the specified criteria,
and has been retrieved.
Oracle Solaris 11 Advanced System Administration 4 - 78
Cicero Ronaldo (ciceroฺronaldo@gmailฺcom) has a non-transferable
license to use this Student Guideฺ
Unauthorized reproduction or distribution prohibitedฺ Copyright© 2014, Oracle and/or its affiliatesฺ

Querying ZFS Properties
The following zfs get options are designed for scripting:
•-H
–Omits header information
–
Presents all white space as tabs
–
Presents
all
white
space
as
tabs
•-o
–Allows customization of output
–Takes a comma-separated list of literal fields to display,
together with a separate list of properties
# zfs get -H -o value compression hrpool/home
on
The zfs get command supports the -H and -o options, which are designed for scripting.
The -H option omits any header information and presents all white spaces as tabs.
You can use the
o
option to customize the output This option takes a comma
separated list
Copyright © 2013, Oracle and/or its affiliates. All rights reserved.
You
can
use
the
-
o
option
to
customize
the
output
.
This
option
takes
a
comma
-
separated
list
of literal fields (name, value, property, and source) to be output, followed by a space and
an argument, which is a comma-separated list of properties.
The example shows how to retrieve a single value by using the -H and -o options with zfs
get. In the example, you are retrieving the hrpool/home compression property value. The
value returned is on.
This concludes our discussion of setting, inheriting, and querying ZFS properties. Next, you
This
concludes
our
discussion
of
setting,
inheriting,
and
querying
ZFS
properties.
Next,
you
briefly look at mounting and sharing ZFS file systems.
Oracle Solaris 11 Advanced System Administration 4 - 79
Cicero Ronaldo (ciceroฺronaldo@gmailฺcom) has a non-transferable
license to use this Student Guideฺ
Unauthorized reproduction or distribution prohibitedฺ Copyright© 2014, Oracle and/or its affiliatesฺ

Mounting and Sharing ZFS File Systems
This section covers the following topics:
•Overriding a default ZFS mount point
•Managing legacy mount points
•
Sharing and unsharing ZFS file systems
•
Sharing
and
unsharing
ZFS
file
systems
Note
The basics of mounting and unmounting ZFS file systems are covered in the Oracle Solaris
11 Fundamentals for System Administrators
course If you are not familiar with how to perform
Copyright © 2013, Oracle and/or its affiliates. All rights reserved.
11
Fundamentals
for
System
Administrators
course
.
If
you
are
not
familiar
with
how
to
perform
these tasks, see Oracle Solaris Administration: ZFS File Systems for details.
Oracle Solaris 11 Advanced System Administration 4 - 80
Cicero Ronaldo (ciceroฺronaldo@gmailฺcom) has a non-transferable
license to use this Student Guideฺ
Unauthorized reproduction or distribution prohibitedฺ Copyright© 2014, Oracle and/or its affiliatesฺ

Overriding Default ZFS Mount Points
•By default, all ZFS file systems are mounted:
–By ZFS at boot by using an SMF service
–Under /path, where path is the name of the file system
•
The default mount point can be overridden by
setting the
The
default
mount
point
can
be
overridden
by
setting
the
mountpoint property to a specific path by using zfs
set.
•When a default mount point is overridden, ZFS
automatically:
–
Creates the mount point if needed
–
Creates
the
mount
point
if
needed
–Mounts the file system to the new mount point
Note: There is no need to edit the /etc/vfstab file.
By default, all ZFS file systems are mounted by ZFS at boot by using the Service
Management Facility’s (SMF) svc://system/filesystem/local service. File systems
are mounted under /path, where path is the name of the file system.
Copyright © 2013, Oracle and/or its affiliates. All rights reserved.
You can override the default mount point by setting the mountpoint property to a specific
path by using the zfs set command. ZFS automatically creates this mount point, if needed,
and automatically mounts the associated file system. ZFS file systems are automatically
mounted at boot time without requiring you to edit the /etc/vfstab file.
Oracle Solaris 11 Advanced System Administration 4 - 81
Cicero Ronaldo (ciceroฺronaldo@gmailฺcom) has a non-transferable
license to use this Student Guideฺ
Unauthorized reproduction or distribution prohibitedฺ Copyright© 2014, Oracle and/or its affiliatesฺ

Introducing the mountpoint Property
The mountpoint property:
•Is inherited
•Can be set to none to prevent the file system from being
mounted automatically
mounted
automatically
•Can be set to legacy to manage through legacy mount
interfaces
–This setting prevents ZFS from automatically mounting and
managing the file system.
The file system must be managed by using legacy tools
–
The
file
system
must
be
managed
by
using
legacy
tools
(mount, umount) and /etc/vfstab.
Note: To determine whether a file system can be mounted,
check the value of the canmount property and the
mountpoint property.
The mountpoint property is inherited. For example, if pool/home has mountpoint set to
/export/stuff, then pool/home/user inherits /export/stuff/user for its
mountpoint property.
Copyright © 2013, Oracle and/or its affiliates. All rights reserved.
You can set the mountpoint property to none to prevent the file system from being mounted
automatically.
If you prefer, you can explicitly manage file systems through legacy mount interfaces by
setting the mountpoint property to legacy. However, doing so prevents ZFS from
automatically mounting and managing this file system. If you decide to take this approach,
you must manage the file systems by using legacy tools (including the mount and umount
commands) and the
/t/ftb
file
commands)
and
the
/
e
t
c
/
v
f
s
t
a
b
file
.
Note: To determine whether a file system can be mounted, check the value of the canmount
property and the mountpoint property.
Oracle Solaris 11 Advanced System Administration 4 - 82
Cicero Ronaldo (ciceroฺronaldo@gmailฺcom) has a non-transferable
license to use this Student Guideฺ
Unauthorized reproduction or distribution prohibitedฺ Copyright© 2014, Oracle and/or its affiliatesฺ

Automatic Mount Point Behavior
•When changing from a legacy or none mount point, ZFS
automatically mounts the file system.
•If ZFS is managing the file system but is currently
unmounted
,
and the mount
p
oint
p
ro
p
ert
y
is chan
g
ed
,
,
p
pp y g ,
the file system remains unmounted.
•When the mountpoint property is changed, ZFS
automatically reassigns the mount point.
•Mount point directories are created as needed.
•
Any data set whose
mountpoint
property is not legacy is
•
Any
data
set
whose
mountpoint
property
is
not
legacy
is
managed by ZFS.
Note: A default mount point can be created by using zpool
create –m.
The type of mount point (automatic or legacy) determines how the mount point behaves.
For example, automatic mount points exhibit the following behaviors:
•
When changing from a
legacy
or
none
mount point
ZFS automatically mounts the file
Copyright © 2013, Oracle and/or its affiliates. All rights reserved.
•
When
changing
from
a
legacy
or
none
mount
point
,
ZFS
automatically
mounts
the
file
system.
•If ZFS is managing the file system but is currently unmounted and the mountpoint
property is changed, the file system remains unmounted.
•When the mountpoint property is changed, ZFS automatically unmounts the file
system from the old mount point and remounts it to the new mount point.
•
Mount point directories are created as needed. If ZFS is unable to unmount a file system
Mount
point
directories
are
created
as
needed.
If
ZFS
is
unable
to
unmount
a
file
system
because it is active, an error is reported and a forced manual unmount is necessary.
•Any data set whose mountpoint property is not legacy is managed by ZFS.
Note: You can set the default mount point for the root data set at creation time by using the
zpool create -m option.
Oracle Solaris 11 Advanced System Administration 4 - 83
Cicero Ronaldo (ciceroฺronaldo@gmailฺcom) has a non-transferable
license to use this Student Guideฺ
Unauthorized reproduction or distribution prohibitedฺ Copyright© 2014, Oracle and/or its affiliatesฺ

Legacy Mount Point Behavior
•Legacy file systems must be managed by using the mount
and umount commands and the /etc/vfstab file.
•ZFS does not automatically mount legacy file systems on
boot.
•The ZFS mount and unmount commands do not operate
on legacy file systems.
•To automatically mount a legacy file system on boot, you
must add an entry to the /etc/vfstab file.
Legacy mount points exhibit the behaviors outlined in the slide:
Copyright © 2013, Oracle and/or its affiliates. All rights reserved.
Oracle Solaris 11 Advanced System Administration 4 - 84
Cicero Ronaldo (ciceroฺronaldo@gmailฺcom) has a non-transferable
license to use this Student Guideฺ
Unauthorized reproduction or distribution prohibitedฺ Copyright© 2014, Oracle and/or its affiliatesฺ

Managing Legacy Mount Points
To manage ZFS file systems with legacy tools, use zfs set
followed by mountpoint=legacy and the file system name.
# zfs set mountpoint=legacy hrpool/home/reports
To mount the file system, use mount –F followed by the file
system type, the file system name, and a mount point.
// /
# mount -F zfs hrpool
/
home
/
reports
/
mnt
As stated previously, you can manage ZFS file systems with legacy tools by setting the
mountpoint property to legacy.
To set up and manage a ZFS file system in legacy mode, use the
zfs
set
command
Copyright © 2013, Oracle and/or its affiliates. All rights reserved.
To
set
up
and
manage
a
ZFS
file
system
in
legacy
mode,
use
the
zfs
set
command
followed by the mountpoint=legacy property and the file system name, as shown in the
first example in the slide.
You can then mount the file system by using the Solaris legacy mount command mount with
the -F option, followed by the file system type, the file system name, and a mount point, as
illustrated in the second example.
Now that you know how to manage a legacy mount point in ZFS, you will look at how to share
and unshare ZFS file systems.
Oracle Solaris 11 Advanced System Administration 4 - 85
Cicero Ronaldo (ciceroฺronaldo@gmailฺcom) has a non-transferable
license to use this Student Guideฺ
Unauthorized reproduction or distribution prohibitedฺ Copyright© 2014, Oracle and/or its affiliatesฺ

share.nfs Property: Introduction
•ZFS automatically shares file systems by using the
share.nfs property.
•The share.nfs property is a comma-separated list of
o
p
tions to
p
ass to the share command.
pp
—
The value on:
—
Is an alias for the default share options
—
Provides read/write permissions to anyone
—
The value off indicates that the file system is not managed by
ZFS.
All file systems whose
hf
property is not
ff
are
•
All
file
systems
whose
s
h
are.n
f
s
property
is
not
o
ff
are
shared during boot.
In Oracle Solaris 11.1 release, the share.nfs property replaces the sharenfs property to
define and publish an NFS share. Similar to directories, ZFS can automatically share file
systems by using the share.nfs property. If you use this method, you do not have to modify
Copyright © 2013, Oracle and/or its affiliates. All rights reserved.
the /etc/dfs/dfstab file when a new file system is added.
The share.nfs property is a comma-separated list of options to pass to the share
command. The value on is an alias for the default share options, which provides read/write
permissions to anyone. The value off indicates that the file system is not managed by ZFS.
All file systems whose share.nfs property is not off are shared during boot.
Oracle Solaris 11 Advanced System Administration 4 - 86
Cicero Ronaldo (ciceroฺronaldo@gmailฺcom) has a non-transferable
license to use this Student Guideฺ
Unauthorized reproduction or distribution prohibitedฺ Copyright© 2014, Oracle and/or its affiliatesฺ

Setting the share.nfs Property
To share a new file system, use the zfs set syntax similar to
what is shown in the following example:
# zfs set share.nfs=on hrpool/home/reports
•The share.nfs property is inherited.
•Setting share.nfs to off:
–Prevents a file system from automatically being shared
–Allows the file system to be shared by using legacy methods
By default, all file systems are unshared. To share a new file system, use the zfs set syntax
(similar to what is shown in the example in the slide). In the example shown, the share.nfs
property is set to on for the hrpool/home/reports file system.
Copyright © 2013, Oracle and/or its affiliates. All rights reserved.
The share.nfs property is inherited, and file systems that are created or exist below a
shared file system are automatically shared.
Setting the share.nfs property to off prevents a file system from being automatically
shared and allows the file system to be shared by using legacy methods.
Oracle Solaris 11 Advanced System Administration 4 - 87
Cicero Ronaldo (ciceroฺronaldo@gmailฺcom) has a non-transferable
license to use this Student Guideฺ
Unauthorized reproduction or distribution prohibitedฺ Copyright© 2014, Oracle and/or its affiliatesฺ

Unsharing ZFS File Systems
To explicitly unshare a file system, use zfs unshare followed
by the file system name or mount point.
# zfs unshare hrpool/home/reports
To unshare all ZFS file systems, use zfs unshare with the -a
option.
# zfs unshare -a
Although most file systems are automatically shared and unshared during boot, creation, and
destruction, file systems sometimes need to be explicitly unshared. To do so, use the zfs
unshare command followed by the file system name or mount point. In the first example in
Copyright © 2013, Oracle and/or its affiliates. All rights reserved.
the slide, the hrpool/home/reports file system is being unshared.
To unshare all ZFS file systems on the system, you can use the -a option, as shown in the
second example.
Note: zfs unshare is a temporary unshare. It does not change the share.nfs property of
the file system (or its children).
Oracle Solaris 11 Advanced System Administration 4 - 88
Cicero Ronaldo (ciceroฺronaldo@gmailฺcom) has a non-transferable
license to use this Student Guideฺ
Unauthorized reproduction or distribution prohibitedฺ Copyright© 2014, Oracle and/or its affiliatesฺ

Sharing ZFS File Systems
To share a file system, use zfs share followed by the file
system name.
# zfs share hrpool/home/reports
To share all ZFS file systems, use zfs share with the -a
option.
# zfs share -a
Most of the time, the automatic behavior of ZFS—sharing on boot and creation—is sufficient
for normal operation. If, for some reason, you unshare a file system, you can share it again by
using the zfs share command. In the first example in the slide, the
Copyright © 2013, Oracle and/or its affiliates. All rights reserved.
hrpool/home/reports file system is being shared.
You can also share all ZFS file systems on the system by using the -a option, as shown in
the second example.
Oracle Solaris 11 Advanced System Administration 4 - 89
Cicero Ronaldo (ciceroฺronaldo@gmailฺcom) has a non-transferable
license to use this Student Guideฺ
Unauthorized reproduction or distribution prohibitedฺ Copyright© 2014, Oracle and/or its affiliatesฺ

Setting ZFS Quotas and Reservations
This section covers the following topics:
•Setting quotas on ZFS file systems
–User quotas
–
Group quotas
–
Group
quotas
•Displaying user and group space usage
•Removing user and group quotas
•Setting reservations on ZFS file systems
Copyright © 2013, Oracle and/or its affiliates. All rights reserved.
Oracle Solaris 11 Advanced System Administration 4 - 90
Cicero Ronaldo (ciceroฺronaldo@gmailฺcom) has a non-transferable
license to use this Student Guideฺ
Unauthorized reproduction or distribution prohibitedฺ Copyright© 2014, Oracle and/or its affiliatesฺ

Introducing the quota, reservation,refquota,
and
used
Properties
and
used
Properties
•Use the quota property to set a limit on the pool space
used by a file system.
•Use the reservation property to guarantee a specified
amount of s
p
ace for a file s
y
stem from a
p
ool.
pyp
•Use the refquota property on a data set to limit the
amount of disk space that a data set can consume.
•The amount of space used by a file system is reported by
the used property.
You can use the quota property to set a limit on the amount of space that a file system can
use. In addition, you can use the reservation property to guarantee that some amount of
space is available to a file system. Both properties apply to the data set on which they are set
Copyright © 2013, Oracle and/or its affiliates. All rights reserved.
and to all descendants of that data set.
For example, if a quota is set on the hrpool/home data set, the total amount of space used
by hrpool/home and all of its descendants cannot exceed the quota. Similarly, if
hrpool/home is given a reservation, hrpool/home and all of its descendants draw from
that reservation.
To limit the amount of disk space that a data set can consume, you can use the refquota
property Unlike the
t
and
ti
properties this property does not include the
property
.
Unlike
the
quo
t
a
and
reserva
ti
on
properties
,
this
property
does
not
include
the
disk space that is consumed by descendants.
The amount of space used by a data set and all of its descendants is reported by the used
property.
Oracle Solaris 11 Advanced System Administration 4 - 91
Cicero Ronaldo (ciceroฺronaldo@gmailฺcom) has a non-transferable
license to use this Student Guideฺ
Unauthorized reproduction or distribution prohibitedฺ Copyright© 2014, Oracle and/or its affiliatesฺ

Setting Quotas for ZFS File Systems
To set a quota on a file system, use zfs set followed by
quota=, the space amount, and the file system name.
# zfs set quota=10ghrpool/home/reports
To display the quota setting for a file system, use zfs get
followed by quota and the file system name.
# zfs
g
et
q
uota hr
p
ool
/
home
/
re
p
orts
Note: The quota cannot be less than the current data set
usage.
gq p/ /p
NAME PROPERTY VALUE SOURCE
hrpool/home/reports quota 10.0G local
ZFS quotas can be set and displayed by using the zfs set and zfs get commands.
In the first example in the slide, you are setting a quota of 10 GB on
hrpool/home/reports
. To do this, you use the
zfs
set
command followed by
Copyright © 2013, Oracle and/or its affiliates. All rights reserved.
hrpool/home/reports
.
To
do
this,
you
use
the
zfs
set
command
followed
by
quota=10gand the file system name.
In the second example, you are displaying the values of the quota property. To do this, you
use the zfs get command followed by the property name quota and the file system name.
Note: You cannot set a quota to an amount that is less than what is currently being used by a
data set.
Oracle Solaris 11 Advanced System Administration 4 - 92
Cicero Ronaldo (ciceroฺronaldo@gmailฺcom) has a non-transferable
license to use this Student Guideฺ
Unauthorized reproduction or distribution prohibitedฺ Copyright© 2014, Oracle and/or its affiliatesฺ

Setting Quotas for ZFS File Systems
To limit the amount of disk space that a data set can consume,
use zfs set followed by refquota=, the space amount, and
the data set name.
#
zfs set refquota 10
g
hrstaff/tsmith
#
zfs
set
refquota
=
10
g
hrstaff/tsmith
# zfs list -t all -r hrstaff
NAME USED AVAIL REFER MOUNTPOINT
hrstaff 150M 66.8G 32K /hrstaff
hrstaff/tsmith 150M 9.85G 150M /hrstaff/tsmith
hrstaff/tsmith@yesterday 0 - 150M -
# zfs snapshot hrstaff/tsmith@today
# zfs list -t all -r hrstaff
hrstaff 150M 66.8G 32K /hrstaff
hrstaff
150M
66.8G
32K
/hrstaff
hrstaff/tsmith 150M 9.90G 100M /hrstaff/tsmith
hrstaff/tsmith@yesterday 50.0M - 150M -
hrstaff/tsmith@today 0 - 100M -
You can set a refquota on a file system to limit the amount of disk space that a data set can
consume. As was mentioned previously, this hard limit does not include the disk space that is
consumed by descendants.
Copyright © 2013, Oracle and/or its affiliates. All rights reserved.
In the example, you are setting a refquota of 10 GB on hrstaff/tsmith. To do this, you
use the zfs set command followed by refquota=10gand the file system name. You then
run the zfs list command with the -t option to see the snapshots associated with the
hrstaff data set. Then you create a new snapshot of hrstaff/tsmith and call it
hrstaff/tsmith@today. When you run the zfs list -t command again, you will see
that tsmith’s 10 GB quota is not affected by the space that is consumed by the snapshots.
Oracle Solaris 11 Advanced System Administration 4 - 93
Cicero Ronaldo (ciceroฺronaldo@gmailฺcom) has a non-transferable
license to use this Student Guideฺ
Unauthorized reproduction or distribution prohibitedฺ Copyright© 2014, Oracle and/or its affiliatesฺ

Setting a User Quota on a ZFS File System
To set a user quota on a file system, use zfs set followed by
userquota@<name>=, the space amount, and the file system
name.
# zfs create finance
/
tax
To display the user quota setting for a file system, use zfs get
followed by userquota@<name> and the file system name.
/
# zfs set userquota@rsmart=10gfinance/tax
# zfs get userquota@rsmart finance/tax
NAME PROPERTY VALUE SOURCE
finance/tax userquota@rsmart 10glocal
You can set user or group quota on the amount of space consumed by the files that are
owned by a particular user or group.
You can set a user quota by using the
zfs
set
userquota
command followed by the
Copyright © 2013, Oracle and/or its affiliates. All rights reserved.
You
can
set
a
user
quota
by
using
the
zfs
set
userquota
command
followed
by
the
username, the amount of space that you want to allocate to the user, and the file system
name. In the first example in the slide, you first create the file system finance/tax. Then
you set the user quota to 10 GB for the username rsmart.
To display the current user quota, use the zfs get command followed by the userquota
(userquota@<name>) command and the file system name.
Oracle Solaris 11 Advanced System Administration 4 - 94
Cicero Ronaldo (ciceroฺronaldo@gmailฺcom) has a non-transferable
license to use this Student Guideฺ
Unauthorized reproduction or distribution prohibitedฺ Copyright© 2014, Oracle and/or its affiliatesฺ

Setting a Group Quota on ZFS File System
To set a group quota on a file system, use zfs set followed by
groupquota@<name>=, the space amount, and the file
system name.
#
zfs create finance/ar
To display the group quota setting for a file system, use zfs
get followed by groupquota@<group> and the file system
name.
#
zfs
create
finance/ar
# zfs set groupquota@ar=20GB finance/ar
# zfs get groupquota@staff finance/ar
NAME PROPERTY VALUE SOURCE
finance/ar groupquota@ar 20G local
To set group quota, use the zfs set groupquota command followed by the amount of
space that you want to allocate to the group and the file system name. In the first example in
the slide, you first create the file system finance/ar. Then you set the group quota to 20
Copyright © 2013, Oracle and/or its affiliates. All rights reserved.
GB for the group ar.
To display the current group quota, use the zfs get command followed by the groupquota
(groupquota@<name>) command and the file system name.
Note: Enforcement of user or group quotas might be delayed, which means that users might
exceed their quota before the system notices that they are over quota and refuses additional
writes.
Oracle Solaris 11 Advanced System Administration 4 - 95
Cicero Ronaldo (ciceroฺronaldo@gmailฺcom) has a non-transferable
license to use this Student Guideฺ
Unauthorized reproduction or distribution prohibitedฺ Copyright© 2014, Oracle and/or its affiliatesฺ

Displaying User and Group Space Usage
To display general user space usage, use zfs userspace
followed by the file system name.
# zfs userspace finance/tax
TYPE
NAME
USED
QUOTA
To display general group space usage, use zfs groupspace
followed by the file system name.
TYPE
NAME
USED
QUOTA
POSIX User root 227M none
POSIX User rsmart 455M 10g
# zfs groupspace finance/ar
TYPE NAME USED QUOTA
POSIX Group root 217M none
POSIX Group ar 217M 20G
You can display general user and group space usage by using the zfs userspace and zfs
groupspace subcommands, respectively, as illustrated in the examples in the slide.
Copyright © 2013, Oracle and/or its affiliates. All rights reserved.
Oracle Solaris 11 Advanced System Administration 4 - 96
Cicero Ronaldo (ciceroฺronaldo@gmailฺcom) has a non-transferable
license to use this Student Guideฺ
Unauthorized reproduction or distribution prohibitedฺ Copyright© 2014, Oracle and/or its affiliatesฺ

Identifying User and Group Space Usage
To identify individual user space usage, use zfs
userused@<name>followed by the file system name.
# zfs get userused@rsmart finance/tax
NAME
PROPERTY
VALUE
SOURCE
To identify group space usage, use zfs groupused@<name>
followed by the file system name.
NAME
PROPERTY
VALUE
SOURCE
finance/tax userused@rsmart 455M local
# zfs
g
et
g
rou
p
used@ar finance/ar
ggp
NAME PROPERTY VALUE SOURCE
finance/ar groupused@ar 217M local
You can identify individual user space usage by using the zfs get command followed by
userused@<name>and the file system name, as shown in the first example in the slide.
Here, you want to identify the space used by rsmart in the file system finance/tax. You
Copyright © 2013, Oracle and/or its affiliates. All rights reserved.
can see that 455 MB of space is being used.
Similarly, you can identify group space usage by using the zfs get command followed by
groupused@<name>and the file system name, as shown in the second example. Here, you
want to identify the space used by the group ar in the finance/ar file system. You can see
that 217 MB of space is being used.
Note: The user and group quota properties are not displayed by using the zfs get all
dt t
d th t di l li ti f ll fil t ti
d
a
t
ase
t
comman
d
th
a
t
di
sp
l
ays a
li
s
ti
ng o
f
a
ll
fil
e sys
t
em proper
ti
es.
Oracle Solaris 11 Advanced System Administration 4 - 97
Cicero Ronaldo (ciceroฺronaldo@gmailฺcom) has a non-transferable
license to use this Student Guideฺ
Unauthorized reproduction or distribution prohibitedฺ Copyright© 2014, Oracle and/or its affiliatesฺ

Removing User and Group Quotas
To remove a user quota, use zfs set
userquota@<name>=none followed by the file system name.
# zfs set userquota@rsmart=none finance/tax
To remove a group quota, use zfs set
groupquota@<name>=none followed by the file system
name.
# zfs set groupquota@staff=none finance/ar
You can remove a user or group quota by using the zfs set command to set the user or
group quota property to none, as illustrated in the examples in the slide.
Now you look at how to set reservations on ZFS file systems.
Copyright © 2013, Oracle and/or its affiliates. All rights reserved.
Now
you
look
at
how
to
set
reservations
on
ZFS
file
systems.
Oracle Solaris 11 Advanced System Administration 4 - 98
Cicero Ronaldo (ciceroฺronaldo@gmailฺcom) has a non-transferable
license to use this Student Guideฺ
Unauthorized reproduction or distribution prohibitedฺ Copyright© 2014, Oracle and/or its affiliatesฺ

Identifying Reservation Restrictions
•A ZFS reservation is an allocation of space from the pool
that is guaranteed to be available to a data set.
•Space cannot be reserved for a data set if that space is not
currentl
y
available in the
p
ool.
yp
•The total amount of all outstanding unconsumed
reservations cannot exceed the amount of unused space
in the pool.
•A data set can use more space than it has reserved if:
Unreserved space is available in the pool
–
Unreserved
space
is
available
in
the
pool
–Its current usage is below its quota
•A data set cannot consume space that is reserved for
another data set.
Copyright © 2013, Oracle and/or its affiliates. All rights reserved.
Oracle Solaris 11 Advanced System Administration 4 - 99
Cicero Ronaldo (ciceroฺronaldo@gmailฺcom) has a non-transferable
license to use this Student Guideฺ
Unauthorized reproduction or distribution prohibitedฺ Copyright© 2014, Oracle and/or its affiliatesฺ
Setting Space Reservation
on a Data Set and Snapshot
on
a
Data
Set
and
Snapshot
To set a space reservation on a data set and snapshot, use
zfs set followed by reservation, the space amount, and
the file system name.
# zfs set reservation=20g finance/ap
# zfs list
NAME USED AVAIL REFER MOUNTPOINT
finance 20.0G 13.2G 19K /finance
finance/ap 10g33.2G 18K /finance/ap
To guarantee space allocation on a data set and snapshot, you can set ZFS reservations by
using the zfs set reservation= command.
Regular reservations are accounted for in the parent
’
s used space.
Copyright © 2013, Oracle and/or its affiliates. All rights reserved.
Regular
reservations
are
accounted
for
in
the
parent s
used
space.
In the example in the slide, you are setting the reservation value of the finance/ap file
system to 20 GB from 10 GB.
Note: A reservation on a file system is shared with its descendants.
If you run the zfs list command, you can see that the smaller of the two quotas (10 GB
versus 20 GB) that you just set for finance/ap is displayed.
Notice also that the increase in reserved space is reflected in the
USED
and
AVAIL
space
Notice
also
that
the
increase
in
reserved
space
is
reflected
in
the
USED
and
AVAIL
space
columns of the parent (finance). The amounts have changed from 10 GB to 20 GB in the
USED column and from 23.2 GB to 13.2 GB in the AVAIL column.
Oracle Solaris 11 Advanced System Administration 4 - 100
Cicero Ronaldo (ciceroฺronaldo@gmailฺcom) has a non-transferable
license to use this Student Guideฺ
Unauthorized reproduction or distribution prohibitedฺ Copyright© 2014, Oracle and/or its affiliatesฺ
Setting Space Reservation on a Data Set
To set a space reservation on a specific data set, use zfs set
followed by refreservation=, the space amount, and the
file system name.
# zfs set refreservation=10gfinance/ap
# zfs list
NAME USED AVAIL REFER MOUNTPOINT
finance 10.0G 23.2G 19K /finance
finance/ap 10g33.2G 18K /finance/ap
•The space consumed by descendants, snapshots, and
clones is not included.
•The setting counts against the parent data set’s quotas
and reservation.
You can use a reservation property called refreservation to set a space reservation on a
specific data set that does not include the space consumed by descendants, snapshots, and
clones.
Copyright © 2013, Oracle and/or its affiliates. All rights reserved.
The refreservation value is accounted for in the parent data set’s space used, and
counts against the parent data set’s quotas and reservations.
To set this property, use the zfs set command followed by refreservation=, the amount
of space that you want to allocate, and the file system name. In this example, you are
reserving 10 GB of space for the file system finance/ap. Notice how this is reflected in the
AVAIL column.
Oracle Solaris 11 Advanced System Administration 4 - 101
Cicero Ronaldo (ciceroฺronaldo@gmailฺcom) has a non-transferable
license to use this Student Guideฺ
Unauthorized reproduction or distribution prohibitedฺ Copyright© 2014, Oracle and/or its affiliatesฺ

Displaying Reservation Values
To see the values of both reservations, use zfs get followed
by reservation, refreservation, and the file system
name.
/
Note: If refreservation is set, a snapshot is allowed only if
hf l i t t id thi ti t
# zfs get reservation,refreservation finance
/
ap
NAME PROPERTY VALUE SOURCE
finance/ap reservation 20G local
finance/ap refreservation 10glocal
enoug
h
f
ree poo
l
space ex
i
s
t
s ou
t
s
id
e
thi
s reserva
ti
on
t
o
accommodate the current number of referenced bytes in the
data set.
To see the values of both reservations for the finance/ap file system, you can use the zfs
get command followed by the reservation and refreservation property names
(separated by a comma) and the file system name, as shown in the example in the slide. In
Copyright © 2013, Oracle and/or its affiliates. All rights reserved.
the example, both the reservation and refreservation property values are displayed
for the finance/ap file system. With this view, you can see that the reservation property
is set to 20 GB and the refreservation property is set to 10 GB.
Note: If refreservation is set (as it is in this example), a snapshot is allowed only if
enough free pool space exists outside this reservation to accommodate the current number of
referenced bytes in the data set.
N th t h b tt d t di f h t t t d ti ZFS fil
N
ow
th
a
t
you
h
ave a
b
e
tt
er un
d
ers
t
an
di
ng o
f
h
ow
t
o se
t
quo
t
as an
d
reserva
ti
ons on
ZFS
fil
e
systems, you can practice what you have learned.
Oracle Solaris 11 Advanced System Administration 4 - 102
Cicero Ronaldo (ciceroฺronaldo@gmailฺcom) has a non-transferable
license to use this Student Guideฺ
Unauthorized reproduction or distribution prohibitedฺ Copyright© 2014, Oracle and/or its affiliatesฺ

Practice 4-4 Overview:
Configuring ZFS Properties
Configuring
ZFS
Properties
This practice covers the configuration of:
•Quota and reservation properties
•The share property
•
ZFS compression
•
ZFS
compression
This practice should take about 1.5 hours to complete.
Copyright © 2013, Oracle and/or its affiliates. All rights reserved.
Oracle Solaris 11 Advanced System Administration 4 - 103
Cicero Ronaldo (ciceroฺronaldo@gmailฺcom) has a non-transferable
license to use this Student Guideฺ
Unauthorized reproduction or distribution prohibitedฺ Copyright© 2014, Oracle and/or its affiliatesฺ

Lesson Agenda
• Planning for Data Storage Configuration and Backup
• Managing Data Redundancy with Mirrored Storage Pools
• Backing Up and Recovering Data with ZFS Snapshots
•
Managing Data Storage Space with ZFS File System
•
Managing
Data
Storage
Space
with
ZFS
File
System
Properties
•Troubleshooting ZFS Failures
You now look at how to troubleshoot several different types of ZFS failures, including ZFS
device and data issues.
Copyright © 2013, Oracle and/or its affiliates. All rights reserved.
Oracle Solaris 11 Advanced System Administration 4 - 104
Cicero Ronaldo (ciceroฺronaldo@gmailฺcom) has a non-transferable
license to use this Student Guideฺ
Unauthorized reproduction or distribution prohibitedฺ Copyright© 2014, Oracle and/or its affiliatesฺ

Troubleshooting ZFS Failures
•Identifying problems in ZFS
•Repairing a damaged ZFS configuration
•Repairing a missing device
•
Repairing a damaged device
•
Repairing
a
damaged
device
•Repairing damaged data
In this section, you are shown how to identify and recover from ZFS failure modes.
Information about preventing failures is provided as well.
Copyright © 2013, Oracle and/or its affiliates. All rights reserved.
Oracle Solaris 11 Advanced System Administration 4 - 105
Cicero Ronaldo (ciceroฺronaldo@gmailฺcom) has a non-transferable
license to use this Student Guideฺ
Unauthorized reproduction or distribution prohibitedฺ Copyright© 2014, Oracle and/or its affiliatesฺ

Identifying Problems in ZFS
This section covers the following topics:
•Overview of troubleshooting in ZFS
•The basic recovery process
•
Configuring
syslog
for FMD messages
•
Configuring
syslog
for
FMD
messages
•Determining problems in a ZFS storage pool
•Interpreting zpool status output
Copyright © 2013, Oracle and/or its affiliates. All rights reserved.
Oracle Solaris 11 Advanced System Administration 4 - 106
Cicero Ronaldo (ciceroฺronaldo@gmailฺcom) has a non-transferable
license to use this Student Guideฺ
Unauthorized reproduction or distribution prohibitedฺ Copyright© 2014, Oracle and/or its affiliatesฺ

Troubleshooting in ZFS: Overview
The zpool status command is central to ZFS
troubleshooting. This command does the following:
•Analyzes various failures in the system
•
Identifies the most severe problem
Identifies
the
most
severe
problem
•Presents a suggested action
•Presents a link to a knowledge article for more information
•Presents only a single problem
All ZFS troubleshooting is centered on the zpool status command. This command
analyzes various failures in the system and identifies the most severe problem, presenting
you with a suggested action and a link to a knowledge article for more information. Note that
Copyright © 2013, Oracle and/or its affiliates. All rights reserved.
zpool status identifies only a single problem with a pool, although multiple problems can
exist.
Oracle Solaris 11 Advanced System Administration 4 - 107
Cicero Ronaldo (ciceroฺronaldo@gmailฺcom) has a non-transferable
license to use this Student Guideฺ
Unauthorized reproduction or distribution prohibitedฺ Copyright© 2014, Oracle and/or its affiliatesฺ

Basic Recovery Process
The basic recovery process is as follows:
1. Identify errors through the Fault Management Daemon
(FMD) messages displayed on the system console or in
/
var
/
adm
/
messa
g
es.
/// g
2. Find further repair instructions in zpool status -x.
3. Repair the failures:
–Replace the faulted or missing device and bring it online.
–Restore the faulted configuration or corrupted data from a
backup
backup
.
4. Verify the recovery by using zpool status -x.
5. Back up the restored configuration, if applicable.
The slide lists the basic steps that you should perform to recover from ZFS problems.
Note: You see and interpret FMD messages during the practice that follows this lecture.
Copyright © 2013, Oracle and/or its affiliates. All rights reserved.
Oracle Solaris 11 Advanced System Administration 4 - 108
Cicero Ronaldo (ciceroฺronaldo@gmailฺcom) has a non-transferable
license to use this Student Guideฺ
Unauthorized reproduction or distribution prohibitedฺ Copyright© 2014, Oracle and/or its affiliatesฺ

Configuring syslog for FMD Messages
1. Create a new file named /var/adm/messages.fmd for
Fault Management Daemon to log the device-related
messages.
2. Back u
p
the current
/
etc
/
s
y
slo
g
.conf file.
p
//yg
3. Edit the /etc/syslog.conf file by entering a new line
below the existing line as follows:
*.err;kern.debug;daemon.notice;mail.crit /var/adm/messages
daemon.err /var/adm/messages.fmd
4. Restart the syslog service for the new configuration to
take effect by using svcadm restart system-log.
Copyright © 2013, Oracle and/or its affiliates. All rights reserved.
Oracle Solaris 11 Advanced System Administration 4 - 109
Cicero Ronaldo (ciceroฺronaldo@gmailฺcom) has a non-transferable
license to use this Student Guideฺ
Unauthorized reproduction or distribution prohibitedฺ Copyright© 2014, Oracle and/or its affiliatesฺ

Determining Problems in a ZFS Storage Pool
•Use zpool status -x to determine if a known problem
exists.
•If no bad pools exist, the “all pools are healthy” status is
returned.
•Without the -x flag, the status of all pools (regardless of
health) is displayed.
# zpool status -x
all pools are healthy
The easiest way to determine if a known problem exists on a system is to use the zpool
status -x command. This command displays only pools that exhibit problems.
If no bad pools exist on the system, the command displays a simple
“
all
pools
are
Copyright © 2013, Oracle and/or its affiliates. All rights reserved.
If
no
bad
pools
exist
on
the
system,
the
command
displays
a
simple
all
pools
are
healthy” message, as shown in the example in the slide.
Without the -x flag, the command displays the complete status for all pools (or the requested
pool, if specified on the command line), even if the pools are otherwise healthy.
You now look at an example of a zpool status output.
Oracle Solaris 11 Advanced System Administration 4 - 110
Cicero Ronaldo (ciceroฺronaldo@gmailฺcom) has a non-transferable
license to use this Student Guideฺ
Unauthorized reproduction or distribution prohibitedฺ Copyright© 2014, Oracle and/or its affiliatesฺ

Interpreting zpool status Output
Header section
# zpool status hrpool
pool: hrpool
state: DEGRADED
t t O d i h b t k ffli b th
s
t
a
t
us:
O
ne or more
d
ev
i
ces
h
as
b
een
t
a
k
en o
ffli
ne
b
y
th
e
administrator. Sufficient replicas exist for the pool to
continue functioning in a degraded state.
action: Online the device using ’zpool online’ or replace the
device with ’zpool replace’.
scrub: none requested
config:
NAME
STATE
READ WRITE CKSUM
NAME
STATE
READ
WRITE
CKSUM
hrpool DEGRADED 0 0 0
mirror-0 DEGRADED 0 0 0
c1t0d0 ONLINE 0 0 0
c1t1d0 OFFLINE 0 0 0
errors: No known data errors
The header section in the zpool status output (as highlighted in the example in the slide)
contains the following fields, some of which are displayed only for pools that exhibit problems:
•
p
ool: Name of the
p
ool
Copyright © 2013, Oracle and/or its affiliates. All rights reserved.
p
p
•state: Current health of the pool
•status: Description of what is wrong with the pool
•action:Recommended action for repairing the errors
•see: Reference to a knowledge article that contains detailed repair information
(displayed only when a pool is exhibiting problems; see slide 116 for an example)
•
scrub
:
Current status of a scrub operation This information is distinct from whether any
scrub
:
Current
status
of
a
scrub
operation
.
This
information
is
distinct
from
whether
any
errors are detected on the system, although this information can be used to determine
the accuracy of the data corruption error reporting. If the last scrub ended recently, it is
likely that any known data corruption has been discovered.
•errors:Known data errors or the absence of known data errors. ZFS maintains a
persistent log of all data errors associated with the pool. This log is rotated whenever a
complete scrub of the system finishes. Data corruption errors are always fatal.
Oracle Solaris 11 Advanced System Administration 4 - 111
Cicero Ronaldo (ciceroฺronaldo@gmailฺcom) has a non-transferable
license to use this Student Guideฺ
Unauthorized reproduction or distribution prohibitedฺ Copyright© 2014, Oracle and/or its affiliatesฺ

Interpreting zpool status Output
Configuration (config) field: first section
# zpool status hrpool
pool: hrpool
state: DEGRADED
t t O d i h b t k ffli b th
s
t
a
t
us:
O
ne or more
d
ev
i
ces
h
as
b
een
t
a
k
en o
ffli
ne
b
y
th
e
administrator. Sufficient replicas exist for the pool to
continue functioning in a degraded state.
action: Online the device using ’zpool online’ or replace the
device with ’zpool replace’.
scrub: none requested
config:
NAME
STATE
READ WRITE CKSUM
NAME
STATE
READ
WRITE
CKSUM
hrpool DEGRADED 0 0 0
mirror-0 DEGRADED 0 0 0
c1t0d0 ONLINE 0 0 0
c1t1d0 OFFLINE 0 0 0
errors: No known data errors
The configuration (config) field in the zpool status output, which is highlighted in the
example in the slide, describes the configuration layout of the devices comprising the pool,
their state, and any errors generated from the devices.
Copyright © 2013, Oracle and/or its affiliates. All rights reserved.
The state can be one of the following: ONLINE, DEGRADED, FAULTED, OFFLINE, REMOVED,
or UNAVAIL.
If the state is anything but ONLINE, the fault tolerance of the pool has been compromised.
Oracle Solaris 11 Advanced System Administration 4 - 112
Cicero Ronaldo (ciceroฺronaldo@gmailฺcom) has a non-transferable
license to use this Student Guideฺ
Unauthorized reproduction or distribution prohibitedฺ Copyright© 2014, Oracle and/or its affiliatesฺ

Interpreting zpool status Output
Configuration (config) field: second section
# zpool status hrpool
pool: hrpool
state: DEGRADED
t t O d i h b t k ffli b th
s
t
a
t
us:
O
ne or more
d
ev
i
ces
h
as
b
een
t
a
k
en o
ffli
ne
b
y
th
e
administrator. Sufficient replicas exist for the pool to
continue functioning in a degraded state.
action: Online the device using ’zpool online’ or replace the
device with ’zpool replace’.
scrub: none requested
config:
NAME
STATE
READ WRITE CKSUM
NAME
STATE
READ
WRITE
CKSUM
hrpool DEGRADED 0 0 0
mirror-0 DEGRADED 0 0 0
c1t0d0 ONLINE 0 0 0
c1t1d0 OFFLINE 0 0 0
errors: No known data errors
The second section of the configuration output, which is highlighted in the example in the
slide, displays error statistics (that is, the number of errors). These errors are divided into
three categories:
Copyright © 2013, Oracle and/or its affiliates. All rights reserved.
•READ: The I/O error occurred while issuing a read request.
•WRITE: The I/O error occurred while issuing a write request.
•CKSUM: Checksum error. The device returned corrupted data as the result of a read
request.
These errors can be used to determine if the damage is permanent.
Oracle Solaris 11 Advanced System Administration 4 - 113
Cicero Ronaldo (ciceroฺronaldo@gmailฺcom) has a non-transferable
license to use this Student Guideฺ
Unauthorized reproduction or distribution prohibitedฺ Copyright© 2014, Oracle and/or its affiliatesฺ

Determining Problems in a ZFS Storage Pool
ZFS displays syslog messages for the following:
•Device state transition
•Data corruption
•
Pool failures and device failures
•
Pool
failures
and
device
failures
In addition to persistently keeping track of errors within the pool, ZFS also displays syslog
messages when events of interest occur.
The following scenarios generate events to notify the administrator:
Copyright © 2013, Oracle and/or its affiliates. All rights reserved.
The
following
scenarios
generate
events
to
notify
the
administrator:
•Device state transition
•Data corruption
•Pool failures and device failures
Oracle Solaris 11 Advanced System Administration 4 - 114
Cicero Ronaldo (ciceroฺronaldo@gmailฺcom) has a non-transferable
license to use this Student Guideฺ
Unauthorized reproduction or distribution prohibitedฺ Copyright© 2014, Oracle and/or its affiliatesฺ

Repairing a Damaged ZFS Configuration
•ZFS maintains a cache of active pools and their
configuration on the root file system in
/etc/zfs/zpool.cache.
•To recover the confi
g
uration
,
y
ou can:
g,y
–Export the pool (if it is visible at all)
–Re-import it
ZFS maintains a cache of active pools and their configurations on the root file system in
/etc/zfs/zpool.cache.
If this file is corrupted or somehow becomes out of sync with what is stored on disk, the pool
Copyright © 2013, Oracle and/or its affiliates. All rights reserved.
If
this
file
is
corrupted
or
somehow
becomes
out
of
sync
with
what
is
stored
on
disk,
the
pool
can no longer be opened.
ZFS tries to avoid this situation, although arbitrary corruption is always possible.
This situation typically results in a pool disappearing from the system when it should
otherwise be available. This situation can also occur as a partial configuration that is missing
an unknown number of top-level virtual devices.
In either case, you can recover the configuration by exporting the pool (if it is visible at all) and
In
either
case,
you
can
recover
the
configuration
by
exporting
the
pool
(if
it
is
visible
at
all)
and
re-importing it.
Oracle Solaris 11 Advanced System Administration 4 - 115
Cicero Ronaldo (ciceroฺronaldo@gmailฺcom) has a non-transferable
license to use this Student Guideฺ
Unauthorized reproduction or distribution prohibitedฺ Copyright© 2014, Oracle and/or its affiliatesฺ

Repairing a Missing Device
If a device cannot be opened, UNAVAIL is displayed in the
zpool status output.
# zpool status hrpool
p
ool: hr
p
ool
pp
state: DEGRADED
status: One or more devices could not be opened. Sufficient replicas exist for
the pool to continue functioning in a degraded state.
action: Attach the missing device and online it using 'zpool online'.
see: http://www.sun.com/msg/ZFS-8000-2Q
scrub: none requested
config:
NAME STATE READ WRITE CKSUM
hrpool DEGRADED 0 0 0
hrpool
DEGRADED
0
0
0
mirror-0 DEGRADED 0 0 0
c1t0d0 ONLINE 0 0 0
c1t1d0 UNAVAIL 0 0 0 cannot open
errors: No known data errors
If a device cannot be opened, it appears as UNAVAIL in the zpool status output, as
highlighted in the example in the slide.
Copyright © 2013, Oracle and/or its affiliates. All rights reserved.
Oracle Solaris 11 Advanced System Administration 4 - 116
Cicero Ronaldo (ciceroฺronaldo@gmailฺcom) has a non-transferable
license to use this Student Guideฺ
Unauthorized reproduction or distribution prohibitedฺ Copyright© 2014, Oracle and/or its affiliatesฺ

Repairing a Missing Device
•An UNAVAIL status means that:
–The device could not be opened when the pool was first
accessed
–
The device has since become unavailable
•If the device causes a top-level virtual device to be
unavailable, nothing in the pool can be accessed.
•To restore normal operation, reattach the device to the
system.
An UNAVAIL status means that ZFS was unable to open the device when the pool was first
accessed, or that the device has since become unavailable.
If the device causes a top
-
level virtual device to be unavailable, nothing in the pool can be
Copyright © 2013, Oracle and/or its affiliates. All rights reserved.
If
the
device
causes
a
top
level
virtual
device
to
be
unavailable,
nothing
in
the
pool
can
be
accessed. This is to avoid the possibility of the fault tolerance of the pool being compromised.
In either case, the device simply needs to be reattached to the system to restore normal
operation. You now look at how this can be done.
Oracle Solaris 11 Advanced System Administration 4 - 117
Cicero Ronaldo (ciceroฺronaldo@gmailฺcom) has a non-transferable
license to use this Student Guideฺ
Unauthorized reproduction or distribution prohibitedฺ Copyright© 2014, Oracle and/or its affiliatesฺ
Reattaching a Device
Device Type Action
Network-attached drive
Restore connectivity.
Rhh
USB or other removable
media
R
eattac
h
to t
h
e system.
Local disk
Determine if it is a disk or controller problem.
Exactly how a missing device is reattached depends on the device in question:
• If the device is a network-attached drive, connectivity should be restored.
•
If the device is a USB or other removable media it should be reattached to the system
Copyright © 2013, Oracle and/or its affiliates. All rights reserved.
•
If
the
device
is
a
USB
or
other
removable
media
,
it
should
be
reattached
to
the
system
.
• If the device is a local disk, a controller may have failed resulting in the device being no
longer visible to the system. In this case, the controller should be replaced, at which
point the disks will be available again.
Oracle Solaris 11 Advanced System Administration 4 - 118
Cicero Ronaldo (ciceroฺronaldo@gmailฺcom) has a non-transferable
license to use this Student Guideฺ
Unauthorized reproduction or distribution prohibitedฺ Copyright© 2014, Oracle and/or its affiliatesฺ

Repairing a Missing Device
•ZFS may not automatically detect device availability if:
–The pool was degraded
–The device was replaced while the system was up
•
Use
zpool
online
to notify ZFS that the device is now
Use
zpool
online
to
notify
ZFS
that
the
device
is
now
available and ready to be reopened.
# zpool online hrpool c0t1d0
After a device is reattached to the system, ZFS may or may not automatically detect its
availability.
If the pool was previously faulted, or the system was rebooted as part of the attach procedure,
Copyright © 2013, Oracle and/or its affiliates. All rights reserved.
If
the
pool
was
previously
faulted,
or
the
system
was
rebooted
as
part
of
the
attach
procedure,
ZFS automatically rescans all devices when it tries to open the pool.
However, if the pool was degraded and the device was replaced while the system was up,
you must notify ZFS that the device is now available and ready to be reopened by using the
zpool online command, as shown in the example in the slide, where you are bringing
device c0t1d0 back into the pool named hrpool.
Oracle Solaris 11 Advanced System Administration 4 - 119
Cicero Ronaldo (ciceroฺronaldo@gmailฺcom) has a non-transferable
license to use this Student Guideฺ
Unauthorized reproduction or distribution prohibitedฺ Copyright© 2014, Oracle and/or its affiliatesฺ

Repairing a Damaged Device
This section covers the following topics:
•Determining the cause of device failure
•Clearing transient errors
•
Replacing a device in a ZFS storage pool
•
Replacing
a
device
in
a
ZFS
storage
pool
•Viewing resilvering status
Copyright © 2013, Oracle and/or its affiliates. All rights reserved.
Oracle Solaris 11 Advanced System Administration 4 - 120
Cicero Ronaldo (ciceroฺronaldo@gmailฺcom) has a non-transferable
license to use this Student Guideฺ
Unauthorized reproduction or distribution prohibitedฺ Copyright© 2014, Oracle and/or its affiliatesฺ

Determining the Cause of Device Failure
Possible causes of device failure
•Bit rot
•Misdirected reads or writes
•
Administrator error
•
Administrator
error
•Temporary outage
•Bad or flaky hardware
•Offlined device
If you have a device failure, the first thing that you must do is to determine what caused the
device to fail. The damage to the device could have been caused by a several possible
situations:
Copyright © 2013, Oracle and/or its affiliates. All rights reserved.
•Bit rot
•Misdirected reads or writes
•Administrator error
•Temporary outage
•Bad or flaky hardware
•
Offlined device
•
Offlined
device
So how do you determine what caused the damage?
Oracle Solaris 11 Advanced System Administration 4 - 121
Cicero Ronaldo (ciceroฺronaldo@gmailฺcom) has a non-transferable
license to use this Student Guideฺ
Unauthorized reproduction or distribution prohibitedฺ Copyright© 2014, Oracle and/or its affiliatesฺ

Determining the Cause of Device Failure
Use zpool status –v to examine the error counts.
# zpool status -v
pool: hrpool
state: UNAVAIL
status: One or more devices are faulted in response to IO failures.
action: Make sure the affected devices are connected, then run 'zpool
clear'.
see: http://www.sun.com/msg/ZFS-8000-HC
scrub: scrub completed after 0h0m with 0 errors on Tue Oct 4 13:08:42 2011
config:
NAME STATE READ WRITE CKSUM
hrpool UNAVAIL 0 0 0 insufficient replicas
c1t0d0 ONLINE 0 0 0
c1t1d0 UNAVAIL 4 1 0 cannot o
p
en
p
errors: Permanent errors have been detected in the following files:
/hrpool/data/aaa
/hrpool/data/bbb
/hrpool/data/ccc
The first step is to examine the error counts in the zpool status output by using the zpool
status –v command, as shown in the example in the slide.
The errors are divided into I/O errors and checksum errors, both of which may indicate the
Copyright © 2013, Oracle and/or its affiliates. All rights reserved.
The
errors
are
divided
into
I/O
errors
and
checksum
errors,
both
of
which
may
indicate
the
possible failure type.
A typical operation predicts a very small number of errors (just a few over long periods of
time).
If you are seeing large numbers of errors, the situation probably indicates impending or
complete device failure.
A
l
so
ta
k
e
so
m
e
t
im
e
to
r
ead
t
h
e
kn
o
wl
edge
a
r
t
i
c
l
e
t
h
at
i
s
r
e
f
e
r
e
n
ced
in
t
h
e
see
sect
i
o
n
o
f
t
h
e
so ta e so e t e to ead t e o edge a t c e t at s e e e ced t e
see
sect o o t e
zpool status output. It contains detailed repair information that you might find useful.
Oracle Solaris 11 Advanced System Administration 4 - 122
Cicero Ronaldo (ciceroฺronaldo@gmailฺcom) has a non-transferable
license to use this Student Guideฺ
Unauthorized reproduction or distribution prohibitedฺ Copyright© 2014, Oracle and/or its affiliatesฺ

Determining the Cause of Device Failure
Check the system log:
•A large number of SCSI or fibre channel driver messages
indicates serious hardware problems.
•
If no
syslog
messages are generated damage is likely to
If
no
syslog
messages
are
generated
,
damage
is
likely
to
be transient.
The other source of information is the system log. If the log shows a large number of SCSI or
fibre channel driver messages, the situation probably indicates serious hardware problems.
If no
syslog
messages are generated, the damage is likely to be transient.
Copyright © 2013, Oracle and/or its affiliates. All rights reserved.
If
no
syslog
messages
are
generated,
the
damage
is
likely
to
be
transient.
The question to ask is: Is another error likely to occur on this device?
If the answer to this question is “No,” you can clear the transient errors. You now take a brief
look at how to do this.
Oracle Solaris 11 Advanced System Administration 4 - 123
Cicero Ronaldo (ciceroฺronaldo@gmailฺcom) has a non-transferable
license to use this Student Guideฺ
Unauthorized reproduction or distribution prohibitedฺ Copyright© 2014, Oracle and/or its affiliatesฺ

Clearing Transient Errors
•To clear the error counters for RAID-Z or mirrored devices
and to clear any errors associated with the device, use
zpool clear poolname devicename.
# l l h l 1t0d0
•To clear all errors associated with the virtual devices in the
pool and to clear any data error counts associated with the
pool, use zpool clear poolname.
#
zpoo
l
c
l
ear
h
rpoo
l
c
1t0d0
# zpool clear hrpool
If the device errors are deemed to be transient (that is, if they are unlikely to affect the future
health of the device), the device errors can be safely cleared to indicate that no fatal error
occurred.
Copyright © 2013, Oracle and/or its affiliates. All rights reserved.
To clear the error counters for RAID-Z or mirrored devices, use the zpool clear command
followed by the device name, as shown in the first example in the slide. This syntax clears any
errors associated with the device.
To clear all errors associated with the virtual devices in the pool and to clear any data error
counts associated with the pool, use the zpool clear command followed by the pool name.
This is shown in the second example, where the transient errors are being cleared from the
hl
pool
h
rpoo
l
pool
.
Oracle Solaris 11 Advanced System Administration 4 - 124
Cicero Ronaldo (ciceroฺronaldo@gmailฺcom) has a non-transferable
license to use this Student Guideฺ
Unauthorized reproduction or distribution prohibitedฺ Copyright© 2014, Oracle and/or its affiliatesฺ

Replacing a Device in a ZFS Storage Pool
•For a device to be replaced, the device must be part of a
replicated configuration.
•The disk is part of a replicated configuration; therefore,
sufficient re
p
licas from which to retrieve
g
ood data must
pg
exist.
•A device cannot be safely replaced if:
–The loss of a device causes the pool to become faulted
–The device contains too many data errors in an unreplicated
configuration
configuration
If you determine that the damage to the device is permanent or that permanent damage is
likely in the future, you must replace the device. Whether the device can be replaced depends
on the configuration. The device must be part of a replicated configuration. The disk is part of
Copyright © 2013, Oracle and/or its affiliates. All rights reserved.
a replicated configuration; therefore, sufficient replicas from which to retrieve good data must
exist.
If the loss of a device causes the pool to become faulted, or if the device contains too many
data errors in an unreplicated configuration, the device cannot safely be replaced.
Oracle Solaris 11 Advanced System Administration 4 - 125
Cicero Ronaldo (ciceroฺronaldo@gmailฺcom) has a non-transferable
license to use this Student Guideฺ
Unauthorized reproduction or distribution prohibitedฺ Copyright© 2014, Oracle and/or its affiliatesฺ

Replacing a Device in a ZFS Storage Pool
•Use zpool replace poolname devicename to replace
a device with a new device in the same location.
# zpool replace hrpool c1t0d0
•To replace a damaged device with a different device, use
zpool replace poolname devicename devicename.
# zpool replace hrpool c1t0d0 c2t0d0
Use the zpool replace command followed by the pool and device names to replace a
device with a new device in the same location. This is shown in the first example, where you
are replacing the device c1t0d0 in the pool named hrpool.
Copyright © 2013, Oracle and/or its affiliates. All rights reserved.
Or, if the autoreplace property is set, you can physically replace the device in the same
location.
If you are replacing the damaged device with a different device, use the zpool replace
command followed by the pool name, the name of the device that you are replacing, and the
name of the device that is replacing the damaged device. This is shown in the second
example, where you are replacing the damaged device c1t0d0 in the pool named hrpool
with the device
2t0d0
with
the
device
c
2t0d0
.
Oracle Solaris 11 Advanced System Administration 4 - 126
Cicero Ronaldo (ciceroฺronaldo@gmailฺcom) has a non-transferable
license to use this Student Guideฺ
Unauthorized reproduction or distribution prohibitedฺ Copyright© 2014, Oracle and/or its affiliatesฺ

Viewing Resilvering Status
Resilvering:
•Is the process of moving data from one device to another
•Is monitored by using zpool status
•
Resilvers only the minimum amount of necessary data
•
Resilvers
only
the
minimum
amount
of
necessary
data
•Is interruptible and safe
The process of replacing a drive can take an extended period of time, depending on the size
of the drive and the amount of data in the pool.
The process of moving data from one device to another is known as
resilvering
and can be
Copyright © 2013, Oracle and/or its affiliates. All rights reserved.
The
process
of
moving
data
from
one
device
to
another
is
known
as
resilvering
and
can
be
monitored by using the zpool status command. ZFS resilvers only the minimum amount of
necessary data. Resilvering is interruptible and safe.
Oracle Solaris 11 Advanced System Administration 4 - 127
Cicero Ronaldo (ciceroฺronaldo@gmailฺcom) has a non-transferable
license to use this Student Guideฺ
Unauthorized reproduction or distribution prohibitedฺ Copyright© 2014, Oracle and/or its affiliatesฺ

Scrubbing
•Examines all data to discover silent errors due to hardware
faults or disk failure
•Supports automatic repair of any damage discovered
durin
g
the scrub
g
•Is monitored by using zpool status
•Cannot be run if:
–Another scrub is already in progress
–A resilver is in progress
Ib b i
l
b
l
•
I
s
b
egun
b
y us
i
ng zpoo
l
scru
b
p
oo
l
Scrubbing and resilvering are very similar operations. The difference is that resilvering
examines only data that ZFS knows to be out of date (for example, when attaching a new
device to a mirror or replacing an existing device), whereas scrubbing examines all data to
Copyright © 2013, Oracle and/or its affiliates. All rights reserved.
discover silent errors due to hardware faults or disk failure.
The scrub examines all data in specified pools to verify that it checksums correctly. For
replicated (mirror or raidz) devices, ZFS automatically repairs any damage discovered during
the scrub. The zpool status command reports the progress of the scrub and summarizes
the results of the scrub after completion.
Because scrubbing and resilvering are I/O-intensive operations, ZFS allows only one at a
time If a scrub is in progress a subsequent
l
b
returns an error with the advice to
time
.
If
a
scrub
is
in
progress
,
a
subsequent
zpoo
l
scru
b
returns
an
error
,
with
the
advice
to
use zpool scrub -s to cancel the current scrub. If a resilver is in progress, ZFS does not
allow a scrub to be started until the resilver completes.
To begin the scrub operation, you use zpool scrub pool.
Oracle Solaris 11 Advanced System Administration 4 - 128
Cicero Ronaldo (ciceroฺronaldo@gmailฺcom) has a non-transferable
license to use this Student Guideฺ
Unauthorized reproduction or distribution prohibitedฺ Copyright© 2014, Oracle and/or its affiliatesฺ

Repairing Damaged Data
This section covers the following topics:
•Data corruption overview
•Identifying the type of data corruption
•
Repairing a corrupted file or directory
•
Repairing
a
corrupted
file
or
directory
•Repairing ZFS storage pool–wide damage
Copyright © 2013, Oracle and/or its affiliates. All rights reserved.
Oracle Solaris 11 Advanced System Administration 4 - 129
Cicero Ronaldo (ciceroฺronaldo@gmailฺcom) has a non-transferable
license to use this Student Guideฺ
Unauthorized reproduction or distribution prohibitedฺ Copyright© 2014, Oracle and/or its affiliatesฺ

Data Corruption: Overview
•Data corruption can occur if:
–The pool is not replicated
–Corruption occurred while the pool was degraded
–
An unlikely series of events conspired to corrupt multiple
An
unlikely
series
of
events
conspired
to
corrupt
multiple
copies of a piece of data
•Two basic types of data can be corrupted:
–Pool metadata
–Object data
ZFS uses checksumming, replication, and self-healing data to minimize the chances of data
corruption. ZFS verifies data during normal operation, as well as through scrubbing.
Nonetheless, data corruption can occur if the pool is not replicated, if corruption occurred
Copyright © 2013, Oracle and/or its affiliates. All rights reserved.
Nonetheless,
data
corruption
can
occur
if
the
pool
is
not
replicated,
if
corruption
occurred
while the pool was degraded, or if an unlikely series of events corrupted multiple copies of a
piece of data.
Two basic types of data can be corrupted:
•Pool metadata
•Object data
Oracle Solaris 11 Advanced System Administration 4 - 130
Cicero Ronaldo (ciceroฺronaldo@gmailฺcom) has a non-transferable
license to use this Student Guideฺ
Unauthorized reproduction or distribution prohibitedฺ Copyright© 2014, Oracle and/or its affiliatesฺ
Identifying the Type of Data Corruption
Use zpool status –v poolname to identify the type of
data corruption.
Object data corruption example:
# zpool status hrpool -v
pool: hrpool
state: ONLINE
status: One or more devices has experienced an error resulting in data
corruption. Applications may be affected.
action: Restore the file in question if possible. Otherwise restore
the entire pool from backup.
see: http://www sun com/msg/ZFS
-
8000
-
8A
see:
http://www
.
sun
.
com/msg/ZFS
8000
8A
<output omitted>
errors: Permanent errors have been detected in the following files:
/hrpool/data/abc
/hrpool/data/def.txt
/hrpool/data/ghi.txt
The zpool status -v command shows that corruption has occurred; it also shows where
the corruption occurred.
The code output in the slide is an example of object data corruption. Notice that the state of
Copyright © 2013, Oracle and/or its affiliates. All rights reserved.
The
code
output
in
the
slide
is
an
example
of
object
data
corruption.
Notice
that
the
state
of
the pool called hrpool is ONLINE but the status reveals that “One or more devices has
experienced an error resulting in data corruption.” Notice also that the
errors section lists several files in which errors have been detected.
Oracle Solaris 11 Advanced System Administration 4 - 131
Cicero Ronaldo (ciceroฺronaldo@gmailฺcom) has a non-transferable
license to use this Student Guideฺ
Unauthorized reproduction or distribution prohibitedฺ Copyright© 2014, Oracle and/or its affiliatesฺ

Identifying the Type of Data Corruption
Pool metadata corruption example:
# zpool status -v sales
pool: sales
id: 1422736890544688191
state FAULTED
state
:
FAULTED
status: The pool metadata is corrupted.
action: The pool cannot be imported due to damaged devices or data.
see: http://www.sun.com/msg/ZFS-8000-72
config:
sales FAULTED corrupted data
c1t1d0 ONLINE
If the data corruption is in pool-wide metadata, the output is slightly different, as shown in this
example. Notice that the state of the pool called sales is FAULTED and the status is “The
pool metadata is corrupted.”
Copyright © 2013, Oracle and/or its affiliates. All rights reserved.
Oracle Solaris 11 Advanced System Administration 4 - 132
Cicero Ronaldo (ciceroฺronaldo@gmailฺcom) has a non-transferable
license to use this Student Guideฺ
Unauthorized reproduction or distribution prohibitedฺ Copyright© 2014, Oracle and/or its affiliatesฺ

Repairing a Corrupted File or Directory
•The system may still be able to function.
•Any damage is effectively unrecoverable.
•No good copies of the data exist anywhere on the system.
•
If the data is valuable restore the affected data from
•
If
the
data
is
valuable
,
restore
the
affected
data
from
backup.
•If the damage is within a file data block, remove the file.
If a file or directory is corrupted, the system may still be able to function, depending on the
type of corruption.
Any damage is effectively unrecoverable. No good copies of the data exist anywhere on the
Copyright © 2013, Oracle and/or its affiliates. All rights reserved.
Any
damage
is
effectively
unrecoverable.
No
good
copies
of
the
data
exist
anywhere
on
the
system.
If the data is valuable, your only choice is to restore the affected data from backup.
If the damage is within a file data block, the file can safely be removed, thereby clearing the
error from the system.
Oracle Solaris 11 Advanced System Administration 4 - 133
Cicero Ronaldo (ciceroฺronaldo@gmailฺcom) has a non-transferable
license to use this Student Guideฺ
Unauthorized reproduction or distribution prohibitedฺ Copyright© 2014, Oracle and/or its affiliatesฺ

Repairing ZFS Storage Pool–Wide Damage
If you cannot open or import a pool because of damage to the
pool metadata, you must perform either of the following:
•Attempt to recover the pool by using zpool clear –F
p
oolnam
e
or z
p
ool im
p
ort –F
p
oolnam
e
.
p
p
p
p
–An attempt is made to roll back to an operational state.
–To review a damaged pool and see recommended recovery
steps, use zpool status.
•Restore the pool and all its data from a backup copy.
–
Save the pool configuration as displayed in
zpool
status
Save
the
pool
configuration
as
displayed
in
zpool
status
.
–Destroy the pool by using zpool destroy -f poolname.
–Keep a file of the data set layout and local property settings.
–Reconstruct the complete pool configuration.
–Populate the data by using the backup / restore strategy.
If the damage is in pool metadata, and if that damage prevents the pool from being opened or
imported, you have two options.
•You can attem
p
t to recover the
p
ool b
y
usin
g
the z
p
ool clear -F command or the
Copyright © 2013, Oracle and/or its affiliates. All rights reserved.
ppyg
p
zpool import -F command followed by the pool name. These commands attempt to
roll back the last few pool transactions to an operational state. You can use the zpool
status command to review a damaged pool and the recommended recovery steps.
•If the pool cannot be recovered by the pool recovery method, you must restore the pool
and all its data from a backup copy. The approach that you use to restore the pool
varies widely depending on the pool configuration and backup strategy. First, save the
configuration as displayed by the
zpool
status
command so that you can re
-
create it
configuration
as
displayed
by
the
zpool
status
command
so
that
you
can
re
-
create
it
after the pool is destroyed. Then use the zpool destroy -f command to destroy the
pool. In addition, you should keep a file that describes the layout of the data sets and the
various locally set properties in a safe place, because this information becomes
inaccessible if the pool is ever rendered inaccessible. With the pool configuration and
data set layout, you can reconstruct your complete configuration after destroying the
pool. You can then populate the data by using whatever backup or restoration strategy
you use
you
use
.
Oracle Solaris 11 Advanced System Administration 4 - 134
Cicero Ronaldo (ciceroฺronaldo@gmailฺcom) has a non-transferable
license to use this Student Guideฺ
Unauthorized reproduction or distribution prohibitedฺ Copyright© 2014, Oracle and/or its affiliatesฺ

Practice 4-5 Overview:
Troubleshooting ZFS Failures
Troubleshooting
ZFS
Failures
This practice covers the troubleshooting of:
•ZFS device issues
•ZFS data errors in a mirror pool
This practice should take about 30 minutes to complete.
Copyright © 2013, Oracle and/or its affiliates. All rights reserved.
Oracle Solaris 11 Advanced System Administration 4 - 135
Cicero Ronaldo (ciceroฺronaldo@gmailฺcom) has a non-transferable
license to use this Student Guideฺ
Unauthorized reproduction or distribution prohibitedฺ Copyright© 2014, Oracle and/or its affiliatesฺ

Summary
In this lesson, you should have learned how to:
•Implement a plan for data storage configuration and
backup
•
Manage data redundancy with a mirrored storage pool
Manage
data
redundancy
with
a
mirrored
storage
pool
•Configure data backup and restore by using ZFS
snapshots
•Manage data storage space by using ZFS file system
properties
T bl h t ZFS i
•
T
rou
bl
es
h
oo
t
ZFS
i
ssues
In this lesson, you were shown how to implement a plan for data storage configuration and
backup. You learned how to provide data redundancy for your company’s business
application data by configuring a mirrored storage pool. You were also taught how to use
Copyright © 2013, Oracle and/or its affiliates. All rights reserved.
snapshots to back up and recover data. You were shown how to manage data storage space
by using several ZFS file system properties. Finally, you were shown how to troubleshoot
several ZFS issues that have to do with devices and data.
Oracle Solaris 11 Advanced System Administration 4 - 136
Cicero Ronaldo (ciceroฺronaldo@gmailฺcom) has a non-transferable
license to use this Student Guideฺ
Unauthorized reproduction or distribution prohibitedฺ Copyright© 2014, Oracle and/or its affiliatesฺ

C fi i N t k d T ffi F il
C
on
fi
gur
i
ng
N
e
t
wor
k
an
d
T
ra
ffi
c
F
a
il
over
Copyright © 2013, Oracle and/or its affiliates. All rights reserved.
Cicero Ronaldo (ciceroฺronaldo@gmailฺcom) has a non-transferable
license to use this Student Guideฺ
Unauthorized reproduction or distribution prohibitedฺ Copyright© 2014, Oracle and/or its affiliatesฺ

Objectives
After completing this lesson, you should be able to:
•Implement a plan for network and traffic failover
configuration
•
Configure the following:
Configure
the
following:
–Systems on a local network
–A reactive network
–Network File System
–Link aggregation
AIPMP
–
A
n
IPMP
group
•Implement link failover by using IPMP
•Monitor an IPMP group
In this lesson, you learn how to configure and monitor an IP multipathing (IPMP) group on an
existing local network for traffic failover in accordance with a plan. In addition, you are
introduced to and shown how to configure a reactive network and Network File System (NFS).
Copyright © 2013, Oracle and/or its affiliates. All rights reserved.
Oracle Solaris 11 Advanced System Administration 5 - 2
Cicero Ronaldo (ciceroฺronaldo@gmailฺcom) has a non-transferable
license to use this Student Guideฺ
Unauthorized reproduction or distribution prohibitedฺ Copyright© 2014, Oracle and/or its affiliatesฺ
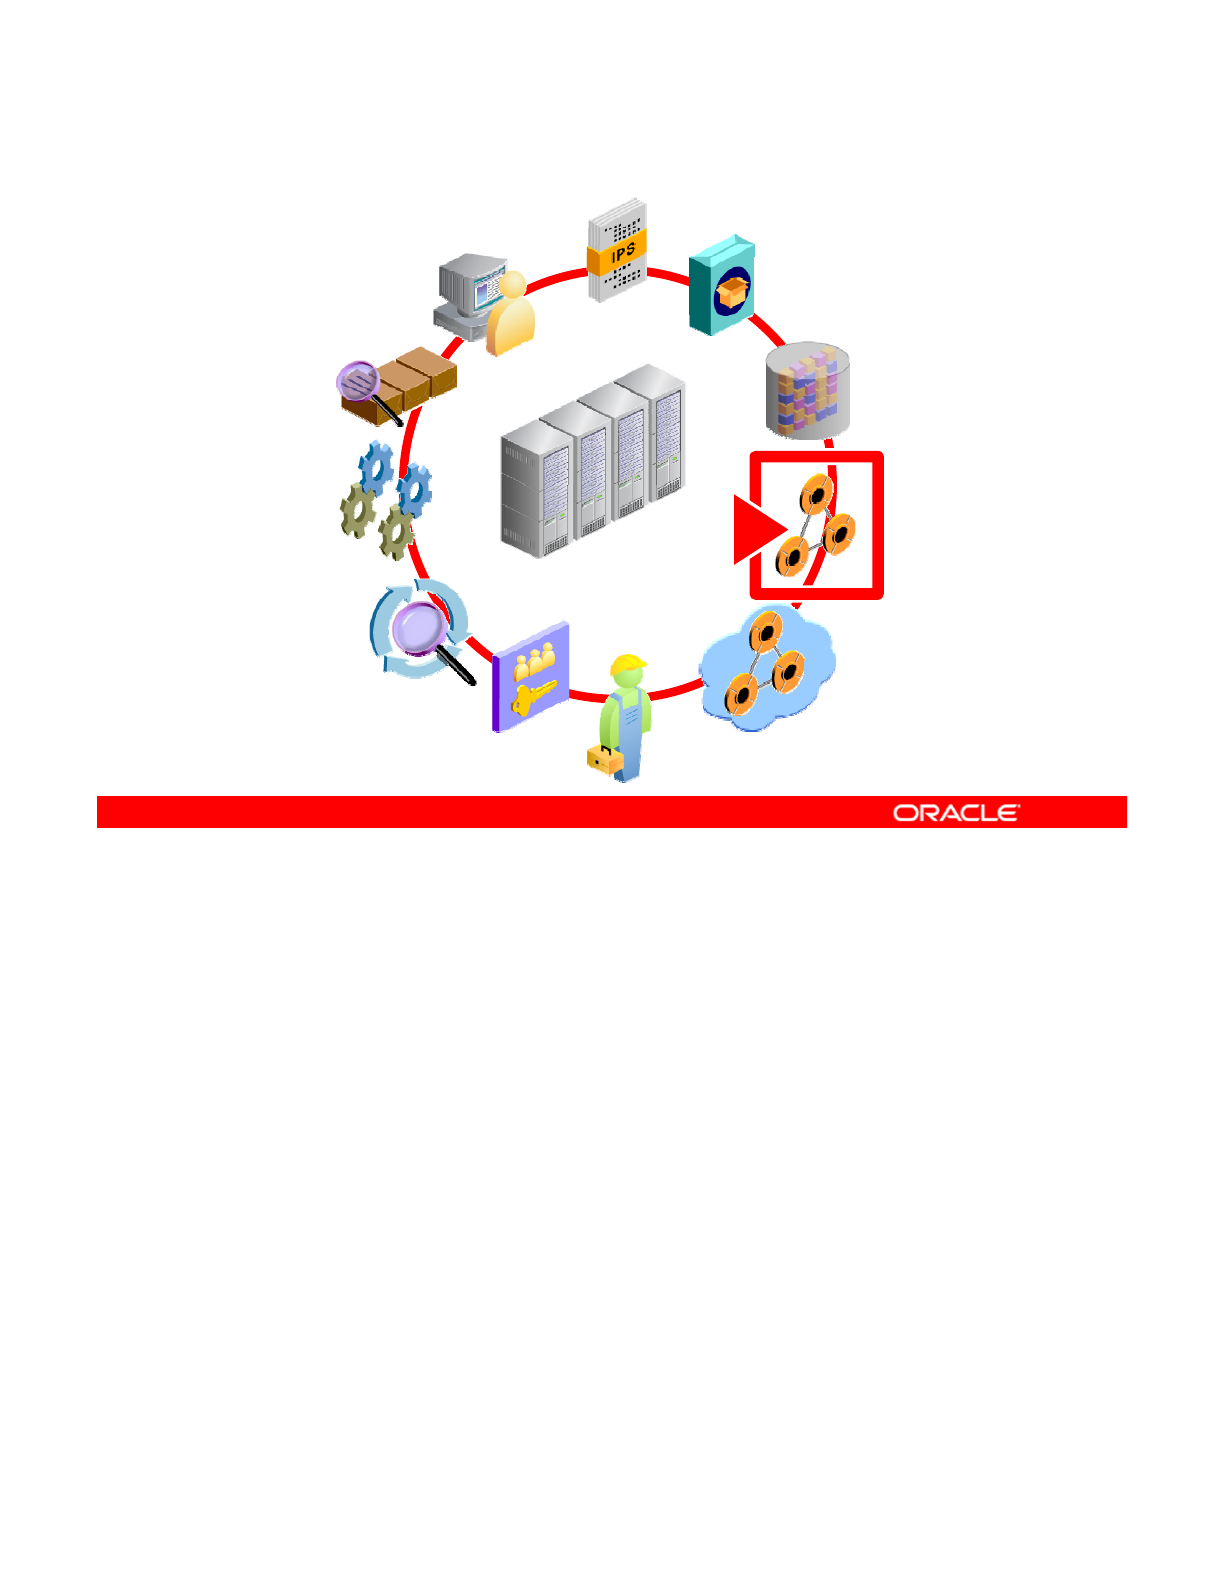
Workflow Orientation
AI INSTALL
IPS
DATA
STORAGE
MONITORING
RESOURCE
EVALUATION
STORAGE
NETWORK
CONFIGURATION
PROCESSES
ENTERPRISE
DATACENTER
EVALUATION
SERVICES
PRIVILEGES
AUDITING
DATACENTER
NETWORK
VIRTUALIZATION
Before you begin the lesson, take just a moment to orient yourself in the job workflow. You
have successfully installed the operating system and have updated it. You have configured
the data storage environment and are now ready to configure the physical network. In an
Copyright © 2013, Oracle and/or its affiliates. All rights reserved.
enterprise environment, as a general practice, the client and server machines are all
networked together. The application data is transmitted over the network to the data storage
medium, such as databases. The users interact with the database for query and update
purposes. If network connectivity is not working optimally, the whole data transmission
operation is affected. As a system administrator, it is your responsibility to ensure the network
is configured appropriately and is always operational.
Oracle Solaris 11 Advanced System Administration 5 - 3
Cicero Ronaldo (ciceroฺronaldo@gmailฺcom) has a non-transferable
license to use this Student Guideฺ
Unauthorized reproduction or distribution prohibitedฺ Copyright© 2014, Oracle and/or its affiliatesฺ

Lesson Agenda
•Planning for Network and Traffic Failover
• Configuring Systems on a Local Network
• Configuring a Reactive Network
•
Configuring Network File System
•
Configuring
Network
File
System
• Configuring Link Aggregation
• Configuring an IPMP Group
• Implementing Link Failover by Using IPMP
• Monitorin
g
an IPMP Grou
p
gp
Copyright © 2013, Oracle and/or its affiliates. All rights reserved.
Oracle Solaris 11 Advanced System Administration 5 - 4
Cicero Ronaldo (ciceroฺronaldo@gmailฺcom) has a non-transferable
license to use this Student Guideฺ
Unauthorized reproduction or distribution prohibitedฺ Copyright© 2014, Oracle and/or its affiliatesฺ

Planning for Network and Traffic Failover
Network and traffic failover planning is required to ensure that:
•Network needs of the business and the user community
are supported
•
Network communications remain uninterrupted
Network
communications
remain
uninterrupted
•Network performance is good
Your company wants assurance that the new operating system will support the user
community’s needs. Given the amount of network traffic your company has on a daily basis,
and the number of transactions that occur over the network—both internal and external to the
Copyright © 2013, Oracle and/or its affiliates. All rights reserved.
company—the business cannot afford unplanned network down time. As part of your
company’s predeployment testing plan, your group will be focused on testing network
connectivity functionality and performance with the goal of ensuring that when the operating
system is deployed, the network configuration supports both uninterrupted network
communications and good network performance.
In this topic you are introduced to several key Oracle Solaris 11 network features that will
enable you to meet your company
’
s network connectivity requirements
enable
you
to
meet
your
company s
network
connectivity
requirements
.
Oracle Solaris 11 Advanced System Administration 5 - 5
Cicero Ronaldo (ciceroฺronaldo@gmailฺcom) has a non-transferable
license to use this Student Guideฺ
Unauthorized reproduction or distribution prohibitedฺ Copyright© 2014, Oracle and/or its affiliatesฺ
Configuring a Host For TCP/IP
Network configuration checklist:
IP addresses
Netmask
Domain name
Domain
name
Name service
Default router
After a network is physically in place, the network configuration process involves configuring
the network interfaces and associated IP addresses. Daemons and services that implement
the TCP/IP protocol are made available to the system based on this configuration or acquired
Copyright © 2013, Oracle and/or its affiliates. All rights reserved.
from the network configuration server, known as network client mode.
A typical TCP/IP network configuration requires the following information:
•IP address of each network interface on every system. The address scheme can be IP
version 4 (IPv4) or IP version 6 (IPv6) and it may include subnet addressing.
•Netmask in use on each system’s network and subnetmask, if applicable
•Name service or director
y
service that
y
our network uses, such as NIS, LDAP, or DNS
yy
•Domain name for your network, such as oracle.com
•Default router addresses
Oracle Solaris 11 Advanced System Administration 5 - 6
Cicero Ronaldo (ciceroฺronaldo@gmailฺcom) has a non-transferable
license to use this Student Guideฺ
Unauthorized reproduction or distribution prohibitedฺ Copyright© 2014, Oracle and/or its affiliatesฺ
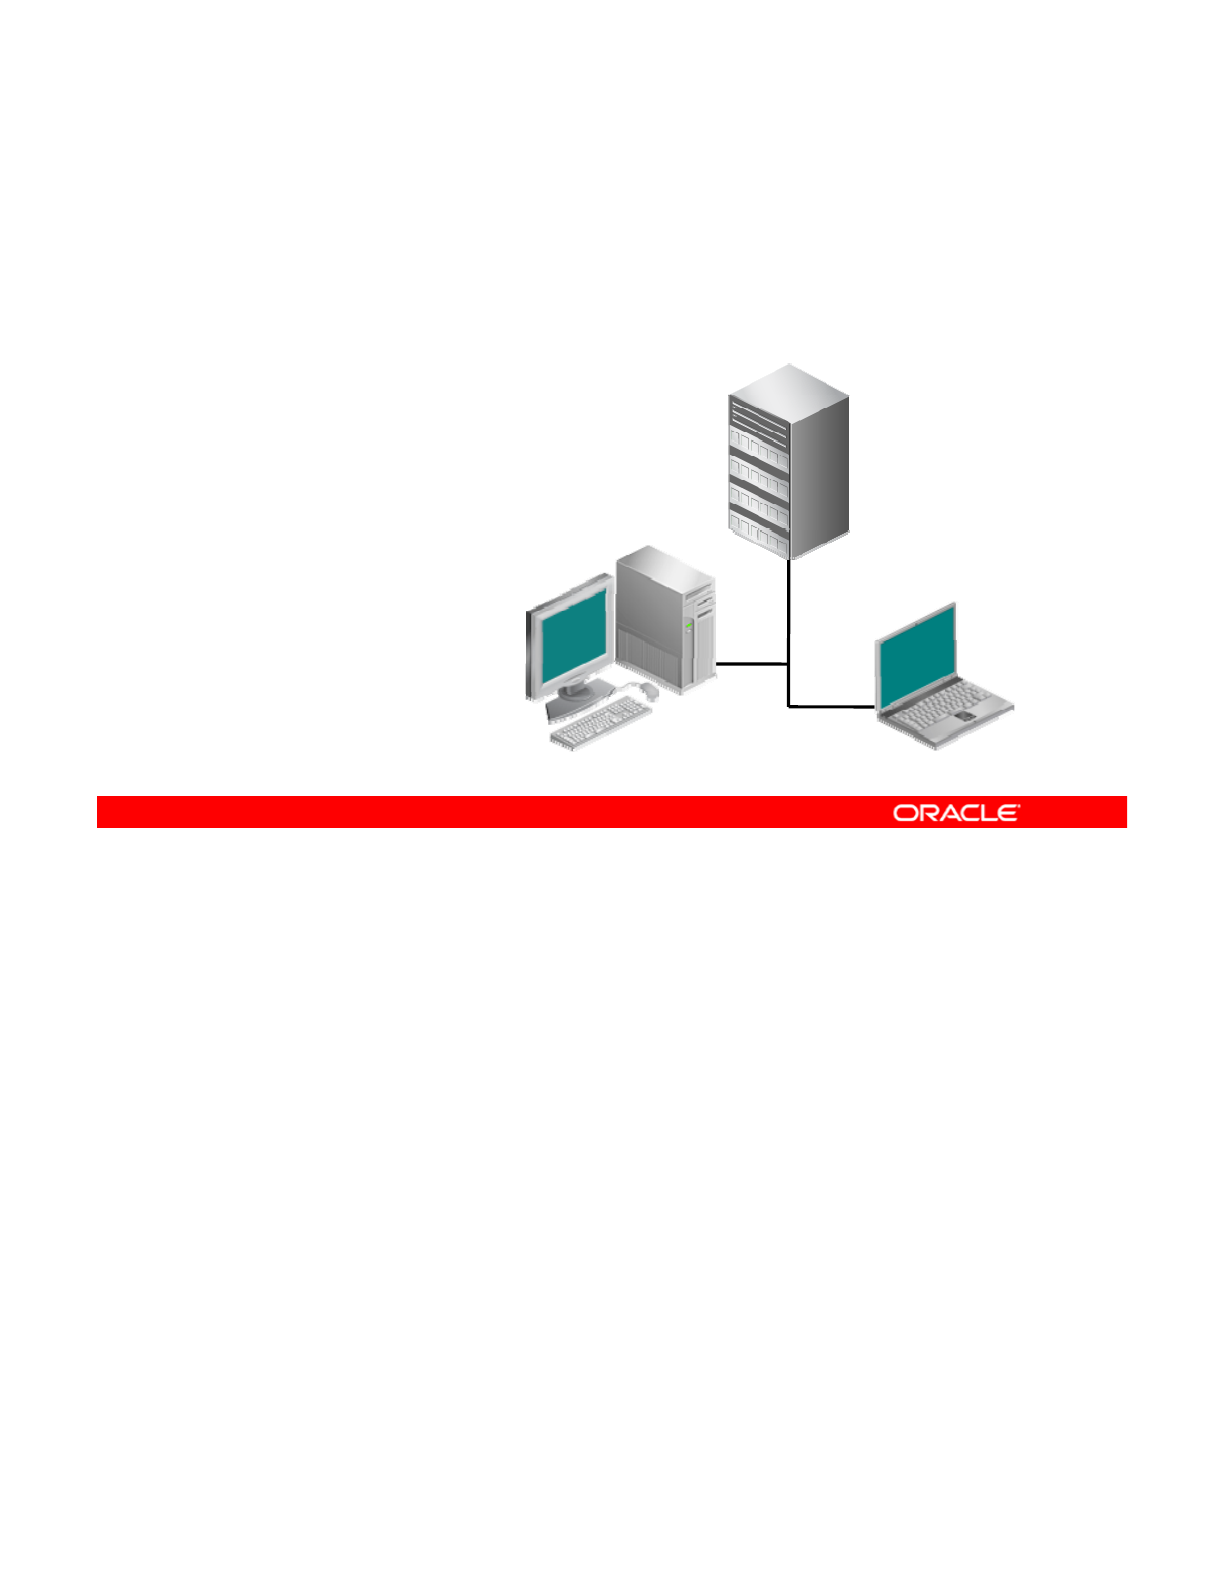
Configuring Network Services
•RARP/ARP
•TFTP
•NFS
•
Name service
TCP/IP
Server
•
Name
service
–NIS, LDAP, DNS
Network Client Network Client
If there is at least one host configured as a network client, then there must be at least one
machine, usually configured locally, that supplies the TCP/IP configuration information and
other directory services and acts as a server for the clients. The server can be configured with
Copyright © 2013, Oracle and/or its affiliates. All rights reserved.
different protocols, such as:
•Reverse Address Resolution Protocol (RARP): Maps Ethernet addresses to IPv4
addresses and is the reverse of ARP. Clients obtain their IP addresses by using this
service.
•Trivial File Transfer Protocol (TFTP): An application that allows for the transfer of files
between systems
Nt kFil S (NFS)
Ebl littt tl dtf fil
•
N
e
t
wor
k
Fil
e
S
ervers
(NFS)
:
E
na
bl
es c
li
en
t
s
t
o
t
ransparen
tl
y access
d
a
t
a
f
rom a
fil
e
server. You will configure an NFS server later in this lesson.
•Name services: For example, NIS, LDAP, and DNS
Oracle Solaris 11 Advanced System Administration 5 - 7
Cicero Ronaldo (ciceroฺronaldo@gmailฺcom) has a non-transferable
license to use this Student Guideฺ
Unauthorized reproduction or distribution prohibitedฺ Copyright© 2014, Oracle and/or its affiliatesฺ
Reactive Network Configuration
Reactive network configuration consists of:
•Network Configuration Profiles (NCPs)
•Location profile
•
Network Configuration Units (NCUs)
Network
Configuration
Units
(NCUs)
•External Network Modifiers (ENMs)
•Known WLANs
In Oracle Solaris 11.1, NWAM has been renamed to reactive network configuration. You can
manage network configuration automatically using the reactive network configuration feature.
Reactive network configuration works according to the default policy rules defined by the
Copyright © 2013, Oracle and/or its affiliates. All rights reserved.
system, or you can customize it using Network Configuration Profiles (NCPs). It is dynamic in
design, so it can respond to a system’s changing configuration. For example, if a laptop is
unplugged from an Ethernet cable, reactive network configuration can automatically connect
to a wireless network. Therefore, location profiles are another big component of reactive
network configuration. They house the systemwide network configuration in both system-
defined and user-defined locations.
Network Configuration Units (NCUs) are containers that store all the individual configuration
Network
Configuration
Units
(NCUs)
are
containers
that
store
all
the
individual
configuration
objects that make up an NCP. Each object correlates to an individual link or interface in the
system.
External Network Modifiers (ENMs) are profiles to manage external applications, such as a
virtual private network (VPN) application.
All the known wireless local area networks (WLANs) to your system are contained in a list that
reactive network confi
g
uration maintains
(
and can reference
)
to help determine the order in
g( )
which connections to available wireless networks are attempted.
Oracle Solaris 11 Advanced System Administration 5 - 8
Cicero Ronaldo (ciceroฺronaldo@gmailฺcom) has a non-transferable
license to use this Student Guideฺ
Unauthorized reproduction or distribution prohibitedฺ Copyright© 2014, Oracle and/or its affiliatesฺ

Network File System
Servers and Clients
Servers
and
Clients
•Server versus client roles
•Advantages of NFS:
–Accesses the same data
–
Reduces storage costs
–
Reduces
storage
costs
–Provides data consistency and reliability
–Provides transparency
–Reduces administration overhead
–Provides heterogeneous environments
Enables automatic file sharing
–
Enables
automatic
file
sharing
The terms client and server are used to describe the roles that a computer assumes when
sharing file systems over a network. The computers that access the files are called clients and
the computers that share their files are called servers. The Network File System (NFS) is a
Copyright © 2013, Oracle and/or its affiliates. All rights reserved.
service that provides file sharing. Any computer can access any other computer’s file systems
as well as its own. A computer can assume the role of a client or server or both at any time.
Clients access the files on the server by mounting the shared file system, thereby accessing it
directly and transparently, just like any other local mount on their system.
The advantages of NFS are numerous. Because multiple computers can access the same
files and the same data, it reduces the storage costs because clients don’t need local disk
space to have copies of the file Sharing the files by using NFS is also transparent to the user
space
to
have
copies
of
the
file
.
Sharing
the
files
by
using
NFS
is
also
transparent
to
the
user
and provides data consistency and reliability throughout all the applications. This reduces the
time that system administrators need to maintain the system. NFS also supports
heterogeneous environments, which is pertinent in today’s multiplatform world, and with NFS
the file sharing can be automatic.
Oracle Solaris 11 Advanced System Administration 5 - 9
Cicero Ronaldo (ciceroฺronaldo@gmailฺcom) has a non-transferable
license to use this Student Guideฺ
Unauthorized reproduction or distribution prohibitedฺ Copyright© 2014, Oracle and/or its affiliatesฺ

Network Performance Concepts
•Bandwidth: Bit rate for sending or receiving data over a
network
•Failover: Ability to substitute a backup component for one
that becomes unavailable
•Load balancing: Distribution of workload to achieve
optimal utilization
•Resource management: Setting of bandwidth and
resource limits for OS-forced network sharing policies
When planning your network configuration, there are several key performance concepts that
you need to take into consideration:
•B
a
n
d
wi
dt
h: In
c
r
eas
in
g
ba
n
d
wi
dt
h i
s
a
n
e
v
er
-
e
n
d
in
g
tas
k f
o
r
t
h
e
n
et
w
o
rk
ad
mini
st
r
ato
r
Copyright © 2013, Oracle and/or its affiliates. All rights reserved.
ad dt
c eas g ba d dt s a e e
e d g tas o t e et o ad st ato
and there are many methods to achieve this, some of which are discussed in this
lesson.
•Failover: When a server, system, or network goes down, the ability to automatically
switch over to a redundant or standby service is called an automatic failover. In
networking, failover can be achieved with link aggregation. Also, through the Oracle
Solaris IPMP functionality, you can combine multiple network connections in parallel to
provide failover and increase network throughput
provide
failover
and
increase
network
throughput
.
•Load balancing: Another way to maximize throughput and minimize response time may
entail load balancing, which simply means to distribute the workload across multiple
networking resources, as can be achieved with the integrated load balancer in Oracle
Solaris.
•Resource management: Using virtual network interface cards (VNICs), users can
consolidate server workloads, establish flows, and better enforce resource limits, which
means more efficient handling of network traffic and the ability to offer a better QoS
without adding overhead.
Oracle Solaris 11 Advanced System Administration 5 - 10
Cicero Ronaldo (ciceroฺronaldo@gmailฺcom) has a non-transferable
license to use this Student Guideฺ
Unauthorized reproduction or distribution prohibitedฺ Copyright© 2014, Oracle and/or its affiliatesฺ
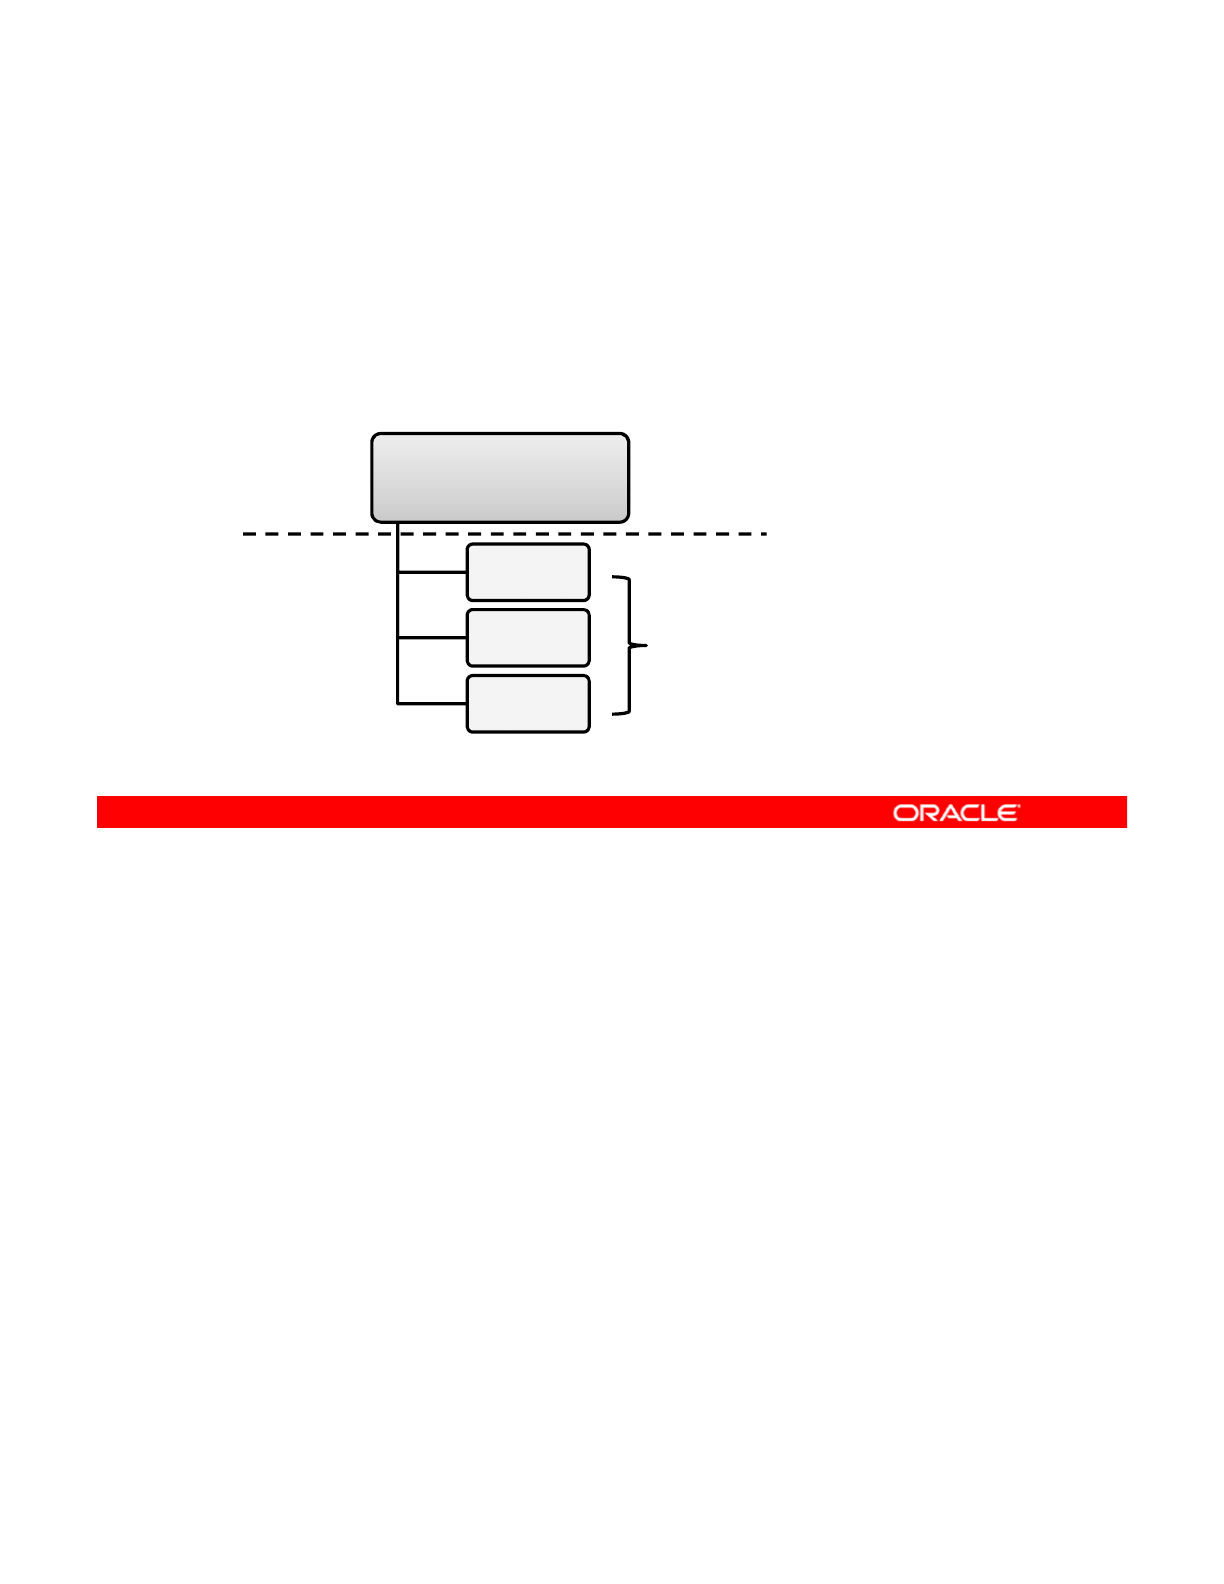
Link Aggregation
•Provides performance advantages
•Links must be of the same speed, full duplex, and point-to-
point.
•
Utilizes the
dladm
command
Utilizes
the
dladm
command
external
internal
aggr1
192.168.50.21
net0
full duplex, p2p,
same speed
net1
net2
Also called “trunking,” link aggregation consists of two or more IP interfaces on a system,
which are combined to form a single, logical unit for the purposes of increasing bandwidth or
achieving automatic failover, load balancing, and redundancy. Having one IP address for all
Copyright © 2013, Oracle and/or its affiliates. All rights reserved.
aggregated interfaces instead of one per interface is also easier to administer in many
respects, and is less demanding on the network address pool. For systems that run an
application with heavy queries, a link aggregation can be dedicated to that application’s traffic
for ease of administration. For sites that do not want to expose their internal interfaces for
security purposes, link aggregation ensures the interfaces are hidden from external
applications. In this example, a link aggregation named aggr1 has an exposed IP address of
192.168.50.21, but the internal interfaces net0, net1, and net2 are not seen externally.
The Link Aggregation Standard states that all links must be full-duplex, point-to-point links that
operate at identical speeds.
You can create, modify, and delete link aggregations by using the dladm command. You
learn how to perform these tasks later in this lesson.
Oracle Solaris 11 Advanced System Administration 5 - 11
Cicero Ronaldo (ciceroฺronaldo@gmailฺcom) has a non-transferable
license to use this Student Guideฺ
Unauthorized reproduction or distribution prohibitedฺ Copyright© 2014, Oracle and/or its affiliatesฺ

Load Balancing and Aggregation Policies
In policy making, determination of the outgoing link is done by
hashing the specific header of each packet:
•L2 (Networking): MAC header
•
L3 (Addressing):
IP header
L3
(Addressing):
IP
header
•L4 (Communication): TCP/UDP or other ULP header
When planning to use link aggregation, it is best to define a policy for outgoing traffic to
establish load balancing. A policy can specify how packets are distributed across the
available links. These are the possible layer specifiers for the aggregation policy. The
Copyright © 2013, Oracle and/or its affiliates. All rights reserved.
default—as shown in the dladm man page
—
is L4, but any combination of these policies is
valid.
Note: ULP stands for Upper Layer Protocol.
Oracle Solaris 11 Advanced System Administration 5 - 12
Cicero Ronaldo (ciceroฺronaldo@gmailฺcom) has a non-transferable
license to use this Student Guideฺ
Unauthorized reproduction or distribution prohibitedฺ Copyright© 2014, Oracle and/or its affiliatesฺ

Aggregation Modes and Switches
LACP switch modes:
•Off: Default mode, no LACPDUs
•Active: LACPDUs at specified, regular intervals
•
Passive:
LACPDUs only when received from switch
•
Passive:
LACPDUs
only
when
received
from
switch
If the aggregation topology is connected through a switch and supports the link aggregation
control protocol (LACP), you can configure LACP for the switch and the aggregation by using
one of these modes. The LACP packets are called LACP Data Units or (LACPDUs). If the
Copyright © 2013, Oracle and/or its affiliates. All rights reserved.
switch and the aggregation are both configured in passive mode, then they cannot exchange
LACPDUs.
Oracle Solaris 11 Advanced System Administration 5 - 13
Cicero Ronaldo (ciceroฺronaldo@gmailฺcom) has a non-transferable
license to use this Student Guideฺ
Unauthorized reproduction or distribution prohibitedฺ Copyright© 2014, Oracle and/or its affiliatesฺ
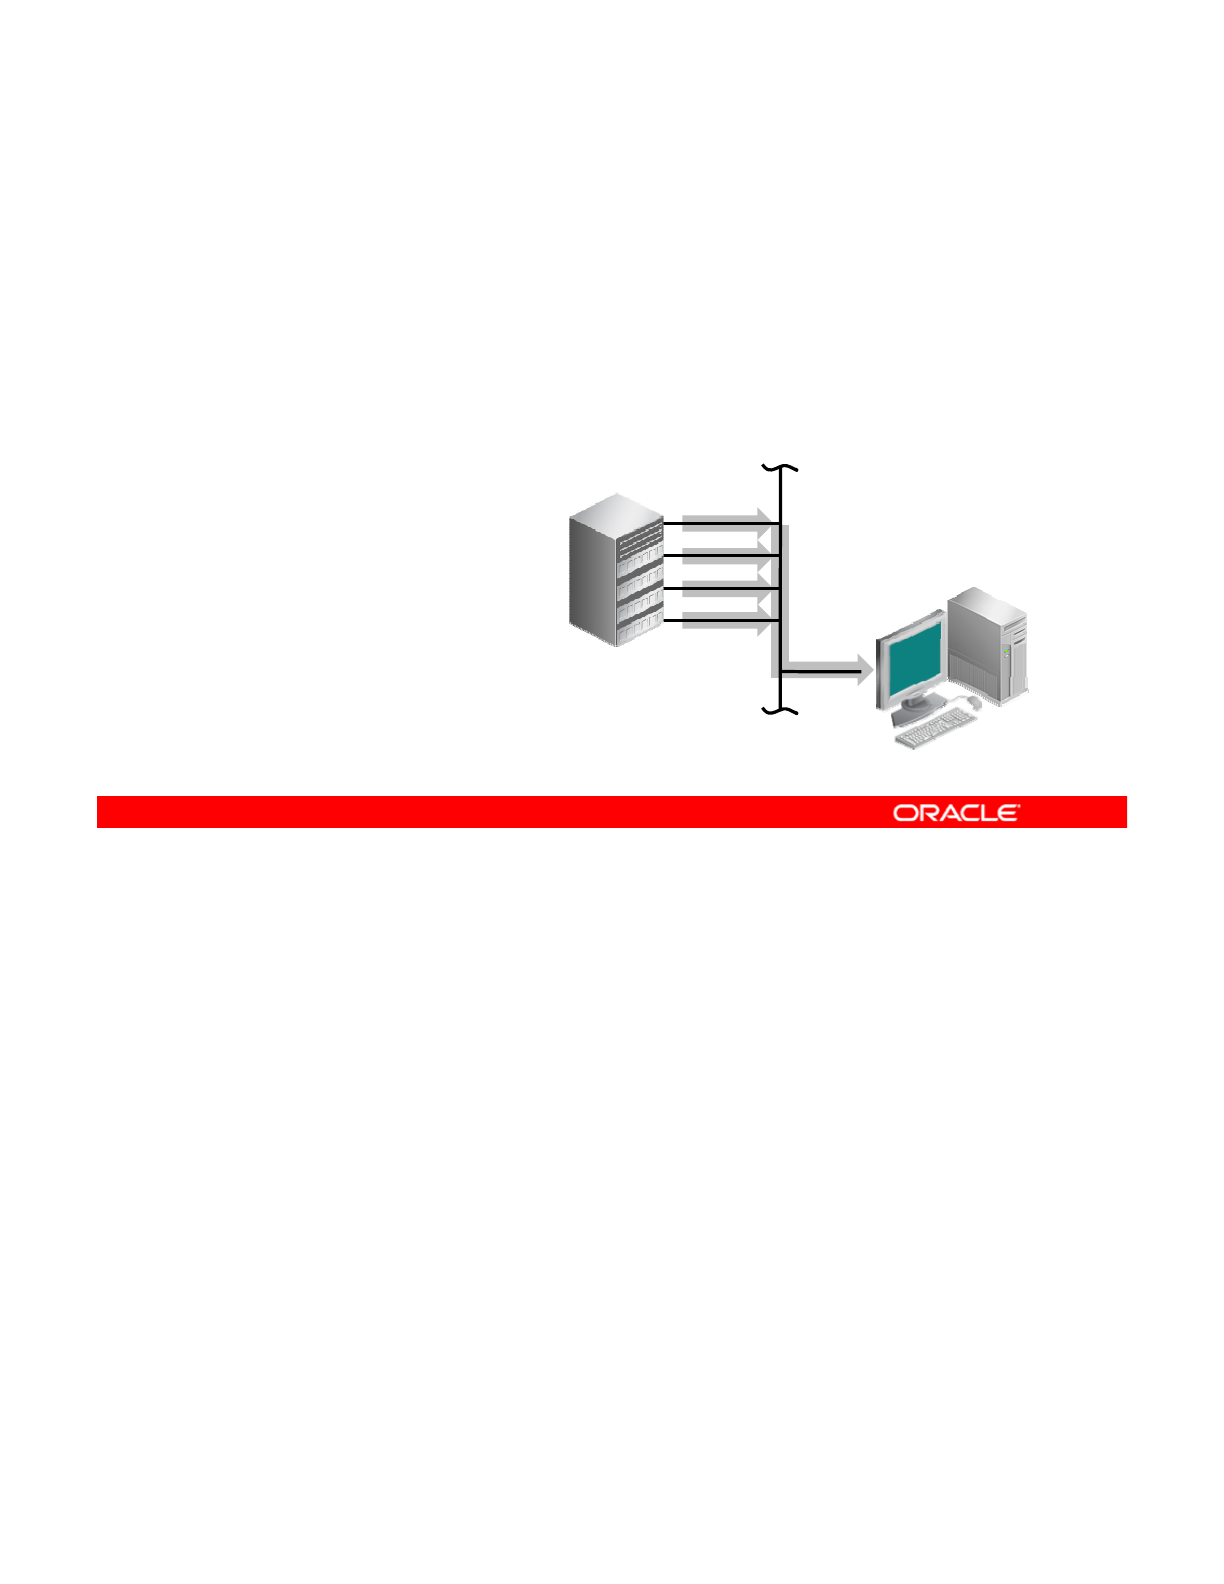
IPMP: Introduction
•Performance advantages
–Fault tolerance
–Load spreading
–
Increased bandwidth
Increased
bandwidth
–Transparent redundancy
•IPMP groups
–Active-active
–Active-standby
LAN
net0
net1
net2
net3
Server
Client
Another useful Oracle Solaris feature that provides physical interface failure detection, packet
load balancing, and transparent redundancy is IP multipathing (IPMP). IPMP makes it
possible to assign an IP address to a group of network interfaces. If the IP is bound to an NIC
Copyright © 2013, Oracle and/or its affiliates. All rights reserved.
in an IPMP group and the NIC fails, the group can bind the IP address to another NIC in the
group. As a result, a client that uses the IP to contact a service does not experience a loss of
service.
This means any port, NIC, cable, or switch failures don’t impact any connections because
IPMP assigns interfaces to an IP address while continually monitoring the underlying
interfaces to ensure a connection is maintained. If IPMP detects that the IP interface being
used has failed it swaps it to a working IP interface Applications do not need to be aware
used
has
failed
,
it
swaps
it
to
a
working
IP
interface
.
Applications
do
not
need
to
be
aware
that they are running on a system managed by IPMP. IPMP can be configured for both IPv4
and IPV6.
Oracle Solaris 11 Advanced System Administration 5 - 14
Cicero Ronaldo (ciceroฺronaldo@gmailฺcom) has a non-transferable
license to use this Student Guideฺ
Unauthorized reproduction or distribution prohibitedฺ Copyright© 2014, Oracle and/or its affiliatesฺ

The IPMP load-spreading feature increases bandwidth by spreading the outbound load
between two or more physical NICs on the same system to the same IPMP group. An IPMP
group is represented as an IPMP interface, which is treated like any other interface on the IP
layer. These interfaces can belong to an IPMP group in either an active-active or active-
standby configuration.
Active-active configuration means all the underlying interfaces are ready and currently
available for use by the IPMP group. An active-standby configuration means that at least one
interface is in standby mode but can be automatically deployed in the case of a failed
interface.
Oracle Solaris 11 Advanced System Administration 5 - 15
Cicero Ronaldo (ciceroฺronaldo@gmailฺcom) has a non-transferable
license to use this Student Guideฺ
Unauthorized reproduction or distribution prohibitedฺ Copyright© 2014, Oracle and/or its affiliatesฺ

IPMP Components
•IPMP daemon: in.mpathd
•IPMP service: svc:/network/ipmp
•Configuration file: /etc/default/mpathd
•
IPMP administration command:
ipadm
•
IPMP
administration
command:
ipadm
•IPMP display information command: ipmpstat
•Customized IPMP interface names
•Dynamic Host Control Protocol
IPMP consists of the following components:
•IPMP daemon (in.mpathd): Detects failure by sending ICMP echo probes through the
interface and also monitors the RUNNING fla
g
on the interface. If a failure is detected
Copyright © 2013, Oracle and/or its affiliates. All rights reserved.
g
from one of these methods, the daemon chooses the standby IP address or next
appropriate IP address and failover occurs.
•IPMP service (svc:/network/ipmp): Sets IPMP properties, such as enabling or
disabling transitive probing
•Configuration file (/etc/default/mpathd): Is used to specify the daemon’s default
behavior. This file can be used to set parameters, such as specifying which interfaces to
b f f il d th ti d ti Thi fil l b d t if h t th
pro
b
e
f
or
f
a
il
ure an
d
th
e
ti
me
d
ura
ti
on.
Thi
s
fil
e can a
l
so
b
e use
d
t
o spec
if
y w
h
a
t
th
e
status of a failed interface should be after it is repaired, or whether to monitor all
interfaces, including those not belonging to an IPMP group.
•IPMP administration command (ipadm): Is used to administer IP interfaces that are
part of an IPMP group
Oracle Solaris 11 Advanced System Administration 5 - 16
Cicero Ronaldo (ciceroฺronaldo@gmailฺcom) has a non-transferable
license to use this Student Guideฺ
Unauthorized reproduction or distribution prohibitedฺ Copyright© 2014, Oracle and/or its affiliatesฺ

•IPMP display information command (ipmpstat): Provides information about the
IPMP configuration, such as the underlying IP group interfaces, the test and data IP
addresses in use, the types of failure detection being used, and interfaces that have
failed (if applicable)
•Customized IPMP interface names: With the ability to customize link names, link
configuration is no longer bound to the physical NIC, which means greater flexibility in
administering IP interfaces and IPMP itself. For example, if a failover occurs, the new
NIC can be given the same name as the failed one, provided they are of the same type.
The same configuration files can then be used, thus saving valuable administration time.
•Dynamic Host Control Protocol: Used by IPMP to create and assign IP addresses
Oracle Solaris 11 Advanced System Administration 5 - 17
Cicero Ronaldo (ciceroฺronaldo@gmailฺcom) has a non-transferable
license to use this Student Guideฺ
Unauthorized reproduction or distribution prohibitedฺ Copyright© 2014, Oracle and/or its affiliatesฺ
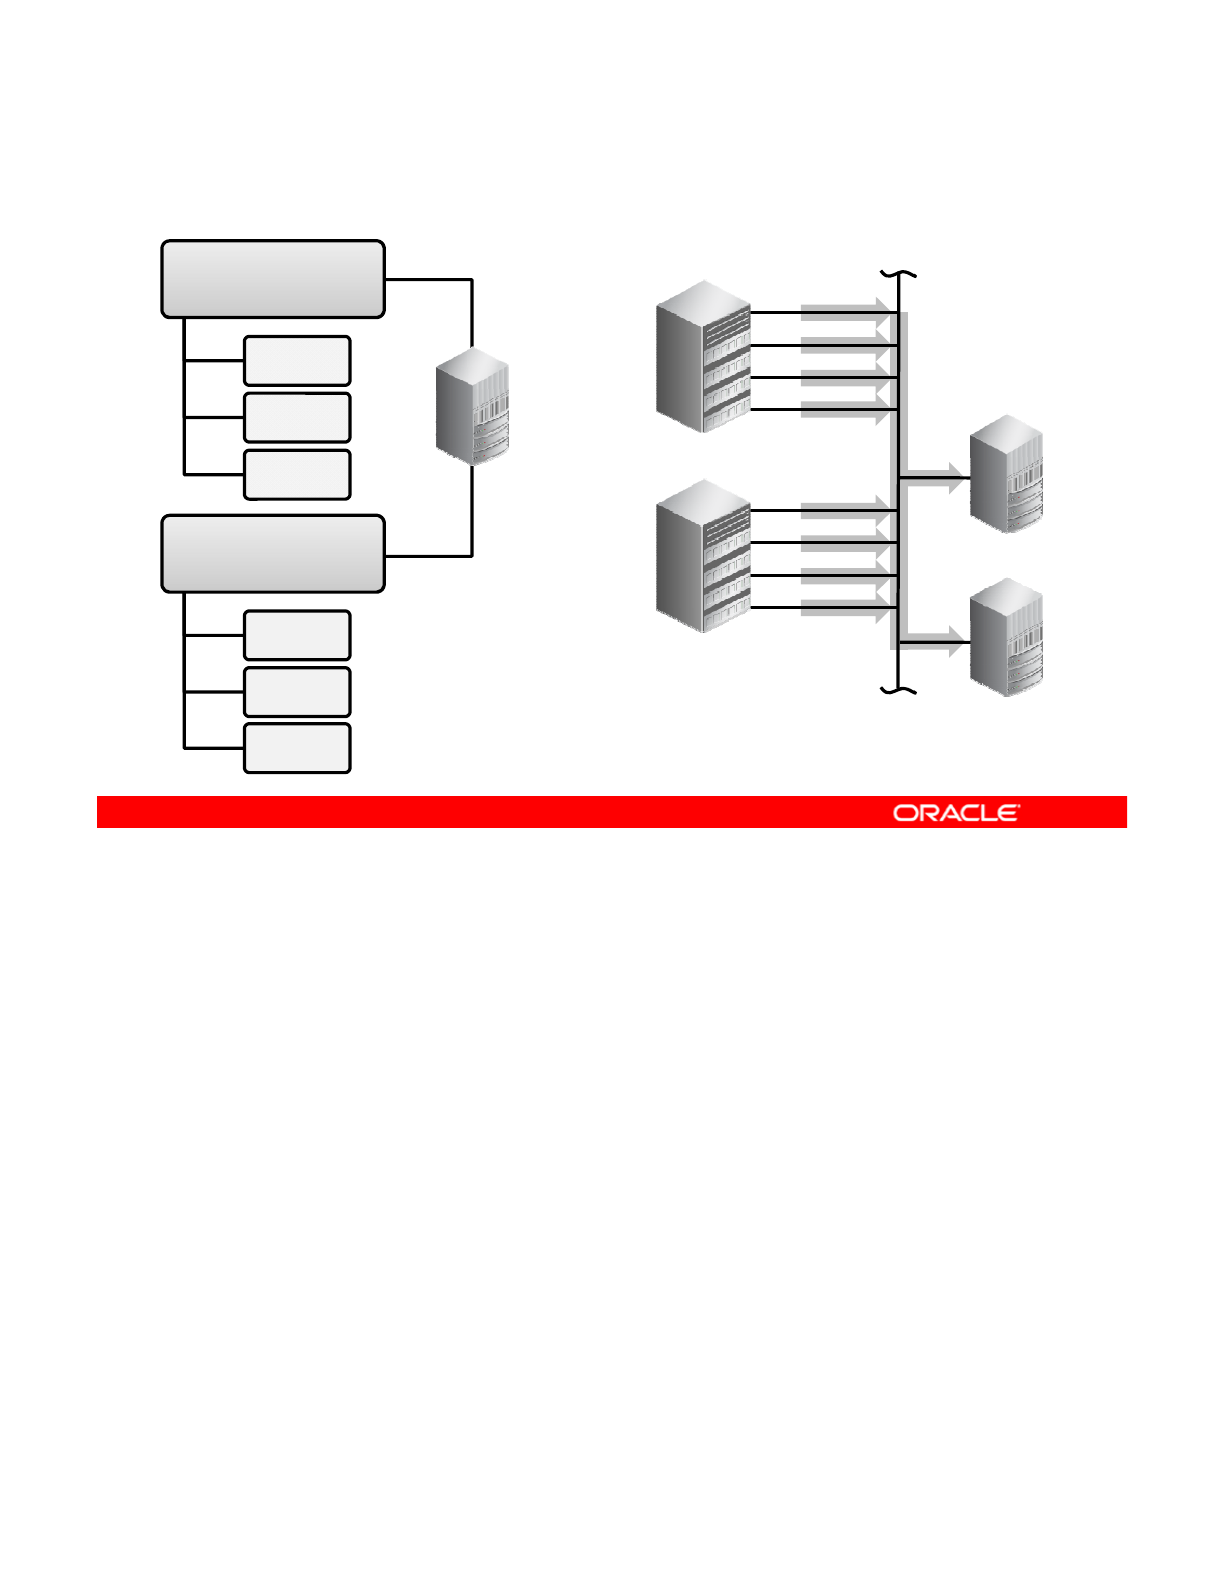
Comparing Link Aggregation and IPMP
Aggregated Links
IPMP Group
net0
net1
net2
net3
aggr1
192.168.50.21
net0
VERSUS
net3
Server
Switch
net4
net5
net6
net7
Switch
aggr2
192.168.50.22
net1
net2
LAN
Switch
net7
Server
net3
net4
net5
In link aggregations, incoming traffic is spread over the multiple links that comprise the
aggregation. Thus, networking performance is enhanced as more NICs are installed to add
links to the aggregation. IPMP’s traffic uses the IPMP interface’s data addresses as they are
Copyright © 2013, Oracle and/or its affiliates. All rights reserved.
bound to the available active interfaces. If, for example, all the data traffic is flowing between
only two IP addresses but not necessarily over the same connection, then adding more NICs
will not improve performance with IPMP because only two IP addresses remain usable.
The two technologies complement each other and can be deployed together to provide the
combined benefits of network performance and availability. For example, except where
proprietary solutions are provided by certain vendors, link aggregations currently cannot span
multiple switches Thus a switch becomes a single point of failure for a link aggregation
multiple
switches
.
Thus
,
a
switch
becomes
a
single
point
of
failure
for
a
link
aggregation
between the switch and a host. If the switch fails, the link aggregation is likewise lost, and
network performance declines. IPMP groups do not face this switch limitation. Thus, in the
scenario of a LAN using multiple switches, link aggregations that connect to their respective
switches can be combined into an IPMP group on the host. With this configuration, both
enhanced network performance as well as high availability are obtained. If a switch fails, the
data addresses of the link aggregation to that failed switch are redistributed among the
remaining link aggregations in the group
remaining
link
aggregations
in
the
group
.
Oracle Solaris 11 Advanced System Administration 5 - 18
Cicero Ronaldo (ciceroฺronaldo@gmailฺcom) has a non-transferable
license to use this Student Guideฺ
Unauthorized reproduction or distribution prohibitedฺ Copyright© 2014, Oracle and/or its affiliatesฺ

Implementing the Network and
Traffic Failover Plan
Traffic
Failover
Plan
Your assignment is to:
•Test the reactive network configuration and NFS
•Configure link aggregation
•
Configure link failover by using IPMP
•
Configure
link
failover
by
using
IPMP
Copyright © 2013, Oracle and/or its affiliates. All rights reserved.
Oracle Solaris 11 Advanced System Administration 5 - 19
Cicero Ronaldo (ciceroฺronaldo@gmailฺcom) has a non-transferable
license to use this Student Guideฺ
Unauthorized reproduction or distribution prohibitedฺ Copyright© 2014, Oracle and/or its affiliatesฺ

Quiz
What is the default policy for link aggregation?
a. L2 (Networking): MAC header
b. L3 (Addressing): IP header
c
L4 (Communication): TCP/UDP or other ULP header
c
.
L4
(Communication):
TCP/UDP
or
other
ULP
header
Answer: c
Copyright © 2013, Oracle and/or its affiliates. All rights reserved.
Oracle Solaris 11 Advanced System Administration 5 - 20
Cicero Ronaldo (ciceroฺronaldo@gmailฺcom) has a non-transferable
license to use this Student Guideฺ
Unauthorized reproduction or distribution prohibitedฺ Copyright© 2014, Oracle and/or its affiliatesฺ

Quiz
IPMP can be configured for both IPv4 and IPv6.
a. True
b. False
Answer: a
Copyright © 2013, Oracle and/or its affiliates. All rights reserved.
Oracle Solaris 11 Advanced System Administration 5 - 21
Cicero Ronaldo (ciceroฺronaldo@gmailฺcom) has a non-transferable
license to use this Student Guideฺ
Unauthorized reproduction or distribution prohibitedฺ Copyright© 2014, Oracle and/or its affiliatesฺ

Quiz
Which IPMP component is responsible for detecting failures?
a. IPMP daemon
b. IPMP service
c
DHCP
c
.
DHCP
Answer: a
Copyright © 2013, Oracle and/or its affiliates. All rights reserved.
Oracle Solaris 11 Advanced System Administration 5 - 22
Cicero Ronaldo (ciceroฺronaldo@gmailฺcom) has a non-transferable
license to use this Student Guideฺ
Unauthorized reproduction or distribution prohibitedฺ Copyright© 2014, Oracle and/or its affiliatesฺ

Quiz
Link aggregation and IPMP cannot be deployed together.
a. True
b. False
Answer: b
Copyright © 2013, Oracle and/or its affiliates. All rights reserved.
Oracle Solaris 11 Advanced System Administration 5 - 23
Cicero Ronaldo (ciceroฺronaldo@gmailฺcom) has a non-transferable
license to use this Student Guideฺ
Unauthorized reproduction or distribution prohibitedฺ Copyright© 2014, Oracle and/or its affiliatesฺ

Lesson Agenda
• Planning for Network and Traffic Failover
•Configuring Systems on a Local Network
• Configuring a Reactive Network
•
Configuring Network File System
•
Configuring
Network
File
System
• Configuring Link Aggregation
• Configuring an IPMP Group
• Implementing Link Failover by Using IPMP
• Monitorin
g
an IPMP Grou
p
gp
Copyright © 2013, Oracle and/or its affiliates. All rights reserved.
Oracle Solaris 11 Advanced System Administration 5 - 24
Cicero Ronaldo (ciceroฺronaldo@gmailฺcom) has a non-transferable
license to use this Student Guideฺ
Unauthorized reproduction or distribution prohibitedฺ Copyright© 2014, Oracle and/or its affiliatesฺ

Configuring Systems on a Local Network
This section covers the following topics:
•Configuring a physical network interface manually
•Deleting a physical network interface manually
•
Displaying TCP/IP network information
•
Displaying
TCP/IP
network
information
Copyright © 2013, Oracle and/or its affiliates. All rights reserved.
Oracle Solaris 11 Advanced System Administration 5 - 25
Cicero Ronaldo (ciceroฺronaldo@gmailฺcom) has a non-transferable
license to use this Student Guideฺ
Unauthorized reproduction or distribution prohibitedฺ Copyright© 2014, Oracle and/or its affiliatesฺ

Configuring a Physical Network
Interface Manually
Interface
Manually
1. Check the current status of the
network/physical:default service by using svcs
network/physical. If the service is not up and running,
enable it by using svcadm enable
network/physical:default.
2. Create the network interface by using ipadm create-ip
interface.
3. Specify the IP address by using ipadm create-addr –
T static -a addrob
j
.
j
4. Verify the network interface configuration by using ipadm
show-if.
5. Verify the IP address information by using ipadm show-
addr.
To configure a physical network interface manually (as opposed to having it done
automatically for you by the reactive network configuration), you complete the steps listed in
the slide.
Copyright © 2013, Oracle and/or its affiliates. All rights reserved.
Notes for step 2: The ipadm command is used to configure and manage IP network
interfaces, addresses, and TCP/IP protocol properties. The create-ip subcommand
creates an IP interface that handles both IPv4 and IPv6 packets. The address of the IPv4
interface will be set to 0.0.0.0 and the address of the IPv6 interface will be set to ::. This
subcommand, by default, causes the information to persist, so that on the next reboot this
interface will be instantiated.
Notes for step 3:
The
t
dd b d ith th
Ttti
option
Notes
for
step
3:
The
crea
t
e-a
dd
r su
b
comman
d
w
ith
th
e -
T
s
t
a
ti
c -a
option
creates a static IPv4 or IPv6 address on the specified interface. If the interface on which the
address is created is not plumbed, this subcommand will implicitly plumb the interface. By
default, a configured address will be marked up, so that it can be used as a source or
destination of or for outbound and inbound packets.
Notes for step 4: The show-if subcommand displays network interface configuration
information, either for all the network interfaces confi
g
ured on the s
y
stem, includin
g
the ones
gy g
that are only in the persistent configuration, or for the specified network interface.
Oracle Solaris 11 Advanced System Administration 5 - 26
Cicero Ronaldo (ciceroฺronaldo@gmailฺcom) has a non-transferable
license to use this Student Guideฺ
Unauthorized reproduction or distribution prohibitedฺ Copyright© 2014, Oracle and/or its affiliatesฺ

Configuring a Physical
Network Interface Manually: Example
Network
Interface
Manually:
Example
# svcs network/physical
STATE STIME FMRI
online 9:34:40 svc:/network/physical:default
#
i
p
adm create-i
p
net0
#
p
p
# ipadm create-addr –T static -a 192.168.0.112/24 net0/v4add1
# ipadm show-if
IFNAME CLASS STATE ACTIVE OVER
lo0 loopback ok yes --
net0 ip ok yes --
# ipadm show-addr
ADDROBJ TYPE STATE ADDR
lo0/v4 static ok 127.0.0.1/8
net0/v4add1 static ok 192.168.0.112/24
lo0/v6 static ok ::1/128
The example in the slide presents the steps for configuring a physical network interface
manually. First, you check if the network/physical:default service is online and find
that it is. You then create the network interface net0 and specify the IP address. To verify
Copyright © 2013, Oracle and/or its affiliates. All rights reserved.
that your network interface is working, use the ipadm show-if command. Here you can
see that net0 is in the ok state and active. The final step is to verify the IP address for the
new network interface by using the ipadm show-addr command.
Oracle Solaris 11 Advanced System Administration 5 - 27
Cicero Ronaldo (ciceroฺronaldo@gmailฺcom) has a non-transferable
license to use this Student Guideฺ
Unauthorized reproduction or distribution prohibitedฺ Copyright© 2014, Oracle and/or its affiliatesฺ

Deleting a Physical Network Interface Manually
1. Delete the IP address by using ipadm delete-addr
addrobj.
2. Delete the network interface by using ipadm delete-ip
interfac
e
.
3. Verify that the network interface has been deleted by using
ipadm show-if.
4. Verify that the IP address information has been deleted by
using ipadm show-addr.
To delete a physical network interface manually, you complete the steps listed in the slide.
Notes for step 1: The delete-addr subcommand deletes all the addresses identified for
the specified interface. It also removes these addresses from the persistent data store. This
Copyright © 2013, Oracle and/or its affiliates. All rights reserved.
the
specified
interface.
It
also
removes
these
addresses
from
the
persistent
data
store.
This
means these addresses will not be instantiated on reboot.
If the address object is a DHCP-controlled address, delete-addr removes the address from
the system without notifying the DHCP server, and records the current lease for later use.
Notes for step 2: The delete-ip subcommand deletes the interface from active
configuration. All addresses configured on the interface will be torn down. Further, all the
persistent information related to the interface will be removed from the persistent data store
and, for this reason, the interface is not to be instantiated on reboot. To disable an interface
from active configuration (rather than delete the interface), you can use the disable-if
subcommand.
Note: If you use the ipadm delete-ip interface command first, you do not need
to use the ipadm delete-addr addrobj command because the former
automatically removes all IP addresses associated with the specified interface.
Oracle Solaris 11 Advanced System Administration 5 - 28
Cicero Ronaldo (ciceroฺronaldo@gmailฺcom) has a non-transferable
license to use this Student Guideฺ
Unauthorized reproduction or distribution prohibitedฺ Copyright© 2014, Oracle and/or its affiliatesฺ

Deleting a Physical
Network Interface Manually: Example
Network
Interface
Manually:
Example
# ipadm delete-addr 192.168.0.112/24 net0/v4add1
# ipadm delete-ip net0
# ipadm show-if
IFNAME CLASS STATE ACTIVE OVER
lo0 loopback ok yes
--
lo0
loopback
ok
yes
# ipadm show-addr
ADDROBJ TYPE STATE ADDR
lo0/v4 static ok 127.0.0.1/8
lo0/v6 static ok ::1/128
The example in the slide presents the steps for deleting a physical network interface
manually. In this case, you first delete the IP address associated with the network interface
net0 and then the interface itself. To verify that the network interface has been deleted, use
Copyright © 2013, Oracle and/or its affiliates. All rights reserved.
the ipadm show-if command. Here, you can see that net0 is no longer part of the
configuration. The final step is to verify that the IP address has been deleted as well, by using
the ipadm show-addr command.
Oracle Solaris 11 Advanced System Administration 5 - 29
Cicero Ronaldo (ciceroฺronaldo@gmailฺcom) has a non-transferable
license to use this Student Guideฺ
Unauthorized reproduction or distribution prohibitedฺ Copyright© 2014, Oracle and/or its affiliatesฺ

Displaying TCP/IP Network Information
This section covers the following topics:
•Displaying the status of network interfaces
•Displaying the routing table
•
Capturing packets from the network
•
Capturing
packets
from
the
network
Copyright © 2013, Oracle and/or its affiliates. All rights reserved.
Oracle Solaris 11 Advanced System Administration 5 - 30
Cicero Ronaldo (ciceroฺronaldo@gmailฺcom) has a non-transferable
license to use this Student Guideฺ
Unauthorized reproduction or distribution prohibitedฺ Copyright© 2014, Oracle and/or its affiliatesฺ

Displaying the Status of Network Interfaces
To display the status of the network interfaces, use
netstat -i.
# netstat -i
Name Mtu Net
/
Dest Address I
p
kts Ierrs O
p
kts Oerrs Collis
Q
ueue
/pp Q
lo0 8232 software localhost 1280 0 1280 0 0 0
net0 1500 loopback khan 1628480 0 347070 16 39354 0
The main utility for displaying network statistics is netstat. The netstat -i command
shows the state of the interfaces that are used for IP traffic. The output includes names of the
physical interfaces, counts for input and output packets (Ipkts and Opkts) plus additional
Copyright © 2013, Oracle and/or its affiliates. All rights reserved.
information, such as counts for input and output errors (Ierrs and Oerrs) and Collisions
(Collis). You can study these stats to determine the health of the network.
Oracle Solaris 11 Advanced System Administration 5 - 31
Cicero Ronaldo (ciceroฺronaldo@gmailฺcom) has a non-transferable
license to use this Student Guideฺ
Unauthorized reproduction or distribution prohibitedฺ Copyright© 2014, Oracle and/or its affiliatesฺ

Displaying the Routing Table
To display known routes, use netstat -r.
# netstat -r
Routing Table: IPv4
Destination Gateway Flags Ref Use Interface
----------- -------- ----- --- ---- ---------
localhost localhost UH 0 2817 lo0
earth pluto U 2 14293 net0
default tothestars UG 0 14142
. . . . .
The netstat -r command shows the routing tables for either IPv4 or IPv6. In this example,
the UH flags mean the route is up through a host, as opposed to UG, which is through a
gateway. The Ref column shows the current number of routes that share the same link layer,
Copyright © 2013, Oracle and/or its affiliates. All rights reserved.
and the Use column indicates the number of packets sent.
Note: If you set the DEFAULT_IP=VERSION4 in the /etc/default/inet_type file, the
IPv6 statistics will be omitted from the netstat displays.
Oracle Solaris 11 Advanced System Administration 5 - 32
Cicero Ronaldo (ciceroฺronaldo@gmailฺcom) has a non-transferable
license to use this Student Guideฺ
Unauthorized reproduction or distribution prohibitedฺ Copyright© 2014, Oracle and/or its affiliatesฺ

Capturing Packets from the Network
To capture packets, use snoop.
# snoop -v
Using device net0 (promiscuous mode)
ETHER: ----- Ether Header -----
kid
ETHER: Pac
k
et 1 arr
i
ve
d
at 13:52:2.50694
ETHER: Packet size = 106 bytes
ETHER: Destination = 0:7:e9:24:45:93,
ETHER: Source =
0:3:ba:45:a6:d4,
ETHER: Ethertype = 0800 (IP)
. . . . .
IP: ----- IP Header -----
IP: Version = 4
IP: Header length = 20 bytes
IP: Type of service = 0x00
IP: xxx. .... = 0 (precedence)
IP: ...0 .... = normal delay
IP: .... 0... = normal throughput
. . . . .
^C
The snoop command is a useful troubleshooting or informational tool. It captures packets
from a datalink or IP interface and displays their content. If a datalink or IP interface is not
specified on the command line, then snoop will pick a datalink to use based on ones that
Copyright © 2013, Oracle and/or its affiliates. All rights reserved.
have been configured for IP traffic. It can display packets in a single-line summary form or in
verbose multiline forms. The output mode runs until a Ctrl + C character is entered. The
captured packets can also be saved to a file by using snoop.
This example shows a truncated output that uses the multiline verbose mode.
Oracle Solaris 11 Advanced System Administration 5 - 33
Cicero Ronaldo (ciceroฺronaldo@gmailฺcom) has a non-transferable
license to use this Student Guideฺ
Unauthorized reproduction or distribution prohibitedฺ Copyright© 2014, Oracle and/or its affiliatesฺ

Lesson Agenda
• Planning for Network and Traffic Failover
• Configuring Systems on a Local Network
•Configuring a Reactive Network
•
Configuring Network File System
•
Configuring
Network
File
System
• Configuring Link Aggregation
• Configuring an IPMP Group
• Implementing Link Failover by Using IPMP
• Monitorin
g
an IPMP Grou
p
gp
Copyright © 2013, Oracle and/or its affiliates. All rights reserved.
Oracle Solaris 11 Advanced System Administration 5 - 34
Cicero Ronaldo (ciceroฺronaldo@gmailฺcom) has a non-transferable
license to use this Student Guideฺ
Unauthorized reproduction or distribution prohibitedฺ Copyright© 2014, Oracle and/or its affiliatesฺ

Configuring a Reactive Network
This section covers the following topics:
•Configuring a reactive network profile
•Creating a location profile
•
Activating and deactivating profiles
•
Activating
and
deactivating
profiles
•Querying the profile information
•Removing NCPs
•Working with the reactive network service through SMF
•Modif
y
in
g
the reactive network confi
g
uration
yg g
Copyright © 2013, Oracle and/or its affiliates. All rights reserved.
Oracle Solaris 11 Advanced System Administration 5 - 35
Cicero Ronaldo (ciceroฺronaldo@gmailฺcom) has a non-transferable
license to use this Student Guideฺ
Unauthorized reproduction or distribution prohibitedฺ Copyright© 2014, Oracle and/or its affiliatesฺ

Creating a Network Configuration Profile
To create an NCP, use the netcfg utility.
# netcfg
netcfg> create ncp my_profile
netcfg:ncp:my_profile> create ncu phys net1
Created ncu 'net1'. Walking properties …
ii
d( l)[ l|iiid]
l
act
i
vat
i
on-mo
d
e
(
manua
l)
[
manua
l|
pr
i
or
i
t
i
ze
d]
> manua
l
link-mac-addr>
link-autopush>
link-mtu>
netcfg:ncp:my_profile:ncu:net1> list
ncu:net1
type link
class phys
parent
”
my profile
”
parent
my
_
profile
activation-mode manual
enabled true
netcfg:ncp:my_profile:ncu:net1> end
Committed changes
netcfg:ncp:my_profile> list
NCUs:
phys net1
Using the interactive netcfg tool, you can create a Network Configuration Profile (NCP) and
any Network Configuration Units (NCUs) within it.
Note:
You will recall from the first topic that NCUs are containers that store all the individual
Copyright © 2013, Oracle and/or its affiliates. All rights reserved.
Note:
You
will
recall
from
the
first
topic
that
NCUs
are
containers
that
store
all
the
individual
configuration objects that make up an NCP. Each object correlates to an individual link or
interface in the system.
When creating the NCU, the system will interactively walk you through the creation process of
setting properties. You can use the defaults by pressing Enter or by entering the desired
configuration for each step. In this example, the activation mode is set to manual by typing it
in when prompted and all the default link properties are selected by pressing Enter. When you
dlitthNCUtdilthfiti
are
d
one, you can
li
s
t
th
e
NCU
t
o
di
sp
l
ay
th
e con
fi
gura
ti
on.
Note that after the end command commits the changes to the NCU, you can enter another
list command at the profile level to list all the NCUs contained within the profile.
Oracle Solaris 11 Advanced System Administration 5 - 36
Cicero Ronaldo (ciceroฺronaldo@gmailฺcom) has a non-transferable
license to use this Student Guideฺ
Unauthorized reproduction or distribution prohibitedฺ Copyright© 2014, Oracle and/or its affiliatesฺ

Creating a Location Profile
Use the netcfg utility:
# netcfg
netcfg> create loc office
Created loc ’office'. Walking properties ...
activation-mode (manual) [manual|conditional-any|conditional-all]>
conditional-all
conditions
"system
domain is mydomain com”
conditions
>
"system
-
domain
is
mydomain
.
com”
nameservices (dns) [dns|files|nis|ldap]> dns
nameservices-config-file ("/etc/nsswitch.dns")> <return>
dns-nameservice-configsrc (dhcp) [manual|dhcp]> manual
dns-nameservice-domain> "mydomain.com”
dns-nameservice-servers> "192.168.0.100”
dns-nameservice-search> <return>
dns-nameservice-sortlist> <return>
dns-nameservice-o
p
tions> <return>
p
nfsv4-domain> <return>
ipfilter-config-file> <return>
ipfilter-v6-config-file> <return>
ipnat-config-file> <return>
ippool-config-file> <return>
ike-config-file> <return>
ipsecpolicy-config-file> <return>
netcfg:loc:office> list
You can also create a location profile in interactive mode by using netcfg. Much like in the
previous slide, the system will walk you through setting the properties of your location profile
and then enable you to list them. In this example, a location profile called office is created.
Copyright © 2013, Oracle and/or its affiliates. All rights reserved.
When entering the conditional-all property, the next prompt asks you to state the
conditions. In this case, the system domain is set to the domain name. When a name service
(such as DNS) is selected, the properties for that name service appear so that you can set
them. Again, you can accept the default setting by pressing Enter or by entering the desired
setting.
Note: The output continues in the next slide.
Oracle Solaris 11 Advanced System Administration 5 - 37
Cicero Ronaldo (ciceroฺronaldo@gmailฺcom) has a non-transferable
license to use this Student Guideฺ
Unauthorized reproduction or distribution prohibitedฺ Copyright© 2014, Oracle and/or its affiliatesฺ

Listing a Location Profile
netcfg:loc:office> list
loc:office
activation-mode conditional-all
conditions "system-domain is
di ”
my
d
oma
i
n.com
”
enabled false
nameservices dns
nameservices-config-file "/etc/nsswitch.dns”
dns-nameservice-configsrc manual
dns-nameservice-domain "mydomain.com
dns-nameservice-servers "192.168.0.100”
fl ffi
if
netc
f
g:
l
oc:o
ffi
ce> ver
if
y
All properties verified
netcfg:loc:office> commit
Committed changes
netcfg:loc:office> end
netcfg> exit
The list command (at the location profile level within the netcfg command) lists the
properties of the office location profile that was just created in the previous slide. The
verify command then verifies all the properties, and the commit command commits the
Copyright © 2013, Oracle and/or its affiliates. All rights reserved.
changes. The location profile creation process is complete after you exit the command.
Oracle Solaris 11 Advanced System Administration 5 - 38
Cicero Ronaldo (ciceroฺronaldo@gmailฺcom) has a non-transferable
license to use this Student Guideฺ
Unauthorized reproduction or distribution prohibitedฺ Copyright© 2014, Oracle and/or its affiliatesฺ

Modifying Profiles
# netcfg
netcfg> select ncp my_profile
netcfg:ncp:my_profile> select ncu net1
netcfg:ncp:my_profile:ncu:net1>list
ncu:net1
type link
class phys
parent “my_profile”
activation-mode manual
enabled true
netcfg:ncp:my_profile:ncu:net1>set activation-mode=prioritized
netcfg:ncp:my_profile:ncu:net1>list
ncu:net1
t
li k
t
ype
li
n
k
class phys
parent “my_profile”
activation-mode prioritized
enabled true
To modify a profile, use the netcfg utility. First, select the profile and then the NCU. You can
then set a different property by using the set subcommand and the syntax of
property=value.
Copyright © 2013, Oracle and/or its affiliates. All rights reserved.
In this example, the activation mode is changed from manual to prioritized. Some
properties (such as type, class, and enabled) are read-only and cannot be modified.
Oracle Solaris 11 Advanced System Administration 5 - 39
Cicero Ronaldo (ciceroฺronaldo@gmailฺcom) has a non-transferable
license to use this Student Guideฺ
Unauthorized reproduction or distribution prohibitedฺ Copyright© 2014, Oracle and/or its affiliatesฺ

Listing Reactive Network Profiles
Use the netcfg utility to list all the NCPs and locations:
# netcfg list
NCPs:
A
utomatic
my_profile
start_state
Locations:
aces
Automatic
classroom
NoNet
User
You can use the netcfg list command to list all the current NCPs and location profiles on
the system, which includes the system-defined profiles and locations, such as Automatic,
NoNet, and User. Any custom NCPs and locations created also appear, such as the
Copyright © 2013, Oracle and/or its affiliates. All rights reserved.
my_profile profile and office location.
Oracle Solaris 11 Advanced System Administration 5 - 40
Cicero Ronaldo (ciceroฺronaldo@gmailฺcom) has a non-transferable
license to use this Student Guideฺ
Unauthorized reproduction or distribution prohibitedฺ Copyright© 2014, Oracle and/or its affiliatesฺ

Enabling and Disabling Reactive Network Profiles
Use the netadm utility to enable and disable an NCP or
location profile.
•To enable the newly created profiles:
#
dblffi
•To disable the newly created profiles:
#
neta
d
m ena
bl
e o
ffi
ce
Enabling loc ‘office’
# netadm enable my_profile
Enabling ncp ‘my_profile’
# netadm disable office
Disabling loc ‘office’
# netadm enable -p ncp Automatic
Enabling ncp ‘Automatic’
After the reactive network profiles are created and verified, you can use the netadm enable
command to enable the profiles. When enabling or disabling profiles, if the profile name is not
unique, the profile type (NCU/loc/NCP) must be specified with the -p option. To disable a
Copyright © 2013, Oracle and/or its affiliates. All rights reserved.
location profile, use the netadm disable command. To disable an NCP, enable another
one in its place. You cannot disable an NCP with the netadm disable command.
Profiles are also automatically enabled according to the policies set, or when an event occurs
such as switching from an Ethernet cable to a wireless connection.
Oracle Solaris 11 Advanced System Administration 5 - 41
Cicero Ronaldo (ciceroฺronaldo@gmailฺcom) has a non-transferable
license to use this Student Guideฺ
Unauthorized reproduction or distribution prohibitedฺ Copyright© 2014, Oracle and/or its affiliatesฺ

Displaying Profile States
To list reactive network profiles and their current states, use the
netadm utility.
# netadm list
TYPE PROFILE STATE
TYPE
PROFILE
STATE
ncp Automatic disabled
ncp start_state online
ncu:phys net0 online
ncu:ip net0 online
loc aces online
loc Automatic offline
loc NoNet offline
loc User disabled
The states reported are online, offline, disabled, initialized, or uninitialized.
Copyright © 2013, Oracle and/or its affiliates. All rights reserved.
Oracle Solaris 11 Advanced System Administration 5 - 42
Cicero Ronaldo (ciceroฺronaldo@gmailฺcom) has a non-transferable
license to use this Student Guideฺ
Unauthorized reproduction or distribution prohibitedฺ Copyright© 2014, Oracle and/or its affiliatesฺ

Displaying Profiles and Their Auxiliary States
To list reactive network profiles and their auxiliary states, use
netadm list -x.
# netadm list -x
TYPE PROFILE STATE AUXILIARY STATE
ncp Automatic disabled disabled by administrator
ncp start_state online active
ncu:phys net0 online interface/link is up
ncu:ip net0 online interface/link is up
loc aces online active
loc Automatic offline conditions for activation are unmet
loc NoNet offline conditions for activation are unmet
loc User disabled disabled by administrator
Copyright © 2013, Oracle and/or its affiliates. All rights reserved.
Oracle Solaris 11 Advanced System Administration 5 - 43
Cicero Ronaldo (ciceroฺronaldo@gmailฺcom) has a non-transferable
license to use this Student Guideฺ
Unauthorized reproduction or distribution prohibitedฺ Copyright© 2014, Oracle and/or its affiliatesฺ

Creating a Backup of a Profile
To create a backup of a reactive network profile, use netcfg
export –f profile.
# netcfg export -f oracle_ncp_backup ncp my_profile
#
ls *backup
#
ls
*backup
oracle_ncp_backup
To create a backup of a profile, use the netcfg export -f command followed by the
name of the backup file and the profile. In the example, a backup called
oracle_ncp_backup is being created for the my_profile profile. You can verify that the
Copyright © 2013, Oracle and/or its affiliates. All rights reserved.
backup has been created by using the ls *backup command. The backup is listed.
Oracle Solaris 11 Advanced System Administration 5 - 44
Cicero Ronaldo (ciceroฺronaldo@gmailฺcom) has a non-transferable
license to use this Student Guideฺ
Unauthorized reproduction or distribution prohibitedฺ Copyright© 2014, Oracle and/or its affiliatesฺ

Removing Reactive Network Profiles
To remove a profile, use netcfg destroy.
# netcfg destroy loc office
# netcfg destroy ncp my_profile
Copyright © 2013, Oracle and/or its affiliates. All rights reserved.
Oracle Solaris 11 Advanced System Administration 5 - 45
Cicero Ronaldo (ciceroฺronaldo@gmailฺcom) has a non-transferable
license to use this Student Guideฺ
Unauthorized reproduction or distribution prohibitedฺ Copyright© 2014, Oracle and/or its affiliatesฺ

Practice 5-1 Overview:
Managing a Reactive Network
Managing
a
Reactive
Network
This practice covers the following topics:
•Assessing the current reactive network configuration
•Creating and deploying a reactive network profile
The practices for this lesson are designed to reinforce the concepts that have been presented
in the lecture portion. These practices cover the following tasks:
•Pr
act
i
ce
5
-1: M
a
n
ag
in
g
r
eact
iv
e
n
et
w
o
rk
Copyright © 2013, Oracle and/or its affiliates. All rights reserved.
act ce 5
a ag g eact e et o
•Practice 5-2: Configuring the Network File System
•Practice 5-3: Configuring a link aggregation
•Practice 5-4: Configuring IP multipathing
Practice 5-1 should take you about 30 minutes to complete.
Oracle Solaris 11 Advanced System Administration 5 - 46
Cicero Ronaldo (ciceroฺronaldo@gmailฺcom) has a non-transferable
license to use this Student Guideฺ
Unauthorized reproduction or distribution prohibitedฺ Copyright© 2014, Oracle and/or its affiliatesฺ

Lesson Agenda
• Planning for Network and Traffic Failover
• Configuring Systems on a Local Network
• Configuring a Reactive Network
•
Configuring Network File System
•
Configuring
Network
File
System
• Configuring Link Aggregation
• Configuring an IPMP Group
• Implementing Link Failover by Using IPMP
• Monitorin
g
an IPMP Grou
p
gp
Copyright © 2013, Oracle and/or its affiliates. All rights reserved.
Oracle Solaris 11 Advanced System Administration 5 - 47
Cicero Ronaldo (ciceroฺronaldo@gmailฺcom) has a non-transferable
license to use this Student Guideฺ
Unauthorized reproduction or distribution prohibitedฺ Copyright© 2014, Oracle and/or its affiliatesฺ

Configuring Network File System (NFS)
This section covers the following topics:
•Configuring the NFS server
•Checking the NFS services status
•
Configuring the NFS client
•
Configuring
the
NFS
client
•Selecting a different version of NFS on a server
•Enabling the automounter service
•Displaying NFS server and client statistics
Copyright © 2013, Oracle and/or its affiliates. All rights reserved.
Oracle Solaris 11 Advanced System Administration 5 - 48
Cicero Ronaldo (ciceroฺronaldo@gmailฺcom) has a non-transferable
license to use this Student Guideฺ
Unauthorized reproduction or distribution prohibitedฺ Copyright© 2014, Oracle and/or its affiliatesฺ

Configuring the NFS Server
1. Create a ZFS file system for the files you want to share.
2. To share the file system:
a. Set the ZFS share property.
b
Set the ZFS
sharenfs
property to
on
b
.
Set
the
ZFS
sharenfs
property
to
on
.
3. Use the share command to verify what is being shared.
# zfs create rpool/export/home/docs
# zfs set share_name=docs,path=/export/home/docs,prot=nfs \
rpool/export/home/docs
rpool/export/home/docs
name=docs,path=/export/home/docs,prot=nfs
# zfs set sharenfs=on rpool/export/home/docs
# zfs set compression=on rpool/export/home/docs
# share
docs /export/home/docs nfs sec=sys,rw
You configure the NFS server by creating a file system for the files you want to share and
then setting the sharenefs property for that file system, as shown in the steps in the slide.
Notes for step 2a:
The
share
property shares ZFS file systems that have the
sharenfs
or
Copyright © 2013, Oracle and/or its affiliates. All rights reserved.
Notes
for
step
2a:
The
share
property
shares
ZFS
file
systems
that
have
the
sharenfs
or
sharesmb property set. Sharing a file system with the NFS or SMB protocol means that the
file system data is available over the network. ZFS file systems that have the sharenfs or
sharesmb property set are automatically shared when a system is booted.
Notes for step 2b: The sharenfs property controls whether a file system is available over
NFS and what options are used. If set to on, the zfs share command is invoked with no
options.
In the example, a ZFS file system called rpool/export/home/docs is created. In the next
two steps, you share the file system, specifying the NFS protocol (prot=nfs). As a best
practice, you set the compression property to on. The final step is to verify that the
/export/home/docs is being shared―and it is.
Oracle Solaris 11 Advanced System Administration 5 - 49
Cicero Ronaldo (ciceroฺronaldo@gmailฺcom) has a non-transferable
license to use this Student Guideฺ
Unauthorized reproduction or distribution prohibitedฺ Copyright© 2014, Oracle and/or its affiliatesฺ

Checking the NFS Services Status
To check the status of the NFS services, use svcs –a |
grep nfs.
# svcs -a | grep nfs
disabled 7:01:37 svc:/network/nfs/cbd:default
disabled
7:01:37
svc:/network/nfs/cbd:default
disabled 7:01:37 svc:/network/nfs/client:default
online 16:30:02 svc:/network/nfs/status:default
online 16:30:05 svc:/network/nfs/mapid:default
online 16:30:07 svc:/network/nfs/rquota:default
online 16:30:08 svc:/network/nfs/nlockmgr:default
online 17:21:32 svc:/network/nfs/server:default
Copyright © 2013, Oracle and/or its affiliates. All rights reserved.
Oracle Solaris 11 Advanced System Administration 5 - 50
Cicero Ronaldo (ciceroฺronaldo@gmailฺcom) has a non-transferable
license to use this Student Guideฺ
Unauthorized reproduction or distribution prohibitedฺ Copyright© 2014, Oracle and/or its affiliatesฺ

Configuring the NFS Client
1. Verify that you can view the shared resource by using
dfshares server.
2. Create a directory to use as the mount point.
3
Specify the resource to be mounted by using
mount
-
F
3
.
Specify
the
resource
to
be
mounted
by
using
mount
F
nfs -o ro server:resource /directory.
4. Verify that the files within the shared resource can be
shared.
# dfshares server1
RESOURCE SERVER ACCESS TRANSPORT
RESOURCE
SERVER
ACCESS
TRANSPORT
server1:/export/home/docs server1 - -
#mkdir /docs
#mount -F nfs -o ro server1:/export/home/docs /docs
#cd /docs
server1:/docs# ls
assetlist
You configure the NFS client by ensuring that you can see the shared resource and then
specifying the resource to be mounted, as shown in the steps in the slide.
Notes for step 3:
To unmount a directory, you use the following command:
Copyright © 2013, Oracle and/or its affiliates. All rights reserved.
Notes
for
step
3:
To
unmount
a
directory,
you
use
the
following
command:
# unmount /directory
In the example, you first verify that you can view the shared resource /export/home/docs
on server1. Next, you create a directory called /docs to use at the mount point. You then
specify the resource to be mounted in the directory that you just created. The final step is to
verify that the file within the shared resource /export/home/docs can be shared, and it
can.
Oracle Solaris 11 Advanced System Administration 5 - 51
Cicero Ronaldo (ciceroฺronaldo@gmailฺcom) has a non-transferable
license to use this Student Guideฺ
Unauthorized reproduction or distribution prohibitedฺ Copyright© 2014, Oracle and/or its affiliatesฺ

Selecting a Different Version of NFS on a Server
To select a different version of NFS on a server or client, use
the sharectl set command.
Exam
p
le:
p
To set a server or client to provide only NFS version 3:
Server:
# sharectl set -p server_versmax=3 nfs
# sharectl set -p server_versmin=3 nfs
Client:
# sharectl set -p client_versmax=3 nfs
# sharectl set -p client_versmin=3 nfs
Although there have been previous versions of the NFS protocol in use, NFS version 4
(NFSv4) has more features than the previous versions and is the most widely used version to
date. It is also now the default version in Oracle Solaris. To select different versions of NFS
Copyright © 2013, Oracle and/or its affiliates. All rights reserved.
on a server or client, use the sharectl set command as shown in this example.
See the documentation for more detailed information about NFS version 2 or 3.
Oracle Solaris 11 Advanced System Administration 5 - 52
Cicero Ronaldo (ciceroฺronaldo@gmailฺcom) has a non-transferable
license to use this Student Guideฺ
Unauthorized reproduction or distribution prohibitedฺ Copyright© 2014, Oracle and/or its affiliatesฺ

Enabling the Automounter
To enable or disable the automounter service, use the svcadm
command.
Enable service:
# svcadm enable autofs
Mount file system:
# cd /net/server1/export/share/local
Disable service:
# svcadm disable autofs
In addition to mounting the file systems automatically during boot time or on demand using
the command line, you can also mount the file systems with the automounter (autofs). The
automounter provides advantages over the other two methods; however, in many situations,
Copyright © 2013, Oracle and/or its affiliates. All rights reserved.
all three methods are used. The automounter uses the /net file system. After the autofs
service is enabled, you can change the directory using the /net path from the client.
The automounter can be customized using specific SMF properties and by editing the
automounter maps.
Oracle Solaris 11 Advanced System Administration 5 - 53
Cicero Ronaldo (ciceroฺronaldo@gmailฺcom) has a non-transferable
license to use this Student Guideฺ
Unauthorized reproduction or distribution prohibitedฺ Copyright© 2014, Oracle and/or its affiliatesฺ

Displaying NFS Server and Client Statistics
To display statistics about the NFS service on the client or
server, use the nfsstat command.
# nfsstat -c
Client rpc:
Connection oriented:
calls badcalls badxids timeouts newcreds badverfs timers
calls
badcalls
badxids
timeouts
newcreds
badverfs
timers
1595799 1511 59 297 0 0 0
cantconn nomem interrupts
1198 0 7
Connectionless:
calls badcalls badxids timeouts newcreds badverfs timers
1595799 1511 59 297 0 0 0
. . . . .
Client nfs:
calls badcalls clgets cltoomany
1640097 3112 1640097 0
. . . . .
Client nfs_acl:
Version 2: (3105 calls)
null getacl setacl getattr access
0 0% 0 0 % 0 0% 3105 100% 0 0%
To display useful information about the Remote Procedure Calls (RPC) and NFS data, use
the nfsstat command. This example is for the client, using the -c option but similar
information is displayed when using the -s option for the server. The ouptput for the client
Copyright © 2013, Oracle and/or its affiliates. All rights reserved.
uses the following stats:
•calls: Total number of RPC calls made
•badcalls: Total number of calls rejected by the RPC layer
•badxids: Number of times a reply from a server was received that didn’t correspond to
a call
•timeouts: Number of times a call timed out while waiting for a reply from the server
•newcreds: Number of times authentication information had to be refreshed
•badverfs: Number of times the call failed due to a bad verifier in the response
•timers: Number of times the calculated time-out value was greater than or equal to the
minimum specified timeout value for a call
•clgets: Number of times the CLIENT handle was received
•cltooman
y
: Number of times the CLIENT handle cache had no unused entries
y
Oracle Solaris 11 Advanced System Administration 5 - 54
Cicero Ronaldo (ciceroฺronaldo@gmailฺcom) has a non-transferable
license to use this Student Guideฺ
Unauthorized reproduction or distribution prohibitedฺ Copyright© 2014, Oracle and/or its affiliatesฺ

Practice 5-2 Overview:
Configuring the Network File System
Configuring
the
Network
File
System
This practice covers the configuration of the following:
•NFS server
•NFS client
This practice should take you about 15 minutes to complete.
Copyright © 2013, Oracle and/or its affiliates. All rights reserved.
Oracle Solaris 11 Advanced System Administration 5 - 55
Cicero Ronaldo (ciceroฺronaldo@gmailฺcom) has a non-transferable
license to use this Student Guideฺ
Unauthorized reproduction or distribution prohibitedฺ Copyright© 2014, Oracle and/or its affiliatesฺ

Lesson Agenda
• Planning for Network and Traffic Failover
• Configuring Systems on a Local Network
• Configuring a Reactive Network
•
Configuring Network File System
•
Configuring
Network
File
System
•Configuring Link Aggregation
• Configuring an IPMP Group
• Implementing Link Failover by Using IPMP
• Monitorin
g
an IPMP Grou
p
gp
Copyright © 2013, Oracle and/or its affiliates. All rights reserved.
Oracle Solaris 11 Advanced System Administration 5 - 56
Cicero Ronaldo (ciceroฺronaldo@gmailฺcom) has a non-transferable
license to use this Student Guideฺ
Unauthorized reproduction or distribution prohibitedฺ Copyright© 2014, Oracle and/or its affiliatesฺ

Preparing for Link Aggregation
Before configuring the link aggregation:
1. Make sure the links are to specification.
2. Set switch LACP mode.
3
Use the
dladm show
link
command to verify state
3
.
Use
the
dladm
show
-
link
command
to
verify
state
.
You may need to delete the interface first.
# dladm show-link
LINK CLASS MTU STATE OVER
net0 phys 1500 unknown --
net1
phys
1500
unknown
net1
phys
1500
unknown
--
net2 phys 1500 unknown --
Before configuring link aggregation, you need to make sure the links to be combined are full-
duplex and point-to-point, and that they operate at identical speeds. If using a switch,
configure the ports to be used as an aggregation. If the switch supports LACP, configure it for
Copyright © 2013, Oracle and/or its affiliates. All rights reserved.
active or passive mode. Use the dladm show-link command to display the data links and
VLANs on the system and their state. If the link is in use, plumbed, or up, then the link should
be deleted first with the ipadm delete-if command.
Oracle Solaris 11 Advanced System Administration 5 - 57
Cicero Ronaldo (ciceroฺronaldo@gmailฺcom) has a non-transferable
license to use this Student Guideฺ
Unauthorized reproduction or distribution prohibitedฺ Copyright© 2014, Oracle and/or its affiliatesฺ

Creating Link Aggregation
The following commands are used to create and display link
aggregation:
•dladm create-aggr
•
dladm show
-
aggr
dladm
show
aggr
# dladm create-aggr -l net0 -l net1 aggr1
# dladm show-link
LINK CLASS MTU STATE OVER
net0 phys 1500 up --
net1 phys 1500 up --
net2 phys 1500 up
--
net2
phys
1500
up
--
net3 phys 1500 up --
aggr1 aggr 1500 up -- net0 net1
# dladm show-aggr
LINK POLICY ADDRPOLICY LACPACTIVITY LACPTIMER FLAGS
aggr1 L4 auto off short -----
To create a link aggregation, you use the dladm create-aggr command as seen here.
Display the newly created aggregated link by using the show-link subcommand or display
aggregations separately using the show-aggr subcommand. In the example, notice that the
Copyright © 2013, Oracle and/or its affiliates. All rights reserved.
policy defaulted to L4 and that the LACP switch mode is in the default off setting.
After creating a static address for the new interface aggr1 and rebooting the system, the
aggregated link will be configured.
Oracle Solaris 11 Advanced System Administration 5 - 58
Cicero Ronaldo (ciceroฺronaldo@gmailฺcom) has a non-transferable
license to use this Student Guideฺ
Unauthorized reproduction or distribution prohibitedฺ Copyright© 2014, Oracle and/or its affiliatesฺ

Modifying Link Aggregation
The following commands are used to modify link aggregation:
•dladm modify-aggr
•dladm add-aggr
•
dladm remove
aggr
•
dladm
remove
-
aggr
# dladm modify-aggr --policy=L3 aggr1
# dladm add-aggr -l net2 -l netg3 aggr1
# dladm remove-aggr -l net0 aggr1
To modify the parameters of the specified link aggregation, use the dladm modify-aggr
command. For example, if you want a policy for managing data that is based on the
addressing (IP, layer 3) instead of the communication protocol (TCP/UDP, layer 4), enter the
Copyright © 2013, Oracle and/or its affiliates. All rights reserved.
top command in this example. To add links to the specified aggregation, use the add-aggr
subcommand or, to remove links, use the remove-addr subcommand as seen in the bottom
two lines of this example.
Oracle Solaris 11 Advanced System Administration 5 - 59
Cicero Ronaldo (ciceroฺronaldo@gmailฺcom) has a non-transferable
license to use this Student Guideฺ
Unauthorized reproduction or distribution prohibitedฺ Copyright© 2014, Oracle and/or its affiliatesฺ

Deleting Link Aggregation
The following command is used to delete aggregation:
dladm delete-aggr
# dladm delete-aggr aggr1
Copyright © 2013, Oracle and/or its affiliates. All rights reserved.
Oracle Solaris 11 Advanced System Administration 5 - 60
Cicero Ronaldo (ciceroฺronaldo@gmailฺcom) has a non-transferable
license to use this Student Guideฺ
Unauthorized reproduction or distribution prohibitedฺ Copyright© 2014, Oracle and/or its affiliatesฺ

Practice 5-3 Overview:
Configuring a Link Aggregation
Configuring
a
Link
Aggregation
This practice covers the following topics:
•Creating a link aggregation
•Removing a link aggregation
This practice should take you about 15 minutes to complete.
Copyright © 2013, Oracle and/or its affiliates. All rights reserved.
Oracle Solaris 11 Advanced System Administration 5 - 61
Cicero Ronaldo (ciceroฺronaldo@gmailฺcom) has a non-transferable
license to use this Student Guideฺ
Unauthorized reproduction or distribution prohibitedฺ Copyright© 2014, Oracle and/or its affiliatesฺ

Lesson Agenda
• Planning for Network and Traffic Failover
• Configuring Systems on a Local Network
• Configuring a Reactive Network
•
Configuring Network File System
•
Configuring
Network
File
System
• Configuring Link Aggregation
•Configuring an IPMP Group
• Implementing Link Failover by Using IPMP
• Monitorin
g
an IPMP Grou
p
gp
Copyright © 2013, Oracle and/or its affiliates. All rights reserved.
Oracle Solaris 11 Advanced System Administration 5 - 62
Cicero Ronaldo (ciceroฺronaldo@gmailฺcom) has a non-transferable
license to use this Student Guideฺ
Unauthorized reproduction or distribution prohibitedฺ Copyright© 2014, Oracle and/or its affiliatesฺ

Configuring an IPMP Group
This section covers the following topics:
•Creating an IPMP group
•Adding IP addresses to an IPMP group
•
Moving an interface from one IPMP group to another
•
Moving
an
interface
from
one
IPMP
group
to
another
•Deleting or disabling an IPMP group
Copyright © 2013, Oracle and/or its affiliates. All rights reserved.
Oracle Solaris 11 Advanced System Administration 5 - 63
Cicero Ronaldo (ciceroฺronaldo@gmailฺcom) has a non-transferable
license to use this Student Guideฺ
Unauthorized reproduction or distribution prohibitedฺ Copyright© 2014, Oracle and/or its affiliatesฺ

Creating an IPMP Group
1. Create IP interfaces for the data links to use in the IPMP
group by using the ipadm create-ip command.
2. Create the IPMP group by using the ipadm create-
i
p
m
p
command.
pp
# ipadm create-ip link0_ipmp0
# ipadm create-ip link1_ipmp0
# ipadm create-ipmp ipmp0
#ipadm add-ipmp –i link0_ipmp0 –i link1_ipmp0 ipmp0
#ipmpstat –g
GROUP GROUPNAME STATE FDT INTERFACES
GROUP
GROUPNAME
STATE
FDT
INTERFACES
ipmp0 ipmp0 ok -- link1_ipmp0 link0_ipmp0
To create an IPMP group, follow the steps listed in the slide. In this example, create two IP
interfaces are being created for the data links net0 and net1.
Note:
Before creating IP interfaces for the data links shown in the example, you renamed
Copyright © 2013, Oracle and/or its affiliates. All rights reserved.
Note:
Before
creating
IP
interfaces
for
the
data
links
shown
in
the
example,
you
renamed
data links net0 and net1 to link0_ipmp0 and link1_ipmp0, respectively, using the
dlamd rename-link command.
You then create an IPMP group called ipmp_group0 with the ipadm create-ipmp
command. Finally, you add the specified network interfaces to the IPMP group that you just
created. You run the ipmpstat -g command to display the group information.
Oracle Solaris 11 Advanced System Administration 5 - 64
Cicero Ronaldo (ciceroฺronaldo@gmailฺcom) has a non-transferable
license to use this Student Guideฺ
Unauthorized reproduction or distribution prohibitedฺ Copyright© 2014, Oracle and/or its affiliatesฺ

Adding IP Addresses to an IPMP Group
1. Add addresses to an IPMP group by using the ipadm
create-addr command.
2. Verify the results with the ipadm show-addr command.
# ipadm create-addr -T static -a 192.168.0.112/24 ipmp0/v4add1
# ipadm create-addr -T static -a 192.168.0.113/24 ipmp0/v4add2
# ipadm show-addr
ADDROBJ TYPE STATE ADDR
ipmp0/v4add1 static ok 192.168.0.112/24
ipmp0/v4add2 static ok 192.168.0.113/24
To add static type addresses to the IPMP interfaces, use the ipadm create-addr
command as seen in this example, and then display the results with the ipadm show-addr
command.
Copyright © 2013, Oracle and/or its affiliates. All rights reserved.
Oracle Solaris 11 Advanced System Administration 5 - 65
Cicero Ronaldo (ciceroฺronaldo@gmailฺcom) has a non-transferable
license to use this Student Guideฺ
Unauthorized reproduction or distribution prohibitedฺ Copyright© 2014, Oracle and/or its affiliatesฺ

Moving an Interface
from One IPMP Group to Another Group
from
One
IPMP
Group
to
Another
Group
1. Remove the interface from the IPMP group by using the
ipadm remove-ipmp command.
2. Add it to another group by using the ipadm add-ipmp
command.
# ipadm remove-ipmp -i link0_ipmp0 ipmp0
# ipadm add-ipmp -i link0_ipmp0 ipmp1
To move an interface from one IPMP group to another group, you remove the interface from
the first group and add it to another group. The steps for completing this task are presented in
the slide.
Copyright © 2013, Oracle and/or its affiliates. All rights reserved.
In this example, the link0_ipmp0 interface is removed from ipmp0 with the ipadm
remove-ipmp command. It is then added to the ipmp1 group by using the ipadm add-
ipmp command.
Oracle Solaris 11 Advanced System Administration 5 - 66
Cicero Ronaldo (ciceroฺronaldo@gmailฺcom) has a non-transferable
license to use this Student Guideฺ
Unauthorized reproduction or distribution prohibitedฺ Copyright© 2014, Oracle and/or its affiliatesฺ

Deleting or Disabling an IPMP Group
To delete an IPMP group, use the ipadm delete-ip
command.
# ipadm delete-ipmp ipmp0
To disable an IPMP group, use the ipadm disable-if
command.
# ipadm disable-if -t ipmp0
To delete an IPMP group, you use the ipadm delete-ipmp command. This means all
addresses configured on this interface will be torn down and all the persistent information will
be removed. If there are any underlying interfaces, the -f option is used to force the deletion.
Copyright © 2013, Oracle and/or its affiliates. All rights reserved.
As an alternative, you can also disable the IPMP group from active configuration by using the
disable-if subcommand.
Note: The –t option makes the operation temporary. See man ipadm(1M) for more details.
Oracle Solaris 11 Advanced System Administration 5 - 67
Cicero Ronaldo (ciceroฺronaldo@gmailฺcom) has a non-transferable
license to use this Student Guideฺ
Unauthorized reproduction or distribution prohibitedฺ Copyright© 2014, Oracle and/or its affiliatesฺ

Lesson Agenda
• Planning for Network and Traffic Failover
• Configuring Systems on a Local Network
• Configuring a Reactive Network
•
Configuring Network File System
•
Configuring
Network
File
System
• Configuring Link Aggregation
• Configuring an IPMP Group
•Implementing Link Failover by Using IPMP
• Monitorin
g
an IPMP Grou
p
gp
Copyright © 2013, Oracle and/or its affiliates. All rights reserved.
Oracle Solaris 11 Advanced System Administration 5 - 68
Cicero Ronaldo (ciceroฺronaldo@gmailฺcom) has a non-transferable
license to use this Student Guideฺ
Unauthorized reproduction or distribution prohibitedฺ Copyright© 2014, Oracle and/or its affiliatesฺ

Implementing Link Failover by Using IPMP
This section covers the configuration of:
•An active-active IPMP group
•An active-standby IPMP group
Copyright © 2013, Oracle and/or its affiliates. All rights reserved.
Oracle Solaris 11 Advanced System Administration 5 - 69
Cicero Ronaldo (ciceroฺronaldo@gmailฺcom) has a non-transferable
license to use this Student Guideฺ
Unauthorized reproduction or distribution prohibitedฺ Copyright© 2014, Oracle and/or its affiliatesฺ

Configuring an Active-Active IPMP Group
#
dl d
lik t0lik0i 0
1. Create IP interfaces by using ipadm.
2. Create an IPMP group and add the interfaces to the group.
3. Create static IP addresses for data access.
#
dl
a
d
m rename-
li
n
k
ne
t0
li
n
k0
_
i
pmp
0
# dladm rename-link net1 link1_ipmp0
# ipadm create-ip link0_ipmp0
# ipadm create-ip link1_ipmp0
# ipadm create-ipmp ipmp0
# ipadm add-ipmp –i link0_ipmp0 –i link1_ipmp0 ipmp0
# ipadm create-addr –T static –a 192.168.0.112/24 ipmp0/v4add1
#ipadm create-addr –T static –a 192.168.0.113/24 ipmp0/v4add2
#
ipadm show
-
addr
#
ipadm
show
-
addr
ADDROBJ TYPE STATE ADDR
lo0/v4 static ok 127.0.0.1/8
ipmp0/v4add1 static ok 192.168.0.112/24
ipmp0/v4add2 static ok 192.168.0.113/24
lo0/v6 static ok ::1/128
link0_ipmp0/_a static ok fe80::a00:27ff:fec0:b88a/10
link1_ipmp0/_a static ok fe80::a00:27ff:fe35:4321/10
IPMP groups are configured as either active-active or active-standby configurations. In an
active-active IPMP group configuration, all underlying interfaces are active, which means they
are currently available for use by the IPMP group. This is the default setting when adding the
Copyright © 2013, Oracle and/or its affiliates. All rights reserved.
interfaces to the IPMP group.
In this example, you first create IP interfaces for the net0 and net1 datalinks after renaming
these datalinks link0_ipmp0 and link1_ipmp0 respectively. Then you create an IPMP
group called ipmp_group0 and the interfaces are added to that group. After you assign static
addresses to be used for data access, you display the IPMP group address information by
using the ipadm show-addr command. All the interfaces are currently available for use. So
this is an active
-
active configuration
this
is
an
active
active
configuration
.
Oracle Solaris 11 Advanced System Administration 5 - 70
Cicero Ronaldo (ciceroฺronaldo@gmailฺcom) has a non-transferable
license to use this Student Guideฺ
Unauthorized reproduction or distribution prohibitedฺ Copyright© 2014, Oracle and/or its affiliatesฺ

Assigning Test Addresses
# ipadm create-addr –T static –a 192.168.0.142/24 link0_ipmp0/test
#
ipadm create
-
addr
–
T static
–
a 192.168.0.143/24 link1 ipmp0/test
To assign test addresses to an IPMP sub-interface, use ipadm
create-addr –T static –a IP_address link/test.
#
ipadm
create
addr
T
static
a
192.168.0.143/24
link1
_
ipmp0/test
# ipadm show-addr
ADDROBJ TYPE STATE ADDR
lo0/v4 static ok 127.0.0.1/8
link0_ipmp0/test static ok 192.168.0.142/24
link1_ipmp0/test static ok 192.168.0.143/24
ipmp0/v4add1 static ok 192.168.0.112/24
ipmp0/v4add2 static ok 192.168.0.113/24
lo0/v6 static ok ::1/128
link0_ipmp0/_a static ok fe80::a00:27ff:fec0:b88a/10
link1_ipmp0/_a static ok fe80::a00:27ff:fe35:4321/10
It is highly recommended that you assign a static IP address to each IPMP subinterface to be
used for link testing. This is done using the ipadm create-add -T static -a command
that was used to assign an IP address to the IPMP group to be used for data access.
Copyright © 2013, Oracle and/or its affiliates. All rights reserved.
In the example, you assign static addresses to link0_ipmp0 and link1_ipmp0 to be used
for link testing. Next, you display the IPMP group address information by using the ipadm
show-addr command. Here you can see that the two test addresses are currently available
for use.
Oracle Solaris 11 Advanced System Administration 5 - 71
Cicero Ronaldo (ciceroฺronaldo@gmailฺcom) has a non-transferable
license to use this Student Guideฺ
Unauthorized reproduction or distribution prohibitedฺ Copyright© 2014, Oracle and/or its affiliatesฺ

Configuring an Active-Standby IPMP Group
1. Set at least one interface’s property to standby by using
the ipadm set-ifprop command.
2. Confirm the results.
#ipadm show-ifprop -p standby link2_ipmp0
IFNAME PROPERTY PROTO PERM CURRENT PERSISTENT DEFAULT POSSIBLE
link2_ipmp0 standby ip rw off -- off on,off
#ipadm set-ifprop -p standby=on -m ip link2_ipmp0
#ipadm show-ifprop -p standby link2_ipmp0
IFNAME PROPERTY PROTO PERM CURRENT PERSISTENT DEFAULT POSSIBLE
link2_ipmp0 standby ip rw on on off on,off
In an active-standby IPMP group configuration, at least one interface is configured to be on
standby. The reserve interface is idle but if it supports link-failure notification, then it could
become active. The multipathing daemon monitors all the standby interfaces and is aware of
Copyright © 2013, Oracle and/or its affiliates. All rights reserved.
their availability. If a link failure occurs, then the reserve interface springs into action and
failover occurs. The multipathing daemon also uses probe-based failure detection if a link is
configured with a test address. The daemon sends probes to the link to keep constant watch
for any failures and the standby interface is automatically deployed as needed.
In this example, the current standby setting is displayed for the net2 interface, which you
have renamed to link2_ipmp0. Note that standby is currently set to off. Then the
standby
property is set by using the
ipadm set
-
ifprop
command and the results are
standby
property
is
set
by
using
the
ipadm
set
ifprop
command
,
and
the
results
are
displayed.
Oracle Solaris 11 Advanced System Administration 5 - 72
Cicero Ronaldo (ciceroฺronaldo@gmailฺcom) has a non-transferable
license to use this Student Guideฺ
Unauthorized reproduction or distribution prohibitedฺ Copyright© 2014, Oracle and/or its affiliatesฺ

Lesson Agenda
• Planning for Network and Traffic Failover
• Configuring Systems on a Local Network
• Configuring a Reactive Network
•
Configuring Network File System
•
Configuring
Network
File
System
• Configuring Link Aggregation
• Configuring an IPMP Group
• Implementing Link Failover by Using IPMP
•Monitorin
g
an IPMP Grou
p
gp
Copyright © 2013, Oracle and/or its affiliates. All rights reserved.
Oracle Solaris 11 Advanced System Administration 5 - 73
Cicero Ronaldo (ciceroฺronaldo@gmailฺcom) has a non-transferable
license to use this Student Guideฺ
Unauthorized reproduction or distribution prohibitedฺ Copyright© 2014, Oracle and/or its affiliatesฺ

Monitoring an IPMP Group
This section covers the following topics:
•Displaying IPMP group information
•Obtaining IPMP address information
•
Verifying IPMP interface information
•
Verifying
IPMP
interface
information
•Obtaining probe target information
•Checking probe information
Copyright © 2013, Oracle and/or its affiliates. All rights reserved.
Oracle Solaris 11 Advanced System Administration 5 - 74
Cicero Ronaldo (ciceroฺronaldo@gmailฺcom) has a non-transferable
license to use this Student Guideฺ
Unauthorized reproduction or distribution prohibitedฺ Copyright© 2014, Oracle and/or its affiliatesฺ

Displaying IPMP Group Information
To display IPMP group information, use ipmpstat -g.
# ipmpstat -g
GROUP GROUPNAME STATE FDT INTERFACES
ipmp0 ipmp0 ok 10.00s link1_ipmp0 link0_ipmp0 (link2_ipmp0)
As shown in the example, the output from this command displays the IPMP group information,
such as group name, state, failed detection time (FDT), and interface names. If probe-based
failure detection is disabled, the FDT filed is empty. Note that interface link2_ipmp0 is in
Copyright © 2013, Oracle and/or its affiliates. All rights reserved.
parentheses, indicating that it is in standby mode.
Oracle Solaris 11 Advanced System Administration 5 - 75
Cicero Ronaldo (ciceroฺronaldo@gmailฺcom) has a non-transferable
license to use this Student Guideฺ
Unauthorized reproduction or distribution prohibitedฺ Copyright© 2014, Oracle and/or its affiliatesฺ

Obtaining IPMP Address Information
To display IPMP address information, use ipmpstat -an.
# ipmpstat -an
ADDRESS STATE GROUP INBOUND OUTBOUND
:: down ipmp0 -- --
192.168.0.113 up ipmp0 link1_ipmp0 link1_ipmp0 link0_ipmp0
192.168.0.112 up ipmp0 link0_ipmp0 link1_ipmp0 link0_ipmp0
The output for this command displays the address information for the IPMP, the state, the
group, and the inbound and outbound links.
Note, in this example, that the inbound traffic is restricted to one interface depending on which
Copyright © 2013, Oracle and/or its affiliates. All rights reserved.
Note,
in
this
example,
that
the
inbound
traffic
is
restricted
to
one
interface
depending
on
which
IP address is used, and the outbound traffic is spread across both the interfaces.
Oracle Solaris 11 Advanced System Administration 5 - 76
Cicero Ronaldo (ciceroฺronaldo@gmailฺcom) has a non-transferable
license to use this Student Guideฺ
Unauthorized reproduction or distribution prohibitedฺ Copyright© 2014, Oracle and/or its affiliatesฺ

Verifying IPMP Interface Information
To verify IPMP interface information, use ipmpstat -i.
# ipmpstat -i
INTERFACE ACTIVE GROUP FLAGS LINK PROBE STATE
link2_ipmp0 yes ipmp0 -s----- up ok ok
link1 ipmp0 yes ipmp0
--
mbM
--
up ok ok
link1
_
ipmp0
yes
ipmp0
--
mbM
--
up
ok
ok
link0_ipmp0 no ipmp0 ------- up failed failed
The output for this command displays the interface, whether the link is active or not, the IPMP
group, flags, the link status, the probe status, and the state of the interface.
In this example, both
link1 ipmp0
and
link2 ipmp0
are active, up, and in the
ipmp0
Copyright © 2013, Oracle and/or its affiliates. All rights reserved.
In
this
example,
both
link1
_
ipmp0
and
link2
_
ipmp0
are
active,
up,
and
in
the
ipmp0
IPMP group. The third link in the group, link2_ipmp0, is active and up, but in standby
mode.
The flags in this output are defined as:
•i: Unusable due to being INACTIVE
•s: Masked STANDBY
•
m
:
Nominated to send/receive IPv4 multicast for its IPMP group
m
:
Nominated
to
send/receive
IPv4
multicast
for
its
IPMP
group
•b: Nominated to send/receive IPv4 broadcast for its IPMP group
•M: Nominated to send/receive IPv6 multicast for its IPMP group
•d: Unusable due to being down
•h: Unusable due to being brought OFFLINE by in.mpathd (IPMP daemon) because of
a duplicate hardware address
Oracle Solaris 11 Advanced System Administration 5 - 77
Cicero Ronaldo (ciceroฺronaldo@gmailฺcom) has a non-transferable
license to use this Student Guideฺ
Unauthorized reproduction or distribution prohibitedฺ Copyright© 2014, Oracle and/or its affiliatesฺ

Obtaining Probe Target Information
To display information about test address targets, use
ipmpstat -nt.
#ipmpstat -nt
INTERFACE MODE TESTADDR TARGETS
link1_ipmp0 multicast 192.168.0.143 192.168.0.100 192.168.0.111
link0_ipmp0 multicast 192.168.0.142 192.168.0.100 192.168.0.111
The output for this command presents the interface, mode, test address, and targets for each
probe, as shown in the example.
The
TARGETS
column shows the host name or IP address of the target to which an ICMP
Copyright © 2013, Oracle and/or its affiliates. All rights reserved.
The
TARGETS
column
shows
the
host
name
or
IP
address
of
the
target
to
which
an
ICMP
probe is sent in firing order for each interface.
Oracle Solaris 11 Advanced System Administration 5 - 78
Cicero Ronaldo (ciceroฺronaldo@gmailฺcom) has a non-transferable
license to use this Student Guideฺ
Unauthorized reproduction or distribution prohibitedฺ Copyright© 2014, Oracle and/or its affiliatesฺ

Checking Probe Information
To check probe information, use ipmpstat –pn.
# ipmpstat –pn
TIME INTERFACE PROBE NETRTT RTT RTTAVG TARGET
0.06s link2_ipmp0 i163 0.26ms 0.49ms 0.33ms 192.168.0.100
0 90s link1 ipmp0 i162 0 26ms 0 39ms 0 31ms 192 168 0 100
0
.
90s
link1
_
ipmp0
i162
0
.
26ms
0
.
39ms
0
.
31ms
192
.
168
.
0
.
100
0.92s link2_ipmp0 i164 0.19ms 0.36ms 0.34ms 192.168.0.100
0.49s link0_ipmp0 i161 -- -- -- 192.168.0.100
-0.49s link0_ipmp0 i160 -- -- -- 192.168.0.100
2.52s link2_ipmp0 i165 0.23ms 0.39ms 0.34ms 192.168.0.100
2.74s link1_ipmp0 i163 0.24ms 0.38ms 0.32ms 192.168.0.100
3.69s link1_ipmp0 i164 0.25ms 0.45ms 0.34ms 192.168.0.100
2.31s link0_ipmp0 i162 -- -- -- 192.168.0.100
…
…
…
<Ctrl+C>
The probe mode displays information about the probes being sent by in.mpathd. Unlike the
other output modes, this mode runs until you terminate it with Ctrl + C.
The output shows a table of times that includes the following columns:
Copyright © 2013, Oracle and/or its affiliates. All rights reserved.
The
output
shows
a
table
of
times
that
includes
the
following
columns:
•NETRTT: Network round-trip time for the probe
•RTT: Total round-trip time for the probe. Spikes in the total RTT that are not present in
the NETRTT indicate that the local system is overloaded.
•RTTAVG:Average round-trip time to TARGET over INTERFACE. If there is not sufficient
data to calculate the average, the field will be empty.
Oracle Solaris 11 Advanced System Administration 5 - 79
Cicero Ronaldo (ciceroฺronaldo@gmailฺcom) has a non-transferable
license to use this Student Guideฺ
Unauthorized reproduction or distribution prohibitedฺ Copyright© 2014, Oracle and/or its affiliatesฺ

Practice 5-4 Overview:
Configuring IPMP
Configuring
IPMP
This practice covers the following topics:
•Configuring an active-active IPMP configuration
•Configuring an active-standby IPMP configuration
•
Removing the IPMP configuration
•
Removing
the
IPMP
configuration
This practice should take you about one hour to complete.
Copyright © 2013, Oracle and/or its affiliates. All rights reserved.
Oracle Solaris 11 Advanced System Administration 5 - 80
Cicero Ronaldo (ciceroฺronaldo@gmailฺcom) has a non-transferable
license to use this Student Guideฺ
Unauthorized reproduction or distribution prohibitedฺ Copyright© 2014, Oracle and/or its affiliatesฺ

Summary
In this lesson, you should have learned how to:
•Implement a plan for network and traffic failover
configuration
•
Configure the following:
Configure
the
following:
–Systems on a local network
–A reactive network
–Network File System
–Link aggregation
AIPMP
–
A
n
IPMP
group
•Implement link failover by using IPMP
•Monitor an IPMP group
Copyright © 2013, Oracle and/or its affiliates. All rights reserved.
Oracle Solaris 11 Advanced System Administration 5 - 81
Cicero Ronaldo (ciceroฺronaldo@gmailฺcom) has a non-transferable
license to use this Student Guideฺ
Unauthorized reproduction or distribution prohibitedฺ Copyright© 2014, Oracle and/or its affiliatesฺ

Cicero Ronaldo (ciceroฺronaldo@gmailฺcom) has a non-transferable
license to use this Student Guideฺ
Unauthorized reproduction or distribution prohibitedฺ Copyright© 2014, Oracle and/or its affiliatesฺ

Cfi i Z dthVitlNt k
C
on
fi
gur
i
ng
Z
ones an
d
th
e
Vi
r
t
ua
l
N
e
t
wor
k
Copyright © 2013, Oracle and/or its affiliates. All rights reserved.
Cicero Ronaldo (ciceroฺronaldo@gmailฺcom) has a non-transferable
license to use this Student Guideฺ
Unauthorized reproduction or distribution prohibitedฺ Copyright© 2014, Oracle and/or its affiliatesฺ

Objectives
After completing this lesson, you should be able to:
•Implement a plan to configure Oracle Solaris zones with a
virtual network
•
Create a virtual network
Create
a
virtual
network
•Configure Oracle Solaris zones to use VNICs
•Allocate resources to an Oracle Solaris zone
•Manage virtual network resources
Copyright © 2013, Oracle and/or its affiliates. All rights reserved.
Oracle Solaris 11 Advanced System Administration 6 - 2
Cicero Ronaldo (ciceroฺronaldo@gmailฺcom) has a non-transferable
license to use this Student Guideฺ
Unauthorized reproduction or distribution prohibitedฺ Copyright© 2014, Oracle and/or its affiliatesฺ
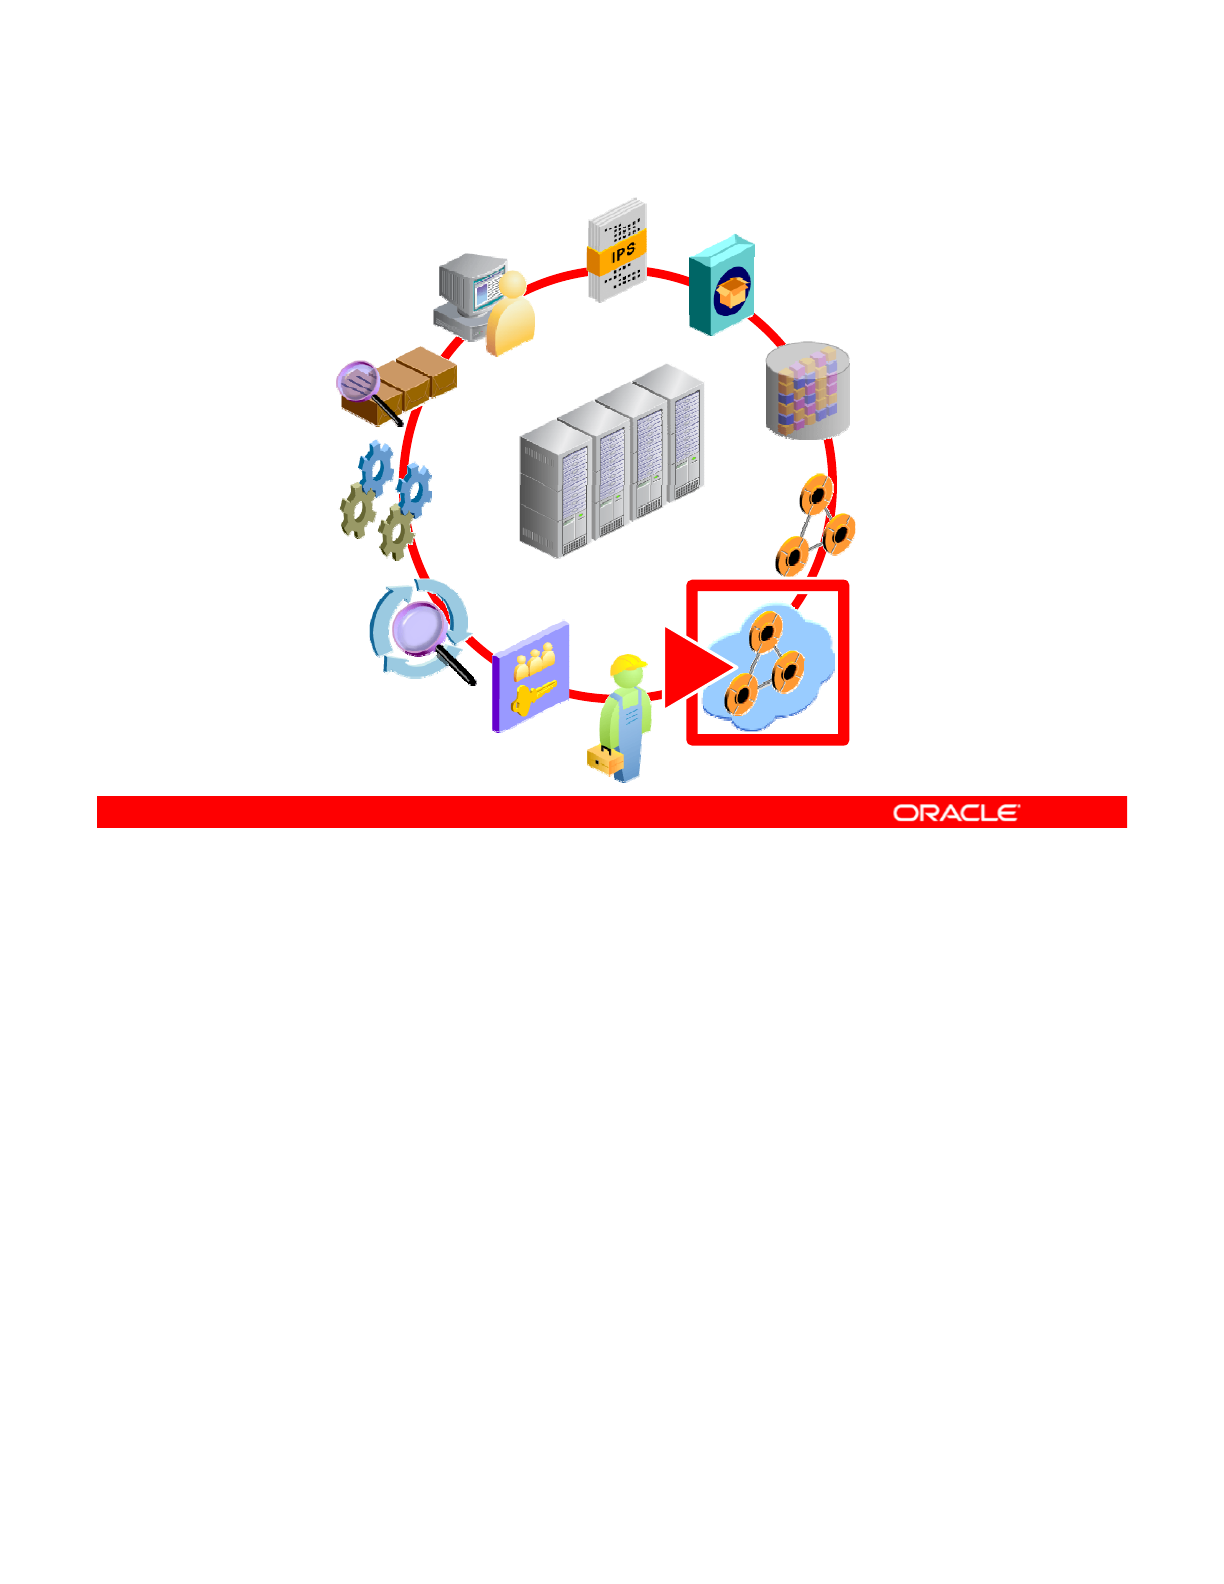
Workflow Orientation
AI INSTALL
IPS
DATA
STORAGE
MONITORING
RESOURCE
EVALUATION
STORAGE
NETWORK
CONFIGURATION
PROCESSES
ENTERPRISE
DATACENTER
EVALUATION
SERVICES
PRIVILEGES
AUDITING
NETWORK
VIRTUALIZATION
Before you begin the lesson, orient yourself in the job workflow. You have successfully
installed the operating system by using AI, created a local IPS repository, set up the storage
environment for your company’s business application data, and configured the physical
Copyright © 2013, Oracle and/or its affiliates. All rights reserved.
network. Now you are ready to enter the world of virtualization. An increasing number of
companies are benefiting from the cost savings that virtualization offers. As a system
administrator, you will be expected to know how to support your company’s virtualization
needs and requirements, including setting up virtual networks and zones.
Oracle Solaris 11 Advanced System Administration 6 - 3
Cicero Ronaldo (ciceroฺronaldo@gmailฺcom) has a non-transferable
license to use this Student Guideฺ
Unauthorized reproduction or distribution prohibitedฺ Copyright© 2014, Oracle and/or its affiliatesฺ

Lesson Agenda
•Planning for a Virtual Network and Zones
• Creating a Virtual Network
• Configuring Zones to Use VNICs
•
Allocating and Managing System Resources in a Zone
•
Allocating
and
Managing
System
Resources
in
a
Zone
• Managing Resources on the Virtual Network
Copyright © 2013, Oracle and/or its affiliates. All rights reserved.
Oracle Solaris 11 Advanced System Administration 6 - 4
Cicero Ronaldo (ciceroฺronaldo@gmailฺcom) has a non-transferable
license to use this Student Guideฺ
Unauthorized reproduction or distribution prohibitedฺ Copyright© 2014, Oracle and/or its affiliatesฺ

Planning for a Virtual Network and Zones
•Identify the virtual network configuration:
–Virtual switch or etherstub
–Number of VNICs and name assignments
•
Identify the zone configuration:
Identify
the
zone
configuration:
–Number of zones
–Zone configuration details
–Zone and VNIC assignments
•Identify the requirements for allocating system resources
to zones
to
zones
.
•Identify the requirements for managing virtual network
resources.
Your company is exploring ways to improve system and network efficiency and performance.
They have heard of the cost-saving benefits of using Oracle Solaris zones to consolidate
multiple applications that are running on many systems to a single system, and using the
Copyright © 2013, Oracle and/or its affiliates. All rights reserved.
virtual network technology to expand a single system’s network interface capacity. Your
company now wants to test configuring zones on a virtual network.
The plan for implementing a virtual network includes identifying the virtual network
configuration, including whether to create the virtual network with a virtual switch or etherstub,
how many virtual network interfaces (VNICs) to create, and what to call each VNIC. The plan
also identifies how many zones to configure, how to configure the zones, and what the zone-
to
-
VNIC assignments are
to
VNIC
assignments
are
.
In addition, your company wants to investigate allocating system resources, such as CPUs
and memory, to the zones that use the Oracle Solaris 11 resource control features,
specifically resource pools and resource capping. Finally, the plan identifies the requirements
for implementing virtual network resource management. As part of the network efficiency and
performance initiative, your company wants to be able to control and manage its virtual
network resources. They are specifically interested in testing the use of flows. In the following
lid i t d d t i t l t k d h t fi t i t l
s
lid
es, you are
i
n
t
ro
d
uce
d
t
o v
i
r
t
ua
l
ne
t
wor
k
s an
d
h
ow
t
o con
fi
gure zones
t
o use a v
i
r
t
ua
l
network. You are also introduced to resource pools and capping, and how to manage virtual
network resources by using flows.
Oracle Solaris 11 Advanced System Administration 6 - 5
Cicero Ronaldo (ciceroฺronaldo@gmailฺcom) has a non-transferable
license to use this Student Guideฺ
Unauthorized reproduction or distribution prohibitedฺ Copyright© 2014, Oracle and/or its affiliatesฺ

Network Virtualization and Virtual Networks
•Network virtualization
–Is the process of combining hardware network resources and
software network resources
–
Provides efficient, controlled, and secure sharin
g
of network
g
resources
•Virtual networks
–External networks: Several local networks administered by
software as a single entity
–
Internal networks: One system using virtual machines or
zones that are configured over at least one pseudonetwork
interface
Planning for Oracle Solaris Zones
Network virtualization is the process of combining hardware network resources and software
network resources into a single administrative unit The goal of network virtualization is to
Copyright © 2013, Oracle and/or its affiliates. All rights reserved.
network
resources
into
a
single
administrative
unit
.
The
goal
of
network
virtualization
is
to
provide systems and users with efficient, controlled, and secure sharing of the networking
resources.
The end product of network virtualization is the virtual network. Virtual networks are classified
into two broad types: external and internal. External virtual networks consist of several local
networks that are administered by software as a single entity. The building blocks of classic
external virtual networks are switch hardware and VLAN software technology. Examples of
tlitltkildl ttkddt t
ex
t
erna
l
v
i
r
t
ua
l
ne
t
wor
k
s
i
nc
l
u
d
e
l
arge corpora
t
e ne
t
wor
k
s an
d
d
a
t
a cen
t
ers.
An internal virtual network consists of one system using virtual machines or zones that are
configured over at least one pseudonetwork interface. These containers can communicate
with each other as though they are on the same local network, thus providing a virtual network
on a single host. The building blocks of the virtual network are virtual network interface cards
or virtual NICs (VNICs) and virtual switches. Oracle Solaris network virtualization provides the
internal virtual network solution
,
which will be in focus in this course.
,
Oracle Solaris 11 Advanced System Administration 6 - 6
Cicero Ronaldo (ciceroฺronaldo@gmailฺcom) has a non-transferable
license to use this Student Guideฺ
Unauthorized reproduction or distribution prohibitedฺ Copyright© 2014, Oracle and/or its affiliatesฺ
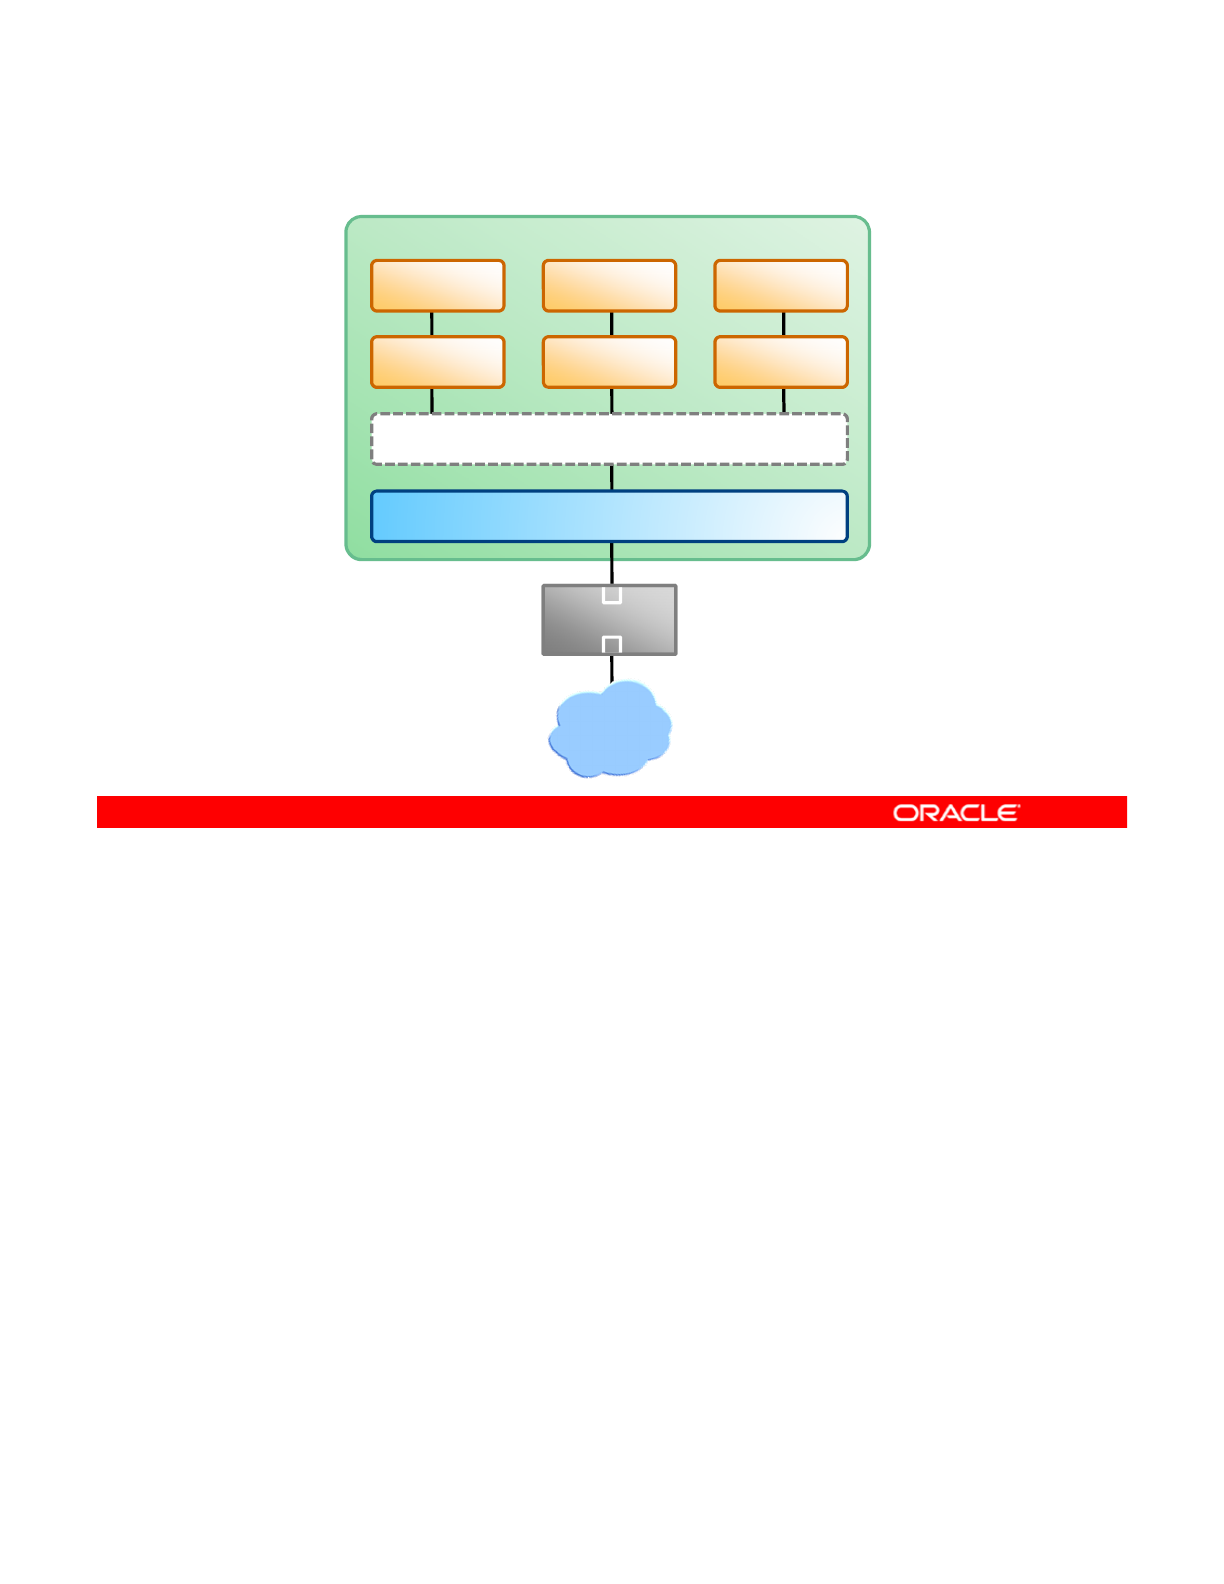
Virtual Network Components
System
VNIC 1 VNIC 2 VNIC 3
Zone 1 Zone 2 Zone 3
Virtual Switch
NIC
Switch
Internet
An internal virtual network built on Oracle Solaris consists of the following components:
•At least one network interface card (NIC)
•
A virtual NIC (VNIC) which is configured on top of the network interface The VNIC is a
Copyright © 2013, Oracle and/or its affiliates. All rights reserved.
•
A
virtual
NIC
(VNIC)
,
which
is
configured
on
top
of
the
network
interface
.
The
VNIC
is
a
virtual network device with the same datalink interface as a physical interface.
•A virtual switch, which is configured at the same time as the first VNIC on the interface.
The virtual switch provides the same connectivity between VNICs on a virtual network
that switch hardware provides for the systems connected to a switch’s ports.
•A container, such as a zone or virtual machine, which is configured on top of the VNIC
The graphic in the slide shows these components and how they fit together on a single
The
graphic
in
the
slide
shows
these
components
and
how
they
fit
together
on
a
single
system. The single system has one NIC. The NIC is configured with three VNICs. Each VNIC
supports a single zone. Therefore, Zone 1, Zone 2, and Zone 3 are configured over VNIC 1,
VNIC 2, and VNIC 3, respectively. The three VNICs are virtually connected to one virtual
switch. This switch provides the connection between the VNICs and the physical NIC upon
which the VNICs are built. The physical interface provides the system with its external
network connection.
Alternati el o can create a irt al net ork based on the etherst b Etherst bs are p rel
Alternati
v
el
y, y
o
u
can
create
a
v
irt
u
al
net
w
ork
based
on
the
etherst
u
b
.
Etherst
u
bs
are
p
u
rel
y
software and do not require a network interface as the basis for the virtual network. In this
lesson, you learn how to create a virtual network by using an etherstub.
Oracle Solaris 11 Advanced System Administration 6 - 7
Cicero Ronaldo (ciceroฺronaldo@gmailฺcom) has a non-transferable
license to use this Student Guideฺ
Unauthorized reproduction or distribution prohibitedฺ Copyright© 2014, Oracle and/or its affiliatesฺ
Introducing Zone Configuration by Using VNICs
•Step 1: Create the
virtual switch or
etherstub.
•Ste
p
2: Create the
System
Zone 1
Zone 2
Zone 3
p
VNICs.
•Step 3: Configure the
zones to use the
VNICs.
VNIC 1 VNIC 2 VNIC 3
Virtual Switch
Zone
1
Zone
2
Zone
3
To configure zones to use a virtual network, the first step is to create your virtual network by
creating the virtual switch or etherstub. The second step is to create the VNICs over the
switch or etherstub. After you have the VNICs created, the third step is to configure your
Copyright © 2013, Oracle and/or its affiliates. All rights reserved.
zones to use the VNICs.
Oracle Solaris 11 Advanced System Administration 6 - 8
Cicero Ronaldo (ciceroฺronaldo@gmailฺcom) has a non-transferable
license to use this Student Guideฺ
Unauthorized reproduction or distribution prohibitedฺ Copyright© 2014, Oracle and/or its affiliatesฺ

Allocating System Resources to a Zone
To allocate system resources to a zone, perform the following
steps:
•Specify a subset of the system’s processors that should be
dedicated to a zone while it is runnin
g
.
g
•Limit the amount of CPU resources that can be consumed
by a zone.
•Control the allocation of available CPU resources among
zones, based on their importance.
•
Limit the amount of physical memory
•
Limit
the
amount
of
physical
memory
.
After a zone is running, the zone and the applications that are running within it consume a
percentage of the system’s CPU, physical memory, and process resources. The resource
usage by a zone is based on its workload. The workload can increase or decrease based on
Copyright © 2013, Oracle and/or its affiliates. All rights reserved.
several factors. By monitoring zone resource usage, a system administrator can determine if a
zone is utilizing too much of a system’s resources, the type of resource being used, and when
the impact to the system is occurring, that is, on a regular basis or on a periodic basis.
As a system administrator, if you know where, when, and why the resource impacts are
happening, you can allocate or control the system resources that are being used by doing the
following:
•
Specify a subset of the system
’
s processors that should be dedicated to a zone while it
•
Specify
a
subset
of
the
system s
processors
that
should
be
dedicated
to
a
zone
while
it
is running.
•Limit the amount of CPU resources that can be consumed by a zone.
•Control the allocation of available CPU resources among zones, based on their
importance.
•Limit the amount of physical memory.
Oracle Solaris 11 Advanced System Administration 6 - 9
Cicero Ronaldo (ciceroฺronaldo@gmailฺcom) has a non-transferable
license to use this Student Guideฺ
Unauthorized reproduction or distribution prohibitedฺ Copyright© 2014, Oracle and/or its affiliatesฺ

Managing System Resource Allocation to a Zone
System resource allocation to a zone can be controlled by:
•Resource pools: Used primarily to manage CPU usage
•Resource capping: Used to regulate physical memory
consumption
consumption
•Process scheduling: Used to control the allocation of
available CPU resources to processes
There are various ways to manage the allocation of system resources to a zone. For example,
you can use resource pools to manage CPU usage, resource capping to regulate physical
memory consumption, and process scheduling to control the allocation of available CPU
Copyright © 2013, Oracle and/or its affiliates. All rights reserved.
resources to processes.
Note: Process scheduling is controlled by the process scheduler. The scheduler supports the
use of scheduling classes, which, in turn, are used to define a scheduling policy that is used
to schedule processes with a scheduling class. In the Oracle Solaris operating system, the
default TimeSharing scheduler (TS) tries to give every process relatively equal access to the
available CPUs. However, you can specify that certain processes should be given more
resources than others by using the fair share scheduler (FSS) which controls the allocation of
resources
than
others
by
using
the
fair
share
scheduler
(FSS)
,
which
controls
the
allocation
of
the available CPU resources among workloads, based on their importance. This importance
is expressed by the number of shares of CPU resources that you assign to each workload.
This lesson focuses on using resource pools and resource capping to manage zone resource
allocation. Process scheduling is presented in detail in the lesson titled “Managing Processes
and Priorities.”
Oracle Solaris 11 Advanced System Administration 6 - 10
Cicero Ronaldo (ciceroฺronaldo@gmailฺcom) has a non-transferable
license to use this Student Guideฺ
Unauthorized reproduction or distribution prohibitedฺ Copyright© 2014, Oracle and/or its affiliatesฺ

As part of planning, the resource allocations for each zone should be identified, along with
how the resource allocations will be managed (for example, through resource pools or
resource capping). If resource allocations for the zones cannot be determined at the time of
planning (primarily because of insufficient zone resource usage statistics), they can be set at
a later time.
Now you take a closer look at how you can use resource pools and resource capping to
manage your zone’s resource allocations.
Oracle Solaris 11 Advanced System Administration 6 - 11
Cicero Ronaldo (ciceroฺronaldo@gmailฺcom) has a non-transferable
license to use this Student Guideฺ
Unauthorized reproduction or distribution prohibitedฺ Copyright© 2014, Oracle and/or its affiliatesฺ

Resource Pool Allocation
•SMF supports two resource pool services:
–Default resource pool service
svc:/system/pools:default
–
D
y
namic resource
p
ool service
yp
svc:/system/pools/dynamic:default
•Resource pool services are disabled by default.
•To allocate a resource pool to a zone, you must:
–Enable the two resource pool services
–
Create a pool configuration file and save it in the default
Create
a
pool
configuration
file
and
save
it
in
the
default
configuration file /etc/pooladm.conf
–Modify the pool configuration file to specify a subset of the
system’s processors that should be dedicated to a zone
–Bind the resource pool to the zone
Resource pools enable you to separate workloads so that workload consumption of certain
resources does not overlap. This resource reservation helps to achieve predictable
performance on systems with mixed workloads. There are two types of resource pool services
Copyright © 2013, Oracle and/or its affiliates. All rights reserved.
in the Oracle Solaris service management facility (SMF) that reside on the system: the default
resource pool service (svc:/system/pools:default), and the dynamic resource pool
service (svc:/system/pools/dynamic:default), which is dependent on the default
pool service. By default, neither of these services is active.
To allocate a resource pool to a zone, you must first enable these services and create a pool
configuration file for the current pool configuration that you save in the default
/etc/pooladm conf
configuration file This file which is in XML format contains a
/etc/pooladm
.
conf
configuration
file
.
This
file
,
which
is
in
XML
format
,
contains
a
description of the pools to be created on the system and the elements that can be
manipulated: system, pool, pset (processor set) and cpu. This configuration file is referred to
as the static configuration file. After you have created and saved the pool configuration file,
you can modify it to specify a subset of the system’s processors that should be dedicated to a
zone while it is running. The static configuration file now matches the current dynamic
configuration that represents the way you want the system to be configured with respect to
how the resource pool or pools will function After you have modified the pool configuration file
how
the
resource
pool
or
pools
will
function
.
After
you
have
modified
the
pool
configuration
file
and saved the changes, you must allocate or bind the zone to the resource pool.
Oracle Solaris 11 Advanced System Administration 6 - 12
Cicero Ronaldo (ciceroฺronaldo@gmailฺcom) has a non-transferable
license to use this Student Guideฺ
Unauthorized reproduction or distribution prohibitedฺ Copyright© 2014, Oracle and/or its affiliatesฺ

How Resource Pools Work
•Oracle Solaris software boots.
•The initialization SMF service checks for the
/etc/pooladm.conf file.
•
If the file exists
pooladm
makes the configuration the
If
the
file
exists
,
pooladm
makes
the
configuration
the
active pools’ configuration.
•The system creates the dynamic configuration.
•Resources are allocated and monitored by the pools’
resource controller (poold).
When the Oracle Solaris software boots, an SMF service checks to see if the
/etc/pooladm.conf file exists. If this file is found and the pools are enabled, the pooladm
command is invoked to make this configuration the active pools’ configuration. The system
Copyright © 2013, Oracle and/or its affiliates. All rights reserved.
creates a dynamic configuration to reflect the organization that is requested in
/etc/pooladm.conf, and the machine’s resources are allocated accordingly.
Note: The pooladm command is used to activate and deactivate the resource pools facility.
The pools resource controller, poold, is started with the dynamic resource pools facility. This
system daemon should always be active when dynamic resource allocation is required. The
poold resource controller identifies available resources and monitors workloads to determine
ht bjti lbitThtllth id
w
h
en sys
t
em usage o
bj
ec
ti
ves are no
l
onger
b
e
i
ng me
t
.
Th
e con
t
ro
ll
er
th
en cons
id
ers
alternative configurations in terms of the objectives, and remedial action is taken. If possible,
the resources are reconfigured so that the objectives can be met. If this action is not possible,
the daemon logs that the user-specified objectives can no longer be achieved. Following a
reconfiguration, the daemon resumes monitoring workload objectives.
Now that you have a better idea of how resource pools are used to control zone resource
allocations,
y
ou will look at memor
y
resource cappin
g
.
yyg
Oracle Solaris 11 Advanced System Administration 6 - 13
Cicero Ronaldo (ciceroฺronaldo@gmailฺcom) has a non-transferable
license to use this Student Guideฺ
Unauthorized reproduction or distribution prohibitedฺ Copyright© 2014, Oracle and/or its affiliatesฺ

Memory Resource Capping
•Resource capping is controlled by the rcapd daemon.
•The rcapd daemon repeatedly samples the resource
utilization of projects that have physical memory caps.
•
The sampling interval is specified by the administrator
The
sampling
interval
is
specified
by
the
administrator
.
•When physical memory utilization thresholds are
exceeded, the daemon reduces the resource consumption
with memory caps.
If there is a memory resource conflict with the zones on your system, you can control the
amount of memory that is allocated to each zone with resource capping. Resource capping is
controlled by the rcapd daemon. The rcapd daemon repeatedly samples the resource
Copyright © 2013, Oracle and/or its affiliates. All rights reserved.
utilization of projects in zones that have physical memory caps. The sampling interval that is
used by the daemon is specified by the administrator. When the system’s physical memory
utilization exceeds the threshold for cap enforcement, and when other conditions are met, the
daemon takes action to reduce the resource consumption of projects with memory caps to
levels at or below the caps.
Note: You can use the rcapadm command without arguments to display the current status of
the resource capping daemon
the
resource
capping
daemon
.
For more information about resource capping and the rcapd daemon, see “Administering the
Resource Capping Daemon” in the Oracle Solaris Administration: Oracle Solaris Zones,
Oracle Solaris 10 Zones, and Resource Management guide.
Oracle Solaris 11 Advanced System Administration 6 - 14
Cicero Ronaldo (ciceroฺronaldo@gmailฺcom) has a non-transferable
license to use this Student Guideฺ
Unauthorized reproduction or distribution prohibitedฺ Copyright© 2014, Oracle and/or its affiliatesฺ

Specifying Resource Capping Within a Zone
•The capped-memory resource sets limits for physical,
swap, and locked memory.
•At least one limit must be set.
•
The
rcapd
daemon and
rcap
service must be up and
The
rcapd
daemon
and
rcap
service
must
be
up
and
running.
To allocate the maximum amount of memory that can be consumed by a specified zone and
have it as a persistent cap, you can use the capped-memory resource. This resource sets
limits for physical, swap, and locked memory. Each limit is optional, but at least one must be
Copyright © 2013, Oracle and/or its affiliates. All rights reserved.
set.
Note: You can specify a temporary resource cap for a zone by using the rcapadm command;
however, this setting lasts only until the next reboot. For example, to set a maximum memory
value of 512 MB for the hrzone zone, you use the following command:
# rcapadm -z hrzone -m 512M
To use the capped-memory resource, the rcapd daemon and its associated service (rcap)
must be up and running. These system facilities provide the capability to use the capped-
memory option.
In this lesson, you learn how to set a persistent cap for a zone. In the lesson titled “Evaluating
System Resources,” you learn how to configure resources at the system level.
Oracle Solaris 11 Advanced System Administration 6 - 15
Cicero Ronaldo (ciceroฺronaldo@gmailฺcom) has a non-transferable
license to use this Student Guideฺ
Unauthorized reproduction or distribution prohibitedฺ Copyright© 2014, Oracle and/or its affiliatesฺ
Implementing Controls on Network Resources
•Increase the efficiency of
virtual networks with
resource controls.
•Use resource controls to:
Global Zone
hrzone
192.168.3.20
itzone
192.168.3.22
Exclusive IP
Packets
System
–Share bandwidth among
VNICs
–Customize link properties
–Create flows
Virtual Switch
vnic1
192.168.3.20
vnic2
192.168.3.22
Packets
Packets
Local network 192.168.3.0
e1000g0
192.168.3.70
Packets
When a virtual network is configured, a zone sends traffic to an external host in the same
fashion as a system without a virtual network. Traffic flows from the zone, through the VNIC to
the virtual switch, and then to the physical interface, which sends the data out onto the
Copyright © 2013, Oracle and/or its affiliates. All rights reserved.
network.
To increase efficiency on your virtual network, you can implement controls to determine how
resources are being used by the networking processes. Resource control is the process of
allocating a system’s resources in a controlled fashion. The resource control features of
Oracle Solaris enable bandwidth to be shared among the VNICs on a system’s virtual
network. Link properties that are specifically related to network resources, such as rings,
CPUs and so on can be customized to process network packets In addition you can also
CPUs
,
and
so
on
,
can
be
customized
to
process
network
packets
.
In
addition
,
you
can
also
create flows to manage network usage.
Oracle Solaris 11 Advanced System Administration 6 - 16
Cicero Ronaldo (ciceroฺronaldo@gmailฺcom) has a non-transferable
license to use this Student Guideฺ
Unauthorized reproduction or distribution prohibitedฺ Copyright© 2014, Oracle and/or its affiliatesฺ

Managing Virtual Network Resources
by Using Flows
by
Using
Flows
•Flows are created on a per-VNIC basis.
•Flows are used to categorize network packets.
•Flows define and isolate packets with similar
characteristics
characteristics
.
•Flows can be assigned specific resources.
•Bandwidth is assigned based on the usage policy for the
system.
Resource management for the virtual network involves creating flows on a per-VNIC basis.
A flow is a customized way of categorizing network packets to further control how resources
are used to process these packets. These flows define and isolate packets with similar
Copyright © 2013, Oracle and/or its affiliates. All rights reserved.
characteristics, such as the port number or IP address of the sending host. Packets that share
an attribute constitute a flow and are labeled with a specific flow name. Specific resources can
then be assigned to the flow. You assign bandwidth based on the usage policy for the system.
Oracle Solaris 11 Advanced System Administration 6 - 17
Cicero Ronaldo (ciceroฺronaldo@gmailฺcom) has a non-transferable
license to use this Student Guideฺ
Unauthorized reproduction or distribution prohibitedฺ Copyright© 2014, Oracle and/or its affiliatesฺ

Creating Flows and Selecting Flow Properties
•Flows are created according to attributes.
•Attributes are classifications that are used to organize
network packets into a flow.
•
Flows use properties to control resources:
Flows
use
properties
to
control
resources:
–maxbw: Maximum amount of a link’s bandwidth that packets
identified with this flow can use
–priority: Priority given to the packets in a flow:
—
Options: high, medium, or low
—
Default: mediu
m
Creating and Implementing Flows
Flows are created according to the attribute that you determined for each flow. An attribute is
a classification that you use to organize network packets into a flow For example an IP
Copyright © 2013, Oracle and/or its affiliates. All rights reserved.
a
classification
that
you
use
to
organize
network
packets
into
a
flow
.
For
example
,
an
IP
address or transport protocol, such as TCP, can be used as an attribute. When you create a
flow, you identify an attribute as well as a name for the flow.
Flows also have properties that are used to control resources. Currently, there are only two
flow properties that can be set:
•Maxbw: The maximum amount of the link’s bandwidth that packets identified with this
flow can use. The value you set must be within the allowed range of values for the link’s
bandwidth.
•Priority: The priority given to the packets in this flow. The possible values are high,
medium, and low;medium is the default value.
In the section titled “Allocating and Managing System Resources in a Zone,” which will be
covered later in this lesson, you learn how to manage virtual network resources by using a
flow.
Oracle Solaris 11 Advanced System Administration 6 - 18
Cicero Ronaldo (ciceroฺronaldo@gmailฺcom) has a non-transferable
license to use this Student Guideฺ
Unauthorized reproduction or distribution prohibitedฺ Copyright© 2014, Oracle and/or its affiliatesฺ

Implementing the Virtual Network and Zones Plan
Your assignment is to:
•Create a virtual network
•Configure zones to use VNICs
•
Allocate resources to a zone
•
Allocate
resources
to
a
zone
•Manage network resources by using flows
Implementing the Data Storage Management Plan
It is now time to test the virtual network functionality in Oracle Solaris 11. Your assignment is
to create a virtual network and then configure zones to use the virtual network interfaces that
Copyright © 2013, Oracle and/or its affiliates. All rights reserved.
to
create
a
virtual
network
,
and
then
configure
zones
to
use
the
virtual
network
interfaces
that
you have created as part of the virtual network. Next, you allocate resources to a zone by
using resource pools. Your last task is to test managing the network resources by using flows.
In the sections that follow, you learn the commands that you need to perform these tasks.
Oracle Solaris 11 Advanced System Administration 6 - 19
Cicero Ronaldo (ciceroฺronaldo@gmailฺcom) has a non-transferable
license to use this Student Guideฺ
Unauthorized reproduction or distribution prohibitedฺ Copyright© 2014, Oracle and/or its affiliatesฺ

Quiz
A VNIC is a virtual network device with the same datalink
interface as a physical interface.
a. True
b
False
b
.
False
Answer: a
Copyright © 2013, Oracle and/or its affiliates. All rights reserved.
Oracle Solaris 11 Advanced System Administration 6 - 20
Cicero Ronaldo (ciceroฺronaldo@gmailฺcom) has a non-transferable
license to use this Student Guideฺ
Unauthorized reproduction or distribution prohibitedฺ Copyright© 2014, Oracle and/or its affiliatesฺ

Quiz
In which order is a virtual network created?
a. Virtual switch, VNICs, zones
b. Zones, VNICs, virtual switch
c
VNICs virtual switch zones
c
.
VNICs
,
virtual
switch
,
zones
Answer: a
Copyright © 2013, Oracle and/or its affiliates. All rights reserved.
Oracle Solaris 11 Advanced System Administration 6 - 21
Cicero Ronaldo (ciceroฺronaldo@gmailฺcom) has a non-transferable
license to use this Student Guideฺ
Unauthorized reproduction or distribution prohibitedฺ Copyright© 2014, Oracle and/or its affiliatesฺ

Quiz
Which two properties do flows use to control resources?
a. speed and mtu
b. maxbw and priority
c
flowctrl
and
threshold
c
.
flowctrl
and
threshold
Answer: b
Copyright © 2013, Oracle and/or its affiliates. All rights reserved.
Oracle Solaris 11 Advanced System Administration 6 - 22
Cicero Ronaldo (ciceroฺronaldo@gmailฺcom) has a non-transferable
license to use this Student Guideฺ
Unauthorized reproduction or distribution prohibitedฺ Copyright© 2014, Oracle and/or its affiliatesฺ

Lesson Agenda
• Planning for a Virtual Network and Zones
•Creating a Virtual Network
• Configuring Zones to Use VNICs
•
Allocating and Managing System Resources in a Zone
•
Allocating
and
Managing
System
Resources
in
a
Zone
• Managing Resources on the Virtual Network
Copyright © 2013, Oracle and/or its affiliates. All rights reserved.
Oracle Solaris 11 Advanced System Administration 6 - 23
Cicero Ronaldo (ciceroฺronaldo@gmailฺcom) has a non-transferable
license to use this Student Guideฺ
Unauthorized reproduction or distribution prohibitedฺ Copyright© 2014, Oracle and/or its affiliatesฺ

Creating a Virtual Network
This section covers the following topics:
•Creating a virtual network switch
•Creating the virtual network interfaces
•
Displaying the virtual network configuration
•
Displaying
the
virtual
network
configuration
Copyright © 2013, Oracle and/or its affiliates. All rights reserved.
Oracle Solaris 11 Advanced System Administration 6 - 24
Cicero Ronaldo (ciceroฺronaldo@gmailฺcom) has a non-transferable
license to use this Student Guideฺ
Unauthorized reproduction or distribution prohibitedฺ Copyright© 2014, Oracle and/or its affiliatesฺ
Creating a Virtual Network Switch
To create an etherstub, use dladm create-etherstub
etherstub.
#dladm create-etherstub stub0
To verify the creation of the etherstub, use dladm show
link.
#dladm show-link
LINK CLASS MTU STATE BRIDGE OVER
net0 phys 1500 up
net0
phys
1500
up
-- --
net1 phys 1500 unknown -- --
net2 phys 1500 unknown -- --
net3 phys 1500 unknown -- --
stub0 etherstub 9000 unknown -- --
An ethernet stub can be used instead of a physical NIC to create VNICs. VNICs that are
created on an etherstub will appear to be connected through a virtual switch, allowing
complete virtual networks to be built without physical hardware. The VNICs over an etherstub
Copyright © 2013, Oracle and/or its affiliates. All rights reserved.
become independent of the physical NICs in the system. You can use etherstubs to isolate
the virtual network from the rest of the virtual networks in the system, as well as the external
network to which the system is connected.
You cannot use an etherstub just by itself. Instead, you use VNICs with an etherstub to create
the private or isolated virtual networks. You can create as many etherstubs as you require.
You can also create as many VNICs over each etherstub as required.
To create an etherstub use the
dl d t
th t b
command followed by the
To
create
an
etherstub
,
use
the
dl
a
d
m crea
t
e-e
th
ers
t
u
b
command
followed
by
the
etherstub name. In the example, you are creating the etherstub stub0.
To confirm the creation of the etherstub, you can use the dladm show-link command, as
shown in the example in the slide. Here, you can see that stub0 has been created and that
its current state is unknown.
Oracle Solaris 11 Advanced System Administration 6 - 25
Cicero Ronaldo (ciceroฺronaldo@gmailฺcom) has a non-transferable
license to use this Student Guideฺ
Unauthorized reproduction or distribution prohibitedฺ Copyright© 2014, Oracle and/or its affiliatesฺ

Creating the Virtual Network Interfaces
To create a VNIC and attach it to the etherstub, use dladm
create-vnic –l etherstub vnic.
#dladm create-vnic -l stub0 vnic0
#
dl d t
i
ltb0 i1
#
dl
a
d
m crea
t
e-vn
i
c -
l
s
t
u
b0
vn
i
c
1
# dladm create-vnic -l stub0 vnic2
After you have created the etherstub, you can create the VNICs and attach them to the
etherstub by using the dladm create-vnic command followed by the -l option, the
etherstub name, and the VNIC name, as shown in the first example in the slide. The -l option
Copyright © 2013, Oracle and/or its affiliates. All rights reserved.
precedes the link, which can be either a physical link or an etherstub.
Note: vnic0 is required for the virtual switch. The other VNICs (vnic1 and vnic2) are for
use with the zones that will be created.
Oracle Solaris 11 Advanced System Administration 6 - 26
Cicero Ronaldo (ciceroฺronaldo@gmailฺcom) has a non-transferable
license to use this Student Guideฺ
Unauthorized reproduction or distribution prohibitedฺ Copyright© 2014, Oracle and/or its affiliatesฺ

Displaying the Virtual Network Configuration
To display the virtual network configuration, use dladm show-
vnic.
# dladm show-vnic
LINK OVER SPEED MACADDRESS MACADDRTYPE VID
LINK
OVER
SPEED
MACADDRESS
MACADDRTYPE
VID
vnic0 stub0 0 2:8:20:70:d0:f8 random 0
vnic1 stub0 0 2:8:20:80:65:0 random 0
vnic2 stub0 0 2:8:20:1f:c5:bd random 0
To verify that the VNICs are created and to display the virtual network configuration, you can
use the dladm show-vnic command, as shown in the example in the slide. The dladm
show-vnic command is used to show the VNIC configuration information for all VNICs, all
Copyright © 2013, Oracle and/or its affiliates. All rights reserved.
VNICs on a link, or only a specified vnic-link. The output for this command displays the
name of the link (LINK), the name of the physical link over which the VNIC is configured
(OVER), the maximum speed of the VNIC [in megabits per second (SPEED)], the MAC address
of the VNIC (MACADDRESS), the MAC address type of the VNIC (MACADDRTYPE) that can be
either a random address assigned to the VNIC (random) or a factory MAC address used by
the VNIC (factory), and the VLAN identifier (VID). The etherstub or virtual switch uses the
VLAN identifier to determine the interface to send a data
p
acket to.
p
In this example, all the VNICs have been configured over etherstub stub0. Currently, there is
no data passing through the links, so there is no speed being recorded. The MAC addresses
are present for each VNIC and they have all been randomly assigned. There is one VLAN
and it is identified with VID 0.
Oracle Solaris 11 Advanced System Administration 6 - 27
Cicero Ronaldo (ciceroฺronaldo@gmailฺcom) has a non-transferable
license to use this Student Guideฺ
Unauthorized reproduction or distribution prohibitedฺ Copyright© 2014, Oracle and/or its affiliatesฺ
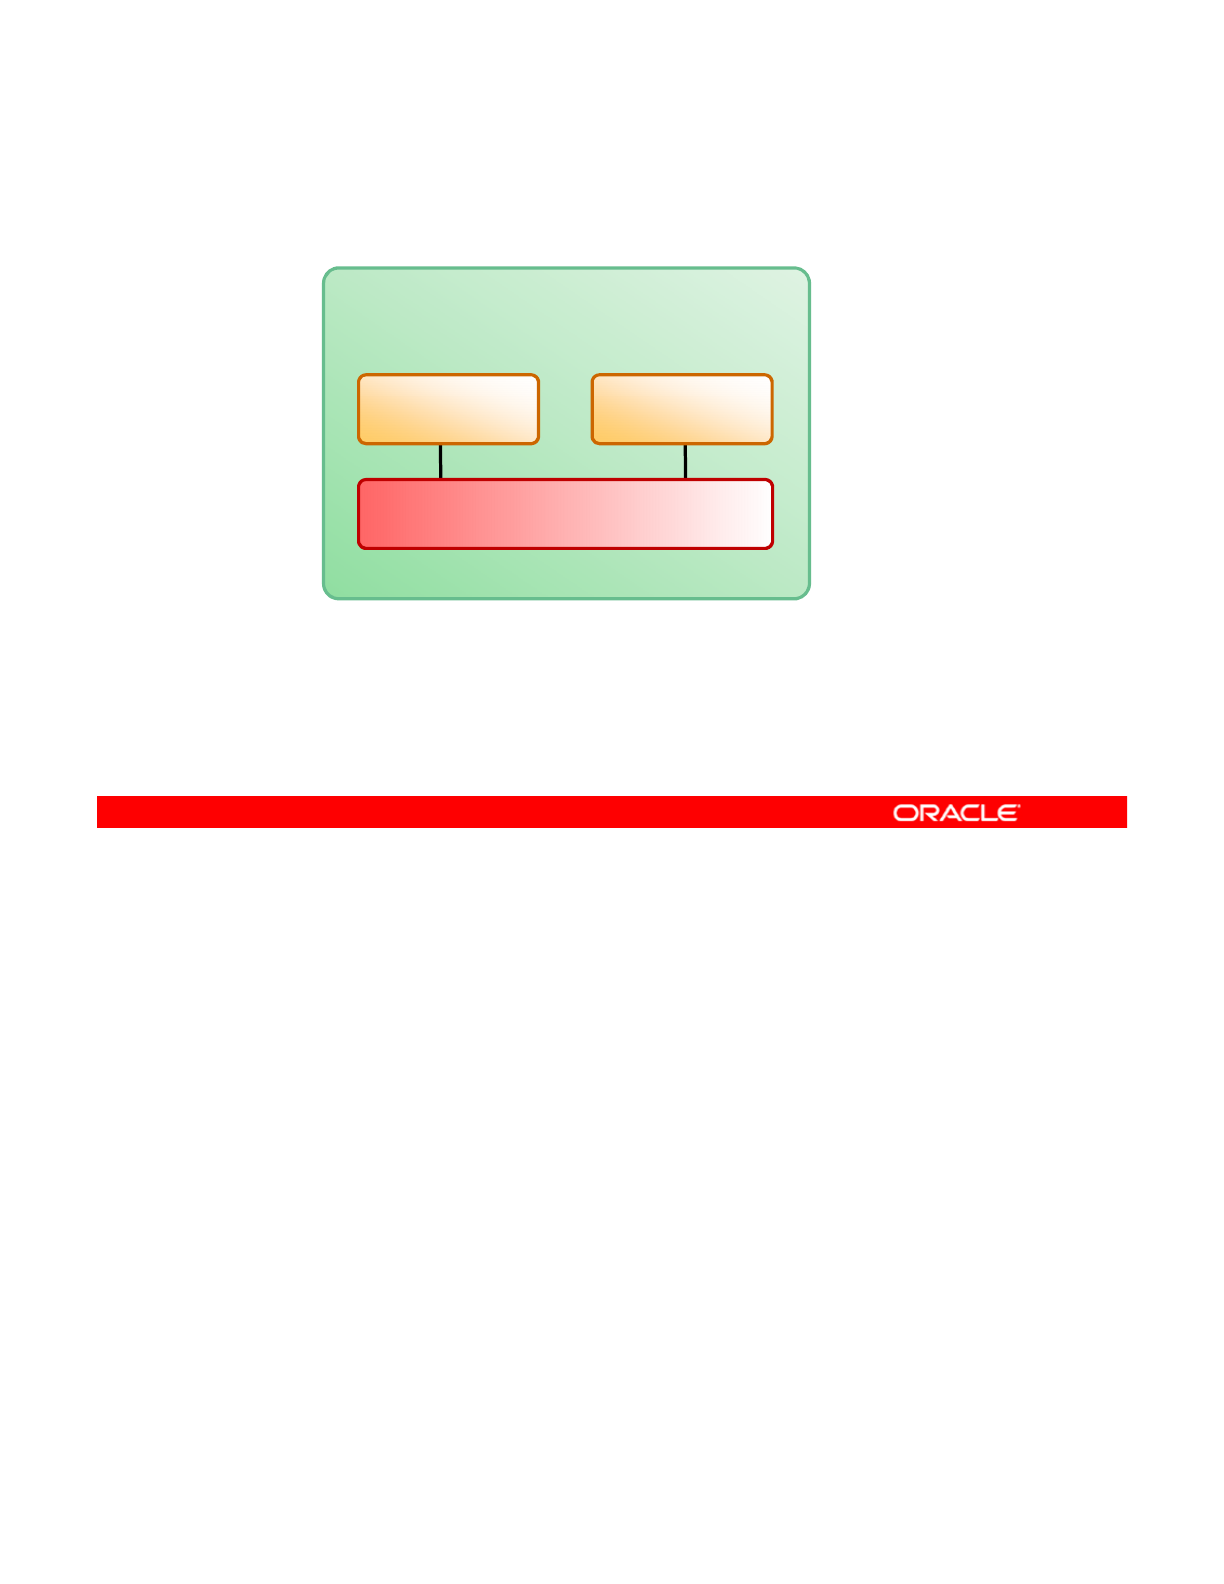
The Virtual Network Configuration So Far
System
VNIC 1 VNIC 2
Etherstub
The graphic in the slide illustrates what the virtual network configuration looks like so far.
There is the etherstub, and two VNICs connected to the switch.
Now that you have created the network, you are ready to configure your zones on top of this
Copyright © 2013, Oracle and/or its affiliates. All rights reserved.
Now
that
you
have
created
the
network,
you
are
ready
to
configure
your
zones
on
top
of
this
network. You will look at how to do this in the subsequent slides.
Oracle Solaris 11 Advanced System Administration 6 - 28
Cicero Ronaldo (ciceroฺronaldo@gmailฺcom) has a non-transferable
license to use this Student Guideฺ
Unauthorized reproduction or distribution prohibitedฺ Copyright© 2014, Oracle and/or its affiliatesฺ

Quiz
Which utility is used to create virtual switches and VNICs?
a. lnkadm
b. dladm
c
vniccfg
c
.
vniccfg
d. dlcfg
Answer: b
Copyright © 2013, Oracle and/or its affiliates. All rights reserved.
Oracle Solaris 11 Advanced System Administration 6 - 29
Cicero Ronaldo (ciceroฺronaldo@gmailฺcom) has a non-transferable
license to use this Student Guideฺ
Unauthorized reproduction or distribution prohibitedฺ Copyright© 2014, Oracle and/or its affiliatesฺ

Quiz
You have created an etherstub called stub2. You now want to
create vnic1 and attach it to stub2. Which set of commands
do you use to do this?
a. # dladm create-vnic1
b. # dladm create-vnic -l vnic1
c. # dladm create-vnic -l stub2 vnic0
d. # dladm create-vnic -l stub2 vnic1
Answer: c
Copyright © 2013, Oracle and/or its affiliates. All rights reserved.
Oracle Solaris 11 Advanced System Administration 6 - 30
Cicero Ronaldo (ciceroฺronaldo@gmailฺcom) has a non-transferable
license to use this Student Guideฺ
Unauthorized reproduction or distribution prohibitedฺ Copyright© 2014, Oracle and/or its affiliatesฺ

Practice 6-1 Overview:
Creating an Oracle Solaris 11 Virtual Network
Creating
an
Oracle
Solaris
11
Virtual
Network
This practice covers the following topics:
•Creating a virtual network switch
•Creating the virtual network interfaces
•
Displaying the virtual network configuration
•
Displaying
the
virtual
network
configuration
The practices for this lesson are designed to reinforce the concepts that have been presented
in the lecture portion. These practices cover the following tasks:
•Pr
act
i
ce
6
-1:
C
r
eat
in
g
a
n
O
r
ac
l
e
So
l
a
ri
s
11 vir
tua
l n
et
w
o
rk
Copyright © 2013, Oracle and/or its affiliates. All rights reserved.
act ce 6
C eat g a O ac e So a s tua et o
•Practice 6-2: Creating two zones by using VNICs
•Practice 6-3: Allocating resources to zones
•Practice 6-4: Managing the virtual network data flow
•Practice 6-5: Removing part of the virtual network
Practice 6-1 should take about 10 minutes to complete.
Oracle Solaris 11 Advanced System Administration 6 - 31
Cicero Ronaldo (ciceroฺronaldo@gmailฺcom) has a non-transferable
license to use this Student Guideฺ
Unauthorized reproduction or distribution prohibitedฺ Copyright© 2014, Oracle and/or its affiliatesฺ

Lesson Agenda
• Planning for a Virtual Network and Zones
• Creating a Virtual Network
•Configuring Zones to Use VNICs
•
Allocating and Containing System Resources to a Zone
•
Allocating
and
Containing
System
Resources
to
a
Zone
• Managing Resources on the Virtual Network
Copyright © 2013, Oracle and/or its affiliates. All rights reserved.
Oracle Solaris 11 Advanced System Administration 6 - 32
Cicero Ronaldo (ciceroฺronaldo@gmailฺcom) has a non-transferable
license to use this Student Guideฺ
Unauthorized reproduction or distribution prohibitedฺ Copyright© 2014, Oracle and/or its affiliatesฺ

Configuring Zones to Use VNICs
This section covers the following topics:
•Configuring the zone
•Displaying a zone configuration
•
Checking the virtual network configuration for a zone
•
Checking
the
virtual
network
configuration
for
a
zone
Copyright © 2013, Oracle and/or its affiliates. All rights reserved.
Oracle Solaris 11 Advanced System Administration 6 - 33
Cicero Ronaldo (ciceroฺronaldo@gmailฺcom) has a non-transferable
license to use this Student Guideฺ
Unauthorized reproduction or distribution prohibitedฺ Copyright© 2014, Oracle and/or its affiliatesฺ
Zone Configuration Process: Overview
Plan the zone strategy.
Exit the zone configuration
utility.
Start
Create a ZFS file system for
the zones in rpool.
Configure the zone.
Cltiitilitl
Install the zone.
Boot the zone.
Verify and commit the zone
configuration.
C
omp
l
e
t
e
i
n
iti
a
l
i
n
t
erna
l
zone configuration.
End
Before configuring a zone or zones to use VNICs, you should know what your company’s
zone strategy is. That is, how many zones will you create and what type of virtual network
setup will you use? You need to create a ZFS file system for the zones in the root file
Copyright © 2013, Oracle and/or its affiliates. All rights reserved.
system (rpool). You then configure the zone or zones. During zone configuration, you
identify the VNIC that you want to use for the zone. After completing the configuration, you
verify and then commit it. Next, you exit the zone, install it, and boot it. Finally, you return to
the zone, log in, and complete the initial internal zone configuration.
Note: To configure additional zones to use other VNICs, you follow the same basic steps.
You now walk through each of these steps, beginning with planning the zone strategy.
Oracle Solaris 11 Advanced System Administration 6 - 34
Cicero Ronaldo (ciceroฺronaldo@gmailฺcom) has a non-transferable
license to use this Student Guideฺ
Unauthorized reproduction or distribution prohibitedฺ Copyright© 2014, Oracle and/or its affiliatesฺ

Planning the Zone Strategy
•Virtual network configuration: etherstub stub0 with two
VNICs (vnic1 and vnic2)
•Two zones: hrzone and itzone
•
Zone paths:
/zones/hrzone
;
/zones/itzone
Zone
paths:
/zones/hrzone
;
/zones/itzone
•IP type: exclusive-IP
•VNIC to zone association: vnic1 for hrzone; vnic2 for
itzone
Suppose that you have been tasked with creating two zones over a virtual network. Your
strategy is to create the virtual network first, which you have already done, and then create
the zones. As part of your zones configuration planning, you have identified the following
Copyright © 2013, Oracle and/or its affiliates. All rights reserved.
information:
•Zone names: The zone name must be unique. You use the names hrzone and
itzone to create your zones.
•Zone paths: Each zone requires a path to its root directory that is relative to the global
zone’s root directory. You are creating a file system called zones as part of rpool, and
then you create two other file systems under zones, one to contain hrzone and one to
contain
itzone
The two zone paths should look like this respectively:
contain
itzone
.
The
two
zone
paths
should
look
like
this
,
respectively:
/zones/hrzone and /zones/itzone.
•IP type: To use VNICs, a zone must be configured as an exclusive IP zone.
•Specific VNIC to be associated with the zone: You use vnic1 for hrzone and
vnic2 for itzone.
Now that you know what your zone strategy is, your next step is to create the ZFS file system
structure for your zones
structure
for
your
zones
.
Oracle Solaris 11 Advanced System Administration 6 - 35
Cicero Ronaldo (ciceroฺronaldo@gmailฺcom) has a non-transferable
license to use this Student Guideฺ
Unauthorized reproduction or distribution prohibitedฺ Copyright© 2014, Oracle and/or its affiliatesฺ

Creating a ZFS File System for Zones in rpool
To create a ZFS file system for zones in rpool, use zfs
create -o mountpoint=/zones rpool/zones.
# zfs create -o mountpoint=/zones rpool/zones
To verify that the file system exists and that it has been
mounted, use zfs list rpool/zones.
# zfs list rpool/zones
NAME USED AVAIL REFER MOUNTPOINT
rpool/zones 31K 22.6G 31K /zones
The first ZFS file system that you want to create in rpool is a file system that will contain all
the individual zones’ file systems. Typically, this file system is called zones. To create this file
system, use the zfs create command with the -o option (to specify the mountpoint
Copyright © 2013, Oracle and/or its affiliates. All rights reserved.
property), followed by the mountpoint property value (mountpoint=/zones) and the file
system name (rpool/zones), as shown in the first example in the slide.
You can then verify that the file system has been created and mounted by using the zfs
list command followed by the file system name, as shown in the second example.
You will create the zone-specific file system during zone configuration.
Oracle Solaris 11 Advanced System Administration 6 - 36
Cicero Ronaldo (ciceroฺronaldo@gmailฺcom) has a non-transferable
license to use this Student Guideฺ
Unauthorized reproduction or distribution prohibitedฺ Copyright© 2014, Oracle and/or its affiliatesฺ

Configuring the Zone
To configure a zone, use zonecfg -z zonename.
# zonecfg -z hrzone
hrzone: No such zone configured
Use
'
create
'
to begin configuring a new zone.
Use
create
to
begin
configuring
a
new
zone.
zonecfg:hrzone> create
create: Using system default template ‘SYSdefault’
zonecfg:hrzone> set zonepath=/zones/hrzone
zonecfg:hrzone> set autoboot=true
zonecfg:hrzone> add net
zonecfg:hrzone:net> set physical=vnic1
zonecfg:hrzone:net> end
zonecfg:hrzone>
The zonecfg command is used to create the zone configuration. You must be a superuser or
have the appropriate rights profile to configure a zone. To perform the configuration, use the
zonecfg command with the -z option to specify the name of the zone, followed by the zone
Copyright © 2013, Oracle and/or its affiliates. All rights reserved.
name, as shown in the example. After you enter the command, and if you are configuring a
new zone, you see the following message: “No such zone configured. Use 'create' to
begin configuring a new zone.”
The next step is to enter create. This enables you to create the new zone configuration by
setting specific properties, such as the zone path, the IP type, and the network type.
Note: The IP type is set to exclusive by default. To set it to shared, use the set ip-
thd
command
t
ype=s
h
are
d
command
.
Then you set the zone path by using the set zonepath= command followed by the zone
name (for example, /zones/hrzone).
Next, you set autoboot to true by using set autoboot=true. This setting indicates that
the zone should be booted automatically at system boot. At this point in the configuration, you
specify that you want to add a network interface to the zone. To do this, use the add net
command
command
.
Oracle Solaris 11 Advanced System Administration 6 - 37
Cicero Ronaldo (ciceroฺronaldo@gmailฺcom) has a non-transferable
license to use this Student Guideฺ
Unauthorized reproduction or distribution prohibitedฺ Copyright© 2014, Oracle and/or its affiliatesฺ

Notice, in the example, that the zonecfg prompt for the zone that you are creating has been
modified to include “net”: zonecfg:hrzone:net. Here, you can set the network physical
property to specify the VNIC that you want this zone to use by using set physical=
followed by the VNIC name (for example, set physical=vnic1).
To stop work on the zone’s network configuration, enter the end command. You have
completed the zone configuration.
Oracle Solaris 11 Advanced System Administration 6 - 38
Cicero Ronaldo (ciceroฺronaldo@gmailฺcom) has a non-transferable
license to use this Student Guideฺ
Unauthorized reproduction or distribution prohibitedฺ Copyright© 2014, Oracle and/or its affiliatesฺ

Verifying, Committing, and Exiting
the New Zone Configuration
the
New
Zone
Configuration
# zonecfg -z hrzone
Use 'create' to begin configuring a new zone.
zonecfg:hrzone> create
zonecfg:hrzone> set zonepath=/zones/hrzone
zonecfg:hrzone> set autoboot=true
zonecfg:hrzone> set ip-type=exclusive
zonecfg:hrzone> add net
zonecfg:hrzone:net> set physical=vnic1
zonecfg:hrzone:net> end
zonecfg:hrzone> verify
zonecfg:hrzone>
commit
zonecfg:hrzone>
commit
zonecfg:hrzone> exit
#
After you complete your zone configuration, you need to verify that all the required information
is present. You do this by using the verify command, as shown in the example in the slide.
If all the required information is not present, the system will notify you, in which case you will
Copyright © 2013, Oracle and/or its affiliates. All rights reserved.
need to review your configuration to determine what is missing. If no messages are displayed,
you can continue to the next step, which is to commit the configuration. The commit
command takes the configuration from memory and puts it into permanent storage.
After the zone configuration is committed, you can exit the zone configuration session by
using the exit command.
Note: To configure, verify, commit, and exit itzone as per your zone strategy, you repeat the
ttht jt d
s
t
eps
th
a
t
you
j
us
t
covere
d
.
Oracle Solaris 11 Advanced System Administration 6 - 39
Cicero Ronaldo (ciceroฺronaldo@gmailฺcom) has a non-transferable
license to use this Student Guideฺ
Unauthorized reproduction or distribution prohibitedฺ Copyright© 2014, Oracle and/or its affiliatesฺ
Displaying a Zone Configuration
To display a zone configuration, use zonecfg -z zonename
info.
#zonecfg -z hrzone info
zonename: hrzone
zone
p
ath: /zones/hrzone
p
brand: solaris
autoboot: true
file-mac-profile:
bootargs:
pool:
limitpriv:
scheduling-class:
ip-type: exclusive
hostid:
fs-allowed:
net:
address not specified
allowed-address not specified
physical: vnic1
defrouter not specified
<continued on next slide>
After you have finished your zone configuration, it is a good practice to review your zone
configuration before you install the zone. To display a zone configuration, use the zonecfg -
zcommand followed by the zone name and the info subcommand, as shown in the slide.
Copyright © 2013, Oracle and/or its affiliates. All rights reserved.
Verify that you have set the zone path, IP type, and network interface properties correctly.
Oracle Solaris 11 Advanced System Administration 6 - 40
Cicero Ronaldo (ciceroฺronaldo@gmailฺcom) has a non-transferable
license to use this Student Guideฺ
Unauthorized reproduction or distribution prohibitedฺ Copyright© 2014, Oracle and/or its affiliatesฺ

Displaying a Zone Configuration
<continued from previous slide>
anet:
linkname: net0
lower-link: auto
allowed-address not specified
configure-allowed-address: true
defrouter not specified
allowed-dhcp-cids not specified
link-protection: mac-nospoof
mac-address: random
mac-prefix not specified
mac-slot not specified
vlan-id not specified
priority not specified
rxrings not specified
txrings not specified
mtu not specified
maxbw not specified
maxbw
not
specified
rxfanout not specified
vsi-typeid not specified
vsi-vers not specified
vsi-mgrid not specified
etsbw-lcl not specified
cos not specified
pkey not specified
linkmode not specified
This slide shows the continuation of the zonecfg –z hrzone info command example.
Copyright © 2013, Oracle and/or its affiliates. All rights reserved.
Oracle Solaris 11 Advanced System Administration 6 - 41
Cicero Ronaldo (ciceroฺronaldo@gmailฺcom) has a non-transferable
license to use this Student Guideฺ
Unauthorized reproduction or distribution prohibitedฺ Copyright© 2014, Oracle and/or its affiliatesฺ

Verifying That a Zone Is in configured State
To list all configured and running zones on the system, use
zoneadm list –cv.
# zoneadm list -cv
ID NAME STATUS PATH BRAND IP
0 global running / solaris shared
- hrzone configured /zones/hrzone solaris excl
- itzone configured /zones/itzone solaris excl
You are now ready to install the zone. But, before you do that, it is a good idea to confirm that
the zone is in the configured state. You can use the zoneadm list -cv command to see
all configured and running zones on a system, as shown in the example in the slide. Both the
Copyright © 2013, Oracle and/or its affiliates. All rights reserved.
zones that you have created, hrzone and itzone, have a status of configured.
You can now install the configured zones.
Oracle Solaris 11 Advanced System Administration 6 - 42
Cicero Ronaldo (ciceroฺronaldo@gmailฺcom) has a non-transferable
license to use this Student Guideฺ
Unauthorized reproduction or distribution prohibitedฺ Copyright© 2014, Oracle and/or its affiliatesฺ

Gathering Information for
the System Configuration Profile
the
System
Configuration
Profile
•Computer Name: hrzone
•Wired Ethernet Network Configuration: Manually
•IP address of the zone: 192.168.1.100
•
DNS Name service:
Do
not
configure
DNS
•
DNS
Name
service:
Do
not
configure
DNS
•Alternate Name Service: None
•Time Zone, Region, and Location: Use your local region.
•Netmask of the IP address: 255.255.255.0
•Users, username, and
p
assword
p
After you have verified that the zone is in the configured state, you need to create a system
configuration profile for the zone, which utilizes the System Configuration Tool (sysconfig,
for short). The system configuration profile specifies the default locale and time zone, the
Copyright © 2013, Oracle and/or its affiliates. All rights reserved.
zone’s root password, a naming service to use, and other aspects of the application
environment, to include (but not limited to) the following:
•The computer name of the zone (for example, hrzone)
•IP address of the zone, which is based on the IP address of the zone’s VNIC
•Netmask of the IP address
You need to
g
ather this information before creatin
g
the s
y
stem confi
g
uration profile. Most of
ggyg
the information is supplied by selecting from a list of choices. Typically, the default options are
enough unless your system configuration requires otherwise. After you have supplied the
required information for the zone, the zone is restarted.
This slide presents a sample of the type of information that you need to complete the system
configuration profile.
Oracle Solaris 11 Advanced System Administration 6 - 43
Cicero Ronaldo (ciceroฺronaldo@gmailฺcom) has a non-transferable
license to use this Student Guideฺ
Unauthorized reproduction or distribution prohibitedฺ Copyright© 2014, Oracle and/or its affiliatesฺ

Creating the System Configuration Profile
# sysconfig create-profile –o /opt/ora/data/hrconf.xml
To create the system configuration profile, use sysconfig
create-profile –o pathname.
<prompt sequence omitted>
Exiting System Configuration Tool. Log is available at:
/var/tmp/install/sysconfig.log
To create a system configuration profile for a zone, use the sysconfig create-profile –
ocommand followed by the path name of the location in which you want the profile to reside,
as shown in the example in the slide. Using the configuration information that you gathered
Copyright © 2013, Oracle and/or its affiliates. All rights reserved.
previously, respond to each of the prompts that are presented. When you have finished, you
will be exited from the System Configuration Tool.
Oracle Solaris 11 Advanced System Administration 6 - 44
Cicero Ronaldo (ciceroฺronaldo@gmailฺcom) has a non-transferable
license to use this Student Guideฺ
Unauthorized reproduction or distribution prohibitedฺ Copyright© 2014, Oracle and/or its affiliatesฺ

Installing the Zone
To install a zone, use zoneadm -z zonename install -c
profile_pathname.
# zoneadm -z hrzone install –c /opt/ora/data/hrconf.xml
A ZFS file system has been created for this zone.
Publisher: Using solaris (http://server1.mydomain.com/ ).
Image: Preparing at /zones/hrzone/root.
Sanity Check: Looking for 'entire' incorporation.
...
Done: Installation completed in 356.558 seconds.
After you have created the system configuration profile, you are ready to install the zone. To
install a zone, use the zoneadm -z command followed by the zone name, the install -c
subcommand, and the path name to the system configuration profile, as shown in the
Copyright © 2013, Oracle and/or its affiliates. All rights reserved.
example in the slide.
The installation process automatically creates a ZFS file system (data set) for the zone path
when the zone is installed. If the file system cannot be created, the zone is not installed. The
installation process also verifies the specified publisher and downloads the zone installation
packages from IPS. This process normally takes about three to five minutes per zone.
Oracle Solaris 11 Advanced System Administration 6 - 45
Cicero Ronaldo (ciceroฺronaldo@gmailฺcom) has a non-transferable
license to use this Student Guideฺ
Unauthorized reproduction or distribution prohibitedฺ Copyright© 2014, Oracle and/or its affiliatesฺ

Booting the Zone
# zoneadm list -iv
ID NAME STATUS PATH BRAND IP
To list all running and installed zones on the system, use
zoneadm list -iv.
0 global running / solaris shared
- hrzone installed /zones/hrzone solaris excl
- itzone installed /zones/itzone solaris excl
To boot a zone, use zoneadm -z zonename boot.
# zoneadm -z hrzone boot
#
d
it b t
#
zonea
d
m -z
it
zone
b
oo
t
# zoneadm list -v
ID NAME STATUS PATH BRAND IP
0 global running / solaris shared
1 hrzone running /zones/hrzone solaris excl
2 itzone running /zones/itzone solaris excl
The next step is to boot the zone. But, before you do that, it is a good idea to confirm that the
zone is in the installed state. You can use the zoneadm list -civ command to see all
the running and installed zones on a system, as shown in the first example in the slide. As
Copyright © 2013, Oracle and/or its affiliates. All rights reserved.
you can see, both hrzone and itzone have a status of installed.
You can now boot the installed zones. To boot a zone, use the zoneadm -z command
followed by the zone name and the boot subcommand, as shown in the second example.
To verify that a zone is in running state, you can run the zoneadm list -v command, as
shown in the second part of the second example. Note that the two non-global zones now
have assigned IDs.
Oracle Solaris 11 Advanced System Administration 6 - 46
Cicero Ronaldo (ciceroฺronaldo@gmailฺcom) has a non-transferable
license to use this Student Guideฺ
Unauthorized reproduction or distribution prohibitedฺ Copyright© 2014, Oracle and/or its affiliatesฺ

Checking the Virtual Network
Configuration in a Zone
Configuration
in
a
Zone
To display the network interface address information for a zone,
log in to the zone, and then use ipadm show-addr.
#zlogin hrzone
[
Connected to zone 'hrzone'
p
ts
/
2
]
[p/]
Oracle Corporation SunOS 5.11 11.0 November 2011
root@hrzone:~# ipadm show-addr
ADDROBJ TYPE STATE ADDR
lo0/v4 static ok 127.0.0.1/8
vnic1/v4 static ok 192.168.1.100/24
lo0/v6 static ok ::1/128
vnic1/v6 addrconf ok fe80::8:20ff:fe43:7986/10
Now you learn how to check the virtual network configuration in a zone. First, you need to log
in to the zone. Log in to hrzone. To do this, use the zlogin command again, followed by the
zone name, as shown in the example in the slide. After you are logged in, you can use the
Copyright © 2013, Oracle and/or its affiliates. All rights reserved.
ipadm show-addr command to see the network interface address information for the zone.
Here, you can see the IP address assignment of 192.168.1.100 that you made for the net0
network interface while creating the system configuration profile. You can also see the type
and state of the interface.
Oracle Solaris 11 Advanced System Administration 6 - 47
Cicero Ronaldo (ciceroฺronaldo@gmailฺcom) has a non-transferable
license to use this Student Guideฺ
Unauthorized reproduction or distribution prohibitedฺ Copyright© 2014, Oracle and/or its affiliatesฺ

Verifying That a Zone’s Virtual Network
Interface Connection Is Operational
Interface
Connection
Is
Operational
To verify that a zone’s virtual network interface connection is
operational, use ping and an IP address.
root@hrzone:~# ping 192.168.1.200
192 168 1 200 is alive
192
.
168
.
1
.
200
is
alive
To verify that a zone’s virtual network interface connection is operational, ping an IP address
from within the zone. In the example, you are pinging the IP address for the second zone that
was created, itzone. As you can see from the output, the virtual network that connects these
Copyright © 2013, Oracle and/or its affiliates. All rights reserved.
two zones is operational.
Oracle Solaris 11 Advanced System Administration 6 - 48
Cicero Ronaldo (ciceroฺronaldo@gmailฺcom) has a non-transferable
license to use this Student Guideฺ
Unauthorized reproduction or distribution prohibitedฺ Copyright© 2014, Oracle and/or its affiliatesฺ
Virtual Network Configuration
Global Zone
hrzone
192 168 1 100
itzone
192 168 1 200
System
Etherstub
192
.
168
.
1
.
100
192
.
168
.
1
.
200
vnic1
192.168.1.100
vnic2
192.168.1.200
Local network 192.168.0.0
e1000g0
192.168.0.112
The graphic in the slide illustrates what the final virtual network configuration looks like. You
have two zones, hrzone and itzone, each with a dedicated or exclusive IP address. The
hrzone zone is using vnic1 as its network interface, and itzone is using vnic2 as its
Copyright © 2013, Oracle and/or its affiliates. All rights reserved.
network interface. The VNICs are using etherstub stub0.
Oracle Solaris 11 Advanced System Administration 6 - 49
Cicero Ronaldo (ciceroฺronaldo@gmailฺcom) has a non-transferable
license to use this Student Guideฺ
Unauthorized reproduction or distribution prohibitedฺ Copyright© 2014, Oracle and/or its affiliatesฺ

Removing the Virtual Network
Without Removing the Zones
Without
Removing
the
Zones
1. Verify the state of the configured zones.
2. Halt the exclusive IP zones.
3. Verify that the zones have been halted.
4
List the VNICs that were configured for the halted zones
4
.
List
the
VNICs
that
were
configured
for
the
halted
zones
.
5. Delete the VNICs.
If you find that you need to use the zones that you have created in a different configuration, or
if you need to move the zones to a different zone path or migrate them to another network,
you must disable the zone’s virtual network while keeping the zones intact.
Copyright © 2013, Oracle and/or its affiliates. All rights reserved.
Note: This procedure assumes that you are running a virtual network that consists of
exclusive IP zones.
The steps for removing a virtual network without removing the zones are presented in the
slide. You now take a closer look at how to complete each step, beginning with how to verify
the state of the configured zones.
Oracle Solaris 11 Advanced System Administration 6 - 50
Cicero Ronaldo (ciceroฺronaldo@gmailฺcom) has a non-transferable
license to use this Student Guideฺ
Unauthorized reproduction or distribution prohibitedฺ Copyright© 2014, Oracle and/or its affiliatesฺ

Verifying the State of the Configured Zones
To verify the state of the configured zones, use zoneadm
list –cv.
# zoneadm list -cv
ID NAME STATUS PATH BRAND IP
0 global running / solaris shared
- hrzone running /zones/hrzone solaris excl
- itzone running /zones/itzone solaris excl
To verify the state of the currently configured zones on the system, use the zoneadm list
command with the -cv option, as shown in the example in the slide. As you can see, hrzone
and itzone are currently running. You can also verify that both zones have exclusive IP
Copyright © 2013, Oracle and/or its affiliates. All rights reserved.
addresses.
Oracle Solaris 11 Advanced System Administration 6 - 51
Cicero Ronaldo (ciceroฺronaldo@gmailฺcom) has a non-transferable
license to use this Student Guideฺ
Unauthorized reproduction or distribution prohibitedฺ Copyright© 2014, Oracle and/or its affiliatesฺ

Halting the Exclusive IP Zones
To halt the exclusive zones, use zoneadm –z zonename
halt.
#zoneadm –z hrzone halt
#zoneadm –z itzone halt
After you have verified the status of the zones and that they are exclusive IP zones, you can
halt each zone by using the zoneadm -z command followed by the zone name and the halt
subcommand, as shown in the example in the slide. When you halt a zone, you remove the
Copyright © 2013, Oracle and/or its affiliates. All rights reserved.
zone’s application environment and terminate several system activities.
Note: You can also use the zoneadm –z zonename shutdown command to cleanly shut
down a zone. Alternatively, for instructions on how to perform the same procedure by using
the zlogin command, refer to the chapter titled “How to Use zlogin to Shut Down a Zone”
in the Oracle Solaris Administration: Oracle Solaris Zones, Oracle Solaris 10 Zones, and
Resource Management guide.
Oracle Solaris 11 Advanced System Administration 6 - 52
Cicero Ronaldo (ciceroฺronaldo@gmailฺcom) has a non-transferable
license to use this Student Guideฺ
Unauthorized reproduction or distribution prohibitedฺ Copyright© 2014, Oracle and/or its affiliatesฺ

Verifying That the Zones Have Been Halted
To verify the state of the configured zones, use zoneadm
list –iv.
# zoneadm list -iv
ID NAME STATUS PATH BRAND IP
0 global running / solaris shared
- hrzone installed /zones/hrzone solaris excl
- itzone installed /zones/itzone solaris excl
To verify that the zones have been halted, use the zoneadm list -iv command, as shown
in the example in the slide. Include the -i option to see all the installed zones on the system.
As you can see,
hrzone
and
itzone
have been returned to the
installed
state.
Copyright © 2013, Oracle and/or its affiliates. All rights reserved.
As
you
can
see,
hrzone
and
itzone
have
been
returned
to
the
installed
state.
Oracle Solaris 11 Advanced System Administration 6 - 53
Cicero Ronaldo (ciceroฺronaldo@gmailฺcom) has a non-transferable
license to use this Student Guideฺ
Unauthorized reproduction or distribution prohibitedฺ Copyright© 2014, Oracle and/or its affiliatesฺ

Listing the VNICs That Were Configured
for the Halted Zones
# dladm show-vnic
LINK OVER SPEED MACADDRESS MACADDRTYPE VID
for
the
Halted
Zones
To list the VNICs that were configured for the halted zones, use
dladm show-vnic.
LINK
OVER
SPEED
MACADDRESS
MACADDRTYPE
VID
vnic0 stub0 1000 MBps 2:8:20:70:d0:f8 random 0
vnic1 stub0 1000 MBps 2:8:20:80:65:0 random 0
vnic2 stub0 1000 MBps 2:8:20:1f:c5:bd random 0
The next step is to list the VNICs that were configured for the halted zones. To do this, use
the dladm show-vnic command, as shown in the example in the slide. You will recall that
vnic0 is for the etherstub; so the two VNICs that you are interested in are vnic1 and
Copyright © 2013, Oracle and/or its affiliates. All rights reserved.
vnic2, which correspond to hrzone and itzone, respectively.
Oracle Solaris 11 Advanced System Administration 6 - 54
Cicero Ronaldo (ciceroฺronaldo@gmailฺcom) has a non-transferable
license to use this Student Guideฺ
Unauthorized reproduction or distribution prohibitedฺ Copyright© 2014, Oracle and/or its affiliatesฺ

Deleting the VNICs
To delete the VNICs, use dladm delete-vnic vnicname.
# dladm delete-vnic vnic0
# dladm delete-vnic vnic1
# dladm delete
vnic vnic2
#
dladm
delete
-
vnic
vnic2
The final step is to delete the VNICs. This is done by using the dladm delete-vnic
command followed by the VNIC name, as shown in the example in the slide.
Copyright © 2013, Oracle and/or its affiliates. All rights reserved.
Oracle Solaris 11 Advanced System Administration 6 - 55
Cicero Ronaldo (ciceroฺronaldo@gmailฺcom) has a non-transferable
license to use this Student Guideฺ
Unauthorized reproduction or distribution prohibitedฺ Copyright© 2014, Oracle and/or its affiliatesฺ

Quiz
After you have run the zonecfg -z zonename command,
which command would you use to start the configuration of a
new zone?
a. add zone
b. begin
c. create
d. start
Answer: c
Copyright © 2013, Oracle and/or its affiliates. All rights reserved.
Oracle Solaris 11 Advanced System Administration 6 - 56
Cicero Ronaldo (ciceroฺronaldo@gmailฺcom) has a non-transferable
license to use this Student Guideฺ
Unauthorized reproduction or distribution prohibitedฺ Copyright© 2014, Oracle and/or its affiliatesฺ

Quiz
To use VNICs, which IP type must a zone be configured as?
a. Shared-IP
b. Exclusive-IP
c
Either shared or exclusive
c
.
Either
shared
or
exclusive
Answer: b
Copyright © 2013, Oracle and/or its affiliates. All rights reserved.
Oracle Solaris 11 Advanced System Administration 6 - 57
Cicero Ronaldo (ciceroฺronaldo@gmailฺcom) has a non-transferable
license to use this Student Guideฺ
Unauthorized reproduction or distribution prohibitedฺ Copyright© 2014, Oracle and/or its affiliatesฺ

Quiz
You have created the configuration for a new zone. What is the
next step?
a. Boot the new zone.
b
Commit the configuration
b
.
Commit
the
configuration
.
c. Exit the configuration.
d. Verify the configuration.
Answer: d
Copyright © 2013, Oracle and/or its affiliates. All rights reserved.
Oracle Solaris 11 Advanced System Administration 6 - 58
Cicero Ronaldo (ciceroฺronaldo@gmailฺcom) has a non-transferable
license to use this Student Guideฺ
Unauthorized reproduction or distribution prohibitedฺ Copyright© 2014, Oracle and/or its affiliatesฺ

Practice 6-2:
Creating Two Zones by Using VNICs
Creating
Two
Zones
by
Using
VNICs
This practice covers the following topics:
•Configuring two zones by using VNICs
•Displaying the zone configuration, including the interfaces
This practice should take about 45 minutes to complete.
Copyright © 2013, Oracle and/or its affiliates. All rights reserved.
Oracle Solaris 11 Advanced System Administration 6 - 59
Cicero Ronaldo (ciceroฺronaldo@gmailฺcom) has a non-transferable
license to use this Student Guideฺ
Unauthorized reproduction or distribution prohibitedฺ Copyright© 2014, Oracle and/or its affiliatesฺ

Lesson Agenda
• Planning for a Virtual Network and Zones
• Configuring a Virtual Network
• Configuring Zones to Use VNICs
•
Allocating and Managing System Resources in a Zone
•
Allocating
and
Managing
System
Resources
in
a
Zone
• Managing Resources on the Virtual Network
Copyright © 2013, Oracle and/or its affiliates. All rights reserved.
Oracle Solaris 11 Advanced System Administration 6 - 60
Cicero Ronaldo (ciceroฺronaldo@gmailฺcom) has a non-transferable
license to use this Student Guideฺ
Unauthorized reproduction or distribution prohibitedฺ Copyright© 2014, Oracle and/or its affiliatesฺ

Allocating and Managing System
Resources in a Zone
Resources
in
a
Zone
This section covers allocating and managing the following:
•CPU resources with resource pools
•Physical memory resources with resource capping
Copyright © 2013, Oracle and/or its affiliates. All rights reserved.
Oracle Solaris 11 Advanced System Administration 6 - 61
Cicero Ronaldo (ciceroฺronaldo@gmailฺcom) has a non-transferable
license to use this Student Guideฺ
Unauthorized reproduction or distribution prohibitedฺ Copyright© 2014, Oracle and/or its affiliatesฺ

Allocating and Managing CPU Resources
with Resource Pools
with
Resource
Pools
•Enabling services for resource pools
•Configuring a persistent resource pool
•Binding the zone to a persistent resource pool
•
Removing the resource pool configuration
•
Removing
the
resource
pool
configuration
To manage CPU consumption in a zone, you can use a resource pool. To do this, you must
first enable pool services, configure the resource pool, and then bind the zone to the pool.
When you no longer have the need to manage CPU usage in the zone, you can remove the
Copyright © 2013, Oracle and/or its affiliates. All rights reserved.
resource pool. Next, you look at how to perform each of these tasks, beginning with enabling
pool services.
For the purposes of training, assume that you have been monitoring the CPU usage of your
zones and that hrzone is creating a resource conflict. You will create a resource pool that will
control the CPU usage of hrzone.
Oracle Solaris 11 Advanced System Administration 6 - 62
Cicero Ronaldo (ciceroฺronaldo@gmailฺcom) has a non-transferable
license to use this Student Guideฺ
Unauthorized reproduction or distribution prohibitedฺ Copyright© 2014, Oracle and/or its affiliatesฺ

Enabling Services for Resource Pools
To activate the resource pool services, run svcadm enable -
r pools/dynamic.
# svcadm enable -r pools/dynamic
To verify that the service pools and the poold daemon are up,
run svcs *pools* and pgrep –lf poold, respectively.
# svcs *pools*
STATE STIME FMRI
online 16:08:10 svc:/system/pools:default
online
16:08:10
svc:/system/pools:default
online 16:08:11 svc:/system/pools/dynamic:default
# pgrep -lf poold
2283 /usr/lib/pool/poold
You may recall from the first topic, on planning for a virtual network and zones, that resource
pool services are not enabled by default. To activate both resource pool services, you can run
the svcadm enable command with the -r option, followed by pools/dynamic, as shown in
Copyright © 2013, Oracle and/or its affiliates. All rights reserved.
the example in the slide.
To verify that the pool services are online, you can run the svcs *pools* command, as
shown in the example. You can also verify that the poold daemon is running.
Oracle Solaris 11 Advanced System Administration 6 - 63
Cicero Ronaldo (ciceroฺronaldo@gmailฺcom) has a non-transferable
license to use this Student Guideฺ
Unauthorized reproduction or distribution prohibitedฺ Copyright© 2014, Oracle and/or its affiliatesฺ

Configuring a Persistent Resource Pool
To create the pool configuration file, use pooladm -s.
To verify that the file has been created use
ls
l
# pooladm –s
To
verify
that
the
file
has
been
created
,
use
ls
–
l
/etc/pool*.
# ls -l /etc/pool*
-rw-r--r-- 1 root root 1298 Dec 14 16:13 /etc/pooladm.conf
# file /etc/pooladm.conf
//ld f d
/
etc
/
poo
l
a
d
m.con
f
: XML
d
ocument
After enabling the resource pool services, you can create the pool configuration file and save
it in the default configuration file /etc/pooladm.conf. To create the pool configuration file,
use the pooladm command with the -s option, which saves the file.
Copyright © 2013, Oracle and/or its affiliates. All rights reserved.
Note: The pooladm command is used to activate and deactivate the resource pools facility.
To verify that the file is created, you can use the ls –l /etc/pool* command, as shown in
the example in the slide. If you run the file /etc/pooladm.conf command, you can see
that the file is an XML document.
Note: You examine the contents of the XML document during the practice.
Oracle Solaris 11 Advanced System Administration 6 - 64
Cicero Ronaldo (ciceroฺronaldo@gmailฺcom) has a non-transferable
license to use this Student Guideฺ
Unauthorized reproduction or distribution prohibitedฺ Copyright© 2014, Oracle and/or its affiliatesฺ

Displaying the Resource Pool Configuration File
To display the resource pool configuration file, use poolcfg
-c info.
# poolcfg -c info
system default
system
default
string system.comment
int system.version 1
boolean system.bind-default true
string system.poold.objectives wt-load
<Com
p
lete out
p
ut
p
resented in the Notes>
ppp
Before you modify the resource pool configuration, you should familiarize yourself with the
contents of the configuration file. To display the file, use the poolcfg command with the -c
option, followed by the info subcommand, as shown in the example in the slide.
Copyright © 2013, Oracle and/or its affiliates. All rights reserved.
Note:
•The poolcfg utility is used to create and modify the resource pool configuration files.
•Due to space constraints in the slide, the full output for the resource pool configuration is
displayed on the next page.
In the output on the next page, notice that the current pool is pool_default and that the
p
rocessor set
(p
set
)
is
p
set default. Below that,
y
ou can see that there are two CPUs
p(p)
p
_
y
associated with the default pset. The number of CPUs available to the pset is identified in the
pset value uint pset.size 2.
Note: A processor set allows the binding of processes to groups of CPUs.
After checking the resource pool configuration and verifying that it is now the default
configuration, you can exit the pool by using the exit command.
Oracle Solaris 11 Advanced System Administration 6 - 65
Cicero Ronaldo (ciceroฺronaldo@gmailฺcom) has a non-transferable
license to use this Student Guideฺ
Unauthorized reproduction or distribution prohibitedฺ Copyright© 2014, Oracle and/or its affiliatesฺ

system default
string system.comment
int system.version 1
boolean
system bind
-
default true
boolean
system
.
bind
default
true
string system.poold.objectives wt-load
pool pool_default
int pool.sys_id 0
boolean pool.active true
boolean pool.default true
int pool.importance 1
string pool.comment
pset pset_default
pset pset_default
int pset.sys_id -1
boolean pset.default true
uint pset.min 1
uint pset.max 65536
string pset.units population
uint
p
set.load 395
p
uint pset.size 2
string pset.comment
cpu
int cpu.sys_id 1
string
cpu comment
string
cpu
.
comment
string cpu.status on-line
cpu
int cpu.sys_id 0
string cpu.comment
string cpu.status on-line
Oracle Solaris 11 Advanced System Administration 6 - 66
Cicero Ronaldo (ciceroฺronaldo@gmailฺcom) has a non-transferable
license to use this Student Guideฺ
Unauthorized reproduction or distribution prohibitedฺ Copyright© 2014, Oracle and/or its affiliatesฺ

Modifying the Resource Pool Configuration File
To create the pset, use poolcfg –c 'create pset
pset_psetname (uint pset.min = x; uint
pset.max = x)'.
#poolcfg -c 'create pset pset_1to2 (uint pset.min = 1; uint
To create the pool, use poolcfg –c 'create pool
pool_poolname’.
pset.max = 2)'
#poolcfg -c 'create pool pool_hrzone'
To associate the pset with the pool, use poolcfg -c
'associate pool pool_poolname (pset
pset_psetname) '.
#poolcfg -c 'associate pool pool_hrzone (pset pset_1to2)'
You are now ready to modify the configuration file to control the CPU usage of hrzone. To do
this, you create a pset, and then you create a pool. You then join or associate the pset with
the pool. You now look at each step separately.
Copyright © 2013, Oracle and/or its affiliates. All rights reserved.
Suppose that you have decided to allocate two CPUs to address the workload in hrzone.
This will enable the kernel to use either one or two CPUs to support hrzone’s workload.
To create the pset and define its parameters, use the poolcfg -c command followed by
create pset, the name that you want to give the pset (pset_psetname), and the
unassigned integer (uint) minimum and maximum values, which are the minimum and
maximum numbers of the CPUs that you want allocated to this pset. In the example shown in
th lid t ti th t i i f CPU h ld b d ith i f t
th
e s
lid
e, you are s
t
a
ti
ng
th
a
t
a m
i
n
i
mum o
f
one
CPU
s
h
ou
ld
b
e use
d
, w
ith
a max
i
mum o
f
t
wo.
You have named the pset pset_1to2.
Note: The -c option is used to specify a command.
Oracle Solaris 11 Advanced System Administration 6 - 67
Cicero Ronaldo (ciceroฺronaldo@gmailฺcom) has a non-transferable
license to use this Student Guideฺ
Unauthorized reproduction or distribution prohibitedฺ Copyright© 2014, Oracle and/or its affiliatesฺ

To create the pool, use the poolcfg -c command again, followed by create pool and the
name that you want to give the pool (pool_poolname), as shown in the second example. In
the example, because you are creating this pool for hrzone, you have named the pool
pool_hrzone.
To associate the pset with the pool, use the poolcfg -c command followed by 'associate
pool pool_poolname (pset pset_psetname)‘, as shown in the third example.
Note: Psets and pools are created separately to provide flexibility. For example, you could
create another pset and associate it with pool_hrzone if you wanted to do so.
Oracle Solaris 11 Advanced System Administration 6 - 68
Cicero Ronaldo (ciceroฺronaldo@gmailฺcom) has a non-transferable
license to use this Student Guideฺ
Unauthorized reproduction or distribution prohibitedฺ Copyright© 2014, Oracle and/or its affiliatesฺ

Displaying and Committing the Modified
Resource Pool Configuration File
Resource
Pool
Configuration
File
To display the modified resource pool configuration,
use poolcfg -c info.
#poolcfg -c info
Ot t tdi th Nt
To validate and commit the modified configuration,
use pooladm -n –c, and then pooladm –c.
<
O
u
t
pu
t
presen
t
e
d
i
n
th
e
N
o
t
es>
#
pooladm
-
n
–
c
#
pooladm
n
c
# pooladm -c
To view the modified pool configuration, use the poolcfg -c command followed by the info
subcommand, as shown in the first example in the slide.
Note:
Due to space constraints in the slide, the full output for the resource pool configuration
Copyright © 2013, Oracle and/or its affiliates. All rights reserved.
Note:
Due
to
space
constraints
in
the
slide,
the
full
output
for
the
resource
pool
configuration
is presented on the next page.
In the output on the next page, notice that you now have a pool called pool_hrzone and a
pset called pset_1to2 as part of your resource pool configuration.
After viewing the modified pool configuration, you will want to validate and then commit it. To
validate the configuration, use the pooladm command with the -n -c options, as shown in
the second example. After the validation is completed, you can commit the configuration by
using the pooladm -c command. This is your static resource pool configuration file.
Oracle Solaris 11 Advanced System Administration 6 - 69
Cicero Ronaldo (ciceroฺronaldo@gmailฺcom) has a non-transferable
license to use this Student Guideฺ
Unauthorized reproduction or distribution prohibitedฺ Copyright© 2014, Oracle and/or its affiliatesฺ

system default
string system.comment
int system.version 1
bl
bi d
df l
b
oo
l
ean system.
bi
n
d
-
d
e
f
au
l
t true
string system.poold.objectives wt-load
pool pool_default
int pool.sys_id 0
boolean
pool.active true
boolean
pool.active
true
boolean pool.default true
int pool.importance 1
string pool.comment
pset pset_default
pool pool_hrzone
boolean pool.active true
boolean pool.default false
string pool.scheduler FSS
int pool.importance 1
string pool.comment
pset pset_1to2
pset pset_default
int pset.sys_id -1
boolean
pset default true
boolean
pset
.
default
true
uint pset.min 1
uint pset.max 65536
string pset.units population
uint pset.load 388
uint pset.size 2
string pset.comment
Oracle Solaris 11 Advanced System Administration 6 - 70
Cicero Ronaldo (ciceroฺronaldo@gmailฺcom) has a non-transferable
license to use this Student Guideฺ
Unauthorized reproduction or distribution prohibitedฺ Copyright© 2014, Oracle and/or its affiliatesฺ

cpu
int cpu.sys_id 1
string cpu.comment
i
li
str
i
ng cpu.status on-
li
ne
cpu
int cpu.sys_id 0
string cpu.comment
string
cpu.status on
-
line
string
cpu.status
on
line
pset pset_1to2
int pset.sys_id -2
boolean pset.default false
uint pset.min 1
uint pset.max 2
string pset.units population
uint pset.load 0
uint pset.size 0
string pset.comment
Oracle Solaris 11 Advanced System Administration 6 - 71
Cicero Ronaldo (ciceroฺronaldo@gmailฺcom) has a non-transferable
license to use this Student Guideฺ
Unauthorized reproduction or distribution prohibitedฺ Copyright© 2014, Oracle and/or its affiliatesฺ

Displaying the Resource Pool Configuration
That Is Currently in Use
That
Is
Currently
in
Use
To display the resource pool configuration that is currently in
use, use poolcfg -dc info.
# poolcfg -dc info
system default
string system.comment
int system.version 1
boolean system.bind-default true
string system.poold.objectives wt-load
pool pool_hrzone
int pool.sys_id 1
boolean pool.active true
boolean pool.default false
int pool.importance 1
string pool.comment
pset pset_1to2
To view the resource pool configuration that the system is currently using (that is, the dynamic
pool configuration), use the poolcfg command with the -dc option, followed by the info
subcommand, as shown in the example in the slide.
Copyright © 2013, Oracle and/or its affiliates. All rights reserved.
Note: The -d option specifies the dynamic pool configuration—that is, the configuration that
is operating directly on the kernel state.
As you can see in the example, the pool that you just created, pool_hrzone, is the resource
pool configuration that is currently in use.
Oracle Solaris 11 Advanced System Administration 6 - 72
Cicero Ronaldo (ciceroฺronaldo@gmailฺcom) has a non-transferable
license to use this Student Guideฺ
Unauthorized reproduction or distribution prohibitedฺ Copyright© 2014, Oracle and/or its affiliatesฺ

Displaying all Active Resource Pools
To display all the active resource pools on the system,
use poolstat -r all.
# poolstat -r all
id
p
ool t
yp
e rid rset min max size used load
pyp
1 pool_hrzone pset 1 pset_1to2 1 2 1 0.00 0.00
0 pool_default pset -1 pset_default 1 66K 1 0.00 0.17
If you want to see all the active resource pools on the system, use the poolstat -r all
command, as shown in the example in the slide.
Note:
The
poolstat
utility is used to report statistics on active resource pools.
Copyright © 2013, Oracle and/or its affiliates. All rights reserved.
Note:
The
poolstat
utility
is
used
to
report
statistics
on
active
resource
pools.
Here, you can see that there are two active resource pools: the pool that was just created
(pool_hrzone) and the default pool (pool_default).
The output for this command displays the following information:
•Pool ID
•Name of the pool
T pe of reso rce set A reso rce set is a process
bindable reso rce E amples of
•
T
y
pe
of
reso
u
rce
set
.
A
reso
u
rce
set
is
a
process
-
bindable
reso
u
rce
.
E
x
amples
of
resource sets include processor sets and scheduling classes.
•Resource set ID (rid)
•Resource set name (rset)
•Minimum resource set size (min)
•Maximum resource set size (max)
Oracle Solaris 11 Advanced System Administration 6 - 73
Cicero Ronaldo (ciceroฺronaldo@gmailฺcom) has a non-transferable
license to use this Student Guideฺ
Unauthorized reproduction or distribution prohibitedฺ Copyright© 2014, Oracle and/or its affiliatesฺ

•Current resource set size (size)
•Amount of the resource set currently in use (used). This measure is calculated as the
percentage utilization of the resource set multiplied by its size. If the resource set has
been reconfi
g
ured durin
g
the last sam
p
lin
g
interval, this value mi
g
ht be not re
p
orted
(
–
)
.
gg pg g p(
)
•Load that is put on the resource set (load). For the definition of this property, see
libpool (3LIB).
Oracle Solaris 11 Advanced System Administration 6 - 74
Cicero Ronaldo (ciceroฺronaldo@gmailฺcom) has a non-transferable
license to use this Student Guideฺ
Unauthorized reproduction or distribution prohibitedฺ Copyright© 2014, Oracle and/or its affiliatesฺ

Binding the Zone to a Persistent Resource Pool
This section covers the following steps:
1. Listing the current state of the zones
2. Allocating the pool to the zone and confirming the
allocation
allocation
3. Rebooting the zone to activate the resource pool binding
4. Confirming the availability of the resource pool
Note
In this example, you are binding the zone to a persistent resource pool. Persistent resource
pools remain even if the system shuts down and comes back up You can also configure
Copyright © 2013, Oracle and/or its affiliates. All rights reserved.
pools
remain
even
if
the
system
shuts
down
and
comes
back
up
.
You
can
also
configure
temporary resource pools. For information about configuring temporary resource pools, see
the section titled “Resource Pools” in the Oracle Solaris Administration: Oracle Solaris Zones,
Oracle Solaris 10 Zones, and Resource Management guide.
Oracle Solaris 11 Advanced System Administration 6 - 75
Cicero Ronaldo (ciceroฺronaldo@gmailฺcom) has a non-transferable
license to use this Student Guideฺ
Unauthorized reproduction or distribution prohibitedฺ Copyright© 2014, Oracle and/or its affiliatesฺ

Listing the Current State of the Zones
To list the current state of the zones on the system,
use zoneadm list –iv.
#zoneadm list -iv
ID NAME STATUS PATH BRAND IP
0 global running / solaris shared
1 hrzone running /zones/hrzone solaris excl
2 itzone running /zones/itzone solaris excl
Because you want to bind a running zone to the resource pool, you verify that the zone is up
and running. To do this, use the zoneadm list -iv command, as shown in the example in
the slide. As you can see, all zones are up and running.
Copyright © 2013, Oracle and/or its affiliates. All rights reserved.
Oracle Solaris 11 Advanced System Administration 6 - 76
Cicero Ronaldo (ciceroฺronaldo@gmailฺcom) has a non-transferable
license to use this Student Guideฺ
Unauthorized reproduction or distribution prohibitedฺ Copyright© 2014, Oracle and/or its affiliatesฺ

Allocating the Pool to the Zone
and Confirming the Allocation
and
Confirming
the
Allocation
To allocate the pool to the zone, use zonecfg –z followed by
the zone name and set pool=pool_poolname.
#zonecfg -z hrzone set pool=pool_hrzone
To confirm that the allocation has been made, use zonecfg -
z zonename info pool.
#zonecf
g
-z hrzone info
|
g
re
p
p
ool
g
|g pp
pool: pool_hrzone
Now that you have verified that the hrzone zone is running, you can allocate the pool to that
zone. To do this, use the zonecfg -z command followed by the zone name and set
pool=pool_poolname, as shown in the first example in the slide.
Copyright © 2013, Oracle and/or its affiliates. All rights reserved.
To confirm that the pool allocation has been included in the zone configuration, use the
zonecfg -z command followed by the zone name, the info subcommand, and | grep
pool, as shown in the second example. In this case, you have confirmation that the resource
pool is part of the zone configuration.
Oracle Solaris 11 Advanced System Administration 6 - 77
Cicero Ronaldo (ciceroฺronaldo@gmailฺcom) has a non-transferable
license to use this Student Guideฺ
Unauthorized reproduction or distribution prohibitedฺ Copyright© 2014, Oracle and/or its affiliatesฺ

Rebooting the Zone to Activate
the Resource Pool Binding
the
Resource
Pool
Binding
To reboot the zone, use zoneadm -z hrzone shutdown
-r.
# zoneadm -z hrzone shutdown -r
To verify that the zone is back up and running, use zoneadm
list –iv.
#zoneadm list -iv
ID NAME STATUS PATH BRAND IP
0 global running / solaris shared
1 hrzone running /zones/hrzone solaris excl
2 itzone running /zones/itzone solaris excl
The next step is to reboot the zone to activate the resource pool binding. To do this, use the
zoneadm command followed by the zone name and the shutdown subcommand with the -r
option, as shown in the first example in the slide.
Copyright © 2013, Oracle and/or its affiliates. All rights reserved.
Note: You can also use init 6 to reboot.
Next, you want to verify that the zone is back up and running. To do this, run the zoneadm
list -iv command again, as shown in the second example. As you can see, hrzone is
back up and running.
Oracle Solaris 11 Advanced System Administration 6 - 78
Cicero Ronaldo (ciceroฺronaldo@gmailฺcom) has a non-transferable
license to use this Student Guideฺ
Unauthorized reproduction or distribution prohibitedฺ Copyright© 2014, Oracle and/or its affiliatesฺ

Confirming the Availability of the Resource Pool
To confirm the availability of the resource pool, log in by using
zlogin zonename, and then use poolcfg -dc info.
# zlogin hrzone
[Connected to zone
'
hrzone
'
pts/2]
[Connected
to
zone
hrzone
pts/2]
Oracle Corporation SunOS 5.11 11.0 November 2011
# poolcfg -dc info
<Output presented in the Notes>
# exit
Logout
[Connection to zone 'hrzone' pts/2 closed]
Now you want to confirm that the resource pool is available. To do this, you first log in to the
zone by using the zlogin command followed by the zone name. Then use the poolcfg
command with the -dc options, followed by the info subcommand, as shown in the example
Copyright © 2013, Oracle and/or its affiliates. All rights reserved.
in the slide.
Note: Due to space constraints in the slide, the full output for the resource pool configuration
is presented on the next page.
In the output on the next page, notice that you have a pool called pool_hrzone and that its
pset is pset_1to2. Below that, you can see the details for the pset as well as the two CPUs
that you specified.
After you have confirmed the availability of the resource pool and reviewed the resource pool
configuration, you can exit the pool by using the exit command.
Oracle Solaris 11 Advanced System Administration 6 - 79
Cicero Ronaldo (ciceroฺronaldo@gmailฺcom) has a non-transferable
license to use this Student Guideฺ
Unauthorized reproduction or distribution prohibitedฺ Copyright© 2014, Oracle and/or its affiliatesฺ

system default
string system.comment
int system.version 1
bl
bi d
df l
b
oo
l
ean system.
bi
n
d
-
d
e
f
au
l
t true
string system.poold.objectives wt-load
pool pool_hrzone
int pool.sys_id 1
boolean
pool.active true
boolean
pool.active
true
boolean pool.default false
int pool.importance 1
string pool.comment
pset pset_1to2
pset pset_1to2
int pset.sys_id 1
boolean pset.default false
uint pset.min 1
uint pset.max 2
string pset.units population
uint pset.load 24
uint pset.size 1
string pset.comment
cpu
cpu
int cpu.sys_id 0
string cpu.comment
string cpu.status on-line
Oracle Solaris 11 Advanced System Administration 6 - 80
Cicero Ronaldo (ciceroฺronaldo@gmailฺcom) has a non-transferable
license to use this Student Guideฺ
Unauthorized reproduction or distribution prohibitedฺ Copyright© 2014, Oracle and/or its affiliatesฺ

Removing the Resource Pool Configuration
This section covers the following steps:
1. Removing the pool configuration from the zone
2. Rebooting the zone
3
Checking the resource pool configuration for the zone
3
.
Checking
the
resource
pool
configuration
for
the
zone
4. Deleting the resource pool
Copyright © 2013, Oracle and/or its affiliates. All rights reserved.
Oracle Solaris 11 Advanced System Administration 6 - 81
Cicero Ronaldo (ciceroฺronaldo@gmailฺcom) has a non-transferable
license to use this Student Guideฺ
Unauthorized reproduction or distribution prohibitedฺ Copyright© 2014, Oracle and/or its affiliatesฺ

Removing the Pool Configuration from the Zone
To remove the resource pool configuration from the zone,
use zonecfg -z zonename clear pool.
#zonecfg -z hrzone clear pool
To remove the resource pool configuration from the zone, use the zonecfg -z command
followed by the zone name and the clear pool subcommand, as shown in the example in
the slide. This action removes the resource pool configuration that you allocated to the zone
Copyright © 2013, Oracle and/or its affiliates. All rights reserved.
and replaces it with the default resource pool configuration.
Oracle Solaris 11 Advanced System Administration 6 - 82
Cicero Ronaldo (ciceroฺronaldo@gmailฺcom) has a non-transferable
license to use this Student Guideฺ
Unauthorized reproduction or distribution prohibitedฺ Copyright© 2014, Oracle and/or its affiliatesฺ
Rebooting the Zone
To reboot the zone, use zoneadm -z hrzone shutdown
-r.
#zoneadm -z hrzone shutdown -r
To verify that the zone is back up and running, use zoneadm
list –iv.
# zoneadm list -iv
ID NAME STATUS PATH BRAND IP
/
0 global running
/
solaris shared
1 hrzone running /zones/hrzone solaris excl
2 itzone running /zones/itzone solaris excl
The next step is to reboot the zone to activate the change. To do this, use the zoneadm
command followed by the zone name and the shutdown subcommand with the -r option, as
shown in the first example in the slide.
Copyright © 2013, Oracle and/or its affiliates. All rights reserved.
Next, you want to verify that the zone is back up and running. To do this, run the zoneadm
list -iv command again, as shown in the second example. As you can see, hrzone is
back up and running.
Oracle Solaris 11 Advanced System Administration 6 - 83
Cicero Ronaldo (ciceroฺronaldo@gmailฺcom) has a non-transferable
license to use this Student Guideฺ
Unauthorized reproduction or distribution prohibitedฺ Copyright© 2014, Oracle and/or its affiliatesฺ

Checking the Resource Pool
Configuration for the Zone
Configuration
for
the
Zone
To check the resource pool configuration for the zone, log in by
using zlogin zonename, and then use poolcfg -dc info.
# zlogin hrzone
[Connected to zone 'hrzone' pts/2]
Oracle Corporation SunOS 5.11 11.0 November 2011
#poolcfg -dc info
<Output presented in the Notes>
#
exit
#
exit
Logout
[Connection to zone 'hrzone' pts/2 closed]
Next, you want to check that the resource pool has been removed. To do this, first log in to
the zone by using the zlogin command followed by the zone name. Then use the poolcfg
command with the -dc options, followed by the info subcommand, as shown in the example
Copyright © 2013, Oracle and/or its affiliates. All rights reserved.
in the slide.
Note: Due to space constraints in the slide, the full output for the resource pool configuration
is presented on the next page.
In the output on the next page, notice that only the default resource pool configuration is
available. The only pool that is available is the pool_default pool, and the only pset that is
available is pset_default. Below the default pset, you can see the two CPUs associated
ith th t t
w
ith
th
a
t
pse
t
.
After you have checked the resource pool configuration and verified that it is now the default
configuration, you can exit the pool by using the exit command.
Oracle Solaris 11 Advanced System Administration 6 - 84
Cicero Ronaldo (ciceroฺronaldo@gmailฺcom) has a non-transferable
license to use this Student Guideฺ
Unauthorized reproduction or distribution prohibitedฺ Copyright© 2014, Oracle and/or its affiliatesฺ

system default
string system.comment
int system.version 1
boolean
system bind
-
default true
boolean
system
.
bind
default
true
string system.poold.objectives wt-load
pool pool_default
int pool.sys_id 0
boolean pool.active true
boolean pool.default true
int pool.importance 1
string pool.comment
pset pset_default
pset pset_default
int pset.sys_id -1
boolean pset.default true
uint pset.min 1
uint pset.max 65536
string pset.units population
uint
p
set.load 268
p
uint pset.size 1
string pset.comment
cpu
int cpu.sys_id 1
string
cpu comment
string
cpu
.
comment
string cpu.status on-line
Oracle Solaris 11 Advanced System Administration 6 - 85
Cicero Ronaldo (ciceroฺronaldo@gmailฺcom) has a non-transferable
license to use this Student Guideฺ
Unauthorized reproduction or distribution prohibitedฺ Copyright© 2014, Oracle and/or its affiliatesฺ

Deleting the Resource Pool
To delete the resource pool, use pooladm –x.
#pooladm -x
The next step is to delete the resource pool. To do this, use the pooladm command with the
-x option. The -x option removes the currently active pool configuration, destroys all defined
resources, and returns all formerly partitioned components to their default resources.
Copyright © 2013, Oracle and/or its affiliates. All rights reserved.
Oracle Solaris 11 Advanced System Administration 6 - 86
Cicero Ronaldo (ciceroฺronaldo@gmailฺcom) has a non-transferable
license to use this Student Guideฺ
Unauthorized reproduction or distribution prohibitedฺ Copyright© 2014, Oracle and/or its affiliatesฺ

Displaying all Active Resource Pools
To display all the active resource pools on the system,
use poolstat -r all.
#poolstat -r all
id pool type rid rset min max size used load
0 pool_default pset -1 pset_default 1 66K 2 0.00 0.73
The final step is to verify that the resource pool that you deleted is no longer active on the
system. To do this, use the poolstat -r all command, as shown in the example in the
slide. You can see that there is now only one active resource pool: the default pool
Copyright © 2013, Oracle and/or its affiliates. All rights reserved.
(pool_default).
Oracle Solaris 11 Advanced System Administration 6 - 87
Cicero Ronaldo (ciceroฺronaldo@gmailฺcom) has a non-transferable
license to use this Student Guideฺ
Unauthorized reproduction or distribution prohibitedฺ Copyright© 2014, Oracle and/or its affiliatesฺ

Allocating and Managing Physical Memory
Resources with Resource Capping
Resources
with
Resource
Capping
To add a memory cap to a zone, perform the following steps:
1. Configure the zone by using zonecfg –z zone.
2. Add the memory cap resource and set each memory cap
type as appropriate: physical swap and locked
type
as
appropriate:
physical
,
swap
,
and
locked
.
3. Verify, commit, and exit the zone.
# zonecfg -z itzone
zonecfg:itzone> add capped-memory
zonecfg:itone:capped-memory> set physical=50m
zonecfg:itzone:capped-memory> set swap=100m
zonecfg:itzone:capped-memory> set locked=30m
zonecfg:itone:capped-memory> end
zonecfg:itzone> verify
zonecfg:itzone> commit
zonecfg:itzone> exit
As mentioned in the first topic on planning for a virtual network and zones, you have the
option of setting memory resource capping in a zone. The steps for adding a memory cap are
listed in the slide.
Copyright © 2013, Oracle and/or its affiliates. All rights reserved.
In the example, you are setting the physical, swap, and locked memory resource caps for the
zone called itzone.
Note: You do not have to set all three limits, but you must set at least one. These settings are
persistent.
Oracle Solaris 11 Advanced System Administration 6 - 88
Cicero Ronaldo (ciceroฺronaldo@gmailฺcom) has a non-transferable
license to use this Student Guideฺ
Unauthorized reproduction or distribution prohibitedฺ Copyright© 2014, Oracle and/or its affiliatesฺ

Practice 6-3 Overview:
Allocating Resources to Zones
Allocating
Resources
to
Zones
This practice covers the following topics:
•Enabling services for resource pools
•Configuring a persistent resource pool
•
Binding the zone to a persistent resource pool
•
Binding
the
zone
to
a
persistent
resource
pool
•Removing the resource pool configuration
This practice should take about 25 minutes to complete.
Copyright © 2013, Oracle and/or its affiliates. All rights reserved.
Oracle Solaris 11 Advanced System Administration 6 - 89
Cicero Ronaldo (ciceroฺronaldo@gmailฺcom) has a non-transferable
license to use this Student Guideฺ
Unauthorized reproduction or distribution prohibitedฺ Copyright© 2014, Oracle and/or its affiliatesฺ

Lesson Agenda
• Planning for a Virtual Network and Zones
• Configuring a Virtual Network
• Configuring Zones to Use VNICs
•
Allocating and Managing System Resources in a Zone
•
Allocating
and
Managing
System
Resources
in
a
Zone
•Managing Resources on the Virtual Network
Copyright © 2013, Oracle and/or its affiliates. All rights reserved.
Oracle Solaris 11 Advanced System Administration 6 - 90
Cicero Ronaldo (ciceroฺronaldo@gmailฺcom) has a non-transferable
license to use this Student Guideฺ
Unauthorized reproduction or distribution prohibitedฺ Copyright© 2014, Oracle and/or its affiliatesฺ

Managing Resources on the Virtual Network
This section covers the following topics:
•Determining the configured VNIC states
•Creating and implementing a flow
•
Displaying flow controls
•
Displaying
flow
controls
•Setting flow properties
•Displaying flow control properties
•Setting a priority property
Copyright © 2013, Oracle and/or its affiliates. All rights reserved.
Oracle Solaris 11 Advanced System Administration 6 - 91
Cicero Ronaldo (ciceroฺronaldo@gmailฺcom) has a non-transferable
license to use this Student Guideฺ
Unauthorized reproduction or distribution prohibitedฺ Copyright© 2014, Oracle and/or its affiliatesฺ

Determining the Configured VNIC States
To determine the current state of the VNICs on the system,
use dladm show-link.
#dladm show-link
t1 h 1500 k
ne
t1
p
h
ys
1500
un
k
nown --
net2 phys 1500 unknown --
net0 phys 1500 up --
net3 phys 1500 unknown --
stub0 etherstub 9000 unknown --
vnic0 vnic 9000 up stub0
vnic1 vnic 9000 u
p
stub0
p
hrzone/vnic1 vnic 9000 up stub0
vnic2 vnic 9000 up stub0
itzone/vnic2 vnic 9000 up stub0
itzone/net0 vnic 1500 up net0
hrzone/net0 vnic 1500 up net0
Before you create a flow, you want to determine the current state of the VNICs that you want
to create the flow for. To do this, use dladm show-link, as shown in the example in the
slide. As you can see, the VNICs that you created earlier are up.
Copyright © 2013, Oracle and/or its affiliates. All rights reserved.
Oracle Solaris 11 Advanced System Administration 6 - 92
Cicero Ronaldo (ciceroฺronaldo@gmailฺcom) has a non-transferable
license to use this Student Guideฺ
Unauthorized reproduction or distribution prohibitedฺ Copyright© 2014, Oracle and/or its affiliatesฺ

Creating and Adding a Flow
1. Create a new VNIC by using dladm create-vnic –l
etherstub vnic.
2. Select the attribute on which you want to base the flow.
3
Determinehowyouwanttocustomizetheflow
’
suseofthe
3
.
Determine
how
you
want
to
customize
the
flow s
use
of
the
network resources.
4. Add the VNIC as a flow by using flowadm add-flow -l
link -a attribute=value flow.
# dladm create-vnic -l stub0 vnic3
#
flowadm add
flow
l vnic3
a transport tcp local port 80 http1
#
flowadm
add
-
flow
-
l
vnic3
-
a
transport
=
tcp
,
local
_
port
=
80
http1
#flowadm show-flow
FLOW LINK IPADDR PROTO LPORT RPORT DSFLD
http1 vnic3 -- tcp 80 -- --
To create a flow, you first create a new VNIC. You then select the attribute that you want to
base the flow on, and then determine how you want to customize the flow’s use of resources
by selecting the bandwidth and priority settings for the network resource.
Copyright © 2013, Oracle and/or its affiliates. All rights reserved.
Next, you add the VNIC as a flow by using the flowadm add-flow command followed by
the -l option, the link name, the -a option that specifies the attribute value, the attribute
value, and the flow name.
In this example, you have created a new VNIC, vnic3, to add as a flow. The flow is based on
the TCP transport protocol, which is the attribute. You have defined the transport as local and
assigned it to port 80. The name of the flow is http1.
Oracle Solaris 11 Advanced System Administration 6 - 93
Cicero Ronaldo (ciceroฺronaldo@gmailฺcom) has a non-transferable
license to use this Student Guideฺ
Unauthorized reproduction or distribution prohibitedฺ Copyright© 2014, Oracle and/or its affiliatesฺ

Displaying Flow Controls
To display the flow controls that are currently configured in the
system, use flowadm show-flow.
# flowadm show-flo
w
FLOW LINK IPADDR PROTO LPORT RPORT DSFLD
http1 vnic3 -- tcp -- -- --
To display the flow controls that are currently configured in the system, use the flowadm
show-flow command, as shown in the example in the slide. As you can see, there is only
one flow that is currently configured in the system, and that is the flow that you just created.
Copyright © 2013, Oracle and/or its affiliates. All rights reserved.
Oracle Solaris 11 Advanced System Administration 6 - 94
Cicero Ronaldo (ciceroฺronaldo@gmailฺcom) has a non-transferable
license to use this Student Guideฺ
Unauthorized reproduction or distribution prohibitedฺ Copyright© 2014, Oracle and/or its affiliatesฺ

Setting Flow Properties
To set a flow property, use flowadm set-flowprop –p
property=value flow.
#flowadm set-flowprop -p maxbw=100M http1
To set a flow property, use the flowadm set-flowprop command followed by the -p option
to specify the properties that you want to use to control the resources, property values, and
flow name.
Copyright © 2013, Oracle and/or its affiliates. All rights reserved.
In the example in the slide, the maximum bandwidth is set to 100 MB per second.
Note: The value that you set for the bandwidth must be within the allowed range of values for
the link’s bandwidth. To display the possible range of values for a link’s bandwidth, check the
POSSIBLE field in the output that is generated by the following command: dladm show-
linkprop -p maxbw link.
Oracle Solaris 11 Advanced System Administration 6 - 95
Cicero Ronaldo (ciceroฺronaldo@gmailฺcom) has a non-transferable
license to use this Student Guideฺ
Unauthorized reproduction or distribution prohibitedฺ Copyright© 2014, Oracle and/or its affiliatesฺ

Displaying Flow Control Properties
To display a flow’s control properties, use flowadm show-
flowprop flow.
#flowadm show-flowprop http1
FLOW PROPERTY VALUE DEFAULT POSSIBLE
http1 maxbw 100 -- --
If you want to see the control properties that a flow has, you can do so by using the flowadm
show-flowprop command, as shown in the example in the slide.
Copyright © 2013, Oracle and/or its affiliates. All rights reserved.
Oracle Solaris 11 Advanced System Administration 6 - 96
Cicero Ronaldo (ciceroฺronaldo@gmailฺcom) has a non-transferable
license to use this Student Guideฺ
Unauthorized reproduction or distribution prohibitedฺ Copyright© 2014, Oracle and/or its affiliatesฺ

Setting a Priority Property
To set a link property, use dladm set-linkprop -p
property=high vnic.
# dladm set-linkprop -p priority=high vnic1
To view the priority property for a link, use dladm show-
linkproperty –p priority vnic.
#
dladm set
linkprop
p priority=high vnic1
#
dladm
set
-
linkprop
-
p
priority=high
vnic1
# dladm show-linkprop -p priority vnic1
LINK PROPERTY PERM VALUE DEFAULT POSSIBLE
vnic1 priority rw high high low,medium,high
After you set the flow properties, you can also set a priority property on the link. To do so, use
the dladm set-linkprop command followed by the -p option to specify the priority value,
the priority value itself, and the name of the VNIC, as shown in the first example in the slide.
Copyright © 2013, Oracle and/or its affiliates. All rights reserved.
The possible priority values are low, medium, and high. In this example, the link priority for
vnic1 is set to high.
To view the priority property for a link, you can use the dladm show-linkprop command
followed by the -p priority subcommand and the name of the VNIC, as shown in the second
example.
Oracle Solaris 11 Advanced System Administration 6 - 97
Cicero Ronaldo (ciceroฺronaldo@gmailฺcom) has a non-transferable
license to use this Student Guideฺ
Unauthorized reproduction or distribution prohibitedฺ Copyright© 2014, Oracle and/or its affiliatesฺ

Practices 6-4 and 6-5 Overview:
Managing the Virtual Network Data Flow and
Managing
the
Virtual
Network
Data
Flow
and
Removing Part of the Virtual Network
These practices cover the following topics:
•Managing resources on the virtual network by using data
flows
flows
•Dismantling the virtual network and zones
Each practice should take about 10 minutes to complete.
Copyright © 2013, Oracle and/or its affiliates. All rights reserved.
Oracle Solaris 11 Advanced System Administration 6 - 98
Cicero Ronaldo (ciceroฺronaldo@gmailฺcom) has a non-transferable
license to use this Student Guideฺ
Unauthorized reproduction or distribution prohibitedฺ Copyright© 2014, Oracle and/or its affiliatesฺ

Summary
In this lesson, you should have learned how to:
•Implement a plan to configure Oracle Solaris zones with a
virtual network
•
Create a virtual network
Create
a
virtual
network
•Configure Oracle Solaris zones to use VNICs
•Allocate resources to an Oracle Solaris zone
•Manage virtual network resources
Copyright © 2013, Oracle and/or its affiliates. All rights reserved.
Oracle Solaris 11 Advanced System Administration 6 - 99
Cicero Ronaldo (ciceroฺronaldo@gmailฺcom) has a non-transferable
license to use this Student Guideฺ
Unauthorized reproduction or distribution prohibitedฺ Copyright© 2014, Oracle and/or its affiliatesฺ

Cicero Ronaldo (ciceroฺronaldo@gmailฺcom) has a non-transferable
license to use this Student Guideฺ
Unauthorized reproduction or distribution prohibitedฺ Copyright© 2014, Oracle and/or its affiliatesฺ
