P60 PRINTERS AND OPENOFFICE IMPLEMENTATION GUIDE
User Manual:
Open the PDF directly: View PDF ![]() .
.
Page Count: 31

Implementation Guide
P60 Printer and OpenOffice
Implementation Guide
OpenPeople v8.12
Prepared by
Selina Ettles
Advanced Business Solutions
Northpoint
Exploration Drive
Bridge of Don
Aberdeen
AB23 8HZ
Tel: +44 (0)1224 692903
Fax: +44 (0)1224 693078
Web: www.advancedcomputersoftware.com/abs
Date: 31/1/2012
Copyright © Advanced Business Software and Solutions Ltd. 2012
Whilst Advanced Business Software and Solutions Ltd endeavour to ensure that the information in this
document is correct it does not accept any liability for errors or omissions or any liability arising out of
its use.
The software described in this document is supplied under licence and may be used or copied only in
accordance with the terms of such a licence. Issue of this document does not entitle the recipient to
access or use the software described.
The development of Advanced Business Software and Solutions Ltd software is continuous and the
published information may not reflect the current status. Any particular release of the software may not
contain all of the facilities described and / or may contain facilities not described.

Contents
1 Overview .........................................................................................................7
2 OpenOffice Installation.................................................................................... 8
2.1 Overview ................................................................................................................8
2.2 Download OpenOffice................................................................................................9
2.3 OpenOffice Registration...........................................................................................13
2.4 Add Extension - DocumentExport.oxt ........................................................................15
2.5 OpenOffice Entry in Openstrt.ini ...............................................................................18
3 Advanced Outlook Security............................................................................ 20
3.1 Overview ..............................................................................................................20
3.2 Installation............................................................................................................20
4 P60 Printers Set Up .......................................................................................24
4.1 Overview ..............................................................................................................24
4.2 P60A Printer ..........................................................................................................24
4.3 PDFPRINTER Printer................................................................................................26
4.4 P60C Printer ..........................................................................................................26
4.5 Allocating Printers to Users ......................................................................................28
5 Setting Up Default P60 Formats..................................................................... 30
5.1 Overview ..............................................................................................................30
5.2 P60 format default parameters.................................................................................30

1 Overview
This document describes the set up required in order to generate both paper and
electronic P60s in OpenPeople.
This includes information on:
o Installing OpenOffice
o Installing Outlook Security features
o P60 printer set up
o Setting up default P60 options

2 OpenOffice Installation
2.1 Overview
OpenPeople uses OpenOffice (minimum v3.3) as the mechanism for converting
P60s to PDF format. It is required when generating electronic P60s (format B).
OpenOffice can be freely downloaded from the internet.
When OpenOffice is downloaded there may be an amendment required within the
openstrt.ini file.
When OpenOffice is installed, there can be a few different types of setups
depending on each customer’s setup.
OpenOffice installed locally on OpenPeople client machines
OpenOffice installed on the OpenPeople server
OpenOffice installed on a shared network separate from OpenPeople
If OpenOffice is installed locally on an OpenPeople client machine then no
amendment to the openstrt.ini is required as it will be detected automatically.
If OpenOffice is installed on the OpenPeople server then there are some specific
configuration options that are required. This should be completed by your IT team.
If OpenOffice is installed on a shared network, then the openstrt.ini must be
amended to point to its network install location. This is to ensure that it is available
for everyone across the network.
Note: - OpenOffice is free to download from OpenOffice.org and has no license
issues. Also note that the screens may look different from those shown within this
guide as OpenOffice versions are updated regularly.
2.2 Download OpenOffice
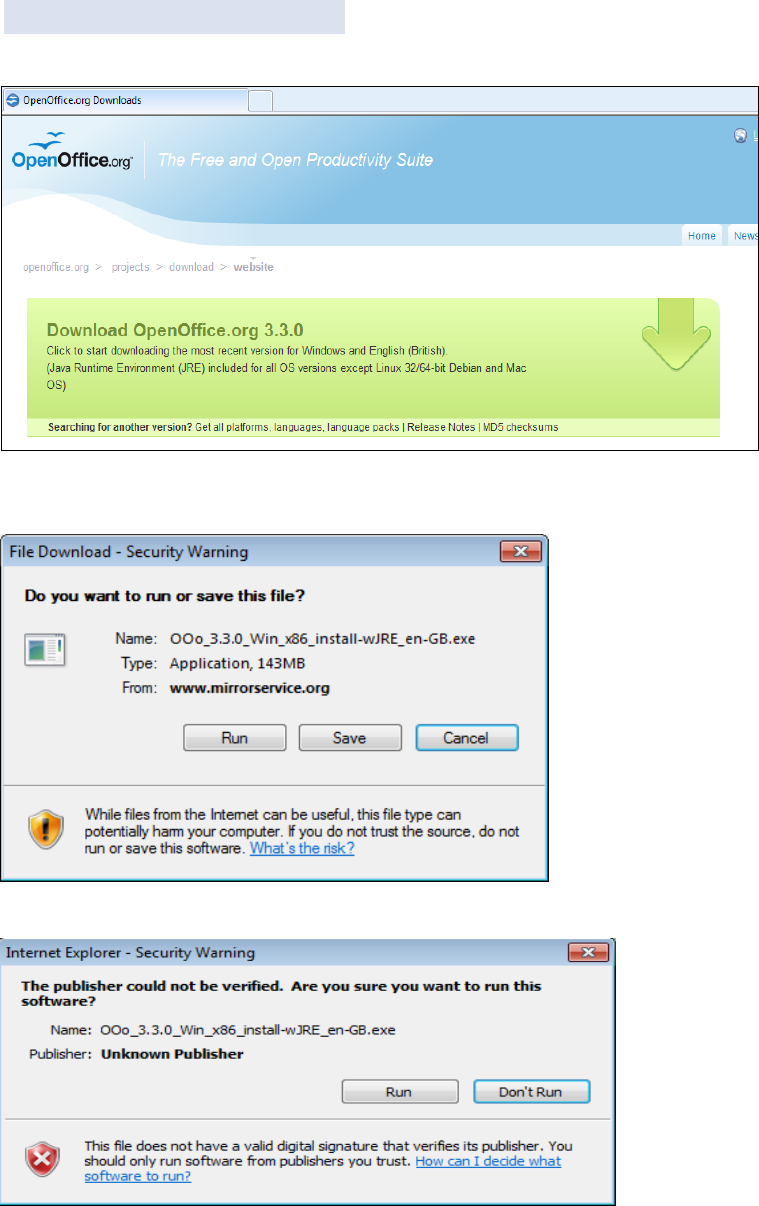
Online Navigate to OpenOffice.org.
User selects Download OpenOffice from the options on the OpenOffice home
page.
Select Run
Select Run
Once the download is complete the screen below will be displayed. The version may
be different but it must be 3.3 or later.
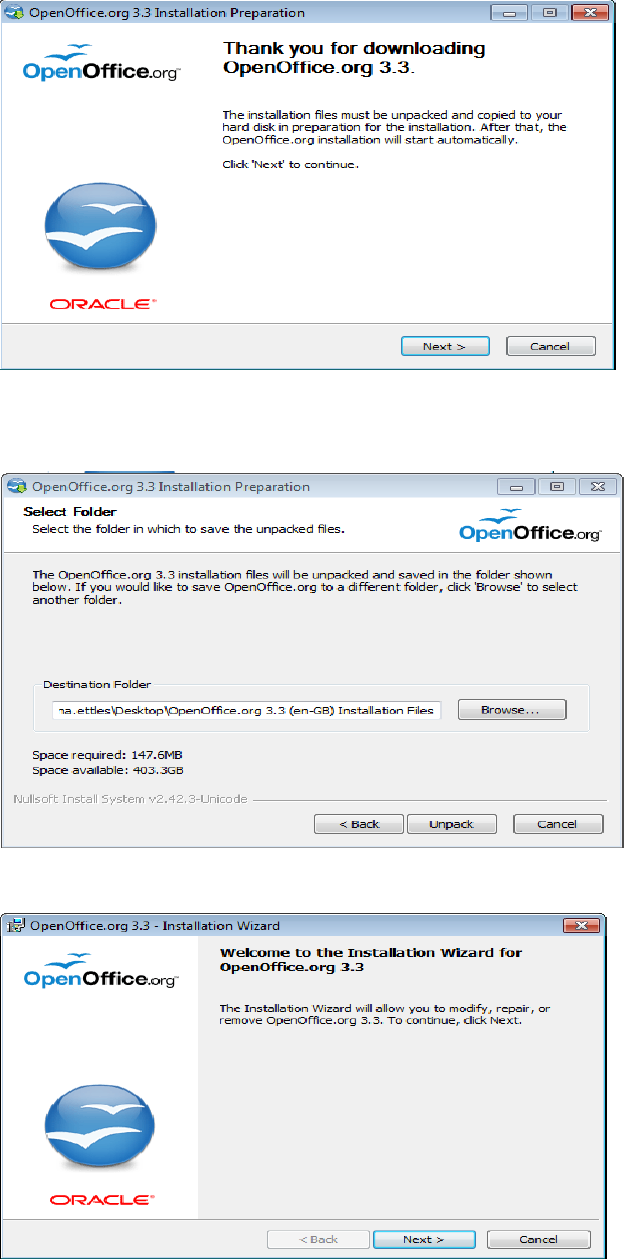
Select Next
Note: - OpenOffice by default will download to the C drive.
Select Unpack
Select Next
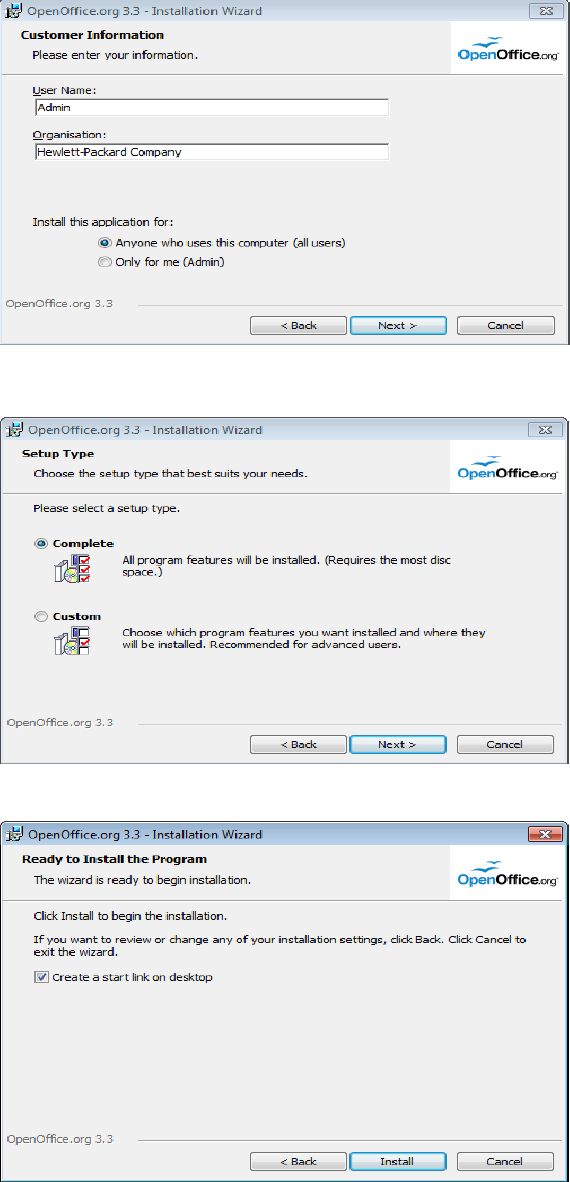
Enter the User Name and Organisation details. The radio button selection should
remain as ‘Anyone who uses this computer’.
Select Next
Select Complete and select Next
Enter a tick as shown below if you wish a hyperlink for OpenOffice on your
desktop.
Select Install
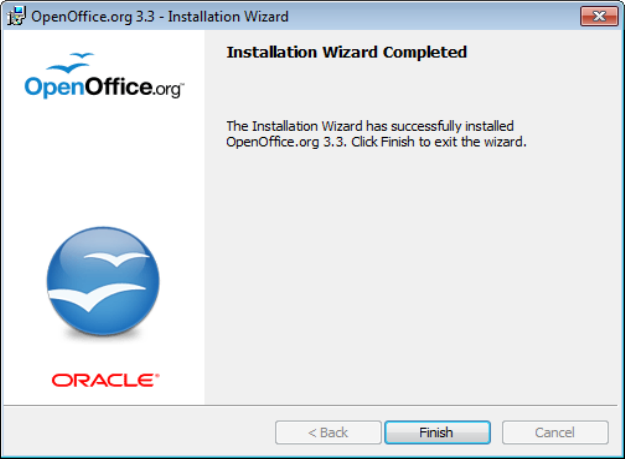
Select Finish.
If a tick was entered as shown above the user will now have a visible icon on their
desktop to allow access to OpenOffice.
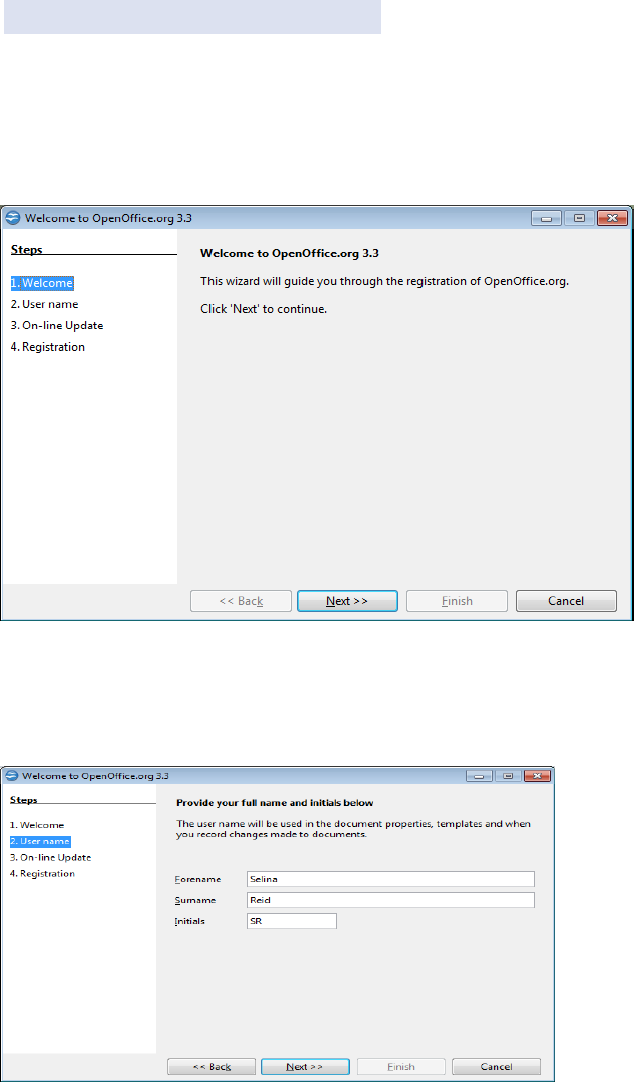
2.3 OpenOffice Registration
Once installed OpenOffice registration must be completed.
Note this will only be required once, immediately after installation.
Enter OpenOffice via the desktop icon.
Screen will be displayed as shown below: -
Select Next
Enter user name applicable (Example only below).
Select Next
Enter the user name applicable (example only above).
Select Next
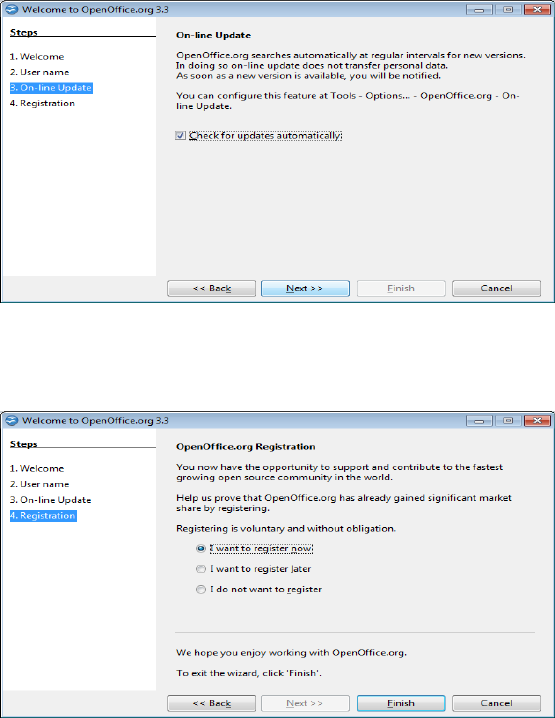
Tick – ‘Check for updates automatically’ as shown above.
Select Next
Check – ‘I want to register now’ as shown above.
Select Finish
Complete the registration details, the registration screen will look slightly
different depending on the OpenOffice and Oracle version.
Once completed select - Register Now
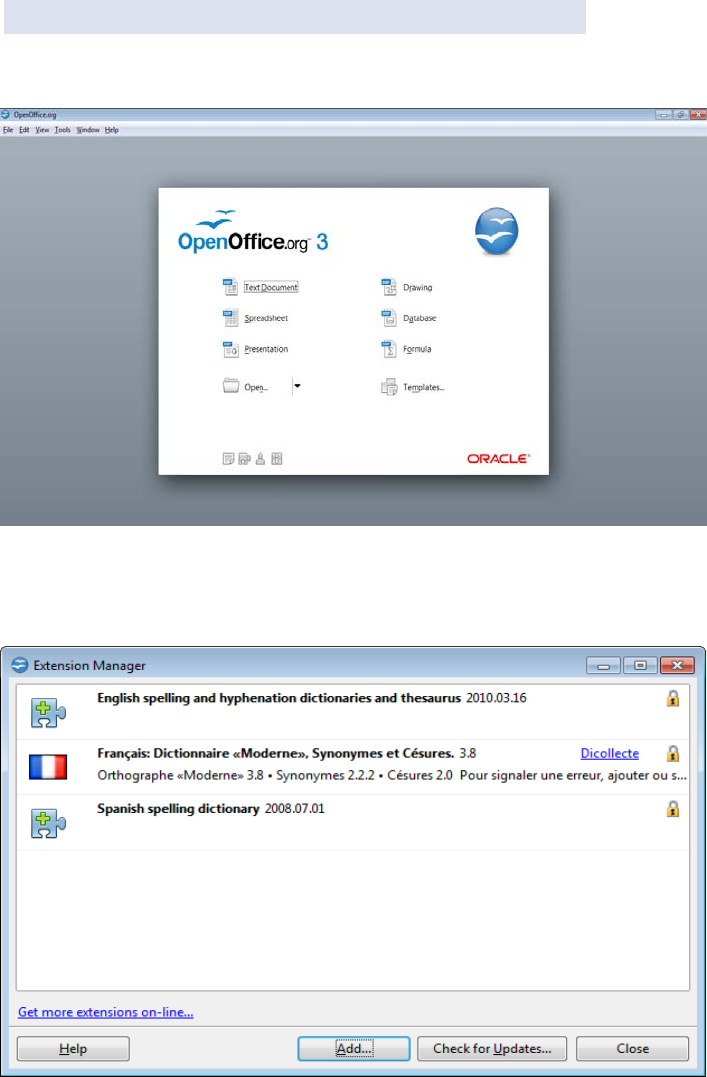
2.4 Add Extension - DocumentExport.oxt
Once registration is complete an ‘extension’ is required to be added to OpenOffice
(Extension - DocumentExport.oxt).
Within OpenOffice from the screen above, top menu, select,
Tools
Extension Manager
The screen above will be displayed: -
Select Add
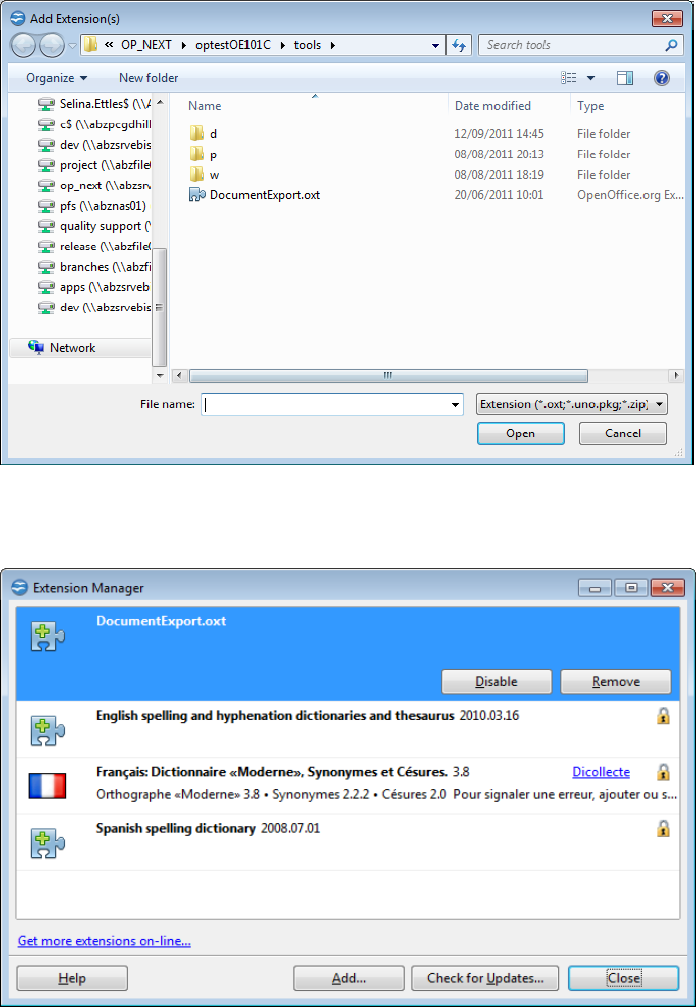
The screen below may be displayed, if not then browse to the location of the
DocumentExport.oxt extension, which will be in your code tree, tools folder.
Path example: - OpenPeople\v811\livev101c\oplive\tools.
Highlight DocumentExport.oxt from your tools folder.
Select Open
DocumentExport.oxt will now be loaded and displayed as shown above: -
Select Close

Again from the top menu select,
Tools
Options as displayed below:
Highlight Memory as displayed above:
Within the ‘OpenOffice.Org Quickstarter’ subsection (displayed above).
Uncheck (Remove the tick) – ‘Load OpenOffice.org during system start-up’.
Select OK
Important Note: Leaving this box checked will interfere with the document
conversion process while running eP60s.
2.5 OpenOffice Entry in Openstrt.ini
The Openstrt.ini file requires an additional command added so the location of
OpenOffice can be determined. The openstrt.ini file can be found within
[OpenPeople Installation directory]\openstrt directory.
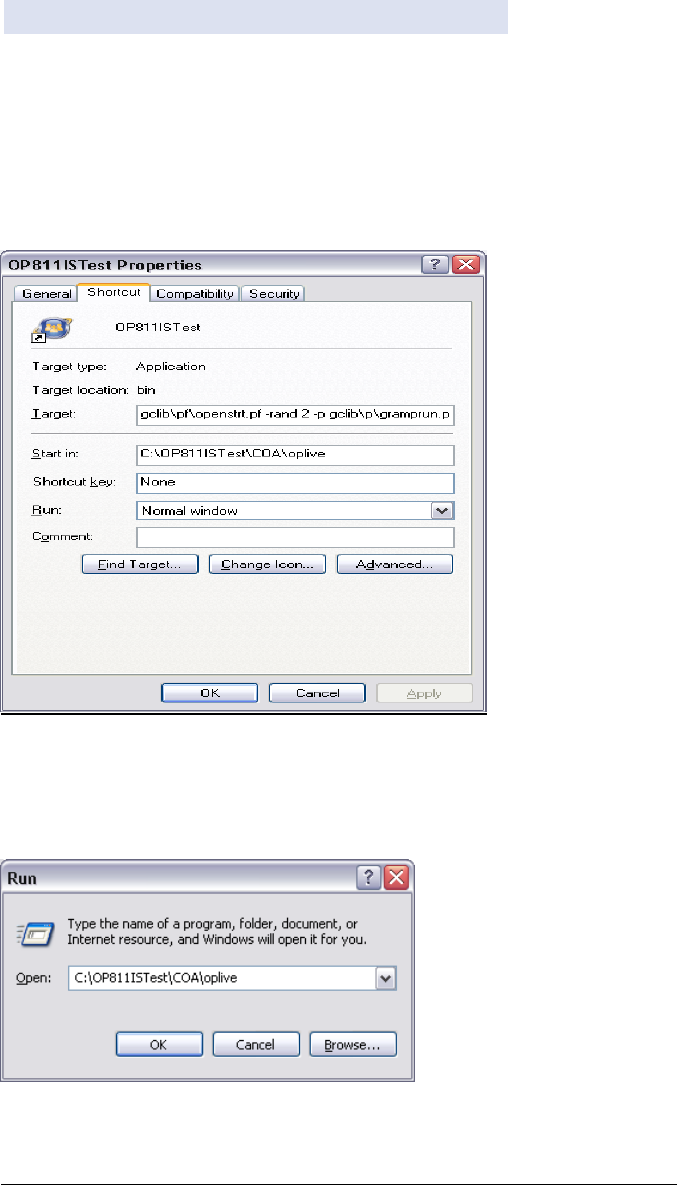
If you are unsure of the Openpeople installation directory right click on your
OpenPeople icon and select properties.
The installation directory is shown against the ‘Start in’ field:
Use Windows Explorer to search for the Openstrt.ini file or alternatively copy the
location into the Start\Run command line.
Example displayed below:
The following command must be added to the openstrt.ini file.
OpenOfficePath=C:\Program Files\OpenOffice.org 3\program\soffice.exe
The OpenOffice version must mirror the version you have installed

An example of an updated Openstrt.ini file is displayed below: -

3 Advanced Outlook Security
3.1 Overview
When an email is sent with an attachment, outlook may give a prompt asking if you
are sure you wish to send the email. You must then click “Yes” to send the email. If
the user has chosen eP60s, which are emailed to each applicable employee, it
would not be workable if this prompt was to appear for every eP60 sent.
Advanced Security setting allows the user to bypass this prompt, allowing all emails
to be sent without a prompt. For this reason we would recommend that advanced
security is setup on your Outlook account.
3.2 Installation
Advanced security settings can be downloaded via the web site below: -
http://www.mapilab.com/outlook/security/
Click on the Download tab
Scroll down to Advanced Security for Outlook as shown above.
Click on Download from Mapilab.com
Select Open to download the file.
Note: - by default this will download to the C drive.
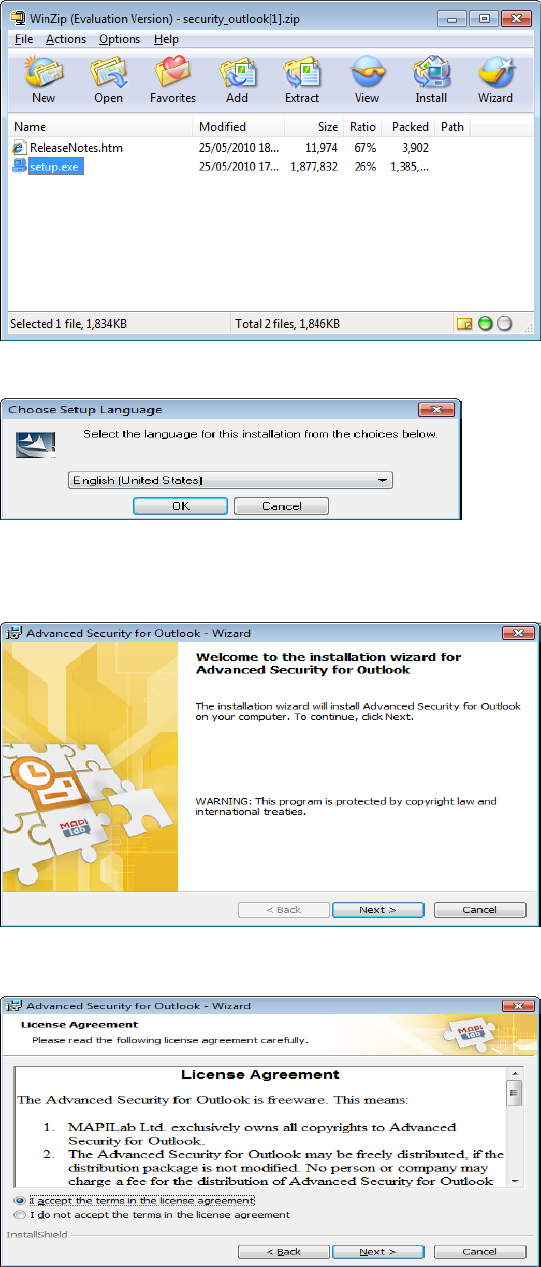
Double click on the applicable setup.exe ZIP file.
Ensure you select English (United States may be the only option available)
Select OK
Select Next
Check – I accept the terms in the licence agreement.
Select Next
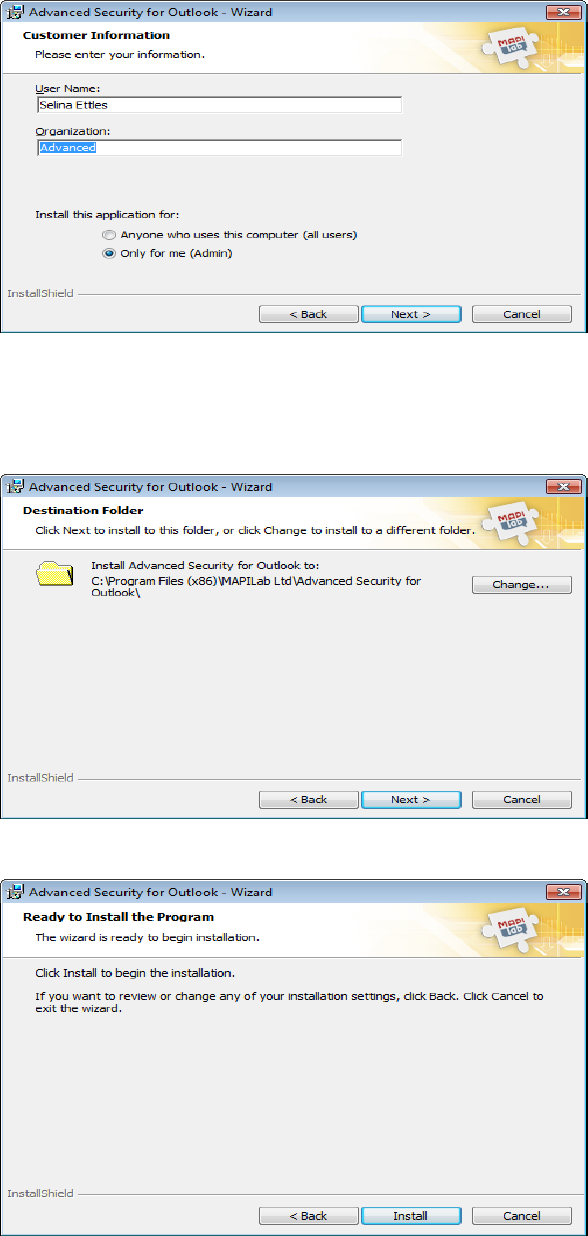
Enter the appropriate user name (Example only below).
Check - Only for me (Admin).
Select Next
Select Next
Select Install
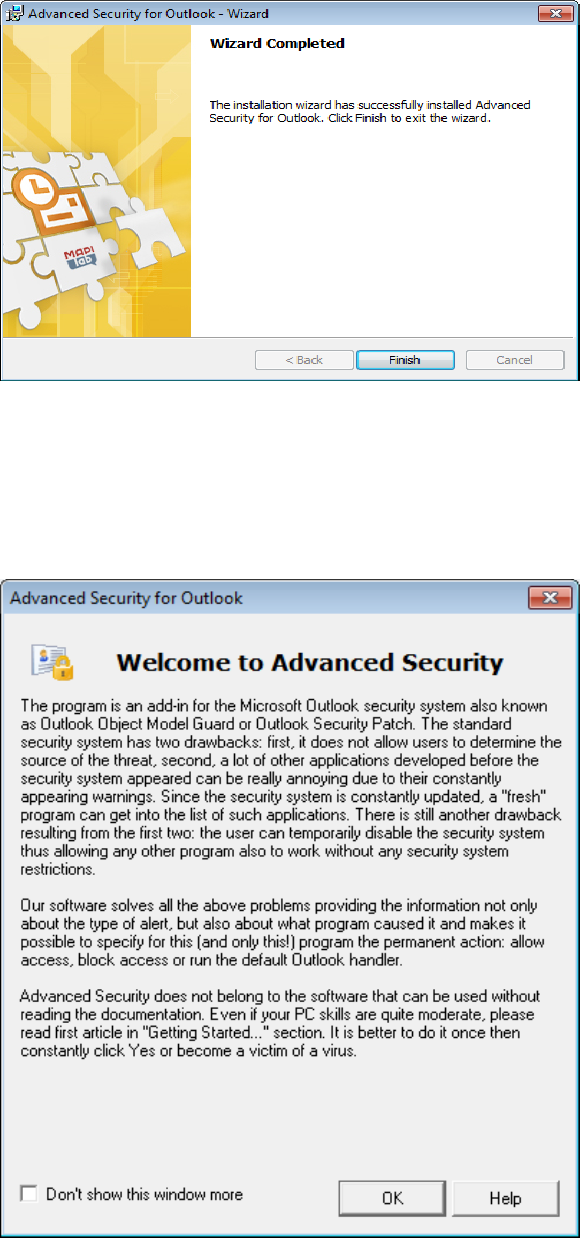
Select Finish
Once the download is complete the user must exit and re-enter their Outlook email
account.
A message will be displayed as shown below: -
Select OK
Select OK
The Advanced Outlook Security settings are now in place.
4 P60 Printers Set Up
4.1 Overview
This section covers details regarding the P60 printers that are required for the
production of P60s.
There are three separate printers that will be installed, one for each P60 format.
Although the printers are automatically set up through Installshield additional
printer setup will be required for the P60A and P60C printers.
4.2 P60A Printer
The option selected at run time to allow users to print P60s on plain paper is
’Format A – Plain Paper P60’. This uses the P60A printer.
The default directory and the actual template used in the creation of the P60 should
be defined against the P60A printer.
A new directory/folder must be created for storing P60s. This can be anywhere on
the network and requires no specific folder name.
It is recommended that appropriate security is put on this folder to prevent any
unauthorised access.
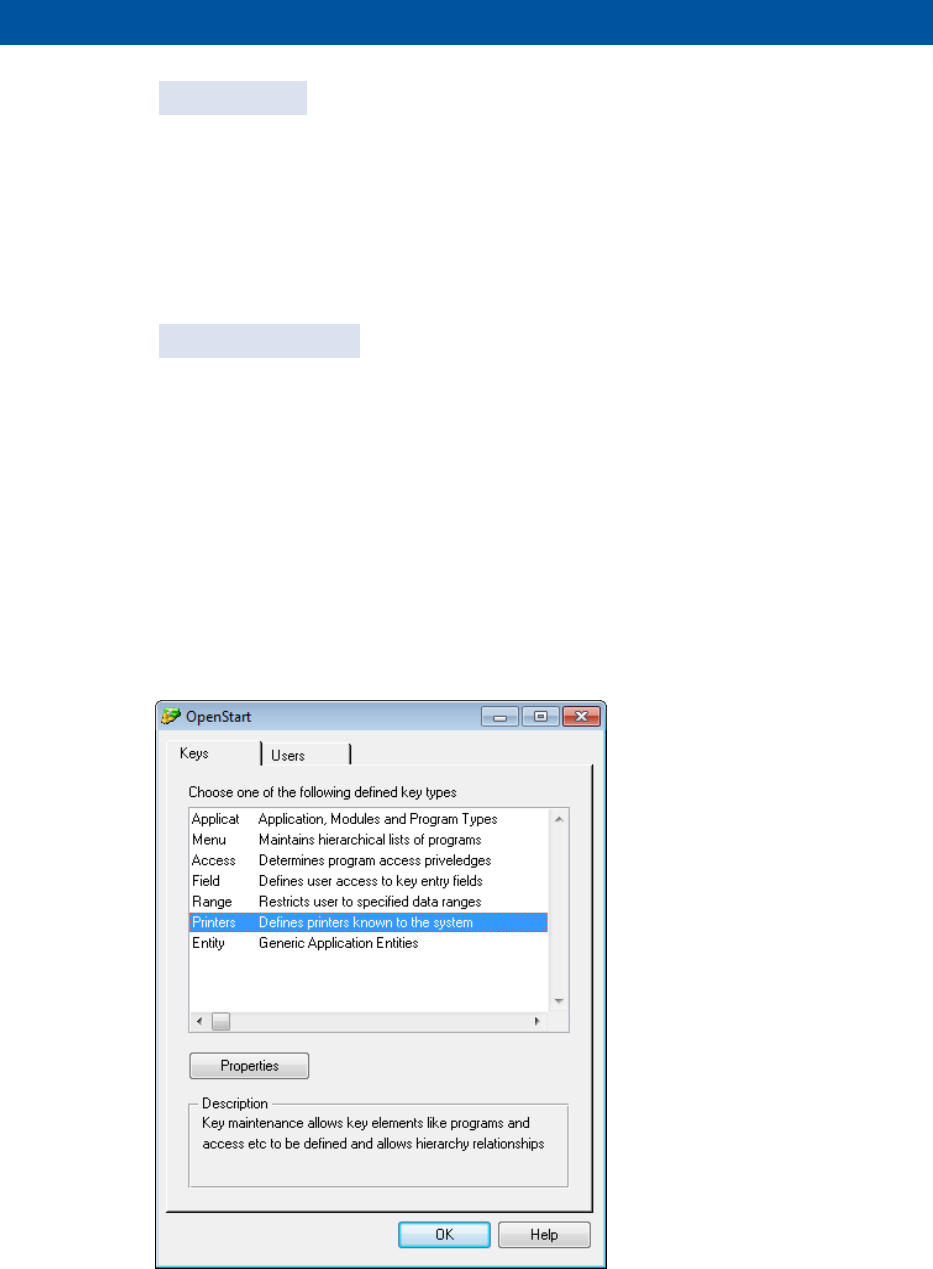
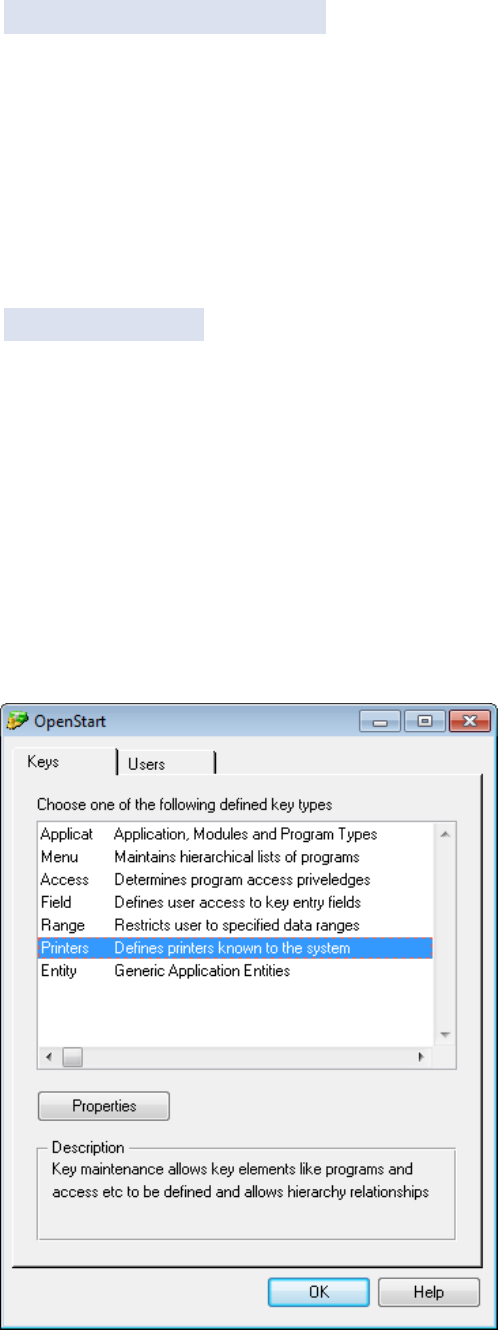
Log in to OpenPeople as the System Administrator. Select ‘Administration’ and
‘System Administration’ menu options and then highlight Printers from the menu
as displayed below to set the default directory and mail merge template:
Click on Properties

Scroll down until the P60A - Plain Paper printer is visible and highlight as displayed
below:
Click Properties
Click on the Control tab as shown above.
The P60 template that is set by default against the ‘Mail Merge File’ field is the
colour version. This can be changed to the black and white template if necessary –
click on the ‘Files’ button and select the P60_201112_Plain_Paper_BW.doc
template.
The ‘Default Directory’ on the ‘Control’ tab of the P60A printer should be updated
with the folder added previously.
Select OK to save the changes
4.3 PDFPRINTER Printer
If eP60s are being created then ‘Format B – Electronic P60’ is the option that should
be selected.
These are converted into PDF format (by OpenOffice) and sent to the employee as
an email attachment
Electronic P60s use the printer called ‘PDFPrinter’ which Installshield will have
already installed.
There is no additional printer setup required for Format B.
4.4 P60C Printer
The option selected at run time to allow users to print laser security P60s is ’Format
C – Laser Security P60’. This uses the P60C printer.
Similar to Format A the default directory and the actual template used for the
creation of the P60 should be defined against the P60C printer.
A new directory/folder must be created for storing P60s. This can be anywhere on
the network and requires no specific folder name.
It is recommended that appropriate security is put on this folder to prevent any
unauthorised access.
Log in to OpenPeople as the System Administrator. Select ‘Administration’ and
‘System Administration’ menu options and then highlight Printers from the menu
as displayed below to set the default directory and mail merge template:
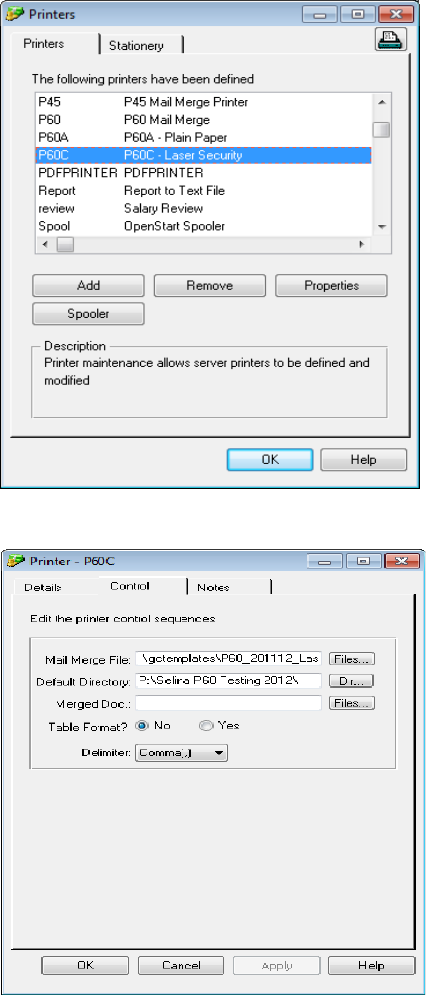
Click on Properties
Scroll down until the P60C – Laser Security printer is visible and highlight as
displayed below:
Click Properties
Click on the Control tab as shown above.
Do not change the ‘Mail Merge File’ setting against the P60C.
The ‘Default Directory’ on the ‘Control’ tab of the P60C printer should be updated
with the folder added previously.
Select OK to save the changes
4.5 Allocating Printers to Users
The P60 printer must be allocated to users who will be creating P60s.
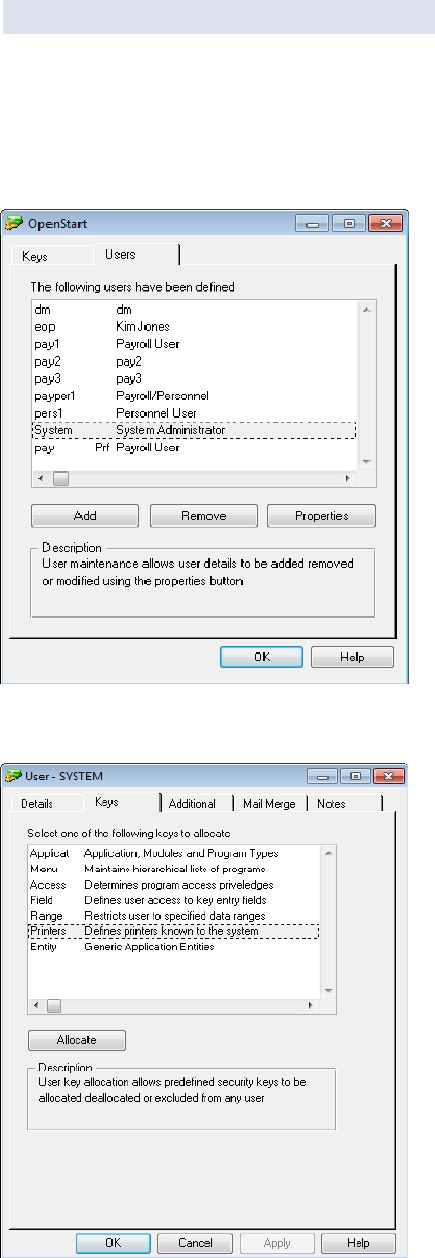
Log into OpenPeople as the System Administrator. Select ‘Administration’ and
‘System Administration’ menu options and then highlight Users from the menu as
displayed below: -
Highlight the user that the printer will be allocated to.
Click Properties
Click Keys tab
Highlight Printers as displayed above
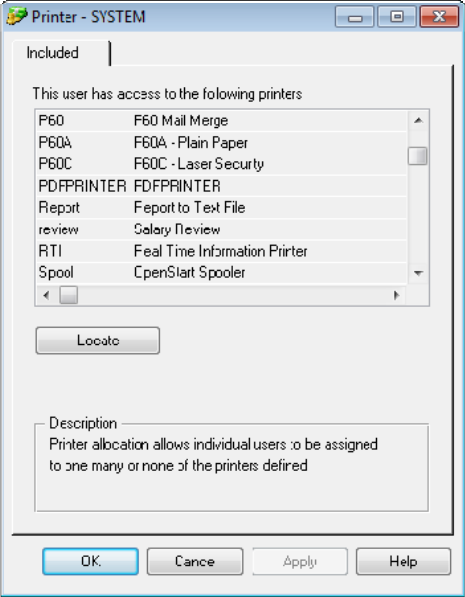
Click Allocate
Scroll until the required P60 printer is visible. Printers will be listed as below.
All printers already allocated to the user will be highlighted.
To allocate a new printer, hold down the Ctrl or Shift Key on the keyboard and
highlight all printers to be allocated to the user, including the applicable P60
printer.
Once all printers are highlighted select Apply.
Repeat the process, allocating the P60 printer to all applicable users.
5 Setting Up Default P60 Formats
5.1 Overview
A parameter can be set against the P60 print program (w-py91.w) to default the
P60 runtime screen to the appropriate P60 format.
It is not necessary to set this parameter but it does mean that each time the P60
program is opened the appropriate format is defaulted accordingly.
5.2 P60 format default parameters
The user can set one of the following parameters against the P60 program so the
same format is defaulted each time the screen is opened:
o Format A (Plain Paper) - No parameter required, A is the standard default
o Format B (Electronic P60s) - Parameter ‘DEFAULT=B’
o Format C (Laser Security) - Parameter ‘DEFAULT=C’
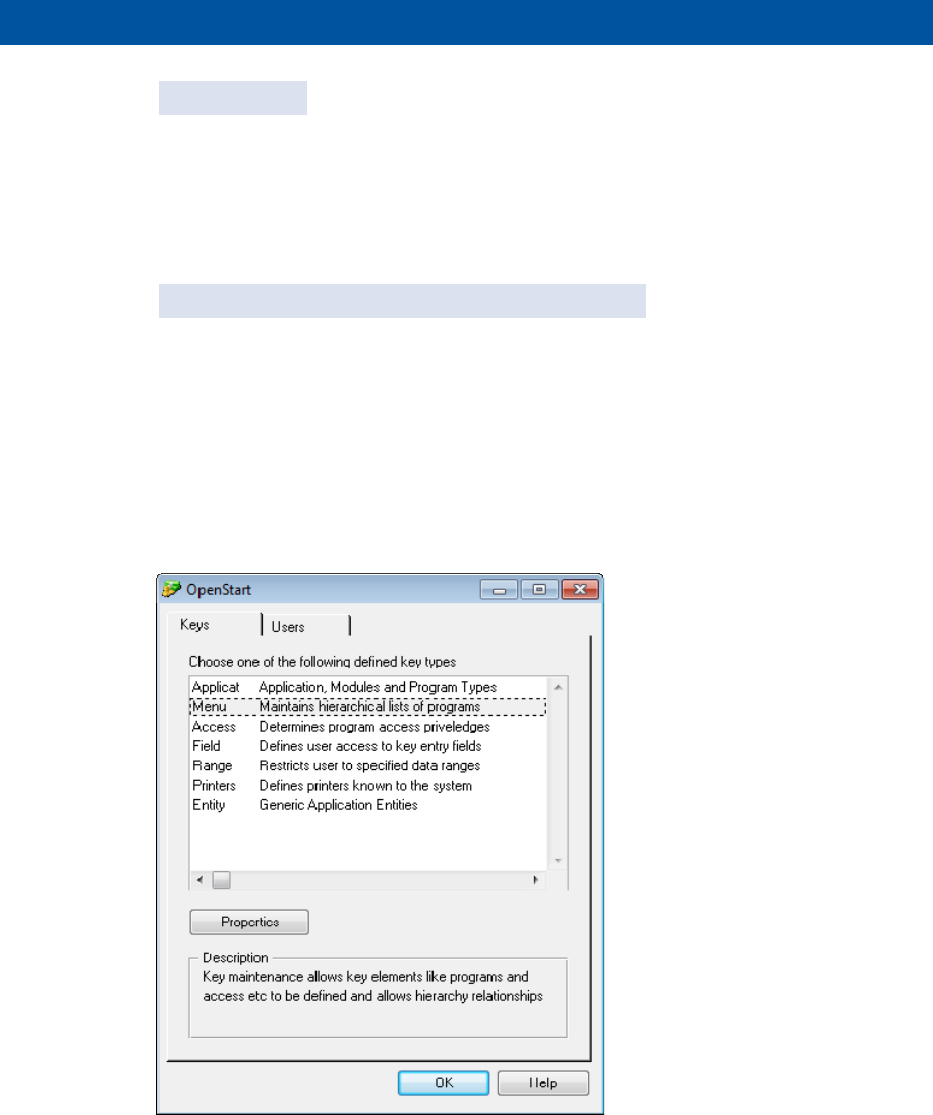
To set the parameter the user will log in as the System Administrator and select
menu options ‘Administration’/’System Administration’.
Select Menu and the then the Properties button
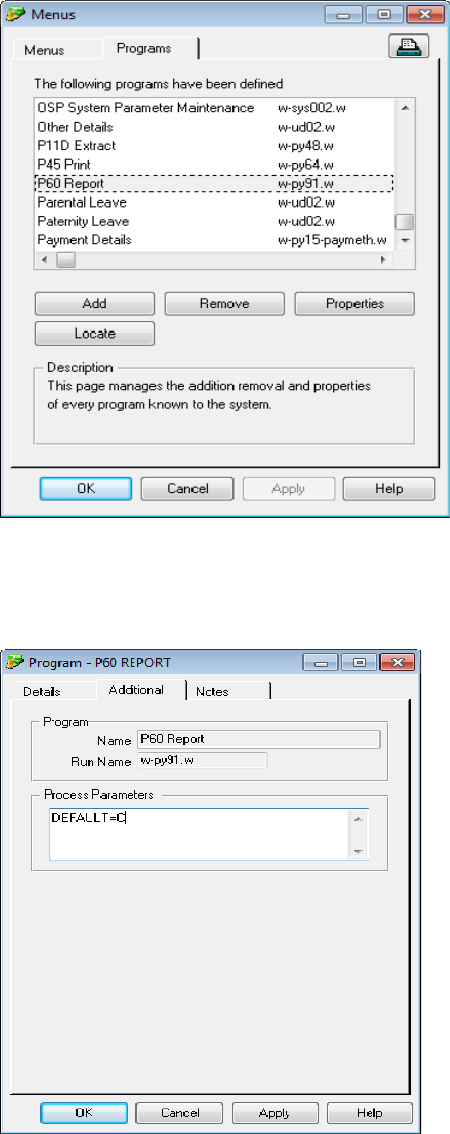
Select the Programs tab
Select Locate and use the Search option to locate the P60 program (w-py91.w)
Once located, highlight the program and select Properties
Within the ‘Additional’ tab the user can enter the default parameter for the P60
format they have chosen.
Example displayed above is for Format C – Laser Security.
Note - the parameters are an optional feature and even if a parameter has been set
the user can still choose alternative P60 formats via the drop down list.
