PA7 Instruction Manual
PA7%20Instruction%20Manual
User Manual:
Open the PDF directly: View PDF ![]() .
.
Page Count: 11

PA7 Solar System
Instruction Manual
Nick Jordy
Alex Kastanek
Mari Trombley

Table of Contents
● Overview
○ Dependencies; pg 2
○ Extra Credit; pg 2-3
● User Manual
○ Building and Running; pg 4-5
○ Keyboard Inputs and Camera Modes; pg 5-9
■ Overall Controls; pg 5
■ Focus Mode; pg 5
■ Free Mode; pg 7
■ Overview/ Top-down mode; pg 9
● Tech Manual
○ Issues and Bugs; pg 9
○ Changes made since Wednesday (Oct. 17,
2018); pg 9
● Appendix A: Grading Rubric
1

Overview
Dependencies
For both of the operating systems to run this project installation of these five programs
are required GLEW, GLM, SDL2, assimp, and ImageMagick++.
To install GLEW, GLM, and SDL2 the command is:
sudo apt-get update
sudo apt-get install libglew-dev libglm-dev libsdl2-dev
To install assimp, the linux terminal command is:
sudo apt-get update
sudo apt-get install libassimp-dev
To install ImageMagick++, the linux terminal command is:
sudo apt-get update
sudo apt-get install libmagick++-dev
This project uses OpenGL 3.3. Some computers, such as virtual machines in the ECC,
can not run this version. In in order to run OpenGL 2.7 follow the instructions at Using
OpenGL 2.7
Extra Credit
Rubric Defined Extra Credit:
-This program uses a config file called "planetData.txt" located in the assets folder to
determine scales for the planets (Extra for non-grad students)
-This program allows the user to change the simulation speed. (Extra for non-grad
students)
-This program has rings on Uranus, Neptune, and Jupiter in addition to Saturn.
2

Considerations for Extra Credit:
-Advanced camera controls
This program has 3 different camera modes: Focus, Free, and
Overview/Top-Down. Each mode has different features and controls. Focus
mode allows the user to focus on a particular planet or the Sun, allowing them to
get a good look at each planet. Free mode allows the user to pan around the
solar system. Lastly, Overview/Top-down mode allows the user to see the solar
system from the top. The camera modes are defined more in-depth in the
Keyboard Controls
-Correct amount of satellites for each planet
This program is able to render and update the correct number of satellites for
each planet. Here are the numbers of satellites for each planet:
● Mercury - 0
● Venus - 0
● Earth - 1
● Mars - 2
● Jupiter - 79
● Saturn - 62
● Uranus - 27
● Neptune - 13
● Pluto - 5
These satellites, except for Earth’s Moon, are on random scales, orbit paths,
rotation speeds, and orbit distances.
-Added a Star Box
This program adds a box of stars around the solar system render area, getting rid
of the flat blue background. This is shown in the screenshots provided in the
Keyboard Controls.
-Added Names to the planets
Each planet has its name displayed over top of it.
-Added HUD
The top left corner of the screen now has a window that displays the speed
value, current camera mode, and focused planet.
3

User Manual
Building and Running
To build this project there are two options. One is to use CMake which makes including
new libraries easier, and handles new files added automatically to the src and include
directory. CMake is a small new learning curve but makes things easier in the future.
The second option is to use the provided Makefile which is used as usual.
Running the make in a separate directory will allow easy cleanup of the build data, and
an easy way to prevent unnecessary data to be added to the git repository.
To install Cmake, the linux terminal command is:
sudo apt-get update
sudo apt-get install cmake
CMake Instructions
The building of the project is done using CMake, installation with apt-get or brew may
be necessary. Later use with CMake and Shader files will be require the copy of a
directory where those files are stored (ex. shaders). To do this in the
add_custom_target function place
COMMAND ${CMAKE_COMMAND} -E copy_directory
${PROJECT_SOURCE_DIR}/shaders/ ${CMAKE_CURRENT_BINARY_DIR}/shaders
Run Instructions
After building the project, the executable can be ran. This program requires a config file
to run. The file must be placed in PA7/assets and must be named "planetData.txt"
In the PA7 directory, enter the following commands into the terminal:
mkdir build
cd build
cmake ..
make
./SolarSystem
4

Format of planetData.txt
All items in the config file must be formatted specifically for the program to run.
The first line must read: “Camera” speedMod(focus mode) speedMod(free mode)
The second line must read: Sun {scale of sun compared to earth}
The third line must read: Star {scale of Stars}
The next 9 lines must be formatted as such: Name moonsNum orbitRadius(per 35mil
miles) rotSpeed(in days) orbitSpeed(in years) planetScale(scale to earth)
These formatting rules are also described within "planetData.txt" included with the
program
Keyboard Controls and Camera Modes
This program uses an advanced camera feature to traverse the solar system. The
camera is split into three different modes that can be toggled by pressing the “M” key on
the keyboard.
Overall Controls
ESC - must be pressed to close the window (or right-click on the task bar and select
close).
M - toggle camera mode (1. Focus Mode, 2. Free Mode, 3. Top-Down/Overview Mode)
“+” - Speed up simulation
“-” - Slow down simulation
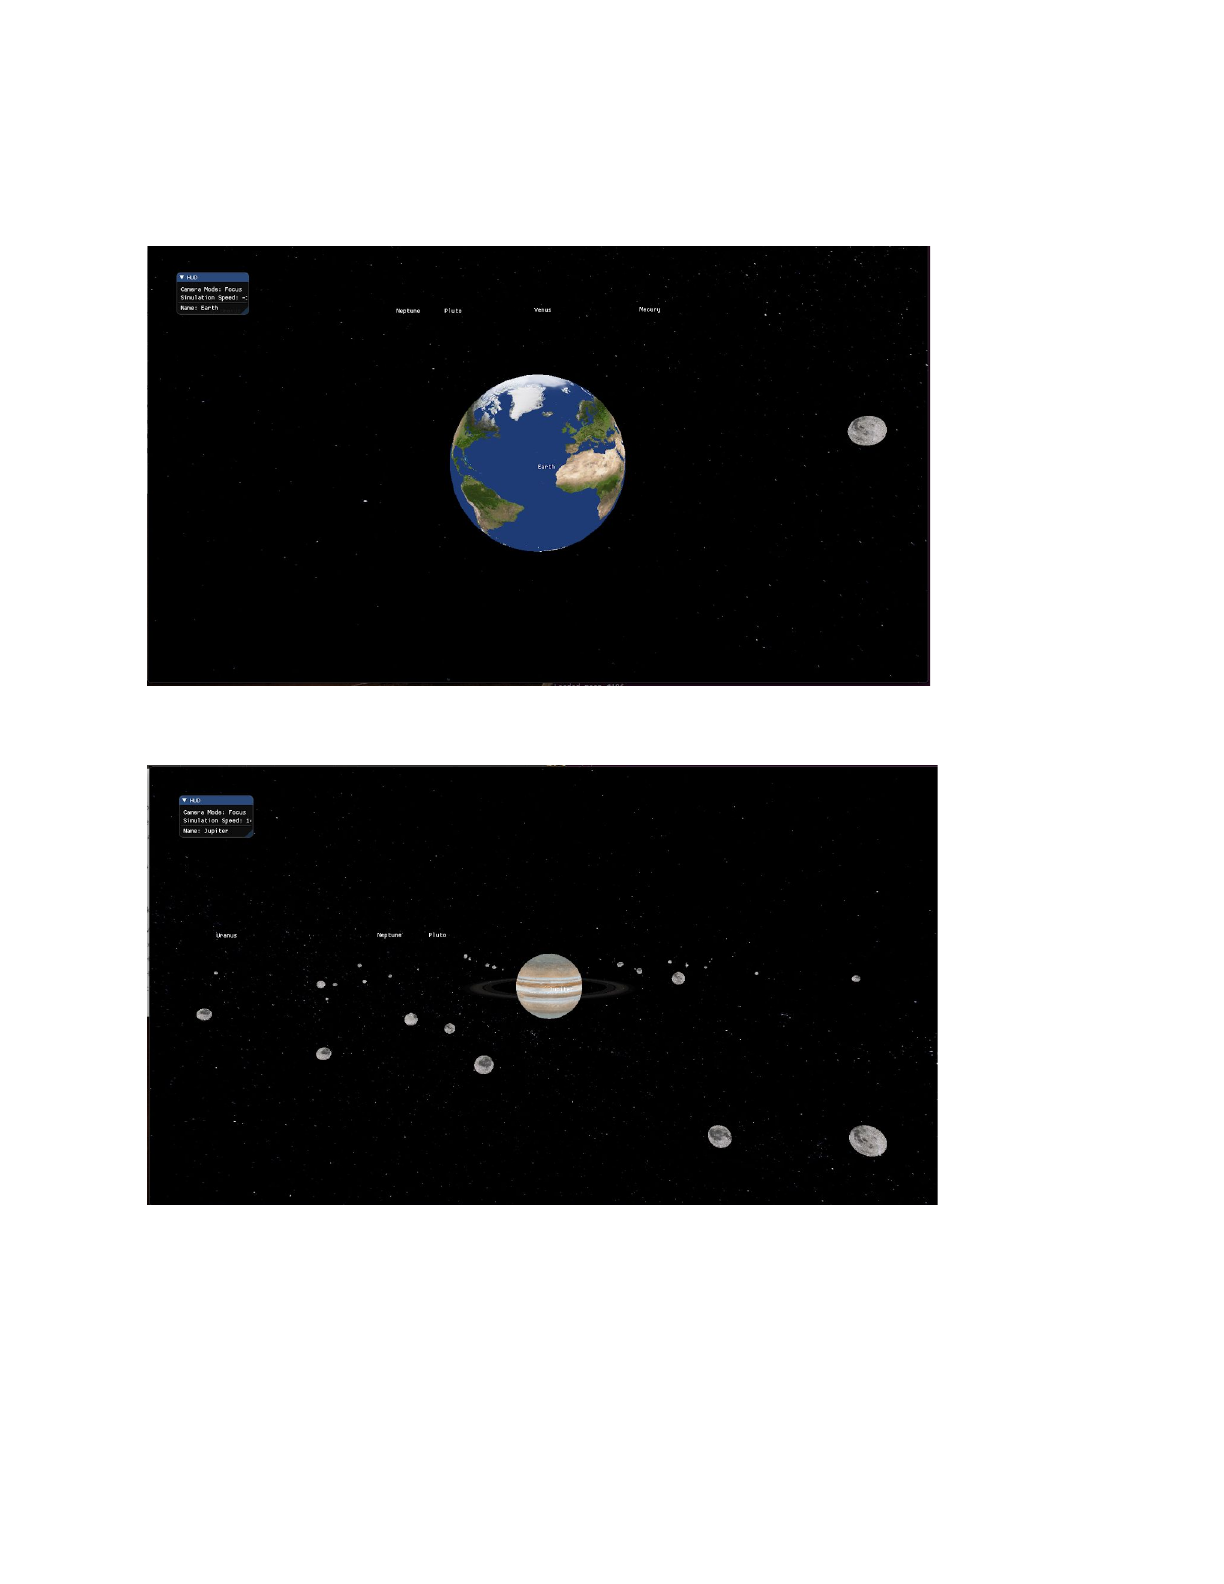
Focus Mode (Default Mode)
This camera mode allows the user to focus on each planet individually. Shown in figures
1-3.
F - Change currently focused planet
W - Zoom in on currently focused planet
S - Zoom out from currently foucsed planet
5
UpArrow - tilt camera up
DownArrow - tilt camera down
Fig 1. Earth Focus
Fig 2. Jupiter Focus
6
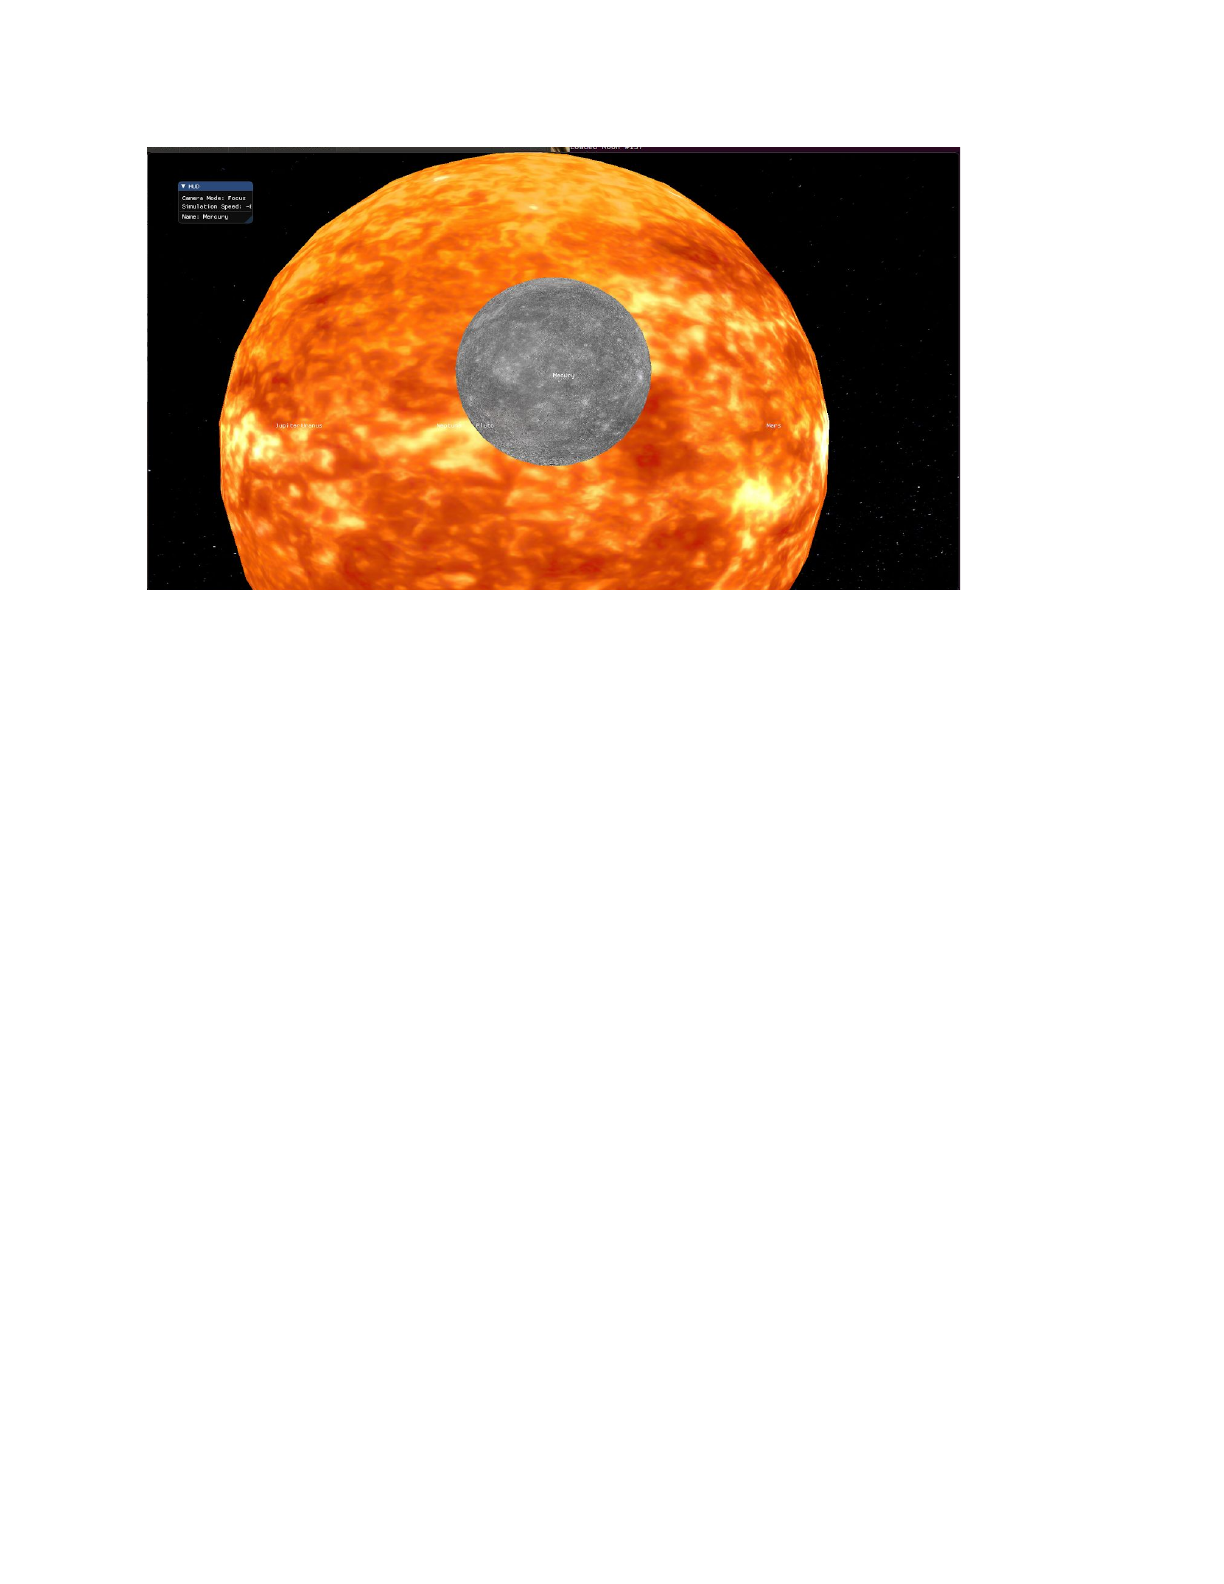
Fig 3. Mercury Focus
Free Mode
This camera mode allows the user to move around the solar system freely. Shown in
figures 4-6.
W - Move forward
S - Move back
A - Move left
D - Move right
UpArrow - Look up (increase pitch)
DownArrow - Look down (decrease pitch)
LeftArrow - Look left (decrease yaw)
RightArrow - Look right (increase yaw)
7
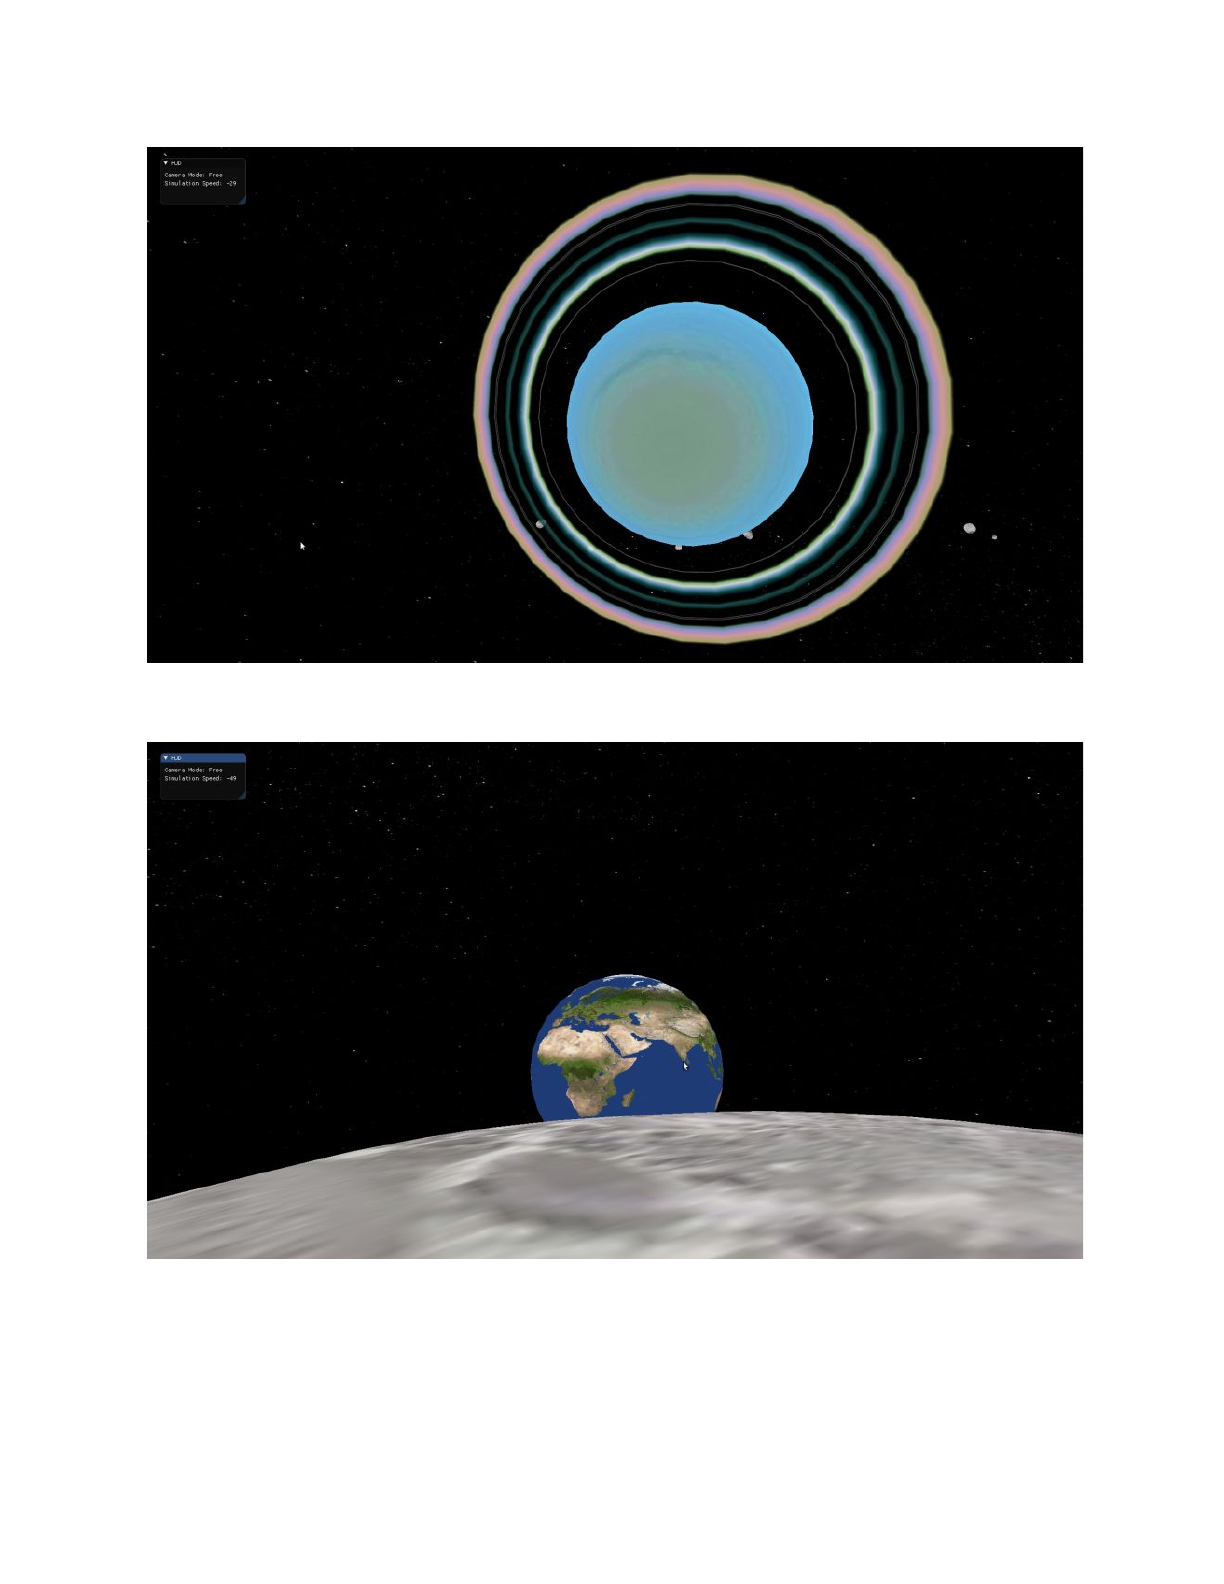
Fig 4. Uranus
Fig 5. Earth from the Moon
8
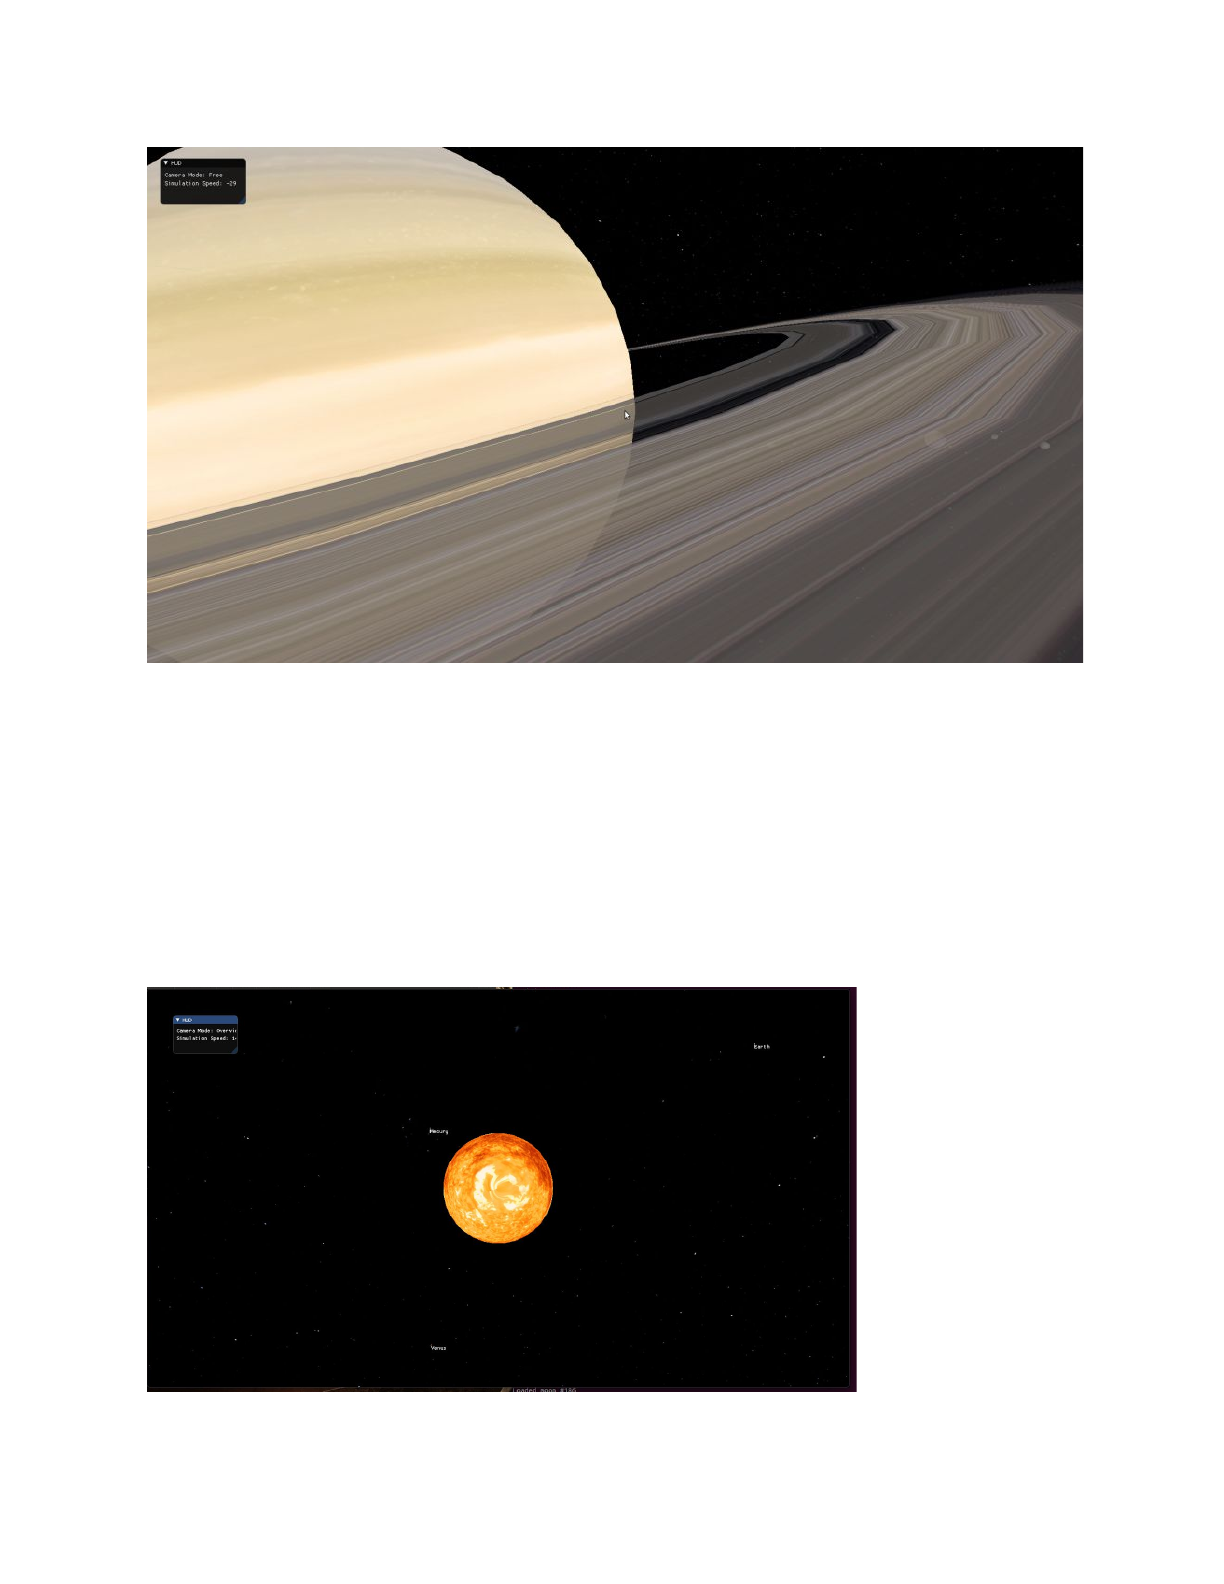
Fig 6. Saturn Close-up
Overview/Top-down Mode
This camera mode gives the user a top down perspective of the solar system. Shown in
figure 7.
W - Zoom in
S - Zoom out
Fig 7. Overview Mode
9

Tech Manual
Issues and Bugs
● Pluto’s moons are small and blend into the star background; they are hard to see
with the background
● Some Textures are tilted; Possible issue with Blender
● Camera move speed is different for every machine; pseudo-fixed by adding a
“camera speed modifier” to the config file.
Changes made since Wednesday (Oct. 17, 2018)
● Added Star Box
● Added proper number of moons for each planet
● Added rings to Uranus, Neptune, and Jupiter
● Made Uranus spin sideways and tilted saturn
● Made program able to change simulation speed
● Program now has a Heads up Display(HUD)
● Planets have names displayed above them.
10
