Technics SX KC211 User Manual PANASONIC
Technics SX-KC211 User Manual panasonic_sx-kc211_user_manual Technics - SX-KC211 - User Manual
Technics SX-KC211 User Manual panasonic_sx-kc211_user_manual Technics - SX-KC211 - User Manual
User Manual: Technics SX-KC211 User Manual Technics - SX-KC211 - User Manual
Open the PDF directly: View PDF ![]() .
.
Page Count: 36
QQTG0598AENGLISH
SX-KC211
KEYBOARD
(For AC cord type only)
For your safety, please read the following text care-
fully.
This appliance is supplied with a moulded three pin
mains plug for your safety and convenience. A 5-
ampere fuse is fitted in this plug. Should the fuse
need to be replaced please ensure that the replace-
ment fuse has a rating of 5-ampere and that it is
approved by ASTA or BSI to BS1362. Check for the
ASTA mark or the BSI mark on the body
of the fuse.
If the plug contains a removable fuse cover you must
ensure that it is refitted when the fuse is replaced.
If you lose the fuse cover the plug must not be used
until a replacement cover is obtained.
A replacement fuse cover can be purchased from
your local dealer.
If a new plug is to be fitted please observe the wiring
code as stated below. If in any doubt please consult
a qualified electrician.
IMPORTANT
The wires in this mains lead are coloured in accor-
dance with the following code:
Blue: Neutral, Brown: Live.
As these colours may not correspond with the col-
oured markings identifying the terminals in your
plug, proceed as follows:
The wire which is coloured Blue must be connected
to the terminal which is marked with the letter N or
coloured Black or Blue.
The wire which is coloured Brown must be con-
nected to the terminal which is marked with the letter
L or coloured Brown or Red.
WARNING: DO NOT CONNECT EITHER WIRE TO
THE EARTH TERMINAL WHICH IS MARKED WITH
THE LETTER E, BY THE EARTH SYMBOL OR
COLOURED GREEN OR GREEN/ YELLOW.
THIS PLUG IS NOT WATERPROOF
—KEEP DRY.
Before use
Remove the connector cover.
How to replace the fuse
The location of the fuse differ according to the type
of AC mains plug (figures A and B). Confirm the AC
mains plug fitted and follow the instructions below.
Illustrations may differ from actual AC mains plug.
1. Open the fuse cover with a screwdriver.
2. Replace the fuse and close or attach the fuse
cover.
CAUTION!
IF THE FITTED MOULDED PLUG IS
UNSUITABLE FOR THE SOCKET OUTLET IN
YOUR HOME THEN THE FUSE SHOULD BE
RE-MOVED AND THE PLUG CUT OFF AND
DIS-POSED OF SAFELY. THERE IS A
DANGER OF SEVERE ELECTRICAL SHOCK
IF THE CUT OFF PLUG IS INSERTED INTO
ANY 13-AMPERE SOCKET.
Figure A
Figure B
Figure A
Figure B
Fuse
(5 ampere)
Fuse
(5 ampere)
Fuse cover
Caution for AC Mains Lead
2
QQTG0598
Caution
Voltage (except North America, Mexico, Europe, Australia, New Zealand, China and
Russia)
Be sure the voltage adjuster located on the AC adaptor is in accordance with local voltage
in your area before using this unit. Use a screwdriver to set the voltage adjuster to the local
voltage.
WARNING: TO REDUCE THE RISK OF FIRE OR ELECTRIC SHOCK, DO NOT
EXPOSE THIS PRODUCT TO RAIN OR MOISTURE.
BEFORE YOU PLAY, PLEASE READ THE CAUTIONARY COPY APPEARING ON
PAGE 4.
Before you play
For long and pleasurable use of this instrument, and to gain a thorough understanding of your KC211
Keyboard, it is strongly recommended that you read through this Owner’s Manual once.
The Owner’s Manual is comprised of the following parts.
BASIC FUNCTIONS
This part includes an explanation of basic procedures and points you should be aware of for
proper operation of your instrument.
PRACTICAL APPLICATIONS
This part comprises a detailed explanation of sound, effect, rhythm, Recording, Disk Drive and
Setting functions.
REFERENCE GUIDE (separate booklet)
Reference guide for the contents of the Sound List, Drum Kits, MIDI Implementation Chart.
OWNER’S MANUAL
3
QQTG0598

Cautions for safest use of this unit
Installation location
1. A well-ventilated place.
Take care not to use this unit in a place where it
will not receive sufficient ventilation, and not to per-
mit the ventilation holes to be covered by curtains,
or any similar materials.
2. Place away from direct sunlight and excessive heat
from heating equipment.
3. A place where humidity, vibration and dust are min-
imized.
Power source
1. For the power source, use ONLY the included AC
adaptor. Use of a different AC adaptor may result in
malfunction or even damage to the equipment.
2. If the unit is not to be used for some time, remove
the AC adaptor from the wall socket.
Handling the power cord
1. Never touch the power cord, or its plug, with wet
hands.
2. Don’t pull the power cord.
Metal items inside the unit may result in elec-
tric shock or damage.
Do not permit metal articles to get inside the unit.
Be especially careful with regard to this point if child-
ren are near this unit. They should be warned never
to try to put anything inside.
If, nevertheless, some such article does get inside, dis-
connect the power cord plug from the electrical outlet,
and contact the store where the unit was purchased.
If water gets into the unit
Disconnect the power cord plug from the electrical out-
let, and contact the store where it was purchased.
As a precaution, it is suggested that flower vases and
other containers which hold liquids not be placed on
the top of this unit.
If operation seems abnormal
Immediately turn off the power, disconnect the power
cord plug from the electrical outlet, and contact the
store where it was purchased.
Discontinue using the unit at once. Failure to do so
may result in additional damage or some other unex-
pected damage or accident.
•Because the power source is located inside the unit,
it is normal for the cabinet to become warm.
A word about the power cord
If the power cord is scarred, is partially cut or broken,
or has a bad contact, it may cause a fire or serious
electrical shock if used. NEVER use a damaged
power cord for any appliance. Moreover, the power
cord should never be forcibly bent.
Don’t touch the inside parts of this unit.
Some places inside this unit have high voltage poten-
tial. Never try to remove the top or back panels of this
unit, or to touch inside parts by hand or with tools.
Contact someone who is qualified in order to inspect
the inside, or to replace a fuse, if such becomes nec-
essary. Never attempt to do these things yourself.
Maintenance
The following suggestions will assist you in keeping
the unit in top condition.
•Be sure to switch the instrument off after use, and
do not switch the unit on and off in quick succes-
sion, as this places an undue load on the electronic
components.
•To keep the luster of the surface and buttons,
simply use a clean, damp cloth; polish with a soft,
dry cloth. Polish may be used but do not use thin-
ners or petro-chemical-based polishes.
•A wax-based polish may be used on the cabinet, al-
though you will find that rubbing with a soft cloth will
suffice.
SERVICE MUST BE CARRIED OUT BY DEALER
OR OTHER QUALIFIED PERSON
Marking sign is located on bottom of the unit.
4
QQTG0598
Contents
Cautions for safest use of this unit . . . . . . . . . . . . . . . . . . . . . . . . . . . . . . . . . . . . . . . . 4
Controls and functions . . . . . . . . . . . . . . . . . . . . . . . . . . . . . . . . . . . . . . . . . . . . . . . . . . 6
BASIC FUNCTIONS
Getting started . . . . . . . . . . . . . . . . . . . . . . . . . . . . . . . . . . . . . . . . . . . . . . . . 8
Playing . . . . . . . . . . . . . . . . . . . . . . . . . . . . . . . . . . . . . . . . . . . . . . . . . . . . . . 9
Add an automatic accompaniment . . . . . . . . . . . . . . . . . . . . . . . . . . . . . . 10
Play back the 100 Songs . . . . . . . . . . . . . . . . . . . . . . . . . . . . . . . . . . . . . . 12
Beat Master . . . . . . . . . . . . . . . . . . . . . . . . . . . . . . . . . . . . . . . . . . . . . . . . . 14
PRACTICAL APPLICATIONS
About the display . . . . . . . . . . . . . . . . . . . . . . . . . . . . . . . . . . . . . . . . . . . . . 17
Part I Sounds and effects
Sound . . . . . . . . . . . . . . . . . . . . . . . . . . . . . . . . . . . . . . . . . . . . . . . . . . . . . . 18
Solo Piano . . . . . . . . . . . . . . . . . . . . . . . . . . . . . . . . . . . . . . . . . . . . . . . . . . 18
Sustain . . . . . . . . . . . . . . . . . . . . . . . . . . . . . . . . . . . . . . . . . . . . . . . . . . . . .19
Touch . . . . . . . . . . . . . . . . . . . . . . . . . . . . . . . . . . . . . . . . . . . . . . . . . . . . . . 19
Transpose . . . . . . . . . . . . . . . . . . . . . . . . . . . . . . . . . . . . . . . . . . . . . . . . . . 19
Harmony . . . . . . . . . . . . . . . . . . . . . . . . . . . . . . . . . . . . . . . . . . . . . . . . . . . . 20
Part II Playing the rhythm
Rhythm . . . . . . . . . . . . . . . . . . . . . . . . . . . . . . . . . . . . . . . . . . . . . . . . . . . . . 21
Synchro Start . . . . . . . . . . . . . . . . . . . . . . . . . . . . . . . . . . . . . . . . . . . . . . . . 21
Tempo . . . . . . . . . . . . . . . . . . . . . . . . . . . . . . . . . . . . . . . . . . . . . . . . . . . . .22
Rhythm performance . . . . . . . . . . . . . . . . . . . . . . . . . . . . . . . . . . . . . . . . .22
Auto Play Chord . . . . . . . . . . . . . . . . . . . . . . . . . . . . . . . . . . . . . . . . . . . . .23
Chord Finder . . . . . . . . . . . . . . . . . . . . . . . . . . . . . . . . . . . . . . . . . . . . . . . . 25
One Touch Play . . . . . . . . . . . . . . . . . . . . . . . . . . . . . . . . . . . . . . . . . . . . . . 26
Party Pads . . . . . . . . . . . . . . . . . . . . . . . . . . . . . . . . . . . . . . . . . . . . . . . . . . 27
Part III Menu
Outline of the procedure . . . . . . . . . . . . . . . . . . . . . . . . . . . . . . . . . . . . . . . 28
Setting menus . . . . . . . . . . . . . . . . . . . . . . . . . . . . . . . . . . . . . . . . . . . . . . .29
Symptoms which appear to be signs of trouble . . . . . . . . . . . . . . . . . . . . . . . . . . . . 31
Connections . . . . . . . . . . . . . . . . . . . . . . . . . . . . . . . . . . . . . . . . . . . . . . . . . . . . . . . . . . . 32
Separately sold option . . . . . . . . . . . . . . . . . . . . . . . . . . . . . . . . . . . . . . . . . . . . . . . . . . 32
Index . . . . . . . . . . . . . . . . . . . . . . . . . . . . . . . . . . . . . . . . . . . . . . . . . . . . . . . . . . . . . . . . .33
Specifications . . . . . . . . . . . . . . . . . . . . . . . . . . . . . . . . . . . . . . . . . . . . . . . . . . . . . . . . .34
Demo Performance List . . . . . . . . . . . . . . . . . . . . . . . . . . . . . . . . . . . . . . . . . . . . . . . . . 35
Supplied accessories
Please check the supplied accessories.
Music stand
AC adaptor
SONG BOOK
5
QQTG0598
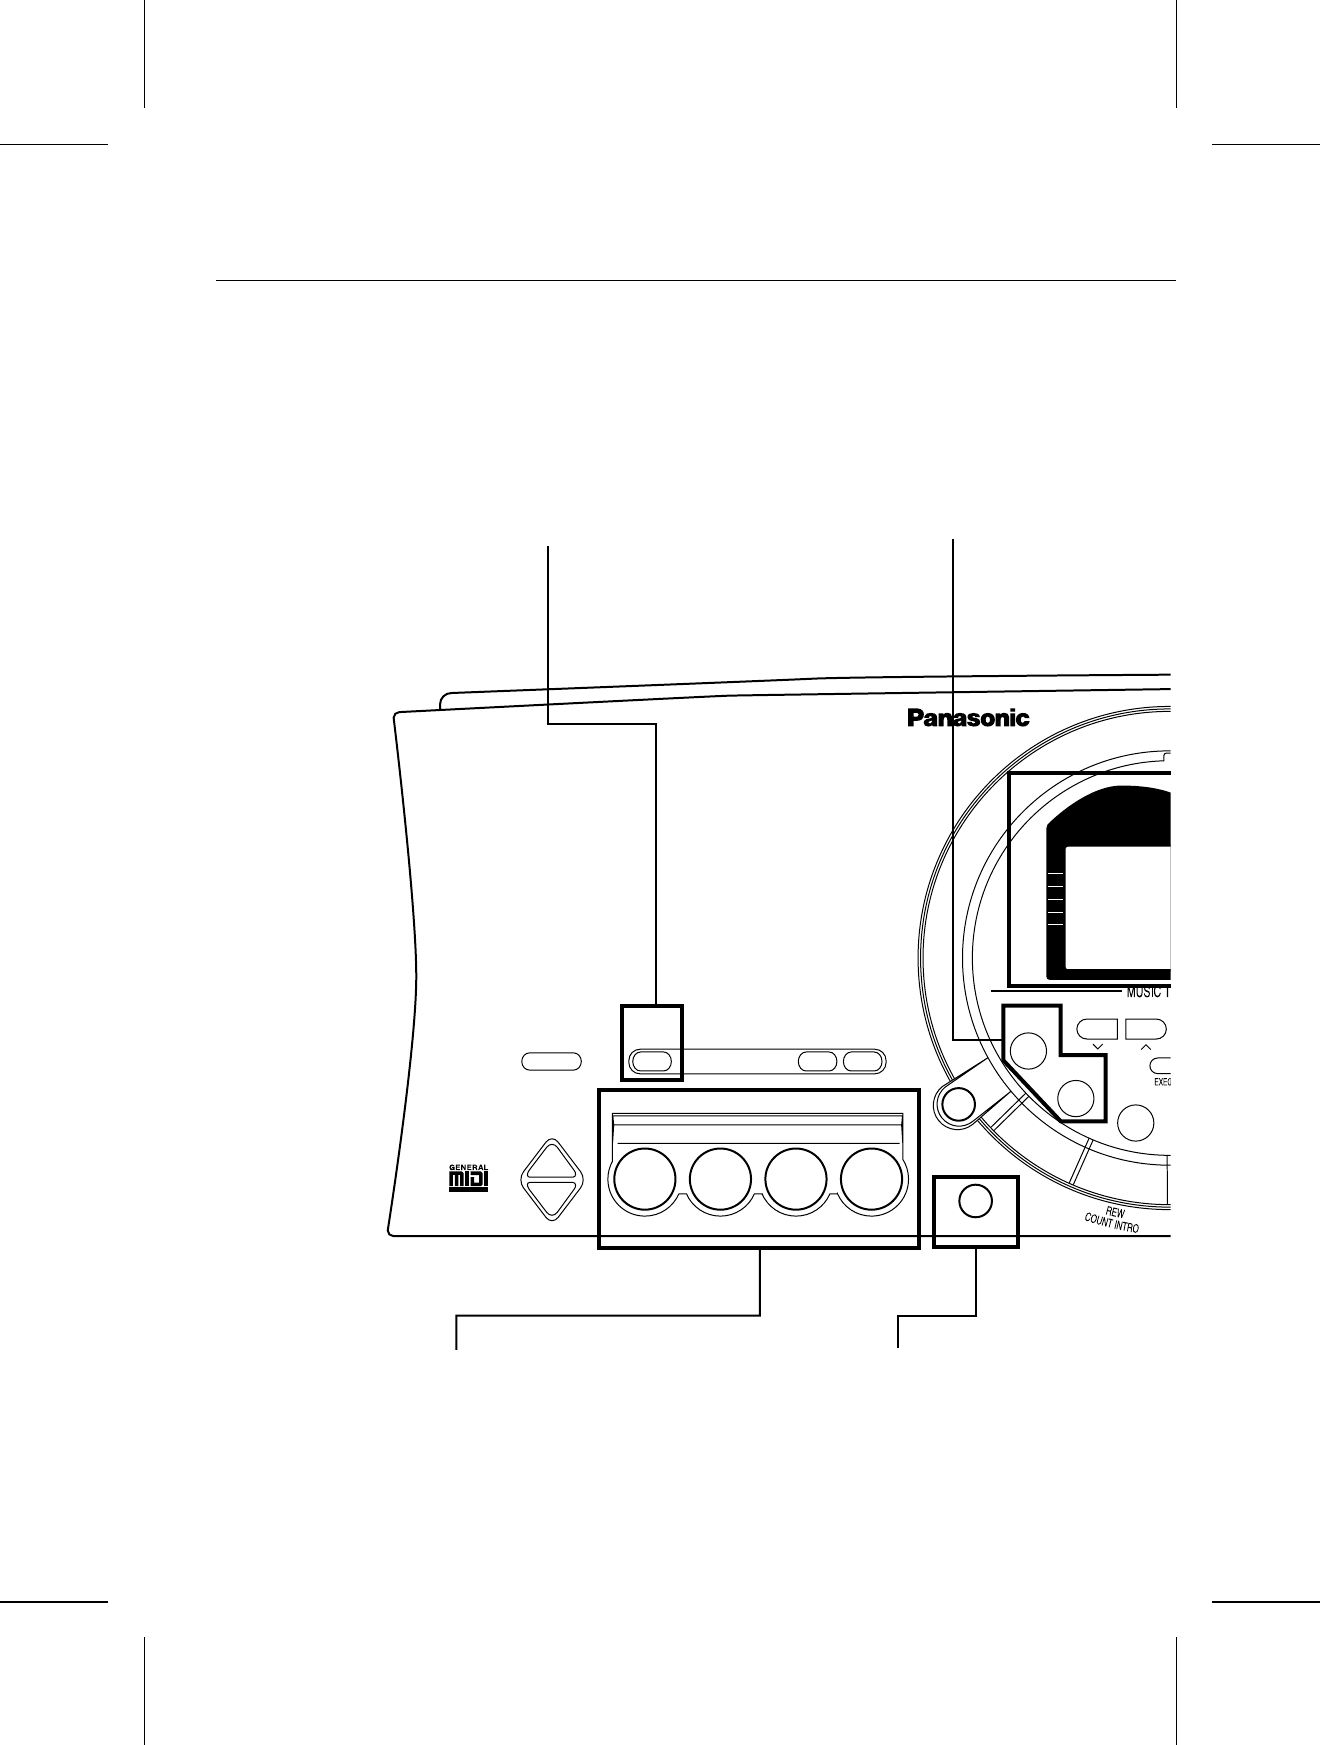
Controls and functions
BEAT MASTER
TRAINING
BEAT MASTER
CHALLENGE
RESET
FILL IN
TEMPO
PROGRAM
CHORD
FINDEF
PARTY PADS
BANK
APC/SONG
VOLUME
AUTO PLAY
CHORD DOWN UP
PLAY
OFF/ON
MAIN VOLUME
UP
PARTY PADS / BEAT MASTER
DOWN
SX-KC211
TOUCH
SUSTAIN
HARMONY
APC
SYNCHRO
ONE TOUCH PLAY
1234
AUTO PLAY CHORD
An automatically accompaniment is
added to your playing merely by
specifying a chord. (Refer to page 23.)
PARTY PADS/BEAT MASTER
Just press a pad button to add a fun sound effect to
your playing. You can also tap the pad buttons in
time with the beat. (Refer to pages 14, 27.)
ONE TOUCH PLAY
An appropriate combination of sounds,
etc. for your selected rhythm are
automatically set up for the automatic
accompaniment. (Refer to page 26.)
BEAT MASTER
A fun way to develop your sense
of rhythm. (Refer to page 14.)
6
QQTG0598
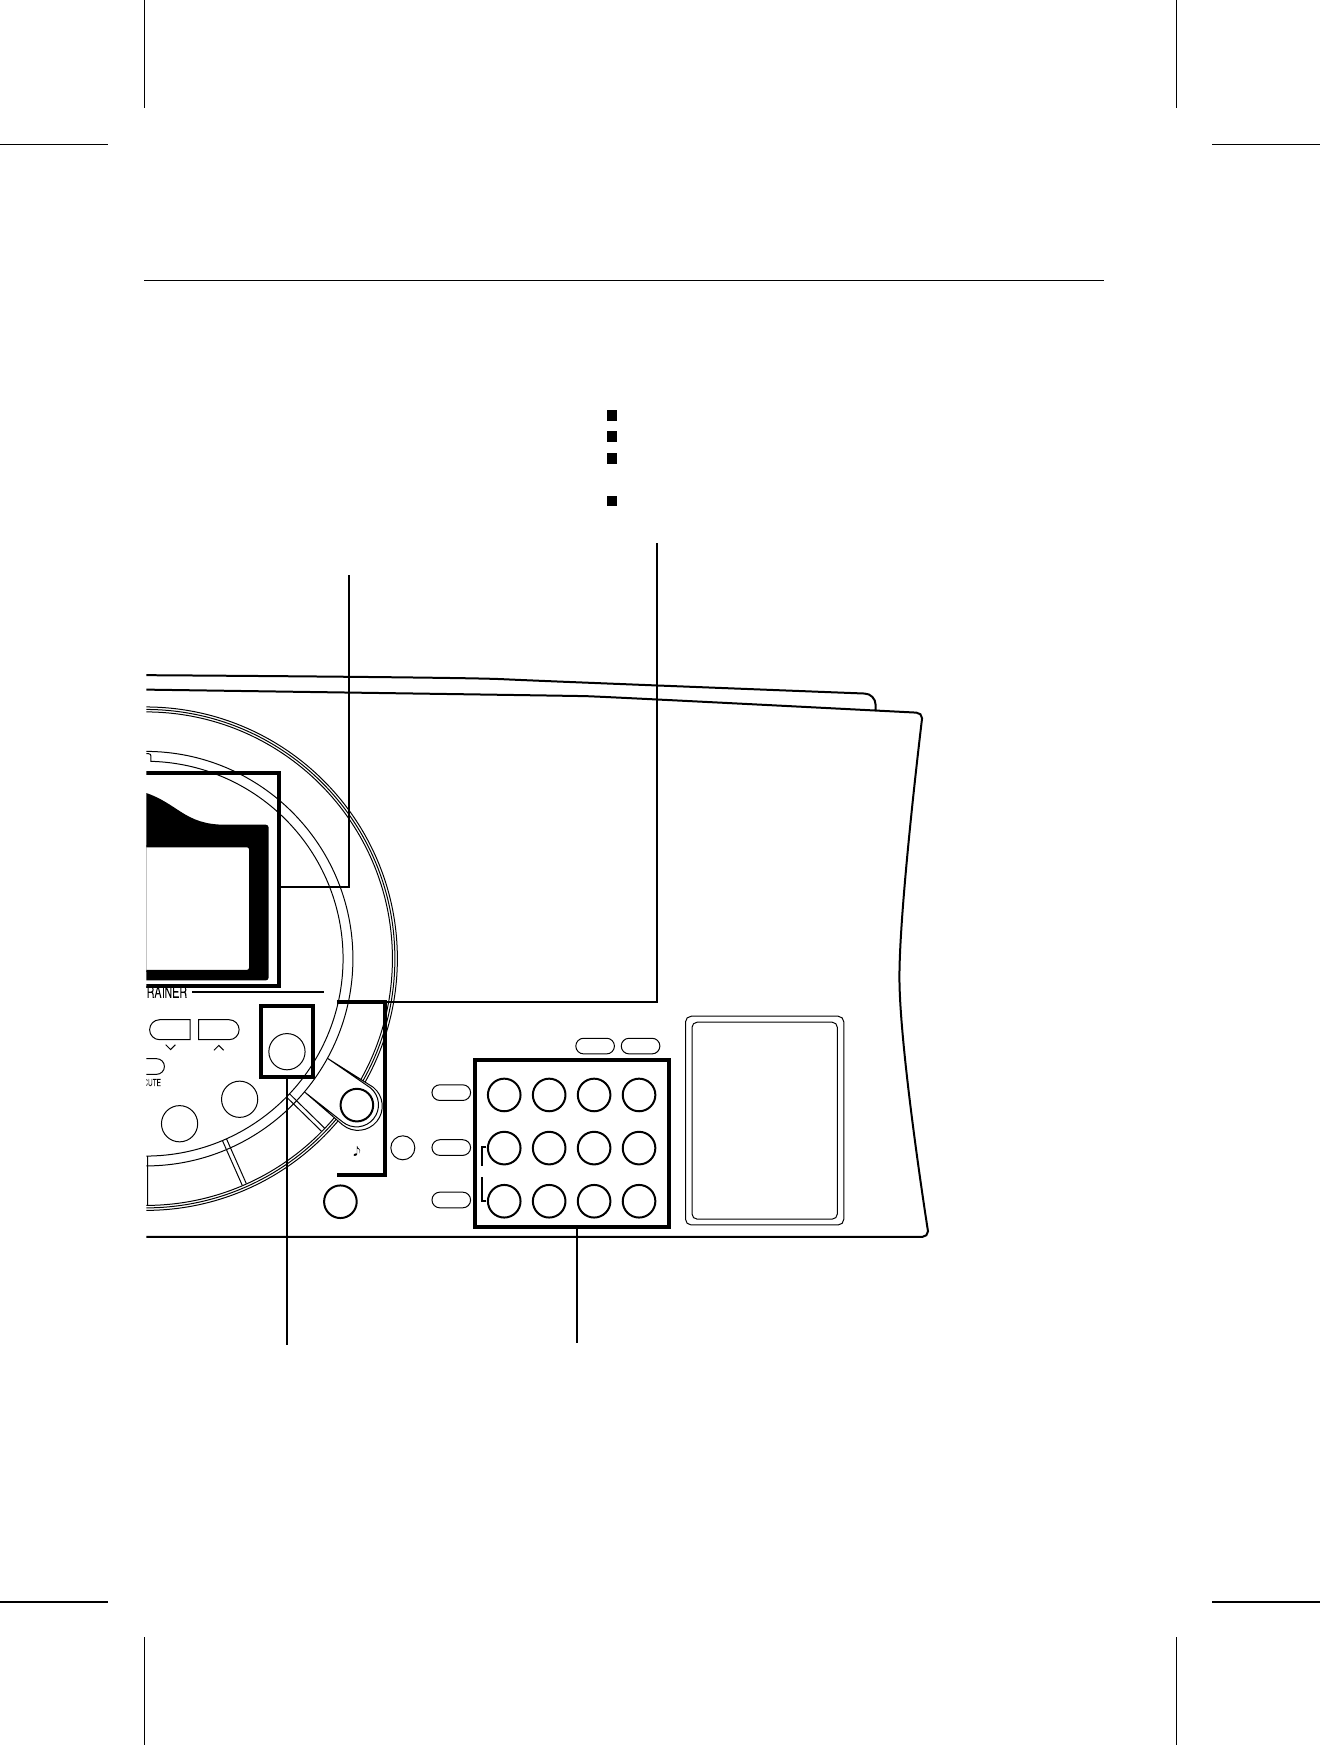
PLAY/PAUSE
START/STOP
FF
MINUS
ONE
SOLO
PIANO
100
SONGS
TRANSPOSE
PROGRAM
MENU
TOUCH
SUSTAIN
HARMONY
SOUND
RHYTHM
SYNCHRO START
–789
CANCEL
0123
+ 4 5 6
DEMO
Display
Displays the status of your instrument
and is also used for setting the various
functions. (Refer to page 17.)
MUSIC TRAINER
The MUSIC TRAINER function incorporated in this
instrument can be a helpful aid to improving your
performance.
Example
BEAT MASTER, to develop your sense of rhythm.
CHORD FINDER, to teach you how to play chords.
MINUS ONE lets you practice the melody part while
listening to the other song parts.
The display shows a visual illustration of the keys
and notes you play.
Number buttons
Specify the desired sounds and rhythms
etc. by number.
100 SONGS
Play back the internal song data.
(Refer to page 12.)
7
QQTG0598
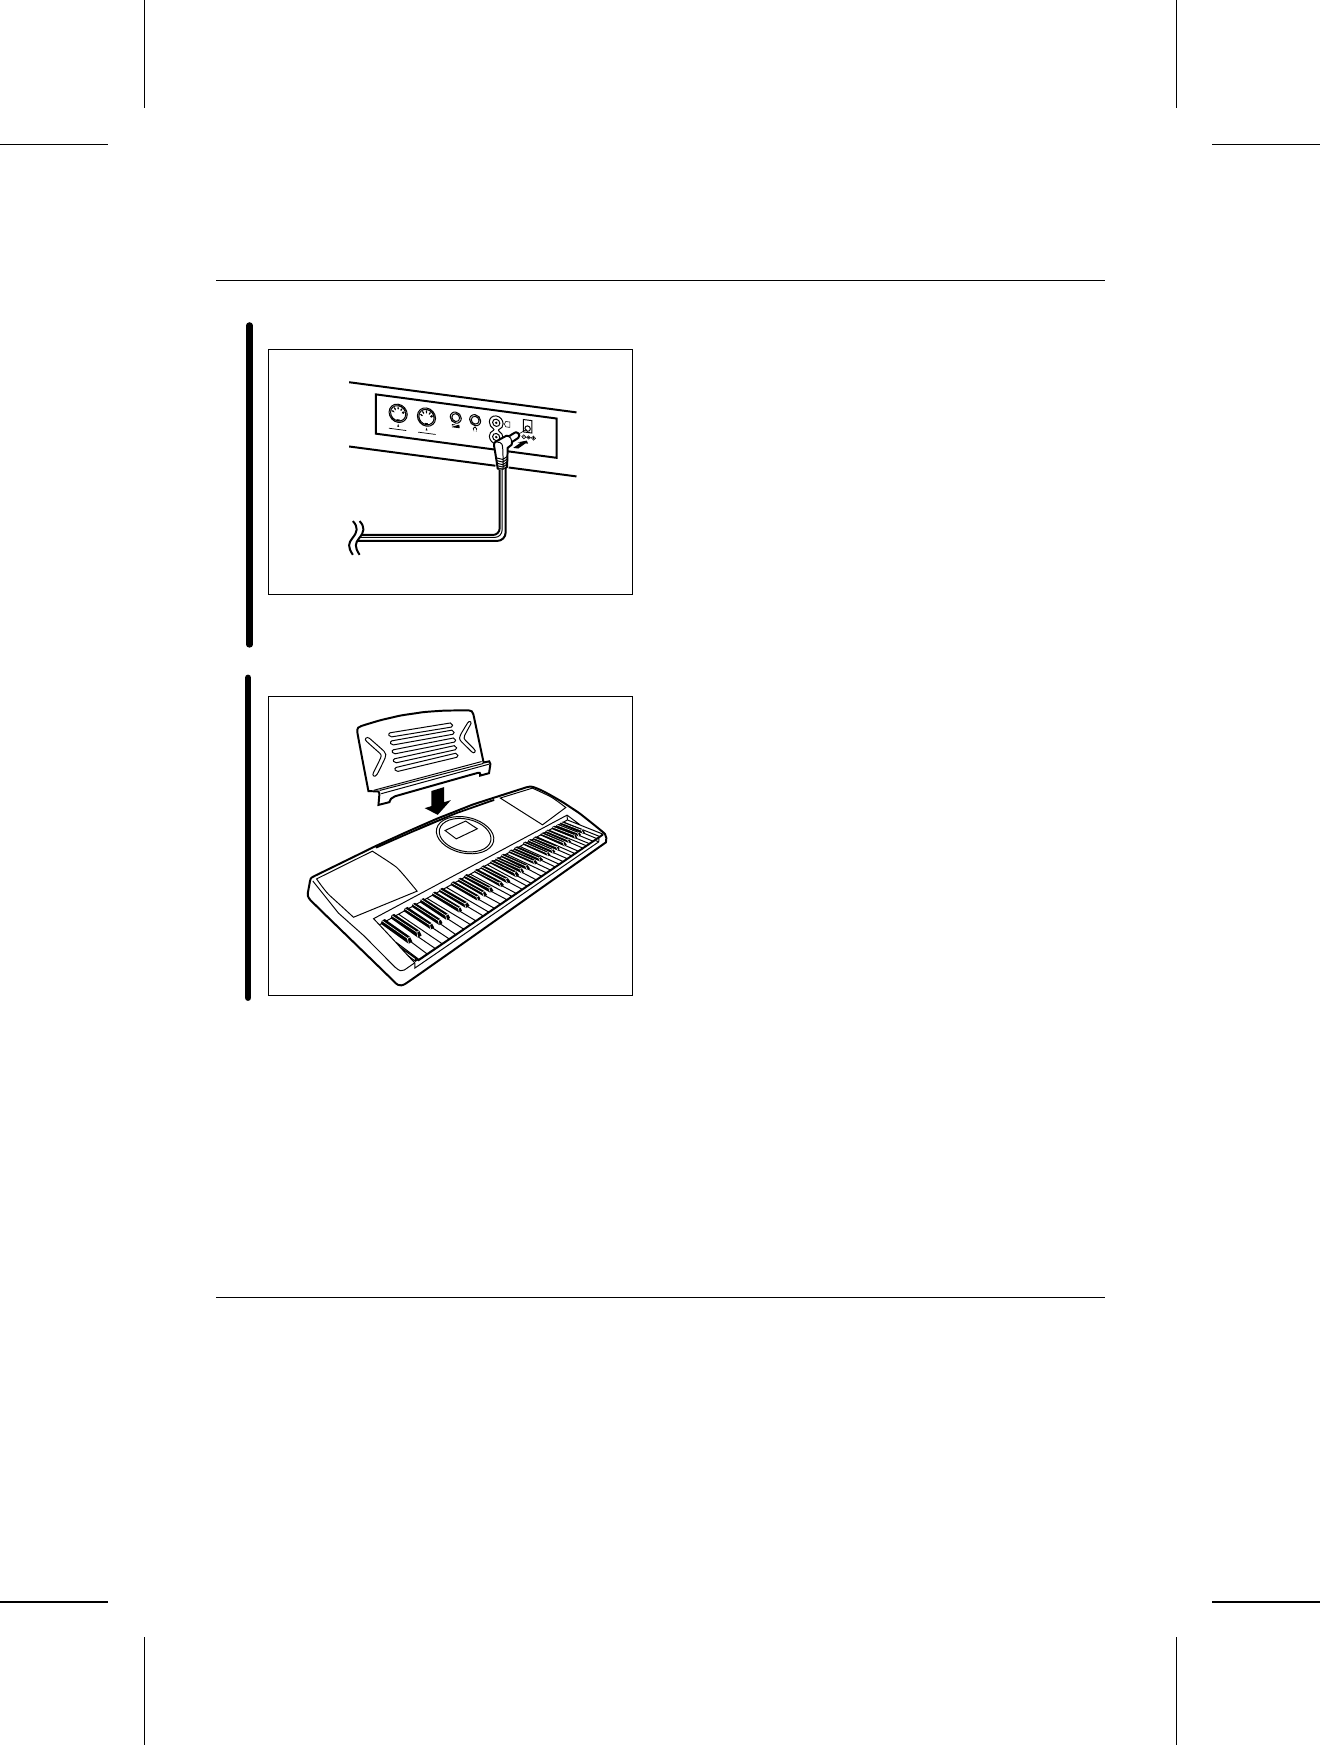
Getting started
1Connect the AC adaptor (included).
•Do not disconnect and connect the AC adap-
tor when the PLAY button is on.
2Affix the music stand as shown.
•The unit is in the standby condition when the AC
adaptor is connected. The primary circuit is always
“live” as long as the AC adaptor is connected to an
electrical outlet.
•When leaving the product unused for a long time,
turn off the PLAY button of the unit and pull the AC
adaptor out of the socket for power saving. (The pro-
duct consumes a power of 2 W even with the PLAY
button of the unit turned off.)
Memory function
The various settings and memory contents of this in-
strument are maintained as long as the AC adaptor is
connected to this instrument and plugged into an out-
let.
FOOT
SW
OUT
MIDI
IN
AUX IN
PHONES/
LINE OUT
L
R
(Rear panel)
8
QQTG0598
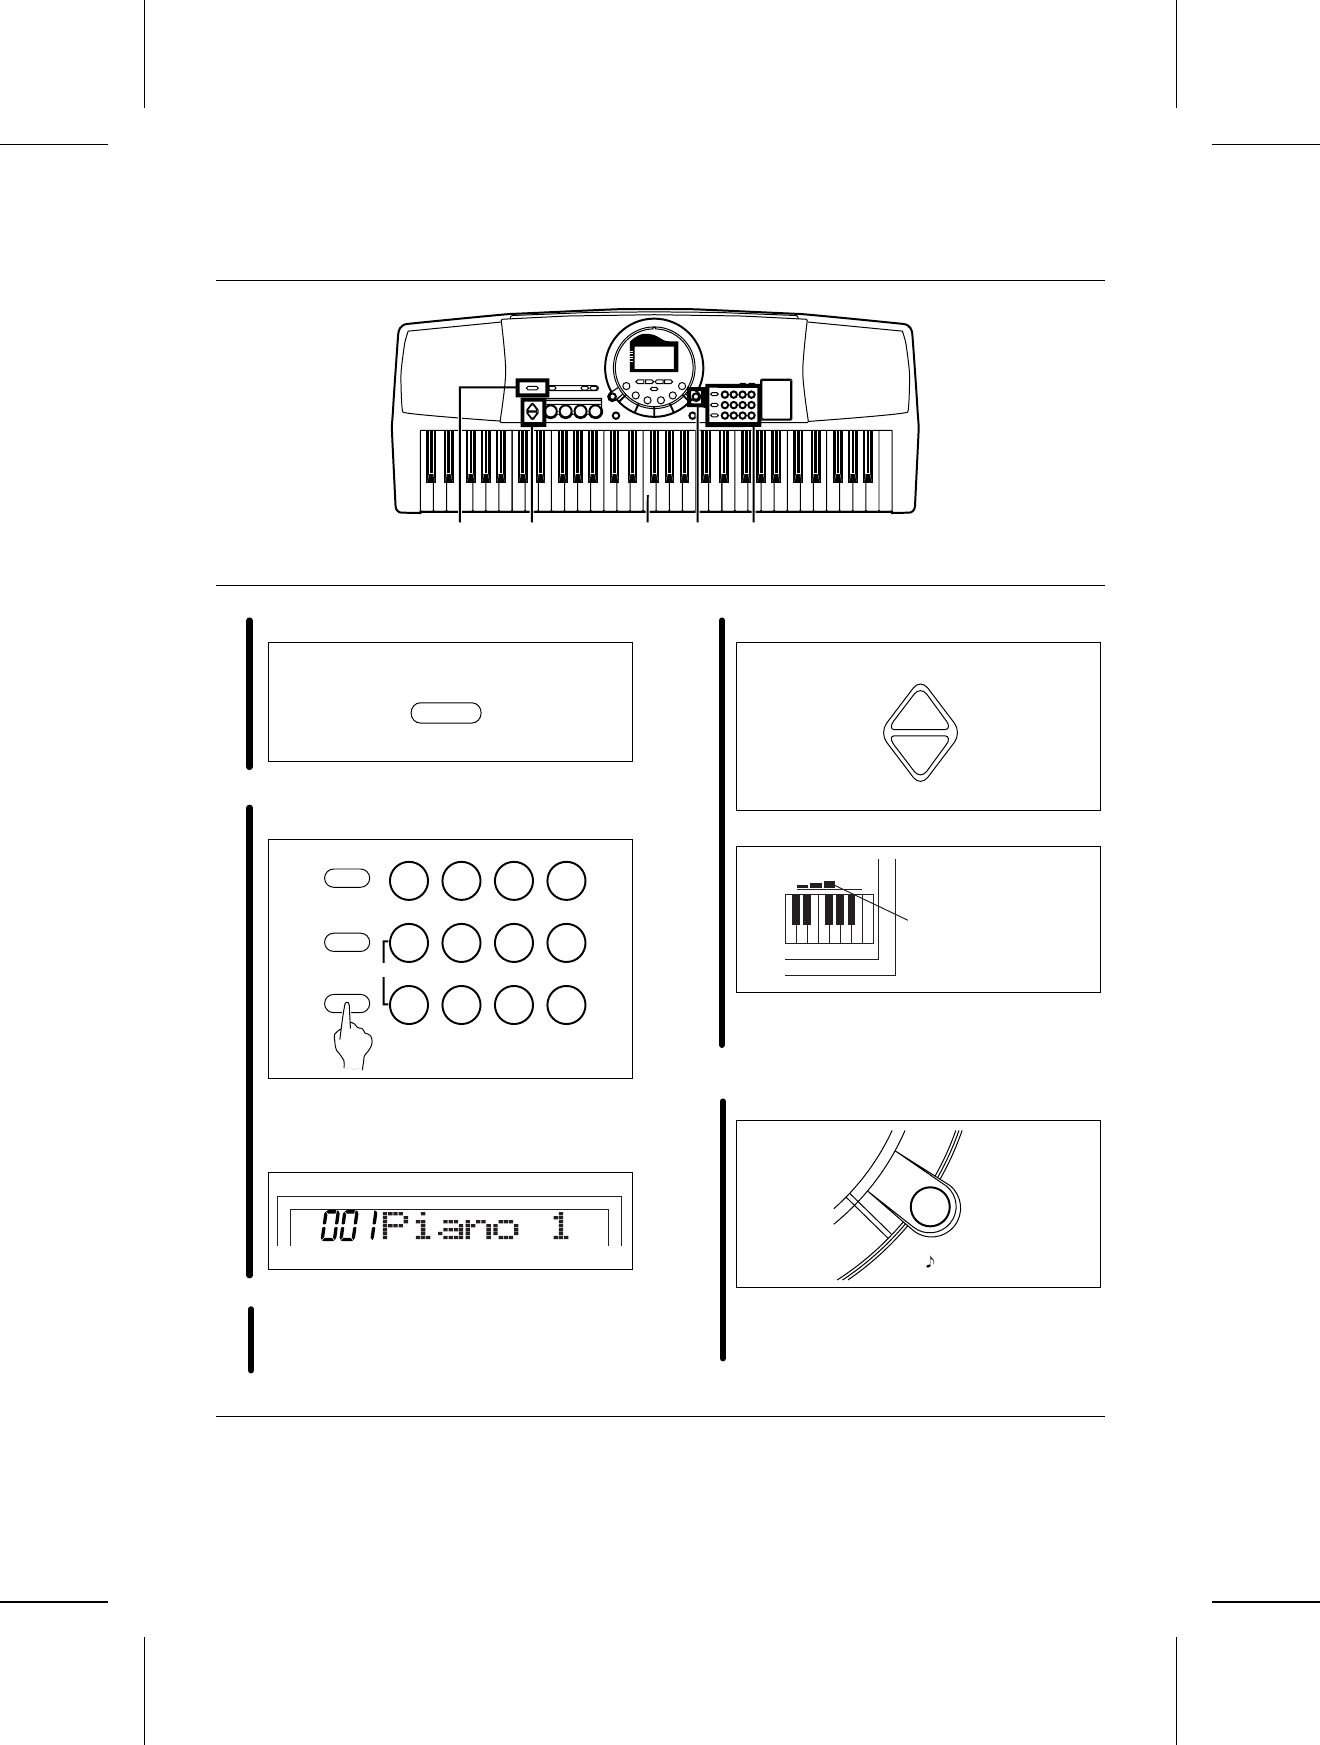
Playing
1Press the PLAY button to turn it on.
2Press the SOUND button, and use the number
buttons to select a sound number (three digits).
•The list of SOUNDS is found near the right
side of the panel.
•The name and number of the selected sound
are shown on the display.
3Play the keyboard.
4Set the MAIN VOLUME to an appropriate level.
•The volume setting is shown on the display.
•Each graduation represents two degrees of
volume change.
DEMO
APress the DEMO button.
•The demonstration performance begins.
•The two demo tunes are playing continuously
until you press the DEMO button again.
•The pitch of this instrument can be adjusted, for ex-
ample, when playing with other instruments. (Refer
to pages 28 and 30.)
•For detailed information about selecting sounds,
refer to page 18.
•Some of the buttons do not work during the demon-
stration performance.
1 4 3 A 2
PLAY
OFF/ON
MENU
SOUND
RHYTHM
0 1 2 3
+ 4 5 6
— 7 8 9
CANCEL
SOUND
MAIN VOLUME
UP
DOWN
VOLUME
Volume setting
DEMO
9
QQTG0598
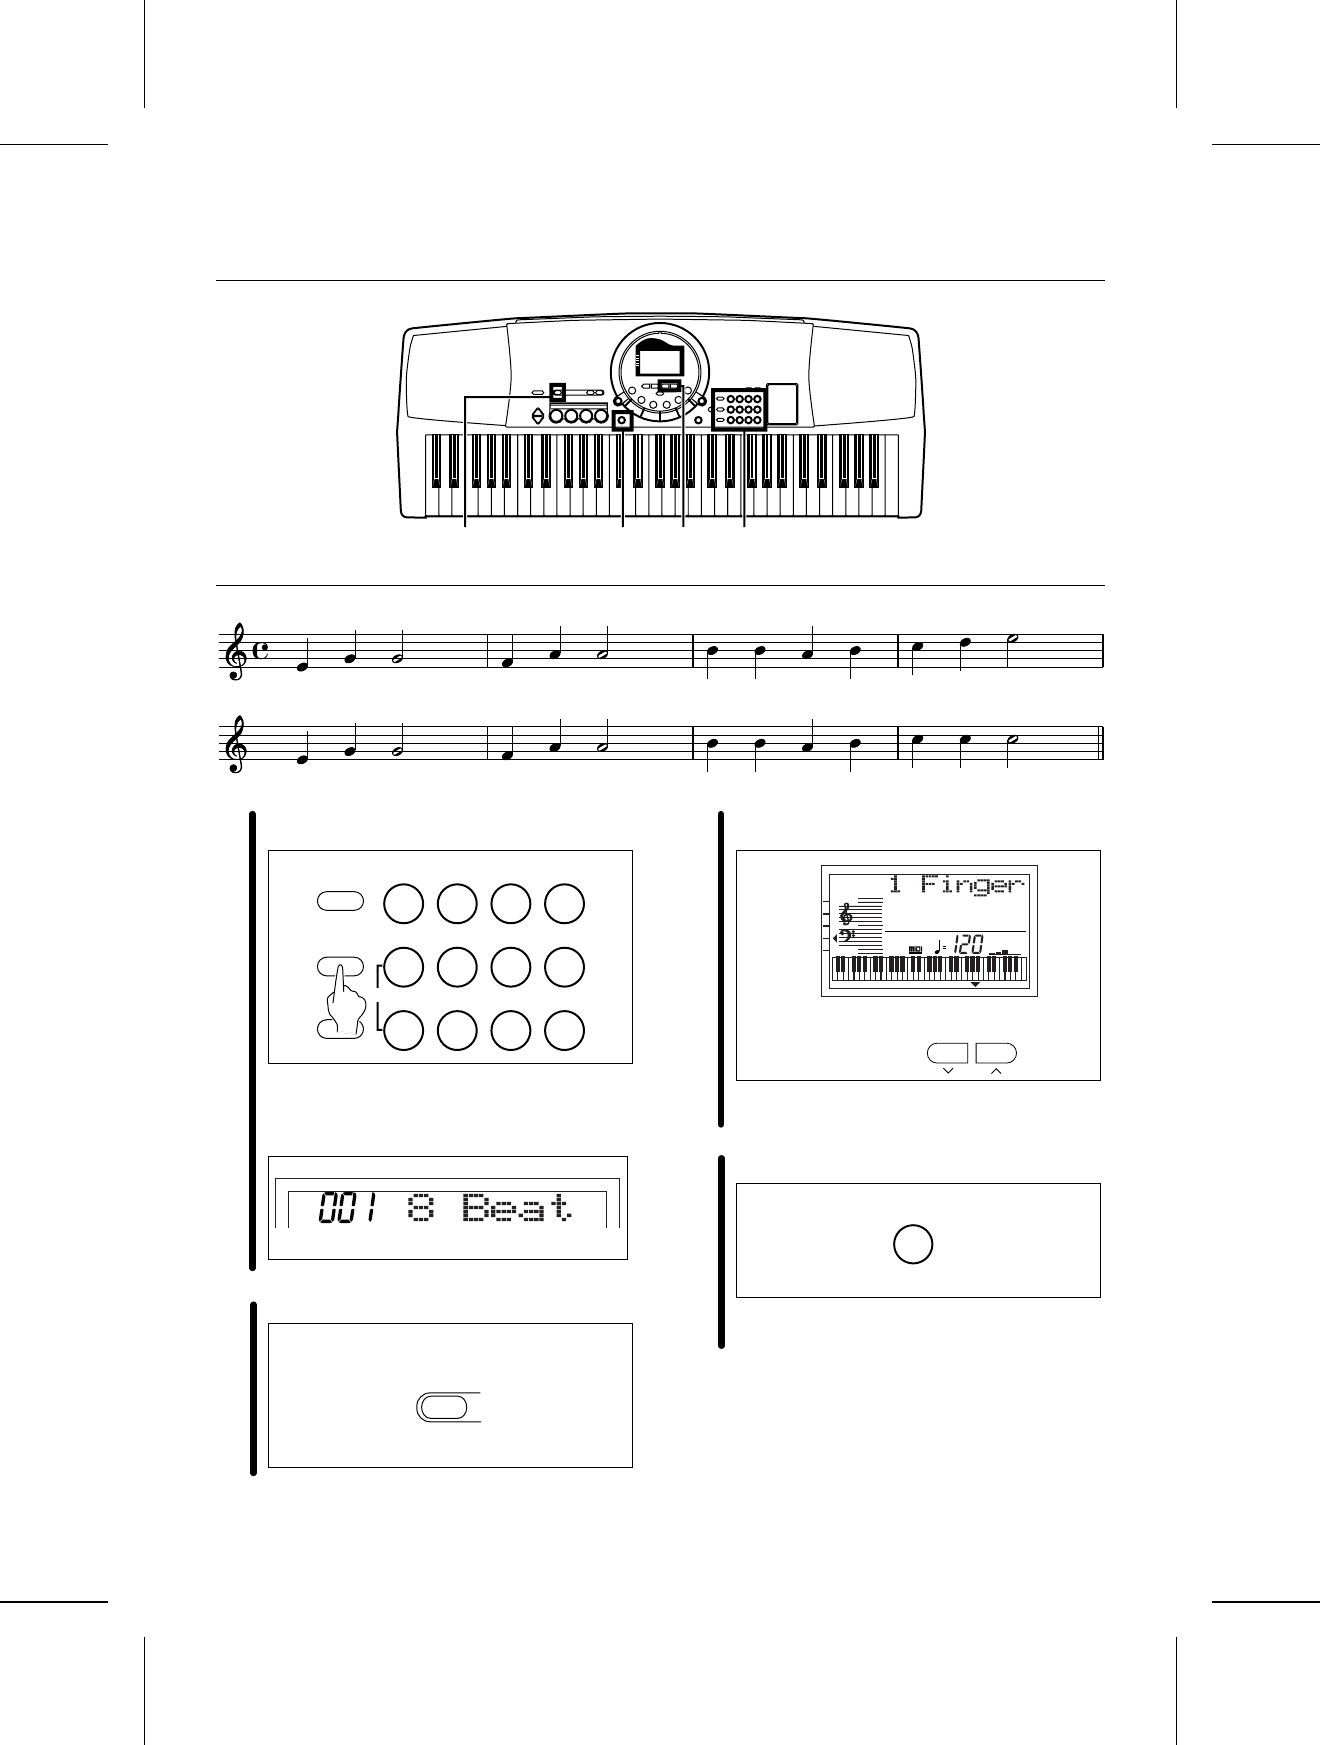
Add an automatic accompaniment
1Press the RHYTHM button, and use the number
buttons to select a rhythm number (three digits).
•The list of RHYTHMS is shown near the left
end of the panel.
•The rhythm number and name are shown on
the display.
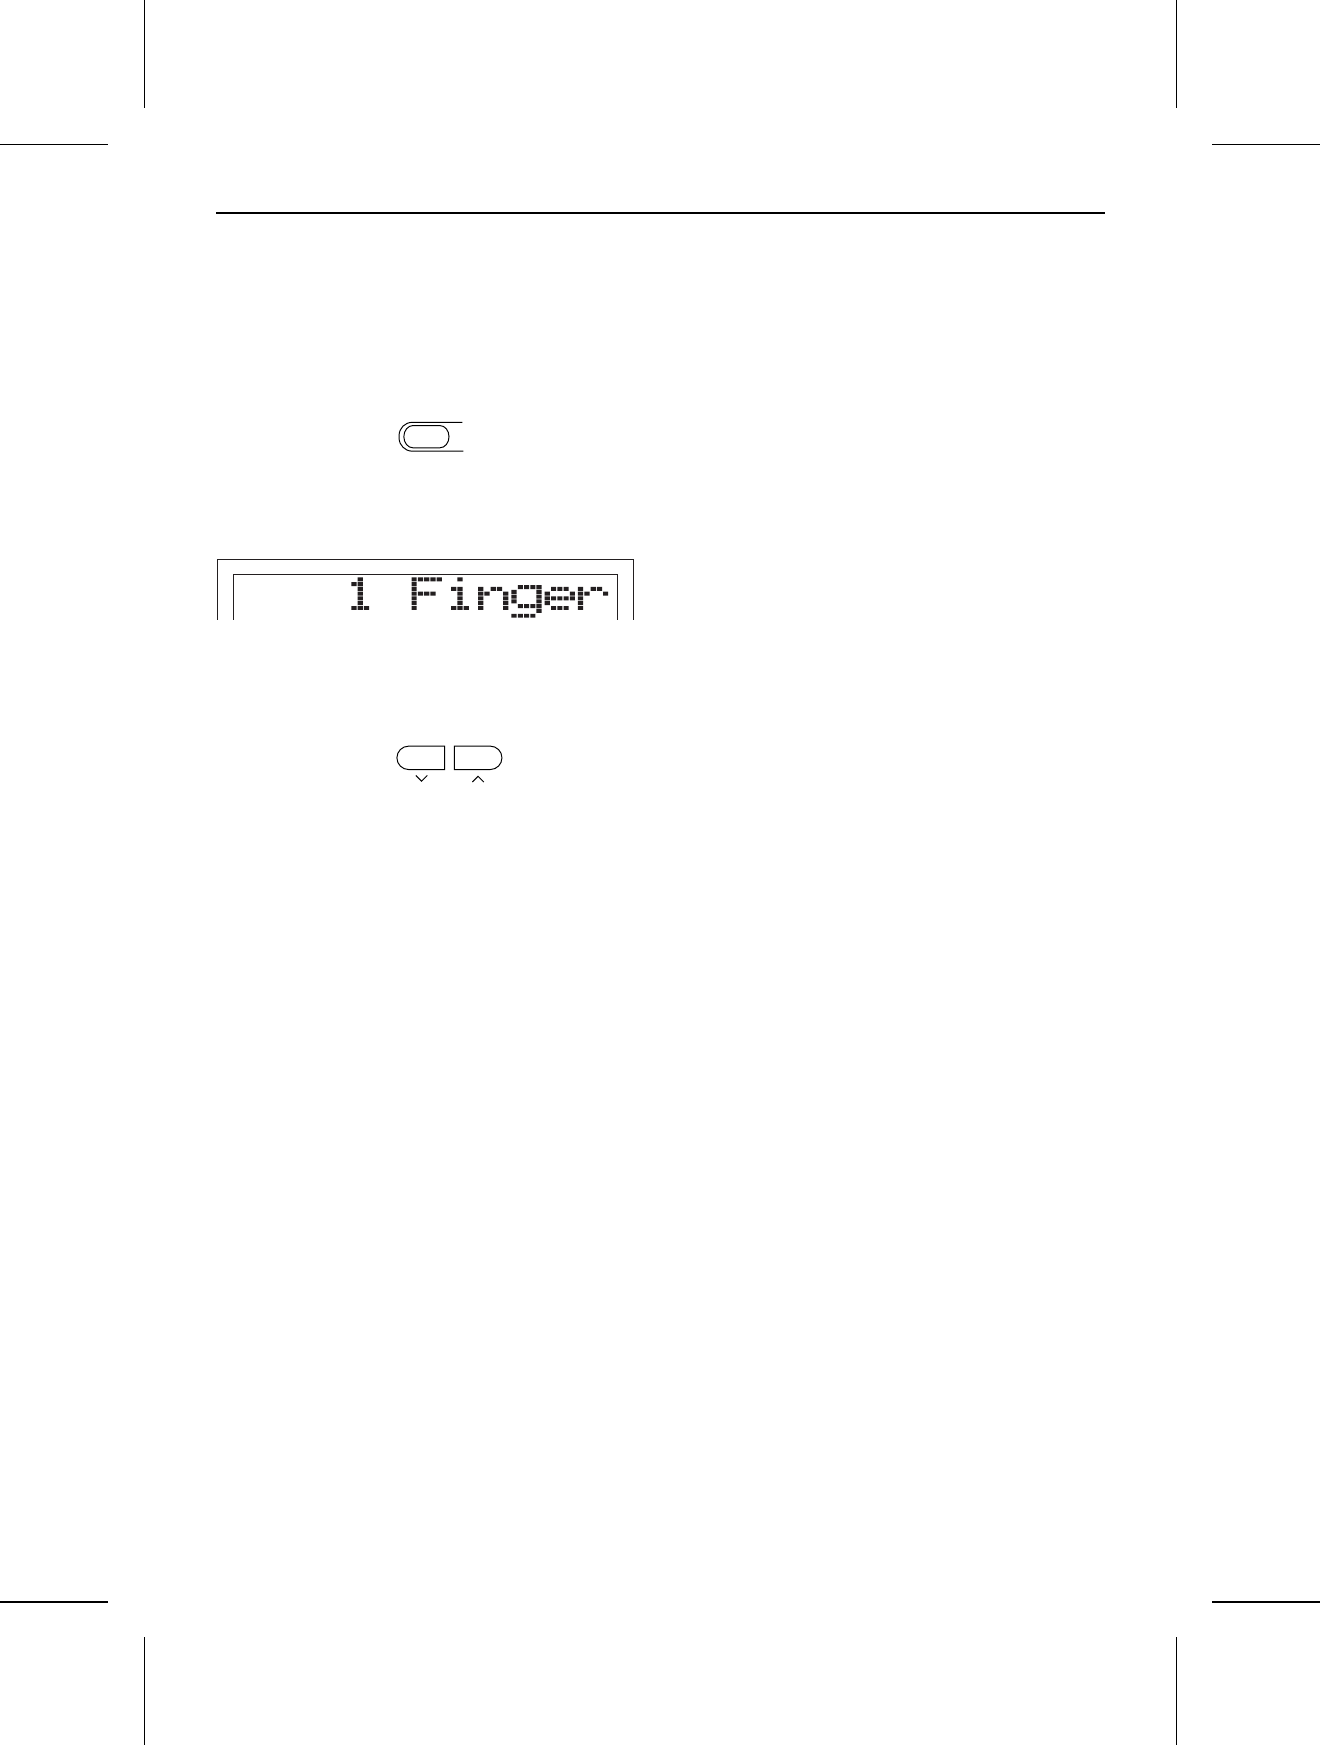
2Press the AUTO PLAY CHORD button.
3Use the TRANSPOSE/PROGRAM buttons to
show “1 Finger” on the display.
•Perform this operation while the PROGRAM in-
dication is flashing on the display.
4Press the ONE TOUCH PLAY button.
•The sounds, etc. appropriate for the selected
rhythm are automatically set up.
2 34 1
C F G7C
C F G
7
C
MENU
SOUND
RHYTHM
0 1 2 3
+ 4 5 6
— 7 8 9
CANCEL
RHYTHM
AUTO PLAY
CHORD
TRANSPOSE
PROGRAM
TEMPO
TRANSPOSE
VOLUME
TOUCH
SUSTAIN
HARMONY
APC
SYNCHRO
GENERAL
CHORD
PROGRAM
ONE TOUCH PLAY
10
QQTG0598

5Play the chord with your left hand, and the
melody with your right hand.
•When you play the keyboard with your left
hand, the automatic accompaniment starts
(SYNCHRO START).
•For example, when you press a C key, an
automatic accompaniment in the C major
chord begins to play.
6When you are finished playing the song, press
the START/STOP button.
•The automatic accompaniment stops.
•To end your performance with the automatic
accompaniment, press the AUTO PLAY
CHORD button again.
•For information about selecting rhythms, refer to
page 21.
•For information about the automatic accompaniment,
refer to page 23.
65
Chord Melody
C3
PLAY/PAUSE
START/STOP
C chord F chord
G7 chord
11
QQTG0598
Play back the 100 Songs
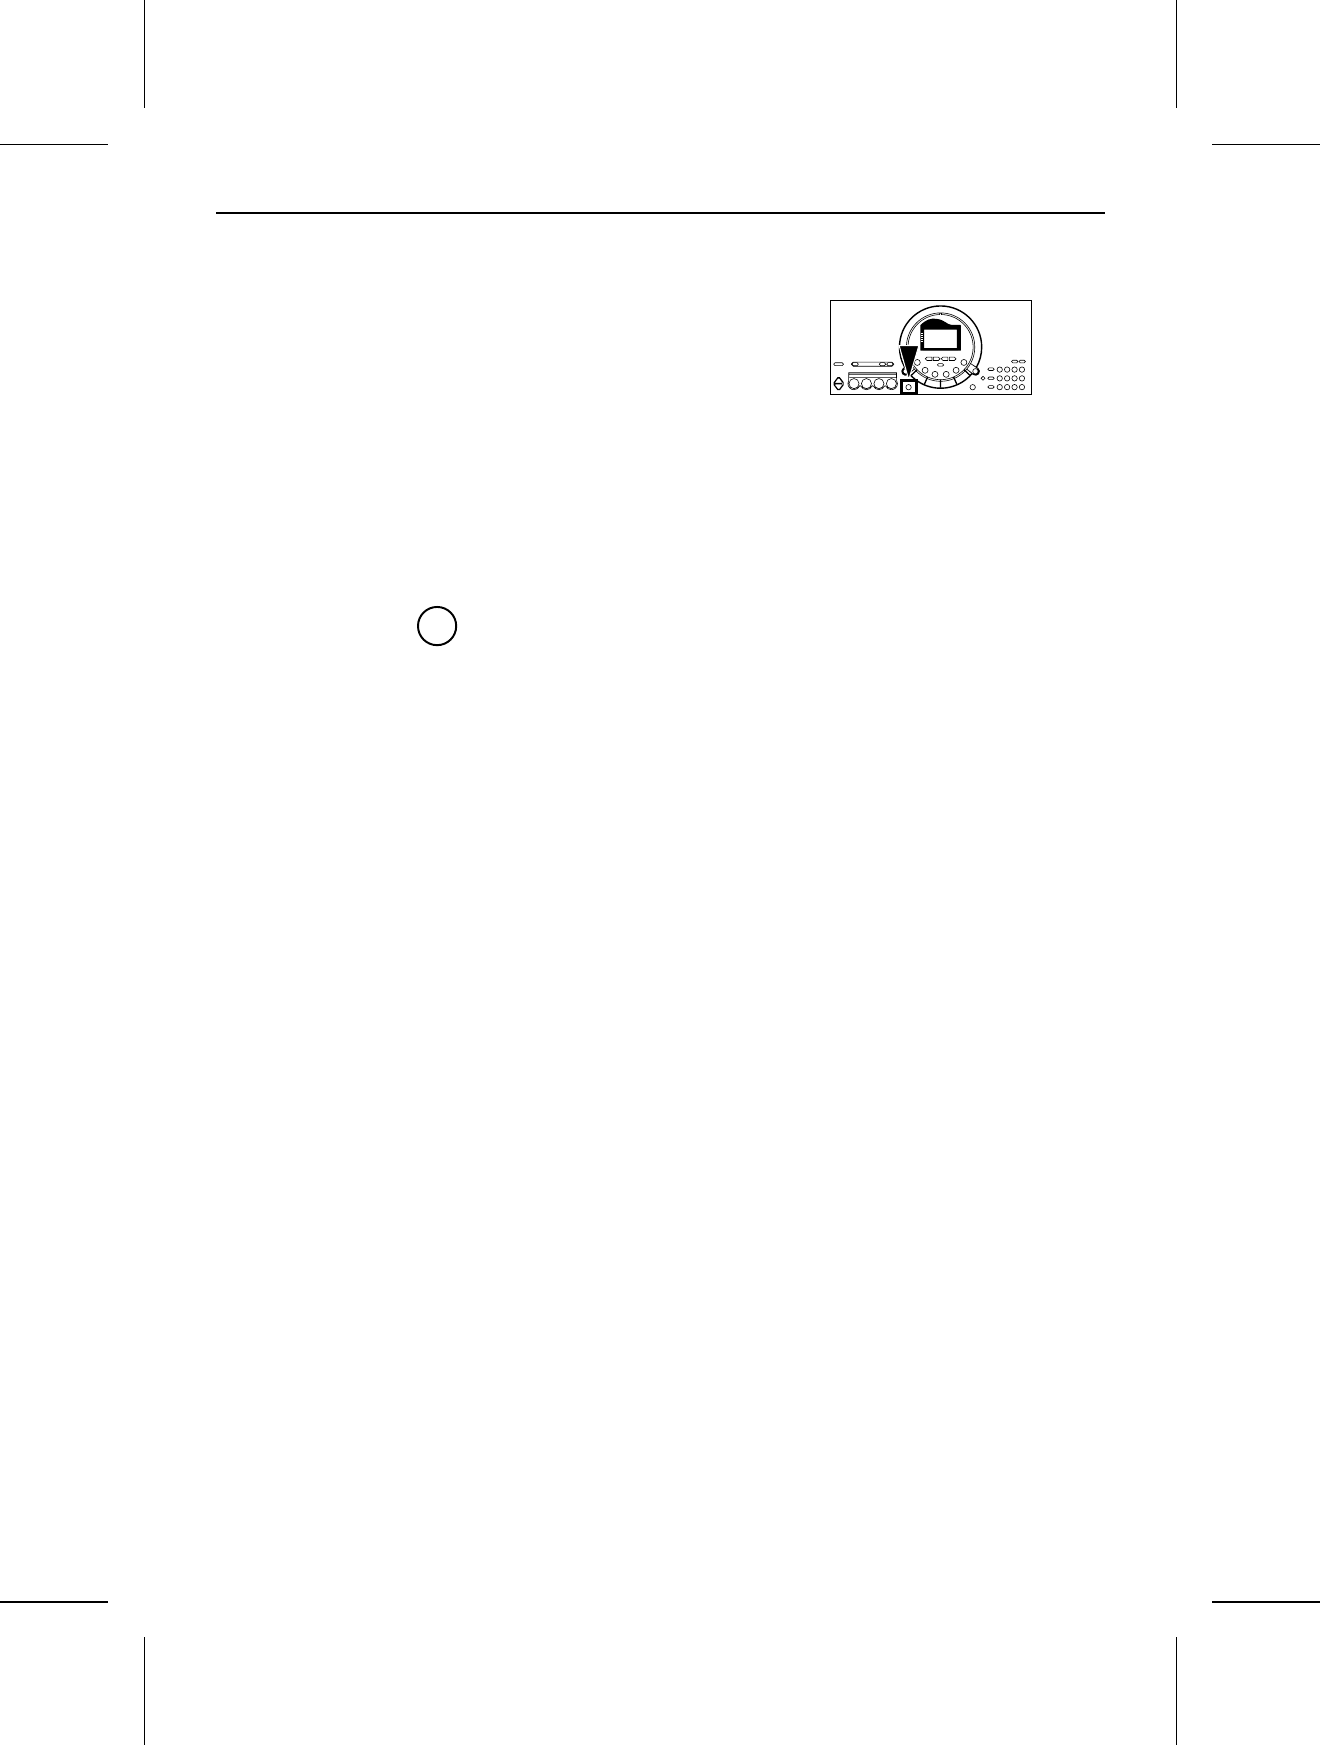
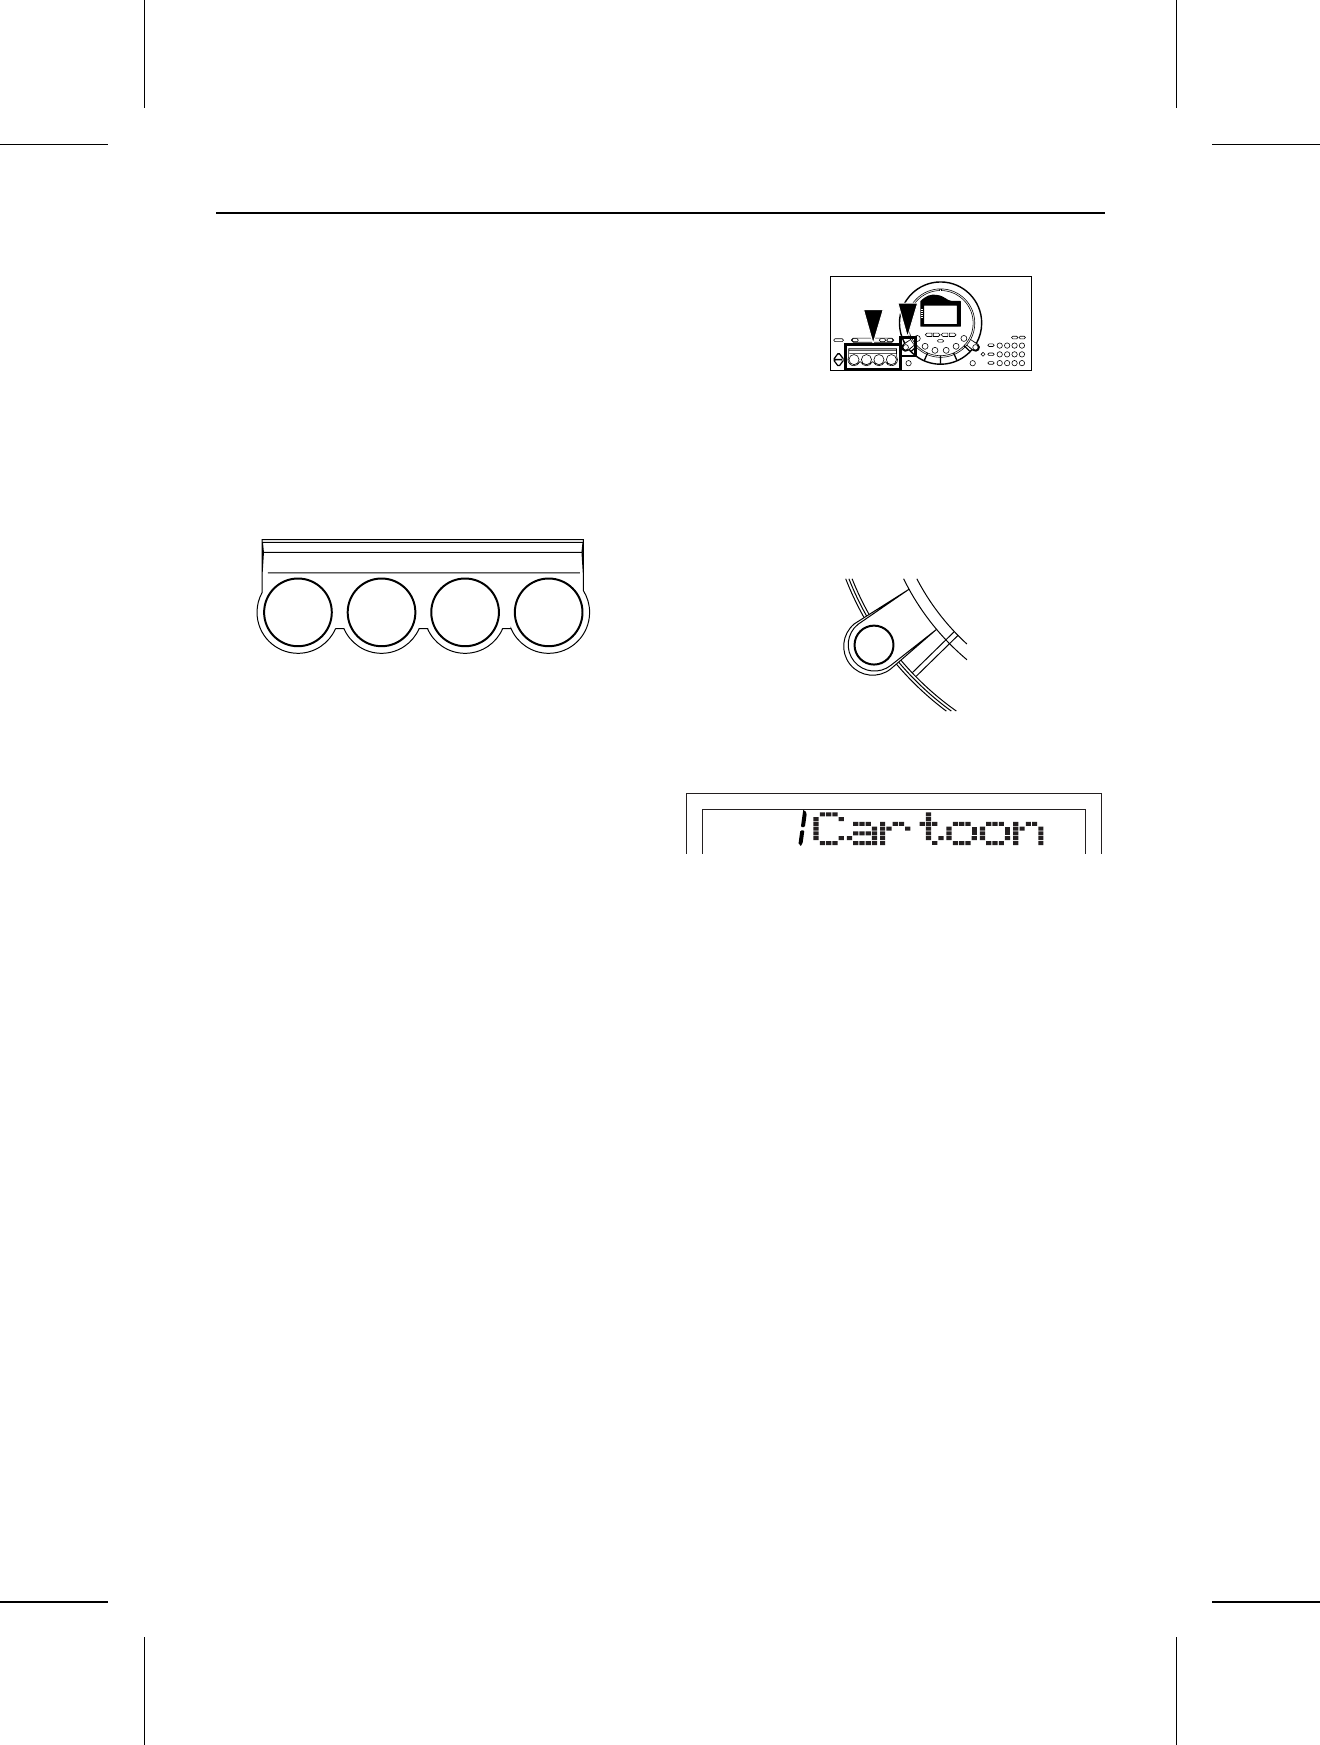
1 Press the 100 SONGS button.
2Use the number buttons to select a song num-
ber (3 digits).
•The song numbers can be found on the sepa-
rate music score provided.
•You can also use the TRANSPOSE/PRO-
GRAM buttons below the display to select it.
•Songs 101 to 105 are song medleys with
differing themes.
•The selected song number and abbreviated
song name are shown on the display.
3Press the PLAY/PAUSE (START/ STOP) button.
•The selected song is played back.
Function of each button
•If the APC/SONG VOLUME button is pressed, the
playback volume can be adjusted. This is useful
when playing the keyboard along with a song. (Refer
to page 25.)
312
100
SONGS
0 1 2 3
+ 4 5 6
— 7 8 9
CANCEL
SONG
PLAY/PAUSE
START/STOP
Return to top
(during stop)
Rewind
(during stop; by measure)
Fast forward
(during stop;
by measure)
Stop (pause)
12
QQTG0598

MINUS ONE
You can mute the melody part of the playback song
data and play it yourself.
APress the MINUS ONE button to turn it on.
•The display looks similar to the following.
•To cancel this mode, press the MINUS ONE
button again.
•When the “100 SONGS” feature is used, the settings
for the sounds and rhythms etc. are initialized.
A
MINUS
ONE
TEMPO
TRANSPOSE
VOLUME
TOUCH
SUSTAIN
H
ARMONY
APC
S
YNCHRO
GENERAL
CHORD
SONG
MINUS
ONE
13
QQTG0598
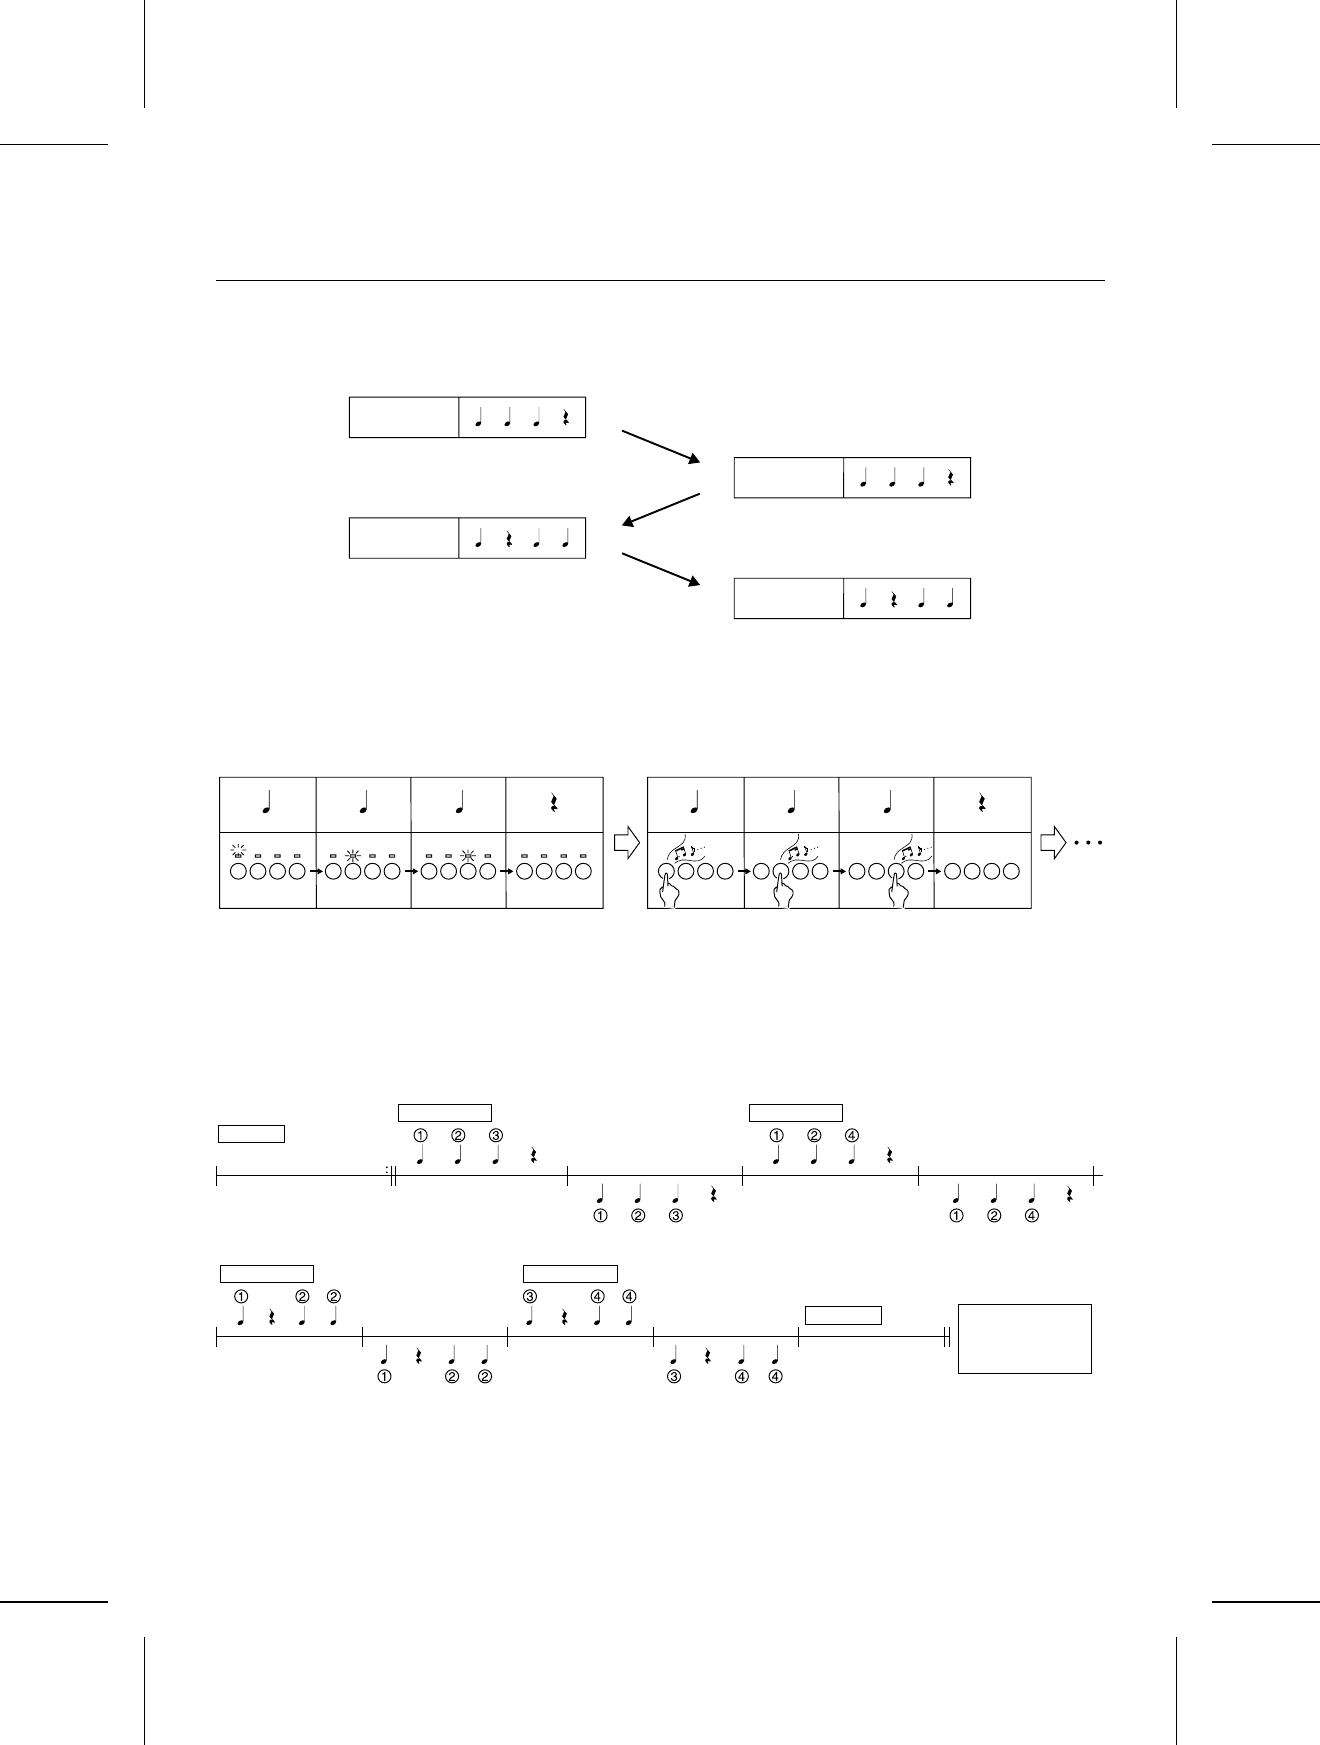
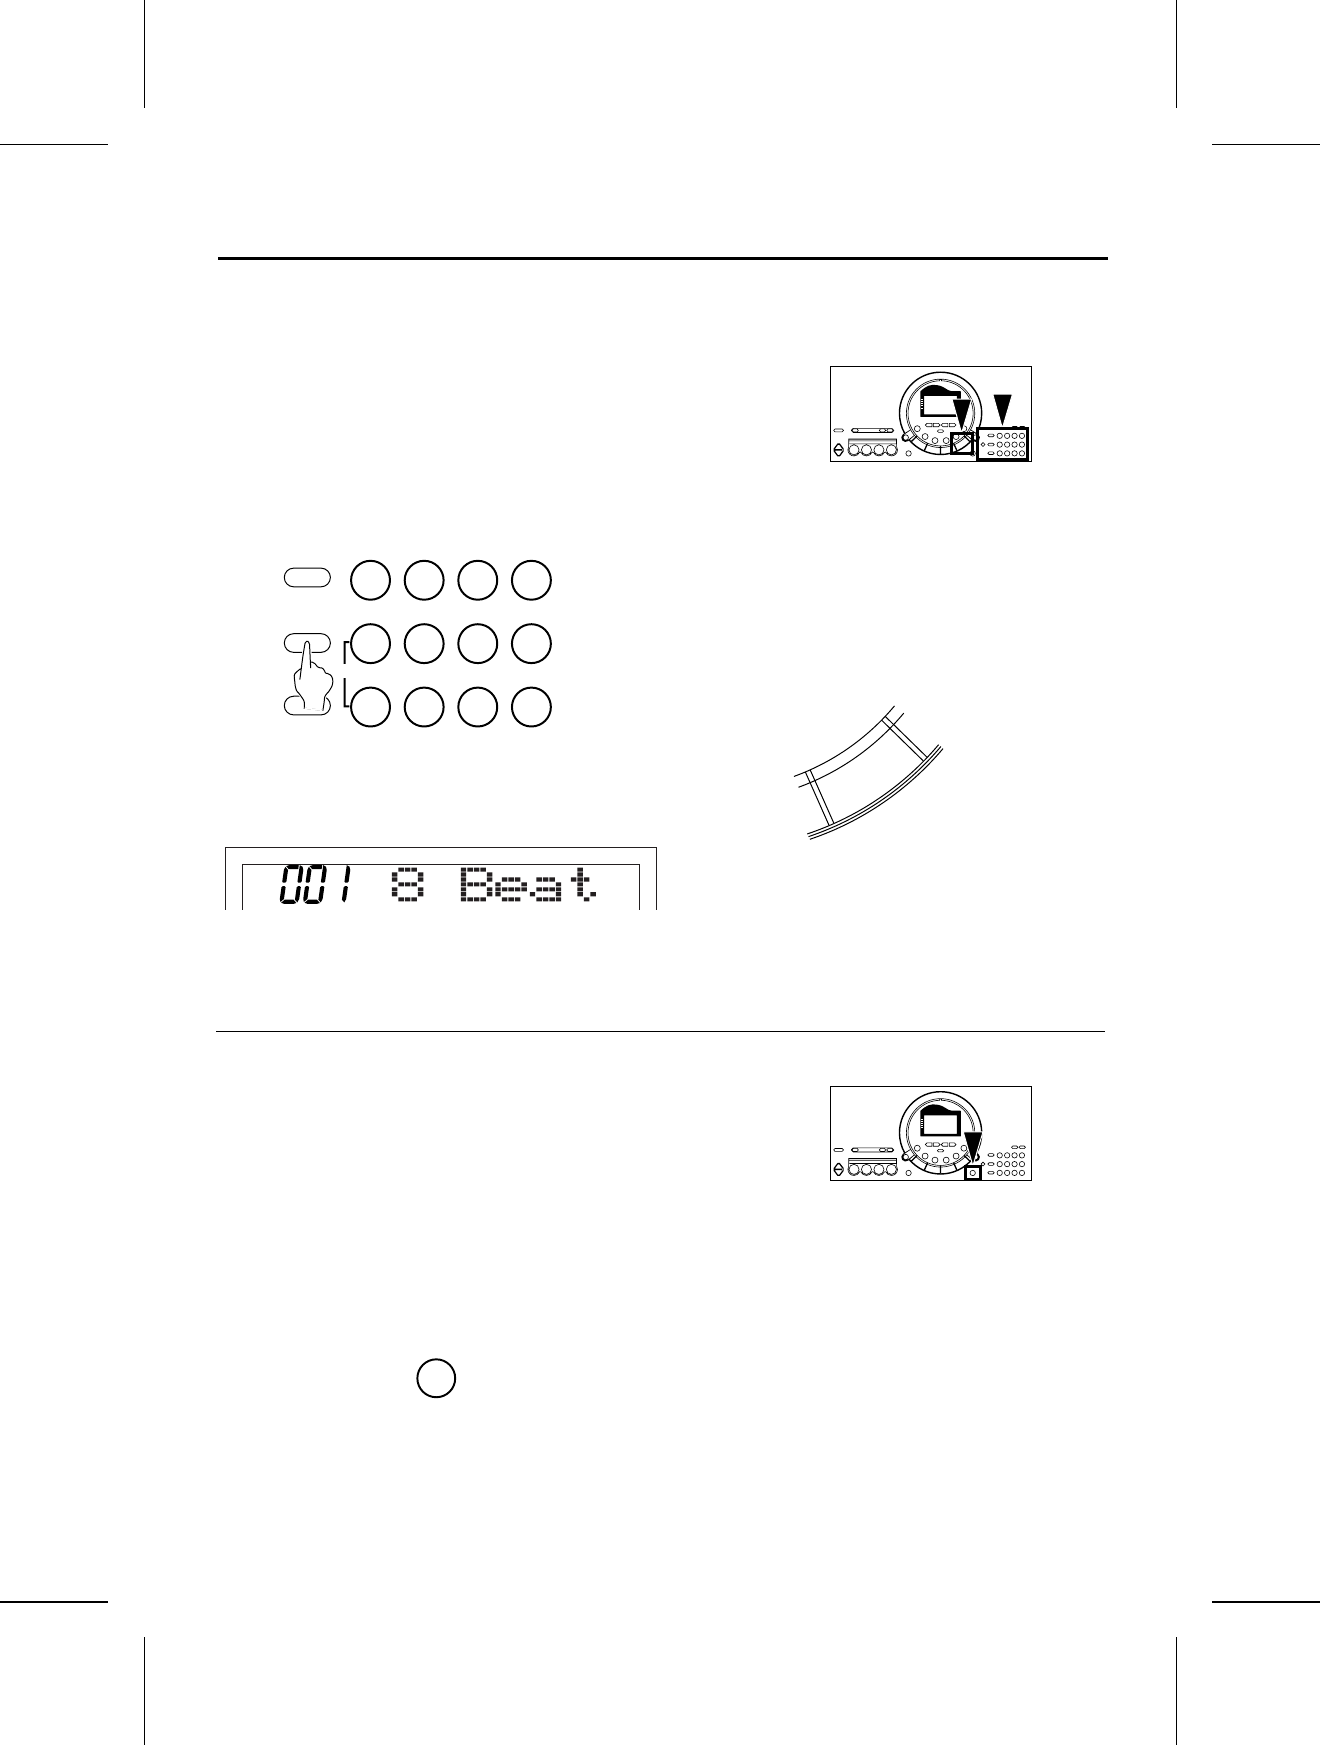
Beat Master
BEAT MASTER is a fun feature that helps you develop your sense of rhythm while you enjoy playing, just like com-
peting with a friend in a game.
Think of yourself as the student, and the instrument your teacher. First, the teacher “claps” out the rhythm, and
then you try to mimic it.
Your rhythm lesson uses the four pad buttons. As the instrument models the rhythm, the corresponding pad indica-
tors light. Then you try to tap the same pad buttons, with your fingers, using the same timing.
But it’s more than just a rhythm lesson—as you tap the pad buttons, a melody is played in time with your rhythm!
With BEAT MASTER you play a game of musical Questions & Answers with the instrument.
The BEAT MASTER has two levels to choose from: TRAINING (beginner) and CHALLENGE (advanced).
To learn how to use the BEAT MASTER, begin with the TRAINING song “1:Warm Up”. The structure of this song is
shown below, so take a minute to look it over before starting the lesson (following).
Number: Pad number
Note: Beat timing
Teacher
Student
Teacher
Student
LISTEN PLAY
Melody
LISTEN LISTEN
PLAY PLAY
INTRO PHRASE 1 PHRASE 2
LISTEN LISTEN
PLAY PLAY
PHRASE 3 PHRASE 4
ENDING
Evaluation of
your
performance
14
QQTG0598

1Press the BEAT MASTER TRAINING or CHAL-
LENGE button.
•Select TRAINING if you are a beginner, or
CHALLENGE to improve your skill.
•A BGM is heard and the pad indicators light
up.
2Use the TRANSPOSE/PROGRAM buttons to
select a song number.
•Select a number from 1 to 4 (TRAINING)/C1
to C7 (CHALLENGE). The higher the number,
the more difficult the tune.
3Press the START/STOP button.
•Listen to the intro.
4The Question phrase is played. Watch the
timing of the pad indicators and try to remem-
ber it.
•During this time, the display looks like this:
5Mimic the Question phrase by tapping the same
pad buttons in the same order and timing.
•An evaluation of each phrase you reproduce
is shown as “Bravo!”, “Good”,“Poor.”
2 314 5
BEAT MASTER
TRAINING
BEAT MASTER
CHALLENGE
TRANSPOSE
PROGRAM
TEMPO
TRANSPOSE
VOLUME
TOUCH
SUSTAIN
HARMONY
APC
SYNCHRO
GENERAL
CHORD
BEAT MASTER
PROGRAM
PLAY/PAUSE
START/STOP
1234
BEAT MASTER
LISTEN
1234
15
QQTG0598
•During this time, the display looks like this:
6The next Question phrase is then played. Con-
tinue in the same manner.
7After the ending plays, you will see an evalua-
tion of your performance on the display.
•Your total performance is assessed as
“Master!”, “Good”, “Fair” or “Practice.”
•To try the same lesson again, press the
START/STOP button. Or you can try an
another song.
8To turn off the BEAT MASTER, press the
BEAT MASTER button that you selected in
step 1.
•If the tempo is too fast, use the TEMPO buttons
below the display to adjust it.
•When the BEAT MASTER is used, the settings for
the sounds and rhythms etc. are initialized.
•Note that in some songs the Question and Answer
phrases are one measure long and in others they
are two measures long. Enjoy the challenge!
•There is an INTERLUDE (bridge) section (when
there are no Question and Answers) in the middle of
the songs so you can catch your breath! (Some
songs have no INTERLUDE section.)
8 76
BEAT MASTER
16
QQTG0598
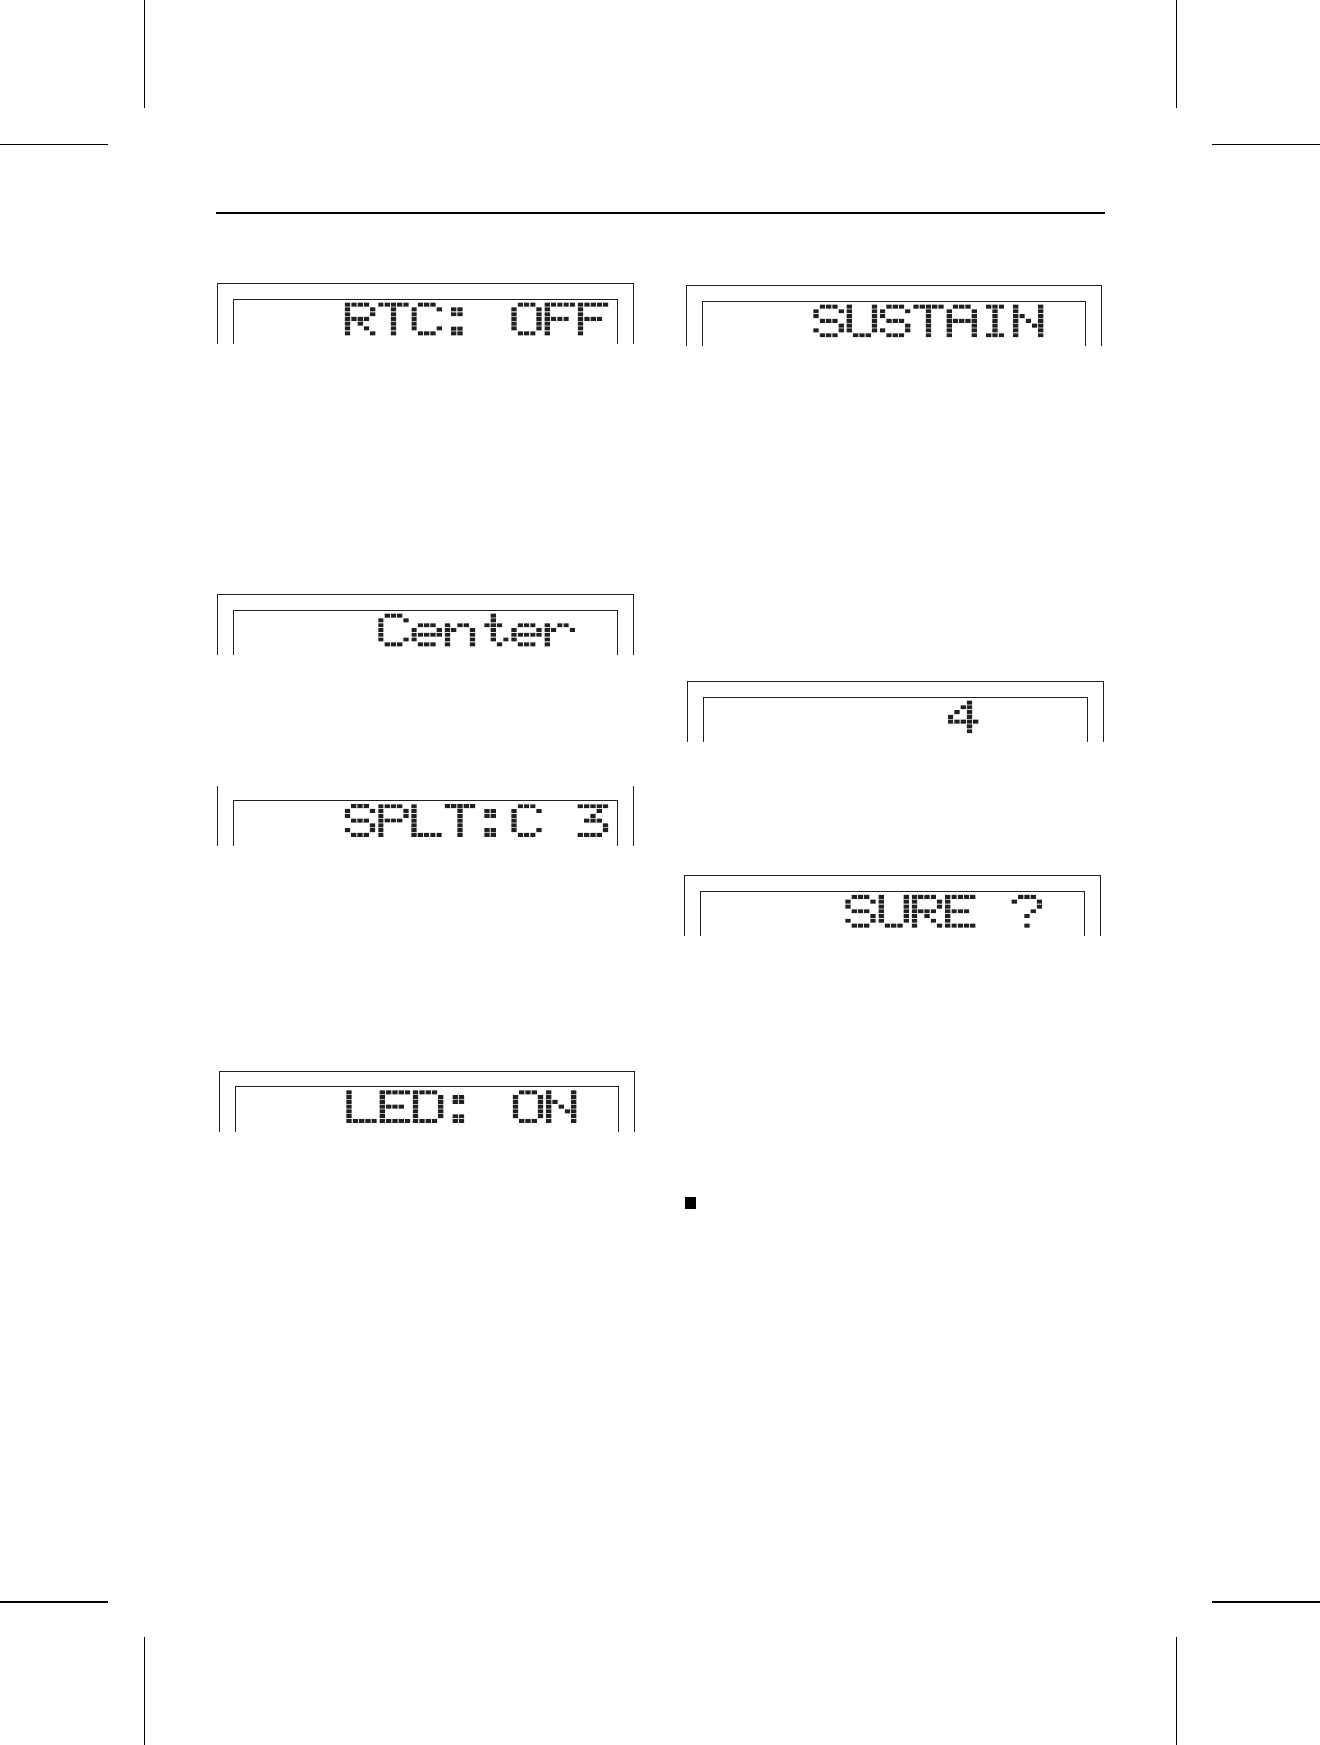
About the display
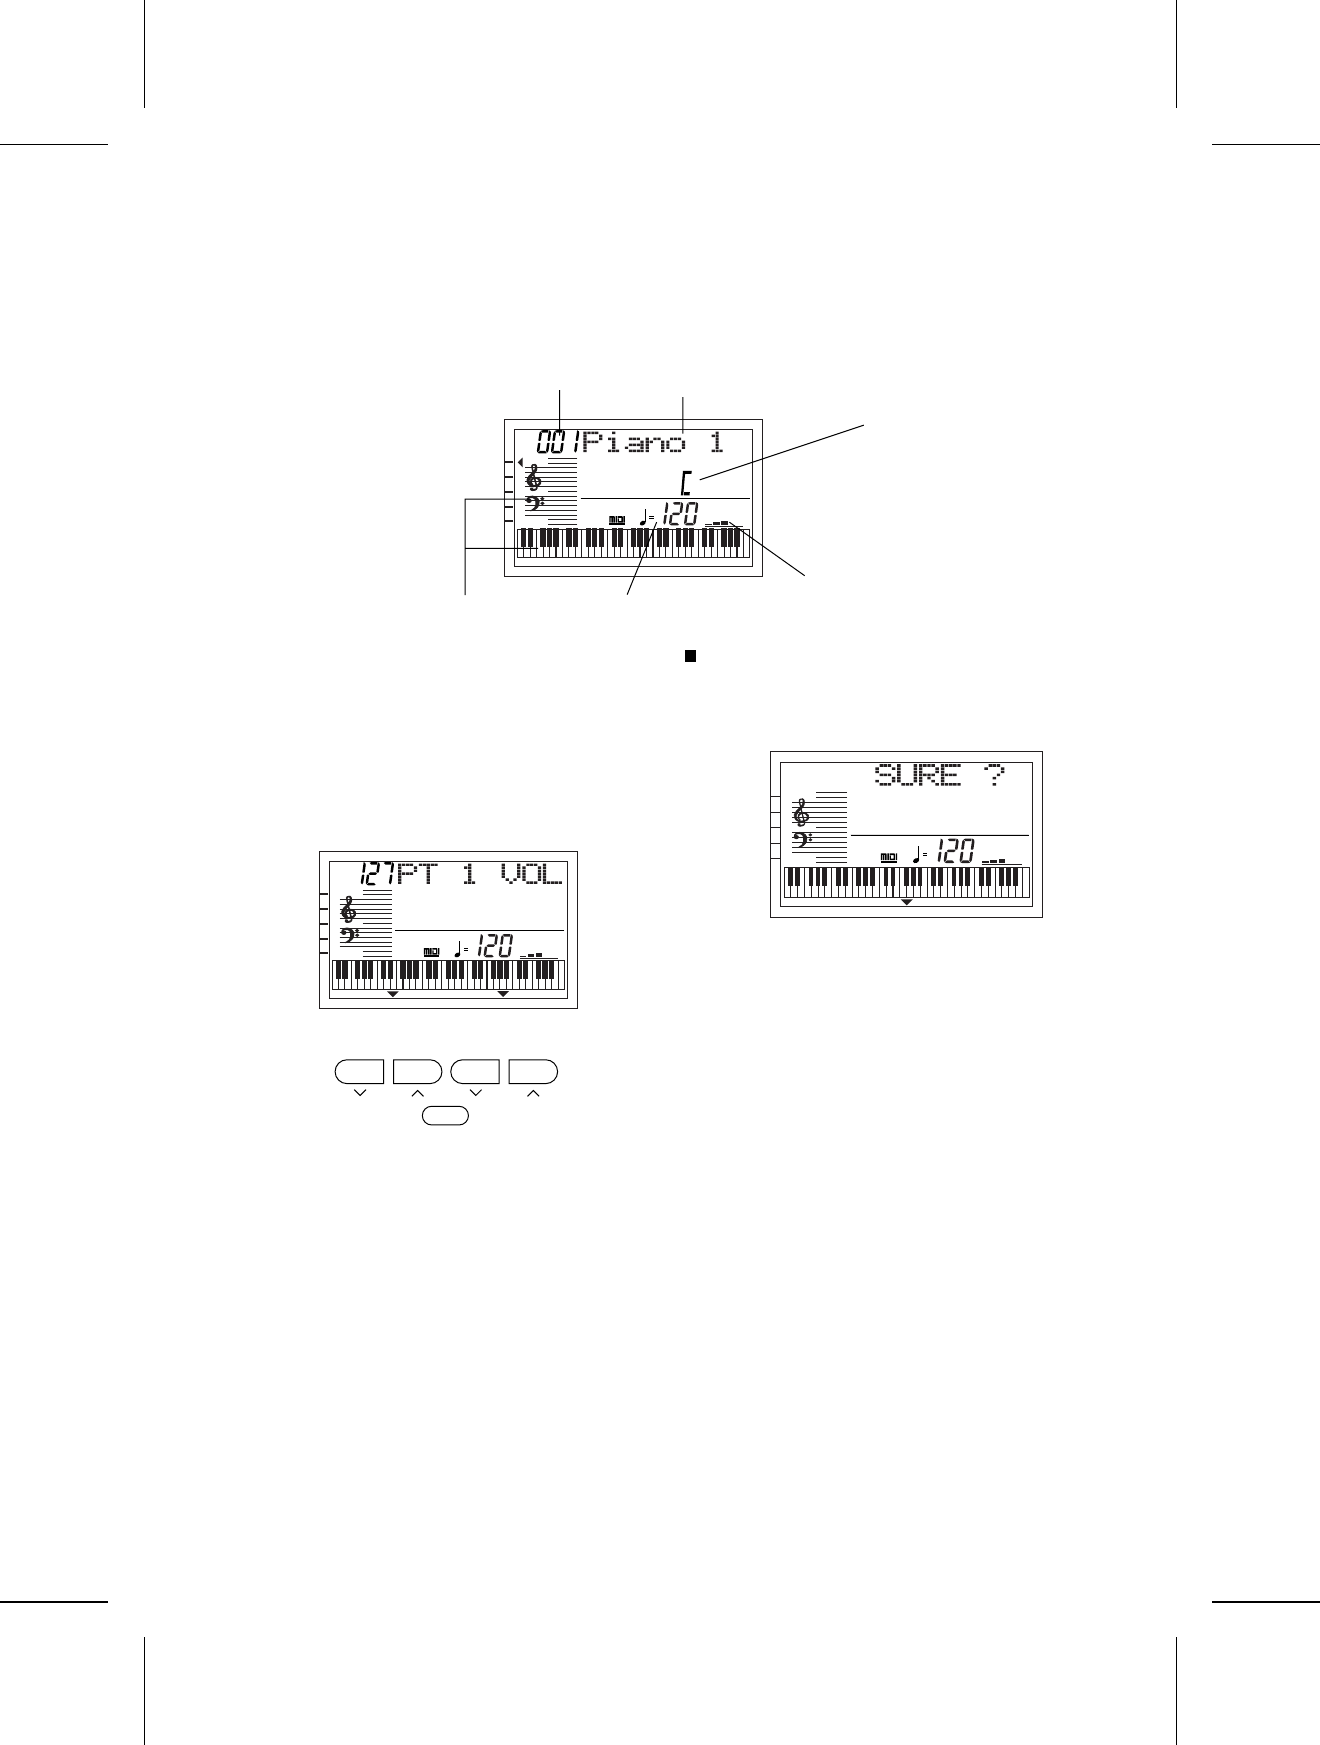
The display shows the status of this instrument, the played keys, etc., and is also used for setting the various functions.
Normal display
•A mark next to the function name to the left of the
display indicates that the corresponding button is ON.
(In the example above, the TOUCH function is On.)
•The readability (LCD CONTRAST) of the display can
be adjusted. (Refer to pages 28 and 30.)
Setting display example
Example: PART VOLUME
The TRANSPOSE/PROGRAM buttons and TEMPO/
PROGRAM buttons below the display, as well as the
number buttons and + and – buttons, are used to select
the various functions and specify values, etc.
•When the TRANSPOSE/PROGRAM buttons or
TEMPO/PROGRAM buttons are used to set a function,
the corresponding PROGRAM indication flashes.
•The number buttons are convenient for entering num-
bers directly, and the TRANSPOSE/ PROGRAM but-
tons or the + and – number buttons are convenient for
selecting the modes, etc. while viewing the display.
EXECUTE
When it is necessary to confirm that you wish to execute
a function, press the EXECUTE button.
•If necessary, the EXECUTE indication on the display
will flash.
•At this time if you wish to cancel the procedure instead
of executing it, press the button that you to select the
function (MENU button, etc.).
•The display illustrations used throughout this manual
are for purposes of explanation and may differ from the
actual display you see when you are using your instru-
ment.
TEMPO
TRANSPOSE
VOLUME
TOUCH
SUSTAIN
HARMONY
APC
SYNCHRO
GENERAL
CHORD
SOUND
m
7
Main volume
Tempo
Sound number Sound name
Chord name
Performance data
▲
TEMPO
PROGRAM
TRANSPOSE
PROGRAM
EXECUTE
TEMPO
TRANSPOSE
VOLUME
TOUCH
SUSTAIN
HARMONY
APC
SYNCHRO
GENERAL
CHORD
MENU
PROGRAM
PROGRAM
TEMPO
TRANSPOSE
VOLUME
TOUCH
SUSTAIN
HARMONY
APC
SYNCHRO
GENERAL
CHORD
MENU
EXECUTE
17
QQTG0598

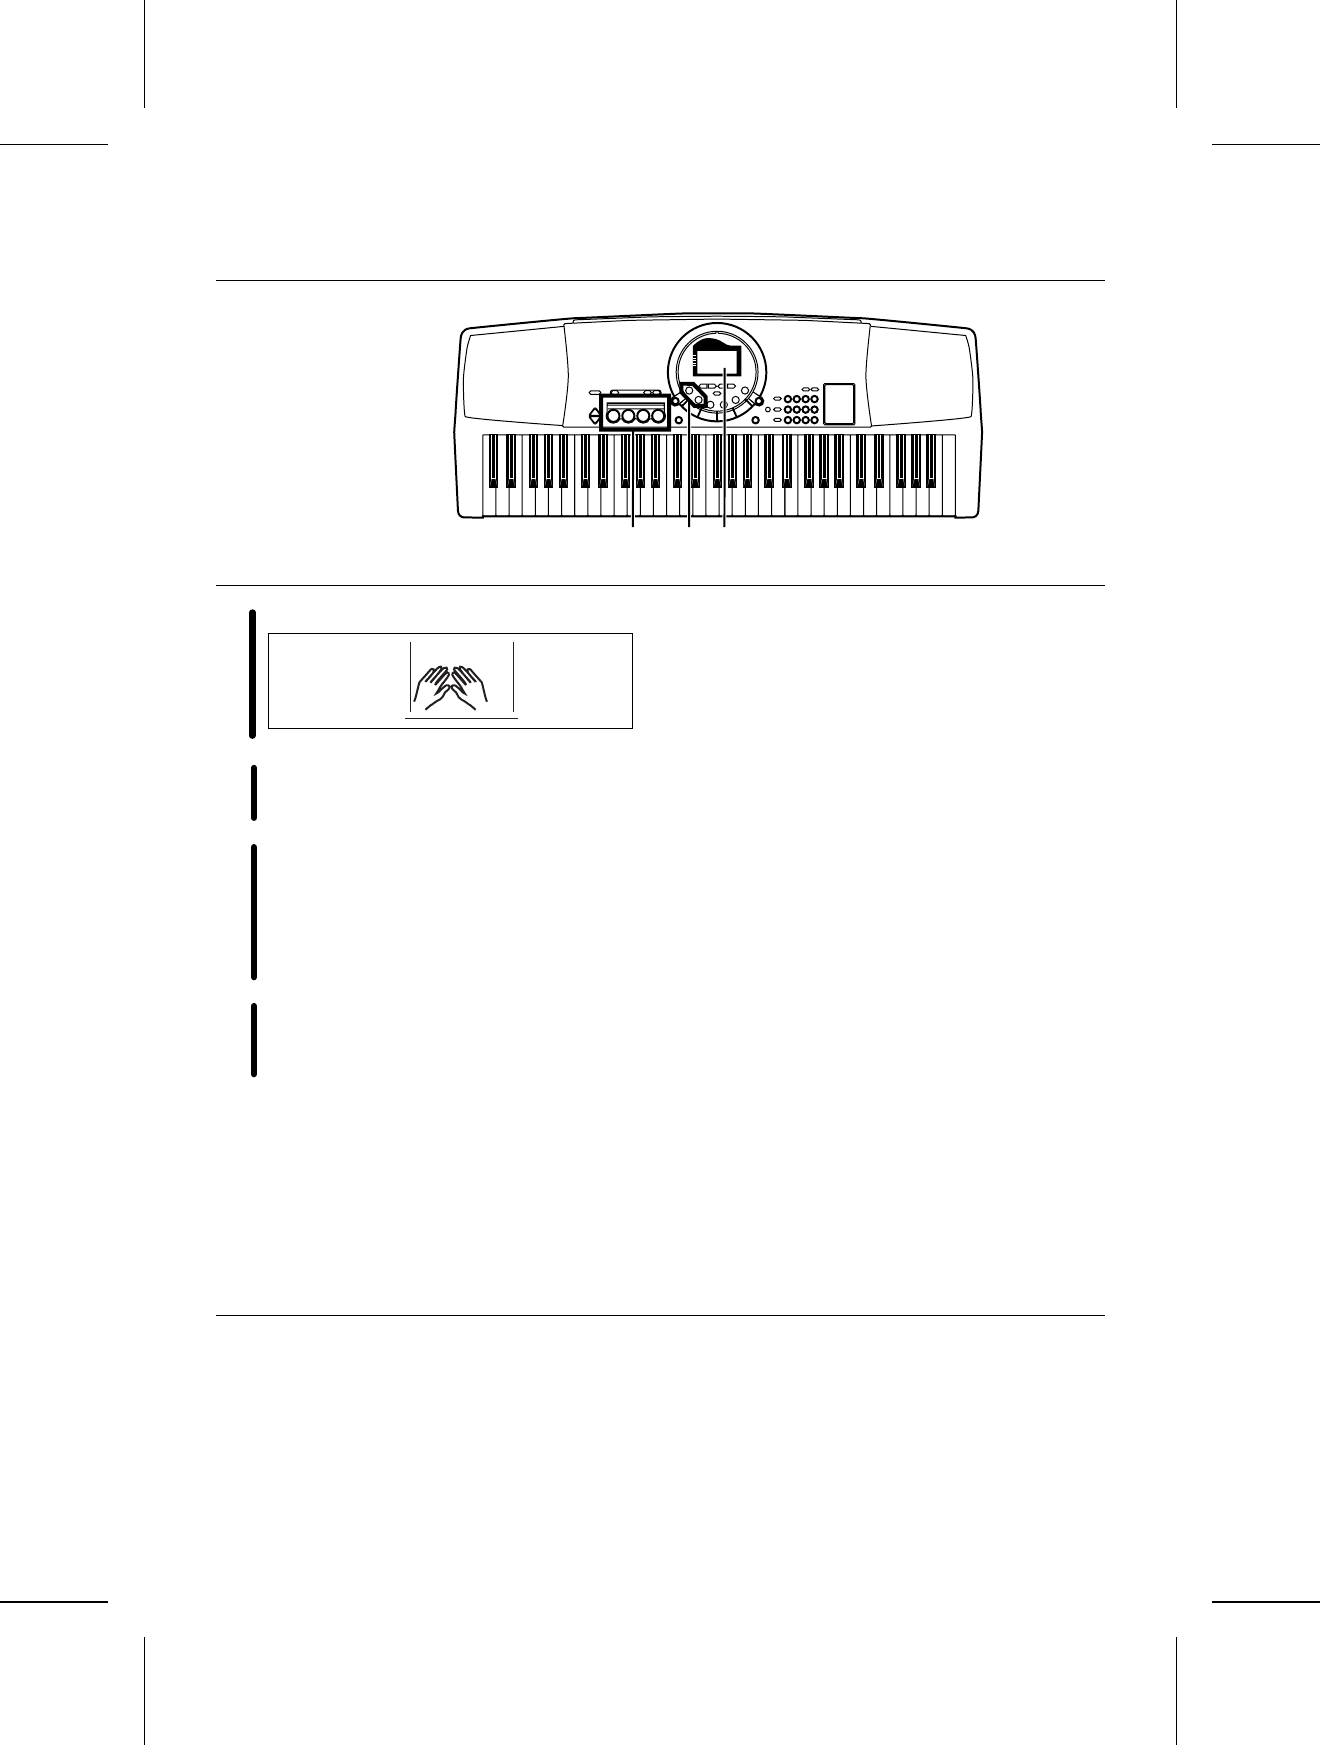
There are 150 different sounds permanently stored in this instrument to enhance your playing enjoyment.
Sound
1.Press the SOUND button. Use the number buttons to
select a sound number (three digits).
•The list of SOUNDS is printed on the upper right portion
of the panel.
•The selected sound number and sound name are
shown on the display.
•Enter three digits to specify the sound. For example,
for sound number 003, press 0, 0, 3. For sound number
030, press 0, 3, 0.
2.Play the keyboard.
•Non-pitched (percussion) sounds are also available.
•For SPLIT sounds, the sounds produced on the left
and right sections of the keyboard are different. The
keyboard split point is at C3 (the third C from the
bottom).
•For DRUM KITS sounds, percussion instrument
sounds corresponding to the illustration are played
with the keyboard keys.
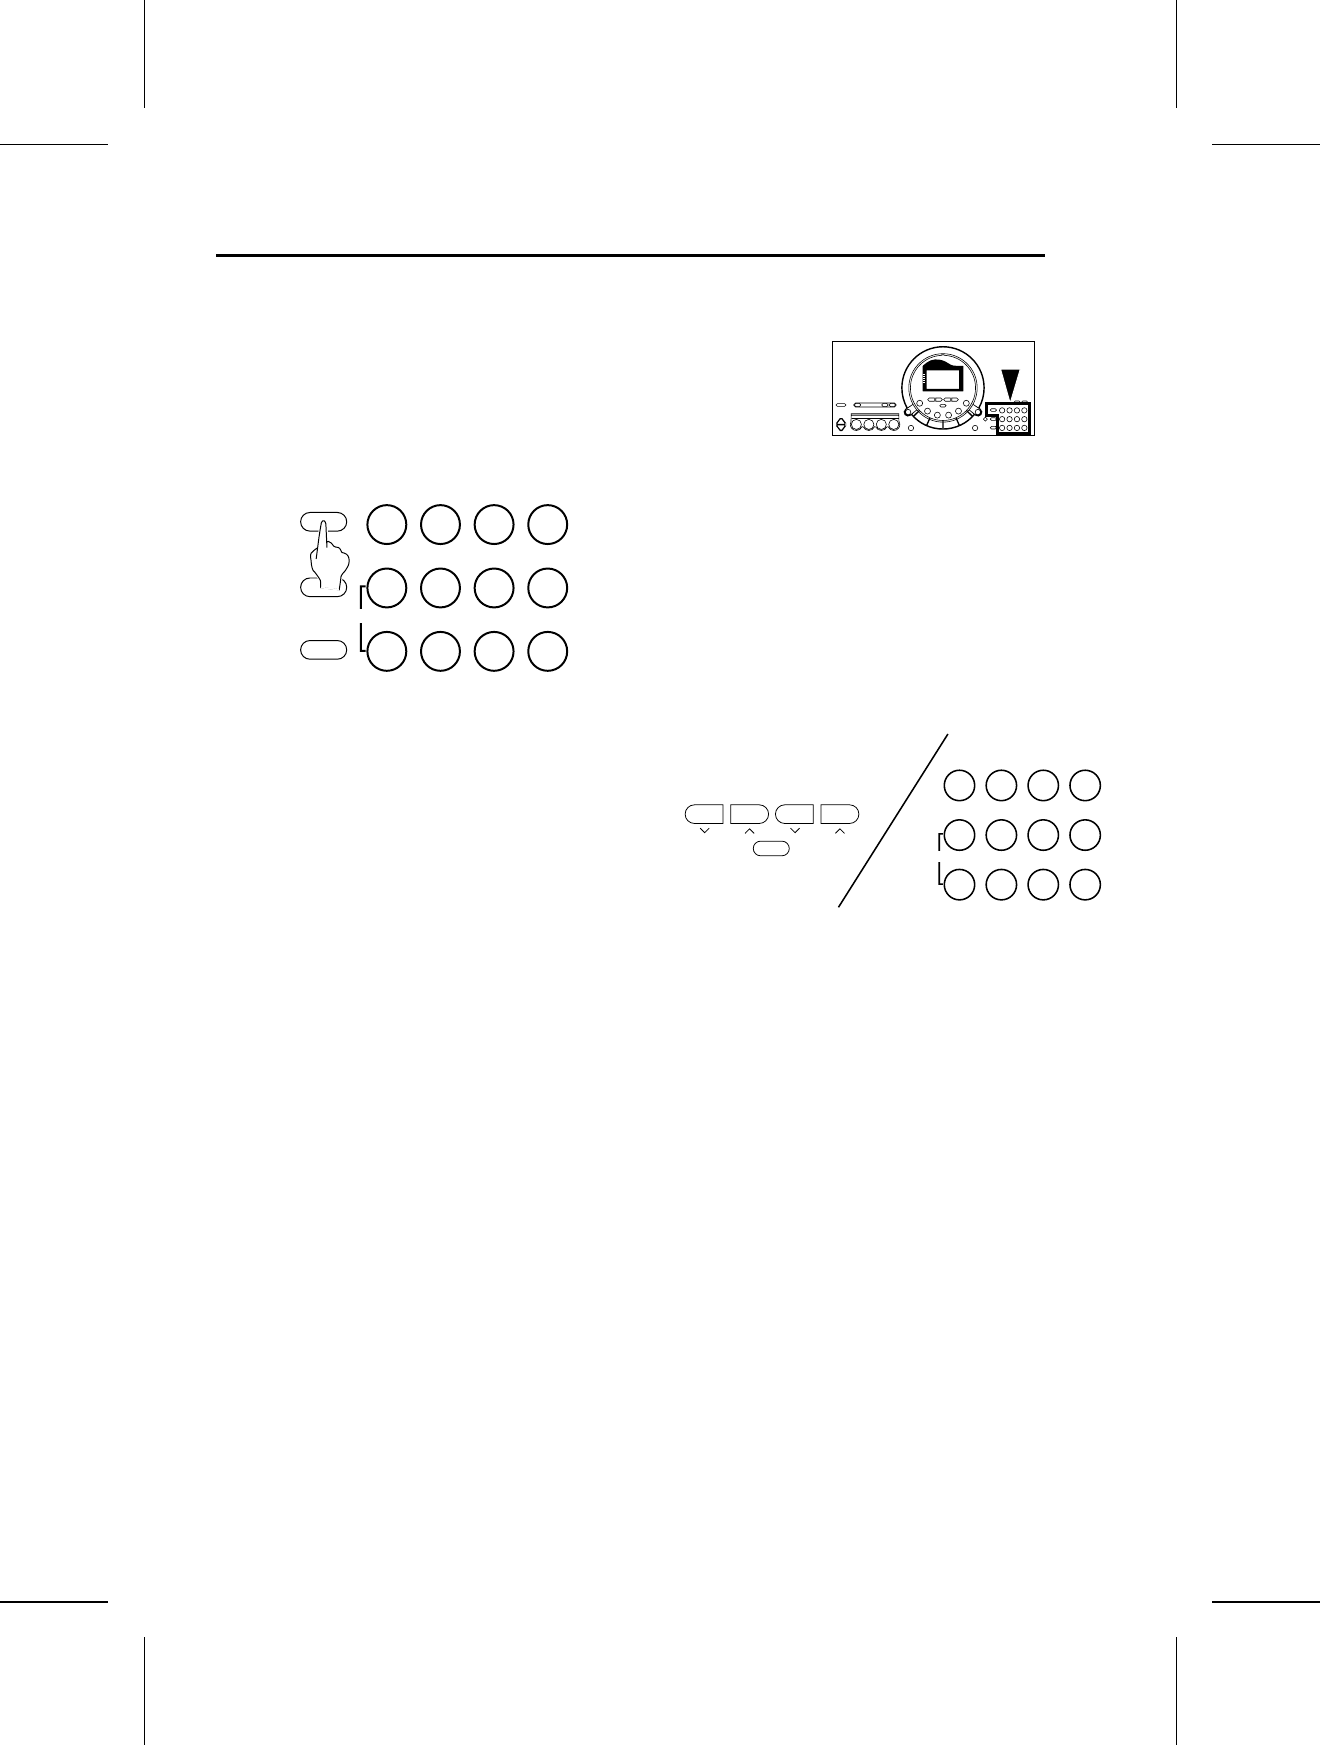
About the number buttons
The number buttons are convenient for selecting func-
tions with assigned numbers, such as sounds and
rhythms, MENU functions, 100 songs, etc.
•The + and – buttons can be used to increase or
decrease the number. When a button is pressed and
held, the numbers change quickly.
•If you wish to cancel the number you are in the midst
of entering, press the + and – buttons at the same
time. If you pause in the midst of entering a number,
the entry may automatically be canceled after a few
seconds.
Solo Piano
Press the SOLO PIANO button for a solo piano performance without having to make complicated settings.
⇒Press the SOLO PIANO button.
•The appropriate settings for a piano performance is
automatically set.
•Note that the settings that were in effect immediately
before this button is pressed will be lost.
MENU
SOUND
RHYTHM
0123
+ 4 5 6
— 7 8 9
CANCEL
SOUND
SOLO
PIANO
Part I Sounds and effects
18
QQTG0598
Sustain
SUSTAIN is the gradual fading out of musical tones after
the key is released.
⇒Press the SUSTAIN button to turn it on. •The mark next to the SUSTAIN indication on the
left side of the display indicates that this effect is on.
Touch
You can add dynamics to the sound by varying the key-
board touch.
•The initialized setting is ON.
⇒Press the TOUCH button to turn it on.
•The mark next to the TOUCH indication on the left
side of the display indicates that this effect is on.
•The display looks similar to the following.
•If necessary, the TRANSPOSE/PROGRAM buttons
can be used to to select the mode (Heavy, Normal,
Light).
•Perform this operation while the PROGRAM indication
is flashing on the display. After a few seconds, the
display returns to the previous display.
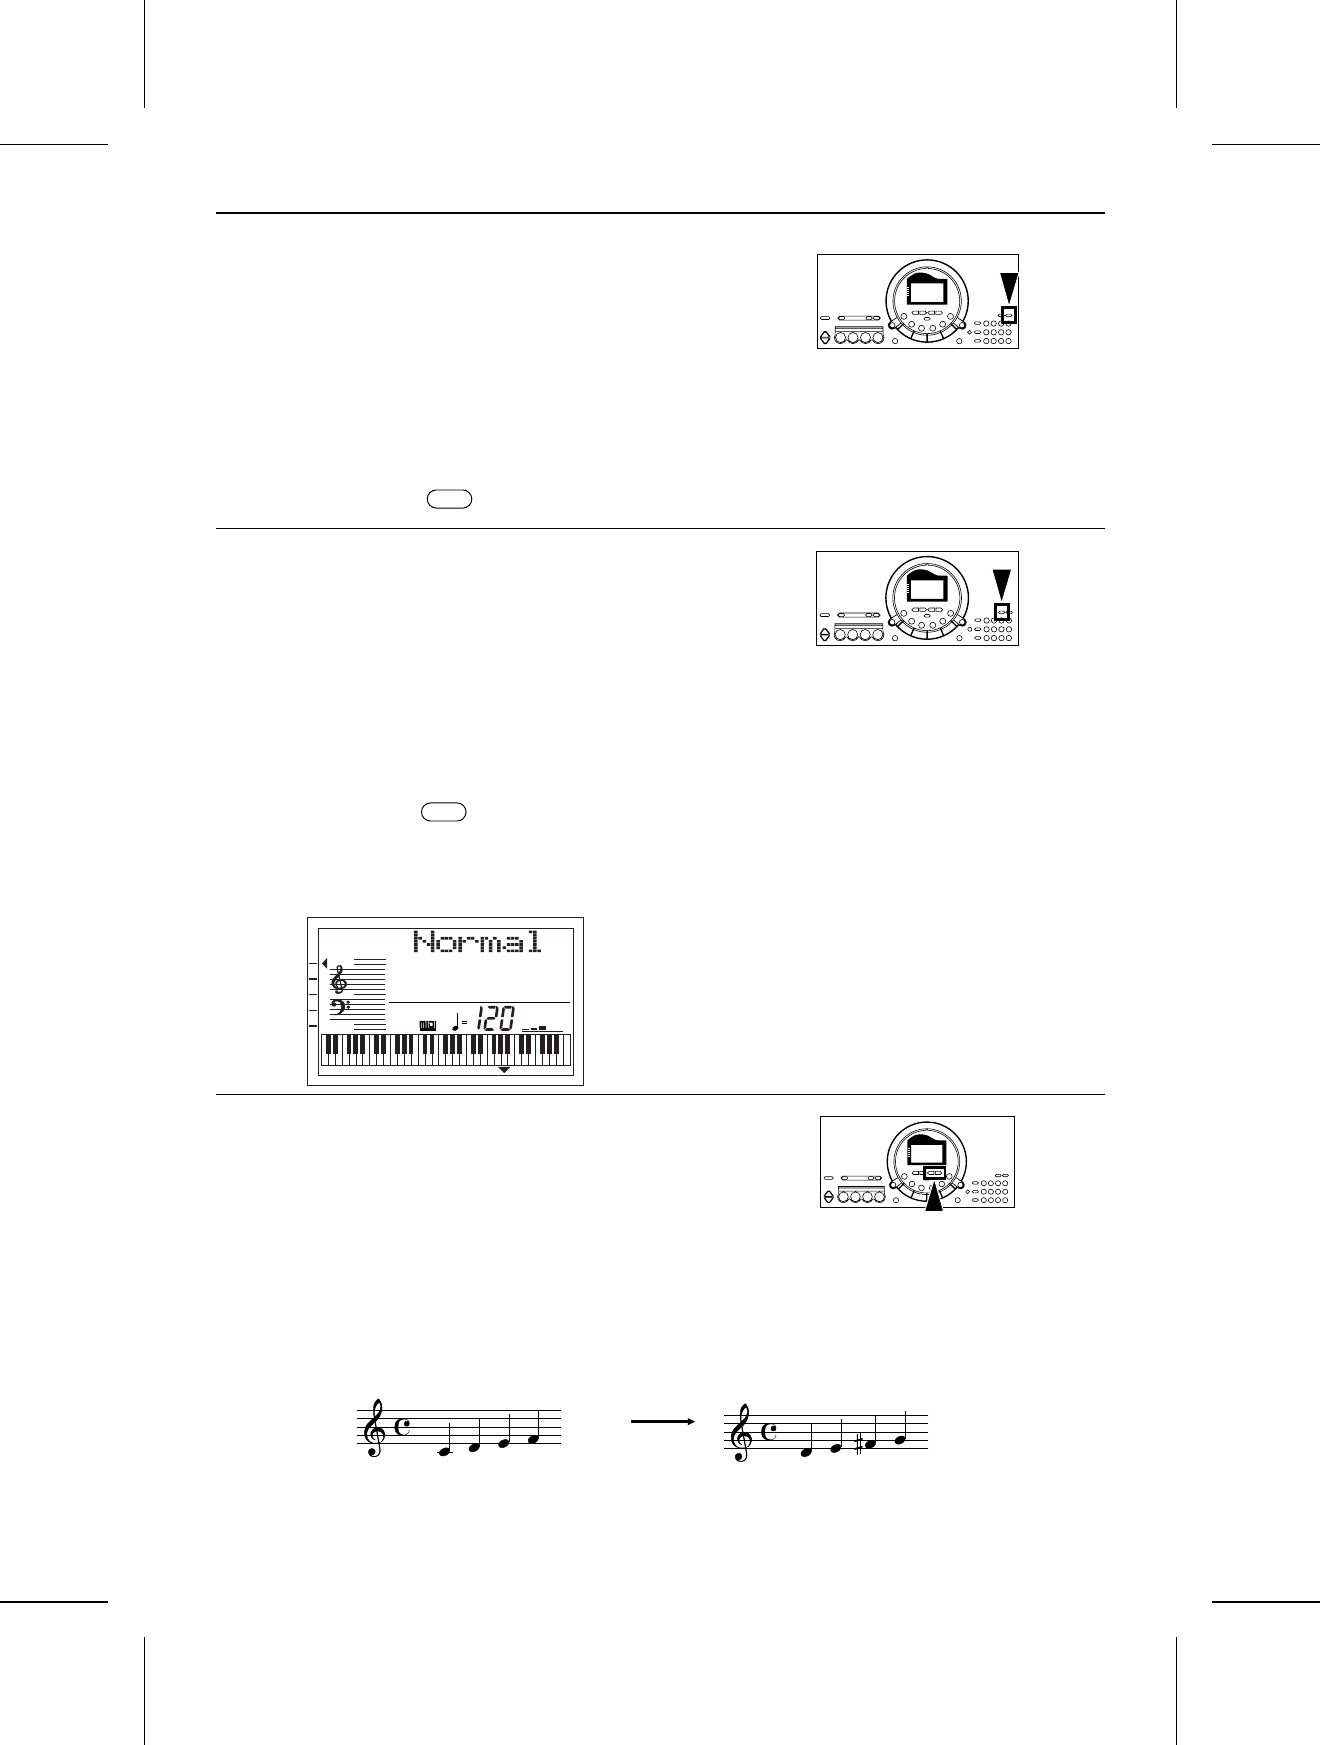
Transpose
The TRANSPOSE buttons are used to change the key of the entire instrument in semitone steps across an entire
octave.
Suppose you learn to play a song—in the key of C, for example—and decide you want to sing it, only to find that it’s
either too high or too low for your voice. Your choice is to either learn the song all over again in a different key, or to
use the TRANSPOSE feature.
<Example: transposed to D>
SUSTAIN
▲
TOUCH
▲
TEMPO
TRANSPOSE
VOLUME
TOUCH
SUSTAIN
HARMONY
APC
SYNCHRO
GENERAL
CHORD
PROGRAM
Played keys: C major Notes that sound: D major
Part I Sound and effects
19
QQTG0598
⇒Adjust the key with the TRANSPOSE ∧ and ∨ buttons.
•Each press of the ∧ button raises the key in semitone
steps, and each press of the ∨ button lowers the key
in semitone steps (G – C – F#).
•If the two buttons are pressed at the same time, the
key returns to C.
•When the TRANSPOSE function is active, the trans-
pose illustration is shown on the display.
•When PROGRAM is shown on the display above the
buttons, these buttons are used for various settings
and cannot be used for TRANSPOSE. To access the
TRANSPOSE function in this case, first exit the setting
mode.
Harmony
This function automatically adds harmony to the single-note melody you play in the right part, based on the chord you
specify in the left part.
1.Press the HARMONY button to turn it on.
•The mark next to the HARMONY indication on the
left side of the display indicates that this effect is on.
•The display looks similar to the following.
•If necessary, the TRANSPOSE/PROGRAM buttons
can be used to select the type of harmony.
•Perform this operation while the PROGRAM indication
is flashing on the display. After a few seconds, the
display returns to the previous display.
•For details about each type, refer to the separate
REFERENCE GUIDE provided.
2.During a performance using the automatic accompani-
ment (refer to page 23), while specifying the chord
with your left hand, play the melody with your right
hand.
•If the “Octave”, “Hard Rock” or “Fanfare” type is
selected, HARMONY is added even when the auto-
matic accompaniment is not used.
TRANSPOSE
PROGRAM
TEMPO
TRANSPOSE
VOLUME
TOUCH
SUSTAIN
HARMONY
APC
SYNCHRO
GENERAL
SOUND
Key
Transpose illustration
HARMONY
▲
TEMPO
TRANSPOSE
VOLUME
TOUCH
SUSTAIN
HARMONY
APC
SYNCHRO
GENERAL
CHORD
PROGRAM
Part I Sound and effects
20
QQTG0598
There are 100 rhythms stored in the memory of this instrument.
Rhythm
1.Press the RHYTHM button. Use the number buttons
to select a rhythm number (three digits).
•The list of RHYTHMS is shown near the left end of
the panel.
•The rhythm number and name are shown on the dis-
play.
•Enter three digits to specify the rhythm. For example,
for rhythm number 003, press 0, 0, 3. For rhythm
number 030, press 0, 3, 0.
•The + and – buttons can be used to increase or
decrease the number. When a button is pressed and
held, the numbers change quickly.
•To cancel a number you are entering, press the + and
– buttons at the same time (CANCEL).
2.Press the START/STOP button.
•The selected rhythm pattern begins to play.
•You can stop the rhythm by pressing the START/STOP
button again to turn it off.
•Since there is no DRUM part for the 091 CLASSIC
BALLAD rhythm, the pattern does not sound unless
the AUTO PLAY CHORD is used.
Synchro Start
With the synchronized start feature, the rhythm pattern begins to play when you press a key on the keyboard.
1.Select a rhythm.
2.Press the SYNCHRO START button to turn it on.
•The mark next to the SYNCHRO indication on the
left side of the display indicates that this function is
on.
3.Play a key to the left of the keyboard split point (C3).
•The rhythm pattern begins to play.
MENU
SOUND
RHYTHM
0 1 2 3
+ 4 5 6
— 7 8 9
CANCEL
RHYTHM
PLAY/PAUSE
START/STOP
SYNCHRO START
▲
Part II Playing the rhythm
21
QQTG0598
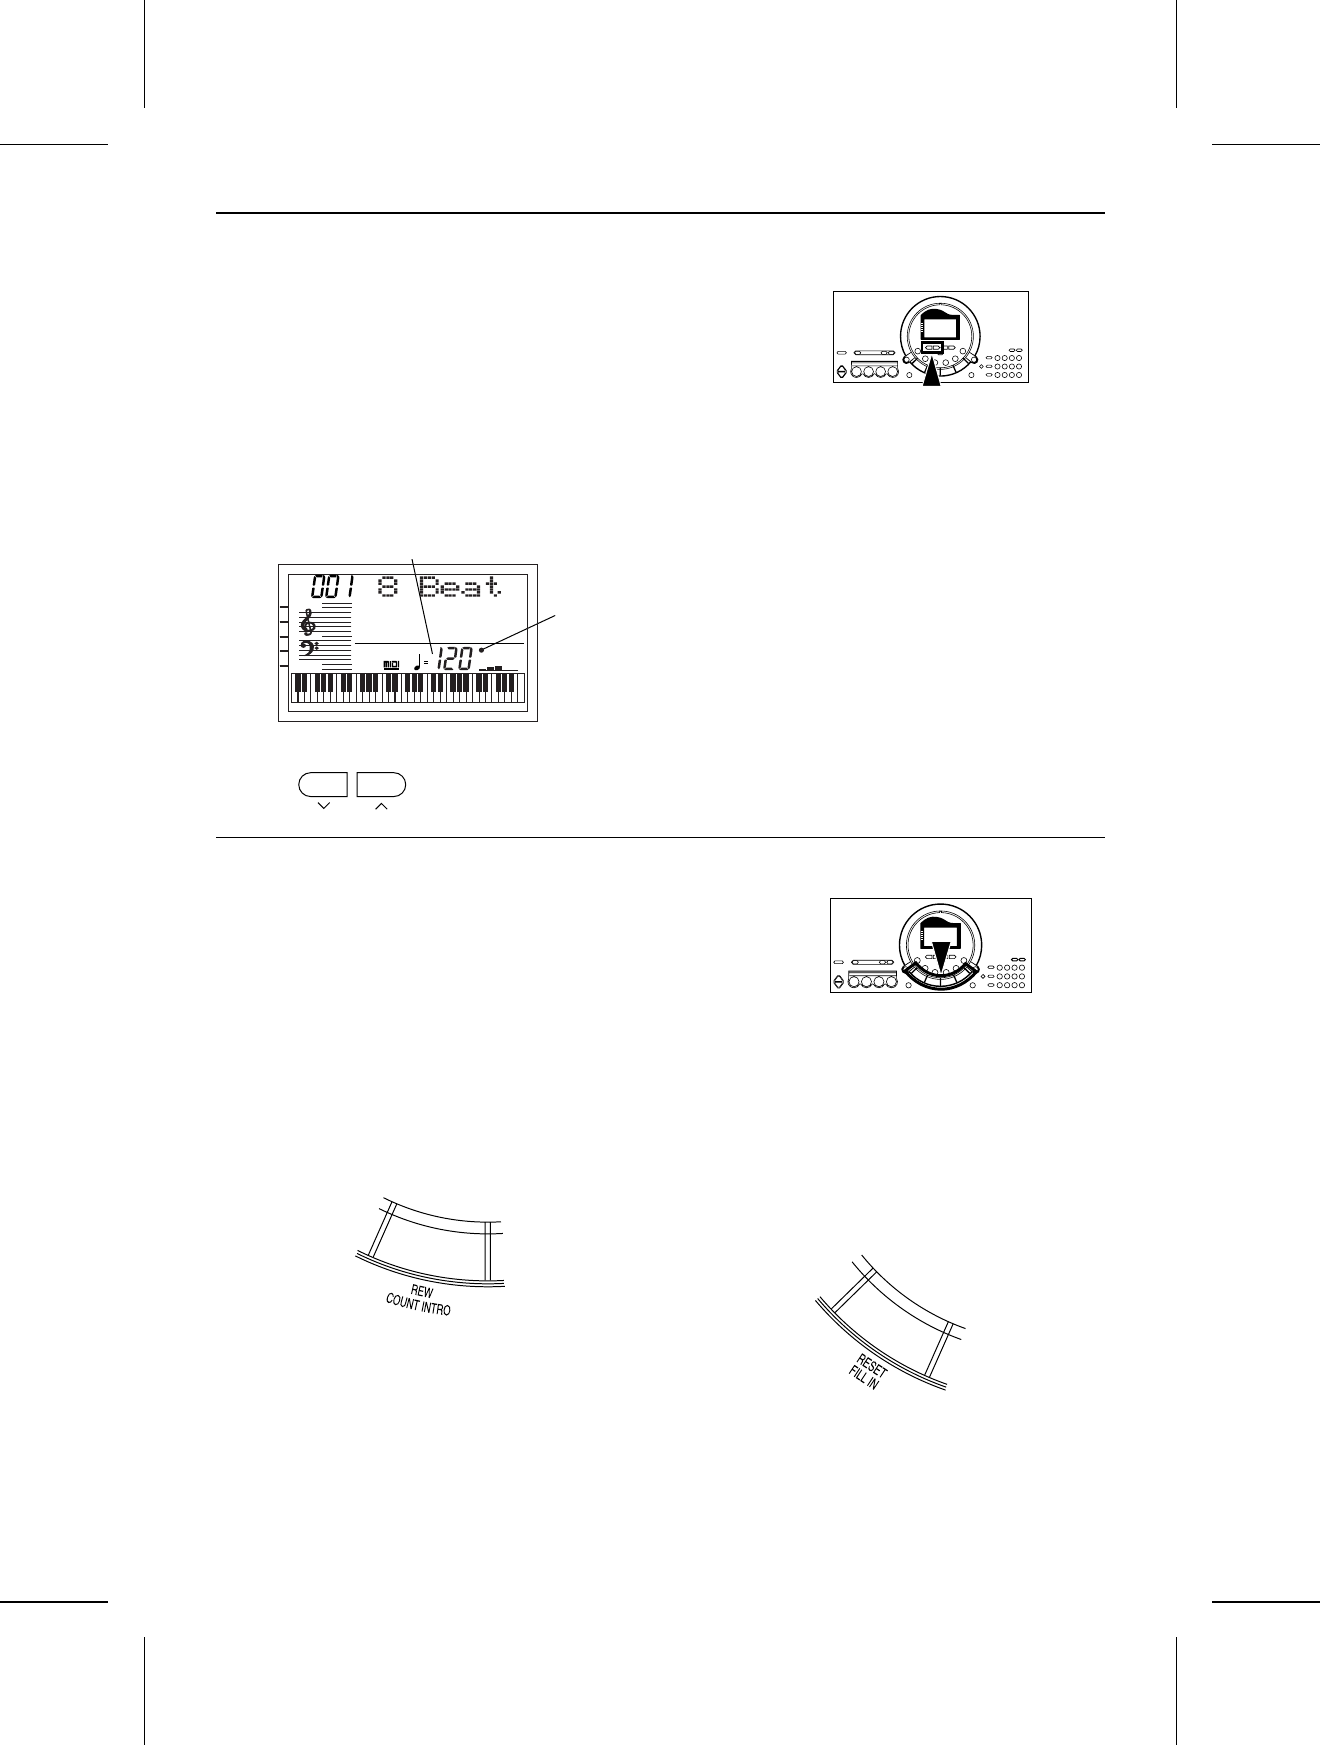
Tempo
The tempo of the rhythm pattern is adjusted with the TEMPO buttons.
⇒Press the right button for a faster tempo, and the left
button for a slower tempo (q=40 – 300).
•Press both buttons at the same time to reset the tempo
to the standard q=120.
•The tempo is shown on the display.
•The beat is indicated to the right of the displayed
tempo.
•When “PROGRAM” appears on the display above the
buttons, these buttons are used for various settings
and cannot be used to adjust the TEMPO. To adjust
the TEMPO in this case, you must first exit the setting
mode.
Rhythm performance
Count and fill-in patterns are available for each rhythm.
COUNT INTRO
You can begin the rhythm performance with a one-
measure count.
1.Press the COUNT INTRO button to turn it on.
2.Press the START/STOP button to start the rhythm.
•A one-measure count is played, after which the normal
rhythm pattern begins.
FILL IN
You can insert a fill-in pattern any time during the rhythm
performance.
1.Select a rhythm and press the START/STOP button.
2.Press the FILL IN button.
•A fill-in pattern is heard immediately for the remainder
of the measure.
•When a FILL IN button is pressed on the last beat of
the measure, the fill-in pattern continues to the end of
the following measure.
TEMPO
PROGRAM
TEMPO
TRANSPOSE
VOLUME
TOUCH
SUSTAIN
HARMONY
APC
SYNCHRO
GENERAL
CHORD
RHYTHM
Tempo indication
Beat
indication
Part II Playing the rhythm
22
QQTG0598
Auto Play Chord
Simply by playing a chord on the keyboard, the AUTO PLAY CHORD function automatically plays an accompaniment
pattern which matches perfectly the selected rhythm. With a real accompaniment as a background, you can concentrate
on playing the melody.
⇒Choose from three ways of playing chords.
One Finger (1 Finger) mode
In the One Finger mode, a major chord can be played
just by pressing the key for its root note.
Minor, seventh and minor seventh chords are also easily
produced.
Fingered mode
In the Fingered mode, you specify the chord by playing
all the notes in the chord.
•Play at least three notes to specify the chord.
•If the CHORD FINDER procedure is used, you can
see the types of chords that can be specified and the
keys you press to play them. (Refer to page 25.)
Pianist mode
In the Pianist mode, the entire keyboard can be used to
specify chords (Fingered mode) for the automatic accom-
paniment; and the keyboard does not split.
•If the CHORD FINDER procedure is used, you can
see the types of chords that can be specified and the
keys you press to play them. (Refer to page 25.)
•When specifying chords, if you press a key a perfect
5th or more below the lowest note of the chord, the
BASS part becomes a pattern based on that note.
Example: C chord
minor chord seventh chord minor seventh chord
Play the root note plus a black key
to the left of it. Play the root note plus a white key
to the left of it. Play the root note plus a black key
and a white key to the left of it.
Example: Cm Example: C7 Example: Cm7
Part II Playing the rhythm
23
QQTG0598
How to use the AUTO PLAY CHORD
1.Select the desired rhythm and sound(s), and set the
tempo.
2.Press the AUTO PLAY CHORD button to turn it on.
•The mark next to the APC indication on the left
side of the display indicates that this function is on.
•The display looks similar to the following.
3.Use the TRANSPOSE/PROGRAM buttons to select
the chord mode (1 Finger, Fingered, Pianist).
•Perform this operation while the PROGRAM indication
is flashing on the display. After a few seconds, the
display returns to the previous display.
4.Start the rhythm.
5.Specify a chord.
•If the 1 Finger or Fingered mode was selected, specify
the chord on the keyboard section to the left of the
split point (C3). The split point can be changed. (Refer
to pages 28 and 30.)
•An accompaniment pattern in the specified chord is
automatically played.
•The specified chord is shown in the CHORD section
on the display.
•When you use the fill-in pattern, the automatic accom-
paniment is also used in these patterns.
•Once a chord is specified, it continues to play even
when the keys are released, until you specify another
chord.
6.To stop the automatic accompaniment, press the
START/STOP button.
•The AUTO PLAY CHORD is comprised of five parts
(ACCOMP [ACP] 1, 2 and 3, BASS and DRUMS), the
volume balance for each of which can be adjusted with
the PART VOLUME function. (Refer to pages 28 and
29.)
•In the 1 Finger or Fingered mode, if you specify a
chord without starting the rhythm, the root bass note
(R.BS) and the chord notes (CHRD) will sound. The
volumes of these parts can be adjusted with the PART
VOLUME function. (Refer to pages 28 and 29.)
•There is no automatic accompaniment pattern for the
METRONOME rhythm.
AUTO PLAY
CHORD
▲
TRANSPOSE
PROGRAM
Part II Playing the rhythm
24
QQTG0598
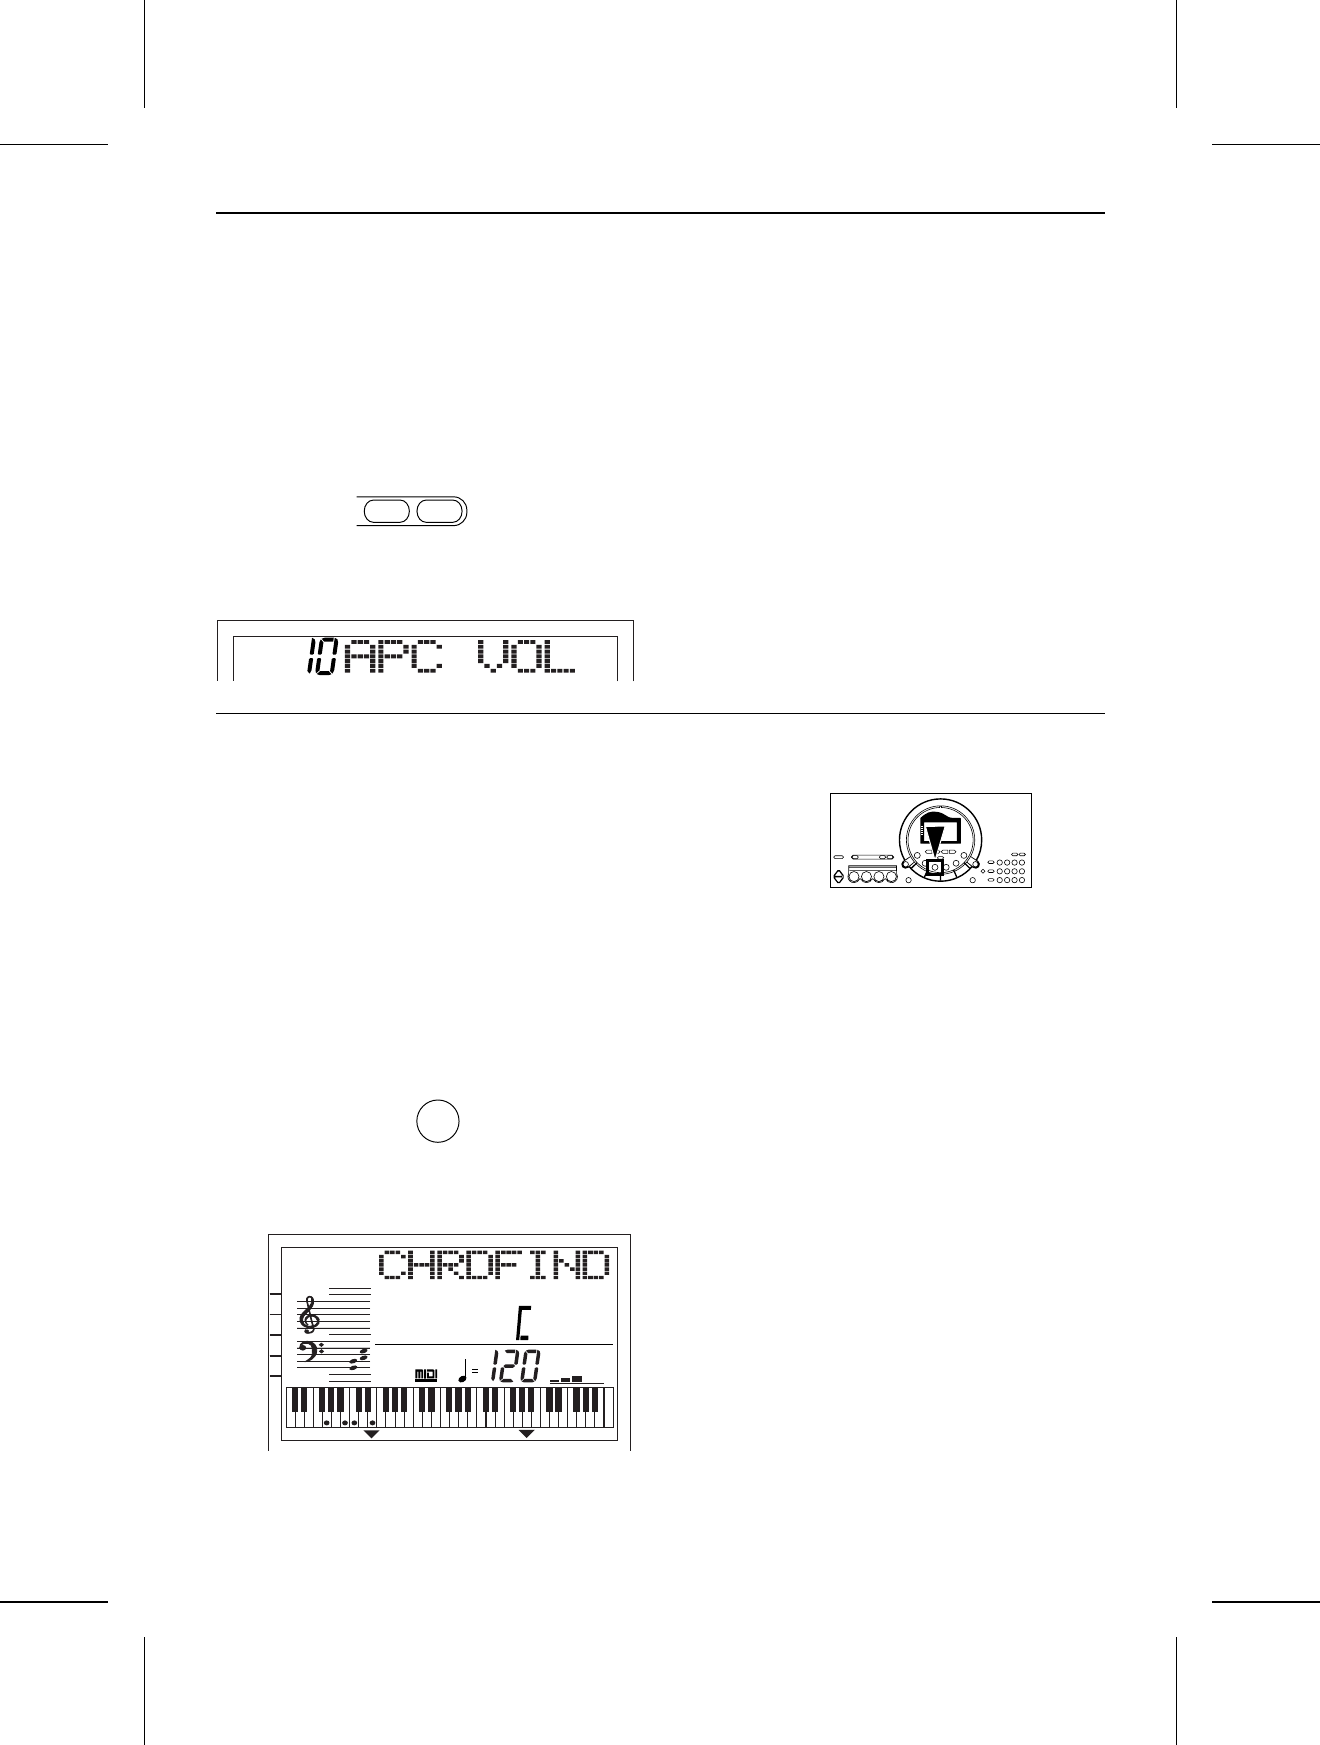
APC/SONG VOLUME
You can lower the volume of the automatic accompani-
ment to balance it with the volume of the sounds you
play.
•This setting also functions for the song playback
volume.
⇒Adjust the volume with the UP and DOWN buttons of
the APC/SONG VOLUME (0 to 10).
•The display looks similar to the following.
•A setting of 10 is the normal volume.
•After a few seconds, the display returns to the previous
display.
•After the volume setting is changed, the volumes of
all the parts other than the one you are playing (for
example, BEAT MASTER, etc.) are also changed.
Chord Finder
This feature shows you the keys to press for a specific chord. You may find this convenient when you don’t know how
to play certain chords indicated in the sheet music.
1.Select the chord mode. (Refer to page 24.)
•Select Fingered or Pianist.
2.Press the CHORD FINDER button to turn it on.
•The display looks similar to the following.
3.Use the TEMPO/PROGRAM buttons to specify the
chord’s root note, and the TRANSPOSE/PROGRAM
buttons to specify the chord type.
•On the display, the keys you press to play the specified
chord are indicated on the keyboard illustration.
•If you press the EXECUTE button, the selected chord
will sound.
4.Press the CHORD FINDER button again to turn this
function off.
APC/SONG
VOLUME
DOWN UP
CHORD
FINDER
TEMPO
TRANSPOSE
VOLUME
TOUCH
SUSTAIN
HARMONY
APC
SYNCHRO
GENERAL
CHORD FINDER
M
7
PROGRAM PROGRAM
Part II Playing the rhythm
25
QQTG0598
One Touch Play
ONE TOUCH PLAY automatically sets the sounds, etc. that match your chosen rhythm. Just by pressing a button you
can immediately perform using the automatic accompaniment.
•Note that when the automatic settings are executed, the previous settings are canceled.
1.With the rhythm stopped, select a rhythm pattern.
2.Press the ONE TOUCH PLAY button.
•Sounds and effects, tempo, etc. that match your
selected rhythm are automatically set, and the AUTO
PLAY CHORD and SYNCHRO START are turned on.
3.Play the keyboard.
•When you specify a chord, the automatic rhythm
begins to play immediately.
ONE TOUCH PLAY
Part II Playing the rhythm
26
QQTG0598
Party Pads
You can insert various phrases just by pressing the pad buttons.
Pad performance
You can use the four pad buttons to produce four different
sound effects.
•Playback will stop if you press the same pad button
again.
Select a bank
Four banks have been prepared so that you can play
sound effects that match the selected theme.
⇒Press the PARTY PADS BANK button to select the
desired bank on the display.
•The display looks similar to the following.
•Each time the button is pressed, the bank number
changes in order from 1 to 4.
•The list of PARTY PADS BANKS is found on the panel
above the pad buttons.
•After a few seconds, the display returns to the previous
display.
•Each pad produces a phrase that matches the selected
bank.
PARTY PADS / BEAT MASTER
1234
PARTY PADS
BANK
Part II Playing the rhythm
27
QQTG0598
Various settings that enhance the functions of this instrument are accessed through the MENU function.
Outline of the procedure
1.Press the MENU button.
2.Use the number buttons to enter the menu number of
the setting you wish to display (two digits).
•The + and – buttons and the TRANSPOSE/ PRO-
GRAM buttons can also be used to select the menu
number.
MENU list:
[ ] indicates the name shown on the display.
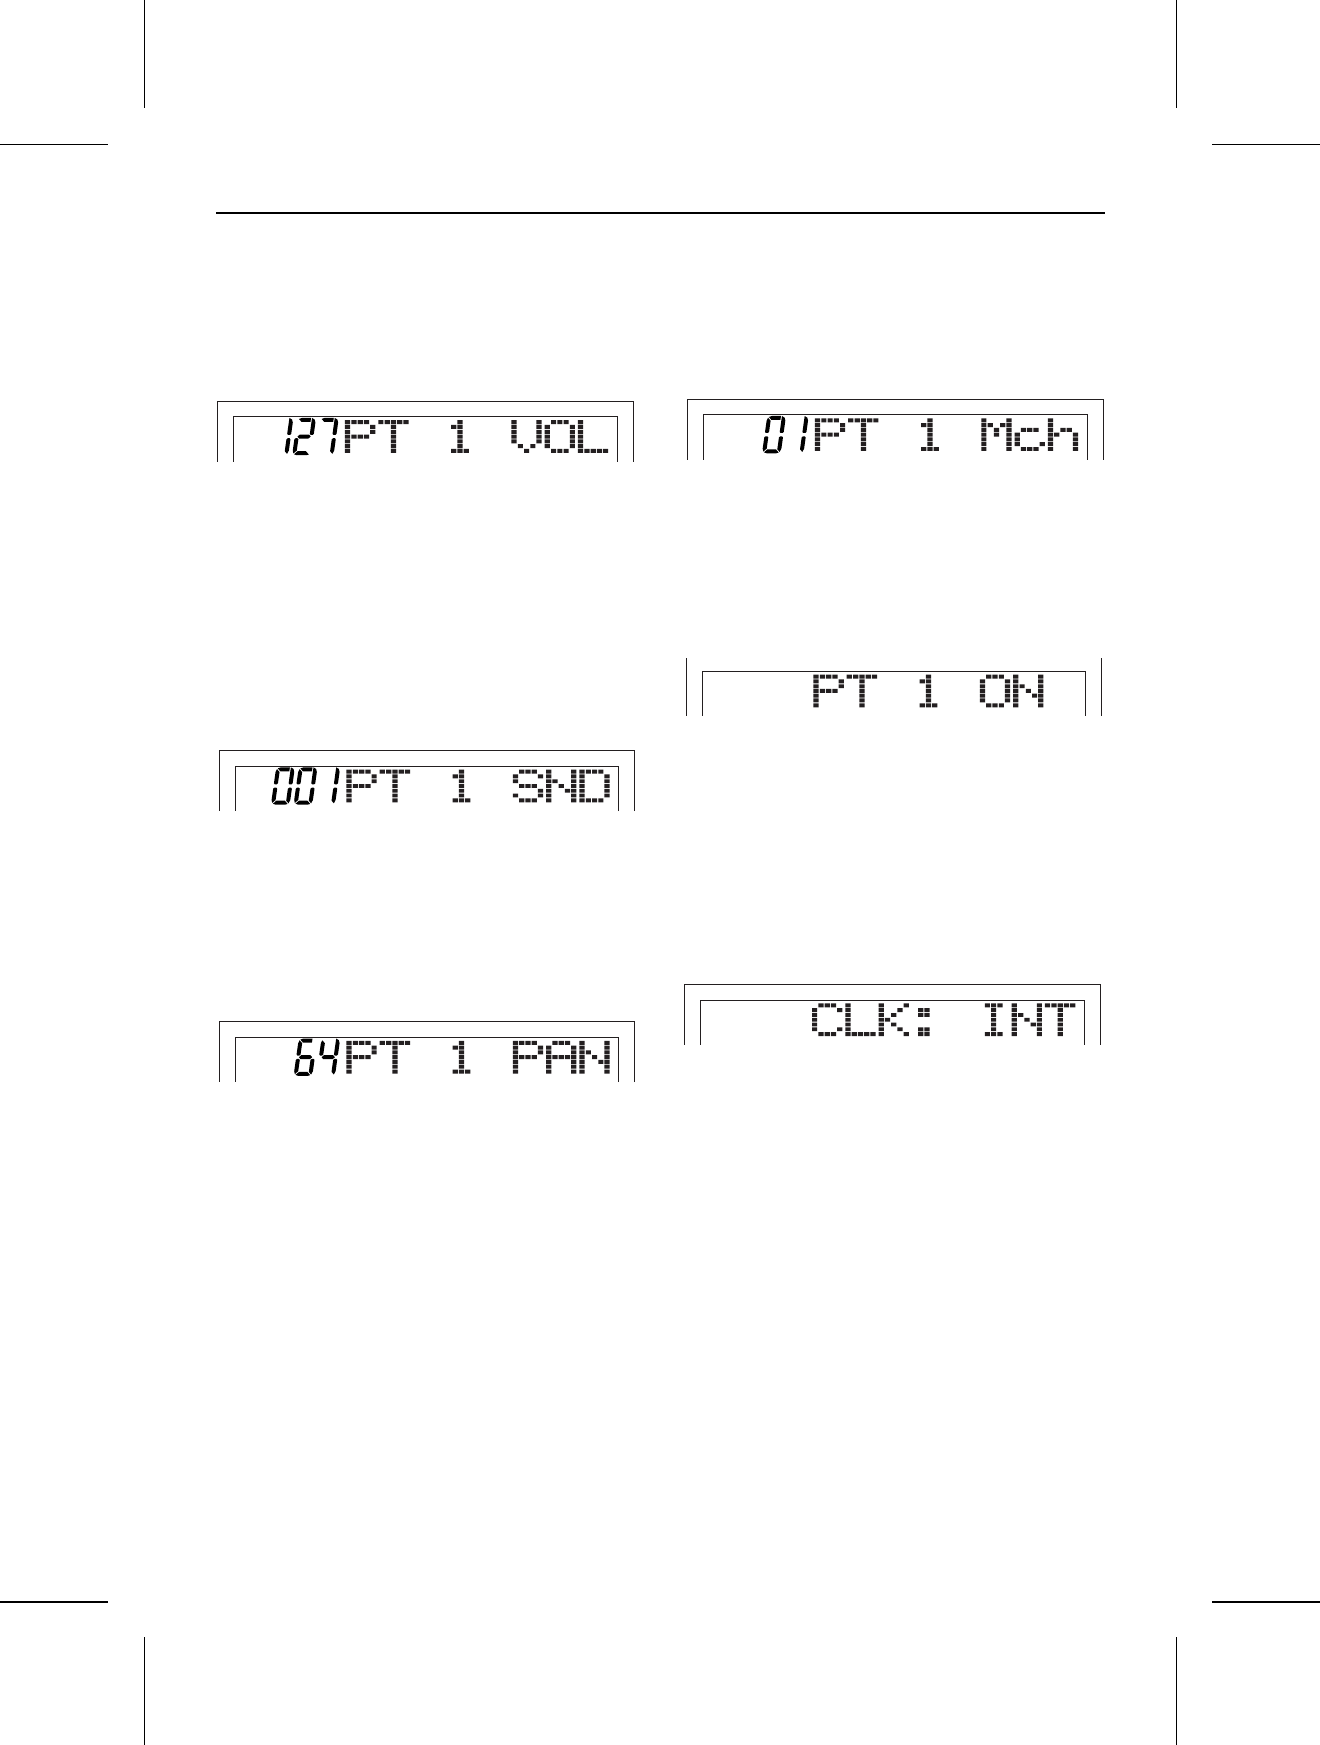
01: PART VOLUME [PT VOL]
Volume settings for each part.
02: PART SOUND [PT SOUND]
Sound settings for each part.
03: PART PANPOT [PT PAN]
Stereo setting for each part.
04: PART MIDI CHANNEL [PT MIDI]
MIDI channel settings for each part
05: PART LOCAL SETTING [PT LOCAL]
MIDI LOCAL CONTROL settings for each part.
06: MIDI CLOCK [MIDI CLK]
MIDI CLOCK mode settings.
07: MIDI REALTIME COMMAND [MIDI RTC]
Setting to enable or disable the transmission/re-
ception of MIDI REALTIME COMMAND data.
08: MASTER TUNING [TUNING]
Fine adjustment of the tuning for the whole in-
strument.
09: SPLIT POINT [SPLIT]
Change the split point on the keyboard.
10: FOOT SWITCH ASSIGN [FOOT SW]
Assign a function to the Foot Switch (sold sepa-
rately).
11: LCD CONTRAST [CONTRAST]
Adjust the readability of the display.
12: DEMO LED [DEMO LED]
ON/OFF settings for the LED lighting of the pad
buttons during a SONG or DEMO performance.
13: ALL INITIAL [ALL INIT]
Reset this instrument to the original settings.
3.Press the EXECUTE button.
•The display changes to the setting display for the
selected MENU.
4.Use the TEMPO/PROGRAM buttons, the TRANS-
POSE/PROGRAM buttons, or the EXECUTE button to
adjust the settings in the selected menu.
5.When you have finished making the settings, press
the MENU button again.
•If you execute a setting, there is also a menu to exit
the setting mode.
MENU
SOUND
RHYTHM
0 1 2 3
+ 4 5 6
— 7 8 9
CANCEL
TEMPO
PROGRAM
TRANSPOSE
PROGRAM
EXECUTE
0 1 2 3
+ 4 5 6
— 7 8 9
CANCEL
Part III Menu
28
QQTG0598
Setting menus
Select the desired setting menu (refer to page 28), and perform the corresponding settings.
PART VOLUME
1.Use the TRANSPOSE/PROGRAM buttons to select
the part you wish to set.
•PT is the abbreviation for part and ACP for ACCOMP.
•For an explanation of CHRD and R.BS, refer to page
24.
2.Use the TEMPO/PROGRAM buttons to adjust the
volume (0 to 127).
•Repeat these steps for each part as necessary.
PART SOUND
1.Use the TRANSPOSE/PROGRAM buttons to select
the part you wish to set.
2.Use the TEMPO/PROGRAM buttons or the number
buttons to select a sound for the part.
PART PANPOT
1.Use the TRANSPOSE/PROGRAM buttons to select
the part you wish to set.
2.Use the TEMPO/PROGRAM buttons to adjust the
stereo midpoint (0 to 127).
•At 0 the center is all the way to the left, at 64 the
center is midway between right and left, and at 127
the center is all the way to the right.
PART MIDI CHANNEL
1.Use the TRANSPOSE/PROGRAM buttons to select
the part you wish to set.
2.Use the TEMPO/PROGRAM buttons to set the channel
(OFF, 01 to 16).
PART LOCAL SETTING
1.Use the TEMPO/PROGRAM buttons to select the part
you wish to set.
2.Use the TRANSPOSE/PROGRAM buttons to set the
LOCAL CONTROL setting (ON or OFF).
•When set to OFF, the performance for the part is
transmitted as MIDI data but does not sound from this
instrument.
MIDI CLOCK
Use the TRANSPOSE/PROGRAM buttons to select the
MIDI CLOCK mode.
INT: This instrument’s internal clock is used to con-
trol the connected MIDI equipment.
EXT: The clock of the connected MIDI equipment is
used to control this instrument. (The tempo is dis-
played as “q= – – –”.)
•For information about MIDI connections, refer to page
32.
•The setting is always set to INT when the power to
this instrument is turned on.
MENU
MENU
MENU
MENU
MENU
MENU
Part III Menu
29
QQTG0598
MIDI REALTIME COMMAND
Use the TRANSPOSE/PROGRAM buttons to enable or
disable the transmission/reception of MIDI REALTIME
COMMAND data.
ON: REALTIME COMMAND (START/STOP, CON-
TINUE) data are transmitted/received.
OFF: REALTIME COMMAND data are not trans-
mitted/received.
MASTER TUNING
Use the TRANSPOSE/PROGRAM buttons to adjust the
tuning value (–38 – Center – +39).
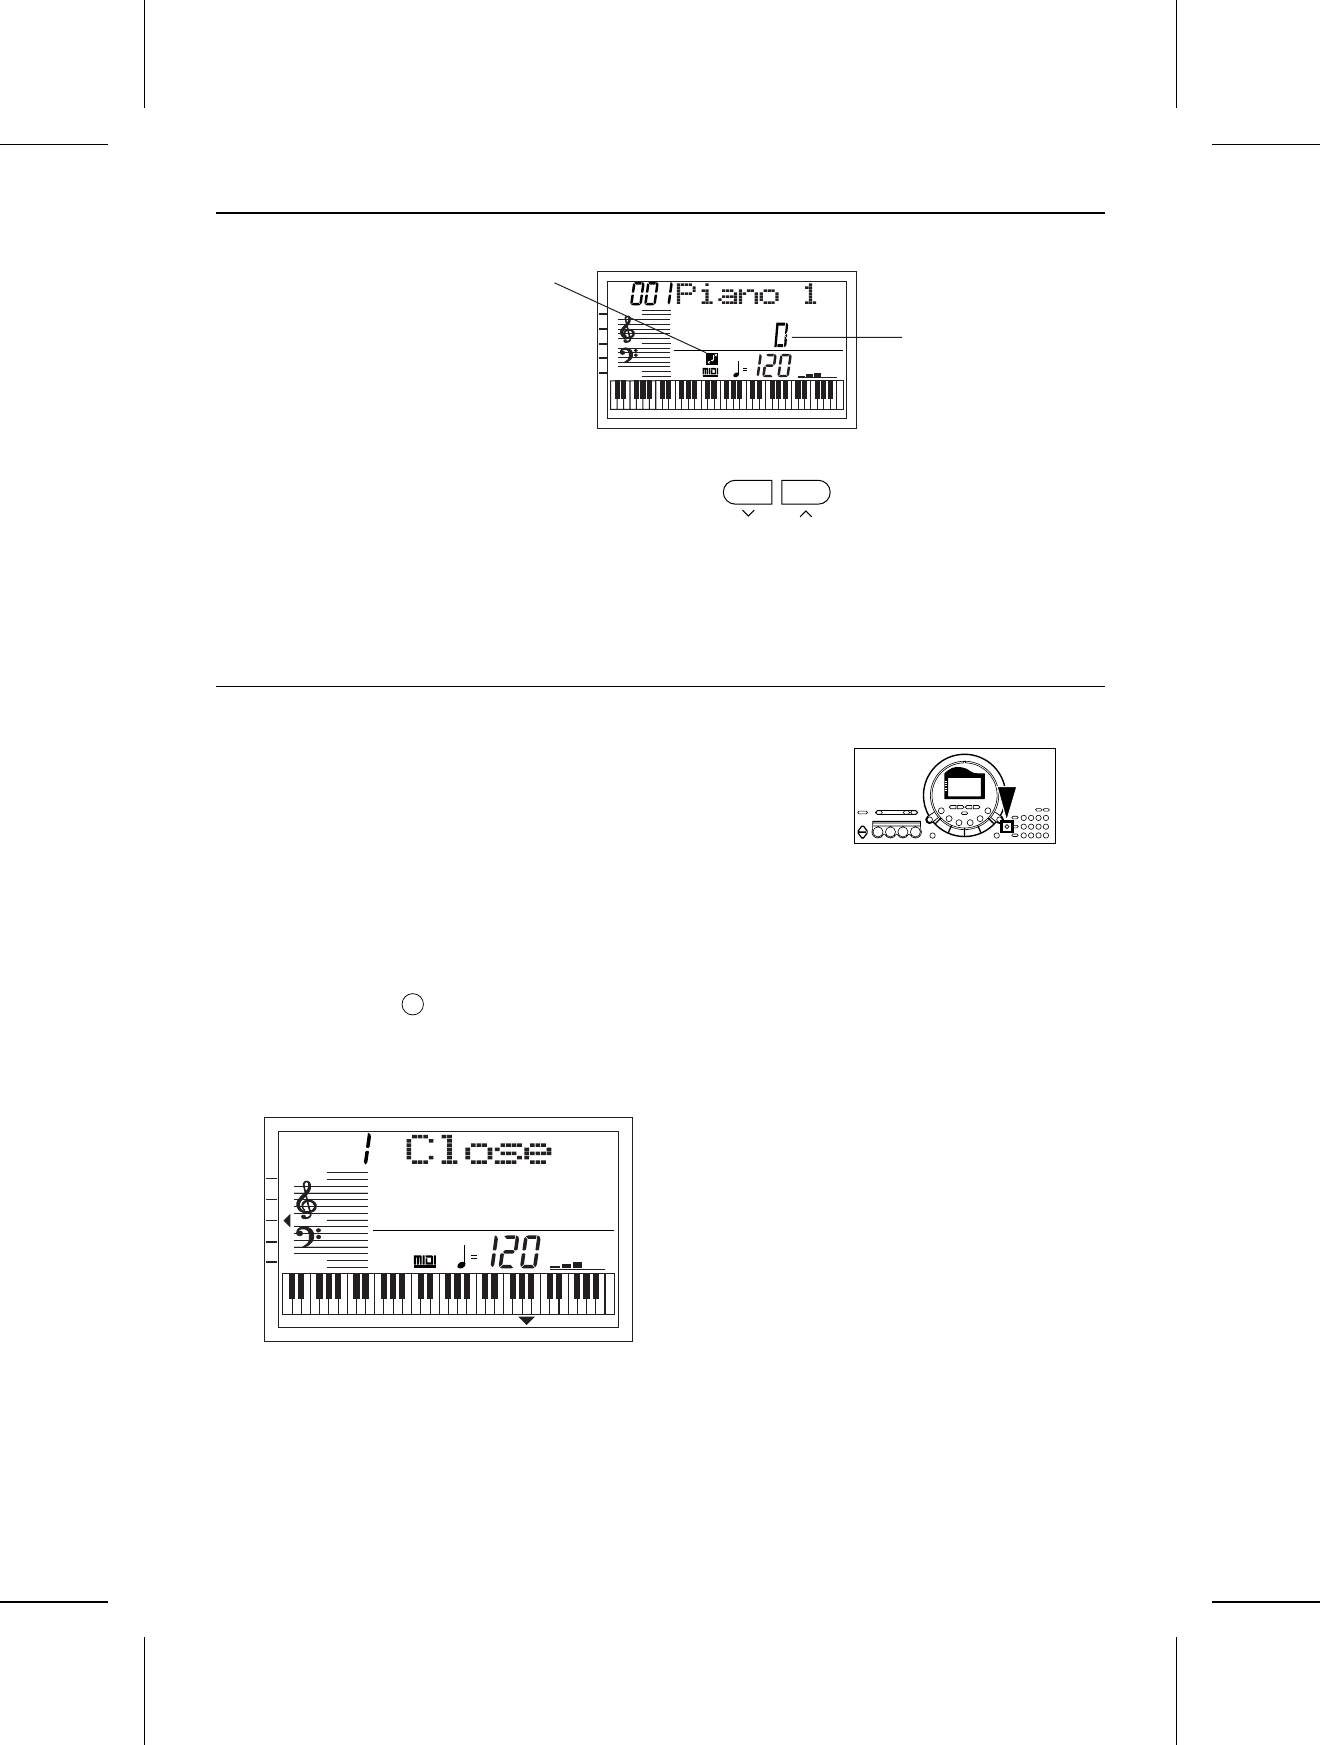
SPLIT POINT
Press the keyboard key to specify the desired split posi-
tion for the automatic accompaniment.
•The name of the specified note is shown on the display.
•The initialized setting is at C3.
•The key at the split point is the lowest note of the right
keyboard (melody) section.
•The split point for a SPLIT sound does not change.
DEMO LED
Use the TRANSPOSE/PROGRAM buttons to specify
whether or not the pad button LEDs light during a 100
SONG or DEMO performance.
ON: The pad button LEDs light also during a 100
SONGS or DEMO performance.
OFF: The pad button LEDs do not light during the
100 SONGS or DEMO performance.
FOOT SWITCH ASSIGN
Use the TRANSPOSE/PROGRAM buttons to select a
function to assign to the Foot Switch (separately sold
option).
•Select from SUSTAIN, START/STOP [ST/STOP] and
GLIDE.
•In cases where the switch polarity is reversed, select
a function name that is preceded by a “–” indication.
•Pressing the Foot Switch will turn the assigned function
on.
•GLIDE “bends” the pitch down by about one semitone.
•For information about connecting a Foot Switch, refer
to page 32.
LCD CONTRAST
Use the TRANSPOSE/PROGRAM buttons to adjust the
readability of the display (1 to 10).
ALL INITIAL
Press the EXECUTE button.
•“COMPLETE” appears on the display, and all the set-
tings of the instrument (except for MAIN VOLUME)
are reset to the factory-preset status.
•You can also reset the instrument with the following
procedure: While pressing the TEMPO ∧ and ∨ at
the same time, turn on the power to the instrument.
With this method, the MAIN VOLUME setting is also
initialized.
Memory function
The various settings and memory contents of this instru-
ment are maintained as long as the AC adaptor is con-
nected to this instrument and plugged into an outlet.
MENU
MENU
MENU
MENU
MENU
MENU
MENU
Part III Menu
30
QQTG0598
Symptoms which appear to be signs of trouble
The following changes in performance may occur in the Keyboard but do not indicate trouble.
Phenomenon Remedy
Sounds and effects
The buttons, keys, etc. malfunction. •Turn off the PLAY button once, then turn it on
again. If this procedure is not successful, turn off
the PLAY button once. Then, while pressing the
TEMPO ∧ and ∨ buttons at the same time, turn
the PLAY button on again. (Note that, in this case,
all programmable settings, functions and
memories return to their factory-preset status.)
No sound is produced when the keys are pressed. •The MAIN VOLUME is at the minimum setting.
Adjust the volume with the MAIN VOLUME
control.
•The volumes for the selected parts are set to the
minimum levels. Set the volumes of the relevant
parts to appropriate levels. (Refer to pages 28
and 29.)
•The LOCAL CONTROL for a part performed on
the keyboard is set to OFF. Set the LOCAL
CONTROL to ON. (Refer to pages 28 and 29.)
Only percussive instrument sounds are produced when
the keyboard is played.
•A DRUM KITS sound is selected.
Rhythm
The rhythm does not start. •The DRUMS volume is set to the minimum level.
Set the DRUMS volume to an appropriate level.
(Refer to the pages 28 and 29.)
•The 091 CLASSIC BALLAD rhythm is selected.
This rhythm does not sound unless the AUTO
PLAY CHORD is used.
•MIDI CLOCK is set to EXT. Set CLOCK to INT.
(Refer to pages 28 and 29.)
AUTO PLAY
CHORD
No sound is produced for the automatic accompaniment. •The APC/SONG VOLUME is set to the minimum
setting. Set it to a suitable level. (Refer to page
25.)
Other
Noise from a radio or TV can be heard. •This sometimes occurs when electrical equipment
such as a radio or TV is used near the instrument.
Try moving such electrical equipment further
away from the instrument.
•The sound may be coming from a nearby
broadcast station or amateur radio station. If the
sound is bothersome, consult your dealer or
service center.
The cabinet becomes warm during use. •This instrument has a power source that heats
the cabinet to some degree. This is not an
indication of trouble.
31
QQTG0598
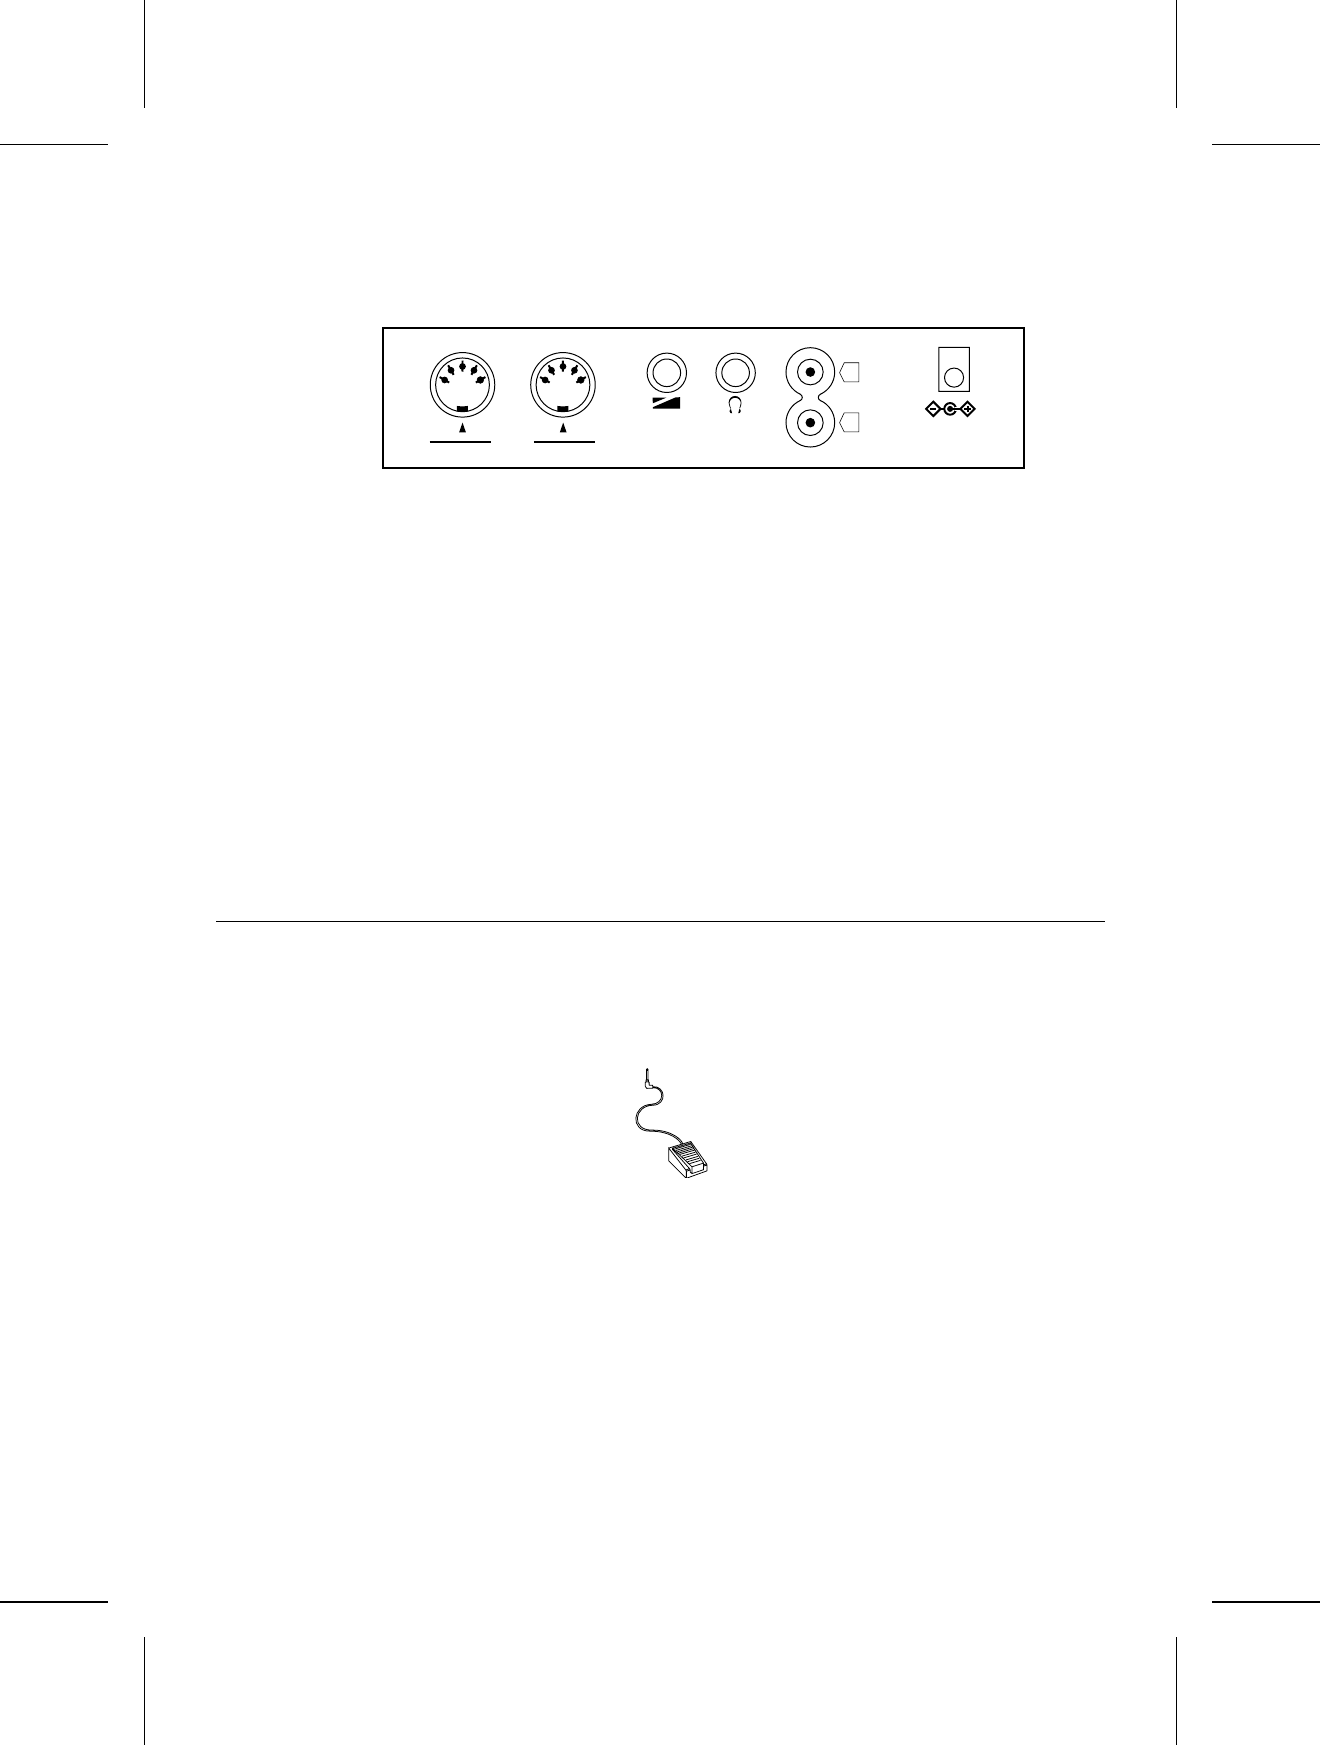
Connections
MIDI OUT
Used for transmitting MIDI data. Connect the other end
of the MIDI cable to the MIDI IN terminal of another in-
strument. This terminal is used, for example, to generate
sound from a connected instrument by playing this in-
strument.
MIDI IN
Used for receiving MIDI data. Connect the other end of
the MIDI cable to the MIDI OUT terminal of another in-
strument. This terminal is used, for example, to generate
sound from this instrument by playing a connected in-
strument.
AUX IN (stereo pin cord)
Connect to the LINE OUT terminal of another instrument
to this terminal. The sound from a connected CD player,
for example, can be output from this instrument’s
speakers.
FOOT SW
An optional SZ-P1 Foot Switch (sold separately) can be
connected to this terminal to control various functions.
(Refer to pages 28 and 30.)
PHONES/LINE OUT (output level 1.5 Vrms, 16 Ω)
Headphones, a keyboard amplifier, or stereo equipment
can be connected to this terminal. When another appara-
tus is connected to this terminal, the speaker system is
automatically switched off, and sound is heard only
through the connected device.
Separately sold option
FOOT
SW
OUT
MIDI
IN
AUX IN
DC IN
9V-10V
PHONES/
LINE OUT
L
R
Rear panel
SZ-P1 Foot Switch
32
QQTG0598

Index
A
ALL INITIAL . . . . . . . . . . . . . . . . . . . . . . . . . . . . . . . . . 30
APC/SONG VOLUME . . . . . . . . . . . . . . . . . . . . . . . . . . 25
AUTO PLAY CHORD . . . . . . . . . . . . . . . . . . . . . . . . . . 23
AUX IN . . . . . . . . . . . . . . . . . . . . . . . . . . . . . . . . . . . . . 32
B
BEAT MASTER . . . . . . . . . . . . . . . . . . . . . . . . . . . . . . . 14
C
CANCEL . . . . . . . . . . . . . . . . . . . . . . . . . . . . . . . . . . . . 18
CHORD FINDER . . . . . . . . . . . . . . . . . . . . . . . . . . . . . . 25
CLOCK (MIDI) . . . . . . . . . . . . . . . . . . . . . . . . . . . . . . . . 29
Connections . . . . . . . . . . . . . . . . . . . . . . . . . . . . . . . . . 32
COUNT INTRO . . . . . . . . . . . . . . . . . . . . . . . . . . . . . . . 22
D
DEMO . . . . . . . . . . . . . . . . . . . . . . . . . . . . . . . . . . . . . . 9
Display . . . . . . . . . . . . . . . . . . . . . . . . . . . . . . . . . . . . . 17
E
EXECUTE . . . . . . . . . . . . . . . . . . . . . . . . . . . . . . . . . . . 17
F
FF . . . . . . . . . . . . . . . . . . . . . . . . . . . . . . . . . . . . . . . . . 12
FILL IN . . . . . . . . . . . . . . . . . . . . . . . . . . . . . . . . . . . . . 22
FINGERED . . . . . . . . . . . . . . . . . . . . . . . . . . . . . . . . . . 23
FOOT SW . . . . . . . . . . . . . . . . . . . . . . . . . . . . . . . . . . . 30
Foot Switch . . . . . . . . . . . . . . . . . . . . . . . . . . . . . . . . . . 32
G
GLIDE . . . . . . . . . . . . . . . . . . . . . . . . . . . . . . . . . . . . . . 30
H
HARMONY . . . . . . . . . . . . . . . . . . . . . . . . . . . . . . . . . . 20
Headphones . . . . . . . . . . . . . . . . . . . . . . . . . . . . . . . . . 32
L
LCD CONTRAST . . . . . . . . . . . . . . . . . . . . . . . . . . . . . 30
LINE OUT . . . . . . . . . . . . . . . . . . . . . . . . . . . . . . . . . . . 32
LOCAL (MIDI) . . . . . . . . . . . . . . . . . . . . . . . . . . . . . . . . 29
M
MAIN VOLUME . . . . . . . . . . . . . . . . . . . . . . . . . . . . . . . 9
MASTER TUNING . . . . . . . . . . . . . . . . . . . . . . . . . . . . 30
MENU . . . . . . . . . . . . . . . . . . . . . . . . . . . . . . . . . . . . . . 28
MIDI . . . . . . . . . . . . . . . . . . . . . . . . . . . . . . . . . . . . . . . 32
MIDI CLOCK . . . . . . . . . . . . . . . . . . . . . . . . . . . . . . . . . 29
MIDI REALTIME COMMAND . . . . . . . . . . . . . . . . . . . . 30
MINUS ONE . . . . . . . . . . . . . . . . . . . . . . . . . . . . . . . . . 13
Music stand . . . . . . . . . . . . . . . . . . . . . . . . . . . . . . . . . . 8
O
ONE FINGER . . . . . . . . . . . . . . . . . . . . . . . . . . . . . . . . 23
ONE TOUCH PLAY . . . . . . . . . . . . . . . . . . . . . . . . . . . 26
Option . . . . . . . . . . . . . . . . . . . . . . . . . . . . . . . . . . . . . . 32
P
PAN . . . . . . . . . . . . . . . . . . . . . . . . . . . . . . . . . . . . . . . . 29
PART SETTING . . . . . . . . . . . . . . . . . . . . . . . . . . . . . . 29
PARTY PADS . . . . . . . . . . . . . . . . . . . . . . . . . . . . . . . . 27
PIANIST . . . . . . . . . . . . . . . . . . . . . . . . . . . . . . . . . . . . . 23
PLAY OFF/ON . . . . . . . . . . . . . . . . . . . . . . . . . . . . . . . . 9
R
RESET . . . . . . . . . . . . . . . . . . . . . . . . . . . . . . . . . . . . . . 12
REW . . . . . . . . . . . . . . . . . . . . . . . . . . . . . . . . . . . . . . . 12
RHYTHM . . . . . . . . . . . . . . . . . . . . . . . . . . . . . . . . . . . . 21
S
SOLO PIANO . . . . . . . . . . . . . . . . . . . . . . . . . . . . . . . . 18
SOUND . . . . . . . . . . . . . . . . . . . . . . . . . . . . . . . . . . . . . 18
Specifications . . . . . . . . . . . . . . . . . . . . . . . . . . . . . . . . 34
START/STOP . . . . . . . . . . . . . . . . . . . . . . . . . . . . . . . . 21
SUSTAIN . . . . . . . . . . . . . . . . . . . . . . . . . . . . . . . . . . . . 19
SYNCHRO START . . . . . . . . . . . . . . . . . . . . . . . . . . . . 21
T
TEMPO . . . . . . . . . . . . . . . . . . . . . . . . . . . . . . . . . . . . . 22
TEMPO/PROGRAM . . . . . . . . . . . . . . . . . . . . . . . . . . . 17
TOUCH . . . . . . . . . . . . . . . . . . . . . . . . . . . . . . . . . . . . . 19
TRANSPOSE . . . . . . . . . . . . . . . . . . . . . . . . . . . . . . . . 19
TRANSPOSE/PROGRAM . . . . . . . . . . . . . . . . . . . . . . . 17
Troubleshooting . . . . . . . . . . . . . . . . . . . . . . . . . . . . . . . 31
33
QQTG0598
Specifications
SX-KC211
KEYBOARD 61 KEYS (WITH INITIAL TOUCH)
SOUND GENERATOR PCM
MAX. POLYPHONY 24 NOTES
SOUNDS 150 SOUNDS
EFFECT TOUCH, SUSTAIN
HARMONY 10 TYPES
TRANSPOSE G – C – F#
RHYTHMS 100 RHYTHMS
RHYTHM CONTROLS SYNCHRO START, START/STOP, COUNT INTRO, FILL IN, TEMPO
PARTY PADS 4 PADS, 4 BANKS
AUTO PLAY CHORD MODE: ONE FINGER, FINGERED, PIANIST
MUSIC TRAINER BEAT MASTER (TRAINING, CHALLENGE), CHORD FINDER, PIANO
STYLIST, SOLO PIANO,
MINUS ONE, 100 SONGS
CONTROLS MAIN VOLUME, APC/SONG VOLUME, ONE TOUCH PLAY, EXECUTE,
MENU
DISPLAY CUSTOM LCD (WITH BACKLIGHT)
DEMO o
TERMINALS MIDI IN, MIDI OUT, FOOT SW, PHONES/LINE OUT, AUX IN
OUTPUT 5 W (2.5W × 2)
SPEAKERS 12 cm × 2
POWER REQUIREMENT DC IN 10 V (WITH EXCLUSIVE AC ADAPTOR)
POWER CONSUMPTION 4.4 W (WHEN POWER IS OFF BY THE PLAY BUTTON: 2 W)
DIMENSIONS (W × H × D) 96.0 cm × 14.6 cm × 37.8 cm (37-25/32’’ × 5-3/4’’ × 14-7/8’’)
NET WEIGHT 5.1 kg (11.2 lbs)
ACCESSORIES AC ADAPTOR, MUSIC STAND, SONG BOOK
•Design and specifications are subject to change without notice.
EXCLUSIVE AC ADAPTOR
PART NO. REGION VOLTAGE
QFAG016B TAIWAN, MALAYSIA, SINGAPORE, ETC. 120/220/230/240 V
QFAG033A NORTH AMERICA, MEXICO 120 V
QFAG034A UNITED KINGDOM 230 – 240 V
QFAG035A EUROPE, SOUTH AFRICA 230 V
QFAG036A AUSTRALIA, NEW ZEALAND 230 – 240 V
QFAG018B SAUDI ARABIA, KUWAIT, HONG KONG 120/220/230/240 V
QFAG026B ARGENTINA 120/220/230/240 V
34
QQTG0598
Demo Performance List
Axel F Theme from the paramount Motion Picture BEVERLY
HILLS COP by Harold Faltermeyer
Copyritght© 1984, 1985 by Famous Music Corporation
International Copyright Secured
All Rights Reserved
Cool Gig Technics Original
35
QQTG0598
ENGLISH
Matsushita Electric Industrial Co., Ltd.
Central P.O. Box 288, Osaka 530-91, Japan
QQTG0598A
Se0101S0
