PDF Created By PDFfiller How To Guide
User Manual:
Open the PDF directly: View PDF ![]() .
.
Page Count: 138 [warning: Documents this large are best viewed by clicking the View PDF Link!]

Fill in Documents Online
Fast. Easy. Secure.
Easy Step-by-Step Instructions

Guidebook
Table of Contents
PDF Document Editor 3
Erasing, Highlighting, Redacting and Drawing
46
Encryption and Security 41
Add Watermark, Images and Video
58
Search text in PDF
71
New Form and Document Creator
77
Sign
83
Add Fillable Fields
94
Host Fillable Forms
101
Forms Security and Authentication 104
Send Documents out to Be Signed 110
Signer Authentication and Security 116
Add Your Own Branding 120
Fill Forms Automatically 124
PDF Converter 130
Merge PDFs and Paginate 134
Collaborate and Versions
Audit Trail
24
39
Folders 12

Guidebook 3
PDF Document Editor
Add Text
Make major changes to a PDF document such as adjusting content and
document formatting.
Type and insert text anywhere on a PDF document. Click where you need to add text and
start typing.
To format text, use this toolbar :
A. Change font
B. Change text size
C. Apply bold formatting
D. Italicize
E. Underline
F. Normal / Extended font
G. Color
H. Link text to a webpage
A B
C
D F H
GE

Guidebook 4
If the beginning of the word you are typing matches the first letters of a word or a phrase that
you’ve already entered in the current or any other document, those words or phrases will appear
below.
To save time, select the phrase you need instead of typing it again.
Spellchecker
The spellchecker checks only what you type and underlines misspelled, unknown or uncapitalized
words.
You can activate the spellchecker at any time before or after you start typing.
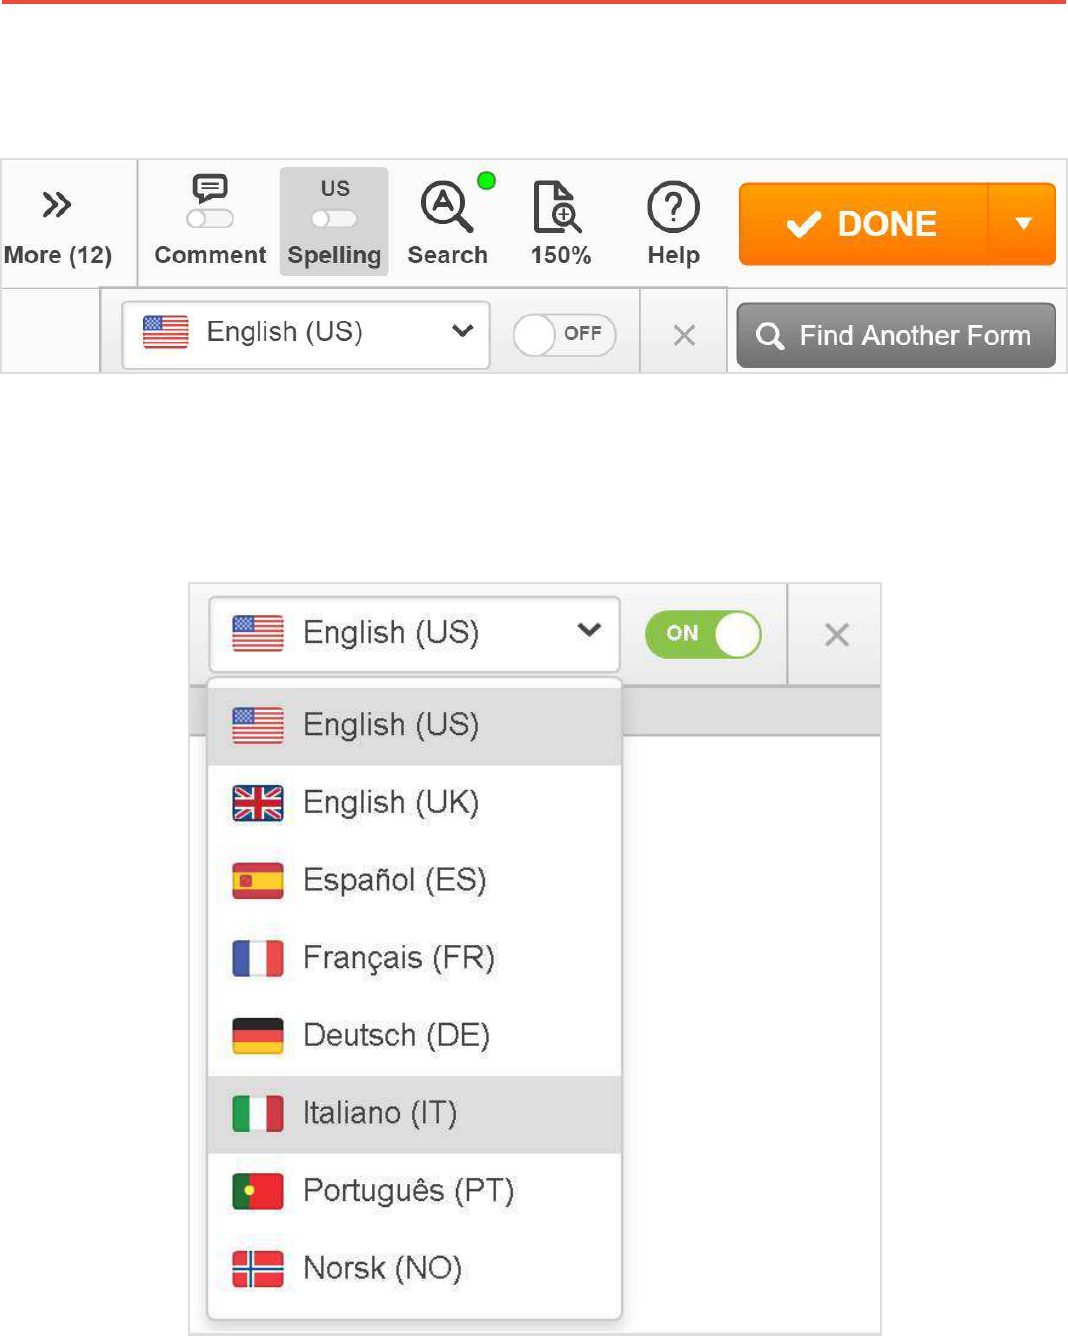
Click the Spelling icon in the main toolbar.
Guidebook 5
The spellchecker panel will appear below the main toolbar, just click on the toggle.
Apart from English, you can check French, German, Italian, Norwegian, Portuguese and Spanish
texts. Select the language you need from the dropdown list.
Guidebook 6
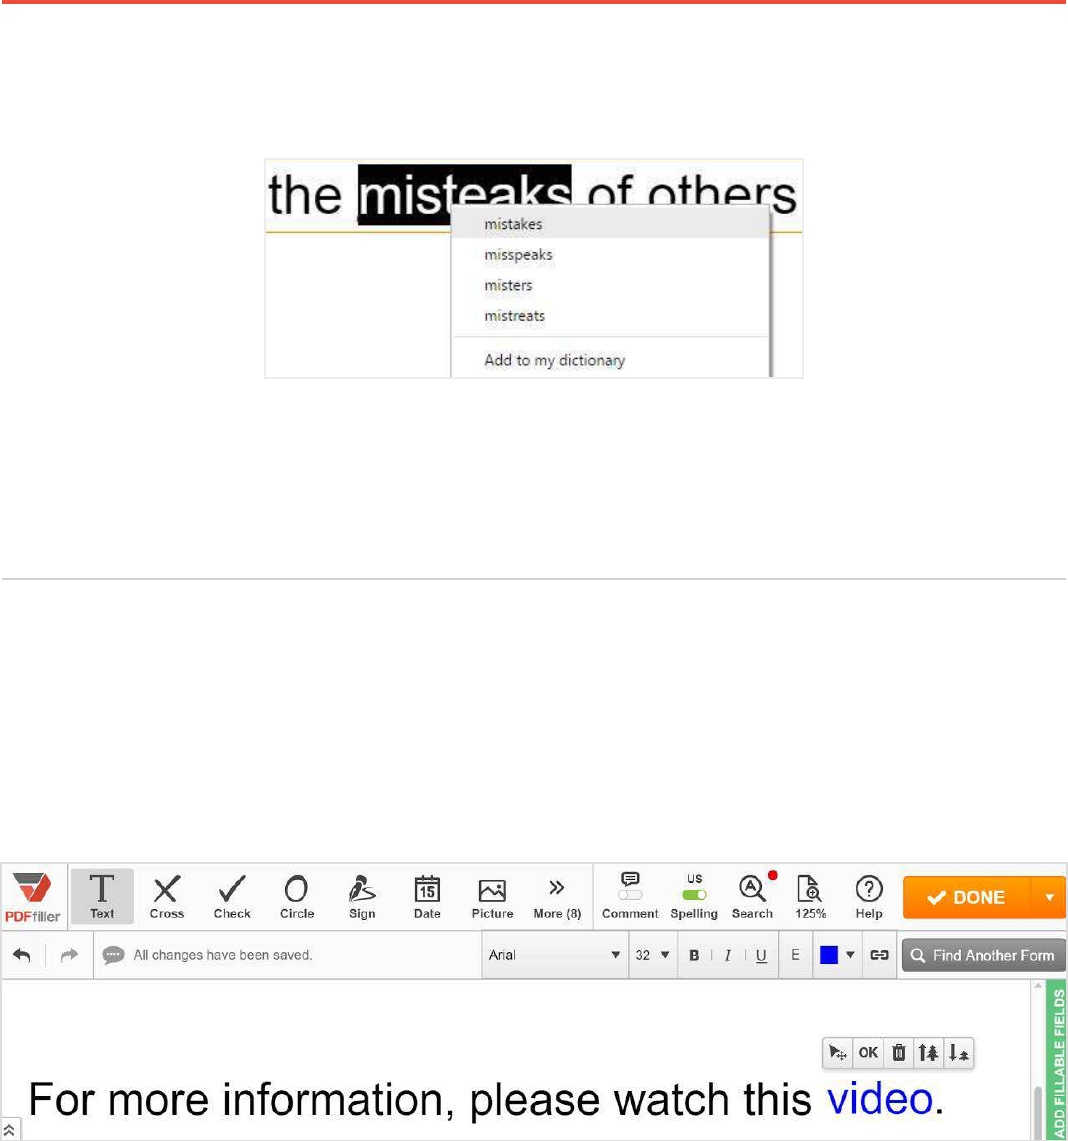
To correct a word, right-click it and choose a replacement from the dropdown list.
The spellchecker underlines words that it does not recognize. If the word is spelled correctly, you
can add it to your dictionary. The spellchecker will recognize it the next time you type it.
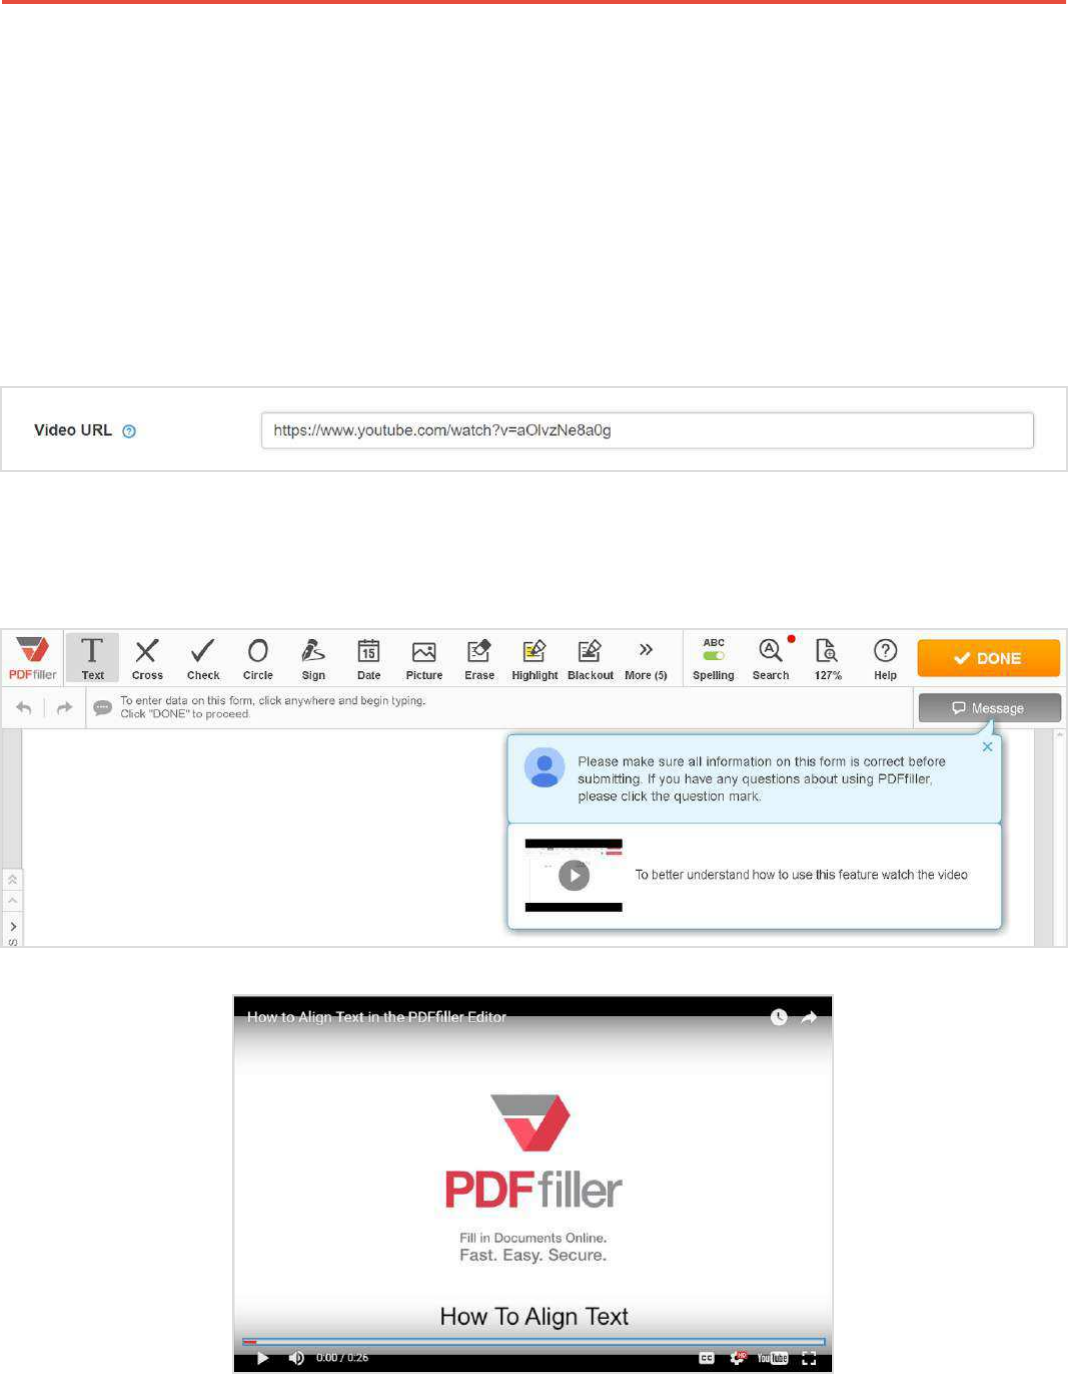
Linking Videos to Documents
Add instructional, marketing or welcome videos to your documents.
Open a document, type a phrase that you want to link to the video and click the Hyperlink icon.
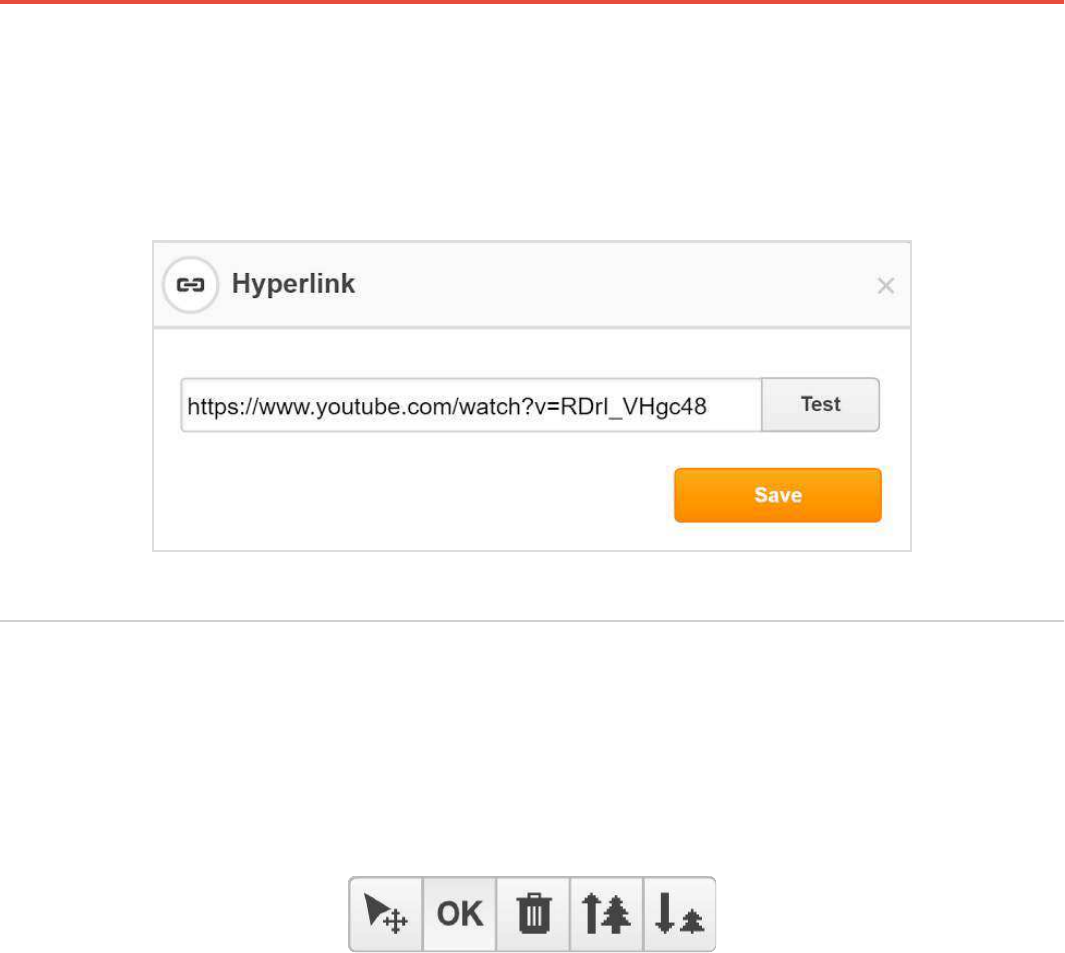
Guidebook 7
In the dialog window that will open, insert the URL address of the video and press Save.
Please note that the video must be published on Youtube. Whoever opens the document will be
able to watch the video.
Mini Toolbar
The mini toolbar appears above any content you add to the document including text, checkmarks,
pictures, etc.
To change the position of the content, click the arrow icon and, while holding down the mouse
button, drag the content where you need to place it. OK confirms your action and activates the
Text tool. To resize the content, use the tree icons. To delete content, click the trash can icon.
Guidebook 8
Add a Checkmark
Select the checkmark, “X” or circle in the main toolbar and click where you would like to place it.
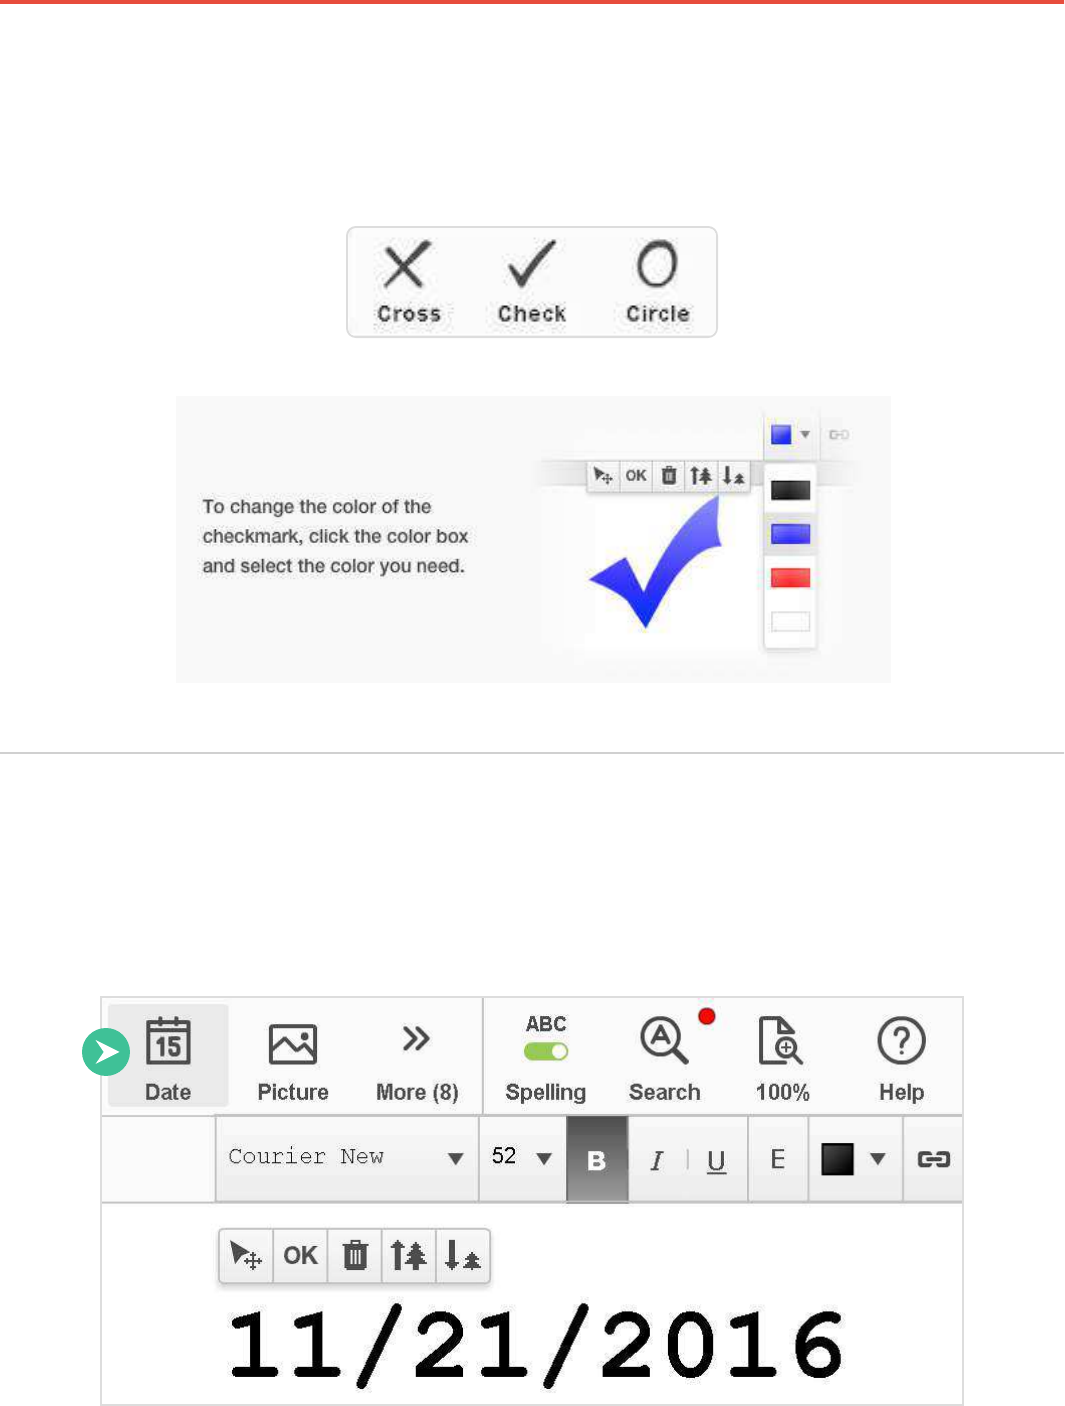
Add the Date
Click the Date icon in the main toolbar and click where you want to place the date. The current
date appears by default. You can change it to any date you want.
Guidebook 9
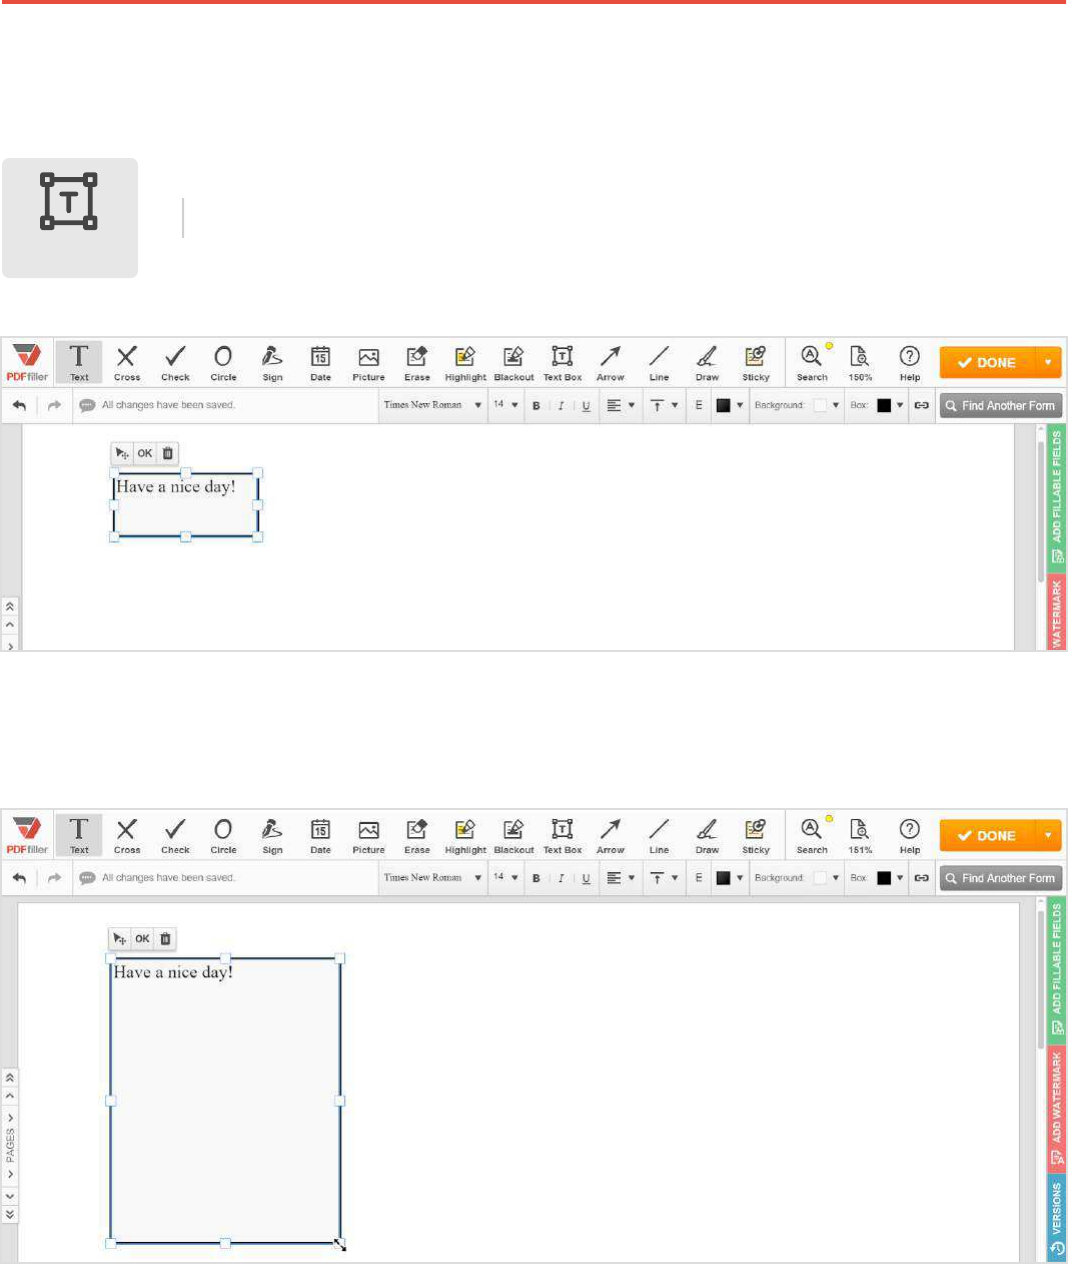
Add a TextBox
Select the Textbox icon in the main toolbar, click where you want to
place the text box and type your comment.
Textbox
To resize the text box, drag its corners or edges.

Guidebook 10
Change the vertical and horizontal alignment of the text using the vertical and horizontal
alignment tools.
To change the background color, click the Background icon and select the color from the palette.

Guidebook 11
To change the color of the borders, click the Box icon and select the color from the palette.
Guidebook 12
Folders
Creating Folders and Subfolders
To optimize your workflow, you can create folders and organize your
documents more effectively.
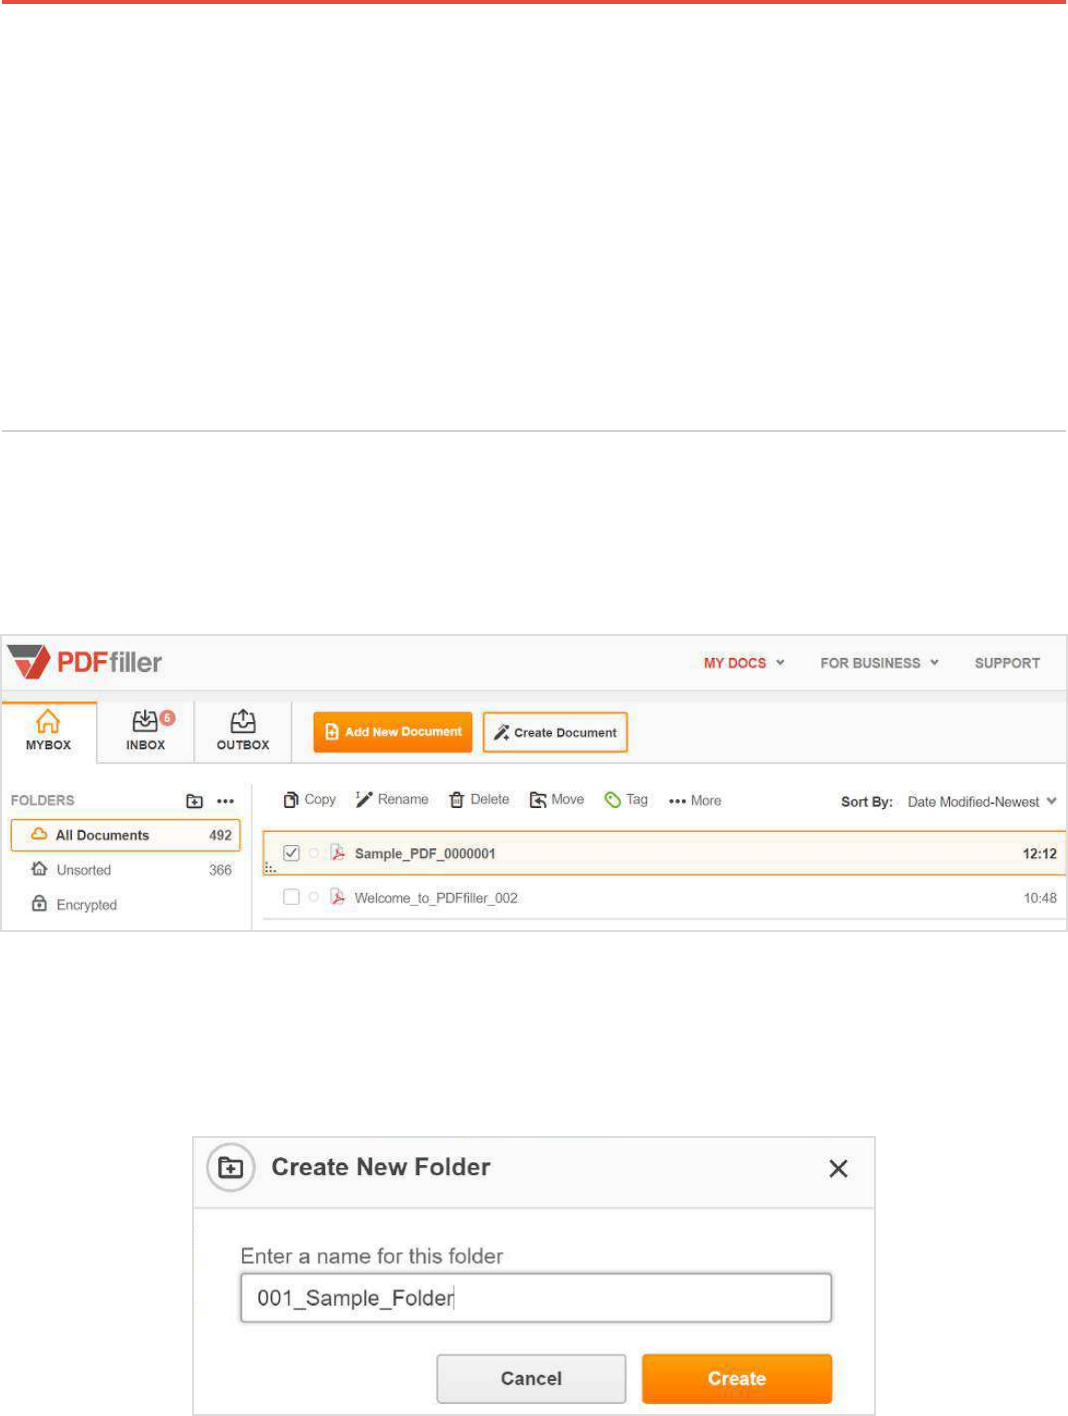
To create a folder, go to MY DOCS > MYBOX and click the folder icon.
In the dialog box that will open next, type in a name for the new folder, for instance
001_Sample_Folder, and press Create.
Guidebook 13
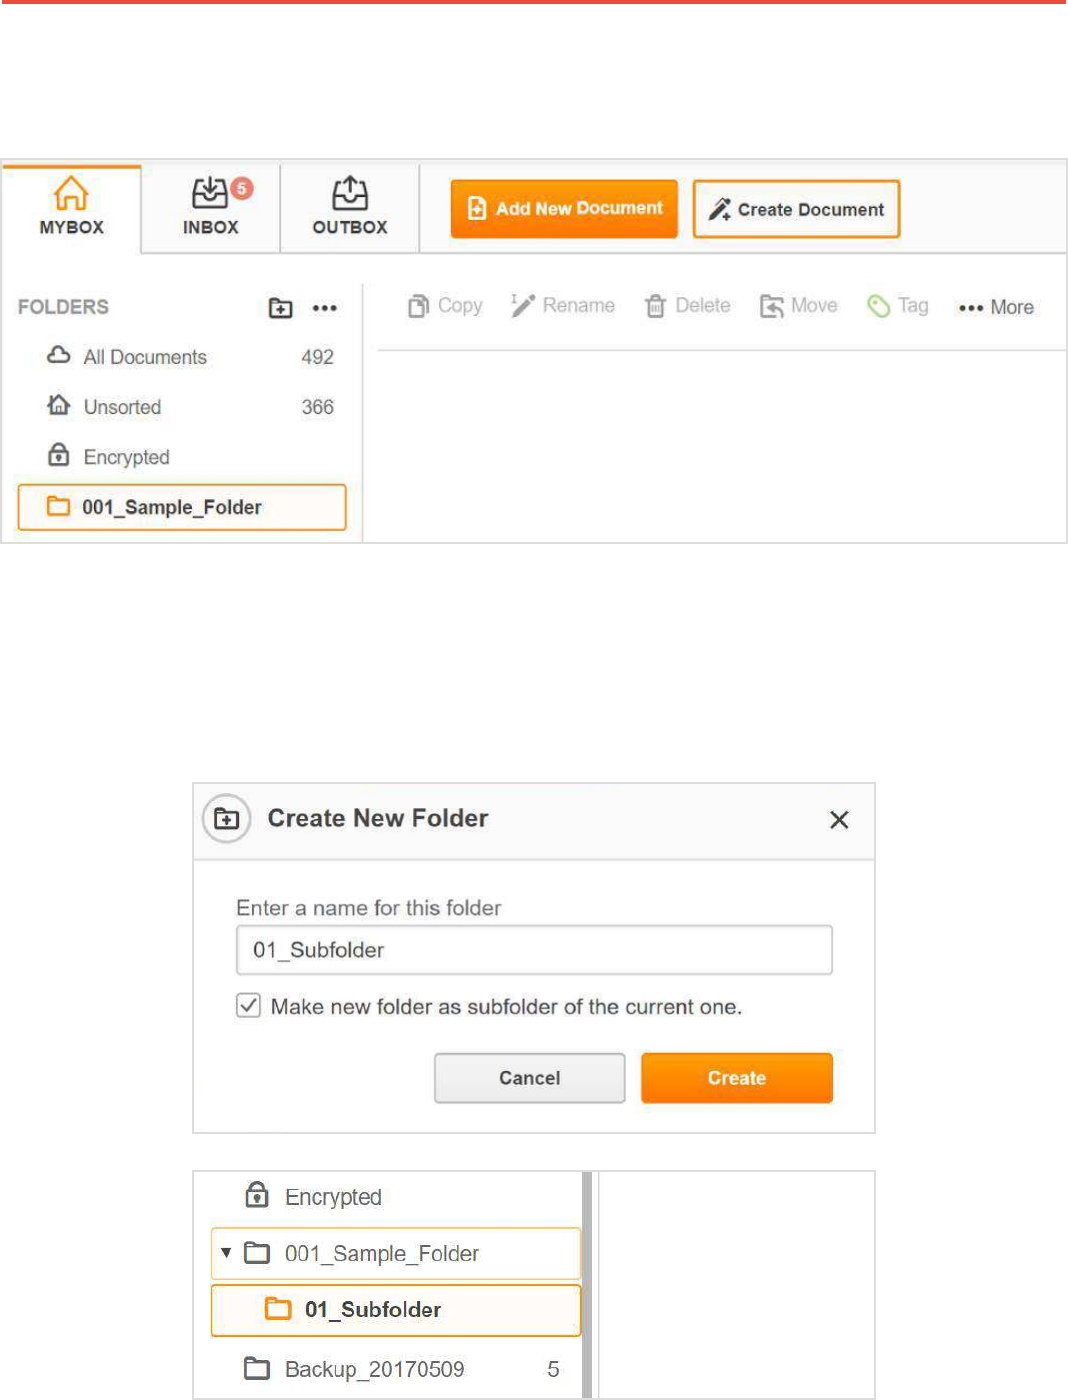
The newly created folder will be placed alphabetically among the other folders.
To create a subfolder, select the parent folder and click the folder icon above. In the dialog box,
enter a name for the new subfolder, for instance 01_Subfolder, check the box under the name,
and press Create.
Guidebook 14
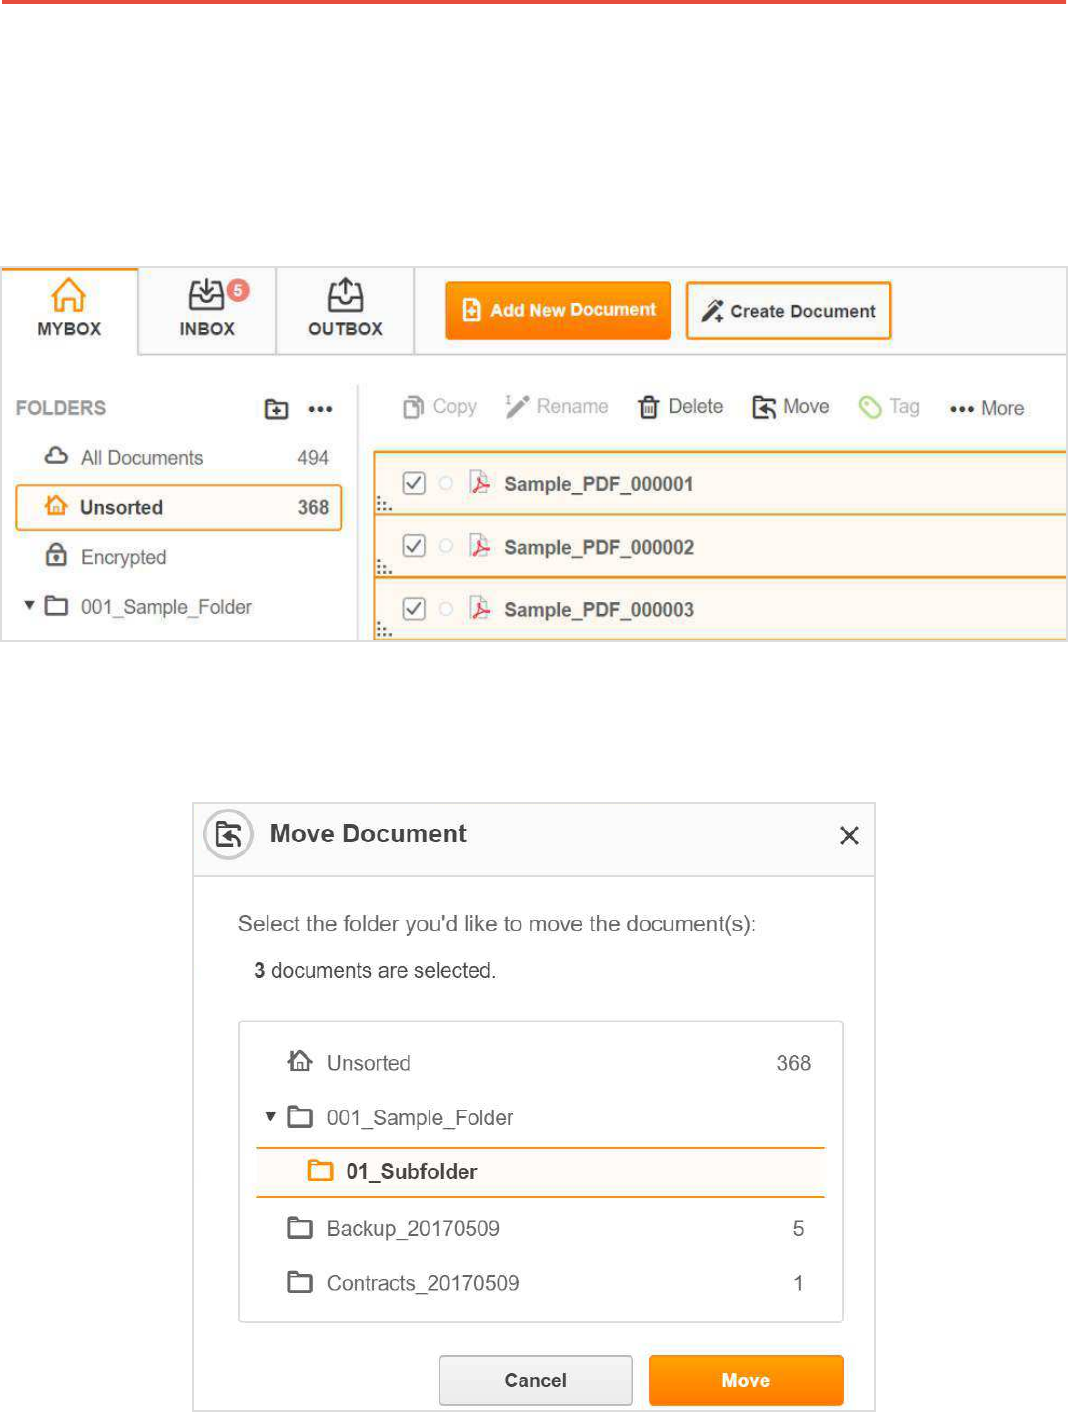
Moving Documents
You can easily move any document to any folder.
First, select one or more documents that you want to move and click Move.
Then, select the destination folder and press the Move button.

Guidebook 15
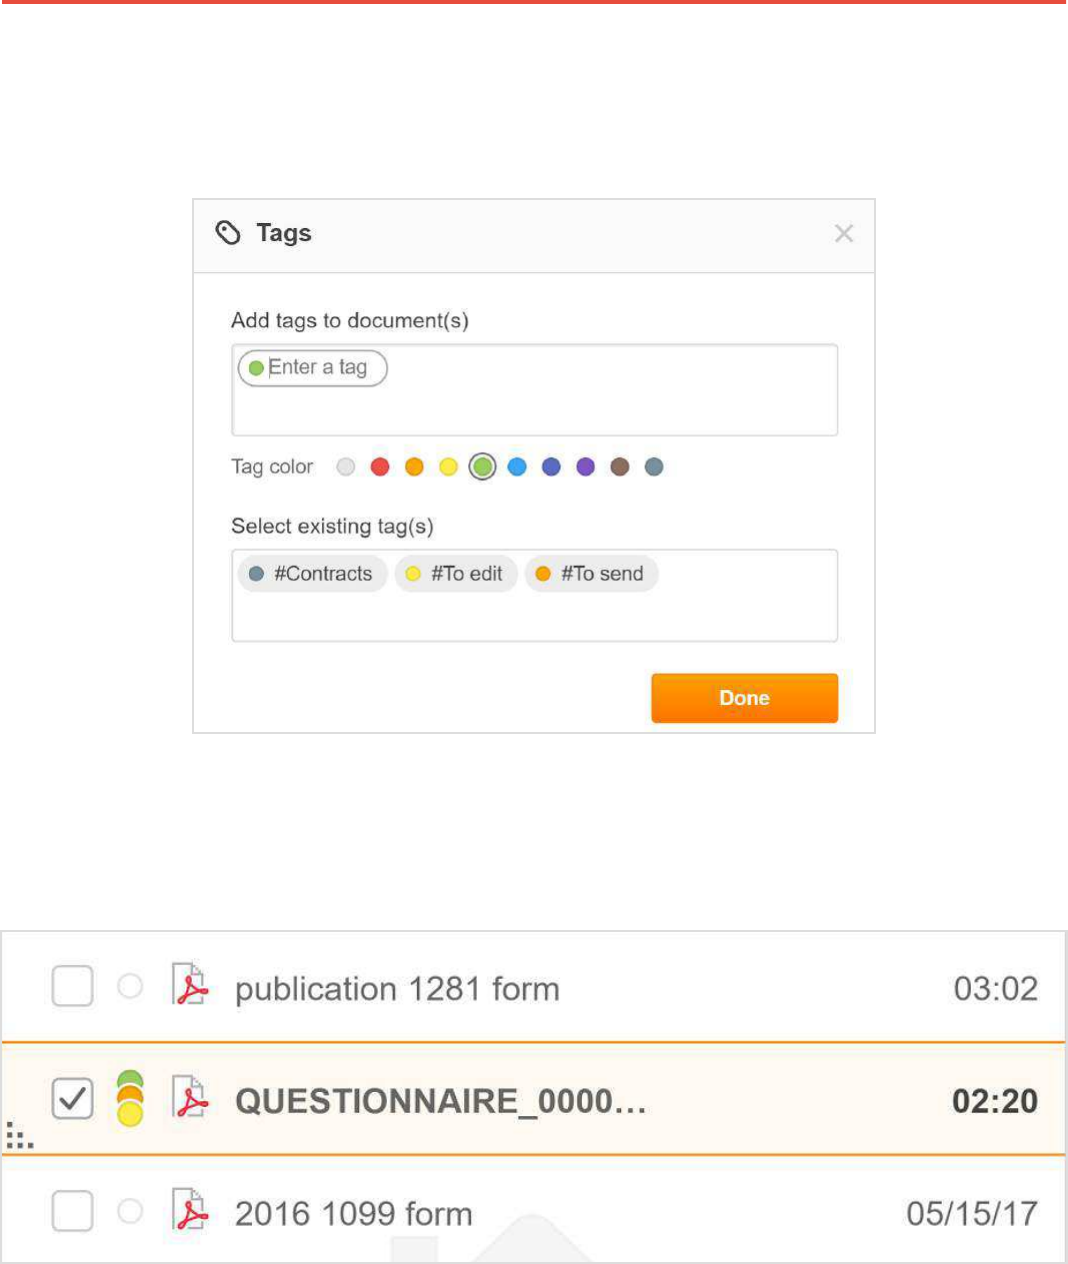
Tagging Documents
You can attach color-coded tags to your documents. Tagging enables you to group documents
into categories and makes search for documents easier. To add a tag, select the document and
click the Tag icon above or the dot next to the document’s name.
Guidebook 16
You can create a new tag or attach an existing one. To create a new tag, select a color dot and
enter a name for the new tag. To attach an existing tag, select it from the list.
You can attach more than one tag to any document by repeating these steps. Press Done to close
the dialog box.
Guidebook 17
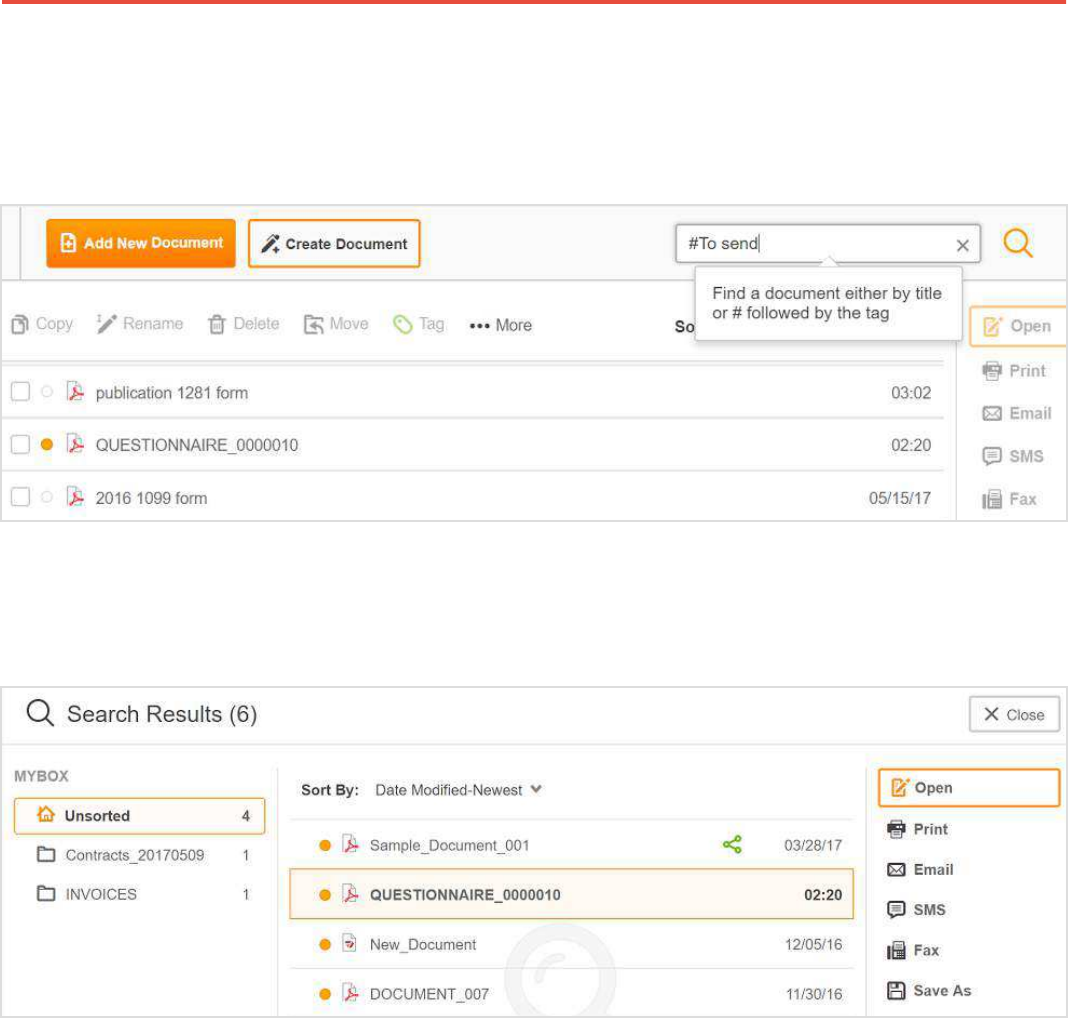
To find documents with the same tag, click the search icon, enter # followed by the tag name, and
press Enter on your keyboard.
Documents with the same tag will appear in the search results.

Guidebook 18
Preview
Using the Preview feature, you can find documents much faster because you don’t have to open them.
To open the preview pane, click Show Preview on the right.
To see the previous or the next page, click < or > respectively.
Guidebook 19
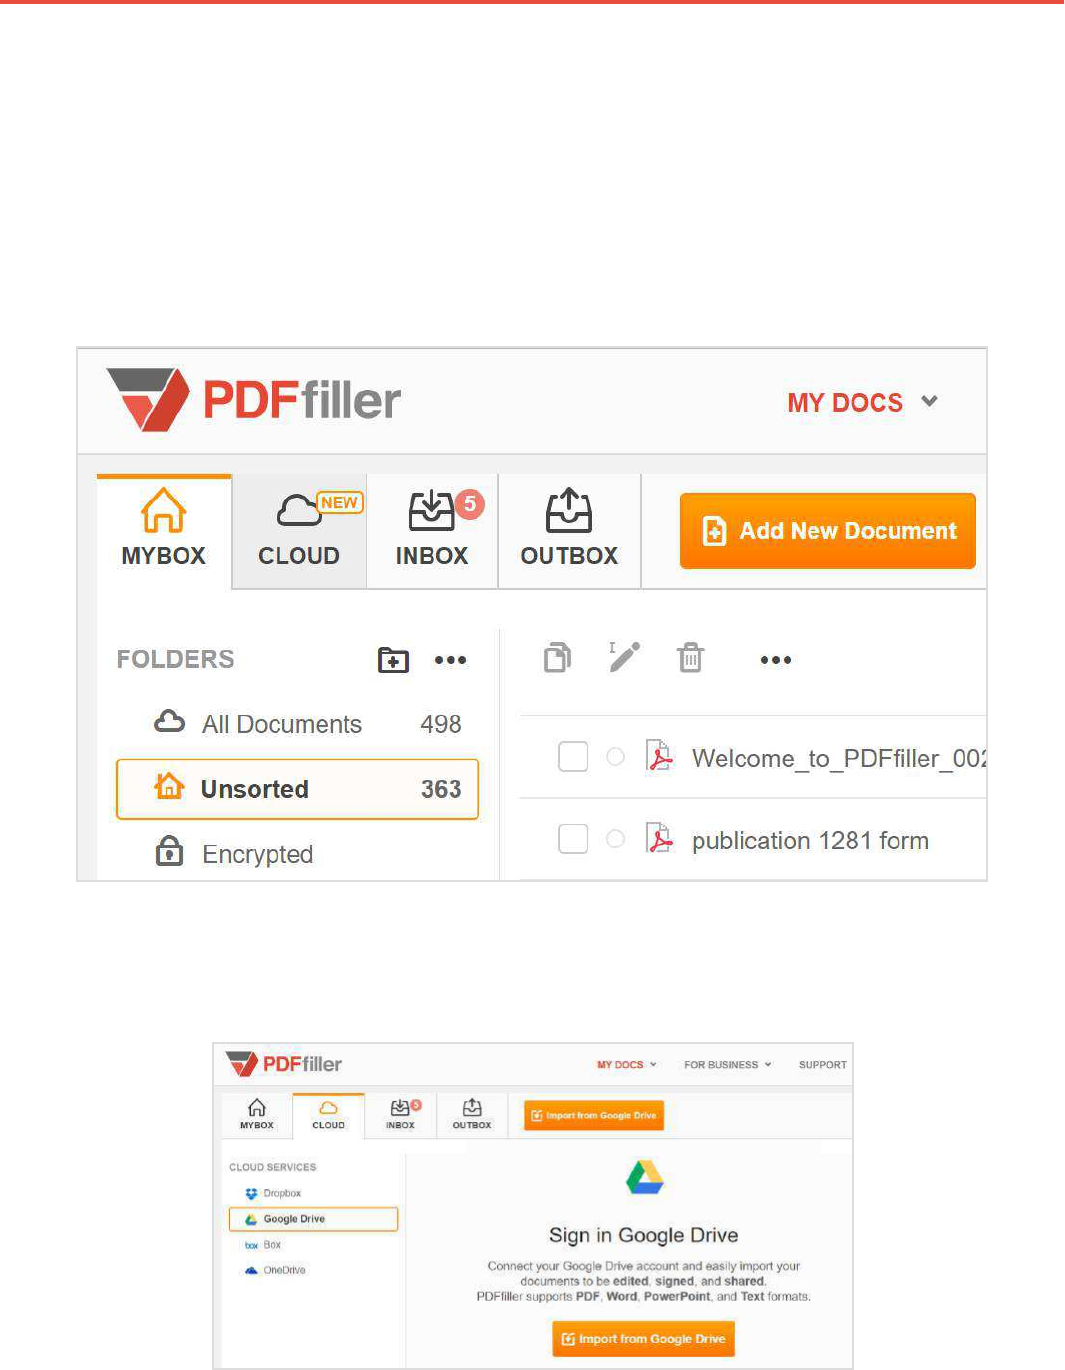
Importing Documents from Cloud Storage
You can import documents directly from Dropbox, Google Drive, Box or OneDrive to PDFfiller. This
can save you a lot of time because you don’t have to download documents to your local drive and
upload them to PDFfiller.
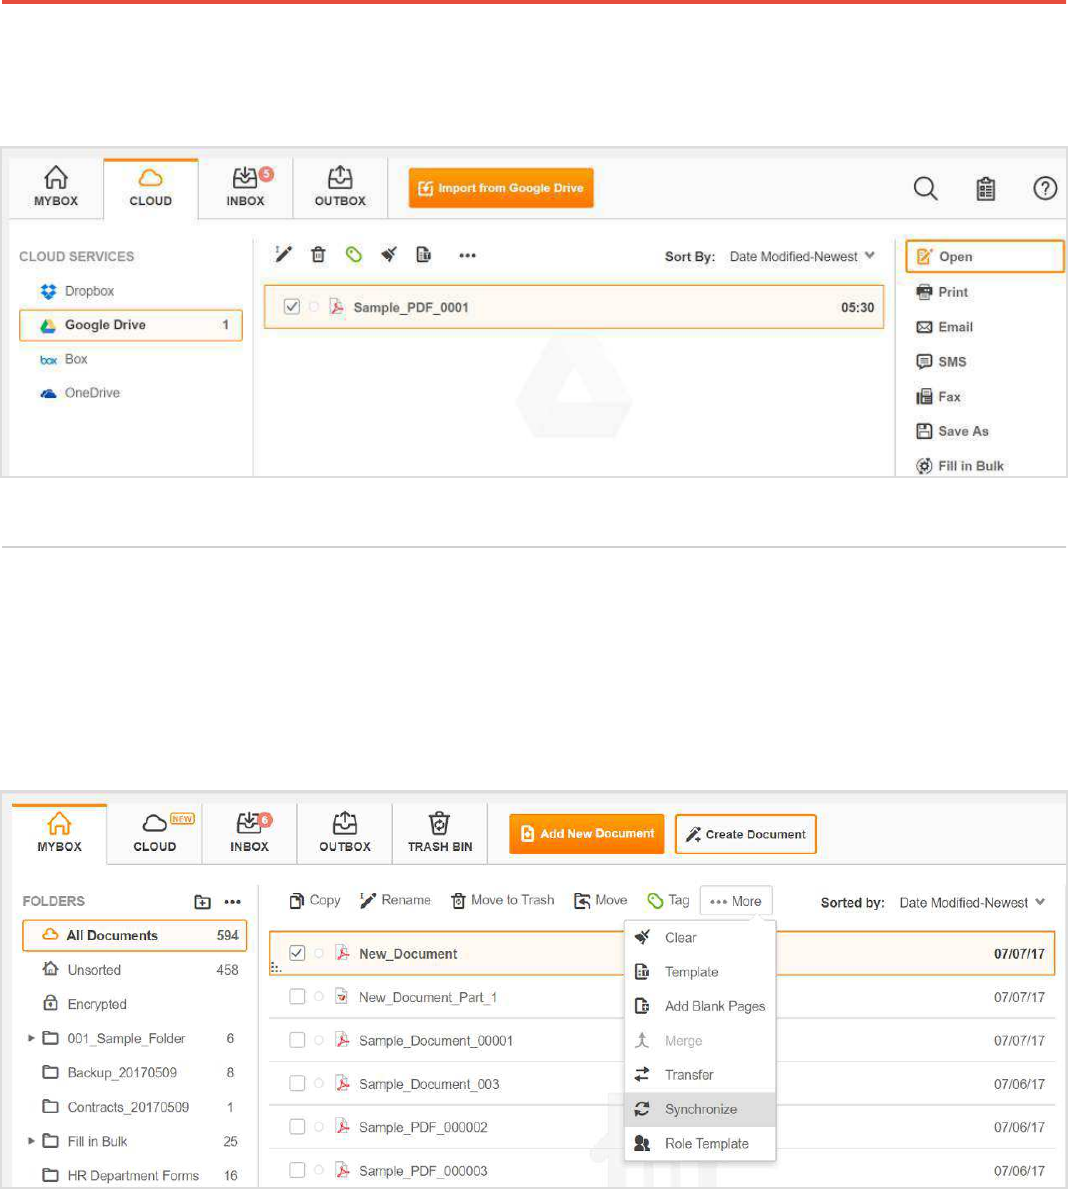
In MY DOCS, open the CLOUD tab.
Select your cloud storage, for instance, Google Drive.
Guidebook 20
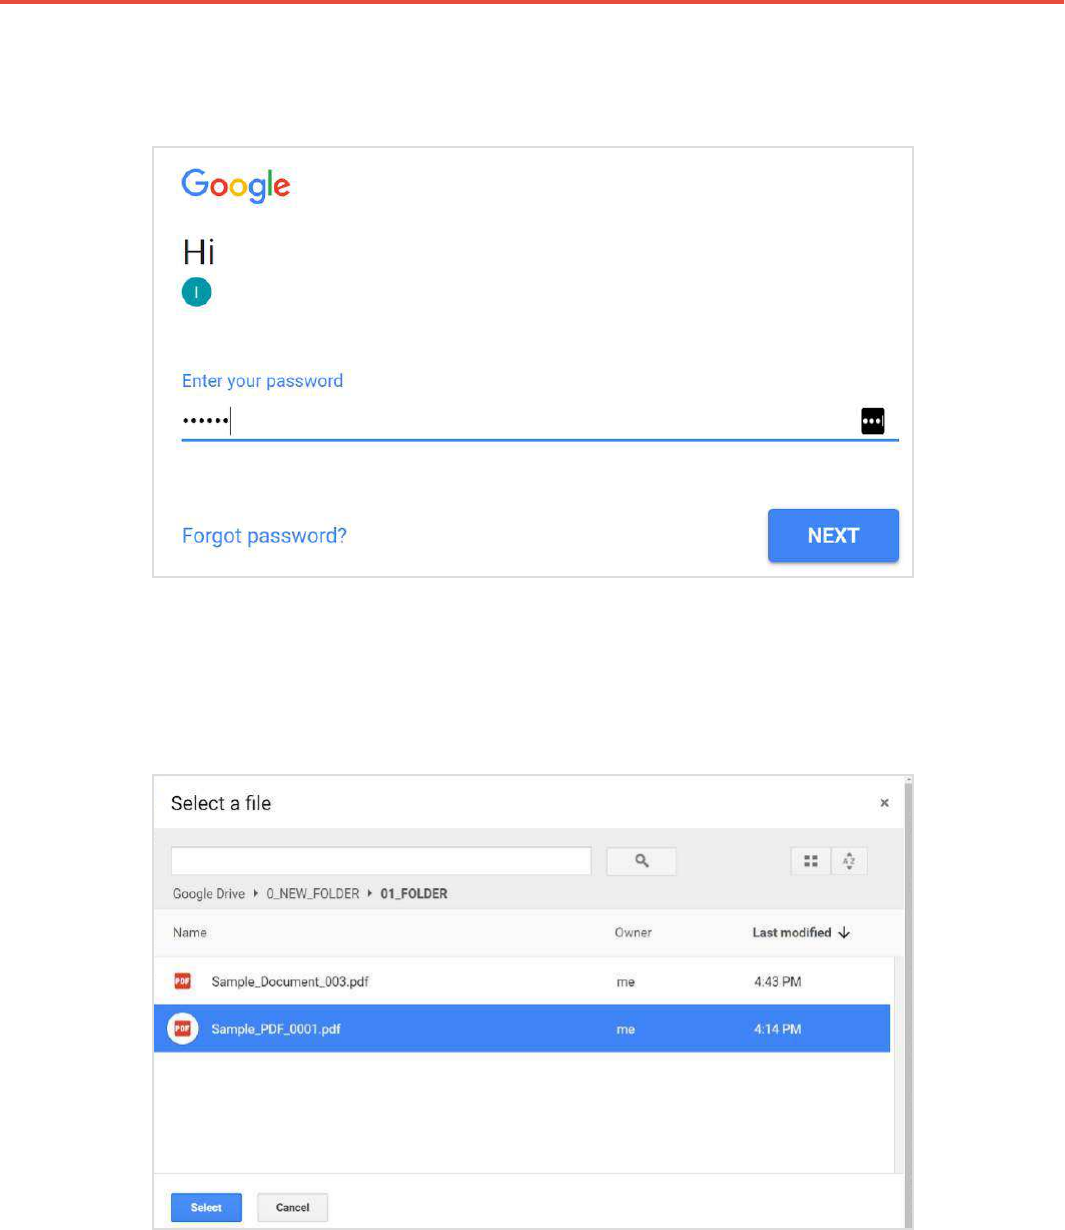
Log in.
If you’re already logged in, this step will be omitted.
Click on the document that you’d like to import and press Select.
Guidebook 21
The document will open immediately in the PDFfiller editor and remain unchanged in Google Drive.
Synchronizing
Use the Synchronize feature to refresh the MYBOX page or the CLOUD page to get the latest
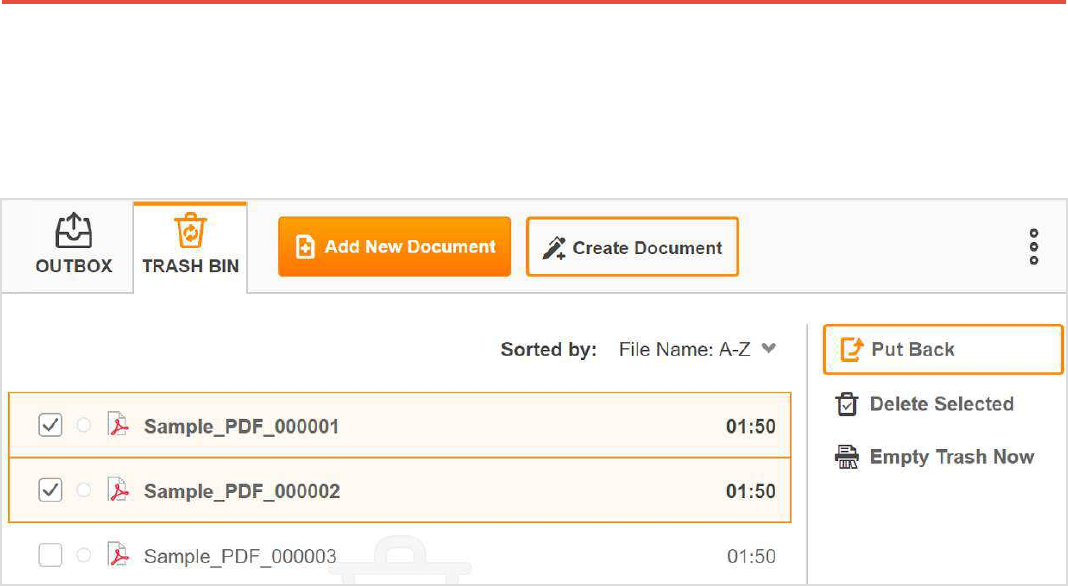
version. Click More and select Synchronize from the dropdown menu.
The page will be instantly updated.

Guidebook 22
Trash Bin
To remove a file from your storage, you can put it in the TRASH BIN.
Select the files you want to delete and click Move to Trash.
Your deleted files will stay in the TRASH BIN until you delete them permanently or empty your
trash. The left pane reminds you where you kept the files before moving them to the TRASH BIN.
Once you put a file in the TRASH BIN, you can either restore or delete the file forever.
Guidebook 23
To restore files, select them and click Put Back in the right pane. To delete the selected files
permanently, click Delete Selected.
To remove all the files from the TRASH BIN, click Empty Trash Now.
Guidebook 24
Collaborate and Versions
Sharing Documents
Give limited access to your forms to others, track their activity, and restore
earlier versions of your documents.
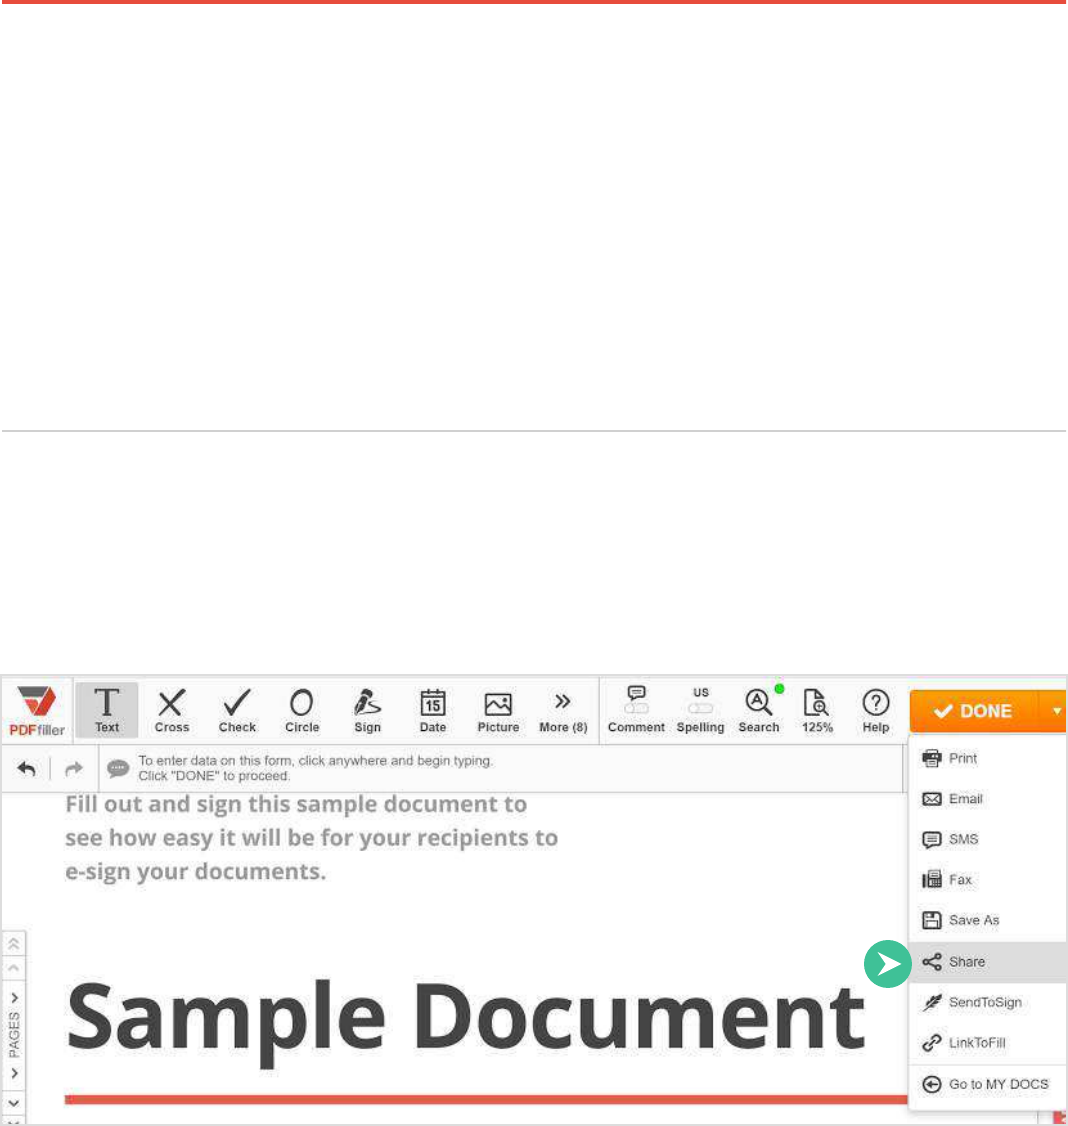
Work together on any device to access, edit, collaborate and comment on a single document.
Click the Done button and select Share from the dropdown menu.
Guidebook 25
Alternatively, select the document in MY DOCS and click Share in the right pane.
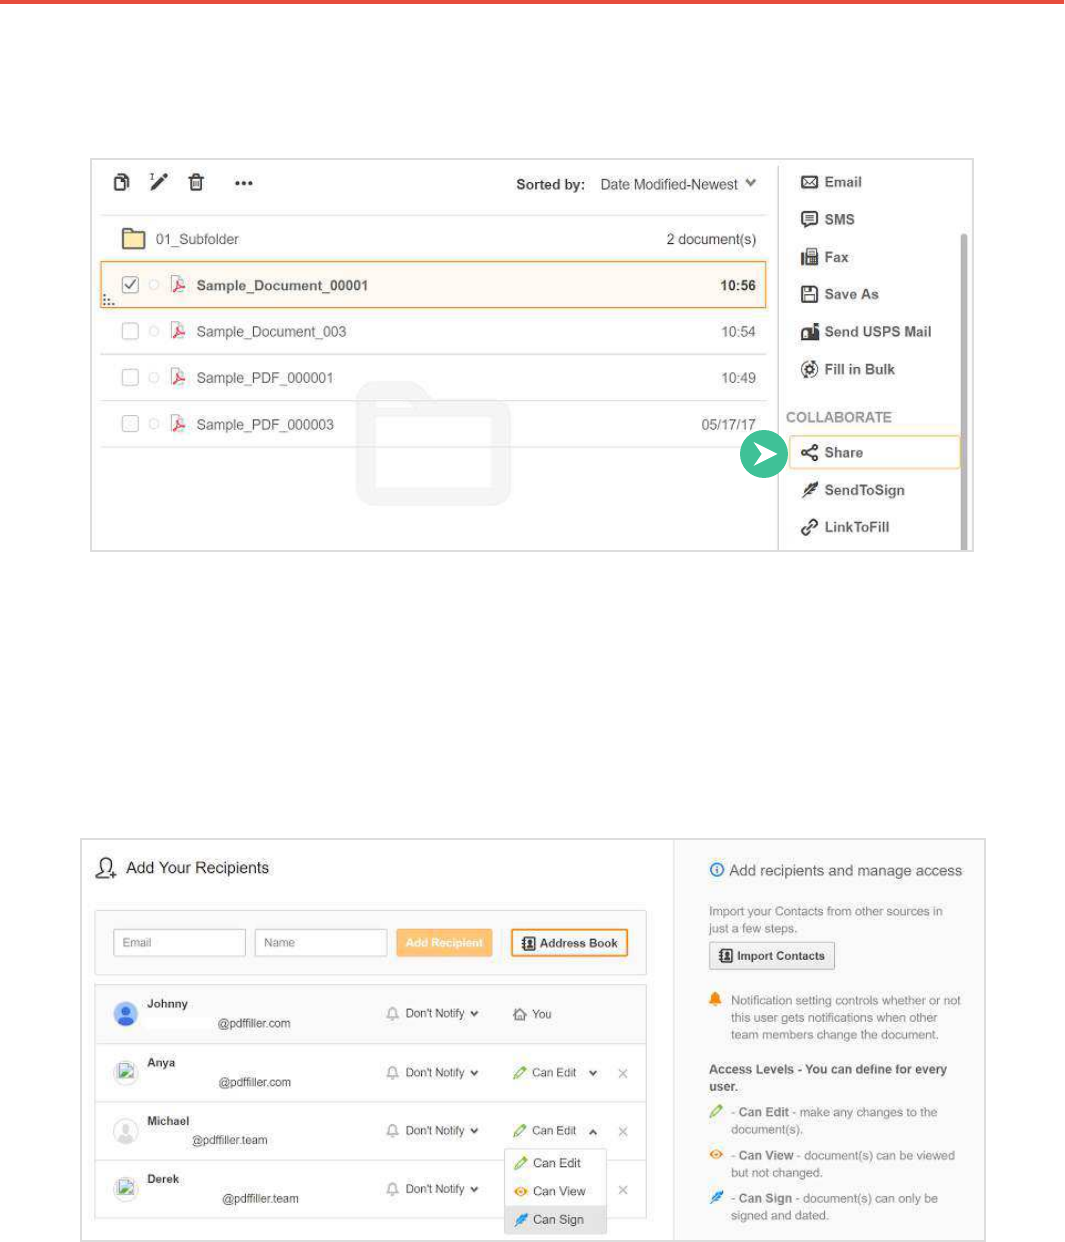
Enter the first recipient’s name and email address and press Add Recipient. Use your address
book or import your contacts from Gmail, Yahoo, Hotmail or Outlook. You can share any document
with up to 10 people. Set permissions for each recipient by selecting Can Edit, Can View or Can
Sign from the dropdown list.
Guidebook 26
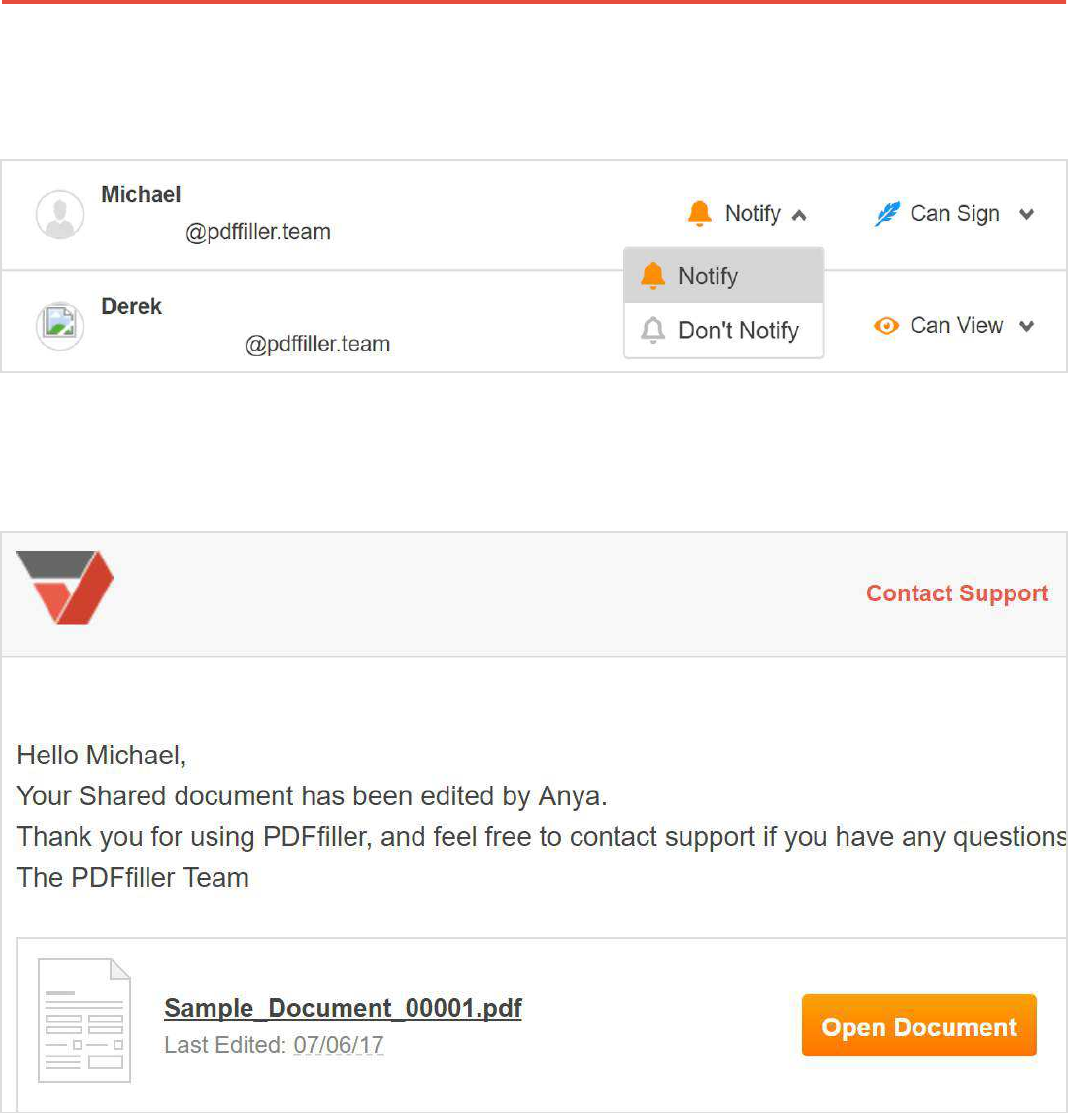
Select the notification settings for each user by choosing Notify or Don’t Notify from the dropdown.
If you choose Notify, the user will receive an email every time other recipients edit the document.
Guidebook 27
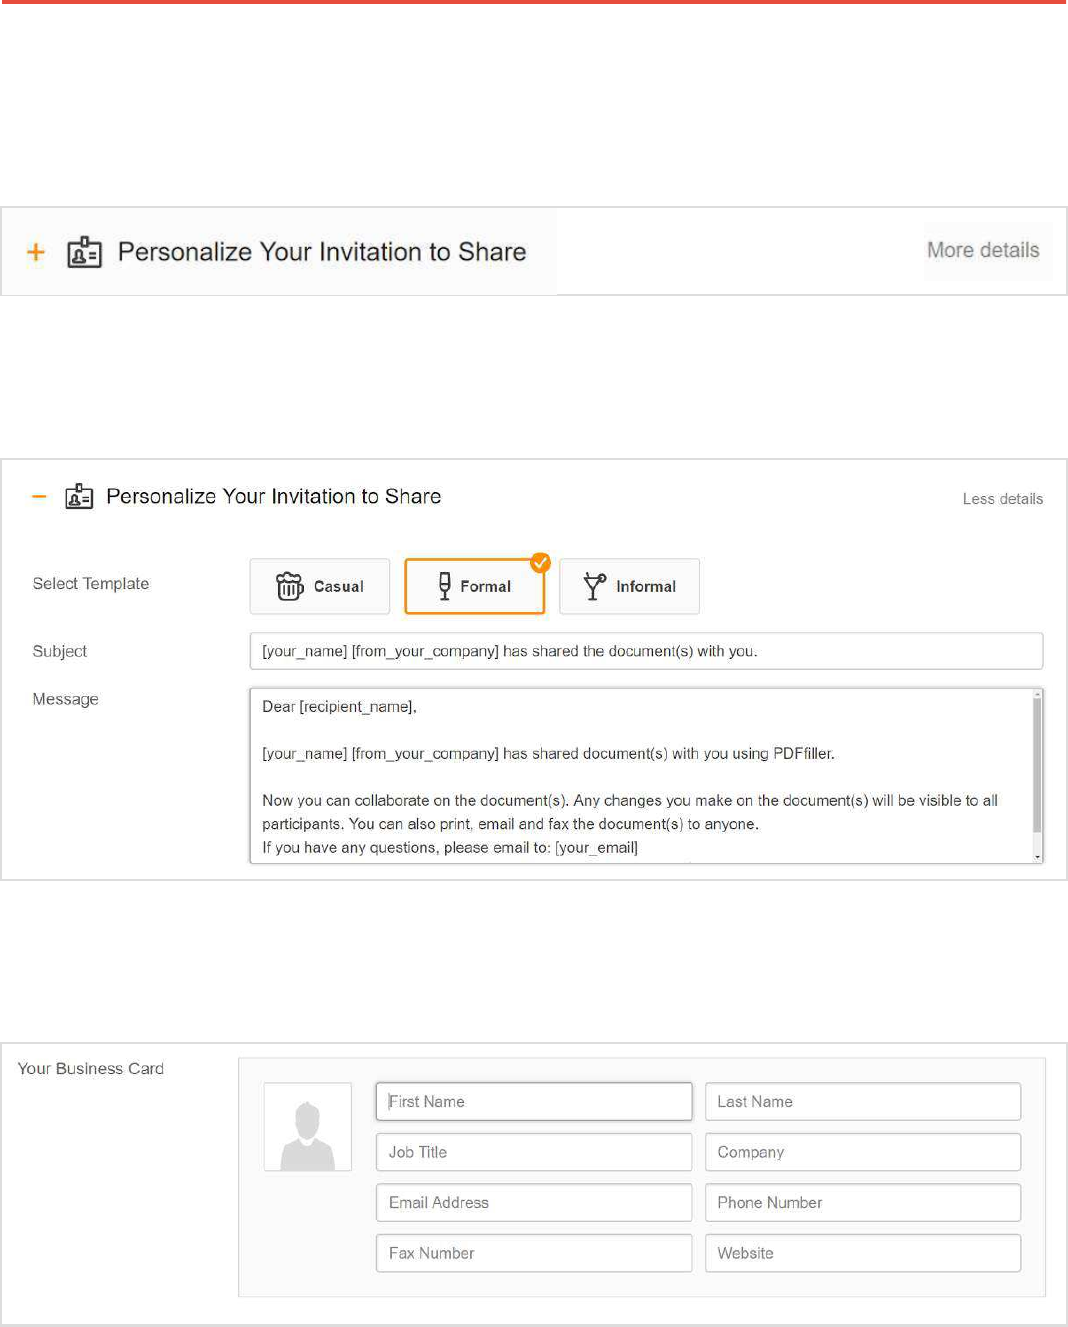
Write a message to your recipients inviting them to edit or sign the document.
Click Personalize Your Invitation to Share.
For your convenience, PDFfiller offers three invitation templates: Casual, Formal and Informal.
Create your business card by filling the fields with your contact information.
Guidebook 28
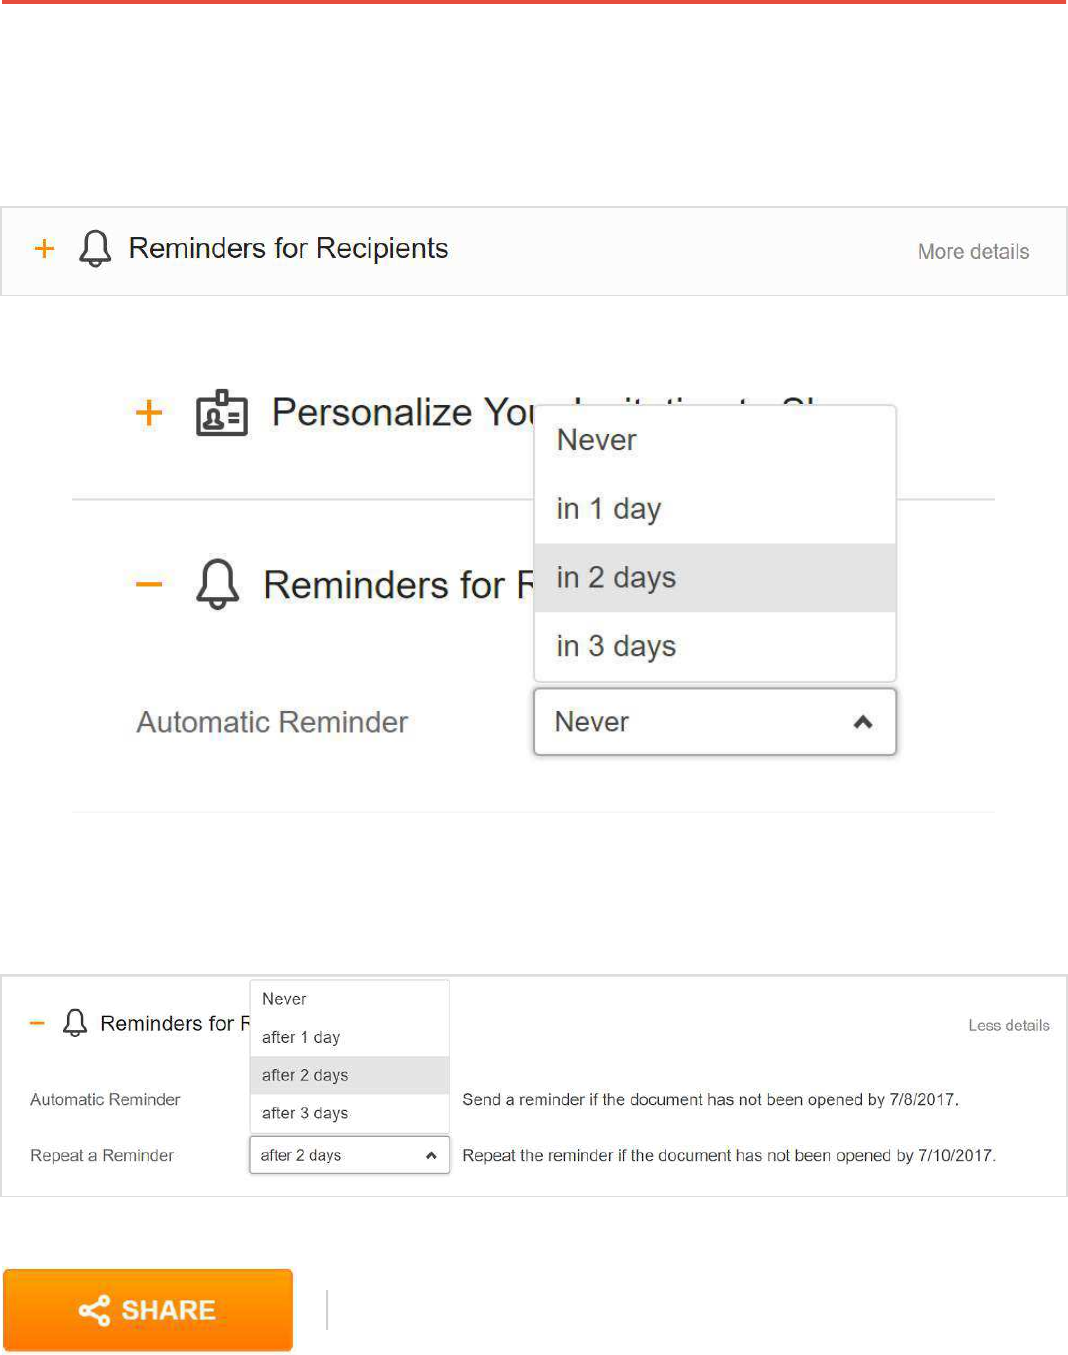
PDFfiller can automatically remind your recipients to edit or sign a document.
Click Reminder for Recipients and select when you want the reminder to be sent.
In addition, you can set another reminder if the recipient ignores the first one.
Finally, press SHARE at the bottom of the page.
Guidebook 29
An email with a direct link to the document will be sent to each recipient.
Collaborators can make changes based on the permissions you’ve set for each. They will be able
to print, save or send the document after they’ve edited or signed it.
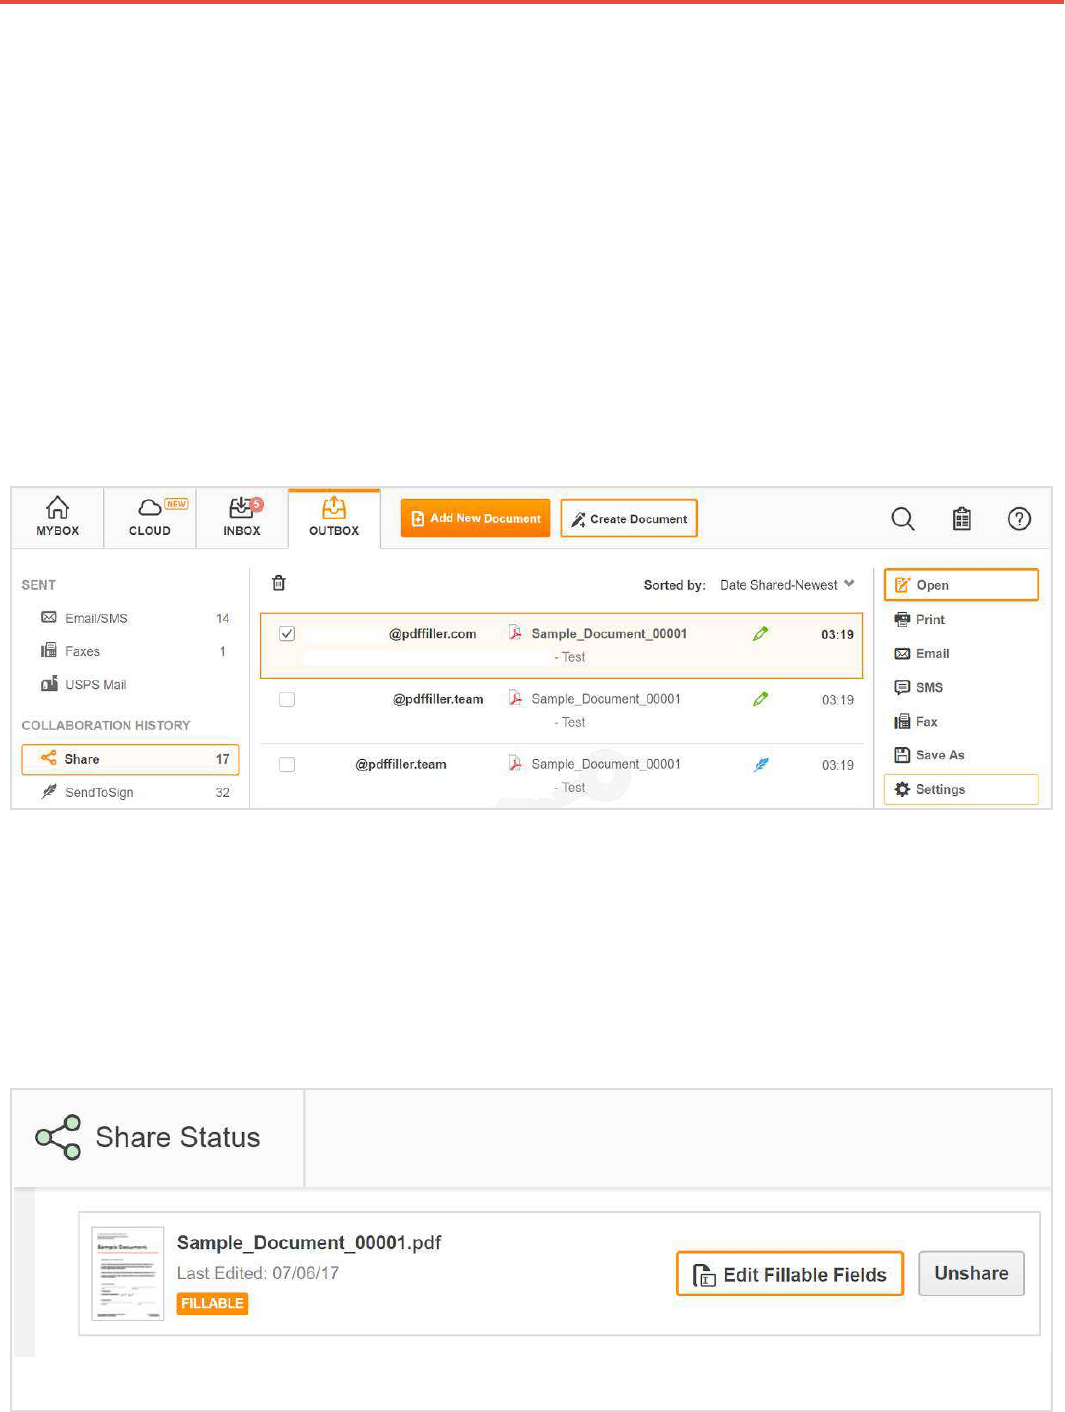
To view the settings and changes made to a shared document, go to MY DOCS > OUTBOX >
Share. If you send the document to three recipients, three copies of the same document will
appear in the Share folder. To add or remove collaborators or to modify their permissions, select
the document and click Settings.
You can also revoke editing privileges.
On the Share Status page, press the Unshare button. The document will be removed from the
Share folder and the recipients will no longer be able to access the document.

Guidebook 30
Role Template
When you share or send a document for signature, you can assign a fillable field to a particular
person so that nobody other than this person will be able to fill in the field.
First, create fillable fields in the document. Please refer to the Add Fillable Fields section of this
Guidebook.
Then, select the document, click More and choose Role Template.
Type in the name of the first person who will sign the document and press Enter on your keyboard.
Repeat this step for each signer and press Assign Roles in the bottom right corner.
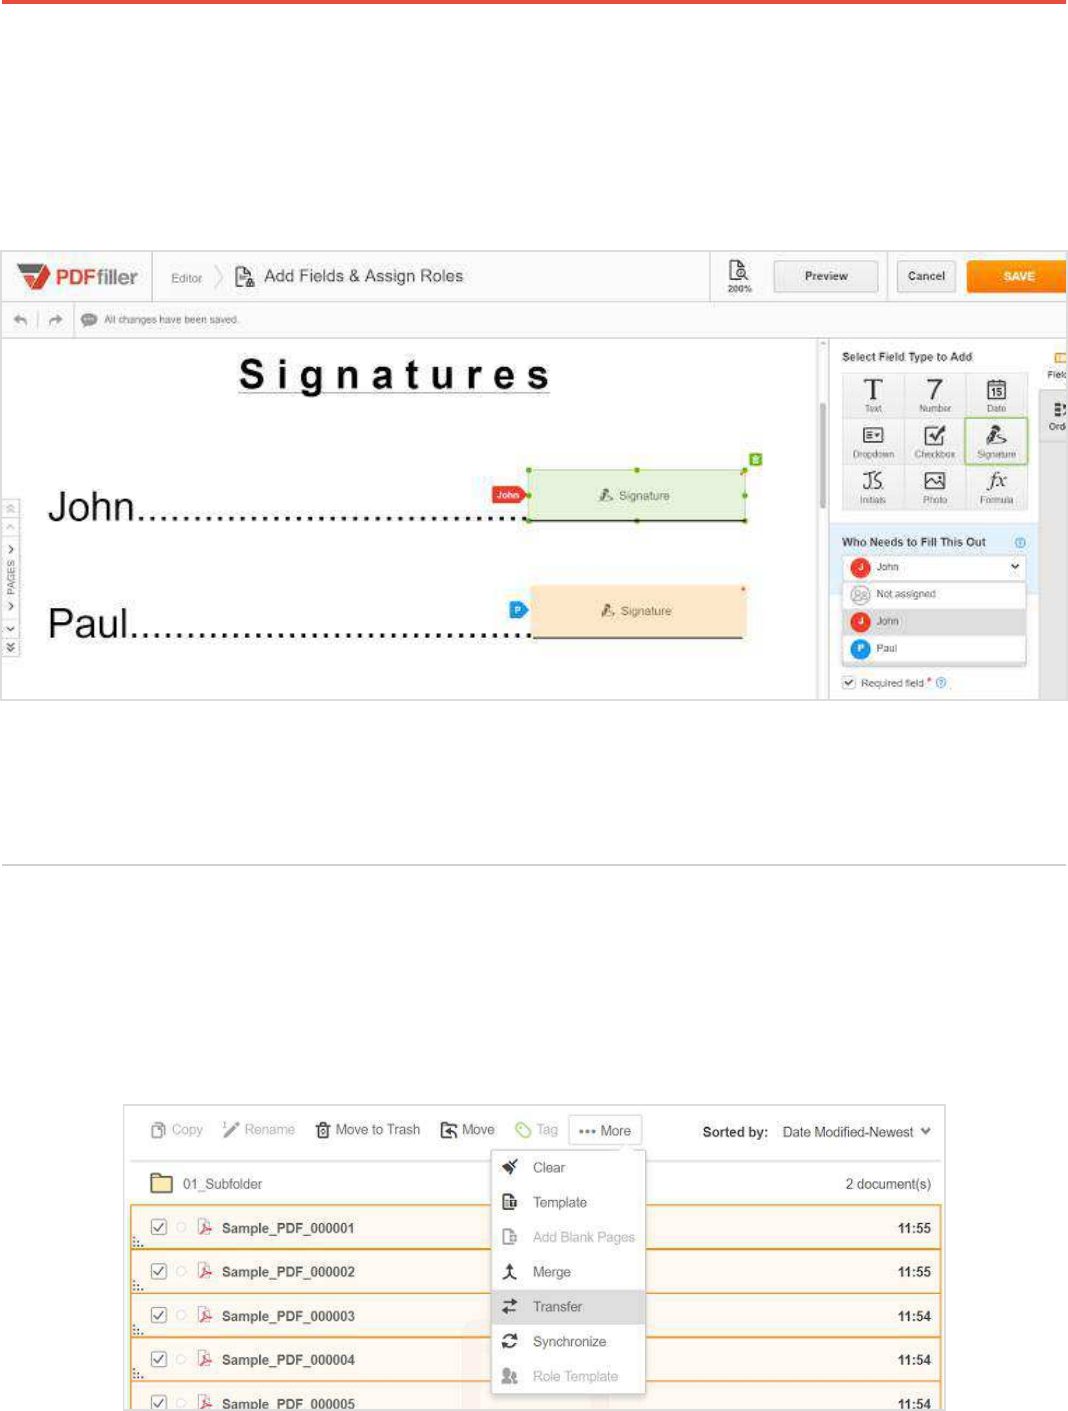
Guidebook 31
Click on the field you want to assign, open the dropdown list under Who Needs to Fill This Out
and select the name of the person who will have the exclusive right to fill in the field. Repeat this
step for each person signing the document and press Save in the top right corner.
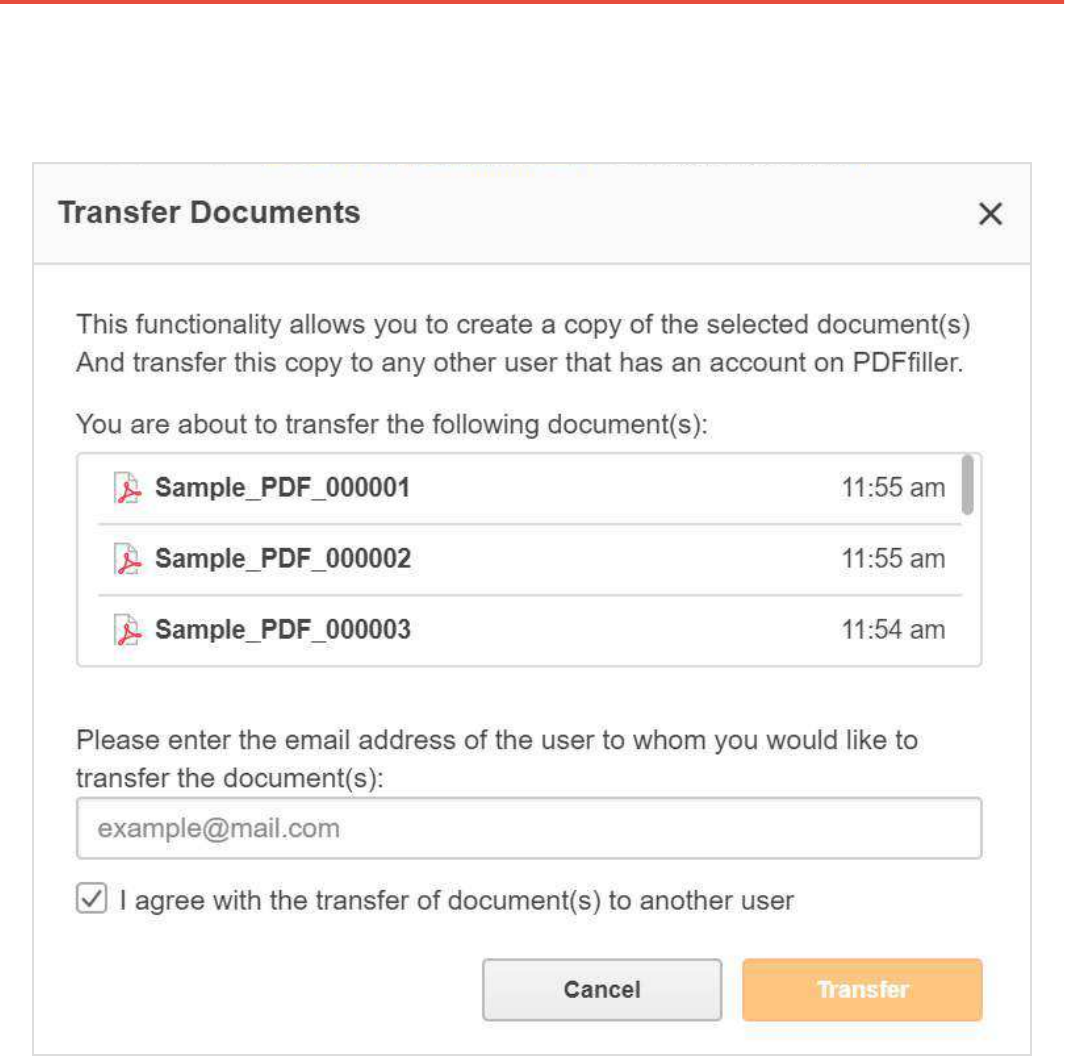
Send copies of documents to any PDFfiller customer.
Select one or more documents, click More and choose Transfer from the dropdown menu.
Please note, that if you don’t assign a fillable field to anyone, any recipient will be able to fill it.
Transferring Documents
Guidebook 32
Enter the recipient’s email in the address field, check the box under the field and press Transfer.
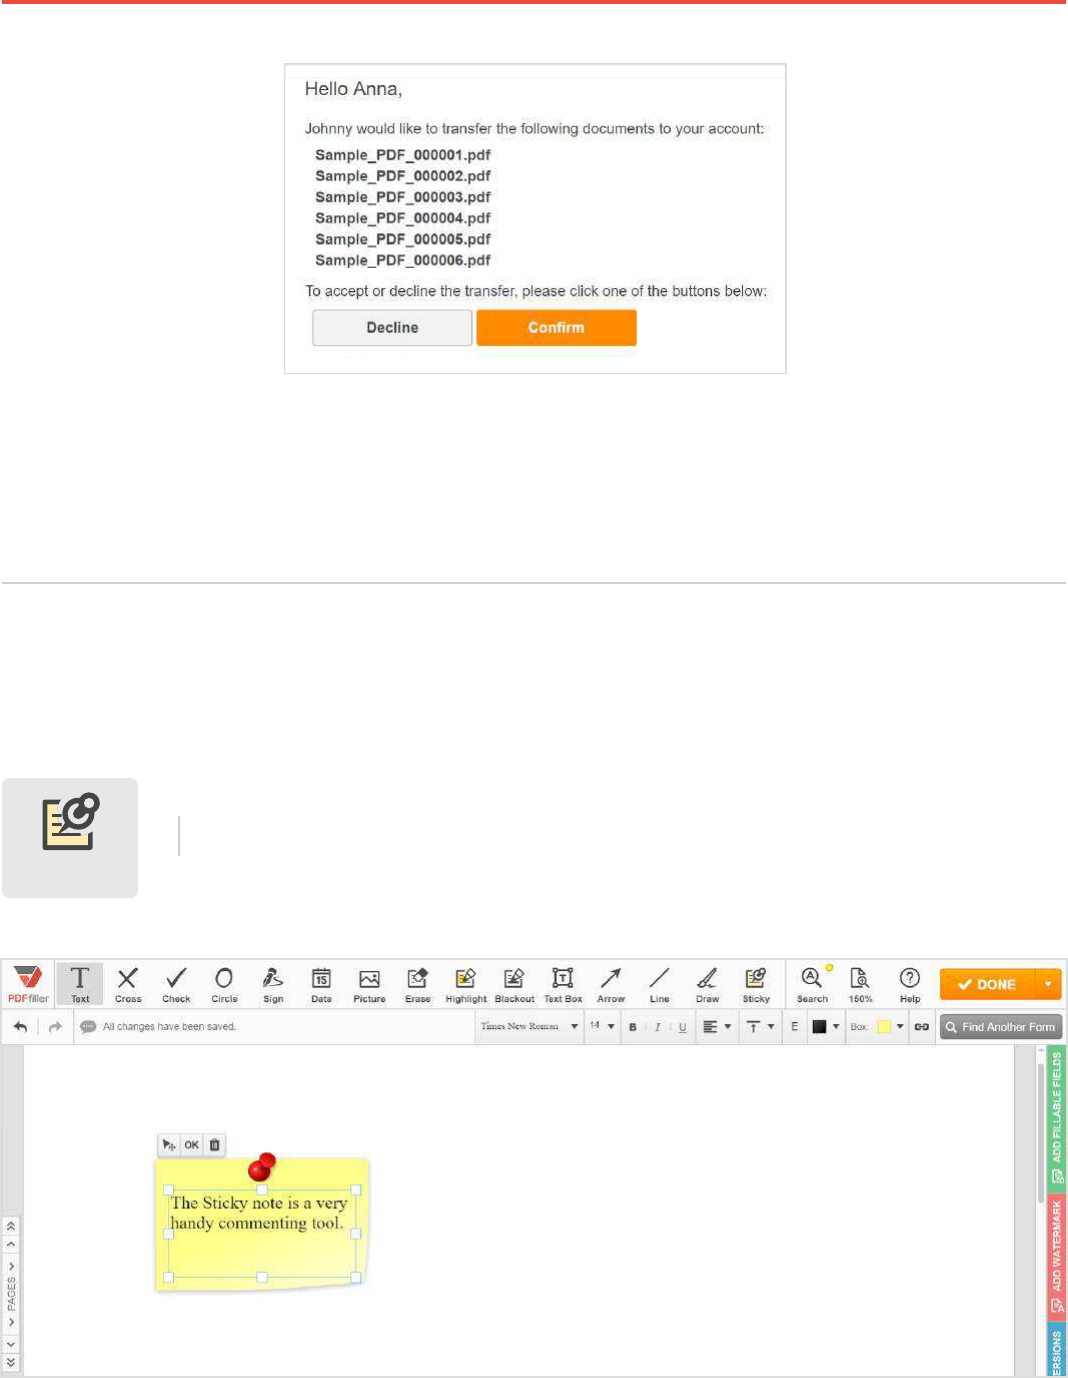
The recipient will receive an email requesting transfer. To complete the transfer, the recipient has
to press Confirm.
Guidebook 33
StickyNotes and Annotations
Leave comments on PDF documents with sticky notes and annotations.
Select the Sticky icon in the main toolbar, click where you want to place
the note and type your comment.
Sticky
A new folder will be automatically created in the recipient’s account. The documents will be
saved in that folder.
Guidebook 34
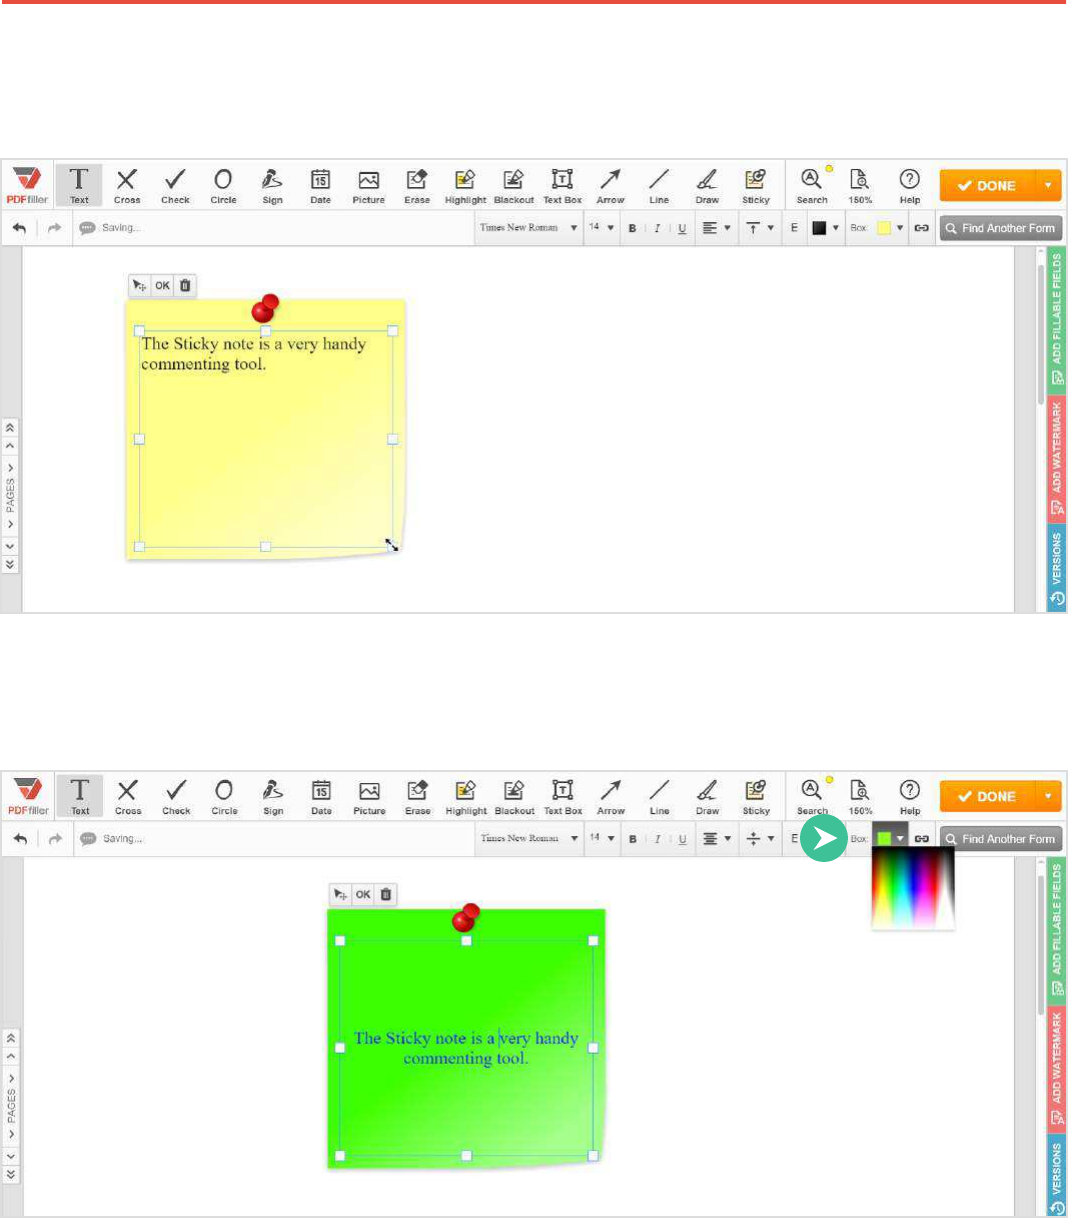
To resize the sticky note, drag its corners or edges.
To change the color of a sticky note, click the Box icon and select the color from the palette.
Guidebook 35
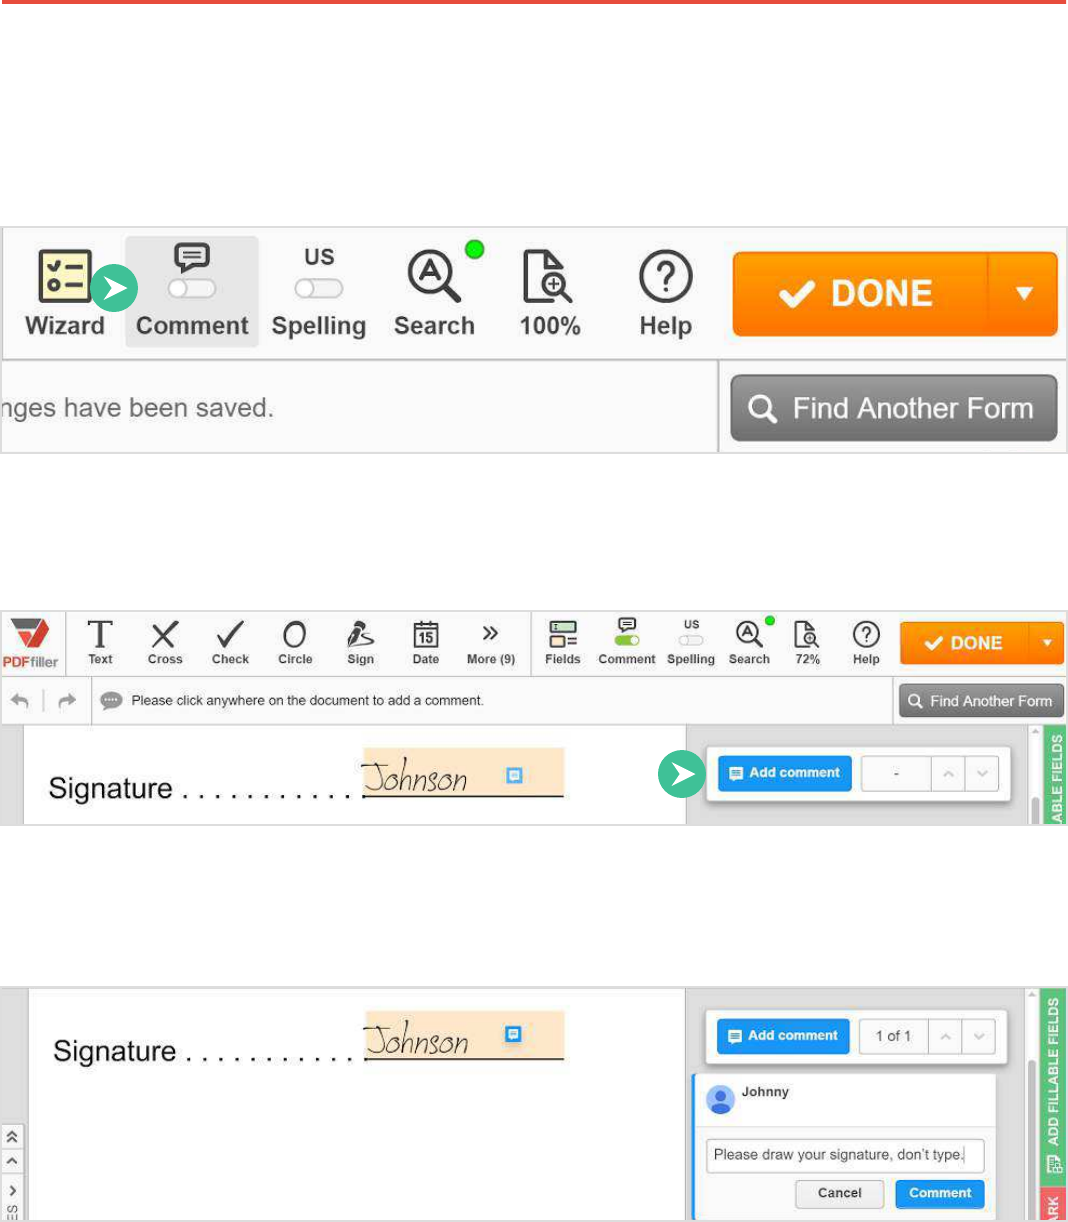
Add a comment
To add a comment, select Comment in the main toolbar.
Press the blue Add comment button and click on the text or image you want to comment on.
Type your comment and click Comment.

Guidebook 36
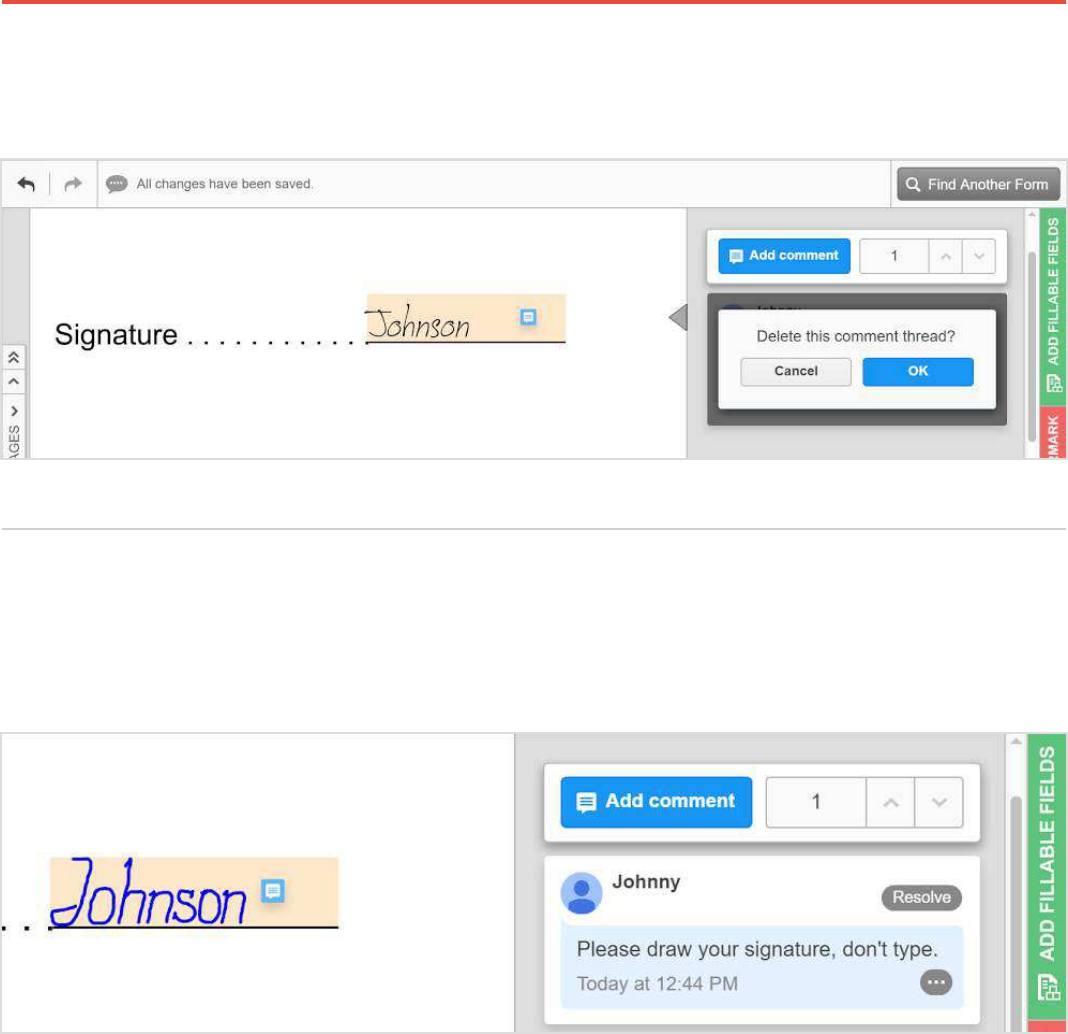
Edit, delete or reply to a comment
Click on the comment you want to edit, delete or reply to, click More […] and select Edit, Delete
Edit the comment and click Save.
Type your response and click Reply.
Guidebook 37
After you’ve selected Delete, click OK to confirm your action.
Resolving comments
To resolve a comment, click Resolve. This will remove the comment.

Guidebook 38
View Changes and Versions
Track all edits in automatically saved versions of the same document.
Here, you can view each saved document state (documents are saved each time you hit DONE).
Restore a Previous Version
Clicking on Restore this version will revert your document to that previous state. You can undo
this restore by returning to the Versions panel and choosing the most recent version.
To exit the versions preview, click Close in the top right corner of the page.
While editing a document, open the Versions tab on the right.
Guidebook 39
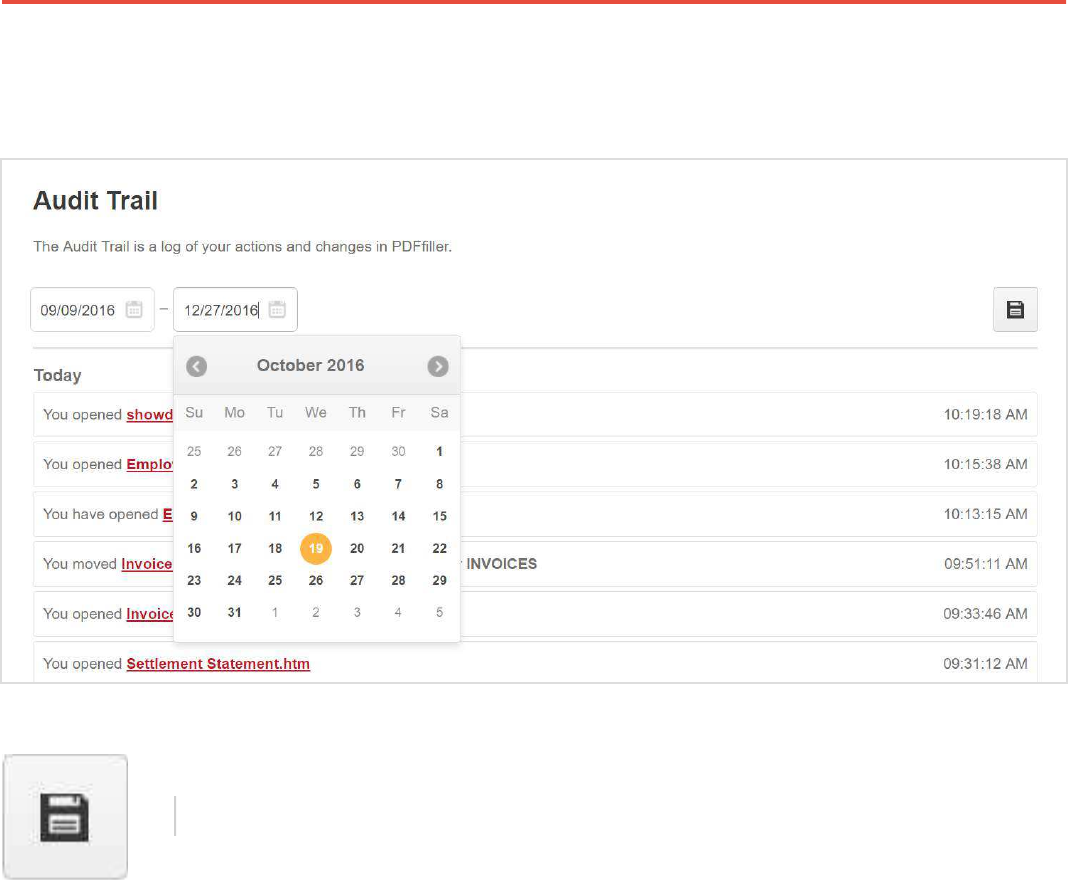
Audit Trail
Audit Trail
Browse authentication records for all activities in your account.
The audit trail shows when you logged in and out, opened, sent, deleted, downloaded
documents, etc. You can make an inquiry for any period of time you are interested in.
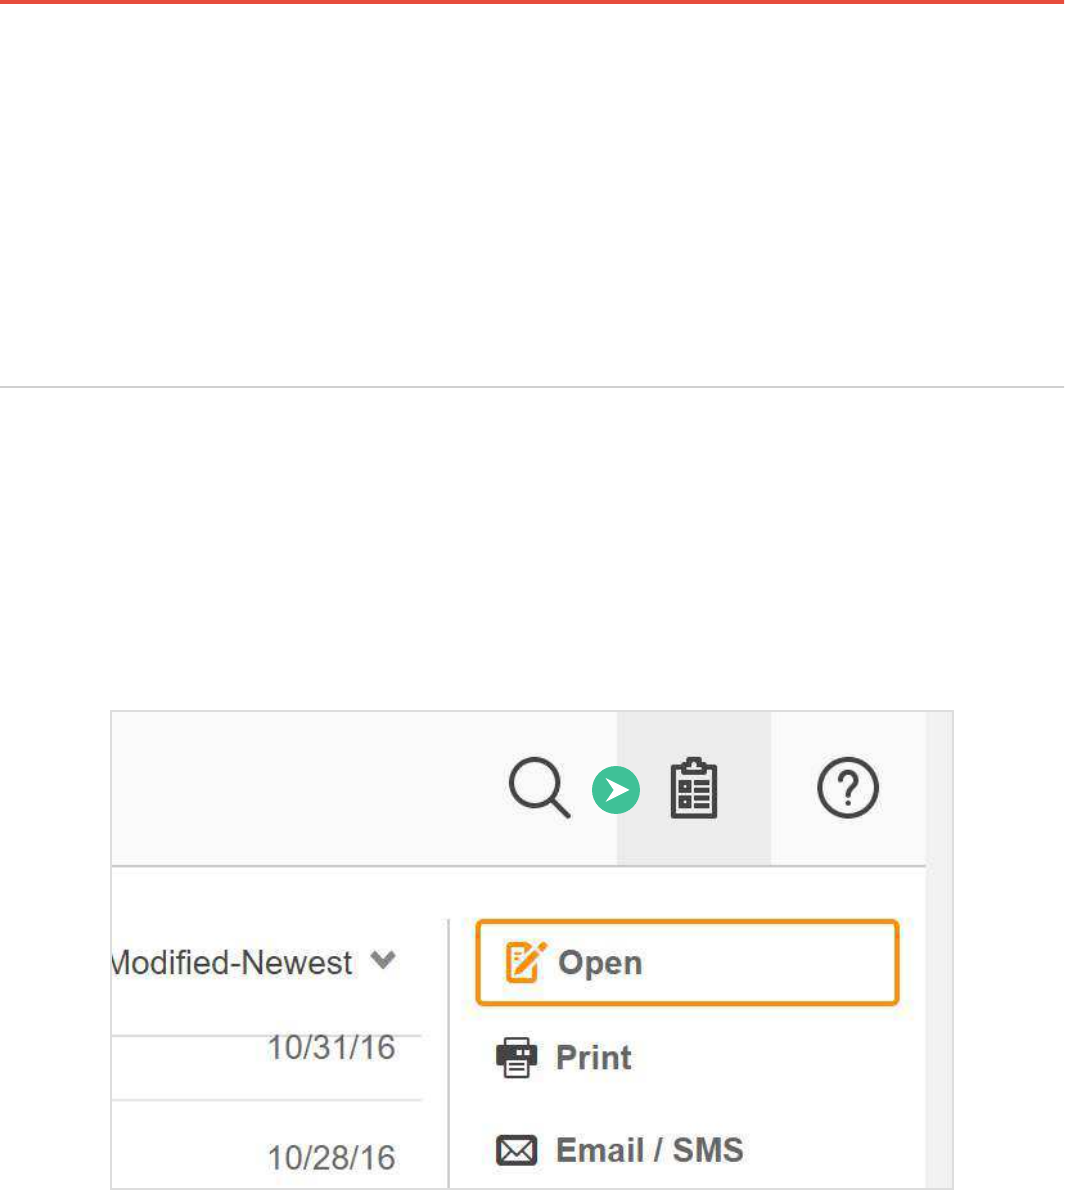
To check your activities, go to My Docs and click the Audit Trail icon in the top right corner.
Guidebook 40
Select the period you would like to check.
To save the audit trail as a PDF file to your local drive, click the Save icon.
Guidebook 41
Encryption and Security
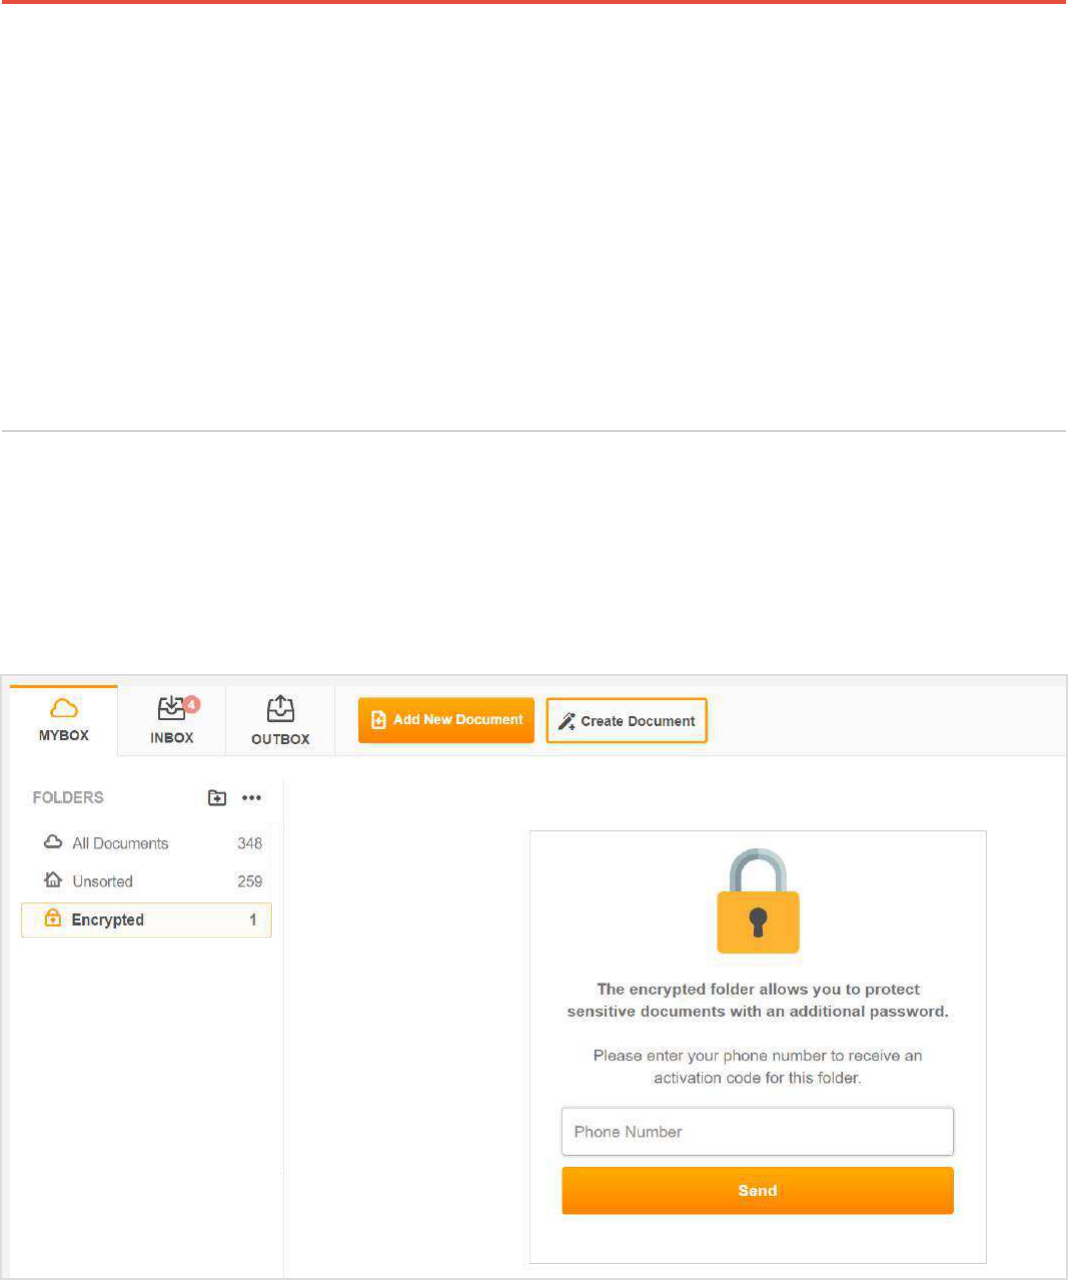
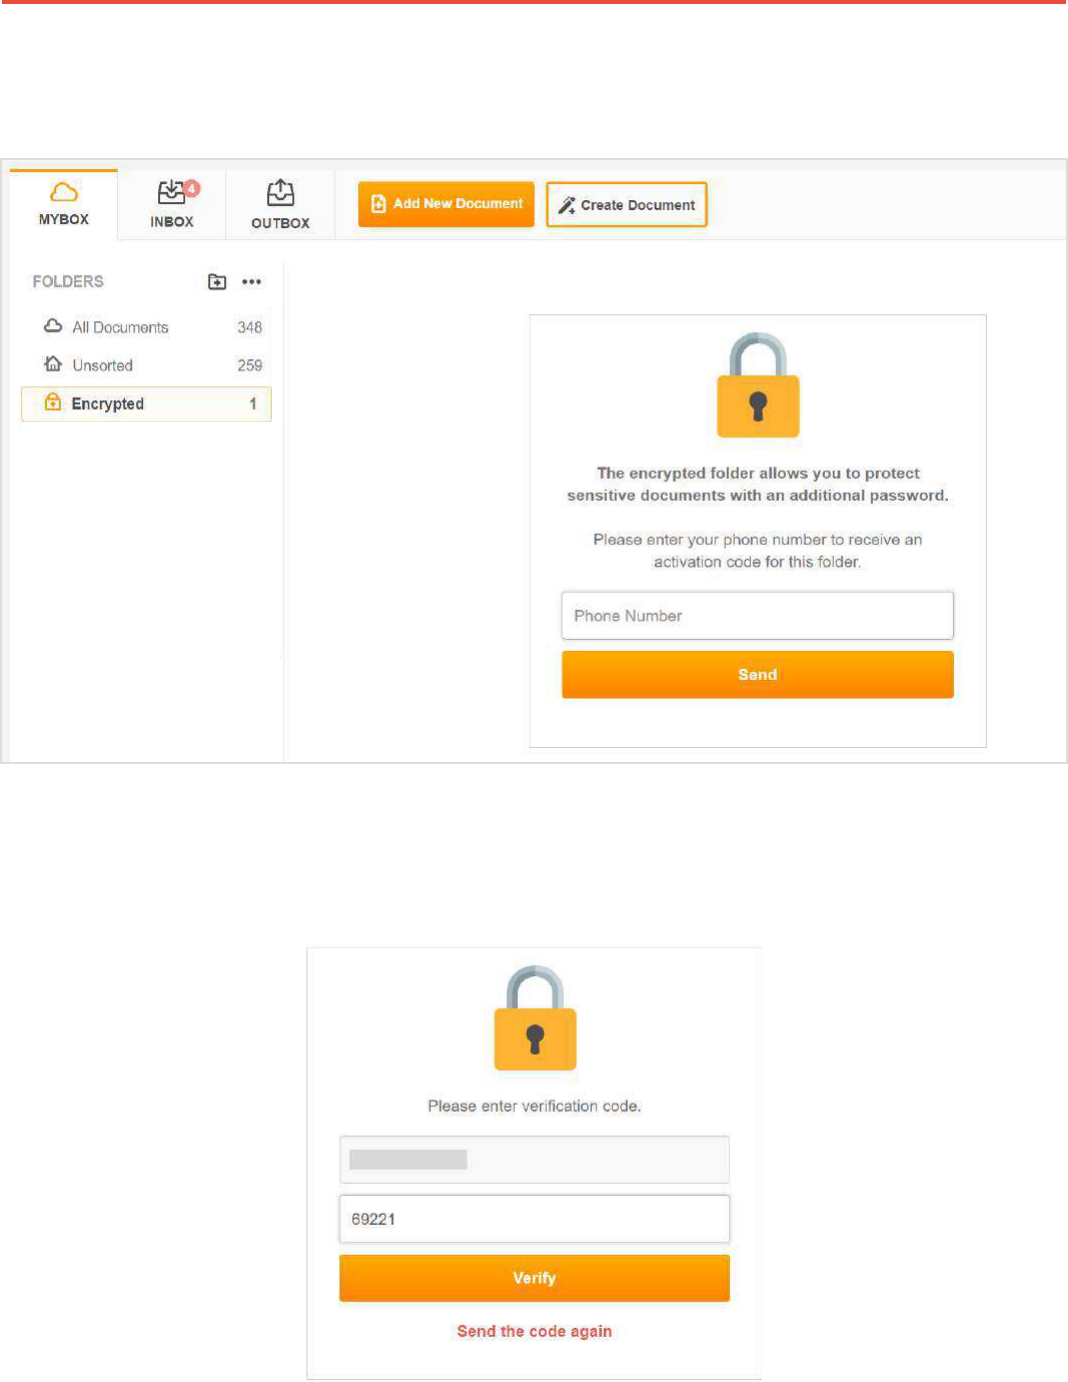
Encrypted Folder
Protect your documents and keep important information confidential with
advanced encryption and authentication.
Protect your documents with two-factor authentication in your Encrypted folder.
To activate the Encrypted folder, select it in MYBOX and enter your cell phone number.
Guidebook 42
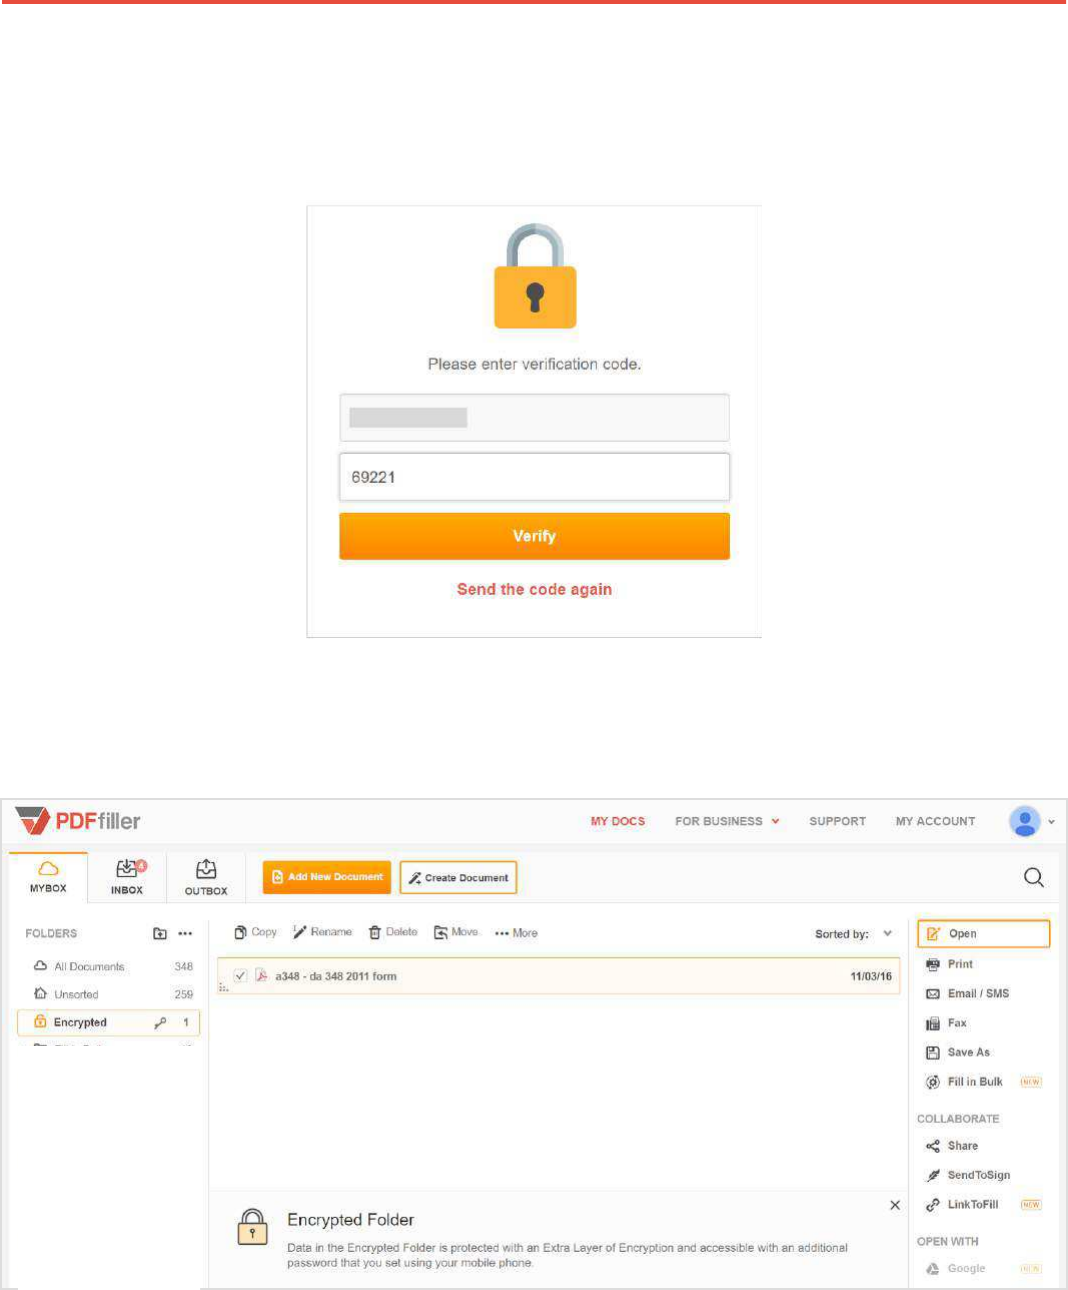
You will immediately receive an activation code via text message. Enter the activation code and
click Verify to create a password.
Create and confirm your password — this will open the folder.
Guidebook 43
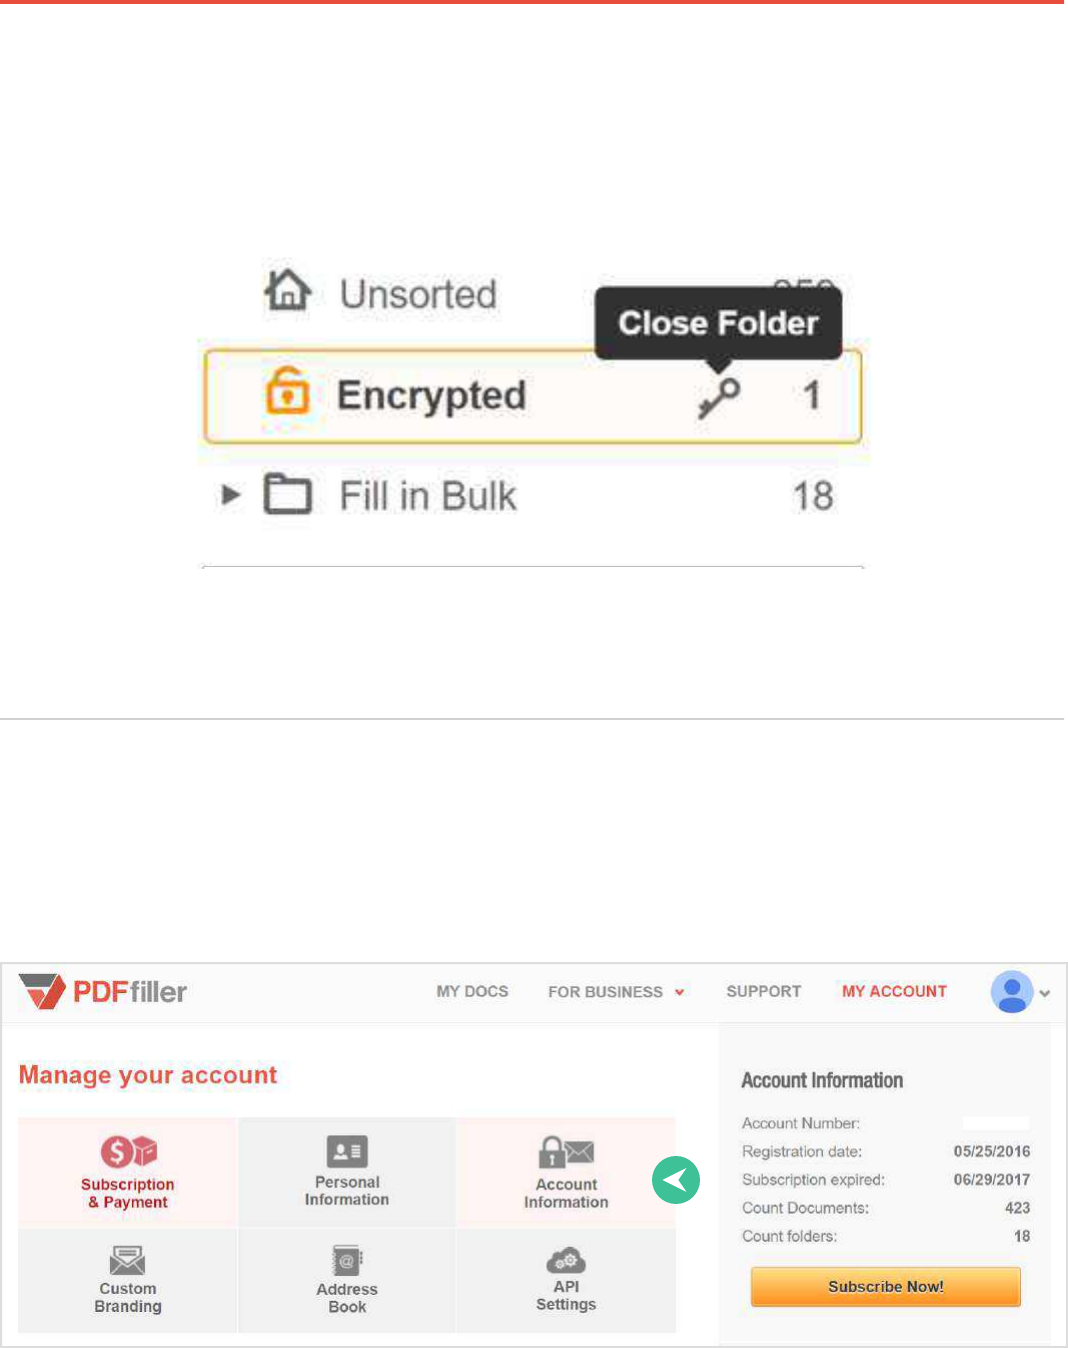
To add documents to the Encrypted folder, drag them from any other folder. After you’ve finished
working with your protected documents, close the Encrypted folder by clicking the key icon. It will
also automatically lock after 10 minutes of inactivity.
To access the documents in the Encrypted folder, you will have to enter your password again.
HIPAA Compliance
Protect medical records with security that meets HIPAA standards.
Go to MY ACCOUNT and select Account Information.
Guidebook 44
Check the box in HIPAA Compliance section and click Save.
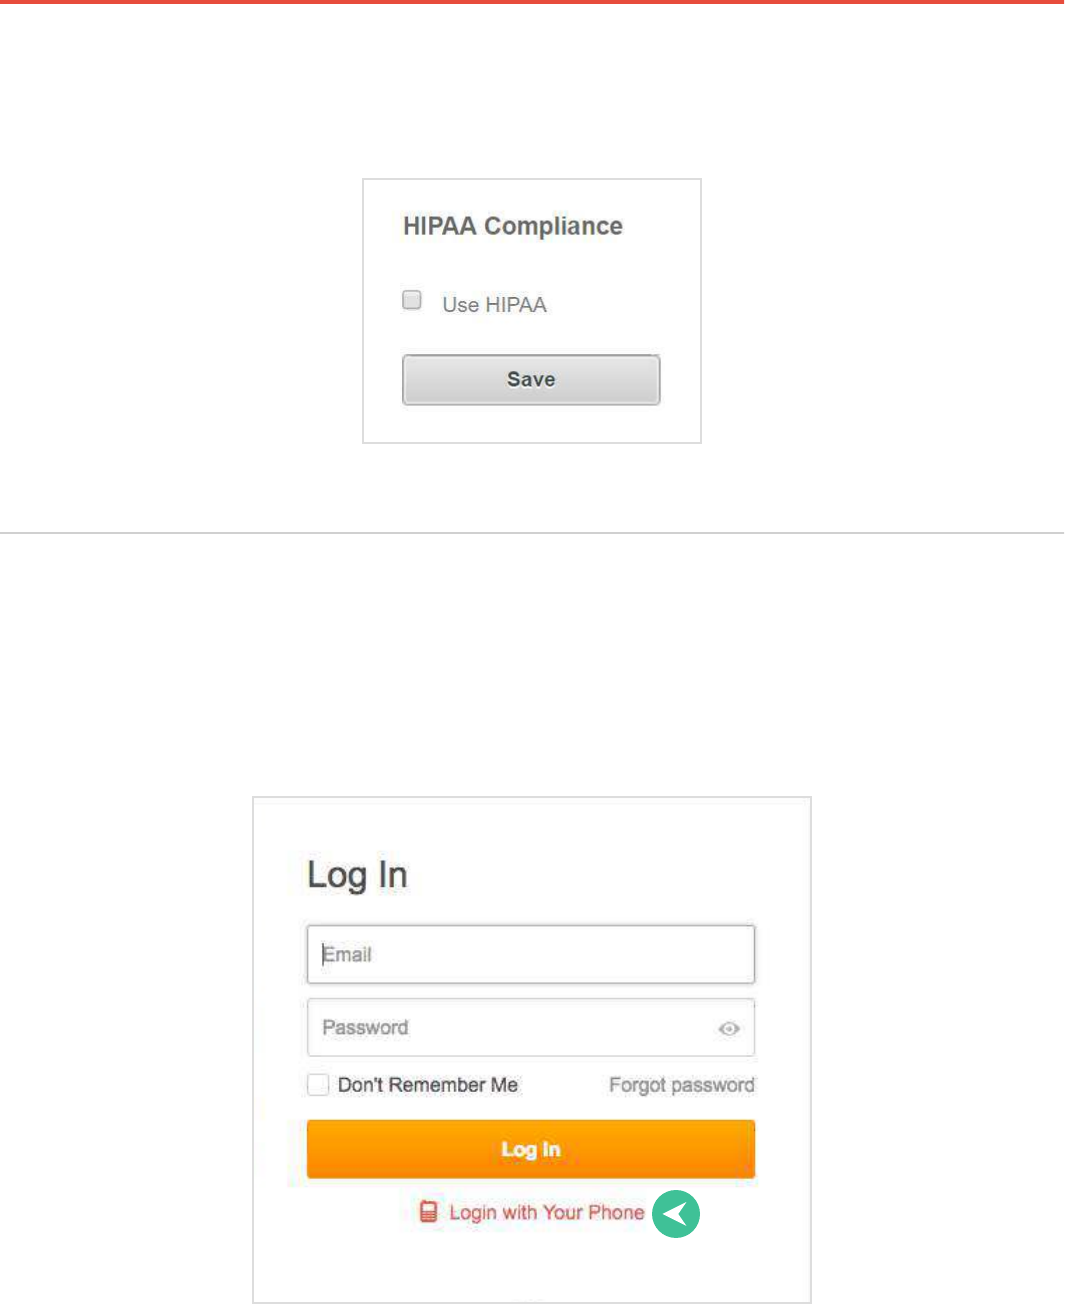
Login with Phone
Use your phone instead of the email to access your account.
Select the Login with Your Phone option.
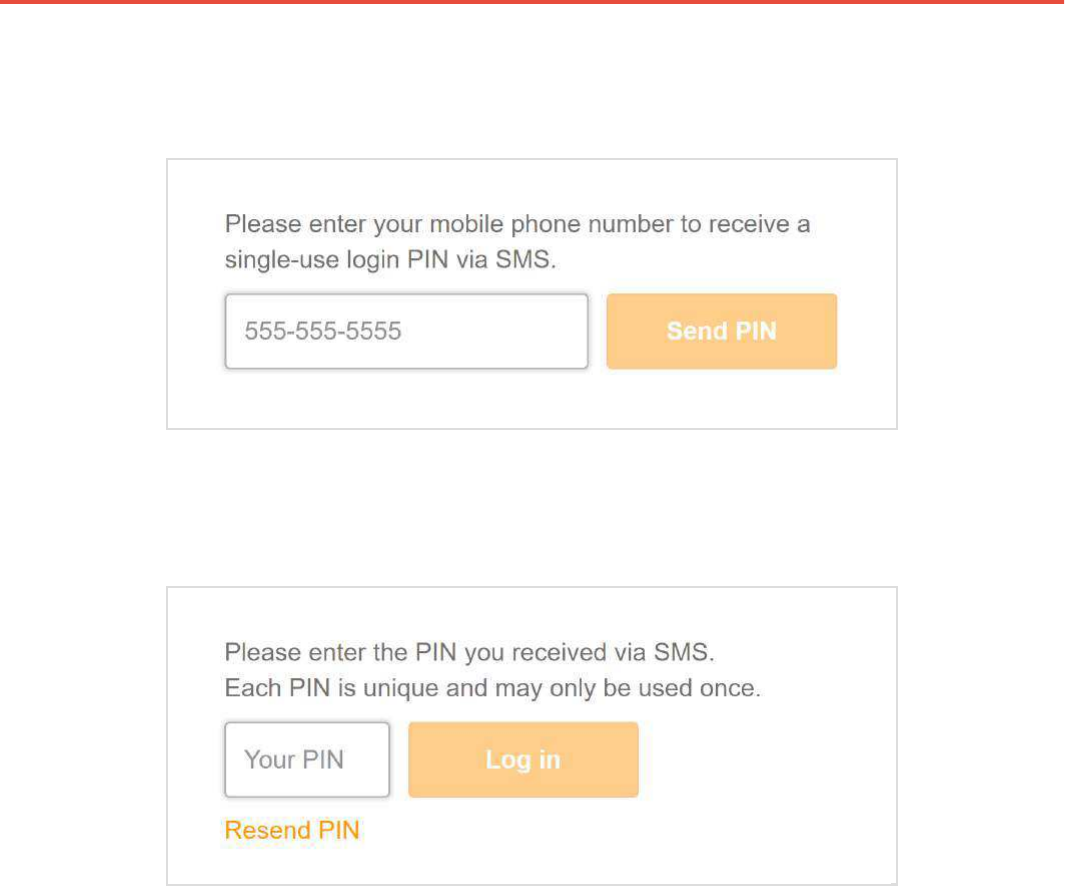
Guidebook 45
Enter your cell phone number. You will receive a single-use login PIN via SMS.
Enter the PIN and click Log in.
Please note that prior to using this feature, you have to save your cell phone number in
My Account.
Guidebook 46
Host Fillable Forms
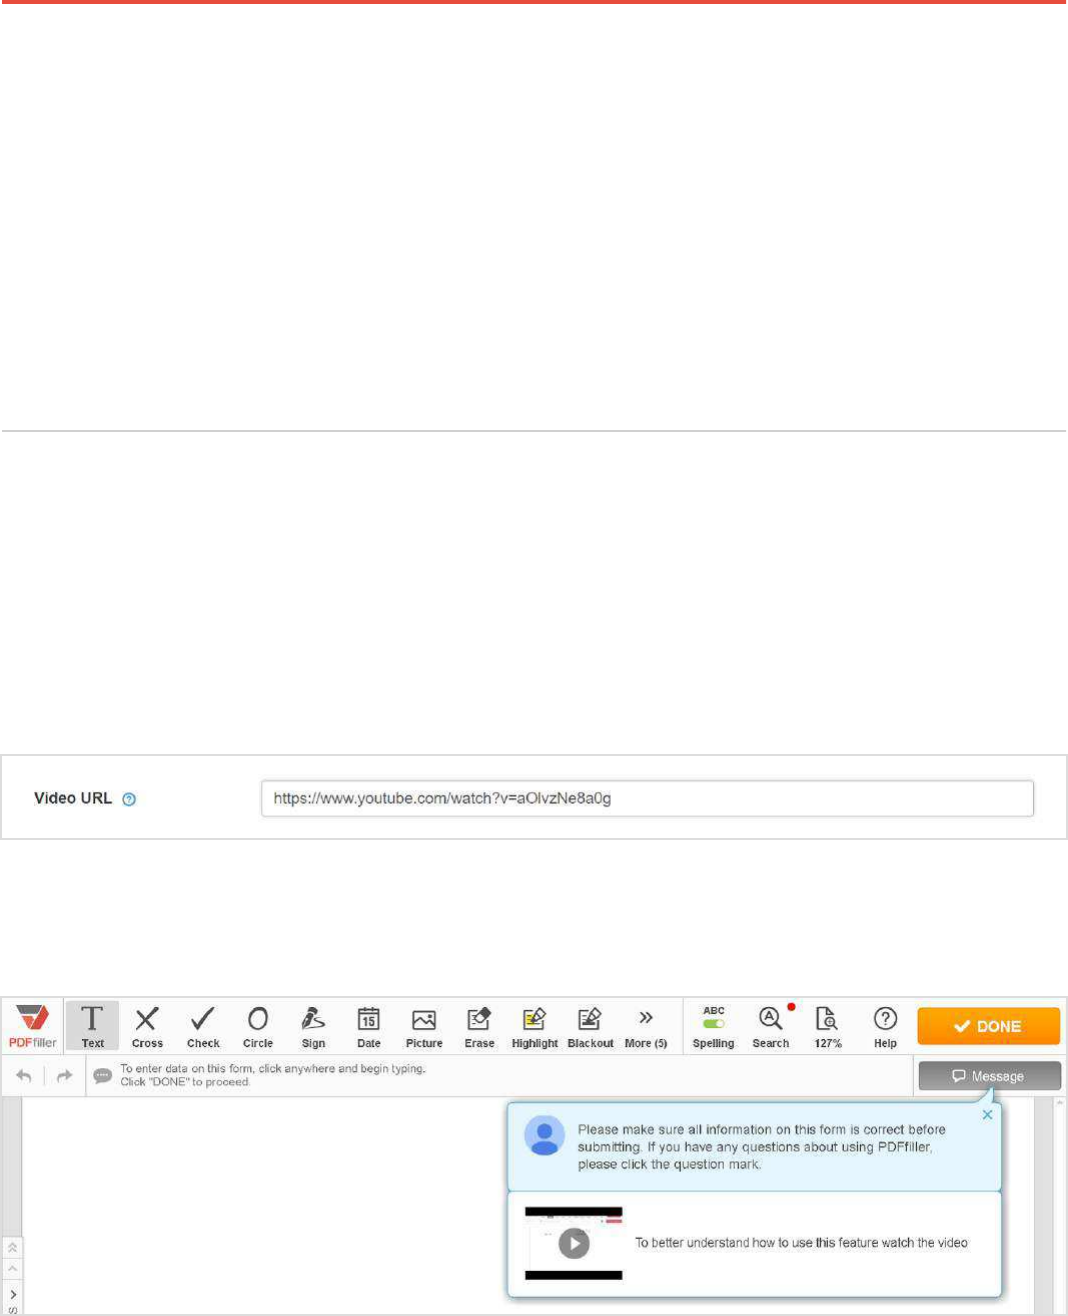
Attach Video Greeting Help
Interactive fillable documents available to anyone to fill out from any device.
No coding or hosting necessary.
Introduce recipients to your fillable document by adding a help or welcome video.
While customizing the link to a document, insert a link to the video that you need to attach to the
document. Please note that the video should be published on YouTube.
Whoever opens the document for filling will be able to watch the video.
Guidebook 47
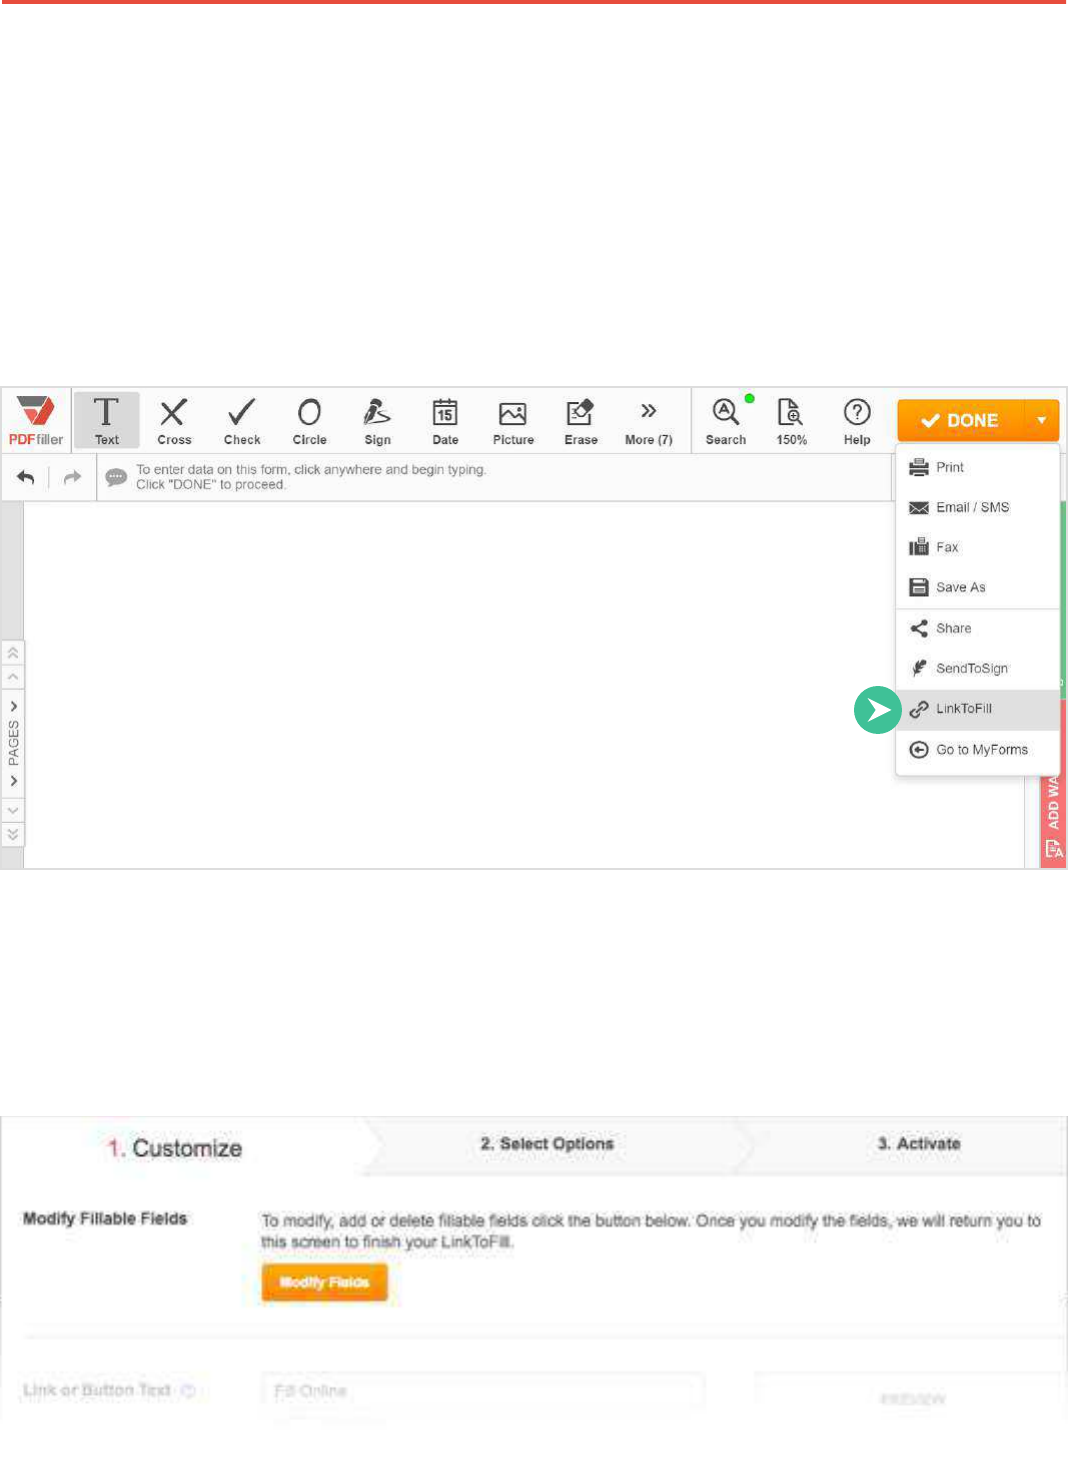
Publish on Website
Make your document publicly accessible. Create a link to the document and publish the link on
your website as a button or an HTML link.
You can start creating the link directly from PDFfiller’s editor. Click Done and select LinkToFill
from the drop-down menu.
Alternatively, go to My Docs, select the document in its folder and click LinkToFill on the right.
Customize the embeddable HTML link.

Guidebook 48
Add fillable fields to the document. Create checkboxes and fillable fields for various types of data
including text, numbers, signatures, dates, and photos. For more information, please refer to the
Add Fillable Fields section of this Guidebook.
Customize the link’s text. Type your own text in the text field. It cannot be longer than
50 characters.
Choose a link style. There are three styles available: simple link, small button and large button.
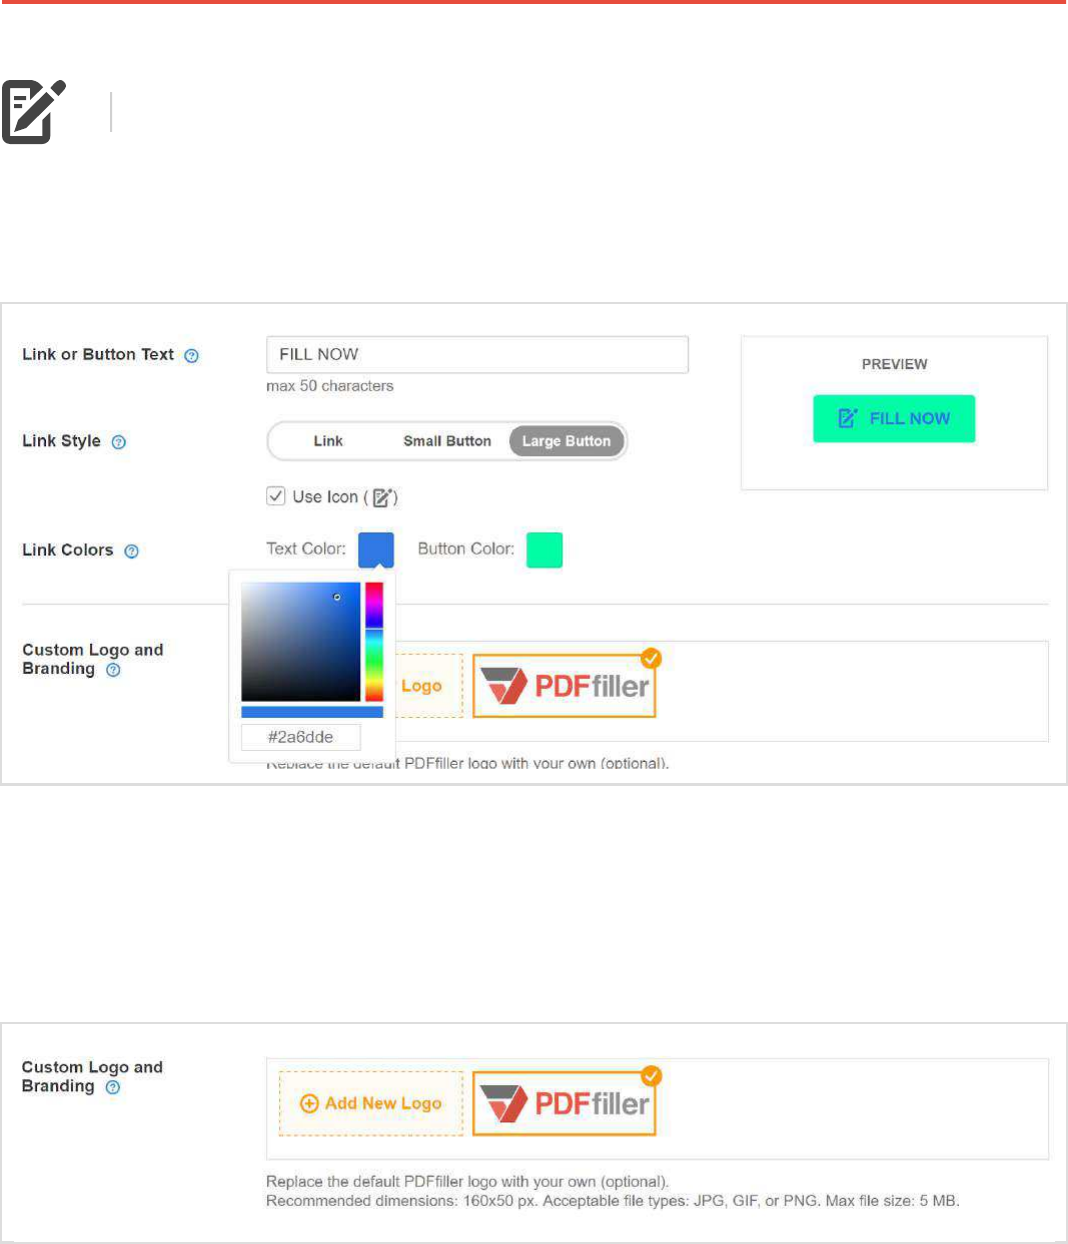
Guidebook 49
You can also choose whether or not to use the document icon, just check or
uncheck its checkbox.
Choose the link colors by clicking the colored squares.
Upload a custom logo for your document. Click the Add New Logo button and follow your
browser’s tips to upload an image from your device. The image should be in JPEG, GIF, or PNG
format and its size cannot exceed 5 MB.
Whoever fills the document will see your logo in the top left corner of the page. If you choose not
to use this option, PDFfiller’s logo will appear by default.
Guidebook 50
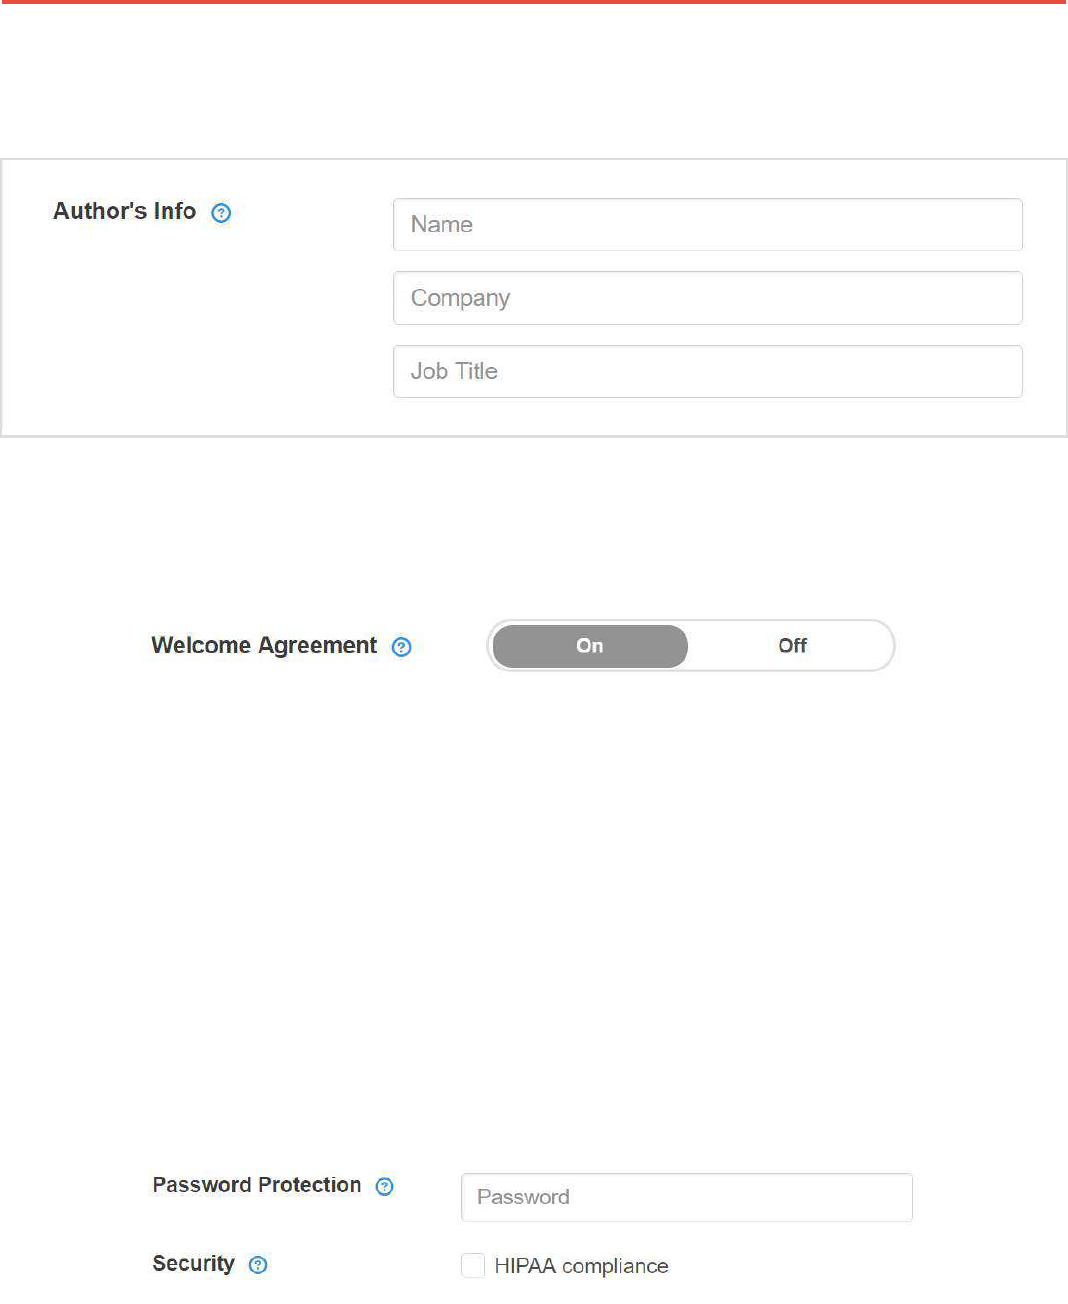
Provide the name, company and job title of the document’s author.
To request recipients’ consent to use their electronic signatures and records, switch on the toggle.
Write a message to those who will fill the form, for instance, an instruction or request. Add a video
as mentioned above and proceed by clicking Select Options in the bottom right corner of the
page. This will open the tab where you can select the following options:
Password Protection and HIPAA compliance. Create a password to restrict access to the
document. You will have to provide the password to those who need to access the document.
To comply with the standards of data protection under the Health Insurance Portability and
Accountability Act, check the box.

Guidebook 51
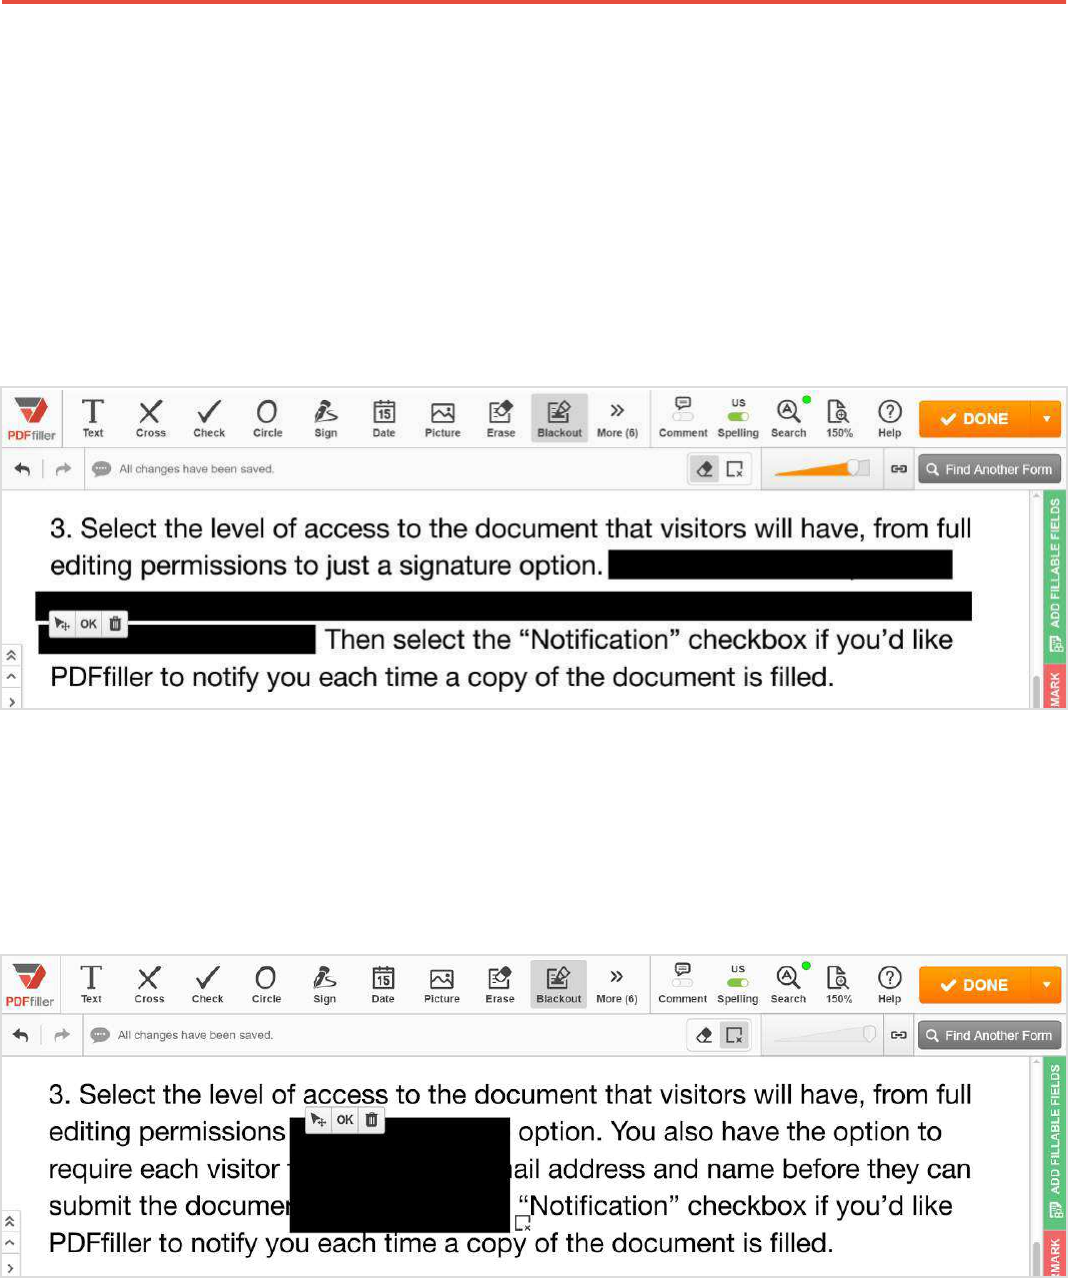
Permissions. Select Full Access to enable the recipients to edit the document using all
PDFfiller tools or select Signature Only to limit the editing capabilities to signature and date
only.
Signature Stamp. To turn on the “Verified by PDFfiller” stamp that will appear next to every
signature, check the Enforce box.
Request Additional Documents. You can request the documents that should be sent along
with the filled document.
Submission Requirements. You may request a name and email address from a person
submitting the document.
Download Options. If you permit downloads, whoever fills the document will be able to get
a copy of it.
Guidebook 52
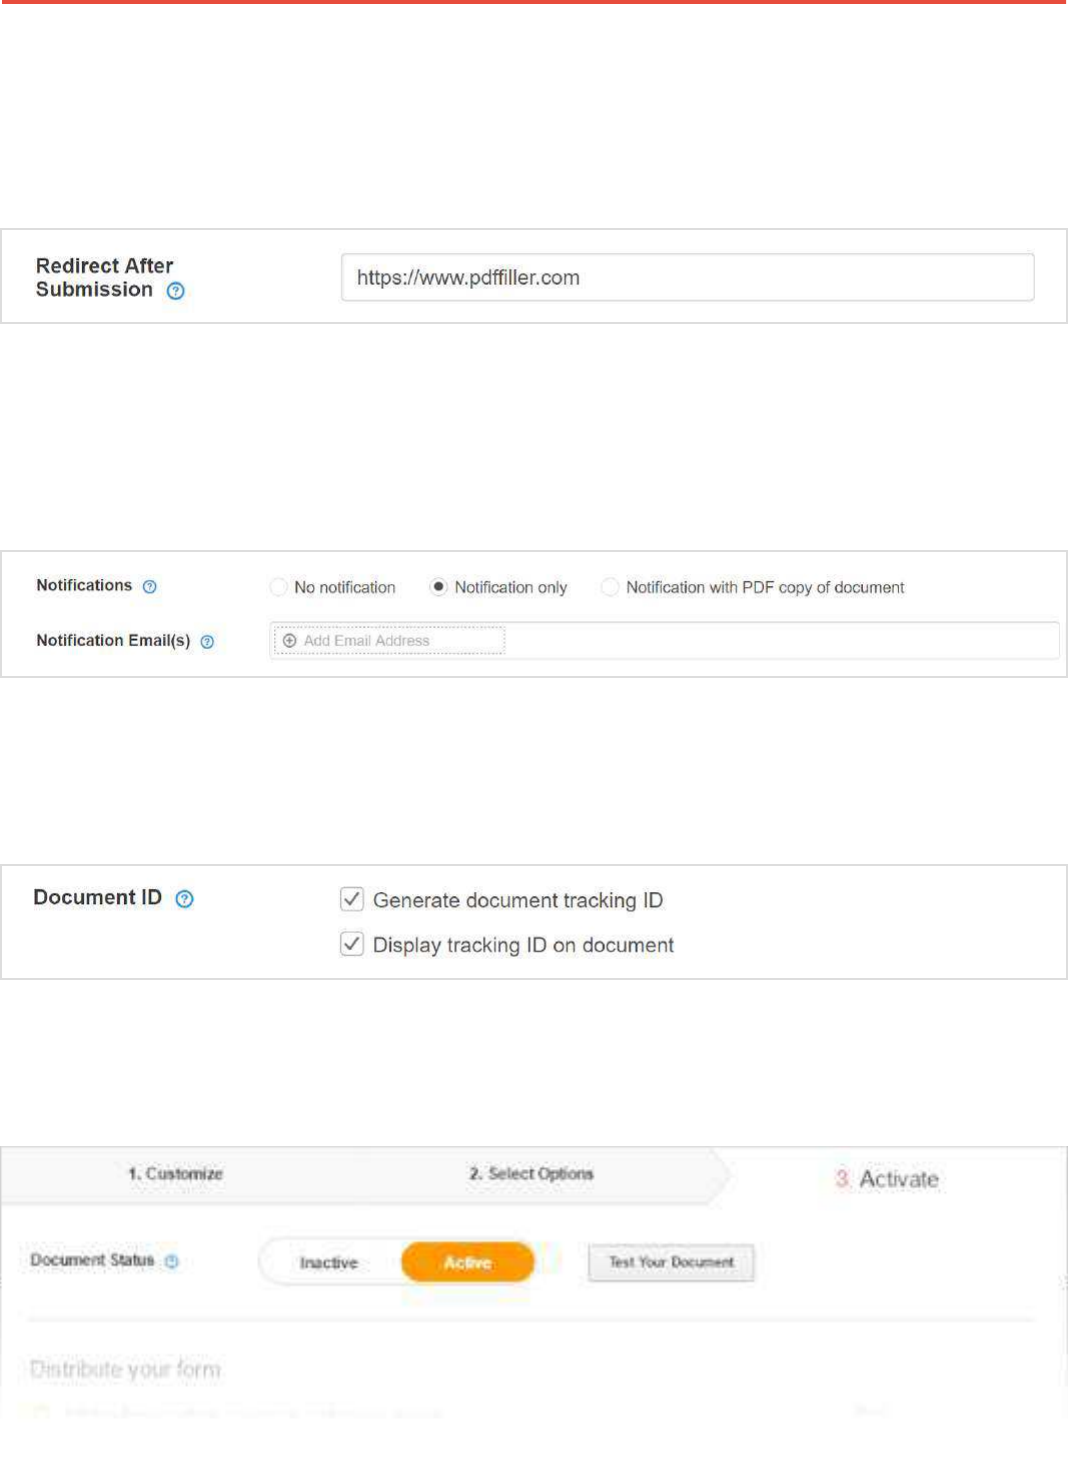
Redirect After Submission. As soon as visitors of your site fill and submit the document, you
can redirect them to any webpage you like — just insert the URL address of the web page in
the text field.
Notifications. You can choose whether or not to receive an email notification every time
somebody submits the document. Enter email addresses of those who need to receive
notifications.
Document ID. If you choose to use this option, PDFfiller will generate a unique ID that can be
used to track the document.
After you’ve selected all the relevant options, click Activate at the bottom of the page; this will
open the Activate tab.

Guidebook 53
Set the Document Status. Change the document’s status to “Active” or “Inactive”.
Once the document is active, you will be able to distribute it using its URL address, HTML
code, or QR code.
Your website’s visitors will be able to open the document in the PDFfiller editor where they can
easily fill, sign, and submit the document with just a few clicks.
QR Code
Share your fillable document via QR code to allow instant access from any mobile device.
Download the QR code and add it to any printed document, booklet, leaflet, etc.
Smartphone users will be able to scan the code with their cameras to easily access the document
on their devices.
Guidebook 54
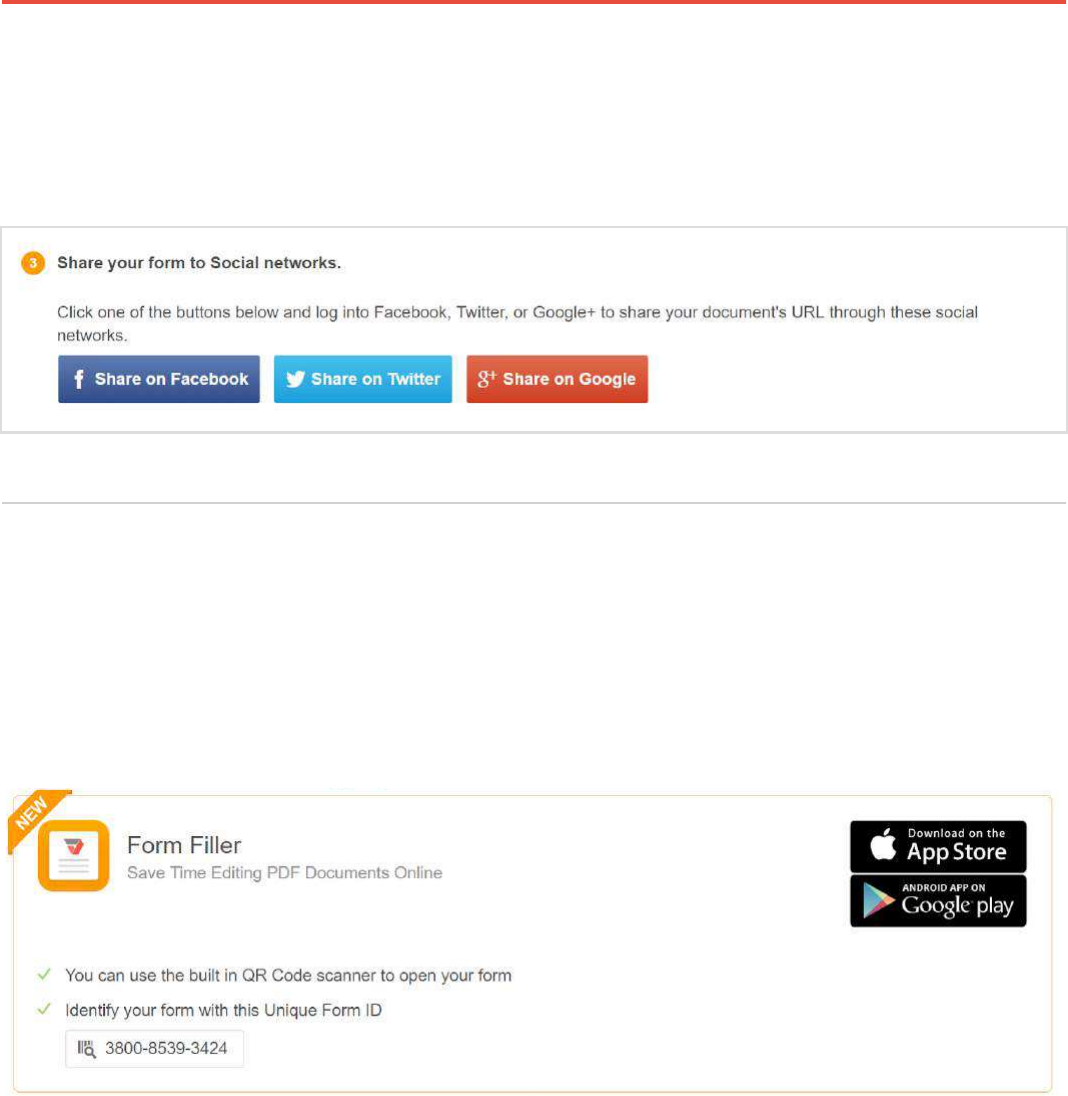
Social Networks
You can also share your document through social networks such as Facebook, Twitter or Google+.
A separate downloadable application allows your forms to be available at all times on any mobile
device. To install the Form Filler App on your mobile device, use the links to the App Store or
Google Play.
To fill and submit a hosted fillable form, all you’ll have to do is just open the link or scan the
QR code.
Mobile Version
Guidebook 55
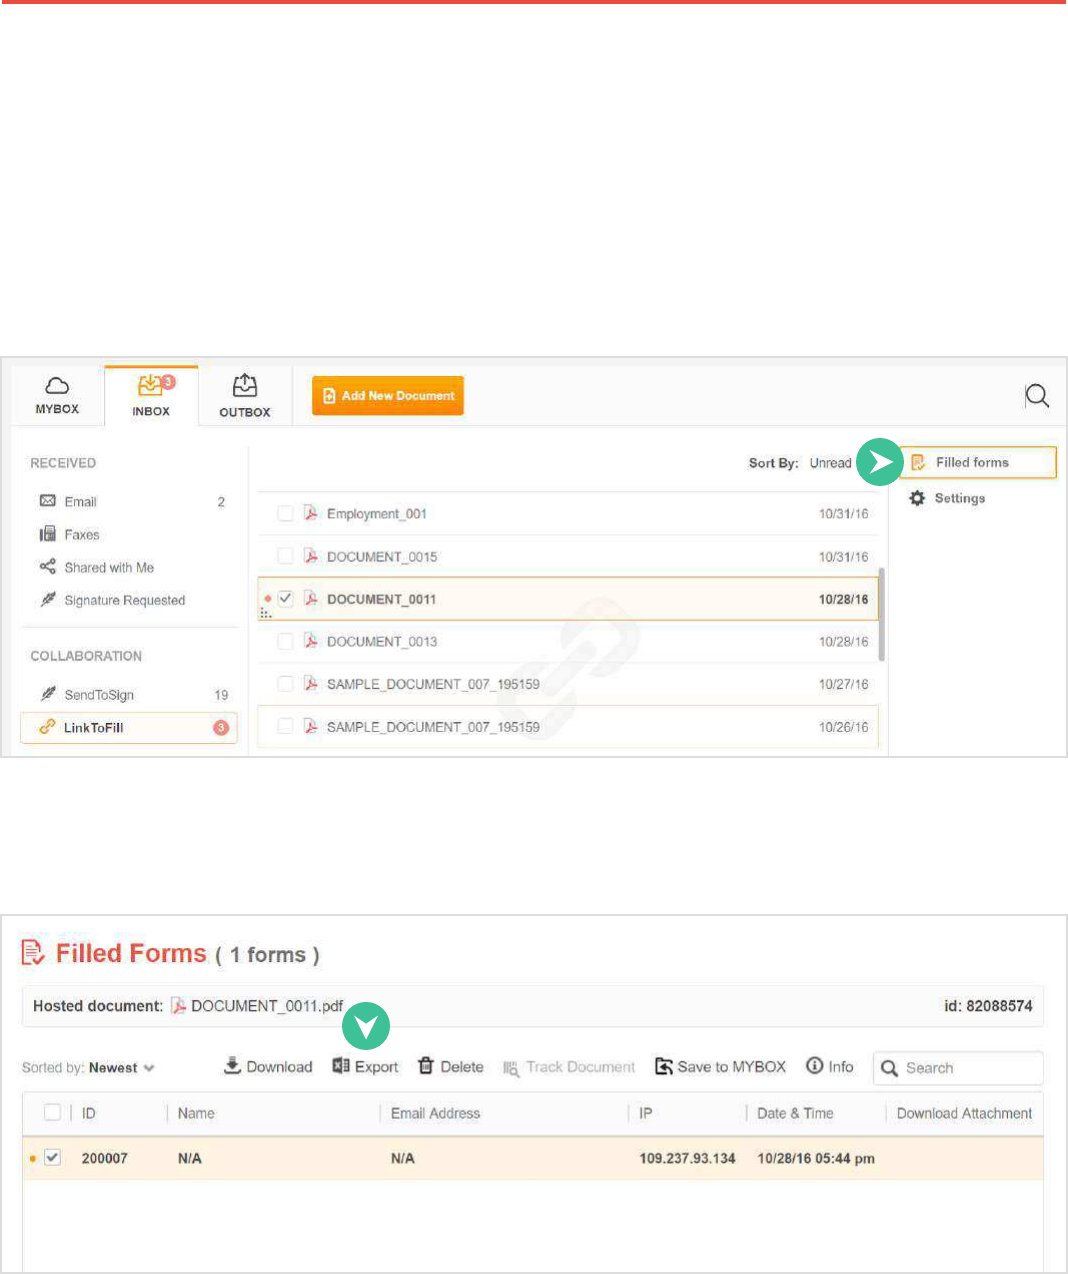
Extract Data into Excel
Export data from filled PDF documents as an Excel spreadsheet.
To access the completed document, go to MY DOCS > INBOX > LinkToFill. Select the document
and click Filled forms.
To export information from the document as an Excel spreadsheet, click Export.
Guidebook 56
Notifications when Filled
Every time somebody fills and submits the document, you’ll receive an email notification.
You can access the document using the link included in the notification.
Store and Access All Filled Forms
Access your filled forms anytime and from any device by keeping them in secure cloud storage.

Guidebook 57
Go to MY DOCS > INBOX > LinkToFill and select the document you need.

Guidebook 58
Add Fillable Fields
Drag and Drop Fields
Transform any document or form into a fillable form with smart digital fields
using our drag and drop wizard.
The technique for adding fields is the same for all field types. While editing a document, open the
Add Fillable Fields tab on the right.
Select the field you need, then drag and drop it where it should be in the document. Resize the
field by dragging its corners or edges.
Guidebook 59
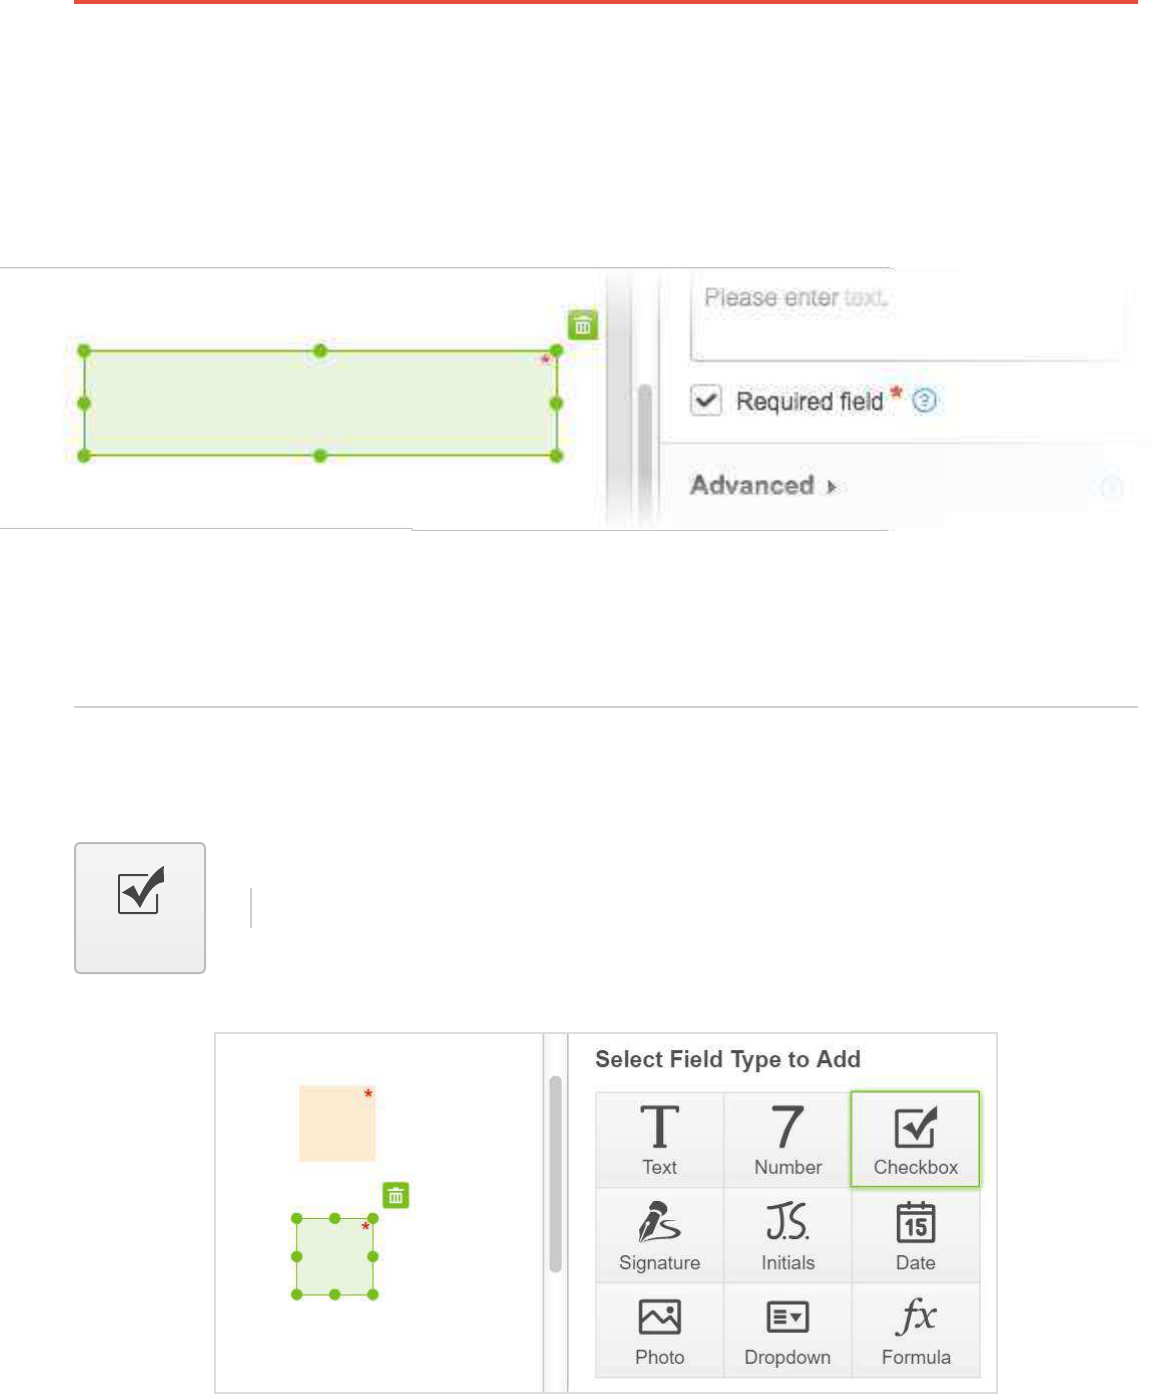
Required Fields
You can mark any field as Required. Check the box and a red asterisk will appear in the top right
corner of the field.
It is impossible to submit a form if a required field is empty.
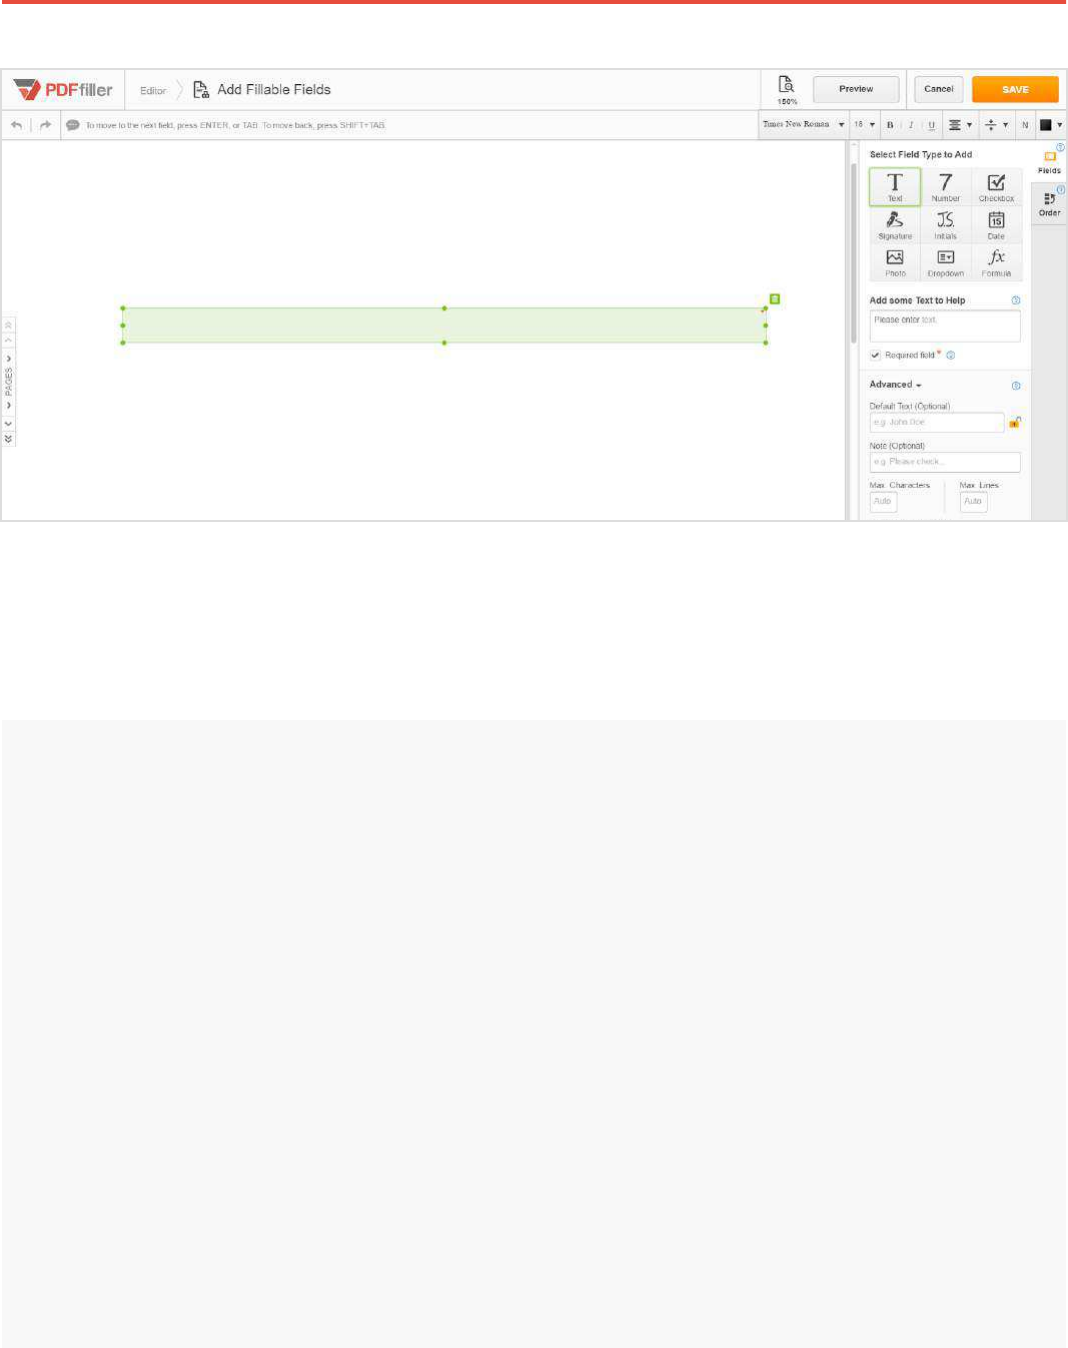
Checkboxes
Checkbox
To add a checkbox field, click the Checkbox icon and click where you want
to place it.

Guidebook 60
When you resize a checkbox, the next one will be of the same size so you will not have to resize
each checkbox.
Default. Select whether the default setting for a checkbox is checked or unchecked.
Note. Enter instructions or tips for filling the field. Users will see the note when they hover their
mouse over the field.
Database Field Name. Create a name for the field that will appear when you export filled data to a
spreadsheet or when you use a PDFfiller API.
To customize a checkbox, select it, then click Advanced
to expand options:
Type of Checkbox. You can format the checkbox to be filled with a simple checkmark, “X”, or circle.
Group Name. Group checkboxes together by entering the same group name for each box. When
filling the document, only one checkbox within a group can be checked at any time.
Text Field
To add a text field, click Text, then click where you want to place the field.
Text
Guidebook 61
Use the text formatting tools to preset the field’s text format including the font, size, color and
alignment of text. It will be impossible to change text format while filling the field.
Note. Here you can enter any instructions or tips for filling the field. Users will see the note when they
hover their mouse over the field.
Max Characters. Set the maximum number of characters allowed in the field. The “auto” setting will
limit that number to what can physically fit into the field.
To customize the text field further, click Advanced
to expand options.
Default Text is the text that will appear in the field when others fill the form. If you lock the field,
nobody will be able to replace the default text.
Max Lines. Set the maximum number of lines allowed in the field.
Database Field Name. Create a name for the field that will appear when you export filled data to
a spreadsheet or when you use a PDFfiller API.
Guidebook 62
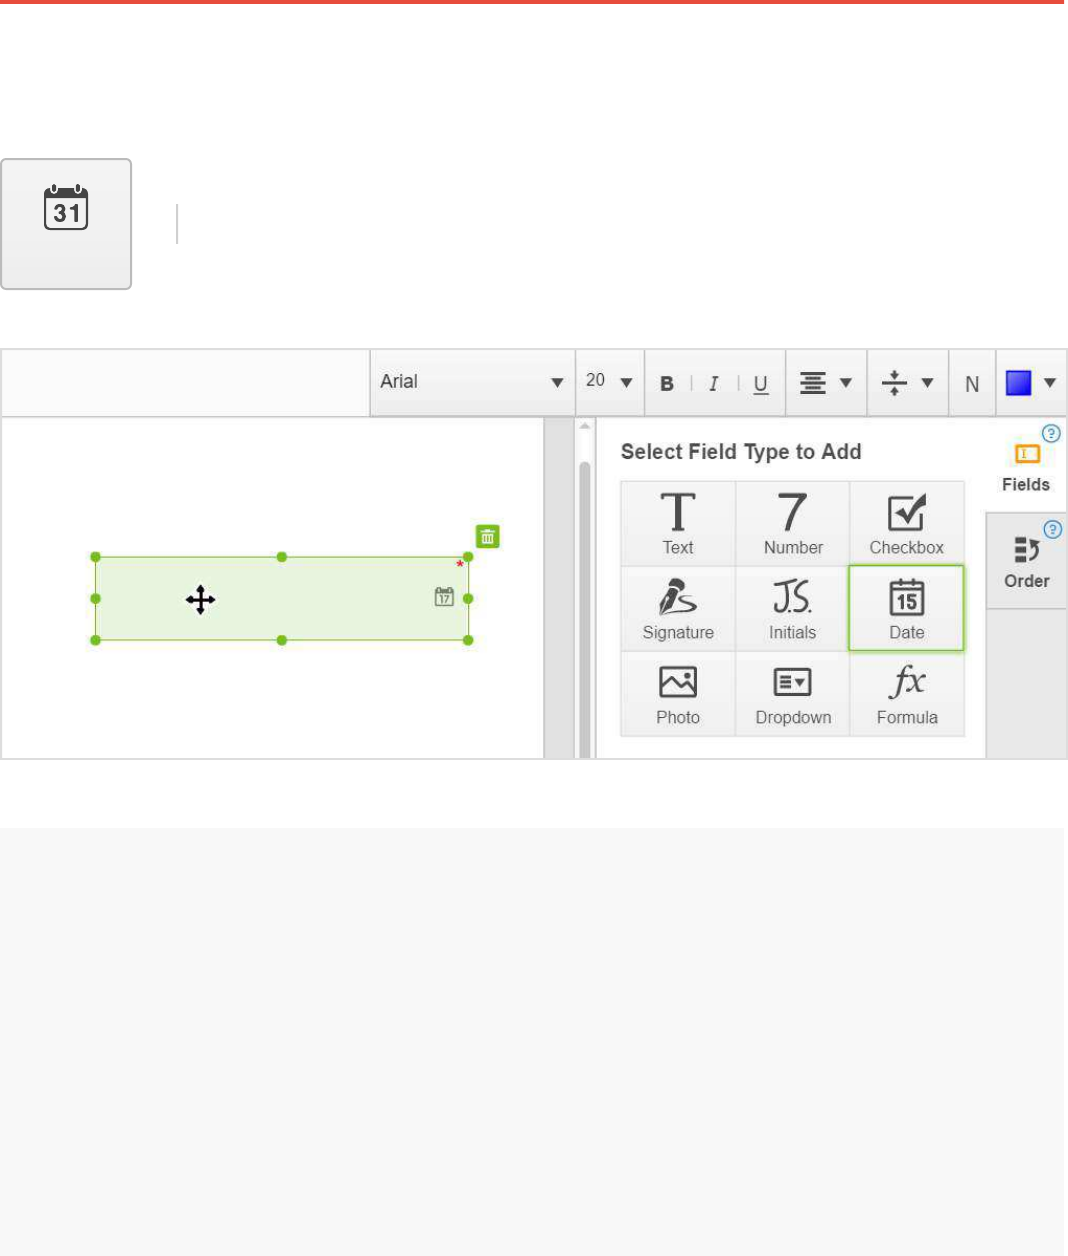
Date Field
To add a date field, click Date, then place the field where it should be
in the document.
Date
Default. Choose the date that the field will display before the user changes it.
Note. Enter any instructions or tips for filling the field.
To customize a date field, click Advanced to expand options.
Format. Select one of many date formats.
Database Field Name. Create a name for the field that will appear when you export filled data to
a spreadsheet or when you use a PDFfiller API.
Guidebook 63
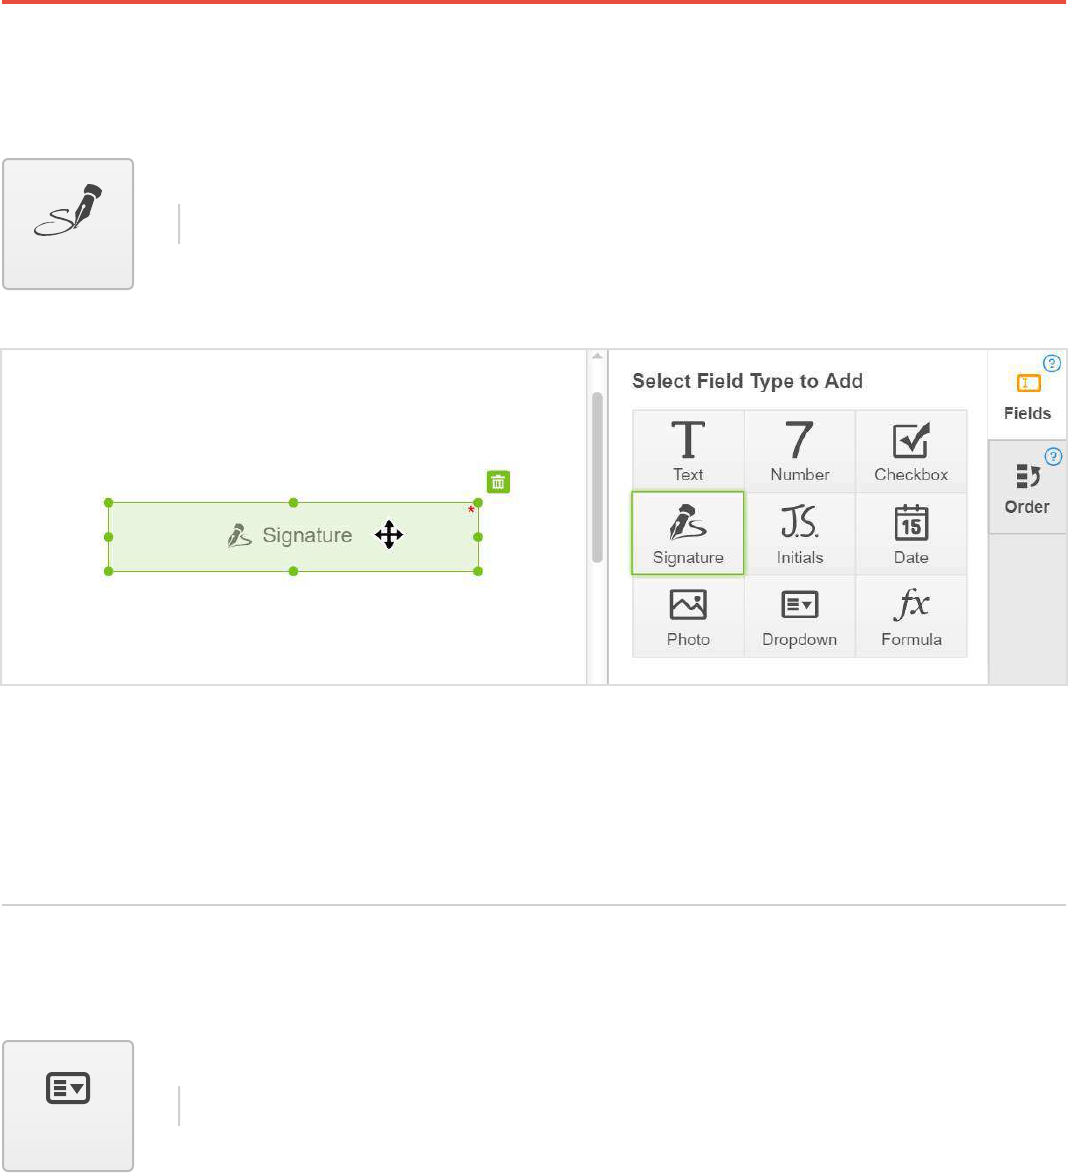
Signature Field
To add a signature field, click Signature and drag the field where you
want to place it.
Anyone filling the document can click the signature field and use PDFfiller’s signature tool to sign
the document.
Signature
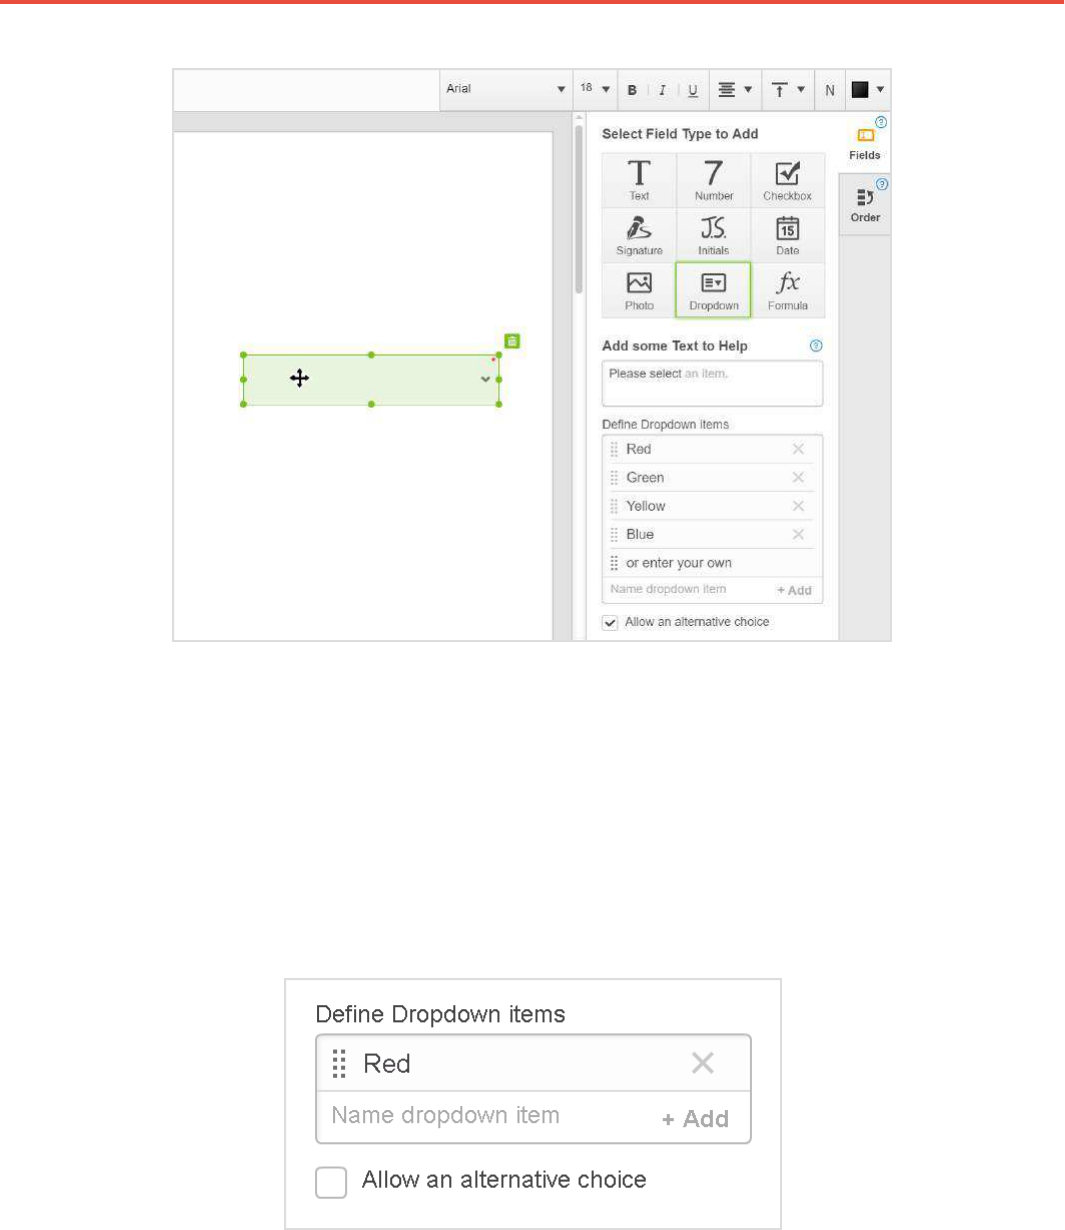
Drop-down Field
To add a fillable drop-down field, click Dropdown and drag the field where
it should be in the document.
Dropdown
Guidebook 64
To help users choose an item from the list, provide a suggestion in the Add Some Text to Help
textbox.
To add an item to the list, type a new value in the empty field and click + Add. To allow users to
provide their own alternative, check the respective box.
Guidebook 65
Use the text formatting tools to preset the field’s text format including the font, size, color and
alignment of text.
You can customize a number field just like a text field. To learn more, please refer to the
Text Field section above.
Default. Select the default item from the list you’ve created.
Note. Enter any instructions or tips for filling the field.
To customize a drop-down field, click Advanced to expand options.
Database Field Name. Create a name for the field that will appear when you export filled data to
a spreadsheet or when you use a PDFfiller API.
Number Field
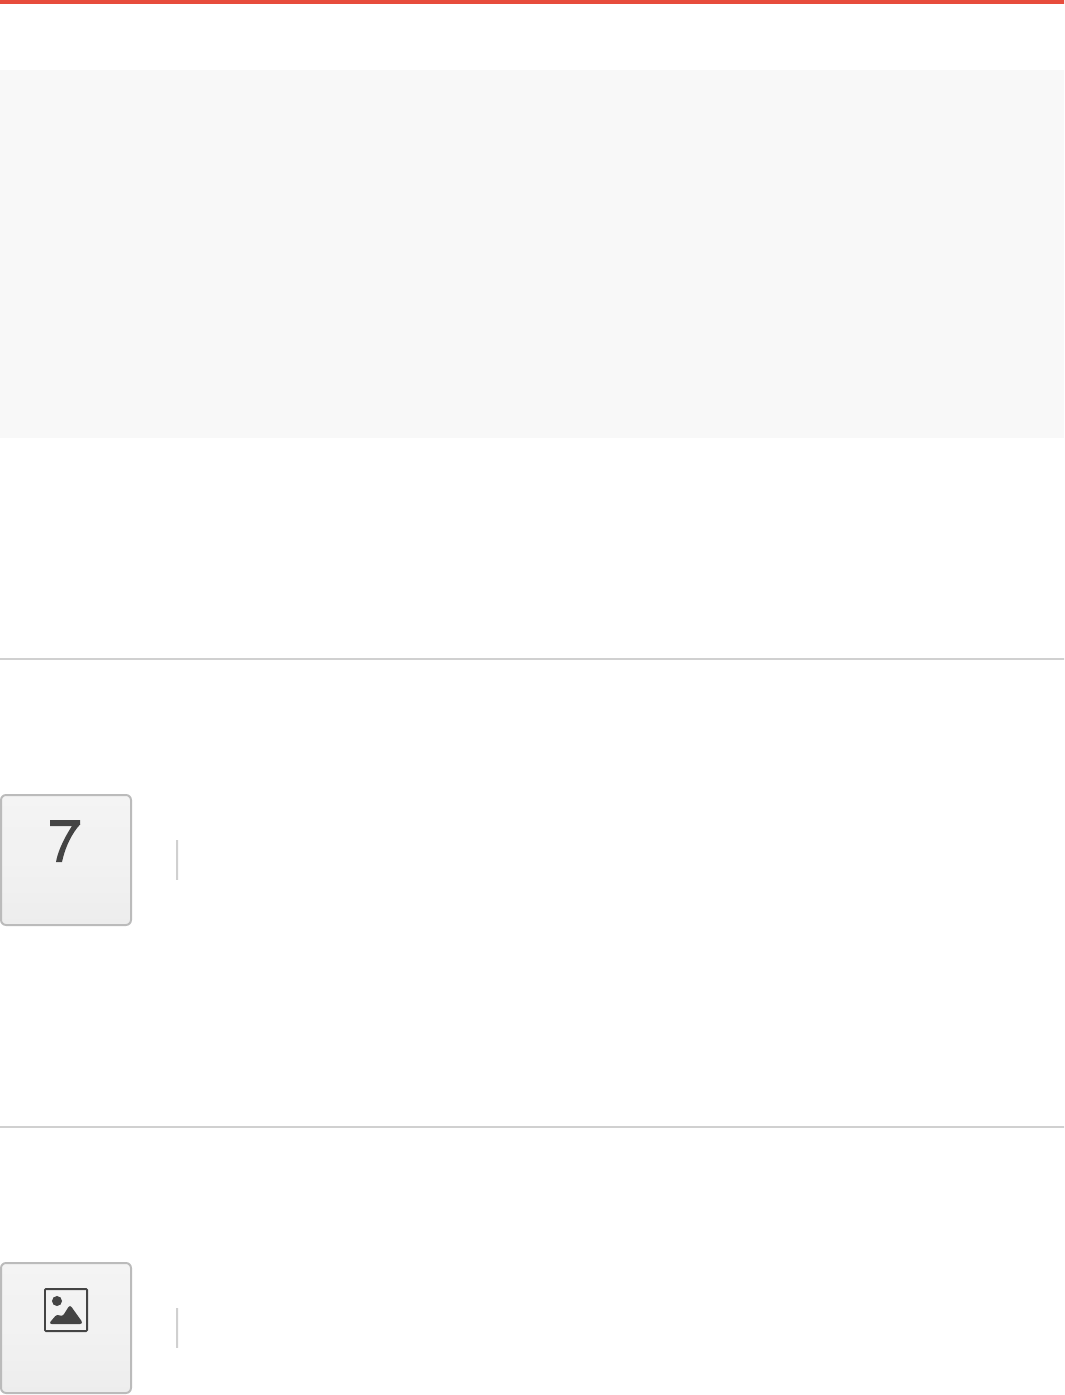
Photo Field
To add a number field, click the Number icon, then click where you want to
place the field.
To add a photo field, click the Photo icon, then click where you want
to place it.
Number
Photo
Guidebook 66
Anyone filling the document will be able to click the photo field and either upload a photo from their
device or take one with their webcam.
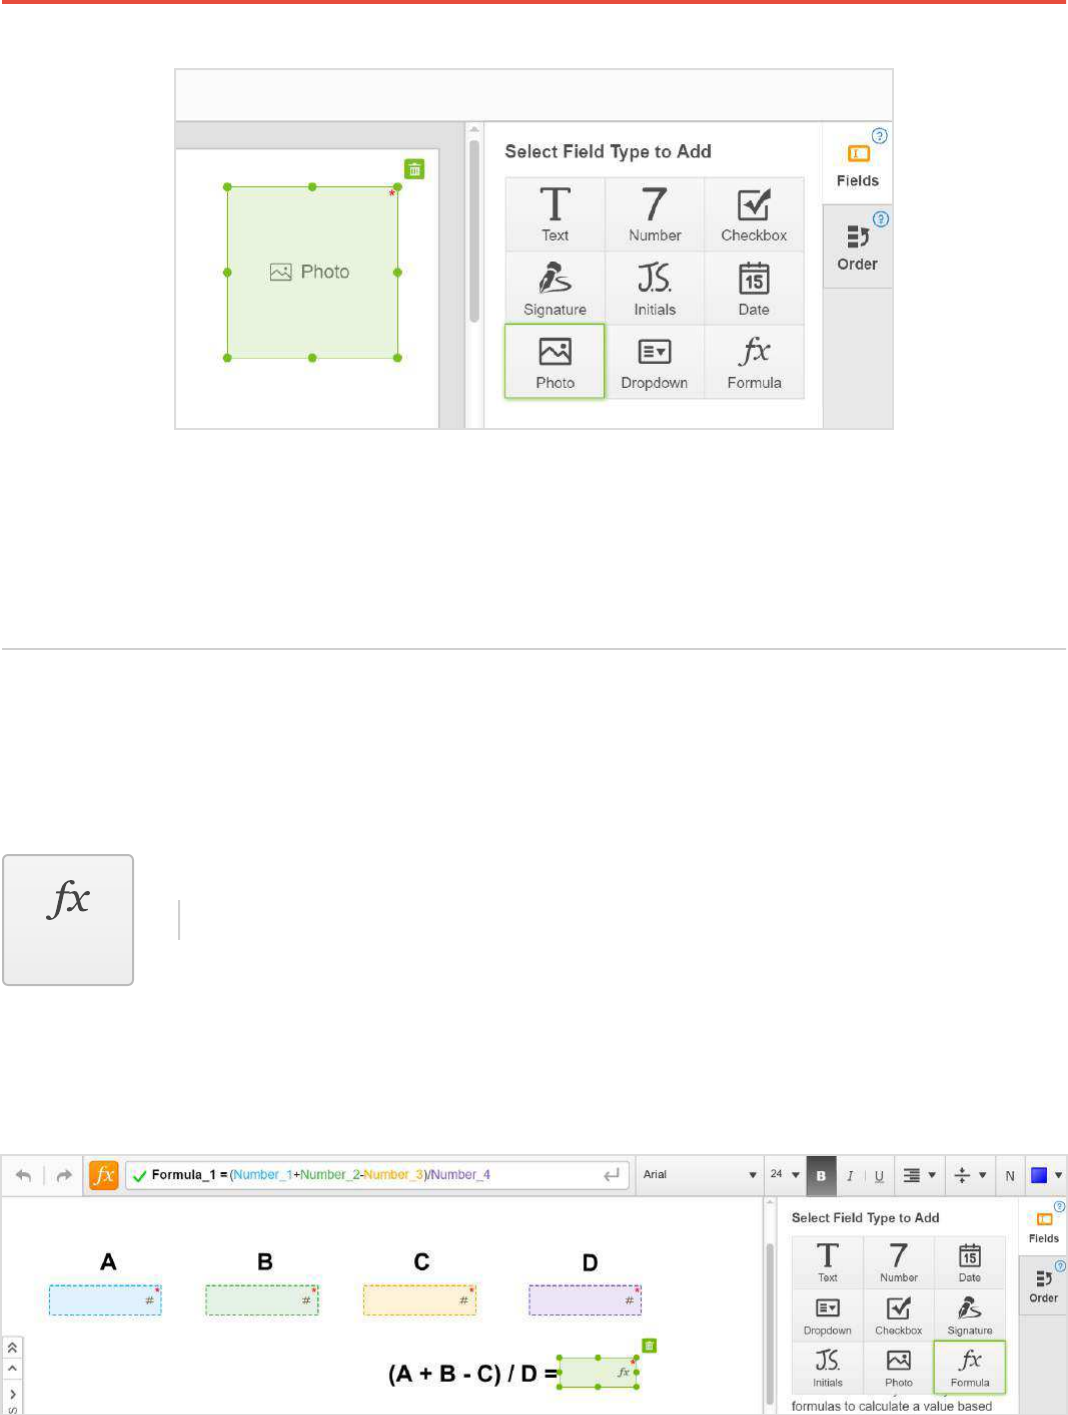
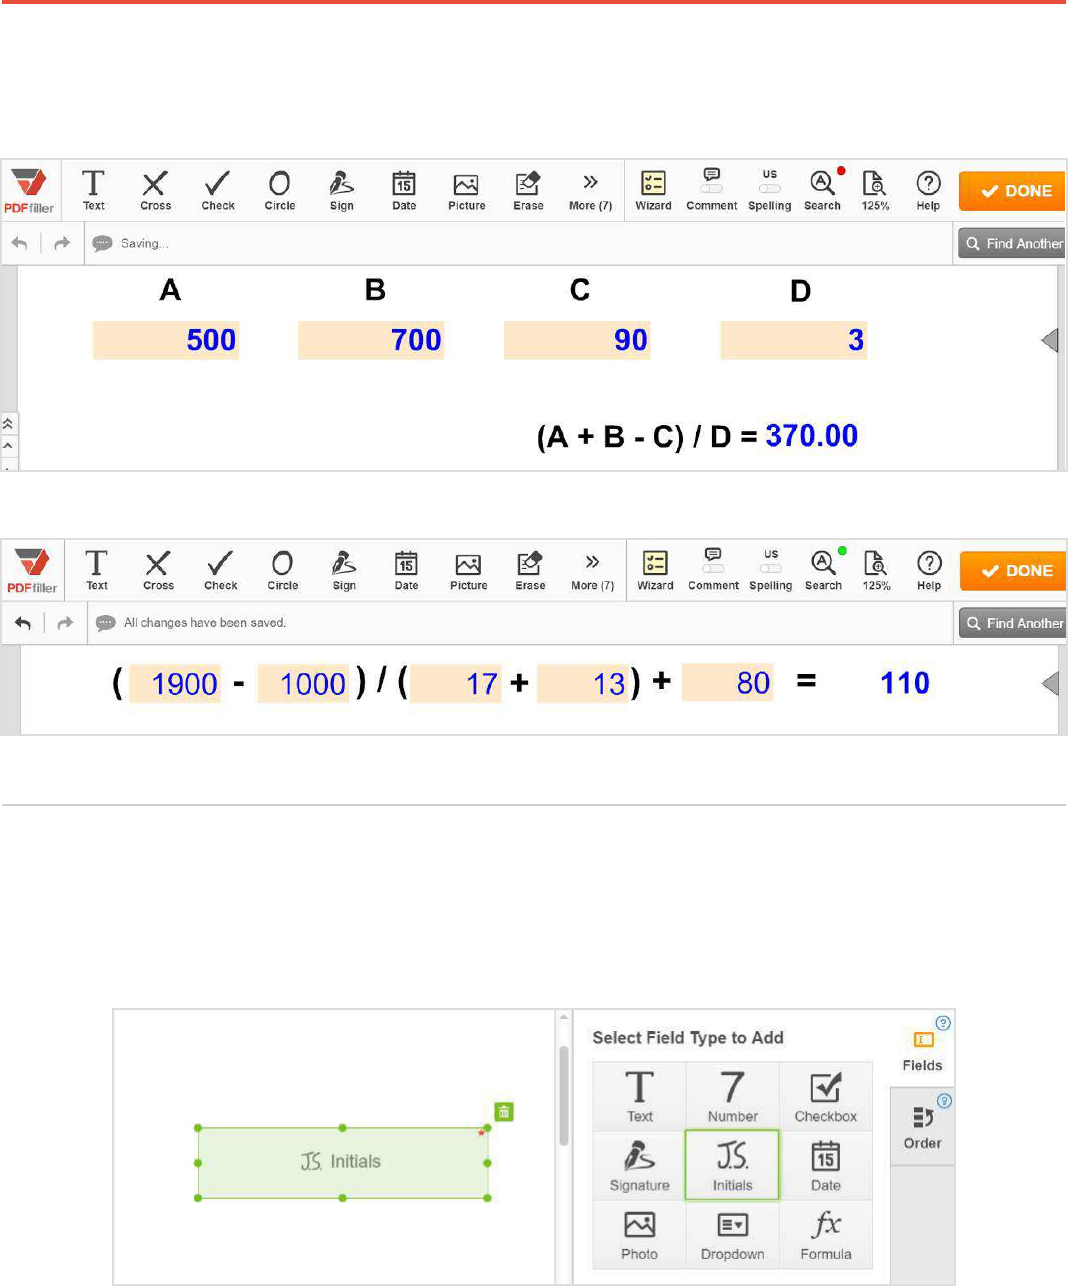
You can make simple calculations using the formula field.
Formula Field
First, you need to create number fields that will be used as operands. Then,
click Formula and place the formula field where you need it.
Formula
Write the formula in the formula box just above the document using the number fields as
operands. A click on a number field adds it to the formula.

Guidebook 67
Alternatively, you can use the Formula builder to create formulas. Add a formula field, click the fx
button to activate the Formula builder. Press New Number Field to add the first operand. Repeat
this step to add as many number fields as you want.
Select the first operand from the list and the first operator by pressing +, -, * or /, then select the
Guidebook 68
When you fill number fields, the formula field will automatically show the result of the calculation.
To add a fillable field for initials, click the Initials icon and drag the field where you want to place it.
Initials Field

Guidebook 69
There are three modes of filling a document containing fillable fields: Wizard, Fields and Off.
To activate the mode you need, click the Wizard icon in the main toolbar and use the selector that
Wizard Control
The Wizard mode allows you to go from field to field following the default sequence or in any other
order that might appear more appropriate. You don’t have to go through the document in search of
fillable fields, save time selecting fields from a convenient list.
The Wizard shows you the fields you’ve already filled, the current field and the
remaining fields, so you can easily estimate the progress you are making. To
expand the Wizard, click the Wizard icon.
As soon as you fill a field, the corresponding box in the Wizard will be checked and the instructions

Guidebook 70
To go to the next field following the default sequence, either click the Next button under the field or
press Enter, Tab or the Right/Down Arrow key on your keyboard. You can fill the document in
any other order by selecting fields from the list.
In the Fields mode, you can select fields by pressing the Tab or arrow keys on your keyboard or
using your mouse.
Use the selector to deactivate fillable fields. Be careful - the data you’ve already entered in the
fields will be deleted and will not reappear even if you return to the Wizard or Fields mode.
To restore the data, use the Undo button or press Ctrl+Z (Command + Z on a
Mac) on your keyboard.
Guidebook 71
Sign
Add a signature on Mobile
Create legally binding eSignatures faster than ever before.
Sign documents on the go by drawing your signature on any mobile device.
Tap the Signature icon, then tap the document where you need to put your signature. Create a
signature using your finger or select a signature if you have already uploaded it. The signature you
create will be saved for future use.
Guidebook 72
Add a Signature from your Computer
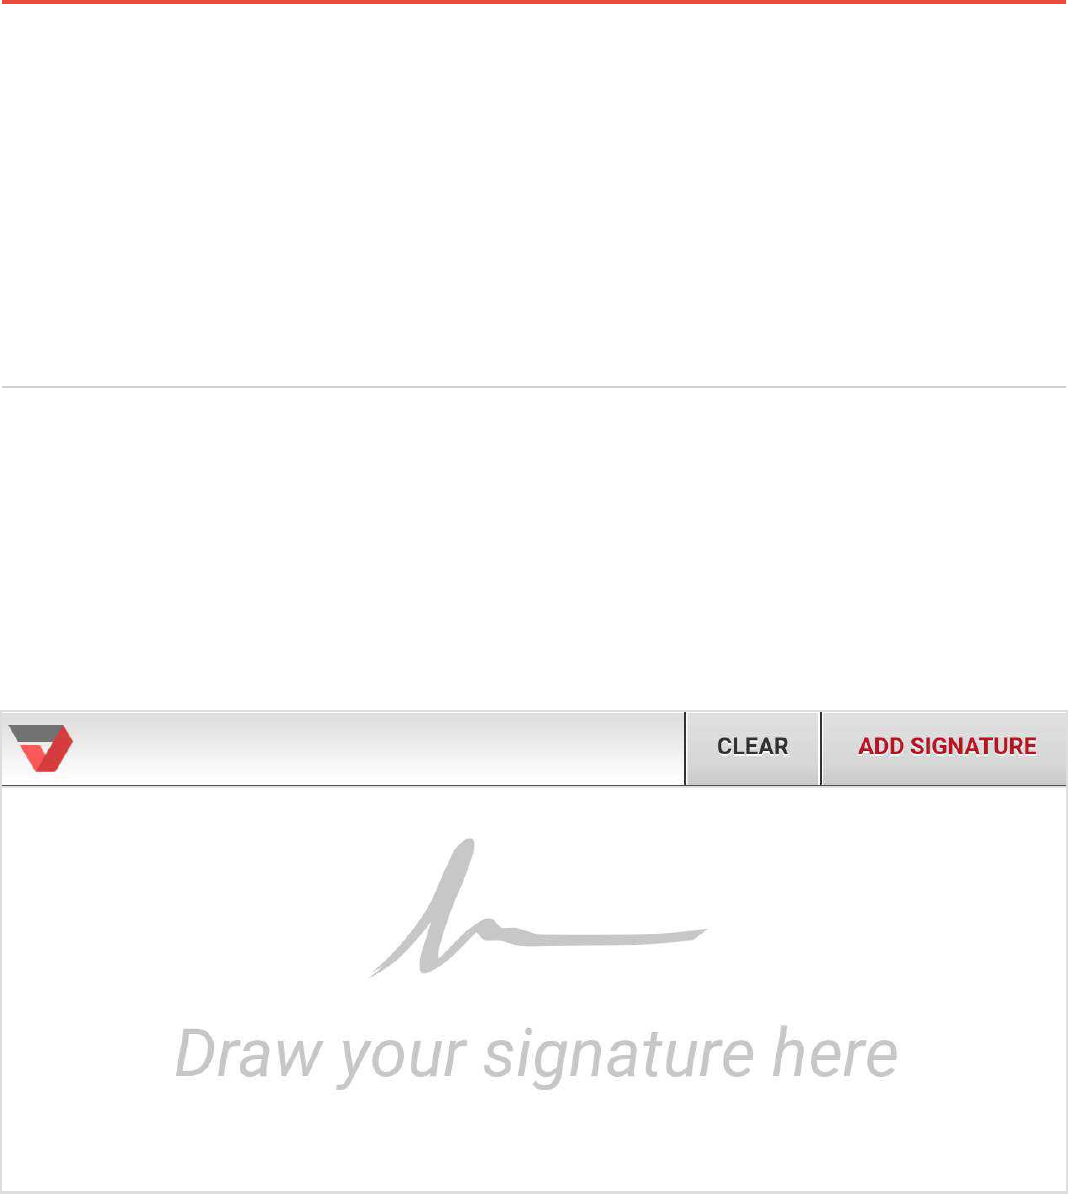
Draw a signature with your mouse or touchpad and add it to your document.
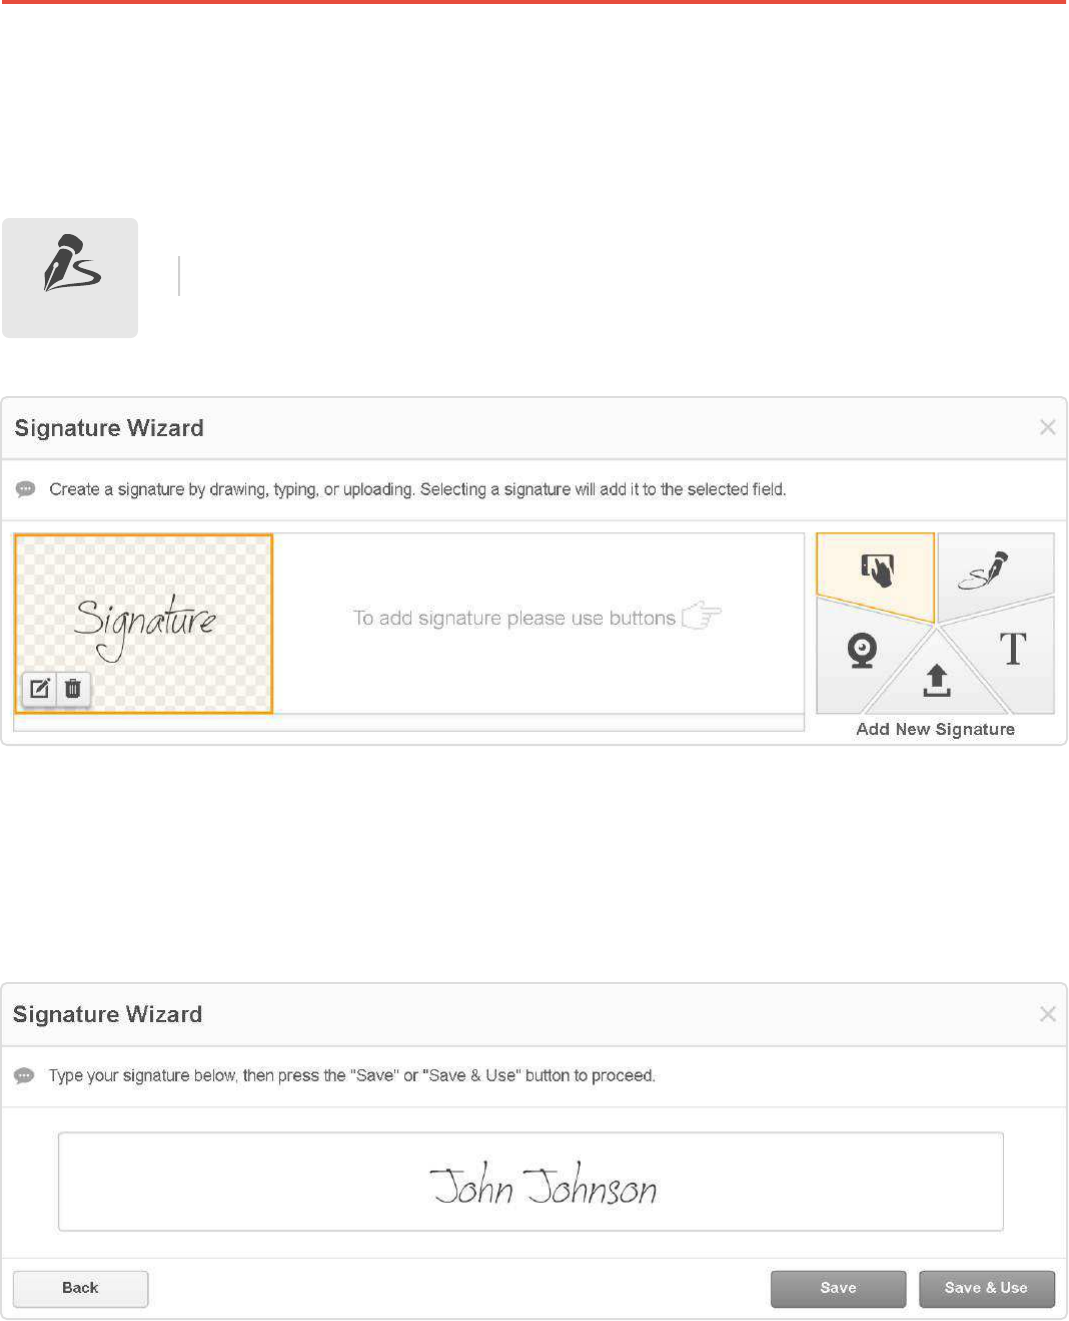
To type a signature, click the T icon and type your name. Click Save and Use to use the signature
immediately or Save to use it lately. In both cases the signature will be saved in the Signature
Wizard.
Sign
Click the Sign icon in the main toolbar to open the Signature Wizard that
allows you to type, draw, sign, upload, or capture a signature.

Guidebook 73
Click where you need to place the signature. Use the mini-toolbar to resize the signature
or change its position.
To draw, click the fountain pen icon and use your mouse or trackpad to draw your signature by
clicking and dragging. You can also change the color and thickness of the signature.
Save and place the signature exactly where you want it to appear.

Guidebook 74
Real Signature with a Photo
Make it easy to add a legally binding signature to a document by capturing a handwritten
signature with a webcam.
Click the webcam icon and allow PDFfiller access to your camera.
Sign a piece of paper and hold it up to the camera, so the signature fits inside the blue box,
then click Take.
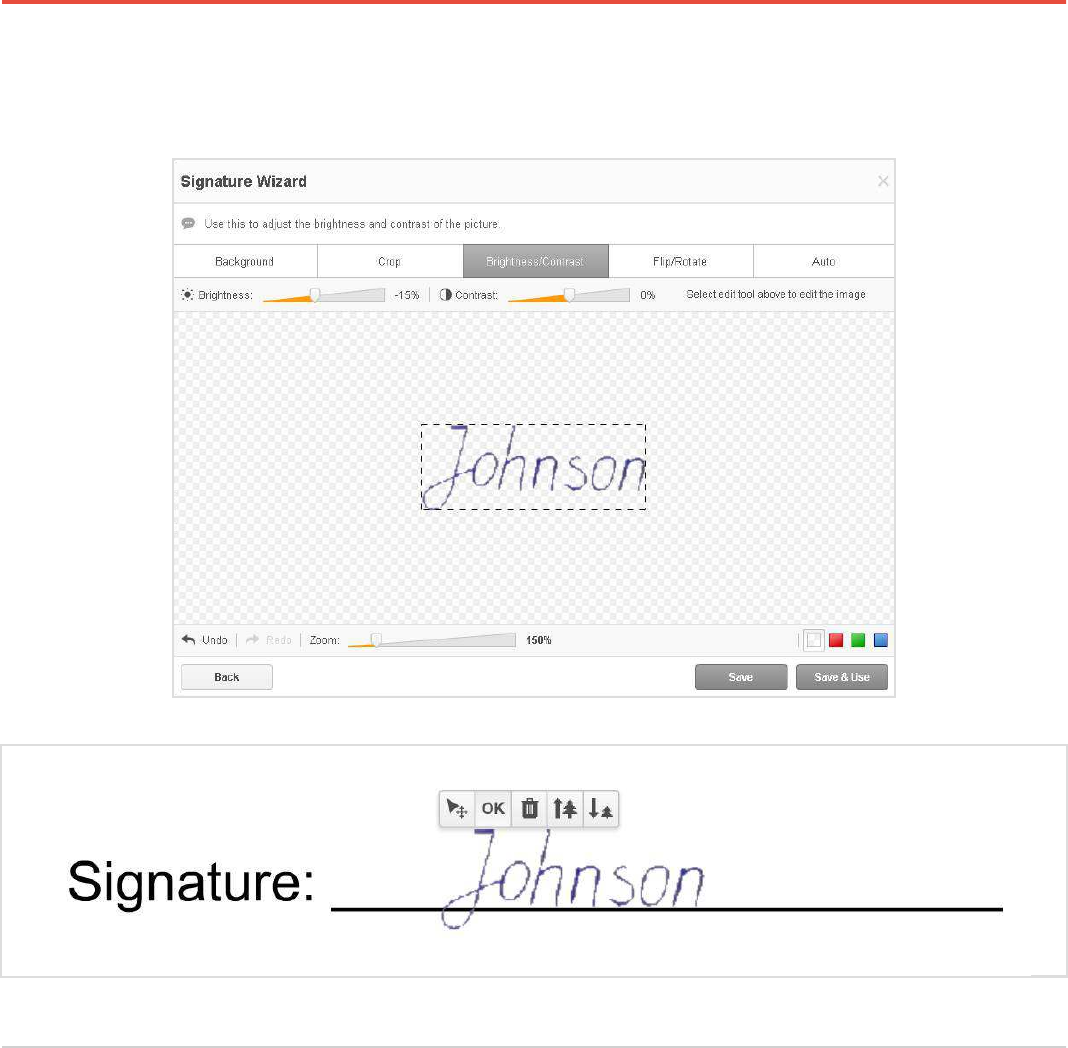
Guidebook 75
You can then choose to make adjustments to the scan or use the signature as-is.
Verified by PDFfiller Stamp
PDFfiller verifies your signature with a stamp showing the date when you signed the document.
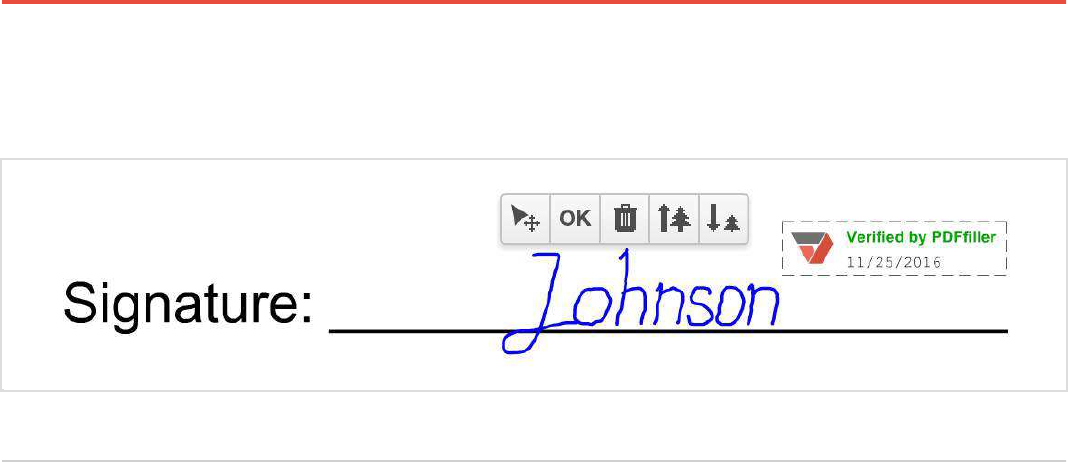
Guidebook 76
To show the stamp, click its icon.
Legal in 50 States
All signatures added in PDFfiller are legally binding under the E-Sign Act (2000).
Guidebook 77
Erasing, Highlighting, Redacting
and Drawing
Erasing
Easily customize documents to fit your needs with a variety of tools.
Quickly Erase any content from a PDF document with precision.
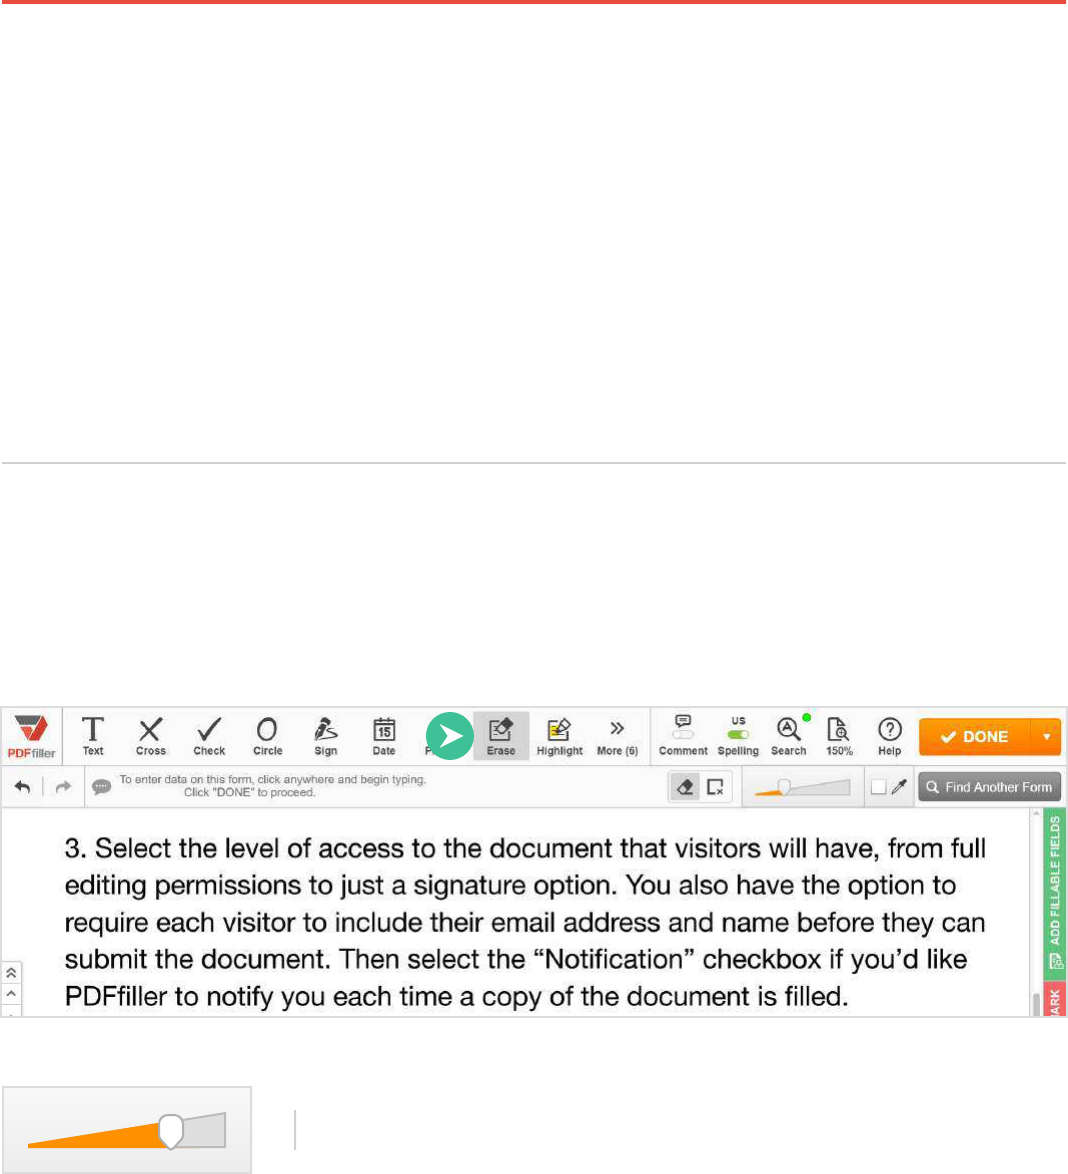
Clicking the Erase button will cause the eraser toolbar to appear under the editing tools.
Use the slider to change the thickness of the eraser.
Guidebook 78
Navigate to the content you want to erase, press and hold down the mouse button, drag the eraser
across the content, then release the button and click OK.
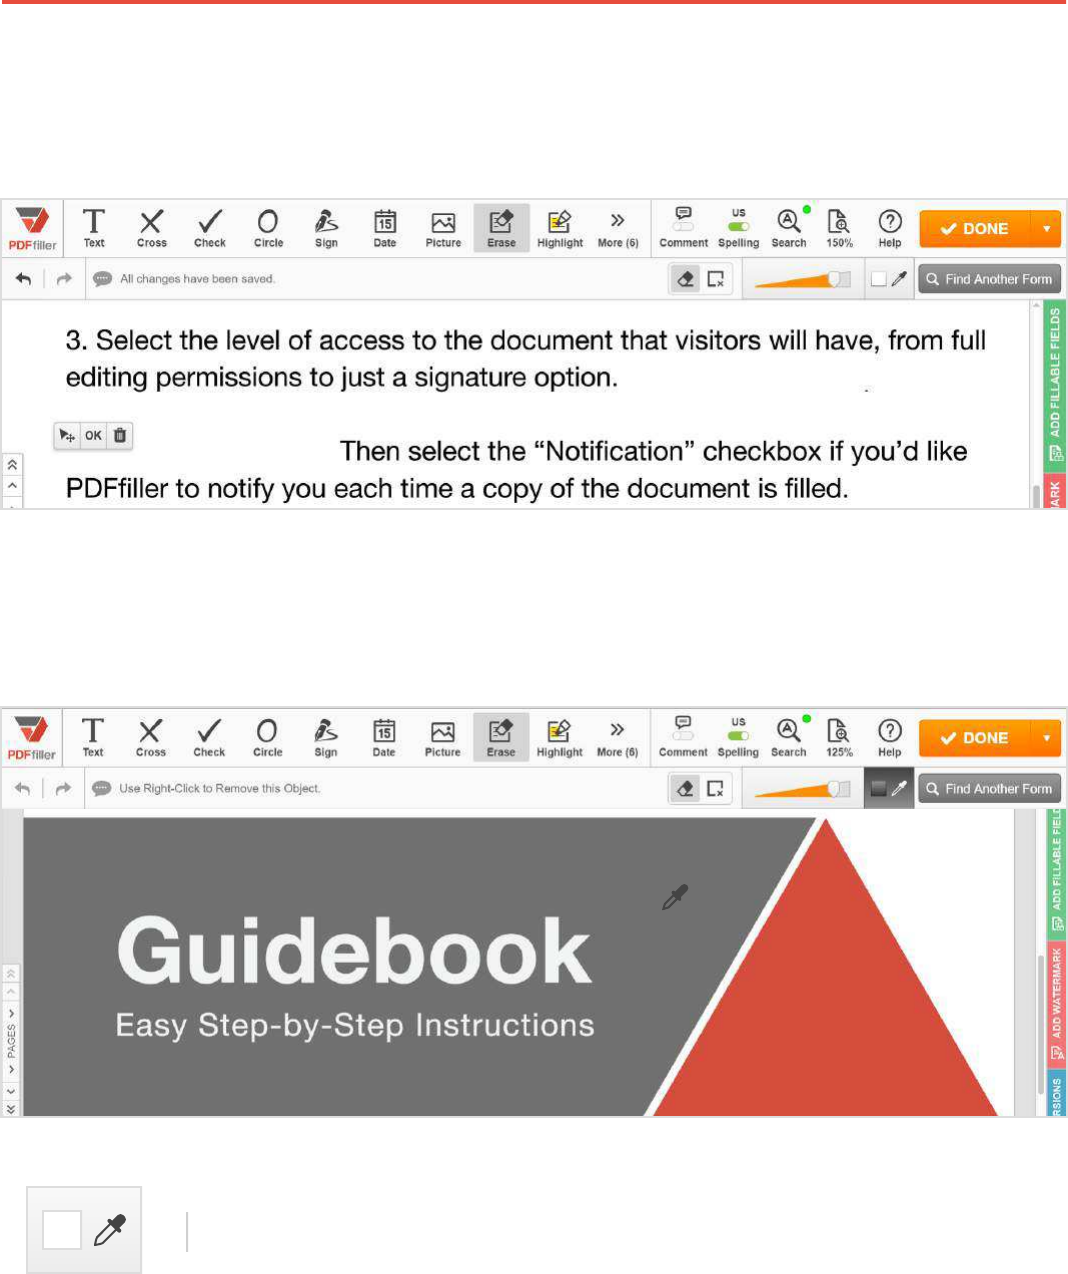
If the page color or background is not white, use the color selector to change the eraser’s color.
Click the color selector icon, then click once anywhere on the page or background.
Navigate to the content you want to erase, click and drag the eraser across it
and then click OK.

Guidebook 79
Highlighting
Highlight text in documents with a simple swipe of the cursor.
You can also delete content within a rectangle of any dimensions.
Click the rectangle icon, place the cursor at any corner of the rectangle you need to delete, press
down the mouse button, drag it to the opposite corner and release the button.
Guidebook 80
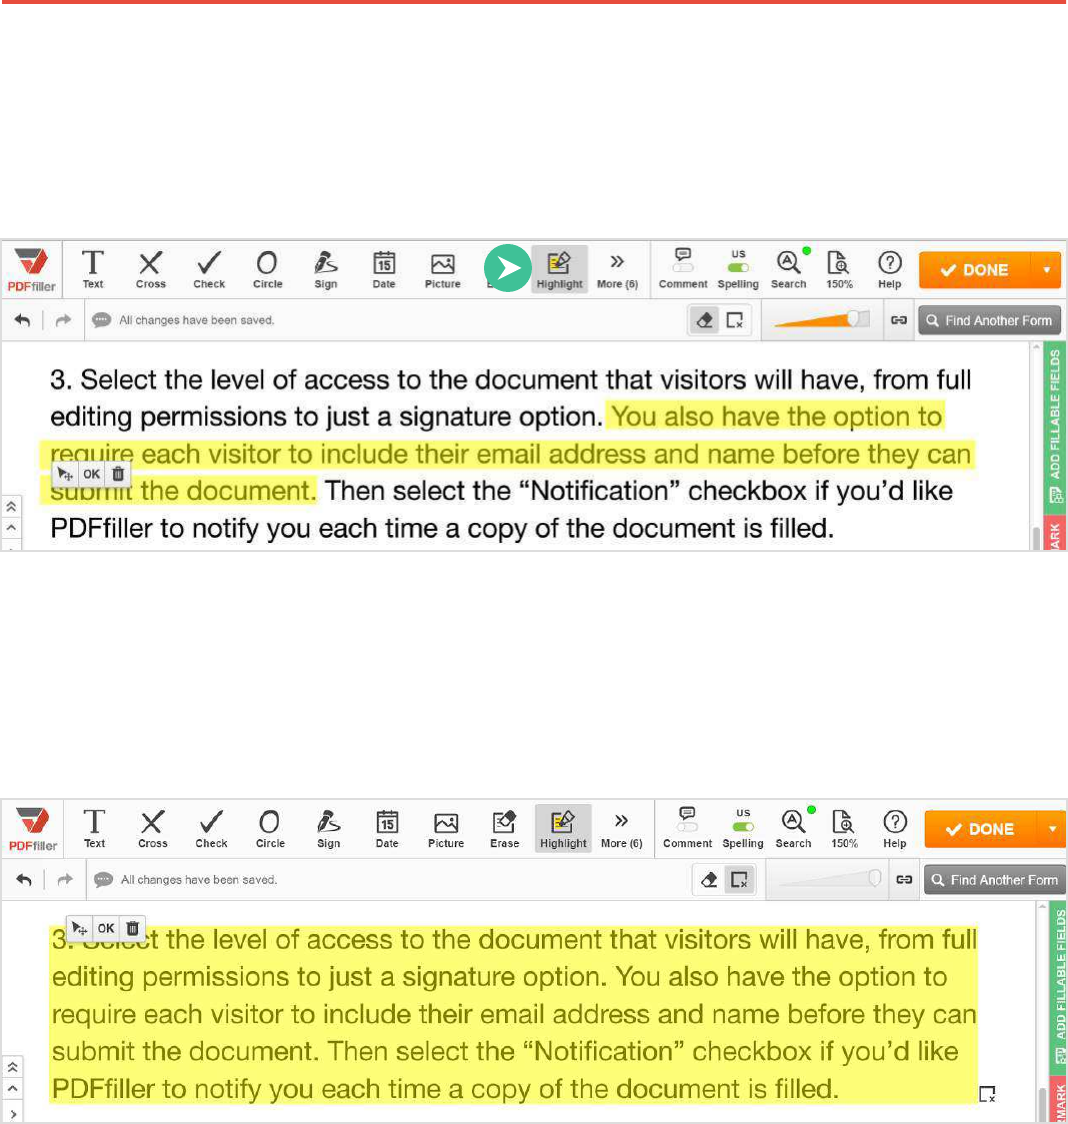
If you want to highlight an entire paragraph, click the rectangle icon, place the cursor in the top left
corner of the paragraph, press down on the mouse button, drag the cursor to the bottom right
corner and release the button.
If you need to highlight specific words or phrases, use the Search tool and its highlighter.
To delete a highlight, select the highlight and then click the trash can icon.
Сlick the Highlight button in the main toolbar, navigate to the content you want to highlight, press
and hold down the mouse button, drag the cursor across the content, then release the button and
click OK. Use the slider to change the thickness of the highlighter before or after highlighting.
Guidebook 81
You can blackout content within a rectangle of any dimensions.
Click the rectangle icon, place the cursor at any corner of the rectangle you need to blackout,
press down the mouse button, drag the cursor to the opposite corner and release the button.
If you need to redact specific words or phrases, use the Search tool.
Redacting
Use the Blackout tool to redact sensitive information.
Click the Blackout button in the main toolbar, navigate to the content you want to redact, then
click and hold down the mouse button while dragging your cursor across it. Use the slider to
change the thickness of the black line before or after redacting.
Guidebook 82
Drawing
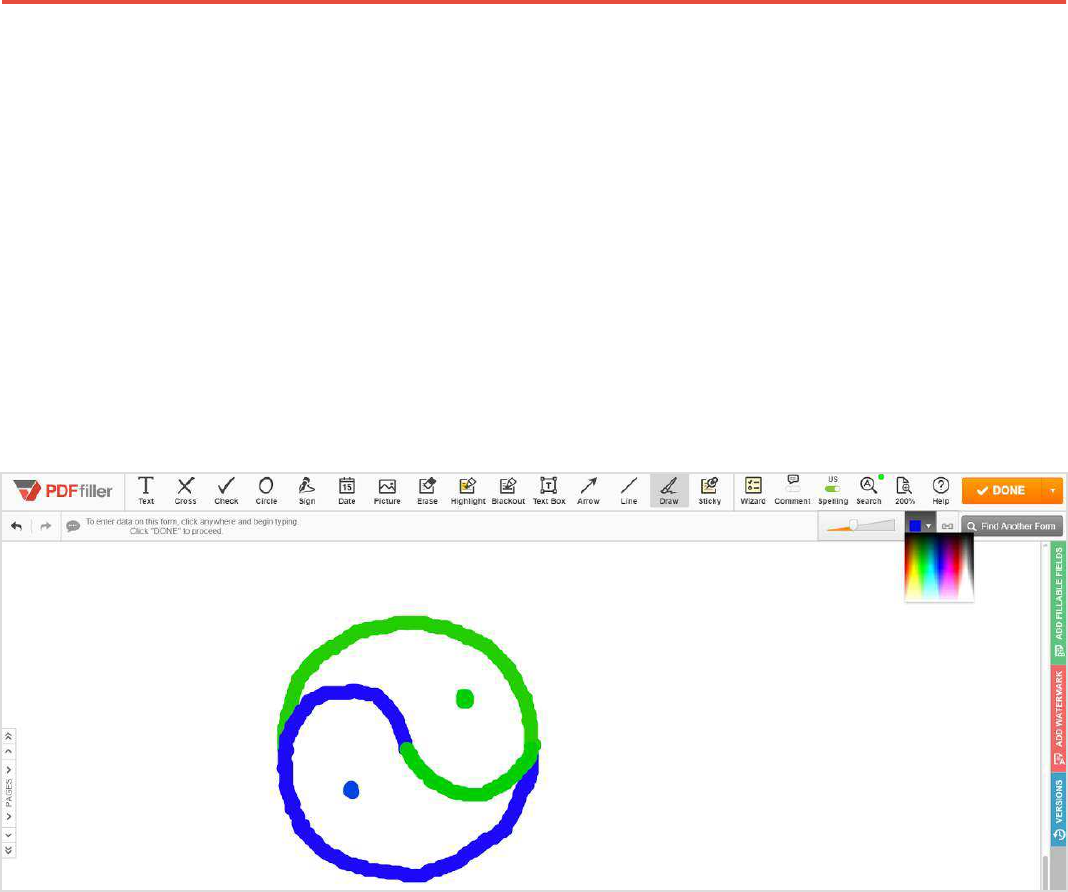
Use powerful tools to draw any shape.
Select the Draw icon, the drawing toolbar will appear under the editing tools. Use the slider to set
the thickness of the line. Click the color square and choose the color from the palette.
Click where you want to start and draw any shape by dragging. Release the mouse button to stop
drawing and click OK.
You can change the thickness and color of the line after you’ve completed the drawing. Select it in
the document and use the slider and the color palette.

Guidebook 83
New Form and Document Creator
Create a New Form
Create new documents and customize their layout with a feature-rich
web-based online editor.
Create forms and add text, tables, graphics, images and drawings.
In My Docs, select a folder where you need to create a document and click Create Document.

Guidebook 84
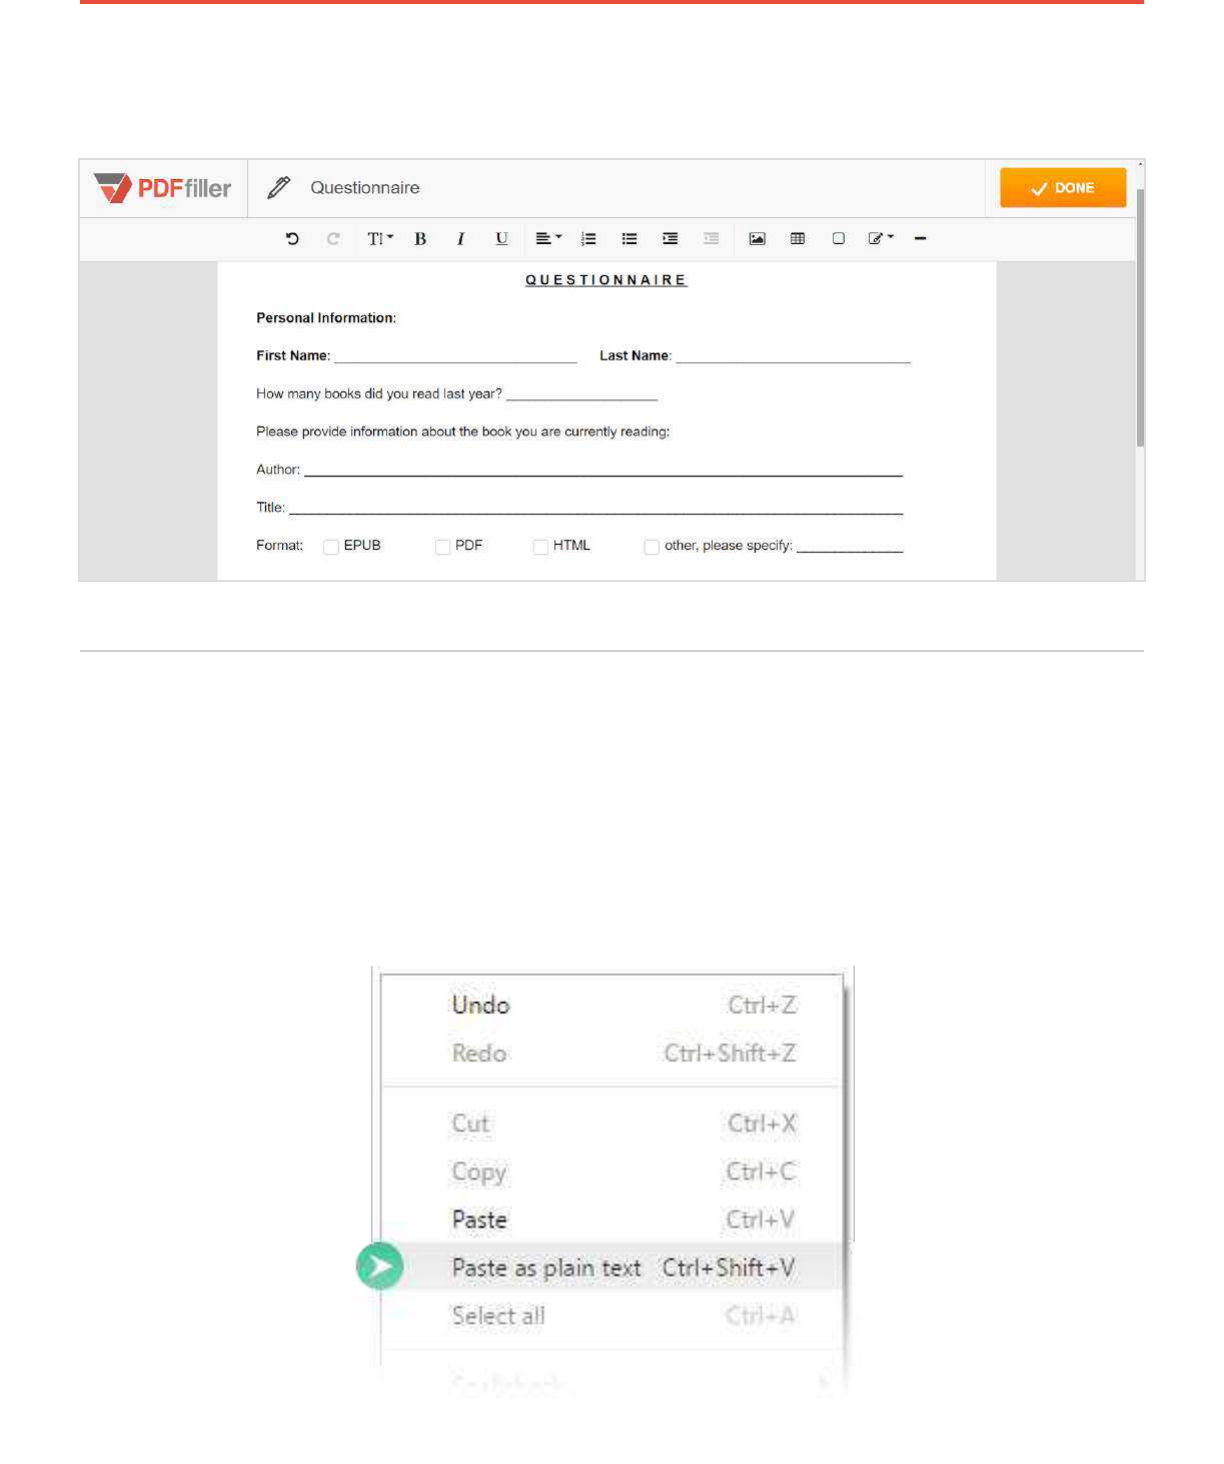
This will open a sample document in the PDFfiller Document Creator.
To rename the document, delete its default name, enter the name you would like, and press
Enter on your keyboard.
Guidebook 85
Delete the sample content before creating yours.
Add Text and Checkboxes
Adding text is easy. Just type it directly into the document or copy it from any other document.
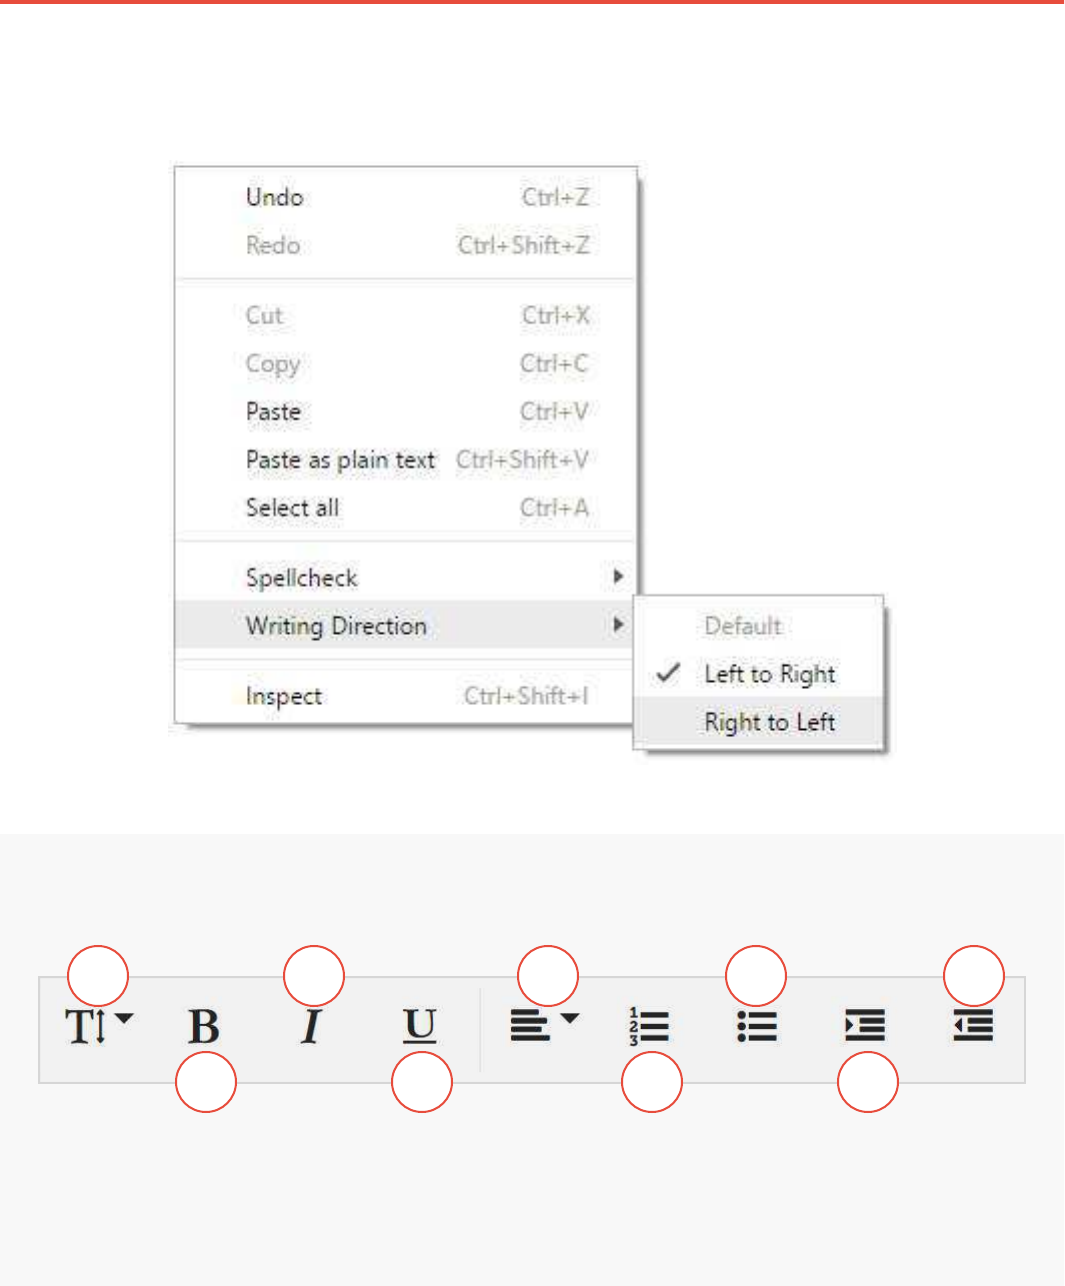
To paste text, press Ctrl+V or right-click and select Paste from the menu. You can also paste
unformatted text by selecting Paste as plain text from the menu or pressing Ctrl+Shift+V on
your keyboard.
Guidebook 86
To change the writing direction, select Left to Right or Right to Left from the menu.
Format text using these tools.
A. Font Size
B. Bold
C. Italic
D. Underline
E. Align
F. Numbered List
G. Bulleted List
H. Increase Indent
I. Decrease Indent
A
B
C
D F
G
H
IE

Guidebook 87
To add a checkbox, click Insert Checkbox in the toolbar. The check box will appear at the text
cursor’s position.
Add Tables
Enrich your documents by adding images and tables.
To insert a table, click Insert Table in the toolbar and move the cursor over the grid until you
highlight the number of rows and columns you need.

Guidebook 88
When you click in the table, the table tools will appear.
To add a header, select H.
You can insert and delete rows and columns.
Guidebook 89
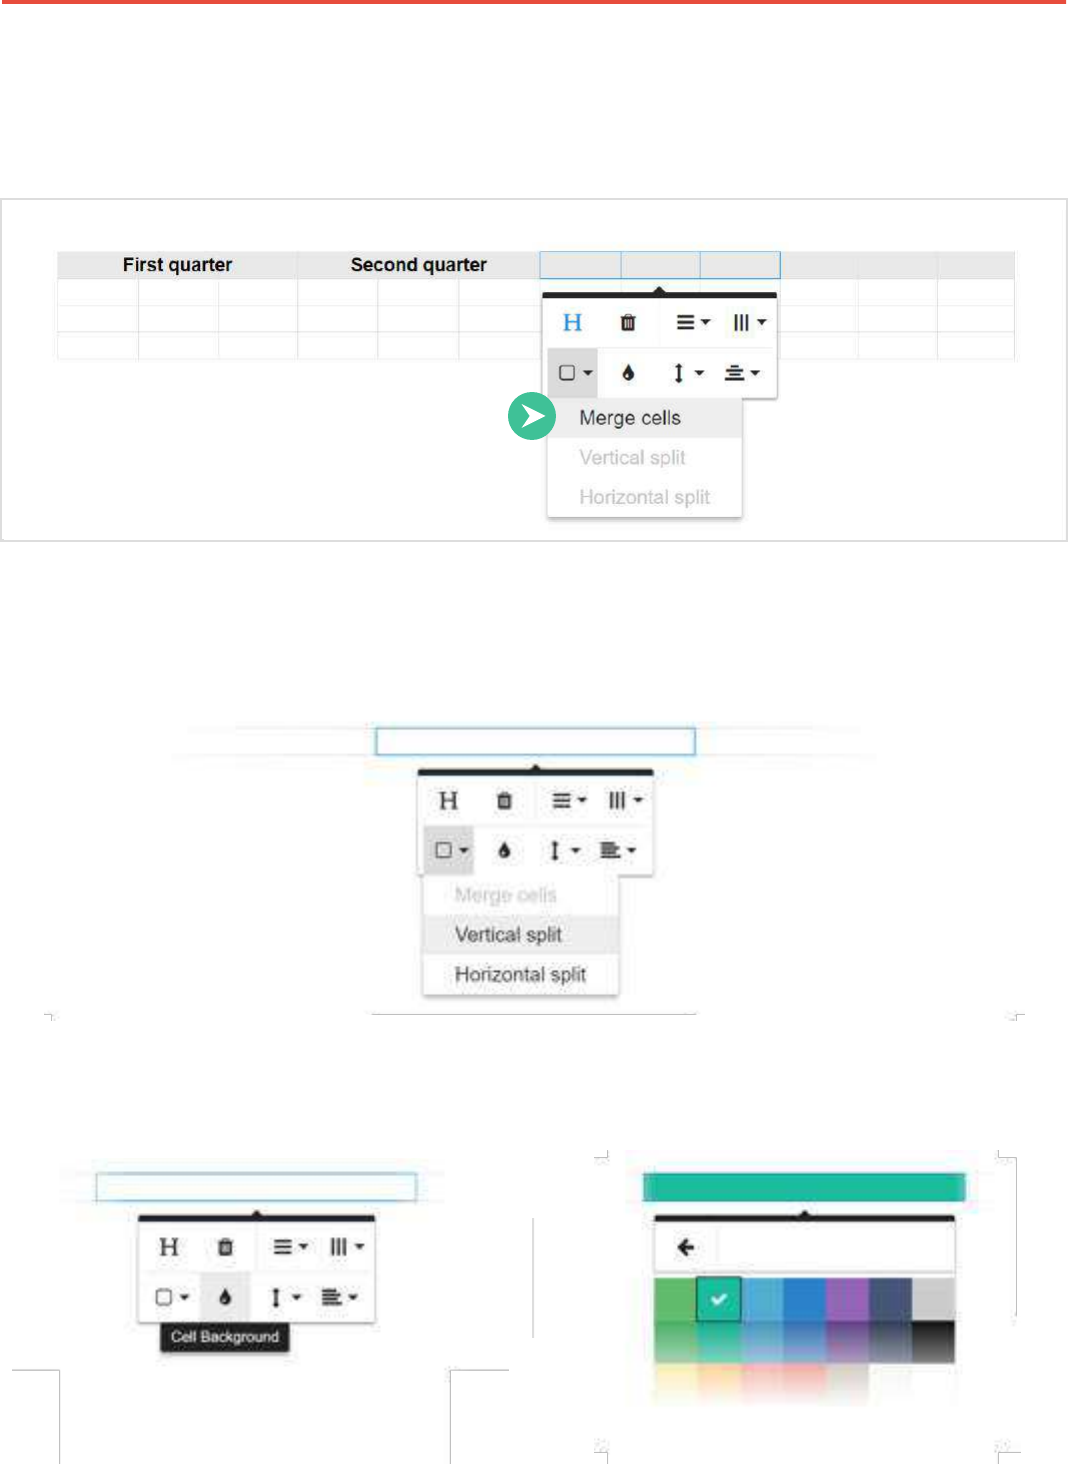
To merge cells, select the cells you want to combine, click Cell in the table tools and select
Merge cells. You can merge cells located in the same row or in the same column.
You can split a cell in two either vertically or horizontally. Click in the cell you need to split and
select Vertical split or Horizontal split from the table tools.
To change the cell background, click in the cell, click Cell Background and select the color
you want.
Page
Guidebook 90
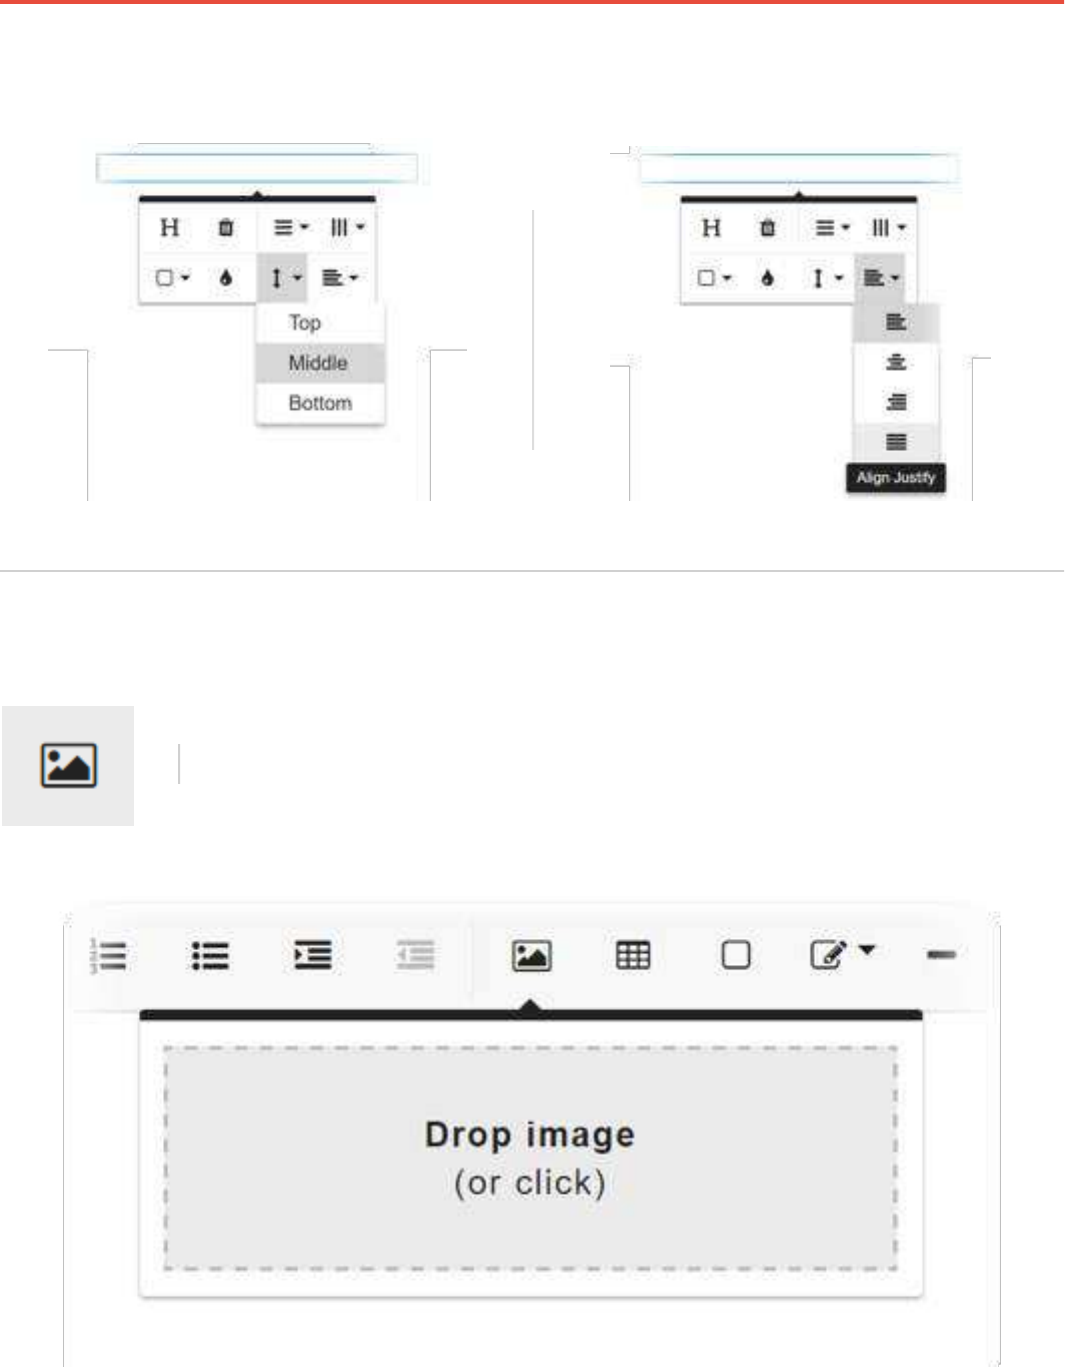
Use the alignment tools to change position of text in cells.
Add Images
To add an image to the document, click in the toolbar or press Ctrl+P on your
keyboard and then either drag-and-drop the image from your device into the
box or click in the box to upload the image.
Guidebook 91
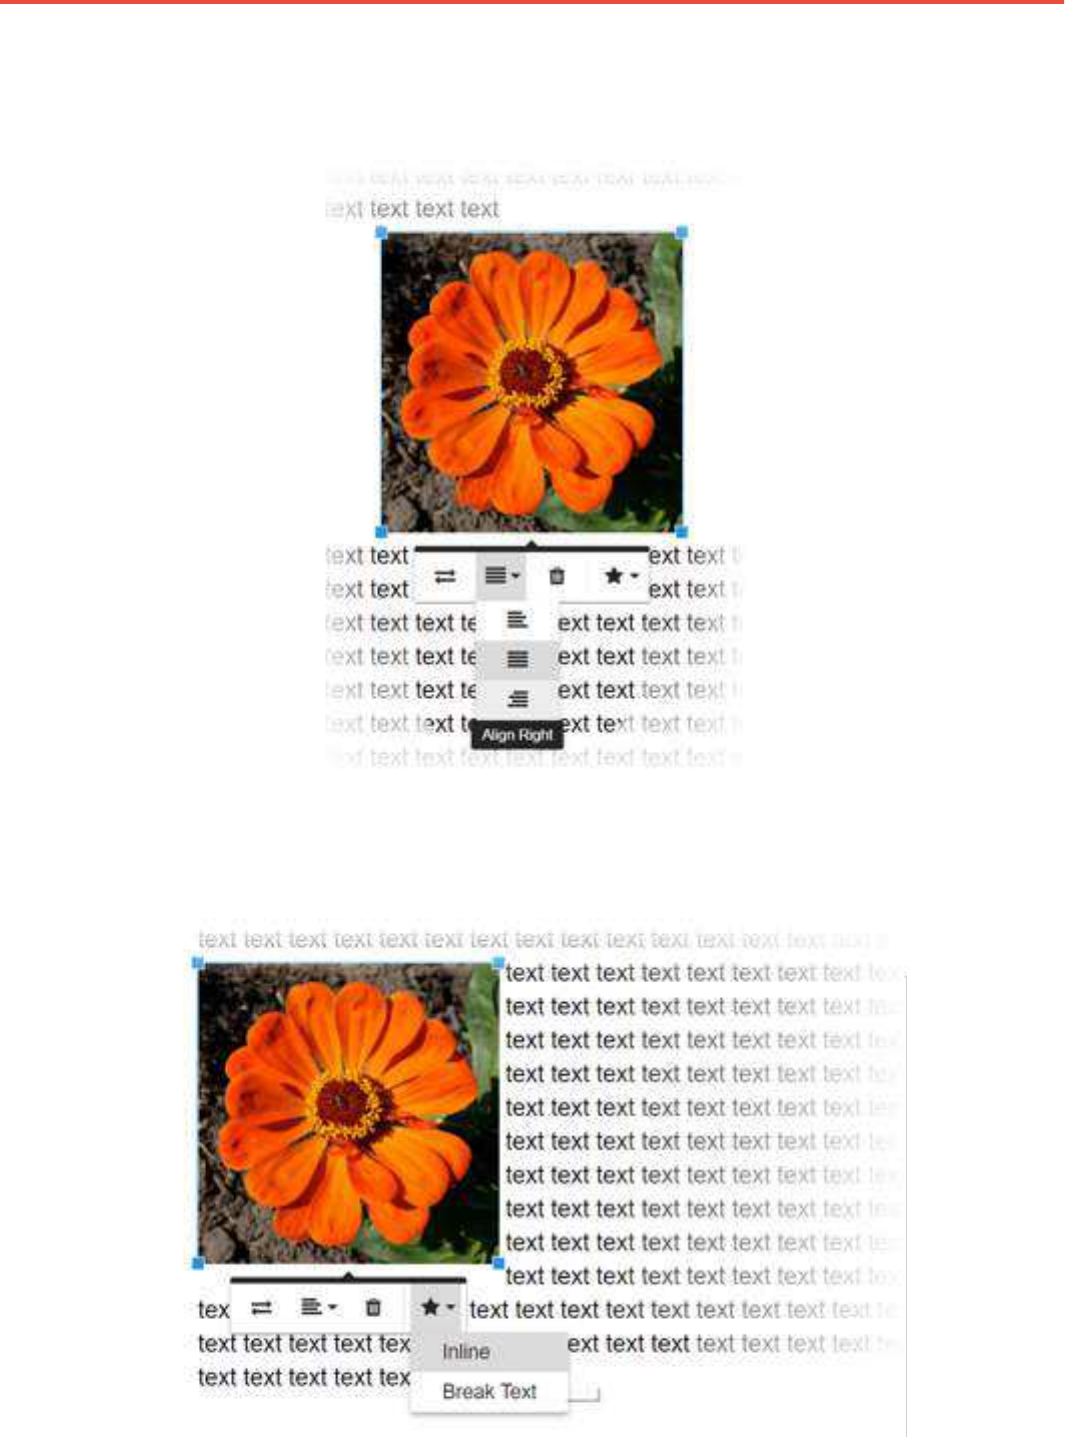
Resize the image by dragging its corners. To change position of the image, use the alignment tool.
To control how text wraps around the image, select Inline or Break Text options.
Guidebook 92
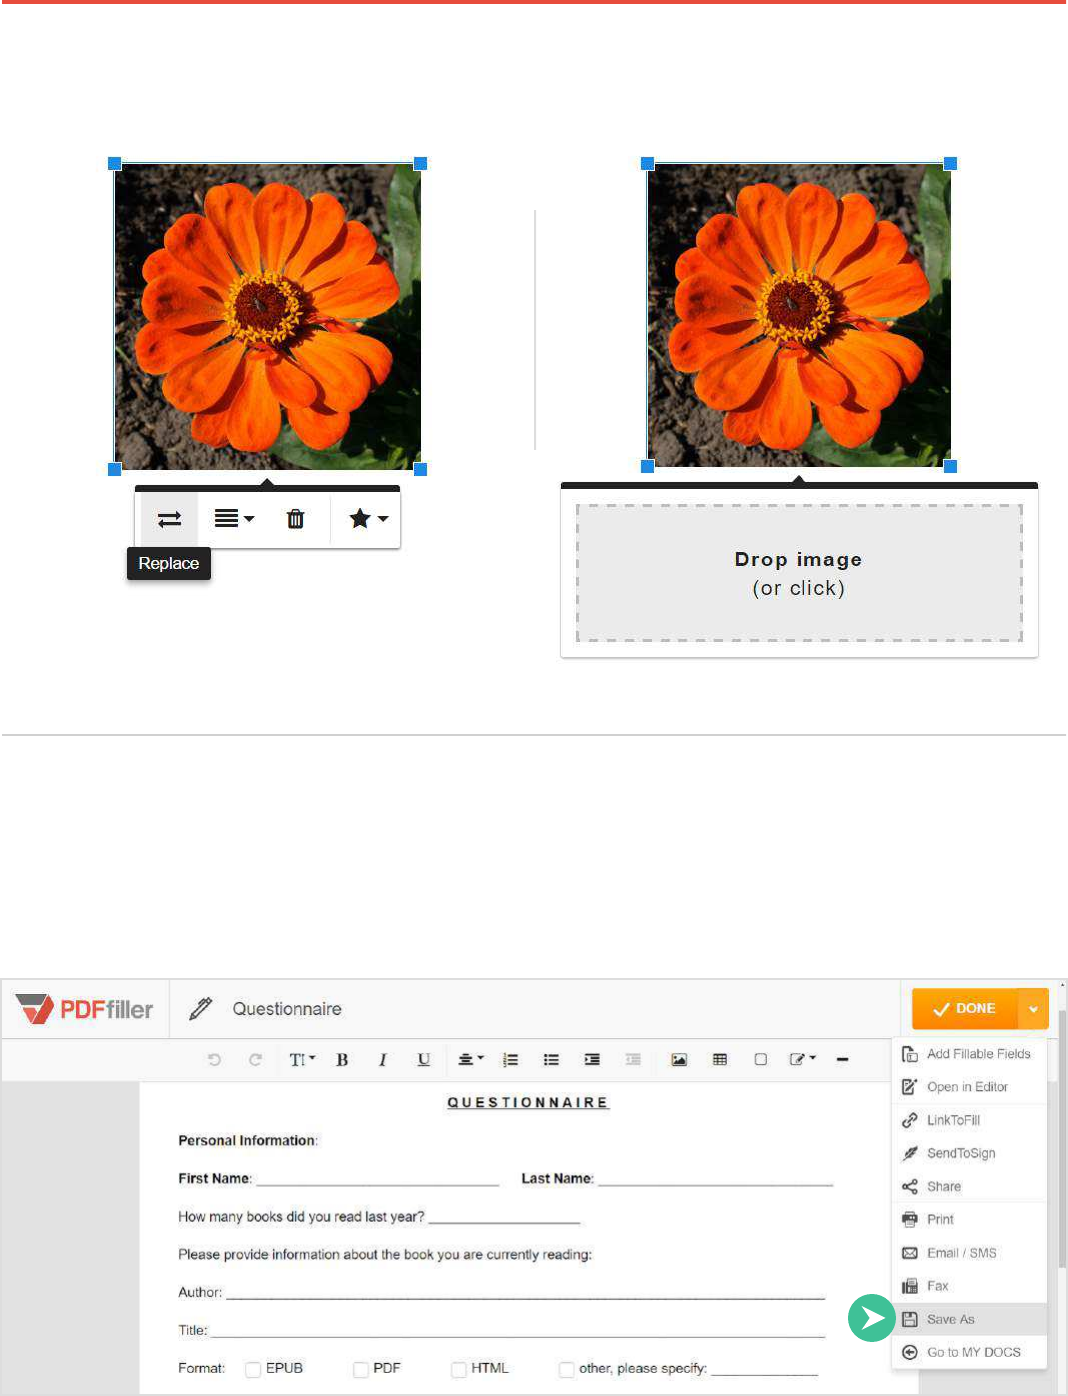
To replace the image, click Replace and then upload another image.
To save the newly created document as a PDF file, click Done and select Save As from the drop-
down menu.
Turn the Form into a PDF
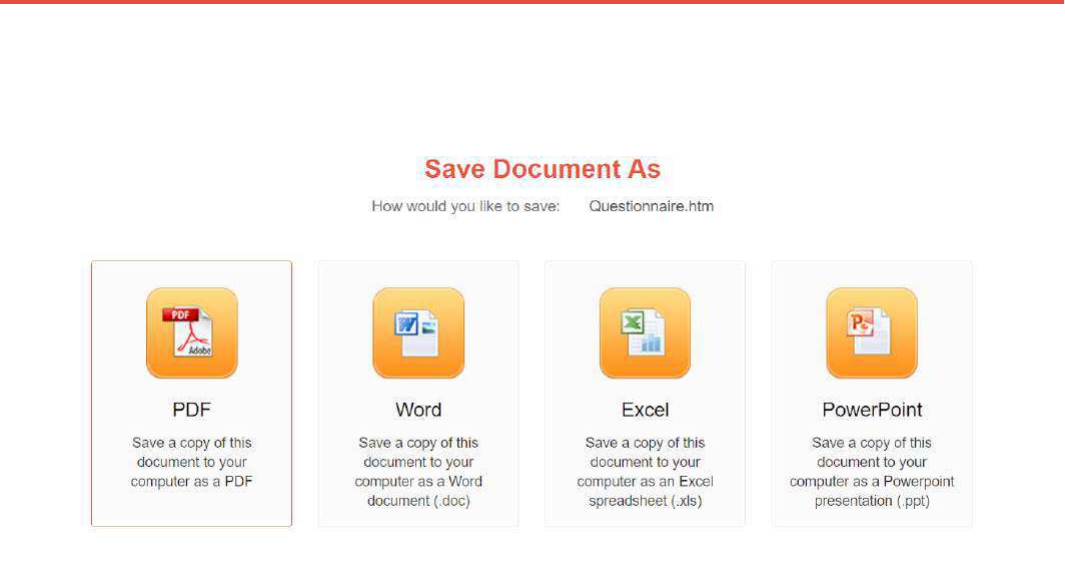
Guidebook 93
Select the PDF icon to save the document as PDF to your local drive.
Guidebook 94
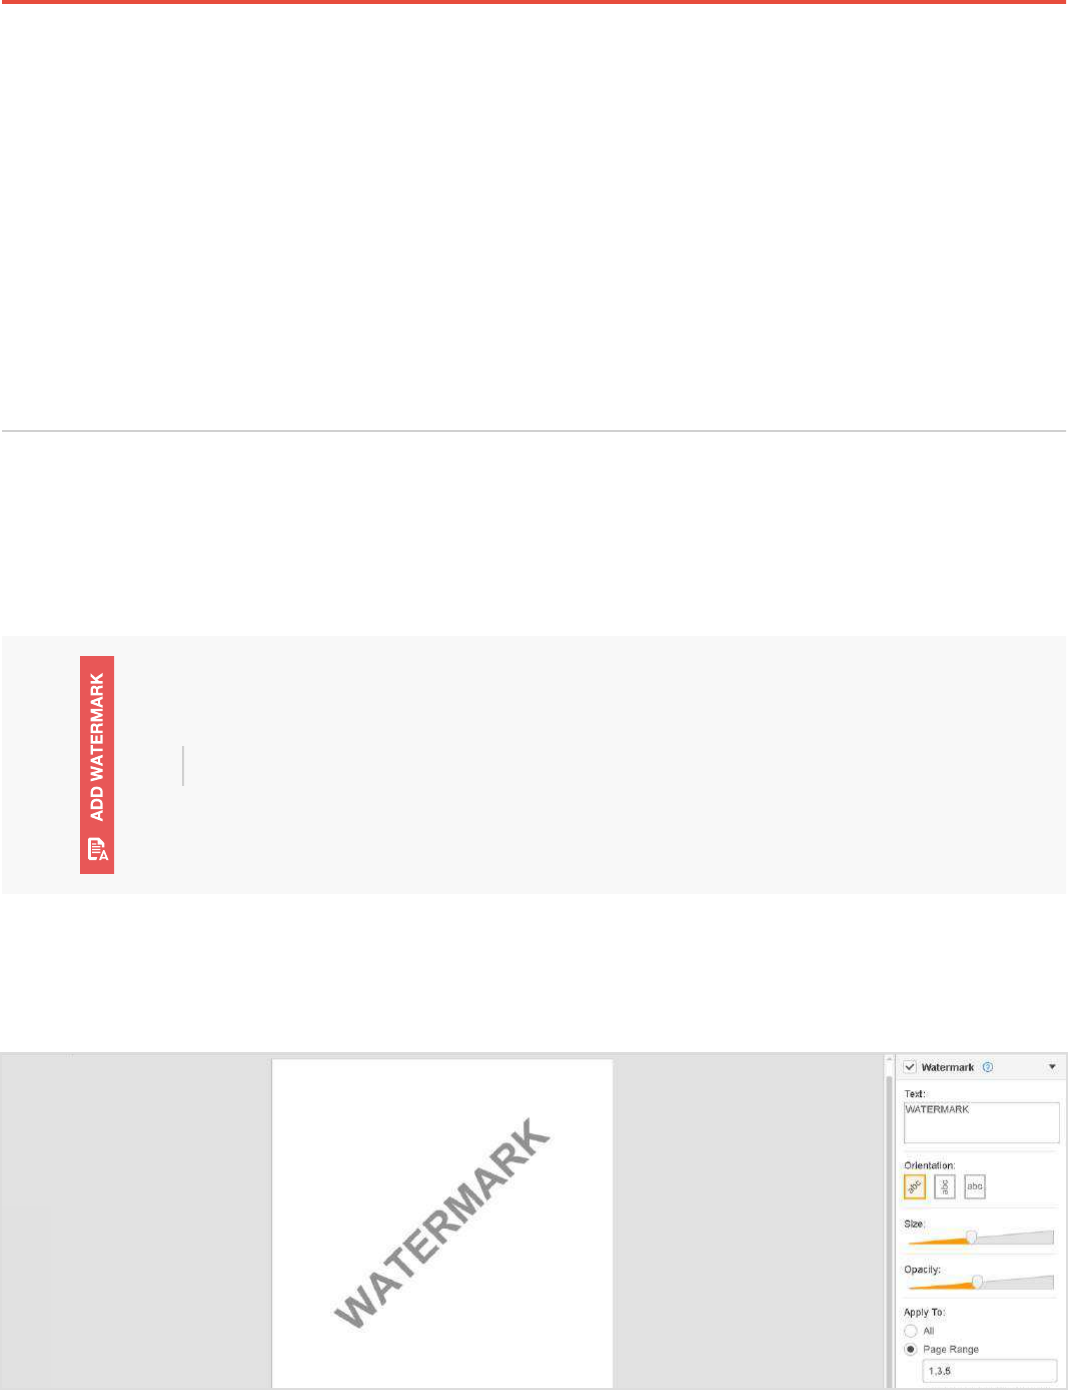
Add Watermarks, Images and Video
Add a Watermark
Customize your documents with visual content using simple,
but powerful tools.
Add a custom watermark to PDF documents.
Check the box and add the text that you want to appear in the watermark.
Click on the Add Watermark tab on the right to expand the panel.
Guidebook 95
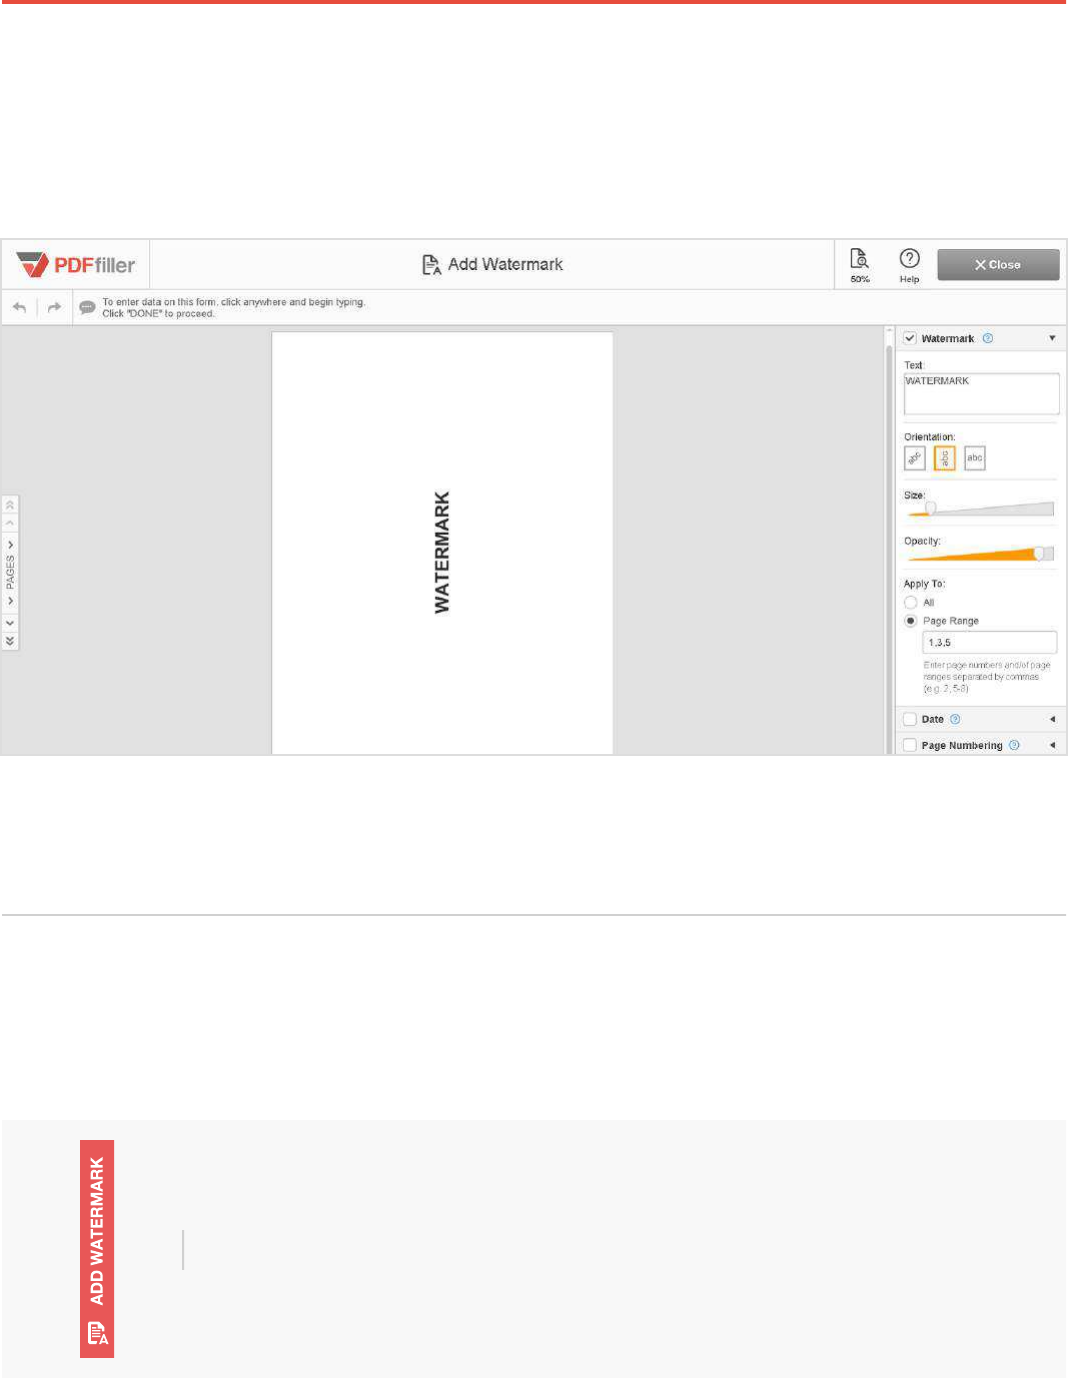
After the orientation, size, and opacity of the watermark have been defined, you can see the
changes to your document in real time — simply select the pages you’d like to apply your
watermark to see how it looks.
To remove the watermark, uncheck the box.
Add Page Numbers
Number the pages of a document with just one click.
While editing a document, open the Add Watermark tab on the right.
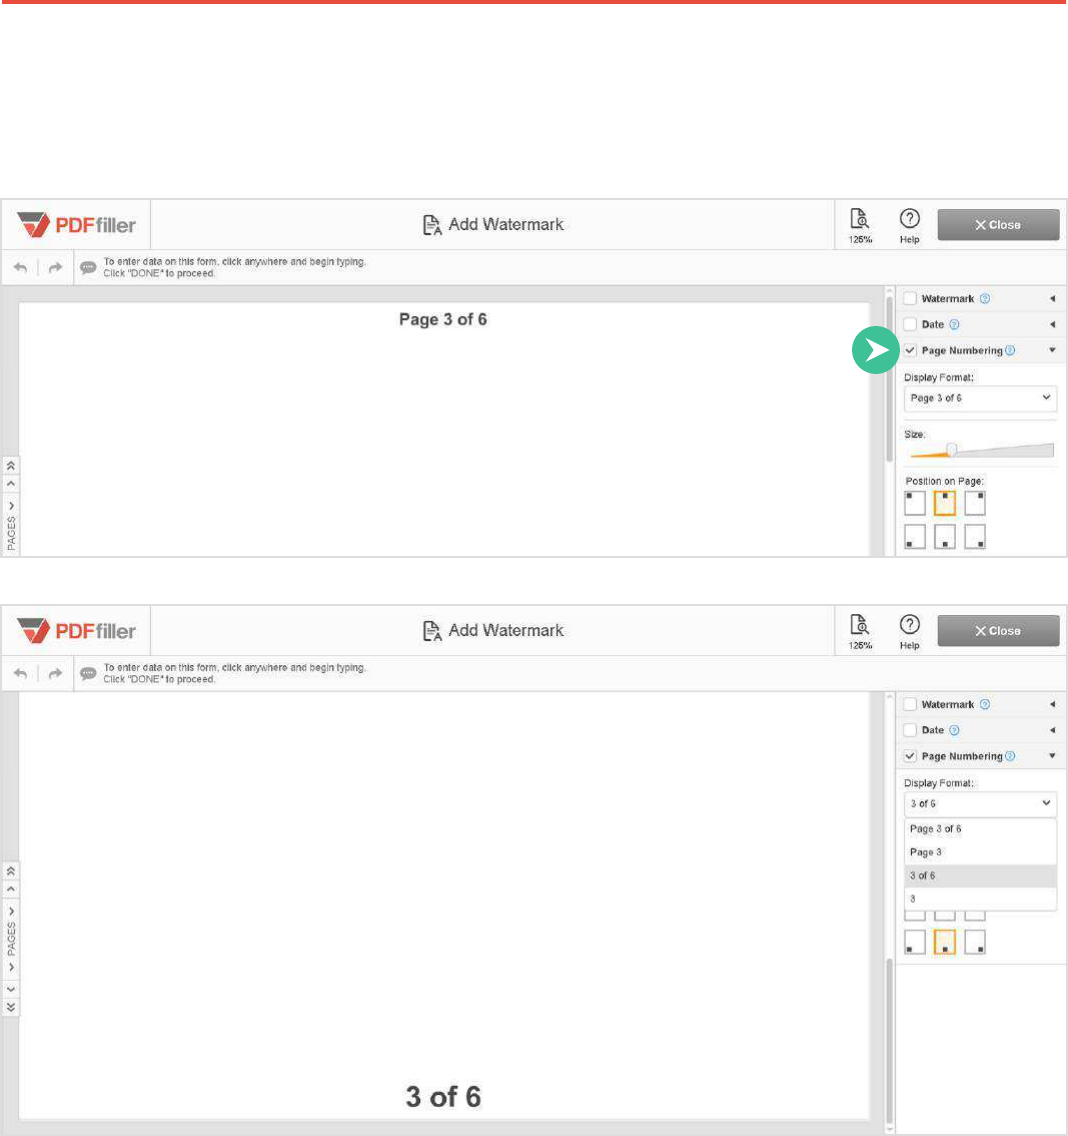
Guidebook 96
Select the Page Numbering dropdown menu to change the format, size and position of the
numbers on the page.
To hide page numbers, uncheck the box.
Guidebook 97
Add an Image
Enhance documents with images or pictures that have been uploaded or taken with a webcam.
To upload a photo from your computer, click the Upload button.
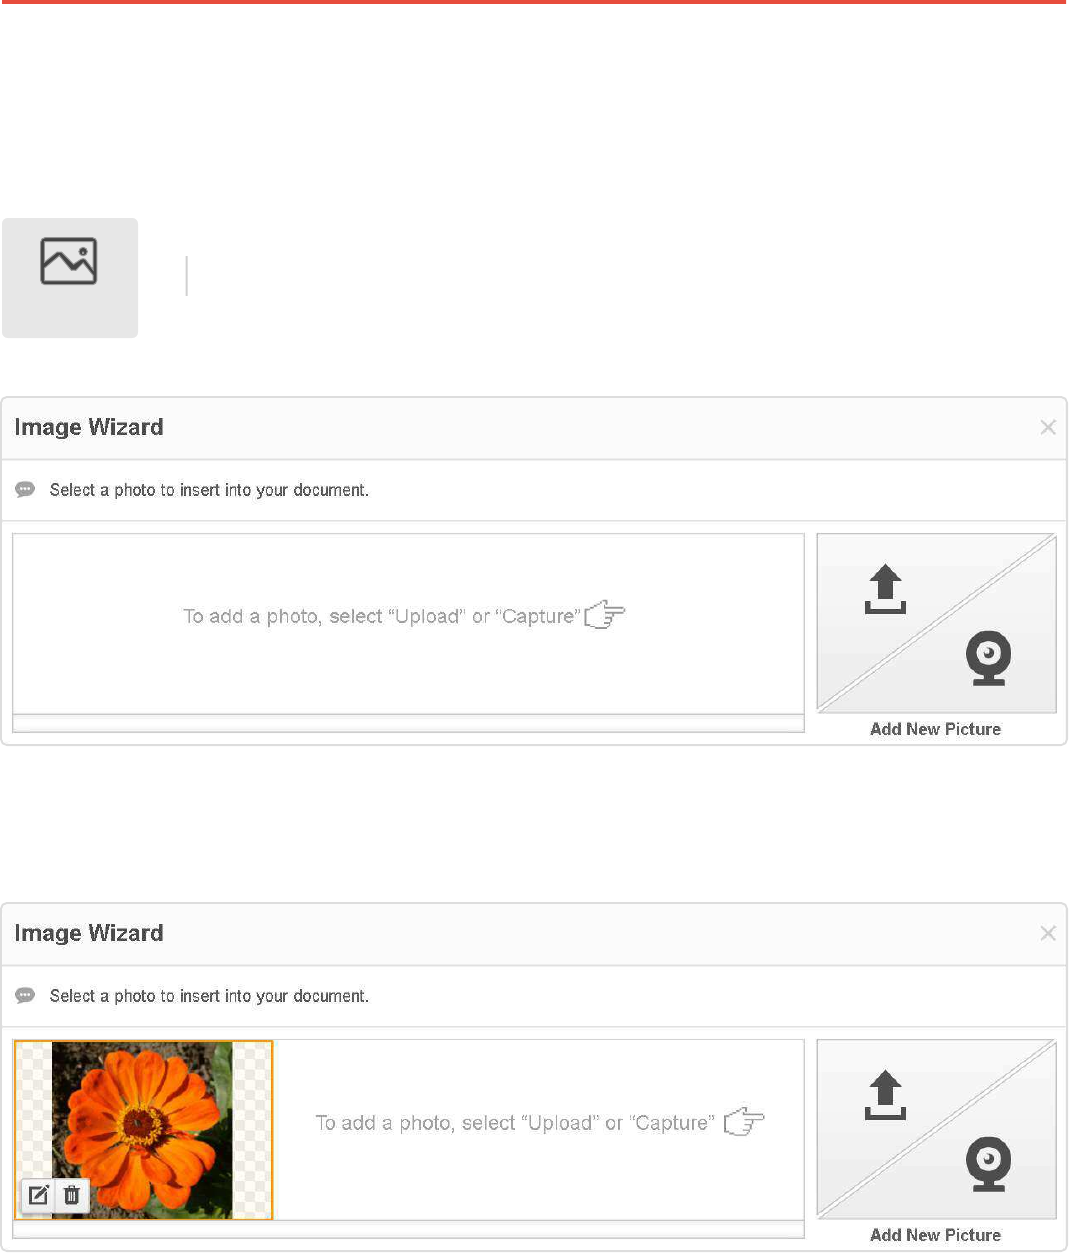
Select the Picture icon in the main toolbar to open the Image Wizard. You
can either upload a picture that you already have or take a new one using
your webcam.
Picture

Guidebook 98
Before inserting the image in the document, you can crop, rotate and flip it, change its
background, and adjust its brightness and contrast.
To place the image on the document, just click on it in the Image Wizard. Move or resize it for
a perfect fit using the mini toolbar.

Guidebook 99
You can also take a picture using your webcam and add it to the document. Select a photo size to
the right of your camera image, click Take, then click Use to proceed.
The window that will open next allows you to crop the image, adjust its brightness and contrast,
flip and rotate it, or enhance it otherwise. After you’ve finished editing your picture, click Save and
Use to add it to your document immediately or select Save to use the picture later.
Guidebook 100
Add Video
Add instructional, marketing or welcome videos to the documents that you host using our
LinkToFill feature.
While customizing a link to a document, insert a link to the video that you want to attach to it.
Note that the video should be published on YouTube.
Whoever opens the document will be able to watch the video.
Guidebook 101
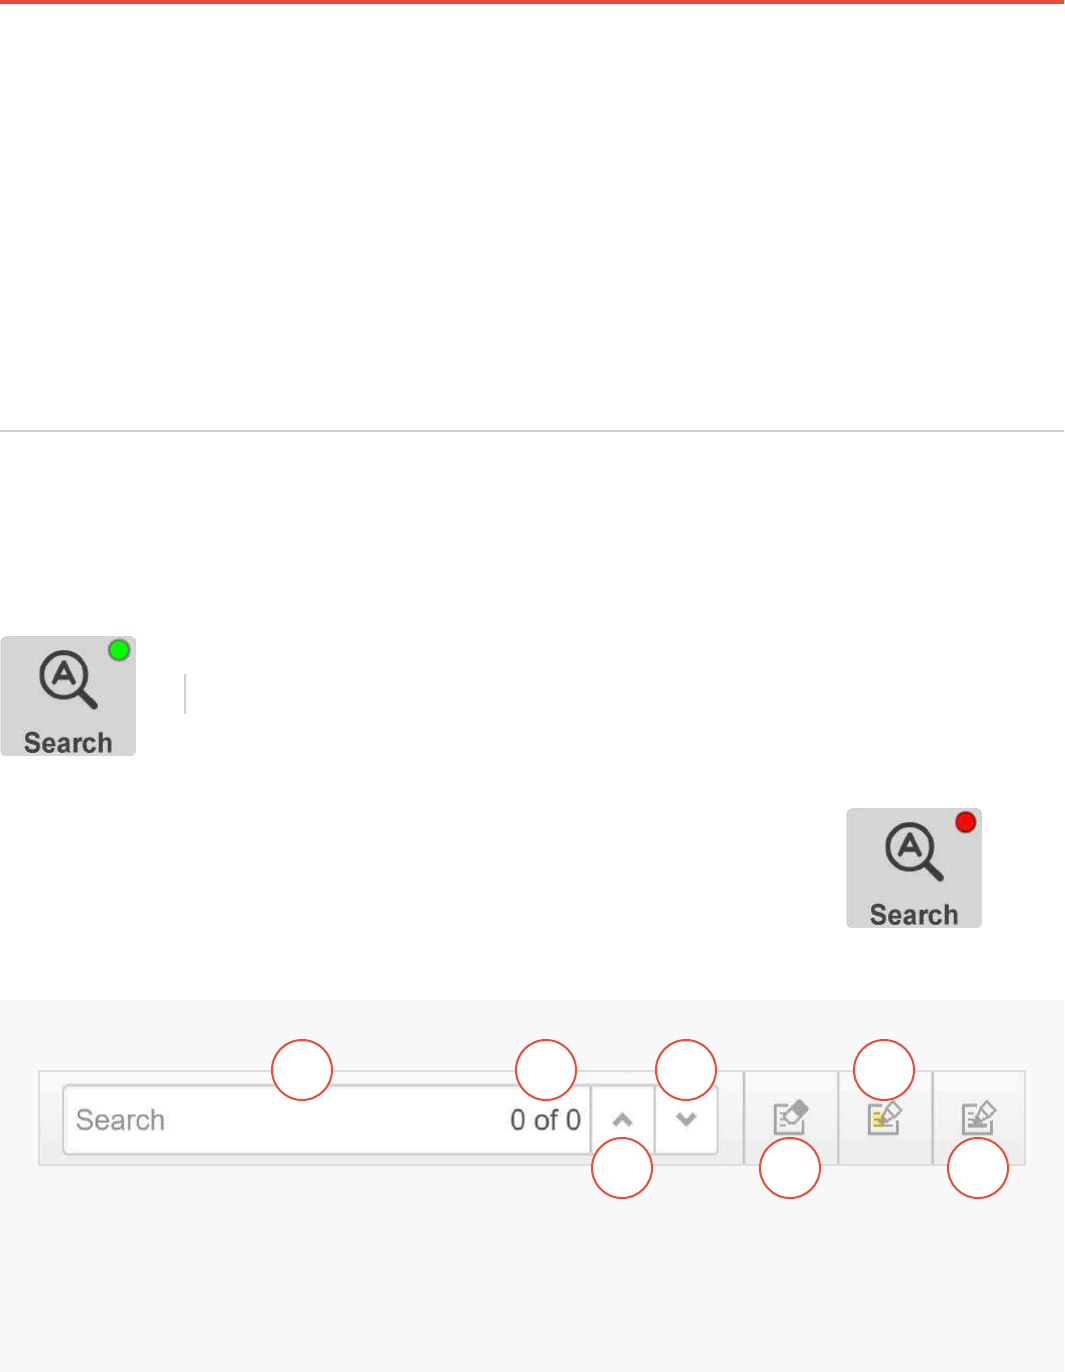
Search Text in PDF
Search
Find specific words or phrases in PDF documents.
Use the Search tool to find a word or a phrase in the currently open document.
A. Search field
B. Counter
C. Previous
D. Next
E. Erase
F. Highlight
G. Blackout
A B
C
D F
GE
To activate the Search tool, click its icon in the main toolbar or press CTRL
+F on your keyboard.
If a PDF document is not searchable, the dot on the Search icon will be red.

Guidebook 102
Type the text you want to find in the search field. The counter will show you the number of the
current search term and the total number of search terms found in the document. The current
search term is highlighted in green, the others are highlighted in red.
Search and Erase
To delete the current search term, click Erase. The next search term will automatically become
current.

Guidebook 103
Search and Redact
To redact the search term, click Blackout.
Search and Highlight
To highlight the current search term in yellow, click Highlight.
Guidebook 104
Forms Security and Authentication
Use a PIN
Use 2-Factor Authentication
Protect your documents with two-factor authentication, encrypted folders
and HIPAA compliance.
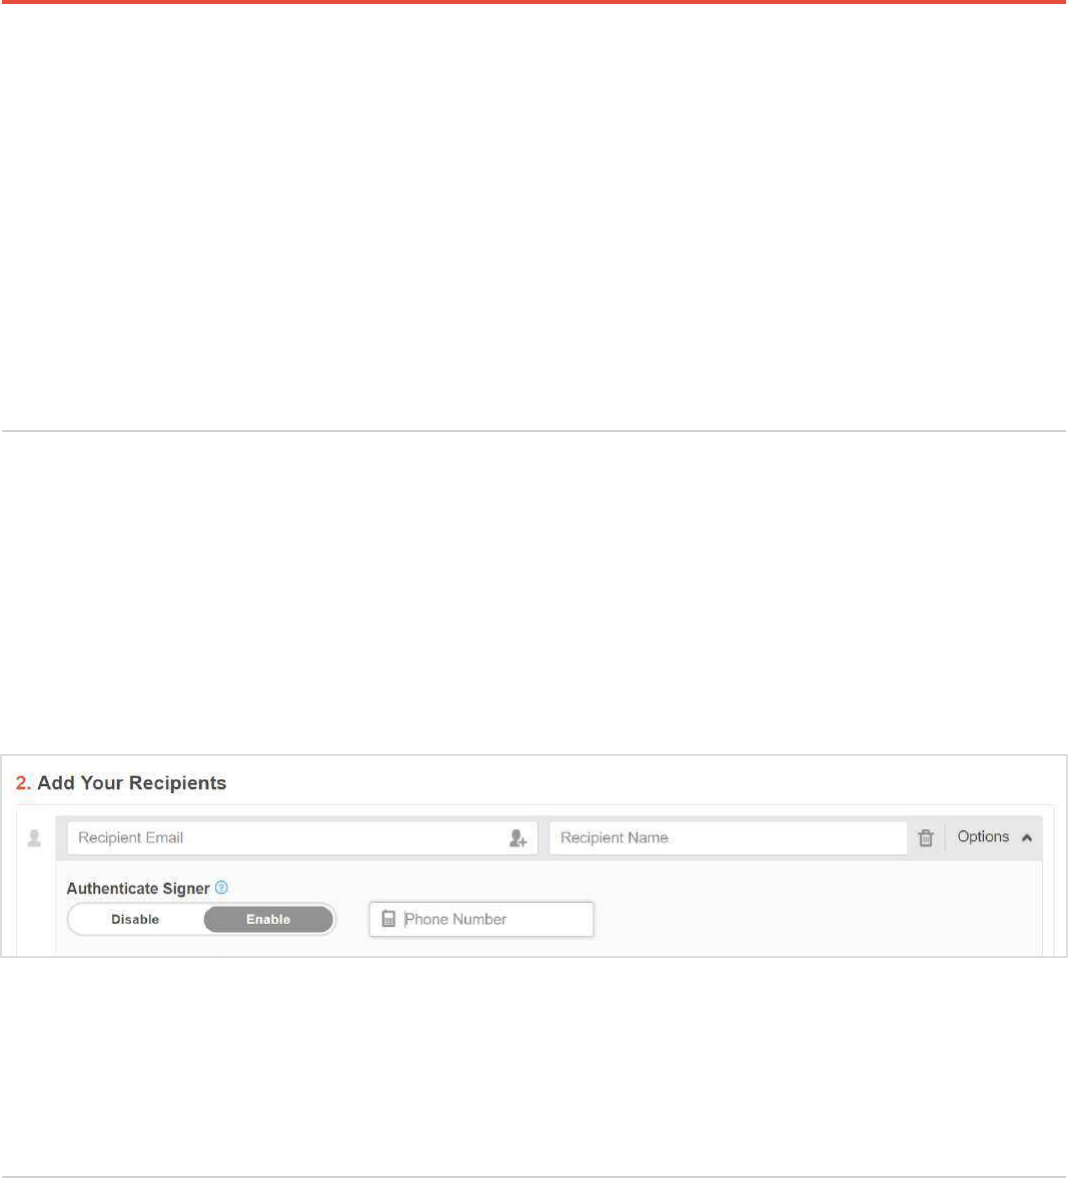
Secure recipients’ access to documents by applying a 4-digit PIN.
While sending a document for signature, you can add an extra layer of security to the document.
Enable the recipient’s authentication and enter his cell phone number.
Protect a folder or a form by adding 2-factor authentication, just like many bank accounts demand.
The recipient will receive a text message containing a 4-digit PIN. To access the document, the
recipient will have to enter the PIN.
Guidebook 105
To activate the Encrypted folder, select it in MYBOX and enter your cell phone number.
You will receive immediately an activation code via text message. Enter the activation code
and click Verify to create a password.

Guidebook 106
Create and confirm your password, this will open the folder.
To add documents to the Encrypted folder, drag them from any other folder. After you’ve finished
working with your protected documents, close the Encrypted folder by clicking the key icon. It will
also automatically lock after 10 minutes of inactivity.
To access the documents in the Encrypted folder, you will have to enter your password again.
Guidebook 107
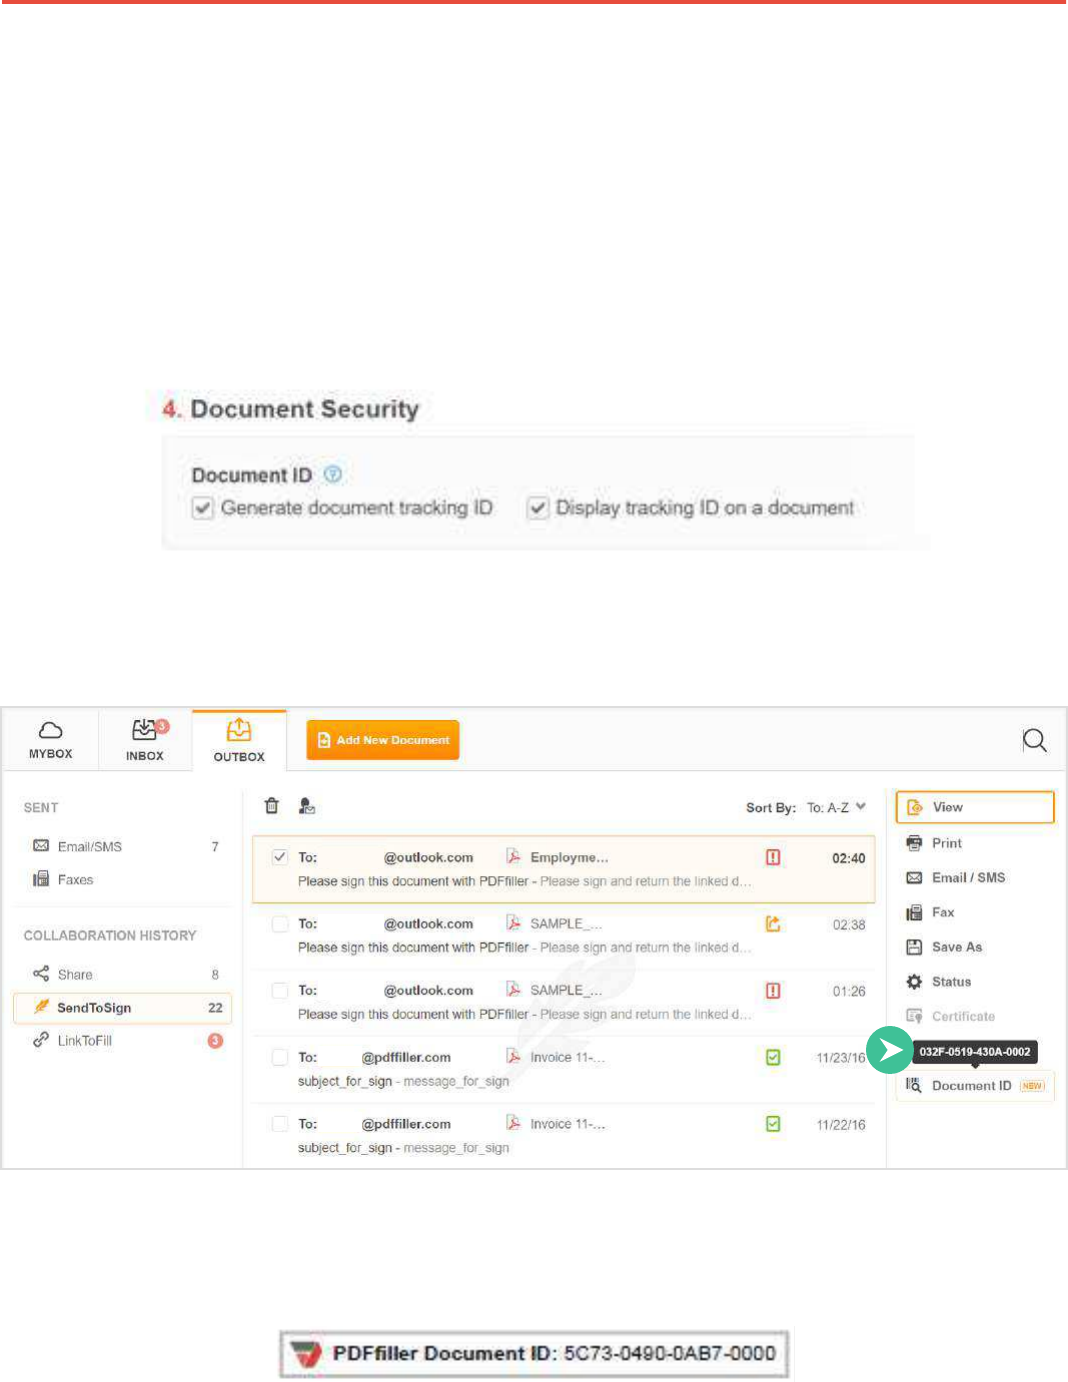
Unique Document ID for Each Document
Secure the authenticity of the document with the help of a unique Document ID.
While sending a document for signature, create its tracking ID. You can also activate the
Document ID option for the fillable forms that you host on your website or via QR code using the
LinkToFill feature.
To see the document’s ID, go to its folder and select Document ID on the right.
If you choose to display the tracking ID on the document, it will appear at the page bottom.
Guidebook 108
Copy the document’s ID and save it in a file for tracking the document.
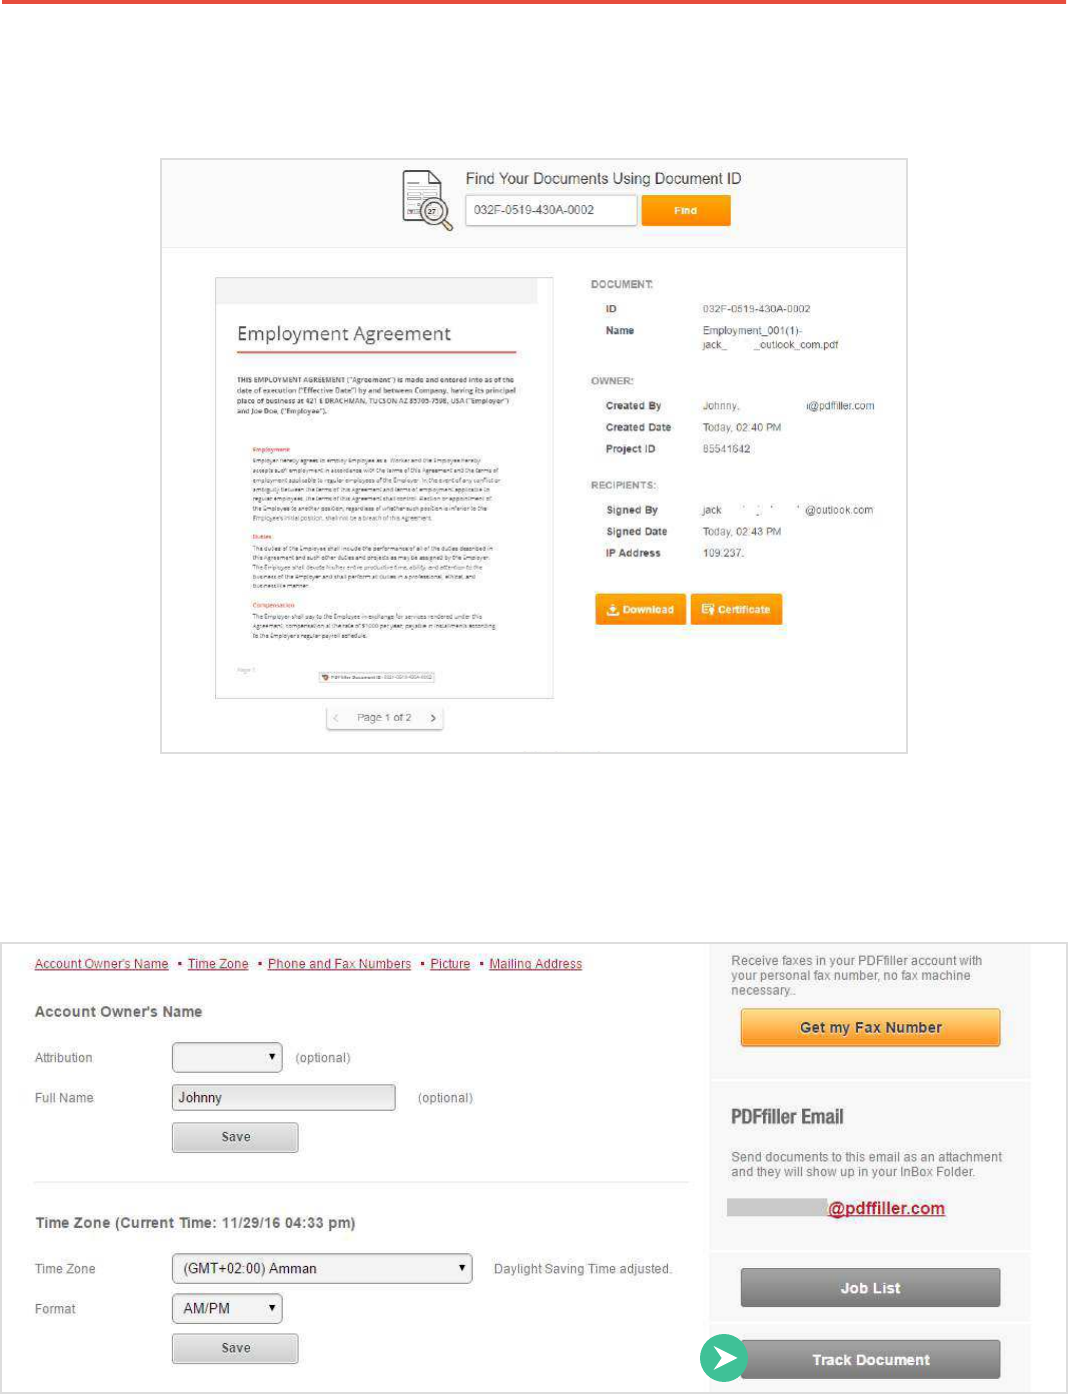
To find the document and information about it, you don’t have to remember where you stored it.
Go to My Account > Personal Information and click Track Document.

Guidebook 109
Insert the Document ID in the search box and click Find.
Require Filler Email and Name
Identify recipients of the documents by requesting their names and emails.
While setting the options for a fillable form that you are going to host on your website using the
LinkToFill feature, go to the Submission Requirements and mark the respective checkbox.
Guidebook 110
Send Documents out to Be Signed
Invite up to 20 Signers
SendToSign is an easy and efficient way of requesting signatures.
Make up to 20 copies of a document and send them for signature. Each recipient signs his own
copy and submits it to you.
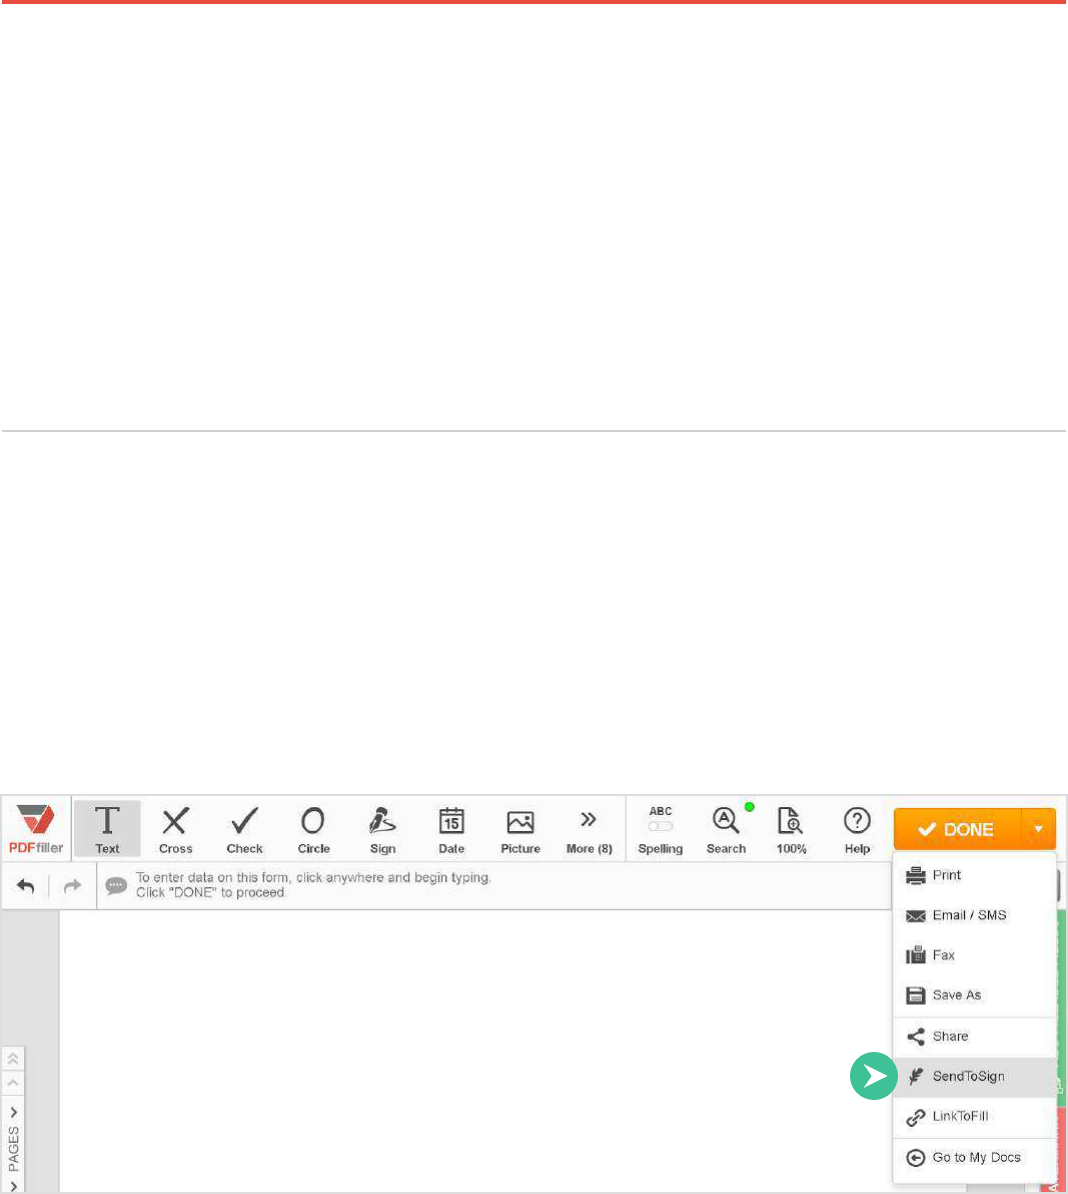
You can start directly from the PDFfiller editor. When you’ve finished editing your document, click
the Done button and select SendToSign from the drop-down menu.
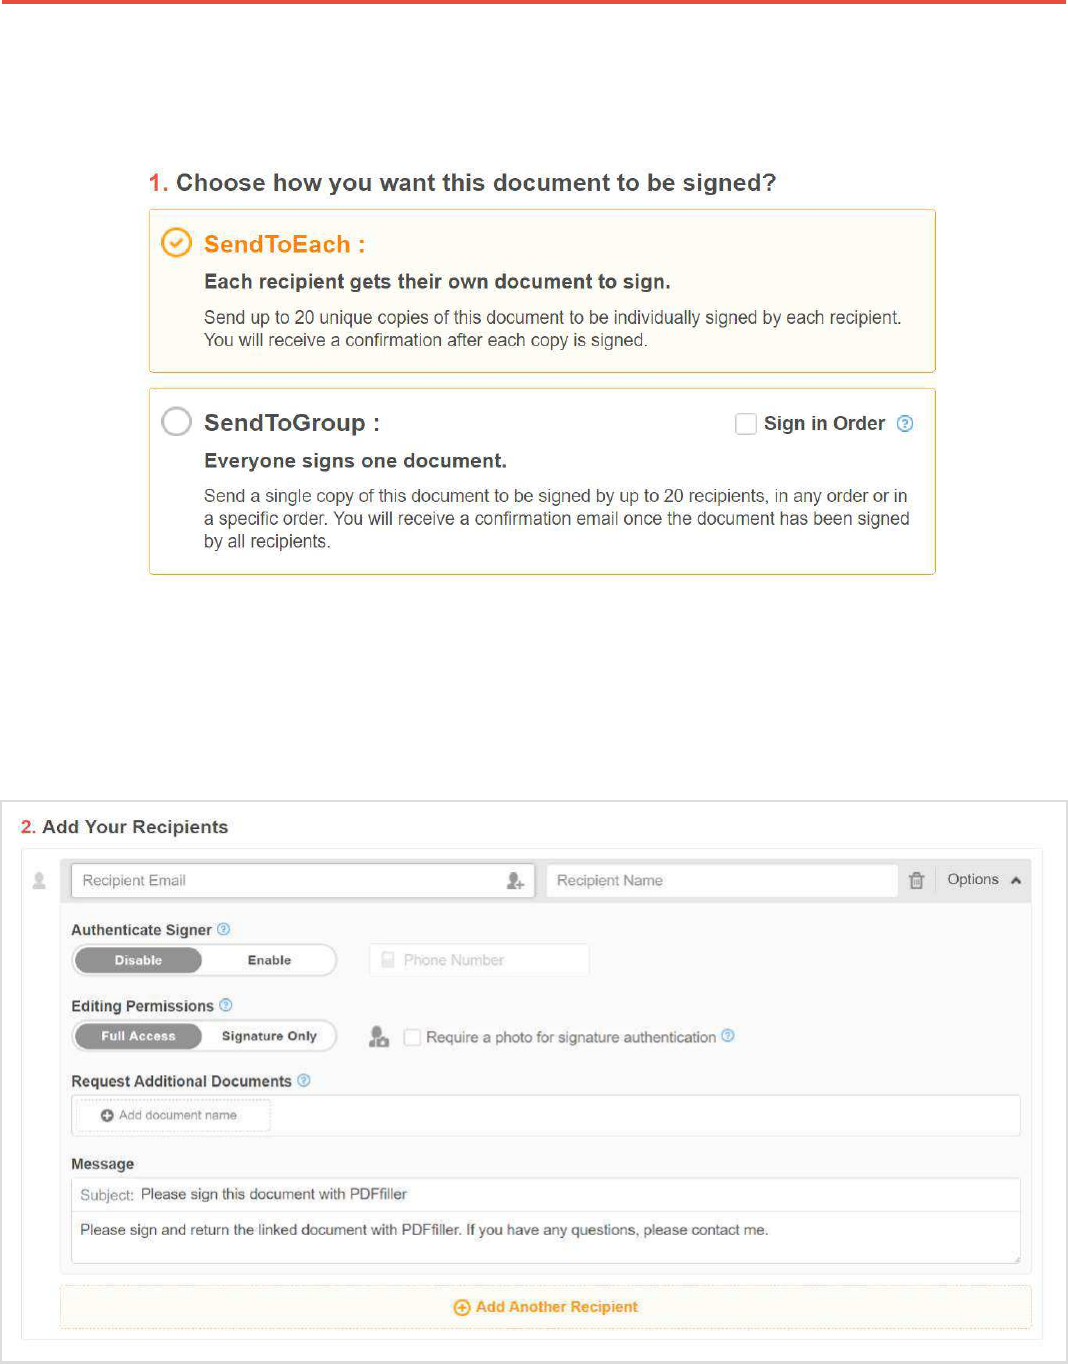
Guidebook 111
On the next page, select SendToEach.
Add recipients’ email addresses and names, set authentication options and editing permissions,
and write a message to each of them. Add as many recipients as you need by clicking on Add
Another Recipient.
Guidebook 112
Finally, click SendToSign in the bottom right corner of
the page.
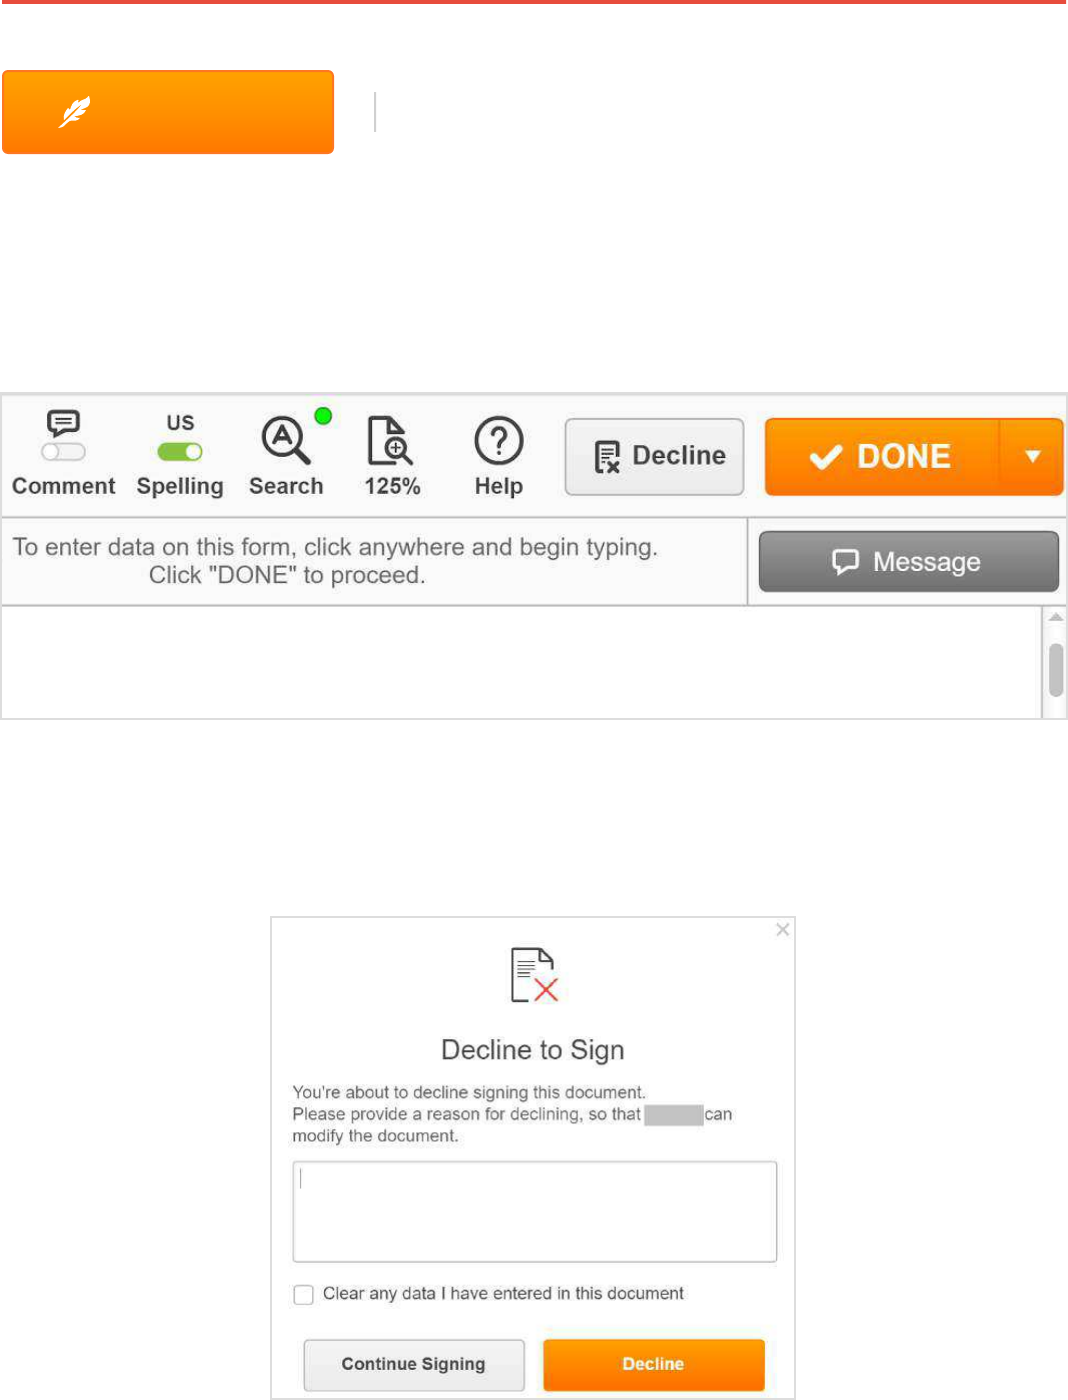
SendToSign
Any SendТoEach recipient can refuse to sign the document and write a message to you explaining
why they would not sign it or requesting changes to the document. Click Decline in the top right
corner to alert the sender that you have declined to sign the document.
You can add a message to the sender in the text box. The recipient can delete all the data they
Guidebook 113
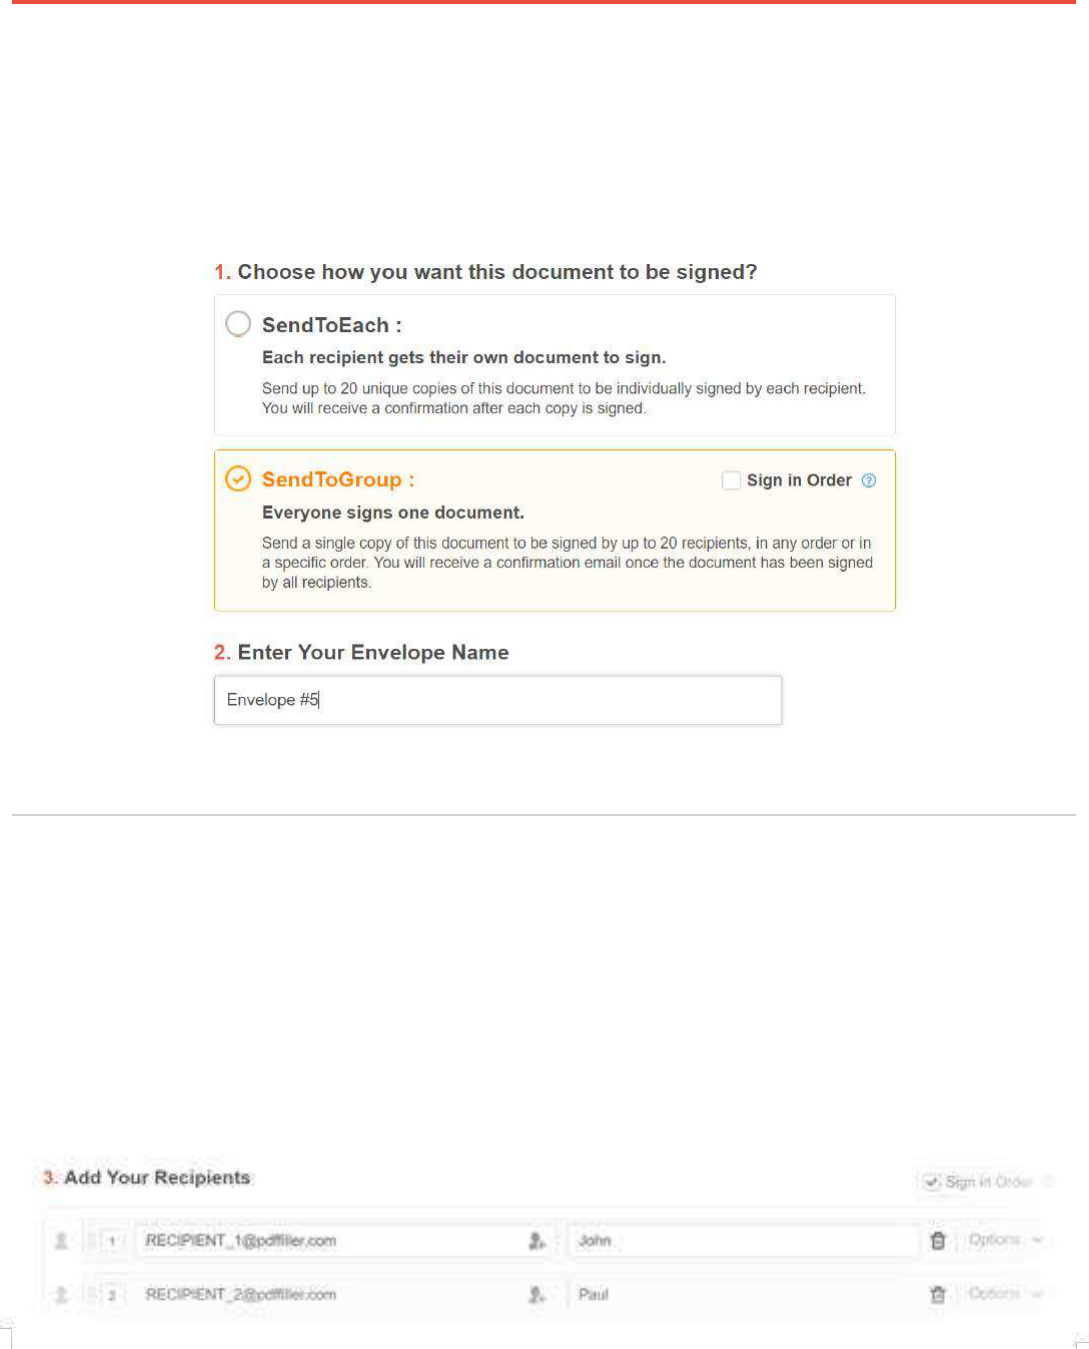
Multiple Signers
Signatures Workflows
Send a single copy of a document to be signed by up to 20 recipients.
Select SendToGroup and create an envelope name to label the group of signers.
Use the Sign in Order option to set the order in which SendToGroup recipients will receive their
requests and sign the document.
Check the Sign in Order box then either drag or type to the left of each recipient to set your
desired order.
Guidebook 114
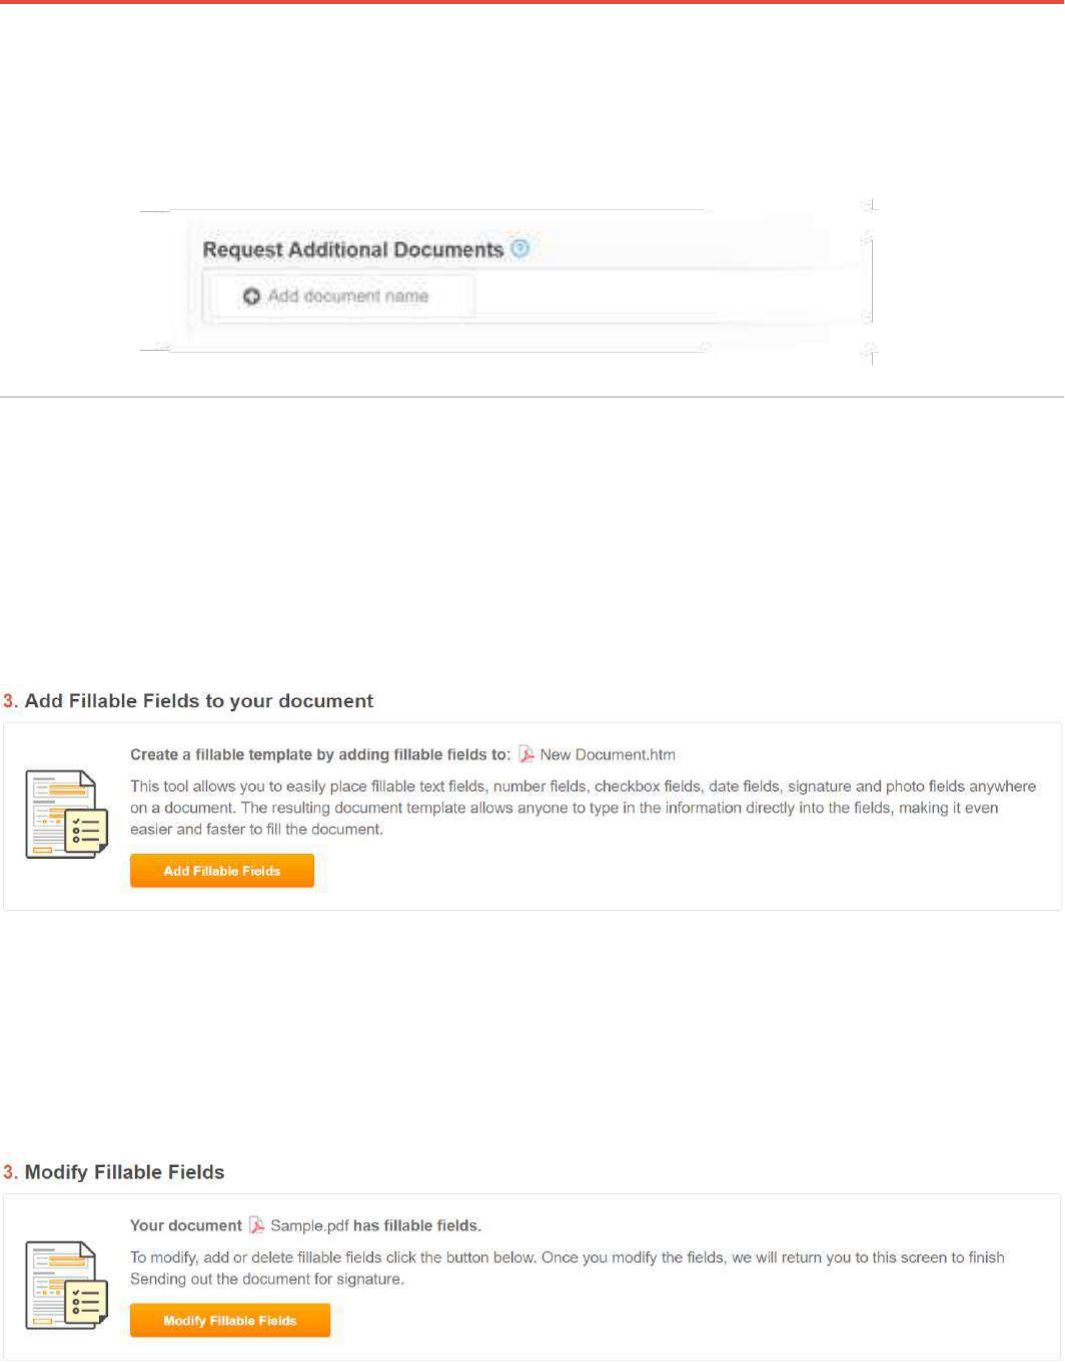
Request Additional Documents
Required Fields
Ask a recipient to send you up to five documents as attachment to the document that he signs.
Required fields ensure that all the necessary information is provided and nothing is missing.
If the document you are sending for signature does not contain any fillable fields, but you need to
add them, click Add Fillable Fields.
You can add fillable fields to the document before you start preparing it for signature request.
However, if you decide to create more fillable fields or to modify the existing ones in the midst of
preparation, click Modify Fillable Fields.
Guidebook 115
It is impossible to submit a form if a required field is empty.
For more information about fillable fields, please refer to the Add Fillable Fields section of this
Guidebook.
You can mark any field as Required. Check the box, and a red asterisk will appear in the top right
corner of the field.
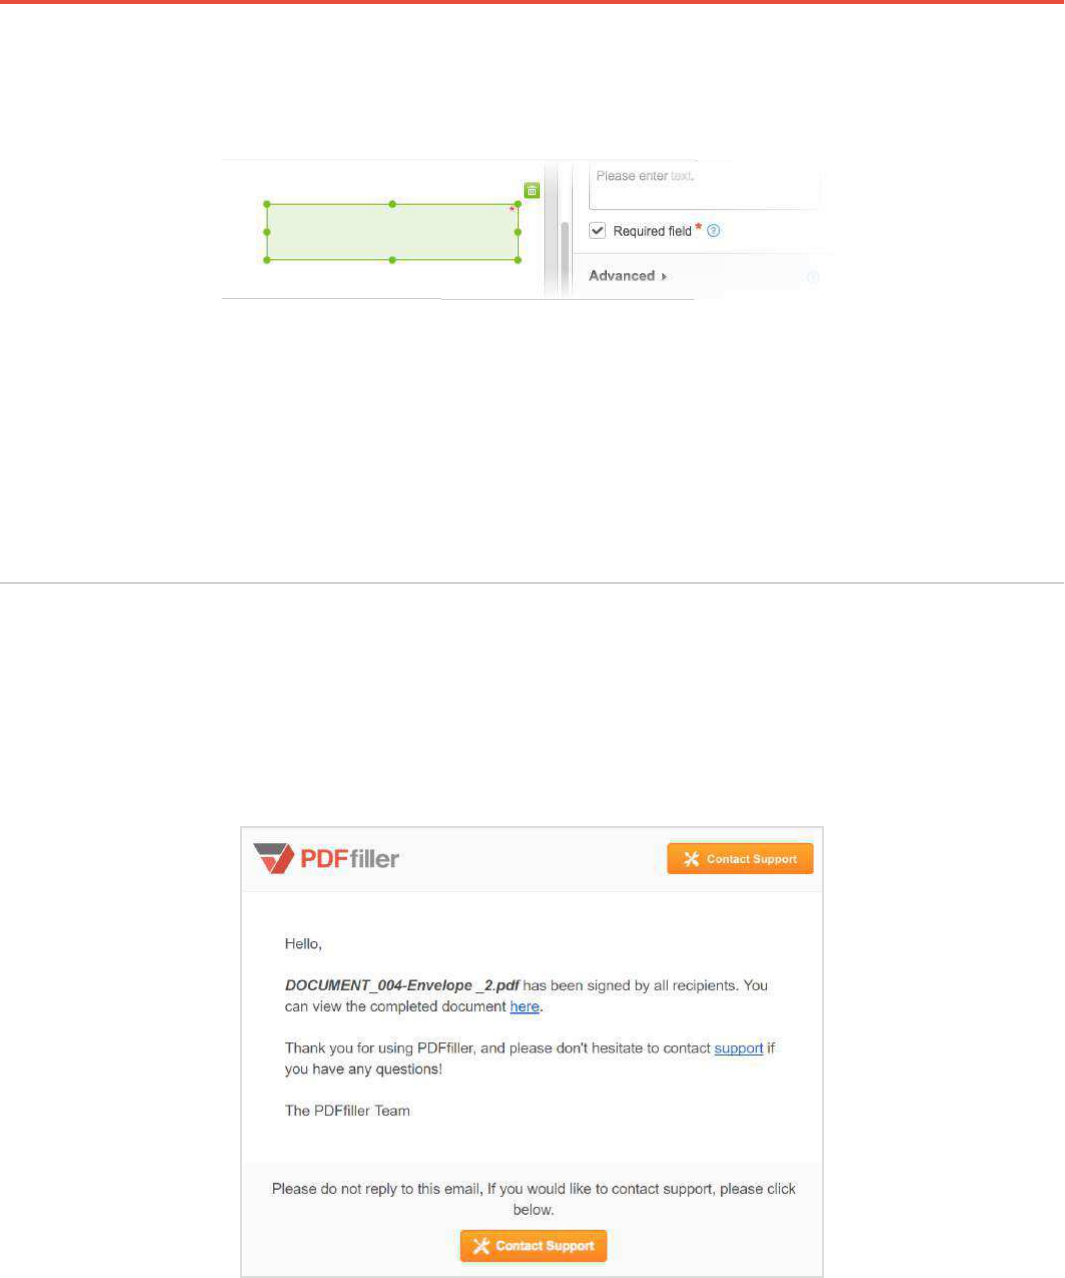
Notifications When Done
Once all the recipients sign the document that you requested to sign through SendToGroup, you
will receive a confirmation email.
You will receive a similar message every time a recipient signs the document that you requested to
sign through SendToEach. To review the document, use the link in the message.
Guidebook 116
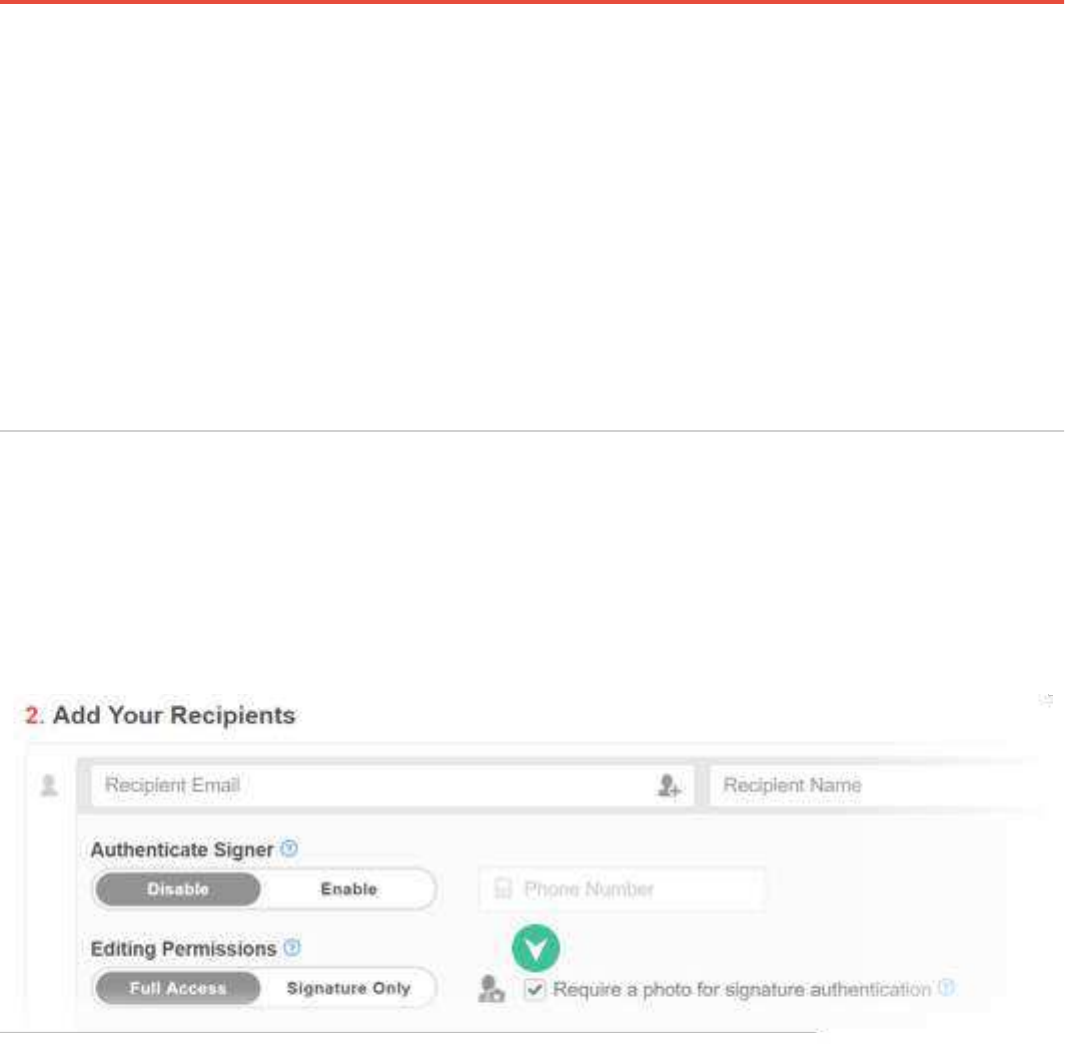
Signer Authentication and Security
Photo Verification
Verify signer identity with multiple levels of authentication before giving
access to documents.
While sending a document for signature, you can ask the recipient to prove his identity with a
photo. Check the box that activates this option.
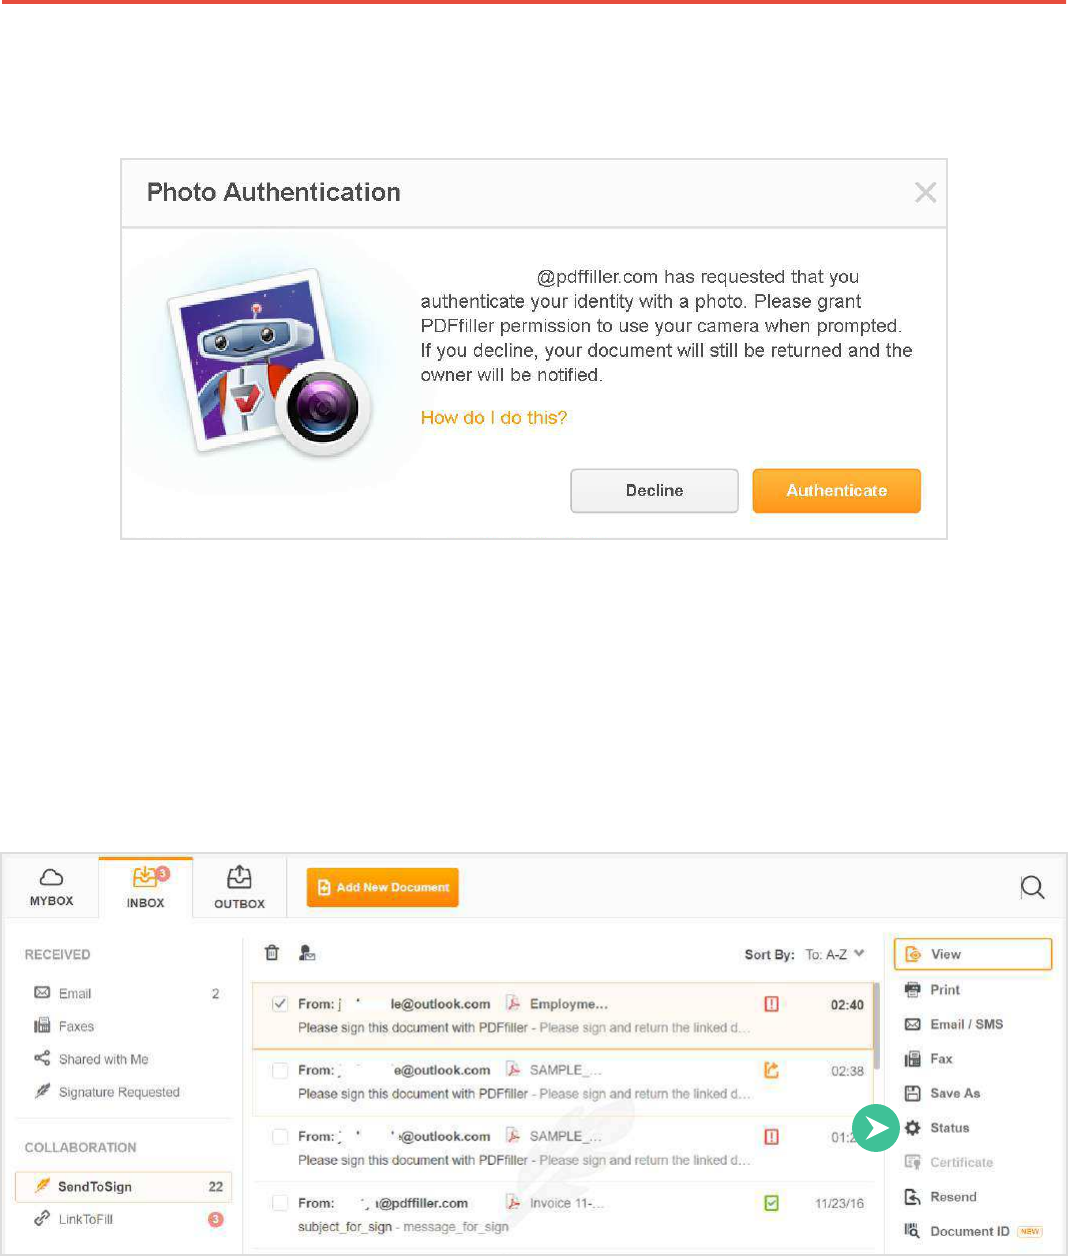
Guidebook 117
The recipient will receive a request to identify himself with a photo.
The recipient should photograph himself using his webcam.
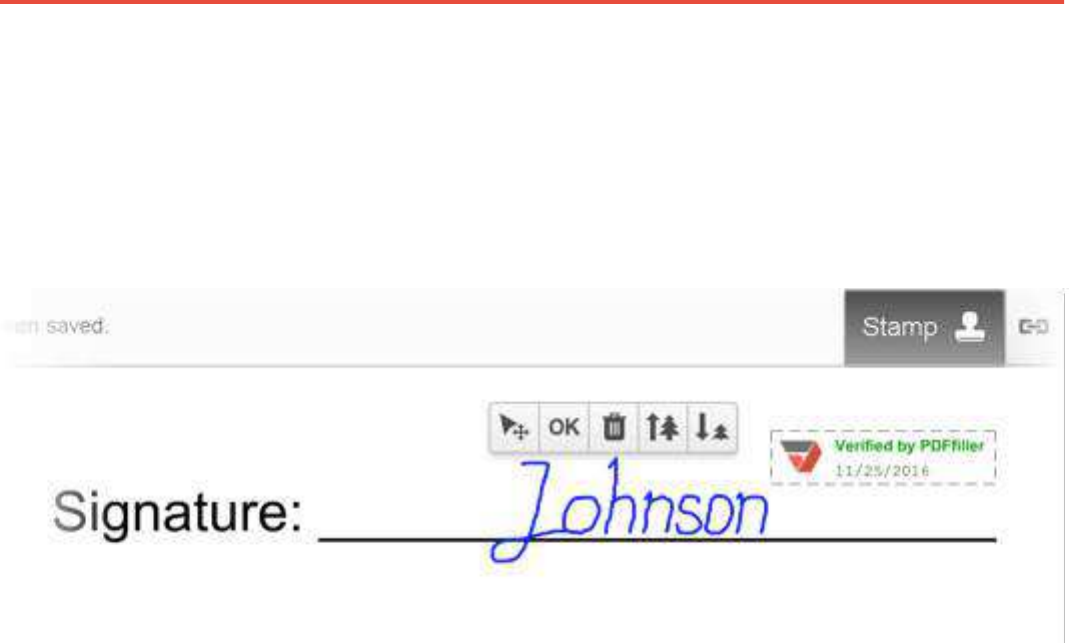
As soon as you have received the signed document, you will be able to check the signer’s identity.
Go to MY DOCS > INBOX > SendToSign, select the document and click Status.

Guidebook 118
On the document status page, you will see the signer’s photo. You can download it to your
local drive.
2-Factor Authentication
You can add one more level of security to your document by having a recipient enter a password
sent by SMS.
While sending a document for signature, enable recipient’s authentication and enter his cell
phone number.
The recipient will receive a text message containing a 4-digit PIN. To get access to the document,
the recipient will have to enter the PIN.
Guidebook 119
Verified by PDFfiller Stamp
PDFfiller verifies your signature with a stamp showing the date when you signed the document.
To show the stamp, click its icon.
Guidebook 120
Add Your Own Branding
Brand the Look and Feel
Reflect the company brand on the emails and web pages the recipients see
when completing documents.
Make a document template correspond to company branding by adding a logo, watermark and
branded colors.
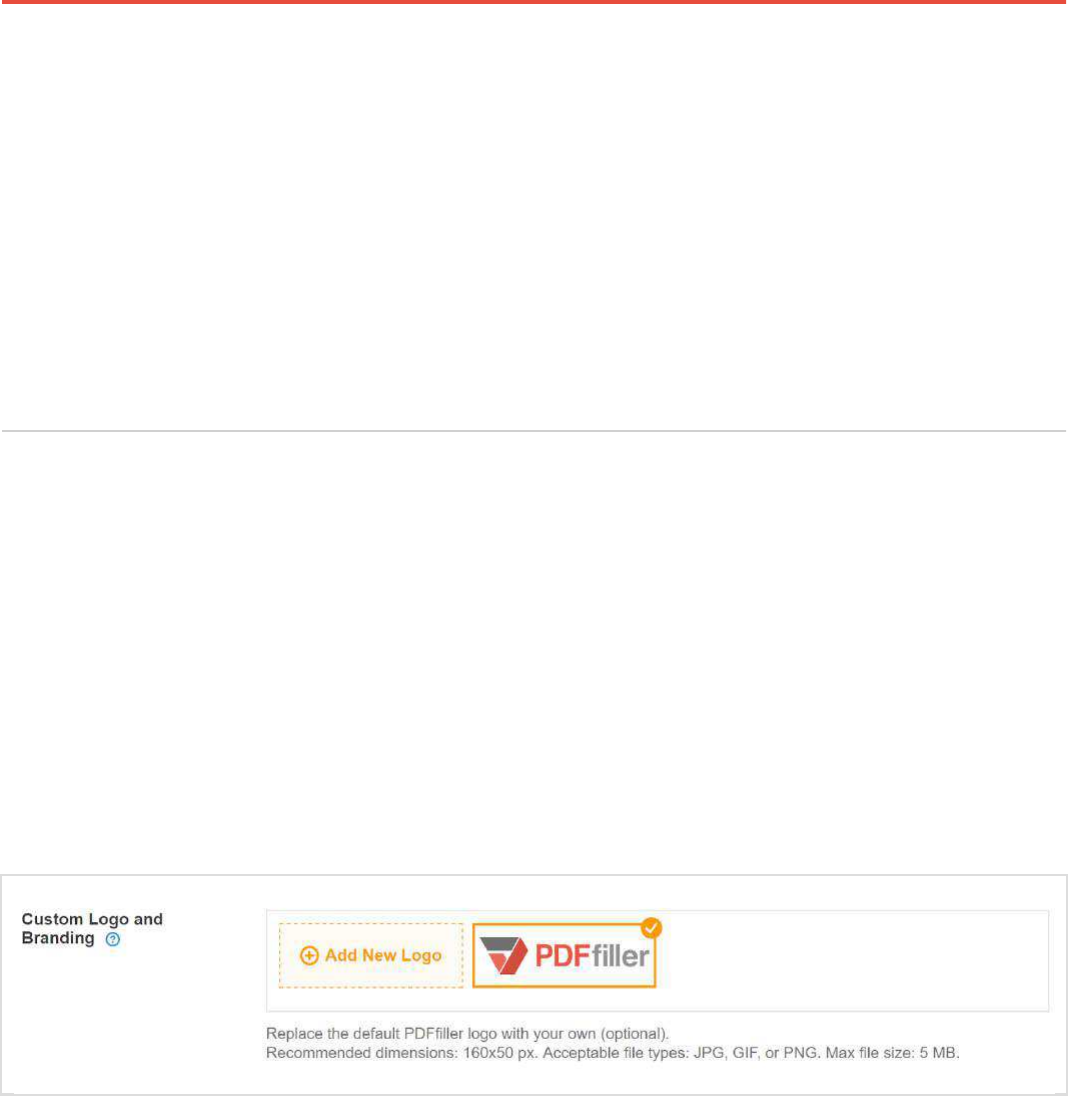
Add your company’s logo to the fillable documents that you host on your website using our
LinkToFill feature. Click the Add New Logo button and follow your browser’s tips to upload an
image from your device. The image should be in JPEG, GIF, or PNG format, its size cannot exceed
5 MB.
Whoever fills the document will see your logo in the top left corner of the page. If you choose not to
use this option, PDFfiller’s logo will appear by default.
Guidebook 121
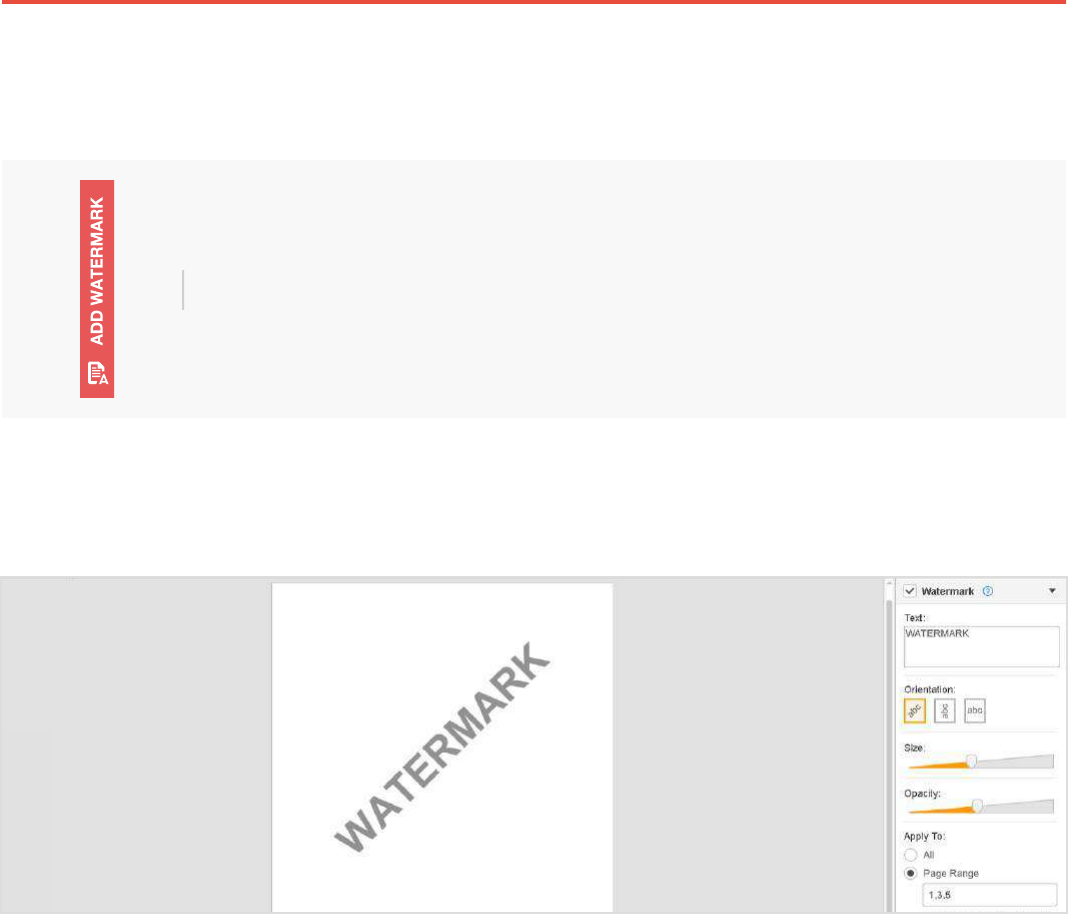
Add a custom watermark to PDF documents.
Click on the Add Watermark tab on the right to expand the panel.
Check the box and add the watermark text.
After the orientation, size, and opacity of the watermark have been defined, you can see the
changes to your document in real time — simply select the pages you’d like to apply your
watermark to to see how it looks.
Guidebook 122
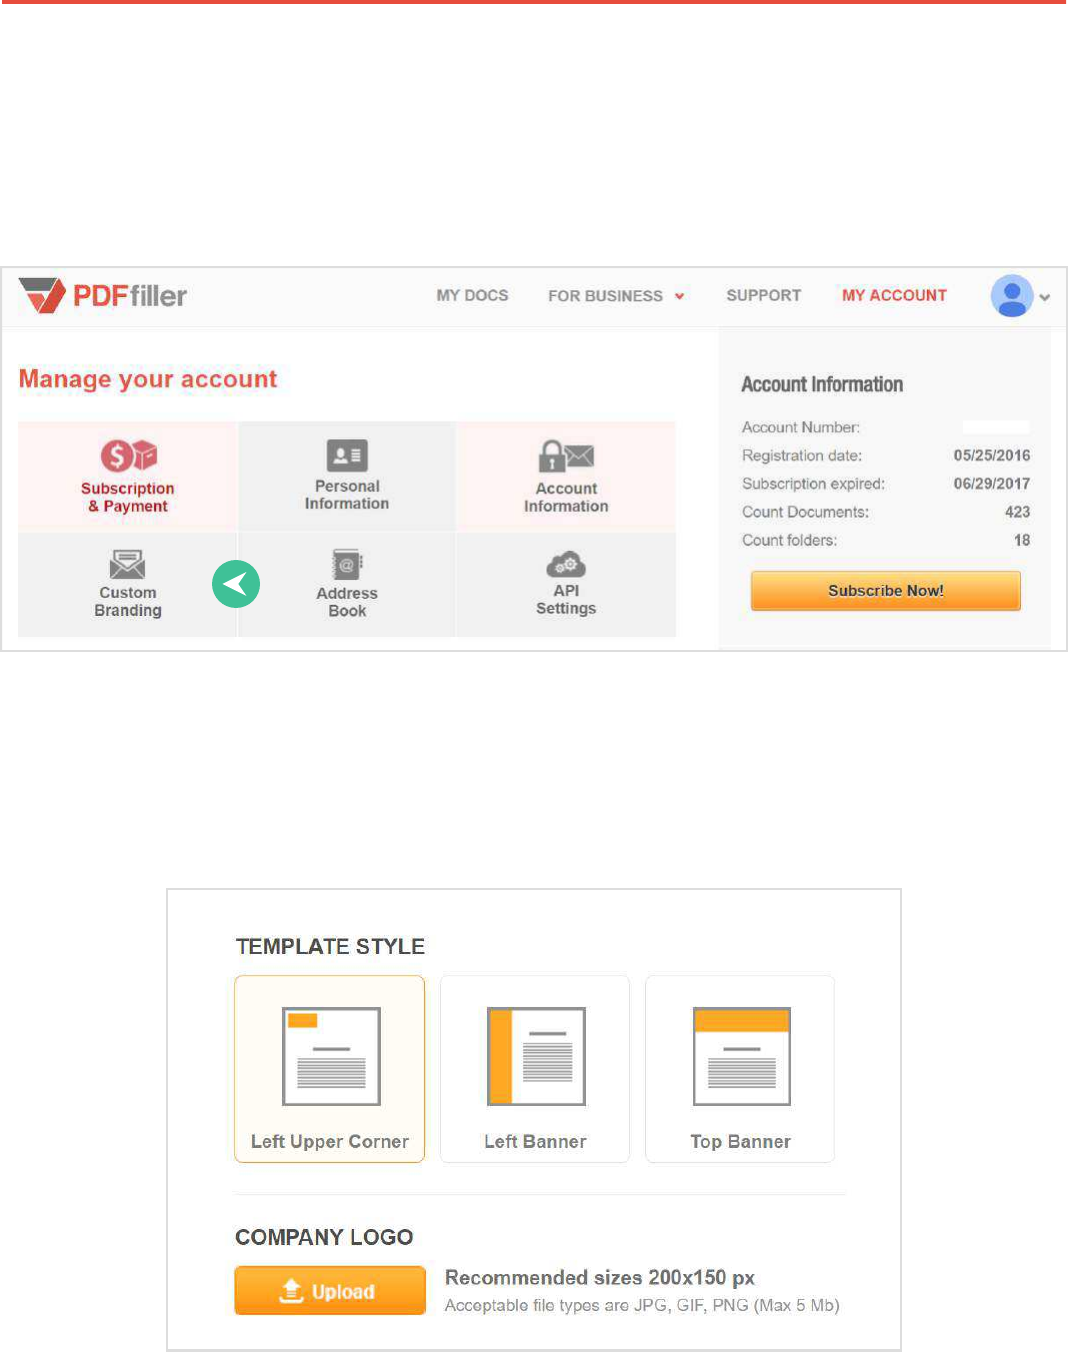
Brand the Communication
Customize emails and communications with logos, videos and unique messages to clients.
Go to MY ACCOUNT and select Custom Branding.
Choose a template for emails that you will send with the purpose of requesting signatures or
sharing documents. Upload your company’s logo, the image should be in JPEG, GIF or PNG
format, its size cannot exceed 5 MB.
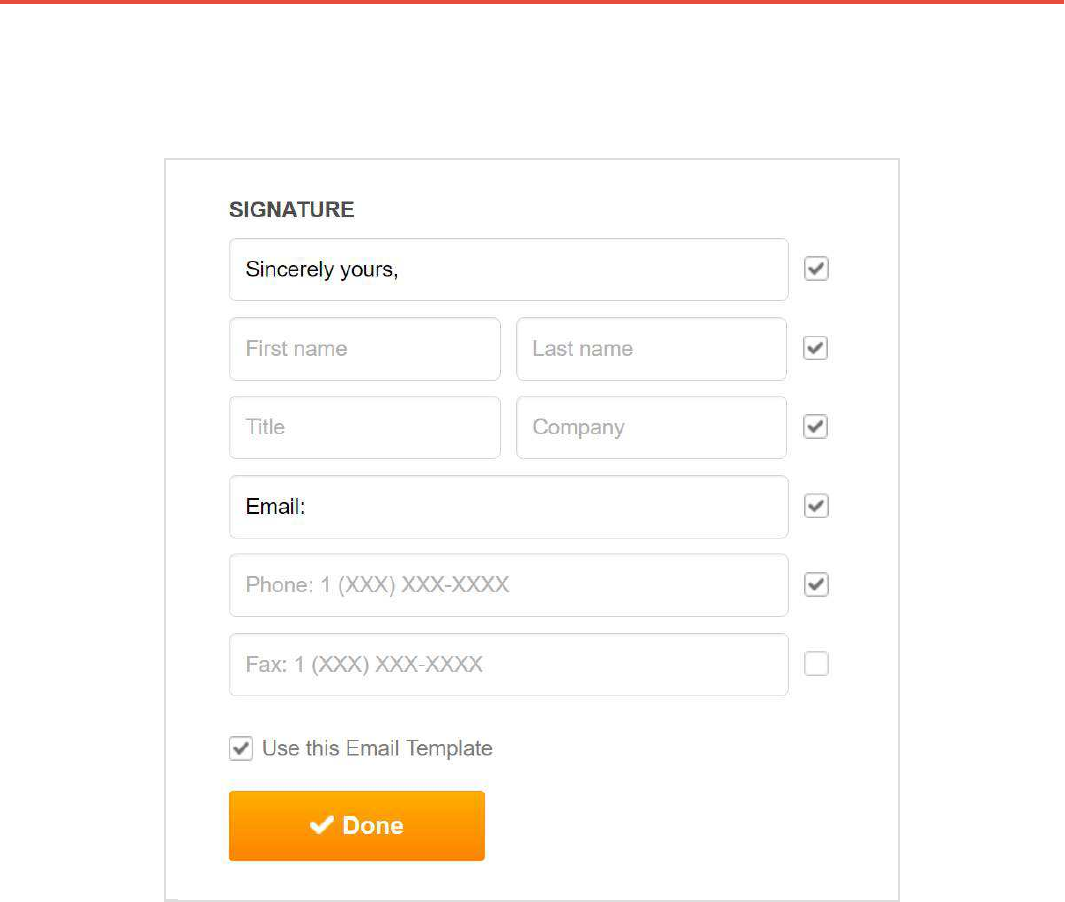
Guidebook 123
Create a signature and click Done to save your template.

Guidebook 124
Fill Forms Automatically
Fill in Bulk
Automatically merge data from database or Excel spreadsheet with a
document and send prefilled copies out to sign or save filled copies in your
account.
You can do it using Fill in Bulk, an advanced feature that enables you to automatically create
prefilled documents.
Select the document in its folder and click Fill in Bulk in the right pane.
Guidebook 125
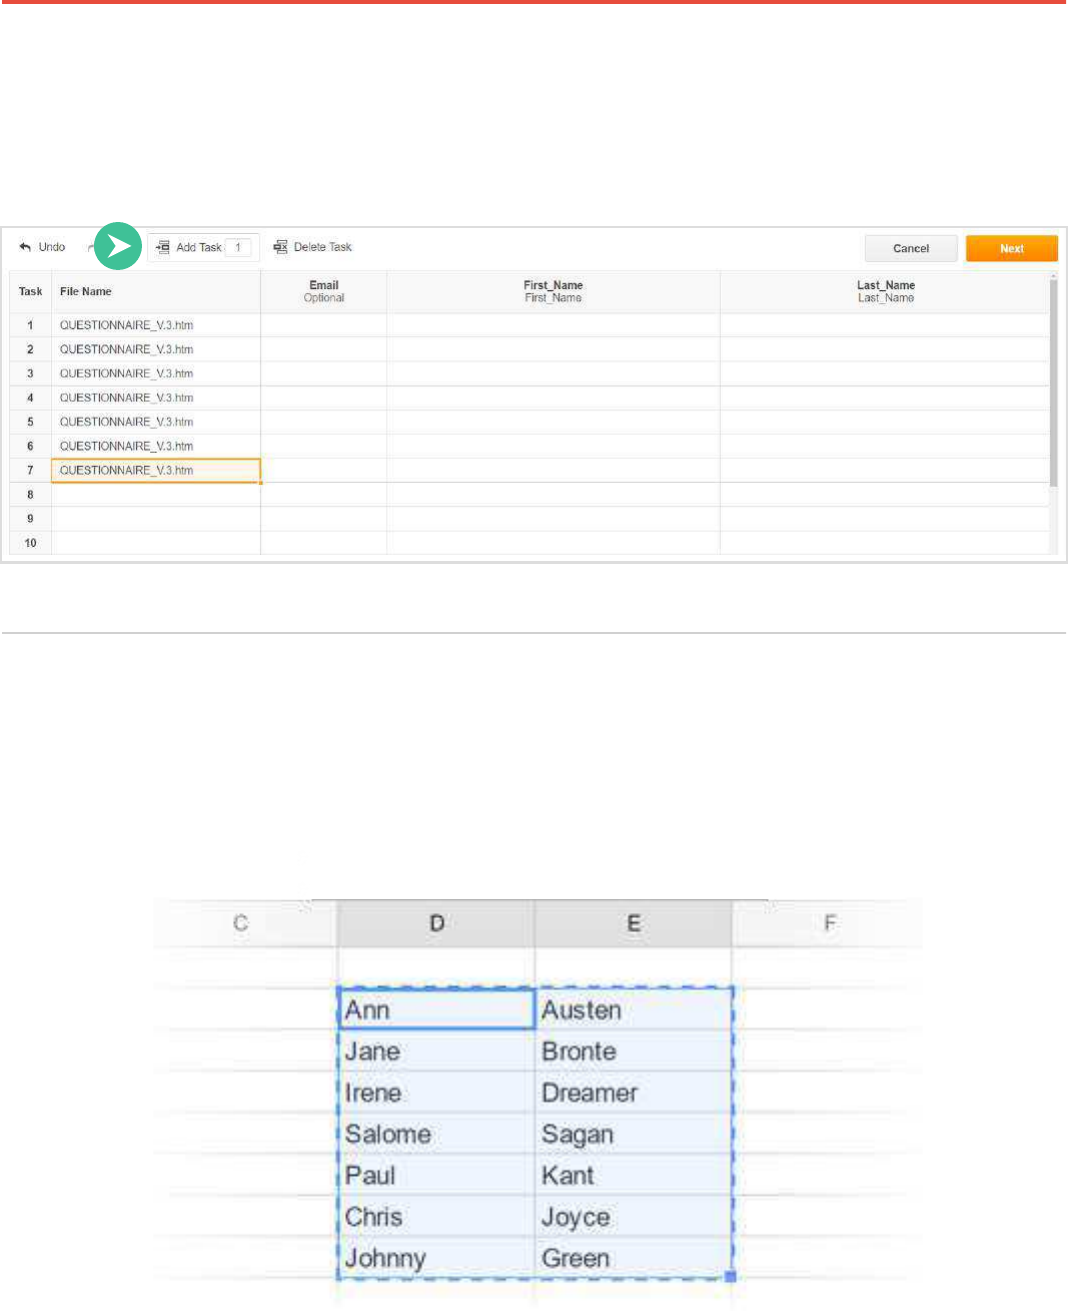
Use the Database Field Name to identify the fields that you need to pre-fill.
Define Fillable Fields
Add fillable fields to a document and fill them with data from a CRM, Excel or database.
Click Add Fillable Fields.
Guidebook 126
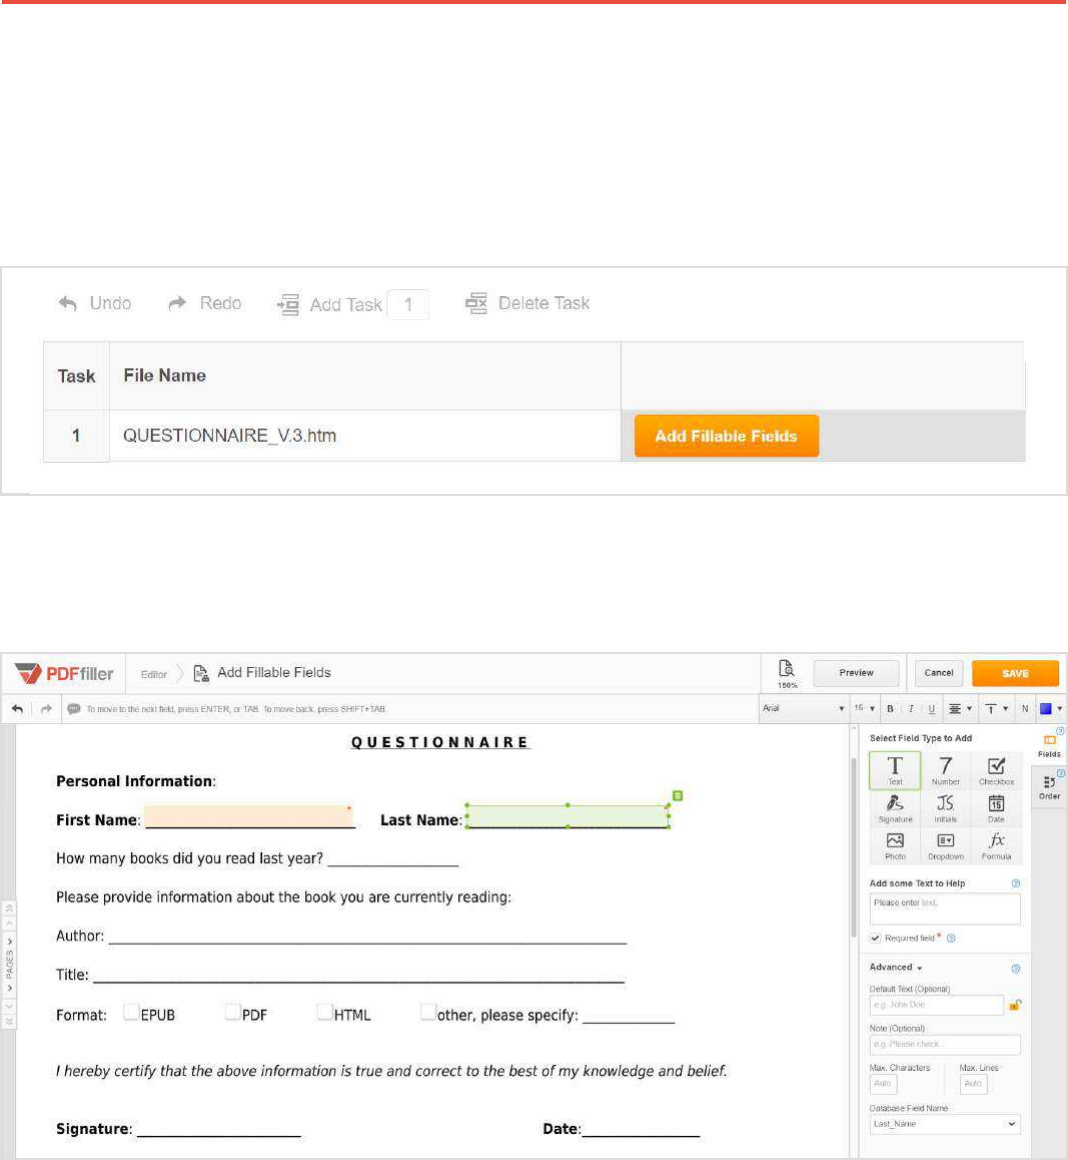
Up to 1,000 Documents in a Job
Use the Add Task tool to create up to 1,000 files.
Upload Data in Excel
Export data from an Excel spreadsheet or type it directly into an online spreadsheet.
Copy the information you need to export from a spreadsheet
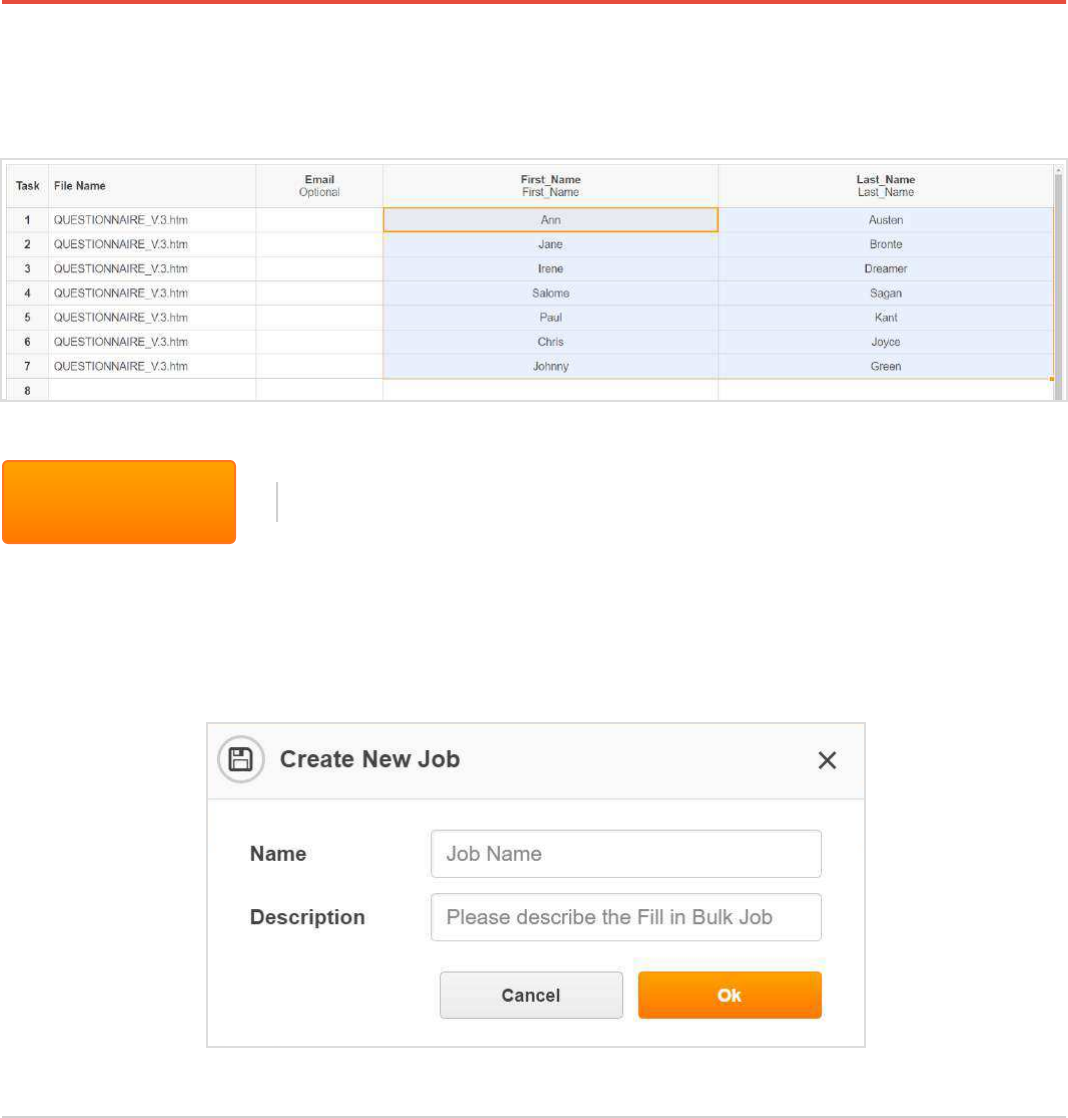
Guidebook 127
And paste it into the Fill in Bulk spreadsheet.
PDFfiller will create a new subfolder in the Fill in Bulk folder. The names of the new subfolder
and of the new job are the same.
To proceed, click Next in the top right corner. In the dialog box that
will open next, enter the name and description of the new job.
Next
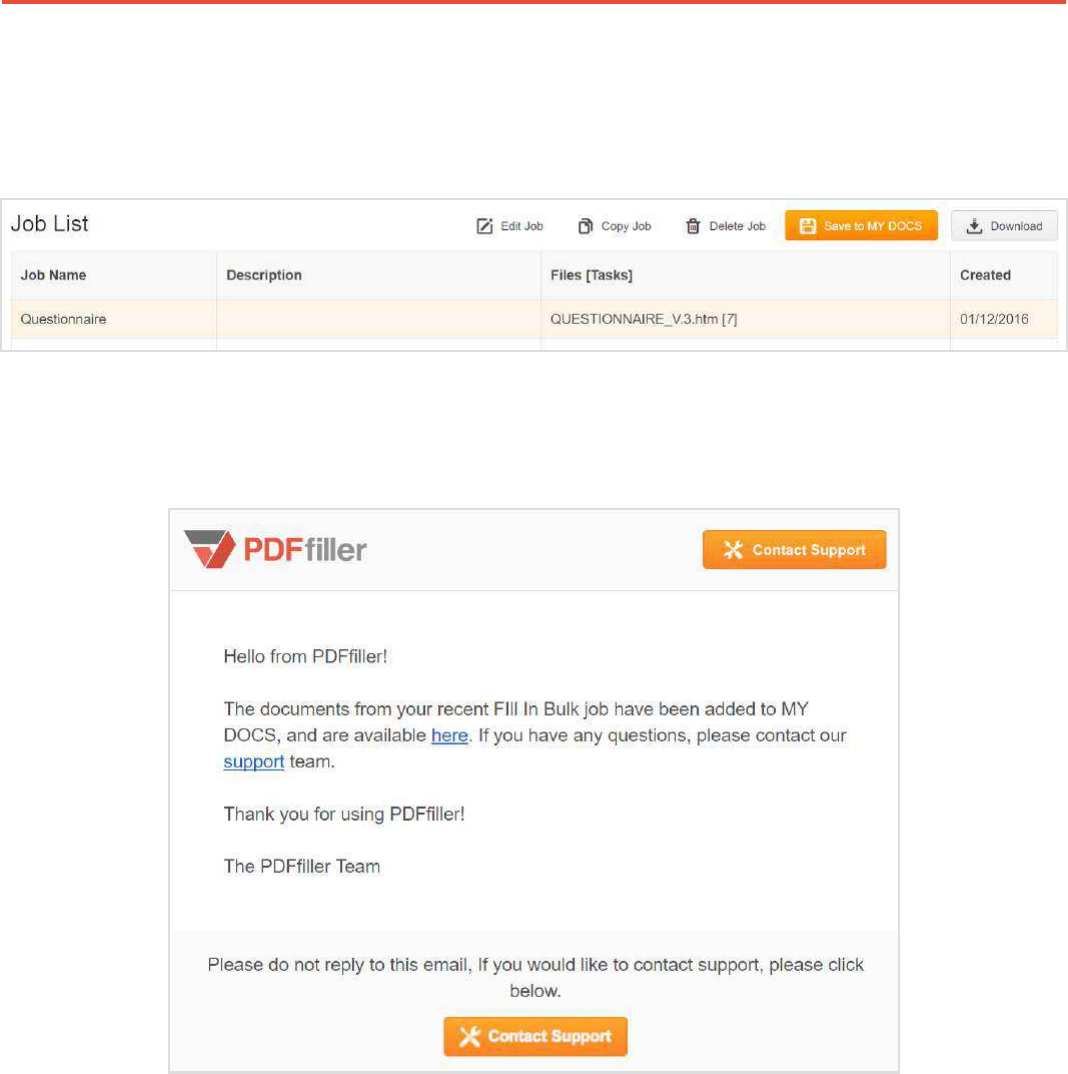
Get All Filled Documents in Your Folder
Save all prefilled documents in a folder to access at any time from any device.
Guidebook 128
After you’ve created a new job, a list of all your jobs will open. Click Save to MY DOCS above the
list to save the prefilled documents.
As soon as your documents are saved, you will receive a confirmation email.

Guidebook 129
To open the folder that contains the prefilled documents, use the link in the message or just go to
MY DOCS > MY BOX > Fill in Bulk and open the subfolder that has the job’s name.
Any of the documents that you’ve created contains the fillable fields that you added and the data
you exported from the Excel spreadsheet.

Guidebook 130
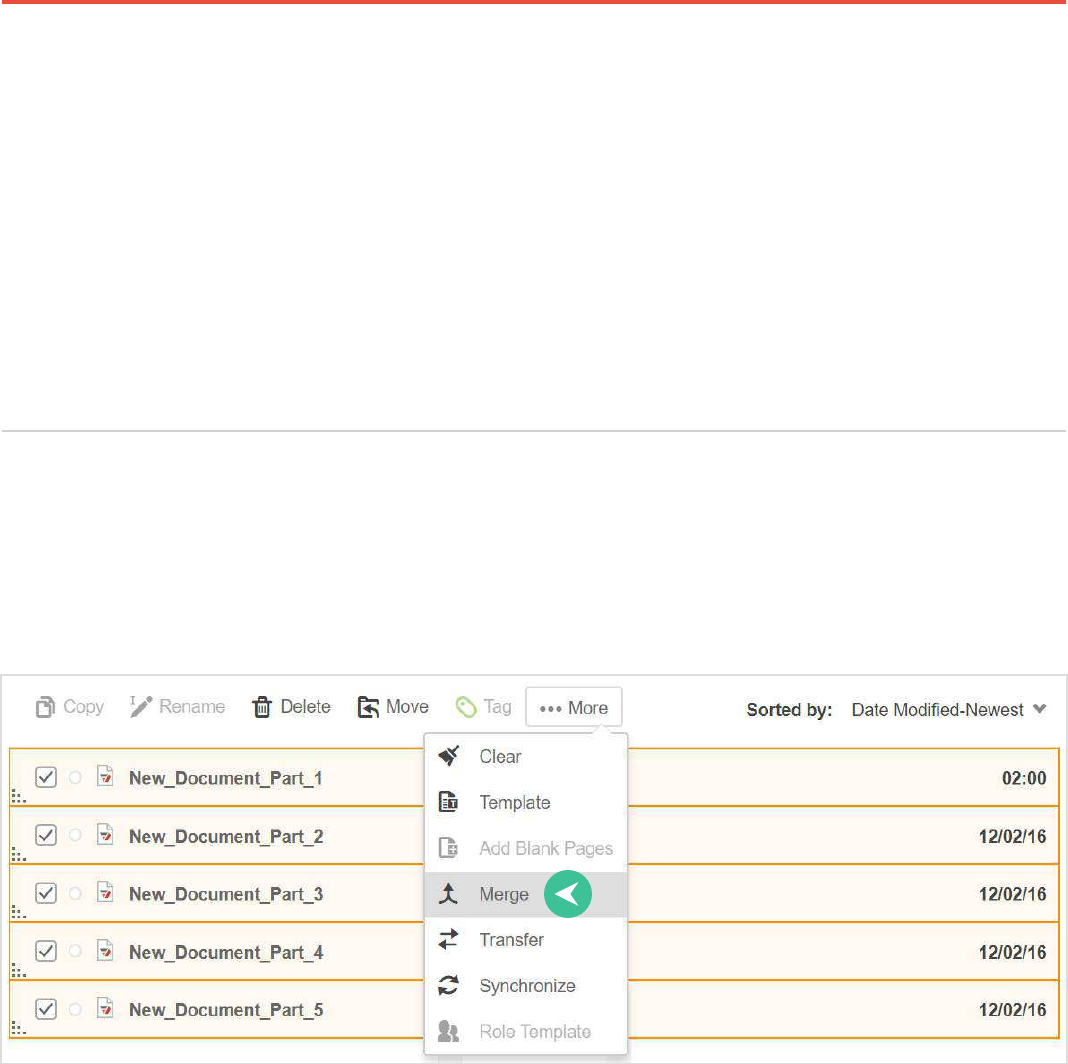
PDF Converter
Convert to DOCX
Convert PDFs to DOCX, XLS, PPT, TXT and JPG formats, or make the
reverse conversions.
Convert your PDF file to .docx format when saving the completed document.
Click Done and select Save As while the document is open in the editor.
Select the Word icon.
Guidebook 131
Open the document in Word or any other program supporting the .docx format for further editing.
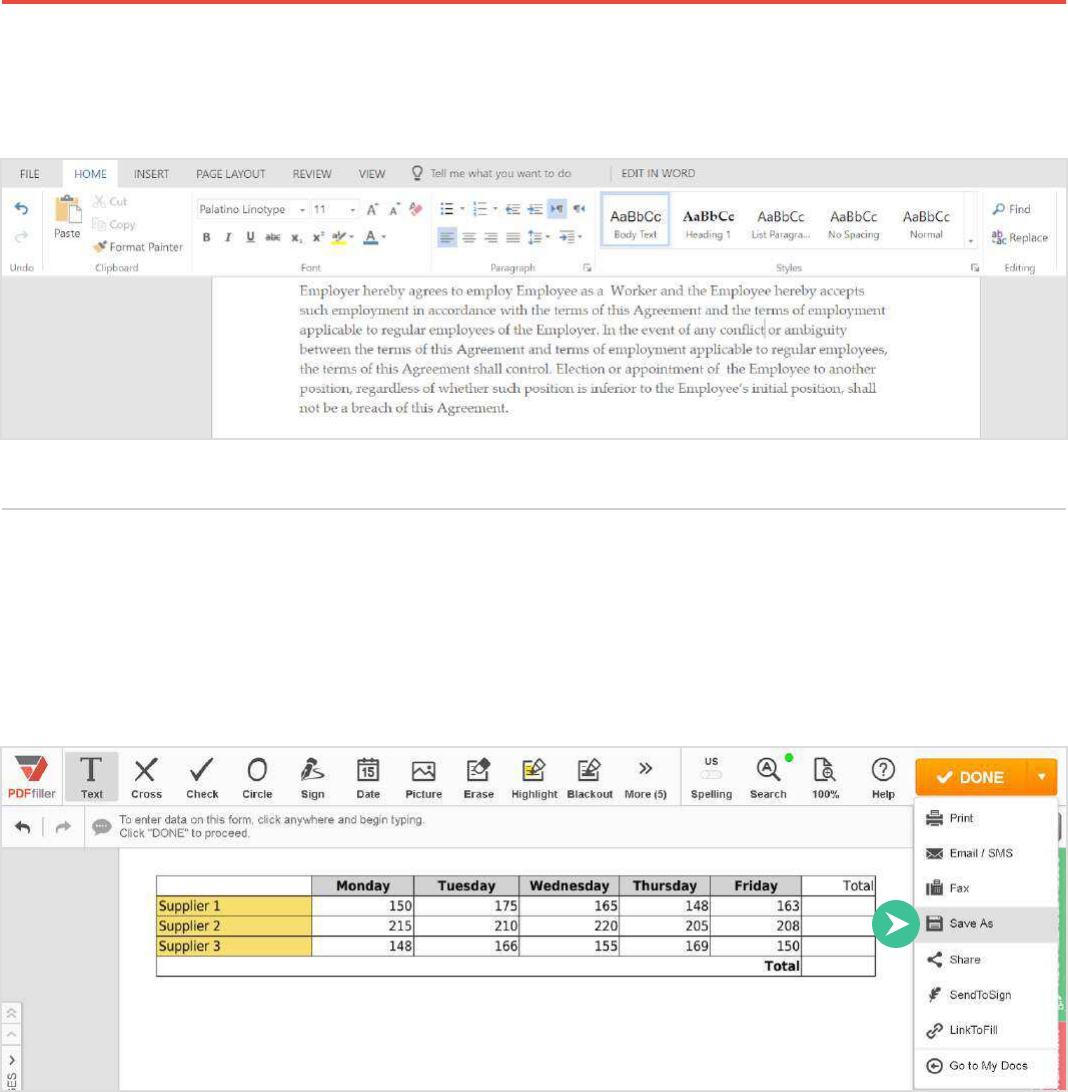
Convert to Excel
Convert your PDF file to .xlsx format when saving the completed document.
Click Done and select Save As while the document is open in the editor.

Guidebook 132
To convert a PDF file to an Excel spreadsheet, select the Excel icon.
Open the document with any program supporting the .xlsx format if you need to make any
calculations.
Convert to PPT
Convert your PDF file to .pptx format when saving the completed document.
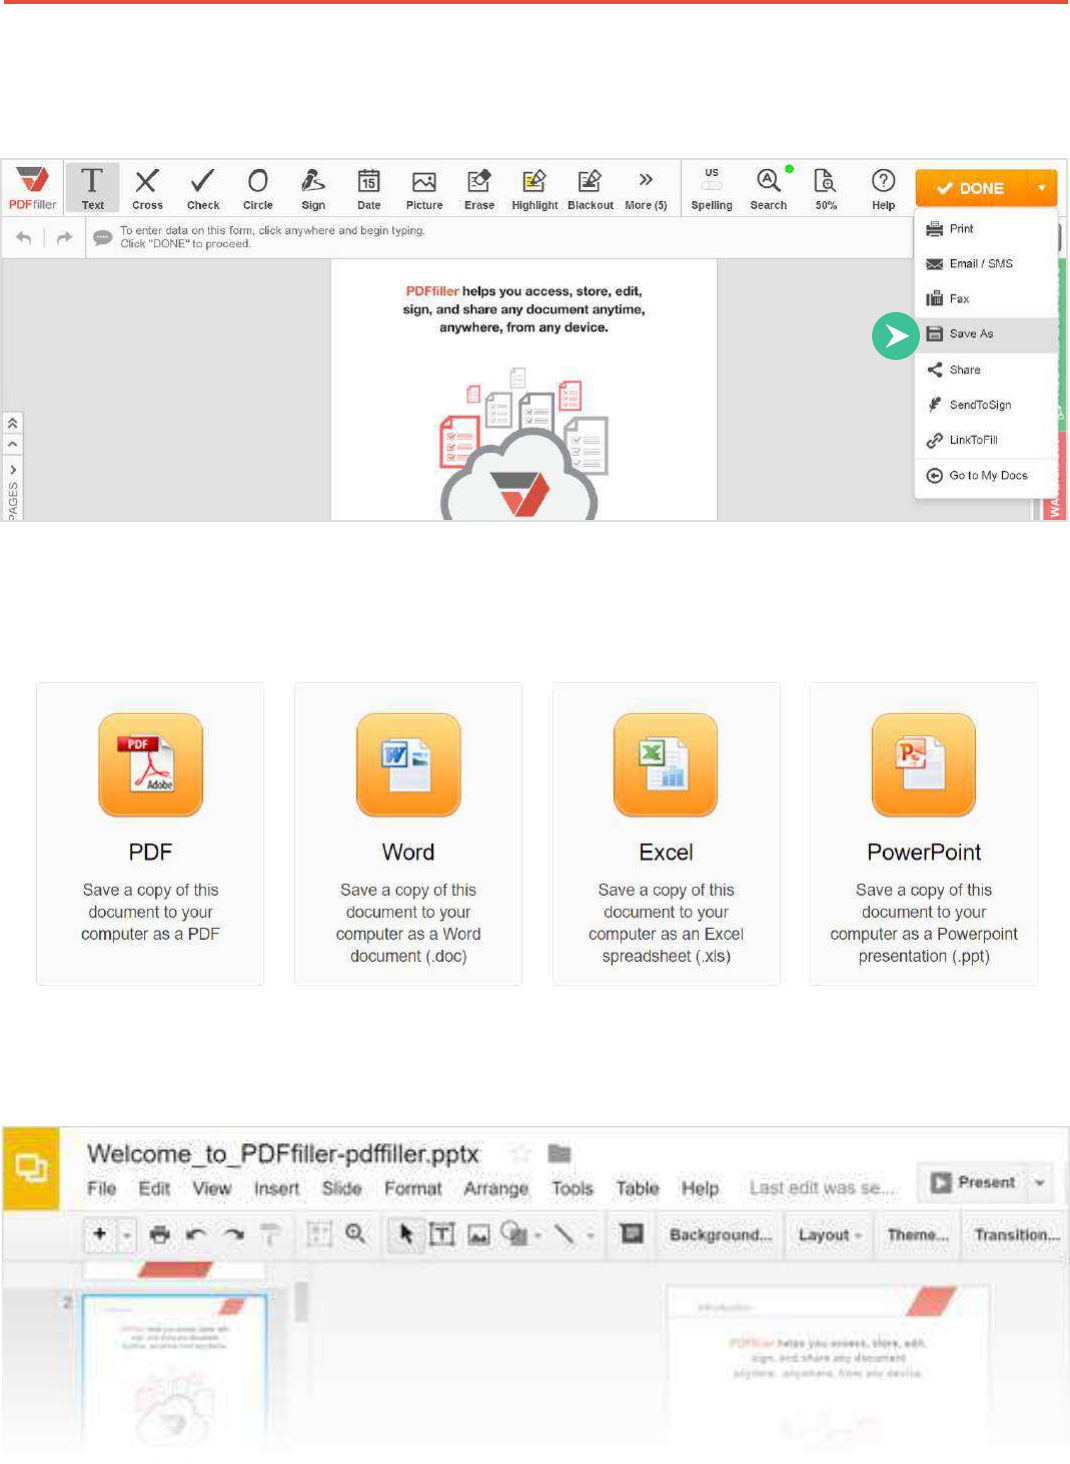
Guidebook 133
Click Done and select Save As while the document is open in the editor.
To convert a PDF file to a PowerPoint presentation, select the PowerPoint icon.
Open the presentation with any program supporting the .pptx format for further editing.
Guidebook 134
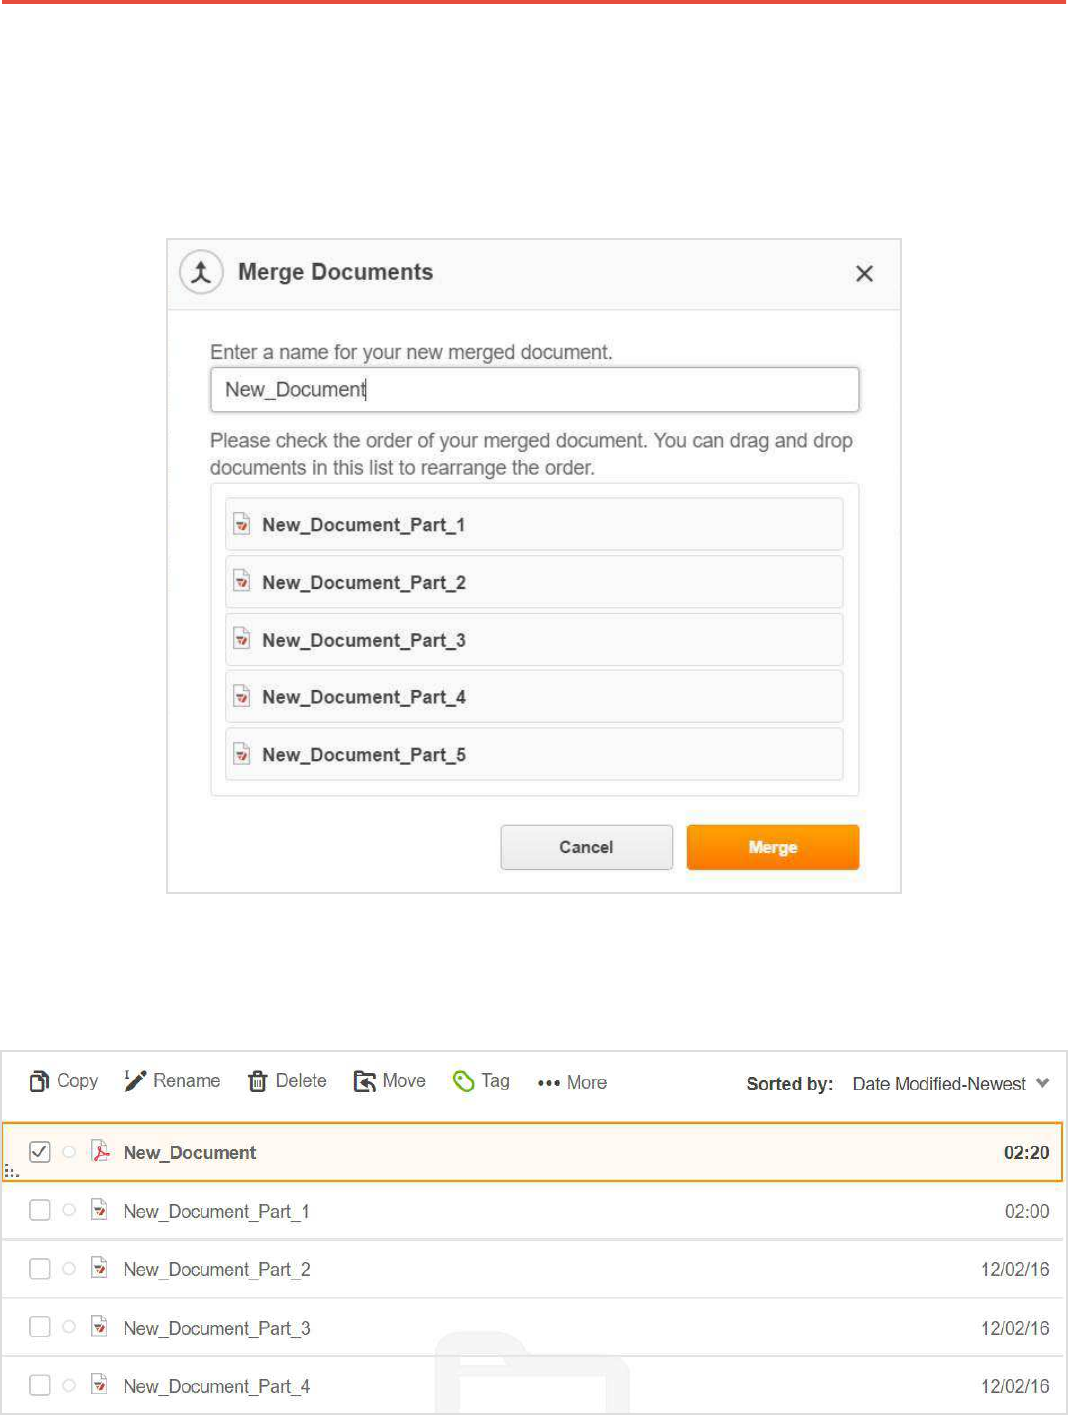
Merge and Pages PDFs
Merging PDF Files
Create a new document from existing PDF files and rearrange document
pages.
Combine pages from multiple PDF documents to create a new PDF.
Select the documents that you’d like to merge, click More and select Merge from the dropdown menu.
Guidebook 135
To change the sequence of documents, drag and drop them where you’d like them. The order of
documents in the list reflects their order in the combined PDF. Enter a name for the merged
document and click Merge.
The combined document will appear in the folder that contains the original PDFs.
Guidebook 136
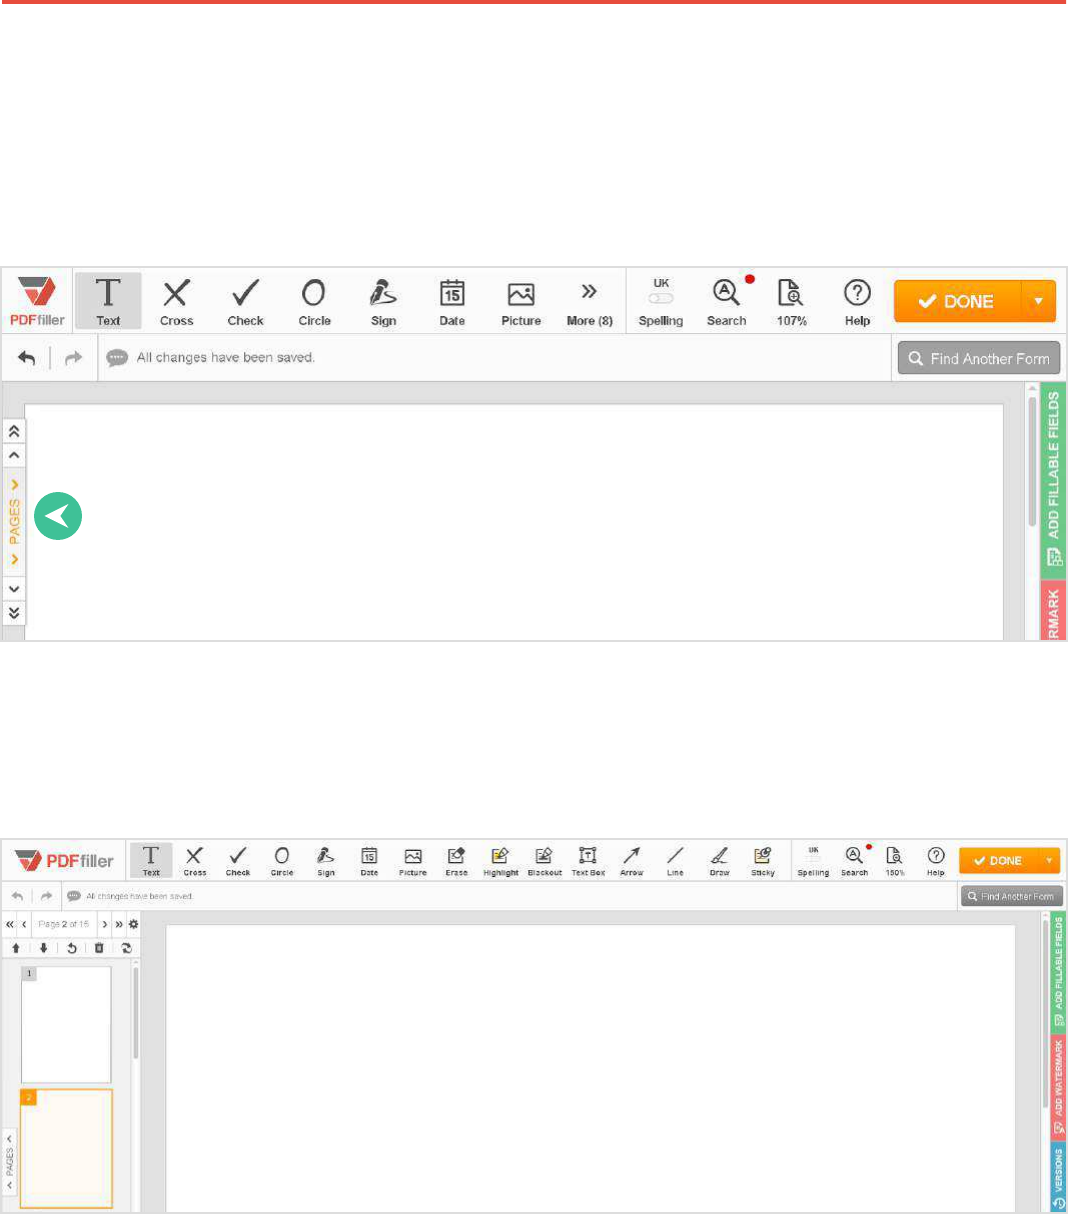
Rearrange Pages
Change the order of pages in your PDF document.
In PDFfiller editor, click PAGES on the left to open the navigation pane.
Select the thumbnail of the page you would like to move; then, use the Move Up or Move Down
icon at the top of the navigation pane.
Every time you click the Move Up or Move Down icon, the page will move respectively one step
up or down.

Guidebook 137
Insert Pages
Insert additional pages into your PDF document and format them according to your needs. Select
the document in its folder, then choose More > Add Blank Pages.
In the Add Blank Pages dialog box, select the number of pages you need to insert and click
Add Pages.
If you need to insert more than five pages, repeat the procedure.

Guidebook 138
Delete Pages
To delete a page, select its thumbnail in the navigation pane and click the trash can icon above.
