Www.elechouse.com PN532 NFC RFID Module Manual
User Manual:
Open the PDF directly: View PDF ![]() .
.
Page Count: 11
www.elechouse.com
PN532 NFC RFID Module User Guide
Introduction
NFC is a popular technology in recent years. We often heard this word while smartphone company such as Samsung or HTC
introduces their latest high-end phones. Almost all the high-end phones in the market support NFC.
Near field communication (NFC) is a set of standards for smartphones and similar devices to establish radio communication with
each other by touching them together or bringing them into close proximity, usually no more than a few centimeters.
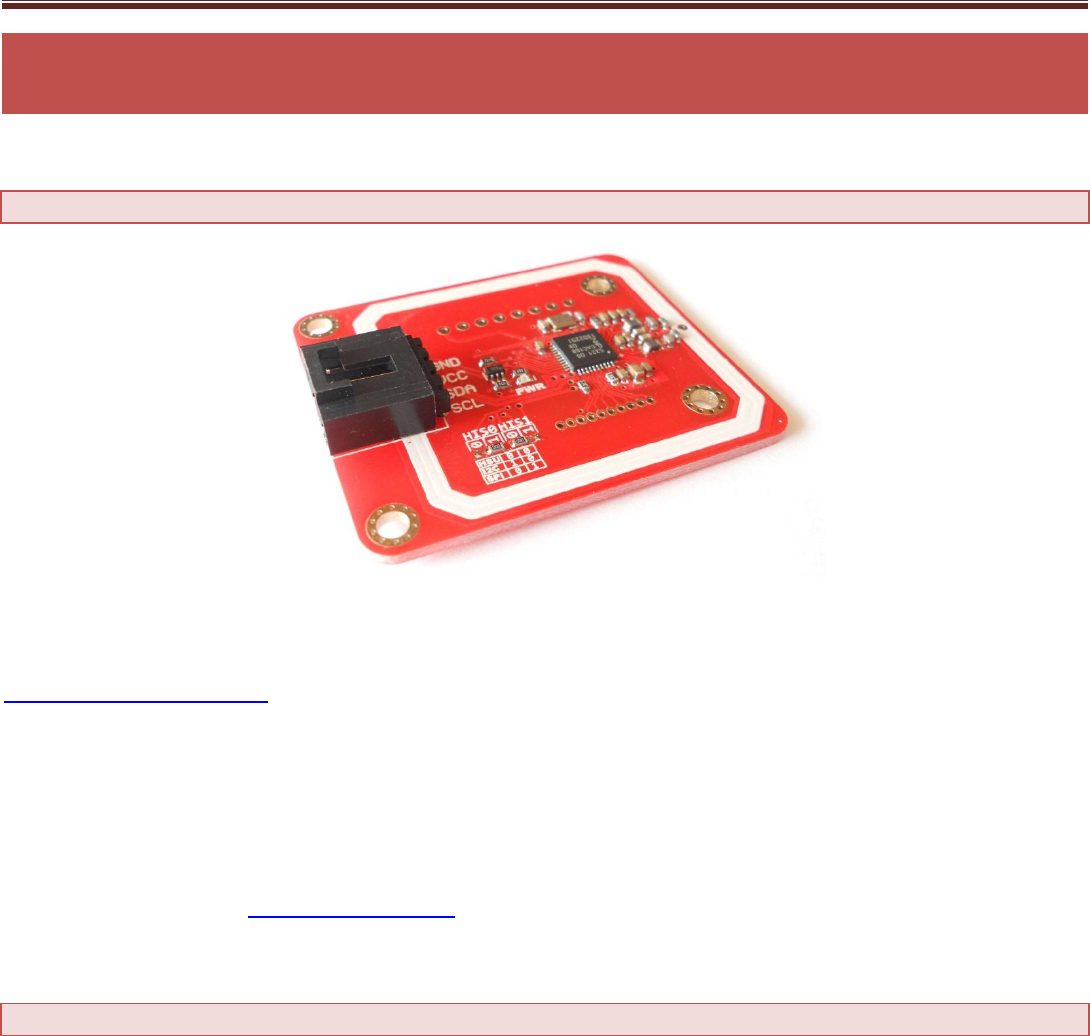
For electronics geeks, we also want to use NFC technology to make our own things. So we build this NFC RFID module. This module is
built around NXP PN532. NXP PN532 is very popular in NFC area. And the company offers much technology document to help
developers. We developed this module based on the official document. To make things easier, we also build library for this module.
We almost break out all the IO pins of NXP532 on this module. Users could easily connect and play. On this module, I2C is the data
Interface by default. With our Arduino Sensor Shield V6, it is very easy to plug and play. However, if users want to use other
interface such as UART or SPI, this module also makes it easy to connect those pins.
Features
1. Work in NFC Mode or RFID reader/writer Mode
2. RFID reader/writer mode support
Mifare 1k, 4k, Ultralight, and DesFire cards
ISO/IEC 14443-4 cards such as CD97BX, CD light, DesFire, P5CN072 (SMX)
Innovision Jewel cards such as IRT5001 card
FeliCa cards such as RCS_860 and RCS_854
3. Plug and play, Arduino compatible
4. Built in PCB Antenna, with 4cm~6cm communication distance
5. On-board level shifter, Standard 5V TTL for I2C and UART, 3.3V TTL SPI
6. Work as RFID reader/writer
7. Work as 1443-A card or a virtual card
www.elechouse.com

www.elechouse.com
8. Exchange data with other NFC devices such as smartphone
9. Gold plated PCB, more durable under extreme environment
Interface
VCC: 3.3V~5V
I2C/UART: 3.3V~30V TTL
Interface: I2C (default)/UART/SPI
The I2C interface is configured as the default interface. But you could change the interface by setting the configuration pads.
The pad setting is according to the following table:
Working Interface
HIS0
HIS1
HSU
0
0
I2C
1
0
SPI
0
1
Here we use 0 ohm resistors to bridge the pad (The factory requires so for efficiency reason). In fact, Resistor is not necessary. The
pads are designed as soldering pads. It is very easy to bridge two pads with melting solder.
If you use HSU (high speed UART) , you could find the pins definition on the back of this module.
www.elechouse.com
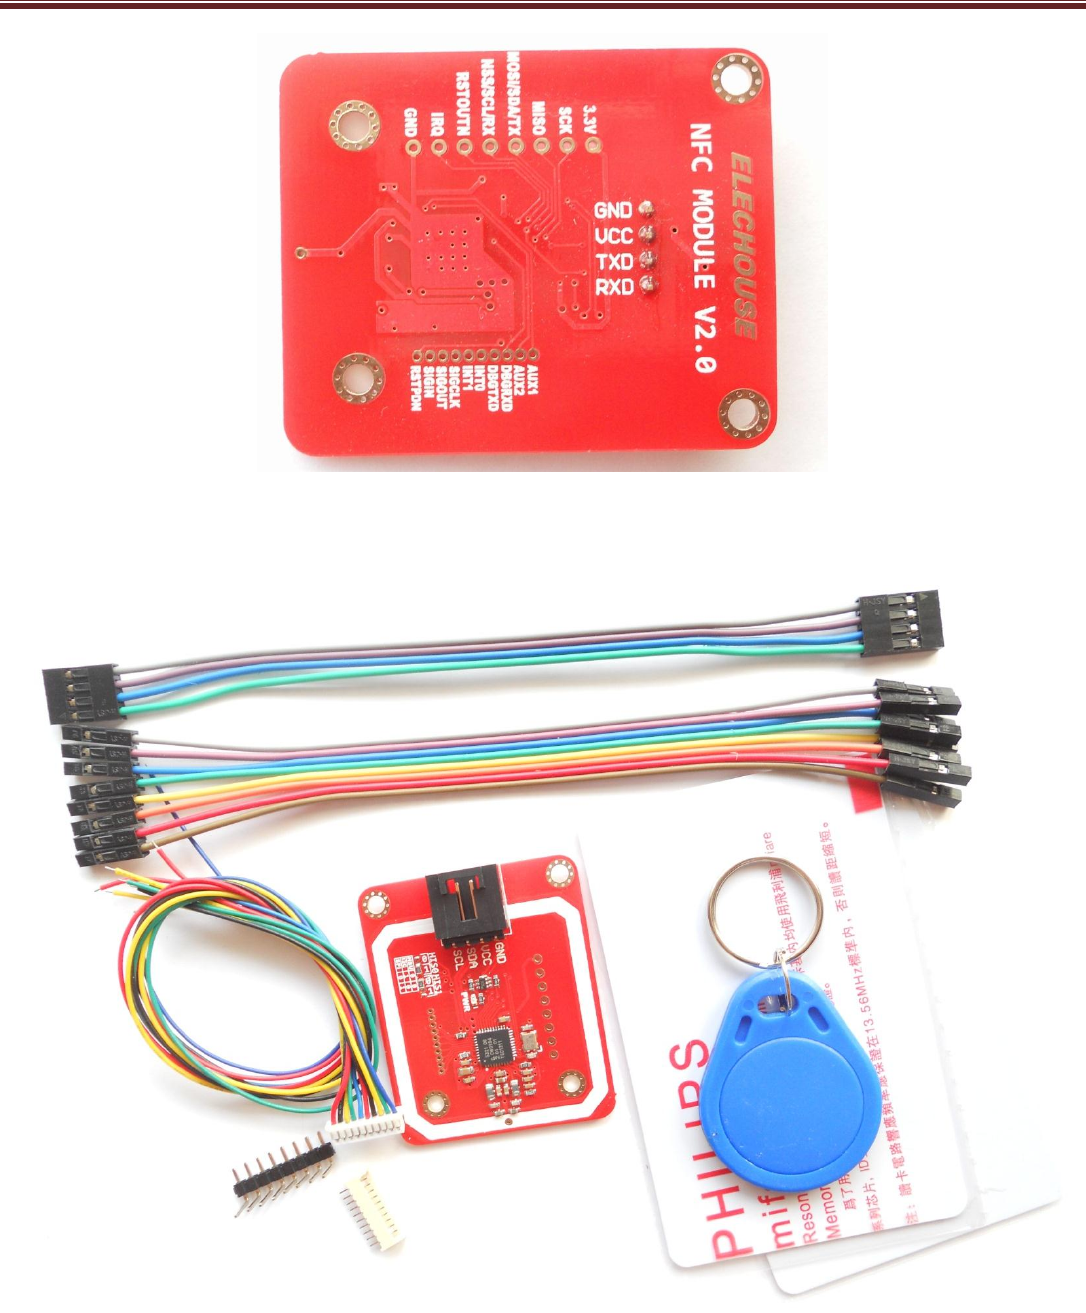
www.elechouse.com
In fact, we add all the pin definition on the back. It is useful for some developers. In the developer kits, we will supply pins and wires
for all those interface. You don’t worry about how to connect wire from the 1.27mm spacing interface.
www.elechouse.com
www.elechouse.com
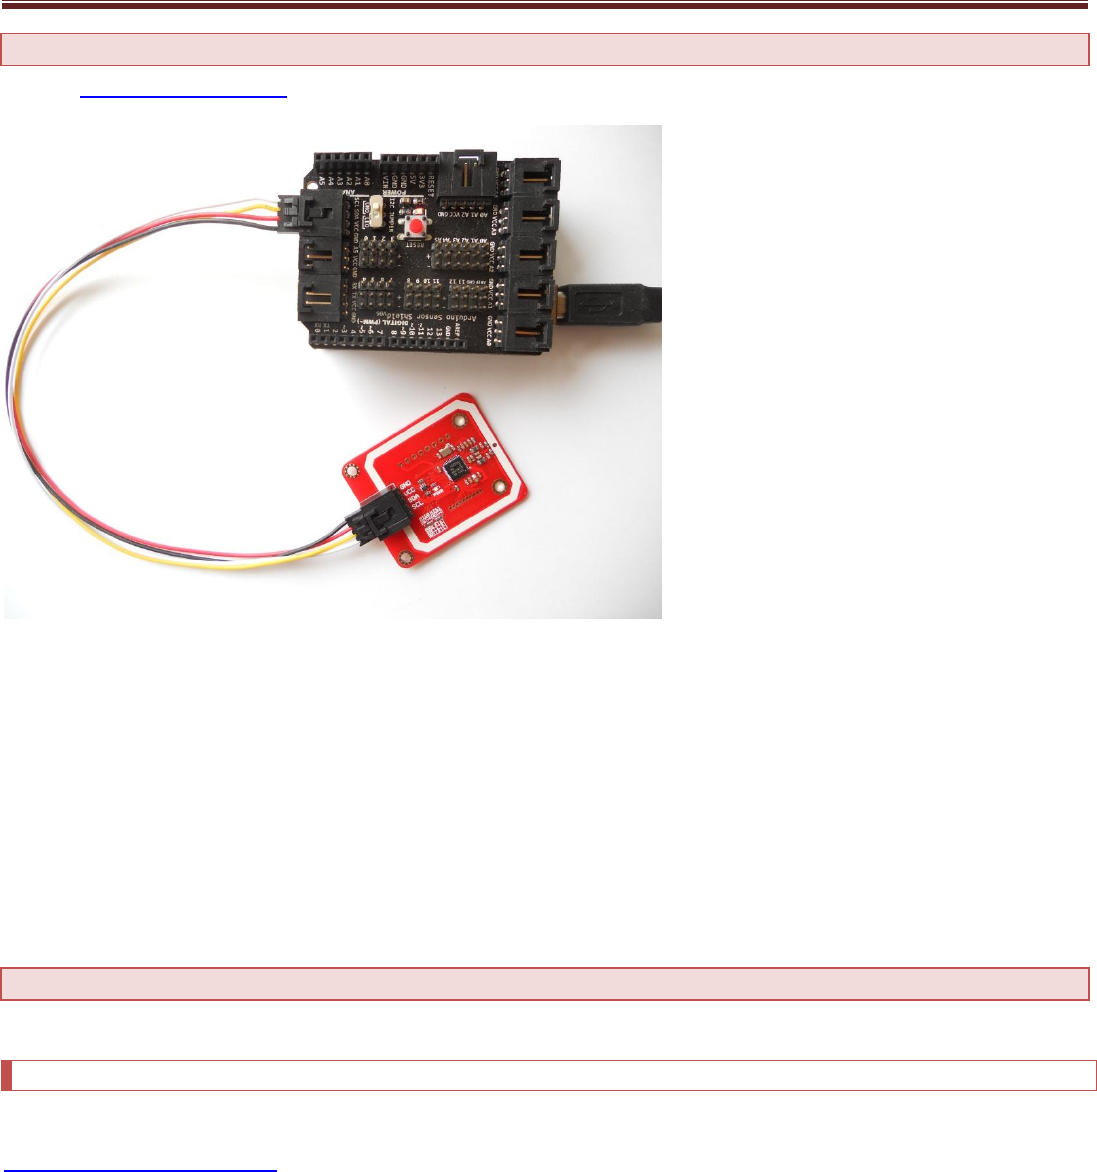
Hardware Installation
With our Arduino Sensor Shield V6, just plug and play
If without the sensor shield, please connect as following:
Arduino PN532 Module
GND <--------------------> GND
5V <---------------------> VCC
SDA <---------------------> SDA
SCL <---------------------> SCL
Function Test
Here we will show you several functions of this PN532 module. We did the test with Arduino.
RFID Reader/Writer
Here we show how to read and write RFID card with this module.
Click here to download the library. We added comments in the code to help understanding.
/** include library */
#include "Wire.h"
#include "nfc.h"
/** define an nfc object */
NFC_Module nfc;
void setup(void)
{
Serial.begin(9600);
www.elechouse.com

www.elechouse.com
nfc.begin();
Serial.println("MF1S50 Reader Demo From Elechouse!");
uint32_t versiondata = nfc.get_version();
if (! versiondata) {
Serial.print("Didn't find PN53x board");
while (1); // halt
}
// Got ok data, print it out!
Serial.print("Found chip PN5");
Serial.println((versiondata>>24) & 0xFF, HEX);
Serial.print("Firmware ver. ");
Serial.print((versiondata>>16) & 0xFF, DEC);
Serial.print('.');
Serial.println((versiondata>>8) & 0xFF, DEC);
/** Set normal mode, and disable SAM */
nfc.SAMConfiguration();
}
void loop(void)
{
u8 buf[32],sta;
/** Polling the mifar card, buf[0] is the length of the UID */
sta = nfc.InListPassiveTarget(buf);
/** check state and UID length */
if(sta && buf[0] == 4){
/** the card may be Mifare Classic card, try to read the block */
Serial.print("UUID length:");
Serial.print(buf[0], DEC);
Serial.println();
Serial.print("UUID:");
nfc.puthex(buf+1, buf[0]); // print out the UID
Serial.println();
/** factory default KeyA: 0xFF 0xFF 0xFF 0xFF 0xFF 0xFF */
u8 key[6] = {0xFF, 0xFF, 0xFF, 0xFF, 0xFF, 0xFF};
u8 blocknum = 4;
/** Authentication block 4 */
sta = nfc.MifareAuthentication(0, blocknum, buf+1, buf[0], key);
if(sta){
/** create array to save block data read from the card*/
u8 block[16];
Serial.println("Authentication success.");
/***********************************************************
The following are examples to write data to RFID card. To
protect user’s data in RFID card. By Default we disabled it.
Please remove the annotation symbol to enable it
***********************************************************/
/*
strcpy((char*)block, "Elechouse - NFC");
sta = nfc.MifareWriteBlock(blocknum, block);
if(sta){
Serial.println("Write block successfully:");
}
*/
/***********************************************************
The following are examples to read data from RFID card.
***********************************************************/
/** read block 4 */
sta = nfc.MifareReadBlock(blocknum, block);
if(sta){
Serial.println("Read block successfully:");
www.elechouse.com

www.elechouse.com
nfc.puthex(block, 16);
Serial.println();
}
/** read block 5 */
sta = nfc.MifareReadBlock(blocknum+1, block);
if(sta){
Serial.println("Read block successfully:");
nfc.puthex(block, 16);
Serial.println();
}
/** read block 6 */
sta = nfc.MifareReadBlock(blocknum+2, block);
if(sta){
Serial.println("Read block successfully:");
nfc.puthex(block, 16);
Serial.println();
}
/** read block 7 */
sta = nfc.MifareReadBlock(blocknum+3, block);
if(sta){
Serial.println("Read block successfully:");
nfc.puthex(block, 16);
Serial.println();
}
}
}
}
Uploading the code to Arduino, and then open the Serial Monitor on Arduino IDE:
Put the card above the antenna.
www.elechouse.com
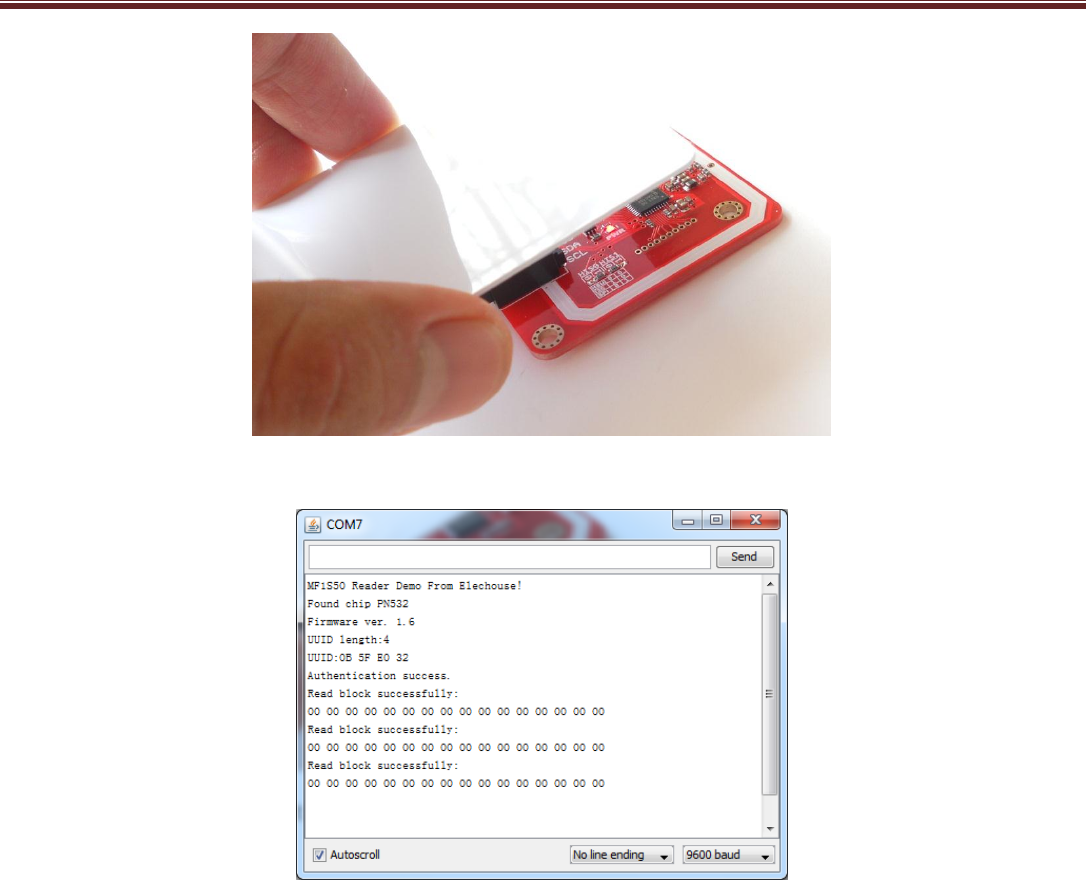
www.elechouse.com
Then you could get output:
If you enable the code of wring card
strcpy((char*)block, "Elechouse - NFC");
sta = nfc.MifareWriteBlock(blocknum, block);
if(sta){
Serial.println("Write block successfully:");
}
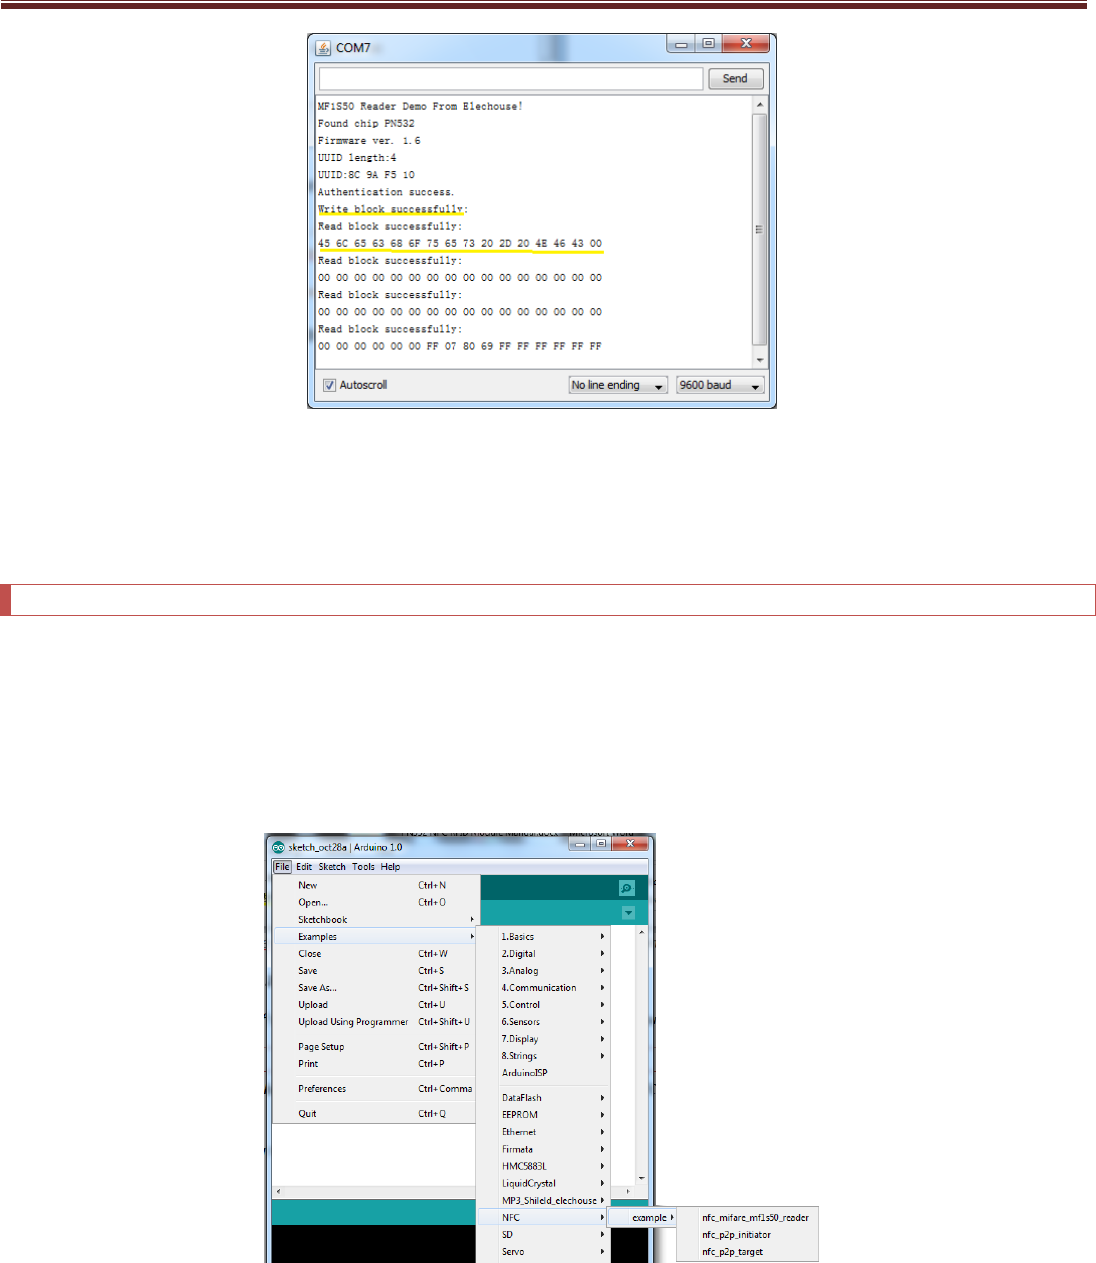
You will get the following output:
www.elechouse.com
www.elechouse.com
You wrote string "Elechouse - NFC" to block 4, and then you read from block 4 the following data:
45 6C 65 63 68 6F 75 65 73 20 2D 20 4E 46 43 00
Those are Hex ASCII code of the string "Elechouse - NFC". You could change the code to output strings.
NFC
Here we need two Arduino boards to test this function. Basically we will program one NFC module as Initiator, and the other as
Target.
Please upload the following two examples to the two Arduino board:
NFC_p2p_initiator
NFC_p2p_target
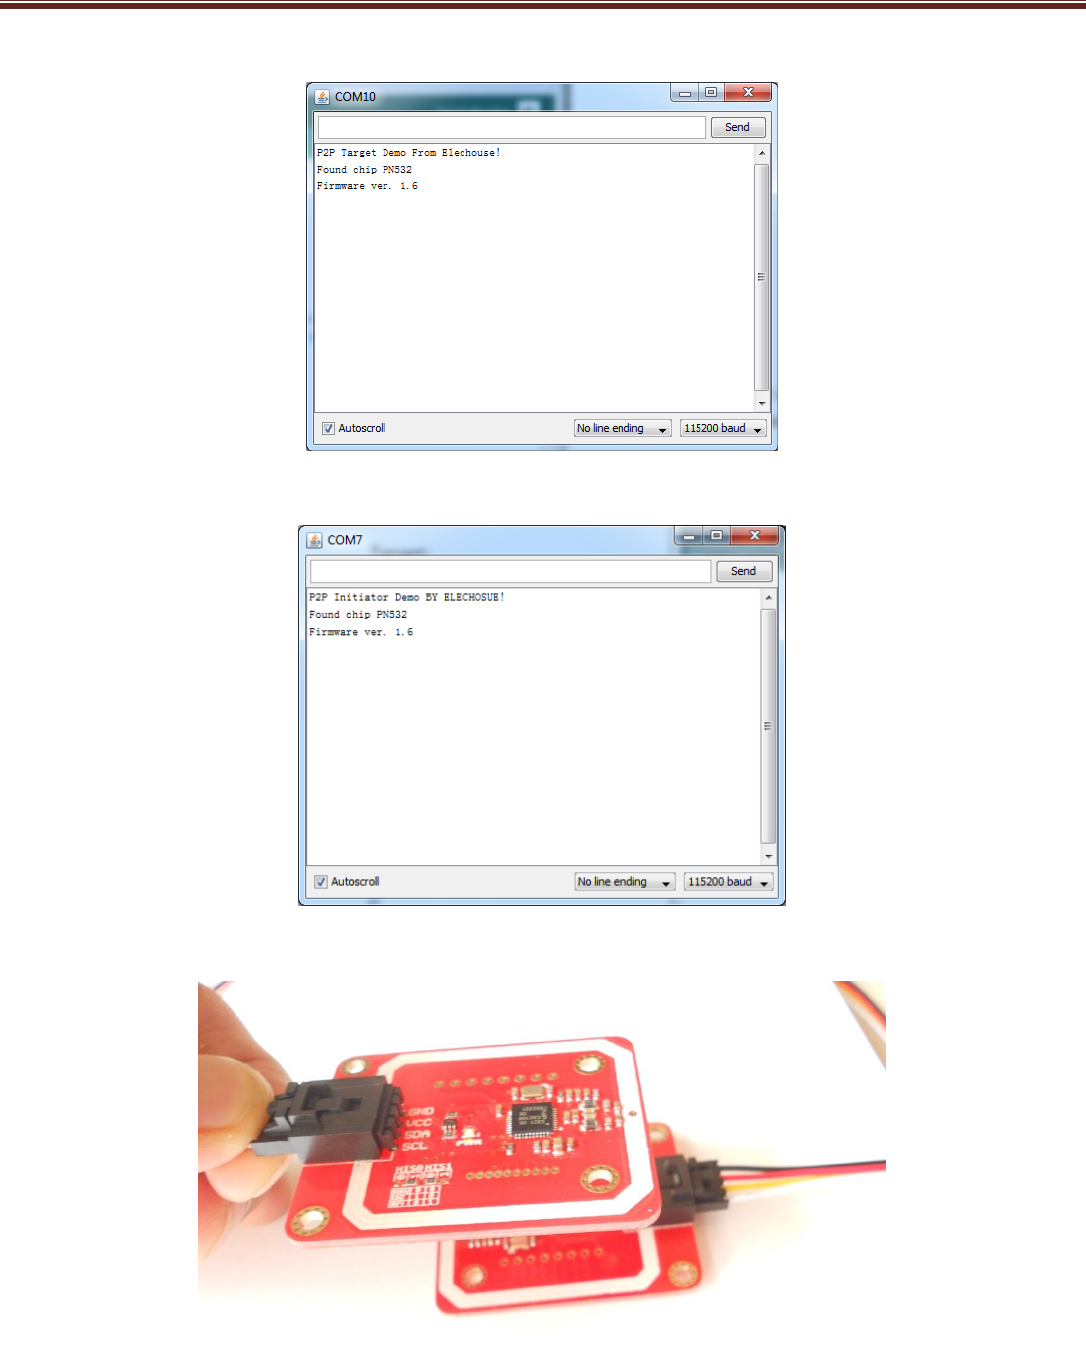
After uploading the sketches, open the Serial Monitor. Please note that Arduino IDE doesn’t support opening 2 Serial Monitors. So
you need another Serial Tool. Here we have 2 versions of Arduino IDE installed in my PC: Arduino 0022 and Arduino 1.0. We open the
two and could have two Serial Monitor working. Note the baud rate is 115200.
www.elechouse.com
www.elechouse.com
Target:
Initiator:
Then put one module above the other:
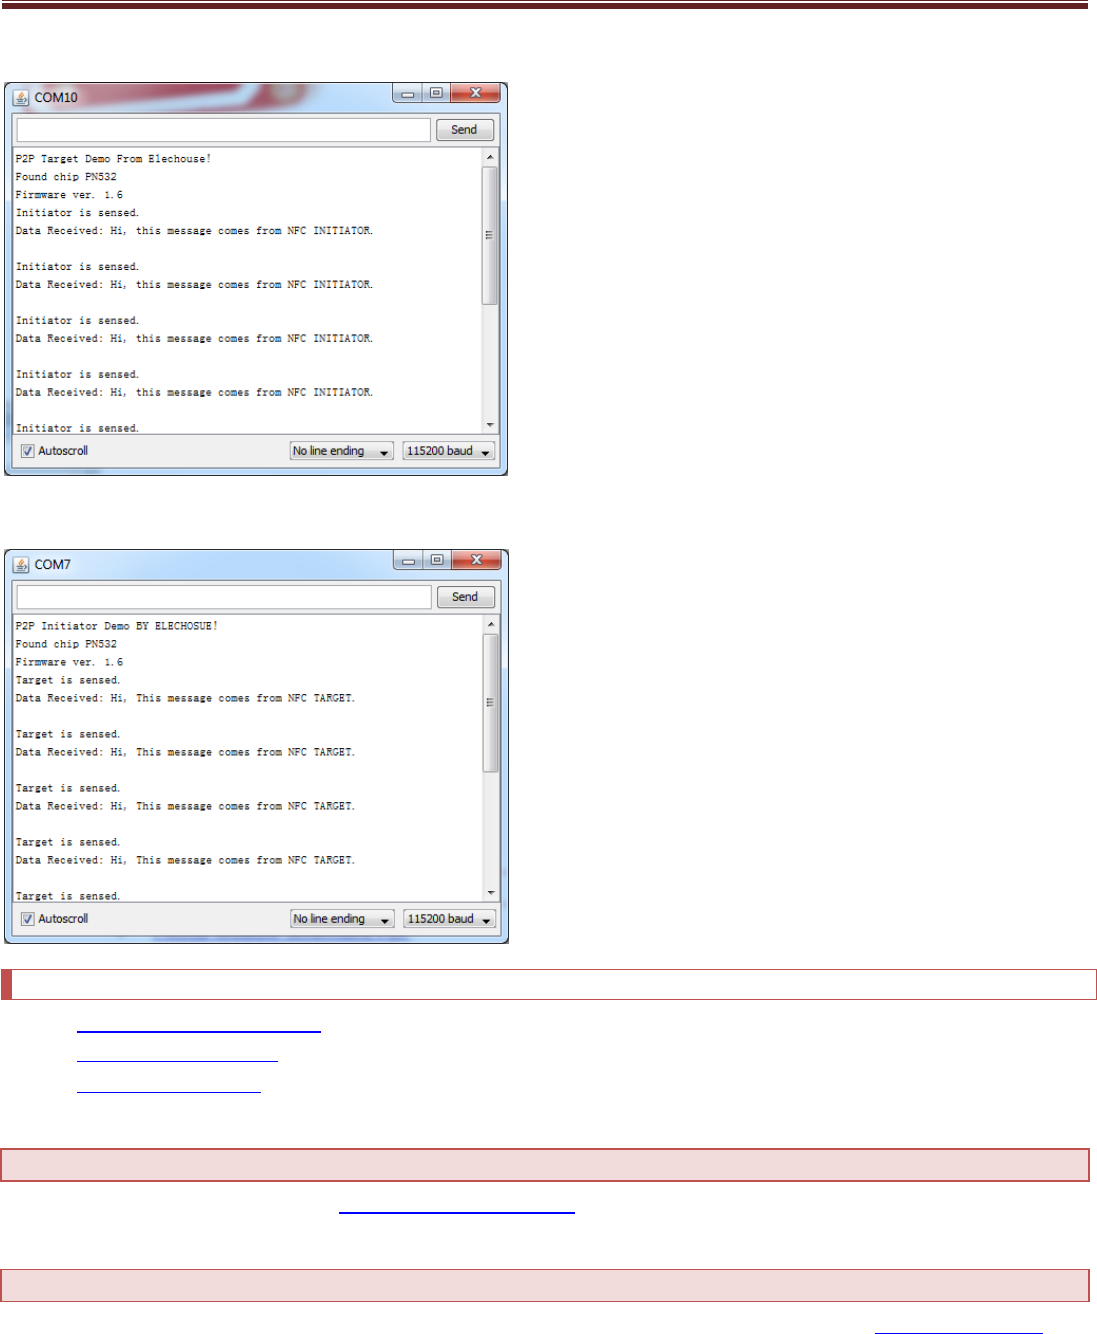
Finally we get
:
www.elechouse.com
www.elechouse.com
Target:
Initiator:
Useful link
PN532 Module Schematic PDF
NXP PN532 User Manual
NXP Mifare One S50 IC
Where to buy
Please visit this page to buy this product: PN532 NFC RFID module kits
Disclaimer and Revisions
The information in this document may change without notice. If you have any problem about it, please visit www.elechouse.com to
contact us.
Revision History
www.elechouse.com

www.elechouse.com
Rev.
Date
Author
Description
A
Oct. 25th , 2012
Wilson
Initial version
www.elechouse.com
