Processing Mode File Manual
User Manual:
Open the PDF directly: View PDF ![]() .
.
Page Count: 5
Processing Mode Test Files
for LaserWORKS v8.01.07
(Engraving, Cutting & Scoring)
251 Gordon Street
Sanford, FL 32771
Phone 888-652-1555 • Fax 407-878-0880
www.BOSSLASER.com
BossLaser.com 888 652-1555
BossLaser.com
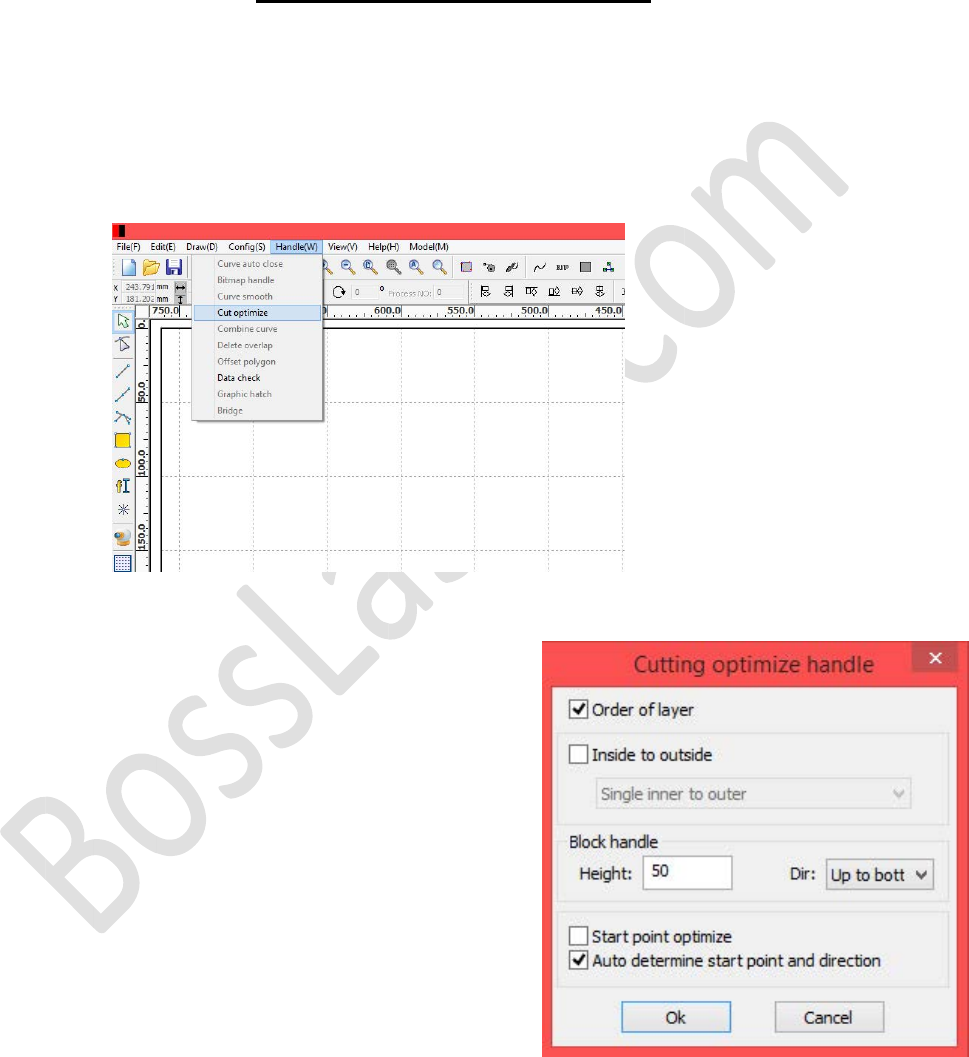
Figure 1. Accessing the Cut optimize menu.
Figure 2. Cut optimize settings.
Open LaserWORKS with a new/blank file. To process the test files correctly in the order
of the layers assigned to a given path, the Cut optimize settings will need to be
configured. Figure 1 shows on how to access that menu by clicking on Handle(W)
located on the top toolbar, then selecting Cut optimize.
Here, Figure 2 illustrates on which options should
be selected. The only options that need to be check
so that the following test files can run properly is
Order of layer and Auto determine start point and
direction. Upon finishing this exercise, you may
change back to any settings you had prior to this
setup.
Before proceeding through this exercise, make sure you have the latest version of
LaserWORKS (8.01.07 & up)*. To prolong the life of the laser tube, we do NOT recommend
going over 85% power over long periods. Doing so will reduce the life of your laser tube and its
performance.
Cut Optimize Settings
*This section must be completed before running the test files*
*Find the latest version of LaserWORKS at www.bosslaser.com/laser-software. To uninstall the older
version correctly, watch the tutorial video on how to do so from our BossLaser Youtube.
BossLaser.com
BossLaser.com 888 652-1555
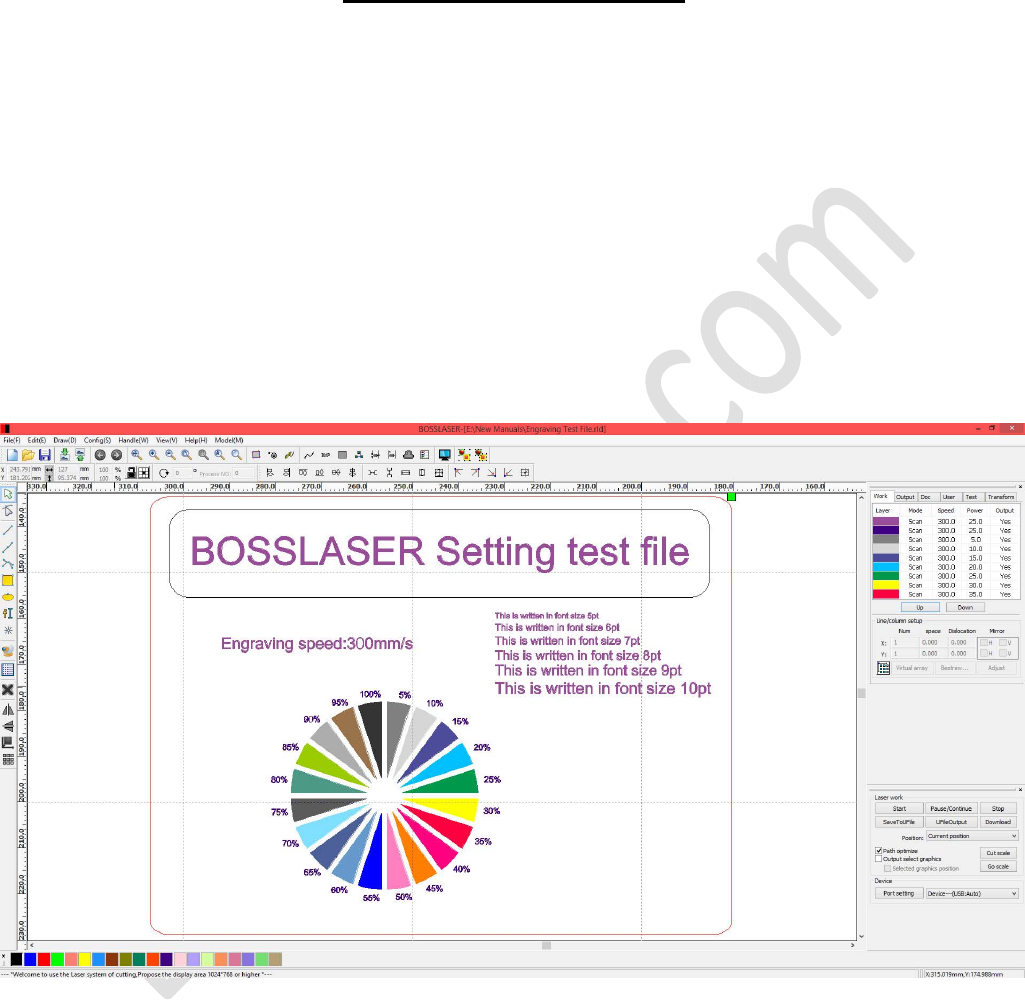
Engraving Test File
Figure 3. Engraving test file with different power settings @ 300 mm/s.
Now go to File(F) > Open... and locate the file "Engraving Test File." Select and open the
file to see a pre-made template with different layers associated with it's own power
setting, as illustrated in Figure 3. There's no need to change any of the layers and settings
since they are already configured correctly. If the image is larger than your sample material
that you'll be testing on, you can resize the image (as a whole) to properly fit your
material.
Finally, download the file to your machine by either using the Download button (using the
Blue USB Cable) or the SavetoUFile button (using a USB Flash Drive). Make sure you
autofocus (or focus with the focal guide if the autofocus feature is not available to you) the
material and FRAME the image before running the file. For best practice, framing before
running the file will help you align your image onto your material accurately and effectively.
BossLaser.com
BossLaser.com 888 652-1555
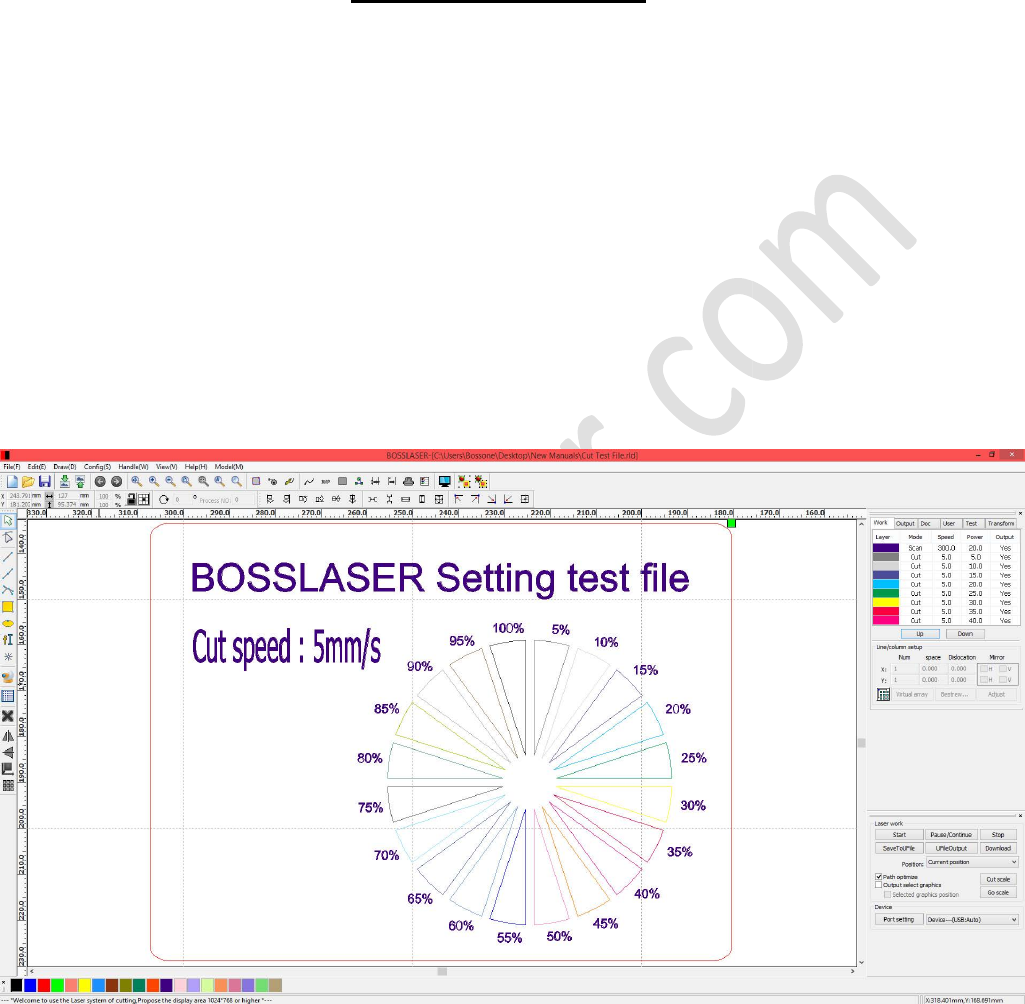
Cutting Test File
Figure 4. Cutting test file with different power settings @ 5 mm/s.
Go to File(F) > Open... and locate the file "Cutting Test File." Select and open the file to see
a pre-made template with different layers associated with it's own power setting, as
illustrated in Figure 3. There's no need to change any of the layers and settings since they
are already configured correctly. If the image is larger than your sample material that you'll
be testing on, you can resize the image (as a whole) to properly fit your material.
Now, download the file to your machine by either using the Download button (using the
Blue USB Cable) or the SavetoUFile button (using a USB Flash Drive). Make sure you
autofocus (or focus with the focal guide if the autofocus feature is not available to you) the
material and FRAME the image before running the file. For best practice, framing before
running the file will help you align your image onto your material accurately and effectively.
BossLaser.com
BossLaser.com 888 652-1555
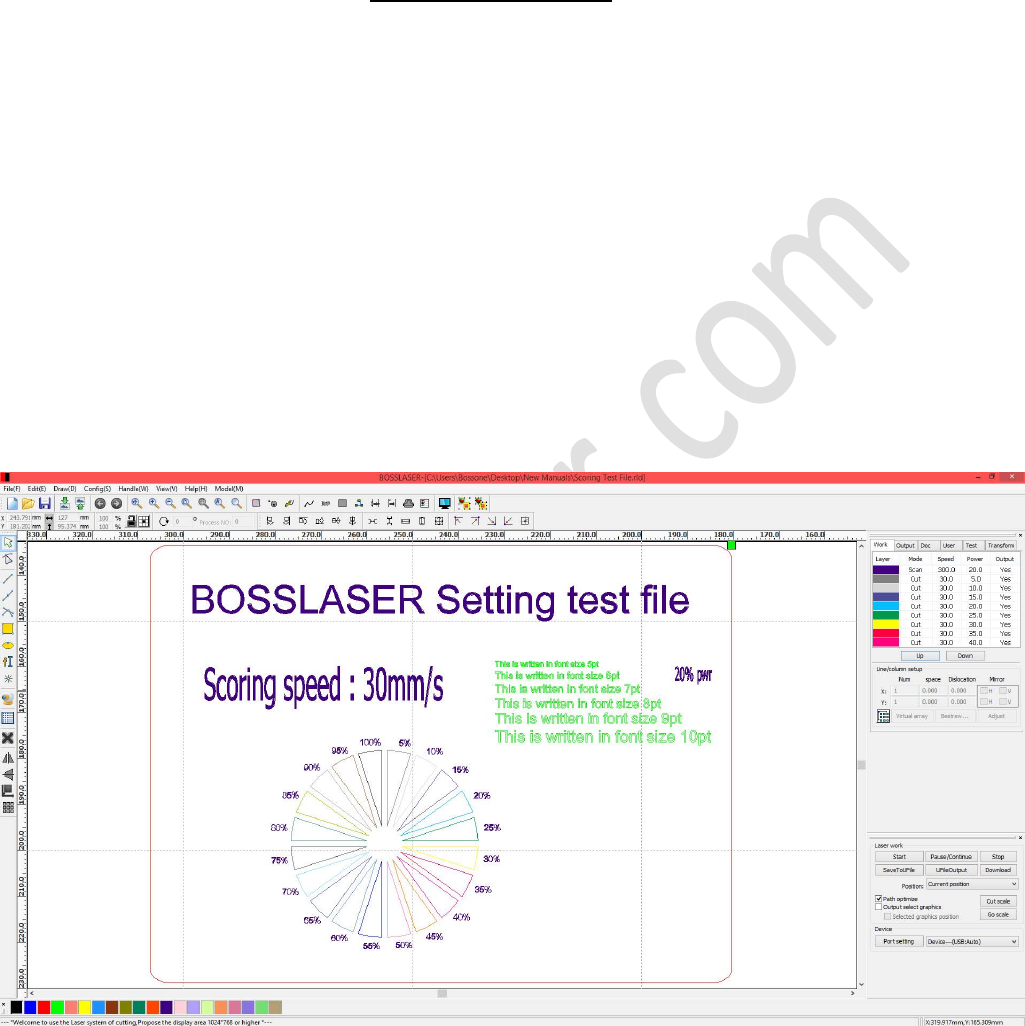
Scoring Test File
Figure 5. Scoring test file with different power settings @ 30 mm/s.
Go to File(F) > Open... and locate the file "Scoring Test File." Select and open the file to see
a pre-made template with different layers associated with it's own power setting, as
illustrated in Figure 3. There's no need to change any of the layers and settings since they
are already configured correctly. If the image is larger than your sample material that you'll
be testing on, you can resize the image (as a whole) to properly fit your material.
Lastly, download the file to your machine by either using the Download button (using the
Blue USB Cable) or the SavetoUFile button (using a USB Flash Drive). Make sure you
autofocus (or focus with the focal guide if the autofocus feature is not available to you) the
material and FRAME the image before running the file. For best practice, framing before
running the file will help you align your image onto your material accurately and effectively.
