Pro Tools Reference Guide Protools 7.4
Pro Tools HD - 7.4 - Reference Guide hd_Pro_Tools_Ref_7.4 Free User Guide for Pro Tools Software, Manual - page1
Pro Tools - 7.4 - Reference Guide 7.4_Pro_Tools_Ref Free User Guide for Pro Tools Software, Manual - page1
Pro Tools LE - 7.4 - Reference Guide le_7.4_Pro_Tools_Ref Free User Guide for Pro Tools Software, Manual - page2
Pro Tools M-Powered - 7.4 - Reference Guide mp_7.4_Pro_Tools_Ref Free User Guide for Pro Tools Software, Manual - page2
User Manual: Protools 7.4
Open the PDF directly: View PDF ![]() .
.
Page Count: 981 [warning: Documents this large are best viewed by clicking the View PDF Link!]
- Contents
- Introduction
- Chapter 1: Welcome to Pro Tools
- Chapter 2: Pro Tools Concepts
- Chapter 3: Keyboard and Right-Click Mouse Shortcuts
- System Configuration
- Chapter 4: Pro Tools Systems
- Chapter 5: System Setup
- Chapter 6: I/O Setup
- Chapter 7: Preferences
- Sessions & Tracks
- Chapter 8: Sessions
- Chapter 9: Pro Tools Main Windows
- Chapter 10: Tracks
- Track Types
- Track Channel Strips
- Track Controls and Indicators
- Edit Window Views
- Track Level Meter
- Adjusting Track Width
- Creating Tracks
- Track Views
- Track Height
- The Track List
- Track Name Right-Click PopUp Menus
- Assigning Audio Inputs and Outputs to Tracks
- Track Priority and Voice Assignment
- Assigning MIDI Inputs and Outputs to Tracks
- Soloing and Muting Tracks
- Making Tracks Inactive
- Color Coding for Tracks, Regions, Markers, and Groups
- Chapter 11: Grouping Tracks
- Chapter 12: The Region List
- Region List Pop-Up Menu
- Sorting and Searching in the Region List
- Selecting Regions in the Region List
- Previewing Regions in the Region List
- Stereo and Multichannel Regions in the Region List
- Naming and Displaying Regions in the Region List
- Managing Regions in the Region List
- Region Name Right-Click PopUp Menus
- Chapter 13: DigiBase
- DigiBase Elements
- Performance and Transfer Volumes
- Digidesign Databases
- Browser Windows and Tools
- Indexing DigiBase Databases
- The Browser Menu
- Browser Panes and Display
- Column Data
- Selecting Items
- Moving, Copying, Duplicating, and Deleting Items
- Searching Items
- Waveforms
- Elastic Audio Analysis
- Previewing
- Linking and Relinking Files
- Relink Window
- Workspace Browser
- Project Browser
- DigiBase Pro Catalogs
- Task Window
- Chapter 14: Importing and Exporting Session Data
- Importing and Exporting to and from a Session
- Audio Conversion on Import
- Import Options and Preferences
- Importing Files with Drag and Drop
- Importing Audio Files and Regions Using the Import Audio Command
- Importing Audio from Audio CDs
- Importing ACID and REX Files
- Importing Multichannel Audio Files from a Field Recorder
- Exporting Audio
- Importing Session Data
- Importing AAF and OMF Sequences
- Exporting Pro Tools Tracks as AAF or OMFI Sequences
- Exporting Sessions as Text
- Send via DigiDelivery
- Importing MIDI Files
- Exporting MIDI Files
- Send to Sibelius
- Importing and Exporting Region Group Files
- Chapter 15: File and Session Management and Compatibility
- Playback and Recording
- Chapter 16: Playing Back Track Material
- Playing Tracks
- Playback Location
- Setting the Playback Location
- Setting Playback Location Using the Selector Tool
- Setting Playback Location with Basic Transport Controls
- Setting Playback Location with the Main Counter or Edit Selection Start Indicator
- Setting Playback Location with Fast Forward/Rewind
- Setting Playback Location with Back and Forward Commands
- Additional Ways of Moving the Playback Location
- Scrolling Options
- Playing Selections
- Playing Timeline and Edit Selections with the Playhead
- Playback Modes
- Chapter 17: Record Setup
- Record Setup Overview
- Configuring Pro Tools Hardware I/O for Recording
- Connecting a Sound Source
- Allocating Hard Drive Space for Recording
- Recording with a Click (Optional)
- Setting the Default Meter and Tempo (Optional)
- Record Modes
- Configuring Default Names for Audio Files and Regions (Optional)
- Assigning Hardware I/O on a Track
- Record Enabling Tracks
- Recording with Multiple Hard Drives (Optional)
- Selecting a Record Input Monitoring Mode
- Setting Monitor Levels for Record and Playback
- Reducing Monitoring Latency
- Chapter 18: Audio Recording
- Chapter 19: MIDI Recording
- Recording from MIDI Devices
- Enabling Input Devices
- MIDI Thru
- MIDI Input Filter
- Input Quantize
- Wait for Note
- MIDI Merge/Replace
- Configuring MIDI or Instrument Tracks for Recording
- Recording MIDI and Instrument Tracks
- MIDI Punch Recording Over a Specified Range
- Loop Recording MIDI
- MIDI Step Input
- Recording System Exclusive Data
- Recording Audio from a MIDI Instrument
- Chapter 20: Advanced Punch Recording
- QuickPunch Audio Recording
- TrackPunch Audio Recording
- Voice Requirements for TrackPunch Recording
- TrackPunch Recording
- TrackPunch Preferences
- Configuring Synchronization and Track Arming
- Enabling TrackPunch Mode
- Transport Display of TrackPunch Status
- TrackPunch Enabling Tracks
- TrackPunch Recording
- Example TrackPunch Workflows
- Film Dubbing and Mixing with TrackPunch
- Loading Dailies Using RecordLock
- Foley Recording with TrackPunch
- Tracking and Overdubbing Music with TrackPunch
- DestructivePunch Audio Recording
- Editing
- Chapter 21: Editing Basics
- Chapter 22: Editing Modes and Tools
- Chapter 23: Making Selections
- Chapter 24: Editing Regions and Selections
- Chapter 25: Fades and Crossfades
- Using Fades
- Fades Dialog
- Creating Fades at the Beginnings and Ends of Regions
- Creating a Crossfade
- Using AutoFades
- Creating Fades and Crossfades in Batches
- Moving and Nudging Fades and Crossfades
- Separating Regions That Include Fades or Crossfades
- Trimming Regions That Include Fades or Crossfades
- Fade Boundaries and Shapes in Displayed Automation View
- Chapter 26: Elastic Audio
- Example Elastic Audio Workflow
- Elastic Audio Tracks
- Elastic Audio Analysis
- Real-Time and Rendered Elastic Audio Processing
- Elastic Audio Plug-ins
- Editing in Warp View
- Editing in Analysis View
- Moving Elastic Audio Between Tracks
- Elastic Properties
- AudioSuite Processing and Elastic Audio Regions
- Fades and MicroFades
- Elastic Audio Preferences
- Chapter 27: MIDI Editing
- Mirrored MIDI Editing
- The Pencil Tool
- Custom Note Duration
- Setting the Grid Value
- Inserting MIDI Notes
- Manually Editing MIDI Notes
- Time Compression/Expansion Trimmer Tool Functionality on MIDI Regions
- Continuous Controller Events
- Patch Select (Program and Bank Changes)
- System Exclusive Events
- Note and Controller Chasing
- Offsetting MIDI Tracks
- Stuck Notes
- Remove Duplicate Notes
- MIDI Real-Time Properties
- Chapter 28: Event Operations
- Chapter 29: MIDI Event List
- Arranging
- Chapter 30: Time, Tempo, Meter, and Key
- Chapter 31: Memory Locations
- Chapter 32: Arranging Regions
- Chapter 33: Region Loops and Groups
- Chapter 34: Beat Detective
- Beat Detective Requirements
- The Beat Detective Window
- Beat Detective Modes
- Defining a Beat Detective Selection
- Beat Detective Analysis
- Calculating Tempo with Beat Detective
- Generating Beat Triggers
- Generating Bar|Beat Markers with Beat Detective
- DigiGroove Templates
- Separating Regions with Beat Detective
- Conforming Regions with Beat Detective
- Edit Smoothing
- Detection (Normal) and Collection Mode
- Mixing
- Chapter 35: Basic Mixing
- Mixing Concepts
- Metering and Calibration
- Signal Flow by Track Type
- Inserts
- Views in the Mix and Edit Windows
- Audio Input and Output Paths
- Sends
- Output Windows for Tracks and Sends
- Signal Routing for Monitoring and Submixing
- Delay Compensation
- Dither
- Using an Ethernet Control Surface with Pro Tools
- Using a MIDI Control Surface with Pro Tools
- Chapter 36: Plug-in and Hardware Inserts
- Voice Usage and Total Latency for RTAS Plug-ins
- Viewing Inserts
- Making Inserts Inactive
- Inserting Plug-ins on Tracks
- Plug-in Menu Organization
- Moving and Duplicating Plug- in and Hardware Inserts
- The Plug-in Window
- Using the Librarian
- Editing Plug-in Controls
- Instrument Plug-ins
- Using Hardware Inserts
- Connecting and Integrating External Devices
- Chapter 37: Automation
- Automation QuickStart
- Automation Playlists
- Automation Modes
- Automation Preferences
- Viewing Automation
- Writing Automation
- Enabling and Suspending Automation
- Deleting Automation
- Thinning Automation
- Drawing Automation
- Editing Automation
- Trimming Automation
- Writing Automation to the Start, End, or All of a Track or Selection
- Writing Automation to the Next Breakpoint or to the Punch Point
- Guidelines for “Write To” Commands
- Overwriting or Extending Mute Automation
- Creating Snapshot Automation
- Previewing Automation
- Capturing Automation
- VCA Master Track Automation
- Chapter 38: Mixdown
- Video, Sync, Surround
- Chapter 39: Pro Tools Setup for Surround (Pro Tools HD Only)
- Chapter 40: Multichannel Tracks and Signal Routing (Pro Tools HD Only)
- Chapter 41: Surround Panning and Mixing (Pro Tools HD Only)
- Chapter 42: Working with Synchronization
- Pro Tools Synchronization Options
- Session Setup Window
- Preparing to Work with SMPTE
- Configuring Pro Tools for SMPTE
- Pull Up and Pull Down
- Putting Pro Tools Online
- Generating Time Code
- Using MIDI Machine Control
- Setting Minimum Sync Delay
- Setting Pro Tools LTC Source
- Remote Track Arming
- Spotting Regions to SMPTE Frame Locations
- Time Stamping
- Identifying a Synchronization Point
- Troubleshooting SMPTE Synchronization
- MIDI Beat Clock
- Chapter 43: Working with Video in Pro Tools
- Introduction
- QuickTime Movies Support in Pro Tools
- Windows Media Video (VC-1 AP Codec) Support in Pro Tools
- Before Starting Your Project
- Video Tracks
- Main Video Track
- Video Track Controls and Indicators
- Locking Video Tracks
- Video Engine Rate
- Importing Video into Pro Tools
- Extracting Audio from QuickTime and Windows Media Video
- Video Regions
- General Video Editing
- Renaming Video Disk Files
- Video Region Groups
- Using the Video Window
- Browsing Video in the Video Universe Window
- Playback of High-Definition QuickTime and Windows Media Video
- Playing QuickTime DV Video to an External Monitor Via FireWire
- Playing Video to an External Monitor Via a Video Card
- Bouncing the Video Track to a QuickTime Movie
- Bouncing a Video Track with Windows Media Video to a WIndows Media Movie
- Using Pro Tools LE to Import Video from Other Versions of Pro Tools
- Index

Pro Tools
®
Reference Guide
Version 7.4
Legal Notices
This guide is copyrighted ©2007 by Digidesign, a division of
Avid Technology, Inc. (hereafter “Digidesign”), with all rights
reserved. Under copyright laws, this guide may not be
duplicated in whole or in part without the written consent of
Digidesign.
003, 003 Rack, 96 I/O, 96i I/O, 192 Digital I/O, 192 I/O,
888|24 I/O, 882|20 I/O, 1622 I/O, 24-Bit ADAT Bridge I/O,
AudioSuite, Avid, Avid DNA, Avid Mojo, Avid Unity, Avid Unity
ISIS, Avid Unity MediaNetwork, Avid Xpress, AVoption,
AVoption|V10, Beat Detective, Bruno, Command|8, Control|24,
D-Command, D-Control, D-Fi, D-fx, D-Show, DAE, Digi 002,
Digi 002 Rack, DigiBase, DigiDelivery, Digidesign, Digidesign
Audio Engine, Digidesign Intelligent Noise Reduction,
Digidesign TDM Bus, DigiDrive, DigiRack, DigiTest,
DigiTranslator, DINR, DV Toolkit, EditPack, Impact, Interplay,
M-Audio, MachineControl, Maxim, Mbox, MediaComposer,
MIDI I/O, MIX, MultiShell, OMF, OMF Interchange, PRE,
ProControl, Pro Tools M-Powered, Pro Tools, Pro Tools|HD,
Pro Tools LE, QuickPunch, Reel Tape, Reso, Reverb One,
ReVibe, RTAS, Smack!, SoundReplacer, Sound Designer II,
Strike, Structure, SYNC HD, SYNC I/O, Synchronic, TL Space,
Velvet, and X-Form are trademarks or registered trademarks of
Digidesign and/or Avid Technology, Inc. All other trademarks
are the property of their respective owners.
Product features, specifications, system requirements, and
availability are subject to change without notice.
PN 9106-56837-00 REV A 08/07
Comments or suggestions regarding our documentation?
email: techpubs@digidesign.com
Contents
iii
Contents
Part I Introduction
Chapter 1. Welcome to Pro Tools
. . . . . . . . . . . . . . . . . . . . . . . . . . . . . . . . . . . . . . . . . . . . . . . . 3
The Pro Tools Guides
. . . . . . . . . . . . . . . . . . . . . . . . . . . . . . . . . . . . . . . . . . . . . . . . . . . . . . 3
Compatibility Information
. . . . . . . . . . . . . . . . . . . . . . . . . . . . . . . . . . . . . . . . . . . . . . . . . . . 4
About www.digidesign.com
. . . . . . . . . . . . . . . . . . . . . . . . . . . . . . . . . . . . . . . . . . . . . . . . . 4
Chapter 2. Pro Tools Concepts
. . . . . . . . . . . . . . . . . . . . . . . . . . . . . . . . . . . . . . . . . . . . . . . . . . 5
Hard Disk Audio Recording
. . . . . . . . . . . . . . . . . . . . . . . . . . . . . . . . . . . . . . . . . . . . . . . . . . 5
Pro Tools Nonlinear Editing
. . . . . . . . . . . . . . . . . . . . . . . . . . . . . . . . . . . . . . . . . . . . . . . . . 5
The Digidesign Audio Engine
. . . . . . . . . . . . . . . . . . . . . . . . . . . . . . . . . . . . . . . . . . . . . . . . 6
MIDI
. . . . . . . . . . . . . . . . . . . . . . . . . . . . . . . . . . . . . . . . . . . . . . . . . . . . . . . . . . . . . . . . . . 7
Synchronization
. . . . . . . . . . . . . . . . . . . . . . . . . . . . . . . . . . . . . . . . . . . . . . . . . . . . . . . . . 9
Surround
. . . . . . . . . . . . . . . . . . . . . . . . . . . . . . . . . . . . . . . . . . . . . . . . . . . . . . . . . . . . . . 9
Pro Tools Sessions
. . . . . . . . . . . . . . . . . . . . . . . . . . . . . . . . . . . . . . . . . . . . . . . . . . . . . . 10
Tick-Based and Sample-Based Time
. . . . . . . . . . . . . . . . . . . . . . . . . . . . . . . . . . . . . . . . . . 15
System Resources
. . . . . . . . . . . . . . . . . . . . . . . . . . . . . . . . . . . . . . . . . . . . . . . . . . . . . . . 16
DigiBase
. . . . . . . . . . . . . . . . . . . . . . . . . . . . . . . . . . . . . . . . . . . . . . . . . . . . . . . . . . . . . . 18
Chapter 3. Keyboard and Right-Click Mouse Shortcuts
. . . . . . . . . . . . . . . . . . . . . . . . . . . . . . 19
Right-Click Mouse Shortcuts
. . . . . . . . . . . . . . . . . . . . . . . . . . . . . . . . . . . . . . . . . . . . . . . . 19
Global Key Commands
. . . . . . . . . . . . . . . . . . . . . . . . . . . . . . . . . . . . . . . . . . . . . . . . . . . 19
Keyboard Focus
. . . . . . . . . . . . . . . . . . . . . . . . . . . . . . . . . . . . . . . . . . . . . . . . . . . . . . . . 20
Numeric Keypad Modes
. . . . . . . . . . . . . . . . . . . . . . . . . . . . . . . . . . . . . . . . . . . . . . . . . . . 21
Pro Tools Reference Guide
iv
Part II System Configuration
Chapter 4. Pro Tools Systems
. . . . . . . . . . . . . . . . . . . . . . . . . . . . . . . . . . . . . . . . . . . . . . . . . . 25
Pro Tools|HD Systems
. . . . . . . . . . . . . . . . . . . . . . . . . . . . . . . . . . . . . . . . . . . . . . . . . . . 25
Pro Tools LE Systems
. . . . . . . . . . . . . . . . . . . . . . . . . . . . . . . . . . . . . . . . . . . . . . . . . . . . 29
Pro Tools M-Powered
. . . . . . . . . . . . . . . . . . . . . . . . . . . . . . . . . . . . . . . . . . . . . . . . . . . . 31
DV Toolkit 2 and Music Production Toolkit
. . . . . . . . . . . . . . . . . . . . . . . . . . . . . . . . . . . . . 31
Chapter 5. System Setup
. . . . . . . . . . . . . . . . . . . . . . . . . . . . . . . . . . . . . . . . . . . . . . . . . . . . . . 33
Starting Up or Shutting Down Your System
. . . . . . . . . . . . . . . . . . . . . . . . . . . . . . . . . . . . . 33
Checking an HD System with DigiTest
. . . . . . . . . . . . . . . . . . . . . . . . . . . . . . . . . . . . . . . . 34
Configuring Pro Tools System Settings
. . . . . . . . . . . . . . . . . . . . . . . . . . . . . . . . . . . . . . . . 34
Configuring MIDI Setup
. . . . . . . . . . . . . . . . . . . . . . . . . . . . . . . . . . . . . . . . . . . . . . . . . . . 43
Configuring Pro Tools Hardware Settings
. . . . . . . . . . . . . . . . . . . . . . . . . . . . . . . . . . . . . . 43
System Usage
. . . . . . . . . . . . . . . . . . . . . . . . . . . . . . . . . . . . . . . . . . . . . . . . . . . . . . . . . 49
Chapter 6. I/O Setup
. . . . . . . . . . . . . . . . . . . . . . . . . . . . . . . . . . . . . . . . . . . . . . . . . . . . . . . . . 51
Pro Tools Signal Paths
. . . . . . . . . . . . . . . . . . . . . . . . . . . . . . . . . . . . . . . . . . . . . . . . . . . 52
I/O Setup Dialog Tabs and Controls
. . . . . . . . . . . . . . . . . . . . . . . . . . . . . . . . . . . . . . . . . . 54
Routing Hardware I/O to Pro Tools I/O
. . . . . . . . . . . . . . . . . . . . . . . . . . . . . . . . . . . . . . . . 56
Creating New Paths
. . . . . . . . . . . . . . . . . . . . . . . . . . . . . . . . . . . . . . . . . . . . . . . . . . . . . 57
Editing Paths
. . . . . . . . . . . . . . . . . . . . . . . . . . . . . . . . . . . . . . . . . . . . . . . . . . . . . . . . . . 58
Channel Mapping
. . . . . . . . . . . . . . . . . . . . . . . . . . . . . . . . . . . . . . . . . . . . . . . . . . . . . . . 62
Valid Paths and Requirements
. . . . . . . . . . . . . . . . . . . . . . . . . . . . . . . . . . . . . . . . . . . . . . 63
Working with I/O Settings Files
. . . . . . . . . . . . . . . . . . . . . . . . . . . . . . . . . . . . . . . . . . . . . 63
I/O Setup Options
. . . . . . . . . . . . . . . . . . . . . . . . . . . . . . . . . . . . . . . . . . . . . . . . . . . . . . . 67
Mic Preamps
. . . . . . . . . . . . . . . . . . . . . . . . . . . . . . . . . . . . . . . . . . . . . . . . . . . . . . . . . . 69
H/W Insert Delay Compensation
. . . . . . . . . . . . . . . . . . . . . . . . . . . . . . . . . . . . . . . . . . . . 70
Chapter 7. Preferences
. . . . . . . . . . . . . . . . . . . . . . . . . . . . . . . . . . . . . . . . . . . . . . . . . . . . . . . 71
Global and Local Preferences
. . . . . . . . . . . . . . . . . . . . . . . . . . . . . . . . . . . . . . . . . . . . . . 72
Display Preferences
. . . . . . . . . . . . . . . . . . . . . . . . . . . . . . . . . . . . . . . . . . . . . . . . . . . . . 73
Operation Preferences
. . . . . . . . . . . . . . . . . . . . . . . . . . . . . . . . . . . . . . . . . . . . . . . . . . . 76
Editing Preferences
. . . . . . . . . . . . . . . . . . . . . . . . . . . . . . . . . . . . . . . . . . . . . . . . . . . . . 81
Mixing Preferences
. . . . . . . . . . . . . . . . . . . . . . . . . . . . . . . . . . . . . . . . . . . . . . . . . . . . . . 83
Processing Preferences
. . . . . . . . . . . . . . . . . . . . . . . . . . . . . . . . . . . . . . . . . . . . . . . . . . . 86
MIDI Preferences
. . . . . . . . . . . . . . . . . . . . . . . . . . . . . . . . . . . . . . . . . . . . . . . . . . . . . . . 89
Synchronization Preferences
. . . . . . . . . . . . . . . . . . . . . . . . . . . . . . . . . . . . . . . . . . . . . . . 90
Contents
v
Part III Sessions & Tracks
Chapter 8. Sessions
. . . . . . . . . . . . . . . . . . . . . . . . . . . . . . . . . . . . . . . . . . . . . . . . . . . . . . . . . . 95
Creating a New Session
. . . . . . . . . . . . . . . . . . . . . . . . . . . . . . . . . . . . . . . . . . . . . . . . . . . 95
Session Files and Folders
. . . . . . . . . . . . . . . . . . . . . . . . . . . . . . . . . . . . . . . . . . . . . . . . . . 96
Opening a Session
. . . . . . . . . . . . . . . . . . . . . . . . . . . . . . . . . . . . . . . . . . . . . . . . . . . . . . . 97
Opening Recent Sessions
. . . . . . . . . . . . . . . . . . . . . . . . . . . . . . . . . . . . . . . . . . . . . . . . . . 99
Saving a Session
. . . . . . . . . . . . . . . . . . . . . . . . . . . . . . . . . . . . . . . . . . . . . . . . . . . . . . . 100
Creating Custom Session Templates
. . . . . . . . . . . . . . . . . . . . . . . . . . . . . . . . . . . . . . . . . 105
Closing a Session
. . . . . . . . . . . . . . . . . . . . . . . . . . . . . . . . . . . . . . . . . . . . . . . . . . . . . . 107
Exiting or Quitting Pro Tools
. . . . . . . . . . . . . . . . . . . . . . . . . . . . . . . . . . . . . . . . . . . . . . . 107
Chapter 9. Pro Tools Main Windows
. . . . . . . . . . . . . . . . . . . . . . . . . . . . . . . . . . . . . . . . . . . . 109
Mix Window
. . . . . . . . . . . . . . . . . . . . . . . . . . . . . . . . . . . . . . . . . . . . . . . . . . . . . . . . . . 110
Edit Window
. . . . . . . . . . . . . . . . . . . . . . . . . . . . . . . . . . . . . . . . . . . . . . . . . . . . . . . . . . 110
Transport Window
. . . . . . . . . . . . . . . . . . . . . . . . . . . . . . . . . . . . . . . . . . . . . . . . . . . . . . 116
DigiBase Browsers
. . . . . . . . . . . . . . . . . . . . . . . . . . . . . . . . . . . . . . . . . . . . . . . . . . . . . 121
Window Configurations
. . . . . . . . . . . . . . . . . . . . . . . . . . . . . . . . . . . . . . . . . . . . . . . . . . 123
Menus
. . . . . . . . . . . . . . . . . . . . . . . . . . . . . . . . . . . . . . . . . . . . . . . . . . . . . . . . . . . . . . 130
Tool Tips
. . . . . . . . . . . . . . . . . . . . . . . . . . . . . . . . . . . . . . . . . . . . . . . . . . . . . . . . . . . . . 132
Chapter 10. Tracks
. . . . . . . . . . . . . . . . . . . . . . . . . . . . . . . . . . . . . . . . . . . . . . . . . . . . . . . . . . 133
Track Types
. . . . . . . . . . . . . . . . . . . . . . . . . . . . . . . . . . . . . . . . . . . . . . . . . . . . . . . . . . 133
Track Channel Strips
. . . . . . . . . . . . . . . . . . . . . . . . . . . . . . . . . . . . . . . . . . . . . . . . . . . . 135
Track Controls and Indicators
. . . . . . . . . . . . . . . . . . . . . . . . . . . . . . . . . . . . . . . . . . . . . . 138
Edit Window Views
. . . . . . . . . . . . . . . . . . . . . . . . . . . . . . . . . . . . . . . . . . . . . . . . . . . . . 140
Track Level Meter
. . . . . . . . . . . . . . . . . . . . . . . . . . . . . . . . . . . . . . . . . . . . . . . . . . . . . . 142
Adjusting Track Width
. . . . . . . . . . . . . . . . . . . . . . . . . . . . . . . . . . . . . . . . . . . . . . . . . . . 143
Creating Tracks
. . . . . . . . . . . . . . . . . . . . . . . . . . . . . . . . . . . . . . . . . . . . . . . . . . . . . . . . 144
Track Views
. . . . . . . . . . . . . . . . . . . . . . . . . . . . . . . . . . . . . . . . . . . . . . . . . . . . . . . . . . 149
Track Height
. . . . . . . . . . . . . . . . . . . . . . . . . . . . . . . . . . . . . . . . . . . . . . . . . . . . . . . . . . 152
The Track List
. . . . . . . . . . . . . . . . . . . . . . . . . . . . . . . . . . . . . . . . . . . . . . . . . . . . . . . . . 154
Track Name Right-Click Pop-Up Menus
. . . . . . . . . . . . . . . . . . . . . . . . . . . . . . . . . . . . . . . 157
Assigning Audio Inputs and Outputs to Tracks
. . . . . . . . . . . . . . . . . . . . . . . . . . . . . . . . . . 158
Track Priority and Voice Assignment
. . . . . . . . . . . . . . . . . . . . . . . . . . . . . . . . . . . . . . . . . 161
Assigning MIDI Inputs and Outputs to Tracks
. . . . . . . . . . . . . . . . . . . . . . . . . . . . . . . . . . . 165
Soloing and Muting Tracks
. . . . . . . . . . . . . . . . . . . . . . . . . . . . . . . . . . . . . . . . . . . . . . . . 167
Making Tracks Inactive
. . . . . . . . . . . . . . . . . . . . . . . . . . . . . . . . . . . . . . . . . . . . . . . . . . 171
Color Coding for Tracks, Regions, Markers, and Groups
. . . . . . . . . . . . . . . . . . . . . . . . . . . . 172
Pro Tools Reference Guide
vi
Chapter 11. Grouping Tracks
. . . . . . . . . . . . . . . . . . . . . . . . . . . . . . . . . . . . . . . . . . . . . . . . . 175
Grouping Tracks
. . . . . . . . . . . . . . . . . . . . . . . . . . . . . . . . . . . . . . . . . . . . . . . . . . . . . . . 175
Group Controls
. . . . . . . . . . . . . . . . . . . . . . . . . . . . . . . . . . . . . . . . . . . . . . . . . . . . . . . . 177
Working with Groups
. . . . . . . . . . . . . . . . . . . . . . . . . . . . . . . . . . . . . . . . . . . . . . . . . . . 180
Setting Group Attributes
. . . . . . . . . . . . . . . . . . . . . . . . . . . . . . . . . . . . . . . . . . . . . . . . . 185
Enabling Groups
. . . . . . . . . . . . . . . . . . . . . . . . . . . . . . . . . . . . . . . . . . . . . . . . . . . . . . . 187
Grouped Control Offsets
. . . . . . . . . . . . . . . . . . . . . . . . . . . . . . . . . . . . . . . . . . . . . . . . . 188
Chapter 12. The Region List
. . . . . . . . . . . . . . . . . . . . . . . . . . . . . . . . . . . . . . . . . . . . . . . . . . 189
Region List Pop-Up Menu
. . . . . . . . . . . . . . . . . . . . . . . . . . . . . . . . . . . . . . . . . . . . . . . . 189
Sorting and Searching in the Region List
. . . . . . . . . . . . . . . . . . . . . . . . . . . . . . . . . . . . . 191
Selecting Regions in the Region List
. . . . . . . . . . . . . . . . . . . . . . . . . . . . . . . . . . . . . . . . 193
Previewing Regions in the Region List
. . . . . . . . . . . . . . . . . . . . . . . . . . . . . . . . . . . . . . . 195
Stereo and Multichannel Regions in the Region List
. . . . . . . . . . . . . . . . . . . . . . . . . . . . . 195
Naming and Displaying Regions in the Region List
. . . . . . . . . . . . . . . . . . . . . . . . . . . . . . 196
Managing Regions in the Region List
. . . . . . . . . . . . . . . . . . . . . . . . . . . . . . . . . . . . . . . . 197
Region Name Right-Click Pop-Up Menus
. . . . . . . . . . . . . . . . . . . . . . . . . . . . . . . . . . . . . . 199
Chapter 13. DigiBase. . . . . . . . . . . . . . . . . . . . . . . . . . . . . . . . . . . . . . . . . . . . . . . . . . . . . . . . 201
DigiBase Elements . . . . . . . . . . . . . . . . . . . . . . . . . . . . . . . . . . . . . . . . . . . . . . . . . . . . . 201
Performance and Transfer Volumes . . . . . . . . . . . . . . . . . . . . . . . . . . . . . . . . . . . . . . . . . 204
Digidesign Databases . . . . . . . . . . . . . . . . . . . . . . . . . . . . . . . . . . . . . . . . . . . . . . . . . . . 205
Browser Windows and Tools . . . . . . . . . . . . . . . . . . . . . . . . . . . . . . . . . . . . . . . . . . . . . . 206
Indexing DigiBase Databases . . . . . . . . . . . . . . . . . . . . . . . . . . . . . . . . . . . . . . . . . . . . . 210
The Browser Menu . . . . . . . . . . . . . . . . . . . . . . . . . . . . . . . . . . . . . . . . . . . . . . . . . . . . . 211
Browser Panes and Display . . . . . . . . . . . . . . . . . . . . . . . . . . . . . . . . . . . . . . . . . . . . . . . 214
Column Data . . . . . . . . . . . . . . . . . . . . . . . . . . . . . . . . . . . . . . . . . . . . . . . . . . . . . . . . . 215
Selecting Items . . . . . . . . . . . . . . . . . . . . . . . . . . . . . . . . . . . . . . . . . . . . . . . . . . . . . . . 218
Moving, Copying, Duplicating, and Deleting Items . . . . . . . . . . . . . . . . . . . . . . . . . . . . . . . 219
Searching Items . . . . . . . . . . . . . . . . . . . . . . . . . . . . . . . . . . . . . . . . . . . . . . . . . . . . . . . 220
Waveforms . . . . . . . . . . . . . . . . . . . . . . . . . . . . . . . . . . . . . . . . . . . . . . . . . . . . . . . . . . 224
Elastic Audio Analysis . . . . . . . . . . . . . . . . . . . . . . . . . . . . . . . . . . . . . . . . . . . . . . . . . . . 224
Previewing. . . . . . . . . . . . . . . . . . . . . . . . . . . . . . . . . . . . . . . . . . . . . . . . . . . . . . . . . . . 226
Linking and Relinking Files . . . . . . . . . . . . . . . . . . . . . . . . . . . . . . . . . . . . . . . . . . . . . . . 230
Relink Window. . . . . . . . . . . . . . . . . . . . . . . . . . . . . . . . . . . . . . . . . . . . . . . . . . . . . . . . 234
Workspace Browser . . . . . . . . . . . . . . . . . . . . . . . . . . . . . . . . . . . . . . . . . . . . . . . . . . . . 238
Project Browser . . . . . . . . . . . . . . . . . . . . . . . . . . . . . . . . . . . . . . . . . . . . . . . . . . . . . . . 241
DigiBase Pro Catalogs . . . . . . . . . . . . . . . . . . . . . . . . . . . . . . . . . . . . . . . . . . . . . . . . . . 243
Task Window . . . . . . . . . . . . . . . . . . . . . . . . . . . . . . . . . . . . . . . . . . . . . . . . . . . . . . . . . 247
Contents vii
Chapter 14. Importing and Exporting Session Data . . . . . . . . . . . . . . . . . . . . . . . . . . . . . . . . 251
Importing and Exporting to and from a Session . . . . . . . . . . . . . . . . . . . . . . . . . . . . . . . . . 251
Audio Conversion on Import . . . . . . . . . . . . . . . . . . . . . . . . . . . . . . . . . . . . . . . . . . . . . . . 252
Import Options and Preferences . . . . . . . . . . . . . . . . . . . . . . . . . . . . . . . . . . . . . . . . . . . . 254
Importing Files with Drag and Drop. . . . . . . . . . . . . . . . . . . . . . . . . . . . . . . . . . . . . . . . . . 256
Importing Audio Files and Regions Using the Import Audio Command . . . . . . . . . . . . . . . . . 259
Importing Audio from Audio CDs. . . . . . . . . . . . . . . . . . . . . . . . . . . . . . . . . . . . . . . . . . . . 261
Importing ACID and REX Files. . . . . . . . . . . . . . . . . . . . . . . . . . . . . . . . . . . . . . . . . . . . . . 261
Importing Multichannel Audio Files from a Field Recorder. . . . . . . . . . . . . . . . . . . . . . . . . . 263
Exporting Audio. . . . . . . . . . . . . . . . . . . . . . . . . . . . . . . . . . . . . . . . . . . . . . . . . . . . . . . . 263
Importing Session Data . . . . . . . . . . . . . . . . . . . . . . . . . . . . . . . . . . . . . . . . . . . . . . . . . . 266
Importing AAF and OMF Sequences . . . . . . . . . . . . . . . . . . . . . . . . . . . . . . . . . . . . . . . . . 274
Exporting Pro Tools Tracks as AAF or OMFI Sequences . . . . . . . . . . . . . . . . . . . . . . . . . . . . 274
Exporting Sessions as Text . . . . . . . . . . . . . . . . . . . . . . . . . . . . . . . . . . . . . . . . . . . . . . . . 275
Send via DigiDelivery . . . . . . . . . . . . . . . . . . . . . . . . . . . . . . . . . . . . . . . . . . . . . . . . . . . . 276
Importing MIDI Files . . . . . . . . . . . . . . . . . . . . . . . . . . . . . . . . . . . . . . . . . . . . . . . . . . . . 277
Exporting MIDI Files. . . . . . . . . . . . . . . . . . . . . . . . . . . . . . . . . . . . . . . . . . . . . . . . . . . . . 279
Send to Sibelius . . . . . . . . . . . . . . . . . . . . . . . . . . . . . . . . . . . . . . . . . . . . . . . . . . . . . . . 281
Importing and Exporting Region Group Files. . . . . . . . . . . . . . . . . . . . . . . . . . . . . . . . . . . . 282
Chapter 15. File and Session Management and Compatibility . . . . . . . . . . . . . . . . . . . . . . . 285
Audio File Management. . . . . . . . . . . . . . . . . . . . . . . . . . . . . . . . . . . . . . . . . . . . . . . . . . 285
WAV File Compatibility. . . . . . . . . . . . . . . . . . . . . . . . . . . . . . . . . . . . . . . . . . . . . . . . . . . 288
Sharing Sessions Created on Different Computer Platforms . . . . . . . . . . . . . . . . . . . . . . . . 288
Sharing Sessions Created on Different Pro Tools Systems . . . . . . . . . . . . . . . . . . . . . . . . . . 292
Sharing Sessions Created on Different Pro Tools Software Versions . . . . . . . . . . . . . . . . . . . 294
Language Compatibility . . . . . . . . . . . . . . . . . . . . . . . . . . . . . . . . . . . . . . . . . . . . . . . . . . 298
Part IV Playback and Recording
Chapter 16. Playing Back Track Material. . . . . . . . . . . . . . . . . . . . . . . . . . . . . . . . . . . . . . . . 303
Playing Tracks . . . . . . . . . . . . . . . . . . . . . . . . . . . . . . . . . . . . . . . . . . . . . . . . . . . . . . . . 303
Playback Location . . . . . . . . . . . . . . . . . . . . . . . . . . . . . . . . . . . . . . . . . . . . . . . . . . . . . . 304
Setting the Playback Location . . . . . . . . . . . . . . . . . . . . . . . . . . . . . . . . . . . . . . . . . . . . . 306
Scrolling Options . . . . . . . . . . . . . . . . . . . . . . . . . . . . . . . . . . . . . . . . . . . . . . . . . . . . . . . 310
Playing Selections . . . . . . . . . . . . . . . . . . . . . . . . . . . . . . . . . . . . . . . . . . . . . . . . . . . . . . 311
Playing Timeline and Edit Selections with the Playhead . . . . . . . . . . . . . . . . . . . . . . . . . . . 313
Playback Modes . . . . . . . . . . . . . . . . . . . . . . . . . . . . . . . . . . . . . . . . . . . . . . . . . . . . . . . 313
Pro Tools Reference Guideviii
Chapter 17. Record Setup . . . . . . . . . . . . . . . . . . . . . . . . . . . . . . . . . . . . . . . . . . . . . . . . . . . . 319
Record Setup Overview . . . . . . . . . . . . . . . . . . . . . . . . . . . . . . . . . . . . . . . . . . . . . . . . . . 319
Configuring Pro Tools Hardware I/O for Recording . . . . . . . . . . . . . . . . . . . . . . . . . . . . . . . 320
Connecting a Sound Source. . . . . . . . . . . . . . . . . . . . . . . . . . . . . . . . . . . . . . . . . . . . . . . 321
Allocating Hard Drive Space for Recording . . . . . . . . . . . . . . . . . . . . . . . . . . . . . . . . . . . . 321
Recording with a Click (Optional) . . . . . . . . . . . . . . . . . . . . . . . . . . . . . . . . . . . . . . . . . . . 322
Setting the Default Meter and Tempo (Optional) . . . . . . . . . . . . . . . . . . . . . . . . . . . . . . . . 325
Record Modes . . . . . . . . . . . . . . . . . . . . . . . . . . . . . . . . . . . . . . . . . . . . . . . . . . . . . . . . 327
Configuring Default Names for Audio Files and Regions (Optional) . . . . . . . . . . . . . . . . . . . 330
Assigning Hardware I/O on a Track . . . . . . . . . . . . . . . . . . . . . . . . . . . . . . . . . . . . . . . . . 332
Record Enabling Tracks. . . . . . . . . . . . . . . . . . . . . . . . . . . . . . . . . . . . . . . . . . . . . . . . . . 333
Recording with Multiple Hard Drives (Optional) . . . . . . . . . . . . . . . . . . . . . . . . . . . . . . . . . 335
Selecting a Record Input Monitoring Mode . . . . . . . . . . . . . . . . . . . . . . . . . . . . . . . . . . . . 338
Setting Monitor Levels for Record and Playback . . . . . . . . . . . . . . . . . . . . . . . . . . . . . . . . 340
Reducing Monitoring Latency. . . . . . . . . . . . . . . . . . . . . . . . . . . . . . . . . . . . . . . . . . . . . . 341
Chapter 18. Audio Recording . . . . . . . . . . . . . . . . . . . . . . . . . . . . . . . . . . . . . . . . . . . . . . . . . 343
Recording an Audio Track . . . . . . . . . . . . . . . . . . . . . . . . . . . . . . . . . . . . . . . . . . . . . . . . 343
Record Shortcuts . . . . . . . . . . . . . . . . . . . . . . . . . . . . . . . . . . . . . . . . . . . . . . . . . . . . . . 346
Record Pause Mode . . . . . . . . . . . . . . . . . . . . . . . . . . . . . . . . . . . . . . . . . . . . . . . . . . . . 346
Recording Additional Takes . . . . . . . . . . . . . . . . . . . . . . . . . . . . . . . . . . . . . . . . . . . . . . . 346
Audio Punch Recording Over a Specified Range . . . . . . . . . . . . . . . . . . . . . . . . . . . . . . . . 349
Loop Recording Audio. . . . . . . . . . . . . . . . . . . . . . . . . . . . . . . . . . . . . . . . . . . . . . . . . . . 350
Auditioning Different Record Takes in the Timeline . . . . . . . . . . . . . . . . . . . . . . . . . . . . . . 351
Setting Punch and Loop Points . . . . . . . . . . . . . . . . . . . . . . . . . . . . . . . . . . . . . . . . . . . . 354
Recording from a Digital Source . . . . . . . . . . . . . . . . . . . . . . . . . . . . . . . . . . . . . . . . . . . 358
Half-Speed Recording . . . . . . . . . . . . . . . . . . . . . . . . . . . . . . . . . . . . . . . . . . . . . . . . . . . 360
Chapter 19. MIDI Recording . . . . . . . . . . . . . . . . . . . . . . . . . . . . . . . . . . . . . . . . . . . . . . . . . . 361
Recording from MIDI Devices . . . . . . . . . . . . . . . . . . . . . . . . . . . . . . . . . . . . . . . . . . . . . 361
Enabling Input Devices . . . . . . . . . . . . . . . . . . . . . . . . . . . . . . . . . . . . . . . . . . . . . . . . . . 362
MIDI Thru . . . . . . . . . . . . . . . . . . . . . . . . . . . . . . . . . . . . . . . . . . . . . . . . . . . . . . . . . . . 363
MIDI Input Filter . . . . . . . . . . . . . . . . . . . . . . . . . . . . . . . . . . . . . . . . . . . . . . . . . . . . . . . 364
Input Quantize . . . . . . . . . . . . . . . . . . . . . . . . . . . . . . . . . . . . . . . . . . . . . . . . . . . . . . . . 364
Wait for Note . . . . . . . . . . . . . . . . . . . . . . . . . . . . . . . . . . . . . . . . . . . . . . . . . . . . . . . . . 364
MIDI Merge/Replace. . . . . . . . . . . . . . . . . . . . . . . . . . . . . . . . . . . . . . . . . . . . . . . . . . . . 365
Configuring MIDI or Instrument Tracks for Recording . . . . . . . . . . . . . . . . . . . . . . . . . . . . . 366
Recording MIDI and Instrument Tracks. . . . . . . . . . . . . . . . . . . . . . . . . . . . . . . . . . . . . . . 368
MIDI Punch Recording Over a Specified Range . . . . . . . . . . . . . . . . . . . . . . . . . . . . . . . . . 370
Loop Recording MIDI . . . . . . . . . . . . . . . . . . . . . . . . . . . . . . . . . . . . . . . . . . . . . . . . . . . 372
MIDI Step Input . . . . . . . . . . . . . . . . . . . . . . . . . . . . . . . . . . . . . . . . . . . . . . . . . . . . . . . 375
Recording System Exclusive Data. . . . . . . . . . . . . . . . . . . . . . . . . . . . . . . . . . . . . . . . . . . 375
Recording Audio from a MIDI Instrument . . . . . . . . . . . . . . . . . . . . . . . . . . . . . . . . . . . . . 377
Contents ix
Chapter 20. Advanced Punch Recording. . . . . . . . . . . . . . . . . . . . . . . . . . . . . . . . . . . . . . . . . 379
QuickPunch Audio Recording . . . . . . . . . . . . . . . . . . . . . . . . . . . . . . . . . . . . . . . . . . . . . . 379
TrackPunch Audio Recording . . . . . . . . . . . . . . . . . . . . . . . . . . . . . . . . . . . . . . . . . . . . . . 383
DestructivePunch Audio Recording . . . . . . . . . . . . . . . . . . . . . . . . . . . . . . . . . . . . . . . . . . 392
Part V Editing
Chapter 21. Editing Basics . . . . . . . . . . . . . . . . . . . . . . . . . . . . . . . . . . . . . . . . . . . . . . . . . . . 401
Pro Tools Editing . . . . . . . . . . . . . . . . . . . . . . . . . . . . . . . . . . . . . . . . . . . . . . . . . . . . . . . 401
Track Material. . . . . . . . . . . . . . . . . . . . . . . . . . . . . . . . . . . . . . . . . . . . . . . . . . . . . . . . . 402
Audio Regions and Waveforms. . . . . . . . . . . . . . . . . . . . . . . . . . . . . . . . . . . . . . . . . . . . . 404
MIDI Regions and MIDI Data . . . . . . . . . . . . . . . . . . . . . . . . . . . . . . . . . . . . . . . . . . . . . . 406
Naming Regions . . . . . . . . . . . . . . . . . . . . . . . . . . . . . . . . . . . . . . . . . . . . . . . . . . . . . . . 409
Playlists . . . . . . . . . . . . . . . . . . . . . . . . . . . . . . . . . . . . . . . . . . . . . . . . . . . . . . . . . . . . . 410
Displaying Region Names, Region Times, and Other Data in Playlists. . . . . . . . . . . . . . . . . . 413
Multiple Undo . . . . . . . . . . . . . . . . . . . . . . . . . . . . . . . . . . . . . . . . . . . . . . . . . . . . . . . . . 414
Basic Editing Commands . . . . . . . . . . . . . . . . . . . . . . . . . . . . . . . . . . . . . . . . . . . . . . . . . 416
Editing Across Multiple Tracks . . . . . . . . . . . . . . . . . . . . . . . . . . . . . . . . . . . . . . . . . . . . . 420
Chapter 22. Editing Modes and Tools . . . . . . . . . . . . . . . . . . . . . . . . . . . . . . . . . . . . . . . . . . . 421
Edit Modes . . . . . . . . . . . . . . . . . . . . . . . . . . . . . . . . . . . . . . . . . . . . . . . . . . . . . . . . . . . 421
Edit Tools . . . . . . . . . . . . . . . . . . . . . . . . . . . . . . . . . . . . . . . . . . . . . . . . . . . . . . . . . . . . 424
Using the Zoomer Tools . . . . . . . . . . . . . . . . . . . . . . . . . . . . . . . . . . . . . . . . . . . . . . . . . . 424
Using the Trimmer Tools . . . . . . . . . . . . . . . . . . . . . . . . . . . . . . . . . . . . . . . . . . . . . . . . . 433
Using the Selector Tool . . . . . . . . . . . . . . . . . . . . . . . . . . . . . . . . . . . . . . . . . . . . . . . . . . 438
Using the Grabber Tools. . . . . . . . . . . . . . . . . . . . . . . . . . . . . . . . . . . . . . . . . . . . . . . . . . 438
Using the Smart Tool . . . . . . . . . . . . . . . . . . . . . . . . . . . . . . . . . . . . . . . . . . . . . . . . . . . . 439
Using the Scrubber Tool . . . . . . . . . . . . . . . . . . . . . . . . . . . . . . . . . . . . . . . . . . . . . . . . . . 441
Using the Pencil Tool . . . . . . . . . . . . . . . . . . . . . . . . . . . . . . . . . . . . . . . . . . . . . . . . . . . . 444
Chapter 23. Making Selections . . . . . . . . . . . . . . . . . . . . . . . . . . . . . . . . . . . . . . . . . . . . . . . . 447
Linking or Unlinking Timeline and Edit Selections. . . . . . . . . . . . . . . . . . . . . . . . . . . . . . . . 447
Linking or Unlinking Track and Edit Selections . . . . . . . . . . . . . . . . . . . . . . . . . . . . . . . . . . 448
Selecting Track Material . . . . . . . . . . . . . . . . . . . . . . . . . . . . . . . . . . . . . . . . . . . . . . . . . 449
Timeline Selections . . . . . . . . . . . . . . . . . . . . . . . . . . . . . . . . . . . . . . . . . . . . . . . . . . . . . 458
Auto-Scrolling Tracks in the Mix and Edit Windows . . . . . . . . . . . . . . . . . . . . . . . . . . . . . . . 461
The Universe Window . . . . . . . . . . . . . . . . . . . . . . . . . . . . . . . . . . . . . . . . . . . . . . . . . . . 462
Pro Tools Reference Guidex
Chapter 24. Editing Regions and Selections . . . . . . . . . . . . . . . . . . . . . . . . . . . . . . . . . . . . . 465
Creating New Regions. . . . . . . . . . . . . . . . . . . . . . . . . . . . . . . . . . . . . . . . . . . . . . . . . . . 465
Healing Separated Regions . . . . . . . . . . . . . . . . . . . . . . . . . . . . . . . . . . . . . . . . . . . . . . . 469
Trimming Regions . . . . . . . . . . . . . . . . . . . . . . . . . . . . . . . . . . . . . . . . . . . . . . . . . . . . . 470
Nudging Regions . . . . . . . . . . . . . . . . . . . . . . . . . . . . . . . . . . . . . . . . . . . . . . . . . . . . . . 472
Quantizing Regions to Grid . . . . . . . . . . . . . . . . . . . . . . . . . . . . . . . . . . . . . . . . . . . . . . . 474
Editing Stereo and Multichannel Tracks . . . . . . . . . . . . . . . . . . . . . . . . . . . . . . . . . . . . . . 474
Consolidate Command . . . . . . . . . . . . . . . . . . . . . . . . . . . . . . . . . . . . . . . . . . . . . . . . . . 475
Compacting an Audio File . . . . . . . . . . . . . . . . . . . . . . . . . . . . . . . . . . . . . . . . . . . . . . . . 476
Processing Audio with AudioSuite Plug-ins . . . . . . . . . . . . . . . . . . . . . . . . . . . . . . . . . . . . 477
TCE (Time Compression and Expansion) Edit To Timeline Selection . . . . . . . . . . . . . . . . . . . 477
Chapter 25. Fades and Crossfades. . . . . . . . . . . . . . . . . . . . . . . . . . . . . . . . . . . . . . . . . . . . . 479
Using Fades . . . . . . . . . . . . . . . . . . . . . . . . . . . . . . . . . . . . . . . . . . . . . . . . . . . . . . . . . . 479
Fades Dialog . . . . . . . . . . . . . . . . . . . . . . . . . . . . . . . . . . . . . . . . . . . . . . . . . . . . . . . . . 481
Creating Fades at the Beginnings and Ends of Regions . . . . . . . . . . . . . . . . . . . . . . . . . . . 487
Creating a Crossfade . . . . . . . . . . . . . . . . . . . . . . . . . . . . . . . . . . . . . . . . . . . . . . . . . . . 489
Using AutoFades . . . . . . . . . . . . . . . . . . . . . . . . . . . . . . . . . . . . . . . . . . . . . . . . . . . . . . 490
Creating Fades and Crossfades in Batches . . . . . . . . . . . . . . . . . . . . . . . . . . . . . . . . . . . . 491
Moving and Nudging Fades and Crossfades . . . . . . . . . . . . . . . . . . . . . . . . . . . . . . . . . . . 492
Separating Regions That Include Fades or Crossfades . . . . . . . . . . . . . . . . . . . . . . . . . . . . 495
Trimming Regions That Include Fades or Crossfades . . . . . . . . . . . . . . . . . . . . . . . . . . . . . 496
Fade Boundaries and Shapes in Displayed Automation View . . . . . . . . . . . . . . . . . . . . . . . 496
Chapter 26. Elastic Audio . . . . . . . . . . . . . . . . . . . . . . . . . . . . . . . . . . . . . . . . . . . . . . . . . . . . 497
Example Elastic Audio Workflow . . . . . . . . . . . . . . . . . . . . . . . . . . . . . . . . . . . . . . . . . . . 498
Elastic Audio Tracks . . . . . . . . . . . . . . . . . . . . . . . . . . . . . . . . . . . . . . . . . . . . . . . . . . . . 502
Elastic Audio Analysis . . . . . . . . . . . . . . . . . . . . . . . . . . . . . . . . . . . . . . . . . . . . . . . . . . . 505
Real-Time and Rendered Elastic Audio Processing. . . . . . . . . . . . . . . . . . . . . . . . . . . . . . . 506
Elastic Audio Plug-ins . . . . . . . . . . . . . . . . . . . . . . . . . . . . . . . . . . . . . . . . . . . . . . . . . . . 507
Editing in Warp View. . . . . . . . . . . . . . . . . . . . . . . . . . . . . . . . . . . . . . . . . . . . . . . . . . . . 511
Editing in Analysis View. . . . . . . . . . . . . . . . . . . . . . . . . . . . . . . . . . . . . . . . . . . . . . . . . . 518
Moving Elastic Audio Between Tracks. . . . . . . . . . . . . . . . . . . . . . . . . . . . . . . . . . . . . . . . 521
Elastic Properties . . . . . . . . . . . . . . . . . . . . . . . . . . . . . . . . . . . . . . . . . . . . . . . . . . . . . . 522
AudioSuite Processing and Elastic Audio Regions . . . . . . . . . . . . . . . . . . . . . . . . . . . . . . . 524
Fades and MicroFades . . . . . . . . . . . . . . . . . . . . . . . . . . . . . . . . . . . . . . . . . . . . . . . . . . 525
Elastic Audio Preferences . . . . . . . . . . . . . . . . . . . . . . . . . . . . . . . . . . . . . . . . . . . . . . . . 526
Contents xi
Chapter 27. MIDI Editing . . . . . . . . . . . . . . . . . . . . . . . . . . . . . . . . . . . . . . . . . . . . . . . . . . . . . 527
Mirrored MIDI Editing. . . . . . . . . . . . . . . . . . . . . . . . . . . . . . . . . . . . . . . . . . . . . . . . . . . . 527
The Pencil Tool . . . . . . . . . . . . . . . . . . . . . . . . . . . . . . . . . . . . . . . . . . . . . . . . . . . . . . . . 528
Custom Note Duration . . . . . . . . . . . . . . . . . . . . . . . . . . . . . . . . . . . . . . . . . . . . . . . . . . . 529
Setting the Grid Value . . . . . . . . . . . . . . . . . . . . . . . . . . . . . . . . . . . . . . . . . . . . . . . . . . . 530
Inserting MIDI Notes . . . . . . . . . . . . . . . . . . . . . . . . . . . . . . . . . . . . . . . . . . . . . . . . . . . . 530
Manually Editing MIDI Notes. . . . . . . . . . . . . . . . . . . . . . . . . . . . . . . . . . . . . . . . . . . . . . . 532
Time Compression/Expansion Trimmer Tool Functionality on MIDI Regions . . . . . . . . . . . . . 537
Continuous Controller Events . . . . . . . . . . . . . . . . . . . . . . . . . . . . . . . . . . . . . . . . . . . . . . 539
Patch Select (Program and Bank Changes) . . . . . . . . . . . . . . . . . . . . . . . . . . . . . . . . . . . . 541
System Exclusive Events . . . . . . . . . . . . . . . . . . . . . . . . . . . . . . . . . . . . . . . . . . . . . . . . . 545
Note and Controller Chasing. . . . . . . . . . . . . . . . . . . . . . . . . . . . . . . . . . . . . . . . . . . . . . . 546
Offsetting MIDI Tracks . . . . . . . . . . . . . . . . . . . . . . . . . . . . . . . . . . . . . . . . . . . . . . . . . . . 547
Stuck Notes . . . . . . . . . . . . . . . . . . . . . . . . . . . . . . . . . . . . . . . . . . . . . . . . . . . . . . . . . . 549
Remove Duplicate Notes . . . . . . . . . . . . . . . . . . . . . . . . . . . . . . . . . . . . . . . . . . . . . . . . . 549
MIDI Real-Time Properties . . . . . . . . . . . . . . . . . . . . . . . . . . . . . . . . . . . . . . . . . . . . . . . . 549
Chapter 28. Event Operations . . . . . . . . . . . . . . . . . . . . . . . . . . . . . . . . . . . . . . . . . . . . . . . . . 557
Event Operations Window . . . . . . . . . . . . . . . . . . . . . . . . . . . . . . . . . . . . . . . . . . . . . . . . 557
Quantize. . . . . . . . . . . . . . . . . . . . . . . . . . . . . . . . . . . . . . . . . . . . . . . . . . . . . . . . . . . . . 558
Restore Performance. . . . . . . . . . . . . . . . . . . . . . . . . . . . . . . . . . . . . . . . . . . . . . . . . . . . 571
Flatten Performance . . . . . . . . . . . . . . . . . . . . . . . . . . . . . . . . . . . . . . . . . . . . . . . . . . . . 572
Change Velocity . . . . . . . . . . . . . . . . . . . . . . . . . . . . . . . . . . . . . . . . . . . . . . . . . . . . . . . 572
Change Duration . . . . . . . . . . . . . . . . . . . . . . . . . . . . . . . . . . . . . . . . . . . . . . . . . . . . . . . 574
Transpose. . . . . . . . . . . . . . . . . . . . . . . . . . . . . . . . . . . . . . . . . . . . . . . . . . . . . . . . . . . . 576
Select/Split Notes . . . . . . . . . . . . . . . . . . . . . . . . . . . . . . . . . . . . . . . . . . . . . . . . . . . . . . 578
Input Quantize . . . . . . . . . . . . . . . . . . . . . . . . . . . . . . . . . . . . . . . . . . . . . . . . . . . . . . . . 580
Step Input . . . . . . . . . . . . . . . . . . . . . . . . . . . . . . . . . . . . . . . . . . . . . . . . . . . . . . . . . . . 581
Chapter 29. MIDI Event List. . . . . . . . . . . . . . . . . . . . . . . . . . . . . . . . . . . . . . . . . . . . . . . . . . . 585
The MIDI Event List . . . . . . . . . . . . . . . . . . . . . . . . . . . . . . . . . . . . . . . . . . . . . . . . . . . . . 585
Inserting Events in the MIDI Event List. . . . . . . . . . . . . . . . . . . . . . . . . . . . . . . . . . . . . . . . 588
Editing Events in the MIDI Event List . . . . . . . . . . . . . . . . . . . . . . . . . . . . . . . . . . . . . . . . . 590
MIDI Event List Options . . . . . . . . . . . . . . . . . . . . . . . . . . . . . . . . . . . . . . . . . . . . . . . . . . 592
Pro Tools Reference Guidexii
Part VI Arranging
Chapter 30. Time, Tempo, Meter, and Key . . . . . . . . . . . . . . . . . . . . . . . . . . . . . . . . . . . . . . 595
Timebase Rulers and Conductor Rulers . . . . . . . . . . . . . . . . . . . . . . . . . . . . . . . . . . . . . . 595
Main Time Scale . . . . . . . . . . . . . . . . . . . . . . . . . . . . . . . . . . . . . . . . . . . . . . . . . . . . . . 597
Tick-Based Timing . . . . . . . . . . . . . . . . . . . . . . . . . . . . . . . . . . . . . . . . . . . . . . . . . . . . . 599
Song Start Marker . . . . . . . . . . . . . . . . . . . . . . . . . . . . . . . . . . . . . . . . . . . . . . . . . . . . . 602
Tempo. . . . . . . . . . . . . . . . . . . . . . . . . . . . . . . . . . . . . . . . . . . . . . . . . . . . . . . . . . . . . . 602
Graphic Tempo Editor . . . . . . . . . . . . . . . . . . . . . . . . . . . . . . . . . . . . . . . . . . . . . . . . . . . 607
Changing the Linearity Display Mode . . . . . . . . . . . . . . . . . . . . . . . . . . . . . . . . . . . . . . . . 613
Tempo Operations Window . . . . . . . . . . . . . . . . . . . . . . . . . . . . . . . . . . . . . . . . . . . . . . . 614
Identify Beat Command . . . . . . . . . . . . . . . . . . . . . . . . . . . . . . . . . . . . . . . . . . . . . . . . . 620
Meter Events . . . . . . . . . . . . . . . . . . . . . . . . . . . . . . . . . . . . . . . . . . . . . . . . . . . . . . . . . 623
Time Operations. . . . . . . . . . . . . . . . . . . . . . . . . . . . . . . . . . . . . . . . . . . . . . . . . . . . . . . 626
Renumbering Bars . . . . . . . . . . . . . . . . . . . . . . . . . . . . . . . . . . . . . . . . . . . . . . . . . . . . . 632
Key Signatures. . . . . . . . . . . . . . . . . . . . . . . . . . . . . . . . . . . . . . . . . . . . . . . . . . . . . . . . 632
Chapter 31. Memory Locations. . . . . . . . . . . . . . . . . . . . . . . . . . . . . . . . . . . . . . . . . . . . . . . . 637
Memory Locations and Markers. . . . . . . . . . . . . . . . . . . . . . . . . . . . . . . . . . . . . . . . . . . . 637
Memory Locations Window . . . . . . . . . . . . . . . . . . . . . . . . . . . . . . . . . . . . . . . . . . . . . . . 644
Chapter 32. Arranging Regions. . . . . . . . . . . . . . . . . . . . . . . . . . . . . . . . . . . . . . . . . . . . . . . . 647
Placing Regions in Tracks . . . . . . . . . . . . . . . . . . . . . . . . . . . . . . . . . . . . . . . . . . . . . . . . 647
Replacing Audio Regions . . . . . . . . . . . . . . . . . . . . . . . . . . . . . . . . . . . . . . . . . . . . . . . . 657
Audio Regions from Field Recorders. . . . . . . . . . . . . . . . . . . . . . . . . . . . . . . . . . . . . . . . . 660
Sync Points . . . . . . . . . . . . . . . . . . . . . . . . . . . . . . . . . . . . . . . . . . . . . . . . . . . . . . . . . . 662
Shift Command . . . . . . . . . . . . . . . . . . . . . . . . . . . . . . . . . . . . . . . . . . . . . . . . . . . . . . . 664
Locking Regions. . . . . . . . . . . . . . . . . . . . . . . . . . . . . . . . . . . . . . . . . . . . . . . . . . . . . . . 664
Muting/Unmuting Regions . . . . . . . . . . . . . . . . . . . . . . . . . . . . . . . . . . . . . . . . . . . . . . . 665
Stripping Silence from Regions . . . . . . . . . . . . . . . . . . . . . . . . . . . . . . . . . . . . . . . . . . . . 665
Inserting Silence . . . . . . . . . . . . . . . . . . . . . . . . . . . . . . . . . . . . . . . . . . . . . . . . . . . . . . 668
Duplicating Regions . . . . . . . . . . . . . . . . . . . . . . . . . . . . . . . . . . . . . . . . . . . . . . . . . . . . 669
Repeating Regions . . . . . . . . . . . . . . . . . . . . . . . . . . . . . . . . . . . . . . . . . . . . . . . . . . . . . 669
Chapter 33. Region Loops and Groups . . . . . . . . . . . . . . . . . . . . . . . . . . . . . . . . . . . . . . . . . . 671
Region Looping . . . . . . . . . . . . . . . . . . . . . . . . . . . . . . . . . . . . . . . . . . . . . . . . . . . . . . . 671
Region Groups . . . . . . . . . . . . . . . . . . . . . . . . . . . . . . . . . . . . . . . . . . . . . . . . . . . . . . . . 675
Contents xiii
Chapter 34. Beat Detective . . . . . . . . . . . . . . . . . . . . . . . . . . . . . . . . . . . . . . . . . . . . . . . . . . . 683
Beat Detective Requirements . . . . . . . . . . . . . . . . . . . . . . . . . . . . . . . . . . . . . . . . . . . . . . 684
The Beat Detective Window . . . . . . . . . . . . . . . . . . . . . . . . . . . . . . . . . . . . . . . . . . . . . . . 685
Beat Detective Modes . . . . . . . . . . . . . . . . . . . . . . . . . . . . . . . . . . . . . . . . . . . . . . . . . . . 685
Defining a Beat Detective Selection . . . . . . . . . . . . . . . . . . . . . . . . . . . . . . . . . . . . . . . . . 686
Beat Detective Analysis . . . . . . . . . . . . . . . . . . . . . . . . . . . . . . . . . . . . . . . . . . . . . . . . . . 687
Calculating Tempo with Beat Detective . . . . . . . . . . . . . . . . . . . . . . . . . . . . . . . . . . . . . . . 688
Generating Beat Triggers . . . . . . . . . . . . . . . . . . . . . . . . . . . . . . . . . . . . . . . . . . . . . . . . . 688
Generating Bar|Beat Markers with Beat Detective . . . . . . . . . . . . . . . . . . . . . . . . . . . . . . . 693
DigiGroove Templates . . . . . . . . . . . . . . . . . . . . . . . . . . . . . . . . . . . . . . . . . . . . . . . . . . . 694
Separating Regions with Beat Detective . . . . . . . . . . . . . . . . . . . . . . . . . . . . . . . . . . . . . . 696
Conforming Regions with Beat Detective . . . . . . . . . . . . . . . . . . . . . . . . . . . . . . . . . . . . . . 698
Edit Smoothing . . . . . . . . . . . . . . . . . . . . . . . . . . . . . . . . . . . . . . . . . . . . . . . . . . . . . . . . 701
Detection (Normal) and Collection Mode . . . . . . . . . . . . . . . . . . . . . . . . . . . . . . . . . . . . . . 702
Part VII Mixing
Chapter 35. Basic Mixing. . . . . . . . . . . . . . . . . . . . . . . . . . . . . . . . . . . . . . . . . . . . . . . . . . . . . 709
Mixing Concepts . . . . . . . . . . . . . . . . . . . . . . . . . . . . . . . . . . . . . . . . . . . . . . . . . . . . . . . 709
Metering and Calibration . . . . . . . . . . . . . . . . . . . . . . . . . . . . . . . . . . . . . . . . . . . . . . . . . 709
Signal Flow by Track Type . . . . . . . . . . . . . . . . . . . . . . . . . . . . . . . . . . . . . . . . . . . . . . . . 710
Inserts . . . . . . . . . . . . . . . . . . . . . . . . . . . . . . . . . . . . . . . . . . . . . . . . . . . . . . . . . . . . . . 718
Views in the Mix and Edit Windows . . . . . . . . . . . . . . . . . . . . . . . . . . . . . . . . . . . . . . . . . . 718
Audio Input and Output Paths. . . . . . . . . . . . . . . . . . . . . . . . . . . . . . . . . . . . . . . . . . . . . . 721
Sends . . . . . . . . . . . . . . . . . . . . . . . . . . . . . . . . . . . . . . . . . . . . . . . . . . . . . . . . . . . . . . 724
Output Windows for Tracks and Sends . . . . . . . . . . . . . . . . . . . . . . . . . . . . . . . . . . . . . . . 730
Signal Routing for Monitoring and Submixing. . . . . . . . . . . . . . . . . . . . . . . . . . . . . . . . . . . 735
Delay Compensation . . . . . . . . . . . . . . . . . . . . . . . . . . . . . . . . . . . . . . . . . . . . . . . . . . . . 741
Dither . . . . . . . . . . . . . . . . . . . . . . . . . . . . . . . . . . . . . . . . . . . . . . . . . . . . . . . . . . . . . . 746
Using an Ethernet Control Surface with Pro Tools . . . . . . . . . . . . . . . . . . . . . . . . . . . . . . . . 748
Using a MIDI Control Surface with Pro Tools. . . . . . . . . . . . . . . . . . . . . . . . . . . . . . . . . . . . 749
Chapter 36. Plug-in and Hardware Inserts . . . . . . . . . . . . . . . . . . . . . . . . . . . . . . . . . . . . . . . 751
Inserting Plug-ins on Tracks . . . . . . . . . . . . . . . . . . . . . . . . . . . . . . . . . . . . . . . . . . . . . . . 756
Plug-in Menu Organization . . . . . . . . . . . . . . . . . . . . . . . . . . . . . . . . . . . . . . . . . . . . . . . . 757
Moving and Duplicating Plug-in and Hardware Inserts. . . . . . . . . . . . . . . . . . . . . . . . . . . . . 760
The Plug-in Window. . . . . . . . . . . . . . . . . . . . . . . . . . . . . . . . . . . . . . . . . . . . . . . . . . . . . 760
Using the Librarian . . . . . . . . . . . . . . . . . . . . . . . . . . . . . . . . . . . . . . . . . . . . . . . . . . . . . 763
Editing Plug-in Controls . . . . . . . . . . . . . . . . . . . . . . . . . . . . . . . . . . . . . . . . . . . . . . . . . . 771
Instrument Plug-ins . . . . . . . . . . . . . . . . . . . . . . . . . . . . . . . . . . . . . . . . . . . . . . . . . . . . . 773
Using Hardware Inserts . . . . . . . . . . . . . . . . . . . . . . . . . . . . . . . . . . . . . . . . . . . . . . . . . . 774
Connecting and Integrating External Devices . . . . . . . . . . . . . . . . . . . . . . . . . . . . . . . . . . . 774
Pro Tools Reference Guidexiv
Chapter 37. Automation . . . . . . . . . . . . . . . . . . . . . . . . . . . . . . . . . . . . . . . . . . . . . . . . . . . . . 777
Automation QuickStart . . . . . . . . . . . . . . . . . . . . . . . . . . . . . . . . . . . . . . . . . . . . . . . . . . 777
Automation Playlists. . . . . . . . . . . . . . . . . . . . . . . . . . . . . . . . . . . . . . . . . . . . . . . . . . . . 778
Automation Modes . . . . . . . . . . . . . . . . . . . . . . . . . . . . . . . . . . . . . . . . . . . . . . . . . . . . . 780
Automation Preferences . . . . . . . . . . . . . . . . . . . . . . . . . . . . . . . . . . . . . . . . . . . . . . . . . 784
Viewing Automation . . . . . . . . . . . . . . . . . . . . . . . . . . . . . . . . . . . . . . . . . . . . . . . . . . . . 786
Writing Automation . . . . . . . . . . . . . . . . . . . . . . . . . . . . . . . . . . . . . . . . . . . . . . . . . . . . 788
Enabling and Suspending Automation . . . . . . . . . . . . . . . . . . . . . . . . . . . . . . . . . . . . . . . 797
Deleting Automation. . . . . . . . . . . . . . . . . . . . . . . . . . . . . . . . . . . . . . . . . . . . . . . . . . . . 799
Thinning Automation . . . . . . . . . . . . . . . . . . . . . . . . . . . . . . . . . . . . . . . . . . . . . . . . . . . 800
Drawing Automation. . . . . . . . . . . . . . . . . . . . . . . . . . . . . . . . . . . . . . . . . . . . . . . . . . . . 801
Editing Automation. . . . . . . . . . . . . . . . . . . . . . . . . . . . . . . . . . . . . . . . . . . . . . . . . . . . . 803
Trimming Automation. . . . . . . . . . . . . . . . . . . . . . . . . . . . . . . . . . . . . . . . . . . . . . . . . . . 811
Writing Automation to the Start, End, or All of a Track or Selection . . . . . . . . . . . . . . . . . . . 813
Writing Automation to the Next Breakpoint or to the Punch Point . . . . . . . . . . . . . . . . . . . . 815
Guidelines for “Write To” Commands . . . . . . . . . . . . . . . . . . . . . . . . . . . . . . . . . . . . . . . . 818
Overwriting or Extending Mute Automation . . . . . . . . . . . . . . . . . . . . . . . . . . . . . . . . . . . . 819
Creating Snapshot Automation . . . . . . . . . . . . . . . . . . . . . . . . . . . . . . . . . . . . . . . . . . . . 821
Previewing Automation . . . . . . . . . . . . . . . . . . . . . . . . . . . . . . . . . . . . . . . . . . . . . . . . . . 824
Capturing Automation. . . . . . . . . . . . . . . . . . . . . . . . . . . . . . . . . . . . . . . . . . . . . . . . . . . 826
VCA Master Track Automation . . . . . . . . . . . . . . . . . . . . . . . . . . . . . . . . . . . . . . . . . . . . . 829
Chapter 38. Mixdown . . . . . . . . . . . . . . . . . . . . . . . . . . . . . . . . . . . . . . . . . . . . . . . . . . . . . . . 833
Recording to Tracks . . . . . . . . . . . . . . . . . . . . . . . . . . . . . . . . . . . . . . . . . . . . . . . . . . . . 835
Bounce to Disk. . . . . . . . . . . . . . . . . . . . . . . . . . . . . . . . . . . . . . . . . . . . . . . . . . . . . . . . 836
Bounce Options . . . . . . . . . . . . . . . . . . . . . . . . . . . . . . . . . . . . . . . . . . . . . . . . . . . . . . . 837
Recording a Submix (with Bounce to Disk) . . . . . . . . . . . . . . . . . . . . . . . . . . . . . . . . . . . . 843
Final Mixdown . . . . . . . . . . . . . . . . . . . . . . . . . . . . . . . . . . . . . . . . . . . . . . . . . . . . . . . . 844
Mastering . . . . . . . . . . . . . . . . . . . . . . . . . . . . . . . . . . . . . . . . . . . . . . . . . . . . . . . . . . . 845
Contents xv
Part VIII Video, Sync, Surround
Chapter 39. Pro Tools Setup for Surround (Pro Tools HD Only) . . . . . . . . . . . . . . . . . . . . . . 849
Pro Tools Audio Connections for 5.1 Mixing . . . . . . . . . . . . . . . . . . . . . . . . . . . . . . . . . . . . 849
Configuring Pro Tools for Multichannel Sessions. . . . . . . . . . . . . . . . . . . . . . . . . . . . . . . . . 850
Default I/O Selectors in I/O Setup . . . . . . . . . . . . . . . . . . . . . . . . . . . . . . . . . . . . . . . . . . 853
5.1 Track Layouts, Routing, and Metering . . . . . . . . . . . . . . . . . . . . . . . . . . . . . . . . . . . . . 854
Chapter 40. Multichannel Tracks and Signal Routing (Pro Tools HD Only) . . . . . . . . . . . . . 855
Multichannel Audio Tracks . . . . . . . . . . . . . . . . . . . . . . . . . . . . . . . . . . . . . . . . . . . . . . . . 855
Multichannel Signal Routing. . . . . . . . . . . . . . . . . . . . . . . . . . . . . . . . . . . . . . . . . . . . . . . 858
Paths in Surround Mixes . . . . . . . . . . . . . . . . . . . . . . . . . . . . . . . . . . . . . . . . . . . . . . . . . 861
Example Paths and Signal Routing for a Surround Mix . . . . . . . . . . . . . . . . . . . . . . . . . . . . 863
Chapter 41. Surround Panning and Mixing (Pro Tools HD Only) . . . . . . . . . . . . . . . . . . . . . . 867
Introduction to Pro Tools Surround Panning . . . . . . . . . . . . . . . . . . . . . . . . . . . . . . . . . . . . 867
Output Windows . . . . . . . . . . . . . . . . . . . . . . . . . . . . . . . . . . . . . . . . . . . . . . . . . . . . . . . 868
Standard Controls . . . . . . . . . . . . . . . . . . . . . . . . . . . . . . . . . . . . . . . . . . . . . . . . . . . . . . 869
Surround Panner Controls . . . . . . . . . . . . . . . . . . . . . . . . . . . . . . . . . . . . . . . . . . . . . . . . 870
Panning Modes . . . . . . . . . . . . . . . . . . . . . . . . . . . . . . . . . . . . . . . . . . . . . . . . . . . . . . . . 873
Divergence and Center Percentage . . . . . . . . . . . . . . . . . . . . . . . . . . . . . . . . . . . . . . . . . . 876
LFE Faders in Multichannel Panners . . . . . . . . . . . . . . . . . . . . . . . . . . . . . . . . . . . . . . . . . 878
Pan Playlists. . . . . . . . . . . . . . . . . . . . . . . . . . . . . . . . . . . . . . . . . . . . . . . . . . . . . . . . . . 879
Surround Scope Plug-in . . . . . . . . . . . . . . . . . . . . . . . . . . . . . . . . . . . . . . . . . . . . . . . . . . 879
Chapter 42. Working with Synchronization. . . . . . . . . . . . . . . . . . . . . . . . . . . . . . . . . . . . . . . 881
Pro Tools Synchronization Options . . . . . . . . . . . . . . . . . . . . . . . . . . . . . . . . . . . . . . . . . . 881
Session Setup Window . . . . . . . . . . . . . . . . . . . . . . . . . . . . . . . . . . . . . . . . . . . . . . . . . . 883
Preparing to Work with SMPTE . . . . . . . . . . . . . . . . . . . . . . . . . . . . . . . . . . . . . . . . . . . . . 888
Configuring Pro Tools for SMPTE. . . . . . . . . . . . . . . . . . . . . . . . . . . . . . . . . . . . . . . . . . . . 888
Pull Up and Pull Down . . . . . . . . . . . . . . . . . . . . . . . . . . . . . . . . . . . . . . . . . . . . . . . . . . . 890
Putting Pro Tools Online. . . . . . . . . . . . . . . . . . . . . . . . . . . . . . . . . . . . . . . . . . . . . . . . . . 894
Generating Time Code . . . . . . . . . . . . . . . . . . . . . . . . . . . . . . . . . . . . . . . . . . . . . . . . . . . 895
Using MIDI Machine Control . . . . . . . . . . . . . . . . . . . . . . . . . . . . . . . . . . . . . . . . . . . . . . . 896
Setting Minimum Sync Delay . . . . . . . . . . . . . . . . . . . . . . . . . . . . . . . . . . . . . . . . . . . . . . 899
Setting Pro Tools LTC Source . . . . . . . . . . . . . . . . . . . . . . . . . . . . . . . . . . . . . . . . . . . . . . 900
Remote Track Arming . . . . . . . . . . . . . . . . . . . . . . . . . . . . . . . . . . . . . . . . . . . . . . . . . . . 900
Spotting Regions to SMPTE Frame Locations . . . . . . . . . . . . . . . . . . . . . . . . . . . . . . . . . . . 901
Time Stamping . . . . . . . . . . . . . . . . . . . . . . . . . . . . . . . . . . . . . . . . . . . . . . . . . . . . . . . . 903
Identifying a Synchronization Point . . . . . . . . . . . . . . . . . . . . . . . . . . . . . . . . . . . . . . . . . . 905
Troubleshooting SMPTE Synchronization . . . . . . . . . . . . . . . . . . . . . . . . . . . . . . . . . . . . . . 905
MIDI Beat Clock . . . . . . . . . . . . . . . . . . . . . . . . . . . . . . . . . . . . . . . . . . . . . . . . . . . . . . . 907
Pro Tools Reference Guidexvi
Chapter 43. Working with Video in Pro Tools . . . . . . . . . . . . . . . . . . . . . . . . . . . . . . . . . . . . 909
Introduction . . . . . . . . . . . . . . . . . . . . . . . . . . . . . . . . . . . . . . . . . . . . . . . . . . . . . . . . . . 909
QuickTime Movies Support in Pro Tools . . . . . . . . . . . . . . . . . . . . . . . . . . . . . . . . . . . . . . 910
Windows Media Video (VC-1 AP Codec) Support in Pro Tools . . . . . . . . . . . . . . . . . . . . . . . 911
Before Starting Your Project . . . . . . . . . . . . . . . . . . . . . . . . . . . . . . . . . . . . . . . . . . . . . . 911
Video Tracks . . . . . . . . . . . . . . . . . . . . . . . . . . . . . . . . . . . . . . . . . . . . . . . . . . . . . . . . . 912
Main Video Track . . . . . . . . . . . . . . . . . . . . . . . . . . . . . . . . . . . . . . . . . . . . . . . . . . . . . . 913
Video Track Controls and Indicators . . . . . . . . . . . . . . . . . . . . . . . . . . . . . . . . . . . . . . . . . 914
Locking Video Tracks . . . . . . . . . . . . . . . . . . . . . . . . . . . . . . . . . . . . . . . . . . . . . . . . . . . 915
Video Engine Rate . . . . . . . . . . . . . . . . . . . . . . . . . . . . . . . . . . . . . . . . . . . . . . . . . . . . . 916
Importing Video into Pro Tools. . . . . . . . . . . . . . . . . . . . . . . . . . . . . . . . . . . . . . . . . . . . . 917
Extracting Audio from QuickTime and Windows Media Video . . . . . . . . . . . . . . . . . . . . . . . 920
Video Regions . . . . . . . . . . . . . . . . . . . . . . . . . . . . . . . . . . . . . . . . . . . . . . . . . . . . . . . . 921
General Video Editing . . . . . . . . . . . . . . . . . . . . . . . . . . . . . . . . . . . . . . . . . . . . . . . . . . . 922
Renaming Video Disk Files . . . . . . . . . . . . . . . . . . . . . . . . . . . . . . . . . . . . . . . . . . . . . . . 924
Video Region Groups . . . . . . . . . . . . . . . . . . . . . . . . . . . . . . . . . . . . . . . . . . . . . . . . . . . 924
Using the Video Window . . . . . . . . . . . . . . . . . . . . . . . . . . . . . . . . . . . . . . . . . . . . . . . . . 925
Browsing Video in the Video Universe Window. . . . . . . . . . . . . . . . . . . . . . . . . . . . . . . . . . 927
Playback of High-Definition QuickTime and Windows Media Video . . . . . . . . . . . . . . . . . . . 928
Playing QuickTime DV Video to an External Monitor Via FireWire. . . . . . . . . . . . . . . . . . . . . 929
Playing Video to an External Monitor Via a Video Card . . . . . . . . . . . . . . . . . . . . . . . . . . . . 931
Bouncing the Video Track to a QuickTime Movie . . . . . . . . . . . . . . . . . . . . . . . . . . . . . . . . 931
Bouncing a Video Track with Windows Media Video to a WIndows Media Movie . . . . . . . . . . 932
Using Pro Tools LE to Import Video from Other Versions of Pro Tools. . . . . . . . . . . . . . . . . . 933
Index . . . . . . . . . . . . . . . . . . . . . . . . . . . . . . . . . . . . . . . . . . . . . . . . . . . . . . . . . . . . . . . . . . . . . 935

1
Part I: Introduction
2

Chapter 1: Welcome to Pro Tools 3
Chapter 1: Welcome to Pro Tools
Welcome to Pro Tools®! Pro Tools integrates
powerful multitrack digital audio and MIDI
sequencing features, giving you everything you
need to record, arrange, compose, edit, mix, and
master professional quality audio and MIDI for
music, video, film, and multimedia.
The Pro Tools Guides
In addition to any printed guides or documenta-
tion included with your system, PDF versions of
the printed guides and many additional
Pro Tools guides and Read Mes are installed au-
tomatically during Pro Tools installation to the
Digidesign/Documentation folder.
To view or print PDF guides, you can use Adobe
Reader or Apple Preview (Mac only).
Getting Started Guide
The printed Getting Started Guide for your system
includes instructions for installing Pro Tools
and connecting your studio. For Pro Tools LE™
and M-Powered™, these guides also contain spe-
cific methods for accomplishing common tasks
(such as recording in a Pro Tools session, im-
porting audio from a CD, and creating an audio
CD from a Pro Tools session).
Guides Accessible in Pro Tools
The main Pro Tools guides are accessible from
the Pro Tools Help menu. These include:
•Pro Tools Reference Guide, which explains
Pro Tools software in detail.
•Pro Tools Menus Guide, which covers all the
Pro Tools on-screen menus.
•DigiRack Plug-ins Guide, which explains how
to use Digidesign® plug-ins included with
Pro Tools for both real-time and file-based au-
dio processing.
•Pro Tools Shortcuts for your operating system,
which lists keyboard and Right-click shortcuts
for Pro Tools, including those shown in
Pro Tools menus.
Expanded Systems Guide
(Pro Tools|HD Systems Only)
This printed guide provides instructions for ex-
panding a Pro Tools|HD® system with addi-
tional Digidesign cards and audio interfaces,
with or without an expansion chassis.
Additional Digidesign Printed Guides
Digidesign also provides guides with Pro Tools
audio interfaces, dedicated worksurfaces (such
as D-Control™) and control surfaces (such as
Command|8®), and other Digidesign options
(such as MIDI I/O™, PRE, and SYNC HD™). Re-
fer to the separate guide provided with each
Digidesign product.
Printed copies of the Pro Tools Reference
Guide and some guides in the Pro Tools
guide set can be purchased separately from
the DigiStore (www.digidesign.com).
Pro Tools Reference Guide4
Conventions Used in These Guides
The Pro Tools guides use the following conven-
tions to indicate menu choices, keyboard com-
mands, and mouse commands:
:
The following symbols are used to highlight im-
portant information:
Pro Tools M-Powered
Compatibility Information
Digidesign can only assure compatibility and
provide support for hardware and software it
has tested and approved.
For a list of Digidesign-qualified computers, op-
erating systems, hard drives, and third-party de-
vices, visit the Digidesign website
(www.digidesign.com).
About www.digidesign.com
The Digidesign website (www.digidesign.com)
is your best online source for information to
help you get the most out of your Pro Tools sys-
tem. The following are just a few of the services
and features available.
Product Registration Register your purchase on-
line. See the Digidesign Registration Informa-
tion Card included with your system for instruc-
tions.
Support and Downloads Contact Digidesign
Technical Support or Customer Service; down-
load software updates and the latest online
manuals; browse the Compatibility documents
for system requirements; search the online An-
swerbase or join the worldwide Pro Tools com-
munity on the Digidesign User Conference.
Training and Education Study on your own using
courses available online or find out how you can
learn in a classroom setting at a certified
Pro Tools training center.
Products and Developers Learn about Digidesign
products; download demo software or learn
about our Development Partners and their plug-
ins, applications, and hardware.
News and Events Get the latest news from Digi-
design or sign up for a Pro Tools demo.
Convention Action
File > Save Choose Save from the
File menu
Control+N Hold down the Control
key and press the N key
Control-click Hold down the Control
key and click the mouse
button
Right-click Click with the right
mouse button
User Tips are helpful hints for getting the
most from your Pro Tools system.
Important Notices include information that
could affect your Pro Tools session data or
the performance of your Pro Tools system.
Shortcuts show you useful keyboard or
mouse shortcuts.
Cross References point to related sections in
this guide and other Digidesign guides.
References to Pro Tools LE™ in this guide
are usually interchangeable with Pro Tools
M-Powered™, except as noted in the
Pro Tools M-Powered Getting Started
Guide.

Chapter 2: Pro Tools Concepts 5
Chapter 2: Pro Tools Concepts
This chapter explains some of the principles and
concepts that form the foundation of Pro Tools
operation and functionality.
Hard Disk Audio Recording
Hard disk recording is a nonlinear (or random ac-
cess) medium—you can go immediately to any
spot in a recording without having to rewind or
fast forward.
This differs from tape-based recording, which is
a linear medium—where you need to rewind or
fast forward a tape to hear a particular spot in a
recording. To rearrange or repeat material in a
linear system, you need to re-record it, or cut
and splice it.
Nonlinear systems have several advantages. You
can easily rearrange or repeat parts of a record-
ing by making the hard disk read parts of the re-
cording in a different order and/or multiple
times. In addition, this re-arrangement is non-
destructive, meaning that the original recorded
material is not altered.
Pro Tools Nonlinear Editing
Pro Tools is a nonlinear recording editing sys-
tem that lets you rearrange and mix recorded
material nondestructively. Nonlinear editing
simply means that you can cut, copy, paste,
move, delete, trim, and otherwise rearrange any
audio, MIDI, or video in the Pro Tools Edit win-
dow.
Nonlinear editing provides significant advan-
tages over dubbing (re-recording), and cutting
and splicing magnetic tape. It gives you the
greatest possible flexibility for editing and ar-
ranging, and it is all nondestructive and “undo-
able.” Additionally, with nonlinear editing in
Pro Tools, you will never introduce any degra-
dation of audio fidelity like you would with
tape.
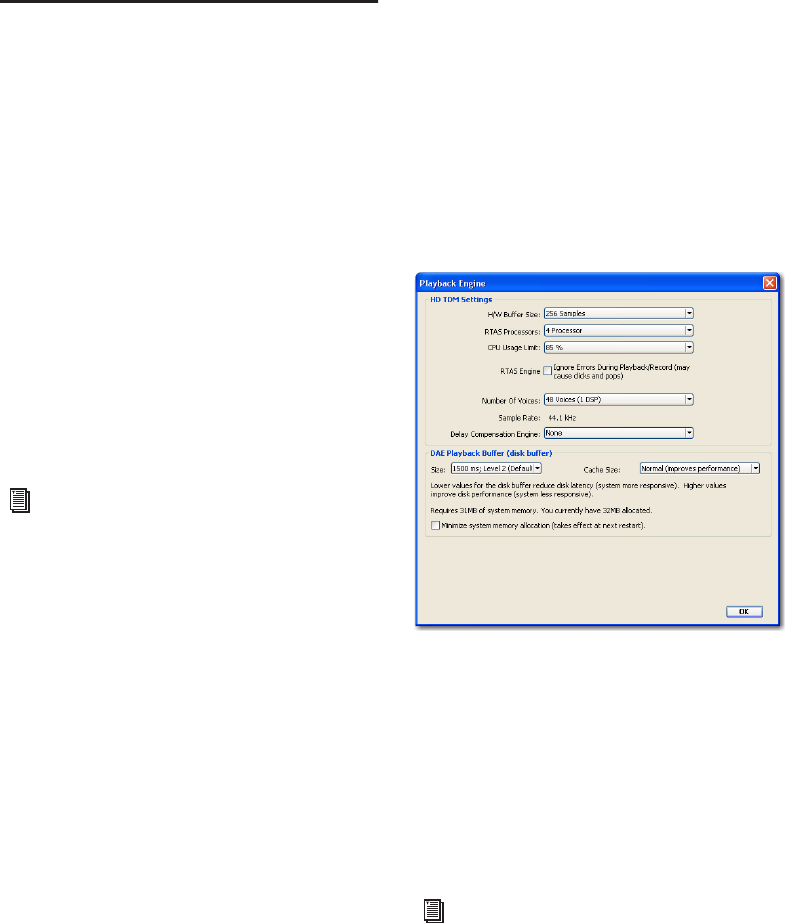
Pro Tools Reference Guide6
The Digidesign Audio Engine
The Digidesign Audio Engine (DAE) is Digi-
design’s real-time operating system for digital
audio recording, playback, and processing.
When you install Pro Tools, DAE is automati-
cally installed on your system.
In the same way that a computer’s operating
system provides the foundation for programs
that run on the computer, DAE provides the
foundation for much of the hard disk recording,
digital signal processing, and mix automation
required by Pro Tools and other products from
Digidesign and its Development Partners.
The DAE Playback Buffer Size determines the
amount of memory DAE allocates to manage
disk buffers. The DAE Playback Buffer Size can
be changed in the Playback Engine dialog.
Playback Engine Dialog
Pro Tools lets you adjust the performance of
your system by changing system settings that af-
fect its capacity for processing, playback, and re-
cording. These system settings are available in
the Playback Engine dialog (Setup > Playback
Engine).
Pro Tools takes advantage of your computer’s
host processor for certain tasks and optional
host-based DSP processing.
Pro Tools LE uses host (CPU) processing to pro-
vide audio track recording, playback, mixing,
and effects processing. Both Pro Tools LE and
Pro Tools HD use host processing to run RTAS®
(Real-Time AudioSuite) plug-ins for effects pro-
cessing. Performance is determined by your sys-
tem and its Playback Engine settings.
The Playback Engine dialog lets you set a hard-
ware buffer size and allocate a percentage of
CPU resources for these tasks.
On Pro Tools|HD systems, you can select the
number of voices and voiceable tracks for your
system and its sessions. Voice count choices are
based on how much DSP processing you want to
allocate for voicing.
On Pro Tools|HD systems, the Playback Engine
dialog is also where you assign dedicated DSP re-
sources for Delay Compensation.
For information on configuring the DAE
Playback Buffer Size, see “DAE Playback
Buffer Size” on page 40.
Playback Engine dialog for Pro Tools|HD system
For more information, see “Configuring
Pro Tools System Settings” on page 34. See
also “System Resources” on page 16.
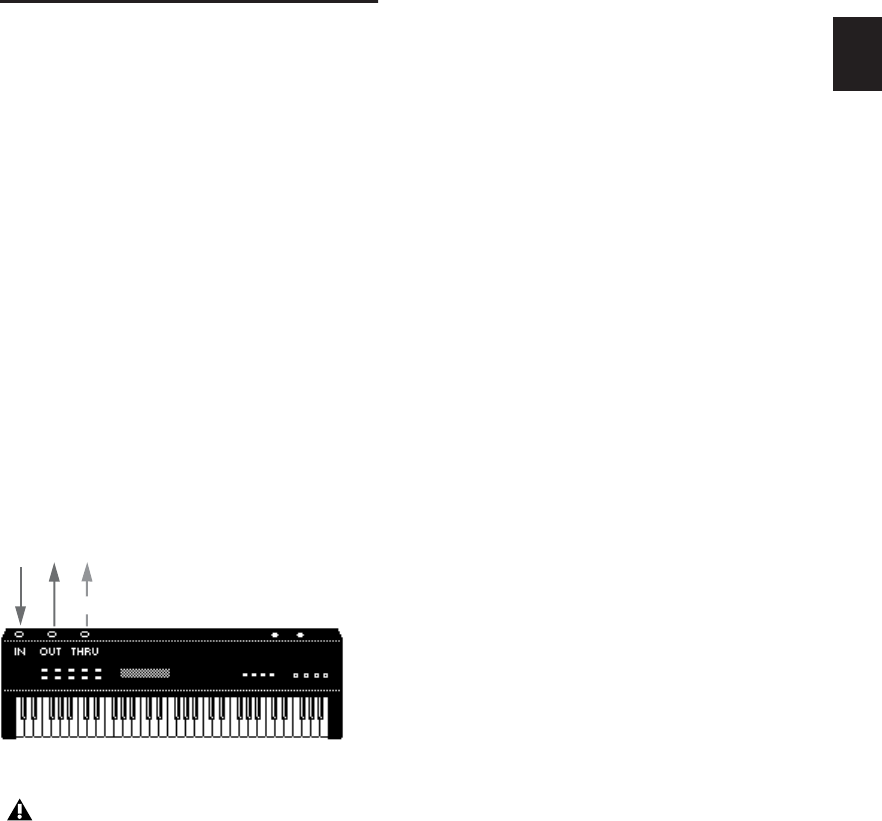
Chapter 2: Pro Tools Concepts 7
MIDI
MIDI (Musical Instrument Digital Interface) is a
communication protocol for musical instru-
ments. This industry standard enables connec-
tions between a variety of devices from different
manufacturers. Examples of MIDI-compatible
equipment include synthesizers, sound mod-
ules, drum machines, MIDI patch bays, effects
processors, MIDI interfaces, MIDI control sur-
faces, and MIDI sequencers.
MIDI devices are equipped with 5-pin DIN con-
nectors, labeled as either IN, OUT, or THRU. The
MIDI OUT port transmits messages. The MIDI
IN port receives messages. The MIDI THRU out-
puts whatever is received from the IN port. MIDI
devices are connected with MIDI cables that are
available at most music stores.
USB and FireWire-compatible MIDI devices
send and receive MIDI messages to and from the
computer over USB or FireWire.
The MIDI protocol provides 16 channels of
MIDI per port. A single MIDI cable can transmit
a separate set of messages for each of the 16
channels. These 16 channels can correspond to
separate MIDI devices or to multiple channels
within a single device (if the device is multi-
timbral). Each channel can control a different
instrument sound. For example, bass on
channel 1, piano on channel 2, and drums on
channel 10. Similar to a multitrack tape re-
corder, a MIDI sequencer can record complex ar-
rangements—even using only a single multi-
timbral keyboard.
MIDI Terms
The following are some basic MIDI terms:
MIDI Instrument A hardware MIDI device or soft-
ware instrument (such as an instrument plug-
in).
MIDI Interface Hardware that lets computers
connect to and communicate with MIDI de-
vices.
MIDI Device Any physical MIDI keyboard,
sound module, effects device, or other equip-
ment that can send or receive MIDI informa-
tion.
MIDI Controller Any MIDI device that transmits
MIDI performance data. These include MIDI
keyboards, MIDI guitar controllers, MIDI wind
controllers, and others. Controllers transmit
MIDI from their MIDI OUT ports.
MIDI Control Surface Any device (such as the
Digidesign Command|8), which uses a MIDI
connection to send control messages to a soft-
ware program, but is not generally used to
record MIDI information.
Multitimbral The ability of one MIDI device to
play several different instrument sounds (such
as piano, bass, and drums) simultaneously on
separate MIDI channels. This makes it possible
for a single multitimbral MIDI instrument to
play back entire arrangements.
MIDI signal flow
Not all devices will have all three MIDI
ports (IN, OUT, and THRU).
passes input
Pro Tools Reference Guide8
MIDI Port A physical MIDI port on a MIDI inter-
face or a virtual MIDI port created in software.
There are separate ports for MIDI In and Out.
Physical MIDI ports connect to external MIDI
devices using MIDI cables. Virtual MIDI ports
connect software (see also Virtual MIDI Nodes).
MIDI Channel Up to 16 channels of MIDI perfor-
mance data can be transmitted on a single MIDI
cable. The channel number separates the differ-
ent messages so your sound sources can receive
the right ones.
Program Change Event A MIDI command that
tells a sound source which of its sounds (or
sound patches) to use. The MIDI protocol lets
you choose from a range of 128 patches.
Bank Select Message Many devices have more
than 128 patches, which are arranged in banks.
The Bank Select Message is a MIDI command
that specifies the bank of patches from which to
choose.
Local Control A controller setting found on most
MIDI keyboards that lets them play their own
sound source. Disabling “local control” ensures
that a device’s internal sound source is only
played by external MIDI messages (such as those
sent from Pro Tools when MIDI in Pro Tools is
routed to the MIDI keyboard). When using
Pro Tools, “local control” should usually be dis-
abled. When “local control” is off, your key-
board still transmits data to its MIDI OUT port.
Continuous Controller Events MIDI instructions
that allow real-time changes to notes that are
currently sounding. These include pitch bend,
modulation, volume, pan, and many others.
System Exclusive Data MIDI data commonly
used for sending and retrieving patch parameter
information for storage purposes.
Virtual MIDI Nodes When using MIDI with in-
strument plug-ins in Pro Tools, virtual MIDI
nodes are created. These nodes act like MIDI
ports and provide software MIDI connections
between Pro Tools and other MIDI software,
such as instrument plug-ins. For example, when
you insert Propellerhead’s Reason as a ReWire
client on a track, the various MIDI inputs to Rea-
son become available to Pro Tools MIDI and In-
strument track MIDI outputs.
Common MIDI Misconceptions
MIDI is not audio, and by itself makes no sound.
MIDI is control information only. It is like the
piano roll for a player piano; it provides control
information for what note to play when, for
how long, at what volume, and what sound (in-
strument). For example, when you strike a key
on a MIDI keyboard, it sends a message to a
MIDI instrument to play that particular note at
that particular velocity using the selected sound
(instrument). This could be its internal tone
generator (like a synthesizer or sampler), an-
other external MIDI instrument, or an instru-
ment plug-in within Pro Tools. In order to play
and hear a MIDI recording, you must have a
MIDI instrument. Audio from an external MIDI
instrument can be sent to an external mixer or
monitored through your Pro Tools audio inter-
face (using either an Instrument track or Auxil-
iary track).
If you are using an external MIDI instrument, it
must be connected to MIDI ports that are recog-
nized by your computer. These ports can be on a
Pro Tools interface that has MIDI ports (such as
an Mbox 2) or some other MIDI interface (such
as a Digidesign MIDI I/O).
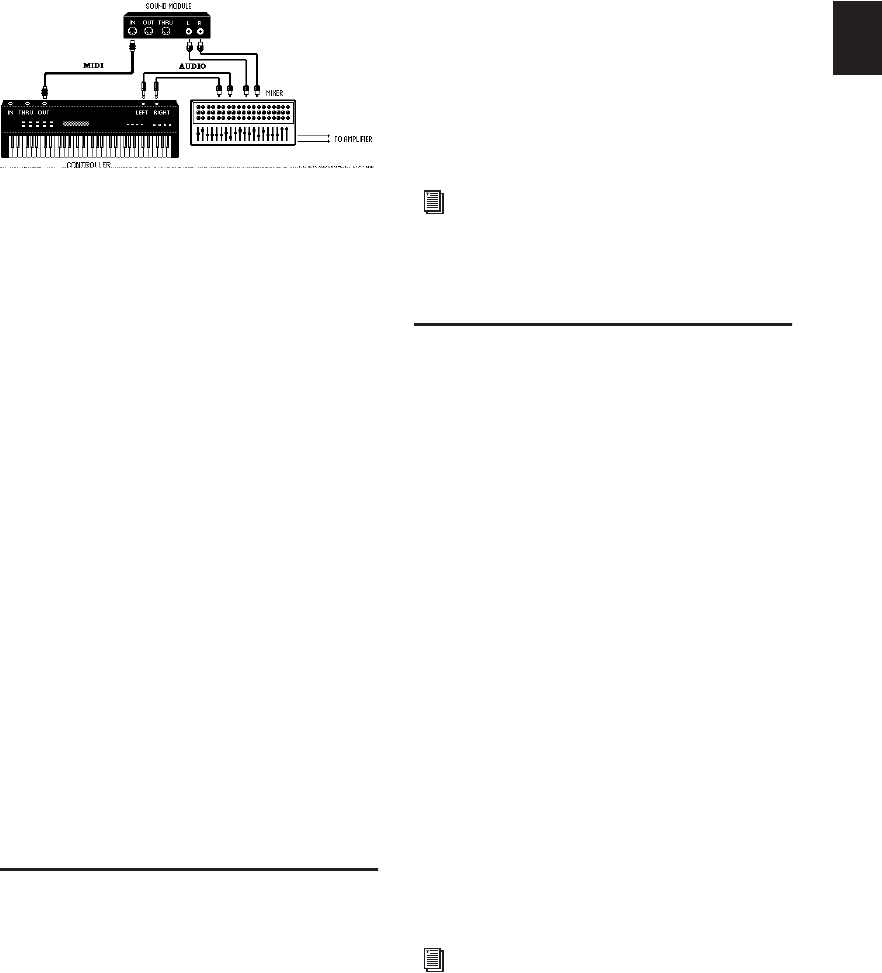
Chapter 2: Pro Tools Concepts 9
To actually hear an external MIDI instrument,
you need to connect its audio outputs to a mix-
ing console or connect it to one of the audio in-
puts of your Pro Tools audio interface.
Just as each Pro Tools system has unique hard-
ware features, each MIDI device has its own fea-
tures (and limitations) as to the number of
voices and instruments it can play at one time.
Consult the device’s documentation for infor-
mation on its capabilities.
MIDI In Pro Tools
Pro Tools provides MIDI sequencing capabili-
ties. You can record, enter, edit, and playback
MIDI data on Pro Tools tracks and in the MIDI
Event List. MIDI data in Pro Tools can be any-
thing from MIDI note data (note number,
on/off, velocity) to System Exclusive (Sysex)
messages. MIDI data can be recorded or played
back from both external MIDI devices with a
MIDI interface (like the Digidesign MIDI I/O or
Mbox 2) and other MIDI software (such as in-
strument plug-ins and ReWire client applica-
tions).
Synchronization
When you are working with multiple time-
based systems, such as Pro Tools and an external
deck, you want both systems to be synchro-
nized. Synchronization is where one system
outputs time code or MIDI Beat Clock and an-
other device synchronizes to or follows that
time code or MIDI Beat Clock so that they work
together according to the same clock source.
Pro Tools can be synchronized to other devices
(or other devices can be synchronized to
Pro Tools) using SMPTE/EBU time code or MIDI
Time Code.
Surround
Surround sound simply means having one or
more speakers with discrete audio signals (chan-
nels) placed behind the listener in addition to
the typical stereo pair.
There are multiple types of surround formats in
use (from three-channel LCR to 7.1, which has 8
channels).
The most common surround format is 5.1,
which refers to having 5 speakers and a sub-
woofer (the “.1”). 5.1 is used in movie theaters
and home entertainment systems. Additionally,
most DVDs are mixed to 5.1. The standard
speaker placement for 5.1 for surround monitor-
ing is stereo left and right speakers, and an addi-
tional center speaker in front, two more stereo
left and right speakers in the rear, and the sub-
woofer on the side.
Only Pro Tools HD supports mixing in surround
formats. In Pro Tools, each surround format is
considered to be a Pro Tools greater-than-stereo
multichannel format.
Signal paths for external MIDI instruments
For more information on different
SMPTE/EBU formats, and other concepts
related to time code, refer to the Pro Tools
Sync & Surround Concepts Guide.
For information on fundamental surround
concepts, see the Pro Tools Sync & Surround
Concepts Guide.
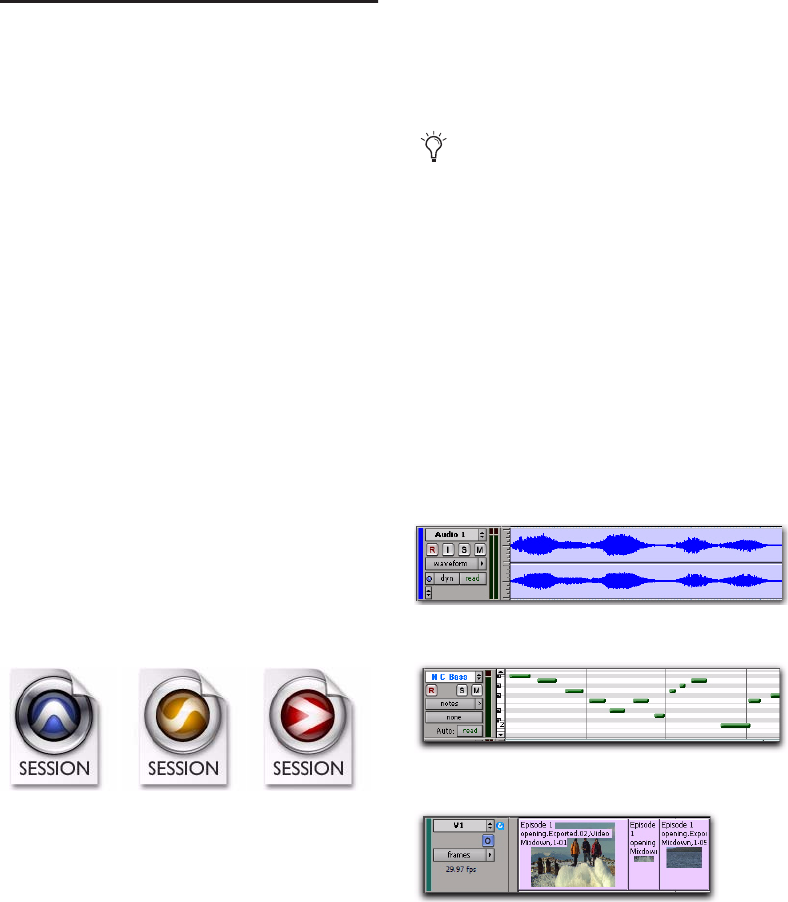
Pro Tools Reference Guide10
Pro Tools Sessions
When you start a project in Pro Tools, you create
a session. Some basic elements of sessions are ex-
plained in this section.
Session File
A session file is the document that Pro Tools cre-
ates when you choose File > New Session and
configure a new session. Pro Tools can open
only one session file at a time. The session file is
named with a .ptf (Pro Tools file) extension. Ses-
sion files contain maps of all elements associ-
ated with a project, including audio files, MIDI
data, and all your edit and mix information. It is
important to realize that a Pro Tools session file
does not contain any media files (audio or
video). Instead, it references audio, video, MIDI,
and other files. You can make changes to a ses-
sion and save those changes in a new session
file. This lets you create multiple versions of a
session or back up your editing and mixing
work.
There are different session file icons for each
type of Pro Tools system software.
Although there are different session file icons,
the session files may be opened by the other
types of Pro Tools system software (with certain
restrictions). See “Opening a Session” on
page 97.
Tracks
Pro Tools tracks are where audio, MIDI, video,
and automation data are recorded and edited.
Pro Tools tracks also provide audio channels for
routing internal busses, and physical inputs and
outputs for audio and MIDI.
Pro Tools provides mulitple types of tracks: au-
dio, Auxiliary Input, Master Fader, VCA Master,
MIDI, Instrument, and video.
Session file icons
Pro Tools HD Pro Tools M-Powered
Pro Tools LE
When a session is transferred to a different
Pro Tools system, its session file icon
changes to the icon type of the destination
system.
Audio track in the Edit window (stereo track shown)
MIDI track in the Edit window
Video track in Frames View
Chapter 2: Pro Tools Concepts 11
Audio, MIDI, Instrument, and video track data
can be edited into regions or repeated in differ-
ent locations to create loops, re-arrange sections
or entire songs, or to assemble tracks using ma-
terial from multiple takes.
Auxiliary Input tracks can route internal audio
busses or physical inputs to internal busses or
physical outputs. Auxiliary Inputs are typically
used for audio effects busses, audio throughput
(monitoring), and submixing.
Master Fader tracks provide controls for physical
audio output channels, including the volume
level of your mix, panning, and plug-in inserts.
VCA Master tracks (Pro Tools HD only) provide
control of tracks in a Mix Group that has been
assigned to the VCA Master.
Video tracks support QuickTime movies (all
Pro Tools systems) and VC-1 video files (Win-
dows Vista only). Additionally, Avid video is
supported on Pro Tools LE or Pro Tools HD with
an Avid video peripheral, or Pro Tools LE with
DV Toolkit 2 software. An individual video track
can play back only one type of video at a time.
Audio, Auxiliary Input, Master Fader, VCA Mas-
ter (Pro Tools HD only), and Instrument tracks
can be mono, stereo, or multichannel
(Pro Tools HD only). When creating a new
track, select from the list of channel formats
supported by your system.
Media Files
Pro Tools sessions create, import, export, and
reference media files. Media files are audio,
MIDI, and video files. Audio and video media
files are stored separately from the Pro Tools ses-
sion file. MIDI data is stored in the session file.
Audio Files
When you record audio into a Pro Tools session,
audio files are created.
Audio files for each session are stored in a folder
named “Audio Files.” Audio files are listed in the
Pro Tools Region List and can appear in an au-
dio track. A section of an audio file can be de-
fined as a region. See “Regions” on page 12.
MIDI Files
When you record or enter MIDI into a Pro Tools
session, all MIDI data is stored in the Pro Tools
session file. You can import and export MIDI
files to and from Pro Tools sessions, but MIDI re-
corded or otherwise created in a Pro Tools ses-
sion does not automatically create new MIDI
files.
Video Files
When you record or import video into a
Pro Tools session, all video data is stored as the
corresponding video file type (such as Quick-
Time). Video files can be created in (or copied
to) the Video Files folder in the session folder.
However, in most cases, Pro Tools references
video files that have been captured by another
application, such as Avid Media Composer.
Audio file icons
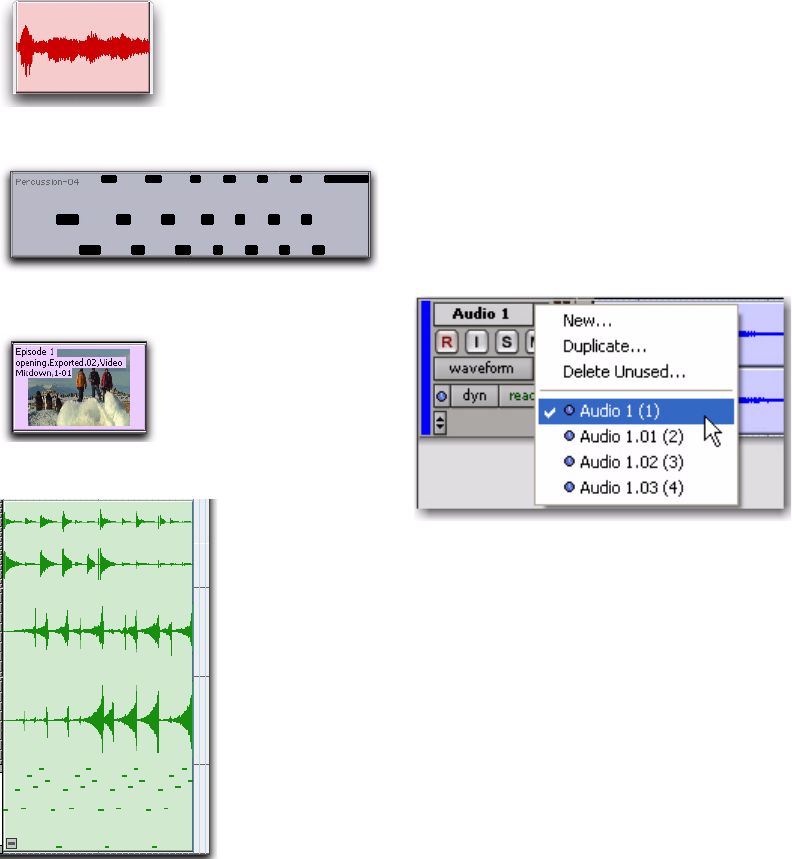
Pro Tools Reference Guide12
Regions A region is a segment of audio, MIDI, or video
data. A region could be a drum loop, a guitar riff,
a verse of a song, a recording take, a sound ef-
fect, some dialog, or an entire sound file. Re-
gions are especially useful for arranging audio
and MIDI. A region can also have associated au-
tomation data. In Pro Tools, regions are created
from audio files or MIDI data, and can be ar-
ranged in audio and MIDI track playlists. Re-
gions can also be grouped (a region of regions)
and looped (repeated).
Playlist
A playlist is a sequence of regions arranged on an
audio, MIDI, or video track. Tracks have edit
playlists and automation playlists.
On audio tracks, an edit playlist tells the hard
disk which audio regions to play in what order.
For example, you can have separate audio re-
gions for a song introduction, the first verse, the
first chorus, and so on. You can also use the
same audio region to access the same piece of
audio multiple times at different locations and
not use additional disk space. Different versions
of the same original audio can be used in differ-
ent places and have different effects applied. On
MIDI and Instrument tracks, edit playlists can
store multiple MIDI sequences (or perfor-
mances) on a track.
Audio region
MIDI region
Video region (Frames View)
Region group (Mixed audio and MIDI multitrack region
group)
Playlist selector pop-up menu
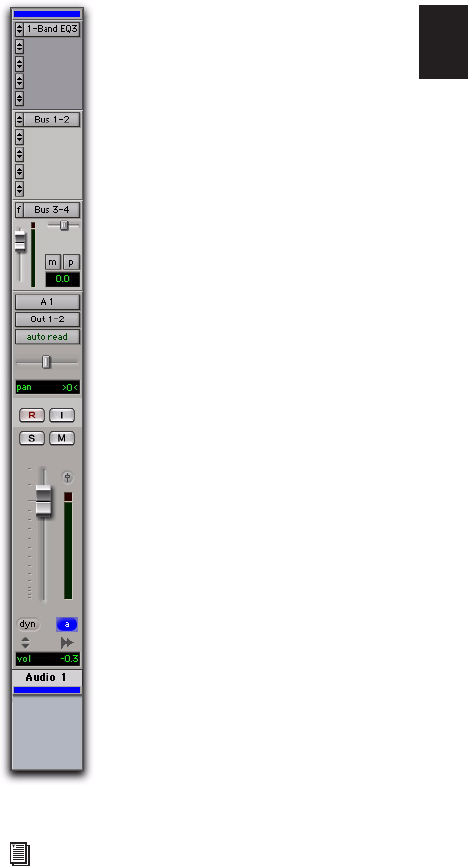
Chapter 2: Pro Tools Concepts 13
A playlist can be made up of a single region or
many separate regions. It can be made up of
similar elements, such as regions from several
different takes of a solo, or dissimilar elements,
such as several sound effects.
You can create any number of alternate edit
playlists for a track. This lets you assemble dif-
ferent versions of performances or edits on a sin-
gle track and choose between them from a pop-
up menu on the track.
Each track also has a single set of automation
playlists, for volume, pan, mute, and each auto-
mation-enabled control for the insert and send
assignments on that track.
Channel
The term channel is used to describe several re-
lated components of a Pro Tools system. The
first example of channel refers to a physical in-
put or output of your Pro Tools system. For ex-
ample, a 96 I/O audio interface provides up to
16 channels of input and output to a
Pro Tools|HD system, while an Mbox 2 audio in-
terface provides up to four inputs and two out-
puts.
The second use of the term channel refers to a
channel strip in the Pro Tools Mix window.
Each track in a Pro Tools session has a corre-
sponding channel strip in the Mix window.
Audio and MIDI channel strips have similar
controls, but those controls have slightly differ-
ent effects. For example, audio, Auxiliary Input,
and Instrument track channel strip faders con-
trol the output gain to the mix bus for that
channel, while MIDI channel strip faders send
MIDI volume data (MIDI controller 7) to the se-
lected MIDI instrument.
Channel strip in the Mix window (audio track)
The term MIDI channel also describes a
separate aspect of MIDI operation. See
“MIDI” on page 7.

Pro Tools Reference Guide14
Signal Routing
Pro Tools provides software-based mixing and
signal routing controls for audio and MIDI.
These controls are located in the Mix window.
Some of these controls can also be accessed from
the Edit window.
A common audio signal routing task is to sub-
mix multiple tracks to a single channel strip
(such as an Auxiliary Input) for shared process-
ing and level control. The following example
shows three audio tracks submixed to a stereo
Auxiliary Input.
Signal Routing Options
Signal routing options include the following:
Track Input and Output (I/O) Controls The most
basic type of signal routing is track input and
output. A track needs to have an assigned input
path to record audio, and an assigned output
path in order to be audible through a hardware
output. Signals can also be routed to or from
other tracks in Pro Tools (or hardware inputs
and outputs) using internal busses.
Auxiliary Input and Master Fader Tracks Auxil-
iary Inputs can be used as returns, submixers,
and bus masters. Master Fader tracks are used as
bus and output master level controls. Both Aux-
iliary Input and Master Fader tracks can have
plug-in and hardware inserts.
MIDI Tracks MIDI tracks are generally used for
routing MIDI from internal or external sources
to external MIDI devices. MIDI data can also be
routed to plug-ins on Auxiliary Inputs or Instru-
ment tracks.
Instrument Tracks Instrument tracks are the pri-
mary way to route MIDI to an instrument plug-
in and then route the plug-in’s sound to out-
puts, sends and busses, or other inserts. Instru-
ment tracks can also be used to route audio in-
puts to other busses, sends, or outputs, as well as
to send MIDI to external devices.
Sends Sends route audio from tracks to hard-
ware outputs, or to internal busses that are in
turn routed to other tracks within Pro Tools.
Master Fader and VCA Master tracks do not have
sends.
Plug-in and Hardware Inserts Plug-in processing
occurs completely within the Pro Tools system.
Hardware inserts use audio interface inputs and
outputs, for traditional insert routing to and
from external effects and other devices.
Submixing to an Auxiliary Input
Input from
stereo bus
path
Stereo
plug-in
Output to
stereo output
path
Outputs to
stereo bus
path
Auxiliary
Input track
Audio tracks
Inserts
Sends

Chapter 2: Pro Tools Concepts 15
Instrument Plug-ins Instrument Plug-ins are dif-
ferent from processing plug-ins in that they gen-
erate audio rather than process the audio signal
from a track’s audio input or from hard disk. In-
strument plug-ins are typically played by MIDI.
Paths Paths are any routing option in Pro Tools,
including internal or external inputs, outputs,
busses, and inserts. Pro Tools lets you name
these paths, and these path names appear in the
Audio Input and Output Path selectors and
other menus. See Chapter 6, “I/O Setup” for
more information.
Mixing Formats Sessions can include combina-
tions of mono, stereo, and greater-than-stereo
multichannel format tracks, busses, inputs, out-
puts, and inserts. Greater-than-stereo multi-
channel formats are supported on Pro Tools|HD
systems only.
Grouping and VCA Tracks Tracks can be grouped
together for mixing so that their relative mixing
settings are maintained when changing any one
of the mix settings for any track in the group
(that is, changing the volume of one track af-
fects all the other tracks in the group as well).
VCA tracks (Pro Tools HD only) provide a single
track to control the relative mix settings for all
tracks within the selected group.
Tick-Based and Sample-Based
Time
Pro Tools uses both tick-based time and sample-
based time. Sample-based time is actual time in
minutes and seconds. Samples of audio exist as a
fraction of real time. For example, the sample
rate of CDs is 44.1 kHz, that is to say there are
44,100 samples per second. Tick-based time on
the other hand is measured in bars and beats,
not minutes and seconds. The difference is that
the number of bars and beats in actual time is
variable depending on changes in tempo (how
many beats per minute). For example, a single
bar can last 5 seconds or 2 seconds depending
on how slow or fast the tempo is.
Pro Tools lets you set any track timebase to ei-
ther sample-based or tick-based. You can also
scale the Timeline to be viewed as tick-based or
sample-based.
Audio in Pro Tools is sample-based by default.
This means that if an audio region is located at a
particular sample location, it will not move
from that location if the tempo changes in the
session—though its bar and beat location will
change.
MIDI data in Pro Tools is tick-based by default.
This means that if a MIDI region is located at a
particular bar and beat location, it will not move
from that location if the tempo changes in the
session—though its sample location will
change.
You can select whether a track is sample-based
or tick-based when it is created, or change time-
bases later.
Sample-Based Audio and MIDI
With a sample-based audio track, all regions in
the track have an absolute location on the Time-
line. Regions stay fixed to the sample time, re-
gardless of where tempo or meter changes occur
in a session.
If you make a MIDI track sample-based, all MIDI
events in the track have an absolute location on
the Timeline. MIDI events stay fixed to the sam-
ple time, regardless of where tempo or meter
changes occur in a session.

Pro Tools Reference Guide16
Tick-Based Audio and MIDI
Tick-based audio is fixed to Bars|Beats, and
moves relative to the sample Timeline when
tempo and meter changes occur. However,
MIDI events and tick-based audio respond dif-
ferently to tempo changes in respect to dura-
tion. MIDI note events change length when
tempo or meter is adjusted, while audio regions
do not (unless Elastic Audio is enabled). With
Elastic Audio not enabled on an audio track,
meter and tempo changes affect only the start
point (or sync point) for each audio region in a
tick-based track. If Elastic Audio is enabled on
an audio track, tempo changes apply Elastic Au-
dio processing, which results in changing the
duration of the audio region.
Elastic Audio
Elastic Audio is real-time or rendered Time
Compression and Expansion (TCE) of audio.
Tick-based Elastic Audio tracks actually change
the location of samples according to changes in
tempo. The audio stretches or compresses to
match changes in tempo.
Pro Tools Elastic Audio uses exceptionally high-
quality transient detection algorithms, beat and
tempo analysis, and real-time or rendered TCE
processing algorithms. Elastic Audio lets you
quickly and easily tempo conform and beat
match audio to the session’s Tempo ruler. It also
provides an unprecedented degree of control
over transient detection and TCE processing on
an event-by-event basis.
With Elastic Audio, Pro Tools analyzes entire au-
dio files for transient “events.” For example, an
event can be a drum hit, a sung note, or chord
played by a guitar. These detected events can
then serve as control points for “warping” the
audio. Pro Tools can warp (TCE) audio events
automatically, such as automatically conform-
ing audio to the session tempo or quantizing au-
dio events, or you can warp audio manually us-
ing the standard editing tools in the new Warp
Track View.
Elastic Audio is useful in several common work-
flows: working with loops, correcting perfor-
mances, remixing, sound design and special ef-
fects, and film music and post production.
System Resources
Track count, plug-in processing, signal path and
routing options, and voice availability are ulti-
mately limited by the combined resources avail-
able from the host computer, and from your
Pro Tools hardware.
Pro Tools provides several ways to manage and
conserve resources to maximize the perfor-
mance of your system. As you begin working
with Pro Tools sessions and tracks, you can take
advantage of the following features to extend
the effectiveness of your available DSP and
other resources:
Pro Tools lets you adjust the performance of
your system by changing system settings that af-
fect its capacity for processing, playback, and re-
cording. See “Configuring Pro Tools System
Settings” on page 34.
In order to free up needed DSP resources,
Pro Tools allows for certain items (such as tracks
and inserts) to be manually made inactive. Inac-
tive elements are viewable, editable, and re-
tained within the session. See “Active and
Inactive Items” on page 17.
All Pro Tools systems provide flexible voice
options for audio tracks, to help maximize use
of available voices in your system. For more in-
formation on voice management and options,
see “Voice Borrowing” on page 164.
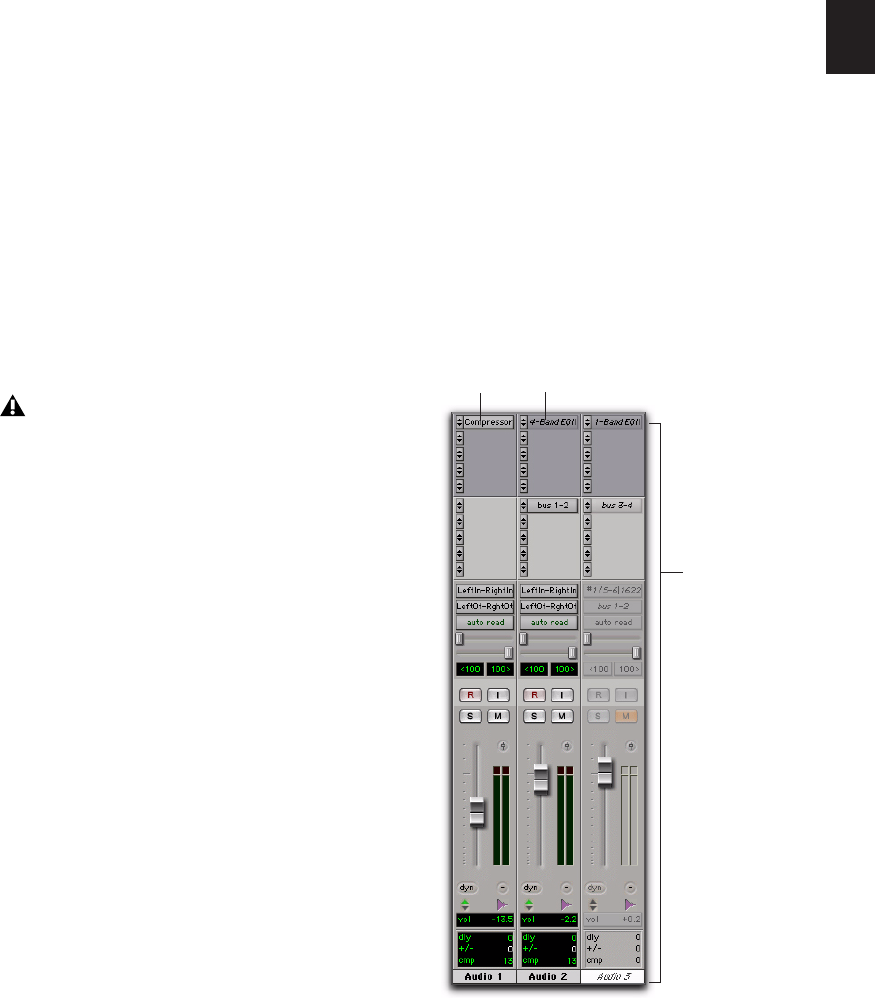
Chapter 2: Pro Tools Concepts 17
Active and Inactive Items
Pro Tools lets you make certain items (such as
tracks and inserts) inactive, in order to free up
DSP resources and mixer connections.
Items in Pro Tools that can be made inactive (or
active) include the following:
• Audio, Auxiliary Input, Master Fader,
VCA Master, and Instrument tracks
• Track Inputs and Outputs
• Sends
• Side-chain inputs
• Plug-ins
• Hardware inserts
• Paths (session-wide)
In addition to manually setting Active and Inac-
tive modes, Pro Tools automatically makes
items inactive if there are insufficient or un-
available resources.
When active, items are fully engaged and opera-
tional.
When inactive, items are silent and off, although
most associated controls can still be adjusted.
Different inactive items affect available system
resources in specific ways, as follows:
Plug-ins When a plug-in is inactive on a track, its
DSP is made available for other plug-ins and
processing. Plug-in assignments can be made in-
active manually, or automatically (see “Auto-
matic and Manual Inactive Mode” on page 18).
Paths and Path Assignments When a path or
path assignment is inactive, its mixer resources
are made available for other signal routing pur-
poses in the session. Paths and assignments can
be made inactive manually, or automatically
(see “Automatic and Manual Inactive Mode” on
page 18).
Tracks When a track is made inactive, its voices
become available for another track. Mono inac-
tive tracks free up one voice; stereo and multi-
channel tracks free up one voice per channel.
Additionally, when an audio, Auxiliary Input,
Instrument, or Master Fader track is made inac-
tive, its plug-ins, inserts, sends, and I/O assign-
ments become inactive, and the associated DSP
used is freed up for use elsewhere in the session.
Display of Inactive Items
When items are inactive, their names appear in
italics, and their background becomes dark gray.
When a track is inactive, the entire channel strip
is grayed out.
MIDI tracks cannot be made inactive.
Active and inactive plug-ins, sends, and tracks
Active Inactive plug-in
Inactive track

Pro Tools Reference Guide18
Automatic and Manual Inactive Mode
Active and Inactive modes are powerful options
for session transfer and system resource man-
agement. Pro Tools provides automatic and
manual Inactive mode switching. You can man-
ually make items inactive (or active) to selec-
tively manage system resources while editing
and mixing.
Automatically Inactive Items
When opening a session, it is possible that not
all signal paths, plug-ins, or audio interfaces
used in the session will be available as defined
on the current system. When opening a session,
sufficient voices may also be unavailable if the
session was created on a different Pro Tools sys-
tem type (for example, opening a session cre-
ated on a Pro Tools HD system on a Pro Tools LE
system).
Whenever this occurs, the session will open as it
was last saved. All items that are unavailable, or
cannot be loaded due to insufficient resources,
are made inactive.
Manual Inactive Switching
You can manually apply Active or Inactive
modes to manage system resources. By making
an item inactive, its associated resources are
made available elsewhere in the session.
The following are basic instructions for manu-
ally making items inactive. Throughout the
Pro Tools Reference Guide, instructions are pro-
vided whenever an item can be made inactive.
To toggle an item active or inactive:
Control-Start-click (Windows) or Command-
Control-click (Mac) the item.
You can apply Active or Inactive modes to all or
all selected tracks using standard Pro Tools mod-
ifiers (Alt and Alt+Shift in Windows, Option and
Option+Shift on the Mac).
Side-chain inputs support direct active and inac-
tive switching, but do not follow switching all
or all selected side-chain inputs.
DigiBase
DigiBase is a database management tool for
Pro Tools. DigiBase expands upon basic
Pro Tools search and import capabilities by pro-
viding powerful tools to manage your data both
inside and outside of your sessions, on any hard
drive connected to the system.
A database is a way of organizing data such that
it can easily be searched, sorted, managed, and
utilized. Your checkbook is an example of a da-
tabase file. For every check you write, you enter
a new record. That record contains information
about the check, such as when you wrote it, to
whom you wrote it, and for what amount. This
information is written in specific columns, or
fields. Everything you need to know (the check’s
metadata) is there, even though the check itself
is not.
DigiBase browsers let you search, sort, and
mange these databases by volume or catalog
(DigiBase Pro only). Use DigiBase browsers not
only to organize your Pro Tools sessions and
media files (audio, MIDI, and video), but also to
audition and import by drag and drop.
For more information about DigiBase, see
“DigiBase” on page 201.

Chapter 3: Keyboard and Right-Click Mouse Shortcuts 19
Chapter 3: Keyboard and Right-Click
Mouse Shortcuts
This chapter provides an overview of Pro Tools
mouse and keyboard shortcuts.
Right-Click Mouse Shortcuts
Pro Tools provides Right-click shortcuts for
choosing various Pro Tools commands and
menus with any Right-click capable mouse.
Global Key Commands
This section covers keyboard shortcuts that ap-
ply to many functions in Pro Tools.
Track Functions
Pro Tools provides keyboard shortcuts for the
following track functions:
• Changing Automation mode
• Enabling playlists
• Adding plug-ins
• Record enabling, soloing, and muting
tracks
• Record safing and solo safing tracks
• Assigning inputs, outputs, and sends
• Toggling volume/peak/delay display
• Clearing meters
• Changing track heights
A PDF listing of all shortcuts is available in
Pro Tools. Choose Help > Shortcuts.
For a complete list of Right-click shortcuts,
see the Shortcuts Guide.
For a complete list of keyboard shortcuts,
see the Shortcuts Guide.
Command Windows Mac
Apply action to all
channel strips/tracks
Alt+
action
Option+
action
Apply action to
selected channel
strips/tracks
Alt+
Shift+
action
Option+
Shift+
action
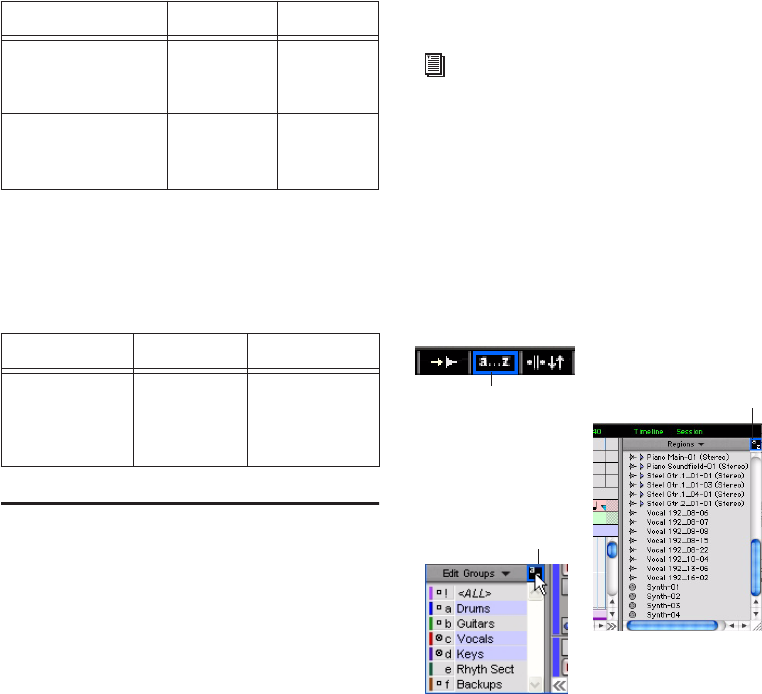
Pro Tools Reference Guide20
List and Parameter Selection
Pro Tools provides keyboard shortcuts for the
following items:
• Selection of tracks in Track List
• Enabling of groups in Group List
• Automation Enable window parameters
• Setting Memory Location parameters
Controls and Editing Tools
Pro Tools provides keyboard shortcuts for mov-
ing plug-in controls, faders and sliders, the
Scrubber, and automation data.
Keyboard Focus
The Keyboard Focus in Pro Tools determines
how the alpha keys function. Depending on
which Keyboard Focus is enabled, you can use
the keys on your QWERTY (alpha) keyboard to
select regions in the Region List, enable or dis-
able groups, or perform an edit or play com-
mand.
You can only enable one of the three Keyboard
Focus modes at a time. Enabling a Keyboard Fo-
cus will disable the one previously enabled.
There are three types of Keyboard Focus:
Commands Keyboard Focus When selected, this
provides a wide range of single key shortcuts
from the QWERTY keyboard for editing and
playing.
With Commands Keyboard Focus disabled, you
can still access any of its key shortcuts by press-
ing the Start key (Windows) or Control (Mac)
along with the key.
Region List Keyboard Focus When selected, au-
dio regions, MIDI regions, and Region Groups
can be located and selected in the Region List by
typing the first few letters of the region’s name.
Group List Keyboard Focus When selected, Mix
and Edit Groups can be enabled or disabled by
typing the Group ID letter (in either the Mix or
Edit window).
Command Windows Mac
Toggle item and set
all others to same
new state
Alt-click item Option-click
item
Toggle item and set
all others to oppo-
site state
Control-click
item
Command-
click item
Command Windows Mac
Fine adjustment
of sliders,
knobs, and
breakpoints
Hold Control
while click-
ing the item
Hold Command
while clicking
the item
For a complete list of Commands Keyboard
Focus shortcuts, see the Shortcuts Guide.
Keyboard Focus buttons
Region List
Keyboard Focus
Group List
Keyboard Focus
Commands Keyboard Focus
(in the Edit Window bar)

Chapter 3: Keyboard and Right-Click Mouse Shortcuts 21
To set the Keyboard Focus, do one of the following:
Click the a–z button for the focus you want to
enable.
– or –
While pressing Control+Alt (Windows) or
Command+Option (Mac), press one of the fol-
lowing keys: 1 (Commands), 2 (Region List), or
3 (Group List).
Numeric Keypad Modes
The Operation preference for Numeric Keypad
mode determines how the numeric keypad
functions for Transport.
There are two Shuttle Lock modes (Classic and
Transport), and one Shuttle mode.
No matter which Numeric Keypad mode is se-
lected, you can always use the numeric keypad
to select and enter values in the Event Edit Area,
Edit Selection indicators, Main and Sub
Counters, and Transport fields.
To set the Numeric Keypad Mode:
1 Choose Setup > Preferences and click the Op-
eration tab.
2 In the Transport section, select a Numeric Key-
pad mode (Classic, Transport, or Shuttle).
3 Click OK.
Shuttle Lock Modes
With either Shuttle Lock mode (Classic or Trans-
port) you can use the numeric keypad to shuttle
forward or backwards at specific speeds.
• 5 is normal speed.
• 6–9 provide increasingly faster fast-forward
speeds.
• 1–4 provide progressively faster rewind
speeds (4 is the slowest rewind Shuttle Lock
speed, 1 is the fastest).
• Press 0 to stop Shuttle Lock, then press the
number to resume Shuttle Lock speed.
• Press Escape or Spacebar to exit Shuttle
Lock mode.
Custom Shuttle Lock Speed
(Pro Tools HD and Pro Tools LE with
DV Toolkit 2 Only)
The highest fast-forward Shuttle Lock speed
(key 9) can be customized.
Classic Mode
This mode emulates the way Pro Tools worked
in versions lower than 5.0. With the Numeric
Keypad mode set to Classic, you can:
• Play up to two tracks of audio in Shuttle
Lock mode. Press the Start key (Windows)
or Control (Mac), followed by 1–9 for dif-
ferent play speeds.
• Press Plus or Minus to reverse direction.
• Press 0 to stop Shuttle Lock, then press the
number to resume Shuttle Lock speed.
• Press Escape or Spacebar to exit Shuttle
Lock mode.
• Recall Memory Locations by typing the
Memory Location, followed by a Period (.).
Although multiple plug-in windows can
have a keyboard focus enabled, only the
front-most window receives any keyboard
input.
For more information on each mode, see
“Numeric Keypad Mode” on page 77.
For information, see “Custom Shuttle Lock
Speed” on page 443.
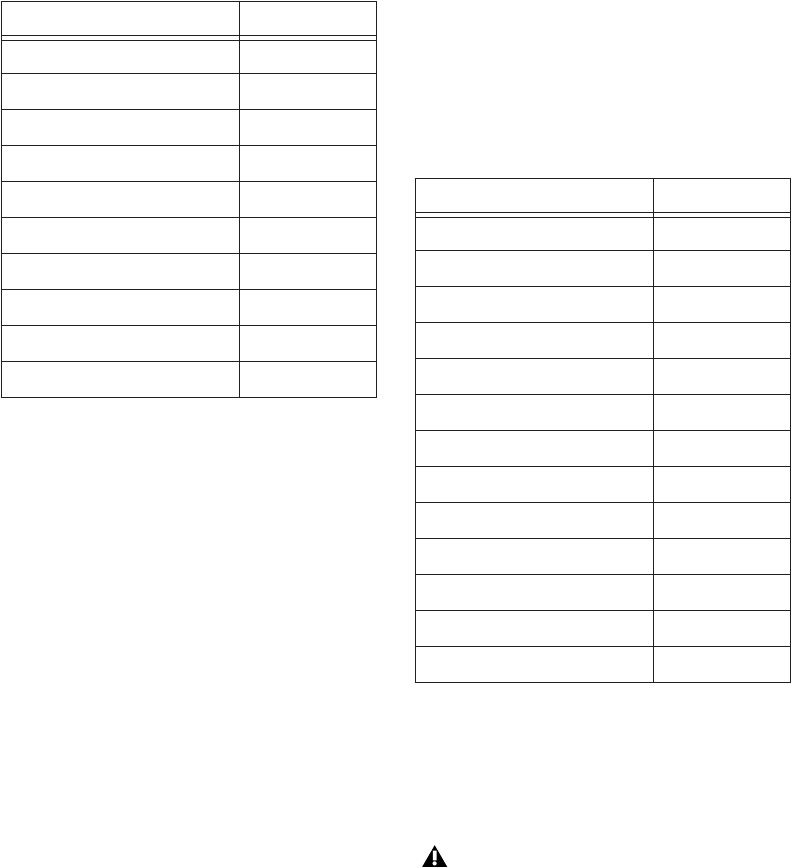
Pro Tools Reference Guide22
Transport Mode
This mode allows you to set a number of record
and play functions, and also operate the Trans-
port from the numeric keypad.
:
With the Numeric Keypad mode set to Trans-
port, you can also:
• Play up to two tracks of audio in Shuttle
Lock mode. Press the Start key (Windows)
or Control (Mac), followed by 1–9 for dif-
ferent play speeds.
• Press Plus or Minus to reverse direction.
• Press 0 to stop Shuttle Lock, then press the
number to resume Shuttle Lock speed.
• Press Escape or Spacebar to exit Shuttle
Lock mode.
• Recall Memory Locations by typing Period
(.), the Memory Location number, and Pe-
riod (.) again.
Shuttle Mode
(Pro Tools HD Only)
Pro Tools offers another form of shuttling, dif-
ferent from that of the two Shuttle Lock modes.
With the Numeric Keypad mode set to Shuttle,
playback of the current Edit selection is trig-
gered by pressing and holding the keys on the
numeric keypad—playback stops once the keys
are released. Various playback speeds are avail-
able in both forward and reverse. In this mode,
pre- and post-roll are ignored.
:
With the Numeric Keypad mode set to Shuttle,
you can also:
• Recall Memory Locations by typing Period (.),
the Memory Location number, and Period (.)
again.
Function Key
Click on/off 7
Countoff on/off 8
MIDI Merge/Replace mode 9
Loop Playback mode on/off 4
Loop Record mode on/off 5
QuickPunch mode on/off 6
Rewind 1
Fast Forward 2
Record enable 3
Play/Stop 0
Playback Speeds Key
1x Forward 6
1x Rewind 4
4x Forward 9
4x Rewind 7
1/4x Forward 3
1/4x Rewind 1
1/2x Forward 5+6
1/2x Rewind 5+4
2x Forward 8+9
2x Rewind 8+7
1/16x Forward 2+3
1/16x Rewind 2+1
Loop Selection (1x) 0
Shuttle Lock modes are not available when
the Numeric Keypad mode is set to Shuttle.

23
Part II: System Configuration
24
Chapter 4: Pro Tools Systems 25
Chapter 4: Pro Tools Systems
There are three types of Pro Tools systems:
Pro Tools|HD These systems include
Pro Tools HD® software for Pro Tools|HD sys-
tem hardware.
Pro Tools LE These systems include Pro Tools LE
software for 003, 003 Rack, Digi 002®,
Digi 002 Rack™, Mbox® 2, Mbox 2 Pro,
Mbox 2 Mini, or Mbox hardware.
Pro Tools M-Powered These systems include
Pro Tools M-Powered software for Digidesign-
qualified M-Audio® interfaces.
Optional Systems
Pro Tools LE with DV Toolkit 2 Pro Tools LE sys-
tems that have been upgraded with the
DV Toolkit™ 2 software option.
Pro Tools LE or M-Powered with Music Production
Toolkit Pro Tools LE or M-Powered systems that
have been upgraded with the Music Production
Toolkit software option.
Pro Tools|HD Systems
Pro Tools|HD systems are available in the con-
figurations shown on page 26. Each system re-
quires at least one Digidesign audio interface
(sold separately). Pro Tools|HD systems can be
expanded by adding Pro Tools|HD system cards
to increase track count, add to the amount of
possible plug-in and mixer processing, and con-
nect additional audio interfaces.
References to Pro Tools LE in this guide are
usually interchangeable with Pro Tools M-
Powered, except as noted in the Pro Tools
M-Powered Getting Started Guide.
Pro Tools system performance depends on
factors such as computer processor speed,
amount of system memory, and hard drive
performance. Contact your Digidesign
dealer or visit the Digidesign website
(www.digidesign.com) for the latest system
requirements and compatibility informa-
tion.

Pro Tools Reference Guide26
Pro Tools|HD Systems
Pro Tools|HD 1
Includes:
• Accel Core (for PCIe) or HD Core (for PCI)
card
• Pro Tools HD software
Pro Tools|HD 2 Accel
Includes:
• Accel Core (for PCIe) or HD Core (for PCI)
card
• HD Accel card
• Pro Tools HD software
Pro Tools|HD 3 Accel
Includes:
• Accel Core (for PCIe) or HD Core (for PCI)
card
• Two HD Accel cards
• Pro Tools HD software
Pro Tools|HD 2
Includes:
• HD Core card
• HD Process card
• Pro Tools HD software
Pro Tools|HD 3
Includes:
• HD Core card
• Two HD Process cards
• Pro Tools HD software
Expanded Pro Tools|HD Systems
Any Pro Tools|HD system can be expanded by
adding additional HD Process or HD Accel cards.
For more information, see the Expanded Systems
Guide.
Supported Audio Interfaces
(Pro Tools|HD Systems Only)
The following audio interfaces are compatible
with Pro Tools|HD systems:
• 192 I/O™
• 192 Digital I/O™
• 96 I/O™
• 96i I/O™
The following “Legacy” Digidesign audio inter-
faces are supported with Pro Tools|HD systems:
• 888|24 I/O™ and 882|20 I/O™
• 1622 I/O™
• 24-bit ADAT Bridge I/O™
HD Accel and HD Process cards can be used
in the same system. For more information,
refer to the Pro Tools|HD Getting Started
Guide.
Pro Tools|HD systems require the use of at
least one 192 I/O, 192 Digital I/O, 96 I/O,
or 96i I/O.
“Legacy” I/Os (such as 888|24 I/O) require
the use of at least one 192 I/O, 192 Digital
I/O, 96 I/O, or 96i I/O.

Chapter 4: Pro Tools Systems 27
Pro Tools|HD System Playback, Recording and Voice Limits
The following table lists the audio playback, recording, and voiceable track limits of each type of
Pro Tools|HD system. Playback and recording voices refer to the number of unique simultaneous
playback and record tracks on your system. Total voiceable tracks refers to the maximum number of
audio tracks that can share the available voices on your system. (Mono tracks take up one voice. Ste-
reo and multichannel tracks take up one voice per channel.) Voice limits are dependent on the ses-
sion sample rate and the number of DSP chips dedicated to the system’s Playback Engine.
Pro Tools|HD systems can open sessions with up to 256 audio tracks, but any audio tracks beyond
that system’s voiceable track limit will be automatically set to Voice Off.
Pro Tools|HD systems provide up to 160 Auxiliary Input tracks and a total of 128 internal mix busses.
These systems also provide up to 5 inserts and 10 sends per track (depending on the DSP capacity of
your system). Pro Tools|HD systems also support up to 128 Instrument tracks, 256 MIDI tracks, 128
VCA tracks, and multiple video tracks.
Table 5. Pro Tools|HD system audio playback, recording and voice limits
Core System Type
Sample
Rate
(kHz)
Playback
Voices
(Mono Tracks of
Simultaneous
Playback)
Recording
Voices
(Mono Tracks of
Simultaneous
Recording)
Total
Voiceable
Tracks
Pro Tools|HD 1 44.1/48 96 96 112
88.2/96 48 48 48
176.4/192 18 (for PCIe)
12 (for PCI)
18 (for PCIe)
12 (for PCI)
18
(for PCIe)
12
(for PCI)
Pro Tools|HD Accel 2,
Pro Tools|HD Accel 3
44.1/48 192 192 224
88.2/96 96 96 120
176.4/192 36 36 36
Pro Tools|HD 2,
Pro Tools|HD 3,
or any expanded Pro Tools|HD system
44.1/48 128 128 224
88.2/96 64 64 80
176.4/192 24 24 24
Pro Tools Reference Guide28
Audio Interfaces for Pro Tools|HD Systems
Table 6 lists the input and output capabilities of the various audio interfaces for Pro Tools|HD sys-
tems.
You can expand your Pro Tools|HD system by adding Pro Tools|HD cards to your computer, either di-
rectly in the computer or using an expansion chassis. Expanding your Pro Tools system will provide
an increased track count, add to the amount of possible plug-in and mixer processing, and let you
connect additional audio interfaces. For more information, see the Expanded Systems Guide.
Table 6. Pro Tools|HD system audio interface channel capabilities
Interface Type Number of I/O
Channels
Sample Rates
(kHz)
A/D
Conversion
D/A
Conversion Digital I/O
192 I/O 16 in/16 out 44.1, 48, 88.2,
96, 176.4, 192
24-bit 24-bit 24-bit
192 Digital I/O 16 in/16 out 44.1, 48, 88.2,
96, 176.4, 192
None None 24-bit
96 I/O 16 in/16 out 44.1, 48, 88.2,
96
24-bit 24-bit 24-bit
96i I/O 16 in/2 out 44.1, 48, 88.2,
96
24-bit 24-bit 24-bit
888|24 I/O 8 in/8 out 44.1, 48 24-bit 24-bit (or
20-bit, on
older I/O)
24-bit
882|20 I/O 8 in/8 out 44.1, 48 20-bit 20-bit 24-bit
1622 I/O 16 in/2 out 44.1, 48 20-bit 24-bit 24-bit
24-bit ADAT
Bridge I/O
16 in/16 out 44.1, 48 None 24-bit 24-bit
“Legacy” I/Os (such as 888|24 I/O) require the use of at least one 192 I/O, 192 Digital I/O, 96 I/O,
or 96i I/O.

Chapter 4: Pro Tools Systems 29
Pro Tools LE Systems
Pro Tools LE-based systems are available in the
following configurations:
003
A 003 system includes:
• Pro Tools LE software
• 003 audio and MIDI interface, with control
surface
003 Rack
A 003 Rack system includes:
• Pro Tools LE software
• 003 audio and MIDI interface
Digi 002
A Digi 002 system includes:
• Pro Tools LE software
• Digi 002 audio and MIDI interface, with
control surface
Digi 002 Rack
A Digi 002 Rack system includes:
• Pro Tools LE software
• Digi 002 audio and MIDI interface
Mbox 2 Pro
An Mbox 2 system includes:
• Pro Tools LE software
• Mbox 2 Pro audio and MIDI interface
Mbox 2
An Mbox 2 system includes:
• Pro Tools LE software
• Mbox 2 audio and MIDI interface
Mbox 2 Mini
An Mbox 2 system includes:
• Pro Tools LE software
• Mbox 2 Mini audio interface
Mbox
An Mbox system includes:
• Pro Tools LE software
• Mbox audio interface
Processing Capacity
The total processing capacity of a
Pro Tools LE system depends on the pro-
cessing power of your computer. Contact
your Digidesign dealer or visit Digidesign’s
website (www.digidesign.com) for the latest
system requirements and compatibility in-
formation.

Pro Tools Reference Guide30
Pro Tools LE System Capabilities
Table 7 lists the playback, recording, and input and output capabilities of each Pro Tools LE system.
Mono tracks of simultaneous playback refers to the number of unique simultaneous playback and
record tracks on your system. Total voiceable tracks refers to the maximum number of audio tracks
that can share the available voices on your system. (Mono tracks take up a single audio track, while
stereo tracks take up two tracks.) If you open a Pro Tools session created on a Pro Tools|HD system
containing more than the number of tracks supported on the LE-based system, audio tracks beyond
the LE system’s voiceable track limit will be automatically set to inactive.
Pro Tools LE systems provide up to 128 Auxiliary Input tracks, a total of 32 internal mix busses, and
up to 5 inserts and 10 sends per track (depending on your computer’s processing capacity). In addi-
tion, Pro Tools LE systems support up to 32 Instrument tracks and 256 MIDI tracks. Pro Tools LE also
supports a single QuickTime video track.
For details on transferring session material between Pro Tools|HD and Pro Tools LE systems, see
“Sharing Sessions Created on Different Pro Tools Systems” on page 292.
Table 7. Pro Tools LE system audio playback, recording, and channel capabilities
System
Type
Mono Tracks of
Simultaneous
Playback
Total
Voiceable
Tracks
Number of I/O
Channels
A/D
Conversion
D/A
Conversion
Digital
I/O
003,
003 Rack,
Digi 002,
or
Digi 002
Rack
32 128 up to 18 in/18 out
(48 kHz or lower)
up to 10 in/10 out
(88.2 or 96 kHz)
24-bit 24-bit 24-bit
Mbox 2
Pro
32 128 up to 6 in/8 out
(48 kHz or lower)
up to 4 in/6 out
(88.2 or 96 kHz)
24-bit 24-bit 24-bit
Mbox 2 or
Mbox
32 128 up to 2 in/2 out 24-bit 24-bit 24-bit
Mbox 2
Mini
32 128 up to 2 in/2 out 24-bit 24-bit N/A
Chapter 4: Pro Tools Systems 31
Pro Tools M-Powered
A Pro Tools M-Powered system includes:
• Pro Tools M-Powered software
• Digidesign-qualified M-Audio interface (not
supplied with M-Powered software)
DV Toolkit 2 and Music
Production Toolkit
In addition to all the regular capabilities pro-
vided with Pro Tools LE and Pro Tools M-Pow-
ered, Pro Tools LE systems equipped with
DV Toolkit 2 and Pro Tools LE and M-Powered
systems equipped with Music Production Tool-
kit provide expanded capabilities.
Support for 48 Mono or Stereo
Tracks
Pro Tools LE systems with the DV Toolkit 2 op-
tion and Pro Tools LE or M-Powered systems
with the Music Production Toolkit option let
you play or record up to 48 simultaneous stereo
or mono tracks. These higher track counts may
require additional drives and faster Digidesign-
qualified computers.
Support for Up to 24 QuickPunch
Tracks
With DV Toolkit 2 or Music Production Toolkit,
up to 24 mono or stereo audio tracks can be si-
multaneously recorded with QuickPunch.
DV Toolkit 2 Capabilitites
(Pro Tools LE Only)
Pro Tools LE Features
DV Toolkit 2 enables the following features for
working with audio, film, video, or digital video
in Pro Tools LE:
• Session and track features:
• Up to 48 audio tracks of simultaneous play-
back or recording, mono or stereo
• Multiple video tracks, with multiple video
playlists and multiple QuickTime movies
per track.
• Ability to use QuickPunch on up to 24
tracks
• Import Session Data options (Destination
Track Names, Time Code Mapping, Find
Matching Tracks, Session Data to Import,
Track Playlist)
• MP3 export option (for bounce recording
or exporting a region as an MP3 file)
• DigiBase Pro (including support for Catalog
browsers and the ability to search on mul-
tiple criteria simultaneously in DigiBase
browsers)
References to Pro Tools LE in this guide are
usually interchangeable with Pro Tools
M-Powered, except as noted in the
Pro Tools M-Powered Getting Started
Guide.
For the most current list of Digidesign-qual-
ified M-Audio interfaces, visit the Digi-
design website (www.digidesign.com).
Visit the Digidesign website for more infor-
mation (www.digidesign.com).
For more information on track priority and
voice assignment, see “Voice Assignment
with Toolkit Options” on page 163.
The combination of audio tracks and
QuickPunch tracks cannot be greater
than 48.
Pro Tools Reference Guide32
• Editing features:
• Universe window
• Continuous Scroll
• Scrub Trim tool
• Replace Region command
• TCE Edit to Timeline Selection command
• Selection of alternate field recorder audio
channels in the Pro Tools Timeline
• Expanding alternate field recorder audio
channels to new tracks
• Mixing and Automation features:
• Snapshot automation for writing or trim-
ming automation data
• Glide Automation commands
• Time code and synchronization features:
• Timebase rulers (Time Code and
Feet+Frames)
• Time Code Rate selector
• Feet+Frame Rate selector
• Current Time Code Position command
• Current Feet+Frames Position command
• Use Subframes option
• Audio Rate Pull Up and Pull Down
• Video Rate Pull Up and Pull Down
Additional Software
DV Toolkit 2 includes additional software for
working with audio or digital video in Pro Tools:
DINR™ (Digidesign Intelligent Noise Reduction™)
LE Plug-in For reducing noise in audio.
DigiTranslator™ 2.0 Software Option For ex-
changing audio and video files, and sequences
with other AAF and OMFI-compatible applica-
tions.
TL Space Native™ Convolution Reverb Plug-in For
applying convolution reverb to your audio.
VocALign Project Plug-in from Synchro Arts Soft-
ware For automatically adjusting the timing of
one audio signal to match another.
Music Production Toolkit
(Pro Tools LE and Pro Tools M-Powered Only)
Pro Tools Features
Music Production Toolkit enables the following
features in Pro Tools LE and M-Powered:
• Session and track features:
• Up to 48 audio tracks of simultaneous play-
back or recording, mono or stereo
• Ability to use QuickPunch on up to 24
tracks
• MP3 export option (for bounce recording
or exporting a region as an MP3 file)
• Beat Detective features:
• Ability to apply Beat Detective across mul-
tiple tracks
• Collection Mode
Additional Software
Music Production Toolkit includes additional
software for working with Pro Tools:
DINR™ (Digidesign Intelligent Noise Reduction™)
LE Plug-in For reducing noise in audio.
Hybrid RTAS Synthesizer Plug-in For use as a vir-
tual instrument in your Pro Tools sessions.
Smack!™ LE Compressor Plug-in For applying
compression to your audio.
SoundReplacer™ Plug-in For replacing one
sound in a track with another (such as replacing
only the snares in your drum track with a differ-
ent one-hit sample)
TL Space Native™ Convolution Reverb Plug-in For
applying convolution reverb to your audio.
Chapter 5: System Setup 33
Chapter 5: System Setup
Starting Up or Shutting Down
Your System
To ensure that the components of your
Pro Tools system communicate properly with
each other, you need to start them in a particu-
lar order.
Start up your Pro Tools system in this order:
1 Make sure all your equipment (including your
computer) is off.
2 Lower the volume of all output devices in
your system.
3 For Pro Tools|HD systems with an expansion
chassis, turn on the chassis.
4 Turn on any external hard drives. Wait ap-
proximately ten seconds for them to spin up to
speed.
5 Turn on any worksurfaces (such as
D-Command) or control surfaces (such as
Command|8).
6 Turn on any MIDI interfaces, MIDI devices, or
synchronization peripherals.
7 Do one of the following, depending on your
Pro Tools system:
• For Pro Tools|HD systems, with the volume
of all output devices lowered, turn on your
Pro Tools Legacy I/O (such as an 888|24 I/O
or 882|20 I/O) first, then your Pro Tools|HD
audio interfaces (such as 96 I/O). Wait at
least fifteen seconds for your system hard-
ware to initialize.
– or –
• For Pro Tools LE and M-Powered systems
that use hardware requiring external power
(such as 003), turn on the hardware.
8 Turn on your computer.
9 Launch Pro Tools or any third-party audio or
MIDI applications.
Shut down your Pro Tools system in this order:
1 Quit Pro Tools and any other running applica-
tions.
2 Turn off or lower the volume of all output de-
vices in your system.
3 Turn off your computer.
To quit Pro Tools, choose File > Exit (Win-
dows) or Pro Tools > Quit (Mac).

Pro Tools Reference Guide34
4 Do one of the following depending on your
Pro Tools system:
• For Pro Tools|HD systems, turn off your
Pro Tools audio interfaces.
– or –
• For Pro Tools LE and M-Powered systems
that use hardware requiring external power
(such as 003), turn off the hardware.
5 For Pro Tools|HD systems with an expansion
chassis, turn off the chassis.
6 Turn off any MIDI interfaces, MIDI devices, or
synchronization peripherals.
7 Turn off any worksurfaces (such as
D-Command) or control surfaces (such as
Command|8).
8 Turn off any external hard drives.
Checking an HD System with
DigiTest
Before you use Pro Tools, you may want to run
the DigiTest diagnostic application to ensure
that all Pro Tools|HD cards in the system are rec-
ognized, installed in the proper order, and have
valid TDM FlexCable connections. See the HD
Getting Started Guide for more information.
Configuring Pro Tools System
Settings
Pro Tools lets you adjust the performance of
your system by changing system settings that af-
fect its capacity for processing, playback, and re-
cording. These system settings are available in
the Playback Engine dialog (Setup > Playback
Engine).
In most cases, the default settings for your sys-
tem provide optimum performance, but you
may want to adjust them to accommodate large
or processing-intensive Pro Tools sessions.
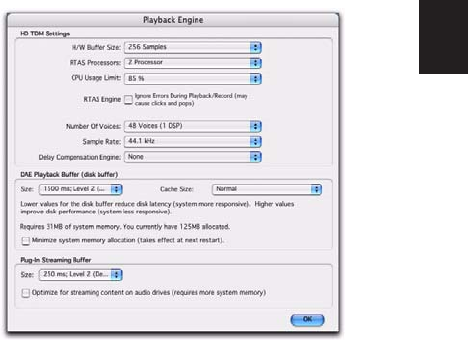
Chapter 5: System Setup 35
Hardware Buffer Size
The Hardware Buffer Size (H/W Buffer Size) con-
trols the size of the buffer used to handle host
processing tasks such as Real-Time AudioSuite™
(RTAS) plug-ins.
• Lower Hardware Buffer Size settings are useful
for improving latency issues in certain record-
ing situations or for improving certain system
performance problems.
• On all Pro Tools systems, lower settings re-
duce RTAS MIDI-to-audio latency (such as
when playing an RTAS virtual instrument
live and monitoring the instrument’s out-
put). Lower settings can also improve
screen response or the accuracy of plug-in
and mute automation data.
• On Pro Tools LE systems, lower settings re-
duce all input-to-output monitoring la-
tency on any record-armed tracks or
Auxiliary Inputs with live inputs.
• On Pro Tools HD systems, lower settings re-
duce monitoring latency that occurs on
tracks that have one or more RTAS plug-ins.
Lower settings can also improve the accu-
racy of MIDI track timing on systems that
do not use a MIDI interface that supports
time stamping (such as MIDI I/O). Tracks
using MIDI virtual instruments that do not
support time stamping will also have better
MIDI track timing with lower settings.
Higher Hardware Buffer Size settings are use-
ful for sessions that are using more RTAS plug-
ins for playback. These settings allow for more
audio processing. They can also be useful to re-
duce errors on machines that require a higher
buffer size.
To change the Hardware Buffer Size:
1 Choose Setup > Playback Engine.
2 From the H/W Buffer Size pop-up menu, select
the audio buffer size, in samples.
3 Click OK.
Playback Engine dialog for Pro Tools|HD system
Pro Tools Reference Guide36
RTAS Processors
The RTAS Processors setting determines the
number of processors in your computer allo-
cated for RTAS (Real-Time AudioSuite) plug-in
processing.
With computers that have multiple processors,
or that feature multi-core processing or hyper-
threading, this setting lets you enable multipro-
cessor support for RTAS plug-ins. Used in com-
bination with the CPU Usage Limit setting, the
RTAS Processors setting lets you control the way
RTAS processing and other Pro Tools tasks are
handled by the system. For example:
• For sessions with large numbers of RTAS plug-
ins, you can allocate 2 or more processors to
RTAS processing and set a high CPU Usage
Limit.
• For sessions with few RTAS plug-ins, you can
allocate fewer processors to RTAS and set a low
CPU Usage Limit to leave more CPU resources
available for automation accuracy, screen re-
sponse, and video.
• Increase these settings to accommodate TDM
to RTAS plug-in conversion. Conversely, de-
crease these settings if you are only using
TDM plug-ins or are converting RTAS plug-ins
to TDM. TDM/RTAS conversion can be desir-
able during recording, depending on latency,
voicing needs, and record-monitoring capa-
bilities of the specific TDM and RTAS plug-ins.
• Depending on the importance of video and
overall screen response, and on the density of
automation being employed, try different
combinations of RTAS Processing and CPU
Usage Limit settings to achieve the best re-
sults. For example, to improve screen re-
sponse in a medium-sized session using a
moderate number of RTAS plug-ins, try reduc-
ing the number of RTAS plug-ins, but keep the
CPU Usage Limit set to the maximum (99%)
on a single processor system.
To set the number of RTAS Processors:
1 Choose Setup > Playback Engine.
2 From the RTAS Processing pop-up menu, se-
lect the number of available processors you
want to allocate. The number of processors
available varies depending on how many pro-
cessors are available on your computer:
• Choose 1 Processor to limit RTAS process-
ing to one CPU in the system.
• Choose 2 Processors to enable load balanc-
ing across two available processors.
• On systems running four or more proces-
sors, choose the desired number of RTAS
processors as needed.
3 Click OK.
System Usage Window and RTAS Processing
The System Usage window displays the com-
bined amount of RTAS processing occurring on
all enabled processors with a single indicator, re-
gardless of how many processors are available in
the system. If the System Usage Window shows
that you are at the limit of available resources,
increase the number of RTAS processors and ad-
just the CPU Usage Limit setting. (For more in-
formation, see “System Usage” on page 49.)

Chapter 5: System Setup 37
CPU Usage Limit
The CPU Usage Limit controls the percentage of
CPU resources allocated to Pro Tools host pro-
cessing tasks. Used in combination with the
RTAS Processors setting, the CPU Usage Limit
setting lets you control the way Pro Tools tasks
are carried out by the system.
Lower CPU Usage Limit settings limit the ef-
fect of Pro Tools processing on other CPU-inten-
sive tasks, such as screen redraws, and are useful
when you are experiencing slow system re-
sponse, or when running other applications at
the same time as Pro Tools.
Higher CPU Usage Limit settings allocate
more processing power to Pro Tools, and are
useful for playing back large sessions or using
more RTAS plug-ins.
The maximum available CPU Usage Limit de-
pends on the number of processors in your com-
puter and on the number of processors you
specify for RTAS processing. This value can
range from 85 percent for single-processor com-
puters (except for 003, 003 Rack, Digi 002, and
Digi 002 Rack, which have a limit of 99 per-
cent), and 99 percent for multiprocessor com-
puters (which dedicate one entire processor to
Pro Tools).
On multiprocessor computers, the maximum
CPU Usage Limit is reduced when you use all
your processors (as selected in the RTAS Process-
ing pop-up menu). For example, on dual-proces-
sors, the limit will be 90%. On four-processor
computers, the limit will be 95%.
To change the CPU Usage Limit:
1 Choose Setup > Playback Engine.
2 From the CPU Usage Limit pop-up menu, se-
lect the percentage of CPU processing you want
to allocate to Pro Tools.
3 Click OK.
RTAS Engine (RTAS Error Suppression)
The RTAS Engine options determine RTAS error
reporting during playback and recording. This is
especially useful when working with instrument
plug-ins.
On Pro Tools|HD systems, there is a single RTAS
Engine option. On Pro Tools LE systems, there
are two options.
You should only enable RTAS error suppression
if you are experiencing frequent RTAS errors
that are interrupting your creative workflow.
When RTAS error suppression is enabled, you
can experience a degradation of audio quality.
However, this may be acceptable in order to
avoid interrupting playback and recording
when working with instrument plug-ins. Be sure
to disable RTAS error suppression when you
need to ensure the highest possible audio qual-
ity, such as for a final mix.
Increasing the CPU Usage Limit may slow
down screen responses on slower computers.
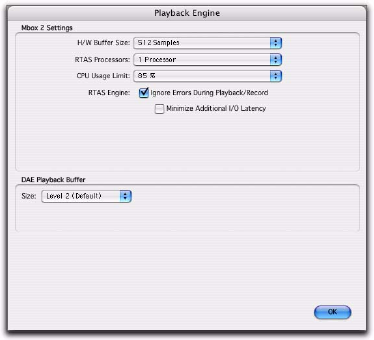
Pro Tools Reference Guide38
To enable RTAS error suppression:
1 Choose Setup > Playback Engine.
2 Select Ignore Errors During Playback/Record.
3 If available, you can also select Minimize Ad-
ditional I/O Latency.
4 Click OK.
RTAS Error Suppression Options
Ignore Errors During Playback/Record When en-
abled, Pro Tools continues to play and record
even if the RTAS processing requirements ex-
ceed the selected CPU Usage Limit. This can re-
sult in pops and clicks in the audio, but does not
stop the transport.
Minimize Additional I/O Latency (Pro Tools LE
Only) When enabled, any additional latency due
to suppressing RTAS errors during playback and
record is minimized to 128 samples. Suppressing
RTAS errors requires at least 128 samples of ad-
ditional buffering on some systems. If this op-
tion is disabled, the buffer is half the H/W Buffer
Size, or at least 128 samples (whichever is
greater). If you are on an older, slower com-
puter, you may want to disable this option to
avoid adverse performance.
This option is only available if the Ignore Errors
During Playback/Record option is enabled and
the Pro Tools system you are using requires ad-
ditional buffering for RTAS error suppression, as
follows:
• Windows:
• Mbox 2 Pro
• Digidesign-qualified M-Audio interfaces
with Pro Tools M-Powered
• Mac OS X:
• 003 and 003 Rack
• Mbox
• Mbox 2
• Mbox 2 Mini
• Mbox 2 Pro
• Digi 002 and 002 Rack
• All Pro Tools M-Powered systems
Number of Voices
(Pro Tools HD Only)
On Pro Tools|HD systems, the Number of Voices
setting lets you control the number of available
voices and how those voices are allocated to
DSPs in your system. For example, the default
number of voices on a Pro Tools|HD 1 system is
48 voices, using one DSP (at sample rates of
44.1 kHz or 48 kHz).
Changing the number of voices affects
DSP usage, the total number of voiceable tracks,
and overall system performance.
Playback Engine dialog, Mbox 2
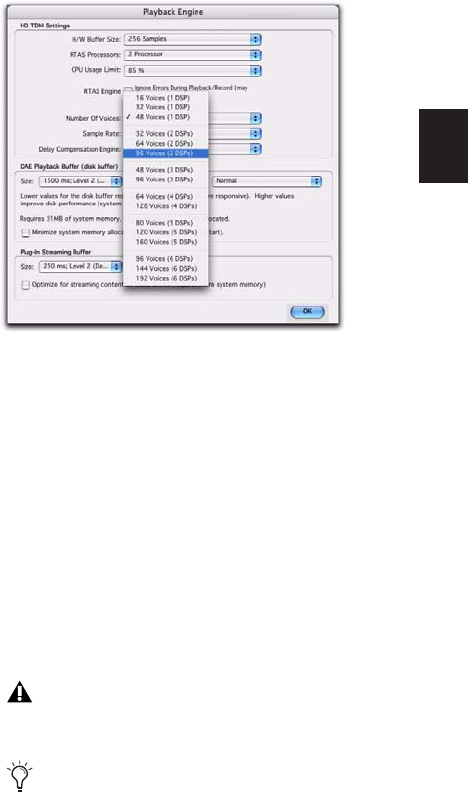
Chapter 5: System Setup 39
Depending on the session sample rate and the
number of Pro Tools|HD cards in your system,
there are different choices for voice count. For
voice limits on different Pro Tools|HD systems,
see “Pro Tools|HD System Playback, Recording
and Voice Limits” on page 27.
To change the Number of Voices and DSP to
allocate for voicing:
1 Choose Setup > Playback Engine.
2 Select the number of voices and DSPs to allo-
cate for voicing by selecting a value from the
Number of Voices pop-up menu as follows:
• Select minimum voice numbers if you are
using high-bandwidth PCI or PCIe cards
(such as video capture cards) along with
your Digidesign cards. These settings place
the lightest processing load on each allo-
cated DSP chip, but generally require more
DSP chips be dedicated to voicing and mix-
ing (leaving fewer available for plug-ins).
• Select medium voice numbers when your
Digidesign cards are in an expansion chas-
sis, or when you are using other PCI or PCIe
cards along with Digidesign cards. These
settings generally provide an optimum bal-
ance between number of chips needed for
voicing, and the processing load placed on
each.
• Select higher voice numbers when your
Pro Tools|HD cards are the only PCI or PCIe
cards in your computer, or when you are
using an expansion chassis to run higher
track counts (such as 64 tracks at 96 kHz)
and you want more voices per DSP (such as
16 voices per DSP at 96 kHz). These settings
use fewer DSP chips for mixing (leaving
more available for plug-ins) but place the
highest processing load on each.
3 Click OK.
Default Sample Rate (Playback Engine
Dialog)
(Pro Tools HD Only)
The Sample Rate setting in the Playback Engine
dialog determines the default sample rate when
you create a new session. This setting is available
only when there is no session open. Otherwise,
the current session sample rate is displayed, but
cannot be changed.
Number of Voices menu (HD Accel-equipped system)
The Sample Rate setting can affect the
number of available voices.
You can change the sample rate when creat-
ing a new Pro Tools session by selecting a
different sample rate in the New Session dia-
log. (See “Creating a New Session” on
page 95.) You can also change the default
Sample Rate in the Hardware dialog, as long
as no session is open.
To make a copy of a session with a new sam-
ple rate, use Save Copy In.
Pro Tools Reference Guide40
To change the default Sample Rate in the
Playback Engine:
1 With no session open, choose Setup > Play-
back Engine.
2 Select the sample rate from the Sample Rate
pop-up menu.
3 Click OK.
Delay Compensation Engine
(Pro Tools HD Only)
The Delay Compensation Engine determines
how much DSP resources are dedicated for
Pro Tools Delay Compensation, which manages
DSP delays in the Pro Tools mixer.
Within a session, you can choose to enable or
disable Delay Compensation (Options > Delay
Compensation).
To configure the Delay Compensation Engine:
1 Choose Setup > Playback Engine.
2 From the Delay Compensation Engine pop-up
menu, select a Delay Compensation setting.
3 Click OK.
Delay Compensation Settings
There are three settings in the Playback Engine
dialog to dedicate DSP resources for Delay Com-
pensation:
None Allocates no DSP resources for Delay Com-
pensation.
Short Allocates minimum DSP resources of De-
lay Compensation for each channel. This is the
most efficient setting for Pro Tools|HD Accel
systems.
For sessions with only a few plug-ins that do not
induce too much DSP-based delay, this setting
should be sufficient.
Long Allocates maximum DSP resources for De-
lay Compensation for each mixer channel.
For sessions with a lot of plug-ins resulting in a
large amount of DSP-induced delay, select this
setting.
DAE Playback Buffer Size
The DAE Playback Buffer Size determines the
amount of memory DAE allocates for disk buff-
ers. In addition to levels, the DAE Playback
Buffer Size shows values in milliseconds, which
indicates the amount of audio buffered when
the system reads from disk.
The optimum DAE Playback Buffer Size for most
disk operations is 1500 msec (Level 2).
• DAE Playback Buffer Size settings lower than
1500 msec (Level 2) may improve playback and
recording initiation speed. However, a lower set-
ting may make it difficult to play or record
tracks reliably with sessions containing a large
number of tracks or a high density of edits, or
with systems that have slower or heavily frag-
mented hard drives.
• DAE Playback Buffer Size settings higher than
1500 msec (Level 2) allow higher track count,
higher density of edits in a session, or the use of
slower hard drives. However, a higher setting
may increase the time lag when starting play-
back or recording, or cause a longer audible time
lag while editing during playback.
For more information, see “Delay Compen-
sation” on page 741.
Using a larger DAE Playback Buffer Size
leaves less system memory for other tasks.
The default setting of 1500 msec (Level 2) is
recommended unless you are encountering
-9073 (“Disk too slow or fragmented”)
errors.
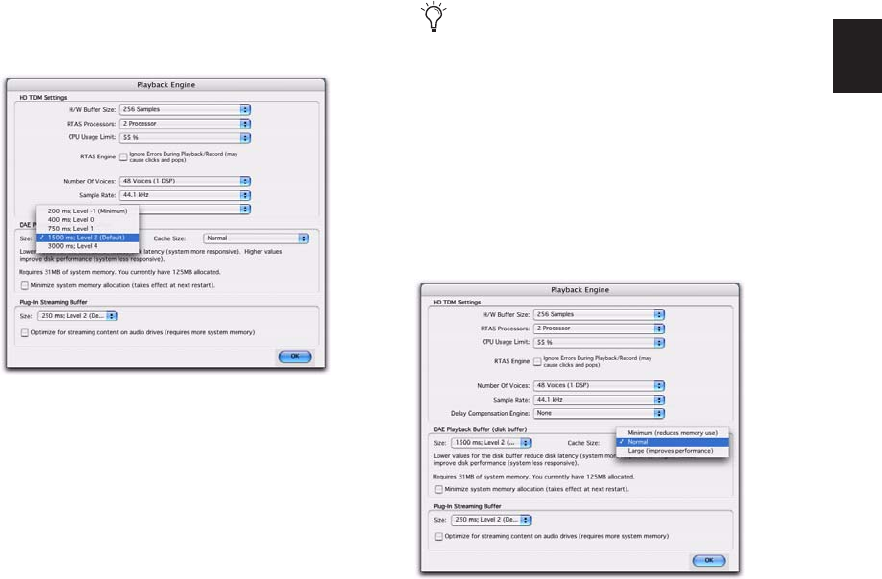
Chapter 5: System Setup 41
To change the DAE Playback Buffer Size:
1 Choose Setup > Playback Engine.
2 From the DAE Playback Buffer pop-up menu,
select a buffer size. Memory requirements for
each setting are shown at the bottom of the
Playback Engine dialog.
3 Click OK.
4 If Pro Tools needs more system memory for
the DAE Playback Buffer, it will prompt you to
restart your computer.
Cache Size
The Cache Size determines the amount of mem-
ory DAE allocates to pre-buffer audio for play-
back and looping when using Elastic Audio.
• A Cache Size setting of Minimum reduces the
amount of system memory used for disk opera-
tions and frees up memory for other system
tasks. However, performance when using Elastic
Audio features may decrease.
Normal is the optimum Cache Size for most
sessions.
• A Cache Size of Large improves performance
when using Elastic Audio features, but it also de-
creases the amount of memory available for
other system tasks, such as RTAS processing.
To change the Cache Size:
1 Choose Setup > Playback Engine.
2 From the Cache Size pop-up menu, select a
disk cache size.
3 Click OK.
Playback Buffer Size menu in the Playback Engine
dialog
Using a larger Cache Size leaves less system
memory for other tasks. The default setting
of Normal is recommended unless you are
encountering -9500 (“Cache too small”)
errors.
Cache Size menu in the Playback Engine dialog
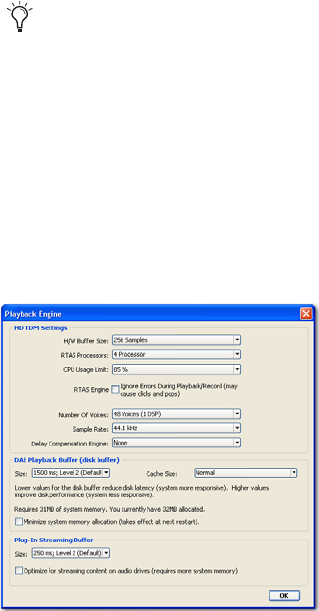
Pro Tools Reference Guide42
System Memory Allocation
(Pro Tools HD Only)
When you start your computer, Pro Tools auto-
matically reserves a portion of system memory
for the DAE Playback Buffer. This reserved mem-
ory is unavailable to other applications, even if
Pro Tools is not running.
You can set Pro Tools to reserve only the mini-
mum amount of required memory, so that more
system memory is available to other applica-
tions.
To minimize system memory allocation:
1 Choose Setup > Playback Engine.
2 Select the “Minimize System Memory Alloca-
tion” option.
3 Click OK.
4 Do one of the following:
• On Windows systems, restart your com-
puter.
– or –
• On Mac systems, if prompted, enter your
password, then restart your computer.
Plug-in Streaming Buffer Size
(Structure Plug-in Only)
This setting appears in the Playback Engine dia-
log only if the Structure Professional Sampling
Workstation plug-in is installed on your system.
The Plug-in Streaming Buffer Size determines
the amount of memory DAE allocates for
streaming playback from disk with the Structure
plug-in. This setting only affects playback if disk
streaming is activated in Structure’s plug-in con-
trols (see the Structure Plug-in Guide for more in-
formation).
The optimum Plug-in Streaming Buffer Size for
most sessions is 250 ms (Level 2).
• Plug-in Streaming Buffer Size settings lower
than 250 msec (Level 2) reduce the amount of
system memory used for sample playback and
frees up memory for other system tasks. How-
ever, reliability of sample playback may de-
crease.
• Plug-in Streaming Buffer Size settings higher
than 250 msec (Level 2) improve the reliability
of sample playback, but they also decrease the
amount of memory available for other system
tasks, such as RTAS processing.
To change the Plug-in Streaming Buffer Size:
1 Choose Setup > Playback Engine.
2 From the Plug-in Streaming Buffer Size pop-up
menu, select a buffer size.
3 Click OK.
Using a larger Plug-in Streaming Buffer Size
leaves less system memory for other tasks.
The default setting of 250 ms (Level 2) is
recommended unless you are experiencing
problems with the reliability of streaming
playback from disk.
Plug-in Streaming Buffer Size menu in the Playback
Engine dialog
Chapter 5: System Setup 43
Optimizing the Plug-in Streaming Buffer
Size
(Structure Plug-in Only)
This option appears in the Playback Engine dia-
log only if the Structure Professional Sampling
Workstation plug-in is installed on your system.
This option is useful when you are playing sam-
ples from the same drive that contains audio for
the current session. When this option is se-
lected, Pro Tools automatically optimizes the
size of the Plug-in Streaming Buffer to facilitate
disk access from both Pro Tools and Structure.
The Plug-in Streaming Buffer Size pop-up menu
is unavailable when this option is selected.
To set Pro Tools to automatically optimize the
Plug-in Streaming Buffer Size:
1 Choose Setup > Playback Engine.
2 Select the “Optimize for Streaming Content
on Audio Drives” option.
3 Click OK.
Configuring MIDI Setup
If you plan to use any MIDI devices with
Pro Tools, you need to configure your MIDI
setup: MIDI Studio Setup (Windows) or Audio
MIDI Setup (Mac).
Configuring Pro Tools
Hardware Settings
Pro Tools lets you configure the signal routing,
digital I/O format, default sample rate, clock
source, and other hardware-based settings de-
pending on your system configuration.
These system settings are available in the Hard-
ware Setup dialog (Setup > Hardware).
Configuring Default Sample Rate
Setting in Hardware Setup Dialog
The Sample Rate setting determines the default
sample rate when you create a new session. This
setting is available only when there is no session
open. Otherwise, the current session sample rate
is displayed, but cannot be changed.
On Pro Tools LE, you can only change the de-
fault sample rate in the Hardware Setup dialog
On Pro Tools HD, you can change the default
Sample Rate in the Hardware Setup dialog, or in
the Playback Engine dialog.
To change the default Sample Rate in the
Hardware Setup dialog:
1 Choose Setup > Hardware Setup.
2 Select the sample rate from the Sample Rate
pop-up menu.
3 Click OK.
See your Getting Started Guide for informa-
tion on configuring MIDI on Windows and
Mac systems.
On Pro Tools HD, the Sample Rate setting
can affect the number of available voices.
You can change the sample rate when creat-
ing a new Pro Tools session by selecting a
different sample rate in the New Session di-
alog.

Pro Tools Reference Guide44
Configuring Clock Source
The Pro Tools Hardware Setup dialog lets you se-
lect the Clock Source for the system.
Internal If you are recording an analog signal di-
rectly into Pro Tools, you will usually use the
Pro Tools Internal clock source.
External If you are transferring material into
Pro Tools from an external digital device, or if
you utilize a common house clock signal, you
will synchronize Pro Tools to that digital device
or common signal.
Depending on your audio interface, external op-
tions can include AES/EBU [Encl], S/PDIF, Opti-
cal [Encl], AES/EBU 1–8, TDIF, ADAT, and Word
Clock. For details, refer to the guide for your au-
dio interface.
To select the Clock Source:
1 Choose Setup > Hardware.
2 Choose the clock source from the Clock
Source pop-up menu.
3 Click OK.
Configuring Digital Format and
Hardware Routing
The Hardware Setup dialog includes additional
settings for configuring the digital format and
hardware routing for your system’s audio inter-
faces.
The following section outlines the configura-
tion of a Pro Tools|HD system with one or more
Pro Tools|HD interfaces (with one or more Leg-
acy interfaces attached).
Example: Configuring
Pro Tools|HD Hardware Settings
On Pro Tools|HD systems, you configure Hard-
ware settings for each audio interface connected
to your system. For example, Pro Tools|HD sys-
tems can have 192 I/O, 192 Digital I/O, 96 I/O,
or 96i I/O audio interfaces connected to
HD Core and HD Accel or HD Process cards in
the system. The 192 I/O, 192 Digital I/O, and
96 I/O can have additional interfaces attached
(including older Digidesign audio interfaces—
Legacy I/Os—such as the 888|24 I/O, 882|20 I/O
or 1622 I/O). For more information, see
Chapter 4, “Pro Tools Systems.”
Configuring Audio Interfaces
The Main page of the Hardware Setup dialog is
where you define which physical inputs and
outputs on your audio interface are routed to
available inputs and outputs in Pro Tools. You
Changes made to Clock Source in the Session
Setup window will be reflected in the Hard-
ware Setup window and vice versa.
Your digital input device must be connected
and powered on for Pro Tools to synchro-
nize to it. If your input device is not powered
on, leave the Clock Source set to Internal.
To configure a Pro Tools LE or M-Powered
system, refer to the Getting Started Guide
that came with your system.
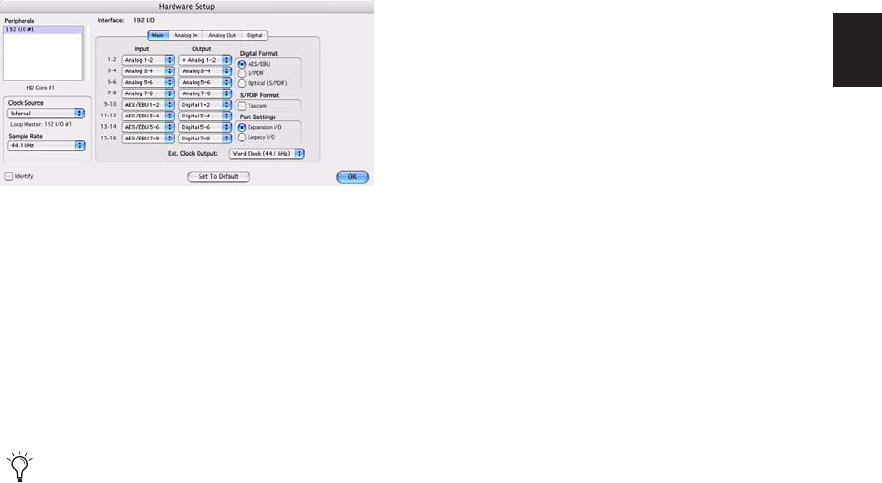
Chapter 5: System Setup 45
can think of this window as a patchbay that al-
lows you to route any of the inputs or outputs
on your Pro Tools|HD audio interfaces to chan-
nel assignments in the Pro Tools mixer.
The Main page also provides controls for defin-
ing whether Expansion Port or Legacy Port pe-
ripherals are active.
Additional pages are available to configure other
controls for each audio interface (such as setting
operating levels). For details, refer to the Getting
Started Guide for your system, or to the guide for
your audio interface.
To configure Pro Tools|HD audio interfaces:
1 Choose Setup > Hardware.
2 From the Peripherals list, select the Digidesign
audio interface connected to the first card in
your system. This will be the interface at the top
of the list.
3 Click the Main tab.
4 From the Clock Source pop-up menu, select
the appropriate clock source for the system.
In many cases, you will use Internal. The other
choices are for resolving Pro Tools to external
clock sources. Depending on your audio inter-
face, Clock Source options can include:
AES/EBU [Encl], S/PDIF, Optical [Encl], AES/EBU
1–8, TDIF, ADAT, and Word Clock (optional
Word Clock rates are available when operating
at higher sample rates).
5 If you want to send clock output to other de-
vices attached to the audio interface, select the
appropriate output from the Ext. Clock Output
pop-up menu.
If the Legacy I/O Port is enabled (and not the
Expansion I/O Port) then the Ext. Clock Output
automatically switches to Slave Clock (256x
sample rate). To reset the Ext. Clock Output to
Word Clock, change the Port Settings back to
Expansion I/O, then select the Legacy I/O in the
Peripherals list, and set it to No Interface in the
Interface pop-up menu. (The 96i I/O does not
support Legacy I/O.)
6 Select which digital I/O port on your audio in-
terface enclosure is active under Digital Format.
Choices include: AES/EBU, S/PDIF, and Optical
(S/PDIF). Selecting Optical (S/PDIF) resets the
Optical I/O port (which is, by default, eight
channels of ADAT I/O) to two channels of
S/PDIF Optical I/O. (The 96i I/O supports stereo
S/PDIF RCA digital input and output only.) For
more information about Pro Tools|HD enclosure
and card ports, refer to the guide for your audio
interface.
7 For S/PDIF compatibility with Tascam DA-30
DAT recorders select the Tascam option under
S/PDIF Format.
8 For the 96 I/O and 96i I/O, click the Meters
pop-up menu and select whether to meter the
input or output signal.
Hardware Setup dialog for 192 I/O, Main page
Identify audio interface connections at any
time by selecting the interface name in the
Peripherals list, then clicking Identify. All
the LEDs on the interface front panel illu-
minate.
Pro Tools Reference Guide46
9 From the Input and Output pop-up menus, se-
lect the physical ports (such as Analog 1–2 or
Optical 1–2), that will be routed to the corre-
sponding Pro Tools input and output channels
(such as Ch 1–2 or Ch 3–4), listed on the left side
of the Main page. (This feature is not available
with the 96i I/O.)
Inputs and outputs of similar format are differ-
entiated in the input and output channel pop-
up menus. For example, the AES/EBU inputs
and outputs in the 192 I/O enclosure are listed
as AES/EBU [Encl], while the AES/EBU inputs
and outputs on the factory-installed Digital I/O
card are listed (in pairs) as AES/EBU 1–2,
AES/EBU 3–4, AES/EBU 5–6, and AES/EBU 7–8.
For 192 I/Os equipped with the optional
Digital I/O Card, the additional AES/EBU I/O
ports on the optional card are listed as AES/EBU
9–10, AES/EBU 11–12, AES/EBU 13–14, and
AES/EBU 15–16.
10 Click other tabs (such as Analog In and Ana-
log Out) for additional configuration options
specific to the audio interface. These include:
• On the 96 I/O, configuring the operating
levels of analog inputs and outputs (+4 dBu
or –10 dBV).
• On the 96i I/O, configuring the operating
levels of analog inputs and outputs (+4 dBu
or –10 dBV).
• On the 192 I/O analog input, setting the
input connector and Soft Limit
• On the 192 I/O, configuring the two sets of
trims for analog inputs and outputs.
• On the 192 I/O and 192 Digital I/O, config-
uring real-time Sample Rate Conversion for
digital inputs.
• On the 192 I/O and 192 I/O Digital, config-
uring inputs and outputs on any optional
A/D card, D/A card, or Digital I/O cards in-
stalled in the unit.
11 Repeat the above steps for each additional
Pro Tools|HD audio interface.
12 Repeat the above steps for any Legacy I/Os
connected to the Pro Tools|HD audio interfaces
in your system. Before you can configure a Leg-
acy I/O, it must first be initialized in Hardware
Setup.
13 Click OK.
Refer to your peripheral’s guide for configu-
ration details and restrictions. For example,
the Optical 1–8 channels (on the 192 I/O
enclosure) will not be available at session
sample rates of 88.2 kHz or higher, while
the ports on the 192 I/O Digital I/O card
will still be available.
For more information on Hardware Setup
controls for each Pro Tools|HD audio inter-
face, refer to the Pro Tools|HD Getting
Started Guide or the guide for that audio in-
terface.
Use the Up and Down Arrow keys to scroll
though peripherals in the Peripherals list.

Chapter 5: System Setup 47
Initializing MIX-Series Legacy I/Os
Before you can configure a Legacy I/O on a
Pro Tools|HD system, it must first be initialized
in Hardware Setup.
To initialize a Legacy I/O on a Pro Tools|HD
system:
1 Start up your Pro Tools system. See “Starting
Up or Shutting Down Your System” on page 33.
2 From the Peripherals list, choose the primary
audio interface (the Pro Tools|HD interface to
which your Legacy I/O is connected).
3 In the Main page of the Hardware Setup dia-
log, select the Legacy I/O option under Port Set-
tings.
4 In the Peripherals list, “No Interface” is listed
twice, directly below the primary audio inter-
face. Click the first “No Interface.” An Interface
pop-up menu appears in the Hardware Setup di-
alog, listing supported I/O choices.
5 From the Interface pop-up menu, select the
type of Legacy I/O you connected. The Main
page updates with controls that can be config-
ured.
After you select the type of Legacy I/O, the Main
page updates with controls that can be config-
ured. If your Legacy interface does not appear,
check connections and repeat from step 1,
above. See also “Offline Peripherals” on page 47.
6 Repeat the above steps for each additional
Legacy I/O.
To remove a Legacy I/O:
1 Lower the volume of your output devices.
2 Turn off your Legacy I/O.
3 Choose Setup > Hardware in Pro Tools.
4 In the Main Page of the Hardware Setup dia-
log, select the Expansion I/O option under Port
Settings.
5 In the Peripherals list, select the name of a
Legacy interface.
6 From the Interface pop-up menu, choose “No
Interface.”
7 Repeat the above steps for each additional
Legacy I/O.
Offline Peripherals
When a Legacy I/O and Pro Tools|HD peripheral
are connected to your primary Pro Tools|HD pe-
ripheral, only one can be online at a time. An
offline peripheral is indicated by brackets in the
Peripherals list of the Hardware Setup dialog.
For example, if you have a 96 I/O and an 882|20
connected to a 192 I/O, and the 96 I/O is off-
line, it will appear in the Peripherals list as
“[96 I/O].”
Peripherals will also go offline if the audio inter-
face or card to which they are attached is made
inactive.
Before turning on your Legacy I/O, make
sure to lower the volume of your output de-
vices. Very loud digital noise may be emit-
ted before the Legacy I/O is initialized.
For information on Hardware Setup controls
for each Legacy I/O, refer to the guide for that
interface.
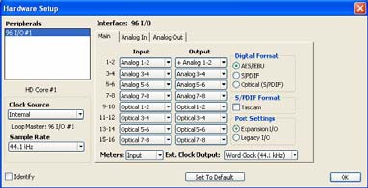
Pro Tools Reference Guide48
Configuring I/O Setup
The I/O Setup dialog provides a graphical repre-
sentation of the signal routing for each con-
nected audio interface, with controls to route
physical ports on the audio interface to
Pro Tools inputs and outputs. These controls
mirror the routing controls found in the Hard-
ware Setup dialog—changes made to physical
routing in one dialog are always reflected in the
other.
The I/O Setup dialog lets you label and map
Pro Tools input, output, insert, and bus signal
paths. The I/O Setup dialog also provides impor-
tant audition, meter, and surround settings. For
more information, see Chapter 6, “I/O Setup.”
Routing a Pro Tools Output Pair to
Multiple Destinations
Pro Tools channel pairs can be routed to multi-
ple outputs on an audio interface through the
Hardware Setup dialog.
For example, if you assign both Analog 1–2 and
Analog 3–4 interface outputs to Pro Tools Out-
put pair 1–2, when you send a signal to
Pro Tools Output pair 1–2, that signal will be
routed simultaneously to both pairs of output
ports on your audio interface.
This lets you send the same signal (such as a ste-
reo pair, a stem mix, or a multichannel mix) to
multiple destinations (such as multiple master-
ing devices).
To route a Pro Tools output channel pair to
multiple audio interface output ports:
1 Choose Setup > Hardware.
2 From the Peripherals list, select an interface.
3 Click the Main tab.
4 Select an output port pair from an Output
pop-up menu.
5 Start-click (Windows) or Control-click (Mac)
the same pop-up menu a second time to choose
an additional output port pair.
The output name updates with a plus sign (“+”)
before it to indicate that multiple output ports
are selected. In the pop-up menu, each physical
port pair assigned to that Pro Tools output pair
is indicated by a check mark.
6 Repeat the above steps to select additional
output destinations. The only limit to output
choices is the number of outputs available in
your system.
Pro Tools output pairs can also be routed to
multiple audio interface outputs in the
I/O Setup dialog. For more information, see
“Routing Hardware I/O to Pro Tools I/O” on
page 56.
Hardware Setup dialog for 96 I/O (Main page)
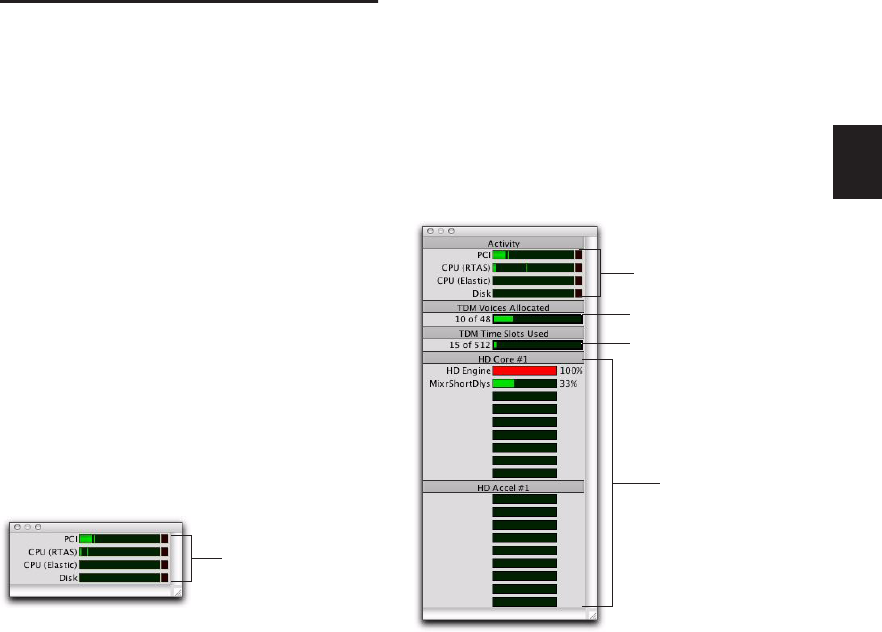
Chapter 5: System Setup 49
System Usage
About Processing Bandwidth
Meters in the System Usage window indicate
how much of your system’s processing power is
being used in processing audio, and when writ-
ing and playing back automation.
Pro Tools HD, LE, and M-Powered have four
common system activity meters:
PCI Displays the amount of PCI bus activity.
CPU (RTAS) Displays the amount of CPU pro-
cessing activity for RTAS processing.
CPU (Elastic) Displays the amount of processing
activity for Real-Time Elastic Audio processing.
Disk Displays the amount of hard disk process-
ing activity.
As these meters approach their limits, native
processing and recording, or playback of auto-
mation data can be affected. If CPU or PCI Activ-
ity are high, a system error may occur. If Disk
Activity is high, Pro Tools may miss playback of
some automation data during particularly dense
periods of activity, such as while using the
Bounce to Disk command.
With Pro Tools HD, there are additional meters:
TDM Voices Allocated Displays the total number
of TDM voices that can be allocated and the
number of voices currently allocated. This in-
cludes all voices whether they are allocated ex-
plicitly or dynamically, as well as any voices
used for routing RTAS processing.
TDM Time Slots Used Displays the total number
of TDM Time Slots available and the number of
TDM Time Slots currently used.
DSP Usage (Accel Core, HD Core, HD Accel, and
HD Process) Displays the percentage of how
much of each DSP chip on each Pro Tools|HD
card is currently being used for mixer configura-
tions and TDM plug-ins.
To monitor the usage of resources during a
Pro Tools session:
Choose Window > System Usage.
To reduce processing load, do one of the following:
Reduce the density of automation in places
where it shows the most activity. For details, see
“Thinning Automation” on page 800.
– or –
Turn off meters in Sends View, if enabled (by
disabling Show Meters in Sends View in the Dis-
play Preferences page). For details, see “Individ-
ual Send Views and Meters” on page 727.
System Usage window (Pro Tools LE shown)
System activity meters
System Usage window (Pro Tools HD shown)
DSP usage
System activity meters
TDM Time Slot Used
TDM Voices Allocated

Pro Tools Reference Guide50
System Usage Views
(Pro Tools HD Only)
With Pro Tools HD, there are five different Sys-
tem Usage Views: Small, Large, Detailed, Gas
Gauge, and Activity Only. The Detailed and Gas
Gauge formats show the percentage of each DSP
chip in use.
To change the System Usage View:
Choose View > System Usage, and one of the
System Usage View formats (such as Small).
For information on using different views to
monitor DSP usage, see the Pro Tools|HD
Getting Started Guide.
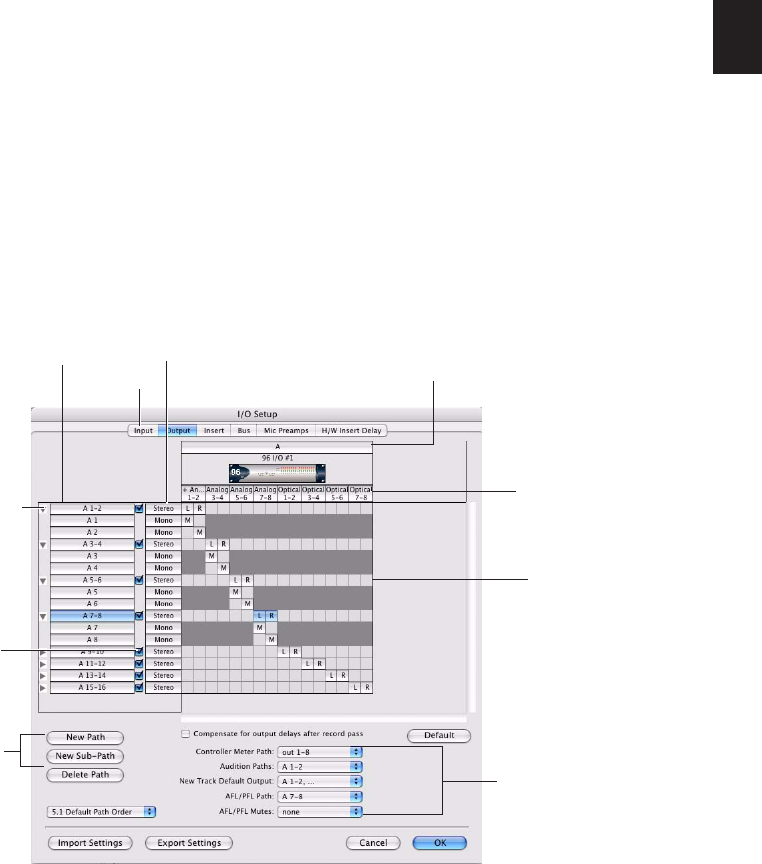
Chapter 6: I/O Setup 51
Chapter 6: I/O Setup
The I/O Setup dialog (or I/O Setup) provides
tools to label, format, and map Pro Tools input,
output, insert, or bus signal paths for each ses-
sion. With Pro Tools HD, Digidesign PRE (Mic
Preamp) signal paths are supported and you can
also configure Delay Compensation for hard-
ware inserts.
The I/O Setup dialog includes a graphical repre-
sentation of the signal routing for internal bus-
sing, and for each connected audio interface.
I/O Setup controls let you route physical ports
on the audio interface to Pro Tools inputs and
outputs. These controls mirror the routing con-
trols found in the Hardware Setup dialog—
changes made to physical routing in one dialog
are always reflected in the other.
Figure 1. I/O Setup dialog on a Pro Tools|HD system with a 96 I/O
Channel Grid
Path Type tabs
Expand/collapse paths
Active/Inactive
Status
Options
Path Format selector
Path Name column
Path tools
Input and Output
selectors
Interface Name label

Pro Tools Reference Guide52
Opening the I/O Setup Dialog
The I/O Setup dialog can be opened from the ap-
plication window (with a session closed), or
from within a session (when a session is open).
To open the I/O Setup dialog:
1 Make sure your audio interfaces are enabled
and configured properly in the Hardware Setup.
See “Configuring Pro Tools Hardware Settings”
on page 43.
2 Choose Setup > I/O.
Closing the I/O Setup Dialog
To close the I/O Setup dialog and save changes:
Click OK.
When you click OK, Pro Tools checks several
settings for routing validity (to prevent feedback
loops). If there are any overlapping or invalid
settings, you will be required to correct them be-
fore the I/O Setup dialog will close. For more in-
formation, see “Valid Paths and Requirements”
on page 63.
To close the I/O Setup dialog without saving
changes:
Click Cancel.
Resizing the I/O Setup Dialog
To resize the I/O Setup dialog, do one of the
following:
On Windows, drag any corner of the window.
– or –
On Mac, drag the lower-right corner of the
window.
Navigating in the I/O Setup Dialog
To scroll left or right in the I/O Setup dialog:
Press Alt+Page Up/Down (Windows) or Op-
tion+Page Up/Down (Mac).
Pro Tools Signal Paths
A signal path is a logical grouping of multiple
inputs, outputs or busses that has a single name
and (channel) format. The I/O Setup dialog lets
you define and name paths according to the
needs of each project.
Main Paths and Sub-Paths
Paths in Pro Tools tracks and I/O Setup include
main paths and sub-paths.
Main Paths Main paths are logical groupings of
inputs, inserts, busses, or outputs. For example,
a master stereo output path will include both its
left and right channels.
Sub-Paths A sub-path represents a signal path
within a main path. For example, a default ste-
reo output path consists of two mono sub-paths,
left and right. Mono tracks and sends can be
routed to either mono sub-path of the stereo
output path.
It is especially useful to define and name
sub-paths for complex mixing setups, such
as a 5.1 Surround mix.
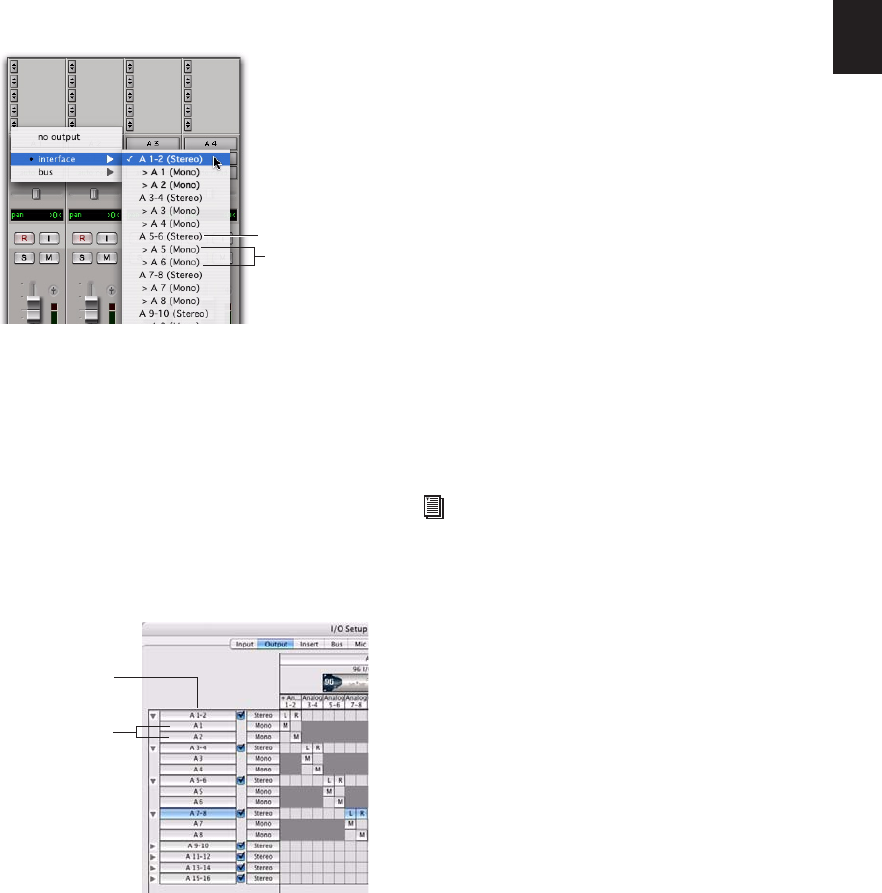
Chapter 6: I/O Setup 53
Paths in Session Tracks
In sessions, audio is routed using the track In-
put, Output, Insert, Plug-in, and Send selectors.
These selectors let you assign tracks to hardware
inputs and outputs, internal busses, and other
Pro Tools signal paths.
Paths comprise the lists of available signal rout-
ing choices in track Input, Output, Insert and
Send selectors.
Paths in the I/O Setup Dialog
The signal routing path choices available in a
session are defined in the I/O Setup dialog. For
more information, see “I/O Setup Dialog Tabs
and Controls” on page 54.
Path Configurations and I/O
Settings
Each Pro Tools session retains its path configu-
rations as I/O Settings.
Each Pro Tools system can have a different path
configuration, determined by:
• Whether it is a Pro Tools|HD, Pro Tools LE,
or Pro Tools M-Powered system
• On Pro Tools|HD systems, the number and
types of audio interfaces
• On Pro Tools|HD systems, the installed
Mixer plug-in (Stereo or Surround)
The I/O Settings saved with the session are
loaded automatically when the session is
opened. Unavailable items (including hardware,
paths, or required resources) remain in the ses-
sion as inactive items (see “Making Paths Active
or Inactive” on page 61).
When you create a new session, you can specify
which I/O Settings to use (for example, the “Last
Used” settings, or one of any custom I/O Set-
tings files).
Default I/O Settings
A default I/O Settings file is installed automati-
cally by Pro Tools, so you have a set of default
paths that will get you started, without the need
to configure the I/O Setup dialog. These paths
are available in session tracks and are reflected
in the I/O Setup dialog. You can customize your
I/O Setup configuration at any time, according
to the needs of each project (see “I/O Setup Dia-
log Tabs and Controls” on page 54).
Main and sub-paths in a session track
Main and sub-paths in I/O Setup
Stereo main path
mono sub-paths
Stereo main path
Mono sub-paths
You can save and import I/O Settings files
in the I/O Setup dialog (see “Importing and
Exporting I/O Settings Files” on page 64).

Pro Tools Reference Guide54
Default Settings Files
The default Stereo settings file is available on all
Pro Tools systems, and provides stereo main
paths, each with its own mono sub-paths.
Multichannel settings files are available on
Pro Tools|HD systems. These settings provide
specialized path definitions for surround mix-
ing. See “Configuring Pro Tools for Multichan-
nel Sessions” on page 850.
Default Path Names
Default names for input, output, and insert
paths are based on the type of system (such as
specific Pro Tools LE systems) or type and num-
ber of interfaces (Pro Tools|HD systems) you are
using.
I/O Setup Dialog Tabs and
Controls
Path Type Tabs
The I/O Setup dialog provides tabs to open pages
for configuring the following I/O Settings:
Input Configure input signal path names, for-
mats, and source channel (analog or digital au-
dio interface).
Output Configure output signal path names, for-
mats, and destination (audio interface channel
or internal send bus).
Insert Configure insert signal path names, for-
mats, and destination (audio interface chan-
nels).
Bus Configure bus signal path names and for-
mats.
Mic Preamps (Pro Tools HD Only) Map Digi-
design PRE™ outputs to an audio interface’s in-
puts to establish communication between
Pro Tools and PRE.
H/W Insert Delay (Pro Tools HD Only) Set the
amount of Delay Compensation (in millisec-
onds) for each external device. These times will
be used by the Delay Compensation Engine to
time align input paths when the hardware insert
is in use and Delay Compensation is enabled.
To open an I/O Setup page:
Click the corresponding tab at the top of the
I/O Setup dialog.
I/O Setup Dialog Signal Path
Controls
Depending on the I/O Setup page, the I/O Setup
dialog can provide the following controls in its
graphical section for configuring signal routing
paths:
Input and Output Selectors Let you select the
physical ports on your audio interface to route
to Pro Tools inputs and outputs. Ports are select-
able in channel pairs. Available ports for each
displayed interface are based on Hardware Setup
settings; for example, if the AES/EBU inputs and
outputs of an interface are enabled in Hardware
Setup, they are available for routing in I/O
Setup. The functionality provided with the In-
put and Output selector is the same as that pro-
vided on the Main page of the Hardware Setup
dialog.
Path Name Column Shows paths that are avail-
able for selection, including the name of each
defined path. Path names can be renamed.
Expand/Collapse Triangle Shows or hides the
sub-paths associated with a main path.

Chapter 6: I/O Setup 55
Active/Inactive Status Box Shows and changes
the active/inactive status of each path.
Path Format Selector Shows and selects the
type/format (such as Mono, Stereo, Quad, or
5.1) of each defined path (greater-than-stereo
multichannel formats are supported with
Pro Tools|HD systems only).
Channel Grid Maps paths to specific interfaces
and channels.
I/O Setup Dialog Buttons, Menus,
and Selectors
Depending on the I/O Setup page, the I/O Setup
dialog can provide the following buttons,
menus, and selectors for configuring signal rout-
ing:
New Path Button Lets you create a new path on
signal path pages for Input, Output, Insert, Bus,
or Mic Preamp (Pro Tools HD only).
New Sub-Path Button Lets you create a new sub-
path on signal path pages for Input, Output, In-
sert, Bus, or Mic Preamp (Pro Tools HD only).
Delete Path Button Lets you delete any selected
path or sub-path on signal path pages for Input,
Output, Insert, Bus, or Mic Preamp (Pro Tools
HD only).
5.1 Default Path Order Selector (Pro Tools HD
Only) Lets you select the default track layout you
want Pro Tools to follow when creating and
mapping 5.1-format main or sub-paths in the
I/O Setup dialog.
Import Settings Button Lets you import an I/O
settings file to reconfigure I/O Setup.
Export Settings Button Lets you save I/O set-
tings as a file that can be imported into other
sessions.
Default Button Resets a path type to its default
path configuration, depending on which inter-
face you are using and how your Hardware
Setup window is configured.
Compensation for Input Delays After Record Pass
(Input Page, Pro Tools HD Only) Provides auto-
matic compensation for any analog or digital in-
put delay. Enable this option for all recording
situations. When recording from a digital
source, both the Compensation for Input Delays
After Record Pass and the Compensation for
Output Delays After Record Pass options must
be enabled.
Compensation for Output Delays After Record
Pass (Output Page, Pro Tools HD Only) Provides
automatic compensation for any analog or digi-
tal output delay. Enable this option for overdub-
bing recording situations. Disable this option
when working with video. When recording
from a digital source, both the Compensation
for Input Delays After Record Pass and the Com-
pensation for Output Delays After Record Pass
options must be enabled.
Show Last Saved Setup Appears in the I/O Setup
dialog in certain session transfer situations. For
details on this feature, see “Show Last Saved
Setup and Show Current Setup” on page 66.
Pop-Up Menu Selectors I/O Options Provide se-
lectors with pop-up menus to set paths or or-
ders. The Output and Bus pages provide a Con-
troller Meter Path selector. The Output page also
provides selectors for Audition Paths (Region
List previewing), New Track Default Output, De-
fault Path Order, AFL/PFL Path (Pro Tools HD
only), and AFL/PFL Mutes (Pro Tools HD only).
See “I/O Setup Options” on page 67.
Cancel Button Closes the I/O Setup dialog with-
out saving changes
OK Button Closes the I/O Setup dialog and save
changes.
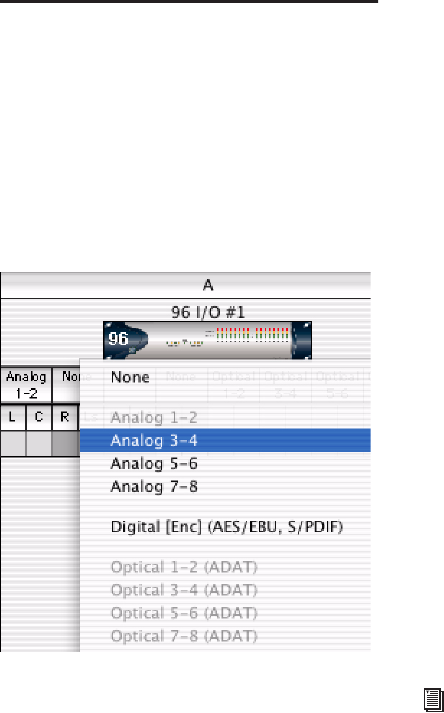
Pro Tools Reference Guide56
Routing Hardware I/O to
Pro Tools I/O
The I/O Setup dialog lets you define which
physical ports on your I/O peripheral are routed
to available inputs and outputs in Pro Tools. Use
the Input and Output selectors in the I/O Setup
dialog to serve as a patchbay to route any of the
physical inputs or outputs to your Pro Tools
mixer.
To configure I/O routing in I/O Setup:
1 Choose Setup > I/O.
2 Click the Input or Output tab to display the
corresponding path type.
3 Click the Input or Output selector for the first
interface channel pair, located below the first
audio interface icon.
4 From the pop-up menu, select a physical port
pair (such as Analog 1–2), to route to a Pro Tools
channel pair (such as A 1–2) in the Path Name
column on the left.
5 Repeat the above step for additional channel
pairs.
6 Click OK to save changes and close the I/O
Setup dialog.
Routing a Pro Tools Output Pair to
Multiple Destinations
Pro Tools channel pairs can be routed to multi-
ple outputs on an audio interface through the
I/O Setup dialog. For example, if you assign both
Analog 1–2 and Analog 3–4 interface outputs to
Pro Tools Output pair 1–2, when you send a sig-
nal to Pro Tools Outputs 1–2, that signal will be
routed simultaneously to both pairs of output
ports on your audio interface.
This lets you send the same signal (such as a ste-
reo pair, a stem mix, or a multichannel mix) to
multiple destinations (such as multiple master-
ing devices).
The only limit to output choices is the number
of outputs available in your system.
Pro Tools outputs pairs can also be routed to
multiple audio interface outputs in the Hard-
ware Setup dialog. For information, see “Rout-
ing a Pro Tools Output Pair to Multiple Destina-
tions” on page 48.
I/O Channel selector pop-up menu
0utput path assignments cannot overlap.
See “Valid Paths and Requirements” on
page 63 for details.
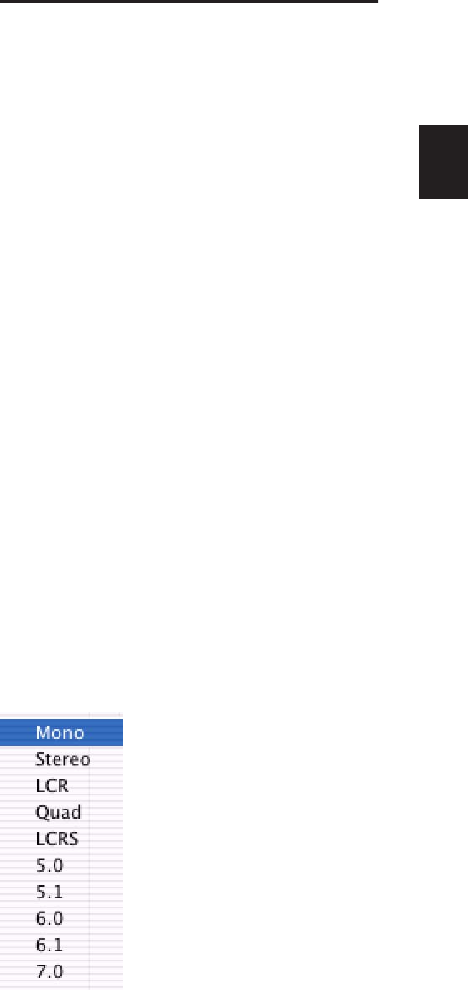
Chapter 6: I/O Setup 57
To route a Pro Tools output channel pair to
multiple audio interface output ports:
1 Choose Setup > I/O.
2 Click the Output tab.
3 Click the Output selector for an interface
channel pair, just below an audio interface icon.
4 From the pop-up menu, select a physical port
pair (such as Analog 1–2) to route to the corre-
sponding Pro Tools channel pair (such as A 1–2)
in the Path Name column on the left.
5 Start-click (Windows) or Control-click (Mac)
the same Output selector and select an addi-
tional output pair from the same pop-up menu.
The output name updates with a plus sign (“+”)
before it to indicate that multiple output ports
are selected. In the pop-up menu, each physical
port pair assigned to that Pro Tools output pair
is indicated by a check mark.
6 Repeat the above steps to select additional
output destinations.
7 Click OK to save changes and close the I/O
Setup dialog.
Creating New Paths
The I/O Setup dialog lets you create new main
path and sub-paths with custom names, format,
and mapping. Custom path names appear in a
session’s track Input, Output, Insert, and Bus se-
lectors.
To create a new path:
1 Choose Setup > I/O.
2 Click the Input, Output, Insert, or Bus tab to
display the corresponding path type.
3 Do one of the following:
• Click New Path, or press Control+N (Win-
dows) or Command+N (Mac).
– or –
• Select a main path and click New Sub-Path.
4 Double-click in the Name field and enter a
name for the path.
5 Press Tab to set the new path name and move
to the next path’s Name Field, or press Enter
(Windows) or Return (Mac) to set the new path
name.
6 Choose a format from the Path Format selec-
tor (mono, stereo, or multichannel).
Path Format selector (Pro Tools HD shown)
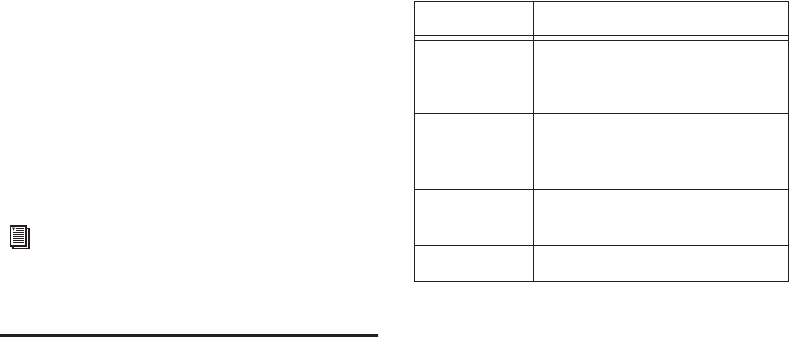
Pro Tools Reference Guide58
7 Map the path to a specific audio interface, or
bus channel in the Grid column. See “Channel
Mapping” on page 62
8 Repeat the previous steps to configure all path
types (Input, Output, Insert, or Bus).
9 Click OK to save changes and close the I/O
Setup dialog. If there are any overlapping or
identically named paths, you will be instructed
to correct them before the I/O Setup dialog will
close. For more information, see “Valid Paths
and Requirements” on page 63.
Editing Paths
The I/O Setup dialog lets you edit or customize
signal path definitions.
Paths can be:
• Restored to default configurations
• Renamed, for easier identification after
changing or renaming audio interfaces
• Selected and reordered to change menu or-
der in track selectors
• Selected and deleted
• Remapped to or from different sources or
destinations
• Deactivated (or reactivated) to manage un-
available or unnecessary I/O resources
In addition, you can import and export your
I/O Setup configurations as I/O Settings files, as
well as set default path parameters. See “Work-
ing with I/O Settings Files” on page 63.
The following table lists the available path at-
tributes for each path type.
Path interface names can also be renamed and
configured as defaults, which can be restored.
Restoring Default Paths and Path
Names
You can set an I/O Setup path type to its default
path configuration at any time. When restoring
the default path, Pro Tools does the following:
• Creates new default paths up to the capacity
of your system’s available audio interfaces and
resources.
• Resets selected path names to matching or
corresponding paths in the current I/O Setup
configuration. For example, if you replace an
audio interface on a Pro Tools|HD system, you
can use the Default switch to update your
I/O Setup definitions with the new hardware
configuration.
If there are matching paths available with the
new system configuration, existing paths will be
updated to include new audio interfaces
(Pro Tools|HD systems).
Multichannel paths and mixing are ex-
plained in Chapter 39, “Pro Tools Setup for
Surround (Pro Tools HD Only).”
Path options by type
Path Type Path Options (Attributes)
Input Names, formats, and source
channel (analog or digital audio
interface)
Output Names, formats, and destination
(audio interface output channel or
internal send bus)
Insert Names, formats and destination
(audio interface channels)
Bus Names and formats
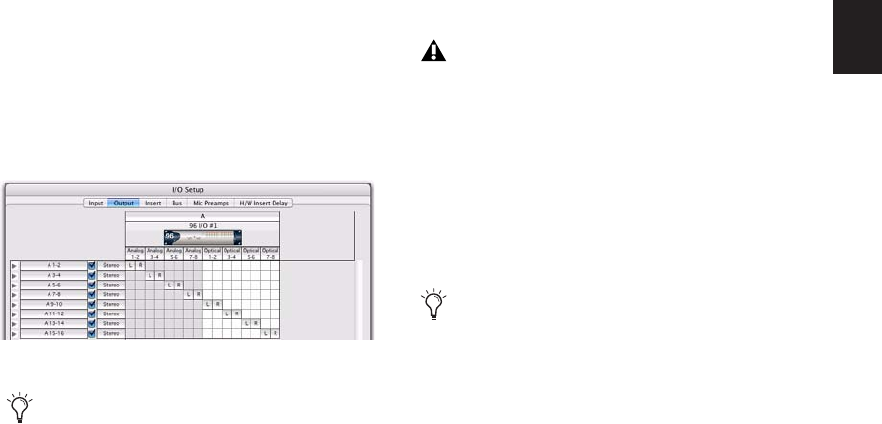
Chapter 6: I/O Setup 59
To restore default paths and path names:
1 Choose Setup > I/O.
2 Click the Input, Output, Insert, or Bus tab to
display the corresponding path type.
3 Click Default.
Pro Tools creates all possible stereo main paths.
Mono sub-paths are also auto-created for every
stereo main path. These default path names ap-
pear in a session’s track Audio Input and Output
Path selectors.
4 Click OK to save changes and close the I/O
Setup dialog.
Resetting Mix Busses
(Pro Tools HD Only)
Pro Tools HD 7.x and Pro Tools TDM 6.9 sup-
port up to 128 mix busses. However, lower ver-
sions of Pro Tools TDM and Pro Tools LE pro-
vide only up to 64 or 32 mix busses respectively.
When you open a session that was created with
Pro Tools LE or a lower version of Pro Tools
TDM on a current version of Pro Tools HD, only
the number of busses supported on the original
system are initially available. You can reset the
number of available busses to match your
Pro Tools HD system’s full capabilities.
To make all of your busses available in sessions
that support a lower number of mix busses:
1 Open the I/O Setup dialog.
2 Click the Bus tab in the upper left.
3 Click Default.
4 Click OK to save changes and close the I/O
Setup dialog.
Renaming Path Names
Path names can be customized in the I/O Setup
dialog.
To rename a path in the I/O Setup dialog:
1 Double-click the path name.
2 Enter a new path name.
3 Click OK to save changes and close the I/O
Setup dialog.
Renaming Interface Names
Audio interface names can be customized in the
I/O Setup dialog. With Pro Tools HD only, the
I/O Setup dialog then bases default Input and
Output path names on the custom names.
Default stereo output paths
With Pro Tools|HD systems, to optimize
DSP resources, it is best to create mono sub-
paths for Outputs and Busses, rather than
mono main paths.
Setting busses to the default setting will re-
name all busses to their default name.
I/O paths can also be renamed directly from
the Edit or Mix window by Right-clicking
the Input or Output selector and choosing
Rename.
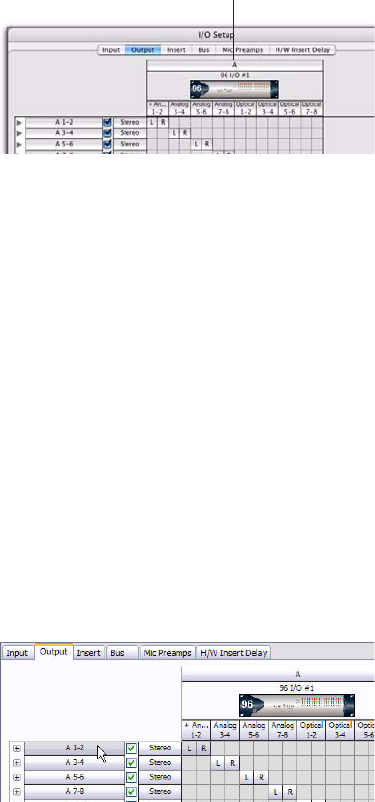
Pro Tools Reference Guide60
To rename an audio interface in the I/O Setup
dialog:
1 Double-click the label above an interface.
2 Enter a new interface name.
3 Click OK to save changes and close the I/O
Setup dialog.
Selecting Paths
Individual and multiple paths can be selected in
the I/O Setup dialog Path Name column. Se-
lected paths and sub-paths can be reordered
higher or lower in the Path Name column to
change their menu order in track Input, Output,
Insert, and Bus selectors. Paths can also be de-
leted. Sub-paths follow their main paths when
they are moved in the I/O Setup dialog.
To select a main path or sub-path:
Click the path name.
To select a range of paths:
1 Click the path name.
2 Shift-click an additional path name.
All paths that occur between the first path name
selected and the additional path name will also
be selected.
To select or deselect noncontiguous paths, do one
of the following:
Control-click (Windows) or Command-click
(Mac) path names that are unhighlighted to se-
lect them.
– or –
Control-click (Windows) or Command-click
(Mac) path names that are highlighted to dese-
lect them.
To select all paths and sub-paths:
Alt-click (Windows) or Option-click (Mac)
any path name that is unhighlighted.
To deselect all paths and sub-paths:
Alt-click (Windows) or Option-click (Mac)
any path name that is highlighted.
Reordering Paths
Selected paths and sub-paths can be reordered
higher or lower in the Path Name column to
change their menu order in track Input, Output,
Insert, and Bus selectors.
To reorder paths in the I/O Setup dialog and Track
Selectors:
1 Drag one or more selected path names up or
down.
2 Click OK to save changes and close the I/O
Setup dialog.
Interface Names
Selecting paths in the I/O Setup dialog
Interface Name label
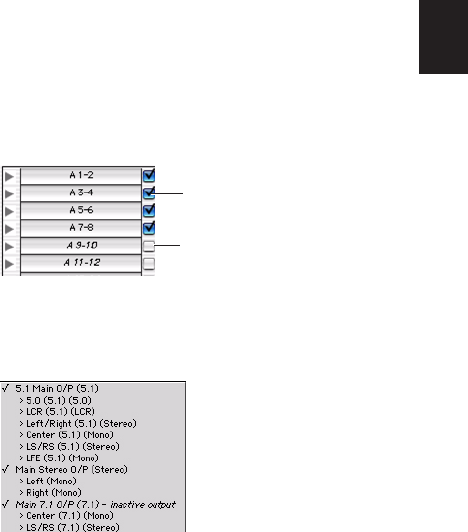
Chapter 6: I/O Setup 61
Deleting Paths
Path definitions can be deleted from the current
session to reflect changes to your hardware
setup, or to clean up track selector menus by re-
moving unwanted or unnecessary path defini-
tions. After deleting a path, any tracks or send
assignments to that path are reset to No Output.
To delete a main path or sub-path:
1 In the I/O Setup dialog, select the path you
want to delete.
2 Click Delete Path.
3 Click OK to save changes and close the I/O
Setup dialog.
To delete all paths:
1 Alt-click (Windows) or Option-click (Mac) any
path name.
2 Click Delete Path.
3 Click OK to save changes and close the I/O
Setup dialog.
Making Paths Active or Inactive
Pro Tools paths can be Active (on) or Inactive
(off, or unavailable). Paths can be globally acti-
vated or deactivated in the I/O Setup dialog.
Making a signal path inactive will turn off the
signal path on any and all tracks currently as-
signed to it.
Pro Tools also sets unavailable paths to inactive.
Paths can be unavailable when hardware or
other system resources are unavailable, such as
when opening a session saved on a different sys-
tem.
Tracks can also be made active or inactive. For
information, see “Making Track Inputs and Out-
puts Inactive from the Edit or Mix Window” on
page 160.
To globally activate or deactivate a path:
1 Choose Setup > I/O.
2 Select a path type using the tabs at the top of
the window.
3 Set the Active/Inactive control for the path.
Inactive tracks that were assigned to the path
display in italics in the track path selectors.
4 Click OK to save changes and close the I/O
Setup dialog.
Display of Active and Inactive Paths in I/O
Setup
Unhighlighted (Italics) Indicates the path is inac-
tive.
Highlighted (Non-Italics) Indicates the path is ac-
tive.
Highlighted (Italics) Indicates the path is active,
but there are not enough system resources avail-
able.
Active and inactive path settings in I/O Setup
Active and inactive paths in a track Output Path
selector
Inactive
Active
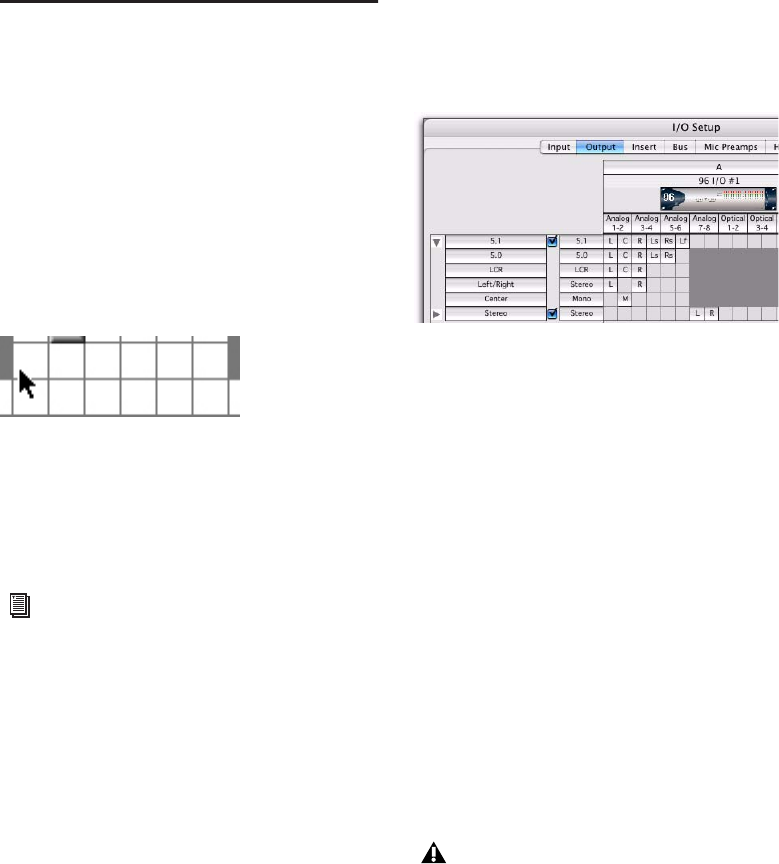
Pro Tools Reference Guide62
Channel Mapping
Paths must be mapped to a specific audio inter-
face, or bus channels in the Grid. Paths can be
mapped when they are created, and remapped
at any time.
To map channels:
1 Select a main path or sub-path.
2 In the row for the selected path, click in the
Grid column under an audio interface and
channel.
Other channels for the path type, if any, fill to
the right. For example, when mapping a new
stereo path, clicking in the path row under out-
put channel 1 fills both channel 1 and 2 (left to
1, right to 2).
3 Click OK to save changes and close the I/O
Setup dialog.
If there are any overlapping or invalid settings,
you will be required to correct them before the
I/O Setup dialog will close. For more informa-
tion, see “Valid Paths and Requirements” on
page 63.
Channel Mapping and Surround Mixer
(Pro Tools HD Only)
When mapping multichannel paths, the left
channel (L) is mapped first to the clicked Grid
box, and remaining channels fill immediately to
the right according to the default path order. Be-
cause some multichannel mixing formats use
unique track layouts, Pro Tools lets you set the
default format in the I/O Setup dialog (see “I/O
Setup Options” on page 67).
Remapping Channels
You can move the individual assignments to dif-
ferent channels, to reorder the path’s definition
(for example, changing a multichannel map to
L-R-C-LF-LS-RS).
To remap channels in a path:
Drag the channel to the new location in the
Grid. Other channel assignments will move
(shuffle) to accommodate dragged channels.
Channel Shuffling
Moving a signal from right to left results in a
shuffle of other signals after the new destination
channel. Moving a signal from left to right shuf-
fles any and all signals after the new destination
channel and leaves the previous channel empty.
Mapping channels
To remap channels in a path, see “Remap-
ping Channels” on page 62.
Customized Output paths for a 5.1 mix
Changing a path’s format erases any cur-
rent channel mapping.

Chapter 6: I/O Setup 63
Sub-Paths Follow Main Paths
When a main path is remapped, its sub-paths (if
any) will remap automatically to maintain con-
sistent routing. For example, remapping a stereo
path to different hardware outputs results in
any of its sub-paths moving with it.
Valid Paths and Requirements
While configuring the I/O Setup dialog, certain
rules apply for path definition and channel
mapping. All paths must be valid before the
I/O Setup configuration can be applied.
Though it is possible to set up invalid mappings
in the Channel Grid, Pro Tools will not accept
an I/O Setup configuration unless all paths meet
the path definition and channel mapping re-
quirements, as follows:
Minimum Path Definitions All paths must have a
name, be of a specific format, and have a valid
I/O mapping.
Overlapping Channels and Valid Paths Channel
mapping follows certain rules regarding over-
lapping paths.
• There can be no partial or complete over-
laps between any two main Output paths,
any two Insert paths, or any two main Bus
paths.
• A newly-created Output or Bus path must
either be completely independent of other
maps (not mapped to any other available
I/O interface/channels), or it must be a sub-
path completely contained within a larger
path (for example, an LCR sub-path within
a larger 5.1 path).
• Output and Insert paths can overlap in I/O
Setup, but only one or the other can be
used at any given time in a session. (Inputs,
however, can be routed to multiple tracks.)
Working with I/O Settings
Files
I/O Settings can be managed when transferring
sessions, and when developing I/O Setup con-
figurations over the course of multiple sessions
and projects.
I/O Settings Files
When creating a new session, you can set the
session’s I/O Setup configuration by selecting an
available I/O Settings file. I/O Settings can also
be imported before or after you open a session.
The following types of I/O Settings are available:
Last Used The most recent (or last used)
I/O Setup configuration is saved as a Last Used
settings file. See “Last Used I/O Settings” on
page 64 for more information.
Factory I/O Settings The Pro Tools Installer pro-
vides settings files for factory I/O setups for ste-
reo and surround (Pro Tools HD only). See “Au-
dio Interfaces and Session Transfer” on page 65
for more information.
Custom I/O Settings The current I/O Setup con-
figuration can be edited and saved as a custom
I/O Setting using the Export command in the
I/O Setup dialog. See “Importing and Exporting
I/O Settings Files” on page 64.
Default I/O Settings at First Launch
The first time you launch Pro Tools and create a
session, you can choose default Stereo Mix or
Surround Mix settings, depending on your sys-
tem and installation choices. See “Audio Inter-
faces and Session Transfer” on page 65.

Pro Tools Reference Guide64
Importing and Exporting I/O
Settings Files
You can export and import I/O Setup configura-
tions as I/O Settings files. This lets you save set-
tings for different projects, import settings for
reconfiguring I/O Setup, and manage path defi-
nitions and signal routing setups.
Exporting I/O Settings
To export and save an I/O Setup configuration as
a custom I/O Settings file:
1 Update I/O Setup settings (see “I/O Setup Dia-
log Tabs and Controls” on page 54).
2 Click Export Settings.
3 Name and save the settings file.
Importing I/O Settings
I/O Settings can be imported before or after you
open a session.
When you import I/O Settings, you can choose
to delete any unused path definitions before im-
porting the new paths, or leave unused path def-
initions intact and add the new paths to the cur-
rent I/O Setup configuration.
To import I/O Settings:
1 Click Import Settings in the I/O Setup dialog.
2 Select an I/O settings file in the Import Set-
tings dialog and click Import.
3 A dialog appears asking whether you want to
delete existing paths. Do one of the following:
• Click Yes to remove any unused paths and
add the imported paths to the current I/O
Setup configuration. Any I/O assignments
and automation data associated with the
unused paths are also deleted.
– or –
• Click No to add the imported paths to the
current I/O Setup configuration.
If the import results in overlapping paths, the
new paths will appear in the I/O Setup dialog as
Inactive. See “Making Paths Active or Inactive”
on page 61.
After importing I/O Settings, you can then reas-
sign path routing definitions in the I/O Setup di-
alog by remapping, renaming, and deleting
paths. See “Creating New Paths” on page 57.
Last Used I/O Settings
If any changes are made to the I/O Setup dialog,
these changes are saved to the Last Used settings
file when the I/O Setup dialog is closed (by click-
ing OK).
Changes to I/O Setup are saved along with the
current session (if one is open). Custom I/O Set-
tings files will not contain recent changes unless
you export an updated settings file.
The Last Used setting is available as a choice
when creating a session or when importing I/O
Settings in the I/O Setup dialog.
To start sessions with a blank or empty
I/O Setup dialog, you can create and export
an I/O Settings file in which all definitions
have been deleted.
You can also import I/O path and assign-
ment names, as well as other session data,
from a different session by using the Import
Session Data command (see “Import Ses-
sion Data Dialog” on page 267).

Chapter 6: I/O Setup 65
Factory I/O Settings
Pro Tools provides I/O Settings files for Stereo
and Surround mixing. These files provide ge-
neric main and sub-path definitions for either
mixing format.
Factory I/O Settings are available as a choice
when creating a session or when importing I/O
Settings in the I/O Setup dialog.
Stereo Mix Settings File
The Stereo Mix settings file consists of all possi-
ble stereo and mono paths for your session.
Specifically, the Stereo Mix settings file creates
the maximum number paths of each type, as de-
termined by the available system’s I/O Setup
and hardware configuration.
Surround Mix Settings File (Pro Tools HD Only)
The Surround Mix provides additional, sur-
round-specific Output and Bus settings files. See
“Surround Mix Settings Files” on page 851 for
more information.
Custom I/O Settings
Custom I/O Settings files can be created by
changing I/O Setup controls and then exporting
the I/O Setup configuration (see “Exporting I/O
Settings” on page 64). Custom I/O settings are
available as a choice when creating a session or
when importing I/O Settings in the I/O Setup di-
alog.
Audio Interfaces and Session
Transfer
Pro Tools sessions store the type and order of au-
dio interfaces connected and active when the
session was last saved. When opening a session
on a system with different audio interfaces, the
I/O Setup may need to update.
Unavailable I/O
When opening a session, Pro Tools checks to see
if the hardware configuration has changed since
the session was last saved. If the current hard-
ware configuration differs from that saved in the
session, paths associated with the unavailable
I/O are made inactive.
Remapping
Remapping occurs when a session’s original
I/O Setup does not match that of the current
system and session paths are remapped to cur-
rent hardware.
Systems of equivalent I/O capability are
remapped directly. For example, a session
tracked to a Pro Tools|HD system through two
192 I/O audio interfaces would include 32 input
paths spread across the two 16-channel inter-
faces. The session is taken to a second Pro Tools
system that has a 96 I/O audio interface (a 16-
channel I/O unit) and a 1622 I/O (with its 16 an-
alog inputs) connected to its Legacy Port. When
the session is first opened on the second system,
Pro Tools will map the 32 input paths to the in-
puts of the two interfaces.
Using the “Stereo Mix” settings file has the
same effect as clicking Default for every in-
dividual tab in I/O Settings. See “Creating
New Paths” on page 57 for details.
Pro Tools Reference Guide66
When hardware is unavailable to a session being
opened, assignments can either be replaced us-
ing the remap option, or opened as Inactive.
Any tracks left assigned to an unavailable path
will not be audible. This can be beneficial, how-
ever, when you want to reassign tracks into your
system’s mix one at a time.
Show Last Saved Setup and Show Current
Setup
When a session is opened that contains path
definitions for unavailable I/O interfaces, the
I/O Setup dialog lists those paths in italics.
The Show Last Saved Setup button displays the
audio interfaces used in the original session.
This temporary display lets you check the last
saved I/O configuration for reference while con-
figuring the session for your system.
Once a session has been opened with unavail-
able I/O retained, you can then reassign tracks
to available I/O paths.
Opening Older Sessions Saved in
Direct Outputs Mode
Direct Outputs mode, as found in older versions
of Pro Tools, has been replaced by the default
mono sub-paths available through all valid I/O
in the I/O Setup dialog.
The Default switch creates main Output paths
with appropriate mono sub-paths. These sub-
paths provide discrete monophonic routing.
When a session is opened that was saved in Di-
rect Outputs mode, Pro Tools maps all the out-
put assignments to equivalent mono sub-paths
(as available).
To convert a session so that it emulates Direct
Outputs mode, use the Auto Assign Ascending
Outputs feature, as follows:
To auto assign track outputs for Direct Outputs:
1 Make sure that all tracks you want to assign
are visible (hidden tracks will not be affected).
2 Select the tracks you want to assign.
3 Control-Alt-click (Windows) or Command-
Option-click (Mac) the Output selector of the
left-most track and assign it to the sub-path for
Output #1. All visible tracks will be auto-as-
signed to unique mono sub-path outputs in as-
cending order.
See “Making Paths Active or Inactive” on
page 61 for more information.
To redefine the paths, see “Editing Paths”
on page 58.
You can identify audio interface connec-
tions at any time by selecting the interface
name in the Peripherals list of the Hardware
Setup dialog, then clicking Identify. All the
LEDs on the interface front panel will illu-
minate.
Chapter 6: I/O Setup 67
I/O Setup Options
Pro Tools systems have additional I/O Setup fea-
tures. These include default signal routing for
metering and auditioning, and default track lay-
out for multichannel mix formats.
Controller Meter Path
(D-Control, D-Command, and ProControl Only)
The Controller Meter Path selector determines
the path displayed across the Output meters of
D-Control, D-Command®, or ProControl con-
trol surfaces. For more details, refer to your con-
trol surface documentation.
This selector is available in the Output and Bus
pages of I/O Setup.
Audition Paths
You can specify the output path through which
files and regions are auditioned in the Region
List or in DigiBase browsers.
Using the Default Audition Path
When you audition a file or region in the Region
List, Pro Tools routes the audio output through
the Audition Path. Pro Tools assigns a default
Audition Path to the first available main Output
path of the corresponding format. You can also
select a different Audition Path in the I/O Setup
dialog.
Configuring Audition Paths
You can specify the monitoring outputs for Re-
gion List auditioning using the Audition Paths
menu.
Audition Paths Main Menu The main menu con-
sists of all path format choices available on the
current system (Mono and Stereo on all systems,
and LCR and greater on Pro Tools|HD systems).
Audition Paths Submenus Each path format
choice has a submenu listing Output paths of
that given format. (The mono submenu lists
Output paths of any format.)
To configure an Audition Path:
Select a path from the Audition Paths menu or
submenus.
To audition regions in the Region List:
Alt-click (Windows) or Option-click (Mac) the
region in the list.
Auditioning Discrete Signals in Multichannel
Items
In the Region List, multichannel regions are au-
ditioned through the current Audition Path. Sig-
nals can be auditioned “in-place,” or through all
outputs, as described below.
Audition In-Place
When auditioning a mono component of a
mono component region, the mono region can
be played from the corresponding channel of its
parent mono component region. This playback
method is called audition in-place.
To audition in-place:
1 In the Region List, make sure the stereo or
multichannel region is in expanded view (show-
ing .L, .R, and other component channels).
2 Alt-click (Windows) or Option-click (Mac) the
region for the channel you want to audition.
On Pro Tools|HD systems with more than
one audio interface, you can only select the
first audio interface as an audition path.
Pro Tools Reference Guide68
Audition to All Outputs
When auditioning a mono component of a
mono component region, the region can be
routed equally to all outputs of the parent re-
gion’s Audition Path.
To audition through all channels of the main
audition path:
Shift-Alt-click (Windows) or Shift-Option-
click (Mac) on the signal in the Region List.
New Track Default Output Path
You can specify the default output path assign-
ment for new tracks, in each available format.
The New Track Default Output selector is avail-
able in the Output page of I/O Setup dialog
only.
To specify a default output for new tracks in the
I/O Setup dialog:
Click the New Track Default Output selector
and select a format and Output.
AFL/PFL Path
(Pro Tools HD Only)
Tracks soloed in AFL (After Fader Listen) or PFL
(Pre Fader Listen) Solo mode are routed to the
current AFL/PFL Path, as set with the AFL/PFL
Path selector.
This selector is available in the Output page of
I/O Setup dialog only.
To select the AFL/PFL Path output:
1 Choose Setup > I/O.
2 Click the Output tab to display the Output
page.
3 Select a path from the AFL/PFL Path selector.
4 Click OK to close the I/O Setup dialog.
Setting AFL or PFL Path Levels
You can set a separate master AFL/PFL Path level
for all AFL solos and all PFL solos.
To set the AFL/PFL Path level for AFL or PFL solos:
1 Choose Options > Solo Mode, and select a
Solo mode, as follows:
• If you want to set the level for AFL solos, se-
lect AFL.
– or –
• If you want to set the level for PFL solos, se-
lect PFL.
2 In the Mix or Edit window, Control-click
(Windows) or Command-click (Mac) a Solo but-
ton on any track.
3 Adjust the AFL/PFL Path fader.
The New Track Default Output can be set to
bus paths, as well as output paths.
See “Solo Modes” on page 168 for more in-
formation on using AFL or PFL Solo modes.
If you do not see the AFL/PFL Path selector,
check that you have installed the Surround
Mixer in the Plug-ins (Used) folder. For in-
formation on switching Mixer plug-ins, see
the Pro Tools|HD Getting Started Guide.
Selecting None as the AFL/PFL Path disables
AFL and PFL Solo modes. When None is se-
lected, AFL and PFL cannot be used.
Tracks do not need to be soloed to have the
master AFL/PFL Path level adjusted.
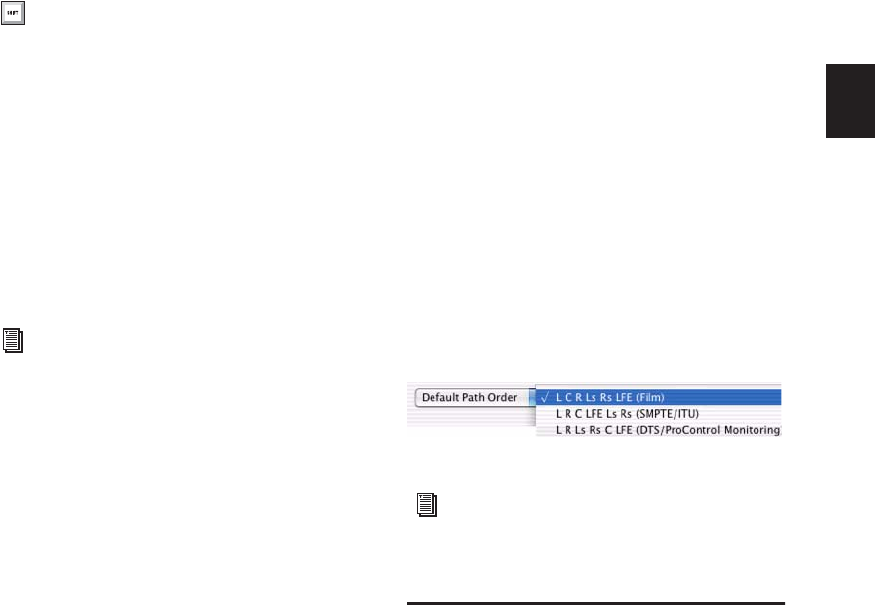
Chapter 6: I/O Setup 69
4 Click on the new fader position (or press Esc)
to close the fader display.
AFL/PFL Mutes (Output Path) Selector
(Systems without a D-Control or D-Command
Control Surface)
If you are not using a D-Control or D-Command
worksurface, your regular Pro Tools output path
can be muted when you send a signal to the
AFL/PFL Path. The muted path is set with the
AFL/PFL Mutes (Output Path) selector.
To set which output path is muted when tracks are
soloed in AFL or PFL Solo mode:
1 Choose Setup > I/O.
2 Click the Output tab to display the Output
page.
3 Select a path from the AFL/PFL Mutes (Output
Path) selector.
4 Click OK to close the I/O Setup dialog.
Default Path Order
(Pro Tools HD Only)
The Default Path Order selector lets you select
the default track layout you want Pro Tools to
follow when creating and mapping 5.1-format
main or sub-paths in the I/O Setup dialog.
This selector is available in the Output page of
I/O Setup dialog only.
This setting does not affect existing path defini-
tions or metering—it only specifies channel
mapping in new 5.1-format paths.
To choose a Default Path Order:
Select the channel mapping from the Default
Path Order menu.
Mic Preamps
(Digidesign PRE with Pro Tools HD Only)
On the Mic Preamps page of the I/O Setup dia-
log, signal paths for one or more Digidesign PRE
multi-purpose microphone preamplifiers can be
mapped to Pro Tools HD audio interfaces. Refer
to the PRE Guide for more information.
To set the AFL/PFL Path level to 0 dB, Con-
trol-Start-click (Windows) or Control-Com-
mand-click (Mac) any Solo button.
See “Solo Modes” on page 168 for more in-
formation on selecting and using AFL or
PFL Solo modes.
Default Path Order selector
For more information about multichannel
mixing, see Chapter 39, “Pro Tools Setup
for Surround (Pro Tools HD Only).”
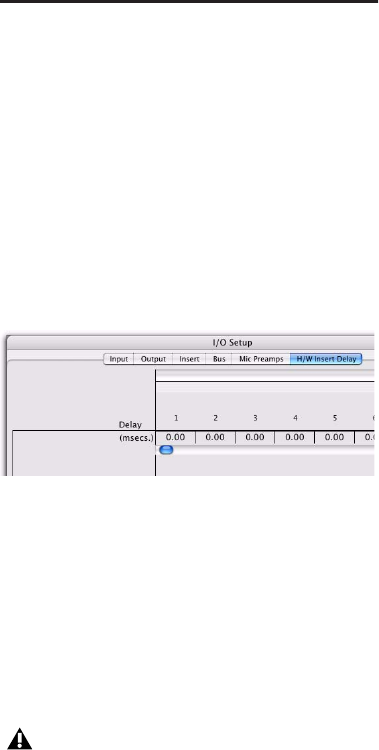
Pro Tools Reference Guide70
H/W Insert Delay
Compensation
(Pro Tools HD Only)
To compensate for the delay (latency) of any ex-
ternal hardware devices (such as an effects unit)
used in your session, you can set the amount of
Delay Compensation (in milliseconds) for each
external device. These times will be used by the
Delay Compensation Engine to time-align input
paths when the hardware insert is in use and De-
lay Compensation is enabled.
To set an insert delay offset:
Enter a value, in milliseconds, in the field cor-
responding with the input where the hardware
insert is connected.
If you do not know your hardware’s insert delay,
see “Determining Your Hardware’s Insert Delay”
on page 70.
Determining Your Hardware’s Insert
Delay
You can check the documentation for your ex-
ternal hardware to see if it identifies the hard-
ware latency, or you can use the following pro-
cedure in Pro Tools to determine the latency for
hardware inserts.
To determine your hardware’s insert delay, do one
of the following:
1 Change your session’s Main Time Scale to
Min:Sec.
2 Create two tracks.
3 Route the tracks as follows: Route the output
of track 1 to the device’s inputs, then route the
input of track 2 to the device’s outputs.
4 Place a short tone (or other sound with a de-
finitive beginning) on track 1.
5 Record enable track 2 and press Record Enable
and Play in the Transport window to play back
the audio in track 1 and record it to track 2.
6 After recording, zoom in and measure the dif-
ference between where the audio starts in track
1 and track 2. The difference is the value you
would enter as your hardware’s insert delay off-
set.
Insert offset delay field
Insert delay offsets only have an effect when
the I/O is used for hardware inserts.
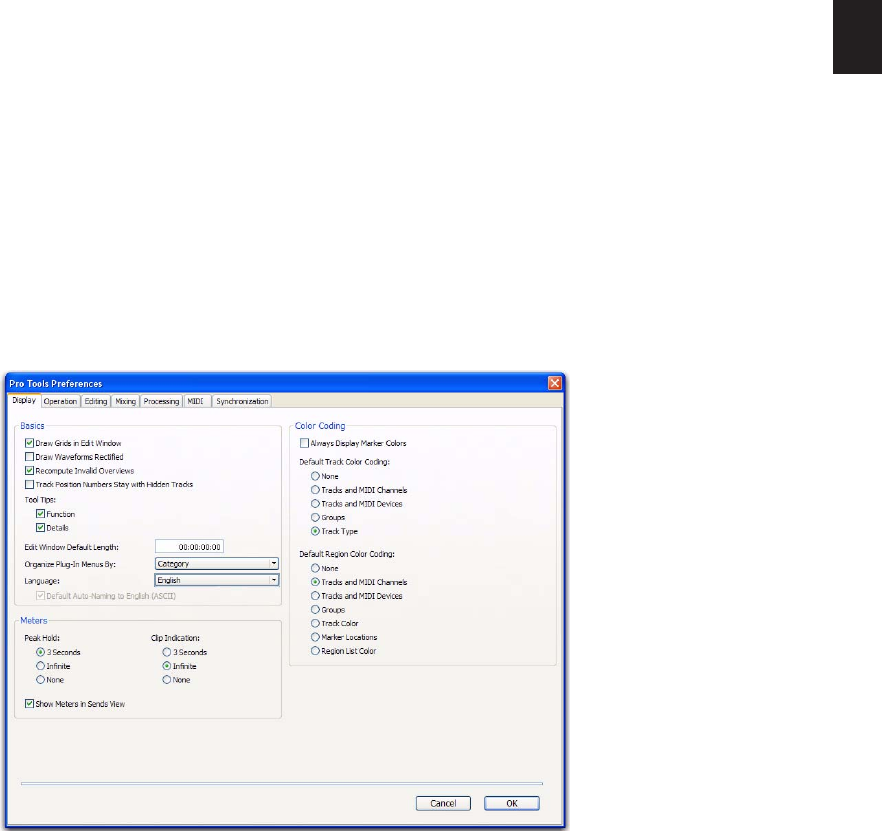
Chapter 7: Preferences 71
Chapter 7: Preferences
The settings in the Preferences dialog define
how Pro Tools features work by default. This di-
alog can be opened from the application win-
dow (with a session closed), or from within a
session (when a session is open).
The Preferences dialog has several tabbed pages
in which you can specify your preferred settings
for various types of session parameters. Each
Preferences page is covered in detail in this
chapter.
To change Pro Tools preferences:
1 Choose Setup > Preferences.
2 Click the tab for the page that has preferences
you want to change.
3 Change preferences as desired.
4 Click OK to save changes and close the win-
dow.
Figure 2. Pro Tools Preferences dialog on a Pro Tools|HD system (Display Preferences page shown)

Pro Tools Reference Guide72
Global and Local Preferences
Pro Tools preferences are either global (system-
wide) or local (for the current session only).
Global (System-Wide) Preferences
Global preferences are applied to all sessions.
These preferences become the default prefer-
ences for any existing sessions that you subse-
quently open or any new sessions that are cre-
ated.
Local (Current Session) Preferences
Local preferences are applied to the current ses-
sion (if one is open). Local preferences are not
applied to older sessions that are subsequently
opened.
Preferences and New Sessions
New sessions use global preference settings, plus
the most recent local preference settings. The
most recent local settings refer to the last open
session (unless subsequent changes were made
in the Preference dialog from the application
window).
Local (Current Session)
Preferences List
All Preferences are global, except for the follow-
ing, which are local:
• Display Preferences
• Edit Window Default Length
• Always Display Marker Colors
• Default Track Color Coding options
• Default Region Color Coding options
• Operation Preferences
• Custom Shuttle Lock Speed
• Back/Forward Amount (Pro Tools HD only)
• QuickTime Playback Priority options
• PEC/Direct Style Input Monitoring
(Pro Tools HD only)
• DestructivePunch File Length (Pro Tools
HD only)
• Editing Preferences
• None
• Mixing Preferences
• Coalesce Trim Automation Options
(Pro Tools HD only)
• Processing Preferences
• Convert Imported “WAV” Files To
AES31/BroadcastWave
• MIDI Preferences
• Play MIDI Notes When Editing
• Display Events as Modified by Real-Time
Properties
• Automatically Create Click Track in New
Sessions
• Default Thru Instrument
• Pencil Tool Resolution When Drawing
Controller Data
• Delay for External Devices Options
(Pro Tools HD only)
• Synchronization Preferences
• None
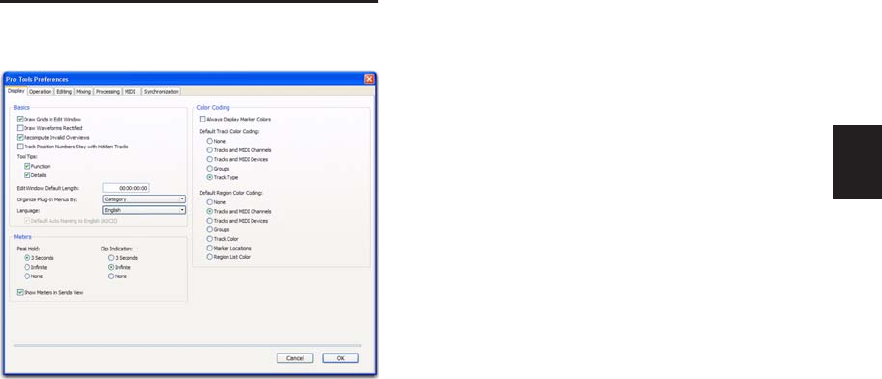
Chapter 7: Preferences 73
Display Preferences
Basics Section
Draw Grids in Edit Window Adds grid lines to the
Edit window. Grid line resolution is based on
the zoom level of the Edit window.
Draw Waveforms Rectified Displays audio wave-
form data in rectified view. In this view, audio
waveforms are displayed so that their positive
and negative waveform excursions (the portions
that fall above and below the center line) are
summed together and viewed as a single posi-
tive-value signal. This view allows more wave-
form detail to be seen in either normal or re-
duced track height views. It can be particularly
useful when editing volume automation data,
since it depicts waveform levels as starting at the
bottom of the track.
Recompute Invalid Overviews Prompts Pro Tools
to look for missing or corrupted overview data
(the data used to create waveform displays)
when it opens sessions. If Pro Tools finds that
overview data is missing or corrupted, it will re-
create one or more overviews for the session.
This may take some time if there are many
tracks in the session. If you suspect that over-
view data for a session has become corrupted, or
if you import audio files which have no over-
view data into a session, make sure this prefer-
ence is enabled for the session, save and close
the session, then reopen it. Pro Tools will recre-
ate any overviews for the session when it opens.
Track Position Numbers Stay with Hidden
Tracks When selected, tracks keep their track
numbers even when hidden. When not se-
lected, numbers are only assigned to tracks that
are shown. In this case, shown tracks are then
numbered sequentially, and hidden tracks are
not numbered.
Tool Tips Display Options
Function Configures Tool Tips to show the basic
function of the item.
Details Configures Tool Tips to show the com-
plete name of an abbreviated name or item
(such as a track name). Details view can also
show the hidden or abbreviated value of param-
eters, as well as input and output assignments.
Edit Window Default Length
This preference sets a default length for the Edit
window in hours, minutes, seconds, and frames
(Pro Tools HD or Pro Tools LE with DV Toolkit 2
only). This is useful if you want to assemble a
session of a particular length or leave extra room
to expand the Edit window’s work area in your
session. The maximum length is 12 hours and
25 seconds at 48 kHz, and proportionally less at
higher sampling rates. For best scrollbar sensi-
tivity, set the length to slightly longer (a minute
or more) than the total session or song length.
“Organize Plug-in Menus By” Options
These option customize how plug-in menus are
organized in the Insert selector or Plug-in selec-
tor.
Pro Tools Reference Guide74
Flat List Organizes plug-ins in a single list, in al-
phabetical order.
Category Organizes plug-ins by process category
(such as EQ, Dynamics, and Delay), with indi-
vidual plug-ins listed in the category submenus.
Plug-ins that do not fit into a standard category
(such as the DigiRack Signal Generator), or
third-party plug-ins that have not had a cate-
gory designated by their developers, appear in
the Other category. Plug-ins can appear in more
than one category.
Manufacturer Organizes plug-ins by their manu-
facturer (such as Digidesign, Eventide, Line 6,
and McDSP), with individual plug-ins listed in
the manufacturer submenus. Plug-ins that do
not have a Manufacturer defined will appear in
the “Other” manufacturer folder.
Most Digidesign-distributed third-party plug-ins
will be grouped under Digidesign when Manu-
facturer view is enabled.
Category and Manufacturer Organizes plug-ins
in two levels of menus. The top menus display
plug-ins by process category (such as EQ, Dy-
namics, and Delay), with individual plug-ins
listed in the category submenus. The bottom
menus display plug-ins by manufacturer (such
as Digidesign, Eventide, Line 6, or McDSP), with
individual plug-ins listed in the manufacturer
submenus.
Language Options
Language Sets the language to use in the
Pro Tools application, independently of what
language version of Windows is used.
Default Automatic Naming to English Causes au-
tomatically named session elements in a session
to be named in English even when working with
the Pro Tools application set to another lan-
guage.
Meters Section
Peak Hold Options
These options determine how long the peak in-
dicators on track meters stay lit after a peak is
detected.
3 Second Peak Hold When selected, track meters
display the last peak level for three seconds.
Infinite Peak Hold When selected, track meters
display the last peak level until you click them
to clear them.
No Peak Hold When selected, track meters do
not hold the peak level.
Clip Indication Options
These options determine how long the clip indi-
cators on plug-in, send, and track meters stay lit
after a clip is detected.
3 Second Clip Hold When selected, meters dis-
play the last clip indication for three seconds.
Infinite Clip Hold When selected, meters display
the last clip indications until you click them to
clear them.
No Clip Hold When selected, meters do not hold
the clip indication.
Show Meters in Sends View
When the Sends View is displaying individual
send controls, you can select this option to
show send level meters. Deselecting this option
can help speed up screen redraws and process-
ing.

Chapter 7: Preferences 75
Color Coding
Always Display Marker Colors Lets you choose to
view Marker colors in the Markers ruler, regard-
less of the settings you choose for Default Re-
gion Color Coding.
Default Track Color Coding Options
These color coding options determine the de-
fault color coding assignment for tracks in the
Edit and Mix windows. Choices are:
None Turns off color assignment for tracks.
Tracks and MIDI Channels Assigns a color to
each track in the Mix or Edit window according
to its voice assignment or MIDI channel assign-
ment.
Tracks and MIDI Devices Assigns a color to each
track in the Mix or Edit window according to its
voice assignment or MIDI device assignment.
Groups Assigns a color to each track according to
its Group ID. If groups are suspended using the
Suspend Groups command, the tracks color bars
are not shown.
Track Type Assigns a color to each track accord-
ing to its type (audio, MIDI, Instrument, Auxil-
iary or Master Fader).
Default Region Color Coding Options
These color coding options determine the de-
fault color coding assignment for tracks, Marker
Locations, and regions residing in the track
playlist and Region List. Choices are:
None Turns off color assignment for regions. Re-
gions are drawn with black waveform or MIDI
notes on a light gray background.
Tracks and MIDI Channels Assigns a color to
each region in the Edit window according to its
voice or MIDI channel assignment.
Tracks and MIDI Devices Assigns a color to each
region in the Edit window according to its voice
assignment or MIDI device assignment.
Groups Assigns a color to each region according
to the Group ID of its track. If groups are sus-
pended using the Suspend Groups command,
all regions display black waveforms or MIDI
notes on a light gray background.
Track Color Assigns a region color based on the
color assigned to the track.
Marker Locations Assigns a unique color to each
marker area in the Marker ruler, including the
area preceding the first marker.
Region List Color Assigns a color to each region
based on its color in the Region List.
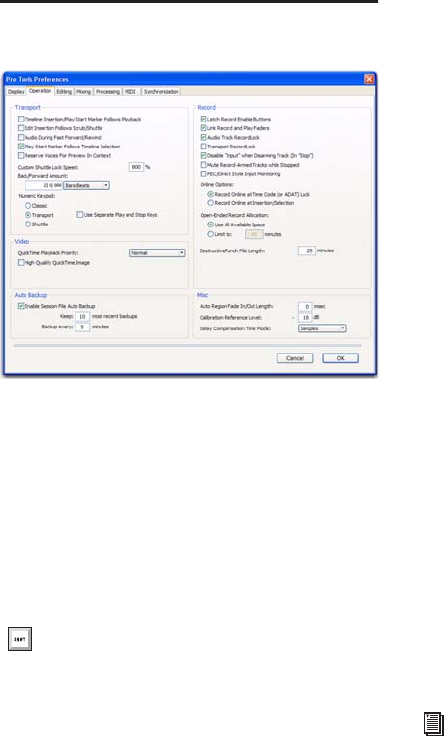
Pro Tools Reference Guide76
Operation Preferences
Transport Section
Timeline Insertion/Play Start Marker Follows
Playback When selected, the Timeline Insertion
and the Play Start Marker both move to the
point in the Timeline where playback stops.
When deselected, the Timeline Insertion and
Play Start Marker do not follow playback, but re-
turn to the point in time where playback began.
Edit Insertion Follows Scrub/Shuttle When se-
lected, the edit cursor automatically locates to
the point where scrubbing stops.
Audio During Fast Forward/Rewind When se-
lected, audio is audible during fast forward or re-
wind.
Play Start Marker Follows Timeline
Selection When enabled, the Play Start Marker
snaps to the Timeline Selection Start Marker
when you move the Timeline Selection, draw a
new Timeline Selection, or adjust the Timeline
Selection Start. When disabled, the Play Start
Marker doesn’t move with the Timeline selec-
tion.
Reserve Voices for Preview in Context (Pro Tools
HD Only) When enabled, Pro Tools reserve the
appropriate number of voices for preview in
context (previewing audio files in DigiBase dur-
ing session playback). The number of available
voices is reduced by the channel width of the se-
lected Audition Paths on the Output page of the
I/O Setup window. For example, if the number
of playback voices is set to 48 in the Playback
Engine, and you have a stereo audition path se-
lected in the I/O Setup, only 46 voices will be
available for tracks. If you have a 5.1 audition
path, only 42 voices will be available. When this
option is disabled, you will not be able to pre-
view in context if there are not enough available
voices.
Custom Shuttle Lock Speed Sets the highest fast-
forward Shuttle Lock speed (key 9) for Shuttle
Lock modes (Classic or Transport). The range for
this setting is 50–800%.
Back/Forward Amount Sets the default length of
Back, Back and Play, Forward and Forward and
Play. The timebase of the Back/Forward Amount
settings follows the Main Time Scale by default,
or you can deselect Follow Main Time Scale and
select another timebase format: Bars:Beats,
Min:Sec, Time Code, Feet+Frames, or Samples.
Press Start+N (Windows) or Control+N
(Mac) to toggle the Timeline Insertion/Play
Start Marker Follows Playback preference
on and off. For more information, see “Custom Shuttle
Lock Speed” on page 443.
Chapter 7: Preferences 77
Numeric Keypad Mode
Numeric Keypad mode determines how the nu-
meric keypad functions. You can always use the
numeric keypad to select and enter values in the
Event Edit Area, Edit Selection indicators, Main
and Sub Counters, and Transport fields.
Classic Selects a Shuttle Lock mode that emu-
lates the way Pro Tools worked in versions lower
than 5.0. With the Numeric Keypad mode set to
Classic, you can play up to two tracks of audio in
Shuttle Lock mode. Press the Start key (Win-
dows) or Control (Mac), followed by 0–9 for dif-
ferent play speeds. Press Plus (+) or Minus (–) to
reverse direction. Recall Memory Locations by
typing the Memory Location number, followed
by Period (.).
Transport Selects a Shuttle Lock mode that lets
you set a number of record and play functions,
and also operate the Transport from the nu-
meric keypad. With the Numeric Keypad mode
set to Transport, you can play up to two tracks of
audio in Shuttle Lock mode. Press the Start key
(Windows) or Control (Mac), followed by 0–9
for different play speeds. Press Plus (+) or Minus
(–) to reverse direction. Recall Memory Loca-
tions by typing Period (.), the Memory Location
number, and Period (.) again.
Shuttle (Pro Tools HD Only) Selects a type of
shuttling different from that of Shuttle Lock
mode. With the Numeric Keypad mode set to
Shuttle, playback is triggered by pressing and
holding the keys on the numeric keypad—play-
back stops once the keys are released. Various
playback speeds are available in both forward
and reverse. You can also recall Memory Loca-
tions by typing Period (.), the Memory Location
number, and Period (.) again.
Use Separate Play and Stop Keys
When enabled, this option lets you start play-
back with the Enter key and stop playback with
the 0 key on the numeric keypad. This is useful
for quickly starting and stopping playback when
auditioning loop transitions. Use Separate Play
and Stop Keys is only available in Transport Nu-
meric Keypad mode.
Video Section
QuickTime Playback Priority Options
Normal This is the default setting for QuickTime
Movie Playback Priority. It gives no extra prior-
ity to movie playback over other screen update
tasks such as metering, moving faders, and so
on. In most cases you should use this setting.
Medium This setting gives QuickTime movie
playback a higher priority relative to other
Pro Tools screen update tasks. Use this setting if
you experience inconsistent QuickTime movie
playback with the Normal setting.
Highest This setting gives QuickTime movie
playback highest priority. In this mode,
Pro Tools disables screen activity and requires
you to use the Spacebar to stop playback. Use
this setting if you require uninterrupted Quick-
Time movie playback.
To customize the highest fast-forward Shut-
tle Lock speed, see “Custom Shuttle Lock
Speed” on page 443.
To customize the highest fast-forward Shut-
tle Lock speed, see “Custom Shuttle Lock
Speed” on page 443.
When this option is enabled, it overrides us-
ing the Enter key to add Memory Location
markers. Instead, press Period (.) and then
Enter on the numeric keypad to add a Mem-
ory Location marker.
Pro Tools Reference Guide78
High Quality QuickTime Image
When enabled, Pro Tools decompresses both
fields of each interlaced frame of QuickTime
video. When viewing a QuickTime movie in the
Pro Tools Video window, select this option to
display the movie at the highest possible resolu-
tion. Deselecting this option can help improve
performance if your system experiences prob-
lems playing back a session with QuickTime
video.
Avid Video Errors Stop Playback
(Pro Tools HD with Avid Video Engine Only)
When selected, Pro Tools automatically stops
playback of audio and video if a single frame of
video is dropped.
When not selected, Pro Tools continues play-
back of audio even if frames are dropped. In
most cases, video playback will recover within a
few frames and continue playing audio and
video in sync.
Avid Video NTSC Has Setup (NTSC-J)
(Pro Tools HD with Avid Video Engine Only)
This preference lets you adjust the level of NTSC
video black output between 7.5 IRE (standard)
or 0 IRE. When this option is selected, output
level is 0 IRE.
Auto Backup Section
Enable Session File Auto Backup When selected,
Pro Tools automatically saves backups of your
Pro Tools session file while you work. Backups
are saved to in the Session Files Backup folder in
your session folder.
Keep specifies the total number of incremental
backups that are kept.
Backup Every Specifies how often the session is
saved.
Record Section
Latch Record Enable Buttons When selected,
multiple audio tracks can be record-enabled.
When not selected, multiple audio tracks can-
not be record-enabled. Record-enabling an au-
dio track takes other audio tracks out of record-
enabled mode.
Link Record and Play Faders When selected,
Pro Tools does not remember separate fader lev-
els for tracks when they are record-enabled, al-
lowing you to maintain the same monitoring
level for tracks during recording and playback.
Audio Track RecordLock (Pro Tools HD
Only) This option configures Pro Tools tracks to
either emulate a digital dubber, or to maintain
legacy behavior for track record status.
• When selected, the record-enabled audio
tracks remain record-enabled when play-
back or recording stops.
• When not selected, record-enabled audio
tracks are taken out of record enable when
Pro Tools is stopped. This prevents tracks
from remaining armed from pass to pass,
emulating track record behavior of a digital
dubber.

Chapter 7: Preferences 79
Transport RecordLock (Pro Tools HD Only) This
option lets the Transport Record (the Record
button in the Transport controls) be configured
to either emulate a digital dubber, or to main-
tain legacy behavior for the Transport master
Record.
• When selected, the Transport Record re-
mains armed when playback or recording
stops. This saves having to re-arm the
Transport between takes, emulating digital
dubber behavior.
• When not selected, the Transport Record
disarms when Pro Tools is manually
stopped or stops due to a loss of time code.
This replicates standard Pro Tools record-
ing behavior.
The Transport RecordLock preference is auto-
matically disabled and grayed out when De-
structive record mode is enabled.
Disable “Input” When Disarming Track (In “Stop”)
(Pro Tools HD Only) For flexibility, TrackInput
monitoring can be customized to remain se-
lected regardless of track record status, or to au-
tomatically switch to Auto Input monitoring af-
ter a recording pass. This lets you optimize
monitoring for a typical dubbing workflow (in
which you might want tracks to remain in Input
Only mode until explicitly switched to Auto In-
put monitoring) or a typical music tracking
workflow (in which leaving a track in Input
Only monitoring mode after recording can re-
sult in accidental double-monitoring).
• When selected, taking an audio track out of
record enable (any mode) takes it out of In-
put Only mode, regardless of the global
monitor mode, and switches it to monitor
audio from disk only.
• When not selected, audio tracks remain in
Input Only monitoring mode until explic-
itly switched to Auto Input monitoring.
Mute Record-Armed Tracks While Stopped
(Pro Tools HD Only) This setting determines
monitor status of record-armed tracks.
• When selected, Pro Tools mutes all record-
enabled tracks when the transport is
stopped. Input can still be monitored while
stopped using the TrackInput Monitor but-
ton.
• When not selected, Pro Tools does not
mute audio input on record-enabled tracks
when the transport is stopped.
PEC/Direct Style Input Monitoring (Pro Tools HD
Only) This option changes the way the Track-
Input monitoring mode is indicated on-screen
(and on supported control surfaces) to emulate
“PEC” (playback) and “Direct” (input/bus) indi-
cation on some large format consoles.
• When not selected, the TrackInput button
shows the letter “I.” The button remains
gray to indicate Auto Input mode and
lights green to indicate Input Only mode.
• When selected, the TrackInput button re-
mains gray and shows the letter “D” to in-
dicated Input Only mode (“Direct”); it
lights green and shows the letter “P” to in-
dicate Auto Input mode (“Pec” or play-
back).
Online Options
Record Online at Time Code (or ADAT)
Lock When selected, online recording begins as
soon as Pro Tools receives and locks to incom-
ing time code.
Record Online at Insertion/Selection When se-
lected, online recording begins at the edit cursor
location. Recording continues until Pro Tools
stops receiving time code. If you make a selec-
tion, Pro Tools records online for the length of
the selection.
Pro Tools Reference Guide80
Open Ended Record Allocation
This preference determines how much of your
available hard drive space is allocated for record-
ing.
Use All Available Space When selected, the
drive’s entire available space is allocated. Gener-
ally, this is a good setting for recording longer
takes, as it provides the maximum amount of
drive space. Additionally, when recording mul-
tiple tracks, the files are spread across your drive.
This can sometimes slow down the recording
process for hard drives that use certain file sys-
tems, including HFS+ and NTFS.
Limit To Sets the maximum allowable recording
duration for one take. This can help reduce the
time it takes to begin recording by allocating
only a portion of your hard drive. The number
of minutes specified is allocated for each record-
enabled track. You may want to experiment
with this number to achieve the recording per-
formance you want.
If you do not regularly record longer takes, set a
smaller length (such as a low multiple of the
song’s total length).
DestructivePunch File Length (Pro Tools HD
Only)
This preference sets the duration of consoli-
dated audio files when preparing tracks for
DestructivePunch mode. The default value for
this setting is 25 minutes.
Misc (Miscellaneous) Section
(Pro Tools HD Only)
Auto Region Fade In/Out Length Sets a default
length for fade-ins and fade-outs automatically
applied to region boundaries. Using automatic
fade-ins and fade-outs saves you the trouble of
editing to zero-crossings or creating numerous
rendered fades in order to eliminate clicks or
pops in playback. Autofades are not written to
disk. Value range is from 0–10 ms for the Auto
Region Fade In/Out Length. A value of zero
means that no auto-fading will occur. The Auto
Fade value is saved with the session, and is auto-
matically applied to all free-standing region
boundaries until you change it.
Calibration Reference Level Sets a default cali-
bration reference level in dB when Pro Tools is
in Calibration mode. For audio interfaces that
have trims (such as the 192 I/O), see the inter-
face’s guide for calibration instructions.
Delay Compensation Time Mode This option lets
you choose whether information in the Delay
Manager is displayed in milliseconds or sam-
ples. This option is only available when Delay
Compensation is enabled (Options > Delay
Compensation).
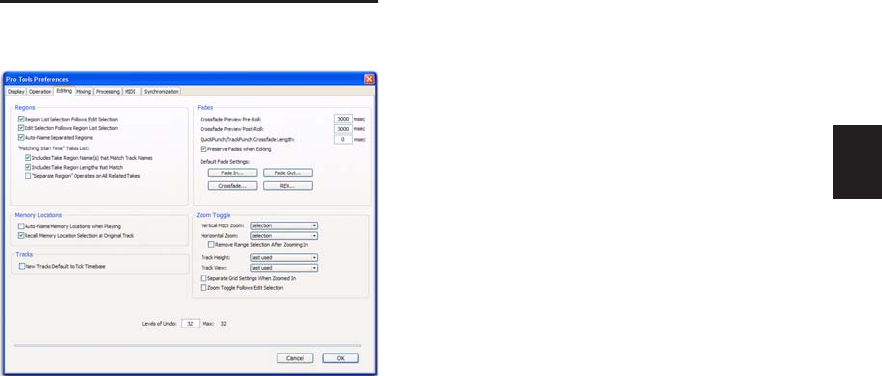
Chapter 7: Preferences 81
Editing Preferences
Regions Section
Region List Selection Follows Edit
Selection When selected, selecting a region in a
track also selects it in the Region List.
Edit Selection Follows Region List
Selection When selected, selecting a region in
the Region List causes Pro Tools to highlight
that region’s occurrence in a track.
Auto-Name Separated Regions When selected,
Pro Tools automatically names newly separated
regions by appending a number to the region’s
name.
“Matching Start Time” Takes List
When you Right-click, Control-click (Win-
dows), or Command-click (Mac) a region in a
track, Pro Tools displays a list of regions (either
in the Matches Right-click submenu or the Al-
ternates pop-up menu) whose time stamp
matches the current Cursor location.
The following preferences determine which re-
gions, or takes, appear in this list:
Includes Take Region Names That Match Track
Names When selected, only regions that share
the same root name with the track and playlist
appear in the Matches Right-click submenu or
the Alternates pop-up menu.
Includes Take Region Lengths That Match When
selected, only regions that match the length of
the current selection appear in the Matches
Right-click submenu or the Alternates pop-up
menu.
“Separate Region” Operates On All Related
Takes When selected, editing a region with the
Separate Region command also affects all other
related takes (recording passes) with the same
User Time Stamp. This option helps you com-
pare different sections from a group of related
takes.
Memory Locations Section
Auto-Name Memory Locations When
Playing When selected, Pro Tools gives new
Memory Locations default names based on their
time location in the session. The time units cur-
rently chosen in the View menu determine the
units for the names.
Recall Memory Location at Original Track When
selected, Memory Locations that recall a selec-
tion also recall the track in which the selection
was made.
Tracks Section
New Tracks Default To Tick Timebase When se-
lected, all new tracks default to ticks. When de-
selected, audio, Auxiliary Input, Master Fader,
and VCA (Pro Tools HD only) tracks default to
samples.
Pro Tools Reference Guide82
Fades Section
Crossfade Preview Pre-Roll This option specifies
the amount of pre-roll to be added when you are
auditioning crossfades in the Fades dialog.
Crossfade Preview Post-Roll This option speci-
fies the amount of post-roll to be added when
you are auditioning crossfades in the Fades dia-
log.
QuickPunch/TrackPunch Crossfade Length Spec-
ifies a default length for crossfades created by
QuickPunch or TrackPunch (Pro Tools HD only)
recordings. Crossfades occur before the punch
in and after the punch out.
Preserve Fades when Editing This option pre-
serves fade-ins and fade outs, and converts sep-
arated crossfades into corresponding fade-ins
and fade-outs.
Default Fade Settings
Fade In Selects the default envelope shape for
fade-ins.
Fade Out Selects the default envelope shape for
fade-outs.
Crossfade Selects the default envelope shape for
crossfades.
REX Selects the default envelope shape for fades
and crossfades between regions (“slices”) in im-
ported REX files.
Zoom Toggle Section
Vertical Zoom Selects either Selection or Last
Used for the Zoom Toggle Vertical Zoom.
Horizontal Zoom Selects either Selection or Last
Used for the Zoom Toggle Horizontal Zoom.
Remove Range Selection After Zooming
In When selected, the current Edit selection col-
lapses into an insertion point after zoom tog-
gling in. Zoom toggling back out reverts to the
previous selection.
Track Height Selects Last Used, Medium, Large,
Extreme, or Fit To Window for the Zoom Toggle
Track Height.
Track View Selects Waveform/Notes,
Warp/Notes, Last Used, or No Change for the
Zoom Toggle Track View.
Separate Grid Settings When Zoomed In When
selected, this option retains the same (current)
grid setting when zoom toggling in or out.
When this option is deselected, the grid setting
stored with Zoom toggle is recalled when zoom
toggling in.
Zoom Toggle Follows Edit Selection When se-
lected, zoom toggle automatically follows the
current Edit selection. When disabled, changing
the Edit selection has no affect on the currently
toggled-in track.
Levels of Undo
This preference sets the maximum number of
actions that can be undone with the multiple
undo feature. Setting this to a lower number can
speed up the performance of slower computers.
Pro Tools supports up to 32 Levels of Undo.

Chapter 7: Preferences 83
Mixing Preferences
Setup Section
Sends Default to –INF When selected, the initial
fader level of newly-created sends is set to –∞
(no audible signal level). When not selected, the
initial fader level of newly-created sends is set to
0 dB.
Send Pans Default to Follow Main Pan When se-
lected, newly created sends have Follow Main
Pan turned on, so the Send Pan controls follow
the pan controls of the track. When not se-
lected, newly created sends have Follow Main
Pan turned off.
Link Mix and Edit Group Enables When selected,
this option links enabling and disabling of Mix
and Edit Groups. For example, enabling Group
A in the Mix Window automatically enables
Group A in the Edit window.
Use Absolute Pan Linking (Pro Tools HD
Only) This option affects behavior of grouped
pan controls.
• When selected, grouped pan controls do
not maintain relative offsets when any of
the grouped pan controls is adjusted. All
grouped pan controls snap to the absolute
value of the adjusted control.
• When not selected, grouped pan controls
maintain relative offsets when any of the
linked controls is adjusted.
Default EQ
This preference lets you choose any installed EQ
plug-in as the default, which makes it available
for quick assignment, both on-screen and on
ICON worksurfaces (Pro Tools HD only). On-
screen, the plug-in appears at the top of the In-
sert selector pop-up menu. On ICON work-
surfaces, the plug-in appears first in the list of
menu choices on the rotary encoders.
Default Dynamics
This preference lets you choose any installed
Dynamics plug-in as the default, which makes it
available for quick assignment, both on-screen
and on ICON worksurfaces (Pro Tools HD only).
On-screen, the plug-in appears at the top of the
Insert selector pop-up menu. On ICON work-
surfaces, the plug-in appears first in the list of
menu choices on the rotary encoders.
Pro Tools Reference Guide84
Controllers
Edit Window Follows Bank Selection If you are
using a supported control surface with
Pro Tools, this option scrolls the Edit window to
display the selected bank of tracks when you
switch banks on the control surface, ensuring
that the current bank is viewable on-screen.
Mix Window Follows Bank Selection If you are
using a supported control surface with
Pro Tools, this option scrolls the Mix window to
display the selected bank of tracks when you
switch banks on the control surface, ensuring
that the current bank is viewable on-screen.
“Scroll to Track” Banks Controllers When using
a control surface (such as D-Control or Pro-
Control) you can select this option to bank con-
trol surface faders to a numbered track when us-
ing the Track > Scroll to Track command.
Always Fill Channel Strips When Banking If you
are using an ICON worksurface (Pro Tools HD
only), or other supported Digidesign control
surface, you can select this option to maximize
the number of channels displayed when bank-
ing. This setting optimizes the Bank commands
to prevent the display of a small number of
channels at the extremes of the surface.
Touch Timeout If you are writing automation in
Touch mode and you stop moving a non-touch
sensitive fader or encoder, Pro Tools continues
to write automation for the Touch Timeout
value.
After the Touch Timeout period, writing of au-
tomation stops and the automation data returns
to its previous automation value at the rate spec-
ified in the AutoMatch Time setting.
Automation Section
Smooth and Thin Data After Pass When se-
lected, Pro Tools automatically smooths and
then applies the specified amount of thinning
to the automation data created in an automa-
tion pass.
Degree of Thinning Specifies the amount of thin-
ning performed on automation data when you
using the Thin Automation command, or if you
have selected the Smooth and Thin Data After
Pass option.
Plug-in Controls Default to Auto-Enabled When
selected, all applicable controls of newly added
plug-ins are enabled for automation. When not
selected, the controls of newly added plug-ins
must be manually enabled for automation.
Suppress Automation “Write To” Warnings
(Pro Tools HD Only) When selected, Pro Tools
suppresses the warnings that appear after invok-
ing any of the Write Automation To Start, Selec-
tion, End, or Punch commands and then stop-
ping the transport.
Latching Behavior for Switch Controls in
“Touch” This option determines the behavior of
switch-type controls (such as mute or plug-in
bypass) when writing automation in Touch
mode.
• When selected, controls in Touch mode
will latch in their current state. If an exist-
ing breakpoint is encountered, writing of
automation stops. If the transport is
stopped while writing, the control will
AutoMatch to the underlying value.
• When not selected, controls in Touch
mode will not latch.

Chapter 7: Preferences 85
Allow Latch Prime in Stop (Pro Tools HD
Only) When selected and any tracks are in Latch
mode, any automation-enabled controls on
those tracks can be set to new values while the
transport is stopped by touching or moving con-
trols, to prepare for the next automation pass.
Coalesce when Removing Slaves from VCA Group
(Pro Tools HD Only) This option determines the
behavior when removing slave tracks from a
VCA-controlled group.
• When selected, any automation on the
VCA Master is automatically coalesced
(without confirmation) to its slave tracks
when the tracks are removed from the
group.
• When not selected, a confirmation dialog
lets you choose whether or not to coalesce
the VCA Master automation to the slave
tracks.
Standard VCA Logic for Group Attributes
(Pro Tools HD Only) This option determines
which Mix group attributes may be selected in
the Group dialog when the group is assigned to
a VCA Master.
• When selected, Main Volume, Mute, Solo,
Record Enable, and Input Monitoring con-
trols on slave tracks follow the VCA Master
only and are not available to be indepen-
dently linked. (This emulates the behavior
of analog console VCA masters.)
• When deselected, Main Volume, Mute,
Solo, Record Enable, and Input Monitoring
controls follow the VCA Master, but also re-
main available for independent linking
with groups.
Include Sends in Trim Mode (Pro Tools HD
Only) This option determines the Trim status of
Send faders when a track is put in Trim mode.
• When selected, Send faders go into Trim
mode along with the Main Volume fader.
• When deselected, the Main Volume fader
goes into Trim mode, but the Send fader
stays in the corresponding standard Auto-
mation mode.
Include Control Changes in Undo Queue This op-
tion determines whether certain mixer control
changes, such as moving a fader or pan control,
are entered into the Undo queue.
• When selected, mixer control changes ap-
pear in the Undo queue, and are undone if
any prior operation is undone.
• When deselected, mixer control changes
will not appear in the undo queue, allow-
ing you to undo other types of operations
without losing the current mixer settings.
Any set to default operations that affect mixer
controls will be entered into the Undo queue.
AutoMatch Time If you are writing automation
in Touch mode, when you release a fader or con-
trol, writing of automation stops and the auto-
mation data returns to its previous value. The
rate of return to the previous value is the Auto-
Match Time.
AutoGlide Time (Pro Tools HD Only) Specifies
how quickly Pro Tools transitions (glides) from
one automation value to another, when Auto-
Glide mode is used.
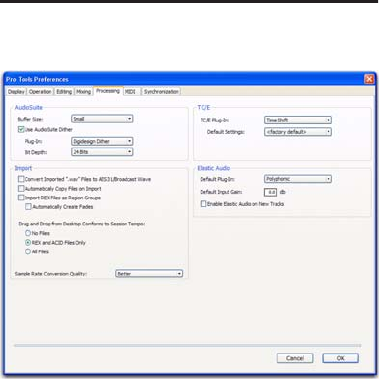
Pro Tools Reference Guide86
After Write Pass, Switch To Selects the Auto-
mation mode that Pro Tools tracks automati-
cally switch to after an automation pass in Write
(or Write Trim) mode. You can choose to switch
to Touch or Latch mode, or stay in Write mode
by selecting No Change. After an automation
pass in Write Trim mode, tracks automatically
switch to the Trim version of the specified set-
ting.
Coalesce Trim Automation Options
(Pro Tools HD Only)
These options determine when Trim automa-
tion is committed to the main automation play-
list on a track.
After Every Pass Sets Trim automation to coa-
lesce when the transport is stopped at the end of
each Trim automation pass. No Composite Play-
list is indicated.
On Exiting Trim Mode Sets Trim Automation to
coalesce on a track when the track is taken out
of Trim mode. A Composite Playlist can be
viewed before committing Trim moves.
Manually Trim Automation can be coalesced
only with the Coalesce Trim Automation com-
mand. A Composite Playlist can be viewed be-
fore committing Trim moves.
Processing Preferences
AudioSuite Section
Buffer Size
AudioSuite Buffer Size sets the size of the mem-
ory buffer used for audio processing and pre-
viewing with AudioSuite plug-ins. If AudioSuite
preview stutters, set the buffer to Mini or Small.
Use AudioSuite Dither When selected, certain
AudioSuite plug-ins automatically apply dither
when processing. AudioSuite plug-ins that sup-
port automatic dithering include: Gain, Nor-
malize, Smack!, and Sonic NoNOISE.
Plug-in Specifies the plug-in used for dither pro-
cessing when the Use AudioSuite Dither option
is selected.
Bit Depth Lets you select a bit depth for the dith-
ered audio (24-bit, 20-bit, 18-bit, or 16-bit).

Chapter 7: Preferences 87
Import Section
Convert Imported “WAV” Files To AES31/Broad-
castWave When selected, this option applies to
all newly imported WAV files, making them
compliant with the AES31/EBU Broadcast stan-
dard.
Automatically Copy Files on Import When se-
lected, all audio files that are imported by drag-
ging and dropping are copied to the current ses-
sion’s Audio Files folder, regardless of whether
the files need to be converted to the current ses-
sion’s file type, bit depth or sample rate. Addi-
tionally, when selected, the Import Session Data
dialog defaults to “Copy from Source Media.”
The Automatically Copy Files on Import prefer-
ence does not affect the Import Audio com-
mand.
Import REX Files as Region Groups When se-
lected, REX flies are imported as region groups,
all the underlying slices are imported as individ-
ual regions contained within the region group.
When this option is not selected, importing
REX files into a session converts them to the ses-
sion’s audio file format, the individual slices are
consolidated, and the slice information is used
for Elastic Audio analysis. These files remain
tick-based after import and conversion.
Automatically Create Fades When selected,
crossfades are applied automatically to the
sliced regions within region groups created by
importing REX files. If the Import REX Files as
Region Groups option is not selected, the Auto-
matically Create Fades option is not available.
To change the default fade settings for REX files,
click the REX button in the Default Fade Set-
tings section on the Editing Preferences page.
Drag and Drop From Desktop Conforms to
Session Tempo
The Drag and Drop From Desktop Conforms to
Session Tempo options determine whether or
not REX, ACID, and audio files are imported as
tick-based Elastic Audio and conformed to the
session tempo.
None When enabled, REX and ACID files, and
all other audio files are not conformed to the
session tempo when imported by drag and drop
from Windows Explorer or the Mac Finder. They
are imported as sample-based files and con-
verted to the sessions audio file format.
REX and ACID Files Only When enabled, only
REX and ACID files are conformed to the session
tempo when imported by drag and drop from
Windows Explorer or the Mac Finder. REX files
are imported either as tick-based Elastic Audio
or, if the Import REX Files as Region Groups op-
tion is enabled, as tick-based region groups.
All Files When enabled, all audio files imported
imported by drag and drop from Windows Ex-
plorer or the Mac Finder are imported as tick-
based Elastic Audio and conform to the session
tempo.
Sample Rate Conversion Quality
The Sample Rate Conversion Quality preference
lets you select the default sample rate conver-
sion quality for importing audio files by drag
and drop from any DigiBase browser, or Win-
dows Explorer, or Mac Finder. The higher the
quality of sample rate conversion you choose,
the longer Pro Tools will take to process the au-
dio file.

Pro Tools Reference Guide88
TC/E (Time Compression/Expansion)
Section
TC/E Plug-in Lets you choose the plug-in used
for Time Compression and Expansion when you
edit audio with the Time Compression/Expan-
sion Trim tool. This Trim tool works by using
Time Compression/Expansion to match an au-
dio region to the length of another region, a
tempo grid, a video scene, or other reference
point.
Default Settings Specifies the default settings
used by the chosen Time Compression/Expan-
sion plug-in.
Elastic Audio Section
These preferences determine Elastic Audio usage
and settings on new tracks, as well as for pre-
viewing and importing tick-based audio.
Default Plug-in Lets you select any Real-Time
Elastic Audio plug-in as the default for preview-
ing and importing Elastic Audio. The selected
Default Elastic Audio plug-in is also used when
new tracks are created with the Enable Elastic
Audio on New Tracks option enabled.
Default Input Gain Lets you attenuate the signal
input to Elastic Audio plug-ins by 0 to –6 dB for
preview and import. If you experience clipping
due to Elastic Audio processing during preview
or after import, you may want to set the Default
Input Gain to slightly attenuate the audio signal
input for Elastic Audio processing. This prefer-
ence also applies to any audio imported to an
Elastic Audio–enabled track.
The Elastic Properties window inherits the De-
fault Input Gain preference. To apply further re-
gion-based Input Gain for Elastic Audio process-
ing, select the region and adjust the Input Gain
setting in the Elastic Properties window (see
“Elastic Properties Window” on page 522).
Enable Elastic Audio on New Tracks When se-
lected, new tracks are created with Elastic Audio
enabled. The selected Default Plug-in is used.
If the Enable Elastic Audio on New Tracks
option is selected, you may want to also se-
lect the New Tracks Default to Tick Time-
base option in the Editing Preferences page.
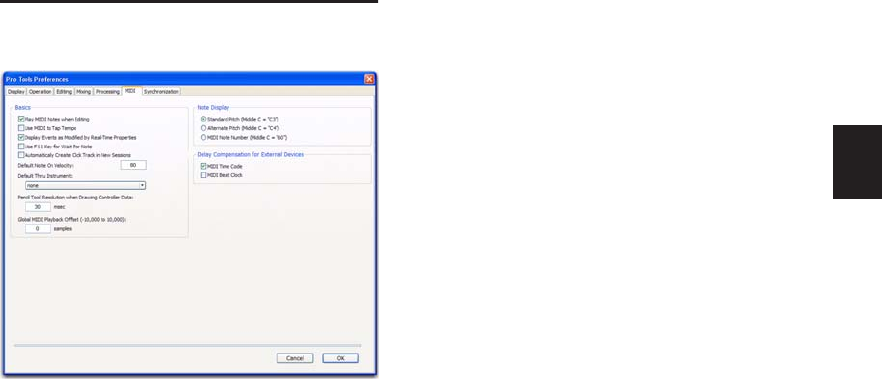
Chapter 7: Preferences 89
MIDI Preferences
Basics Section
Play MIDI Notes When Editing When selected,
causes MIDI notes to sound when you insert
them with the Pencil tool or drag them with any
of the Grabber tools.
Use MIDI to Tap Tempo When selected, you can
tap a MIDI keyboard to enter a new tempo value
into a tempo field.
Display Events as Modified by Real-Time Proper-
ties When selected, Pro Tools displays the ef-
fects of Real-Time Properties in both the Edit
window and the MIDI Event List.
Use F11 Key for Wait for Note When selected,
pressing the F11 Function key puts MIDI record-
ing in Wait for Note mode.
Automatically Create Click Track in New
Sessions When enabled, Pro Tools automati-
cally creates a new click track in new sessions.
Default Note On Velocity Sets the default Note
On velocity for MIDI notes inserted in the Edit
window and the MIDI Event List.
Default Thru Instrument Sets the default MIDI
Thru instrument. You can select a predefined
device from your available MIDI instruments, or
select “First Selected MIDI Track” to use the as-
signed MIDI output of the first selected MIDI or
Instrument track. When multiple MIDI or In-
strument tracks are selected, the instrument in
the selected track that is closest to the top of the
Edit window (or closest to the left edge of the
Mix window) is used.
Pencil Tool Resolution When Drawing Controller
Data Sets the default resolution for MIDI con-
troller data created with the Pencil tool. Setting
this to a lower resolution helps avoid creating
controller data that is unnecessarily dense. The
value range is from 1 to 100 milliseconds.
Global MIDI Playback Offset Sets an offset in
samples to compensate for MIDI latency. Enter-
ing a value here has the same effect as setting an
offset with the MIDI Track Offsets command.
Offset values can be positive (later) or negative
(earlier).
Note Display Options
These options set the reference for middle C as
C3, C4, or MIDI note number 60.
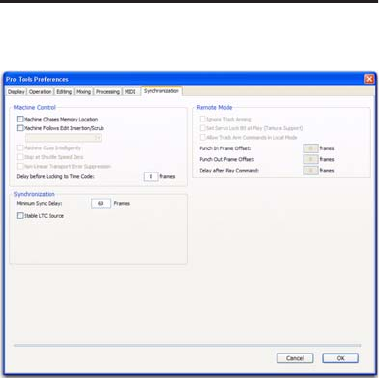
Pro Tools Reference Guide90
Delay for External Devices Section
(Pro Tools HD Only)
These options only apply when a Delay Com-
pensation Engine is chosen in the Playback En-
gine dialog and Delay Compensation is enabled
in Pro Tools. These options are distinct from the
hardware offsets available for hardware inserts
in the I/O Setup.
MIDI Time Code When selected, Pro Tools ap-
plies Delay Compensation to Pro Tools-gener-
ated MIDI Time Code.
MIDI Beat Clock When selected, Pro Tools ap-
plies Delay Compensation to Pro Tools-gener-
ated MIDI Beat Clock.
Synchronization Preferences
These preferences determine how a connected
transport responds to Pro Tools.
Machine Control Section
Machine Chases Memory Location When se-
lected, navigating to a specific location in a ses-
sion with a Memory Location causes a con-
nected transport to chase to that location.
Machine Follows Edit Insertion/Scrub When se-
lected, navigating to a specific location in a ses-
sion by moving the selection point or by scrub-
bing a track will cause a connected transport to
chase to that location.
When the connected device is a linear device
(such as a tape deck), choose “Linear Devices
(jog)” to set Pro Tools to send jog commands.
When the connected device is a non-linear de-
vice (such as a random-access video recorder or
another Pro Tools system), choose “Non-Linear
Devices (cue)” to set Pro Tools to send cue com-
mands.

Chapter 7: Preferences 91
Machine Cues Intelligently (Pro Tools HD
Only) When selected, if you navigate to a cue
point that is more than 10 seconds from the cur-
rent location, Pro Tools will command a con-
nected transport to fast wind to the new loca-
tion at full speed to within 10 seconds of the cue
point. Cueing will then slow to normal speed
until the point is reached. This can significantly
speed up tape cueing with certain video trans-
ports.
Stop at Shuttle Speed Zero (Pro Tools HD
Only) Causes Pro Tools to send a Stop command
whenever you stop shuttling. This is useful if
you have a machine that requires an explicit
stop command to park correctly.
Non-Linear Transport Error Suppression (Pro Tools
HD Only) When Transport = Pro Tools, keeps
Pro Tools from sending a Stop command when
taken offline. This prevents Pro Tools from stop-
ping any other 9-pin devices connected to the
system.
Delay Before Locking to Time Code (Pro Tools HD
Only) Sets the amount of time (in frames) for
Pro Tools to wait before attempting to lock to
machines that issue servo lock messages. This
setting allows time for the servo mechanisms to
achieve stable lock.
Remote Mode Section
(Pro Tools HD Only)
Ignore Track Arming Sets Pro Tools to ignore in-
coming track arming (record enable) com-
mands. This is useful if you are using a master
controller to arm tracks on other machines, but
you do not want to arm tracks in Pro Tools.
Set Servo Lock Bit at Play (Tamura Support) En-
able this option when using a Tamura synchro-
nizer to control Pro Tools in Remote mode to
minimize lock-up times during recording.
Allow Track Arm Commands in Local Mode Sets
Pro Tools to respond to incoming track arming
(record enable) commands even when the sys-
tem is not in Remote Mode. This is useful if you
are using a paddle device to control Pro Tools
track arming or punching.
Punch In Frame Offset Sets an offset (in frames)
to compensate for punch in timing advances or
delays.
Punch Out Frame Offset Sets an offset (in frames)
to compensate for punch out timing advances
or delays.
Delay After Play Command Sets the amount of
time (in frames) for Pro Tools to wait after re-
ceiving a Play command before starting the au-
dio engine. This can prevent false starts when
locking to synchronizers that are not fully sup-
ported by Pro Tools.
Pro Tools Reference Guide92
Synchronization Section
Minimum Sync Delay Sets the initial amount of
prime time (in frames) your system’s devices
need to achieve synchronization “lock.” This
amount varies for each device. Pro Tools lock up
delay is set by entering a value for Minimum
Sync Delay in the Synchronization page of the
Preferences dialog. The lowest value available is
15 frames. Find the shortest possible lock-up
time that your equipment can operate at consis-
tently, and set this as the Minimum Sync Delay.
On systems utilizing Digidesign Machine-
Control, enabling the Use Serial Time Code set-
ting will make machines lock up much faster.
(Serial time code requires both a Digidesign-
qualified synchronization peripheral and exter-
nal devices to be locked to house video refer-
ence.)
Stable LTC Source (Pro Tools HD Only) When se-
lected, this option suppresses the normal 1-sec-
ond wait time before Pro Tools attempts to lock
to incoming LTC. Enable this option when lock-
ing Pro Tools to a stable time code source (such
as a non-linear tape machine or LTC generator)
and not a linear tape machine.

93
Part III: Sessions & Tracks
94
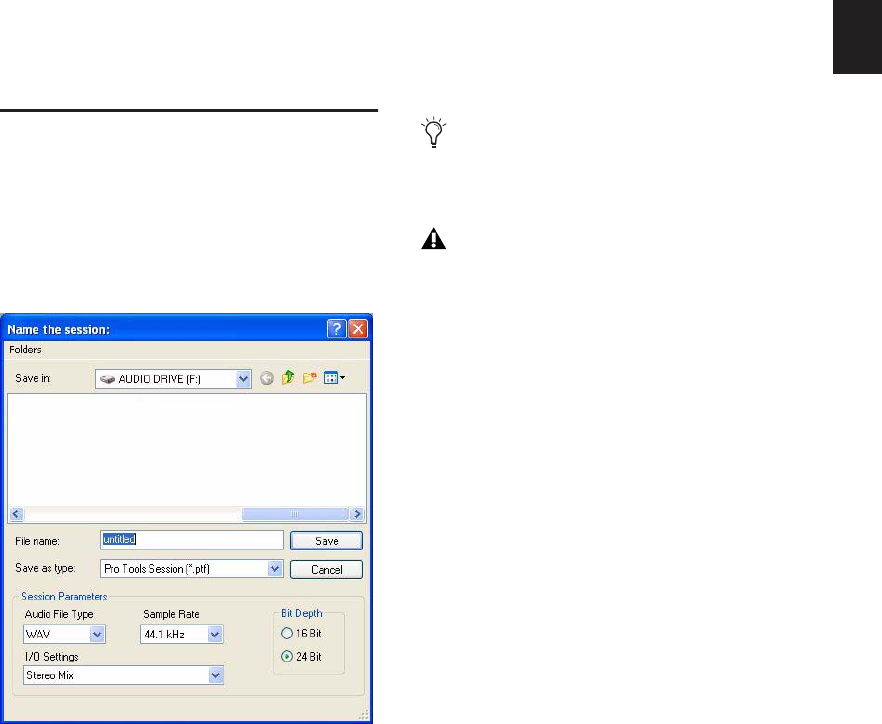
Chapter 8: Sessions 95
Chapter 8: Sessions
This chapter covers the basics of starting a
project in Pro Tools, including how to create
and save a Pro Tools session.
Creating a New Session
The first step in beginning a Pro Tools project is
creating a new session.
To create a new session:
1 Choose File > New Session.
2 Select the drive where you want to save the
session. The session should be saved on a dedi-
cated audio drive.
3 Select the audio file format for the session.
4 Select the bit depth (16 bit or 24 bit) and the
sample rate.
5 Select the I/O Settings to use for the session.
Several pre-configured I/O Settings are included
with your system, or you can select a custom I/O
Setting. For more information, see Chapter 6,
“I/O Setup.”
6 Name the Session.
7 Click Save.
New Session dialog
For optimum compatibility between Win-
dows and Mac, set the file type to BWF
(.WAV).
Sound Designer II (SD II) files are not sup-
ported on Windows systems or at sample
rates above 48 kHz. Also, sessions that use
the SD II file format do not support Elastic
Audio.
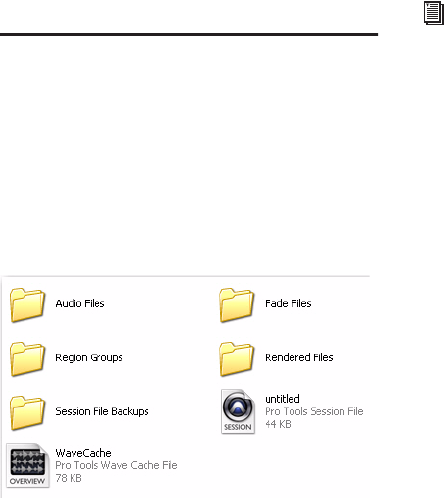
Pro Tools Reference Guide96
Selecting Bit Depth and Sample Rate
When selecting a bit depth or sample rate for
your session, consider fidelity, any compatibil-
ity issues with others systems, and storage space.
Bit depth and sample rate also have an effect on
the amount of mixing power available in a ses-
sion. Fewer mixer channels are available with
24-bit sessions and with sessions at higher sam-
ple rates. (For more information, see your Get-
ting Started Guide.)
It is not possible to combine different bit depths
within a single Pro Tools session; files of differ-
ent bit depths must be converted and imported
into the session.
Session Files and Folders
When you create a new session, Pro Tools auto-
matically creates a new folder named for your
session. Within this folder is the session file, a
WaveCache.wfm file, and several subfolders (in-
cluding (but not limited to) an Audio Files
folder, a Fade Files folder, and a Region Group
folder).
Session File
The session file is the document that Pro Tools
creates when you start a new project. Pro Tools
can open only one session file at a time. The ses-
sion file is appended with the extension .ptf
(Pro Tools file).
Audio Files Folder
The Audio Files folder contains all audio re-
corded or converted during the session.
When you record a new audio track, the track is
saved as a new audio file to the Audio Files
folder. You can also import other audio files into
the session, and work with them as well.
Fade Files Folder
The Fade Files folder contains any crossfaded au-
dio data generated by the session.
Rendered Files Folder
The Rendered Files folder contains any tempo-
rary files created by Rendered Elastic Audio pro-
cessing in the session.
Region Groups Folder
The Region Groups folder is the default direc-
tory for any region groups that you export from
your Pro Tools session.
WaveCache File
The WaveCache.wfm file stores all of the wave-
form display data for the session. If you delete
the WaveCache.wfm file, Pro Tools creates a
new one the next time you open the session.
Typical session folder contents
For details on allocating audio tracks to dif-
ferent hard drive locations, including
shared media volumes, see “Recording with
Multiple Hard Drives (Optional)” on
page 335.
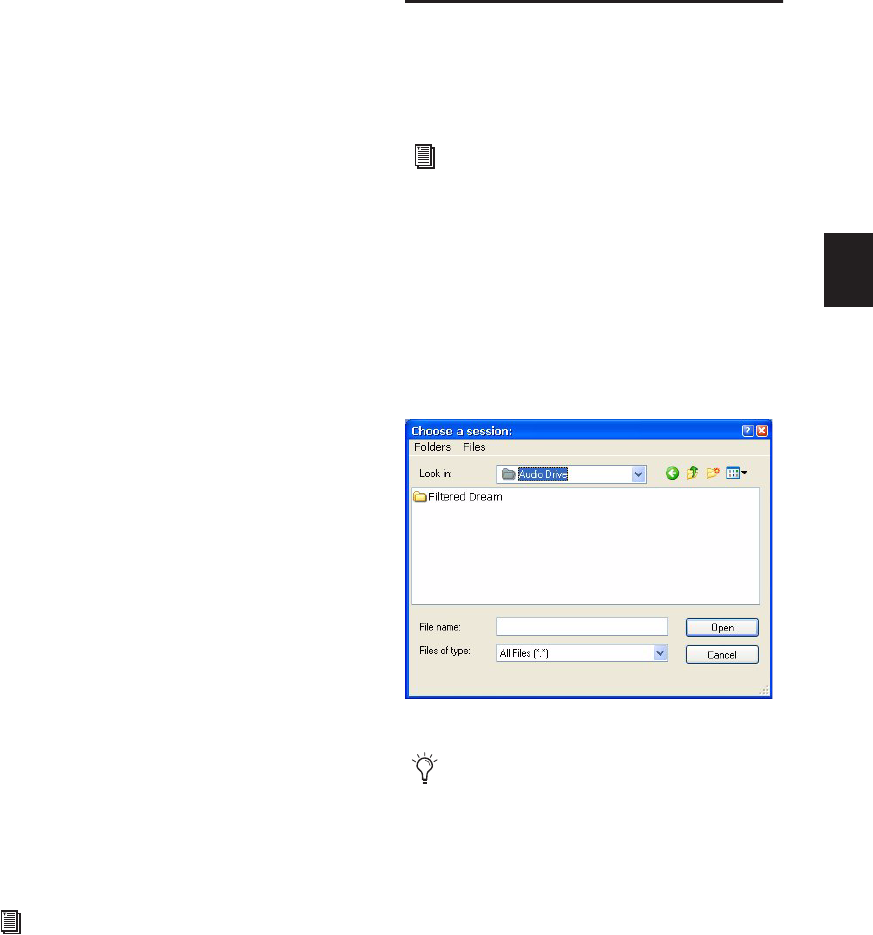
Chapter 8: Sessions 97
By storing waveform data in the WaveCache
file, sessions open more quickly. The session
WaveCache file can be included whenever a ses-
sion is transferred to another Pro Tools 7.x sys-
tem.
Pro Tools also maintains a distinct WaveCache
file inside the local Digidesign Databases folder
(C:\\Digidesign Databases), which retains
waveform data for all files used on the system.
Additional WaveCache files are created on each
hard drive attached to your system, and stored
in the Digidesign Databases folder on each
drive.
Deleting or trashing a WaveCache file does not
harm the session or your system. However, each
session takes longer to open because it has to re-
calculate waveform data for any associated au-
dio files and store that data in a new WaveCache
file.
Session File Backups Folder
The Session File Backups folder contains auto-
matically-generated backups of your Pro Tools
sessions. These files are created when working
on a session and the Operations preference for
Enable Session File Auto Backup is enabled. (See
“Enable Session File Auto Backup” on page 78.)
Renamed Audio Files Folder
This folder includes file names that have been
renamed when you open a session that contains
audio file names with incompatible characters,
or, in certain situations, save a copy of a session
to a Pro Tools version that does not support
long file names.
Opening a Session
When you open a session, Pro Tools looks in the
session folder for audio and fade files linked to
the session.
To open an existing session:
1 Choose File > Open Session.
2 Locate the session you want to open and click
Open.
Opening a Session that Contains
Unavailable Files
DigiBase notifies you if files are located but re-
side on Transfer volumes (such as CD or DVD
discs), or if any required files cannot be found.
For more information, see “Locating Audio
Files” on page 285.
For more information, see “Renamed Audio
Files and the Renamed Audio Files Folder” on
page 287.
For more information on opening sessions
created on different platforms, Pro Tools
systems, or versions of Pro Tools software,
see Chapter 15, “File and Session Manage-
ment and Compatibility.”
Open Session dialog
You can also open a session from a Digi-
Base browser by double-clicking it.
Pro Tools Reference Guide98
Opening a Session from a Transfer
Volume
When opening a session from a Transfer volume
(such as a CD or DVD disc), DigiBase prompts
you to save the session on a Performance vol-
ume, and copy and convert any referenced me-
dia files. For more information, see “Locating
Audio Files” on page 285.
Opening a Session that Contains
Unavailable Resources
Pro Tools prompts you when opening a session
that contains unavailable voices, I/O paths, DSP
resources, or plug-ins. This is common when
transferring sessions between systems with dif-
ferent Digidesign hardware.
The Unavailable Resources dialog provides an
initial report of the missing session compo-
nents. To save a text (.txt) file containing a more
detailed Notes report, along with the resulting
action, click Yes. The Notes report is named
with the session name, followed by Notes.txt.
You can choose to save this file in your Session
folder, or in another location.
The following occurs when opening a session
with unavailable items:
With all Pro Tools Systems:
Inserts assigned to unavailable plug-ins are
made inactive.
Inputs, outputs, and sends that are assigned to
unavailable paths are made inactive.
With Pro Tools HD Only:
Any tracks beyond the maximum number of
available voices on the current system are made
inactive.
With Pro Tools LE Only:
Any tracks beyond the maximum number of
available voices on the current system are set to
voice off.
Opening a Session with Audio File
Names that Contain Illegal
Characters
Pro Tools 7.x does not support audio file names
that contain the following ASCII characters:
/ (Forward Slash)
\ (Backslash)
: (Colon)
* (Asterisk)
? (Question mark)
“ (Quotation marks)
< (Less-than symbol)
> (Greater-than symbol)
| (vertical line or pipe)
Any “high order” ASCII character (created
with a key combination)
When opening sessions that contain audio files
with illegal characters, Pro Tools automatically
creates a renamed copy of each file (replacing
these characters with an underscore “_”). Re-
named files are copied to the Renamed Audio
Files folder. The original files are left intact in
the Audio Files folder.
Before the session opens, you are prompted to
save a detailed report of the renamed files and
their original file names to a Notes text file. Fol-
low the on-screen instructions. By default, the
Notes text file is saved to the Session folder.

Chapter 8: Sessions 99
Opening a Session that Was Saved
with +6 dB Fader Gain
All Pro Tools 7.x sessions have a +12 dB fader
gain level. However, when saving a Pro Tools
7.x session to a lower version of Pro Tools that
supports +6 dB and +12 dB fader gain, the new
session can be saved with either a +6 dB or a
+12 dB maximum fader gain.
When saving a +12 dB session as a +6 dB ses-
sion, Pro Tools alerts you that any automation
settings over +6 dB will be lowered to +6 dB. See
“Saving a Copy of the Session” on page 101.
In Pro Tools 7.x, when opening a session that
was saved with a +6 dB maximum gain level, the
session will update to a +12 dB range.
Opening Recent Sessions
The Open Recent submenu in the File menu lets
you open any of the 10 most recently opened
Pro Tools sessions.
To open a recent session:
Choose File > Open Recent and choose the
session you want to open.
If a session is open when choosing a recent ses-
sion, you are prompted to save it before
Pro Tools closes the session and opens the cho-
sen recent session.
To open the most recent session:
Control+Shift+O (Windows) or Com-
mand+Shift+O (Mac).

Pro Tools Reference Guide100
Saving a Session
You should save regularly while working on
your session to ensure that your work is pre-
served on your hard drive.
Saving the Session File
The Save command saves the changes you have
made to your session and writes them over the
previously saved version of the session file. The
Save command cannot be undone.
To save a session:
Choose File > Save.
Revert to Saved Command
If you have made changes to a session since you
last saved it, you can discard those changes and
revert to its previously saved state.
To revert to the last saved version of a session:
Choose File > Revert to Saved.
Saving the Session File with a
New Name
To save a copy of the current session with a new
name or to a different hard drive location, use
the Save As command. The Save As command
closes the current session and lets you keep
working on the renamed copy. This is useful if
you are experimenting and want to save succes-
sive versions of the session.
By working this way, you can quickly retrace
your steps if you want to go back to an earlier
version of your session. The Save As command
saves a new version of the session file only, and
does not duplicate versions of the audio or fade
files.
To save a session with a new name:
1 Choose File > Save As.
2 Enter a new name for your session.
3 Click Save.
The renamed session file is saved in the session
folder along with the original session (unless
you specify a different destination). Any new
audio files that you record in your renamed ses-
sion will be placed into the same Audio Files
folder that was created for your original session.
If you have enabled the Operation prefer-
ence for Auto Backup, you can also open up
a backup copy of your session. This feature
lets you specify the total number of incre-
mental backups that are kept and how often
the session is saved. See “Auto Backup Sec-
tion” on page 78.
Pro Tools 7.x lets you name files with as
many characters as your operating system
supports.
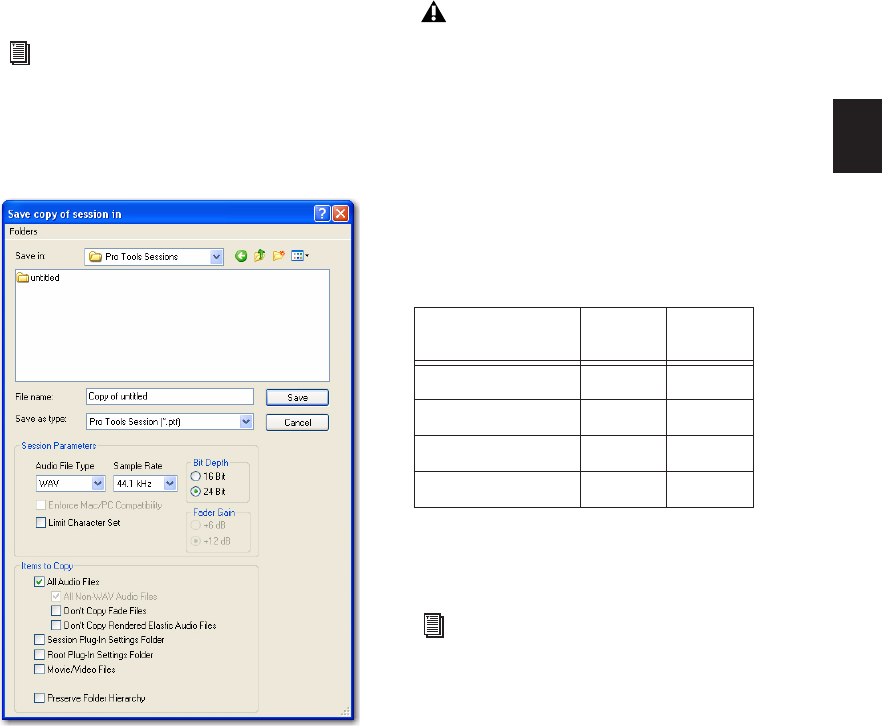
Chapter 8: Sessions 101
Saving a Copy of the Session
To save a copy of the current session with or
without its audio files and fade files, use the
Save Copy In command. In addition, you can
specify the session file format, audio file format,
bit depth, and sample rate for the session copy.
Unlike the Save As command, Save Copy In does
not close the original session, so subsequent ed-
its are made to the original session. Session cop-
ies can be used to archive important sessions, for
versioning, or as a means to prepare sessions for
transfer to another Pro Tools system.
Save Copy In can save only the audio being used
in the session. Any audio that was recorded or
imported and then later removed from the ses-
sion, but not deleted from disk, is not included
in the new session copy.
Using the Save Copy In command is the only
way to change the sample rate of a session. The
sample rate of each of the session’s copied audio
files is converted to the selected sample rate.
When you save a copy of the session to a lower
bit depth, Dither (and Noise Shaping) are ap-
plied. See the following table:
The Dither setting used for any conversion is the
Digidesign Dither plug-in with Noise Shaping
enabled.
To save a session copy in a new location:
1 Choose File > Save Copy In.
2 In the Save Copy In dialog, choose a destina-
tion and enter a name for the new session file.
3 Choose a session file format for the copied ses-
sion.
For information on sharing sessions be-
tween different platforms, Pro Tools sys-
tems, or Pro Tools software versions, see
Chapter 15, “File and Session Management
and Compatibility.”
Save Copy In dialog
To include all audio with the session copy,
All Audio Files must be selected in the Items
to Copy section.
Dither and Noise Shaping with Save Copy In
Session Bit Depth Dither Noise
Shaping
24-bit to 24-bit No No
16-bit to 24-bit No No
24-bit to 16-bit Yes Yes
16-bit to 16-bit No No
For more information about using Dither,
see “Dither” on page 746.

Pro Tools Reference Guide102
4 Set the Audio File Type for the copied session.
If the audio files need to be compatible with ei-
ther Windows or Mac, select BWF (.WAV) or
AIFF.
5 Set the session Sample Rate and Bit Depth for
the copied session.
6 If applicable, select a Fader Gain level for the
copied session.
7 If applicable, select “Enforce Mac/PC Compat-
ibility” to create session and audio files that can
be used on both Windows and Mac Pro Tools
systems (see “Saving Copies of Mac Sessions to
be Compatible with Windows” on page 290).
8 Select the Items to Copy for the copied ses-
sion.
9 Click Save.
Session Format
You can save the session copy in the following
formats, depending on your platform:
Windows:
• Pro Tools Session (.ptf); supports Pro Tools
7.x
• Pro Tools 5.1 -> 6.9 Session (.pts);
• Pro Tools 5.0 Session (.pt5)
• Pro Tools 4 24-Bit Session (.p24)
• Pro Tools 4 16-Bit Session (.pt4)
Mac:
• Latest; supports Pro Tools 7.x
• Pro Tools 5.1 -> 6.9 Session
• Pro Tools 5.0 Session
• Pro Tools 4 24-Bit Session
• Pro Tools 4 16-Bit Session
• Pro Tools 3.2 Session
Session Parameters
Audio File Type
You can save the session to reference BWF
(.WAV) or AIFF audio files. On the Mac, you can
also save the session to reference SD II audio
files (at sample rates up to 48 kHz).
Using Mixed File Types
A session can use mixed audio file types. If your
original session has mixed file types, they are
not converted to a different file type unless you
specify that they be converted. However, when
using mixed file types, audio performance will
be reduced (due to additional file handling re-
quired for some file formats).
Bit Depth
You can save the session at 16-bit or 24-bit
depth. If your session is in a different bit depth,
audio files are converted to the new session bit
depth, and copied to the specified location.
To include audio with the session copy, All
Audio Files must be selected.
When saving sessions to versions lower
than Pro Tools 5.1, multichannel tracks
(including stereo) and multi-mono plug-ins
are lost. In this case, separate the tracks and
plug-ins to individual mono tracks before
saving as a Pro Tools 5.0 session or lower.
SD II sessions are not supported with
Pro Tools on Windows, or with sample
rates higher than 48 kHz. Also, SD II ses-
sions do not support Elastic Audio. For op-
timal compatibility, convert SD II sessions
to BWF (.WAV).
For information on bouncing to disk and
dither, see “Dithering” on page 834.
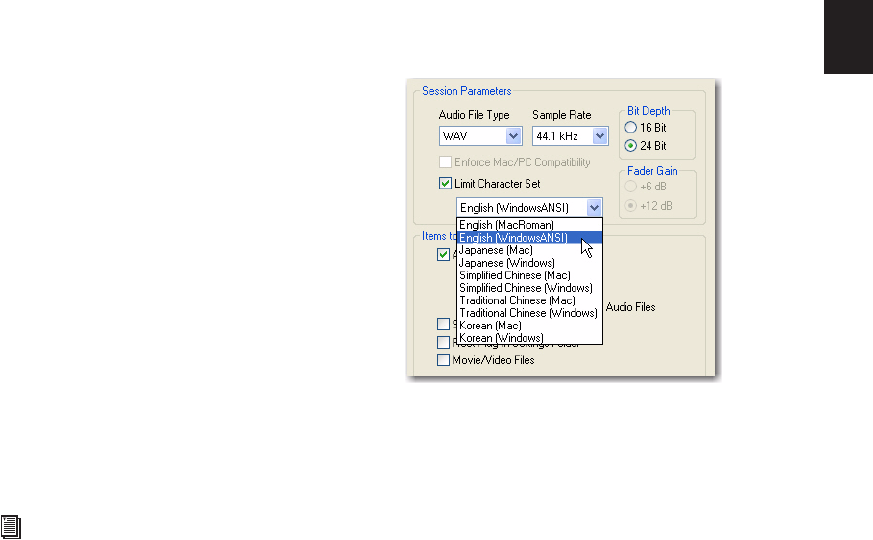
Chapter 8: Sessions 103
Sample Rate
You can save the session at sample rates of
44.1 kHz or 48 kHz (on Mbox 2, Mbox 2 Mini,
and Mbox) and at sample rates up to 96 kHz (on
003, 003 Rack, Digi 002, Digi 002 Rack,
Mbox 2 Pro, and Pro Tools|HD systems with a
96 I/O or 96i I/O) or up to 192 kHz (on
Pro Tools|HD systems with a 192 I/O or
192 Digital I/O). If your session is at a different
sample rate, audio files are converted to the new
session sample rate, and copied to the specified
location.
Fader Gain
When saving a Pro Tools 7.x session to a lower
version of Pro Tools that supports +6 dB and
+12 dB fader gain, you can save the new session
with either a +6 dB or a +12 dB maximum fader
gain. When saving a +12 dB session as a +6 dB
session, Pro Tools alerts you that any automa-
tion settings over +6 dB will be lowered to
+6 dB.
Enforce Mac/PC Compatibility
When saving a Pro Tools 7.x session to a lower
version of Pro Tools, this setting forces Windows
or Mac versions of Pro Tools to create sessions
and audio files that are usable on both plat-
forms.
Limit Character Set
When saving a copy of a session to the current
session format, you can choose to limit the char-
acter set to a single language by selecting the
Limit Character Set option.
When saving a copy of a session to a lower ses-
sion format, the Limit Character Set option is
automatically selected. Select a language from
the Limit Character Set pop-up menu.
To choose the language encoding when saving a
copy of a session:
1 Choose File > Save Copy In.
2 Select the Limit Character Set option.
3 Choose the language you want to use from the
Limit Character Set pop-up menu.
Items to Copy
All Audio Files
When this option is selected, all audio files are
copied to the new location.
This setting is automatically selected if you
change the bit depth or sample rate of the ses-
sion.
For more information, see “Saving Copies of
Mac Sessions to be Compatible with Win-
dows” on page 290.
Limit Character Set options in the Save Copy In dialog
Pro Tools Reference Guide104
All “Non-Native” Audio Files
The name of this option varies depending on
the audio file type you select. If you change the
audio file type of the session, this option ensures
that all files in the copied session are converted
to the selected file type. Use this option to avoid
the reduced performance of a session with
mixed file types.
This option is automatically selected if you do
any of the following:
• Change bit depth or sample rate.
• Copy a session on the Mac from SD II for-
mat to AIFF or BWF (.WAV) format.
• Select Enforce Mac/PC Compatibility.
Don’t Copy Fade Files
When this option is selected, Fade Files are not
copied to the new session Fade Files folder.
Pro Tools opens the session with all available
media, then shows you how many files are miss-
ing (if any) and asks how you want to proceed.
You can choose to locate the existing fades, us-
ing Manually Find Relink or Automatically Find
Relink, or choose to Skip All to let Pro Tools rec-
reate the fades from the session document. You
can also select Regenerate Missing Fades to ex-
clude fade files from the relink process and re-
generate them instead.
Don’t Copy Elastic Audio Rendered Files
When this option is selected, Elastic Audio Ren-
dered files are not copied to the new session’s
Rendered Files folder.
Pro Tools opens the session with all available
media, then shows you how many files are miss-
ing (if any) and asks how you want to proceed.
You can choose to locate the existing rendered
files, using Manually Find Relink or Automati-
cally Find Relink, or choose to Skip All to let
Pro Tools recreate the rendered files from the
session document. You can also select the “Re-
generate missing rendered files without search-
ing” option to exclude rendered files from the
relink process and regenerate them instead. (See
“Missing Files” on page 232.)
Session Plug-in Settings Folder
When this option is selected, the session’s Plug-
in Settings folder is copied to the new location.
The references to these plug-in settings in the
session are redirected to the copied settings files.
Root Plug-in Settings Folder
When this option is selected, the contents of the
root-level Plug-in Settings Folder are copied into
a folder named Place in Root Settings Folder, indi-
cating that these files will need to be moved to
the root level plug-in settings folder on the des-
tination system before you can use them. The
references to these settings files in the session
are not redirected to point to the copied files.
Movie/Video Files
When this option is selected, session video files
(Avid or QuickTime) are copied to the new loca-
tion, and session references are updated to point
to the copied video files.
Preserve Folder Hierarchy When selected, the
relative arrangement of session audio files lo-
cated across different drives or folders is main-
tained. The main folder for the session copy will
include subfolders for each drive or folder in the
original session and the destination subfolders
will use the same names as the source drives and
folders.
When this option is not selected, the Save Copy
In command copies all files of the same type, re-
gardless of their location, into a single destina-
tion folder.
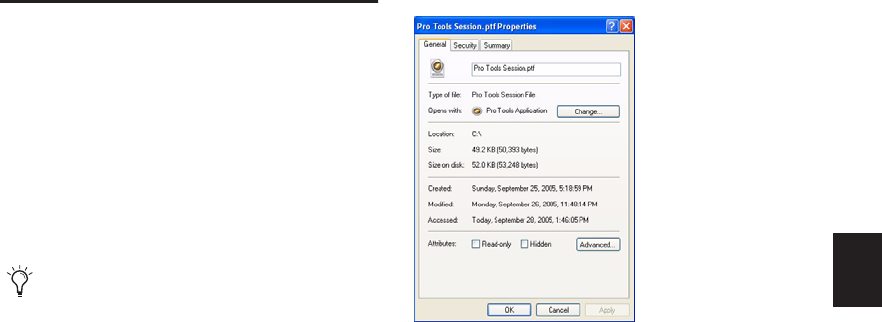
Chapter 8: Sessions 105
Creating Custom Session
Templates
You can create custom session documents that
are pre-configured to the track setups, mixer set-
ups, window arrangements, and zoom level
Memory Locations that you use most fre-
quently. Doing this will save you the trouble of
having to create your studio setup from scratch
every time you start a new session.
Creating Windows Templates
In Windows, you can create a session template
by making a session file a Read Only document.
To create a custom session template in Windows:
1 Create a session and arrange its elements as
you want them to appear in the template. You
can also define elements such as signal routing,
insert and send configurations, Track Views,
ruler settings, and Preference settings.
2 Choose File > Save As.
3 Name the session and click Save.
4 Close the session.
5 In Windows Explorer, locate the session file
that you just saved.
6 Right-click the file and choose Properties.
7 Under Attributes, select Read Only.
8 Click OK.
To use a session template in Windows:
1 Do one of the following:
• Double-click the session template in Win-
dows Explorer.
– or –
• In Pro Tools, open the session template us-
ing the File > Open Session command.
2 Choose File > Save As.
3 In the Save Session As dialog, create a new
folder where you want to save your session.
4 Name the session and click Save.
5 Start working in the session.
To modify the session template in Windows:
1 In Windows Explorer, open the session’s Prop-
erties.
2 Deselect the Read Only option and click Ap-
ply.
3 Open the session in Pro Tools and make your
changes.
4 Save the session and quit Pro Tools.
You can also install and use the factory
Pro Tools Session Templates included on
the Pro Tools Installer disc in the Additional
Files folder. Making a session a Read Only file (Windows)
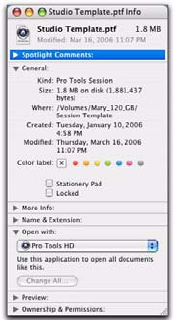
Pro Tools Reference Guide106
5 In Windows Explorer, reopen its Properties,
and change it back to a Read Only file.
Creating Mac Templates
On Mac, create a session template by saving a
session file as a Stationery Pad document. Once a
session is saved as a Stationery Pad, it acts as a
template that can be opened and saved as a new
session, or opened as the original stationery pad
for editing.
To create a custom session template on Mac:
1 Create a session and arrange its elements as
you want them to appear in the template. In ad-
dition to track setup, you can also define ele-
ments such as signal routing, insert and send
configurations, Mix and Edit window views,
ruler settings, and Preference settings.
2 Choose File > Save As.
3 Name the session and click Save.
4 Close the session.
5 In the Mac Finder, locate the session file that
you just saved.
6 Click once on the file to select it.
7 Choose File > Get Info.
8 If necessary, click the General expand/collapse
triangle to display the General information and
options.
9 Select the Stationery Pad option.
10 Select the Locked option.
11 Close the information window.
Saving a session as a Stationery Pad (Mac)
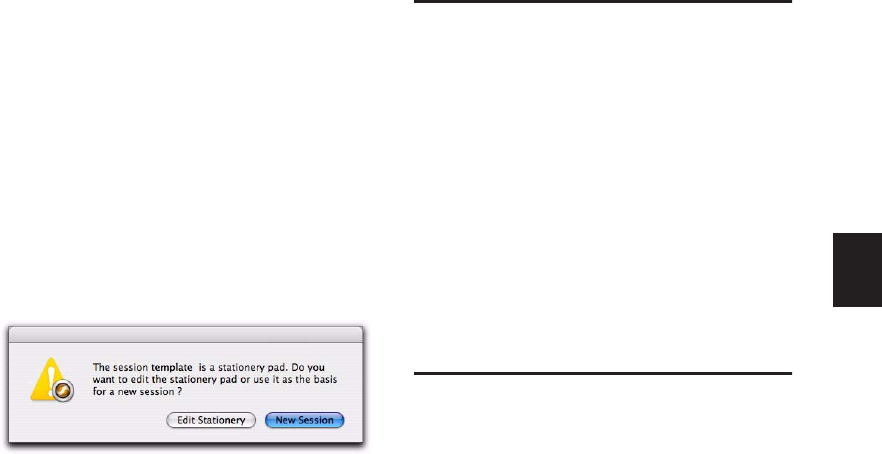
Chapter 8: Sessions 107
To use a session template on Mac:
1 Do one of the following:
• Double-click the session template in the
Mac Finder.
– or –
• In Pro Tools, open the session template us-
ing the File > Open Session command.
When you open a session saved as a Stationery
Pad, Pro Tools gives you the option of editing
the template or starting a new session using the
template settings.
2 Click one of the following:
Edit Stationery Lets you edit the session, but the
session remains a template. After you save your
changes, close the session, and re-open the ses-
sion, you are again prompted to either edit the
stationery pad or save a copy of the template as
a new session.
New Session Prompts you to save a copy of the
template as a new session. You can then work in
the new session normally.
Closing a Session
Pro Tools only lets you work on just one session
at a time. The Close Session command closes
your current Pro Tools session but leaves the
Pro Tools application running. Pro Tools
prompts you to save a session when closing it,
but it is recommended that you save your work
using the Save or Save As command before clos-
ing a session regardless.
To close a session:
Choose File > Close Session.
Exiting or Quitting Pro Tools
When you exit (Windows) or quit (Mac) the
Pro Tools application, Pro Tools prompts you to
save any open session before exiting or closing
the application.
To exit Pro Tools in Windows:
Choose File > Exit.
To quit Pro Tools on the Mac:
Choose Pro Tools > Quit Pro Tools.
Pro Tools Reference Guide108
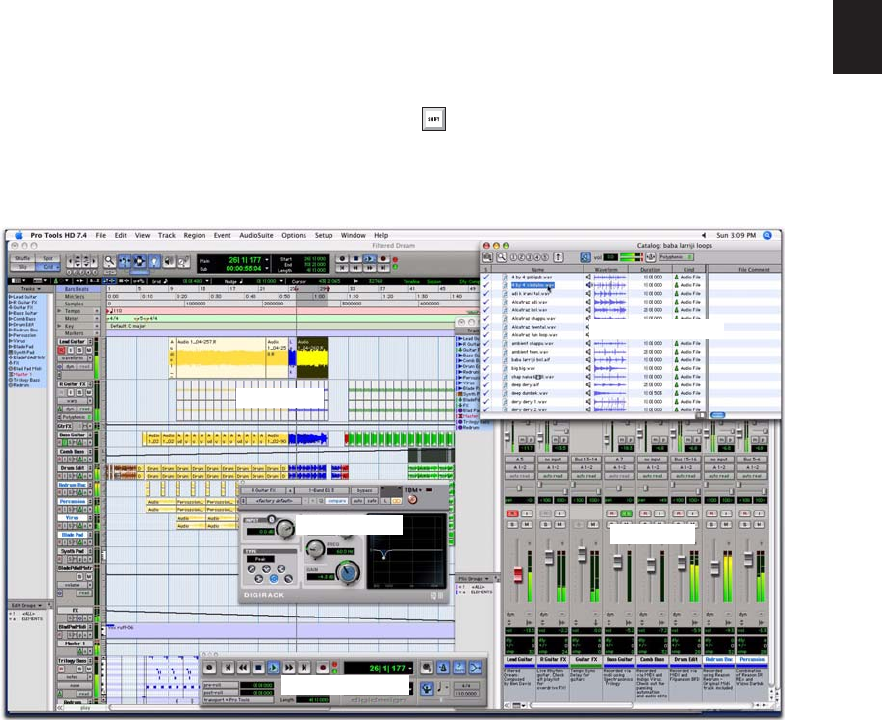
Chapter 9: Pro Tools Main Windows 109
Chapter 9: Pro Tools Main Windows
Pro Tools provides two complementary ways of
viewing tracks in a session: the Mix window and
the Edit window. Pro Tools lets you control the
transport and transport-related functions using
the Transport window. Individual Plug-in win-
dows let you control plug-in parameters (such as
Frequency and Q for an EQ). Additionally, Digi-
Base browsers let you manage, audition, and im-
port media for Pro Tools sessions.
To toggle between the Mix and Edit win-
dows, press Control+Equals (=) (Windows),
or press Command+Equals (=) (Mac).
Figure 3. Pro Tools windows
Edit window
DigiBase browser
Mix window
Transport window
Plug-in window
Pro Tools Reference Guide110
Mix Window
In the Mix window (see Figure 4 on page 111),
tracks appear as channel strips just like a mixing
console, with controls for:
• Inserts
• Sends
• Input and output assignments
• Volume
• Panning
• Record enable
• Track Input monitoring
• Automation mode
• Solo and Mute
• Instrument controls
• Mic preamps (Pro Tools HD only)
To display the Mix window:
Choose Window > Mix.
To display all Mix window view options:
Select View > Mix Window > All.
Edit Window
The Edit window (see Figure 5 on page 112) pro-
vides a Timeline display of audio, video, MIDI
notes, as well as other MIDI data and mixer au-
tomation for recording, editing, and arranging
on tracks. As in the Mix window, each track has
controls for record enable, solo, mute, and auto-
mation mode.
To display the Edit window:
Choose Window > Edit.
To display all Edit window view options:
Select View > Edit Window > All.
For information on selecting individual view
options, see “Views in the Mix and Edit Win-
dows” on page 718.
For information on selecting individual view
options, see “Views in the Mix and Edit Win-
dows” on page 718.
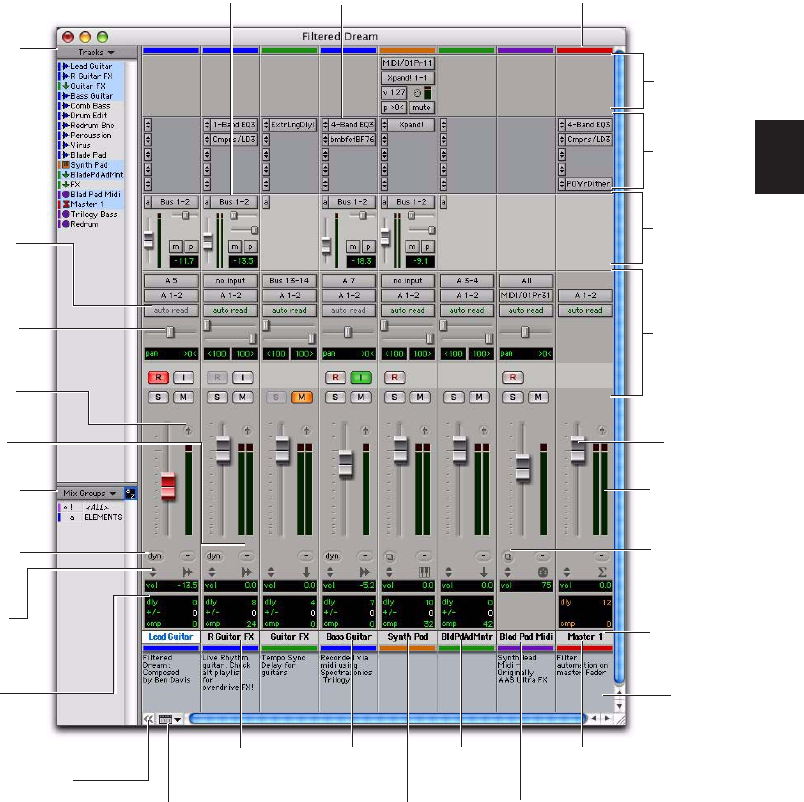
Chapter 9: Pro Tools Main Windows 111
Figure 4. Pro Tools Mix window
Inserts
View
(page 719)
Track List
(page 154)
Volume
fader
(page 142)
Pan Slider
(page 142)
Level meter
(page 142)
Stereo
Audio Track
(page 134)
Auxiliary
Input
(page 135)
Delay
Compensation
View (page 721)
Master
Fader
(page 136)
AutoMatch
indicator
(page 787)
Plug-in Insert (page 751)
Send with
Send controls
(page 724)
Track
Path selectors
and controls
(page 113)
Output Window
button
(page 730)
Mono
Audio Track
(page 134)
MIDI
Track
(page 137)
MIDI Track
Patch Select
button
(page 541)
Sends
View
(page 720)
Automation
Mode selector
(page 780)
Track
Comments
View
(page 719)
Voice selector
(page 162)
Track Name
(page 145)
Mix Group List
(page 175)
Group ID
indicator
(page 178)
Track Color
Coding
(page 172)
Instrument
Track
(page 137)
Instrument
View
(page 719)
Mix Window
View selector
(page 718)
Show/Hide
Track List/Group List
View
(page 154)
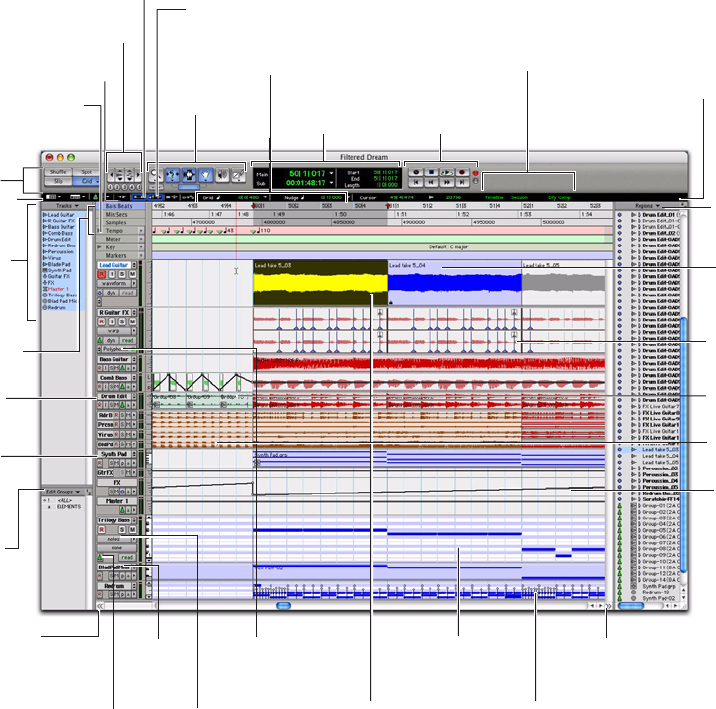
Pro Tools Reference Guide112
Figure 5. Pro Tools Edit window
Timebase and
Conductor rulers
(page 595)
Region
List
(page 189)
Track List
(page 154)
Edit Mode
buttons
(page 421)
Edit tools
(page 113)
Zoom buttons (page 424)
Counters and Edit
Selection indicators
(page 114)
Grid and
Nudge values
(page 114)
MIDI Notes View
(page 406)
MIDI Velocity View
(page 535)
Selected Region
(page 449)
Track View
selector
(page 149)
Edit Group
List
(page 601)
Commands Keyboard Focus (page 20)
Link Edit/Timeline
Selections
(page 458)
Tab to Transients (page 457)
Transport controls
(page 116)
Audio
Waveform
View
(page 404)
Volume
Automation
View
(page 786)
MIDI Track
(page 134)
Audio Track
(page 133)
Graphic Tempo Editor
(page 607)
Show/Hide Track
List/Group List
View
(page 154)
Show/Hide
Region List
(page 189)
Edit Window bar
(page 114)
View selectors
(page 114)
Timebase
selector
(page 600)
Elastic Audio
Warp View
(page 504)
Instrument
Track
(page 137)
Elastic Audio
Plug-in selector
(page 504)
Region Group
(page 675)
Region Loop
(page 671)
Timeline, Session,
and Delay
Compensation
Status indicators
(page 115)
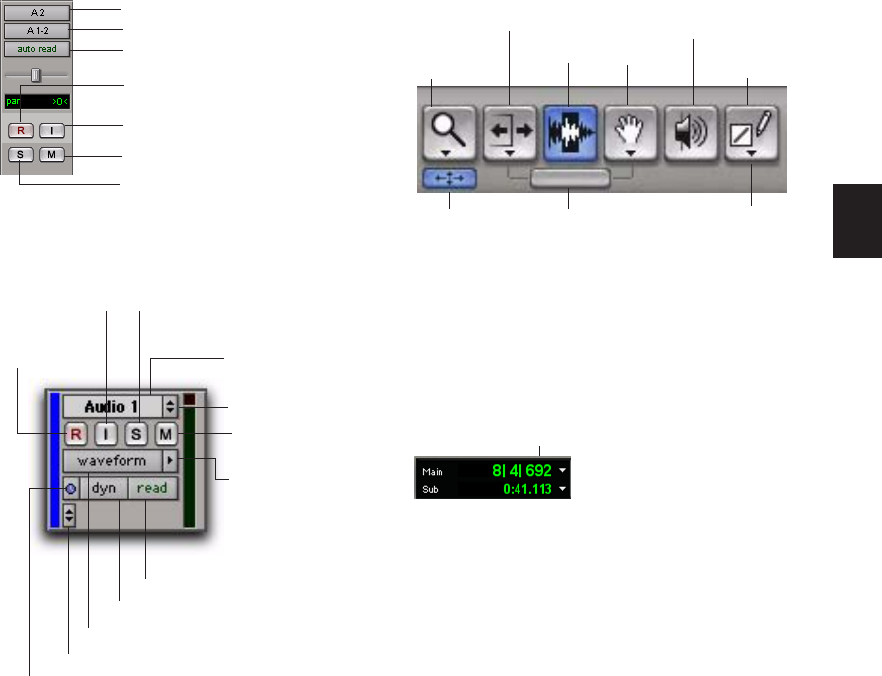
Chapter 9: Pro Tools Main Windows 113
Track Path Selectors and Controls Edit Tools
Edit Window Counters and
Selection Indicators
Main and Sub Counters
The Main and Sub Counters can be set for differ-
ent Time Scale formats (such as Samples,
Bars:Beats, or Minutes:Seconds). For more infor-
mation, see “Main Time Scale” on page 597.
These counters are also displayed in the Trans-
port window.
Mix window track controls for mono audio track
(Wide View)
Edit window track controls for a mono audio track
(medium track height)
Automation Mode selector (page 780)
Record Enable button (page 333)
TrackInput Monitor button (page 339)
(Pro Tools HD only)
Solo button (page 168)
Mute Button (page 170)
Audio Input Path selector (page 141)
Audio Output Path selector (page 141)
Automation Mode selector (page 780)
Mute button
(page 170)
Voice selector (page 162)
Track Height selector
(page 152)
Playlist selector
(page 410)
Track Name (page 145)
Record Enable
button
(page 333)
Solo button
(page 168)
TrackInput Monitor
button (page 339)
Timebase selector (page 600)
Track View selector (page 149)
Elastic Audio plug-in selector (page 504)
Edit tools in Edit window
Edit window display showing counters
Zoomer tool
(page 424)
Trimmer tools
(page 433) Selector
tool
(page 303)
Grabber
tools
(page 451)
Scrubber tool
(page 441)
Smart Tool
(page 439)
Custom Note
Duration button (page 529)
Pencil tool
(page 528)
Zoom Toggle
(page 424)
Main and Sub Counters (page 460)
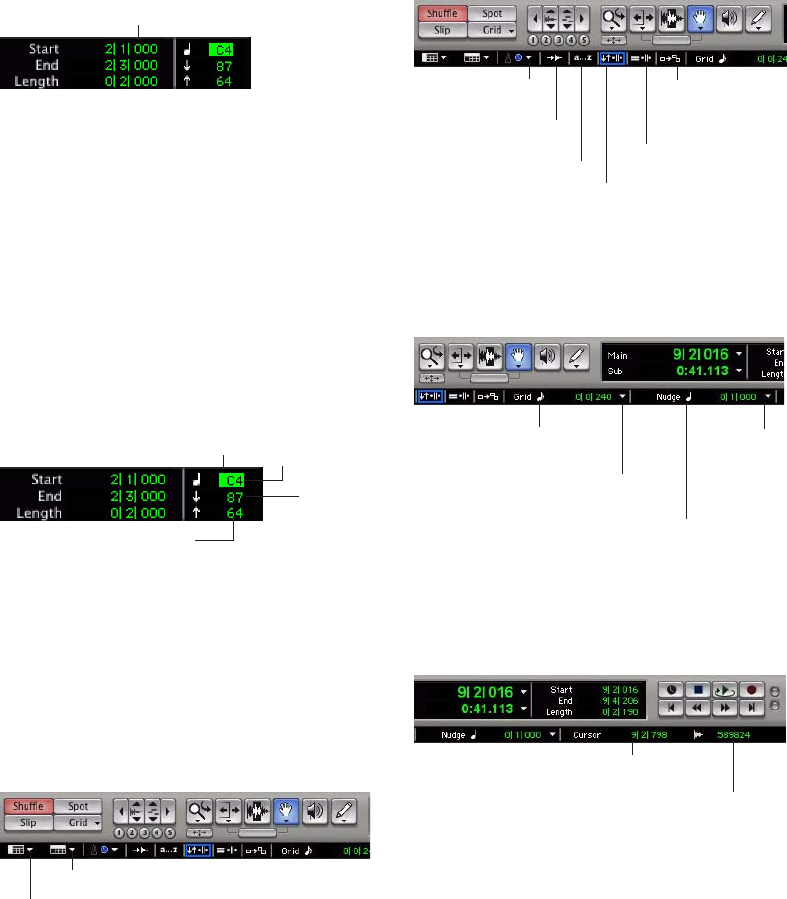
Pro Tools Reference Guide114
Edit Selection Indicators
The Edit Selection Start, End, and Length indica-
tors display can be set for different Time Scale
formats (such as Samples, Bars:Beats, or Min-
utes:Seconds). For more information, see “Main
Time Scale” on page 597.
Event Edit Area
The Event Edit Area provides time, pitch, and
other information for the currently selected au-
dio or MIDI data. It also lets you define selec-
tions using the computer keyboard.
Edit Window Bar
The Edit Window bar contain various selectors,
commands, indicators, and pop-up menus for
working in the Pro Tools Edit window.
View Selectors
Commands
Grid/Nudge Value Indicators and Pop-
Up Menus
Cursor Location Indicators
Edit Selection indicators in the Edit window
Event Edit Area showing MIDI track information
View selectors in the Edit Window bar
Edit Selection indicators (page 460)
Note Attributes (page 536) Pitch
Attack
Velocity
Release Velocity
Ruler View selector (page 718)
Edit window View selector (page 718)
Commands in the Edit Window bar
Grid/Nudge Value indicators and pop-up menus in the
Edit Window bar
Cursor Location indicators in the Edit Window bar
Linearity Display
Mode (page 613)
Tab to Transients
(page 457)
Commands Keyboard Focus
(page 20)
Mirrored MIDI
Editing
(page 527)
Link Track and Edit Selection
(page 448)
Link Timeline and Edit Selection
(page 447)
Grid Value indicator
(page 656)
Grid Value pop-up menu
(page 656)
Nudge Value indicator
(page 472))
Nudge Value
pop-up menu
(page 472)
Cursor Location indicator (page 303)
Cursor Location Value indicator
(page 303)

Chapter 9: Pro Tools Main Windows 115
Timeline, Session, and Delay
Compensation Status Indicators
Timeline Data Online Status Indicator Is green
when all files in use in track playlists are avail-
able for playback. If files are offline, being pro-
cessed, or otherwise unavailable for playback,
this indicator is red.
Session Data Online Status Indicator Is green
when all audio and fade files referenced by the
session are available for playback. If files are off-
line, being processed, or otherwise unavailable
for playback, this indicator is red.
Delay Compensation Status Indicator (Pro Tools
HD Only) Is displayed when Delay Compensa-
tion is enabled. When Delay Compensation is
disabled, this indicator is not displayed.
Edit Window Default Length
Pro Tools lets you set a default length for the
Edit window in hours, minutes, seconds, and
frames (Pro Tools HD or Pro Tools LE with DV
Toolkit 2 only). This is useful if you want to as-
semble a session of a particular length or leave
extra room to expand the Edit window’s work
area in your session. The maximum length is 12
hours and 25 seconds at 48 kHz, and propor-
tionally less at higher sampling rates. For best
scrollbar sensitivity, set the length to slightly
longer (a minute or more) than the total session
or song length.
To set the default length for the Edit window:
1 Choose Setup > Preferences.
2 On the Display page, type the value in hours,
minutes, seconds, and frames in the Edit Win-
dow Default Length field.
3 Click OK.
Timeline, Session, and Delay Compensation indicators
in the Edit Window bar
Timeline Data
Online Status
indicator
Session Data
Online Status
indicator
Delay
Compensation
Status indicator
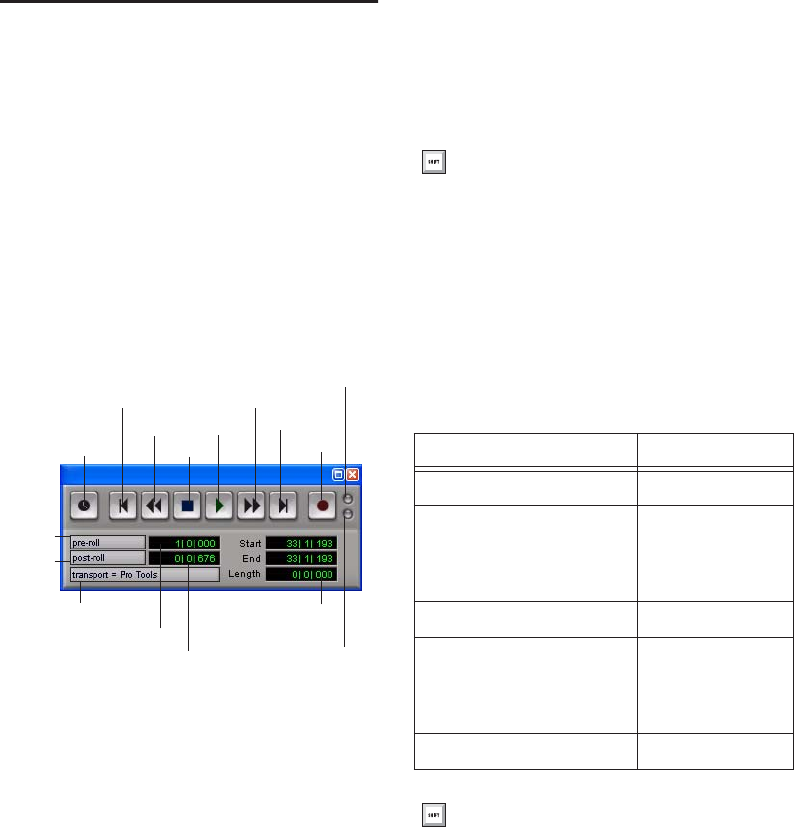
Pro Tools Reference Guide116
Transport Window
The Transport window can be set to show basic
transport controls, counters, MIDI controls, and
expanded features. The counters in the Trans-
port window mirror the controls and counters at
the top of the Edit window.
To display the Transport window:
Choose Window > Transport.
Basic Transport Controls and
Counters
Online Puts Pro Tools online so that playback
and recording is triggered by an external time
code source.
Return to Zero Locates to the beginning of the
session.
Right-clicking the Return to Zero button ac-
cesses the Write to Start and Write to All auto-
mation commands.
Rewind Rewinds from the current play location.
You can also click repeatedly to rewind incre-
mentally, by an amount based on the Main
Time Scale, as follows:
Transport window showing basic transport controls and
counters (Main and Sub Counters and MIDI not shown)
Start, End, and Length
Selection indicators
Online
Rewind
Fast Forward
Stop
Play
Record
Return to Zero
Go to End
Pre-Roll
Transport Master
Post-Roll
Track Record Enable indicator
TrackInput Monitor
indicator
Pre-Roll indicator
Post-Roll indicator
Press Enter (Windows) or Return (Mac) to
Return to Zero.
Rewind Increments
Main Time Scale Format Increment Amount
Min:Sec 1 second
Time Code
(Pro Tools HD or Pro Tools LE
with DV Toolkit 2)
1 frame
Bars:Beats 1 bar
Feet+Frame
(Pro Tools HD or Pro Tools LE
with DV Toolkit 2)
1 foot
Sample 1 second
With the Numeric Keypad mode set to
Transport, you can rewind by pressing 1.
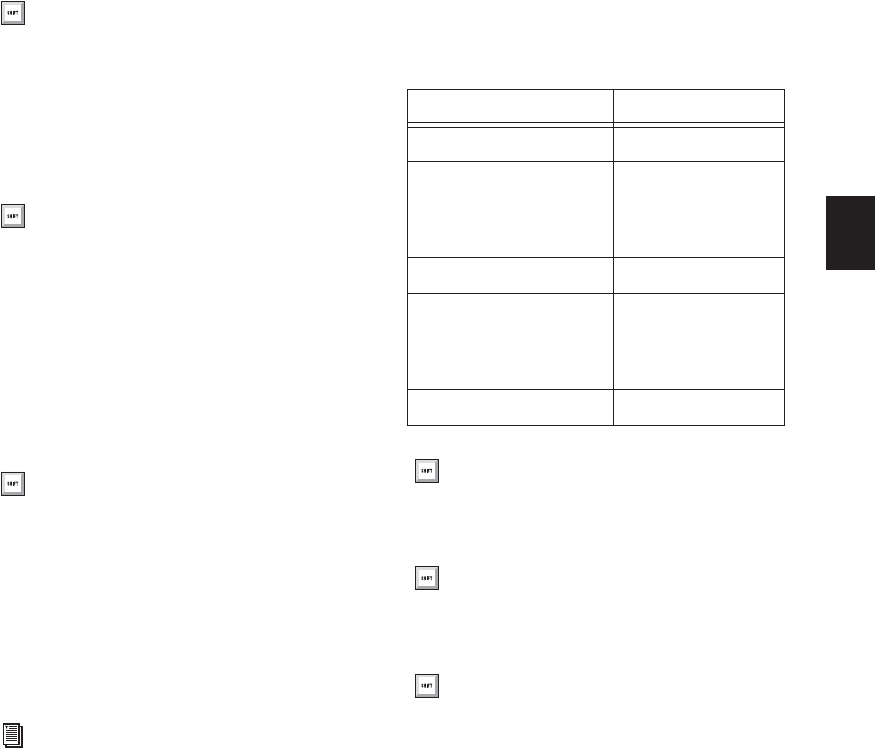
Chapter 9: Pro Tools Main Windows 117
Stop Stops playback or recording.
Play Starts playback or (if the Record button was
clicked first) recording from the Timeline inser-
tion point or the Play Start Marker location if
Dynamic Transport mode is enabled.
Right-clicking the Play button lets you select the
playback mode from a pop-up menu:
• Half-Speed
• Prime for Playback
• Loop
• Dynamic Transport
With the Transport stopped, Start-click Play
(Windows) or Control-click Play (Mac) to toggle
Loop Playback mode. When enabled, a loop
symbol appears in the Play button and Pro Tools
plays continuously from the beginning of the
selection to the end.
Fast Forward Fast forwards from the Timeline in-
sertion point. You can also click repeatedly to
fast forward incrementally (by an amount based
on the Main Time Scale).
Go to End Locates to the end of the session.
You can also stop the transport by pressing
the Spacebar, or with the Numeric Keypad
mode set to Transport, pressing 0.
You can also begin playback by pressing the
Spacebar, or with the Numeric Keypad
mode set to Transport, pressing 0.
To initiate playback at half-speed, you can
also press Shift+Spacebar (Windows or
Mac) or Shift-click (Mac) the Play button.
For more information on loop playback and
Dynamic Transport mode, see “Loop Play-
back Mode” on page 314.
Fast-Forward Increments
Main Time Scale Format Increment Amount
Min:Sec 1 second
Time Code
(Pro Tools HD or Pro Tools
LE with DV Toolkit 2)
1 frame
Bars:Beats 1 bar
Feet+Frame
(Pro Tools HD or Pro Tools
LE with DV Toolkit 2)
1 foot
Sample 1 second
With Numeric Keypad mode set to Trans-
port, you can fast forward by pressing 2.
You can press Control+Enter (Windows) or
Option+Return (Mac) on the QWERTY key-
board to locate to the end of the session.
You can also Right-click the Go to End but-
ton to access automation commands Write
to End and Write to All.

Pro Tools Reference Guide118
Record Arms Pro Tools for recording (the button
flashes). Clicking Play then starts recording on
record-enabled tracks only.
Right-clicking the Record button lets you select
the record mode from a pop-up menu:
• Normal
• Loop
• Destructive
• QuickPunch
• TrackPunch (Pro Tools HD only)
• Destructive Punch (Pro Tools HD only)
You can also cycle through the Pro Tools record
modes with the Transport stopped, by Start-
clicking (Windows) or Control-clicking (Mac)
the Record button.
The Record button changes to indicate the cur-
rently selected mode: blank for Nondestructive,
“D” for Destructive, a loop symbol for Loop
Record, “P” for QuickPunch, “T” for Track-
Punch, and “DP” for DestructivePunch.
Track Record Enable Indicator When lit (red), in-
dicates that at least one audio track is currently
record-enabled. When off (gray), no tracks are
currently record-enabled.
TrackInput Monitor Indicator When lit (green),
indicates that at least one audio track is cur-
rently set to Input Only monitoring (regardless
of record enable status). When off (gray), all
tracks are in Auto Input monitoring.
Pre-Roll During playback or record, specifies the
amount of audio that plays before the Play
(Timeline) Cursor or Play Start Marker location,
or beginning of the Timeline selection. Pre-roll
is particularly useful with punch recording since
it provides you with time to “catch the beat” be-
fore reaching the punch-in point. To set the pre-
roll amount, enter a new value in this field, or
drag the Pre-Roll flag in the Main Timebase
ruler.
To enable pre-roll:
Click the Pre-Roll button to the left of the pre-
roll field so it becomes highlighted.
Post-Roll During playback or record, specifies
the amount that plays after the end of a Time-
line selection. Post-roll is useful in punch re-
cording since playback continues after the
punch-out point so you can check for a smooth
transition to previously recorded material. To
set the post-roll amount, enter a new value in
this field, or drag the Post-Roll flag in the Main
Timebase ruler.
To enable post-roll:
Click the Post-Roll button to the left of the
post-roll field so it becomes highlighted.
Start Specifies the beginning of the play or
record range. You can set the start point by en-
tering a location in this field, or by dragging the
corresponding Timeline Selection or Play Start
Marker in the Main Timebase ruler. For more in-
formation, see “Timeline Selection Markers” on
page 354.
You can also begin recording immediately
by pressing F12, pressing Control+Spacebar
(Windows) or Command+Spacebar (Mac),
or with the Numeric Keypad mode set to
Transport, pressing 3.
To initiate recording at half-speed, you can
press Control+Shift+Spacebar (Windows)
or Command+Shift+Spacebar (Mac).
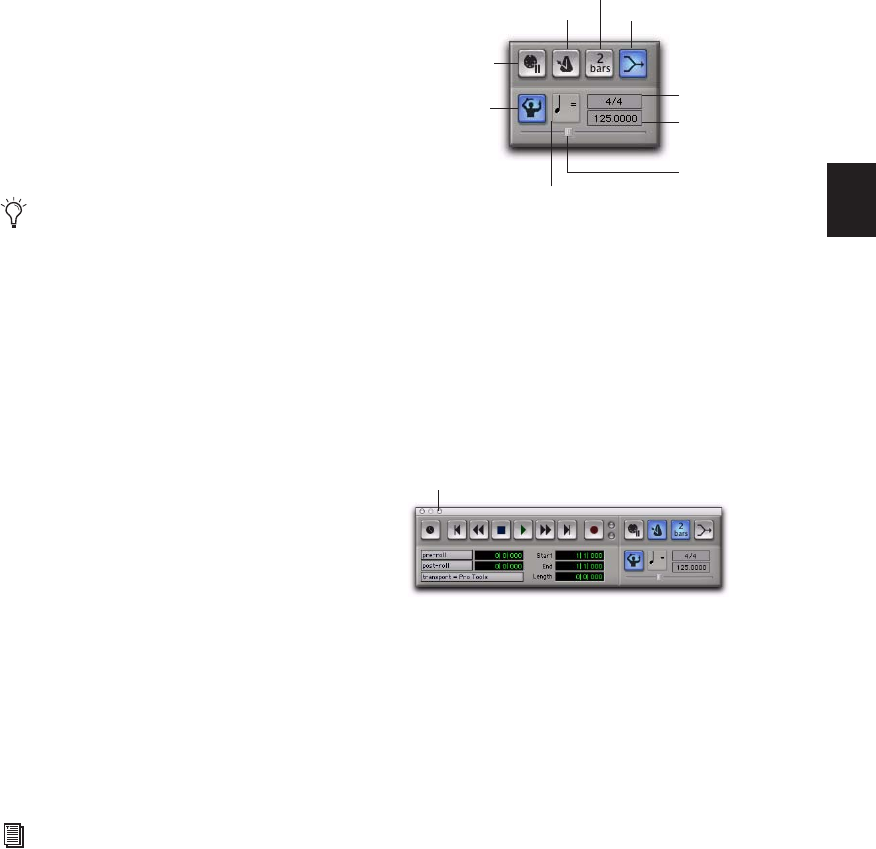
Chapter 9: Pro Tools Main Windows 119
End Specifies the end of the play or record range.
You can set the end point by entering a location
in this field, or by dragging the corresponding
Timeline Selection Marker in the Main Time-
base ruler. For more information, see “Timeline
Selection Markers” on page 354.
Length Specifies the length for the play or record
range. You can set the length by entering a loca-
tion in this field, or by selecting a range in any
Timebase ruler.
Transport Master Selector Specifies the “master”
for transport functions and provides a control to
take enabled devices offline.
To set a Transport Master:
Click the Transport Master selector, from the
Transport submenu, select a Transport Master:
Pro Tools, Machine, MMC (MIDI Machine Con-
trol), or Remote.
To take a device offline:
Click the Transport Master selector, from the
Online submenu, deselect the device (MIDI or
Machine). Device options depend on the cur-
rent Transport Master, and which devices have
been set up in Pro Tools.
To bring the device back online, select it in the
Online submenu.
MIDI Controls
To view the MIDI controls in the Transport, do one
of the following:
Select View > Transport > MIDI Controls.
– or –
Control-click (Windows) or Command-click
(Mac) the Expand/Collapse “+” button in the
Transport window to display the MIDI controls.
When the Timeline and Edit selections are
linked, you can make an Edit selection in a
track’s playlist to set the play and record
range. See “Linking or Unlinking Timeline
and Edit Selections” on page 447
If you using an MMC device, see Chapter 42,
“Working with Synchronization.”
If you are using the Digidesign Machine-
Control option, see the MachineControl
Guide.
Transport window showing MIDI controls
Transport Window with MIDI controls
Tempo Ruler
Enable
Wait for Note
Countoff
Current Meter
Metronome Click MIDI Merge
Current Tempo
Tempo Resolution (Beat Value) pop-up menu
Tempo slider
Expand/Collapse “+” button
Pro Tools Reference Guide120
Wait for Note When selected, recording does not
begin until a MIDI event is received. This en-
sures that you begin recording when you’re
ready to play, and that the first note, or other
MIDI data, is recorded precisely at the beginning
of the record range.
Metronome Click When selected, Pro Tools gen-
erates a metronome pulse that can be set to trig-
ger built-in sounds or MIDI instruments during
playback and recording.
The Pro Tools metronome is configured in the
Click/Countoff Options dialog. Double-click the
Metronome Click button to open the
Click/Countoff Options dialog.
Countoff When selected, Pro Tools counts off a
specified number of measures (indicated in the
button) before playback or recording begins.
Double-click the Countoff button, to open the
Click/Countoff Options dialog.
MIDI Merge When selected (Merge mode), re-
corded MIDI data is merged with existing track
material. When deselected (Replace mode), re-
corded MIDI data replaces existing track mate-
rial.
Tempo Ruler Enable (Conductor) When selected,
Pro Tools uses the tempo map defined in the
Tempo ruler. When deselected, Pro Tools
switches to Manual Tempo mode and ignores
the Tempo ruler.
In Manual Tempo mode, you can enter a BPM
value in the tempo field, or tap in the tempo
with the T key on your QWERTY keyboard.
Tempo Slider When the Tempo Ruler Enable
(Conductor) is disabled, Pro Tools ignores the
tempo events in the Tempo track and instead
plays back the specified Manual Tempo. This
tempo can be set with the Tempo slider.
Current Meter Displays the session’s current
meter based on the play location. Double-click
the Current Meter indicator to open the Change
Meter window.
Current Tempo Displays the session’s current
tempo based on the play location. In Manual
Tempo mode, you can enter a BPM value into
this field, or manually tap in a tempo with a
computer keyboard or an external MIDI key-
board.
You can press F11 to turn on Wait for Note,
unless the MIDI preference for “Disable F11
for Wait for Note” is enabled.
On Mac, the Desktop Keyboard Shortcut
uses the same key command that Pro Tools
uses for Wait For Note (F11). To use F11
for Wait For Note in Pro Tools, be sure to
disable the Desktop Keyboard Shortcut in
the Apple System Preferences.
With the Numeric Keypad mode set to
Transport, press 7 to enable the Metronome
Click.
With the Numeric Keypad mode set to
Transport, press 8 to enable the Countoff.
With the Numeric Keypad mode set to
Transport, press 9 to enable MIDI Merge.

Chapter 9: Pro Tools Main Windows 121
DigiBase Browsers
DigiBase databases are accessed through Digi-
Base browsers. Browsers provide an intuitive user
interface to DigiBase databases with many con-
venient features for various file management
tasks (such as search and sort functions).
Browsers in Pro Tools are analogous to windows
in your computer’s operating system (such as
Windows Explorer or the Mac Finder), but are
designed for Pro Tools workflow. Multiple
browsers can be displayed simultaneously, and
arranged independently with custom display
settings for each.
Browsers let you search and sort audio files,
video files, and sessions. These files are dis-
played in browsers and can be dragged directly
into the current Pro Tools session.
When offline items are needed, Pro Tools lets
you find the correct matching files, then relink
to online media.
The main elements of a DigiBase browser (see
Figure 6 on page 122) include the following:
Title Bar Shows the browser type (Workspace,
Volume, Project, or Catalog), and the name of
its associated volume, session or catalog.
Toolbar Provides the Browser menu, Search icon,
View Presets (numbered 1–5), and browser nav-
igation tools.
Column Headers Display the type of metadata
displayed in the Items List. Column Headers can
be:
• Resized by dragging the column border, or
rearranged by dragging the Column head-
ers.
• Dragged to either of two available panes,
the Fixed or Scrolling panes.
Items List Displays the contents of a volume,
folder, session, or Catalog database. Each col-
umn in the items list displays metadata (such as
file name and format) for volumes, folders, and
files in the Items List.
There are three types of Pro Tools browsers
available on all supported systems:
• The Workspace browser
• Volume browsers
• The Project browser
DigiBase Pro (Pro Tools HD or Pro Tools LE with
DV Toolkit 2 only) provides one additional type
of browser:
• Catalogs
To open the Workspace browser, press Alt+;
(Windows) or Option+; (Mac). To bring all
DigiBase browsers to the front, press Alt+J
(Windows) or Option+J (Mac). To send all
DigiBase browsers to the back, press
Alt+Shift+J (Windows) or Option+Shift+J
(Mac)
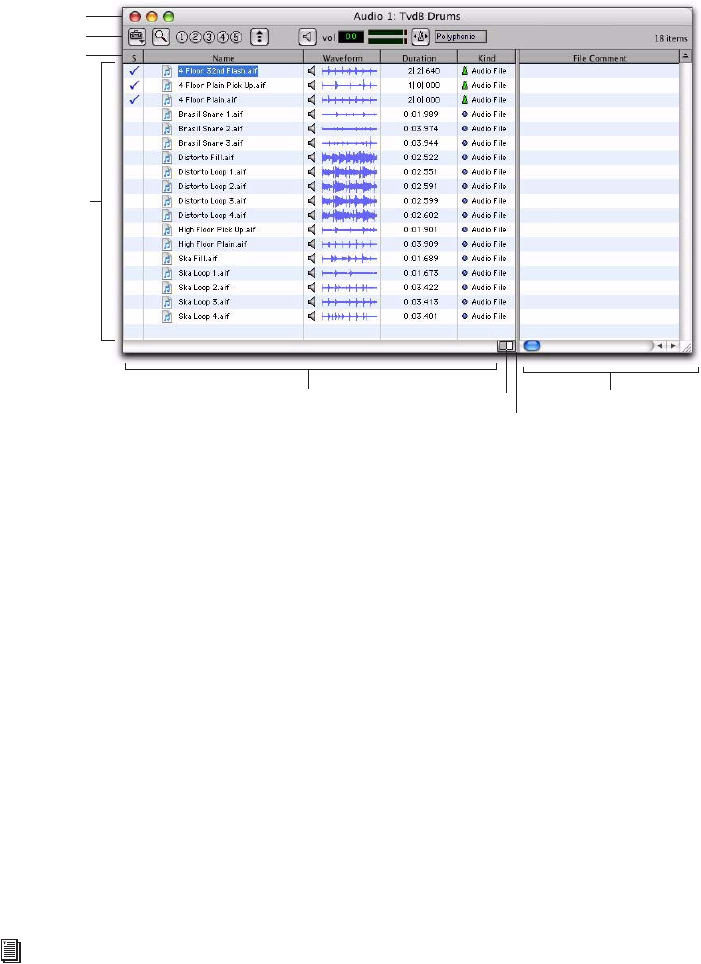
Pro Tools Reference Guide122
Workspace Browser
The Workspace browser provides access to all
your mounted volumes, as well as the folders
and files they contain.
Using the Workspace browser, you can:
• Access all mounted volumes.
• Access all Catalogs.
• Search across multiple volumes and Cata-
logs simultaneously.
• Designate volumes for Record and Play-
back, Playback Only, or Transfer.
• Unmount volumes.
• View, manage, audition, and import indi-
vidual items in any catalog or mounted
volume.
• Update databases for entire volumes.
Volume Browsers
Volume browsers provide file management for
local and network volumes. Volumes are format-
ted partitions on a physical drive (hard drive).
Open a Volume browser by double-clicking a
volume in the Workspace browser. Any changes
made in Volume browsers (such as copying, de-
leting, or moving files and folders) is mirrored
on the volumes themselves. Volumes include
mounted hard drives, network storage, and
CD/DVD-ROMs.
Using Volume browsers you can:
• View, manage, audition, and import indi-
vidual items on the volume.
• Update a database for contents of the vol-
ume.
Figure 6. Main elements of a DigiBase browser (Volume browser shown).
Toolbar
Items
List
Fixed pane Scrolling pane
Pane split
Show/Hide
Column
headers
TItle bar
For more information about the Workspace
browser, see “Workspace Browser” on
page 238.
Chapter 9: Pro Tools Main Windows 123
Project Browser
The Project browser provides powerful search
and management tools for the files referenced in
your current session, regardless of where they
are stored. Using the Project browser, you can:
• Show all the media files associated with the
current session, including any missing
files.
• View, manage, audition, and spot individ-
ual items.
DigiBase Pro Catalogs
(Pro Tools HD and Pro Tools LE with
DV Toolkit 2 Only)
Catalogs provide the highest level of Pro Tools
file management. Catalogs make it easy to orga-
nize files from multiple sources into libraries of
favorite files. Catalogs can be sorted and
searched, even when the files they reference are
offline. Catalogs can also be shared.
Using Catalogs, you can:
• Collect and organize files from any combi-
nation of volumes.
• Create catalogs of complete volumes to
view and search even if a volume is offline.
• View, manage, audition, and import indi-
vidual items in the catalog.
• Update a database for contents of catalog.
Task Window
The Task window is a utility for viewing and
managing all of the background tasks that you
initiate with Pro Tools. Use the Task window to
monitor, pause, or cancel background tasks such
as file copies, searches, indexing, and fade cre-
ation.
Relink Window
The Relink window provides tools and features
for relinking sessions and catalogs to media files.
Use Relink tools to search and reacquire missing
files for use in the current session.
Window Configurations
Pro Tools provides a powerful means of manag-
ing the configuration of windows in your ses-
sion, as well as the internal window configura-
tions of the Edit, Mix, and Transport windows.
Use the Window Configuration List to create (or
delete) and manage stored Window Configura-
tions. Pro Tools lets you store up to 99 Window
Configurations. Window Configurations are
saved with the session.
For detailed information about the Project
browser, see “Project Browser” on page 241.
For detailed information about Catalogs,
see “DigiBase Pro Catalogs” on page 243.
For detailed information about the Task
window, see “Task Window” on page 247.
For detailed information about the Relink
window, see “Relink Window” on
page 234.
Create a session template with your favorite
Window Configurations. You can then use
the template when you start a new session,
or you can use Import Session Data to im-
port Window Configurations into your cur-
rent session.
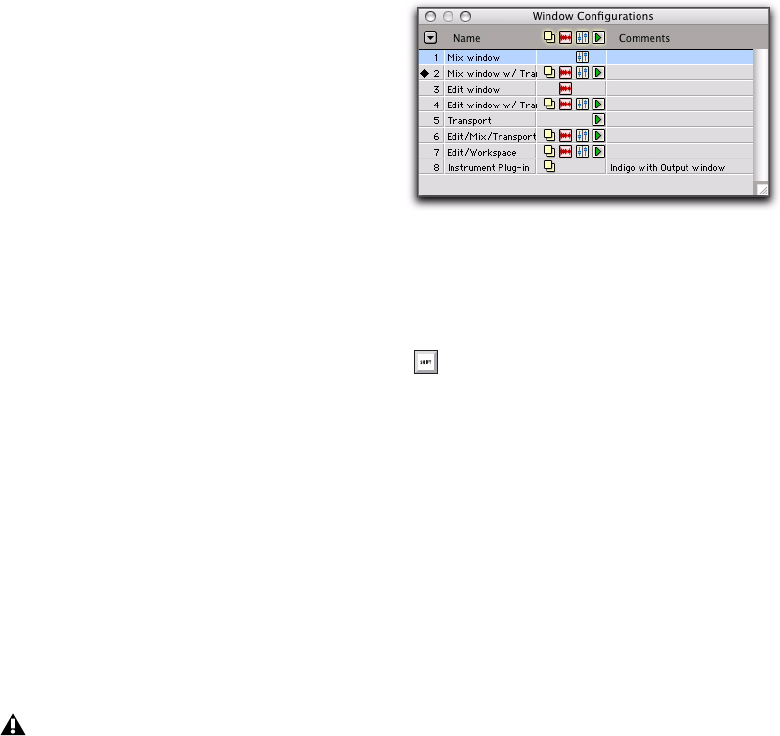
Pro Tools Reference Guide124
A Window Configuration can store the location
and size of all open windows, including:
• Edit window
• Mix window
• Workspace browser
• Project browser
• DigiBase browsers
• Session Setup window
• Time, Tempo, and Event Operations win-
dows
• MIDI Event List
• Real-time MIDI Properties window
• Beat Detective window
• Plug-in windows
• Panner windows
• Mic Pre windows
• All floating windows listed in the Window
menu:
• Task Manager window
• Transport window
• Big Counter window
• Automation window
• Memory Locations window
• Machine Track Arming window
• Universe window
• Video window
• Color Palette window
• Undo History window
• Disk Space window
• System Usage window
A Window Configuration can also store the
Window Display Settings for the Edit, Mix, and
Transport windows.
Window Configuration List
The Window Configuration List lets you recall
and manage stored Window Configurations, as
well as create new Window Configurations.
To open the Window Configuration List:
Select Window > Configurations > Window
Configuration List.
Window Configuration Properties
Window Configurations can be stored and re-
called with the layout of windows in your
Pro Tools session, as well as with the settings for
the Edit, Mix, and Transport windows. You can
specify which of these properties are stored for
each Window Configuration either in the New
Window Configuration dialog or the Edit Win-
dow Configuration dialog.
The location and size of the Window Con-
figuration List is not stored with Window
Configurations.
Window Configuration List
Press Control+Alt+J (Windows) or Com-
mand+Option+J (Mac) to show or hide the
Window Configuration List.

Chapter 9: Pro Tools Main Windows 125
Number Is the number of the slot in which the
Window Configuration is stored (1–99). You
can type Period (.), the number of the Window
Configuration, and then Asterisk (*) on the nu-
meric keypad on your computer keyboard to re-
call the Window Configuration stored in that
slot.
Name Is the name of the stored Window Config-
uration.
Window Layout When enabled, stores the size
and location of all open windows.
Include Edit, Mix, and Transport Display
Settings When enabled, stores all window dis-
play settings for the Edit, Mix, and Transport
windows with the Window Configuration (such
as whether or not the Region List is shown in
the Edit window). The Include Edit, Mix, and
Transport Display Settings option is only avail-
able when the Window Layout option is en-
abled.
Window Display Settings Stores only the window
display settings for the selected window (Edit,
Mix, or Transport):
• Edit Window Display Settings
• Width of the Track List and Group List
• Height of the Track List
• Width of the Region List
• What rulers are shown (the main ruler is al-
ways shown)
• What track columns are shown (such as In-
serts, Sends, or Comments)
• Tempo editor display
• Whether Transport controls are shown in
the Edit window
• Mix Window Display Settings
• Width of the Track List and Group List
• Height of the Track List
• What track rows are shown (such as Inserts,
Sends, or Comments)
• Narrow/wide mixer view
• Transport Window Display Settings
• Counters display
• MIDI controls display
• Expanded view
Comments Lets you type comments for the Win-
dow Configuration.
Edit Window Configuration dialog
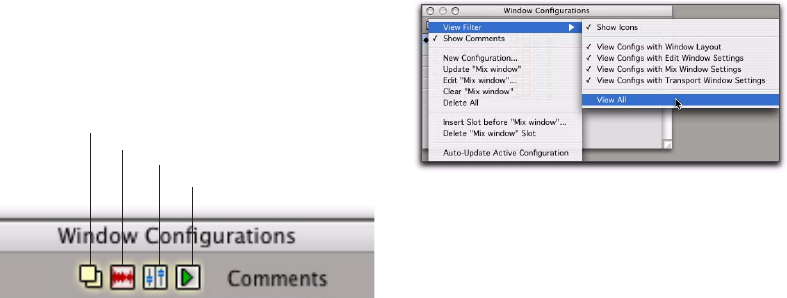
Pro Tools Reference Guide126
Window Configuration Commands and
Options
View Filter Icons
Using the View Filter icons, the Window Con-
figuration List lets you show or hide Window
Configurations based on whether or not they
are stored with Window Layout, Edit Window
settings, Mix Window settings, or Transport
Window settings.
To show or hide Window Configurations in the
Window Configuration List, do one of the
following:
Click the View Filter icon to show or hide
Window Configurations that include that prop-
erty (Window Layout, Edit Window Settings,
Mix Window Settings, or Transport Window
Settings).
– or –
Select or deselect the View Filter item in the
Window Configuration List pop-up menu.
Window Configuration List Pop-Up Menu
You can select viewing and sorting options,
along with commands for creating and remov-
ing Window Configurations, from the pop-up
menu in the Window Configuration List.
View Filter Lets you show or hide Window Con-
figuration filter icons in the Window Configura-
tion List as well as show or hide Window Con-
figurations with Window Layout, Edit Window
Settings, Mix Window Settings, or Transport
Window Settings.
Show Comments Lets you show or hide Com-
ments in the Window Configuration List.
New Configuration Creates a new Window Con-
figuration. This command is also available from
Window > Configurations.
Update <Name> Updates the selected Window
Configuration with any changes to the layout
and settings of windows depending on the Win-
dow Configuration’s properties. This command
is also available from Window > Configurations.
Edit <Name> Opens the Edit Window Configu-
ration dialog where you can edit the properties
of the selected Window Configuration.
Clear <Name> Clears the selected Window Con-
figuration without deleting the slot (number).
Delete All Deletes all Window Configurations.
Window Configuration List view filter icons
Window Layout
Edit Window settings
Mix Window settings
Transport Window settings Window Configuration List pop-up menu
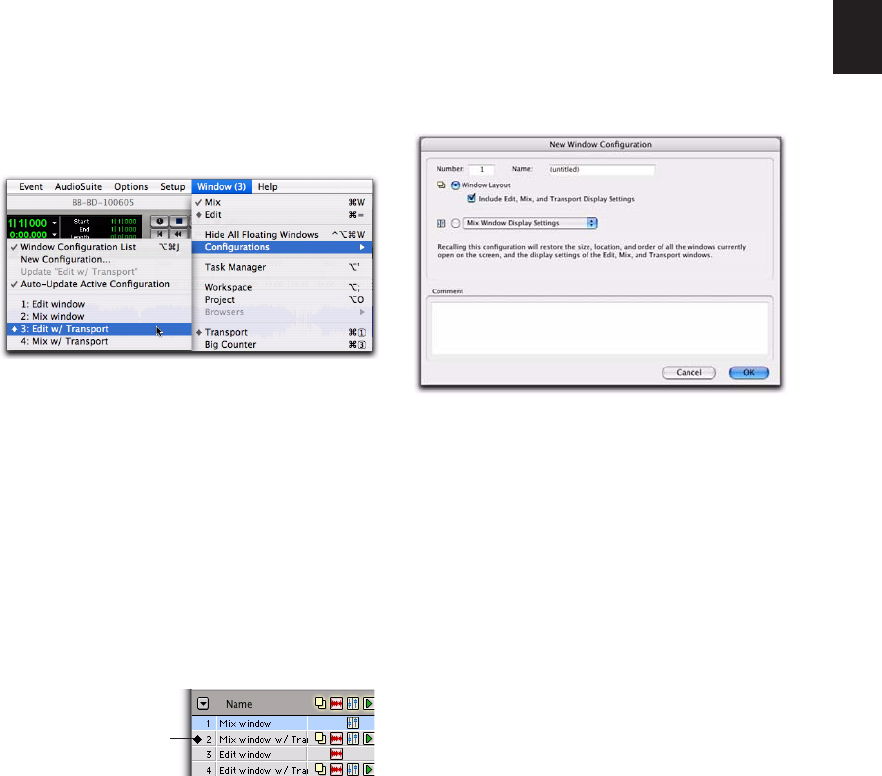
Chapter 9: Pro Tools Main Windows 127
Insert Slot Before <Name> Inserts a new slot be-
fore the selected Window Configuration and, if
necessary, increments the number of each fol-
lowing slot.
Delete <Name> Slot Deletes the selected Win-
dow Configuration and its slot (number), and
renumbers each subsequent slot.
Auto-Update Active Configuration Automatically
updates the active Window Configuration as
you make changes to the layout and settings of
windows. If Auto-Update Active Configuration
is enabled, the number of the active configura-
tion is also displayed in the Window menu. This
command is also available from Window > Con-
figurations.
Active Window Configuration
The active Window Configuration is indicated
by a diamond to the left of the Window Config-
uration Number in the Window Configuration
List and in the Configurations submenu (Win-
dow > Configuration). If Auto-Update Active
Configuration is enabled, the number of the ac-
tive configuration is also displayed in the Win-
dow menu. Only Window Configurations that
include Window Layout can be made active.
Creating New Window Configurations
To create a new Window Configuration:
1 Open the windows you want to include in the
Window Configuration and position them
where you want on the screen.
2 Do one of the following:
• Choose Window > Configurations > New
Configuration.
– or –
• If the Window Configuration List is open,
Choose New Configuration from the Win-
dow Configuration List pop-up menu.
3 In the New Window Configuration dialog, do
one of the following:
• Select Window Layout and whether or not
to include the Edit, Mix, and Transport
window display settings.
– or –
• Select a Window Display Settings option
from the pop-up menu (Edit Window Dis-
play Settings, Mix Window Display Set-
tings, or Transport Window Display
Settings)
4 Name the Window Configuration.
Number of active Window Configuration displayed in
Window menu
Active Window Configuration
Active Window Configuration
New Window Configuration dialog

Pro Tools Reference Guide128
5 You can type a different number for the new
Window Configuration. If the number you type
is already used by another Window Configura-
tion, you are prompted to replace it or Cancel.
Otherwise, Pro Tools automatically fills in the
first available number (1–99) for the Window
Configuration.
6 Type any comments for the new Window
Configuration.
7 Click OK to store the new Window Configura-
tion, or cancel.
The new Window Configuration is added to the
Window Configuration List.
To create a new Window Configuration at a
specific numbered slot:
On the numeric keypad, type Period (.), a
number (1–99), and then Plus (+) to add a new
Window Configuration at that number slot.
Recalling Window Configurations
You can use the Window Configuration List to
recall stored Window Configurations. You can
also use the Number Keypad on your computer
keyboard to recall a specific Window Configura-
tion.
To recall a Window Configuration, do one of the
following:
Select the Window Configuration from Win-
dow > Configurations.
In the Window Configuration List, click the
Window Configuration to recall it.
On the numeric keypad, press Period (.), the
number of the Window Configuration (1–99),
and then Asterisk (*).
The Pro Tools session’s screen layout updates
with the stored Window Configuration.
Undoing Window Configurations
Pro Tools lets you revert to the previous Win-
dow Layout and Window Settings with a single
level of undo. This is useful, for example, if you
recall a Window Configuration, but then decide
you want to revert to the previous screen state.
To undo a Window Configuration:
On the numeric keypad, press Period (.), 0,
and then Asterisk (*).
To redo a Window Configuration:
On the numeric keypad, press Period (.), 0,
and then Asterisk (*).
If Auto-Update Active Configuration is enabled,
undoing the Window Configuration reverts to
the previously stored Window Configuration
without automatically saving changes (see “Up-
dating Window Configurations” on page 129).
Editing Window Configurations
You can change which properties are stored
with Window Configurations, as well as the
number, name, or comments.
To edit a Window Configuration:
1 In the Window Configuration List, select the
Window Configuration you want to edit.
2 From the Window Configuration List pop-up
menu, select Edit <Name>.
3 In the Edit Window Configuration dialog,
make the desired changes and click OK.
If a Window Configuration already exists
at that numbered slot, the new Window
Configuration overwrites it.

Chapter 9: Pro Tools Main Windows 129
Updating Window Configurations
After you recall a stored Window Configuration,
you can make changes to the window layout
and window settings, and then update the
stored Window Configuration with your
changes. You can do this manually, or you can
have Pro Tools automatically update the active
configuration.
To manually update a Window Configuration, do
one of the following:
Choose Window > Configurations > Update
Active Configuration.
The active Window Configuration updates to
include any changes to its included properties
(Window Layout and Window Display Set-
tings).
– or –
From the Window Configuration List pop-up
menu, choose Update <Name>.
The selected Window Configuration updates
with any changes to its included properties.
To have Pro Tools automatically update the active
Window Configuration, do one of the following:
Select Window > Configurations > Auto-Up-
date Active Configuration.
– or –
From the Window Configuration List pop-up
menu, select Auto-Update Active Configuration.
When Auto-Update Active Configuration is se-
lected, the active Window Configuration up-
dates with every change to the Window Layout
and Window Display Settings.
Window Configurations that do not include
Window Layout and only store Window Display
Settings cannot be made active and thus won't
automatically update. If you want to update a
Window Configuration with changes to the
Window Display Settings (such as the width of
the Region List in the Edit window), use the Up-
date command in the Window Configuration
List.
Clearing Window Configurations
Clearing a window configuration removes it and
its associated slot number while keeping the slot
numbers of other window configurations un-
changed. The Clear command is useful if you
want to insert another configuration it the same
slot.
To clear a Window Configuration:
1 In the Window Configuration List, select the
Window Configuration you want to clear.
2 From the Window Configuration List pop-up
menu, select Clear <Name>.
Deleting Window Configurations
Deleting a Window Configuration removes the
it and its slot number, and renumbers any sub-
sequent Window Configurations.
To delete a Window Configuration:
1 In the Window Configuration List, select the
Window Configuration you want to delete.
2 From the Window Configuration List pop-up
menu, select Delete <Name>.
To delete all Window Configurations:
From the Window Configuration List pop-up
menu, select Delete All.
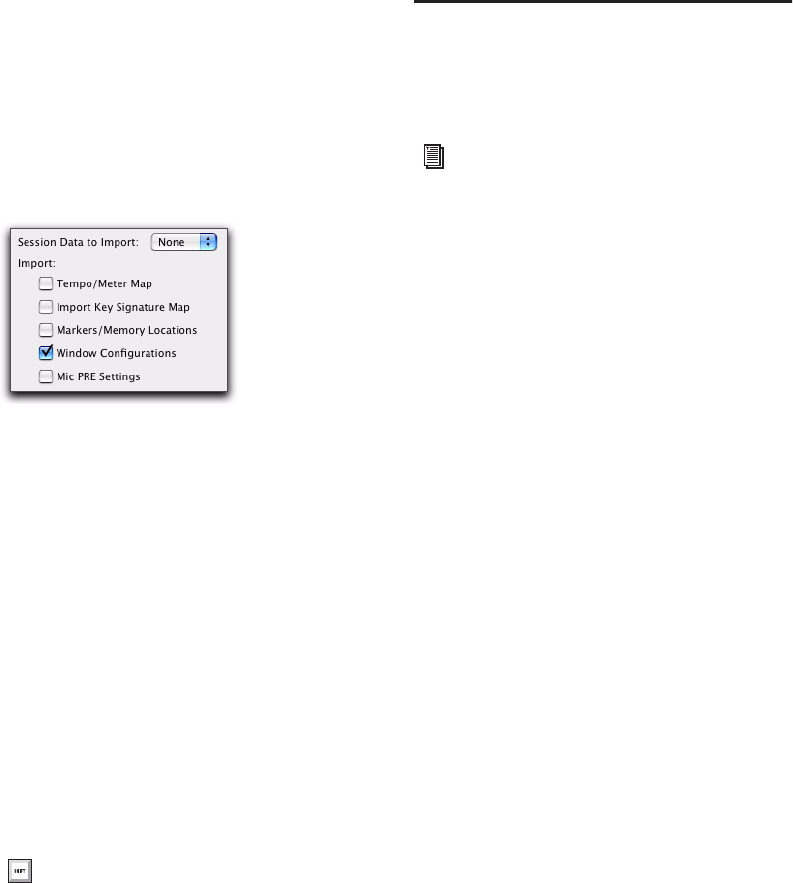
Pro Tools Reference Guide130
Importing Window Configurations
You can import Window Configurations from
another session using Import Session Data.
To import Window Configurations:
1 Choose File > Import > Session Data.
2 Select the Window Configurations option.
3 If you only want to import Window Configu-
rations, click the Session Data to Import pop-up
menu and select None.
4 Click OK.
Hiding All Floating Windows
The Hide All Floating Windows command hides
or shows all floating windows. This is useful for
quickly clearing the screen of all floating win-
dows so that you can work in the Edit or Mix
windows.
To hide or show all floating windows:
Select or deselect Window > Hide All Floating
Windows.
Menus
Pro Tools menus provide commands and op-
tions for configuring and working with
Pro Tools, sessions, and session material.
Pro Tools Main Menus
Pro Tools includes the following main menus:
File Provides commands that are used to create
and maintain Pro Tools sessions.
Edit Provides commands that are used to edit
and manipulate the current selection and affect
data in the Timeline or the clipboard.
View Provides options and commands to cus-
tomize what is shown in various windows.
Track Provides commands that are used to cre-
ate, manage, and edit tracks.
Region Provides commands that are used to
manage and edit regions.
Event Provides commands for editing audio and
MIDI events.
AudioSuite Provides AudioSuite plug-ins.
Options Provides commands that let you select
several editing, recording, monitoring, play-
back, and display options.
Setup Provides commands to open dialogs and
windows or configure various Pro Tools hard-
ware and software parameters.
Window Provides commands to toggle the dis-
play of various Pro Tools windows.
Import Window Configurations
Press Control+Alt+Start+W (Windows) or
Command+Option+Control+W (Mac) to
hide or show all floating windows.
For detailed information on Pro Tools main
menus and Region List pop-up menus, see
the Pro Tools Menus Guide.
Chapter 9: Pro Tools Main Windows 131
Help Provides access to PDF documentation for
Keyboard Shortcuts, Digidesign FAQ, the DigiRack
Plug-ins Guide, the Pro Tools Menus Guide, and
the Pro Tools Reference Guide.
Track, Region, and Group List Menus
The Track, Region, and Group Lists provide pop-
up menus for managing and working with the
contents of each list, as follows:
Track List Pop-Up Menu Provides commands to
show and hide tracks in the Mix and Edit win-
dows. The Track List pop-up menu also lets you
sort the contents of the Track List.
Group List Pop-Up Menus (Edit Groups and Mix
Groups) Provides commands to create, display,
suspend, and delete Mix and Edit Groups.
Region List Pop-Up Menu (Edit Window
Only) Provides commands to find, select, sort,
clear, rename, time stamp, compact, export, and
recalculate waveform overviews of items in the
Region List. The pop-up menu also lets you set
the drop order for regions dragged from the Re-
gion List and dropped in the Timeline.
Track Name and Region Name Right-
Click Pop-Up Menus
Track and region names provide pop-up menus
for managing and working with tracks or re-
gions, as follows:
Track Name Right-Click Pop-Up Menu Right-
clicking a track name in the Edit window, Mix
window, or the Track List provides access to var-
ious track commands (such as show/hide, make
active/inactive, rename, duplicate, and delete
tracks).
Region Name Right-Click Pop-Up Menu (Edit
Window Only) Right-clicking a region name in
the Region List provides commands to clear, re-
name, time stamp, or replace regions. The pop-
up menu also lets you export region definitions
or selected regions as files, recalculate waveform
overviews, select the parent file of selected re-
gions in the DigiBase Workspace Browser, or se-
lect a region as an object in the Edit window.
Group Name and Track Group ID
Indicator Pop-Up Menus
When you click and hold on a group name in
the Group List, or click on a Group ID indicator
in a track, a pop-up menu provides access to var-
ious group commands (such as selecting tracks
in a group).
For more information, see “The Track List”
on page 154.
For more information, see “The Group List”
on page 177
For more information, see Chapter 12,
“The Region List.”
For more information, see “Track Name
Right-Click Pop-Up Menus” on page 157.
For more information, see Chapter 12,
“The Region List.”
For more information, see “Group Name
and Track Group ID Indicator Pop-Up
Menus” on page 178.

Pro Tools Reference Guide132
Tool Tips
Pro Tools provides Tool Tips in all main win-
dows. Holding the cursor for a few seconds over
an abbreviated name, or unlabeled icon or tool,
displays either the function or details of the
item (depending on the Tool Tips preferences
settings).
To configure Tool Tips for Pro Tools:
1 Choose Setup > Preferences, and click the Dis-
play tab.
2 In the Basics section, enable the Tool Tips op-
tions you want displayed.
Function Shows the functional name of different
Pro Tools items (such as specific buttons, indica-
tors, modes, selectors, and Edit tools).
Details Shows abbreviated or hidden Pro Tools
names or values for different Pro Tools items
(such as insert names, gain levels, settings, and
routing assignments).
3 Click OK.
Leave both options unchecked to turn off
Tool Tips.
Chapter 10: Tracks 133
Chapter 10: Tracks
This chapter covers the different types of tracks
in a Pro Tools session and basic track manage-
ment tasks.
Track Types
In a Pro Tools session, you can have several dif-
ferent types of tracks. These can include audio,
Auxiliary Input, Master Fader, VCA Master
(Pro Tools HD only), MIDI, Instrument, and
video tracks.
Audio, Auxiliary Input, Master Fader,
and VCA Master Tracks
Pro Tools provides mono, stereo, and multi-
channel format audio, Auxiliary Input, Master
Fader, and VCA Master tracks.
Audio Tracks
Audio tracks let you record to disk and play back
from disk recorded or imported audio files.
Auxiliary Input Tracks
Auxiliary Input tracks can be used as effects
sends, destinations for submixes, as a bounce
destination, as inputs to monitor or process au-
dio (such as audio from external MIDI instru-
ments), and for many other audio routing tasks.
Master Fader Tracks
Master Fader tracks control the overall level of
audio paths that are routed to physical output
paths. For example, you could have 24 tracks in
a session with channels 1–8 routed to Analog
Output 1–2, channels 9–16 to Analog Output
3–4, and channels 17–24 to Analog Output 5–6.
You could then create three master faders, one
to control each of these output pairs.
Master Fader tracks have additional uses (such as
controlling submix levels). For more informa-
tion, see “Master Fader Tracks” on page 712.
Video track features are described in
Chapter 43, “Working with Video in
Pro Tools”

Pro Tools Reference Guide134
VCA Master Tracks
(Pro Tools HD Only)
VCA Master tracks (or VCA Masters) emulate the
operation of voltage-controlled amplifier chan-
nels on analog consoles, where a VCA channel
fader would be used to control, group, or offset
the signal levels of other channels on the con-
sole.
VCA Master tracks do not pass audio, so they do
not have inputs, outputs, inserts, or sends. A
Mix Group is assigned to a VCA Master track,
which appears in the VCA track’s Assignment
selector.
The controls of the tracks in that Mix Group,
called the slave tracks, are modified by the con-
trols on the VCA Master.
MIDI Tracks
MIDI tracks record, store, and playback MIDI
data. You cannot select a track format when you
create a MIDI track, because audio does not pass
through it.
Instrument Tracks
Instrument tracks are a special type of track that
provide both MIDI and audio capabilities in a
single channel strip. Instrument tracks simplify
using software and hardware instruments to
record and monitor MIDI instruments.
Track Formats
Mono Tracks
A mono audio, Auxiliary Input, Master Fader, or
Instrument track controls volume, and, in some
cases, panning, for a single channel of audio. A
mono audio track uses a single voice. A mono
track can also be routed to a multichannel out-
put.
Stereo Tracks
A stereo audio, Auxiliary Input, Master Fader, or
Instrument track is a single channel strip for two
channels of audio as a stereo pair. Stereo audio
tracks use two voices.
Multichannel Tracks (Pro Tools HD Only)
A multichannel track is a single channel strip
that plays multiple channels of audio (from 3 to
8 channels at a time). This allows Pro Tools to
support multichannel mixing formats including
LCRS, 5.1, 6.1, and others. Audio, Auxiliary In-
put, Master Fader, and Instrument tracks can all
use any supported multichannel format.
For more information on surround mixing with
Pro Tools, see the following chapters:
• Chapter 39, “Pro Tools Setup for Surround
(Pro Tools HD Only)”
• Chapter 40, “Multichannel Tracks and
Signal Routing (Pro Tools HD Only)”
• Chapter 41, “Surround Panning and Mix-
ing (Pro Tools HD Only)”
For more information, see “VCA Master
Tracks” on page 714.
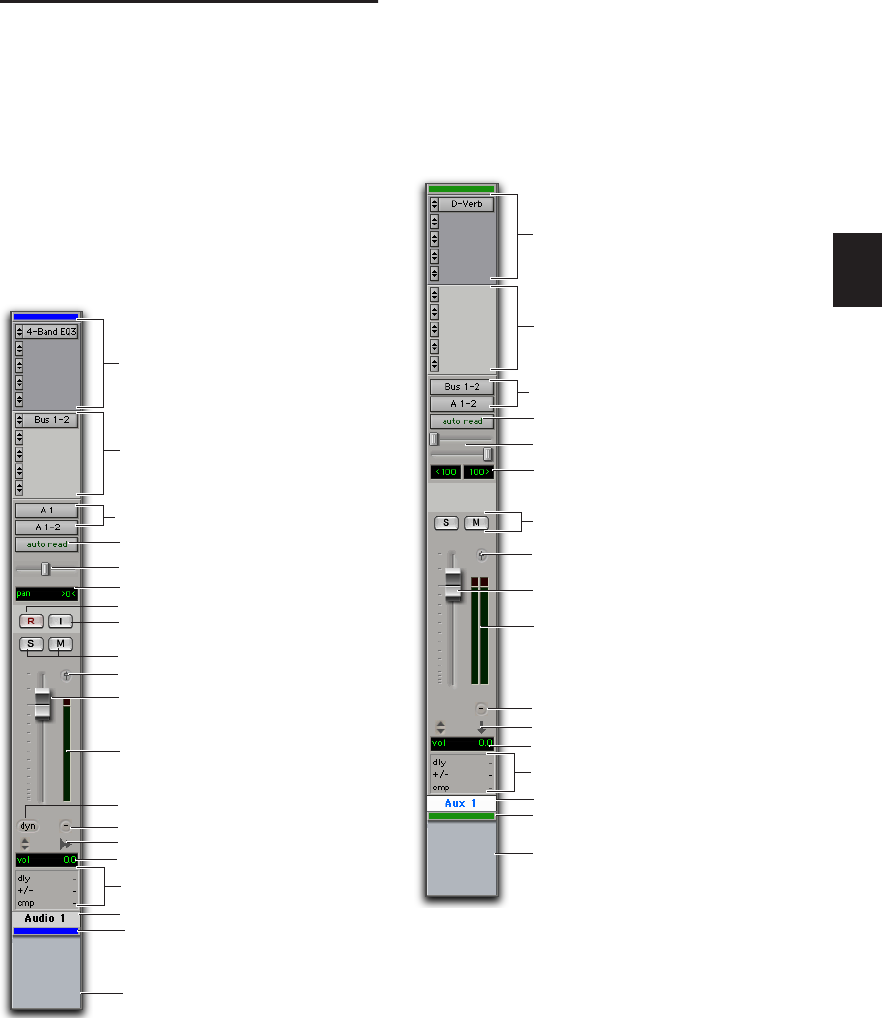
Chapter 10: Tracks 135
Track Channel Strips
(Mix Window)
Audio Track Channel Strips
Each audio track has its own set of channel strip
controls, including volume, pan, record enable,
input monitoring (Pro Tools HD only), automa-
tion mode, solo, mute, and voice assignment.
Audio tracks also have a Comments View to en-
ter and display comments.
Auxiliary Input Track Channel Strips
Each Auxiliary Input track has its own set of
channel strip controls, including volume, pan,
automation mode, solo, and mute. Auxiliary In-
put tracks also have a Comments View to enter
and display comments.
Mono audio track channel strip
Inserts
Sends (A–E shown)
Audio Input/Output Path selectors
Solo/Mute buttons
Automation Mode selector
Track Name button
Pan slider
Level meter
Volume fader
Group ID
Output Window button
Track Comments
Track Type indicator
Voice selector
Track Record Enable button
Volume/Peak/Delay indicator
Pan indicator
Delay Compensation View (Pro Tools HD only)
TrackInput Monitor button (Pro Tools HD only)
Track Color Coding Stereo Auxiliary Input track channel strip
Inserts
Sends (only A–E shown)
Audio Input/Output Path selectors
Solo/Mute buttons
Automation Mode selector
Track Name button
Pan sliders
Level meters
Volume fader
Group ID
Track Comments
Track Type indicator
Volume/Peak/Delay indicator
Pan indicators
Delay Compensation View (Pro Tools HD only)
Track Color Coding
Output Window button
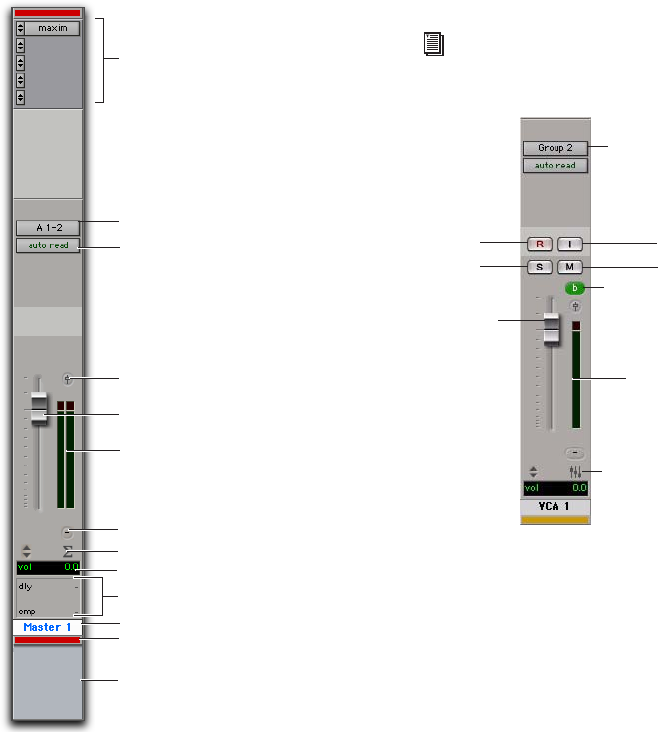
Pro Tools Reference Guide136
Master Fader Track Channel Strips
Each Master Fader track has its own set of chan-
nel strip controls, including volume and auto-
mation mode. Master Fader tracks also have a
Comments View to enter and display com-
ments.
VCA Master Track Channel Strips
(Pro Tools HD Only)
Each VCA Master track has its own set of chan-
nel strip controls, including volume, record en-
able, input monitoring, automation mode, solo,
and mute. VCA Master tracks also have a Com-
ments View to enter and display comments.
Stereo Master Fader track channel strip
Inserts
Audio Output Path selectors
Automation Mode selector
Track Name button
Level meters
Volume fader
Group ID
Track Comments
Track Type indicator
Volume/Peak/Delay indicator
Delay Compensation View (Pro Tools HD only)
Track Color Coding
Output Window button
For more information, see “VCA Master
Tracks” on page 714.
VCA Master track
Group Assignment
selector
VCA Track Type indicators
VCA Group ID
Mute
TrackInput
Volume
Solo
Record
Enable
Level meter
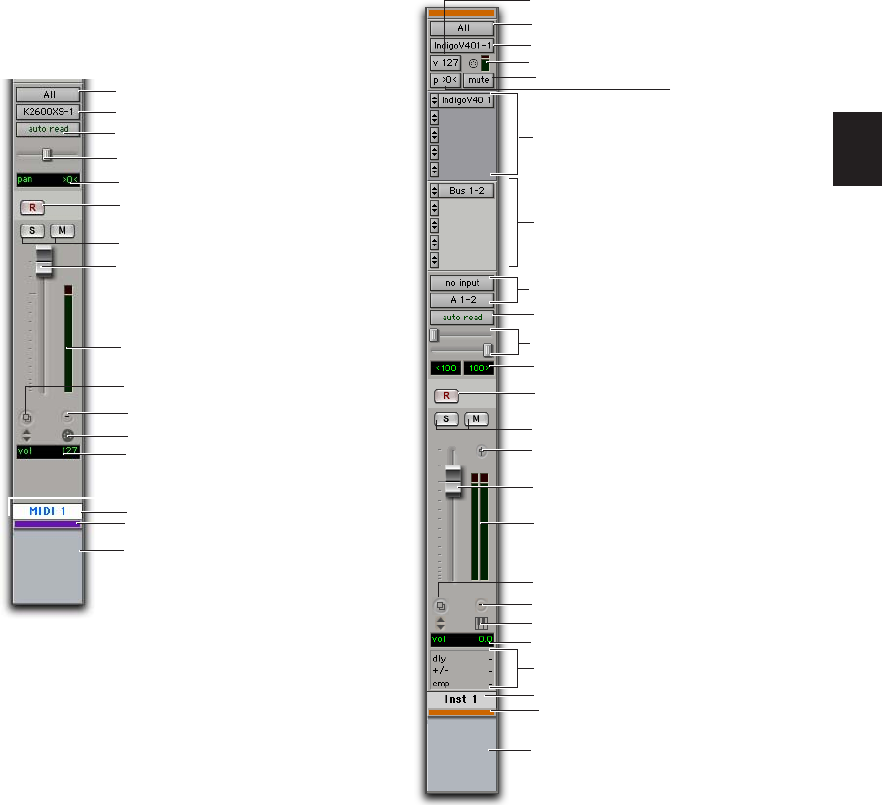
Chapter 10: Tracks 137
MIDI Track Channel Strips
Each MIDI track has its own set of channel strip
controls, including MIDI volume, pan, record
enable, automation mode, solo, mute, patch as-
signment, and channel assignment. MIDI tracks
also have a Comments View to enter and display
comments.
Instrument Track Channel Strips
Each Instrument track has its own set of channel
strip controls, including audio (like an Auxiliary
Input track) volume, pan, automation mode,
solo, and mute, and MIDI (like a MIDI track)
record enable. Instrument tracks have an addi-
tional Instruments View that provides controls
for MIDI input, output, mute, volume, and pan
(like on a MIDI track). Instrument tracks also
have a Comments View to enter and display
comments.
MIDI channel strip
MIDI Input selector
MIDI Volume fader
MIDI Pan slider
Track Name button
MIDI Velocity meter
Automation Mode selector
MIDI Output selector
Record Enable
Patch Select
MIDI Pan indicator
MIDI Volume indicator
Track Type indicator
Group ID
Track Comments
Solo/Mute buttons
Track Color Coding
Stereo Instrument track channel strip, Instruments view
shown
Inserts
Sends
Audio Input/Output Path selectors
Solo/Mute buttons
Automation Mode selector
Track Name
Pan sliders
Level meters
Volume fader
Group ID
Output Window button
Track Comments
Track Type indicator
Volume/Peak/Delay indicator
Pan indicators
Delay Compensation View (Pro Tools HD only)
Record Enable
Patch Select
MIDI Input selector
MIDI Output selector
MIDI meter (Velocity)
MIDI Volume
MIDI Pan slider
MIDI Mute button
Track Color Coding
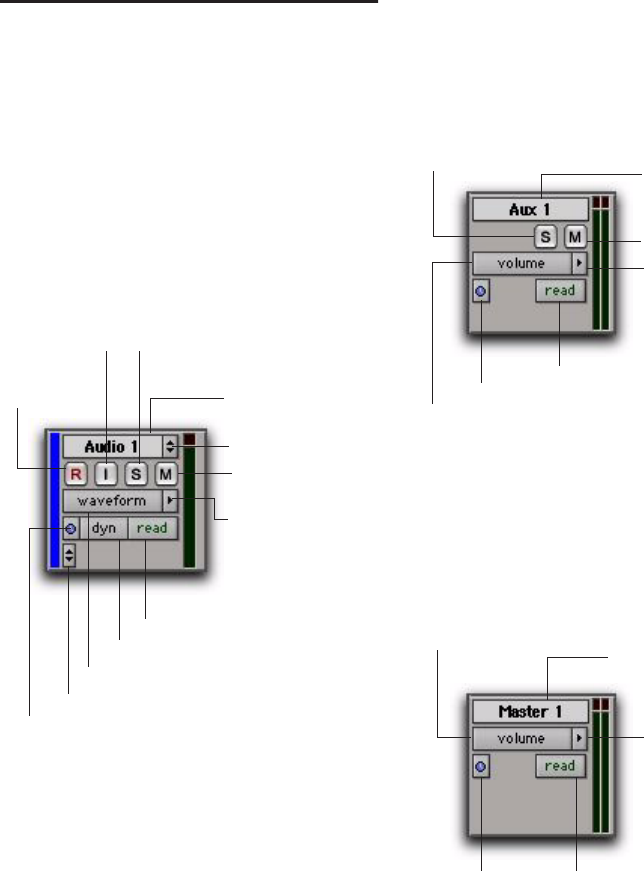
Pro Tools Reference Guide138
Track Controls and Indicators
(Edit Window)
Audio Track Controls
Each audio track has its own set of track con-
trols, including Track Name, Playlist, Record En-
able, Input Monitoring (Pro Tools HD only),
Solo, Mute, Track View, Track Height, Timebase,
Elastic Audio, Voice Assignment, and Auto-
mation mode.
Auxiliary Input Track Controls
Each Auxiliary Input track has its own set of
track controls, including Track Name, Solo,
Mute, Track View, Track Height, Timebase, and
Automation mode.
Master Fader Track Controls
Each Master Fader track has its own set of track
controls, including Track Name, Track View,
Track Height, Timebase, and Automation mode.
Edit window track controls for a mono audio track
(medium track height)
Automation Mode selector
Mute button
Voice selector
Track Height selector
Playlist selector
Track Name
Record Enable
button
Solo button
TrackInput Monitor
button
Timebase selector
Track View selector
Elastic Audio plug-in selector
Edit window track controls for a stereo Auxiliary Input
track (medium track height)
Edit window track controls for a stereo Master Fader
track (medium track height)
Mute button
Track Height
selector
Track Name
Timebase selector
Track View selector
Automation mode
Solo button
Track Height
selector
Track Name
Track View selector
Automation modeTimebase selector
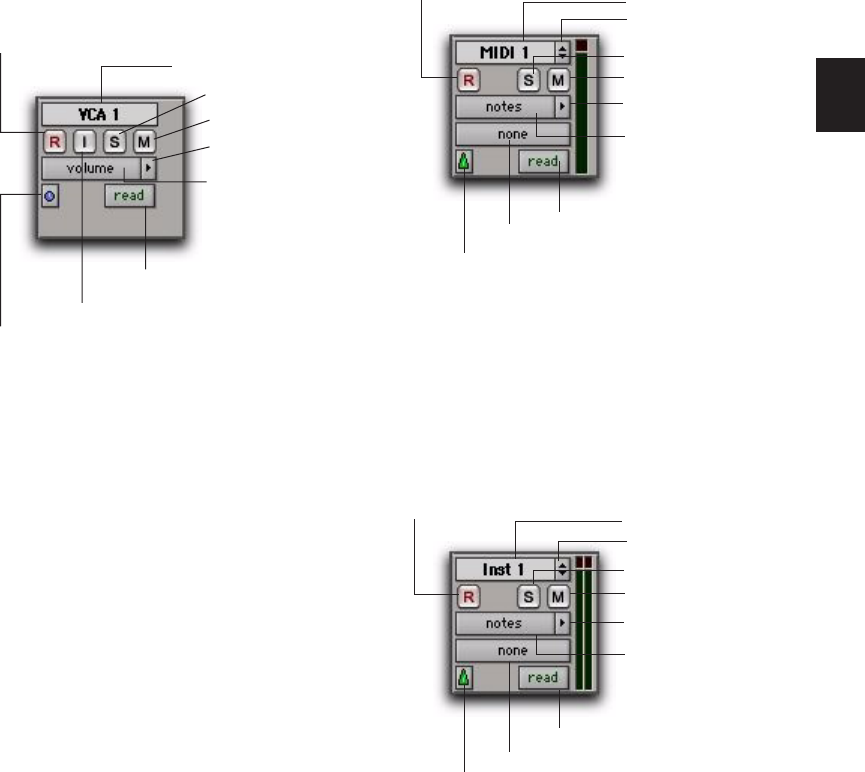
Chapter 10: Tracks 139
VCA Master Track Controls
(Pro Tools HD only)
Each VCA Master track has its own set of track
controls, including Track Name, Playlist, Record
Enable, Input Monitoring, Solo, Mute, Track
View, Track Height, Timebase, and Automation
mode.
MIDI Track Controls
Each MIDI track has its own set of track con-
trols, including Track Name, Playlist, Record En-
able, Solo, Mute, Track View, Track Height,
Patch, Timebase, and Automation mode.
Instrument Track Controls
Each Instrument track has its own set of track
controls, including Track Name, Playlist, Record
Enable, Solo, Mute, Track View, Track Height,
Patch, Timebase, and Automation mode.
Edit window track controls for a VCA Master track
(medium track height)
Automation Mode selector
Mute button
Track Height selector
Track Name
Record Enable button
Solo button
TrackInput Monitor button
Timebase selector
Track View selector
Edit window track controls for a MIDI track (medium
track height)
Edit window track controls for a stereo Instrument track
(medium track height)
Mute button
Patch selector
Track Height selector
Playlist selector
Track Name
Record Enable button
Solo button
Timebase selector
Track View selector
Automation mode
Mute button
Patch selector
Track Height selector
Playlist selector
Track Name
Record Enable button
Solo button
Timebase selector
Track View selector
Automation mode
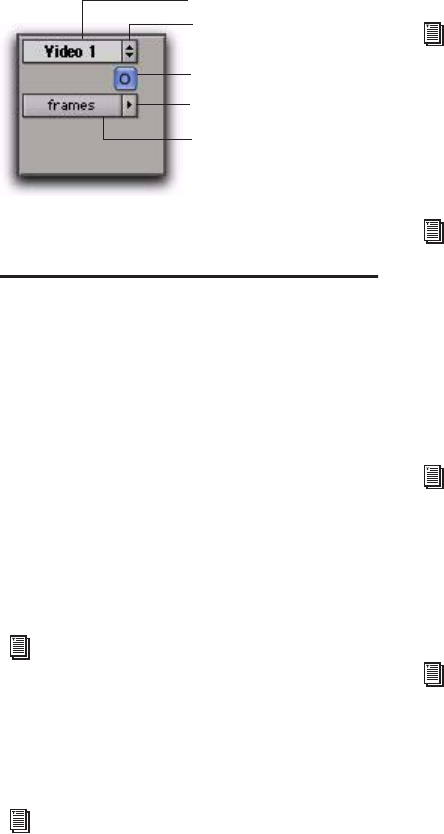
Pro Tools Reference Guide140
Video Track Controls
Each video track has its own set of track con-
trols, including Track Name, Playlist, Online,
Track View, and Track Height.
Edit Window Views
In addition to track controls and playlists (of re-
gions of events on the Timeline), the Edit win-
dow provides the following views that corre-
spond to channel strip controls in the Mix
window:
• Comments
• Mic Preamps (Pro Tools HD only)
• Instruments
• Inserts
• Sends (A–E and F–J)
• I/O
Comments View
Comments view lets you type and view com-
ments for a specific track.
Mic Preamps View
(Pro Tools HD Only)
The Mic Preamps view shows controls for tracks
with physical audio inputs routed through the
Digidesign PRE.
Instruments View
Instruments view provides MIDI controls for In-
strument tracks: MIDI Input selector, MIDI Out-
put selector, MIDI Volume, MIDI Pan, and MIDI
Mute.
Inserts View
Inserts view provides up to five inserts (software
plug-ins and hardware I/O inserts for generating
and processing audio) on each audio, Auxiliary
Input, Master Fader, and Instrument track.
Sends View (Sends A–E and Sends F–J)
Sends view shows send assignments in each au-
dio, Auxiliary Input, and Instrument track.
Edit window track controls for a video track (medium
track height)
See also “Views in the Mix and Edit Win-
dows” on page 718.
For more information on Comments view,
see “Adding Comments to Tracks” on
page 145.
Online button
Track Height selector
Playlist selector
Track Name
Track View selector
For more information, see the PRE Guide.
For more information, see “Assigning MIDI
Input and Output for Instrument Tracks”
on page 166.
For more information on inserts, see
Chapter 36, “Plug-in and Hardware In-
serts.”
For more information, see “Configuring
Sends View in the Mix and Edit Windows”
on page 725.
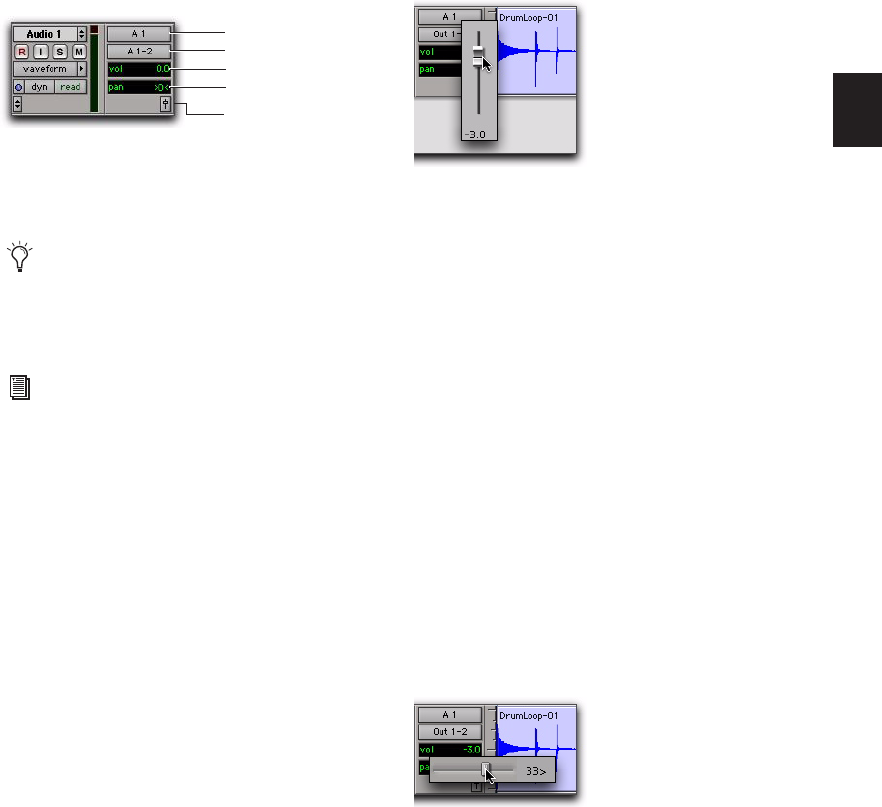
Chapter 10: Tracks 141
I/O View
In the Edit window, I/O view provides Input and
Output selectors on audio, Auxiliary Input, Mas-
ter Fader (output only), MIDI, and Instrument
tracks (corresponding to the controls of the
same name in the Mix window).
To show the I/O View in the Edit window:
Select View > Edit Window > I/O.
Volume/Peak/Channel Delay Indicator
The Volume indicator on an audio track has
three display modes: Volume, Peak, and Chan-
nel Delay.
To toggle the Volume indicator display:
Control-click (Windows) or Command-click
(Mac) the indicator to toggle it between the fol-
lowing modes:
Volume Indicator (and Pop-Up Fader) Shows the
current volume, or input level of a track as set by
the track Volume fader. In I/O View (Edit win-
dow), click the Volume indicator to display the
Volume pop-up fader, which can be used to ad-
just the volume.
Peak Indicator Functions as a headroom indica-
tor based on the last peak playback level. To re-
set the peak counter, click anywhere in the
meter. Values range from –∞ (no signal) to 0 dB.
Channel Delay Indicator (Pro Tools HD
Only) Shows the total delay, in samples, incurred
on the track from the use of any TDM plug-ins
or hardware inserts on that channel.
Pan Indicator
The Pan indicator displays the current pan set-
ting of a track. Pan values range from <100 (full
left) to 100> (full right). Pan controls are only
available for stereo tracks or for mono tracks
routed to a stereo output.
In I/O view (Edit window), click the Pan indica-
tor to display the Pan pop-up slider, which can
be used to adjust panning.
Edit window I/O View (audio track)
Channel strips in the Mix window always
display Input and Output selectors as well
as volume and pan values, so there is no I/O
View display option for the Mix window.
For details on Input and Output selectors,
see “Assigning Audio Inputs and Outputs to
Tracks” on page 158.
Input Path selector
Output Path selector
Volume indicator
Pan indicator
Output Window button
Edit window I/O View, Volume pop-up fader (audio track)
Edit window I/O View, Pan pop-up slider (audio track)

Pro Tools Reference Guide142
Pan Slider
The Pan slider controls the balance of a track be-
tween the assigned output pair. It only appears
if you are using stereo tracks or mono tracks
routed to a stereo output.
The Pan slider on a MIDI track is effective only if
you are controlling a sound module that sup-
ports MIDI panning.
Volume Fader
The Volume fader controls the volume of a track
when it is in playback, and the monitor level of
the track when it is in record. You can link the
record and monitor levels by enabling the Oper-
ation preference for “Link Record and Play Fad-
ers.”
The maximum fader gain for a volume fader is
+12 dB.
MIDI Volume Fader
If your MIDI sound module supports volume,
the volume fader on a MIDI or Instrument track
can send a value of 0–127 to the MIDI volume
controller.
Track Level Meter
On audio tracks, level meters indicate the level
of the signal being recorded or played back from
the hard drive. On Auxiliary Input, Master
Fader, and Instrument tracks, level meters indi-
cate the level of the signal being played through
the channel output. Green indicates nominal
levels; Yellow indicates pre-clipping (–6 dB be-
low full scale); and Red indicates clipping.
When an audio track is record-enabled, these
meters indicate record levels.
On MIDI tracks, and in Instruments view for In-
strument tracks, the meter shows the MIDI ve-
locity of the most recent MIDI event.
Pre- and Post-Fader Metering
You can globally set audio track level meters to
indicate pre- or post-fader levels. When pre-
fader metering is selected, the level meters show
levels independent of fader position. With post-
fader metering, the level meters respond to fader
position.
To toggle track level metering between pre- fader
and post-fader metering:
Select Options > Pre-Fader Metering.
Peak Hold
Pro Tools meters provide a Peak Hold feature
with three options: 3 Second, Infinite, or None.
To choose a Peak Hold setting:
1 Choose Setup > Preferences and click the
Display tab.
2 Select a Peak Hold option.
3 Click OK.
Send Pan controls can be linked to the Main
Pan controls of a track by enabling the Fol-
low Main Pan button in Send window.
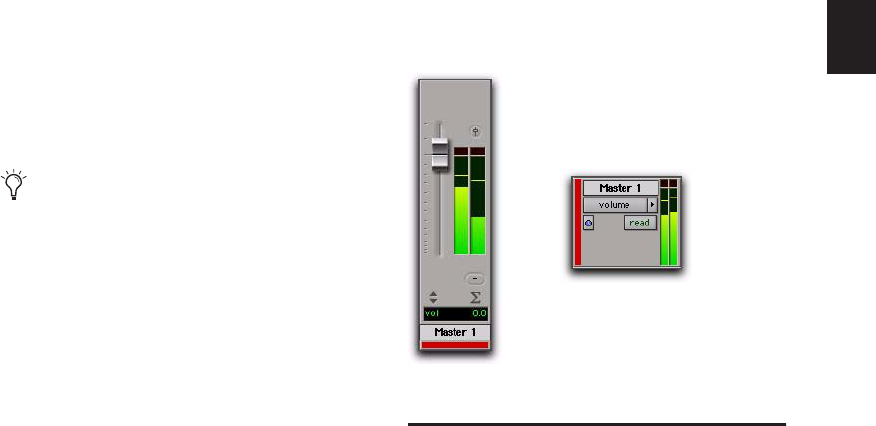
Chapter 10: Tracks 143
To clear a meter:
Click anywhere on the meter.
To clear all meters, do one of the following:
Alt-click (Windows) or Option-click (Mac)
any meter.
Choose Track > Clear All Clip Indicators.
Press Alt+C (Windows) or Option+C (Mac).
Clip Indication
Pro Tools meters provide Clip Indication with
three options: 3 Second, Infinite, or None. If
clipping occurs, the topmost LED will stay lit
(red).
To choose a Clip Indication setting:
1 Choose Setup > Preferences and click the
Display tab.
2 Select a Clip Indication option.
3 Click OK.
To clear a clip indicator:
Click anywhere on the meter.
To clear all clip indicators, do one of the following:
Alt-click (Windows) or Option-click (Mac)
any meter.
Choose Track > Clear All Clip Indicators.
Press Alt+C (Windows) or Option+C (Mac).
Wide Meters View
Wide Meters View expands the width of the
level meters for tracks in both the Mix and Edit
windows, to make the track level meters easier
to read. Wide Meters View are also available Nar-
row Mix View.
To toggle Wide Meters View on or off:
Control-Alt-Start-click (Windows) or Com-
mand-Option-Control-click (Mac) any track
level meter in the Mix or Edit window.
Adjusting Track Width
Mix Window
The Narrow Mix command lets you view all
tracks/channels in the Mix window at a reduced
width to conserve screen space in a large session.
(See “Track Height” on page 152, to adjust track
height in the Edit Window.)
To reduce the width of tracks in the Mix window:
Select View > Narrow Mix.
Clip indicators appear in plug-in, send, and
track windows.
Wide Meters View, Mix and Edit windows
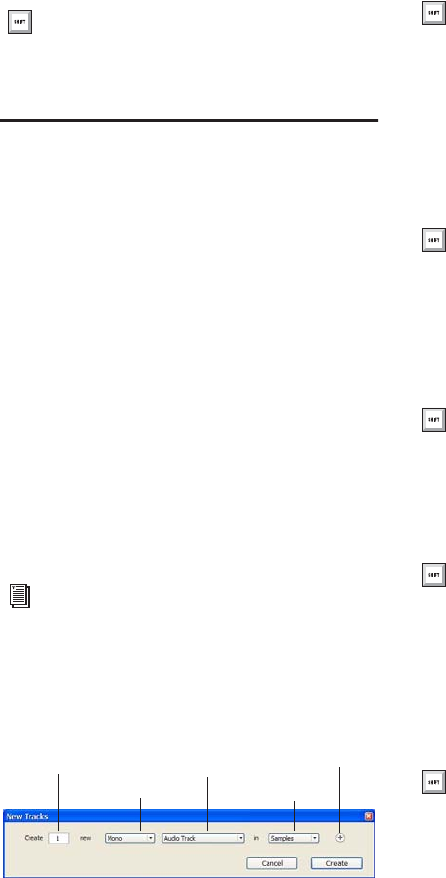
Pro Tools Reference Guide144
To display tracks at normal width:
Deselect View > Narrow Mix.
Creating Tracks
You can create mono and stereo tracks on all
Pro Tools systems. With Pro Tools HD, you can
also create multichannel tracks (from LCR to
7.1).
When new tracks are created, they are given a
default name that can be changed at any time.
To insert new tracks next to a specific track in
a session, select that track by clicking the track’s
name in the Mix or Edit window before opening
the New Tracks dialog. The new tracks are added
immediately after the selected track.
To insert new tracks after the last tracks in a
session, make sure that no track names are se-
lected on-screen before opening the New Tracks
dialog.
To create new tracks:
1 Choose Track > New.
2 Select the type of track you want to add from
the Track Type pop-up menu.
3 Select the track format (mono, stereo, or one
of the multichannel surround formats) from the
Track Format pop-up menu. Surround formats
are available on Pro Tools|HD systems only.
4 Select the timebase (samples or ticks) from the
Track Timebase pop-up menu.
5 Enter the number of new tracks.
6 Do the following, if desired:
• To add more tracks, click the Add Row but-
ton.
– or –
• To remove a track, click the Remove Row
button.
You can toggle track width by pressing Con-
trol+Alt+M (Windows) or Command+Op-
tion+M (Mac).
You can also add tracks to your session by
importing them from preexisting sessions.
See “Importing Session Data” on page 266.
New Tracks dialog
Number of new tracks
Track Format
Track Type
Track Timebase
Add/Remove Row
To auto-scroll the Track Type pop-up menu
in the New Tracks dialog, press Control
(Windows) or Command (Mac) and use the
Up/Down Arrow keys.
To auto-scroll the Track Format pop-up
menu, press Control (Windows) or Com-
mand (Mac) and use the Left/Right Arrow
keys.
To auto-scroll the Track Timebase pop-up
menu, press Control-Alt (Windows) or
Command-Option (Mac) and use the
Up/Down Arrow keys.
If you are creating various multiple new
tracks, you can move to the next or previous
row’s Number of New Tracks field by press-
ing Tab or Shift+Tab.
Add a new track by pressing Control+N
(Windows) or Command+N (Mac), or by
pressing Control+Plus (+) (Windows) or
Command+Plus (+) (Mac) on the numeric
keypad.
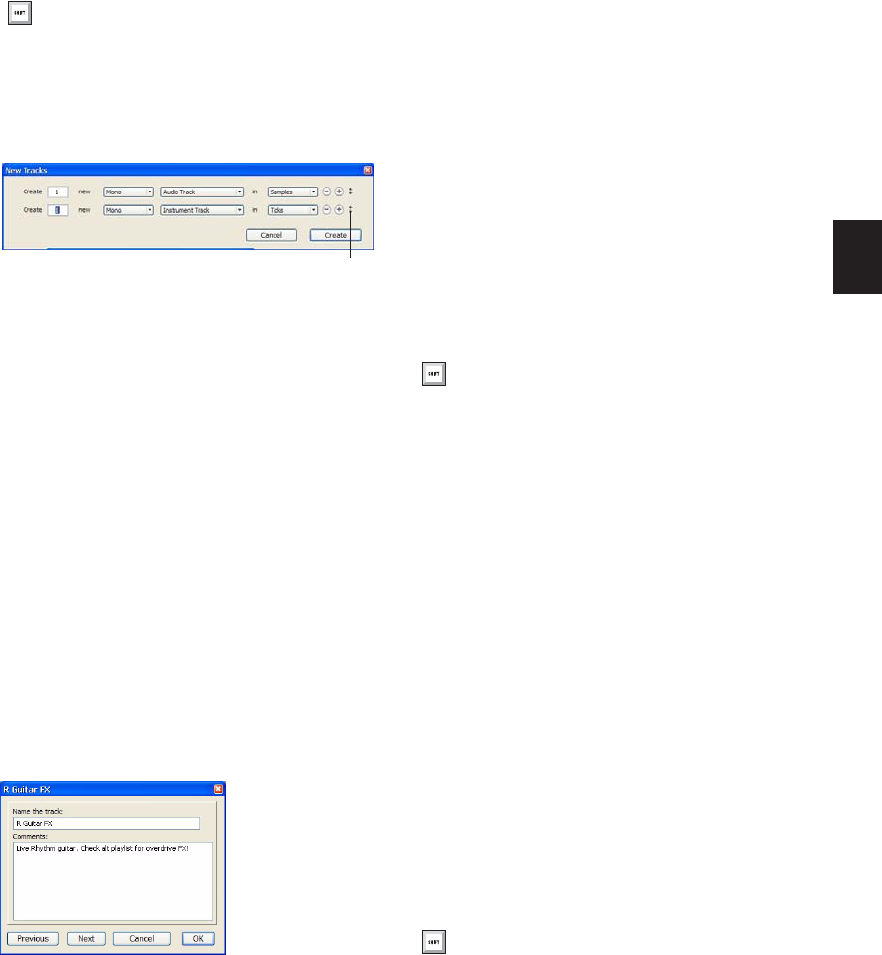
Chapter 10: Tracks 145
7 To reorder tracks, click a Move Row icon and
drag it up or down.
8 Click Create.
Default Track Names
When creating new audio, Auxiliary Input, Mas-
ter Fader, VCA Master, MIDI, and Instrument
tracks, Pro Tools names them as “Audio,”
“Aux,” “Master,” “VCA,” “MIDI, or “Inst” ac-
cordingly and numbers them consecutively. For
example, when you create the first two audio
tracks in a new session, their default names are
“Audio 1” and “Audio 2.” You can rename
tracks and also log comments for each track.
Naming Tracks
Track names are used to auto-name recorded au-
dio files and regions (see “Default Track Names”
on page 145).
To rename a track:
1 Do one of the following:
• In the Mix or Edit window, double-click the
Track Name button for the track you want
to rename.
– or –
• In the Track List, or Mix or Edit window,
Right-click the track name for the track you
want to rename.
2 In the Track Name/Comments dialog, type a
new track name.
3 Click Previous or Next to rename other dis-
played tracks.
4 Click OK.
Adding Comments to Tracks
To enter comments for a track, do one of the
following:
From the track channel strip, click directly in
the Comments area, type any comments for the
track, and press Enter (Windows) or Return
(Mac).
– or –
In the Edit or Mix window, double-click the
Track Name button for a track. Then click di-
rectly in the Comments area, type any com-
ments for the track, and press Enter (Windows)
or Return (Mac).
To remove the last track from the New
Tracks dialog Control+Minus (–) (Win-
dows) or Command+Minus (–) (Mac).
Move Row icon in the New Tracks dialog
Track Name/Comments dialog
Move Row icon
To move to the previous or next track in the
Track Name/Comments dialog, you can
press Control (Windows) or Command
(Mac) and use the Up/Down or Left/Right
Arrows.
To enter a carriage return in the Comments
area, press Shift+Enter (Windows) or
Shift+Return (Mac) on the QWERTY key-
board.
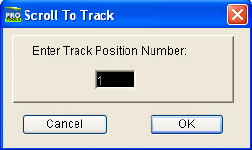
Pro Tools Reference Guide146
Track Numbering
With Track Number View enabled, each track is
assigned a number corresponding to its position
in the Mix and Edit Windows. When tracks are
reordered, they are renumbered to maintain po-
sitional sequence.
To enable Track Number View:
Choose View > Track Number.
To navigate directly to any track number:
1 Do one of the following:
• Choose Track > Scroll to Track.
– or –
• Press Control+Alt+G (Windows) or Com-
mand+Option+G (Mac).
2 In the Scroll To Track dialog, enter the Track
Position Number.
3 Click OK.
The track is selected, and the windows scroll as
follows:
• The Mix window tracks scroll to bring the
selected track as close to the left as possible.
• The Edit window tracks scroll to bring the
selected track as close to the top as possible.
Selecting Tracks
Tracks need to be selected for operations such as
duplicating tracks or adding tracks to a group.
One or more tracks can be selected at a time.
To select a track:
Click the name of an unhighlighted track in
its track channel strip.
To select a range of tracks:
1 Click the name of an unhighlighted track in
its track channel strip.
2 Shift-click an additional Track Name button.
All tracks between the first track selected and
the additional track will also be selected.
To select or deselect noncontiguous tracks, do
one of the following:
Control-click (Windows) or Command-click
(Mac) Track Name buttons that are unhigh-
lighted to select them.
– or –
Control-click (Windows) or Command-click
(Mac) Track Name buttons that are highlighted
to deselect them.
To select all tracks:
Alt-click (Windows) or Option-click (Mac)
any Track Name button that is unhighlighted.
To deselect all tracks:
Alt-click (Windows) or Option-click (Mac)
any Track Name button that is highlighted.
Scroll To Track dialog
Chapter 10: Tracks 147
Selecting Tracks when Making Edit Selections
Pro Tools lets you link Track selection with Edit
selections. When Track and Edit selections are
linked, you can make a selection within a track
or across multiple tracks for editing and each as-
sociated track is selected (track names automat-
ically highlight).
To link Track and Edit selections:
Select Options > Link Track and Edit Selec-
tion.
Scrolling a Track into View
To scroll a track into view:
In the Track List, or Mix or Edit window,
Right-click the track name and select Scroll into
View.
The track is selected, and the windows scroll as
follows:
• The Mix window tracks scroll to bring the
selected track as close to the left as possible.
• The Edit window tracks scroll to bring the
selected track as close to the top as possible.
Deleting Tracks
When you delete tracks, your audio or MIDI re-
gion data remains in the Region List, but your
arrangement of the regions on the deleted track
(the track’s playlist) will be lost.
If the track contains playlists that are not as-
signed to any track, you are prompted to delete
or retain them.
To delete a track:
1 Click the name of the track in its track chan-
nel strip to select it.
2 Do one of the following:
• Choose Track > Delete.
– or –
• In the Track List, or Mix or Edit window,
Right-click the track name and select De-
lete.
3 Click OK to remove the selected tracks from
the session.
Duplicating Tracks
The Duplicate Track command lets you dupli-
cate one or more tracks, including their audio or
MIDI data, playlists, automation, and other at-
tributes.
To duplicate one or more tracks:
1 Select the tracks you want to duplicate.
The Delete Track command cannot be un-
done.
To select multiple tracks, Control-click
(Windows) or Command-click (Mac) addi-
tional Track Names.
To select a range of tracks, Shift-click addi-
tional Track Names.
For information, see “Selecting Tracks” on
page 146.
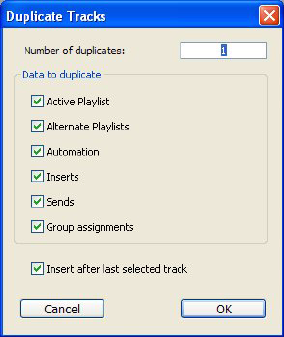
Pro Tools Reference Guide148
2 Do one of the following:
• Choose Track > Duplicate.
• Press Alt+Shift+D (Windows) or Op-
tion+Shift+D (Mac).
• Right-click the name of the track in the
Track List, or Mix or Edit window, and se-
lect Duplicate.
3 In the Duplicate Tracks dialog, configure the
following options as needed:
• Enter how many copies you want to create
in the Number of Duplicates filed.
• To copy the currently active (visible) Edit
playlist from the source track, enable Ac-
tive Playlist.
• To copy all Edit playlists on the source
track, enable Alternate Playlists
• To copy all automation from the source
track, enable Automation.
• To copy all plug-in and insert assignments,
enable Inserts.
• To copy all sends and send assignments,
enable Sends.
• To maintain all Mix and Edit Group assign-
ments, enable Group Assignments.
4 If duplicating multiple tracks, do one of the
following:
• If you want all the newly created tracks to
follow the last selected source track (to the
far-right of the Mix window, and at the bot-
tom of the Edit window), enable the Insert
after Last Selected Track option.
– or –
• If you want each newly-created track to be
inserted directly after its source track, dis-
able the option.
5 Click OK to duplicate tracks according to the
settings in the Duplicate Tracks dialog. Click
Cancel to close the dialog and not create dupli-
cate tracks.
In the Mix window, each duplicate track is cre-
ated to the right of its original track. In the Edit
window, each duplicate track is created below
its original track. When duplicating multiple
tracks, you can also choose to have the new
tracks follow the last selected track (or have each
new track follow its source track).
Duplicating VCA Slave Tracks
(Pro Tools HD Only)
Duplicating a VCA slave track without duplicat-
ing its group assignments will coalesce any auto-
mation on the duplicate track. The coalesced
duplicate plays back exactly as if it were in the
VCA group. For more information, see “VCA
Master Tracks” on page 714.
Duplicate Tracks dialog
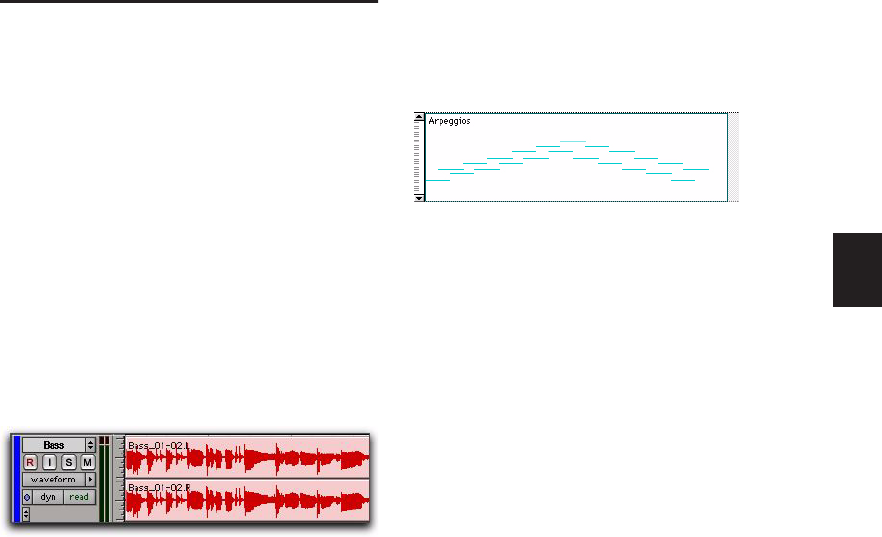
Chapter 10: Tracks 149
Track Views
The Track View determines which data is dis-
played and edited in the track’s playlist area.
Track View data can be set to Blocks, Waveform,
Volume, Pan, Mute, or an automated control or
continuous controller, based on the track type.
Audio Tracks Can be set to Blocks, Analysis,
Warp, Waveform, Volume, Volume Trim, Pan,
Mute, or any plug-in controls that are enabled
for automation. By default, audio tracks are set
to Waveform view where track material is
graphically drawn with amplitude waveforms (a
time-domain representation of sound). This
Track View provides the necessary detail for im-
portant region edits.
Auxiliary Input Tracks Can be set to Volume, Vol-
ume Trim, Pan, Mute, or any plug-in controls that
are enabled for automation.
Master Fader Tracks Can be set to Volume, Vol-
ume Trim, or any plug-in controls that are en-
abled for automation.
VCA Master Tracks (Pro Tools HD Only) Can be
set to Volume, Volume Trim, or Mute.
MIDI Tracks Can be set to Blocks, Regions, Notes,
Volume, Pan, Mute, Velocity, Pitch Bend, After
Touch, Program, Sysex, and any continuous con-
troller type. MIDI tracks are commonly set to
Notes or Regions, each of which displays notes
in a “piano roll” format. Use Notes View for in-
serting, editing, and copying and pasting MIDI
notes. Use Regions View to arrange, capture, or
consolidate regions. Other MIDI track views are
useful for editing controller data, program
changes, and Sysex events.
Instrument Tracks Can be set to Blocks, Regions,
Notes, Volume, Pan, Mute, Velocity, Pitch Bend, Af-
ter Touch, Program, Sysex, and any continuous
controller type for MIDI, as well as Volume, Vol-
ume Trim, Pan, Mute, or any plug-in controls that
enabled for automation. Instrument tracks are
commonly set to Notes or Regions, each of
which displays notes in a “piano roll” format.
Use Notes View for inserting, editing, and copy-
ing and pasting MIDI notes. Use Regions View
to arrange, capture, or consolidate regions.
Other Instrument track views are useful for edit-
ing automation, controller data, program
changes, and Sysex events.
Video Tracks For information on video track
views, see “Video Track View” on page 914.
Blocks Tracks View
With the Track View set to Blocks, audio and
MIDI regions are displayed as empty blocks
bearing the region’s name. This mode is most
useful once you have finished capturing and ed-
iting regions at the waveform or MIDI event
level and are moving and rearranging them.
Screen redraws are fastest with this format.
Track View set to Waveform for audio track
Track View set to Regions for MIDI track
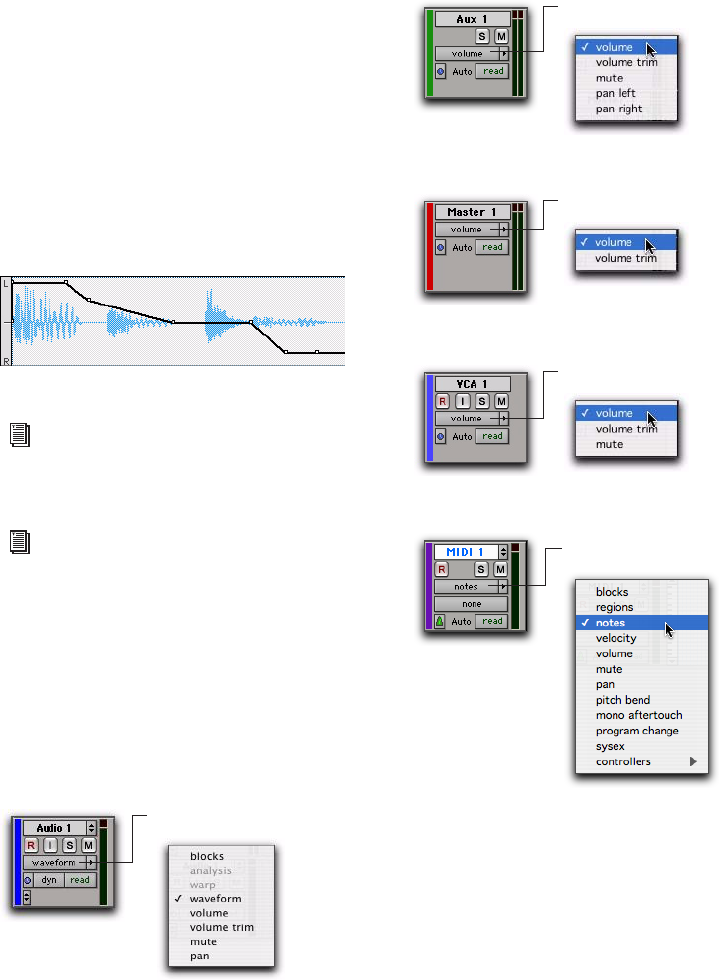
Pro Tools Reference Guide150
Automation and Controller Views
When an audio or Instrument track is displayed
as Volume, Pan, or another automated control,
or when a MIDI or Instrument track is set to one
of the continuous controller types (Volume,
Pitch Bend, After Touch), the data for that track
appears in the form of a line graph with a series
of editable breakpoints. The breakpoints can be
dragged to modify the automation data, and
new breakpoints can be inserted with the Pencil
tool or a Grabber tool.
To set the Track View:
Click the Track View selector for the track and
select the format from the pop-up menu.
The track displays the new format. If the track is
part of an active Edit Group, all tracks in the
group are set to the new format.
Track View set to Pan for audio track
For details on editing automation data for
audio tracks, see Chapter 37, “Auto-
mation.”
For details on inserting and editing control-
ler data for MIDI tracks, see “Continuous
Controller Events” on page 539.
Audio Track View selector
Click for Track View pop-up menu
Auxiliary Track View selector
Master Fader Track View selector
VCA Master Track View selector (Pro Tools HD only)
MIDI Track View selector
Click for Track View pop-up menu
Click for Track View pop-up menu
Click for Track View pop-up menu
Click for Track View pop-up menu
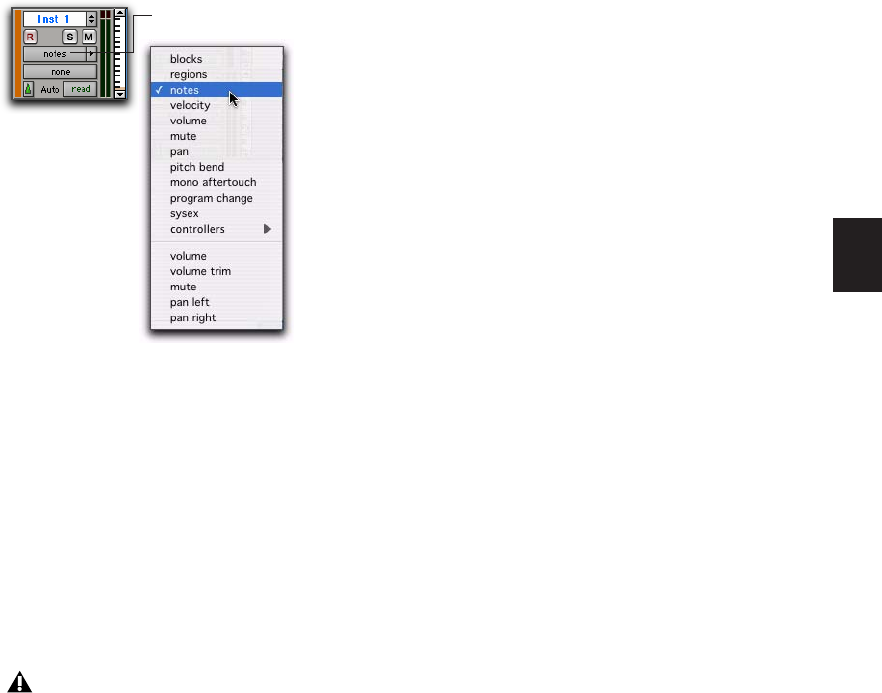
Chapter 10: Tracks 151
Changing Track Views
For audio, Auxiliary Input, MIDI, and Instru-
ment tracks, you can change to the next or pre-
vious Track View, or toggle between pre-defined
common views.
Changing to Previous or Next Track View
When changing to the next or previous Track
View, Track View list ordering is maintained as
shown in the Track View selector.
To change to the previous or next Track View:
1 Click in the track you want to change. To
change views on multiple tracks, Shift-click or
drag the Selector tool to select additional tracks,
or select a group.
2 Do one of the following:
• To change to the previous or next Track
View on all selected tracks, press Con-
trol+Start (Windows) or Control+Com-
mand (Mac) and the Left or Right Arrow
key.
– or –
• To change to the previous or next Track
View on all tracks, press Control+Alt+Start
(Windows) or Control+Option+Command
(Mac) and the Left or Right Arrow key.
Toggling Common Track Views
The most common editing view for audio tracks
are Waveform and Volume View. The most com-
mon editing views for MIDI and Instrument
tracks are Notes and Regions View. Pro Tools
provides an easy way to toggle these views.
To toggle Track Views on tracks containing the
edit cursor (or an Edit selection):
1 Click in the track you want to toggle. To tog-
gle multiple tracks, Shift-click or click and drag
with the Selector tool to select additional tracks.
Instrument Track View selector
Track Views at the beginning of the list
(such as Blocks for audio or MIDI tracks)
cannot be changed to the previous Track
View. Tracks Views at the end of the list
(such as a MIDI controllers option) cannot
be changed to the next Track View.
Click for Track View pop-up menu
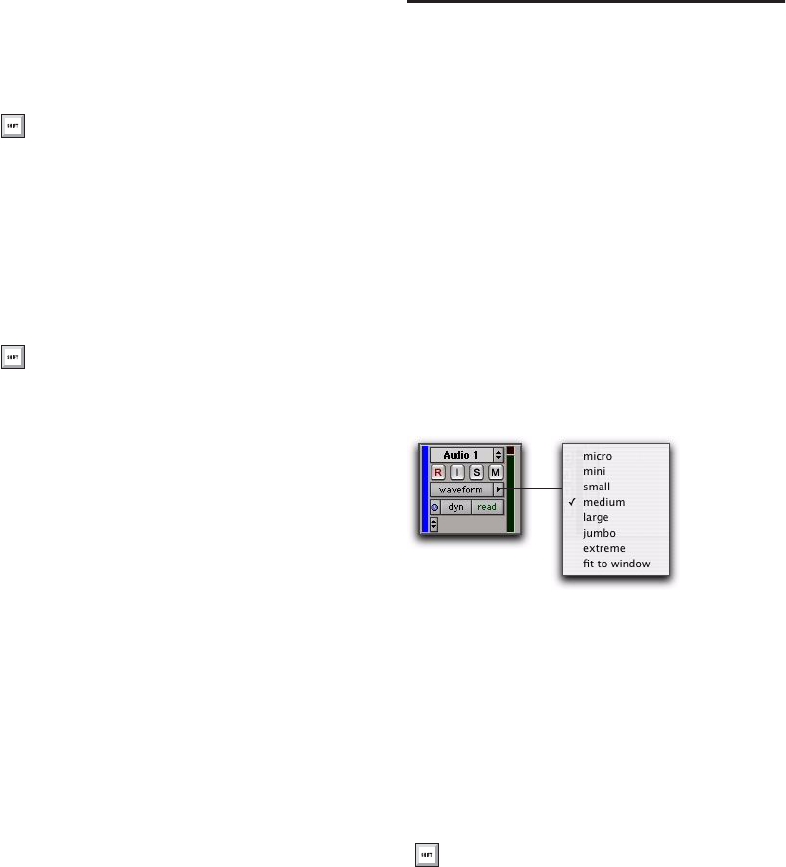
Pro Tools Reference Guide152
2 Do one of the following:
• Press Start+Minus (Windows) or Con-
trol+Minus (Mac) on the QWERTY key-
board.
– or –
• With Commands Keyboard Focus enabled
(see “Keyboard Focus” on page 20), press
Minus on the QWERTY keyboard.
Audio tracks are toggled between Waveform and
Volume View. MIDI and Instrument tracks are
toggled between Notes and Regions View.
Master Views for Tracks
Audio, MIDI, and Instrument tracks have Track
Views that act as “master.” When a track is dis-
played in its Master View, any edits performed
apply to all data in the track. For instance, when
an audio track is set to Waveform, copying and
pasting affects not just the waveform informa-
tion, but all of the automation data as well.
The Master View is based on the type of track, as
follows:
• Audio tracks: Waveform and Blocks
• MIDI and Instrument tracks: Regions,
Blocks, and Notes (when using the Selector
tool)
Track Height
Tracks can be viewed in the Edit window at any
of eight heights: Micro, Mini, Small, Medium,
Large, Jumbo, Extreme and Fit To Window. Larger
track heights are particularly useful for precise
editing, especially for MIDI. Smaller track
heights are useful for conserving screen space in
a large session.
You can adjust track heights on an individual
track basis or set all tracks to the same height.
Track heights can be changed during playback.
To set the Track Height, do one of the following:
Click the small arrow next to the Track View
selector to get the Track Height pop-up menu.
– or –
Right-click on the vertical zoom scale just to
the right of the track controls and choose the
height from the pop-up menu.
The track is resized to the new height. If the
track is part of an Edit Group, all tracks in the
group are set to the new height.
To toggle Track Views for all tracks, press
Alt+Start+Minus (Windows) or Op-
tion+Control+Minus (Mac) on the
QWERTY keyboard.
To toggle Track Views for all tracks with
Command Focus enabled, press Alt+Minus
(Windows) or Option+Minus (Mac) on the
QWERTY keyboard.
Track Height pop-up menu
Press Start+Up/Down Arrow key (Win-
dows) or Control+Up/Down Arrow key
(Mac) to increase/decrease track height of
any track that contains a selection or in
which the edit cursor is currently placed.
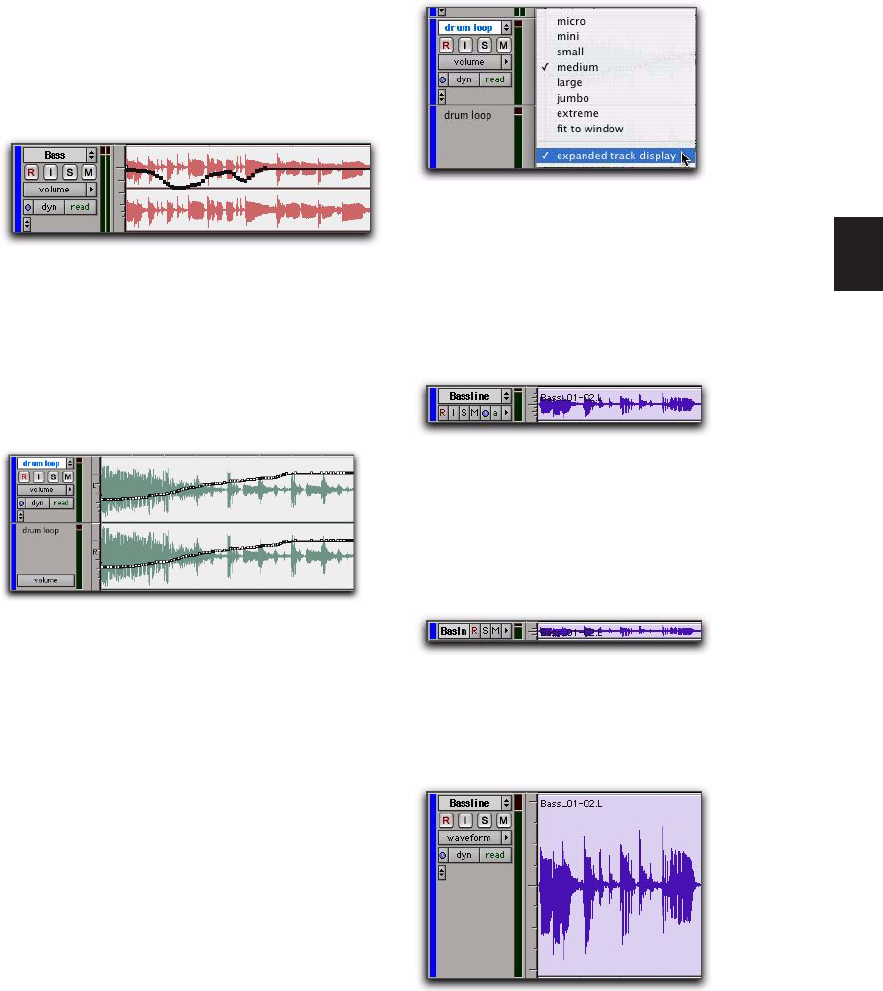
Chapter 10: Tracks 153
Expanded Track Display
Stereo and multichannel tracks share a single
playlist for volume and mute. This shared play-
list normally occupies the entire height of the
track, extending across all channels.
With Expanded Track Display, you can display
playlists individually for each channel, thereby
allowing for more accurate breakpoint editing.
This is also useful for editing pan or multi-mono
plug-in data, both of which can be different for
each channel.
Expanded Track Display also provides for a
larger waveform display (equal to mono tracks),
as well as a separate Track View selector and
meter for each channel.
To turn on Expanded Track Display:
From the Track Height selector, click Ex-
panded Track Display.
Track Controls and Track Height
The Track Height affects how the various track
controls appear in the Edit window. For in-
stance, when a track’s height is set to Small,
most of the buttons are reduced in size.
When the Track Height is set to Mini or Micro,
only controls for Record, Solo, and Mute appear,
and the menus for Playlist, Track Timebase,
Track Height, and Track View are accessed from
the same selector.
When the Track Height is set to Large, Jumbo, or
Extreme, all track controls are displayed at their
full size.
Volume playlist for stereo track
Stereo track in Expanded Track Display
Track Height pop-up menu
Track Height set to Small
Track Height set to Mini
Track Height set to Large
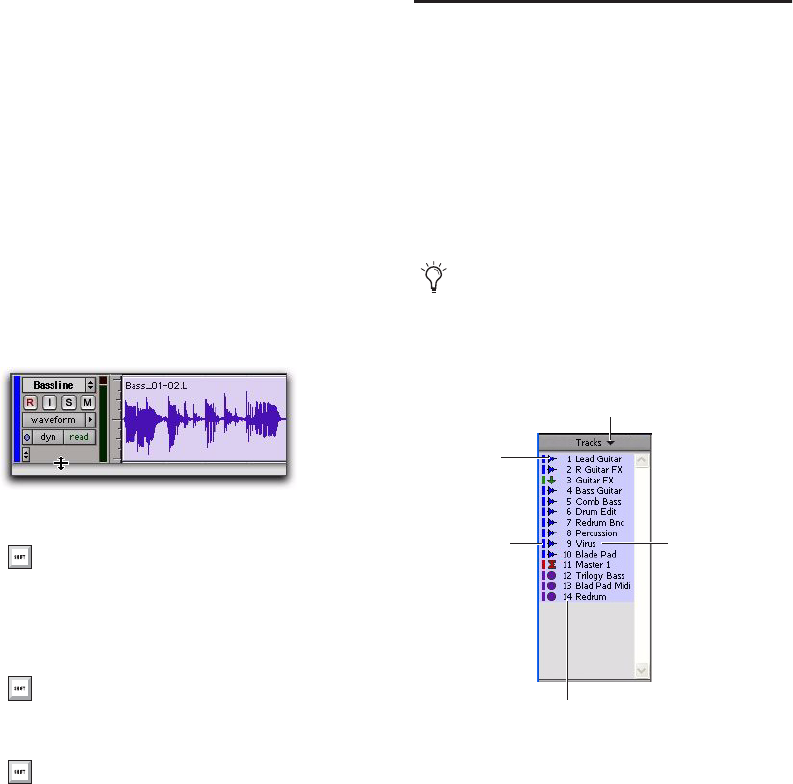
Pro Tools Reference Guide154
Continuously Variable Track Height
In the Edit window, you can continuously resize
the Track Height of any given track by simply
clicking and dragging the lower boundary of the
Track Controls column.
To resize the Track Height of any track in the Edit
window:
Click and drag the bottom line of any given
track’s Track Controls column up or down. The
cursor changes to indicate that you can resize
the track.
The track’s Track Height changes incrementally.
The Track List
The Track List (at the left of both the Mix and
Edit windows) shows all tracks in the session. It
allows you to show or hide a track in the Mix
and Edit windows, by selecting or deselecting its
name. Even though a track is hidden, the mate-
rial on the track will still play as part of the ses-
sion. Inactive tracks appear in italics in the
Track List.
Show/Hide Track List/Group List View
Button
To show (or hide) the Track List (and Group List):
Click the Show/Hide Track List/Group List
View button in the Mix or Edit window.
Adjusting the Track Height of an audio track
Press and hold Control (Windows) or Com-
mand (Mac) while adjusting track height
for continuous, non-incremental adjust-
ments.
To continuously resize all tracks, Alt-click
(Windows) or Option-click (Mac) and drag.
To continuously resize all selected tracks,
Alt-Shift-click (Windows) or Option-Shift-
click (Mac) and drag.
The Track List can also be used to create
new tracks when importing media from
DigiBase. See “Importing Files with Drag
and Drop” on page 256.
Track List
Track List pop-up menu
Track name
Track Type
icon
Track Color
Code
Track Number
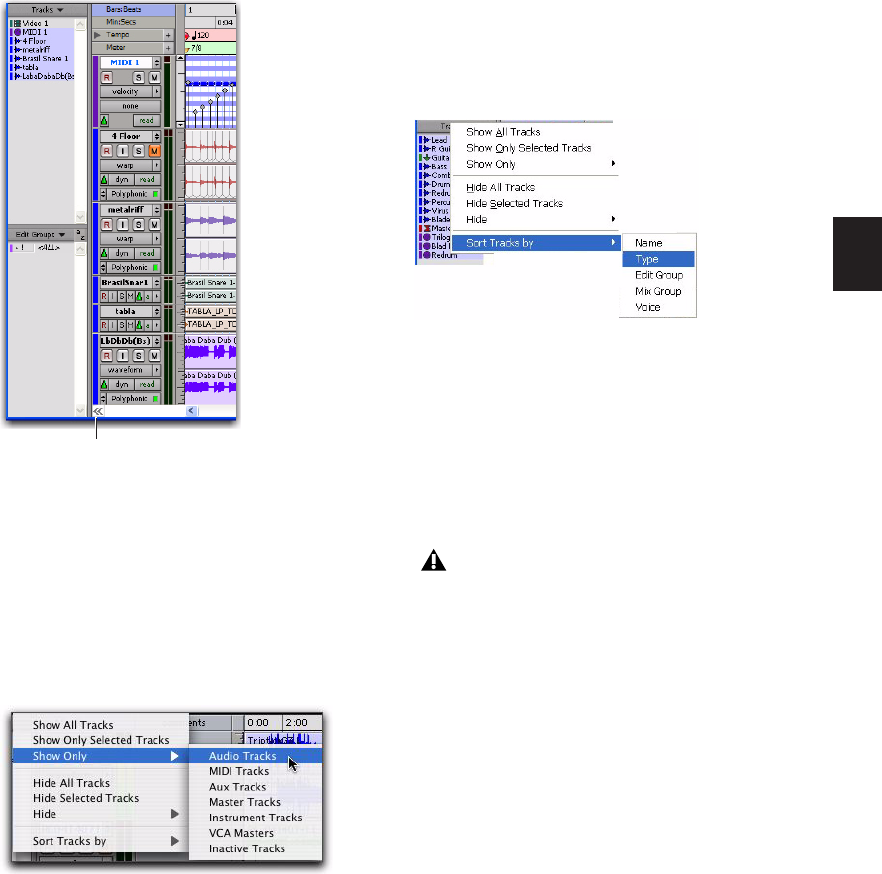
Chapter 10: Tracks 155
Track List Pop-Up Menu
The pop-up menu at the top of the Track List
provides commands that allow you to show or
hide all tracks, tracks currently selected on-
screen, or specific types of tracks (audio, Auxil-
iary Input, Master Fader, MIDI, Instrument,
VCA Master, or Inactive tracks).
The Sort Tracks By command allows you to set
the track order according to Name, Type, Edit
Group, Mix Group, or Voice. The sort order will
be reflected in the Track List in the Mix or Edit
Window.
When a track that is a member of an active
group is hidden from view, editing operations
performed on other members of the group in
the Edit window will not affect the hidden track.
In the Mix window, however, all operations
other than record-enable will affect a hidden
track that is a member of an active group.
To hide a track, do one of the following:
Click the highlighted name of the track in the
Track List.
– or –
In the Track List, or Mix or Edit window,
Right-click the track name and select Hide (or
Hide and Make Inactive if the track is active and
you also want to make the track inactive).
Track List shown in Edit Window
Show Only option
Show/Hide Track List/Group List View
Sort Tracks By option
With Pro Tools HD, even if a track is hid-
den from view, its position relative to other
tracks still affects its voiceable track play-
back priority (see “Voice Borrowing” on
page 164 for details).

Pro Tools Reference Guide156
To show a track that is currently hidden, do one of
the following:
Click the unhighlighted name of the track in
the Track List.
– or –
In the Track List, or Mix or Edit window,
Right-click the track name and select Show (or
Show and Make Active if the track is active and
you also want to make it active).
To show all tracks:
Click the Track List pop-up menu and choose
Show All Tracks.
To hide all tracks:
Click the Track List pop-up menu and choose
Hide All Tracks.
To show a range of tracks:
1 Click the name of an unhighlighted track
name in the Track List.
2 Shift-click an additional track name.
All track names that occur between the first
track name selected and the additional track
name will also be selected.
To show or hide a range of tracks in the Track List
with the Marquee:
1 Press and hold Control (Windows) or Com-
mand (Mac).
2 Move the cursor to the left of a track name un-
til the Marquee with a small “+” symbol ap-
pears.
• To show tracks, the Marquee should be to
the left of an unhighlighted track name.
• To hide tracks, the Marquee should be to
the left of a highlighted track name.
3 Click on the track name and drag up or down
(to show or hide the track and the tracks imme-
diately above or below it).
To show or hide non-contiguous tracks, do one of
the following:
Click track names that are unhighlighted to
select them.
– or –
Click track names that are highlighted to de-
select them.
You can also show all tracks by Alt-clicking
(Windows) or Option-clicking (Mac) the
name of any track that is unhighlighted.
You can also hide all tracks by Alt-clicking
(Windows) or Option-clicking (Mac) the
name of any track that is highlighted, or by
clicking on a track symbol to the left of any
highlighted track name.
To reorder tracks on-screen, drag the track
names to new positions within the Track
List or in the Mix or Edit window.
You can also select a range of tracks by
moving the cursor to the left of the track
names, so the Marquee appears, and drag-
ging around the track names you want to se-
lect.

Chapter 10: Tracks 157
About Mix/Edit Groups and Hidden
Tracks
In the Mix window, if a hidden track is part of
an enabled group, all Mix window operations
performed on other members of the group also
affect the hidden track—with the exception of au-
dio or MIDI record-enabling. If you solo, mute,
or automation write-enable a grouped track, any
group members that are hidden are soloed,
muted, or automation write-enabled as well.
In the Edit window, however, editing operations
performed on members of an enabled group do
not affect hidden tracks that are also members of
the enabled group.
About Clipping and the Track List
(Pro Tools HD Only)
When a track, send, or plug-in clips, the Track
List displays the track’s name in red. Both
shown and hidden tracks display clipping indi-
cation.
About Track Numbering and Hidden
Tracks
In the Mix and Edit windows, Track Position
Numbers can include hidden tracks in their
numbering sequence, or ignore them, as fol-
lows:
• Numbers are only assigned to tracks that are
shown (when Track Position Numbers Stay
with Hidden Tracks is not enabled in the Dis-
play Preferences page). In this case, active
tracks are then numbered sequentially. Hid-
den tracks are un-numbered.
– or –
• Tracks keep their Track Position Numbers
even when hidden (when Track Position
Numbers Stay With Hidden Tracks is enabled
in the Display Preferences page).
Track Name Right-Click
Pop-Up Menus
(Edit Window, Mix Window, or Track List)
When you Right-click a track name in the Edit
window, Mix window, or the Track List, a pop-
up menu provides access to the following com-
mands:
Hide/Show Hides (or shows) the track (or se-
lected tracks if any).
Hide and Make Inactive Hides the track and
makes it inactive (or selected tracks if any).
Make Active/Inactive Toggles the active status
of the track (or all selected tracks in the Mix or
Edit window only).
Scroll Into View Scrolls the track to the top of the
Edit window or to the left of the Mix window.
Send to Sibelius (MIDI and Instrument Tracks
Only) Exports the MIDI data from one or more
MIDI or Instrument tracks and automatically
imports that MIDI data into Sibelius (or G7). For
more information, see “Send to Sibelius” on
page 281.
Export MIDI (MIDI and Instrument Tracks
Only) Exports the MIDI data from one or more
MIDI or Instrument tracks to a standard MIDI
file. For more information, see “Exporting MIDI
Files” on page 279.
Coalesce VCA Master Automation (Pro Tools HD
Only) Coalesces the VCA automation to the
slave tracks of the VCA.
Coalesce Trim Automation (Pro Tools HD
Only) Coalesces Trim automation on the track
(or selected tracks if any).
Clear Trim Automation (Pro Tools HD
Only) Clears Trim automation on the track (or
selected tracks if any).
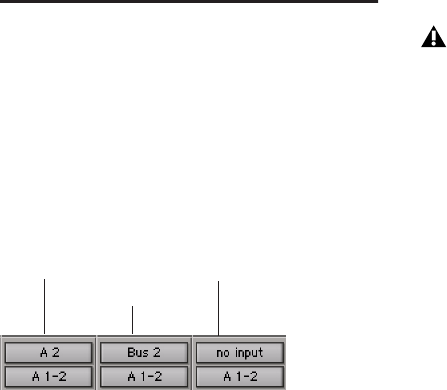
Pro Tools Reference Guide158
Locked (Video Track Only) Toggles the
locked/unlocked status of the video track (or se-
lected video tracks if any).
Rename Opens the Track Name dialog.
Duplicate Duplicates the track (or selected tracks
if any).
Split Into Mono (Multichannel Tracks Only) Splits
a multichannel track (or selected multichannel
tracks if any) into their mono component
tracks.
Delete Deletes the track (or selected tracks if
any).
Expand to New Tracks Expands multichannel
audio files imported from a field recorder to new
tracks, such that every channel resides on its
own mono audio track. Pro Tools also automat-
ically conforms all expanded tracks to the edits
in the guide (expanded) track. You can expand
multichannel files to new tracks ordered by
channel name, by channel number, or by chan-
nel name and number.
Assigning Audio Inputs and
Outputs to Tracks
Inputs for audio, Auxiliary Input, and Instru-
ment tracks can be assigned to audio interface
channels or busses. Outputs for audio, Auxiliary
Input, Master Fader, and Instrument tracks can
also be assigned to audio interface channels or
busses.
For stereo and multichannel surround tracks, in-
puts and outputs appear as stereo pairs and
multichannel groups. The available inputs, out-
puts, and busses are defined as paths in the
I/O Setup dialog (see Chapter 6, “I/O Setup”).
Automatic Input and Output
Assignments
When adding tracks to a new session, inputs are
automatically assigned in ascending order. For
example, if you have an audio interface with
eight inputs, creating four new mono audio
tracks will automatically add four audio tracks
with inputs assigned to the first four paths de-
fined in the I/O Setup dialog. When creating ste-
reo tracks, inputs are automatically assigned to
subsequent input pairs.
The outputs automatically assigned to new
tracks are determined by the New Track Default
Output specified in the I/O Setup dialog.
Assigning Audio Inputs
(Audio Tracks, Auxiliary Inputs, Instrument
Tracks)
To assign an audio track input:
1 In order to assign audio track inputs in the
Edit window, select View > Edit Window > I/O.
Input/output assignments for three mono audio tracks
Track Input
set to Audio 2 Track Input
set to Bus 2
Track set to
No Input
Instrument tracks route their input auto-
matically to any inserted Instrument plug-
in.
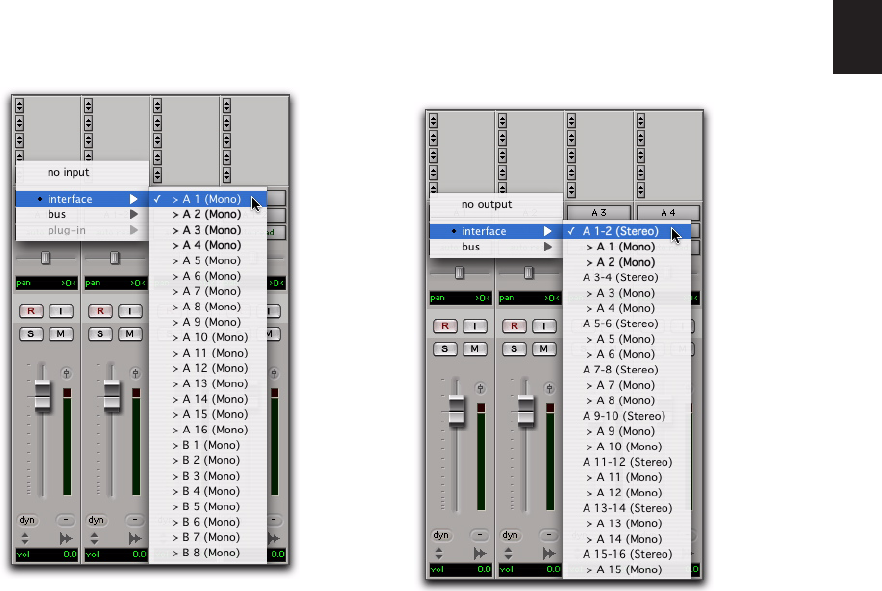
Chapter 10: Tracks 159
2 In the Mix or Edit window, click the track’s In-
put Path selector and choose from the available
audio interface channels and busses. Stereo and
multichannel surround tracks have inputs avail-
able as pairs and multichannel groups.
The Input Path selector allows you to route any
audio input or any of the Pro Tools internal bus-
ses to an audio track or an Auxiliary Input track.
The choices available in this pop-up menu are
determined by the I/O Setup configuration. In-
puts in use by another track appear as bold in
the selector.
To remove an input assignment:
Select No Input from the Input Path selector.
Assigning Audio Outputs
(Audio Tracks, Auxiliary Inputs, Instrument
Tracks, Master Faders)
To assign an audio track output:
1 In order to assign audio track outputs in the
Edit window, select View > Edit Window > I/O.
2 In the Mix or Edit window, click the track’s
Output Path selector and choose from the avail-
able audio interface channels and busses. Stereo
and multichannel surround tracks have outputs
available as pairs and multichannel paths.
The Output Path selector lets you route a track
to any configured audio output or internal bus.
The choices available in this pop-up menu are
determined by the I/O Setup configuration.
Outputs in use by another track appear as bold
in the selector.
Input Path selector Output Path selector
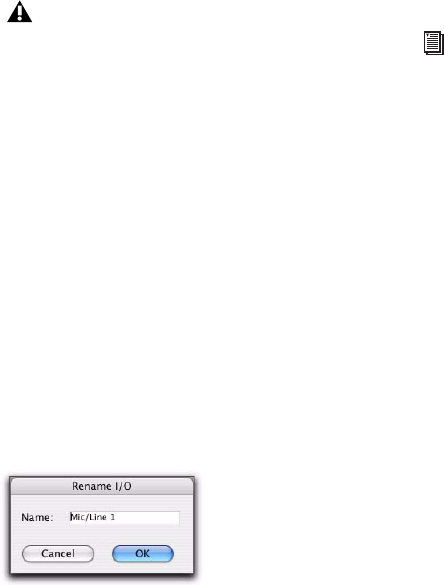
Pro Tools Reference Guide160
To auto-assign all visible tracks to unique mono
sub-path outputs in ascending order:
1 Make sure you have enough mono sub-paths
defined in I/O Setup (see Chapter 6, “I/O
Setup”).
2 Control-Alt-click (Windows) or Command-
Option-click (Mac) the Output Path selector of
the left-most track and assign it to the sub-path
for Output #1. All visible tracks will be auto-as-
signed to unique mono sub-path outputs in as-
cending order.
To remove an output assignment:
Select No Output from the Output Path selec-
tor. Playlists become dimmed for tracks with no
output assignment.
Renaming Track Inputs and
Outputs from the Edit or Mix
Window
I/O path names can be renamed in the Edit or
Mix windows, or in the I/O Setup dialog.
To rename an I/O path in the Edit or Mix window:
1 In the Edit or Mix window, Right-click the In-
put selector or Output selector for a track, and
choose Rename from the pop-up menu.
2 In the Rename I/O dialog, enter a name for the
I/O Path, and click OK.
Making Track Inputs and Outputs
Inactive from the Edit or Mix
Window
Track input, output, and bus path assignments
can be made inactive using the corresponding
selector on the track. Making a track input or
output inactive silences the input or output,
while retaining all automation and playlist data.
Inactive inputs and outputs do not consume re-
sources for TDM mixer connections, but any as-
signed plug-ins on the track continue to use
their required DSP resources. RTAS plug-ins re-
quire CPU resources, and TDM plug-ins use the
DSP available on Pro Tools|HD cards.
You can make track inputs and outputs inactive
(or active) directly from the Edit or Mix win-
dows. Inactive I/O paths are grayed out.
To make a track’s input or output path inactive (or
active), do one of the following:
In the Edit or Mix window, Right-click the In-
put selector or Output selector for a track, and
choose Make Inactive (or Make Active) from the
pop-up menu.
– or –
Control-Start-click (Windows) or Command-
Control-click (Mac) the Input or Output selector
in the Mix or Edit window.
Assigning an audio track, Auxiliary Input,
Master Fader, or Instrument track to “No
Output” will cause its automation data for
pan and plug-in controls to be lost.
Rename I/O dialog
You can also make a path globally inactive
(or active) in the I/O Setup dialog. See
“Making Paths Active or Inactive” on
page 61.

Chapter 10: Tracks 161
To make all track inputs or outputs assigned to the
same path inactive (or active), do one of the
following:
In the Edit or Mix window, Alt-Right-click
(Windows) or Option-Right-click (Mac) the In-
put selector or Output selector for a track, and
choose Make Inactive (or Make Active) from the
pop-up menu.
– or –
Control-Alt-Start-click (Windows) or Com-
mand-Option-Control-click (Mac) the Input or
Output selector in the Mix or Edit window.
To make all selected track inputs or outputs
assigned to the same path inactive (or active), do
one of the following:
In the Edit or Mix window, Alt-Shift-Right-
click (Windows) or Option-Shift-Right-click
(Mac) the Input selector or Output selector for a
track, and choose Make Inactive (or Make Ac-
tive) from the pop-up menu.
– or –
Control-Alt-Start-Shift-click (Windows) or
Command-Option-Control-Shift-click (Mac)
the Input or Output selector in the Mix or Edit
window.
Toggling Multiple Paths
If a track has only one main output assignment,
Control-Start-click (Windows) or Command-
Control-click (Mac) the track’s Output Path se-
lector to toggle the main output to inactive.
When there are multiple assignments, the track
selector will be displayed for you to specify the
input, output, insert, or bus path.
Track Priority and Voice
Assignment
Pro Tools LE systems provide up to 32 voices of
simultaneous audio playback and recording, de-
pending on the system. For details on LE system
capabilities, see Table 7 on page 30.
Pro Tools|HD systems provide a certain number
of voices (simultaneous channels of audio play-
back and recording), depending on the system.
For example, a Pro Tools|HD 1 system can pro-
vide up to 96 voices of audio playback and re-
cording, at 44.1 or 48 kHz. For details on
Pro Tools system capabilities, see Table 5 on
page 27.
Pro Tools LE systems with the DV Toolkit 2 op-
tion or the Music Production Toolkit option let
you play or record up to 48 simultaneous stereo
or mono tracks. For details on system capabili-
ties with these options, see “DV Toolkit 2 and
Music Production Toolkit” on page 31.
Track Priority
While your Pro Tools hardware allows a fixed
number of voices, Pro Tools software allows for
additional audio tracks beyond that fixed num-
ber of voices. While all of these tracks can be re-
corded to or imported, arranged, and cued for
playback, not all of them can be played back si-
multaneously.
When the number of tracks exceeds the number
of available voices, tracks with lower priority
may not be heard. For these situations,
Pro Tools assigns priorities to tracks that com-
pete for the available voices. Because there can
be more tracks than available voices, Pro Tools
provides multiple ways of adjusting the play-
back priority of audio tracks. See “Changing a
Track’s Playback Priority” on page 162 and
“Freeing up Voices on a Track” on page 162.
If a Send (A–J) has multiple output assign-
ments and one of those is toggled active or
inactive, then all of the output assignments
for that Send (A–J) are toggled active or in-
active.

Pro Tools Reference Guide162
With Pro Tools|HD systems, you can assign spe-
cific voices to multiple tracks such that those
voices are shared by more than one track. This
feature is called voice borrowing. The combina-
tion of playback/record tracks and shared voiced
tracks comprises the total number of voiceable
tracks on a Pro Tools|HD system.
To set multiple tracks to the same voice, see
“Setting Voice Assignment” on page 162. For
additional information on voice borrowing,
see“Voice Borrowing” on page 164).
Changing a Track’s Playback Priority
Tracks with higher positions (leftmost in the
Mix window or topmost in the Edit window)
have priority over tracks in lower positions in a
session.
To increase a track’s priority, do any of the
following:
In the Mix window, drag the Track Name but-
ton to the left of other tracks in the session.
Tracks at the left of the Mix window have higher
priority than those on the right.
In the Edit window, drag the Track Name but-
ton above other tracks in the session. Tracks at
the top of the Edit window have higher priority
than those below.
In the Track List, drag the Track Name button
to a higher position in the list. Tracks at the top
of this list have higher priority than those be-
low.
Freeing up Voices on a Track
You can also adjust the relative priority of tracks
by freeing up the voices of individual tracks,
making them available to other tracks in the ses-
sion.
To free up the voice of a track, do one of the
following:
Click the Voice selector of the track and set it
to Off. See “Setting Voice Assignment” on
page 162.
Deactivate the track by Control-Start-clicking
(Windows) or Command-Control-clicking
(Mac) its track type icon in the Mix window.
Make sure the track does not have an output
or send assignment.
With Pro Tools HD, you can temporarily free a
track’s voice during playback by muting it (see
“Mute Frees Assigned Voice” on page 171).
Setting Voice Assignment
A track’s voice assignment can be turned off or
set to be dynamically allocated, and with
Pro Tools HD, can also be explicitly assigned to
a specific voice number.
On all Pro Tools systems, you can use Dynami-
cally Allocated Voicing to automatically take
care of voice management in the background,
assigning voices not in use by other tracks.
Pro Tools LE supports Dynamically Allo-
cated Voicing only; it does not support ex-
plicit voice assignments.
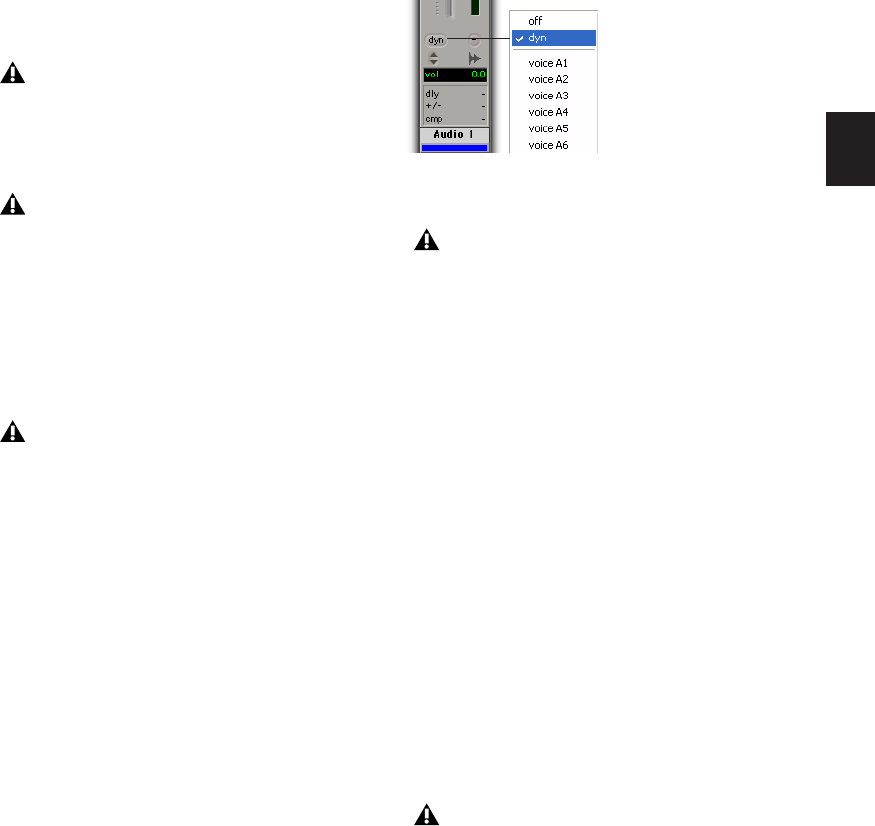
Chapter 10: Tracks 163
With Pro Tools HD, tracks assigned to a specific
voice number take priority over dynamically al-
located tracks and support voice borrowing (see
“Voice Borrowing” on page 164). To ensure a
track is heard, or that it is available for Quick-
Punch, TrackPunch, or DestructivePunch re-
cording, assign an explicit voice to that track.
For stereo and multichannel tracks, voices ap-
pear in pairs and multichannel groups. Voices
already explicitly assigned to another track ap-
pear in bold in the Voice selector pop-up menu.
To set the voice assignment for a track:
Click the Voice selector and set the track to
Dyn, Off, or select a voice number (Pro Tools HD
only).
Voice Assignment with Toolkit Options
(Pro Tools LE with DV Toolkit 2 or Music
Production Toolkit)
Pro Tools LE systems with the DV Toolkit 2 op-
tion or the Music Production Toolkit option let
you play or record up to 48 simultaneous stereo
or mono tracks. Higher track counts are only
supported with multiple hard drives and faster
Digidesign-qualified systems.
The first 48 audio tracks that are active and have
their voice assignment set to DYN (Dynamically
Allocated Voicing) play back. Tracks which oc-
cur after these 48 tracks do not play back and
cannot be recorded on. Their Dynamically Allo-
cated Voicing button will be blue to indicate
they are unavailable for playback or record.
With Pro Tools HD, QuickPunch, Track-
Punch, and DestructivePunch require addi-
tional voices. For more information, see
Chapter 20, “Advanced Punch Recording.”
With Pro Tools HD, the initial insert of an
RTAS plug-in uses additional voices in cer-
tain situations. See“Voice Usage and Total
Latency for RTAS Plug-ins” on page 753.
With Pro Tools HD, you can preview audio
files in DigiBase browsers during session
playback. This requires additional playback
voices. For more information, see “Reserve
Voices for Preview in Context” on page 230.
Voice selector for stereo audio track (Pro Tools HD
shown)
Elastic Audio and RTAS plug-ins are disal-
lowed on explicitly voiced tracks (Pro Tools
HD only). Use Dynamically Allocated Voic-
ing for tracks on which you want to use Elas-
tic Audio or RTAS plug-ins.
Tracks do not play back when they are in-
active or their voice assignment is set to Off.

Pro Tools Reference Guide164
When working with more than 48 audio tracks,
you can play back audio in tracks 49 and higher
by changing the higher track’s priority, as fol-
lows:
• Make a lower track inactive (click the Track
Name and select Track > Make Inactive).
• Set the voice assignment in a lower track to
Off (click the Voice selector and select Off).
• Drag the Track Name button of the higher
track to the left (Mix window) or upwards
(in the Edit window or Track List) until it is
one of the first 48 audio tracks. The previ-
ous 48th audio track will become the 49th
audio track and its voice assignment will
change to Off.
If the original track 49 (or higher) had its voice
assignment set to Off, it automatically resets to
DYN when you do any of the above steps.
Automatic Assignment of Ascending Voices
(Pro Tools HD Only)
You can automatically assign all tracks or all se-
lected tracks to successive voices. For example,
you may want to select eight audio tracks and
reassign them to voices 9–16.
To assign all audio tracks to successive voices:
While pressing Control+Alt (Windows) or
Command+Option (Mac), select the starting
voice number from the Voice selector for the
track at the far left of the Mix window, or at the
top of the Edit window.
The voice is assigned to the first track, with suc-
cessive voices assigned to tracks (with the same
format) of lower priority.
To assign all selected audio tracks to successive
voices:
1 Select the audio tracks by Control-clicking
(Windows) or Command-clicking (Mac) their
names.
2 While pressing Control+Alt+Shift (Windows)
or Command+Option+Shift (Mac), select the
starting voice number from the Voice selector
for the left (Mix window) or top (Edit window)
selected track.
The voice is assigned to the starting track, with
successive voices assigned to currently selected
tracks (with the same format) of lower priority.
Voice Borrowing
(Pro Tools HD Only)
Pro Tools HD features voice borrowing, which lets
you assign more than one track to the same
voice. The track with the highest priority takes
over that voice, but when a hole opens up in the
higher-priority track, its shared voice is tempo-
rarily available, and the track with the next
highest priority “pops through” and begins to
play. When the original track returns, the track
that had popped through relinquishes the
shared voice to the higher priority track.
To select multiple tracks, Control-click
(Windows) or Command-click (Mac) addi-
tional Track Names.
To select a range of tracks, Shift-click addi-
tional Track Names.
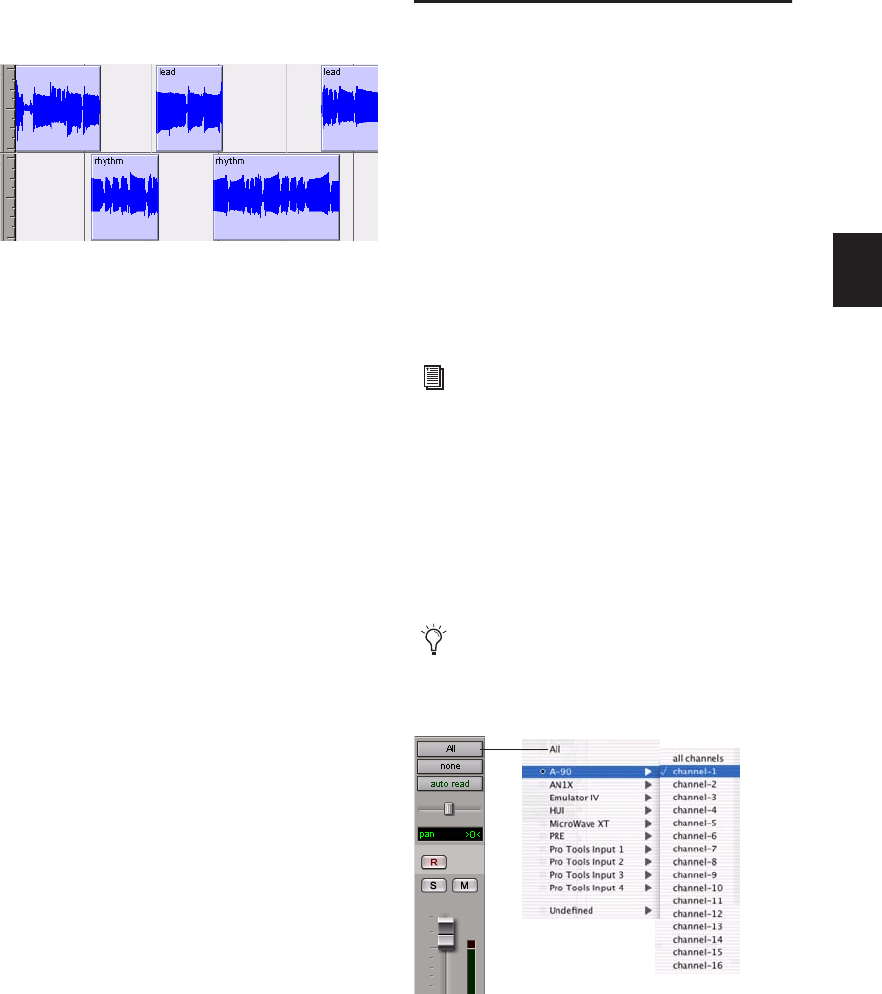
Chapter 10: Tracks 165
The following example demonstrates the con-
cept of voice borrowing:
In Figure 7 above, the two visible tracks are as-
signed to the same voice. There is an open area
in the top track where no region appears. At this
point, the voice is free since it is not being used,
and the next highest priority track assigned to
that voice (the bottom track) pops through the
open area and plays.
By experimenting with track priority, voice as-
signment, and arranging regions so that they are
positioned to “pop through” holes in higher pri-
ority tracks, you can find many useful ways to
maximize voiceable tracks with Pro Tools HD.
Assigning MIDI Inputs and
Outputs to Tracks
MIDI recording and playback is supported with
MIDI tracks and Instrument tracks.
Assigning MIDI Track Input
Pro Tools lets you assign specific MIDI ports and
channels to a MIDI track input. The default se-
lection of All receives all incoming MIDI data
from all ports on all channels. Use the MIDI In-
put selector to specify a MIDI port and channel
for input.
To assign a MIDI track input:
Click the track’s MIDI Input selector and as-
sign a port and channel for MIDI input. Chan-
nels already assigned to another track appear in
bold.
Figure 7. “Rhythm” regions play only when there is no
“Lead” region
For information on assigning MIDI input to
Instrument tracks, see “Assigning MIDI In-
put and Output for Instrument Tracks” on
page 166.
In the Edit window, select View > Edit Win-
dow > I/O to access any track’s Input selec-
tor.
MIDI Input selector (MIDI Track shown)
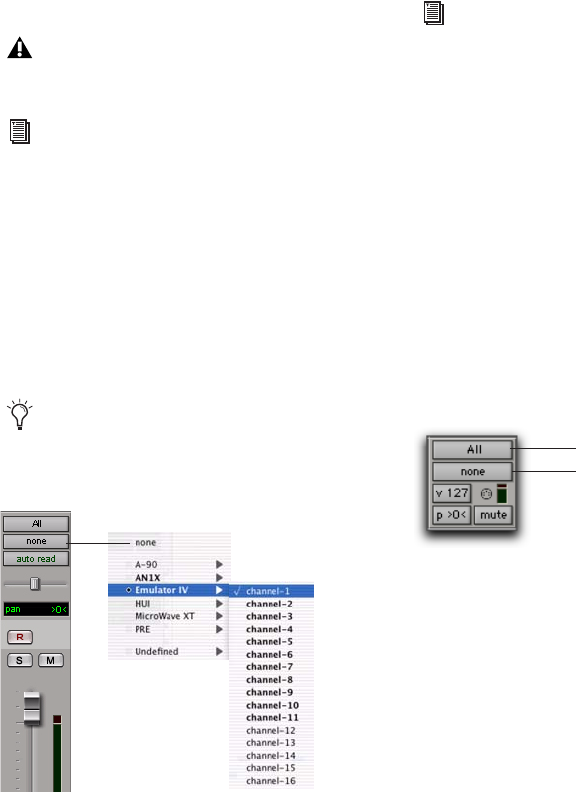
Pro Tools Reference Guide166
Assigning MIDI Track Output
Pro Tools lets you assign specific MIDI ports and
channels to a MIDI track output. The default se-
lection of none sends MIDI data to no port on
any channel. Use the MIDI Output selector to
specify a MIDI port and channel for output.
To assign a MIDI track (and all its regions) to a
specific MIDI device channel:
Click the track’s MIDI Output selector and as-
sign a port and channel for MIDI output. Chan-
nels already assigned to another track appear in
bold.
To assign multiple destinations to a single MIDI
track:
Right-click (Windows) or Control-click (Mac)
the MIDI Output selector and select additional
channels from any device.
Assigning MIDI Input and Output
for Instrument Tracks
Instrument tracks have a specific view for MIDI
controls, including MIDI Input and Output se-
lectors.
To view Instrument track MIDI controls, do one of
the following:
Select View > Mix Window > Instruments.
– or –
Select View > Edit Window > Instruments.
MIDI tracks in Pro Tools cannot contain
multiple channels of MIDI data.
For information on assigning MIDI output
to Instrument tracks, see “Assigning MIDI
Input and Output for Instrument Tracks”
on page 166.
In the Edit window, select View > Edit Win-
dow > I/O to access any track’s Output se-
lector.
MIDI Output selector (MIDI track shown)
For information on recording and importing
MIDI data, see Chapter 19, “MIDI Record-
ing.”
Instruments View
MIDI Input selector
MIDI Output selector
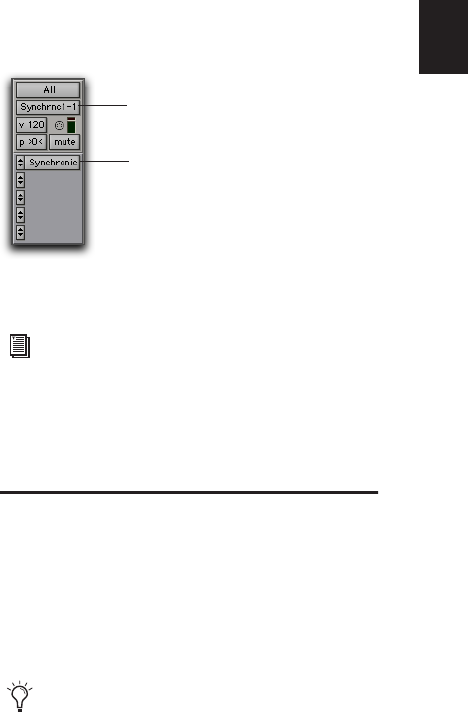
Chapter 10: Tracks 167
Instrument Track MIDI Input
Pro Tools lets you assign specific MIDI ports and
channels to an Instrument tracks’ MIDI input.
The default selection of All receives all incoming
MIDI data from all ports on all channels. Use the
MIDI Input selector to specify a MIDI port and
channel for input.
Channels in use by another track input appear
bold in the MIDI Input pop-up menu.
To assign an Instrument track MIDI input:
Click the track’s MIDI Input selector and as-
sign a port and channel for MIDI input. Chan-
nels already assigned to another track appear in
bold.
Instrument Track MIDI Output
Pro Tools lets you assign specific MIDI ports and
channels to an Instrument tracks’ MIDI output.
The default selection of none sends MIDI data to
no device, port, or node on any channel. Use
the MIDI Output selector to specify a MIDI port
and channel for output.
Channels in use by another track input appear
as bold in the MIDI Input pop-up menu.
To assign an Instrument track MIDI output:
Click the track’s MIDI Output selector and as-
sign a port and channel for MIDI output. Chan-
nels already assigned to another track appear in
bold.
Inserting Instrument Plug-ins on
Instrument Tracks
To insert an instrument plug-in on an Instrument
track:
Click the Insert selector on the Instrument
track and select the instrument plug-in that you
want to use.
A MIDI node (virtual MIDI port) is automati-
cally created and assigned the track’s MIDI out-
put.
Soloing and Muting Tracks
The Solo and Mute buttons can be engaged at
any time during playback. The Solo and Mute
buttons affect MIDI as well as audio tracks. It is
possible to have more than one track soloed or
muted at the same time in a session.
Instrument track with an instrument plug-in (Digidesign
Synchronic shown)
For information on monitoring Instrument
plug-ins, see the “Monitoring and Mixing
Audio with Instrument Tracks” on
page 735. Also, refer to the manufacturer’s
documentation for your instrument plug-in.
Instrument tracks have separate sets of Solo
and Mute buttons for MIDI and audio mon-
itoring.
Insert with instrument plug-in
MIDI Output assigned to the
instrument plug-in’s MIDI Input
Pro Tools Reference Guide168
Track grouping also affects mute and solo be-
havior. Muting or soloing a track that is a mem-
ber of an active Mix Group will mute or solo all
other tracks that are a member of that active
Mix Group as well.
Solo Button
The Solo button normally mutes other tracks so
that the selected track can be auditioned inde-
pendently.
With Pro Tools HD, this behavior is selected as a
Solo mode, called “Solo In Place.” Additional
Solo modes are provided to change how the Solo
button works. See “Solo Modes” on page 168.
To solo tracks:
1 Click the Solo button on a track. The button is
highlighted and all other tracks are muted.
2 Click the Solo button on another track. The
buttons for both tracks are highlighted and all
other tracks are muted.
To un-solo tracks:
Click the Solo button on soloed tracks.
Solo Modes
(Pro Tools HD Only)
With Pro Tools HD, the Solo button can be used
to:
• Mute other tracks so that the chosen track
can be auditioned alone.
– or –
• Route a chosen track to a separate output.
Solo button behavior is defined by the Solo
mode, as follows:
SIP (Solo In Place) The Solo button mutes other
tracks. When this mode is enabled, tracks can be
solo safed (see “Solo Safe Mode” on page 170).
AFL (After Fader Listen) The Solo button routes
the track’s post-fader/post-pan signal to the
AFL/PFL Path output. The AFL/PFL Path is con-
figured in the Output page of the I/O Setup dia-
log (see “AFL/PFL Path” on page 68).
With AFL, the level you hear is dependent on
the fader level for that track. Additionally, there
is a separate master level setting for AFL that af-
fects the output of any or all tracks you solo in
AFL mode (see “AFL/PFL Path” on page 68). This
level setting is independent of the PFL level set-
ting.
PFL (Pre Fader Listen) The Solo button routes
the track’s pre-fader/pre-pan signal to the
AFL/PFL Path output. The AFL/PFL Path is con-
figured in the Output page of the I/O Setup dia-
log (see “AFL/PFL Path” on page 68).
With PFL, the fader level and pan are ignored,
and the level you hear is dependent on the sig-
nal’s recorded level. Additionally, there is a sep-
arate master level setting for PFL that affects the
output of any or all tracks you solo in PFL mode
(see “AFL/PFL Path” on page 68). This level set-
ting is independent of the AFL level setting.
For information on creating and modifying
groups for track soloing and muting, see
“Grouping Tracks” on page 175.
AFL and PFL Solo modes require the Sur-
round Mixer plug-in (see the Pro Tools|HD
Getting Started Guide).
AFL and PFL Solo modes require the Sur-
round Mixer plug-in.
If Mutes Frees Assigned Voice is enabled,
muted tracks will not be audible in PFL
mode.
Chapter 10: Tracks 169
To select a Solo mode:
1 Choose Options > Solo Mode.
2 Select SIP, AFL, or PFL.
DSP Usage when Using AFL or PFL Mode
AFL and PFL are accomplished by Pro Tools cre-
ating a “behind the scenes” mixer to route the
signal to the chosen AFL/PFL Path. Depending
on the size of your main mixer, Pro Tools will
devote a substantial portion of its available DSP
when using AFL/PFL mode.
Un-declaring the AFL/PFL Path will free up all
DSP resources previously used for AFL/PFL
mode.
Using AFL/PFL on Pro Tools Systems with a
D-Control or D-Command
AFL/PFL is optimized for Pro Tools systems us-
ing a D-Control or D-Command control surface,
where the XMON automatically switches its
monitor source between the main output and
the AFL/PFL output from Pro Tools.
Using AFL/PFL on Pro Tools Systems without
D-Control or D-Command
If you are not using a D-Control or D-Command
control surface, your regular Pro Tools output
path is not necessarily muted when you send a
signal to the AFL/PFL Path. If you need the main
signal to automatically mute when an AFL/PFL
signal is invoked, you need to do the following:
1 Configure the output path for AFL or PFL so-
loed tracks.
2 Select the main output path that will mute
when you solo a track in AFL or PFL mode (see
“AFL/PFL Mutes (Output Path) Selector” on
page 69).
3 Set up your hardware to monitor both the
main and AFL/PFL paths simultaneously.
When AFL or PFL is selected as a Solo mode and
a track is soloed, the main output path will mute
and the AFL/PFL signal will appear at the
AFL/PFL Path for monitoring.
Solo Latch Options
Solos can be latched (where pressing subsequent
buttons adds them to the soloed mix of tracks),
unlatched, or temporarily latched (Pro Tools
HD only).
The Solo mode for all soloed tracks can be
changed “on-the-fly” from any Solo mode to
either SIP or AFL. Previously soloed tracks
will switch their solo behavior to the new
mode.
Switching the Solo mode for all soloed
tracks “on-the-fly” to PFL clears all previ-
ously soloed tracks before entering PFL
mode. This prevents potentially large boosts
in level.
For more information on using XMON and
AFL/PFL, see your control surface guide.

Pro Tools Reference Guide170
To select a Solo Latch mode:
Choose Options > Solo Mode and select from
the following options:
Latch When selected, pressing subsequent Solo
buttons adds them to the soloed mix of tracks.
X–OR (Cancels Previous Solos) When selected,
pressing subsequent Solo buttons cancels previ-
ous solos.
Momentary (Pro Tools HD Only) When selected,
Solo buttons are not sticky. A track is soloed
only when its Solo switch is held down.
With a Digidesign-qualified control surface, ad-
ditional tracks can be soloed by pressing their
Solo switches (as long as at least one Solo button
is held down). When no Solo switch is held
down, all soloed tracks will unsolo.
Temporarily Latching Solos in Momentary Solo
Mode
(Pro Tools HD Only)
To temporarily latch solos:
1 Choose Options > Solo Mode > Momentary.
2 Press and hold the Solo button on the first
track that will be soloed.
3 While still holding the first Solo button, press
additional Solo buttons. Solo buttons will re-
main soloed as long as one Solo button is held.
Solo Safe Mode
Pro Tools lets you solo safe a track. This prevents
the track from being muted even if you solo
other tracks. This feature is useful for tracks such
as Auxiliary Inputs that are being used as a sub-
mix of audio tracks, or effects returns, allowing
the audio or effects track to remain in a mix
even when other tracks are soloed. It is also use-
ful to solo safe MIDI tracks so that their play-
back is not affected when you solo audio tracks.
To solo safe a track:
Control-click (Windows) or Command-click
(Mac) the Solo button on the track. This pre-
vents the track from being muted even if you
solo other tracks. The Solo button changes to a
transparent color in Solo Safe mode.
To return a solo safe track to normal:
Control-click (Windows) or Command-click
(Mac) the Solo button on the track again.
Mute Button
The Mute button silences a chosen track. More
than one track can be muted at one time. If Op-
tions > Mute Frees Assigned Voice (Pro Tools HD
only) is enabled, muting a track will allocate its
voice to the next highest priority voiceable track
(assigned to the same voice).
To mute a track:
Click the Mute button on the track. The track
is grayed-out and muted.
To unmute a track:
Click the Mute button again.
To override X–OR mode and solo more than
one track at a time, press and hold the Solo
button on the first track. Subsequently
pressed Solo buttons will latch.
As long as at least one Solo button is held
down, all the solos will remain latched.
AFL or PFL soloed tracks (Pro Tools HD
only) cannot be solo safed.
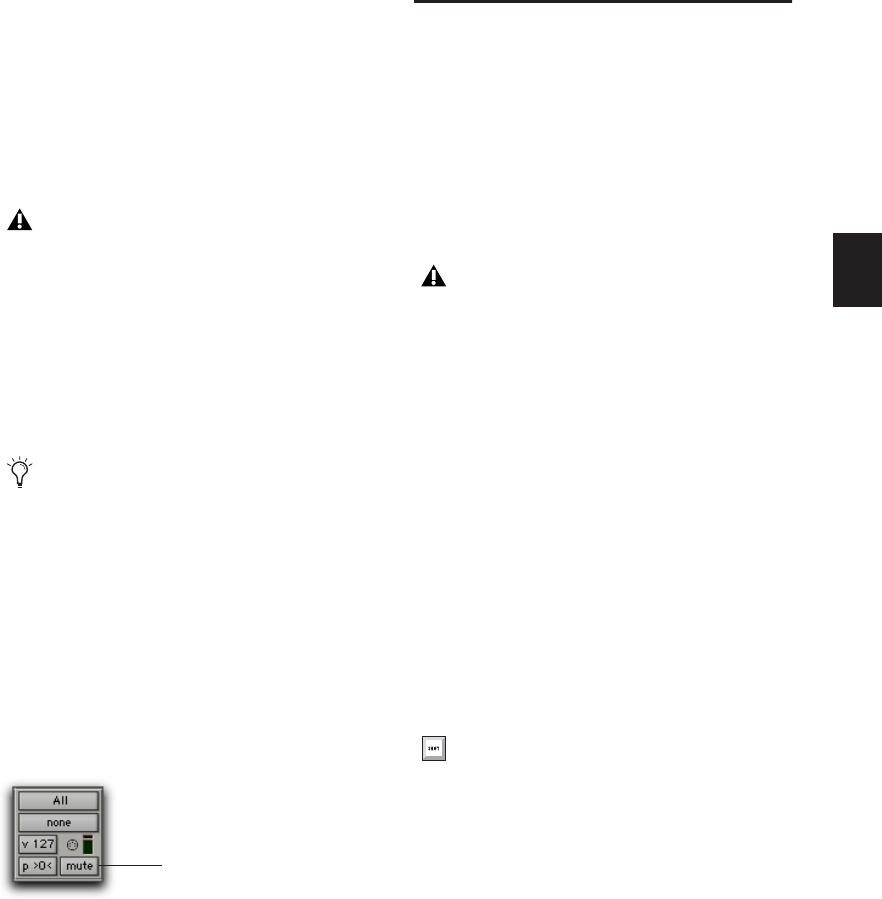
Chapter 10: Tracks 171
Mute Frees Assigned Voice
(Pro Tools HD Only)
Selecting Options > Mute Frees Assigned Voice
and muting a track disables playback of that
track, and surrenders control of its voice to the
next highest priority track with the same voice
assignment.
With this option enabled, there may be a delay
(ranging in length from one to several seconds
depending on the processing power of your sys-
tem) between the time you mute or unmute a
track and when you hear the effect on playback.
MIDI Mute
The Mute button on a MIDI track mutes MIDI
data, not audio. Muting MIDI results in no MIDI
data being passed to the MIDI output. On In-
strument tracks, the track’s Mute button mutes
the audio signal and the MIDI Mute button is
only available in Instruments view.
Making Tracks Inactive
Audio, Auxiliary Input, Master Fader, VCA Mas-
ter (Pro Tools HD only), and Instrument tracks
can be made inactive. Inactive tracks use no DSP
or voices. Plug-ins, sends, voices, and automa-
tion on inactive tracks are all disabled. Tracks
may also be automatically made inactive if a ses-
sion is opened on a system with less DSP power
than the system that it was created on.
To toggle a track active/inactive:
Control-Start-click (Windows) or Command-
Control-click (Mac) the Track Type indicator in
the Mix window.
Playlists for inactive tracks are dimmed and
track controls are grayed out.
To make one or more tracks inactive or active, do
one of the following:
Select the track and choose Make Inactive/Ac-
tive.
– or –
Right-click the Track Name in the Track List,
or Mix or Edit windows and choose Make Inac-
tive/Active.
Muting a track with Mute Frees Assigned
Voice enabled does not free up the voice for
QuickPunch, TrackPunch, or Destructive-
Punch recording.
Larger DAE Playback Buffer Sizes can also
increase the time between clicking the Mute
button and the onset of muting. See “DAE
Playback Buffer Size” on page 40.
Instruments View
MIDI Mute button
MIDI tracks cannot be made inactive.
To select multiple tracks, Control-click
(Windows) or Command-click (Mac) addi-
tional Track Names.
To select a range of tracks, Shift-click the
Track Name bounding the range of tracks
you want selected.
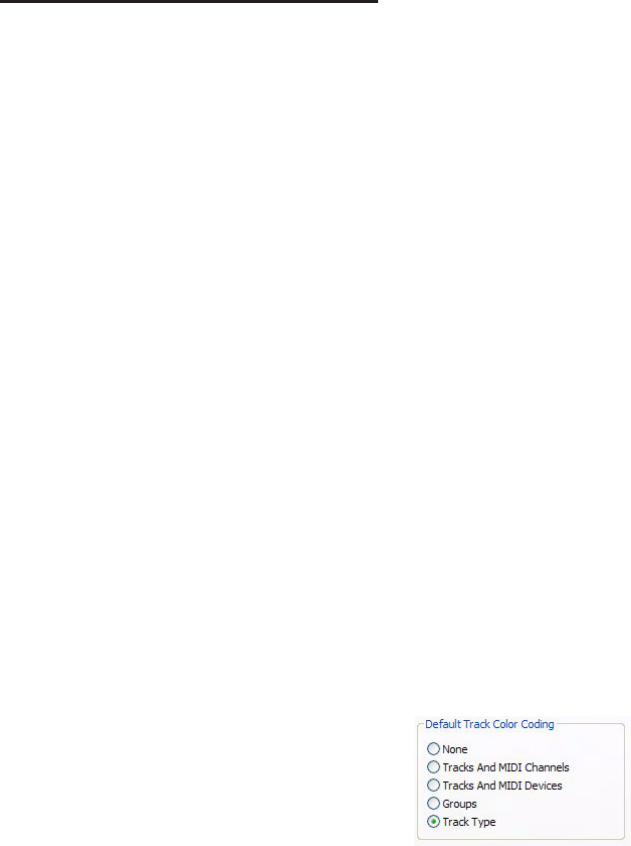
Pro Tools Reference Guide172
Color Coding for Tracks,
Regions, Markers, and Groups
Separate colors can be assigned to audio and
MIDI regions, tracks, markers, and groups. Re-
gions shown in Waveform and Block Views in
the Edit window are drawn in color. Tracks
shown in the Track List, Group List, and Mix
and Edit windows have associated color bars.
Color Bars
Color coding at the track level is displayed using
color bars, as follows:
Mix Window Track colors are displayed in hori-
zontal color bars that appear above each chan-
nel strip, and below the track name.
Edit Window Track colors are displayed in verti-
cal color bars that appear to the left of each
track.
Track List Track colors are displayed in vertical
color bars that appear to the left of each track
name.
Group List Track colors are displayed in vertical
color bars that appear to the left of each Group
Name.
Default colors are automatically assigned to
tracks, but you can override those colors by
choosing from a color palette of 96 possible col-
ors. For more information, see “Color Palette”
on page 174.
Display Page Preferences for
Color Coding
Color Coding options determine how colors are
assigned to the display of tracks and regions.
To change Color Coding options:
1 Choose Setup > Preferences.
2 Click Display.
3 Select or deselect the Always Display Marker
Colors option.
4 Select a Default Track Color Coding option.
5 Select a Default Region Color Coding option.
6 Click OK.
Always Display Marker Colors
This setting lets you choose to view Marker col-
ors in the Markers ruler, regardless of the set-
tings you choose for Default Region Color Cod-
ing.
Default Track Color Coding
The Default Track Color Coding options deter-
mine how colors are assigned to the display of
tracks.
None Turns off default color assignment for
tracks.
Tracks and MIDI Channels Assigns a color to
each track in the Mix or Edit window according
to its voice assignment or MIDI channel assign-
ment.
Default Region Color Coding options
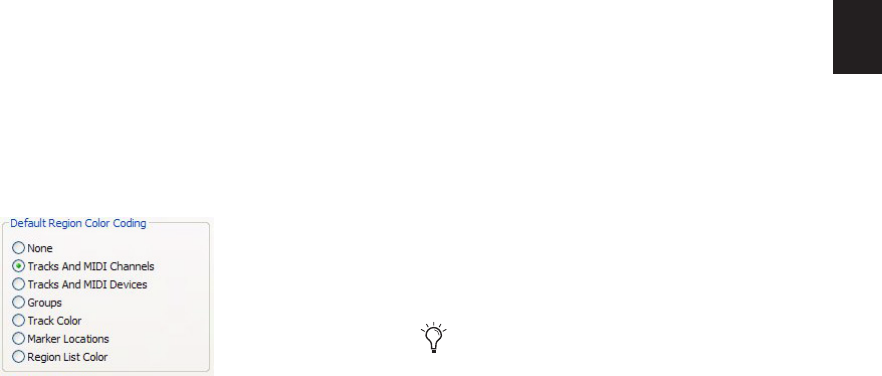
Chapter 10: Tracks 173
Tracks and MIDI Devices Assigns a color to each
track in the Mix or Edit window according to its
voice assignment or MIDI device assignment.
Groups Assigns a color to each track according to
its Mix or Edit Group ID. If groups are sus-
pended using the Suspend Groups command,
the tracks color bars are not shown.
Track Type Assigns a color to each track accord-
ing to its type (audio, Auxiliary Input, Instru-
ment, MIDI, or Master Fader).
Default Region Color Coding
The Default Region Color Coding options deter-
mine how colors are assigned to the display of
tracks, regions in the track playlist and Region
List, and Marker Locations.
None Turns off default color assignment for re-
gions. Regions are drawn as black waveforms or
black MIDI notes on a light gray background.
Tracks and MIDI Channels Assigns a color to
each region in the Edit window according to its
voice or MIDI channel assignment.
Tracks and MIDI Devices Assigns a color to each
region in the Edit window according to its voice
assignment or MIDI device assignment.
Groups Assigns a color to each region according
to the Group ID of its track. If groups are sus-
pended (using the Suspend Groups command)
all regions display black waveforms or MIDI
notes on a light gray background.
Track Color Assigns a region color based on the
color assigned to the track. (See “Color Palette”
on page 174.)
Marker Locations Assigns a unique color to each
marker area in the Marker ruler, including the
area preceding the first marker.
Region List Color Assigns a color to each region
based on its color in the Region List. When this
Default Region Color Coding option is enabled,
the assigned region color is maintained even if
the region is placed in a track set to a different
color coding.
Default Region Color Coding options
Enabling any Default Region Color Coding
option other than Region List Color will
override Region List Color and reassign the
parent track color to copies of the region
placed in tracks. Copies of the region in the
Region List will retain their unique color, if
any.
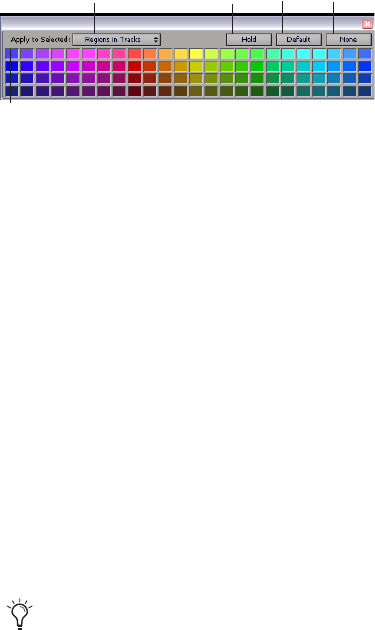
Pro Tools Reference Guide174
Color Palette
The Color Palette lets you make color selections
for tracks, regions, groups and markers.
The Color Palette supports independent region
color coding in the Region List and in tracks.
To apply a color from the Color Palette:
1 Choose Window > Color Palette.
2 Do one of the following:
• In the Apply to Selected pop-up menu, se-
lect the destination for color coding:
Tracks, Marker, Group, Regions in Tracks,
or Regions in Region List.
– or –
• Select a track, marker, group, track region,
or Region List region in the appropriate
Pro Tools window. The Apply to Selected
menu will display the type of item you
have selected.
3 Select a color from the palette, or select one of
the following:
Default Removes any custom coloring and re-
stores the color to the default color orientation.
See “Display Page Preferences for Color Coding”
on page 172 for more information.
None Turns off color assignment. Affected re-
gions are drawn with black waveform or MIDI
notes on light gray background. Affected tracks
and groups no longer show their color bars.
Using the Hold Button
The Color Palette provides a Hold button to sim-
plify the process of assigning the same colors to
multiple items (such as track and regions).
By default, the Hold button is off. When off, the
Color Palette automatically highlights the as-
signed color (if any) of items as you select them.
When the Hold button is enabled, the assigned
color selected in the Color Palette persists and
does not change when a different track or region
is selected.
To use the Hold button to assign the same color to
multiple items:
1 Click the Hold button to enable it. The Hold
button becomes white, and the currently se-
lected color is now highlighted with a wider
white outline.
2 Select additional tracks or regions to which
you want to assign the same color. Because the
Hold button is enabled, the Color Palette does
not follow item selection; it remains (or
“holds”) at the last currently assigned color.
3 Click the assigned color again to assign it to
the new selection of tracks or regions. Use the
Apply to Selected popup menu to determine
which selected elements are affected.
4 To turn off Hold and return the Color Palette
to its default mode, click the Hold button until
it turns off.
Color Palette window
If selecting a marker does not display the
Marker option in the Apply to Selected pop-
up menu, then the Always Display Marker
Colors option in the Display Preferences
page is deselected. See “Always Display
Marker Colors” on page 172 for more infor-
mation.
Apply to Selected Hold Default None
Last Assigned Color

Chapter 11: Grouping Tracks 175
Chapter 11: Grouping Tracks
Grouping Tracks
Pro Tools provides a relative grouping function
for linking tracks and their controls.
Groups are useful for editing several tracks in ex-
actly the same way, or for mixing several tracks
(such as a pair of stereo tracks or a submix) while
keeping them at the same relative volume level.
Pro Tools provides the following grouping fea-
tures:
• Up to 104 different groups are available, ar-
ranged in 4 banks of 26 Group IDs.
• Groups can be nested (subgroups within
groups).
• Grouped faders or controllers preserve
their levels relative to each other.
• Groups are assignable to an available VCA
Master track (Pro Tools HD only).
Mix Groups, Edit Groups, and
Mix/Edit Groups
Mix Groups only affect mixing functions and
Edit Groups only affect editing. Mix/Edit
Groups link the grouping functions of the Mix
Group and the Edit Group.
Edit Groups
Edit Groups affect the following items in the
Edit window:
• Track View
• Track Height
• Track Timebase
• Audio and MIDI editing functions
• Automation editing functions
Mix Groups in Pro Tools HD
Mix Groups in Pro Tools HD can be set to affect
the following items:
• Main Mute
• Solo
• Send Level
• Send Mute
• Main Volume
• Main Pan
• Main LFE Level
• Record Enable
• Input Monitoring
• Automation Mode
• Send Pan
• Send LFE Level
• Plug-in Controls
• Plug-in Bypass
You can also group regions into region
groups. See “Region Groups” on page 675.

Pro Tools Reference Guide176
Mix Groups in Pro Tools LE
Mix Groups in Pro Tools LE always affect the fol-
lowing:
• Main volume
• Automation mode
Mix Groups in Pro Tools LE can also be set to af-
fect the following:
• Main Mute
• Solo
• Send Level
• Send Mute
Grouping Limitations
Grouping does not affect these parameters:
• Voice assignment
• Output assignment
• Inserting plug-ins
• Elastic Audio plug-ins
Selectable Group Attributes
You can select which parameters, or attributes,
are linked in groups by the following methods:
• By making the group an Edit Group, a Mix
Group, or both (Mix/Edit Group)
• With Mix and Mix/Edit Groups, by selecting
from a list of attributes for the group
• With Mix Groups in Pro Tools HD only, by
choosing whether the selected attributes ap-
ply globally to all groups or to individual
groups
Linking Mix and Edit Groupings
The “Link Mix and Edit Group Enables” option
links group enabling between the Mix and Edit
windows.
Pro Tools allows you to create groups that are
both Mix and Edit Groups, but in some cases you
may prefer not to link enabling of Mix and Edit
Groups. For example, when you are using the
Mix window for mixing, you may prefer to work
with large, nested groups. However, in the Edit
window, you may want to perform editing tasks
within a smaller group. You could disable the
Link Mix and Edit Group Enables preference.
This would allow you to work with different
groups in the two windows.
To unlink Mix and Edit Groups:
1 Choose Setup > Preferences and click the Mix-
ing tab.
2 Deselect the “Link Mix and Edit Group En-
ables” option and click OK.
Mix Groups and VCA Masters
(Pro Tools HD Only)
An existing Mix Group can be assigned to a VCA
Master, or a new Mix Group can be assigned to a
VCA Master while it is being created. Only one
group can be assigned to a VCA Master at a time.
A VCA Master cannot control a group that in-
cludes itself.
In Pro Tools HD, when the Main Pan at-
tribute is enabled for groups, grouped be-
havior applies to the Link, Front inverse,
Rear inverse and Front/Rear inverse controls
in stereo and multichannel panner win-
dows.
For information on assigning groups to
VCA Masters, see “Assigning Groups to
VCA Masters” on page 717.
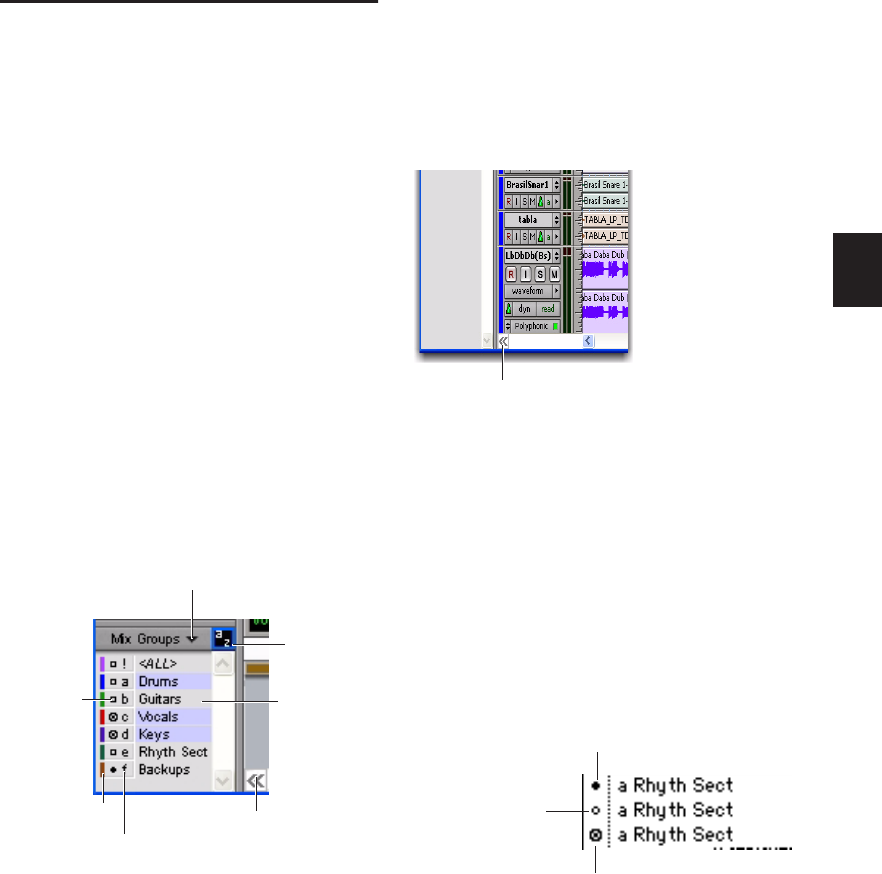
Chapter 11: Grouping Tracks 177
Group Controls
Menus and commands for creating and modify-
ing groups are accessible in the following:
• Group List
• Group name in the Group List
• Group ID indicator on a track
• Track > Group menu
The Group List
The Pro Tools track grouping functions are lo-
cated at the left side of the Mix or Edit window
in the Group List. This scrolling window con-
tains the names of all the groups in your session,
as well as a pop-up menu for accessing grouping
commands. From this menu, you can select and
enable groups.
By default, every session has a group named All,
which includes every track in the session. The
All group cannot be edited or deleted.
Show/Hide Track List/Group List View
Button
To show the Group List (and Track List):
Click the Show/Hide Track List/Group List
View button in the Mix or Edit window.
Group ID
To the left of each name in the Group List is a
letter denoting its Group ID (“a” through “z”).
Group Symbols
To the left of each Group ID (“a” through “z”) is
a symbol indicating whether that group is se-
lected in the current window (either the Mix or
Edit window). There are three types of Group
symbols, as shown in the following figure:
The Group symbols indicate the following:
Filled-in Circle Indicates that all members of the
group are currently selected, and no members
from outside the group are selected
Group List
Group List pop-up menu Click to
select a
group by
typing its
letter
Click to
activate a
group
Click to
select group
members
on-screen
Click to hide
Group List
Group IDs
Colors
Edit Group List in Edit Window
Groups Symbols
Show/Hide Track List/Group List View
Hollow Circle
Filled In Circle
Circle with a Dot
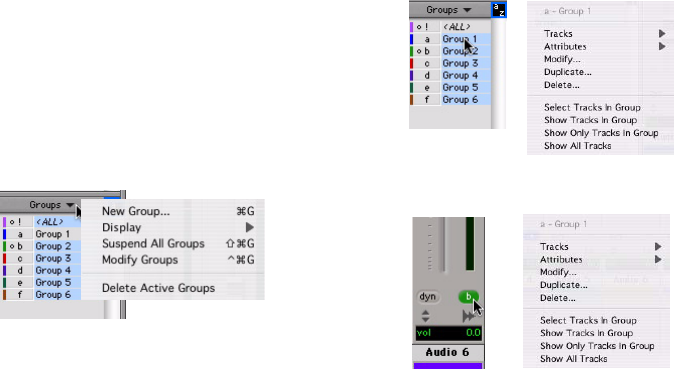
Pro Tools Reference Guide178
Hollow Circle Indicates that only some members
of the group are currently selected
Circle with a Dot Indicates that all members of
the group are currently selected, plus additional
members outside the group
Group List Pop-Up Menu
The pop-up menu at the top of the Group List
provides the following commands:
New Group Executes Track > Group command
Display Provides commands to show Edit groups
only, Mix groups only, or all groups (Edit, Mix,
and Mix/Edit)
Suspend All Groups Suspends group behavior for
all Mix and Edit groups
Modify Groups Opens Group dialog to modify
existing groups only
Delete Active Groups Deletes only currently ac-
tive groups
Group Name and Track Group ID
Indicator Pop-Up Menus
When you click and hold on a group name in
the Group List, or click a Group ID indicator in
a track, a pop-up menu provides the following
commands:
Tracks Displays track membership in group
Attributes Displays attributes of group
Modify Opens Group dialog to modify existing
groups only
Duplicate Opens Group dialog for duplicated
group
Delete Deletes a single group
Select Tracks in Group Selects tracks in the
group
Show/Hide Tracks in Group Shows or hides
tracks in the current group
Show Only Tracks in Group Shows only the tracks
in the group and hides all other tracks
Show All Tracks Shows all tracks in the session
Group List pop-up menu
Group Name pop-up menu
Group ID indicator pop-up menu
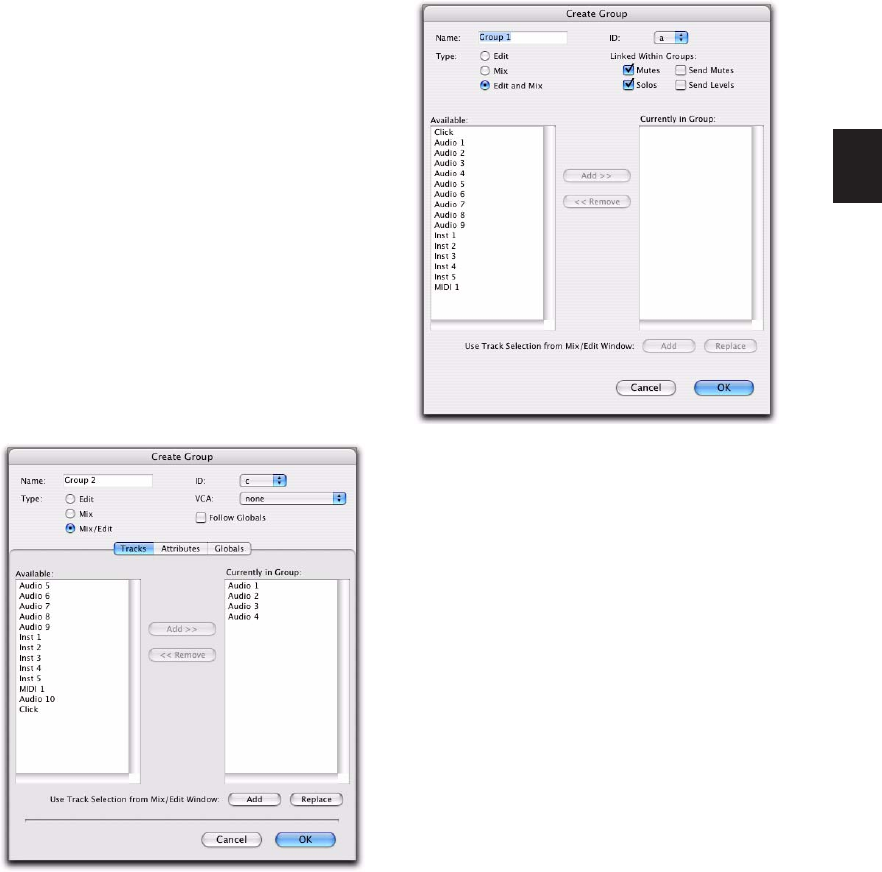
Chapter 11: Grouping Tracks 179
Group Dialog
Whether you are creating or modifying groups
with the Group List, a tracks’s Group ID indica-
tor, or the Track > Group menu command, you
will be using the Groups dialog.
The Group dialog lets you create new groups
and assign attributes to groups.
Group Dialog in Pro Tools HD
In Pro Tools HD, the Group dialog has three
pages:
Tracks Lets you add and remove tracks from the
current group.
Attributes Lets you select which parameters are
linked for the current Mix or Mix/Edit Group.
Globals Lets you select parameters to use as a
template that can be applied to individual
groups by selecting Follow Globals.
Group Dialog in Pro Tools LE
In Pro Tools LE, the Group dialog has a single
page.
Group dialog (Pro Tools HD)
Group dialog (Pro Tools LE)
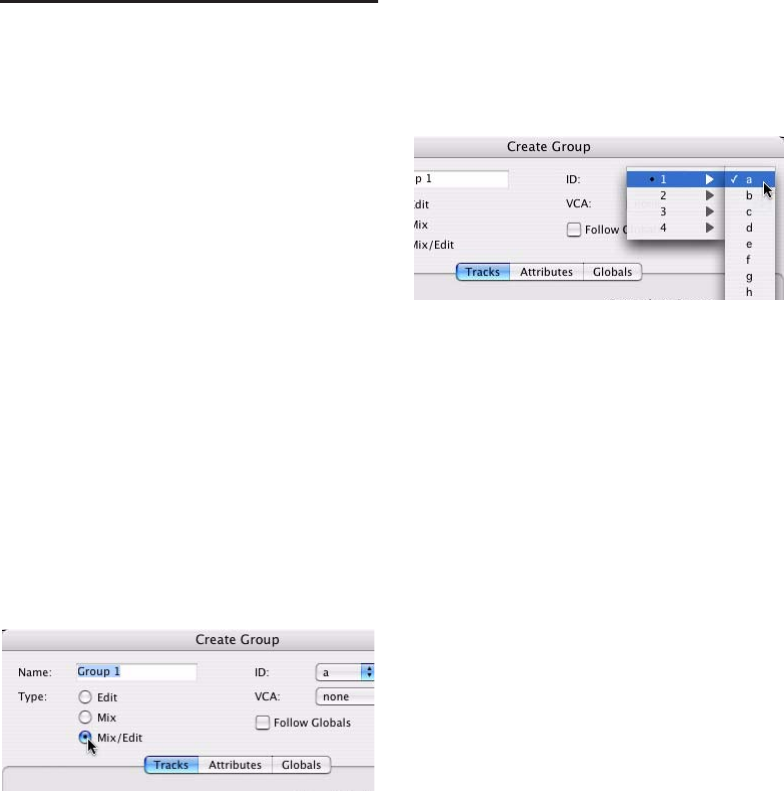
Pro Tools Reference Guide180
Working with Groups
Creating Groups
You can select the tracks you want to add to a
group before creating it, or add and remove
tracks from a group after it has been created.
Creating Groups in Pro Tools HD
To create a group in Pro Tools HD:
1 Select the tracks you want to include in the
group. (If you do not select tracks at this time,
you can add tracks later.)
2 Do one of the following:
• Choose Track > Group.
– or –
• Choose New Group from the Group List
pop-up menu.
3 Enter a name for the group.
4 Select the type of group to create: Edit Group,
Mix Group, or Mix/Edit Group.
5 Choose a Group ID from the ID pop-up menu.
Four banks of 26 are available: a–z, 2a–z, 3a–z,
4a–z. (If you do not choose a Group ID,
Pro Tools automatically assigns the next avail-
able ID to a new group.)
6 Click Tracks in the Group dialog, and do any
of the following:
• To add the tracks that are currently selected
in the session to the group, click the Add
button at the bottom of the Group dialog.
• To add tracks to the group, select the track
names in the Available track list, and click
Add or press A on the computer keyboard.
• To remove tracks from the group, select the
track names in the Currently In Group list,
and click Remove or press R on the com-
puter keyboard.
• Double-click track names in either list to
move them to the opposite column.
• To replace all tracks in the group with the
tracks that are currently selected in the ses-
sion, click the Replace button at the bot-
tom of the Group dialog.
Selecting a Group Type
Choosing a Group ID
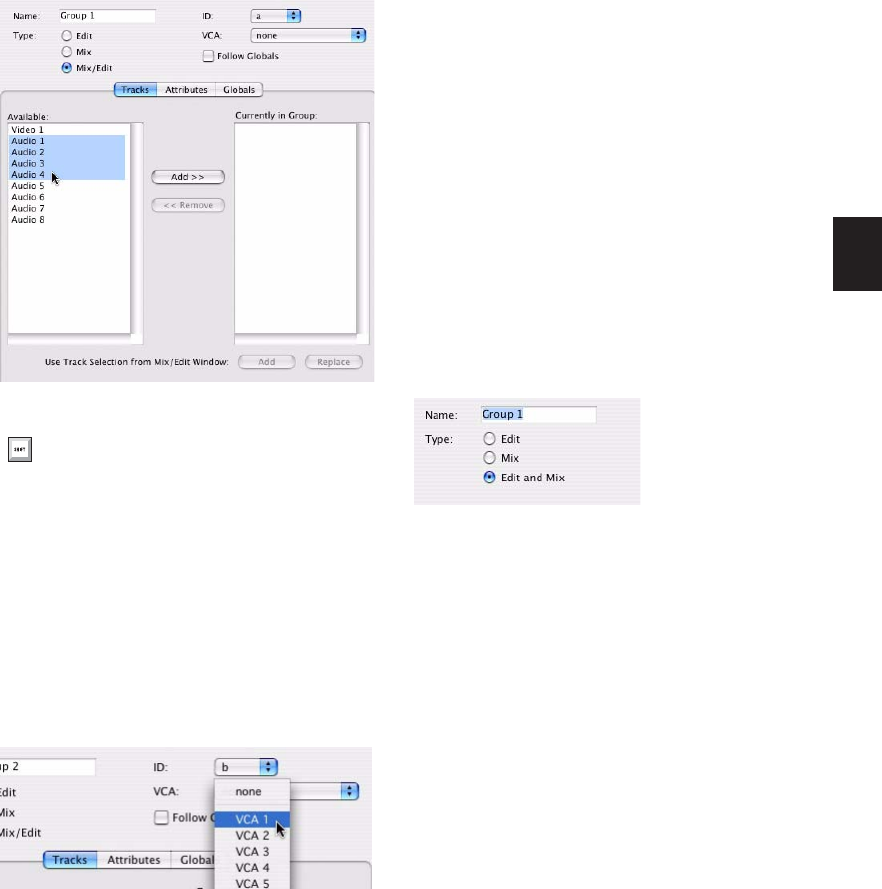
Chapter 11: Grouping Tracks 181
7 If the group is a Mix Group or a Mix/Edit
Group, do the following:
• Set the Attributes for the Group (see “Set-
ting Group Attributes” on page 185).
• If you want to assign the group to an avail-
able VCA, select the VCA track from the
VCA pop-up menu.
8 Click OK.
Creating Groups in Pro Tools LE
To create a group in Pro Tools LE:
1 Select the tracks you want to include in the
group. (If you do not select tracks at this time,
you can add tracks later.)
2 Do one of the following:
• Choose Track > Group.
– or –
• Choose New Group from the Group List
pop-up menu.
3 Enter a name for the group.
4 Select the type of group to create: Edit Group,
Mix Group, or Mix/Edit Group.
5 Choose a Group ID from the ID pop-up menu.
Four banks of 26 are available: a–z, 2a–z, 3a–z,
4a–z. (If you do not choose a Group ID,
Pro Tools automatically assigns the next avail-
able ID to a new group.)
Selecting track names to add to a group
In either list, Shift-click to select a range of
track names. Control-click (Windows) or
Command-click (Mac) to select discontigu-
ous track names.
Choosing a VCA track to control a group
Selecting a Group Type
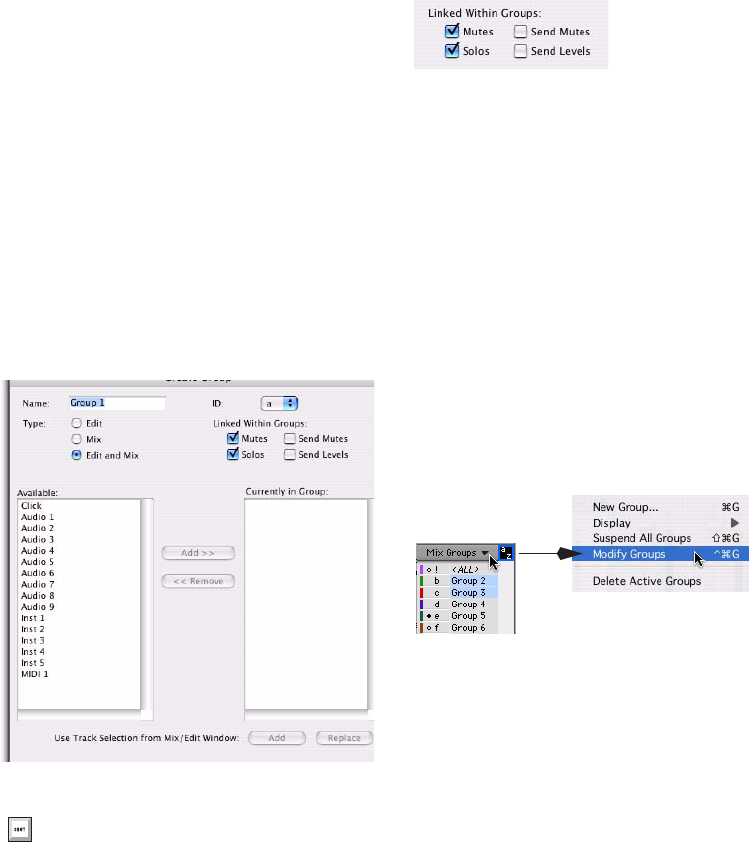
Pro Tools Reference Guide182
6 Do any of the following:
• To add the tracks that are currently selected
in the session to the group, click the Add
button at the bottom of the Group dialog.
• To add tracks to the group, select the track
names in the Available track list, and click
Add or press A on the computer keyboard.
• To remove tracks from the group, select the
track names in the Currently In Group list,
and click Remove or press R on the com-
puter keyboard.
• Double-click track names in either list to
move them to the opposite column.
• To replace all tracks in the group with the
tracks that are currently selected in the ses-
sion, click the Replace button at the bot-
tom of the Group dialog.
7 Select the items to be Linked within Groups
(Mutes, Solos, Send Mute, Send Levels).
8 Click OK.
Modifying Groups
To modify a group:
1 Do one of the following:
• Choose Modify Groups from the Group
List pop-up menu.
• In the Mix window, click the Group ID in-
dicator on a track and choose Modify from
the pop-up menu.
• Right-click the Group name in the Group
List and choose Modify from the pop-up
menu.
2 In the Groups dialog, choose the group you
want to modify from the ID pop-up menu.
Selecting track names to add to a group
In either list, Shift-click to select a range of
track names. Control-click (Windows) or
Command-click (Mac) to select discontigu-
ous track names.
Linked Within Groups options (Pro Tools LE)
Group List pop-up menu
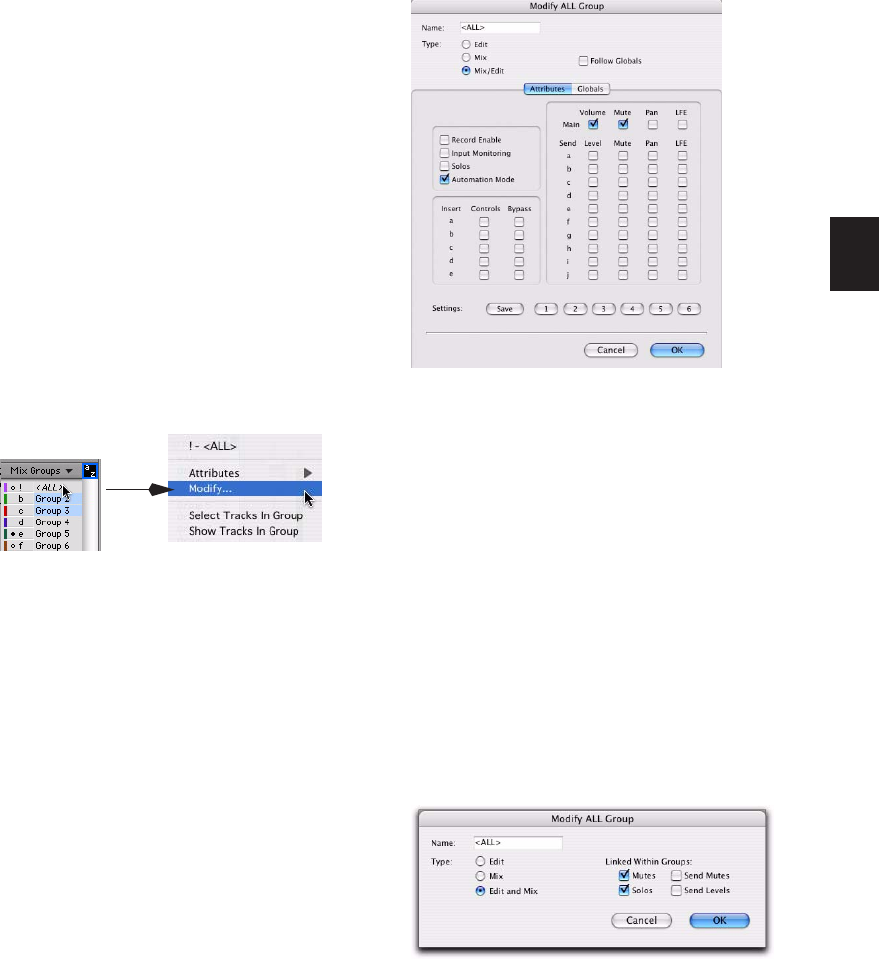
Chapter 11: Grouping Tracks 183
3 Change any of the following for the current
group:
• Group name
• Group type (Edit, Mix or Mix/Edit)
• VCA status (Pro Tools HD only)
• Follows Global status (Pro Tools HD only)
• Track membership
• Attributes (Pro Tools HD only)
• Linked within Group items (Pro Tools LE
only)
4 Click OK.
To modify the settings for the “All” group in
Pro Tools HD:
1 Right-click the “All” group name in the Group
List and choose Modify from the pop-up menu.
2 In the Group dialog, select Edit, Mix, or
Mix/Edit to change the settings for the ALL
group. If you select Edit only or Mix only, the
ALL group will apply only to that Group type.
3 For Mix or Mix/Edit Groups, you can change
any of the following:
• Follows Global status
• Attributes
4 Click OK.
To modify the settings for the “All” group in
Pro Tools LE:
1 Right-click the “All” group name in the Group
List and choose Modify from the pop-up menu.
2 In the Group dialog, select Edit, Mix, or
Mix/Edit to change the settings for the ALL
group. If you select Edit only or Mix only, the
ALL group will apply only to that Group type.
All Group pop-up menu
Modify ALL Group dialog
Modify ALL Group dialog
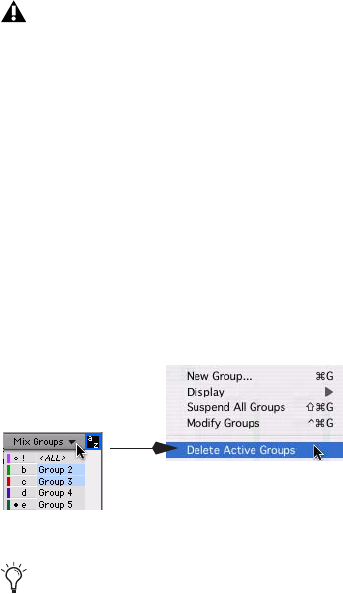
Pro Tools Reference Guide184
3 For Mix or Mix/Edit groups, you can change
any of the following Linked Within Groups op-
tions:
• Mutes
• Solos
• Send Mutes
• Send Levels
4 Click OK.
Deleting Groups
One or all groups can be deleted at a time.
To delete a single group, do one of the following:
In the Mix window, click the Group ID indica-
tor on a track and choose Delete from the pop-
up menu.
– or –
Right-click the Group name in the Group List
and choose Delete from the pop-up menu.
To delete all currently active groups
Choose Delete Active Groups from the Group
List pop-up menu.
Duplicating Groups
You can duplicate a group and modify its set-
tings in order to quickly set up a mix.
To duplicate a group:
1 Do one of the following:
• Click the Group ID indicator on a track and
choose Duplicate from the pop-up menu.
– or –
• Right-click the Group name in the Group
List and choose Duplicate from the pop-up
menu.
2 Change any of the following for the current
group:
• Group name
• Group type (Edit, Mix, or Mix/Edit)
• VCA status (Pro Tools HD only)
• Follows Global status (Pro Tools HD only)
• Track membership
• Attributes (Pro Tools HD only)
• Linked within Group items (Pro Tools LE
only)
3 Click OK.
Deleting a group cannot be undone.
Group List pop-up menu
The ALL group cannot be deleted.
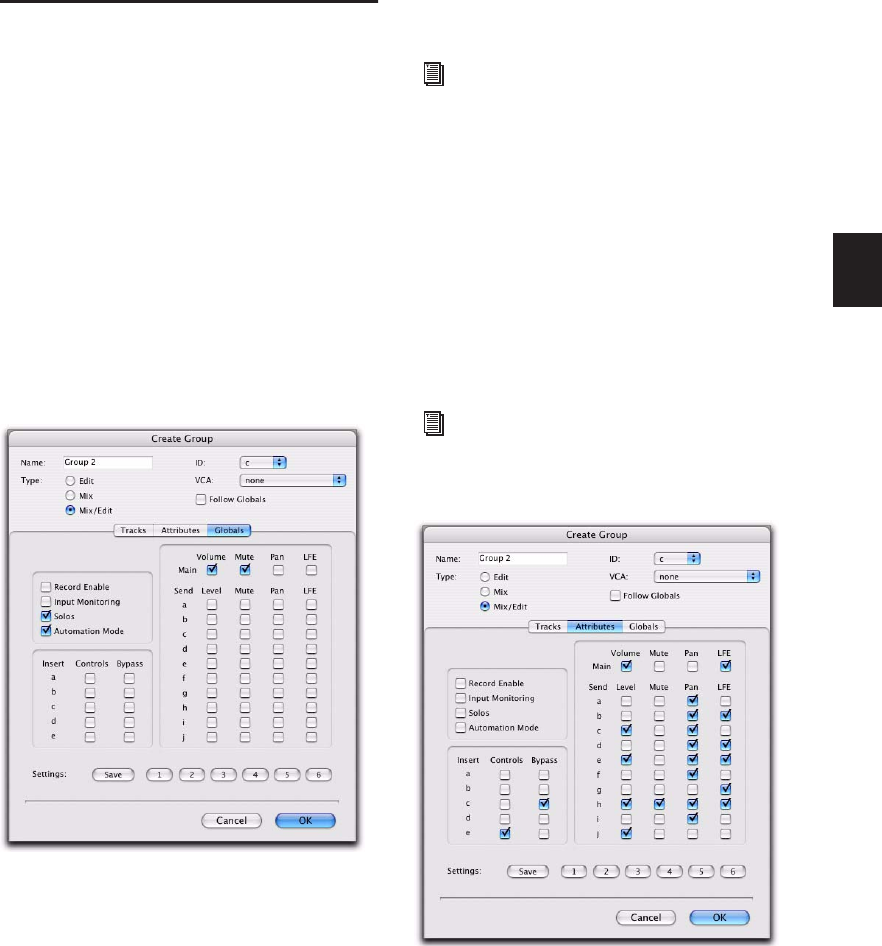
Chapter 11: Grouping Tracks 185
Setting Group Attributes
(Pro Tools HD Only)
When creating a Mix Group or a Mix/Edit
Group, you can select the Mix window parame-
ters that will be linked for that group. These
linked parameters are the attributes of the group.
You can select attributes in the Globals page and
then set individual groups to follow the Global
settings, or you can select attributes for groups
individually.
To select attributes in the Global page:
1 While creating or modifying a group, click
Globals in the Group dialog.
2 Select the base set of attributes for groups in
your session.
3 Click OK to save the group and the new Glo-
bals settings.
To select attributes for an individual group:
1 While creating or modifying a Mix Group or a
Mix/Edit Group, do one of the following:
• Click Attributes in the Group dialog, and
select the attributes you want to link.
– or –
• Click Follow Globals to follow the base set
of attributes. The Attributes page grays out
to indicate that the group is following the
selections in the Globals page.
2 Click OK to save the settings.
Globals page of Group dialog
For information on selecting attributes, see
“Selecting Group Attributes” on page 186.
For information on selecting attributes, see
“Selecting Group Attributes” on page 186.
Attributes page of Group dialog
Pro Tools Reference Guide186
Selecting Group Attributes
The following attributes can be selected for Glo-
bal settings and for individual groups.
Track controls:
• Main Volume
• Main Mute
• Main Pan
• Main LFE Level
• Record Enable
• Input Monitoring
• Solo
• Automation Mode
Send controls (Sends A–J):
• Send Level
• Send Mute
• Send Pan
• Send LFE Level
Insert controls (Inserts A–E):
• Plug-in Controls
• Insert Bypass
To select the attributes for a group, do any of the
following:
Select individual attributes by clicking their
checkboxes.
To select or deselect all attributes, Alt-Shift-
click (Windows) or Option-Shift-click (Mac) any
attribute.
To select or deselect all attributes for a single
Send or Insert (across a row), Start-click (Win-
dows) or Control-click (Mac) any attribute in
that row.
To select or deselect attributes for a single con-
trol across all Sends, all Inserts, or for the four
track controls (down a column), Alt-click (Win-
dows) or Option-click (Mac) any attribute in
that column.
Saving Group Attribute Presets
You can define six Group presets that can be re-
called on either the Attributes or Globals page
whenever you are creating or modifying a Mix
or Mix/Edit Group.
To save the current attribute settings as a Group
preset:
1 In the Groups dialog, click Save. (Follow Glo-
bals must be unchecked to save a setting from
the Attributes page.)
2 Choose one of the six preset locations from
the Location pop-up menu, and click Save.
To recall a Group preset:
Click the corresponding Preset button (1–6) in
the Groups dialog. (Follow Globals must be un-
checked to recall a setting in the Attributes
page.)
Saving a Group preset
To save the current attribute settings di-
rectly to a preset location, Control-click
(Windows) or Command-click (Mac) the
preset button.
Recalling a Group preset
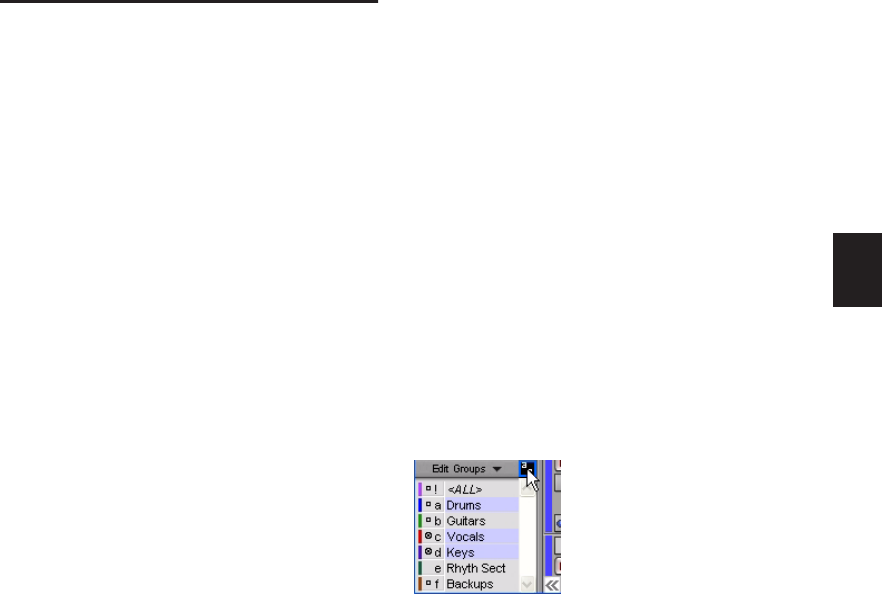
Chapter 11: Grouping Tracks 187
Enabling Groups
Editing operations are not applied to members
of a group that are hidden with the Track List.
Mix operations (with the exception of record-
enabling of tracks) are applied to hidden tracks.
Pro Tools lets you create separate groups for ed-
iting and mixing. You set this option when you
use the New Group command. Groups that ap-
ply to both editing and mixing can be decou-
pled.
To enable a group:
In the Group List, click the name of the group
you want to enable. The Group Name is high-
lighted to indicate that it is enabled.
To enable additional groups, click their names
in the Group List.
Moving a fader of a group member will cause all
other group members to move relative to it. If a
fader belongs to multiple groups, and the
groups conflict when faders are moved, the
fader will follow the topmost or “parent” group
that it belongs to.
To disable a group:
In the Group List, click the name of the group
you want to disable. The Group Name is un-
highlighted to indicate that it is not enabled.
Keyboard Selection of Groups
The Group List Keyboard Focus allows you to
type a Group ID letter to automatically toggle
that group’s enable status.
In the Mix window, the Group List Keyboard
Focus is always enabled.
In the Edit window, you need to enable the
Group List Keyboard Focus to use it.
To enable the Edit Group List Keyboard Focus, do
one of the following:
Click the Keyboard Focus button in upper
right of the Edit Group List.
– or –
Press Control+Alt+3 (Windows) or Com-
mand+Option+3 (Mac).
To enable and disable groups using the Edit and
Mix Group List Keyboard Focus:
With Group List Keyboard Focus enabled,
type the Group ID letter (a–z) to automatically
enable or disable the corresponding group.
Group List Keyboard Focus enabled

Pro Tools Reference Guide188
Temporarily Isolating Control of an
Item from Group Operation
You can temporarily isolate control of a group
item from group operation by Right-clicking on
the item.
The following items can be isolated from group
operation:
• Pan slider (Pro Tools HD only)
• Channel Record Enable (Pro Tools HD
only)
• Channel TrackInput (Pro Tools HD only)
• Send Pan slider
• Channel Volume fader
• Channel Pan slider
• Channel Mute button
• Channel Solo button
• Channel Record Enable button
• Channel TrackInput button
• Send fader
• Send Pan slider
Grouped Control Offsets
When the following controls are grouped with
offsets, and moved to their extremes, relative
offsets are preserved when the controls are
moved back from their extremes:
• Main Volume
• Main Pan (Pro Tools HD only)
• Send Level
• Send Pan
For example, when a grouped Volume fader is
moved to its maximum value, any other faders
in that group that had higher values will re-
member their relative offset whenever the first
fader is pulled down again.
In Automation views, this “overflow” is indi-
cated on the automation playlist by blue auto-
mation breakpoints at the extremes of the auto-
mation playlist.
Setting Group Pan Controls to
Ignore Offsets
By default, offsets are preserved for grouped pan
controls. In some workflows, it is desirable to
have grouped pan controls match absolute val-
ues rather than preserve offsets.
To set grouped pan controls to ignore offsets:
1 Choose Setup > Preferences and click Mixing.
2 Select “Use Absolute Pan Linking.”
When this option is enabled, grouped pan con-
trols will snap to the absolute value of the pan
control that is being adjusted.
You can also temporarily suspend group be-
havior for a track by Start-clicking (Win-
dows) or Control-clicking (Mac) the desired
group function.
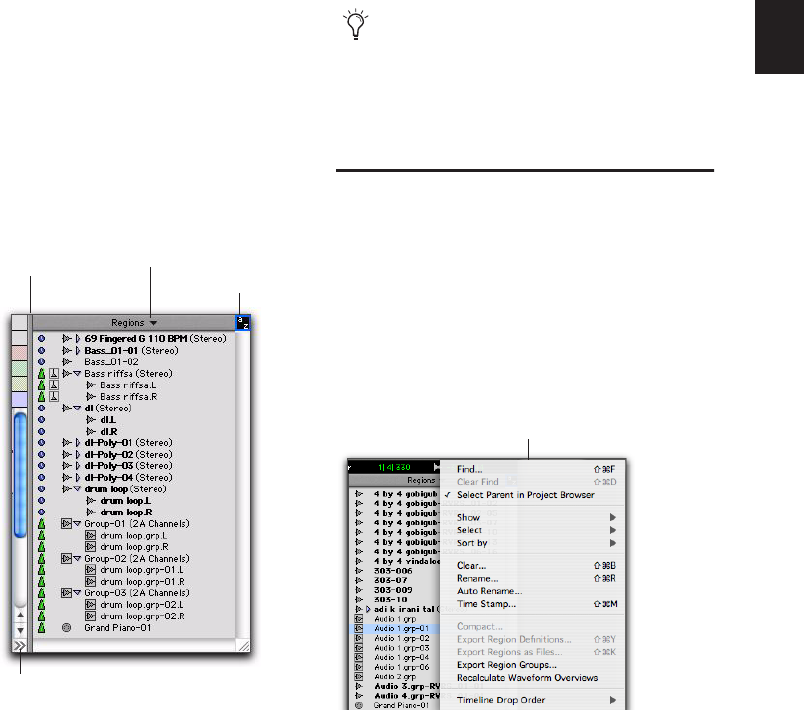
Chapter 12: The Region List 189
Chapter 12: The Region List
The Edit Window displays all audio regions,
MIDI regions, and region groups in a single,
comprehensive Region List.
All regions of all types that are recorded, im-
ported, or created by editing appear in the Re-
gion List. Items can be dragged from the list to
tracks and arranged in any order. You can also
preview audio and MIDI regions and region
groups in the Region List. Region List Pop-Up Menu
The Region List pop-up menu provides tools to
search, select, sort, export, clear, and manage
items in the Region List.
To access the Region List pop-up menu:
In the Edit window, click the Region List pop-
up menu.
Figure 8. Region List
Click Show/Hide Region List
button to hide Region List
Drag to resize width
of Region List
Click for pop-up menu
Keyboard Focus
Use the Region List as a bin for storing your
favorite audio loops and MIDI clips. Save
the session as a template and the regions are
available for future sessions (see “Creating
Custom Session Templates” on page 105).
Region List menu
Region List menu

Pro Tools Reference Guide190
Displaying Regions in the Region List
The Region List can show all region types (au-
dio, MIDI, video, Groups, Auto-Created), or
only certain region types. This is useful for iso-
lating the type of regions you want to work with
while editing and arranging. For example, when
arranging with Region Groups, you may want
the Region List to show only Region Groups.
To show or hide certain types of regions in the
Region List:
Click the Region List pop-up menu (at the top
of the Region List) > Show and select or deselect
the region type you want to show or hide.
Audio Shows or hides audio regions in the Re-
gion List.
MIDI Shows or hides MIDI regions in the Region
List.
Video Shows or hides video regions in the Re-
gion List.
Groups Shows or hides region groups in the Re-
gion List.
Auto-Created Shows or hides automatically-cre-
ated regions (of all types) in the Region List.
These are regions that were created as a by-prod-
uct of cutting, pasting, and separating other re-
gions. Since these by-product regions can be-
come numerous, hiding them (by deselecting
the option) helps you to avoid scrolling through
an unnecessarily long Region List.
In the Region List, whole-file audio regions are
displayed in bold, and stereo and multichannel
audio regions can be expanded to display indi-
vidual channels.
Because region names can become lengthy, the
Region List can be scrolled or resized as neces-
sary (see Figure 8 on page 189).
If the Editing preference for “Region List Selec-
tion Follows Edit Selection” is enabled, selecting
a region or region group in the Region List se-
lects it on any track where it is present in as-
signed playlists. Likewise, selecting a region or
region group on a track selects it in the Region
List.
Displaying File Info for Audio Regions
In addition to region names, the Region List can
also display information about the region’s
color coding, type (audio, MIDI, and region
group), timebase, and parent file:
Color Displays Track Color Coding as assigned
with Default Region Color Coding option in
Display Preferences page, or as assigned in the
Color Palette.
Icon Displays the icon for audio and MIDI re-
gions, and region groups.
Timebase Displays the timebase (samples or
ticks) for audio and MIDI regions, and region
groups.
Warp Indicator Displays the Warp Indicator icon
if Elastic Audio processing has been applied to
the region.
File Name Displays the parent file name.
Disk Name Displays the name of the hard drive
on which referenced file resides.
Full Path Displays the full directory path of the
region’s parent file.
Hiding Auto-Created regions can be useful
when importing region groups (or REX files
as region groups), because these file types
can contain so many separate regions that it
becomes difficult to read the Region List.
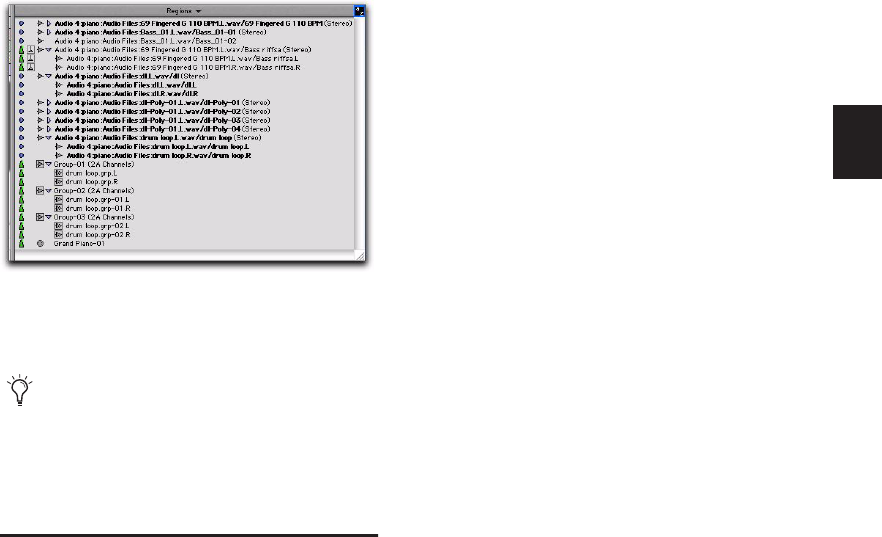
Chapter 12: The Region List 191
Channel Name Displays the channel name for
audio files imported from field recorders.
Scene and Take Displays the scene and take for
audio files imported from field recorders.
Pro Tools displays only the region name in the
Region List by default.
Sorting and Searching in the
Region List
Most sessions will contain many regions, which
can make it challenging to swiftly locate a par-
ticular region in the Region List. Pro Tools lets
you sort and search regions in the Region List to
quickly locate any region you want.
Sorting Regions
To sort regions in the Region List:
1 Click the Region List pop-up menu (at the top
of the Region List) and choose Sort By.
2 Select a basis for sorting from the submenu.
Different options are available for audio and
MIDI regions. See “Sort By Options” on
page 191.
3 To set whether regions are listed in ascending
or descending order, click the Region List pop-
up menu, choose Sort By, and select Ascending
or Descending.
Sort By Options
The Sort By options let you sort regions to help
keep track of large numbers of regions.
Audio regions can be sorted by:
• Region Type
• Name
• Length
• Original Time Stamp
• User Time Stamp
• Timebase
• Start in Parent
• End in Parent
• File Name
• File Length
• File Creation Date
• File Modification Date
• Disk Name (audio and region groups only
• Track Format/Width
• By Channel Name
• By Scene and Take
MIDI regions can be sorted by:
• Name, Length
• Original Time Stamp
• User Time Stamp
• Timebase
• Start in Parent
• End in Parent.
Regions with file information shown in the Region List
When editing, the Region List can become
cluttered with auto-created regions. You can
hide auto-created regions by choosing Show
in the Region List pop-up menu, and dese-
lecting Auto-Created.
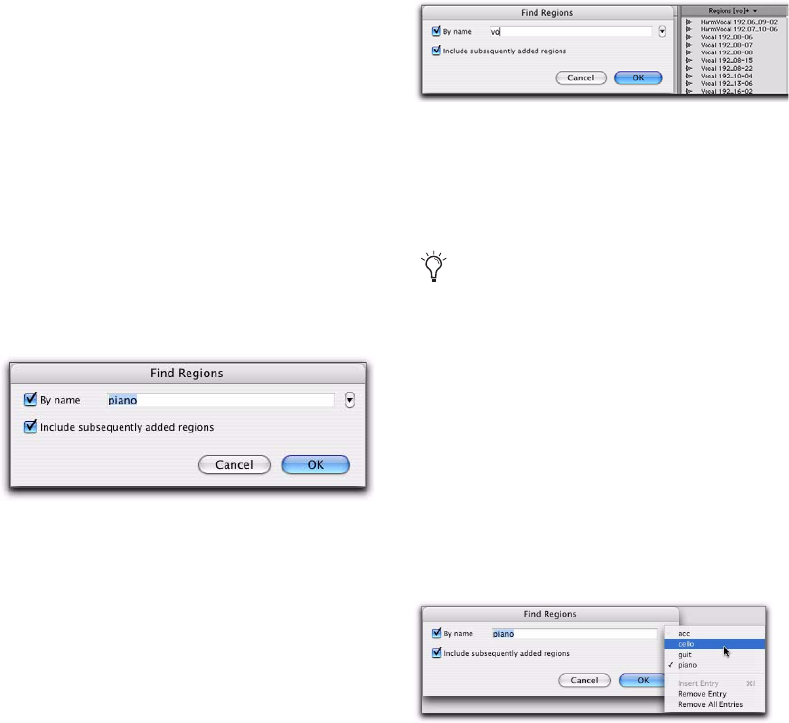
Pro Tools Reference Guide192
Regions can also be sorted by Region Type (Au-
dio and MIDI), or in Ascending or Descending
order.
Finding Regions
Use the Find command to display all regions in
a list whose names contain a particular word or
phrase.
To find and display regions in the Region List:
1 Do one of the following:
• Click the Region List pop-up menu and
choose Find.
– or –
• Press Control+Shift+F (Windows) or Com-
mand+Shift+F (Mac).
2 In the Find Regions dialog, do any of the fol-
lowing:
• Select By Name and type the name, or any
portion of the name, for regions you want
to find. The search string appears at the top
of the Region List.
• Select Include Subsequently Added Regions
to limit the display to newly added regions.
A plus (+) sign appears at the top of the Re-
gion List to indicate this option is selected.
• Select both options to start with a list of
named regions and allow display of added
regions.
Regions of any type whose name match the
word or phrase you searched are displayed in
the Region List. The search string is displayed at
the top of the Region List in brackets.
3 Click OK.
To repeat a previous search:
1 Click the Region List pop-up menu, and
choose Find.
2 Click the small arrow to the right of the text
field in the Find dialog and select a text string
from the Find History pop-up menu.
The Find History is saved with the session.
In addition to storing each text string previously
entered, you can insert multiple entries into the
Find History manually (without having to per-
form each Find in order to store words or
phrases).
Find Regions dialog
Found Regions in the Region List
Text entered into the Find dialog is saved in
a Find History, letting you quickly repeat
previous searches with a minimum of retyp-
ing.
An example of a Find history
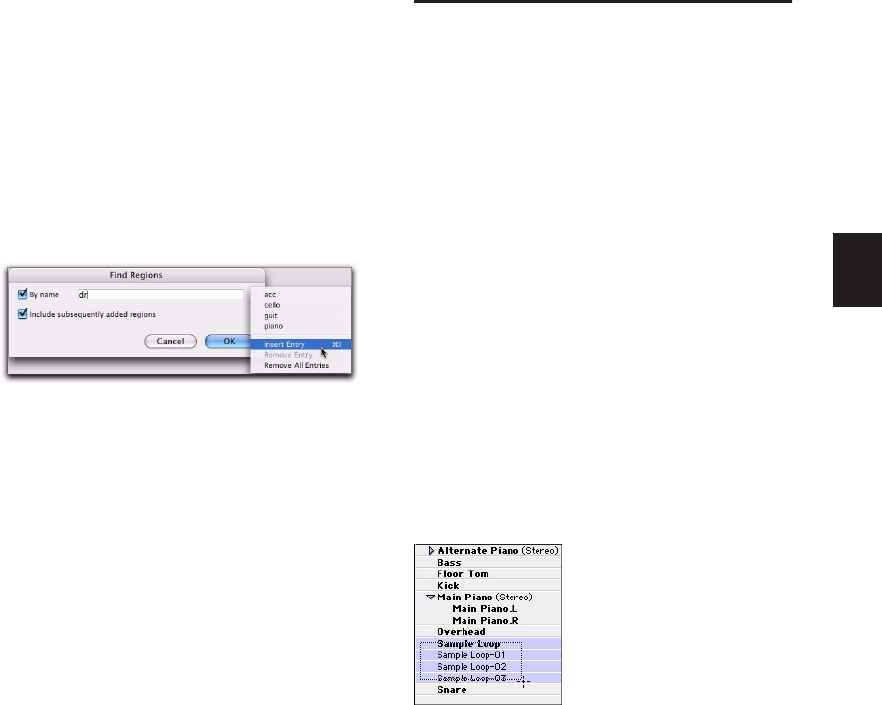
Chapter 12: The Region List 193
To compile a Find History without performing each
search:
1 Click the Region List pop-up menu, and
choose Find.
2 Type the name, or any portion of the name,
for the regions you want to find.
3 Click and hold the double arrow to the right
of the text field in the Find dialog and choose
Insert Entry from the pop-up menu.
4 Type another entry and choose Insert Entry
again to add additional search strings to the his-
tory.
To remove an entry from the history:
1 Select it from the Find History pop-up menu
so it is displayed in the text field.
2 Choose Remove Entry from the Find History
pop-up menu.
To clear the Find History:
Choose Remove All Entries from the Find His-
tory pop-up menu.
Selecting Regions in the
Region List
In the Region List, you can select regions so they
can be dragged to tracks, processed with Audio-
Suite plug-ins, or exported.
To select or deselect a region in the Region List,
do the following:
Click a region name that is unhighlighted to
select it.
– or –
Click a region name that is highlighted to de-
select it.
To select a range of regions in the Region List, do
one of the following:
Move the cursor to the left of the region
names, so the Marquee appears, and drag
around the regions you want to select.
– or –
Click the name of a region in the Region List,
and Shift-click an additional region name.
All regions that occur between the first region
selected and the additional region will also be
selected.
Region List while searching
Regions selected with Marquee
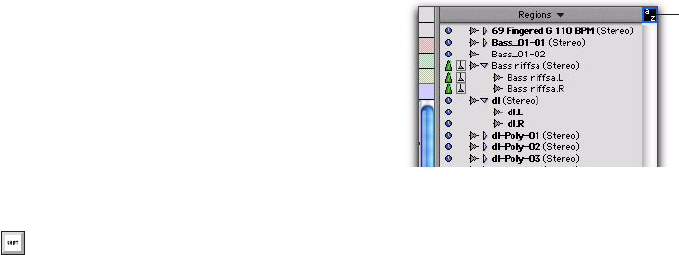
Pro Tools Reference Guide194
To select or deselect a range of regions with the
Marquee:
1 Move the cursor to the left of the region name
until the Marquee icon with a small “+” symbol
appears:
• To select regions, the Marquee should be to
the left of an unhighlighted region name.
• To deselect regions, the Marquee should be
to the left of a highlighted region name.
2 Click on the region name and drag up or
down (to select or deselect regions immediately
above or below the region name).
To select or deselect noncontiguous regions, do
one of the following:
Control-click (Windows) or Command-click
(Mac) region names that are unhighlighted to
select them.
– or –
Control-click (Windows) or Command-click
(Mac) region names that are highlighted to de-
select them.
Keyboard Selection of Regions
If the Region List Keyboard Focus is enabled,
you can type the first few letters of a region’s
name and Pro Tools will automatically locate
and select the region in the Region List.
To enable and use the Region List Keyboard Focus:
1 Click the Keyboard Focus button in the upper
right of the Region List.
2 Type the first or first few letters of the region
to automatically locate and select it. Once a re-
gion is located and selected, it can be dragged to
a track.
Keyboard selection of audio regions locates re-
gions based on their region name, not on the
names for their parent audio files or the vol-
umes on which they reside.
Select Options
In the Region List, you can select specific re-
gions so they can be dragged to tracks, processed
with AudioSuite plug-ins, or exported.
To select specific regions in the Region List:
Choose Select, then choose one of the Select
options:
All Selects all regions in the Region List.
Unused Selects regions that have not been
placed in a track in the current session. Offline
regions appear in the Region List as italicized
and dimmed.
Unused Except Whole Files Selects regions that
have not been placed in a track in the current
session, but do not include Whole-file regions.
Whole-file regions are regions that were created
To select multiple noncontiguous regions in
the Region List, press and hold Control
(Windows) or Command (Mac) when mak-
ing subsequent selections.
Region List Keyboard Focus enabled
Click to enable
or disable
Keyboard Focus
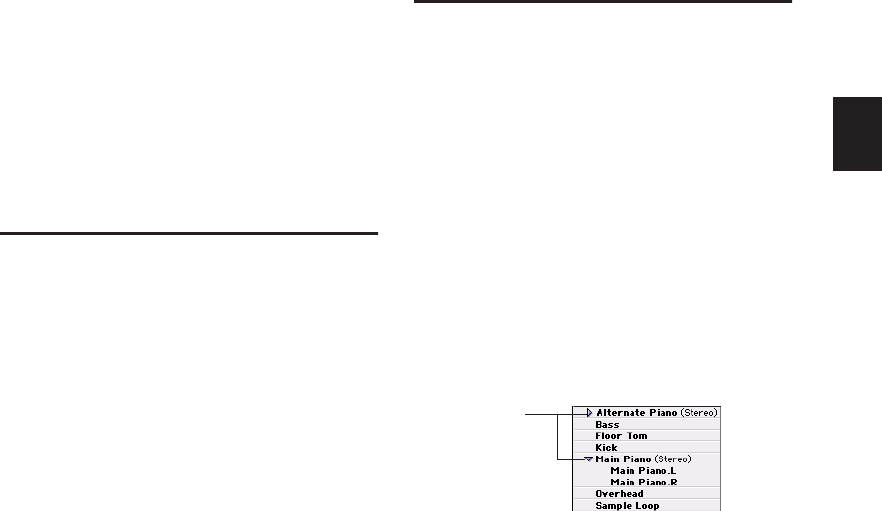
Chapter 12: The Region List 195
when recording or importing audio, consolidat-
ing existing regions, and when nondestructively
processing with an AudioSuite plug-in. Whole-
file audio regions reference an entire audio file
that resides on your hard drive. Whole-file au-
dio regions are displayed in bold in the Region
List
Offline Selects regions whose parent files cannot
be located, or are not available, when opening a
session or importing a track. Offline regions ap-
pear in the Region List as italicized and dimmed;
they appear in playlists as light blue regions
with italicized names.
Previewing Regions in the
Region List
You can preview audio and MIDI regions and re-
gion groups in the Region List. Previewing fol-
lows the master Audition path as selected in the
Output pane of the Pro Tools I/O Setup dialog.
The base level for previewing is determined by
the Master Fader (or Auxiliary Input) level as-
signed to the Audition path.
To preview a region in the Region List:
Alt-click (Windows) or Option-click (Mac) the
region name.
Audio regions and region groups play back
through the specified audition path (see “Audi-
tion Paths” on page 67).
Sample-based regions play back at their native
tempo. Tick-based regions play back at the ses-
sion tempo (based on the location of the play-
back cursor). You can also preview regions from
the Region List during session playback.
MIDI regions playback using the Default Thru
Instrument selected in the MIDI Preferences
page (see “The Default Thru Instrument” on
page 363).
Stereo and Multichannel
Regions in the Region List
Stereo and multichannel regions, whether im-
ported or recorded into Pro Tools, are displayed
as single items in the Region List. For example,
two mono source regions named “Main Pi-
ano.L” and “Main Piano.R” are listed as “Main
Piano (Stereo).” An expand/collapse triangle in-
dicates stereo and multichannel regions.
Stereo and multichannel regions are displayed
in the Region List by default in collapsed view.
The individual regions can be displayed by click-
ing the arrow to the left of the region to expand
the name.
To expand or collapse all stereo and multichannel
regions:
Press Alt (Windows) or Option (Mac) while
clicking the expand/collapse triangle.
Individual items of an expanded-view stereo or
multichannel region can be selected indepen-
dently of the other associated regions in the Re-
gion List.
Stereo regions, collapsed (top) and expanded (bottom)
Expand/collapse
triangles
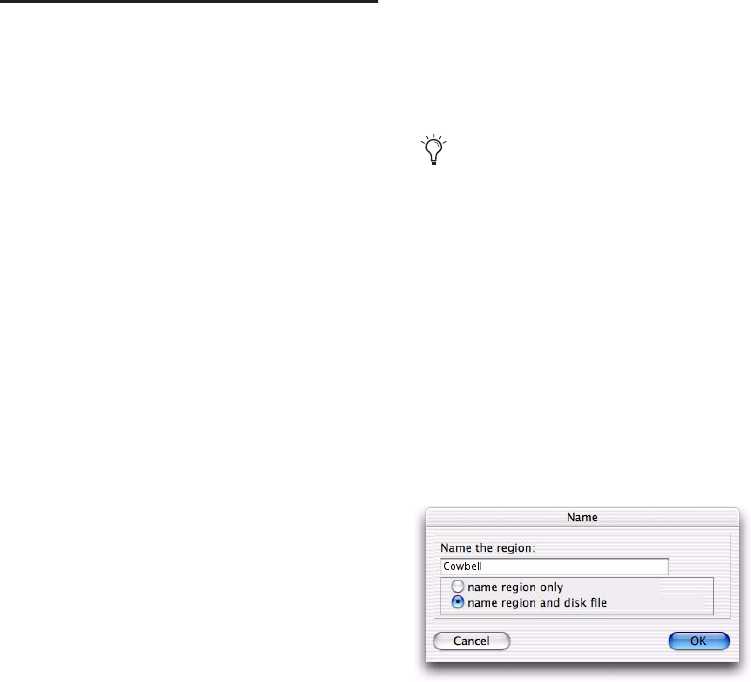
Pro Tools Reference Guide196
Rules for Stereo and Multichannel
Regions
For stereo and multichannel audio regions to be
shown as collective regions, the component re-
gions must be the same length. If an existing ste-
reo or multichannel region has been dragged
onto multiple mono tracks and edited such a
way that one or more components are no longer
the same length, the stereo display is removed
and the regions are displayed as individual re-
gions in the Region List.
Naming and Displaying
Regions in the Region List
A typical session can become cluttered with doz-
ens of tracks and hundreds of regions. There are
a number of things you can do, however, to
keep track of and manage a session’s regions, in-
cluding:
• Renaming existing regions
• Specifying how auto-created regions are
named
• Hiding auto-created regions
• Removing unused regions
Renaming Regions
In the course of a session you can rename re-
gions to give them more descriptive names, or
merely to shorten or simplify existing names.
When renaming a region that was auto-created
during editing, the region becomes a user-de-
fined region and is displayed in the Region List
even when auto-created regions are hidden.
One of the easiest ways to rename a region, if it
resides in a track, is to double-click it with one of
the Grabber tools. However, if the region does
not reside in a track, or if you want to rename
several regions, use the Rename command in
the Region List.
You can also rename a region in a track using
the Rename command in the Region List pop-
up menu or the Right-click pop-up menu.
To rename one or more regions from the Region
List:
1 If you will be renaming an auto-created re-
gion, select Show > Auto-Created in the Region
List.
2 Select one or more regions to be renamed in
the Region List.
3 Do one of the following:
• From the Region List pop-up menu, choose
Rename.
• Right-click on any selected region and se-
lect Rename from the pop-up menu.
4 In the Name dialog, enter a new name for the
region. If a whole-file audio region was selected,
specify whether to rename just the region, or
both the region and the disk file.
If the Region List Selection Follows Edit Se-
lection option in the Editing Preferences
page is enabled, you can highlight a region
in the Region List by selecting it in a track.
Name dialog
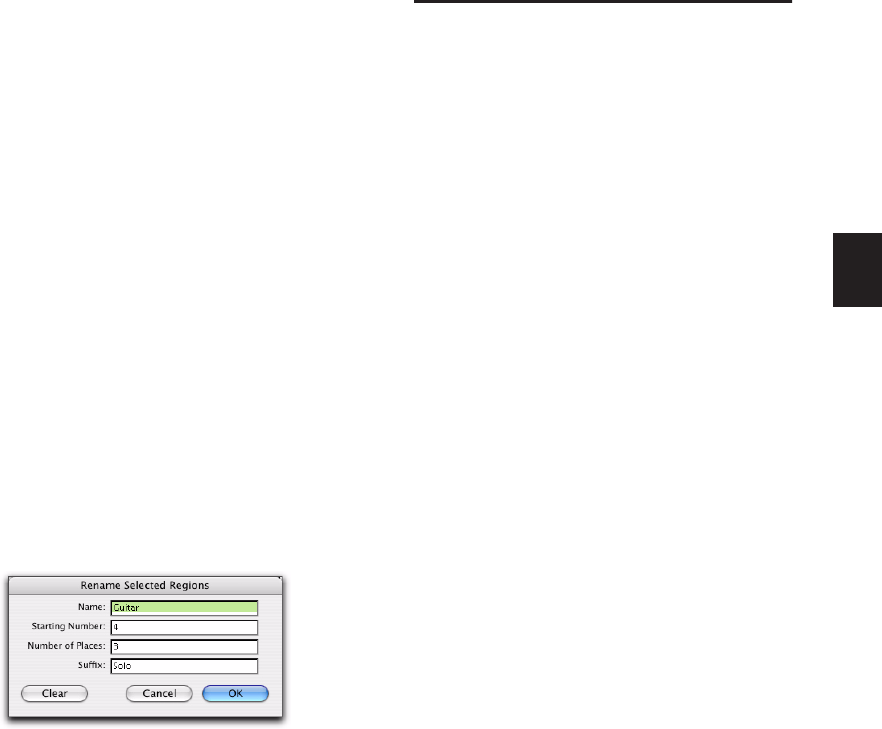
Chapter 12: The Region List 197
5 Click OK to rename the region. If renaming
multiple regions, you are prompted, succes-
sively, to rename each region.
Auto-Naming Options
You can specify the auto-naming options for a
region when new regions are created from it in
the course of editing.
Auto-naming of regions does not affect the
names of parent audio files. Instead, it stores
pointers to the regions within the parent source
file.
To set auto-naming options for a region:
1 Select a region in the Region List.
2 Choose Auto Rename from the Region List
pop-up menu.
3 In the Rename Regions dialog, enter the text
to be used when naming regions created from
the selected region.
Name Determines the root name for the auto-
created regions.
Number Sets the start number for the sequen-
tially numbered new regions.
Zeros Determines the number of zeros that oc-
cur before the auto numbers.
Suffix Specifies text to be appended to the end of
the name, following the auto numbering.
4 Click OK.
Managing Regions in the
Region List
In the course of editing a session, the Region List
can quickly fill up with many regions—with
ones you have created intentionally and also
with those that are automatically created by cut-
ting, pasting, and separating other regions, or
importing Region Group files (or REX files as re-
gion groups). Pro Tools lets you hide or remove
regions in your session so you do not have to
scroll through a long Region List.
Hiding Auto-Created Regions
You can hide regions that were automatically
created during the course of editing.
To hide auto-created regions:
In the Region List, deselect Show > Auto-Cre-
ated. With this option deselected, only user-de-
fined regions appear in the Region List.
User-defined regions include:
• Whole-file regions
• Regions created during recording
• Imported regions
• Renamed regions
• Regions created as a result of AudioSuite
processing
• New regions created with the Region >
Capture command or the Edit > Separate
Region commands
• Regions created by trimming whole-file au-
dio regions
Rename Selected Regions dialog
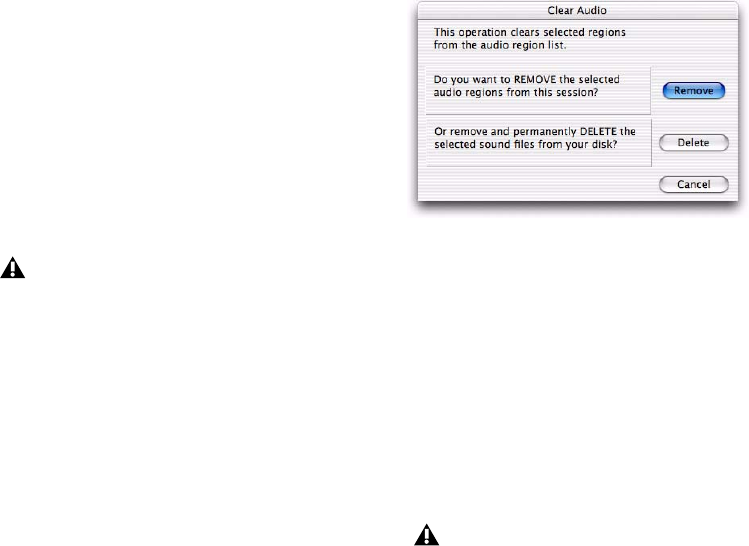
Pro Tools Reference Guide198
When auto-created regions are hidden,
Pro Tools warns you if the number of auto-cre-
ated regions exceeds a certain threshold, and
gives you the option of deleting them. If you
choose to delete them, all auto-created regions
are deleted at the same time.
To ensure that you keep any specific auto-cre-
ated regions, rename them. When you name a
region, it is promoted from being an auto-cre-
ated region to a user-defined region (see “Re-
naming Regions” on page 196).
Removing Unwanted Regions
In the Region List, you can select unwanted re-
gions and then use the Clear command to re-
move them from the session, whole-file regions
can also be permanently removed from the hard
drive on which they are stored.
To find and remove unused regions in a session:
1 Do any of the following:
• For MIDI regions, from the Region List
pop-up menu, choose Select > Unused.
– or –
• For audio regions, from the Region List
pop-up menu, choose Select, then choose
Unused, Unused Except Whole Files, or
Offline (as appropriate).
2 After all unused regions are selected, choose
Clear from the Region List pop-up menu.
3 In the Clear Audio dialog, do one of the fol-
lowing:
• Click Remove to remove the unused re-
gions from the session.
– or –
• If clearing a whole-file audio region and
you want to permanently remove the au-
dio file from your hard drive, click Delete.
When deleting audio files for multiple regions,
Pro Tools presents a warning dialog for each au-
dio file.
To bypass repeated warning dialogs:
Alt-click (Windows) or Option-click (Mac) the
Delete button in the Clear dialog. This perma-
nently deletes each successive audio file from
your hard drive (for each of the unused regions)
without any further warning.
The Clear command cannot be undone.
Clear Selected dialog (audio regions)
Use this “power delete mode” with caution:
Deletion of these files cannot be undone.

Chapter 12: The Region List 199
Region Name Right-Click
Pop-Up Menus
When you Right-click a region name in the Re-
gion List, a pop-up menu provides access to the
following commands:
Clear Removes selected regions from the ses-
sion.
Rename Renames selected regions.
Time Stamp Redefines the time stamp of se-
lected regions.
Replace Region (Pro Tools LE with DV Toolkit 2
Only) Replaces multiple instances of a region
with another region.
Compact Compacts selected regions.
Export Region Definitions Exports definitions for
selected regions.
Export Regions as Files Exports selected regions
as files.
Recalculate Waveform Overviews Redraws wave-
forms for selected regions.
Select Parent in Workspace Highlights the par-
ent file of selected region in the DigiBase Work-
space Browser.
Object Select in Edit Window Selects region as an
object in the Edit window.
Pro Tools Reference Guide200
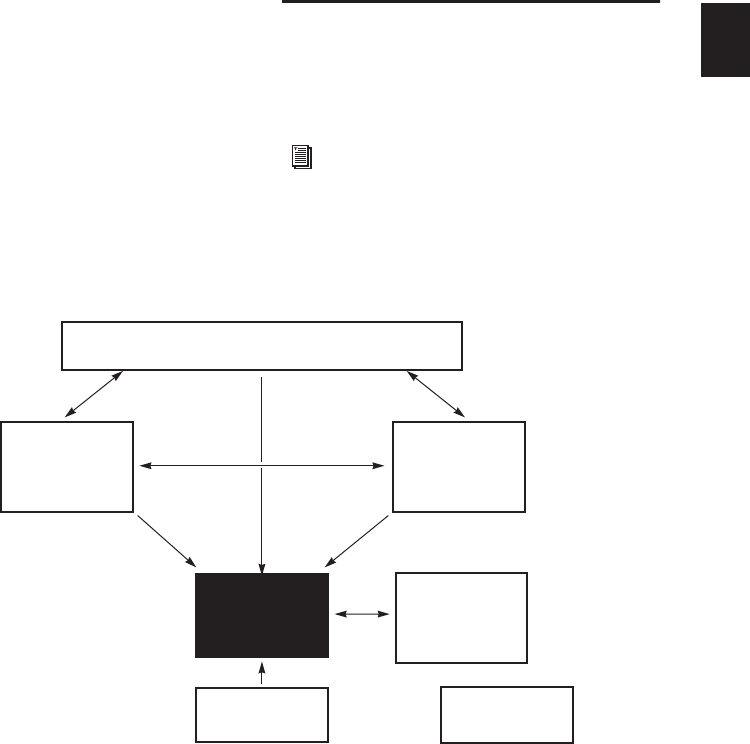
Chapter 13: DigiBase 201
Chapter 13: DigiBase
DigiBase and DigiBase Pro (Pro Tools HD and
Pro Tools LE with DV Toolkit 2 only) combine
an intuitive, browser-style interface with an in-
tegrated databasing engine, optimized for
Pro Tools data and media management.
DigiBase browsers provide extensive databasing
tools for searching, sorting, auditioning, and
importing of audio, MIDI, video, plug-in set-
tings (.txf), and session files. Multiple browsers
can be displayed and arranged, with custom dis-
play settings provided to optimize your work
environment.
DigiBase Elements
Figure 9 shows the various elements of DigiBase.
Arrows show how files can be moved between
the elements.
For information on dragging and dropping
files from DigiBase browsers to your
Pro Tools session, see “Importing Files with
Drag and Drop” on page 256.
Figure 9. Data flow between a Pro Tools session and DigiBase browsers
Workspace browser
Volume browsers Catalogs
Project browser
Relink window Task window
Pro
Tools
session
(DigiBase Pro only)
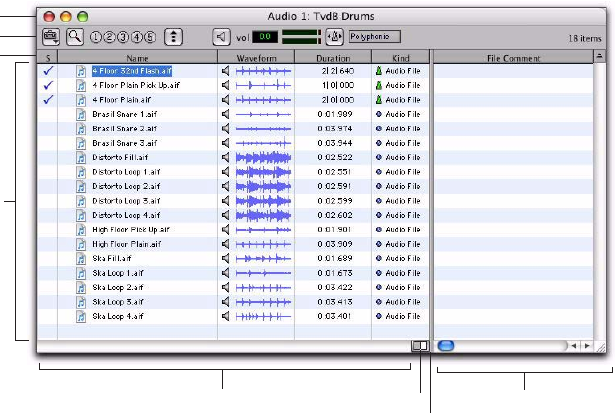
Pro Tools Reference Guide
202
DigiBase Browsers
DigiBase databases are accessed through Digi-
Base
browsers
(see Figure 10). Browsers provide
an intuitive user interface to DigiBase databases
with many convenient features for various file
management tasks (such as search and sort
functions).
Browsers in Pro Tools are analogous to windows
in your computer’s operating system, but are
specifically designed for Pro Tools workflow.
Multiple browsers can be displayed simulta-
neously, and arranged independently with cus-
tom display settings for each.
Browsers let you search and sort audio files,
video files, and sessions. Audio, video, and ses-
sion files displayed in browsers can be dragged
directly into the current Pro Tools session.
When offline items are needed, Pro Tools lets
you find the correct matching files, then relink
to online media.
The main elements of a DigiBase browser (see
Figure 10) include the following.
Title Bar
Shows the browser type (Work-space,
Volume, Project or Catalog), and the name of its
associated volume, session or catalog.
Toolbar
Provides the Browser menu, Search icon,
View Presets (numbered 1–5), and browser nav-
igation tools.
Items List
Displays the contents of a volume,
folder, session, or Catalog database.
Columns
Identifies the type of metadata dis-
played in the items list (such as file name and
format) for volumes, folders, and files in the
Items List.
• Columns can be resized by dragging the
column border, or rearranged by dragging
the Column headers.
• Columns can be dragged to either of two
available panes, the Fixed or Scrolling
panes.
Figure 10. Main elements of a DigiBase browser (Volume browser shown).
Toolbar
Items
List
Fixed pane Scrolling pane
Pane split
Show/Hide
Column
headers
TItle bar
Chapter 13: DigiBase
203
There are three types of Pro Tools browsers
available on all supported systems:
• The Workspace browser
• Volume browsers
• The Project browser
DigiBase Pro (Pro Tools HD and Pro Tools LE
with DV Toolkit 2 only) provides one additional
browser:
• Catalogs
Workspace Browser
The Workspace browser provides access to all
your mounted volumes, as well as the folders
and files they contain.
Using the Workspace browser, you can:
• Access all mounted volumes.
• Access all Catalogs.
• Search across multiple volumes and Cata-
logs simultaneously.
• Designate volumes for Record and Play-
back, Playback Only, or Transfer.
• Unmount volumes.
• View, manage, audition, and import indi-
vidual items in any catalog or mounted
volume.
• Update databases for entire volumes.
Volume Browsers
Volume browsers provide file management for
local and network
volumes
. Volumes are format-
ted partitions on a physical drive (hard drive).
Open a Volume browser by double-clicking a
volume in the Workspace browser. Any changes
made in Volume browsers (such as copying, de-
leting, or moving files and folders) is mirrored
on the volumes themselves. Volumes include
mounted hard drives, network storage, and re-
movable media (such as CD-ROMs).
Using Volume browsers you can:
• View, manage, audition, and import indi-
vidual items on the volume.
• Update a database for contents of the vol-
ume.
Project Browser
The Project browser provides powerful search
and management tools for the files referenced in
your current session, regardless of where they
are stored. Using the Project browser, you can:
• Show all the media files associated with the
current session, including any missing
files.
• View, manage, audition, and spot individ-
ual items.
For detailed information about the Work-
space browser, see “Workspace Browser” on
page 238.
For detailed information about the Project
browser, see “Project Browser” on page 241.
Pro Tools Reference Guide
204
DigiBase Pro Catalogs
(Pro Tools HD and Pro Tools LE with DV
Toolkit 2 Only)
Catalogs provide the highest level of Pro Tools
file management. Catalogs make it easy to orga-
nize files from multiple sources into libraries of
favorite files. Catalogs can be sorted and
searched, even when the files they reference are
offline. Catalogs can also be shared.
Using Catalogs, you can:
• Collect and organize files from any combi-
nation of volumes.
• Create catalogs of complete volumes to
view and search even if a volume is offline.
• View, manage, audition, and import indi-
vidual items in the catalog.
• Update a database for contents of catalog.
Task Window
The Task window is a utility for viewing and
managing all of the background tasks that you
initiate with Pro Tools. Use the Task window to
monitor, pause, or cancel background tasks such
as file copies, searches, indexing, and fade cre-
ation.
Relink Window
The Relink window provides tools and features
for relinking sessions and catalogs to media files.
Use Relink tools to search and reacquire missing
files for use in the current session.
Performance and Transfer
Volumes
DigiBase lets you view, manage, and import ses-
sions and media from both Performance and
Transfer volumes.
Performance Volumes
Are storage volumes (hard
drives) that are suitable for playback and have
been designated in the Workspace browser as
Record and Playback (R) or Playback Only (P) of
media files in a Pro Tools session.
Transfer Volumes
Are volumes that are not sup-
ported for media playback in Pro Tools (such as
shared network volumes or CD-ROMs), or stor-
age volumes (hard drives) that have been desig-
nated in the Workspace browser as Transfer (T)
volumes. Transfer volumes
cannot
be used to
record or play back media in a Pro Tools session.
Designated Transfer (T) volumes can be useful
for transferring session and media files between
different Pro Tools systems.
For detailed information about Catalogs,
see “DigiBase Pro Catalogs” on page 243.
For detailed information about the Task
window, see “Task Window” on page 247.
For detailed information about the Relink
window, see “Relink Window” on
page 234.
For more information on volume designa-
tions, see “Audio and Video Volume Desig-
nators” on page 239.

Chapter 13: DigiBase
205
Digidesign Databases
The information displayed in browsers is stored
in individual databases. Pro Tools creates these
databases automatically for all mounted vol-
umes, including Transfer volumes.
Digidesign databases use three file types:
volume.ddb
Stores media and session file meta-
data for a particular volume.
catalog.ddb (DigiBase Pro Only)
Stores media and
session file metadata for a user defined Catalog.
Cataloged media and session files are can reside
on multiple volumes, including Transfer vol-
umes.
Wavecache.wfm
Stores waveform overviews for
all audio files referenced by each session.
Read/Write Volume Databases (Hard Drives)
For each volume, a database file is created in a
folder named Digidesign Databases, on the root
level of the volume. The database is stored with
the volume it describes so that if the volume is
later moved to a different system the database
does not have to be recreated.
Read-Only Volume Databases
(CD/DVD-ROMs and Write-Protected Volumes)
Since data cannot be written to read-only vol-
umes, databases for read-only volumes are
stored locally on your system drive.
On Windows, these databases are stored in the
Program Files\Digidesign\Pro Tools\
Databases\Volumes folder.
On Mac, they are stored in the Library/
Application Support/Digidesign/Databases/
Volumes folder.
Shared Network Volume Databases
Though a shared volume may be read/write,
Pro Tools treats it as if it were a Transfer volume
and no database is stored on the shared volume.
Consequently, databases for shared volumes are
stored locally on your system drive.
On Windows, volume databases are stored in
the Program Files\Digidesign\Pro Tools\
Databases\Volumes folder.
On Mac, volume databases are stored in the
Library/Application Support/Digidesign/
Databases/Volumes folder.
Sharing Database Files
Database files can be shared among users. This is
particularly useful for Transfer volumes, elimi-
nating duplicate processing (indexing) time.
For example, shared volumes (such as network
storage volumes) tend to be large, and indexing
can be a time consuming task. To avoid dupli-
cate effort, one user can manually index part or
all of the shared volume just once, then email
the database files to other users. Database files
can be added by placing them within each user’s
Volumes folder. Periodic manual indexing then
keeps all databases current.
If you delete the Digidesign Database
folder, all existing database information for
that volume is lost. To recreate a deleted
Digidesign Database folder, re-index the
volume (see “Indexing DigiBase Data-
bases” on page 210).

Pro Tools Reference Guide
206
Sharing Catalogs
(DigiBase Pro Only)
Catalogs can be created for a particular project
and then shared among multiple systems to
help facilitate more efficient workflow. DigiBase
Pro Catalogs are stored as database files on your
system drive.
On Windows, Catalog database files are stored
in the Program Files\Digidesign\Pro Tools\
Databases\Catalogs folder.
On Mac, Catalog database files are stored in the
Library/Application Support/ Digidesign/
Databases/Catalogs folder.
Browser Windows and Tools
Browsers display all files in their database (see
Figure 11 on page 207), including Pro Tools and
non-Pro Tools files. Unknown file types can be
shown, as well as aliases, and desktop folders.
To maximize processing speed and protect vital
components, DigiBase does not display all fold-
ers. For example, in Windows, DigiBase brows-
ers do not display the Program Files, Windows,
Digidesign Databases, WU Temp, or System Vol-
ume Information folders; and on Mac, DigiBase
browsers do not display the System, Applica-
tions, Library, or Digidesign Databases folders.
This excludes them from being indexed,
searched, sorted, or affected in any way by Digi-
Base tasks. You should not store Pro Tools ses-
sion or media files in any of these folders.
The main elements of a DigiBase browser (see
Figure 11 on page 207) include the following:
Title Bar
Shows the browser type (Workspace,
Volume, or Project), and the name of its associ-
ated volume or Catalog.
Toolbar
Includes the Browser menu, Search icon,
View Presets, and browser navigation and pre-
view tools.
Items List
Displays the contents of a volume,
folder, session, or Catalog database in rows.
Columns
Display metadata (such as file name
and format) for volumes, folders, and files in the
Items List.
Each row of data in a browser represents an Item
(such as a file or folder). Data about each item is
displayed in columns. Columns can be arranged
and placed in either the Fixed pane or the Scroll-
ing pane.
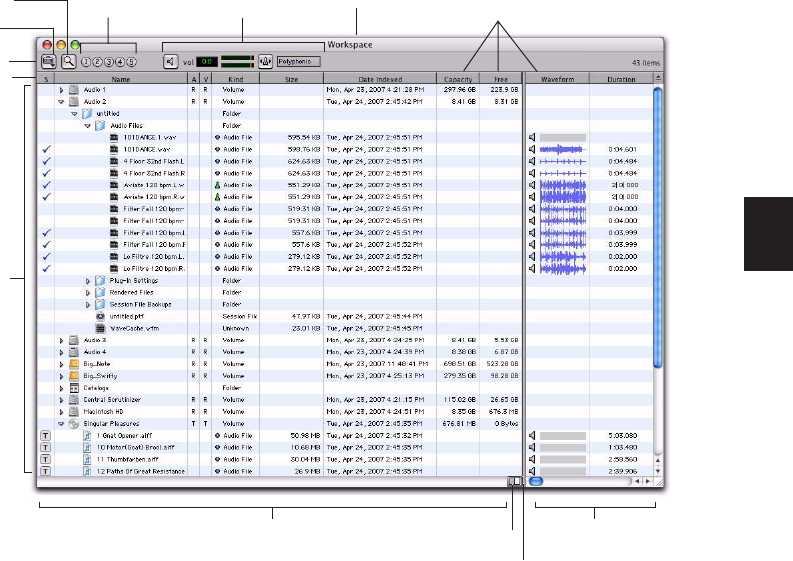
Chapter 13: DigiBase
207
Opening Browsers
There are several ways to open, close, and navi-
gate within browsers.
To open the Workspace browser:
Choose Window > Workspace.
To open a Volume browser:
1
Open the Workspace browser (Window >
Workspace).
2
Double-click a volume or folder in the Items
List. A new Volume browser opens.
To open the Project browser:
1
Open a Pro Tools session.
2
Choose Window > Project.
To open a Catalog browser (DigiBase Pro only):
1
Open the Workspace browser (Window >
Workspace).
2 Click the Expand/Collapse icon next to the
Catalogs icon to show all Catalogs, if they are
not already visible.
3 Double-click a Catalog.
Figure 11. Basic browser tools, panes, and columns (Workspace browser shown)
Toolbar
Items List
Fixed pane Scrolling pane
Pane split
Show/Hide
Title bar
Column headers
Columns
Search icon View Presets
Browser menu
Preview controls
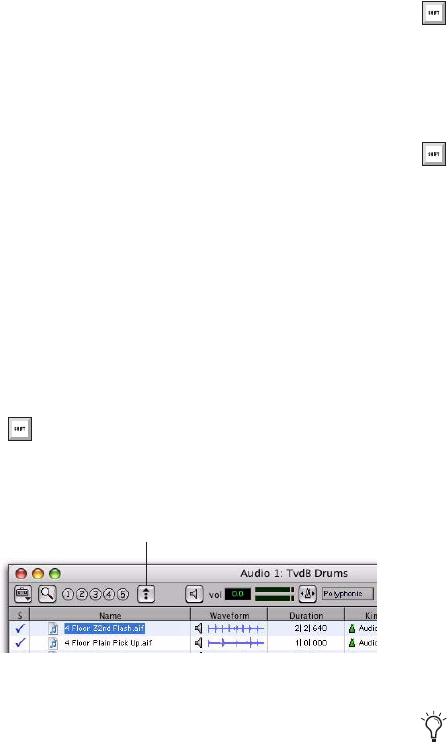
Pro Tools Reference Guide208
To open another Volume or Catalog in a new
browser window and leave the current Volume or
Catalog browser open:
Control-double-click (Windows) or Com-
mand-double-click (Mac) the Volume or Cata-
log.
Viewing the Contents of a Volume,
Folder, or Catalog
To expand or collapse the currently selected
folder, do one of the following:
Click the Expand/Collapse icon next to the
folder.
– or –
Select a volume, folder, or Catalog, and press
the Right Arrow key to expand, or the left Arrow
key to collapse.
To move up one browser level:
Click the Back arrow in the Browser toolbar.
Moving Browsers to the Foreground or
Background
To bring all open browsers to the foreground:
Choose Window > Browsers > Bring to Front.
To send all browsers to the background:
Choose Window > Browsers > Send to Back.
All open browsers are moved to the background,
bringing the other windows to the foreground.
Browsers remain open and accessible.
To bring an open browser to the foreground:
Choose Window > Browsers, and select an
open browser from the submenu.
To cycle to the next or previous browser:
Press Control+Left/Right Arrow keys (Win-
dows) or Command+Left/Right Arrow keys
(Mac).
Closing Browsers
To close all browsers:
Alt-click (Windows) or Option-click (Mac) the
Close box of any browser.
To move up one browser level, press Con-
trol+Up Arrow key (Windows), or Com-
mand+Up Arrow key (Mac).
Browser navigation icon
Browser Back arrow
To bring all browsers to the foreground,
press Alt+J (Windows) or Option+J (Mac).
To send all browsers to the background,
press Alt+Shift+J (Windows) or
Option+Shift+J (Mac).
Because the Task window is a utility and
not a browser, it remains open.

Chapter 13: DigiBase 209
Working wIth Items in Browsers
Opening Sessions
To open a Pro Tools session listed in a browser:
With no Pro Tools session currently open,
double-click a Pro Tools session file in any Digi-
Base browser.
Opening AAF and OMF Sequences
(DigiTranslator 2.0 Only)
On systems with the DigiTranslator 2.0 Option,
AAF and OMF sequences can be opened from
DigiBase browsers.
You can also drag and drop AAF and OMF se-
quences from browsers into the current session.
To open an AAF or OMF sequence from a DigiBase
browser:
1 Do one of the following:
• With no Pro Tools session currently open,
double-click the AAF or OMF sequence in a
browser.
– or –
• Drag the AAF or OMF sequence from a
browser to the Timeline in an open session.
2 Configure the Import Session Data dialog.
3 Click OK.
Creating and Opening Folders
Browsers let you create and manipulate folders
(file system sub-directories). All folders have Ex-
pand/Collapse icons to show their contents.
Dragging items onto a folder icon is the same as
dragging into an open browser.
To create a new folder in a Volume browser or
Catalog:
1 Choose New Folder from the Browser menu.
2 Enter a name for the folder, and click OK.
(Click Cancel to cancel the new folder.)
In Volume browsers, the folder is created on
disk. In Catalogs, the folder is created in the Cat-
alog only. The Items List updates as new items
are added.
To open a folder in the current browser:
Double-click the folder, or click the Ex-
pand/Collapse icon for the item.
To create and open a folder in its own new
browser:
Control-double-click (Windows) or Com-
mand-double-click (Mac) the folder. The previ-
ous (parent) Browser window remains open.
For more information on importing AAF
and OMF sequences, refer to the DigiTrans-
lator Guide.
With the browser in the foreground and the
folder selected, press Control+Down Arrow
key (Windows) or Command+Down Arrow
key (Mac) to open a folder in the current
browser.
With the browser in the foreground and the
folder selected, press Control+Alt+Down
Arrow key (Windows) or Command+Op-
tion+Down Arrow key (Mac) to open a
folder in its own new browser.

Pro Tools Reference Guide210
Scrolling and Moving Selections
To scroll the active pane up or down:
Press the Page Up or Page Down key.
To scroll to the top or bottom of the active pane:
Press Home (for the top) or End (for the bot-
tom).
To move items up or down in the current browser:
1 Select items in a browser, and make sure that
window is in the foreground.
2 Press the Up or Down Arrow key.
Text Entry in Browsers
Many text fields can be edited to replace or up-
date data for an item.
To enter an edit to a text field and exit, and return
to the previous display state:
Press Enter.
To revert to the previous text and cancel a text
edit:
Press Esc.
Indexing DigiBase Databases
Indexing is the process of reading media files,
extracting just the metadata for each file, then
storing that data in an associated database so
that it may be displayed in the columns of a
browser. Once a volume or folder has been fully
indexed, it can be searched very quickly because
all of the metadata has already been sorted and
organized.
If a volume or folder has not been indexed, it is
indexed automatically the first time it is opened
in a DigiBase browser. Volumes or folders con-
taining a lot of media files can take a long time
to index. For this reason, you may want to man-
ually index specific volumes or files prior to
starting a project to help expedite workflow.
Indexing while Browsing
The first time you open a Volume browser for a
volume or folder that has never been indexed,
Pro Tools automatically begins to fill the data-
base for that level of the volume. Files and fold-
ers appear in the browser Items List, along with
metadata in the columns for each item. Index-
ing continues until you either close the browser,
or until that folder is completely indexed.
The next time you open that browser, metadata
for items that have already been indexed is visi-
ble immediately. If the browser or folder was
closed before indexing was complete, or if the
contents of the folder have changed since the
last time it was browsed, Pro Tools automati-
cally updates the database the next time it is
opened. This way, the database is always up to
date for the folder you are browsing. (View the
Task Manager to see current activity.)
Indexing while Browsing saves time because it
only fills the database for items on the level of
the volume that you are currently browsing. For
example, if you are browsing the root level of
the volume, it indexes only the folders and files
on the root level. If you open a folder, Pro Tools
indexes just the items in that folder. As a result,
a database is only indexed for the parts of the
volume that you have browsed. However,
searches are faster and more complete when a
volume is already completely indexed.
For details on column editing, see “Column
Data” on page 215.
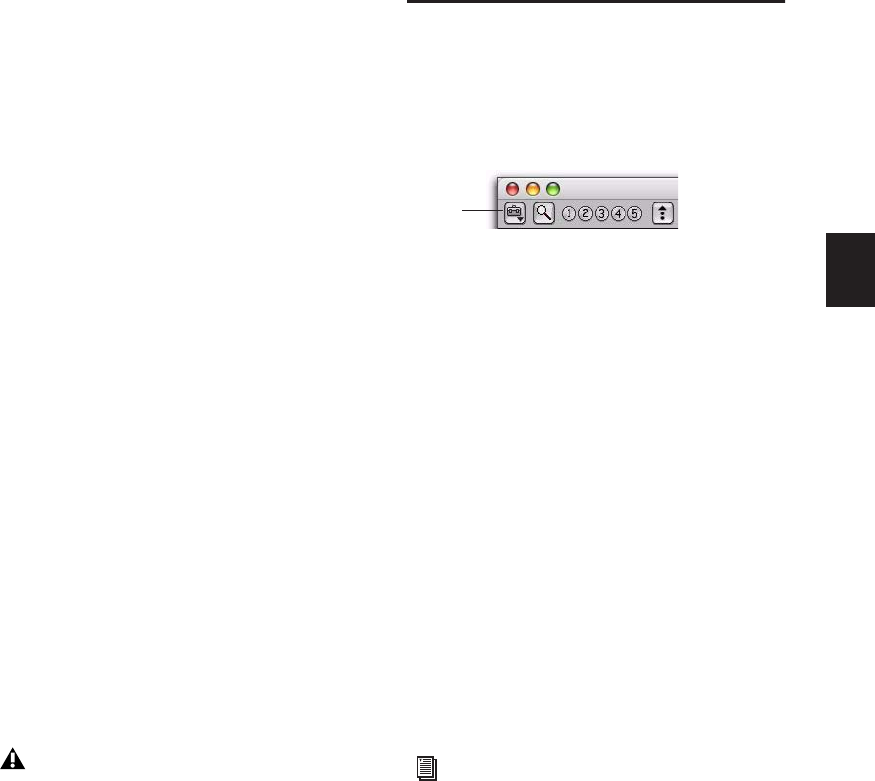
Chapter 13: DigiBase 211
Manual Indexing
Manual indexing fills in all missing data, and
updates changed data for selected folders and all
of their sub-folders.
To update the index for a folder and all sub-folders:
1 Select the item in a browser Items List.
2 Choose Update Database for Selected from the
Browser menu.
To update the index for an entire volume:
1 Select the volume to update in the Workspace
browser.
2 Choose Update Database for Selected from the
Browser menu.
Last Indexed Date Display
The Last Indexed column shows the date that
the index for that folder and all of its sub-folders
was updated. Keep in mind that individual sub-
folders may have been updated more recently.
Automatic Updating for Pro Tools Actions
Whenever Pro Tools adds, deletes, or modifies a
file on a volume or in a session, the appropriate
database is immediately updated to reflect the
change.
The Browser Menu
All Browser windows provide a Browser menu in
the upper left corner of their toolbar. The
Browser menu provides commands specific to
each type of browser, as described below.
Not all browser commands are available in all
browsers, as noted.
New Folder Creates a new folder on the current
volume, or within the current Catalog. In Vol-
ume browsers, a new folder is created on disk.
Available in Catalog and Volume browsers only.
For more information, see “Creating and Open-
ing Folders” on page 209.
New Catalog Creates a new, empty Catalog. Re-
quires DigiBase Pro. Available in the Workspace
browser only.
Create Catalog from Selection Creates a fully in-
dexed catalog of the selected items. Requires
DigiBase Pro.
Calculate Waveform Calculates the waveform
displays for selected audio files, or all files con-
tained in selected folders.
Update Database for Selected Updates the data-
base for the currently selected volumes or fold-
ers. Available in Workspace and Volume brows-
ers only.
Calculate Elastic Analysis Calculates Elastic Au-
dio analysis data for all selected audio files. An-
alyzed files are indicated by a check mark to the
left of the file name. Analyzed files where a
Changes that are made with Windows Ex-
plorer or the Mac Finder (such as copying or
moving files) are not tracked by Pro Tools
and are only indexed if the necessary folder
is browsed or if a manual index is per-
formed.
Browser menu icon
For more information, see “Waveforms” on
page 224.
Browser
menu
Pro Tools Reference Guide212
tempo has been detected are also updated as
tick-based, display their duration in Bars|Beats,
and display their native tempo in the Tempo
column.
Clear Elastic Analysis Clears Elastic Audio analy-
sis data for all selected audio files. Files cleared
of Elastic Audio analysis data revert to sample
timebase, display their duration in minutes and
seconds, and do not report a tempo.
Select Offline Files Selects all files that are cur-
rently offline.
Select Transfer Files Selects all files identified as
Transfer files (files found on media that do not
support playback).
Select Online Files Selects all files that are on-
line.
Invert Selection Reverses (inverts) the current se-
lection.
Reveal in Finder/Explorer Opens the corre-
sponding parent window in the Finder (Mac) or
Explorer (Windows) for the currently selected
file.
Reveal in Browser Opens the parent browser for
the selected item. The selected item is high-
lighted in its parent browser.
Relink Offline Opens the Relink window. Avail-
able in the Project browsers only.
Relink Selected Opens the Relink window, with
all selected files from the current browser dis-
played and selected as Files to Match. Available
in Catalogs and Project browsers only.
Copy and Relink Copies items currently selected
in the Project browser to a chosen location, and
relinks the session to the copies instead of the
originals. Use this to easily move files from a
Transfer to a Performance volume. This com-
mand is also available in DigiBase Pro Catalogs
to copy items and relink the current Catalog to
the copies.
Duplicate Selected Creates a duplicate of the se-
lected items in the same location.
Lock Selected Locks all selected items. Any files
already locked remain so. Locking a folder locks
all files and sub-folders it contains.
Unlock Selected Unlocks the selected items.
Delete Selected Deletes any selected item. In
the Workspace, Project, and Volume browsers,
deleting an item deletes it from the disk. In Cat-
alogs, you are asked whether you want to clear
the items from the Catalog (leaving your disks
unchanged) or delete the files referenced by the
Catalog items.
Unmount Lets you unmount any online volume.
Available in the Workspace browser only.
Auto-Preview Enables or disables automatic pre-
view of files. When this option is enabled, se-
lecting a file in the browser starts preview. The
Preview button updates to show that Auto-Pre-
view is enabled. Additionally, the Preview but-
ton updates to show an Auto-Preview icon.
For more information, see “Elastic Audio
Analysis” on page 224.
While Pro Tools is running, always use the
Unmount command in the Workspace
browser menu to unmount the volume, or
quit Pro Tools and then unmount the vol-
ume.

Chapter 13: DigiBase 213
Loop Preview Previews the selected file by loop-
ing playback of the file. If multiple files are se-
lected, only the first selected file previews.
When Loop Preview mode is enabled, the Pre-
view button updates to show a Loop Preview
Mode icon.
Spacebar Toggles File Preview Enables or dis-
ables the Spacebar for starting and stopping pre-
view. When this option is disabled, use the Pre-
view button to start and stop preview. In this
mode, the spacebar starts and stops session play-
back. This lets you play back the session and,
with the Audio Files Conform to Session Tempo
option enabled, preview the selected audio file
in time with the session.
Audio Files Conform to Session Tempo Con-
forms all tick-based audio files with Elastic Au-
dio analysis, as well as REX and ACID files, to
the session tempo. This option lets you play
back the session, and then simultaneously pre-
view the selected files in time with the session.
This option is only available when a session is
open, otherwise it is disabled and grayed out.
When the Audio Files Conform to Session
Tempo option is enabled, Pro Tools analyzes un-
analyzed files on preview or import. Audio files
that have been analyzed as tick-based can then
be previewed at the session tempo and conform
to the session tempo on import.
When the Audio Files Conform to Session
Tempo option is disabled, any tick-based audio
files with Elastic Audio analysis, and REX and
ACID files preview and import at their native
tempo.
Additional DigiBase Pro Commands
(Pro Tools HD and Pro Tools LE with
DV Toolkit 2 Only)
In Catalogs, the following additional com-
mands are available to manage Comments in se-
lected items.
Copy Database Comments to Clip Names Copies
an item’s Database comments to its Clip Name.
Copy File Comments to Clip Names (Mac Only)
Copies an item’s File Comments to its Clip
Name.
When a browser is front-most, Control+P
(Windows) or Command+P (Mac) starts
and stops preview. Also, the Esc key stops
preview.
For more information, see “Conforming
Preview to the Session Tempo” on page 229
For more information on Comments, see
“Comments Fields” on page 218.
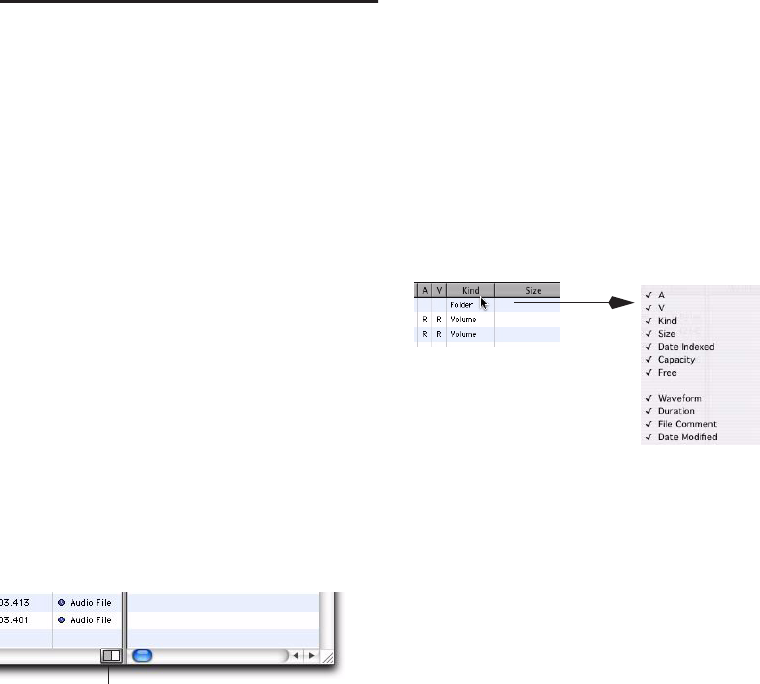
Pro Tools Reference Guide214
Browser Panes and Display
Browsers display an Items List consisting of var-
ious columns (such as file name, size, creation
date, and sample rate). The Items List is split
into two panes. Individual columns can be
placed in either pane, and all columns can be
shown or hidden, resized, reordered, and sorted.
Moving Columns Between Panes
Columns in browser can be placed in either
pane. Move columns you frequently need to see
into the left-hand pane. Columns that you use
less often can be moved to the right-hand pane.
To move columns between panes:
Click the column header and drag it to a dif-
ferent pane.
To show or hide the right-hand pane:
Click the Show/Hide icon in the lower right
corner of the leviathan pane.
Arranging and Resizing Columns
To rearrange columns in a pane:
Drag the column header to a new position.
To resize a column:
Drag the column header boundary to the de-
sired width.
Showing and Hiding Columns
You can show or hide individual columns in
DigiBase browsers to fit your workflow. The de-
fault column display includes the items you
would use in most sessions.
To show or hide individual columns:
Start-click (Windows), Control-click (Mac), or
Right-click a column label and select or deselect
the column name from the pop-up menu.
To show or hide all columns:
Start-click (Windows), Control-click (Mac), or
Right-click a column header and choose ALL or
NONE from the pop-up menu. (Only the Name
and Clip Name columns remain when you
choose NONE.)
To show the default set of columns:
Start-click (Windows), Control-click (Mac), or
Right-click a column header and choose DE-
FAULT from the pop-up menu.
Show/Hide Pane icon
Show/Hide
Showing and hiding columns
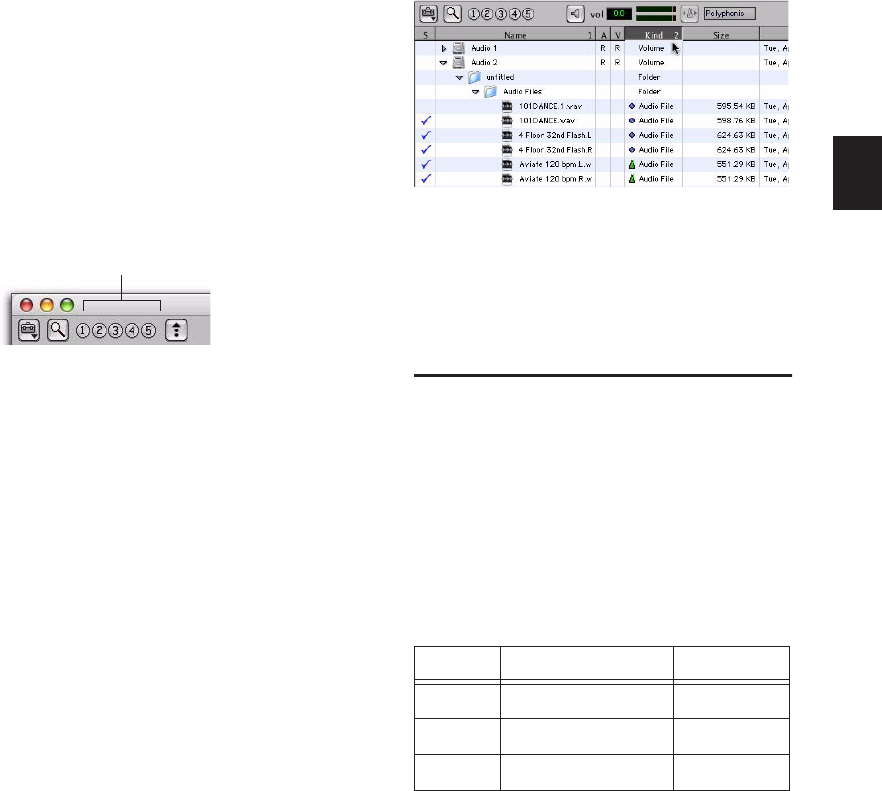
Chapter 13: DigiBase 215
View Presets
Pro Tools lets you save up to five preset views for
each type of browser, and the Relink window.
Presets can be recalled by clicking a View Preset
button. View Presets are specific to each type of
browser.
To store a View Preset:
1 Open a browser, or the Relink window.
2 Arrange columns and views.
3 Control-click (Windows) or Command-click
(Mac) one of the five View Preset buttons.
To recall a saved preset:
Click the appropriate View Preset button.
About View Preset 1
Preset 1 becomes the default layout for other
browsers of its type when they are opened for
the first time.
Sorting Columns
Columns can be sorted in ascending or descend-
ing order, and multiple sorts can be applied (up
to four levels).
To sort by columns:
Click the column title header.
It is often helpful to perform a secondary sort
(for example, to sort by tape and timestamp).
To add a secondary sort:
Alt-click (Windows) or Option-click (Mac) the
column title for the secondary sort criteria.
To toggle the current sort order between
ascending and descending:
Click the Sort toggle arrow, at the top of the
vertical scroll bars.
Column Data
In browsers, each row of data represents an item
in a database (such as a file, session, or volume).
Each column displays specific data for an item,
as follows.
Status The Status column is the first column on
the left, and it displays the status of each item,
as follows.
View preset buttons
Browser View Presets
Performing a secondary sort
Status Icons and Display
Icon Text Status
none Black Online
none Blue italics Offline
T Blue italics Transfer

Pro Tools Reference Guide216
Name Displays the name of the file, folder, vol-
ume, catalog, or session. This text field is edit-
able in all browsers except Catalogs.
A Designates volumes for audio R (Record and
Playback), P (Playback only), or T (Transfer).
Available in the Workspace browser only.
V Designates volumes as video R (Record and
Playback), P (Playback only), or T (Transfer).
Available in the Workspace browser only.
Kind Displays whether the volume, folder, cata-
log, or file. For files, this column displays what
kind of file it is: session file, audio file, video file,
or other. This field cannot be edited. For audio
files, this column also indicates whether the file
is sample-based to tick-based.
Size Displays the size of a file in kilobytes. For
folders, the total size of all files in the folder is
displayed. This field cannot be edited.
Date Indexed Displays the last indexed date for
the item. This field cannot be edited.
Capacity Displays the total capacity of a volume.
This field cannot be edited.
Free Displays the unused space on volumes.
This field cannot be edited.
Waveform Displays a graphical overview of an
audio file. See “Waveforms” on page 224 for
more information.
Duration Displays the duration of a file in abso-
lute time (minutes and seconds), regardless of
the time code format. For region groups, MIDI,
tick-based Elastic Audio files, REX, and ACID
files, Duration displays Bars and Beats. This field
cannot be edited.
File Comment Displays any embedded com-
ments associated with the file. File comments
are supported with BWF and SD II files, but are
not supported with AIFF files. File Comments al-
ways remain with the file when copied, con-
verted, or transferred. See “Comments Fields”
on page 218 for more information.
Database Comment Displays user comments
stored with the database, with support for
Finder comments. Available in the Project
browser and Catalogs only. See “Comments
Fields” on page 218 for more information.
Date Modified Displays the last modified date for
the item. This field cannot be edited.
Date Created Displays the creation date of an
item. This field cannot be edited.
Number of Channels Displays the number of
channels in an audio file: mono, stereo, or 3–8
as appropriate for supported multichannel files.
This field cannot be edited.
Format Displays the audio file format: WAV,
WAV (ACID) for ACID files, WAV (BWF), AIFF,
MP3, or ReCycle for REX files. This field cannot
be edited.
Sample Rate Displays an audio file’s sample
rate. This field can be edited in browsers for
WAV and SDII files only. This can be useful
when dealing with audio that has been pulled
up or down, or to force a sample rate conversion
to occur if that is necessary before importing a
file that otherwise would not require conver-
sion.
Bit Depth Displays an audio file’s bit depth. This
field cannot be edited.
Tempo Displays the tempo associated with re-
gion group, MIDI, tick-based Elastic Audio files,
REX, and ACID files, and session files. This field
cannot be edited.
For more information, see “Audio and
Video Volume Designators” on page 239.

Chapter 13: DigiBase 217
Original Time Stamp Displays the original time
stamp (time code location) of audio or video
files.
User Time Stamp Displays the user time stamp,
if any, of audio files only.
Path Displays the directory path to the item.
Unique ID Displays the unique ID for a Pro Tools
file.
Tape (DigiTranslator 2.0 Only) This column dis-
plays the original Avid tape name if the item is
an OMF file (audio or video). If an audio file was
originally recorded in Pro Tools, this field dis-
plays the name of the original session. Video
files originally recorded in Pro Tools with AVop-
tion|XL do not display a tape name.
TC Rate When DigiTranslator 2.0 is installed,
this column displays the frame rate of the item if
the item is an AAF sequence or an OMF se-
quence or file: 24, 25, 29.97, 30, drop or non-
drop. For sequences, the frame rate at the start
of the sequence is displayed.
Video Compression Displays the compression ra-
tio of video files where applicable.
Frame Rate Displays the frame rate of video files
where applicable.
Channel Names Displays the channel name and
number data embedded in multichannel audio
files. This field cannot be edited.
Scene Displays scene number data embedded in
audio files.
Take Displays take number data embedded in
audio files.
Shoot Date Displays origination date and time
information embedded in audio files. This field
cannot be edited.
Sound Roll Displays sound roll number data
(This data is usually named “Tape” in BWF files,
but is distinct from the date displayed in the
DigiBase Tape column). This field cannot be ed-
ited.
Sound Roll TC Displays the starting time code of
audio files. This field cannot be edited.
Sound Roll TC Rate Displays the frame rate in-
formation embedded in audio files: 24, 25,
29.97, 30, drop or non-drop. This field cannot
be edited.
User Bits Displays text information embedded
in audio files. This field can be used for user
comments, or auto-generated info with certain
field recorders.
Tape ID Displays tape ID information embedded
in audio files. This field cannot be edited.
Project Displays the project name data embed-
ded in audio files.
Circled Indicates if the status of a take is set to
“circled” (No or Yes) in audio files. This is usually
for indicating which take should be used.
Plug-in Name Displays the name of the plug-in
for Plug-in Settings files (.txf).
Plug-in Manufacturer Name Displays the plug-in
manufacturer’s name for Plug-in Settings files
(.txf).
Link Path Displays the path to the file used for
relinking. Available in the Relink window only.
Clip Name Displays the name of the file, or the
Avid clip name when the item is an AAF or OMF
file. The Clip Name is what appears in the Time-
line and Region List when a file is imported into
a session. This field can be edited in Catalogs

Pro Tools Reference Guide218
only, and can be generated using either of the
Copy Comments to Clip Name commands in
the Browser menu (see “Additional DigiBase Pro
Commands” on page 213).
Comments Fields
Comments about individual files can be stored
in the database, and embedded with the file’s
metadata wrapper.
There are two types of comments fields: File
Comments and Database Comments.
File Comments
File Comments are stored with the metadata of
the file itself. Not all file types support File Com-
ments. Indexing stores File Comments in the
database, allowing them to be searched and
viewed even if the file is offline. File Comments
can be edited in browsers, as long as the files or
their parent media are not defined as read-only.
You can also add and edit File Comments to
Pro Tools Session files from the Project browser.
File Comments cannot be edited in Catalogs.
Database Comments
(Catalogs and Project Browsers Only)
Database Comments in a Catalog are stored in
the Catalog database. Database comments in
the Project browser are stored in the Session. Da-
tabase Comments, which can be up to 256 char-
acters in length, are searchable, cross-platform,
and editable. For more information, see “Com-
ments and Catalogs” on page 244.
Adding and Editing Comments
To add, view, or edit a Comment:
1 Click the Comments field. The field expands
to display the entire contents of the field if nec-
essary.
2 Enter or edit a comment.
3 Press Enter, or click outside the text box to
close it.
Selecting Items
To select a single item in a browser:
Click the icon for an item. When selected, the
item Name is highlighted.
To select multiple items:
Marquee-select a group of items, or Shift-click
additional items. Control-click (Windows) or
Command-click (Mac) to select multiple non-
continuous items.
To select all items listed:
Press Control-A (Windows) or Command-A
(Mac).
To select all Transfer files in the current window:
Choose Select Transfer Files from the Browser
menu.
You can also type the first letter, or the first
few letters, of the item you want to select in
the browser. For example, if you have a
folder full of drum loops, and the one you
are looking for is named “Ska Loop,” just
type the letters S and K on your computer
keyboard and the first item that starts with
“sk” will be highlighted in the list.

Chapter 13: DigiBase 219
To select all offline files:
Choose Select Offline Files from the Browser
menu.
To select all online files:
Choose Select Online Files from the Browser
menu.
To reverse the current selection:
Choose Invert Selected from the Browser
menu.
Moving, Copying, Duplicating,
and Deleting Items
Moving, copying, duplicating, and deleting
items in browsers follow the same rules and be-
havior as in the operating system. For example,
moving a file to another volume copies the file,
and Pro Tools warns you if an items is about to
be overwritten or replaced. Dragging an item
from a Catalog to a Volume browser always
makes a new copy of the item.
Moving Items
To move items:
Select one or more items and drag them to a
new location. Moving to a new location on the
same volume moves the item, while moving to a
different volume copies the item.
Copying Items
To copy and move items:
Select one or more items and Option-drag
them to a new location.
Duplicating Items
To duplicate one or more items:
1 Select one or more items.
2 Choose Duplicate Selected from the Browser
menu.
Deleting Items and Folders
You can select and delete files and folders in all
browsers. If a selected item resides on a read-
only volume, it cannot be deleted.
If using DigiBase Pro, see “Deleting Catalog
Items” on page 220 for additional information.
To delete one or more items:
1 Select one or more items.
2 Press Delete, or choose Delete Selected from
the Browser menu.
3 Pro Tools asks you to verify that you want to
permanently delete selected files from disk.
Click Delete to proceed, or click Cancel to leave
your files and disks unchanged.
You can drag items directly into the Time-
line or Region List of the current session. See
“Importing Files with Drag and Drop” on
page 256.
To Duplicate selected items in the Browser,
press Control-D (Windows) or
Command-D (Mac).
To skip the warning dialog, hold down the
Option key while pressing Delete (or while
choosing Delete Selected).

Pro Tools Reference Guide220
To delete locked files:
1 Select one or more items.
2 Press Control+Delete (Windows) or Com-
mand+Delete (Mac).
Deleting Catalog Items
(DigiBase Pro Only)
When you delete a folder or item from a Digi-
Base Pro Catalog, Pro Tools lets you choose
whether to delete only the alias from the Cata-
log, or also delete the original files from the disk.
To delete an item from a Catalog.
1 Open a Catalog and select one or more items.
2 Press Delete, or choose Delete Selected from
the Browser menu.
3 When prompted, do one of the following:
• To remove the aliases for the selected items
from the Catalog, click Aliases.
– or –
• To delete the selected items from disk (and
remove their aliases from the Catalog),
click Files.
Deleting Folders in Catalogs
Deleting a folder from a Catalog does not delete
the folder on disk (even if you choose to delete
all files from disk). Because Catalogs are “snap-
shots” of items, their aliases only include files
that resided in the corresponding folder at the
time the Catalog was created. To avoid potential
data loss, folders are never deleted from disk,
even though you might choose to delete Files
instead of Aliases.
Searching Items
DigiBase provides powerful search capabilities
so you can quickly search and find files.
The Workspace browser lets you search across
multiple volumes and catalogs (if available). All
other browsers let you search the currently dis-
played contents of that individual browser.
Performing a search filters the Items List or
Search Results pane to display only found items
that match the search criteria.
DigiBase Pro lets you search on multiple criteria
in a single search pass, and search Catalogs.
The Relink window provides specialized search
capabilities for finding and relinking missing
files. For more information, see “Linking and
Relinking Files” on page 230.
Search Features for All Systems
All systems provide the following search capa-
bility:
• Search by item Name, Kind, and Date Modi-
fied.
• Results of a search are displayed in the Items
List, where they can immediately be selected
for auditioning, copying, and other opera-
tions. In the Workspace browser, a separate
“Search Results” pane displays found items.
• Utilize search syntax modifiers, such as OR,
wildcard characters, and greater than/less
than. See “Search Modifiers” on page 222.
• Search in Quick or Advanced Search mode.
Quick mode assumes (fills in) wildcard charac-
ters for faster data entry while searching. Ad-
vanced Search mode lets you specify wildcard
characters for more precise searching. See
“Search Modes” on page 223 for more infor-
mation.
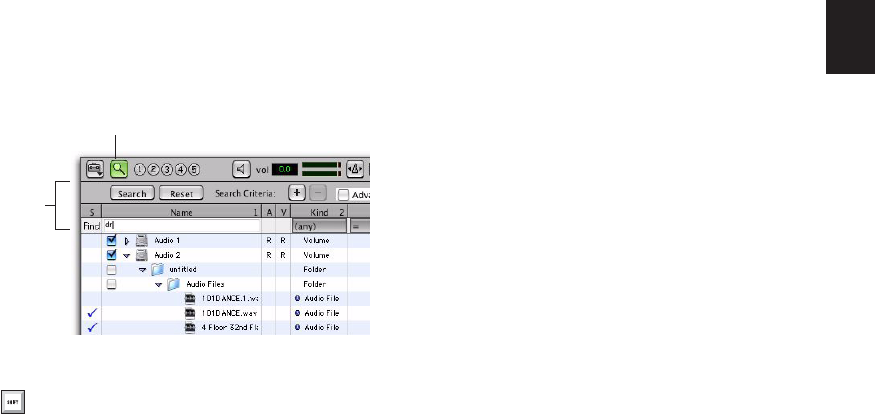
Chapter 13: DigiBase 221
Additional Search Features for DigiBase Pro
Only
With DigiBase Pro you can also:
• Search by any data column, such as Com-
ments fields, sample rate, format, and tempo
• Save the results of a search as a new Catalog.
Starting a Search
To search the current browser:
1 Click the Search icon to display the Search
pane.
2 Do one of the following:
• On all systems, enter text into the File
Name field to search by name, or enter a
date, or select a kind from the Kind pop-up
menu. See “Entering Data for Searches” on
page 221 for more information.
– or –
• If using DigiBase Pro (Pro Tools HD and
Pro Tools LE with DV Toolkit 2), choose ad-
ditional search criteria as needed. Press Tab
to move to the next available search field,
or Shift+Tab to move to the previous.
3 Click the Search button, or press Enter (Win-
dows) or Return (Mac).
Searching begins, indicated by the spinning ar-
rows in the toolbar, and by the Search button
changing to Stop. The Results List (at the bot-
tom of the browser) fills with items that match
the search criteria. Items can be selected and au-
ditioned as they are found.
To stop a search:
During a search, click the Stop button.
This stops the search routine, and the Stop but-
ton changes back to Search. Whatever results
have already been found continue to be dis-
played, and all entries in search fields are re-
tained.
To reset your search settings:
Click Reset to clear all criteria in search fields,
and return to the main Browser view (all items).
The Search pane remains open.
To close the search pane and return to the
complete Browser view:
Click the browser Search icon to toggle the
Search pane closed or open.
The search is stopped, the Search (and Search
Results pane) close, and the window returns to
show the main Browser view.
Entering Data for Searches
Field Formats and Searching
The following describe the types of data formats
available (not all search fields are available on all
systems).
Text Fields Allow direct entry of text. By default,
the field is empty.
Search icon and Search pane
You can also start a search by pressing Con-
trol+F (Windows) or Command+F (Mac).
Search icon
Search
Pane
Pro Tools Reference Guide222
Pull-Down Menus Provide options for certain
fields. For example, the Bit Depth pull-down
provides choices for Any, 16-bit, or 24-bit.
Date and Time Accepts date and time entries in a
variety of formats.
Time Code Uses standard Pro Tools time code
entry shortcuts in hh:min:sec:frames.
Search Modifiers
Certain fields have small pull-down menus con-
taining modifiers, which limit the search criteria
entered in the field.
Modifiers include:
• Equal to (=)
• Not Equal to (!=)
• Less Than (<)
• Greater Than (>)
• Less Than or Equal to (<=)
• Greater Than or Equal To (>=)
• Range (<…>)
About Range-Limited When enabled, a second
search field is added so that a range of two val-
ues can be entered (such as two dates). Pro Tools
finds all items that fall between or are equal to
those two values.
Wildcard Characters (* and ?)
An asterisk (*) can be entered at the beginning
or end of a text entry when you want to perform
wildcard searches. For example, if you want to
find all files with a name that ends with scratch,
you could enter *scratch in the Search field. This
finds files with names such as vocal.scratch, and
dialog2.scratch.
A question mark (?) can be used for single-char-
acter wildcards. For example, a search on f?ee
finds free, and flee. A similar search on f*ee finds
frendlee, flippee, flee, free, and so on.
OR Searches
The Plus (+) and Minus (–) buttons add and de-
lete OR rows to find results that match the crite-
ria either in the top row or the additional rows.
To add and use OR rows in a search:
1 Click the Plus (+) button to add an OR row
identical to the upper row, but with no entries
in the search fields.
2 To add an additional OR row, click the Plus (+)
button again. (An empty OR row has no effect
on the search.)
3 Enter search criteria.
For example, to find all files named either Dog
or Bark:
• Type Dog in the first File Name field.
• Add an OR row.
• Type Bark in the second File Name field.
4 Click Search.
To remove OR rows:
Click the Minus (–) button to delete the bot-
tom OR row.
AND Searches
If you enter two or more words in a text field,
Pro Tools finds files that contain all of those
words. For example, if you type Dog Bark, only
files that contain both the words Dog and Bark
are found.
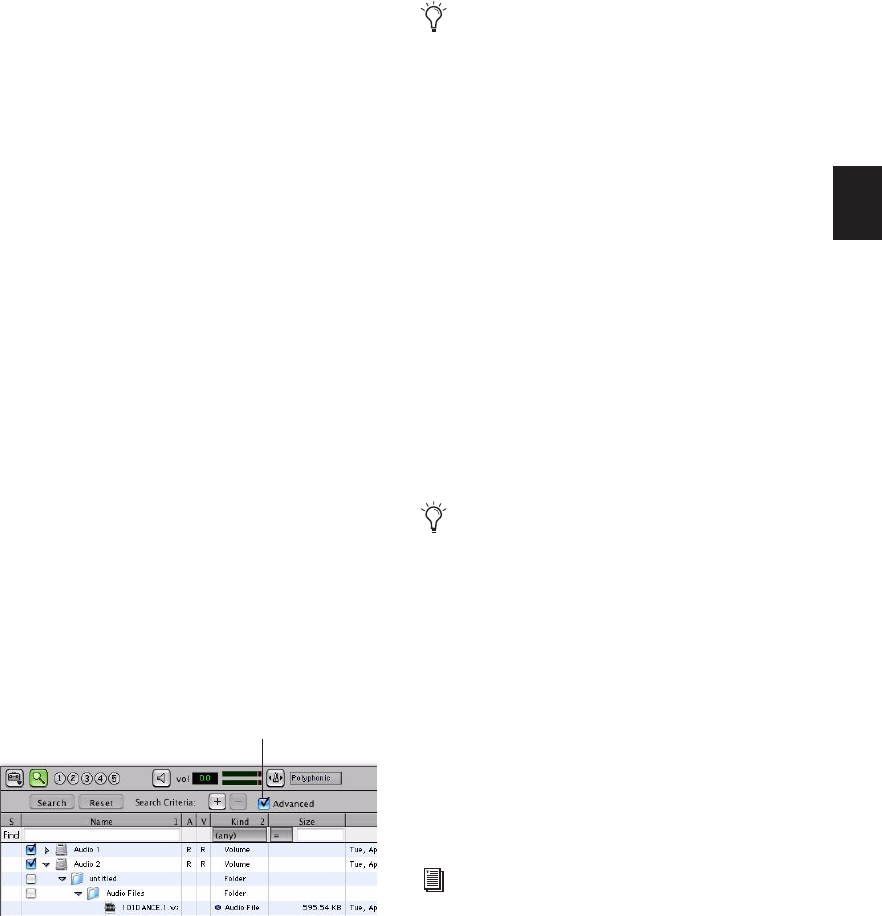
Chapter 13: DigiBase 223
Quotations Marks for Text Strings
Text enclosed in quotation marks is searched as
one text string. For example, if you type “Dog
Bark” (with quotes), only items with Dog Bark
anywhere in the File Name are considered a
match.
Search Modes
DigiBase provides two different text searching
environments:
Quick Search Mode Applies wildcards before
and after each text string. For example, a Quick
search for Dog finds Dogs, dog_bark, and
howling_dogs.
Advanced Search Mode Does not automatically
apply any wildcards. Therefore, an Advanced
search on Dog finds Big Dog, but not Dogs (unless
you manually add a wildcard, as described in
“Wildcard Characters (* and ?)” on page 222).
In addition, Advanced Search recognizes word
breaks such as underscores and capitalization.
For example, an Advanced search on Dog also
finds Big_Dog (Big-underscore-Dog) and BigDog,
though it would not find BigDogs.
To enable Advanced Search mode:
Click to enable the Advanced Search mode
option.
To return to Quick Search mode:
Click to deselect the Advanced Search mode.
About the Searching Process
Searches are conducted in two passes, each indi-
cated by Search Status displayed in the Search
pane (and the Task window).
Searching Databases The existing databases are
searched first. While this is the fastest search
pass, this search pass can only be as accurate as
the database (in other words, if the database is
not completely up to date you might not find
the files you want).
File System Search Pass This is the second pass
of a search. This search is not as fast as the Data-
base pass, but it is more thorough because it is
not relying on the database, which may or may
not be current.
Saving Search Results as a
Catalog
(DigiBase Pro Only)
To save the results of your search as a Catalog:
1 Choose Edit > Select All, or press Control+A
(Windows) or Command+A (Mac), to select all
items in the Items List.
2 From the Browser menu, choose Create Cata-
log.
Search pane
Advanced Search
Toggling search mode affects all DigiBase
browsers.
Each pass is completed before the next pass
begins.
For more information, see “DigiBase Pro
Catalogs” on page 243.
Pro Tools Reference Guide224
Waveforms
The Waveform column displays waveforms for
audio files. Waveform display depends on the
following:
• Waveforms are displayed if they have already
been calculated and stored, either with the file
metadata or in the global Waveform cache.
• When a file is imported into a session, a wave-
form is automatically calculated for it, if nec-
essary.
• Waveforms are gray if they have not been
stored with the file metadata or in the global
Waveform cache.
The waveform overview is stored in the file, or
in the appropriate Digidesign Databases folder.
For more information, see “WaveCache” on
page 224.
Summed Waveforms for Multichannel Files
Waveform displays for stereo and multichannel
files are summed.
Calculating Waveforms for Display
If an audio file item does not have a waveform,
the waveform must be calculated to be visible in
a browser Waveform display.
To calculate waveforms in a browser:
1 Select online audio files, or folders containing
audio files, in a browser.
2 Choose Calculate Waveform from the Browser
menu.
WaveCache
A global WaveCache file stores waveforms that
cannot be written back to the sound file, such as
read-only files, files on network and other read-
only volumes, and interleaved files. The global
WaveCache is stored in the Digidesign Data-
bases folder on your Pro Tools startup volume.
For write-enabled volumes, the cache is stored
with the volume’s Digidesign Database files, on
that volume.
Elastic Audio Analysis
You can both calculate and clear Elastic Audio
analysis for selected audio files in DigiBase
browsers. Only AIFF and WAV files are sup-
ported for Elastic Audio analysis and processing.
Any other file format (such as MP3 and SD2)
must be converted to AIFF or WAV for Elastic
Audio analysis and processing.
Waveform displays in a browser
Item waveforms prior to calculation
Even though MP3 and SD2 file formats are
not directly supported by Elastic Audio, you
can import them into a WAV- or AIFF-
based session and then use the converted
files on Elastic Audio–enabled tracks. File
formats that do not match the session are
converted automatically on import.
For more information on Elastic Audio, see
Chapter 26, “Elastic Audio.”
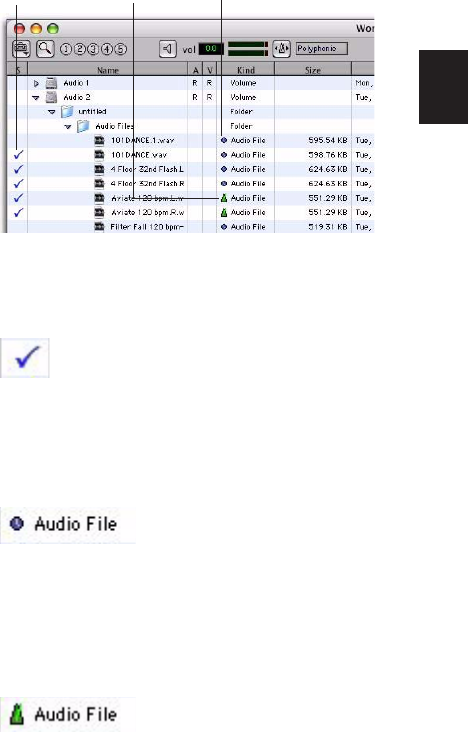
Chapter 13: DigiBase 225
To calculate Elastic Audio analysis:
1 In a browser, select the files you want to ana-
lyze.
2 Do one of the following:
• From the Browser menu, choose Calculate
Elastic Analysis.
• Right-click one of the selected files and
choose Calculate Elastic Analysis from the
pop-up menu.
• Preview the file with the Audio Files Con-
form to Session Tempo option enabled.
Analyzed files are indicated by a check mark to
the left of the file name.
Analyzed files in which a regular tempo was de-
tected are updated as tick-based, display their
duration in Bars|Beats, and display their native
tempo in the Tempo column.
Analyzed files in which no tempo was detected
remain sample-based. These files typically con-
tain only a single transient (such as a snare hit)
or they are longer files without a readily identi-
fiable regular tempo (such as entire songs).
To clear Elastic Audio analysis:
1 In a browser, select the files with Elastic Audio
analysis that you want to clear.
2 Do one of the following:
• From the Browser menu, choose Clear Elas-
tic Analysis.
– or –
• Right-click one of the selected files and
choose Clear Elastic Analysis from the pop-
up menu.
Files cleared of Elastic Audio analysis data revert
to sample timebase, display their duration in
minutes and seconds, and do not report a
tempo.
File Timebase and Elastic Audio
Analysis Icons
DigiBase browsers provide three icons to indi-
cate whether a file has Elastic Audio analysis and
the file’s timebase.
Elastic Audio Analysis Icon Indicates that the file
has Elastic Audio analysis data.
Sample-Based File Icon Indicates that the file is
sample-based. The file’s duration is displayed in
minutes and seconds.
Tick-Based File Icon Indicates that the file is
tick-based. The file’s duration is displayed in
Bars|Beats and the file’s native tempo is dis-
played in the tempo column.
Elastic Audio and Timebase icons in DigiBase browsers
Elastic Audio Analysis icon
Sample-based File icon
Tick-based File icon
Tick-based Sample-based
file icon
Elastic Audio
Analysis icon file icon
Pro Tools Reference Guide226
Previewing
Audio files can be previewed in DigiBase brows-
ers. Previewing follows the master Audition
path as selected in the Output pane of the
Pro Tools I/O Setup dialog (see “Audition Paths”
on page 67). The base level for previewing is de-
termined by the Master Fader (or Auxiliary In-
put) level assigned to the Audition path. You
can also adjust the Preview Volume in the
browser.
Interleaved Files
When previewed in DigiBase, interleaved audio
files with more than two channels are summed
to mono for auditioning.
Multi-Mono Files
Multi-mono files must be previewed one file at a
time.
Split Stereo Files Preview Together
When selecting one of a pair of Split Stereo files,
such as “Drums.L” and “Drums.R,” both files
preview together. To preview only the selected
channel of a split stereo pair, press the Shift key
and start preview.
To preview an audio file in a browser:
1 Select an audio file in a browser Items List.
Make sure the browser is the foreground (active)
window.
2 Do one of the following:
• Click the Waveform Preview button (the
speaker icon to the left of the waveform
display). Click again to stop auditioning.
• If Spacebar Toggles File Preview is selected
in the Browser menu, press the Spacebar.
Press the Spacebar again to stop audition-
ing.
• Press Control+P (Windows) or Com-
mand+P (Mac) to start and stop preview-
ing.
• Press the Esc key to stop previewing.
To audition from a specific location within the file:
Click in the waveform display at the desired
location.
Some Pro Tools operations can cause tem-
porary interruptions in DigiBase audition-
ing.
MIDI files can be previewed from the ses-
sion Region List, but not from DigiBase
browsers. See “Previewing Regions in the Re-
gion List” on page 195.
If the Auto-Preview option is enabled, pre-
viewing starts as soon as the file is selected
in a browser.
Auditioning an audio file
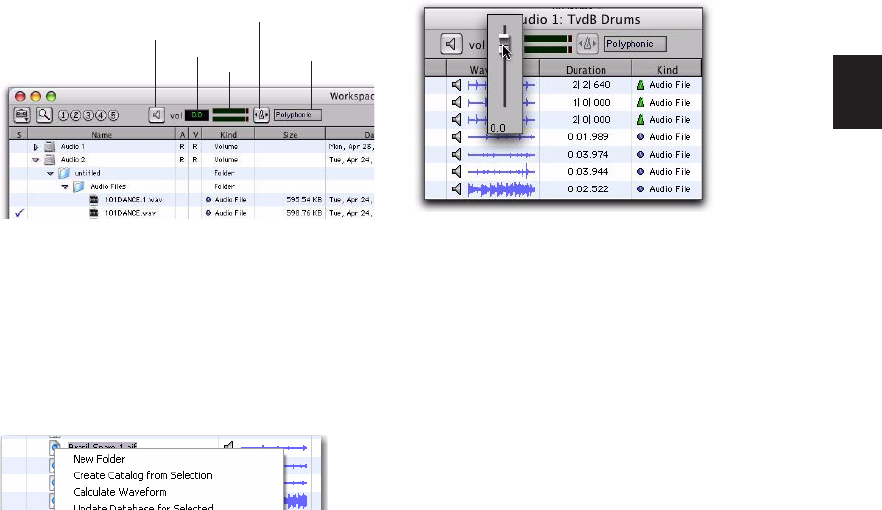
Chapter 13: DigiBase 227
Preview Controls and Indicators
Every DigiBase browser provides the following
preview controls in the Toolbar: Preview, Vol-
ume, Meters, Audio Filed Conform to Session
Tempo, and Elastic Audio Plug-in.
Preview Button
The Preview button starts and stops preview of
audio files selected in browsers. You can also
Right-click the Preview button to change the
Preview mode and set whether or not the space-
bar toggles file preview.
Volume
The Volume control in DigiBase browsers lets
you boost or attenuate the gain for previewing
selected files.
To change the volume for previewing in DigiBase
browsers:
1 Click the Volume field to display the Volume
fader.
2 Adjust the Volume fader as desired (from –INF
to +12 dB).
Meters
The meters display the level of the audio and
also provide clip indicators. For mono files, the
mono signal is shown in both meters. For stereo
files, the top and bottom meters show the left
and right channels respectively. Greater than
stereo multichannel files are displayed as
summed mono in both meters.
The Clip LED lights when clipping occurs and
clears automatically after 3 seconds.
Audio Files Conform to Session Tempo Button
The Audio Files Conform to Session Tempo but-
ton mirrors the corresponding Browser menu
command. When enabled, all tick-based audio
files with Elastic Audio analysis, as well as REX
and ACID files, conform to the session tempo.
This lets you play back the session, and then si-
multaneously preview the selected files in time
with the session. The Audio Files Conform to
Session Tempo button is only available when a
session is open, otherwise it is disabled and
grayed out.
Preview controls in DigiBase browsers
DigiBase Browser, Preview button Right-click pop-up
menu
Preview
button
Volume
Meters
Audio Files
Conform to
Session Tempo button
Elastic Audio
Plug-in selector
DigiBase Browser, Preview Volume fader
Pro Tools Reference Guide228
When the Audio Files Conform to Session
Tempo button is enabled, Pro Tools analyzes
any un-analyzed files on preview or import.
Tick-based audio files conform to the session
tempo during preview and on import. Sample-
based files, those where no tempo has been de-
tected, always preview and import at their orig-
inal speed and duration.
When the Audio Files Conform to Session
Tempo button is disabled, any tick-based audio
files with Elastic Audio analysis, and REX and
ACID files preview at their native tempo.
Elastic Audio Plug-in Selector
The Elastic Audio Plug-in selector lets you select
any Real-Time Elastic Audio plug-in as the de-
fault plug-in for previewing and importing Elas-
tic Audio. Changing the plug-in in any DigiBase
browser also affects the Elastic Audio Default
Plug-in option in the Processing preferences.
Preview Modes
DigiBase browsers provide three Preview modes:
Normal Preview, Loop Preview, and Auto-Pre-
view.
Normal Preview
Normal Preview simply plays the selected audio
file and stops at the end of the file. Deselect
Loop Preview and Auto-Preview for Normal Pre-
view mode.
Loop Preview
Loop Preview plays the selected file by looping
playback of the file. If multiple files are selected,
only the first selected file previews. When Loop
Preview mode is enabled, the Preview button
updates to show a Loop Preview Mode icon.
To loop preview a file in a DigiBase browser:
1 Do one of the following:
• In the Browser menu, select Loop Preview
Mode. The Browser Preview button updates
to show the Loop Preview icon.
– or –
• Right-click the Preview button and select
Loop Preview.
2 Select an audio file in a browser Items List.
Make sure the browser is the foreground (active)
window.
3 Do one of the following:
• Click the Browser Preview button.
• Click the Waveform Preview button.
• If Spacebar Toggles File Preview is selected
in the Browser menu, press the Spacebar.
For more information, see “Conforming
Preview to the Session Tempo” on page 229
For information on Elastic Audio plug-ins,
see “Elastic Audio Plug-ins” on page 507.
Start-click (Windows) or Control-click
(Mac) the Preview button to toggle Loop
Preview mode on and off.
DigiBase Preview button, Loop Preview mode

Chapter 13: DigiBase 229
To stop loop audition:
Do one of the following:
• Click the Browser Preview button again.
• If Spacebar Toggles File Preview is selected
in the Browser menu, press the Spacebar
again.
• Press Control+P (Windows) or Com-
mand+P (Mac).
• Press the Esc key.
Auto-Preview
Auto-Preview plays the audio file as soon as it is
selected. Additionally, the Preview button up-
dates to show an Auto-Preview icon.
To automatically preview files when selected:
Do one of the following:
• From the Browser menu, select Auto-Pre-
view. The Preview button updates to show
that Auto-Preview is enabled.
• Right-click the Preview button and select
Auto-Preview.
Conforming Preview to the
Session Tempo
Pro Tools lets you preview Elastic Audio ana-
lyzed files at the session tempo. The selected de-
fault Elastic Audio plug-in is used for previewing
Elastic Audio analyzed audio files at the session
tempo. Additionally, other tick-based files, such
as REX and ACID files, can also be previewed at
the session tempo and in time with playback.
To preview files at the session tempo:
1 In the session, place the insertion point at the
location where you want to preview the file in
DigiBase.
2 In a DigiBase browser, select the file you want
to preview.
3 Do one of the following:
• Click the Audio Files Conform to Session
Tempo button. It highlights when enabled.
• From the Browser menu, select Audio Files
Conform to Session Tempo.
• Right-click the file you want to preview and
select Audio Files Conform to Session
Tempo from the pop-up menu.
4 Click the Preview button in the browser and
the file plays at the session tempo.
Preview in Context
Pro Tools lets you preview audio files in Digi-
Base browsers while playing back a Pro Tools
session. Tick-based audio files (those with
tempo detected Elastic Audio analysis, as well as
REX and ACID files) can play back in tempo,
and at the corresponding bar and beat location,
with session playback. Tick-based audio files au-
dition at the session tempo when the Audio
Files Conform to Session Tempo option is en-
abled.
Control-click (Windows) or Command-
click (Mac) the Preview button to toggle
Auto-Preview mode on and off.
DigiBase Preview button, Auto-Preview enabled

Pro Tools Reference Guide230
Reserve Voices for Preview in Context
(Pro Tools HD Only)
Preview in context (previewing audio files in
DigiBase during session playback) uses disk
voices for playback. The number of voices re-
quired depends on the channel width of the se-
lected Audition Paths on the Output page of the
I/O Setup window. For example, if a stereo audi-
tion path selected in the I/O Setup requires 2
voices for preview in context, whereas a 5.1 au-
dition path requires 6 voices. If one or more
voices are not available for preview in context
because they are in use by disk tracks (or routing
for RTAS processing), the Preview button in
DigiBase browsers will be unavailable during
session playback.
Pro Tools provides an option to reserve voices
for preview in context. The number of reserved
voices is determined by the channel width of
the selected Audition Paths in the I/O Setup.
Voices reserved for preview in context are un-
available for disk tracks.
To reserve for voices for preview in context:
1 Choose Setup > Preferences.
2 Select the Operation tab.
3 Enable the Reserve Voices For Preview In Con-
text option.
4 Click OK to close the Preferences dialog.
Linking and Relinking Files
A Pro Tools session is made up of references, or
links, to audio files and other session media. Au-
dio and video files must be stored on suitable
Performance volumes and be properly linked in
order to be playable in the session.
The following types of files are not playable:
Transfer Files Files that are stored on volumes
not suitable for playback, such as network vol-
umes or CD-ROMs.
Missing Files Files that cannot be found where
the session expects them, either because they
have been moved, or because they are stored on
volumes that are not currently mounted (offline
volumes).
The process of reacquiring missing files is re-
ferred to as relinking. Relinking can involve cer-
tain sub-tasks, depending on the situation.
• Transfer files must first be copied to a suitable
Performance volume. The session is then
relinked to the copies on the Performance vol-
umes instead of the original Transfer files.
• Volumes may be searched for missing files
and, when the files are found, Pro Tools
relinks the session to the file's new location.
• Files that reside on offline volumes must first
have their volumes mounted (brought online)
before they can be relinked.
Deselect the Spacebar Toggles File Preview
option in the Browser menu to be able to
start and stop session playback with the
spacebar without starting and stopping au-
ditioning in the browser. Use Control+P
(Windows) or Command+P (Mac) to start
and stop preview in the front-most browser
during session playback.
DigiBase Pro Catalogs have unique linking
characteristics. See “Relinking and Aliases
in Catalogs” on page 238.

Chapter 13: DigiBase 231
Choosing When to Relink
Pro Tools lets you relink files while opening a
session or after a session is already open, as fol-
lows:
Relinking when opening a session ensures
that the session opens with all media playable.
Automatic and manual relinking can be per-
formed. See “Opening a Session with Missing
Files” on page 232.
Relinking later (after a session is already open)
is the fastest way to open the session, but all
missing items remain offline and unplayable.
When items are needed, go to the Project
browser to relink offline items. See “Missing
Files in an Open Session” on page 233.
Forcing a Relink
If you cannot relink to the original file, you can
force a relink to another file. See “Force Relink-
ing Files” on page 237.
Transfer Files
Unlike missing files, Transfer files are files that
have been found but which reside on volumes
unsuitable for playback, such as CD-ROMs or
network drives. These volumes appear as Trans-
fer volumes in the Workspace browser.
Opening a Session with Transfer Files
If a session finds files on a volume unsuitable for
playback, a dialog appears prompting you to
copy them to a suitable volume.
To copy Transfer files found when opening a
session, do one of the following:
Click Yes to open the Copy and Relink dialog.
– or –
Click No to open the session with all Transfer
files offline. When opened, the session’s Project
browser indicates Transfer files with a “T” in
their Status column.
Transfer Files in an Open Session
To make Transfer files playable in the current
session:
1 Choose Window > Project.
2 Double click the Audio Files folder to display
all of the audio files.
3 Choose Select Transfer Files from the Browser
menu.
4 Choose Copy and Relink from the Browser
menu.
5 Specify a location for the copied files on a
valid Performance volume and click OK.
6 Repeat for video and fade files, as necessary.
Copy and Relink
The Copy and Relink command is a file manage-
ment option in the Project browser and in
DigiBase Pro Catalogs.
Copy and Relink provides a convenient way to
copy files and relink the session or Catalog to
the copies rather than to the originals.
To copy items to a new location and Relink to the
copies:
1 Do one of the following:
• Choose Window > Project.
– or –
• Open the appropriate Catalog.
2 Select the items you want to copy and relink.
You can select any media files (online, offline,
and Transfer files).
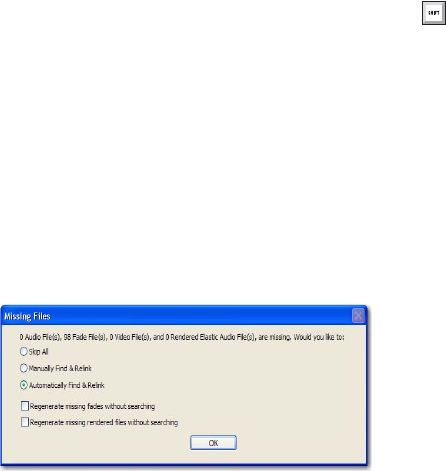
Pro Tools Reference Guide232
3 Choose Copy and Relink Selected from the
Browser menu.
4 If the default location for the copies (the ses-
sion’s Audio Files folder) is not appropriate,
specify a different location and click Choose.
5 The files are copied to the chosen destination
and the session or Catalog is relinked in the
background.
Missing Files
Files are missing if they are not found in the
same location as when the session was last
saved. This could be because you moved the files
or the session folder, or because the files are on
a volume that is not currently mounted.
Opening a Session with Missing Files
To open a session with missing files:
1 When you open a session, Pro Tools opens the
session with all available media, then shows you
how many files are missing (if any) and asks
how you want to proceed. (If told that files are
unsuitable for playback, see “Transfer Files” on
page 231.)
2 Select one of the following:
• Skip All. You can also select Skip All by
pressing Control+A (Windows) or Com-
mand+A (Mac).
• Manually Find Relink. You can also select
Manually Find Relink by pressing Con-
trol+M (Windows) or Command+M (Mac).
• Automatically Find Relink. You can also se-
lect Automatically Find Relink by pressing
Control+A (Windows) or Command+A
(Mac).
3 Select Regenerate Missing Fades Without
Searching to exclude fade files from the relink
process and regenerate them instead.
4 Select Regenerate Missing Rendered Files
Without Searching to exclude Rendered Elastic
Audio files from the relink process and regener-
ate them instead.
5 Click OK
Skip All
Use the Skip All option to skip all missing files
and fades. This option is the fastest way to open
the session utilizing all available media. Missing
files are offline in the session, and shown in the
Region List and the Project browser with italic
text. Missing fades are regenerated if the con-
tributing files are online.
Manually Find and Relink
This option opens the Relink window. Use the
Relink window to search, compare, verify, and
relink missing files. Files can be relinked one at a
time or in batches. See “Relink Window” on
page 234 for more information.
Missing files warning when opening a session
You can also select Regenerate Missing
Fades by pressing Control+R (Windows) or
Command+R (Mac).

Chapter 13: DigiBase 233
Automatically Find and Relink
Automatically Find and Relink is the simplest
method to relink sessions to required media, but
it provides no way to compare files or verify
links. This option cannot be undone. The Auto-
matically Find and Relink option does the fol-
lowing:
• Searches all Performance volumes for all miss-
ing items with matching Name, ID, Format,
and Length.
• Links missing items to the first matches
found.
• Commits links for all items possible, in the
background.
• If some files remain unlinked, the Task win-
dow opens and a failed task appears in the
Paused Tasks pane. Double-click the Task icon
to open the Relink window and manually find
and relink files.
Regenerate Missing Fades Without Searching
Enable this option to exclude fades files from
the relinking process (fades are recalculated in-
stead). This option is available when Automati-
cally Find and Relink or Manually Find and
Relink is enabled.
Regenerate Missing Rendered Files Without
Searching
Enable this option to exclude Elastic Audio Ren-
dered files from the relinking process (rendered
files are recalculated instead). This option is
available when Automatically Find and Relink
or Manually Find and Relink is enabled.
Missing Files in an Open Session
You can open the Project browser to select and
relink some or all missing files.
To relink missing (offline) files in an open session:
1 Choose Window > Project.
2 Choose Relink Offline from the Browser menu
to open the Relink window.
3 Configure the Relink window as needed. See
“Relink Window” on page 234 for more infor-
mation.
To relink selected files in an open session:
1 Choose Window > Project.
2 Select the files to relink. Any file can be
relinked, even if it is not an offline file.
3 Choose Relink Selected from the Browser
menu.
4 Configure the Relink window as needed. See
“Relink Window” on page 234 for more infor-
mation.
Links, once committed, cannot be undone
once the session is saved. The only way to
revert to previous links is to close the session
without saving changes.
Even if all of the missing files are later
found and relinked, the failed task remains
in the Task Window. Like all failed tasks, it
must be manually selected and deleted. See
“About Failed Tasks” on page 250.
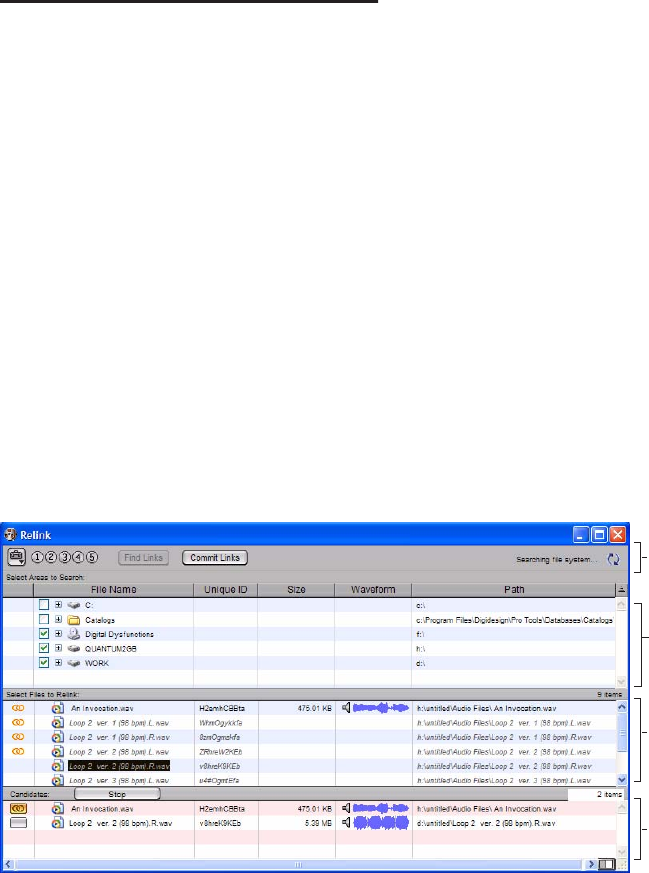
Pro Tools Reference Guide234
Relink Window
The Relink window provides tools for all relink-
ing tasks (see Figure 12 on page 234).
The Relink window includes the following:
Menu and Toolbar Includes the Relink menu,
View Presets, and relinking buttons. Status is
displayed at the far right.
Areas to Search Selects volumes on which to
search for missing items.
Files to Relink Lists missing files.
Candidates Lists files that match the “relinking
criteria” for a particular missing file. The Link
icon next to the candidate can be toggled on or
off to link (or unlink) the proposed candidate to
the selected missing file.
The Relink window controls each phase of the
relinking process.
The following sections explain how to:
• Open the Relink window.
• Select volumes and folders to search (and not
search).
• Search, compare, and link individual files to
one or more candidates.
• Quickly match and link missing files in
batches, with the ability to adjust the criteria
by which files are matched.
• Toggle links on or off for any candidate.
• Compare and review links before committing.
Figure 12. Main elements in the Relink window
Files to Relink
Candidates
Areas to Search
Menu and toolbar
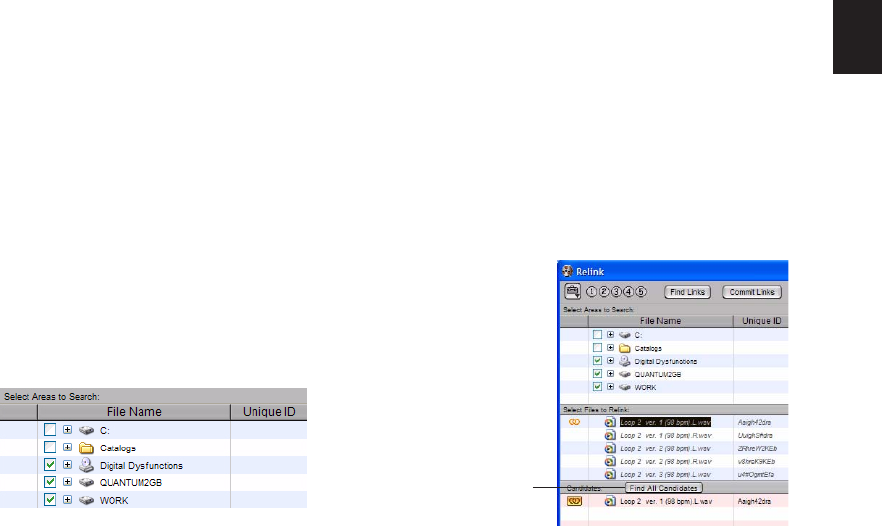
Chapter 13: DigiBase 235
Opening the Relink Window
When opening a session with missing files, use
the Manually Find and Relink option to open
the Relink window.
The Relink window can also be accessed after a
session is open.
To access the Relink window from an open
session:
1 Choose Window > Project.
2 Choose Relink Offline from the Browser
menu.
Selecting Areas to Search
Selecting volumes and folders in the Areas to
Search pane lets you focus the search for missing
files. This can speed the relinking process by
limiting the number of volumes or folders to
search. In addition, excluding folders from a
search for missing files also lets you redirect a
session or Catalog to a more appropriate copy of
an item.
To select volumes or folders to include or exclude
in a search:
1 Configure the Areas to Search pane to display
the appropriate volume, Catalog, or folder.
2 Click each item’s Search column to toggle it to
be included or excluded in the search. A check
next to an item indicates it will be included in
the search. All folders within items are also
checked.
Single and Multi-File Relinking
The Relink window can be used to relink one
missing file at a time, or to relink missing files in
batches.
Relinking Individual Missing Files
In some situations, individual files must be
relinked one at a time in order to relink the ses-
sion to the correct file. This is necessary if mul-
tiple copies of a media file are online, or when-
ever you want the most control and flexibility
over the relinking process.
To relink a missing file:
1 Configure the Areas to Search pane.
2 Select one item in the Files to Relink list.
3 Click Find All Candidates.
Volumes selected to include in the search
Relinking a selected missing file
Find All Candidates
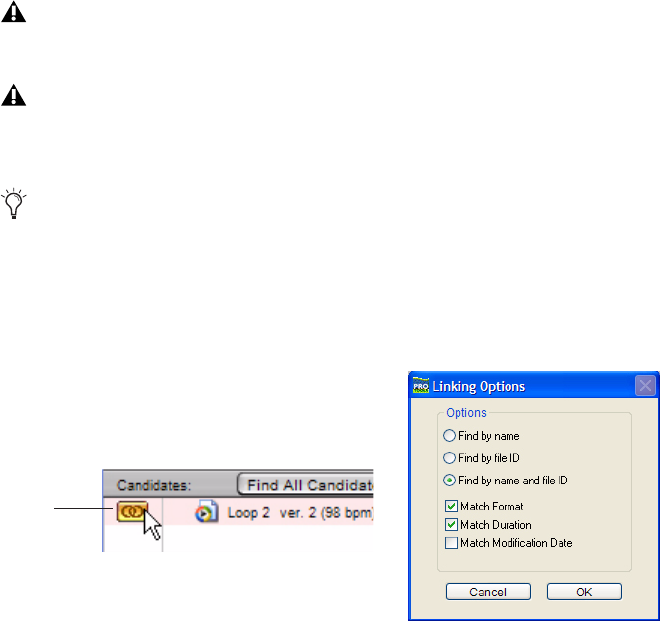
Pro Tools Reference Guide236
Pro Tools searches the selected volumes and dis-
plays all files that match File Name and/or
Unique ID in the Candidates list. Link icons in-
dicate if a Candidate is already linked.
4 Click the Link icon next to the appropriate
Candidate to which you want to relink. A Link
icon next to an item indicates it will be relinked
to the item currently selected in the Files to
Relink list.
5 Click the Link icon next to other Candidates,
if you want to relink to additional missing files.
6 Click the Commit Links button.
Relinking Multiple Missing Files
Using the Find Links button, multiple files can
be matched and linked in one procedure.
To relink multiple missing files:
1 Configure Areas to Search. (See “Selecting Ar-
eas to Search” on page 235.)
2 Select one or more items in the Files to Relink
list. The Find Links button becomes available.
3 Click Find Links.
4 Configure criteria for relinking, if necessary, in
the Linking Options dialog:
• By default, Find by Name and ID is en-
abled.
• To add additional matching criteria, select
an option from the Linking Options dialog.
(Modification Date is only applicable to
Catalogs.)
• If Match Duration is enabled, Pro Tools
only selects files of the same length or
greater.
5 Click OK to continue (or click Cancel to re-
turn to the Relink window).
Pro Tools begins to search for an acceptable can-
didate for the first missing file (the first item se-
lected in the Files to Relink list). A link icon ap-
pears next to each file as Pro Tools finds and
links the first acceptable candidate to the miss-
OMF video clips can only be relinked to a
session if they have matching Unique IDs.
QuickTime video clips can only be relinked
to a session by file name and file format
(QuickTime).
To control matching and linking criteria
when relinking an individual missing file,
use the Find Links button. Find Links is ex-
plained in “Relinking Multiple Missing
Files” on page 236.
Indication of Linked status
Link
icon
Linking options
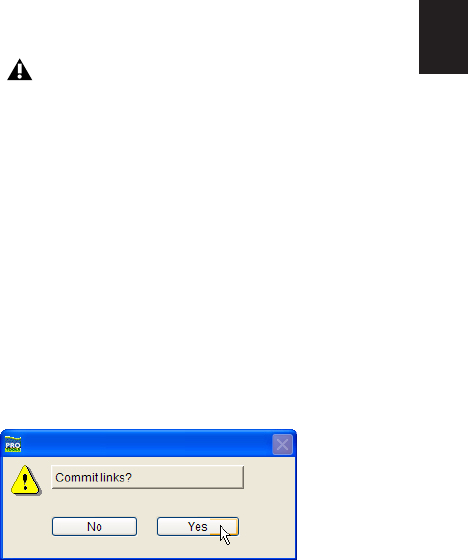
Chapter 13: DigiBase 237
ing file. The Link Path column shows the loca-
tion of the selected candidate. Pro Tools contin-
ues searching, matching, and linking for each
missing file in the Files to Relink list.
6 To view the selected candidate for a particular
missing file, select to highlight the missing file.
That file’s candidate appears in the Candidates
pane, where you can view its file information
and waveform.
7 If, after the Find Links process is finished, you
are not satisfied with the candidate selected for a
particular missing file, you can click Find All
Candidates for the selected file (see “Relinking
Individual Missing Files” on page 235).
Force Relinking Files
If you want to link to a substitute file (for exam-
ple, if you know a file has the same audio or
video but does not have a matching File Name
or Unique ID), you can force a relink.
To force relink an audio file, its file format
(WAV, SD2, AIFF, or MXF), sample rate and bit
depth must match those of the original file.
To force relink a video file, its format (Quick-
Time, Avid, MXF, or OMF) and frame rate must
match those of the original file.
To force a relink:
1 Choose Window > Project.
2 Choose Relink Offline from the Browser
menu.
3 In the Relink window, select one item in the
Files to Relink list.
4 Navigate in the Areas to Search pane to locate
the file you want to relink.
5 Drag the file to the Candidates pane in the
Relink window.
6 Click the Link icon next to the file you
dragged to the Candidates pane.
7 Click the Commit Links button.
Committing Links
There is no Undo for relinking. Once a file has
been relinked and the session saved, the session
always remembers the new link (the original
link is forgotten). For this reason, no files are ac-
tually relinked until you click Commit Links.
To commit links:
1 Use the Relink window to link files as ex-
plained in “Single and Multi-File Relinking” on
page 235.
2 Click Commit. You are asked to verify com-
mitting links.
3 Do one of the following:
• Click Yes to commit links.
– or –
• Click No to stop without affecting files.
The Automatically Find and Relink option
is the only relinking process that does not
ask you to verify links before they are com-
mitted. If you use this option and are unsat-
isfied with the results, close the session
without saving to prevent the new links
from being committed.
Commit Links dialog
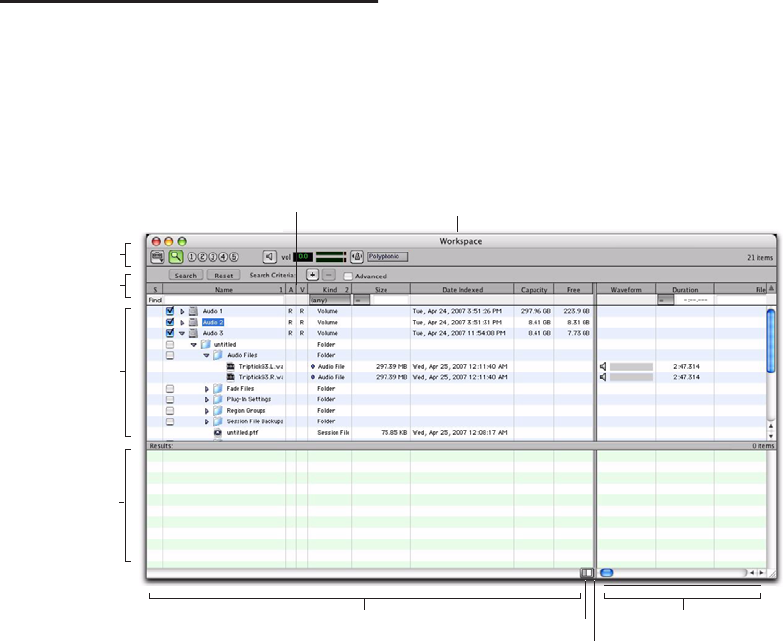
Pro Tools Reference Guide238
Relinking and Aliases in Catalogs
DigiBase Pro Catalogs are collections of “aliases”
or “shortcuts” to actual files. If the files are
moved, an item in a Catalog can become un-
linked from the file it references.
To relink a Catalog:
1 Open the Catalog.
2 Select items to relink.
3 Choose Relink Selected from the Browser
menu in that Catalog window.
Workspace Browser
The Workspace browser is your starting point
for managing media (see Figure 13 on
page 238). The Workspace browser is always
available while Pro Tools is running, even if no
session is open.
Only the Workspace browser lets you do the fol-
lowing:
• Designate volumes as Performance vol-
umes (Playback or Record volumes) or as
Transfer volumes.
• View and access all available volumes
• Unmount volumes
• Create, view, and access Catalogs.
• Search multiple volumes and Catalogs si-
multaneously.
The Workspace browser is similar to your com-
puter’s desktop, in that it shows all of the
mounted local and network volumes. The
Workspace browser has all the common browser
elements, including an Items list, View presets,
and access to all files. In addition, the Work-
space browser provides drive allocation settings,
access to catalogs, and the ability to search mul-
tiple volumes and catalogs simultaneously.
Figure 13. Workspace browser, with the Search pane displayed
Browser name
Menu and toolbar
Items List
Search Results
Volume designators
Fixed pane Scrolling pane
Pane split
Show/Hide
Search pane

Chapter 13: DigiBase 239
Opening the Workspace Browser
To open the Workspace browser:
1 Launch Pro Tools.
2 Choose Window > Workspace.
Audio and Video Volume
Designators
The Workspace includes columns for Audio and
Video Volume designators. These two columns
display, and let you designate, whether a vol-
ume is a Record, Playback, or Transfer volume.
R (Record and Playback) Able to play audio and
video files already on the volume, and record
new files.
P (Playback Only) Can play audio and video files
already on the volume, but cannot have new
files recorded to it.
T (Transfer) Can only be used for storing, trans-
ferring, or auditioning files, and cannot be used
for recording or playback.
To change a volume designator:
1 Open the Workspace browser.
2 Click and select the appropriate Audio and/or
Video designator for the volume.
Mounting and Unmounting
Volumes
The Workspace browser lets you unmount vol-
umes while Pro Tools is running, and shows
newly mounted volumes as they come online.
To unmount a volume from within the Workspace
browser:
1 Select a volume in the Workspace browser.
2 Choose Unmount Volumes from the Browser
menu.
The Workspace browser closes the database file
for the selected online volume and removes it
from the Workspace browser, and unmounts
the disk from the computer.
Press Alt+; (Windows) or Option+; (Mac) to
open the Workspace browser.
Designating a volume in the Workspace
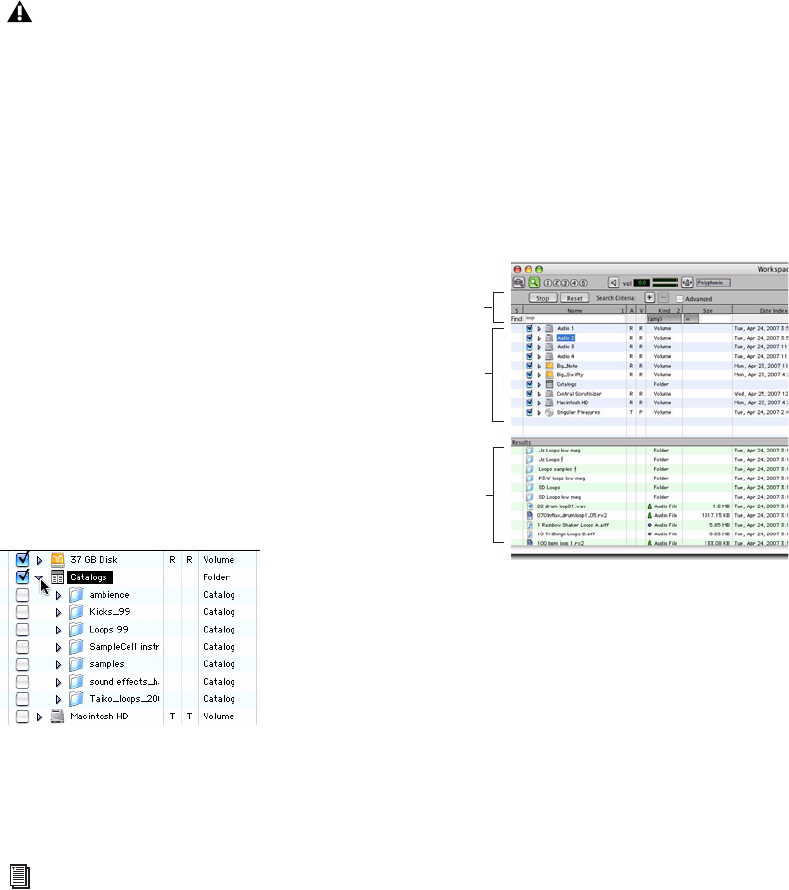
Pro Tools Reference Guide240
Pro Tools alerts you if the volume being un-
mounted has files referenced in the Timeline.
Catalogs in the Workspace
Browser
(DigiBase Pro Only)
With DigiBase Pro, the Workspace browser pro-
vides special tools for creating and accessing
Catalogs. Once Catalogs have been created, they
appear in the Workspace browser in the Cata-
logs folder.
To show all Catalogs:
1 Open the Workspace browser.
2 Click the Expand/Collapse icon next to the
Catalogs folder.
To open an individual Catalog:
Double-clicking a catalog opens a Browser
window for that catalog.
Searching in the Workspace
Browser
The Workspace browser provides the most com-
prehensive DigiBase search capabilities. The
Workspace browser lets you perform searches
across a single volumes, multiple volumes, or
across any combination of volumes, folders, and
Catalogs. You select which volumes to include
in the search, and which to exclude. The Work-
space also provides a separate Search Results
pane to view, select and manage the results of
searches.
The Search Results pane lets you maintain the
results of searches, while still viewing and con-
figuring options for additional searches.
To search from the Workspace:
1 Choose Window > Workspace to open the
Workspace browser.
2 Click the Search icon to display the Work-
space Search pane.
3 Configure search criteria.
Always use the Unmount command in the
Workspace browser menu to unmount vol-
umes, or quit Pro Tools and then unmount
the volume. Do not use any other method to
unmount a volume while Pro Tools is run-
ning.
Viewing Catalogs in the Workspace.
For complete instructions on creating and
working with Catalogs, see “DigiBase Pro
Catalogs” on page 243.
Search and Search Results panes in the Workspace
Search
pane
Areas to
search
Search
results
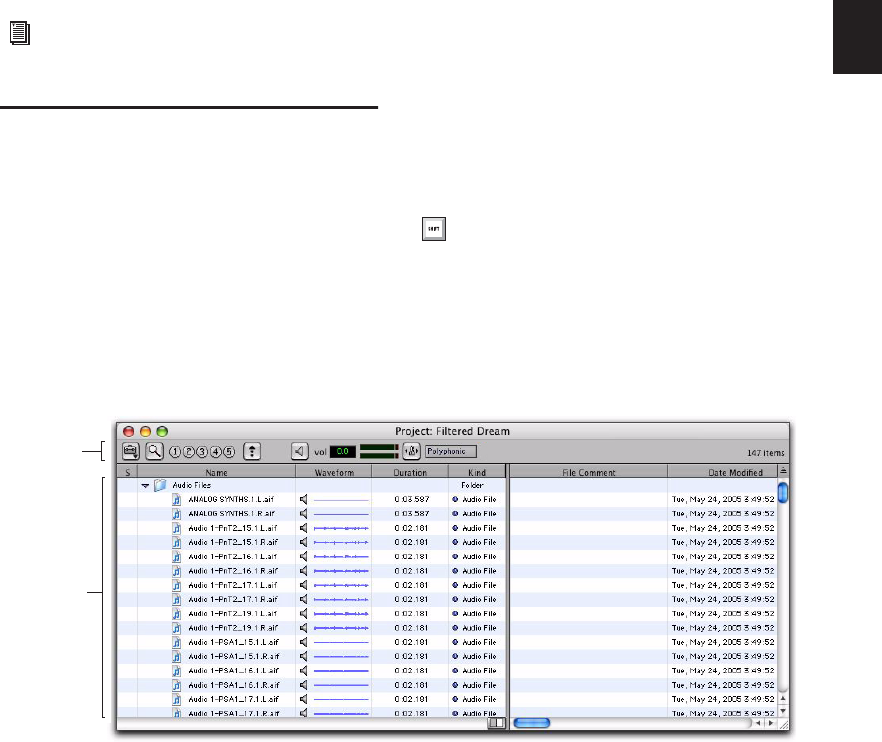
Chapter 13: DigiBase 241
4 Click next to each item in the Areas to Search
list to include or exclude volumes to be
searched. Checked items and their sub-folders
are included in the search. (The next time you
open a Search pane in the Workspace, these set-
tings remain in effect.)
5 Click Search.
6 The results of the search are shown in the
Search Results pane.
Project Browser
The Project browser displays and manages all
the files related to the current session, regardless
of what volume they reside on (see Figure 14 on
page 241).
The Project browser is similar to the Region List
in that it contains all files associated with a ses-
sion, with the added data, searching, and sort-
ing capabilities of Pro Tools browsers.
Unlike the Region List, however, individual re-
gions are not displayed in the Project browser
(in which only complete files are listed).
Use the Project browser and its Browser menu
commands to:
• View all media files associated with a ses-
sion
• Identify, select, and relink offline files
• Identify, select, copy, and relink Transfer
files
Opening the Project Browser
To open the Project browser:
1 Launch Pro Tools and open a session.
2 Choose Window > Project.
For more information on searching, see
“Searching Items” on page 220.
Press Alt+O (Windows) or Option+O (Mac)
to open the Workspace browser.
Figure 14. Project browser
Folders and
files
Browser menu
and toolbar

Pro Tools Reference Guide242
The Project browser displays the following:
Audio Files Folder Contains all of the audio files
currently referenced by the session, regardless of
where they are located.
Fade Files Folder Contains all of the fade files
referenced by the session, regardless of where
they are located.
Render Sources Folder Contains all files that
have been imported into the session, but are still
being converted, copied, or processed.
Video Files Folder Contains any video files refer-
enced by the session.
Each of the folder types in the Project browser
has an Expand/Collapse icon. Clicking the icon
shows or hides all of the files in the sub-group.
The folders displayed in the Project browser are
session-specific groupings of files, not physical
folders on disk.
Locating Parent FIles of Regions
The Project Browser can be set to automatically
highlight the parent file of any region selected
in the Pro Tools Region List.
To highlight the parent file of a selected region:
1 Select a region in the Region List. If the Region
List Selection Follows Track Selection preference
is enabled, you can select a region on a track.
2 From the Region List pop-up menu, select Se-
lect Parent in Project Browser.
About the Project Browser
No Drag and Drop to the Project
Browser
To import a file from another browser into the
current session, you must drag files to the Time-
line or Region List. You cannot import a file into
a session by dragging it to the Project browser.
(You can, however, spot files from the Project
browser into the current session using
drag/drop.)
Deleting Items in the Project Browser
Deleting items in the Workspace browser or in
Volume browsers deletes the files from disk.
Video and session files cannot be deleted in the
Project Browser.
Deleting an item from the Project browser lets
you remove items from the current session, or
delete them from disk (using the Pro Tools Clear
Regions dialog).
Copy and Relink Restrictions
In the Project Browser, the Copy and Relink
command (in the Browser menu) cannot be
used on session files, or on offline audio files.
Use the Relink window to first bring items on-
line. In addition, the Relink Selected command
cannot be used on session files.
Updating the Project Browser
The Project browser is automatically updated
whenever a file is added to or deleted from the
session, so it is always fully indexed and up to
date.
When the Select Parent in Project Browser
option is enabled, the Project browser auto-
matically highlights the parent file of any
file or region selected in the Region List. For instructions on searching, sorting, and
working with the Project Browser, see
“Project Browser” on page 241.
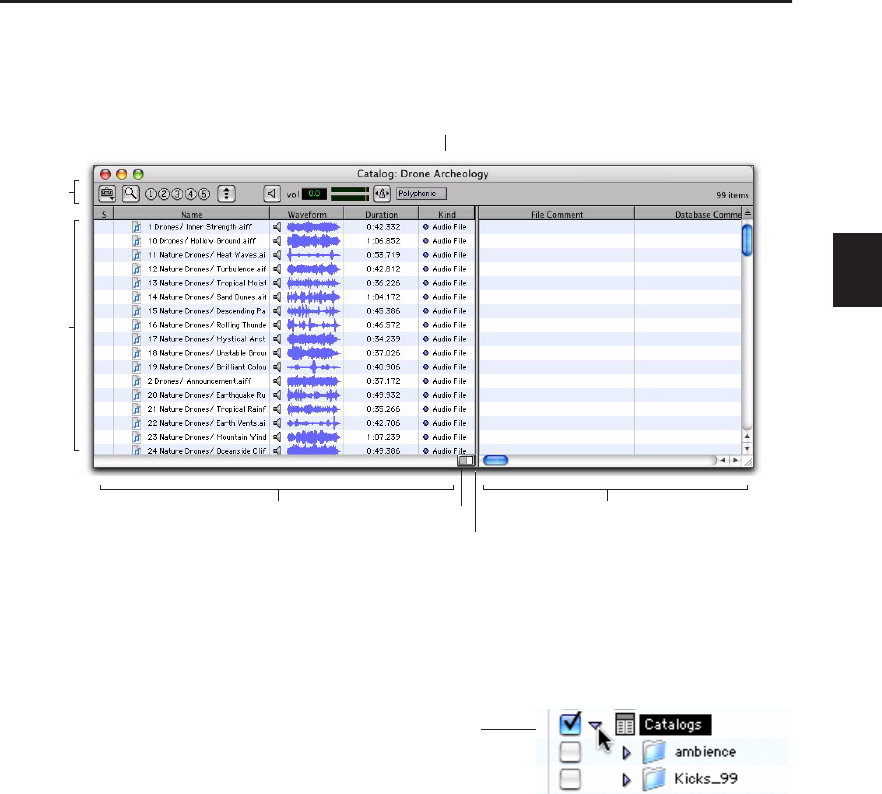
Chapter 13: DigiBase 243
DigiBase Pro Catalogs
(Pro Tools HD and Pro Tools LE with DV Toolkit 2 Only)
Catalogs are available with DigiBase Pro, which
is included with Pro Tools HD and Pro Tools LE
with DV Toolkit 2 (see Figure 15).
While Volume browsers are designed to be an
accurate representation of the file structure on a
given volume, Catalogs are similar to having a
Favorites folder, and serve as a way to collect
and organize frequently used items regardless of
where they are stored.
A Catalog is analogous to a folder full of aliases
or shortcuts. Placing a file in a Catalog does not
create a copy of the file, and does not change
where the file is stored. Rather, it stores a refer-
ence (or alias) to the file so that it can be found
and manipulated without having to search for
its physical location.
Opening a Catalog Browser
Catalogs are displayed in the Workspace
browser.
To open a Catalog browser:
1 Open the Workspace browser.
2 Click the Catalogs Expand/Collapse icon.
Figure 15. Catalog browser
Catalog name
Menu and
toolbar
Items List
Fixed pane Scrolling pane
Pane split
Show/Hide
Catalogs item in the Workspace
Catalogs

Pro Tools Reference Guide244
3 Do one of the following:
• Click the Expand/Collapse icon for the de-
sired Catalog to view its contents in the
Workspace.
– or –
• Double-click the Catalog name to open it
in its own browser window.
Clip Names in Catalogs
Clip Names are the names that appear in the
Timeline and Region List when a file is imported
into a session.
For most files, the Clip name is the same as the
file name. For OMF Files, the Clip Name is the
name that appears in the Avid bin.
Clip names can only be edited in a Catalog. Ed-
iting the Clip name does not affect the actual
file; however, if you add the same file to a new
Catalog, it retains its original Clip Name. When
you drag a file from a Catalog into a session, the
edited Clip Name is what appears in the Time-
line and Region List.
If the Clip Name is longer than 32 characters,
Pro Tools truncates the name automatically
when imported into the session.
Comments and Catalogs
Catalogs provide commands for managing OS 9
Finder comments, Database comments, and
Clip Names.
Database Comments in a Catalog are stored in
the Catalog database. Database Comments,
which can be up to 256 characters in length, are
searchable, cross-platform, and editable.
Copy OS 9 Finder Comment to Database Com-
ments Copies an item’s OS 9 Finder comments
to its Database comments.
Copy Database Comments to Clip Names Copies
an item’s Database comments to Clip Name.
Copy File Comments to Clip Names Copies an
item’s File Comments to Clip Name.
Creating Catalogs
Catalogs can be added to the Workspace as new,
empty Catalogs, or you can select items first and
then save a Catalog of all selected items.
To create a new, empty Catalog:
1 Open the Workspace browser.
2 Choose New Catalog from the browser menu.
3 Enter a unique name and click OK.
To catalog a selection of items:
1 Open any browser (including an existing Cat-
alog).
2 Select the items you want to include in the
new Catalog.
3 Choose Create Catalog from Selection from
the Browser menu.
A new, fully indexed Catalog database of the se-
lected items is created.
OS 9 Finder comments (from the OS 9 Get
Info window) are not supported in OS X Get
Info windows. Use the Copy OS 9 Finder
Comment to Database Comments com-
mand to utilize any OS 9 Finder comments
stored with your media.

Chapter 13: DigiBase 245
Creating Catalogs of Folders
To create a Catalog of an entire folder and all its
contents:
1 Open the Workspace browser, if not already
open.
2 Drag and drop a single folder onto the Catalog
icon in the Workspace browser.
Pro Tools first indexes the folder, then a fully in-
dexed Catalog is created, with the same name as
the dropped folder.
Renaming a Catalog
Catalogs can be renamed at any time.
To rename a Catalog:
1 Click the Catalog item in the Workspace
browser until its name highlights.
2 Enter a new name for the Catalog.
Modifying Catalogs
To add items to a Catalog, do one of the following:
Open the Catalog and drop new items from
another browser.
– or –
Click the main Catalogs icon in the Work-
space, to expand your view of all existing Cata-
logs, then drop items onto any Catalog.
To add a folder to a Catalog:
1 Open the Catalog.
2 Choose Create Folder from the Browser menu.
To delete items from a Catalog:
1 Select the items.
2 Press the Delete key, or choose Delete Selected
from the Browser menu. A warning dialog ap-
pears.
3 In the warning dialog, do one of the follow-
ing:
• Click Cancel to cancel the delete operation.
• Click Delete Files to delete aliases and asso-
ciated files from disk.
• Click Delete Aliases to delete only the
aliases and not the associated files.
This operation cannot be undone.
Consolidating Files with Catalogs
Catalogs are excellent tools for consolidating
files from a variety of sources.
For example, create a Catalog named “Thumps”
and fill it with sound effects from three different
volumes. You can then drag the Catalog from
the Workspace browser to another volume, and
a folder named “Thumps” is created on that vol-
ume. All of the files referenced by the Catalog
are automatically copied to the volume. Folders
and sub-folders, if any, and their contents are
included in the copy.
Delete Catalog warning dialog

Pro Tools Reference Guide246
Updating Catalogs
Since a Catalog database is not linked to any
particular volume, there is a limit to the abilities
of the Update Index command. When Update
Database for Selected is selected from the
Browser menu in a Catalog, Pro Tools searches
for the items represented by the aliases in the
Catalog and updates the following information:
Metadata Metadata for all files found online, in-
cluding File comments, are updated.
Database Comments Database Comments are
not updated, because they are unique to each
Catalog and are not part of the file’s metadata.
Relinking Catalog Items
If files are ever missing from a Catalog, use the
Relink window to locate, copy, and relink files.
For more information, see “Linking and Relink-
ing Files” on page 230.
Deleting Catalogs
To delete a Catalog:
1 Select one or more Catalogs in the Workspace
browser.
2 Press the Delete key, or choose Delete Selected
from the Browser menu. A warning dialog ap-
pears.
3 In the warning dialog, do one of the follow-
ing:
• Click Cancel to cancel the delete operation.
• Click Delete Files to delete aliases and asso-
ciated files from disk.
• Click Delete Aliases to delete only the
aliases and not the associated files.
This operation cannot be undone.
Importing Catalog Items
You can import online and offline items from
Catalogs into the current session.
Importing Online Items from a Catalog
Dragging and dropping audio files to the
Pro Tools Region List and Timeline is identical
to dragging and dropping from Volume brows-
ers.
Importing Offline Items from a Catalog
With Catalogs, it is possible to search and im-
port files that are offline. For example, if you
have a music cue that you know you want to
use, but it resides on a CD-ROM or other un-
mounted volume, you can spot the file from a
Catalog to the session Timeline, and it is auto-
matically imported into the session when the
volume is mounted.
The first step is to add files to a Catalog (files
must be online to be added to a Catalog). Once
added to a Catalog, if the items are taken offline
they are listed in italicized text.
Offline files can be dropped from a Catalog to
the Timeline just like online files. When you
drop the files, a dialog appears asking if you
want to relink the files or skip relinking. Click
Skip All to load all the items as offline files (in
the Timeline, their regions appear in light blue).
In the Project browser, these items are listed in
the Render Sources folder, to ensure that
Pro Tools remembers that these items need to be
relinked.
For more information, see “Importing Files
with Drag and Drop” on page 256.

Chapter 13: DigiBase 247
Whenever the volume containing the offline
items is mounted, Pro Tools automatically starts
to import the files, in the background. This is
true even if you have saved the session, quit,
and relaunched Pro Tools.
Once the items are completely imported, they
appear as online items in the Timeline, Region
List, and in the Project browser.
If the offline items match the session sample
rate, bit depth, and file format, no conversion is
necessary. As long as the volume is playable, the
items become playable in the session as soon as
the volume is mounted.
If the volume is unsuitable for playback, you are
informed that some items must be copied to
suitable volumes first.
Task Window
For maximum performance and flexibility with
file management tasks, Pro Tools provides the
Task window (see Figure 16 on page 248). File
management with Pro Tools involves nearly
constant creating, copying, converting, process-
ing, searching, and indexing files. These tasks
occur in the background, letting you continue
recording, editing, and mixing without delay.
The Task window lets you monitor, pause and
cancel ongoing tasks including file copying,
fade creation and indexing.
Opening the Task Window
To open the Task Window:
In Pro Tools, choose Window > Task Manager.
Task Window Messages
If any background task cannot be successfully
completed, the Task window comes to the fore-
ground to notify you. The incomplete task is
shown in the Paused Tasks pane of the Task win-
dow.
Because the Task window is a floating window,
it does not interrupt current work. This allows
you to continue recording and editing, and
postpone file management until a more conve-
nient time.
Task Window Views
The Task window provides a maximized and
minimized view.
To toggle between maximized and minimized
views:
Click the View Toggle icon in the top of the
Task window.
For more information on Transfer files,
missing files, and relinking, see “Relink
Window” on page 234.
You cannot drag and drop items to or from
the Task window.
Press Alt+’ (Windows) or Option+’ (Mac) to
open the Workspace browser.
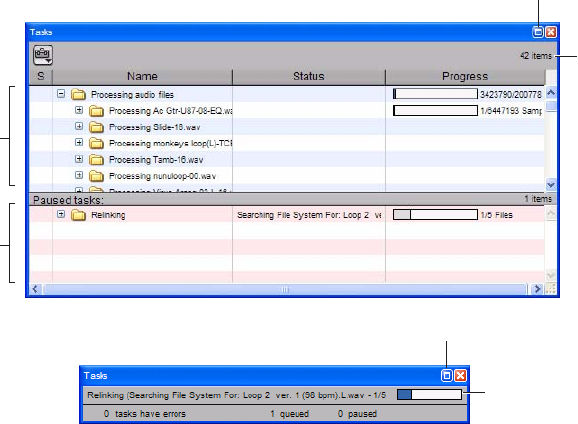
Pro Tools Reference Guide248
Task Window Tools, Columns, and
Displays
The Task window menu provides commands for
Task window operations.
The following data is always displayed in the
Task window (both views):
Item Name Indicates affected item, whether a
file, database, or other supported item.
Status Action being taken (for example, Copy-
ing, Processing, Indexing and so on).
Progress Indicates the progress of the task or its
sub-tasks, which include assessing the size of the
items and the estimated amount of time neces-
sary to complete the task.
Progress Indicator Indicates processing is ongo-
ing.
Quantification Shows percentage of progress of
the current task.
Active Tasks Pane
The upper Active Tasks pane shows the tasks
that are in progress or waiting to start. The cur-
rently executing task is at the top. Tasks in this
pane will be processed.
As tasks complete, they disappear from the
queue.
Any task that fails to complete successfully is
moved to the Paused Tasks pane (see below).
The Status column displays a description of the
failure.
Figure 16. Task window, maximum view (upper) and minimized view (lower)
Status
Paused Tasks
Active Tasks
Status
View Toggle
(Maximize)
View Toggle
(Minimize)

Chapter 13: DigiBase 249
Paused Tasks Pane
The Paused Tasks pane is displayed below the
Active Tasks pane, and is separated by a move-
able horizontal divider. Tasks listed in this pane
will not be processed until they are moved back
to the Active Tasks pane.
Pausing and Cancelling Tasks
The Task window lets you pause, resume, and
cancel tasks.
To pause a task:
Drag the appropriate task from the Active
Tasks pane to the Paused Tasks pane.
The task moves to the top of the Paused Tasks
pane.
To pause all tasks:
Choose Pause All from the Task window
menu.
To resume a task:
Drag a task from the Paused Tasks pane to the
Active Tasks pane. The task returns to its previ-
ous position in the queue.
To resume all paused tasks:
Select Resume All from the Task window
menu. All tasks in the Paused Tasks pane (except
failed tasks) are moved to the Active Tasks pane.
To cancel a task:
1 Highlight any task in either pane of the Task
window.
2 Press Delete to remove it from the Task win-
dow.
To cancel all tasks:
1 Select any single task in either pane.
2 Press Control-A (Windows) or Command-A
(Mac) to select all the tasks in that pane.
3 Press Delete.
This command cannot be undone.
About Cancelling Tasks
Some tasks involve one or more sub-tasks. Delet-
ing a task cannot undo sub-tasks already com-
pleted. For example, if importing and convert-
ing multiple files appears as a single task,
deleting that task before it is completed stops
the import and conversion process, but files al-
ready converted and imported remain on disk. If
you want to cancel a task involving multiple
sub-tasks, you can instead let the process com-
plete and then use Undo to completely undo all
sub-tasks, as available.
Closing Sessions with Pending
Tasks
If you close a session or quit Pro Tools while
tasks are still pending (either in the Active or
Paused Tasks panes of the Task window)
Pro Tools asks if you want to cancel, or complete
the pending tasks. You can choose to open the
Task window and wait for pending tasks to com-
plete, cancel the pending tasks, or quit. If you
quit, some tasks are cancelled. Tasks that in-
volve file copies are remembered and restarted
when you relaunch Pro Tools.
Pro Tools Reference Guide250
About Failed Tasks
The Paused Tasks pane shows any tasks that
could not be completed. The reason for the fail-
ure is shown in the Status column.
Failed Tasks cannot be resumed, and must be de-
leted manually from the Paused Tasks pane.
If Automatically Find and Relink was unable to
find all files in a session, a failed task is placed in
the Paused Tasks pane of the Task window. It re-
mains there unless you manually remove it
from the Task window (even if you have since
found the files through a subsequent search and
relink task).
Task Prioritization
A task that is in progress may be interrupted by
a task of higher priority. When this happens,
the partially completed task is halted and re-
scheduled later in the queue, and shown with a
progress bar in the Active Tasks pane. When the
higher priority task is finished the first incom-
plete task in the queue resumes.
Tips for Using the Task Window
Pause Tasks During Playback
A global preference Pause during Playback is
provided in the Task window Browser menu.
When enabled, Active Tasks are paused when-
ever Pro Tools is playing (or recording). This set-
ting is especially useful when working on slower
CPUs, or whenever you want to minimize sys-
tem load for maximum playback and recording
performance. This Preference maintains its set-
ting until the next time it is changed.
Stored Tasks
Any task that imports files into a session is
stored with a session when it is closed, and re-
sumes when the session is re-opened.
For example, if you Import Tracks with Copy
Media selected, then save and quit before the
copy completes, the copy tasks resume when
the session is reopened.
Grouped Tasks
Some tasks consist of many smaller tasks. For in-
stance, Copy and Relink may require hundreds
of individual files to be copied. To help manage
these tasks, they are grouped under the originat-
ing command. So in the example of a Copy and
Relink command, one Copy task would appear
with an Expand/Collapse icon in the Task win-
dow. Clicking the icon shows each of the indi-
vidual sub-tasks.
If there is more than one grouped task in the
queue, all of the sub-tasks for the first group
must be completed before the sub-tasks of the
second group can be processed.
If the session is saved and closed while several of
these group tasks are in the queue, and if those
tasks are the type that can be interrupted and
saved when closing the session, all of the tasks
reappear as part of the same group when the ses-
sion is reopened.

Chapter 14: Importing and Exporting Session Data 251
Chapter 14: Importing and Exporting
Session Data
Pro Tools lets you import and export a variety of
data into and out of a session, including audio
and MIDI files, region groups, video files, track
playlists, I/O configurations, and signal routing
configurations.
You can import individual audio and MIDI files
into a session, or import entire audio or MIDI
tracks, along with all of their attributes, from
another session. Additionally, with Pro Tools
HD, you have the option of importing any com-
bination of track attributes from another ses-
sion, such as a track’s audio or MIDI playlists,
signal routing, plug-ins, or automation (see “Im-
porting Session Data” on page 266).
Importing and Exporting to
and from a Session
Importing
Pro Tools lets you import audio, video, MIDI, re-
gion groups, or session files into the current
Pro Tools session by:
• Dragging and dropping from:
• A DigiBase browser
• Windows Explorer or the Mac Finder
• Using the File menu Import commands:
• Session Data
• Audio
• MIDI
• Video
• Region Groups
Session data, audio files and regions can be im-
ported to existing tracks, new tracks, the Track
List, or the Region List in a Pro Tools session.
For information on importing and exporting
video files, see Chapter 43, “Working with
Video in Pro Tools”
Pro Tools Reference Guide252
Exporting
Pro Tools lets you export audio, video, MIDI, re-
gion groups, and session data by:
• Using the Send Via DigiDelivery command
• Using the Send to Sibelius command (MIDI
only)
• Using the File menu Export commands:
• Selected Tracks as New AAF/OMF
• MIDI
• Session Info As Text
• Using the Tracks Right-click pop-up menu:
• Send To Sibelius command
• Export MIDI command
• Using the Region List pop-up menu:
• Export Region Definitions command
• Export Regions as Files command
• Export Region Groups command
Audio Conversion on Import
Depending on the properties of the audio files
you are importing, you can add, copy, or con-
vert the files:
When files are added to a Pro Tools session,
they remain at their current hard drive location
and are not moved or copied. The session refer-
ences the original files where ever they are on
your system.
When files are copied into the session, the
original files remain where ever they are on your
system and are copied to the session’s Audio
Files folder and are then added to the session.
The session references the copied files, not the
original files.
When files are converted into the session, the
original files remain where ever they are on your
system and are copied to the session’s Audio
Files folder and converted to the session’s audio
file format, sample rate, and bit depth. The ses-
sion references the converted files, not the orig-
inal files.
Files That Can Be Added to a Session without
Conversion
Mono and split stereo (or split multichannel)
audio files that are of the same audio file format,
sample rate, and bit depth of the session can be
added to the session without conversion and
with or without copying the files to the session’s
Audio Files folder.
Files That Must Be Converted on Import
Pro Tools automatically converts files that don’t
match the session’s audio file type, sample rate,
or bit depth. Audio files that don’t match the
session audio file type, sample rate, and bit
depth must be converted on import. Pro Tools
also splits interleaved audio files into multiple
mono files.
If region definitions are present in an audio file,
you can convert and import the audio for a re-
gion without importing the entire parent audio
file using the Import Audio command.
You can enable the Automatically Copy
Files on Import option in the Processing
Preferences page to be sure to always copy
files to the session’s Audio Files folder when
importing audio by drag and drop.
Pro Tools 7.x does not support audio file
names that contain certain ASCII charac-
ters (see “Opening a Session that Contains
Audio File Names with Illegal Characters”
on page 287).

Chapter 14: Importing and Exporting Session Data 253
Supported Audio File Formats
Audio files of the following types can be im-
ported into Pro Tools sessions:
• AIFF
• WAV or BWF (.WAV)
• SD II
• SD I
• MP3
• MXF audio
• Sound Resource (AIFL—Mac only)
• WMA (Windows Media—Windows only)
• QuickTime (Mac only)
• AAC audio (including audio with AAC,
Mp4, and M4a file extensions)
• ReCycle (REX 1 and 2) files
• ACID files
Sample Rate Conversion Quality
The Sample Rate Conversion Quality deter-
mines the quality of sample rate conversion
used when converting and importing audio into
a session. It can also applied when exporting
files at different sample rate and when bouncing
to disk. There are five possible settings, ranging
from Low (lowest quality) to Tweak Head (high-
est quality). The higher the quality, and the
larger the conversion, the longer it will take.
The Sample Rate Conversion Quality options
are available in the Import Audio, the Import
Session Data, the Export Regions as Files, and
the Bounce to Disk dialogs. In each case, the
Sample Rate Conversion Quality setting is local
to that specific dialog. The Sample Rate Conver-
sion Quality preference only applies to conver-
sion on import by drag and drop.
To set the sample rate conversion quality for
importing audio by drag and drop:
1 Choose Setup > Preferences and click the
Processing tab.
2 From the Sample Rate Conversion Quality
pop-up menu, select a quality setting. For most
applications, the Good or Better setting will
yield very good results.
3 Click OK.
Bit Depth Conversion and Dithering
When importing audio at a lower bit depth than
the session, Pro Tools converts the file to match
the session bit depth by adding empty bits. For
example, when importing a 16-bit file into a 24-
bit session, Pro Tools converts the file to 24-bit.
When importing audio at a higher bit depth
than the session, Pro Tools automatically ap-
plies a preset, noise-shaped dither and converts
the file to the session bit depth. For example,
when importing a 24-bit file into a 16-bit ses-
sion, dither is applied automatically and the file
is converted to 16-bit.
Pro Tools cannot import protected AAC or
MP4 files with the .M4p file extension.
These files are protected under the rules of
digital rights management.
Sample Rate Conversion Quality preference
The Import Audio, Import Session Data,
and Bounce To Disk dialogs provide local
controls for sample rate conversion quality.
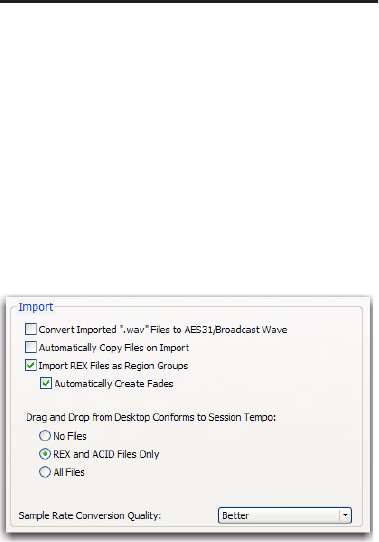
Pro Tools Reference Guide254
Importing Interleaved Files
When using the Import Audio command, inter-
leaved stereo files are automatically imported to
stereo tracks.
Split stereo (dual mono) audio files can be auto-
matically imported to stereo tracks. Split stereo
audio files must have the channel identifiers
“.L” and “.R” in their names (for example, file-
name.L and filename.R), and the files must be the
same length. In Windows, or in Mac/PC Com-
patibility mode, these files will have a 3-letter
file extension appended after the “.L” or “.R”
channel identifier.
Pro Tools also lets you import multichannel in-
terleaved files of any supported file type.
Import Options and
Preferences
Pro Tools provides several options and prefer-
ences that affect audio import. Configure
Pro Tools to match your most common work-
flows. For example, if you frequently work by
importing REX files for loop-based composition,
you can configure Pro Tools to always import
REX files to conform to tempo and create new
tick-based Elastic Audio tracks.
Convert Imported “WAV” Files To AES31/Broad-
castWave When selected, this option applies to
all newly imported WAV files, making them
compliant with the AES31/EBU Broadcast stan-
dard.
Automatically Copy Files on Import When se-
lected, all audio files that are imported by drag-
ging and dropping are copied to the current ses-
sion’s Audio Files folder, regardless of whether
the files need to be converted to the current ses-
sion’s file type, bit depth or sample rate. Addi-
tionally, when selected, the Import Session Data
dialog defaults to “Copy from Source Media.”
The Automatically Copy Files on Import prefer-
ence does not affect the Import Audio com-
mand.
Import REX Files as Region Groups When se-
lected, REX flies are imported as region groups,
all the underlying slices are imported as individ-
ual regions contained within the region group.
When this option is not selected, importing
REX files into a session converts them to the ses-
sion’s audio file format, the individual slices are
consolidated, and the slice information is used
for Elastic Audio analysis. These files remain
tick-based after import and conversion.
Automatically Create Fades When selected,
crossfades are applied automatically to the
sliced regions within region groups created by
importing REX files. If the Import REX Files as
Region Groups option is not selected, the Auto-
matically Create Fades option does not apply.
To change the default fade settings for REX files,
click the REX button in the Default Fade Set-
tings section on the Editing Preferences page
(see “Fades Editing Preference” on page 256).
Import options in the Processing Preferences page

Chapter 14: Importing and Exporting Session Data 255
Drag and Drop From Desktop Conforms to
Session Tempo
The Drag and Drop From Desktop Conforms to
Session Tempo options determine whether or
not REX, ACID, and all other audio file formats
dragged and dropped from Windows Explorer
or Mac Finder are imported as tick-based Elastic
Audio and conformed to the session tempo.
None When enabled, all audio files, including
REX and ACID files, are not conformed to the
session tempo when imported by drag and drop
from Windows Explorer or the Mac Finder. They
are imported as sample-based files and con-
verted to the sessions audio file format.
REX and ACID Files Only When enabled, only
REX and ACID files are conformed to the session
tempo when imported by drag and drop from
Windows Explorer or the Mac Finder. REX files
are imported either as tick-based Elastic Audio
or, if the Import REX Files as Region Groups op-
tion is enabled, as tick-based region groups.
All Files When enabled, all audio files are im-
ported as tick-based Elastic Audio and conform
to the session tempo.
Sample Rate Conversion Quality
The Sample Rate Conversion Quality preference
determines the quality of sample rate conver-
sion used when converting and importing audio
into a session by drag and drop. Sample rate
conversion is used in a variety of Pro Tools pro-
cesses including converting and importing au-
dio files of different formats into a session, and
bouncing and saving tracks to a different sample
rate or bit depth. The higher the quality of sam-
ple rate conversion you choose, the longer
Pro Tools will take to process the audio file.
Elastic Audio Options
The Elastic Audio preferences determine which
Elastic Audio plug-in is used for preview and im-
port, and whether or not new tracks are created
with Elastic Audio enabled using the selected
default plug-in.
Default Plug-in Lets you select any Real-Time
Elastic Audio plug-in as the default plug-in for
previewing and importing Elastic Audio. The se-
lected Default Elastic Audio plug-in is also used
when new tracks are created with Elastic Audio
enabled. The Elastic Audio Plug-in selector in
DigiBase browsers inherits the selected Default
Plug-in. Likewise, changing the selected plug-in
in DigiBase browsers updates the selected De-
fault Plug-in in the Processing preferences.
Default Input Gain Lets you attenuate the signal
input to Elastic Audio plug-ins by 0 to –6 dB for
preview and import. If you experience clipping
due to Elastic Audio processing during preview
or after import, you may want to set the Default
Input Gain to slightly attenuate the audio signal
input for Elastic Audio processing. This prefer-
ence also applies to any audio imported to an
Elastic Audio–enabled track.
If you commit any regions on a track (by dis-
abling Elastic Audio on the track) that were im-
ported with Input Gain, their region-based In
put Gain is reset to 0.
Processing Preferences, Elastic Audio
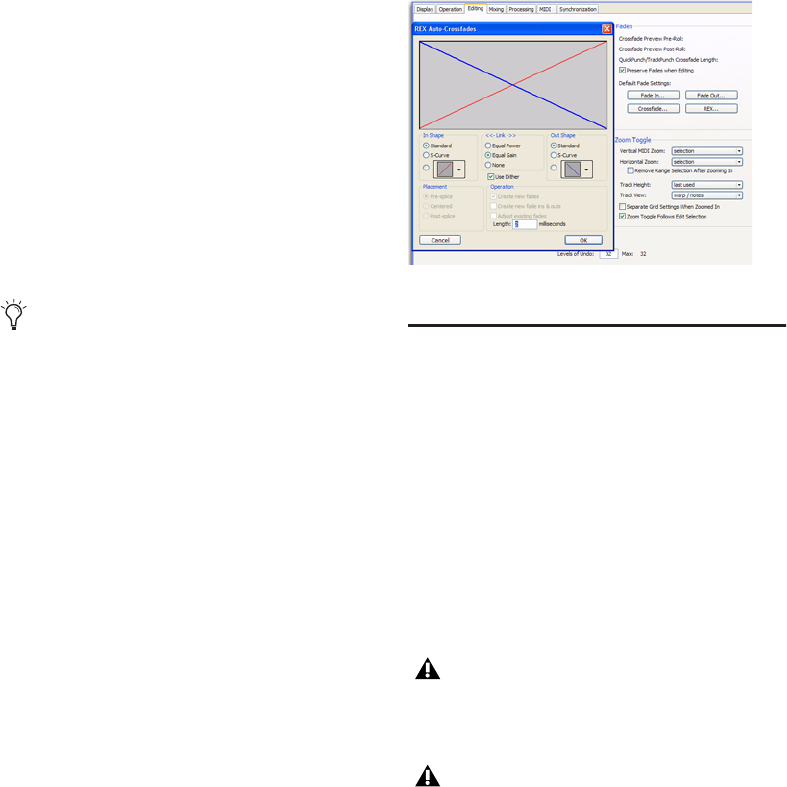
Pro Tools Reference Guide256
The Elastic Properties window inherits the De-
fault Input Gain preference. To apply further re-
gion-based Input Gain for Elastic Audio process-
ing, select the region and adjust the Input Gain
setting in the Elastic Properties window (see
“Elastic Properties Window” on page 522).
Enable Elastic Audio on New Tracks When se-
lected, new tracks are created with Elastic Audio
enabled. The selected Default Plug-in is used.
When importing audio to new tracks, new
tracks are created with Elastic Audio enabled if
this option is enabled.
Tracks Preference
When the New Tracks Default To Tick Timebase
is enabled, all new tracks default to ticks. This
includes importing audio to new tracks. When
deselected, audio, Auxiliary Input, Master Fader,
and VCA (Pro Tools HD only) tracks default to
samples. MIDI and Instrument tracks always de-
fault to ticks.
Fades Editing Preference
The Default Fades for REX files in the Editing
preferences lets you select the default envelope
shape for fades and crossfades between regions
(“slices”) in imported REX files. Fades are only
applied to imported REX files if the Import REX
Files as Region Groups option and the Automat-
ically Create Fades option are both enabled on
the Processing Preferences Page.
Importing Files with Drag and
Drop
Pro Tools lets you import audio, MIDI, video,
and session files by dragging and dropping files
from a DigiBase browser, Windows Explorer or
Mac Finder to the Pro Tools application icon,
the session Timeline, a track, the Track List, or
the Region List.
Figure 17 on page 257 illustrates some of the op-
tions available to import files using drag and
drop from DigiBase browsers.
If the Enable Elastic Audio on New Tracks
option is selected, you may want to also se-
lect the New Tracks Default to Tick Time-
base option in the Editing Preferences page.
REX Auto-Crossfades preference and dialog
Importing does not always convert or copy
audio files. See “Audio Conversion on Im-
port” on page 252.
Importing using drag and drop does not nec-
essarily bring the Edit window to the fore-
ground. For example, dragging and drop-
ping a file from a browser into a track leaves
the source browser in the foreground (not
the Edit window). Always verify the active,
foreground window or browser before con-
tinuing.
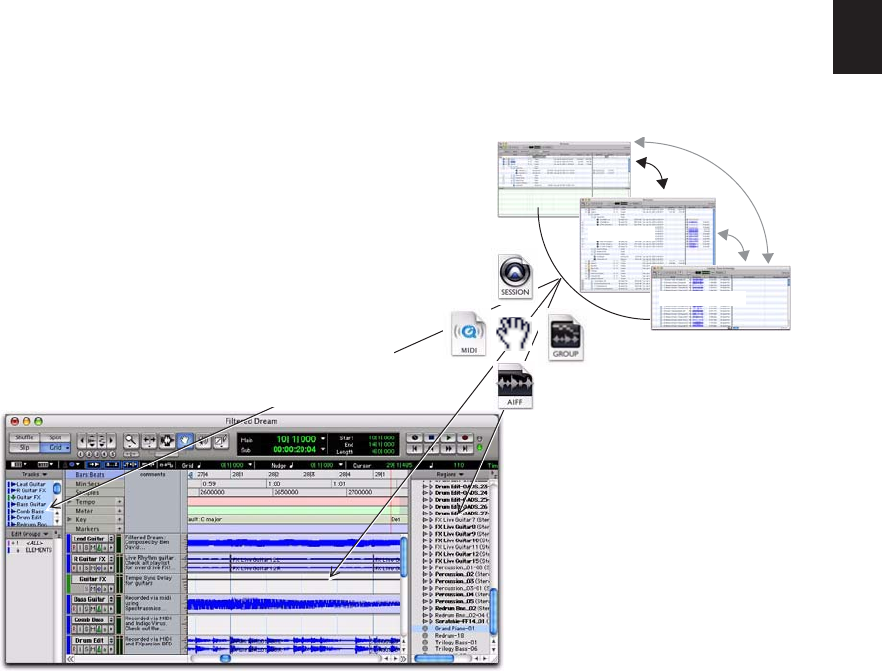
Chapter 14: Importing and Exporting Session Data 257
To import files into the Region List:
1 Select audio, video, MIDI, region group, REX,
or ACID files in a DigiBase browser, or Windows
Explorer, or Mac Finder.
2 Drag the selected files onto the Region List.
To import files into an existing track:
1 Select the files you want to import in a Digi-
Base browser, or Windows Explorer, or Mac
Finder.
2 Drag the selected file onto an existing, com-
patible track at the desired location. The file is
imported and placed where it was dropped.
To import files as new tracks:
1 Select the files you want to import in a Digi-
Base browser, or Windows Explorer, or Mac
Finder.
2 Do any of the following:
• Shift-drag files and drop anywhere in the
Edit window.
• Drop files to the Track List.
• Drop files to empty space in the Edit win-
dow, below or between tracks.
Figure 17. Importing from browsers by drag and drop
Volumes
Catalogs
Drop files in the
Region List to import
Drop media or session files
to existing tracks, or to the
Track List to add as new tracks
Volumes
Workspace
Pro Tools Reference Guide258
To import and spot files into a track:
1 Enable Spot mode.
2 Select the files you want to import in a Digi-
Base browser, or Windows Explorer, or Mac
Finder.
3 Drag the files onto an existing, compatible
track. The Spot dialog appears.
4 Enter the appropriate time code location
(where you want to spot the imported file).
To import and spot an audio file by its Waveform in
DigiBase browsers:
1 In a DigiBase browser, Control-click (Win-
dows) or Command-click (Mac) the file’s Wave-
form display at the approximate reference point
you want to use for placement in a track.
2 While continuing to press Control (Win-
dows), or Command (Mac), drag the waveform
onto an existing audio track (the source audio
file and the destination audio track must have
the same number of channels).
Snapping to Head and Tail
To import and snap to head:
Start-drag (Windows) or Control-drag (Mac) a
file onto a track.
To snap to head and copy the file to the session
Audio files folder:
Alt-Start-drag (Windows) or Option-Control-
drag (Mac) a file onto a track.
To snap to tail:
Control-Start-drag (Windows) or Command-
Control-drag (Mac) a file onto a track.
To snap to tail and copy the file to the session
Audio Files folder:
Control-Alt-Start-drag (Windows) or Com-
mand-Option-Control-drag (Mac) a file onto a
track.
Elastic Audio on Import
When importing any audio file by drag and
drop to an Elastic Audio–enabled track, the au-
dio file is imported and analyzed (if not already
analyzed). If the imported audio file is tick-
based, it is conformed to tempo using the track’s
Elastic Audio plug-in. If it is a sample-based au-
dio file, such as a single drum hit or short sound
effect, it maintains its original duration. Longer
audio files with no detectable tempo also re-
main sample-based.
You can also import audio by drag and drop to
create new tick-based Elastic Audio–enabled
tracks.
When importing tick-based audio by drag and
drop from DigiBase browsers to the Track List or
empty space in the Edit window, Pro Tools cre-
ates a new tick-based, Elastic Audio–enabled
track using the default Elastic Audio plug-in se-
lected in the Processing Preferences page (see
“Elastic Audio Options” on page 255).
If you are importing an audio file by drag and
drop from Windows Explorer or Mac Finder to
the Track List or to empty space in the Edit win-
dow, files are imported as sample-based or as
tick-based Elastic Audio depending on the Drag
and Drop from Desktop Conforms to Session
Tempo preference (see “Drag and Drop From
Desktop Conforms to Session Tempo” on
page 255).
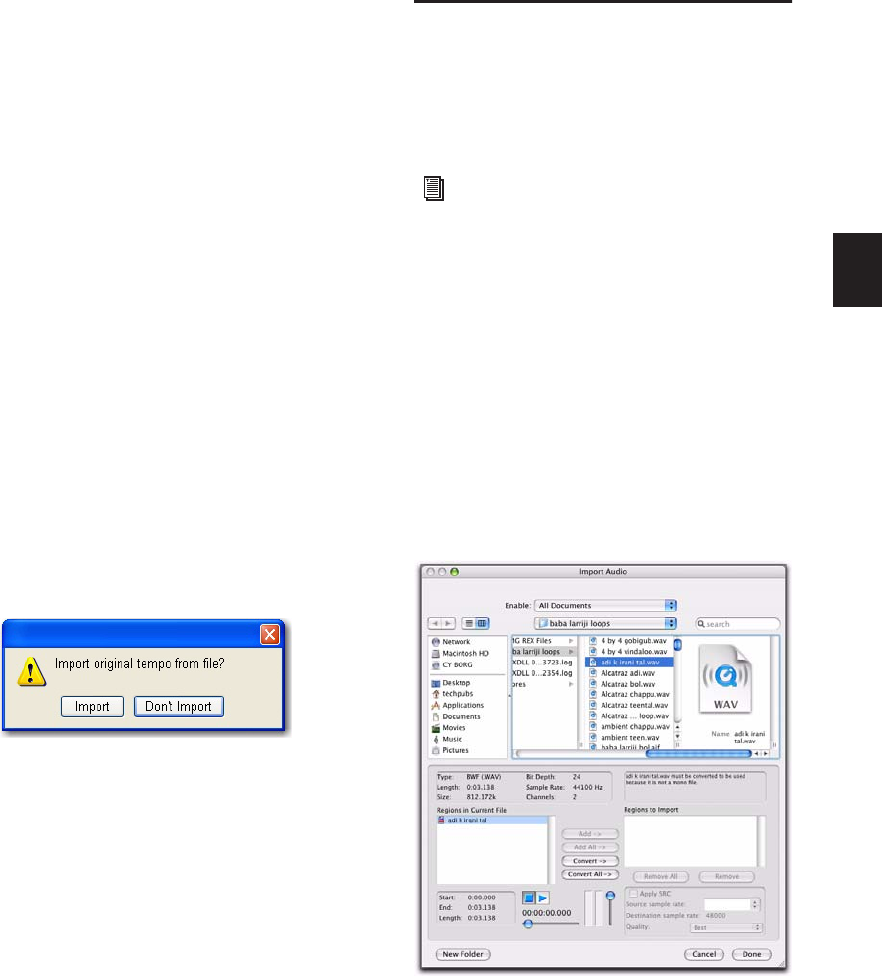
Chapter 14: Importing and Exporting Session Data 259
Importing Elastic Audio from DigiBase
to the Region List
With the Audio Files Conform to Session Tempo
option enabled, dragging and dropping tick-
based audio from DigiBase browsers to the Re-
gion List (or to the Track List), creates two sepa-
rate regions in the Region List. The first is a sam-
ple-based whole file region and the second is the
tick-based copy of the same region.
Importing Tempo from Tick-Based Audio
If there are no tracks in the session, and you im-
port a tick-based audio file to the Region List,
Track List, empty space in the Edit window, you
are prompted to either import the tempo from
the file or use the default session tempo. To keep
the default session tempo, and have the loop
conform to the session tempo, click Don’t Im-
port.
If the session already contains at least one track
(regardless of track type), you are not prompted
to import the tempo from the file and the file is
conformed to the session tempo.
Importing Audio Files and
Regions Using the Import
Audio Command
The Import Audio command lets you import au-
dio files or regions into your Pro Tools session.
To import audio files or regions into a session
using the Import Audio command:
1 Choose File > Import > Audio.
2 In the Import Audio dialog, locate and select
an audio file to display its properties and associ-
ated regions.
You can choose to display only a certain file
type (such as AIFF) by selecting the type from
the Show pop-up menu. To display all sup-
ported file types, select All Documents from the
Show pop-up menu.
Import Original Tempo From File
To import entire tracks from other sessions,
see “Importing Session Data” on page 266.
Figure 18. Import Audio dialog
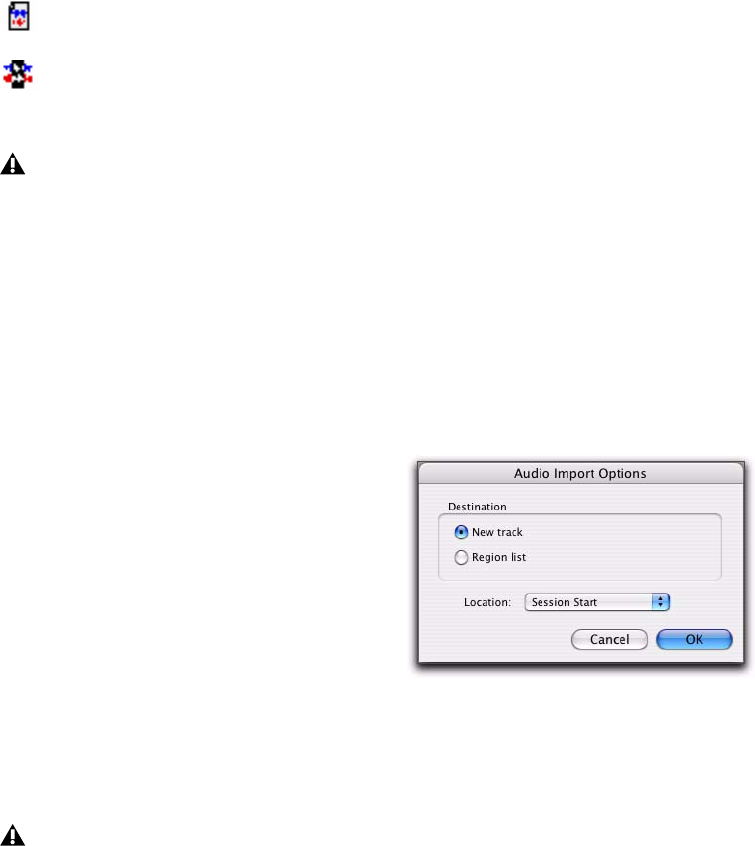
Pro Tools Reference Guide260
In the import list, audio files are distinguished
from regions by their icons.
3 To preview a selected file or region before you
import it, click the Play and Stop buttons in the
Import Audio dialog.
Adjust the preview volume with the vertical
slider. To navigate to a particular location in the
file, use the horizontal slider under the Play and
Stop buttons.
The audition output path defaults to channels
1–2. For Pro Tools systems with more than 2
channels of output, the audition path can be
changed in the I/O Setup (see “Audition Paths”
on page 67).
4 Do any of the following:
• To place a file or region in the Import list,
select the file and click Add or Convert.
• To import all files and regions in the cur-
rent directory, click Add All or Convert All.
• To remove a file or region from the Import
list, select it and click Remove.
• To remove all files and regions, click Re-
move All.
5 When you have added all audio files and re-
gions to the Import list, you can apply sample
rate conversion by doing the following:
• Enable Apply SRC.
• Specify the Source Sample Rate either by
typing a number, or by selecting a sample
rate from the pop-up menu.
• Select the sample rate conversion quality
from the Quality pop-up menu. This set-
ting overrides the Sample Rate Conversion
Quality setting in the Processing Prefer-
ences page.
6 Click Done.
7 If you are copying or converting files, choose
a location for the new files. Choose a folder on a
valid audio drive, such as the Audio Files folder
for the current session.
8 In the Audio Import Options dialog, choose
where the imported files will go in the session:
New Track Each audio file is imported into its
own individual track and into the Region List.
When importing audio into a track, you can also
choose the location in the track where the audio
file will begin (such as Session Start).
Region List Audio files are imported into the Re-
gion List without creating a new track. Imported
audio files appear in the Region List and can
then be dragged into an audio track.
File and Region icons in the Import Audio dialog
On Mac, Sound Resource files must have
the “.SFIL” extension to be imported by
Pro Tools.
Pro Tools lets you add files to a session that
are at a different sample rate than your ses-
sion. In the comments field of the Import
Audio dialog, a warning is posted that these
files will play back at the wrong speed and
pitch if they are not converted.
Audio File icon
Audio Region icon
Audio Import Options dialog
Chapter 14: Importing and Exporting Session Data 261
9 If you chose to create a new track, choose a lo-
cation for the imported file in the track:
Session Start Places the file or region at the start
of the session.
Song Start Aligns the beginning of the file or re-
gion to the Song Start point.
Selection Aligns the beginning of the file or re-
gion to the edit cursor or to the beginning of a
selection in the Timeline.
Spot Displays the Spot dialog, which lets you
spot the file or region to a precise location based
on any of the Time Scales.
10 Click OK.
Importing Audio from Audio
CDs
Pro Tools lets you import tracks from audio CDs
using the same methods that you use to import
audio files, as follows:
• Drag and drop CD audio from the CD
folder.
• Drag and drop files from DigiBase Browser.
• Use the Import Audio command.
Since the transfer is made in the digital domain,
there is no signal loss.
The sample rate for audio CDs is 44.1 kHz.
Therefore, if your session’s sample rate is set to
48 kHz or higher, Pro Tools will convert the
sample rate for the imported audio. Before im-
porting CD audio, set the Conversion Quality
preference accordingly. For more information,
see “Sample Rate Conversion Quality” on
page 253.
Before importing CD audio, make sure your
hard drive has enough space for the converted
audio files.
Importing ACID and REX Files
ACID files and REX 1 and 2 files are converted to
the session audio file type. Depending on the
preferences settings, ACID and REX files can be
imported as sample-based regions or as tick-
based Elastic Audio regions. For REX files only,
Pro Tools uses any slice data to create Event
markers with 100% confidence. ACID files are
analyzed for Elastic Audio events just like WAV
files, and so events are detected with varying de-
grees of confidence.
REX files can also be imported as tick-based re-
gion groups.
Importing CD audio with either drag and
drop method lets you continue working in
the session foreground (such as in the Mix
or Edit window), while the Task Manager
(Window > Task Manager) works in the
background (importing and converting the
audio until the import is completed). For
more information on the Task Manager, see
“Task Window” on page 247.
For information on Elastic Audio, see
Chapter 26, “Elastic Audio.”
For information on region groups, see “Re-
gion Groups” on page 675).
Pro Tools Reference Guide262
To import ACID and REX flies as sample-based
regions:
1 Choose Setup > Preferences and click the Pro-
cessing tab.
2 Disable the Import REX Files as Region Groups
option.
3 Select No Files as the Drag and Drop from
Desktop Conforms to Session Tempo preference.
4 Click OK to close the Preferences dialog.
5 When importing by drag and drop from Digi-
Base browsers, ensure that the Audio Files Con-
form to Session Tempo option is disabled.
6 Import the ACID and REX files you want by
drag and drop from a DigiBase browser or the
Desktop, or using the Import Audio command
(see “Importing Audio Files and Regions Using
the Import Audio Command” on page 259).
To import ACID and REX files as tick-based Elastic
Audio regions:
1 Choose Setup > Preferences and click the Pro-
cessing tab.
2 Disable the Import REX Files as Region Groups
option.
3 Select REX and ACID Files Only or All Files as
the Drag and Drop from Desktop Conforms to
Session Tempo preference.
4 Click OK to close the Preferences dialog.
5 Do one of the following:
• Import the REX files you want by drag and
drop from a DigiBase browser
• Import the REX files you want by drag and
drop from the Desktop.
• Use the Import Audio command (see “Im-
porting Audio Files and Regions Using the
Import Audio Command” on page 259).
To import REX files as tick-based region groups:
1 Choose Setup > Preferences and click the Pro-
cessing tab.
2 Select the Import REX Files as Region Groups
option.
3 If desired, enable the Automatically Create
Fades option (see “Automatic Fades for Im-
ported REX Files” on page 262).
4 Select REX and ACID Files Only or All Files as
the Drag and Drop from Desktop Conforms to
Session Tempo preference.
5 Click OK to close the Preferences dialog.
6 Do one of the following:
• Import the REX files you want by drag and
drop from a DigiBase browser
• Import the REX files you want by drag and
drop from the Desktop.
• Use the Import Audio command (see “Im-
porting Audio Files and Regions Using the
Import Audio Command” on page 259).
Automatic Fades for Imported REX Files
If the Import REX Files as Region Groups option
is enabled in the Processing Preferences page,
Pro Tools can automatically apply real-time
crossfades to the regions or “slices” in imported
REX format files.
To apply real-time crossfades to REX files:
1 Choose Setup > Preferences and click the Pro-
cessing tab.
2 Enable the Import REX Files as Region Groups
option is enabled.
3 Enable the Automatically Create Fades option.
4 In the Preferences dialog, click the Editing tab.
Chapter 14: Importing and Exporting Session Data 263
5 Under Default Fade Settings, click REX and
choose the shapes for the crossfades, and click
OK.
6 Click OK to close the Preferences dialog.
Importing Multichannel Audio
Files from a Field Recorder
Pro Tools lets you use any of its import methods
to import monophonic and polyphonic audio
files recorded by a field recorder. When you im-
port these types of files, they must be converted
to an audio format compatible with Pro Tools.
Importing Monophonic Audio Files
A monophonic audio file contains one mono
channel and relevant metadata from a single
multichannel recording.
When you import monophonic audio files that
were recorded simultaneously, they are con-
verted to multichannel regions and displayed
together in the Region List. Any metadata is also
imported with the files.
Importing Polyphonic Audio Files
A polyphonic audio file contains multiple mono
channels and relevant metadata recorded simul-
taneously in a multichannel recording.
When imported into Pro Tools, a polyphonic
audio file is divided into individual monopho-
nic audio files written to disk—one file for each
channel. Regions for each channel appear in the
playlist, and a multichannel region appears in
the Region List with the channels expandable
underneath. Any metadata is also imported
with the files.
Exporting Audio
Pro Tools supports exporting audio regions as
audio files, exporting left and right audio files as
stereo interleaved files, and exporting region in-
formation.
You can also export audio from Pro Tools by
bouncing or consolidating audio tracks. For
more information, see “Bounce to Disk” on
page 836 and “Consolidate Command” on
page 475.
Exporting a Region as a New
Audio File
You can export regions as audio files with the
Export Regions as Files command. Use this com-
mand if you intend to use a region in other ses-
sions (or other audio applications) without us-
ing its parent source file.
This command also provides a way to convert
regions to a different audio format, sample rate,
or bit depth.
Depending on your edits or tempo changes
after importing REX files, the fades can be
deleted and you will have to recreate them
manually.
For more information on importing files
from a field recorder, refer to the Field
Recorder Workflow Guide.
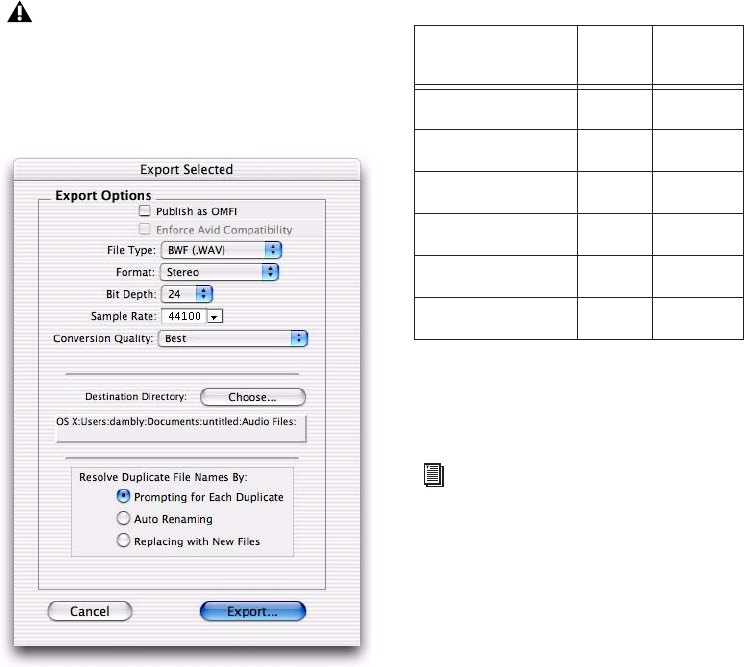
Pro Tools Reference Guide264
To export regions as new audio files:
1 In the Region List, select the regions you want
to export.
2 From the Region List pop-up menu, choose
Export Regions as Files. The Export Selected dia-
log appears.
3 In the Export Selected dialog, set the file type,
format, bit resolution, and sample rate. In addi-
tion, specify the Conversion Quality, and
choose the destination directory.
When you export regions to a lower bit depth,
Dither (with or without Noise Shaping) is ap-
plied as shown in Table 15.
The Dither setting used for any conversion is the
Digidesign Dither plug-in (with or without
Noise Shaping enabled, as noted in Table 15).
4 Select an option for how Pro Tools should re-
solve duplicate file names.
Prompting for Each Duplicate Prompts you for a
file name for any file that has the same name as
a file in your destination directory.
Auto Renaming Automatically changes the
name of any duplicate file by adding a number
at the end of the file name (such as file_01).
Replacing with New Files Replaces files with the
same name with the new files.
5 Once the Export Options are configured, click
Export to export the new audio files.
Warped regions (Elastic Audio) will be ex-
ported unwarped at their original duration.
Export Selected dialog
Table 15. Dither and Noise Shaping with Export
Selected dialog
Bit Depth Dither Noise
Shaping
24-bit to 24-bit No No
16-bit to 24-bit No No
24-bit to 16-bit Yes Yes
16-bit to 16-bit No No
24-bit to 8-bit Yes No
16-bit to 8-bit Yes No
For more information about using Dither,
see “Dither” on page 746.

Chapter 14: Importing and Exporting Session Data 265
Exporting Stereo or Multichannel
Interleaved Files
You can use the Export Regions as Files com-
mand to export audio regions to stereo or multi-
channel interleaved files for use in other appli-
cations. (Pro Tools cannot use interleaved files
directly in the Timeline—these must be con-
verted into multi-mono files.) For example, for
this to work with a stereo file, the selected re-
gions must have identical names with “.L” and
“.R” suffixes (for instance, vocals_01.L and
vocals_01.R). These regions appear as a stereo re-
gion in the Region List.
Pro Tools HD also lets you bounce multichannel
interleaved files of any supported file type.
To export regions as a stereo or multichannel
interleaved file:
1 Select the stereo or multichannel audio region
in the Region List or in the track playlist. If the
regions appear on mono tracks in the session,
select the two mono regions.
2 From the Region List pop-up menu, choose
Export Regions as Files.
3 In the Export Selected dialog, select “Stereo
Interleaved” in the Format pop-up menu. For
multichannel regions, the Stereo Interleaved op-
tion produces a multichannel interleaved file.
4 Configure any other output settings, then
click Export to export the new stereo interleaved
file.
Exporting Region Definitions
Pro Tools stores region definitions for audio files
within each session. If you want to use an audio
file’s regions in another session, or with another
application that supports them, you can export
the region information.
The Export Region Definitions command does
not export regions as audio files (unlike the Ex-
port Regions as Files command). Instead, it
stores pointers to the regions within the parent
source file.
To export region definitions for an audio file:
1 In the Region List, select any regions or region
groups for which you want to export defini-
tions. You do not have to select the parent file
audio region.
2 Choose Export Region Definitions from the
Region List pop-up menu.
3 Click Export.
If you plan to transfer Pro Tools session
data to another session, you should export
region definitions for sessions containing
multiple takes created with Loop Record.

Pro Tools Reference Guide266
Importing Session Data
You can import entire tracks from other
Pro Tools sessions into the current Pro Tools ses-
sion using the Import Session Data command or
drag and drop.
With Pro Tools LE, you can import tracks and
some general session data, but with Pro Tools
HD or Pro Tools LE with DV Toolkit 2, you can
select specific session data (such as automation
and routing) to import. You can also import
main playlist options—either replacing existing
options or overlaying elements onto existing
tracks.
For example, with Pro Tools HD or Pro Tools LE
with DV Toolkit 2, you can choose to import
only the track’s audio into your current
Pro Tools session. This is analogous to “chang-
ing the tape reel” in a traditional studio setup
with a tape machine and mixing console. Or,
you can choose to import all of a track’s mixer
settings without its audio, effectively importing
a channel strip and using it on a track in your
current session. By importing mixer settings for
all of the tracks in a session or session template,
you can reuse an entire Pro Tools mixer on all
the sessions in a project.
To import tracks or their attributes:
1 Open or create a new session.
2 Do one of the following:
• Choose File > Import > Session Data, select
the session to import data from, and click
Open.
– or –
• Drag the session file whose tracks or attributes
you want to import from a DigiBase browser,
Windows Explorer, or Mac Finder into empty
space in the Edit window or to the Track List.
3 If the Fader Gain of the sessions are different,
you will be prompted to keep or change Fader
Gain before the Session Data dialog opens.
4 In the Source Tracks section, select tracks to
import by clicking the pop-up menu to the right
of each track name and selecting Import As New
Track.
5 With Pro Tools HD or Pro Tools LE with
DV Toolkit 2, for each track you select, you can
choose to import it as a new track, or choose a
destination track from the corresponding pop-
up menu. Click Match Tracks to automatically
match source and destination tracks with the
same names.
6 With Pro Tools HD or Pro Tools LE with
DV Toolkit 2, select from among the Track Play-
list options to choose how you want to import
the source tracks.
To select multiple tracks, Alt-click (Win-
dows) or Opt-click (Mac) on any track pop-
up men and select Import As New Track.
If the current Pro Tools system does not
support surround mixing, surround tracks
are not displayed in the Source Track List.
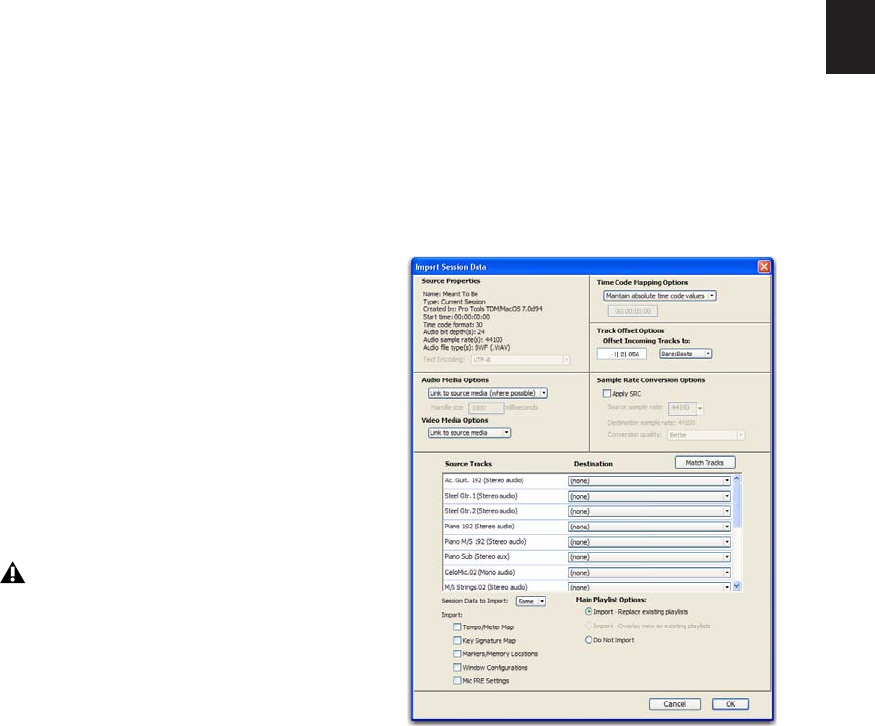
Chapter 14: Importing and Exporting Session Data 267
7 If applicable, choose options for how media
files should be imported from the Audio Media
Options and the Video Media Options pop-up
menus.
8 Choose the Time Code Mapping option for
imported data.
9 If the sample rates of the sessions are different,
select the sample rate for the source session from
the Source Sample Rate pop-up menu.
10 To import the meter and tempo maps from
the source session, select the Import
Tempo/Meter Map option.
11 To import key signatures from the source ses-
sion, select the Import Key Signature Map op-
tion.
12 To import Markers and Memory Locations
from the source session, select the Import
Marker/Memory Locations option.
13 With Pro Tools HD or Pro Tools LE with
DV Toolkit 2, select the Import Mix/Edit Groups
option to import any Mix or Edit Groups from
the source session.
14 With Pro Tools HD, select the Import Mic Pre
Settings option to import any Mic Pre settings
from the source session.
15 Click OK when you are finished.
16 If you chose to copy or consolidate media,
choose a location to place the media files.
Importing Grouped Playlists from Other
Sessions
You can import tracks that use Grouped Playlists
from another Pro Tools session, and the playlist
grouping function will remain intact for those
imported tracks. There is, however, a restriction
for importing from pre-Pro Tools 6.1 sessions:
After importing a partial set of grouped playlists
(such as tracks 1–7 of a 10-track group), you can-
not subsequently import tracks 8–10 and have
them “rejoin” the playlist group for tracks 1–7.
Import Session Data Dialog
The Import Session Data dialog lets you view the
properties of the source session, select which
tracks to import, and with Pro Tools HD, choose
which attributes of those tracks you want to im-
port into the current session.
Imported tracks are made inactive if their
source media is unavailable, or if the cur-
rent session does not contain an equivalent
output path.
Import Session Data dialog (Pro Tools HD)
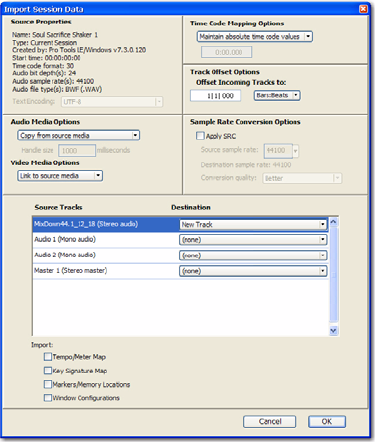
Pro Tools Reference Guide268
Source Properties
The Import Session Data dialog displays proper-
ties for the source session. These properties in-
clude source session name, session type, start
time of the session, audio bit depth, and sample
rate. For Pro Tools 5.1 or higher sessions, the
program that created the session and the ses-
sion’s audio file type are listed.
Text Encoding
Pro Tools allows entry and display of any lan-
guage characters supported in Unicode any-
where in the Pro Tools application. This lets you
use multiple languages in session names, and in
path names, file names and region names.
However, versions of Pro Tools 7.3.x and lower
does not support Unicode. When importing
data from sessions or OMF sequences created or
saved with older versions of Pro Tools, you may
need to identify the language encoding used in
the imported elements.
To choose the language encoding when importing
data from a legacy Pro Tools session:
1 Choose File > Import > Session Data.
2 Choose the language used in the legacy ses-
sion from the Text Encoding pop-up menu.
Audio Media Options
Refer to Source Media (Where Possible) This op-
tion lets you avoid duplicating audio files by re-
ferring to the original files when possible. If the
source files do not reside on supported playback
media (such as a CDs or DVDs), or if they re-
quire bit depth or sample rate conversion, the
source files are copied instead. This option al-
lows the current session to refer to files that do
not match the current session’s audio file for-
mat.
Copy from Source Media This option copies all
audio files related to the imported tracks from
the source media to a new specified location,
and converts the files to the current session’s au-
dio file format, bit depth, and sample rate if nec-
essary. This is useful if you are importing tracks
from a source such as CD or DVDs or shared
storage, and you want to place the audio files on
a different hard drive.
Consolidate from Source Media This option con-
solidates audio while copying it. This is useful if
you want to copy only the regions of the audio
files used in the source tracks, without copying
Import Session Data dialog (Pro Tools LE)

Chapter 14: Importing and Exporting Session Data 269
unused audio. This option copies and converts
consolidated audio to the current session’s au-
dio file format, bit depth, and sample rate if nec-
essary.
When you choose this option, you can also
choose the size of the handle (in milliseconds)
applied to consolidated audio. Handle is the
amount of the original audio file that is pre-
served before and after each region in case you
need to make any edits to the new regions.
Force to Target Session Format This option cop-
ies and converts any files that do not match the
current session’s file format, bit depth, and sam-
ple rate. Files that do match the current session’s
file type, bit depth and sample rate are referred
to directly and not copied.
Video Media Options
You can either choose to leave video media files
in their original locations or copy them to a new
location. This is useful if you are importing
tracks from a source such as CDs or DVDs or
shared storage, and you want to place video files
on a different drive.
Time Code Mapping Options
You can specify where the imported tracks are
placed in the current session. Times are indi-
cated in time code for Pro Tools|HD and
Pro Tools LE with DV Toolkit 2, and min-
utes:seconds for other Pro Tools LE systems.
From the Import Session Data dialog, the fol-
lowing Import Mapping Options are available:
Maintain Absolute Time Code Values This option
places tracks at the locations where they were lo-
cated in the source session. For example, if the
current session starts at 00:01:00:00, and the ses-
sion from which you are importing starts at
10:00:00:00, the earliest imported tracks can ap-
pear in your session is 9 hours and 59 minutes
after the start of the session.
Maintain Relative Time Code Values This option
places tracks at the same offset from session start
as they had in the source session. For example, if
the source session starts at 01:00:00:00 and con-
tains a track that starts at 01:01:00:00, and the
current session start is 02:00:00:00, the track
will be placed at 02:01:00:00 in the current ses-
sion.
Map Start Time Code To This option places
tracks relative to their original session start time.
(With Pro Tools|HD or Pro Tools LE with DV
Toolkit 2 systems, times are expressed in
hh:mm:ss:ff, and on Pro Tools LE systems, times
are expressed in hh:mm:ss.) For example, if the
current session starts at 00:01:00:00, and the ses-
sion from which you are importing starts at
10:00:00:00, you can reset the start time code to
00:01:00:00, to avoid placing files 9 hours and
59 minutes from the start of your session.
Track Offset Options
You can specify a track offset in addition to any
offset incurred with the Time Code Mapping op-
tions. Any imported audio is offset in the cur-
rent session’s Timeline by the specified amount.
You can enter values in Minutes:Seconds,
Bars|Beats, Samples, Time Code, or Feet/Frames.
Sample Rate Conversion (SRC) Options
You can set options that control how sample
rate conversion is applied to imported audio
files. If the source session and the current ses-
sion have the same sample rate, this portion of
the dialog is unavailable.
Pro Tools Reference Guide270
Source Sample Rate For audio files created in
any session, no matter what the session sample
rate is, you can have the sample rate conversion
process treat the files in several ways to compen-
sate for pull-up, pull-down, and NTSC or PAL
frame rates. This setting allows you to choose
the sample rate from which you want the sam-
ple rate conversion process to start.
Destination Sample Rate The destination sam-
ple rate is always set to the sample rate of your
current session.
Conversion Quality This option lets you set the
quality of the sample-rate conversion process.
See “Sample Rate Conversion Quality” on
page 253.
Source Tracks
This area of the dialog lists the tracks in the
source session that can be imported, each with a
corresponding pop-up menu.
Operation/Destination Track Pop-Up
Menus
For each source track, there is a corresponding
pop-up menu that lists options for importing
the track and, with Pro Tools HD and Pro Tools
LE with DV Toolkit 2, possible destination tracks
in the current session. The pop-up menus dis-
play the following items:
Do Not Import Neither the source track nor any
of its attributes are imported.
Import as New Track The source track and all at-
tributes selected in the Session Data to Import
menu are imported into a new track in the cur-
rent session.
Destination Track Names (Pro Tools HD and
Pro Tools LE with DV Toolkit 2 Only) The names
of possible destination tracks in the current ses-
sion are listed at the bottom of the pop-up
menu. Imported playlists and all attributes se-
lected in the Session Data to Import will be
placed in the destination track you choose.
Only destination tracks that match the track
type (audio, Instrument, MIDI, Auxiliary Input,
or Master Fader) and the channel format (mono,
stereo, or any of the supported multichannel
formats) of the source track appear in the pop-
up menu.
Find Matching Tracks
(Pro Tools HD and Pro Tools LE with
DV Toolkit 2 Only)
If you are importing playlists from source tracks
with the same name as destination tracks in the
current session (such as a new cut of a scene),
click Find Matching Tracks to automatically
match the track names. Tracks must have the
same name, track type, and channel format to
be automatically matched.
Session Data to Import
(Pro Tools HD and Pro Tools LE with
DV Toolkit 2 Only)
The Session Data to Import menu is where you
select which attributes of the selected tracks you
want to import into the current session.
Selected attributes are applied to all tracks that
you choose to import into the current session.

Chapter 14: Importing and Exporting Session Data 271
Replacing Track Attributes
When you import an attribute of the source
track into an existing track in the current ses-
sion, it replaces the corresponding attribute in
the destination track. If you choose not to im-
port an attribute of the source track, the corre-
sponding attribute in the destination track is re-
tained.
Replacing Track Path Names
When you import a track’s input, output, send
output or hardware insert assignments, any cus-
tom path names and I/O configurations from
the source session are not imported. You can im-
port path names and I/O configurations by im-
porting I/O Setup settings. See “Working with
I/O Settings Files” on page 63 for more informa-
tion.
Selecting Track Attributes to Import
You can select All, None, or any combination of
the listed attributes to import. The following at-
tributes are available to import:
All Imports all of the source track’s playlists, ac-
cording to the Track Playlist Option setting, and
all of the attributes in the Session Data to Import
list.
None Imports only the source track’s main play-
list, according to the Track Playlist Option set-
ting, and no other attributes of the source track.
Alternate Playlists Imports all of the source
track’s alternate playlists. The alternate playlists
appear in the destination track’s playlist pop-up
menu.
Regions and Media Imports all of the audio files
or regions in the source track, and places them
in the Region List.
Volume Automation and Setting Imports the
source track’s Volume fader setting and any au-
tomation data on the track’s Volume Auto-
mation playlist. The Volume fader setting and
any Volume automation data in the destination
track are replaced.
Pan Automation and Setting Imports the source
track’s Pan Slider settings and any automation
data on the track’s Pan Automation playlist. The
Pan Slider setting and any Pan automation data
in the destination track are replaced.
Mute Automation and Setting Imports the source
track’s Mute setting and any automation data
on the track’s Mute Automation playlist. The
Mute setting and any Mute automation data in
the destination track are replaced.
Main Output Assignments Imports the source
track’s channel output assignments, including
any multiple output assignments. The channel
output assignments in the destination track are
replaced.
Send Output Assignments Imports the source
track’s send output assignments. Any Send out-
put assignments in the destination track are re-
placed.
Plug-in Assignments Imports the source track’s
plug-in assignments. Any plug-ins in the desti-
nation track are removed, and their associated
settings and automation are lost.
If the source track uses a plug-in that is not
available on the destination system, it appears
in the destination track and is made inactive.
Plug-in Settings and Automation When the
source track’s plug-in assignments are imported,
this option imports the track’s plug-in settings
and any automation data associated with the
plug-ins. If no plug-in assignments are im-
ported, this option has no effect.
Pro Tools Reference Guide272
Hardware Insert Assignments Imports the source
track’s hardware Insert assignments. Any Insert
assignments in the destination track are re-
placed.
Voice Assignments Imports the source track’s
voice assignment from the source session. Any
voice assignments in the destination track are
replaced.
Input Assignments Imports the source track’s
channel input assignment. The Input assign-
ment in the destination track is replaced.
Side-Chain Assignments When the source track’s
plug-in assignments are imported, this option
imports any side-chain assignments associated
with the plug-ins. If no plug-in assignments are
imported, this option has no effect.
Track Active State Imports the active/inactive
state of the source track from the source session.
I/O Labels (Path Names) Imports the source
track’s path names.
Track Comments Imports the track comments
associated with the source track. Any comments
in the destination track are replaced.
Record Safe/Solo Safe Settings Imports the
record safe and solo safe settings of the source
track from the source session. Any record safe or
solo safe settings in the destination track are re-
placed.
Track View Settings Imports the track height
and playlist view of the source track from the
source session.
Mix/Edit Groups: Imports track groups from
source session.
Import Options
Import Tempo/Meter Map Imports the meter
and tempo maps, as they appear in the Tempo
and Meter Conductor rulers, from the source
session. Any Tempo or Meter events in the des-
tination session are replaced.
Import Key Signature Map Imports all key signa-
tures (if present) into Pro Tools with the im-
ported session data. Any Key Signatures in the
destination session are replaced.
Import Marker/Memory Locations Imports
markers and Memory Locations as they appear
in the Marker ruler, from the source session.
Any markers and Memory Locations in the des-
tination session are retained. Imported marker
and Memory Locations are assigned the next
available Marker/Memory Location numbers.
Import Window Configurations Imports the Win-
dow Configurations from the source session.
Import Pre Settings (Pro Tools HD Only) Imports
any Pro Tools Mic Pre settings from the source
session. Any Mic Pre settings in the destination
session are replaced.

Chapter 14: Importing and Exporting Session Data 273
Track Playlist Options
(Pro Tools HD and Pro Tools LE with
DV Toolkit 2 Only)
You can select from the following options to
control how the main playlist from each source
track is imported to the destination track in the
current session.
Import Main Playlists — Replacing Destination
Main Playlists Imports the main playlist from
the source track. When you import the playlist
into an existing track, the main playlist in the
destination track is deleted and replaced with
the imported playlist.
If you select this option and import all of the
source track’s attributes, this is equivalent to im-
porting the entire track.
If you select this option and do not import
any of the source track’s attributes, you replace
the audio playlists while keeping your current
mixer settings.
Import Main Playlists—Overlaying New with Exist-
ing, Trimming Existing Regions Imports the
main playlist from the source track. When you
import the playlist into an existing track, any
existing playlist data that overlaps data im-
ported from the source track is trimmed and re-
placed with the imported data. Any playlist data
in the destination track that does not overlap re-
mains in the destination track.
Do Not Import Main Playlists—Leaving Destina-
tion Playlists Intact Does not import the main
playlist from the source track. No audio is im-
ported; only the attributes selected in the Ses-
sion Data to Import list are imported to the se-
lected tracks. When selected, importing all of
the source track’s input, output, send, insert and
plug-in attributes is equivalent to importing a
channel strip.
Importing Sessions and Tracks by
Drag and Drop
Session files can be dragged into the current ses-
sion to import (and spot) audio, video, MIDI, re-
gion group, REX and ACID files, tracks, and ses-
sion data.
• Dragging a session to the Region List imports
all the regions from that session (without im-
porting tracks).
• Dragging a session to a track in Pro Tools LE
lets you import tracks.
• Dragging a session to a track playlist in
Pro Tools HD opens the Import Session Data
dialog, letting you select tracks and attributes
to import. The imported session data will be-
gin wherever you drop the session in the
Timeline.
To import tracks and other session data by drag
and drop:
1 Open a browser.
2 Drag a Pro Tools session file, or an AAF or OMF
sequence (requires DigiTranslator 2.0), into the
current session, as follows:
• Drag onto an existing track to overlay or
overwrite data on the target tracks. Hold
the Shift key while dragging if you intend
to replace the current track playlists with
those being imported (the Shift key pre-
configures the settings in the Import Ses-
sion Data dialog).
• Drag to empty space in the Edit window to
create new tracks for the imported session
data.
• Configure the Import Session Data dialog
as appropriate. (See the Pro Tools Reference
Guide for details on the Import Session
Data dialog.)
Pro Tools Reference Guide274
Copying During Import
If no conversion is necessary, and the files reside
on a suitable Performance volume, Pro Tools
references the original version of the media. You
can also choose to copy media while importing
by using key commands, or enabling the Auto-
matically Copy Files on Import preference. Cop-
ies are created in the session’s Audio Files Folder.
To manually copy files on import:
Alt-drag (Windows) or Option-drag (Mac) the
files. A copy is created in the session Audio Files
folder.
When importing sessions or tracks, the Import
Session Data dialog lets you specify whether to
reference the source media, or copy it.
To automatically copy files on import:
1 Choose Setup > Preferences, and click the Op-
erations tab.
2 Select Automatically Copy Files on Import.
3 Click OK to close the Preferences dialog.
Using Undo after Importing
Using Undo after importing any files to the
Timeline removes the files from the Timeline.
However, the files remain in the session (in the
Region List and Project browser) and are offline.
If you do not remove or delete the files from the
session manually, Pro Tools will report them as
missing files the next time the session is opened.
Importing AAF and OMF
Sequences
(DigiTranslator 2.0 Required)
With the DigiTranslator 2.0 option, Pro Tools
lets you open AAF and OMF sequences as new
Pro Tools sessions or you can import AAF and
OMF sequences into existing Pro Tools sessions.
Exporting Pro Tools Tracks as
AAF or OMFI Sequences
(DigiTranslator 2.0 Required)
With the DigiTranslator 2.0 option, Pro Tools
lets you export individual tracks in AAF or OMFI
format. Use the Export Selected Tracks as
AAF/OMF command.
Pro Tools cannot play MXF audio or video
files embedded within an AAF sequence.
For more information on opening and im-
porting AAF and OMF sequences using the
DigiTranslator 2.0 option, see the Digi-
Translator Guide.
Pro Tools with DigiTranslator 2.0 does not
support AAF files with embedded media.
For more information on exporting selected
tracks from Pro Tools sessions as AAF and
OMF sequences using the DigiTranslator
2.0 option, see the DigiTranslator Guide.
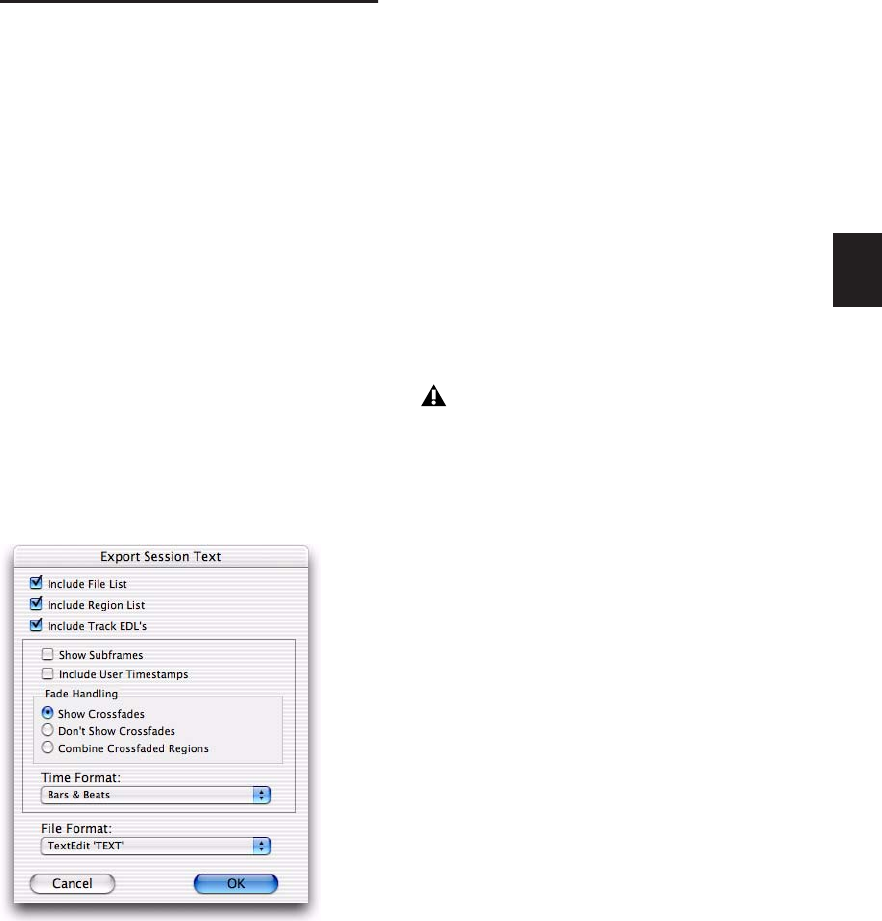
Chapter 14: Importing and Exporting Session Data 275
Exporting Sessions as Text
(Pro Tools HD Only)
You can use the Export Session Info as Text com-
mand to create a text file that contains extensive
information about your session.
This text file can contain a list of audio files, au-
dio regions, audio track EDL (Edit Decision List)
information, extended timestamp information,
and information about crossfades.
Track EDLs are exported as tab-delimited text—
that is, with tabs between each column heading,
and tabs between each event parameter. You
can use this data in a program for reading EDLs,
or you can format the EDL data into tables using
a word processor or spreadsheet application.
Export Session Info as Text
Options
Include File List/Region List
You can choose to export a list of the session’s
audio files and regions. The File List provides a
list of all the audio files and fades in the session,
and their hard drive locations. The Region List
displays all audio regions in the session, and the
source audio file for each region.
Include Track EDLs (Playlists)
You can export track EDLs (playlists). Track
EDLs can be used to spot-check region place-
ment and edits, or in a conforming program for
post applications. In extreme circumstances the
EDL can be used to recreate the entire session.
When exporting track EDLs, the following op-
tions are available:
Show Subframes This option allows you to ex-
port subframe time information with track
EDLs, if used in your session.
Include User Timestamps You can include user
timestamps with track EDLs. User timestamps
indicate a user-defined session location for the
region, or the original location of the region
when recorded.
Fade Handling For track EDLs, you can choose
whether to show crossfades, not to show them,
or to combine crossfaded regions. When regions
are combined, their durations and locations are
listed up to the center of the crossfade (for the
leading region) and from the center of the cross-
fade (for the following region).
Time Format You can select the appropriate time
format that exported EDL information is based
on. For example, for post work, you might select
SMPTE time, but for music creation locked to a
grid, you might select Bars & Beats.
Export Session Info as Text dialog
MIDI track EDLs are not exported.

Pro Tools Reference Guide276
File Format
You can choose to export to any of several differ-
ent text formats. These include standard text
formats, and Microsoft Word and Excel formats.
Exported Session Text
Session Information
The session text file starts with basic informa-
tion about the session. This information in-
cludes the session name, sample rate, bit depth,
time code format, and number of audio tracks,
audio regions, and audio files, as shown in the
following example.
File List and Region List
Next, if you choose to include them, are the lists
of audio files and regions.
Track EDLs
The final item, if exported, is the list of track
EDLs. A track EDL lists the track name, and all
edits, including the event number, the region
name, region start and end time, and region du-
ration. The region timestamp is also exported, if
you select this option. Subframes are shown in
each time field if you select this option.
To export a session as text:
1 Choose File > Export > Session Info as Text.
2 Select whether to include the File List, Region
List, and track EDLs.
3 If you choose to include track EDLs, select
whether to show subframes, and whether to in-
clude user timestamps. Also select an option for
crossfade handling.
4 If you choose to include track EDLs, select the
Time Format for the exported session text from
the pop-up menu.
5 Select the File Format for exported text using
the pop-up menu.
6 When you have set your options, click OK.
7 Select a location and enter a filename for the
exported text file. In Windows, Pro Tools adds
the correct 3-letter filename extension, while on
the Mac, the file extension “.txt” is added.
Send via DigiDelivery
DigiDelivery® is Digidesign’s system for effi-
cient and reliable transfer of digital media files
over the Internet. Send via DigiDelivery lets you
send a Pro Tools session and all of its related files
using DigiDelivery from within Pro Tools.
Like the Save Copy In command, DigiDelivery
copies all files of the same type, regardless of
their location, into a single destination folder.
The requirements for using DigiDelivery with
Pro Tools are as follows:
To send a delivery, senders must have an In-
ternet connection, an account on a DigiDelivery
network appliance, and the DigiDelivery client
application.
Session Information example
SESSION NAME: Ripleys II-092700
SAMPLE RATE: 48000.000000
BIT DEPTH: 24-bit
TIME CODE FORMAT: 30 Frame
# OF AUDIO TRACKS: 19
# OF AUDIO REGIONS: 203
# OF AUDIO FILES: 54
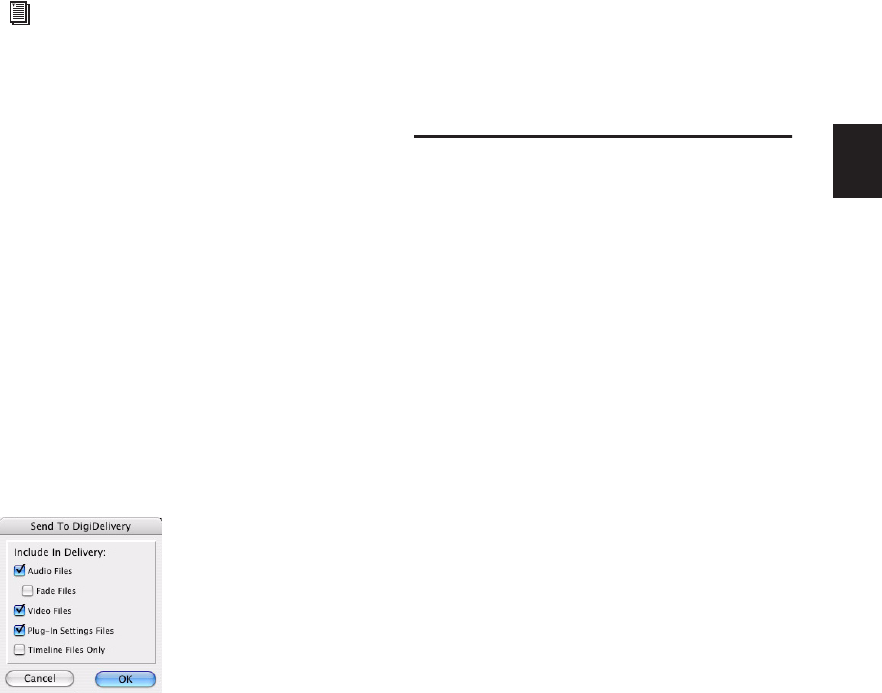
Chapter 14: Importing and Exporting Session Data 277
To receive a delivery, recipients only need an
Internet connection and the DigiDelivery client
application. An account on the network appli-
ance is not needed.
To send a session from Pro Tools using
DigiDelivery:
1 Choose File > Send via DigiDelivery.
2 Do one of the following:
• If the DigiDelivery client is not installed on
your system, Pro Tools will launch your
Web browser, and connect to the Digi-
Delivery site where you can download the
current DigiDelivery client.
– or –
• If the DigiDelivery client is installed on
your system, the Send to DigiDelivery dia-
log will open.
3 In the Send to DigiDelivery dialog, select
which files to include.
You have the option to include:
• Audio files
• Fade files
• Video files
• Plug-in settings files
• Timeline files only (files that are referenced
in the current session Timeline)
4 Click OK. The DigiDelivery client will launch,
and the DigiDelivery Send Wizard (Page 1) will
open. On this page you can name the delivery
and add or remove files.
5 Complete the remaining DigiDelivery Send
Wizard pages and send the file, following the in-
structions that came with the DigiDelivery cli-
ent software.
Importing MIDI Files
You can import Standard MIDI Files (SMF) into
your Pro Tools sessions.
Pro Tools provides several ways to import MIDI
files into an open session.
• “Importing MIDI Files Using Pro Tools
Menu Commands” on page 278.
• “Importing MIDI Files with Drag & Drop”
on page 279.
Pro Tools does not import proprietary sequence
files. To use sequences from other MIDI applica-
tions in a Pro Tools session, you will need to first
save them as Standard MIDI Files. Refer to the
manufacturer’s documentation for details on
saving Standard MIDI Files.
There are two types of Standard MIDI Files, both
of which are supported by Pro Tools:
Type 0 MIDI files store data for all MIDI chan-
nels in a single track. When importing these
files, Pro Tools separates the data by channel
and places each track’s data in separate regions
and tracks.
Type 1 MIDI files, sometimes referred to as
multitrack MIDI files, contain multiple tracks of
MIDI data. When importing these files, each
track’s data is placed on its own new MIDI track
in the Pro Tools session.
For more information, visit the
DigiDelivery website
(www.digidesign.com/digidelivery).
Include in Delivery dialog
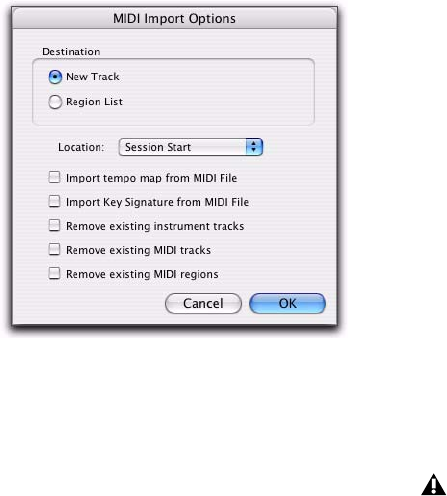
Pro Tools Reference Guide278
Importing MIDI Files Using
Pro Tools Menu Commands
Pro Tools provides menu commands to import
MIDI files.
To import Standard MIDI files into a session using
the Pro Tools File menu:
1 Choose File > Import > MIDI and select the file
you want to import.
2 In the MIDI Import Options dialog, choose
where the imported file will go:
New Track Creates a new track where the file will
be imported.
Region List Imports the file into the Region List,
where it will be available to place into tracks.
3 If you chose to create a new track, choose a lo-
cation for the imported file in the track:
Session Start Places the file or region at the start
of the session.
Song Start Aligns the beginning of the file to
the Song Start point.
Selection Aligns the beginning of the file to the
edit cursor or to the beginning of a selection in
the Timeline.
Spot Displays the Spot dialog, which lets you
spot the file to a precise location based on any of
the Time Scales.
4 Select any of the following Import options:
Import Tempo Map From MIDI File When se-
lected, overwrites any existing tempo and meter
map with tempo and meter information read
from the MIDI file.
Import Key Signature From MIDI File When se-
lected, overwrites any existing key signatures
with key signature information read from the
MIDI file.
Remove Existing Instrument Tracks When se-
lected, deletes any existing Instrument tracks.
Selecting this option does not remove any cur-
rent MIDI tracks. All existing MIDI regions will
be left in the Region List.
Remove Existing MIDI Tracks When selected, de-
letes any existing MIDI tracks. Enabling this op-
tion does not remove any current Instrument
tracks. All existing MIDI regions will be left in
the Region List.
Remove Existing MIDI Regions When selected,
deletes existing MIDI regions (all data on all
MIDI and Instrument tracks) but leaves existing
MIDI and Instrument tracks in place.
5 Click OK.
The MIDI file will be imported according to the
settings in the Import MIDI Settings dialog.
MIDI Import Options dialog
If the Standard MIDI File contains markers,
they are only imported if the current session
does not contain any markers.
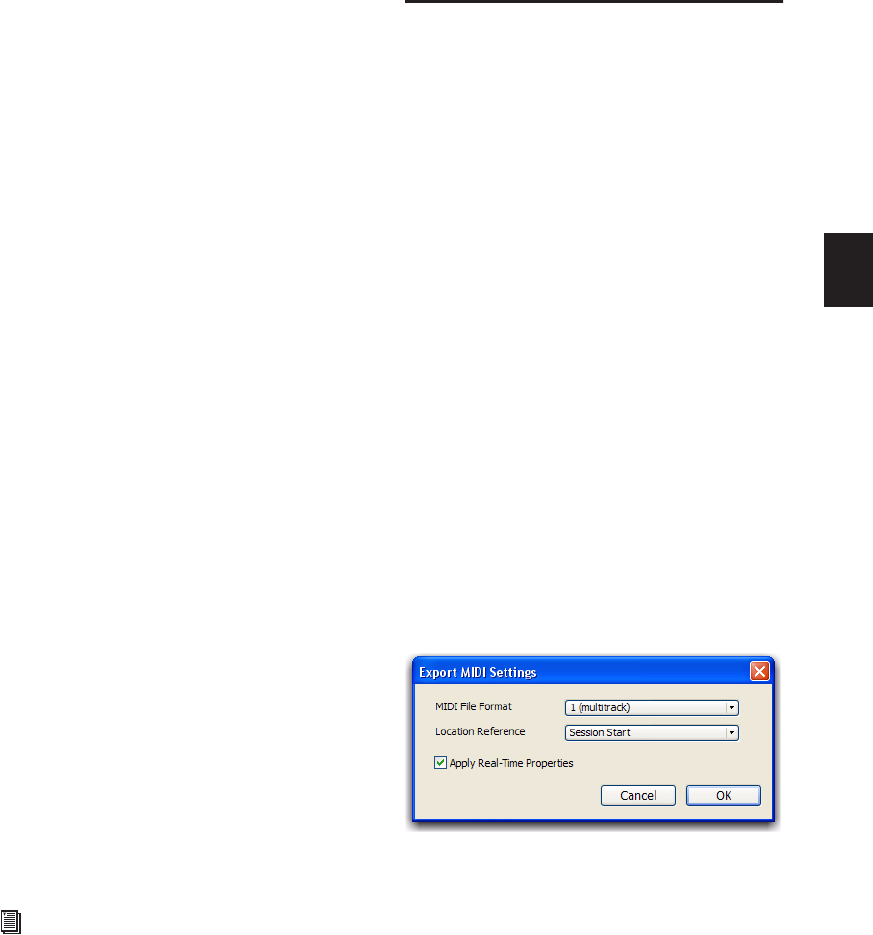
Chapter 14: Importing and Exporting Session Data 279
6 In the Mix window, click the MIDI Output se-
lector for each new track and assign a MIDI in-
strument and channel.
Importing MIDI Files with Drag &
Drop
You can drag and drop MIDI files from a Digi-
Base browser, Windows Explorer, or Mac Finder
to the Timeline, a track, the Track List, or the Re-
gion List.
To import MIDI into the Region List:
1 Select MIDI files in a DigiBase browser, or
Windows Explorer, or Mac Finder.
2 Drag the files onto the Region List of the cur-
rent session.
To import MIDI into an existing track:
1 Select MIDI files in a DigiBase browser, Win-
dows Explorer, or Mac Finder.
2 Drag the files onto an existing track in the Edit
window of the current session.
To import MIDI into new tracks:
1 Select MIDI files in a DigiBase browser, Win-
dows Explorer or Mac Finder.
2 Do one of the following:
• From the DigiBase browser, Shift-drag the
files and drag them anywhere in the Edit
window of the current session.
• Drag the files to the Timeline of the current
session.
• Drag the files to the Track List.
Exporting MIDI Files
To export a session’s MIDI tracks for use in an-
other MIDI application, or for playback with an
external (hardware) MIDI sequencer, you can
export Pro Tools MIDI and Instrument tracks as
a Standard MIDI File.
MIDI can be exported from Pro Tools as a
merged, single, multichannel track (Type 0), or
as multiple tracks (Type 1).
If your Pro Tools session uses key signatures and
meters, they are exported with the MIDI file.
To export all MIDI and Instrument tracks in the
current session:
1 Make sure to unmute any MIDI tracks in the
session that you want included in the exported
MIDI file. (Or, conversely, mute any MIDI tracks
you do not want included in the exported MIDI
file.) For Instrument tracks, enable or disable the
MIDI mute button (Instruments View) as de-
sired.
2 Choose File > Export > MIDI. The Export MIDI
Settings dialog opens.
3 From the MIDI File Format pop-up menu, se-
lect 1 (multitrack) or 0 (single track).
4 If the Song Start time is different from the Ses-
sion Start time, select Session Start or Song Start
from the Location Reference pop-up menu.
For more information on using DigiBase
browsers, refer to the DigiBase Guide.
Export MIDI Settings dialog

Pro Tools Reference Guide280
5 Enable or disable the Apply Real-Time Proper-
ties option as desired.
6 Click OK. A Save dialog opens.
7 Specify a folder destination and name for the
MIDI file.
8 Click Save.
Pro Tools exports all unmuted MIDI and Instru-
ment tracks in the current session to a Standard
MIDI File and writes it to your hard drive. Ex-
ported MIDI information includes notes, con-
troller events, program changes, and System Ex-
clusive data, as well as events for tempo, meter,
and markers.
The SMPTE start time for the session or the song
(depending on the selection from the Location
Reference pop-up menu) is also exported. This
ensures that the exported tracks, when played
from another MIDI application, will align with
the correct SMPTE frames, and also synchronize
correctly to tape and video devices, or Pro Tools.
Refer to your third-party MIDI sequencer docu-
mentation to determine whether it supports im-
porting SMPTE start times from MIDI files.
Items Not Exported with MIDI Files
Mute automation and muted regions do not af-
fect exported MIDI. As long as a MIDI track is
not muted by clicking its Mute button, or an In-
strument track is not muted by clicking its MIDI
mute button (Instruments View), all of its MIDI
data is exported.
When exporting MIDI files from Pro Tools, de-
vice assignments for tracks are not retained
(though channel assignments are). If you export
MIDI or Instrument tracks from Pro Tools and
later re-import them, you will need to reassign
the tracks to devices in your studio.
All playlist information for MIDI and Instru-
ment tracks is lost when exporting. For exam-
ple, tracks that previously contained dozens of
MIDI regions will be flattened and only contain
single regions after exporting and re-importing.
Exporting Individual MIDI and
Instrument Tracks
You can also export individual MIDI and Instru-
ment tracks as MIDI files. This can be useful for
storing libraries of your favorite MIDI sequences
or Sysex data (such as bulk or individual patch
dumps for your external MIDI devices), or for
importing MIDI into notation applications
(other than Sibelius).
To export a single MIDI or Instrument track as a
MIDI file:
1 Do one of the following:
• Right-click the Track name of an unse-
lected track in the Edit or Mix window, or
in the Track List.
– or –
• In the Track List, or Mix or Edit window,
Control-Right-click (Windows) or Com-
mand-Right-click (Mac) the track name.
2 From the Right-click pop-up menu, select Ex-
port MIDI.
3 Set the Export MIDI settings in the Export
MIDI Settings dialog.
4 Click OK.
Pro Tools automatically adds the “.mid”
extension when exporting MIDI files.
Chapter 14: Importing and Exporting Session Data 281
5 In the Save dialog, type a name for the MIDI
file, specify where you want to save it, and click
Save.
To export all selected Pro Tools Instrument or
MIDI tracks as a MIDI file:
1 Select the tracks you want to export to a MIDI
file.
2 Right-click the Track name of one of the se-
lected tracks in the Edit or Mix window, or in
the Track List.
3 From the Right-click pop-up menu, select Ex-
port MIDI.
4 Set the Export MIDI Settings as desired.
5 Click OK.
6 In the Save dialog, type a name for the MIDI
file, specify where you want to save it, and click
Save.
Send to Sibelius
Pro Tools lets you send all or only selected MIDI
and Instrument tracks to Sibelius or G7 notation
software. This lets you print the score and parts
from your Pro Tools session. For example, if you
are working in Pro Tools with a sampled trum-
pet part, but you want to bring in a real trumpet
player to play the part, you can send just the
trumpet track to Sibelius and print the part for
the trumpet player. You can then record the
trumpet player reading the part.
To send all Pro Tools Instrument and MIDI tracks
to Sibelius:
Choose File > Send To Sibelius.
Pro Tools exports all Instrument and MIDI
tracks to Sibelius as a MIDI file. If Sibelius is in-
stalled on your computer, it launches Sibelius. If
Sibelius is not installed, but G7 is, G7 launches.
Sibelius (or G7) prompts you to import the MIDI
file exported from Pro Tools with the Open
MIDI File dialog. You can then further edit the
notation in Sibelius and print the score of your
session.
If your Pro Tools session uses key signatures and
meters, they are exported with the MIDI file and
imported into Sibelius.
MIDI files exported from Pro Tools using the
Send to Sibelius command are saved in an auto-
matically created “MIDI Files” folder in the
Pro Tools session folder. MIDI files are named
after the session, or if only one track is exported,
MIDI files are named after the track.
To send a single Pro Tools Instrument or MIDI
track to Sibelius:
1 Do one of the following:
• Right-click the Track name of an unse-
lected track in the Edit or Mix window, or
in the Track List.
– or –
• In the Track List, or Mix or Edit window,
Control-Right-click (Windows) or Com-
mand-Right-click (Mac) the track name.
2 From the Right-click pop-up menu, select
Send To Sibelius.
The track is selected and sent to Sibelius.
Alt-Right-click (Windows) or Option-Right-
click (Mac) to export all tracks to a single
MIDI file.
Alt-Shift-Right-click (Windows) or Option--
Shift-Right-click (Mac) to export all selected
tracks as a single MIDI file.
Alt-Right-click (Windows) or Option-Right-
click (Mac) to send all tracks to Sibelius.

Pro Tools Reference Guide282
To send all selected Pro Tools Instrument or MIDI
tracks to Sibelius:
1 Select the tracks you want to send to Sibelius.
2 Right-click the Track name of one of the se-
lected tracks in the Edit or Mix window, or in
the Track List.
3 From the Right-click pop-up menu, select
Send To Sibelius.
All selected tracks are sent to Sibelius.
Importing and Exporting
Region Group Files
Pro Tools can export and import the region
group file format (.rgrp). This lets you do the fol-
lowing:
• Separate region group metadata from audio
files to avoid unnecessary file copy opera-
tions when exporting audio region groups
composed from multiple source files.
• Export MIDI data as part of a region group.
• Create multitrack loops.
Region group files store the following metadata:
• References to all audio files within the re-
gion group
• Region names and relative location in
tracks
• Embedded fades and crossfades
• Region group names and format (single or
multitrack)
• All MIDI data present in the region group
(such as notes, controllers, and Sysex)
• Track names
• Elastic Audio Warp markers and TCE factor
• Region timebase (samples or ticks)
• Sync points
• Loops
• Tempo map
Region group files do not store the following:
• Audio
• Automation
• Plug-ins
• Track routing
• Meter map
• Region List information
Pro Tools provides several ways to import Re-
gion Groups into an open session:
• “Importing Region Groups with Pro Tools
Menu Commands” on page 283
• “Importing Region Groups with Drag &
Drop” on page 283
Alt-Shift-Right-click (Windows) or Option-
Shift-Right-click (Mac) to send all selected
tracks to Sibelius.
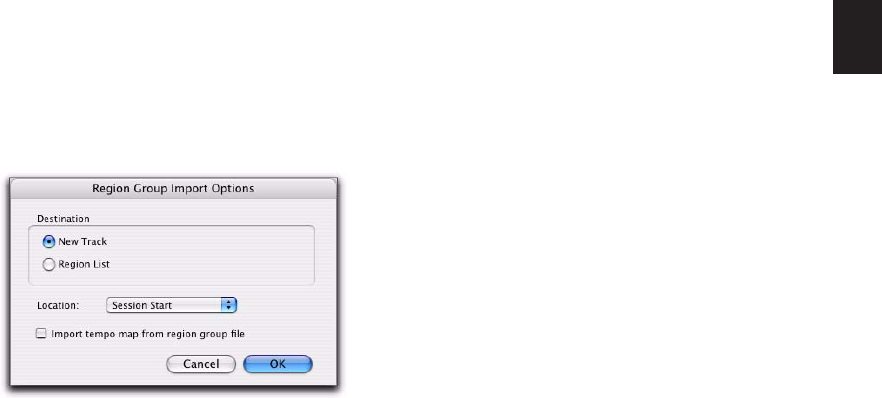
Chapter 14: Importing and Exporting Session Data 283
Importing Region Groups with
Pro Tools Menu Commands
To import a region group with Pro Tools menu
commands:
1 Choose File > Import > Region Groups and se-
lect the region group you want to import.
2 In the Region Group Import Options dialog,
choose where the region group will go:
New Track Creates a new track where the region
group will be imported.
Region List Imports the region group into the
Region List, where it will be where it will be
available to place into tracks.
3 If you chose to create a new track, choose a lo-
cation for the imported group in the track:
Session Start Places the group at the start of the
session.
Song Start Aligns the beginning of the group to
the Song Start point.
Selection Aligns the beginning of the group to
the edit cursor or to the beginning of a selection
in the Timeline.
Spot Displays the Spot dialog, which lets you
spot the group to a precise location based on
any of the Time Scales.
4 Select any of the following import options:
Import Tempo Map from Region Group File When
selected, replaces the session tempo map with
the tempo map of the region group. This option
is only available when importing the region
group to the Session Start.
5 Click OK.
Importing Region Groups with
Drag & Drop
You can drag and drop Region Groups from a
DigiBase browser or from Windows Explorer or
the Mac Finder to the Timeline, a track, the
Track List, or the Region List.
To import Region Groups into the Region List:
1 Select one or more Region Groups in a Digi-
Base browser, Windows Explorer or Mac Finder.
2 Drag the files onto the Region List of the cur-
rent session.
To import Region Groups into an existing track:
1 Select one or more Region Groups in a
DigiBase browser or from Windows Explorer or
Mac Finder.
2 Drag the files onto an existing track in the Edit
window of the current session.
Region Group Import Options dialog
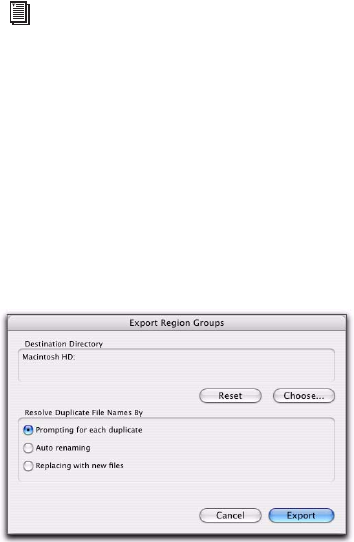
Pro Tools Reference Guide284
To import Region Groups into new tracks:
1 Select one or more Region Groups in a Digi-
Base browser, Windows Explorer or Mac Finder.
2 Do one of the following:
• From the DigiBase browser, Shift-drag the
files and drag them anywhere in the Edit
window of the current session.
• Drag the files onto any empty space in the
Edit window of the current session.
• Drag the files to the Track List.
Exporting Region Groups
To export a region group:
1 Select one or more region groups in the Re-
gion List.
2 From the Region List pop-up menu, choose
Export Region Groups. The Export Region
Groups dialog opens.
3 The Destination Directory defaults to the
auto-created Region Groups folder in the session
folder. You can change the Destination Direc-
tory by clicking the Choose button, navigating
to the desired location, and clicking Choose.
Click Reset to reset the Destination Directory to
the default location.
4 Enable one of the following options for resolv-
ing duplicate region group file names:
• Prompting for Each Duplicate (default)
• Auto Renaming
• Replacing with New Files
5 Click OK.
Exporting Region Groups to Another Hard Drive
Generally, if you are exporting region groups to
another hard drive, you should copy any refer-
enced audio files. This way you can move region
groups not only from one session to another,
but from one system to another.
To export a region group to a different hard drive
and include its audio files:
1 Export one or more region groups to the de-
sired drive.
2 Create a new session on the new drive.
3 Choose Setup > Preferences.
4 In the Preferences dialog, click the Processing
tab and select Automatically Copy Files on Im-
port.
5 Click OK to close the Preferences dialog.
6 Import all previously exported region groups
by dragging and dropping them into the ses-
sion.
The audio files folder of the new session now
contains all files referenced by the region
groups.
For more information on using DigiBase
browsers, refer to the DigiBase Guide.
Export Region Groups dialog

Chapter 15: File and Session Management and Compatibility 285
Chapter 15: File and Session
Management and Compatibility
When you work with Pro Tools, you encounter
several different kinds of computer files.
Pro Tools systems require that you keep certain
files in specific hard drive locations in order to
function properly.
Pro Tools software files (such as the applica-
tion and plug-ins files) should be located on
your Startup drive (the drive that contains your
operating system and other system-related files).
On Pro Tools|HD systems, data files (such as
session files, audio files, and fade files) can be lo-
cated on any compatible drive connected to
your computer’s internal or external ATA/IDE,
FireWire, or SCSI busses (including SCSI HBA).
For maximum performance, SCSI drives are rec-
ommended for Pro Tools|HD systems. FireWire
and ATA/IDE drives are also supported. See the
Digidesign website for details (www.digide-
sign.com).
On Pro Tools LE systems, data files (such as
session files, audio files, and fade files) can be lo-
cated on any compatible hard drive connected
to your computer’s internal or external
ATA/IDE, FireWire, or SCSI busses.
Audio File Management
Unique File IDs
Pro Tools tags each audio file in a session with a
unique identifier that allows it to distinguish a
particular file even if its name or location has
changed.
Locating Audio Files
With Pro Tools, you manage links to audio and
other media files using the Relink window.
Pro Tools classifies storage volumes according to
their suitability for performance (recording or
playback) or transfer (storage or copying) of au-
dio and other media files. Audio files must be
stored on suitable Performance volumes and be
properly linked in order to be playable in a
Pro Tools session.
Although Pro Tools lets you record to your
system drive, this is generally not recom-
mended. You should record to system drives
only when necessary—for example, if your
computer system has just one hard drive, or
it your other hard drives are completely out
of space.
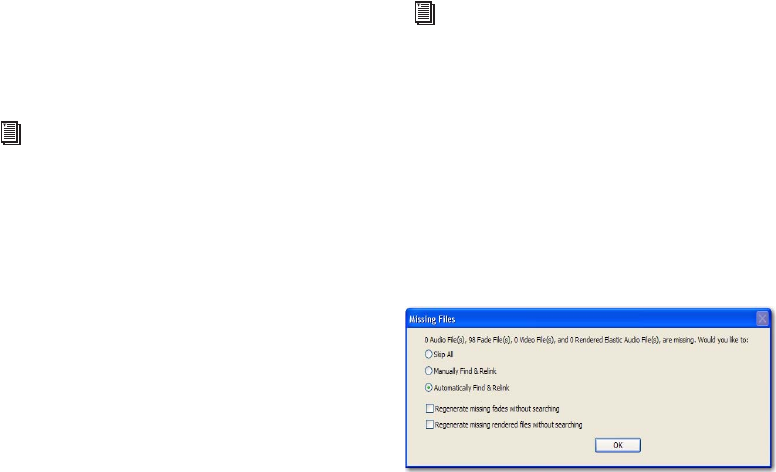
Pro Tools Reference Guide286
When you open a session, if Pro Tools deter-
mines that audio files are not located on a Per-
formance volume, or if it is unable to locate au-
dio files contained in the session, you can locate
or copy the files in order to play back the ses-
sion. This process is called relinking.
Transfer Files
Transfer files reside on volumes unsuitable for
playback, such as CD or DVD discs, or network
drives.
To open a session containing Transfer files:
Open the Pro Tools session. If any files are on
a volume unsuitable for playback, Pro Tools
prompts you to do one of the following:
• Click Yes to open the Copy and Relink win-
dow.
– or –
• Click No to open the session with all Trans-
fer files offline.
To make Transfer files playable in the current
session:
1 Choose Window > Project.
2 Double-click the Audio Files folder to display
all of the audio files.
3 Choose Select Transfer Files from the Browser
menu.
4 Choose Copy and Relink from the Browser
menu.
5 Specify a location for the copied files on a
valid Performance volume.
6 Click OK.
Missing Files
A file is missing if it is not found in the same lo-
cation as when the session was last saved.
To open a session with missing files:
1 Open the Pro Tools session. If any files are
missing, Pro Tools posts a Missing Files warning.
2 Choose one of the following options:
Skip All Ignores all missing files and fades. The
missing files are offline in the session.
Manually Find and Relink Opens the Relink win-
dow, where you can search, compare, verify, and
relink missing files.
Automatically Find and Relink Searches all Per-
formance volumes for all missing files with
matching name, unique file ID, format, and
length, and automatically commits links to
missing files where possible.
3 To exclude fades from the relinking process,
and have them recalculated instead, select Re-
generate Missing Fades Without Searching.
For more information on storage volume
classifications, see “Performance and
Transfer Volumes” on page 204.
For complete information on relinking
Transfer files, see “Linking and Relinking
Files” on page 230.
Missing files warning when opening a session

Chapter 15: File and Session Management and Compatibility 287
4 To exclude any Rendered Elastic Audio files
from the relink process and regenerate them in-
stead, select Regenerate Missing Rendered Files
Without Searching.
5 Click OK.
Renamed Audio Files and the Renamed
Audio Files Folder
Renamed audio files are located in the auto-cre-
ated Renamed Audio Files folder in the
Pro Tools session folder. Files can be renamed
when you open a session that references audio
file names with incompatible characters. Files
can also be renamed in certain situations when
saving a copy of a session to a Pro Tools version
that does not support long file names
Opening a Session that Contains Audio File
Names with Illegal Characters
Pro Tools 7.x does not support audio file names
that contain the following ASCII characters:
/ (Forward Slash)
\ (Backslash)
: (Colon)
* (Asterisk)
? (Question mark)
“ (Quotation marks)
< (Less-than symbol)
> (Greater-than symbol)
| (vertical line or pipe)
Any “high order” ASCII character (created
with a key combination)
When opening sessions that contain audio file
names with illegal characters, Pro Tools auto-
matically creates a renamed copy of each file
that contains illegal characters (replacing these
characters with an underscore “_”). Renamed
files are copied to the Renamed Audio Files
folder. The original files are left intact in the Au-
dio Files folder.
Before the session opens, you are prompted to
save a detailed report of the renamed files and
their original file names to a Notes text file. By
default, the Notes text file is saved to the Session
folder.
Saving a Copy of a Session that Contains Long
Audio File Names
When saving files to Pro Tools 6.9.x and lower
(using Save Copy In), audio files with file names
that exceed the limits of the destination format
are truncated and located in the Session folder,
as follows:
• If the new session is saved to the same direc-
tory as the original, a Renamed Audio Files
folder is created in the session’s original
folder, and the renamed audio files are placed
in it.
• If the new session is saved to a different direc-
tory than the original and the All Audio Files
option is not checked, a new Session folder is
created, which includes an Audio Files folder
and a Renamed Audio Files folder. Renamed
audio files are included in the Audio Files
folder.
For more information on relinking missing
files, see “Linking and Relinking Files” on
page 230.
It is possible to have a Pro Tools 7.x session
that contains audio file names with illegal
characters. If you Save Copy In the session
to Pro Tools 6.9.x or lower with Mac/PC
Compatibility on, the tracks are renamed
with legal characters. If Mac/PC Compati-
bility is off, the characters are not changed.
Pro Tools Reference Guide288
• If the new session is saved to a different direc-
tory than the original and the All Audio Files
option is checked, a new Session folder is cre-
ated, which includes an Audio Files folder. Re-
named audio files are included in the Audio
Files folder.
WAV File Compatibility
Convert Imported WAV files to
AES31/BroadcastWave
Pro Tools always creates AES31/Broadcast com-
pliant BWF (.wav) files when the file originates
in Pro Tools. Non-BWF .wav files can be added
to BWF (WAV) format Pro Tools sessions with-
out conversion. This option ensures that all
WAV files are imported, and if necessary, con-
verted to BWF (WAV), compliant with the
AES31/EBU Broadcast standard.
AES31/Broadcast Wave is a variant of the stan-
dard audio WAV file type. The AES31 format
contains SMPTE time stamps and other infor-
mation beyond the raw PCM audio data.
This variant complies with standards set by the
AES (Audio Engineering Society) and EBU (Euro-
pean Broadcasters Union). Choose this option
to ensure compatibility with other workstations
that recognize this file type.
To make imported WAV files compliant with the
AES31/EBU Broadcast standard:
1 Choose Setup > Preferences and click the Pro-
cessing tab.
2 Select the Convert Imported “.wav” Files to
AES31/BroadcastWave option.
3 Click OK.
Sharing Sessions Created on
Different Computer Platforms
This section includes the following:
• “Working with Mac-Based HFS+ Drives on
Windows Computers” on page 288.
• “Saving Copies of Mac Sessions to be Com-
patible with Windows” on page 290.
Working with Mac-Based HFS+
Drives on Windows Computers
Either the Digidesign HFS+ Disk Support option
or the MacDrive Utility is required to mount
HFS+ drives on an NTFS system for use with
Pro Tools.
Digidesign HFS+ Drive Support Option
(Windows Only)
Pro Tools HD and Pro Tools LE for Windows
support recording and playback of sessions di-
rectly from Mac-formatted (HFS+) drives using
the Digidesign HFS+ Disk Support option. The
HFS+ Disk Support option is automatically in-
stalled with Pro Tools HD and Pro Tools LE soft-
ware by default.
When using the Digidesign HFS+ Disk Support
option for recording and playback on a Win-
dows system, the session file and all associated
files (such as audio and MIDI files) must be
stored on Mac-formatted (HFS+) drives. Record-
ing and playback of a session from a mixture of
Windows- and Mac-formatted drives is not sup-
ported.
For more information, see the Mac HFS+
Disk Support Option Guide.
Chapter 15: File and Session Management and Compatibility 289
Moving Sessions on Windows Systems
to Mac-Based HFS+ Drives
(From Window-Based NTFS Drives Only)
There are specific steps for transferring session
files from Windows-based NTFS drives to Mac-
based HFS+ drives.
To transfer Pro Tools Windows sessions from NTFS
drives to HFS+ drives:
1 Set the Digidesign HFS+ Disk Support Options
or the MacDrive Options to Backup/File Trans-
fer.
2 Do one of the following:
• Drag the session folder from the NTFS drive
to the HFS+ drive.
– or –
• Open the Windows session on the NTFS
drive, choose Save Copy In, and save a
copy of the session to the HFS+ drive.
Moving Mac-Based Sessions on HFS+
Drives to Windows Systems
(To Windows-Based NTFS Drives Only)
There are specific steps for transferring files from
Mac-based HFS+ drives to Windows-based NTFS
drives.
To transfer Pro Tools Mac sessions from HFS+
drives to NTFS drives:
1 Set the Digidesign HFS+ Disk Support option
or the MacDrive Options to Normal Use.
2 Do one of the following:
• Drag the session folder from the HFS+ drive
to the NTFS drive.
– or –
• Open the Mac session on the HFS+ drive,
and when prompted, choose Save Copy In
and save a copy of the session to the HFS+
drive.
If the session previously used SD II files, the files
are converted to the new audio file format.
To save (or create) Mac sessions to be com-
patible on Windows systems, see “Saving
Copies of Mac Sessions to be Compatible
with Windows” on page 290.
When transferring Pro Tools sessions from
HFS+ drives to NTFS drives, Pro Tools ses-
sions cannot relink to audio files and fades
that have Mac characters that are illegal in
Windows. These characters are automati-
cally converted to underscore (“_”) charac-
ters. These files are saved to the Renamed
Audio Files folder. You need to manually
relink each file by File ID. See “Missing
Files” on page 286.
To save session with no illegal characters,
see “Saving Copies of Mac Sessions to be
Compatible with Windows” on page 290.

Pro Tools Reference Guide290
Recording and Playback from HFS+
Drives on Windows
Windows supports recording and playback of
sessions directly from Mac-formatted (HFS+)
drives using either the Digidesign HFS+ Disk
Support option or the MacDrive software appli-
cation.
When using either the Digidesign HFS+ Disk
Support option or MacDrive for recording and
playback on a Windows system, the session file
and all audio files must be stored on Mac-for-
matted (HFS+) drives. Recording and playback
of a session from a mixture of Windows- and
Mac-formatted drives is not supported.
To record or play back from HFS+ drives with
Windows using MacDrive:
1 In Windows, go to the MacDrive Control
Panel.
2 Choose Options > File Names and select the
“International Use” option.
3 Delete all options listed under “File Name
Maps.”
4 In Pro Tools, choose Window > Workspace
and make sure that all Mac-formatted volumes
are set to R (record) or P (playback) in the A (Au-
dio) and V (Video) columns.
Saving Copies of Mac Sessions to
be Compatible with Windows
(Save Copy In to Pro Tools 6.9.x and Lower
Only)
Sessions created and saved as Pro Tools 7.x ses-
sions are always compatible on both Windows
and Mac systems.
If you create a Pro Tools 6.9.x or lower session
on a Mac system, the session is only compatible
on Windows systems if the Enforce Mac/PC
Compatibility option is selected during the Save
Copy In. In addition, there are cross-platform
limits to consider when completing the Save
Copy In.
Cross-Platform Session Limits
When saving (or creating) a copy of a Pro Tools
session that you want to be compatible on both
Mac and Windows, keep in mind the following
limits and how Pro Tools deals with them:
Audio File Types
The recommended file format for cross-platform
interoperability is BWF (.WAV). To support op-
timal session interchange, Pro Tools defaults to
BWF format for new sessions.
Pro Tools lets you save, bounce, and export in a
variety of file formats. However, if you create a
session using the SD II format, a warning dialog
appears reminding you of its limitations:
• SD II is not supported on Windows XP.
• The maximum sample rate for SD II files is
48 kHz.
In older versions of Pro Tools, Mac-for-
matted HFS+ drives could only be used as
Transfer volumes when connected to
Windows systems using MacDrive.
For information on using the Digidesign
HFS+ Disk Support option, see the Mac
HFS+ Disk Support Option Guide.

Chapter 15: File and Session Management and Compatibility 291
File Name Extensions
For cross-platform compatibility, all files in a
session must have a 3-letter file extension added
to the file name. Pro Tools 5.1 to 6.9.x session
files have the extension “.pts,” and Pro Tools 5
sessions have the extension “.pt5.” Wave files
have the “.wav” file extension, and AIFF files
have the “.aif” file extension.
Incompatible ASCII Characters
Region names, track names, file names, and
plug-in settings cannot use ASCII characters
that are incompatible with either system.
When importing files into a session, incompati-
ble characters are converted to underscores (“_”)
and the renamed files are placed in the Re-
named Files folder.
The following characters cannot be used in
Windows sessions:
/ (Forward Slash)
\ (Backslash)
: (Colon)
* (Asterisk)
? (Question mark)
“ (Quotation marks)
< (Less-than symbol)
> (Greater-than symbol)
| (vertical line or pipe)
Any “high order” ASCII character (created
with a key combination)
Saving Cross-Platform Sessions
To save an existing session to Pro Tools 6.9.x or
lower and maintain Mac and Windows
compatibility:
1 Choose File > Save Copy In.
2 In the Save Copy In dialog, choose a destina-
tion and enter a name for the new session file.
3 Set the Audio File Type to AIFF or BWF (.WAV).
These file formats are compatible with either
platform.
4 Set the Sample Rate and Bit Depth for the ses-
sion.
5 Select Enforce Mac/PC Compatibility. This op-
tion must be selected to make the session cross-
platform compatible.
6 Select the Items to Copy to the new session.
7 Click Save.
If the session previously used SD II files, the files
are converted to the new audio file format.
Pro Tools can convert a file created on a
Mac and saved without the “Enforce
Mac/PC compatibility” option selected to a
Windows compatible file. For more infor-
mation, see “Sharing Sessions Created on
Different Computer Platforms” on
page 288.
Pro Tools Reference Guide292
Sharing Sessions Created on Different Pro Tools Systems
Pro Tools makes it easy to share sessions between Pro Tools|HD systems and Pro Tools LE systems.
There are some important differences between the three types of systems that can affect how session
material is transferred.
The following table also includes Pro Tools LE systems with the DV Toolkit 2 option, as well as
Pro Tools LE systems with the Music Production Toolkit option.
For details on transferring sessions between Windows and Mac systems, see “Sharing Sessions Cre-
ated on Different Computer Platforms” on page 288.
Differences between Pro Tools systems
Feature Pro Tools|HD
Systems
Pro Tools LE
Systems
Pro Tools LE
Systems with
DV Toolkit 2
Pro Tools LE
Systems with Music
Production Toolkit
Maximum number
of audio tracks
up to 256 tracks up to 128 tracks
(32 voiceable)
up to 128 tracks
(48 voiceable)
up to 128 tracks
(48 voiceable)
Maximum number
of Instrument
tracks
128 32 32 32
Maximum number
of mix busses
128 busses
(Pro Tools 6.9
and higher)
64 busses
(Pro Tools 6.7
and lower)
32 busses
(Pro Tools 7.x)
16 busses
(Pro Tools 6.9.x
and lower)
32 32
Inserts per track up to 5 inserts up to 5 inserts up to 5 inserts up to 5 inserts
Sends per track up to 10 sends
(Pro Tools 7.x)
up to 5 sends
(Pro Tools 6.9.x
and lower)
up to 10 sends
(Pro Tools 7.x)
up to 5 sends
(Pro Tools 6.9.x
and lower)
up to 10 sends up to 10 sends

Chapter 15: File and Session Management and Compatibility 293
Opening Pro Tools HD Sessions in
Pro Tools LE
A Pro Tools HD 7.2 or higher session that does
not contain video tracks or VCA Masters can be
opened with Pro Tools LE 7.x, but certain ses-
sion components open differently or not at all.
When opening a Pro Tools HD 7.x session in
Pro Tools LE 7.x, the following occurs:
Tracks
• Any tracks beyond the first 32, as well any in-
active tracks, are set to voice off.
• Any assignments to busses beyond 32 are
made inactive.
• Any Instrument tracks beyond 32 are made
inactive.
• TDM plug-ins with RTAS equivalents are con-
verted; those without equivalents are made
inactive.
• Multichannel surround tracks are removed
from the session.
• Unavailable input and output paths are made
inactive.
• Any Delay Compensation settings are re-
moved.
• VCA Master tracks are removed and any unco-
alesced VCA automation is dropped.
Groups
• In Pro Tools LE 7.1 or lower only, all groups
beyond the first 26 (Bank 1, Groups a–z) are
dropped.
• Mix Groups keep only Main Volume informa-
tion.
• Mix/Edit Groups keep only Main Volume and
Automation Mode information.
• Automation overflow information for
grouped controls is be preserved.
• Group behavior of Solos, Mutes, Send Levels,
Send Mutes is be preserved.
• Solo Mode and Solo Latch settings are
dropped.
Video
• Only the main video track is displayed.
• Only the first QuickTime movie in the session
is displayed or played back.
• If the session contains QuickTime movies in
the Region List but no video track, the session
opens with a new QuickTime Movie track
containing the first QuickTime movie from
the Region List.
• The Timeline displays and plays back only the
video playlist that was last active. Alternate
video playlists are not available.
• In Pro Tools LE 7.1 or lower only, video re-
gions and video region groups are not shown
or saved.
Pro Tools HD 7.2 sessions that contain
video tracks or VCA Master tracks can only
be opened with Pro Tools LE 7.0cs3 and
higher.
Pro Tools Reference Guide294
Sharing Sessions Created on
Different Pro Tools Software
Versions
Pro Tools makes it easy to share sessions be-
tween different software versions of a particular
Pro Tools system (such as sharing sessions be-
tween Pro Tools HD 7.x and Pro Tools HD 6.x).
Sharing Pro Tools HD 7.4 Sessions
with Lower Versions of
Pro Tools HD
Opening Pro Tools HD 7.4 Sessions with
Pro Tools HD 7.3.x or 7.2
A Pro Tools HD 7.4 session can be opened with
Pro Tools HD 7.3.x or 7.2, but certain session
components open differently or not at all.
When opening a Pro Tools HD 7.4 session with
Pro Tools HD 7.3.x or 7.2, the following occurs:
Tracks
• Elastic Audio–enabled tracks open without
Elastic Audio region durations revert to the
timing of the original source file.
• Sessions with mixed language characters sup-
ported in Unicode may not open or, if they do
open, Pro Tools displays “garbage” text.
Opening Pro Tools HD 7.2 or Higher
Sessions with Pro Tools HD 7.1 or 7.0
A Pro Tools HD 7.2 or higher session without
video tracks or VCA Masters can be opened with
Pro Tools HD 7.1 or 7.0, but certain session
components open differently or not at all.
When opening a Pro Tools HD 7.4 session with
a version of Pro Tools HD 7.1 or 7.0 the
following occurs:
• All that occurs when opening a Pro Tools HD
7.4 session with Pro Tools HD 7.3.x or 7.2.
Tracks
• VCA Master tracks are removed and any unco-
alesced VCA automation is dropped.
• Any uncoalesced Trim automation is dropped.
Groups
• All groups beyond the first 26 (Bank 1, Groups
a–z) are dropped.
• Mix Groups keep only Main Volume informa-
tion.
• Mix/Edit Groups keep only Main Volume and
Automation Mode information.
• Automation overflow information for
grouped controls is not preserved.
• Group behavior of Solos, LFEs, Mutes, Send
Levels, Send Mutes is not preserved.
• Solo Mode and Solo Latch settings are
dropped.
When opening a Pro Tools 7.4 session with
Pro Tools 7.3.x, you are warned that you
are opening a session created with a newer
version of Pro Tools and that not all session
components will be available.
When opening a Pro Tools 7.4 session with
Pro Tools 7.2, 7.1, or 7.0, you are not be
warned that not all session components
will be available.
Pro Tools HD 7.2 or higher sessions that
contain video tracks or VCA Masters can
only be opened with Pro Tools HD 7.1cs3
and higher.

Chapter 15: File and Session Management and Compatibility 295
Video
• Only the main video track is displayed.
• Only the first QuickTime movie in the session
is displayed or played back.
• If the session contains QuickTime movies in
the Region List but no video track, the session
opens with a new QuickTime Movie track
containing the first QuickTime movie from
the Region List.
• The Timeline displays and plays back only the
video playlist that was last active. Alternate
video playlists are not available.
• Video regions and video region groups are not
shown or saved.
Saving Pro Tools HD 7.4 Sessions to
Pro Tools 5.1 -> 6.9 Format
Pro Tools 7.x sessions cannot be opened with
Pro Tools versions 6.9.x through 5.1.
To save a Pro Tools 7.4 session so it is compati-
ble with Pro Tools version 6.9.x through 5.1, use
the File > Save Copy In command to choose the
“Pro Tools 5.1 -> 6.9” session format.
When saving a Pro Tools HD 7.4 session to
Pro Tools HD 5.1 -> 6.9 format, the following
occurs:
Tracks
• Elastic Audio–enabled tracks are saved un-
warped and region durations revert to the
timing of the original source file.
• Instrument tracks are split into separate Aux-
iliary Input and MIDI tracks.
• VCA Master tracks are removed and VCA au-
tomation is coalesced to the corresponding
slave tracks.
• Trim automation playlists are coalesced to
their corresponding automation playlists.
• Fader Gain levels and automation breakpoints
higher than +6 dB are changed to +6 dB.
• Long names are shortened to 31 characters.
• The following attributes are dropped:
• Region groups
• Region loops
• Sample-based MIDI regions
• Sample-based MIDI tracks
• Sends F–J and any associated automation
• Marker/Memory Locations 201–999
Groups
• All groups beyond the first 26 (Bank 1, Groups
a–z) are dropped.
• Mix Groups keep only Main Volume informa-
tion.
• Mix/Edit Groups keep only Main Volume and
Automation Mode information.
• Automation overflow information for
grouped controls is not preserved.
• Group behavior of Solos, LFEs, Mutes, Send
Levels, Send Mutes is not preserved.
• Solo Mode and Solo Latch settings are
dropped.
Video
• Only the main video track is displayed.
• Only the first QuickTime movie in the session
is displayed or played back.
• If the session contains QuickTime movies in
the Region List but no video track, the session
opens with a new QuickTime Movie track
containing the first QuickTime movie from
the Region List.
• The Timeline displays and plays back only the
video playlist that was last active. Alternate
video playlists are not available.
• Video regions and video region groups are not
shown or saved.

Pro Tools Reference Guide296
Language Compatibility
• The Limit Character Set option must be en-
abled and you must select a single language
and character set.
Saving Pro Tools HD 7.4 Sessions to
Pro Tools 5.0 Format
Pro Tools 7.x sessions cannot be opened with
Pro Tools version 5.0.
To save a Pro Tools 7.4 session so it is compati-
ble with Pro Tools version 5.0, use the File >
Save Copy In command to choose the
“Pro Tools 5.0” session format.
When saving a Pro Tools HD 7.4 session to
Pro Tools 5.0 format, the following occurs:
• All that occurs when saving a Pro Tools HD
7.4 session to Pro Tools HD 5.1->6.9 format.
• Multichannel surround tracks are removed
from the session.
• Inactive tracks are removed from the session.
• Tracks assigned to “No Output” are routed to
Busses 31 and 32.
• Tracks or sends assigned to Busses 33–64 are
routed to Busses 31 and 32.
• Tracks assigned to multichannel paths or sub-
paths of multichannel paths are routed to
Busses 31 and 32.
• Sends assigned to multichannel paths or sub-
paths of multichannel paths are dropped.
• Tracks or sends assigned to stereo paths refer-
ring to even/odd channels (such as 2–3) are
routed to Busses 31 and 32.
• Multi-mono plug-in instances are dropped
Sharing Pro Tools LE 7.4 Sessions
with Lower Versions of
Pro Tools LE
Opening Pro Tools LE 7.4 Sessions with
Pro Tools LE 7.3.x
When opening a Pro Tools LE 7.4 session with
Pro Tools LE 7.3.x, the following occurs:
Tracks
• Any Elastic Audio–enabled tracks open with-
out Elastic Audio and all audio regions on
those tracks are at their original duration. All
warping is lost.
• Sessions with mixed language characters sup-
ported in Unicode may not open or, if they do
open, Pro Tools displays “garbage” text.
When opening a Pro Tools 7.4 session with
Pro Tools 7.3.x, you are warned that you
are opening a session created with a newer
version of Pro Tools and that not all session
components will be available. When open-
ing a Pro Tools 7.4 session with Pro Tools
7.1, or 7.0, you will not be warned that not
all session components will be available.

Chapter 15: File and Session Management and Compatibility 297
Opening Pro Tools LE 7.4 Sessions with
Pro Tools LE 7.1 or 7.0
A Pro Tools LE 7.4 session that does not contain
video tracks can be opened with Pro Tools LE
7.1 or 7.0, but certain session components open
differently or not at all.
When opening a Pro Tools LE 7.4 session with a
version of Pro Tools LE 7.1 or 7.0, all items that
occur when opening a Pro Tools LE 7.4 session
with Pro Tools LE 7.3.x or 7.2 occur, plus the
following:
Groups
• All groups beyond the first 26 (Bank 1, Groups
a–z) are dropped.
• Mix Groups keep only Main Volume informa-
tion.
• Mix/Edit Groups keep only Main Volume and
Automation Mode information.
Video
• Only the main video track is displayed.
• Only the first QuickTime movie in the session
is displayed or played back.
• If the session contains QuickTime movies in
the Region List but no video track, the session
opens with a new QuickTime Movie track
containing the first QuickTime movie from
the Region List.
• The Timeline displays and plays back only the
video playlist that was last active. Alternate
video playlists are not available.
• Video regions and video region groups are not
shown or saved.
Sharing Pro Tools LE 7.4 Sessions
with Pro Tools LE 6.9 or Lower
Pro Tools 7.x format sessions cannot be opened
on Pro Tools versions 6.9.x or lower, but they
can be saved to a lower compatible version.
Some session components in the new copy open
differently or not at all.
Saving Pro Tools LE 7.4 Sessions to
Pro Tools LE 5.1 -> 6.9 Format
To save a Pro Tools 7.4 session so it is compati-
ble with Pro Tools version 6.9.x through 5.1, use
the File > Save Copy In command to choose the
“Pro Tools 5.1 -> 6.9” session format.
When saving a Pro Tools LE 7.4 session to
Pro Tools 5.1 -> 6.9 format, the following
occurs:
• Elastic Audio–enabled tracks are saved un-
warped and region durations revert to the
timing of the original source file.
• All groups beyond the first 26 (Bank 1, Groups
a–z) are dropped.
• Mix Groups keep only Main Volume informa-
tion.
• Mix/Edit Groups keep only Main Volume and
Automation Mode information.
• Only the main video track is displayed.
• Only the first QuickTime movie in the session
is displayed or played back.
• If the session contains QuickTime movies in
the Region List but no video track, the session
opens with a new QuickTime Movie track
containing the first QuickTime movie from
the Region List.
• The Timeline displays and plays back only the
video playlist that was last active. Alternate
video playlists are not available.

Pro Tools Reference Guide298
• Video regions and video region groups are not
shown or saved.
• Fader Gain levels and automation breakpoints
higher than +6 dB are changed to +6 dB.
• Long names are shortened to 31 characters.
• Instrument tracks are split into separate Aux-
iliary Input and MIDI tracks.
• The following attributes are dropped:
• Region groups
• Region loops
• Sample-based MIDI regions
• Sample-based MIDI tracks
• Sends F–J and any associated automation
• Marker/Memory Locations 201–999
• Busses 17–32 (Pro Tools LE)
• The Limit Character Set option must be en-
abled and you must select a single language
and character set.
Saving Pro Tools LE 7.4 Sessions to
Pro Tools LE 5.0 Format
To save a Pro Tools LE 7.4 session so it is com-
patible with Pro Tools version 5.0, use the File >
Save Copy In command to choose the
“Pro Tools 5.0” session format.
When saving a Pro Tools LE 7.4 session to
Pro Tools 5.0 format, the following occurs:
• All that occurs when saving a Pro Tools LE 7.4
session to Pro Tools 5.1->6.9 format.
• Fader Gain levels and automation breakpoints
higher than +6 dB are changed to +6 dB.
• Multi-mono plug-in instances are dropped.
• Sends assigned to multichannel paths or sub-
paths of multichannel paths are dropped.
• Tracks assigned to “No Output” are routed to
Busses 31 and 32.
• Tracks/sends assigned to Busses 33–64 are
routed to Busses 31 and 32.
• Tracks assigned to multichannel paths or sub-
paths of multichannel paths are routed to
Busses 31 and 32.
• Tracks/sends assigned to stereo paths referring
to even/odd channels (such as 2–3) are routed
to Busses 31 and 32.
Language Compatibility
Unicode Support for Languages
Pro Tools supports entry and display of any lan-
guage characters supported in Unicode any-
where in the Pro Tools application. This lets
you:
• Use multiple languages in session names,
and in path names, file names and region
names within the same session.
• Search for terms in multiple languages in
DigiBase browsers.
Pro Tools Automatic Naming
Language
When working in a language other than En-
glish, you can set Pro Tools to automatically
name session elements (such as regions, tracks,
and I/O paths) in English. This is useful when
sharing sessions with other users working in En-
glish.
To set the Automatic Naming Language to match
the language selected for the Pro Tools
application:
1 Choose Setup > Preferences and click the Dis-
play tab.
2 Choose the language you want to use in
Pro Tools from the Language pop-up menu.
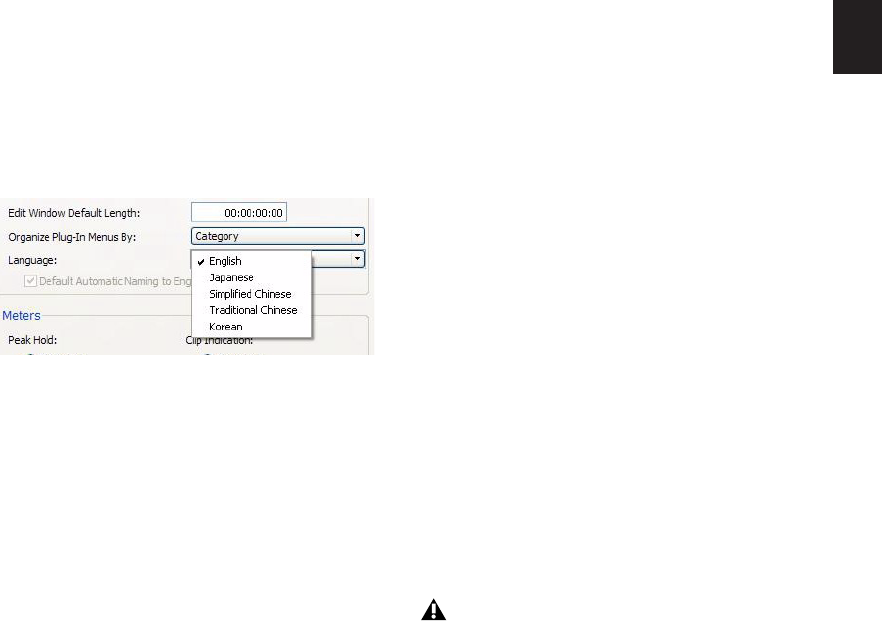
Chapter 15: File and Session Management and Compatibility 299
3 Deselect the “Default Automatic Naming to
English” option.
Pro Tools Application Language
(Windows Only)
You can choose the language you want to use in
the Pro Tools application, independently of
what language version of Windows you are us-
ing.
To select the language for Pro Tools:
1 Choose Setup > Preferences and select the Dis-
play tab.
2 Choose the language you want to use in
Pro Tools from the Language pop-up menu.
Multilingual Application Support
for Pro Tools Systems
(Localized OS on Mac OS X Only)
Localized versions of Pro Tools (such as
Pro Tools Korean, simplified Chinese, or Japa-
nese) can be opened on a Digidesign-qualified
Mac that supports English and the localized lan-
guage versions of Mac OS X. You can also select
a different language in any localized version of
Pro Tools (including English) in the Apple Sys-
tem Preferences.
To change to a different language version of
Pro Tools:
1 Close Pro Tools if it is currently open.
2 Launch Apple System Preferences.
3 Click International (the “flag” icon).
4 Click the Language tab.
5 In the Languages column, click the language
you want, and drag it to the top of the list.
6 Close the International window.
7 Do one of the following:
• If you are changing from a localized lan-
guage to English, launch Pro Tools.
– or –
• If you are changing from one localized lan-
guage to another (or from English to a lo-
calized language), log out and log in from
the Apple menu, then launch Pro Tools.
Language options in the Display Preferences page
If you want your computer to start with the
previous language (after working on a dif-
ferent language version) follow the above
steps and change the International prefer-
ence back to the previous language.
Pro Tools Reference Guide300

301
Part IV: Playback and Recording
302

Chapter 16: Playing Back Track Material 303
Chapter 16: Playing Back Track
Material
Playing Tracks
After importing or recording audio or MIDI to
tracks, you will want to play back the material to
listen to it for editing and mixing.
Starting and Stopping Playback
To start playback, do one of the following:
• Click Play in the Transport.
• Press the Spacebar.
• With the Numeric Keypad mode set to
Transport or Shuttle, press 0 on the nu-
meric keypad.
• If the Numeric Keypad mode is set to Trans-
port, and the Use Separate Play and Stop
Keys option is enabled, press Enter on the
numeric keypad.
• If you have a worksurface or MIDI control
surface connected and configured, press
the Play button.
• If Pro Tools is online and slaved to another
deck, press play on the master deck (see
“Putting Pro Tools Online” on page 894).
To stop playback, do one of the following:
• Click Stop in the Transport.
• Press the Spacebar.
• With the Numeric Keypad mode set to
Transport or Shuttle, press 0 on the nu-
meric keypad.
• If you have a worksurface or MIDI control
surface connected and configured, press
the Stop button.
• If Pro Tools is online and slaved to another
deck, press stop on the master deck (see
“Putting Pro Tools Online” on page 894).
Example: Playing Back Audio
To play back audio:
1 Import or record audio to a track.
2 Assign the track’s Output selector to your
main monitoring path.
3 To have playback start from the beginning of
the session, click Return to Zero in the Trans-
port.
4 The audio plays through the selected Output
Path. Adjust the track’s volume and pan faders
as necessary.
5 Start playback.
6 When you are done, stop playback.
For more information about the Numeric
Keypad modes, see “Numeric Keypad
Modes” on page 21.
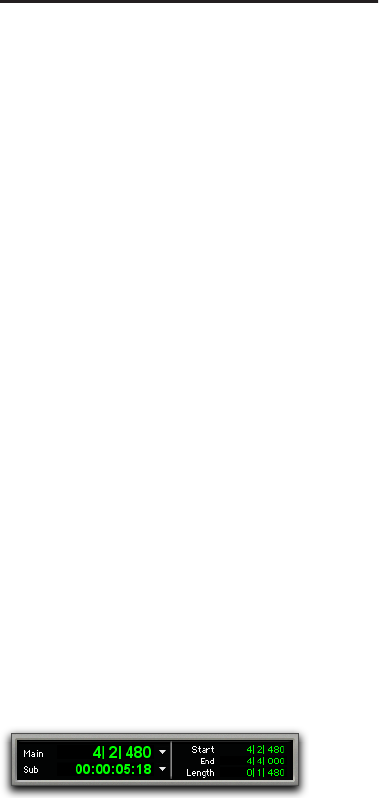
Pro Tools Reference Guide304
Example: Playing Back MIDI
To play back MIDI (and monitor the audio):
1 Import, record, or enter MIDI to a MIDI or In-
strument track.
2 For an Instrument track, do the following:
• Set the Instrument track’s audio Output se-
lector to the main monitoring path.
• If you are using an external MIDI device
(not an Instrument plug-in), set the Instru-
ment track’s audio Input selector to the In-
put path to which your MIDI device’s audio
outputs are connected.
• Set the MIDI Output selector in Instrument
view to the MIDI device (port) and channel
you want to play back.
3 For a MIDI track, do the following:
• Create an Auxiliary Input or Instrument
track to monitor the audio from an exter-
nal MIDI device or Instrument plug-in.
• Set the Auxiliary Input or Instrument
track’s audio Output selector to the main
monitoring path.
• If you are using an external MIDI device
(not an Instrument plug-in), set the Auxil-
iary Input or Instrument track’s audio In-
put selector to the Input path to which
your MIDI device’s audio outputs are con-
nected.
• Set MIDI track’s output selector to the MIDI
device (port) and channel you want to play
back.
4 To have playback start from the beginning of
the session, click Return to Zero in the Trans-
port.
5 Start playback.
6 The MIDI plays the selected MIDI device, and
the audio from the MIDI device is monitored
through the selected Output Path on the Auxil-
iary Input or Instrument track. Adjust the MIDI,
Auxiliary Input, or Instrument track’s volume
and pan faders as necessary.
7 When you are done, stop playback.
Playback Location
The playback location is the point in the
Pro Tools Timeline where you can begin playing
back audio or MIDI in your session.
The playback location is displayed in counters
and indicators in the Edit window, Transport
window, and Big Counter. The playback loca-
tion (or Edit selection) is also indicated by a
playback or edit cursor in the Timeline or play-
list of the Edit window.
Pro Tools also provides a pre-roll control for set-
ting playback to begin before the playback loca-
tion. See “Basic Transport Controls and
Counters” on page 116.
Counters and Indicators that
Display the Playback Location
Main and Sub Counters and Edit Selection
Indicators
At the top of the Edit window, the playback lo-
cation is displayed in the Main and Sub
counters, and the Edit Selection Start indicator.
If no selection is made, the playback location is
also displayed in the End Selection End indica-
tor.
Main and Sub Counters, Edit Selection indicators
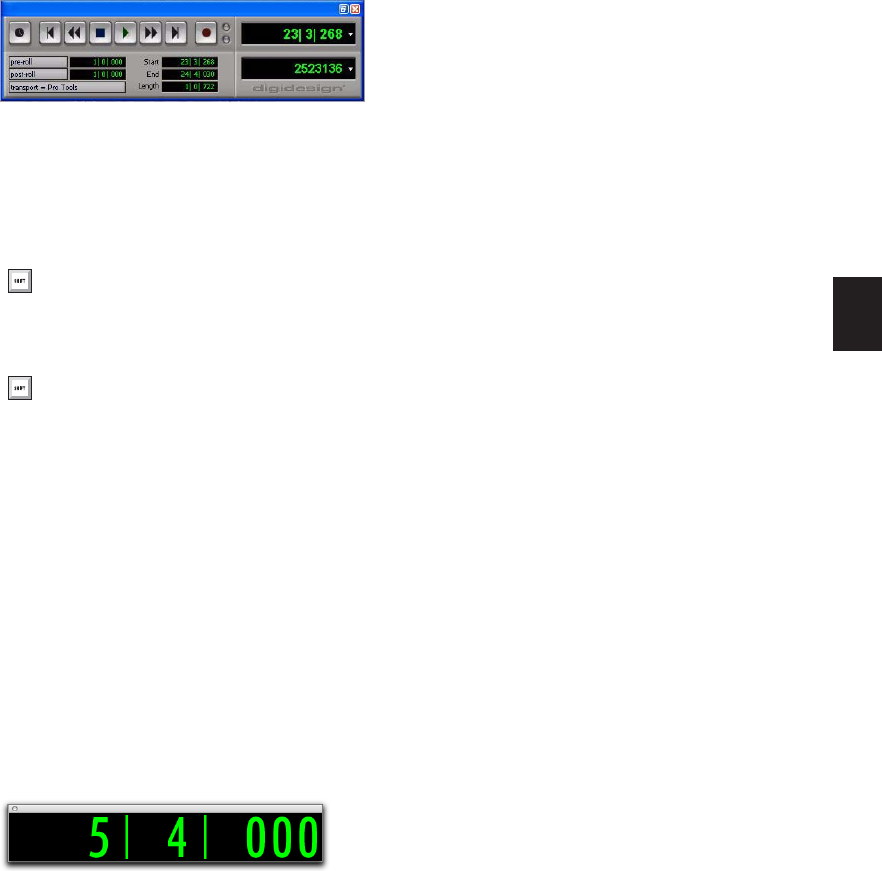
Chapter 16: Playing Back Track Material 305
Counters and Edit Selection indicators can also
be displayed in the Transport window.
To display the Main Counter in the Transport
window:
Choose View > Transport > Counters. The Sub
Counter will only display i
To display the Sub Counter in the Transport
window:
Choose View > Transport > Counters.
To display Edit Selection indicators in the
Transport window:
Choose View > Transport > Expanded.
The Big Counter
The current playback location can also be dis-
played as a Big Counter.
To display the Big Counter:
Choose Window > Big Counter.
Cursors that Indicate the
Playback (or Edit) Location
There are two types of cursors in the Pro Tools
Edit window for indicating the current playback
or Edit selection:
Playback Cursor
The playback cursor is a solid unblinking line
that moves across the Edit window to indicate
the current playback location.
The selected Scrolling Option determines how
the Edit window scrolls during playback, and
how the playback cursor functions. See “Scroll-
ing Options” on page 310 for details.
Edit Cursor
The edit cursor is a flashing line that appears
when you click with the Selector tool in a track’s
playlist. The blinking edit cursor indicates the
start point for any editing tasks performed. If
you make a selection and perform an edit, the
selection is the target of the edit.
Transport with Counters displayed
Start-click (Windows) or Control-click
(Mac) the Expand/Collapse button in the
Transport window to show or hide counters.
Alt-click (Windows) or Option-click (Mac)
the Expand/Collapse button in the Trans-
port window to show or hide counters and
MIDI controls.
Big Counter window
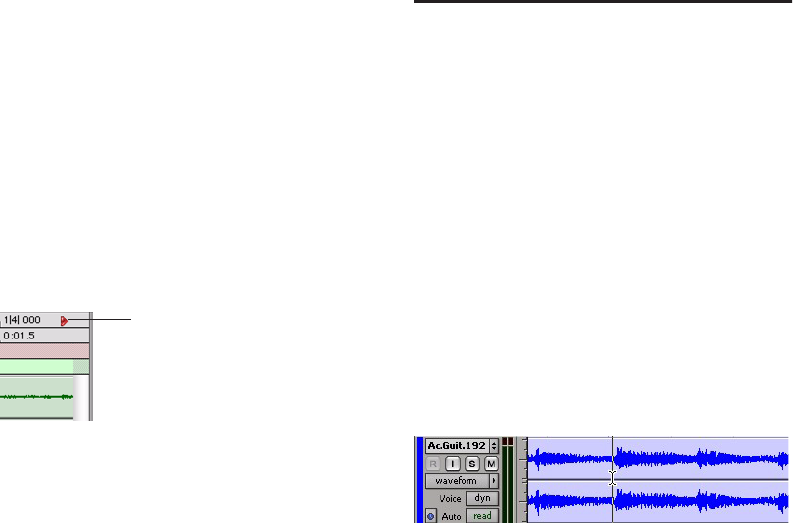
Pro Tools Reference Guide306
Locating the Playback Cursor when It Is
Off-Screen
Use the Playback Cursor locator to locate the
playback cursor when it is off-screen.
The Playback Cursor locator appears on the
right edge of the Main Timebase ruler if the
playback cursor is located beyond the time visi-
ble in the Edit window. If the playback cursor is
located before the time visible in the Edit win-
dow, the Playback Cursor locator appears on the
left edge of the Main Timebase ruler.
For example, if the Scrolling option is set to
None, the playback cursor will move off-screen
after it has played past the time currently visible
in the Edit window. The Playback Cursor locator
will appear on the right edge of the Main Time-
base ruler after the playback cursor moves be-
yond the time visible in the Edit window.
The Playback Cursor locator is red when a track
is record-enabled and blue when no track is
record-enabled.
To locate the playback cursor when it is off-screen:
Click the Playback Cursor locator in the Main
Timebase ruler.
The Edit window changes to center the playback
cursor on-screen.
Setting the Playback Location
There are multiple ways to set or move the play-
back location for Pro Tools material. You can
use these commands for different tasks, includ-
ing finding a passage in a song, moving to a dif-
ferent section of a song, or comparing different
sections.
Setting Playback Location Using
the Selector Tool
To set where playback begins, you can click any-
where in a track with the Selector tool (as long as
the Timeline and Edit selections are linked). See
“Linking or Unlinking Timeline and Edit Selec-
tions” on page 447).
To begin playing from a specific point within a
track:
1 Make sure that Options > Link Timeline and
Edit Selection is enabled.
2 With the Selector tool, click in the track where
you want playback to begin.
3 Start playback.
4 Stop playback.
To jump to a different location and begin playing
from there, do one of the following:
When playback is stopped, click with the Se-
lector tool at that point and click Play in the
Transport window.
– or –
Click the desired location in a Timebase Ruler
during playback.
Playback Cursor locator, recording enabled (playback
cursor located after currently viewed audio)
Playback Cursor locator
Setting a playback point with the Selector tool

Chapter 16: Playing Back Track Material 307
With the Timeline and Edit selections linked,
you can click a region or MIDI note with the
Time Grabber tool to automatically update the
Timeline with the selection’s start time, letting
you play from that point.
Setting Playback Location with
Basic Transport Controls
Transport controls in the Transport window and
top of the Edit window can be used to move the
playback location. These include Rewind, Fast
Forward, and Return to Zero (to move playback
location to the beginning of the session). For
more information, see “Basic Transport Con-
trols and Counters” on page 116.
Setting Playback Location with
the Main Counter or Edit Selection
Start Indicator
To set the playback location using a Main Counter
(or the Edit Selection Start indicator):
1 Do one of the following:
• Click in one of the counters.
– or –
• Press asterisk (*) on the numeric keypad to
highlight the Main Counter in the Edit
window (or the Main Counter in the Trans-
port window or Big Counter window, if ei-
ther are displayed).
2 Type in the new location. Press Period (.) to cy-
cle through to the different time fields.
3 Press Enter to accept the new value and auto-
matically locate there.
Setting Playback Location with
Fast Forward/Rewind
You can use the Fast Forward and Rewind but-
tons in the Transport window to move the play-
back location. If the Operation preference for
“Audio During Fast Forward/Rewind” is se-
lected, the scanned audio is heard (similar to a
CD player) when clicking the Fast Forward and
Rewind buttons.
You can also fast forward or rewind incremen-
tally by repeatedly clicking the appropriate but-
ton. The size of these increments is determined
by the Main Time Scale:
Bars:Beats Moves to the beginning of the previ-
ous or next bar.
Min:Sec Moves back or forward in one-second
steps.
Time Code Moves back or forward in one-second
steps (while adjusting for current SMPTE for-
mat).
Feet+Frames Moves back or forward in one-foot
steps.
Samples Moves back or forward in one-second
steps.
Setting Playback Location with
Back and Forward Commands
(Pro Tools HD Only)
Pro Tools provides four Back/Forward com-
mands (sometimes called “rollback”) for mov-
ing the playback location in the Edit window.

Pro Tools Reference Guide308
You can also move the playback location in
multiple increments by repeating the command
(See “Repeating Back/Forward Commands” on
page 308).
Back Moves the playback location backward by
the Back/Forward Amount.
Back and Play Moves the current playback loca-
tion backward by the Back/Forward Amount and
automatically begins playback.
Forward Moves the playback location forward by
the Back/Forward Amount.
Forward and Play Moves the current playback lo-
cation forward by the Back/Forward Amount
and automatically begins playback.
Setting the Back/Forward Amount
The length of the Back/Forward move is deter-
mined by the Back/Forward Amount preference
in the Operation page (Setup > Preferences).
To configure the Back/Forward Amount:
1 Choose Setup > Preferences and click the Op-
eration tab.
The timebase of the Back/Forward Amount set-
tings follows the Main Time Scale by default, or
you can deselect Follow Main Time and select
any of the following timebase formats:
• Bars:Beats
• Min:Sec
• Time Code
• Feet+Frames
• Samples
2 Do one of the following:
• Select a preset amount in the Back/Forward
Amount pop-up menu.
– or –
• In the Back/Forward Amount field, enter a
custom amount.
Using Back or Forward Commands
To move the playback location backward by the
Back/Forward Amount:
Press Control (Windows) or Command (Mac),
and click Rewind in the Transport window.
To move the playback location forward by the
Back/Forward Amount:
Press Control (Windows) or Command (Mac),
and click Fast Forward in the Transport window.
To move the playback location backward by the
Back/Forward Amount and then begin playback:
Press Control+Alt (Windows) or Com-
mand+Option (Mac), and click Rewind in the
Transport window.
To move the playback location forward by the
Back/Forward Amount and then begin playback:
Press Control+Alt (Windows) or Com-
mand+Option (Mac), and click Fast Forward in
the Transport window.
Repeating Back/Forward Commands
All the Back/Forward commands can be re-
peated in order to increase the amount of the to-
tal Back or Forward move.
Back/Forward commands also work when
controlling a 9-pin device. See the Machine-
Control Guide for details.

Chapter 16: Playing Back Track Material 309
To repeat Back/Forward moves:
1 Press and hold Control (Windows) or Com-
mand (Mac).
2 Click Rewind or Fast Forward the number of
times you want to repeat moving the playback
location backwards or forwards by the Back/For-
ward Amount.
Extending Selections with Back or Back and
Play Commands
The Back or Back and Play commands can be
used to extend a selection backwards by the
length of the Back/Forward Amount.
To extend a selection with Back or Back and Play
commands:
1 Configure the Back/Forward Amount.
(See“Setting the Back/Forward Amount” on
page 308.)
2 With the Selector tool, drag within a track to
make a selection.
3 Do one of the following:
• To extend the selection backwards by the
Back/Forward Amount, press Shift+Control
(Windows) or Shift+Command (Mac) and
click Rewind in the Transport window.
– or –
• To extend the selection backwards by the
Back/Forward Amount and then begin
playback, press Shift+Control+Alt (Win-
dows) or Shift+Command+Option (Mac)
and click Rewind in the Transport window.
Additional Ways of Moving the
Playback Location
You can also move the playback location with
the following:
Shuttle Lock Modes With either Shuttle Lock
mode (Classic or Transport) you can use the nu-
meric keypad to shuttle forward or backwards at
specific speeds. For more information, see
“Shuttle Lock Modes” on page 21.
Memory Locations Memory Locations can be
used to move the playback location (or Edit se-
lection). When a Memory Location is recalled,
the playback location (or Edit selection) up-
dates. Memory Locations can be recalled from
the Memory Locations window and from the
numeric keypad. In addition, Marker Memory
Selections can be recalled by clicking them in
the Markers ruler. For more information, see
“Memory Locations and Markers” on page 637.
Tabbing to Transients With the Tab to Transients
button enabled, you can automatically navigate
to transients in audio waveforms, placing the
cursor just before the detected transient peak.
For more information, see “Tabbing to Tran-
sients” on page 457.
Although you cannot extend a selection
with the Forward or Forward and Play com-
mands, you can use the following proce-
dures with Forward or Forward and Play to
move the start point of a current selection.
Pro Tools Reference Guide310
Scrolling Options
You can configure how contents of the Edit win-
dow scroll during playback and recording.
To configure Scrolling options:
Choose Options > Scrolling and select one of
the following options:
None The Edit window does not scroll during or
after playback. The playback cursor moves
across the Edit window, indicating the playback
location.
After Playback The playback cursor moves
across the Edit window, indicating the playback
location. When playback has stopped, the Edit
window scrolls to the final playback location.
Page The playback cursor moves across the Edit
window, indicating the playback location.
When the right edge of the Edit window is
reached, its entire contents are scrolled, and the
playback cursor continues moving from the left
edge of the window. For more information, see
“Page Scrolling During Playback” on page 310.
Continuous (Pro Tools HD and Pro Tools LE with
DV Toolkit 2 Only) See “Continuous Scrolling
During Playback” on page 310.
Center Playhead (Pro Tools HD Only) See “Cen-
ter Playhead Scrolling” on page 311.
Page Scrolling During Playback
You can set Pro Tools to scroll the track display
while playing, and also have the edit cursor ap-
pear wherever playback stops.
To make the track display and the edit cursor
follow playback:
1 Select Options > Scrolling > Page.
2 Choose Setup > Preferences and click the
Operation tab.
3 Select the option for “Timeline Insertion/Play
Start Marker Follows Playback,” then click OK.
4 Make sure to select Options > Link Timeline
and Edit Selection.
5 With the Selector tool, click in the track where
you want playback to begin.
6 Start playback. The playback cursor scrolls
across the Edit window, indicating the current
playback location.
7 Stop playback. The edit cursor appears at the
location where playback stops.
Continuous Scrolling During Playback
(Pro Tools HD and Pro Tools LE with
DV Toolkit 2 Only)
When this scrolling option is selected, the Edit
window’s contents scroll continuously past the
playback cursor, which remains in the center of
the window. With this option, playback is al-
ways based on the Timeline selection (unlike
the Center Playhead Scrolling option). Continu-
Making a selection in the Timeline or a
playlist, or manually scrolling the Timeline
while in Page Scroll or Continuous Scroll
mode suspends page scrolling. To resume
page scrolling and jump to the current play-
back location, click the Playback Cursor lo-
cator in the Main Timebase ruler (see “Lo-
cating the Playback Cursor when It Is Off-
Screen” on page 306).
Press Start+N (Windows) or Control+N
(Mac) to toggle the Timeline Insertion/Play
Start Marker Follows Playback preference
on and off.
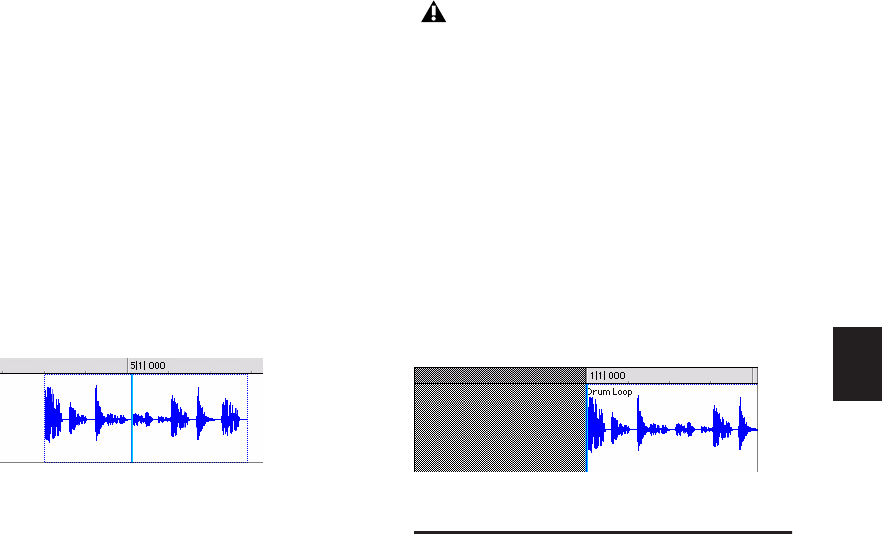
Chapter 16: Playing Back Track Material 311
ous Scrolling During Playback uses host process-
ing power, so use this option with Pro Tools LE
with DV Toolkit 2 only when absolutely neces-
sary.
Center Playhead Scrolling
(Pro Tools HD Only)
When this scrolling option is selected, the Edit
window’s contents scroll continuously past the
Playhead, which is a blue line in the center of the
window (red when recording).
The Playhead indicates where playback begins
when clicking Play in the Transport window.
To move the Playhead to a particular location
for playback, you can scroll there in a ruler (see
“Scrolling in a Timebase Ruler” on page 460),
use the Edit window’s horizontal scroll bar, or
type the location into one of the Edit Selection
indicators or one of the Counters.
Moving the Playhead with these methods does
not update the Timeline selection. However, up-
dating the Timeline selection automatically
moves the Playhead to the Timeline insertion
point.
With the Playhead enabled, you can jump to
and play an Edit or Timeline selection. For de-
tails, see “Playing Timeline and Edit Selections
with the Playhead” on page 313.
Half-Screen Edit Window
When the Scrolling option is set to Continuous
or Center Playhead, a half-screen appears at the
far left of the Edit window (before the beginning
of the session).
Playing Selections
Once an Edit selection is made, you can audi-
tion it by clicking Play in the Transport window.
If enabled, the pre- and post-roll amounts play
as well.
To play a selection:
1 Enable Link Timeline and Edit Selection (Op-
tions > Link Timeline and Edit Selection).
2 With the Selector or Time Grabber tool, make
a track selection.
3 If you want to use pre-roll or post-roll, enable
and set the pre-roll and post-roll amounts. For
details, see “Setting Pre- and Post-Roll” on
page 357.
4 Click Play in the Transport window, or press
the Spacebar.
Center Playhead Scrolling option
Center Playhead Scrolling and Dynamic
Transport mode cannot be used at the same
time. Selecting Center Playhead Scrolling
disables Dynamic Transport mode (if it is
enabled). Likewise, enabling Dynamic
Transport mode when Center Playhead
Scrolling is selected automatically changes
the Scrolling option to No Scrolling.
Half-screen for Center Playhead Scrolling option
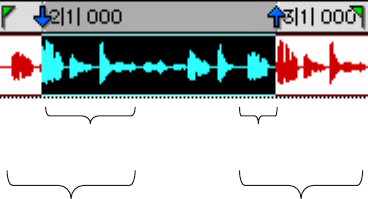
Pro Tools Reference Guide312
All tracks play for the range of the selection, in-
cluding pre-roll and post-roll if enabled.
To play an Edit selection with Link Timeline and
Edit Selection disabled, do one of the following:
Choose Edit > Selection > Play Edit.
To play a Timeline selection with Link Timeline and
Edit Selection disabled:
Choose Edit > Selection > Play Timeline.
Auditioning Pre-Roll and Post-Roll
You can audition and play just the pre-roll or
post-roll material for a selection.
To play from the pre-roll point to the start of a
selection, or to the current Cursor location:
Press Alt+Left Arrow (Windows) or Op-
tion+Left Arrow (Mac).
To play to the post-roll point from the end of a
selection, or from the current Cursor location:
Press Control+Right Arrow (Windows) or
Command+Right Arrow (Mac).
Auditioning Start and End Points for
Selections
There may be times when you want to audition
the start or end of an audio selection without
hearing the entire selection. This allows you to
check, for instance, whether the beginning or
end of a selection includes any unwanted clicks
or pops.
To audition a selection start point:
Press Control+Left Arrow (Windows) or Com-
mand+Left Arrow (Mac).
When auditioning the beginning of a selection,
the selection plays from the start point for a du-
ration equal to the post-roll amount.
To audition a selection start point with pre-roll:
Press Control+Alt+Left Arrow (Windows) or
Command+Option+Left Arrow (Mac).
To audition a selection end point:
Press Alt+Right Arrow (Windows) or Op-
tion+Right Arrow (Mac).
When auditioning the end of a selection, play-
back begins before the end point by the pre-roll
amount.
To audition a selection end point with post-roll:
Press Control+Alt+Right Arrow (Windows) or
Command+Option+Right Arrow (Mac).
Playback ranges for auditioning start/end points
plays start
(for post amount)
plays pre-roll + start
plays end
(for pre amount)
plays end + post-roll

Chapter 16: Playing Back Track Material 313
Playing Timeline and Edit
Selections with the Playhead
(Pro Tools HD Only)
When the Scrolling option is set to Center Play-
head, selections in the Timeline do not deter-
mine when playback begins. The Playhead, it-
self, denotes where playback begins when
clicking Play in the Transport.
The Timeline and Edit selections, however, can
still be played when the Playhead is enabled.
To play an Edit selection with the Playhead
enabled:
1 Deselect Options > Link Timeline and Edit Se-
lections.
2 Select Options > Scrolling > Center Playhead.
3 With the Selector or Time Grabber tool, make
a track selection.
4 Choose Edit > Selection > Play Edit.
The Playhead jumps to the Edit selection and
plays it from beginning to end, and then stops.
To play a Timeline selection with the Playhead
enabled:
1 Deselect Options > Link Timeline and Edit Se-
lections.
2 Select Options > Scrolling > Center Playhead.
3 Drag with the Selector tool in any Timebase
ruler to set the play range.
4 Choose Edit > Selection > Play Timeline.
The Playhead jumps to the Timeline selection
and plays it from beginning to end, and then
stops.
Moving the Playhead
When the Scrolling option is set to Center Play-
head, the Playhead can be moved forward or
back to the next region boundary in the selected
track.
To move the Playhead through a track’s region
boundaries:
1 Make sure the Tab to Transients button is not
enabled (see “Tabbing to Transients” on
page 457).
2 Click in the track with the Selector tool.
3 Do one of the following:
• Press Tab to move the Playhead forward to
the next region boundary.
– or –
• Press Control+Tab (Windows) or Op-
tion+Tab (Mac) to move the Playhead back
to the previous region boundary.
Playback Modes
Pro Tools provides several Playback modes:
• Normal Playback mode
• Half-Speed Playback mode
• Play Pause mode (Prime for Playback)
• Loop Playback mode
• Dynamic Transport mode
Normal Playback Mode
Normal Playback mode is simply when none of
the other Playback modes are selected. In Nor-
mal Playback mode, Pro Tools plays back at the
session sample rate.

Pro Tools Reference Guide314
Half-Speed Playback Mode
Use Half-Speed Playback mode to learn or tran-
scribe difficult passages in recorded tracks.
To play at half-speed:
1 Do one of the following:
• Shift-click the Play button in the Transport.
• Right-click the Play button in the Transport
and select Half-Speed. Then click Play to
start Half-Speed Playback.
2 Click Stop in the Transport to stop playback.
Play Pause Mode
When playing back a large number of tracks,
Pro Tools may take a little longer to actually
start playback. To avoid this delay, put Pro Tools
in Play Pause mode before starting playback.
To enable Play Pause mode and start playback:
1 Do one of the following:
• Alt-click (Windows) or Option-click (Mac)
Play in the Transport to put Pro Tools in
Play Pause mode.
• Right-click the Play button and select
Prime for Playback.
The Stop button lights and the Play button
flashes.
2 To begin playback instantaneously, click Play.
3 Click Stop to stop playback.
Loop Playback Mode
When Loop Playback is enabled, the selected
track range repeats on playback. If there is no se-
lection, playback occurs normally from the cur-
rent Cursor location.
Looping playback is a useful way to check the
rhythmic continuity of a selection when work-
ing with musical material. If you’re working
with one-bar selections, you can loop playback
to see if the material loops cleanly. If it seems to
skip, you should then adjust the length of the
selection until it works “musically” within the
context of the playlist and the other tracks.
To loop playback of a selection:
1 Enable Link Timeline and Edit Selection (Op-
tions > Link Timeline and Edit Selection).
2 With the Selector tool, select the track range
you want to loop.
3 Enable Loop Playback by doing one of the fol-
lowing:
• Select Options > Loop Playback.
• Right-click the Play button in the Transport
window and select Loop from the pop-up
menu.
• Start-click (Windows) or Control-click
(Mac) the Play button in the Transport win-
dow.
• Press Control+Shift+L (Windows) or Com-
mand+Shift+L (Mac).
• With the Numeric Keypad mode set to
Transport, press 4 on the numeric keypad.
You can also play at half-speed by pressing
Shift+Spacebar.
When synchronizing to time code, use Play
Pause mode to play back large numbers of
tracks. This decreases the time it takes to
lock to time code.
A selection must be at least 500 ms in
length for it to loop on playback.
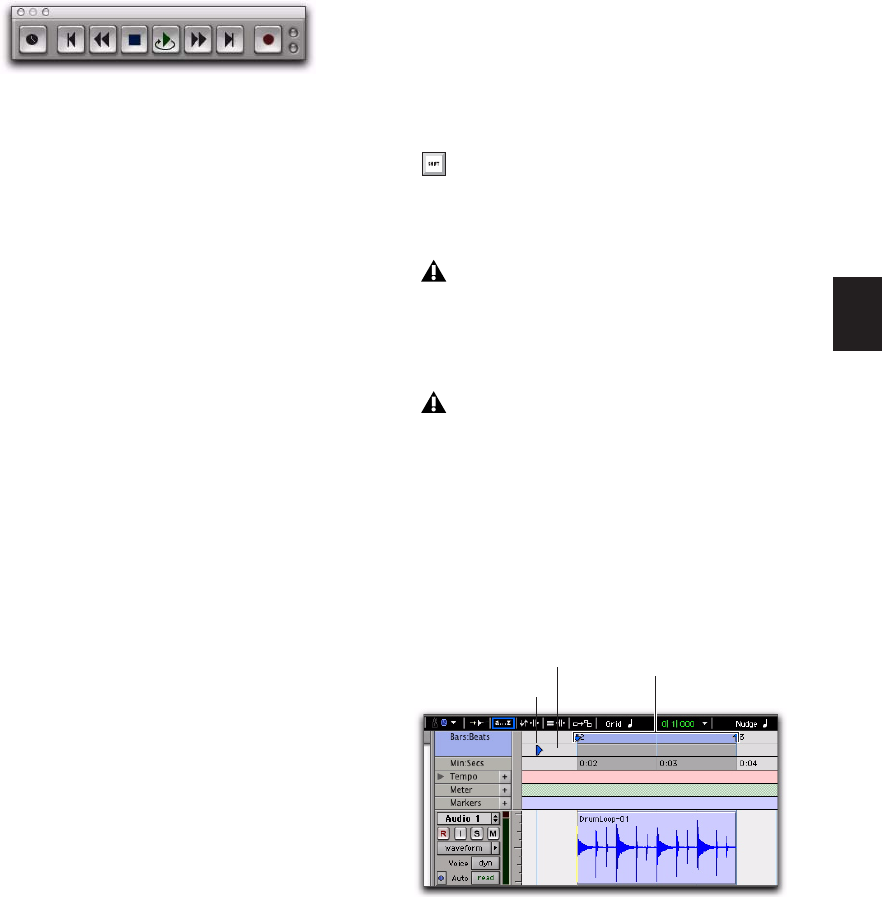
Chapter 16: Playing Back Track Material 315
When enabled, a loop symbol appears in the
Play button in the Transport window.
4 Click Play in the Transport window.
Playback begins from the pre-roll point (if en-
abled) and continues to the selection’s end
point, where it loops back to the selection’s start
point.
5 Click Stop in the Transport window to stop
playback.
Loop Playback and Audio Recording
When Loop Playback is enabled, Pro Tools will
not loop when attempting to record audio
tracks with QuickPunch, Destructive Record, or
Nondestructive Record mode.
To loop record audio tracks in Pro Tools, you
must enable Loop Record mode (see “Loop Re-
cording Audio” on page 350).
Dynamic Transport Mode
Dynamic Transport mode lets you decouple the
playback location from the Timeline selection.
This means that you can start playback from
anywhere on the Timeline without losing your
Timeline or Edit selections. For example, you
can use Dynamic Transport mode in conjunc-
tion with Loop Playback mode to quickly audi-
tion loop transitions.
When Dynamic Transport mode is enabled, the
Main Timebase ruler expands to double-height
and reveals the new Play Start Marker. The Play
Start Marker determines where playback starts
when the Transport is engaged. You can posi-
tion the Play Start Marker independently of the
Timeline Selection. The Play Start Marker can be
repositioned during playback and playback con-
tinues from the new location.
To enable or disable Dynamic Transport mode:
Select or deselect Options > Dynamic Trans-
port.
Loop Playback enabled
Press Control+Start+P (Windows) or Com-
mand+Control+P (Mac) to toggle Dynamic
Transport mode on or off.
Enabling Dynamic Transport mode auto-
matically disables Link Timeline and Edit
Selection, and automatically enables Loop
Playback mode.
Center Playhead Scrolling (Pro Tools HD
only) and Dynamic Transport mode cannot
be used at the same time. Selecting Center
Playhead Scrolling disables Dynamic
Transport mode (if it is enabled). Likewise,
enabling Dynamic Transport mode when
Center Playhead Scrolling is selected auto-
matically changes the Scrolling option to
No Scrolling.
Dynamic Transport mode, Play Start Marker shown in
expanded Main Timebase ruler
Play Start Marker
Timeline selection
Play Start Marker strip
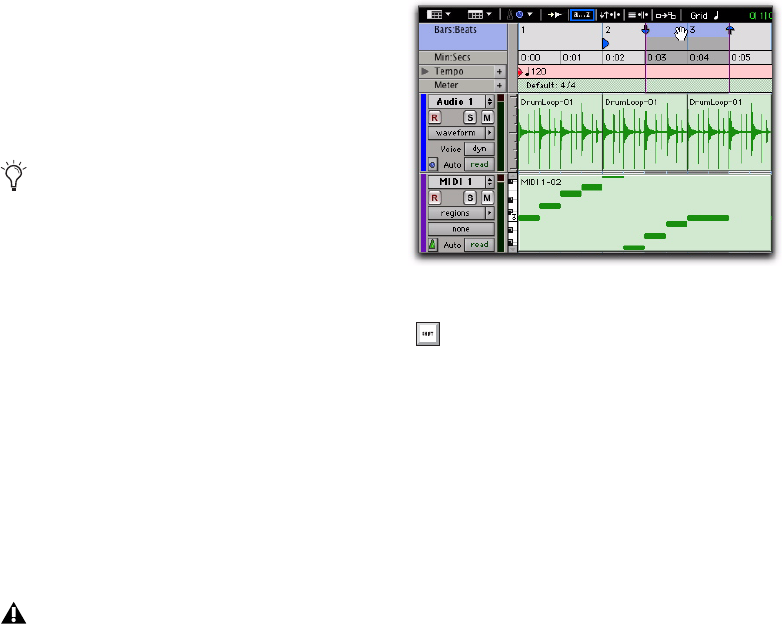
Pro Tools Reference Guide316
To reposition the Play Start Marker, do one of the
following:
With any Edit tool selected, click in the Play
Start Marker strip in the Main Timebase ruler.
With any Edit tool selected, click and drag the
Play Start Marker to a new location.
Click Fast Forward or Rewind in the Transport
to relocate the Play Start Marker forward or
backward by the standard Fast Forward and Re-
wind increment amount.
To change the Timeline Selection Start or End
Markers:
1 Make a Timeline selection with the Selector
tool by clicking and dragging in the Main Time-
base ruler. If Link Timeline and Edit Selection is
enabled (Options > Link Timeline and Edit Se-
lection), you can make an Edit selection with
the Selector or any of the Grabber tools.
2 With any Edit tool selected, click and drag ei-
ther the Timeline Selection Start or End Markers
left or right, extending or constricting the Time-
line selection.
To move the Timeline selection:
With any Edit tool selected, click and drag the
selection on the Main Timeline ruler to another
location.
Play Start Marker Follows Timeline Selection
When enabled, the Play Start Marker snaps to
the Timeline Selection Start Marker when you
move the Timeline Selection, draw a new Time-
line Selection, or adjust the Timeline Selection
Start. When disabled, the Play Start Marker
doesn’t move with the Timeline selection.
To have the Play Start Marker always snap to the
Timeline Selection Start Marker:
1 Choose Setup > Preferences.
2 Click the Operation tab.
3 Select Play Start Marker Follows Timeline Se-
lection.
4 Click OK.
Double-click anywhere in the Play Start
Marker strip in the Main Timebase ruler to
move the Play Start Marker to that location
and start playback.
Changes to the Timeline selection during
playback temporarily interrupt playback.
To minimize this interruption, reduce the
DAE Playback Buffer size in the Playback
Engine dialog.
Dynamic Transport mode, moving the Edit selection
When the Link Timeline and Edit Selection
option is disabled, press Alt-click (Win-
dows) or Option-click (Mac) and drag the
Timeline selection to snap the Edit selection
to the Timeline selection and move both in
tandem.

Chapter 16: Playing Back Track Material 317
Timeline Insertion/Play Start Marker Follows
Playback
When enabled, the Play Start Marker moves to
the point in the Timeline when playback stops.
When disabled, the Play Start Marker does not
follow playback.
When not in Dynamic Transport mode, the
Timeline Insertion follows playback.
To have the Timeline Insertion and the Play Start
Marker follow playback:
1 Choose Setup > Preferences.
2 Click the Operation tab.
3 Select Timeline Insertion/Play Start Marker
Follows Playback.
4 Click OK.
Using Dynamic Transport Mode with
Loop Playback
Use Dynamic Transport mode in conjunction
with Loop Playback to specify the loop start and
end points with the Timeline selection while us-
ing the Play Start Marker to specify where play-
back begins. This is especially useful for audi-
tioning loop transitions.
Enabling Dynamic Transport mode automati-
cally enables Loop Playback mode.
To audition a loop transition:
1 Enable Dynamic Transport mode (Options >
Dynamic Transport).
2 Ensure that Loop Playback mode is enabled
(Options > Loop Playback).
3 Make a Timeline selection to loop. If Link
Timeline and Edit Selection is enabled (Options
> Link Timeline and Edit Selection), you can
make an Edit selection instead.
4 Reposition the Play Start Marker before the
Timeline Selection End Marker.
5 Start playback.
Playback starts before the loop end point and
continues across the loop point through the
loop start. You can reposition the Timeline Se-
lection Start and End Markers by clicking and
dragging them left or right, even during play-
back.
Press Start+N (Windows) or Control+N
(Mac) to toggle the Timeline Insertion/Play
Start Marker Follows Playback preference
on and off.
Dynamic Transport mode, auditioning the loop
transition

Pro Tools Reference Guide318
Using Separate Play and Stop Keys
When enabled, the Use Separate Play and Stop
Keys option lets you start playback with the En-
ter key and stop playback with the 0 key on the
numeric keypad. This is useful for quickly start-
ing and stopping playback when auditioning
loop transitions.
To use separate play and stop keys on the numeric
keypad:
1 Choose Setup > Preferences.
2 Click the Operation tab.
3 Select Transport for the Numeric Keypad.
4 Select Use Separate Play and Stop Keys.
5 Click OK.
The Enter key starts playback. The Zero key
stops playback. Pressing Zero twice locates the
Play Start Marker to the Timeline Selection start.
Keyboard Shortcuts for Relocating the
Play Start Marker
In Dynamic Transport mode, you can use key-
board shortcuts to quickly relocate the Play Start
Marker either during playback or when the
Transport is stopped.
To move the Play Start Marker to the Timeline
Selection Start:
Press Period (.) on the numeric keypad and
then the Left Arrow.
To move the Play Start Marker to the Timeline
Selection End:
Press Period (.) on the numeric keypad and
then the Right Arrow.
To move the Play Start Marker to the Edit
Selection Start:
Press Period (.) on the numeric keypad and
then the Down Arrow.
To move the Play Start Marker to location of the
Playhead:
Press Period (.) on the numeric keypad and
then the Up Arrow.
To nudge the Play Start Marker backward
(rewind):
Press 1 on the numeric keypad.
To nudge the Play Start Marker forward (fast
forward):
Press 2 on the numeric keypad.
To move the Play Start to a specific bar:
With Bars:Beats selected as the Main Timebase
ruler, do the following on the numeric keypad:
• Press Asterisk (*).
• Type the bar number.
• Press Enter.
Recording in Dynamic Transport Mode
Recording in Dynamic Transport mode lets you
start playback independently of the Timeline se-
lection. Recording punches in and out based on
the Timeline selection.
When this option is enabled, it overrides us-
ing the Enter key to add Memory Location
markers. Press Period (.) and then Enter on
the numeric keypad to add a Memory Loca-
tion marker.
Chapter 17: Record Setup 319
Chapter 17: Record Setup
Before you start recording in Pro Tools, you
need to set up your Pro Tools system, a session,
and one or more tracks for recording. You will
also need to configure how Pro Tools monitors
the input you intend to record. For information
on recording audio, see Chapter 18, “Audio Re-
cording.”
While some of the information in this chapter is
relevant to preparing to record MIDI, there are
more specific setup details for MIDI recording in
Chapter 19, “MIDI Recording.”
Record Setup Overview
Record setup includes the following:
Hardware Setup for Recording
• “Configuring Pro Tools Hardware I/O for Re-
cording” on page 320
• “Connecting a Sound Source” on page 321
Session Setup for Recording
• Configuring a new or existing session for re-
cording:
• “Allocating Hard Drive Space for Record-
ing” on page 321
• “Recording with a Click (Optional)” on
page 322
• “Setting the Default Meter and Tempo (Op-
tional)” on page 325
• Setting a Record Mode. See “Record Modes”
on page 327
Track Setup for Recording
• Configuring one or more tracks for recording:
• “Configuring Default Names for Audio
Files and Regions (Optional)” on page 330
• “Assigning Hardware I/O on a Track” on
page 332
• “Record Enabling Tracks” on page 333
• “Recording with Multiple Hard Drives (Op-
tional)” on page 335
Monitoring Setup for Recording
• “Selecting a Record Input Monitoring Mode”
on page 338
• “Setting Monitor Levels for Record and Play-
back” on page 340
• On Pro Tools LE, “Reducing Monitoring La-
tency” on page 341
• On Pro Tools HD, “Disabling Delay Compen-
sation During Recording” on page 342
For information on digitizing (recording)
video in Pro Tools, see Chapter 43, “Work-
ing with Video in Pro Tools” or the Avid
Video Peripherals Guide.

Pro Tools Reference Guide320
Configuring Pro Tools
Hardware I/O for Recording
Before you start recording, make sure your
Pro Tools system hardware is connected and
configured properly. For details on connecting
Pro Tools to your studio and configuring your
Hardware in the Hardware Setup dialog, refer to
the Getting Started Guide that came with your
system. For information on how to route signal
paths in Pro Tools, see Chapter 6, “I/O Setup.”
Input Connections and Audio
Levels
Pro Tools|HD audio interfaces operate as line-
level devices and offer no pre-amplification.
Low-level sources like microphones and electric
guitars need to be pre-amplified. You can do this
with a quality mixing board or dedicated
preamp (such as the Digidesign PRE).
003, 003 Rack, Digi 002, and Digi 002 Rack have
four inputs with preamps, to which you can
connect low-level signals, and four additional
line-level inputs with switchable gain.
Mbox 2, Mbox 2 Pro, Mbox 2 Mini, and Mbox
each have two inputs with preamps, to which
you can connect low-level signals.
For input information on Digidesign-qualified
M-Audio units, refer to your M-Audio documen-
tation.
For all systems, volume and pan controls for
tracks in Pro Tools only affect monitoring lev-
els—not the recording input gain. The LED
meters on Digidesign audio interfaces indicate
both full-code (highest level before clipping)
and true clipping of Pro Tools output signals.
The on-screen meters in Pro Tools indicate only
true clipping.
Digital Clipping
Clipping occurs when you feed a signal to a re-
corder or mixer that is louder or “hotter” than
the device allows. On many analog tape decks, a
little clipping adds a perceived warmth to the
sound due to tape compression. In digital re-
cording, however, clipping causes digital distor-
tion, which is undesirable and should always be
avoided.
Set Input Levels
When you feed a signal into any audio record-
ing system, including Pro Tools, make sure to
adjust the input level to optimize the dynamic
range and signal-to-noise ratio of the recorded
file. If the input level is too low, you will not
take full advantage of the dynamic range of your
Pro Tools system. If the input level is too high,
the waveform can clip and distort the recording.
Set the input levels high, but not high enough
to clip.
As a general rule of thumb, try to set levels so
that they peak within –6 dB to –12 dB on the in-
put meter without triggering the clipping indi-
cator on your audio interface. Depending on the
type of material you are recording and its dy-
namic range and peak content, you may want to
record with higher or lower levels.
The Digidesign PRE can be used as a stand-
alone preamp with all Pro Tools systems, or
it can be remote-controlled from within a
Pro Tools session when used with a
Pro Tools|HD system.

Chapter 17: Record Setup 321
You can display a track’s input levels in its Vol-
ume/Peak/Delay indicator. Normally, this indi-
cator is set to be a Volume indicator. When you
change it into a Peak indicator, it can function
as a headroom indicator based on the last peak
playback level.
To display a track’s peak level:
Control-click (Windows) or Command-click
(Mac) a track’s Volume indicator to step through
the different indicator modes (Volume, Peak,
and Channel Delay) until the indicator displays
peak (pk) level.
Calibration Mode
(Pro Tools HD Only)
You can use the Calibration mode in Pro Tools
to adjust the input and output levels for your
audio interface so they match those of your
mixing console and other audio devices in your
studio.
The 192 I/O has two sets of adjustable trim pots
for its inputs, and two sets of adjustable trim
pots for its outputs. Additionally, the reference
level for the input can be set to +4 dBu or
–10 dBV. For more information on calibrating
192 I/O, see the 192 I/O Guide.
The 888|24 I/O has adjustable trim pots for its
inputs and outputs. For more information, see
the 888|24 I/O Guide.
There are no input or output trims on the fol-
lowing audio interfaces: 192 Digital I/O, 96 I/O,
96i I/O, 882|20 I/O, 1622 I/O, and 24-bit ADAT
Bridge I/O. Some Digidesign I/Os that do not
have output trims (such as the 96i I/O) offer
software-controllable input levels, adjustable
from Setup > Hardware (refer to the guide for
your particular I/O).
Connecting a Sound Source
Depending on your Pro Tools hardware I/O, you
can connect different types of sound sources
(such as musical instruments, mics, and mixer
outputs). Refer to the Getting Started Guide for
your Pro Tools system. For additional informa-
tion, refer to the documentation that came with
your sound source.
If you connect a sound source to a Pro Tools in-
put that was not previously configured to accept
input, you will need to reconfigure you hard-
ware in the Hardware Setup dialog (see your Get-
ting Started Guide). You may also need to reset
your I/O signal paths in I/O Setup (see
Chapter 6, “I/O Setup.”).
Allocating Hard Drive Space
for Recording
The Operation preference for Open Ended
Record Allocation determines how much of
your available hard drive space is allocated
whenever you record into one or more tracks in
Pro Tools.
When this allocation preference is set to Use All
Available Space, the drive’s entire available
space is allocated. This setting lets you record
lengthy takes, or longer sessions.
However, when allocating all available space,
Pro Tools may take a little longer to begin re-
cording. You can reduce this delay by allocating
a specific amount of time for recording.
You can also avoid recording delays by put-
ting Pro Tools in Record Pause mode before
beginning to record. See“Record Pause
Mode” on page 346.
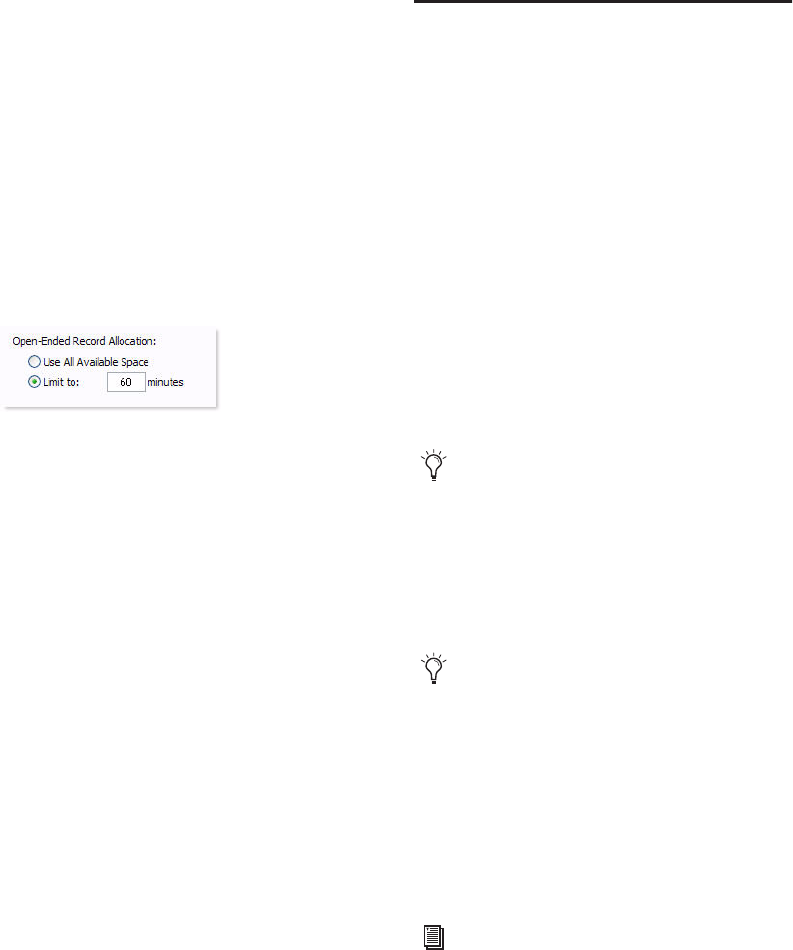
Pro Tools Reference Guide322
In general, the Use All Available Space prefer-
ence makes hard drives work harder. In addition
to record and punch lag times, many systems
see better overall recording performance when
the Open Ended Record Allocation is limited.
To allocate a specific amount of time to recording:
1 Choose Setup > Preferences and click the
Operation tab.
2 Under the Open Ended Record Allocation op-
tion, select Limit To and enter the number of
minutes to be allocated.
The number of minutes specified is allocated for
each record-enabled track.
3 When you are finished, click OK.
Monitoring Drive Space
Pro Tools lets you check how much drive space
is available.
To monitor available space on your drive during a
Pro Tools session:
Choose Window > Disk Space.
To display available drive space in different view
formats:
Choose View > Disk Space, and select a format
(Text View or Gas Gauge).
Recording with a Click
(Optional)
If you intend to work with MIDI or Instrument
tracks in your session, or if the audio you’re
working with is bar and beat-oriented, you can
record your tracks while listening to a click. This
ensures that recorded material, both MIDI and
audio, aligns with the session’s bar and beat
boundaries.
When your track material lines up with the
beats, you can take advantage of some very use-
ful editing functions in Pro Tools, such as quan-
tizing MIDI and audio events or regions, quan-
tizing individual MIDI notes, and copying and
pasting measures and song sections in Grid
mode.
Creating a Click Track
Pro Tools lets you create a Click track using the
DigiRack Click plug-in. You can also create a
click track using MIDI.
Open Ended Record Allocation, Operation preference
Material that is recorded without listening
to a click can still be aligned to bar and beat
boundaries in Pro Tools with Beat Detective
(see Chapter 34, “Beat Detective”), or use
the Identify Beat command to determine the
tempo (see “Identify Beat Command” on
page 620).
You can record MIDI with or without a click
and manually add Bar|Beat markers or gen-
erate a tempo and meter map from it by us-
ing Beat Detective. See Chapter 34, “Beat
Detective.”
For more information on the Click plug-in,
see the DigiRack Plug-ins Guide.
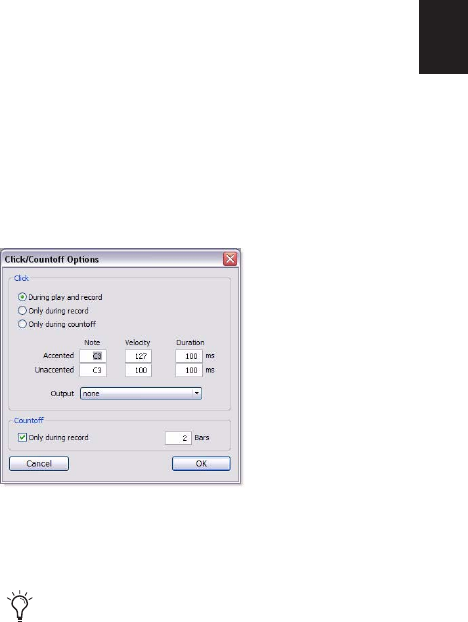
Chapter 17: Record Setup 323
To create a click track using the DigiRack Click
plug-in:
Choose Track > Create Click Track.
Pro Tools creates a new Auxiliary Input track
named “Click” with the Click plug-in already
inserted. In the Edit window, the click track’s
Track Height is set to Mini. You can create more
than one click track and each subsequent click
track is named in sequence. For example, Click
1, Click 2, and Click 3.
To hear the click during playback and recording,
configure the Click Options (see “Click Op-
tions” on page 323) and ensure that Click is en-
abled (see “Enabling Click” on page 324).
To create a click track using MIDI:
1 Create a new (mono) Auxiliary Input or In-
strument track.
2 Do one of the following:
• From the track’s Input selector, select the
path to which the MIDI device is con-
nected.
– or –
• Insert an instrument plug-in on the track
(such as Digidesign’s Xpand!).
3 Configure the Click/Countoff options, and be
sure to select the port for the MIDI device or in-
strument plug-in from the Output pop-up menu
(see “Click Options” on page 323).
4 Enable Click (see “Enabling Click” on
page 324).
Click Options
Pro Tools provides options and controls for
driving a click. The following steps are for con-
figuring and enabling a click using the DigiRack
Click plug-in or MIDI.
To configure click options:
1 Open the Click/Countoff Options dialog by
doing one of the following:
• Choose Setup > Click.
– or –
• Double-click the Metronome Click or
Countoff button in the Transport window.
2 In the Click/Countoff Options dialog, do one
of the following:
• If using the DigiRack Click plug-in, select
None in the Output pop-up menu.
– or –
• If playing a click using MIDI, select the port
number (device) and channel for the click
from the Output pop-up menu.
3 Specify the note, velocity, and duration for
the accented and unaccented notes.
Click/Countoff Options dialog
If one is connected, you can also play new
note values on a MIDI controller keyboard.
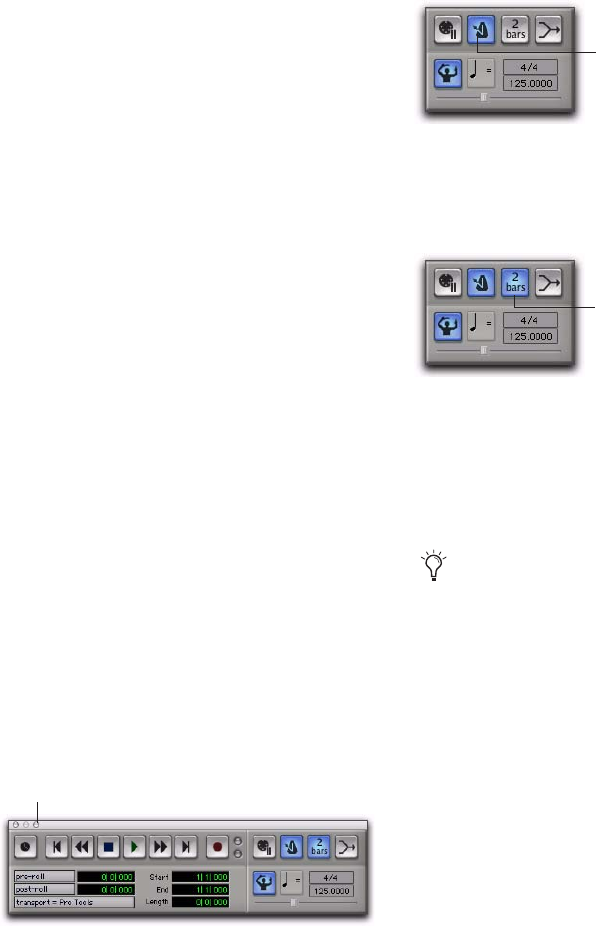
Pro Tools Reference Guide324
When listening to the click in your Pro Tools
sessions, the accented note sounds on the first
beat of each measure and the unaccented note
sounds on the remaining beats.
4 Select whether the click is heard “During play
and record,” or “Only during record,” or “Only
during countoff.”
5 If using a countoff, specify the number of Bars
to be counted off. To hear the countoff only
when recording, select that option.
6 Click OK.
Enabling Click
Click tracks must be enabled to be heard during
playback or recording.
To enable click from the MIDI menu:
Select Options > Click.
To enable click in the Transport:
1 Display the MIDI controls in the Transport by
doing one of the following:
• Select View > Transport > MIDI Controls.
• Control-click (Windows) or Command-
click (Mac) the Expand/Collapse “+” but-
ton in the Transport window to display the
MIDI controls.
• Alt-click (Windows) or Option-click (Mac)
the Expand/Collapse “+” button in the
Transport window to display the MIDI con-
trols and the Counters.
2 In the Transport, click the Metronome Click
button so it is highlighted.
3 To use a countoff when recording or playing,
click the Countoff button in the Transport so it
is highlighted.
Hearing the countoff before recording helps
musicians to start playing at the right time and
in tempo. The Countoff button in the Transport
window displays the number of bars counted
off.
Transport Window with MIDI Controls
Expand/Collapse “+” button
Metronome Click enabled
Countoff enabled
The countoff is ignored when Pro Tools is
online and synchronized to SMPTE time
code.
Metronome Click button
Countoff button
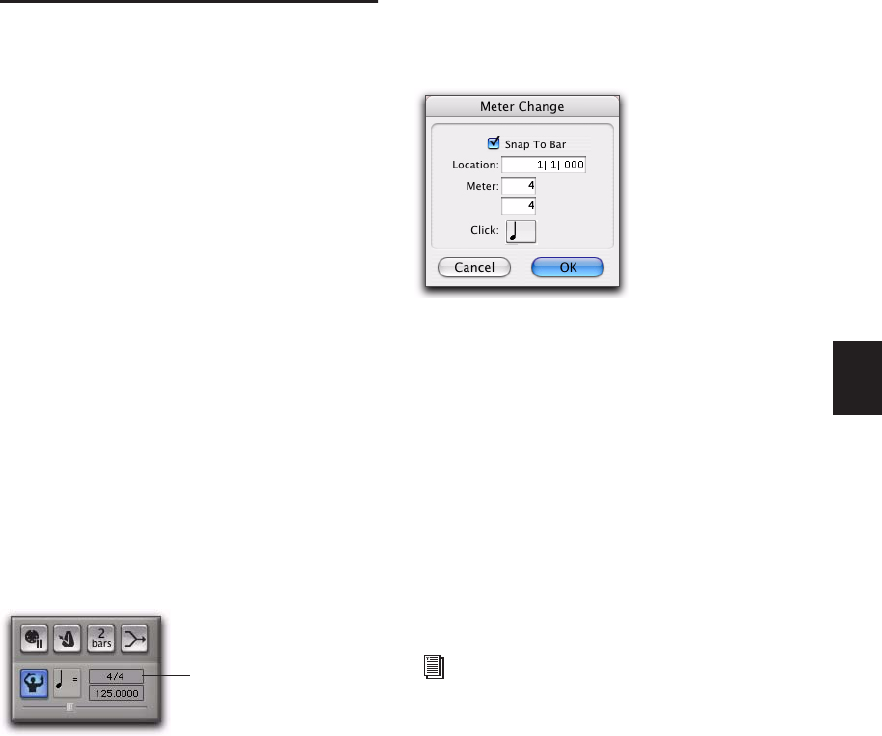
Chapter 17: Record Setup 325
Setting the Default Meter and
Tempo (Optional)
Setting the Default Meter
When opening a new session in Pro Tools, the
meter defaults to 4/4. If you intend to record
with a click in a meter other than 4/4, make sure
to set the default meter accordingly.
If a session’s meter does not match the music
you’re recording, the accented clicks will not
line up with what you’re playing, and, as a re-
sult, the recorded material may not align with
the bars and beats in the Edit window.
Meter events, which can occur anywhere within
a Pro Tools session, appear in the Meter ruler.
For more information on inserting and editing
meter events, see “Meter Events” on page 623.
To set the default meter for a session:
1 Double-click the Current Meter button in the
Transport window.
2 Enter the Meter for the session and set the Lo-
cation to 1|1|000 (to ensure that the inserted
meter event replaces the default).
3 From the Click pop-up menu, select a note
value for the beat. (For example, if you are in
6/8, select a dotted-quarter note for the Click).
4 Click OK to insert the new meter event.
Setting the Default Tempo
When opening a new session in Pro Tools, the
tempo defaults to 120 BPM. If you intend to
record with a click at a tempo other than
120 bpm, make sure to set the default tempo ac-
cordingly.
Current Meter button
Meter Change window
Tempo events, which can occur anywhere
within a Pro Tools session, appear in the
Tempo ruler. For more information on in-
serting and editing tempo events, see
“Tempo” on page 602.
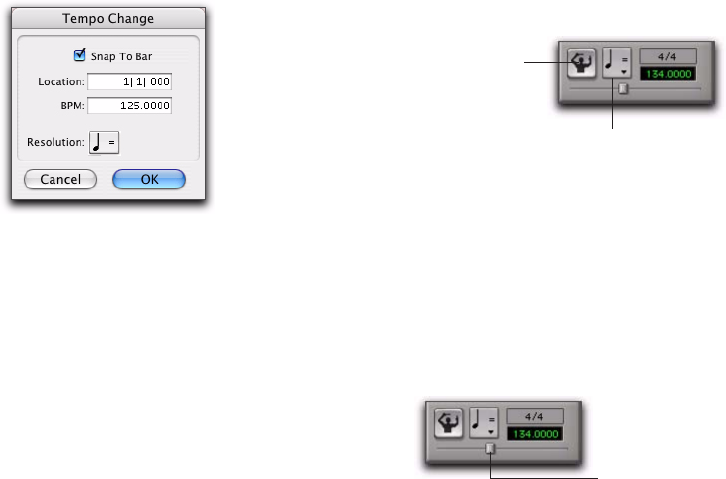
Pro Tools Reference Guide326
To insert a default tempo event:
1 Double-click the Song Start Marker in the Edit
window (see “Song Start Marker” on page 602).
2 Enter the BPM value you will use for the ses-
sion.
3 Set the Location to 1|1|000 (to ensure that the
inserted tempo event replaces the default).
4 From the Resolution pop-up menu, select the
note value for the beat. (For example, if you are
in 6/8, select a dotted-quarter note for the Reso-
lution.)
5 Click OK.
Using Manual Tempo Mode
In Manual Tempo mode, Pro Tools ignores tempo
events in the Tempo track and instead plays
back a Manual Tempo. This tempo can be set
with the Tempo slider, or if you are not sure of
the actual tempo, by tapping in the tempo.
While you can adjust the Manual Tempo during
playback, doing so momentarily interrupts play-
back.
To set the Manual Tempo with the Tempo slider:
1 To view the MIDI controls in the Transport
window, select View > Transport > MIDI Con-
trols.
2 In the Transport window, click the Tempo
Ruler Enable button (Conductor) button so it
becomes unhighlighted. Pro Tools switches to
Manual Tempo mode. In this mode, any tempo
events in the Tempo track are ignored.
3 To base the BPM value on something other
than the default quarter-note, click the Tempo
Resolution selector and select a different note
value. (For example, if you are in 6/8, select a
dotted-quarter note for the Tempo Resolution.)
4 To enter a new tempo, drag the horizontal
Tempo slider in the Transport window.
For finer resolution with the Tempo slider, press
Control (Windows) or Command (Mac) while
dragging.
To exit Manual Tempo mode and enable the Tempo
track:
Click the Tempo Ruler Enable (Conductor)
button in the Transport window so it becomes
highlighted.
Tempo Change window
Manual Tempo mode enabled
Tempo slider
Tempo Ruler
Enable button
Tempo Resolution selector
Tempo slider
Chapter 17: Record Setup 327
To set the Manual Tempo by tapping:
1 To view the MIDI controls in the Transport
window, select View > Transport > MIDI Con-
trols.
2 In the Transport window, click the Tempo
Ruler Enable (Conductor) button so it becomes
unhighlighted. Pro Tools switches to Manual
Tempo mode. In this mode, any tempo events in
the Tempo track are ignored.
3 Do one of the following:
• Click in the Tempo field so it becomes
highlighted and tap the “T” key on your
computer keyboard repeatedly at the new
tempo.
– or –
• Click in the Tempo field so it becomes
highlighted and tap in the tempo by play-
ing a note repeatedly at the new tempo on
your MIDI keyboard controller.
To compute the new tempo, Pro Tools averages
the last eight (or fewer) taps to determine the
correct tempo. The computed BPM value ap-
pears in the Transport window’s Tempo field.
To lock in the new tempo:
Take Pro Tools out of Manual Tempo mode by
clicking the Tempo Ruler Enable (Conductor)
button, then set the default tempo for the Song
Start Marker to the new tempo.
Record Modes
For recording audio, Pro Tools provides the fol-
lowing Record modes:
• Normal (Nondestructive)
• Destructive
• Loop
• QuickPunch
• TrackPunch (Pro Tools HD only)
• DestructivePunch (Pro Tools HD only)
To select the Record mode, do one of the
following:
Select the Record mode in the Options menu.
If no Record mode is selected, Pro Tools is in
Normal (Nondestructive) Record mode.
– or –
Right-click the Record button in the Transport
and select the Record mode from the pop-up
menu.
The Record button changes to indicate the se-
lected Record mode as follows:
• Blank for Normal (Nondestructive)
• “D” for Destructive
• Loop symbol for Loop Record
• “P” for QuickPunch
• “T” for TrackPunch (Pro Tools HD only)
• “DP” for DestructivePunch (Pro Tools HD
only)
You can also cycle through the Pro Tools
record modes with the Transport stopped,
by Start-clicking (Windows) or Control-
clicking (Mac) the Record button.
Destructive Record mode enabled

Pro Tools Reference Guide328
Normal (Nondestructive) Record Mode
In Normal, Nondestructive Record mode,
Pro Tools records audio nondestructively, which
means that if you record over a track’s existing
regions, the audio is not erased from your hard
drive. Both the new and old audio files remain
on your hard drive, available as regions from the
Region List.
In Normal Record mode, the record range can be
defined by selecting a range in a ruler or in a
track’s playlist, or by specifying start and end
points in the Transport window. If there is no
selection, recording begins from the current
Cursor location and continues until the Trans-
port’s Stop button is clicked.
The pre- and post-roll settings allow material to
be heard up to and after the start and end
points, which is useful when punch recording
(see “Audio Punch Recording Over a Specified
Range” on page 349).
Destructive Record Mode
In Destructive Record mode, recording over ex-
isting regions replaces the original audio perma-
nently, which allows you to keep disk use to a
minimum. However, if you have sufficient drive
space, it is usually best to use Pro Tools in Non-
destructive Record mode, to avoid losing any
previously recorded material.
When defining the record range and setting pre-
and post-roll, Destructive Record mode works
the same as Normal (Nondestructive) mode.
Unlike the other record modes, it is not possible
to cancel or Undo record takes when using De-
structive Record mode (see “Canceling a Record
Take” on page 345).
Loop Record Mode
Loop Record mode lets you record take after take
(nondestructively) while the same section of au-
dio repeats. This is a convenient technique for
quickly recording multiple takes of a part with-
out losing spontaneity.
The time range that is looped and recorded—
which must be at least one second in length—is
defined by selecting a range in a ruler or in a
track’s playlist, or by specifying start and end
points in the Transport window. The pre-roll
setting, if enabled, is used during the first record
pass, but on each successive loop the pre- and
post-roll times are ignored.
When recording, you can preserve disk
space by removing unwanted record takes
(see “Removing Unwanted Regions” on
page 198) and compacting audio files (see
“Compacting an Audio File” on page 476).
To set a record range by selecting within a
track’s playlist, the Timeline and Edit selec-
tions must be linked. See “Linking or Un-
linking Timeline and Edit Selections” on
page 447.
In Destructive Record mode, the waveform
overview is not redrawn until you stop re-
cording.
To set a record range by selecting within a
track’s playlist, enable the Link Timeline
and Edit Selection option. See “Linking or
Unlinking Timeline and Edit Selections” on
page 447.
Chapter 17: Record Setup 329
When using Loop Record mode, each successive
take appears as a region in the Region List and
each is numbered sequentially. The various
takes, which are identical in length and start
time, are easily auditioned and placed in the
track at the correct location with the Matches
pop-up menu (see “Auditioning Different
Record Takes in the Timeline” on page 351).
QuickPunch
QuickPunch gives you the ability to manually
and instantaneously punch in (initiate record-
ing) and punch out (stop recording) on record-
enabled audio tracks during playback by click-
ing the Record button in the Transport. Record-
ing with QuickPunch is nondestructive.
When using QuickPunch, Pro Tools begins re-
cording a new file when playback begins, auto-
matically generating regions in that file at each
punch in/out point. These regions appear in the
track’s playlist; and the complete audio file ap-
pears in the Region List along with the Quick-
Punch created regions. Up to 200 of these “run-
ning punches” can be performed in a single
pass.
Though you can punch record in the other
record modes by manually specifying the record
range, only QuickPunch provides instantaneous
monitor switching on punch-out.
TrackPunch
(Pro Tools HD Only)
TrackPunch lets individual tracks be punched
in, punched out, and taken out of record enable
without interrupting online recording and play-
back.
TrackPunch is a nondestructive recording
mode. When a track is TrackPunch-enabled,
Pro Tools begins recording a new file when play-
back begins. During playback, you may record
arm or disarm, or punch in or out a combina-
tion of any or all TrackPunch enabled tracks.
TrackPunch automatically creates regions in
that file at each punch-in and punch-out point.
These regions appear in the track’s playlist, and
the complete audio file appears in the Region
List along with the TrackPunch created regions.
Up to 200 of these “running punches” can be
performed in a single pass.
DestructivePunch
(Pro Tools HD Only)
Destructive Punch is a destructive recording
mode that lets you instantaneously punch in
(start recording) and punch out (stop recording)
on individual audio tracks during playback,
while preserving a contiguous audio file on each
punched track.
In Loop Record mode, the waveform over-
view is not redrawn until you stop record-
ing.
For more information on QuickPunch, see
“QuickPunch Audio Recording” on
page 379.
For more information on TrackPunch, see
“TrackPunch Audio Recording” on
page 383.
For more information on DestructivePunch,
see “DestructivePunch Audio Recording” on
page 392.
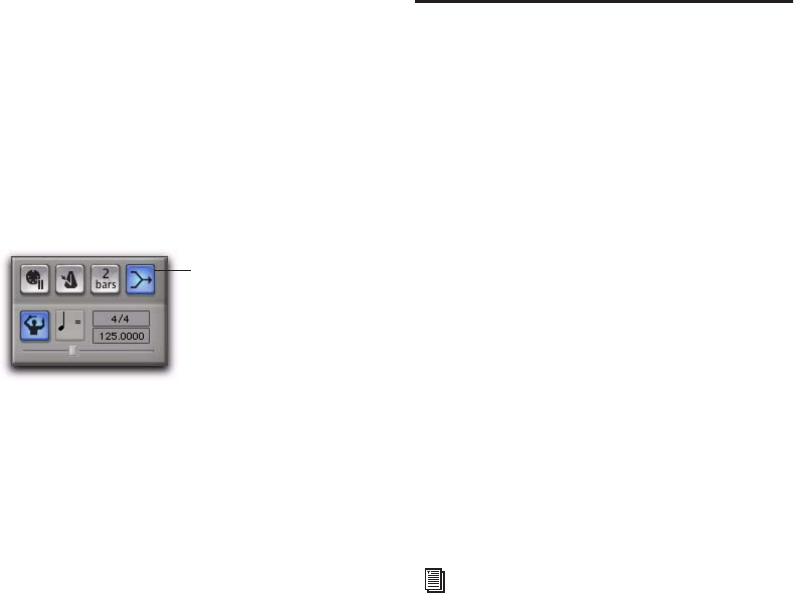
Pro Tools Reference Guide330
Record Modes and MIDI
In addition to the various record modes, there is
also a MIDI Merge button in the Transport win-
dow that determines how MIDI is recorded.
When enabled (Merge mode), recording over ex-
isting MIDI regions results in the new data being
merged with the old. When the MIDI Merge
button is disabled (Replace mode), the new ma-
terial replaces the old.
MIDI recording works the same whether using
Nondestructive or Destructive Record mode. In
addition, neither QuickPunch nor TrackPunch
need to be enabled to punch on-the-fly with
MIDI—this capability is available in Non-
destructive and Destructive Record modes.
Unlike audio loop recording, the state of the
MIDI Merge toggle determines whether existing
material is replaced or merged.
Unless MIDI Merge is enabled, MIDI recording is
destructive (though you can undo a MIDI record
pass), either overwriting or adding to region ma-
terial. One exception to this rule is when Loop
Record mode is enabled; in this mode, existing
track regions are replaced with new regions
when new material is recorded. The old regions
remain intact and available from the Region
List, and from the Matches pop-up menu. In
Loop Record mode, MIDI Merge has no effect, so
its button is dimmed.
Configuring Default Names for
Audio Files and Regions
(Optional)
Track names define new file and region names
when recording to a track (see “Naming Tracks”
on page 145).
When recording to an audio track, the resulting
file and region names are based on the name of
the track. For example, after recording for the
first time on a track called “Electric Gtr,” an au-
dio file is created with the name “Electric
Gtr_01.” In addition, a region appears in the Re-
gion List with the name “Electric Gtr_01.” This
region is a whole-file region.
Subsequent record takes on the same track are
named identically, but the digits (indicating the
take number) are incremented (for example,
“Electric Gtr_02.”) A second set of digits (such as
used in “Electric Gtr_01-01”) indicates that the
region was auto-created from an edit.
When recording MIDI tracks, a similar naming
scheme is used, though with only one set of dig-
its. For example, after recording to a track called
“Synth 1,” a region is created called “Synth 1-
01.” Subsequent regions for that track, generat-
ing either from additional record takes or region
edits, are numbered sequentially (for example,
“Synth 1-02”).
MIDI Merge enabled
MIDI Merge button
QuickPunch, TrackPunch, and Destructive
Punch modes use a different method for
numbering regions. For details, see “Region
and Take Numbering with QuickPunch” on
page 382.
Chapter 17: Record Setup 331
To rename a track:
1 Do one of the following:
• In the Mix or Edit window, double-click the
Track Name button for the track you want
to rename.
– or –
• In the Track List, or Mix or Edit window,
Right-click the track name for the track you
want to rename.
2 In the Track Name/Comments dialog, type a
new track name.
3 Click OK.
Names for Stereo Audio Tracks
When recording to stereo audio tracks, audio
file and region names for the left and right
channels are appended with a “.L” and “.R” suf-
fix.
Names for Multichannel Tracks
(Pro Tools HD Only)
When recording to multichannel surround
tracks, audio file and region names for each
channel are appended with the following suf-
fixes:
Multichannel
Format File and Region Suffixes
LCR L, C, R
Quad L, R, Ls, Rs
LCRS L, C, R, S
5.0 L, C, R, Ls, Rs
5.1 L, C, R, Ls, Rs, LFE
6.0 L, C, R, Ls, Cs, Rs, LFE
6.1 L, C, R, Ls, Cs, Rs
7.0 L, Lc, C, R, Rc, Ls, Rs
7.1 L, Lc, C, R, Rc, Ls, Rs, LFE
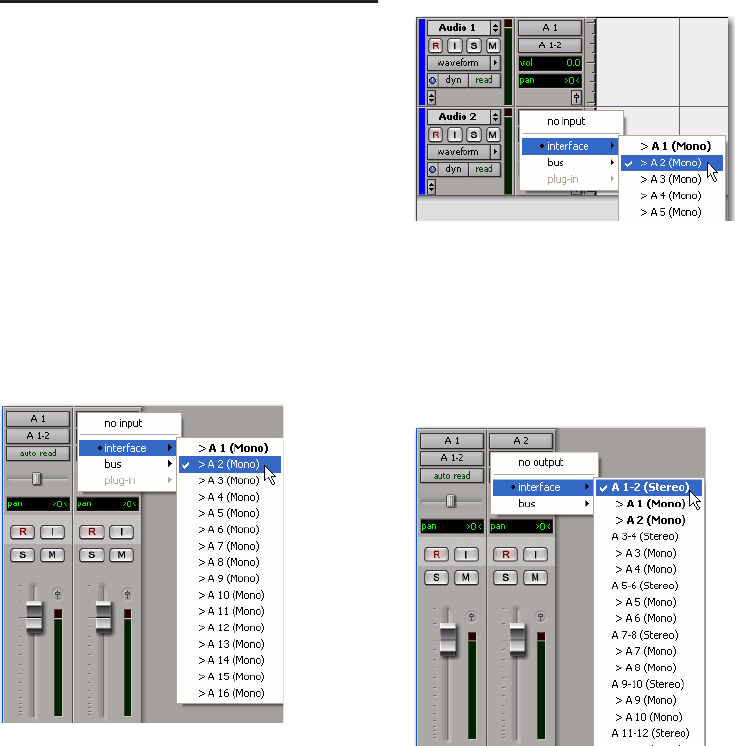
Pro Tools Reference Guide332
Assigning Hardware I/O on a
Track
Before recording to a track, you must specify the
input and output signal path for the material
you are recording. You will do this by assigning
a hardware input (recording source) and output
(for monitoring recording) on the track.
To assign I/O on a track:
1 Assign a hardware input (recording source) by
doing one of the following:
• In the Mix window, select the correspond-
ing hardware input for your source from
the track’s Input Path selector.
– or –
• In the Edit window, with I/O View enabled,
select the corresponding hardware input
for your source from the track’s Input Path
selector.
2 Assign a hardware output (for monitoring re-
cording) by doing one of the following:
• In the Mix window, select the correspond-
ing hardware output for monitoring (such
as A 1–2) from the track’s Output Path se-
lector.
– or –
• In the Edit window, with I/O View enabled,
select the corresponding hardware output
for monitoring (such as A 1–2) from the
track’s Output Path selector.
Input Path selector, Mix window
Input Path selector, Edit window
Output Path selector, Mix window
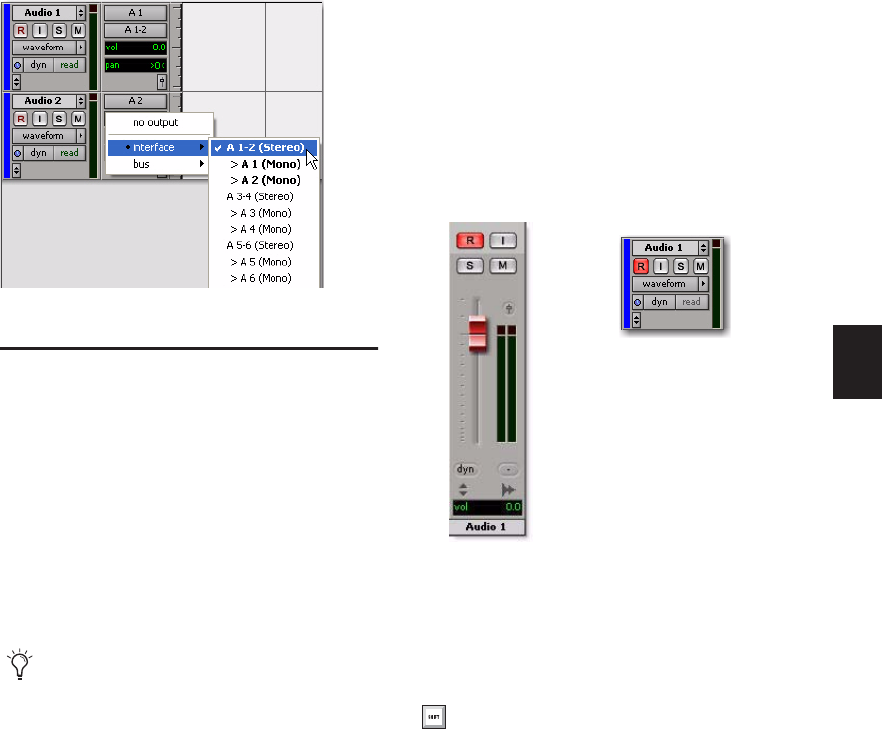
Chapter 17: Record Setup 333
Record Enabling Tracks
To record audio or MIDI to a track you must first
enable the track’s Record Enable button. To
record simultaneously to multiple tracks, record
enable multiple audio, Instrument, or MIDI
tracks.
When one or more tracks are record-enabled,
click the Record button in the Transport to arm
recording, and then click the Play button in the
Transport to start recording.
To record enable an audio, MIDI, or Instrument
track:
From either the Mix or Edit window, click the
track’s Record Enable button to toggle record en-
able on or off for the track. The track’s Record
Enable button flashes red, the track’s fader is
solid red, and the Track Record Enabled indica-
tor in the Transport turns red (indicating at least
one track is record-enabled).
To record enable multiple audio tracks:
From either the Mix or Edit window, click
each audio track’s Record Enable button to tog-
gle record enable on or off for each track.
To record enable multiple MIDI and Instrument
tracks:
From either the Mix or Edit window, Shift-
click each MIDI or Instrument track’s Record En-
able button to toggle record enable on or off for
each track.
Output Path selector, Edit window
MIDI and Instrument tracks can be record-
enabled during playback or record. To
record enable audio tracks, the Transport
must be stopped, or QuickPunch, Track-
Punch, or DestructivePunch must be en-
abled. For more information on Quick-
Punch, TrackPunch, and DestructivePunch,
see “Record Modes” on page 327.
Record-enabled audio track in Mix and Edit windows
If Latch Record mode is not enabled, Shift-
click each track’s Record Enable button to
toggle record enable on or off for each track.
See “Latch Record Enable Buttons Prefer-
ence” on page 334.
Edit window
Mix window

Pro Tools Reference Guide334
To record enable MIDI and Instrument tracks
using the Up/Down Arrows:
While pressing Control (Windows) or Com-
mand (Mac), press the Up/Down Arrows to
record enable the previous or next MIDI or In-
strument track. The previous (or next) record
track is no longer record-enabled.
To record enable all audio tracks, or all MIDI and
Instrument tracks:
Alt-click (Windows) or Option-click (Mac) the
Record Enable button to toggle record enable on
or off for all audio tracks, or all Instrument and
MIDI tracks.
For record-enable, Pro Tools treats MIDI and In-
strument tracks as the same type. Consequently,
Alt-clicking (Windows) or Option-clicking
(Mac) the Record Enable button on any MIDI or
Instrument track will record enable all MIDI and
Instrument tracks.
To record enable all selected audio tracks, or all
selected MIDI and Instrument tracks:
Alt-Shift-click (Windows) or Option-Shift-
click (Mac) the Record Enable button on any se-
lected audio, or MIDI or Instrument track to tog-
gle record enable on or off for all selected audio,
or MIDI and Instrument tracks.
Latch Record Enable Buttons
Preference
When the Latch Record Enable Buttons prefer-
ence is selected, record enable additional audio
tracks by clicking their Record Enable buttons.
Previously record-enabled tracks remain en-
abled. The Latch Record Enable Buttons prefer-
ence affects audio tracks only.
When the Latch Record Enable Buttons prefer-
ence is deselected, record enabling a subsequent
audio track disables the previously record-en-
abled audio track.
To enable the Latch Record Enable Buttons
preference:
1 Choose Setup > Preferences and click the
Operations tab.
2 Select Latch Record Enable Buttons.
To keep the previous track record-enabled
while enabling new tracks, press Con-
trol+Shift+Up/Down (Windows) or Com-
mand+Shift+Up/Down (Mac).
Record enabling a track that is part of a Mix
Group does not record enable the other
tracks in the Group. To record enable all
tracks in a group, click directly to the left of
the group’s name in the Group List to select
all tracks in the group, and then Alt-Shift-
click (Windows) or Option-Shift-click (Mac)
the Record Enable button of one of the
tracks to record enable the selected tracks.

Chapter 17: Record Setup 335
Record Safe Mode
Pro Tools provides a Record Safe mode on a per
track basis that prevents tracks from being
record-enabled. Use Record Safe mode to protect
important audio or MIDI data on a track from
being recorded over.
To put an audio, MIDI, or Instrument track in
Record Safe mode:
Control-click (Windows) or Command-click
(Mac) the track’s Record Enable button. The
Record Enable button is grayed out.
Control-click (Windows) or Command-click
(Mac) again to take the track out of Record Safe
mode.
To put all audio, MIDI, and Instrument tracks in
Record Safe mode:
Control-Alt-click (Windows) or Command-
Option-click (Mac) the Record Enable button on
any track.
Control-Alt-click (Windows) or Command-Op-
tion-click (Mac) again to take all tracks out of
Record Safe mode.
To put all currently selected tracks into Record
Safe mode:
Control-Alt-Shift-click (Windows) or Com-
mand-Option-Shift-click (Mac) the Record En-
able button on any of the selected tracks to
toggle them in and out of Record Safe mode.
Recording with Multiple Hard
Drives (Optional)
By default, Pro Tools records audio files to the
Audio Files folder inside the session folder. If
you have multiple hard drives for recording, you
can use the Disk Allocation window to specify
other hard drive locations to record audio files
on a track-by-track basis.
Hard drives that are full do not appear in the
Disk Allocation window.
To increase system performance, Pro Tools can
record and play each track from a different hard
drive. You can also automatically distribute any
newly created tracks to multiple audio drives
with Round Robin Allocation.
Navigating in the Disk Allocation Window
To resize the Disk Allocation window:
Drag the lower-right corner of the window ac-
cording to standard convention for your operat-
ing system (Windows or Mac).
To scroll up or down in the Disk Allocation window:
Press Page Up or Page Down.
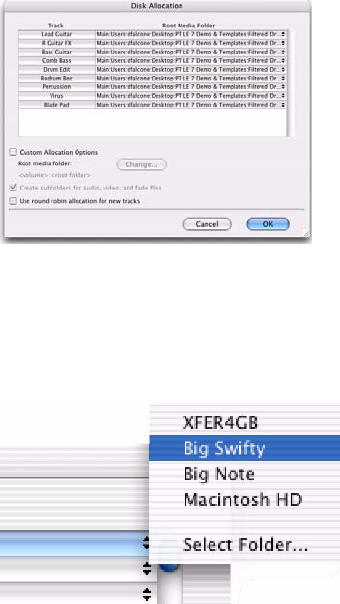
Pro Tools Reference Guide336
Allocating Audio Drives in Your System
To allocate the audio drives in your system:
1 Choose Setup > Disk Allocation.
2 In the Disk Allocation window, assign a hard
drive for each track by clicking in the Root Me-
dia Folder column and selecting a volume from
the Disk Allocation pop-up menu.
Only drives designated as R (Play and Record)
can be selected in the Disk Allocation window.
For more information, see “Performance and
Transfer Volumes” on page 204.
A folder with the session name is created on
each hard drive, containing subfolders for audio
and fade files.
• To assign a track to a different hard drive,
click the track and select a drive name.
• To assign all tracks to the same hard drive,
press Alt (Windows) or Option (Mac) while
selecting a drive name.
• To make a continuous selection, Shift-click
a track name (in the Track column) to ex-
tend the selection to include already-se-
lected tracks and all tracks in between.
• To make a noncontiguous selection, Con-
trol-click (Windows) or Command-click
(Mac) a track name in the Track column to
extend the selection to include already-se-
lected tracks without including tracks in-
between.
3 To save recorded audio files to an existing
folder (without creating another session folder),
select Customize Allocation Options, then click
the Change button and choose the folder. To
create subfolders in this folder, select “Create
Subfolders for audio, video, and fade files.”
4 To automatically distribute any newly created
tracks among the drives connected to your sys-
tem, select “Use Round Robin Allocation for
New Tracks.”
Disk Allocation window
Disk Allocation pop-up menu
Chapter 17: Record Setup 337
If you are using Round Robin Allocation and
want audio to be recorded to your system’s start-
up drive, do the following:
• Open the Workspace browser (Window >
Workspace) and set the Volume Designator
for your system volume to R (Record and
Playback). See “Workspace Volume Desig-
nation” on page 338.
5 When you are finished, click OK.
Saving Disk Allocation Settings
To save Disk Allocation settings for use with fu-
ture sessions, save the session as a template. For
details, see “Creating Custom Session Tem-
plates” on page 105.
Disk Allocation and Cross-Platform
Sessions
To ensure cross-platform operation, it is re-
quired that Mac Pro Tools sessions and their as-
sociated audio files be on Mac-formatted (HFS or
HFS+) drives. Windows Pro Tools sessions and
their associated audio files must be on Win-
dows-formatted NTFS drives.
Reallocating Tracks
When opening a session where some of the pre-
viously assigned hard drives are no longer avail-
able (or do not match the current session plat-
form), Pro Tools automatically reassigns tracks
to the volume where the session file is stored. In
such cases, use Disk Allocation if you need to re-
allocate tracks to other drives.
Round Robin Allocation is not supported
with partitioned hard drives.
If you want to exclude individual, valid,
mounted volumes from Round Robin Allo-
cation passes, open the Workspace browser
and make the volume safe, by designating it
as P (Playback only) or T (Transfer). For
more information, see “Audio and Video
Volume Designators” on page 239.
See “Saving Copies of Mac Sessions to be
Compatible with Windows” on page 290
and “Sharing Sessions Created on Different
Computer Platforms” on page 288.
On Windows, with the Digidesign HFS+
Disk Support option installed, you can
record to and play back from Mac-formatted
HFS+ drives. For more information, see the
Mac HFS+ Disk Support Option Guide.
Reallocating tracks does not affect the previ-
ously recorded audio. Reallocating tracks
only affects where new audio recording is
saved.
Pro Tools Reference Guide338
Workspace Volume Designation
The Workspace volume designation can alter
disk availability, thus affecting Disk Allocation.
From the Workspace browser, you can designate
volumes as Record, Playback, or Transfer. If you
change a drive’s designation, making it read-
only (Play Only or Transfer), check the Disk Al-
location window for any tracks formerly allo-
cated to that drive. For more information, see
“Audio and Video Volume Designators” on
page 239.
Recording to the System Volume
Although Pro Tools lets you record to your sys-
tem volume, this is generally not recom-
mended. Performance for audio recording and
playback on system drives is not as good as on
non-system hard drives.
Record to system drives only when absolutely
necessary, such as if your computer system has
only one hard drive, or if your other hard drives
are completely full.
By default, the system volume is not included in
Round Robin Allocation (regardless of volume
designation in the Workspace browser). To in-
clude the System Volume in Round Robin Allo-
cations, see “Allocating Audio Drives in Your
System” on page 336.
Selecting a Record Input
Monitoring Mode
Pro Tools offers two modes of input monitoring:
Auto Input and Input Only. These monitoring
modes determine how input signals are moni-
tored during playback, recording, or while the
transport is stopped.
Auto Input Monitoring
In Auto Input mode, when session playback is
stopped, Pro Tools monitors audio input. When
playback is started for a punch-in, Pro Tools
monitors existing track material up until the
punch point. While punched in, the input sig-
nal is monitored. On punch-out, monitoring
switches back to the existing track material. This
is similar to the auto-switching logic found on
digital and analog multitrack tape machines.
When in Auto Input mode, the switch back
to monitoring track material on punch-out
is not instantaneous.
With Pro Tools HD, tracks are in Auto In-
put mode by default, and a monitoring con-
trol (TrackInput button) is provided for each
track. See “Selecting Record Monitor Modes
with TrackInput Monitoring” on page 339.
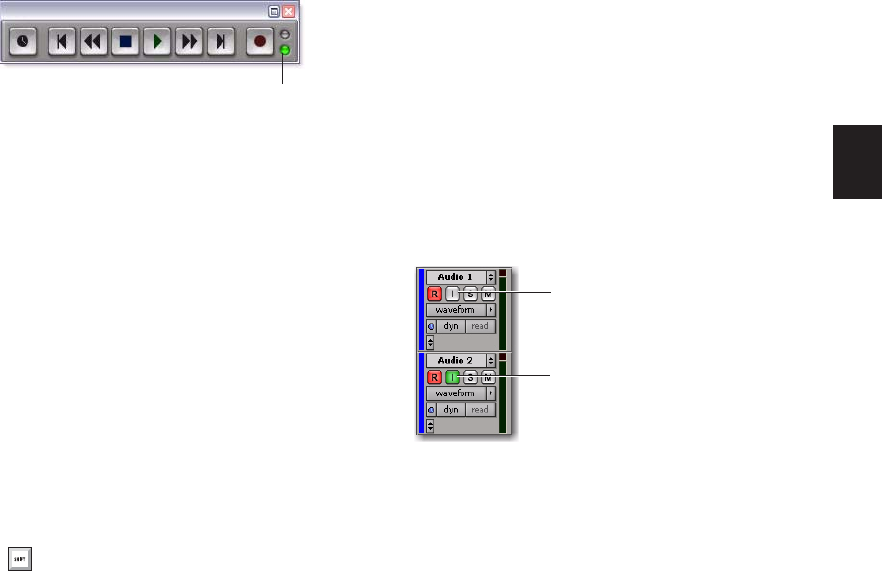
Chapter 17: Record Setup 339
Input Only Monitoring
In Input Only mode, when a track is record-en-
abled, Pro Tools monitors audio input only, re-
gardless of any punch-in/out selection or state.
For Pro Tools LE, the Input Monitor Enabled
Status indicator (in the Transport window)
lights green when Input Only mode is enabled.
For Pro Tools HD, the indicator lights green
when one or more tracks have TrackInput en-
abled (see “Selecting Record Monitor Modes
with TrackInput Monitoring” on page 339).
Selecting a Record Monitor Mode
in Pro Tools LE
For record-enabled tracks to use Auto Input
Monitoring:
Select Track > Auto Input Monitoring.
For record-enabled tracks to use Input Only
Monitoring:
Select Tracks > Input Only Monitoring.
Selecting Record Monitor Modes
with TrackInput Monitoring
(Pro Tools HD Only)
TrackInput monitoring lets you toggle individual
audio tracks between Auto Input and Input
Only monitoring modes at any time, during
playback, recording, while stopped, and even
when a track is not record-enabled. TrackInput
monitoring provides the necessary monitoring
flexibility for overdubbing and mixing, and is
similar to input switching on analog multitrack
recorders and similar machines.
When the TrackInput button in a track is en-
abled (green), the track monitors audio in Input
Only mode.
When the TrackInput button in a track is dis-
abled, the track monitors in Auto Input mode.
To toggle the monitoring mode of audio tracks, do
one of the following:
To toggle individual tracks, click the Track-
Input Monitor button for each track you want to
toggle.
To toggle all tracks in the session, Alt-click
(Windows) or Option-click (Mac) a TrackInput
Monitor button.
To toggle all selected tracks in the session, Alt-
Shift-click (Windows) or Option-Shift-click
(Mac) a selected track’s TrackInput Monitor but-
ton.
Transport window
To toggle between Auto Input and Input
Only monitoring, press Alt+K (Windows)
or Option+K (Mac).
Input Monitor Enabled Status indicator
TrackInput Monitor buttons in the Edit Window
TrackInput button
TrackInput button
Off (Auto Input)
On (Input Only)

Pro Tools Reference Guide340
To toggle the TrackInput button states of all
record-enabled tracks, do one of the following:
To change all record-enabled tracks to Auto
Input monitoring, select Track > Set Record
Tracks to Auto Input.
To change all record-enabled tracks to Input
Only monitoring, select Tracks > Set Record
Tracks to Input Only.
Disable “Input” When Disarming Track
With this Operation preference checked, Track-
Input monitoring is disabled whenever a track is
taken out of record enable. This is useful for cer-
tain workflows, such as when you are recording
on a series of tracks, one at a time.
Disabling this option allows TrackInput buttons
to remain enabled when deselecting the track’s
Record Enable button.
Setting Monitor Levels for
Record and Playback
Pro Tools remembers two different fader levels
for monitoring each audio track: one for when
the track is record-enabled, and one for when it
is not record-enabled.
Pro Tools keeps track of these two states for
fader levels automatically. If you adjust a fader
when a track is record-enabled and then turn off
record enable for the track, the fader returns to
its playback level.
When audio tracks are record-enabled, their vol-
ume faders in the Mix window turn red, indicat-
ing that the record monitor level is active.
Link Record and Play Faders
When the Operation preference for “Link
Record and Play Faders” is selected, Pro Tools
does not keep track of record and play levels for
audio tracks. In this case, record enabling an au-
dio track has no effect on the fader level for the
track. This lets you maintain a consistent mix
regardless of whether you're recording or just lis-
tening.
To toggle record-enabled tracks between
Auto Input and Input Only monitoring,
press Alt+K (Windows) or Option+K
(Mac).

Chapter 17: Record Setup 341
Reducing Monitoring Latency
Because Pro Tools LE uses the host processor in
your computer for all audio processing, play-
back, and recording, there is a small amount of
audio delay, or latency, in the system. For exam-
ple, there my be some audible delay between the
incoming signal and outgoing signal when
monitoring recording through Pro Tools.
Pro Tools HD systems have latency when using
RTAS plug-ins because these plug-ins also use
your computer’s host processor.
With Pro Tools, latency occurs as follows:
• All Pro Tools systems can have RTAS MIDI-
to-audio latency (such as when playing an
RTAS virtual instrument live and monitor-
ing the instrument’s output).
• Pro Tools LE systems have input-to-output
monitoring latency on any record-armed
tracks or Auxiliary Inputs with live inputs.
• Pro Tools HD systems have monitoring la-
tency on tracks that have one or more RTAS
plug-ins.
The latency amount is related to the H/W Buffer
Size—the larger the buffer size the greater the la-
tency. You can reduce the amount of monitor-
ing latency by reducing the H/W Buffer Size.
However, even at the smallest buffer size, there
is still some latency.
In addition, reducing the buffer size limits the
number of simultaneous audio tracks you can
record without encountering performance er-
rors.
While there may be times when you want a
larger buffer size, such as when you have higher
track counts with more plug-ins, you will gener-
ally want the smallest possible buffer size when
latency is present during recording and moni-
toring.
For more information on the Hardware Buffer
Size setting, see “Hardware Buffer Size” on
page 35.
If you are monitoring the recording source with
an external mixer before it is routed to
Pro Tools, you will not hear any latency.
To set the Hardware Buffer Size:
1 Choose Setup > Playback Engine.
2 Choose the number of samples from the H/W
Buffer Size pop-up menu.
3 Click OK.
Zero Latency Monitoring
(Mbox 2, Mbox 2 Mini, and Mbox Only)
Mbox 2, Mbox Mini, and Mbox give you the
ability to monitor your analog input signals
while recording, without hearing any latency.
This zero-latency analog monitoring is con-
trolled by the front panel Mix knob, which you
can use to blend and adjust the mix between the
interface’s analog input and Pro Tools playback.
For more information, refer to your system’s
Getting Started Guide.
Computers with slower CPUs may not be
able to use the 128 buffer size without en-
countering performance errors.

Pro Tools Reference Guide342
Low Latency Monitoring
(003, 003 Rack, Digi 002, Digi 002 Rack, and
Mbox 2 Pro Only)
003, 003 Rack, Digi 002, Digi 002 Rack, and
Mbox 2 Pro systems can use the Low Latency
Monitoring option to record with an extremely
small amount of monitoring latency, to as many
tracks as each system supports. Only tracks with
inputs set to an audio interface (not a bus) use
Low Latency Monitoring.
To use Low Latency Monitoring:
1 Record enable audio tracks by clicking their
Record Enable buttons.
2 From the Output Path selector, assign each
track to either Output 1 or Output 2 (mono), or
both (stereo). Only tracks assigned to these out-
puts use Low Latency Monitoring.
3 Select Options > Low Latency Monitoring.
When Low Latency Monitoring is enabled, any
plug-ins and sends assigned to record-enabled
tracks (routed to Outputs 1–2) are automatically
bypassed, and must remain bypassed. Also,
these tracks do not register on meters for Master
Faders.
Low Latency Monitoring and
Bounce To Disk
With Low Latency Monitoring enabled, only au-
dio tracks are included with the Bounce to Disk
command—Auxiliary Input and Instrument
tracks are ignored. To include Auxiliary Input
and Instrument tracks, disable Low Latency
Monitoring before using Bounce to Disk.
Disabling Delay Compensation
During Recording
(Pro Tools HD Only)
When recording, you should usually disable De-
lay Compensation to keep recorded tracks time-
aligned with other tracks in the session. How-
ever, if you are overdubbing in a complex mix,
you probably do want to use Delay Compensa-
tion and monitor recording through the main
mix.
If Delay Compensation is enabled, when a track
is monitoring input during recording, Pro Tools
automatically suspends Delay Compensation
on the track to provide a low latency monitor
path. Tracks that are not record enabled still ap-
ply Delay Compensation. Pro Tools automati-
cally compensates for any timing discrepancies
between the recorded material and the delay-
compensated mix. When the track is played
back (with both Record Enable and TrackInput
disabled) it is correctly time-aligned with the
other delay-compensated tracks.
To disable Delay Compensation on all tracks:
Deselect Options > Delay Compensation.
External input cannot be recorded during a
Bounce to Disk. To include external input
in your bounce, it must be recorded to new
audio tracks before using Bounce to Disk
(see “Bounce to Disk” on page 836).
For more information, see “Delay Compen-
sation” on page 741.
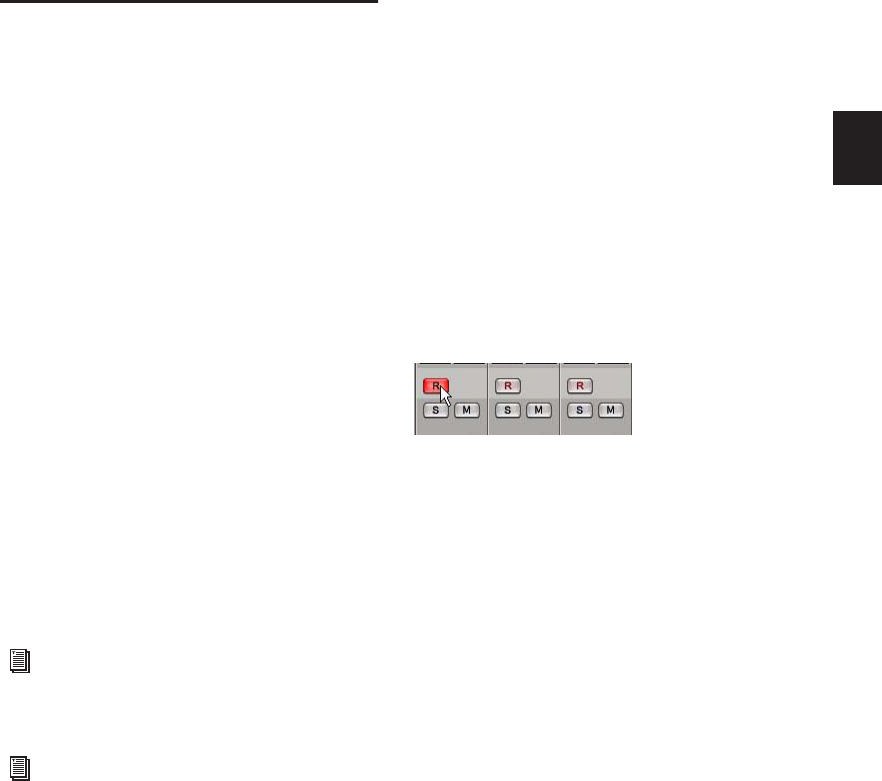
Chapter 18: Audio Recording 343
Chapter 18: Audio Recording
Recording an Audio Track
In Pro Tools, you record audio to audio tracks.
Audio tracks can be mono, stereo, or multi-
channel as appropriate for the recording source.
When recording a mono source, record to a sin-
gle, mono audio track in Pro Tools. A single,
mono audio file is written to disk, and the file
appears as a region both in the track’s playlist
and in the Region List.
When recording a stereo audio source, record to
a single, stereo audio track in Pro Tools. A single,
mono audio file is written to disk for each chan-
nel of a stereo track: one for the left channel,
and one for the right channel. These files appear
as a stereo region both in the track’s playlist and
in the Region List.
Recording a multichannel source to a multi-
channel track (Pro Tools HD only) is similar to
recording stereo audio tracks. A single, mono
audio file is written for each channel in the
track, and these files appear as multichannel re-
gions in both the track’s playlist and in the Re-
gion List.
Before Recording
Before you start recording in Pro Tools, you
need to set up your Pro Tools system, a session,
and one or more tracks for recording. You will
also need to configure how Pro Tools monitors
the input you intend to record. For information,
see Chapter 17, “Record Setup.”
Basic Recording Steps
To record an audio track:
1 Click the Record Enable button for the audio
track so that it is selected (lit).
2 Adjust the output level of your sound source
(instrument, mixer, or preamp). Monitor the
track’s meter levels in Pro Tools to ensure that
levels peak within –6 dB to –12 dB on the input
meter without triggering the clipping indicator
on your audio interface.
For more information on multichannel
tracks, see “Multichannel Audio Tracks” on
page 855.
For detailed record setup information, see
Chapter 17, “Record Setup.”
Record enabling a track in the Mix window
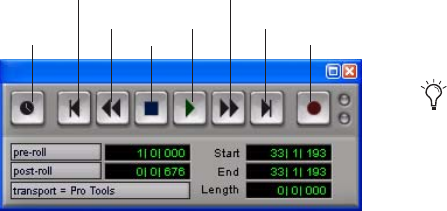
Pro Tools Reference Guide344
3 Do one of the following:
• In the Mix window, adjust the track’s vol-
ume and pan faders. These settings are for
monitoring purposes only and do not af-
fect the recorded material.
– or –
• In the Output window for the track, adjust
the track’s Volume fader and Pan sliders.
These settings are for monitoring purposes
only and do not affect the recorded mate-
rial. (See “Output Windows for Tracks and
Sends” on page 730.)
4 Choose Window > Transport to display the
Transport window. Click Return to Zero to go to
the beginning of the session.
5 Click Record in the Transport window to arm
Pro Tools for recording. The Record button
flashes red to indicate that Pro Tools is ready to
record.
6 Select a Record Mode by doing one of the fol-
lowing:
• In the Options menu, ensure that the fol-
lowing options are deselected: Destructive
Record, Loop Record, QuickPunch, Track-
Punch, and DestructivePunch.
– or –
• Right-click the Record button in the Trans-
port and select Normal.
7 When you are ready to start recording, click
Play or press the Spacebar.
If using Countoff, Pro Tools counts off the spec-
ified number of measures and then begins re-
cording. See “Recording with a Click (Op-
tional)” on page 322.
8 Record your performance.
9 Click Stop in the Transport window or press
the Spacebar when you are finished recording.
The newly recorded audio is written to disk and
appears as an audio region both in the track’s
playlist and in the Region List.
To play back the audio track:
1 Click the Record Enable button for the audio
track so that it is no longer record-enabled.
Track volume faders now function as playback
level controls.
2 To have playback start from the beginning of
the session, click Return to Zero in the Trans-
port.
3 To start playback, click Play in the Transport.
Adjust the track’s volume and pan faders.
Transport window
Fast Forward
Record
Go to EndPlay
Stop
Rewind
Return to Zero
Online
If a record-enabled track is in Auto Input
Monitor mode, you will hear “through” the
input while the Transport is stopped. The
track automatically switches to playback
when you press play, then back to Input
mode when you either stop, or punch into
record. For more information, see “Auto In-
put Monitoring” on page 338.

Chapter 18: Audio Recording 345
Undo or Cancel Audio Recording
Once you have recorded an audio track and the
transport is stopped, you can undo the record
take.
To undo an audio recording:
Once the Transport has been stopped, choose
Edit > Undo Record Audio.
The track’s playlist is restored to its previous
state and material is discarded as follows:
• When in normal Record mode, only the
most recent take is discarded.
• When in Loop Record mode, all takes from
each record pass are discarded.
• When using QuickPunch, TrackPunch, or
DestructivePunch mode, all punches from
the last recording pass are discarded.
If no actions are available to undo, the menu
displays a grayed out Can’t Undo.
Canceling a Record Take
While recording, it is possible to discard the cur-
rent record take. This removes the audio (re-
corded up to that point) from your hard drive
and deletes the region from the track’s playlist
and the Region List. When using Loop Record
mode, all takes from each record pass are dis-
carded. Canceling recording when in Destruc-
tive Record mode is prohibited.
To cancel a record take while recording:
Press Control+Period (.) (Windows) or Com-
mand+Period (.) (Mac) before the Transport is
stopped.
Recording Multiple Audio Tracks
Pro Tools can record multiple audio tracks si-
multaneously, up to the track recording limits of
your system. To record to multiple tracks, con-
figure and record enable each track, then record.
Follow the same steps as in “Recording an Audio
Track” on page 343.
For each record-enabled track, a new audio file is
written to disk, and a new region is created that
appears both in the track’s playlist and in the
Region List.
If you undo a record pass during recording,
Pro Tools removes any previously undone
record pass from the session and lets you de-
lete the previous record pass from your hard
drive.
Pro Tools Reference Guide346
Record Shortcuts
In addition to clicking the Record button in the
Transport or Edit window to arm Pro Tools re-
cording, you can arm and start recording with
the following keyboard shortcuts:
• Press F12 to start recording immediately.
• Press Control+Spacebar (Windows) or Com-
mand+Spacebar (Mac) to start recording.
• Press 3 on the numeric keypad (when the Nu-
meric Keypad mode is set to Transport) to
start recording.
Record Pause Mode
When recording a large number of tracks or
channels, or playing back a large number of
tracks while recording, Pro Tools may take a lit-
tle longer to begin recording. To avoid this de-
lay, put Pro Tools in Record Pause mode before
beginning to record.
To enable Record Pause mode and start recording:
1 Click Record in the Transport. The Record but-
ton flashes.
2 Do one of the following:
• Alt-click (Windows) or Option-click (Mac)
Play in the Transport to put Pro Tools in
Record Pause mode.
• Right-click the Play button and select
Prime for Record.
The Stop button lights and both the Play and
Record buttons flash.
3 To begin recording instantaneously, click Play.
4 Click Stop to stop recording.
Recording Additional Takes
After recording to an audio track, you can record
additional takes to the same track. However, if
you record these additional takes in Destructive
Record mode, the audio residing on your hard
drive from the previous takes is permanently
lost.
To keep the audio from previous takes, record
the new takes in Normal (Nondestructive)
Record mode.
On Mac systems, to use F12 for recording,
the Mac “Dashboard” feature must be dis-
abled or remapped. See your Getting Started
Guide for details.
On Mac systems, to use Command+Spacebar
for recording, the Mac “Spotlight” feature
must be disabled or remapped. See your Get-
ting Started Guide for details.
To initiate recording at half-speed, press
Control+Shift+Spacebar (Windows) or
Command+Shift+Spacebar (Mac). For de-
tails, see “Half-Speed Recording” on
page 360.
When synchronizing to time code, use
Record Pause mode to record or play back
large numbers of tracks. This decreases the
time it takes to lock to time code.
For information on audio file and region
names for new takes, see “Configuring De-
fault Names for Audio Files and Regions
(Optional)” on page 330.
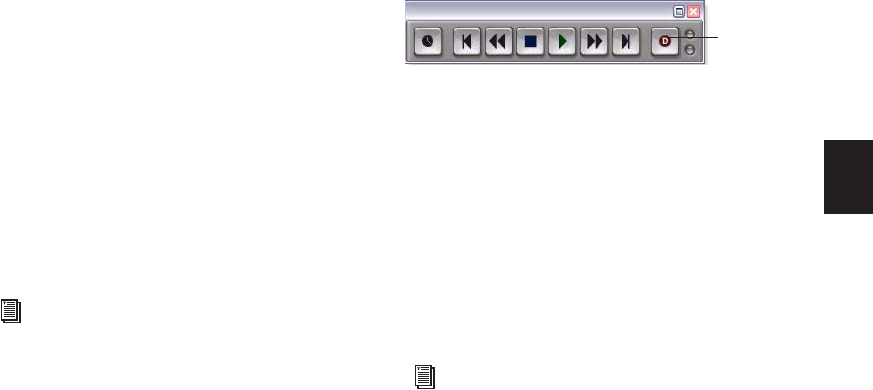
Chapter 18: Audio Recording 347
To nondestructively record a new take on the
same track:
1 Do one of the following:
• In the Options menu, ensure that the fol-
lowing options are deselected: Destructive
Record, Loop Record, QuickPunch, Track-
Punch, and DestructivePunch.
• Right-click the Record button in the Trans-
port and select Normal.
2 Record enable the track.
3 Do one of the following:
• To record from the beginning of the ses-
sion, click Return to Zero in the Transport.
– or –
• If Options > Link Timeline and Edit Selec-
tion is enabled, click anywhere in the
track’s playlist to begin recording from that
point.
4 Click Record in the Transport to arm Pro Tools
for recording.
5 Click Play to start recording.
6 Click Stop to stop recording.
An audio file for the new take is written to disk
and appears as an audio region both in the
track’s playlist and in the Region List.
The audio from the original take remains on
your hard drive, and is still available as a region
in the Region List.
To destructively record over a previous take:
1 Do one of the following:
• Select Options > Destructive Record. When
in Destructive Record mode, a “D” appears
in the Record button.
• Right-click the Record button in the Trans-
port and select Destructive.
2 Record enable the track.
3 Do one of the following:
• To record from the beginning of the track,
click Return to Zero in the Transport.
– or –
• If Options > Link Timeline and Edit Selec-
tion is enabled, click anywhere in the
track’s playlist to begin recording from that
point.
4 Click Record in the Transport to arm Pro Tools
for recording.
5 Click Play to start recording.
6 When finished, click Stop to stop recording.
The audio for the new take is written to disk,
permanently overwriting the original. The new
material replaces the original material within
the existing region and the region is not re-
named.
To record a specific track range, with precise
start and end points, see “Audio Punch Re-
cording Over a Specified Range” on
page 349.
Destructive Record mode enabled
To record a specific track range, with precise
start and end points, see “Audio Punch Re-
cording Over a Specified Range” on
page 349.
Destructive
Record

Pro Tools Reference Guide348
Appending New Material to the End of a
Track
You can also append new material to the end of
a track.
To append new material to the end of a track:
1 Do one of the following:
• Click the Go to End button in the Trans-
port to locate to the end of the track (this
locates the end of the session).
– or –
• Tab to the end point of the last region on
the track.
2 From there, begin recording.
Pro Tools adds the new material to the end of
the track. If using Destructive Record mode, the
new audio is appended to the audio file and re-
gion from the first take. In Nondestructive
Record mode, a new file and region are created.
Recording to a New Playlist
Instead of recording over existing audio regions,
there is another way to nondestructively record
new takes to the same track. Do this by creating
a new playlist for the track, then record just as
before.
Tracks can have multiple edit playlists, each of
which stores a list of regions strung together in a
particular order. Also, since playlists follow
groups, duplicating or selecting alternate play-
lists for a track in an enabled group will affect all
tracks in the group.
To record to a new playlist for a track:
1 From the track’s Playlist selector, choose New.
2 Enter a name for the new playlist.
3 Click OK.
When a new playlist is created, its name replaces
the track name. Names for new audio files and
regions are based on the track name.
4 Record enable the track.
5 To start from the beginning of the session,
click Return to Zero in the Transport.
6 Click Record in the Transport to arm Pro Tools
for recording.
7 Click Play to start recording.
8 Click Stop to stop recording.
An audio file for the new take is written to disk
and appears as an audio region both in the
track’s new playlist and in the Region List.
Selecting a previous playlist from track’s Playlist
selector recalls its regions as they previously ap-
peared in the track. At any time, all regions from
all playlists are available in the Region List, and
can be mixed and matched between playlists
and tracks.
Playlist selector
For more information on playlists and play-
list editing, see “Playlists” on page 410.
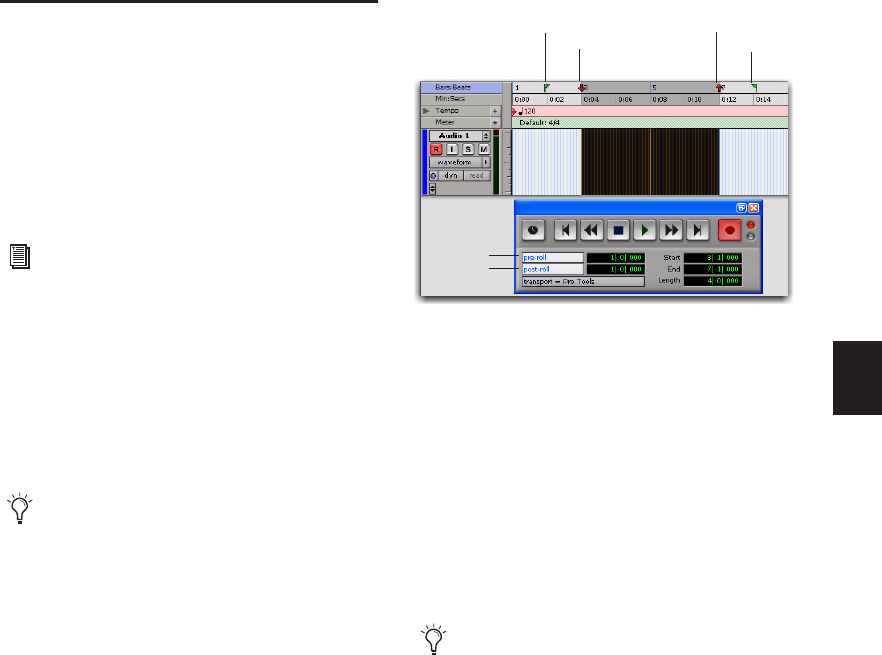
Chapter 18: Audio Recording 349
Audio Punch Recording Over a
Specified Range
You can set Pro Tools to automatically punch
record over a specific range in an audio track (for
example, to replace a portion of a recorded
track). The range’s start (punch in) and end
(punch out) points must be specified before re-
cording.
Though there are several ways to set record and
play ranges (see “Setting Punch and Loop
Points” on page 354), perhaps the easiest is to
select within the track’s playlist the range for re-
cording.
During the recording process, playback begins
at the pre-roll time (if enabled) and proceeds to
the start time (the punch-in point), where re-
cording begins. When the end time (the punch-
out point) is reached, Pro Tools automatically
switches out of Record mode and continues
playing through the specified amount of post-
roll. This automated punch-in/out feature is a
powerful and precise way of recording or re-re-
cording on a track.
To punch record on an audio track:
1 Do one of the following:
• To record nondestructively, make sure that
Options > Destructive Record is not se-
lected.
– or –
• If you do want to permanently record over
the specified record range, select Options >
Destructive Record.
2 Record enable the track.
3 Select Options > Link Timeline and Edit Selec-
tion.
4 With the Selector tool, drag in the track’s play-
list or in one of the Timebase rulers until the se-
lection encompasses the punch range (see
“Setting Punch and Loop Points” on page 354).
To manually punch in and out on record-
enabled audio tracks during playback, refer
to Chapter 20, “Advanced Punch Record-
ing.”
To set a record or play range by selecting
within a playlist, the Edit and Timeline se-
lections must be linked (select Options >
Link Timeline and Edit Selection).
Timeline selection for punch recording with Pre-roll and
Post-roll
If you are recording in any mode other than
Destructive Record mode, punches do not
permanently replace previously recorded
material. If you do want to permanently
record over the specified record range (and
keep only the most recent take), select Op-
tions > Destructive Record.
Punch In
Punch Out
Pre-roll flag
Post-roll flag
Pre-roll
enabled
Post-roll
enabled

Pro Tools Reference Guide350
5 To hear any existing track material up to the
start point, or after the end point, enable and set
pre- and post-roll times (see “Setting Pre- and
Post-Roll” on page 357).
6 Click Record in the Transport to arm Pro Tools
for recording.
7 Click Play to start recording.
Pro Tools starts recording from the punch-in
(start) point. If there is any pre-roll, recording
starts when the punch-in (start) point is
reached. Recording continues until the punch-
out (end) point is reached (unless you manually
stop recording first). If post-roll is enabled, play-
back continues for the specified post-roll
amount.
If recording nondestructively, a new audio file is
written to your hard drive and a new audio re-
gion appears both in the track and the Region
List.
If recording in Destructive Record mode, the
new audio overwrites the previous material in
the existing audio file and region.
Monitoring During Punch-Ins
Pro Tools provides two monitoring modes for
recording: Auto Input monitoring and Input
Only monitoring.
Loop Recording Audio
Pro Tools provides a loop recording feature that
lets you record take after take while the same
section of audio repeats over and over. This is a
convenient technique for quickly recording
multiple takes of a part without losing sponta-
neity.
When loop recording, you must first specify the
start and end points for the loop. Though there
are several ways to set record and play ranges
(see “Setting Punch and Loop Points” on
page 354), the easiest is to select the range to be
looped in the track’s playlist (ensure that Op-
tions > Link Timeline and Edit Selection is se-
lected).
The pre-roll setting, if enabled, is used only dur-
ing the first record pass, and the post-roll set-
ting, if enabled, is used only on the last record
pass. Pre- and post-roll times are ignored on
each successive loop. To compensate for this,
you may want to make the loop range slightly
longer. Later, you can trim back the recorded
takes to the proper length with the Trim tool
(see “Using the Trimmer Tools” on page 433).
When loop recording audio, Pro Tools creates a
single audio file that includes all takes. Takes ap-
pear as individual regions in the Region List and
are numbered sequentially. Once you stop re-
cording, you can audition any of the recorded
takes.
For more information, see “Auto Input
Monitoring” on page 338.
To use alternate takes created with Loop
Record in other sessions (such as when us-
ing Import Session Data), export region def-
initions (see “Exporting Region Defini-
tions” on page 265). If region definitions
are not exported, alternate takes created
with Loop Record will be inaccessible when
imported into another session.

Chapter 18: Audio Recording 351
To loop record an audio track:
1 Do one of the following:
• Select Options > Loop Record. When Loop
Record mode is enabled, a loop symbol ap-
pears in the Record button.
– or –
• Right-click the Record button in the Trans-
port and select Loop.
2 Record enable the audio track by clicking its
Record Enable button.
3 Select Options > Link Timeline and Edit Selec-
tion.
4 With the Selector tool, select the loop range
on the track. For other methods of setting the
record range, see “Setting Punch and Loop
Points” on page 354.
5 To hear track material up to the start point of
the loop, enable pre-roll and set the pre-roll
time (see “Setting Pre- and Post-Roll” on
page 357).
6 Click Record in the Transport to arm Pro Tools
for recording.
7 Click Play to start recording.
The Record button flashes during the pre-roll.
When the start point is reached, Pro Tools be-
gins recording. When the end point is reached,
Pro Tools loops back to the start time and con-
tinues recording.
8 To cancel all recorded takes while loop record-
ing, press Control+Period (.) (Windows) or
Command+Period (.) (Mac).
9 When finished, click Stop to stop recording.
If you stop recording before you reach the mid-
point of the loop, Pro Tools discards that take. If
you record more than half of the looped take,
Pro Tools will leave the take in the track when
you stop recording.
The recorded takes appear as regions in the Re-
gion List and are numbered sequentially. The
most recently recorded take appears in the ac-
tive playlist on the track. For details on audi-
tioning the different takes, see “Auditioning Dif-
ferent Record Takes in the Timeline” on
page 351.
Loop Playback and Audio Recording
Pro Tools ignores “loop playback” when record-
ing. The only way to loop while recording is to
enable Loop Record mode.
Auditioning Different Record
Takes in the Timeline
After recording multiple takes with loop or
punch recording, you can replace the current
take in the track’s active playlist with any of the
previous takes. (Takes must have the same start
time to be available.) Different takes (regions)
can also be auditioned by Alt-clicking (Win-
dows) or Option-clicking (Mac) them in the Re-
gion List.
All takes are numbered sequentially.
Selecting a Different Take from
the Region List
To select a take from the Region List:
1 In the Edit window, select the current take
with the Time Grabber tool.
Loop Recording enabled
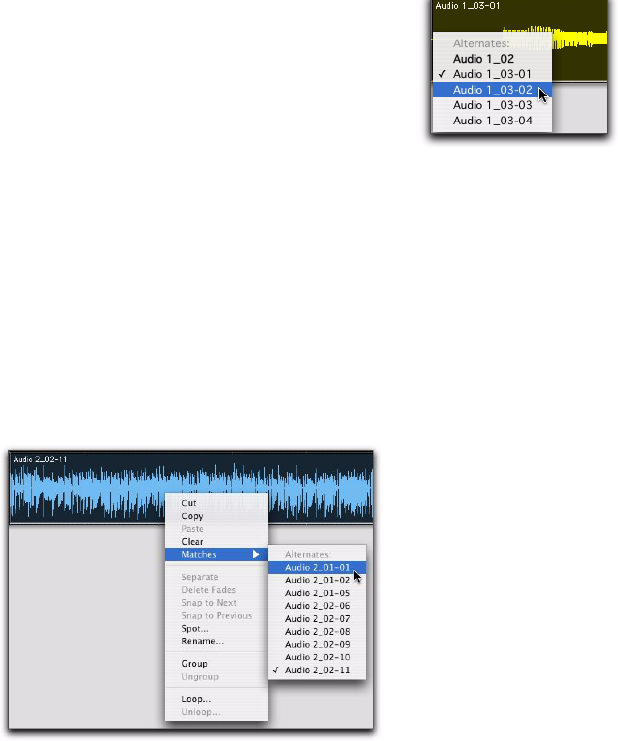
Pro Tools Reference Guide352
2 Control-drag (Windows) or Command-drag
(Mac) another take from the Region List into the
playlist.
The region replaces the previous take and snaps
precisely to the correct location.
3 Repeat the above steps to audition other takes.
Selecting an Alternate Take on a
Track
Each region resulting from a punch or loop
record pass has an identical start time (the User
Time Stamp). You can select and audition alter-
nate takes from the Right-click Matches sub-
menu or the Alternate Takes pop-up menu—
even during playback.
To select an alternate take, do one of the
following:
Right-click the region with the Selector or the
Grabber tool, and select an alternate take from
the Matches submenu in the pop-up menu.
With the Selector tool, Control-click (Win-
dows) or Command-click (Mac) at the precise
beginning of the loop or punch range and select
a different take from the Alternate Takes pop-up
menu.
If the take currently residing in the track is se-
lected, with the Selector tool, Control-click
(Windows) or Command-click (Mac) anywhere
on the selected take and select a different take
from the Alternate Takes pop-up menu.
The selected take (region) replaces the previous
take and snaps precisely to the correct location.
One way to ensure that future takes have the
same User Time Stamp (and appear in the
Matches pop-up menu) is to store punch and
loop record selections as Memory Locations.
Then, if you later need to record additional
takes, recall the Memory Location. For more in-
formation, see “Memory Locations” on
page 356.
To change the User Time Stamp of other regions
so that they appear in the Matches pop-up
menu for a specific location, use the Time Stamp
command in the Region List pop-up menu. For
more information, see “Time Stamping” on
page 903.
Matches and Multiple Tracks
If you have recorded in Loop Record mode on
multiple tracks, and each contains multiple
takes with identical User Time Stamps, you can
change all takes simultaneously.
Right-click Matches submenu
Alternate Takes pop-up menu

Chapter 18: Audio Recording 353
To switch takes for multiple tracks:
1 Choose Setup > Preferences and click the Ed-
iting tab.
2 Enable the following options under “Match-
ing Start Time” Takes List:
• Includes Take Region Name(s) that Match
Track Names
– and –
• Includes Take Regions Lengths That Match
3 Click OK to close the Preferences dialog.
4 With the Selector tool, select the take range
for each track you want to replace.
5 Do one of the following:
• Right-click any of the selected takes and se-
lect a different take from the Matches sub-
menu.
– or –
• Control-click (Windows) or Command-
click (Mac) any of the selected takes and se-
lect a different take from the Alternate
Takes pop-up menu.
The selected take replaces the previous take and
snaps precisely to the correct location on each
track.
Editing Preferences for Takes
In addition to having the same User Time
Stamp, regions that appear in the Matches sub-
menu and the Alternate Takes pop-up menu are
also restricted according to options in the Pref-
erences dialog.
To set Editing preferences for takes:
1 Choose Setup > Preferences and click the
Editing tab.
2 Enable or disable the following options in the
“Matching Start Time” Takes List section:
Includes Take Region Name(s) That Match Track
Names When selected, only regions that share
the same root name with the track/playlist ap-
pear in the Matches submenu and the Alternate
Takes pop-up menu. For example, the Matches
for a track named “Gtr.L” would show the re-
gions “Gtr.L_01” and “Gtr.L_02-01,” but not
“Guitar.L_01.”
Includes Take Region Lengths That Match When
selected, only regions that match the length of
the current selection (even if it is not an entire re-
gion) appear in the Matches submenu and the
Alternate Takes pop-up menu. If there is no se-
lection, all takes with the same User Time Stamp
are displayed.
“Separate Region” Operates On All Related
Takes When selected, editing a region with the
Separate Region command also affects all other
related takes with the same User Time Stamp.
This option helps you compare different sec-
tions from a group of related takes. For example,
you can quickly separate an entire group of re-
lated vocal takes into sections, then audition
and select the best material from each section
independently.
If this option is selected, make sure the Include
Take Region Names That Match Track Name(s)
and Include Take Region Lengths That Match
options are also selected. If they are not, all re-
gions in the session that have the same User
Time Stamp will be affected.
In most instances, you’ll want to deselect the
Separate Region Operates On All Related Takes
option, to prevent a large number of regions
from being created when you use the Separate
Region command.
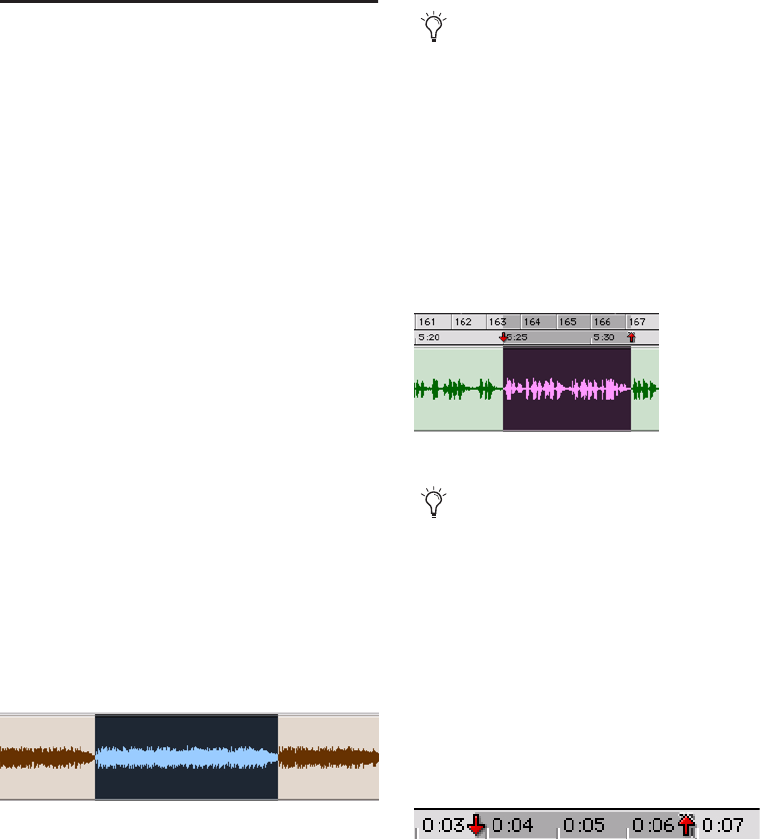
Pro Tools Reference Guide354
Setting Punch and Loop
Points
The start and end points of a record range for
punch and loop recording can be set by the fol-
lowing methods:
• Select a range in a track’s playlist (with Op-
tions > Link Timeline and Edit Selection
enabled).
• Select a range in a Timebase ruler.
• Drag the Timeline Selection Markers in the
ruler.
• Enter start and end times in the Transport
window.
• Recall a Memory Location that includes an
Edit selection (with Options > Link Time-
line and Edit Selection enabled).
To set the record range in a track’s playlist:
1 If you want to constrain the selection to the
current Grid value, set the Edit mode to Grid.
2 Select Options > Link Timeline and Edit Selec-
tion.
3 Do one of the following:
• With the Selector tool, select the record
range in a track’s playlist.
– or –
• If a region’s start and end points define the
record range, select the entire region.
To set the record range in a Timebase ruler:
1 If you want to constrain the selection to the
current Grid value, set the Edit mode to Grid.
2 Select the record range in any Timebase ruler.
Timeline Selection Markers
When tracks are record-enabled, Timeline Selec-
tion Markers for start and end times appear as
red up and down arrows in the Main Timebase
ruler. If no tracks are record-enabled, the Time-
line Selection Markers are blue.
The Timeline Selection Markers can be moved,
either separately or at the same time, to set
record and play ranges.
Playlist selection
You can also enter a start and end point
during playback. Press the Down Arrow to
set the start point, and press the Up Arrow
to set the end points. Note that when in Grid
mode, start and end point when entered in
this manner do not snap to the grid.
Timeline selection
If the Selector tool is not active, you do not
need to manually select it. Other Edit tools
(such as the Time Grabber tool) automati-
cally turn into the Selector tool when used in
Timebase rulers.
Timeline Selection Markers in the Main Timebase ruler
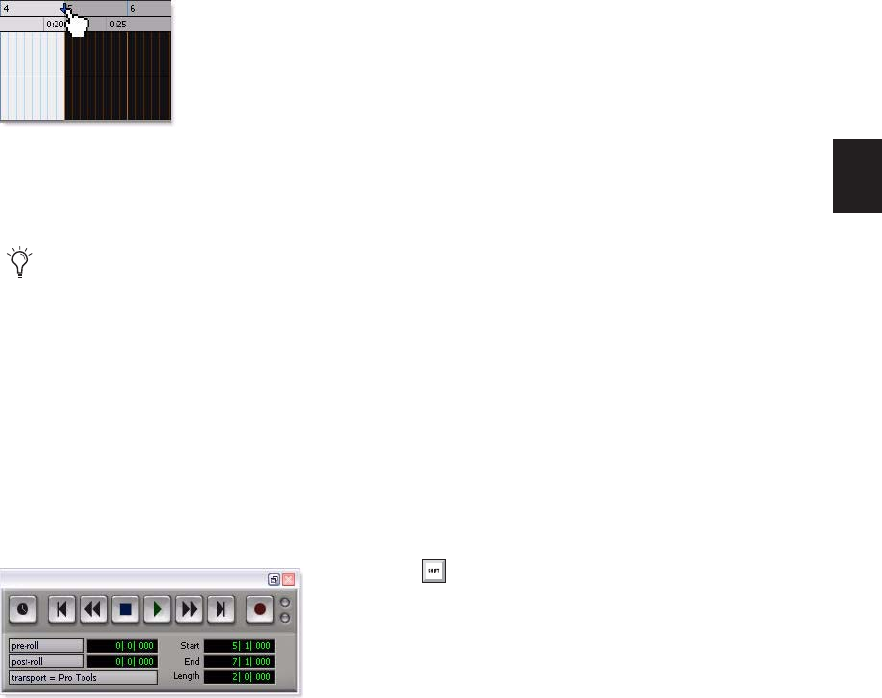
Chapter 18: Audio Recording 355
To set the record range by dragging the Timeline
Selection Markers:
1 If you want the Timeline Selection Markers to
snap to the current Grid value, set the Edit mode
to Grid
2 Drag the first Timeline Selection Marker
(down arrow) to the start point of the range.
3 Drag the second Timeline Selection Marker
(up arrow) to the end point of the range.
Start, End, and Length Fields
In its Expanded View, the Transport window can
display start, end, and length times, and pre-
and post-roll settings. When setting a record or
play range, the range is reflected in these fields.
You can enter locations in the start and end
fields to set the record or play range. The Time-
line Selection Markers in the Main Timebase
ruler are updated accordingly.
To set the record range by entering start and end
times in the Transport window:
1 To see the start, end, and length times, do one
of the following:
• Select View > Transport > Expanded.
– or –
• Shift-click the Expand/Collapse “+” button
in the Transport window.
2 Do one of the following:
• In the Transport window, click in the Start
field.
– or –
• Press Alt+Forward Slash (/) (Windows) or
Option+Forward Slash (/) (Mac) on the nu-
meric keypad to select the start field in the
Transport window.
3 Type in the start location and press Alt+For-
ward Slash (/) (Windows) or Option+Forward
Slash (/) (Mac) on the numeric keypad to enter
the value and automatically move to the end
field.
4 Type in the end location and press Enter to ac-
cept the value.
Dragging a Timeline Selection Marker (start time) in the
Main Timebase ruler
If the current record range is already the
right length and the range needs only to be
moved to a new location, Alt-drag (Win-
dows) or Option-drag (Mac) either Timeline
Selection Marker to move both to a new lo-
cation (while keeping the same length).
Transport window with Start, End, and Length fields
displayed
Use the Period (.) or Left/Right Arrow keys
to move through the different time fields for
Start and End. Use the Up/Down Arrow
keys to increase or decrease the numerical
values.
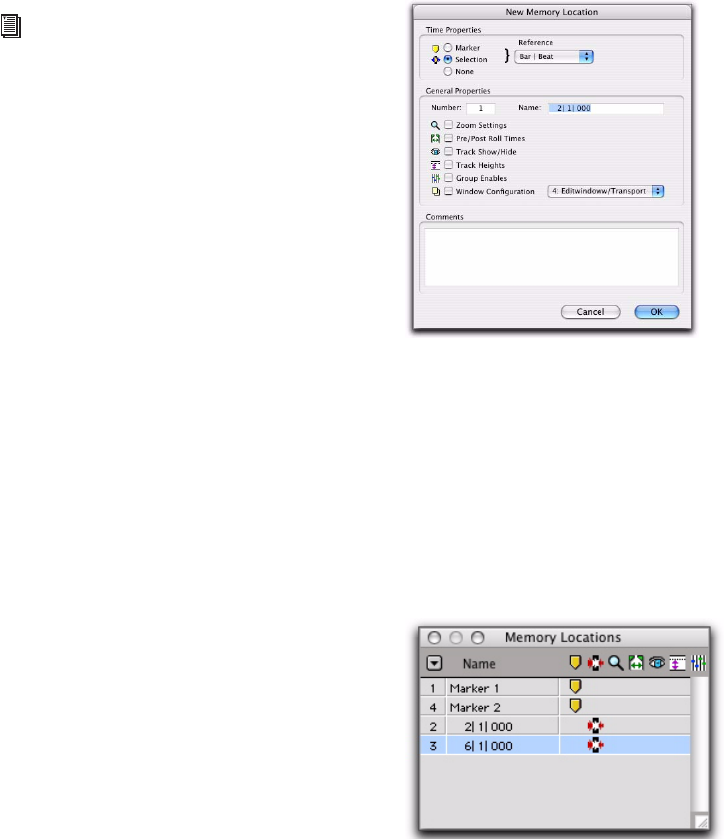
Pro Tools Reference Guide356
Memory Locations
You can store Edit selections as Memory Loca-
tions, which can also include current pre- and
post-roll values.
To save an Edit selection with a Memory Location:
1 Ensure that Options > Link Timeline and Edit
Selection is selected.
2 Set the record range by making an Edit or
Timeline selection, or by entering start and end
times in the Transport window.
3 To save the pre- and post-roll values, enable
and set the pre- and post-roll amounts by enter-
ing them in the Transport window, or by drag-
ging the Pre- and Post-Roll Flags in the ruler that
represents the Main Time Scale (see “Setting Pre-
and Post-Roll” on page 357).
4 Press Enter on the numeric keypad or click the
Add Marker/Memory Location button in the
Edit window.
5 In the New Memory Location dialog, set Time
Properties to Selection, and if saving pre- and
post-roll values, select the General Properties
option for Pre/Post Roll Times.
6 Enter a name for the new Memory Location.
7 Click OK.
To recall an Edit selection with a Memory
Location:
1 Make sure to select Options > Link Timeline
and Edit Selection.
2 Choose Windows > Memory Locations.
For more information on Memory Loca-
tions, see “Memory Locations and Markers”
on page 637.
New Memory Location dialog
Memory Locations window

Chapter 18: Audio Recording 357
3 Do one of the following:
• In the Memory Locations window, click the
name or number of the Memory Location.
– or –
• Recall the Memory Location by typing Pe-
riod (.), the Memory Location number, and
Period (.) again on the numeric keypad.
(See “Numeric Keypad Modes” on
page 21).
The start and end times and pre- and post-roll
settings stored with the Memory Location are re-
called.
Setting Pre- and Post-Roll
Pre- and post-roll times appear as flags in the
ruler that represents the Main Time Scale. When
pre- and post-roll are enabled, the flags are
green, otherwise they are gray.
Pre- and post-roll amounts can be entered in the
Transport window, set from a track’s playlist or
Timebase ruler, or by recalling a Memory Loca-
tion.
Setting Pre- and Post-Roll in the
Transport Window
Pre- and post-roll can be enabled and set in the
Transport window.
To set and enable the pre- and post-roll times in
the Transport window:
1 Select View > Transport > Expanded.
2 In the Transport window, click in the pre-roll
field.
3 Type in the pre-roll amount and press Forward
Slash (/) on the numeric keypad to enter the
value and automatically move to the post-roll
field.
4 Type in the post-roll amount and press Enter
to accept the new value.
5 To enable either pre- or post-roll, click the ap-
propriate button so it is highlighted.
Setting Pre- and Post-Roll in a Playlist
You can use the Selector tool to enable and dis-
able pre- and post-roll by clicking in a track’s
playlist.
To set and enable the pre- and post-roll by clicking
in a playlist:
1 Select Options > Link Timeline and Edit Selec-
tion.
2 With the Selector tool, select the record range
in the track’s playlist.
3 With the Selector tool, Alt-click (Windows) or
Option-click (Mac) in the track’s playlist before
the selection to enable the pre-roll at that loca-
tion.
4 With the Selector tool, Alt-click (Windows) or
Option-click (Mac) in the track’s playlist after
the selection to enable the post-roll at that loca-
tion.
Green Pre- and Post-Roll Flags (enabled) in the Main
Timebase ruler
Use the Period (.) or Left/Right Arrow keys
to move through the different time fields for
pre and post-roll. Use the Up/Down Arrow
keys to increase or decrease the numerical
values.
Pro Tools Reference Guide358
To disable the pre- and post-roll by clicking in a
playlist:
1 With the Selector tool, Alt-click (Windows) or
Option-click (Mac) in the Edit selection near the
start to disable the pre-roll.
2 With the Selector tool, Alt-click (Windows) or
Option-click (Mac) in the Edit selection near the
end to disable the post-roll.
3 Drag the Pre-Roll Flag to the Timeline Selec-
tion Start Marker.
4 Drag the Post-Roll Flag to the Timeline Selec-
tion End Marker.
Enabling Pre/Post-Roll from the
Options Menu
Pre- and post-roll (as a pair) can be enabled and
disabled from the Options menu.
To enable both pre/post-roll from the Options
menu:
Select Options > Pre/Post-Roll.
Dragging Pre- and Post-Roll Flags in the
Timebase Ruler
The Pre- and Post-Roll Flags can be moved in the
Main Timebase ruler, either separately or at the
same time, to set their location.
To set the pre- and post-roll amounts by dragging
in the Main Timebase ruler:
1 If you want the Pre- and Post-Roll flags to snap
to the current Grid value, set the Edit mode to
Grid.
2 Drag the Pre-Roll Flag to a new location in the
ruler.
3 Drag the Post-Roll Flag to a new location in
the Timebase ruler.
Recording from a Digital
Source
If you plan to use a DAT player, digital-output
CD recorder, or other digital device with your
Pro Tools system, make sure it supports the cor-
rect digital format. For example, your Pro Tools
audio interface’s AES/EBU inputs and outputs
should only be connected to another AES/EBU
device.
In the Timeline, you can reset the pre- and
post-roll to zero. First, drag the Pre-Roll Flag
to the Timeline Selection Start Marker, then
drag the Post-Roll Flag to the Timeline Se-
lection End Marker.
Dragging a Pre-Roll Flag in a Timebase ruler
To set pre- and post-roll values to the same
amount, Alt-drag (Windows) or Option-
drag (Mac) either the Pre- or the Post-Roll
Flag in the ruler. The deselected flag will
immediately reset to the same value, and
will adjust accordingly as you drag the se-
lected flag.
For additional information on configuring
your particular Pro Tools system for record-
ing from a digital source, see your Getting
Started Guide.

Chapter 18: Audio Recording 359
Pro Tools|HD Digital Options
The 192 I/O, 192 Digital I/O, and 96 I/O include
AES/EBU, S/PDIF, and ADAT digital options. Ad-
ditionally, the 192 I/O and 192 Digital I/O in-
clude TDIF digital I/O options. The 96i I/O in-
cludes only the S/PDIF digital option.
On a 192 I/O, 192 Digital I/O, or 96 I/O,
Pro Tools can receive digital audio from the fac-
tory-installed Optical (ADAT) I/O at any time (if
it is not set to S/PDIF). However, Pro Tools can
only receive digital audio from one of its enclo-
sure [Encl] digital sources—AES/EBU, S/PDIF, or
Optical (S/PDIF) at a time.
Enclosure digital sources come standard with
Pro Tools|HD I/Os and are labelled on-screen as
[Encl] versions, to differentiate them from digi-
tal inputs and outputs available on the 192’s
Digital I/O card. For example, the AES/EBU in-
puts and outputs that come standard in the
192 I/O enclosure are identified as AES/EBU
[Encl].
The additional digital ports on the 192 I/O and
192 Digital I/O are TDIF, AES/EBU, and ADAT.
Pro Tools can only receive digital audio from
one of these ports at a time.
However, inputs on both the 192 I/O enclosure
I/O and Digital card can be used simultaneously.
For example, on a 192 I/O, it is possible to clock
off a source from one of the enclosure inputs
and have another digital input from the digital
ports doing a sample rate conversion, thus hav-
ing two digital sources.
Pro Tools LE Digital Options
003, 003 Rack, Digi 002, and Digi 002 Rack in-
clude S/PDIF and ADAT digital I/O.
Mbox 2, Mbox 2 Pro, and Mbox include only
the S/PDIF digital option.
All digital outputs are active at all times, so you
can actually send digital audio to different digi-
tal devices simultaneously at mix time.
Recording from Digital Sources
To record from a digital source with Pro Tools:
1 Connect the digital output of the recording
source to the appropriate digital input of your
audio hardware.
2 If you want to start a new session with a dif-
ferent sample rate, do the following:
• Choose File > New Session
• Select the sample rate.
• Configure the rest of the New Session dia-
log accordingly.
• Click Save.
3 Specify the format (digital) of the inputs of the
audio interface to which the digital recording
source is connected:
• Choose Setup > Hardware.
• Choose the audio interface.
• Select the digital format for the appropriate
channel pair (such as AES/EBU or S/PDIF).
Some Digidesign I/O units only have two
channels that can be set for analog or digi-
tal. For example, Mbox 2 has S/PDIF L–R
(Stereo) digital inputs and In 1–2 analog in-
puts. Mbox 2 can record through analog
and digital inputs simultaneously.

Pro Tools Reference Guide360
4 or PT|HD systems, select the appropriate
Clock Source in the Session Setup window or
Hardware Setup dialog.
5 Create a new stereo audio track.
6 Assign the Input Path selector for the track to
the appropriate input. Since this is a digital
transfer, you do not need to worry about input
levels.
7 Assign the Output Path selector for the track
to the appropriate output for monitoring (such
as A 1–2).
8 In the Options menu, ensure that the follow-
ing options are deselected: Destructive Record,
Loop Record, QuickPunch, TrackPunch, and
DestructivePunch.
9 To have recording start from the beginning of
the session, click Return to Zero in the Trans-
port.
10 Record enable the new audio track.
11 Click Record in the Transport to arm
Pro Tools for recording.
12 Click Play to start recording.
13 Start playback on the recording source.
14 When the material from the source has fin-
ished, click Stop in the Transport.
15 Stop playback on the recording source.
After a Digital Transfer
After you have finished recording digitally, set
the Clock Source pop-up menu in the Session
Setup window back to Internal. Otherwise,
Pro Tools will not switch back to its own inter-
nal clock and may not record or play audio
properly. Failure to switch back to Internal syn-
chronization typically results in pitch problems
(fast or slow playback), clicks and pops, or DAE
errors, since a DAT machine or CD Recorder that
is idle can default to a different sample rate or
stop outputting a sample rate clock altogether.
Half-Speed Recording
Pro Tools lets you play and record at half-speed.
This capability is similar to that of a tape deck
where you can record material at half-speed and
then play it back at normal speed (faster and up
an octave), or record material at normal speed
and play it back at half-speed (slower and down
an octave), for special effects.
Half-Speed Recording
Use half-speed recording to record difficult to
play MIDI tracks or to record complex automa-
tion moves.
To record at half-speed:
1 Record enable the tracks you want to record at
half-speed.
2 Click Record in the Transport to arm Pro Tools
for recording.
3 Press Control+Shift+Spacebar (Windows) or
Command+Shift+Spacebar (Mac). Recording be-
gins and all existing track material plays at half-
speed.
4 When you have finished recording, click Stop.
For information on Half-Speed Playback,
see “Half-Speed Playback Mode” on
page 314.

Chapter 19: MIDI Recording 361
Chapter 19: MIDI Recording
Although recording MIDI in Pro Tools is similar
to recording audio, there are some important
differences:
Unlike audio, MIDI recording is almost always
destructive. See “Record Modes and MIDI” on
page 330 for details.
Unlike audio tracks, MIDI and Instrument
tracks can be record-enabled on-the-fly during
playback or recording.
MIDI and Instrument tracks have an Input se-
lector that determines which port on your MIDI
interface (devices) and which MIDI channel is
routed and recorded to the track. If the MIDI In-
put selector is set to All, all channels for all de-
vices are routed to the track.
Similar to Auxiliary Inputs, Instrument tracks
have audio Input and Output selectors. These
selectors are different than the Instrument
track’s selectors for MIDI Input and Output and
are primarily used for monitoring audio from
MIDI instruments or instrument plug-ins.
It is not necessary to use QuickPunch, Track-
Punch, or DestructivePunch to punch in on-the-
fly with MIDI or Instrument tracks. This capabil-
ity is available both in Normal (Nondestructive)
Record mode and Destructive Record mode.
Recording from MIDI Devices
The MIDI Inputs for record-enabled MIDI and
Instrument tracks determine what MIDI data is
recorded in Pro Tools. MIDI Inputs can be set to
a specific device (port) and channel, or they can
be set to All, where all channels for all devices
are merged to the track.
MIDI and Instrument tracks in Pro Tools do not
contain multiple channels and always play back
on the track’s assigned MIDI output device and
channel. Multiple MIDI devices and channels
can be simultaneously recorded to multiple
tracks.
The following Pro Tools options determine
whether you can record from a MIDI controller
(such as a MIDI keyboard or drum pad):
Devices that are assigned as a MIDI Controller
in the Peripherals dialog (Setup > Peripherals)
are ignored when MIDI tracks are recorded. This
is to avoid recording data from MIDI control
surfaces (such as the Digidesign Command|8).
To record and play MIDI, the device must be
enabled in the Input Devices dialog. For more
information, see “Enabling Input Devices” on
page 362.
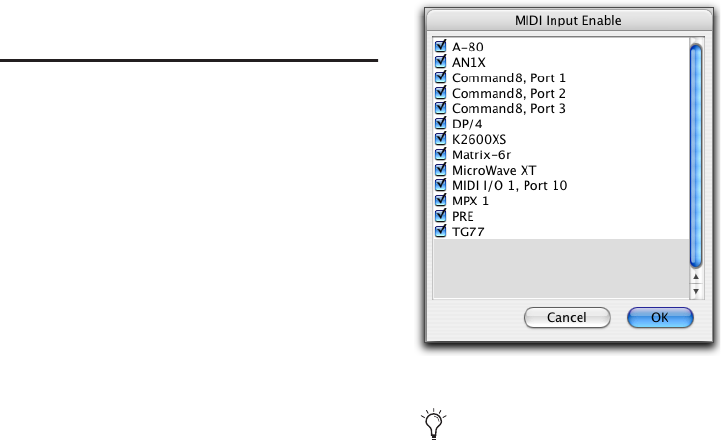
Pro Tools Reference Guide362
In addition, the following options affect how
MIDI data is recorded in Pro Tools:
The MIDI Input Filter can filter out MIDI mes-
sages that you may not want to record, such as
Polyphonic Aftertouch or System Exclusive
data. For more information, see “MIDI Input Fil-
ter” on page 364.
Input Quantize, when enabled, automatically
quantizes (time corrects) all MIDI notes that are
recorded. For more information, see “Input
Quantize” on page 364.
Enabling Input Devices
To record from a MIDI device (such as a MIDI
keyboard) in Pro Tools, the device must be en-
abled in the Input Devices dialog. You can also
use this dialog to make sure unwanted notes
from certain devices, such as drum machines or
arpeggiators, are not recorded.
MIDI Control Surfaces In order to use any MIDI
control surfaces (such as the Digidesign Com-
mand|8), they must be enabled in the Input De-
vices dialog.
MMC In order for Pro Tools to synchronize to
MMC, the MMC source must be enabled in the
Input Devices dialog.
To enable input devices:
1 Choose Setup > MIDI > Input Devices.
2 In the MIDI Input Enable dialog, do the fol-
lowing:
• Select the MIDI devices you want to record.
Also, select any device to be used as a con-
trol surface.
• Deselect any input devices you want to ig-
nore while recording MIDI.
3 Click OK.
MIDI Input Enable dialog
Devices do not need to be selected to receive
MIDI data from Pro Tools. For example, a
device used exclusively as a sound module
does not need to be selected in the MIDI In-
put Enable dialog.

Chapter 19: MIDI Recording 363
MIDI Thru
To monitor MIDI tracks while recording, enable
MIDI Thru. When enabled, Pro Tools routes
MIDI from your controllers to the device and
channels assigned to the MIDI track currently
record-enabled.
To enable MIDI Thru:
Select Options > MIDI Thru.
The Default Thru Instrument
In addition to any MIDI tracks that are record-
enabled, you can also route MIDI to the Default
Thru Instrument. This saves the extra steps of
creating a MIDI track and record enabling it to
hear a particular MIDI device and channel.
Unlike MIDI tracks, which only receive MIDI
from the device and channel assigned to its
MIDI Input selector, all incoming MIDI data is
routed to the Default Thru Instrument.
If the Default Thru Instrument is assigned to a
record-enabled MIDI track, Pro Tools only
routes incoming MIDI to the record-enabled
track.
To configure a default Thru instrument:
1 Choose Setup > Preferences.
2 Click the MIDI tab.
3 Do one of the following:
• Select a specific device from the Default
Thru Instrument pop-up menu to play
MIDI through on that device by default.
• Select “Follows First Selected MIDI Track”
to have MIDI preview assignment follow
MIDI track selection. When multiple MIDI
tracks are selected, previewing uses the top
track or left track in the Edit or Mix win-
dows.
• To disable the Default Thru Instrument, se-
lect None.
The MIDI preference for Global MIDI Play-
back Offset and individual MIDI track off-
sets do not affect MIDI routed with MIDI
Thru.
When MIDI Thru is enabled, System Exclu-
sive (Sysex) events are echoed to the MIDI
device assigned to the record-enabled
track—but only if the Sysex events are
smaller than 256 bytes.
When using MIDI Thru, you should disable
Local Control, if present, on your MIDI de-
vices. Otherwise, your MIDI device may re-
ceive double MIDI notes, which can lead to
stuck notes. If you are unsure how to disable
Local Control for your instrument, refer to
the manufacturer’s documentation.
The Default Thru Follows First Selected
MIDI Track Selection option also lets you
play an instrument without having to create
and record-enable a MIDI or Instrument
track.
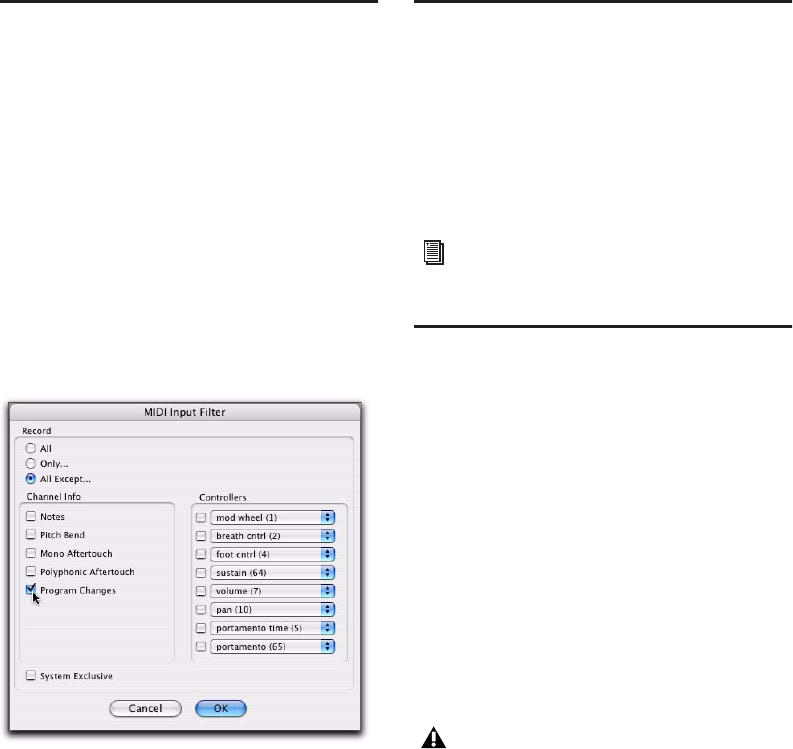
Pro Tools Reference Guide364
MIDI Input Filter
Use the MIDI Input Filter to prevent certain
types of MIDI messages from being recorded.
The MIDI Input Filter can be set to record All
messages, Only the specified messages, or All Ex-
cept the specified messages.
For example, to filter out program changes:
1 Choose Setup > MIDI > Input Filter.
2 In the MIDI Input Filter dialog, select the All
Except option.
3 Select the option for Program Changes. Leave
all other messages deselected.
4 Click OK.
When using the All Except option, the selected
types of MIDI messages are not recorded. Con-
versely, when using the Only option, only the
selected types of MIDI messages are recorded.
Input Quantize
When Input Quantize is enabled, all recorded
MIDI notes are quantized automatically. Input
Quantize is often useful for achieving rhythmi-
cally precise MIDI recordings. However, to pre-
serve all of the original nuance of your recorded
MIDI tracks (such as rubato phrasing), disable
this option.
Wait for Note
The Wait for Note button, located in the Trans-
port window, determines how Pro Tools begins
recording. When enabled, Pro Tools does not
start recording until a MIDI event is received.
This ensures that recording begins only when
you start playing, and that the first note, or
other MIDI data, is recorded precisely at the be-
ginning of the record range (start time).
Wait for Note can be used when recording nor-
mally, when punching in, or when loop record-
ing. If pre-roll is enabled, it occurs after the
MIDI event is received and before recording be-
gins.
MIDI Input Filter dialog
For more information on Input Quantize,
see “Input Quantize” on page 580.
Wait for Note and Countoff are mutually
exclusive and cannot both be enabled at the
same time. If, for instance, Countoff is en-
abled and you click the Wait for Note but-
ton, Countoff is disabled. Furthermore,
Wait for Note starts recording immediately,
ignoring any specified Pre-roll.
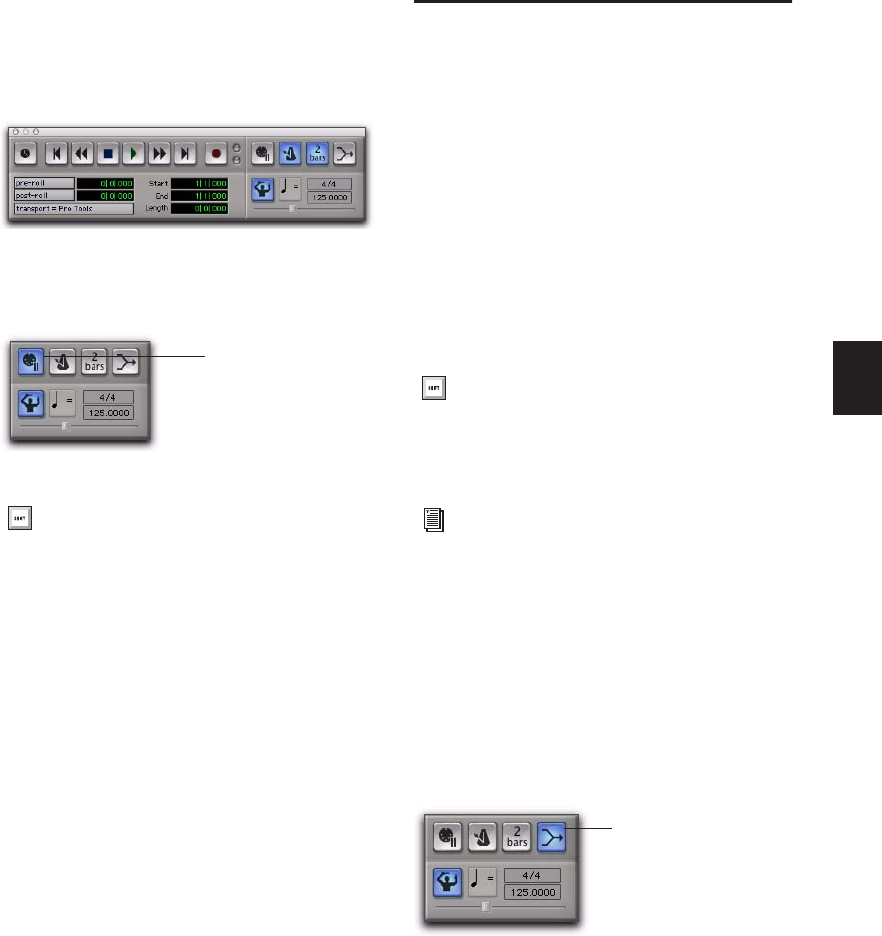
Chapter 19: MIDI Recording 365
To enable Wait for Note:
1 To view the MIDI controls in the Transport
window, select View > Transport > MIDI Con-
trols.
2 In the Transport window, click the Wait for
Note button so it becomes highlighted.
MIDI Merge/Replace
The MIDI Merge button, located in the Trans-
port window, determines how MIDI is recorded
when overdubbing or punching in. When MIDI
Merge is on (Merge mode), recorded MIDI is
merged with existing track material. When
MIDI Merge is off (Replace mode), existing data
within the punched region is replaced by the
newly recorded material.
The MIDI Merge button can be turned on and
off during playback and recording. In Loop
Record mode, MIDI Merge has no effect, and the
button is dimmed.
To enable MIDI Merge:
1 To view the MIDI controls in the Transport
window, select View > Transport > MIDI Con-
trols.
2 In the Transport window, click the MIDI
Merge button so it becomes highlighted.
Transport window with MIDI Controls
Wait for Note enabled
With the Operation preference for “Use F11
for Wait for Note” enabled, you can press
F11 to turn on Wait for Note. (On Mac sys-
tems, the Mac “Desktop” keyboard shortcut
must be disabled or remapped.)
Wait for Note button
To enable MIDI Merge with a keyboard
shortcut, set the Numeric Keypad mode to
Transport, and press the 9 key on the nu-
meric keypad.
You can also paste and merge MIDI notes
using Paste Special commands. See “Special
Paste Function for Automation Data” on
page 809.
MIDI Merge enabled
MIDI Merge button
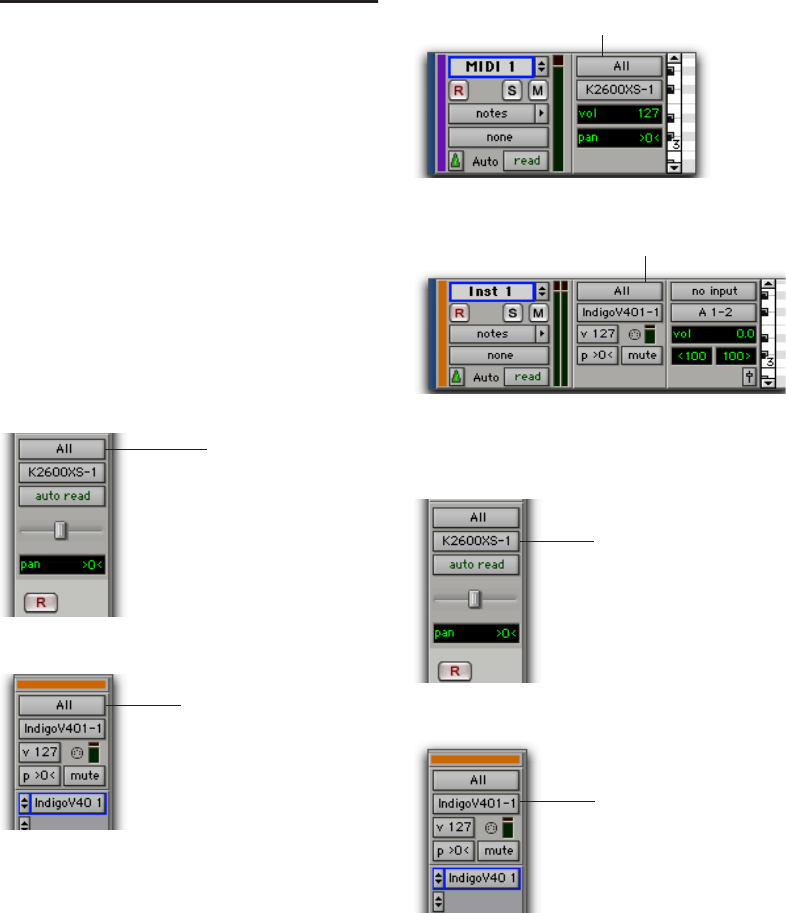
Pro Tools Reference Guide366
Configuring MIDI or
Instrument Tracks for
Recording
To configure one or more MIDI or Instrument
tracks for recording:
1 Create a new MIDI or Instrument track, or use
an existing MIDI or Instrument track.
2 For Instrument tracks, select View > Mix Win-
dow > Instruments or View > Edit Window > In-
struments.
3 From the track’s MIDI Input selector, select
the device and channel to be recorded. (For In-
strument tracks, the MIDI Input selector is avail-
able in Instruments View.)
4 From the MIDI Output selector, select the de-
vice and channel for MIDI play back.
MIDI track Input selector, Mix window
Instrument track MIDI Input selector, Mix window
MIDI Input selector
MIDI Input selector
MIDI track MIDI Input selector, Edit window
Instrument track MIDI Input selector, Edit window
MIDI track MIDI Output selector, Mix window
Instrument track MIDI Output selector, Mix window
MIDI Input selector
MIDI Input selector
MIDI Output selector
MIDI Output selector
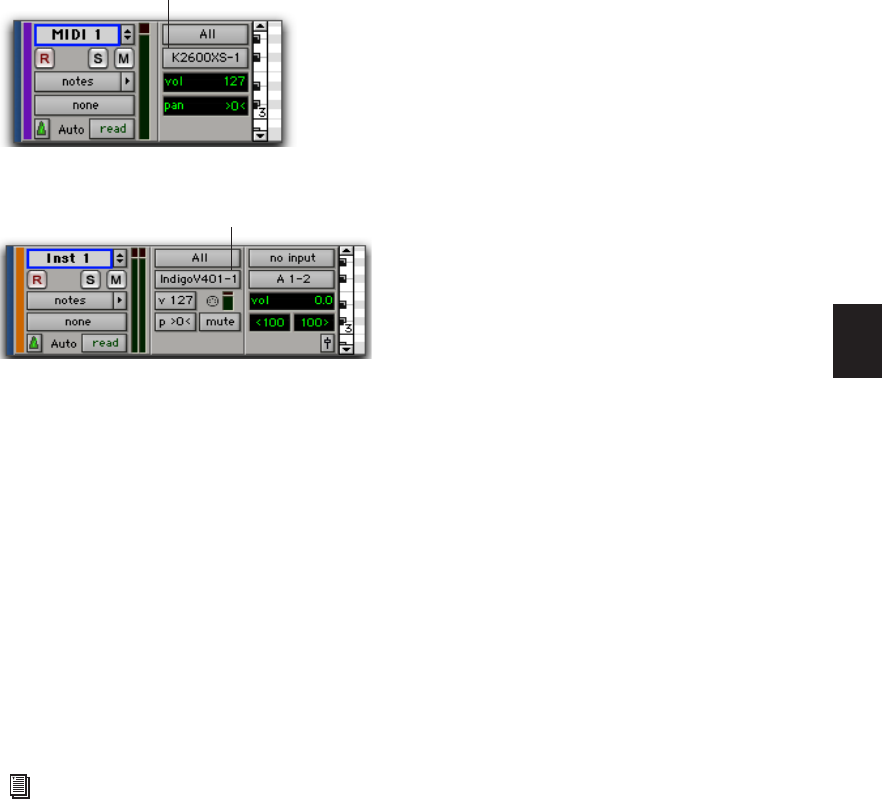
Chapter 19: MIDI Recording 367
5 To assign multiple destinations to a single
MIDI or Instrument track, Start-click (Windows)
or Control-click (Mac) the MIDI Output selector
and select additional channels from any device.
When multiple destinations are selected for a
single MIDI track, an Asterisk (*) appears next to
the first destination name in the track’s MIDI
Output selector.
6 To assign a default program change to the
track, do the following:
• Click the Patch Select button.
• Make the necessary selections for program
and bank select.
• Click Done.
7 If recording to multiple MIDI or Instrument
tracks, repeat the preceding steps for each track,
then continue to the next step.
8 To use a click, enable and configure the click,
and set a default tempo and meter for the ses-
sion (see “Recording with a Click (Optional)” on
page 322).
9 Enable either Wait for Note or Countoff in the
Transport window as appropriate.
10 To replace existing track material, disable
MIDI Merge in the Transport window (see
“MIDI Merge/Replace” on page 365).
11 To automatically quantize material as it is re-
corded, enable Input Quantize (see “Input
Quantize” on page 364).
12 To start recording from the beginning of the
session, click Return to Zero in the Transport.
13 Record enable the MIDI or Instrument track
by clicking its Record Enable button.
14 Select Options > MIDI Thru is selected, then
play your MIDI controller. The MIDI device or
instrument plug-in assigned to the track’s MIDI
Output sounds, and the track’s meters register
MIDI activity.
You are now ready to record MIDI data to the
record-enabled MIDI and Instrument tracks.
MIDI track MIDI Output selector, Edit window
Instrument track MIDI Output selector, Edit window
Default program changes are sent whenever
the track is played. For more information,
see “Patch Select (Program and Bank
Changes)” on page 541.
MIDI Output selector
MIDI Output selector
Pro Tools Reference Guide368
Recording MIDI and
Instrument Tracks
In Pro Tools, you can record to one or more
MIDI and Instrument tracks. Recording simulta-
neously to multiple tracks lets you:
• Record from multiple MIDI devices at the
same time, such as when recording several
performers.
• Record multiple channels from the same de-
vice, such as recording from a split keyboard.
• Transfer MIDI tracks from an external MIDI
sequencer.
To record to one or more MIDI or Instrument
tracks:
1 With Pro Tools HD, make sure that Delay
Compensation is disabled in the Options menu.
2 Configure a MIDI or Instrument track for re-
cording (see “Configuring MIDI or Instrument
Tracks for Recording” on page 366).
3 Record enable the track you want to record by
clicking its Record Enable button.
4 Ensure that Pro Tools is in Normal (Non-
destructive) Record mode. If necessary, do one
of the following:
• Deselect the following in the Options
menu: Destructive Record, Loop Record,
QuickPunch, TrackPunch (Pro Tools HD
only), and DestructivePunch (Pro Tools HD
only).
• Right-click the Record button in the Trans-
port and select Normal.
5 Check your MIDI Merge settings.
6 Check the pre-roll and Countoff settings.
7 To have recording start from the beginning of
the session, click Return to Zero in the Trans-
port.
To take full advantage of the MIDI editing
capabilities in Pro Tools, make sure to
record tick-based MIDI tracks with a click.
This ensures that recorded data aligns with
the session’s bar and beat boundaries. You
can also record to sample-based MIDI
tracks without a click and derive the tempo
and meter from the performance.
To record audio from a MIDI instrument or
instrument plug-in, bus the audio output of
the Instrument or Auxiliary Input track that
is monitoring the instrument to an audio
track. Record enable the audio track and
start recording. See “Recording Audio from a
MIDI Instrument” on page 377.
Digidesign recommends recording without
Delay Compensation in most cases. For
more information, see “Delay Compensa-
tion” on page 741.
To record enable additional MIDI and In-
strument tracks, Shift-click their Record En-
able buttons.
Chapter 19: MIDI Recording 369
8 Click Record in the Transport to arm Pro Tools
for recording (Record Ready mode). The Track
Record Enabled indicator lights red.
9 Click Play to start recording.
If using Countoff, Pro Tools counts off the spec-
ified number of measures and then begins re-
cording.
If Wait for Note is enabled, do not click the Play
button; recording will begin automatically as
soon as you start playing (when a MIDI event is
received).
10 Play your MIDI controller.
11 When you are finished playing, click Stop in
the Transport to stop recording.
For each record-enabled track, a new MIDI re-
gion is created and appears both in the playlist
and in the Region List.
MIDI Regions Created on Barlines
When recording MIDI, or when manually enter-
ing MIDI notes, the beginning and ending of
MIDI regions are created on bar boundaries.
This greatly facilitates arranging MIDI regions in
a musically meaningful way, in whole bar
lengths.
The beginning of a recorded MIDI region always
starts on the barline immediately before the first
MIDI note (note on) of the region. Likewise, the
MIDI region ends on the barline immediately
following the last note (note off) of the region.
Recording Over Exisiting MIDI Regions
Unlike audio regions, existing MIDI regions are
never overwritten even though MIDI data
within regions can be overwritten. When MIDI
Merge mode is disabled and recording MIDI on
a track with existing regions, newly recorded
MIDI data overwrites existing MIDI data within
existing regions, but the existing region bound-
aries remain. New MIDI regions are only created
to fill the gaps between existing MIDI region
boundaries. Typically, new MIDI regions are al-
ways created on barlines. However, if existing
region boundaries are not on barlines, newly
created regions are bound by the existing re-
gions.
Playing Back Recorded MIDI
To play back recorded MIDI and Instrument
tracks:
1 To start from the beginning of the session,
click Return to Zero in the Transport.
2 Click Play in the Transport to begin playback.
The recorded MIDI data plays back through
each track’s assigned Output device (port) and
channel.
Record button in Record Ready mode
Press F12 to start recording immediately.
You can also Press Control+Spacebar (Win-
dows) or Command+Spacebar (Mac) to
start recording. For more information, see
“Record Shortcuts” on page 346.
It is possible to have the note on of a MIDI
note be in one MIDI region, and its note off
be in a subsequent MIDI region. It is also
possible to have the region end before the
note off, resulting in notes that extend be-
yond the region boundary. However, note
ons can never precede the beginning of a re-
gion.

Pro Tools Reference Guide370
Undoing MIDI Recording
You can undo previous MIDI record takes.
To undo a MIDI recording:
Once the Transport has been stopped, choose
Edit > Undo MIDI Recording.
The track’s playlist is restored to its previous
state. However, the following conditions apply:
• If you punched in and out several times be-
fore stopping the Transport, only the last
punch is undone.
• When using Loop Record mode, all takes
from each record pass are discarded.
Canceling a Record Take
It is also possible to discard the current record
take before the Transport is stopped.
To cancel a take while recording:
Press Control+Period (.) (Windows) or Com-
mand+Period (.) (Mac) before the Transport is
stopped.
When in Loop Record mode, all takes from each
record pass are discarded.
MIDI Punch Recording Over a
Specified Range
You can set Pro Tools to automatically punch
record over a specific range in a MIDI or Instru-
ment track. The range’s start (punch in) and end
(punch out) points must be specified before re-
cording.
To punch in on a MIDI or Instrument track:
1 Configure a MIDI or Instrument track for re-
cording (see “Configuring MIDI or Instrument
Tracks for Recording” on page 366).
2 Ensure that Pro Tools is in Normal (Non-
destructive) Record mode. If necessary, do one
of the following:
• Deselect the following in the Options
menu: Destructive Record, Loop Record,
QuickPunch, TrackPunch (Pro Tools HD
only), and DestructivePunch (Pro Tools HD
only).
• Right-click the Record button in the Trans-
port and select Normal.
3 In the Transport window, disable Wait for
Note and Countoff.
4 Select Options > Link Timeline and Edit Selec-
tion.
5 With the Selector tool, select the punch range
in the track’s playlist.
6 To hear existing track material up to the start
point, or after the end point, enable and set pre-
and post-roll times (see “Setting Pre- and Post-
Roll” on page 357).
7 Record enable the track containing the previ-
ous take.
For other methods of setting the record
range, see “Setting Punch and Loop Points”
on page 354.

Chapter 19: MIDI Recording 371
8 Click Record in the Transport to arm Pro Tools
for recording. The Record button flashes.
9 Click Play to start recording.
If pre-roll is enabled, the track material leading
up to the punch-in point plays. You can start
playing during the pre-roll to get the “feel.”
MIDI is not recorded until the start point is
reached.
When the start point is reached, Pro Tools be-
gins recording. Recording continues until the
end point is reached. If post-roll is enabled,
playback continues for the specified post-roll
amount.
10 When you have finished recording, click
Stop in the Transport.
The newly recorded MIDI data appears in the
track.
Punch Recording During Playback with
MIDI
You do not have to set a record range to punch
in on a MIDI or Instrument track. In fact, you
can punch in and out on-the-fly at any time dur-
ing playback. Unlike audio tracks, it is not nec-
essary to enable QuickPunch to perform real-
time punch recording.
To punch record on-the-fly with MIDI:
1 Configure a MIDI or Instrument track for re-
cording (see “Configuring MIDI or Instrument
Tracks for Recording” on page 366).
2 Ensure that Pro Tools is in Normal (Non-
destructive) Record mode. If necessary, do one
of the following:
• Deselect the following in the Options
menu: Destructive Record, Loop Record,
QuickPunch, TrackPunch (Pro Tools HD
only), and DestructivePunch (Pro Tools HD
only).
• Right-click the Record button in the Trans-
port and select Normal.
3 In the Transport window, disable Wait for
Note and Countoff.
4 Record enable the track containing the previ-
ous take.
5 Click Play in the Transport to start playback.
6 When you reach the punch-in point, do one
of the following:
• Click Record in the Transport.
– or –
• For Pro Tools systems using a Digidesign
control surface, 003, 003 Rack, Digi 002,
Digi 002 Rack, Mbox 2 Pro with a con-
nected footswitch, press the footswitch at
the punch-in point.
The Record button in the Transport and the
track’s Record Enable button stop flashing and
stay lit during recording.
7 To punch out, click Record again (or press the
footswitch).
Pro Tools exits Record mode and continues
playing. You can perform additional punches
during the same pass.
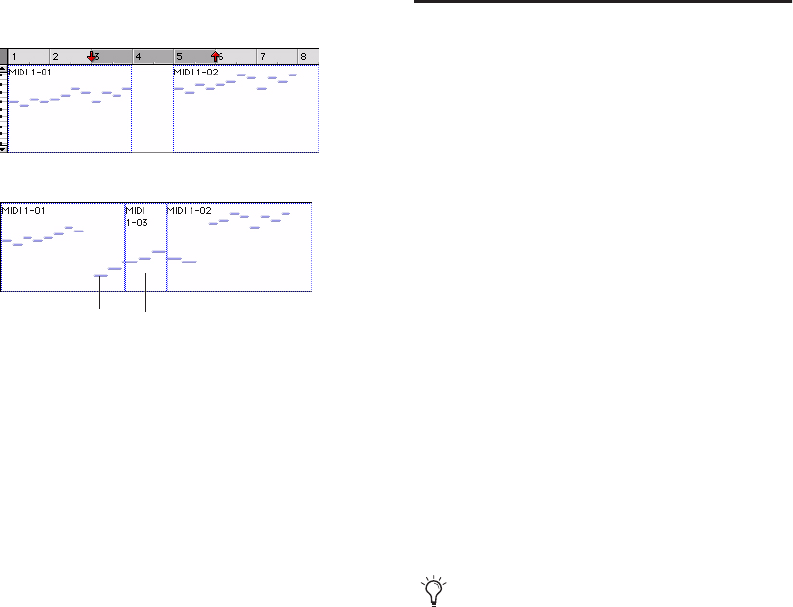
Pro Tools Reference Guide372
Regions and Punch Recording
Depending on the record range, new regions
may be created after punch recording. For exam-
ple, Figure 19 shows two existing regions before
recording. If MIDI Merge mode is disabled, re-
cording overwrites any existing MIDI data
within the record range. Since the start and end
times for recording are located within both of
the existing regions, newly recorded notes are
written into both of the existing regions, and
into a new region created to fill the space be-
tween them.
When selecting an entire region, or a section
within a region, before punching, no new re-
gions are created. In this instance, only the ma-
terial residing within the existing region
changes, with no new material recorded outside
the region.
Unlike audio recording, MIDI recording in this
scenario is destructive. Newly recorded MIDI
data overwrites existing MIDI data while leaving
the existing region boundaries intact.
If the MIDI data within a region is altered be-
cause of a record take, the original material is ei-
ther lost (unless you choose Edit > Undo MIDI
Recording) or combined with new material (if
MIDI Merge was enabled during recording). If
an existing region contains material you want to
keep, use Duplicate to make a copy of the region
(“Duplicating Regions” on page 669), or dupli-
cate the track’s playlist or record in a new play-
list to keep a backup (see “Working with Playl-
ists” on page 410).
Loop Recording MIDI
Loop recording with MIDI is supported by two
methods:
• In Normal (Nondestructive) Record mode, en-
able Loop Playback and MIDI Merge for drum
machine style loop recording.
– or –
• Use Loop Record mode to record multiple
takes on each record pass. This is similar to
loop recording audio.
Loop Recording in MIDI Merge
Mode
For MIDI loop recording, use Normal (Non-
destructive) Record mode with Loop Playback
and MIDI Merge enabled. With this method,
MIDI is recorded and merged to the same region
with each new record pass—for example, you
can record hi-hats on the first pass and kick and
snare on the next.
Figure 19. Region added after punch record
before punch record
after punch record
new region
newly recorded
material
For drum machine style step entry, use Step
Input (see “Step Input” on page 581).
Chapter 19: MIDI Recording 373
Make sure that MIDI Merge is enabled in the
Transport window, otherwise (in Replace mode)
each subsequent take destructively replaces the
previous take.
To loop record in MIDI Merge mode:
1 Configure a MIDI or Instrument track for re-
cording (see “Configuring MIDI or Instrument
Tracks for Recording” on page 366).
2 Ensure that Pro Tools is in Normal (Non-
destructive) Record mode. If necessary, do one
of the following:
• Deselect the following in the Options
menu: Destructive Record, Loop Record,
QuickPunch, TrackPunch (Pro Tools HD
only), and DestructivePunch (Pro Tools HD
only).
• Right-click the Record button in the Trans-
port and select Normal.
3 Select Options > Loop Playback. When Loop
Playback is enabled, a loop symbol appears in
the Play button.
4 Record enable the MIDI or Instrument track.
Ensure that no audio tracks are record-enabled.
5 In the Transport window, click the MIDI
Merge button so it is highlighted.
6 Disable Wait for Note and Countoff in the
Transport window.
7 Select Options > Link Timeline and Edit Selec-
tion.
8 With the Selector tool, select the loop range in
the track’s playlist.
9 To hear track material up to the start point of
the loop, enable and set the pre-roll time (see
“Setting Pre- and Post-Roll” on page 357).
10 Click Record in the Transport to arm
Pro Tools for recording. The Record button
flashes.
11 Click Play to start recording.
The Record button flashes during pre-roll.
When the start point is reached, Pro Tools be-
gins recording. When the end point is reached,
Pro Tools loops back to the start point and con-
tinues playing and recording.
12 Play your MIDI controller. Newly recorded
MIDI data appears as a region in the record
track. On each successive take, recorded mate-
rial shows up in the region, without replacing
material from previous takes.
13 To switch to a new record track, press Con-
trol (Windows) or Command (Mac), and press
the Up/Down Arrow keys to record enable the
previous or next MIDI or Instrument track.
14 When you are finished recording, click Stop
in the Transport.
The newly recorded MIDI data appears as a MIDI
region in the track’s playlist, and in the Region
List.
You can record enable a different MIDI or
Instrument track on-the-fly while loop re-
cording. While pressing Control (Windows)
or Command (Mac), use the Up/Down Ar-
rows to record enable the previous or next
MIDI or Instrument track.
Loop Playback enabled
For other methods of setting the record
range, see “Setting Punch and Loop Points”
on page 354.
Pro Tools Reference Guide374
Loop Recording Multiple Takes
When recording MIDI in Loop Record mode,
new regions are created each time new material
is received during a record pass. This differs
somewhat from loop recording audio, where
Pro Tools creates a single audio file that com-
prises all takes, which appear as individual re-
gions in the Region List.
You can use MIDI loop recording to record suc-
cessive takes without stopping the record pro-
cess, thereby capturing your creative spontane-
ity. Another advantage with this method of
recording MIDI, which is nondestructive, is that
all existing and newly recorded regions remain
intact (and available in the Region List).
To record MIDI in Loop Record mode:
1 Configure a MIDI or Instrument track for re-
cording (see “Configuring MIDI or Instrument
Tracks for Recording” on page 366).
2 Select Options > Loop Record. When Loop
Record mode is enabled, a loop symbol appears
in the Record button.
3 If you have not done so already, record enable
the MIDI or Instrument track by clicking its
Record Enable button. Make sure no audio
tracks are record-enabled.
4 Disable Wait for Note and Countoff in the
Transport window.
5 Select Options > Link Timeline and Edit Selec-
tion.
6 With the Selector tool, select the loop range in
the track’s playlist.
7 To hear track material up to the start point of
the loop, enable and set the pre-roll time (see
“Setting Pre- and Post-Roll” on page 357).
8 Click Record in the Transport to arm Pro Tools
for recording. The Record button flashes.
9 Click Play to start recording.
The Record button flashes during the pre-roll.
When the start point is reached, Pro Tools be-
gins recording. When the end point is reached,
Pro Tools loops back to the start point and con-
tinues playing and recording.
10 Play your MIDI controller. A new MIDI re-
gion containing the newly recorded material is
automatically created and appears in the track’s
playlist, replacing the previous region.
Regions are replaced (nondestructively) during
subsequent record passes when new MIDI mate-
rial is received.
11 When you are finished recording, click Stop
in the Transport.
The recorded takes appear as regions in the Re-
gion List and are numbered sequentially. The
takes, which are the same length and easily in-
terchangeable, can be auditioned from the
Matches pop-up menu—even while the session
plays or loops.
Loop Recording enabled
For other methods of setting the record
range, see “Setting Punch and Loop Points”
on page 354.
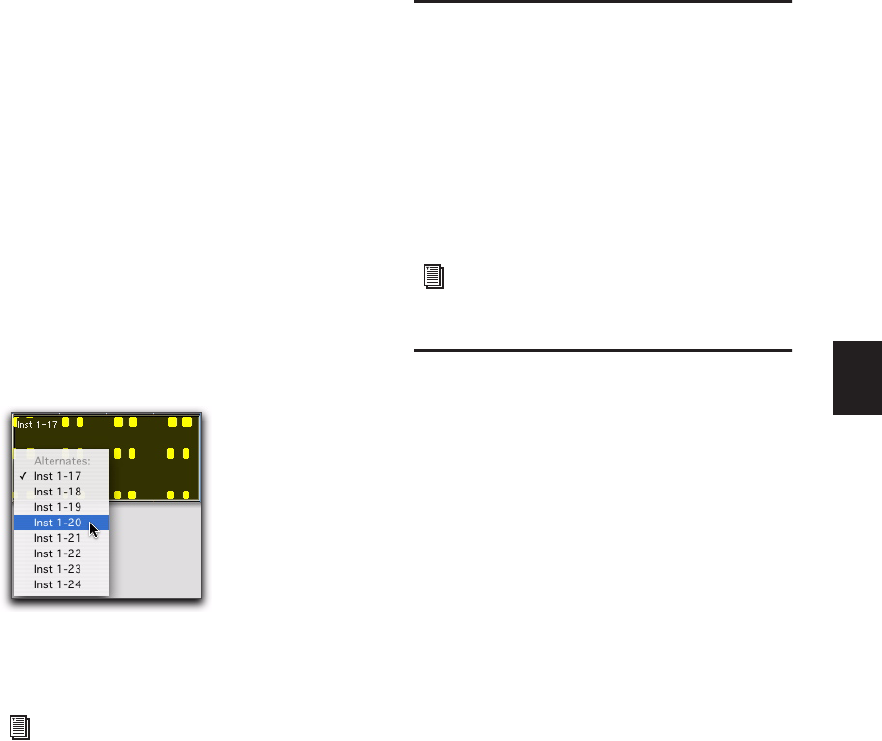
Chapter 19: MIDI Recording 375
To audition the various record takes, do one of the
following:
Right-click the region with the Selector or
Grabber tools, and select the desired take from
the Matches submenu in the pop-up menu.
With the Selector tool, Control-click (Win-
dows) or Command-click (Mac) at the precise
beginning of the loop or punch range and select
a different take from the Alternate Takes pop-up
menu.
If the take currently residing in the track is se-
lected, with the Selector tool, Control-click
(Windows) or Command-click (Mac) anywhere
on the selected take and select a different take
from the Alternate Takes pop-up menu.
The selected take (region) replaces the previous
take and snaps precisely to the correct location.
MIDI Step Input
Step Input lets you use a MIDI keyboard (or any
other MIDI controller that sends MIDI note
data) to enter notes individually, one step at a
time. This gives you precise control over note
placement, duration, and velocity. With MIDI
Step Input you can also create musical passages
that might be difficult to play accurately, or at
faster tempos.
Recording System Exclusive
Data
Pro Tools supports recording and playing Sys-
tem Exclusive data (Sysex) with MIDI tracks.
This allows you to use MIDI tracks in Pro Tools
to store patch and configuration data for your
MIDI devices, or to record real-time Sysex
changes for a particular parameter of a MIDI de-
vice that cannot be controlled by a standard
MIDI controller.
To record a Sysex dump at the beginning of a MIDI
track:
1 Make sure that the MIDI OUT for the device
sending the Sysex is connected to your MIDI in-
terface’s MIDI IN.
2 In the MIDI Input Filter dialog, enable Only
and System Exclusive.
3 Configure a MIDI track for recording (see
“Configuring MIDI or Instrument Tracks for Re-
cording” on page 366).
Selecting an alternate MIDI take
For more information on auditioning and
managing takes, see “Auditioning Different
Record Takes in the Timeline” on page 351.
For more information on Step Input, see
“Step Input” on page 581.

Pro Tools Reference Guide376
4 Ensure that Pro Tools is in Normal (Non-
destructive) Record mode. If necessary, do one
of the following:
• Deselect the following in the Options
menu: Destructive Record, Loop Record,
QuickPunch, TrackPunch (Pro Tools HD
only), and DestructivePunch (Pro Tools HD
only).
• Right-click the Record button in the Trans-
port and select Normal.
5 Record enable a MIDI track.
6 Enable Wait for Note in the Transport win-
dow.
7 To start recording from the beginning of the
session, click Return to Zero in the Transport.
8 When you are ready to begin recording, click
Record in the Transport window.
The Record, Play, and Wait for Note buttons
flash, indicating that Pro Tools is waiting for
MIDI data.
9 Initiate the Sysex transfer from the MIDI de-
vice, according to the manufacturer’s instruc-
tions. Pro Tools automatically begins recording
as soon as it starts to receive Sysex data.
10 When the Sysex transfer is complete, click
Stop in the Transport.
The newly recorded MIDI data appears as a MIDI
region in the track’s playlist, and in the Region
List. MIDI regions that contain System Exclusive
data appear blank when the MIDI Track View is
set to Regions.
To see the Sysex event blocks, which indicate
the location of the data, set the MIDI Track View
to display Sysex (see “Regions View for MIDI
and Instrument Tracks” on page 407).
To send Sysex data from Pro Tools to an external
MIDI device:
1 For the device receiving the System Exclusive
data, make sure its MIDI IN is connected to the
MIDI interface’s MIDI OUT. Also, make sure the
device is set to receive Sysex. Some devices re-
quire that memory protect be off. For more in-
formation, refer to the manufacturer’s
instructions.
2 Make sure that the MIDI track containing the
Sysex data is not record enabled.
3 Click the track’s MIDI Output selector and as-
sign the device from the pop-up menu.
4 Configure the external MIDI device to receive
Sysex data according to the manufacturer’s in-
structions.
5 Click Play in the Transport to begin playback.
Pro Tools begins playing and transmits the pre-
viously recorded Sysex to the assigned MIDI de-
vice.
For information on moving and copying of
Sysex data, see “System Exclusive Events”
on page 545.
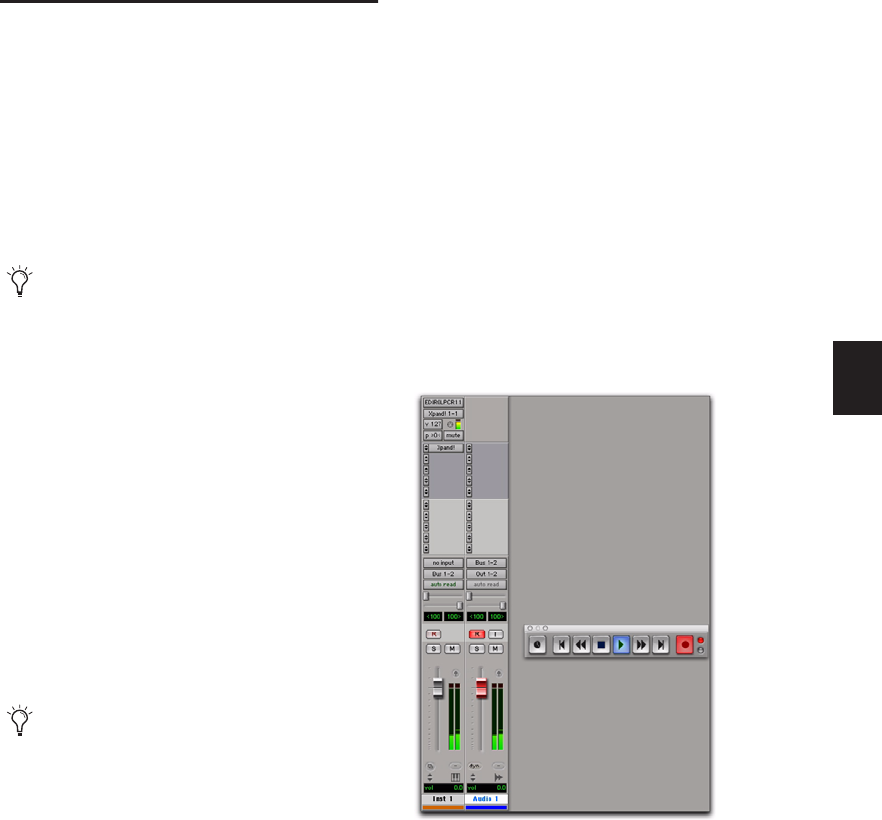
Chapter 19: MIDI Recording 377
Recording Audio from a MIDI
Instrument
Typically, you will monitor the audio from
MIDI instruments (both hardware and plug-ins)
using Instrument and Auxiliary Input tracks.
During the final mixdown, audio from Instru-
ment and Auxiliary Input tracks can be included
when using Bounce to Disk, or on a bussed re-
cording path if recording to a new track.
Recording Audio from an Instrument
Plug-in
To record audio from an instrument plug-in:
1 Create a new Instrument track.
2 Insert an instrument plug-in on that track.
3 Do one of the following:
• Record your MIDI performance on the In-
strument track.
• Manually enter MIDI data in the Instru-
ment track.
4 Create a new audio track with the same num-
ber of channels as the Instrument track.
5 Set the Instrument track’s Audio Output Path
selector to a bus (for example, Bus 1–2).
6 Set the audio track’s Audio Input Path selector
to the same bus.
7 Set the audio track’s Audio Output Path selec-
tor to the main monitoring path (for example,
A 1–2).
8 Record enable the audio track.
9 Do one of the following:
• To record from the beginning of the ses-
sion, click Return To Zero in the Transport.
– or –
• Make a Timeline selection for the record
range.
10 Click Record in the Transport to arm
Pro Tools for recording.
11 Click Play in the Transport to start recording.
12 When your previously recorded MIDI perfor-
mance is finished playing, click Stop in the
Transport to stop recording.
When using instrument plug-ins, you may
want to record the audio from a MIDI in-
strument to a new track before mixing in or-
der to free up DSP resources.
You can also record both the MIDI and au-
dio from your performance at the same
time.
Bus recording audio from an instrument plug-in
Pro Tools Reference Guide378
Recording Audio from an External MIDI
Instrument
You can record audio from an external MIDI in-
strument in one of two ways:
• By bussing audio from the output of the In-
strument (or Auxiliary Input) track used to
monitor the MIDI instrument to an audio
track for recording.
• By setting the audio track’s Audio Input Path
selector to the same Audio Input Path as the
Instrument (or Auxiliary Input) track used for
monitoring the external MIDI instrument.
This second method avoids any additional la-
tency associated with bussing. However, be sure
to mute the Instrument (or Auxiliary Input)
track used for monitoring while recording the
same audio path to the audio track.
Chapter 20: Advanced Punch Recording 379
Chapter 20: Advanced Punch Recording
Pro Tools provides different manual punch re-
cording methods, depending on your system.
QuickPunch A nondestructive Record mode that
lets record-enabled tracks be punched in and
punched out during playback by clicking the
Record button in the Transport.
TrackPunch (Pro Tools HD Only) A nondestruc-
tive Record mode that lets individual tracks be
punched in, punched out, and taken out of
record enable without interrupting online re-
cording and playback.
DestructivePunch (Pro Tools HD Only) A destruc-
tive Record mode that maintains a single con-
tinuos audio file, and lets individual tracks be
punched in, punched out, and taken out of
record enable without interrupting online re-
cording and playback.
QuickPunch Audio Recording
Pro Tools features an on-the-fly punch capabil-
ity called QuickPunch. QuickPunch lets you in-
stantaneously punch in and out on record-en-
abled audio tracks during playback by clicking
the Record button in the Transport.
When using QuickPunch, Pro Tools begins re-
cording a new file when playback begins, auto-
matically generating regions in that file at each
punch-in and punch-out point. These regions
appear in the track’s playlist. The complete au-
dio file appears in the Region List along with the
QuickPunch created regions. Up to 200 of these
“running punches” can be performed in a single
pass. Unlike normal punch recording (see “Au-
dio Punch Recording Over a Specified Range” on
page 349), QuickPunch provides instantaneous
monitor switching on punch-out. All Quick-
Punch recording is nondestructive.
To automatically punch in and out on
record-enabled audio tracks over a specific
range, refer to “Audio Punch Recording
Over a Specified Range” on page 349
For Pro Tools systems with Digidesign con-
trol surfaces, 003, 003 Rack, Digi 002,
Digi 002 Rack, and Mbox 2 Pro, you can
use a footswitch to punch in and out when
recording with QuickPunch.
You do not need to use QuickPunch to
punch on-the-fly with MIDI tracks. This ca-
pability is available in Normal (Non-
destructive) Record mode, and in Destruc-
tive Record mode.
Pro Tools Reference Guide380
QuickPunch/TrackPunch Crossfade
Length
Pro Tools can automatically write a crossfade for
each punch point when using QuickPunch. The
length for these crossfades is set with the Quick-
Punch Crossfade/TrackPunch Length option in
the Editing Preferences page.
To set the QuickPunch Crossfade Length:
1 Choose Setup > Preferences and click the
Editing tab.
2 Enter a new value (in msec) for the Quick-
Punch/TrackPunch CrossFade Length.
A good general-purpose crossfade length for
punches is 10 milliseconds. If you set the prefer-
ence to zero, Pro Tools will not create any cross-
fades at the punch-in/out points.
3 Click OK.
If a value other than zero is specified for the
QuickPunch/TrackPunch Crossfade Length,
Pro Tools writes a pre-crossfade at the punch-in
point (which occurs up to but not into the
punched region boundary), and a post-crossfade
at the punch-out point (which occurs after the
punched region).
Even if the QuickPunch/TrackPunch Crossfade
Length is set to zero, Pro Tools always executes a
4 millisecond “monitor only” crossfade (which
is not written to disk) to avoid distracting pops
or clicks that might occur as you enter and exit
record mode.
QuickPunch crossfades can be edited in the
same manner as standard crossfades (see “Using
Fades” on page 479).
QuickPunch Guidelines for
Pro Tools HD
When using QuickPunch with Pro Tools HD,
two voices are required for each record-enabled,
mono track. This means that you can record up
to half the total number of voices available on
your system. For example, a Pro Tools|HD Accel
system configured for 192 voices can simulta-
neously record on up to 96 mono tracks with
QuickPunch (or 48 stereo tracks).
If the required number of voices for the record-
enabled tracks is not available when switching
to QuickPunch mode, you are prompted to free
up the necessary voices.
To free up voices on tracks that are not record-
enabled, and do not need to be heard while
recording, do any of the following:
Set voice assignments for tracks to Off.
Make tracks inactive.
Group all RTAS plug-ins before TDM plug-ins.
Voices that are in use by others track, but not
record-enabled, may be “stolen” while record-
ing with QuickPunch as necessary. Priority for
tracks while recording with QuickPunch are as
follows:
• Tracks with assigned voices that are not
record-enabled.
• Tracks with assigned voices that are record-
enabled.
• Tracks with Dynamically Allocated Voicing
that are not record-enabled.
• Tracks with Dynamically Allocated Voicing
that are record-enabled.
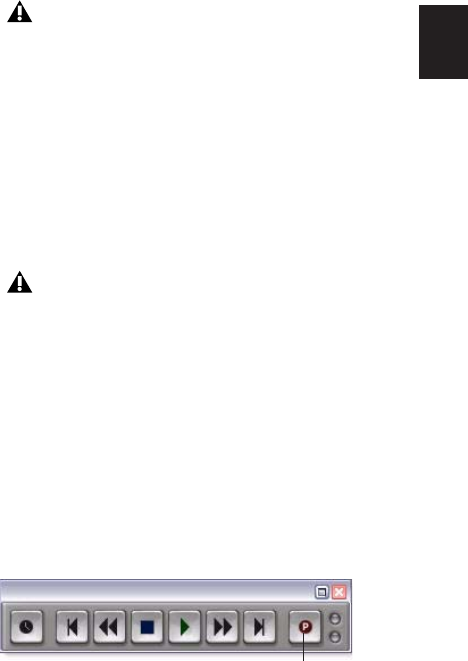
Chapter 20: Advanced Punch Recording 381
If the session has plenty of available voices, you
should have no trouble using QuickPunch with
tracks using Dynamically Allocated Voicing.
However, if you are running out of voices, and
want to ensure that a track is heard when re-
cording with QuickPunch, assign it a voice.
QuickPunch and Dynamically Allocated
Voicing
(Pro Tools HD Only)
When using QuickPunch with a Pro Tools|HD
system configured for its maximum number of
voices, make sure to set the voice assignment for
each audio track to Dyn (for Dynamically Allo-
cated Voicing). This ensures that Pro Tools han-
dles the distribution of voices between each set
of voices automatically. For example, for a 192-
voice configured Pro Tools|HD Accel system,
Dynamically Allocated Voicing distributes
voices evenly across four sets of voices (1–48,
49–96, 97–144, and 145–192).
If you do not use Dynamically Allocated Voic-
ing, the voices must be evenly distributed be-
tween all DSP engines. For example, to use
QuickPunch on 32 tracks without Dynamically
Allocated Voicing, tracks 1–16 must be assigned
to voices 1–16 and tracks 17–32 must be as-
signed to voices 33–48.
QuickPunch Guidelines for
Pro Tools LE
For Pro Tools LE systems, up to 16 mono, or 8
stereo audio tracks can be simultaneously re-
corded with QuickPunch (see “Pro Tools LE Sys-
tem Capabilities” on page 30).
For Pro Tools LE with DV Toolkit 2 or Music Pro-
duction Toolkit, up to 24 mono or stereo audio
tracks can be simultaneously recorded with
QuickPunch. On these systems, the combina-
tion of audio tracks and QuickPunch cannot be
greater than 48.
Recording with QuickPunch
To punch on-the-fly with QuickPunch:
1 With Pro Tools HD, make sure that Delay
Compensation is deselected in the Options
menu.
2 Do one of the following:
• Select Options > QuickPunch.
– or –
• Right-click the Record button in the Trans-
port and select QuickPunch.
When QuickPunch is enabled, a “P” appears in
the Record button in the Transport.
QuickPunch uses CPU processing power,
and may reduce the number of tracks and
plug-ins you can use.
Digidesign recommends recording without
Delay Compensation in most cases. See
“Delay Compensation” on page 741.
QuickPunch enabled
QuickPunch enabled
Pro Tools Reference Guide382
3 To change the automatic crossfade used by
QuickPunch, configure QuickPunch Crossfade
Length option in the Editing Preferences page
(see “QuickPunch/TrackPunch Crossfade
Length” on page 380).
4 Record enable the tracks on which you want
to punch in. Make sure there are enough avail-
able voices on your system.
5 Prepare to record by cueing Pro Tools to an ap-
propriate location. To use pre-roll, enable a pre-
roll value in the Transport window.
6 Start playback by clicking Play in the Trans-
port window.
7 Do one of the following:
• When you reach the punch-in point, click
Record in the Transport.
– or –
• For Pro Tools systems using a Digidesign
control surface, 003, 003 Rack, Digi 002,
Digi 002 Rack, or Mbox 2 Pro with a con-
nected footswitch, press the footswitch at
the punch-in point.
The Record button stops flashing and stays lit
during recording.
8 To punch out, click Record again (or press the
footswitch).
As Pro Tools continues playing, you can per-
form additional punches (up to 200). When re-
cording multiple punches during a single pass, a
single audio file is recorded from which
Pro Tools creates the appropriate regions.
QuickPunch with an Edit Selection
If you make an Edit selection and use Quick-
Punch, the following rules apply:
If the Transport is not online, recording be-
gins and stops whenever you click the Record
button in the Transport—regardless of the selec-
tion’s start or end point.
If the Transport is online, punch-in/out be-
havior is controlled by the Online Options set-
ting in the Operation Preferences page. If you
select Record Online at Insertion/Selection,
QuickPunch punches in and out only within
the selection (or in the case of an insertion
point, only after the insertion point). If you se-
lect Record Online at Time Code Lock, Quick-
Punch disregards the selection and punches in
and out whenever you want (after Pro Tools has
locked to time code).
Region and Take Numbering with
QuickPunch
After recording with QuickPunch, the new au-
dio regions appear in the Region List. This in-
cludes the whole-file audio region encompass-
ing all punches from the record pass, along with
the regions derived for each punch.
Names for the punched regions are numbered
consecutively starting with “01.” For example, if
QuickPunch is used to punch in twice on a track
called “Lead Gtr,” a region for the parent audio
file appears and is named “Lead Gtr_01,” and
two regions for the punches are named “Lead
Gtr_01-01” and “Lead Gtr_01-02.”
If you stop playback and record additional
punches with QuickPunch, subsequent regions
are named by incrementing the first two digits
in the name. For example, on the second pass,
the punched regions are named “Lead Gtr_02-
01,” “Lead Gtr_02-02,” and so forth.

Chapter 20: Advanced Punch Recording 383
TrackPunch Audio Recording
(Pro Tools HD Only)
TrackPunch is especially useful as a digital dub-
ber for film re-recording (dubbing) and mixing.
Keyboard shortcuts and preference settings for
recording and input monitoring provide flexi-
bility that makes TrackPunch equally useful for
loading dailies and recording Foley, as well as
over-dubbing and tracking in music sessions.
TrackPunch Usage Guidelines
TrackPunch and Dynamically Allocated Voicing
When using TrackPunch with a Pro Tools|HD
system configured for maximum voices, make
sure to set the voice assignment for each audio
track to dyn for Dynamically Allocated Voicing
(this mode was previously known as Auto Voice
mode). This ensures that Pro Tools can automat-
ically manage voices most efficiently.
Audio Files and TrackPunch
After a TrackPunch recording pass, the punched
track’s playlist in the Edit window displays the
regions created by punching. You can use any of
the Trim tools after punch recording to open up
the head or tail of TrackPunch (and Quick-
Punch) recorded regions, or to reveal the parent
audio file that was recorded in the background.
This lets you compensate for any late or missed
punches.
Voice Requirements for
TrackPunch Recording
TrackPunch requires two voices for each record-
enabled, mono track. This means that you can
record up to half the total number of voices
available on your system.
When switching to TrackPunch mode, you are
prompted to free up additional voices if not
enough are available.
To free up voices on tracks that are not record-
enabled, and do not need to be heard while
recording, do any of the following:
Set voice assignments for tracks to Off.
Make tracks inactive.
Group all RTAS plug-ins before TDM plug-ins.
As necessary, voices in use by other tracks may
be “stolen” while recording with TrackPunch
(thus silencing some tracks).
TrackPunch voice playback priority follows the
same guidelines as QuickPunch, as follows
(from highest to lowest playback priority):
• Tracks with assigned voices that are not
record-enabled.
• Tracks with assigned voices that are record-
enabled.
• Tracks with Dynamically Allocated Voicing
that are not record-enabled.
• Tracks with Dynamically Allocated Voicing
that are record-enabled.
If the session has plenty of available voices, you
should have no trouble using TrackPunch with
tracks that use Dynamically Allocated Voicing.
However, if you are running out of voices, and
want to ensure that a track will be heard when
recording with TrackPunch, assign it a voice.
Pro Tools Reference Guide384
TrackPunch Recording
Before using TrackPunch, configure Pro Tools
and TrackPunch as follows:
To configure Pro Tools and TrackPunch:
1 Configure TrackPunch preferences (see
“TrackPunch Preferences” on page 385).
2 If necessary, configure Pro Tools synchroniza-
tion settings for online recording and track arm-
ing (see “Configuring Synchronization and
Track Arming” on page 386).
To use TrackPunch:
1 Make sure Pro Tools is not recording or play-
ing back (the Transport is stopped).
2 Make sure that Delay Compensation is dese-
lected in the Options menu.
3 Enable TrackPunch mode (see “Enabling
TrackPunch Mode” on page 387).
4 TrackPunch enable all audio tracks that you
want to punch during the record pass (see
“TrackPunch Enabling Tracks” on page 388).
5 Configure monitoring for record-enabled
tracks by selecting the appropriate mode from
the Track menu, as appropriate. Choices in-
clude:
• Set Record Tracks to Auto Input
• Set Record Tracks to Input Only
Selecting either monitoring mode only affects
tracks that are record-enabled.
6 Start playback.
7 To compare levels of the input source with au-
dio on disk, click the TrackInput button. When
lit (green), the track is monitoring input. When
unlit (gray), the track is monitoring from disk
(see “Selecting Record Monitor Modes with
TrackInput Monitoring” on page 339).
8 To punch tracks one at a time, click Record in
the Transport and then use each individual
track’s Record Enable button to punch in and
out on-the-fly.
9 To punch multiple tracks simultaneously, do
one of the following:
• Record enable as many as 16 TrackPunch
enabled audio tracks, then click Record in
the Transport to punch in and out all
TrackPunch-enabled tracks simultaneously.
– or –
• Click Record in the Transport first, then
Alt-Shift-click (Win) or Option-Shift-click
(Mac) track’s Record Enable button to si-
multaneously punch in and out on all cur-
rently selected TrackPunch enabled tracks.
Digidesign recommends recording without
Delay Compensation in most cases. See
“Delay Compensation” on page 741.
You can also use the TrackInput buttons to
switch the monitor source for record-en-
abled tracks.
Use groups for single-click selection of mul-
tiple tracks (click to the left of the Group
Name in the Group List).
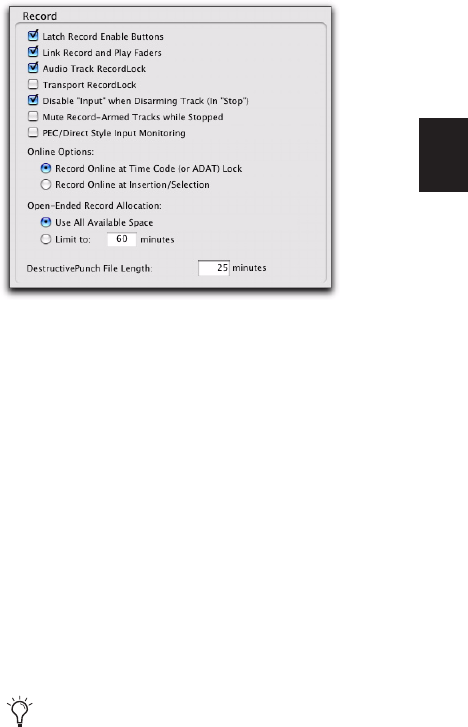
Chapter 20: Advanced Punch Recording 385
10 While continuing local or remote playback,
do any of the following:
• Punch in on other TrackPunch enabled
tracks individually.
• After punching out, take tracks out of
record enable then record enable different
TrackPunch enabled tracks.
• Repeat as needed to punch other stems,
tracks, or takes.
TrackPunch Preferences
The following preference settings let you cus-
tomize TrackPunch performance.
TrackPunch Crossfade Length
Pro Tools can automatically write a crossfade for
each punch point when using TrackPunch. The
length for these crossfades is set with the Quick-
Punch Crossfade/TrackPunch Length option in
the Editing Preferences page. For more informa-
tion, see “QuickPunch/TrackPunch Crossfade
Length” on page 380.
Transport and Track Record Settings
The TrackPunch preferences appear on the Op-
eration Preferences page. These preferences
specify how track and Transport record status re-
spond when the Transport is stopped (during
playback and recording), and let you optimize
Pro Tools for film, video, and music production
workflows.
Transport RecordLock
This setting lets the Transport Record be config-
ured to either emulate a digital dubber, or to
maintain legacy behavior for the Transport mas-
ter Record.
When not enabled, the Transport Record dis-
arms when Pro Tools is manually stopped or
stops due to a loss of time code. This replicates
legacy Pro Tools recording behavior.
When enabled, the Transport Record remains
armed when playback or recording stops. This
saves having to re-arm the Transport between
takes, emulating digital dubber behavior.
TrackPunch preferences
Punching out of record by pressing Record
on the Transport takes the transport out of
record enable.

Pro Tools Reference Guide386
Destructive Recording and Transport
RecordLock
As a precaution against accidentally recording
over previous material, the Transport Record-
Lock preference is automatically disabled and
grayed out when Destructive record mode is en-
abled.
Audio Track RecordLock
This setting lets Pro Tools tracks either emulate
a digital dubber, or maintain legacy behavior for
track record status.
When the Audio RecordLock preference is en-
abled, the record-enabled audio tracks remain
armed when playback or recording stops.
When the Audio RecordLock preference is not
enabled, record-enabled audio tracks are taken
out of record enable when Pro Tools is stopped.
This prevents tracks from remaining armed
from pass to pass, emulating track record behav-
ior of a digital dubber.
Destructive Recording and Transport
RecordLock
As a precaution against accidentally recording
over previous material, the Transport Record-
Lock preference is automatically disabled and
grayed out when Destructive record mode is en-
abled.
Configuring Synchronization and
Track Arming
(Digidesign SYNC HD or SYNC I/O Only)
For online recording and punching, configure
the following Peripheral and Session Setup set-
tings. For best lockup times when synchroniz-
ing, it is recommended that no more than 16
tracks be TrackPunch-enabled at a time.
To record online using TrackPunch switching:
1 Choose Setup > Peripherals.
2 Click the Synchronization tab and make sure
the Enable SYNC Peripheral option is selected,
and that the Digidesign Synchronization Device
is communicating with Pro Tools.
3 Choose Setup > Session, and do the following:
• Select a Clock and Positional reference.
• If you want Pro Tools to be the time code
master, enable Using SYNC. This option is
located in the Generator controls in the
Time Code Settings section of the Session
Setup window.
4 If you are controlling Pro Tools using 9-pin
protocol, do the following:
• Click the Machine Control tab to display
the Machine Control page of the Peripher-
als dialog (Setup > Peripherals).
• Configure Remote 9-pin Deck Emulation
mode settings (see the MachineControl
Guide for details).
• Click OK to close the Peripherals dialog.
Consult the manufacturer of your controller
for the most recent machine profiles and up-
dates available for Pro Tools support.
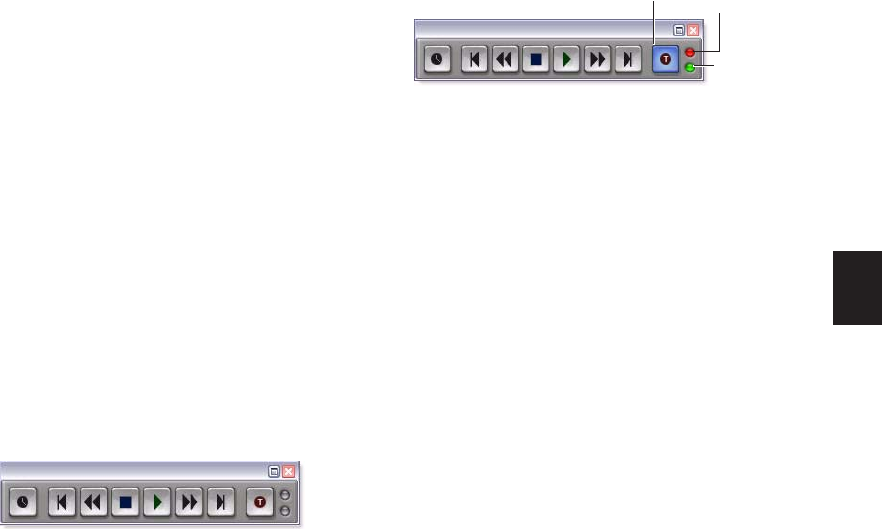
Chapter 20: Advanced Punch Recording 387
Enabling TrackPunch Mode
Before you can enable individual audio tracks
for TrackPunch recording, TrackPunch mode
must be enabled in the Pro Tools transport.
To enable TrackPunch mode:
1 Make sure Pro Tools is not recording or play-
ing back (the Transport is stopped).
2 Do one of the following:
• Select Options > TrackPunch.
• Right-click the Record button in the Trans-
port, and select TrackPunch from the pop-
up menu.
• Start-click (Windows) or Control-click
(Mac) the Record button in the Transport
to cycle through available Record modes
until TrackPunch mode is selected (a “T”
indicates TrackPunch mode).
• Press Control+Shift+T (Windows) or Com-
mand+Shift+T (Mac).
Transport Display of TrackPunch
Status
Transport Record Button
The Transport Record button indicates Track-
Punch and Record status as follows:
When TrackPunch mode is enabled:
A “T” appears in the Record button in the
Transport.
If at least one track is TrackPunch-enabled,
the Record button lights solid blue.
When TrackPunch mode is enabled and the
transport is armed for recording:
If no tracks are TrackPunch-enabled, the
Record button in the Transport flashes gray and
red.
If at least one track is TrackPunch-enabled,
the Record button flashes blue and red.
If at least one TrackPunch-enabled track is
also record-enabled, the Record button flashes
blue and red, and the record LED lights.
Whenever at least one audio track is record-
ing, the Transport Record button lights solid
red.
Transport Record with TrackPunch mode enabled
TrackPunch and TrackInput Status indicators in the
Transport window
Input Status
indicator
TrackPunch enabled Record Enable
Status indicator
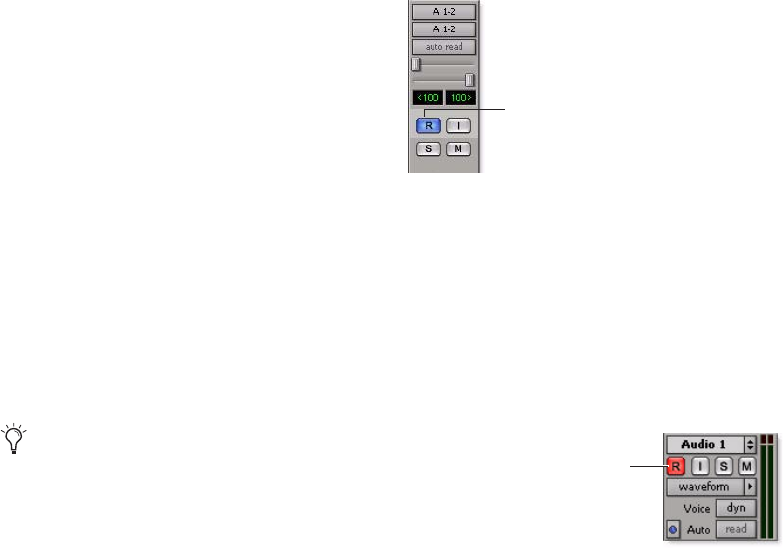
Pro Tools Reference Guide388
TrackPunch Enabling Tracks
You can TrackPunch enable tracks without
record enabling them. This lets you punch in
and out on individual tracks after you start play-
back.
To TrackPunch enable or disable an audio track:
Start-click (Windows) or Control-click (Mac)
the track’s Record Enable button. When Track-
Punch enabled, the button is solid blue.
To TrackPunch enable or disable all audio tracks:
Alt-Start-click (Windows) or Option-Control-
click (Mac) a track’s Record Enable button.
When TrackPunch enabled, the tracks’ Record
Enable buttons are solid blue.
To TrackPunch enable or disable all selected audio
tracks:
Alt-Start-Shift-click (Windows) or Option-
Control-Shift-click (Mac) a track’s Record Enable
button. When TrackPunch enabled, the selected
tracks’ buttons are solid blue.
Track Record Status Display
Each track’s Record Enable button indicates its
TrackPunch and record enable status as follows:
• When a track is both TrackPunch-enabled and
record-enabled, its Record enable button
flashes blue and red.
• When a track is TrackPunch-enabled but not
record-enabled, its Record Enable button
lights solid blue.
• When a track is record-enabled only, its
Record Enable button flashes red.
• While a track is recording (in any mode), its
Record Enable button lights solid red.
Create track groups for each stem or set of
tracks on which you plan to punch. Use the
Group List to quickly select all tracks in the
group. This makes it easier and faster to
take multiple tracks in and out of Track-
Punch enable simultaneously.
TrackPunch status indication in an audio track in the
Mix window
Track Record status in the Edit window
Record Enable button
Red (not flashing) indicates recording
(all modes)

Chapter 20: Advanced Punch Recording 389
TrackPunch Recording
After you have put Pro Tools in TrackPunch
mode, and enabled tracks for TrackPunch re-
cording, you can record with TrackPunch in sev-
eral ways.
Punching In on Individual Tracks
To punch in on individual tracks:
1 Put Pro Tools in TrackPunch mode.
2 Start-click (Windows) or Control-click (Mac)
the Record Enable button for each track you
want to punch in, so that the track is Track-
Punch-enabled only. The track’s Record Enable
button should light solid blue.
3 Click Record in the Transport to enter the
TrackPunch Record Ready mode. The Record
button flashes blue and red.
4 Click Play in the Transport to begin playback.
5 During playback, punch in and out on indi-
vidual TrackPunch-enabled tracks by clicking
their respective Record Enable buttons.
6 Stop playback. When you are finished with
the record pass, track Record Enable status and
transport Record Arm status follow the current
TrackPunch preference settings.
Punching In on Multiple Tracks
Simultaneously
To punch in on multiple tracks simultaneously:
1 Enable TrackPunch mode (see “Enabling
TrackPunch Mode” on page 387).
2 Click the Record Enable button on each track
you want to punch in, so that the track is both
TrackPunch- and Record-enabled. The track’s
Record Enable button flashes blue and red.
3 Click Play in the Transport to begin playback.
4 During playback, click Record in the Transport
to punch in and out on all TrackPunch-enabled
tracks simultaneously.
5 Stop playback. When you are finished with
the record pass, track Record Enable status and
transport Record Arm status follow the current
TrackPunch preference settings.
Start Recording on All Tracks
To punch in on all tracks:
1 Enable TrackPunch mode (see “Enabling
TrackPunch Mode” on page 387).
2 Click the Record Enable button on each track
you want to punch in, so that the track is both
TrackPunch- and Record-enabled. The track’s
Record Enable button flashes blue and red.
3 Click Record in the Transport to enter the
TrackPunch Record Ready mode. The Record
button flashes blue and red.
4 Click Play in the Transport to begin playback.
5 During playback, punch out and back in on
individual TrackPunch-enabled tracks by click-
ing their respective Record Enable buttons.
6 Stop playback. When you are finished with
the record pass, track Record Enable status and
transport Record Arm status follow the current
TrackPunch preference settings.

Pro Tools Reference Guide390
Example TrackPunch Workflows
Pro Tools emulates and enhances the following
four “workflows” commonly performed in film,
video, and music production:
• Dubbing and mixing film (see “Film Dubbing
and Mixing with TrackPunch” on page 390)
• Loading dailies (see “Loading Dailies Using
RecordLock” on page 391)
• Recording Foley (see “Foley Recording with
TrackPunch” on page 392)
• Tracking and overdubbing in music produc-
tion and any other recording situation (see
“Tracking and Overdubbing Music with
TrackPunch” on page 392)
Each of these workflows takes advantage of
TrackPunch features and options.
In the following example workflows, it is as-
sumed you already familiar with routing, select-
ing, and grouping Pro Tools tracks. If you are
not, see Chapter 10, “Tracks” and Chapter 35,
“Basic Mixing.”
Film Dubbing and Mixing with
TrackPunch
By providing all the essential online punch re-
cording and monitor switching capabilities of a
digital dubber, TrackPunch optimizes Pro Tools
for re-recording and mixing for film.
Film dubbing and mixing features of Track-
Punch let you do the following:
• Arm and punch Pro Tools audio tracks re-
motely from a master synchronizer such as
SoundMaster through P2 commands at any
time, without having to stop playback and
while maintaining time code lock. (Requires
Digidesign MachineControl.)
• Toggle Pro Tools audio tracks between input
and disk monitoring.
• Use TrackPunch when Pro Tools is the time
code master (generating) or when slaving.
• Because Pro Tools can be networked, Track-
Punch (and all other) audio files and whole
sessions can be available for secure transfer to
other systems for review, editing, and ar-
chiving.
A typical pre-dub session using TrackPunch
includes the following steps:
1 Configure synchronization between Pro Tools
and other devices as appropriate.
2 Choose Setup > Preferences and click the
Operation tab.
3 Select (enable) Transport RecordLock. This
keeps the Transport Record armed after the
transport stops.
4 Deselect Audio Track RecordLock. This causes
the audio track record to disarm when the trans-
port stops.
5 Choose Options > TrackPunch to enable
TrackPunch mode.
In Remote mode, Transport RecordLock has
no effect. The synchronizer determines the
behavior.
In Remote mode, Audio Track RecordLock
has no effect. The synchronizer determines
the behavior.

Chapter 20: Advanced Punch Recording 391
6 Create 32 new tracks, then do the following:
• Assign their inputs
– and –
• Group them into eight-track groups.
7 Click the record enable buttons in the first
eight tracks to TrackPunch enable the first eight
tracks (or, the group for the first pre-dub).
8 Assign the console paddles to the first eight-
track group in the session.
9 Begin the pre-dub pass. Use the console pad-
dles to arm Pro Tools, and to punch in and out
on the first group.
10 When the first pre-dub is over and all tracks
are punched out, clear all TrackPunch enabled
tracks.
11 Select the next group of tracks and Track-
Punch-enable them.
12 Punch in and out on the second group of
tracks.
13 Repeat the preceding steps as necessary.
Loading Dailies Using RecordLock
In addition to its uses on dub and mix stages,
Pro Tools makes it easy to load dailies. Dailies
and similar types of transfers are comprised of
multiple takes or scenes, each recorded while
locked to unique time-of-day time code. In be-
tween each take, time code does not continue
but stops completely. Because of this, the time
code on dailies and similar source material is
said to be “discontiguous” or discontinuous
(also known as broken time code).
When a session is taken offline while recording
due to broken time code, Pro Tools remains
armed and waits for time code to resume.
Pro Tools begins recording again when lock is
re-established with the time code of the next
take. Each take is recorded to its own audio file.
To configure RecordLock for loading:
1 Choose Setup > Preferences and click the
Operation tab.
2 Enable Transport RecordLock.
3 Enable Audio Track RecordLock.
4 Configure synchronization and other settings
as required.
5 Put Pro Tools online, and start the external
source player.
6 Whenever time code drops out or stops,
Pro Tools remains online and waits to receive
new time code. The Transport and record-en-
abled tracks remain record-enabled (or Track-
Punch enabled). When time code resumes,
Pro Tools begins recording to a new audio file
(properly time stamped based on the incoming
code).
Use the Group List to quickly select all
tracks in the group, and Alt-Shift-click
(Windows) or Option-Shift-click (Mac) to
record-enable all the tracks in the group.
Because Pro Tools has a 13-hour Timeline
limit, you must use multiple sessions to
load dailies if the span is more than
13 hours.

Pro Tools Reference Guide392
Foley Recording with TrackPunch
Foley recording is one of the more specialized
forms of recording in film production with
unique monitoring requirements. Between
punches and takes, inputs must be muted while
Foley artists move themselves and equipment as
they progress through a scene.
TrackInput monitoring can be configured to
support Foley style TrackPunch recording using
the Mute Record-Armed Tracks While Stopped
preference.
To configure Pro Tools for Foley-style punch record
monitoring:
1 Choose Setup > Preferences and click the
Operation tab.
2 Enable Mute Record-Armed Tracks While
Stopped.
3 Configure synchronization and other settings
for Pro Tools and your other devices, then en-
able TrackPunch mode and proceed with punch
recording. (See “TrackPunch Recording” on
page 384 for the complete steps.)
When recording online and Mute Record-
Armed Tracks While Stopped is enabled, record-
enabled tracks mute when the Transport is
stopped. Input can still be monitored at any
time by using the TrackInput switch.
Tracking and Overdubbing Music
with TrackPunch
Modern multitrack recording requires the flexi-
bility to “capture the moment” by allowing on-
the-fly record enabling and punch recording, as
provided by TrackPunch. Features of Track-
Punch for all tracking, overdubbing, and punch-
ing situations include the following:
• Record enable tracks on-the-fly.
• Punch tracks in and out using on-screen
Record Enable buttons, remotely from a syn-
chronizer, from a control surface, or using a
foot switch.
• Compare and match levels using TrackInput
switching.
DestructivePunch Audio
Recording
(Pro Tools HD Only)
DestructivePunch is a destructive recording
mode that lets you instantaneously punch in
(start recording) and punch out (stop recording)
on individual audio tracks during playback,
while preserving a contiguous audio file on each
punched track. No additional regions are cre-
ated when recording in DestructivePunch
mode.
DestructivePunch is useful for mixing and pre-
dubbing workflows where you want the final re-
sult to be a single, contiguous file without any
edits.
DestructivePunch is essentially a destructive
version of TrackPunch mode. Where Track-
Punch always records audio to a new file in the
background, DestructivePunch destructively

Chapter 20: Advanced Punch Recording 393
records audio directly into the original file, us-
ing a fixed 10-millisecond linear crossfade. Up
to 200 “running punches” can be performed in
a track during a single DestructivePunch pass.
DestructivePunch and MachineControl
When using Digidesign MachineControl soft-
ware in Remote 9-Pin Deck Emulation Mode,
DestructivePunch can be controlled via P2 pro-
tocol.
DestructivePunch and Voice Allocation
As with TrackPunch and QuickPunch,
DestructivePunch requires 2 available voices per
mono track. When using DestructivePunch
with a Pro Tools|HD system configured for max-
imum voices, make sure to set the voice assign-
ment for each audio track to dyn for Dynami-
cally Allocated Voicing. This ensures that
Pro Tools can automatically manage voices
most efficiently.
Configuring Pro Tools for
DestructivePunch Recording
Before using DestructivePunch, configure
DestructivePunch preferences and related
Pro Tools settings as described in this section.
Transport and Track Record Settings
The Transport RecordLock and Audio Record-
Lock preferences specify track and Transport
Record Enable behavior when playback or re-
cording are stopped. They function with
DestructivePunch as with TrackPunch. For more
information, see “TrackPunch Preferences” on
page 385.
Delay Compensation Settings
When using DestructivePunch to punch in on
an existing recording, make sure the Delay
Compensation settings are the same as when
the original file was recorded. If they differ, the
punched-in audio will not be time-accurate to
the original recording.
If Delay Compensation was inactive when re-
cording the original file, it should be deactivated
while punching into the original file in
DestructivePunch mode.
If Delay Compensation was active when re-
cording the original file, it should be kept active
while punching into the original file in
DestructivePunch mode.
To ensure that the Delay Compensation path on
record tracks remains consistent while using
DestructivePunch, you need to prevent
Pro Tools from using the Low Latency monitor-
ing path when record tracks switch to Input
monitoring.
Track Compensation indicator displays in blue
To apply Delay Compensation to a track where
Delay Compensation was suspended:
Control-Start-click (Windows) or Command-
Control-click (Mac) the Track Compensation in-
dicator on the track.
To apply Delay Compensation to all selected
tracks where Delay Compensation was
suspended:
Control-Start-Shift-click (Windows) or Com-
mand-Control-Shift-click (Mac) the Track Com-
pensation indicator on the track.
Digidesign recommends recording without
Delay Compensation in most cases. For
more information, see “Delay Compensa-
tion” on page 741.

Pro Tools Reference Guide394
Enabling DestructivePunch Mode
Before you can enable individual audio tracks
for DestructivePunch recording, you must put
Pro Tools in DestructivePunch mode.
To enable DestructivePunch mode:
1 Make sure Pro Tools is not recording or play-
ing back (the Transport is stopped).
2 Do one of the following:
• Select Options > DestructivePunch.
• Right-click the Record button in the Trans-
port and select DestructivePunch from the
pop-up menu.
• Start-click (Windows) or Control-click
(Mac) the Record button in the Transport
to cycle through available Record modes
until DestructivePunch mode is indicated
by “dp” in the Transport Record Enable
button.
Enabling Tracks for
DestructivePunch Recording
DestructivePunch Enabling Tracks
without Record Enabling Them
You can enable tracks for DestructivePunch
without record enabling them. This lets you
punch in on individual tracks at any time after
starting playback by clicking their respective
Record Enable buttons.
To DestructivePunch-enable an audio track:
Start-click (Windows) or Control-click (Mac)
the track’s Record Enable button to toggle the
button to solid blue.
To DestructivePunch-enable all audio tracks:
Alt-Start-click (Windows) or Option-Control-
click (Mac) a track’s Record Enable button to
toggle all Record Enable buttons to solid blue.
To DestructivePunch-enable all selected audio
tracks:
Alt-Start-Shift-click (Windows) or Control-
Option-Shift-click (Mac) a track’s Record Enable
button to toggle the Record Enable buttons for
the selected audio tracks solid blue.
Create a VCA group for each stem or set of
tracks on which you plan to punch, and use
the VCA Record Enable button to arm all
tracks in the group for DestructivePunch.
For more information, see “VCA Master
Tracks” on page 714.
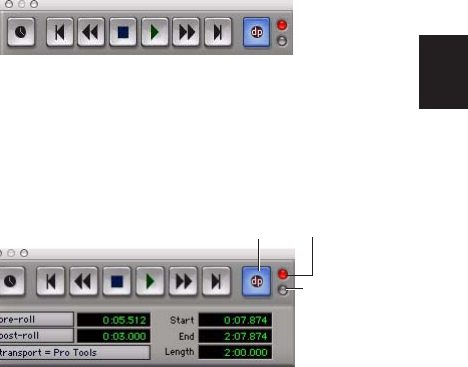
Chapter 20: Advanced Punch Recording 395
DestructivePunch-Enabling and Record-
Enabling Tracks Simultaneously
You can simultaneously DestructivePunch en-
able tracks and record enable them. This starts
recording as soon as the transport is record-
armed and playback begins.
To simultaneously DestructivePunch enable and
record enable an audio track:
Click the track’s Record Enable button. The
track’s Record Enable button flashes blue and
red.
To simultaneously DestructivePunch enable and
record enable all audio tracks:
Alt-click (Windows) or Option-click (Mac) a
track’s Record Enable button. All tracks’ Record
Enable buttons flash blue and red.
To simultaneously DestructivePunch enable and
record enable all selected audio tracks:
Alt-Shift-click (Windows) or Option-Shift-
click (Mac) a track’s Record Enable button. The
Record Enable buttons for the selected audio
tracks flash blue and red.
Display of DestructivePunch
Status
Transport Record Enable Button
The Transport Record Enable button indicates
DestructivePunch mode and Record status as
follows:
When DestructivePunch mode is enabled:
The letters “dp” appears in the Record button
in the Transport.
If at least one track is DestructivePunch-en-
abled, the Record button in the Transport lights
solid blue.
Transport Record Enable button with DestructivePunch
mode enabled
DestructivePunch status in the Transport window
Input Status
LED
DestructivePunch enabled
Record Enable
Status indicator

Pro Tools Reference Guide396
When DestructivePunch mode is enabled and the
transport is armed for recording:
If no tracks are DestructivePunch-enabled, the
Record button in the Transport flashes gray and
red.
If at least one track is DestructivePunch-en-
abled, the Record button flashes blue and red.
If at least one DestructivePunch-enabled track
is also record enabled, the Record button flashes
blue and red, and the record LED lights.
Whenever at least one audio track is record-
ing, the Record button lights solid red.
Track Record Status Display
When Pro Tools is in DestructivePunch mode,
each track’s Record Enable button indicates its
DestructivePunch and record enable status as
follows:
• When a track is both DestructivePunch-en-
abled and record-enabled, its Record Enable
button flashes blue and red.
• When a track is DestructivePunch-enabled
but not record-enabled, its Record Enable but-
ton lights solid blue.
• When a track is record-enabled only, its
Record Enable button flashes red.
• While a track is recording (in any mode), its
Record Enable button lights solid red.
Record and Input Status LEDs
Record and Input LEDs next to the Transport
Record Enable button indicate track Record and
Input status as follows, in all recording modes:
Record Status LED When lit (red), indicates that
at least one audio track is currently record-en-
abled. When off (gray), no tracks are currently
record-enabled.
Input Status LED When lit (green), indicates
that at least one audio track is currently set to
Input Only monitoring (regardless of record en-
able status). When off (gray), all tracks are in
Auto Input monitoring
.
Preparing Tracks for
DestructivePunch Recording
In order for a track to be enabled for Destructive-
Punch recording, the track must contain a con-
tiguous audio file that meets the following re-
quirements:
• The file must start at the beginning
(sample 0) of the session.
– and –
• The File Length must be equal to or greater
than the DestructivePunch File Length set-
ting (see “DestructivePunch File Length”
on page 397).
Track Record Enable buttons also appear in
blue to indicate that track is Destructive-
Punch-enabled.

Chapter 20: Advanced Punch Recording 397
If a track does not contain a file that meets these
requirements, you can do any of the following
to meet the requirements:
• Move the current file in the track Timeline
so that its beginning aligns with the session
start.
• Select the material in the track and use the
Consolidate command to create a continu-
ous file of the required length.
• Change the DestructivePunch File Length
setting so that the current file is equal to or
greater than the required length.
• Use the Prepare DPE Tracks command to
consolidate audio on all DestructivePunch-
enabled tracks. (See “Using the Prepare DPE
Tracks Command” on page 397.)
DestructivePunch File Length
To use DestructivePunch on an audio track, the
track must contain a contiguous audio file of a
minimum length, which is set in the Pro Tools
Operation preferences page.
To set DestructivePunch File Length:
1 Choose Setup > Preferences and click Opera-
tion.
2 Enter a value for DestructivePunch File
Length.
3 Click OK.
Using the Prepare DPE Tracks Command
To prepare a track for DestructivePunch recording:
1 Enable DestructivePunch mode (“Enabling
DestructivePunch Mode” on page 394).
2 Make sure the tracks you want to prepare are
DestructivePunch-enabled (“DestructivePunch
Enabling Tracks without Record Enabling
Them” on page 394).
3 Choose Options > Prepare DPE Tracks.
Pro Tools consolidates audio on all Destructive-
Punch-enabled tracks from the beginning of the
session to the value specified in the Destructive-
Punch File Length preference.
DestructivePunch Recording
After you have put Pro Tools in Destructive-
Punch mode, enabled tracks for Destructive-
Punch recording, and prepared tracks if neces-
sary, you can record in several ways.
Punching In On Single Tracks
To punch in on single tracks:
1 Enable DestructivePunch mode (“Enabling
DestructivePunch Mode” on page 394).
2 Start-click (Windows) or Control-click (Mac)
the Record Enable button for each track you
want to punch in, so that the track is
DestructivePunch-enabled only. The track’s
Record Enable button lights solid blue.
3 Click Record in the Transport to enter Record
Ready mode. The Record Enable button flashes
blue and red.
4 Click Play in the Transport to begin playback.
5 During playback, punch in and out on indi-
vidual DestructivePunch-enabled tracks by
clicking their Record Enable buttons.
Pro Tools Reference Guide398
6 Stop playback. When you are finished with
the record pass, track Record Enable status and
transport Record Arm status follow the current
Audio Track RecordLock and Transport Record-
Lock preference settings.
Punching In on Multiple Tracks
To punch in on multiple tracks simultaneously:
1 Enable DestructivePunch mode (“Enabling
DestructivePunch Mode” on page 394).
2 Click the Record Enable button on each track
you want to punch in, so that the track is both
DestructivePunch-enabled and Record-enabled.
Each track’s Record Enable button flashes blue
and red.
3 Click Play in the Transport to begin playback.
4 During playback, click Record in the Transport
to punch in and out on all DestructivePunch-
enabled tracks simultaneously.
5 Stop playback. When you are finished with
the record pass, track Record Enable status and
transport Record Arm status follow the current
Audio Track RecordLock and Transport Record-
Lock preference settings.
Starting Recording Immediately on
Multiple Tracks
To punch in on multiple tracks:
1 Enable DestructivePunch mode (“Enabling
DestructivePunch Mode” on page 394).
2 Click the Record Enable button on each track
you want to punch in, so that the track is both
DestructivePunch-enabled and Record-enabled.
Each track’s Record Enable button flashes blue
and red.
3 Click Record in the Transport to enter Record
Ready mode. The Record button flashes blue
and red.
4 Click Play in the Transport to begin playback.
5 During playback, punch out and back in on
individual DestructivePunch-enabled tracks by
clicking their respective Record Enable buttons.
6 Stop playback. When you are finished with
the record pass, track Record Enable status and
transport Record Arm status follow the current
Audio Track RecordLock and Transport Record-
Lock preference settings.

399
Part V: Editing
400
Chapter 21: Editing Basics 401
Chapter 21: Editing Basics
Pro Tools Editing
The Edit window in Pro Tools provides a power-
ful collection of tools for editing and arranging
audio, video, and MIDI. Track material can be
edited nondestructively and in real time during
playback. The Edit window also lets you graphi-
cally edit Elastic Audio and track automation.
This chapter covers the basic concepts of editing
audio and MIDI regions and playlists. Subse-
quent chapters provide more detailed informa-
tion on the following editing tasks:
• For information on editing regions and selec-
tions, see Chapter 24, “Editing Regions and
Selections.” Also, see Chapter 32, “Arranging
Regions.”
• For information on editing fades and cross-
fades, see Chapter 25, “Fades and Crossfades.”
• For information on editing Elastic Audio, see
Chapter 26, “Elastic Audio.”
• For information on editing MIDI notes and
other MIDI data in the Edit window, see
Chapter 27, “MIDI Editing.”
• For information on editing MIDI in the MIDI
Event List, see Chapter 29, “MIDI Event List.”
• For information on editing Automation data,
see Chapter 37, “Automation.”
• For information on editing video, see
Chapter 43, “Working with Video in
Pro Tools.”
Nondestructive Editing
The vast majority of audio editing in Pro Tools is
nondestructive. Whether cutting, pasting, trim-
ming, separating, or clearing regions, you are
only performing these functions on a map of
the actual media (such as audio files). The
source files remain untouched. However, cer-
tain processes or tools work destructively (that
is, it can permanently change audio files on
your hard disk), as noted in this guide.
While editing for MIDI tracks is in some in-
stances destructive, with a few precautions you
can keep important MIDI tracks and regions safe
when performing edits (see “Nondestructive
MIDI Editing” on page 408).
Editing During Playback
Pro Tools lets you perform many editing tasks
while the session plays. This powerful capability
lets you interactively modify and edit a session,
hearing the changes as you make them.
Use Loop and Dynamic Transport modes for
auditioning and editing loops during play-
back. See “Playback Modes” on page 313.

Pro Tools Reference Guide402
Following are just a few examples of editing and
arranging tasks that can be performed while
playing back a Pro Tools session:
• Capture, separate, cut, copy, paste, and
trim regions.
• Place, spot, or rearrange regions.
• Add fades or crossfades to audio regions.
• Quantize MIDI and audio events (Elastic
Audio).
• Transpose and otherwise modify MIDI
tracks.
• Nudge audio or MIDI regions.
• Audition different playlists.
• Adjust or scale automation and MIDI con-
tinuous controller data.
• Insert real-time plug-ins.
• Apply Real-Time (and Rendered) Elastic Au-
dio processing.
• Process audio with an AudioSuite plug-in.
• Automation editing.
There are a few things that cannot be changed
while Pro Tools plays, as noted throughout this
guide.
Track Material
Each time you record or import audio, video,
and MIDI, Pro Tools creates regions for the new
track data, which not only indicate where the
material begins and ends, but also provides
good feedback on its general shape and content.
When you record additional takes, or “punch
in” on a specific location within a track,
Pro Tools creates additional regions.
Regions are also created by cutting and pasting,
resizing, separating, and re-capturing existing
regions. Regions in a session are listed in the Re-
gion List, where they can be dragged to existing
tracks. A track can contain any number of re-
gions, in any arrangement. The order and loca-
tion of regions in a track define its playlist.
In addition to audio and MIDI regions,
tracks provide automation playlists of any
automation data (such as volume and pan).
Automation can be recorded and edited in
the Mix or Edit windows. For more informa-
tion, see Chapter 37, “Automation.”

Chapter 21: Editing Basics 403
Region Types
There are different types of audio and MIDI re-
gions, based on how they are created:
Whole-File Audio Regions These audio regions
are created when recording or importing audio,
consolidating existing regions, and when non-
destructively processing with an AudioSuite
plug-in. Whole-file audio regions reference an
entire audio file that resides on your hard drive.
Whole-file audio regions are displayed in bold
in the Region List (see Chapter 12, “The Region
List”). Normal regions often reference only a
portion of the parent audio file and are created
in the course of editing and, in some instances,
when punch recording.
User-Defined Regions These are regions that are
explicitly defined, such as when you record or
import audio or MIDI; capture, separate, or con-
solidate a selection; trim a whole-file audio re-
gion; or rename an existing region.
Auto-Created Regions These regions are auto-
matically created in the course of editing, and,
in some instances, when punch recording over
existing regions. Since these regions can accu-
mulate rapidly in a session, you can hide them
in the Region List. Auto-created regions can be
turned into user-defined regions by renaming
them.
Offline Regions Regions are offline when their
parent files cannot be located, or are not avail-
able, when opening a session or importing a
track. Offline regions appear in the Region List
as italicized and dimmed; they appear in play-
lists as light blue regions with italicized names.
Offline regions can be edited like other regions,
but they cannot be processed with AudioSuite
plug-ins.
Multichannel Regions These regions, which are
displayed as a single region in the Region List,
reference multiple regions and audio files for
stereo and surround tracks. Multichannel re-
gions can be expanded (by clicking the triangle
next to their name) to see the individual chan-
nels, which can be dragged independently to
tracks.
Region Groups A region group is a collection of
any combination of audio and MIDI regions
that looks and acts like a single region. Region
groups are essentially containers holding one or
more regions. Region groups can be created on a
single track or on multiple adjacent audio,
MIDI, and Instrument tracks. Region groups let
you “nest” multiple regions into “macro” re-
gions for groove and tempo manipulation, edit-
ing, and arranging.
Warped Regions Regions on Real-Time Elastic
Audio–enabled tracks can be warped. Warped re-
gions are identified with a Warp Indicator icon
in the upper-right corner of regions on tracks
and to the left of region names in the Region
List. Warped regions result from the application
of Elastic Audio processing. Elastic Audio pro-
cessing can be applied manually in Warp view
or by using the TCE Trimmer in Waveform view,
or automatically due to tempo conform or
quantization.
For information on video regions, see
Chapter 43, “Working with Video in
Pro Tools.”
For more information, see “Naming and
Displaying Regions in the Region List” on
page 196.
For more information on region groups, see
“Region Groups” on page 675.
For more information, see “Warped Re-
gions” on page 517.
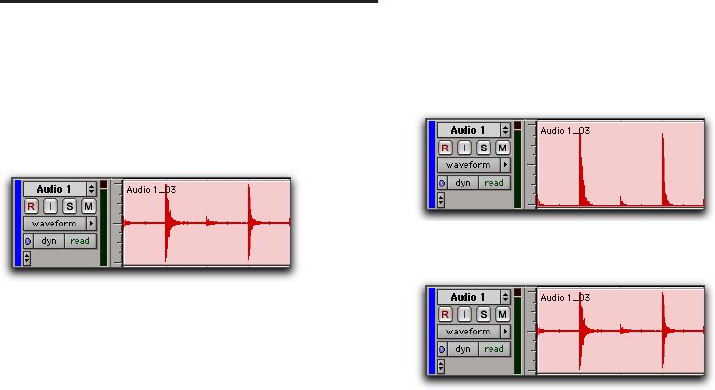
Pro Tools Reference Guide404
Audio Regions and Waveforms
When the Track View for audio tracks is set to
Waveform, Pro Tools draws a waveform dia-
gram of the audio. Audio waveforms tell you
several things about the recorded sound.
In Figure 20, the “peaks” represent places in the
recording where the attack of the sound causes
the volume to increase momentarily. These are
followed by “valleys,” where the volume de-
creases.
Different types of sounds produce different
types of waveforms. Drums, for example, gener-
ally produce waveforms with sharp transients
(peaks of short duration) that are clearly de-
fined. A drum hit has a loud, sharp attack and a
rapid decay.
Other sounds, such as vocals or sustained syn-
thesizer pads, produce very different waveforms.
These sounds have less pronounced peaks and
valleys because they generally have softer at-
tacks and longer decays.
Draw Waveforms Rectified Preference
When the Display preference for Draw Wave-
forms Rectified is selected (in the Display Prefer-
ences page), audio waveforms are displayed so
that their positive and negative waveform ex-
cursions are summed together and viewed as a
single positive-value signal. However, even
when this preference is enabled, zooming in be-
yond a certain point will cause the waveforms to
be displayed normally.
Rectified mode displays more detailed wave-
forms when using track heights of Medium or
Small, and can be particularly useful when edit-
ing volume automation data, since it depicts
waveform “levels” as starting at the bottom of
the track.
Figure 20. Audio waveform of a drum track
Audio displayed in Rectified mode
Audio displayed in Normal mode
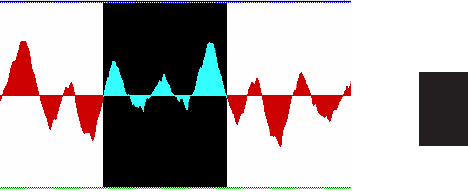
Chapter 21: Editing Basics 405
Guidelines for Editing Waveforms
With the Selector tool in the Edit window, you
can select portions of audio waveforms and di-
vide them into segments called regions, so that
you can rearrange and manipulate them in
tracks.
While editing musical material, try to create re-
gions that let you maintain a consistent beat. If
you always define regions so that they contain a
whole number of beats, you will be able to string
the regions together and maintain a smooth,
steady rhythm.
It is sometimes useful to have a steady, well-de-
fined reference waveform (such as a drum track
or click track) as a guide when selecting and de-
fining other regions. If you have played in time
with the beat, it should be easier to create rhyth-
mically accurate regions by referring to the ref-
erence waveform.
Some important rules to keep in mind when de-
fining regions:
Whenever possible, begin a region precisely
before a volume peak, and end it immediately
before another volume peak.
Whenever possible, make sure a region starts
and ends on exactly the same part of a beat.
Use the following Pro Tools features to help
you edit rhythmic material or audio with clear
transients into precise regions:
• Tab to Transients (see “Tabbing to Tran-
sients” on page 457.)
• Editing to a Grid (see “Grid” on page 422)
• Beat Detective (see Chapter 34, “Beat De-
tective”)
Avoiding Clicks and Pops
If an edited region begins or ends at a point of
high amplitude, you may hear a click when
Pro Tools plays from one region to another. In
order to avoid clicks or pops do any of the fol-
lowing:
Make sure that the start and end points of
your selection are as close as possible to the
point where the amplitude of the waveform
tapers down to meet the zero-crossing line (the
center line of the track’s waveform display). If
necessary, use the zooming tools in the Edit
window (see “Using the Zoomer Tools” on
page 424) to display waveforms in greater detail.
Apply a crossfade between regions where a
click or pop occurs. See “Creating a Crossfade”
on page 489 for details.
With Pro Tools HD, use the AutoFade feature
to apply real-time fade-ins/outs to all region
boundaries that do not touch or overlap other
regions. See “Using AutoFades” on page 490 for
details.
Selection that begins and ends at zero crossings
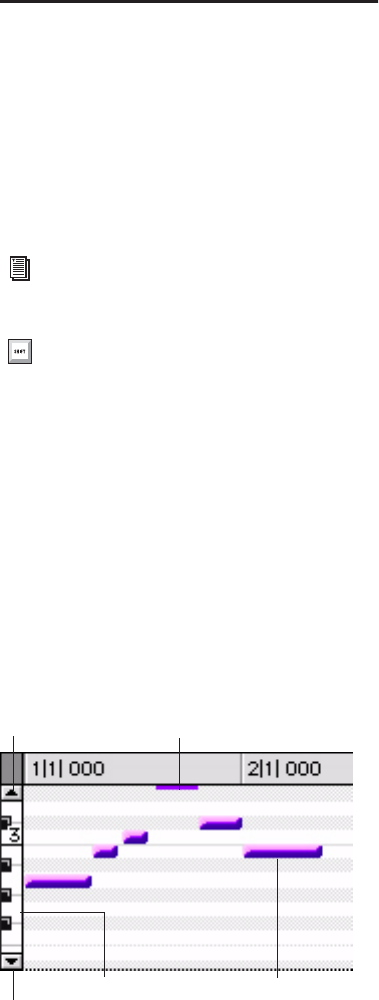
Pro Tools Reference Guide406
Nondestructive Audio Editing
When editing an audio track’s playlist in
Pro Tools, you are not actually cutting and mov-
ing pieces of sound as you would if you were
cutting and splicing analog tape. Instead,
Pro Tools creates a map of the audio file on your
hard disk, which describes the order in which to
play various portions of the audio.
When trimming audio regions with any of the
Trimmer tools, or when editing the placement
or order of regions within a track, you can use
multiple playlists to easily return to a track’s pre-
vious state. For more information, see “Playl-
ists” on page 410.
Audio Regions and Automation
Data
Automation data for audio resides in tracks and
not in the Region List. This means that when
you drag an audio region from the Region List to
a new track, no automation data is placed in the
track. However, if you drag an audio region
from an existing track (that contains automa-
tion data) to another track, the automation
from the source track is placed in the destina-
tion track.
MIDI Regions and MIDI Data
The two most common Track Views you will use
for MIDI and Instrument tracks are Notes and
Regions:
Use Notes View for inserting and editing indi-
vidual MIDI notes, and for working with and af-
fecting groups of notes.
Use Regions View for arranging regions.
Notes View for MIDI and
Instrument Tracks
When a MIDI or Instrument track’s Track View is
set to Notes, MIDI notes are displayed in a
“piano roll” format. Each note is displayed as a
small rectangle with its vertical placement indi-
cating pitch and its horizontal placement indi-
cating location in time (and duration).
For more information on setting Track
View, see “Track Views” on page 149.
To toggle the Track View between Notes
and Regions, click in the track you want to
toggle and press Start+Minus (Windows) or
Control+Minus (Mac) on the QWERTY
keyboard.
Figure 21. MIDI track displaying notes
Up arrow
Down arrow
MIDI note above the current display
Keyboard reference MIDI note
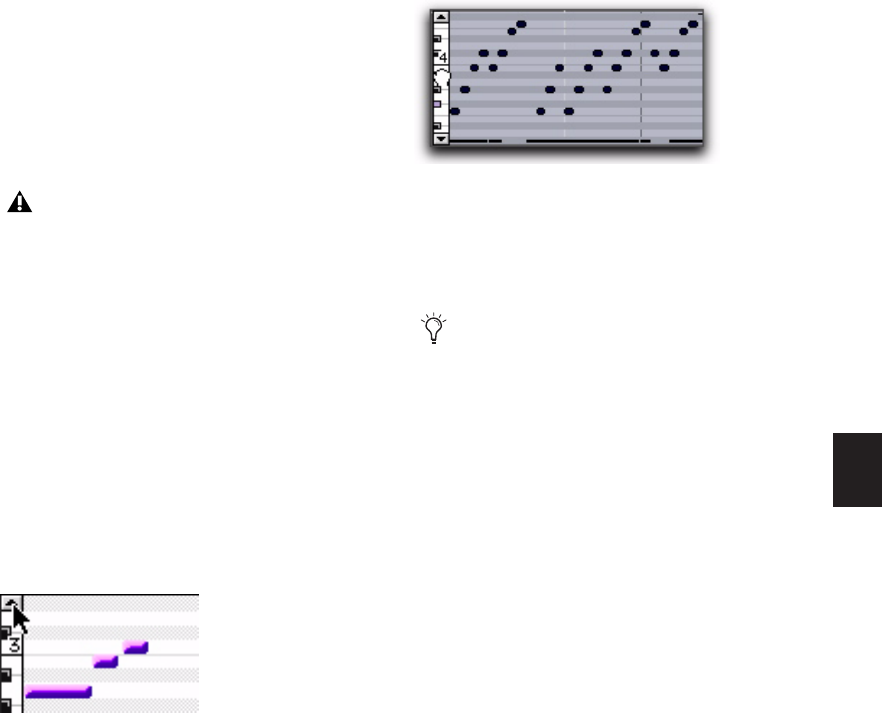
Chapter 21: Editing Basics 407
To the left of the MIDI or Instrument track’s
playlist is a vertical mini-keyboard, complete
with octave numbering, for pitch reference. You
can click the mini-keyboard to play pitches us-
ing the track’s selected MIDI output. Arrows at
the top and bottom of the mini-keyboard (not
available in the smaller track heights) are used
to scroll the Notes display up and down.
In Notes View, the pitch range of MIDI notes
that can be displayed depends on the track
height, and on the current zoom value. Any
time a track’s notes do not fit within its current
height, notes above or below the viewed area are
displayed as single-pixel lines at the very top
and bottom of the range (see Figure 21 above).
To scroll the Notes display up or down for a MIDI or
Instrument track, do one of the following:
Click either the up or down arrow of the mini-
keyboard.
– or –
With any of the Edit tools (such as the Time
Grabber tool) selected, press Control+Alt+Start
(Windows) or Command+Option+Control
(Mac) and click and drag up or down on the
mini-keyboard.
Using the Edit tools, notes can be inserted, de-
leted, transposed, trimmed, and moved. For
more information, see “Manually Editing MIDI
Notes” on page 532.
Regions View for MIDI and
Instrument Tracks
MIDI and Instrument tracks can also be viewed
as Regions, which is similar to Waveform View
for audio tracks. While a track’s notes are visible
in Regions View, individual note editing is not
available in this view. Instead, all editing occurs
across a time range encompassing all track data,
including continuous controller events, pro-
gram changes, and System Exclusive events.
Use Regions View to define regions that repre-
sent song sections and clips, or to rearrange or
assemble track material.
In Regions View, the vertical zoom is automati-
cally scaled to fit the entire range of pitches of
MIDI notes on a track.
Clicking the mini-keyboard clears the cur-
rent Edit selection. For more information,
see “Selecting MIDI Notes” on page 532.
Scrolling notes with the Up arrow on mini-keyboard
Scrolling Notes display by dragging
If you have a mouse with a scroll wheel, you
can use it to scroll a MIDI or Instrument
track’s Notes display. Place the mouse over
a MIDI or Instrument track in the Edit win-
dow, and Control-Alt-Start-scroll (Win-
dows) or Command-Option-Control-scroll
(Mac) the scroll wheel to scroll the Notes
display for that track.
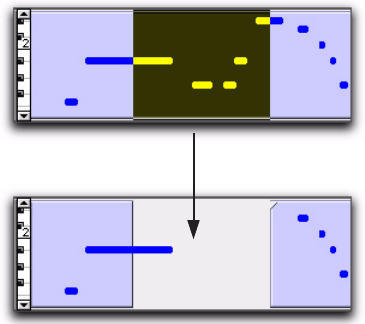
Pro Tools Reference Guide408
There are a few things to consider when select-
ing, copying and cutting, and trimming MIDI
regions:
When cutting or clearing a region or region
group selection that includes a note’s start
point, the entire note is removed. This is even
the case when only a portion of the note (that
includes its start point) is selected.
When cutting or clearing a region or region
group selection that includes a note’s end point
(but not its start point), the note remains and
overlaps the edge of the region (see Figure 22 on
page 408).
Similar rules also apply when MIDI regions or
region groups containing MIDI regions are
trimmed with any of the Trimmer tools. If the
MIDI region’s start point is moved beyond a
note’s start point, the note is removed. If the re-
gion’s end point is trimmed so that a note’s start
point is within the region but its end point is
not, the note remains and overlaps the edge of
the region.
When moving and placing MIDI regions with
overlapping notes, the notes always move with
the regions. When placing MIDI regions with
overlapping notes next to or near another re-
gion, the overlapping notes extend into the
next region on the track.
MIDI Regions Created on Barlines
When recording MIDI, or when manually enter-
ing MIDI notes, the beginning and ending of re-
sulting MIDI regions are constrained to bar
boundaries. This greatly facilitates arranging
MIDI regions in a musically meaningful way, in
whole bar lengths.
The beginning of a recorded MIDI region always
starts on the barline immediately before the first
MIDI note (note on) of the region. Likewise, the
MIDI region ends on the barline immediately
following the last note (note off) of the region.
Nondestructive MIDI Editing
While editing audio regions is usually non-
destructive, this is generally not the case for
MIDI regions. For instance, if a MIDI region re-
sides in just one track at a single location, edit-
ing for that region is destructive. This means
that altering the pitch, duration, or placement
of notes in Notes View permanently alters the
region.
Figure 22. Cutting a MIDI region with note overlap
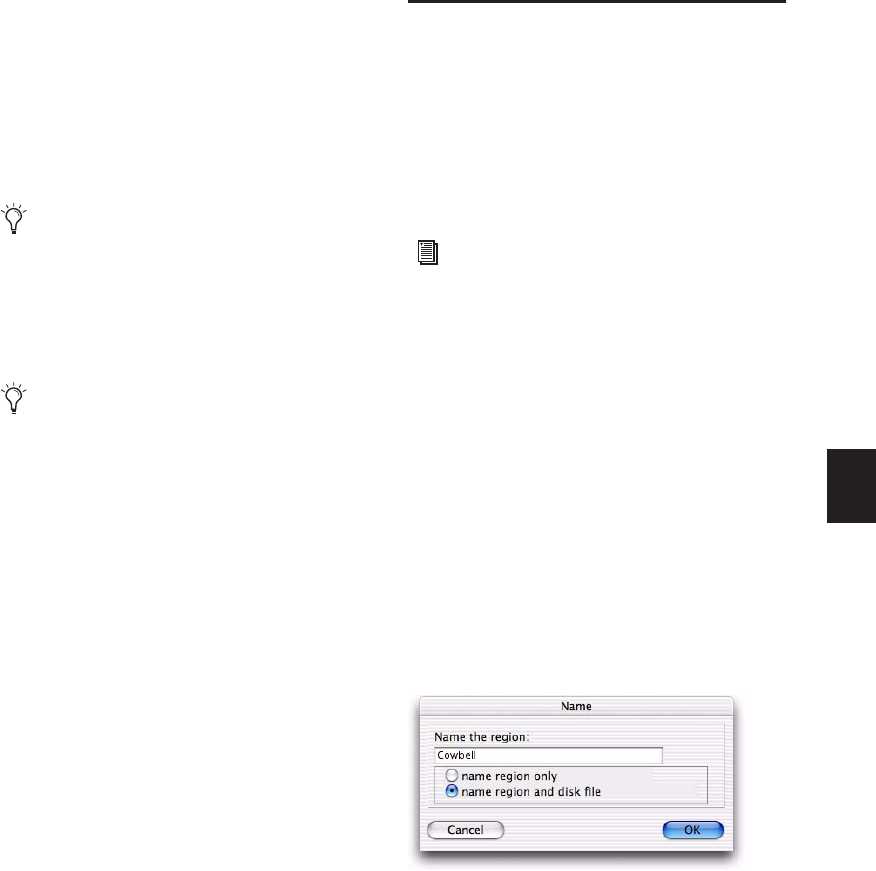
Chapter 21: Editing Basics 409
However, when editing a MIDI region that ap-
pears elsewhere, in the same track (at another
location or in a different playlist) or in another
track, the editing is nondestructive and creates a
new auto-created region. To go back to the pre-
vious material, drag the original region from the
Region List, or return to a previously saved play-
list.
MIDI Regions and Continuous
Controller Events
Continuous controller events reside in MIDI re-
gions and not in tracks. This means that when
dragging regions that contain controller data
from either a track or the Region List, the con-
troller data is written to the destination track.
Unlike continuous controller events, which rep-
resent nuances that are part of a MIDI perfor-
mance, Mute in Pro Tools is an automation
playlist that actually mutes the MIDI engine.
Mute automation does not correspond to actual
MIDI events and is therefore not exported when
saving as a Standard MIDI File.
Naming Regions
You can rename regions to give them more de-
scriptive names, or merely to shorten or simplify
existing names. When renaming a region that
was auto-created during editing, the region be-
comes a user-defined region and is displayed in
the Region List even when auto-created regions
are hidden.
To rename a region on a track:
1 Do one of the following:
• With the Grabber tool, double-click the re-
gion you want to rename.
• With any of the Edit tools, Right-click the
the region that you want to rename and se-
lect Rename from the pop-up menu.
• Press Control+Shift+R (Windows) or Com-
mand+Shift+R (Mac).
2 In the Name dialog, enter a new name for the
region. If a whole-file audio region was selected,
specify whether to rename just the region, or
both the region and the disk file.
3 Click OK to rename the region.
One way to safely return to a track’s previ-
ous state is with playlists. Before you edit
notes, trim regions, or rearrange the order of
regions, make a duplicate of the track’s ex-
isting playlist and then edit the duplicate
(see “Playlists” on page 410).
To apply edits to all instances of a MIDI re-
gion, enable Mirrored MIDI Editing mode
(see “Mirrored MIDI Editing” on page 527).
For information on renaming regions in the
Region List, see “Renaming Regions” on
page 196.
Name dialog
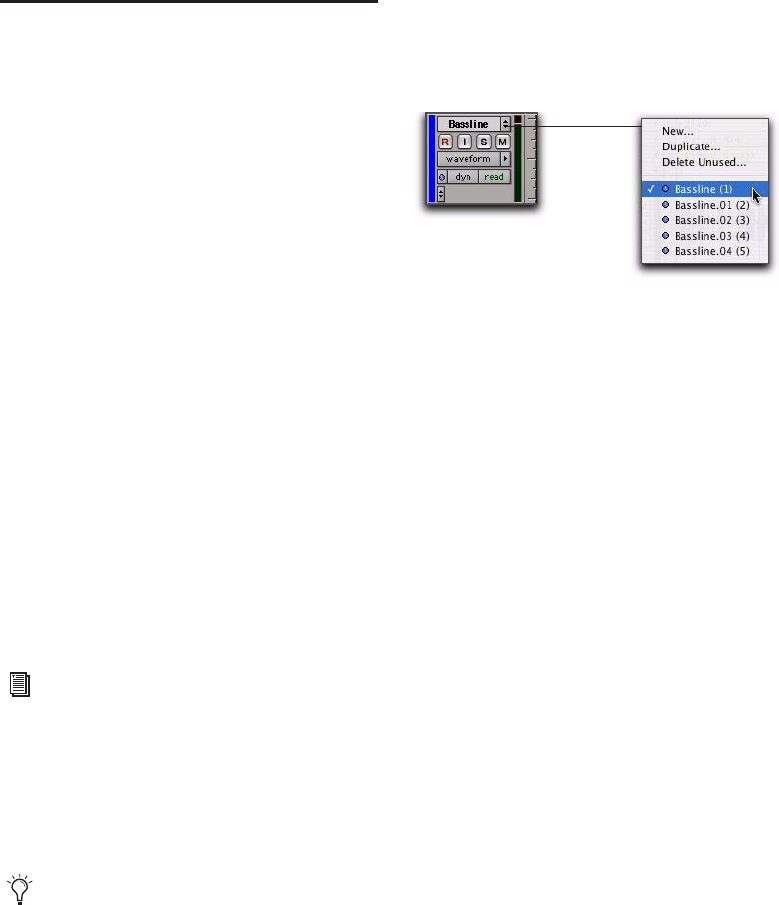
Pro Tools Reference Guide410
Playlists
The ability to create playlists is a powerful fea-
ture of Pro Tools. Each track maintains a “main”
playlist and any number of “alternate” edit play-
lists.
Edit playlists let you take a snapshot of a track’s
current arrangement of regions, thereby freeing
you to experiment with alternate arrangements,
returning as necessary to previously saved play-
lists.
A playlist, which can consist of a single region or
many regions, can only be assigned to a track if
it is not in use by another track. While you can
create an almost unlimited number of edit play-
lists, which are shared among all tracks, each
track has its own set of dedicated automation
playlists.
Automation playlists for audio tracks store data
for volume, pan, mute, and plug-in controls.
Automation playlists for MIDI tracks, however,
store only mute information; continuous con-
troller events, program changes, and Sysex
events are stored in MIDI regions and therefore
reside within edit playlists.
Working with Playlists
When you create a new track, it contains a sin-
gle, empty playlist until you record, import, or
drag and drop material to it.
New playlists can be created that are empty or
duplicates of the current playlist. Once created,
you can recall, rename, and delete playlists as
needed by using the Playlist selector.
Duplicating a Playlist
When you edit a track, you can work with a
copy of the track's playlist and keep the original
playlist arrangement intact.
To duplicate a track’s current playlist:
1 Click the track’s Playlist selector and choose
Duplicate from the pop-up menu.
2 Enter a name for the new playlist and click
OK.
The duplicated playlist appears in the track and
the track’s name is changed to the name of the
new playlist.
New and duplicated playlists are auto-named
with the track name, followed by a Period (.)
and the playlist number. For example, the first
duplicated playlist on a track named “Kick” is
auto-named “Kick.01,” subsequent duplicated
playlists are auto-named “Kick.02,” “Kick.03,”
and so on.
For more information on automation play-
lists, see Chapter 37, “Automation.”
Audio material can be dragged and dropped
onto a track from the Region List, DigiBase
browsers, from Windows Explorer or the
Mac Finder.
Playlist selector
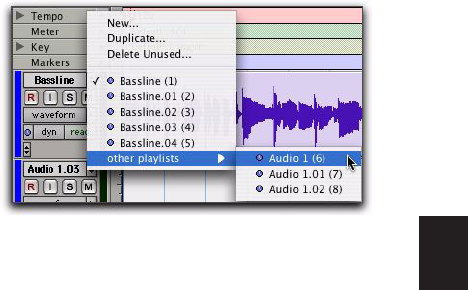
Chapter 21: Editing Basics 411
Creating a Playlist
You can create new empty playlists for record-
ing or importing audio and MIDI. This can be
useful for creating alternate takes of audio or
MIDI, or for constructing alternate arrange-
ments.
To create a new (empty) playlist:
1 Click the track’s Playlist selector and choose
New.
2 Enter a name for the new playlist and click
OK. An empty playlist with the specified name
appears in the track.
Assigning a Playlist to Another Track
By default, a playlist is typically available only
for the track on which it was created. However,
if the playlist is no longer in use on its original
track or any other track, it can be reassigned in
another track using the Other Playlists feature.
When a playlist is reassigned to another track
(assigned on any track), it is unavailable to other
tracks including the track on which it origi-
nated.
An audio playlist’s timebase is saved with the
playlist. When assigning an unassigned playlist
to any track, the track assumes the saved time-
base of the playlist.
To assign a track playlist:
Click the track’s Playlist selector and do one of
the following:
• Select one of the track’s playlists.
– or –
• Select a playlist from a different track by
clicking the Other Playlists submenu, and
selecting the desired playlist.
The selected playlist appears in the track and the
track’s name is updated to that of the selected
playlist.
Renaming a Playlist
You can rename a playlist by renaming the track
to which it is assigned.
To rename a track’s assigned playlist:
1 Double-click the track’s name.
2 Enter a new name and click OK. Both the track
and playlist names are updated.
Selecting a playlist from a different track

Pro Tools Reference Guide412
Deleting a Playlist
You can delete a playlist from a session entirely.
However, since playlists require minimal disk
space, you do not need to delete them to con-
serve storage.
To delete one or more playlists from a track:
1 Click the track’s Playlist selector and choose
Delete Unused.
2 Select the unassigned playlists you want to de-
lete. Shift-click (Windows or Mac), Control-click
(Windows), or Command-click (Mac) to select
multiple playlists.
3 Click OK to delete the selected playlists. This
operation cannot be undone.
Playlists and Groups
Creating new playlists with grouped tracks auto-
matically increments the suffixes of the playlist
names for each track of the active group. This
lets you revert back to an earlier take by switch-
ing the playlist takes by group.
Using this method, you can add new tracks to
the existing group and the suffixes for their
playlist names are synchronized with the origi-
nal tracks.
“Empty” playlists are created automatically to
keep the playlist takes synchronized when
switching back to the earliest playlist takes in
the group.
To keep your playlist names and performances
synchronized (example workflow):
1 Create new tracks and group them together.
2 Make sure the group is enabled.
3 Create a new playlist (by clicking the Playlist
selector in one of the tracks in the group and
choosing New). The default suffix will now be
“.01”—signifying take 1.
4 Record take 1, then create a new playlist. The
playlists on all tracks in the group increment to
“.02.”
5 Create new tracks (for example, for an addi-
tional musician or microphone), then add these
tracks to the group (or create a new group with
all the tracks).
6 Increment all the playlists by clicking the
Playlist selector in one of the tracks in the group
and choosing New.
All the playlists will now have the same suffix
appended to them. (Creating additional play-
lists in any of the group tracks will increment
their playlists to keep them synchronized.)
7 If you want to hear the .01 take on the first
group of tracks, you can switch any playlist in
the group back to playlist .01.
All tracks in the group have playlists numbered
with .01 suffixes (even those tracks that were
added to the original group after the earlier
takes). Empty playlists are automatically created
on these newly-added members so that playlist
numbers match across all members of the
group.
When deleting a track from a session, you
have the option of deleting or keeping its
playlists, so they can be used on other
tracks.
For more information on grouping tracks,
see “Grouping Tracks” on page 175.
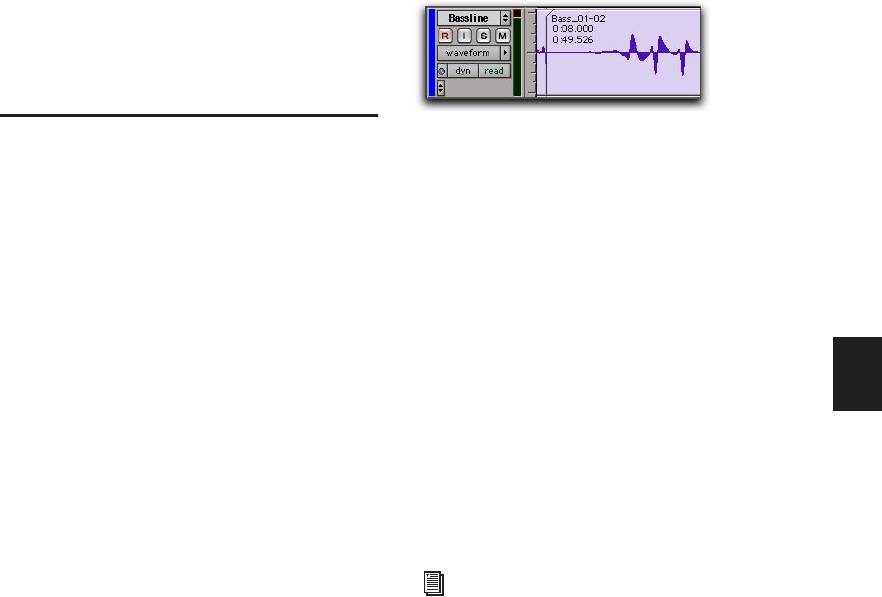
Chapter 21: Editing Basics 413
Elastic Audio and Alternate
Playlists
Alternate playlists on Elastic Audio–enabled,
tick-based tracks are only affected by tempo
changes. Otherwise, alternate playlists are not
affected by editing Warp or Event markers in the
main playlist.
Displaying Region Names,
Region Times, and Other Data
in Playlists
Region names and times can sometimes get in
the way of editing audio waveforms and MIDI
data. In these instances, you may want to dis-
able their display. In other instances, such as ar-
ranging or spotting Foley, displaying region
names and times is extremely useful.
To enable or disable the display of region names in
playlists:
Select or deselect
> Name.
To display region times:
From View > Region, select one of the follow-
ing options:
No Time Disables display of region times.
Current Time Displays start and end times for re-
gions.
Original Time Stamp Displays the Original Time
Stamp for each region. The Original Time Stamp
is the original time code location for the region
when it was first recorded or created.
User Time Stamp Displays the User Time Stamp
for each region. The User Time Stamp, which
defaults to the Original Time Stamp, can be re-
defined with the Time Stamp command.
You can also choose to display the following in
regions:
Sync Points Can be displayed on regions in play-
lists (see “Sync Points” on page 662). This is use-
ful when visually spotting to time code or in ar-
ranging in Grid mode.
Region Overlaps Can be displayed on regions in
playlists. This is useful for arranging and when
working with tick-based audio tracks (see “Re-
gion Overlap and Underlap” on page 468).
Channel Name and Scene And Take
Information Can be displayed in regions in play-
lists and in the Region List. This is useful for
working with multichannel recordings and
metadata made by field recorders.
Display enabled for region names, Overlap, and times
See the Field Recorder Workflow Guide for
detailed information on workflows for field
recorders.
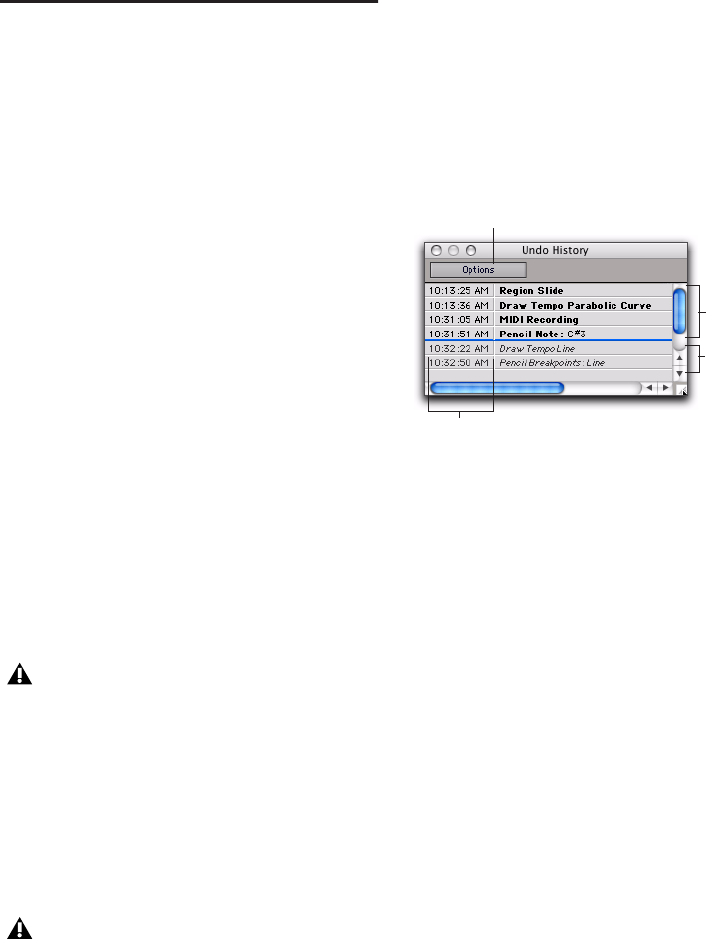
Pro Tools Reference Guide414
Multiple Undo
Pro Tools can keep track of up to 32 of the last
undoable operations, allowing you to return to
a previous editing state.
The Undo operations in Pro Tools are stored in a
queue, in the order in which they were invoked.
When choosing Edit > Undo, the most recent
operation is undone. If you choose Undo again,
the next operation in the queue is undone. You
can also choose Edit > Redo to redo an opera-
tion, which moves back through the Undo
queue by one step.
When the number of operations in the Undo
queue reaches the maximum Level of Undo,
performing another undoable operation will re-
move the oldest operation at the top of the
queue.
To undo the last operation, do one of the following:
Choose Edit > Undo.
– or –
Press Control+Z (Windows) or Command+Z
(Mac).
To redo the last undone operation, do one of the
following:
Choose Edit > Redo.
– or –
Press Shift+Control+Z (Windows) or
Shift+Command+Z (Mac).
Undo History Window
You can use the Undo History window to view
the queue of the undoable and redoable opera-
tions and return to any previous state. The
Undo History can show edit creation times, en-
abling you to revert to the state a session held at
a particular time.
To show (or hide) the Undo History window:
Choose Window > Undo History.
To undo operations in the Undo History window:
Click the operation (bold) in the list to undo.
All operations in the queue that were performed
after the operation you select are also undone.
In the Undo History window, undoable opera-
tions are shown in bold and redoable operations
(operations that have already been undone) are
shown in italics.
To redo operations in the Undo History window:
Click the operation (italics) in the list to redo.
The operation you choose, as well as all the op-
erations in the queue before it, are redone.
If no actions are available to undo, the
menu displays Can’t Undo.
If no actions are available to redo, the menu
displays Can’t Redo.
Undo History Window
Undoable
operations
Redoable
operations
Creation times
Options selector
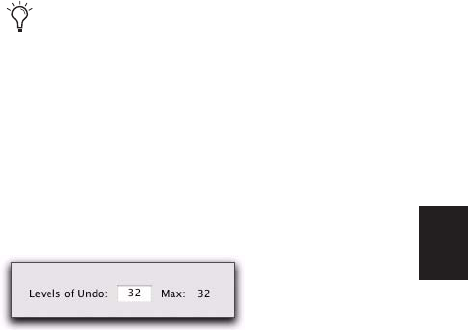
Chapter 21: Editing Basics 415
To toggle display of creation times in the Undo
History window:
Click the Options pop-up menu and choose
Show Creation Times.
To undo all the operations in the Undo Queue:
Click the Options pop-up menu and choose
Undo All.
To redo all the operations in the Redo Queue:
Click the Options pop-up menu and choose
Redo All.
To clear the Undo Queue
Click the Options pop-up menu and choose
Clear Undo Queue.
Other operations that clear the Undo Queue in-
clude:
• Deleting a track, or clearing a region from
the Region List
• Selecting “Select > Unused,” or “Select >
Unused Audio Except Whole Files” in the
Region List pop-up menu
When the number of operations in the Undo
History reaches the maximum level of Undo,
performing another undoable operation re-
moves the oldest operation at the top of the
Undo History queue. When the oldest operation
is one operation away from being pushed out of
the queue, it is shown in red.
Levels of Undo and Memory
Because Pro Tools needs to keep track of the
playlists for all tracks that are edited, the use of
multiple Levels of Undo can be memory inten-
sive. You can lower the Levels of Undo in
Pro Tools to reduce the amount of system mem-
ory (RAM) used by the Undo queue. If you have
plenty of memory available for Pro Tools, you
can use higher Levels Of Undo.
To set the Levels of Undo in Pro Tools:
1 Choose Setup > Preferences and click the
Editing tab.
2 Click in the Levels of Undo field and enter a
value of between 1–32.
3 Click OK.
Use the Undo History window to view a
queue of undo operations and return to a
previous state.
Levels of Undo preference
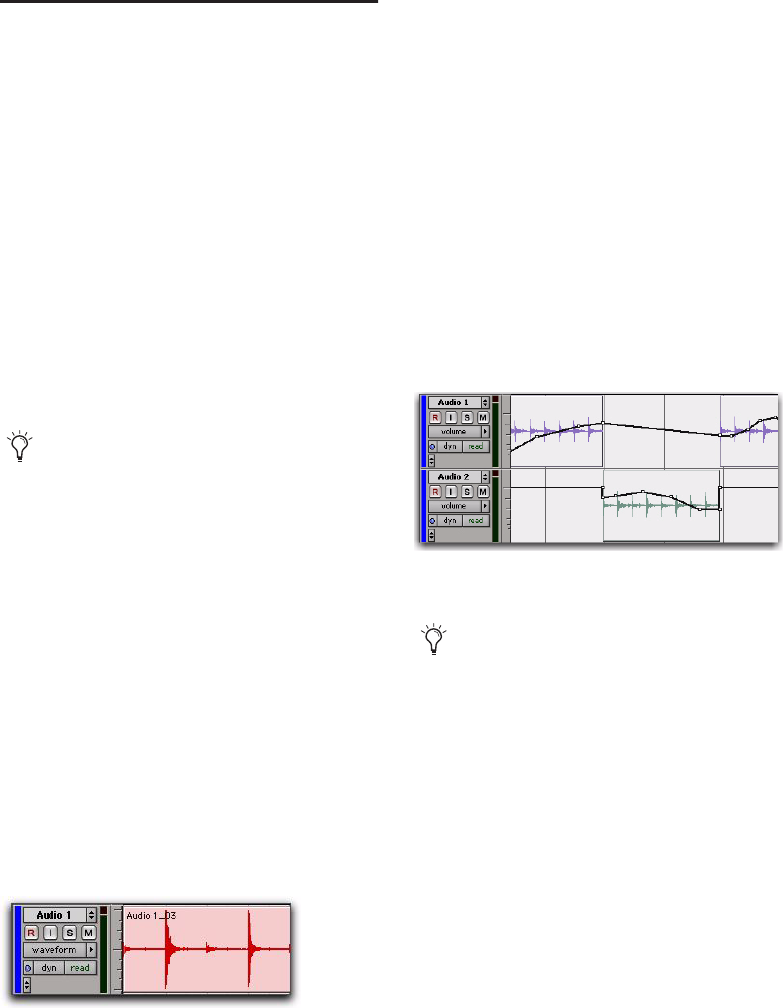
Pro Tools Reference Guide416
Basic Editing Commands
Pro Tools provides many standard edit com-
mands (such as cut, copy, and paste). Pro Tools
also provides many specialized edit commands
that are optimized for audio and MIDI produc-
tion (such as Repeat Paste to Fill).
Cut, Copy, Paste, and Clear
Use the Cut, Copy, Paste, and Clear commands
to rearrange and edit track material. Edits can
operate on entire regions selected with the Time
Grabber tool, or on track ranges selected with
the Selector tool. Edits can also work across mul-
tiple tracks (see “Editing Across Multiple Tracks”
on page 420).
Track View and Edit Content
When cutting or copying track material, the
Track View determines the type of data placed
on the Clipboard. When editing in a track’s
Master View (Waveform View for audio tracks
and Notes View for MIDI or Instrument tracks),
selections can include all underlying automa-
tion and controller data (“Automation Follows
Edit Option” on page 785). Thus, cutting an au-
dio region can also cut any volume, pan, mute,
send, continuous controller, or plug-in automa-
tion that is also on the track. This saves you
from having to individually cut from each auto-
mation playlist on the track.
However, when selecting groups of MIDI notes
with any of the Grabber tools (by drawing a rect-
angle around them), only the note data is placed
on the Clipboard. When selecting a time range
of MIDI notes with the Selector tool, all control-
ler data in the track is selected (similar to select-
ing with the Selector tool for audio tracks in
Waveform View).
When a track is displaying automation data or
controller data, only that data is placed on the
Clipboard. Also, whenever you cut or copy auto-
mation data, bounding breakpoints are created
at each end of the selected area, in order to pre-
serve the slope of the automation both inside
and outside the selection.
If tracks are grouped, copying and pasting on
any of the tracks affects each of the other tracks
in the group. Tracks that are hidden—even if
they are part of a group being edited—are not af-
fected by edits.
You can cut, copy, and paste noncontiguous
regions by selecting them with the Object
Grabber tool.
Audio waveform data
Automation data (breakpoint-type data) with Cut and
Pasted audio region
Use Control+Start+V (Windows) or Com-
mand+Control+V (Mac) to special paste au-
tomation data into another automation
type. For example, you can copy Pan auto-
mation into a Volume automation playlist.

Chapter 21: Editing Basics 417
The Edit mode affects how material is selected,
copied, and pasted:
• In Slip mode, the Cut command leaves an
empty space corresponding to the data re-
moved from the track.
• In Slip mode, pasted data can overlap an adja-
cent region.
• In Shuffle mode, the Cut command leaves no
empty space, since the regions to the right of
the cut slide over, closing the gap.
• In Shuffle mode, pasted data causes all regions
to slide over to make room for the pasted ma-
terial.
New regions are often auto-created when per-
forming edits. For instance, when clearing a se-
lection from a region, new regions are auto-cre-
ated from the material residing outside of the
selection.
Cut and Copy Commands
Use the Cut command to remove the selection
from the track and place it on the Clipboard.
Use the Copy command to place a copy of the
selection on the Clipboard so it can be pasted to
another track, or to the same track at a different
location, while leaving the original intact and in
place.
To cut or copy a selection or region:
1 If you want to constrain the selection to the
current Grid value, set the Edit mode to Grid.
2 Set the Track View for the tracks you want to
edit.
When displaying waveforms for audio tracks, or
notes or regions for MIDI tracks, selections in-
clude underlying automation and controller
data. If the track is displaying automation data,
only the automation data is affected by the ed-
its.
3 Make an Edit selection of the material you
want to cut or copy.
4 Do one of the following:
• Choose Edit > Cut to remove the selection
and place it on the Clipboard.
– or –
• Choose Edit > Copy to place the selection
on the Clipboard, without removing it.
If a portion of a region was cut or copied, the
material on the Clipboard appears as a new re-
gion in the Region List. If a portion of a region
was cut, new regions are auto-created from the
material residing outside of the selection.
When working in Shuffle mode, any subsequent
regions slide over to fill any empty space.
Deleting Underlying Region Data
When removing a region or selection, you can
choose to remove or keep the underlying region
data.
To delete a region or selection along with the
underlying region data:
Choose Edit > Cut.
To delete a region or selection without removing
the underlying region data:
Choose Edit > Clear.
For more information on the Edit modes,
see “Edit Modes” on page 421.
For information on making Edit selections,
see “Selecting Track Material” on page 449.

Pro Tools Reference Guide418
Paste Command
Use the Paste command to place the contents of
the Clipboard at the Edit insertion point, and
overwrite any material already there.
To paste a selection or region:
1 If you want to constrain the insertion point or
the selection to the current Grid value, set the
Edit mode to Grid.
2 Do one of the following:
• With the Selector tool, click in a track at
the point where you want to paste the ma-
terial.
– or –
• Use the Selector or Time Grabber tool to
make a selection where the material will be
placed.
3 Choose Edit > Paste.
If pasting at an insertion point in Shuffle mode,
material to the right of the paste point is shifted
to the right. In Slip mode, the material is over-
written.
If pasting into a selection in Shuffle mode, the
selection is replaced by the Clipboard’s contents
with the adjacent material slid left or right as
necessary. In Slip mode, the selection is also re-
placed but with the surrounding material re-
maining unchanged.
Clear Command
Use the Clear command to remove a selection
from a track without placing it on the Clip-
board.
To clear a selection or region:
1 If you want to constrain the selection to the
current Grid value, set the Edit mode to Grid.
2 Set the Track View for the tracks you want to
edit.
When displaying waveforms for audio tracks, or
notes or regions for MIDI tracks, selections in-
clude underlying automation and controller
data. If the track is displaying automation data,
only the automation data is affected by the ed-
its.
3 Make an Edit selection.
4 Choose Edit > Clear to remove the selection.
If a portion of a region was cleared, new regions
are auto-created from the material residing out-
side of the selection. If working in Shuffle mode,
any subsequent regions slide over to fill any
empty space.
With the Grabber tool, Start-click (Win-
dows) or Control-click (Mac) a region to
conform it to the current selection.
When working with MIDI, you can merge
the contents of the Clipboard with material
in the destination track using Edit > Paste
Special > Merge. For more information, see
“Paste Special” on page 809.

Chapter 21: Editing Basics 419
Special Cut, Copy, Paste, and
Clear Commands
Use the four “special” Edit menu commands
(Cut Special, Copy Special, Paste Special, and
Clear Special) for cutting, copying, pasting, and
clearing automation (volume, pan, mute, and
plug-in automation) on audio, Auxiliary Input,
Master Fader, VCA Master, and Instrument
tracks. These commands can also be used for
MIDI controller data on MIDI and Instrument
tracks.
Repeat To Fill Selection
The Repeat to Fill Selection command lets you
automatically fill a selection with audio or MIDI
regions or data without requiring that you man-
ually duplicate the regions. To use Repeat to Fill
Selection, cut or copy a region, then make a se-
lection and use the command to fill the selec-
tion. When pasting audio regions, you are
prompted to specify a crossfade to be used for
the pasted regions.
If you fill an area that is an exact multiple of the
copied region size (for example, filling 16 bars
with a 4-bar region), the copied selection is
pasted as many times as it takes to fill the selec-
tion. If you fill an area that is not an exact mul-
tiple of the copied region size (for example, fill-
ing 15 seconds of a track with a 2-second region
of room noise), the remaining selection area is
filled with an automatically trimmed version of
the original selection.
To fill a selection with Repeat to Fill Selection:
1 Select the region you want to copy.
2 Choose Edit > Copy.
3 Select the area you want to fill using the Selec-
tor tool and choose Edit > Paste Special > Repeat
to Fill Selection.
4 Do one of the following:
• If pasting audio regions to larger areas, the
Batch Fades dialog opens. Configure the di-
alog to create crossfades between each
pasted region, then click OK.
– or –
• If you do not want crossfades for the pasted
audio, click Cancel in the Batch Fades dia-
log.
You cannot paste MIDI controller data to
automation data nor automation to MIDI.
For more information, see “Cutting, Copy-
ing, and Pasting Automation” on page 806.

Pro Tools Reference Guide420
Editing Across Multiple Tracks
When working with data from multiple tracks,
there are some important points to remember.
For example, if any selected tracks are set to
their master view (see “Master Views for Tracks”
on page 152), edits affect not only audio and
MIDI for the selected tracks, but all automation
and controller data as well.
If all selected tracks are displayed as automation
data, edits only affect the type of automation
data displayed in each track. Furthermore, if
track 1 displays Pan automation, track 2 displays
Volume automation, and track 3 displays Mute
automation, the Cut command cuts only pan
data from track 1, volume data from track 2, and
mute data from track 3.
To copy all types of automation on all selected
tracks when copying only automation or controller
data:
Choose Edit > Copy Special > All Automation.
To paste to multiple tracks:
1 Do one of the following:
• Place the insertion point in each of the des-
tination tracks by Shift-clicking in them
• Make a selection in one of the Timebase
rulers.
2 Choose Edit > Paste.
When you paste multiple types of data, what-
ever data has been copied is pasted into the cor-
rect type of playlist. Automation data is pasted
into the corresponding automation playlist. Au-
dio or MIDI data is pasted into the audio or
MIDI playlist. You do not need to set target
tracks to the specific type of data being pasted
for the paste to work correctly.
If all destination tracks in a multitrack paste are
displayed as automation, the paste replaces any
previous data on the target track without shuf-
fling—regardless of whether you are in Slip or
Shuffle mode.
For more information on selecting data on
multiple tracks, see “Selecting Across Multi-
ple Tracks” on page 455.
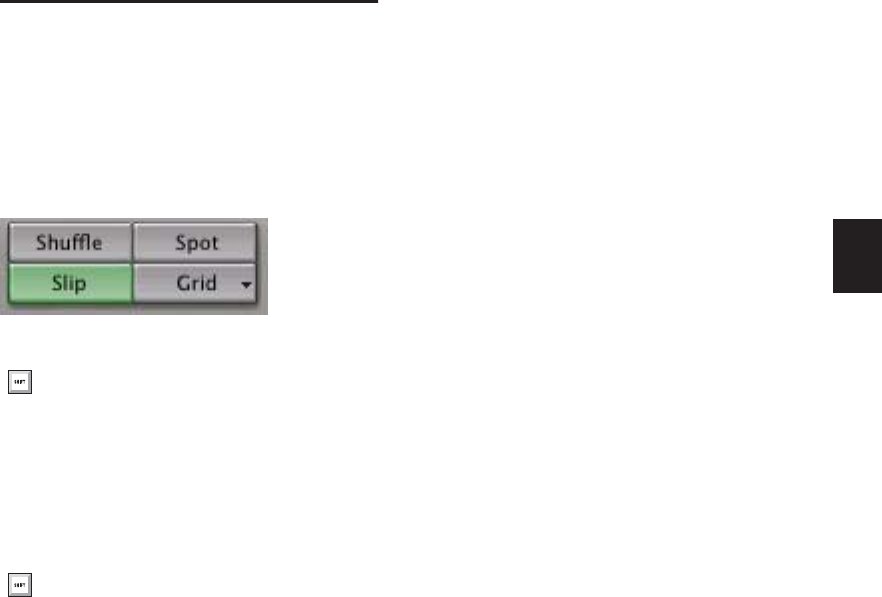
Chapter 22: Editing Modes and Tools 421
Chapter 22: Editing Modes and Tools
Edit Modes
Pro Tools has four Edit modes: Shuffle, Spot,
Slip, and Grid. Grid mode provides two modes
of operation, Relative and Absolute, explained
below. The Edit mode is selected by clicking the
corresponding button in the upper left of the
Edit window.
The Edit mode affects the movement and place-
ment of audio and MIDI regions (and MIDI
notes), how commands like Copy and Paste
function, and also how the various Edit tools
(Trim, Selector, Grabber, and Pencil tools) work.
Shuffle
In Shuffle mode, you can move, trim, delete,
cut, or paste regions freely within a track or to
other tracks, but their movement is constrained
by other regions. That is, if you place several re-
gions in a track, they automatically snap to each
other. You can then “shuffle” their order, but
you cannot separate them from each other and
you cannot make them overlap as in Slip mode.
However, if there is silence between existing re-
gions, and the regions are shuffled, the silence is
maintained, and not removed.
In Shuffle mode, adding another region to the
beginning of a track moves all subsequent re-
gions to the right (later in time) by the length of
the added region.
When using any of the Trimmer tools in Shuffle
mode, changing a region’s start or end point au-
tomatically moves any subsequent regions as
necessary. The placement and insertion of MIDI
notes is not affected by Shuffle mode.
Shuffle Lock
With certain workflows, it is important to ex-
clude Shuffle mode in order to ensure that re-
gions stay time-aligned while editing. Shuffle
Lock prevents you from inadvertently entering
Shuffle mode by disabling all key commands
and control surface switches for Shuffle mode.
You cannot invoke Shuffle Lock while in Shuffle
mode.
Edit mode buttons
You can also use F1 (Shuffle), F2 (Slip), F3
(Spot), and F4 (Grid) to set the Edit mode.
Use the Accent key ( ` ) to toggle through the
Edit modes.
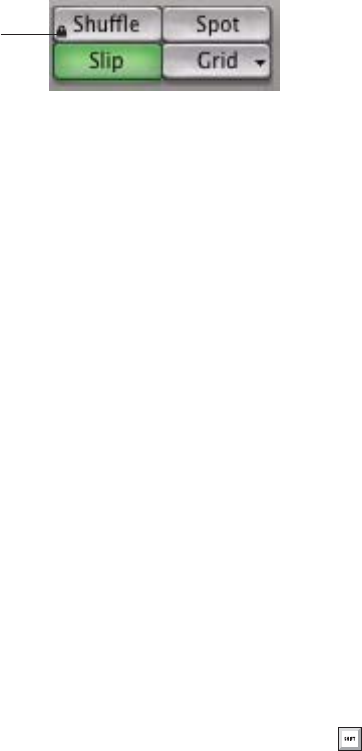
Pro Tools Reference Guide422
To lock out Shuffle Mode:
While in any Edit mode other than Shuffle
mode, Control-click (Windows) or Command-
click (Mac) the Shuffle button on-screen. A lock
icon appears in the Shuffle button.
To unlock Shuffle Mode:
Control-click (Windows) or Command-click
(Mac) the locked Shuffle button on-screen.
Slip
In Slip mode, regions can be moved freely
within a track or to other tracks. In this mode, it
is possible to place a region so that there is space
between it and other regions in a track. When
the track is played back, this space is silent. It is
also possible to move a region so that it overlaps
or completely covers another region.
Use Slip mode when you want the Trim, Selec-
tor, Grabber, and Pencil tools to work without
any restrictions to placement in time.
Spot
Use Spot mode to place regions at precise loca-
tions. In Spot mode you can specify a frame lo-
cation (or a location based on any of the other
time formats), capture an incoming Time Code
address, or use a region’s time stamps as refer-
ence points for spotting. This can be particularly
useful when performing post production tasks
around SMPTE frame locations.
When Spot mode is enabled, Pro Tools asks you
to specify a destination location when a region
is dragged from the Region List, a DigiBase
browser, Windows Explorer, or the Mac Finder.
Grid
In Grid mode, regions and MIDI notes that are
moved, trimmed or inserted “snap” to the cur-
rently selected Grid value, or to precise incre-
ments on a user-definable time grid.
Absolute and Relative Grid
Grid mode can be applied in Absolute or Rela-
tive mode:
In Absolute Grid mode, moving any region
snaps the region start to Grid boundaries. If a re-
gion’s start point falls between beats, and the
Grid is set to 1/4 notes, dragging the region will
snap its start time to the nearest 1/4 note (the
current absolute Grid value).
In Relative Grid mode, regions can be moved
by Grid (or Nudge) units. If a region’s start point
falls between beats and the Grid is set to a 1/4
note (assuming the 1/4 note gets the beat), drag-
ging the region will be constrained to 1/4 notes,
preserving the region’s relative position to the
nearest beat. For more information on Relative
Grid mode, see “Sliding Regions in Grid Mode”
on page 656.
To select Absolute or Relative Grid mode:
Click the Grid mode selector and choose Ab-
solute or Relative.
Lock icon indicating Shuffle Lock
Shuffle
Lock
To temporarily suspend Grid mode and
switch to Slip mode while dragging a region,
hold down the Control key (Windows) or
Command key (Mac) after clicking the
mouse.
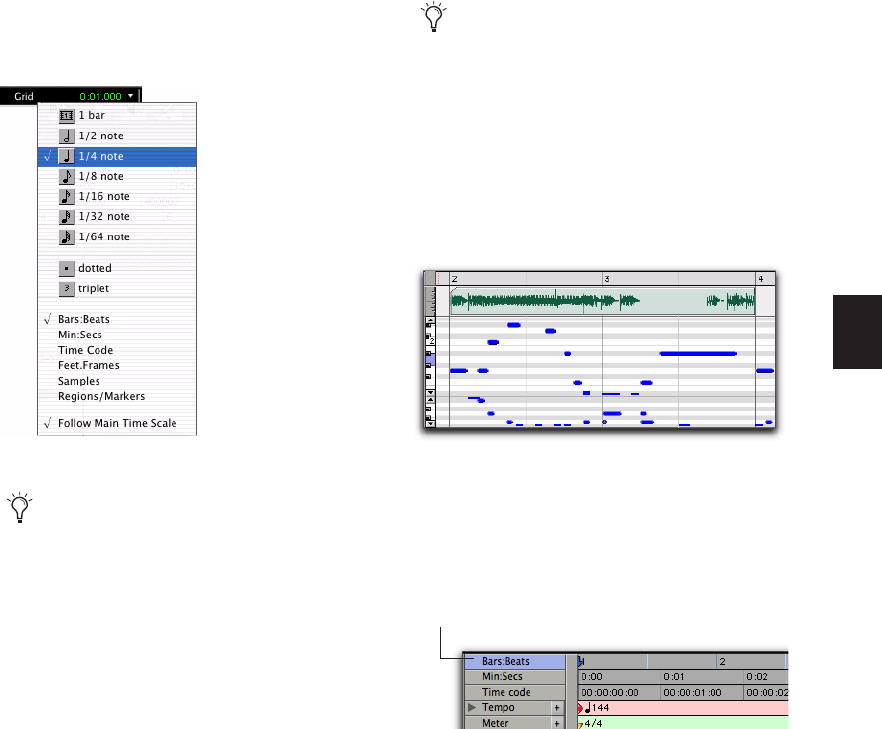
Chapter 22: Editing Modes and Tools 423
Configuring the Grid
The actual Grid size, chosen from the Grid value
pop-up menu can be based on a time value us-
ing the Main Time Scale; or, if Follow Main Time
Scale is deselected, another time format can be
used for the Grid size.
The Grid Value indicator and pop-up menu are
located in the Edit window.
Also available in the Grid Value pop-up is an op-
tion for Regions/Markers. When selected, events
can be placed freely (as in Slip mode) but will
snap to region locations (start, end, and sync
points), markers, and Edit selections when
placed near them.
To display the Grid lines in the Edit window, do one
of the following:
Choose Setup > Preferences and click the
Display tab, then Enable Draw Grids in Edit
Window.
– or –
Enable (and disable) Grid lines by clicking the
currently selected Timebase ruler name.
Grid Value indicator and pop-up menu
The current Grid value is also used for the
Quantize to Grid command (see “Quantiz-
ing Regions to Grid” on page 474) and Sep-
arated Region At Grid command (see “Sep-
arate Region Commands” on page 466).
MIDI notes inserted with the Pencil tool ig-
nore the Regions/Markers option, and in-
stead snap to the time value selected in the
Grid Value pop-up menu.
Grid lines displayed in the Edit window with the Grid
value set to 1/2 note
Turning on Grid lines from a Timebase ruler
Click to enable or disable Grid lines
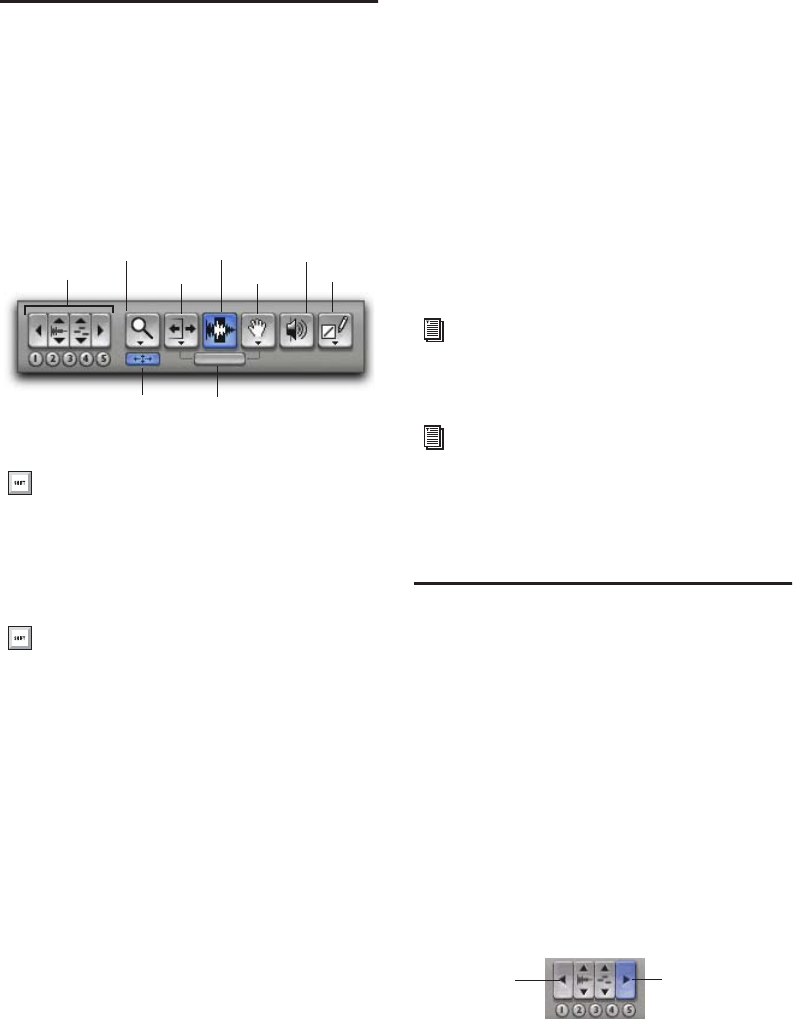
Pro Tools Reference Guide424
Edit Tools
Pro Tools has several Edit tools: the Zoomer,
Trimmer, Selector, Grabber, Scrubber, and Pencil
tools, and the multifunctional Smart Tool. Se-
lect an Edit tool by clicking it in the Edit win-
dow. The Zoomer, Trimmer, Grabber, and Pencil
tools have multiple modes, which you can select
from a pop-up menu when you click the tool.
Zoom Buttons Use the Zoom buttons to zoom in
and out vertically and horizontally on MIDI and
audio track material. You can also store and re-
call five Zoom presets.
Zoomer Tool Use the Zoomer tool to select a
zoom view in a track.
Zoom Toggle Use the Zoom Toggle to switch be-
tween the current zoom view and a defined
zoom view.
Trimmer Tools Use the Trimmer tools to trim re-
gions and region groups.
Selector Tool Use the Selector to make selections
on tracks.
Grabber Tools Use the Grabber tools to select,
separate, or move regions on tracks.
Smart Tool Use the Smart tool to Trim, Select, or
Grab regions in tracks.
Scrubber Tool Use the Scrubber tool to scrub
through track material.
Pencil Tool Use the Pencil tool to draw automa-
tion and MIDI data.
Using the Zoomer Tools
Zooming options in Pro Tools include Zoom
buttons, the Zoomer tool, the Zoom Preset but-
tons, and the Zoom Toggle command.
Zoom Buttons
Pro Tools includes different Zoom buttons for
zooming in and out on track data.
Horizontal Zoom In and Out Buttons
The Horizontal Zoom In and Out buttons let
you zoom in and out horizontally on track data.
Zoom buttons and Edit tools
You can use F5 (Zoomer), F6 (Trimmer), F7
(Selector), and F8 (Grabber), F9 (Scrubber),
and F10 (Pencil) to select the Edit tool and
toggle through each tools’ respective subset
of tools.
Press the Escape key to toggle through the
Edit tools.
Zoom Toggle Smart Tool
Pencil tool
Zoomer tool
Trimmer tools
Selector tool
Grabber tools
Scrubber tool
Zoom buttons
For information on using the Edit tools in
Notes view on MIDI and Instrument tracks,
see Chapter 27, “MIDI Editing.”
For information on using the Edit tools in
Warp view and Analysis view on Elastic
Audio–enabled tracks, see “Editing in Warp
View” on page 511 and “Editing in Analy-
sis View” on page 518.
Horizontal Zoom In button
Horizontal Zoom
Out button
Horizontal Zoom In
button (selected)

Chapter 22: Editing Modes and Tools 425
To zoom in horizontally for all tracks, do one of the
following:
Click the Horizontal Zoom In button.
Press Control+] (Windows) or Command+]
(Mac).
Click and drag on the Horizontal Zoom In
button to zoom in continuously.
To zoom out horizontally for all tracks, do one of
the following:
Click the Horizontal Zoom Out button.
Press Control+[ (Windows) or Command+[
(Mac).
Click and drag on the Horizontal Zoom Out
button to zoom out continuously.
Audio and MIDI Zoom In and Out Buttons
The Audio and MIDI Zoom buttons let you
zoom in and out vertically on audio and MIDI
data respectively.
To zoom in vertically for all audio tracks, do one of
the following:
Click the Audio Zoom In button.
Press Control+Alt+] (Windows) or Com-
mand+Option+] (Mac).
Click and drag on the Audio Zoom In button
to zoom continuously.
To zoom out vertically for all audio tracks, do one
of the following:
Click the Audio Zoom Out button.
Press Control+Alt+[ or Control+Alt+] (Win-
dows) or Command+Option+[ or Com-
mand+Option+] (Mac).
Click the Audio Vertical Zoom buttons.
To zoom in vertically for all MIDI and Instrument
tracks, do one of the following:
Click the MIDI Zoom In button.
– or –
Press Control+Shift+] (Windows) or Com-
mand+Shift+] (Mac).
To zoom out vertically for all MIDI and Instrument
tracks, do one of the following:
Click the MIDI Zoom Out button.
– or –
Press Control+Shift+[ (Windows) or Com-
mand+Shift+[ (Mac).
To zoom in or out vertically for a single MIDI or
Instrument track:
1 Make sure the Track View is not set to Regions
View.
2 Select the Zoomer tool.
3 Hold Start (Windows) or Control (Mac) and
click and drag upwards to zoom in, or down-
ward to zoom out.
Audio and MIDI Vertical Zoom buttons
Audio Vertical
Zoom buttons
MIDI Vertical
Zoom buttons

Pro Tools Reference Guide426
Additional Zoom Button Features
To return to the previous zoom level, do one of the
following:
Alt-click (Windows) or Option-click (Mac)
any of the Horizontal, Audio, or MIDI Zoom
buttons.
– or –
Press Control+Alt+E (Windows) or Com-
mand+Option+E (Mac).
To zoom in on a selection:
Press Alt+F (Windows) or Option+F (Mac).
To zoom so that all regions are visible in the Edit
window, do one of the following:
Double-click the Zoomer tool in the toolbar.
– or –
Press Alt+A (Windows) or Option+A (Mac).
Zoomer Tool
Use the Zoomer tool to zoom in and out around
a particular area within a track. The Zoomer tool
offers two modes: Normal, and Single Zoom
mode.
In Normal Zoom mode, the Zoomer tool re-
mains selected after zooming.
In Single Zoom mode, the previously selected
Edit tool is automatically reselected after zoom-
ing.
Normal Zoomer Tool
To zoom around a certain track point:
1 Enable Normal Zoom mode by doing one of
the following:
• Click the Zoomer tool pop-up menu and
select Normal Zoom mode.
– or –
• Press the F5 key to toggle to Normal Zoom
mode.
2 Click once with the Zoomer tool at a location
within the track. All tracks are zoomed in by one
level and the Edit window is centered around
the zoomed location.
3 To zoom back to the previous level, Alt-click
(Window) or Option-click (Mac) with the
Zoomer tool.
To zoom into a particular track area:
1 Enable Normal Zoom mode by doing one of
the following:
• Click the Zoomer tool pop-up menu and
select Normal Zoom mode.
– or –
• Press the F5 key to toggle to Normal Zoom
mode.
Zoomer tool
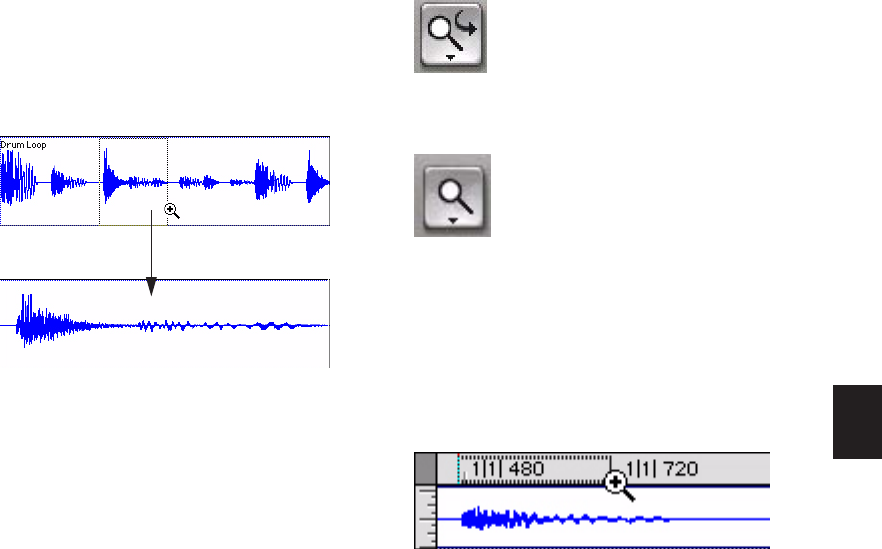
Chapter 22: Editing Modes and Tools 427
2 Do any of the following:
• To zoom horizontally, drag with the
Zoomer tool in the track’s playlist.
– or –
• To zoom horizontally and vertically, press
Control (Windows) or Command (Mac)
while dragging in the track’s playlist.
The zoomed area fills the entire Edit window.
Single Zoom Mode
Single Zoom mode returns you to the previously
selected tool after a zoom has been performed.
For example, when using the Smart Tool you
can click the Single Zoomer tool, and once the
Zoom operation has been performed, Pro Tools
automatically switches back to the Smart Tool.
To use Single Zoom mode, do one of the following:
Click the Zoomer tool pop-up menu and se-
lect Single Zoom mode.
– or –
Press the F5 key to toggle to Single Zoom
mode.
Single Zoom is identified with an arrow to the
right of the Zoomer icon.
Normal Zoom mode does not have the arrow.
Zooming in a Ruler
To zoom horizontally in a ruler:
1 Press Control+Alt (Windows) or Com-
mand+Control (Mac) and move the cursor into
the ruler area, so the Zoomer tool appears.
2 Do one of the following:
• Click once to zoom in one level around a
certain point.
– or –
• Drag to zoom in around a particular ruler
range.
Zooming horizontally with Zoomer tool
Single Zoom mode
Normal Zoom mode
Zooming in a ruler
Pro Tools Reference Guide428
Continuous Zoom with the Zoomer Tool
Use the Zoomer tool to zoom in or out continu-
ously.
To use continuous zoom on one track or a group of
tracks:
1 Select the Zoomer tool.
2 Hold the Start key (Windows) or Control
(Mac) and do one of the following:
• Drag up to continuously zoom in vertically.
• Drag down to continuously zoom out ver-
tically.
• Drag to the right to continuously zoom in
horizontally.
• Drag to the left to continuously zoom out
horizontally.
For horizontal zoom, all tracks zoom together.
Tracks will zoom in or out centered horizontally
on the location where you click.
Vertical Zooming In or Out of All Audio Tracks
Continuously
The continuous zoom feature usually only af-
fects the track or group of tracks in which you
click and drag up or down to zoom out or in.
When using continuous zoom on audio tracks,
you can choose to have all shown audio tracks
zoom as one.
To vertically zoom in or out of all audio tracks
using continuous zoom:
1 Select the Zoomer tool.
2 Do one of the following:
• Drag up or down on the Audio Zoom In
button. Any waveform height offsets will
be maintained.
– or –
• Press Start+Shift (Windows) or Con-
trol+Shift (Mac) and drag up or down.
When you release the mouse, all shown au-
dio tracks will zoom to the same zoom
level.
To zoom all audio tracks and reset waveform
display to the default height, do one of the
following:
Double-click the Zoomer tool.
– or –
Press Alt+A (Windows) or Option+A (Mac).
To set all audio track waveform heights to match
the waveform height of the topmost audio track in
the Edit window:
Control-Shift-click (Windows) or Command-
Shift-click (Mac) any of the Zoom buttons. All
waveform height offsets will be lost.
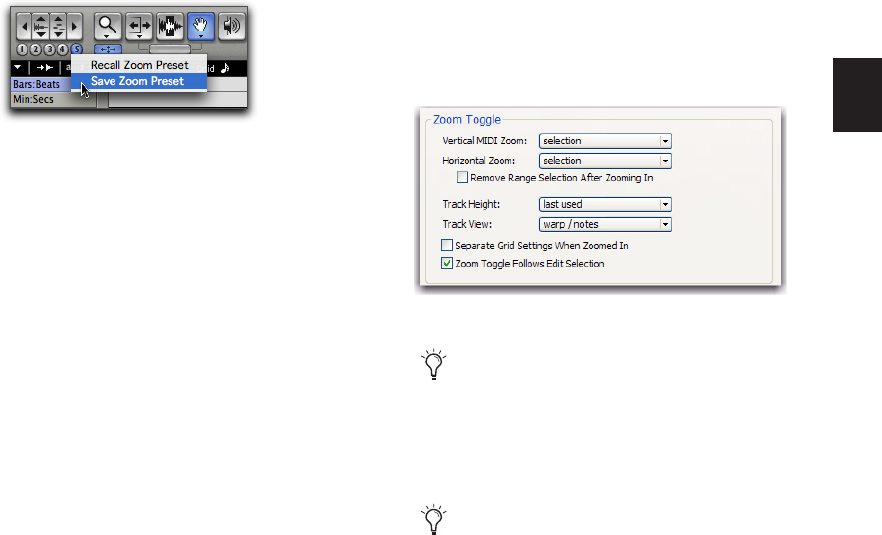
Chapter 22: Editing Modes and Tools 429
Zoom Preset Buttons
Pro Tools lets you save up to five horizontal Edit
window Zoom presets, which can be recalled by
typing a number or by clicking a Zoom Preset
button.
To store a view as a Zoom preset:
1 Use the Zoomer tool to configure the Track
View as desired.
2 Click and hold one of the Zoom Preset but-
tons (1–5) and choose Save Zoom Preset from
the Zoom Preset pop-up menu. The preset but-
ton flashes momentarily, and any previously
stored Zoom preset at that number is replaced.
To recall a saved Zoom preset, do one of the
following:
Click the appropriate Zoom Preset button
(1–5).
– or –
Click and hold the Zoom Preset button and
choose Recall Zoom Preset from the Zoom Preset
pop-up menu.
Zoom Toggle
Zoom Toggle lets you define and toggle between
zoom states in the Edit window.
Zoom Toggle Parameters
The Zoom Toggle stores and recalls the follow-
ing parameters:
• Vertical Zoom
• Horizontal Zoom
• Track Height
• Track View
• Grid setting
Zoom Toggle Preferences
The Zoom Toggle preferences determine how
Zoom Toggle works. Adjust the Zoom Toggle
preferences to fit your workflow.
Zoom Preset pop-up menu
Zoom Toggle preferences
For MIDI Editing, set the Zoom Toggle pref-
erences as follows: Vertical Zoom to Last
Used, Horizontal Zoom to Last Used, Track
View to Waveform/Notes, and Track
Height to Fit to Window.
For audio editing, set the Zoom Toggle pref-
erences as follows: Vertical Zoom to Selec-
tion, Horizontal Zoom to Selection, Track
Height to Fit to Window, and Track View to
No Change.
Pro Tools Reference Guide430
Vertical Zoom
Selection When selected, zoom toggling in
zooms vertically to the current Edit Selection.
Last Used When selected, zoom toggling in
zooms vertically to the last stored Zoom Toggle
state for MIDI notes in Notes view only.
Horizontal Zoom
Selection When selected, zoom toggling in
zooms horizontally to the current selection.
This is especially useful for audio editing.
Last Used When selected, zoom toggling in
zooms horizontally to the last stored Zoom Tog-
gle state. This option can emulate a separate ed-
itor window. This is especially useful for editing
MIDI notes.
Remove Range Selection After Zooming In
When the Remove Range Selection After Zoom-
ing In option is selected, the current Edit selec-
tion collapses into an insertion point after zoom
toggling in.
Track Height
Last Used When selected, zoom toggling in
changes all tracks containing an Edit Selection
to the last used Track Height.
Medium When selected, zoom toggling in
changes all tracks containing an Edit Selection
to the Medium Track Height.
Large When selected, zoom toggling in changes
all tracks containing an Edit Selection to the
Large Track Height.
Jumbo When selected, zoom toggling in changes
all tracks containing an Edit Selection to the
Jumbo Track Height.
Extreme When selected, zoom toggling in
changes all tracks containing an Edit Selection
to the Extreme Track Height.
Fit To Window When selected, zoom toggling in
changes all tracks containing an Edit Selection
to the Fit To Window Track Height.
Track View
Waveform/Notes When selected, zoom toggling
in changes the Track View for audio tracks to
Waveform view, and changes the Track View for
Instrument and MIDI tracks to Notes view.
Warp/Notes When selected, zoom toggling in
changes the Track View for audio tracks to Warp
view, and changes the Track View for Instru-
ment and MIDI tracks to Notes view.
Last Used When selected, zoom toggling in
changes the Track View to the last used Track
View that was stored with Zoom Toggle.
No Change When selected, the track view does
not change when zoom toggling in or out.
Separate Grid Settings When Zoomed In
When selected, this option retains the same
(current) grid setting when zoom toggling in or
out. When this option is deselected, the grid set-
ting stored with Zoom toggle is recalled when
zoom toggling in.
Zoom Toggle Follows Edit Selection
When selected, this option ensures that zoom
toggle automatically follows the current Edit se-
lection. When disabled, changing the Edit selec-
tion has no affect on the currently toggled-in
track.
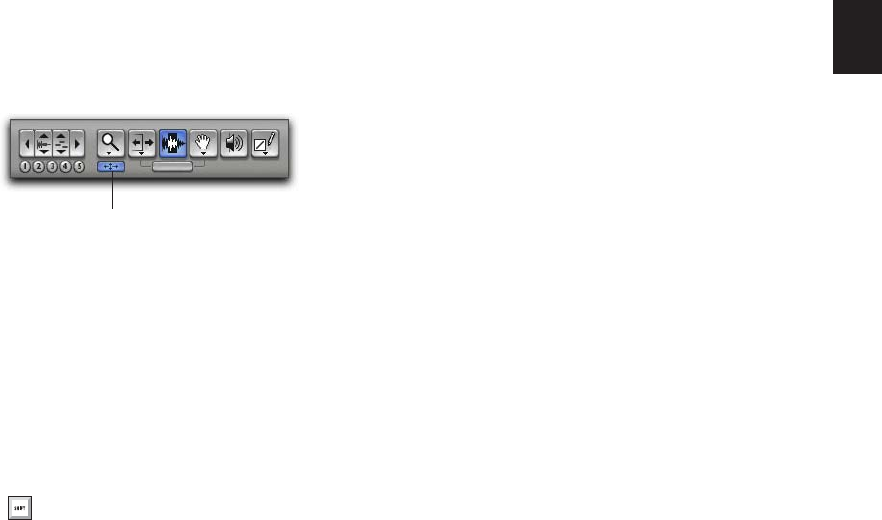
Chapter 22: Editing Modes and Tools 431
Using Zoom Toggle
Depending on the Zoom Toggle preferences set-
tings, the Zoom Toggle button in the Edit win-
dow lets you define a zoom state and toggle be-
tween it and the current zoom state, or it zooms
to the settings in the Zoom Toggle preferences.
When Zoom Toggle is enabled, the Edit window
displays the stored zoom state. Additionally,
any changes made to the view while Zoom Tog-
gle is enabled are also stored in the zoom state.
When Zoom Toggle is disabled, the Edit window
reverts to the last zoom state.
To store a zoom state using Zoom Toggle:
1 Set the Zoom Toggle preferences.
2 Make an Edit selection.
3 Click the Zoom Toggle button. It lights to in-
dicate that Zoom Toggle is enabled and
Pro Tools zoom toggles in based on the settings
of the Zoom Toggle preferences.
If Last Used is selected for any of the following,
you can adjust the corresponding zoom, height,
or view in the Edit window to update the stored
zoom state:
• Vertical Zoom
• Horizontal Zoom
• Track Height
• Track View
To modify the stored Zoom Toggle state, do one of
the following:
Change the Zoom Toggle preferences.
– or –
If Last Used is selected for any of the Vertical
Zoom, Horizontal Zoom, Track Height, or Track
View preferences, do the following:
• Make sure the Zoom Toggle button is lit
(enabled).
– and –
• Adjust the Track Height, Vertical Zoom,
Track View, or the Grid depending on
which preferences are set to Last Used.
Changes are stored as the new Zoom Toggle
state.
To clear the stored Zoom Toggle state:
1 Make sure the Zoom Toggle button is lit (en-
abled).
2 Alt-click (Windows) or Option-click (Mac) the
Zoom Toggle button.
Zoom Toggle button in the Edit window
In Commands Keyboard Focus mode (see
“Keyboard Focus” on page 20), press the E
key to enable or disable Zoom Toggle.
Zoom Toggle button
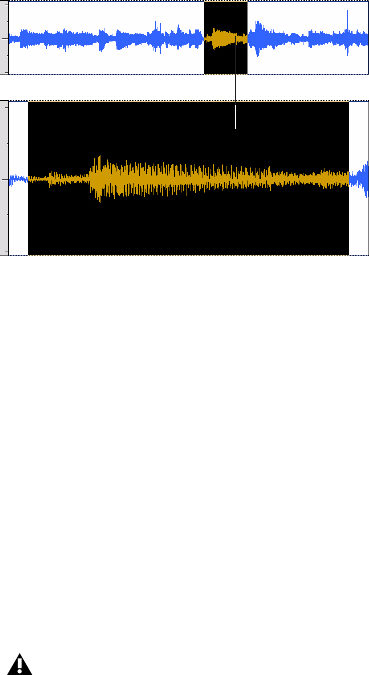
Pro Tools Reference Guide432
To use Zoom Toggle without changing playlist
views:
1 Make a selection on one or more tracks.
2 Do one of the following:
• Press Alt+Start+E (Windows) or Op-
tion+Control+E (Mac).
– or –
• With Commands Keyboard Focus enabled
(see “Keyboard Focus” on page 20), press
Alt+E (Windows) or Option+E (Mac).
Auto-Toggle When Changing Selection
When Zoom Toggle is enabled, selecting a dif-
ferent range of material, or selecting material on
a different track affects Zoom Toggle as follows:
• Changing the selection length does not re-
zoom the window, the current zoom level
is maintained.
• Changing the selection to a different track
sets the toggle-in state for track height and
view. However, horizontal zoom remains
unchanged. When moving the selection
from a toggled in track, the toggled out
track height and view are restored.
Zooming with a Scroll Wheel
If you have a mouse with a scroll wheel, you can
use the scroll wheel to zoom in and out of
tracks, both vertically and horizontally.
To continuously zoom in the Edit window
(horizontal zoom):
Hold Alt (Windows) or Option (Mac) while
turning the mouse scroll wheel.
To continuously zoom audio (vertical zoom) in the
Edit window:
Hold Alt+Shift (Windows) or Option+Shift
(Mac) while turning the mouse scroll wheel.
To continuously zoom MIDI (vertical zoom) in the
Edit window:
Hold Alt+Start (Windows) or Option+Control
(Mac) while turning the mouse scroll wheel.
To scroll the contents of the Edit window or Mix
window horizontally:
1 Focus the window you want to scroll by click-
ing in it or bringing it forward.
2 Hold the Shift key while turning the mouse
scroll wheel.
Using the Zoom Toggle
Auto-Toggle does not work for Edit selec-
tions across multiple tracks that are Zoom-
toggled to Fit to Window.
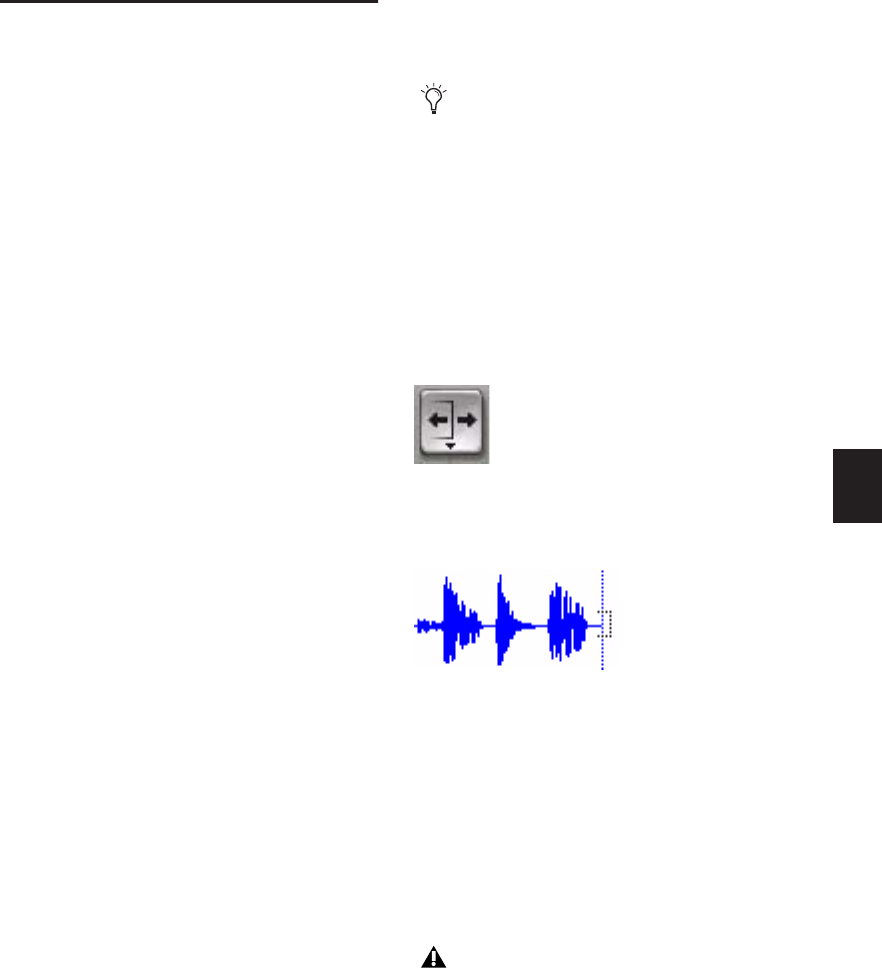
Chapter 22: Editing Modes and Tools 433
Using the Trimmer Tools
Trimmer tools provide region, note, and data
trimming functions. The following Trimmer
tools are available:
• Trimmer tool; also called Standard Trim-
mer tool
• Time Compression/Expansion Trimmer
tool; also called TCE Trimmer tool
• Scrub Trimmer tool (Pro Tools HD only)
• Loop Trimmer tool
The Standard and Scrub Trimmer tools are only
constrained by the boundaries of the whole-au-
dio file referenced by the region. The TCE Trim-
mer tool is only constrained by the maximum
TCE amount when using the TCE Trimmer tool.
Trimmer Tool
With the Trimmer tool, you can quickly shorten
or expand a region (up to the entire length of
the source audio file). The first time you trim a
region, Pro Tools automatically adds it to the
Region List as a new region (with a name de-
rived from the original) in order to differentiate
it from the original.
The Trimmer tool is a nondestructive tool and
does not actually modify the original audio or
MIDI data (when working on regions). To return
to the length of the original region, drag it from
the Region List, or resize the edited region with
the Trimmer tool to its original length.
Use of the Trimmer tool is affected by the cur-
rent Edit mode: Shuffle, Slip, Spot, or Grid (see
“Edit Modes” on page 421).
To trim a region with the Trimmer tool:
1 Select the Trimmer tool.
2 With Pro Tools HD, click the Trimmer tool
pop-up menu and select “Standard.”
3 Move the cursor near the start or end of the re-
gion, so the Trimmer Tool cursor appears.
To reverse the direction of the Trimmer tool,
press Alt (Windows) or Option (Mac).
4 Do one of the following:
• If trimming the end, drag left to shorten
the region, right to lengthen.
– or –
• If trimming the start, drag right to shorten
the region, left to lengthen.
The Trimmer tool can also be used to
lengthen and shorten MIDI notes (see
“Trimming Note Start and End Times” on
page 534), and also to scale automation
and controller data up or down “Drawing
Automation” on page 801.
Trimmer tool
Trimmer tool
When working with audio, you cannot trim
past the boundaries of adjacent regions.
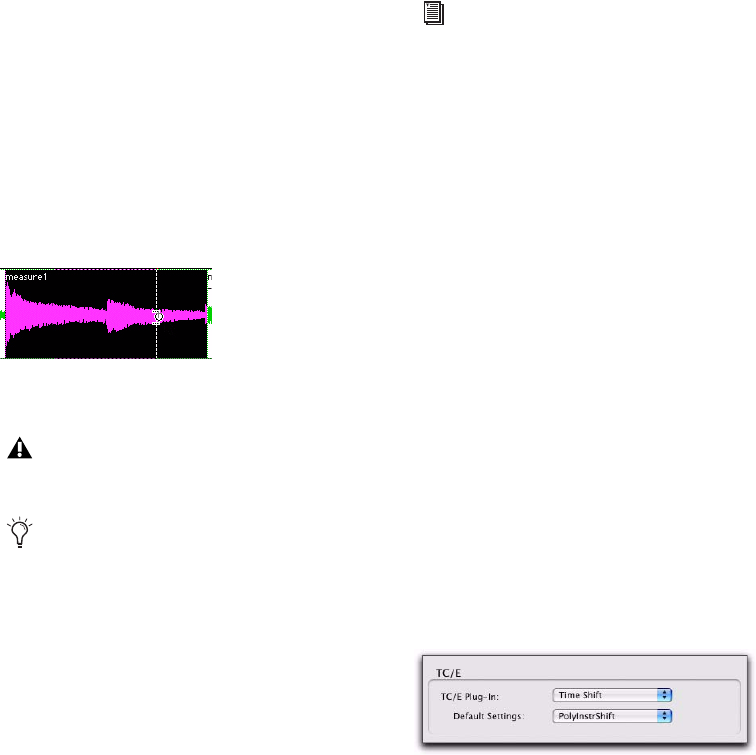
Pro Tools Reference Guide434
When trimming regions in a stereo or multi-
channel track, all channels are trimmed.
When using Shuffle mode, subsequent regions
are slid as necessary to make room for the edited
region. If using Grid mode, the dragged
start/end times snap to the nearest Grid bound-
ary. If using Spot mode, the Spot dialog opens,
where you can enter the new location for the re-
gion’s start or end point.
Time Compression/Expansion
Trimmer Tool
The Time Compression/Expansion Trimmer
tool (TCE Trimmer) is a convenient tool for
matching an audio region to the length of an-
other region, a tempo grid, a video scene, or to
practically any other reference point you want.
Elastic Audio TCE Trimmer Tool
On Elastic Audio–enabled tracks, the TCE tool
uses the track’s selected Elastic Audio plug-in
(Real-Time or Rendered) to apply Real-Time or
Rendered Elastic Audio processing. The result-
ing region displays a Warp indicator to indicate
Elastic Audio processing.
AudioSuite TCE Trim Tool
On audio tracks without Elastic Audio enabled,
the Time Compression/Expansion Trimmer tool
works by using the Time Compression/Expan-
sion (TCE) AudioSuite plug-in selected in the
Pro Tools Processing preferences to create a new
audio file.
Time Compression/Expansion Plug-in
Preferences
You can select which AudioSuite plug-in is used
for trimming with the TCE Trimmer tool on
non-Elastic Audio–enabled audio tracks.
To set the AudioSuite plug-in for use with the TCE
Trimmer tool:
1 Choose Setup > Preferences.
2 Click the Processing tab.
3 From the TC/E Plug-in pop-up menu, select
the AudioSuite plug-in to be used with the Time
Compression/Expansion Trimmer tool.
4 From the Default Settings pop-up menu, select
the plug-in setting.
Time Compression/Expansion Trimmer tool over a
region
The TCE Trimmer tool unloops and consol-
idates looped regions.
With Pro Tools HD or LE with DV Toolkit
2, you can match an Edit selection to the
length of a Timeline selection by selecting
Edit > TCE Edit to Timeline Selection com-
mand (see “TCE (Time Compression and
Expansion) Edit To Timeline Selection” on
page 477.
For information on Elastic Audio plug-ins,
see “Elastic Audio Plug-ins” on page 507.
TC/E Preferences
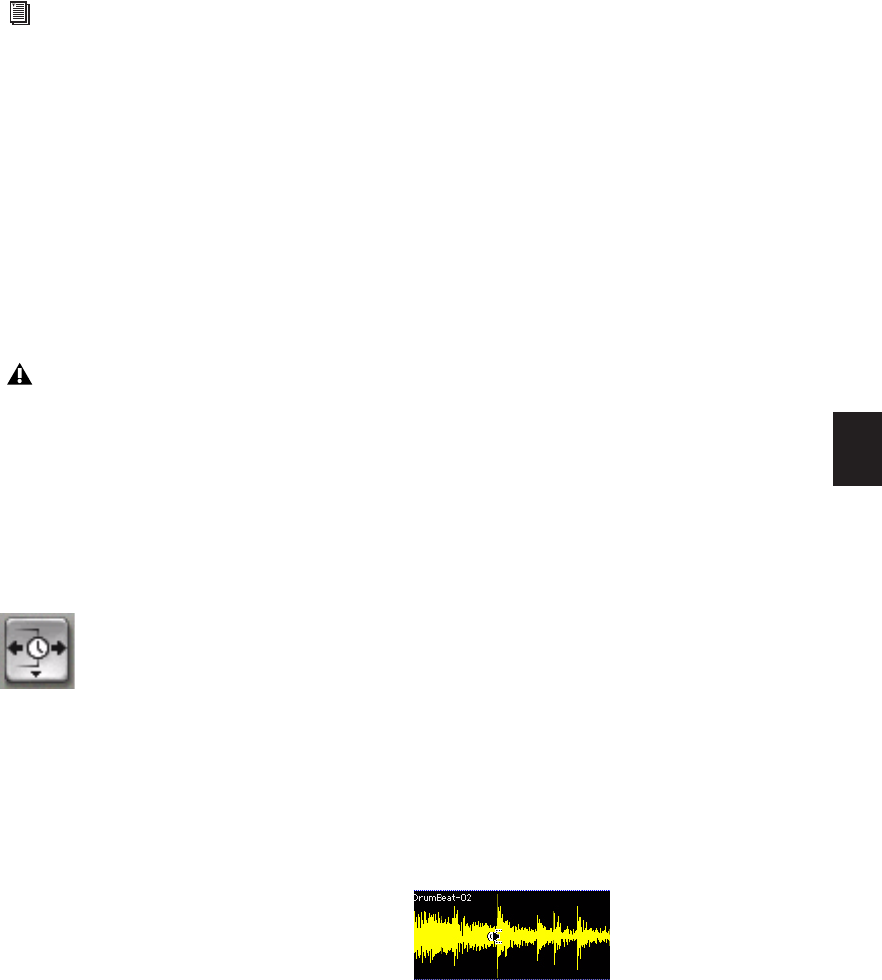
Chapter 22: Editing Modes and Tools 435
5 Click OK.
Using the TCE Trimmer Tool in Grid Mode
The TCE Trimmer tool can be used in Grid mode
to match a region to the tempo of a session or a
section of a session. For example, you might im-
port a one-bar drum loop with a tempo of 90
BPM into a session with a tempo of 120 BPM. In
Grid mode, you can use this tool to simply and
quickly “time compress” the drum loop to the
length of one measure, with no noticeable to
minimal loss of audio fidelity.
To use the TCE Trimmer tool in Grid mode:
1 Set the Edit mode to Grid.
2 Click the Trimmer tool pop-up menu and se-
lect TCE.
3 With the TCE Trimmer tool, drag the audio re-
gion’s start or end point to compress or expand
the region to the Grid (for example, by quarter
notes).
Using the TCE Trimmer Tool in Slip Mode
To use the TCE Trimmer tool in Slip mode:
1 Set the Edit mode to Slip.
2 Click the Trimmer tool pop-up menu and se-
lect TCE.
3 With the TCE Trimmer tool, drag the region’s
start or end point to compress or expand the re-
gion freely.
Using the TCE Trimmer Tool in Spot Mode
In Spot mode, clicking with the TCE Trimmer
tool in a region opens the Spot dialog. You can
specify the location you want the region to start
or end at, or the duration of the region, and the
region is automatically compressed or expanded
as specified.
To use the TCE Trimmer tool in Spot mode:
1 Set the Edit mode to Spot.
2 Click the Trimmer tool pop-up menu and se-
lect TCE.
3 Click the region near its start or end point.
The Spot dialog opens. Using any Time Scale,
enter a new start or end time (or duration) for
the region, then click OK.
Scrub Trimmer Tool
(Pro Tools HD Only)
The Scrub Trimmer tool is a convenient tool for
auditioning material (on up to two tracks) to
find a trim point. You can drag in a track to hear
the audio information, then trim at a specific lo-
cation by releasing the mouse button.
This action creates a new region. Note that the
Scrub Trimmer tool changes into a “right trim”
or “left trim” shape as it is placed over the right
or left side of a region. To reverse the direction
of the Scrub Trimmer tool, press Alt (Windows)
or Option (Mac) before you click the region.
Refer to the DigiRack Plug-ins Guide for
more information about AudioSuite plug-
ins.
Trimming regions while in Relative Grid
mode will trim the regions in grid incre-
ments while maintaining their relative off-
set (if any) from the grid.
Time Compression/Expansion Trimmer tool
Scrub Trimmer tool over a region
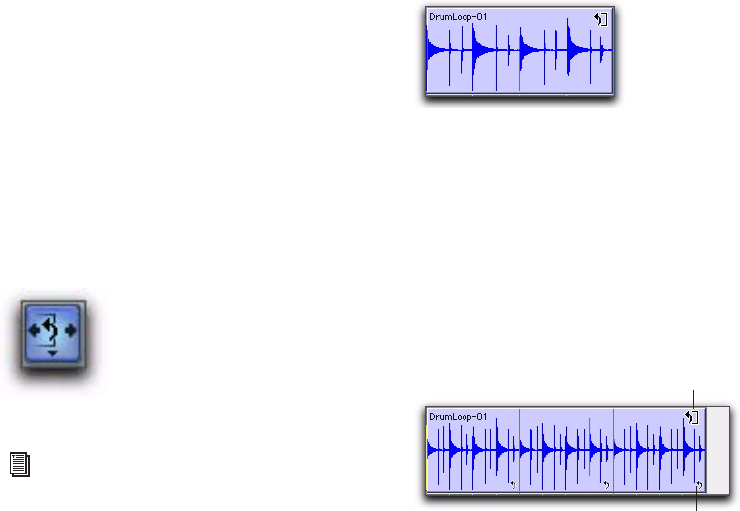
Pro Tools Reference Guide436
Scrub playback speed and direction vary with
controller movement. Scrubbed audio is routed
through the track signal path, so you hear any
effects in the signal path.
To scrub trim a track:
1 Click the Trimmer tool pop-up menu and se-
lect Scrub. The tool changes to a speaker with a
bracket.
2 Drag within a track to the left or right. Audio
from a scrubbed track is routed through the
track signal path, including any TDM effects.
When you locate the trim point, release the
mouse button to trim the region.
To scrub trim two tracks, click with the Scrub
Trimmer tool between two adjacent tracks and
drag.
To scrub with finer resolution (without having
to zoom in), press Control (Windows) or Com-
mand (Mac) while scrubbing.
Loop Trimmer Tool
Use the Loop Trimmer tool to create or trim
looped regions.
Creating Loops with the Loop Trimmer
Tool
To create loop regions using the Loop Trimmer
tool:
1 Click the Trimmer tool icon in the Edit win-
dow to access the Trimmer Tool pop-up menu.
2 Select Loop.
3 Position the cursor over the top half of an un-
looped audio or MIDI region, or region group.
The cursor changes to indicate that you can
loop trim the region. (Positioning the cursor
over the bottom half of the region results in the
Standard Trim cursor.)
4 Do one of the following:
• Click at the end of the region, and drag left
or right to the point you want the loop to
stop.
– or –
• Click at the beginning of the region, and
drag left or right to the point you want the
loop to start.
Loop Trimmer tool
For more information on looping regions,
see “Region Looping” on page 671.
Loop Trim cursor
Looped region
Loop Trimmer tool
Loop icon
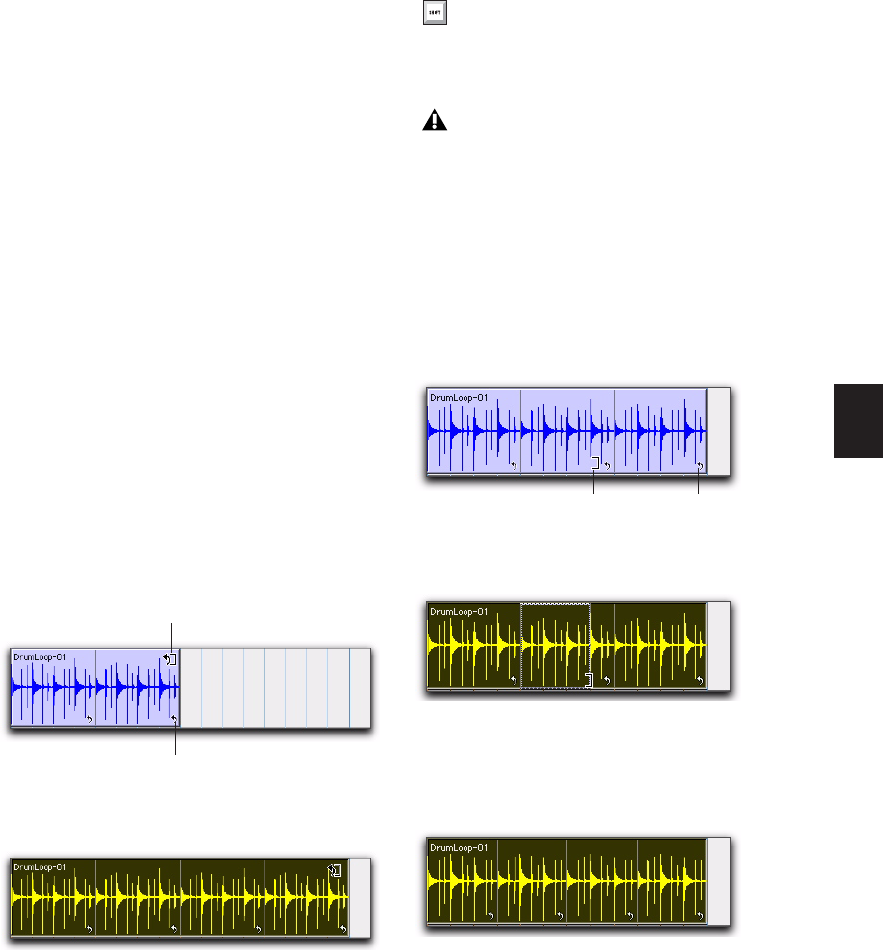
Chapter 22: Editing Modes and Tools 437
Trimming Looped Regions
You can trim looped regions in two ways:
• Loop Trim a looped region to change how
long the region is looped. For example, Loop
Trim a looped region from 2 bars to four bars.
With a 1 bar region, the number of loops
changes from 2 to 4. Each loop iteration re-
mains the same length, but the length of the
entire looped region changes.
• Trim the source region (loop iteration) while
keeping the overall loop length unchanged.
The number of loop iterations within the
looped region changes accordingly. For exam-
ple, trim a 2 bar loop iteration of a 4 bar
looped region to 1 bar. The 4 bar looped re-
gion remains constant, but the number of
loop iterations changes from 2 to 4. Each loop
iteration’s length changes, but how long the
region is looped does not.
To Loop Trim a looped region:
1 Select the Loop Trimmer tool.
2 Move the cursor over the top half of the
looped region (not over a Loop icon). The cursor
indicates the Loop Trimmer tool.
3 Trim the looped region.
The number of loops increases or decreases to
fill the new length of the entire looped region.
To trim the source region (loop iteration) of a
looped region:
1 Select the Loop Trimmer tool.
2 Move the cursor over a Loop icon in the
looped region, or anywhere along the bottom of
the region. The cursor indicates the Trimmer
tool icon.
3 Trim the start or end of the loop iteration.
The number of trimmed loop iterations in-
creases or decreases to fill the original length of
the entire looped region.
Looped region
Loop trimming a looped region
Loop Trimmer tool
Loop icon
Hold down the Start key on Windows, or
the Control key on Mac, while trimming to
trim in loop iteration increments.
Trimming a looped region does not trim any
underlying Fades.
Looped region
Trimming a looped region
Trimmed looped region
Trimmer tool Loop icon
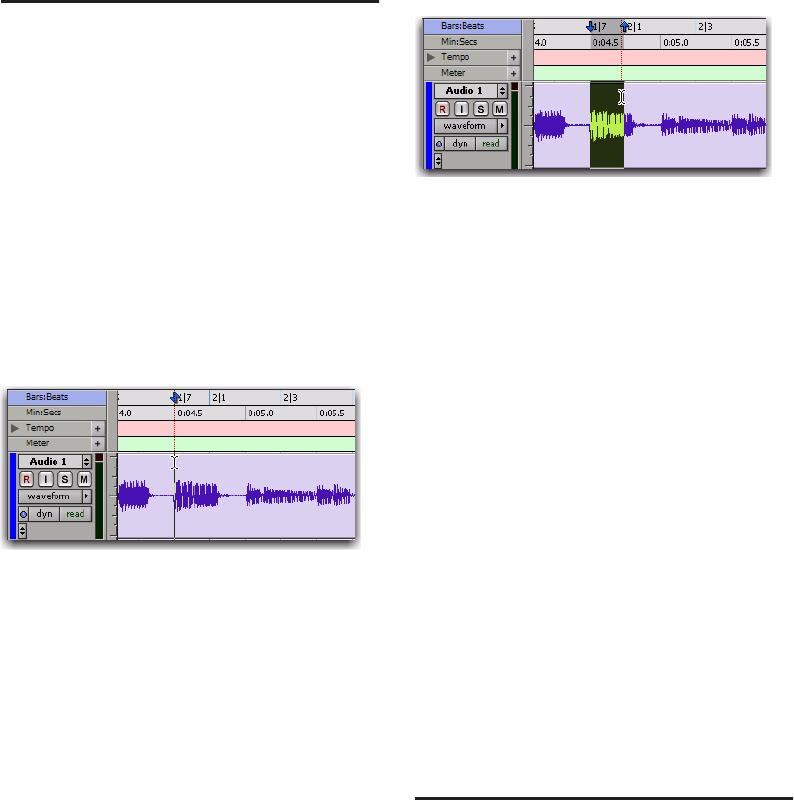
Pro Tools Reference Guide438
Using the Selector Tool
Use the Selector tool to place the edit cursor in a
track or Timebase ruler, or to make Timeline se-
lections or Edit selections on tracks. For more in-
formation on making selections, also see
Chapter 23, “Making Selections.”
Placing the Edit Cursor
To place the edit cursor with the Selector tool:
1 Select the Selector tool in the Edit window.
2 Click the desired location in a track or on a
Timebase ruler.
Making an Edit Selection with the
Selector Tool
To make an Edit selection with the Selector tool:
1 Select the Selector tool in the Edit window.
2 Do one of the following:
• To make an Edit selection in a single track,
click and drag in the track.
• To make an Edit selection across multiple
tracks, click and drag across the tracks.
• If Link Timeline and Edit Selection is en-
abled, click and drag on Timebase ruler to
make an Edit selection across all tracks.
To select an entire region with the Selector tool:
1 Select the Selector tool in the Edit window.
2 Double-click the desired region on a track.
To select an entire track with the Selector tool:
1 Select the Selector tool in the Edit window.
2 Triple-click the desired track.
Making a Timeline Selection with the
Selector Tool
To make a Timeline selection with the Selector
tool:
1 Select the Selector tool in the Edit window.
2 Do one of the following:
• Click and drag in a on Timebase ruler.
– or –
• If Link Timeline and Edit Selection is en-
abled, click and drag in a track.
Using the Grabber Tools
Use the Grabber tools to select, move, separate,
and arrange regions on tracks. There are three
modes for the Grabber tool: Time Grabber, Sep-
aration Grabber, and Object Grabber. For more
information about arranging regions, also see
Chapter 32, “Arranging Regions.”
Placing the edit cursor with the Selector tool
Making a selection with the Selector tool
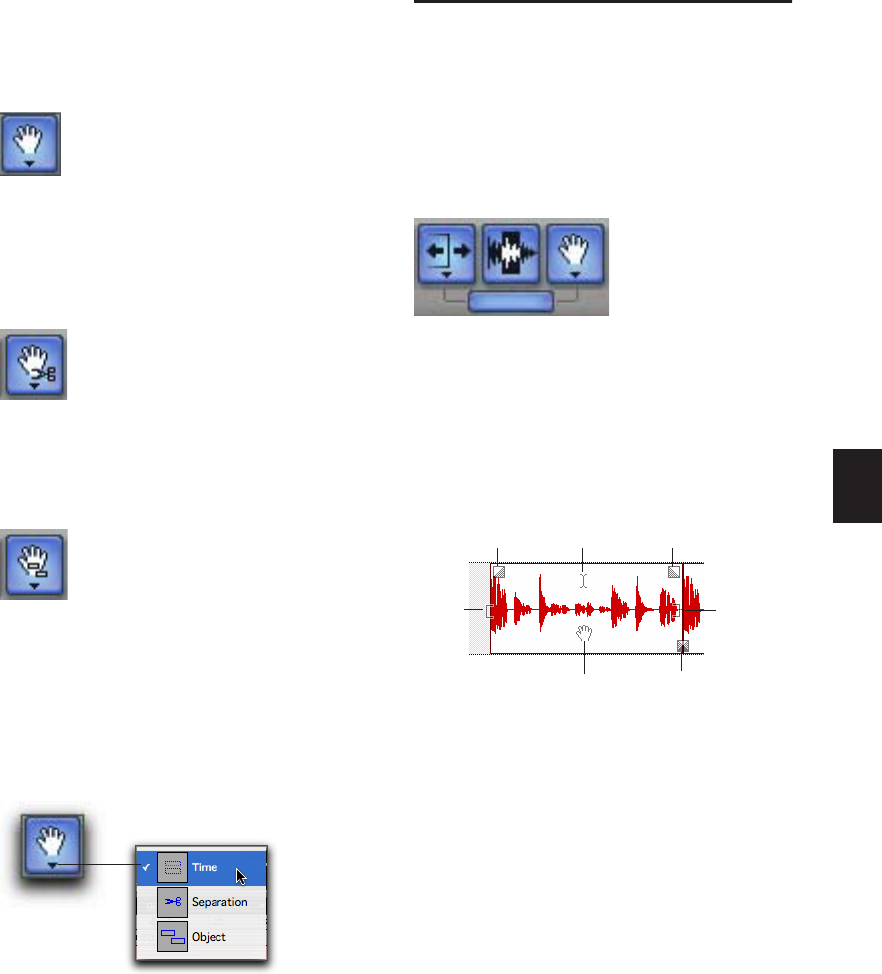
Chapter 22: Editing Modes and Tools 439
Time Grabber Selects an entire region on a track
with a single click. For more information on se-
lecting regions, see “Selecting Track Material”
on page 449.
Separation Grabber Cuts and pastes an Edit se-
lection from one location to another by clicking
and dragging. For more information, see “Sepa-
ration Grabber Tool” on page 468.
Object Grabber Lets you select multiple, non-
contiguous regions. For more information, see
“Object Selections” on page 451.
To select one of the Grabber tools:
1 Click and hold the Grabber tool in the Edit
window.
2 From the Grabber tool pop-up menu, select
the desired Grabber tool.
Using the Smart Tool
With the Smart Tool, you can instantly access
the Selector, Grabber, and Trimmer tools, and
you can also perform fades and crossfades. The
position of the cursor in relation to a region or
note, or within an automation playlist, deter-
mines how the Smart Tool functions.
To select the Smart Tool, click its icon in the up-
per left of the Edit window, or press F6+F7 (or
F7+F8) simultaneously.
The Smart Tool in Waveform View (or
MIDI Track Regions View)
The following capabilities are available with the
Smart Tool when working with audio tracks in
Waveform or Blocks View, or MIDI or Instru-
ment tracks in Regions View:
For the Selector tool, position the cursor over
the middle of the region, in the upper half of the
region.
For the Grabber tool, position the cursor over
the middle of a region, in the lower half of the
region.
For the Trimmer tool, position the cursor near
the region’s start or end point.
Time Grabber tool
Separation Grabber tool
Object Grabber tool
Selecting a Grabber tool
Smart Tool in Edit window
Smart Tool in Waveform View
Fade-In Fade-Out
Selector tool
Grabber tool
T
rimmer
tool
(start)
Trimmer
tool (end)
Crossfade
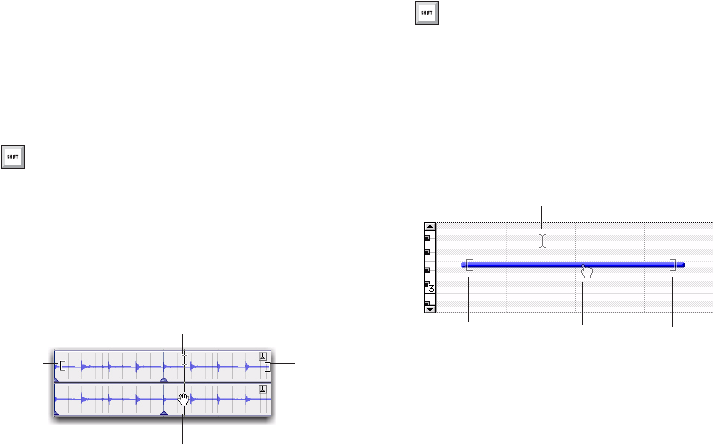
Pro Tools Reference Guide440
For a fade-in or fade-out, position the cursor
near an audio region’s start or end point, near
the top of the region. Once the Fade cursor ap-
pears, drag into the region to set the fade length.
The fade is created automatically with the De-
fault Fade Settings (in the Editing Preferences
page).
For a crossfade, position the cursor between
two adjacent audio regions, near the bottom of
the region. Once the Crossfade cursor appears
drag left or right to set the crossfade length. The
crossfade is created automatically with the De-
fault Fade Settings (in the Editing Preferences
page).
The Smart Tool in Warp View
The following capabilities are available with the
Smart Tool when working with Elastic Au-
dio–enabled audio tracks in Warp View, or MIDI
or Instrument tracks in Regions View:
For the Selector tool, position the cursor over
the middle of the region, in the upper half of the
region.
For the Grabber tool, position the cursor over
the middle of a region, in the lower half of the
region, but not over an Event marker or Warp
marker.
For Elastic Audio warping, position the cursor
over an Event marker or a Warp marker, in the
lower half of the region (for more information
on warping audio, see “Editing in Warp View”
on page 511).
For the Trimmer tool, position the cursor near
the region’s start or end point, in the upper half
of the region.
The Smart Tool in Notes View
The following capabilities are available with the
Smart Tool when working with MIDI and In-
strument tracks in Notes View:
For the Selector tool, position the cursor so it
does not cover any notes.
To get the Selector tool while positioning the
cursor over notes, press Control (Windows) or
Command (Mac).
For the Grabber tool, position the cursor over
the note, near its middle.
To get the Marquee so you can select a group
of notes, position the cursor so it does not cover
any notes and press Control (Windows) or Com-
mand (Mac).
For the Trimmer tool, position the cursor near
the note’s start or end point.
To temporarily switch the Smart Tool to the
Scrubber, place the cursor over the region so
that the Selector tool is enabled, then press
Start (Windows) or Control (Mac).
Smart Tool in Warp View
Selector tool
Grabber tool
T
rimmer
tool
(start)
Trimmer
tool (end)
To temporarily switch the Smart Tool to the
Scrubber, place the cursor in the upper half
of the region so that the Selector tool is en-
abled, then press Start (Windows) or Con-
trol (Mac).
Smart Tool in Notes View
Selector tool
Grabber tool
Trim note start Trim note end

Chapter 22: Editing Modes and Tools 441
The Smart Tool in Automation and
Controller Views
The following capabilities are available with the
Smart Tool when working in both automation
and controller views:
For the Selector tool, position the cursor any-
where in the bottom 75% of the playlist for the
Selector tool. Drag with the Selector tool to se-
lect breakpoints.
For Trimmer tools, position the cursor in the
top 25% of the playlist for the Trimmer tool.
Drag with the Trimmer tool to trim breakpoints.
Press Control (Windows) or Command (Mac)
while trimming for fine control.
For Grabber tools, Control (Windows) or
Command (Mac) for the Grabber tool, then
click in on the automation line to create break-
points
To edit existing breakpoints, move the cursor
near a breakpoint for the Grabber tool.
For fine control with the Grabber tool, press
Control (Windows) or Command (Mac)—or
continue to hold the key if you are creating a
new breakpoint.
To vertically constrain Grabber tool movement,
press Shift.
To vertically constrain Grabber tool movement
with fine control, press Control+Shift (Win-
dows) or Command+Shift (Mac).
The Smart Tool with Stereo and
Multichannel Tracks
When using the Smart Tool on stereo and multi-
channel tracks, individual channels cannot be
independently edited. All edits affect all chan-
nels as a whole.
Tool switching for the Smart Tool in stereo and
multichannel tracks is determined by the posi-
tion within the entire track, and not within in-
dividual channels.
Using the Scrubber Tool
The Scrubber tool lets you “scrub” up to two
tracks of audio in the Edit Window. Scrubbing is
a technique that originated in tape editing,
where the tape was rocked back and forth past
the playhead at slower than normal speeds to
find a particular location (usually for cutting
and splicing).
While viewing an audio waveform in Pro Tools
can be helpful in visually finding an edit point,
sometimes a waveform display (because of its
sonic characteristics) may not reveal the desired
spot in the audio material. By scrubbing back
and forth in Pro Tools, you can listen and locate
an exact edit point.
When the Edit Insertion Follows Scrub/Shuttle
option is enabled in the Operation Preferences
page, the edit cursor automatically locates to the
point where scrubbing stops.
When the Scrolling option is set to Continuous
(Pro Tools HD and LE with DV Toolkit 2 only) or
Center Playhead (Pro Tools HD only), clicking
with the Scrubber in a track’s playlist centers the
To temporarily switch the Smart Tool to the
Pencil tool, press Start (Windows) or Con-
trol (Mac).
To temporarily switch the Smart Tool to the
Eraser, press Alt+Start (Windows) or Op-
tion+Control (Mac).
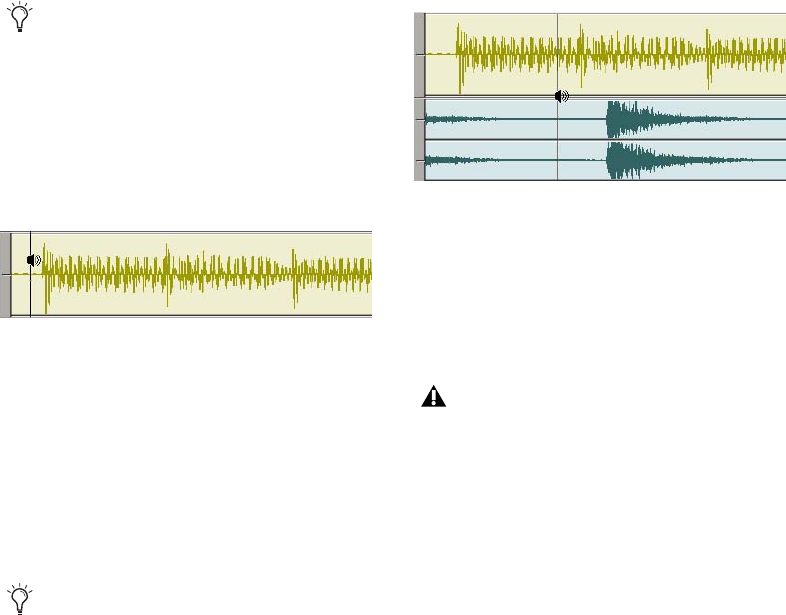
Pro Tools Reference Guide442
Edit window around that point, and moves the
Playhead there. With these Scrolling Options,
scrubbed material moves past the Playhead,
which remains stationary and centered.
To scrub a single audio track:
1 Select the Scrubber tool.
2 Drag within the track: left for reverse or right
for forward.
The distance and speed with which you drag
(with either the mouse, or the scrub wheel on a
control surface) determine the length and speed
of the scrubbed audio. Audio from the scrubbed
track is routed to its output, along with any ef-
fects assigned to the track.
The resolution for the Scrubber is dependent on
the zoom factor for the scrubbed track.
To scrub multiple audio tracks, do one of the
following:
With the Scrubber selected, drag between two
adjacent tracks.
– or –
Scrub within a selection that contains multi-
ple tracks.
When scrubbing multiple tracks, only the first
two tracks are heard.
Scrub/Shuttle Mode
When scrubbing normally, you can scrub at nor-
mal playback speeds or slower. Scrub/Shuttle
mode, however, lets you scrub at several times
normal speed, which is helpful in playing
through large ranges and locating material.
To scrub in Shuttle mode (at several times normal
speed):
1 Select the Scrubber tool.
2 While pressing Alt (Windows) or Option
(Mac), drag within the track—left for reverse,
right for forward. The Fast Forward and Rewind
buttons in the Transport window engage.
Scrubbing is only supported for audio
tracks. MIDI and Instrument tracks cannot
be scrubbed.
Scrubbing an audio track with the Scrubber
You can temporarily switch the Selector tool
to the Scrubber tool by Start-clicking (Win-
dows) or Control-clicking (Mac). For finer
resolution, Control-Start-click (Windows)
or Command-Control-click (Mac).
Scrubbing between two audio tracks
The maximum number of channels
scrubbed in Pro Tools is eight, which lets
you scrub a 7.1 track, two stereo tracks
(four channels), but not two 5.1 surround
tracks (12 channels).

Chapter 22: Editing Modes and Tools 443
The distance and speed dragged determine the
speed for the scrubbed audio.
Shuttle Lock Mode
Shuttle Lock mode lets you use the numeric key-
pad to shuttle up to two tracks forward or back-
wards at specific speeds: 5 is normal speed, num-
bers from 6 up to 9 provide increasingly faster
fast-forward speeds, and numbers from 4 down
to 1 provide progressively faster rewind speeds
(4 is the slowest rewind Shuttle Lock speed, 1 is
the fastest). If multiple tracks are selected, only
the first two tracks are shuttled.
To play one or two tracks with the shuttle lock:
1 With Pro Tools HD, make sure the Operation
preference for Numeric Keypad mode is not set
to Shuttle (see “Operation Preferences” on
page 76).
2 With the Selector tool, click in the track where
you want playback to begin. To shuttle on two
tracks, Shift-click in a second track.
3 Press the Start key (Windows) or Control
(Mac) and a number on the numeric keypad:
0–9 (9 is fastest, 5 is normal speed, and 0 stops
shuttling).
Once Shuttle Lock mode is initiated, Fast For-
ward and Rewind become highlighted in the
Transport window.
4 Press additional keys to change the playback
speed, or press Plus (+) or Minus (–) to switch the
playback direction (plus for forward, minus for
backward).
5 To stop playback, press Start+0 (Windows) or
Control+0 (Mac).
To exit Shuttle Lock mode, do one of the following:
Press Stop in the Transport window.
– or –
Press the Spacebar.
Custom Shuttle Lock Speed
Use the Custom Shuttle Lock Speed preference
to customize the highest fast-forward Shuttle
Lock speed (key 9) to better match your editing
and auditioning needs.
To configure Custom Shuttle Lock Speed:
1 In Pro Tools, select Setup > Preferences and
click the Operation tab.
2 Be sure that the Numeric Keypad mode is set
to Transport or Classic (see “Operation Prefer-
ences” on page 76).
3 Enter a desired percentage for the Custom
Shuttle Lock Speed setting. The range for this
setting is 50–800%. You can use the Up and
Down Arrow keys to increase or decrease the set-
ting.
4 Click OK.
The Custom Shuttle Lock Speed will be saved
with your Pro Tools preferences (not with the
session).
To enable Custom Shuttle Lock Speed:
Press Start+9 (Windows) or Control+ 9 (Mac)
on the numeric keypad.
Pro Tools Reference Guide444
Numeric Keypad Set to Shuttle
(Pro Tools HD Only)
Pro Tools offers another form of shuttling, dif-
ferent from that of Shuttle Lock mode. With the
Numeric Keypad mode set to Shuttle, playback
of the current Edit selection is triggered by press-
ing and holding the keys on the numeric key-
pad—playback stops once the keys are released.
Various playback speeds are available in both
forward and reverse. In this mode, pre- and
post-roll are ignored.
To shuttle with the Numeric Keypad mode set to
Shuttle:
1 Choose Setup > Preferences and click the Op-
eration tab.
2 Set the Numeric Keypad mode to Shuttle and
click OK.
3 With the Selector tool, click in the track where
you want playback to begin. To shuttle on two
tracks, Shift-click in a second track.
4 Press and hold any of the following keys (or
key combinations) on the numeric keypad to
trigger playback.
5 Press a different key to switch the playback di-
rection or speed. Release to stop.
Using the Pencil Tool
The Pencil tool lets you draw audio waveforms
(at the sample level), tempo changes, MIDI data,
and automation.
Waveform Repair with the Pencil
Tool
On audio tracks, the Pencil tool lets you destruc-
tively “redraw” waveform data. This tool is most
commonly used to repair a pop or click in an au-
dio file. A pop or click appears as a sudden sharp
spike in a waveform. This tool only becomes ac-
tive when the Edit window is zoomed in to the
sample level.
Although you can Undo a Pencil tool edit, it is
recommended that you create a backup copy of
the target audio, before using the Pencil tool.
You can do this by using the AudioSuite Dupli-
cate plug-in.
Shuttle Speed Rewind Key Forward Key
1 X Speed 4 6
4 X Speed 7 9
1/4 X Speed 1 3
1/2 X Speed 4+5 5+6
2 X Speed 7+8 8+9
For information on drawing tempo changes,
see “Editing Tempo Events in the Tempo
Editor” on page 608.
For information on drawing MIDI data, see
“The Pencil Tool” on page 528.
For information on drawing automation,
see “Drawing Automation” on page 801.
The Pencil tool is a destructive editing tool
that permanently modifies the audio file on
disk and should be used with caution.
Refer to the DigiRack Plug-ins Guide for in-
formation about the AudioSuite Duplicate
plug-in.
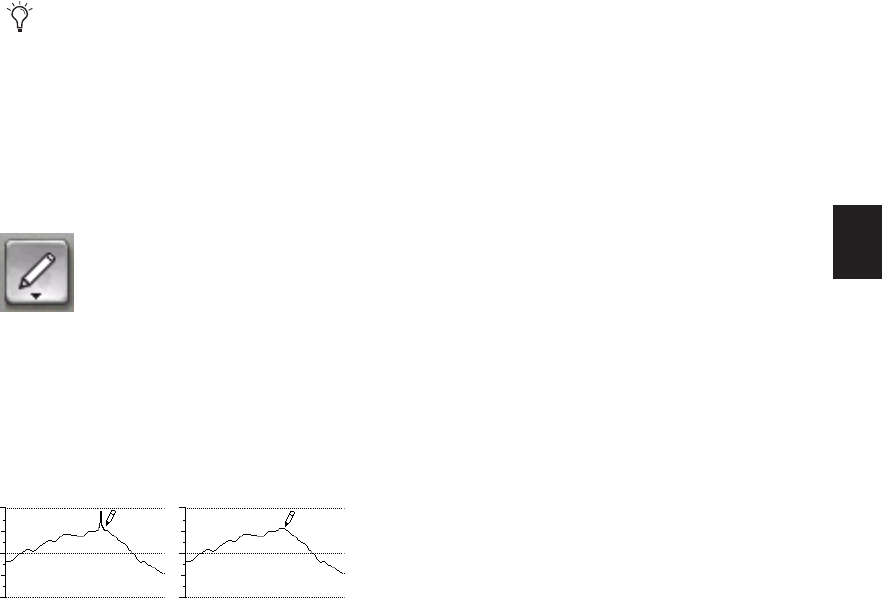
Chapter 22: Editing Modes and Tools 445
To destructively edit an audio waveform with the
Pencil tool:
1 Locate the area you want to edit.
2 Using the Zoomer tool or the Zoom buttons,
zoom down to the sample level so the waveform
appears as a continuous thin line. Adjust the
Track Height, as necessary, to edit the waveform
with greater precision. You can also use vertical
zoom for greater visual resolution.
3 Select the Pencil tool.
4 Carefully draw with the Pencil tool by drag-
ging over the area of the waveform.
Do not over-edit or the results may be undesir-
able. However, you can use the Undo command
to undo your previous edit.
The Pencil tool can independently edit different
channels of a multichannel track.
Try to limit editing to smoothing over a very
small problem area, and keep the “fixes” in
character with the shape of the surrounding
waveform.
You can recall zoom levels with the Zoom
Preset buttons (see “Using the Zoomer
Tools” on page 424), or with Memory Loca-
tions (see “Memory Locations and Markers”
on page 637). The default setting for Zoom
Preset 5 is at the sample level for Pencil ed-
iting.
Pencil tool
Repairing a “pop” with the Pencil tool
Pro Tools Reference Guide446
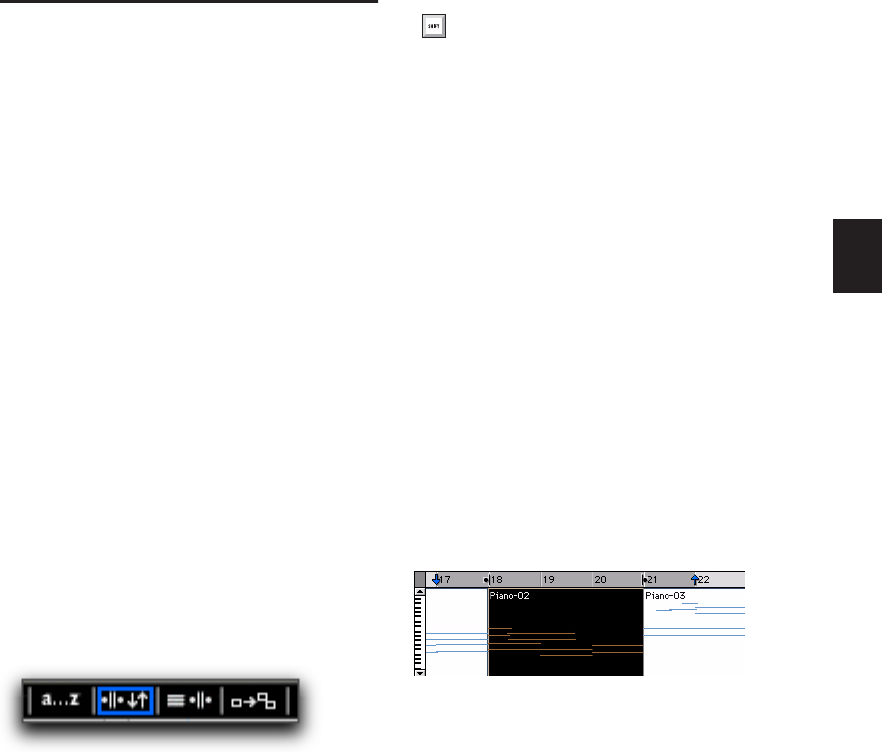
Chapter 23: Making Selections 447
Chapter 23: Making Selections
Linking or Unlinking Timeline
and Edit Selections
Pro Tools lets you link or unlink the Timeline
and Edit selections.
When the Timeline and Edit selections are
linked, selecting in a track’s playlist (making an
Edit selection) also defines the play and record
range (the Timeline selection).
Unlinking Timeline and Edit selections lets you
make a selection within a track for editing pur-
poses that is distinct from the selection in the
Timeline (which determines the playback and
recording range).
To link or unlink the Timeline and Edit selections,
do one of the following:
Select or deselect Options > Link Timeline and
Edit Selection.
– or –
In the upper left of the Edit window, click the
Link Timeline and Edit Selection button so it be-
comes highlighted (selected) or un-highlighted
(not selected).
If you are working on a film or video scene, you
may want to unlink the Timeline and Edit selec-
tions to find or audition material that is at a dif-
ferent location than the current Timeline selec-
tion. Edit selections can be played (choose Edit >
Selection > Play Edit) without disrupting the
current Timeline selection. Once you find the
material, you can then go back to the Timeline
selection and place it within the context of the
scene.
Figure 23 illustrates another reason why you
might want to unlink the Timeline and Edit se-
lections. In this example, the Timeline selection
sets a range to be looped on playback, while a
MIDI region (residing within the loop) is se-
lected for editing purposes. During playback,
the Edit selection can be nudged, quantized, or
transposed while the loop plays back com-
pletely independent and uninterrupted.
Link Timeline and Edit Selection enabled
Press Shift+Forward Slash (/) to toggle Link
Timeline and Edit Selection on and off.
Figure 23. Timeline and Edit selections unlinked
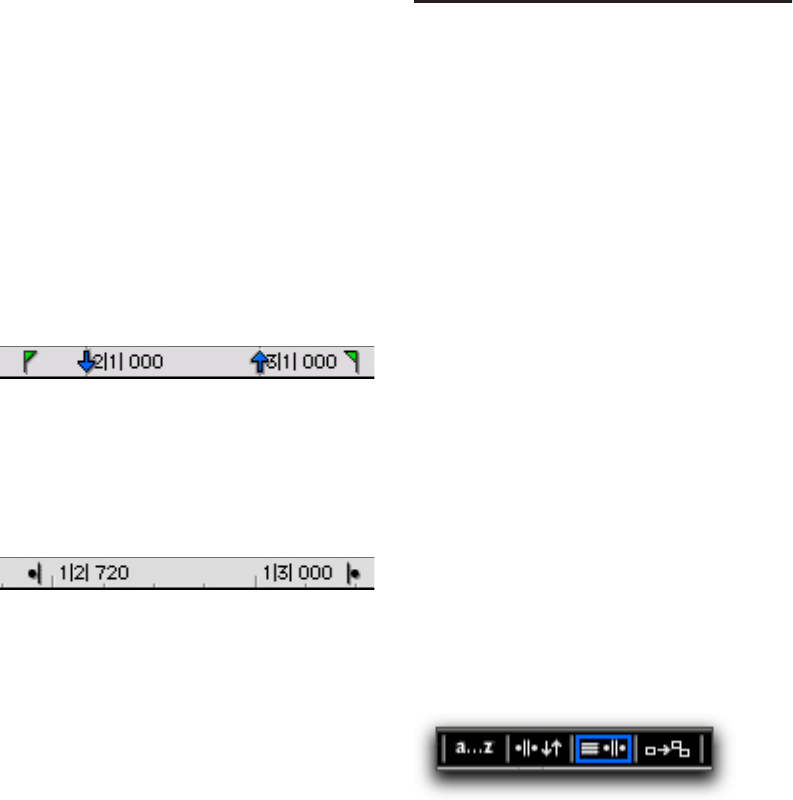
Pro Tools Reference Guide448
While you could theoretically do this with the
Timeline and Edit selections linked, as soon as
playback is stopped, the playback range would
then be updated to that of the more recent edit
range, or to a single note when editing MIDI.
Timeline and Edit Selection Markers
Timeline selections are displayed in the Main
Timebase ruler with Timeline Selection Markers,
which appear as blue arrows (red when record-
ing). In addition, there are Pre- and Post-Roll
Flags (which are green when enabled) indicating
the location for pre- and post-roll.
When the Timeline and Edit selections are un-
linked, Edit selections are displayed in the ruler
with Edit Markers, which appear as black brack-
ets.
If the Timeline and Edit selections are linked,
Edit selections are represented by the blue Time-
line Selection Markers.
See the following sections for more information
on working with Timeline and Edit selections:
• “Selecting Track Material” on page 449
• “Timeline Selections” on page 458
• “Setting Punch and Loop Points” on
page 354
• “Setting Pre- and Post-Roll” on page 357
Linking or Unlinking Track and
Edit Selections
Pro Tools lets you link or unlink Track selection
with Edit selections.
When Track and Edit selections are linked, you
can make a selection within a track or across
multiple tracks for editing and each associated
track is selected (track names automatically
highlight). This lets you quickly apply track-
level commands (such as Track View toggle,
change track heights) and have the command
apply to all tracks you are working on.
When Track and Edit selections are unlinked,
making an Edit selection does not automatically
select all associated tracks.
To link or unlink Track and Edit selection, do one of
the following:
Select or deselect Options > Link Track and
Edit Selection.
– or –
In the upper left of the Edit window, click the
Link Track and Edit Selection button so it be-
comes highlighted (selected) or un-highlighted
(not selected).
Timeline Selection Markers with Pre- and Post-Roll
Flags
Figure 24. Edit Markers
Link Track and Edit Selection enabled
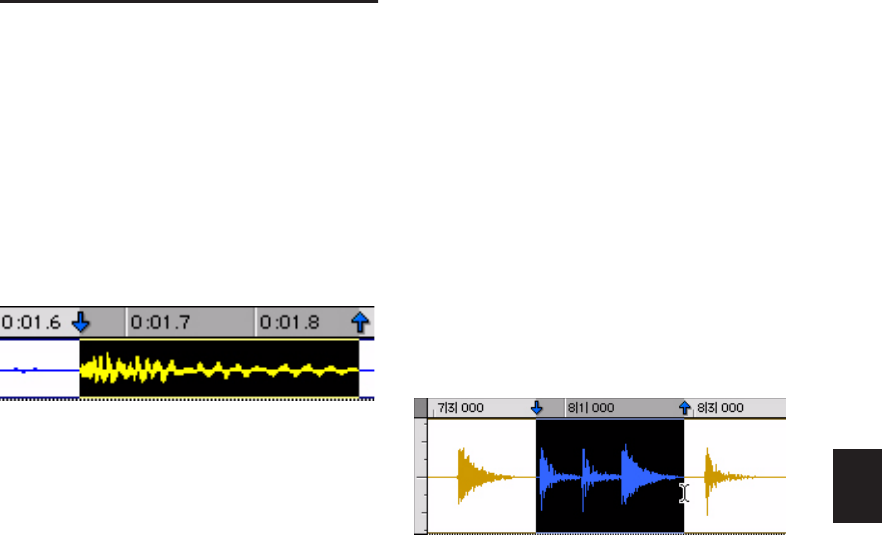
Chapter 23: Making Selections 449
Selecting Track Material
Before audio and MIDI material can be edited, it
must first be selected. The Track View deter-
mines how the material is viewed and selected.
When you make a selection, it appears as a high-
lighted area of the tracks, and is also indicated
by blue start and end arrows (Timeline Selection
Markers) in the Main Timebase ruler. If any track
(audio or MIDI) in the session is record-enabled,
even if it is hidden, these markers appear red.
If the Timeline and Edit selections are unlinked,
the Edit selection range is indicated by Edit
Markers in the Main Timebase ruler. See “Link-
ing or Unlinking Timeline and Edit Selections”
on page 447 for details.
Selections and Edit Groups
When making selections on tracks that are part
of an Edit Group, all tracks within the group be-
come selected.
Selections and Hidden Tracks
When editing tracks that are part of an active
Edit Group, any tracks within the group that are
hidden are not affected by the edits. To edit all
members of a group, make sure they are visible
by highlighting their names in the Track List.
Selections in Multiple Tracks
To make a selection in multiple tracks:
With the Selector tool, click and drag horizon-
tally to include adjacent tracks in a selection
(drag vertically to define the time range).
Selecting Regions
To select a portion of a region:
With the Selector tool, drag within a region
(left or right) to select the material on a single
track. (You can also use the Selector tool across
multiple, adjacent tracks to make multitrack se-
lections.)
To select an entire region, do one of the following:
Click the region with the Time Grabber tool.
– or –
Double-click the region with the Selector tool.
To select two regions and the time range between
them:
1 With the Time Grabber, click the first region.
2 Shift-click the second region. Both regions are
selected, along with the time range between
them (including any other regions).
Timeline Selection Markers indicating Edit selection
Selecting a portion of a region

Pro Tools Reference Guide450
To select an entire track, do one of the following:
Click in the track with the Selector tool and
then choose Edit > Select All.
– or –
Triple-click with the Selector tool in the track.
To select all regions in all tracks:
1 Select the “All” Edit Group in the Group List
pop-up menu.
2 Do one of the following:
• Click in any track with the Selector tool
and choose Edit > Select All.
– or –
• Triple-click with the Selector tool in any
track.
Region List Selection Follows Edit
Selection
When the Editing preference for “Region List Se-
lection Follows Edit Selection” is enabled, select-
ing a region in a track also causes the region to
become selected in the Region List.
Conversely, if the Editing preference for “Edit
Selection Follows Region List Selection” is en-
abled, selecting a region in the Region List
causes the initial occurrence of that region to
become selected within the track.
Selecting All from Timebase Rulers
To select all material in all displayed audio and
MIDI tracks:
1 Enable Link Timeline and Edit Selection (Op-
tions > Link Timeline and Edit Selection).
2 Double-click in any Timebase ruler. All regions
in all displayed audio and MIDI tracks are se-
lected. Tracks that are hidden are not selected.
To select all material in all tracks, including
Conductor events:
1 Enable Link Timeline and Edit Selection (Op-
tions > Link Timeline and Edit Selection).
2 While pressing Control (Windows) or Option
(Mac), double-click in any Timebase ruler. All re-
gions in all displayed audio and MIDI tracks are
selected, including all events in each of the Con-
ductor tracks.
Making Selections While Playing
Pro Tools lets you make on-the-fly selections
with the Up and Down Arrow keys.
To make a selection while playing:
1 Enable Link Timeline and Edit Selection (Op-
tions > Link Timeline and Edit Selection).
2 With the Selector tool, click somewhere near
the beginning of the track in which you want to
make the selection.
3 Click Play in the Transport window to begin
playback.
4 When playback reaches the point where you
want the selection to begin, press the Down Ar-
row key.
5 Press the Up Arrow key at the point where you
want the selection to end. The selected range be-
comes highlighted.
Another way to select all regions in all
tracks, without having to select the “All”
Edit Group, is to press Enter (Windows) or
Return (Mac), then press Control+A (Win-
dows) or Command+A (Mac). The Link
Timeline and Edit Selection option must be
enabled.
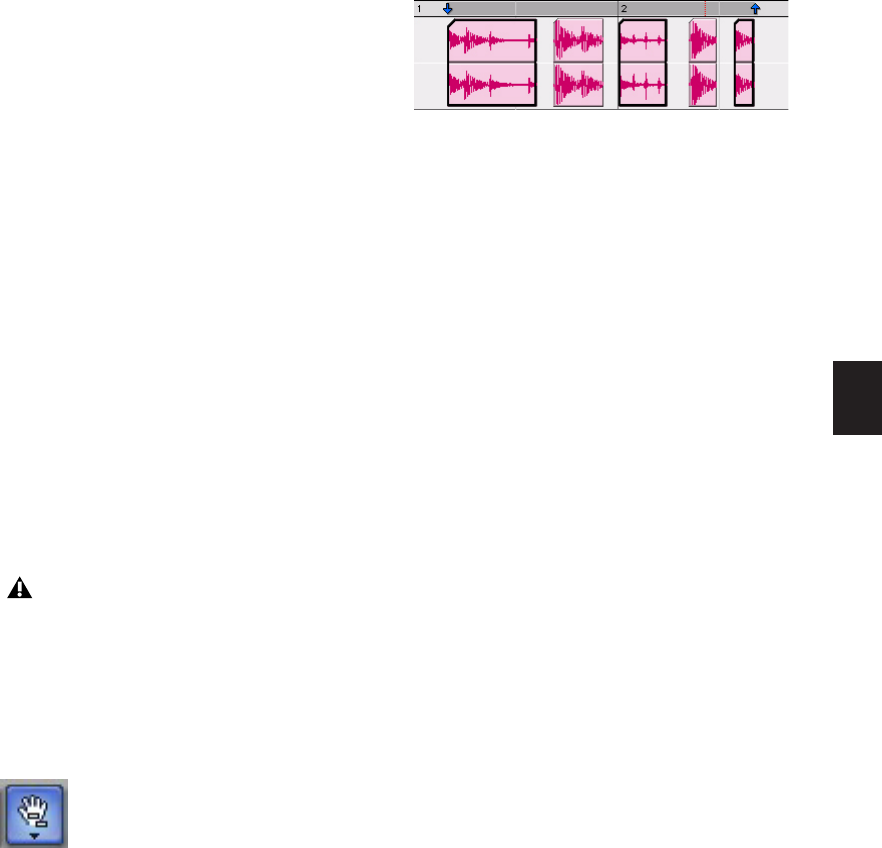
Chapter 23: Making Selections 451
6 To stop playback, click Stop in the Transport
window.
To automatically scroll to the beginning of the
selection (or to the location of the on-screen
cursor), press the Left Arrow key. To scroll to the
end of the selection, press the Right Arrow key.
While in Page Scroll or Continuous Scroll mode,
making a selection in the Timeline or a playlist
during playback as the playback cursor moves
off-screen suspends page scrolling. To resume
page scrolling and jump to the current playback
location, click the Playback Cursor locator in
the Main Timebase ruler (see “Locating the Play-
back Cursor when It Is Off-Screen” on
page 306).
Object Selections
Use the Object Grabber tool to select noncontig-
uous regions on one or more tracks. Noncontig-
uous selections must encompass entire regions.
If you want a noncontiguous selection to in-
clude a portion of a region, first turn the portion
into a new region with the Separate Region com-
mand (see “Separate Region Commands” on
page 466).
To select noncontiguous regions:
1 Set the Edit mode to either Slip or Grid.
2 Click the Grabber tools pop-up menu and se-
lect “Object.”
3 Shift-click each region you want to include in
the selection. The regions can even reside on dif-
ferent tracks.
Each clicked region is surrounded by a dark bor-
der, indicating it is selected.
The Object Grabber tool ignores Edit Groups
when making selections. For instance, selecting
a region on a grouped track does not cause re-
gions in the other tracks in the group to become
selected.
Object to Time Selection
You can convert between Time- and Object-
based selections. Time selections are made with
the Selector and Time Grabber tools. Object se-
lections are made with the Object Grabber tool.
Converting to an Object selection is useful
when you are working with large selections, es-
pecially across multiple tracks, and you want to
remove certain regions from the selection.
Converting to a Time selection is useful if you
want to select all regions between a noncontig-
uous Object selection.
The Object Grabber is not available when
the Edit mode is set to Shuffle or Spot.
Object Grabber tool
Noncontiguous selection
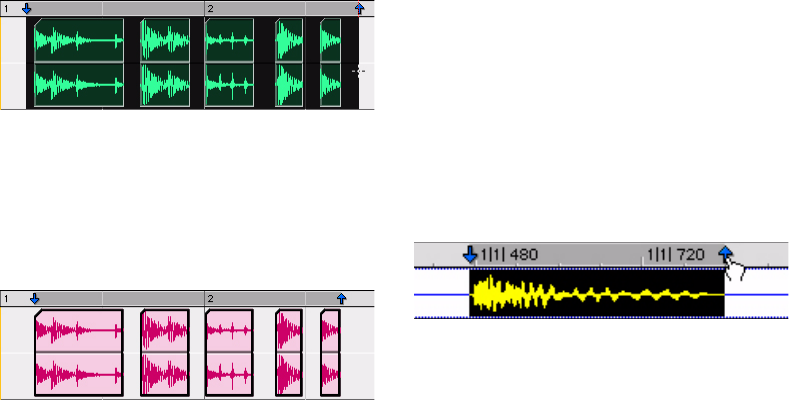
Pro Tools Reference Guide452
To change a Time selection to an Object selection:
1 Drag with the Selector tool in any track to de-
fine a selection, or select in a Timebase ruler to
select across all tracks.
2 With the Object Grabber tool selected, dou-
ble-click the Grabber icon in the toolbar. Re-
gions falling within the selection range become
selected as objects. Regions that were partially
selected become deselected.
To select regions that were partially selected,
press Start (Windows) or Control (Mac) while
double-clicking the Grabber icon.
To change an Object selection to a Time selection:
1 Select any number of regions with the Object
Grabber tool.
2 Double-click the Selector tool in the toolbar.
The time range between the first and last region
becomes selected.
When using the Object Grabber tool on tracks
that belong to an Edit Group, regions in the
other grouped tracks are selected if they fall
within the range of the selected region.
Changing a Selection Length
The selection range can be shortened or length-
ened. This does not affect the material within
the selection.
To change the length of a selection, do one of the
following:
With the Selector tool, position the cursor
over one end of the current selection and Shift-
click or Shift-click and drag left or right.
In the Main Timebase ruler, drag the Timeline
Selection Marker for the selection’s start or end
point.
If Link Timeline and Edit Selection is disabled,
drag the Edit Markers (see Figure 24 on
page 448) to change the selection length.
To make a long-length selection:
1 With the Selector tool, click at where you
want the selection to start.
2 Scroll to the end point and Shift-click at the
point where you want the selection to end.
To verify the start and end points of a long selec-
tion, press the Left Arrow key to scroll to the be-
ginning of the selection, or press the Right Ar-
row key to scroll to the end.
Selected regions
Regions selected as objects
Dragging a Timeline Selection Marker

Chapter 23: Making Selections 453
Nudging a Selection Range
The selection range (not the material within the
selection) can be moved by the Nudge value.
To nudge a selection range:
1 Configure the Nudge value. For details, see
“Defining the Nudge Value” on page 472.
2 Make the initial selection with the Selector
tool.
3 While pressing Shift, press Plus (+) or
Minus (–) on the numeric keypad to move the
selection range by the Nudge value.
Nudging Selection Start/End Points
Start and end points for selections can be moved
by nudging them.
To move a selection start or end point by the
Nudge value:
1 Configure the Nudge value. For details, see
“Defining the Nudge Value” on page 472.
2 Make the initial selection with the Selector
tool.
3 Do one of the following:
• While pressing Alt+Shift (Windows) or Op-
tion+Shift (Mac), press Plus (+) or Minus (–)
on the numeric keypad to move the selec-
tion’s start point by the Nudge value.
– or –
• While pressing Control+Shift (Windows)
or Command+Shift (Mac), press Plus (+) or
Minus (–) on the numeric keypad to move
the selection’s end point by the Nudge
value.
Extending Selections
You can extend selections to region start and
end points, to include an adjacent region, or to
Markers and Memory Locations.
To extend a selection to a region start or end
point:
1 With the Selector tool, select a portion of a re-
gion, or click anywhere in the region.
2 Do one of the following:
• Press Shift+Tab to extend the selection to
the region’s end point.
– or –
• Press Control+Shift+Tab (Windows) or Op-
tion+Shift+Tab (Mac) to extend the selec-
tion to the region’s start point.
To extend a selection to include an adjacent
region:
1 Select the first region with the Time Grabber
tool.
2 Do one of the following:
• With Tab to Transients disabled, press
Start+Shift+Tab (Windows) or Con-
trol+Shift+Tab (Mac) to extend the selec-
tion to the next region boundary.
– or –
• Press Control+Start+Shift+Tab (Windows)
or Option+Control+Shift+Tab (Mac) to ex-
tend the selection to include the previous
region boundary.

Pro Tools Reference Guide454
To extend a selection to a Marker or Memory
Location:
1 Do one of the following:
• Click in a track with the Selector tool at the
desired start or end point.
– or –
• Make a selection with the Selector or Time
Grabber tool.
2 Do one of the following:
• Shift-click a Marker in the Markers ruler.
– or –
• Shift-click a Memory Location in the Mem-
ory Locations window.
The selection is extended from the original In-
sertion point to the Marker or Memory Loca-
tion.
Using the Edit Selection
Indicators (Start, End, and Length)
The Edit Selection indicators at the top of the
Edit window can define precise Edit selections.
Time values for the Edit Selection indicators use
the time format for the Main Time Scale.
To make a selection with the Edit Selection
indicators:
1 Click with the Selector tool in the track you
want to select.
2 Click in the Start field at the top of the Edit
window.
3 Type in the start point for the selection and
press the Forward Slash key (/) to enter the value
and automatically move to the end field.
4 Type in the end point for the selection and
press Enter to accept the value.
Numeric Entry Shortcuts for Selection
Indicators
You can use the following shortcuts for entering
values in the Edit Selection indicators:
• Press the Forward Slash (/) key to cycle
through the three Edit Selection indicators.
• Use Period (.) or the Left and Right Arrow keys
to move through the different time fields in
each Edit Selection indicator.
• Press the Up or Down Arrow keys to increase
or decrease the numerical values.
• Click and drag in a field to scroll to a new
value. For finer resolution, Control-drag
(Windows) or Command-drag (Mac).
• Press Control (Windows) or Command (Mac)
and Plus (+) or Minus (–), then type a number,
to add or subtract from the current field value.
For example, to add 10 to a current field value,
cycle to the field, press Control (Windows) or
Command (Mac) and Plus (+) key, type “10,”
and then press Enter.
Press Escape to exit the Edit Selection indica-
tors without entering any values.
Calculator Entry Mode
You can perform calculator-style editing of val-
ues in the Edit Selection indicators.
To subtract time values:
1 In the Edit Selection indicator, highlight the
time field you want to change.
2 Press Minus (–) on the numeric keypad.
Edit Selection indicators
These shortcuts can also be used to enter
start and end values in the Transport win-
dow.
Chapter 23: Making Selections 455
3 Type the amount you want to subtract from
the current time value, then press Enter.
4 Press Enter again to apply the change.
To add time values:
1 In the Edit Selection indicator, highlight the
time field you want to change.
2 Press Plus (+) on the numeric keypad.
3 Type the amount you want to add to the cur-
rent time value, then press Enter.
4 Press Enter again to apply the change.
Selecting Across Multiple Tracks
To perform edits across multiple tracks or all
tracks, you must first select the tracks. Do this by
including other tracks in the selection, or by se-
lecting in a Timebase ruler (for all tracks).
To make a selection in multiple tracks:
With the Selector tool, click and drag verti-
cally to include adjacent tracks in a selection
(drag horizontally to define the time range).
To extend a selection to another track:
1 Using the Selector or Time Grabber tool, make
a selection in the first track or tracks.
2 Shift-click in additional tracks with the Selec-
tor tool. An identical range is selected for each
additional track.
To shorten or lengthen the selection across each
of the tracks, press Shift while dragging to
change the range of the selection.
To select across all tracks, do one of the following:
Enable the All Edit Group and make a selec-
tion in any track.
– or –
Drag with the Selector tool in any Timebase
ruler (make sure the Timeline and Edit Selec-
tions are linked).
These selections include all tracks in the Edit
window, but do not include the Conductor
tracks (for Tempo, Meter, and Markers).
To select across all tracks, including the
Conductor tracks (for Tempo, Meter, and
Markers):
Alt-drag (Windows) or Option-drag (Mac)
with the Selector tool in any Timebase ruler.
Moving and Extending Selections
Between Tracks
With Commands Keyboard Focus enabled, Edit
selections can be moved or extended to adjacent
tracks.
To move a selection to an adjacent track:
1 Enable Commands Keyboard Focus (see “Key-
board Focus” on page 20).
2 With the Selector or Time Grabber tool, make
a selection.
Commands Keyboard Focus button enabled

Pro Tools Reference Guide456
3 Do one of the following:
• Press P on your computer keyboard to
move the selection to the previous track.
– or –
• Press semicolon (;) to move the selection to
the next track.
In either instance, the original Edit selection be-
comes deselected.
To extend a selection to an adjacent track:
1 Enable Commands Keyboard Focus (see “Key-
board Focus” on page 20).
2 With the Selector or Time Grabber tool, make
a selection.
3 Do one of the following:
• Press Shift+P to extend the selection to the
previous track.
– or –
• Press Shift+Semicolon (;) to extend the se-
lection to the next track.
In either instance, the original Edit selection re-
mains selected.
To remove the bottom track from a selection:
Press Alt+Start+Semicolon (;) (Windows) or
Option+Control+Semicolon (;) (Mac) to remove
the bottom track.
Other Useful Selection Techniques
Following are some additional selection tech-
niques.
To position the edit cursor precisely at a region
start, end, or sync point:
1 Make sure the Tab to Transients button is not
enabled. (See “Tabbing to Transients” on
page 457.)
2 Click with the Selector tool in the track.
3 Do one of the following:
• Press Tab to move the cursor to the next re-
gion or region group start, end, or sync
point.
– or –
• Press Control+Tab (Windows) or Op-
tion+Tab (Mac) to move the cursor to the
previous region or region group start, end,
or sync point.
To make a selection with the Scrubber:
1 Choose Setup > Preferences and click the
Operation tab.
2 Select the option for “Edit Insertion Follows
Scrub/Shuttle,” then click OK.
3 Scrub with the Scrubber to find an appropriate
start point for the selection, then release.
4 While pressing Shift, scrub to an appropriate
end point for the selection, then release. The
range between the initial and final scrub be-
comes selected.
With Commands Keyboard Focus disabled,
press Start+P (Windows) or Control+P
(Mac) to move the selection to the previous
track, or Start+Semicolon (;) (Windows) or
Control+Semicolon (;) (Mac) to move the
selection to the next track.
With Commands Keyboard Focus disabled,
press Start+Shift+P (Windows) or Con-
trol+Shift+P (Mac) to extend the selection to
the previous track, or Start+Shift+Semico-
lon (;) (Windows) or Control+Shift+Semi-
colon (;) (Mac) to extend the selection to the
next track.
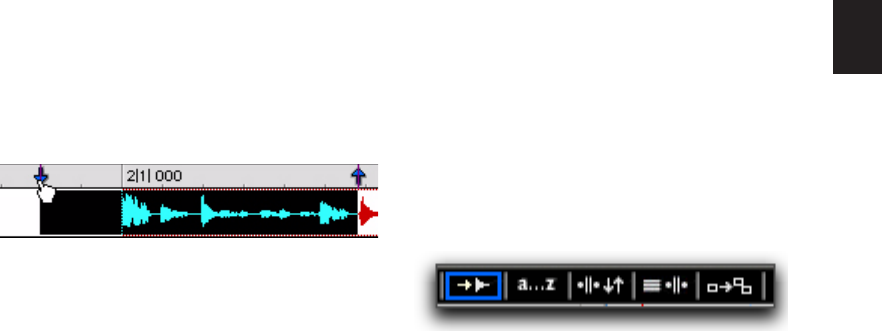
Chapter 23: Making Selections 457
To move a selection to an adjacent region on the
same track:
1 Select a region with the Time Grabber.
2 Do one of the following:
• Press Start+Tab (Windows) or Control+Tab
(Mac) to move the selection to the next re-
gion.
– or –
• Press Control+Start+Tab (Windows) or Op-
tion+Control+Tab (Mac) to move the selec-
tion to the previous region.
In either instance, the original region becomes
deselected.
To slide an Edit selection in the Main Timebase
ruler:
1 With the Selector or Time Grabber tool, make
a selection.
2 While pressing Alt (Windows) or Option
(Mac), move the cursor over either of the Time-
line Selection Markers in the ruler (the Time
Grabber appears).
3 Drag left or right to move the Edit selection
back or forward in time while preserving its
length.
If Link Timeline and Edit Selection is disabled
(Options > Link Timeline and Edit Selection),
Alt-drag (Windows) or Option-drag (Mac) the
Edit Markers instead.
Right-Click Commands and Selection
Preservation
You can use Right-click commands with key
combinations to perform operations on objects
while maintaining selections in the Edit and
Mix windows. For example, you can maintain
selections in the following areas while carrying
out certain commands:
• Region selections in the Timeline
• Region name selections in the Region List
• Track selections
To apply a command to an object while keeping
the current selection:
Control-Right-click (Windows) or Command-
Right-click (Mac) the object and choose a com-
mand from the pop-up menu.
Tabbing to Transients
With the Tab to Transients button enabled, you
can automatically navigate to transients in au-
dio waveforms in Waveform view, placing the
cursor just before the detected transient peak.
This lets you define selections and play ranges,
as well as start and end points for new regions,
without having to zoom in on the waveform.
In Warp view, Tab to Transients tabs to all Event
and Warp markers in a region. Normal Tab tabs
to region boundaries and all Warp markers. In
Analysis view, pressing Tab always tabs to Event
markers, regardless of whether or not Tab to
Transients is enabled.
Sliding an Edit selection in the Main Timebase ruler
Tab to Transients button enabled
Pro Tools Reference Guide458
For MIDI and Instrument tracks in Notes view,
pressing Tab always tabs to the next note, re-
gardless of whether or not Tab to Transients is
enabled. In Regions view, Tab to Transients tabs
to notes and Normal Tab tabs to region bound-
aries.
When Tab to Transients is enabled, the Tabbing
function also locates the cursor to region start
and end points, but not to sync points.
To set the start and end points of a selection with
Tab to Transients:
1 In the upper left of the Edit window, click the
Tab to Transients button so it becomes selected.
2 If you will be setting the play range with this
selection, enable Options > Link Timeline and
Edit Selection.
3 Click in the audio track just before the begin-
ning of the material you want to select.
4 Press Tab repeatedly until the cursor locates to
the transient where you want to start the selec-
tion.
If necessary, you can move to the previous tran-
sient by pressing Control+Tab (Windows) or
Option+Tab (Mac).
5 Press Shift+Tab until the cursor locates to the
end of the material you want to select.
To move the selection end point to the previous
transient, press Control+Shift+Tab (Windows)
or Option+Shift+Tab (Mac).
Once selected, the material can be looped for re-
cording or playback, or it can be turned into a
new region with the Separate or Capture com-
mand.
Tab To Transients Across Multiple
Tracks
With the edit cursor inserted across multiple
tracks, you can use Tab to Transients to tab to
the next transient on any of those tracks. When
transients on multiple tracks are closely aligned,
Tab to Transients tabs to the first transient on
any of those tracks.
Timeline Selections
With the Link Timeline and Edit Selection op-
tion disabled, selections can be made in the
Timeline that are distinct and separate from Edit
selections.
With the Timeline and Edit selections linked,
any Edit selections that are made are mirrored in
the Timeline, and any Timeline selection is mir-
rored as an Edit selection across all tracks.
Whether the Timeline and Edit selections are
linked or not, the range indicated by the Time-
line Selection Markers always determines the
range for playback and recording (except when
in Dynamic Transport mode, see “Dynamic
Transport Mode” on page 315).
With Pro Tools HD, when the Scrolling option is
set to Center Playhead, it determines where
playback begins (see “Playing Timeline and Edit
Selections with the Playhead” on page 313).
To toggle Tab to Transients on and off,
press Control+Alt+Tab (Windows) or Com-
mand+Option+Tab (Mac).
Peak transients are usually visible in the
waveform. However, some low-frequency
transients may not appear as visible peaks
in the waveform.
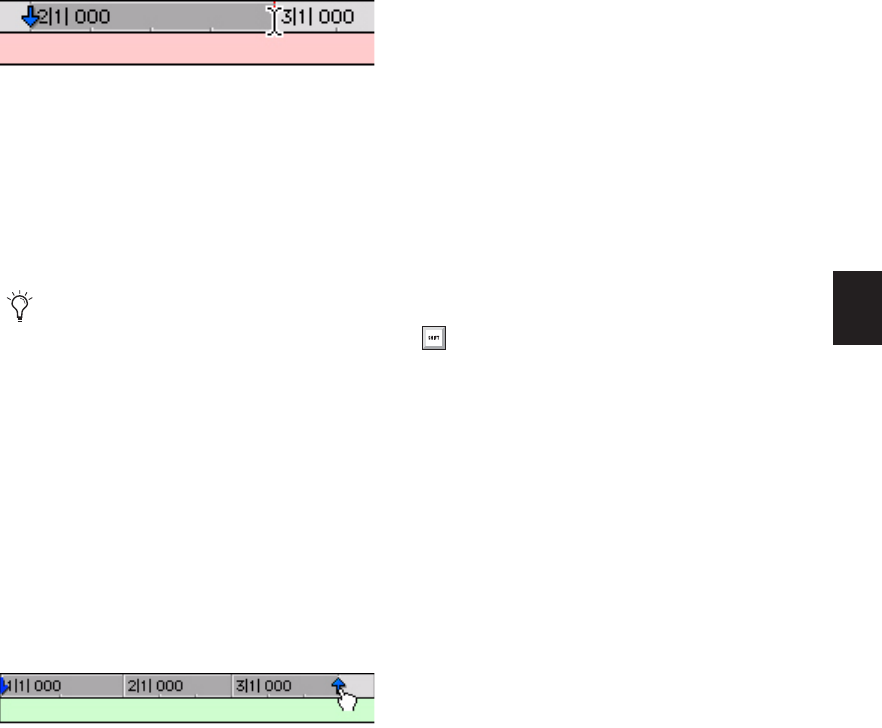
Chapter 23: Making Selections 459
To make a Timeline selection with the Selector
tool:
1 If you want to constrain the selection to the
current Grid value, set the Edit mode to Grid.
2 Click and drag with the Selector tool in any
Timebase ruler.
The Timeline selection is indicated in the Main
Timebase ruler by the blue Timeline Selection
Markers (or if a track is record-enabled, the
Timeline Selection Markers are red). The start,
end, and length for the Timeline selection is dis-
played in the corresponding fields in the Trans-
port window.
To set the Timeline selection by dragging the
Timeline Selection Markers:
1 If you want to constrain movement to the cur-
rent Grid value, set the Edit mode to Grid.
2 With the Time Grabber, drag the first Timeline
Selection Marker (down arrow) to set the start
point.
3 Drag the other Timeline Selection Marker (up
arrow) to set the end point.
To set the Timeline selection by typing into the
Transport window:
1 If necessary, resize the Transport window to
Expanded View so the start and end times are
displayed (View > Transport > Expanded).
2 Do one of the following:
• In the Transport window, click in the start
field.
– or –
• Press Alt+Forward Slash (/) (Windows) or
Option+Forward Slash (/) (Mac) on the nu-
meric keypad to select the start field in the
Transport window.
3 Type in the new start location and press For-
ward Slash (/) to enter the value and automati-
cally move to the end field.
4 Type in the new end location and press Enter
to accept the value.
Sliding a Timeline Selection
Like Edit selections, Timeline selections can be
slid in the Main Timebase ruler.
To move a Timeline selection in the Main
Timebase ruler:
1 While pressing Alt (Windows) or Option
(Mac), move the cursor over either of the Time-
line Selection Markers (the Time Grabber ap-
pears).
2 Drag left or right to move the Timeline selec-
tion back or forward in time, while preserving
its length.
Making a Timeline selection with the Selector tool
To select all tracks, including Conductor
tracks, press Alt (Windows) or Option
(Mac) while clicking and dragging in a
Timebase ruler with the Selector tool.
Dragging a Timeline Selection Marker
Shortcuts for entering start and end values
in the Transport window are listed in “Nu-
meric Entry Shortcuts for Selection Indica-
tors” on page 454.

Pro Tools Reference Guide460
Timeline Selections to/from Edit
Selections
When the Timeline and Edit selections are un-
linked, you can copy selections between them.
To copy the current Edit selection to the Timeline:
Choose Edit > Selection > Change Edit to
Match Timeline.
To copy the current Timeline selection to an Edit
selection:
Choose Edit > Selection > Change Timeline to
Match Edit.
Navigating the Timeline with the
Edit Window Counters and
Indicators
The counters and indicators at the top of the
Edit window display the current playback loca-
tion and Edit selection. These include the Main
and Sub Counters, and the Edit Selection Start,
End, and Length indicators.
All Edit window counters and indicators (except
the Sub Counter) let you enter a location in
their counter display to navigate to a specific
time location.
The Main Counter displays the playback loca-
tion in the time format for the Main Time Scale.
The Sub Counter can be set to any of the other
Time Scale formats for another timing reference.
The Edit Selection indicators (to the right of the
Main and Sub counters) display the Start and
End times, and Length of the current Edit selec-
tion according to the Main Timebase.
The Main and Sub Counters, as well as the Edit
Selection indicators, also appear in the Trans-
port window when it is set to display Counters.
To navigate with the Edit window Main Counter (or
one of the Edit Selection indicators):
1 Do one of the following:
• Click in one of the counters.
– or –
• Press asterisk (*) on the numeric keypad to
highlight the Main Counter in the Edit
window (or the Main Counter in the Trans-
port window or Big Counter window, if ei-
ther are displayed).
2 Type in the new location. Press Period (.) to cy-
cle through to the different time fields.
3 Press Enter to accept the new value and auto-
matically locate there.
Scrolling in a Timebase Ruler
You can scroll the contents of the Edit window
by clicking and dragging in a ruler. While this
does not actually update the session’s Current
Location, it does let you conveniently shift the
display left or right for the sake of finding and
editing material.
This method of scrolling is especially useful
when using the Continuous Scrolling option
(Pro Tools HD and Pro Tools LE with DV Toolkit
2 only), which does not update or follow Time-
line selections.
Main and Sub Counters, Edit Selection indicators
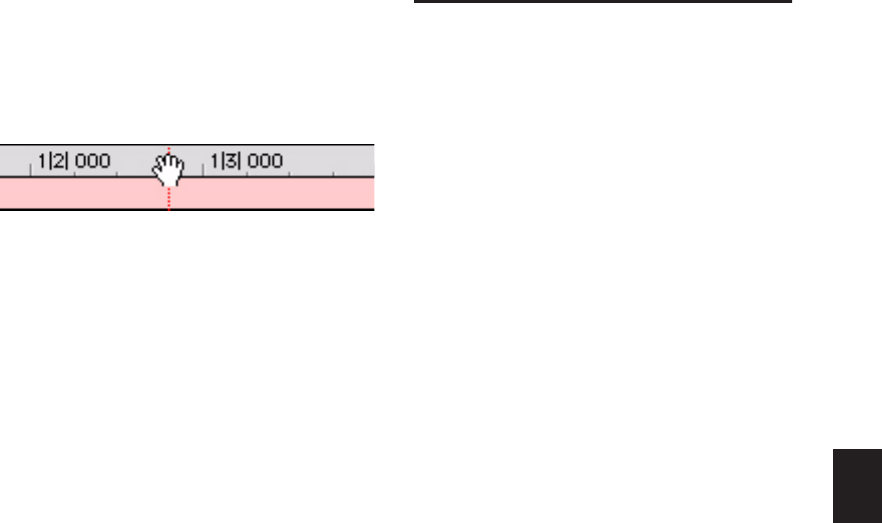
Chapter 23: Making Selections 461
To scroll the entire contents of the Edit window
from a ruler:
While pressing Control+Alt+Start (Windows)
or Command+Option+Control (Mac), drag left
or right in any of the Timebase rulers.
Scrolling with a Scroll Wheel
If you have a mouse with a scroll wheel, you can
use the scroll wheel to scroll vertically or hori-
zontally in any Pro Tools window that has a
scroll bar (such as the MIDI Event List).
To scroll a Pro Tools window vertically:
1 Place the mouse over the window you want to
scroll (for example, in the Edit window you
might want to scroll either the track display or
the Region List).
2 Scroll the scroll wheel up or down to scroll the
window up or down.
To scroll a Pro Tools window horizontally:
1 Place the mouse over the window you want to
scroll (for example, in the Edit window you
might want to scroll either the track display or
the Region List).
2 Shift-scroll the scroll wheel up or down to
scroll the window to the left or right.
Auto-Scrolling Tracks in the
Mix and Edit Windows
(Pro Tools HD Only)
If you are working with more tracks than can be
displayed at one time in the Mix or Edit win-
dows, you can select a track in one window and
Pro Tools will automatically scroll to that track
in both windows.
To auto-scroll the Mix and Edit windows to show a
track, do one of the following:
In the Track List, Right-click the track name
and select Scroll Into View from pop-up menu.
– or –
In the Track List, Control-click (Mac) the track
name and select Scroll Into View from pop-up
menu.
The track becomes selected, and the Mix and
Edit windows both scroll to display the selected
track.
Scrolling in a ruler
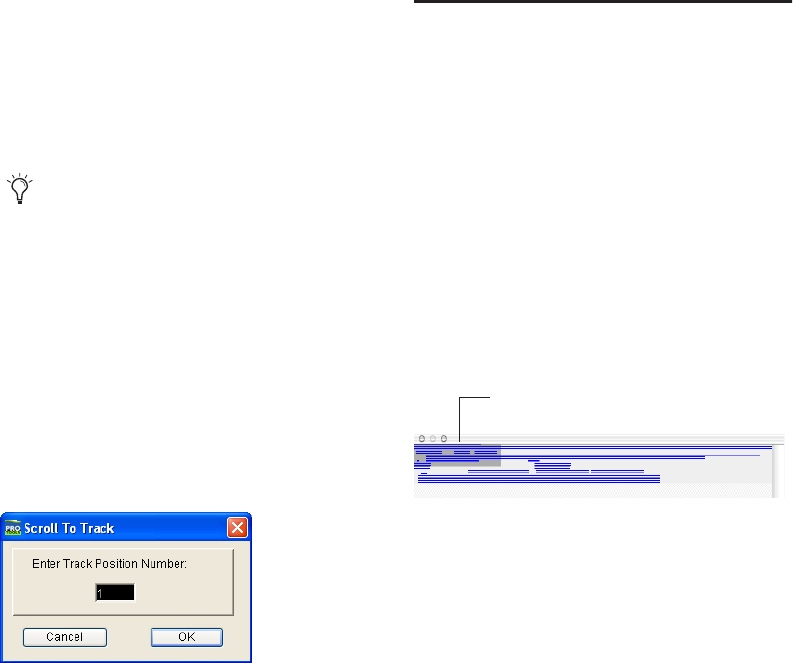
Pro Tools Reference Guide462
Navigating to Tracks Using Track
Position Numbers
With Track Number View enabled, each track is
assigned a number corresponding to its position
in the Mix and Edit Windows. You can scroll di-
rectly to any track by its positional number.
To navigate directly to any track using Track
Position Numbers:
1 Choose View > Track Number.
2 Do one of the following:
• Choose Track > Scroll to Track.
– or –
• Press Control+Alt+F (Windows) or Com-
mand+Option+F (Mac).
3 In the Scroll To Track dialog, enter the Track
Position Number.
4 Click OK.
The track is selected, and the windows scroll as
follows:
• The Edit window tracks scroll to bring the se-
lected track as close to the top as possible.
• The Mix window tracks scroll to bring the se-
lected track as close to the left as possible.
The Universe Window
(Pro Tools HD and Pro Tools LE with
DV Toolkit 2 Only)
The Universe window displays an overview of
the entire session, representing audio and MIDI
material on all tracks that are not hidden (in-
cluding tracks that are inactive, or that contain
offline regions). The order in which material is
displayed in the Universe window corresponds
to the track order in the Edit window.
To open the Universe window:
Choose Window > Universe.
Audio material residing in audio tracks is repre-
sented by a single, horizontal line in the Uni-
verse window. Each channel in a stereo or multi-
channel track is represented individually.
Since Auxiliary Input, Master Fader, and VCA
Master tracks do not contain audio, they are dis-
played as blank areas in the Universe window.
MIDI and Instrument tracks containing MIDI
data are represented by single, horizontal lines.
When tracks are reordered, Track Position
Numbers are reassigned to keep them in nu-
merical sequence.
Scroll To Track dialog
Universe window
shaded area indicates what’s
visible in the Edit window
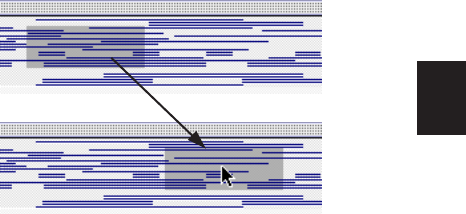
Chapter 23: Making Selections 463
Resizing the Universe Window
Even though the Universe window can be re-
sized horizontally and vertically, the length of
the entire session is always displayed in the Uni-
verse window. If the Universe window is resized
so some of the session’s track are not displayed,
a vertical scroll bar becomes available.
Shaded Area in the Universe Window
The shaded area in the Universe window repre-
sents what is visible in the Edit window. If you
change what is displayed in the Edit window—
by zooming, scrolling horizontally or vertically,
hiding or showing tracks, or changing track
heights—the highlighted area in the Universe
window updates.
During playback, if the Edit window is set to
scroll, the highlighted area in the Universe win-
dow also scrolls.
Scrolling in the Universe Window
By clicking in the Universe window, you can au-
tomatically scroll, either horizontally or verti-
cally, the material displayed in the Edit window.
This provides a convenient method of locating
anywhere in the session, or adjusting which
shown tracks are visible in the Edit window.
To move the highlighted area in the Universe
window:
1 Choose Window > Universe.
2 Drag the highlighted area to a different posi-
tion in the Universe window to affect which
tracks are displayed in the Edit window.
When all tracks are visible in the Edit window
and the session is zoomed all the way out, with
all regions visible, the entire Universe window is
shaded.
Pro Tools Reference Guide464
Chapter 24: Editing Regions and Selections 465
Chapter 24: Editing Regions and
Selections
Regions are the basic building blocks for arrang-
ing audio and MIDI in Pro Tools. Understanding
how regions are created, edited, and arranged is
essential to taking full advantage of the editing
capabilities of Pro Tools.
This chapter covers basic editing functions as
they apply to regions and region groups, and se-
lections, which for the most part apply to both
MIDI and audio data.
Creating New Regions
Pro Tools provides several commands for creat-
ing regions and region groups, each of them
having a slightly different effect on the selec-
tion. When you create a new region or region
group, it appears in the Region List and in the
track’s playlist. When creating a new region
from an existing region, the original region re-
mains in the Region List.
For editing procedures more specific to
MIDI, see Chapter 27, “MIDI Editing.”
For editing procedures specific to video, see
“Video Regions” on page 921.
For details on how these new regions are au-
tomatically named, see “Auto-Naming Op-
tions” on page 197.
For information on automatically-created
regions, see “Region Types” on page 403.
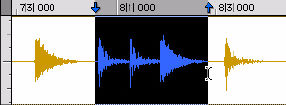
Pro Tools Reference Guide466
Capture Region Command
The Capture Region command defines a selec-
tion as a new region and adds it to the Region
List. From there, the new region can be dragged
to any existing tracks.
To capture a new region:
1 With the Selector tool, click and drag within
an existing region to select the material for the
new region.
2 Choose Region > Capture.
3 Enter a name for the new region and click OK.
The new region appears in the Region List. The
original region remains intact and unchanged.
Separate Region Commands
The Separate Region commands define a selec-
tion within an existing region, or a partially se-
lected region, as a new region and separate it
from surrounding material.
New regions appear in the tracks in which they
are created, separate from the data surrounding
them. They also appear in the Region List.
There are three different Separate Region com-
mands:
At Selection (or Edit Cursor) Creates new region
boundaries at the selection start and end points.
If there is no selection and the edit cursor is
placed within the region, the region is split into
two new regions at the insertion point.
On Grid Creates new regions according to the se-
lected Grid value (see “Defining the Grid Value”
on page 656).
At Transients Automatically creates region
boundaries on detected transients within a se-
lection. This uses the same algorithm for tran-
sient detection as the Tab to Transients feature
(see “Tabbing to Transients” on page 457). On
Elastic Audio–enabled tracks, the Separate At
Transients command uses the transient events
detected by Elastic Audio analysis (see “Elastic
Audio Analysis” on page 505).
To separate one or more regions at the selection
(or at the edit cursor):
1 Do one of the following:
• With the Selector tool, make an Edit selec-
tion.
• With the Selector tool, click at the point
where you want to separate the region.
2 Do one of the following:
• Choose Edit > Separate Region > At Selec-
tion.
• Press Control+E (Windows) or Com-
mand+E (Mac).
• With an Edit selection, Right-click near the
cursor position or selection and choose
Separate from the pop-up menu.
3 If the Editing preference for Auto-Name Sepa-
rated Regions is disabled, enter a name for the
new region when prompted, then click OK.
To separate regions according to the current grid
resolution:
1 Make an Edit selection.
2 Choose Edit > Separate Region > On Grid.
Selecting a region portion
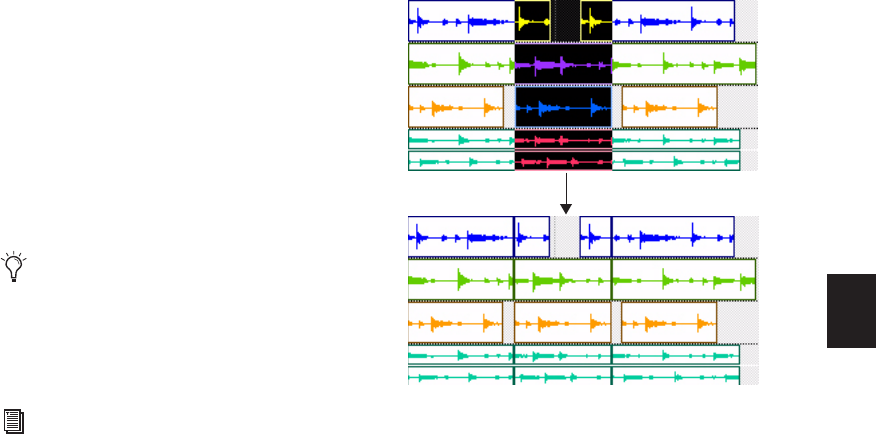
Chapter 24: Editing Regions and Selections 467
To separate regions at transients:
1 Make an Edit selection.
2 Choose Edit > Separate Region > At Transients.
Auto-Name Separated Regions Option
With the Auto-Name Separated Regions option
in the Editing Preferences page selected,
Pro Tools automatically names separated re-
gions for you. The name is a numbered variation
of the original region’s name.
By separating a region, additional regions are
auto-created from data on either side of the sep-
aration, which have new numbers assigned to
their names. The original region remains intact
and unchanged on the Region List.
Separating Multiple Tracks
Figure 25 illustrates a separation across three
mono audio tracks and one stereo track. For
some tracks, the selection resides within a re-
gion, while others reside at the start or end of a
region.
Once separated, this material can be moved or
copied to another location.
The Region List can quickly fill up with
auto-created regions. For easier region man-
agement, click the Region List pop-up menu,
deselect Show > Auto-Created to hide all
auto-created regions in the Region List.
If the Separate Region Operates On All Re-
lated Takes option (Editing Preferences
page) is selected and you are editing a re-
gion that is one of a number of related takes
with the same User Time Stamp (for exam-
ple, as created with loop recording), the Sep-
arate Region command affects each take.
For more information see, “Editing Prefer-
ences for Takes” on page 353.
Figure 25. Separating across multiple tracks
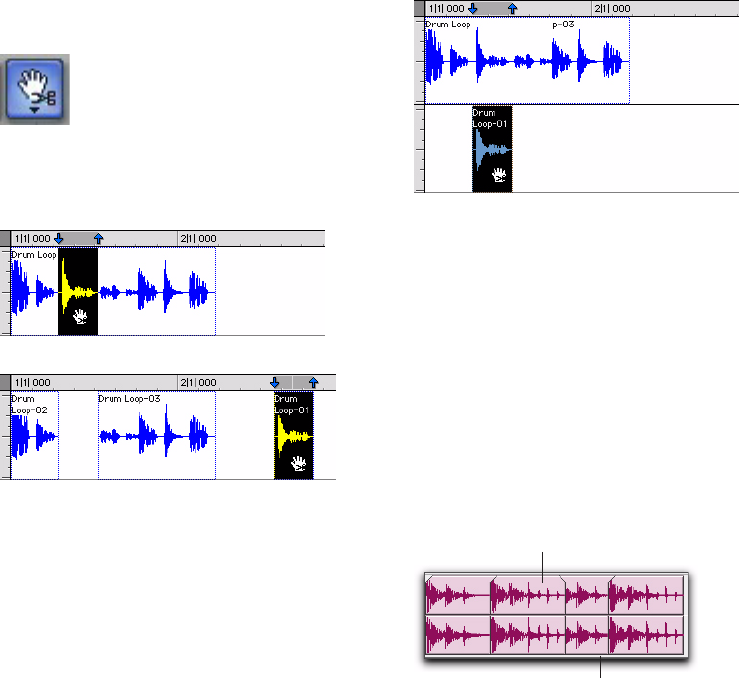
Pro Tools Reference Guide468
Separation Grabber Tool
You can use the Separation Grabber tool to auto-
matically separate an Edit selection and move it
to another location or another track.
To separate a selection with the Separation
Grabber tool:
1 With the Selector tool, make an Edit selection.
The selection can reside within a single region,
across adjacent regions within the same track, or
across multiple tracks.
2 From the Grabber tools pop-up menu, choose
the Separation Grabber tool.
3 Click and drag the selection to the new loca-
tion, or to another track.
A new region (or regions) containing the previ-
ous selection is created, separate from the origi-
nal selection. New regions are also created from
the material outside the original selection.
To separate a selection without affecting the
original regions:
1 With the Selector tool, make an Edit selection.
The selection can reside within a single region,
across adjacent regions within the same track, or
across multiple tracks.
2 From the Grabber tools pop-up menu, choose
the Separation Grabber tool.
3 While pressing Alt (Windows) or Option
(Mac), click and drag the selection to the new lo-
cation, or to another track.
New regions containing the previous selection
are created and placed at the new location. The
original selection and regions remain intact.
Region Overlap and Underlap
When a tick-based audio track has multiple re-
gions, an increase in tempo can cause neighbor-
ing regions to overlap. Audio regions can be set
to display a small “dog-ear” corner to indicate
overlapping region boundaries.
Separation Grabber tool
Dragging later in track with Separation Grabber tool
before after
Dragging to another track with the Separation Grabber
tool
Region overlap and underlap
Overlap region
Underlap region

Chapter 24: Editing Regions and Selections 469
To toggle the display of overlap and underlap
region boundaries:
Choose View > Region > Overlap.
Changing Region Overlap/Underlap
After tempo changes with tick-based audio, and
other edits, regions may overlap in undesired
ways. To correct this, a region can be brought to
the front, or sent behind neighboring regions as
needed.
To change the region overlap or underlap:
1 In the Edit window, choose the region or re-
gions you want to re-order.
2 Do one of the following:
• Choose Region > Bring to Front to make
the region overlap the neighboring re-
gions.
– or –
• Choose Region > Send to Back to make the
region underlap the neighboring regions.
If multiple overlapping regions are selected,
Pro Tools will apply the command to each re-
gion as that region relates to the neighboring re-
gion on the right.
Healing Separated Regions
The Heal Separation command returns sepa-
rated regions to their original state—provided
the regions are still next to each other and their
relative start and end points have not changed
since the separation.
If you have trimmed or otherwise changed the
start or end points of the two regions, or moved
them further away from each other, you will not
be able to repair them with the Heal Separation
command. It is not possible to heal two regions
created from different audio files.
To heal a separation between two regions:
1 With the Selector tool, make a selection that
includes part of the first region, the entire sepa-
ration between the regions, and part of the sec-
ond region.
2 Choose Edit > Heal Separation.
If the regions do not heal with Heal Separation, do
one of the following to return the separated
regions to a single region:
Delete one of the two separated regions (ver-
ify that Slip mode is enabled so the gap does not
close) and use the Trimmer tool to expand the
remaining region to its original length (see “Us-
ing the Trimmer Tools” on page 433).
– or –
Delete both of the separated regions and drag
the original region from the Region List to the
original location (see “Placing Regions in
Tracks” on page 647).
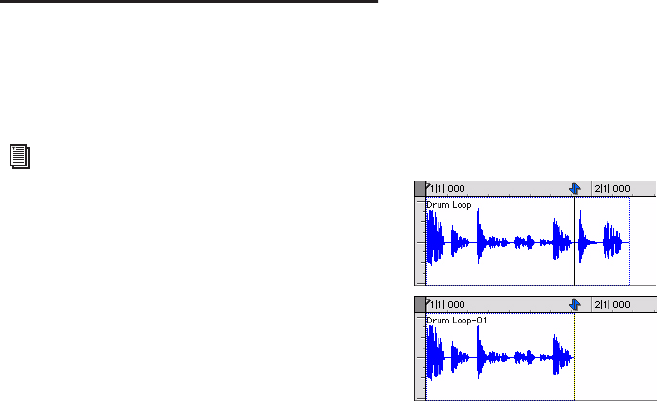
Pro Tools Reference Guide470
Trimming Regions
In addition to the Trimmer tools, Pro Tools pro-
vides several options for editing region and re-
gion group boundaries.
Trim Region to Selection
Command
The Trim Region to Selection command re-
moves data before and after a region or MIDI
note selection, leaving only the selection. This
command lets you quickly remove all data in a
region (and in some instances the entire track)
except for the current selection.
To trim unwanted data from a region or note:
1 With the Selector tool, select a portion of a re-
gion or note (or a range of notes).
2 Choose Edit > Trim Region > To Selection to
remove material outside of the selection.
Trim Region to Insertion
Commands
You can trim a region or MIDI note by automat-
ically removing the material between the Edit
insertion point and the start or end point of the
region.
To trim from a start point to insertion:
1 With the Selector tool, click inside the region
or note where you want the new start point to
be.
2 Choose Edit > Trim Region > Start To Inser-
tion. The region’s start point is automatically
trimmed to the insertion point.
To trim from an end point to insertion:
1 With the Selector tool, click inside the region
or note where you want the new end point.
2 Choose Edit > Trim Region > End To Insertion.
The region’s end point is automatically trimmed
to the insertion point.
Trim to Fill Selection Commands
The Trim to Fill Selection commands let you au-
tomatically reveal underlying material in the
gaps between regions, as follow:
To trim from a start point to fill gaps:
1 With the Selector tool, select across at least
one gap between regions.
2 Choose Edit > Trim Region > Start to Fill Selec-
tion.
For information on using the Trimmer
tools, see “Using the Trimmer Tools” on
page 433.
Region end trimmed to insertion
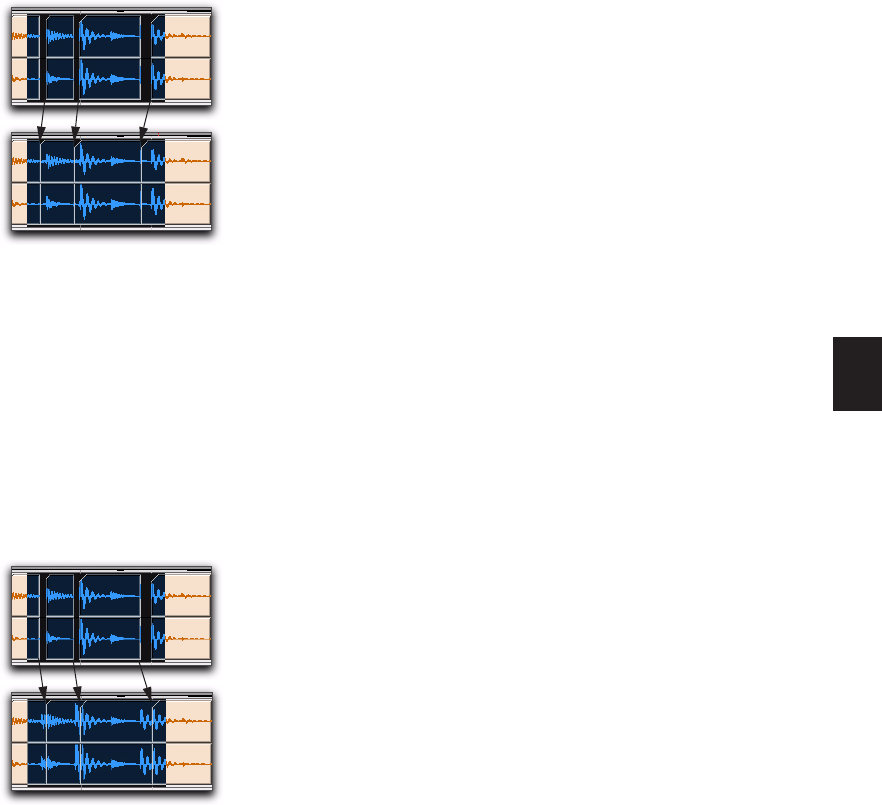
Chapter 24: Editing Regions and Selections 471
The start point of the region behind the gap is
automatically trimmed (expanded) to the previ-
ous region, or as far as possible if there is not
enough underlying material to cover the gap.
To trim from an end point to fill gaps:
1 With the Selector tool, select across at least
one gap between regions.
2 Choose Edit > Trim Region > End To Fill Selec-
tion.
The end point of the region in front of the gap is
automatically trimmed (expanded) to the next
region, or as far as possible if there is not enough
underlying material to cover the gap.
To trim from a region’s start and end points to fill
gaps:
1 With the Selector tool, select across at least
one gap between regions.
2 Choose Edit > Trim Region > To Fill Selection.
The start point of the region behind the gap is
automatically trimmed (expanded) to the previ-
ous region, or as far as possible if there is not
enough underlying material to cover the gap;
and the end point of the region in front of the
gap is automatically trimmed (expanded) to the
next region, or as far as possible if there is not
enough underlying material to cover the gap.
Trimming with Nudge
You can trim the start and end points of a region
by nudging them.
To trim a region’s start or end point by the Nudge
value:
1 Configure the Nudge value (see “Defining the
Nudge Value” on page 472).
2 With the Time Grabber tool, select the region
you want to trim.
3 Do one of the following:
• While pressing Alt (Windows) or Option
(Mac), press Plus (+) or Minus (–) on the nu-
meric keypad to trim the region’s start
point by the Nudge value.
– or –
• While pressing Control (Windows) or
Command (Mac), press Plus (+) or Minus
(–) on the numeric keypad to trim the re-
gion’s end point by the Nudge value.
Region start trimmed to fill gap
Region end trimmed to fill gap
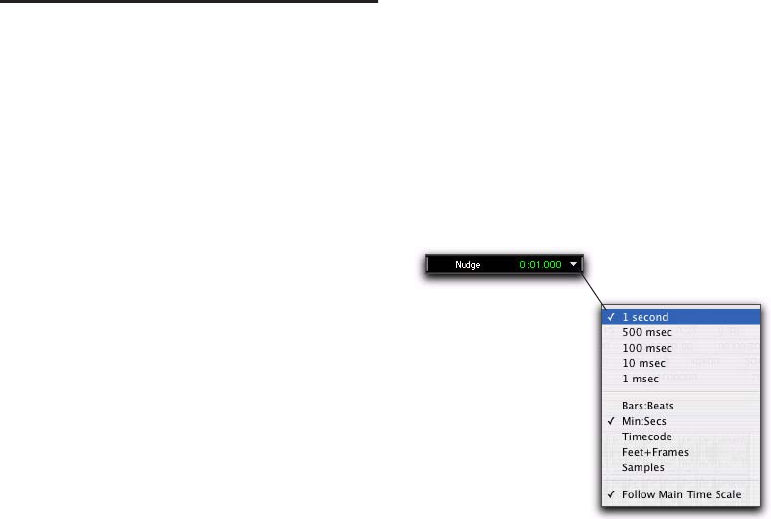
Pro Tools Reference Guide472
Nudging Regions
Pro Tools can nudge regions (or MIDI notes) by
precise increments with the Plus (+) and Minus
(–) keys on the numeric keypad. The amount of
the nudge is determined by the value specified
in the Nudge Value pop-up menu. The Nudge
function can be used in any of the Edit modes.
Nudging can be invaluable for adjusting the
“groove” of a musical phrase or a sound effect
relative to other elements in the session. Since
Pro Tools can nudge material during playback,
you can nudge continuously in real time to ad-
just the timing relationship between tracks.
Nudge can also be used to adjust the placement
of automation breakpoints. For more informa-
tion, see “Editing Automation” on page 803.
Defining the Nudge Value
The Nudge value determines how far regions
and selections are moved when nudging.
Start and end points for selections can also be
moved by the Nudge value (see “Nudging Selec-
tion Start/End Points” on page 453). In addi-
tion, regions can be trimmed by the Nudge
value (see “Trimming with Nudge” on
page 471).
To set the Nudge value:
1 Do one of the following:
• From the View > Main Counter menu, se-
lect the Time Scale for the Nudge value.
– or –
• To keep the Main Time Scale and use a dif-
ferent time format for the Nudge value, de-
select Follow Main Timebase in the Nudge
Value pop-up menu.
2 Specify a Nudge value by doing one of the fol-
lowing:
• From the Nudge value pop-up menu in the
Edit window, select the Nudge value.
– or –
• To specify a Nudge value not listed in the
Nudge Value pop-up menu, click the
Nudge Value indicator and type in the
value.
Nudging with Nudge
To nudge one or more region:
1 Configure the Nudge value. For details, see
“Defining the Nudge Value” on page 472.
2 With the Time Grabber or Selector tool, select
the region, regions, or region groups you want
to nudge. The regions can reside on multiple
tracks. Only regions that are completely selected
are nudged.
3 Do one of the following:
• On the numeric keypad, press Plus (+) to
move the selection forward by the Nudge
value.
– or –
• Press Minus (–) to move the selection back
by the Nudge value.
Nudge Value pop-up menu showing Time Code
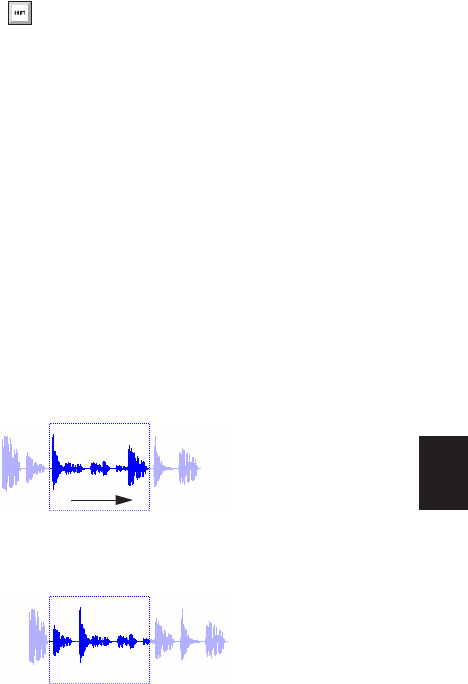
Chapter 24: Editing Regions and Selections 473
The Nudge command works the same regardless
of the Edit mode. Adjacent regions are over-
lapped in Shuffle mode, the Spot dialog does not
appear when in Spot mode, and shifted material
does not snap to the Grid when in Grid mode.
Nudging Regions on Multiple Tracks and
in Multichannel Tracks
When nudging a selection of multiple regions
within a single track or across multiple tracks,
that also contains silence, any automation data
residing within the silence is also nudged.
Nudging by Next Nudge Value
In addition to nudging by the current Nudge
value, you can also nudge by the next, larger
value in the Nudge pop-up menu.
For example, if the Nudge value is set to 1 frame
and you want to nudge by a larger valuer, you
can nudge by the next, larger Nudge value of 10
frames.
To nudge forward or back by the next, larger Nudge
value:
1 Enable Commands Keyboard Focus (see “Key-
board Focus” on page 20).
2 Select the regions or notes you want to nudge.
3 Do one of the following:
• Press Forward Slash (/) to nudge the se-
lected material forward by the next Nudge
value.
• Press M to nudge the selection back by the
next Nudge value.
Nudging a Region’s Contents
Often a region’s start point will reside at the cor-
rect location, perhaps at a SMPTE frame or bar,
but the material within the region starts too late
or early. You can, in effect, nudge a region’s au-
dio waveform or MIDI notes without displacing
the region’s start and end points.
This “sliding” of region contents is only possible
if there is material residing outside the region’s
start and end points—from the region having
been trimmed, or perhaps captured from a larger
region.
When Commands Keyboard Focus is not
enabled, press Start+Forward Slash (/)
(Windows) or Control+Forward Slash (/)
(Mac) to nudge the selected material for-
ward by the next Nudge value, and press
Start+M (Windows) or Control+M (Mac) to
nudge the selected material back by the next
Nudge value.
Nudging region content
Region contents are slid, moving waveform material
into and out of the current region boundaries
before
after

Pro Tools Reference Guide474
To nudge the contents of a region without
changing the region start and end points:
1 Configure the Nudge value (see “Defining the
Nudge Value” on page 472).
2 With the Time Grabber tool, select the region
whose contents you want to nudge.
3 While pressing the Start key (Windows) or
Control (Mac), press Plus (+) or Minus (–) on the
numeric keypad to move the material by the
Nudge value.
Quantizing Regions to Grid
The Quantize to Grid command adjusts the
placement of selected audio and MIDI regions
so that their start points (or sync points, if
present) align precisely to the nearest Grid
boundary.
To quantize individual MIDI notes or Elastic Au-
dio Events, use the Quantize Event Operations.
You can also use the Quantize Event Operation
to quantize audio regions (see “Quantize” on
page 558).
To quantize one or more regions:
1 Select the Grid value (see “Defining the Grid
Value” on page 656).
2 With the Selector or Time Grabber tool, select
the region or regions you want to quantize. The
regions can be on multiple tracks. Only regions
that are entirely selected will be quantized.
3 Choose Region > Quantize to Grid. Region
start times (or sync points) are aligned to the
nearest boundaries for the defined Grid.
For MIDI regions, only the regions are quantized
and all MIDI data contained within the regions
(such as notes) are moved equally, thereby re-
taining their rhythmic relationships.
For Elastic Audio regions, only the regions are
quantized and all Elastic Audio Events con-
tained within the regions (such as transient
events) are moved equally, thereby retaining
their rhythmic relationships.
Editing Stereo and
Multichannel Tracks
Regions on individual channels within stereo
and multichannel tracks cannot be indepen-
dently selected. All selections for these tracks are
time-based, which means that selections made
with the Selector or Time Grabber tool extend to
each and every channel in the track.
When regions in multichannel tracks are edited
with any of the Trimmer tools or dragged with
the Time Grabber tool, material on all channels
is affected equally as a group.
Split Selected Tracks
To edit a specific channel within a stereo or
multichannel track without affecting the other
channels, you can split the track into separate
mono tracks. Once the edits have been made to
the separated material, you can then drag or
copy it back to the original multichannel track.
To quantize individual MIDI notes or Elas-
tic Audio Events, use the Quantize Event
Operations. You can also use the Quantize
Event Operation to quantize audio regions.
For more information see “Quantize” on
page 558).
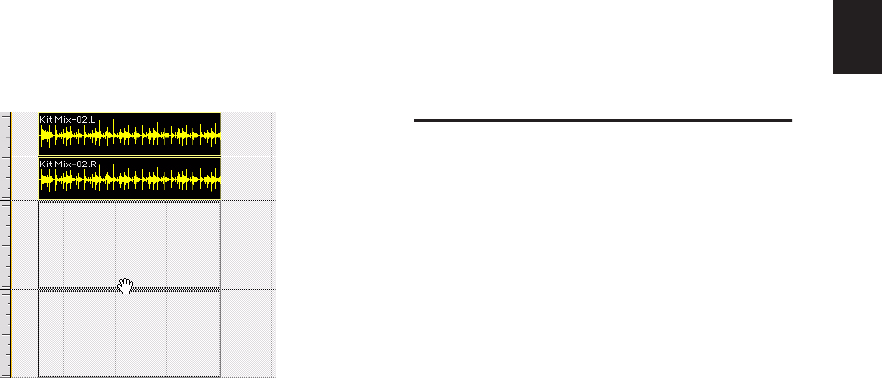
Chapter 24: Editing Regions and Selections 475
To split a stereo or multichannel track:
1 Select one or more stereo or multichannel
tracks (see “Selecting Tracks” on page 146).
2 Choose Track > Split Into Mono. Regions from
the channels on the selected tracks are placed
on new, mono audio tracks.
Names for the new tracks are based on the
source track name and channel suffix. For exam-
ple, if a stereo track called “Funkit” is split, two
new tracks called “Funkit.L” and “Funkit.R” are
created.
Output and send assignments and volume and
pan settings are retained in the new tracks.
Mono equivalents of stereo and multi-mono
plug-in assignments are assigned in the new
tracks. However, multichannel plug-in assign-
ments are not assigned in the new tracks.
Dragging Regions to and from Stereo
and Multichannel Tracks
When dragging regions to or from stereo or
multichannel tracks, the following rules apply:
Provided the number of tracks and channels
are the same for the source and destination, you
can drag regions between multichannel tracks
and mono tracks.
The source and destination for dragged re-
gions can be mixed. For example, you can drag
regions from a 5.0 track (containing five chan-
nels) to a stereo track and three mono audio
tracks.
When dragging multichannel regions to
mono tracks, the destination tracks must be ad-
jacent.
When dragging regions from mono tracks to a
multichannel track, the source tracks need not
be adjacent.
Multichannel regions can also be dragged from
the Region List, to multichannel tracks of the
same format, groups of mono audio tracks, or a
combination of both.
Conversely, a collection of single, mono regions
can be dragged from the Region List to multi-
channel tracks—provided the dragged number
of regions matches the number of channels in
the destination track.
Consolidate Command
During the course of normal edit operations,
any track can accumulate many regions. How-
ever, once a track or track range (such as a verse
or chorus) reaches a satisfactory state, you may
want to consolidate multiple regions into a sin-
gle region.
When consolidating an entire audio track or
just an Edit selection, a new audio file is written
that consists of the entire selection, including
any blank space.
Dragging a stereo region to two mono audio tracks
Pro Tools Reference Guide476
When consolidating, muted regions are treated
as silence. Otherwise, whether or not a track is
muted, or contains Mute automation, does not
affect the Consolidate command.
To consolidate regions within a track:
1 Do one of the following:
• Using the Time Grabber or Selector tool, se-
lect the regions you want to consolidate.
– or –
• To select all regions in a track, triple-click in
its playlist with the Selector tool.
2 Choose Edit > Consolidate.
Compacting an Audio File
The Compact Selected command deletes unused
portions of audio files to conserve disk space,
and to prepare for cleaner hard drive back-ups.
The Compact Selected command also deletes
any audio files for which there are no regions on
tracks referencing those files.
Because it permanently deletes audio data, the
Compact Selected command should be used
only after you have completely finished your
editing and are sure that you have no further use
for the unused audio data.
The Compact Selected command can pad the re-
gions of the compacted file by a selectable
amount. If regions in your session use cross-
fades, or if you want to pad the regions for the
sake of any future trimming, you should enter
an appropriate amount of padding (in millisec-
onds).
To compact an audio file:
1 From the Region List pop-up menu, choose Se-
lect > Unused. All regions that have not been
placed in a track in the current session are high-
lighted in the Region List.
2 To remove all of these unused audio regions,
choose Clear Selected from the Region List pop-
up menu. When the dialog appears, choose Re-
move.
3 In the Region List, select the region or regions
you want to compact.
4 From the Region List pop-up menu, choose
Compact Selected.
5 Enter the amount of padding in milliseconds
that you want for each region in the file.
6 Click Compact to compact the file or Cancel
to cancel the command.
Once the Compact operation has been com-
pleted, the session is saved automatically.
Consolidating an audio track does not con-
solidate underlying automation data. To
create a single file with automation data
applied to the audio, use Bounce to Disk
(see “Bounce to Disk” on page 836).
The Compact Selected command is destruc-
tive and cannot be undone. It permanently
alters the original audio files. There is no
way to recover data deleted by this com-
mand.
Chapter 24: Editing Regions and Selections 477
Processing Audio with
AudioSuite Plug-ins
The AudioSuite plug-ins included with your
Pro Tools system can be used to process and
modify audio regions or even entire audio files.
Do this in order to apply a specific AudioSuite
process (such as Normalization or DC Offset Re-
moval) any number of audio regions in your ses-
sion.
TCE (Time Compression and
Expansion) Edit To Timeline
Selection
(Pro Tools HD and Pro Tools LE with
DV Toolkit 2 Only)
When the Edit and Timeline selections are un-
linked, you can compress or expand an audio se-
lection to fit the Timeline selection. On audio
tracks, TCE Edit to Timeline Selection uses the
TCE AudioSuite Plug-in selected in the Process-
ing preferences (see “Processing Preferences” on
page 86). On Elastic Audio–enabled tracks, TCE
Edit To Timeline Selection uses the track’s se-
lected Elastic Audio plug-in (see “Elastic Audio
Plug-ins” on page 507).
To fit an Edit selection to the Timeline:
1 Deselect Options > Link Timeline and Edit Se-
lections.
2 With the Selector tool, select the audio mate-
rial to be compressed or expanded.
3 In any Timebase ruler, select the time range
where you want to fit the audio material.
4 Choose Edit > TCE Edit to Timeline Selection.
The Edit selection is compressed or expanded to
the length of the Timeline selection.
TCE Edit to Timeline Selection on
Multiple Tracks and Channels
The TCE Edit to Timeline command can be used
on multichannel selections, and selections
across multiple tracks. All regions are com-
pressed or expanded equally by the same per-
centage value, based on Edit selection range.
This ensures that the rhythmic relationship be-
tween the different channels or tracks is main-
tained.
Fitting an Audio Region to an Edit
Selection
Regions can be dragged from the Region List to
fit within an Edit selection. The dragged region
is compressed or expanded to fit within the se-
lection. On audio tracks, fitting an audio region
to the Edit selection uses the TCE AudioSuite
Plug-in selected in the Processing preferences
(see “Processing Preferences” on page 86). On Elas-
tic Audio–enabled tracks, it uses the track’s se-
lected Elastic Audio plug-in (see “Elastic Audio
Plug-ins” on page 507).
To fit an audio region to an Edit selection:
1 With the Selector tool, make an Edit selection
in an audio track.
2 Control-Alt-drag (Windows) or Command-
Option-drag (Mac) the region from the Region
List to the track with the selection. The start of
the region is positioned at the selection start,
and the region is compressed or expanded to
match the length of the selection.
Refer to the DigiRack Plug-ins Guide for
more information about AudioSuite plug-
ins.
Pro Tools Reference Guide478
Fit to Selection on Multiple Tracks and
Channels
The Fit to Selection command supports drag-
ging multiple regions from the Region List to
multiple tracks, or multichannel tracks.
However, all dragged regions are compressed or
expanded equally by the same percentage value,
based on length of the region last clicked before
dragging.
Chapter 25: Fades and Crossfades 479
Chapter 25: Fades and Crossfades
Using Fades
You can quickly and easily apply a fade-in or
fade-out on a region, as well as crossfades be-
tween adjacent audio regions. Crossfading is the
process of fading between two regions of audio
to prevent pops, clicks, or sudden changes in
sound. Crossfades have many applications,
from smoothing transitions between regions to
creating special audio effects. The crossfade du-
ration, position, and shape are all user-defin-
able.
Fades are computed and written to disk. Cross-
fades that are written to disk are stored in a
folder named “Fade Files” within the session
folder. When you play back your track,
Pro Tools reads and plays back the fade file from
disk.
Pro Tools does not let you replace fade-ins and
fade-outs with crossfades. To add a crossfade be-
tween regions, any existing fade-ins and fade-
outs between the regions must first be deleted.
About Crossfades and Curves
To create a crossfade between two regions, use
the Selector tool to select across the end point of
the first region and the start point of the second.
The length of the selection determines the
length of the crossfade. Though fades may ap-
pear to be discrete regions, they cannot actually
be separated from the regions in which they
were created. You can, however, create fade-ins
and fade-outs for individual regions (see “Creat-
ing Fades at the Beginnings and Ends of Re-
gions” on page 487).
Use the Fades dialog to select, view, and manip-
ulate the curves used to perform fades and cross-
fades. Different volume curves can be assigned
to the fade-out and fade-in portions of cross-
fades. The Fades dialog can also render a preview
of the fade.
The following examples illustrate common
types of crossfades, and explain how the type of
selection you make determines the character of
the crossfade.
Pro Tools HD includes an AutoFade feature
that provides real-time fades without pro-
cessing them to disk (see “Using AutoFades”
on page 490).
Since crossfades are created by fading be-
tween overlapping audio material, a cross-
fade cannot be performed on regions that do
not contain audio material beyond their re-
gion boundaries.
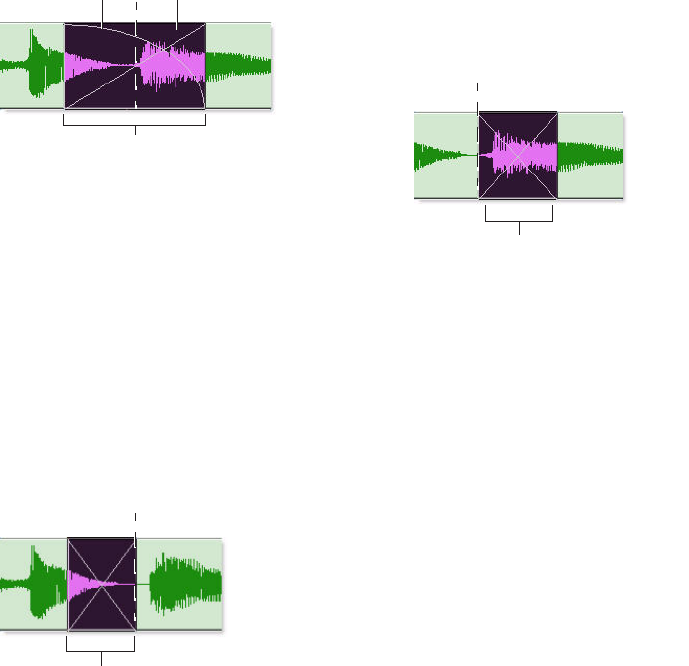
Pro Tools Reference Guide480
Standard Crossfade (Centered)
This type of selection creates a crossfade on both
sides of the splice point, which affects the vol-
ume of region 1 and region 2. It is the most
common type of crossfade.
This crossfade type requires that region 1 con-
tain audio material beyond its end point, and
region 2 contain audio material before its start
point.
Pre Crossfade
This type of selection creates a crossfade before
the splice point. This lets you maintain the vol-
ume of the very beginning of region 2 instead of
fading across it, which is useful if there is a
strong attack at the beginning of region 2 that
you want to preserve. When making selections
for crossfades that occur on the border of two re-
gions, you can use the Tab key to move the cur-
sor to the exact beginning or end of a region.
This crossfade type requires that region 2 con-
tain audio material before its start point.
Post Crossfade
This type of selection creates a crossfade after
the splice point. It is useful if you want to main-
tain the amplitude of region 1 until its very end.
When making selections for crossfades that oc-
cur on the border of two regions, you can use
the Tab key to move the cursor to the exact be-
ginning or end of a region.
This crossfade type requires that region 1 con-
tain audio material beyond its end point.
Centered crossfade
Pre crossfade
splice
point fade-in curvefade-out curve
crossfade selection
region 2
region 1
crossfade selection
region 2region 1
sp
lice
point
crossfade selection
region 2region 1
sp
lice
point
Post crossfade
crossfade selection
region 2region 1
sp
lice
point
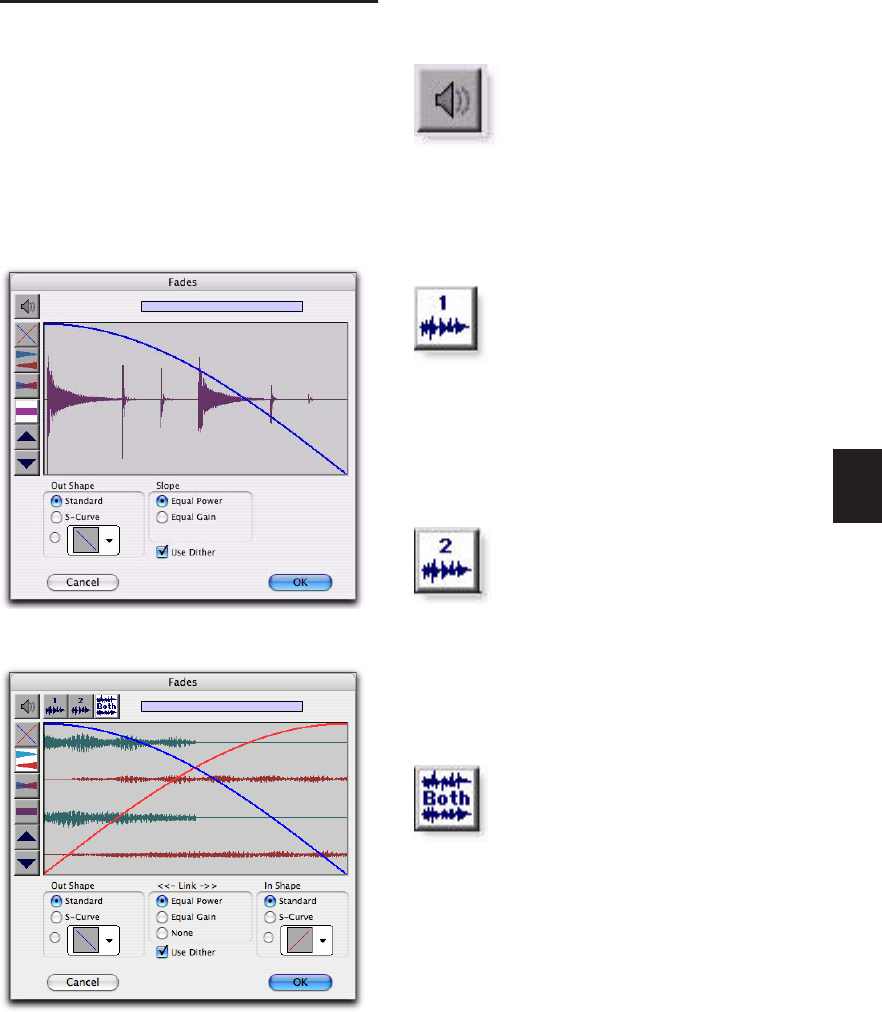
Chapter 25: Fades and Crossfades 481
Fades Dialog
When choosing the Edit > Fades command you
can use the Fades dialog to select, view, and pre-
view fades and crossfades, and to edit the curves
used to perform fades and crossfades. A fade-in
shows the In Shape settings, but not the Out
Shape settings, and likewise a fade-out shows
the Out Shape settings, but not the In Shape set-
tings.
The controls in the Fades dialog include:
Audition
Click this button to audition fades. Pro Tools
supports fade auditioning directly from your au-
dio interface outputs.
View First Track (Crossfades Only)
If you are cross-fading between more than one
track, this button allows you to view and pre-
view the audio of the first in a pair of adjacent
tracks.
View Second Track (Crossfades Only)
If you are cross-fading between more than one
track this button allows you to view and preview
the audio of the second in a pair of adjacent
tracks.
View Both Tracks (Crossfades Only)
Click this button to display the waveforms of
the first two adjacent tracks in a multitrack
crossfade.
Fades dialog, fade-out
Fades dialog, crossfade
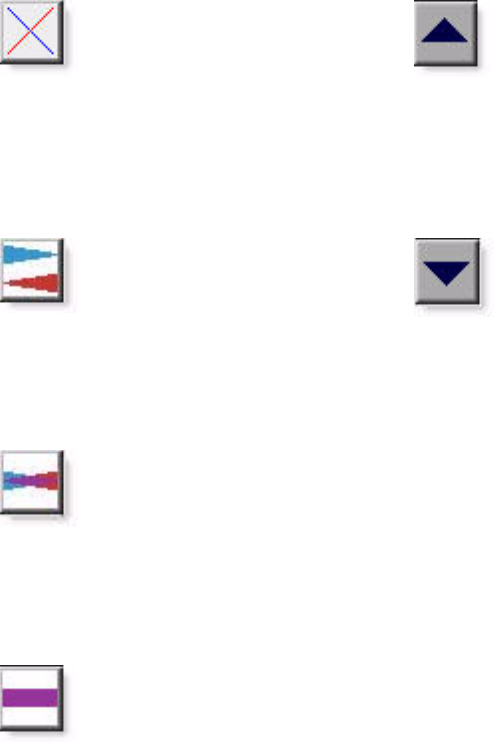
Pro Tools Reference Guide482
Fade Curves Only
Click this button to display the specified fade
curves without showing the actual audio wave-
forms. This is the default view when you open
the Fades dialog.
Fade Curves and Separate Waveforms
Click this button to display the specified fade
curves along with separate views of the fade-in
and fade-out waveforms.
Fade Curves and Superimposed Waveforms
Click this button to display the specified fade
curves along with superimposed views of the
fade-in and fade-out waveforms.
Fade Curves and Summed Waveform
Click this button to display the specified fade
curves along with a single waveform represent-
ing the summation of the any crossfaded audio.
Zoom In
Click this button to scale the view of the wave-
form’s amplitude upwards. Control-click (Win-
dows) or Command-click (Mac) for the default
view scale.
Zoom Out
Click this button to scale the view of the wave-
form’s amplitude downwards. Control-click
(Windows) or Command-click (Mac) for the de-
fault view scale.
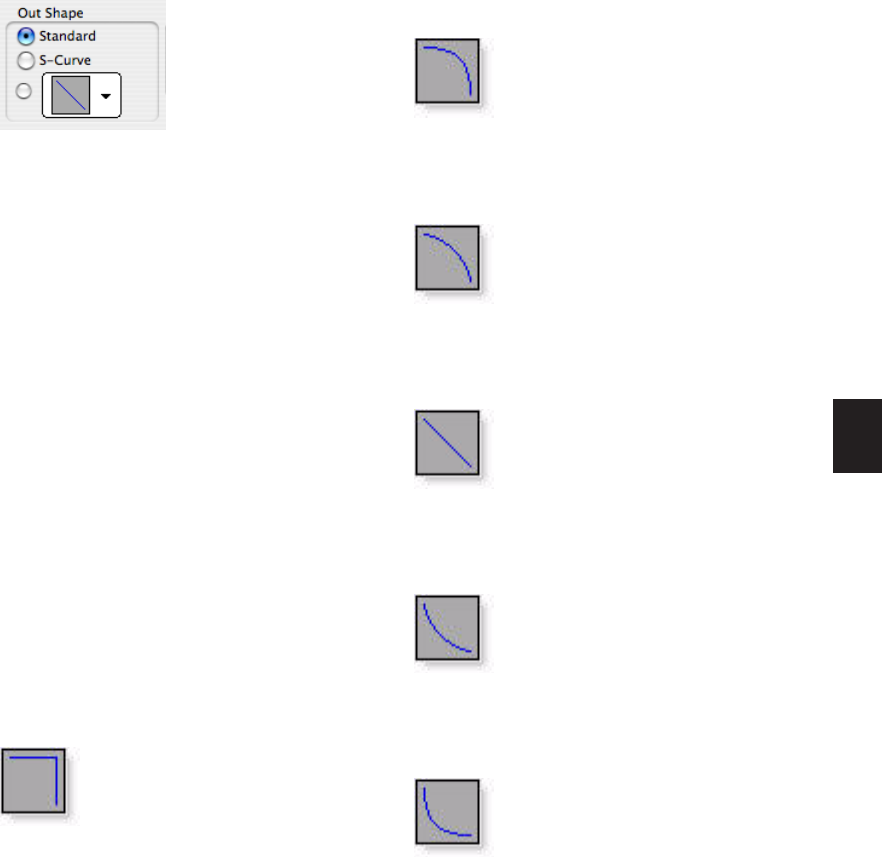
Chapter 25: Fades and Crossfades 483
Fade-Out Shape Settings
The Out Shape setting lets you define the shape
of the fade-out from a region for a fade, or from
region 1 for a crossfade.
Standard Selects a single continuous fade curve.
This creates a general-purpose fade that can be
edited by dragging the curve itself.
S-Curve Selects an S-shaped curve, which inverts
its beginning and end characteristics. This
makes it possible to fade out faster at the curve’s
start and slower at its end, for example. S-shaped
curves can be useful with material that is diffi-
cult to crossfade effectively. S-curves can be ed-
ited by dragging the curve in the curve editor.
Preset Curves Seven commonly used preset
curves are provided for fast crossfade creation.
These can be edited by dragging the end points
of the curve in the curve editor portion of this
dialog. The seven presets are as follows:
Preset Curve 1 stays at full volume through-
out the fade, then immediately drops the vol-
ume at the end of the fade.
Preset Curve 2 fades out relatively slowly,
keeping the volume fairly high throughout the
duration of the fade.
Preset Curve 3 fades out slightly faster, keep-
ing the volume slightly lower during the fade.
Preset Curve 4 fades out with a linear fade.
This is the default curve.
Preset Curve 5 fades out quickly at the begin-
ning of the crossfade.
Preset Curve 6 drops the volume even more
quickly at the beginning of the fade.
Fade-Out Shape
Preset Curve 1
Preset Curve 2
Preset Curve 3
Preset Curve 4
Preset Curve 5
Preset Curve 6
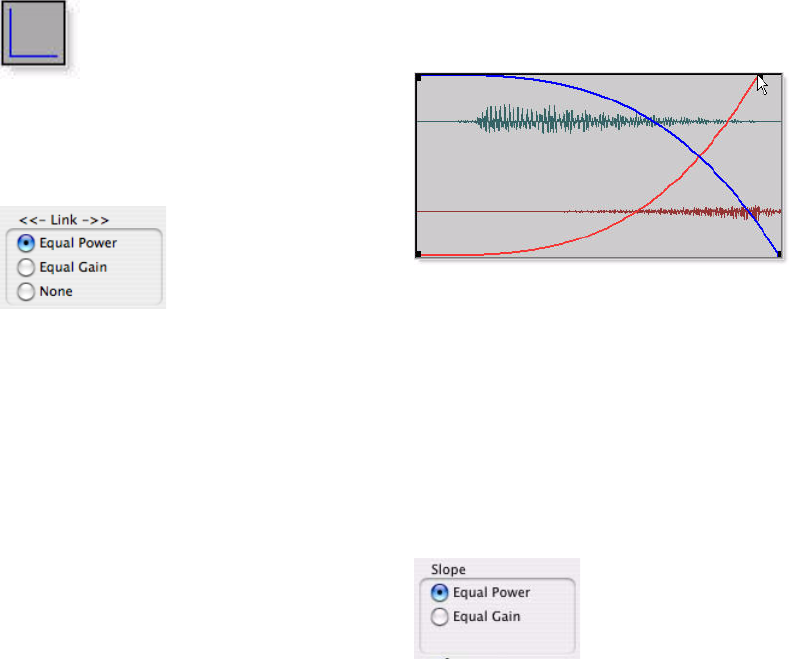
Pro Tools Reference Guide484
Preset Curve 7 silences any audio at the begin-
ning of the fade.
Link Settings
(Crossfades Only)
The Link setting links the selected fade-out and
fade-in curves of a crossfade. If you adjust one
curve, the corresponding curve is also adjusted.
This ensures that the resulting crossfade is an
equal power or equal gain crossfade, depending
on which one you select.
Equal Power Recommended for material that is
not phase coherent, as in the case of a crossfade
between two completely different types of mate-
rial. Use this option to avoid the volume drop
that can occur with an Equal Gain crossfade.
With this fade, you can Alt-click (Windows) or
Option-click (Mac) the fade curve to reset it to
its default shape.
Equal Gain Recommended for material that is
phase-coherent or nearly phase-coherent, as in
the case of a crossfade between identical re-
gions/instruments (for example, a repeated
drum loop). Use this option to avoid clipping
that can occur when using an Equal Power cross-
fade. With this fade, you can Alt-click (Win-
dows) or Option-click (Mac) the fade curve to re-
set it to its default shape.
None Disables linking between the fade-out and
fade-in curves, and lets you freely adjust them
separately, including start and end points. This
option also allows you to create custom cross-
fade shapes.
When Link is set to Equal Power or Equal Gain,
you can edit only the fade-in portion of the
curve, by pressing Alt (Windows) or Option
(Mac) while dragging. To edit only the fade-out
portion of the curve, press Control (Windows)
or Command (Mac) while dragging.
Slope Settings
(Fade-In or Fade-Out Only)
The Slope settings affect the slope of the fade-in
or fade-out. Select either equal power or equal
gain. For more information on equal power and
equal gain fades, see “Link Settings” on
page 484.
Preset Curve 7
Fade Link
Adjusting the end point of a fade curve
Fade Link
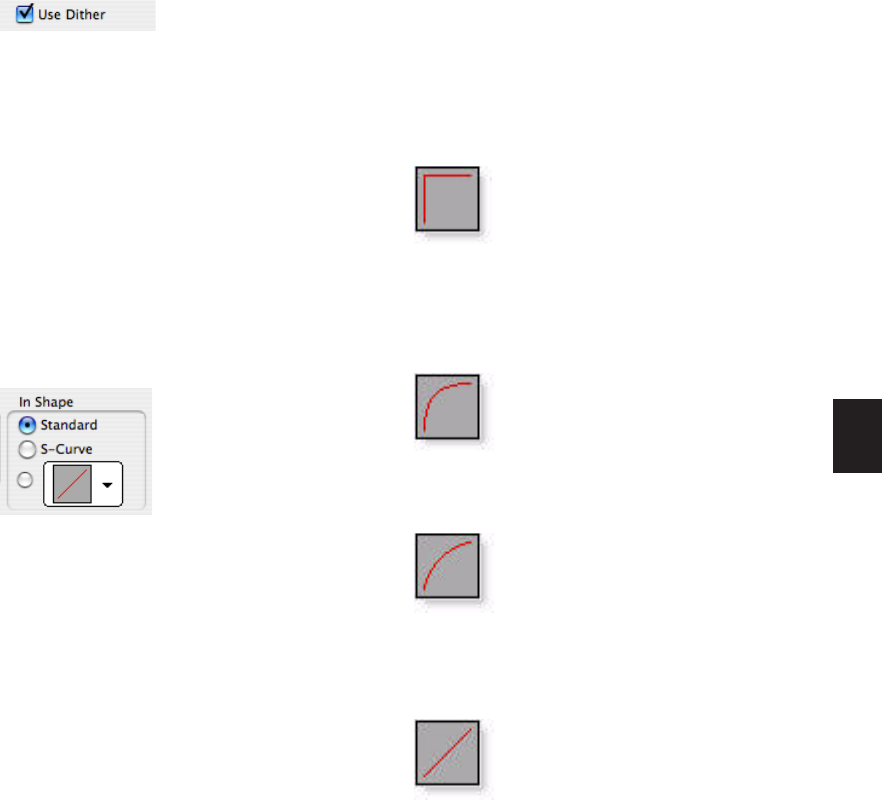
Chapter 25: Fades and Crossfades 485
Use Dither
The Use Dither option turns on a preset, noise-
shaped dither function that improves audio per-
formance when fading in or fading out of si-
lence, and crossfading between low amplitude
regions. Dithering is usually not necessary when
applying fades to regions with audio at high am-
plitudes. You can disable Dither while editing
fades in the Fades dialog to speed up previews
and fade recalculation, then re-enable Dither to
create the final fade or crossfade.
Fade-In Shape Settings
The In Shape setting lets you define the shape of
the fade-in to a region for a fade, or to region 2
for a crossfade.
Standard Selects a single continuous fade curve.
This creates a general-purpose fade that can be
edited by dragging the curve itself.
S-Curve Selects an S-shaped curve, which inverts
its beginning and end characteristics. This
makes it possible to fade in faster at the start of
the curve, and slower at the end. S-shaped
curves are useful with material that is difficult to
fade effectively. S-curves can be edited by drag-
ging the curve in the curve editor.
Preset Curves Seven commonly used preset
curves are provided for fast creation. These can
be edited by dragging the end points of the
curve in the curve editor portion of this dialog.
The seven presets are as follows:
Preset Curve 1 fades in at full volume immedi-
ately at the beginning of the fade and keeps it
there throughout the fade.
Preset Curve 2 fades in quickly in the begin-
ning, reaching full amplitude fairly early in the
fade.
Preset Curve 3 fades in moderately fast.
Preset Curve 4 fades in with a linear fade
curve. This is the default curve.
Dither option for Fades
Fade-in Shape
Preset Curve 1
Preset Curve 2
Preset Curve 3
Preset Curve 4
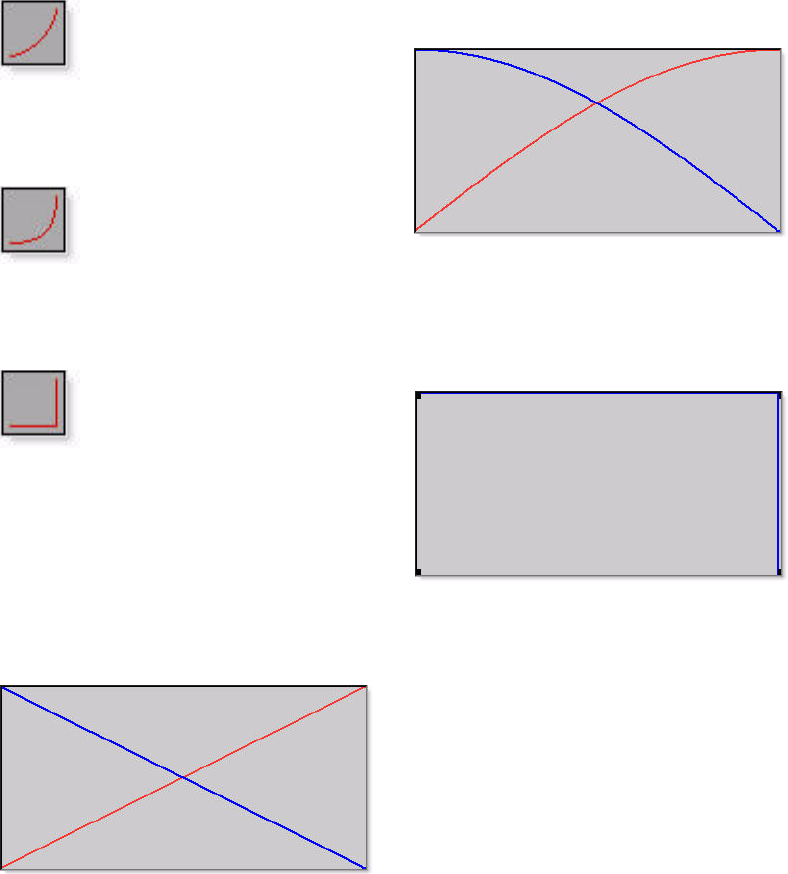
Pro Tools Reference Guide486
Preset Curve 5 fades in slowly at the begin-
ning of the fade.
Preset Curve 6 fades in even more slowly than
the previous curve.
Preset Curve 7 silences any audio until the
end of the fade.
Typical Curve Combinations
Following are the available combinations of
fade-out and fade-in curves.
Linear Crossfade This is a good general purpose
crossfade with a smooth, even transition be-
tween region 1 and region 2.
Equal Power Crossfade This is a good general
purpose crossfade useful in cases where a linear
crossfade seems to create a noticeable drop in
volume across the splice point.
Overlap Fade This combination of curves keeps
both regions at full amplitude throughout the
crossfade: region 2 “jumps in” at the beginning
and region 1 “jumps out” at the end.
Fade and Crossfade Preferences
You can set default fade and crossfade settings.
These settings load as your “base” settings when
you use the Create Fades command, and the
Fade to Start and Fade to End commands.
To set the fade and crossfade preferences:
1 Choose Setup > Preferences and click the
Editing tab.
Preset Curve 5
Preset Curve 6
Preset Curve 7
Linear Crossfade
1. Out 2. In
Equal Power Crossfade
Overlap Crossfade
1. Out 2. In
1. Out 2. In
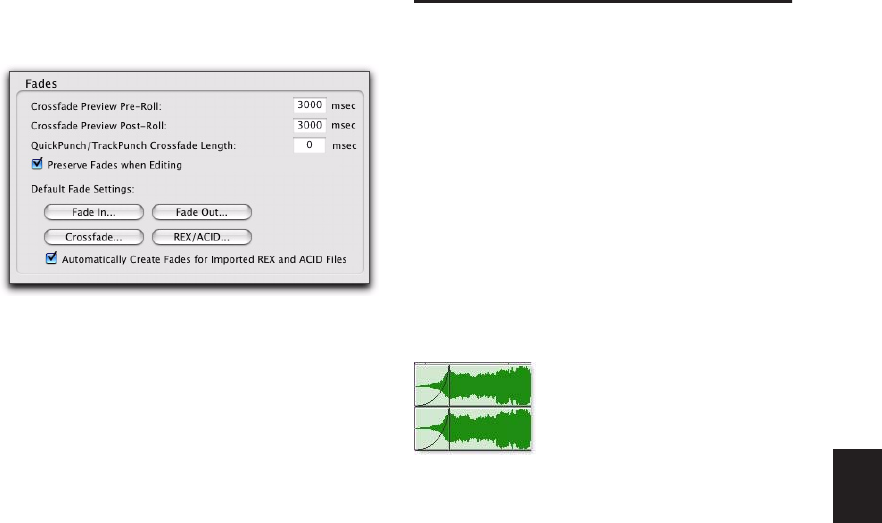
Chapter 25: Fades and Crossfades 487
2 Set the Pre-Roll and Post-Roll times for Fade
previews.
3 Click Fade In and set the default shape for
fade-ins, then click OK.
4 Click Fade Out and set the default shape for
fade-outs, then click OK.
5 Click Crossfade and set the default shape for
crossfades, then click OK.
6 Click OK.
Creating Fades at the
Beginnings and Ends of
Regions
Pro Tools lets you create fade-ins and fade-outs
at the beginnings and ends of regions.
With Pro Tools HD, you can also use an auto-
matic fade-in/out option, which applies real
time fade-ins/outs to all regions during play-
back. These fades are not written to disk, but are
automatically applied during playback. For
more information, see “Using AutoFades” on
page 490.
Creating Fade-Ins and Fade-Outs
Depending on how you make the selection, you
can position a fade-in or fade-out at the exact
beginning or end of a region, or position it so it
extends into a blank area of the track. The
length of the selection in the region determines
the length of the fade-in or fade-out.
You can also fade to the beginning or end of a
region from an insertion point.
Although fades appear to be discrete regions,
they cannot be separated from the regions in
which they were created.
When changing tempo in a tick-based audio
track, fade-ins and fade-outs remain with their
parent regions. Fades maintain their absolute
duration and are consequently recalculated after
any tempo changes.
Fade preferences
Region with a fade-in
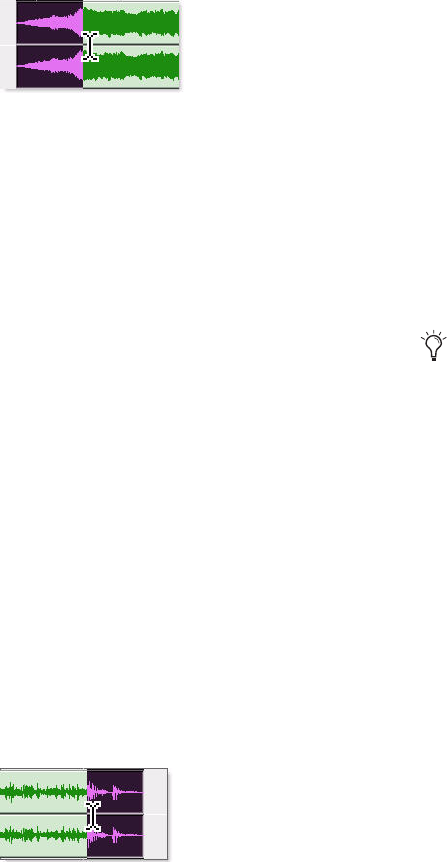
Pro Tools Reference Guide488
To create a fade-in:
1 Select the beginning of the region that you
want to fade in. The selection must extend to
the exact beginning of the region or a blank area
prior to the region in the track.
2 Do one of the following:
• Choose Edit > Fades > Create.
– or –
• Press Control+F (Windows) or Com-
mand+F (Mac).
3 Select the fade-in curve and configure the
other Fade settings.
4 Click the Audition button to audition the
fade.
5 Adjust the curve by dragging it or by selecting
a different shape from the In Shape pop-up
menu.
6 Click OK.
Pro Tools calculates the fade and writes it to
disk. The selected fade curve appears in the re-
gion.
To create a fade-out:
1 Select the end of the region that you want to
fade out. The selection must extend to the exact
end of the region or a blank area after the region
in the track.
2 Do one of the following:
• Choose Edit > Fades > Create.
– or –
• Press Control+F (Windows) or Com-
mand+F (Mac).
3 Select the fade-out curve and configure the
other Fade settings.
4 Click the Audition button to audition the
fade.
5 Adjust the curve by dragging it or by selecting
a different shape from the Out Shape pop-up
menu.
6 Click OK.
Pro Tools calculates the fade and writes it to
disk. The chosen fade curve appears in the re-
gion.
To fade from the insertion point to a region start
point:
1 Place the cursor at a location in the region.
2 Do one of the following:
• Choose Edit > Fades > Fade To Start.
– or –
• Press Alt+D (Windows) or Control+D
(Mac).
The fade is applied based on the Fade In prefer-
ences (see “Fade and Crossfade Preferences” on
page 486).
Selecting the beginning of a region for a fade-in
Selecting the end of a region for a fade-out
Fade lengths can be resized with any of the
Trimmer tools, including Nudge Trim com-
mands. See “Using the Trimmer Tools” on
page 433 and “Trimming with Nudge” on
page 471.

Chapter 25: Fades and Crossfades 489
To fade from the insertion point to a region end
point:
1 Place the cursor at a location in the region.
2 Do one of the following:
• Choose Edit > Fades > Fade To End.
– or –
• Press Alt+G (Windows) or Control+G
(Mac).
The fade is applied based on the Fade Out pref-
erences (see “Fade and Crossfade Preferences”
on page 486).
Creating a Crossfade
To create a crossfade between two regions:
1 With the Selector tool, click at the point
where you want the crossfade to begin in the
first region and drag to where you want it to end
in the second region. Crossfade selections can
begin and end anywhere in their respective re-
gions.
2 Do one of the following:
• Choose Edit > Fades > Create.
– or –
• Press Control+F (Windows) or Com-
mand+F (Mac).
3 Use the view buttons to adjust the view of the
crossfade. It may take a few moments to calcu-
late the waveform display for long selections.
4 Select an Out Shape and an In Shape.
5 Select a Linking option.
6 Click the Audition button to audition the
crossfade. For long crossfades, it may take
Pro Tools a few moments to calculate and load
the audio into playback RAM.
7 Do one of the following:
• Adjust the curves by selecting different pre-
set shapes with the Out Shape and In Shape
pop-up menus.
– or –
• Drag the Fade-In and Fade-Out curves to a
custom shape. By choosing None as the
Linking option, you can drag the begin-
ning or end points of a fade curve to adjust
its beginning or end point.
8 Click the Audition button to audition the
crossfade again.
9 When the crossfade sounds right, click OK.
The fade is calculated and written to disk, but
the audio files and regions remain unchanged.
Crossfades are stored in the Fade Files folder in
the session folder.
To remove a crossfade, do one of the following:
Select the area of the track containing any
crossfades you want to delete and choose Edit >
Fades > Delete.
Select the crossfade with the Time Grabber
tool and press Backspace (Windows) or Delete
(Mac).
Right-click the crossfade with any of the edit
tools and select Delete Fades from the pop-up
menu.
Crossfade lengths can be resized with any of
the Trimmer tools, including Nudge Trim
commands. See “Using the Trimmer Tools”
on page 433 and “Trimming with Nudge”
on page 471.

Pro Tools Reference Guide490
To trim a crossfade:
1 Select the crossfade with the Time Grabber
tool, or double-click it with the Selector tool.
2 With any of the Trimmer tools, trim either
side of the crossfade. The crossfade is recalcu-
lated to reflect the newly trimmed length.
Crossfades on Tick-Based Audio Tracks
Crossfades are re-rendered after changing tempo
in a tick-based audio track. The new crossfade is
the same duration as the crossfade prior to the
tempo change.
If there is not enough audio material to com-
plete the crossfade, or if the new crossfade area
falls outside of valid region boundaries, the
crossfade is removed.
Pre and Post Crossfade Selections
By making a selection that begins or ends pre-
cisely on the border of two regions, you can cre-
ate “pre” or “post” crossfades. Use the Tab key to
place the insertion point at the exact beginning
or end of a region.
To create a pre- or post-crossfade:
1 With the Selector tool, click in the track that
contains the regions you want to crossfade.
2 Do one of the following:
• Press Tab to move forward to the next re-
gion boundary.
– or –
• Press Control+Tab (Windows) or Op-
tion+Tab (Mac) to move back to the previ-
ous region boundary.
3 Extend the selection as follows:
• Shift-drag to adjust your selection, or press
Shift+Tab to extend the selection forward
to the next region boundary.
– or –
• Press Control+Shift+Tab (Windows) or Op-
tion+Shift+Tab (Mac) to extend the selec-
tion back to the previous region boundary.
4 Do one of the following:
• Choose Edit > Fades > Create.
– or –
• Press Control+F (Windows) or Com-
mand+F (Mac).
5 Select a fade type and click OK.
Using AutoFades
(Pro Tools HD Only)
Pro Tools HD can automatically apply real-time
fade-ins and fade-outs to all region boundaries
in the session. Specify the duration (0 to 10 ms)
for automatic real-time fades with the Auto Re-
gion Fade In/Out Length preference in the Op-
eration Preferences page). These fade-ins and
fade-outs are performed during playback and do
not appear in the Edit window, and are not writ-
ten to disk.
The automatic fade-in/out option also has an ef-
fect on Voice borrowing in a session. Whenever
a lower-priority virtual track “pops thru” a si-
lence in a higher-priority track on the same
voice, a fade-in and fade-out is applied to the
transition.
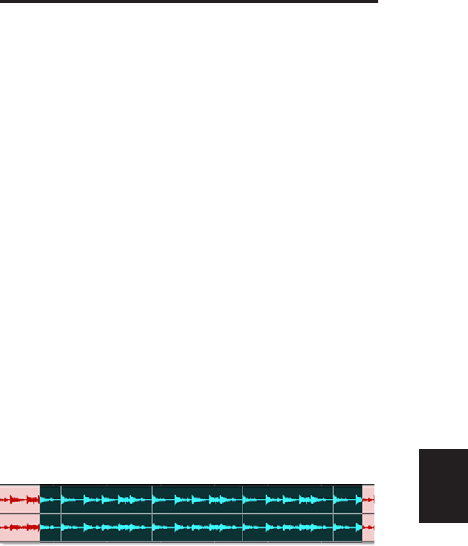
Chapter 25: Fades and Crossfades 491
This feature is especially useful in post produc-
tion situations such as dialogue tracking. For ex-
ample, you could assign both a dialogue track
and a “room tone” track with matching back-
ground to the same voice. You could then set
the AutoFade option to a moderate length (4 ms
or so) so that whenever a silence occurred in the
dialog, playback would switch smoothly to and
from the background track without clicks or
pops.
Using automatic fade-ins/outs saves you the
trouble of editing to zero-crossings or creating
numerous rendered fades in order to eliminate
clicks or pops in playback. However, since these
autofades are not written to disk, those clicks or
pops still exist in the underlying sound file.
Consequently, those anomalies still appear if
the Duplicate AudioSuite plug-in or the Export
Selected as Sound Files command (from the Re-
gion List) are used to duplicate multiple regions
as a continuous file. To render these real-time
auto fades to disk, choose File > Bounce to >
Disk.
To set the length of automatic fade-ins/outs:
1 Choose Setup > Preferences and click the
Operation tab.
2 Enter a value between 0 and 10 ms for the
Auto Region Fade In/Out Length. A value of zero
(the default) means that no auto-fading will oc-
cur.
3 Click OK. The AutoFade value is saved with
the session, and is automatically applied to all
free-standing region boundaries until you
change it.
Creating Fades and
Crossfades in Batches
Using Batch Fades, you can create many fades at
once. Select across several regions and use the
Create Fades command to create crossfades for
each region transition. If your selection includes
regions that already have crossfades, this feature
lets you modify them.
To apply crossfades between multiple regions:
1 With the Selector tool, click in the first region
in which you want to create a crossfade. Make
sure that the selection includes the entire re-
gion.
2 Drag to extend the selection to include the
last region you want to crossfade. Make sure that
the selection includes the entire region.
3 Do one of the following:
• Choose Edit > Fades > Create.
– or –
• Press Control+F (Windows) or Com-
mand+F (Mac).
4 In the Batch Fades dialog, select whether you
want to Create New Fades, Create New Fade-Ins
& Outs, Adjust Existing Fades, or a combination
of these options.
Selected regions for Batch Fades
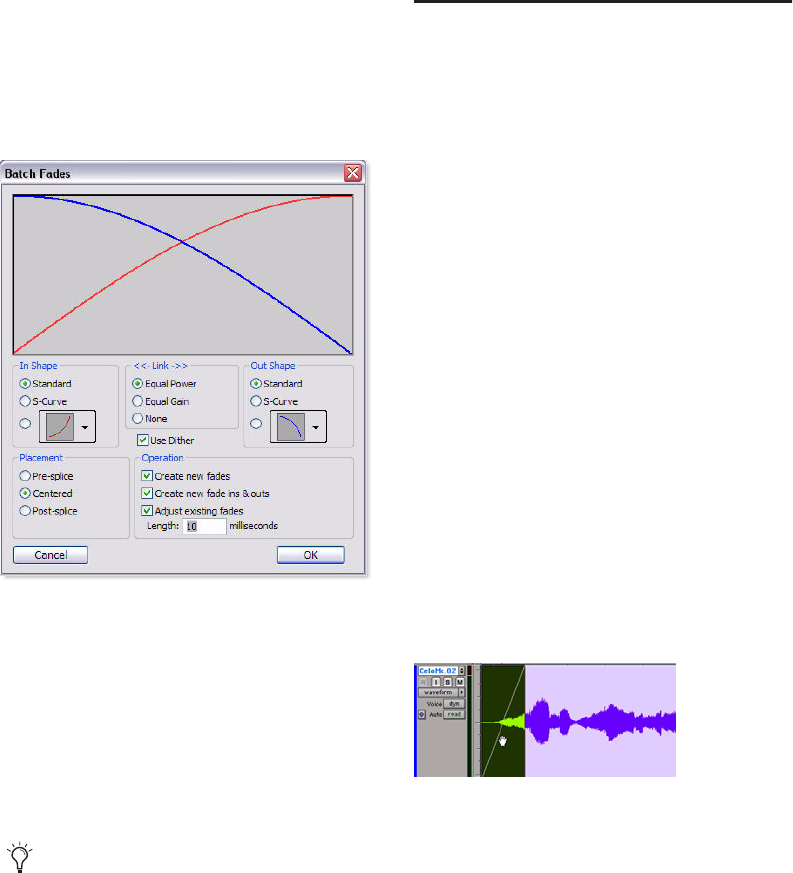
Pro Tools Reference Guide492
If you select to create new fades and new fade-
ins and outs, new crossfades are created at each
region boundary that is bordered by another se-
lected region, a fade-in is created at the start of
the first region, and a fade-out is created at the
end of the last region.
5 Select the placement of the Fades: Pre-Splice,
Centered, or Post-Splice (see “About Crossfades
and Curves” on page 479).
6 Enter a crossfade length in milliseconds.
7 Click OK.
Pro Tools creates the fades for all selected re-
gions.
Moving and Nudging Fades
and Crossfades
Fades and crossfades can be moved or nudged in
tracks, independently of their contributing re-
gions. Moving or nudging fade-ins or fade-outs
reveals or hides audio as the fade is moved from
the edge of a contributing region. Moving or
nudging crossfades changes the overlap point of
the contributing regions. Moving or nudging
fades is also constrained by underlying region
boundaries.
Moving or Nudging Fades or
Crossfades within Regions
To move or nudge a fade or crossfade within its
contributing regions:
1 Select the fade or crossfade by doing one of
the following:
• Use the Time Grabber tool to select the
fade.
– or –
• Use the Selector tool to select a range that
includes the fade.
Batch Fades dialog
Fade lengths can be resized with any of the
Trimmer tools, including Nudge Trim com-
mands. See “Using the Trimmer Tools” on
page 433 and “Trimming with Nudge” on
page 471.
Selecting a fade with the Time Grabber
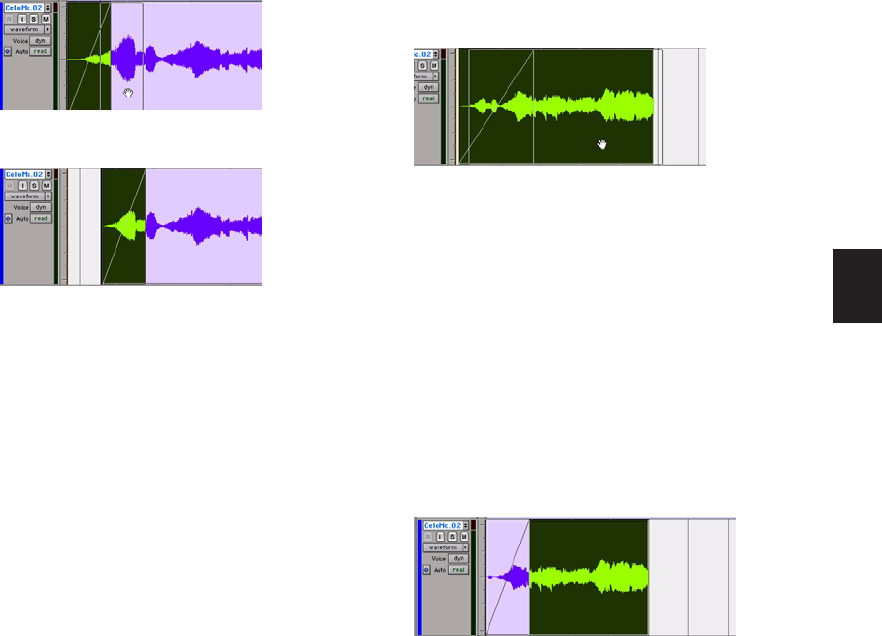
Chapter 25: Fades and Crossfades 493
2 Move the fade by doing one of the following:
• Drag the fade with the Time Grabber tool
to a new location on the track.
– or –
• Nudge the fade by pressing Plus (+) or Mi-
nus (–) on the numeric keypad to move the
fade forward or backward on the track.
Moving and Nudging Regions with
Fades or Crossfades
Moving Regions Containing Fades or
Crossfades
When you move or nudge a region selection
that contains a fade-in, fade-out, or crossfade,
the fade moves with the selection.
To move a region selection with fades or
crossfades:
1 Do one of the following:
• Click a region with the Time Grabber tool
(or double-click with the Selector tool) to
select the region along with the fade (in or
out).
– or –
• Select multiple regions that include the
fades and crossfades you want to move.
2 Move the region selection by doing one of the
following:
• Drag the region selection with the Grabber
tool to a new location on the track.
– or –
• Nudge the region selection by pressing Plus
(+) or Minus (–) on the numeric keypad to
move the region forward or backward on
the track.
Nudging Regions Adjacent to Fade-Ins
or Fade-Outs
When you nudge a region selection adjacent to
a fade-in or fade-out, but do not select the fade,
the adjacent fade stretches or shrinks to main-
tain the fade start or end point. The amount of
change depends on the amount of audio mate-
rial outside the fade start or end point.
To a nudge region without its fade:
1 Select the region, but not the fade.
Dragging the fade with the Time Grabber
Result of moved fade
Dragging a region with its fade
Selecting a region without its fade
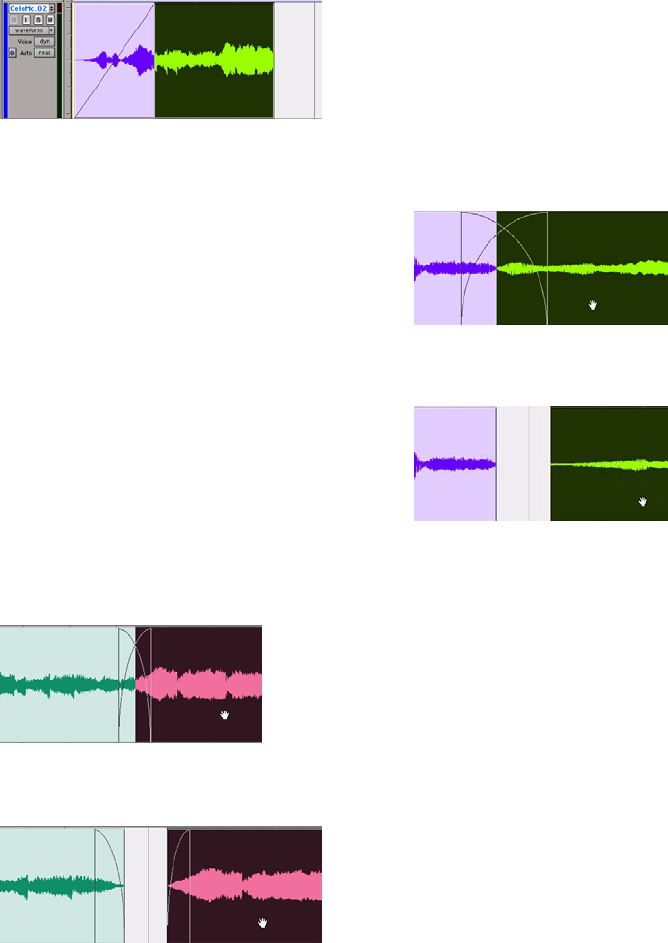
Pro Tools Reference Guide494
2 Nudge the region by pressing Plus (+) or Mi-
nus (–) on the numeric keypad.
Moving Regions Adjacent to Crossfades
When you move either of the regions that con-
tributes to a crossfade, the regions separate. The
status of the fade depends on the Preserve Fades
when Editing preference (in the Editing Prefer-
ences page).
To separate crossfaded regions and retain the
corresponding fades:
1 Choose Setup > Preferences and click the Ed-
iting tab.
2 Select Preserve Fades when Editing.
3 Click OK to close the Preferences dialog.
4 Use the Time Grabber or Separation Grabber
tool to select one of the contributing regions to
a crossfade.
5 Drag the selected region with the Grabber.
To separate crossfaded regions and remove the
fade:
1 Choose Setup > Preferences and click the Ed-
iting tab.
2 Deselect Preserve Fades when Editing.
3 Click OK to close the Preferences dialog.
4 Use the Time Grabber or Separation Grabber
tool to select one of the contributing regions to
a crossfade.
5 Drag the selected region with the Grabber.
Nudging Regions Adjacent to
Crossfades
When you nudge either of the regions that con-
tributes to a crossfade, the fade stretches to pre-
serve the relative position of the crossfade start
and end points. The amount of stretch depends
on the amount of overlap between the contrib-
uting regions.
If you nudge a region beyond the boundary of
available audio for the crossfade, the fade is re-
moved.
Nudging a region without its fade
Selecting a region with a crossfade
Separating regions while preserving fades
Selecting a region with a crossfade
Separating regions while removing fades
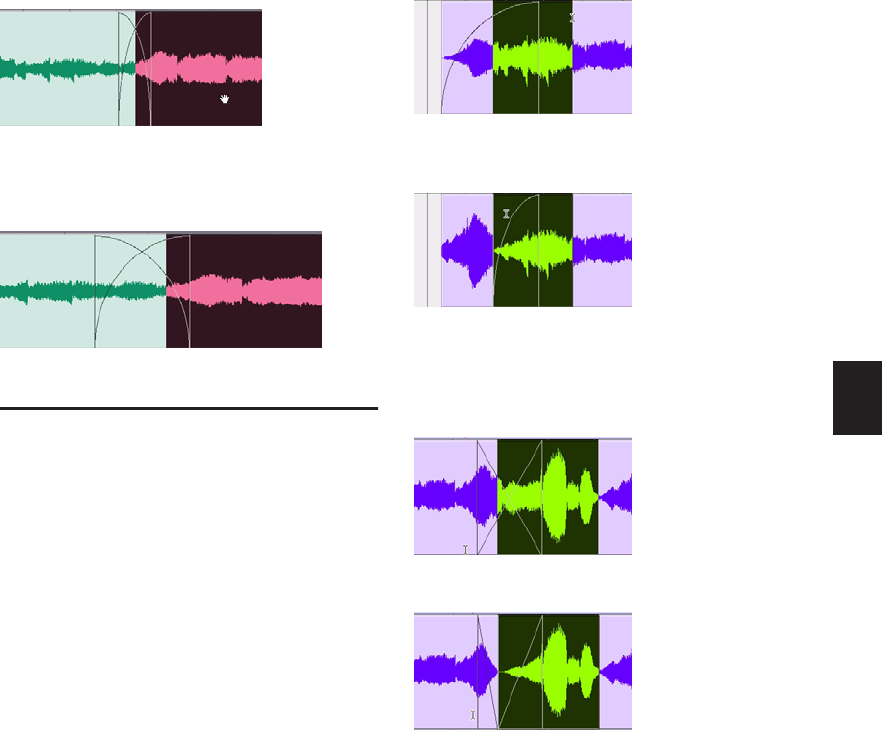
Chapter 25: Fades and Crossfades 495
To nudge a region and stretch its crossfade:
1 Use the Time Grabber tool to select one of the
contributing regions to the crossfade.
2 Nudge the region by pressing Plus (+) or Mi-
nus (–) on the numeric keypad.
Separating Regions That
Include Fades or Crossfades
You can create regions from track material that
overlaps with fades or crossfades. The fades from
the source region are adjusted to the new region.
To separate a region that overlaps with a fade or
crossfade:
1 With the Selector tool, drag to select the ma-
terial for the new region.
2 Do one of the following:
• Choose Edit > Separate Region > At Selec-
tion
– or –
• Press Control+E (Windows) or Com-
mand+E (Mac).
Where your selection overlaps any fade-ins or
fade-outs, the fade is trimmed to fit the selec-
tion.
Where your selection overlaps a crossfade, the
crossfade is separated into a fade-out and fade-in
at the selection boundary.
Selecting a region with a crossfade
Stretching the crossfade by nudging
Selecting material that overlaps a fade-in
Result of Separate Region command on fade-in
Selecting material that overlaps a crossfade
Result of Separate Region command on crossfade
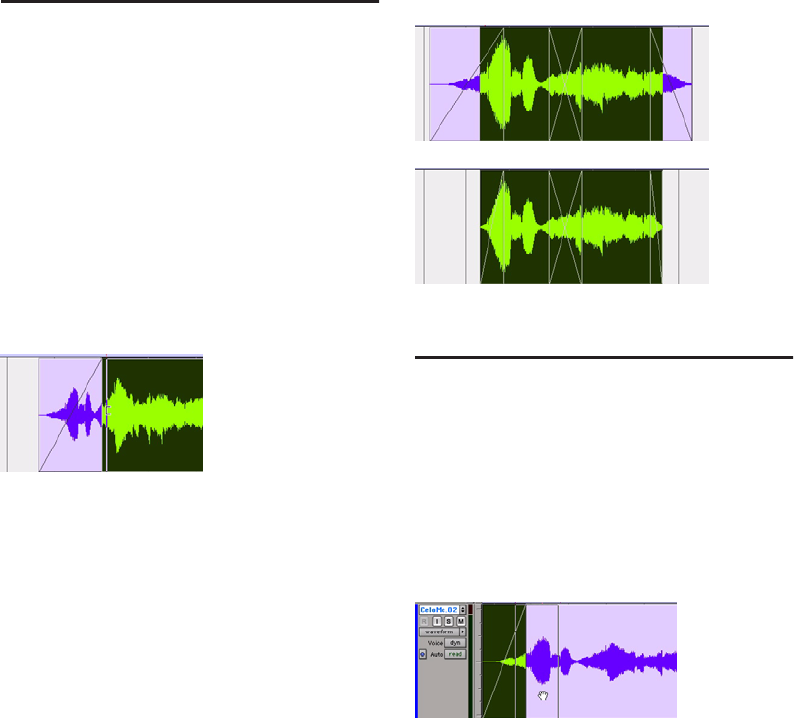
Pro Tools Reference Guide496
Trimming Regions That
Include Fades or Crossfades
Trimming a Region to a Fade Boundary
You can trim regions that are adjacent to fade
and crossfade boundaries.
To trim a region on a fade boundary:
With the Trimmer tool, click the region
boundary and drag to trim the region. The fade
remains constant and follows the new region
boundary.
Trimming to a Selection Across Fades or
Crossfades
You can trim regions to selections that include
fades or crossfades.
To trim a region to a selection that includes fades,
do one of the following:
Make a selection in the track and choose Edit
> Trim Region > To Selection. You can Trim
across multiple regions and fades. Affected fades
are adjusted to the new region boundaries.
– or –
Click with the Selector in the region and
choose Edit > Trim Regions > Start to Insertion
or End to Insertion. You can trim to region or
fade boundary in the track.
Fade Boundaries and Shapes
in Displayed Automation View
Fade boundaries and fade shapes are shown and
can be edited in Automation views, allowing for
more precise viewing and editing of automation
data. For more information on Automation and
Automation views, see Chapter 37, “Auto-
mation.”
Dragging a region boundary with the Trimmer tool
Trimming to a selection across multiple fades
Fade information in Automation view

Chapter 26: Elastic Audio 497
Chapter 26: Elastic Audio
Elastic Audio provides track-based Real-Time
and Rendered Time Compression and Expan-
sion (TCE). Pro Tools Elastic Audio uses excep-
tionally high-quality transient detection algo-
rithms, beat and tempo analysis, and real-time
TCE processing algorithms. Elastic Audio lets
you quickly and easily tempo conform and beat
match audio to the session’s Tempo ruler. It also
provides an unprecedented degree of control
over transient detection and TCE processing on
an event-by-event basis.
With Elastic Audio, Pro Tools analyzes entire au-
dio files for transient events. For example, an
event can be a drum hit, a sung note, or chord
played by a guitar. These detected events can
then serve as control points for warping the au-
dio. Pro Tools can warp (TCE) audio events au-
tomatically, such as automatically conforming
audio to the session tempo or quantizing audio
events, or you can warp audio manually using
the standard editing tools in the new Warp
Track View.
Elastic Audio is useful in several common work-
flows: working with loops, correcting perfor-
mances, remixing, sound design and special ef-
fects, and film music and post production.
Working with Loops
If you work with rhythmic loops, Elastic Audio
lets you preview your loops in DigiBase browsers
at their native tempo (BPM) or at the session
tempo (BPM). You can even preview the loop
while the session is playing back. When you
find the loop you like, drag it from the browser
and drop it into the session. The loop automat-
ically conforms to the session tempo map and
Bar|Beat grid.
Correcting Performances
Elastic Audio lets you quantize audio to tighten
up a performance or even manually re-align that
one note that was played just a little late. Or,
you might decide that the performance is excel-
lent, but just a little under tempo. Tick-based
Elastic Audio automatically warps audio to con-
form to tempo changes. When you change your
tracks to tick-based and increase the session
tempo, the audio automatically time com-
presses to match.
Remixing
Elastic Audio lets you quickly beat match an en-
tire song to the session tempo and Bar|Beat grid.
Sound Design and Special Effects
You can use Elastic Audio to achieve special ef-
fects with extreme or widely variable TCE. Use
the Varispeed algorithm to achieve tape-like ef-
fects for speed and pitch change.
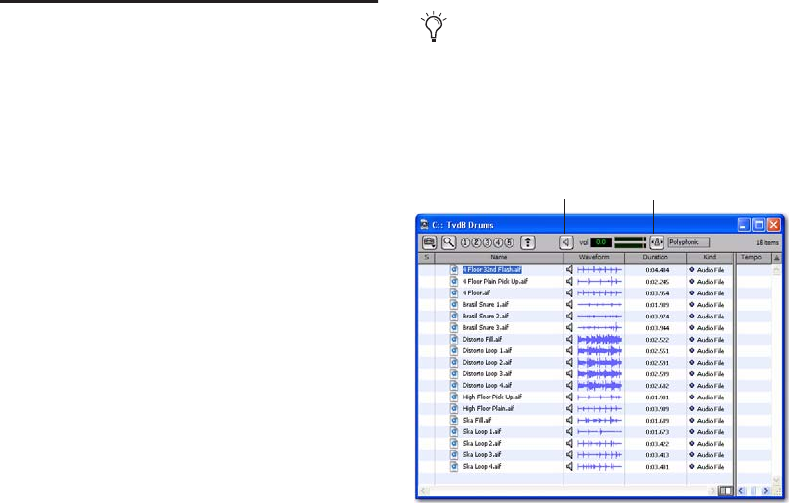
Pro Tools Reference Guide498
Film Music and Post Production
If you are scoring a film scene, use Elastic Audio
to fit the music to the required duration. You
can even use tempo changes to achieve accele-
randos and ritardandos. If you are doing post
production, use Elastic Audio to adjust for pull-
up or pull-down factors.
Example Elastic Audio
Workflow
In this workflow, you will be introduced to
some common Elastic Audio tasks for working
with loops:
• Create and configure a new session for this
workflow.
• Locate and preview a loop in DigiBase at
the session tempo.
• Import the loop at the session tempo on a
tick-based, Elastic Audio–enabled track.
• Change the session tempo to change the
tempo of the region on tick-based, Elastic
Audio–enabled tracks.
• Quantize the audio to apply a Groove Tem-
plate to the rhythm.
Create and configure a new session:
1 Create a new Pro Tools session.
2 Set the session’s Main Timebase ruler to
Bars:Beats.
3 Be sure to display the Tempo and Meter rulers.
4 Use the default tempo of quarter-note equals
120 BPM.
Locate and preview a loop in DigiBase at the
session tempo:
1 Open the Workspace (Window > Workspace).
2 Navigate to the folder where you keep your
drum loops. Double-click the folder name to
open a volume browser of just the folder’s con-
tents.
3 Select the loop you want to preview.
4 Click the Preview button to preview the loop
at its native tempo.
5 Click the Audio Files Conform to Session
Tempo button so that it highlights.
6 Click the Preview button again and the file
previews at the session tempo.
Audition Paths for previewing are selected
in the I/O Setup window (Choose Setup >
I/O and click the Output tab).
Preview and Audio Files Conform to Session Tempo
buttons in a DigiBase browser
Audio Files Conform
to Session Tempo button
Preview button
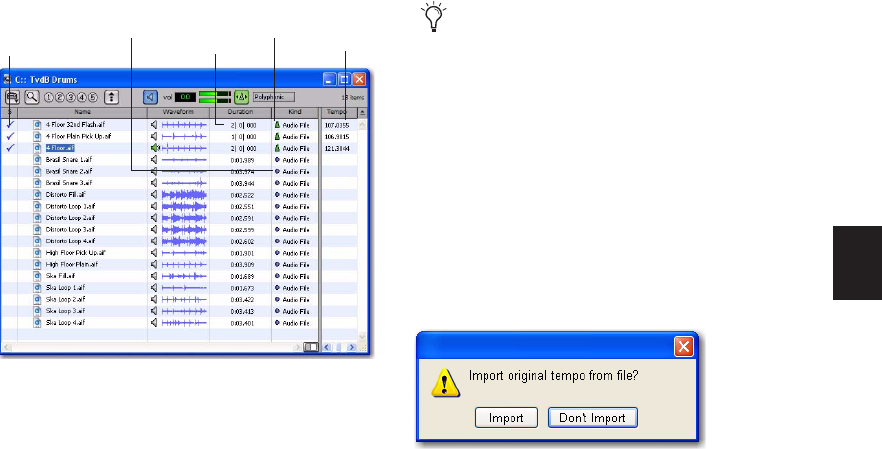
Chapter 26: Elastic Audio 499
7 Notice that if the loop was sample-based to be-
gin with, the column to the left of the file name
initially indicates that DigiBase is analyzing the
file. When it is done a check mark appears in
that column, the file’s Duration is now mea-
sured in Bars and Beats instead of Minutes and
Seconds, the Sample-based icon is replaced by
the Tick-based icon, and the detected tempo of
the file is displayed in the Tempo column.
8 Repeat the preceding steps to preview other
loops at the session tempo.
Import the loop at the session tempo:
1 Make sure that the Audio Files Conform to
Session Tempo button is still highlighted. This
ensures that the file will be imported as a tick-
based region and can be conformed to the ses-
sion tempo.
2 Drag and drop the loop from the browser to
the Track List in the session’s Edit window.
3 If there are no tracks in the session and the file
is tick-based, you are prompted to either import
the tempo from the file or use the session
tempo. To keep the session tempo and have the
loop conform to the session tempo, click Don’t
Import.
If there are tracks in the session, the file is im-
ported and conformed to the session tempo.
Elastic Audio controls and indicators in DigiBase
Sample-based
file icon
Elastic Audio
Analysis icon Duration
Detected
tempo
Tick-based
file icon
If All Files is selected as the Drag and Drop
From Desktop Conforms to Session Tempo
option in the Processing Preferences page,
you can also drag and drop audio files from
the Desktop and they are imported as tick-
based Elastic Audio.
Import Original Tempo from File dialog
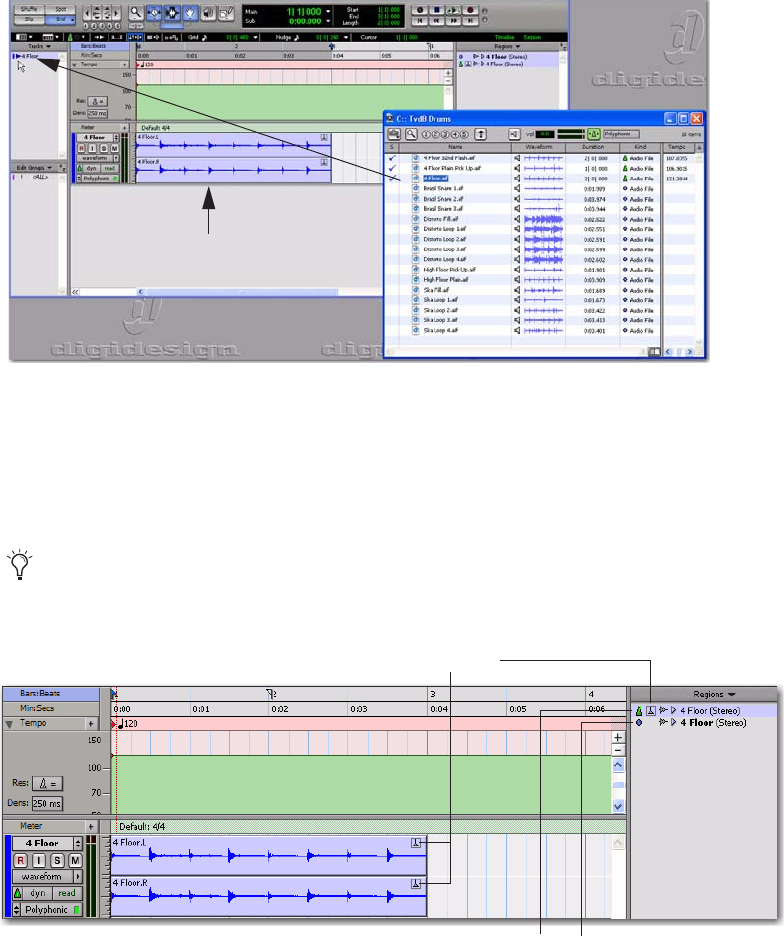
Pro Tools Reference Guide500
4 A new tick-based audio track is created with the Default Elastic Audio plug-in enabled. See Figure 1.
5 Since you chose to not import the file’s original tempo, you will notice that the loop conforms to
the tempo map and Bar|Beat grid of the session. A Warp indicator appears in both the region in the
track and in the Region List. Also in the Region List, notice that there are two regions. One is the sam-
ple-based whole file region (the imported source file) and the other is the tick-based Elastic Au-
dio–processed copy. See Figure 2.
Figure 1. Dragging and dropping a tick-based audio file from a DigiBase browser to the Track List
New tick-based,
Elastic Audio–enabled
track
You can also conform regions on Elastic Audio–enabled tracks to the session tempo using the Con-
form to Tempo command (see “Conform to Tempo” on page 607).
Figure 2. Imported tick-based audio file with Elastic Audio processing
Warp indicators
Sample-based whole-file region
Tick-based Elastic Audio–processed region
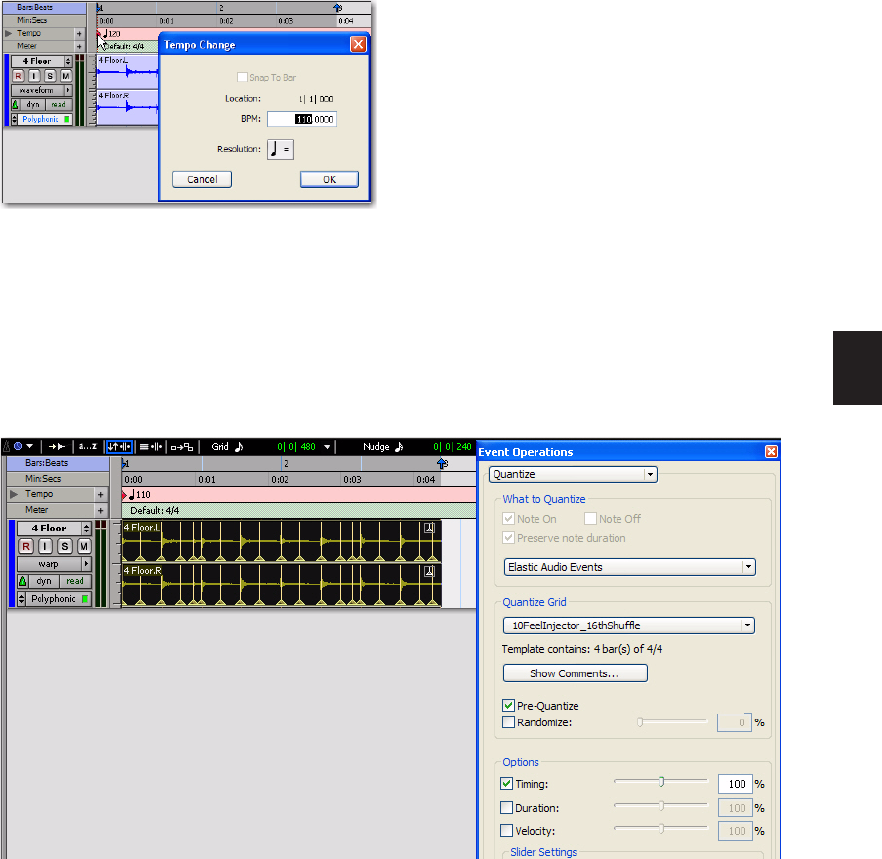
Chapter 26: Elastic Audio 501
Change the session tempo to change the tempo of
the region:
1 Change the tempo from the default 120 BPM
to 110 BPM (see “Tempo” on page 602).
2 Notice that since the region is on a tick-based,
Real-Time Elastic Audio–enabled track it auto-
matically conforms to the new tempo.
Quantize audio to apply a Groove Template:
1 Select the region on the tick-based, Real-Time
Elastic Audio–enabled track.
2 Choose Event > Event Operations > Quantize.
3 In the What to Quantize section, make sure
Elastic Audio Events is selected in the pop-up
menu.
4 From the Quantize Grid pop-up menu, select
the desired Groove Template.
5 Set any other options as desired.
6 Click Apply.
7 In Figure 3 below, notice that the audio has
been quantized according to the selected
Groove Template. In Warp view, you can see
that Warp markers have been added at every
Event marker near the Quantize Grid and were
used to apply quantization to those events.
Changing the default tempo
Figure 3. Quantized audio events (Warp markers) in Warp view
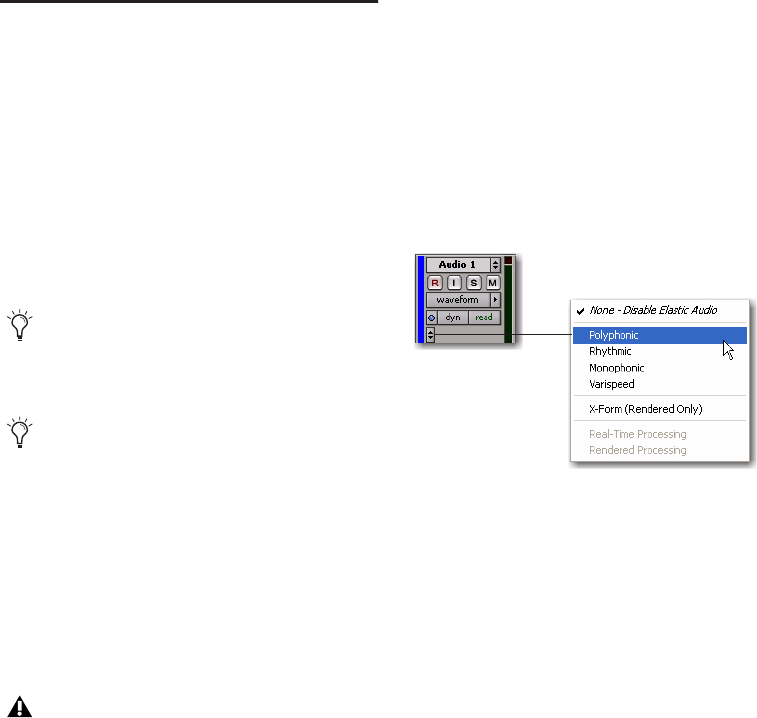
Pro Tools Reference Guide502
Elastic Audio Tracks
Any audio track in your Pro Tools session can be
Elastic Audio enabled. Elastic Audio tracks can
be either sample- or tick-based. Sample-based
Elastic Audio–enabled tracks let you apply real-
time or rendered Elastic Audio processing by ed-
iting in Warp view, applying Quantize, and us-
ing the TCE Trimmer tool. However, only tick-
based Elastic Audio tracks also automatically ap-
ply Elastic Audio processing based on tempo
changes.
To enable Elastic Audio on a track:
1 Create a new audio track or choose an existing
audio track.
2 Click the track’s Elastic Audio Plug-in selector,
and select the Elastic Audio plug-in appropriate
to your track material and the results you want
from the pop-up menu: Polyphonic, Rhythmic,
Monophonic, Varispeed, or X-Form (see “Elastic
Audio Plug-ins” on page 507).
Any audio regions on the track temporarily go
offline while they are analyzed and come back
online when the analysis is finished. The wave-
form for audio regions that are offline for Elastic
Audio analysis appears grayed out.
When recording to a real-time Elastic Audio–en-
abled track, once recording is stopped, the
newly recorded audio temporarily goes offline
while it is analyzed and comes back online as
soon as the analysis is finished.
To have all new tracks be tick-based, enable
the New Tracks Default To Tick Timebase
option in the Editing preferences.
When creating new tracks by dragging and
dropping audio from a DigiBase browser, if
the Audio Files Conform to Session Tempo
option is enabled, Pro Tools creates tick-
based Elastic Audio–enabled tracks regard-
less of whether the Elastic Audio analyzed
file is tick-based or sample-based. If the Au-
dio Files Conform to Session Tempo option
is not enabled, Pro Tools creates regular
sample-based tracks.
With Pro Tools HD, Elastic Audio is disal-
lowed on voiced tracks. Use dynamic voice
allocation for tracks on which you want to
use Elastic Audio. (Pro Tools LE only sup-
ports dynamic voice allocation, and cannot
specifically allocate individual voices.)
Elastic Audio Plug-in pop-up menu
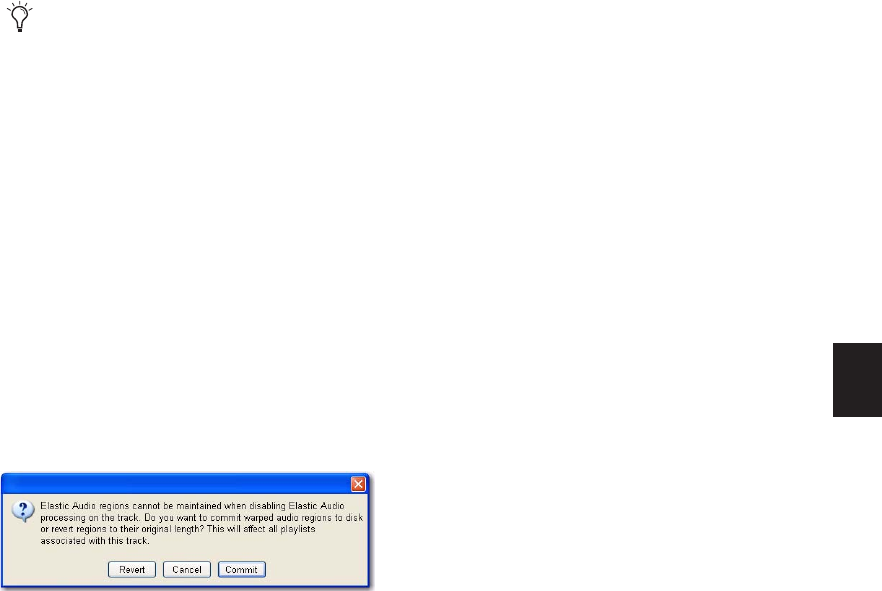
Chapter 26: Elastic Audio 503
3 From the track’s Elastic Audio Plug-in pop-up
menu, select Real-Time Processing or Rendered
Processing for Real-Time or Rendered Elastic Au-
dio processing.
To disable Elastic Audio on a track:
1 From the track’s Elastic Audio Plug-in selector,
select None – Disable Elastic Audio.
2 If the track had any Elastic Audio-based pro-
cessing, you are prompted to Cancel, Revert, or
Commit.
Cancel Leaves Elastic Audio enabled on the
track.
Revert Removes any Elastic Audio processing,
reverts regions on the track to their original du-
ration, and disables Elastic Audio on the track.
Commit Renders and commits any Elastic Audio
processing on the track, writes new files to disk,
and disables Elastic Audio on the track.
Committed Regions
Regions that are committed, either by disabling
Elastic Audio on a track or by moving a region to
a track without Elastic Audio enabled, are writ-
ten to disk as new audio files. These new audio
files include the audio in the region, plus any
fades, and also an additional 5 seconds of audio
before and after the region, if available.
Alternate Playlists
Disabling Elastic Audio on a track affects all
playlists on the track. All playlists on the track
are committed or reverted depending on which
option you choose.
Creating New Tracks with Elastic Audio
Enabled
New tracks are created with Elastic Audio auto-
matically enabled in the following cases:
• When the Enable Elastic Audio On New
Tracks option is enabled in the Processing
Preferences page (see “Elastic Audio Op-
tions” on page 255).
• When dragging and dropping tick-based,
Elastic Audio analyzed files from DigiBase
browsers to the Track List or empty space in
the Edit window with the Audio Files Con-
form to Session Tempo option enabled (see
“Elastic Audio on Import” on page 258).
• When dragging and dropping REX or ACID
files from the Desktop (if either REX and
ACID Files Only or the All Files option is
enabled for the Drag and Drop from Desk-
top Conforms to Session Tempo prefer-
ence) or a DigiBase browser (if the Audio
Files Conform to Session Tempo button is
enabled) to the Track List or empty space in
the Edit window (see “Importing ACID and
REX Files” on page 261).
Elastic Audio processing can be Real-Time
or Rendered. Real-Time Elastic Audio pro-
cessing is immediate, but it is more de-
manding of system resources. Rendered
Elastic Audio processing is non-real-time,
but is less demanding of system resources. If
you are working on a system with limited re-
sources, use Rendered Elastic Audio process-
ing. For more information, see “Real-Time
and Rendered Elastic Audio Processing” on
page 506.
Commit Elastic Audio dialog
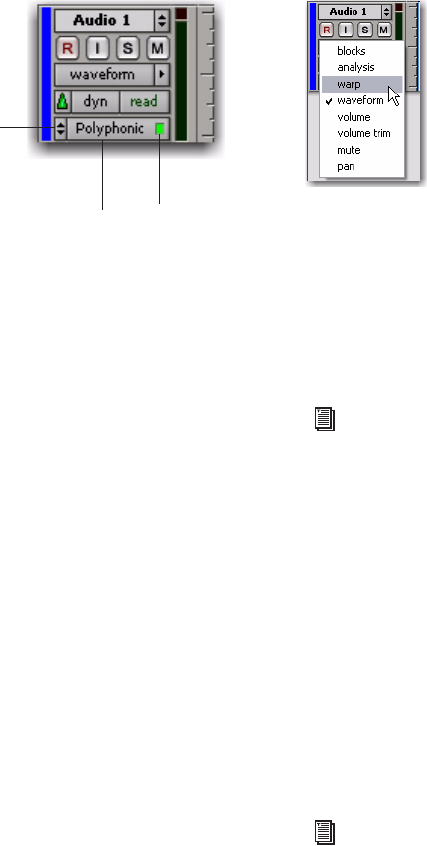
Pro Tools Reference Guide504
Elastic Audio Track Controls
Audio tracks provide a new set of controls for
Elastic Audio.
Elastic Audio Plug-in Selector Selects the Elastic
Audio plug-in for Elastic Audio processing (see
“Elastic Audio Plug-ins” on page 507). You can
also use the Elastic Audio Plug-in selector to dis-
able Elastic Audio processing, and to select ei-
ther Real-Time or Rendered processing (see
“Real-Time and Rendered Elastic Audio Process-
ing” on page 506).
Elastic Audio Plug-in Button Displays the name
of the selected Elastic Audio plug-in. Click the
Elastic Audio Plug-in button to open the Elastic
Audio Plug-in window (see “Elastic Audio Plug-
ins” on page 507).
Real-Time or Rendered Processing
Indicator Lights when Elastic Audio processing is
real-time and dims when Elastic Audio process-
ing is rendered (see “Real-Time and Rendered
Elastic Audio Processing” on page 506).
Elastic Audio Track Views
Pro Tools two track views for Elastic Audio–en-
abled tracks: Warp and Analysis.
Warp View
Warp view lets you manually “warp” (Elastic
Audio process) audio. In Warp view you can cre-
ate and edit Warp markers. If you are using Elas-
tic Audio to correct the timing of a performance,
or to achieve special effects, work in Warp view.
Analysis View
Analysis view lets you edit detected Event mark-
ers. In most cases you will not need to use Anal-
ysis view. However, with material that does not
have clear transients, you may want to work in
Analysis view to add or relocate Event markers,
or to delete erroneous Event markers. For exam-
ple, when using Elastic Audio to correct the tim-
ing of a performance, you may need to add,
move, or remove Event markers in Analysis view
to achieve the highest quality Elastic Audio pro-
cessing.
Elastic Audio Track controls
Elastic Audio
Plug-in selector
Elastic Audio
Plug-in button
Real-Time or
Rendered
Processing
indicator
Track View pop-up menu
For detailed information on working in
Warp view, see “Editing in Warp View” on
page 511.
For detailed information on working in
Analysis view, see “Editing in Analysis
View” on page 518.

Chapter 26: Elastic Audio 505
Elastic Audio Analysis
When recording, pasting, moving, or importing
un-analyzed audio to an Elastic Audio–enabled
track, or when enabling Elastic Audio on an ex-
isting audio track, Pro Tools automatically ana-
lyzes the audio for transient events. In Wave-
form view, the waveform initially appears
grayed out because regions go offline during
Elastic Audio analysis. Once the analysis is com-
plete, the audio comes back online. Elastic Au-
dio analysis is file-based, which means that even
if you are only working with a small region of a
large file, the entire audio file is analyzed.
Elastic Audio analysis detects transient events in
the audio file. These transient events are indi-
cated by Event markers. Event markers are dis-
played in both the Warp and Analysis track
views. Elastic Audio analysis also calculates the
native tempo of the analyzed audio file and its
duration in bars and beats.
Elastic Audio analysis data (detected events,
tempo, and duration in Bars:Beats) is stored
with the file. In DigiBase browsers, analyzed au-
dio files are indicated by a check mark to the left
of the file name, and these files display their du-
ration in Bars|Beats, their timebase as ticks, and
their native tempo in BPM.
Tempo Detection
Elastic Audio analysis does its best to detect a
regular tempo for all analyzed audio. Any audio
containing regular periodic rhythm can be suc-
cessfully analyzed for tempo and duration in
bars and beats. Analyzed files in which a tempo
was detected are treated as tick-based files. Tick-
based files can be conformed to the session
tempo for preview and import.
Analyzed files in which no tempo was detected
are treated as sample-based files. If there is only
a single transient in the file (such as with a sin-
gle snare hit), no tempo will be detected. Also,
longer files that contain tempo changes or ru-
bato, or that do not contain regular periodic
rhythmic patterns will probably not have a de-
tected tempo and will be treated as sample-
based files.
Event Confidence
Transient events are detected with a certain de-
gree of confidence. The level of confidence is
based on the relative clarity of transients.
For example, a drum loop is likely to have clear,
sharp transients. These will be detected with a
high degree of confidence. However, a legato vi-
olin melody may not have clear, sharp tran-
sients, so transients will be detected with a lower
degree of confidence.
Note that peak amplitude is not the most
important measure for event confidence.
The clarity of transients is measured in part
by the spectral transition from one moment
to the next. This tends to favor higher fre-
quency content in terms of event confidence.
For example, changing the Event Sensitivity
in the Elastic Properties window for a se-
lected drum loop results in the clearer tran-
sients of the higher frequency hi-hat hits
having more event confidence than the less
well defined transients of the lower fre-
quency kick drum hits even though kick
drum hits have a higher peak amplitude.

Pro Tools Reference Guide506
Pro Tools is very aggressive with its transient de-
tection in order to detect every possible audio
event. Consequently, it is possible to have erro-
neously detected events. These events will be
analyzed with a low degree of confidence and
can be filtered out by lowering the Event Sensi-
tivity in the Elastic Properties window (see
“Event Sensitivity” on page 524). Filtering out
any false transients can result in higher quality
Elastic Audio processing.
Conversely, for material with few clear tran-
sients, Elastic Audio analysis may not accurately
detect audio events, and those detected may be
detected with a low level of confidence. You can
relocate or add Event markers where necessary
in Analysis view (see “Editing in Analysis View”
on page 518).
For example, a slow synth pad may not have
clear transients and detected Event markers may
be incorrectly located or may have not been de-
tected at all. In Analysis view, you can relocate,
remove, and add Event markers as necessary
(such as where the chord changes). Accurately
locating Event markers yields better results
when applying Elastic Audio processing.
Real-Time and Rendered
Elastic Audio Processing
Real-Time Elastic Audio processing means that
any changes to Elastic Audio processing—
whether it be a tempo change or a manual TCE
warp—take effect immediately. However, Real-
Time Elastic Audio processing can be very de-
manding on your system’s resources. Conse-
quently, you may want to use Rendered Elastic
Audio processing in some cases. With Rendered
Elastic Audio processing, when you make a
change to Elastic Audio processing, any affected
audio regions temporarily go offline, a new
“rendered” audio file is generated, and any af-
fected audio regions come back online.
To set an Elastic Audio track to Real-Time or
Rendered:
1 Click the track’s Elastic Audio Plug-in selector.
2 From the pop-up menu, select the desired
Elastic Audio plug-in.
3 From the pop-up menu, select one of the fol-
lowing:
• Real-Time Processing
– or –
• Rendered Processing
When processing non-rhythmic audio (such
as legato strings) with the Polyphonic plug-
in, reducing the number of Event markers
often yields better sounding results. You can
either manually remove Event markers in
Analysis view (see “Editing in Analysis
View” on page 518) or lower the Event Sen-
sitivity setting in the Elastic Properties win-
dow for the region you want to process (see
“Elastic Properties Window” on page 522).
In rendered mode, any change you make is
rendered using the original source audio to
avoid generational loss from multiple subse-
quent edits.
Select Real-Time processing for tick-based
Elastic Audio processing (such as tempo
changes). Rendered audio processing can be
useful for sample-based Elastic Audio pro-
cessing or if you need to save system re-
sources.
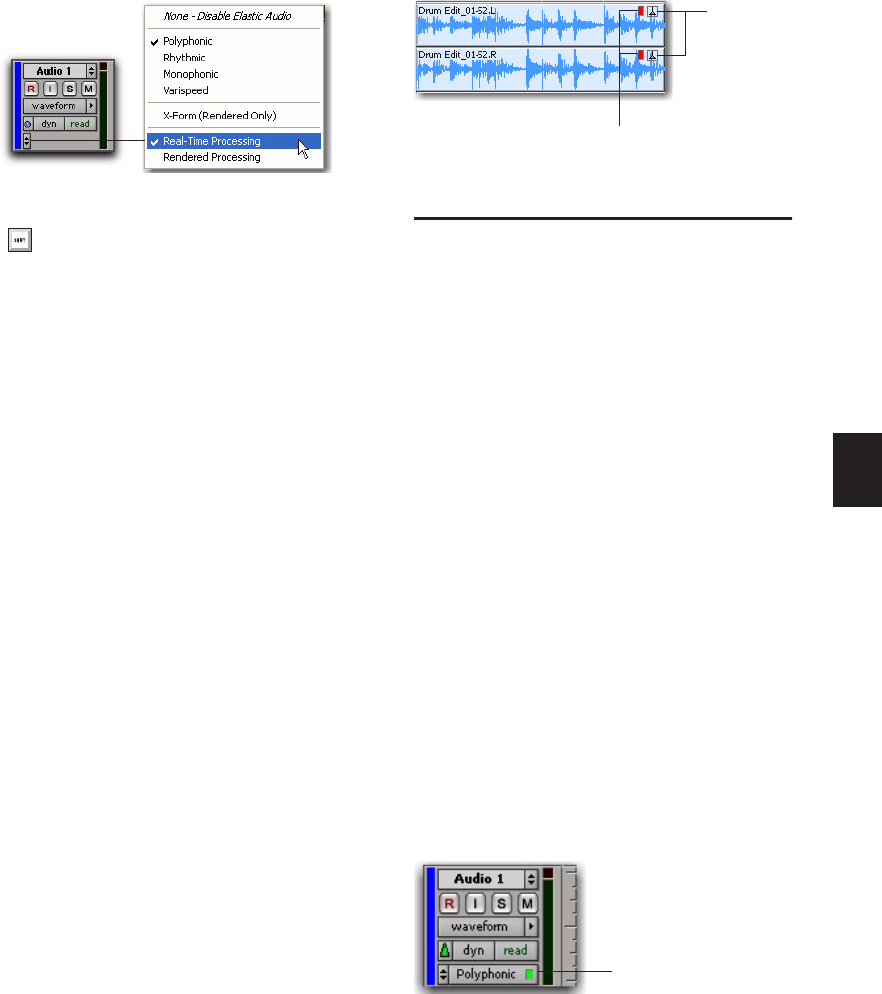
Chapter 26: Elastic Audio 507
About Rendered Files
Pro Tools creates temporary files for Rendered
Elastic Audio processing. These files are kept in a
new, auto-created Rendered Files folder in the
session folder. Once you commit Rendered Elas-
tic Audio processing to a track (by disabling
Elastic Audio on a track and clicking Commit in
the Commit Elastic Audio dialog), a new file is
written to disk in the Audio Files folder, and the
temporary rendered file from which it was cre-
ated is deleted from the Rendered Files folder.
Region Clip Indicator
(Rendered Processing Only)
Since Rendered Elastic Audio processing is not
real-time, it does not report clipping due to Elas-
tic Audio processing in the Elastic Audio plug-in
window. Instead, when clipping occurs due to
Rendered Elastic Audio processing, the region
displays an Elastic Audio Processing Clip indica-
tor just to the left of the Warp indicator. To
avoid clipping on playback, lower the Input
Gain for the region in the Elastic Properties win-
dow (see “Elastic Properties Window” on
page 522).
Elastic Audio Plug-ins
Pro Tools provides several TCE algorithms for
real-time and rendered track-based Elastic Audio
processing. The selected Elastic Audio plug-in
determines how the audio is processed. Each
plug-in uses different algorithms for Elastic Au-
dio processing. Different algorithms are better
suited to different types of audio. Select the
plug-in whose algorithm is appropriate to the
material on the track you want to process.
Elastic Audio plug-ins have their own unique se-
lector that is only available in the Edit window.
You cannot insert Elastic Audio plug-ins on
track Plug-in Inserts (TDM, RTAS, and hardware
inserts).
Elastic Audio plug-ins provide few to no adjust-
able parameters. The adjustable controls, if any,
for Elastic Audio plug-ins are available in the
Elastic Audio Plug-in window. Elastic Audio
plug-in parameters cannot be automated.
To open an Elastic Audio Plug-in window:
Click the Elastic Audio Plug-in button.
Elastic Audio Plug-in selector and pop-up menu
To toggle between Real-Time and Rendered
Elastic Audio processing, Control-Start-
click (Windows) or Command-Control-
click (Mac) the Elastic Audio Plug-in but-
ton.
Elastic Audio Region Clip indicator
Elastic Audio plug-in button
Elastic Audio Region
Clip indicators
Warp
indicators
Elastic Audio
Plug-in button
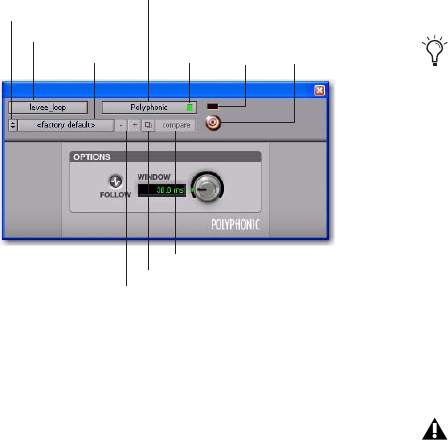
Pro Tools Reference Guide508
Elastic Audio Plug-in Window Controls
The Elastic Audio Plug-in window provides a set
of controls in the window header that are com-
mon to all Elastic Audio plug-ins.
Track Selector Accesses any other audio track in
the session.
Plug-in Selector Lets you select any Elastic Audio
plug-in or disable Elastic Audio.
Real-Time or Rendered Processing
Indicator Lights when Elastic Audio processing is
real-time and dims when Elastic Audio process-
ing is rendered (see “Real-Time and Rendered
Elastic Audio Processing” on page 506).
Clip LED Lights red to indicate clipping in the
Elastic Audio processing. Clipping can occur
when time compressing audio. If clipping oc-
curs, you can lower the Input Gain in the Elastic
Properties window (“Input Gain” on page 524),
or attenuate the Default Input Gain in the Pro-
cessing Preferences page (see “Elastic Audio Op-
tions” on page 255).
You can also undo any Elastic Audio processing
and apply an appropriate amount of AudioSuite
Gain reduction, and then try the Elastic Audio
processing again. The Clip LED only functions
for Real-Time Elastic Audio processing; it does
not function for Rendered Elastic Audio process-
ing.
Settings Menu Lets you copy, paste, save, and
import plug-in settings.
Librarian Menu Recalls settings files saved in the
plug-in’s root settings folder or in the current
session’s Settings folder.
Next (+) and Previous (–) Setting Buttons Let
you select the next or previous plug-in setting
from the Librarian menu.
Plug-ins Settings Select Button Accesses the
Plug-in Settings dialog, which lists the settings
files for the current plug-in. From this list, you
can select a new setting, or audition a series of
settings.
Compare Toggles between the original saved
plug-in setting and any changes you have made
to it so you can compare them.
Target Button When multiple Elastic Audio
Plug-in windows are open, clicking this button
selects that plug-in as the target for any com-
puter keyboard commands. Deselecting the Tar-
get button lets you open another targeted Elastic
Audio Plug-in window.
Elastic Audio plug-in controls
Settings menu
Track selector
Librarian menu
Target
button
Clip
LED
Plug-in selector
Real-Time or
Rendered
Processing
indicator
Next and Previous Settings buttons
Compare button
Plug-ins Settings Select button
For Rendered Elastic Audio processing, clip-
ping is indicated by the appearance of the
Elastic Audio Processing Clip indicator on
the region (see “Region Clip Indicator” on
page 507).
You will lose the current settings if they are
not saved before you use the Next and Pre-
vious Setting buttons. Always save your set-
tings to the Librarian menu.
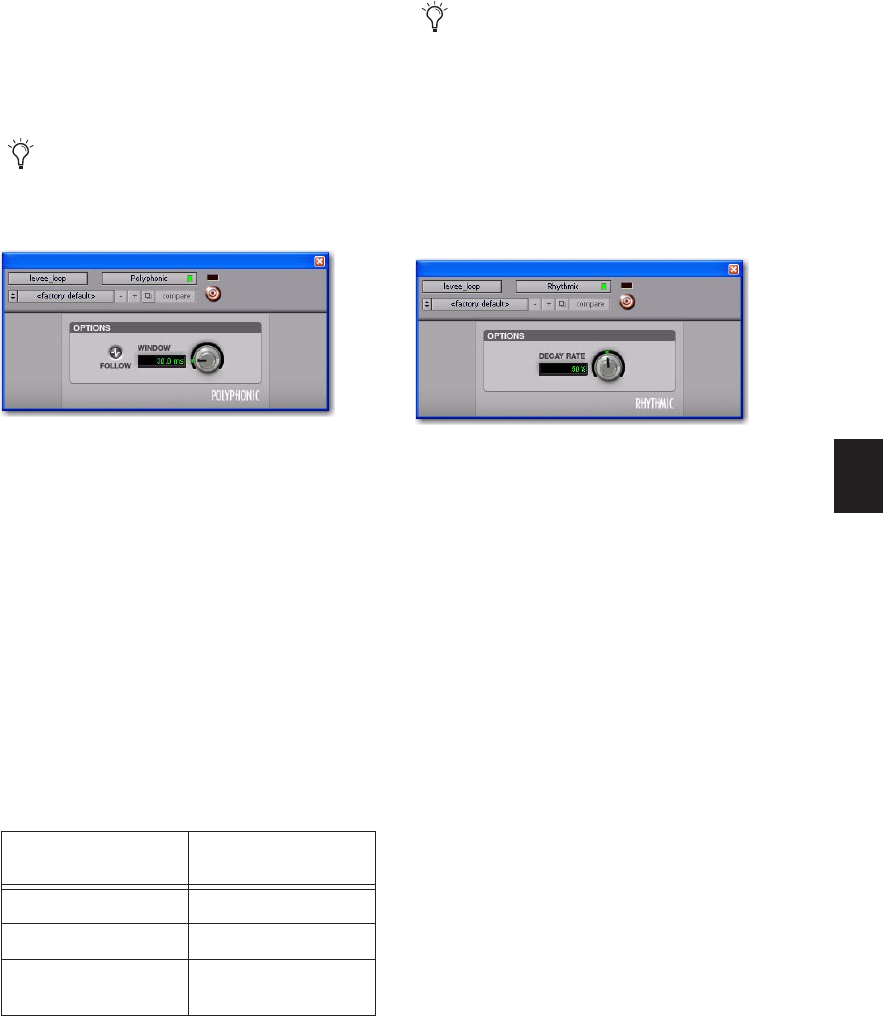
Chapter 26: Elastic Audio 509
Polyphonic
The Polyphonic plug-in is a general, all-purpose
algorithm that is effective with a wide range of
material. For complex loops and multi-instru-
ment mixes, use the Polyphonic plug-in.
Follow
Selecting the Follow option enables an envelope
follower that simulates the original acoustics of
the audio being stretched. Click the Follow but-
ton to enable or disable envelope following.
Window
The Polyphonic plug-in provides a single con-
trol for adjusting the analysis window size for
TCE processing. Experiment with adjusting the
Window size for different types of material until
you achieve the best results. The following table
provides some recommended Window sizes for
different types of material.
Rhythmic
The Rhythmic plug-in is best suited to material
with clear attack transients, such as drums.
Decay Rate
The Decay Rate control determines how much
of the decay from a transient is heard in the pro-
cessed audio when time stretching. When the
Rhythmic plug-in is selected, any gaps between
transients resulting from time stretching are
filled in with audio. The Decay Rate determines
how much of this audio is heard by applying a
fade out rate. Adjust the Decay Rate up to 100%
to hear the audio that is filling the gaps created
by the time stretching with only a slight fade, or
adjust down to 1.0% to completely fade out be-
tween the original transients.
The Polyphonic plug-in is the default plug-
in for previewing and importing from Digi-
Base browsers or the Region List.
Elastic Audio plug-in: Polyphonic
Type of Material Recommended
Window Size
General purpose 30–40 ms
Percussive 20 ms or lower
Pads and other legato
material
60 ms or higher
If you frequently work with distinct types of
material, you may want to find the best
Window settings for each type of material
and save them as plug-in settings for quick
and easy recall.
Elastic Audio plug-in: Rhythmic
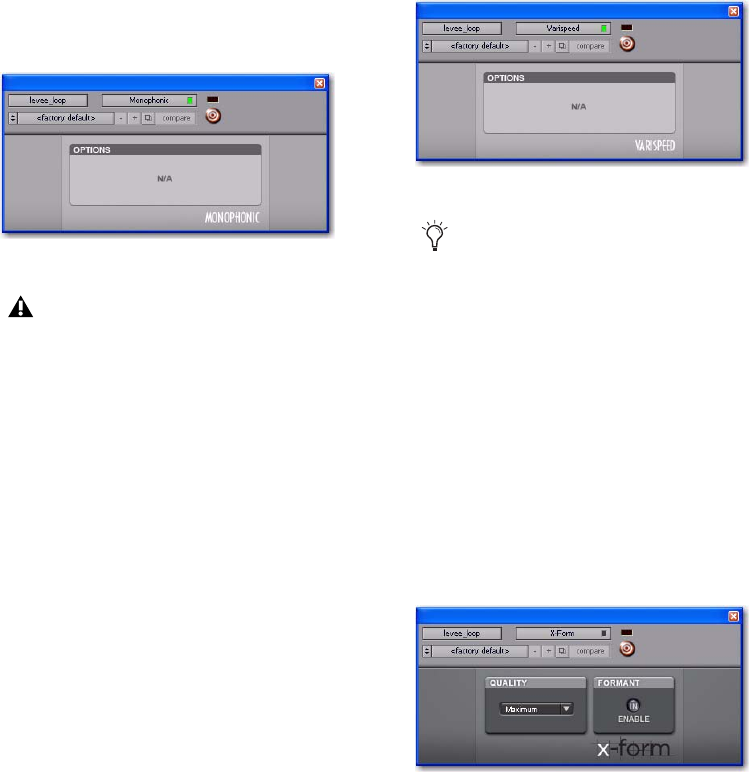
Pro Tools Reference Guide510
Monophonic
The Monophonic plug-in is best suited to
monophonic material where you want to keep
the formant relationships intact, such as with
vocals. The Monophonic plug-in is also well
suited to monophonic instrumental lines, such
as a bass track. The Monophonic plug-in pro-
vides no plug-in specific parameters.
Varispeed
Use the Varispeed plug-in to link time and pitch
changes for tape-like speed change effects, and
post production workflows. The Varispeed plug-
in provides no plug-in specific controls.
X-Form
(Rendered Only)
The X-Form Elastic Audio plug-in is a modified
version of Digidesign’s standalone X-Form
AudioSuite processing plug-in. The X-Form Elas-
tic Audio plug-in is for Rendered Elastic Audio
processing only and cannot process in real-time
or as an AudioSuite plug-in. It provides the
highest quality time compression algorithms for
music production, sound design, and audio
loop applications.
Elastic Audio plug-in: Monophonic
The Monophonic plug-in analyzes pitch as
well as peak transients in order to provide
higher quality TCE to pitched material.
Consequently, analysis for the Monophonic
algorithm takes longer than for the Poly-
phonic, Rhythmic, and Varispeed algo-
rithms. Also, when switching from another
Elastic Audio plug-in to Monophonic,
Pro Tools reanalyzes any audio on the track
to collect the extra analysis data.
Elastic Audio plug-in: Varispeed
Try using Varispeed with Quantize on drum
loops for some interesting effects.
Elastic Audio plug-in: X-Form
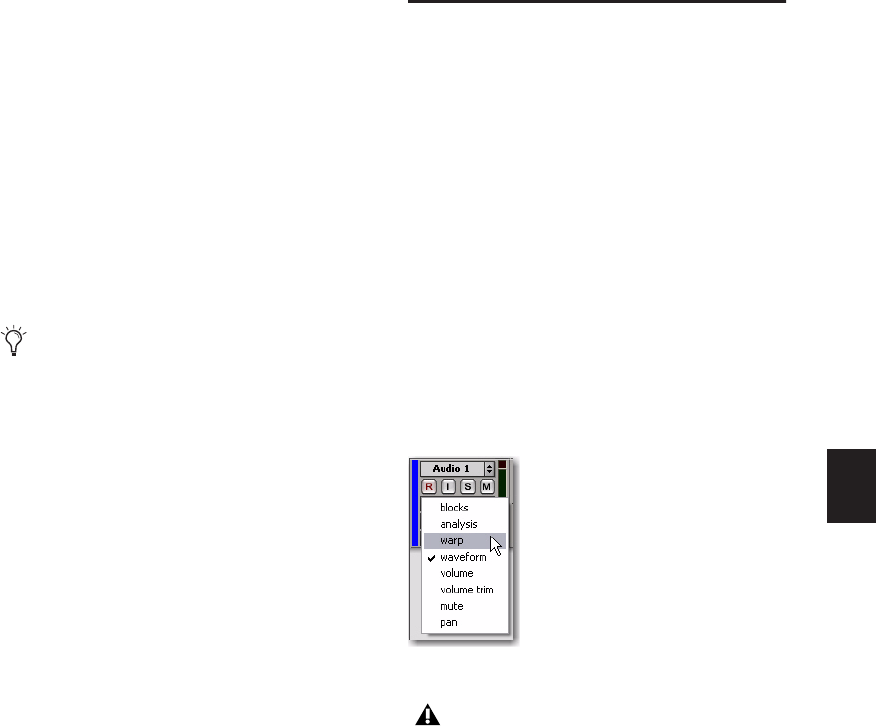
Chapter 26: Elastic Audio 511
Quality
Select either Maximum or Low (Faster) from the
Quality pop-up menu. Maximum is the slowest
processing algorithm, but provides the highest
quality results. Low (Faster) produces relatively
good results and is much faster than the Maxi-
mum setting.
Formant
For audio material with clear formants, enable
Formant to preserve the formant shape of audio
when applying TCE processing.
Editing in Warp View
In Warp view, you can manually “warp” (TCE)
audio to correct or adjust the timing of a perfor-
mance, or create special effects. In Warp view,
you can add, move, and delete Warp markers.
Warp markers are used to fix a specific point in
the audio (typically a detected transient event)
to a specific point in the Timeline. In this way,
you can apply detailed and nuanced “warping”
(TCE) of audio events.
To display Warp view:
1 Click the Elastic Audio–enabled track’s Track
View selector.
2 Select Warp from the Track View pop-up
menu.
Audio with a fundamental pitch has an
overtone series, or set of higher harmonics.
The strength of these higher harmonics cre-
ates a formant shape, which is apparent if
viewed using a spectrum analyzer. The over-
tone series, or harmonics, have the same
spacing related to the pitch and have the
same general shape regardless of what the
fundamental pitch is. It is this formant
shape that gives the audio its overall char-
acteristic sound or timbre. When pitch
shifting audio, the formant shape is shifted
with the rest of the material, which can re-
sult in an unnatural sound. Keeping this
shape constant is critical to formant correct
pitch shifting and achieving a natural
sounding result.
Selecting Warp view for an Elastic Audio–enabled track
Warp view is only available for Elastic Au-
dio–enabled tracks.
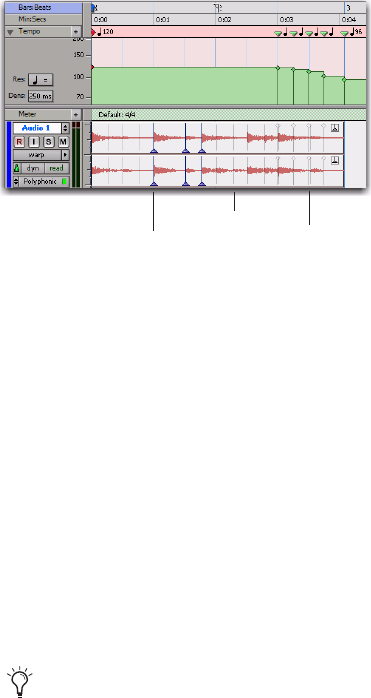
Pro Tools Reference Guide512
Elastic Audio Markers in Warp
View
Three types of markers are visible in Warp view:
Event markers, Warp markers, and Tempo
Event–generated Warp markers. Use Event
markers and Warp markers as control points for
applying Elastic Audio processing.
Event Markers
Event markers indicate detected (or manually
created) audio events. Event markers are only
displayed in Warp view and Analysis view. In
Warp view, Event markers appear as gray verti-
cal lines that do not fully extend to the top and
bottom of the track. With the Grabber tool in
Warp view, you can drag Event markers to apply
various kinds of warping depending on whether
or not Warp markers are present in the region as
well. In Warp view, you cannot add, relocate, or
delete Event markers. Use Analysis view to edit
Event markers (see “Editing in Analysis View”
on page 518).
Warp Markers
Warp markers anchor the audio to a specific
point in the Timeline. Warp markers are only
displayed in Warp view. In Warp view, a Warp
marker appears as a thick black vertical line with
a triangle at its base.
To better understand how Warp markers work,
think of the audio region as a rubber band, the
Timeline as a ruler, and Warp markers as pins.
Warp markers can be used to pin a specific point
of the rubber band (the audio) to a specific point
on the ruler (the Timeline). If you pin down one
point of the rubber band to one point on the
ruler, use a second pin to pin down another
point of the rubber band to another point on
the ruler, and then place a third pin equally be-
tween them on the rubber band, but fix it to a
point on the ruler closer to the second pin, the
rubber band will be stretched (or expanded) be-
tween the first and middle pins, and relaxed (or
compressed) between the middle pin and the
last pin.
In Warp view, you can add, relocate (without
warping), and delete Warp markers. You can
also move a Warp marker to apply Elastic Audio
processing (see “Warping Audio” on page 514).
Figure 4. Elastic Audio markers in Warp view
The display of Event markers is dependent
on Horizontal Zoom. If you are zoomed out
too far, Event markers are not displayed. To
see Event markers, zoom in.
Warp marker
Event marker
Tempo Event
Warp marker

Chapter 26: Elastic Audio 513
To add a Warp marker:
In Warp view, do one of the following:
• With the Pencil tool, click anywhere in the
region to add a Warp marker at that loca-
tion. If you click on an Event marker, a
Warp marker is created on top of the Event
marker.
• With the Grabber tool, Start-click (Win-
dows) or Control-click (Mac) anywhere in
the region to add a Warp marker at that lo-
cation. If you click on an Event marker, a
Warp marker is created on top of the Event
marker.
• With the Grabber tool, if no Warp markers
are present in the region, or if Warp mark-
ers are only present prior to the location
where you want to add a new Warp marker,
double-click an Event marker to add a
Warp marker on top of the Event marker.
• With the Grabber tool, double-click any-
where in the region where an Event marker
is not present to add a Warp marker at that
location.
• With the Grabber tool, single-click any
Event marker prior to another existing
Warp marker in the region to add a Warp
marker on top of that Event marker.
• With any Edit tool, Right-click anywhere in
the region and select Add Warp Marker
from the pop-up menu to add a Warp
marker at that location. If there is an Edit
selection, Warp markers are added at the se-
lection start and end.
To relocate a Warp marker (without applying
warping):
With the Grabber or the Pencil tool, Start-
click (Windows) or Control-click (Mac) and drag
a Warp marker to a new location.
To delete a Warp marker:
In Warp view, do one of the following:
• With the Grabber tool, double-click a Warp
marker.
• With the Grabber or the Pencil tool, Alt-
click (Windows) or Option-click (Mac) a
Warp marker.
• With any Edit tool, Right-click a Warp
marker and select Remove Warp Marker
from the pop-up menu.
To delete all Warp markers in a selection:
1 In Warp view, make an Edit selection that in-
cludes only the Warp markers you want to de-
lete (and none of the Warp markers you want to
keep).
2 Do one of the following:
• Press Delete or Backspace on your com-
puter keyboard.
– or –
• With any Edit tool, Right-click the Edit se-
lection and select Remove Warp Marker
from the pop-up menu.
Tempo Event–Generated Warp Markers
Tempo Event–generated Warp markers are not
editable and are only displayed to indicate
where Elastic Audio processing has been applied
to conform the audio to Tempo Events. You will
only see Tempo Event–generated Warp markers
on tick-based tracks. In Warp view, Tempo
Event–generated Warp markers appear as gray
vertical lines that do not fully extend to the bot-
tom of the track, and have a diamond at the top.
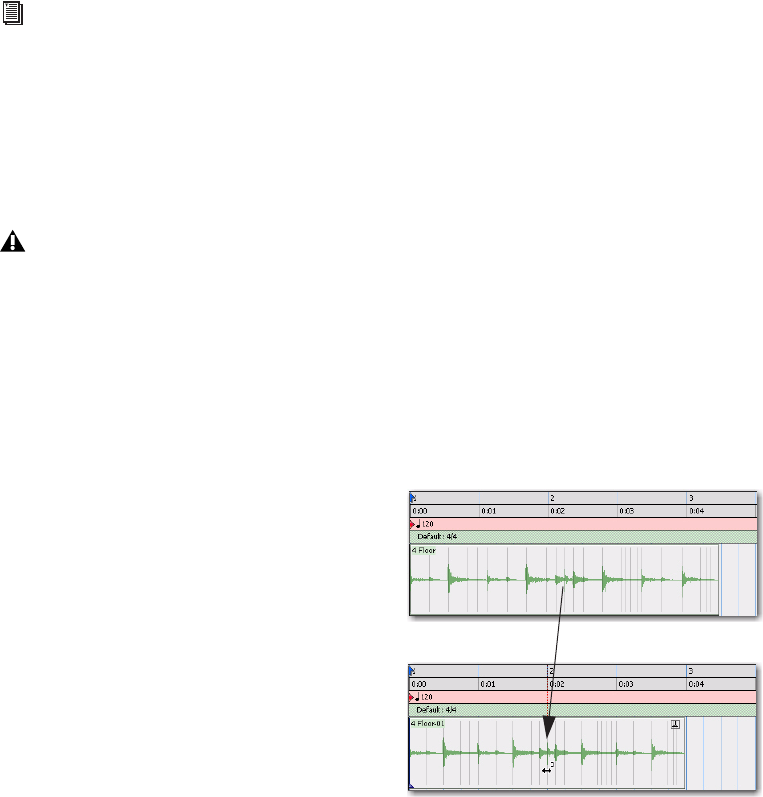
Pro Tools Reference Guide514
If you change the track timebase from ticks to
samples, any Tempo Event–generated Warp
markers convert to regular, editable Warp mark-
ers.
Warping Audio
In Warp view, you can manually warp audio in
three specific ways: Telescoping Warp, Accor-
dion Warp, and Range Warp.
Telescoping Warp
Telescoping Warp can be applied to any audio
region before or after a Warp marker as long as
no other Warp marker precedes or follows it ac-
cordingly. The audio can be on a sample- or tick-
based track. Telescoping Warp is especially use-
ful for adjusting audio files to match the session
tempo map and Bar|Beat grid.
To apply Telescoping Warp to a region:
In Warp view, do one of the following:
• With the Grabber tool, drag any Event
marker that is after the last Warp marker in
the region to the left or right to Telescope-
Warp the audio that is after the Warp
marker in or out. If no Warp marker is
present in the region, one is created auto-
matically at the region start. The region
start remains anchored to its location on
the Timeline.
– or –
• With the Grabber tool, Alt-click (Windows)
or Option-click (Mac) and drag any Event
marker that is before the first Warp marker
in the region to the left or right to Tele-
scope-Warp the audio that is before the
Warp marker in or out. If no Warp marker is
present in the region, one is created auto-
matically at the region end. The region end
remains anchored to its location on the
Timeline.
For more information, see “Tempo Changes
and Tick-Based Elastic Audio Tracks” on
page 606.
Automation does not follow manual warp-
ing of audio regions, including TCE trim-
ming and quantization of Elastic Audio.
However, automation does follow tempo
changes on tick-based tracks.
Telescoping Warp with the region start fixed
before warping
after warping
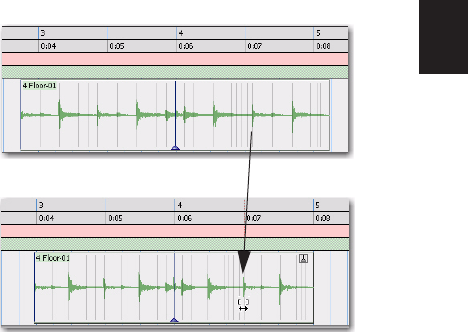
Chapter 26: Elastic Audio 515
Workflow Example
Beat match a song to the session tempo and
Bar|Beat grid using Telescoping Warp:
1 Make sure the Main Timebase ruler is set to
Bars:Beats.
2 Set the default tempo and meter as desired.
3 Select Grid mode.
4 Import a song, or any other longer audio file
from a DigiBase browser.
5 Make sure that Elastic Audio is enabled on the
track.
6 Select Warp view.
7 Make sure there are no Warp markers present
on the region. If necessary, delete any exisiting
Warp markers.
8 With the Pencil tool, add a Warp marker at the
bar 1 downbeat location within the region.
9 With the Grabber tool, drag the single Warp
marker to the bar in the Timeline where you
want the downbeat of the audio file to start.
10 Click and drag the Event marker on the
downbeat of bar 2 of the region to Telescope
warp the audio such that the Event marker
matches the corresponding bar number in the
Bars:Beats ruler.
11 If the region’s tempo varies, add a Warp
marker to the next downbeat location at the
tempo change and repeat the preceding steps.
Accordion Warp
Accordion Warp applies Elastic Audio process-
ing on both sides of a singe Warp marker in a re-
gion. This lets you expand or compress the au-
dio equally on both sides of a fixed point.
Accordion warp is useful for audio files where
the downbeat occurs in the middle of the re-
gion.
To apply Accordion Warp to a region:
1 In Warp view, add a single Warp marker at the
point in the region that you want to remain
fixed on the Timeline.
2 With the Grabber tool, drag any Event marker
that is before or after the single Warp marker to
the left or the right.
Accordion Warping a region around a fixed point
before warping
after warping
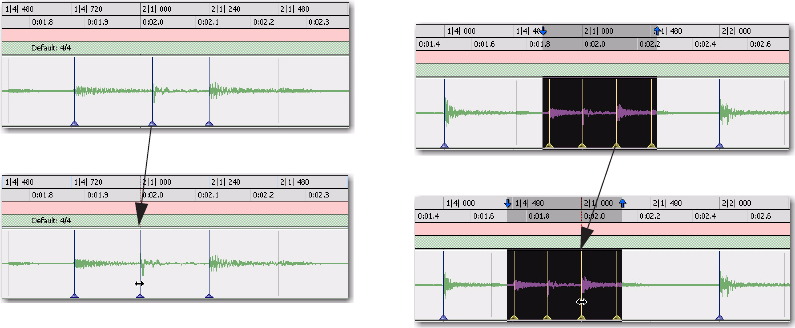
Pro Tools Reference Guide516
Range Warp
Range Warp applies Elastic Audio processing be-
tween two fixed points in a region. To apply
Range Warp, there must be at least two Warp
markers present in the region.
To apply Range Warp within a region:
1 In Warp view, add a Warp marker at the first
point that you want to fix to the Timeline.
2 Add another Warp marker to the end point
that you want to fix to the Timeline.
3 With the Grabber tool, drag an Event marker
between the two Warp markers to the left or
right. A Warp marker is added on top of the
Event marker and the audio is compressed or ex-
panded on either side of the clicked and dragged
marker while the audio outside the bounding
markers remains unaffected.
Range Warp with an Edit Selection
Pro Tools lets you apply Range Warp between
bounding Warp markers, but keeps the timing
intact between other Warp markers within an
Edit selection.
To apply Range Warp with an Edit Selection:
1 In Warp view, add a Warp marker at the first
point that you want to fix to the Timeline.
2 Add another Warp marker to the end point
that you want to fix to the Timeline.
3 Add any number of Warp markers in between.
4 With the Selector tool, make an Edit selection
that includes the Warp markers in between the
bounding Warp markers.
5 With the Grabber tool, drag any of the Warp
markers within the Edit Selection to the left or
the right.
Applying Range Warp between two Warp markers in a
region
before warping
after warping
Applying Range Warp to a selection between bounding
Warp markers
before warping
after warping
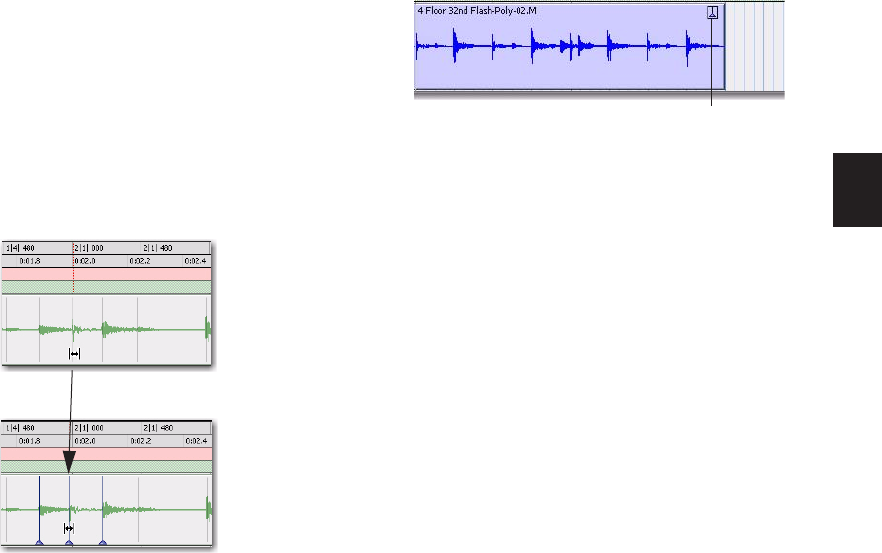
Chapter 26: Elastic Audio 517
Elastic Audio processing is only applied to the
audio between the bounding Warp markers and
the first and last Warp markers in the Edit Selec-
tion. All audio between the first and last Warp
markers in the Edit Selection maintain their rel-
ative timing.
Individual Range Warp
Individual Range Warp applies warping to a sin-
gle audio event in relation to the adjacent audio
events.
To apply Individual Range Warp:
1 In Warp view, with the Grabber tool, Shift-
click a Warp marker or an Event marker. If not
already present, Warp markers are automatically
created on the adjacent Event markers.
2 Drag to the left or right to warp the clicked
event.
Warped Regions
Regions that have been warped either manually
or automatically by tempo change or quantiza-
tion, display a Warp indicator in the upper
right-hand corner of the region. This indicator is
visible in any track view. Since unwarped re-
gions can reside on Elastic Audio–enabled
tracks, regions on Elastic Audio–enabled tracks
do not necessarily display the Warp indicator.
The Warp indicator only indicates that Elastic
Audio processing has been applied to a region.
Displaying the Warp Indicator
The Warp indicator for Elastic Audio regions can
displayed or hidden.
To toggle the display of the Warp indicator in
Elastic Audio regions:
Select or deselect View > Region > Warp Indi-
cator.
Out of Range Processing
Pro Tools lets you apply extreme amounts of
Elastic Audio processing. However, at such ex-
tremes, it is possible to go out of the selected
Elastic Audio plug-in’s processing range. When
this happens, it is possible that not every sample
will be processed correctly and you may en-
counter audio drop outs.
Applying Individual Range Warp
before warping
after warping
Warp indicator in a region in Waveform view
Warp
indicator
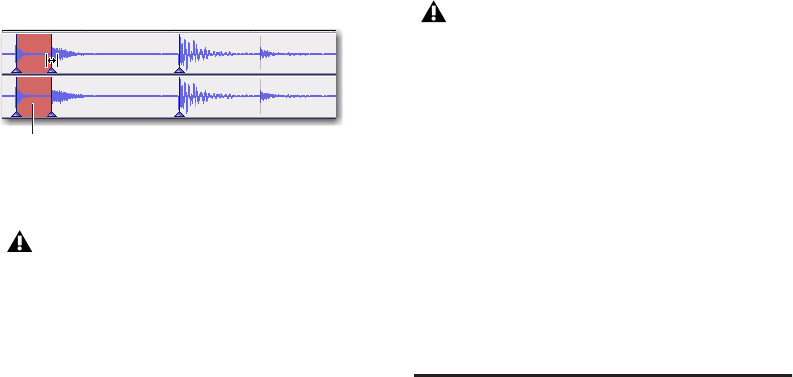
Pro Tools Reference Guide518
The valid range for Elastic Audio TCE processing
is 1/4x to 4x for all Elastic Audio plug-ins except
X-Form, which supports 1/8x to 8x. TCE less
than or greater than these ranges is effectively
“out of range.”
When out of range processing occurs, the sec-
tion of the audio region that is out of range
turns red. You can still apply Elastic Audio pro-
cessing, but you are warned by the color change
that the TCE factor is out of the normal range of
Elastic Audio processing.
Removing Region Warping
If you have applied any warping to a region, you
can remove warping and revert the region to its
original duration. This can be useful if you are
not satisfied with the results and want to revert
to the pre-warped region. Warp markers are not
deleted when applying the Remove Warp com-
mand, but any warping is undone.
To remove region warping:
1 Select the region for which you want to re-
move warping.
2 Do one of the following:
• Choose Region > Remove Warp.
– or –
• With any Edit tool, Right-click the region
and select Remove Warp from the pop-up
menu.
Edit Groups and Warp Editing
Elastic Audio–enabled tracks can be included in
Edit Groups. For Elastic Audio–enabled tracks
that are part of an Edit Group, applying Elastic
Audio processing on one track likewise applies it
to all other tracks within that Edit Group.
Editing in Analysis View
In Analysis view, you can add, move, and delete
Event markers. Usually, Pro Tools accurately de-
tects all the transient events (Event markers) in
an audio file and you will not need to work in
Analysis view. However, Pro Tools may not ac-
curately detect every audio event or may errone-
ously detect audio events with some types of au-
dio material. This is especially true for audio
without clear transients, such as legato strings,
melismatic vocals, or a soft synth pad.
Red indicates that the TCE Factor is out of range
The TCE Factor in the Elastic Properties
window supports extreme ranges from
1–9999%. However anything outside of
25–400% will be “out-of-range” and will
be displayed in red.
TCE Factor
out of range
Remove Warp can only be applied to re-
gions and cannot be applied to region
groups. To unwarp region groups you must
first ungroup the region, then apply Remove
Warp to the underlying regions, and then
regroup those regions.
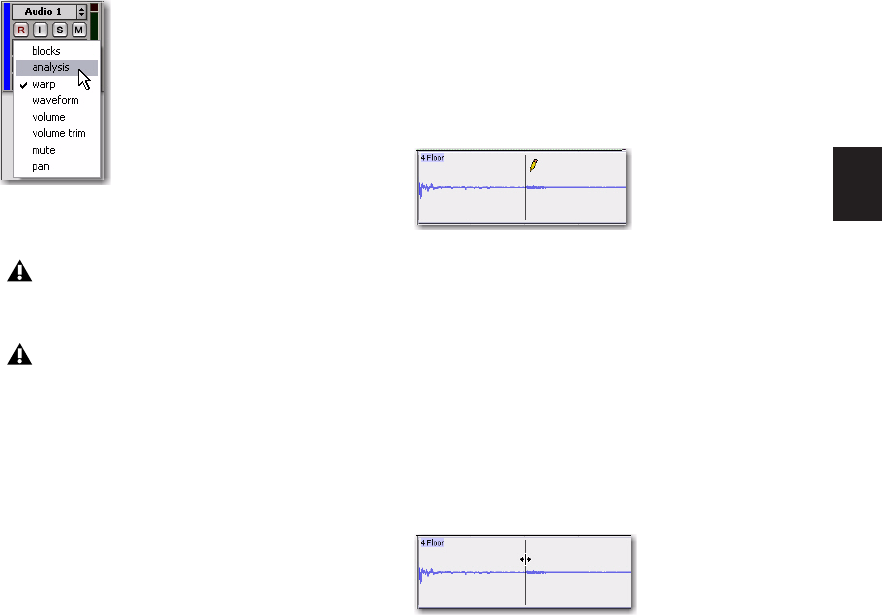
Chapter 26: Elastic Audio 519
Use Analysis view to manually correct the pres-
ence and location of Event markers. The accu-
rate identification of audio events yields the
best results when applying Elastic Audio pro-
cessing.
To display Analysis view:
1 Click the Elastic Audio–enabled track’s Track
View selector.
2 Select Analysis from the Track View Selector
pop-up menu.
Adding Event Markers
To add an Event marker:
In Analysis view, do one of the following:
• With the Pencil tool, click at the location
where you want to add an Event marker.
• With the Grabber tool, double-click at the
location where you want to add an Event
marker.
• With the Grabber tool, Start-click (Win-
dows) or Control-click (Mac) at the loca-
tion where you want to add an Event
marker.
• With any Edit tool, Right-click at the loca-
tion where you want to add an Event
marker and select Add Event Marker from
the pop-up menu.
Moving Event Markers
To move an Event marker:
In Analysis view, do one of the following:
• With the Pencil tool, drag the Event marker
to a new location.
– or –
• With the Grabber tool, drag the Event
marker to a new location.
Selecting Analysis view for an Elastic Audio–enabled
track
Analysis view is only available for Elastic
Audio–enabled tracks.
In Analysis view, you can only edit Analysis
markers using the Edit tools. You cannot
use the Edit tools for any region editing.
Switch to Warp or Waveform views for re-
gion-based editing capabilities with the
Edit tools.
Adding an Event marker with the Pencil tool
Moving an Event marker

Pro Tools Reference Guide520
Deleting Event Markers
To delete an Event marker:
In Analysis view, do one of the following:
• With the Pencil tool, Alt-click (Windows)
or Option-click (Mac) the Event marker
you want to delete.
• With the Grabber tool, Alt-click (Windows)
or Option-click (Mac) the Event marker
you want to delete.
• With the Selector tool, make an Edit selec-
tion that includes any Event markers you
want to delete and press Delete or Back-
space on your computer keyboard.
• With the Selector tool, make an Edit selec-
tion that includes any Event markers you
want to delete, Right-click the selection,
and choose Remove Event Marker from the
pop-up menu.
Edit Groups and Event Editing
Elastic Audio–enabled tracks can be included in
Edit Groups. For Elastic Audio–enabled tracks
that are part of an Edit Group, editing Event
markers on one track likewise apply to all other
tracks within that Edit Group.
If corresponding Warp markers are not already
present on Elastic Audio–enabled tracks that are
part of an Edit Group, new Warp markers are
created on those tracks when you add or move a
Warp marker on any track that is part of the Edit
Group.
Deleting an Event marker with the Pencil tool
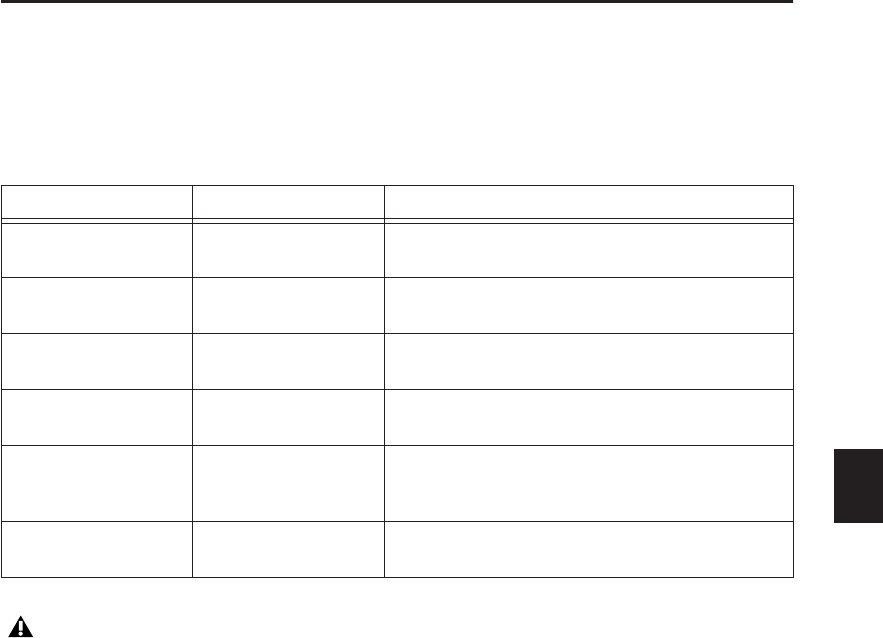
Chapter 26: Elastic Audio 521
Moving Elastic Audio Between Tracks
Pro Tools analyzes, conforms, and commits audio in different ways when moving audio regions be-
tween tracks with Elastic Audio enabled and tracks without Elastic Audio enabled. Table 27 on
page 521 shows the different results for moving regions between real-time Elastic Audio–enabled
tracks, Rendered Elastic Audio–enabled tracks, and audio tracks without Elastic Audio.
Table 27. Moving Elastic Audio between tracks
From To Result
Real-time Elastic
Audio–enabled track
Rendered Elastic
Audio–enabled track
Render region with destination track’s Elastic Audio plug-
in
Real-time Elastic
Audio–enabled track
audio track (no Elastic
Audio)
Render region with source track’s Elastic Audio plug-in
and commit the region to the destination track
Rendered Elastic
Audio–enabled track
Real-time Elastic
Audio–enabled track
Apply real-time Elastic Audio processing using the desti-
nation track’s Elastic Audio plug-in
Rendered Elastic
Audio–enabled track
audio track (no Elastic
Audio)
Commit to track
Audio track (no Elastic
Audio)
Real-time Elastic
Audio–enabled track
Calculate Elastic Audio analysis and apply real-time
Elastic Audio processing using the destination track’s
Elastic Audio plug-in
Audio track (no Elastic
Audio)
Rendered Elastic
Audio–enabled track
Calculate Elastic Audio analysis and render the region
using the destination track’s Elastic Audio plug-in
Regions that are committed, either by disabling Elastic Audio on a track or by moving a region to a
track without Elastic Audio enabled, are written to disk as new audio files (see “Committed Regions”
on page 503.)
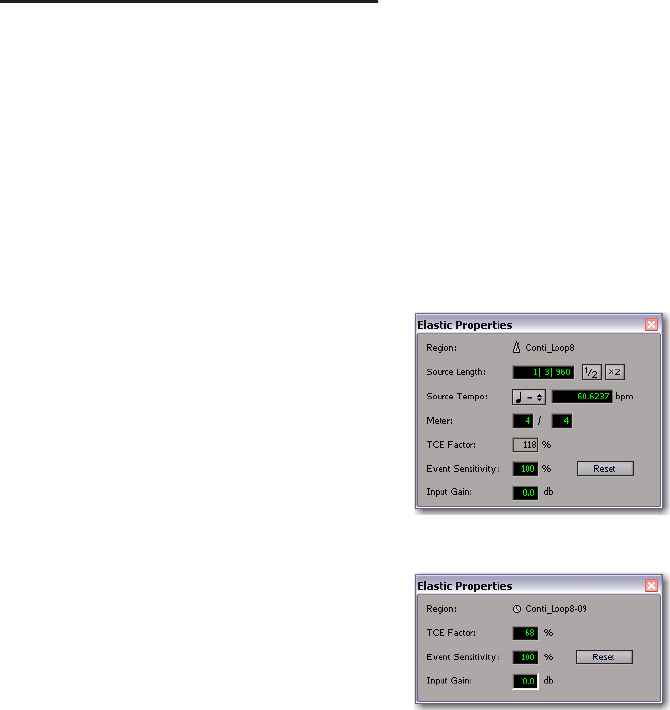
Pro Tools Reference Guide522
Elastic Properties
Each region on an Elastic Audio–enabled track
has specific Elastic Audio properties (such as
tempo, meter, TCE factor, and Input Gain).
The Elastic Properties window lets you view and
change the properties for selected regions. For
example, you can reduce the Input Gain for
Elastic Audio processing to avoid clipping that
can occur during processing.
From the Elastic Properties window, you can
also filter Event markers for Elastic Audio re-
gions on tick-based tracks. Filtering Event mark-
ers can result in better quality Elastic Audio pro-
cessing of material with ambiguous transients.
To view the Elastic Properties for a region:
1 Select a region on an Elastic Audio–enabled
track. The track can be either sample- or tick-
based.
2 Do one of the following:
• Choose Region > Elastic Properties.
– or –
• Right-click the region and choose Elastic
Properties from the pop-up menu.
Elastic Properties Window
The Elastic Properties window displays informa-
tion about Elastic Audio processing and analysis
for one or more regions. You can also use the
Elastic Properties window to adjust Elastic Audio
processing and analysis data.
There are different Elastic Properties available in
the Elastic Properties window, depending on
whether the track is tick-based or sample-based.
If the track is sample-based, a reduced set of
Elastic Audio Properties are displayed.
Region
The Region property displays the name of the
region and indicates whether or not the region
is on a tick or sample-based track. If more than
one region is selected, the number of selected re-
gions is displayed. If regions on both tick and
sample-based tracks are selected, only the re-
duced set of properties are displayed.
Elastic Properties, tick-based
Elastic Properties, sample-based
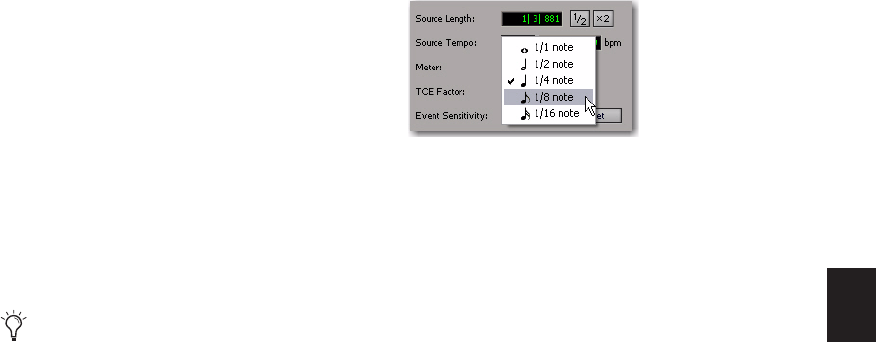
Chapter 26: Elastic Audio 523
Source Length (Tick-Based Tracks Only)
The Source Length property displays the length
of the region based on the source file in bars and
beats. If the length of the source file was ana-
lyzed incorrectly, you can change it.
To change the Source Length of a region:
1 Open the Elastic Properties window for the re-
gion.
2 Do one of the following:
• Type the correct bar, beat, and tick values
in the Source Length field.
• If the duration was incorrectly analyzed as
being half the duration of the source file,
click the x2 button.
• If the duration was incorrectly analyzed as
being twice the duration of the source file,
click the 1/2 button.
Source Tempo (Tick-Based Tracks Only)
The Source Tempo property displays the average
tempo of the source file, which is calculated
based on the detected transient events and the
length of the file. If the tempo of the source file
was analyzed incorrectly, you can change it.
To change Source Tempo of a region:
1 Open the Elastic Properties window for the re-
gion.
2 Select the correct note value for the beat from
the Tempo Resolution pop-up menu. For exam-
ple, if the source file is in 5/8, select 1/8 note.
3 Do one of the following:
• Type the tempo in the Source Tempo field.
• If the tempo was incorrectly analyzed as
being half the tempo of the source file,
click the x2 button.
• If the tempo was incorrectly analyzed as
being twice the tempo of the source file,
click the 1/2 button.
Meter (Tick-Based Only)
Elastic Audio analysis does not calculate meter
and assumes all files are in 4/4. If you work with
meters other than 4/4, use the Meter property to
correctly identify the source meter.
To change Meter of a region:
1 Open the Elastic Properties window for the re-
gion.
2 Click in the Meter nominator field and type
the correct number of beats per measure. For ex-
ample, if the region is in 3/4, type 3.
3 Click the Meter denominator field and type
the correct note value. For example, if the meter
is in 6/8, type 8.
Changing the duration of a region on an
Elastic Audio–enabled track using the TCE
Trimmer tool updates the Source Length in
the Elastic Properties window.
Elastic Properties, selecting the Tempo Resolution

Pro Tools Reference Guide524
TCE Factor
The TCE Factor property displays the percentage
of change applied to the source file. On tick-
based tracks, this property is display only and
cannot be edited. On sample-based tracks, you
can change the TCE Factor to apply TCE to the
region. The percentage of the TCE factor is al-
ways calculated in relation to the source file.
Event Sensitivity
The Event Sensitivity property lets you filter
Event markers based on the analysis confidence
level. The confidence level for any detected
transient event is based, in part, on the clarity of
the transient. For example, if the file is a drum
loop, loud accented hits will be analyzed with a
higher degree of confidence than a soft, unac-
cented hit.
The Event Sensitivity acts like a threshold for
showing only the transient events that were de-
tected with a high degree of confidence. In
Warp or Analysis track views you will see the
number of Event markers decrease or increase as
you lower or raise the Event Sensitivity.
Lowering the event sensitivity can help reduce
the number of erroneously detected transients.
In turn, this can result in better sounding Elastic
Audio processing. Pro Tools preserves the de-
tected transients when applying TCE in order to
avoid flamming and granulation of the tran-
sients. Consequently, false transients are also
preserved and the resulting sound quality can be
less than desirable. If you are working with au-
dio material that does not have clearly defined
transients, you may want to lower the Event
Sensitivity in the Elastic Properties, or you may
want to even edit the Event markers in Analysis
view.
Input Gain
It is possible to encounter clipping when time
compressing audio. Real-Time Elastic Audio
plug-ins provide a Clip indicator to let you
know when clipping has occurred. Rendered
Elastic Audio regions display a Clip indicator on
the region when clipping has occurred (see “Re-
gion Clip Indicator” on page 507).
If you encounter clipping when processing Elas-
tic Audio, use the Input Gain property to atten-
uate the gain of the audio signal before it is pro-
cessed.
AudioSuite Processing and
Elastic Audio Regions
Real-Time Elastic Audio processing is non-de-
structive. However, since AudioSuite plug-ins
process the entire region and write a new audio
file (or actually apply destructive processing),
when applying AudioSuite processing to regions
on Elastic Audio–enabled tracks, any Elastic Au-
dio processing is rendered first, the rendered file
is then processed by AudioSuite, and the result-
ing new audio file is analyzed for Elastic Audio
processing.
For REX files, Pro Tools converts the slices
as Events with 100% confidence. Conse-
quently, setting the Event Sensitivity from
99% to 1% does not filter out any events
based on slices. However, if you set the
Event Sensitivity to 0%, all markers are fil-
tered out regardless.

Chapter 26: Elastic Audio
525
Fades and MicroFades
Fades and Elastic Audio Processing
When applying fades to warped regions (regions
that have been processed by Elastic Audio), the
audio selected for the fade is first rendered and
then the fade is generated based on the rendered
audio file. While you can create fades and cross-
fades on regions on Elastic Audio–enabled
tracks, neither Real-Time nor Rendered Elastic
Audio processing can be applied to fades. Con-
sequently, fades always retain their absolute du-
ration and fades must be recalculated after any
Elastic Audio processing has been applied to the
underlying audio.
For example, if you change the session tempo, a
region on a tick-based Elastic Audio–enabled
track will change its duration (in minutes and
seconds) to match the new tempo, but any fades
that are part of that region do not change dura-
tion. The underlying audio is processed to
match the tempo change, then it is rendered,
and then the fade is regenerated. Even though
the underlying audio changes, the absolute du-
ration of the fade does not.
In Warp view, you will notice that Event mark-
ers never appear in fades and that Warp markers
cannot be added within fades. As a general rule,
apply fades to regions on Elastic Audio–enabled
tracks only after you have finshed any manual
warp editing.
Microfades
Real-time Elastic Audio processing is not com-
pletely deterministic. Consequently, depending
on where you start playback, the part of a region
being played might actually be a few samples
longer or shorter. When fades or crossfades are
applied to warped regions, the audio waveform
at the boundary between the (real-time) region
and the (rendered) fade may not actually be
continuous.
For example, if there are two butt-spliced re-
gions on a Real-Time Elastic Audio–enabled
track, Elastic Audio processes them separately
even though they are contiguous on the track.
As a result, the audio may not really be contigu-
ous after Elastic Audio processing and there may
be an audible pop when playing back across the
transition between the two regions.
To help compensate, Pro Tools applies micro-
fades to region boundaries on Real-Time Elastic
Audio–enabled tracks. Microfades are small real-
time fades at region boundaries intended to mit-
igate artifacts across region boundaries, or be-
tween an Elastic Audio processed region and a
rendered Fade file. Microfades are very short;
they are only about 1.5 milliseconds long (64
samples at 44 kHz, 128 samples at 96 kHz, and
256 samples at 192 kHz).
Approximate Waveforms
Another consequence of Real-Time Elastic Au-
dio processing is that the drawing of the wave-
forms is only approximate. For example, if you
bus record a Real-Time Elastic Audio processed
track, you will notice that the Waveform on the
source track does not necessarily exactly match
the recorded track. However, be assured that
what you hear is an accurate rendition of the
Real-Time Elastic Audio processing even if the
waveform drawing on the source track is only
approximate.
Region groups that contain regions with
fades are not allowed on Elastic Audio–en-
abled tracks.
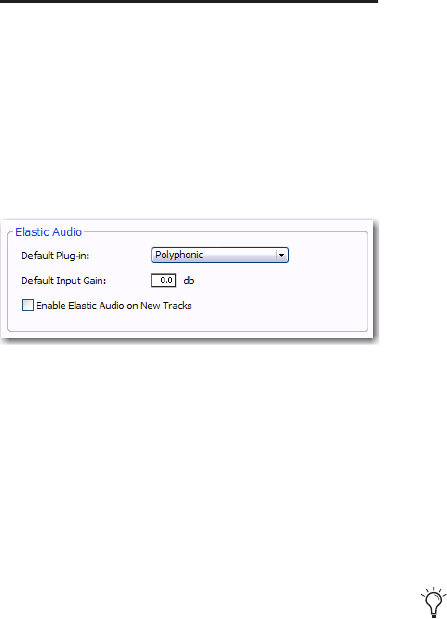
Pro Tools Reference Guide526
Elastic Audio Preferences
Pro Tools provides several preferences for Elastic
Audio. These preferences determine which Elas-
tic Audio plug-in is used for preview and import,
and whether or not new tracks are created with
Elastic Audio enabled using the selected default
plug-in.
Default Plug-in Lets you select any Real-Time
Elastic Audio plug-in as the default plug-in for
previewing and importing Elastic Audio. The se-
lected Default Elastic Audio plug-in is also used
when new tracks are created with Elastic Audio
enabled. The Elastic Audio Plug-in selector in
DigiBase browsers inherits the selected Default
Plug-in. Likewise, changing the selected plug-in
in DigiBase browsers updates the selected De-
fault Plug-in in the Processing preferences page.
Default Input Gain Lets you attenuate the signal
input to Elastic Audio plug-ins by 0 to –6 dB for
preview and import. If you experience clipping
due to Elastic Audio processing during preview
or after import, you may want to set the Default
Input Gain to slightly attenuate the audio signal
input for Elastic Audio processing. This prefer-
ence also applies to any audio imported to an
Elastic Audio–enabled track.
If you commit any regions on a track (by dis-
abling Elastic Audio on the track) that were im-
ported with Input Gain, their region-based In
put Gain is reset to 0.
The Elastic Properties window inherits the De-
fault Input Gain preference. To apply further re-
gion-based Input Gain for Elastic Audio process-
ing, select the region and adjust the Input Gain
setting in the Elastic Properties window (see
“Elastic Properties Window” on page 522).
Enable Elastic Audio on New Tracks When se-
lected, new tracks are created with Elastic Audio
enabled. The selected Default Plug-in is used.
Processing Preferences, Elastic Audio
If the Enable Elastic Audio on New Tracks
option is selected, you may want to also se-
lect the New Tracks Default to Tick Time-
base option in the Editing Preferences page.
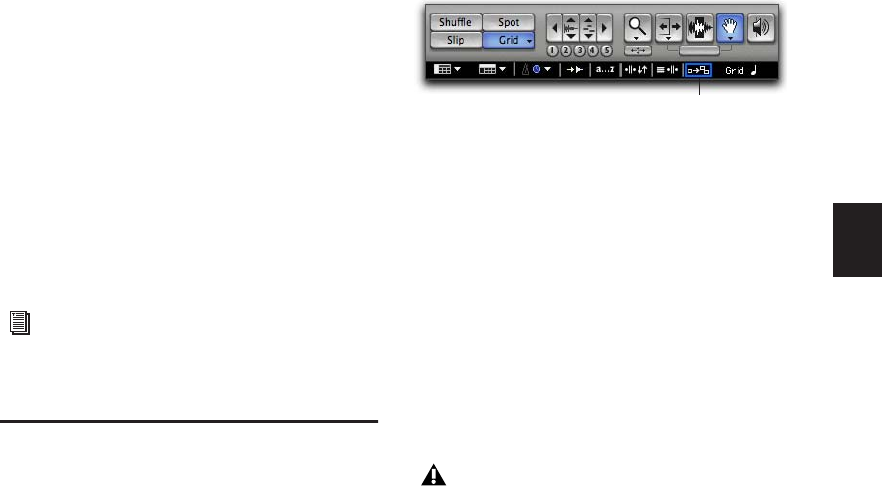
Chapter 27: MIDI Editing 527
Chapter 27: MIDI Editing
Pro Tools provides powerful MIDI editing tools.
You can create and edit individual MIDI notes
and controller events with the Pencil, Trim, and
Grabber tools in the Edit window. You can use
the various Event Operations (such as Quantize,
Transpose, Change Velocity, and Change Dura-
tion) to destructively transform groups of MIDI
notes in terms of pitch, timing, dynamics, and
phrasing. You can also use Real-Time Properties
to nondestructively affect MIDI on playback or
play-through. Pro Tools also provides numerous
zoom and view tools that are optimized for
MIDI editing.
Mirrored MIDI Editing
Mirrored MIDI Editing lets you edit MIDI re-
gions and have your edits apply to every MIDI
region of the same name. This can be particu-
larly useful when editing looped MIDI regions.
To enable Mirrored MIDI Editing, do one of the
following:
Select Options > Mirror MIDI Editing.
– or –
Enable the Mirrored MIDI Editing button in
the Edit window.
In Mirrored MIDI Editing mode, the Mirrored
MIDI Editing button blinks Red once as an edit
is made to alert you that your edit is being ap-
plied to more than one region.
To disable Mirrored MIDI Editing, do one of the
following:
Deselect Options > Mirror MIDI Editing.
– or –
Disable the Mirrored MIDI Editing button in
the Edit window.
For information on region-specific editing
for both MIDI and audio, see Chapter 24,
“Editing Regions and Selections.”
Mirrored MIDI Edit button in the Edit window
If Mirrored MIDI Editing mode is disabled,
and you edit notes of looped regions in
Notes View, the edit flattens the loop. Sim-
ilarly editing region groups separates the re-
gion groups.
Mirrored MIDI Edit button
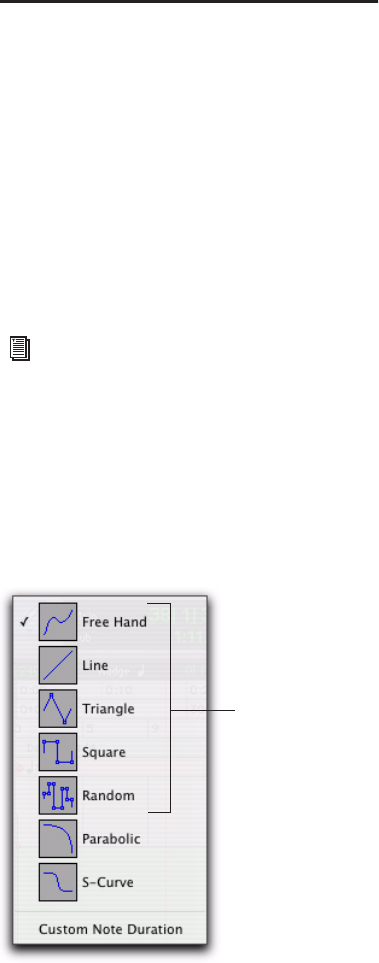
Pro Tools Reference Guide528
The Pencil Tool
The Pencil tool is useful for creating and editing
MIDI data. The first five Pencil tool shapes (Free
Hand, Line, Triangle, Square, and Random) can
be used to enter pitches with varying durations
and velocities (note velocities are determined by
the Pencil tool shape). The various Pencil tool
shapes can be particularly useful for drawing
and editing different types of MIDI control
data—for example, try using Line for volume,
Triangle for pan, Free Hand for pitch bend, and
Square or Random for velocity.
To select the Pencil tool shape:
1 Click the Pencil tool icon in the Tool Bar for
the Pencil tool shape pop-up menu.
2 Select a Pencil tool shape.
Free Hand
When in Notes View, the Free Hand shape in-
serts a single MIDI note whose velocity is de-
fined by the Default Note On Velocity MIDI
preference. The pitch, location, and duration of
the note are determined by where on the MIDI
track you click and release with the mouse.
When editing MIDI velocities or continuous
controller data, the Free Hand shape draws
freely according to the movement of the mouse.
The shape is reproduced as a series of steps ac-
cording to the Pencil Tool Resolution When
Drawing Controller Data MIDI preference.
Line
When in Notes View, the Line shape inserts a se-
ries of MIDI notes on a single pitch whose veloc-
ities are defined by the Default Note On Velocity
MIDI preference. The duration of each note is
determined by the current Grid value.
When editing MIDI velocities or continuous
controller data, the Line shape draws in a
straight line from click to release. MIDI contin-
uous controller values change in steps according
to the Pencil Tool Resolution When Drawing
Controller Data MIDI preference.
Triangle
When in Notes View, the Triangle shape inserts
a series of MIDI notes on a single pitch whose
velocities oscillate between the defined Default
Note On Velocity MIDI preference and 127 ac-
cording to a triangle pattern. The duration of
each note is determined by the current Grid
value.
Parabolic and S-Curve Pencil shapes are
used for drawing tempo events only in the
Tempo Editor. See “Drawing Tempo
Events” on page 608.
Pencil tool shape pop-up menu
Pencil tool
shapes
available for
MIDI
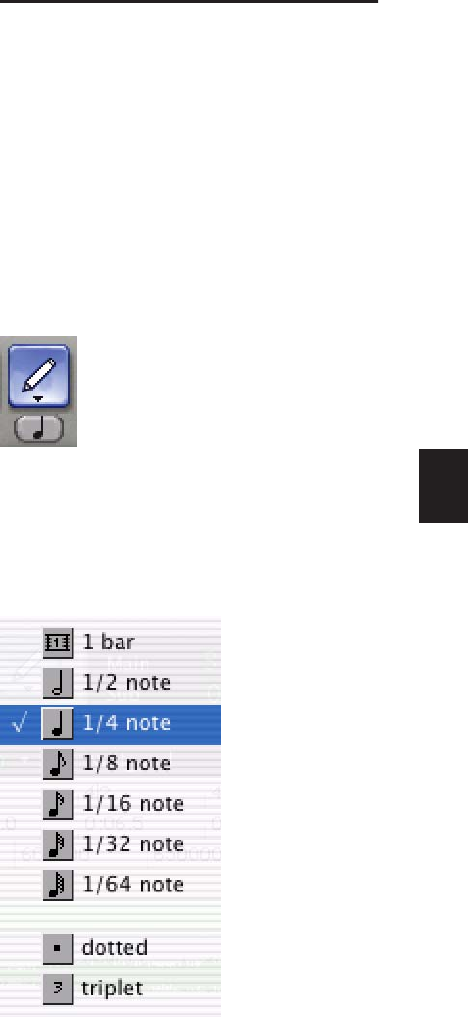
Chapter 27: MIDI Editing 529
When editing MIDI velocities or continuous
controller data, the Triangle shape draws a trian-
gular pattern that changes direction according
to the current Grid value. MIDI controller values
change in steps according to the Pencil Tool Res-
olution When Drawing Controller Data MIDI
option in the MIDI Preferences page.
Square
When in Notes View, the Square shape inserts a
series of MIDI notes on a single pitch whose ve-
locities alternate between the defined Default
Note On Velocity MIDI preference and 127. The
duration of each note is determined by the cur-
rent Grid value.
When editing MIDI velocities or continuous
controller data, the Square shape draws a square
pattern that repeats at a rate based on the cur-
rent Grid value.
Random
When in Notes View, the Random shape inserts
a series of MIDI notes on a single pitch whose
velocities change randomly within the range be-
tween the defined Default Note On Velocity
MIDI preference and 127. The duration of each
note is determined by the current Grid value.
When editing MIDI velocities or continuous
controller data, the Random shape draws a se-
ries of random values that change at a rate based
on the current Grid value.
Custom Note Duration
The Custom Note Duration command lets you
define the default note duration for inserting
notes manually.
To select a Custom Note Duration:
1 Click the Pencil tool icon in the Tool Bar for
the Pencil tool shape pop-up menu.
2 Select Custom Note Duration. A note icon
(the Custom Note Duration button) will appear
below the Pencil tool icon in the Tool Bar.
3 Click the note icon for the Custom Note Du-
ration pop-up menu, and select a note duration.
The note icon changes to show the selected note
value.
Pencil tool with note icon
Custom Note Duration pop-up menu
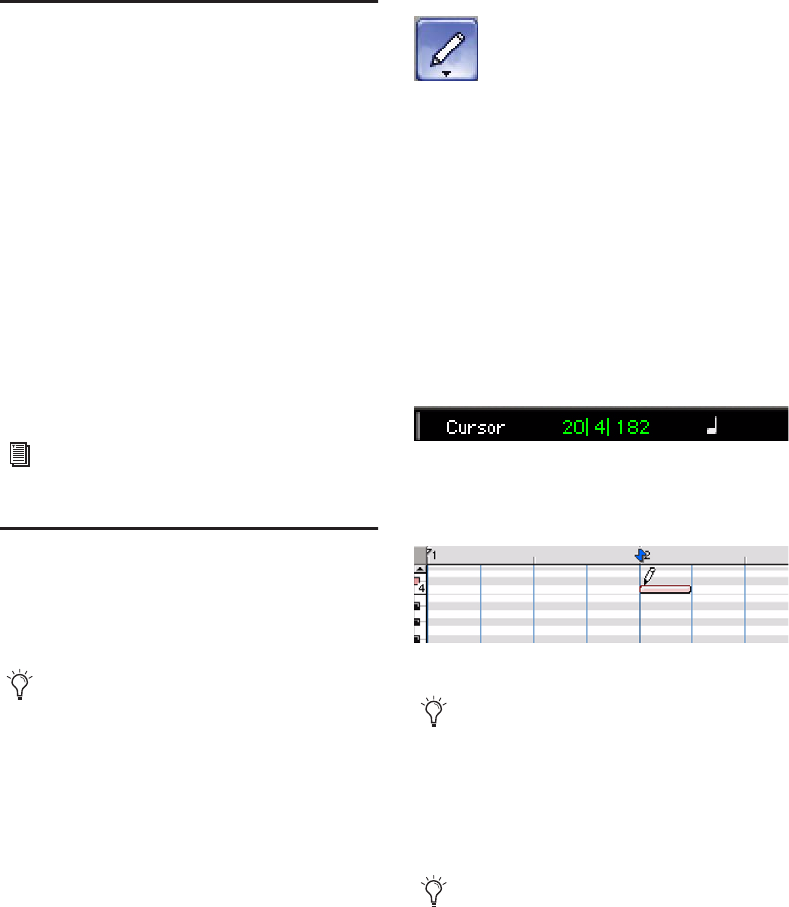
Pro Tools Reference Guide530
Setting the Grid Value
When inserting MIDI notes with the Pencil tool,
the Grid value determines the duration of each
note, or other characteristics, based on the Pen-
cil tool shape (see “The Pencil Tool” on
page 528).
To set the Grid value for MIDI editing:
1 Set the Main Time Scale to Bars:Beats (see “Set-
ting the Main Time Scale” on page 598).
2 From the Grid Value pop-up menu, select a
note value (such as 1/4, 1/8, or 1/16).
3 Verify the default session meter and tempo
(see “Setting the Default Meter” on page 325
and “Setting the Default Tempo” on page 325).
Inserting MIDI Notes
In addition to recording, step recording, and im-
porting MIDI into Pro Tools, you can manually
insert MIDI notes using the Pencil tool.
To insert a MIDI note:
1 Set the MIDI or Instrument track to Notes
View.
2 Select the Pencil tool and make sure it is set to
Free Hand. The cursor will change to the Pencil
tool when located over the playlist area of a
MIDI or Instrument track in Notes View.
3 To insert quarter notes on the beat, set the
Main Time Scale to Bars:Beats, and set the Edit
mode to Grid and the Grid value to quarter
notes (0|1|000).
4 Move the Pencil tool into the playlist area for
the MIDI or Instrument track. Use the Edit win-
dow’s ruler and the track’s mini-keyboard to lo-
cate the pitch and time location you want.
When using the Pencil tool, the Cursor location
and value are displayed in the Options Bar.
5 When you reach the pitch and time location
you want, click to insert the note.
For more information on Grid mode, see
“Grid” on page 422.
When inserting MIDI notes or other MIDI
data with the Pencil tool, MIDI region
boundaries are created on the nearest bar-
lines.
Pencil tool set to Free Hand
Cursor location and value
MIDI note inserted with the Pencil tool
With the Smart Tool active (see “Using the
Smart Tool” on page 439), Start-click
(Windows) or Control-click (Mac) to change
the cursor to the Pencil tool and insert MIDI
notes; Option-Control-click (Mac) or Alt-
Start-click (Mac) to delete notes.
With the Grid mode enabled, the start point
of the MIDI note snaps to the nearest Grid
boundary by default. With the Free Hand
Pencil tool, press Control (Windows) or
Command (Mac) after clicking and holding
to temporarily suspend snap to grid.
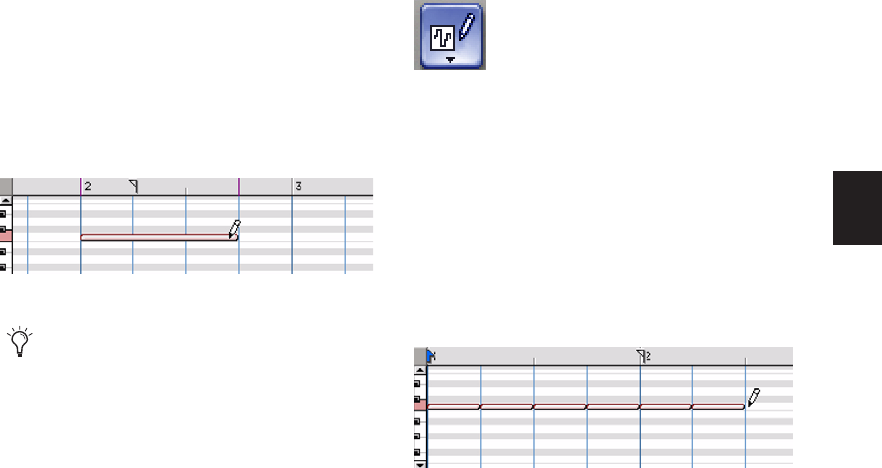
Chapter 27: MIDI Editing 531
The velocity for inserted notes is determined by
the Default Note On Velocity MIDI option in
the MIDI Preferences page. When in Grid mode,
the duration of the note is determined by the
Edit window’s Grid value. The duration of the
note can also be determined by the Custom
Note Duration value (see “Custom Note Dura-
tion” on page 529).
If the Play MIDI Notes when Editing option in
the MIDI Preferences page is enabled, each note
sounds as it is inserted.
The Pencil tool can be dragged after clicking
(and before releasing) to adjust the note’s pitch
or duration. Click and drag right to lengthen the
note without changing its start point. Click and
drag left to shorten the note without changing
its end point.
The Line, Triangle, Square, and Random Pencil
tool shapes can be used to enter a series of iden-
tical pitches with varying velocities. The length
and spacing for the inserted notes are deter-
mined by the current Grid value, or by the Cus-
tom Note Duration value. The note velocities
are determined by the Pencil tool shape.
Use the Square shape for alternating velocities of
loud and soft. Use the Triangle shape for a ramp
up and down of velocities. The Line shape en-
ters notes with identical velocities.
To insert a series of notes with random velocities:
1 Set the MIDI or Instrument track to Notes
View.
2 Select the Pencil tool and make sure it is set to
Random.
3 Set the Main Time Scale to Bars:Beats. In addi-
tion, set the Edit mode to Grid and the Grid
value to quarter notes (0|1|000).
With these settings, the notes are inserted
spaced one quarter note apart.
4 Click at the point to insert the first note and
drag to the right until the number of notes you
want have been inserted.
Adjusting the duration for an inserted note
With the Grid mode enabled, the end point
of the MIDI note snaps to the nearest Grid
boundary by default. Control-drag (Win-
dows) or Command-drag (Mac) with the
Pencil tool to temporarily disable snap to
grid.
Pencil tool set to Random
Inserting a series of notes with the Pencil tool
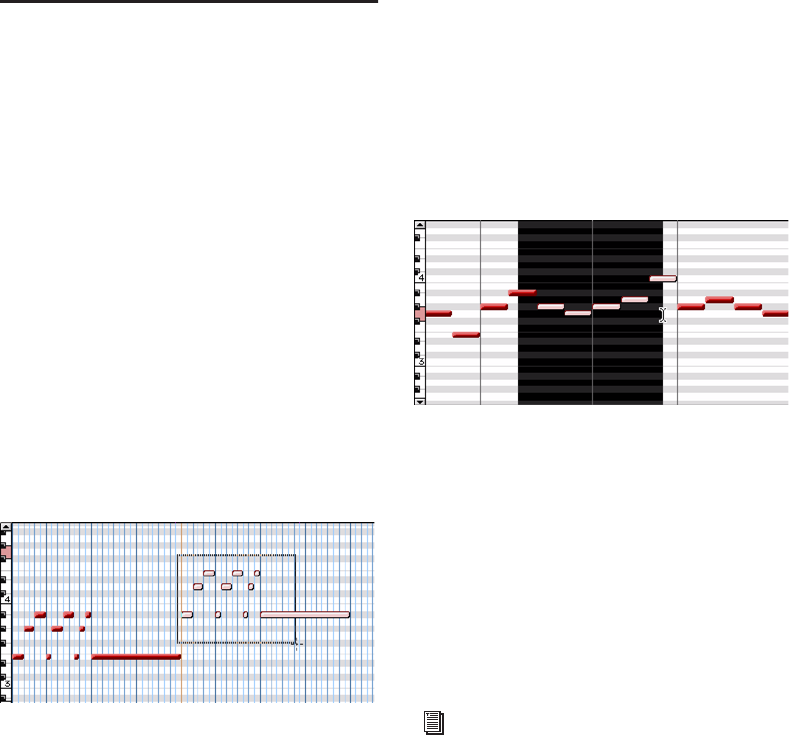
Pro Tools Reference Guide532
Manually Editing MIDI Notes
All aspects of a MIDI note can be edited from the
Edit window, including start and end points,
duration, pitch, and velocity. The Selector,
Grabber, and Pencil tools can operate on indi-
vidual notes or groups of notes.
Selecting MIDI Notes
MIDI notes must be selected, before they can be
edited.
To select MIDI notes, do one of the following:
With the Pencil tool or any Grabber tool,
Shift-click each note.
With any Grabber tool, move the cursor to
where there are no notes (the Marquee appears)
and click and draw a rectangle around the group
of notes you want to edit.
When using a Grabber tool, if any portion of the
rectangle touches a note (either its start or end
point), the note is included in the selection.
However, selections made with a Grabber tool
do not include underlying controller and auto-
mation data for the MIDI track.
With the Selector tool, drag across a range of
notes.
When using the Selector tool, a note’s start
point must be included in order for it to be se-
lected. When a MIDI or Instrument track is in
Notes or Regions View, selections made with the
Selector tool include all underlying controller
and automation data.
To deselect one or more notes from a selection:
With the Pencil tool or any Grabber tool,
Shift-click the notes so they become deselected.
Selecting and Auditioning MIDI Notes with the
Mini-Keyboard
Use the mini-keyboard on MIDI and Instrument
tracks to select and play notes on that track. You
can click on the mini-keyboard with any Edit
tool.
Selecting notes with a Grabber tool
Selecting notes with the Selector tool
You can also select notes in the Select/Split
Notes window. See “Select/Split Notes” on
page 578.
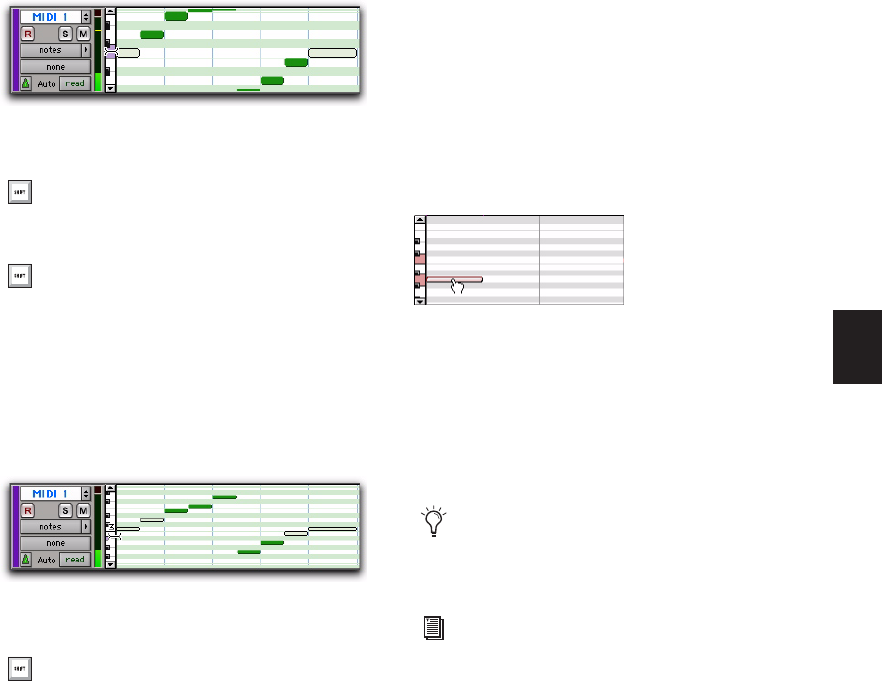
Chapter 27: MIDI Editing 533
To play a note on a MIDI or Instrument track, and
select all notes of that pitch on the track (if
present):
With any Edit tool selected, click a key on the
mini-keyboard.
To select and play a range of notes on a MIDI or
Instrument track:
With any Edit tool selected, click a key and
drag up or down on the mini-keyboard.
Transposing Notes
MIDI notes can be transposed by dragging up or
down with the Pencil tool or any Grabber tool.
If several notes are selected before dragging,
each is transposed.
To transpose a MIDI note:
1 Set the MIDI or Instrument track to Notes
View.
2 Select the Pencil tool or any Grabber tool.
3 While pressing Shift, drag the note up or
down.
The Shift key ensures that the transposed note
retains its start point. While dragging, each new
note sounds and the Cursor Location Value in-
dicator (in the Edit window) indicates the num-
ber of semitones and direction (+/–) for the
transposition.
Playing a note with the mini-keyboard and selecting all
notes of that pitch
Alt-click (Windows) or Option-click (Mac)
to play notes without making a selection.
Control-click (Windows) or Command-
click (Mac) to select or deselect notes, and to
make noncontiguous selections.
Playing a note with the mini-keyboard and selecting all
notes of that pitch
You can also Shift-click on the mini-key-
board to extend or contract the range of
notes.
Transposing with a Grabber tool
To transpose a copy of the note, leaving the
original unchanged, press Alt (Windows) or
Option (Mac) while dragging.
MIDI notes can also be transposed using
the Transpose Event Operation (see “Trans-
pose” on page 576) or MIDI Real-Time
Properties (see “MIDI Real-Time Proper-
ties” on page 549).
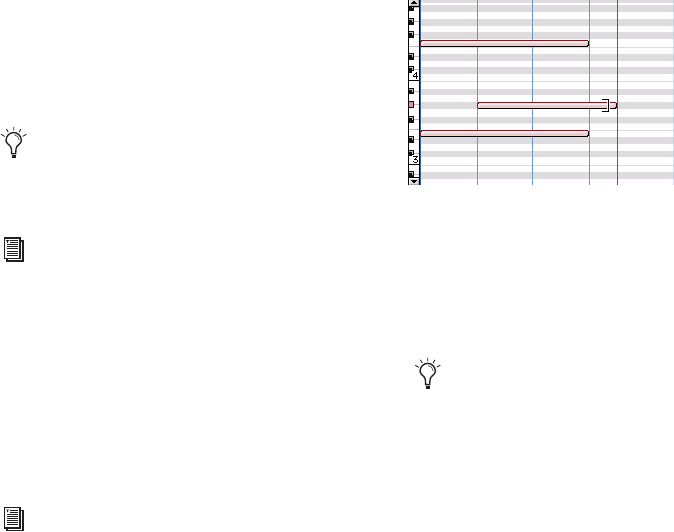
Pro Tools Reference Guide534
Moving Notes
Like regions, MIDI notes can be dragged left or
right with the Pencil tool or any Grabber tool to
change their start point. If several notes are se-
lected before dragging, they are all moved to-
gether.
To move a MIDI note:
1 Set the MIDI or Instrument track to Notes
View.
2 With the Pencil tool or any Grabber tool, drag
the note left or right (press Shift while dragging
to preserve the note’s pitch).
As the note is dragged, the Cursor Location
Value indicator (in the Edit window) displays
the new start point.
If the Edit mode is set to Grid, the dragged note
snaps to the nearest Grid boundary. If the Edit
mode is set to Spot, the Spot dialog opens.
Trimming Note Start and End Times
Like regions, start and end points for MIDI notes
can be adjusted with the Trimmer tool. If several
notes are selected when performing the trim,
each note is changed.
To change the start or end points for a group of
MIDI notes:
1 Set the MIDI or Instrument track to Notes
View.
2 Using the Pencil tool or any Grabber tool,
Shift-click each note you want to trim.
3 Do one of the following:
• Select the Trimmer tool.
– or –
• Use the Pencil tool.
4 Move the cursor near the beginning of any of
the highlighted notes, so the Trimmer tool ap-
pears. Drag right to shorten the notes, or drag
left to lengthen them.
If using Grid mode, the dragged start or end
point snaps to the nearest Grid boundary. If us-
ing Spot mode, the Spot dialog opens, where
you can enter the new location for the note’s
start or end point.
Notes can also be trimmed with the Trim Region
to Selection command (see “Trim Region to Se-
lection Command” on page 470) and the Trim
To Insertion command (see “Trimming with
Nudge” on page 471).
To copy the selected notes, leaving the orig-
inals intact, press Alt (Windows) or Option
(Mac) while dragging.
The placement of MIDI notes can also be
adjusted with Shift (see “Shift Command”
on page 664) or Nudge (see “Nudging Re-
gions” on page 472).
The Trimmer tool can also be used on MIDI
regions. For more informations, see “Time
Compression/Expansion Trimmer Tool
Functionality on MIDI Regions” on
page 537.
Changing note end times with the Trimmer tool
When in Grid mode, use the Control key
(Windows) or the Command key (Mac) to
temporarily disable Grid mode.
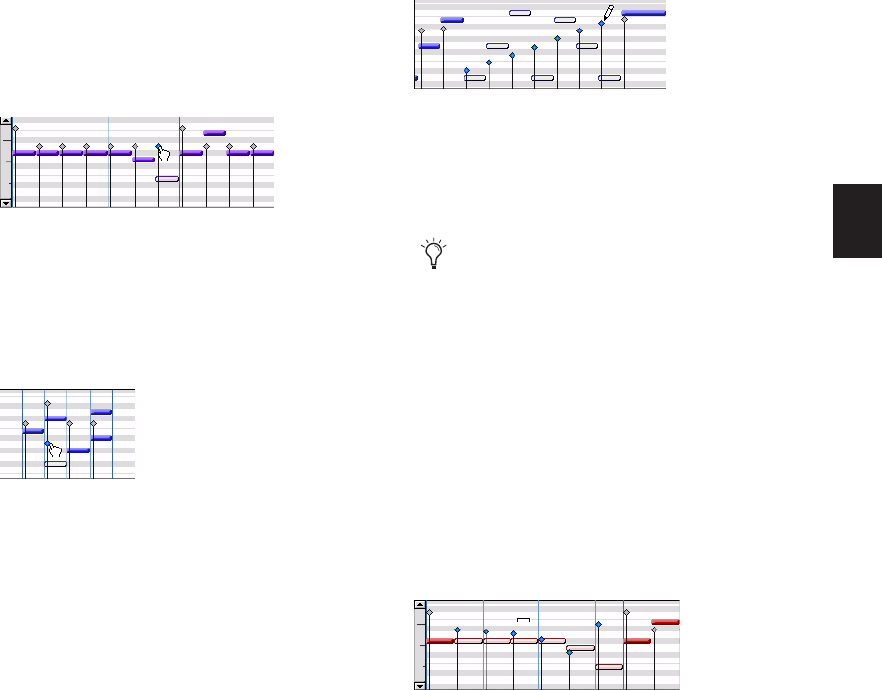
Chapter 27: MIDI Editing 535
Manually Editing Note Velocities
When a MIDI or Instrument track is set to Veloc-
ity View, each note’s attack velocity is repre-
sented with a velocity stalk. The taller the veloc-
ity stalk, the higher the velocity value (0–127).
To edit MIDI velocity:
1 Set the MIDI or Instrument track to Velocity
View.
2 Select any Grabber tool.
3 Do one of the following:
• Drag the top (diamond) of the velocity
stalk up or down.
– or –
• If two notes have the same start time (with
velocity stalks on top of each other), Con-
trol-drag (Windows) or Command-drag
(Mac) the actual note up or down.
Drag up to increase the velocity value, or down
to decrease it. While dragging, the diamond
turns blue and the associated note becomes se-
lected. The dragged velocity values are reflected
in the Cursor Location Value indicator (in the
Edit window).
The velocities for a range of notes can be edited
with any Pencil tool.
To draw velocity values for a crescendo:
1 Set the MIDI or Instrument track to Velocity
View.
2 Select the Pencil tool with the shape set to
Line.
3 Click at the beginning of the note range, near
the bottom of the velocity range, and drag to
the right and up until the line encompasses the
range of notes you want to include in the fade.
You can also use the Trimmer tool to scale the
velocities for all selected notes. This is useful if
you like the velocity relationship between the
notes, but want them all to be louder or softer.
To scale velocities with the Trimmer tool:
1 Set the MIDI or Instrument track to Velocity
View.
2 Using the Selector tool or any Grabber tool, se-
lect the range of notes to be edited.
3 With the Trimmer tool, click near the range of
selected notes and drag up or down. Dragging
up increases the velocities for each note and
dragging down decreases them.
Dragging a velocity stalk
Editing simultaneous velocities
Changing velocities with the Line shape
When in Velocity View, the Trimmer tool
can be used to trim note durations in addi-
tion to changing velocities.
Changing velocities with the Trimmer tool
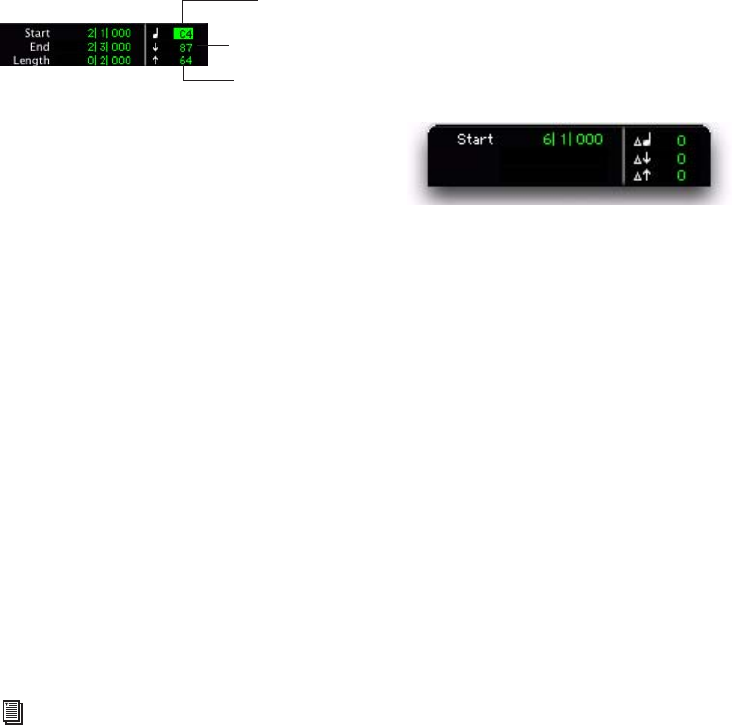
Pro Tools Reference Guide536
Typing in Note Attributes
When an individual note is selected with the
Pencil tool or any Grabber tool, its attributes are
displayed in the Event Edit area.
Pitch is listed by note name and octave number.
Attack and release velocities are listed with their
MIDI values (0–127). Edit Selection Start, End,
and Length times are displayed in the Main
Time Scale.
To change an attribute for a MIDI note:
1 In the MIDI or Instrument track’s playlist area,
select the note with the Pencil tool or any Grab-
ber tool.
2 Click in the Attributes text box and do one of
the following:
• Enter the new value on the numeric key-
pad.
• Press the Up or Down Arrow to increment
or decrement to the new value.
• Drag up or down to scroll to the new value.
• Play the new note value on your MIDI key-
board controller.
Press Forward Slash (/) to move between the
fields in the Event Edit area.
Multiple Notes and Event Edit Area
When multiple notes are selected, you can enter
values in the Event Edit area fields to affect all
selected notes. A triangle (delta symbol) to the
left of the displayed note indicates that multiple
notes are selected.
A new value in the Start field moves the first
note in the selection to that location, with all
other notes moving with it.
Values entered in the pitch and velocity fields
add to or subtract from the values for all selected
notes. For example, to transpose all selected
notes down an octave, enter a value of –12 for
pitch.
Deleting MIDI Notes
In addition to deleting selected notes with the
Clear command in the Edit menu, individual
notes can also be deleted with the Pencil tool.
To delete a group of MIDI notes with the Clear
command:
1 Using the Grabber or Selector tool, select the
notes to be deleted (see “Selecting MIDI Notes”
on page 532).
Event Edit Area showing MIDI track information
You can also change attributes of MIDI
notes in the MIDI Event List (see
Chapter 29, “MIDI Event List”).
Pitch
Attack Velocity
Release Velocity
Multiple notes in the Event Edit area
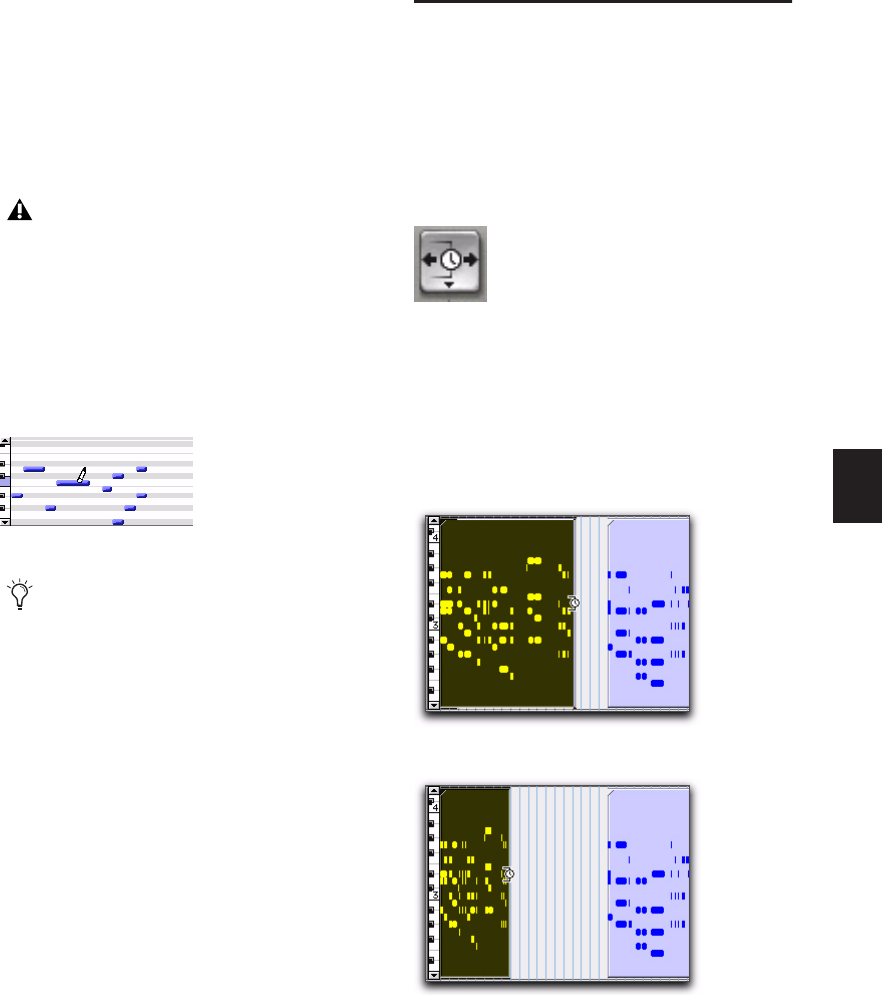
Chapter 27: MIDI Editing 537
2 Do one of the following:
• Choose Edit > Clear to delete the selected
notes. The track’s underlying controller
data remains intact.
– or –
• Press the Backspace (Windows) or Delete
(Mac) key.
To delete a single MIDI note with the Pencil tool:
With the Pencil tool selected, Alt-click (Win-
dows) or Option-click (Mac) the note. The Pen-
cil tool changes to an Eraser when Alt
(Windows) or Option (Mac) is pressed.
Time Compression/Expansion
Trimmer Tool Functionality on
MIDI Regions
The Time Compression/Expansion Trimmer
tool is useful for matching a MIDI region to the
length of another region, a tempo grid, or any
other reference point.
With the Time Compression/Expansion Trim-
mer tool, you can move the MIDI region’s start
or end point to expand or compress the region,
scaling the MIDI data accordingly regardless of
the track’s timebase (ticks or samples).
When deleting MIDI notes within a time
range selection, all underlying controller
and automation data is also deleted.
Deleting a note with Pencil tool
Program change events and Sysex events
can also be deleted by Alt-clicking (Win-
dows) or Option-clicking (Mac) them with
the Pencil tool.
Time Compression/Expansion Trimmer tool
Scaling a MIDI region with the Time
Compression/Expansion Trimmer tool
before trimming
after trimming
Pro Tools Reference Guide538
Using the Time Compression/
Expansion Trimmer Tool in Grid Mode
The Time Compression/Expansion Trimmer
tool (TCE Trimmer tool) can be used in Grid
mode to match a region to the tempo of a ses-
sion or a section of a session, or to create “dou-
ble time” or “half time” performances.
To compress or expand MIDI regions in Grid mode:
1 Set the Edit mode to Grid.
2 Set the MIDI or Instrument track to Regions
View.
3 Select the TCE Trimmer tool.
4 With the TCE Trimmer tool, drag the MIDI re-
gion’s start or end point to compress or expand
the region to the Grid (for example, by quarter
notes). A new MIDI region is automatically cre-
ated, and appears both in the playlist and in the
Region List.
Using the Time Compression/
Expansion Trimmer Tool in Slip Mode
To compress or expand MIDI regions in Slip mode:
1 Set the Edit mode to Slip.
2 Set the MIDI or Instrument track to Regions
View.
3 Select the TCE Trimmer tool.
4 With the TCE Trimmer tool, drag the MIDI re-
gion’s start or end point to compress or expand
the region freely A new MIDI region is automat-
ically created, and appears both in the playlist
and in the Region List.
Using the Time Compression/
Expansion Trimmer Tool in Spot Mode
In Spot mode, clicking with the TCE Trimmer
tool in a region opens the Spot dialog. You can
specify the location where you want the region
to start or end, or the duration of the region,
and the region is automatically compressed or
expanded as specified.
To compress or expand MIDI regions in Spot mode:
1 Set the Edit mode to Spot.
2 Set the MIDI or Instrument track to Regions
View.
3 Select the TCE Trimmer tool.
4 Click the MIDI region near its start or end
point. The Spot dialog opens. Using any Time
Scale, enter a new start or end time (or duration)
for the region, and then click OK. A new MIDI
region is automatically created, and appears
both in the playlist and in the Region List.
Using the Time Compression/
Expansion Trimmer Tool in Shuffle Mode
In Shuffle mode, the trimmed region will always
begin at the original region’s start point regard-
less of whether you trim from the front to the
rear or from the rear to the front.
To compress or expand MIDI regions in Shuffle
mode:
1 Set the Edit mode to Shuffle.
2 Set the MIDI or Instrument track to Regions
View.
3 Select TCE Trimmer tool.
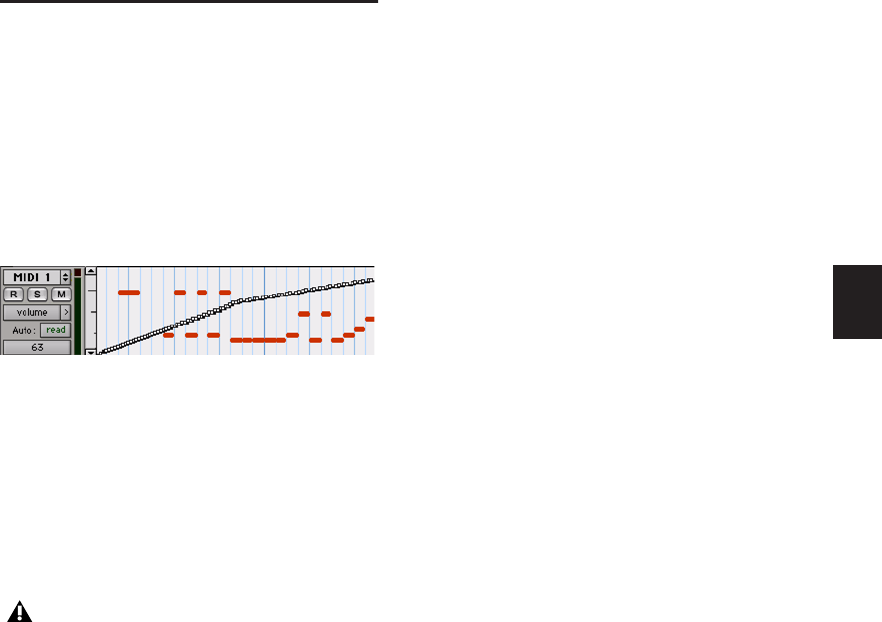
Chapter 27: MIDI Editing 539
4 With the Time Compression/Expansion Trim-
mer tool, drag the MIDI region’s start or end
point to compress or expand the region freely. A
new MIDI region is automatically created, and
appears both in the playlist and in the Region
List.
Continuous Controller Events
Continuous controller events for MIDI and In-
strument tracks are displayed in the form of a
line graph with a series of editable breakpoints.
Controller events for MIDI and Instrument
tracks differ from automation data for audio
tracks in that the breakpoints are stepped (in-
stead of vector-based), where each breakpoint
represents a single controller event.
Continuous controller events that can be in-
serted and edited in Pro Tools include:
• volume
• pan
• pitch bend
• aftertouch (mono)
• MIDI controllers, 0–127
MIDI controller #7 (volume) and #10 (pan) are
treated by Pro Tools as automation data. This
means that these controller events (along with
Mutes) can be recorded and automated from the
Mix window; in addition, each MIDI or Instru-
ment track’s automation mode affects how
these events are played back and recorded.
While a MIDI track’s volume, pan, and mute
events can be suspended, all other controller
events in the track always play. Instrument
tracks support both MIDI volume, pan, and
mute, and audio volume, pan, and mute.
To avoid overwriting existing MIDI volume and
pan automation data, record in MIDI Merge
mode. When recording in MIDI Merge mode,
existing volume and pan data play back while
recording new MIDI data.
Continuous controller events (including vol-
ume and pan) can be recorded from an external
MIDI controller (such as a keyboard or control
surface), and they can be inserted in a MIDI
track’s playlist using the Pencil tool or any Grab-
ber tool.
Inserting and Editing Controller
Events
Continuous controller events can be edited with
any of the following methods:
Individual breakpoints can be dragged with
any Grabber tool to adjust their location or
value.
A group of selected breakpoints can be scaled
up or down with any of the Trimmer tools.
New controller events can be drawn in with
the Pencil tool to replace existing events. Events
can be drawn with the Pencil tool (set to Free
Hand, Line, Triangle, Square, or Random).
Controller events can be cut or copied and
pasted, as well as nudged or shifted.
MIDI track displaying volume events
Polyphonic aftertouch cannot be viewed in
the Edit window. To view polyphonic after-
touch in Pro Tools, use the MIDI Event List
(see Chapter 29, “MIDI Event List”).
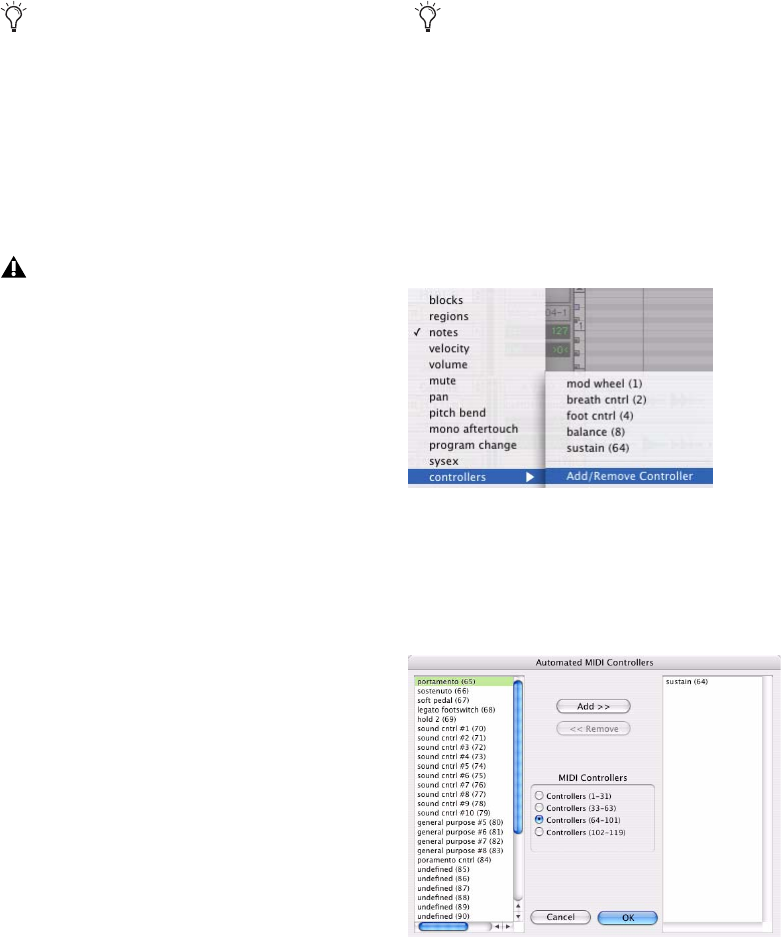
Pro Tools Reference Guide540
Resolution for Inserted Controller
Events
When inserting controller events with the Pen-
cil tool, the density of the events is determined
by the Pencil Tool Resolution When Drawing
Controller Data preference in the MIDI Prefer-
ences page.
To set the Pencil tool resolution:
1 Choose Setup > Preferences, then click the
MIDI tab.
2 Enter a value (1 to 100 milliseconds) for Pencil
Tool Resolution When Drawing Controller
Data.
3 Click OK.
To edit a continuous controller event with the
Pencil tool, the controller first has to be added
to the Automated MIDI Controllers list.
To manually enable a continuous controller for
automation:
1 Click the Track View selector for the MIDI or
Instrument track you want to edit, and select
Add/Remove Controller from the controllers
pop-up.
2 Select the MIDI controller range for the con-
troller you want to automate.
3 Select the continuous controllers that to auto-
mate from the list on the left, and click Add.
4 Click OK to close the Automated MIDI Con-
troller dialog.
To copy continuous MIDI controller events
and paste to a different MIDI controller, use
Special Paste (Edit > Paste Special > To Cur-
rent Automation Type). For example, you
might want to use the same control data for
volume and a cut-off filter, or for pan and
pitch bend. For more information, see “Spe-
cial Paste Function for Automation Data”
on page 809.
Edits to volume data affect all tracks within
an enabled Edit Group. This is not the case,
however, for other controller playlists (such
as pan). To insert and edit other controller
types across all tracks in an Edit Group,
press the Start key (Windows) or Control
(Mac) while performing the edits.
The controller is automatically added to the
Automated MIDI Controllers list when you
record controller information from an exter-
nal device.
MIDI Controllers pop-up
Automated MIDI Controllers dialog
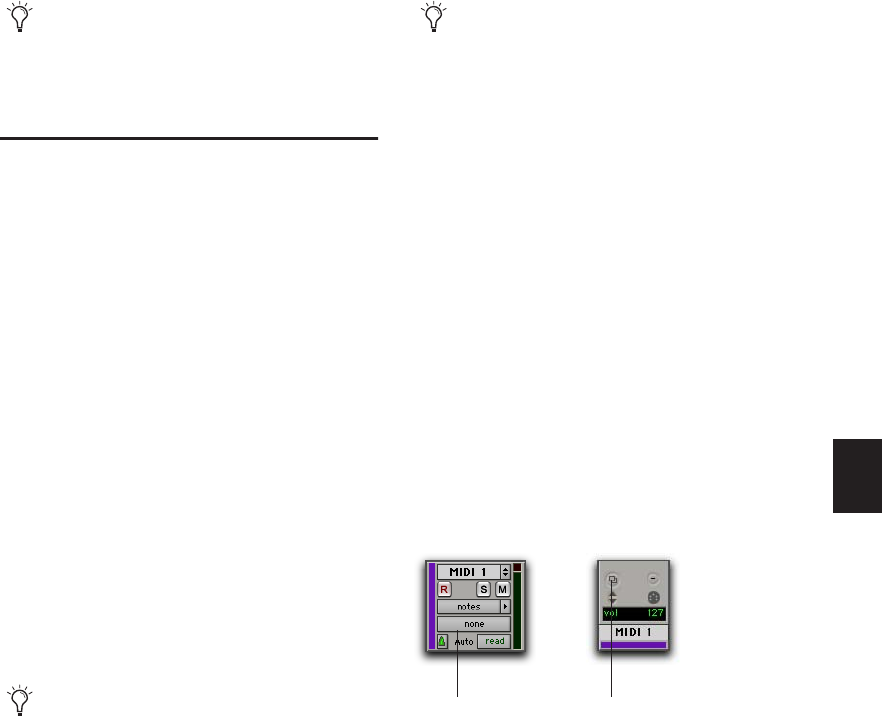
Chapter 27: MIDI Editing 541
Patch Select (Program and
Bank Changes)
Each MIDI and Instrument track can have a de-
fault program change that is sent each time the
track plays. Additional program changes can be
inserted at any point within the track.
About Program and Bank Changes
The MIDI protocol lets you choose from a range
of 128 programs (0–127). However, most MIDI
instruments have several banks of 128 pro-
grams. To specify a bank, a bank select message
must be sent. Some instruments use Controller
0 to switch the bank while others use Controller
32; some use a combination of the two. The
Patch Select dialog in Pro Tools lets you use ei-
ther of these bank select messages when insert-
ing a program change event. Check the manu-
facturer’s documentation for your MIDI device
to see which Controller value it uses.
Default Program Change
The default program change for each MIDI track
is specified by clicking on the Patch Select but-
ton, from either the Mix or Edit window. Once
specified, the default program change message
is sent to your instrument when playing the
track.
To set the default program change for a MIDI or
Instrument track:
1 From the Mix or Edit window, click the Patch
Select button.
When you record continuous controller in-
formation from an external MIDI device,
the controller is automatically added to the
MIDI Controllers list.
If you do not know what bank select com-
mand your instrument uses, you can record
MIDI to Pro Tools while making a bank
change from the instrument. Then review
the bank select information your instrument
has recorded into Pro Tools in the MIDI
Event List.
Some older MIDI devices (such as the Kurz-
weil K1000) use a program change instead
of a Bank Select message to switch banks.
For these devices you may find it necessary
to send two program change messages to ac-
cess a particular program, where the first
sets the bank and the second sets the pro-
gram.
Patch Select button
Patch Select button,
(Edit window)
Patch Select button,
(Mix window)
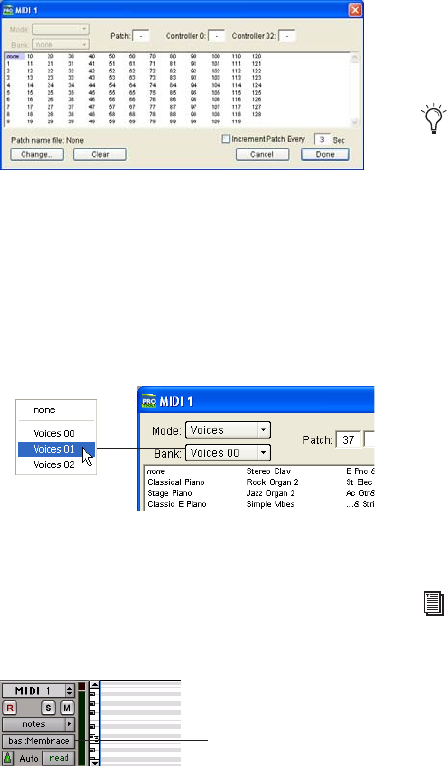
Pro Tools Reference Guide542
2 Do one of the following:
• In the Patch Select dialog, select a program
number.
– or –
• If you are using patch name files, choose a
bank from the pop-up menu in the upper
left of the Patch Select dialog and select a
patch name. See “Patch Names” on
page 542.
3 Click Done.
Once selected, the program number (or patch
name) appears in the Patch Select button in the
Edit window.
Unlike recorded and inserted program change
events, the default program change does not ap-
pear in the track’s playlist.
To clear the default program change, select
None in the Patch Select dialog.
Patch Names
Pro Tools supports XML (Extensible Markup
Language) for storing and importing patch
names for external MIDI devices (such as MIDI
instruments). Pro Tools installs MIDI patch
name files (.midnam) for the factory default
patch names of many common MIDI devices.
Patch name files are sorted by manufacturer and
are located:
• On Windows, in Program Files\Common
Files\Digidesign\MIDI Patch Names\ Digi-
design
• On Mac, in /Library/Audio/ MIDI Patch
Names/Digidesign
To import MIDI patch names into Pro Tools:
1 Choose Setup > MIDI > MIDI Studio, and ver-
ify the MIDI Device definition in the MIDI Stu-
dio Setup window (Windows) or Audio MIDI
Setup (Mac).
2 Verify the MIDI track’s output is correctly as-
signed to the MIDI device.
3 Click the MIDI track’s Patch Select button.
Patch Select dialog
Choosing a bank in Patch Select dialog
Patch Select button, Edit window
patch name
MIDI patch name files (.midnam) can be
edited in any text editor, or you can use
third-party patch librarian and editor soft-
ware to create your own custom patch
names.
See your Getting Started Guide for informa-
tion on configuring MIDI on Windows and
Mac systems.
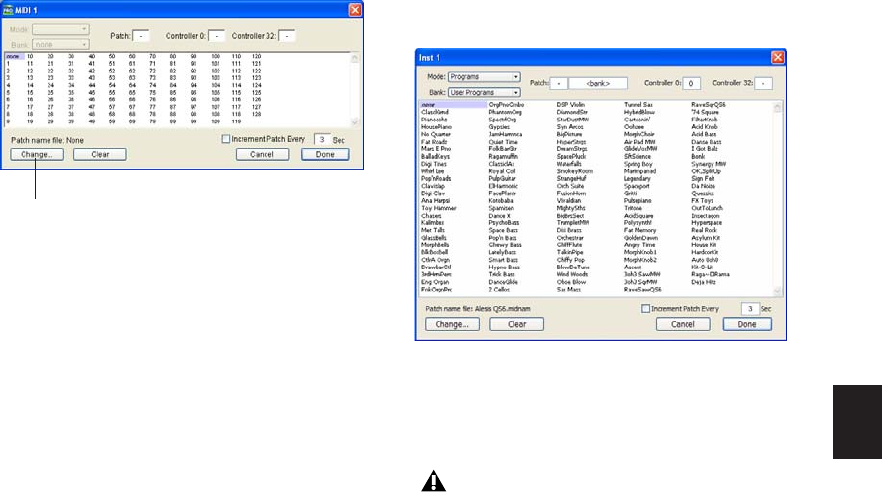
Chapter 27: MIDI Editing 543
4 In the Patch Select dialog, click the Change
button.
5 In the Open dialog, navigate to one of the fol-
lowing:
• On Windows, Program Files\Common
Files\Digidesign\MIDI Patch Names\Digi-
design\<name of manufacturer>
– or –
• On Mac, /Library/Audio/MIDI Patch
Names/Digidesign/<name of manufac-
turer>
6 Select the MIDI Patch Name file (.midnam) for
the MIDI device.
7 Click Open.
8 The Patch Select dialog is populated by patch
names from the selected file, and the Patch
Name Bank pop-up menu appears in the upper
left hand corner of the window.
Once patch names have been imported into
Pro Tools, they are available for that MIDI de-
vice in all subsequent sessions.
To clear patch names:
1 In the Patch Select dialog, click the Clear but-
ton.
2 Click Done.
Patch Select dialog
Change button
Patch Select dialog with patch names
Pro Tools does not let you import a patch
name file that does not match the model
and manufacturer information selected in
the MIDI Studio Setup window (Windows)
or in the Audio MIDI Setup (Mac).
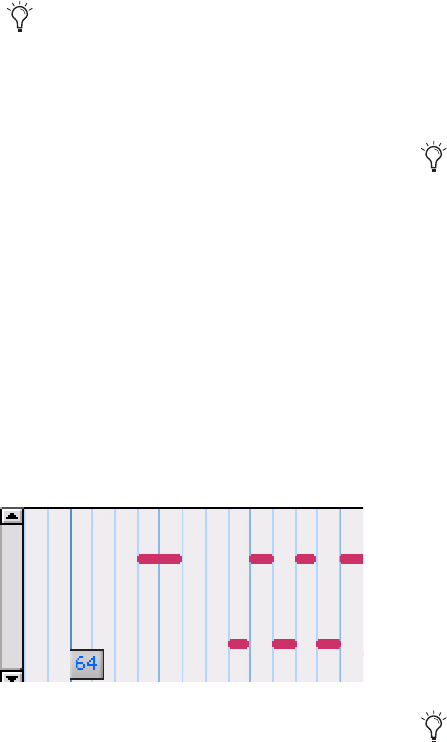
Pro Tools Reference Guide544
Inserting and Editing Program
Changes
Program changes can be inserted into a track’s
playlist with the Pencil tool. Existing program
changes can be edited, moved, and copied and
pasted.
To insert a program change with the Pencil tool:
1 Set the MIDI or Instrument track to Program
Change view.
2 If you want the inserted event to snap to a
Grid value, enable Grid mode.
3 Click with the Pencil tool in the track’s playlist
at the point where you want to insert the pro-
gram change.
4 In the Patch Select dialog, select a program
number (or name) and, if necessary, specify a
bank change value.
5 Click Done to insert the program change
event in the track’s playlist.
To edit a program change event:
1 With the Pencil tool or any Grabber tool, dou-
ble-click the program change event you want to
edit.
2 In the Patch Select dialog, select the new pro-
gram number (or name) and, if necessary, spec-
ify a bank change value.
3 Click Done.
To move a program change event:
With the Pencil tool or any Grabber tool, drag
the program change event left or right.
If the Edit mode is set to Grid, the dragged event
snaps to the nearest Grid boundary. If the Edit
mode is set to Spot, the Spot dialog opens.
To delete a program change event:
1 Do one of the following:
• With the track set to Program Change
View, click the program change event with
any Grabber tool to select it.
– or –
• If the region contains other events you
want to delete, select the entire region with
any Grabber tool (when the track is dis-
playing regions).
2 Do one of the following:
• Choose Edit > Clear to remove the selected
events from the track.
– or –
• Press the Backspace (Windows) or Delete
(Mac).
On some instruments, changing programs
during playback can interrupt playback. To
avoid this, place program change events in
the track where there are no notes sounding.
Program change event
The placement of program changes can also
be adjusted with Shift (see “Shift Com-
mand” on page 664) or Nudge (see “Nudg-
ing Regions” on page 472).
Individual program change events can also
be deleted by Alt-clicking (Windows) or Op-
tion-clicking (Mac) them with the Pencil
tool.
Chapter 27: MIDI Editing 545
Auditioning Programs
When the Patch Select dialog is open, Pro Tools
can automatically scroll through the different
patches for a track’s assigned MIDI device.
To audition patches:
1 If you want to audition patches for a MIDI
track or Instrument during playback, click Play
in the Transport window.
2 Open the Patch Select dialog by clicking the
Patch Select button, or by inserting or editing a
program change event in a MIDI or Instrument
track.
3 Click a program number—the starting point
from which you will scroll through the patches.
4 Enter a value for the number of seconds that
will elapse between each program change.
5 Select the option for Increment Patch.
After the specified number of seconds, Pro Tools
selects the next patch and transmits the pro-
gram change to the track’s assigned MIDI de-
vice.
6 When you are finished auditioning settings,
click Done to stop incrementing patches, and to
close the Patch Select dialog.
System Exclusive Events
System Exclusive (Sysex) events can be recorded
to MIDI or Instrument tracks in Pro Tools (see
“MIDI Step Input” on page 375). Once the
events are recorded, they appear in the track’s
playlist as blocks when the Track View is set to
Sysex.
While the contents of recorded System Exclu-
sive events cannot be directly edited in
Pro Tools, the events can be moved or nudged,
copied and pasted, or deleted.
To move a Sysex event:
1 Set the MIDI or Instrument track to Sysex
View.
2 With any Grabber tool, drag the Sysex event
left or right.
If the Edit mode is set to Grid, the dragged event
snaps to the nearest Grid boundary. If the Edit
mode is set to Spot, the Spot dialog opens.
Sysex event block
The placement of Sysex event blocks can
also be adjusted with Shift (see “Shift Com-
mand” on page 664) or Nudge (see “Nudg-
ing Regions” on page 472).
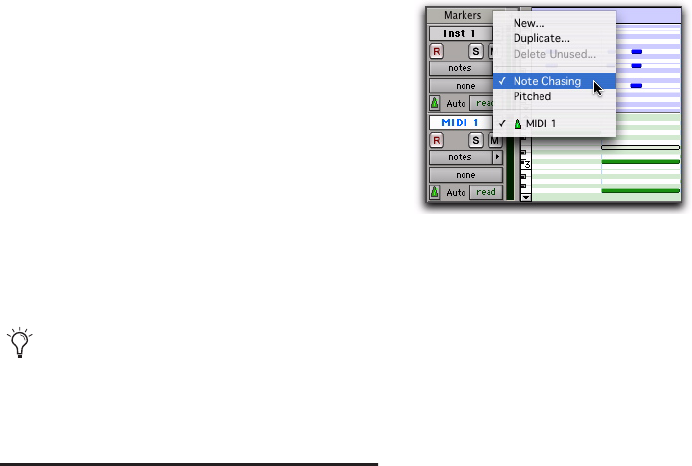
Pro Tools Reference Guide546
To delete one or more Sysex events:
1 Do one of the following:
• With the track to Sysex View, click the Sy-
sex event with any Grabber tool to select it.
– or –
• If the region contains other Sysex events
you want to delete, select the entire region
with any Grabber tool (when the track is
displaying regions).
2 Do one of the following:
• Choose Edit > Clear to remove the selected
events from the track.
– or –
• Press the Backspace (Windows) or Delete
(Mac).
Note and Controller Chasing
Note Chasing
Note Chasing allows long, sustained MIDI notes
to be heard when playing from a point after
their start time. For example, if a note’s start
time is at 1|1|000 and lasts for 8 measures (until
9|1|000), note chasing lets you begin playing
from bar 5 and still hear the note that started at
1|1|000 as it continues to sustain until 9|1|000.
Note Chasing is something that can turned on
and off individually for each MIDI or Instru-
ment track. By default, new MIDI and Instru-
ment tracks have Note Chasing enabled.
To enable Note Chasing for a MIDI track:
Click the track’s Playlist selector and select the
option for Note Chasing.
Make sure to disable Note Chasing when work-
ing with samplers that are playing loops. If a
MIDI track, for example, is triggering a 4-bar
drum loop and you begin playing at bar 3, the
loop will begin playing at the wrong time and be
out of synchronization with the other tracks.
Controller and Program Chasing
Pro Tools always chases continuous controller
events and program changes for MIDI tracks.
This ensures that controller values and patches
for MIDI devices are always appropriately set.
For example, suppose a MIDI track lasting 32
measures starts with a volume of 127 and in the
last bar fades the volume down to 0. If after
playing the track in its entirety you attempt to
play from bar 8, the initial volume of 127 is
chased and sent to the track’s assigned device—
otherwise the track would not be heard since the
most recent volume event sent would have
been 0.
Individual Sysex event blocks can also be
deleted by Alt-clicking (Windows) or Op-
tion-clicking (Mac) them with the Pencil
tool.
Note Chasing enabled in Playlist selector
Chapter 27: MIDI Editing 547
Chasing also occurs for a MIDI track’s default
program change, along with any program
change events residing within the track. There-
fore, if you have chosen a default program
change for a track, when playing from any point
within the track, the program change event is
sent to the track’s assigned device.
Default Controller Values and Chasing
Though new MIDI tracks appear to have default
values for continuous controller playlists, this is
actually not the case. For example, when view-
ing a MIDI track’s Mod Wheel playlist, you’ll see
that the breakpoint line is set to a default of
zero. However, since the modulation wheel on
your synth may purposely be set to a different
value, the default value in the track is not trans-
mitted when playing.
For example, if you insert a Mod Wheel change
from 0–90 towards the end of the track, and you
then play from the beginning of the track, or
from anywhere before the change, the Mod
Wheel value remains at 90 until the 0 value is
reached, which is likely not what you want.
To ensure that the default controller value for a
playlist is sent (and chased), click the initial
breakpoint at the beginning of the track, move
it slightly, and set it back to the default value.
Offsetting MIDI Tracks
Pro Tools can offset MIDI tracks globally or indi-
vidually.
Global MIDI Playback Offset
Pro Tools offers a MIDI offset preference that al-
lows MIDI and Instrument tracks to play back
earlier or later (than audio tracks) by a specified
number of samples. The offset affects playback
only and does not alter in any way how MIDI
data is displayed in the Edit window.
This capability is provided in large part to com-
pensate for the audio monitoring latency in
Pro Tools LE. If you are monitoring the output
of external MIDI instruments with an external
mixer or sound system (or headphones), there is
no latency. If, however, you are monitoring the
output of your MIDI devices through a
Pro Tools LE interface (such as Mbox 2), your
MIDI tracks sound slightly later than your audio
tracks. The larger the setting for the H/W Buffer
Size (128, 256, 512, or 1024 samples), the larger
the latency.
By configuring the Global MIDI Playback Offset,
you can align your MIDI tracks to play back
slightly earlier (by a specified number of sam-
ples), thereby compensating for any latency
when monitoring audio in Pro Tools LE.
With Pro Tools HD, when Delay Compen-
sation is active, MIDI and Instrument
tracks are automatically delay-compen-
sated to provide low latency monitoring. For
more information, see “Delay Compensa-
tion for MIDI” on page 745.
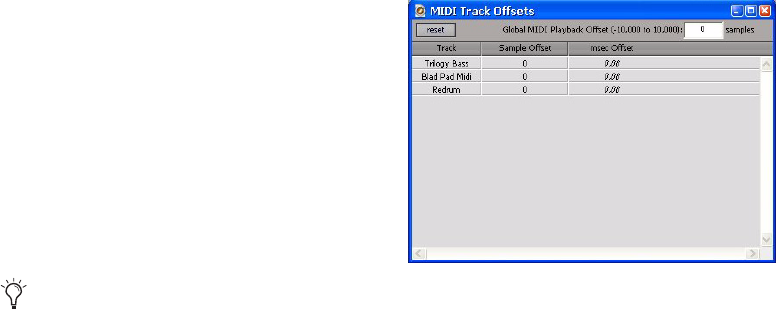
Pro Tools Reference Guide548
To configure the Global MIDI Playback Offset:
1 Choose Setup > Preferences and click the MIDI
tab.
2 For the Global MIDI Playback Offset option,
enter the number of samples (–10,000 to
10,000) for the offset. A negative value causes
the MIDI tracks to play back earlier than the au-
dio tracks; a positive value causes the MIDI
tracks to play back later.
To allow for monitoring latency in Pro Tools LE,
set the offset to a value that is roughly equiva-
lent to the H/W Buffer Size.
3 Click OK.
Individual MIDI and Instrument Track
Offsets
You can offset individual MIDI and Instrument
track offsets in Pro Tools to compensate for de-
lays in MIDI devices (the time it takes to trigger
events on a sampler or synth).
For example, if you have some kick drums that
are being played by an audio track in Pro Tools
and want them to be exactly synchronized with
kick drums that are being played by a MIDI de-
vice, you may need to use a MIDI offset. In this
example, it will usually take at least 5 ms to trig-
ger the MIDI notes, and it could take even
longer, depending on the MIDI device.
You can measure the latency for a MIDI device
assigned to a MIDI track by recording its audio
output back into Pro Tools. Compare the sam-
ple locations for the recorded audio events
against the original MIDI notes to calculate the
latency.
To configure a MIDI or Instrument track offset for
a track:
1 Choose Event > MIDI Track Offsets.
2 Click in the Sample Offset column for the
MIDI track and enter the number of samples
(–10,000 to 10,000) for the offset. A negative
value causes the MIDI or Instrument tracks to
play back earlier than the audio tracks; a posi-
tive value causes the MIDI or Instrument tracks
to play back later.
The equivalent offset in milliseconds is dis-
played in the msec Offset column. This value
cannot be edited, but updates when a new value
is entered in the SMPTE Offset column.
3 Press Enter (Windows) or Return (Mac) to ac-
cept the entered offset value.
To reset all offsets for all MIDI and Instrument
tracks, click the Reset button in the upper left of
the window.
The Global MIDI Playback Offset can also
be set from the MIDI Track Offsets window.
You can also apply MIDI Real-Time Proper-
ties delay to offset MIDI (see “MIDI Real-
Time Properties” on page 549).
MIDI Track Offsets window
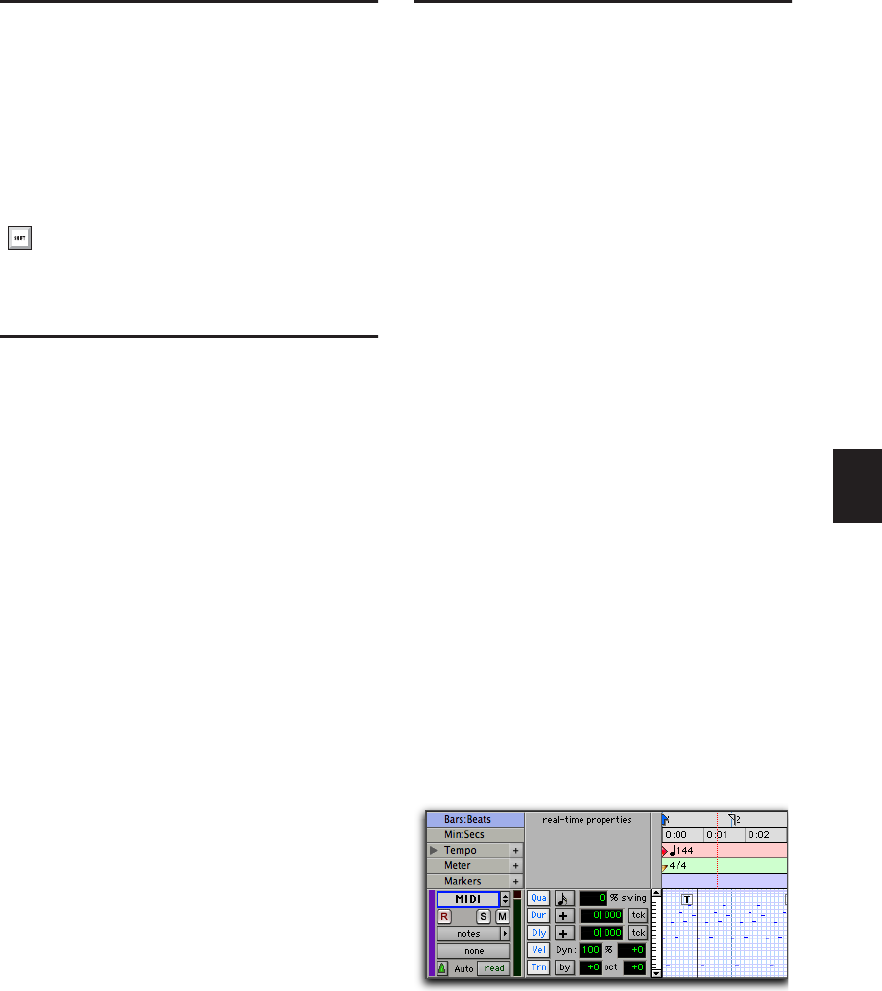
Chapter 27: MIDI Editing 549
Stuck Notes
If you encounter stuck notes with any of your
MIDI devices, you can silence them with the All
MIDI Notes Off command.
To turn off all stuck notes:
Choose Event > All MIDI Notes Off.
Remove Duplicate Notes
The Remove Duplicate Notes command is useful
for removing duplicate notes from a MIDI per-
formance. If a note starts within the first 25% of
the duration of a note of the same pitch which is
already sounding (or within an eighth-note,
whichever is shorter), it is considered a dupli-
cate and is combined with the previous note. If
it starts later than that, the first note is short-
ened so that it ends at the same tick at which the
new one starts.
To remove duplicate notes:
1 Make an Edit selection including the duplicate
notes you want to remove.
2 Choose Event > Remove Duplicate Notes.
MIDI Real-Time Properties
MIDI Real-Time Properties let you change some
MIDI properties of MIDI and Instrument tracks
(or MIDI regions) during playback. There are
five types of MIDI Real-Time Properties: Quan-
tize, Duration, Delay, Velocity, and Transpose.
MIDI Real-Time Properties can be adjusted dur-
ing playback, so you can listen for the desired re-
sults. Once you have found the settings you
want, you can write the settings to the selected
tracks or regions. This overwrites the corre-
sponding MIDI properties on selected tracks or
regions and resets the Real-Time Properties dis-
play to its default settings.
Real-Time Properties can be adjusted in the Real-
Time Properties View in the Edit window, or in
the Real-Time Properties window.
Real-Time Properties View
Real-Time Properties View in the Edit window
only applies to tracks. To apply Real-Time Prop-
erties to regions, use the Real-Time Properties
window (see “Real-Time Properties Window” on
page 550).
To enable Real-Time Properties View in the Edit
window:
Select View > Edit Window > Real-Time Prop-
erties.
Press Control+Shift+Period (.) (Windows)
or Command+Shift+Period (.) (Mac) for the
All MIDI Notes Off command.
Real-Time Properties column in the Edit window
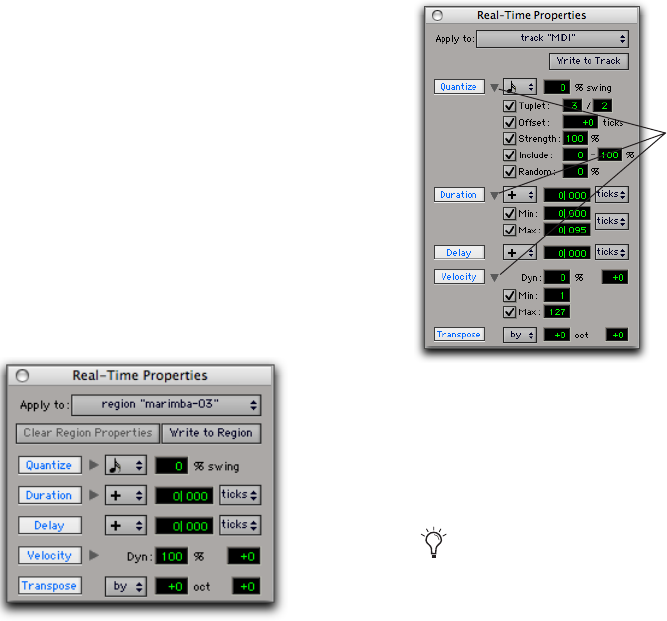
Pro Tools Reference Guide550
For Micro, Mini, and Small track heights, the
Real-Time Properties column only displays one
or two properties, accordingly. The first one or
two properties that are enabled are displayed au-
tomatically.
To select a different Real-Time Property in Mini or
Small track height view:
Control-click (Windows) or Command-click
(Mac) on a real-time property element to select a
different element from the pop-up menu.
Real-Time Properties Window
Using the Real-Time Properties window, you
can apply Real-Time Properties to selected tracks
or regions.
To open the Real-Time Properties window:
Choose Event > MIDI Real-Time Properties.
The Real-Time Properties window can be used to
apply either track-based or region-based Real-
Time Properties by making an Edit selection and
selecting tracks or regions from the Apply To
pop-up menu.
Expanded Real-Time Properties Window
In the Real-Time Properties window, Quantize,
Duration, and Velocity each provide an ex-
pand/collapse triangle to show or hide addi-
tional settings.
Enabling Real-Time Properties
To enable Real-Time Properties:
1 Select a track, or make an Edit selection.
2 In Real-Time Properties View in the Edit win-
dow, or in the Real-Time Properties window, se-
lect the desired Real-Time Properties by clicking
the property name (Quantize, Duration, Delay,
Velocity, or Transpose). Enabled Real-Time Prop-
erties are highlighted and display their settings.
Real-Time Properties window with properties enabled
Real-Time Properties window, expanded view
When using Real-Time Properties, enable
Link Track and Edit Selection mode to make
a track selection from an Edit selection (see
“Linking or Unlinking Track and Edit Selec-
tions” on page 448).
Expand/collapse
triangles
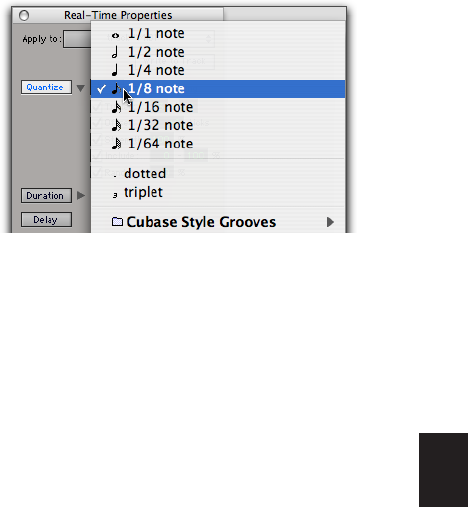
Chapter 27: MIDI Editing 551
3 If you are using the Real-Time Properties win-
dow and Link Track and Edit Selection mode is
enabled, select the track or region to affect from
the Apply To pop-up menu.
4 Configure the Real-Time Properties settings
(see “Real-Time Properties Settings” on
page 551).
Enabled Real-Time Properties are heard on play-
back and play through for the selected tracks
and regions.
Real-Time Properties Settings
Quantize
Quantize either can be based on a grid or a
groove template. For grid quantize, additional
tuplet and grid offset settings are available in ad-
dition to the standard MIDI quantize properties.
For groove quantize, additional controls are pro-
vided to set the extent to which the groove’s du-
ration and velocities are applied. Both grid and
groove quantize also let you set a strength
amount, an “include” range, and a randomize
amount.
Quantize Pop-Up Menu Select the desired quan-
tize value, including all standard note rhythm
values between whole notes and 64th notes, in-
cluding dotted and triplet options. This pop-up
menu also provides access to all standard and
custom groove templates.
Swing Value Enter the desired amount of swing
as a percentage between 0 and 300%.
Tuplet Value Enable Tuplet and enter the ratio
for the tuplet (1–99), such as 3 to 2 or 5 to 4. Tu-
plet is only available in the expanded Real-Time
Properties window.
Offset Value Enable Offset and enter the desired
offset value in Ticks between –2000 and 2000.
Offset is only available in the expanded Real-
Time Properties window.
Strength Value Enable Strength and enter the
amount as a percentage between 0 and 100%.
Strength is only available in the expanded Real-
Time Properties window.
Include Enable Include and enter the range be-
tween 0 and 100%. Include is only available in
the expanded Real-Time Properties window.
Random Enable Random and enter a percentage
between 0 and 100%. Random is only available
in the expanded Real-Time Properties window.
Duration
Duration can be used to increase or decrease the
duration of MIDI notes by a fixed amount or by
a percentage. This is useful for creating legato or
staccato passages.
Selecting a Grid Quantize value or a Groove Template
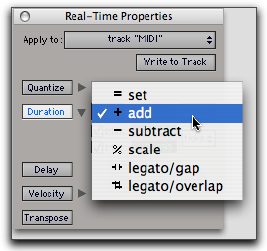
Pro Tools Reference Guide552
Duration Mode Pop-Up Menu
Select one of the following options from the Du-
ration Mode pop-up menu: Set, Add, Subtract,
Scale, Legato/Gap, or Legato/Overlap.
Set Select to set notes to the specified duration.
Add Select to add the specified duration to the
current duration of each note.
Subtract Select to subtract the specified duration
from the current duration of each note.
Scale Select to scale the current duration of each
note by a percentage from 1 to 400%.
Legato/Gap Select to extend each note to the
following note. The specified duration is the
subtracted to create a consistent gap between
notes.
Legato/Overlap Select to extend each note to the
following note. The specified duration is then
added to create a consistent amount of overlap.
Duration Amount
If the Ticks or Notes pop-up menu is set to ticks,
enter a duration as a number of quarter-notes
plus a number of ticks, such as 4|000. If the Ticks
or Notes pop-up menu is set to a note size, enter
a number to by which to multiply that note size,
such as 7 16th-notes.
Ticks or Notes Pop-Up Menus
The Ticks or Notes pop-up menu lets you select
either Ticks or a note size for Note Durations.
There is also a Ticks or Notes pop-up menu for
the Minimum and Maximum Durations op-
tions.
Minimum and Maximum Durations
Enable either or both minimum and maximum
durations and enter a value in quarter notes plus
ticks or as a multiple of a note size. The Mini-
mum and Maximum Durations options are only
available in the expanded Real-Time Properties
window.
Delay
Delay lets you delay or advance all MIDI data in
the selected region or track. Select “+” from the
Delay pop-up menu to delay MIDI data, or select
“–” to advance MIDI data. Select Ticks or Milli-
seconds from the Ticks or Milliseconds pop-up
menu. Enter the Delay amount in Tick or Milli-
second values. Delay is limited to a maximum of
value of 2000 ms or 999 ticks.
Velocity
Velocity lets you change MIDI velocity by a per-
centage or by constant value. Enter a percentage
value in the Dynamics field to scale velocity
around the median velocity of 64. You can also
enter an offset by adding (+) or subtracting (–)
values between 1 and 127. You can also enter
Minimum and Maximum Velocity value limits.
The Minimum and Maximum Durations op-
tions are only available in the expanded Real-
Time Properties window.
Velocity can be applied as a Real-Time Property
to MIDI Input and Thru.
Selecting a Duration mode
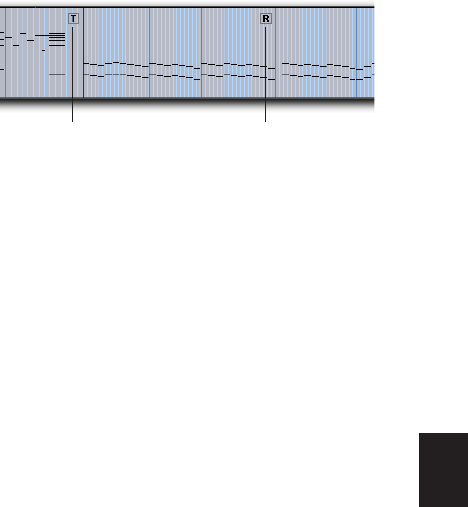
Chapter 27: MIDI Editing 553
Transpose
Transpose lets you transpose MIDI notes up or
down by a specified number of octaves and
semitones, or in key by scale steps (based on the
Key Signature ruler). You can also transpose to a
specified pitch. Select By, To, or In from the
Transpose pop-up menu to transpose by an in-
terval, to a specific pitch, or in key by scale steps.
To transpose by an interval, enter the desired
number of octaves and semitones as a positive
or negative numbers.
To transpose to a specific pitch, enter the de-
sired MIDI note.
To transpose in key by scale steps, enter the de-
sired number of steps as a positive or negative
numbers. For example, enter +2 to transpose up
by thirds in key (a unison plus a second equals a
third).
Transpose can be applied as a Real-Time Prop-
erty to MIDI Input and Thru.
Real-Time Properties On Tracks
and Regions
Real-Time Properties can be configured to apply
to an entire track (all regions on that track), or
on a region-by-region basis. Track-level proper-
ties also provide real-time MIDI input process-
ing of velocity and transposition.
The presence of track-based Real-Time Proper-
ties are indicated by a “T” displayed in the upper
right-hand corner of MIDI regions. Region-
based Real-Time Properties are indicated by an
“R” displayed in the upper right-hand corner of
the region. Regions boundaries are indicated in
Notes View.
Region-Based Real-Time Properties
Region-based Real-Time Properties can only be
applied using the Real-Time Properties window
(Event > MIDI Real-Time Properties). Real-Time
Properties can be applied to multiple regions.
Once Real-Time Properties have been assigned
to a region, the region can be moved or copied
and pasted and retain its Real-Time Properties.
Track-Based Real-Time Properties
All track-based Real-Time Properties consis-
tently apply to MIDI sequences throughout the
entire track. However, regions with region-
based Real-Time Properties will take precedence
over any track-based Real-Time Properties. You
can clear region-based Real-Time Properties by
selecting the region and clicking the Clear Re-
gion Properties button in the Real-Time Proper-
ties window (see “Writing Real-Time Properties
to Tracks or Regions” on page 554).
For greater flexibility, when Real-Time Proper-
ties are assigned on a track basis they are actu-
ally contained in a track playlist. This lets you
create multiple playlists containing different
Real-Time Property settings.
Track-based and region-based Real-Time Property
indicators
Indicates
track-based
Real-Time Properties
Indicates
region-based
Real-Time Properties
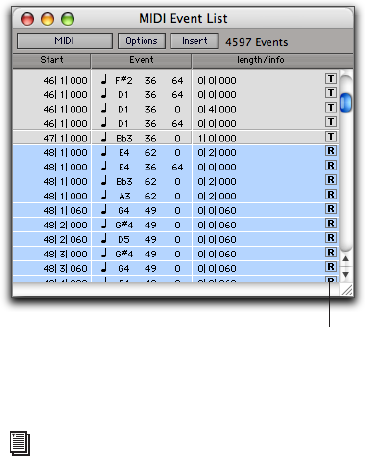
Pro Tools Reference Guide554
Writing Real-Time Properties to
Tracks or Regions
Once you have found the settings you want, you
can write Real-Time Properties to the selected
tracks or regions using the Real-Time Properties
window. Real-Time Properties are applied to the
current MIDI data on the track or in a region.
To write Real-Time Properties to tracks:
1 Enable Link Track and Edit Selection mode.
2 Select one or more tracks to which you want
to apply Real-Time Properties.
3 Open the Real-Time Properties window (Event
> MIDI Real-Time Properties).
4 Select Tracks from the Real-Time Properties
Apply To pop-up menu.
5 Configure the Real-Time Property settings as
desired.
6 Do one of the following:
• Click the Write to Track button in the Real-
Time Properties window.
– or –
• Choose Track > Write MIDI Real-Time
Properties.
To write Real-Time Properties to regions:
1 Select one or more regions to which you want
to apply Real-Time Properties.
2 Open the Real-Time Properties window (Event
> MIDI Real-Time Properties).
3 If Link Track and Edit Selection mode is en-
abled, select Regions from the Real-Time Proper-
ties Apply To pop-up menu.
4 Configure the Real-Time Property settings as
desired.
5 Click the Write to Region button.
To clear Real-Time Properties from a region:
1 Select the region for which you want to clear
Real-Time Properties.
2 Open the Real-Time Properties window (Event
> MIDI Real-Time Properties).
3 Select Regions from the Real-Time Properties
Apply To pop-up menu.
4 Click the Clear Region Properties button.
Real-Time Properties In the MIDI
Event List
In the MIDI Event List, the presence of track-
based Real-Time Properties are indicated by a
“T” displayed to the right of each event. Region-
based Real-Time Properties are indicated by an
“R.”
Track-based and region-based Real-Time Properties
indicated in the MIDI Event List
For more information on the MIDI Event
List, see Chapter 29, “MIDI Event List.”
Track/region column
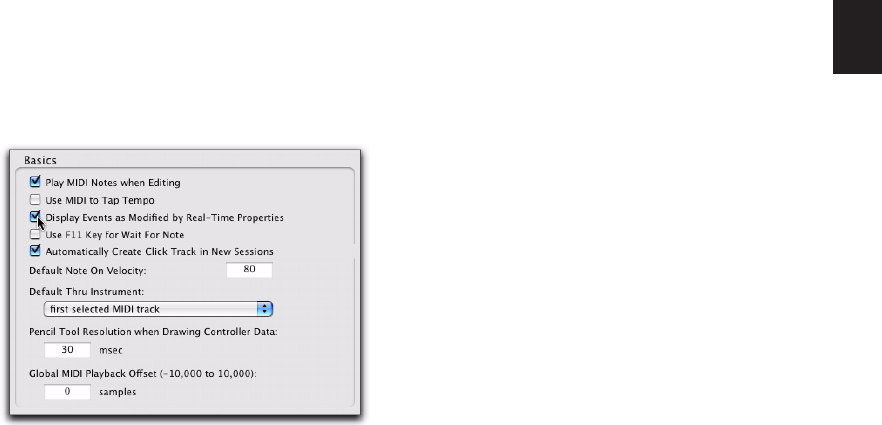
Chapter 27: MIDI Editing 555
Display of Real-Time Properties
Effects
The Display Events as Modified by the Real-
Time Properties option determines if Pro Tools
displays the effects of Real-Time Properties in
both the Edit window and the MIDI Event List.
The Edit window and the MIDI Event List dis-
play the effects of Real-Time Properties when
the Display Events as Modified by Real-Time
Properties option is enabled. With this option
disabled, the effects of Real-Time Properties are
heard but not seen—you see the notes and other
MIDI events with their original location, pitch,
duration, or velocity, but you hear them as they
are affected by the Real-Time Properties settings.
To enable or disable the Display Events as
Modified by Real-Time Properties option:
1 Choose Setup > Preferences.
2 Click the MIDI Tab.
3 Enable or disable the Display Events as Modi-
fied by Real-Time Properties option.
4 Click OK.
Real-Time Properties Effects Displayed
in the MIDI Event List
The MIDI Event List takes into account the ef-
fect of Real-Time Properties whenever the Dis-
play Events as Modified by Real-Time Properties
option is enabled. When editing or inserting an
event in a track or region with active Real-Time
Properties, Pro Tools takes the properties into
account and edits or inserts the event in a differ-
ent place if necessary to match the effect of the
Real-Time Properties.
Real-Time Properties Effects Displayed
in the Edit Window
In the Edit window with the Display Events as
Modified by Real-Time Properties preference en-
abled, MIDI events appear where they sound.
However, MIDI events are not actually written
to their modified locations until you write the
Real-Time Properties to the track or region.
When moving MIDI events, the actual locations
(pitch or time) move by the amount the events
are dragged, but the effect of Real-Time Proper-
ties is displayed.
When inserting an event in a track or region
with active properties, Pro Tools takes the prop-
erties into account and edits or inserts the event
in a different place if necessary to match the ef-
fect of the Real-Time Properties.
Display Events as Modified by Real-Time Properties
option, MIDI Preferences page
Pro Tools Reference Guide556
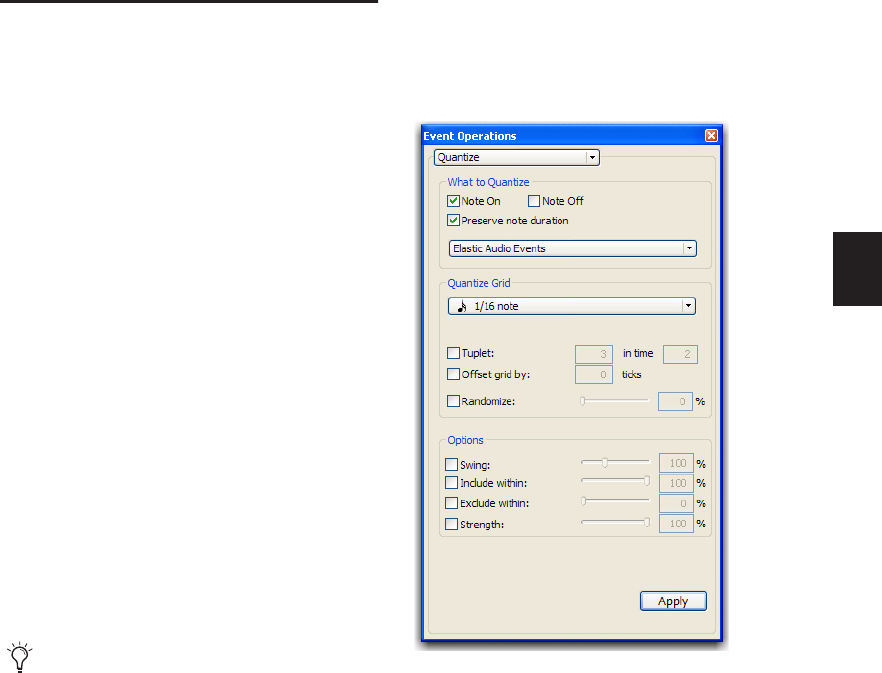
Chapter 28: Event Operations 557
Chapter 28: Event Operations
Event Operations Window
The Event Operations window provides com-
mands to transform groups of MIDI notes to af-
fect pitch, timing, and phrasing. The Quantize
and Restore Performance Event Operations can
also be applied to audio region start times (or
sync points) and Elastic Audio events.
The Event Operations window has nine pages,
one for each Event Operations command.
• Quantize
• Restore Performance
• Flatten Performance
• Change Velocity
• Change Duration
• Transpose
• Select/Split Notes
• Input Quantize
• Step Input
The Event Operations window can be left open,
This provides quick access to apply a command
or try out different options for a particular com-
mand.
To open a specific Event Operations window page:
Choose Event > Event Operations, followed
by one of the Event Operations (such as Quan-
tize).
You can also apply quantize, duration, de-
lay, and transpose nondestructively using
MIDI Real-Time Properties. See “MIDI
Real-Time Properties” on page 549.
Event Operations window (Quantize page shown)

Pro Tools Reference Guide558
To open the last active Event Operations window
page:
Choose Event > Event Operations > Opera-
tions Window.
To apply an Event Operations command, do one of
the following:
Click Apply or press Enter on the numeric
keypad. This applies the command and leaves
the window in the foreground.
– or –
Press Enter on the QWERTY keyboard (Win-
dows) or Return (Mac). This applies the com-
mand and closes the window.
To undo a command in the Event Operations
window:
Choose Edit > Undo.
Using the Event Operations Window
Use the following methods to configure options
in the Event Operations window:
To move forward and back through the vari-
ous fields, press Tab or Shift+Tab.
Increment or decrement selected fields with
the Up and Down Arrow keys. Press and hold
these keys to scroll quickly through the values.
Click and drag up or down in a selected field
to scroll to a new value.
Press Control (Windows) or Command (Mac)
while adjusting sliders for finer resolution.
For selected pitch and velocity fields, play a
note on your MIDI controller keyboard to auto-
matically enter it.
Changing a value for a particular control
(such as the Swing Percentage in the Quantize
window), automatically enables the control.
Quantize
The Quantize command can be applied to MIDI
notes, audio regions, and Elastic Audio events.
For MIDI, quantization adjusts MIDI note loca-
tions and durations so that timing is improved,
or so that a particular rhythmic “feel” is
achieved. For audio regions, quantization ad-
justs the start times (or sync points) of audio re-
gions. For Elastic Audio, quantization adjusts to
the location of detected transient events and ap-
plies Elastic Audio processing accordingly.
The Quantize Event Operations window lets you
apply Grid Quantize based on rhythmic values
(such as 1/16 note) or using Groove Quantize
based on Groove Templates. Slightly different
options are provided for Grid Quantize and
Groove Quantize.
To open the last active Event Operations
window page, press Alt+3 (Windows) or
Option+3 (Mac).
If the Event Operations window is already
open, you can select any of the pages from
the pop-up menu at the top of the window.
When using the Event Operations window
and MIDI Real-Time Properties at the same
time, Event Operations are applied to the
actual MIDI data. MIDI Real-Time Proper-
ties continue to applied on top of the actual
MIDI data.
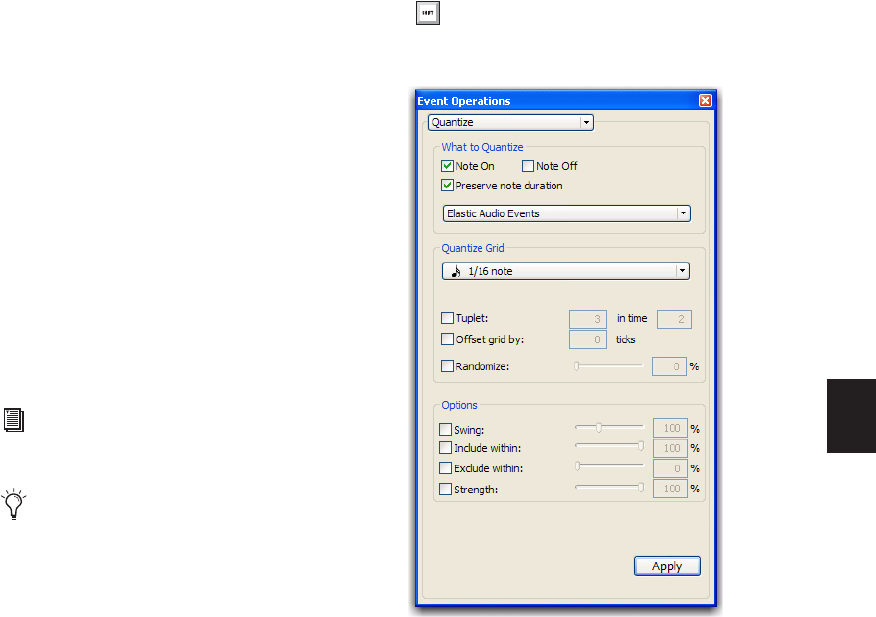
Chapter 28: Event Operations 559
The Quantize Event Operation and Quantize to
Grid commands can both be used to quantize
regions. However, each command also has a
specific additional use.
Use the Quantize to Grid command (Region >
Quantize to Grid) to adjust the start points (or
sync points) for selected regions. The Quantize
to Grid command can be applied to both MIDI
and audio regions (see “Quantizing Regions to
Grid” on page 474).
The Quantize Event Operation, on the other
hand, can be applied to MIDI notes and Elastic
Audio events individually in addition to audio
region start times (or sync points). Some notes
or events may be moved back in time, others
forward. For MIDI notes only, some may be
shortened, some lengthened, and some more
drastically affected than others.
To open the Quantize window:
Choose Event > Event Operations > Quantize.
To select Grid Quantize:
From the Quantize Grid pop-up menu, select
a note value.
To select Groove Quantize:
From the Quantize Grid pop-up menu, select
a groove template.
You can also quantize MIDI input, see “In-
put Quantize” on page 580.
The settings in the Quantize window are
saved with each session. To store your fa-
vorite settings for use in future sessions,
save them as part of a session template (see
“Creating Custom Session Templates” on
page 105).
Press Alt+0 on Windows or Option+0 on
Mac to open the Quantize window.
Event Operations window, Quantize
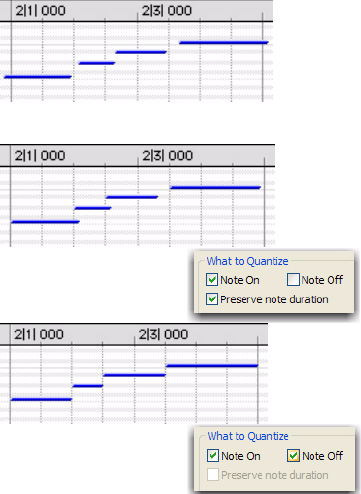
Pro Tools Reference Guide560
Grid Quantize
The Quantize window can apply Grid Quantize
when a specific rhythmic value is selected in the
Quantize Grid pop-up menu. When a groove
template is selected in the Quantize pop-up
menu, Groove Quantize can be applied. For in-
formation on Groove Quantize, see “Groove
Quantize” on page 564.
What to Quantize
The What to Quantize options determine what
aspects of any selected MIDI notes are quan-
tized: Note Ons (attacks), Note Offs (releases), or
both. You can also select whether to quantize
audio regions or Elastic Audio events. Depend-
ing on what type of track material is selected,
not all options will be available. If only MIDI is
selected, the Audio Regions and Elastic Audio
Events options are unavailable. If only audio is
selected, the Note On, Note Off, and Preserve
Note Duration options are not available.
Note On When selected, note start points are
quantized.
Note Off When selected, note end points are
quantized.
Preserve Note Duration When selected, note du-
rations are preserved.
When deselected with the Note On option se-
lected, note end points are not moved.
When deselected with the Note Off option se-
lected, note start points are not moved.
If the options for both Note On and Note Off are
selected, the Don’t Change Durations option is
unavailable.
Figure 5 shows how MIDI notes are adjusted by
the different What To Quantize options.
Audio Regions When selected in the What to
Quantize pop-up menu, Quantize is applied to
region start times (or sync points if present) for
selected audio regions. MIDI regions are not af-
fected. Typically, you will only want to apply
quantization to sliced audio regions or region
groups (such as imported REX files or regions
created using the Separate Regions at Transients
command or Beat Detective). Quantization can
be applied to mixed selections of MIDI notes
and audio regions.
Elastic Audio Events When selected in the What
to Quantize pop-up menu, Quantize is applied
to detected transient events within the Edit se-
lection on Elastic Audio–enabled tracks. Quanti-
zation can be applied to mixed selections of
MIDI notes and Elastic Audio events. Warp
Figure 5. What To Quantize examples
before quantize
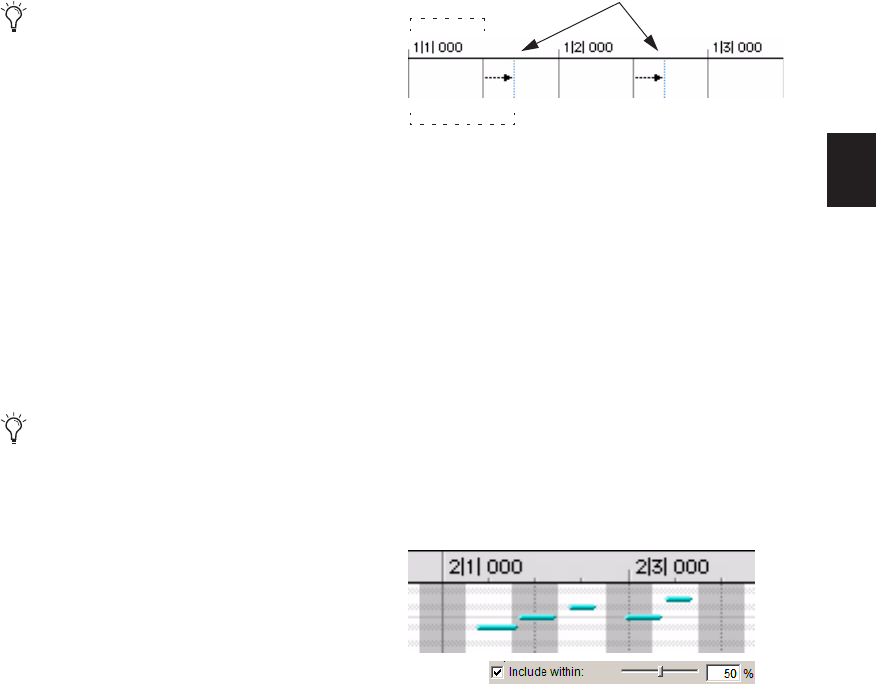
Chapter 28: Event Operations 561
markers are created automatically on top of
Event markers nearest the quantize grid. Quan-
tize then uses these Warp markers to apply
quantization.
Quantize Grid
Quantize Grid Pop-Up Menu Determines the beat
boundaries to which MIDI notes, Elastic Audio
events, and audio region start points are
aligned. Any size from whole notes (1/1) to
sixty-fourth notes (1/64), including dotted and
triplet values, can be selected for the Grid size.
Tuplet Select the Tuplet option to quantize ac-
cording to irregular note groupings, such as
quintuplets (5 in the time of 4). The Quantize
Grid for tuplets is calculated from the note size
selection and the Tuplet value. For example, if
an sixteenth note equals 240 ticks, quintuplet
sixteenth notes with 5 in time of 4 would yield a
Grid size of 192 ticks or (240 ticks/5)*4.
Offset Grid By Offsets the Quantize Grid forward
or back in time by a specified number of ticks.
Use this option to achieve a pushed feel (by us-
ing positive values) or a laid back feel (by using
negative values).
Randomize When selected, MIDI notes, Elastic
Audio events, and audio regions are moved ran-
domly forward or back in time (after the Quan-
tize occurs). For example, with the Quantize
Grid set to eighth notes and Randomize set to
50%, notes and events are placed up to a 32nd
note before or after the beat boundary. The Ran-
domize setting also affects note durations (if Re-
leases is selected).
Options
Additional Quantize options include:
Swing When selected, every other Grid bound-
ary is shifted by the specified percentage value
(0–300) to achieve a “swing” feel. A Swing value
of 0% yields no swing, while 100% yields a trip-
let feel. Settings above 100% progressively nar-
row the swing until the maximum of 300%, at
which every other Grid boundary is moved to
the next Grid point.
Include Within When selected, MIDI Note Ons
and MIDI Note Offs, Elastic Audio events, and
audio regions are only quantized if located
within the specified percentage of the Quantize
Grid. Use this option to clean up downbeats
without affecting notes that are “swung” or
wildly off the beat.
Figure 6 shows the Quantize Grid set to quarter
notes with the Include Within option set to
50%. In this example, only the MIDI Note Ons
and MIDI Note Offs falling within the shaded
area (equivalent to an eight note area around
each beat) are quantized.
Relative Grid mode does not affect the
Quantize Grid.
To Quantize just the backbeats, set the
Quantize Grid to half-notes with an Offset
of 960 ticks.
100% Swing, eighth note Grid
Figure 6. Include Within option
Every other Grid point
shifted by swing
0% Swing
(480 ticks)
100% Swing
(640 ticks)
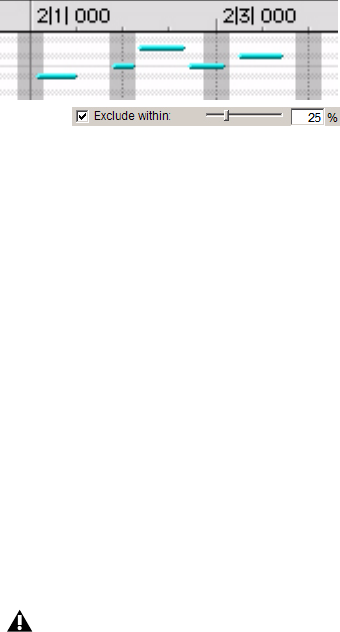
Pro Tools Reference Guide562
Exclude Within When selected, MIDI Note Ons
and MIDI Note Offs, Elastic Audio events, and
audio regions are not quantized if located
within the specified percentage of the Quantize
Grid. Use this option to preserve the feel of
events close to the beat, while correcting others
that are drastically away from the beat.
Figure 7 shows the Quantize Grid set to quarter
notes with the Exclude Within option set to
25%. In this example, MIDI Note Ons and MIDI
Note Offs falling within the shaded area (equiv-
alent to a sixteenth note area around each beat)
are not quantized.
Strength When selected, MIDI notes, Elastic Au-
dio events, and audio regions are moved a per-
centage toward the Quantize Grid. Lower per-
centages preserve the original feel of the events,
higher percentages align the notes more tightly
to the Grid.
Grid Quantize Examples
The following examples illustrate some of the
more common uses for Grid Quantize.
If you intend to loop playback while quantizing,
you may want to deselect Options > Link Time-
line and Edit Selection. This ensures that the
play range does not change when selected
events are moved in the course of quantizing
and undoing.
Straight Quantize
To quantize to a straight sixteenth note feel:
1 Select the range of MIDI notes, Elastic Audio
events, or audio regions to be quantized.
2 Choose Event > Event Operations > Quantize.
3 Under What to Quantize, select the Note On
option for quantizing MIDI notes. To also quan-
tize MIDI note durations, select the Note Off op-
tion. If you are quantizing audio, select Audio
Regions or Elastic Audio Events from the pop-up
menu.
4 From the Quantize Grid pop-up menu, select
sixteenth notes (1/16). Make sure that the other
options for Tuplet, Offset Grid By, and Swing are
not selected.
5 Ensure that the remaining Quantize options
are deselected.
6 Click Apply.
Quantizing While Preserving the
Original “Feel”
You can quantize less strictly, to preserve the
original feel of your recorded MIDI and audio
tracks.
To quantize while preserving the original feel:
1 Select the range of MIDI notes, Elastic Audio
events, or audio regions to be quantized.
2 Choose Event > Event Operations > Quantize.
3 Under What to Quantize, select the Note Off
option for quantizing MIDI notes. To also quan-
tize MIDI note durations, select the Note Off op-
tion. If you are quantizing audio, select Audio
Regions or Elastic Audio Events from the pop-up
menu.
4 From the Quantize Grid pop-up menu, select
the note value you want to use.
Figure 7. Exclude Within option
After quantizing, you can use Restore Per-
formance to revert to the original version
(see “Restore Performance” on page 571.)

Chapter 28: Event Operations 563
5 Ensure that the other options for Tuplet, Off-
set Grid By, and Swing are not selected.
6 Select the Exclude Within option with a value
of 10–15%.
7 Select the Strength option with a value of
70–80%.
8 Ensure that the remaining Quantize options
are deselected.
9 Click Apply.
10 Audition the change. If the desired effect is
not achieved, undo the edit and experiment
with different values for Exclude Within and
Strength.
Quantizing with Swing
If you are working with MIDI hi-hats or bass
lines or audio equivalents, you may want to ap-
ply more of a swing feel when quantizing.
To quantize with an eighth note swing feel:
1 Select the range of MIDI notes, Elastic Audio
events, or audio regions to be quantized.
2 Choose Event > Event Operations > Quantize.
3 Under What to Quantize, select the Note Off
option for quantizing MIDI notes. To also quan-
tize MIDI note durations, select the Note Off op-
tion. If you are quantizing audio, select Audio
Regions or Elastic Audio Events from the pop-up
menu.
4 From the Quantize Grid pop-up menu, select
eighth notes (1/8).
5 Select the Swing option with the Swing per-
centage you want:
• For a light swing, use 12%.
• For a tighter swing-like groove, use 24%.
• For a true “triplet-like” swing feel, use
50–75%.
6 Ensure that the options for Tuplet, Offset Grid
By, and Randomize are not selected.
7 Click Apply.
8 Audition the change. If the desired effect is
not achieved, undo the edit and experiment
with different Swing percentages.
Quantizing with Randomize
If quantized events sound too mechanical or
“on the beat,” use the Randomize option in the
Quantize window to make them sound more
natural.
To “humanize” the rhythmic feel of events:
1 Select the range of MIDI notes, Elastic Audio
events, or audio regions to be quantized.
2 Choose Event > Event Operations > Quantize.
3 Under What to Quantize, select the Note Off
option for quantizing MIDI notes. To also quan-
tize MIDI note durations, select the Note Off op-
tion. If you are quantizing audio, select Audio
Regions or Elastic Audio Events from the pop-up
menu.
4 From the Quantize Grid pop-up menu, select
the note value you want to use.
5 Select the Randomize option and enter a value
of 5%.
6 Click Apply.
7 Audition the change. If the desired effect is
not achieved, undo the edit and experiment
with different Randomize percentages.
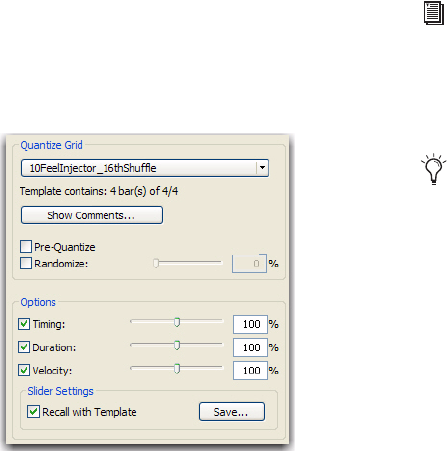
Pro Tools Reference Guide564
Experimenting with Quantize
When using the Quantize command, you may
have to experiment with many of the controls
to achieve the results you want. Try different
values for Include and Exclude Within, and
Strength; these controls determine which notes
are affected and how drastically they are
changed. Additionally, use the Randomize con-
trol, which adds a percentage of randomness to
the quantize, to make tracks sound less “me-
chanical.”
Groove Quantize
In the Quantize window, you can apply Groove
Quantize when a groove template is selected in
the Quantize Grid pop-up menu. Groove quan-
tize adjusts MIDI note locations and durations,
Elastic Audio events, and audio regions accord-
ing to a groove template rather than a strict quan-
tization grid. Groove templates extract the par-
ticular rhythmic feel of a recorded audio or
MIDI performance so that is can be applied to
another MIDI sequence or audio selection. Digi-
Groove templates can be generated using Beat
Detective.
Groove Templates
Groove templates (such as DigiGroove tem-
plates) are “quantization maps” derived from
real musical performances. The rhythmic char-
acter of each performance is analyzed and stored
as a groove template. Groove templates can be
used to transfer the feel of a particular perfor-
mance to MIDI notes (Timing, Duration, and
Velocity), Elastic Audio events, and audio re-
gions.
DigiGroove templates can be created using Beat
Detective. Beat Detective analyzes an audio se-
lection for transient peaks according to a de-
fined threshold and maps the rhythmic rela-
tionships to a 960 parts per quarter note (ppq)
template. Beat Detective can also analyze a MIDI
selection for note ons and velocities to generate
groove templates. These template can then be
used with Groove Quantize, as well as with Beat
Detective.
DigiGroove templates are also available from
Digidesign and third-party manufacturers.
Quantize options with a groove template selected
For information on Beat Detective and cre-
ating groove templates, see Chapter 34,
“Beat Detective.”
Numerical Sound’s Feel Injector Templates
(960 ppq) are supported in Pro Tools, but
DNA Groove Templates (192 ppq) are not.

Chapter 28: Event Operations 565
Quantize Grid
Quantize Grid Pop-Up Menu Determines which
groove template to use for quantization. All
groove template files in the Grooves folder are
available in the Quantize Grid pop-up menu.
The directory path for the Grooves folder is:
• On Windows: C:\Program Files\
Digidesign\Pro Tools\Grooves
• On Mac: Applications/Digidesign/
Pro Tools/Grooves
If you organize your groove templates in sub-
folders in the Groove folder, they appear as sub-
menus in the pop-up menu. Once you have se-
lected a groove template, specific information
about the template’s meter and duration (in
bars) is displayed under the pop-up menu.
Show Comments The Comments field displays
any comments saved with the groove template
from Beat Detective. The Comments field can-
not be edited in the Quantize page, but can be
edited when saving a groove template from the
Groove Quantize page.
Pre-Quantize Enable to hard quantize the se-
lected MIDI notes to a sixteenth-note grid be-
fore applying Groove Quantize.
Options
Timing Enable to apply Groove Quantize to the
selected MIDI notes, Elastic Audio events, or au-
dio regions. Use the slider to change the amount
of quantization applied to the selection. If the
slider is set to 0%, there is no change in timing.
A setting of 100% moves notes to the underly-
ing template locations. If the slider is set to
200%, events move to a tick location that is
twice the difference between the original event
location and the position of the referenced tem-
plate event.
For example, if an event was played at Bar
1|1|060 (a 16th note), and the corresponding
template event is at 1|1|073, a slider value of
100% results in the event being shifted to
1|1|073 (a slider value of 200% shifts the note to
1|1|086).
The default value for the Timing slider is 100%.
Duration Enable to influence the durations of
the selected MIDI notes. The Duration option
does not apply to audio selections. At a setting
of 100%, durations are changed to match the
current groove template. Set to 200%, durations
increase and decrease based on the ratio of the
original duration of the selected notes and the
durations in the template.
The default value for the Duration slider is
100%.
Velocity Enable to influence the velocities of the
selected MIDI notes. The Velocity option does
not apply to audio selections. If the slider is set
to 0% there is no change to the selected veloci-
ties, a setting of 100% sets all velocities to match
the current groove template. A velocity setting
of 200% typically results in over-exaggerated ve-
locities—loud notes increasing and soft notes
decreasing in volume.
For example, if two adjacent notes have equal
velocities of 80, and the two corresponding tem-
plate velocities are 70 and 90, setting the slider
to 200% changes the velocities to 60 and 100.
The default value for the Velocity slider is 100%.
Beat Detective does not extract duration in-
formation from audio performances. Digi-
Groove templates created using Beat Detec-
tive contain a fixed duration value that is
50% of the selected template resolution (see
“Defining a Beat Detective Selection” on
page 686).
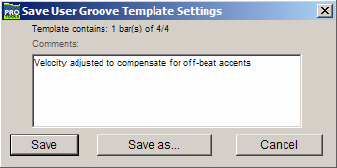
Pro Tools Reference Guide566
Slider Settings
To Save the groove template with the current
Options Slider Settings:
1 In the Quantize window, select Recall with
Template if you want to restore all Groove
Quantize Options to the settings that are saved
with the current template
2 Click the Save button.
3 Enter or edit any comments you want to save
with the template.
4 Do one of the following:
• Click the Save button to save the groove
template with the current Options Slider
Settings.
– or –
• Click the Save As button to make a copy of
the groove template with the current Op-
tions Slider Settings. In the resulting Save
dialog, enter a name for the copy and click
Save.
Slider settings can be lost if any of the following
operations are performed without saving the
settings first:
• Another Event Operations window is se-
lected.
• The Event Operations window is closed.
• You switch to another groove template.
Applying Groove Templates
Groove templates can be of any length and can
be applied to any number of bars. Typically, you
will apply groove templates to selections of the
same bar length and meter. However, groove
templates can be applied to different meters—
for example, a groove template in 6/8 can be ap-
plied to a selection in 4/4. Also, it is not neces-
sary to start on the downbeat when making a se-
lection to apply a groove template.
To apply Grove Quantize:
1 With the Grabber or Selector tool, select the
MIDI notes, Elastic Audio events, or audio re-
gions you want to Groove Quantize.
2 Choose Event > Event Operations > Quantize.
3 Select a groove template from the Grid Quan-
tize pop-up menu.
4 Enable Timing, Duration, and Velocity as de-
sired, and adjust their sliders to the percentages
you want.
5 If desired, enable Pre-Process using Quantize.
6 Click the Apply button.
Save User Groove Template Settings dialog
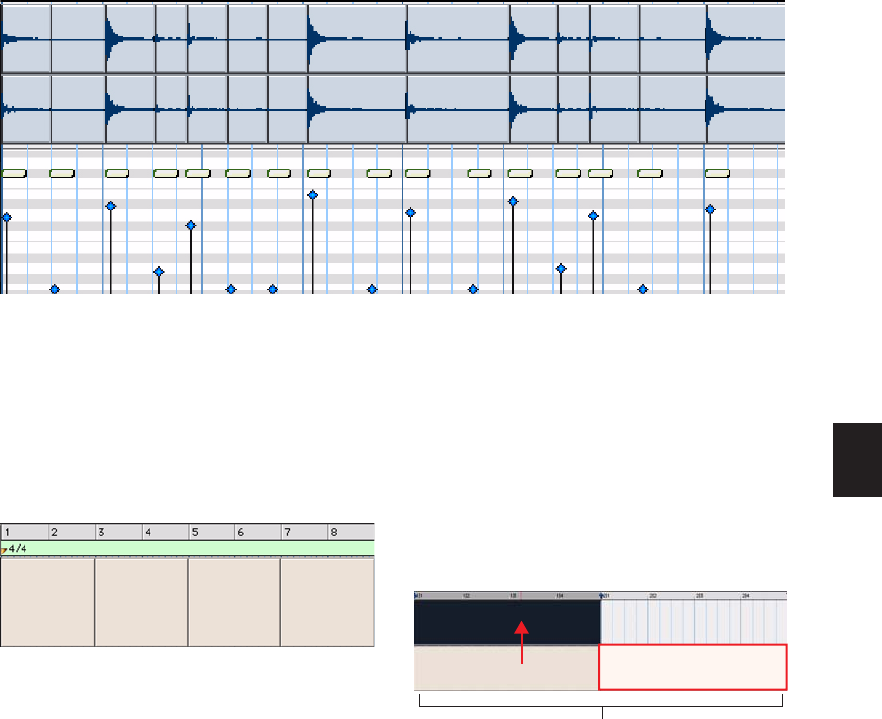
Chapter 28: Event Operations 567
Mapping Groove Templates
Pro Tools applies groove templates relative to
the song start. For example, a two-bar groove
template repeats starting at every odd-num-
bered bar in the session (bar 1, 3, 5, 7…).
Template Mapping for Equal Meters And Odd
Numbered Bars
If a two-bar groove template is applied to a selec-
tion of one bar of the same meter, only the first
bar of the template is used. If the selection does
not encompass bar boundaries, for example
1|2|000 to 2|1|000, the groove template only
modifies the selected notes.
Figure 8. A DigiGroove template (derived from the audio shown) applied to a series of sixteenth-notes with Timing
and Velocity both set to 100%
2-bar groove template, repeating template grid
2-bar
groove
template
2-bar
groove
template
2-bar
groove
template
2-bar
groove
template
Applying 2-bar groove template to a 1-bar selection,
odd numbered bar
4/4 bar 1 4/4 bar 2 (not used)
4/4 1-bar selection
Groove template
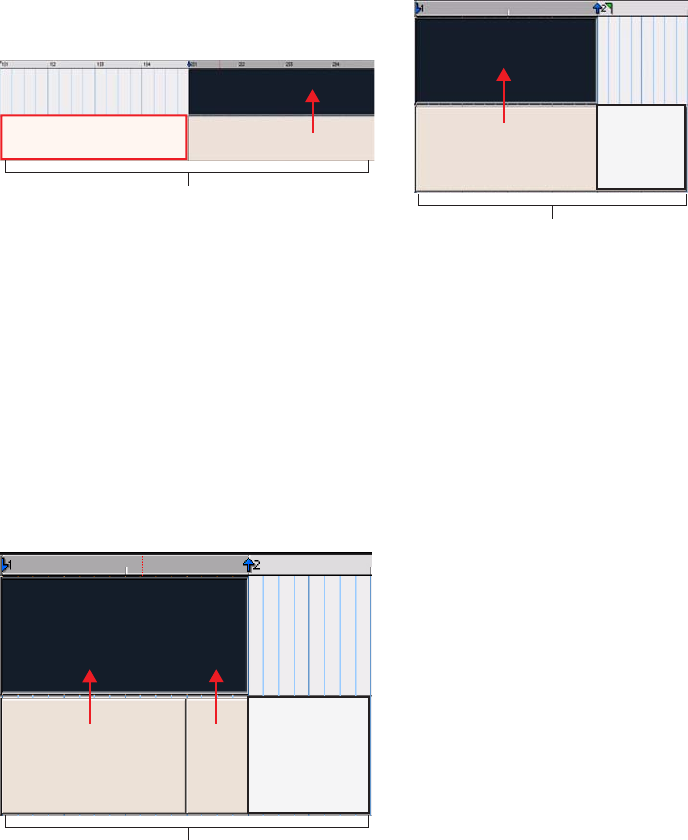
Pro Tools Reference Guide568
Template Mapping for Equal Meters And Even
Bars
If a selection starts on an even bar, only the ap-
propriate portion of the groove template will be
used. For example, if the selection is two bars
long and starts on an even bar, the template ap-
plies bar 2 before bar 1.
Template Mapping for Unequal Meters
In cases where the Groove Templates and track
selections are based on different meters, the
template will be repeated or truncated to match
the number of beats in the selection.
For example, if the Groove Template contains
fewer beats than the selection, such as a one-bar
template in 6/8 being applied to a one-bar selec-
tion in 4/4, the template repeats to make up the
difference.
If the Groove Template contains more beats
than the selection on a track, such as a one-bar
template in 6/4 being applied to a two-bar selec-
tion in 4/4, only uses the appropriate number of
beats.
Behavior for Mixed Meters
If the selection contains mixed meters, the
groove template will always be mapped so that
the downbeats are aligned. For example, if the
Groove Template consists of one-bar of 4/4 and
it is being applied to a selection of one-bar of 4/4
followed by a bar of 7/16 and one-bar of 5/8, the
downbeat of the Groove Template is aligned
with the downbeats in the selection and only
uses the appropriate number of beats from the
Groove Template.
Applying a 2-bar groove template to a 1-bar selection,
even numbered bar
Applying a 1-bar groove template in 6/8 to a 1-bar
selection in 4/4
4/4 bar 1 (not used) 4/4 bar 2
4/4 1-bar selection
Groove template
6/8 bar 1
4/4 1-bar selection
6/8 bar 1 repeated
(beats 3–6
Groove template
not used)
Applying a 1-bar groove template in 6/4 to a 1-bar
selection in 4/4
6/4 bar 1
4/4 1-bar selection
Groove template
(beats 3–6
not used)
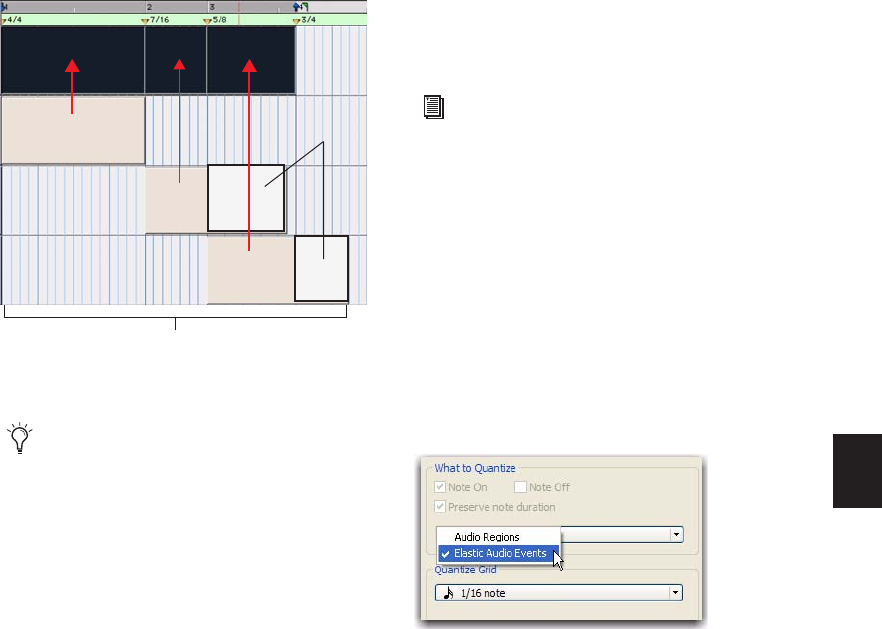
Chapter 28: Event Operations 569
Quantizing Elastic Audio
Pro Tools lets you apply Quantize to Elastic Au-
dio events as well as MIDI notes. Quantize can
be applied to Event and Warp markers closest to
the quantize grid on Elastic Audio–enabled
tracks, regardless of whether they are sample- or
tick-based. When quantizing, Event markers
closest to the quantize grid are promoted to
Warp markers and all Warp markers closest to
the quantize grid are quantized based on the
Quantize settings.
Quantization can also be applied to region start
times (or sync points) on all audio tracks,
whether they are Elastic Audio–enabled, or sam-
ple- or tick-based. This lets you quickly quantize
audio regions without applying TCE, and is es-
pecially useful when working with “one-shot”
regions (single-event regions) such as sliced re-
gions or region groups.
To quantize Elastic Audio events:
1 Select the audio you want to quantize on Elas-
tic Audio–enabled tracks. (Audio not on Elastic
Audio–enabled tracks will not be quantized.)
2 Choose Events > Event Operations > Quan-
tize.
3 In the Quantize window, select Elastic Audio
Events from the What to Quantize pop-up
menu.
4 Set the Quantize Grid and Options settings as
desired.
Applying a 1-bar groove template in 4/4 to a 3-bar
selection in different meters
You can reset the groove template grid by
adding a new meter marker (it can be the
same meter). The groove template will re-
start at the meter marker regardless of the
measure number or whether or not the meter
has actually changed.
3-bar selection of changing meters
4/4 bar 1
4/4 bar 1
4/4 bar 1
(not used)
Groove template
Use Restore Performance to undo quantiza-
tion of audio and MIDI. See “Restore Perfor-
mance” on page 571.
Selecting Elastic Audio Events for What to Quantize
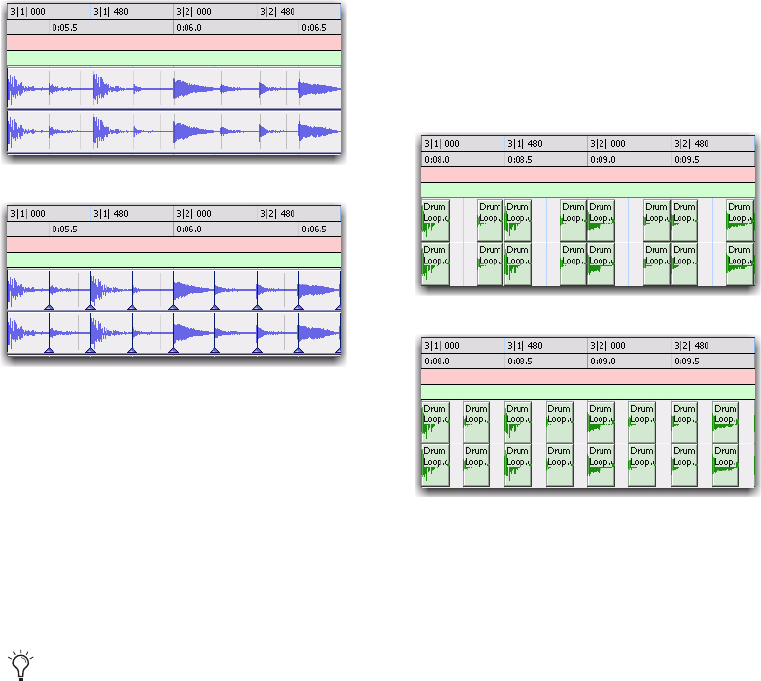
Pro Tools Reference Guide570
5 Click Apply.
The Warp and Event markers closest to the
Quantize Grid are quantized accordingly. TCE is
applied between these markers and all other
markers maintain their position relative to the
Quantize Grid.
Quantizing Audio Regions
Pro Tools lets you quantize audio region start
times (or sync points) using the Quantize oper-
ation. Audio region start times (or sync points)
are quantized to the nearest quantize grid value.
To quantize audio regions:
1 Select the audio regions you want to quantize.
2 Choose Events > Event Operations > Quan-
tize.
3 In the Quantize window, select Audio Regions
from the What to Quantize pop-up menu.
4 Set the Quantize Grid and Options settings as
desired.
5 Click Apply.
The region start times (or sync points if present)
are quantized according to the quantize set-
tings.
Quantizing Mixed Selections
You can apply Quantize to both MIDI notes and
audio regions, or both MIDI notes and Elastic
Audio events at the same time. However, you
cannot apply Quantize to both audio regions
and Elastic Audio events at the same time.
Quantized Elastic Audio Events in Warp view
Quantizing region groups only adjust the lo-
cation of the region group start (or sync
point). To quantize the underlying sliced re-
gions in a region group, you must first un-
group, then quantize, and then regroup. For
more information on region groups, see “Re-
gion Groups” on page 675.
before quantizing
after quantizing
Quantized audio regions
before quantizing
after quantizing
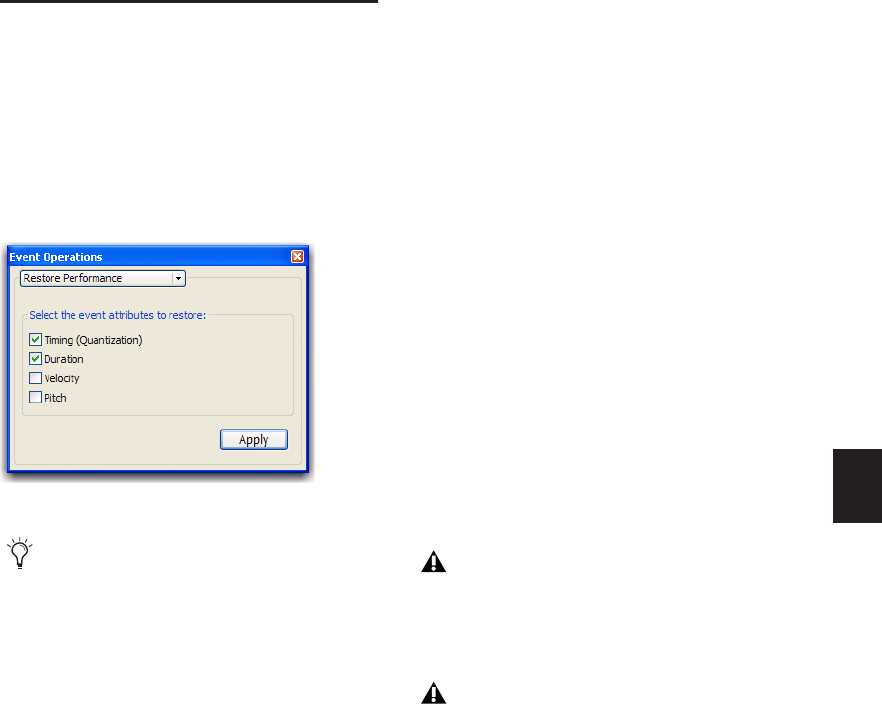
Chapter 28: Event Operations 571
Restore Performance
The Restore Performance command reverts all
selected MIDI notes to their original state (when
first recorded or manually inserted), even after
the session has been saved, or the Undo queue
has been cleared. Restore Performance can also
be applied to quantized Elastic Audio Events or
quantized audio regions.
The following MIDI note, Elastic Audio Event,
and audio region attributes can be restored:
Timing (Quantization) Restores the original start
times of the selected notes, audio regions, and
Elastic Audio Events. For MIDI only, this
changes the durations of selected notes if the
Duration option is not enabled.
Duration Restores the original durations of the
selected notes. If the Timing (Quantization) op-
tion is not enabled, the start times of selected
notes are not restored and the end times are af-
fected. Duration has no effect on audio.
Velocity Restore the original velocities of the se-
lected notes. Velocity has no effect on audio.
Pitch Restores the original pitches of the se-
lected notes. Pitch has no effect on audio.
To restore the original time, duration, velocity, or
pitch for selected MIDI notes, audio regions, or
Elastic Audio Events:
1 Select the MIDI notes, audio regions, or Elastic
Audio Events you want to restore.
2 Choose Event > Event Operations > Restore
Performance.
3 Select which performance attributes to re-
store.
4 Click Apply.
Any changes made through the Quantize,
Change Duration (MIDI only), Change Velocity
(MIDI only), or Change Pitch (MIDI only) com-
mands are undone and the original “perfor-
mance” is restored. Also, any MIDI notes that
were recorded with Input Quantize enabled are
restored (see “Input Quantize” on page 580).
Event Operations window, Restore Performance page
The Restore Performance command can be
undone. Restore Performance does not undo cut, cop-
ied, pasted, or otherwise manually moved
MIDI notes, audio regions, or Elastic Audio
events.
Restore Performance does not undo Dura-
tion changes made by trimming the start of
a note. Trimming the start of a note essen-
tially changes the note’s timing, and there-
fore is treated by Pro Tools the same as if it
were manually moved.
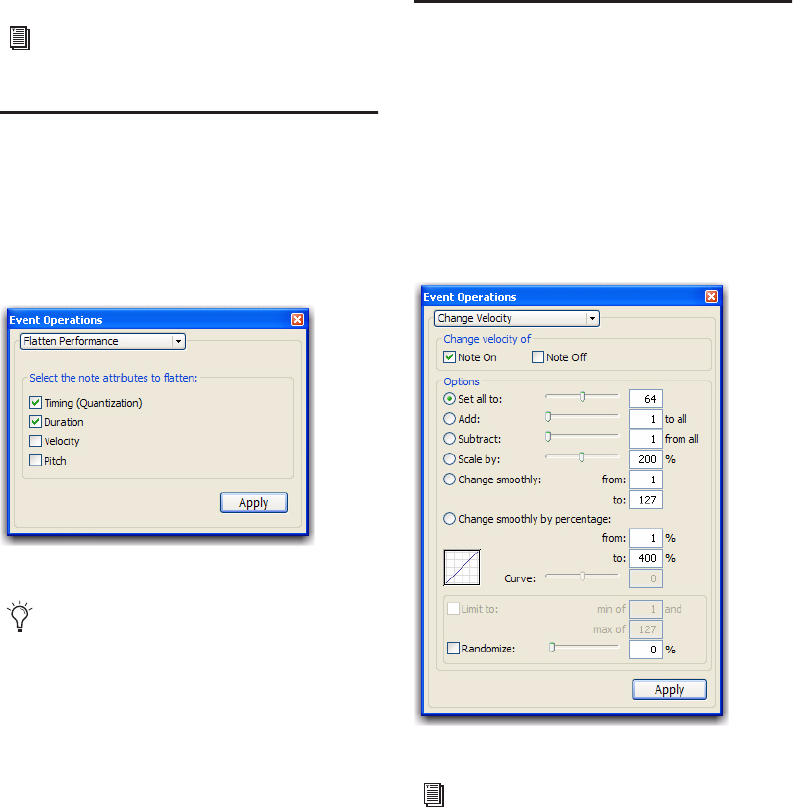
Pro Tools Reference Guide572
Removing Input Quantize
Restore Performance can be used to remove
quantization on input for MIDI notes. For ex-
ample, if you recorded a performance with In-
put Quantize on, you can still restore the perfor-
mance as it was actually played.
Flatten Performance
The Flatten Performance command “locks in”
the current performance for selected notes, cre-
ating a new “restore to” state for the specified
note attributes when using Restore Perfor-
mance.
To flatten the performance:
1 With the Grabber or Selector tool, select the
MIDI notes you want to flatten.
2 Choose Event > Event Operations > Flatten
Performance to open the Restore Performance
page.
3 Select the note attributes to flatten. (For de-
scriptions of these attributes, see “Flatten Perfor-
mance” on page 572).
4 Click Apply.
Change Velocity
The Change Velocity command automatically
adjusts Note On (attack) and Note Off (release)
velocities for selected MIDI notes. Use it to make
notes louder or softer, or to create crescendos or
decrescendos.
Velocities can also be edited manually with the
Pencil and Grabber tools (see “Manually Editing
MIDI Notes” on page 532).
For information on Input Quantize, see “In-
put Quantize” on page 580.
Event Operations window, Flatten Performance page
The Flatten Performance command can be
undone.
Event Operations window, Change Velocity page
You can also change velocity non-
destructively in real-time using MIDI Real-
Time Properties. See “MIDI Real-Time
Properties” on page 549.
Chapter 28: Event Operations 573
Note On Applies the Change Velocity options to
the MIDI Note On.
Note Off Applies the Change Velocity options to
the MIDI Note Off.
Set All To Sets all velocities to the specified value
(1–127).
Add Adds to existing velocity values by the spec-
ified amount (1–127).
Subtract Subtracts from existing velocity values
by the specified amount (1–127).
Scale By Scales all velocities by a percentage
amount (1–400%).
Change Smoothly Allows velocities to change
smoothly from one value to another over time.
Change Smoothly by Percentage Allows veloci-
ties to change smoothly from one percentage
value to another over time.
The curve for this change can be adjusted
(+/– 99) to affect how gradually the change oc-
curs.
Limit To When selected, restricts the Change Ve-
locity command to a minimum and maximum
range.
Randomize When selected, the Change Velocity
command is randomized by the specified per-
centage value. For example, using “Set all to”
with a value of 64, along with a Randomize
value of 50%, yields velocities anywhere be-
tween 48 and 80 (+/– 25% of the velocity value).
Velocity Ranges
The valid range for MIDI note velocities is
1–127. The Change Velocity command will
never result in moving velocities outside this
range; 1 is always the lowest and 127 is always
the highest. This means that you can encounter
situations where the Change Velocity command
has no effect on a particular note.
For example, if a note with a velocity 64 is scaled
by 200%, the new velocity would be 127. At-
tempting to scale or increase the velocity any
further yields no further change.
Fading Velocities
To change velocities smoothly over time:
1 Select the range of MIDI notes to be edited.
2 Choose Event > Event Operations > Change
Velocity.
3 Select the Change Smoothly option with the
range set from 127 to 0.
4 Click Apply.
Velocity values usually affect the loudness
of MIDI notes. Depending on how velocity is
mapped with any MIDI instrument, veloci-
ties may also affect other aspects of an in-
strument’s sound (such as filter cutoff, en-
velopes, and modulations).
The settings in the Change Velocity window
are saved with each session. To store your
favorite settings as the default for use in fu-
ture sessions, save them as part of a session
template (see “Creating Custom Session
Templates” on page 105).
While there are options for adjusting both
the Note On (attack) and Note Off (release)
velocities for notes, most MIDI devices ig-
nore release velocity information. To see if
your instrument supports release velocities,
refer to the manufacturer’s documentation.
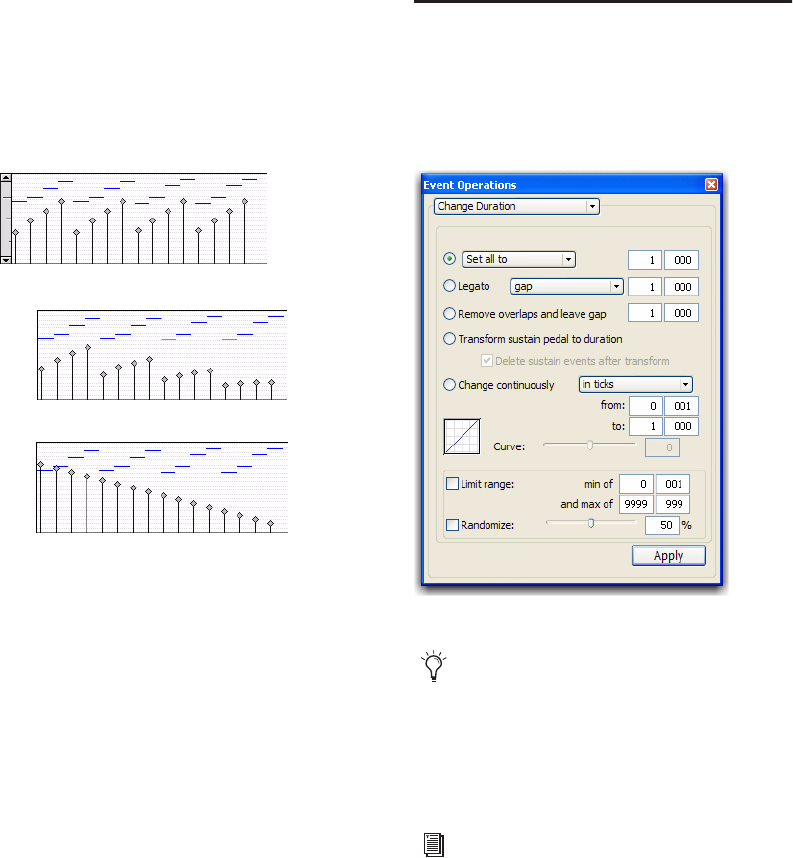
Pro Tools Reference Guide574
Preserving Existing Velocity Relationships
To partially preserve the existing velocity rela-
tionships and still achieve velocity fades, use the
option for Change Smoothly by Percentage.
Figure 9 illustrates the difference between the
two Change Smoothly options.
Scaling Velocities
Many times existing note velocities already have
the relationship between them that you want,
but are either too soft or too loud overall. In
these instances, use the Scale By option.
For example, to make velocities 20% louder:
1 Select the range of MIDI notes to be edited.
2 Choose Event > Event Operations > Change
Velocity.
3 Select the Scale By option with the percentage
value set to 120.
4 Click Apply.
Change Duration
The Change Duration command adjusts dura-
tions for selected MIDI notes. Use it to affect the
articulation of the selected notes by making
them more staccato or legato.
Figure 9. Change Smoothly by Percentage
Original velocities
After Change Smoothly by Percentage, 100% to 20%
After Change Smoothly, from velocity of 100 to 10
Event Operations window, Change Duration
The settings in the Change Duration page
are saved with each session. To store your
favorite settings as the default for use in fu-
ture sessions, save them as part of a session
template (see “Creating Custom Session
Templates” on page 105).
You can also change note duration non-
destructively in real-time using MIDI Real-
Time Properties. See “MIDI Real-Time
Properties” on page 549.

Chapter 28: Event Operations 575
Set/Add/Subtract/Scale Option
Set All To Sets all durations to a length specified
in quarter notes and ticks.
Add Adds to the durations by a specified number
of quarter notes and ticks.
Subtract Subtracts from the durations by a spec-
ified number of quarter notes and ticks.
Scale by Shortens or lengthens durations based
on a percentage value (1–400%).
Legato
Enable the legato option to add legato to the
MIDI selection. Select Gap or Overlap from the
Legato pop-up menu and enter the desired gap
or overlap in beats and ticks.
Remove Overlap
The Remove Overlap option removes any note
overlap for all notes of the same pitch. This
command is different from Legato in that non-
overlapping notes of the same or different
pitches remain unchanged. To create a gap be-
tween previously overlapping notes, enter the
desired gap in beats and ticks.
Transform Sustain Pedal To Duration
The Transform Sustain Pedal To Duration op-
tion extends the length of all notes that are
sounding when the sustain pedal (controller 64)
is down (64 to 127) to the point when the sus-
tain pedal goes up (0 to 63). Enable the Delete
Sustain Pedal Events option to convert sustain
pedal events to note durations. Converting sus-
tain pedal events to note duration can greatly
simplify editing while maintaining the desired
performance effect. For example, if a sustain
pedal down event is deleted while editing, the
subsequent MIDI performance looses its legato
effect.
Change Continuously Option
The Change Continuously option lets you
change the duration of notes continuously in
ticks or by percentage. Adjust the Curve slider to
modify the shape of the change.
Change Continuously in Ticks Allows note
lengths to change smoothly from one duration
to another over time. Duration values are speci-
fied in quarter notes and ticks.
Change Continuously by Percentage Allows note
lengths to change smoothly from one percent-
age value to another over time.
The curve for this change can be adjusted
(+/– 99) to affect how gradually the change oc-
curs.
Limit Range When selected, restricts the Change
Duration command to a minimum and maxi-
mum range (in quarter notes and ticks).
Randomize When selected, the Change Duration
command is randomized by the specified per-
centage value. For example, using “Set all to”
with a value of 480 ticks, along with a Random-
ize value of 50%, yields durations anywhere be-
tween 360 and 600 (+/– 25% of the duration
value).
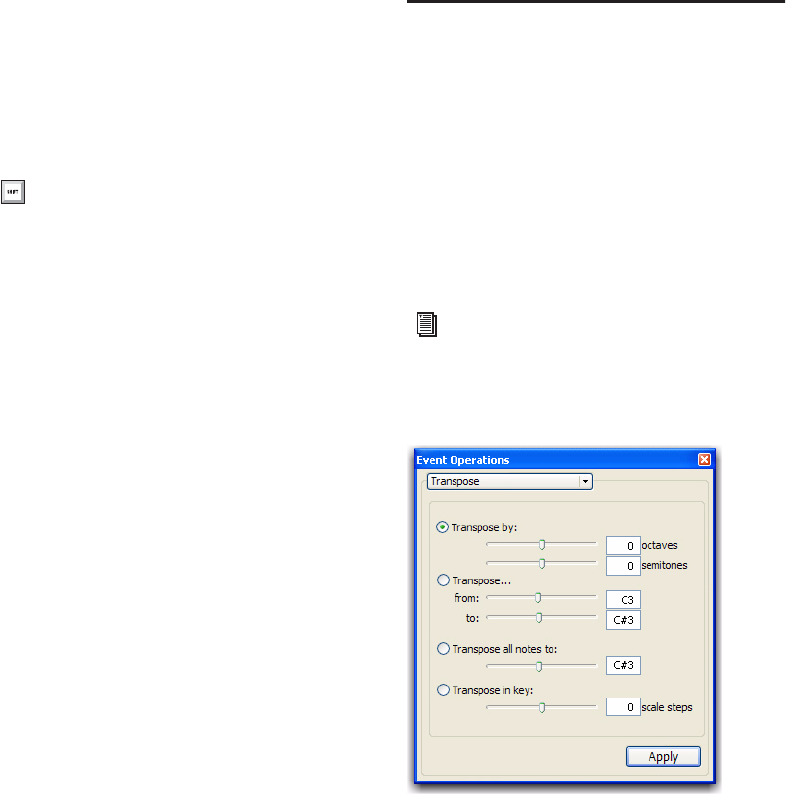
Pro Tools Reference Guide576
Change Duration Examples
To make notes more staccato:
1 Select the range of MIDI notes to be edited.
2 Choose Event > Event Operations > Change
Duration.
3 Select the option for Scale By with a percent-
age value of 50.
4 Click Apply. The durations for the selected
notes are reduced by 50%.
With this option you may have to experiment
with the percentage value to achieve the desired
effect.
To make notes more legato:
1 Select the range of MIDI notes to be edited.
2 Choose Event > Event Operations > Change
Duration.
3 Select the Legato option.
4 From the Legato pop-up menu, select Overlap.
5 Enter 0|000 for the amount of overlap.
6 Click Apply.
The end points for the selected notes are ex-
tended to the start point of the next note,
thereby eliminating the space between each
note.
Transpose
While the Grabber tools can be used to manu-
ally transpose individual MIDI notes, or small
groups of notes, the Transpose command can be
used for entire MIDI tracks and regions. One of
the more common uses for Transpose is to
change the key for your MIDI tracks. You can
define an Edit Group for MIDI tracks that you
want to transpose, making sure to exclude any
drum tracks from the group so they aren’t trans-
posed. You can even transpose in key.
Press Alt+P on Windows or Option+P on
Mac to open the Change Duration window.
You can also transpose MIDI notes non-
destructively in real-time using MIDI Real-
Time Properties. See “MIDI Real-Time
Properties” on page 549.
Event Operations window, Transpose

Chapter 28: Event Operations 577
Transpose By (Octaves) Transposes selected
notes by up to +/– 10 octaves.
Transpose By (Semitones) Transposes selected
notes chromatically, up or down, by up to
+/–127 semitones.
Transpose (From and To) Transposes selected
notes by semitones, as expressed by the differ-
ence between the source and destination
pitches. Transposing from C3 to F#3, for exam-
ple, transposes the notes up by an augmented
fourth (six semitones).
Transpose All Notes To Transposes all selected
notes to the same pitch. Use the slider or the
number entry box to enter the desired pitch to
which to transpose all selected notes.
Transpose In Key Transposes selected notes in
key up or down by scale steps (based on the Key
Signature ruler).
To transpose MIDI notes:
1 If you will be transposing a group of tracks,
enable the Edit Group.
2 Select the notes you want to transpose.
3 Choose Event > Event Operations > Trans-
pose.
4 Select the option for Transpose (By, From and
To, All Notes To, or In Key).
5 Set the corresponding pitch fields.
With any pitch field selected, play a note on
your MIDI controller to automatically enter it as
the pitch value.
6 Click Apply.
To transpose all notes on a track down by an
octave:
1 With the Selector tool, double-click in the
track to select all of its notes.
2 Choose Event > Event Operations > Trans-
pose.
3 Select the Transpose By option.
4 Enter a value of –1 octave.
5 Click Apply.
To transpose selected notes in key:
1 Select the notes you want to transpose.
2 Choose Event > Event Operations > Trans-
pose.
3 Select Transpose in Key.
4 Adjust the slider (or type a number) for the
number of scale steps (+ or –) by which you want
to transpose the selection. For example, to trans-
pose down a third, enter “–2.”
5 Click Apply.
Press Alt+T (Windows) or Option+T (Mac)
to open the Transpose window.
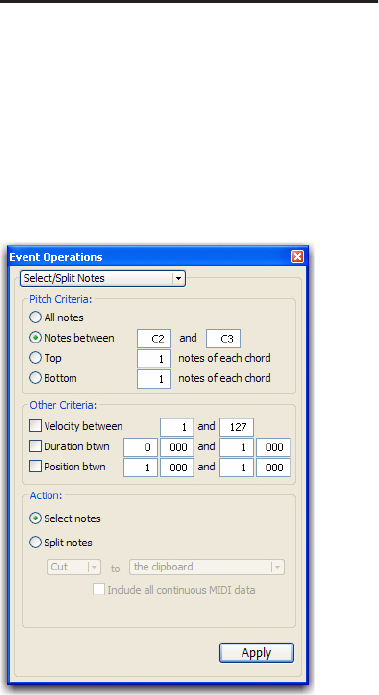
Pro Tools Reference Guide578
Select/Split Notes
The Select/Split Notes window provides a com-
plete set of tools to select and split notes based
on a wide variety of criteria. Additional tools are
provided to specify whether selected data is cop-
ied to the clipboard or to new tracks, whether
the data is split to multiple new tracks or a single
destination, and more.
Pitch Criteria
All Notes Selects all notes.
Notes Between Selects a range of notes between
the specified upper and lower note. Values for
the notes can be entered in pitch (C1–G8) or
MIDI note numbers (0–127).
Top Selects the highest note or notes in each
chord.
Bottom Selects the lowest note or notes in each
chord.
Other Criteria
Velocity Enable the Velocity option to specify a
range of velocities for selecting or splitting
notes. Enter the desired minimum and maxi-
mum velocities.
Duration Enable the Duration option to specify a
range of durations (in beats and ticks) for select-
ing or splitting notes. Enter the desired mini-
mum and maximum durations.
Position Enable the Position option to select or
split all notes that fall into a range of relative
beat and tick locations within each bar. The
minimum value determines the start of the
range, the maximum value sets the end of the
range.
Action
Select Notes Selects MIDI notes based on the
specified criteria.
Split Notes: The Clipboard Copies the selected
data to the clipboard only.
Split Notes: A New Track Copies all selected data
to a single, new track. If the selection includes
multiple tracks, that same number of tracks are
created. The new tracks duplicate the original
track type (Instrument or MIDI).
Split Notes: A New Track per Pitch Copies all se-
lected data to multiple new tracks (one new
track for each pitch). New tracks zoom to single-
note display. If the selection includes multiple
tracks, each track has its data split separately.
Include MIDI Controller Data Includes all contin-
uous MIDI data, including pitchbend and after-
touch, on the entire track, without any restric-
tion on time selection.
Event Operations window, Select/Split Notes

Chapter 28: Event Operations 579
Selecting and Splitting Notes
To select and split notes:
1 Do one of the following:
• With the Grabber or Selector tool, select
the range of MIDI notes that contains the
notes.
– or –
• To affect all the MIDI notes on a track, click
in the track with the Selector tool, so that it
contains a blinking edit cursor.
2 Choose Event > Event Operations > Se-
lect/Split Notes.
3 Configure the Pitch Criteria as desired.
4 Configure the Other Criteria (Velocity, Dura-
tion, and Position) as desired.
5 Enable the Select or Split option as desired.
6 From the Split Notes pop-up menu, select
Copy or Cut.
7 If splitting notes, select the Copy or Cut to
destination.
8 If splitting notes, enable the Include MIDI
Controller Data option. Enabling this option in-
cludes all controller data associated with the
split notes in newly created tracks. Leave this
option unchecked to split only note data to new
tracks.
9 Click Apply.
Any Real-Time Properties associated with the
track or regions are copied to new tracks created
by Select/Split Notes.
Selecting a Pitch Range of Notes
A common use for Select/Split Notes is to select
a single note for the entire length of a region or
track. This is especially useful if you want to se-
lect a note in a MIDI drum track (such as a hi-
hat), and affect it over the selected time range
with the Quantize, Groove Quantize, Transpose,
or Change Duration command.
To select only the hi-hats in a General MIDI drum
track:
1 Do one of the following:
• With the Grabber or Selector tool, select
the range of MIDI notes that contains the
notes.
– or –
• To affect all the MIDI notes on a track, click
in the track with the Selector tool, so that it
contains a blinking edit cursor.
2 Choose Event > Event Operations > Se-
lect/Split Notes.
3 Select the Notes Between option with the note
range set to F#1 and F#1 (if the MIDI Note Dis-
play preference is set to Standard Pitch).
For a General MIDI drum kit, the closed hi-hat is
assigned to MIDI note number 42 (F#1 at Stan-
dard Pitch). If the hi-hat for your drum kit is as-
signed to a different note, make sure to specify
it.
4 Click Apply.
You can also select all notes of a specific
pitch on a track using the mini-keyboard.
For more information, see “Selecting MIDI
Notes” on page 532.
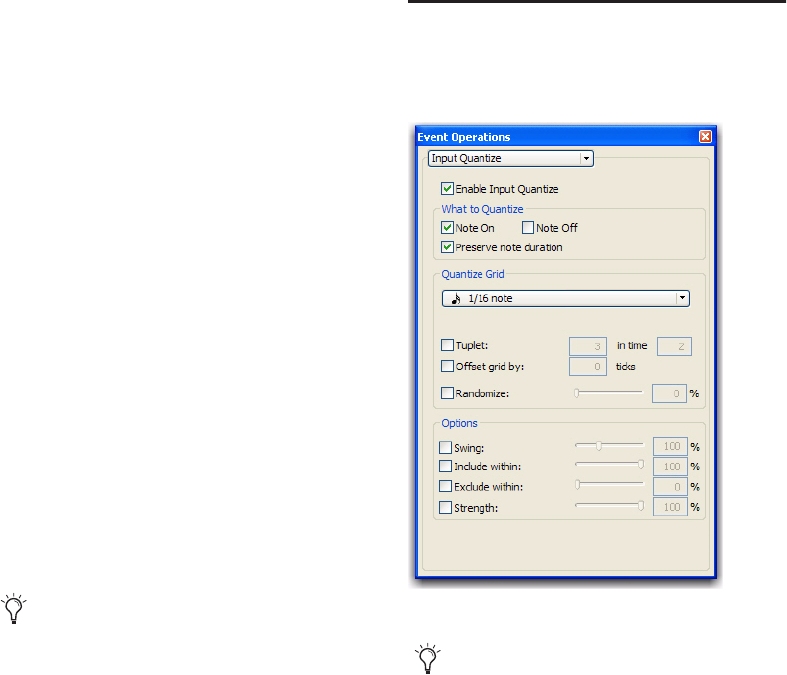
Pro Tools Reference Guide580
Selecting Notes in a Chord
Another use for Select/Split Notes is to select
only the upper or lower notes in a chord. Many
times you may only want to affect the upper or
lower notes in a chord—for example, to increase
velocities or transpose pitches.
To select only the bass notes in a chord:
1 Do one of the following:
• With the Grabber or Selector tool, select
the range of MIDI notes that contains the
notes.
– or –
• To affect all the MIDI notes on a track, click
in the track with the Selector tool, so that it
contains a blinking edit cursor.
2 Choose Event > Event Operations > Se-
lect/Split Notes.
3 Select the Bottom option and leave the num-
ber of notes set to 1.
4 Click Apply.
Input Quantize
When Input Quantize is enabled, all recorded
MIDI notes are quantized automatically.
To enable Input Quantize:
1 Choose Event > Event Operations > Input
Quantize.
2 In the Input Quantize page, select Enable In-
put Quantize.
3 Configure the other options in the Input
Quantize page. (For more information on the
Quantize options, see “Quantize” on page 558.)
4 When finished, close the Event Operations
window.
In order for notes to be considered a chord,
their start times must be within thirty-two
ppq ticks of each other.
Event Operations window, Input Quantize
Use Input Quantize for drum machine style
loop recording (see “Loop Recording in MIDI
Merge Mode” on page 372).
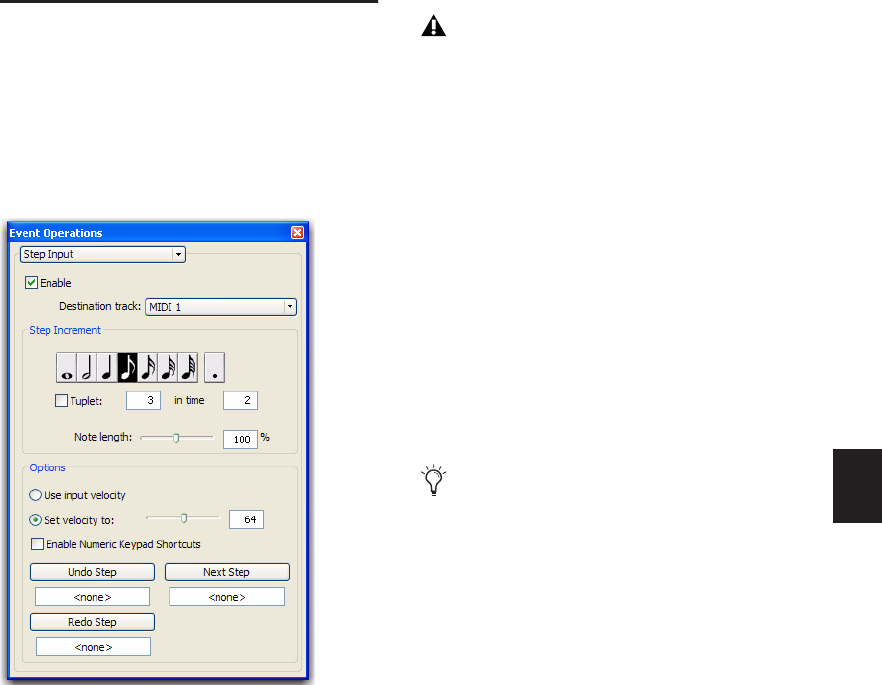
Chapter 28: Event Operations 581
Step Input
Step Input lets you use a MIDI controller to en-
ter notes individually, one step at a time. This
gives you precise control over note placement,
duration, and velocity. With MIDI step input
you can also create musical passages that might
be difficult to play accurately, or at a fast tempo.
To enter MIDI notes with Step Input (using an
external MIDI device):
1 Make certain your external MIDI device is
properly connected and working with Pro Tools.
2 Choose Event > Event Operations > Step In-
put.
3 Select the Enable option.
4 Choose the MIDI or Instrument track for step
entry from the Destination pop-up menu.
5 Choose the note value you want to enter from
the Step Increment section.
6 Play a note or chord on your MIDI instru-
ment. This enters the note and moves to the
next step of the insertion point.
To increase a note’s length while using Step Input:
1 Play and hold a note on your MIDI instru-
ment.
2 Choose the note value that you would like to
add and press the Increment button.
Release the note on your MIDI keyboard to
move to the next step insertion point.
Step Input Controls
The Step Input page has the following controls:
Enable When selected, adds MIDI events to the
destination track when you play your external
MIDI keyboard. Additionally, each previously
record-enabled MIDI track is taken out of record
enable.
If a Default Thru Instrument is defined in the
MIDI Preferences page, it is disabled when Step
Input is enabled, and is re-enabled when Step
Input is no longer disabled.
Step Input window
When Step Input is enabled, each previ-
ously record-enabled MIDI or Instrument
track is taken out of record enable, and if
the Default Thru Instrument preference is
defined, it is disabled.
When a note is being held on the MIDI key-
board, Next Step changes to read “Incre-
ment.”
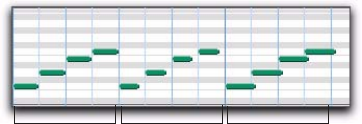
Pro Tools Reference Guide582
Destination Lets you select the destination track
for the Step Input from a pop-up list of all the
MIDI tracks in your session.
Step Increment
The options in the Step Increment section let
you set the spacing and duration of MIDI events
entered using the Step Input operation. You can
select any size from whole notes to sixty-fourth
notes (including dotted values).
Tuplet Lets you input irregular note groupings
(such as triplets or quintuplets). The tuplet
length is calculated from the note spacing selec-
tion and the Tuplet values. For example, an
eighth note equals 480 ticks, so tuplet eighth
notes with 3 in time of 2 would yield a note
spacing of 320 ticks (480 ticks / 3 * 2).
Note Length Lets you select the note length as a
percentage of the spacing value. For example, an
eighth note equals 480 ticks, so an eighth note
with an 80% duration would be 384 ticks long.
Options
Use Input Velocity When selected, MIDI notes
are recorded using the velocity that you play on
your MIDI keyboard.
Set Velocity To When selected, MIDI notes are
recorded with the velocity that you specify in
the Velocity field. This value can be set with the
Velocity slider.
Enable Numeric Keypad Shortcuts When se-
lected, Step Input options can be selected from
the numeric keypad. See “Numeric Keypad
Shortcuts” on page 583.
Undo Step, Next Step, and Redo Step
Use the Undo Step and Next Step buttons to do
the following:
• Move the step insertion point, by either re-
moving the previous note or by advancing
the insertion point by the Step Increment
value.
• Lengthen and shorten notes that are being
held on the MIDI controller, by adding or
removing Step Increment values. The Step
Increment value can be changed mid-note
to create a note with a hybrid note length.
Use the Redo Step button to sequentially redo
any previously undone steps.
Undo Step When the previous note has been re-
leased from the MIDI keyboard, and the inser-
tion point has moved forward to the next note,
Undo Step removes the entire last note.
When a note is being held on the MIDI key-
board, Undo Step changes to read “Decrement,”
and removes the last Step Increment length that
was added to the held note.
Next Step (or Increment) When no note is being
held on the MIDI keyboard, Next Step moves
the insertion point by the Step Increment value,
essentially inserting a musical rest.
When a note is being held on the MIDI key-
board, Next Step changes to read “Increment”
and adds the Step Increment value to the held
note, increasing its length by the Step Incre-
ment value.
Note length percentages
100% 80% 120%
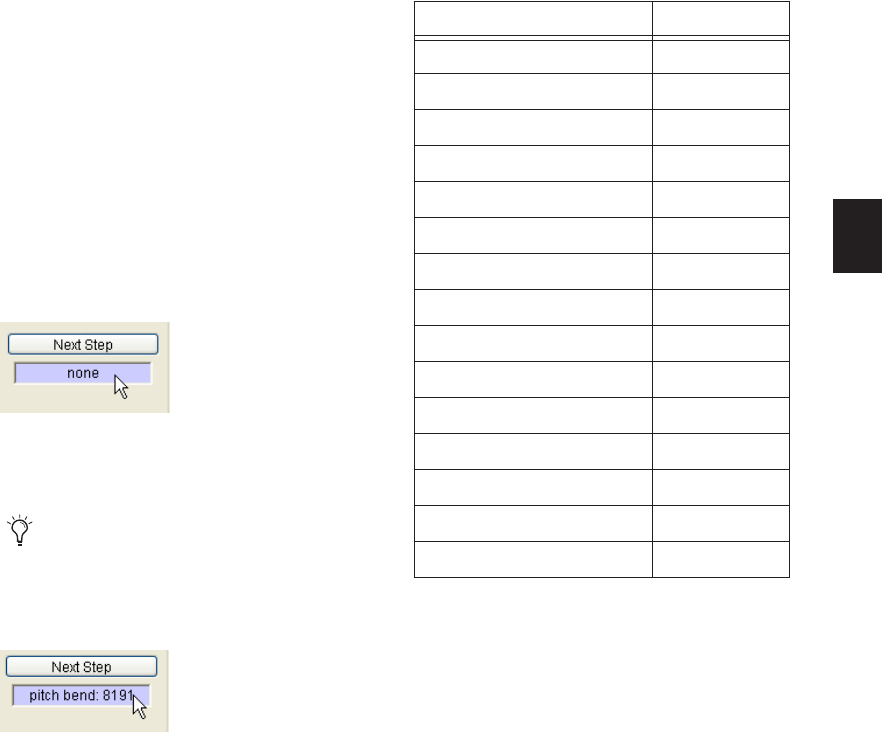
Chapter 28: Event Operations 583
While the note is being held, the Step Increment
value can be changed, allowing you to create
notes of any musical length.
Redo Step Reinserts the last note that was re-
moved by the Undo Step operation.
Triggering the Undo Step, Next Step, or Redo Step
Buttons
The Undo Step, Next Step and Redo Step but-
tons can be set to be triggered by an external
MIDI synth, drum pad, or other controller.
To set Undo Step, Next Step and Redo Step MIDI
triggers:
1 Place the Edit insertion on a track at the loca-
tion where you want to enter the first MIDI
note.
2 Choose Event > Event Operations > Step In-
put.
3 Locate the button you want to assign a MIDI
event to, and click in the field below the button.
4 Play the MIDI event you want to use as a trig-
ger.
5 Press Enter to confirm the MIDI trigger assign-
ment.
Numeric Keypad Shortcuts
When Enable Numeric Keypad Shortcuts is se-
lected, you can apply many of the controls in
the Step Input page, as well as several selection
controls, using your computer’s numeric key-
pad.
:
Selecting the Next Step field
If you use a continuous controller as a trig-
ger (such as Pitch Bend), you should make
certain to use an extreme controller value to
avoid erroneous data input.
Next Step field triggered by pitch bend
Step Input Shortcuts Key
Whole note 1
1/2 note 2
1/4 note 4
1/8 note 5
1/16 note 6
1/32 note 7
1/64 note 8
Dotted note . (decimal key)
Toggle Tuplet on/off 3
Next step Enter
Undo step 0
Nudge forward +
Nudge back –
Select Main Counter =
Edit Selection indicators /
Pro Tools Reference Guide584
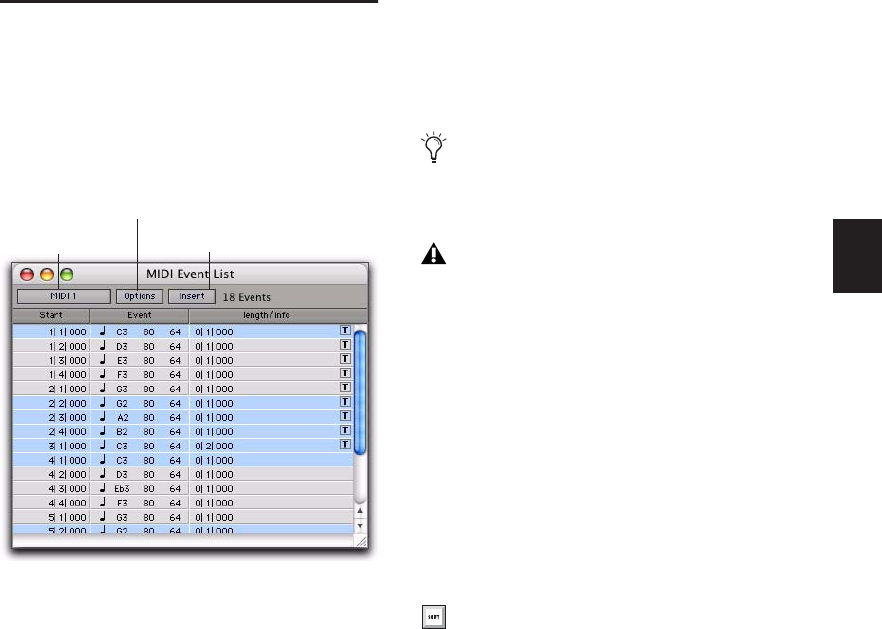
Chapter 29: MIDI Event List 585
Chapter 29: MIDI Event List
The MIDI Event List
The MIDI Event List displays a detailed list of all
events in a single MIDI or Instrument track. The
events are displayed with text and numbers, al-
lowing you to precisely edit their location,
length, and event values.
Events in the MIDI Event List can be copied and
pasted, selected, or deleted. Any MIDI event (ex-
cept Sysex data) can be inserted and edited in
the list. Certain MIDI event types can be hidden
with the View Filter.
Opening the MIDI Event List
To open the MIDI Event List, do one of the
following:
Choose Event > MIDI Event List.
Start-double-click (Windows) or Control-dou-
ble-click (Mac) a MIDI or Instrument track name
in the Mix or Edit window.
Press Alt+Equal (Windows) or Option+Equal
(Mac).
MIDI Event List
Track selector
Options menu
Insert menu
Unlike playlists in the Edit window, you can
insert and display polyphonic aftertouch in
the MIDI Event List.
Mute data for MIDI and Instrument tracks
is not displayed in the MIDI Event List.
You can also use Alt+Equal (Windows) or
Option+Equal (Mac) to toggle between the
MIDI Event List and the Edit window.
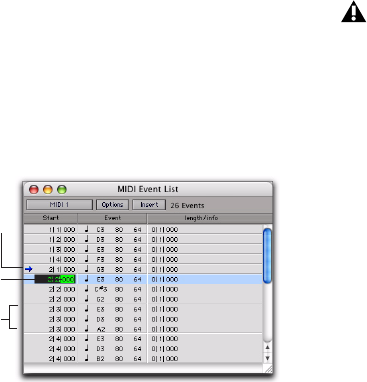
Pro Tools Reference Guide586
Menus in the MIDI Event List
At the top of the MIDI Event List are three pop-
up menus:
Track Selector Indicates the MIDI or Instrument
track currently displayed, and can be used to
choose a different MIDI or Instrument track to
be displayed.
Options Menu Contains commands and options
for the MIDI Event List (see “MIDI Event List
Options” on page 592).
Insert Menu Contains a list of event types that
can be inserted.
To the right of these pop-up menus, the number
of displayed events is indicated.
Columns in the MIDI Event List
Information for the events in the MIDI Event
List is displayed in the following three columns:
Start Column Displays the start location, using
the Main Time Scale, for each event. Locations
can also be displayed in the Sub Time Scale
when the Show Sub Counter option is selected
in the Options pop-up menu.
The playback cursor appears as a blue arrow (red,
when tracks are record-enabled) in the Start col-
umn.
When several events reside at the same location,
the location is only indicated for the top event,
with the others dimmed. The dimmed locations
can be edited by double-clicking them.
Event Column Displays the event type, indicated
by an icon, and associated event values.
Length/Info Column Displays the end point or
length for notes, depending on which option is
selected in the Options pop-up menu. Also dis-
played are the names for continuous controller
events and program changes.
View Filter for MIDI Event List
You can use the View Filter to specify which
event types are displayed in the MIDI Event List.
This can help you zero in on only the events you
want to affect; it also protects MIDI events from
being edited or deleted. Events not displayed in
the MIDI Event List still play back.
The View Filter can be set to display “all” mes-
sages, “only” the specified messages, or “all ex-
cept” the specified messages.
MIDI Event List columns
double-click
to edit
simultaneous
MIDI events
Playback cursor
When inserting an event type that has been
filtered from the MIDI Event List, that event
type will no longer be filtered.
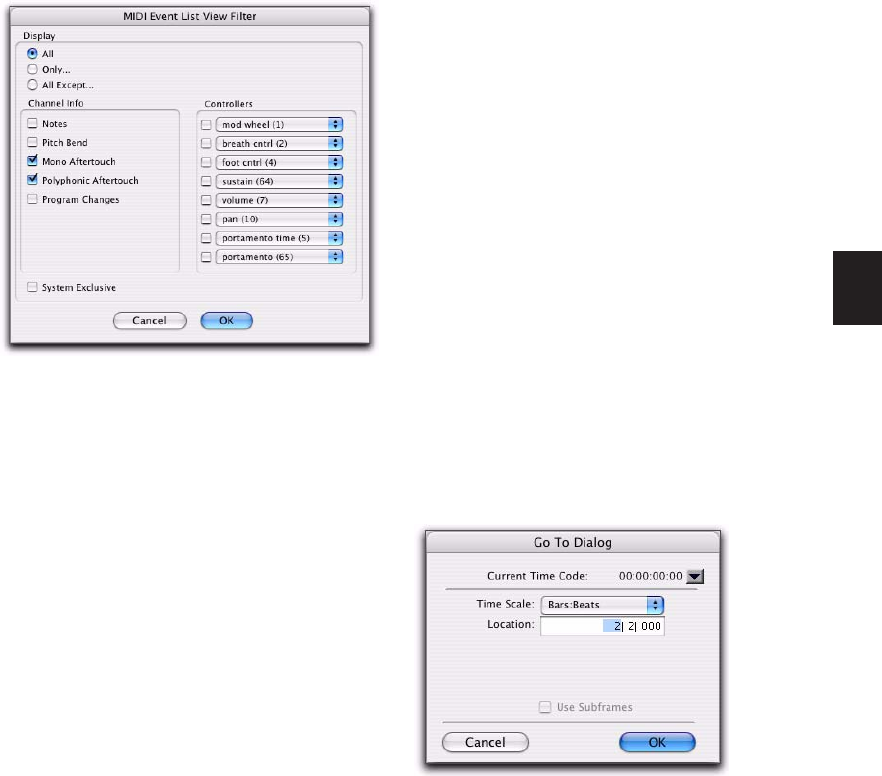
Chapter 29: MIDI Event List 587
Example: To filter the display of aftertouch and
System Exclusive Messages in the MIDI Event
List:
1 In the MIDI Event List, choose View Filter
from the Options pop-up menu.
2 In the MIDI Event List View Filter dialog, se-
lect the All Except option.
3 Select the options for Mono Aftertouch, Poly-
phonic Aftertouch, and System Exclusive. Leave
all other messages deselected.
When using the All Except option, the selected
events are not displayed. Conversely, when us-
ing the Only option, only the selected events are
displayed.
4 Click OK.
Navigating in the MIDI Event List
You can use the Tab and Arrow keys to move
through the MIDI Event List. You can also locate
to the Edit start point, or any other specified lo-
cation.
To move through the MIDI Event List, do any of the
following:
• Double-click to edit a value.
• Press Tab or the Down Arrow to move to the
next event (with or without the edit field se-
lected).
• Press Control+Tab (Windows) or Option+Tab
(Mac) or the Up Arrow to move to the previ-
ous event (with or without the edit field se-
lected).
• With an edit field selected, press the Right Ar-
row to move to the next edit field to the right.
• With an edit field selected, press the Left Ar-
row to move to the next edit field to the left.
To keep the last event selected, press Shift while
moving to the next or previous event.
To go to the Edit start point:
In the MIDI Event List, choose Scroll To Edit
Selection from the Options pop-up menu.
To go to a specific location in the MIDI Event List:
1 In the MIDI Event List, choose Go To from the
Options pop-up menu.
2 In the Go To dialog, choose a format from the
Time Scale pop-up menu.
MIDI Event List View Filter dialog
Go To dialog
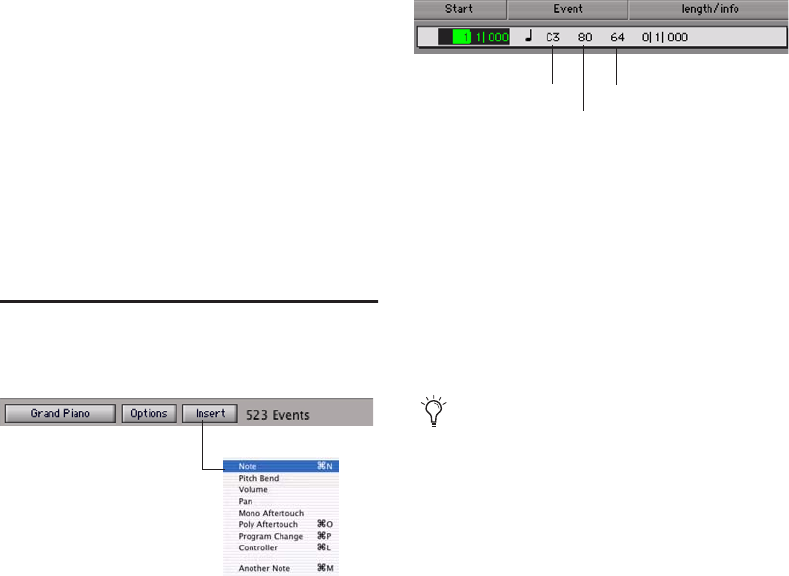
Pro Tools Reference Guide588
3 If using Time Code (Pro Tools HD and
Pro Tools LE with DV Toolkit 2 only), you can
select the Use Subframes option.
4 Enter the location you want to go to, then
click OK.
The following items from the Options menu af-
fect navigating in the MIDI Event List:
• When the Page Scroll During Playback op-
tion is selected, the MIDI Event List scrolls
during playback.
• When Scroll During Edit Selection is se-
lected, the MIDI Event List is scrolled auto-
matically when the Edit selection changes
in the Edit window.
Inserting Events in the MIDI
Event List
You can insert events in the MIDI Event List by
choosing an event type from the Insert menu.
Following are several examples of inserting
events in the MIDI Event List.
To insert a note in the MIDI Event List:
1 Do one of the following:
• Click the Insert button and choose Note
from the pop-up menu.
– or –
• Press Control+N (Windows) or Com-
mand+N (Mac).
2 Enter the location, pitch, attack (Note On)
and release (Note Off) velocities, and length for
the new note. To move between the Event Entry
fields, use the Left and Right Arrow keys.
When a field is selected, enter a value with any
of the following methods:
• Enter the value on the numeric keypad.
• Drag up or down to scroll to the value.
• Play the note on your MIDI controller key-
board, then press Enter (Windows) or Re-
turn (Mac) on the QWERTY keyboard to
confirm the value.
3 Do one of the following:
• To insert the note and remain in Event En-
try mode, press Enter on the numeric key-
pad.
• To insert the note and exit Event Entry
mode, press Enter (Windows) or Return
(Mac) on the QWERTY keyboard.
• To exit Event Entry mode, without insert-
ing the note event, press Escape on the
QWERTY keyboard.
Insert menu, MIDI Event List
Event Entry fields for note
With the Start field selected, you can auto-
matically enter the location of another event
already in the track by clicking that event.
Pitch
Attack velocity
Release velocity
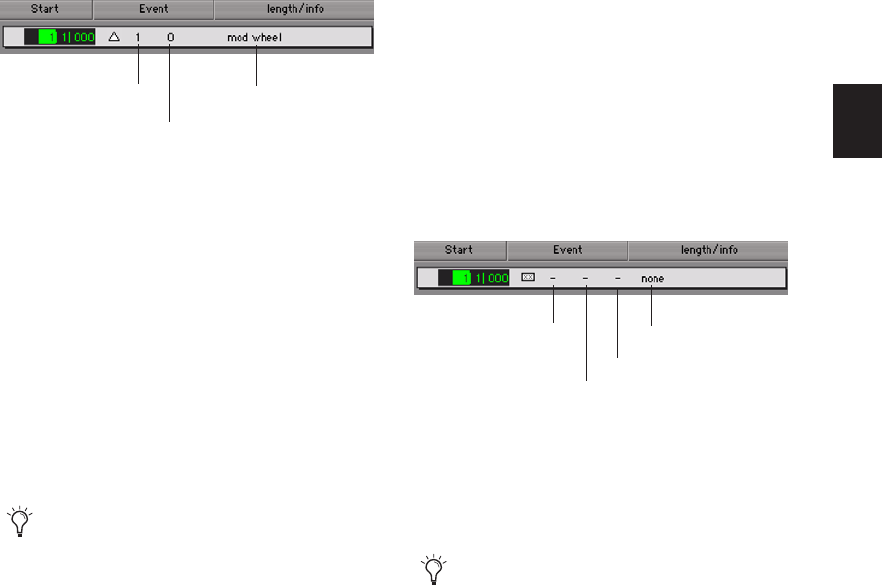
Chapter 29: MIDI Event List 589
To insert a controller event in the MIDI Event List:
1 Do one of the following:
• Click the Insert button and choose Con-
troller from the pop-up menu.
– or –
• Press Control+L (Windows) or Com-
mand+L (Mac).
2 Enter the location, controller “type” number,
and controller value for the new event. The con-
troller name is displayed in the Length/Info col-
umn, to the right of the controller value. To
move between the Event Entry fields, use the
Left and Right Arrow keys.
When a field is selected, enter a value with any
of the following methods:
• Enter the value on the numeric keypad.
• Press the Up or Down Arrow to scroll to the
value.
• While pressing Control (Windows) or
Command (Mac), drag up or down to scroll
to the value.
• Play the controller event on your MIDI
controller keyboard, then press Enter (Win-
dows) or Return (Mac) on the QWERTY
keyboard to confirm the value.
3 Do one of the following:
• To insert the controller event and remain
in Event Entry mode, press Enter on the
numeric keypad.
• To insert the controller event and exit
Event Entry mode, press Return on the
QWERTY keyboard.
• To exit Event Entry mode, without insert-
ing the controller event, press Escape on
the QWERTY keyboard.
To insert a program change in the MIDI Event List:
1 Do one of the following:
• Click the Insert button and choose Pro-
gram Change from the pop-up menu.
– or –
• Press Control+P (Windows) or Com-
mand+P (Mac).
2 Enter the location for the new event.
3 Enter a Program Change number and Bank Se-
lect value (if necessary). The program change
name is displayed in the Info column.
You can click in the Info column to open the
Program Change window (for details, see “Patch
Select (Program and Bank Changes)” on
page 541).
Event Entry fields for controller event
With the Start field selected, you can auto-
matically enter the location of another event
already in the track by clicking that event.
Controller number Controller name
Controller value
Event Entry fields for program change
With the Start field selected, you can auto-
matically enter the location of another event
already in the track by clicking that event.
Program number Program name
Controller 0 value
Controller 32 value

Pro Tools Reference Guide590
4 Do one of the following:
• To insert the program change and remain
in Event Entry mode, press Enter on the
numeric keypad.
• To insert the program change and exit
Event Entry mode, press Return on the
QWERTY keyboard.
• To exit Event Entry mode, without insert-
ing the program change, press Escape on
the QWERTY keyboard.
Inserting Another Event
After inserting an event, you can easily insert
another event of the same type. The event type
to be inserted is indicated at the bottom of the
Insert menu.
Example: After inserting a note, to insert another,
do one of the following:
Click the Insert button and choose Another
Note from the pop-up menu.
– or –
Press Control+M (Windows) or Command+M
(Mac).
Editing Events in the MIDI
Event List
Events in the MIDI Event List can be edited, se-
lected, deleted, and copied and pasted.
To edit an event in the MIDI Event List:
1 Do one of the following:
• Double-click the event field you want to
edit.
– or –
• To edit a selected event, press Control+En-
ter (Windows) or Command+Enter (Mac).
2 Enter a new value with any of the following
methods:
• Enter the new value on the numeric key-
pad.
• While pressing Alt (Windows) or Option
(Mac), press the Up or Down Arrow to
scroll to a new value.
• While pressing Control (Windows) or
Command (Mac), drag up or down to scroll
to a new value.
• Play the new note or controller value on
your MIDI controller keyboard, then press
Enter (Windows) or Return (Mac) on the
QWERTY keyboard to confirm.
3 Do one of the following:
• To enter the new event value and move to
another field or event, use the Arrow keys.
• To enter the new value and remain in Edit
Entry mode, press Enter on the numeric
keypad.
• To enter the new value and exit Edit Entry
mode, press Enter (Windows) or Return
(Mac) on the QWERTY keypad.
• To exit Edit Entry mode without entering
the new value, press Escape on the
QWERTY keyboard.
When the option for Insert At Playback Lo-
cation is enabled (see “MIDI Event List Op-
tions” on page 592), you can use the key-
board shortcuts for inserting “another”
event to insert events on-the-fly.
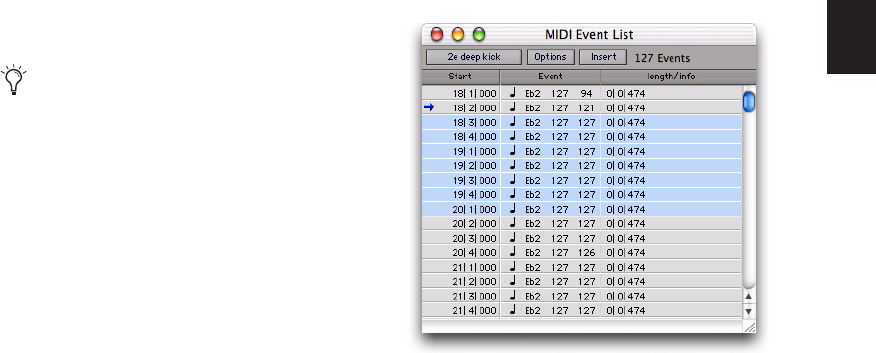
Chapter 29: MIDI Event List 591
Selecting Events in the MIDI Event
List
To select a range of events in the MIDI Event List,
do one of the following:
Click the event at the beginning of the selec-
tion and drag to the ending event.
– or –
Shift-click the event at the beginning of the
selection, then Shift-click the ending event.
To select noncontiguous events in the MIDI Event
List:
Control-click (Windows) or Command-click
(Mac) each event.
To deselect an event in the MIDI Event List:
Control-click (Windows) or Command-click
(Mac) the selected event.
Deleting Events in the MIDI Event
List
To delete an event in the MIDI Event List:
Alt-click (Windows) or Option-click (Mac) the
event you want to delete.
To delete a selection of events in the MIDI Event
List:
1 Select the events you want to delete, by either
dragging in the Start column, or by Shift-click-
ing each event.
2 To view only the events you want to delete,
use the View Filter (see “View Filter for MIDI
Event List” on page 586). Events not displayed
cannot be deleted.
3 Do one of the following:
• Choose Edit > Clear to delete all selected
events.
– or –
• Press Backspace (Windows) or Delete (Mac)
on the QWERTY keyboard.
Copying and Pasting Events in the
MIDI Event List
To copy and paste events in the MIDI Event List:
1 Select the events you want to copy in the
MIDI Event List.
2 Choose Edit > Copy.
Notes selected in the MIDI Event List can be
modified by any of the commands in the
Event Operations window (see Chapter 28,
“Event Operations”).
Selecting in the MIDI Event List
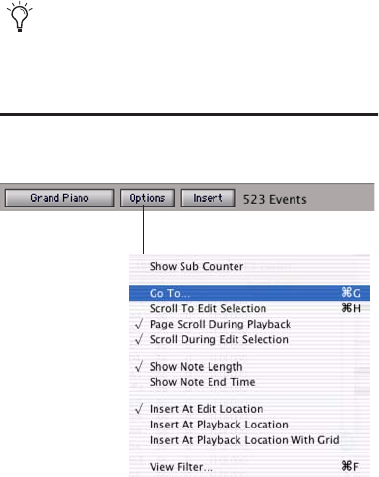
Pro Tools Reference Guide592
3 Do one of the following:
• To paste the material at an existing event’s
location, click the event in the MIDI Event
List.
– or –
• To paste the material at any location,
choose Go To from the Options menu in
the MIDI Event List, enter the location
where you want to paste, and click OK.
4 Choose Edit > Paste. The events from the Clip-
board are pasted, replacing any existing events
already there.
MIDI Event List Options
The MIDI Event List provides the following op-
tions:
Show Sub Counter Displays event times in the
Sub Time Scale.
Go To Opens the Go To dialog, where you can
specify a location, based on any of the sup-
ported Time Scales, to which the Edit insertion
point is moved.
Scroll To Edit Selection Scrolls the MIDI Event
List to the Edit start point or Edit insertion
point.
Page Scroll During Playback Scrolls the MIDI
Event List during playback.
Scroll During Edit Selection Scrolls the MIDI
Event List automatically when the Edit selection
changes in the Edit window.
Show Note Length Displays note lengths, in-
stead of note end times, in the Length/Info col-
umn of the MIDI Event List.
Show Note End Time Displays note end times,
instead of note lengths, in the Length/Info col-
umn of the MIDI Event List.
Insert At Edit Location Defaults the location for
inserted events defaults to the Edit start point or
Edit insertion point.
Insert At Playback Location Lets you insert
events in the MIDI Event List in real time while
listening to the session playback.
Insert At Playback Location With Grid Snaps the
location for events inserted in real time to the
grid.
View Filter Opens the View Filter dialog, where
you can specify which events are displayed in
the MIDI Event List. Events that are not dis-
played are not affected by Cut, Copy, and Paste
operations in the MIDI Event List. Events that
are not displayed still play back. For more infor-
mation, see “View Filter for MIDI Event List” on
page 586.
To paste events without overwriting other
events, use the Merge Paste Special com-
mand.
MIDI Event List options

593
Part VI: Arranging
594
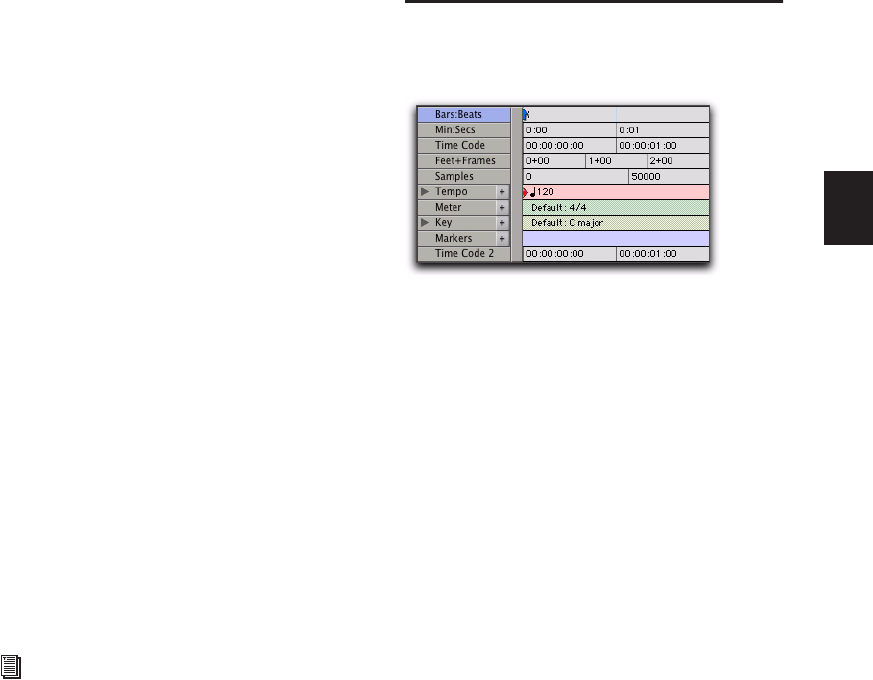
Chapter 30: Time, Tempo, Meter, and Key 595
Chapter 30: Time, Tempo, Meter, and
Key
In Pro Tools, editing and arranging is typically
done on tracks against a fixed Timeline.
Regions and events can be anchored to points in
absolute time, or relative time, as measured on
the session’s Timeline. The Timeline includes
two different types of rulers for measuring time:
Timebase rulers and Conductor Rulers.
The Timebase rulers can measure time in two
different ways: sample-based time (absolute
time) and tick-based time (relative time). For ex-
ample, the Minutes:Seconds ruler measures ab-
solute time and the Bars:Beats ruler measures
relative time.
The relative time of the Bars:Beats ruler is deter-
mined in part by tempo and meter. Tempo,
Meter, and also Key Signature rulers reside in
Conductor tracks. Tempo and meter events af-
fect the timing of tick-based tracks, and also pro-
vide the tempo and meter map for the Bar:Beat
grid and Click. You can edit tempo events in the
Tempo ruler or Tempo Editor.
Key changes can affect MIDI notes when apply-
ing transposition. You can edit key and key
changes in the Key Signature ruler.
Timebase Rulers and
Conductor Rulers
Timebase Rulers
Any or all of the following Timebase rulers can
be displayed at the top of the Edit window:
Bars:Beats Displays the Time Scale in bars and
beats. Use this Time Scale if you are working
with musical material that must align with bars
and beats. The Bars:Beats Time Scale is relative
and is affected by the session’s tempo and meter
map.
Pro Tools also provides a Markers ruler for
Memory Locations. For more information,
see Chapter 31, “Memory Locations.”
All rulers displayed

Pro Tools Reference Guide596
Minutes:Seconds Displays the Time Scale in
minutes and seconds. As you zoom in farther
with the Zoomer tool, the Time Scale begins to
display tenths, hundredths, and thousandths of
a second. The Minutes:Seconds Time Scale is ab-
solute.
Time Code (Pro Tools HD and Pro Tools LE with
DV Toolkit 2 Only) Displays the Time Scale in
SMPTE frames. The Time Code Rate and Session
Start time are set from the Session Setup win-
dow. The Time Code Time Scale is absolute
based on the frame rate.
Pro Tools supports the following frame rates:
• 23.976 FPS
• 24 FPS
• 25 FPS
• 29.97 FPS
• 29.97 FPS Drop
• 30 FPS
• 30 FPS Drop
Secondary Time Code Ruler (Pro Tools HD and
Pro Tools LE with DV Toolkit 2 Only) A second-
ary time code ruler, labeled Time Code 2, lets
you reference video frame rates in the Timeline
that are different from the session Time Code
rate. However, you cannot Spot to the Time
Code 2 ruler and it cannot be set as the Main
Time Scale. The secondary time code ruler can
be set to show any Pro Tools supported frame
rate. The Time Code 2 ruler can also display the
additional following frame rates:
• 50 FPS
• 59.94 FPS
• 59.94 FPS Drop
• 60 FPS
• 60 FPS Drop
Feet+Frames (Pro Tools HD and Pro Tools LE with
DV Toolkit 2 Only) Displays the Time Scale in
feet and frames for referencing audio-for-film
projects. The Feet+Frames time display is based
on the 35 millimeter film format. The
Feet+Frames Time Scale is absolute based on the
frame rate.
Samples Displays the Time Scale in samples.
This format is very useful for high-precision
sample editing. The Samples Time Scale is abso-
lute based on the sample rate.
In addition to providing a timing reference for
track material, the Timebase rulers are also used
to define Edit selections for track material, and
Timeline selections for record and play ranges.
Conductor Rulers
Any or all of the following Conductor rulers can
be displayed:
• Tempo (and Tempo Editor)
• Meter
• Key Signature
• Markers
To ensure your tracks align with the bars
and beats in your session, record with a
click (see “Recording with a Click (Op-
tional)” on page 322). Material that is re-
corded without listening to the click can still
be aligned to bar and beat boundaries in
Pro Tools with the Identify Beat command
(see “Identify Beat Command” on
page 620), or with Beat Detective (see
Chapter 34, “Beat Detective”).
With the Selector tool, drag in any Time-
base ruler to select material across all tracks
in the Edit window. To include the Conduc-
tor tracks in the selection, press Alt (Win-
dows) or Option (Mac) while dragging.
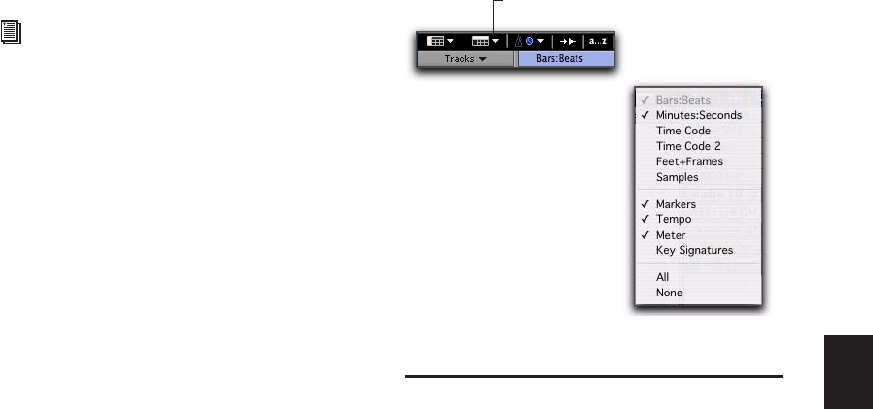
Chapter 30: Time, Tempo, Meter, and Key 597
The Meter and Tempo rulers indicate changes in
meter and tempo within the Session. The Key
Signature ruler indicates changes of key. The
Markers ruler displays markers to important
track locations.
To display all rulers:
Select View > Rulers > All.
To remove a ruler from the display, do one of the
following:
Option-click the ruler’s name (to the left of
the ruler display).
– or –
Choose View > Rulers, and select a ruler op-
tion.
To display only the Main Time Scale in the
Timebase ruler:
Select View > Rulers > None (“Main Time
Scale” on page 597.)
To add a specific ruler to the display, such as the
Markers ruler, for instance:
Select View > Rulers > Marker.
To change the display order for the rulers:
Click a ruler’s name and drag up or down to
the new location.
Ruler View Selector
The Timebase and Conductor rulers can also be
configured with the Ruler View selector.
Main Time Scale
While all Timebase rulers can be displayed si-
multaneously in the Edit window, there is only
one that represents the Main Time Scale. This
ruler is also called the Main Timebase ruler.
The Main Time Scale determines the time for-
mat used for:
• The Main Counter in the Transport win-
dow
• The Main Counter at the top of the Edit
window
• Start, End, and Length values
• Pre- and post-roll amounts
• Grid and Nudge values
For more information on Memory Location
markers and Meter, Tempo, and Key Signa-
ture rulers, see Chapter 31, “Memory Loca-
tions.”
Ruler View selector in the Edit Window.
Click the Ruler View selector
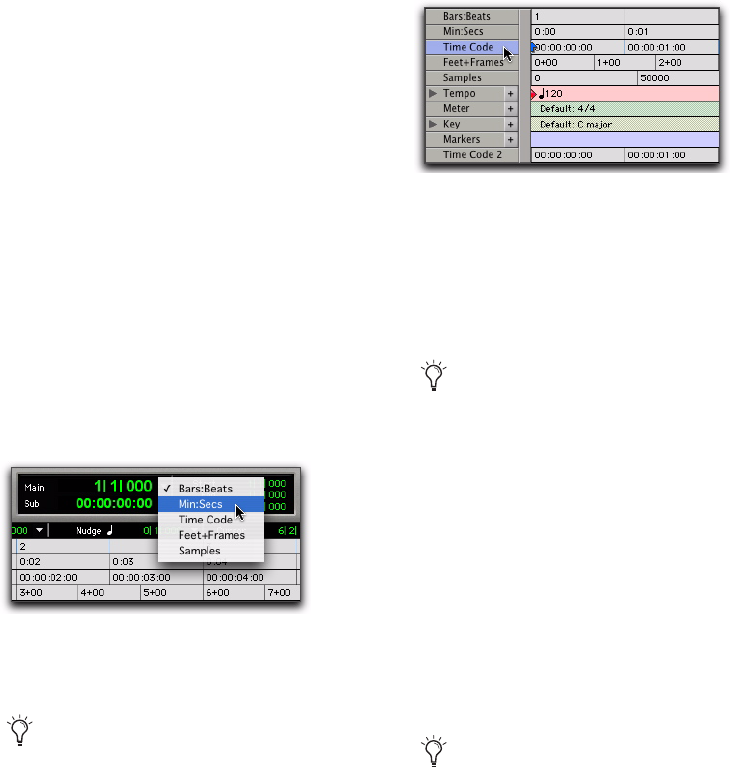
Pro Tools Reference Guide598
The Main Time Scale can be set to the following
formats:
• Bars:Beats
• Minutes:Seconds
• Time Code (Pro Tools HD and Pro Tools LE
with DV Toolkit 2 only)
• Feet+Frames (Pro Tools HD and Pro Tools
LE with DV Toolkit 2 only)
• Samples
Setting the Main Time Scale
To set the Main Time Scale, do one of the
following:
Click a Main Counter selector (located at the
top of the Edit window and also in the Transport
window, when it is set to display Counters) and
select a Time Scale.
If a Timebase ruler is displayed, click its name
so it becomes highlighted.
Navigating with the Main Counters
The Main Counters (at the top of the Edit win-
dow and in the Transport window) provide a
convenient way to navigate to a specific time lo-
cation.
To navigate with a Main Counter:
1 Click in a Main Counter.
2 Type in a location.
3 Press Enter (Windows or Mac) or Return (Mac)
to automatically navigate to a new location.
Setting the Sub Counter Time Scale
Below each Main Counter is a Sub Counter,
which provides an additional timing reference.
Main Counter selector (in the Edit window)
Setting the Main Time Scale to the timebase
currently displayed in the Sub Counter
switches the two Time Scales, setting the
Sub Time Scale to the previous timebase of
the Main Time Scale.
Switching the Main Time Scale
The Main Counter indicator in the Trans-
port window only displays when the Trans-
port is set to display Counters.
The Sub Counter indicator in the Transport
window only displays when the Transport is
set to display Counters and its view is max-
imized.
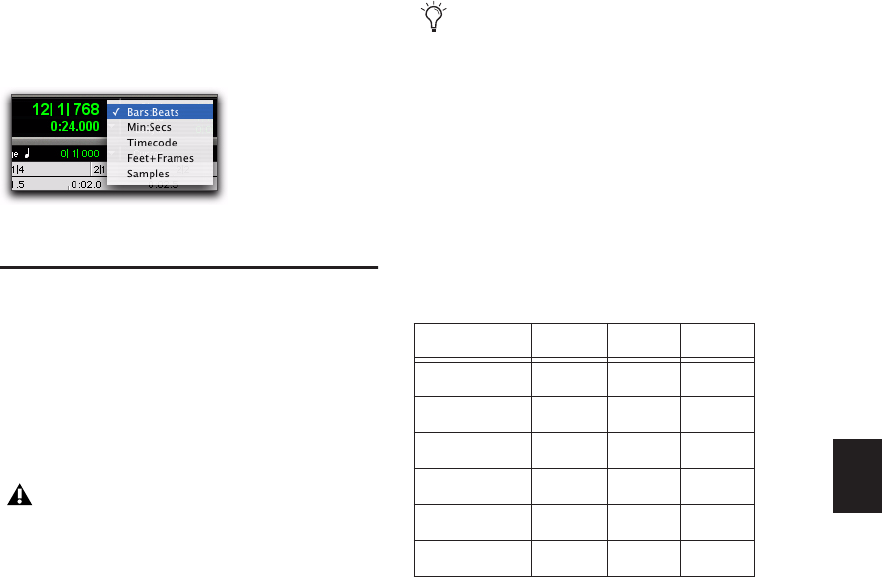
Chapter 30: Time, Tempo, Meter, and Key 599
To set the Time Scale for the Sub Counter:
Click a Sub Counter selector and select a Time
Scale.
Tick-Based Timing
Pro Tools is a sample-based program with an in-
ternal MIDI resolution of 960,000 pulses per
quarter note (ppq). However, when the Time
Scale is set to Bars:Beats, the display resolution
in Pro Tools is 960 ppq and the Timebase is tick-
based.
When working in Bars:Beats, you will often
want to specify tick values for a number of oper-
ations, including:
• Placing and spotting regions
• Setting lengths for regions or MIDI notes
• Locating and setting play and record
ranges (including pre- and post-roll)
• Specifying settings in the Quantize and
Change Duration pages of the Event Oper-
ations window
• Setting the Grid and Nudge values
The following table lists the number of ticks for
each of the main note sizes:
Tick- and Sample-Based
Timebases
Pro Tools lets you set any track timebase to ei-
ther sample-based or tick-based.
Audio tracks in Pro Tools are sample-based by
default. This means that audio regions and
events are located at specific sample locations,
and they do not move from that location if the
tempo changes in the session—even though
their bar and beat locations do change.
MIDI and Instrument tracks in Pro Tools are
tick-based by default. This means that MIDI re-
gions and events are located at a specific bar and
beat locations, and they do not move from that
location if the tempo changes in the session—
even though its sample location does change.
Sub Counter selector (in the Edit window)
In the Bars:Beats Time Scale, Pro Tools is
tick-based (960 ticks to a quarter note),
which means that some amount of sample-
rounding may occur when placing events at
certain locations (see “Sample Rounding
and Edit Operations” on page 601).
When the Main Time Scale is set to
Bars:Beats, and you are using tempo
changes, set the Linearity Display Mode to
Linear Tick Display (see “Changing the Lin-
earity Display Mode” on page 613). This
will keep the Bars:Beats ruler fixed (at the
selected zoom level) and sample-based rul-
ers such as Minutes:Seconds will scale to fit
any tempo changes while bar lengths re-
main constant.
Note Value Normal Dotted Triplet
1/2 note 1920 2880 1280
1/4 note 960 1440 640
1/8 note 480 720 320
1/16 note 240 360 160
1/32 note 120 180 80
1/64 note 60 90 40
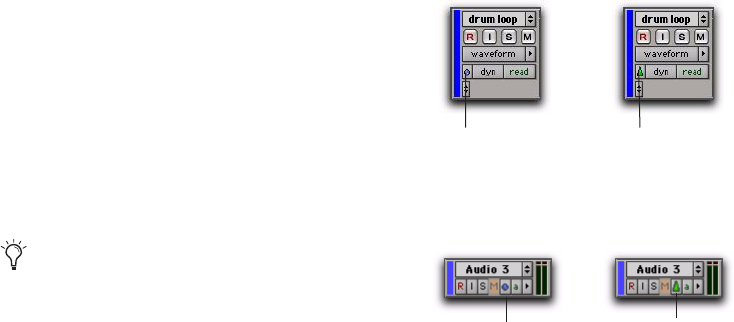
Pro Tools Reference Guide600
Sample-Based Audio and MIDI
With a sample-based audio track, all audio re-
gions in the track have an absolute location on
the absolute Timeline (for example, on the Sam-
ples or Minutes:Seconds Timebase ruler). Audio
stays fixed to the sample time, regardless of any
tempo or meter changes occur in a session.
On sample-based MIDI and Instrument tracks,
all MIDI events in the track have an absolute lo-
cation on the absolute Timeline (for example,
on the Sample or Minutes:Seconds Timebase
ruler). MIDI events stay fixed to the sample
time, regardless of where tempo or meter
changes occur in a session.
Tick-Based Audio and MIDI
Tick-based audio is fixed to the relative time of
the Bars:Beats Timebase ruler, and moves rela-
tive to the sample Timeline when tempo and
meter changes occur. However, MIDI and Elastic
Audio events, and tick-based audio regions
(non–Elastic Audio) respond differently to
tempo changes in respect to duration. MIDI
note events and Elastic Audio regions change
their duration when tempo is adjusted, while
non–Elastic Audio audio regions do not. Tempo
changes affect only the location of the begin-
ning (or sync point) of each audio region in a
tick-based audio track.
You can select whether a track is sample-based
or tick-based when it is created, or change time-
bases later.
Tick-Based Elastic Audio
Tick-based Elastic Audio tracks automatically
apply Real-Time (or Rendered) Elastic Audio
processing (TCE) when changing tempo. For
more information, see “Tempo Changes and
Tick-Based Elastic Audio Tracks” on page 606.
Switching Timebases
All Pro Tools tracks can be switched between be-
ing sample-based or tick-based.
Track height affects how various track controls
appear in the Edit window. The Timebase selec-
tor, which is used for switching a track’s time-
base, is only visible in Small or larger track
heights.
To switch the timebase of a track, do one of the
following:
If the track’s height is set to Small or larger,
click the Timebase selector for the track and se-
lect the desired timebase. The Timebase selector
icon changes to reflect your choice.
.
– or –
To have all new tracks default to tick-based,
enable the New Tracks Default to Tick
Timebase option in the Editing Preferences.
Track Timebase selector on a track with a Medium
height
Track Timebase selector on a track with a Small height
Timebase selector
(samples)
Timebase selector
(ticks)
Timebase selector
(samples)
Timebase selector
(ticks)
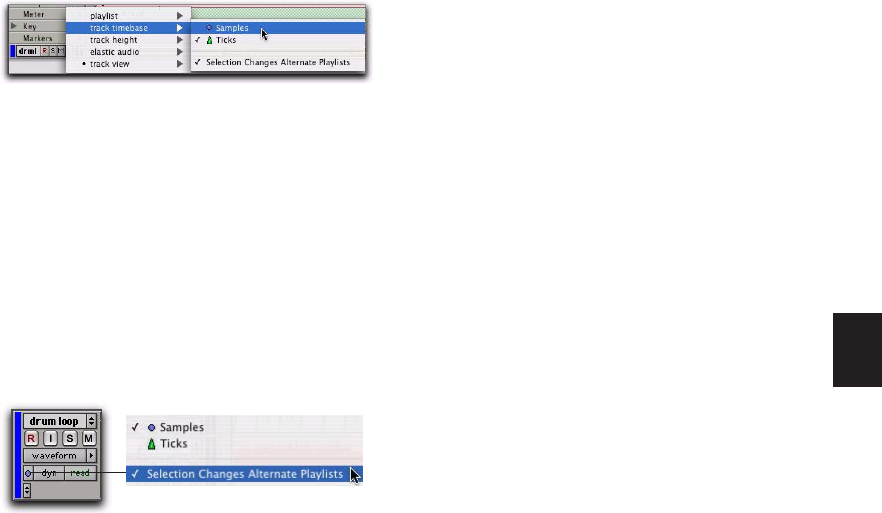
Chapter 30: Time, Tempo, Meter, and Key 601
If the track’s height is set to Mini, click the
small arrow next to the Track View selector to
for the Track Height pop-up menu, and select
the desired timebase from the Track Timebase
submenu.
Alternate Playlist Timebases
When you change a track’s timebase, you can
choose to apply the timebase change to that
track only, or to the active Playlist and all alter-
nate playlists for that track.
To configure a timebase change to affect
timebases of all playlists in a track:
Click the Timebase selector and enable the
“Selection Changes Alternate Playlists” option.
Groups
When you change the timebase for an audio
track that is part of an active group, all the tracks
in the group will change to the same timebase.
Audio Region Location
In tick-based audio tracks, the location of an au-
dio region is determined by the region’s start
point, unless the region contains a sync point.
If the region contains a sync point, the sync
point determines where the audio region is
fixed to the grid.
Marker Location
When creating markers and Selection Memory
Locations, you can specify whether they have
an Absolute (sample-based) or Bar:Beat (tick-
based) reference. For more information, see
“Bar|Beat and Absolute Reference” on page 638.
Sample Rounding and Edit Operations
When audio material in Pro Tools is sample-
based, some amount of sample-rounding may
occur with some edits when the Main Time
Scale is set to Bars:Beats. This is most evident
when you need audio regions to fall cleanly on
the beat (as when looping) and notice that the
material is sometimes a tick or two off. With a
few simple precautions, this can be avoided.
To ensure that selections are precise aligned to
the grid for looping, copying, duplicating, or re-
peating, consider the following:
If you use the Selector tool, enable Grid mode
and select the appropriate grid value (such as
sixteenth notes).
For the greatest accuracy, type the selection
Start and End points in the Event Edit area.
Do not select the material with any of the
Grabber tools (or by double-clicking with the Se-
lector tool).
Track Height pop-up menu
Timebase selector and pop-up menu
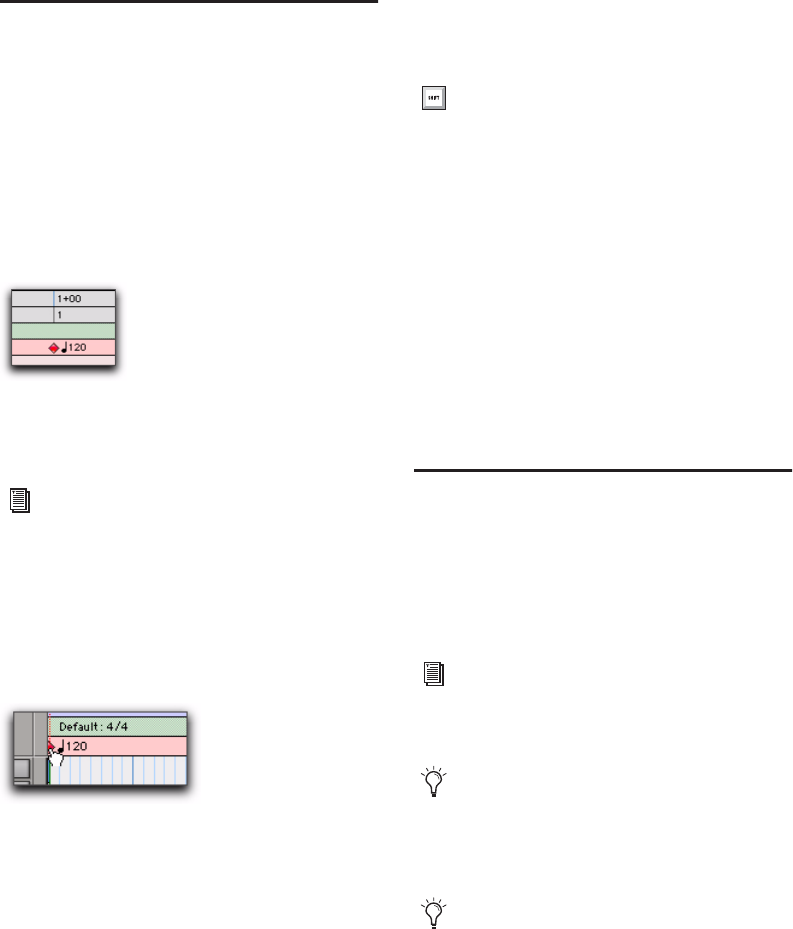
Pro Tools Reference Guide602
Song Start Marker
The Song Start Marker defines the initial tempo
for Bar|Beat-based material. New sessions open
with a default tempo of 120 BPM.
When a new session is created, the Song Start
Marker has no associated meter event. A meter
event is added automatically at the Song Start if
you add another meter event anywhere else on
the Meter ruler.
The Song Start Marker can be moved, but not
deleted.
To move the Song Start Marker by dragging:
In the Tempo ruler, drag the Song Start Marker
left or right.
If the Edit mode is set to Grid, the Song Start
Marker moves in increments of the current Grid
value.
To edit the initial tempo in the Song Start Marker:
1 In the Tempo ruler, double-click the Song Start
Marker.
2 In the Change Tempo dialog, enter a new BPM
value.
3 Click OK.
Tempo
The Tempo ruler lets you edit Tempo events one
at a time or according to tempo curves. You can
edit tempo visually in the Tempo Editor, or
make precise changes in tempo using the
Tempo Operations window.
Song Start Marker
The position of the Song Start Marker can
also be changed in the Time Operations
window, see “Move Song Start” on
page 631.
Dragging the Song Start Marker
To move the Song Start Marker only, with-
out moving any tick-based data, press
Start+Shift (Windows) or Control+Shift
(Mac) while dragging. When dragging the
Song Start Marker only, dragging is con-
strained to whole bar increments only.
To set the default session tempo, see “Set-
ting the Default Meter and Tempo (Op-
tional)” on page 325.
You can use Beat Detective to generate
Bar|Beat markers (tempo map). For more in-
formation, see “Generating Bar|Beat Mark-
ers with Beat Detective” on page 693.
When working with tempo changes and
tick-based material, set the Linearity Dis-
play Mode to Linear Tick Display.
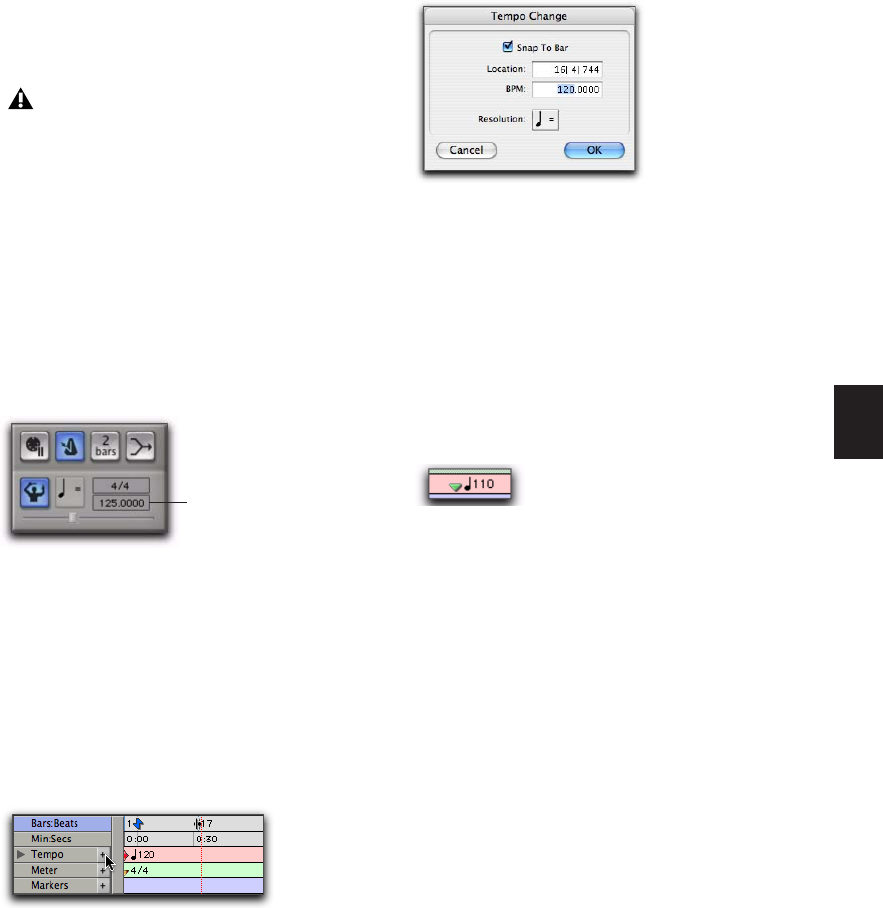
Chapter 30: Time, Tempo, Meter, and Key 603
Tempo Events
Tempo events can be assigned to the Song Start
Marker to replace the default tempo (of 120
BPM), and they can be inserted anywhere else
within the session to change tempo.
To display the Tempo ruler:
Select View > Rulers > Tempo.
Current Tempo
As tempo events are encountered during play-
back, the session’s current tempo is displayed in
the Transport window.
Inserting Tempo Events
To insert a tempo event:
1 Click in the Tempo ruler where you want to
insert the tempo event.
2 Click the Add Tempo Change button at the
left of the Tempo ruler.
3 In the Tempo Change window, enter the Lo-
cation and BPM value for the tempo change.
Select the Snap To Bar option to place the in-
serted tempo event cleanly on the first beat of
the nearest measure.
4 To base the BPM value on something other
than the default quarter note, select a different
note value.
5 Click Ok. The new tempo event is inserted
and appears in the Tempo ruler.
Each tempo event has a small green triangle
next to it that indicates its location. These trian-
gles can be dragged to move the tempo event,
and they can be double-clicked to edit the
tempo event.
Editing and Moving Tempo Events
Existing tempo events can be moved, edited, de-
leted, copied, and pasted.
In Manual Tempo mode, the Tempo track is
ignored and the session plays at the tempo
defined in the Transport window, see “Us-
ing Manual Tempo Mode” on page 326.
Current Tempo displayed in Transport window
Add Tempo Change button
Current Tempo indicator
Tempo Change dialog
Inserted tempo event
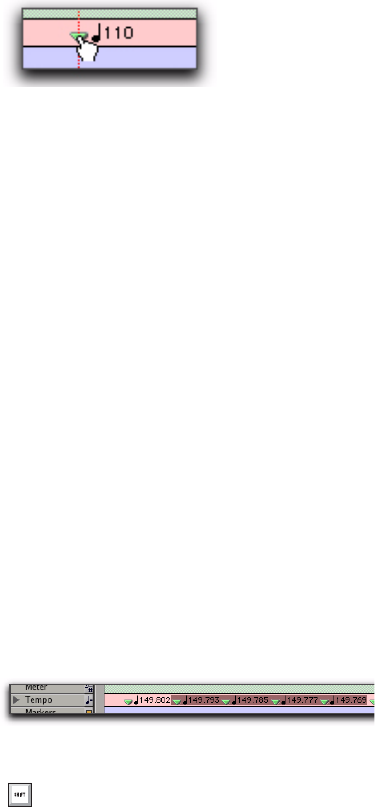
Pro Tools Reference Guide604
To move a tempo event by dragging:
In the Tempo ruler, drag the triangle for the
tempo event left or right.
If the Edit mode is set to Grid, the dragged event
snaps to the current Grid value.
To edit a tempo event:
1 In the Tempo ruler, double-click the tempo
event.
2 In the Tempo Change window, enter a new
Location or BPM value for the tempo event.
3 Click OK.
To delete a tempo event:
While pressing Alt (Windows) or Option
(Mac), move the cursor over the tempo event
(where the cursor changes to a Grabber with a
“–”) and click to remove it.
To copy and paste several tempo events:
1 With the Selector tool, click and drag in the
Tempo ruler to select the range of bars that in-
cludes the tempo events.
2 Choose Edit > Copy.
3 Click in the Tempo ruler at the point where
you want to paste the tempo events.
4 Choose Edit > Paste. The contents of the Clip-
board are pasted from the insertion point, re-
placing any existing tempo events.
To extend an Edit selection in a track to the Tempo
ruler:
1 With the Selector or Time Grabber tool, select
a time range.
2 Shift-click in the Tempo ruler.
To select all tempo events:
Double-click with the Selector tool in the
Tempo ruler.
To clear a range of selected tempo events:
1 If you want to constrain the selection to the
current Grid value, set the Edit mode to Grid.
2 Drag with the Selector tool in the Tempo ruler
to select the tempo events you want to remove.
3 Choose Edit > Clear to delete the selected
tempo events.
Tap Tempo
You can manually set the tempo for a Pro Tools
session by tapping on your computer keyboard.
You can also use a connected MIDI keyboard to
tap tempo.
To set the Manual Tempo by tapping on a
computer keyboard:
1 To view the MIDI controls in the Transport
window, select View > Transport > MIDI Con-
trols.
Dragging a tempo event
Tempo events selected
Press Alt (Windows) or Option (Mac) while
dragging to select across all Conductor
tracks.
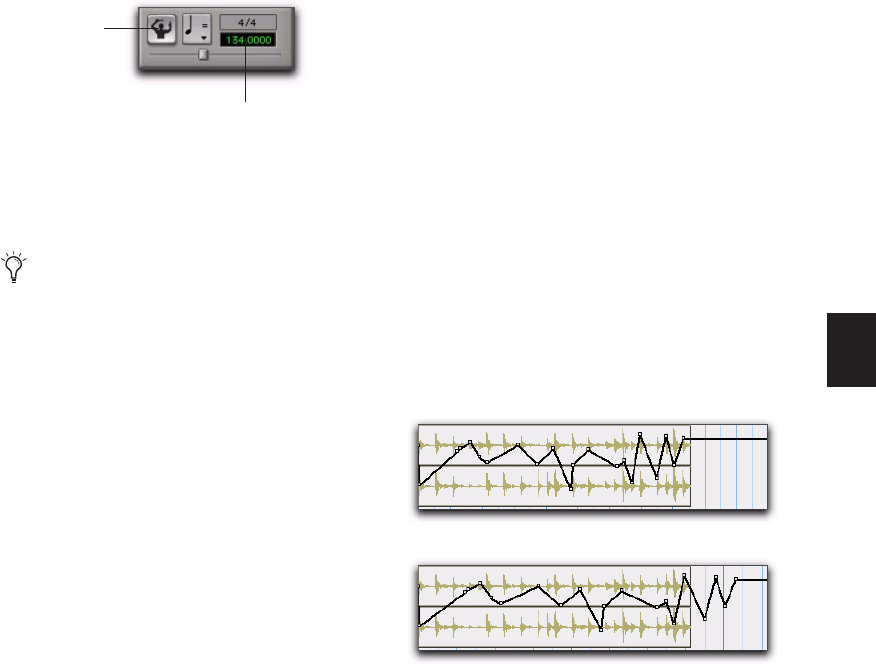
Chapter 30: Time, Tempo, Meter, and Key 605
2 In the Transport window, click the Tempo
Ruler Enable (Conductor) button so it becomes
unhighlighted. Pro Tools switches to Manual
Tempo mode. In this mode, any tempo events in
the Tempo track are ignored.
3 Click in the Tempo field so it becomes high-
lighted and tap the “T” key on your computer
keyboard repeatedly at the new tempo.
To set the Manual Tempo by tapping on an
external MIDI keyboard:
1 To view the MIDI controls in the Transport
window, select View > Transport > MIDI Con-
trols.
2 Choose Setup > Preferences and click the MIDI
tab.
3 Select Use MIDI To Tap Tempo
4 In the Transport window, click the Tempo
Ruler Enable (Conductor) button so it becomes
unhighlighted. Pro Tools switches to Manual
Tempo mode. In this mode, any tempo events in
the Tempo track are ignored.
5 Click in the Tempo field so it becomes high-
lighted and tap in the tempo by playing a note
repeatedly at the new tempo on your MIDI key-
board controller.
To compute the new tempo, Pro Tools averages
the last eight (or fewer) taps to determine the
correct tempo. The computed BPM value ap-
pears in the Transport’s Tempo field.
Tempo Changes and Automation
Drift
When a track is sample-based, the track’s auto-
mation playlist is unaffected by changes in
tempo. This means that automation is always
aligned with the audio on the track with sample
accuracy.
When a track is tick-based, however, the auto-
mation breakpoints change to match the
changes in tempo.
Since the length of each audio region in a track
is unaffected by changes in tempo, existing au-
tomation data is out of sync with the audio after
a tempo change is made to a tick-based audio
track.
Minimizing Automation Drift
In general, automation drift is more pro-
nounced with larger audio regions. By creating
many small audio regions, the effects of auto-
mation drift can be minimized, because the start
Manual Tempo mode enabled
You can apply the new tempo to the entire
session by changing the default tempo of the
Song Start Marker. See “Song Start Marker”
on page 602.
Tempo Ruler
Enable button
Tempo field
Tempo changes applied to larger regions
When tempo changes on a tick-based audio track...
...automation gets out of sync with audio.
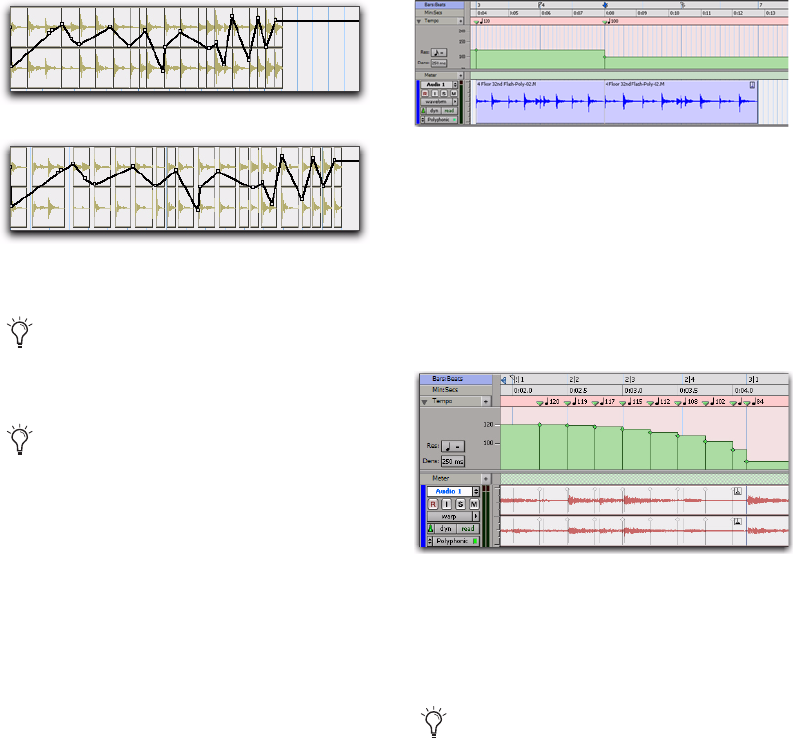
Pro Tools Reference Guide606
points of each subsequent region changes as the
tempo changes. When tempo is decreased, auto-
mation expands. When tempo is increased, au-
tomation contracts.
Tempo Changes and Tick-Based
Elastic Audio Tracks
Regions on tick-based, Elastic Audio–enabled
tracks apply Time Compression and Expansion
(TCE) based on tempo changes. For simple
tempo changes, regions on tick-based Elastic
Audio–enabled tracks automatically conform to
match the new tempo. Tempo changes do not
affect sample-based, Elastic Audio–enabled
tracks. In Figure 10 below, the first two-bar re-
gion is at its native tempo of 120 bpm. The sec-
ond two-bar region has been conformed to the
tempo change of 100 bpm. Since the second re-
gion has been warped to remain two-bars long
at the slower tempo, it displays the Region Warp
indicator in the upper right-hand corner of the
region.
For tempo curves, such as an accelerando or ri-
tardando, Tempo Event Warp markers are auto-
matically created corresponding to each tempo
event, and the region conforms accordingly.
Figure 11 below shows a region in Warp view.
Notice how the audio conforms to the tempo
curve.
Tempo Event–generated Warp markers cannot
be edited. They only show where the audio has
been warped in order to conform to tempo
changes.
Tempo changes applied to small regions
To break an audio region into smaller re-
gions, use Beat Detective. For more informa-
tion, see Chapter 34, “Beat Detective.”
You can also separate regions at transients
or based on the current grid resolution. For
more information, see “Separate Region
Commands” on page 466
Using many smaller regions...
...keeps audio aligned with automation changes.
Figure 10. Tempo conformed audio, linear tempo
change
Figure 11. Tempo conformed audio, tempo curve
If you change the track timebase from ticks
to samples, any Tempo Event–generated
Warp markers convert to regular, editable
Warp markers.
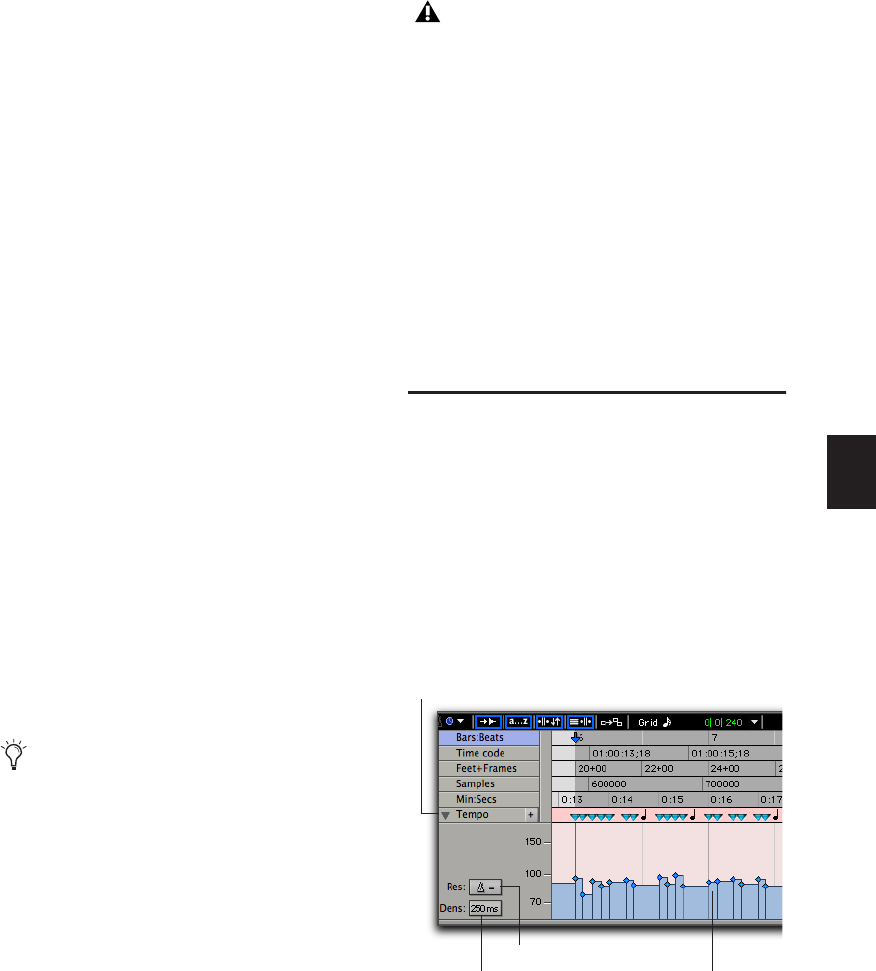
Chapter 30: Time, Tempo, Meter, and Key 607
Conform to Tempo
Pro Tools lets you conform regions on Elastic
Audio–enabled tracks (both sample- and tick-
based) to the session tempo. If necessary, the
Conform to Tempo command analyzes the se-
lected regions to determine its tempo and dura-
tion (in bars and beats), and then applies Elastic
Audio processing to conform the region to
match the session tempo.
To conform a region to the session tempo:
1 Select the region you want to conform to the
session tempo.
2 Do one of the following:
• Choose Region > Conform to Tempo.
– or –
• Right-click the region you wan to conform
to tempo and select Conform to Tempo
from the pop-up menu.
Pro Tools analyzes the region’s entire file for
Elastic Audio events and tempo. If a tempo is de-
tected, and a duration in bars and beats is deter-
mined, the region conforms automatically to
the session tempo. If a tempo and duration is
not detected (such as with a region that is a sin-
gle drum hit or with a long region with no clear
tempo), the region is not conformed to the ses-
sion tempo.
Alternate Playlists
Alternate playlists on Elastic Audio–enabled,
tick-based tracks are only affected by tempo
changes. Otherwise, alternate playlists are not
affected by editing Warp or Event markers in the
main playlist.
Graphic Tempo Editor
The Tempo Editor, a resizeable window beneath
the Tempo ruler in the Edit Window, lets you
view and edit tempo information graphically.
Tempo Editor
The Tempo Editor is an expansion of the Tempo
ruler, opening in the rulers section of the Edit
Window.
You can also use telescoping warp in Warp
view to manually conform a long region to
the session tempo. See “Telescoping Warp”
on page 514.
Conform to Tempo can only be applied to
regions and cannot be applied to region
groups. To conform region groups to the
tempo you must first ungroup the region
group, then apply Conform to Tempo to the
underlying regions, and then regroup those
regions.
Tempo Editor
Tempo Editor expand/collapse triangle
Tempo events
Tempo Resolution
Tempo Edit Density
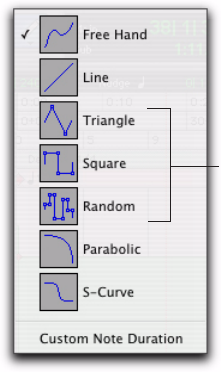
Pro Tools Reference Guide608
To display the Tempo Editor, do one of the
following:
Select View > Rulers > Tempo, then View >
Rulers > Tempo > Tempo Editor.
– or –
Click the Tempo Editor expand/collapse trian-
gle.
Editing Tempo Events in the Tempo
Editor
Tempo events in the Tempo Editor can be edited
with any of the following methods:
Individual tempo events can be dragged with
any of the Grabber tools to adjust their location
or value.
A group of selected tempos can be scaled up or
down with the Trimmer tool.
New tempo events can be drawn in with the
Pencil tool to replace existing ones.
Tempo events can be copied and pasted,
nudged, and shifted.
Drawing Tempo Events
Tempo events can be drawn in the Tempo Edi-
tor using the Pencil tool.
Free Hand The Free Hand shape draws freely ac-
cording to the movement of the mouse. The
shape is reproduced as a series of steps according
to the Tempo Edit Density setting. (For more in-
formation, see “Selecting Tempo Edit Density”
on page 609.)
Line The Line shape draws in a straight line from
click to release. Tempo values change in steps
according to the Tempo Edit Density and Reso-
lution. (For more information, see “Selecting
Tempo Edit Density” on page 609.)
Parabolic The Parabolic shape draws the best
possible curve to fit your freehand drawing. The
shape is reproduced as a series of steps according
to the Tempo Edit Density setting.
Pencil tool shape pop-up menu
These tool shapes
are not functional
in the Tempo Editor.
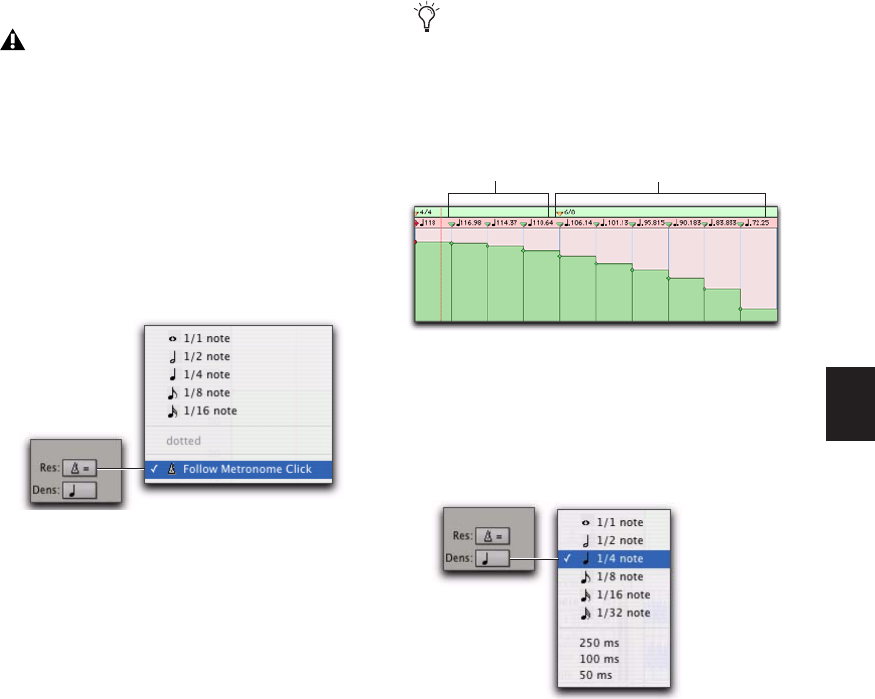
Chapter 30: Time, Tempo, Meter, and Key 609
S-Curve The S-Curve shape draws a best possible
fit of an S-Curve to your freehand drawing. The
shape is reproduced as a series of steps according
to the Tempo Edit Density setting.
Selecting Tempo Resolution (BPM Rate)
The Tempo Editor lets you specify the beat note
value for tempo events by changing the Tempo
Resolution. The beat note value selected for the
Tempo Resolution is usually based on the meter.
For example, in 4/4 the beat is a quarter note
and in 6/8 the beat is (usually) a dotted-quarter
note.
To select the Tempo Resolution (BPM rate) for
Pencil tool edits, do one of the following:
Click the Tempo Resolution selector and se-
lect the appropriate note value from the pop-up
menu. The Tempo Resolution for tempo events
created by drawing with the Pencil tool are set to
the specified note value for the BPM rate.
– or –
Click the Tempo Resolution selector and se-
lect Follow Metronome Click. The Tempo Reso-
lution for tempo events created by drawing with
the Pencil tool automatically mirror the click
values set by meter events in the Meter ruler.
A tempo curve can have different BPM values if
there are meter click changes within the selected
range.
Selecting Tempo Edit Density
The Tempo Editor lets you specify the density of
tempo events created in the Tempo ruler when
you draw a tempo curve with the Pencil tool.
The Triangle, Square, and Random Pencil
tool shapes do not apply to tempo events.
Tempo Resolution selector and pop-up menu
Because it can be unnecessarily complicated
to set meter events separately for each
Tempo event, Digidesign recommends se-
lecting Follow Metronome Click in most
cases.
Tempo curve with different click values
Tempo Edit Density selector and pop-up menu
Quarter note click Dotted quarter note click
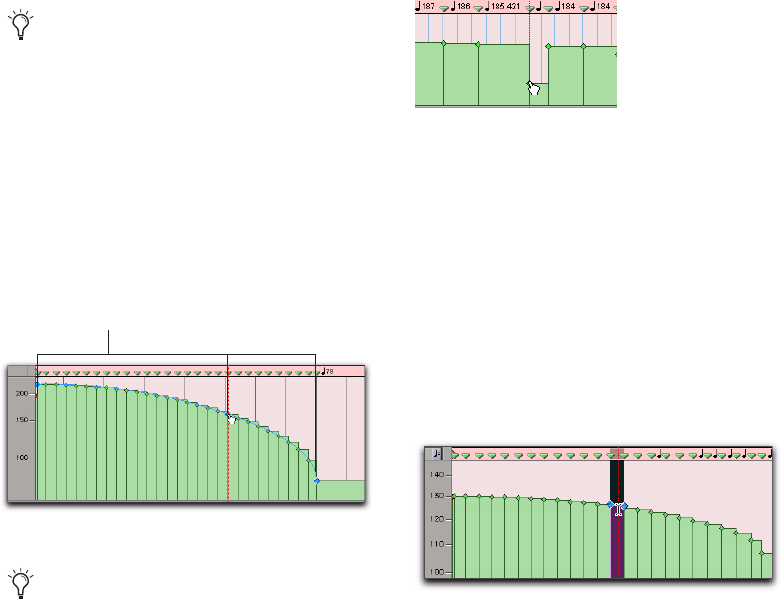
Pro Tools Reference Guide610
To select the Tempo Edit Density for Pencil tool
edits:
Click the Tempo Edit Density selector and se-
lect a time value from the pop-up menu. Tempo
events created by drawing with the Pencil tool
are placed in the Tempo ruler at the specified
density.
Curve Adjustment Mode
Immediately after you draw new tempos using
the Pencil tool, a tempo curve appears in blue,
outlining the newly created tempo graph. Blue
adjustment handles on the curve let you adjust
the shape and size of the new tempo graph.
The blue adjustment handles are only active un-
til a new tool is selected or a new command is
executed.
Grabbing Tempo Events
The Grabber tools let you create new tempo set-
tings by dragging tempo events in the Tempo
Editor. To remove a tempo event, Alt-click
(Windows) or Option-click (Mac) the tempo
event with any of the Grabber tools.
Drag a tempo event to the left or right to adjust
the location of the tempo change.
Selecting Tempo Events
You can easily select a single tempo event, or an
entire tempo curve within the Tempo Editor.
To Select a tempo event in the Tempo Editor:
Using the Selector tool or any Grabber tool, dou-
ble-click on the horizontal tempo line.
Pressing Start (Windows) or Control (Mac)
before drawing a pencil line conforms al-
ready created tempo events to the drawn
line rather than creating new tempo events.
Tempo curve adjustment
All the new tempo events under the curve
will change as you move the Tempo Curve
Adjustment Handles. To adjust the curve
shape without the track data adjusting im-
mediately, press Start (Windows) or Control
(Mac) while adjusting the curve. Tempo
events will change to fit the new curve when
you release the mouse button.
Tempo Curve Adjustment Handles
Using a Grabber tool to change a tempo event
Selecting a single tempo event
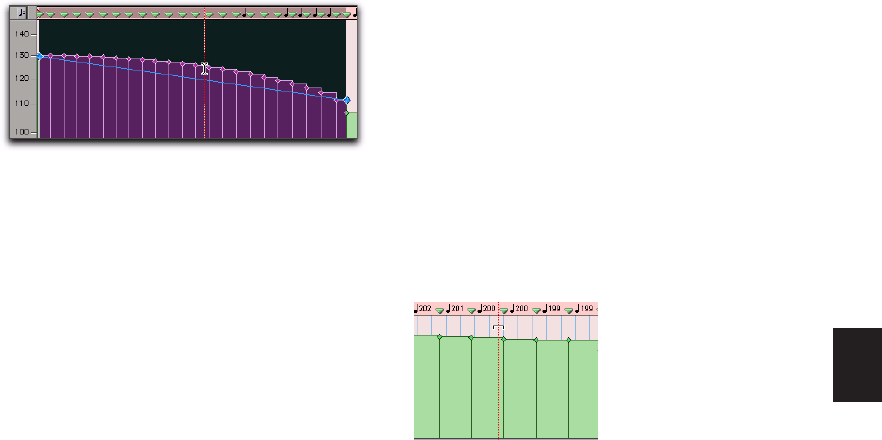
Chapter 30: Time, Tempo, Meter, and Key 611
To Select a tempo curve in the Tempo Editor:
Using the Selector tool or any Grabber tool,
triple-click on a horizontal tempo line in the
curve that you want to select.
Extending Tempo Selections
You can extend Tempo selections to the next or
the previous tempo event.
To extend a tempo selection:
1 Select a portion of a region, or click anywhere
in the region.
2 Do one of the following:
• Press Shift+Tab to extend the selection to
the next tempo event.
– or –
• Press Shift+Control+Tab (Windows) or
Shift+Option+Tab (Mac) to extend the se-
lection to the previous tempo event.
Using the Trimmer Tool
The Trimmer tool lets you scale all the tempo
events of the session, or within a Timeline selec-
tion. The Trimmer tool also lets you stretch a re-
gion of tempo events to cover a longer or shorter
area in the Timeline.
To scale all the session’s tempo events with the
Trimmer tool:
1 Open the Tempo Editor.
2 Select the Trimmer tool.
3 Click above the tempo events and drag up or
down. Dragging up increases the tempo values
for each tempo event in BPM; dragging down
decreases them.
To scale selected tempo events with the Trimmer
tool:
1 Open the Tempo Editor.
2 Using the Selector tool, select the area you
want to edit.
3 Select the Trimmer tool.
Selecting a tempo curve
Changing all tempo events with the Trimmer tool
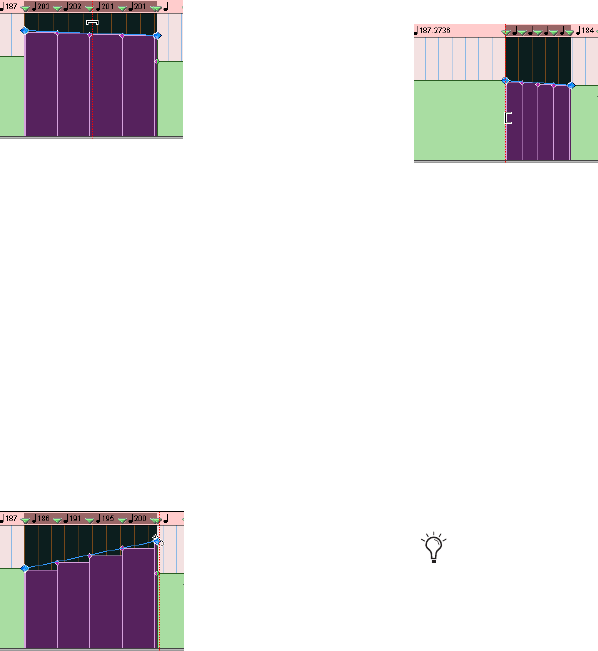
Pro Tools Reference Guide612
4 Click within the selected area, and drag up or
down. Dragging up increases the tempo values
of the selection in BPM; dragging down de-
creases them.
To adjust the rate of tempo change over absolute
time with the Trimmer tool:
1 Open the Tempo Editor.
2 Using the Selector tool, select the area you
want to edit.
3 Select the Trimmer tool.
4 Click either the start or end handle for the se-
lected range, and drag up or down. The BPM val-
ues for tempo events scale accordingly and
tempo events scale over a longer or shorter
amount of absolute time.
To scale the duration of tempo changes with the
Trimmer tool:
1 Open the Tempo Editor.
2 Using the Selector tool, select the area you
want to edit.
3 Select the Trimmer tool.
4 Click at the start or end of the selection, and
drag horizontally. Tempo events do not change
in terms of actual BPM values, but they are
scaled over a longer or shorter amount of abso-
lute time.
Moving, Cutting, Pasting and Nudging in the
Tempo Editor
To move a selected group of tempo events in the
Tempo Editor:
1 Open the Tempo Editor.
2 Using the Selector tool, select the area you
want to move.
3 Click on any selected tempo event with any
Grabber tool, and drag horizontally to move the
tempo events to a new location.
To copy and Paste tempo events in the Tempo
Editor:
1 Open the Tempo Editor.
2 Using the Selector tool, select the area you
want to copy.
3 Choose Edit > Copy.
4 Click in the Tempo Editor at the point where
you want to paste the tempo events.
Changing selected tempo events with the Trimmer tool
Adjusting the rate of tempo change with the Trimmer
tool
Scaling the duration of selected tempo events with the
Trimmer tool
Press Alt (Windows) or Option (Mac) while
dragging to move a copy of the tempo
events.
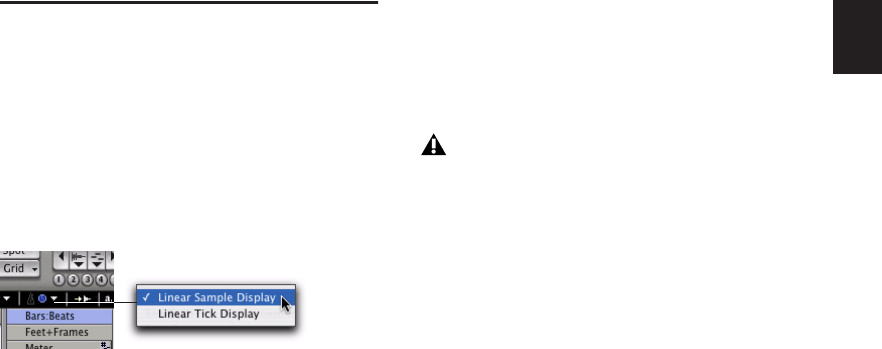
Chapter 30: Time, Tempo, Meter, and Key 613
5 Choose Edit > Paste. Your copied selection is
pasted from the insertion point, replacing any
existing tempo events.
To nudge a selection in the Tempo Editor:
1 Open the Tempo Editor.
2 Using the Selector tool, select the area you
want to nudge.
3 Do one of the following:
• On the numeric keypad, press Plus (+) to
move the selected tempo events forward by
the Nudge value.
– or –
• Press Minus (–) to move the selection back
by the Nudge value.
Changing the Linearity
Display Mode
The Timeline can be viewed in either a Linear
Tick (relative) scale or a Linear Sample (absolute)
Time Scale. MIDI and Instrument tracks, audio
tracks, and Tempo curves can appear and func-
tion very differently depending on the timebase
display settings.
The Linearity Display Mode pop-up menu deter-
mines whether the Tempo Editor displays
tempo events in an absolute (samples) timebase
or a relative (ticks) timebase.
Linear Sample Display The display of the Time-
line is sample-based and the location of tick-
based events (like Bars and Beats) shift after a
tempo curve is drawn. That is, as you change
tempo, the location of bars and beats move
against the fixed sample-based Timeline (such
as Minutes:Seconds). When working with sam-
ple-based material, such as when you are track-
ing or mixing, make sure that Linear Sample
Display is selected. This is especially true if you
intend to align the tempo and meter map to
sample-based events.
Linear Tick Display The display of tempo events
is tick-based and tempo event Bar|Beat locations
remain constant after the tempo curve is drawn
and all sample-based events move against bar
beat locations in the Timeline. When working
on any tick-based material, such as MIDI notes
or Elastic Audio events, make sure that Linear
Sample Display is selected. This is especially true
if you will be making tempo changes, but want
the bars and beats to remain fixed in the Time-
line.
To change the timebase display:
Click the Linearity Display Mode selector and
select a timebase from pop-up menu.
Tempo Edit Density and Linearity Display Mode
When the Tempo Edit Density setting (in the
Tempo Editor) and the Linearity Display Mode
setting are both set to either a Bars:Beats Time
Scale or to an absolute Time Scale, Tempo edits
appear evenly spaced. When the Tempo Edit
Density setting and the Linearity Display Mode
Linearity Display Mode selector and pop-up menu
Drawing tempo events using the Linear
Sample Display causes Bar|Beat based ma-
terial to move. This can make it difficult to
work on tick-based material. Digidesign
recommends that you use Linear Tick Dis-
play when drawing tempo changes.
Pro Tools Reference Guide614
setting are set so that one is set to an absolute
Time Scale and the other is set to a Bars:Beats
Time Scale, the number of Tempo edits appear
to increase or decrease over time (against abso-
lute time).
Tempo Operations Window
The Tempo Operations window lets you define
tempo events over a range of time (or measures).
The time range is specified in the time format
chosen for your Main Time Scale. In addition,
the Tempo Operations window lets you:
• Fit a specific number of Bars:Beats into a
precise time range.
• Create tempos that speed up or slow down,
both linearly and over various curves.
• Scale and stretch existing tempos.
The Tempo Operations window has six pages,
one for each type of tempo operation.
Constant Lets you create a constant tempo over
a selected range of time.
Linear Lets you create tempos that change
evenly over a selected range of time.
Parabolic Lets you create tempos that accelerate
or decelerate following a tempo curve that
changes the tempo more rapidly or less rapidly
over the selection time.
S-Curve Lets you create tempos that accelerate
or decelerate following a tempo curve with a de-
finable breakpoint that determines mid-curve
times and tempo values.
Scale Lets you scale tempos within the selection
by a percentage amount.
Stretch Lets you select a region of tempo events
and apply them to a larger or smaller selection
area.
To open a specific Tempo Operations window
page:
Choose Event > Tempo Operations, followed
by one of the Tempo Operations page com-
mands (such as Constant).
To open the last active Tempo Operations window
page:
Choose Event > Tempo Operations > Tempo
Operations Window.
To define tempo events over a range of time:
1 Make a selection in the Timebase or in a track.
2 Choose Event > Tempo Operations > Tempo
Operations Window.
3 Select a Tempo Operation page from the pop-
up menu at the top of the Tempo Operation
window.
4 Change the settings for the page you have
chosen, as necessary.
5 Do one of the following:
• Click Apply.
– or –
• Press Enter (Windows) or Return (Mac) to
automatically apply the values and close
the window.
The Tempo Operations window is not avail-
able in Manual Tempo mode.
If the Tempo Operations window is already
open, you can select any of the pages from
the pop-up menu at the top of the window.
Press Alt+2 (Windows) or Option+2
(Mac) on the number keypad to open the
Tempo Operations window and display
the last active Tempo Operations page.
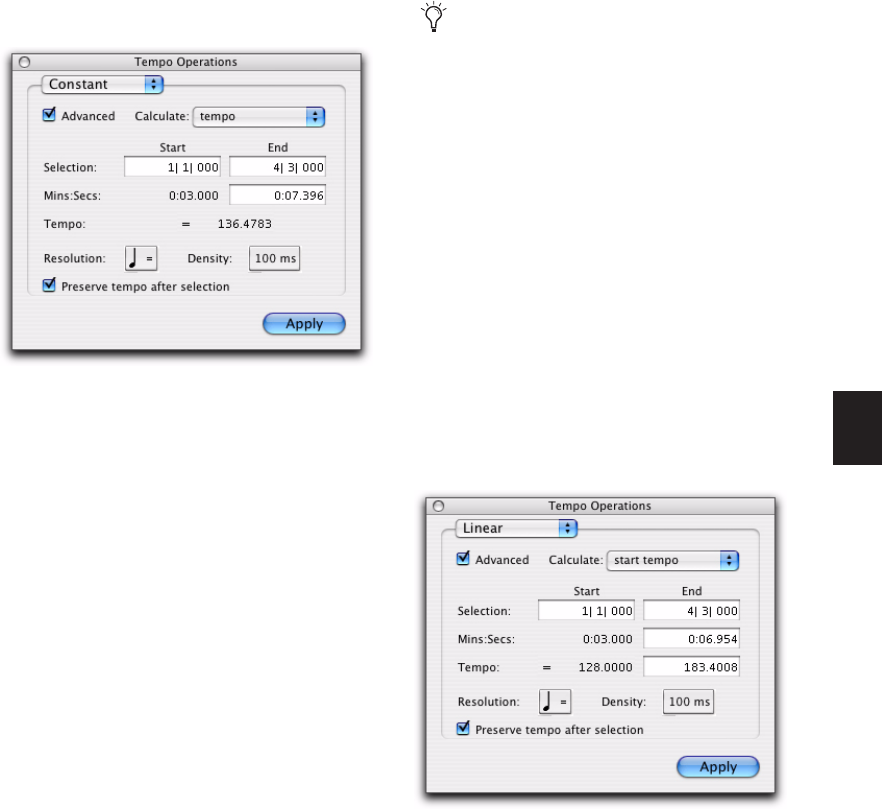
Chapter 30: Time, Tempo, Meter, and Key 615
Constant
The Constant page lets you create a constant
tempo over a selected range of time.
Advanced When the Advanced checkbox is se-
lected, the selection range changes to the Main
Time Scale format, and additional and modified
options become available.
Calculate (Advanced Option) Calculates either
the tempo, or the selection end time.
Selection Start and End Specifies the start and
end point for the tempo change in Bars|Beats.
When an Edit selection is made, the Start and
End fields will display the selection boundaries.
End Time (Advanced Option) Displays the selec-
tion end time. When the Main Time Scale is set
to Bars:Beats, the end time is displayed in the
Sub Time Scale. When the Main Time Scale is set
to any absolute timebase, the end time is calcu-
lated and displayed in Bars|Beats. Changing the
end time value causes the tempo to change.
Tempo Specifies the tempo, in beats per minute
(BPM), to apply to the selected range.
Resolution (Advanced Option) Lets you select the
BPM note value for your tempo setting.
Density (Advanced Option) Lets you specify the
density of the tempo change events written to
the Tempo ruler.
Preserve Tempo after Selection If selected, the
previous tempo setting that was in effect at the
selection end point is preserved after the selec-
tion. If unselected, the last tempo event created
by the tempo operation continues to the end of
the session, or until the next tempo event be-
yond the selected range.
Linear
The Linear page lets you create tempos that
change evenly over a selected range of time.
Advanced When the Advanced checkbox is se-
lected, the selection range changes to the Main
Time Scale format, and additional and modified
options become available.
Constant page (Advanced Option)
Selecting “Follow Metronome Click” will set
the tempo BPM note value to mirror the
click value set in the meter markers.
Linear page (Advanced Option)
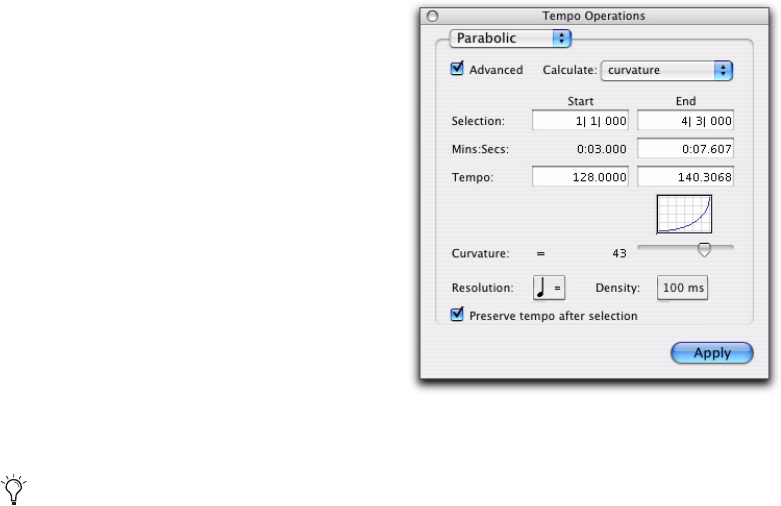
Pro Tools Reference Guide616
Calculate (Advanced Option) Calculates either
the selection end time, the start tempo, or the
end tempo.
Selection Start and End Displays the start and
end points for the tempo change in the cur-
rently selected Main timebase. When an Edit se-
lection is made, the Start and End fields will dis-
play the selection boundaries. Changing start or
end values changes the selection range.
End Time (Advanced Option) Displays the abso-
lute time for the selection end. When the Main
Time Scale is set to Bars:Beats, the end time is
displayed in the Sub Time Scale. When the Main
Time Scale is set to any absolute timebase, the
end time is calculated and displayed in
Bars|Beats. Changing the end time value causes
the tempo to change.
Tempo Start and End Displays the tempo, in
beats per minute (BPM), for the start and end
points of the selected range. Changing the
tempo causes the end time value to change.
Resolution (Advanced Option) Lets you select the
BPM note value for your tempo setting.
Density (Advanced Option) Lets you specify the
density of the tempo change events written to
the Tempo ruler.
Preserve Tempo after Selection If selected, the
previous tempo setting that was in effect at the
selection end point is preserved after the selec-
tion. If unselected, the last tempo event created
by the tempo operation continues to the end of
the session, or until the next tempo event be-
yond the selected range.
Parabolic
The Parabolic page lets you create tempos that
accelerate or decelerate by following a tempo
curve, which changes the tempo more rapidly or
less rapidly over the selection time.
Advanced When the Advanced checkbox is se-
lected, the selection range changes to the Main
Time Scale format, and additional and modified
options become available.
Calculate (Advanced Option) Calculates the se-
lection end time, the start tempo, the end
tempo, or the curvature of the tempo change.
Selection Start and End Displays the start and
end points for the tempo change in the cur-
rently selected Main timebase. When an Edit se-
lection is made, the Start and End fields will dis-
play the selection boundaries. Changing start or
end values changes the selection range.
Selecting “Follow Metronome Click” will set
the tempo BPM note value to mirror the
click value set in the meter markers.
Parabolic page (Advanced Option)
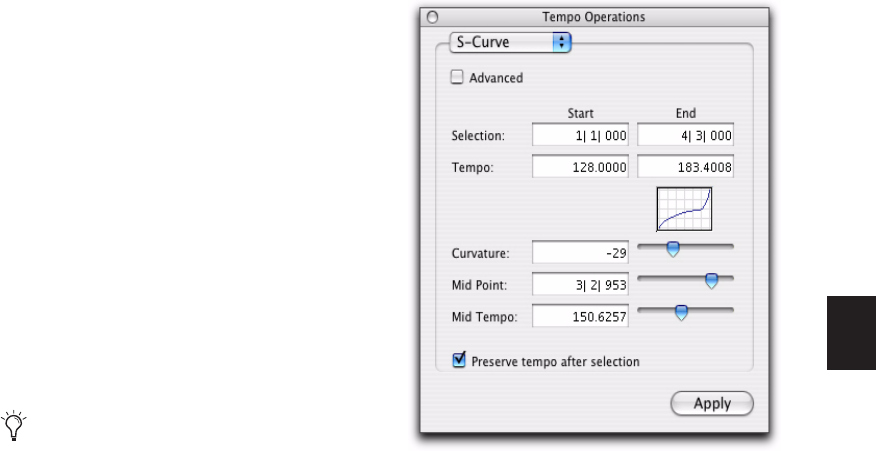
Chapter 30: Time, Tempo, Meter, and Key 617
End Time (Advanced Option) Displays the abso-
lute time for the selection end. When the Main
Time Scale is set to Bars:Beats, the end time is
displayed in the Sub Time Scale. When the Main
Time Scale is set to any absolute timebase, the
end time is calculated and displayed in
Bars|Beats. Changing the end time value causes
the tempo to change.
Tempo Start and End Displays the tempo, in
beats per minute (BPM), for the start and end
points of the selected range. Changing the
tempo causes the end time value to change.
Curvature Specifies and displays a numerical
and graphic representation of the tempo curve.
Negative numbers indicate a more rapid tempo
change at the beginning of the time range, and
positive numbers indicate a more rapid tempo
change at the end of the time range. This value
can be set with the Curvature slider.
Resolution (Advanced Option) Lets you select the
BPM note value for your tempo setting.
Density (Advanced Option) Lets you specify the
density of the tempo change events written to
the Tempo ruler.
Preserve Tempo after Selection If selected, the
previous tempo setting that was in effect at the
selection end point is preserved after the selec-
tion. If unselected, the last tempo event created
by the tempo operation continues to the end of
the session, or until the next tempo event be-
yond the selected range.
S-Curve
The S-Curve page lets you create tempos that ac-
celerate or decelerate by following a tempo
curve with a definable breakpoint that deter-
mines mid-curve times and tempo values.
Advanced When the Advanced checkbox is se-
lected, the selection range changes to the Main
Time Scale format, and additional and modified
options become available.
Calculate (Advanced Option) Calculates either
the selection end time, the start tempo, the end
tempo or the curvature of the tempo change.
Selection Start and End Displays the start and
end points for the tempo change in the cur-
rently selected Main timebase. When an Edit se-
lection is made, the Start and End fields will dis-
play the selection boundaries. Changing start or
end values changes the selection range.
Selecting “Follow Metronome Click” will set
the tempo BPM note value to mirror the
click value set in the meter markers. S-Curve page (Advanced Option)
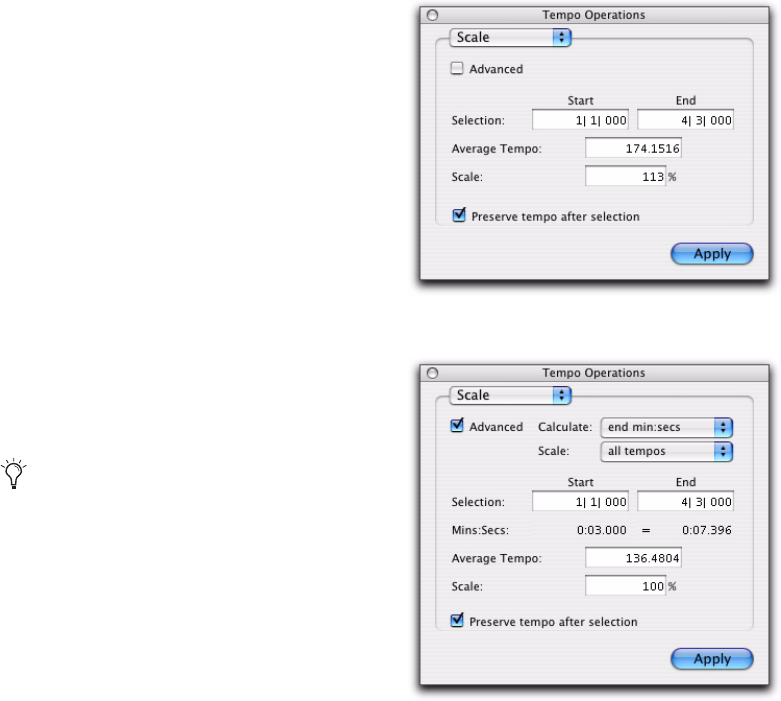
Pro Tools Reference Guide618
Start and End Time (Advanced Option) Displays
the absolute time for the selection end. When
the Main Time Scale is set to Bars:Beats, the end
time is displayed in the Sub Time Scale. When
the Main Time Scale is set to any absolute time-
base, the end time is calculated and displayed in
Bars|Beats.
Tempo Start and End Displays the tempo, in
beats per minute (BPM), for the start and end
points of the selected range. Changing the
tempo causes the end time value to change.
Curvature Specifies and displays a numerical
and graphic representation of the tempo curve.
Negative numbers indicate a more rapid tempo
change at the start and end of the of the time
range, with a low rate of change around the
midpoint. Positive numbers indicate a low rate
of change near the start and end of the selected
range, with rapid tempo change around the
midpoint. This value can be set with the Curva-
ture slider.
Mid Point Specifies the Main Time Scale location
for the curve mid point. This value can be set
with the Mid Point slider.
Mid Tempo Specifies the tempo at the mid point.
This value can be set with the Mid Tempo slider.
Resolution (Advanced Option) Lets you select the
BPM note value for your tempo setting.
Density (Advanced Option) Lets you specify the
density of the tempo change events written to
the Tempo ruler.
Preserve Tempo after Selection If selected, the
previous tempo setting that was in effect at the
selection end point is preserved after the selec-
tion. If unselected, the last tempo event created
by the tempo operation continues to the end of
the session, or until the next tempo event be-
yond the selected range.
Scale
The Scale page lets you scale tempos within the
selection by a percentage amount.
Select “Follow Metronome Click” will set
the tempo BPM note value to mirror the
click value set in the meter markers.
Scale page
Scale page (Advanced Option)
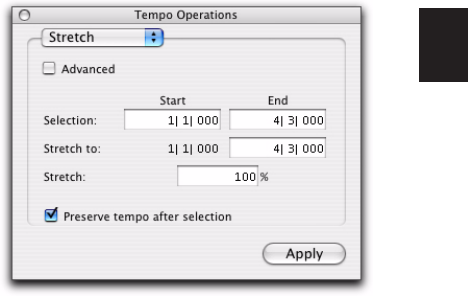
Chapter 30: Time, Tempo, Meter, and Key 619
Advanced When the Advanced checkbox is se-
lected, the selection range changes to the Main
Time Scale format, and additional and modified
options become available.
Calculate (Advanced Option) In combination
with settings chosen in the Scale pop-up menu,
the Calculate pop-up menu lets you calculate
the selection end time, the average tempo, the
start tempo, or the end tempo.
Scale (Advanced Option) In combination with
settings chosen in the Calculate pop-up menu,
the Scale pop-up menu lets you scale all tempos,
the start tempo, or the end tempo.
Scaling all tempos scales each tempo in the se-
lected range equally. Scaling the start tempo
scales the tempos unevenly, scaling the first
tempo event the most, scaling each consecutive
tempo event less until the end tempo which is
not scaled. Scaling the end tempo scales the
tempos unevenly, scaling the last tempo the
most, scaling each previous tempo event less
until the start tempo which is not scaled.
Selection Start and End Displays the start and
end points for the tempo operation in the cur-
rently selected Main timebase. When an Edit se-
lection is made, the Start and End fields will dis-
play the selection boundaries. Changing start or
end values changes the selection range.
Start and End Time Displays the absolute time
for the selection start and end points. When the
Main Time Scale is set to Bars:Beats, times are
displayed in the Sub Time Scale. When the Main
Time Scale is set to any absolute timebase, times
are calculated and displayed in Bars|Beats.
Average Tempo Displays the Average Tempo, in
beats per minute (BPM), across the selected
range. Changing the Average Tempo changes
the Scale percentage.
Scale Displays the percentage by which the
tempo is scaled, in beats per minute (BPM),
across the selected range. Changing Scale
changes Average Tempo.
Preserve Tempo after Selection If selected, the
previous tempo setting that was in effect at the
selection end point is preserved after the selec-
tion. If unselected, the last tempo event created
by the tempo operation continues to the end of
the session, or until the next tempo event be-
yond the selected range.
Stretch
The Stretch page lets you select a region of
tempo events and apply them to a larger or
smaller selection area.
Advanced When the Advanced checkbox is se-
lected, the selection range changes to the Main
Time Scale format, and additional and modified
options become available.
Selection Start and End Specifies the range of
tempo events that you want to modify. When
an Edit selection is made, the Start and End
fields will display the selection boundaries.
Stretch page
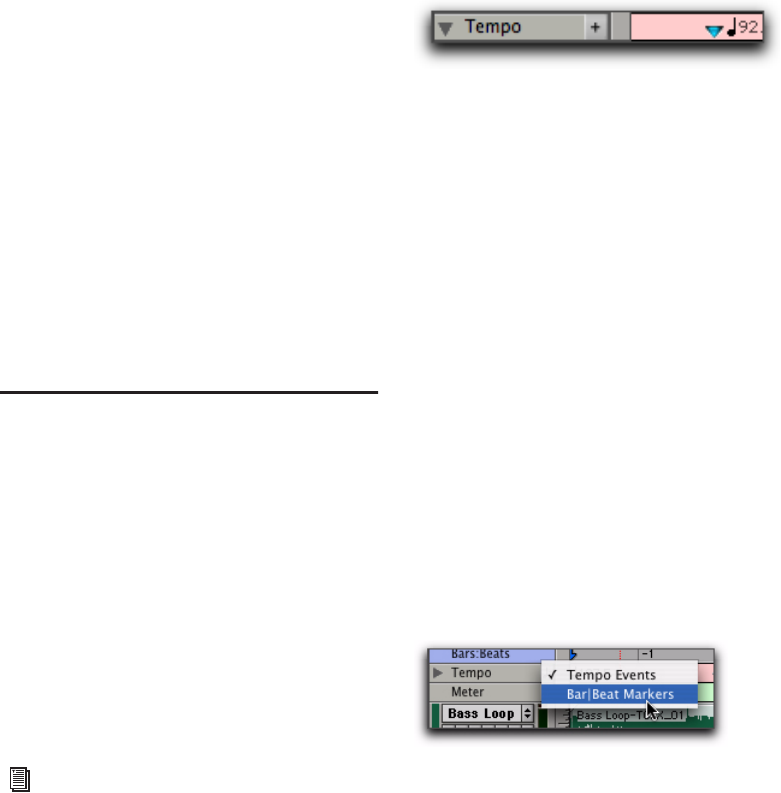
Pro Tools Reference Guide620
Stretch To End Specifies a new end point for the
region to which you want to apply the selected
tempo events. Changing the end point causes
the Stretch percentage to change.
Stretch To Start (Advanced Option) Specifies a
new start point for the region to which you
want to apply the selected tempo events.
Changing the end point causes the Stretch per-
centage to change.
Stretch Specifies the percentage of time for the
the selected tempo events to cover.
Preserve Tempo after Selection If selected, the
previous tempo setting that was in effect at the
selection end point is preserved after the selec-
tion. If unselected, the last tempo event created
by the tempo operation continues to the end of
the session, or until the next tempo event be-
yond the selected range.
Identify Beat Command
The Identify Beat command lets you establish a
tempo/meter map for audio that was recorded
without a click, or for imported audio with un-
known tempos.
The Identify Beat command analyzes a selection
range (usually with a distinct number of beats or
measures) and calculates its tempo based on the
specified meter. In doing this, Bar|Beat Markers
for the calculated tempo are inserted and appear
in the Tempo ruler at the beginning and end of
the selection; in addition, meter events are in-
serted into the Meter ruler.
Bar|Beat Markers
Bar|Beat Markers look similar to tempo events,
but instead have small blue triangles to indicate
their location.
Choosing Bar|Beat Markers or Tempo
Events
Because tempo events are tick-based, and
Bar|Beat Markers are sample-based, they cannot
be mixed. If a session contains tempo events
and you attempt to insert Bar|Beat Markers, ex-
isting tempo events are converted to Bar|Beat
Markers (and vice versa).
Tempo events can also be manually converted
to Bar|Beat Markers and vice versa. When con-
verting between Tempo events and Bar|Beat
Markers, some amount of sample rounding may
occur.
To use either tempo events or Bar|Beat Markers:
1 Press Control (Windows) or Command (Mac)
and click the Add Tempo Change button.
2 Select either Tempo Events or Bar|Beat Mark-
ers from the pop-up menu.
Use Beat Detective to generate Bar|Beat
Markers within a selection that includes
rhythmic changes on beats or sub-beats. For
more information, see Chapter 34, “Beat
Detective.”
Bar|Beat Marker
Tempo ruler pop-up menu
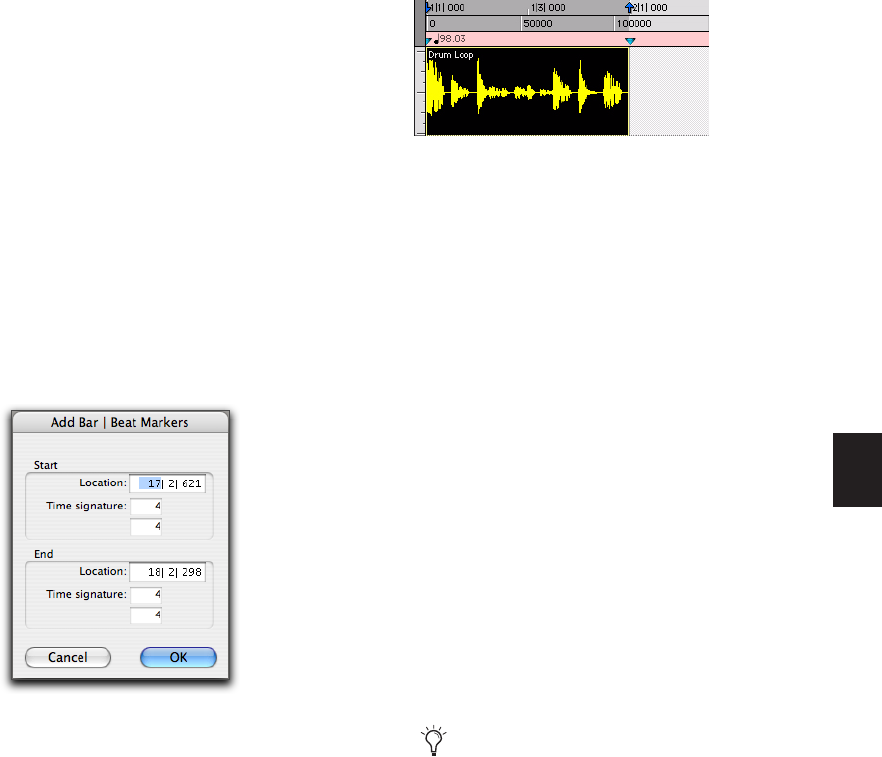
Chapter 30: Time, Tempo, Meter, and Key 621
Identifying Beats
Identifying the beat of a one-bar drum loop and
creating Bar|Beat Markers for it:
1 Place a one-bar drum loop at the beginning of
an audio track.
2 Select View > Rulers > Samples. This ensures
that the selected audio material will be sample-
accurate.
3 Select the audio region with the Time Grabber
tool and choose Event > Identify Beat.
4 In the Bar|Beat Markers dialog, specify the
start and end locations for the inserted Bar|Beat
Markers. Since this example deals with a one-bar
loop, enter 1|1|000 and 2|1|000.
5 If necessary, specify a time signature for the
start and end range.
6 Click OK to automatically calculate the new
tempo and insert the necessary Bar|Beat Markers
and meter events. Any existing tempo and
meter events residing within the selection are
deleted.
Once the tempo has been determined for the au-
dio, you can duplicate the original audio region
with the Repeat command.
When working with a selection, the Identify
Beat command only calculates a single tempo
for the selected range. If the tempo varies from
measure to measure, or beat to beat, you’ll need
to use the Identify Beat command for each
tempo variance (making sure to accurately de-
fine a precise selection range or beat location for
the tempo change).
To accurately define tempos for a range of audio
with the Identify Beat command, make certain
that the initial selection represents an accurate
length of beats or measures. You may want to
first loop the selection on playback to see if it
plays cleanly without skipping (see “Loop Play-
back Mode” on page 314). To avoid drift, and re-
main sample-accurate, select the audio material
with the Time Scale set to Samples rather than
Bars|Beats.
Identify Beat dialog
Bar|Beat Markers inserted
When identifying beats, select as large an
area as possible. For example, if you have a
four-bar-long audio file you want to iden-
tify, select the entire four bars instead of just
one bar, in order to minimize rounding er-
rors (see “Sample Rounding and Edit Oper-
ations” on page 601).
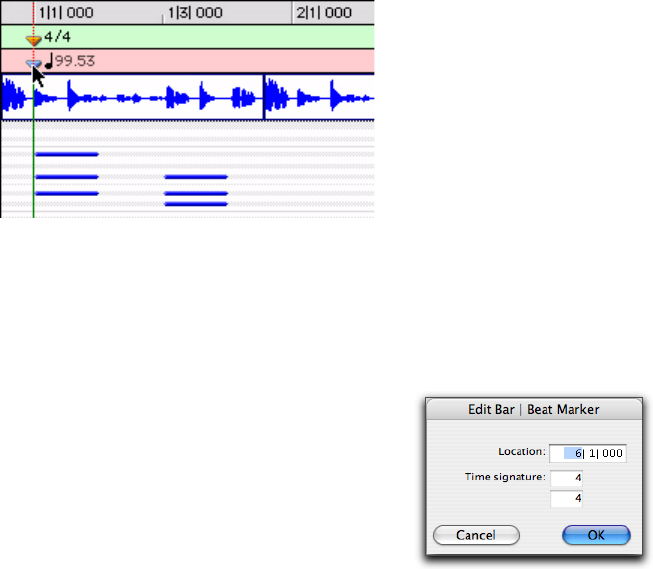
Pro Tools Reference Guide622
Dragging Bar|Beat Markers
Bar|Beat Markers can be dragged to new loca-
tions so they can align with audio regions that
have been moved, or so that they can align to a
slightly different point within an audio region.
This results in neighboring MIDI data being ad-
justed to align with the new tempo map.
Because Bar|Beat Markers are sample-based and
tempo events are tick-based, they behave differ-
ently when you drag them in the Tempo ruler.
When dragging a tempo event:
• The tempo event is placed at a new bar and
beat location. The sample and SMPTE loca-
tions for the event are updated as well.
• The BPM value for the dragged tempo event
remains constant, as do any other tempo
events in the session.
• Neighboring MIDI events and audio regions
on tick-based tracks, along with the ruler,
shrink or expand as necessary to adjust for the
new tempo location.
When dragging a Bar|Beat Marker:
• Its BPM value is recalculated along with the
Bar|Beat Marker to its immediate left. Bar|Beat
Markers to the right of the dragged marker re-
main unchanged.
• Its bar and beat location is dragged with the
Bar|Beat Marker. If the Bar|Beat Marker was
originally placed at 3|1|000, it remains there
(unless it is edited).
• Its sample and SMPTE locations change, as
calculated for by the new tempo for the
Bar|Beat Marker.
• Neighboring MIDI events, along with the
Bars:Beats ruler, shrink or expand as necessary
to adjust for the new tempo.
Editing Bar|Beat Markers
A Bar|Beat Marker can be edited to redefine its
bar and beat location, which also redefines the
start or end point of the range being analyzed
for tempo. This is different from dragging a
Bar|Beat Marker.
To edit a Bar|Beat Marker:
1 In the Tempo ruler, double-click the Bar|Beat
Marker.
2 In the Edit Bar|Beat dialog, enter a new Loca-
tion for the Bar|Beat Marker.
3 Enter a new Time Signature if desired.
4 Click OK.
Dragging a Bar|Beat Marker
Edit Bar|Beat dialog
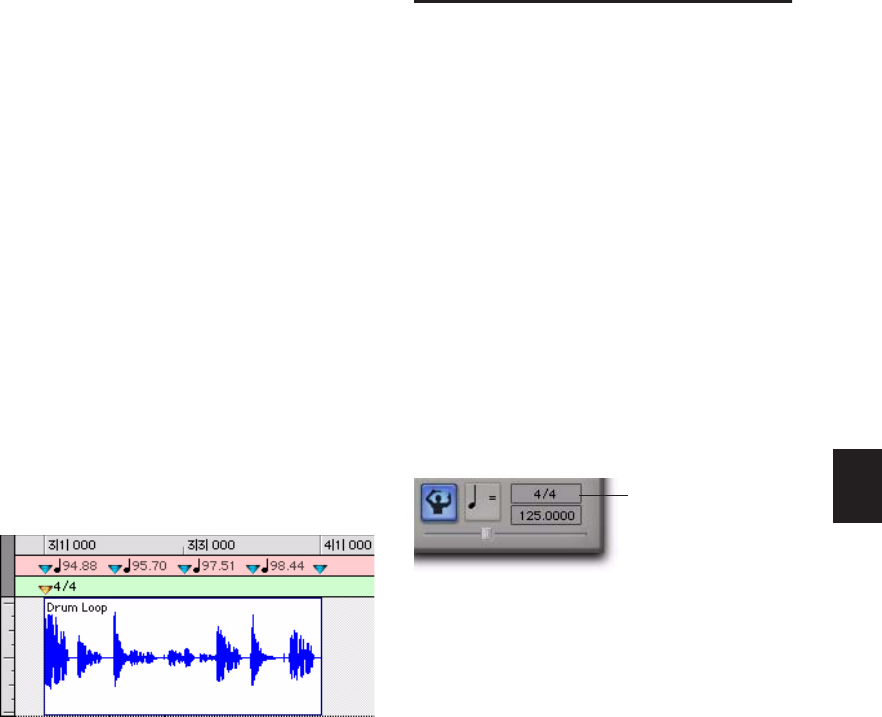
Chapter 30: Time, Tempo, Meter, and Key 623
To delete a Bar|Beat Marker:
While pressing Alt (Windows) or Option (Mac),
move the cursor over the Bar|Beat Marker
(where the cursor changes to the Grabber with a
“–”) and click to remove it.
Inserting Bar|Beat Markers One at
a Time
Sample-Based Material with Varying Tempos
You can insert Bar|Beat Markers one at a time by
setting an Edit insertion point (instead of mak-
ing a selection) before using the Identify Beat
command. The ability to identify each beat, one
at a time, is especially useful when working with
sample-based material with varying tempos.
For instance, if you have a measure that acceler-
ates slightly, you could insert a Bar|Beat Marker
on each beat (see Figure 12) so the tempo is ac-
curately reflected.
After the Bar|Beat Markers are inserted, further
adjustments in the tempo map are possible by
dragging each of the Markers, as necessary, to
align with the associated beat within the audio.
Meter Events
You can change meter in the Meter ruler, or
make precise meter changes in the Time Opera-
tions window.
Meter events can be inserted at the beginning of
a session to replace the default meter (of 4/4),
and they can be inserted anywhere within the
session for additional meter changes.
To display the Meter ruler:
Select View > Rulers > Meter.
Current Meter
As meter events are encountered during play-
back, the session’s current meter is displayed in
the Transport window.
Figure 12. Bar|Beat Markers on each beat
Current meter displayed in Transport window
current meter
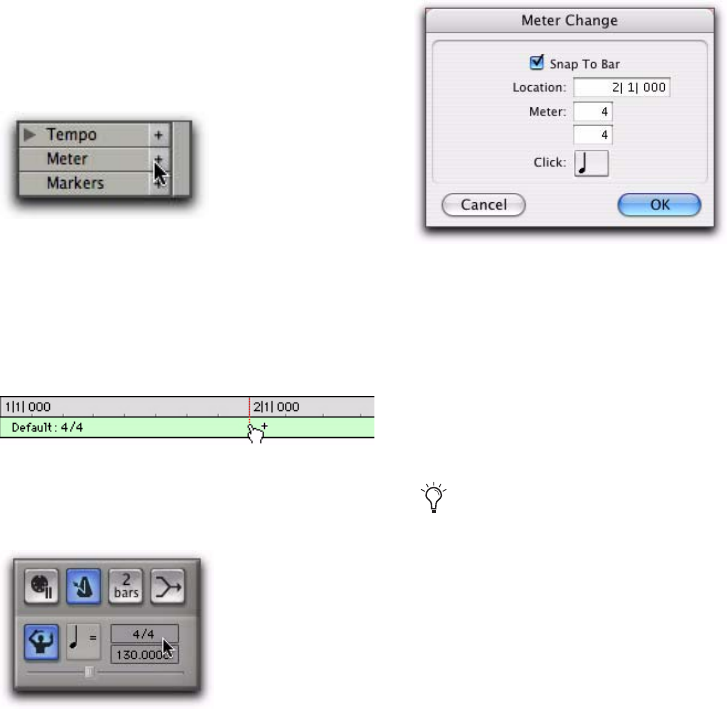
Pro Tools Reference Guide624
Inserting Meter Events
To insert a meter event:
1 Do one of the following:
• Choose Event > Time Operations > Change
Meter.
• Click the Add Meter Change button at the
right of the Meter ruler.
• While pressing the Start key (Windows) or
Control (Mac), move the cursor into the
Meter ruler (where the cursor changes to
the Grabber with a “+”) and click at the lo-
cation where you want to insert the event.
• Double click the meter display in the Trans-
port window.
2 In the Meter Change window, do the follow-
ing:
• Enter the Location and Meter for the meter
change.
– and –
• If you want the inserted meter event to fall
cleanly on the first beat of the nearest mea-
sure, select the Snap To Bar option.
3 Select a note value for the number of clicks to
sound in each measure. For a dotted-note click
value, select the dot (.) option.
Add Meter Change button
Manually inserting a meter event
Current Meter display in the Transport window
Meter Change window
For some meters, it may be desirable to use
a dotted value for the click. For instance, if
using a meter of 6/8, a dotted quarter note
click (yielding two clicks per measure) is
generally more suitable than a straight
eighth note click (six clicks per measure).
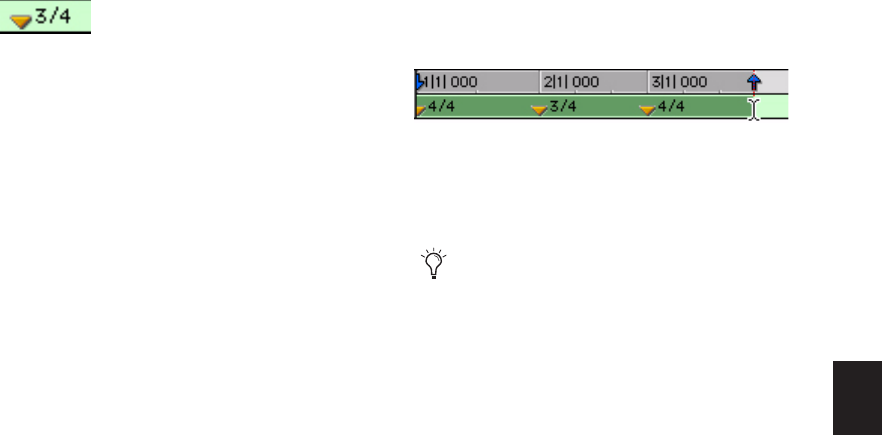
Chapter 30: Time, Tempo, Meter, and Key 625
4 Click Apply to insert the new meter event. The
new meter event is inserted and appears in the
Meter ruler.
Each meter event has a small yellow triangle
next to it that indicates its location. These trian-
gles can be selected for copying and pasting, and
they can be double-clicked to edit the meter
event.
Editing Meter Events
Existing meter events can be edited, deleted,
copied, and pasted.
To edit a meter event:
1 In the Meter ruler, double-click the meter
event.
2 In the Meter Change dialog, enter a new Loca-
tion or Meter for the event.
3 Click OK.
To delete a meter event:
While pressing Alt (Windows) or Option
(Mac), move the cursor over the meter event
(where the cursor changes to the Grabber with a
“–”) and click to remove it.
To copy and paste several meter events:
1 If you want to constrain the selection to the
current Grid value, set the Edit mode to Grid.
2 Drag in the Meter ruler to select the range that
includes the meter events.
If the beginning of the selection includes a
meter event, press Control (Windows) or Com-
mand (Mac) so the Selector tool appears.
3 Choose Edit > Copy.
4 Click in the Meter ruler at the point where you
want to paste the meter events.
5 Choose Edit > Paste. The contents of the Clip-
board are pasted from the insertion point, re-
placing any existing meter events.
To extend an Edit selection in a track to the Meter
ruler:
1 Using the Selector tool or any Time Grabber
tool, select a track range.
2 Shift-click in the Meter ruler.
Shift-click again in the Meter ruler to remove it
from the selection.
To select all meter events:
Double-click with the Selector tool in the
Meter ruler.
Inserted meter event
Meter events selected
Press Alt (Windows) or Option (Mac) while
dragging to select across all Conductor
tracks.
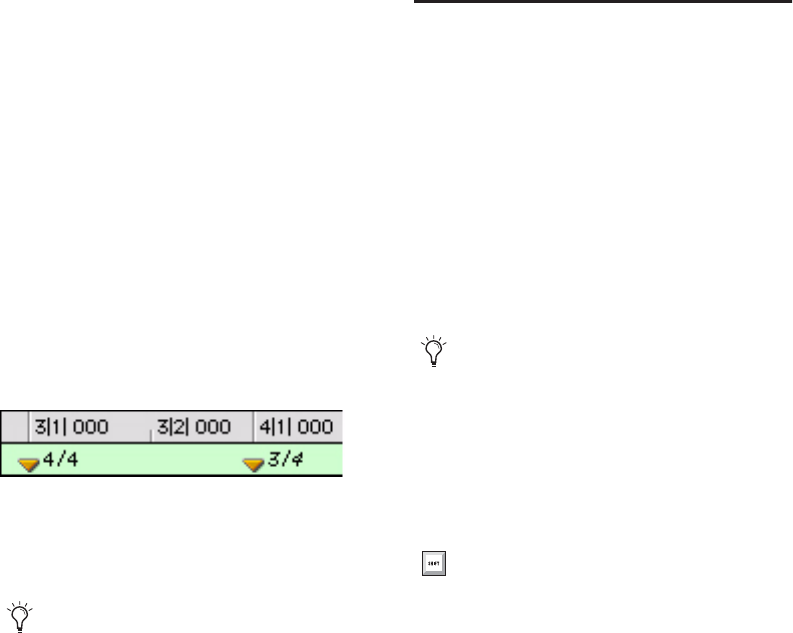
Pro Tools Reference Guide626
To clear a range of selected meter events:
1 If you want to constrain the selection to the
current Grid value, set the Edit mode to Grid.
2 Drag in the Meter ruler to select the meter
events you want to remove.
3 Choose Edit > Clear to delete the selected
meter events.
Partial Measures
As necessary, Pro Tools will create a partial mea-
sure to accommodate the inserted meter event.
When a meter event is preceded by a partial
measure, the meter event is displayed in italics
in the Meter ruler.
Partial measures can also occur when pasting
meter events to locations other than the first
beat of a measure.
Time Operations
The Time Operations window lets you:
• Change Meter
• Insert Time
• Cut Time
• Move Song Start
To open a specific Time Operations window:
Choose Event > Time Operations, followed by
one of the Time Operations commands (such as
Change Meter).
To open the last active Time Operations window:
Choose Event > Time Operations > Time Op-
erations Window.
Partial measure of 4/4
To insert meter events while avoiding par-
tial bars, use the Change Meter command in
the Time Operations window. See “Change
Meter” on page 627.
If the Time Operations window is already
open, you can select any Time Operation
from the pop-up menu at the top of the win-
dow.
Press Alt+1 (Windows) or Option+1
(Mac) on the number keypad to open the
Time Operations window and display the
last active Time Operations window.
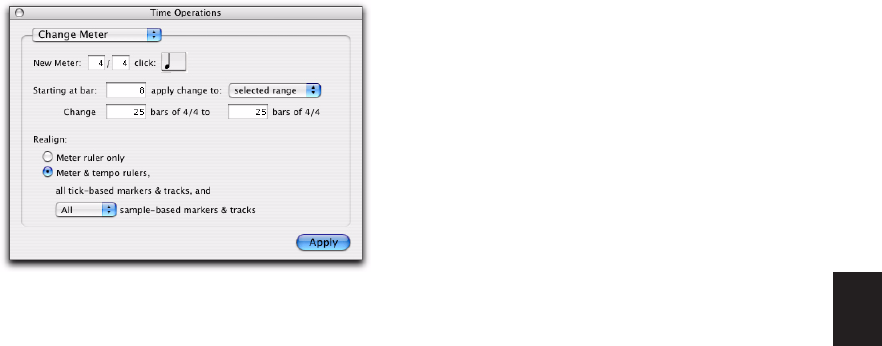
Chapter 30: Time, Tempo, Meter, and Key 627
Change Meter
Change Meter lets you specify complex meter
changes for Bar|Beat-based material. You can en-
ter meter changes at a particular bar, make a
meter change over a selected area of time, or add
meter changes sequentially one bar at a time.
Options for the Change Meter command in-
clude:
New Meter Lets you specify a new time signa-
ture. The first field lets you enter the number of
beats (up to 99) in a measure, and the second
field lets you enter the note length that counts
as one beat.
Click Lets you specify the note value that will
trigger the metronome click. For example, if an
eighth note is chosen, a click is played for every
eighth note, regardless of tempo.
Starting at Bar Sets the bar where the meter
change is added. Meter changes made in the
Change Meter page can only be made at the be-
ginning of a bar.
Apply Change To Lets you apply the meter
change to the selected range, to the end of the
session, or until the next bar.
Change The Change fields let you specify the
number of bars of the new meter that you want
to have replace the selected range.
Pro Tools automatically calculates the nearest
whole bar number, or you can specify a number
of bars to be affected. Time is inserted or deleted,
in whole bar increments, at the end of the selec-
tion, as necessary on all affected tracks when
you override the calculated range.
Realign
The Realign controls let you choose which items
to realign after a meter change has been made.
You can choose to realign meter events, or
choose to realign meter and tempo events, tick-
based markers and tracks, and also all or none of
the sample-based markers and tracks.
Meter Ruler Only Applies the meter change and
realigns only the Meter ruler. All other rulers
and tracks are unaffected.
Meter and Tempo Rulers, All Tick-Based Markers
and Tracks, and Sample-Based Markers and
Tracks Applies the meter change and realigns
the Meter and Tempo rulers, and all tick-based
markers and tracks. Using the pop-up menu,
you can also choose to realign all or none of the
sample-based markers and tracks. Time is in-
serted or deleted as needed at the end of the se-
lection to preserve the alignment of material fol-
lowing the selection.
Change Meter window
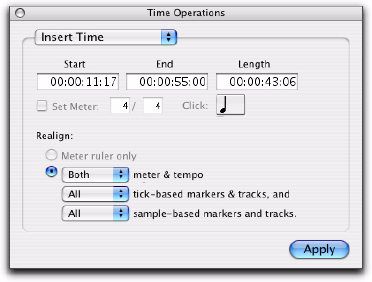
Pro Tools Reference Guide628
Change Meter Examples
To change the meter over a range of bars:
1 Do one of the following:
• Drag with the Selector tool to select a range
of bars to change.
– or –
• To have the meter change apply until the
next meter event, click where you want the
meter change to begin with the Selector
tool. The meter change will be made at the
beginning of the nearest bar.
2 Choose Event > Time Operations > Change
Meter.
3 Specify a new meter and click setting.
Pro Tools will automatically set the selection op-
tions to fit the new meter to the selected range
as closely as possible, adding or subtracting
beats a necessary.
4 Select To Selected Range in the Apply Change
pop-up menu.
5 Select which rulers and tracks you want to re-
align after meter changes have been made.
6 Click Apply.
To add a series of meter changes, one measure at
a time:
1 Do one of the following:
• With the Selector tool, click where you
want the meter change to begin. The meter
change will be made at the beginning the
nearest bar.
– or –
• Enter the first measure number in the Start-
ing At Bar field.
2 Choose Event > Time Operations > Change
Meter.
3 Specify a new meter and click setting.
4 Select “Until the Next Bar” from the Apply
Change To pop-up menu.
5 Click Apply to enter the new meter and to
move the insertion point to the end of the new
measure.
6 Specify a new meter and click setting for the
next measure.
7 Repeat steps 5–6 for every additional meter
change you want to insert.
Insert Time
Insert Time lets you insert an amount of blank
time (silence) into Conductor rulers, MIDI
tracks, and audio tracks.
Options for the Insert Time command include:
Start, End, and Length Sets the start and end
points for the selection, and the selection
length.
Set Meter If your Main Time Scale is Bars:Beats,
Set Meter lets you specify a new meter for the in-
serted time. The selection is quantized to the
nearest bars, and the previous meter is inserted
after the selection. If your Main Time Scale is
sample-based, Set Meter is not available.
Insert Time window

Chapter 30: Time, Tempo, Meter, and Key 629
Realign
The Realign controls let you choose which items
shift (occur later) when time is inserted, as fol-
lows:
• If your Main Time Scale is set to Bars:Beats,
you can choose to realign meter events only,
or choose to realign a combination of Meter
and Tempo rulers, all tick-based markers and
tracks, and your choice of sample-based
tracks.
• If your Main Time Scale is set to an absolute
timebase (such as Min:Secs), you can choose
to independently realign conductor events,
tick-based markers and tracks, and your
choice of sample-based tracks.
Meter Ruler Only If your Main Time Scale is
Bars:Beats, you have the option to insert time
into the Meter ruler only. Meter events after the
start point of the selection are shifted past the
end point by the length of time selection.
If your Main Time Scale is sample-based, Realign
Meter Ruler Only is not available.
Meter and Tempo Rulers Lets you insert time
into the Meter and Tempo rulers. Meter and
Tempo events after the start point of the selec-
tion are shifted past the end point by the length
of time inserted.
Tick-Based Markers and Tracks Lets you shift
Bar|Beat-based markers, and insert time into
tick-based tracks. Marker events and tick-based
tracks after the start point of the selection are
shifted past the end point by the length of time
inserted.
If the Timeline selection includes any audio re-
gions on tick-based tracks, the audio regions are
separated at the Start point, and the new region
containing the previous selection is shifted to
the end point.
Sample-Based Markers and Tracks Lets you shift
absolute time-based markers, and insert time
into sample-based tracks. Marker events and
sample-based tracks after the start point of the
selection are shifted past the end point by the
length of time inserted.
If the selection includes any audio regions on
sample-based tracks, the selected portions of the
audio regions are separated at the Start point,
and the new region containing the previous se-
lection is shifted to the end point.
Insert Time Example
To insert four empty measures of 4/4 time into a
session:
1 Set the Main Time Scale to Bars:Beats.
2 Choose Event > Time Operations > Insert
Time.
3 Enter the measure where you want to insert
the measures in the Start field.
4 Enter four measures in the Length field.
5 Select the Realign option to Meter and Tempo
Rulers, All Tick-Based Markers & Tracks, and All
Sample-Based Markers and Tracks.
6 Click Apply.
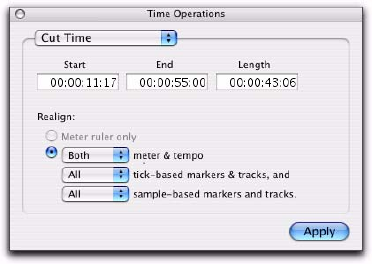
Pro Tools Reference Guide630
Cut Time
Cut Time lets you cut a specified amount of time
(both Timebase and track data) from Conductor
rulers, MIDI tracks, and audio tracks.
Options for the Cut Time command include:
Start, End, and Length Sets the start and end
points for the selection, and the selection
length.
Realign
The Realign controls let you choose which items
shift when time is cut, as follows:
• If your Main Time Scale is set to Bars:Beats,
you can choose to realign meter events only,
or choose to realign a combination of Meter
and Tempo rulers together, all tick-based
markers and tracks, and your choice of sam-
ple-based tracks.
• If your Main Time Scale is set to an absolute
timebase (such as Min:Secs), you can choose
to independently realign conductor events,
tick-based markers and tracks, and your
choice of sample-based tracks.
Meter Ruler Only If your Main Time Scale is
Bars:Beats, you have the option to remove time
from the Meter ruler only. Meter events within
the selection are removed, and meter events
that occur after the end point of the selection
are shifted to the selection start point.
If your Main Time Scale is sample-based, Realign
Meter Ruler Only is not available.
Meter and Tempo Rulers Lets you cut time from
the Meter and Tempo rulers. Meter and tempo
events within the selection are removed, and
the meter and tempo events that occur after the
end point of the selection are shifted to the se-
lection start point.
Tick-Based Markers and Tracks Lets you shift
Bar|Beat-based markers, and delete time from
tick-based tracks. Marker events and tick-based
tracks within the selection are removed, and the
marker events and tick-based tracks that occur
after the end point of the selection are shifted
forward.
If the time selection includes any tick-based au-
dio regions, the selected area of the audio region
is deleted, and the region following the selec-
tion is shifted forward.
Sample-Based Markers and Tracks Lets you shift
absolute time-based markers, and cut time from
sample-based tracks. Marker events and sample-
based tracks within the selection are removed,
and the marker events and sample-based tracks
that occur after the end point of the selection
are shifted forward.
If the time selection includes any sample-based
audio regions, the selected area of the audio re-
gion is deleted, and the region following the se-
lection is shifted forward.
Cut Time window
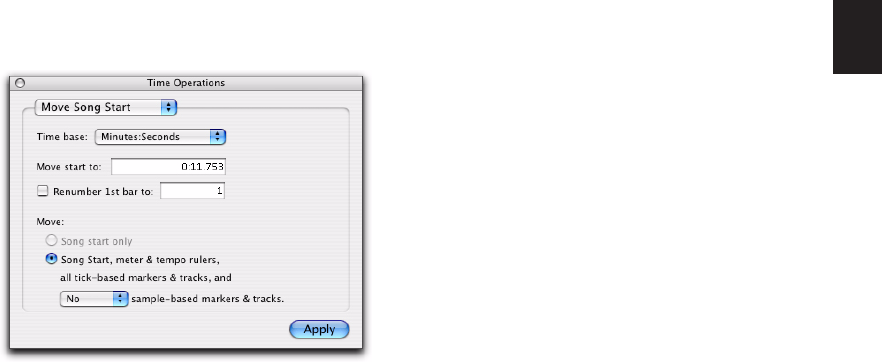
Chapter 30: Time, Tempo, Meter, and Key 631
Cut Time Example
To cut thirty seconds of time from a session:
1 Set the Main Time Scale to Minutes:Seconds.
2 Choose Event > Time Operations > Cut Time.
3 With the Selector tool, click at the beginning
of the area that you want to cut.
4 Enter thirty seconds (0:30.000) in the Length
field.
5 Select the options to Realign both Meter and
Tempo rulers, all tick-based tracks, and all sam-
ple-based markers and tracks.
6 Click Apply.
Move Song Start
Move Song Start lets you redefine the location of
the Song Start Marker.
Options for the Move Song Start command in-
clude:
Timebase Lets you precisely redefine the posi-
tion of the Song Start Marker measured by any
supported timebase.
Move Start To Sets the location for the Song
Start Marker in the chosen timebase.
Renumber Song Start To When enabled, this lets
you set the Song Start Marker to any bar num-
ber.
Move
The Move controls let you choose which items
shift when the Song Start is moved, as follows:
Song Start Only Moves the Song Start Marker
only.
Meter and Tempo Rulers, Tick-Based Markers and
Tracks, and Sample-Based Markers and
Tracks Moves the Song Start Marker, Meter, and
Tempo rulers, tick-based tracks, and your choice
of sample-based tracks.
Move Song Start Example
To move the Song Start Marker to 15 seconds on
the Timeline:
1 Choose Event > Time Operations > Move Song
Start.
2 Select Minutes:Seconds from the Timebase
pop-up menu.
3 In the Move Song Start To field, enter
“0:15:000” to move the song start forward by 15
seconds.
4 If you want to renumber the bars so that the
Song Start Marker sits at a different bar, select
the Renumber Song Start option, and enter the
bar number in the Renumber 1st Bar to field.
5 Select whether you want to move all sample-
based markers and tracks or none of them.
6 Click Apply.
Move Song Start window
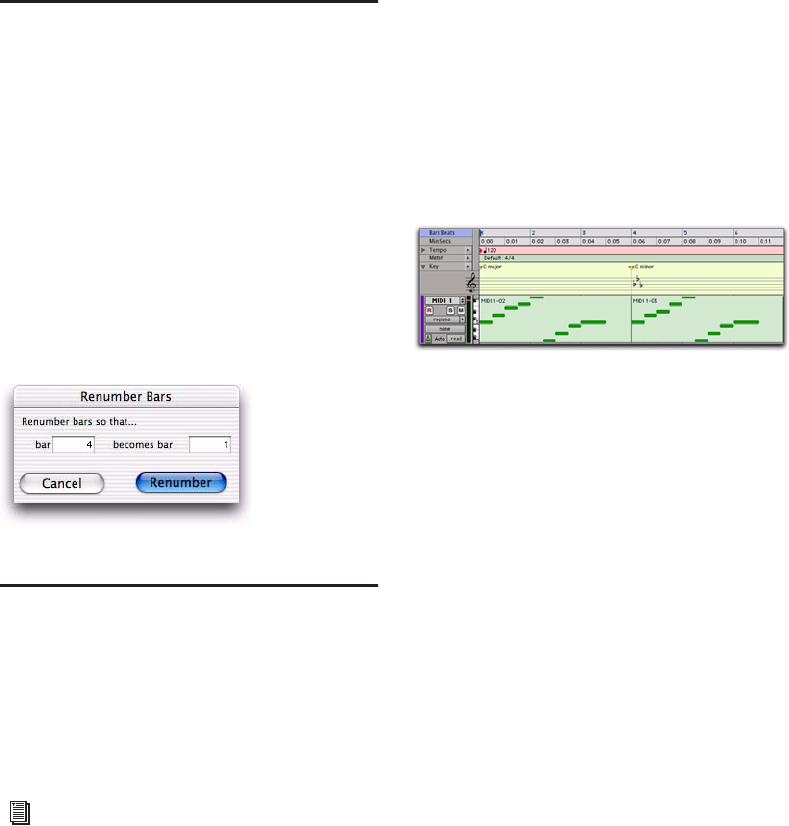
Pro Tools Reference Guide632
Renumbering Bars
You can use the Renumber Bars command to re-
number all bars in the session, effectively
changing the bar locations for all regions, meter
and tempo events while leaving their position
intact. In doing so, however, the SMPTE and
sample locations of the session data are not
changed.
To renumber bars:
1 Choose Event > Renumber Bars.
2 Specify the bar you want to renumber, along
with the new bar number, then click Renumber.
Key Signatures
The Key Signature ruler lets you add key signa-
tures to Pro Tools sessions. Key signatures can be
imported and exported with MIDI data. This is
especially useful when exporting MIDI se-
quences for use in notation programs like Sibel-
ius. The default key signature is C major.
Key Signature Ruler
The Key Signature ruler lets you add, edit, and
delete key signatures. You can use key signatures
to indicate key and key changes in your
Pro Tools session. Key signatures can also be
used for certain diatonic functions, such as
transposing in key or constraining pitches to the
specified key.
To view the Key Signature ruler, do one of the
following:
Select View > Rulers > Key Signature.
– or –
From the View selector in the Edit window, se-
lect Key Signatures.
You can also show or hide the Key Signature
Staff for the Key Signatures ruler.
To view the staff for the Key Signature ruler:
1 Show the Key Signature ruler.
2 Do one of the following:
• Select View > Rulers > Key Signature Staff.
– or –
• Click the Show/Hide triangle on the Key
Signature ruler.
Renumber Bars dialog
For information on exporting MIDI to Sibe-
lius, see “Send to Sibelius” on page 281.
Key Signature ruler
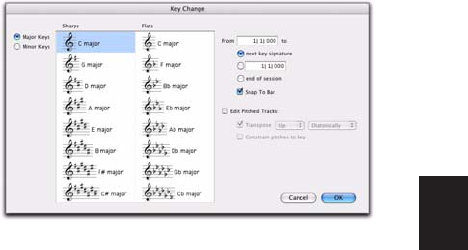
Chapter 30: Time, Tempo, Meter, and Key 633
Changing Key Signatures
You can add, edit, or delete key signatures.
To add a key signature:
1 Place the cursor in the Timeline where you
want to add a key signature.
2 Do one of the following:
• Choose Event > Add Key Change.
– or –
• Click the Plus (+) button in the Key Signa-
ture ruler.
3 In the Key Change dialog, select the mode
(major or minor), the key, its location and
range, and how you want it to affect pitched
tracks.
4 Click OK.
To edit a key signature:
1 Double-click the Key Signature marker in the
Key Signature ruler.
2 In the Key Change dialog, make the desired
changes.
3 Click OK.
To delete a key signature, do one of the following:
Alt-click (Windows) or Option-click (Mac) the
Key Signature marker in the Key Signature ruler.
– or –
Make a selection in the Key Signature ruler
that includes the key signature you want to de-
lete and choose Edit > Clear or press Delete.
Key Change Dialog
The Key Change dialog lets you specify the
mode (major or minor), the key (from seven
flats to seven sharps), the range affected (for ex-
ample, from Bar 1 to the next key change), and
whether or not MIDI notes on pitched tracks are
transposed or constrained to key (see “Pitched
Tracks” on page 634). The Key Change dialog
opens whenever you add or edit a Key Signature
marker.
Major Keys Displays the major keys from seven
flats to seven sharps.
Minor Keys Displays the minor keys from seven
flats to seven sharps. Pro Tools only applies the
natural minor mode.
Sharps Lets you select any of the sharp keys to
seven sharps and C major (or A minor).
Flats Lets you select any of the flat keys to seven
flats and C major (or A minor).
From Lets you specify where to place the Key Sig-
nature marker in Bars|Beats.
To Lets you specify to where you want the key
change to take effect: to the next Key Signature
marker, to a selection, or to the end of the ses-
sion.
Snap to Bar Snaps the Key Signature marker to
the barline.
Key Change dialog
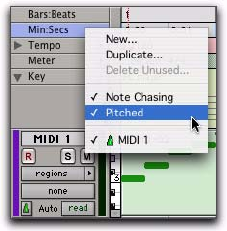
Pro Tools Reference Guide634
Edit Pitched Tracks Enabling the Edit Pitched
Tracks option lets you transpose existing MIDI
notes on Pitched tracks up or down, either dia-
tonically or chromatically based on the key
change, or constrain pitches to the new key. For
more information on Pitched tracks, see
“Pitched Tracks” on page 634.
Transpose When the Edit Pitched Tracks option
is enabled, lets you transpose existing MIDI
notes on Pitched tracks up or down, diatonically
or chromatically. For example, if the session is
in C major and you are adding a key change to D
minor, select Edit Pitched Tracks, Transpose,
Up, and Diatonically to transpose notes on
Pitched tracks up a whole step and then lower
the third, sixth, and seventh scale degrees by a
half step. The sequence C, D, E is transposed to
D, E, F (natural, rather than sharp as happens
when transposing chromatically).
When transposing diatonically, chromatic
notes are maintained when changing key. For
example, when changing key from C major to E
major, the note B-flat is transposed to D-natural.
This lets you maintain “blue-notes” when
changing keys and applying diatonic transposi-
tion.
Constrain Pitches To Key When the Edit Pitched
Tracks option is enabled, lets you constrain
pitches to the notes of the new key. This means
that any diatonic pitches of the old key on
Pitched tracks that are not in the new key are in-
dividually transposed to the nearest diatonic
pitch of the new key. For example, when chang-
ing from C major to D major, the sequence C, D,
E, F, G changes to C-sharp, D, E, F-sharp, G.
Constraining pitches to key also constrains any
chromatic pitches to the new diatonic scale. For
example, when changing from C major to D ma-
jor, the sequence C, D, D-sharp, E changes to C-
sharp, D, D, E.
Pitched Tracks
Pitched tracks are MIDI or Instrument tracks
that can be affected by transpositions due to key
changes (including constrain to key). MIDI and
Instrument tracks are “pitched” by default.
However, if you have MIDI or Instrument tracks
assigned to drum machines or samplers, you do
not want those tracks to be affected by key
changes because of key mappings. You can dese-
lect the Pitched option for specific MIDI and In-
strument tracks so that they will not be affected
by key changes.
To select or deselect Pitched tracks:
Click the track’s Playlist selector and select or
deselect the Pitched option.
Pitched enabled in Playlist selector
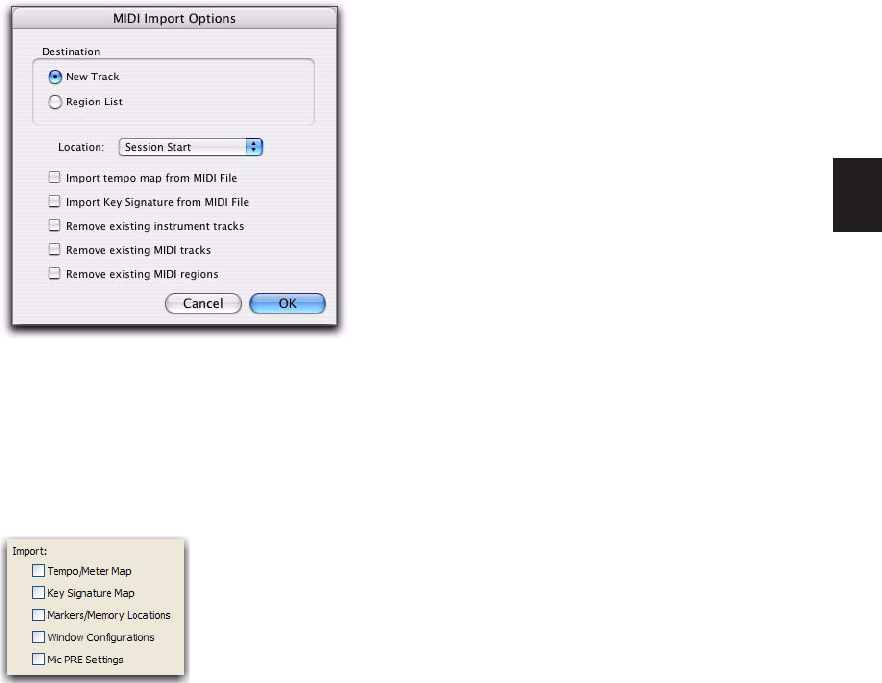
Chapter 30: Time, Tempo, Meter, and Key 635
Importing Key Signatures
When importing MIDI (or session data with
MIDI), you can select whether or not to import
any key signatures stored in MIDI files.
Import MIDI
The Import MIDI dialog includes the Import Key
Signature from MIDI File option. When se-
lected, key signatures (if present) are imported
into Pro Tools with any other MIDI data.
Import Session Data
The Import Session Data dialog includes the Im-
port Key Signature Map option. When selected,
key signatures (if present) are imported into
Pro Tools with the imported session data.
Import MIDI dialog
Import Session Data
Pro Tools Reference Guide636
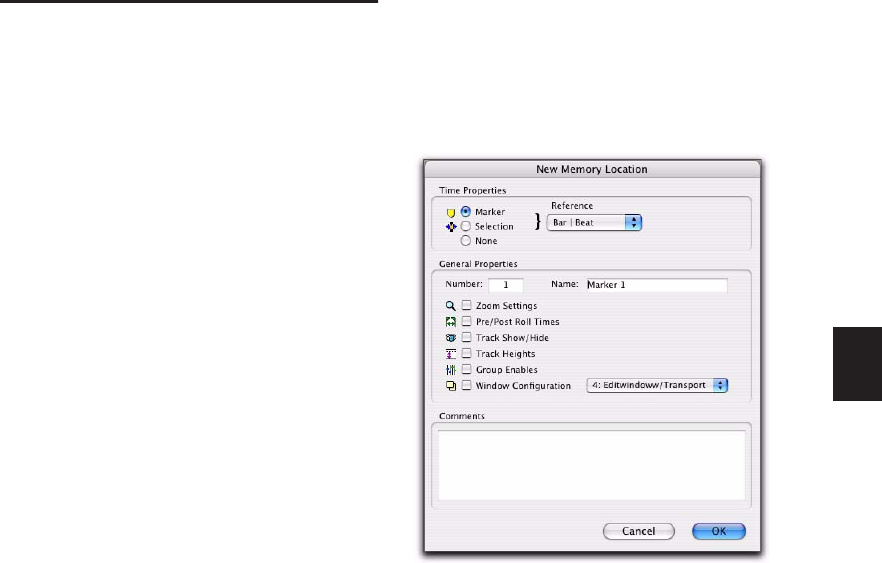
Chapter 31: Memory Locations 637
Chapter 31: Memory Locations
Memory Locations and
Markers
Memory locations provide a powerful way to
navigate your session while editing and arrang-
ing. These can be markers to specific points in
the Timeline, Edit selections, or even a set of
track display settings that can be recalled.
Each session can save up to 999 Memory Loca-
tions that can be used to recall:
• Markers to important locations in the ses-
sion
• Edit selections across one or more tracks
• Record and play ranges, along with pre-
and post-roll times
• Track settings that include Show/Hide sta-
tus, Track Heights, and zoom values
• Edit and Mix Groups enables
• Window Configurations
Memory Locations are viewed and sorted in the
Memory Locations window, where they can be
recalled by clicking the Memory Location.
Properties of Memory Locations
When creating a new Memory Location (see
“Creating Memory Locations” on page 639) you
are prompted to define its Time Properties and
General Properties.
Time Properties
Under Time Properties, a Memory Location can
be set to Marker, Selection, or None. This deter-
mines the type of Memory Location that is cre-
ated. Each of these three Memory Location
types can also save any combination of General
Properties.
Memory Locations window
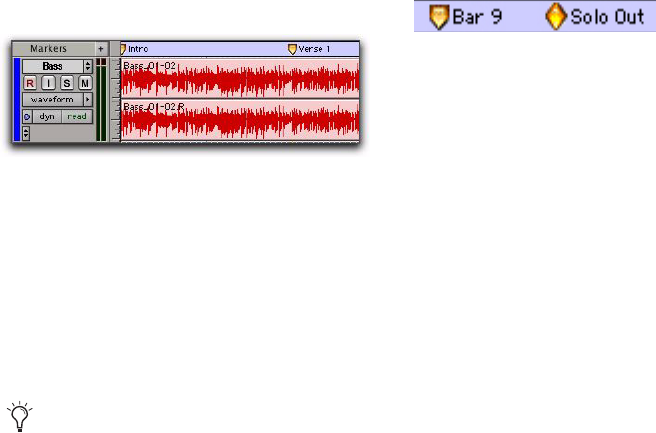
Pro Tools Reference Guide638
Marker Recalls a Timeline location whose refer-
ence can be either Bar|Beat (tick-based) or Abso-
lute (sample-based). When recalling a Marker
Memory Location, the playback cursor moves to
the Marker’s location and the start and end
times in the Transport window are also updated.
If the Timeline and Edit Selections are linked,
the edit cursor also moves to the Marker loca-
tion.
Markers appear in the Markers ruler with a thin
yellow line extending down through all tracks
in the Edit window (to assist in arranging and
aligning track material). You can click a Marker
in the Markers ruler to recall its location along
with its stored General Properties.
Selection Recalls an Edit selection or edit cursor
location whose reference can be either Bar|Beat
(tick-based) or Absolute (sample-based). A Selec-
tion Memory Location lets you store Edit selec-
tions, for one or more tracks, that you return to
often within a session. If the Timeline and Edit
Selections are linked, a Selection Memory Loca-
tion can recall record and play ranges.
None Recalls no Time Properties and is therefore
referred to as a General Properties Memory Loca-
tion.
Bar|Beat and Absolute Reference
The Reference pop-up determines whether the
Marker or Selection Memory Location is
Bar|Beat or Absolute. When set to Bar|Beat, the
Memory Location is tick-based and its bar and
beat location remains constant if the tempo is
changed—though its relation to the absolute
sample location changes accordingly.
When set to Absolute, the Memory Location is
sample-based and its bar and beat location shifts
if the tempo is changed—though its sample lo-
cation remains constant, along with its relation
to audio material.
In the Markers ruler, Markers that are Bar|Beat
appear as yellow chevrons, and Markers that are
Absolute appear as yellow diamonds.
General Properties
All three types of Memory Locations (Marker,
Selection, and None) can store and recall any
combination of the following General Proper-
ties:
Number Change the number to overwrite an ex-
isting Memory Location, or to reorder Memory
Locations in the Memory Locations window.
Zoom Settings Recalls the horizontal, audio,
and MIDI zoom values for audio, MIDI, and In-
strument tracks.
Pre- and Post-Roll Times Recalls pre- and post-
roll times (but not whether they are enabled).
This property can be stored with a Selection
Memory Location to recall record and play
ranges along with pre- and post-roll.
Markers in the Markers ruler
Only contiguous selections can be saved
with Memory Locations. Noncontiguous se-
lections, made with the Object Grabber tool,
will be recalled as if the selections were
made with the Time Grabber tool.
Bar|Beat Marker (left) and Absolute Marker (right)
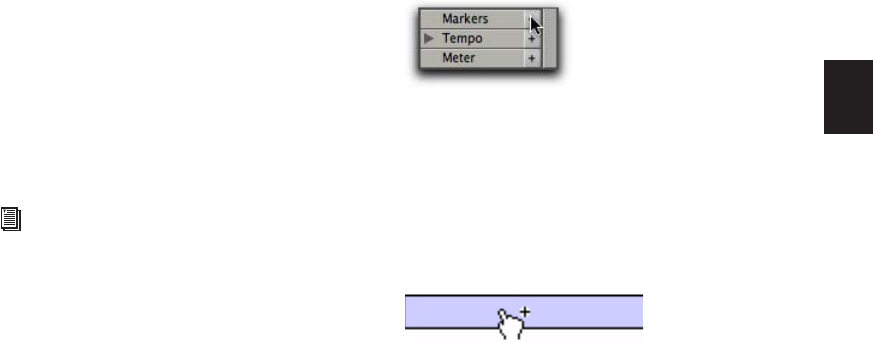
Chapter 31: Memory Locations 639
Track Show/Hide Recalls which tracks are hid-
den. Use this property to display groups of
tracks for editing and mixing.
Track Heights Recalls all Track Heights. Use this
option along with Zoom Settings to recall edit
environments that are suited for particular
tasks, such as editing down to the sample level
or trimming MIDI notes.
Group Enables Recalls which Edit and Mix
Groups are enabled. This option is helpful in re-
calling groups for particular edit and mixing op-
erations, such as muting all drum tracks or fad-
ing a stereo pair.
Window Configuration Recalls a specific Window
Configuration. This option is helpful in recall-
ing specific Window Configurations to facilitate
editing or mixing tasks. For more information
on Window Configurations, see “Window Con-
figurations” on page 123.
Comments
All three types of Memory Locations (Marker,
Selection, and None) can store and recall com-
ments. You can enter a maximum of 255 char-
acters to describe the Memory Location. You
can also edit comments previously entered.
Creating Memory Locations
Memory Locations can be created in different
ways, based on the type of Memory Location.
When creating Memory Locations, the next
available number is assigned to it (1–999). This
number is used in recalling the Memory Loca-
tion from the numeric keypad.
To create a Marker Memory Location:
1 Configure any session settings you will save
with the Marker Memory Location, such as
zoom settings, pre- and post-roll times,
Show/Hide status for tracks, Track Heights, and
Edit and Mix Group enables.
2 Make sure to select Options > Link Timeline
and Edit Selection.
3 If the Markers ruler is not displayed, select
View > Rulers > Markers.
4 Do one of the following:
• Click with the Selector tool in any track or
ruler at the location where you want to
place the Marker. To place a Marker at the
beginning of a region, select the region
with the Time Grabber tool. Click the Add
Marker/Memory Location button (or press
Enter on the numeric keypad).
– or –
• While pressing the Start key (Windows) or
Control (Mac), move the cursor into the
Markers ruler (where the cursor changes to
the Grabber with a “+”) and click at the lo-
cation where you want to place the Marker.
5 In the New Memory Location dialog, select
the Marker option and specify the Reference as
either Bar|Beat or Absolute.
6 Enter a name for the new Marker and select
any General Properties you want to save with
the Marker.
See “Creating Memory Locations” on
page 639 and “Editing Memory Locations”
on page 642 for more information.
Marker/Memory Location button
Manually inserting a Marker

Pro Tools Reference Guide640
7 Click OK. The Marker is created and appears in
the Markers ruler, and in the Memory Locations
window.
To create a Selection Memory Location:
1 Configure any session settings you will save
with the Selection Memory Location, such as
zoom settings, pre- and post-roll times,
Show/Hide status for tracks, Track Heights, and
Edit and Mix Group enables.
2 Select a range of material in one or more
tracks.
3 Do one of the following:
• Press Enter on the numeric keypad.
– or –
• From the pop-up menu in the Memory Lo-
cations window (click the Name button),
choose Add Memory Location.
4 In the New Memory Location dialog, select
the Selection option and specify the Reference
as either Bar|Beat or Absolute.
5 Enter a name for the new Memory Location
and select any General Properties you want to
save with it.
6 Click OK. The Selection Memory Location is
created and appears in the Memory Locations
window.
To create a General Properties Memory Location:
1 Configure any session settings you will save
with the Selection Memory Location, such as
zoom settings, pre- and post-roll times,
Show/Hide status for tracks, Track Heights, and
Edit and Mix Group enables.
2 Press Enter on the numeric keypad.
3 In the Memory Location dialog, select the
None option.
4 Enter a name for the new Memory Location
and select any General Properties you want to
save with it.
5 Click OK. The General Properties Memory Lo-
cation is created and appears in the Memory Lo-
cations window.
Creating Memory Locations On-the-Fly
When the Auto-Name Memory Locations When
Playing option is enabled in the Editing Prefer-
ences page, Memory Locations can be created
during playback, without raising the New Mem-
ory Location dialog. This option can also be se-
lected from the pop-up menu in the Memory
Locations window.
This capability is useful if you want to mark cer-
tain locations while listening during a record
pass, or if you want to mark frame locations
while viewing a video scene.
To create a Marker during playback:
1 From the pop-up menu in the Memory Loca-
tions window, select Default To Marker. This en-
sures that new Memory Locations default to
being Markers.
2 From the pop-up menu in the Memory Loca-
tions window, select Auto-Name Memory Loca-
tions.
3 For inserted Markers to have a Bar|Beat refer-
ence, make sure to set the Main Time Scale to
Bars:Beats.
4 Click Play in the Transport window.
In the New Memory Location dialog, you
can Alt-click (Windows) or Option-click
(Mac) any General Property to enable or dis-
able all properties. You can also Control-
click (Windows) or Command-click (Mac)
any property to toggle its state and the state
of all other General Properties.

Chapter 31: Memory Locations 641
5 When the location is reached, press Enter on
the numeric keypad. A Marker is automatically
created and appears in the Markers ruler.
Auto-created Markers are named with increasing
numbers, as in “Marker 1,” “Marker 2,” and
“Marker 3.”
When the option for Default To Marker is dese-
lected, new Memory Locations default to what-
ever type was last created. Therefore, if a Selec-
tion Memory Location was created last, it will be
the type that is created on-the-fly. In this case,
the name for the created Memory Location is
based on the start of the Edit selection using the
time format for the Main Time Scale (such as
“2|2|305” or “0:02.658”).
Recalling Memory Locations
Memory Locations can be recalled from the
Memory Locations window and from the nu-
meric keypad. Additionally, Memory Location
Markers can be recalled by clicking them in the
Markers ruler.
To recall a Memory Location:
1 If the Memory Locations window is not al-
ready open, choose Window > Memory Loca-
tions to display it.
2 If recalling a Selection Memory Location that
will define a record or play range, make sure to
select Options > Link Timeline and Edit Selec-
tion.
3 Do one of the following:
• In the Memory Locations window, click the
Memory Location to recall it.
• With the Numeric Keypad mode set to
Classic, press the Memory Location num-
ber followed by Period (.).
• With the Numeric Keypad mode set to
Transport or Shuttle, press Period (.), the
Memory Location number, and Period (.)
again.
To recall a Marker from the Markers ruler:
1 If the Markers ruler is not displayed, select
View > Rulers > Markers.
2 Click the Marker. The playback cursor locates
to the Marker and any General Properties stored
with the Marker are recalled.
When Use Separate Play and Stop Keys op-
tion is enabled in the Operation Preferences
page, it overrides using the Enter key to add
Memory Location markers. When this op-
tion is enabled, press Period (.) and then En-
ter on the numeric keypad to add a Memory
Location marker. The new marker is created
when you press Enter.
When recalling a Memory Location from
the numeric keypad, the Memory Locations
window does not need to be open.
Even if the Markers ruler is not displayed,
Markers can be recalled from the Memory Lo-
cations window, or from the numeric keypad.
Pro Tools Reference Guide642
Editing Memory Locations
Memory Locations can be renamed, edited, de-
leted, and copied and pasted.
To rename a Memory Location:
1 Do one of the following:
• In the Memory Locations window, double-
click the Memory Location to open the Edit
Memory Location dialog.
• In the Marker ruler, double-click the
Marker to open the Edit Memory Location
dialog and relocate the insertion point at
the marker location.
• In the Marker ruler, Start-click (Windows)
or Control-click (Mac) the Marker to open
the Edit Memory Location dialog without
locating the insertion point at the marker
location.
2 Enter the new name for the Memory Location,
and click OK.
To redefine the General Properties stored with a
Memory Location:
1 Make changes to the session’s zoom settings,
pre- and post-roll times, Show/Hide status of
tracks, Track Heights, or Group Enables.
2 Do one of the following:
• In the Memory Locations window, double-
click the Memory Location to open the Edit
Memory Location dialog.
• In the Marker ruler, double-click the
Marker to open the Edit Memory Location
dialog and relocate the insertion point at
the marker location.
• In the Marker ruler, Start-click (Windows)
or Control-click (Mac) the Marker to open
the Edit Memory Location dialog without
locating the insertion point at the marker
location.
3 In the Memory Location dialog, select the
General Properties you want to save with the
Memory Location.
4 Enter a new name for the Memory Location, if
desired, and click OK.
To change a Memory Location from one type to
another:
1 Do one of the following:
• In the Memory Locations window, double-
click the Memory Location to open the Edit
Memory Location dialog.
• In the Marker ruler, double-click the
Marker to open the Edit Memory Location
dialog and relocate the insertion point at
the marker location.
• In the Marker ruler, Start-click (Windows)
or Control-click (Mac) the Marker to open
the Edit Memory Location dialog without
locating the insertion point at the marker
location.
2 In the Memory Location dialog, select either
Marker, Selection, or None as the Memory Loca-
tion type.
3 Enter a new name for the Memory Location, if
desired, and click OK.
To change the Selection stored with a Memory
Location:
1 If the Memory Locations window is not al-
ready open, choose Window > Memory Loca-
tions to display it.
2 Select a range of material in one or more
tracks.
3 In the Memory Locations window, Right-click
(Windows) or Control-click (Mac) the Memory
Location that you want to redefine.
4 Enter a new name for the Memory Location, if
desired, and click OK.
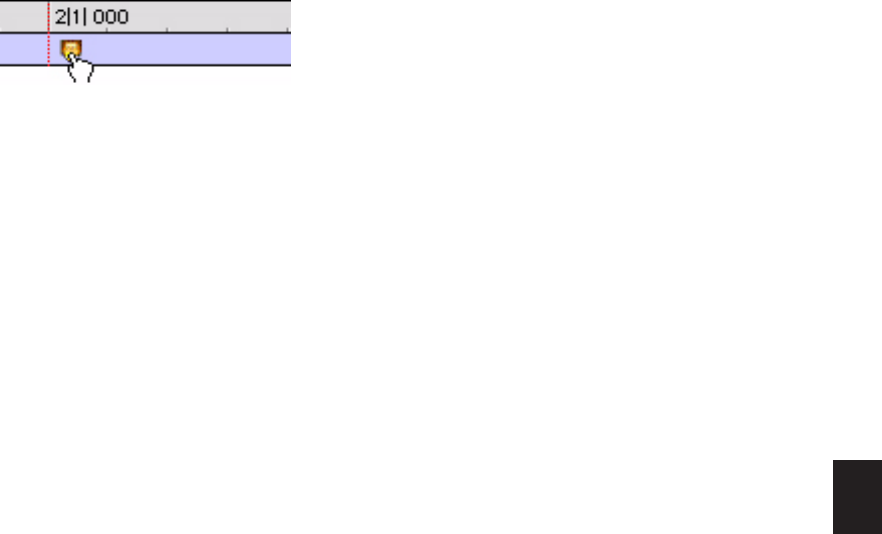
Chapter 31: Memory Locations 643
To move a Marker by dragging:
In the Markers ruler, click and drag the Marker
left or right.
If the Edit mode is set to Grid, the dragged event
snaps to the current Grid value. If using Spot
mode, the Spot dialog opens.
To align a Marker to a different location:
1 Make sure to select Options > Link Timeline
and Edit Selection.
2 Do one of the following:
• In any of the Timebase rulers, click with
the Selector tool at the new location.
– or –
• Click in the playlist for any track. To align
the Marker to the start of a region, select
the region with the Time Grabber tool.
3 In the Memory Locations window or the
Markers ruler, Start-click (Windows) or Control-
click (Mac) the Marker Memory Location that
you want to redefine.
4 Enter a new name for the Marker, if desired,
and click OK.
Deleting Memory Locations
To delete a Memory Location, do one of the
following:
In the Memory Locations window, select the
Memory Location and choose Delete Memory
Location from the pop-up menu.
– or –
In the Memory Locations window, Alt-click
(Windows) or Option-click (Mac) the Memory
Location.
To delete all Memory Locations, do one of the
following:
In the Memory Locations Window, choose
Delete All from the pop-up menu.
– or –
Alt-Shift-click (Windows) or Option-Shift-
click (Mac) any Memory Location in the Mem-
ory Locations window.
To delete a Marker from the Markers ruler:
While pressing Alt (Windows) or Option
(Mac), move the cursor over the Marker (where
the cursor changes to the Grabber with a “–”)
and click to remove it.
Dragging a Marker
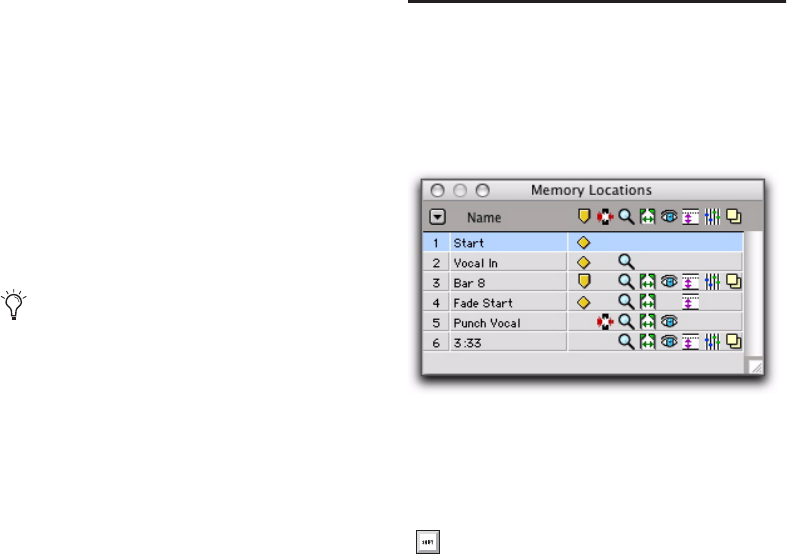
Pro Tools Reference Guide644
Copying Marker Memory Locations
To copy and paste a range of Markers:
1 If you want to constrain the selection to the
current Grid value, set the Edit mode to Grid.
2 Drag in the Tempo ruler to select the range of
measures that includes the Markers.
If the beginning of the selection includes a
Marker, press Control (Windows) or Command
(Mac) so the Selector tool appears.
3 Choose Edit > Copy.
4 Click in the Markers ruler at the point where
you want to paste the tempo events.
5 Choose Edit > Paste. The contents of the Clip-
board are pasted from the insertion point, re-
placing any existing Markers.
To extend an Edit selection in a track to the
Markers ruler:
1 Using the Selector or Time Grabber tool, select
a track range.
2 Shift-click in the Markers ruler.
Shift-click again in the Tempo ruler to remove it
from the selection.
To select all Markers in the Markers ruler:
Double-click with the Selector tool in the
Tempo ruler.
Memory Locations Window
In the Memory Locations windows, Memory Lo-
cations are listed with assigned number, name,
and View Filter icons. Locations can be recalled
or edited from this window.
To recall a Memory Location from the Memory
Location window:
Click the Memory Location.
Press Alt (Windows) or Option (Mac) while
dragging to select across all Conductor
tracks.
Memory Locations window with View Filter icons
With the Numeric Keypad mode set to
Classic, press the Memory Location number
followed by Period (.). With the Numeric
Keypad mode set to Transport or Shuttle,
press Period (.), the Memory Location num-
ber, and Period (.) again.
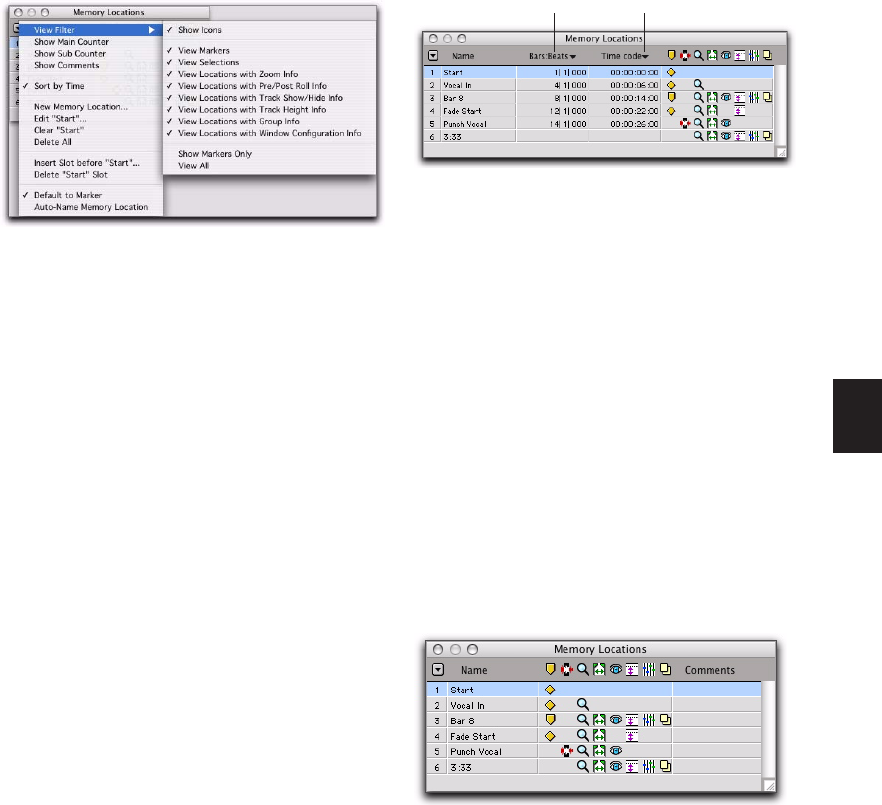
Chapter 31: Memory Locations 645
Memory Locations Commands and
Options
You can select viewing and sorting options,
along with commands for creating and remov-
ing Memory Locations, from the pop-up menu
in the Memory Locations window.
View Filter Submenu Provides commands to
show or hide specific memory location proper-
ties:
• Show Icons
• View Markers
• View Selections
• View Locations with Zoom Info
• View Locations with Pre/Post Roll Info
• View Locations with Track Show/Hide Info
• View Locations with Track Height Info
• View Locations with Group Info
• View Locations with Window Configura-
tion Info
• Show Markers Only
• All
Show Main Counter When selected, a column
appears in the Memory Locations window that
displays the locations based on the Main Time-
scale for Markers, and the start times for Selec-
tion Memory Locations. General Property Mem-
ory Locations display nothing in this column.
You can click at the top of the Main Time Scale
column for a pop-up menu that lets you change
the Main Time Scale.
Show Sub Counter When selected, a column ap-
pears in the Memory Locations window that dis-
plays the locations based on the Sub Timescale
for Markers, and the start times for Selection
Memory Locations. General Property Memory
Locations display nothing in this column.
You can click at the top of the Sub Timescale
column for a pop-up menu that lets you change
the Sub Timescale.
Show Comments When selected, a column ap-
pears in the Memory Locations window that dis-
plays the comments for each of the Markers.
Memory Locations window pop-up menu
Main/Sub Counters in the Memory Locations window
Comments in the Memory Locations window
Sub Time ScaleMain Time Scale

Pro Tools Reference Guide646
Sort by Time When selected, Markers are sorted
by their order in the Timeline, followed by Se-
lection and General Properties Memory Loca-
tions, which are listed in the order in which
they were created.
When Sort by Time is deselected, all Memory
Locations are listed in the order of their assigned
numbers.
New Memory Location Choose this command to
create a new Memory Location.
Edit <Name> Opens the Edit Memory Location
dialog for the selected Memory Location. You
can also double-click a Memory Location in the
Memory Locations window to edit it.
Clear <Name> Clears the selected Memory Loca-
tion, but does not remove its slot. Subsequent
Memory Locations are not renumbered.
Delete All Deletes all Memory Locations. The
next Memory Location you add starts at slot
number 1.
Insert Slot Before <Name> Adds a new, empty
Memory Location slot above the selected Mem-
ory Location, and renumbers all subsequent
Memory Locations.
Delete <Name> Slot Deletes the selected Mem-
ory Location, and renumbers all subsequent
Memory Locations.
Default To Marker When selected, new Memory
Locations default to Markers, though in the New
Memory Location dialog you can still define the
new Memory Location as one of the other types.
Auto-Name Memory Location When selected,
Memory Locations are created automatically
without encountering the New Memory Loca-
tion dialog. If the Default To Marker option is
selected, a Marker Memory Location is auto-cre-
ated. Otherwise, the Memory Location type is
determined by whatever type (Marker, Selec-
tion, or None) was created last.
View Filter Icons
When Show Icons is selected in the Memory Lo-
cations pop-up menu, the Memory Locations
window provides an icon-based “View Filter”
that lets you show or hide Memory Locations
based on the properties they contain. To show
or hide Memory Locations containing a specific
property, click the appropriate icon.
If an icon is disabled (grayed out), all Memory
Locations associated with that property are hid-
den. However, if a Memory Location contains
other properties for an icon that is enabled, it is
still displayed. When a view icon is enabled, it
appears in color. When it is disabled, it appears
gray.
In addition, the View Filter provides a handy
reference for which properties are stored in each
Memory Location (indicated by a row of icons
for each Memory Location).
Alt-click (Windows) or Option-click (Mac)
a Memory Location in the Memory Loca-
tions window to clear it.
Memory Locations View Filter icons
Marker
Selection
Memory Location
Zoom
Pre- and Post-Roll
Show/Hide
Track Heights
Settings
Active Groups
Window Configuration
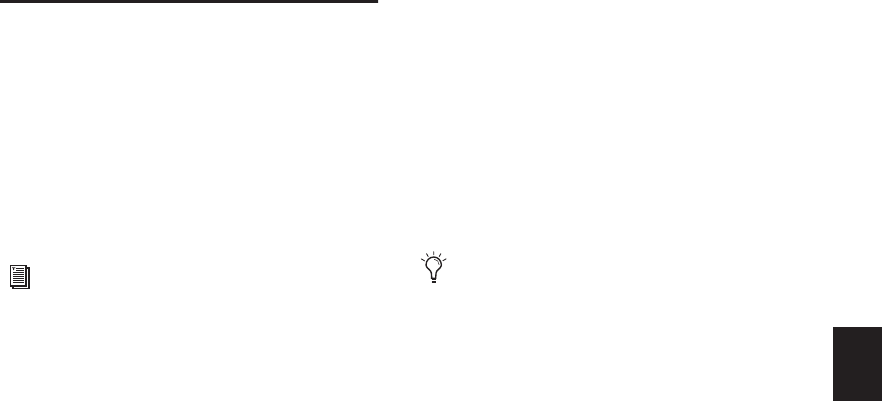
Chapter 32: Arranging Regions 647
Chapter 32: Arranging Regions
Placing Regions in Tracks
Once you have created a region, it appears in the
Region List. From the Region List you can drag it
to a track to add to an existing arrangement of
regions, or you can create a new track and start
adding regions from scratch. The exact place-
ment of regions in a track depends on whether
the Edit mode is set to Shuffle, Slip, Spot, or Grid
(see “Edit Modes” on page 421).
To place a region in a track:
1 In the Region List, select the region or regions
you want to place.
2 Drag the selected regions from the Region List
to a location in a track.
If dragging multiple regions, the regions are
placed on adjacent tracks left to right or on mul-
tiple tracks from top to bottom depending on
the selected Region List Timeline Drop Order
(see “Timeline Drop Order” on page 647). If
dragging a stereo region, it must be placed in a
stereo track or in two mono tracks.
Regions are placed according to the current Edit
mode:
• In Shuffle mode, existing track regions are slid
as necessary to make room for the new region.
• In Spot mode, you are prompted by the Spot
dialog to enter a location for the dragged re-
gion (see “Spotting Regions” on page 654).
• In Grid mode, the dragged region snaps to the
nearest Grid boundary.
• In Slip mode, the regions are placed exactly
where they are dropped in the destination
track.
Timeline Drop Order
The Timeline Drop Order option in the Region
List pop-up menu sets whether tracks dragged
from the Region List are dropped sequentially in
a single track or spread across multiple tracks, as
follows:
Top to Bottom When enabled, regions spread
across multiple destination (drop) tracks or on
new tracks (when dragging to the area below the
last track or to the Track List).
For information on locating regions in the
Region List by typing the first few letters of
their name, see “Keyboard Selection of Re-
gions” on page 194.
You can temporarily disable Grid mode
while dragging a region by holding down the
Control key (Windows) or Command key
(Mac) after clicking with the mouse.

Pro Tools Reference Guide648
Left to Right When enabled, regions are placed
sequentially in a single destination (drop) track
or on a new track (when dragging to the area be-
low the last track or on to the Track List).
To set the Region List Drop Order:
Choose Region List > Timeline Drop Order,
and then Top to Bottom or Left to Right.
To drag and drop multiple items from the Region
List to multiple new tracks:
1 From the Region List pop-up menu, choose
Timeline Drop Order > Top to Bottom.
2 Search and sort the Region List if desired to
configure the order in which items will be
placed.
3 Select multiple items in the Region List and do
one of the following:
• To create new tracks and place items to a
specific location, drop items at the desired
location along the area below the last track.
– or –
• To create new tracks and have items placed
at the start of the session, drop the items on
the Track List.
To place multiple items across multiple existing
tracks:
1 From the Region List pop-up menu, choose
Timeline Drop Order > Top to Bottom.
2 Select multiple items in the Region List and
drop them in the playlist of a compatible track
at the desired location. When the cursor is over
a compatible destination, the region outlines
appear at the location.
To drag and drop multiple items from the Region
List to a single track:
1 From the Region List pop-up menu, choose
Timeline Drop Order > Left to Right.
2 Search and sort the Region List if desired to
configure the order in which items will be
placed.
3 Select multiple items in the Region List and do
one of the following:
• To create a new track and spot the first item
to a specific location, drop at the desired lo-
cation in the area below the last track
shown in the Edit window.
• To create a new track and have the first
item placed at the start of the session, drop
the items on the Track List.
• To place items in an existing track, drop the
items in the Edit playlist for the desired
track.
New tracks after dropping multiple Region List items,
with Timeline Drop Order set to Top to Bottom mode
A new track created by dropping multiple Region List
items with Timeline Drop Order set to Left to Right
mode

Chapter 32: Arranging Regions 649
If the selected items include mixed types of re-
gions (such as audio and MIDI, or region groups
and MIDI) the appropriate track types will be
created and each corresponding item will be
placed in them. Similarly, if the selected items
include multiple formats (mono, stereo, or
other) new tracks of each format will be created
and those regions placed in them.
Placing Regions at the Edit
Insertion Point
You can drag a region from the same track, from
another track, or from the Region List, and align
its start, end, or sync point to the Edit insertion
point. This technique is useful in post produc-
tion since it lets you set an Edit selection point
during playback or while stopped and then
quickly place sound effects at the edit insertion
point.
To place the start of a region at the Edit insertion
point:
1 With the Selector tool, click in the track at the
time location where you want to place the start
of the region.
2 Do one of the following:
• While pressing the Start key (Windows) or
Control (Mac), drag the region from the Re-
gion List, or from another track, to the des-
tination track.
– or –
• If the region is already in the track, Start-
click (Windows) or Control-click (Mac) the
region with the Time Grabber tool.
To place the end of a region at the Edit insertion
point:
1 With the Selector tool, click in the track at the
time location where you want to place the end
of the region.
2 Do one of the following:
• While pressing Control+Start (Windows)
or Command+Control (Mac), drag the re-
gion from the Region List, or from another
track, to the destination track.
– or –
• If the region is already in the track, Con-
trol-Start-click (Windows) or Command-
Control-click (Mac) the region with the
Time Grabber tool.
To place the sync point of a region at the Edit
insertion point:
1 With the Selector tool, click in the track at the
time location where you want to place the sync
point of the region.
2 Do one of the following:
• While pressing Start+Shift (Windows) or
Control+Shift (Mac), drag the region from
the Region List, or from another track, to
the destination track.
– or –
• If the region is already in the track, Shift-
Start-click (Windows) or Shift-Control-
click (Mac) the region with the Time Grab-
ber tool.
With Pro Tools HD, when the Scrolling op-
tion is set to Center Playhead, regions snap
to the playhead, instead of the Edit inser-
tion point.

Pro Tools Reference Guide650
Aligning Region Start Points
The start, end, and sync point of one region can
be aligned to the start of a different region on
another track.
To align the start points of regions on different
tracks:
1 With the Time Grabber tool, select the region
you want to align to by clicking it.
2 If the Scrolling option is set to Center Play-
head (Pro Tools HD only), move the playhead to
the start of the selected region. For details, see
“Moving the Playhead” on page 313.
3 Do one of the following:
• Start-drag (Windows) or Control-drag
(Mac) a region from the Region List to an-
other track.
– or –
• If the region is already in the track, Start-
click (Windows) or Control-click (Mac) the
region you want to move with the Time
Grabber tool.
The start point of the second region is aligned to
the start of the first region.
To align the end point of a region to the start of
another region (on a different track):
1 With the Time Grabber tool, select the region
you want to align to by clicking it.
2 If the Scrolling option is set to Center Play-
head (Pro Tools HD only), move the playhead to
the start of the selected region (see “Moving the
Playhead” on page 313).
3 Do one of the following:
• Control-Start-drag (Windows) or Com-
mand-Control-drag (Mac) a region from
the Region List to another track.
– or –
• If the region is already in the track, Con-
trol-Start-click (Windows) or Command-
Control-click (Mac) the region you want to
move with the Time Grabber tool.
The end point of the second region is aligned to
the start of the first region.
To align the sync point of a region to the start of
another region (on a different track):
1 With the Time Grabber tool, select the region
you want to align.
2 If the Scrolling option is set to Center Play-
head (Pro Tools HD only), move the playhead to
the start of the selected region (see “Moving the
Playhead” on page 313).
3 Do one of the following:
• Start-Shift-drag (Windows) or Control-
Shift-drag (Mac) a region from the Region
List to another track.
– or –
• If the region is already in the track, Start-
Shift-click (Windows) or Control-Shift-
click (Mac) the region you want to move
with the Time Grabber tool.
The sync point of the second region is aligned to
the start of the first region.
With Pro Tools HD, when the Scrolling op-
tion is set to Center Playhead, region start,
end, and sync points align to the playhead.

Chapter 32: Arranging Regions 651
Sliding Regions
A region or group of selected regions (on the
same track or on multiple tracks) can be slid
with the Time Grabber tool to new locations or
to other tracks. This feature is useful in post pro-
duction applications where the timing of audio
events such as sound effects and dialog need to
be spotted to music, film, or video.
Sliding regions is affected by whether the cur-
rent Edit mode is set to Shuffle, Slip, Spot, or
Grid (see “Edit Modes” on page 421).
Shuffling Regions
In Shuffle mode, you can move regions freely
within a track or onto another track, but their
movement is constrained by other regions. That
is, if you place several regions in a track, their
start and end points automatically snap to each
other. You can then “shuffle” their order, but
you cannot separate them from each other and
you cannot make them overlap as in Slip mode.
In Shuffle mode, adding another region to the
beginning of a track moves all subsequent re-
gions to the right by the length of the region
added.
To shuffle regions:
1 Set the Edit mode to Shuffle by clicking its
button in the upper left of the Edit window.
2 Drag a mono region from the Region List to an
empty track. The region snaps to the beginning
of the track.
3 Drag a second region from the Region List to
the same track, somewhere in the middle. The
start point for the second region snaps to the
end of the first region.
4 With the Time Grabber tool, drag the second
region to the beginning of the track.
Pro Tools “shuffles” the position of the two re-
gions. The second region now occurs first, yet
the two still cling together.
5 Experiment more with Shuffle mode by drag-
ging additional regions to the track and rear-
ranging them.
Locked regions (see “Locking Regions” on
page 664), and all regions occurring after the
locked region, are not displaced when other
neighboring regions are moved in Shuffle mode.
If there is not enough room to place or duplicate
a region in front of a locked region, the insertion
area is disabled.
If you place a region while in Slip mode and
switch to Shuffle mode, Pro Tools preserves the
relative timing and position of the slipped re-
gion, and any space between it and other re-
gions.
You can slide a copy of a region to another
location or track by pressing Alt (Windows)
or Option (Mac) while dragging.
To retain a region’s time location when
dragging to another track, press the Start key
(Windows) or Control (Mac) while drag-
ging.
With certain workflows, it is important to
exclude Shuffle mode in order to ensure that
regions stay time-aligned while editing.
Shuffle Lock prevents you from inadvert-
ently entering Shuffle mode by disabling all
key commands and control surface switches
for Shuffle mode. For more information, see
“Shuffle Lock” on page 421.
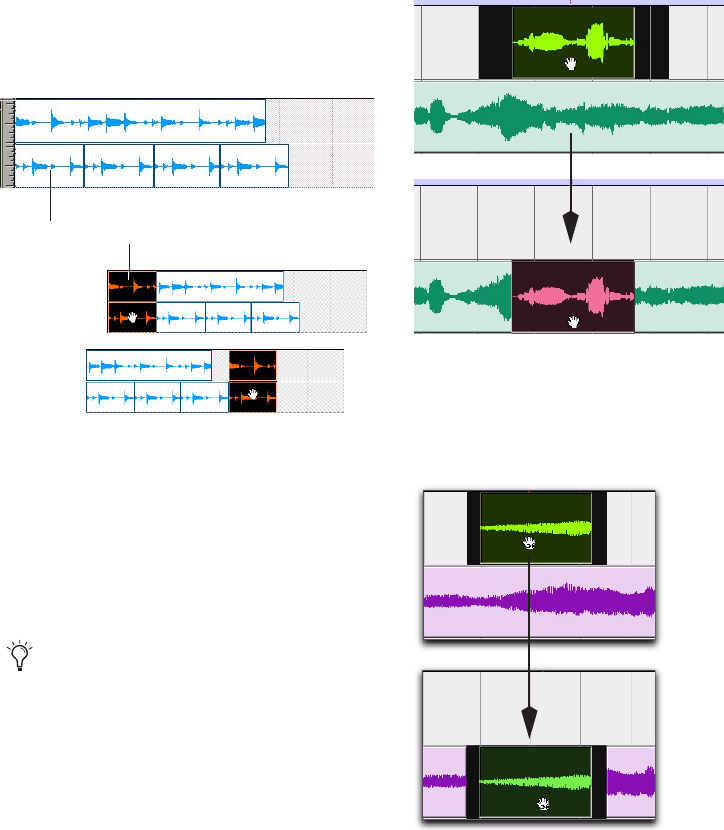
Pro Tools Reference Guide652
Shuffling Multiple Tracks and
Multichannel Regions
Selections across multiple tracks or on multi-
channel tracks can be shuffled. Unlike shuffling
regions on a single track, any partially selected
regions are cut and moved along with the
dragged region. This lets you retain only the ma-
terial that corresponds to the dragged region.
Moving Regions with the Grabber
Tools
Use the Grabber tools to move one or more re-
gions, or the Edit selection, to another location.
The Grabber tools cut the selection and paste it
to the new location.
To move one or more regions, or the Edit selection,
with one of the Grabber tools:
1 Make a selection.
2 With of the Grabber tools (Time, Separation,
or Object), click and drag the selection to the
new location.
Time Grabber and Object Grabber
If you are moving audio data, the Time Grabber
and Object Grabber tools overlay only the audio
data on the destination track.
Separation Grabber
The Separation Grabber replaces the entire se-
lected range on the destination track Timeline.
Shuffling multichannel regions
Hold down Alt (Windows) or Option (Mac)
when clicking and dragging the selection
with a Grabber tool to copy the selection
rather than cut it.
Shuffling this region cuts this channel
Moving a selection with the Time Grabber
Moving a selection with the Separation Grabber
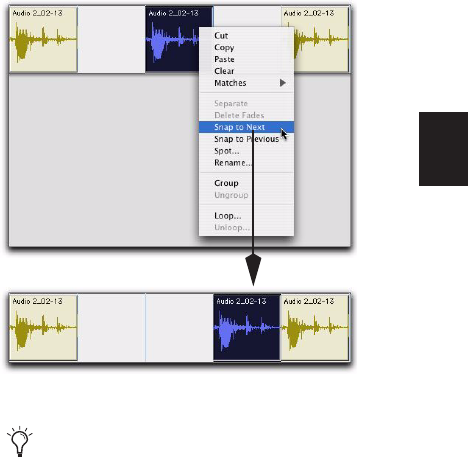
Chapter 32: Arranging Regions 653
Snapping to the Preceding or Next
Region on a Track
A region—or an Edit selection including one or
more regions on the same track or on multiple
tracks—can snap to the end of the preceding re-
gion or to the beginning of the following region
using the Snap to Next or Snap to Previous com-
mands. This is useful for “butt splicing” adja-
cent regions on a track.
To snap to the preceding region on a track:
1 Do one of the following:
• With the Time Grabber, select a region.
– or –
• With the Selector, select an area in a track
that contains whole regions. The regions
do not need to be adjacent.
2 Do one of the following:
• Choose Edit > Snap To > Previous.
– or –
• Right-click the region or Edit selection and
choose Snap to Previous in the pop-up
menu.
The selected region snaps to the preceding re-
gion on the track so that the two regions are
“butt-spliced.”
To snap to the next region on a track:
1 Do one of the following:
• With the Time Grabber, select a region.
– or –
• With the Selector, select an area in a track
that contains whole regions. The regions
do not need to be adjacent.
2 Do one of the following:
• Choose Edit > Snap To > Next.
– or –
• Right-click the region or Edit selection and
choose Snap to Next in the pop-up menu.
The selected region snaps to the following re-
gion on the track so that the two regions are
“butt-spliced.”
Snapping a region to the next region in a track
You can also use the Snap To commands
with an Edit selection that includes multi-
ple regions on one or more tracks.

Pro Tools Reference Guide654
Slipping Regions
In Slip mode, regions can be moved with the
Time Grabber tool freely within a track, or onto
other tracks. In this mode, it is possible to place
a region so that there is space between it and
other regions in a track. When the track is
played back, this space is silent. It is also possi-
ble to move a region so that it overlaps or com-
pletely covers another region.
To slip regions:
1 Enable Slip mode (see “Edit Modes” on
page 421).
2 Drag a region from the Region List to an
empty track.
3 Drag a second region from the Region List to
the same track, somewhere in the middle. The
second region is placed wherever you release it.
It doesn’t snap to the first region as in Shuffle
mode.
4 Drag the regions to different locations within
the track to get a feel for moving them in Slip
mode. Try placing the second region so that it
slightly overlaps the first region. Play back the
results.
Spotting Regions
Spot mode is useful for sessions in which you
want to spot regions to precise locations based
on any of the Time Scales. This is useful when
performing post production tasks. In Spot mode
you can spot a region by specifying a SMPTE
frame (Pro Tools HD and Pro Tools LE with DV
Toolkit 2 only) or bar and beat location, by cap-
turing an incoming time code address, or by us-
ing the region’s time stamps.
To spot a region:
1 Set the Edit mode to Spot by clicking its but-
ton in the upper left of the Edit window.
2 Do one of the following:
• Drag a region from the Region List, or drag
audio files or sessions from a DigiBase
browser, to an existing track.
– or –
• Click a region already in a track with the
Time Grabber tool.
3 In the Spot dialog, select a time format from
the Time Scale pop-up menu.
Each of the fields in the Spot dialog are dis-
played in the chosen Time Scale.
For even quicker spotting, if you are using
VITC, use the Auto-Spot Regions command
to spot a region to the current SMPTE frame
location with the Time Grabber tool. For
more information, see “Auto-Spotting Re-
gions” on page 903.
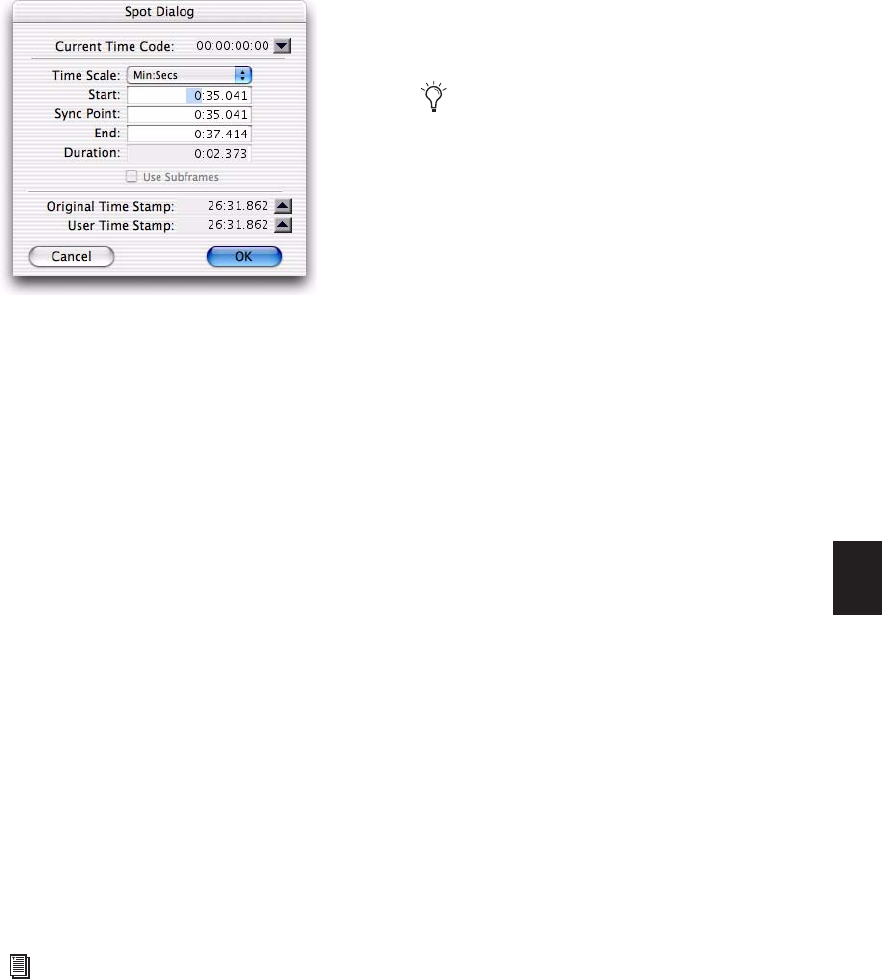
Chapter 32: Arranging Regions 655
4 With Pro Tools HD or Pro Tools LE with DV
Toolkit 2, if the Time Scale is set to Time Code,
select the Use Subframes option to display sub-
frames in the fields for improved accuracy.
5 Do one of the following:
• Click in the field for Start, Sync Point, or
End and type in a new location. Changing
one of these locate points automatically
updates the other locate points.
• Click one of the up arrows next to Original
Time Stamp or User Time Stamp to enter
the associated values into the currently se-
lected field.
• If you are using an external SMPTE time
code source, click the down arrow next to
the Current Time Code display—or press
Equal (=) on the numeric keypad—to cap-
ture an incoming time code address.
6 Click OK. The region is moved to the new lo-
cation specified for its start, end, or sync point.
If a region does not have a sync point defined,
the Sync Point field in the Spot dialog functions
the same as the Start field.
Right-Click Commands for Spotting Regions
You can use Right-click commands with a key
combination to spot regions in a track.
To spot a region to a selection:
1 Click or drag with the Selector tool to locate
the cursor or make a selection in the track where
you want to spot the region.
2 Control-Right-click (Windows) or Command-
Right-click (Mac) the region and choose any of
the following from the pop-up menu:
• Move Region Start to Selection Start
• Move Region Sync to Selection Start
• Move Region End to Selection Start
Region Time Stamps
When a region is created, it is time stamped rel-
ative to the SMPTE start time specified for the
session. This Original Time Stamp is perma-
nently stored with the region and cannot be
changed. If a region is ever moved, it can easily
be placed at its original position from the Spot
dialog.
When the Original Time Stamp for a region is
initially set, this same location is also used to de-
fine the region’s User Time Stamp.
Unlike the Original Time Stamp, the User Time
Stamp can be redefined with the Time Stamp
command in the Region List pop-up menu (see
“Time Stamping” on page 903).
Time Stamps in DigiBase
Columns are provided in DigiBase browsers for
both the Original and User Time Stamps.
Spot dialog
For more information on using SMPTE with
Pro Tools, see Chapter 42, “Working with
Synchronization.”
In lower versions of Pro Tools, Right-click-
ing in a region with the Grabber tool would
spot the region to a selection.
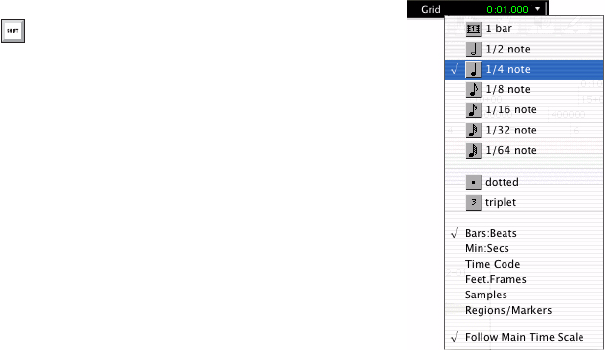
Pro Tools Reference Guide656
Time Stamps and Matches
Regions with identical User Time Stamps appear
together in the Matches submenu in the Right-
click pop-up menu when auditioning takes (see
“Selecting an Alternate Take on a Track” on
page 352).
Sliding Regions in Grid Mode
Grid mode provides several useful capabilities
for sliding and moving regions in track playlists.
This mode is especially useful for lining up re-
gions at precise intervals, as when working with
a session that is bar- and beat-based. Grid
boundaries, depending on the Main Time Scale,
can be based on frames, bar and beat values,
minutes or seconds, or a number of samples.
Grid mode also provides two operational
modes, Absolute and Relative. These modes con-
trol how the Grid is applied (see “Absolute and
Relative Grid Mode” on page 657).
Setting Up the Grid
When the Draw Grid in Edit Window option is
enabled in the Display Preferences page, vertical
Grid lines appear in the Edit window.
Grid lines in the Edit window can also be en-
abled and disabled by clicking the Timebase
ruler name after it becomes highlighted.
Defining the Grid Value
In addition to affecting the placement of re-
gions, the Grid value also constrains Timeline
and Edit selections, and determines how the Re-
gion > Quantize to Grid command works.
To set the Grid value:
1 Do one of the following:
• From the View > Main Counter menu, se-
lect the Time Scale for the Grid value.
– or –
• To keep the Main Time Scale and use a dif-
ferent time format for the Grid, deselect
Follow Main Timebase in the Grid value
pop-up menu in the Edit window.
2 Do one of the following:
• From the Grid value pop-up menu in the
Edit window, select the time value for de-
fining the Grid boundaries.
– or –
• To define a Grid based on the session’s
Markers, selections, and region boundaries,
select Regions/Markers from the Grid value
pop-up menu.
To temporarily suspend Grid mode and
switch to Slip mode while dragging a region,
hold down the Control key (Windows) or
Command key (Mac).
Grid value pop-up menu showing Bars:Beats

Chapter 32: Arranging Regions 657
Absolute and Relative Grid Mode
Grid mode can be applied in Absolute or Rela-
tive mode.
In Absolute Grid mode, moving any region
snaps the region start to Grid boundaries. If a re-
gion’s start point falls between beats, and the
Grid is set to 1/4 notes, dragging the region will
snap its start time to the nearest 1/4 note (the
current absolute Grid value).
In Relative Grid mode, regions can be moved
by Grid (or Nudge) units. If a region’s start point
falls between beats and the Grid is set to 1/4
notes, dragging the region will be constrained to
1/4 notes, preserving the region’s relative posi-
tion to the nearest beat.
To select Absolute or Relative Grid mode:
Click the Grid mode selector and choose Ab-
solute or Relative.
To place or move a region while in Grid mode:
1 Configure the Grid value (see “Defining the
Grid Value” on page 656).
2 Do one of the following:
• Drag a region from the Region List to an ex-
isting track.
– or –
• With the Time Grabber tool, drag a region
already in a track to a new location.
The region’s start point snaps to the closest Grid
boundary. If the region has a sync point de-
fined, the sync point snaps to the Grid bound-
ary.
Replacing Audio Regions
(Pro Tools HD and Pro Tools LE with
DV Toolkit 2 Only)
Use the Replace Region function to replace mul-
tiple instances of an audio region in a playlist
with another region. This is useful in post pro-
duction if you use a sound effect, room noise, or
atmosphere region many times in a session, and
later decide to replace one or all of the original
regions with a different region.
This is also useful in music production if you
want to replace a certain loop or sample (for ex-
ample, a drum beat) with a new one. You can
use this compositionally, if you know the tempo
of a section or session, to create a scratch piece
with “rough” regions of the correct length, and
later replace them with “final” regions of the
same length.
To temporarily suspend Grid mode and
switch to Slip mode while dragging a region,
hold down the Control key (Windows) or
Command key (Mac).
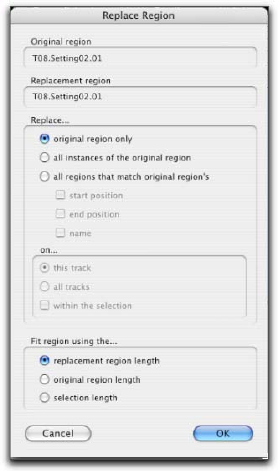
Pro Tools Reference Guide658
Replace Region Dialog
The following options are available in the Re-
place Region dialog:
Replace: Original Region Only Replaces only the
selected region with the replacement region
dragged from the Region List.
Replace: All Instances of the Original Region Re-
places all instances of the selected region that fit
the On criteria with the replacement region
from the Region List.
• On This Track: replaces regions that fit the
Match criteria and are on the same track as
the original region.
• On All Tracks: replaces regions that fit the
Match criteria for all tracks in the session.
• On Within the Selection: replaces regions
that fit the Match criteria within the cur-
rent selection.
Replace: All Regions That Match Original Re-
gion’s Replaces all regions that fit the Match cri-
teria and the On criteria with the replacement
region from the Region List.
• Start Position: replaces all regions that have
the same original start time as the selected
region. This includes regions that may
have been auto-created when trimming
end points.
• End Position: replaces all regions that have
the same original end time as the selected
region. This includes regions that may
have been auto-created when trimming
start points.
• Name: replaces all regions that come from
the same audio file and have been renamed
to the same name
• On This Track: replaces regions that fit the
Match criteria and are on the same track as
the original region.
• On All Tracks: replaces regions that fit the
Match criteria for all tracks in the session.
• On Within the Selection: replaces regions
that fit the Match criteria within the cur-
rent selection.
Region matching uses all specified Match crite-
ria. For example, if you select Start Position and
End Position, all regions from the same original
audio file as your selection with the same origi-
nal start and end times will be replaced.
Fit Region Using The: Original Region Length If
the replacement region is smaller than the orig-
inal region, the region is placed in the playlist
and any remaining audio from the original re-
gion is removed.
If the replacement region is larger than the se-
lection, it is placed in the playlist and trimmed
to fit within the length of the original region.
Replace Region dialog

Chapter 32: Arranging Regions 659
Fit Region Using The: Original Selection
Length When the playlist selection extends be-
yond the original region, the replacement re-
gion (if larger than the original region) is
trimmed to fit within the selection.
Fit Region Using The: Replacement Region
Length The replacement region is placed in its
entirety, regardless of the length of the original
region or selection.
To replace regions by dragging and dropping:
1 Select a region in a track’s playlist that you
want to replace. The selection can extend be-
yond the region’s end point, to include material
from the replacement region that is longer than
the original region.
2 Control-Shift-drag (Windows) or Command-
Shift-drag (Mac) the replacement region from
the Region List to the selected region. The Re-
place Region dialog opens.
3 Configure the Replace Region dialog (see “Re-
place Region Dialog” on page 658).
4 Click OK.
Replacing Regions from the Region List
The Replace Regions command is also available
in the Region List pop-up menu. To use this
command, make sure there is a region selected
in a track and a different (replacement) region
selected in the Region List.
To replace regions using the Region List pop-up
menu:
1 Select a region in a track to be replaced.
2 Do one of the following:
• Right-click the desired replacement region
in the Region List and choose Replace Re-
gions from the pop-up menu.
• Select the desired replacement region in
the Region List and choose Replace Regions
from the Region List pop-up menu. (If the
Region List Selection Follows Edit Selection
preference is enabled, Control-click (Win-
dows) or Command-click (Mac) the se-
lected region to deselect it, then Control-
click (Windows) or Command-click (Mac)
the desired replacement region to select it,
and then choose Replace Regions from the
Region List pop-up menu.)
3 Configure the Replace Region dialog (see “Re-
place Region Dialog” on page 658).
4 Click OK.
Replace Region and Multichannel
Tracks
The Replace Region command supports drag-
ging multichannel regions from the Region List
to multichannel tracks, provided they are the
same channel format. For example, you can re-
place a selected stereo region in a stereo audio
track with another stereo region from the Re-
gion List. However, you cannot replace it with
two mono audio regions. Additionally, you can-
not replace regions in multiple mono tracks
with multichannel regions.
Control-Shift-drag (Windows) or Com-
mand-Shift-drag (Mac) any region from the
Region List to any unselected region on a
track to open the Replace Region dialog
without first making a selection.
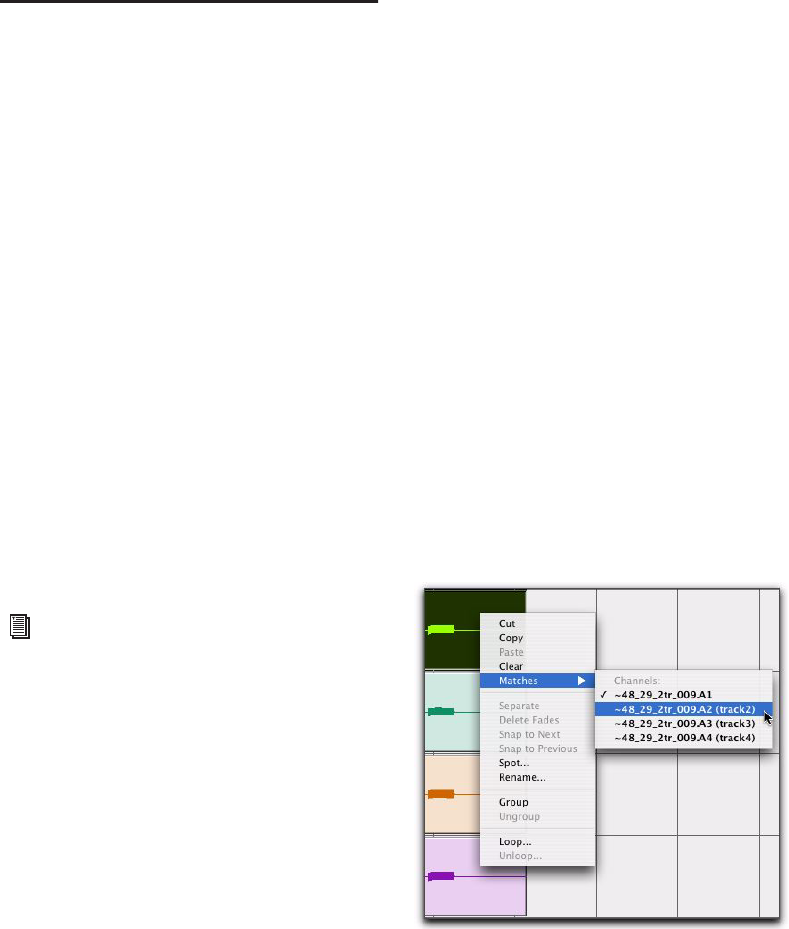
Pro Tools Reference Guide660
Audio Regions from Field
Recorders
Pro Tools provides region replacement tools spe-
cifically for field recording workflows. For audio
imported from a field recorder, you can replace
regions on tracks with alternate channels and
you can expand multiple channels to new
tracks.
Replacing a Region with an
Alternate Channel
(Pro Tools HD and Pro Tools LE with
DV Toolkit 2 Only)
Pro Tools provides region replacement tools spe-
cifically for field recording workflows. You can
replace a mono region (or selected portion of a
mono region) with a matching segment of an al-
ternate channel that was recorded simulta-
neously. Any fades performed on the original re-
gion are automatically recalculated against the
replacement region, and any pre-existing auto-
mation on that track is unchanged.
To replace a region with a matching alternate
channel:
1 In the Timeline, make a selection that in-
cludes or overlaps the region or portion of the
region you want to replace.
2 Do one of the following:
• With any Edit tool, Right-click (Windows
or Mac) or Control-click (Mac) the selec-
tion you want to replace, then select
Matches from the pop-up menu.
– or –
• With the Selector tool, Control-click (Win-
dows) or Command-click (Mac) the selec-
tion you want to replace.
The Matches submenu displays matching alter-
nate channels under the Channels header. (This
submenu also displays any available alternate
takes under the Alternates header.)
3 From the Matches submenu, select the name
of the alternate region that you want to use to
replace the original region.
4 Repeat this procedure for every region you
want to replace on each track.
For detailed information on working with
multichannel recordings made with field re-
corders, see the Field Recorder Workflow
Guide.
Selecting an alternate channel from a channel group to
replace a region

Chapter 32: Arranging Regions 661
Conditions for Alternate Channel
Availability
An alternate channel is available to replace the
original channel (represented by the region or
portion of a region selected on the Timeline) if
all of the following are true:
• Both channels are part of a multichannel
part of a recording made simultaneously
on one or more field recorders.
• Certain metadata matches between the
original channel and the alternate channel.
• The metadata embedded during shooting
and recording has been preserved prior to
import into Pro Tools.
With multichannel recordings from one or
more field recorders, both channels must over-
lap at least once between their start time code
and end time code positions, and must also
meet one of the following conditions:
• Matching Scene and Take
• Matching Shoot Date (applies only if Scene
and Take contain any information for both
channels)
• Matching Tape name
• Matching Sound Roll name
• Alternate channel Sound Roll name
matches current channel Tape name
• Alternate channel Tape name matches cur-
rent channel Sound Roll name
Expanding Alternate Channels to
New Tracks
(Pro Tools HD and Pro Tools LE with
DV Toolkit 2 Only)
When working with a mono region that is part
of a multichannel recording, you can expand
that region (or a selected portion of it) to new
tracks that reflect its matching alternate chan-
nels while preserving any edits or fades.
For example, you can use this feature to easily
create different versions of an edited dialogue
track corresponding to multiple channel inputs
(microphones) that were recorded simulta-
neously.
To expand alternate channels to new tracks:
1 In the Timeline, do one of the following:
• To expand only a portion of the regions on
the track, make a selection that includes or
overlaps any number of regions on a track,
and Right-click (Windows or Mac) or Con-
trol-click (Mac) the selection.
– or –
• To expand all of the regions on the track,
Right-click (Windows or Mac) or Control-
click (Mac) the track name.
Matching alternate channels are mono
channels that were recorded simultaneously
with the original region (such as multi-
channel recordings made by one or more
field recorders). For detailed criteria that al-
ternate matching channels must meet, see
the Field Recorder Workflow Guide.
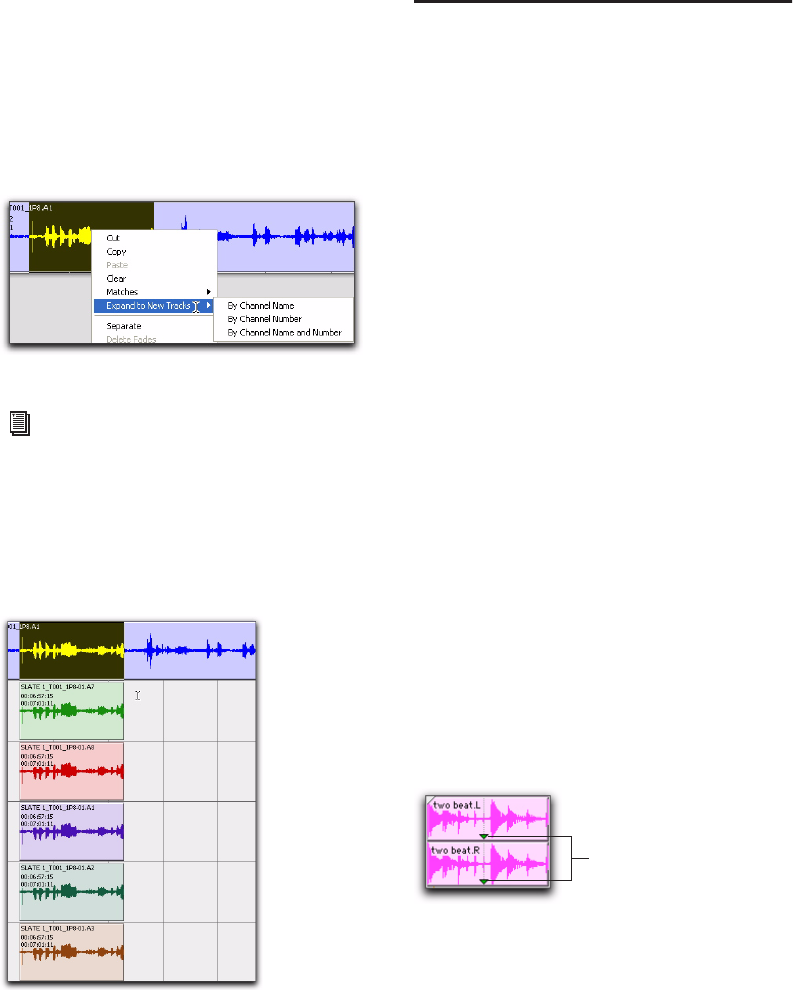
Pro Tools Reference Guide662
2 Choose the Expand to New Tracks pop-up
menu, and select one of the following methods
by which to expand alternate channels for the
selection to new tracks:
• By Channel Name
• By Channel Number
• By Channel Name and Number
If alternate channels are available, Pro Tools ex-
pands them to new tracks (including the chan-
nel represented in the original track) according
to the chosen parameters.
Sync Points
The placement of regions in Grid and Spot
mode can be based on the definition of a region
sync point. Sync points are used when a specific
point within a region must be aligned to the
Grid or to a particular SMPTE or bar/beat loca-
tion. This capability is important in placing mu-
sic and sound effects for film and video work.
For example, suppose you had an audio region
for a door slam that included the creak of the
door closing, the actual slam, and the reverb of
the slam. Using a sync point for the slam lets
you spot the slam to a specific time in the ses-
sion.
To define a region sync point:
1 Enable Slip mode (see “Edit Modes” on
page 421).
2 Do one of the following:
• With the Selector tool, click at the point in
the region where you want the sync point.
– or –
• Press the Down Arrow key while playing
back.
3 Choose Region > Identify Sync Point. A small
down arrow appears at the bottom of the region,
with a vertical, light gray line indicating the lo-
cation of the sync point.
Expanding a selection to new tracks
For detailed information on how each of
these options expand to new tracks, see the
Field Recorder Workflow Guide.
Result of expanding a selection to new tracks
Sync Points
Sync points
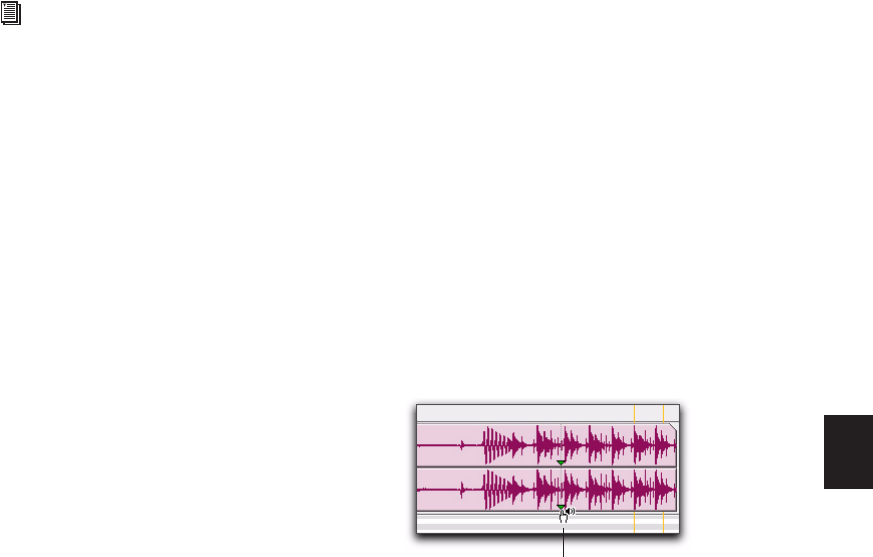
Chapter 32: Arranging Regions 663
To change the location of a sync point:
With the Selector tool, click at a point in a re-
gion and choose Region > Identify Sync Point.
The new location is identified as the sync point
for the region.
Removing Sync Points
To remove a sync point, do one of the following:
Select the entire region and choose Region >
Remove Sync Point.
– or –
Choose the Time Grabber tool, then Alt-click
(Windows) or Option-click (Mac) the sync point
to delete it.
Displaying Sync Points
Sync points in audio regions may displayed or
hidden.
To disable the display of sync points in audio
regions:
Deselect View > Region > Sync Point.
To enable the display of sync points in audio
regions:
Choose View > Region > Sync Point.
Dragging Sync Points
You can click and drag a sync point to another
position in the audio region.
To set the sync point by dragging:
1 If you want the sync point to snap to the cur-
rent Grid value, enable Grid mode (see “Edit
Modes” on page 421).
2 Select the Time Grabber tool.
3 Click and drag the sync point to a new loca-
tion.
Scrubbing Sync Points
While viewing an audio waveform can be a good
way to set a sync point, a waveform display may
not always reveal the desired spot in the audio
material. By scrubbing while moving the sync
point over an audio waveform, you can listen
for the exact location to place the sync point.
To scrub while dragging the sync point:
1 If you want the sync point to snap to the cur-
rent Grid value when you finish scrubbing, set
the Edit mode to Grid (see “Edit Modes” on
page 421).
2 Select the Scrubber tool.
3 Click and drag the sync point to a new loca-
tion. The sync point scrubs the audio as you
move it.
You can also move the location of a sync
point by clicking and dragging it. See
“Dragging Sync Points” on page 663.
Scrubbing a Sync Point
Sync Point Scrub cursor
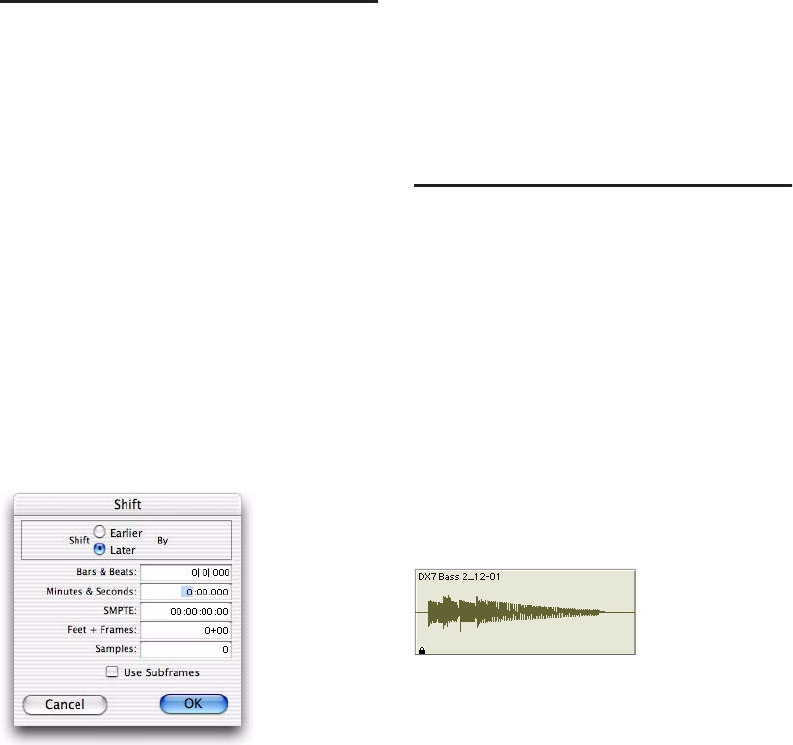
Pro Tools Reference Guide664
Shift Command
Use the Shift command to move track material
forward or back in time by a specified amount.
The Shift command can operate on selections,
regions, MIDI notes, MIDI controller data, and
automation breakpoints.
To shift a selection or region:
1 With the Selector or Time Grabber tool, select
the track material you want to shift. The se-
lected material can reside on multiple tracks.
2 Choose Edit > Shift. In the Shift dialog, select
whether the data will be moved Earlier or Later.
3 Click in one of the Timebase fields to specify
the amount by which the material will be
shifted. Entering a value in one Timebase field
automatically updates the others.
4 If you want to shift material with greater pre-
cision, select the Use Subframes option.
5 Click OK. The material is shifted earlier or
later by the specified amount.
If a portion of a region was selected, new regions
are created from the selection and from any ma-
terial outside of the selection.
The Shift command works the same regardless
of the Edit mode. For example, adjacent regions
are overlapped in Shuffle mode, the Spot dialog
does not appear when in Spot mode, and shifted
material does not snap to the Grid when in Grid
mode.
Locking Regions
If you have a region or group of regions that you
want to permanently associate with a particular
location in a track (a beat, SMPTE frame, or sam-
ple location), you can lock it in place so it can-
not be moved accidentally. Locked regions can-
not be moved or deleted.
To lock (or unlock) a region:
1 With the Time Grabber, select the region or re-
gions to lock (or unlock). The regions can reside
on multiple tracks.
2 Choose Region > Lock (or Region > Unlock).
When locked, a small lock appears in the region
and it cannot be moved or deleted. If you at-
tempt to perform edits that would move a
locked region, Pro Tools alerts you.
In Shuffle mode, locked regions, and all regions
occurring after the locked region, are not dis-
placed when other neighboring regions are
moved.
On tick-based Elastic Audio–enabled tracks,
locked regions conform to tempo changes, but
not other Elastic Audio processing (such as
Quantize or manual warping) can be applied.
Shift dialog
Locked audio region
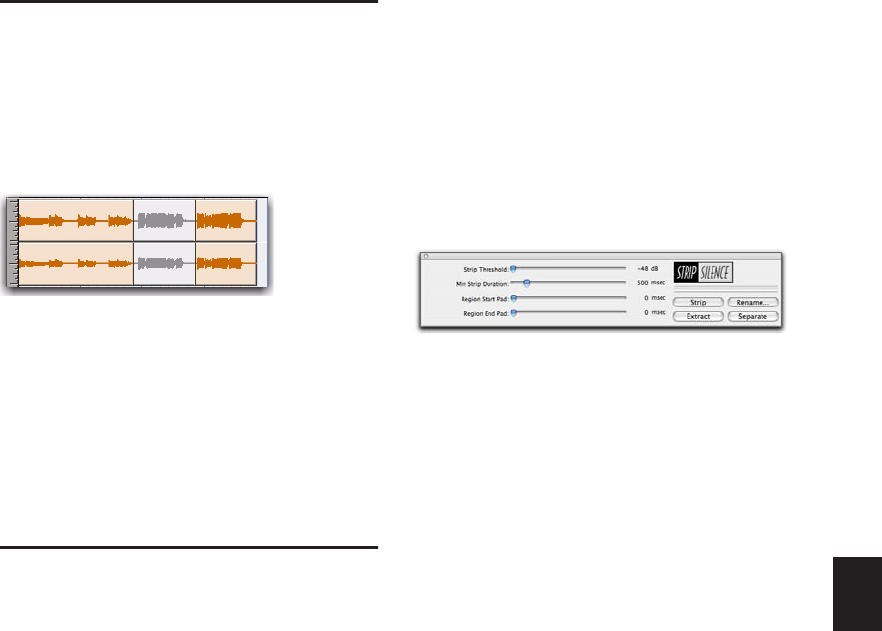
Chapter 32: Arranging Regions 665
Muting/Unmuting Regions
Choosing the Mute/Unmute Region command
mutes playback of a selected region. Choosing
the command a second time unmutes the re-
gion. Regions that are muted become dimmed
to indicate their status.
To mute or unmute a region or regions:
1 With the Time Grabber, select the region or re-
gions you want to mute or unmute. The regions
can even reside on multiple tracks.
2 Choose Region > Mute/Unmute. When
muted, regions are dimmed.
Stripping Silence from
Regions
The Strip Silence commands analyze audio se-
lections—across multiple tracks—and removes
(or extracts) any areas of silence, dividing the se-
lection into smaller regions and removing the
silent areas.
You can use Strip Silence commands to strip (re-
move) silence from a region, or instead, extract
the audio and keep the silence. Getting rid of si-
lent areas is useful when preparing to compact
audio (see “Compacting an Audio File” on
page 476). Strip Silence automatically separates
the selection into separate regions, which is use-
ful if you want to quantize audio to musical val-
ues, or locate sound effects to SMPTE locations.
The Strip Silence Window
The Strip Silence window contains the following
controls that let you set the parameters by
which silence is defined when using the Strip Si-
lence command. Adjusting these controls causes
rectangles to temporarily appear in the selection
(see Figure 13 on page 666), indicating areas of
silence that will be affected by the Strip, Extract,
or Separate commands.
Strip Threshold Sets the amplitude threshold
(from –48 dB to 0 dB) for Strip Silence. Audio
falling below this threshold is considered silence
and removed. Audio above the threshold is re-
tained and defined as new regions.
Minimum Strip Duration Sets the minimum dura-
tion (from 0 to 10,000 ms) that the material be-
low the threshold must last to be considered si-
lence. Use this control to avoid countless small
regions that may occur within a selection.
Region Start Pad Specifies a time value to be
added to the beginning of each new region cre-
ated with Strip Silence. This is useful for preserv-
ing musical material that falls below the thresh-
old, such as the breath before a vocal phrase, or
the finger slide before a guitar chord.
Region End Pad Specifies a time value to be ap-
pended to the end of each new region created
with Strip Silence, thereby preserving the nu-
ances in the decay of the material.
Strip Clears the detected silence, but leaves the
regions containing audio on the track.
Muted audio region (middle)
Strip Silence window
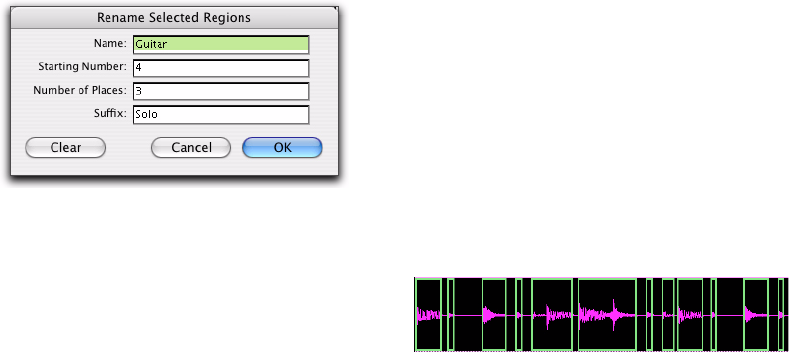
Pro Tools Reference Guide666
Extract Clears the audio and leaves the silent
portions of the track (in other words, an “in-
verse” strip silence feature that is ideal for gen-
erating room tone or ambience to use else-
where).
Rename Opens the Rename Selected Regions di-
alog (see “Auto-Naming for Strip Silence” on
page 666).
Separate Separates regions based on the bound-
aries detected by Strip Silence.
Auto-Naming for Strip Silence
The Rename button in the Strip Silence window
opens the Rename Selected Regions dialog,
which determines how regions are named with
the Strip Silence command. The dialog remem-
bers your previous settings, which can be
cleared by clicking the Clear button.
Name Specifies the base name for regions cre-
ated with Strip Silence.
Number Specifies the number at which sequen-
tial auto-numbering starts.
Zeros Specifies the number of zeroes that occur
before the appended auto numbers.
Suffix Specifies text appended to the end of the
name, after the auto numbering.
For example, if you set these naming options to:
• Name = SFX
• Auto Number Start = 23
• Leading Zeros = 1
• Suffix = .Reel1
The names generated for regions created by Strip
Silence would be:
• SFX023.Reel1
• SFX024.Reel1
• SFX025.Reel1
• SFX026.Reel1
• SFX027.Reel1
• SFX028.Reel1
Using Strip Silence
To strip silence from an audio selection:
1 Select one or more audio regions.
2 Choose Edit > Strip Silence.
3 To set the naming scheme for regions created
with Strip Silence, click Rename to open the Re-
naming dialog. For details, see “Auto-Naming
for Strip Silence” on page 666.
4 In the Strip Silence window, adjust the sliders
for Strip Threshold and Minimum Strip Dura-
tion until the Strip Silence rectangles appear in
the selection.
For finer resolution on these sliders, press Con-
trol (Windows) or Command (Mac) while ad-
justing them.
Rename Selected Regions dialog
Figure 13. Strip Silence rectangles
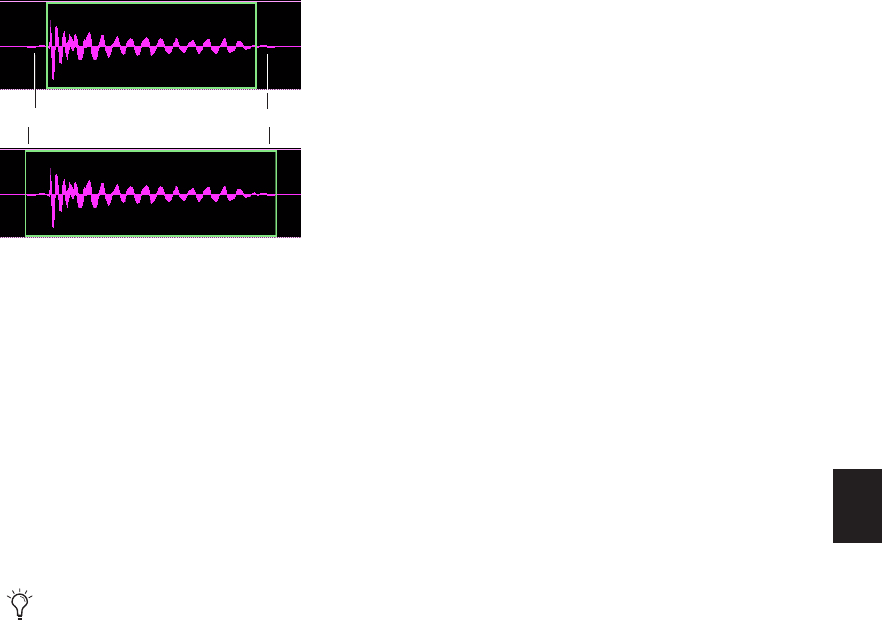
Chapter 32: Arranging Regions 667
5 To retain material before and after the new re-
gions, adjust the sliders for Region Start Pad and
Region End Pad.
6 Once the Strip Silence rectangles encompass
the audio that you want to keep, press the Strip
button.
The material defined as silence is removed from
the selection and new regions are created, which
also appear in the Region List.
The Strip Silence command is nondestructive
and does not remove audio data from parent au-
dio files. In addition to the Undo command,
you can use the Heal Separation command to re-
store stripped material.
To extract audio from an audio selection using
Strip Silence:
1 Make an Edit selection.
2 Choose Edit > Strip Silence.
3 To set the naming scheme for regions created
with Strip Silence, click Rename to open the Re-
naming dialog (see “Auto-Naming for Strip Si-
lence” on page 666).
4 In the Strip Silence window, adjust the sliders
for Strip Threshold and Minimum Strip Dura-
tion until the Strip Silence rectangles appear in
the selection.
5 Click the Extract button.
All audio above the designated threshold is de-
leted and the “silent” portions of the track are
left.
To separate regions using Strip Silence:
1 Make an Edit or Timeline selection.
2 Choose Edit > Strip Silence.
3 To set the naming scheme for regions created
with Strip Silence, click Rename to open the Re-
naming dialog (see “Auto-Naming for Strip Si-
lence” on page 666).
4 In the Strip Silence window, adjust the sliders
for Strip Threshold and Minimum Strip Dura-
tion until the Strip Silence rectangles appear in
the selection.
5 Click the Separate button.
New regions are created based on the bound-
aries detected by Strip Silence.
Strip Silence, padding region start and end points
Strip Silence works with stereo and multi-
channel tracks, and keeps their audio re-
gions phase-coherent.
Attack to be padded Decay to be padded

Pro Tools Reference Guide668
Inserting Silence
The Insert Silence command is a simple and
convenient way to insert silence on audio,
MIDI, and Instrument tracks. This command
lets you make a selection on a track (or tracks)
and insert precisely that amount of silence.
In Shuffle mode, all data on the track is shuffled
later in the track by an amount equal to the se-
lection.
In Grid mode, the Insert Silence command
works just like the Clear command.
Shuffle Mode When inserting silence on multi-
ple tracks in Shuffle mode, the following condi-
tions apply:
If any track is displayed as audio or MIDI data,
the selected duration of silence is inserted into
the audio or MIDI data and all underlying auto-
mation data on all selected tracks. All subse-
quent regions are shuffled by the amount of
silence inserted. On MIDI tracks, only notes that
are selected from the beginning are affected, so
if you have selected the tail of a note and you In-
sert Silence, the note will remain unchanged.
If all selected tracks are displayed as automa-
tion data, the selected range is cleared of auto-
mation data only of the type visible on each
track. Regions are not shuffled. Instead, a blank
gap appears equal to the length of the selection.
If all selected tracks are displayed as automa-
tion data, press the Start key (Windows) or Con-
trol (Mac) while choosing the Insert Silence
command to inserts silence on all automation
playlists for all selected tracks. Regions are not
shuffled.
Slip Mode When inserting silence on multiple
tracks in Slip mode, the following conditions
apply:
If any track is displayed as audio or MIDI data,
the selected range is cleared of audio or MIDI
data and all underlying automation data on all
selected tracks.
If all selected tracks are displayed as automa-
tion data, silence is inserted only into the auto-
mation type visible on each track.
If all selected tracks are displayed as automa-
tion data, press the Start key (Windows) or Con-
trol (Mac) while choosing the Insert Silence
command to insert silence on all automation
playlists for all selected tracks.
To insert silence into a track:
1 Make a selection in a track or tracks. The
length of the selection determines the duration
of the silence inserted.
2 Choose Edit > Insert Silence.
For Shuffle mode, Pro Tools inserts the selected
amount of silence. In the process, it splits the re-
gions at the beginning of the insertion point,
and moves the new regions later in the track by
an amount equal to the length of the selection.

Chapter 32: Arranging Regions 669
Duplicating Regions
The Duplicate command copies a selection and
places it immediately after the end of the selec-
tion. Though this is similar to using Copy and
Paste, Duplicate is more convenient and faster,
particularly when working with data on multi-
ple tracks.
To make more than one copy of a selection, use
the Repeat command (see “Repeating Regions”
on page 669). You can also loop regions (see
“Region Looping” on page 671).
As with the Copy and Paste commands, certain
rules apply when duplicating material on multi-
ple tracks (see “Editing Across Multiple Tracks”
on page 420).
To duplicate a selection or region:
1 If working with material that is bar- and beat-
based, such as loops, set the Main Time Scale to
Bars:Beats.
2 If you want to constrain the selection to the
current Grid value, set the Edit mode to Grid.
3 Make an Edit selection.
4 Choose Edit > Duplicate. The material is
placed immediately after the selection’s end
point.
In Shuffle mode, the duplicated data is placed
directly after the end of the selection. Regions
occurring after it slide to accommodate the du-
plicated material. In Slip mode, the duplicated
material overlaps any adjacent data.
When using Duplicate (or Repeat) with MIDI
notes that were selected with the Time Grabber
tool, material is always duplicated one measure
later, and is merged with existing track material
(instead of replacing it).
Duplicating Audio
When using Duplicate (or Repeat) for audio that
must fall cleanly on the beat (such as rhythmic
loops), it is important that you select the audio
material with the Selector tool, or by typing in
the start and end points in the Event Edit area. If
you select an audio region with the Time Grab-
ber tool (or by double-clicking it with the Selec-
tor tool), the material may drift by several ticks
because of sample-rounding.
If, on the other hand, you want to Duplicate (or
Repeat) audio that is not bar- and beat-based, set
the Time Scale to any format except Bars:Beats.
This ensures that the duplicated audio material
has the correct number of samples and is accu-
rately placed.
Repeating Regions
The Repeat command is similar to Duplicate,
but lets you specify the number of times the se-
lected material is duplicated.
As with the Copy and Paste commands, certain
rules apply when repeating material on multiple
tracks (see “Editing Across Multiple Tracks” on
page 420).
You can repeatedly paste copied data until it
completely fills a selection (see “Repeat To Fill
Selection” on page 419).
You can also loop regions (see “Region Looping”
on page 671).
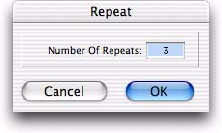
Pro Tools Reference Guide670
To repeat a selection or region:
1 If working with material that is bar- and beat-
based, such as loops, set the Main Time Scale to
Bars:Beats.
2 If you want to constrain the selection to the
current Grid value, set the Edit mode to Grid.
3 Make an Edit selection.
4 Choose Edit > Repeat. In the Repeat dialog,
enter the number of times you want the mate-
rial to repeat, then click OK.
The material is placed immediately after the se-
lection’s end point, and duplicated the specified
number of times.
In Shuffle mode, the repeated data is placed di-
rectly after the end of the selection. Regions oc-
curring after it slide to accommodate the re-
peated material. In Slip mode, the repeated
material overlaps any subsequent data.
Repeat dialog
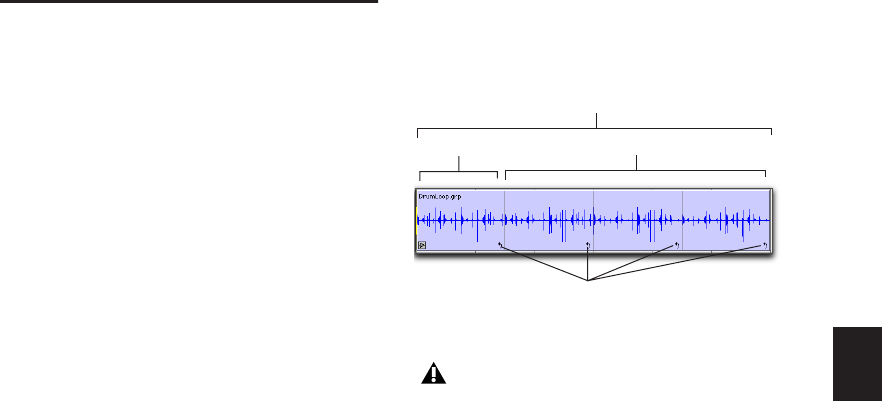
Chapter 33: Region Loops and Groups 671
Chapter 33: Region Loops and Groups
Region Looping
Pro Tools lets you loop audio regions, MIDI re-
gions, and region groups. Looping regions is an
easy and powerful way to repeat a single region
on a track or regions across tracks for composing
and arranging. Looping regions provides more
flexibility than the Repeat and Duplicate com-
mands.
Looped regions repeat the source region as
many times as specified in the Region Looping
dialog, or enough to fill the specified Loop
Length (such as 30 seconds or until the next re-
gion on the track). The source region is the origi-
nal region selected for looping. Loop iterations
are all looped regions following the source re-
gion. In cases where a specific number of repeti-
tions has not been indicated, the last loop itera-
tion is truncated to fill to the end of the
selection or specified Loop Length.
Once looped, the looped region can be edited
much like a region group. For example, selecting
and moving a looped region selects and moves
the source region and all its loop iterations to-
gether.
Looped regions (all iterations) display a Loop
icon in the lower, right corner or each loop iter-
ation.
Looped region
Looping a region does not loop any automa-
tion associated with the source region. Use
the Copy Special and Paste Special Repeat
To Fill Selection commands to copy auto-
mation for the source loop to all loop itera-
tions (see “Automation and Looped Re-
gions” on page 675).
Loop icons
Source region Loop iterations
Looped region
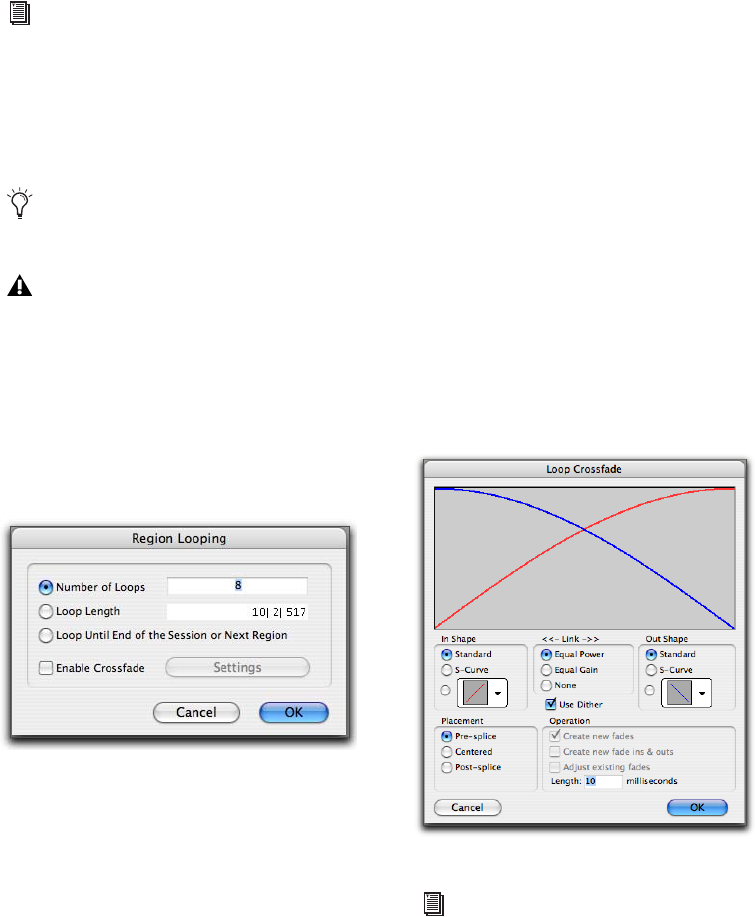
Pro Tools Reference Guide672
Creating Looped Regions
You can create looped regions using the Loop
command or using the Loop Trimmer tool.
To loop a region:
1 Select an audio or MIDI region, or region
group.
2 Do one of the following:
• Choose Region > Loop.
– or –
• Right-click the region you want to loop and
select Loop from the pop-up menu.
3 In the Region Looping dialog, do one of the
following:
• Select the Number of Loops option and en-
ter the number of times to loop the region.
• Select the Loop Length option and enter
the duration according to the main time-
base. If the duration is not an exact multi-
ple of the source loop’s duration, the last
loop iteration will be truncated.
• Select the Loop Until End of Session or
Next Region option. The looped region will
be repeated until the end of the session, or
until the next region on the track. If neces-
sary, the last loop iteration will be trun-
cated to fit.
4 If desired, select the Enable Crossfade option.
This will create a crossfade at the loop point. To
edit the loop crossfade, do the following:
• Click the Settings button.
• Configure the Loop Crossfades.
• Click OK.
For information on using the Loop Trimmer
tool, see “Loop Trimmer Tool” on
page 436.
You can also select regions across tracks for
looping.
Selecting and looping more than one region
on a track only loops the first region in the
selection.
Region Looping dialog
Loop Crossfade dialog
For information on working with crossfades,
see Chapter 25, “Fades and Crossfades.”
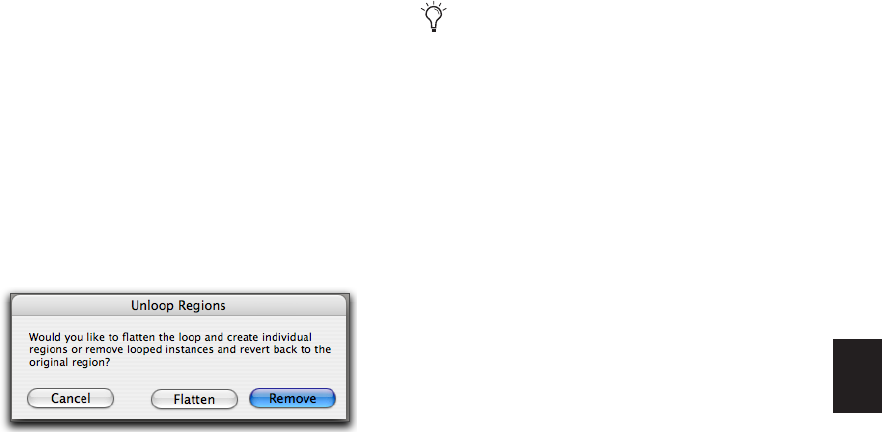
Chapter 33: Region Loops and Groups 673
5 In the Region Looping dialog, click OK.
To rename the looped region name only (or the
region name and disk file name):
1 Double-click the loop icon with the Grabber.
2 Type in a new name.
3 Choose to name region name only, or rename
region name and disk file name.
4 Click OK.
To unloop a looped region:
1 Select the looped region.
2 Do one of the following:
• Choose Region > Unloop.
– or –
• Right-click the region you want to unloop
and select Unloop from the pop-up menu.
3 In the Unloop Regions dialog, do one of the
following:
• Click Remove to unloop and remove all
loop iterations except the first full loop it-
eration (source region).
– or –
• Click Flatten to unloop and create individ-
ual regions from each loop iteration.
To unloop and ungroup a selection down to its
individual regions:
1 Select a looped region that contains one or
more region groups.
2 Choose Region > Ungroup All.
Unlooping and Flattening Looped Regions with
Separate Regions Menu Commands
The Separate Regions commands (At Selection,
On Grid, and At Transients) will automatically
unloop and flatten looped regions before sepa-
rating.
Editing Looped Regions
Looped regions can be edited as a group (all loop
iterations together) or as individual regions
(each loop iteration). For example, selecting a
looped region with the Grabber tool selects the
entire loop (the source region and all its loop it-
erations), but clicking the Loop icon of one of
the loop iterations selects only that one itera-
tion.
Unloop Regions dialog
Region Ungroup functions on loops the
same as using the Unloop command and
choosing Flatten.

Pro Tools Reference Guide674
Moving a looped region moves the source re-
gion and all its loop iterations together as a
group. Loop iterations cannot be moved inde-
pendently of their source region. If you move or
paste another shorter region over a looped re-
gion the loop is continued after the new region.
The parts of a separated looped region can be ad-
justed independently.
To select a looped region as a group (all loop
iterations), do one of the following:
With the Grabber tool or Smart Tool, single-
click the looped region.
– or –
With the Selector tool, double-click the
looped region.
The source region and all its loop iterations are
selected.
To select an individual source region or loop
iteration, do one of the following:
With the Grabber tool or Smart Tool, single-
click the Loop icon of the source region or loop
iteration.
– or –
With the Selector tool, single click the Looped
Region icon and drag to the left until the region
is selected.
Tabbing to Transients and Region Boundaries
Tab to Transients tabs to transients and region
boundaries in a looped region. Normal Tab (Tab
to Transients disabled) tabs to the start and end
boundaries of the entire looped region. For
more information, see “Tabbing to Transients”
on page 457.
Trimming Looped Regions
Trimming looped regions can be done using the
Trimmer tool, the Loop Trimmer tool, or one of
the Trim Region commands. The Loop Trimmer
tool trims the entire looped region. The Trim-
mer tool trims only the individual loop iteration
while increasing or decreasing the number of
loop iterations to fill the total length of the
looped region.
If the source region is extended to the left by us-
ing the Trimmer tool to change the total length
of the looped region, the source region is moved
earlier in the Timeline and loop iterations fill in
up to the point where the last original loop iter-
ation ended. If the trim to the left is part of the
source region’s length, the source region is not
moved and a partial loop iteration is created to
the left of the source region. This is a powerful
feature that lets you make quick changes to your
arrangement by using partial loops as upbeats,
or by extending looped sound effects or ambi-
ence earlier in a film score.
To trim a looped region to the selection:
1 Use the Selector tool to make an Edit selection
including some or all of the looped region.
2 Choose Edit > Trim Region and one of the
Trim Region commands (To Selection, To Fill Se-
lection, Start to Fill Selection, End to Fill Selec-
tion).
Manually warping any part of a looped re-
gion in Warp view separates only that iter-
ation from the looped region. For information on trimming looped regions
using the Loop Trimmer tool, see “Loop
Trimmer Tool” on page 436.
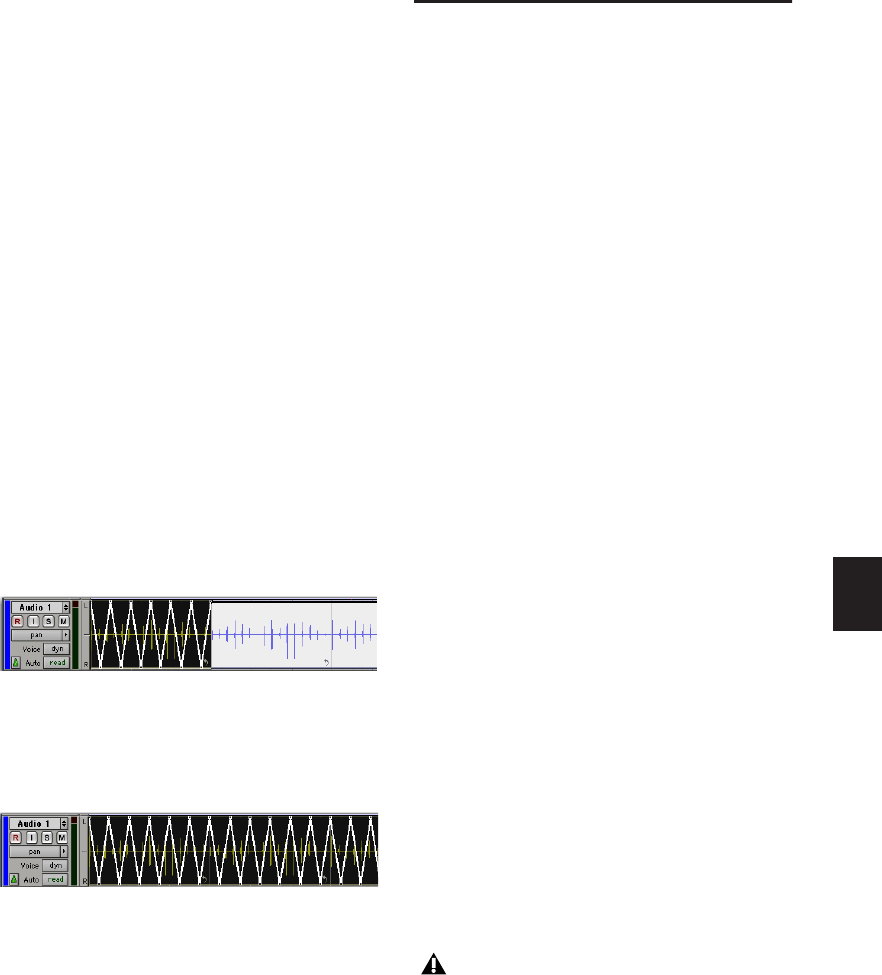
Chapter 33: Region Loops and Groups 675
Automation and Looped Regions
Looping an audio region does not loop any au-
tomation associated with the source region.
This lets you apply automation across an entire
looped region. For example, you may want to
have a long fade across part or all of a looped re-
gion that is independent of any one loop itera-
tion.
You can also repeat automation on each loop it-
eration. For looped audio regions, use the Copy
Special and Paste Special Repeat to Fill Selection
commands to copy and paste any or all automa-
tion data from the source region to some or all
of its loop iterations.
To copy and paste automation from the source
region to loop iterations:
1 Select the source region.
2 Choose Edit > Copy Special and one of the
Copy Special commands (All Automation, Pan
Automation, or Plug-in Automation), depend-
ing on what automation you want to copy.
3 Select the entire looped region.
4 Choose Edit > Paste Special > Repeat to Fill Se-
lection.
Region Groups
A region group is a collection of any combina-
tion of audio and MIDI regions that looks and
acts like a single region. Region groups are essen-
tially containers holding one or more regions.
Region groups can be created on single or on
multiple adjacent audio, MIDI, and Instrument
tracks. Region groups let you “nest” multiple re-
gions into “macro” regions for groove and
tempo manipulation, editing, and arranging.
Region groups can be placed on tracks alongside
standard regions, and edited using many of the
same Pro Tools editing techniques. Certain edits
to a region group will apply to all regions con-
tained by the region group, such as Cut or De-
lete. Other edits only apply to the boundaries of
the region group and do not affect the underlin-
ing regions, such as Trim.
Each region group is saved with the session as a
Region Group file (.rgrp). Region Group files can
be exported from and imported into different
Pro Tools sessions.
Region groups are especially useful for:
• Grouping tick-based audio regions that have
been separated into many small regions, such
as with individual hits of a drum pattern.
Many such small regions can easily be created
with Beat Detective or the Separate Region At
Transients command, or imported as REX or
ACID files.
• Grouping parts and sections of your session to
facilitate composition and arranging. For ex-
ample, grouping the regions of a brass section
during the chorus to copy it to the next cho-
rus.
Selected Pan automation for Special Copy
Pan automation Special Paste to Fill Selection
Region groups are completely independent
of Mix and Edit Groups.
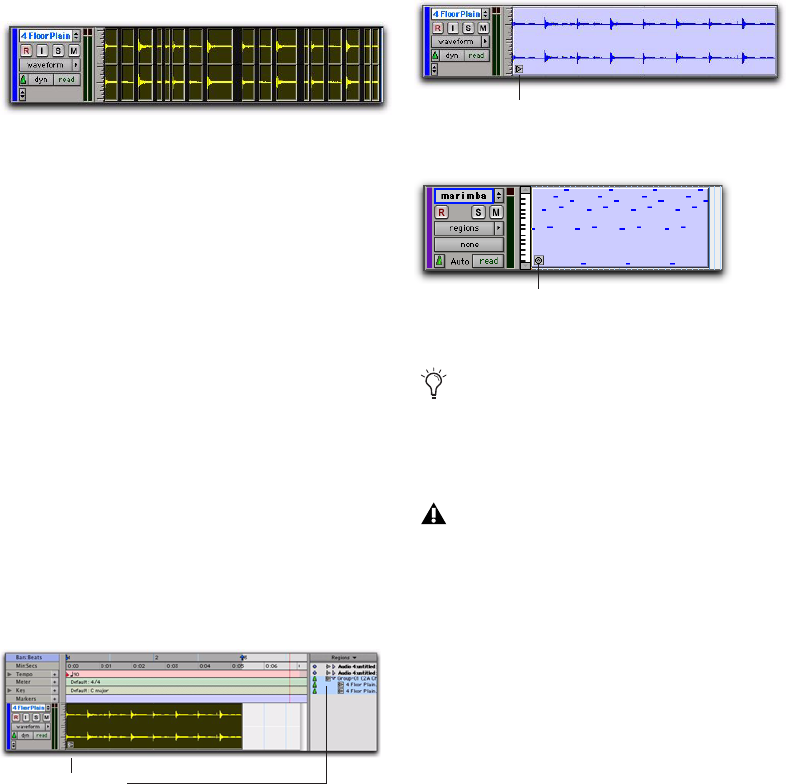
Pro Tools Reference Guide676
Creating Region Groups
To create a region group:
1 Select one or more regions on one or more
tracks. (For more information on multitrack re-
gion groups, see “Multitrack Region Groups” on
page 677).
The size of the selection determines the size of
the region group. The selection can start and
end on any region boundary, empty space, or
even in the middle of a region. Selections start-
ing or ending within a region will separate the
region at the selection boundary when you cre-
ate a region group. Region groups created from
object-based selections include all selected and
unselected regions between the first and last se-
lected region on the track.
2 Do one of the following:
• Choose Region > Group.
– or –
• Right-click the Edit selection and choose
Group from the pop-up menu.
The region group appears as one region with the
region groups icon in the lower left corner. Re-
gion groups also appear in the Region List.
Region Group Timebase Format
Region groups are created in the same timebase
format (samples or ticks) as the tracks on which
they are created. Multitrack region groups can
include both sample-based and tick-based
tracks.
Ungrouping Regions
To ungroup a region group:
1 Select a region group.
2 Do one of the following:
• Choose Region > Ungroup.
– or –
• Right-click the Edit selection and choose
Ungroup from the pop-up menu.
Selecting regions to be grouped on a single audio track
A region group on an audio track and in the Region List
Region Group icon
A region group on an audio track
A region group on a MIDI track
Region groups can be created from empty se-
lections. This can be useful when working
in Shuffle mode to preserve the gaps between
regions.
The Group and Ungroup Region menu com-
mands apply to any Edit selection regard-
less of the current Track View.
Audio Region Group icon
MIDI Region Group icon
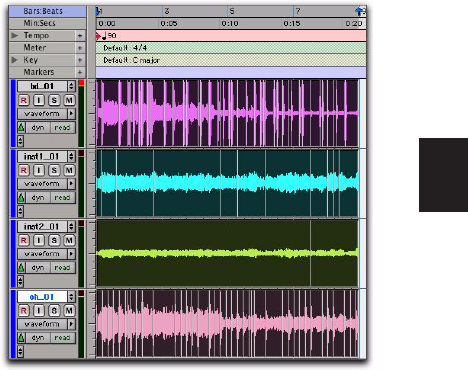
Chapter 33: Region Loops and Groups 677
The region group disappears, revealing all un-
derlying regions and any nested region groups.
When there are multiple nested region groups,
the Ungroup command will ungroup the front-
most top-layer region group only, preserving
any underlying region groups.
To ungroup a region group (and include all of its
nested region groups):
1 Select a region group.
2 Choose Region > Ungroup All.
Regrouping Regions
The Regroup menu command undoes the last
Ungroup command and regroups all the indi-
vidual regions as a region group. This lets you
ungroup a grouped region, edit its underlying
regions in any way desired, and regroup it to
continue working on higher-level composition
and arranging.
To regroup a region group:
1 Select any region from the ungrouped region
group.
2 Choose Region > Regroup.
If you used the Ungroup All command, the Re-
group command recreates all previous nested re-
gion groups.
3 If you regrouped an ungrouped region group
that was used more than once in the session, do
one of the following when the Change All dia-
log opens.
• Choose Modify to apply your changes to all
other instances of the same region group.
– or –
• Choose Copy to create a copy and apply
your changes only to the copied region
group.
Multitrack Region Groups
Multitrack region groups (region groups created
across multiple tracks) are useful for grouping
parts (such as multi-miked drum tracks), and for
composing and arranging. Multitrack region
groups can be created across any combination of
audio, MIDI, and Instrument tracks, and can in-
clude either or both tick-based or sample-based
tracks.
Multitrack region groups work much like single-
track region groups. Multitrack region groups
appear as a single object across adjacent tracks.
To create a multitrack region group:
1 Select regions across multiple adjacent tracks.
Selecting regions to be grouped across multiple tracks
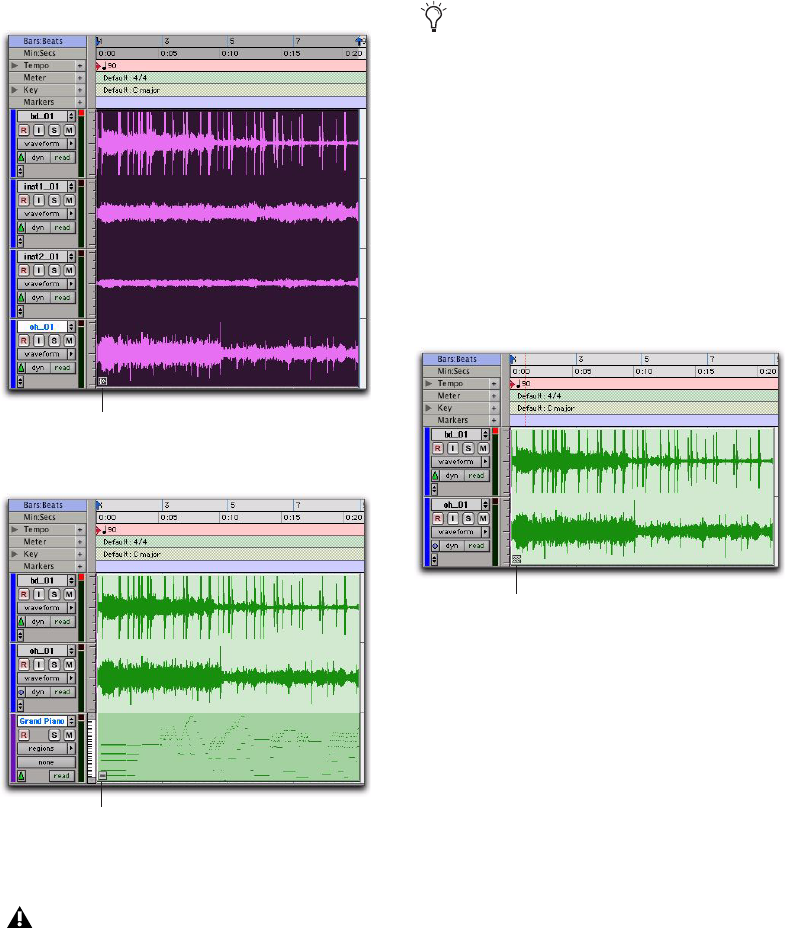
Pro Tools Reference Guide678
2 Choose Region > Group.
Separated Multitrack Region Groups
You can insert, move, hide, or delete tracks in
multitrack region groups, but it may break the
region group. A separated region group displays
a break in the Region Group icon. Separated re-
gion groups will continue to function as a single
region group, but the separated icon indicates
that the region group displayed is somehow in-
complete or separated across nonadjacent
tracks.
A region group is separated when you do any of
the following:
• Insert a track within a multitrack region
group.
• Move a track that is part of a multitrack region
group so that it is no longer adjacent with the
other tracks of the region group.
• Hide a track that is part of a multitrack region
group.
• Delete a track that is part of a multitrack re-
gion group.
• Change the tempo of a mixed sample-based
and tick-based region group.
Multitrack region group
Mixed multitrack region group (sample- and tick-based
audio, and tick-based MIDI)
Multitrack region groups create nested re-
gion groups of multiple regions by track be-
fore grouping them across tracks.
Region Group icon
Mixed Region Group icon
The Regroup command supports multitrack
region groups.
Region group separated by deleting a track
Separated Region Group icon
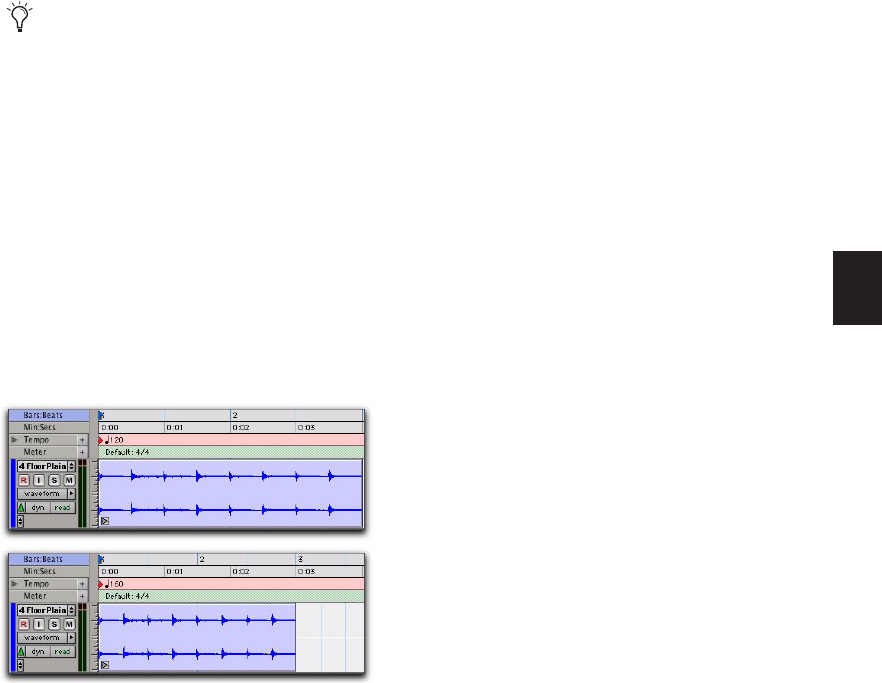
Chapter 33: Region Loops and Groups 679
• Record into a region group.
• Change playlists on a track that is part of a
multitrack region group.
• Apply manual warping in Warp view.
There may be situations where you want sepa-
rated region groups. For example, if you use the
same accompaniment on verses one and two of
a song, you can group the parts of verse one and
copy them as a region group for verse two, but
still have a continuous vocal track in the middle
of those region groups.
Region Groups on Tick-Based
Tracks
When changing tempos, region groups on tick-
based tracks adjust their length by adjusting the
position of all enclosed regions accordingly.
This is useful for arranging rhythmic material
and for playing back region groups imported
from REX and ACID files.
Changing Region Group Timebase
The timebase format of a region group can be
changed by:
• Changing the track’s timebase.
• Dragging the region group to a track with a
different timebase.
Changing the timebase creates a copy of the
original region group. Both region groups (the
original and the copy) appear in the Region List,
but they have different timebases.
Converting Samples to Ticks
When dragging a region group from a sample-
based track to a tick-based track, the length of
the region group does not change. This is be-
cause region groups are converted from samples
to ticks after they are moved into tick-based
tracks. The length of the region group only
changes with subsequent tempo changes. If ap-
propriate, change the local tempo on the tick-
based track to match the tempo of the sample-
based region group before moving a sample-
based region group to a tick-based track.
Converting Ticks to Samples
When dragging a region group from a tick-based
track to a sample-based track, the length of the
region group does not change unless it is moved
to another time location with a different tempo.
This is because region groups are converted
from ticks to samples after they are moved into
the sample-based tracks.
If you want to delete a track and keep the re-
gion group intact, first ungroup the region
group, then delete the desired track, and
then Regroup the region group. The region
group will be recreated intact, but without
the deleted track.
A region group on a tick-based audio track at 120 BPM
and at 160 BPM
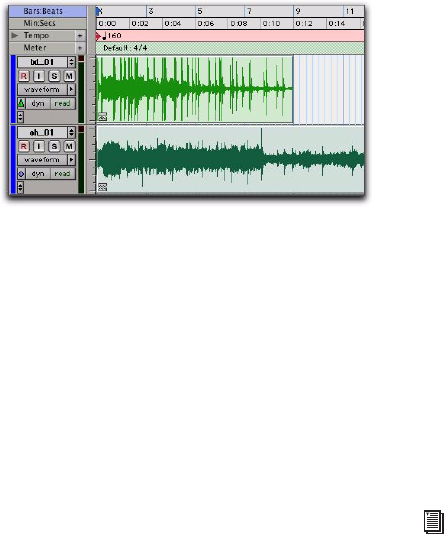
Pro Tools Reference Guide680
Multitrack Region Groups with Sample- and
Tick-Based Tracks
Multitrack region groups can include both sam-
ple-based and tick-based tracks. However,
changing the tempo separates the region group
between sample-based tracks and tick-based
tracks.
Editing Region Groups
Region groups are edited in much the same way
as regular regions: They can be named, moved,
cut, copied, pasted, trimmed, muted, locked,
and so on. However, there are a few significant
differences between editing regular regions and
region groups.
Editing MIDI Region Groups
If a MIDI region within a region group is modi-
fied in any way, a new region copy is created
and placed over of the region group. For exam-
ple, if you record, draw in a new note, edit MIDI
controller data, or Quantize a Timeline selec-
tion, a new region is created over the region
group.
Editing Audio Region Groups
Certain audio editing commands create new re-
gions over region groups. To use these com-
mands and maintain the region group, ungroup
the region group, perform the edit, and then re-
group the region group.
The following edit commands create new re-
gions over region groups:
• AudioSuite processing of a grouped region re-
sults in a new region over the region group.
• Consolidating a selection of a grouped region
creates a new audio file and region over the re-
gion group.
• Recording into a region group creates a new
audio file and region over the region group.
• Pencil tool waveform redraw results in a new
region over the region group.
Tabbing to Transients and Region Boundaries
With Tab to Transients enabled, the Tab key
moves the Location Cursor to transients and re-
gion boundaries within a region group.
With Tab to Transients disabled, the Tab key
moves the Location Cursor to region group
boundaries only (and the sync point, if present).
A multitrack region group separated across sample-
based and tick-based tracks after changing tempo
For more information, see “Tabbing to
Transients” on page 457.
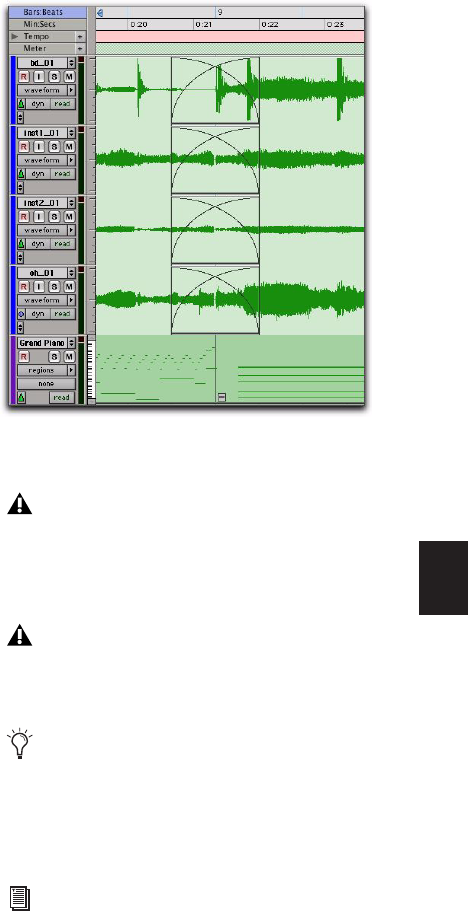
Chapter 33: Region Loops and Groups
681
Trimming Region Groups
Trimming region groups with the Standard
Trimmer tool works the same way as trimming
regular regions, regardless of whether you are
trimming a single-track region group or a multi-
track region group.
Trimming a region group does not trim the un-
derlying regions, but rather trims the region
group boundaries. All underlying regions retain
their original length and location. This is true
for all underlying audio and MIDI regions, and
nested region groups. If you trim the region
group shorter, underlying regions may not be
heard on playback because they are outside the
region boundaries of the trimmed region group.
When trimming region groups with the TC/E
Trimmer tool, it applies only to audio regions,
and creates a new region over the region group.
If you Ungroup after trimming a region group in
(shorter), audio regions falling outside of the
bounds of the current region group are trimmed
to fit the region group boundary or removed.
Recording
When recording audio or MIDI, new regions are
created over (in front) of region groups instead
of being included in the region group. To record
into a region group, first ungroup the region
group, then record, and then regroup the region
group. The region group will be recreated intact
with the newly recorded material.
Fades and Crossfades on Region
Groups
Region groups can have fades and crossfades
just like regular regions. Fades only apply to au-
dio regions. In addition to crossfading between
region groups, you can also crossfade between
region groups and regular audio regions.
Two adjacent multitrack region groups with crossfades
on the audio tracks, but not on the MIDI track
Ungrouping a region group removes any re-
gion group level fades or crossfades. Fades
and crossfades are restored by the Regroup
command.
Region groups that contain regions with
fades are not allowed on Elastic Audio–en-
abled tracks.
When changing tempo with region groups
on tick-based tracks, you may need to Un-
group, redo or create new fades, and then
Regroup in order to maintain the desired
fades.
For information on working with fades and
crossfades in Pro Tools, see Chapter 25,
“Fades and Crossfades.”

Pro Tools Reference Guide682
Importing and Exporting Region
Group Files
Pro Tools can export and import region groups
as region group files (.rgrp) to do any of the fol-
lowing:
• Separate region group metadata from audio
files to avoid unnecessary file copy opera-
tions when exporting audio region groups
composed from multiple source files
• Export MIDI data as part of a region group
• Create multitrack loops
Region group files store the following metadata:
• References to all audio files within the re-
gion group
• Region names and relative location in
tracks
• Embedded fades and crossfades
• Region group names and format (single or
multitrack)
• All MIDI data present in the region group
(such as notes, controllers, Sysex, and so
on)
• Track names
• Elastic Audio Warp markers and TCE factor
• Region timebase (samples or ticks)
• Sync points
• Loops
• Tempo map
Region group files do not store the following:
• Automation
• Plug-ins
• Track routing
• Meter map
• Region List information
For information importing and exporting
region groups, see “Importing and Exporting
Region Group Files” on page 282.

Chapter 34: Beat Detective 683
Chapter 34: Beat Detective
Beat Detective is a powerful tool for analyzing,
editing, and manipulating audio or MIDI tracks
that have an inherent rhythmic character.
Beat Detective analyzes an audio or MIDI selec-
tion, identifies its peak transients or accented
notes, and generates beat triggers based on the
detected peak transients or MIDI notes. From
these beat triggers, Beat Detective can:
• Extract tempo and beat information to create
Bar|Beat Markers that can be used to define
the session’s tempo map. See “Generating
Bar|Beat Markers with Beat Detective” on
page 693.
• Extract tempo and groove information as
groove templates, called DigiGrooves. These
templates can be applied to audio or MIDI us-
ing Beat Detective or Groove Quantize (see
“DigiGroove Templates” on page 694.
• Separate an audio selection into discrete re-
gions, and then conform (or “quantize”) sep-
arated regions to the session’s tempo map, or
to groove templates. See “Separating Regions
with Beat Detective” on page 696 and “Con-
forming Regions with Beat Detective” on
page 698.
Beat Detective and Source Material
Beat Detective is most effective with audio or
MIDI that has clear attack transients or accent
patterns (including most instruments used in
popular music, such as drums, guitar, or bass).
Beat Detective will be less successful with audio
material with soft attacks, or legato phrasing
(such as strings and vocals).
Uses for Beat Detective
Beat Detective can be useful in many situations,
including:
Extracting Tempo from Audio Beat Detective can
generate Bar|Beat Markers, from which it can ex-
tract the tempo—even if the audio contains
varying tempos, or material with a swing feel.
Additionally, once Bar|Beat Markers have been
generated, other audio and MIDI regions can be
quantized to them.
Creating DigiGrooves Beat Detective can extract
groove templates, called DigiGrooves, from an
audio selection. DigiGrooves can be used to ap-
ply the groove, or feel of the captured passage to
other audio selections (using Groove Conform)
or MIDI data (using Groove Quantize).
Conforming Audio Regions Beat Detective can
conform (“quantize”) audio with a different
tempo, or with varying tempos, to the session’s
current tempo map, or to a groove template.
Pro Tools Reference Guide684
“Tighten Up” Performances Beat Detective can
be used to improve the timing of some audio
material by calculating and extracting its aver-
age tempo, and then conforming its rhythmic
components—regions separated with Beat De-
tective—to the session’s tempo map.
Loop Matching Since Beat Detective can extract
tempo and beat information from audio, and
conform audio to an existing tempo map or
groove template, this makes it very useful for
aligning loops with different tempos or grooves.
If a loop is at a different tempo than the current
session, Beat Detective lets you quickly separate
each beat in the loop and conform them to the
tempo map (as an alternative to time compress-
ing or expanding the loop, which can alter the
pitch and tone of the audio).
Remixes Beat Detective can be used for remixes
or creating new rhythms. It can extract tempo
from the original drum tracks, or in some in-
stances the original stereo mix. New audio or
MIDI tracks can then be conformed to the orig-
inal material, or the original material can be
conformed to new drum tracks, achieving an
entirely new feel.
Smoothing Post Production Edits (Audio
Only) Beat Detective’s Edit Smoothing can be
used to automatically clean up foley tracks that
contain many regions requiring trimming and
crossfading, effectively removing the gaps of si-
lence between the regions (thus retaining the
room tone throughout the track).
Beat Detective Requirements
Beat Detective is available with all Pro Tools sys-
tems.
RAM Requirements for Beat Detective
Beat Detective operations can require a large
amount of RAM, especially when working with
multiple tracks and lengthy selections.
To avoid low memory situations with Beat De-
tective, do the following:
• If you begin to experience slower Beat Detec-
tive response, add more RAM to your com-
puter.
• If your computer does not have the extra
RAM, work with shorter selections, or individ-
ual tracks.
• Set the Editing preference for Levels of Undo
to a smaller value (see “Levels of Undo and
Memory” on page 415). Memory-intensive
editing operations, such as Edit Smoothing
(audio only) with Beat Detective, can use up a
large amount of memory when in the Undo
queue.
When working with tick-based audio, use
Beat Detective’s Region Separation com-
mand to quickly separate audio regions into
individual “hits” (or slices). You can also
create a region group of the separated re-
gions to facilitate editing and arranging.
Beat Detective LE cannot be used across
multiple tracks without the Music Produc-
tion Toolkit option. When Beat Detective
LE (without the Music Production Toolkit
option) is applied to multiple tracks, only
the top track is edited.
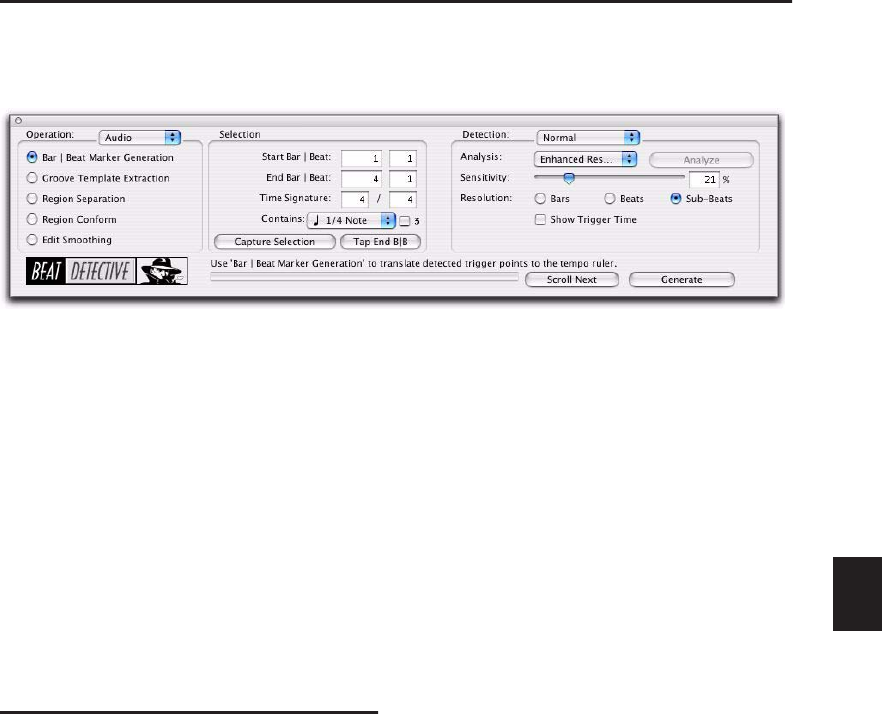
Chapter 34: Beat Detective 685
The Beat Detective Window
The Beat Detective window appears as shown in Figure 14, below.
To open the Beat Detective window, do one of the
following:
Choose Event > Beat Detective.
– or –
Press Control+8 (Windows) or Command+8
(Mac) on the numeric keypad.
Beat Detective is a floating window that can be
left open while working. This lets you adjust the
controls in real time during playback, while
viewing the beat triggers that appear in your se-
lection in the Edit window.
Beat Detective Modes
The Beat Detective window is divided into three
sections: Operation, Selection, and Detection.
Depending on the Operation mode, the con-
trols in the Action section change. The Selection
options for Beat Detective are available in each
of the Operation modes.
The Beat Detective modes include the following:
Operation Lets you choose to analyze either
MIDI or audio material.
Bar|Beat Marker Generation Generates Bar|Beat
Markers corresponding to transients detected in
the audio selection.
Groove Template Extraction Extracts the rhyth-
mic and dynamic information from audio, and
saves this information to the Groove Clipboard,
or as a DigiGroove template.
Region Separation (Audio Only) Separates and
creates new regions based on transients detected
in the audio selection.
Region Conform (Audio Only) Conforms all sepa-
rated regions within the selection to the current
tempo map. Beat Detective can conform audio
regions to groove templates (such as DigiGroove
templates) in addition to standard quantization.
Edit Smoothing (Audio Only) Fills the gaps be-
tween conformed regions by automatically
trimming them, and if you choose, inserts cross-
fades.
Figure 14. Beat Detective (Pro Tools HD shown)
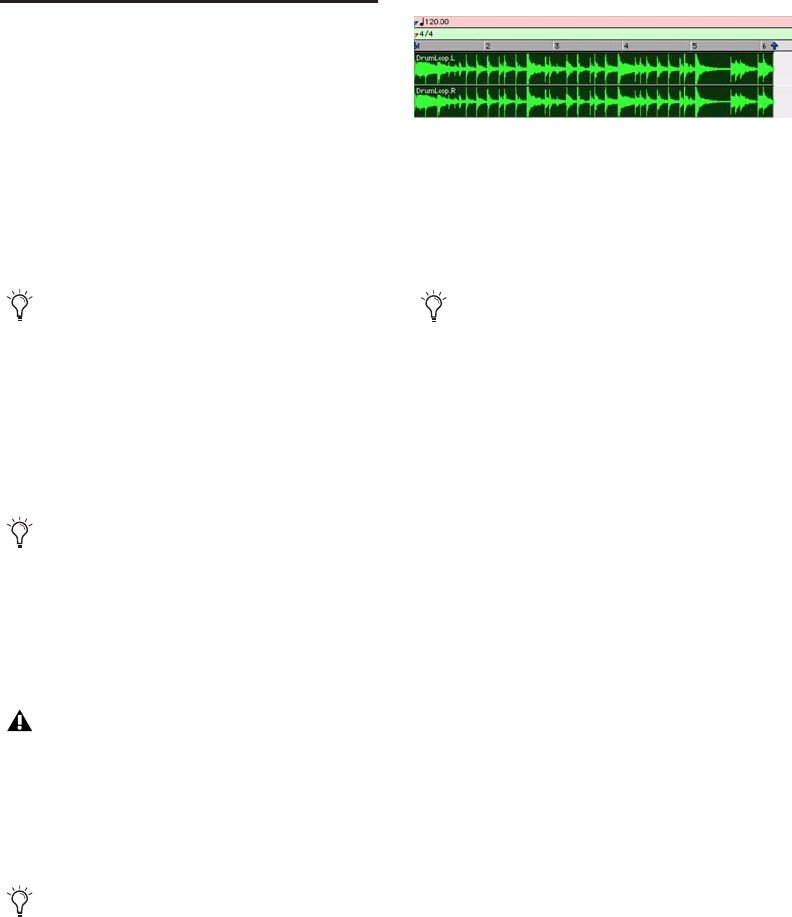
Pro Tools Reference Guide686
Defining a Beat Detective
Selection
Whether you will be generating Bar|Beat Mark-
ers, extracting a DigiGroove template, or sepa-
rating regions to be conformed, you must al-
ways define the audio or MIDI selection to be
analyzed. The Beat Detective window provides
tools to define and capture the selection range,
time signature, and swing (sub-division) con-
tent for the selected audio.
For Beat Detective to generate beat triggers that
are metrically accurate, the length and meter of
the selection must be correctly defined. In addi-
tion, the selection should not contain any meter
or tempo changes.
To define a selection for Beat Detective:
1 In the Edit window, select a range of audio or
MIDI material in a single track or in multiple
tracks.
Make sure the selection’s start and end points
fall cleanly on the beat. To zero in on an audio
region’s start and end points, zoom to the sam-
ple level and use the Tab to Transients option
(see “Tabbing to Transients” on page 457).
2 Choose Event > Beat Detective.
3 You must define or capture the selection every
time you make a new selection or change the
tempo map. To define the selection range, do
one of the following:
• If the tempo and meter of the audio selec-
tion do not match the session’s default
tempo and meter, enter the Time Signa-
ture, and Start Bar|Beat and End Bar|Beat
locations. For a four-bar selection that
starts on beat 1, enter 1|1 and 5|1.
• If the tempo and meter of the audio selec-
tion do not match the session’s default
tempo and meter, and you are unsure of
the length of the material, enter the Time
Signature and the Start Bar|Beat location;
then start playback, and click the Tap but-
ton repeatedly to automatically calculate
the End Bar|Beat. When using Tap with
long selections, continue to tap until the
End Bar|Beat stabilizes. Once stabilized,
you may need to manually adjust the num-
ber to the nearest bar boundary.
To ensure the best possible results with Beat
Detective, make sure the selected passage
starts exactly on the attack of the first beat.
Use Loop playback to check the accuracy of
your selection.
Beat Detective LE cannot be used across
multiple tracks without the Music Produc-
tion Toolkit option. When Beat Detective
LE (without the Music Production Toolkit
option) is applied to multiple tracks, only
the top track is edited.
To keep the Edit selection intact while play-
ing or looping from any location, deselect
Options > Link Timeline and Edit Selection.
Making an audio selection for Beat Detective
To avoid losing an existing selection, save
and recall an Edit selection by saving it as a
Memory Location. See “Memory Locations
and Markers” on page 637.
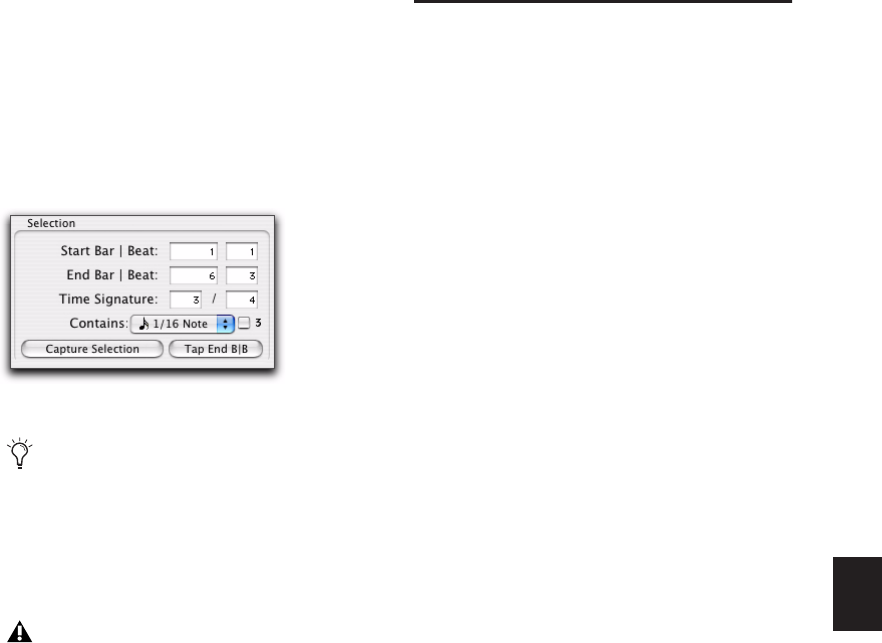
Chapter 34: Beat Detective 687
• If the selection’s tempo and meter match
the session tempo and meter (see “Calcu-
lating Tempo with Beat Detective” on
page 688), and it aligns correctly with the
session’s bars and beats, click the Capture
Selection button. The correct Time Signa-
ture, and Start Bar|Beat and End Bar|Beat
values will be filled in automatically.
4 To improve Beat Detective’s accuracy in ana-
lyzing swung notes, select the Contains option
that indicates the smallest sub-division of the
beat contained in the selection. The Contains
option includes quarter-notes, eighth-notes, six-
teenth-notes (the default setting), thirty-sec-
ond-notes, and a triplet modifier. The selected
Contains option determines the groove tem-
plate grid locations for DigiGroove templates.
Beat Detective Analysis
Beat Detective provides several analysis algo-
rithms for beat detection appropriate to differ-
ent types of audio material.
High Emphasis Works well with high frequency,
inharmonic material, such as cymbals and hi-
hats, while avoiding low frequency material.
Low Emphasis Works well with low frequency
material, such as bass guitar and kick drum, as
well as with most harmonic material, such as pi-
ano or rhythm guitar.
Enhanced Resolution Works well with the broad-
est range of material, such as full mixes and
loops.
Beat Detection Across Multiple Tracks
When analyzing a selection with multiple
tracks, Beat Detective analyzes each indepen-
dently. Transients that are detected in any track
appear as Beat Triggers across all selected tracks
regardless of whether or not the detected tran-
sient resides in any other track. However, for
closely aligned events on multiple tracks, Beat
Detective only identifies the first detected tran-
sient of a beat event.
For example, if you have four drum tracks—
kick, snare, and a pair of overheads—transients
in the overhead mics tracks occur a little later
than the closely miked snare and kick tracks be-
cause it takes more time for the sound to travel
from the source to the microphones. If you
make a selection across all four tracks and ana-
lyze them using Beat Detective, only the tran-
sients in the kick and snare tracks will be identi-
fied as beat triggers because the transients on
overheads will be recognized as being part of the
Beat Detective, Selection options
As long as the audio material is correctly
aligned with the session’s tempo map, use
Capture Selection each time you make a
new selection or make any changes to the
tempo map (such as changing tempo or
meter).
The Selection definition is not retained
when a session is closed and re-opened
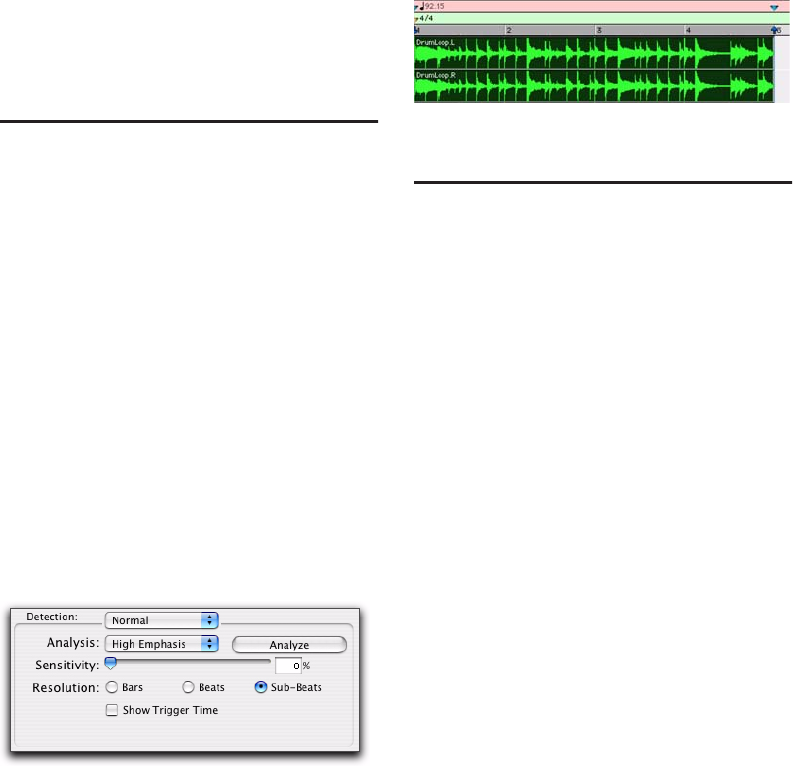
Pro Tools Reference Guide688
same beat events (only a little bit late). For infor-
mation on individually analyzing multiple
tracks, see “Using Collection Mode” on
page 703.
Calculating Tempo with Beat
Detective
If you know the meter, and start and end points
of the audio selection, use Beat Detective to cal-
culate its tempo.
To calculate a selection’s tempo with Beat
Detective:
1 Make an audio selection in the Edit window
and define the selection in the Beat Detective
window as described in “Defining a Beat Detec-
tive Selection” on page 686.
2 Select Bar|Beat Marker Generation mode.
3 In the Detection section (Normal mode), click
Analyze.
4 Set the Sensitivity slider set to 0%
5 Click Generate.
Bar|Beat Markers are automatically generated at
the beginning and end of the selection, indicat-
ing the material’s tempo and meter.
Generating Beat Triggers
Once you have accurately defined the selection
range, Beat Detective can generate beat triggers
based on detected MIDI notes or audio peak
transients. The range and type of transients
found can be adjusted with the Detection set-
tings, allowing you to zero in on the bars, beats,
and sub-beats in the material, while avoiding
the non-rhythmic content.
To generate beat triggers from an audio selection:
1 In the Edit window, make an audio selection.
2 Select Audio from the operation pop-up
menu.
3 In the Beat Detective window, select one of
the following modes:
• Bar|Beat Marker Generation
• Groove Template Extraction
• Region Separation (audio only)
4 Define or capture the selection as described in
“Defining a Beat Detective Selection” on
page 686.
5 From the Analysis pop-up menu, choose the
desired detection algorithm.
6 Click the Analyze button.
7 Depending on the rhythmic content of the se-
lection, set the Resolution to Bars, Beats, or Sub-
Beats.
Beat Detective, Detection mode
Beat Detective generated Bar|Beat Markers identifying
tempo and meter
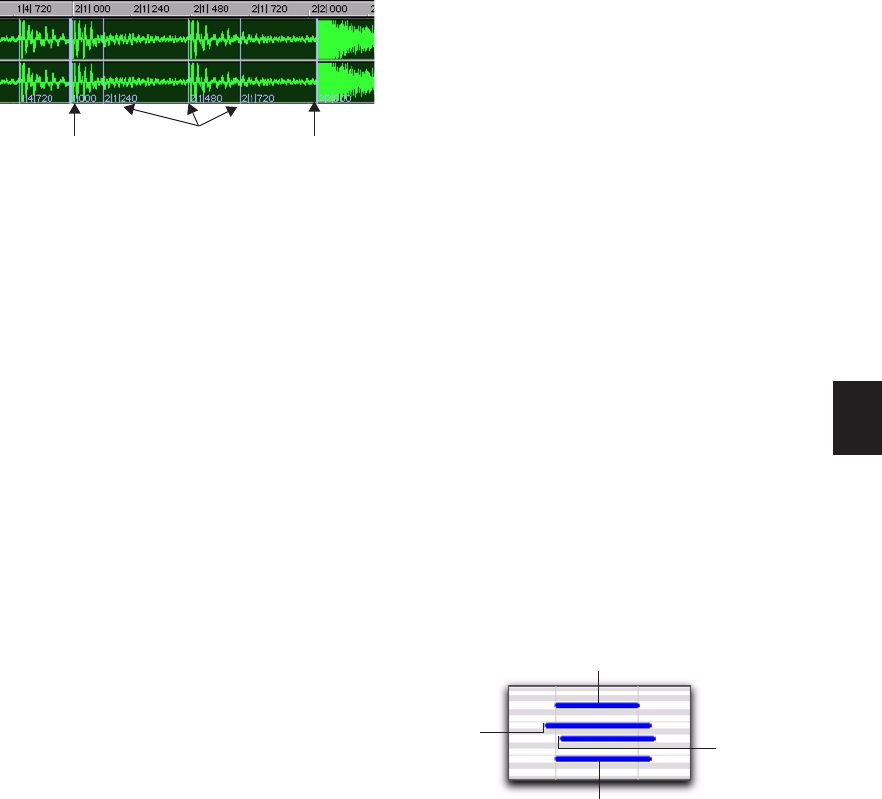
Chapter 34: Beat Detective 689
8 Adjust the Sensitivity slider until beat triggers
appear on the beats and sub-beats in the selec-
tion.
Bar triggers are indicated with thick lines, beat
triggers with medium lines, and sub-beat trig-
gers with thin lines.
9 You can zoom to the sample level and click
the Scroll Next button to scroll to the next trig-
ger within the selection. To scroll to the previ-
ous trigger, Alt-click (Windows) or Option-click
(Mac) the Scroll Next button (see “Navigating
Consecutive Beat Triggers” on page 693). This is
useful to confirm that the beat triggers are ap-
pearing in the appropriate locations. If false trig-
gers appear between the beats or sub-beats
(representing non-rhythmic material) delete
them (see “Deleting Beat Triggers” on page 691),
or reduce the Sensitivity value.
10 To display the metric locations for the trig-
gers, select the Show Trigger Time option.
11 If you cannot get the beat triggers to appear
at the right locations, repeat steps 5–10 trying
the other Analysis algorithm (High or Low Em-
phasis).
To generate beat triggers from a MIDI selection:
1 In the Edit window, set the MIDI track you
want to use to Notes View.
2 Make a selection across a range of MIDI data.
Make certain that the selection start and end
points are at musically relevant locations, such
as barlines.
3 Choose Event > Beat Detective.
4 Select MIDI from the operation pop-up menu.
5 In the Beat Detective window, select one of
the following modes:
• Bar|Beat Marker Generation
• Groove Template Extraction
6 Define the selection range. If the tempo and
meter of the audio selection do not match the
session’s default tempo and meter, enter the
Time Signature, and Start Bar|Beat and End
Bar|Beat locations. For a four-bar selection that
starts on beat 1, enter 1|1 and 5|1.
7 If your MIDI track contains chords, choose
one of the following MIDI chord recognition al-
gorithms from the Analysis pop-up menu:
• Last Note
• First Note
• Loudest Note
• Average Location
• Highest Note
• Lowest Note
8 Click the Analyze button.
MIDI Chord Recognition
Since MIDI notes in a chord may be played at
slightly different moments, Beat Detective inter-
prets notes that are close together (closer than
half the time value that is set in the Selection
Contains field) as a chord.
Beat triggers
BarBeat Sub-Beats
MIDI chord analysis
First
Note Last
Note
Highest Note
Lowest Note
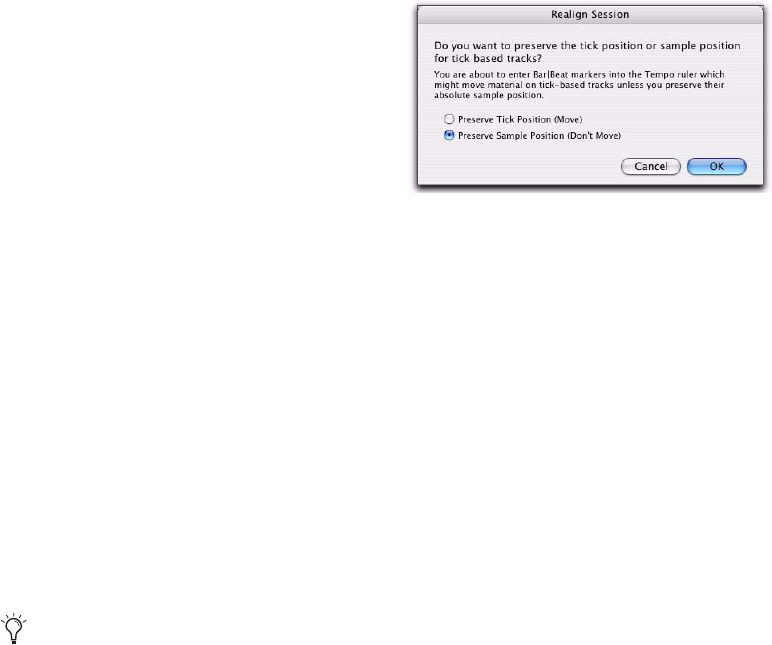
Pro Tools Reference Guide690
Beat Detective will use the criteria you set in the
Analysis pop-up menu to interpret the location
of the beat in relation to the chord.
Last Note Sets the beat trigger to the start of the
last note played in the chord.
First Note Sets the beat trigger to the start of the
first note played in the chord.
Loudest Note Sets the beat trigger to the start of
the note in the chord played with the highest
velocity.
Average Location Sets the beat trigger to a point
that represents the average between the start of
the first note played in the chord, and the last
note played in the chord.
Highest Note Sets the beat trigger to the start of
the highest note played in the chord.
Lowest Note Sets the beat trigger to the start of
the lowest note played in the chord.
Realign Session
Beat Detective’s Realign Session function lets you
generate Bar|Beat markers without tick-based
material shifting. This is useful if you want to
extrapolate Bar|Beat markers from tick-based
material to align the tempo map and Bar|Beat
grid to the tick-based material.
Generating Bar|Beat markers in sessions with
tick-based material, such as MIDI tracks and
tick-based audio tracks, can cause the tick-based
material to shift in absolute time. This can be
useful if you want to align the tick-based mate-
rial to Bar|Beat markers generated from sample-
based material.
When you generate Bar|Beat Markers in a ses-
sion that contains tick-based audio or MIDI,
Beat Detective gives you the option to preserve
the position of the session’s tick-based material,
or to allow the material to shift.
To generate Bar|Beat Markers with Beat
Detective in a session with tick-based tracks:
1 In the Edit window, make an audio or MIDI se-
lection.
2 In the Beat Detective window, select Bar|Beat
Marker Generation mode.
3 Define or capture the selection as described
in“Defining a Beat Detective Selection” on
page 686.
4 Set the Detection resolution to Bars or Beats.
5 Click the Generate button.
6 Do one of the following:
• In the Realign Session dialog, choose Pre-
serve Tick Position if you want to let the
tick-based material shift in absolute time.
This option maintains prior Beat Detective
functionality.
– or –
• Choose Preserve Sample Position if you
want to have the tick-based material main-
tain its absolute position. This option can
be useful when adding a meter and tempo
map to a freely played performance.
7 Click OK.
You can also switch tick-based material,
such as a MIDI performance, to be sample-
based and then manually insert Bar|Beat
markers.
Realign Session dialog
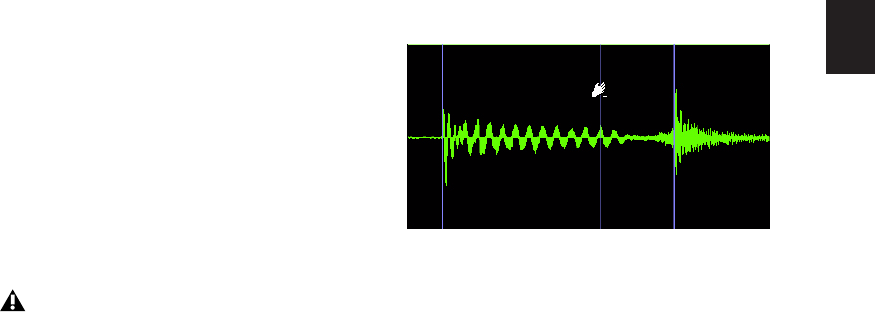
Chapter 34: Beat Detective 691
Tips for Getting Useful Beat Triggers
Use the following tips to verify beat triggers:
To focus on a particular area in the selection,
unlink the Timeline and Edit Selections and set
the playback range by clicking or dragging in
any Timebase ruler.
Check the thickness of the beat triggers to see
if they align properly with the audio material.
Thick triggers fall on barlines, medium triggers
fall on beats, and thin triggers fall on sub-beats.
Select the option for Show Trigger Time and
see if the (assumed) metric locations of the trig-
gers align with the material. A false trigger
should be moved or deleted because it can cause
subsequent triggers to appear in the wrong loca-
tions (see “Editing Beat Triggers” on page 691).
Consider whether lengthy selections should
first be broken down into smaller selections,
which could be more easily managed. For exam-
ple, working in 8- or 4-bar sections might yield
better results more quickly.
Beat triggers are preserved when switching be-
tween audio and MIDI modes. This allows using
MIDI triggers for editing audio, or collecting
triggers from combinations of MIDI and audio
tracks (Pro Tools HD only).
For selections across multiple tracks, consider
whether it may be easier to work with them in-
dividually, or in Collection mode (Pro Tools HD
and Pro Tools LE with Music Production Toolkit
only). See “Detection (Normal) and Collection
Mode” on page 702.
Editing Beat Triggers
Even though Beat Detective offers a great deal of
flexibility in how transients are detected, there
may be times when beat triggers must be de-
leted, moved, or manually inserted. Addition-
ally, triggers can be promoted so they are re-
tained at lower sensitivity settings.
Deleting Beat Triggers
False triggers, which do not represent an actual
beat or sub-beat in the source material, may ap-
pear when raising the Sensitivity slider to detect
quiet material. In these instances you can locate
and manually delete any false triggers.
To delete a beat trigger:
1 With the Beat Detective window open, select
any Grabber tool in the Edit window.
2 Locate the false trigger you want to delete.
Transients for false triggers usually have smaller
peaks than the other trigger points, and typi-
cally fall between the sub-beats.
3 Alt-click (Windows) or Option-click (Mac) the
trigger to delete it.
Beat Detective LE cannot be used across
multiple tracks without the Music Produc-
tion Toolkit option. When Beat Detective
LE (without the Music Production Toolkit
option) is applied to multiple tracks, only
the top track is edited.
Deleting a beat trigger
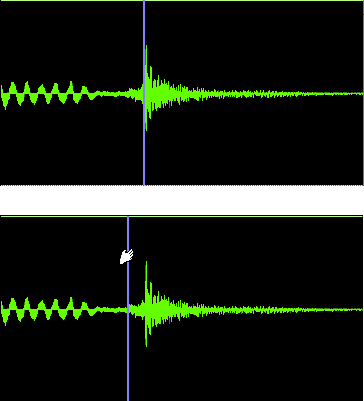
Pro Tools Reference Guide692
Moving Beat Triggers
You can adjust the placement of triggers to al-
low for the attack of their transients, or to com-
pensate for an individual transient that is
slightly ahead of or behind the beat.
To move a beat trigger:
1 With the Beat Detective window open, select
any Grabber tool in the Edit window.
2 Locate the beat trigger you want to move and
drag it left or right.
Inserting Beat Triggers
If an important beat or sub-beat is not detected,
because it is too quiet, you can manually insert a
beat trigger.
To insert a beat trigger:
1 With the Beat Detective window open, select
any Grabber tool in the Edit window.
2 Click in the selection where you want to insert
the new trigger. After inserting a beat trigger,
you can drag it left or right to adjust its place-
ment (see “Moving Beat Triggers” on page 692).
If you click too close to an existing trigger, the
existing trigger will be moved to the new loca-
tion.
Promoting Beat Triggers
To ensure that important beat triggers do not
disappear when lowering the Sensitivity value,
you can promote them. This is useful if a selec-
tion has numerous false triggers (too many to
bother deleting) at a Sensitivity level where cru-
cial, necessary beat triggers are also displayed. If
lowering the Sensitivity slider causes the needed
triggers to disappear, simply promote them first.
To promote a beat trigger:
1 Raise the Sensitivity slider until the desired
transient is detected and a beat trigger appears.
2 Control-click (Windows) or Command-click
(Mac) the beat trigger to promote it.
3 If necessary, repeat steps 1–2 to promote addi-
tional beat triggers.
4 Lower the Sensitivity slider to a value where
the false triggers disappear.
Once beat triggers are promoted, they will only
disappear if the Sensitivity value is set to 0%. To
demote all beat triggers in the selection—return-
ing them to their original state—click the Ana-
lyze button.
Moving a beat trigger
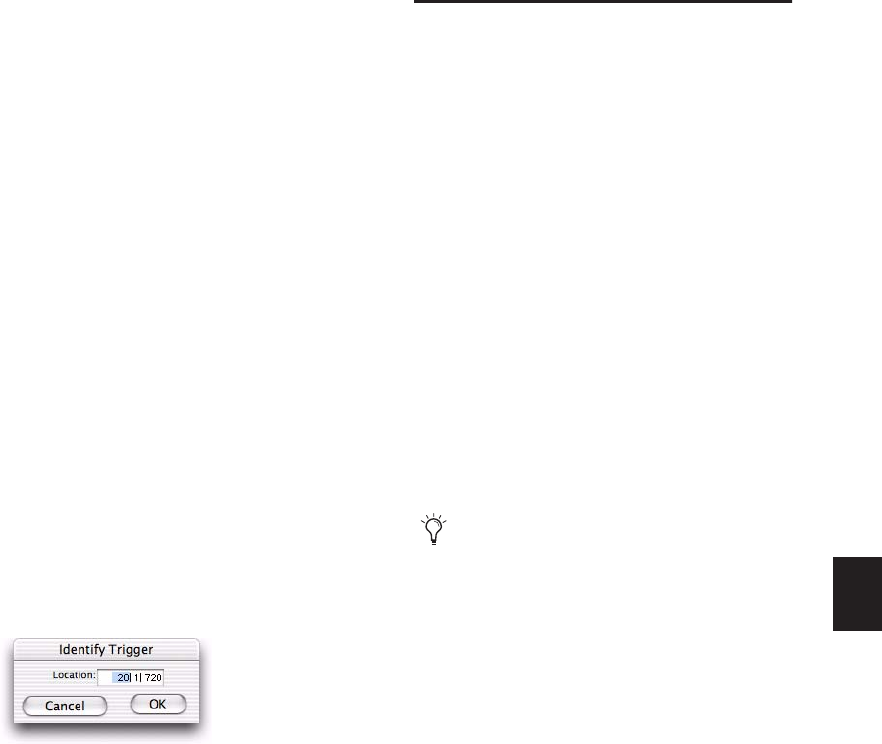
Chapter 34: Beat Detective 693
Redefining a Beat Trigger’s Metric
Location
It is vital that beat triggers are accurately placed
at the correct metric location. If a detected tran-
sient is slightly off the beat, Beat Detective may
assign it, as well as other transients in the selec-
tion, to the wrong metric location.
For example, if you have a bass track where a
note was intended to be a downbeat, but was
played too early, Beat Detective may define its
location as occurring a little before the down-
beat. If you then separate and conform the re-
gion containing this note, it will be moved to
the wrong location. Subsequent regions may be
moved to the wrong locations as well.
If a beat trigger is not assigned the correct metric
location, relocate it using Identify Trigger.
To change the metric location of a beat trigger:
1 Double-click the beat trigger you want to relo-
cate. The Identify Trigger dialog opens.
2 In the Identify Trigger dialog, enter the correct
location for the trigger, then click OK.
Navigating Consecutive Beat Triggers
Use the Scroll Next button to move from the
currently selected beat trigger to the next beat
trigger. To move to the previous beat trigger,
Alt-click (Windows) or Option-click (Mac) the
Scroll Next button. This is particularly useful for
editing consecutive beat triggers when zoomed
in at the sample level.
Generating Bar|Beat Markers
with Beat Detective
Once Beat Detective has accurately detected the
peak transients in the audio selection and accu-
rately generated beat triggers, the triggers can be
converted to Bar|Beat Markers. Bar|Beat Markers
generated by Beat Detective create a tempo map
that can be used throughout the session.
Once a tempo map has been generated, other
audio regions and MIDI notes can be conformed
to the Bar|Beat Markers generated by Beat Detec-
tive.
If you want to match the audio material to the
session’s existing tempo map or a groove tem-
plate, do not generate Bar|Beat Markers from the
material. Instead, use Beat Detective to separate
and conform the material (see “Separating Re-
gions with Beat Detective” on page 696).
To generate Bar|Beat Markers with Beat
Detective:
1 In the Edit window, make an audio selection.
2 In the Beat Detective window, select Bar|Beat
Marker Generation mode.
3 Define or capture the selection as described in
“Defining a Beat Detective Selection” on
page 686.
4 Set the Detection resolution to Bars or Beats,
and configure the Detection settings so the se-
lection’s peak transients are accurately detected
(see “Generating Beat Triggers” on page 688).
5 Click the Generate button.
Identify Trigger dialog
If you are simply aligning a sloppy part to
the other tracks, you probably do not need to
generate Bar|Beat markers.
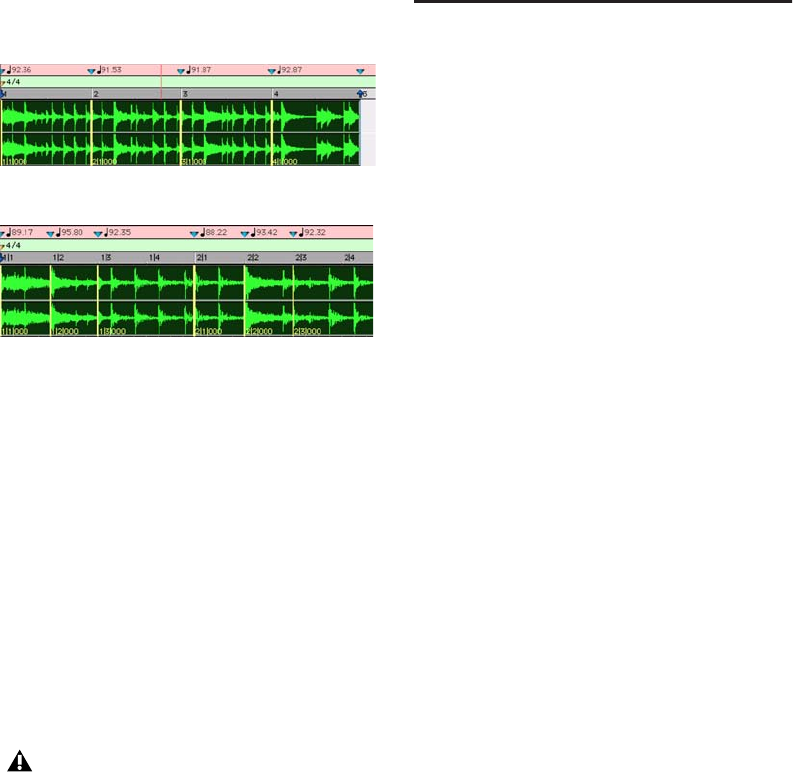
Pro Tools Reference Guide694
Bar|Beat Markers are generated, based on the
beat triggers, and appear in the Tempo ruler.
Working with Sub-Beats
Tempo is derived from Bar|Beat Markers.
Groove, or feel, is derived from Sub-Beats—the
deviation of subdivisions of the beat from the
strict tempo grid determines the groove or feel.
To extract the groove from a selection, set the
Detection Resolution to Sub-Beats. This ensures
that the inner rhythms within each bar (if they
indeed exist) are represented when generating
Bar|Beat Markers. These Bar|Beat Markers can
then be used to quantize other audio regions or
MIDI tracks, thereby conforming to the Bar|Beat
Markers generated by Beat Detective.
DigiGroove Templates
Beat Detective allows the fine timing nuances of
a rhythmic performance to be extracted and
saved as a groove template, called a DigiGroove
template. DigiGrooves can be saved locally to
the Groove Clipboard, or saved to disk as Digi-
Grooves.
Groove templates can be used to transfer the feel
of a particular performance to:
• Selected audio regions using Groove Conform
(see “Groove Conform” on page 700).
• Selected MIDI data using Groove Quantize
(see “Groove Quantize” on page 564).
Groove templates are “quantization maps” de-
rived from real musical performances. The
rhythmic character of each performance is ana-
lyzed and stored as a groove template. Beat De-
tective analyzes an audio selection for transient
peaks according to a defined threshold and
maps the rhythmic relationships to a 960 parts
per quarter note (ppq) template.
When creating DigiGroove templates, Beat De-
tective also analyzes the dynamics of a perfor-
mance. MIDI velocity data is saved from MIDI
tracks, and accents and peak levels in audio data
are incorporated into the groove template as ve-
locity data, which can be applied to change the
dynamics of MIDI tracks.
Beat Detective translates the amplitude of sig-
nals in audio tracks to MIDI velocity according
to a linear scale. For example:
• A 0 dBFS signal equals a MIDI velocity of
127.
• A signal at –6 dBFS equals a MIDI velocity
of 64.
• A signal at –12 dBFS equals a MIDI velocity
of 32.
• A –48 dBFS equals a MIDI velocity of 1.
Bar|Beat Markers generated at Bar resolution
Bar|Beat Markers generated at Beat resolution
When quantizing regions or MIDI notes to
Bar|Beat Markers on sub-beats that repre-
sent a swing feel, make sure to use a
straight quantize value (with the Swing op-
tion for Quantize disabled).
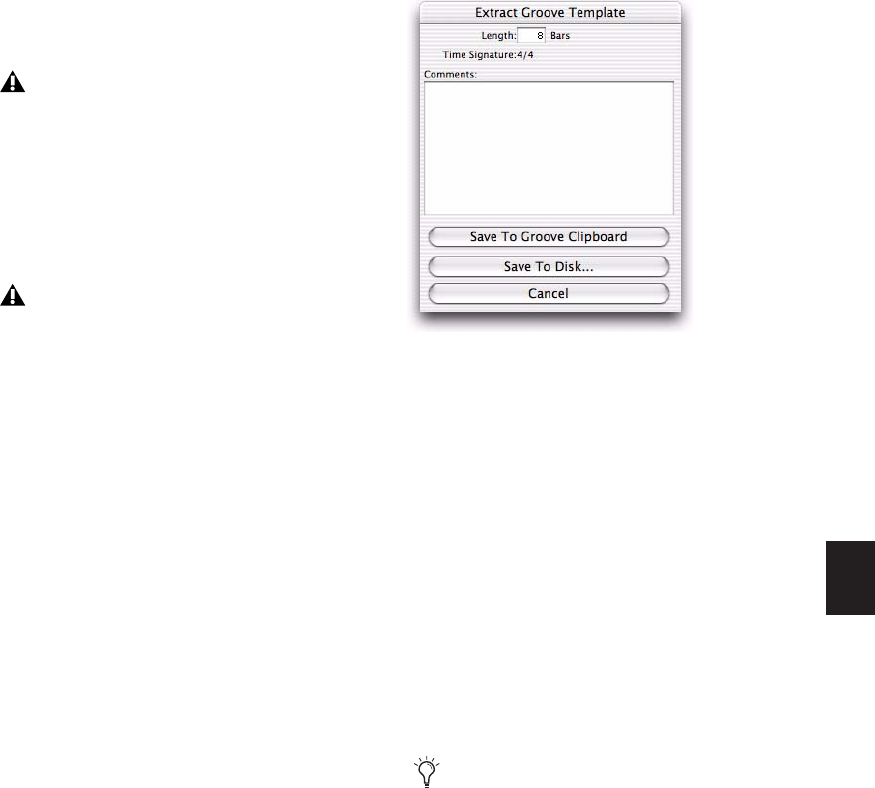
Chapter 34: Beat Detective 695
Capturing this information is very important to
preserving the feel of a performance, and can
add life to MIDI tracks that lack dynamics.
To extract a Groove Template:
1 In the Edit window, make an audio or MIDI se-
lection. The selection should consist of one or
more complete bars, starting and ending on
downbeats.
2 In the Beat Detective window, select Groove
Template Extraction mode.
3 Define or capture the selection as described in
“Defining a Beat Detective Selection” on
page 686.
4 Configure the Detection options so the selec-
tion’s peak transients are accurately detected
(see “Generating Beat Triggers” on page 688).
5 Click the Extract button.
6 In the Extract Groove Template dialog, enter
comments about the groove. You can enter a
maximum of 255 characters to describe the
groove. Comments can be viewed using the
Show Info button in the Beat Detective window.
7 Do one of the following:
• To save the extracted template for use in
the current session, without writing the
template file to disk, click Save To Groove
Clipboard. (This template will be lost when
you close the current session.)
• To save the extracted template to disk in or-
der to use it in other sessions or share it
with other Pro Tools users, click Save To
Disk. Enter a name for the template and
click Save. (Do not change the location of
DigiGroove template files and folders or
they will not be available in your sessions.)
• Click Cancel to cancel without saving the
template.
Beat Detective only captures duration data
from MIDI tracks, not from audio tracks.
When extracting Groove Templates, the
captured selection must not include
Bar|Beat Markers. Otherwise, the accuracy
of the Groove Template will be compro-
mised.
Extract Groove Template dialog
Use folders and subdirectories to organize
DigiGroove templates. However, be sure
they are always located in C:\
Program Files\Digidesign\Pro Tools\
Grooves (Windows) or Applications/
Digidesign/Pro Tools/Grooves (Mac).
Groove template files located elsewhere will
not be available in either Groove Quantize
or Beat Detective.

Pro Tools Reference Guide696
Swing Content for Generating Groove
Templates
When defining swing content of the selection,
select the Contains eighth-note option if the au-
dio selection has a heavily swung eighth-note
groove. If the audio selection has relatively
straight eighth-notes, use the Contains six-
teenth-note option. This lets the resultant Digi-
Groove template be applied more easily else-
where. Although a groove might be based upon
non-swung eighth-note material, you might
want to apply the template to material that con-
tains sixteenth-notes. If a template only has
eighth-note resolution, but the material being
conformed contains sixteenth-notes, adjacent
sixteenth-notes will be mapped to the same
eighth-note location.
Groove Extrapolation
Beat Detective’s ability to extract tempo data
from a wide range of material is enhanced by its
powerful “groove extrapolation” logic. Groove
extrapolation automatically generates beat trig-
gers for inclusion in groove templates even if a
peak transient is not detected. For example, a
drum loop might not have a hit on beat 3, con-
sequently no peak transient is detected and no
beat trigger is generated. Beat Detective will ex-
trapolate from other beat triggers in the selec-
tion and create a trigger for beat 3 in the groove
template.
In addition, extrapolated triggers preserve the
feel of triggers generated from detected peak
transients. For example, if a bar of kick drum de-
tected three beat triggers, all of which were 20
ticks ahead of the beat, any extrapolated beat
triggers will also be mapped 20 ticks ahead of
the beat.
Separating Regions with
Beat Detective
(Audio Only)
Once beat triggers appear in your selection, they
can be used to define start and end points for
new regions that can be separated automati-
cally. The new regions can then be conformed
to the session’s existing tempo map, or to a
groove template.
If you want to clean up the timing for the selec-
tion, without affecting the tempo, make sure to
first calculate the tempo by generating Bar|Beat
Markers (see “Calculating Tempo with Beat De-
tective” on page 688).
To separate regions with Beat Detective:
1 In the Edit window, make an audio selection.
2 In the Beat Detective window, select Region
Separation mode.
3 Define or capture the selection as described in
“Defining a Beat Detective Selection” on
page 686.
4 Configure the Detection options so the selec-
tion’s peak transients are accurately detected
(see “Generating Beat Triggers” on page 688).
5 Click the Separate button.
Regions are separated based on the detected beat
triggers.
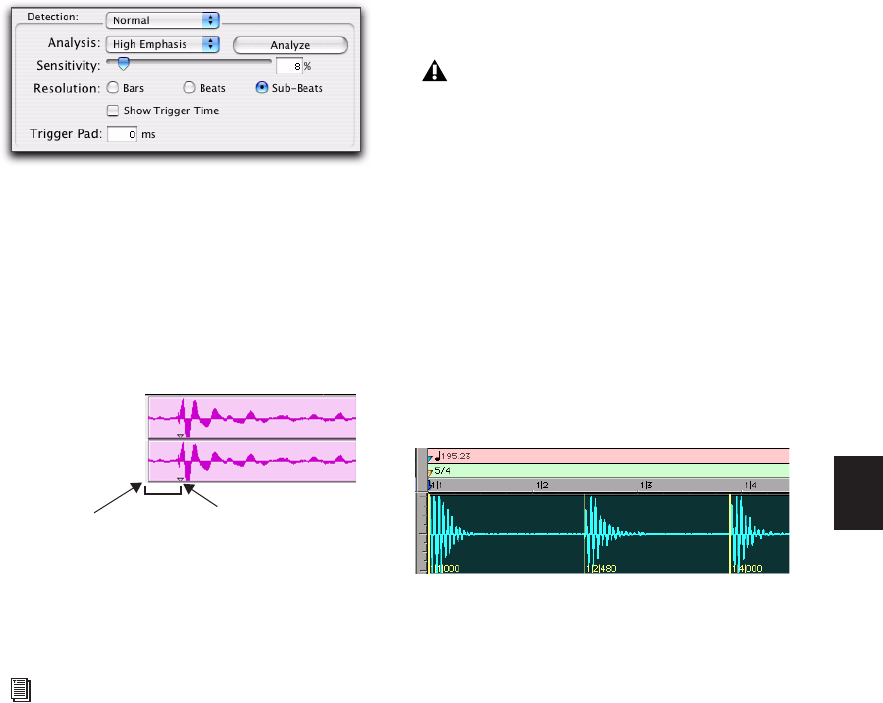
Chapter 34: Beat Detective 697
Trigger Pad
When separating regions, the Beat Detective
window displays an option called Trigger Pad.
Enter a value (0–50 ms) in this field to pad re-
gion start points—where the point of separation
is located in relation to the beat trigger (tran-
sient). This creates a space between the region
start point and the region sync point, thereby
ensuring that the attack portion of the material
remains intact.
When conforming separated regions, the region
sync point, not the region start point, deter-
mines where the region is placed.
Separating Multiple Tracks
(Pro Tools HD and Pro Tools LE with Music
Production Toolkit Only)
You can use beat triggers from a single track, or
subset of tracks, to separate a group of tracks.
In the following example, the defined selection
is a drum loop consisting of two bars of 5/4. The
kick, snare, hi-hat, and overhead microphones
are recorded to separate tracks.
Analyzing the loop’s kick drum track, with De-
tection Resolution set to Beats, Beat Detective
places beat triggers at the transients on beats 1
and 4 (see Figure 15).
Detection settings, Region Separation mode
Separated region with 20 ms Trigger Pad
For more information on region sync points,
see “Sync Points” on page 662.
Region start Sync point
(point of separation)
20
ms
(beat trigger)
Beat Detective LE cannot be used across
multiple tracks without the Music Produc-
tion Toolkit option. When Beat Detective
LE (without the Music Production Toolkit
option) is applied to multiple tracks, only
the top track is edited.
Figure 15. Kick drum track
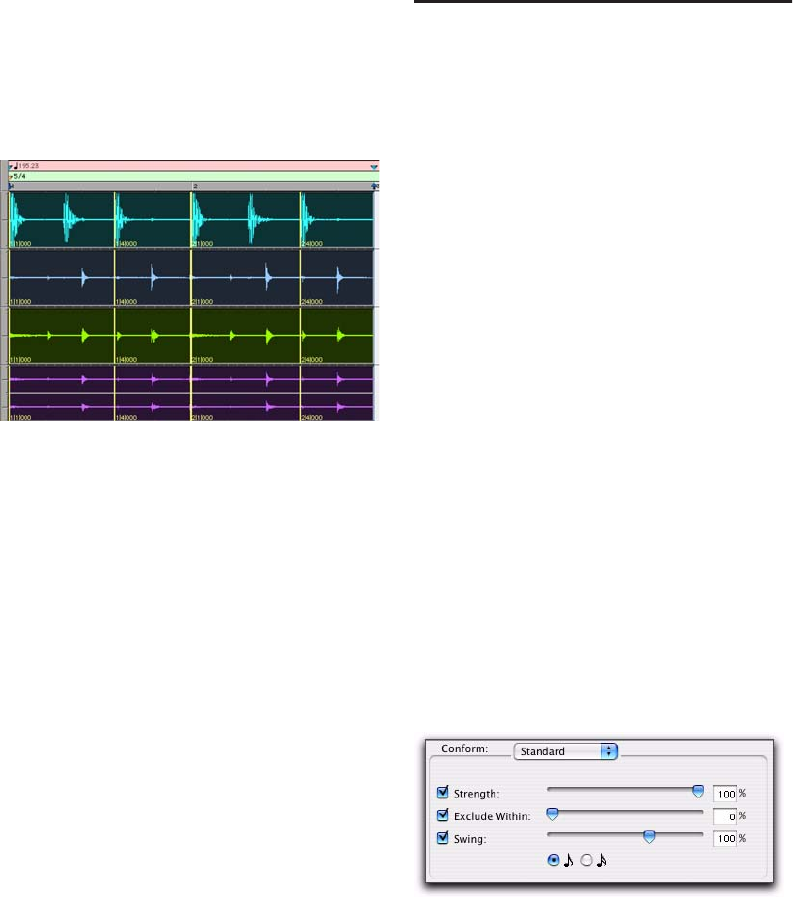
Pro Tools Reference Guide
698
Extending the selection to the snare, hi-hat, and
overhead microphones tracks, and then per-
forming the separation, results in separated re-
gions in each of the drum tracks at the same lo-
cation, based on the beat triggers from the kick
drum track (see Figure 16).
The separated regions can then be conformed as
a group.
You can also utilize Collection mode (Pro Tools
HD and Pro Tools LE with Music Production
Toolkit only) when working with multiple
tracks. Collection mode lets you analyze and de-
tect triggers on tracks individually, and if you
choose, add only the unique triggers from the
current track to the overall collection. For more
information, see “Detection (Normal) and Col-
lection Mode” on page 702.
Conforming Regions with
Beat Detective
(Audio Only)
After regions have been separated with Beat De-
tective, the regions can then be conformed us-
ing one of two modes:
Standard Conform
Uses the session’s current
tempo map (Grid)
Groove Conform
Uses groove templates.
Beat Detective will conform any selected region,
whether or not it was separated with Beat Detec-
tive. However, in order to successfully conform
regions with Beat Detective, the region start
points must correspond to the start of the mate-
rial that will align with the session’s bars and
beats. This should generally not be a problem if
the regions were separated with Beat Detective
(rather than manually separated or trimmed).
Standard Conform
This is similar to using the Region > Quantize to
Grid command, but with one important differ-
ence: With a single operation, Beat Detective
can adjust the position of all regions, whether
they have a straight or swing feel.
Figure 16. Kick drum, snare, hi-hat, and overhead
microphones tracks
Beat Detective, Standard Conform options
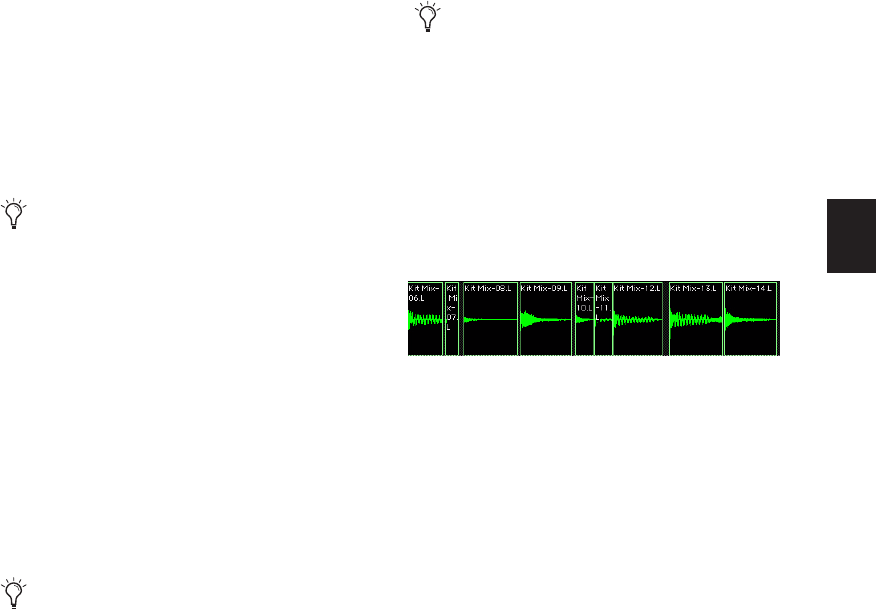
Chapter 34: Beat Detective
699
To conform regions using Standard Conform:
1
In the Beat Detective window, select Region
Conform mode.
2
Make sure Standard is selected.
3
In the Edit window, if not already selected, se-
lect the separated regions you want to conform.
Make sure the selection’s start and end points
fall cleanly on the beat.
4
In the Beat Detective window, define or recap-
ture the selection as described in “Defining a
Beat Detective Selection” on page 686.
5
To affect how strongly the regions are con-
formed to the Grid (tempo map), select the
Strength option and specify a percentage value
with either the slider or by typing in a value:
• Lower percentage values preserve the origi-
nal feel of the regions.
• Higher percentage values align the regions
more tightly to the tempo map, with 100%
aligning precisely to the tempo map.
6
To affect which regions are conformed, select
the Exclude Within option and specify a per-
centage value with the slider or by typing in a
value:
• Lower percentage values ensure that re-
gions further away from the Grid are con-
formed, while those closer to the Grid are
not.
• Higher percentage values ensure that re-
gions closer to the Grid, as well as those
further away, are conformed.
7
To achieve a swing feel for the conformed re-
gions, select the Swing option and whether the
swing is based on eighth-notes or sixteenth-
notes, then specify a percentage value with the
slider or by typing in a value:
• Smaller percentage values yield less swing,
with 0% yielding none.
• Larger percentage values yield more swing,
with 100% yielding a triplet, swing feel.
• Percentage values between 100–150 move
the regions beyond a triplet, swing feel, to-
ward the next sixteenth-note boundary
(provided the Swing note value is set to
eighth-notes).
8
Click the Conform button to automatically
conform all regions in the selection.
9
Audition the new conformed regions by click-
ing Play in the Transport window.
10
Do one of the following:
• If necessary, select Edit > Undo, and repeat
steps 4–8 trying a different set of Conform
settings.
– or –
• If necessary, apply Edit Smoothing (see
“Edit Smoothing” on page 701).
To “tighten up” the original feel, while re-
taining it, set the Strength option to
85–88%.
To “tighten up” the original feel, while re-
taining it, set the Exclude Within option to
10–15%.
If Beat Detective has successfully captured
enough of the sub-beats from a selection be-
fore separating, you can successfully con-
form with the Swing option to change the
groove from a “straight” feel to one that is
swung. You can also import a groove tem-
plate containing a swing feel (see “Groove
Conform” on page 700).
Regions conformed with Beat Detective
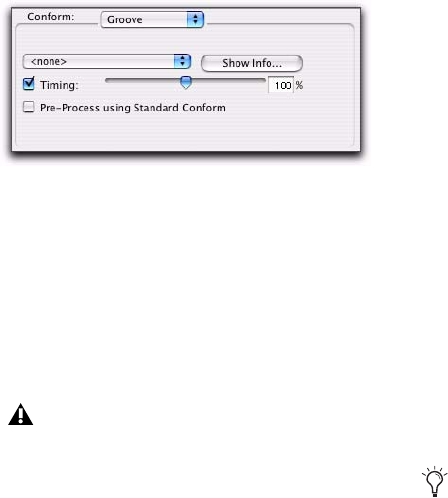
Pro Tools Reference Guide
700
Groove Conform
Instead of using a grid based on the session’s
tempo map, Groove Conform uses a grid based
on a groove template, or DigiGroove. Digi-
Grooves can be used to apply the feel of a cap-
tured passage to the selected audio regions. For
information about creating DigiGroove tem-
plates, see “DigiGroove Templates” on
page 694.
To conform regions using Groove Conform:
1
In the Beat Detective window, select Region
Conform mode.
2
Select Groove.
3
In the Edit window, if not already selected, se-
lect the separated regions you want to conform.
Make sure the selection’s start and end points
fall cleanly on the beat.
4
In the Beat Detective window, define or recap-
ture the selection as described in “Defining a
Beat Detective Selection” on page 686.
5
From the Groove Template pop-up menu, se-
lect the Groove Clipboard or a saved groove
template (for information on creating groove
templates, see “DigiGroove Templates” on
page 694).
6
To see comments about the selected template,
click Show Info.
7
To affect how strongly the regions are con-
formed to the groove template, select the Tim-
ing option and specify a percentage value with
either the slider or by typing in a value:
• Lower percentage values preserve the origi-
nal feel of the regions.
• Higher percentage values align the regions
more tightly to the groove templates grid,
with 100% aligning precisely to the tem-
plate grid.
• If the slider is set to 200%, regions move to
a location that is twice the difference be-
tween the original region location and the
position of the referenced template event.
For example, if a note was played at Bar 1|1|060
(a 16th note), and the corresponding template
event is at 1|1|073, a slider value of 100% results
in the note being shifted to 1|1|073; a slider
value of 200% shifts the note to 1|1|086.
8
If desired, enable the Pre-Process using Stan-
dard Conform option. With this option en-
abled, Beat Detective conforms regions to the
current Standard Conform settings before ap-
plying the groove template. With material in
which the performance was not accurate, Pre-
Process using Standard Conform can lead to bet-
ter results by ensuring that the performance is
accurately mapped to the correct bars, beats,
and sub-beats before the groove template is ap-
plied. Experimentation is the best way to deter-
mine when it is appropriate to use this option.
Beat Detective, Groove Conform options
When using Groove Conform, the captured
selection must not include Bar|Beat Mark-
ers. Otherwise, the accuracy of the Groove
Template will be compromised.
When conforming an audio passage to a
heavily swung groove template, enabling
Pre-Process using Standard Conform will of-
ten yield better results.
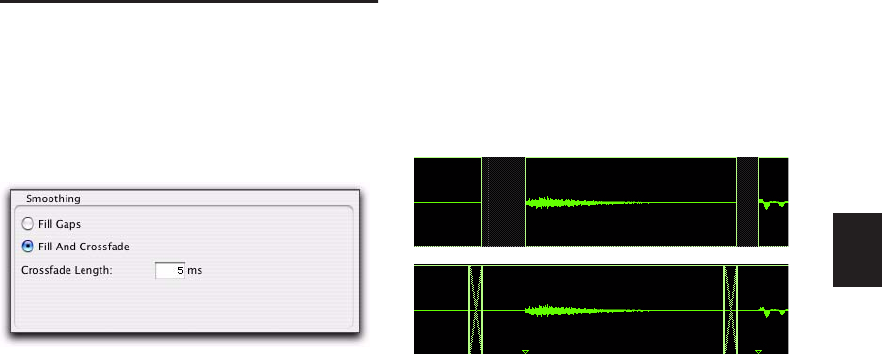
Chapter 34: Beat Detective
701
9
Click the Conform button to automatically
conform all regions in the selection.
10
Audition the new conformed regions by
clicking Play in the Transport window.
11
Do one of the following:
• If necessary, select Edit > Undo, and repeat
steps 4–9 trying a different groove template
or Groove Conform settings.
– or –
• If necessary, apply Edit Smoothing (see
“Edit Smoothing” on page 701).
Edit Smoothing
(Audio Only)
After regions are conformed, there may be gaps
between the regions. These gaps can cause the
material to sound unnatural on playback.
Beat Detective can automatically fill the gaps be-
tween regions, and even add crossfades if you
choose. This Edit Smoothing option can be used
with regions that have been conformed, or with
a track that contains many regions that need to
be trimmed and crossfaded (such as in a sound
effects track). This automated process of
smoothing region edits can save many hours of
tedious editing.
To use Edit Smoothing on conformed regions:
1
In the Beat Detective window, select Edit
Smoothing mode.
2
Select a Smoothing options:
Fill Gaps
Select this option to trim region end
points so that the gaps between regions are
filled.
Fill And Crossfade
Select this option to trim re-
gion end points and automatically add a pre-
fade (in ms) directly before each region start
point.
3
In the Edit window, if not already selected, se-
lect the range of conformed audio regions you
want to smooth. Make sure the selection’s start
and end points fall cleanly on the beat.
4
Click the Smooth button to smooth the edits
for the selected regions.
5
Audition the results by clicking Play in the
Transport window.
6
If necessary, select Edit > Undo, and repeat
steps 2–5 trying a different Crossfade Length.
Beat Detective, Smoothing options
Regions before and after Edit Smoothing
Pro Tools Reference Guide
702
Edit Smoothing Creates Sync Points
After smoothing edits with Beat Detective, sync
points (corresponding to the material’s start
point) are automatically created for the con-
formed regions. This allows you to later con-
form the regions to a different tempo map or
groove template, or use different Conform set-
tings. However, sync points are only created as
they are needed: If gaps between regions are cre-
ated during Region Conform, Fill Gaps in Edit
Smoothing mode will trim regions to fill the gap
and a sync point will be created at each region’s
original start point. If there is no gap between
regions, no sync point will be created by Edit
Smoothing.
Consolidating Regions after Edit
Smoothing
The process of separating, conforming, and
smoothing with Beat Detective can leave tracks
with many regions and many crossfades. If you
are working with multiple tracks, the density of
these edits may lead to system performance
problems.
Once you are satisfied with the results from Beat
Detective, it is recommended that you flatten
the tracks with the Consolidate command. For
all regions selected, Consolidate creates a single,
contiguous audio file to reduce the session’s edit
density. See “Consolidate Command” on
page 475.
Detection (Normal) and
Collection Mode
(Pro Tools HD and Pro Tools LE with Music
Production Toolkit Only)
In some instances, it may be difficult for Beat
Detective to successfully analyze multiple tracks
with the same Detection settings. With Beat De-
tective’s Collection mode, you can collect a set
of beat triggers from different tracks, each with
different Detection settings, and use the collec-
tion of triggers to generate Bar|Beat Markers or
DigiGroove templates, or separate new regions.
Collection mode is the only way to analyze and
create beat triggers on one track, and apply
them to another track.
This method of selectively adding beat triggers
from separate analysis passes on different tracks,
until you get only the triggers you want, is po-
tentially much more effective than manually
deleting, inserting, or adjusting incorrect or
false triggers.
For more information on region sync points,
see “Sync Points” on page 662.
If performance is not an issue, use the Re-
gion Group command for easier editing and
manipulation of regions. This can be useful
for arranging beats that were sliced with
Beat Detective, especially if you plan on
changing tempos with tick-based audio
tracks. For more information on region
groups, see “Region Groups” on page 675.
Before consolidating a large selection across
multiple tracks, make sure there is enough
RAM available. See “RAM Requirements for
Beat Detective” on page 684.
Beat Detective LE does not support Collec-
tion Mode without the Music Production
Toolkit option.
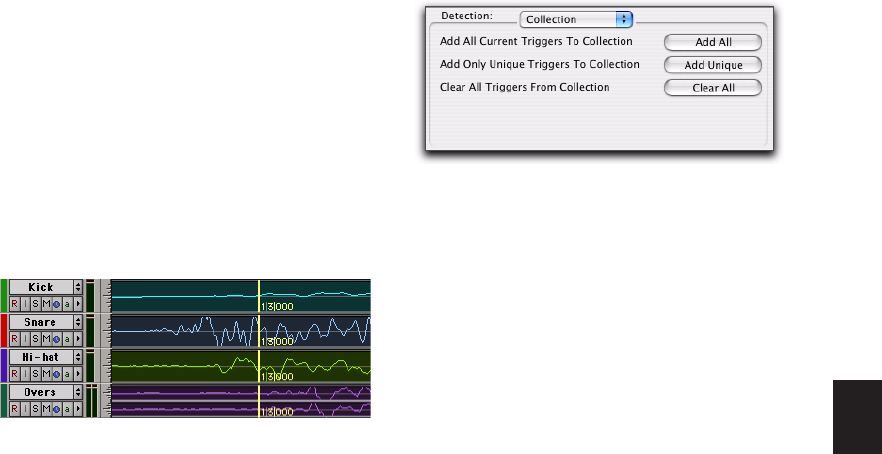
Chapter 34: Beat Detective
703
Drum Tracks and Collection Mode
Suppose you have drum tracks for kick, snare,
hi-hat, and overhead mics. If you analyze a se-
lection across all of the tracks, you may get
many false triggers when you raise the Sensitiv-
ity slider high enough to capture the hi-hat ma-
terial (coming mainly from the tracks for the
overhead mics).
However, if you analyze only the track for the
overhead mics, the resulting beat triggers are
slightly later than the material on the other
tracks (since it will take more time for the sound
to reach the overhead mics). If you then extend
the selection to the other drum tracks and sepa-
rate them, the regions from the kick, snare, and
tom tracks will be cut slightly late (see Figure 17
below).
Using Collection mode, you can analyze each
drum track separately, one at a time, optimizing
the Detection settings for each track until you
get the triggers you want. The triggers for each
track can be added successively to the collec-
tion, or you can choose to collect only the
unique triggers from a track. The collection of
triggers that results can then be used to generate
Bar|Beat Markers or a DigiGroove template, or
separate new regions.
Using Collection Mode
Collection mode is available in Bar|Beat Marker
Generation, Groove Template Extraction, or Re-
gion Separation mode (audio only), and is ac-
cessed by clicking the Collection Mode button
in the Detection section.
To use Collection mode:
1
In the Edit window, make an audio selection
on a single track. Make sure the selection’s start
and end points fall cleanly on the beat.
2
In the Beat Detective window, select one of
the following modes:
• Bar|Beat Marker Generation
• Groove Template Extraction
• Region Separation (audio only)
3
Define or capture the selection as described in
“Defining a Beat Detective Selection” on
page 686.
4
Configure the Detection options so the selec-
tion’s peak transients are accurately detected
(see “Generating Beat Triggers” on page 688).
5
Click the Collection Mode button.
6
In the Detection (Collection Mode) section,
click Add to add all the current beat triggers to
the collection.
Figure 17. Overhead mics generate late beat triggers
Beat Detective, Collection mode options

Pro Tools Reference Guide
704
7
Click the Normal Mode button and move the
selection to the next track you want to analyze.
Make sure to keep the selection range constant
for each track.
8
Configure the Detection options so the selec-
tion’s peak transients are accurately detected
(see “Generating Beat Triggers” on page 688).
9
Click the Collection Mode button again.
10
Do one of the following:
• In the Detection (Collection Mode) sec-
tion, click Add Unique Triggers to add only
the
unique
triggers from the track to the col-
lection.
• Click Add All to add
all
triggers to the col-
lection.
• Click Clear All to clear
all
triggers from the
collection.
Each new set of triggers added to the collection
appears in a different color. If successive triggers
in the collection are located closely together (for
example, because of microphone leakage), Beat
Detective keeps only the earlier triggers (see
Figure 18).
11
Repeat steps 7–10 for each additional track
you are analyzing.
The beat triggers stored in the Collection mode
are saved with sessions. Therefore, when a ses-
sion is opened later, the previous collection ma-
terial is still there (until it is cleared).
12
Once the desired beat triggers have been
added to the collection, you can use them to
generate Bar|Beat Markers or groove template, or
separate regions. However, this must be done
from the Collection Mode section (when the
triggers are displayed in multiple colors).
Press Start+P (Windows) or Control+P
(Mac) to move the selection up, or
Start+Semi-colon (Windows) or Con-
trol+Semi-colon (Mac) to move the selection
down.
With Commands Keyboard Focus enabled,
press “P” to move the selection up, or Semi-
colon (;) to move the selection down. Hold
down the Shift key to retain and add to the
current selection
To separate regions across multiple tracks,
make sure to extend the selection to any ad-
ditional tracks before separating.
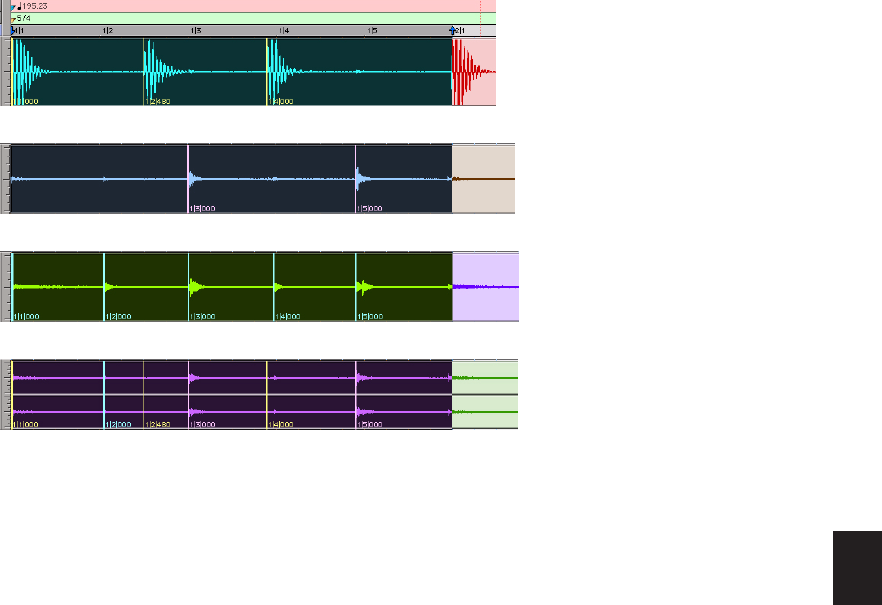
Chapter 34: Beat Detective 705
Figure 18. Overhead mic track displaying a collection of beat triggers containing unique triggers generated from the
kick, snare, and hi-hat tracks
Beat triggers
detected in Kick track
added to collection
Unique beat triggers
detected in Snare track
added to collection
Unique beat triggers
detected in Hi-hat track
added to collection
Collected beat triggers
applied to Overhead
microphones track
Pro Tools Reference Guide706

707
Part VII: Mixing
708
Chapter 35: Basic Mixing 709
Chapter 35: Basic Mixing
In addition to the final mixdown, mixing tasks
can occur any time during a recording session.
This chapter covers Pro Tools mixing, including
audio signal flow, output and bus paths, sends,
and signal routing for submixing and mixdown.
During mixing, real-time plug-ins and hardware
inserts provide effects and signal processing (see
Chapter 36, “Plug-in and Hardware Inserts”).
Mixing Concepts
Mixing involves making decisions about ele-
ments such as volume levels, panning, and ef-
fects in your studio. While you can control
many variables in your studio (such as speakers
and room acoustics), you cannot control the lis-
tening environment in which your final mix
will be heard. The following tips will help you
make your mix sound as good as possible to as
many listeners as possible:
Alternate Speakers and Reference
Monitoring Listen to your mixes on a variety of
different speakers to gauge how well the mix
will translate to different playback systems.
Reference Mixes Make discs and MP3s of rough
mixes and audition them outside the studio in
different listening environments.
Format Compatibility Monitoring Check stereo
mixes for compatibility with mono playback
systems, and multichannel surround mixes for
compatibility with stereo playback systems. (see
the Pro Tools Sync & Surround Concepts Guide).
Metering and Calibration
Meters provide a visual display of signal levels.
They tell whether signal is getting to a channel,
and how loud or soft a signal is relative to
(above or below) “0.”
By calibrating all your equipment to standard
reference levels, a consistent level can be
achieved (and metered) among different record-
ing devices in a studio, throughout a facility, or
throughout an entire production chain. For ex-
ample, a level of –18 dBFS coming out of a DAT
deck should play and meter at –18 dBFS in
Pro Tools.
Calibrating Audio Interfaces
(Pro Tools|HD with 192 I/O Only)
If you are using a Pro Tools|HD system with a
192 I/O audio interface, use the Calibration Ref-
erence Level option (in the Operation Prefer-
ences page) to set the reference level when
Pro Tools is in Calibration mode.
For instructions on calibrating a 192 I/O
Audio Interface, see the 192 I/O Guide.
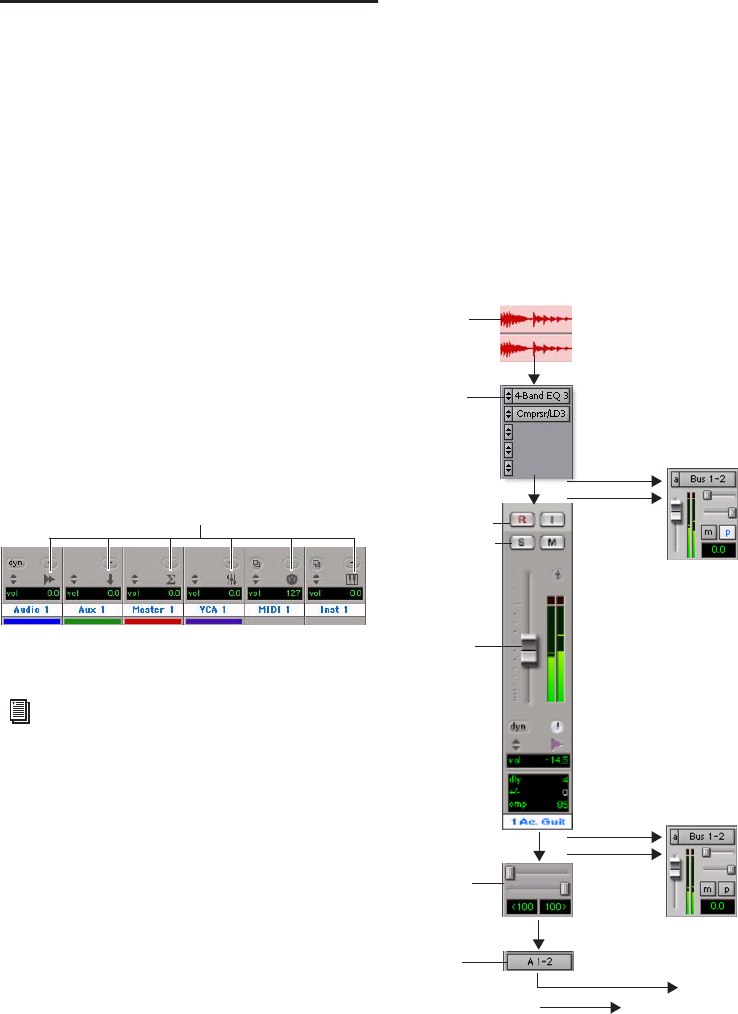
Pro Tools Reference Guide710
Signal Flow by Track Type
Pro Tools provides the following track types:
• Audio
• Auxiliary Input
• Master Fader
• MIDI
• Instrument
• VCA Master (Pro Tools HD only)
Audio, Auxiliary Input, Master Fader, and In-
strument tracks can route audio. MIDI and In-
strument tracks can control MIDI data.
VCA Master tracks do not pass audio or control
MIDI, but do affect controls on other tracks. See
“VCA Master Tracks” on page 714.
Tracks can be identified in the Mix window by
their Track Type icon.
Audio Tracks
Audio tracks play audio from disk, record audio
to disk, and monitor input signals when record-
enabled or in TrackInput monitoring mode. In-
serts on audio tracks are pre-fader. Sends on au-
dio tracks can be pre- or post-fader.
Mono and stereo audio tracks are available on
all Pro Tools systems.
Multichannel audio tracks and surround mixing
formats are supported by Pro Tools HD only.
Audio, Auxiliary Input, Master Fader, VCA Master, MIDI,
and Instrument tracks
For information on creating tracks, see
“Creating Tracks” on page 144.
T
rac
k
T
ype
i
cons
Audio track audio signal flow
Inserts
Sends,
Volume
(plug-ins or
Main Output
pre-fader
Solo/Mute
Panner
Additional Outputs
Sends, post-fader
Output
+
Source: any mono, stereo, or
multichannel audio file, playing
back from disk
Source
or Input
inserts)
hardware
Input: while record-monitoring or
in TrackInput monitoring mode
Record
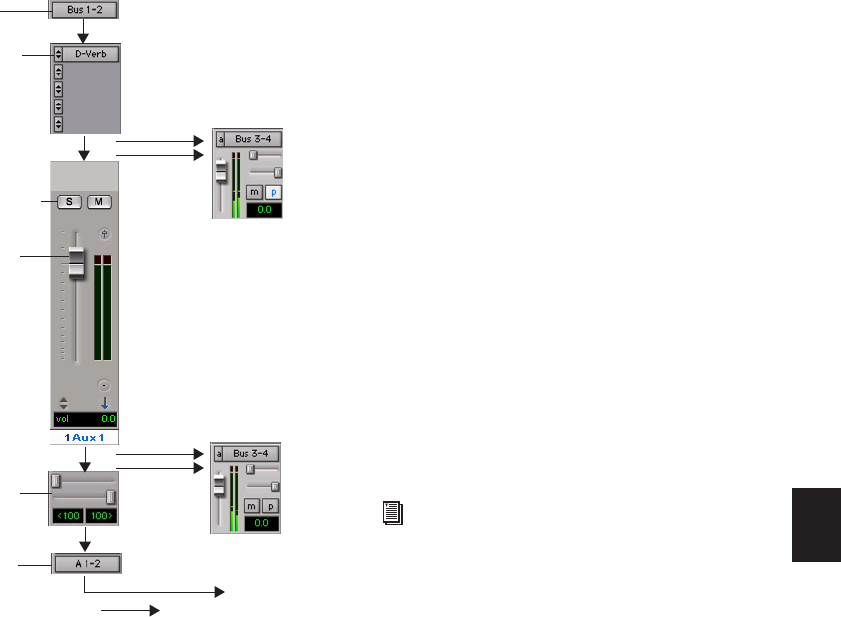
Chapter 35: Basic Mixing 711
Auxiliary Input Tracks
Auxiliary Input tracks provide the same signal
routing options as audio tracks, except that their
input must come from an internal bus or hard-
ware input. Inserts on Auxiliary Inputs are
pre-fader.
Auxiliary Input tracks are used as inputs for au-
dio from external MIDI instrument and other
sources, as well as to submix internal bus and
output paths. They can be fully automated.
When using Auxiliary Input tracks as inputs for
external sources, adjust the source output levels
to achieve proper recording levels.
Common Uses for Auxiliary Inputs
Auxiliary Inputs can be used to:
• Apply real-time plug-ins or an external pro-
cessor to a submix, using the Auxiliary In-
put as an effects return (such as reverb or
bus line compression)
• Input audio from external MIDI instru-
ments and other audio sources into the
mix, to monitor or route to audio tracks for
recording to disk (such as from the audio
outputs of a MIDI synthesizer)
• Consolidate volume control of any submix
under a single fader
• Integrate an instrument plug-in (such as
Digidesign’s Xpand!) into a session. How-
ever, the preferred way to integrate instru-
ment plug-ins is with Instrument tracks.
To route an Auxiliary Input:
1 Click the Input Path selector of the Auxiliary
Input and choose an input or bus path.
2 Click the Output Path selector of the Auxiliary
Input and choose an output or bus path.
3 Adjust the Auxiliary Input fader to set the re-
turn volume.
Auxiliary Input track audio signal flow
Inserts
Sends,
Volume
(plug-ins or
Main Output
pre-fader
Solo/Mute
Panner
Additional Outputs
Sends, post-fader
Output
+
Source: bus or
Input
inserts)
hardware
hardware input path
See the submix examples in “Signal Routing
for Monitoring and Submixing” on
page 735.
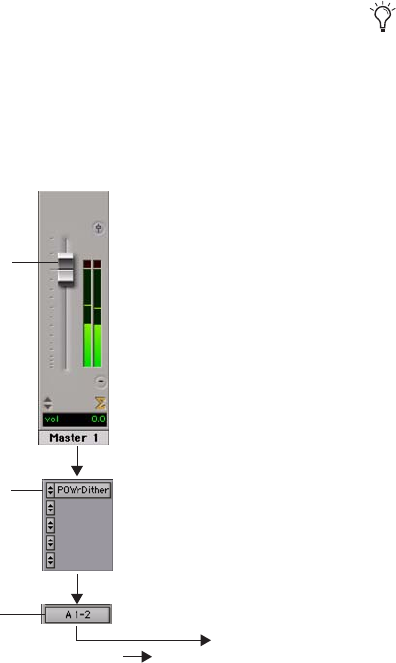
Pro Tools Reference Guide712
Master Fader Tracks
Master Fader tracks control the master output
levels of output and bus paths. When assigned
to an active output or bus path, they provide
post-fader effects processing and master level
control for a main mix, headphone and cue
mixes, stems, effects sends, and other signal
routing applications. Master Faders support all
track formats supported on your Pro Tools sys-
tem.
Unlike inserts on audio tracks and Auxiliary In-
puts, Master Fader inserts are post-fader. This
lets you insert a dither plug-in, or similar plug-
in, on your master mix, and affect its processing
with the Master Fader level. For more informa-
tion, see “Dither” on page 746.
Master Faders provide up to five post-fader in-
serts and no sends. Also, Master Fader tracks do
not have Pan sliders, or Mute and Solo buttons.
Common Uses for Master Faders
Master Faders can be used to:
• Control and process output mixes
• Monitor and meter an output (such as a
bus or hardware output) to guard against
clipping
• Control submix levels
• Control effects sends levels
• Control submaster (bussed tracks) levels
• Apply dither or other inserts to an entire
mix
Use Master Faders to control submix levels, send
level masters, and other outputs. Master Faders
can control either audio interface outputs or in-
ternal busses. A Stereo Master Fader controls the
level of a pair of outputs. Master Faders do not
consume any of your system’s audio processing
power.
To use a Master Fader as a stereo master volume
control:
1 Create a stereo Master Fader track.
2 Set the outputs of all audio tracks in the ses-
sion to the main output path (for example, out-
puts 1–2 of your primary audio interface) and
set the panning for each track.
3 Set the output of the Master Fader to the main
output path.
Master Fader track audio signal flow
Inserts,
Volume
(plug-ins or
Output
post-fader
hardware)
Main Output
Additional Outputs
+
Input (source) determined by
output assignment (of other
tracks)
If you absolutely must have a pre-fader in-
sert on your Master Fader signal, set up an
Auxiliary Input before the Master Fader.
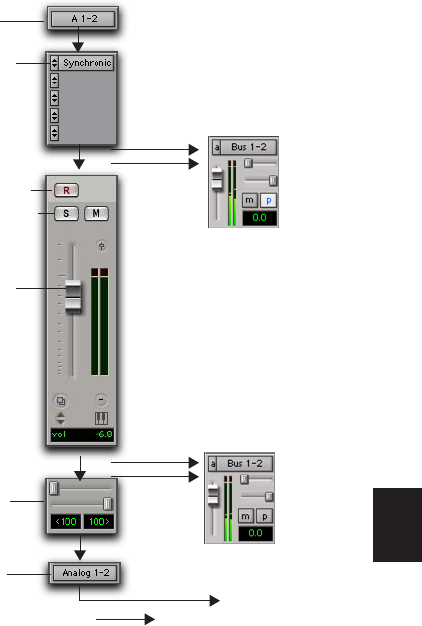
Chapter 35: Basic Mixing 713
Master Fader Meters
Meters on Master faders always show post-fader
levels, regardless of the Pre-Fader Metering set-
ting in the Options menu.
Master Faders and Paths
Master Faders can be assigned to main or sub-
paths as defined in the I/O Setup. Multiple Mas-
ter Faders cannot be assigned to the same path.
Active and Inactive Master Faders
When a Master Fader track is inactive, its associ-
ated plug-ins, I/O assignments, and their re-
sources are made inactive.
When a Master Fader output assignment (path
assignment) is made inactive, the Master Fader
no longer controls the master gain of that path.
When you duplicate a Master Fader track, the
duplicated track’s assignment will be inactive.
Instrument Tracks
Instrument tracks provide the same audio signal
routing options as Auxiliary Input tracks, except
that their input must come from an instrument
plug-in inserted on that Instrument track, or
from a bus or hardware input.
Instrument tracks are used as inputs for instru-
ment plug-ins, and other sources (including in-
ternal busses). They can be fully automated.
When using an Instrument track as an input for
an external source, adjust the output level at the
source to achieve proper recording level.
Instrument track audio signal flow
Inserts
Sends,
Volume
(plug-ins or
Main Output
pre-fader
Solo/Mute
Panner
Additional Outputs
Sends, post-fader
Output
+
Input
inserts)
hardware
Record
(MIDI only)
Instrument plug-in,
internal bus, or
hardware instrument
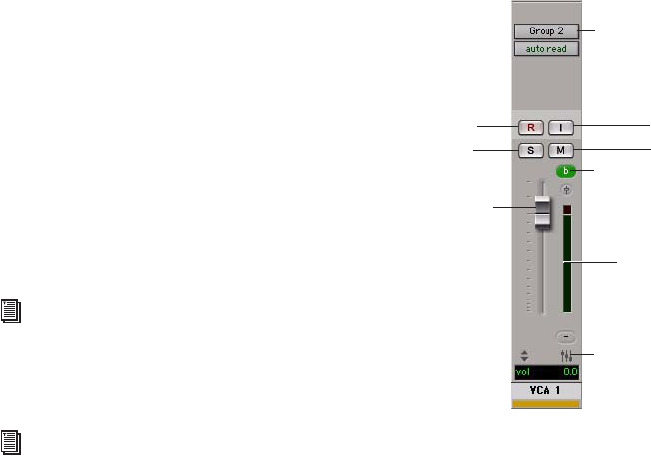
Pro Tools Reference Guide714
Common Uses for Instrument Tracks
By playing back MIDI from or through an In-
strument track you can control and monitor the
audio from:
• Instrument plug-ins, such as software syn-
thesizers or samplers.
• External MIDI instruments, such as synthe-
sizers and samplers
To route audio from an external MIDI instrument to
an Instrument track:
1 Click the Input Path selector of the Instru-
ment track and choose the corresponding hard-
ware input for your external MIDI instrument.
2 Click the Output Path selector of the Instru-
ment track and choose an output or bus path.
3 In Instruments View, click the MIDI Input se-
lector, and assign a device and channel from the
pop-up menu to record and control the external
MIDI instrument.
4 In Instruments View, click the MIDI Output
selector, and assign the port and channel for the
external MIDI instrument from the pop-up
menu.
5 Adjust the Instrument fader to set the volume.
VCA Master Tracks
(Pro Tools HD Only)
VCA Master tracks emulate the operation of
voltage-controlled amplifier channels on analog
consoles, where a VCA channel fader would be
used to control, group, or offset the signal levels
of other channels on the console.
VCA Master tracks do not pass audio, so they do
not have inputs, outputs, inserts or sends. A Mix
group is assigned to a VCA Master track, which
appears in the VCA track’s Group Assignment
selector. The controls of the tracks in that Mix
group, called the slave tracks, are modified by
the controls on the VCA Master.
For information on assigning MIDI input
and output for Instrument tracks, see “As-
signing MIDI Input and Output for Instru-
ment Tracks” on page 166.
For information inserting Instrument plug-
ins on Instrument tracks, see “Inserting In-
strument Plug-ins on Instrument Tracks”
on page 167.
VCA Master track
Group Assignment
selector
VCA Group ID
VCA Track Type indicator
TrackInput
Mute
Record
Volume
Solo
Enable
Level meter

Chapter 35: Basic Mixing 715
VCA Slave Track Control Indications
Unlike VCAs on traditional analog consoles,
VCA Master tracks in Pro Tools directly affect
their slave tracks, so that the controls on each
slave track always show their actual values:
• The output level of each slave track is indi-
cated by the position of its fader.
• The solo, mute, record enable, and Track-
Input status of each slave track are indi-
cated by the corresponding controls on the
track.
This ensures that even when a VCA Master track
is not visible, the true state of its slave tracks is
accurately displayed.
VCA Slave Track Controls and Group Behavior
When a group is assigned to a VCA Master, the
VCA-modifiable controls (Volume, Mute, Solo,
Record Enable and TrackInput) on its slave
tracks, by default, do not follow any grouped be-
havior that may be set in the Attributes page of
the Groups dialog. This lets you control the out-
put levels of the group’s member tracks while re-
taining the ability to adjust individual member
track levels.
Slave tracks can be set to follow normal grouped
behavior. See “Assigning Groups to VCA Mas-
ters” on page 717.
Common Uses for VCA Master Tracks
By grouping tracks in a Mix group and assigning
that group to a VCA Master track, you can:
• Control the output levels of all the VCA
group’s member tracks without the need to
bus them to an Auxiliary Input track or to
the same output path
• Create multiple, nested VCA groups and
control the output levels of multiple sub-
mixes at the same time
• Automate a submix by automating its VCA
Master track
VCA Master Track Controls
The controls on a VCA Master track affect the
corresponding controls on the slave tracks in its
assigned Mix group. VCA Master tracks have the
following controls:
Volume
The VCA Volume fader controls the Volume
fader on audio, Auxiliary Input, Instrument,
Master Fader, and other VCA Master tracks in a
VCA-controlled group. (Volume faders on MIDI
tracks are not affected.) Volume faders on slave
tracks move to show the composite level, or the
level on each track resulting from the position
of the VCA Master Volume fader.
Mute
The VCA Mute button controls the mute state of
audio, Auxiliary Input, Instrument, MIDI, and
other VCA Master tracks in a VCA-controlled
group. Muting a VCA-controlled group does not
change the underlying mute state of slave
tracks. (Mute buttons on slave tracks that were
previously unmuted show an implicit mute.)
Pro Tools Reference Guide716
Solo
The VCA Solo button controls the solo state of
audio, Auxiliary Input, Instrument, MIDI, and
other VCA Master tracks in a VCA-controlled
group.
• Soloing a VCA Master will implicitly mute
all tracks except its slave tracks, thereby in-
directly soloing the slave tracks.
• Soloing a VCA Master will clear any explicit
solos on its slave tracks, leaving them indi-
rectly soloed, and implicitly mute all other
tracks.
• Explicitly soloing a slave track while its
VCA Master track is soloed will override the
VCA Master solo.
Record Enable
The VCA Record Enable button toggles the
Record Enable status of only those audio, Instru-
ment, and other VCA tracks that have already
been record-enabled individually. You can then
toggle record enable on and off for those tracks
using the VCA Master Record Enable.
To temporarily force all slave tracks to toggle their
record enable status:
Alt-click (Windows) or Option-click (Mac) the
Record Enable button on the VCA Master.
TrackInput
The VCA TrackInput button toggles the input
monitor status of only those audio tracks in a
VCA-controlled group that are record-enabled.
You can toggle input monitor status for those
tracks using the VCA Master TrackInput button.
To temporarily force all slave tracks to toggle their
input monitoring status:
Alt-click (Windows) or Option-click (Mac) the
VCA Master TrackInput button on the VCA Mas-
ter.
Level Meter
On VCA Master tracks, level meters indicate the
highest level occurring on any of its individual
tracks, not a summed level of all slave tracks.
The channel format of level meters on the VCA
Master is set according to the channel formats of
its slave tracks, as follows:
• If all slave tracks are the same channel for-
mat (mono, stereo or a multichannel for-
mat), the number of level meters on the
VCA Master track is identical to that of the
slave tracks.
• If the slave tracks are different formats, the
number of level meters on the VCA Master
track is set to one.
Record Enable, TrackInput and Slave
Tracks
When a slave track is record-enabled (the Record
Enable button is lit) or set to Input Only mode
(the TrackInput button is lit), its automation is
temporarily turned off, and its Volume fader is
no longer affected by the VCA Master.
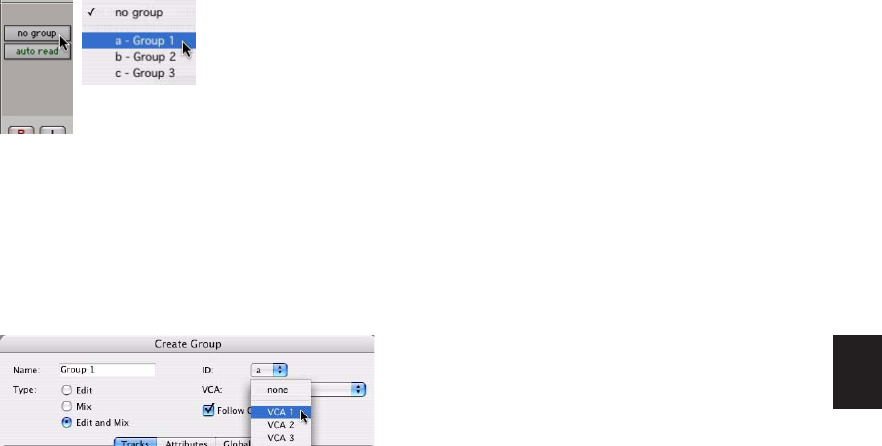
Chapter 35: Basic Mixing 717
Assigning Groups to VCA Masters
An existing Mix group can be assigned to a VCA
Master, or a new Mix group can be assigned to a
VCA Master while it is being created. Only one
group can be assigned to a VCA Master at a time.
A VCA Master cannot control a group that in-
cludes itself.
To assign an existing group to a VCA Master:
Click the Group Assignment selector on the
VCA Master track and choose an available group
from the pop-up menu.
To assign a new group to a VCA Master:
1 While creating a new group, select Mix or
Mix/Edit as the Group type.
2 In the Group dialog, choose an available VCA
Master track from the VCA pop-up menu.
Track Membership in Multiple VCA Groups
It is possible for a single slave track to be a mem-
ber of more than one VCA-controlled group. In
this case, the contribution of all VCA Master
Volume faders is summed on the slave track.
Mute, Solo, Record Enable, and TrackInput fol-
low the same rules for enabling or disabling
slave tracks.
Allowing Grouped Behavior of VCA
Slave Track Controls
When a track is a VCA slave track, its Volume,
Mute, Solo, Record Enable, and TrackInput con-
trols follow VCA functions, and normally do
not follow Mix group behavior.
However, these slave track controls can be set to
allow Mix group behavior in addition to their
VCA functions.
To allow grouped behavior of VCA-related controls
on slave tracks:
1 Choose Setup > Preferences and click Mixing.
2 In the Automation section, deselect the “Stan-
dard VCA Logic for Group Attributes” option.
Volume, Mute, Solo, Record Enable, and Track-
Input are made available as Mix group attributes
in the Group dialog.
Assigning an existing group to a VCA Master
Assigning a new group to a VCA Master
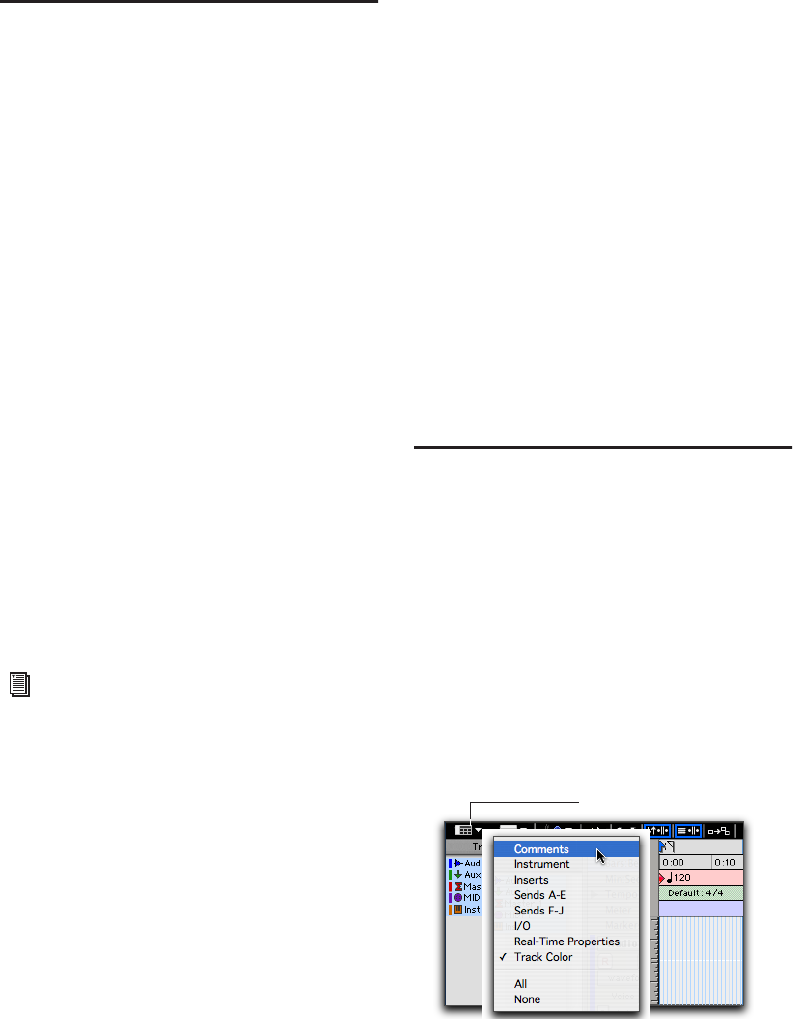
Pro Tools Reference Guide718
Inserts
Pro Tools lets you insert up to five inserts on
each audio, Auxiliary Input, Master Fader, or In-
strument track. Each insert can be either a soft-
ware plug-in insert or a hardware insert, or an in-
strument plug-in.
Inserts provide the following features:
• Plug-ins and hardware inserts route the signal
from the track through the effect of your
choice, and automatically return it to the
same track.
• Hardware inserts send and return the signal to
corresponding input and output channels of
an audio interface, which can be connected to
outboard effects.
• Some Instrument plug-ins (such as Virus In-
digo) accept audio from the track input (let-
ting you use them as processing plug-ins.
• Inserts on audio, Auxiliary Input, and Instru-
ment tracks are pre-fader.
• Inserts on Master Faders are post-fader.
• Inserts can be bypassed or made inactive.
• Most plug-in controls are fully automatable.
Track Output Format and Plug-ins
Pro Tools supports mono, multi-mono, stereo,
and multichannel plug-ins (Pro Tools HD with
Surround Mixer only).
Because inserts process in series, changing the
plug-in format can alter the channel format. For
example, inserting a mono-to-stereo plug-in on
a mono Auxiliary Input changes the signal path
from that plug-in through the rest of the track.
This restricts all hardware inserts or plug-ins af-
ter the stereo plug-in to be stereo-in/stereo-out
plug-ins (or the supported multichannel for-
mat).
Plug-in Formats
Pro Tools supports mono and stereo plug-ins,
including the following three types of plug-in
paths:
• mono-in/mono-out
• mono-in/stereo-out
• stereo-in/stereo-out
Pro Tools HD sessions running with the Sur-
round mixer also support 3–8 channel multi-
mono and multichannel plug-ins.
Views in the Mix and Edit
Windows
The Mix and Edit windows can be configured to
show or hide various mixing controls, using
menu commands or view selectors.
Most of these views are available in both win-
dows, unless noted.
Window View Selectors
Both the Edit window and Mix window provide
Window View selectors to configure their views.
See Chapter 36, “Plug-in and Hardware In-
serts” for details about using plug-ins and
inserts.
Edit Window View selector
Edit Window View selector
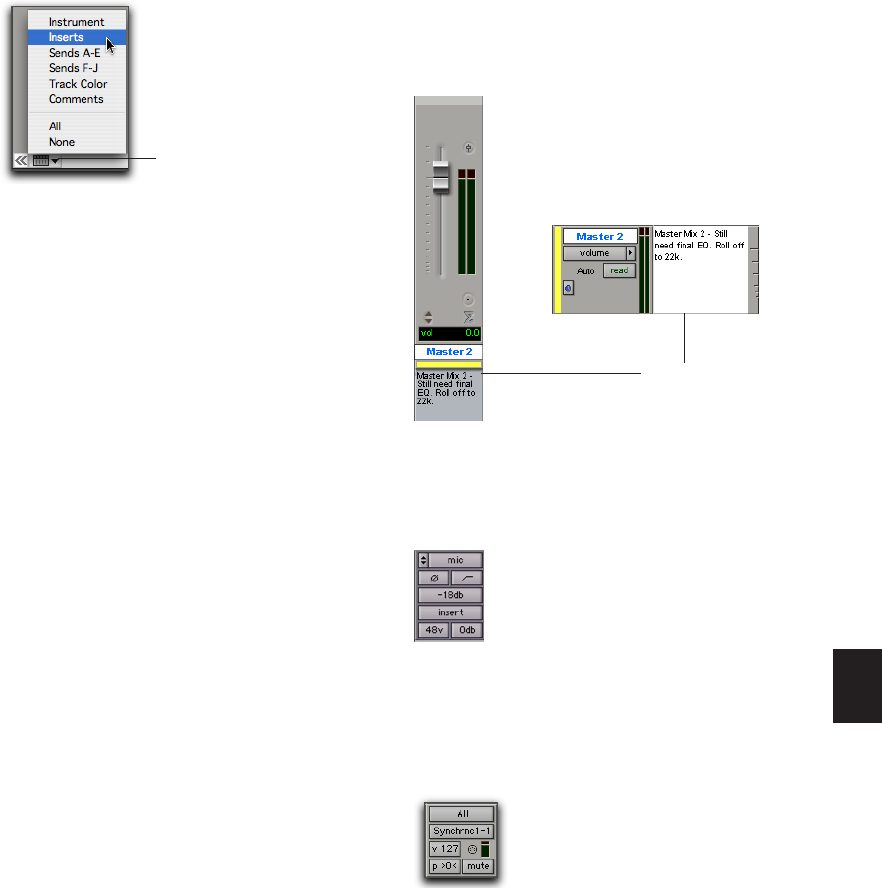
Chapter 35: Basic Mixing 719
Displaying Views
To display all views in the Mix or Edit window, do
one of the following:
Select View > Mix Window (or Edit Window) >
All.
– or –
Click the Mix Window View selector (or Edit
Window View selector), and select All.
To display none of the views in the Mix or Edit
window, do one of the following:
Select View > Mix Window (or Edit Window) >
None.
– or –
Click the Mix Window View selector (or Edit
Window View selector), and select None.
To show or hide available views in the Mix and Edit
windows, do one of the following:
Choose View > Mix Window (or Edit Win-
dow) and select or deselect one of the view types
(such as Comments).
– or –
Click the Mix Window View selector (or Edit
Window View selector), and select or deselect
one of the view types (such as Comments).
Comments View Shows any text entered as com-
ments in the Track Name/Comments dialog. For
more information, see “Naming Tracks” on
page 145.
Mic Preamps View (Pro Tools HD Only) Shows
controls in each track for the Digidesign PRE.
For detailed information, see the PRE Guide.
Instruments View Shows MIDI controls on In-
strument tracks (MIDI Input selector, MIDI Out-
put selector, MIDI volume, MIDI pan, and MIDI
mute).
Inserts View Shows inserts (software plug-ins
and hardware I/O inserts) in each track.
Mix Window View selector
Mix Window View selector
Comments View in the Mix and Edit windows
Mic Preamps View
Instruments View
Comments View
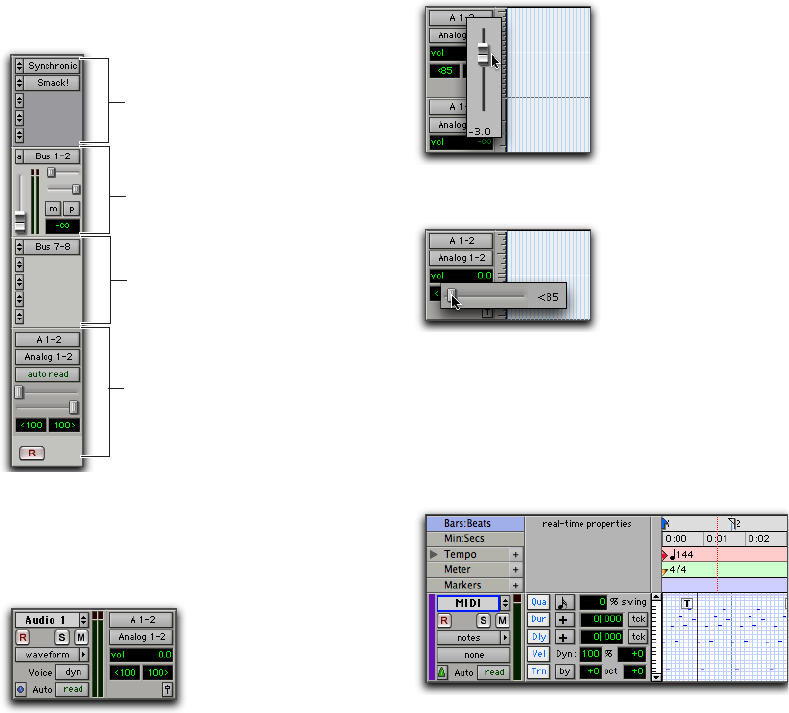
Pro Tools Reference Guide720
Sends View (Sends A–E and Sends F–J) Shows
send assignments in each track. Deselect to
hide. For more information, see “Configuring
Sends View in the Mix and Edit Windows” on
page 725.
I/O View (Edit Window Only) Shows Input and
Output selectors, and Volume and Pan indica-
tors in each track.
Click on the volume or pan indicators in the
Edit window I/O View to adjust the volume or
pan controls with a pop-up fader.
Real-Time Properties View (Edit Window
Only) Shows controls for Real-Time Properties
for MIDI and Instrument tracks. For more infor-
mation on Real-Time Properties, see “MIDI Real-
Time Properties” on page 549.
Views in the Mix window
I/O View (Edit window)
Inserts View
Sends (A–E) View
I/O View
Sends (F–J) View
I/O View Volume pop-up fader (Edit window)
I/O View Pan pop-up slider (Edit window)
Real-Time Properties View (Edit window)
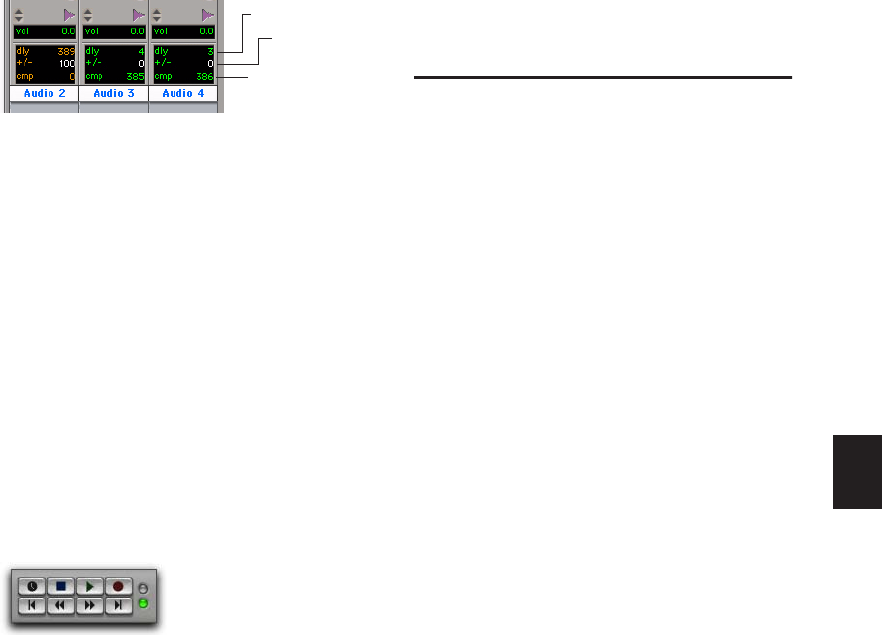
Chapter 35: Basic Mixing 721
Delay Compensation View (Mix Window on
Pro Tools HD Only) The Delay Compensation
View displays the total amount of plug-in (TDM
and RTAS) and hardware insert delay on each
track, lets you apply a user offset of track delay,
and displays the total amount of delay that
Pro Tools applies to each track. The Delay Com-
pensation View can be shown or hidden in the
Mix Window.
Delay values can be specified in either samples
or milliseconds, as selected in the Operation
Preferences page. For more information on De-
lay Compensation, see “Delay Compensation”
on page 741.
Track Color View Shows track color in each
track. For detailed information, see “Color Cod-
ing for Tracks, Regions, Markers, and Groups”
on page 172.
Transport View (Edit Window Only) Displays
functional transport controls in the top up-
per–right of the Edit window. These controls are
the same as those in the Transport window. For
more information, see “Transport Window” on
page 116.
Hiding Views in the Edit Window
You can quickly hide View columns in the Edit
window using a simple keyboard shortcut.
To hide a View column in the Edit window:
Alt-click (Windows) or Option-click (Mac) at
the top of the column you want to hide (Mic
Pre, Comments, Instrument, Inserts, Sends A–E,
Sends F–J, I/O, Real-Time Properties, or Track
Color).
Audio Input and Output Paths
Pro Tools lets you configure the physical input
and outputs of your audio interfaces and also in-
ternal bus paths and subpaths in the I/O Setup
dialog and the Hardware Setup dialog. These
hardware inputs and outputs, and internal bus
paths can be assigned as inputs and outputs on
audio, Auxiliary Input, Instrument, and Master
Fader tracks.
Input Audio Path
Input Path selectors determine the source input
for audio, Auxiliary Input, and (optionally) In-
strument tracks. Track inputs can be set from
hardware inputs or internal bus paths or sub-
paths. For detailed information on assigning
track inputs, see “Assigning Audio Inputs” on
page 158.
Hardware input and bus paths can be config-
ured in the I/O Setup. For more information, see
Chapter 6, “I/O Setup.”
You can also define what physical ports are
routed to Pro Tools input ports in the Hardware
Setup dialog. For more information, see “Con-
figuring Pro Tools System Settings” on page 34.
Delay Compensation View
Transport Controls (Edit window)
User Offset
Track Compensation
indicator
Delay indicator

Pro Tools Reference Guide722
Output Audio Path
Track Output Path selectors route the post-fader
signals to the assigned output or bus paths. The
Output Path selector routes the main track out-
put to the chosen main or sub-path. Tracks can
be routed directly to hardware output or inter-
nal bus paths and subpaths for submixing (main
or sub-paths).
The track format (mono, stereo, or multi-
channel) determines the available main and
sub-path choices for track output. For detailed
information on assigning track outputs, see “As-
signing Audio Outputs” on page 159.
When audio, Auxiliary Input, Master Fader, and
Instrument tracks are created, their mono, ste-
reo, or greater-than-stereo multichannel format
is defined:
• Mono tracks can be assigned to any available
mono, stereo, multichannel main and sub-
paths.
• Stereo tracks can be assigned to any available
mono, stereo, or multichannel main and sub-
paths.
• Multichannel tracks (Pro Tools HD only) can
be assigned to any mono path, or path of the
same number of channels (for example, an
LCRS track can be assigned to a mono or LCRS
path).
Output Windows
Output windows provide the essential track
mixing controls (such as track panning and vol-
ume), as an alternative to Mix and Edit window
views. Multichannel Output and Send windows
also provide expanded Panner views, and other
surround-specific controls. See Chapter 41,
“Surround Panning and Mixing (Pro Tools HD
Only).”
Output windows are useful in large sessions to
leave important tracks in an anchored location,
unaffected by Mix and Edit window (or control
surface) banking. See “Output Windows for
Tracks and Sends” on page 730.
Multiple Output Assignments
Pro Tools audio, Auxiliary Input, and Instru-
ment tracks can be assigned to multiple output
paths. Assigning to multiple paths is an efficient
way to route an identical mix to other discrete
outputs, for simultaneous monitor feeds, head-
phone mixes, or other situations where a paral-
lel mix is needed.
To assign a track to multiple outputs:
1 Assign a main output path by selecting it from
the track’s Output Path selector.
2 Start-click (Windows) or Control-click (Mac)
an additional output path in the track’s Output
Path selector. The newly selected output desti-
nation is added as an additional output.
Alt-Start-click (Windows) or Option-Con-
trol-click (Mac) to add the assignment to all
tracks, or Alt-Shift-Start-click (Windows) or
Option-Shift-Control-click (Mac) to add to
all selected tracks.
Chapter 35: Basic Mixing 723
Display of Multiple Output Assignments
When a track is assigned to multiple output
paths, the Output Path selector denotes multi-
ple assignment status and active/inactive status
with the following indicators:
• A plus sign (+) indicates that the track has
multiple output assignments.
• In the Output Path selector menu, all cur-
rently assigned track outputs are checked to
indicate they are active for the current track.
• An asterisk (*) indicates that one or more cur-
rently assigned outputs is Inactive.
Inactive Outputs
An output path can be made inactive, either glo-
bally in the I/O Setup dialog (affecting all tracks
assigned to that path), or locally per assignment
(only affecting that output on that audio track
Auxiliary Input track, or Instrument track).
When opening sessions, outputs will be made
inactive automatically if the required hardware
or other resources are not available.
Inactive outputs retain all associated automa-
tion playlists. Edits made in the session also af-
fect the inactive track’s output automation play-
lists.
Inactive Outputs and DSP Resources
Making a track output inactive silences the out-
put, while retaining all automation and playlist
data. Inactive outputs do not consume resources
for TDM mixer connections, but any assigned
plug-ins on the track continue to use their re-
quired DSP resources. RTAS plug-ins require
CPU resources, and TDM plug-ins use the DSP
available on Pro Tools|HD cards.
You can free up DSP of an unused plug-in by
making its track inactive, or by making just the
plug-in inactive.
About the “No Output” Option
Track outputs can be set to No Output. Assign-
ing a track output to No Output causes any pan-
ning automation associated with the track to be
lost.
Tracks assigned to No Output will not be audi-
ble, but they do not free their associated DSP re-
sources.
Indication of multiple output assignments
Indication of multiple output assignments with at least
one inactive output
See “Making Tracks Inactive” on page 171.
See “Active and Inactive Items” on page 17,
and “Making Inserts Inactive” on page 755
for more information.
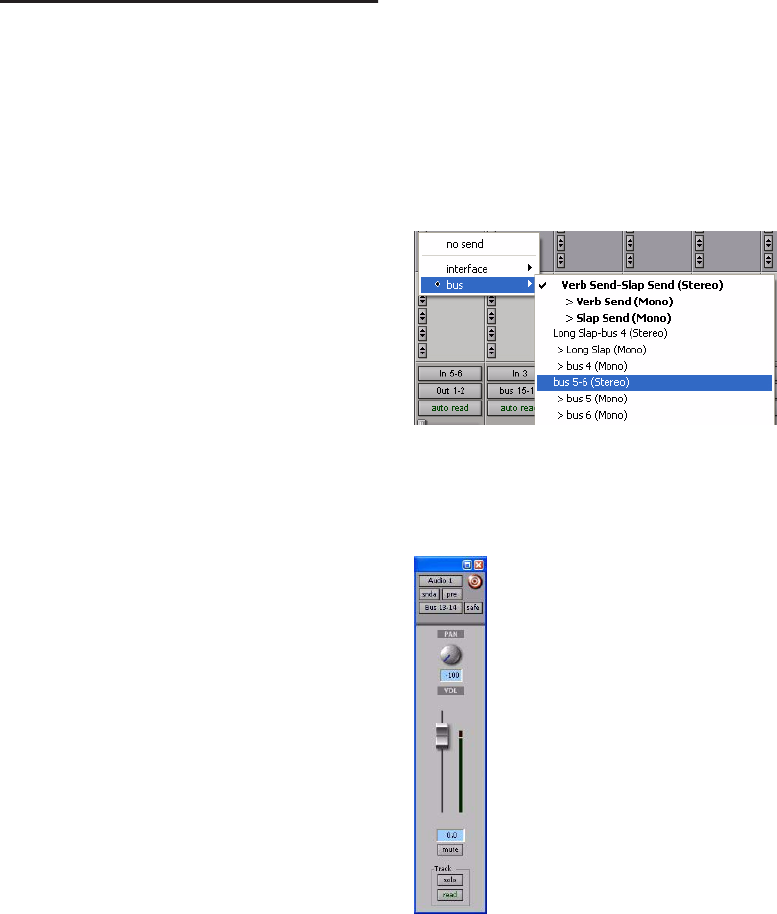
Pro Tools Reference Guide724
Sends
Pro Tools lets you insert up to ten sends (A–E
and F–J) on each audio track, Auxiliary Input, or
Instrument track.
Sends provide the following features:
• Sends can be set as pre- or post-fader.
• Send level, pan, mute, and LFE controls can be
configured to follow Groups.
• Send level, send mute, and send pan (for ste-
reo and multichannel sends) are fully autom-
atable. See “Automating Sends” on page 790.
• Send controls can be displayed and edited
from the Mix or Edit windows, or in their own
output windows.
• Sends can be assigned to available output and
bus paths (main or sub-paths), in mono or ste-
reo, or any of the supported multichannel for-
mats for surround mixing.
• Each send can have multiple assignments (for
example, to available output and bus paths).
To be audible in Pro Tools, sends must be re-
turned to the mix through an Auxiliary Input,
audio track, or Instrument track. The sends can
then be monitored and processed through an
Auxiliary Input (or Instrument track), recorded
to audio tracks, and bounced to disk. (Bouncing
and mixdown are explained in Chapter 38,
“Mixdown.”)
Assigning Sends to Tracks
To add a send to a track:
1 Make sure Sends View is enabled in the Mix or
Edit window (see “Views in the Mix and Edit
Windows” on page 718 for information).
2 Click the Send selector on the track and
choose a path from the pop-up menu.
The send can be a mono or stereo (or any of the
supported multichannel formats for surround
mixing) output or bus path.
Assigning a send to a stereo bus path
Send window (mono)

Chapter 35: Basic Mixing 725
3 Set the output level of the send in the Send
window by doing one of the following:
• Adjust the Send Level fader.
– or –
• Set the send level to unity gain (0 dB) by
Alt-clicking (Windows) or Option-clicking
(Mac) the Send Level fader.
When you create a new send, its initial output
level depends on the setting of the “Sends De-
fault to –INF” preference.
To change the default setting for sends:
1 Choose Setup > Preferences and click the
Operation tab.
2 Do one of the following:
• Select Sends Default to “–INF.”
– or –
• Deselect Sends Default to “–INF” and new
sends will default to unity gain (0 dB).
To remove a send from a track:
Click the Sends button on the track and
choose No Send from the pop-up menu.
Send Formats
Mono and Stereo Sends When you click the
Sends button on a track, you can choose from a
list of mono or stereo output or bus paths.
Multichannel Sends (Pro Tools HD Only) When
you click the Sends button on a track, you can
choose from a list of multichannel output or bus
paths.
Send Path Choices
The choices available in track Send selectors in-
clude bus and output paths.
Internal Mix Busses Pro Tools HD provides 128
busses and Pro Tools LE provides 32 busses for
routing signals internally. Internal bus paths are
useful for submixing and processing with plug-
ins. Bus paths are defined in the I/O Setup dia-
log, and are available in all supported channel
formats (mono, stereo, or multichannel, as sup-
ported on your system).
Hardware Outputs Hardware sends are often
used for headphone cue mixes, or for sending
signals to external effects processors. Sends do
not automatically return audio as do hardware
inserts.
Configuring Sends View in the Mix
and Edit Windows
Audio tracks, Auxiliary Inputs, and Instrument
tracks include two sets of Sends Views: Sends
A–E (sends 1–5) and Sends F–J (sends 6–10). The
View menu provides separate options for view-
ing these sends in the Mix and Edit windows.
To display sends in the Mix window:
Select any of the following:
• View > Mix Window > Sends A–E.
• View > Mix Window > Sends F–J.
To display sends in the Edit window:
Select any of the following:
• View > Edit Window > Sends A–E.
• View > Edit Window > Sends F–J.
The names, format, and channel mapping
of busses and output paths can be custom-
ized in the I/O Setup dialog. See “Creating
New Paths” on page 57.
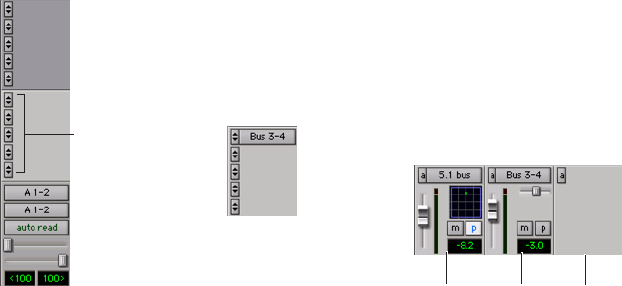
Pro Tools Reference Guide726
Sends View Options
Sends are displayed in the Mix and Edit window
according to the Sends A–E View and Sends F–J
View options. Each Send View has six view
choices: Assignments View and five individual
Send Views (A–E or F–J).
Assignments View
This is the default Sends View, showing all five
of the Sends A–E or Sends F–J sends on all tracks
displayed in the Mix and Edit windows.
In Assignment View, send controls are adjusted
from Send windows. See “To view a different
track Output or Send window:” on page 731.
To show all send assignments:
1 If sends are not currently visible on your
tracks, select View > Mix Window (or Edit Win-
dow) > Sends A–E (or Sends F–J).
2 Do one of the following:
• Select View > Sends A–E > Assignments or
View > Sends F–J > Assignments.
– or –
• When displaying sends in an individual
Send View (such as Send A View), Control-
click (Windows) or Command-click (Mac)
the Send selector and select Assignments.
Individual Send Views (A–J)
Individual Send Views (such as Send A) provide
send level, pan, and mute controls for a single
send across all tracks.
Send controls can be adjusted directly from
these Send Views. Sends can also be opened for
control or metering in Send windows. See “Out-
put Windows for Tracks and Sends” on
page 730.
Assignments View, no sends (left) and with an assigned
send (right)
Send selectors
Send A, Assignment View
Send A View, with different types of send assignments
pre-fader
multichannel
post-fader
no assignment
stereo
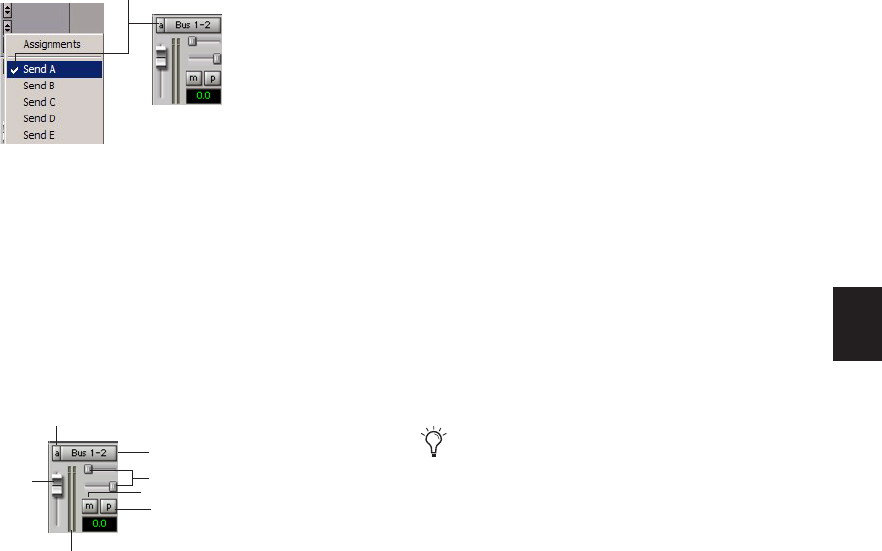
Chapter 35: Basic Mixing 727
To display the controls for an individual send
across all tracks:
1 If sends are not currently visible on your
tracks, select View > Mix Window (or Edit Win-
dow) > Sends A–E (or Sends F–J).
2 Do one of the following:
• Select View > Sends A–E (or Sends F-J) and
select one of the individual Send Views
(such as Send A).
– or –
• In Assignment View, Control-click (Win-
dows) or Command-click (Mac) the Send
Assignment selector.
Editing Sends in the Mix and Edit
Windows (Individual Send Views)
Individual Send Views (such as Send A) display
all the controls of an individual send in the
sends area of the Mix and Edit windows. These
views provide full access to all controls for that
send on all tracks.
Send level and mute can follow Mix groups, to
adjust multiple send controls from a single set of
controls.
Individual Send Views and Meters
When you display the controls for an individual
send, you also have the option of displaying
send level meters.
Send level meters show peak values and indicate
clipping that occurs while the meter is displayed
(if a send clips any time before its meter is dis-
played, this is not shown). If you are using a
slower computer, hiding send level meters can
improve screen redraw times.
To display send level meters when viewing
individual sends:
1 Choose Setup > Preferences and click the
Display tab.
2 Select Show Meters in Sends View and click
OK.
To clear a send meter’s Clip indicator:
Click the Clip indicator.
To clear all meters, do one of the following:
Option-click any Clip indicator.
Choose Track > Clear All Clip Indicators.
Press Alt-C (Windows) or Option-C (Mac).
Sends Views
Send A View, with stereo send shown
Send Assignment selector
Send Mute button
Send Pan sliders
Send meter
Send
Pre/Post Fader button
Level
Send selector
fader
Send Assignment button In Assignment View, edit sends by opening
their Output windows. See “Output Win-
dows for Tracks and Sends” on page 730.
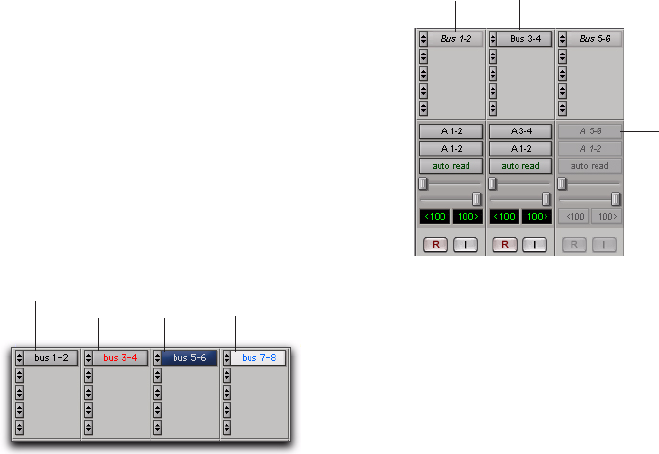
Pro Tools Reference Guide728
Send Status Display
When displaying all controls for an individual
sends, the Send status is visible directly in the
Mix or Edit windows.
In Assignment View, Send status is displayed as
follows:
• By default, the Send button is gray, to indicate
that it is unmuted.
• The Send button text is red when the send has
clipped.
• The Send button is blue when the send is
muted.
• The Send button is lit whenever a send’s win-
dow is open.
If you use a control surface (such as D-Control
or 003) with Pro Tools, colored outlines around
sends, inserts, and outputs indicate the current
controller focus.
Inactive Sends
Sends can be made inactive. Inactive sends free
their DSP and mixer resources, while retaining
their position in track Sends View. Inactive
sends do not output audio. However, Inactive
sends retain all related automation playlists. In
addition, edits made to regions on tracks with
inactive sends can still affect the sends automa-
tion playlists.
When opening sessions, sends will automati-
cally be made inactive if the required hardware
or other resources are not available.
To make a send inactive, do one of the following:
Control-Start-click (Windows) or Command-
Control-click (Mac) on the Send assignment.
– or –
Make the Track inactive. See “Making Tracks
Inactive” on page 171.
To toggle sends in the same position (A–J) and
assigned to the same path on all tracks active or
inactive:
Control-Start-Alt click (Windows) or Com-
mand-Control-Option click (Mac) a send button
in the position you want to toggle.
To toggle sends in the same position (A–J) and
assigned to the same path on all selected tracks
active or inactive:
Control-Start-Alt-Shift-click (Windows) or
Command-Control-Option-Shift-click (Mac) a
send button in the position you want to toggle.
Indication of Send mute, clipping, and window status
U
nmute
dWi
n
d
ow
i
s open
(lit Send)
M
ute
d
(blue)
Cli
ppe
d
(red text)
Display of inactive sends
Inactive send Active
Inactive track
(italicized and
grayed out) send
(plain text)
(entire track is italicized
and grayed out)

Chapter 35: Basic Mixing 729
Moving or Copying Sends
Sends can be moved or copied to other tracks, or
to other positions on the same track by drag-
ging. Sends can be dragged to create new sends
at the destination, or dragged onto existing send
assignments to replace them.
Sends can be moved and copied to tracks with
compatible send formats (mono, stereo, or
other). Pro Tools alerts you when you try to
move or copy a send to an incompatible destina-
tion. (For more information, see “Send Format
and Track Compatibility” on page 729).
To move a send:
Click the send name and drag it to a new po-
sition in the original track or in a different track.
To copy a send:
Alt-drag (Windows) or Option-drag (Mac) the
send to a new position.
Moving or copying a send maintains all routing
assignments, automation, level/pan/mute set-
tings, and output format.
Send Format and Track Compatibility
Sends can only be copied to other tracks with a
compatible send output format (mono, stereo,
or other). In addition, the following conditions
apply when moving or copying sends among
tracks:
• When copying a stereo send from a mono
track to a stereo track, Send pan automation
(if any) will be dropped without warning.
• When copying a stereo send from a stereo
track to a mono track, the left Send pan auto-
mation data is retained and the right side data
is dropped. A warning dialog appears for you
to confirm or cancel this destructive opera-
tion.
• When moving or copying a send and replac-
ing an existing send, all automation on the
existing send will be replaced. A warning dia-
log appears for you to confirm or cancel this
destructive operation.
Copying Track Settings to Sends
(Pro Tools HD Only)
Sometimes you need send settings to match the
settings in the track itself—for example, to pro-
vide a headphone mix based on the main mix.
You can copy the current values or the entire au-
tomation playlist from selected tracks to any of
their sends.
For more information, see “Copying Track
Automation to Sends” on page 790.
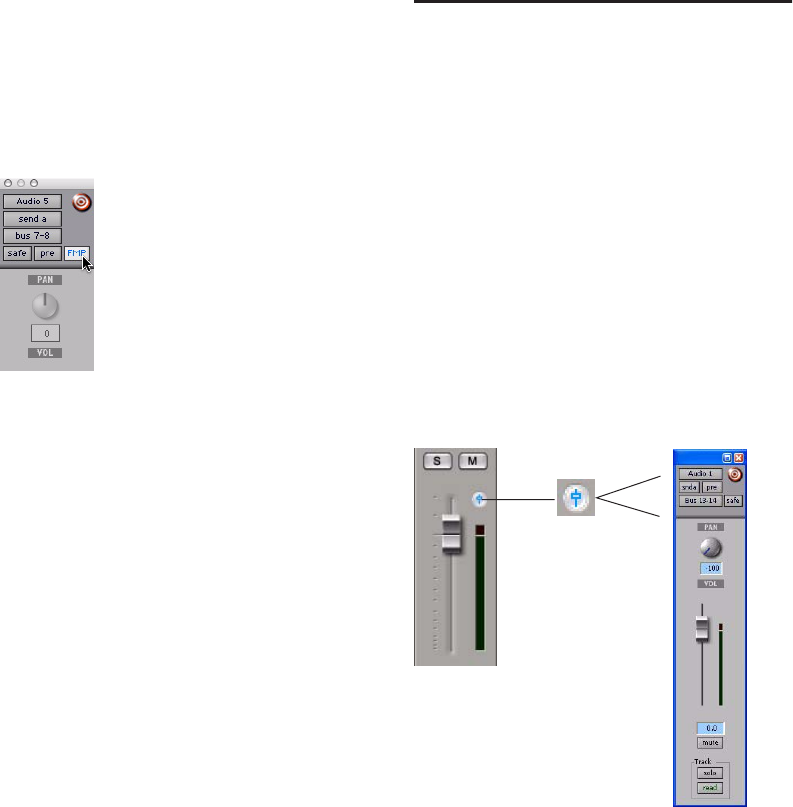
Pro Tools Reference Guide730
Linking Send Pan and Main Pan
Controls
You can link pan controls of individual Sends to
the Main pan controls of their corresponding
tracks, allowing for fast setup of cue mixes or ef-
fects processing.
Linked Send pan controls appear in light gray.
To link a Send’s Pan controls to the Main Pan
controls of a track:
1 Click the Send Assignment button for the
Send you want to link to open the Send window.
2 In the Send window, click the FMP (Follow
Main Pan) button.
To change the default FMP (Follows Main Pan)
setting for newly created Sends:
1 Choose Setup > Preferences and click Mixing.
2 Under Setup, select or deselect Send Pans De-
fault to Follow Main Pan.
Output Windows for Tracks
and Sends
Track outputs and sends can be opened for dis-
play and editing in dedicated windows.
• Track Output windows provide track fader,
pan, automation, solo, and mute controls.
• Send windows provide send level, pan, auto-
mation, and mute controls.
• Standard Output and Send window controls
provide additional routing, assignment, and
display settings.
To open a track Output window:
Click the Output Window button in the chan-
nel strip.
Linking Send Pan to Main Pan
Opening a track Output window
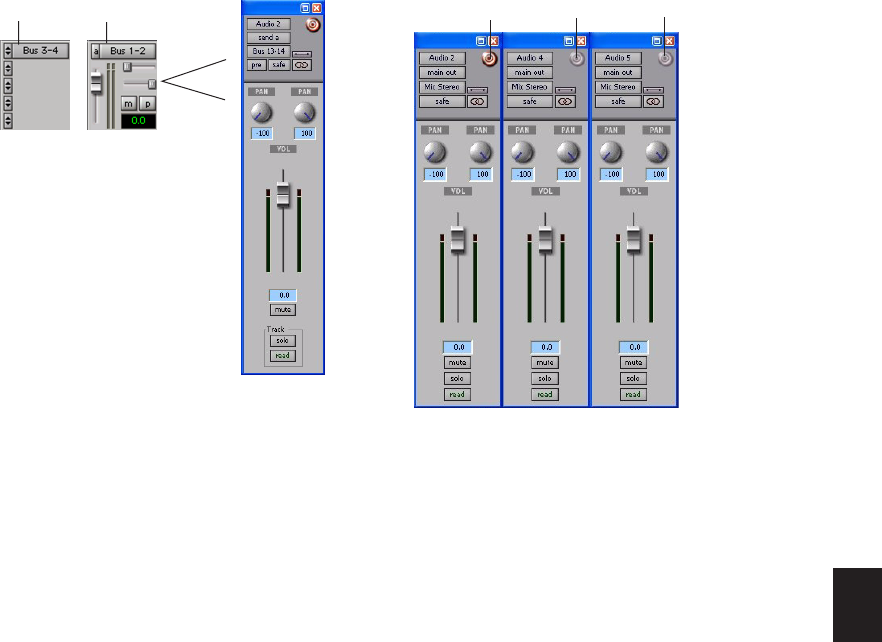
Chapter 35: Basic Mixing 731
To open a Send window:
Click the Send Assignment button in the Mix
or Edit window.
To view a different track Output or Send window:
Click an Output Window button, or Send As-
signment button, in the Mix or Edit window.
If a similar Output window was already open
with a highlighted Target icon (red, lit), the
newly selected send will open in its place.
Opening Multiple Output Windows
Multiple track and Send windows can be dis-
played simultaneously using either of the fol-
lowing methods.
To open additional Output windows:
Shift-click any Output Window button or
Send Assignment button.
To set a window to remain open when opening
additional Output windows:
Make sure the Target is disabled.
For additional information, see “Targeted Win-
dows” on page 734.
Panner Linking
Stereo outputs provide two panning controls,
one for each side of the left/right pair. Multi-
channel outputs provide a multichannel pan-
ner.
The Output window provides controls to link
channels for precise panning of stereo and
multichannel tracks.
In the linked state, all sides match changes to
any other side’s Pan control. This is Absolute
Link mode. To mirror panning changes, see “In-
verse Linked Panning” on page 732.
Opening a Send window
click here or here
Multiple Send windows
Target enabled Target disabled
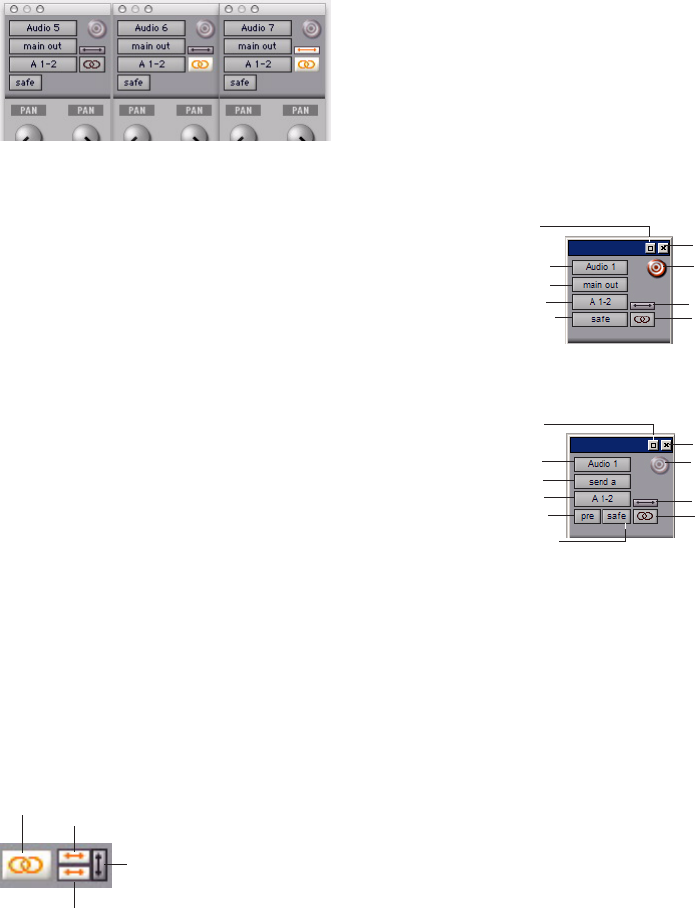
Pro Tools Reference Guide732
When unlinked, Pan controls are completely in-
dependent of each other.
To enable linking:
Enable the Link icon.
To unlink an output for independent panning:
Deselect the Link icon.
Inverse Linked Panning
When linked and set to Inverse mode, panning
moves are inverted or reversed in the other
channels.
Inverse panning reflects one side’s location and
direction in the other side. For example, when
enabled for Front Inverse, if you pan one side of
a stereo track output from right to left, the other
side will exactly mirror that movement and pan
left to right.
Front Inverse linking is available on all systems.
Rear Inverse, and Front/Rear Inverse linking are
available on Pro Tools|HD systems only, and
only appear as options on multichannel plug-
ins and panners/output windows.
To enable inverse linking:
1 Enable the Link icon.
2 Select an Inverse mode.
Standard Selector Controls in
Output Windows
All Output windows provide standard selectors
for path, automation, and other controls in the
top area of the window (the Output Editor area).
Close Closes the window.
Track Selector Provides access to any audio
track, Auxiliary Input, or Master Fader in the
session.
Output View Selector Provides access to other
outputs (track and send) in the track, if any, dis-
playing the selected output in the current win-
dow.
Send View Selector (Send Window Only) Pro-
vides access to other sends on the track.
Output Path Selector Allows you to assign the
Output path for the current track or send.
Unlinked (left), linked (middle), front inverse linked
(right) Output windows
Link and Inverse selectors (multichannel track)
Link
Front/Rear Inverse
Front Inverse
Rear Inverse
Output window standard controls
Send window standard controls
Automation Safe button
Target
Path Meter View
Path selector
Output View selector
Track selector
Close
Inverse Pan
Link
Automation Safe button
Pre/Post Fader button
Target
Path Meter View
Path selector
Send selector
Track selector
Close
Inverse Pan
Link
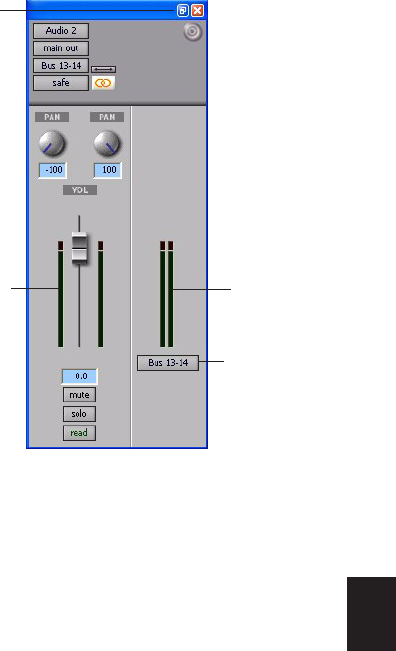
Chapter 35: Basic Mixing 733
Pre/Post Fader button (Send Window Only) De-
termines whether the send is pre- or post-fader.
Automation Safe Protects track and send level,
pan, and other controls from automation over-
writes by placing them in Automation Safe
mode. See Chapter 37, “Automation” for more
information.
Inverse Pan Reflects one side’s panning location
and direction in the other side (for example,
left- and right-channel Pan controls).
Link and Unlink Lets you link and unlink left and
right (or other) outputs in stereo (or multi-
channel). Unlinked mode provides discrete ad-
justment of individual sides, or channels. When
linked, all changes affect all channels. See “Pan-
ner Linking” on page 731.
Target Identifies the target of plug-in settings
commands. Also sets the current window for
display of Output windows. See “Targeted Win-
dows” on page 734.
Path Meter View Opens the path Meter View.
These meters display levels of the selected path
(not the levels of the track or send).
Track Fader, Pan Controls, and Solo,
Mute, and Automation Controls
Output windows provide the associated track’s
Volume fader, Pan controls, Solo and Mute
switches, and Automation Mode selector. Use
these to adjust or automate the controls of the
Output window.
Path Meter View in a Send window
Path
Path Meter
Send meter
Path Meter
selector
meters
View button
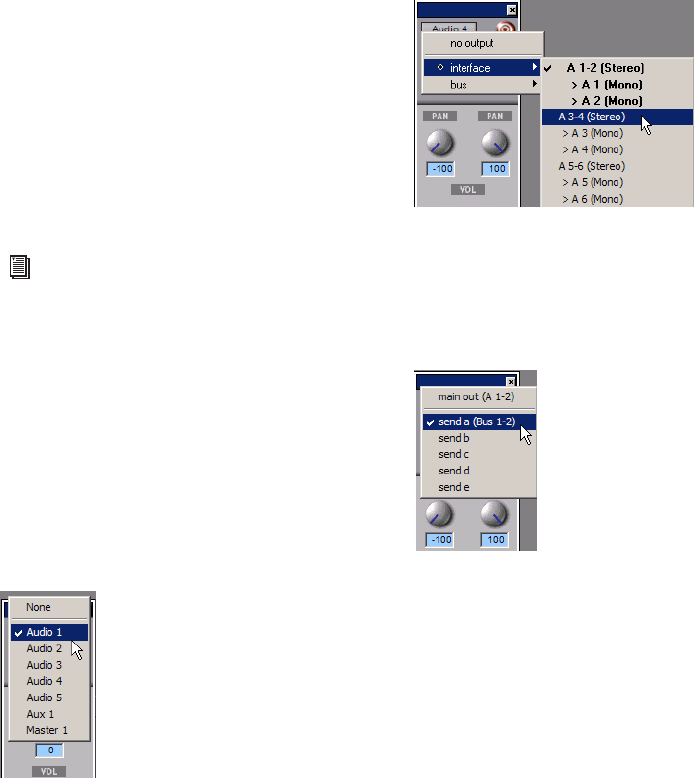
Pro Tools Reference Guide734
Targeted Windows
When lit (red), the Target indicates its window is
“targeted,” and the next window opened of the
same type replaces the current display (unless it
is opened as an additional window with the
Shift modifier). When unlit, the target is gray,
and the current window anchors to its current
contents and location on-screen. Opening addi-
tional windows does not affect anchored win-
dows.
To set an open Send window as the target window:
Click the Target, so that it is lit (red).
Using Output Windows
Output windows provide standard Pro Tools
track, send, Target, and other controls.
To move to a different track:
Click the Track selector and choose a track
from the pop-up menu.
To reassign output:
Click the Output Path selector and select a
path from the pop-up menu.
To display the controls for a different send on the
same track:
Click the Send View selector and select the
send.
To assign a different send to the same track:
Click the Send selector and choose an output
or bus path from the pop-up menu.
To add an additional output assignment to the
current send:
Press Start (Windows) or Control (Mac) while
selecting an additional output path from the
Send selector (or Output Path selector.
Plug-in windows have additional features
related to the Target (such as Focus of Set-
tings commands). See “The Plug-in Win-
dow” on page 760.
Selecting a track from the Output window
Selecting a path in the Output window
Accessing another send in the Output window
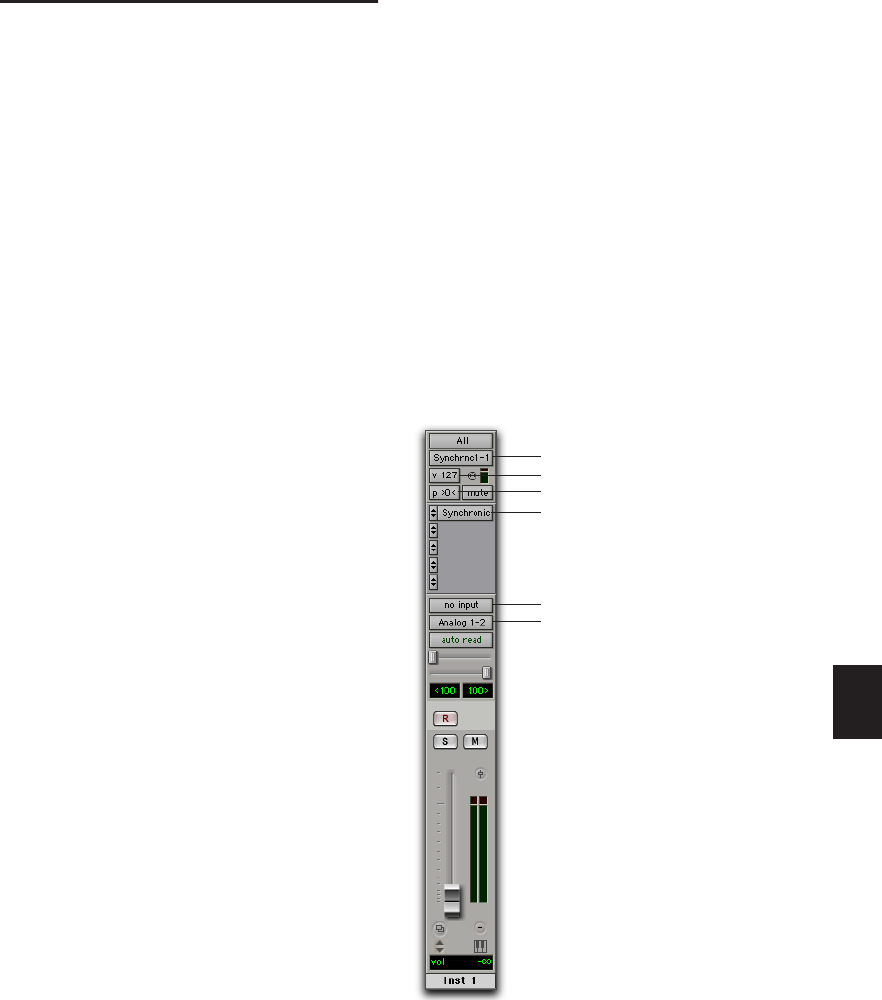
Chapter 35: Basic Mixing 735
Signal Routing for Monitoring
and Submixing
The bussing and mixing features in Pro Tools
support many possibilities for submixing and
monitoring, including the ability to:
• Monitor and mix playback of audio tracks
with audio inputs or with MIDI instruments
• Bus submixes for effects processing or moni-
toring
• Mix submixes with Master Faders
Monitoring and Mixing Audio with
Auxiliary Input Tracks
Use Auxiliary Input tracks to monitor and mix
audio from external sources, such as MIDI in-
struments, tape, or microphone inputs, in a
Pro Tools mix.
To use an Auxiliary Input track to monitor and mix
external audio sources:
1 Connect the audio outputs of your audio
source (such as a MIDI synthesizer or tape out-
put) to available inputs on your Pro Tools audio
interface.
2 If necessary, configure the I/O Setup dialog for
the input paths you plan to use (see Chapter 6,
“I/O Setup.”)
3 Use an existing or create a new Auxiliary Input
track with a channel format that corresponds to
the channel format of your audio source (mono,
stereo, or multichannel).
4 Set the input of the Auxiliary Input track to
the corresponding input path.
5 Assign the track output to the appropriate
path or paths for monitoring.
6 Adjust the Auxiliary Input fader to mix the au-
dio input.
Monitoring and Mixing Audio with
Instrument Tracks
Use Instrument tracks to monitor and mix audio
from instrument plug-ins or external MIDI in-
struments in a Pro Tools mix.
To use an Instrument track to monitor and mix the
output of an instrument plug-in:
1 Use an existing or create a new Instrument
track.
2 Choose View > Mix Window > Instruments to
show the MIDI controls of the Instrument track.
3 Select an instrument plug-in from the first In-
sert selector on the Instrument track (such as
Digidesign’s Xpand!).
Instrument track configured to control and monitor an
instrument plug-in (Digidesign Synchronic)
MIDI Output selector
MIDI Volume control
Audio Input selector, set to no input
Audio Output selector
MIDI Pan control
Instrument plug-in
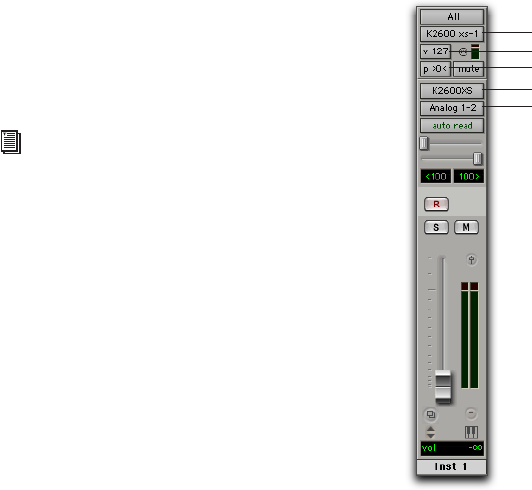
Pro Tools Reference Guide736
4 The virtual MIDI node (port) for the instru-
ment plug-in should be automatically selected
for the Instrument track’s MIDI Output. If not,
select the MIDI channel and corresponding port
for the instrument plug-in.
5 Assign the track output to the appropriate
path or paths for monitoring.
6 Adjust the Instrument track fader to mix the
audio input.
7 If you are controlling the Instrument plug-in
from the Instrument track, you can also mix us-
ing the MIDI Volume and Pan controls in the In-
strument View.
To use an Instrument track to monitor and mix
audio from an external MIDI instrument:
1 Connect the audio outputs of your external
MIDI instrument (such as a MIDI synthesizer) to
available inputs on your Pro Tools audio inter-
face.
2 If necessary, configure the I/O Setup dialog for
the input paths you plan to use (see Chapter 6,
“I/O Setup.”)
3 Connect the MIDI input and output of your
external MIDI instrument to available MIDI in-
put and output ports on your MIDI interface.
4 If necessary, configure the MIDI Studio Setup
(Setup > MIDI > MIDI Studio).
5 Use an existing or create a new Instrument
track with a channel format that corresponds to
the channel format of your audio source (mono,
stereo, or multichannel).
6 Choose View > Mix Window > Instruments to
show the MIDI controls of the Instrument track.
7 Set the audio input of the Instrument track to
the corresponding input path.
8 In the Instrument track’s Instrument View, set
the MIDI output to the corresponding MIDI
port connected to the MIDI input of your exter-
nal MIDI instrument.
9 Assign the track output to the appropriate
path or paths for monitoring.
10 Adjust the Instrument track fader to mix the
audio input.
11 If you are controlling the external MIDI in-
strument from the Instrument track, you can
also mix using the MIDI Volume and Pan con-
trols in the Instrument View.
For information on configuring audio and
MIDI signal routing for controlling and
monitoring ReWire client applications, see
the DigiRack Plug-ins Guide.
Instrument track configured to control and monitor an
external MIDI instrument (K2600XS)
MIDI Output selector
MIDI Volume control
Audio Input selector
Audio Output selector
MIDI Pan control
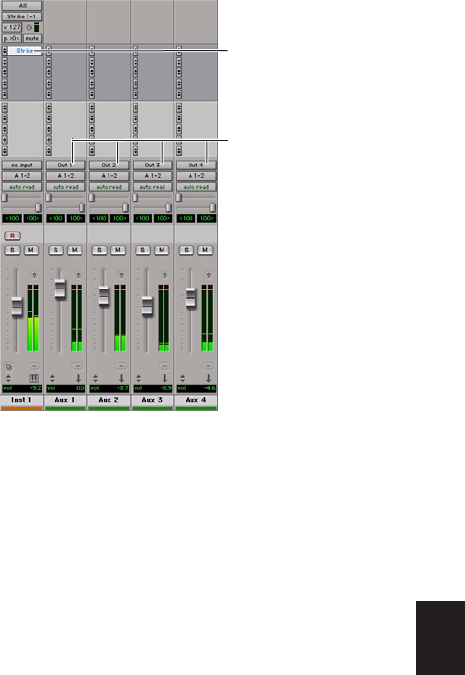
Chapter 35: Basic Mixing 737
To monitor and mix audio from an Instrument plug-
in with multiple audio outputs:
1 Use an existing or create a new Instrument
track.
2 Choose View > Mix Window > Instruments to
show the MIDI controls of the Instrument track.
3 Select a multi-output instrument plug-in from
the first Insert selector on the Instrument track
(such as Digidesign Strike).
4 The virtual MIDI node (port) for the instru-
ment plug-in should be automatically selected
for the Instrument track’s MIDI Output. If not,
select the MIDI channel and corresponding port
for the instrument plug-in.
5 In the plug-in window, assign the individual
audio outputs of the plug-in. (In the Strike plug-
in, channel outputs are assigned from the Mix
page.)
6 Create an Auxiliary Input track for each out-
put of the plug-in. Make sure the channel for-
mat of the Auxiliary Inputs corresponds to the
channel format of the plug-in outputs (mono,
stereo, or multichannel).
7 Set the inputs of the Auxiliary Input tracks to
receive the individual outputs of the plug-in.
8 Assign the outputs of the Auxiliary Input
tracks to the appropriate path or paths for mon-
itoring.
9 Adjust the Auxiliary Input faders to mix the
individual outputs of the plug-in.
Creating a Submix
A submix is created by routing multiple audio
sources to a common bus or output path. This
“submixes” the sources to a single path that can
be returned to an Auxiliary Input, where the
submix can be processed with plug-ins or exter-
nal effects processors.
Audio is routed to a submix by assigning any
combination of sends and track output to avail-
able bus or output paths.
Submixing with Track Outputs or Sends
You can use both track outputs and sends to
route audio for submixing, depending on
whether you want a discrete or send and return
submix.
Instrument plug-in with multiple outputs routed to
Auxiliary Input tracks
Instrument plug-in
Inputs from
plug-in outputs

Pro Tools Reference Guide738
Discrete Submix Output
Pro Tools lets you discretely route source audio
through a submix. This is preferred for dither or
other mastering processing, where you do not
want unprocessed audio heard in addition to
the processed signals. Use track outputs (not
sends) to assign tracks to a bus path for discrete
submixing. In this arrangement, the balance of
processed and unprocessed signal is controlled
by plug-in wet/dry settings.
To create a discrete submix:
1 Set the output of the tracks you want to in-
clude in the submix to a stereo bus path.
2 Pan each track.
3 Choose Track > New.
4 Specify the track type (Aux Input) and format
(stereo), then click Create.
5 Set the input of the Auxiliary Input to the
same bus path to which you assigned all con-
tributing tracks.
6 Set the output of the Auxiliary Input track to
your main stereo mix outputs (typically, outputs
1–2).
7 Set the Auxiliary Input Track level.
8 To process the submix, assign a plug-in or
hardware insert on the Auxiliary Input.
9 Set the controls of the plug-in. The plug-in By-
pass and Wet/Dry controls (if available) deter-
mine the amount of effect heard.
The contributing track faders control the bal-
ance within the submix. The Auxiliary Input
track controls the output levels of all tracks
routed to it.
You can apply mix automation to the volume,
pan, mute, and send level, send pan, and send
mute controls of the Auxiliary Input.
You can also bounce a submix to disk to free up
the voices for use by other tracks. See
Chapter 38, “Mixdown” for more information.
Send and Return Submixing for Effects
Processing
When you are submixing for reverb, delay, and
similar effects processing, use sends to achieve
traditional send/return bussing. You can use a
real-time plug-in or a hardware insert as a shared
resource for all tracks included in a submix. The
wet/dry balance in the mix can be controlled us-
ing the track faders (dry level) and Auxiliary In-
put fader (effect return, or wet, level).
To create an effects return submix with a plug-in or
hardware insert:
1 Assign each track’s main output to your main
mix outputs.
2 On the source tracks, assign a send (mono or
stereo) and select a mono or stereo bus path
from the Send selector. Configure the sends for
pre- or post-fader, as needed.
3 Choose Track > New.
4 Specify the track type (Aux Input) and format
(stereo), then click Create.
5 From the Auxiliary Input track’s Input Path se-
lector, select the send bus path.
6 Solo safe the track so that if you solo another
track that uses the effects send, you won’t mute
the effects return (see “Solo Safe Mode” on
page 170).
7 Assign a plug-in or hardware insert on the
Auxiliary Input.
8 Set the effect to “100% wet,” and set any other
controls.
See Chapter 36, “Plug-in and Hardware In-
serts” for more information.
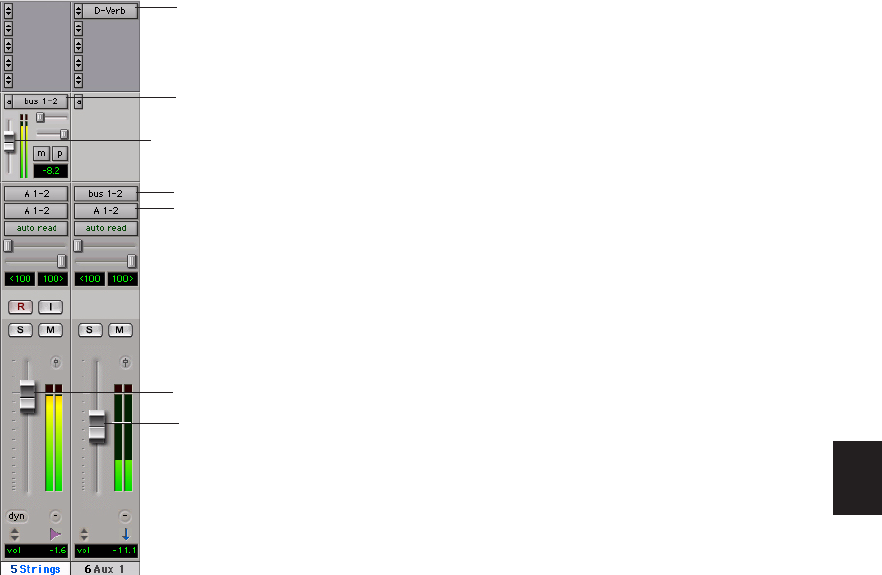
Chapter 35: Basic Mixing 739
9 From the Auxiliary Input track’s Output Path
selector, select an output path (main outputs).
Adjust the individual track faders to balance the
dry (unprocessed) tracks. With the send set to
pre-fader, the amount of effect is controlled by
the level of the Send Level fader or the Auxiliary
Input Volume fader. If the send is post-fader, the
Send Level fader follows volume level.
Send and Return Submixes with
External Devices
To create an effects return submix with an
external device:
1 Assign each track’s main output to your main
mix outputs.
2 Assign a send (mono or stereo) and set the
send destinations on the source tracks to the
output path connected to the external device.
Configure the sends for pre- or post-fader, as
needed.
3 Choose Track > New.
4 Specify the track type (Aux Input) and format
(stereo or mono), then click Create.
5 From the Auxiliary Input track’s Input Path se-
lector, select the input path connected to the ex-
ternal device.
6 From the Auxiliary Input track’s Output Path
selector, select an output path (main outputs).
7 Adjust the individual track faders to balance
the dry (unprocessed) tracks.
Send/return setup for a plug-in or hardware insert
Send to effect bus
Input set to send bus path
Output set to main mix outs
Controls level of dry signal
Controls level of effect return
Effect (plug-in or hardware)
Insert
Controls level of send to effects bus
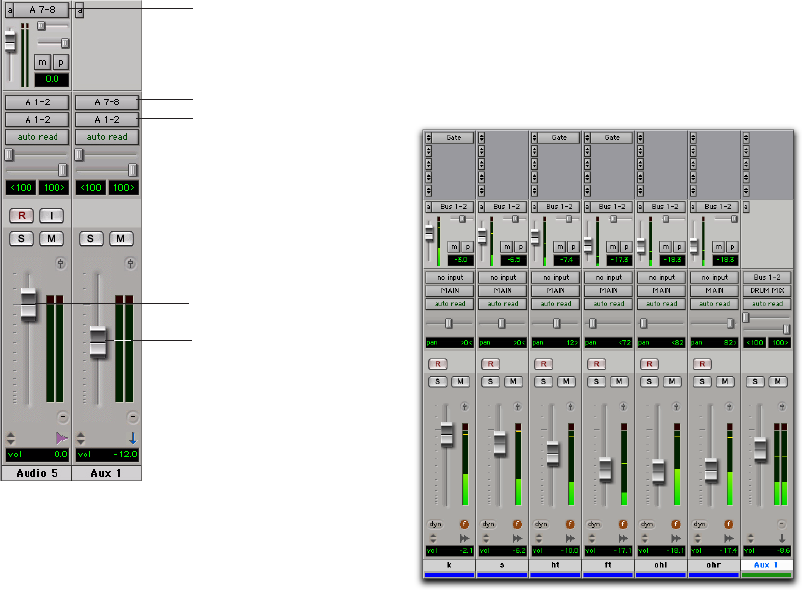
Pro Tools Reference Guide740
The amount of effect is controlled by the level of
the Send Level fader or the Auxiliary Input Vol-
ume fader.
Creating Monitor Submixes
Route track sends to one or more Auxiliary In-
put tracks to monitor submixes in a studio envi-
ronment. For example, you may want to pro-
vide the bassist with a drum submix for tracking
a new bass part.
To create a monitor submix:
1 Assign each track’s main output to your main
mix outputs.
2 Assign a send (mono or stereo) and set the
send destinations on the source tracks to the
output path connected to the external device.
Configure the sends for pre- or post-fader, as
needed.
3 Choose Track > New.
4 Specify the track type (Aux Input) and format
(stereo or mono), then click Create.
5 From the Auxiliary Input track’s Output Path
selector, select the output path (not the main
outputs) for monitoring the mix.
Adjust the Auxiliary Input track fader to control
the volume for the monitor mix.
Creating a Master Send Level Control
A Master Fader can control the overall level of
bus and output paths.
To create a Master send level control:
1 Choose Track > New.
2 Specify the track type (Master Fader), and
mono, stereo, or any of the supported multi-
channel formats for surround mixing.
3 Click Create.
Send/return setup for an external device
Send to external device
Input set to device’s return
Output set to main mix
Controls level of dry signal
Controls level of effect
outs
Drum submix for monitoring

Chapter 35: Basic Mixing 741
4 Do one of the following:
• Set the output of the Master Fader to the
same path that you are using to send to an
Auxiliary Input track.
• Set the output of the Master Fader to match
the path that you have chosen for your ef-
fects send.
You can then adjust send levels to balance the
source tracks, and use the Master Fader as a mas-
ter level control for the entire submix.
Soloing Tracks in a Submix
Soloing any tracks implicitly mutes all other
tracks, including Auxiliary Inputs. Solo-safing
an Auxiliary Input prevents this implicit muting
and lets the Auxiliary Input continue to pass au-
dio when its source tracks are in Solo.
To solo safe an Auxiliary Input:
Control-click (Windows) or Command-click
(Mac) the Solo button on the Auxiliary Input
track.
To solo an individual track that is part of a group:
Start-click (Windows) or Control-click (Mac)
the Solo button.
Generating Stereo Output from a Mono
Send/Return
You can use an Auxiliary Input to generate a ste-
reo output from a mono send. Set the send des-
tination to a mono Auxiliary Input track and
place a mono to stereo plug-in on the Auxiliary
Input. The output of the Auxiliary Input be-
comes stereo.
To create a “stereo” effect from a mono source,
you must use reverb, delay, or other time do-
main effects.
Delay Compensation
(Pro Tools HD Only)
Pro Tools provides Delay Compensation for
managing DSP delays from plug-in and hard-
ware inserts, and mixer routing (bussing). With
Delay Compensation enabled, Pro Tools main-
tains phase coherent time alignment between
tracks that have plug-ins with differing DSP de-
lays, tracks with different mixing paths, tracks
that are split off and recombined within the
mixer, and tracks with hardware inserts.
To maintain phase coherent time alignment,
Delay Compensation should be enabled during
playback and mixing.
Enabling Delay Compensation
To enable Delay Compensation:
Select Options > Delay Compensation.
When Delay Compensation is enabled, the De-
lay Compensation status indicator in the Edit
Window bar is displayed (see “Timeline, Ses-
sion, and Delay Compensation Status Indica-
tors” on page 115).
If desired, the Delay Compensation View for
tracks can be displayed in the Mix Window (see
“Delay Compensation View” on page 742).
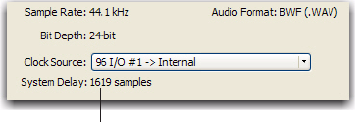
Pro Tools Reference Guide742
Configuring Delay Compensation
Engine
The amount of Delay Compensation available
for your session is set in the Playback Engine.
The total amount of delay due to inserts and
mixer routing for the entire session is displayed
in the Session Setup window.
There are three settings in the Playback Engine
dialog to dedicate DSP resources for Delay Com-
pensation:
None Allocates no DSP resources for Delay Com-
pensation.
Short Allocates minimum DSP resources of De-
lay Compensation for each channel. This is the
most efficient setting for Pro Tools|HD Accel
systems. For sessions with only a few plug-ins
that do not induce too much DSP-based delay,
this setting should be sufficient.
Long Allocates maximum DSP resources for De-
lay Compensation for each mixer channel. For
sessions with a lot of plug-ins resulting in a large
amount of DSP-induced delay, select this set-
ting.
To configure the Delay Compensation Engine:
1 Choose Setup > Playback Engine.
2 From the Delay Compensation Engine pop-up
menu, select a Delay Compensation setting.
3 Click OK.
Delay Compensation Time Mode
Delay values can be specified in either samples
or milliseconds, as selected with the Delay Com-
pensation Time Mode option in the Operation
Preferences page.
Delay Compensation Limit
The Delay Compensation limit is displayed in
samples in the Delay Compensation Engine
pop-up menu in the Playback Engine dialog.
This is the maximum amount of Delay Com-
pensation available for the session. This value is
different depending on the session sample rate
and which Delay Compensation Engine option
is selected.
System Delay
Pro Tools adds the exact amount of delay to
each track necessary to make that particular
track’s delay equal to the total System Delay.
The total System Delay is the longest delay re-
ported on a track, plus any additional delay
caused by mixer routing.
The System Delay is shown in the Session Setup
window. Reference the reported System Delay to
monitor whether or not you are close to exceed-
ing the Delay Compensation limit.
Delay Compensation View
The Delay Compensation View displays the to-
tal amount of plug-in (TDM and RTAS) and
hardware insert delay on each track, lets you ap-
ply a user offset of track delay, and displays the
total amount of delay that Pro Tools applies to
each track. The Delay Compensation View can
be shown or hidden in the Mix Window.
System Delay in Session Setup window
System Delay
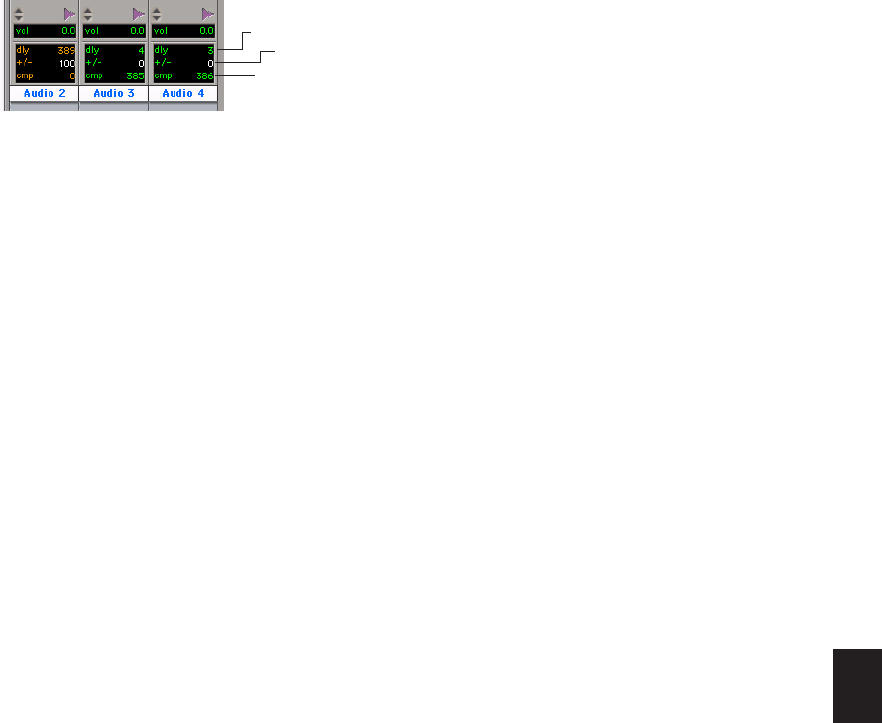
Chapter 35: Basic Mixing 743
To view Delay Compensation information:
Select View > Mix Window > Delay Compen-
sation.
Delay Compensation View Indicators
and Field
Delay (dly) Indicator
The Delay (dly) indicator reports the total plug-
in (TDM and RTAS) and hardware insert delay
on the track.
The Delay indicator’s report to Pro Tools Delay
Compensation Engine can be bypassed when
Delay Compensation is enabled. This is useful
for manually time-aligning a track when the to-
tal delay on a track exceeds the Delay Compen-
sation limit. See “Delay that Exceeds the Com-
pensation Limit” on page 744.
The display color indicates reported track delay,
as follows:
Green: Indicates that track delay reporting is en-
abled and the track does not exceed the avail-
able amount of Delay Compensation.
Orange: Indicates that this is the track reporting
the longest plug-in and hardware insert delay in
the session.
Red: Indicates that the amount of plug-in and
hardware insert delay on the track exceeds the
available amount of Delay Compensation (see
“Delay that Exceeds the Compensation Limit”
on page 744).
Gray: Track delay report is bypassed.
User Offset (+/–) Field
This field lets you adjust track delays manually
while Delay Compensation is enabled. The User
Offset is in addition to or subtraction from the
amount of delay applied by Track Compensa-
tion. The User Offset is useful for the following
cases:
• For manually time-aligning a track if a
plug-in is incorrectly reporting its delay.
• For adjusting the timing “feel” of a track.
The color of the values in this field indicate User
Offset status, as follows:
White: Indicates that the User Offset is enabled
on the track and the User Offset compensation
value is applied to the track.
Gray: Indicates that the User Offset is disabled
on the track and the User Offset compensation
value is not applied.
To change track delay using the User Offset field:
1 In the Delay Compensation View, click in the
User Offset edit field.
2 To set your delay value (in samples or millisec-
onds depending on your current preferences),
do one of the following:
• Enter a positive number (with or without
the “+” modifier) for a positive delay (later
in time) or negative number (with the “–”
modifier) for a negative delay (earlier in
time).
• Drag in the User Offset field to scroll to a
new value. For finer resolution, Control-
drag (Windows) or Command-drag (Mac).
• Press the Up and Down Arrow keys to in-
crease or decrease the numerical values.
3 Press Enter.
Delay Compensation View
Track Compensation
indicator
Delay indicator
User Offset field
Pro Tools Reference Guide744
To bypass the user delay:
Start-Control-click (Windows) or Command-
Control-click (Mac) the User Offset field. The
user-defined delay appears grayed out and does
not apply to the track.
Track Compensation (cmp) Indicator
This indicator shows the amount of Delay Com-
pensation Pro Tools applies to each track.
The display color indicates the amount of Delay
Compensation applied, as follows:
Green: Track compensation is enabled and the
track does not exceed the Delay Compensation
limit. The amount of Delay Compensation
shown in the indicator is applied to the track.
Blue (Audio Tracks Only): Indicates that Delay
Compensation is force-enabled on the track.
When the track is record-enabled or TrackInput-
enabled, Delay Compensation is not suspended
and remains enabled (see “Overriding Sus-
pended Delay Compensation” on page 745).
Red: Indicates that the track delay exceeds the
available amount of Delay Compensation and
no Delay Compensation is applied to the track
(see “Delay that Exceeds the Compensation
Limit” on page 744).
Gray: Indicates that Delay Compensation for the
track is bypassed and no delay is applied to the
track.
Delay that Exceeds the Compensation
Limit
When the total delay on a track exceeds the to-
tal available amount of Delay Compensation
(selected in the Playback Engine dialog), no De-
lay Compensation is applied on that track. Any
audio on that track will no longer be properly
time-aligned and will be out of phase. Both the
Delay indicator and Track Compensation indi-
cator turn red to show that the track delay ex-
ceeds the Delay Compensation limit. The maxi-
mum available Delay Compensation is applied
to all other tracks.
To compensate for delay that exceeds the
compensation limit, do one of the following:
If the Delay Compensation Engine setting in
the Playback Engine is set to Short, change the
setting to Long.
– or –
If the Delay Compensation Engine is already
set to Long, do the following:
• Bypass the reported delay for the track by
Start-Control-clicking (Windows) or Com-
mand-Control-clicking (Mac) the Delay in-
dicator. The track information is grayed out
once it is bypassed.
– and –
• Manually nudge any audio data on the
track earlier by the amount of delay re-
ported in the track’s Delay indicator.

Chapter 35: Basic Mixing 745
Low Latency Monitoring During
Recording
When an audio track is armed for recording
(record-enabled), TrackInput-enabled,
DestructivePunch-enabled, or punched in, the
track’s Delay Compensation is automatically
suspended (and the Track Compensation indi-
cator displays 0). This provides low-latency
monitoring on those track outputs.
Tracks that are not record enabled still apply De-
lay Compensation. Pro Tools automatically
compensates for any timing discrepancies be-
tween the recorded material and the delay-com-
pensated mix. When the track is played back
(with both record-enable and TrackInput dis-
abled) it is correctly time-aligned with the other
delay-compensated tracks.
Overriding Suspended Delay Compensation
You can override the automatic suspension of
Delay Compensation on record-enabled tracks,
but you will introduce latency in the signal path
by the amount of Delay Compensation. This la-
tency may be acceptable depending on the re-
cording source.
For example, if you are bus recording a mix-
down, you will want to force-enable Delay Com-
pensation on the record track. Or, if you are re-
cording a source that does not need to monitor
the session, you can force Delay Compensation
on a track so that it is not automatically sus-
pended for record-enabled, TrackInput-enabled,
or DestructivePunch-enabled tracks.
To apply Delay Compensation to tracks where
Delay Compensation was suspended:
Start-Control-click (Windows) or Command-
Control-click (Mac) the Track Compensation in-
dicator. Track delay is applied to the track and
the Track Compensation indicator displays in
blue.
Delay Compensation on Auxiliary
Inputs
Delay Compensation on Auxiliary Inputs can be
bypassed to let you monitor outside sources
(such as the audio tracks of a slaved video deck)
with minimal latency, while still reporting the
track’s delay.
To bypass an Auxiliary Input’s Delay
Compensation:
Start-Control-click (Windows) or Command-
Control-click (Mac) the Track Compensation in-
dicator. The reported track delay will be zero,
and will appear grayed out.
Delay Compensation for MIDI
When Delay Compensation is active, a MIDI
event that is recorded to sound “in time” with
delay-compensated material actually is recorded
late by the length of total delay in effect.
To compensate, MIDI events are shifted back in
time by the total session delay following each
MIDI recording pass.

Pro Tools Reference Guide746
Low-Latency Recording with Virtual
MIDI Instruments
When a MIDI or Instrument track that is routing
MIDI data to an instrument plug-in is record-en-
abled, Pro Tools automatically suspends Delay
Compensation through the main outputs of the
audio track, Auxiliary Input, or Instrument track
on which the instrument plug-in is inserted. This
allows for latency-free monitoring of the instru-
ment plug-in during recording.
MIDI and Audio Processing Plug-ins
Some audio processing plug-ins (such as Bruno
and Reso) and many instrument plug-ins let you
process audio while allowing MIDI data to con-
trol processing parameters. When you record
enable a MIDI or Instrument track that is con-
trolling an audio processing plug-in, the track
the plug-in is inserted on will go into low-la-
tency mode, effectively making the processed
audio play early. The steps to prevent this and
keep audio time-aligned depend on the type of
track on which the plug-in resides.
To keep audio time-aligned when recording using a
MIDI controlled plug-in on an audio track:
Start-Control-click (Windows) or Command-
Control-click (Mac) the Track Compensation in-
dicator for the audio track to apply Delay Com-
pensation.
To keep audio time-aligned when recording using a
MIDI controlled plug-in on an Auxiliary Input:
1 Start-Control-click (Windows) or Command-
Control-click (Mac) the Track Compensation in-
dicator for the Auxiliary Input to bypass Delay
Compensation.
2 Enter the total system delay into the User Off-
set field.
Dither
Dither is used to minimize quantization arti-
facts when reducing the bit depth of an audio
signal, for example, from 24-bit to 16-bit. Quan-
tization artifacts are most apparent when a sig-
nal is near the low end of its dynamic range,
such as during a quiet passage or a fade-out.
Dither minimizes quantization artifacts by in-
troducing very low-level random noise to a sig-
nal, which smooths out the distortion that can
result when the signal’s bit depth is reduced.
With dither there is a trade-off between signal-
to-noise performance and less-apparent distor-
tion. Proper use of dither lets you get better sub-
jective performance when reducing the bit
depth of audio.
Delay Compensation for virtual MIDI in-
struments works only when all MIDI and
audio connections take place inside of
Pro Tools. For example, Pro Tools does not
suspend Delay Compensation when you are
using ReWire to connect software synthe-
sizers and samplers in other ReWire client
applications (such as Reason).
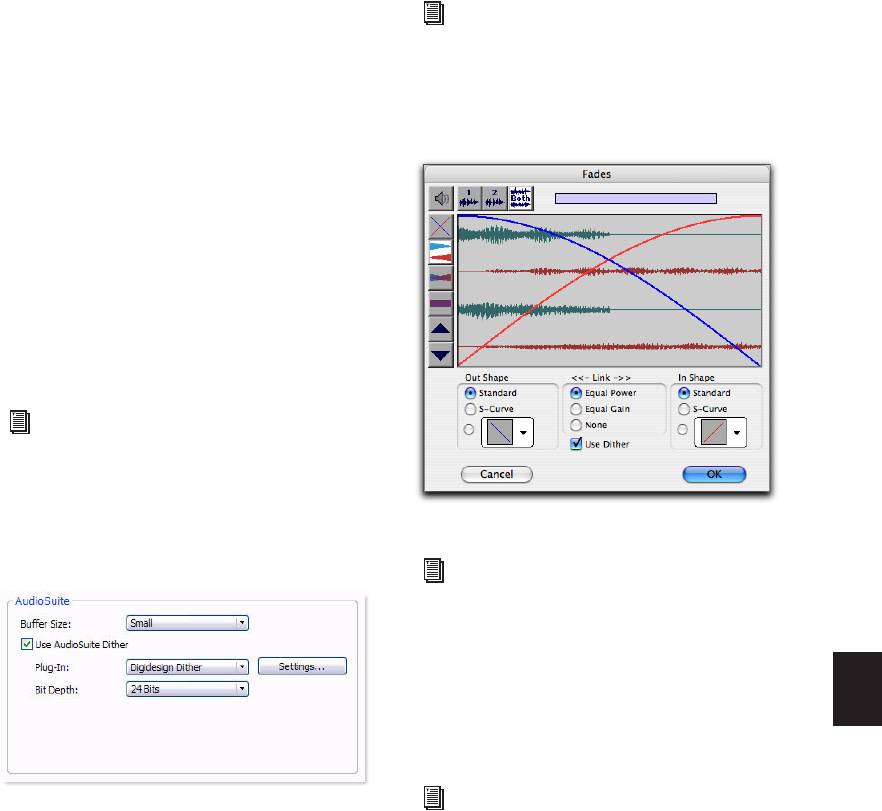
Chapter 35: Basic Mixing 747
Dither in Pro Tools
There are several ways dither can be used in
Pro Tools. Each has a specific application within
the various operations that could benefit from
using dither.
Dither Plug-ins for Mixdown Whenever you are
mixing down or bouncing to disk and your des-
tination bit depth is lower than 24-bit, insert a
dither plug-in on a Master Fader that controls
the output mix. You can use real-time dither
plug-ins from Digidesign or third-party manu-
facturers.
For important information on using dither
when mixing down or bouncing to disk, see
“Dithering” on page 834.
AudioSuite Dither Some AudioSuite plug-ins can
automatically apply dither when processing.
You can select this option in the Processing Pref-
erences page.
The Use AudioSuite Dither option enables a pre-
set, noise-shaped dither for the following Digi-
Rack AudioSuite plug-ins:
• Gain
• Normalize
• Smack!
• Sonic NoNOISE
Dither in Fades and Crossfades In the Fades dia-
log (Edit > Fades > Create), the Use Dither op-
tion enables a preset, noise-shaped dither.
Dither on Export and Import When you export
audio to a lower bit depth, or when you import
an audio file into a session that is at a lower bit
depth than the file, a preset, noise-shaped dither
is applied.
For more information on Dither plug-ins, see
the DigiRack Plug-ins Guide.
Operation preferences, for AudioSuite dither
For more information on AudioSuite Dither,
see the DigiRack Plug-ins Guide.
Create Fades dialog
For more information on using the Dither in
fades and crossfades, see “Use Dither” on
page 485.
For more information about the application
of dither on export, see “Exporting Audio”
on page 263.
For more information about the application
of dither on import, see “Bit Depth Conver-
sion and Dithering” on page 253.

Pro Tools Reference Guide748
Dithered Mixer Plug-ins (Pro Tools HD Only) Digi-
design has developed a mixer that provides all
of the benefits of the standard Stereo Mixer and
Surround Mixer plug-ins, but also provides un-
correlated dither on any summed output. There
are two Mixer plug-ins that feature dither with
noise shaping: Stereo Dithered Mixer and Sur-
round Dithered Mixer.
Noise Shaping
Noise shaping can further improve audio perfor-
mance and reduce perceived noise inherent in
dithered audio. Noise shaping uses filtering to
shift noise away from frequencies in the middle
of the audio spectrum (around 4 kHz), where
the human ear is most sensitive.
Noise Shaping is available in the Digidesign
Dither and POW-r Dither plug-ins.
Using an Ethernet Control
Surface with Pro Tools
Digidesign offers several Ethernet-based control
surface options for Pro Tools.
Digidesign D-Control and D-Command
(Pro Tools HD Only)
D-Control and D-Command tactile work-
surfaces are part of Digidesign’s ICON, a flexi-
ble, integrated system that extends the func-
tionality of Pro Tools.
Digidesign ProControl
(Pro Tools HD Only)
ProControl is an expandable, dedicated control
surface that provides access to Pro Tools record-
ing, mixing, editing, signal routing, plug-in con-
trol, and automation features.
Digidesign Control|24
(Pro Tools HD and LE Only)
Control|24 is a dedicated control surface that
provides access to nearly all Pro Tools recording,
mixing, editing, signal routing, plug-in control,
and automation features.
Enabling an Ethernet Control
Surface in Pro Tools
To enable an Ethernet control surface in Pro Tools:
1 Choose Setup > Peripherals and click Ethernet
Controllers.
2 Select Enable.
3 If your Ethernet control surface consists of
more than one unit, select the units in numeri-
cal order as you want them arranged left to
right.
4 Click OK.
For more information on using the Dithered
Mixer plug-ins, see the Pro Tools|HD
Getting Started Guide.
For more information on using Noise Shaping,
see the DigiRack Plug-ins Guide.
Chapter 35: Basic Mixing 749
Using a MIDI Control Surface
with Pro Tools
MIDI Control Surfaces add hands-on control to
many Pro Tools functions, allowing you to ad-
just faders and knobs, activate transport con-
trols, or edit plug-in parameters.
Digidesign Command|8
Command|8 is Digidesign’s compact USB-based
MIDI control surface for Pro Tools systems.
Other MIDI Control Surfaces
Pro Tools supports MIDI control surfaces from
CM Labs (such as MotorMate and MotorMix),
and Mackie (such as Mackie Control and HUI),
as well as other control surfaces that support the
MotorMix and HUI controller personalities.
MIDI Control Surface
Personalities
MIDI Control Surface Personalities are files that al-
low Pro Tools to communicate with the MIDI
control surface. When you install Pro Tools,
these files are installed by default in the Con-
trollers folder inside the Pro Tools application
folder. If the files are not present, run the
Pro Tools installer to install the personality files.
Connecting a MIDI Control Surface
If your Pro Tools hardware includes MIDI ports,
you can connect a MIDI control surface directly
to your system. If it does not include MIDI ports,
you will need to use a MIDI Interface such as the
Digidesign MIDI I/O.
To connect a MIDI control surface:
1 Using a standard 5-pin MIDI cable, connect
the MIDI Out port on your MIDI control surface
to the MIDI In port on your Pro Tools hardware
or MIDI interface.
1 Using a standard 5-pin MIDI cable, connect
the MIDI In port on your MIDI control surface
to the MIDI Out port on your Pro Tools hard-
ware or MIDI interface.
2 If you have a multi-port MIDI interface, note
which MIDI port the control surface is con-
nected to.
Configuring Your System for a
MIDI Control Surface
A MIDI Control Surface is configured in the
same way as any other MIDI device in Pro Tools,
using MIDI Studio Setup (Windows) or Audio
MIDI Setup (Mac).
For complete instructions on connecting
and configuring Command|8, see the
Command|8 Guide.
For complete instructions on configuring
you r MIDI studio, see the Getting Started
Guide that came with your system.
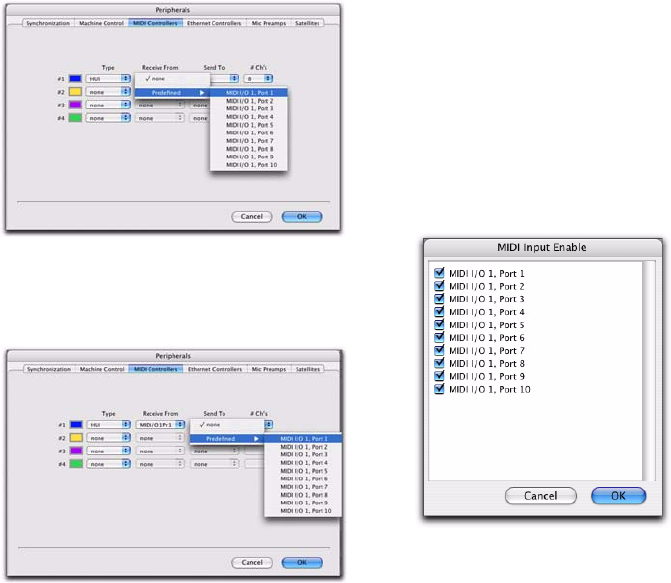
Pro Tools Reference Guide750
Enabling a MIDI Control Surface in
Pro Tools
To enable a MIDI control surface in Pro Tools:
1 Choose Setup > Peripherals and click the MIDI
Controllers tab.
2 Choose your MIDI control surface device
name from the Type pop-up menu.
3 Choose the MIDI control surface’s source port
from the Receive From pop-up menu.
4 Choose a destination port from the Send To
pop-up menu.
5 If your MIDI control surface has more than
eight channel strips, or if you are using multiple
devices of the same type in series, choose the ap-
propriate number of channel strips from the
pop up menu under #Ch’s.
6 Click OK.
You can configure additional MIDI control sur-
faces (up to a total of four) by repeating the
above steps. Make sure that none of the control
surfaces are assigned to the same MIDI source
and destination ports or channels in the
Pro Tools Peripherals dialog.
Enabling the MIDI Control Surface as an
Input Device
You must enable the MIDI control surface as an
input device in Pro Tools.
To enable a MIDI control surface as an input
device:
1 Choose Setup > MIDI > Input Devices.
2 Select the source port that you selected in the
Receive From pop-up menu in the MIDI Con-
trollers page of the Peripherals dialog.
3 Click OK.
If you want to prevent control surface MIDI data
from reaching Pro Tools, you can deselect its
source port in the MIDI Input Enable window.
Choosing the source port for a MIDI control surface
Choosing the destination port for a MIDI control surface
Enabling a MIDI input device
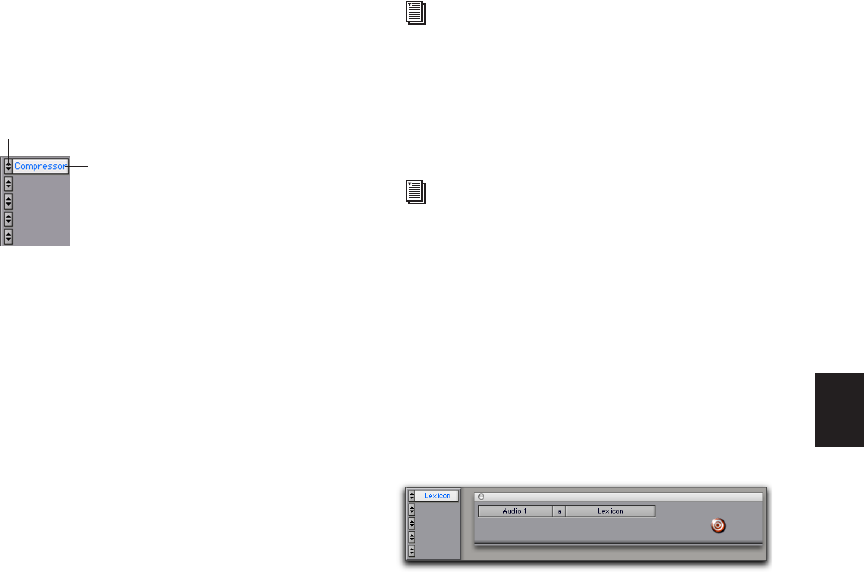
Chapter 36: Plug-in and Hardware Inserts 751
Chapter 36: Plug-in and Hardware
Inserts
Pro Tools provides up to five unity-gain inserts
on each audio, Auxiliary Input, Master Fader,
and Instrument track. Audio, Auxiliary Input,
and Instrument track inserts are pre-fader, and
Master Faders inserts are post-fader.
An insert can be either a software DSP plug-in or
a hardware insert. A Pro Tools insert routes the
signal from the track to a plug-in or external
hardware effect of your choice and automati-
cally returns it to the same track. Inserts do not
alter the original audio source files, but process
audio in real time, during playback. You can
permanently apply real-time effects to tracks by
recording or bouncing the effect to disk (see
Chapter 38, “Mixdown” for more information).
Plug-in Inserts Plug-in inserts are software in-
serts that process audio material on a track in
real time. For example, the DigiRack EQ, com-
pressor, and delay plug-ins supplied with your
Pro Tools system can be used as real-time plug-
in inserts.
Additional real-time plug-ins are available from
Digidesign and from many third-party develop-
ers.
Hardware I/O Inserts Hardware I/O inserts can
route audio through an external device con-
nected to parallel inputs and outputs of an au-
dio interface. You can process the audio mate-
rial on a track with a hardware insert in real
time.
Insert paths require audio interface inputs and
outputs, and are determined by the I/O Setup
configuration of your system.
Insert button and selector on a track
Insert button
Insert selector
For more information about the plug-ins
supplied with your Pro Tools system, see the
DigiRack Plug-ins Guide.
For information about optional Digidesign
plug-ins, see the electronic Digidesign Plug-
ins Guide. For information about third-
party plug-ins, visit the Digidesign website
(www.digidesign.com).
Hardware I/O insert

Pro Tools Reference Guide752
General Information
When more than one insert is used on a track,
they are processed in series. Each effect is added
to that of any previous plug-ins or inserts (flow-
ing from top to bottom in the Mix window In-
serts View, and left to right in the Edit window
Inserts View).
Inserts on audio tracks and Auxiliary Inputs and
Instrument tracks are pre-fader. You can cause
clipping if you boost their gain to extremes, es-
pecially on tracks recorded at high amplitude.
Watch on-screen metering for indication of clip-
ping. (Inserts on Master Faders are post-fader.)
Using Inserts for Effects Processing
Inserts can be used in two ways:
On Single Tracks An insert can be applied to an
individual audio, Auxiliary Input, Master Fader,
or Instrument track.
With in-line inserts, you control the amount of
effect by adjusting the balance (or the wet/dry
mix) controls of the plug-in or external device.
As Shared Resources An insert can be used as a
shared resource in a send-and-return arrange-
ment, by bussing signals from several tracks to
an Auxiliary Input, and then applying the insert
to the Auxiliary Input track. You can then con-
trol the send level for each track, and the overall
level of the effect can be controlled from the
Auxiliary Input track. Using sends and other sig-
nal routing features helps maximize your sys-
tem’s processing power.
Insert Formats
Mono Inserts Used on mono tracks. Inserts that
occur on a track after a stereo insert are automat-
ically used in stereo as well.
Stereo Inserts Used on stereo tracks. A stereo
hardware I/O insert sends the signal to an in-
put/output path.
Mono In/Stereo Out Plug-in Inserts Used to re-
turn a stereo effect from a mono source. Certain
plug-ins (such as D-Verb) let you generate stereo
output from a mono channel. A track made into
stereo in this way has panning controls for each
channel of the stereo signal. Any inserts that oc-
cur on a track after a stereo insert are automati-
cally used in stereo as well.
Multi-Mono Plug-in Inserts Used on stereo or
greater-than-stereo multichannel tracks when a
multichannel version of the plug-in is not avail-
able. Controls for all channels are linked by de-
fault so that you can adjust them in tandem.
You can unlink controls for independent adjust-
ment using the Master Link button. See “Link-
ing and Unlinking Controls on Multi-Mono
Plug-ins” on page 770.
Multichannel Plug-in Inserts Used on stereo and
greater-than-stereo multichannel tracks. On
greater-than-stereo multichannel tracks, the
controls for all channels are generally linked to-
gether.
For examples of send and return busses and
other submixing setups, see “Signal Routing
for Monitoring and Submixing” on
page 735.
Relinking may cause automation to be lost.
See “Linking and Unlinking Controls on
Multi-Mono Plug-ins” on page 770

Chapter 36: Plug-in and Hardware Inserts 753
TDM and RTAS Plug-ins
There are three plug-in formats supported by
Pro Tools (TDM, RTAS, and AudioSuite), two of
which can be used as real-time inserts, as fol-
lows:
TDM Plug-ins Used with Pro Tools HD systems,
these plug-ins rely on the processing power of
DSP on Pro Tools|HD system cards.
RTAS Plug-ins Similar to their TDM counter-
parts, but unlike TDM plug-ins, they rely on and
are limited by the host processing power of your
computer.
AudioSuite Plug-ins Non-real-time, file-based
processing plug-ins for Pro Tools (see the Digi-
Rack Guide).
Depending on your Pro Tools software, plug-ins
can be used as follows:
Pro Tools HD
• Both TDM and RTAS plug-ins can be used on
audio, Auxiliary Input, Master Fader, and In-
strument tracks.
Pro Tools LE
• RTAS plug-ins can be used on audio, Auxiliary
Input, Master Fader, and Instrument tracks.
Voice Usage and Total Latency for
RTAS Plug-ins
(Pro Tools HD Only)
With Pro Tools HD, the initial insert of an RTAS
plug-in may cause additional latency, and will
take up two additional voices per channel (one
voice for input and one voice for output) in the
following conditions:
• When inserted on an Auxiliary Input or
Master Fader track
• When inserted on an Instrument track that
does not contain an instrument plug-in
• When inserted after a TDM plug-in on any
kind of track
For example, the initial insert of an RTAS plug-
in on a mono Auxiliary Input track uses two
voices (one channel with two voices), while the
initial insert of that plug-in on a stereo Auxiliary
Input track uses four voices (two channels with
two voices each).
Subsequent RTAS plug-ins on the same track do
not take up additional voices unless a TDM
plug-in is inserted between other RTAS plug-ins.
Audio tracks that have active RTAS plug-in in-
serts cannot be explicitly voiced. The voice allo-
cation must be set to Dynamic or Off.
With Pro Tools HD, RTAS plug-ins placed
on Auxiliary Input, Master Fader, and In-
strument tracks will use additional voices
and may introduce extra latency based on
the HW Buffer Size. For more information,
see “Voice Usage and Total Latency for
RTAS Plug-ins” on page 753.
For tips on maximizing RTAS performance,
see the DigiRack Plug-ins Guide.
Avoid inserting TDM plug-ins between
RTAS plug-ins on any kind of track—this
causes unnecessary voice usage and may
cause additional latency.
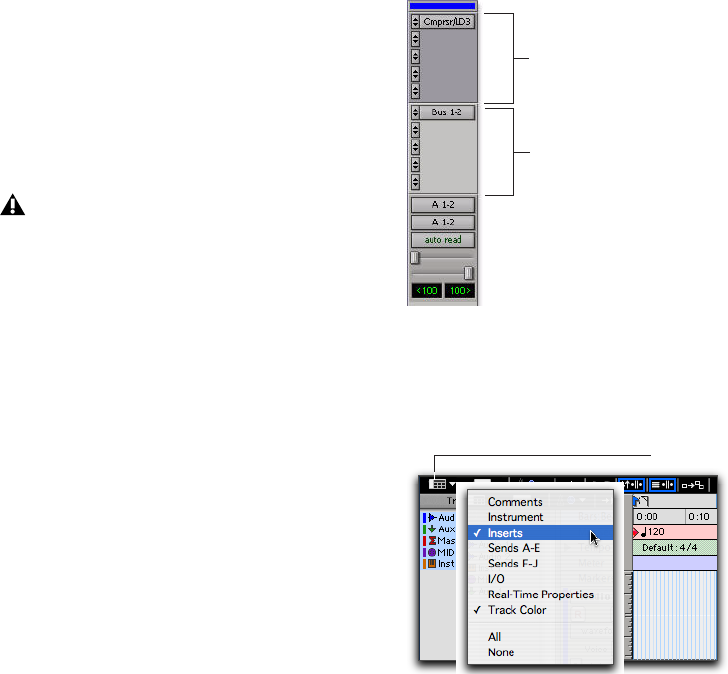
Pro Tools Reference Guide754
Furthermore, one additional voice is used for
each occurrence of any of the following condi-
tions when using voices for RTAS plug-ins on a
track:
• When you use the external key side-chain
of an RTAS plug-in on that track
• When you select multiple track outputs for
that track (one voice used for each output)
• When you select an AFL/PFL Path output
in the Output tab of the I/O Setup dialog
(one voice used for each channel)
Viewing Inserts
Both the Mix and Edit windows can be config-
ured to show or hide inserts. Plug-in windows
provide complete access to plug-in controls.
To show (or hide) inserts, do one of the following:
In the Mix window (or Edit window), select
View > Mix Window (or Edit Window) > Inserts.
– or –
Select Inserts View from the Edit Window or
Mix Window View selector.
When you use Pro Tools 6.9.x or lower to
open a session originally created with
Pro Tools 7, any RTAS plug-ins inserted on
Auxiliary Input or Master Fader tracks—or
after TDM plug-ins on any kind of track—
will become inactive. Showing Inserts in the Mix Window
Showing Inserts using the View selector
Inserts
Sends (A–E)
View selector
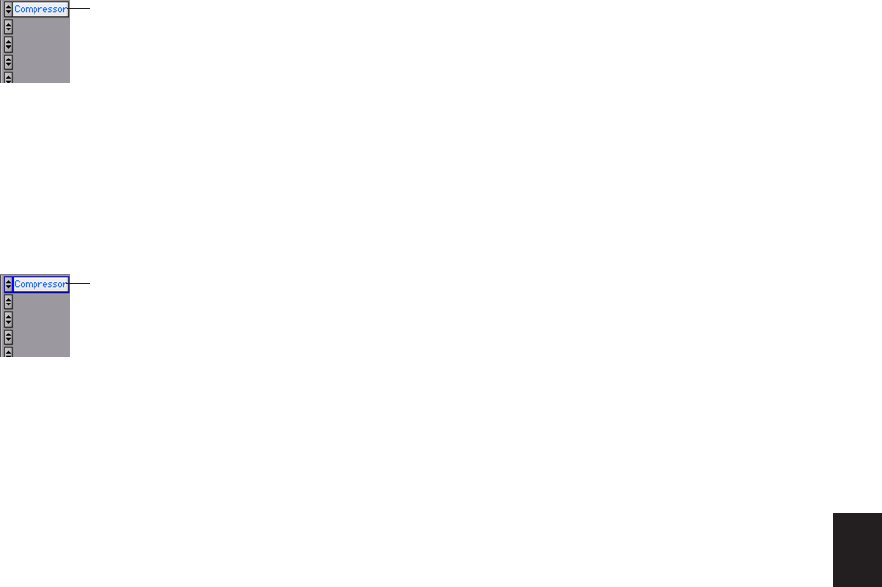
Chapter 36: Plug-in and Hardware Inserts 755
Display of Plug-in Window Status
In the Mix and Edit window, the plug-in button
and selector display the currently inserted plug-
in, its bypass state (see “Bypassing Plug-ins” on
page 770), target status, and window status.
Indicating the Controller Target
If you are using a control surface with Pro Tools,
only one plug-in can be targeted at a time. The
current controller target, if any, is indicated
with a color outline around its name:
Making Inserts Inactive
Plug-in and hardware inserts can be made inac-
tive to free up their resources for other uses.
When a plug-in insert is inactive it retains its as-
signment, position, and related automation
playlists. However, it will not pass audio and
does not consume any DSP or TDM resources.
When opening sessions, inserts will automati-
cally be made inactive in any of the following
situations:
• The system has insufficient DSP resources.
• A plug-in is not installed.
• A plug-in type is not available (RTAS or TDM).
• Opening the session results in plug-in type
substitutions. This can happen if the type is
available but substituting would result in an
unsupported condition, such as opening a
session containing a TDM plug-in for which
an RTAS version is unavailable.
To make an insert inactive, do one of the following:
Control-Start-click (Windows) or Command-
Control-click (Mac) the Insert button.
– or –
Make the track inactive. See “Making Tracks
Inactive” on page 171.
To toggle inserts in the same position on all tracks
active or inactive:
Control-Start-Alt click (Windows) or Com-
mand-Control-Option click (Mac) an Insert but-
ton in the position you want to toggle.
To toggle inserts in the same position on all
selected tracks active or inactive:
Control-Start-Alt-Shift-click (Windows) or
Command-Control-Option-Shift-click (Mac) an
Insert button in the position you want to toggle.
Indication of open plug-in window
The controller target
Lit plug-in name
Target outline
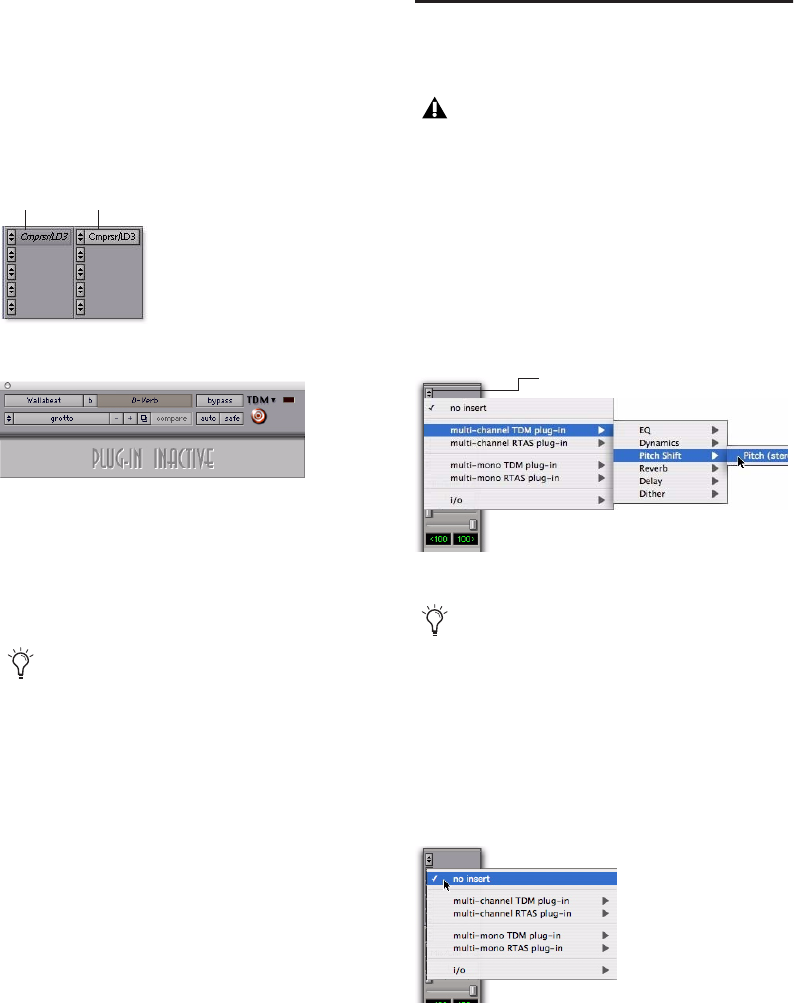
Pro Tools Reference Guide756
Inactive Plug-in Inserts
Inactive plug-in inserts retain all associated au-
tomation playlists. In addition, any edits made
in the session affect the plug-in automation
playlists. You cannot record automation or ad-
just the controls for an inactive plug-in.
Inactive Hardware Inserts
Inactive hardware inserts retain their assign-
ments, but do not pass audio and do not con-
sume any DSP resources.
Inserting Plug-ins on Tracks
To use a real-time plug-in, insert it on a track.
To insert a plug-in on a track:
1 Make sure the Inserts View is shown in the
Mix or Edit window.
2 Click the Insert selector on the track and select
the plug-in that you want to use. (See “TDM and
RTAS Plug-ins” on page 753 for related informa-
tion.)
To remove an insert from a track:
Click the Insert selector and choose No Insert.
Display of inactive plug-ins
Display of inactive Plug-in window
Hardware inserts do not provide a bypass
control. You can use the inactive feature
whenever you need to mute or bypass a
hardware insert.
(italicized)
Active
(plain text)
Inactive
Plug-ins cannot be inserted or removed dur-
ing recording.
Inserting a TDM plug-in
You can insert a plug-in on a track by drag-
ging one of its Plug-ins Settings (.txf) files
from a DigiBase browser onto an available
track Insert position in the Mix window. See
“Dragging and Dropping Plug-in Settings
Files” on page 769.
Removing a plug-in
Insert selector
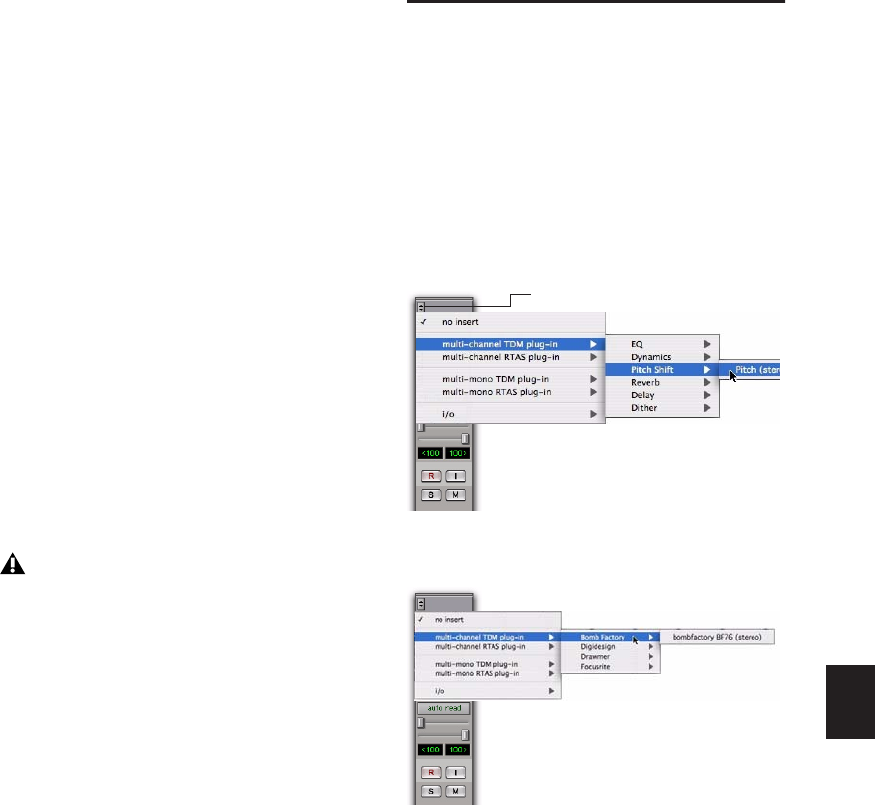
Chapter 36: Plug-in and Hardware Inserts 757
Ordering RTAS and TDM Plug-ins
on Audio Tracks
(Pro Tools HD Only)
With Pro Tools HD, when RTAS and TDM plug-
ins are combined on an audio track, Auxiliary
Input, or Master Fader, the order in which they
are inserted produces different results:
RTAS Plug-ins Grouped Before TDM Plug-ins No
additional voices will be used, and no process-
ing latency will occur. RTAS plug-ins will be by-
passed when Record Enable or TrackInput mon-
itoring is enabled for that track.
TDM Plug-ins Grouped Before RTAS Plug-ins Each
initial insert of an RTAS plug-in after a TDM
plug-in on a track will cause processing latency,
and will use voices as described in “Voice Usage
and Total Latency for RTAS Plug-ins” on
page 753. RTAS plug-ins will stay active while
Record Enable or TrackInput monitoring is en-
abled for that track.
Ordering Recommendations
When combining RTAS and TDM plug-ins on
an audio track, use one of the following two
strategies based on your recording needs:
• To ensure that RTAS plug-ins stay active when
you record enable a track or use TrackInput
monitoring, order all TDM plug-ins before
RTAS plug-ins.
– or –
• To conserve voices and minimize processing
latency, order all RTAS plug-ins before TDM
plug-ins.
Plug-in Menu Organization
You can customize how plug-in lists (plug-in
menus) are organized in the Insert selector and
Plug-in selector.
Use the “Organize Plug-in Menus By” pop-up
menu in the Pro Tools Display Preferences page
to organize plug-in menus in a Flat List (with
plug-ins in alphabetical order), or by Category,
Manufacturer, or Category and Manufacturer.
As a rule, always group plug-ins of the same
type together, especially if inserting RTAS
after TDM plug-ins. Otherwise, additional
voices may be unnecessarily used.
Plug-ins organized by category (using the Insert
selector)
Plug-ins organized by Manufacturer (using the Plug-in
selector)
Insert selector

Pro Tools Reference Guide758
“Organize Plug-in Menus By” Pop-Up Menu
Flat List Organizes plug-ins in a single list, in al-
phabetical order.
Category Organizes plug-ins by process category
(such as EQ, Dynamics, and Delay), with indi-
vidual plug-ins listed in the category submenus.
Plug-ins that do not fit into a standard category
(such as the DigiRack Signal Generator), or
third-party plug-ins that have not had a cate-
gory designated by their developers, appear in
the Other category. Plug-ins can appear in more
than one category.
Plug in categories include:
•EQ
• Dynamics
• Pitch Shift
• Reverb
• Delay
• Modulation
• Harmonic
• Noise Reduction
• Dither
• Sound Field
• Hardware
• Instrument
• Other
• Effects
The Effects subfolder organizes special effects,
multi-effect processors, and other plug-ins. All
plug-ins that specify their plug-in category as an
“Effects” type will be displayed within the Ef-
fects subfolder.
Manufacturer Organizes plug-ins by their manu-
facturer (such as Digidesign, Eventide, Line 6,
and McDSP), with individual plug-ins listed in
the manufacturer submenus. Plug-ins that do
not have a Manufacturer defined will appear in
the “Other” manufacturer folder.
Most Digidesign-distributed third-party plug-ins
will be grouped under Digidesign when this op-
tion is enabled.
Category and Manufacturer Organizes plug-ins
in two levels of menus. The top menus display
plug-ins by process category (such as EQ, Dy-
namics, and Delay), with individual plug-ins
listed in the category submenus. The bottom
menus display plug-ins by manufacturer (such
as Digidesign, Eventide, Line 6, and McDSP),
with individual plug-ins listed in the manufac-
turer submenus.
To select how plug-ins are organized:
1 Open or create a session.
2 Choose Setup > Preferences, and click Display.
3 Click the “Organize Plug-in Menus By” pop-
up menu, and select one of the view options.
4 Click OK.
The current “Organize Plug-in Menus By” set-
ting is saved with Pro Tools preferences (it is not
saved with the Pro Tools session file).
If no plug-ins within a certain category are
installed on your system, the subfolder
named for that category will not appear in
the menu.
If no plug-ins by a certain manufacturer are
installed on your system, the subfolder
named for that manufacturer will not ap-
pear in the menu.
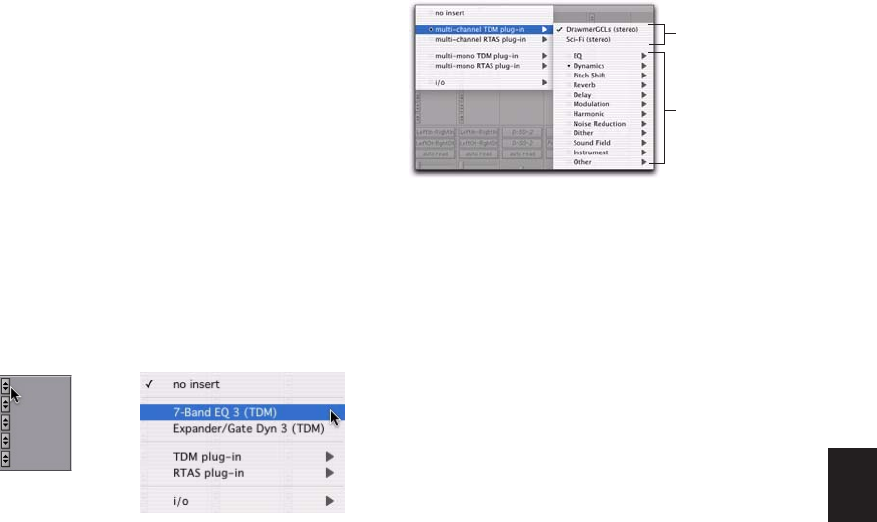
Chapter 36: Plug-in and Hardware Inserts 759
Control Surface Support
Digidesign control surfaces with multi-color
LCDs (such as D-Control) indicate plug-ins as
follows:
• Plug-in categories (such as EQ) and plug-in
manufacturers (such as Digidesign) are in-
dicated in green text.
• Specific plug-ins located in the plug-in sub-
folders (such as EQ III in the EQ subfolder)
are indicated in yellow (amber) text.
Control surfaces with single-color displays (such
as ProControl and Command|8) do not indicate
plug-in view choices. They display contents of a
plug-in folder as a single list of plug-ins.
Default EQ and Dynamics Plug-ins
You can set a default EQ plug-in and Dynamics
plug-in, which places them at the top of the In-
sert selector pop-up menu on-screen, and first in
the list of menu choices when assigning inserts
on ICON worksurfaces.
To set a default plug-in:
1 Choose Setup > Preferences and click Mixing.
2 Under Setup, choose a plug-in from the De-
fault EQ or Default Dynamics pop-up menu.
3 Click OK to close the Preferences window.
Plug-in Favorites
To find a plug-in faster, a plug-in can be desig-
nated as a favorite. Favorite plug-ins are shown
at the top of the plug-in menu.
When a plug-in becomes a favorite, it is still
shown in its plug-in category and its name ap-
pears in bold.
To designate a plug-in as a favorite:
Control-click (Windows) or Command-click
(Mac) the Insert selector and select a plug-in
from a to designate it as a favorite.
To change the status of a plug-in favorite:
Control-click (Windows) or Command-click
(Mac) the Insert selector and select a plug-in fa-
vorite that you no longer want designated as a
favorite.
When selecting the plug-in favorite to change,
you can select the plug-in from the list of favor-
ites at the top of the plug-in menu, or in its plug-
in category (where the plug-in appears in bold).
Default plug-in display in Insert selector menu
Menu display of favorite plug-ins
Favorite plug-ins
Plug-in categories
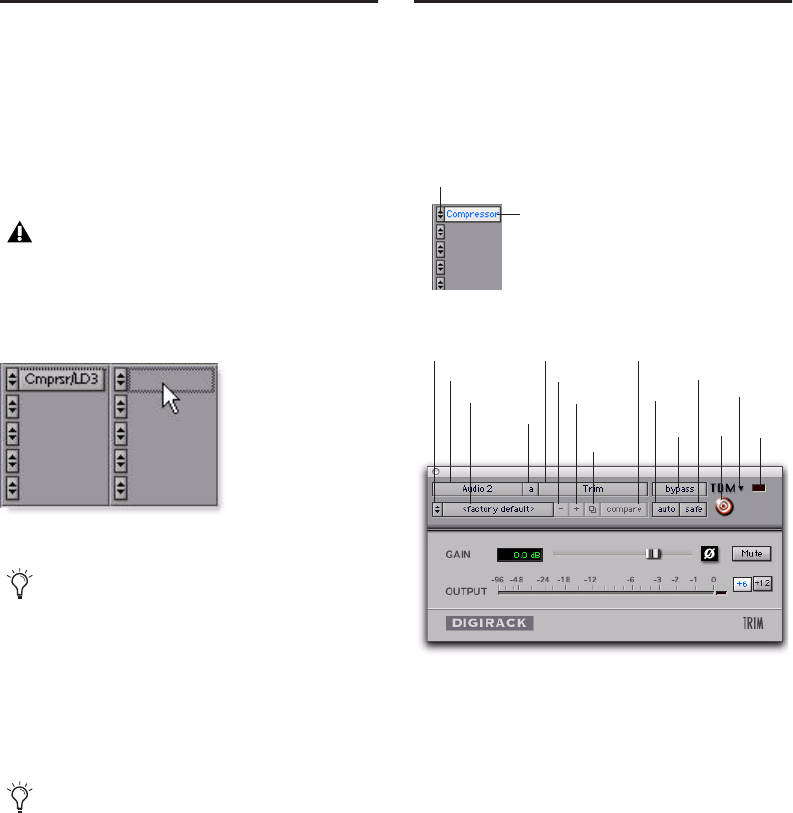
Pro Tools Reference Guide760
Moving and Duplicating Plug-
in and Hardware Inserts
You can move or duplicate an insert by dragging
it to a different position on the same track or a
different track. Inserts that are moved or dupli-
cated retain their original settings and automa-
tion.
To move an insert:
Drag the insert to a new insert location.
To duplicate an insert:
Alt-drag (Windows) or Option-drag (Mac) the
insert to a new insert location. Duplicated plug-
in inserts retain their original settings and auto-
mation.
The Plug-in Window
The Plug-in window appears whenever you click
a plug-in’s Insert button on a track. This floating
window lets you edit the adjust the controls of
any real-time plug-in insert in use on a track.
Track Selector Accesses any non-MIDI track in a
session.
Insert Position Selector Accesses any insert on
the current track.
Plug-in Selector Lets you select any real-time
plug-in installed in the Plug-ins folder (that is
created when you install Pro Tools).
Effect Bypass Button Disables the currently dis-
played plug-in. This lets you compare the track
with and without the effect.
Plug-ins cannot be moved or duplicated
during recording.
Moving a plug-in
Dragging an insert on top of an existing in-
sert will replace it and any automation.
You can also duplicate Sends. See “Moving
or Copying Sends” on page 729
Insert button and selector on track
Plug-in window (mono Trim shown)
Insert button
Insert selector
Settings menu
Track selector
Librarian menu
Insert Position
selector
Plug-in selector Compare
Target
button
Previous setting
Next setting
Settings
Menu
selector
Effect
Bypass
Automation Safe
Auto button
Convert
plug-in
Clip
LED
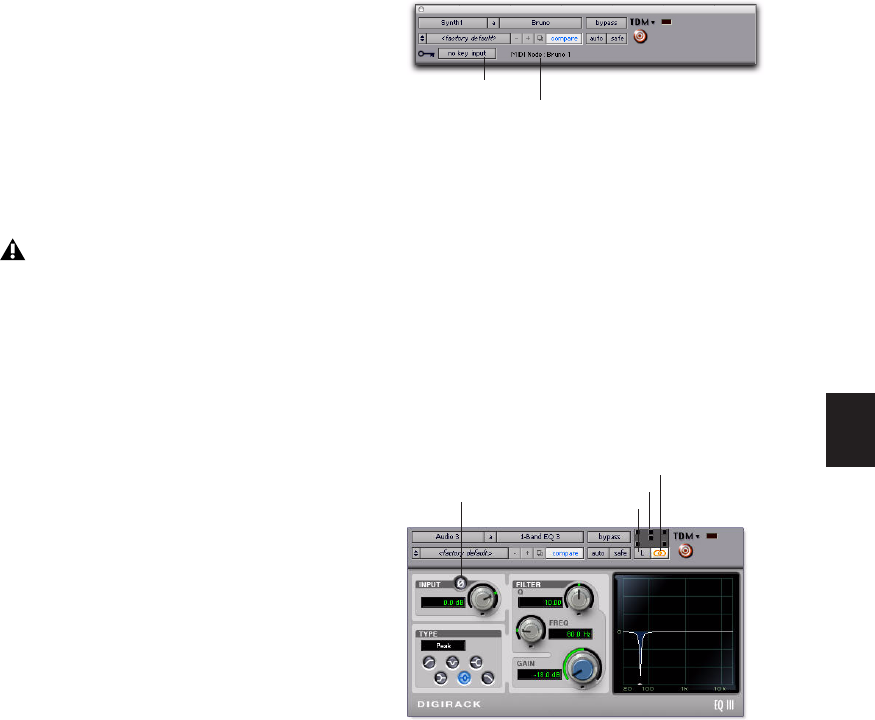
Chapter 36: Plug-in and Hardware Inserts 761
Convert Plug-in Selector Lets you convert the in-
sert from a TDM plug-in to an RTAS plug-in of
the same type (or vice-versa). This feature can
only be used on plug-ins that are available in
both TDM and RTAS formats.
Clip LED Lights red to indicate if any meter in a
plug-in has clipped (not available on all plug-
ins). The Plug-in Clip LED follows Pro Tools set-
tings for clip indication.
ΩSettings Menu Lets you copy, paste, save, and
import plug-in settings.
Librarian Menu Recalls settings files saved in the
plug-in’s root settings folder or in the current
session’s Settings folder. See “Using the Librar-
ian” on page 763.
Next (+) and Previous (–) Setting Buttons Let
you select the next or previous plug-in setting
from the Librarian menu.
Plug-ins Settings Select Button Accesses the
Plug-in Settings dialog, which lists the settings
files for the current plug-in. From this list, you
can select a new setting, or audition a series of
settings.
Compare Toggles between the original saved
plug-in setting and any changes you have made
to it so you can compare them.
Auto Button Lets you enable individual plug-in
controls for automation recording. See “Auto-
mating Plug-ins” on page 791.
Automation Safe When enabled, prevents exist-
ing plug-in automation from being overwritten.
Target Button When multiple Plug-in windows
are open, clicking this button selects that plug-
in as the target for any computer keyboard com-
mands. For more information, see “Targeted
Windows” on page 734.
Key Input Selector Lets you select audio on a
particular input or bus and route it to trigger the
plug-in. This menu only appears on plug-ins
that feature side-chain processing. Key inputs
are monophonic.
MIDI Node Display Shows MIDI node informa-
tion for MIDI-enabled plug-ins. MIDI nodes are
virtual connections from Pro Tools to software
instruments and other MIDI-enabled plug-ins.
MIDI nodes are useful for routing multiple MIDI
tracks to different channels of a single virtual
MIDI device. MIDI node numbers are also dis-
played in a track’s MIDI Output selector.
Master Link Button When enabled, links the
controls on all channels of a multi-mono plug-
in so that they can be adjusted in tandem.
You will lose the current settings if they are
not saved before you use the Next and Pre-
vious Setting buttons. Always save your set-
tings to the Librarian menu.
MIDI node display in a plug-in header (Bruno shown)
Plug-in window (multi-mono 1-Band EQ shown)
MIDI node
Key Input selector
Channel Selector
Link Enable buttons
Master Link button
Phase
Invert
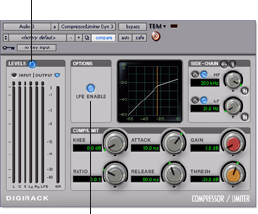
Pro Tools Reference Guide762
Link Enable Buttons Let you selectively link or
unlink the controls of specific channels of a
multi-mono plug-in. Each square represents a
speaker channel. The Master Link button must
be disabled to use the Link Enable buttons. See
“Linking and Unlinking Controls on Multi-
Mono Plug-ins” on page 770.
Channel Selector Accesses a specific channel
within a multichannel track for plug-in control
editing. This menu appears only on multi-mono
plug-ins inserted on tracks with more than one
channel. Shift-clicking this selector opens a sep-
arate Plug-in window for each channel of the
multichannel track on which the plug-in is in-
serted.
Phase Invert Button Inverts the phase polarity of
the input signal on some plug-ins.
LFE Enable Enables plug-in processing of the
LFE (low frequency effects) channel on a multi-
channel track formatted for 5.1, 6.1, or 7.1 sur-
round formats on some plug-ins. To disable LFE
processing, deselect this button.
Tempo Sync Enables compatible plug-ins to au-
tomatically synchronize to the session tempo,
for rhythmic delay, echo, and similar effects.
Opening Plug-in Windows
To open a plug-in window:
Click the plug-in button in the Mix or Edit
window channel strip.
By default, each plug-in you open will appear in
the same location as a currently open plug-in,
replacing it in the same window location.
Opening Multiple Plug-in Windows
Pro Tools normally displays a single plug-in
window from which you can adjust the controls
of any session plug-in. You can also open addi-
tional Plug-in windows for specific plug-ins.
Once you begin working with multiple plug-in
windows, you will need to click the Target but-
ton on the plug-in whose controls you want to
adjust using keyboard commands.
To open an additional plug-in window:
In the Mix window, Shift-click the Insert but-
ton of a plug-in.
To open plug-in windows for each channel of a
multi-mono plug-in:
Alt-click (Windows) or Option-click (Mac) the
Channel selector in the Plug-in window of a
plug-in insert.
To close all currently open plug-in windows:
Alt-click (Windows) or Option-click (Mac) the
close box of any currently open plug-in window.
Plug-in window (multichannel Compressor shown)
LFE Enable
Phase Invert button
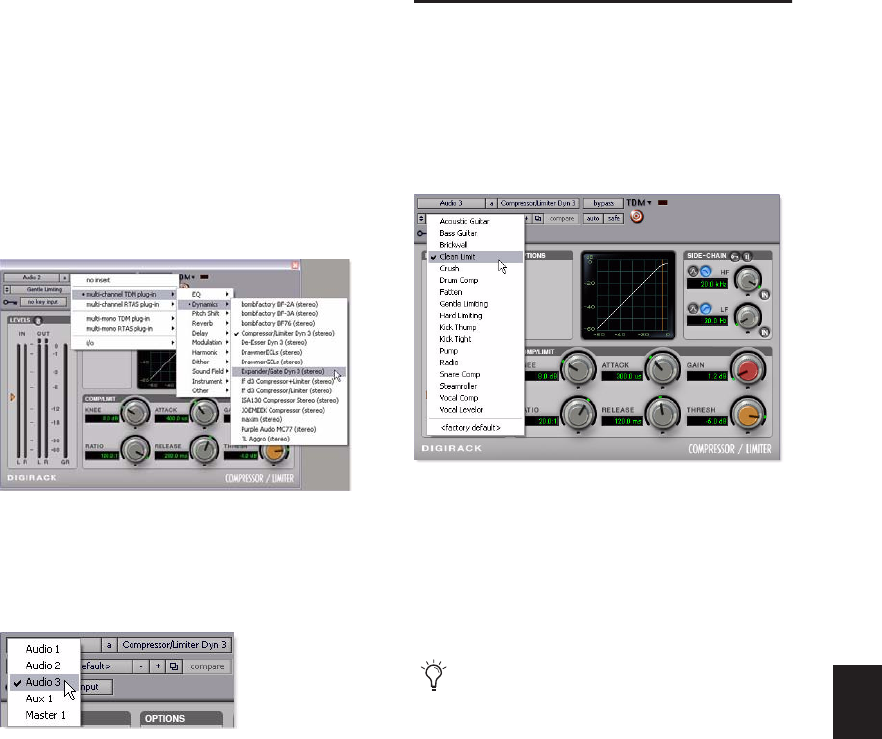
Chapter 36: Plug-in and Hardware Inserts 763
Plug-in Window Controls
All plug-ins provide standard Pro Tools controls
for track and insert selection, bypass, and other
controls, in addition to the EQ, dynamics, and
other processor-specific controls.
To select a different plug-in on the same track:
Click the Insert selector and select a plug-in
from the pop-up menu.
To choose a different track:
Click the Track selector and choose a track
from the pop-up menu.
Target Window and Settings Shortcuts
When multiple plug-in windows are open, a
highlighted target indicates the target window.
Pro Tools keeps a single plug-in target window.
Opening a new plug-in opens it as the new tar-
get window, in the same location. In addition,
the plug-in target window is also the focus of
keyboard shortcuts for plug-in settings.
Using the Librarian
The Settings Librarian makes it easy to create
your own library of plug-in settings. Using the
Librarian and Settings pop-up menus, you can
copy, paste, save, and import these settings from
plug-in to plug-in, or from session to session.
Once you create and save settings files to disk
(and tell Pro Tools where to find them by assign-
ing their root folder) they appear both in the Li-
brarian menu and in the Plug-in Settings dialog.
The also appear as Plug-in Settings files (.txf) in
DigiBase browsers.
Selecting a plug-in from the Plug-in window
Selecting a track from the Plug-in window
Librarian menu
You can also use the Plug-in Settings dialog
to select settings or audition plug-in set-
tings. See “Plug-in Settings Dialog” on
page 767.
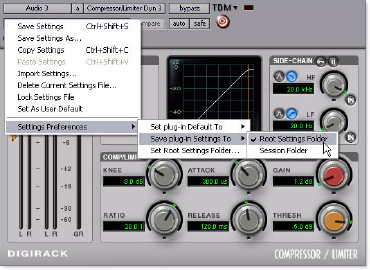
Pro Tools Reference Guide764
The Settings Menu
Use the Settings menu commands to save, copy,
paste, and manage plug-in settings files.
Settings menu commands include:
Save Settings Saves the current settings. This
command overwrites any previous version of
the settings. The setting then appears in the Li-
brarian menu.
Save Settings As Saves the current settings un-
der a different name.
Copy Settings Copies the current settings. You
can then apply these settings to the same type of
plug-in on a different track by choosing the
track in the Plug-in window and pasting the set-
tings with the Paste Settings command.
Paste Settings Pastes settings copied with the
Copy Settings command.
Import Settings Imports a settings file from a lo-
cation other than the Root Settings folder or Ses-
sion folder.
Delete Current Settings File Permanently de-
letes the current settings file from disk.
Lock Settings File Prevents the current settings
from being overwritten by the Save command.
If you attempt to save control settings, you will
be required to save them using a different name
or disk location.
Set As User Default Defines the current settings
as the User Default for a specific plug-in.
Settings Preferences
The Settings Preferences submenus are for
choosing preferences for saving and importing
plug-in settings. They include:
Set Plug-in Default To Sets the default setting to
either Factory Default (the standard default set-
ting for that plug-in) or User Default (your cus-
tom setting).
Save Plug-in Settings To Selects the folder where
plug-in settings are saved. If you choose Session
Folder, the settings are saved in a folder named
“Plug-in Settings” within the current Session
folder. If you choose Root Settings Folder, the
settings are saved in the folder you specified
with the Set Root Settings Folder command.
Set Root Settings Folder Selects a location or
root folder for saving and importing settings.
This root settings folder must be named “Plug-in
Settings.” Use this command only if you want to
choose a location other than the default Plug-in
Settings folder.
The default location for the Root Plug-in Set-
tings folder is as follows:
Windows Program Files\Common Files\
Digidesign\DAE\Plug-in Settings
Settings menu
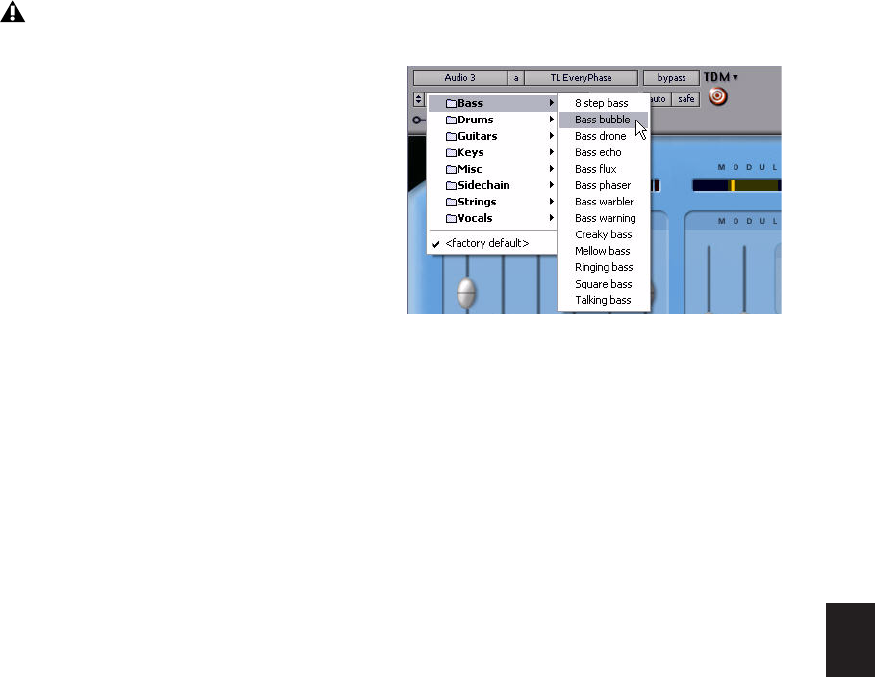
Chapter 36: Plug-in and Hardware Inserts 765
Mac Library/Application Support/
Digidesign/Plug-in Settings
Choosing a Destination for
Settings
Before you save plug-in settings, select their des-
tination folder.
To select a destination folder:
From the Settings pop-up menu, choose Set-
tings Preferences > Save Plug-in Settings To, and
choose Session Folder or Root Settings Folder.
If you choose Root Settings folder, Pro Tools
saves to the default Root Plug-in Settings folder
unless you have specified a different location for
the Root Settings folder.
To select a different Root Settings folder:
1 From the Settings pop-up menu, choose Set-
tings Preferences > Set Root Settings Folder.
2 Select the folder you want to use as your Root
folder and click Select.
Creating Subfolders for Settings
To make it easier to find specific types of set-
tings, you can subdivide settings files by creat-
ing subfolders for them.
To create a settings subfolder:
3 From the Settings pop-up menu, choose Save
Settings.
4 Click the New Folder button and type a name
for the subfolder.
5 Name the setting and click Save. The setting is
saved within the subfolder.
To save plug-in settings to any location
other than the default Plug-in Settings
folder, you must first create a folder named
“Plug-in Settings” in the new location and
then save to that folder.
Librarian menu
Pro Tools Reference Guide766
Managing Settings
Use the Settings pop-up menu to manage set-
tings.
To save a setting:
1 Choose Save Settings from the Settings pop-
up menu.
2 Type a name and click OK. The setting appears
in the Librarian menu.
To load a previously saved setting:
Choose the setting from the Librarian pop-up
menu.
To import a setting:
1 Choose Import Settings from the Settings pop-
up menu.
2 Locate the settings file you want to import
and click Open. Pro Tools loads the setting and
copies it to the root destination folder.
To copy a setting:
Choose Copy Settings from the Settings pop-
up menu.
To paste a setting:
1 Open the destination plug-in.
2 Choose Paste Settings from the Settings pop-
up menu.
To create a custom User Default setting:
1 Create and save a setting.
2 Choose Set As User Default from the Settings
pop-up menu.
To make a plug-in default to your custom setting:
From the Settings pop-up menu, choose Set-
tings Preferences > Set Plug-in Default To > User
Setting.
Changing Settings with the Next (+) and
Previous (–) Setting Buttons
These buttons let you select the next or previous
setting of the Librarian menu.
To change plug-in settings using the +/– buttons:
Click the Plus (+) or Minus (–) buttons to se-
lect the next or previous plug-in settings file.
The next (or previous) settings file are enabled,
and the Librarian menu changes to reflect the
new setting.
Unlinked multi-mono plug-ins have specific
rules for settings. See “Linking and Unlink-
ing Controls on Multi-Mono Plug-ins” on
page 770.
Press Control+Shift+S (Windows) or Com-
mand+Shift+S (Mac) to save plug-in set-
tings.
Press Control+Shift+C (Windows) or Com-
mand+Shift+C (Mac) to copy plug-in set-
tings.
Press Control+Shift+V (Windows) or Com-
mand+Shift+V (Mac) to paste plug-in set-
tings.
You will lose the current settings if they are
not saved before you use the Next and Pre-
vious Setting buttons. Always save your set-
tings to the Librarian menu.
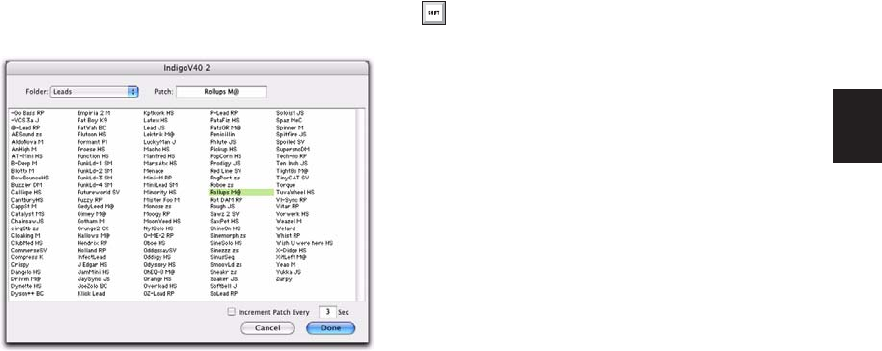
Chapter 36: Plug-in and Hardware Inserts 767
Editing Settings on Unlinked Multi-
Mono Plug-ins
When a multi-mono plug-in is unlinked, im-
porting, copying, pasting, or bypassing settings
affects only the currently selected channel.
To apply an operation to all channels of an
unlinked plug-in:
Hold down the Alt key (Windows) or Option
key (Mac) while performing the command.
Plug-in Settings Dialog
The Plug-in Settings dialog lists the settings files
for the current plug-in type. From this list, you
can select a new setting, or audition a series of
settings. Auditioning plug-in settings is espe-
cially useful for selecting patch names for virtual
MIDI instrument plug-ins or trying out different
effects types applied to your audio.
Use the Folder pop-up menu at the top of the
Settings dialog to switch between plug-in set-
tings subfolders, or root and session settings
folders.
The Plug-in Settings dialog includes the follow-
ing:
Folder This pop-up menu lets you switch be-
tween settings located in root or session folders
(and any available subfolders).
Patch Field This field displays the name of the
active (highlighted) setting.
Increment Patch Every X Sec This option lets
you audition contiguous plug-in settings on-
the-fly by automatically scrolling through them
for a specified number of seconds.
To change plug-in settings using the Plug-in
Settings dialog:
1 Click the Settings Select button.
2 Do one of the following:
• Select a plug-in setting from the dialog list.
– or –
• Use the Arrow keys to scroll through the
available settings.
3 Click Done.
Plug-in Settings dialog
To switch between settings subfolders, press
Control (Windows) or Command (Mac)
and use the Up/Down Arrow keys.
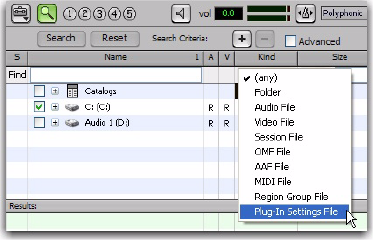
Pro Tools Reference Guide768
Auditioning Plug-in Settings
When the Plug-in Settings dialog is open, you
can have Pro Tools automatically scroll through
and audition the settings files saved in the plug-
in’s root settings folder or in the current ses-
sion’s settings folder.
To audition plug-in settings:
1 Click the Settings Select button.
2 From the dialog list, click a setting—the start-
ing point from which you will scroll through
the settings files.
3 Enter a value for the number of seconds that
will elapse between each program change.
4 Select the option for Increment Patch.
After the specified number of seconds, Pro Tools
selects the next setting.
5 When you are finished auditioning settings,
do one of the following:
• Click Done to stop incrementing patches,
and to close the Plug-in Settings dialog.
– or –
• Select the Increment Patch option to stop
incrementing patches and keep the Plug-in
Settings dialog open.
DigiBase and Plug-in Settings
Files
DigiBase browsers recognize plug-ins settings
files (.txf) as a known Type and lets you drag and
drop them to Pro Tools plug-in windows and In-
serts. You can also search for plug-in settings by
type.
Searching for Plug-in Settings Files
To search for plug-in settings files:
1 In the Workspace browser, click the Search
icon.
2 Select Plug-in Settings File from the Type pop-
up menu.
3 To further narrow your search, type all or part
of the name of the plug-in settings file you want.
4 Click Search.
Searching for plug-in settings files
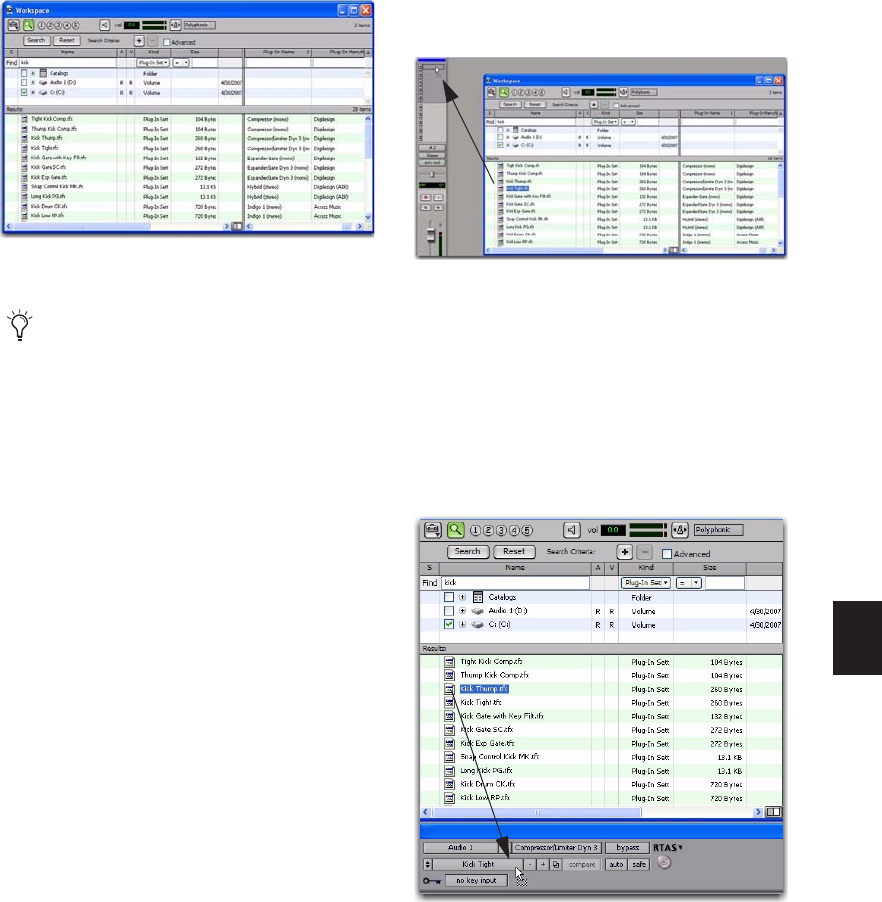
Chapter 36: Plug-in and Hardware Inserts 769
5 To sort your search by Plug-in Name or Man-
ufacturer, click the corresponding column title.
Dragging and Dropping Plug-in Settings Files
You can insert a plug-in with a specific plug-in
settings file, as well as change plug-in settings of
inserted plug-ins by dragging and dropping
plug-in settings files from a DigiBase browser,
Windows Explorer, or the Mac Finder.
To insert a plug-in by drag and drop:
Drag and drop a plug-in settings file from a
DigiBase browser, Windows Explorer, or the Mac
Finder to an Insert in the Mix (or Edit) window.
To change plug-in settings by drag and drop:
Drag and drop a plug-in settings file from a
DigiBase browser, Windows Explorer, or the Mac
Finder to the plug-in window. The plug-in set-
tings file must be for the same plug-in name. For
example, you cannot replace a 1-Band EQ 3 with
a plug-in setting for 4-Band EQ 3.
Plug-in settings files found in the Workspace browser
and sorted by Plug-in Name
With DigiBase Pro (Pro Tools HD and LE
with DV Toolkit 2 only), you can create cat-
alogs of specific plug-in settings that you
work with frequently to streamline your
workflow. For more information on Digi-
Base Pro Catalogs, see “DigiBase Pro Cata-
logs” on page 243.
Dragging and dropping a plug-in settings file to an
Insert
Dragging and dropping a plug-in settings file to a plug-in
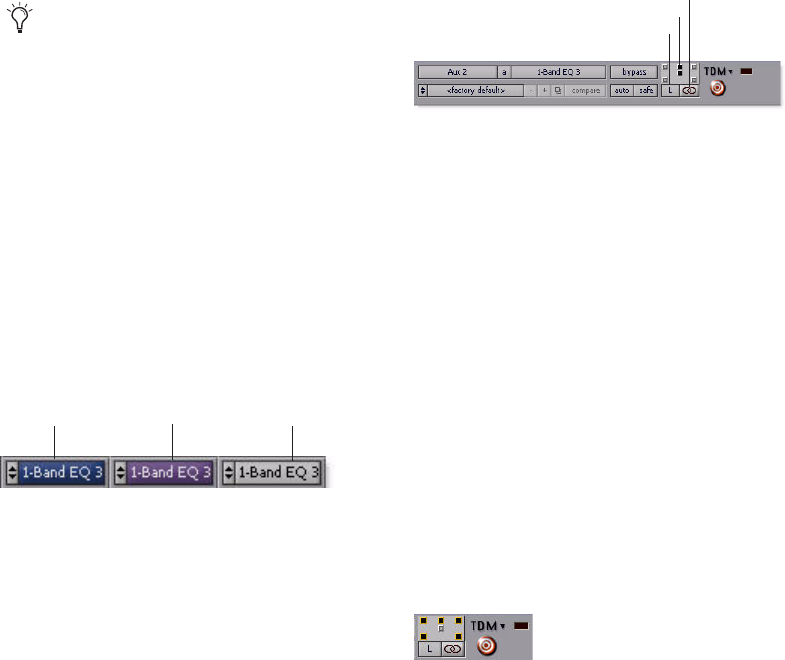
Pro Tools Reference Guide770
Bypassing Plug-ins
Plug-ins can be bypassed from their Plug-in win-
dow, or from the Mix and Edit window Inserts
View.
To bypass a plug-in, do one of the following:
Click the Plug-in window’s Effect Bypass but-
ton.
– or –
Control-click (Windows) or Command-click
(Mac) the plug-in’s Insert button in the Mix or
Edit window.
Linking and Unlinking Controls on
Multi-Mono Plug-ins
When a multi-mono plug-in is used on a stereo
track or greater-than-stereo multichannel track
(Pro Tools HD only), the controls are linked by
default. Adjusting the Gain control on one
channel, for example, will adjust it for all chan-
nels.
You can unlink multi-mono plug-in controls on
specific channels of a track and edit them inde-
pendently. You can also selectively link the con-
trols of specific channels.
To unlink controls on a multi-mono plug-in:
Deselect the Master Link button.
To access controls for a specific channel:
Select the channel from the Channel selector.
To link the controls of specific channels:
1 Deselect the Master Link button if it is not al-
ready deselected.
2 Click the Link Enable buttons for the chan-
nels whose controls you want to link. For exam-
ple, on plug-ins that do provide discrete LFE
controls from the LFE Enable button, you can
link all channels except the LFE by highlighting
the icons representing the five full-range speak-
ers in a multi-mono plug-in.
When a plug-in insert is bypassed, the In-
sert selector in the Mix window changes its
color to blue for easy visual reference. If
some, but not all channels of an unlinked
multi-mono plug-in are bypassed, the Insert
selector appears purple.
Indication of bypassed plug-in state
bypassed (blue)
some channels
bypassed (purple) not bypassed
Channel selector and Link controls (shown with Link
disabled)
All channels linked except the LFE
Channel selector
Link Enable buttons
M
as
t
er
Li
n
k
b
u
tt
on

Chapter 36: Plug-in and Hardware Inserts 771
Editing Plug-in Controls
You can adjust plug-in controls by dragging the
control’s slider or knob, or by typing a value into
the control’s text box. For instructions on edit-
ing specific plug-ins, see the plug-in’s documen-
tation.
To adjust a plug-in control:
1 Begin audio playback so that you can hear the
control changes in real time.
2 Adjust the controls of the plug-in for the effect
you want.
3 Close the Plug-in window to save the most re-
cent changes.
Editing Parameters Using a Mouse
You can adjust rotary controls by dragging hori-
zontally or vertically. Parameter values increase
as you drag upward or to the right, and decrease
as you drag downward or to the left.
Keyboard Shortcuts
For finer adjustments, Control-drag (Win-
dows) or Command-drag (Mac) the control.
To return a control to its default value, Alt-
click (Windows) or Option-click (Mac) the con-
trol.
Editing Parameters Using a Computer
Keyboard
You can use your computer keyboard to edit
plug-in controls.
If multiple Plug-in windows are open, Tab and
keyboard entry remain focused on the plug-in
that is the target window.
To change control values with a computer
keyboard:
1 Click or Navigate to the control text field that
you want to edit to activate the field.
2 Change the value by doing one of the follow-
ing.
• To increase a value, press the Up Arrow on
your keyboard.
• To decrease a value, press the Down Arrow
on your keyboard.
• Type the value.
3 Do one of the following to confirm the value:
• Press Enter on the numeric keyboard to in-
put the value and remain in keyboard edit-
ing mode.
– or –
• Press Enter on the alpha keyboard (Win-
dows) or Return (Mac) to enter the value
and leave keyboard editing mode.
The DigiRack plug-ins (installed with
Pro Tools) are documented in the DigiRack
Plug-ins Guide.
The plug-in target window is the focus of
keyboard shortcuts for plug-in settings. To
make a plug-in the target for any computer
keyboard commands (including key short-
cuts), click the plug-in’s Target button in its
Plug-in window.
To move forward through the different con-
trol fields, press the Tab key. To move back-
ward, press Shift+Tab.
In fields that support values in kilohertz,
typing “k” after a number value will multi-
ply the value by 1,000. For example, type
“8k” to enter a value of 8,000.
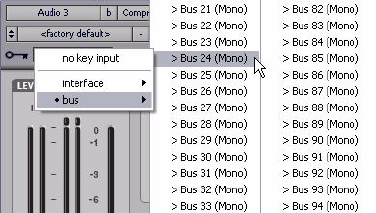
Pro Tools Reference Guide772
To clear plug-in clipping
Press Alt-C (Windows) or Option-C (Mac).
Plug-in Automation and Safe
All real-time plug-ins can be fully automated,
and support all Pro Tools Automation modes
(Write, Touch, and Latch, plus Trim).
The Auto button opens the Plug-in Automation
dialog, where you can enable individual plug-in
controls for automation recording. (See “Auto-
mating Plug-ins” on page 791 for more informa-
tion.)
The Safe button engages Automation Safe mode.
When enabled, existing plug-in automation is
protected from being overwritten. (See “Record
Safing Plug-in Automation” on page 793.)
Using a Side-Chain Input
The side-chain input is the split-off signal used
by a plug-in's detector to trigger dynamics pro-
cessing, and is generally drawn internally from
the input signal. However, some plug-ins let you
switch between internal and external side-chain
processing.
With external side-chain processing, a plug-in's
detector is triggered by an external signal (such
as a separate reference track or audio source)
known as the key input.
A typical use for external side-chain processing
is to control the dynamics of one audio signal
using the dynamics of another signal (the key
input). For example, a kick drum track could be
used to trigger gating of a bass track to tighten it
up, or a rhythm guitar track could be used to
gate a keyboard pad.
Side-Chain Filters
Some plug-ins feature key high-pass and low-
pass filters. These controls let you define a spe-
cific frequency range in the side-chain signal
with which to trigger the plug-in effect. A com-
mon production technique is to use these con-
trols to filter a drum track so that only specific
high frequency sounds (such as a hi-hat) or low
frequency ones (such a tom or a kick) trigger the
effect.
Using a Key Input for External Side-
Chain Processing
To use a key input for external side-chain
processing:
1 Click the plug-in’s Key Input selector and se-
lect the input or bus carrying the audio you
want to use to trigger the plug-in.
2 Click the External Key to activate external
side-chain processing.
3 Press the Spacebar to begin playback. The
plug-in uses the input or bus that you chose as a
key input to trigger its effect.
Selecting a Key Input
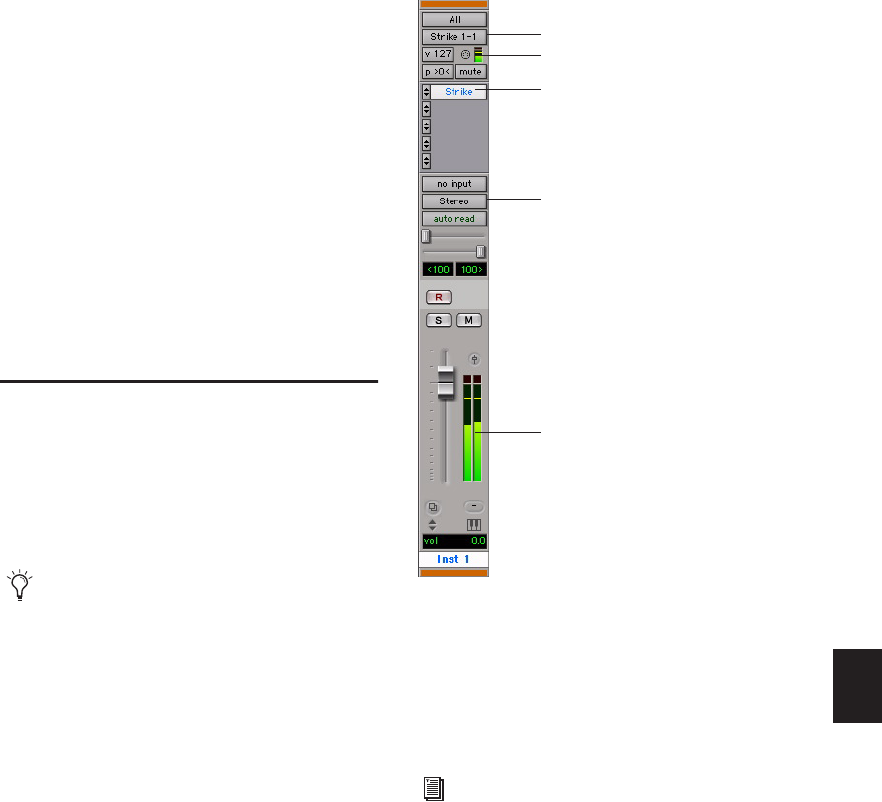
Chapter 36: Plug-in and Hardware Inserts 773
4 During playback, do any of the following to
fine-tune key input triggering:
• To hear the audio source you have selected
to control the key input, enable Side-Chain
Listen or Key Listen (depending on the
plug-in). When finished, disable Side-
Chain Listen/Key Listen to resume normal
plug-in monitoring.
• To filter the key input so that only specific
frequencies trigger the plug-in, use the fil-
tering controls (if available) to select the
frequency range.
5 Adjust the plug-in’s Threshold control (if
available) and other controls as needed.
Instrument Plug-ins
Instrument plug-ins are software instruments
(such as synthesizers or samplers) that generate
audio and that can be controlled with MIDI. In-
strument plug-ins can be inserted on audio,
Auxiliary Input, and Instrument tracks.
Instrument plug-ins are inserted on tracks in the
same way as other plug-ins. Instrument plug-ins
can be moved and duplicated, their controls can
be bypassed, safed and automated, and their set-
tings can be saved in the same way as other
plug-ins.
By inserting an instrument plug-in on an In-
strument track, you can control both the
MIDI input to the plug-in and audio output
of the plug-in from a single track. See “Mon-
itoring and Mixing Audio with Instrument
Tracks” on page 735.
Instrument plug-in inserted on an Instrument track
For information on using Pro Tools with
ReWire client applications, see the Digi-
Rack Plug-ins Guide.
MIDI Output routed to plug-in
Audio Output selector
Instrument plug-in insert
MIDI meter (Velocity) showing MIDI input
Level meters showing audio output
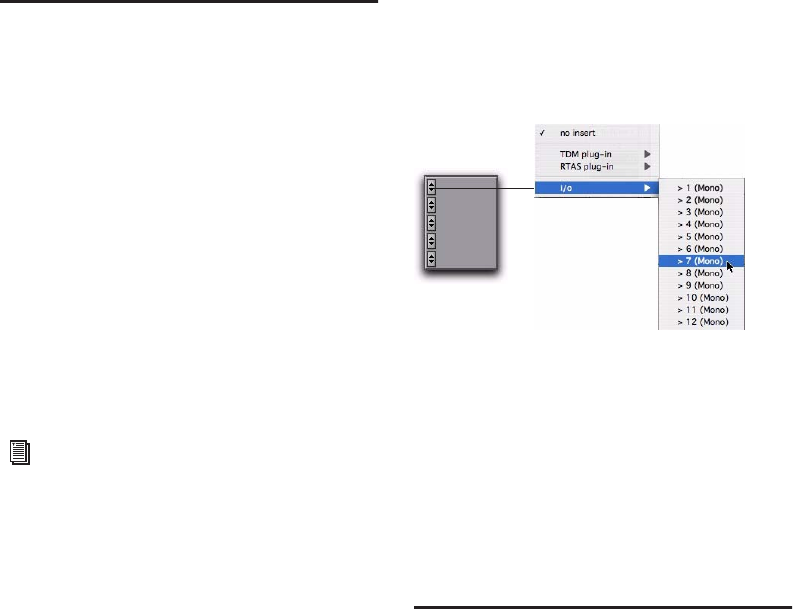
Pro Tools Reference Guide774
Using Hardware Inserts
You can connect external devices, such as reverb
or effects processors, to your Pro Tools system
and use them as hardware inserts on individual
tracks or on submixes.
Pro Tools inserts utilize corresponding hardware
input and output channels to send and return
the audio. Inserts can be defined, and their
channels mapped to audio interface channels,
in the I/O Setup dialog.
If you plan to use a device as an insert, be sure to
connect the device to matching inputs and out-
puts on your system. For example, a hardware
insert being supplied by outputs 7–8 needs to be
returned to hardware inputs 7–8.
To define a hardware insert:
1 Choose Setup > I/O, then click the Inserts tab.
2 Select an insert path, or click New Path to cre-
ate a new Insert path.
3 Double-click the Path Name to enter a custom
path name for the insert.
4 Make sure the insert path is set to the correct
format (mono, stereo, or other).
5 Map inserts in the Channel Grid as needed.
Insert and Output paths have special rules re-
garding channel mapping (see “Valid Paths and
Requirements” on page 63).
Assigning Hardware Inserts
To assign an external hardware insert to a track:
Select an insert from the track Insert selector.
Bypassing Hardware Inserts
Hardware inserts do not provide a bypass con-
trol. To monitor playback without a hardware
insert, either set it to Inactive, remove it by reas-
signing it to No Insert, or use a bypass switch on
the hardware device itself. (See “Making Inserts
Inactive” on page 755 for more information.)
Connecting and Integrating
External Devices
Pro Tools can create dedicated connections to
external analog or digital devices. The number
and type of connections depends on what kind
of system you have.
To connect an external device to a Pro Tools
system:
1 Connect an unused output (or pair of outputs
for a stereo device) of your Pro Tools system to
an input of the external signal processor.
2 Connect the output of the external signal pro-
cessor to an unused input (or pair of inputs for a
stereo device) of your Pro Tools system.
Delay Compensation can be applied to
Hardware Inserts. See “H/W Insert Delay
Compensation” on page 70.
Selecting a hardware I/O insert
Chapter 36: Plug-in and Hardware Inserts 775
3 Define what physical ports are routed to
Pro Tools input and output ports, as appropri-
ate, in either the Hardware Setup dialog or
I/O Setup dialog.
4 Define output, input, or insert paths as appro-
priate in the I/O Setup dialog.
If you plan to use a device as an insert, be sure to
connect the device to matching inputs and out-
puts on your system. For example, to use out-
puts 7–8, the insert has to use inputs 7–8 also.
Connecting Effects Units Digitally
If you want to use the digital inputs and outputs
on your Pro Tools system as effects sends and re-
turns to a digital effects device, Pro Tools should
be the clock master in most cases. Set your digi-
tal effects device to accept an external digital
clock so that it synchronizes to Pro Tools.
To set up a digital send to an external device from
a Pro Tools|HD system:
1 Do one of the following:
• On a 192 I/O, 192 Digital I/O, 96 I/O,
96i I/O, or 888|24 I/O, choose Setup >
Hardware, choose the peripheral, format,
and clock format, and set the channel pair
to Digital.
• On an 882|20 I/O or 1622 I/O, choose
Setup > Hardware, choose the peripheral,
and set Channel 1–2 input to Digital.
2 Choose Internal from the Clock Source pop-
up menu.
3 Click OK.
To set up a digital send to an external device from
a 003, 003 Rack, Digi 002 or Digi 002 Rack
system:
1 Choose Setup > Playback Engine and choose
the peripheral.
2 Do one of the following:
• If the external device is connected to the
S/PDIF RCA jacks, deselect S/PDIF Mirror-
ing. (When S/PDIF Mirroring is on, digital
output at the S/PDIF RCA jacks exactly mir-
rors the output of analog Channels 1–2.)
• If the external device is connected to the
Optical ports, choose a format (most likely
S/PDIF for an effects device) from the Opti-
cal Format pop-up menu.
3 Choose Internal from the Clock Source pop-
up menu.
4 Click OK.
5 Optionally, configure the I/O Setup dialog
with new path names for effects routing.
For additional information on connecting
external devices, refer to your Pro Tools Get-
ting Started Guide.
If you set the Optical Format to S/PDIF,
Pro Tools will watch the Optical port for
any audio input, and ignore any audio in-
put on the S/PDIF RCA jacks.
Pro Tools Reference Guide776
Using External Clock Sources (for
Recording and Monitoring)
When recording or monitoring, Pro Tools can
synchronize to an external clock source. Op-
tions for external clock vary according to the
type of Pro Tools system you are using.
Pro Tools|HD Systems
Pro Tools|HD systems can receive external clock
through any of the digital inputs on any
Pro Tools|HD I/O (including AES/EBU, S/PDIF,
and Optical).
With an expanded Pro Tools|HD system that in-
cludes Legacy interfaces (such as the 888|24
I/O), connect to the digital input on Channels
1–2 of the Legacy audio interface in order to
clock from them. Legacy I/Os only support
44.1 kHz and 48 kHz sample rates.
To select an external clock source for a
Pro Tools|HD system:
1 Choose Setup > Hardware.
2 Select the appropriate Pro Tools|HD I/O in or-
der to display its settings in the Main page.
3 If necessary, enable the appropriate Digital
Format (if you have not already done so, accord-
ing to the instructions in your Getting Started
Guide or I/O Guide).
4 Set the Clock Source to match the type of in-
put.
5 Configure input routing of the digital source,
using the Input and Output pop-up menus, if
necessary.
6 Click OK to close the Hardware Setup dialog.
003, 003 Rack, Digi 002, or Digi 002 Rack
Systems
Pro Tools can receive external clock from the
Optical input or S/PDIF input.
To select an external clock source for 003,
003 Rack, Digi 002, or Digi 002 Rack system:
1 Choose Setup > Hardware.
2 Set the Clock Source to match the type of in-
put.
3 If you choose Optical, make sure the Optical
Format matches the type of optical input you
are sending to your Pro Tools system.
Mbox 2, Mbox 2 Pro, and Mbox Systems
Pro Tools can receive external clock from the
S/PDIF input on these interfaces.
To select an external clock source for an Mbox 2,
Mbox 2 Pro, or Mbox system:
1 Choose Setup > Hardware.
2 Choose the SPDIF (Windows) or SPDIF/RCA
(Mac) from the Clock Source pop-up menu.
3 Click OK.
To determine correct card order and audio
interface connections, refer to the
Pro Tools|HD Getting Started Guide.
If you set the Optical Format to S/PDIF,
Pro Tools will watch the Optical port for ex-
ternal clock, and ignore any clock input on
the S/PDIF RCA jacks.
Your digital input device must be connected
and powered on for Pro Tools to synchro-
nize to it. If your input device is not powered
on, leave the Clock Source set to Internal.

Chapter 37: Automation 777
Chapter 37: Automation
Pro Tools features dynamic automation of mix-
ing controls on each of the track types. You can
write automation moves and view them in real
time during playback of your session. You can
also edit automation data with the same tech-
niques you use to edit audio and MIDI data.
Automation Accuracy with
Control Surfaces
Digidesign Control Surfaces Digidesign’s D-Con-
trol, D-Command, ProControl, Control|24, and
Command|8 control surfaces support the auto-
mation features in Pro Tools. Digidesign control
surfaces provide 10-bit resolution, or 1,024 steps
of fader resolution. Pro Tools interpolates this
input to 24-bit resolution on playback, resulting
in extremely accurate and smooth fader auto-
mation.
MIDI Control Surfaces Most MIDI control sur-
faces have 7-bit resolution, or 128 steps.
Pro Tools interpolates this input to 24-bit reso-
lution on playback, resulting in accurate and
smooth fader automation.
Automation QuickStart
Pro Tools provides many options for recording,
replacing, and editing automation data.
The basic steps for automation recording are:
• Enable the automation type that you want to
record (volume, pan, mute, send level, send
pan, send mute, or plug-in automation).
• Put the appropriate tracks in an automation
writing mode (Write, Touch, or Latch, or a
Trim mode).
• If you are automating a plug-in, enable the in-
dividual plug-in controls to be automated.
• Automation Safe any plug-ins, outputs, or
sends that have existing automation data that
you want to protect from being overwritten.
• Begin playback to begin automation record-
ing, and adjust controls as needed. Pro Tools
remembers all moves performed on enabled
controls.
To edit automation once it has been recorded,
you can:
• Repeat the above steps to write new automa-
tion over the previous data.
• Graphically edit the automation data in the
Edit window.
• Cut, copy, paste, or delete automation data
(certain restrictions apply).
For details on using Digidesign control sur-
faces to create mix automation, refer to your
Digidesign control surface guide.

Pro Tools Reference Guide778
Automation Playlists
Each Pro Tools track contains a single automa-
tion playlist for each automatable parameter.
On audio tracks, these parameters include:
• Volume
• Volume Trim (Pro Tools|HD only)
• Pan
• Mute
• Send Level
• Send Level Trim (Pro Tools|HD only)
• Send Pan
• Send Mute
• Plug-in controls
On Auxiliary Input tracks, these parameters in-
clude:
• Volume
• Volume Trim (Pro Tools|HD only)
• Mute
• Pan
On Master Faders, these parameters include:
• Volume
• Volume Trim (Pro Tools|HD only)
On MIDI tracks, these parameters include:
• Volume (MIDI)
• Pan (MIDI)
• Mute
On Instrument tracks, these parameters include:
• Volume (audio)
• Volume Trim (audio) (Pro Tools|HD only)
• Mute (audio)
• Pan (audio)
On VCA Master tracks (Pro Tools HD only),
these parameters include:
• Volume
• Volume Trim
• Mute
You can display and edit each of these automat-
able playlists individually from Pro Tools, even
during playback.
In addition, on MIDI and Instrument tracks you
can display and edit other continuous MIDI
controller data (such as mod wheel, breath con-
troller, foot controller, or sustain) in a similar
manner. For more information on editing MIDI
data, see “Continuous Controller Events” on
page 539.
Automation Playlists with Audio
and MIDI Regions
Pro Tools handles audio regions and their auto-
mation playlists differently from MIDI regions
and their automation playlists.
Audio Tracks
On audio tracks, automation data resides on a
separate playlist from audio data and regions.
Each edit playlist on an audio track shares the
same automation data.
Chapter 37: Automation 779
MIDI and Instrument Tracks
On MIDI tracks and Instrument tracks, all con-
troller automation data except for MIDI Mute
data, or audio mute (Instrument tracks only), is
stored in the MIDI region that contains it. Each
edit playlist on the track is separate, and repre-
sents a distinct performance, complete with
controller automation.
Trim Automation Playlists
Separate Trim automation playlists are available
for Volume trim and Send Level trim. Volume
trim is available on all track types except MIDI
tracks. Send Level trim is available on audio
tracks only.
Each Trim automation playlist shows the posi-
tion of the Trim fader with yellow breakpoint
automation that can be edited. For more infor-
mation on Trim playlists, see “Trim Mode” on
page 782 and “Viewing Automation” on
page 786.
Multiple Edit Playlists and Audio
Track Automation
All edit playlists on a single audio track share the
same automation data. When you record or edit
automation data in an audio track, the automa-
tion data is stored in the track’s corresponding
automation playlist so it can be edited with, or
independently from, its associated audio re-
gions.
When you copy or cut audio data from a track
while it is in Waveform View, the underlying au-
tomation data is cut or copied with it.
If you paste audio data from other locations or
tracks into an edit playlist, you may change the
underlying automation data on the track.
When you trim regions using Edit > Trim, the
underlying automation data remains un-
changed.
Duplicating Tracks for Playlist Editing
The Duplicate Track command provides a con-
venient way to make a working copy of a track
to experiment with routing, plug-ins, and auto-
mation. This protects the original track and its
automation data from being edited or overwrit-
ten.
MIDI Mute data is independent of the MIDI
data in a MIDI region. This lets you mute
playback of individual MIDI or Instrument
tracks in Pro Tools without altering the
controller data.
MIDI continuous controller data always
follows region editing, with the exception of
mute. See “MIDI and Instrument Tracks”
on page 779 for more information.
For more information, see “Editing Auto-
mation” on page 803.
For more information on duplicating tracks
command, see “Duplicating Tracks” on
page 147.

Pro Tools Reference Guide780
Automation Modes
Automation modes control how a track’s auto-
mation data is written and played back. Each
track provides an Automation Mode selector for
selecting the track’s Automation mode.
Off Mode
Off mode turns off automation for all automat-
able parameters:
• Volume
• Pan
• Mute
• Send volume, pan, and mute
• Plug-in controls
• MIDI volume, pan, and mute
In Off mode, automation data for these parame-
ters is ignored during playback. All other MIDI
controller data is sent.
Automation can be switched from Off to an-
other Automation mode during playback or
record.
Read Mode
Read mode plays any automation that was pre-
viously written for a track.
Write Mode
Write mode writes automation from the time
playback starts to the time it stops, erasing any
previously written automation for the duration
of the automation pass.
AutoMatch can be applied to a Write automa-
tion pass. See “AutoMatch Time” on page 785.
“After Write Pass, Switch To” Option
You can set Pro Tools to automatically change
to Touch mode or Latch mode, or remain in
Write mode after the completion of an automa-
tion pass in Write mode.
To set the Automation mode after a Write pass:
1 Choose Setup > Preferences and click Mixing.
2 Under Automation, select an “After Write
Pass, Switch To” option (Touch, Latch, or No
Change).
3 Click OK to close the Preferences window.
Touch Mode
Touch mode writes automation only while a
fader or switch is touched or clicked with the
mouse. When the fader is released, the writing
of automation stops and the fader returns to any
previously automated position, at a rate deter-
mined by the AutoMatch and Touch Timeout
settings. See “Automation Preferences” on
page 784.
In Touch mode, certain control surfaces start
writing automation as soon as you touch them.
These include touch-sensitive fader controllers,
such as Digidesign’s D-Control, D-Command,
ProControl, Control|24, 003, Digi 002, Com-
mand|8, or the Mackie HUI.
With other control surfaces in Touch mode,
writing of automation does not begin until the
fader hits the pass-through point, or the previ-
ously automated position. Once you reach the
pass-through point with the fader, or a non-
touch sensitive rotary control, writing of auto-
mation begins and continues until you stop
moving the fader.
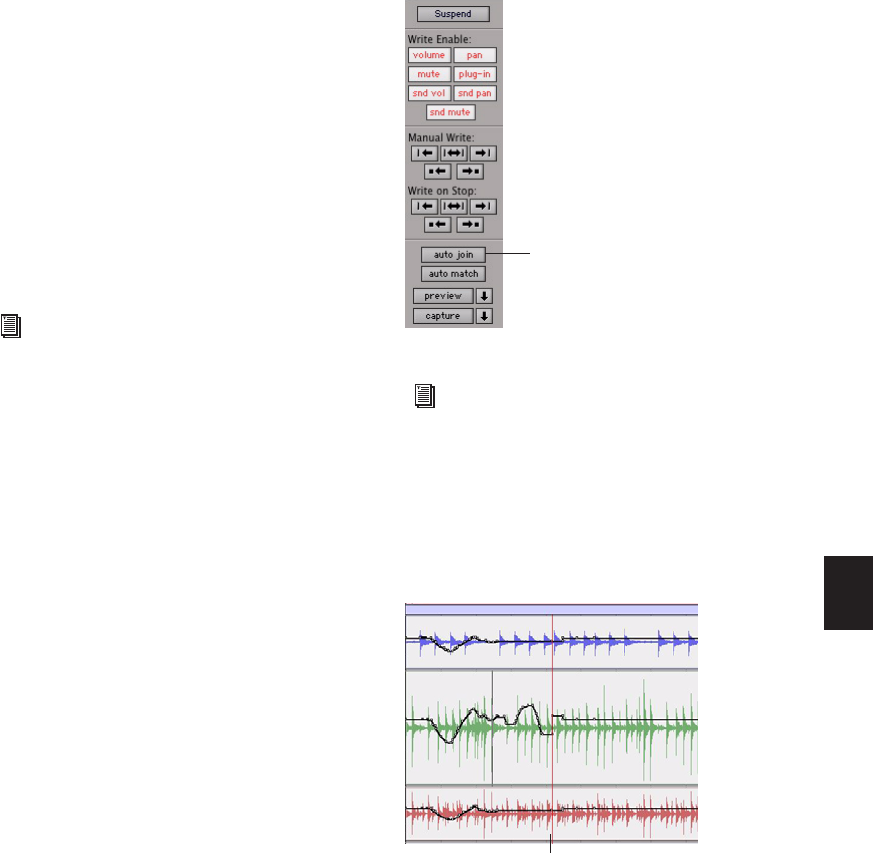
Chapter 37: Automation 781
Latch Mode
Latch mode works in the same way as Touch
mode, writing automation only if you touch or
move a control. However, unlike Touch, writing
of automation continues until you stop play-
back or “punch out” of the automation pass by
changing the Automation mode to Read or
Touch.
AutoMatch can be applied to a Latch automa-
tion pass. See “AutoMatch Time” on page 785.
Latch mode is particularly useful for automating
Pan controls and plug-ins on non-touch sensi-
tive rotary controls, since it does not time out
and revert to its previous position when you re-
lease a control.
AutoJoin with Latch Mode
(Pro Tools HD Only)
Pro Tools provides two different methods to re-
sume writing automation on controls that were
active at the point where the transport stopped:
AutoJoin Lets you automatically resume writing
automation in Latch mode.
Join Lets you manually resume writing automa-
tion in Latch mode. Join is available only with
Digidesign-supported control surfaces.
To enable AutoJoin from Pro Tools:
1 Choose Window > Automation.
2 Click the AutoJoin button.
AutoJoin Indicator
After a Latch automation pass with AutoJoin en-
abled, the AutoJoin indicator appears in the
Pro Tools Edit window.
See also “Writing Automation to the Start,
End, or All of a Track or Selection” on
page 813.
AutoJoin Enable button in the Automation window
See your control surface guide for details on
using Join and AutoJoin with a control sur-
face.
AutoJoin indicator in the Edit window
AutoJoin button
AutoJoin indicator

Pro Tools Reference Guide782
The AutoJoin indicator is a vertical line that sig-
nifies the point where the last automation pass
was stopped, and the point where the “join” will
automatically occur on all tracks that were writ-
ing during that previous pass. When automa-
tion writing is resumed from this point, the line
disappears.
Touch/Latch Mode
(Pro Tools HD Only)
Touch/Latch Automation mode places a track’s
Volume control in Touch mode and all other
automatable controls in Latch mode.
In Touch/Latch mode, the Volume control fol-
lows Touch behavior, writing automation when
touched and returning to previously written lev-
els when released.
All other controls follow Latch behavior, writing
automation when touched and continuing until
playback stops, or until you punch out of writ-
ing automation.
Trim Mode
(Pro Tools HD Only)
Pro Tools HD can adjust (or trim) existing track
volume and send level automation data in real
time. Pan, mute and plug-in automation cannot
be trimmed in this manner. Trim mode works in
combination with the other Automation modes
(Read, Touch, Latch, Touch/Latch, and Write)
and is useful when you want to preserve all of
your volume automation moves, but need to
make levels a bit louder or softer to balance a
mix.
When writing automation in Trim mode, fader
moves write relative rather than absolute values.
The existing automation data is changed by the
amount of increase or decrease (or the delta
value) indicated by the faders.
When Trim mode is enabled, non-trimmable
controls behave in the same manner as in the
standard Automation modes, with the excep-
tion of Write/Trim mode, where non-trimmable
controls operate as in Touch mode.
Trim Automation Modes
When a track is in a Trim automation mode (ex-
cept for Trim Off) its main Volume faders and all
Send level faders are displayed in yellow. When
trimming, a track’s Volume indicator or Send
Level indicator shows the delta value being writ-
ten rather than the absolute value.
Behavior of the Trim Automation modes also
depends on the Coalesce Trim Automation pref-
erence setting. See “Coalescing Trim Auto-
mation” on page 812.
To use Join or AutoJoin to resume writing
on controls that were writing when the
transport stopped, restart the transport be-
fore the AutoJoin indicator.
Selecting Touch/Latch mode

Chapter 37: Automation 783
Trim Off
Trim Off turns off reading and writing of all au-
tomation (main and trim) for a track. All auto-
mation moves are ignored during playback.
Trim faders are temporarily set to zero when a
track is set to Trim Off mode.
Depending on the Coalesce Trim Automation
preference setting, changing a track to Trim Off
can coalesce Trim automation on that track. See
“Coalescing Trim Automation” on page 812.
Automation can be switched from Trim Off to
another Automation mode during playback or
record.
Read Trim
In Read Trim mode, Volume and Send level
Trim faders are disengaged from the main auto-
mation playlist and follow any existing Trim au-
tomation. You can move a Trim fader during
playback to audition new trim values, but no au-
tomation is written. When the Trim fader is re-
leased, it returns to any previously written Trim
automation values.
If a track does not contain Trim automation,
you can move a Trim fader during playback to
audition new trim values, but no automation is
written. The Trim fader retains its position until
the track is removed from Trim mode, or if you
manually coalesce the Trim level.
When this mode is enabled, non-trimmable
controls (all controls other than track volume
and send level) behave as if they are in regular
Read mode—no automation data is written.
Touch Trim
In Touch Trim mode, Volume and Send level
Trim faders are disengaged from the main auto-
mation playlist and follow any existing Trim au-
tomation. When a Trim fader is touched, writ-
ing of Trim automation begins. When the fader
is released, writing stops and the fader returns to
any previously written Trim automation values.
The rate of the fader’s return to previous trim
values is determined by the AutoMatch Time
specified in the Automation Preferences page.
See “AutoMatch Time” on page 785 for more in-
formation.
When this mode is enabled, non-trimmable
controls (all controls other than track volume
and send level) behave as if they are in regular
Touch mode—they follow the previously writ-
ten automation until touched. When they are
touched, their absolute positions are written un-
til the control is released or until playback stops.
Latch Trim
In Latch Trim mode, Volume and Send level
Trim faders are disengaged from the main auto-
mation playlist and follow any existing Trim au-
tomation. When a Trim fader is touched, writ-
ing of Trim automation begins. Writing of Trim
automation continues until playback stops, or
until you punch out of writing automation.
When this mode is enabled, non-trimmable
controls (all controls other than track volume
and send level) behave as if they are in regular
Latch mode—they follow the previously written
automation until touched. When they are
touched, their absolute positions are written un-
til playback is stopped.
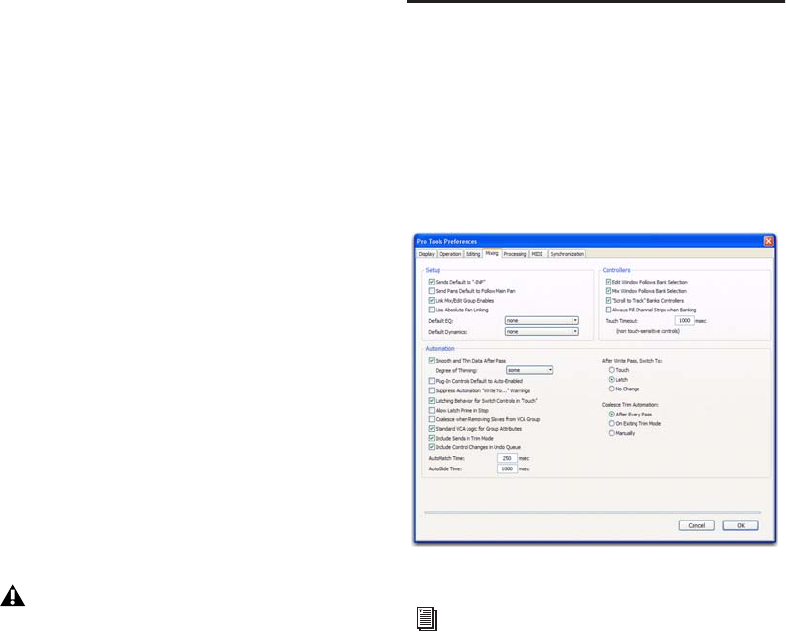
Pro Tools Reference Guide784
Touch/Latch Trim
In Touch/Latch Trim mode, Volume and Send
level faders are disengaged from the main auto-
mation playlist and follow any existing Trim au-
tomation. The main Volume Trim fader follows
Touch Trim behavior, and Send level Trim fad-
ers follow Latch Trim behavior.
Write Trim
In Write Trim mode, as soon as playback begins,
writing of Trim automation begins for Volume
and Send levels, and continues until playback
stops, or until you punch out of writing automa-
tion.
When Write Trim mode is enabled, non-trim-
mable controls (all controls other than track
volume and send level) are not in Write mode,
but behave as if they are in regular Touch mode
(no automation is written unless a control is
touched). This is to prevent the controls from
overwriting all of their automation data on ev-
ery pass in Write Trim mode.
Automation Preferences
Pro Tools gives you several options for control-
ling the writing and playback of automation
data.
To display Automation preferences:
Choose Setup > Preferences and click Mixing.
Send Levels and Trim Mode
(Pro Tools HD Only)
You can set Pro Tools to exclude Send levels
from Trim mode, so that only the Main Volume
goes into Trim when a track is put into Trim
mode. This gives you more flexibility in setting
Send levels while in Trim mode.
The “After Write Pass, Switch To” prefer-
ence affects Write Trim mode. After an au-
tomation pass in Write/Trim mode, tracks
automatically switch to the Trim mode ver-
sion of the setting specified by this prefer-
ence.
Mixing Preferences page
For detailed information on Pro Tools
Automation preferences, see “Mixing Pref-
erences” on page 83.

Chapter 37: Automation 785
To exclude Send levels from Trim mode:
1 Choose Setup > Preferences and click Mixing.
2 Under Automation, deselect Include Sends in
Trim Mode.
3 Click OK.
Smoothing
When you perform automation moves (includ-
ing Trim moves) with a continuous control,
Pro Tools records the move as a series of very
small steps, resulting in a staircase pattern with
many breakpoints. Smoothing intelligently re-
solves this staircase pattern into a single,
smooth ramp from one breakpoint to the next.
(Smoothing does not apply to switched controls
such as mutes or plug-in bypasses.) With
smoothing enabled, the resulting automation
data is often a more accurate representation of
actual automation moves.
Thinning
Thinning automatically reduces the overall
number of breakpoints in an automation play-
list (including Trim playlists) in order to im-
prove system performance. The amount of thin-
ning applied is determined by the Degree of
Thinning setting in the Automation Preferences
page. When using high amounts of thinning,
the resulting automation may differ noticeably
from the original automation moves. Thinning
only applies to audio tracks, and does not affect
MIDI tracks. For instructions, see “Thinning
Automation” on page 800.
AutoMatch Time
AutoMatch Time is the amount of time it takes
for a fader to return (by ramping up or down) to
the level of automation still on the track as the
automation pass ends. This time value is set in
the Automation Preferences page (see “Auto-
mation Preferences” on page 784).
AutoMatch is automatically applied to all Touch
mode passes, and can be applied to Latch or
Write passes.
The AutoMatch Time also determines the rate at
which delta values written with the Trim will re-
turn to 0 dB (delta value of zero).
The AutoMatch feature works with continuous
controls (such as Volume or Pan) by ramping
their values back to previously automated levels.
There are some stepped controls (for example,
the EQ type in the 1-band EQ plug-in) that pro-
vide more than two discrete steps over their op-
erational range. AutoMatch has no effect on
these controls.
Automation Follows Edit Option
When disabled, automation events are not af-
fected by edits to audio or MIDI notes. When
enabled, automation events are affected by edits
to audio or MIDI notes.
To disable Automation Follows Edit:
Choose Options > Automation Follows Edit.
Any uncoalesced automation on a Send will
still coalesce when the other automation on
its track is coalesced, even if “Include Sends
in Trim Mode” is deselected.
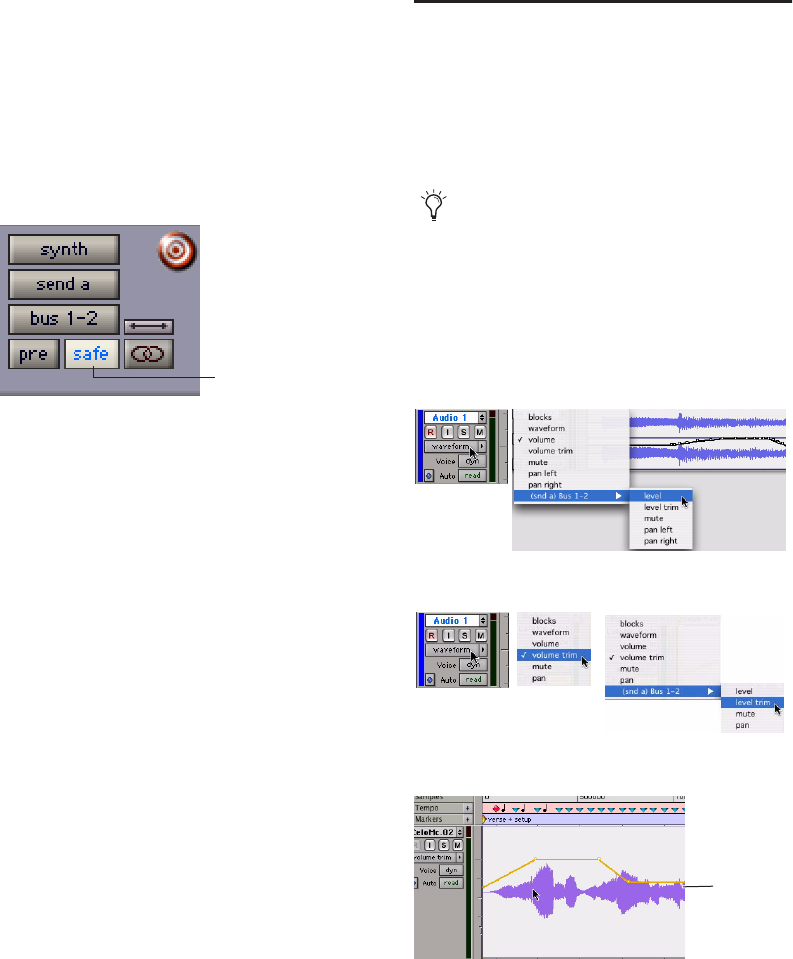
Pro Tools Reference Guide786
Automation Safe
Outputs, sends, and plug-ins can be placed in
Automation Safe mode. In Automation Safe
mode, any automation associated with an Out-
put window (such as track or send level, pan-
ning, or mute), or plug-in on that track, is pro-
tected from being overwritten while automating
other items on that track.
Automation Safe mode suspends automation re-
cording for the selected track output, send, or
plug-in that is enabled. You can also suspend
automation recording and playback session-
wide from the Automation window. See “En-
abling and Suspending Automation” on
page 797.
Viewing Automation
Pro Tools creates a separate playlist in the Edit
window for each type of automation in a track,
including a playlist for each type of Trim auto-
mation. This data can be viewed and edited in
the same way as audio and MIDI data.
To display an automation playlist:
Click the Track View selector and select from
the pop-up menu the automation type you
want to view.
Automation Safe enabled send
Automation Safe enabled
You can easily toggle between different
Track Views. See “Changing Track Views”
on page 151.
Displaying a standard automation playlist
Displaying Trim automation playlists
Trim automation playlist
Volume
Trim
data
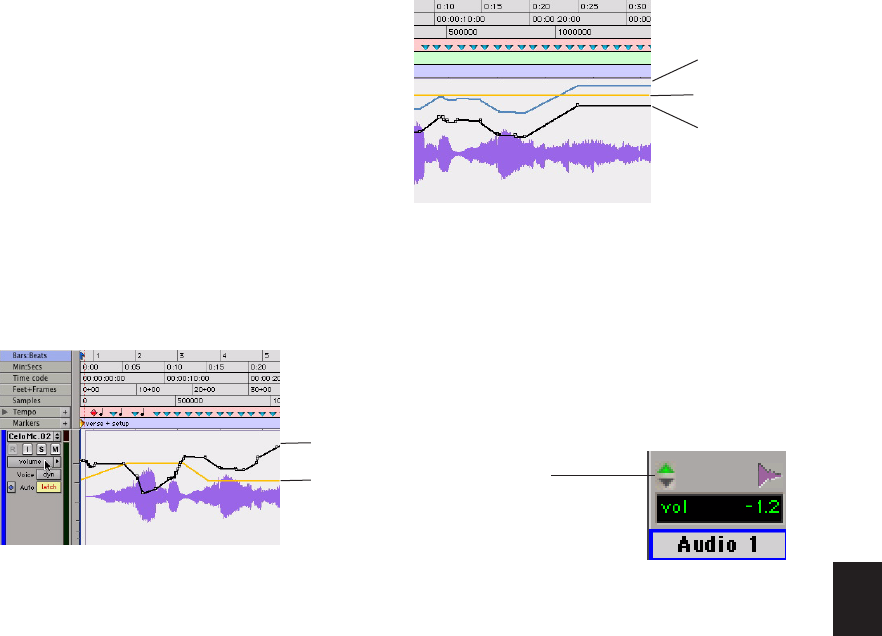
Chapter 37: Automation 787
Displaying Trim Automation Along
with the Main Playlist
(Pro Tools HD Only)
The appearance of Trim automation depends on
how it is set to be coalesced. See “Coalescing
Trim Automation” on page 812.
If automation is not set to coalesce after every
automation pass, you can display Trim automa-
tion data along with the main Volume or Send
level automation data in the same automation
view. This Trim automation display cannot be
directly edited.
To display the Trim automation playlist along with
main automation playlist on tracks:
Choose View > Automation > Trim Playlist.
Displaying the Composite
Automation Playlist
(Pro Tools HD Only)
If automation is not set to coalesce after every
automation pass, you can display a composite
automation playlist that shows the contribution
of the Trim automation to the main Volume or
Send Level automation data. This composite
playlist display cannot be directly edited.
The composite playlist is shown in both the
main automation playlist and the Trim automa-
tion playlist.
To display the composite playlist:
Choose View > Automation > Composite
Playlist.
AutoMatch Indicators
There are triangular AutoMatch indicators at the
bottom left of each channel strip in the Mix
window. When lit, these indicate the direction
the fader will automatically move when Auto-
Matching.
Display of Trim automation in a main Volume playlist
Volume
data
Volume
Trim
data
Display of Trim automation and the composite playlist
in a main Volume playlist
Triangular AutoMatch indicators on a channel strip
Volume
data
Volume
Trim
data
Composite
playlist
AutoMatch indicator
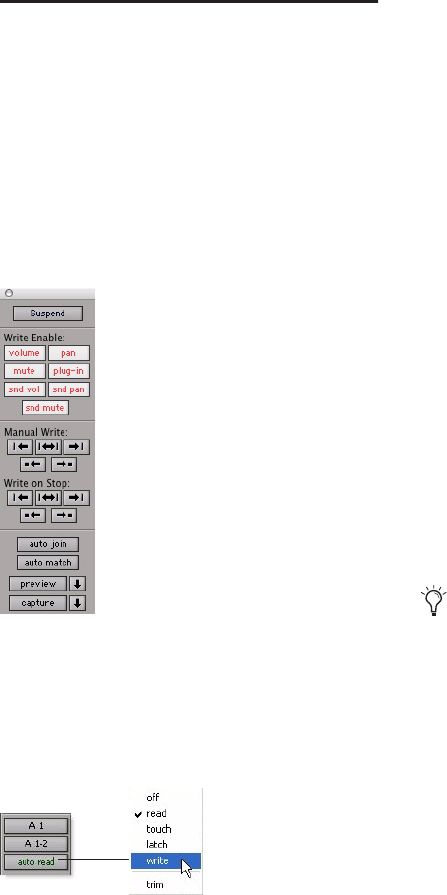
Pro Tools Reference Guide788
Writing Automation
You can write automation for all automatable
controls by moving those controls during play-
back.
To write automation on tracks:
1 Choose Window > Automation.
2 Make sure the automation type is write-en-
abled.
3 In the Mix or Edit window, click the Auto-
mation Mode selector on each of the tracks you
want to automate, and set the Automation
mode. For the initial automation pass, choose
Write mode.
4 Click Play to begin writing automation.
5 Move the controls you want to automate.
6 When you have finished, click Stop.
After the first automation pass, you can write
additional automation to the track without
completely erasing the previous pass by choos-
ing Touch mode or Latch mode. These modes
add new automation only when you actually
move a control. (See “Automation Modes” on
page 780.)
To write additional automation to a previous pass:
1 Enable Options > Link Timeline and Edit Se-
lection.
2 In the Edit window, make a selection or place
the cursor in the location where you want to
start writing automation.
3 In the Mix or Edit window, click the Auto-
mation Mode selector on each of the tracks you
want to automate, and set the Automation
mode to Touch or Latch mode.
4 Click Play to begin writing automation.
5 Move the controls you want to automate.
6 When you have finished, click Stop.
Automation window
Setting the Automation mode of a track
If you write automation in Touch mode
with Loop Playback enabled, writing of au-
tomation will automatically stop at the end
of the looped selection. At the beginning of
each successive loop, you can then touch or
move the control again to write new data.

Chapter 37: Automation 789
Storing an Initial Control Position
When you create a new audio, Auxiliary Input,
VCA Master, MIDI, or Instrument track, it is au-
tomatically placed in Read mode. Even though
the track is in Read mode, you can set the initial
position of any automatable control, and it is
saved with your session.
In this initial state, only a single automation
breakpoint appears at the beginning of each au-
tomation playlist. If you move the control with-
out writing automation, this breakpoint will
move to the new value.
You can permanently store the initial position
of an automatable control by doing any of the
following:
• Place the track in Write mode and press Play
to write a few seconds of automation data to
the track
• Manually place a breakpoint on the automa-
tion playlist somewhere after the initial break-
point. (See “Graphical Editing of Automation
Data” on page 803 for more information.)
Automating Switched Controls
When automating switched controls (such as
mutes, plug-in bypasses, or switched controls on
plug-ins) Pro Tool s treats them as touch sensi-
tive controls. Automation data is written for as
long as the switch or button for that control is
pressed or touched.
For example, if you have just written a series of
mute on/off states on a track in quick succes-
sion, the manual method for clearing this auto-
mation data would require you to move to the
Edit window, choose automation playlist for
Mute, select the mute automation data, and de-
lete it. In Pro Tools, this can be done automati-
cally.
To automate a switched control (such as the Mute
button):
1 Perform another automation pass on the
track.
2 When you reach the location of the mute state
you want to remove, press and hold down the
switched control (such as the Mute button).
3 As long as the button is held down, Pro Tools
overwrites the underlying data on the track with
the current state of the switch (on or off) until
playback is stopped.
Automating Switched Controls in Touch
Mode
When automating switched controls (including
mute, plug-in bypass, and any switched control
on a plug-in) in Touch mode, these controls will
latch in their current state after they are
touched.
However, to preserve any automation for that
switched control later in the Timeline, this
latched behavior ends if either of the following
occurs:
• If an existing automation breakpoint is en-
countered, Pro Tools stops writing automa-
tion at that point.
• If you stop playback or punch out of writ-
ing automation before reaching an existing
automation breakpoint, Pro Tools Au-
toMatches to the underlying automation
state.
When playback gets to the first muted sec-
tion, the Mute button becomes highlighted.

Pro Tools Reference Guide790
Setting Switched Controls for
Momentary Behavior
In some cases, such as when overwriting or ex-
tending Mute automation, you may want to
momentarily write automation for a control by
holding it down, and not have the control latch.
To set switched controls for momentary behavior:
1 Choose Options > Preferences and click Mix-
ing.
2 Deselect Latching Behavior for Switch Con-
trols in Touch.
3 Click OK to close the Preferences window.
Automating Sends
Pro Tools provides automation of send level,
send mute, and send pan (for stereo and multi-
channel sends only). This makes it easy to con-
trol effect levels and placement during mix-
down with great precision.
Send level and mute can also be configured to
follow groups.
To automate a send level, mute or pan:
1 In the Automation window, make sure the au-
tomation type is write-enabled (send level, send
mute, send pan).
2 In the Mix or Edit window, set the Auto-
mation mode for each track containing sends
you want to automate. For each track, click the
Automation Mode selector and set the Auto-
mation mode. For the initial automation pass,
choose Write mode.
3 If sends are not currently visible on your
tracks, select View > Mix Window (or Edit Win-
dow) > Sends A–E (or Sends F–J).
4 To display send controls, do one of the follow-
ing:
• Click the send to open the Output window
for the send that you want to automate.
– or –
• Choose View > Sends A–E (or Sends F–J)
and select one of the individual views (such
as Send A).
5 Click Play to begin writing automation.
6 Move the controls you want to automate.
7 When you have finished, click Stop.
Copying Track Automation to Sends
(Pro Tools HD Only)
There may be times where you want a track’s
send settings or automation to mirror the set-
tings or automation in the track itself, for exam-
ple, when creating a headphone mix based on
the main mix, or when an effect level needs to
follow the levels in a main mix. You can copy
the current settings or the entire automation
playlist for the selected controls to the corre-
sponding playlist for the send.
Send level, mute, and pan can also be con-
figured to follow Mix Groups. See “Auto-
mation Preferences” on page 784 for infor-
mation.
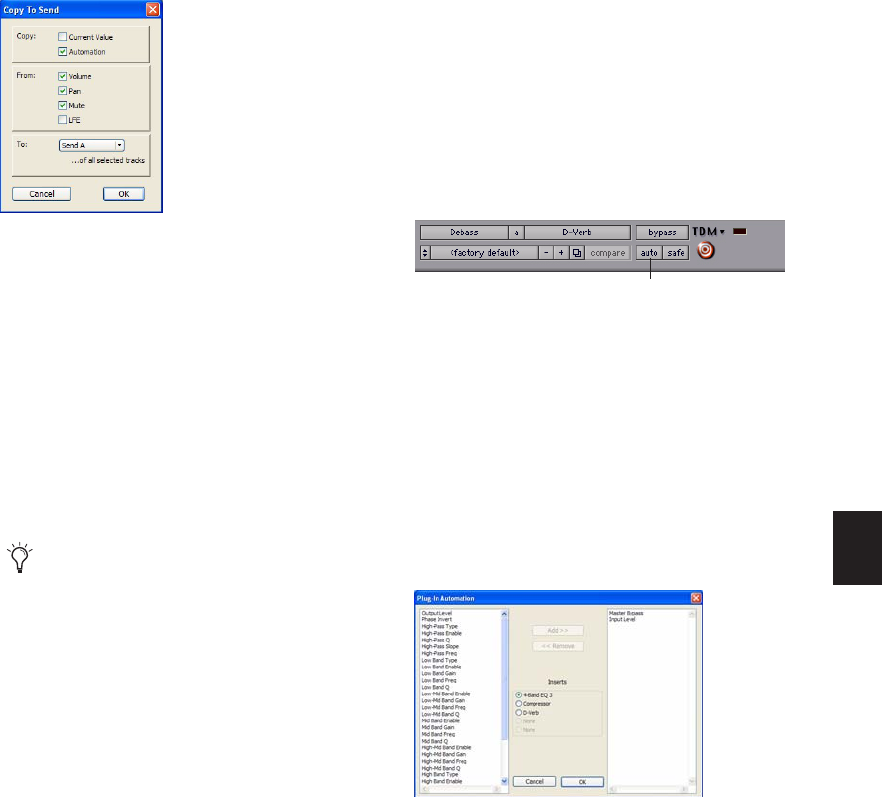
Chapter 37: Automation 791
To copy a track’s settings or automation to one of
its sends:
1 Select the tracks you want to edit by clicking
on the track names to highlight them.
2 Choose Edit > Automation > Copy to Send.
3 In the Copy to Send dialog, do any of the fol-
lowing:
• Select Current Value to copy the current
settings of the corresponding controls.
• Select Automation to copy the entire auto-
mation playlist for the corresponding con-
trols.
4 Select the controls you want to copy.
5 Select the sends to which to copy the automa-
tion, and click OK.
You can undo the results of the Copy to Send
command.
Automating Plug-ins
You can automate changes to virtually all plug-
in controls. Automating a plug-in is slightly dif-
ferent from other automation procedures, be-
cause you must enable individual plug-in con-
trols for automation.
To enable plug-in controls for automation:
1 Open the Plug-in window for the plug-in you
want to automate.
2 Do one of the following:
• Click the Automation Enable button in the
Plug-in window.
– or –
• Control-Alt-Start-click (Windows) or Com-
mand-Option-Control-click the Track View
selector in the Edit window.
3 In the plug-in automation dialog, choose the
controls to automate and click Add. If there are
multiple plug-ins on the same track, you can se-
lect from among them by clicking their buttons
in the Inserts section of this dialog.
4 Click OK to close the Plug-in Automation dia-
log.
Copy To Send dialog
When overwriting automation, Pro Tools
presents a confirmation dialog. To suppress
this dialog, press Alt (Windows) or Option
(Mac) while clicking OK.
Accessing the Plug-in Automation dialog
Plug-in automation dialog
Automation Enable button
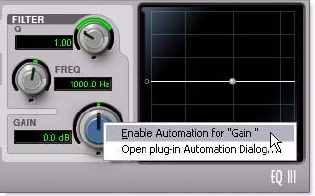
Pro Tools Reference Guide792
To automate a plug-in:
1 In the Plug-in Automation Enable window,
make sure plug-in automation is enabled.
2 In the Mix or Edit window, for each track con-
taining plug-ins you want to automate, click the
Automation Mode selector and set the Auto-
mation mode. For the initial automation pass,
choose Write mode.
3 Click Play to begin writing automation, and
move the controls you want to automate.
4 When you have finished, click Stop.
Enabling Automation for Individual
Plug-in Parameters
You can enable individual plug-in controls di-
rectly from the Plug-in window.
To enable a plug-in parameter from the plug-in
window:
1 Make sure the plug-in window is open for the
plug-in you want to automate.
2 Control-Alt-Start-click (Windows) or Com-
mand-Option-Control-click (Mac) the control
for the parameter.
Enabling Automation for All Plug-in
Parameters
To enable all plug-in parameters:
1 Make sure the plug-in window is open for the
plug-in you want to automate.
2 Control+Alt+Start-click (Windows) or Com-
mand+Option+Control-click (Mac) on the Auto
button at the top of the plug-in window.
Automatically Enabling Plug-ins for
Automation
You can set Pro Tools to automatically enable all
controls of a plug-in for automation when you
first add the plug-in to your session.
To automatically enable all plug-in controls for
automation:
1 Choose Setup > Preferences and click Mixing.
2 Select “Plug-in Controls Default to Auto-En-
abled.”
3 Click OK to close the Preferences window.
Enabling plug-in automation for individual parameters
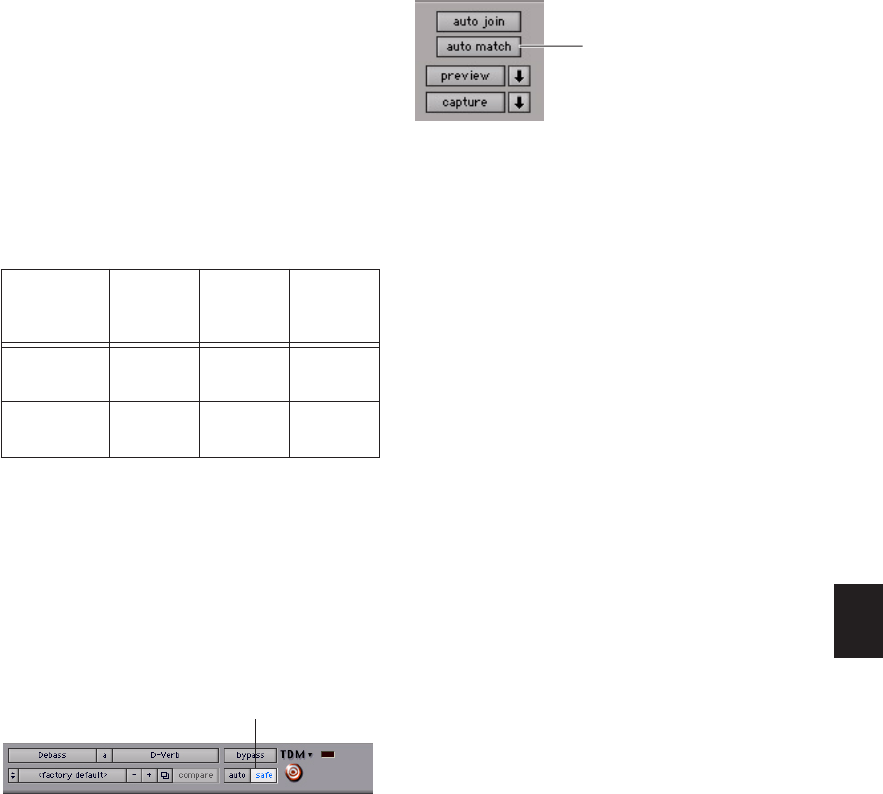
Chapter 37: Automation 793
Color Indication of Automation Mode
for Plug-in Parameters
In the Plug-in window, the controls for plug-in
parameters highlight in different colors to indi-
cate whether or not a control is automated in
what automation mode. The color also is differ-
ent depending on whether or not a parameter is
being controlled by a control surface (such as D-
Command or Command|8).
The following table shows the color coding for
automated plug-in parameters, with and with-
out a control surface.
Record Safing Plug-in Automation
You can protect plug-in automation from being
overwritten by using Automation Safe mode.
To enable plug-in safe mode:
1 Open a plug-in.
2 Click the Safe button so that it is highlighted.
AutoMatching Controls
(Pro Tools HD Only)
AutoMatching All Controls
You can AutoMatch all currently writing con-
trols to their existing automation levels.
To AutoMatch all currently writing controls:
1 Choose Window > Automation.
2 Make sure the automation types you want to
AutoMatch are write-enabled.
3 Start playback.
4 When you reach a point in the track where
you want to return control to their previously
written values, click the AutoMatch button in
the Automation window.
All currently writing controls stop writing auto-
mation and return to any previously written val-
ues according to the AutoMatch Time setting in
the Mixing preferences.
Color coding for automated plug-in parameters
Automation
Mode: Off Read
Touch,
Latch,
Write
No Control
Surface
none Green Red
Control
Surface
none Blue Yellow
Automation Safe enabled plug-in
Safe enabled
AutoMatch button in the Automation window
AutoMatch button
Pro Tools Reference Guide794
AutoMatching Individual Tracks
You can invoke AutoMatch on individual
tracks. All controls currently writing automa-
tion on the track stop writing and return to ex-
isting automation levels.
To AutoMatch all controls on a track:
Control-click (Windows) or Command-click
(Mac) the Automation Mode selector on the
track.
AutoMatching Individual Automation
Types
You can invoke AutoMatch on individual auto-
mation types across a session.
To AutoMatch all controls of one automation type:
In the Automation window, Control-click
(Windows) or Command-click (Mac) the button
for the automation type (Volume, Pan, Mute,
Plug-in, Send level, Send pan, or Send mute).
AutoMatching Individual Controls
(D-Control and D-Command Only)
On ICON worksurfaces, you can invoke Auto-
Match on individual controls or control types
on single channels.
To AutoMatch all controls of a type on a channel:
Hold Control (Windows) or Command (Mac)
and press any of the following in the Channel
Strip Mode controls for the track whose controls
you want to AutoMatch:
• Inserts
• Sends
• Pan
• Dyn (D-Control only)
• EQ (D-Control only)
To AutoMatch a pan control or the controls for an
individual insert or send:
1 Press the switch in the Channel Strip Mode
controls to display the Pan controls or the top
level of Inserts or Sends for the channel.
2 Hold Control (Windows) or Command (Mac)
and press the Rotary Encoder Select switch for
the control you want to AutoMatch:
• For Sends, the Send level, pan, and mute
will AutoMatch.
• For Inserts, all automated controls will
AutoMatch.
• For Pan, all pan sliders on the channel will
AutoMatch.
To AutoMatch all controls for a plug-in displayed in
the Dynamics or EQ section:
Hold Control (Windows) or Command (Mac)
and press the Auto switch in the Dyn or EQ sec-
tion of the console.
Priming Controls for Writing
Automation in Latch Mode
(Pro Tools HD Only)
If a track is in Latch or Touch/Latch automation
mode, you can prime individual controls for
writing automation while the transport is
stopped. This Latch Prime capability lets you pre-
pare for an automation pass before starting play-
back.
To prime controls for writing automation in Latch
mode while the transport is stopped:
1 Choose Setup > Preferences and click Mixing.
2 Under Automation, select Allow Latch Prime
in Stop.
3 Click OK to close the Preferences window.
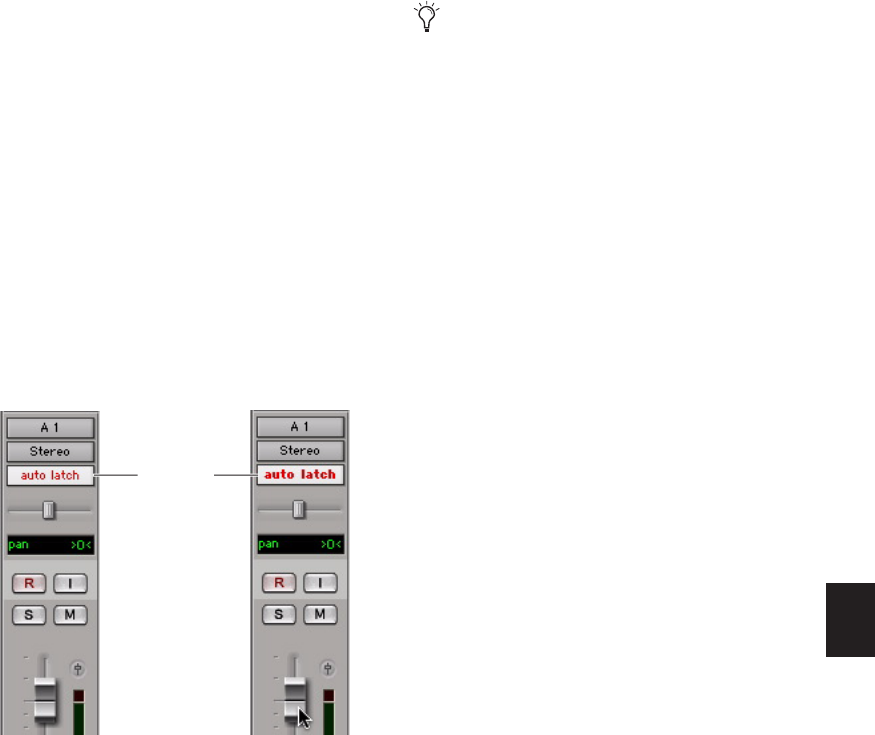
Chapter 37: Automation 795
4 In the Automation window, make sure the
controls you want to automate are write-en-
abled.
5 Click the Automation Mode selector on the
track where you want to write automation and
do one of the following:
• Choose Latch mode to allow priming of all
automation-enabled controls on the track.
– or –
• Choose Touch/Latch mode to leave the
main Volume fader in Touch mode and al-
low priming of all other automation-en-
abled controls.
6 While the transport is stopped, touch or move
the controls you want to start writing at the be-
ginning of the automation pass. When at least
one control on a track is primed, the Auto-
mation Mode selector displays in bold.
7 Start playback. All primed controls begin writ-
ing automation at their primed values.
8 Stop playback to finish the automation pass.
All tracks are taken out of their Latch Prime
state.
Taking Tracks and Controls Out of Latch
Prime
You can take individual tracks or automation
types out of their Latch Prime state before or
during an automation pass.
When you take a track or automation type out
of Latch Prime before starting playback, it stays
in Latch mode but the corresponding controls
are not primed to write when playback starts.
When you take a track or automation type out
of Latch Prime during an automation pass, the
corresponding controls AutoMatch to their cur-
rently written values.
If you AutoMatch a control that is in a Latch
Prime state, the control will no longer be
primed.
To take a track out of Latch Prime:
Control-click (Windows) or Command-click
(Mac) the Automation Mode selector on the
track.
The selector button unbolds to indicate that the
track is no longer primed.
Automation mode indicator before (left) and after
priming of latched controls (right)
Automation
Mode
selector
You can use the Write to Punch command
at the end of your automation pass to write
the current value back to the start of the
pass.
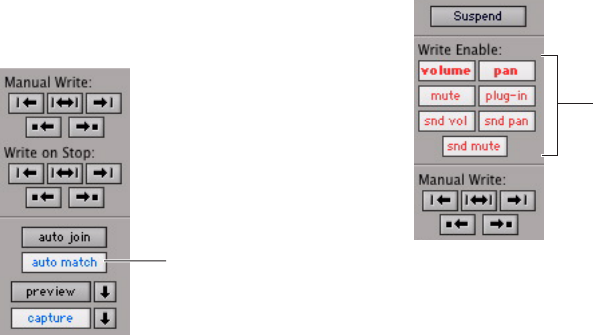
Pro Tools Reference Guide796
To take all tracks out of Latch Prime, do one of the
following:
Alt-Control-click (Windows) or Option-Com-
mand-click (Mac) the Automation Mode selec-
tor on a track.
– or –
Click the AutoMatch button in the Auto-
mation window.
To take all selected tracks out of Latch Prime, do
one of the following:
Alt-Control-Shift-click (Windows) or Option-
Command-Shift-click (Mac) the Automation
Mode selector on a track.
– or –
Alt-Shift-click (Windows) Option-Shift-click
(Mac) the AutoMatch button in the Automation
window.
To take an automation type out of Latch Prime on
all tracks, do one of the following:
In the Automation window, Control-click
(Windows) or Command-click (Mac) the button
for the automation type (Volume, Pan, Mute,
Plug-in, Send level, Send pan, or Send mute).
Rolling Through Automation Punch
Points in Latch Prime
After you prime controls for writing automation
while the transport is stopped, you can set
Pro Tools to automatically punch in at that
point after issuing a back and play command, or
after rolling back and locking to time code.
To set Pro Tools to automatically punch in
automation writing on a track:
1 Locate the cursor where you want to punch in
automation.
2 Prime controls for writing while the transport
is stopped. (See “Priming Controls for Writing
Automation in Latch Mode” on page 794.)
3 In the Automation window, click the AutoJoin
button.
4 In the Automation window, click the Capture
button and then click the Punch Capture but-
ton. The AutoJoin marker (a vertical red line) ap-
pears on-screen at the punch point.
AutoMatch button in the Automation window
AutoMatch button Automation types in the Automation window
Automation
type buttons
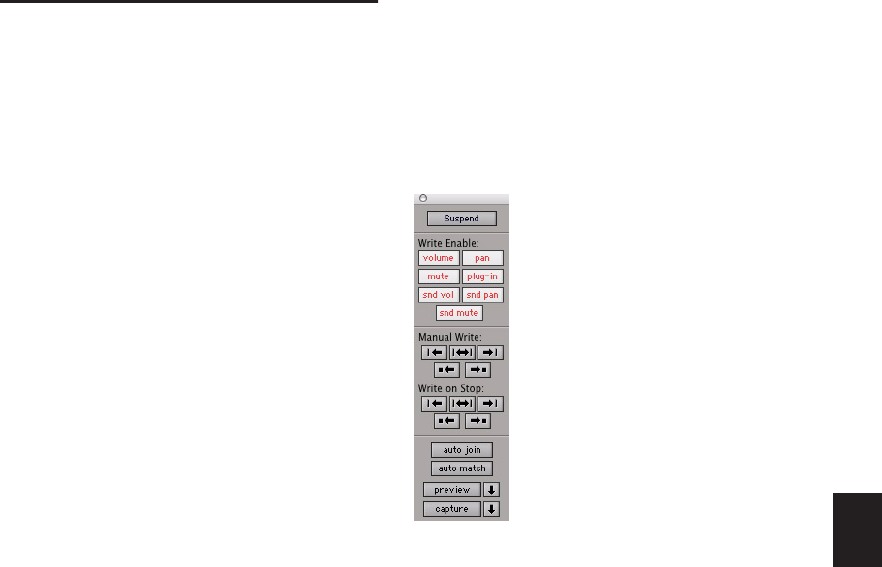
Chapter 37: Automation 797
5 Issue a Back and Play command, roll back the
external machine to before the punch in point,
or enable pre-roll.
6 Start playback. When the transport reaches
the punch-in point, automation writing begins.
Enabling and Suspending
Automation
From the Automation window, you can enable
or suspend writing for the following types of au-
tomation across all tracks:
• Volume
• Volume trim
• Pan
• Mute
• Plug-in
• Send level
• Send level trim
• Send pan
• Send mute
Automation can be suspended or enabled dur-
ing playback (without having to stop the Trans-
port).
Suspending Automation on All Tracks
To suspend automation on all tracks:
1 Choose Window > Automation.
2 Do one of the following:
• To suspend writing of all automation on all
tracks, click the Auto Suspend button.
– or –
• To suspend writing of a specific type of au-
tomation on all tracks, click the button for
that automation type (volume, mute, pan,
plug-in, send level, send mute, or send
pan).
Automation window

Pro Tools Reference Guide798
To suspend Trim automation on all tracks
(Pro Tools HD only):
In the Automation window, Command-click
(Mac) or Control-click (Windows) the Suspend
button.
The Suspend button highlights yellow to indi-
cate that Trim automation is suspended.
Suspending Automation for Individual
Controls
You can suspend automation for one or more
controls. When a control is suspended, its con-
trol name is italicized in the Track View selector.
To suspend automation for individual controls on a
track:
1 In the Edit window, set the Track View selector
to show the automation playlist for the control
you want to suspend.
2 Do one of the following:
• To suspend writing and playback of auto-
mation for only the displayed control,
Control-click (Windows) or Command-
click (Mac) the control name in the Track
View selector.
• To suspend writing and playback of auto-
mation for all controls, Control-Shift-click
(Windows) or Command-Shift-click (Mac)
the name of any control in the Track View
selector.
• To suspend writing and playback of auto-
mation for a specific control on all tracks,
Control-Alt-click (Windows) or Command-
Option-click (Mac) the name of the control
in the Track View selector.
To suspend Trim automation for individual controls
on a track (Pro Tools HD only):
1 In the Edit window, set the Track View selector
to show the automation playlist for the Trim
control you want to suspend (Volume Trim or
Send level Trim).
2 Do one of the following:
• To suspend only the displayed Trim control
on a single track, Control-click (Windows)
or Command-click (Mac) the control name
in the Track View selector.
– or –
• To suspend the displayed Trim control on
all tracks, Control-Alt-click (Windows) or
Command-Option-click (Mac) the control
name in the Track View selector.
Suspending Trim automation
Suspending automation from the Edit win-
dow obeys Edit groups. To suppress grouped
behavior, hold Start (Windows) or Control
(Mac) while suspending a control.
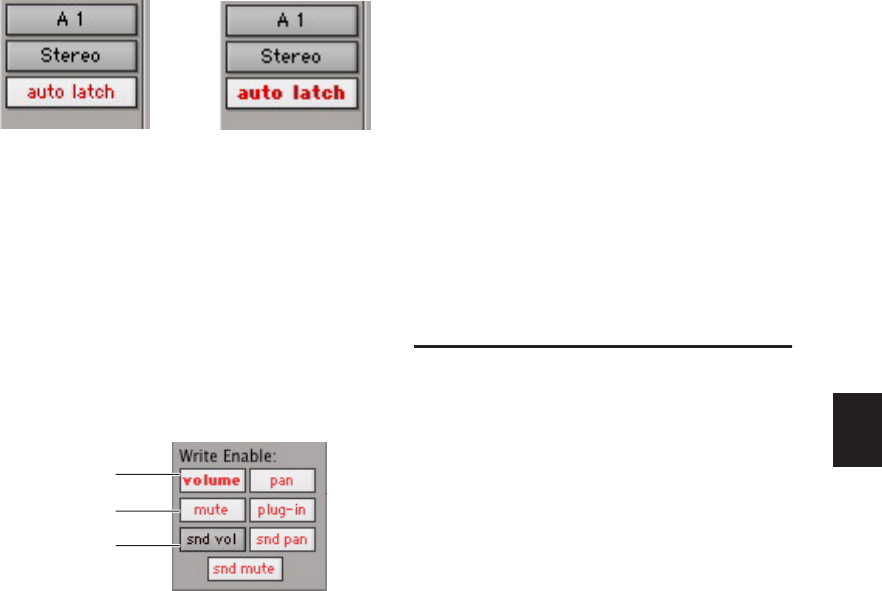
Chapter 37: Automation 799
Viewing Automation Enable
Status
Track Automation Mode Selectors
When a track is enabled for automation but
not writing automation, the Automation mode
selector shows the mode in normal red text.
When any control on a track is writing auto-
mation, the Automation mode selector shows
the mode in bold red text.
Automation Window Buttons
When an automation type is writing automa-
tion on any track in the session, the correspond-
ing button in the Automation window displays
bold red text.
When an automation type is enabled but is
not writing anywhere in the session, the corre-
sponding button in the Automation window
displays normal red text.
Automation Enable Guidelines
The following rules determine whether automa-
tion is enabled for a track:
Although Pro Tools shows a single Auto-
mation mode for each track, all automatable
controls associated with that track are not nec-
essarily in the same Automation mode.
If automation is globally suspended in the
Automation window, all automatable controls
behave as if they were in Off mode, regardless of
the track’s current Automation mode.
If automation for a control is suspended by
Control-clicking (Windows) or Command-click-
ing (Mac) its name in the Track View selector,
that control behaves as if it were in Off mode, re-
gardless of the track’s current Automation
mode.
If automation for a control is suspended in
the Automation window, that control behaves
as if it is in Read mode when the track is in a re-
cordable Automation mode (Touch, Latch, or
Write mode).
Deleting Automation
Automation data takes the form of a line graph
with editable breakpoints. The easiest way to re-
move automation in a track or selection is to
manually delete breakpoints from the automa-
tion playlist.
Removing data in this manner is different from
using the Cut command, which creates anchor
breakpoints at the boundaries of the remaining
data. For details, see “Cutting, Copying, and
Pasting Automation” on page 806.
Automation Mode selector showing enabled state (left)
and writing state (right)
Automation window showing possible automation
states
Writing
Enabled
Not Enabled
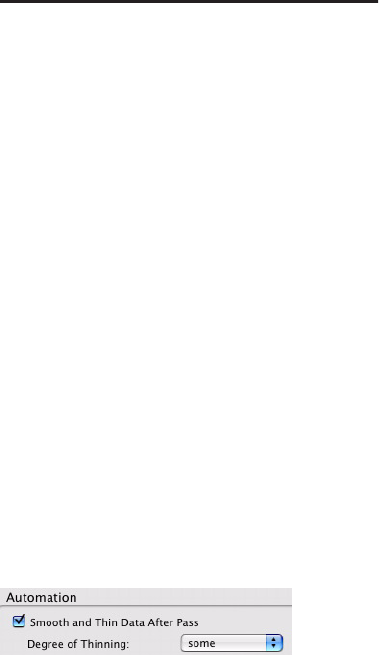
Pro Tools Reference Guide800
To remove automation data, display the auto-
mation playlist you want to edit by selecting it
from the Track View selector, and do one of the
following:
To remove a single breakpoint:
With the Pencil tool or any Grabber tool, Alt-
click (Windows) or Option-click (Mac) the
breakpoint.
To remove several breakpoints at once:
Use the Selector tool to select a range that
contains the breakpoints, and press Backspace
(Windows) or Delete (Mac).
To remove all automation data of the displayed
type:
Click with the Selector tool in the track and
choose Edit > Select All, then press Backspace
(Windows) or Delete (Mac).
To remove all automation for all automation
playlists on a track:
1 Use the Selector tool to select a range of data
to be removed.
2 Press Start+Backspace (Windows) or Con-
trol+Delete (Mac).
All automation data within the selection is re-
moved for all automation playlists on that track,
regardless of whether automation is write-en-
abled for those controls.
Clearing Trim Automation
(Pro Tools HD Only)
If Trim automation has not been coalesced on a
track, you can clear it. When you clear Trim au-
tomation, automation breakpoints on all Trim
playlists are deleted and all Trim faders are reset
to zero.
To clear Trim automation:
1 Select the track where you want to clear the
Trim automation.
2 Do one of the following:
• Choose Track > Clear Trim Automation.
– or –
• Right-click the track name and choose
Clear Trim Automation from the pop-up
menu.
Thinning Automation
Pro Tools writes a maximum density of automa-
tion data during an automation pass in the form
of breakpoints. Since Pro Tools creates ramps be-
tween breakpoints, it may not need all of the
captured points to create a sonically accurate
representation of the automation moves that
you have made. Each breakpoint takes up space
in memory allocated for automation, so thin-
ning data can maximize system efficiency and
performance.
Pro Tools provides two different ways to thin
automation data and remove unneeded break-
points: the Smooth and Thin Data After Pass op-
tion and the Thin Automation command.
Using Smooth and Thin Data After Pass
When this option is selected in the Mixing Pref-
erences page, Pro Tools automatically thins the
automation breakpoint data after each automa-
tion pass.
The Smooth and Thin Data After Pass Option
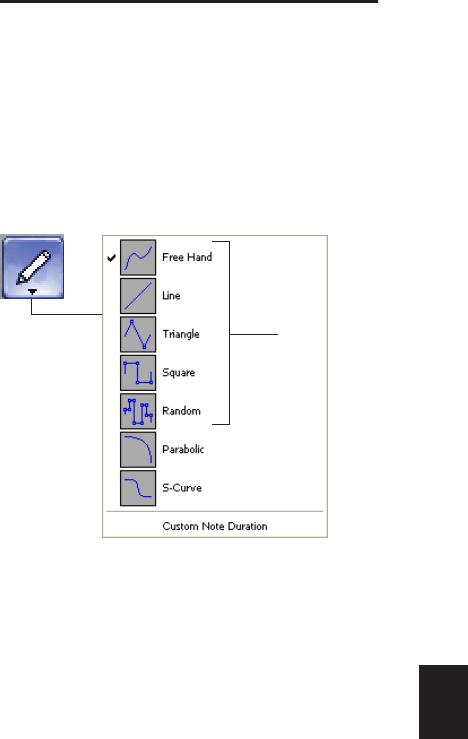
Chapter 37: Automation 801
In the default settings for new sessions, the
Smooth and Thin Data After Pass option is se-
lected, with the “Some” setting chosen. In most
cases, this setting yields optimum performance
while providing an accurate reproduction of
your automation moves.
If you choose None, Pro Tools writes the maxi-
mum possible number of breakpoints. You can
still perform thinning at any time with the Thin
command. For more information on smoothing
automation data, see “Smoothing” on page 785.
Using the Thin Automation Command
The Thin Automation command lets you selec-
tively thin areas in a track where automation
data is too dense. You can use the Undo com-
mand to audition the results of thinning (com-
paring thinning and not thinning) before you
apply it permanently.
To use the Thin Automation command:
1 In the Edit window, click the Track View selec-
tor to display the automation type you want to
thin.
2 With the Selector tool, highlight the automa-
tion data you want to thin. To thin all automa-
tion of the selected type in the track, click with
the Selector tool in the track and choose the Se-
lect All command.
3 Choose Edit > Automation > Thin
(Pro Tools HD) or Edit > Thin Automation
(Pro Tools LE) to thin the selected automation
by the amount you have selected in the Mixing
Preferences page.
Drawing Automation
Use the Pencil tool to create automation events
for audio and MIDI tracks by drawing in any au-
tomation or MIDI controller playlist, including
Trim automation if it has not been coalesced.
The Pencil tool can be set to draw a series of au-
tomation events with the following shapes:
Free Hand Draws freely according to the move-
ment of the mouse. In audio tracks, the shape
has the number of breakpoints needed to
smoothly interpolate and reproduce the auto-
mation shape. In MIDI tracks, the shape is re-
produced as a series of steps, according to the
resolution setting in the MIDI Preferences page.
Line Draws a straight line. In audio tracks, the
line has a single breakpoint at either end. In
MIDI tracks, the controller value changes in
steps according to the resolution setting in the
MIDI Preferences page.
Triangle Draws a sawtooth pattern that repeats
at a rate based on the current Grid value. In au-
dio tracks, the pattern has a single breakpoint at
each extreme. In MIDI tracks, the controller
Choosing a Pencil tool shape
Pencil tool
shapes
available for
automation

Pro Tools Reference Guide802
value changes in steps according to the resolu-
tion setting in the MIDI Preferences page. Am-
plitude is controlled by vertical movement of
the Pencil tool.
Square Draws a square pattern that repeats at a
rate based on the current Grid value. Amplitude
is controlled by vertical movement of the Pencil
tool.
Random Draws a random pattern of levels that
change at a rate based on the current Grid value.
Amplitude is controlled by vertical movement
of the Pencil tool.
Using Pencil Tool Shapes
You can draw automation for audio as well as
MIDI tracks. For example, use the Triangle pat-
tern to control continuous functions, or the
Square pattern to control switched functions
such as Mute or Bypass.
Since the Pencil tool draws these shapes using
the current Grid value, you can use it to perform
panning in tempo with a music track, or on
frame scene changes when working in post pro-
duction.
Resolution of MIDI Controller Data
When using the Pencil tool to draw MIDI auto-
mation, the data is drawn as a series of discrete
steps. You can control the resolution (or den-
sity) of these steps to help manage the amount
of MIDI data sent for a given MIDI controller
move.
To set the resolution for the Pencil tool:
1 Choose Setup > Preferences and click MIDI.
2 Enter a value for “Pencil Tool Resolution
When Drawing Controller Data.” The value can
range from 1 to 100 milliseconds.
3 Click OK to close the Preferences window.
The illustrations below show the same MIDI
controller automation drawn with different
Pencil tool resolution settings.
For better performance, consider selecting a
smaller value for MIDI controls that need higher
resolution (such as MIDI volume), and a larger
value for controls that may not require a high
resolution (such as Pan).
For more information on MIDI continuous
controller data, see “Continuous Controller
Events” on page 539.
MIDI Data drawn with resolution of 10 ms
MIDI Data drawn with resolution of 100 ms
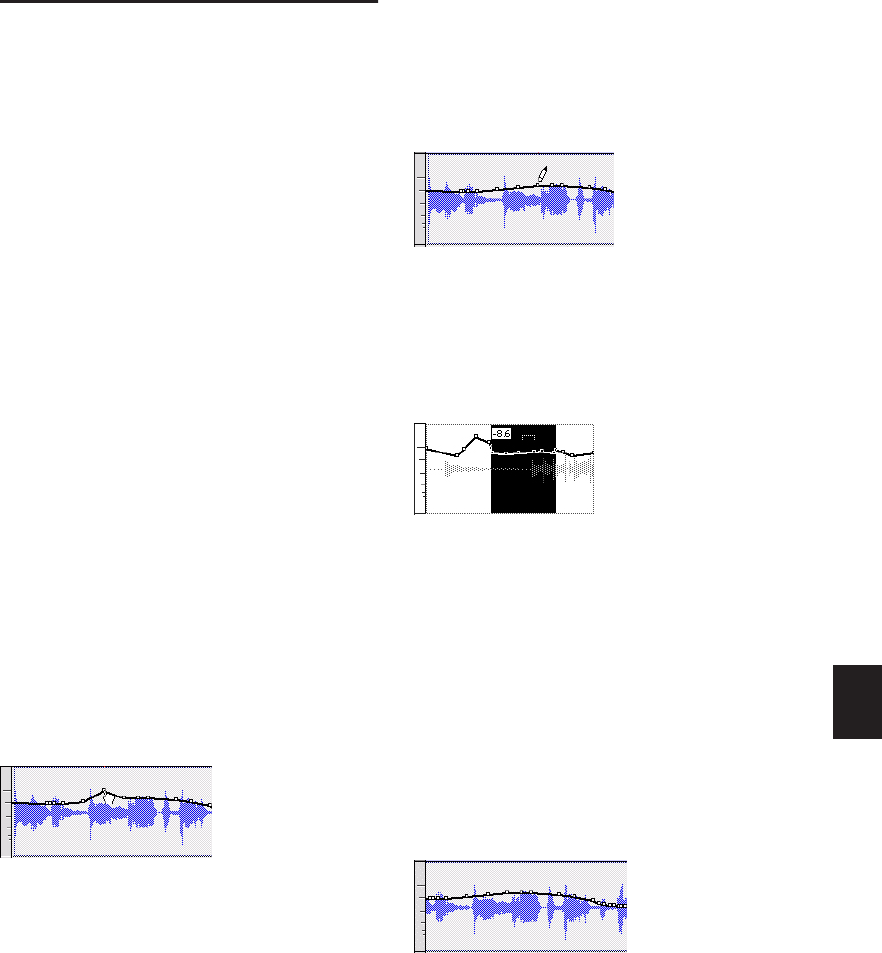
Chapter 37: Automation 803
Editing Automation
Pro Tools provides several ways to edit automa-
tion data, including Trim automation if it has
not been coalesced., for any track in your ses-
sion. You can edit automation data graphically
by adjusting breakpoints in any automation
playlist. You can also cut, copy, and paste auto-
mation data in the same manner as audio and
MIDI data.
Graphical Editing of Automation
Data
Automation data takes the form of a line graph
with editable breakpoints. By dragging these
breakpoints, you can modify the automation
data directly in the Edit window. When you
drag an automation breakpoint up or down, the
change in value is numerically or textually indi-
cated. Dragging an automation breakpoint to
the left or right adjusts the timing of the auto-
mation event.
Using the Grabber Tools
The Grabber tools lets you create new break-
points by clicking on the graph line, or adjust
existing breakpoints by dragging them. Alt-click
(Windows) or Option-click (Mac) breakpoints
with a Grabber tool to remove them.
Using the Pencil Tool
The Pencil tool lets you create new breakpoints
by clicking once on the graph line. Alt-click
(Windows) or Option-click (Mac) breakpoints
with the Pencil tool to remove them.
Using the Trimmer Tools
The Trimmer tools let you adjust all selected
breakpoints up or down by dragging anywhere
within that selection.
Editing Automation Types
Each automatable control has its own automa-
tion playlist, that can be displayed by choosing
it from the Track View selector. “Viewing Auto-
mation” on page 786.
Editing Volume Automation
Drag a breakpoint up or down to change the vol-
ume (dB value). Drag a breakpoint to the left or
right to adjust the timing of the volume change.
Using the Grabber tool to create a new breakpoint
Using the Pencil tool to delete a breakpoint
Using the Trimmer tool to move breakpoints
Track volume automation
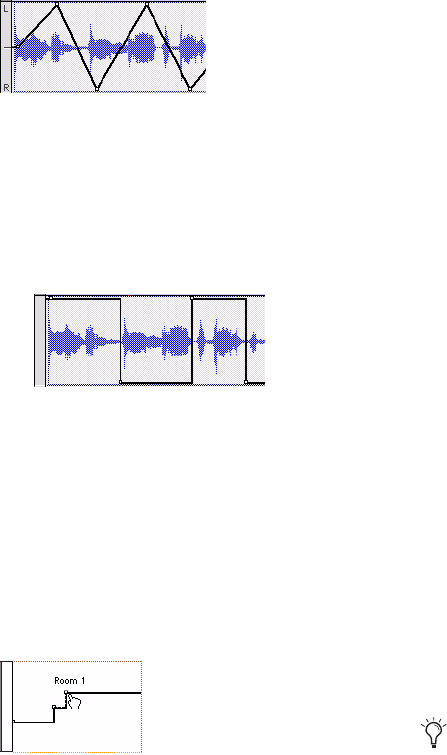
Pro Tools Reference Guide804
Editing Pan Automation
Drag a breakpoint down to pan right, and up to
pan left. Drag a breakpoint to the left or right to
adjust the timing of the panning moves.
Editing Mute Automation
Drag the breakpoint down to mute a section.
Drag a breakpoint up to unmute the section.
Drag a breakpoint to the left or right to adjust
the timing of the mute.
Editing Stepped Control Automation
Automation for certain controls (such as MIDI
controller values or plug-in settings) appears as a
stepped pattern on the breakpoint line. Drag a
breakpoint up or down to a different step to
change to a new control value. Drag a break-
point to the left or right to adjust the timing of
the stepped control change.
Editing Automation Breakpoints
To edit automation breakpoints, display the au-
tomation playlist for the control you want to
edit by selecting it from the Track View selector,
then do one of the following:
To create a new breakpoint:
Click with the Pencil tool or any Grabber tool
on the line graph.
To edit one breakpoint:
Click an existing point on the line graph with
the any Grabber tool and drag it to a new posi-
tion.
To clear one breakpoint:
Alt-click (Windows) or Option-click (Mac)
with any Grabber tool.
To edit several breakpoints at once:
Use the Selector tool to select a range in the
automation playlist that contains the break-
points, and do one of the following:
• To move the breakpoints earlier or later in
the track, press the Plus key (+) to nudge
them later (to the right) or the Minus key
(–) to move them earlier (to the left). The
breakpoints move by the current Nudge
value.
• To adjust the breakpoint values, click with
any of the Trimmer tools in the selection
and drag the breakpoints up or down.
Track Pan automation
Track mute automation
Stepped control automation
When you use a Trimmer tool to edit a se-
lection containing breakpoints, new anchor
breakpoints are created before and after the
selected area. To suppress creation of an-
chor breakpoints, press Alt (Windows) or
Option (Mac) while using a Trimmer tool.
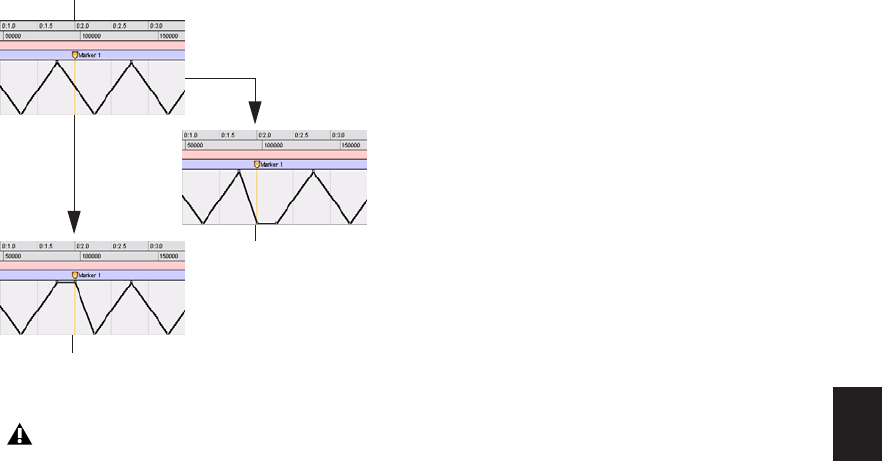
Chapter 37: Automation 805
To edit all breakpoint values in a region:
Click in the region with any of the Trimmer
tools and drag the breakpoints up or down.
Constrain New Breakpoints to Next or
Previous Automation Value
New automation breakpoints can be con-
strained and written to the same value as the
next or previous breakpoint.
To write a new breakpoint to the next automation
value:
Press and hold Alt+Shift (Windows) or Op-
tion+Shift (Mac) while writing a breakpoint (by
clicking with any Grabber tool in a track’s auto-
mation playlist).
To write a new breakpoint to the previous
automation value:
Press and hold Control+Alt (Windows) or
Command+Option (Mac) while writing a break-
point (by clicking with any Grabber tool in a
track’s automation playlist).
Editing Automation on Stereo and
Multichannel Tracks
Stereo and multichannel tracks display a single
automation playlist per track. Only one playlist
for volume and mute is available for the stereo
or multichannel track.
For multi-mono plug-ins, automation playlists
for each individual channel can be displayed
and edited when the plug-in is unlinked, and
the track is in Expanded Track Display.
Expanded Track View
By default, a single automation playlist is dis-
played on stereo and multichannel tracks. The
playlist occupies the entire height of the track
(similar to mono automation playlists).
Optionally, you can display an expanded view
of the track whereby the same automation play-
list is displayed across each channel.
Plug-in Automation Playlists on Stereo and
Multichannel Tracks
Some multichannel plug-ins provide a single set
of automatable controls for all channels in a
track. Other multichannel plug-ins and all
multi-mono plug-ins provide a single set of con-
trols for all channels when linked, or discrete
controls for each channel when unlinked. Refer
to your plug-in guide for more information.
Constraining and writing new breakpoints (at Marker 1)
Writing a new breakpoint to the next or pre-
vious automation value is accomplished us-
ing any Grabber tool, but is not supported
with the Smart Tool.
Original automation
After write to previous breakpoint
After write to next breakpoint
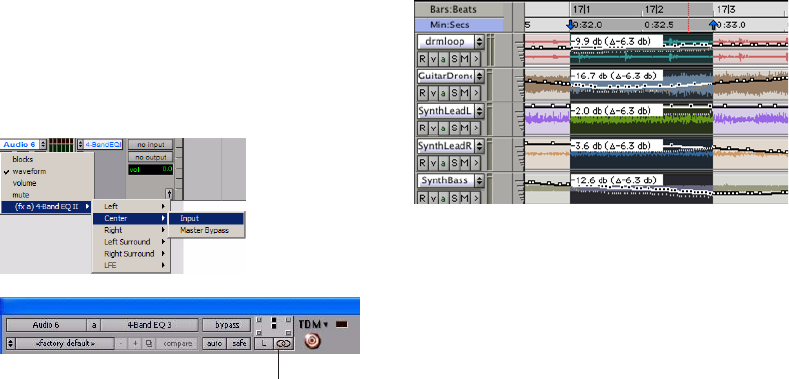
Pro Tools Reference Guide806
To view and edit the individual playlists of a multi-
mono plug-in:
1 Unlink the plug-in.
2 Select the required playlist from the Track
View selector.
Editing Automation on Grouped
Tracks
When you edit automation on an audio track
that is a member of an active Edit Group, the
same type of automation is also edited on all
tracks that are part of that group. This occurs
even if the playlist for that type of automation is
not currently displayed on the other grouped
tracks.
Examples
If you create new automation breakpoints on
a grouped track (with the Pencil tool or any
Grabber tool), other members of the group have
breakpoints placed relative to that track.
If you move automation on a grouped track
(with any of the Trimmer tools), other members
of the group have their breakpoints trimmed rel-
ative to that track. This lets you trim entire sec-
tions of a mix.
To individually edit a automation for a member of a
group without affecting the other members, do
one of the following:
Press the Start key (Windows) or Control
(Mac) while you perform the edit.
Cutting, Copying, and Pasting
Automation
Cutting automation data is different from delet-
ing it, and yields different results (although both
change the existing automation data). Copying
automation leaves the original automation data
intact.
You delete automation data by selecting a range
of breakpoints and pressing Backspace (Win-
dows) or Delete (Mac). See “Deleting Auto-
mation” on page 799 for details.
You cut automation data by selecting a range of
breakpoints from an automation playlist and se-
lecting the Cut command.
When you cut automation data and when you
paste it into a new location, anchor breakpoints
are added to the beginning and end points of
the data. This is done to preserve the true slope
(of continuous controls, such as Volume faders
or pans) or state (of switched or stepped con-
trols, such as Mutes) of the automation data
both inside and outside the selection.
Selecting an automation playlist for an unlinked
multi-mono plug-in
multi-mono
plug-in unlinked
Trimming automation on an active grouped track
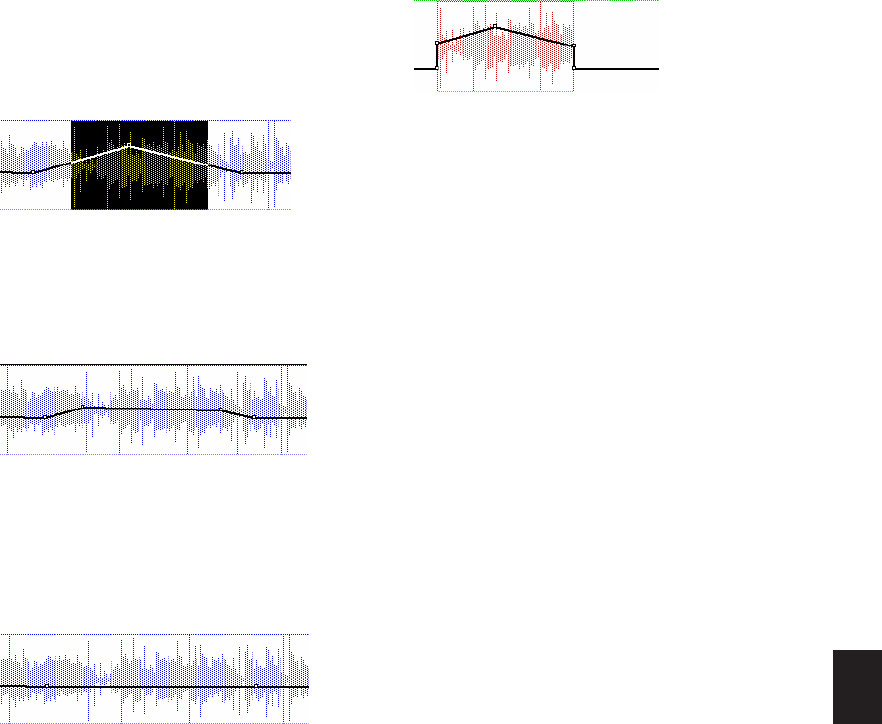
Chapter 37: Automation 807
The following illustrations show the difference
between cutting and deleting automation data.
In Figure 19, a track is set to display volume au-
tomation, and a range of automation data is se-
lected.
If the Cut command is chosen, anchor break-
points are created at each end of the selection,
and the automation slope on either side of the
cut data is preserved, as shown in Figure 20.
If the data is deleted by pressing Backspace
(Windows) or Delete (Mac), the automation
data is removed, and automation values span
the gap between pre-existing breakpoints, as in
Figure 21.
In addition, if cut or copied data is pasted else-
where in a track, breakpoints are created at the
end points of the pasted data to preserve its
“neighboring” (incoming and outgoing) auto-
mation value and slope, as shown in Figure 22.
Editing and Track Views
Audio, MIDI, and Instrument tracks each have a
Track View that acts as the Master View for pur-
poses of editing. When the Master View is dis-
played, any edits performed on the track apply
to all data in the track.
The Master Views are:
• Audio tracks: Blocks and Waveform
• MIDI and Instrument tracks: Blocks, Re-
gions, and Notes
For example, when an audio track is set to
Waveform or Blocks, cutting, copying and past-
ing affects the audio data and all types of auto-
mation data on that track. If the track is set to
show Pan automation, only the Pan data is af-
fected.
When a selection includes multiple tracks, if
any of those tracks is in its Master View, all data
on all selected tracks is affected.
To edit all automation types on an Auxiliary Input
or Master Fader track, do one of the following:
Make an Edit selection that includes at least
one audio or MIDI track that is displayed in its
main format.
– or –
Press Control while cutting or copying the au-
tomation data.
Figure 19. Selecting automation data
Figure 20. After cutting the automation data
Figure 21. After deleting the automation data
Figure 22. After pasting the automation data in
another location

Pro Tools Reference Guide808
Tips for Cutting, Copying and Pasting
On audio tracks, when you are in Waveform
View and cut or copy a section of the waveform,
any automation data associated with the wave-
form is also cut or copied.
On audio tracks, when you are in Waveform
View and cut audio data from a track also con-
taining automation data, breakpoints are auto-
matically created at the boundaries of the
remaining automation data.
On audio tracks, pasting waveform data also
pastes any associated automation data.
On Auxiliary Input, Master Fader, or Instru-
ment tracks, only the displayed automation
data is cut or copied. To cut or copy all automa-
tion data on these types of tracks, press Control
while cutting or copying.
In tracks where an automation playlist con-
tains no data (when there is only a single break-
point at the very beginning of the track), if you
cut data, no new breakpoints are created.
In cases where regions overlap (such as when
moving regions in Slip mode) and an overlap-
ping region is removed, any overlapped auto-
mation breakpoints are lost.
If cut or copied data contains a type of auto-
mation not currently on the target track,
Pro Tools prompts you before allowing you to
paste the data.
Cut or copied automation data for plug-ins or
sends that do not exist on the target track is ig-
nored when pasted.
Cut, Copy, Clear, and Paste Special
Commands
The four “special” commands (Cut Special,
Copy Special, Paste Special, and Clear Special)
simplify the tasks involved with moving or
clearing different types of automation data and
MIDI controller data between tracks, sends, and
plug-ins. These commands let you
• Edit automation and MIDI controller data
only (without associated audio or MIDI
notes).
• Edit automation and MIDI controller data
without having to change Track Views
In addition, the Paste Special command lets you
copy one data type to another (for example, Left
Pan data into the Right Pan playlist)
T
Cut Special
The Cut Special commands lets you cut just au-
tomation data from the current selection (with-
out associated audio or MIDI notes) and place it
in memory to paste elsewhere, as follows.
Choices include:
All Automation Cuts all automation or MIDI
controller data whether it is shown or not.
Pan Automation Cuts only pan automation or
MIDI pan data whether it is shown or not.
Plug-in Automation Cuts only the plug-in auto-
mation that is shown.
For additional flexibility, you can use play-
lists or the Duplicate Track command to
work nondestructively on a copy of the edit
data.
You cannot paste MIDI controller data to
automation data nor automation to MIDI.

Chapter 37: Automation 809
Copy Special
The Copy Special commands let you copy just
automation data from the current selection
(without associated audio or MIDI notes) and
place a copy of it in memory to paste elsewhere,
as follows:
All Automation Copies all automation or MIDI
controller data whether it is shown or not.
Pan Automation Copies only pan automation or
MIDI pan data whether it is shown or not.
Plug-in Automation Copies only the plug-in au-
tomation that is shown.
Paste Special
The Paste Special commands let you paste auto-
mation data into another region (without affect-
ing associated audio or MIDI notes) in the fol-
lowing ways:
Merge Lets you add the pasted data to any exist-
ing automation data of the same type in the des-
tination selection. This can be useful for consol-
idating MIDI data from several tracks into a
single MIDI track. For example, you like the
pitch bend on the synth trombones and want to
apply it to the synth guitar.
Repeat to Fill Selection Pastes multiple itera-
tions of the automation data to the entire selec-
tion range. If you select an area that is not an ex-
act multiple of the copied region size, the
remaining selection area is filled with a trimmed
version of the original selection. This lets you
easily create drum loops and other repetitive ef-
fects. Before the data is pasted, Pro Tools
prompts you to specify a crossfade to smooth
transitions between regions.
To Current Automation Type Pastes the automa-
tion data or MIDI controller data from the clip-
board to the selection as current automation
type or MIDI controller. This lets you copy auto-
mation from any type to any other type. For ex-
ample, you can copy a Left Pan automation to
Plug-in automation. Or, you can copy MIDI vol-
ume data and paste it to MIDI pan.
Clear Special
The Clear Special commands let you clear just
automation data from the current region, as fol-
lows:
All Automation Clears all automation or MIDI
controller data whether it is shown or not.
Pan Automation Clears only pan automation or
MIDI pan whether it is shown or not.
Plug-in Automation Clears only the plug-in auto-
mation that is shown.
Special Paste Function for Automation
Data
Normally, when you copy and paste automa-
tion data, it is pasted in an automation playlist
of the exact same type (for example, Left Pan
data is pasted into the Left Pan playlist).
However, there may be times when you want to
paste from one data type to another (for exam-
ple, Left Pan data into the Right Pan playlist).
The Special Paste function lets you copy one
data type to another.
If you want to paste automation or MIDI con-
troller data only (without its associated audio or
MIDI notes), use the Paste Special command.
Pro Tools Reference Guide810
For this special paste mode to function, the fol-
lowing must be true:
• Every track selected for pasting must be cur-
rently displayed as automation data.
– and –
• There must be only one automation playlist
on the Clipboard for each target track. (The
Special Paste function cannot copy multiple
automation playlists for each track.)
To paste data into a different automation playlist:
Press the Start key (Windows) or Control
(Mac) when choosing Edit > Paste.
Glide Automation
(Pro Tools HD and Pro Tools LE with
DV Toolkit 2 Only)
The Glide Automation commands let you man-
ually create an automation transition (or glide)
from an existing automation value to a new
one, over a selected area.
To apply a Glide Automation to the current
automation parameter type:
1 In the Automation window, make sure the au-
tomation type is write-enabled.
2 Click the Track View selector to choose the au-
tomation type you want to automate.
3 Drag with the Selector tool in the track to se-
lect the area you want to write the glide to.
4 Change the automation parameter to the
value you want at the end of the selection. For
example, to glide automation volume to –Infin-
ity, move the Volume fader to –Infinity.
5 Choose Edit > Automation > Glide to Current.
To do a Glide Automation to all current enabled
parameters:
1 In the Automation window, make sure the au-
tomation types are write-enabled.
2 In each track you want to automate, click the
Track View selector and select from the pop-up
menu the automation type you want to auto-
mate.
3 With the Selector tool, drag horizontally to in-
clude all the tracks you want to automate in a se-
lection (drag vertically to define the time range).
4 In each track you want to automate, change
the automation parameter to the value you
want at the end of the selection.
5 Choose Edit > Automation > Glide to All En-
abled.
You cannot interchange automation data
between audio and MIDI tracks, or between
continuous controls (such as faders or pans)
and switched or stepped controls (such as
mute or MIDI controllers).
When gliding multiple parameters at the
same time, such as with the Surround Pan-
ner or plug-ins, use the Edit > Automation >
Glide to All Enabled option.
You can also press Alt+Forward Slash (/)
(Windows) or Option+Forward Slash (/)
(Mac).
You can also press Alt+Shift+Forward Slash
(/) (Windows) or Option+Shift+Forward
Slash (/) (Mac).
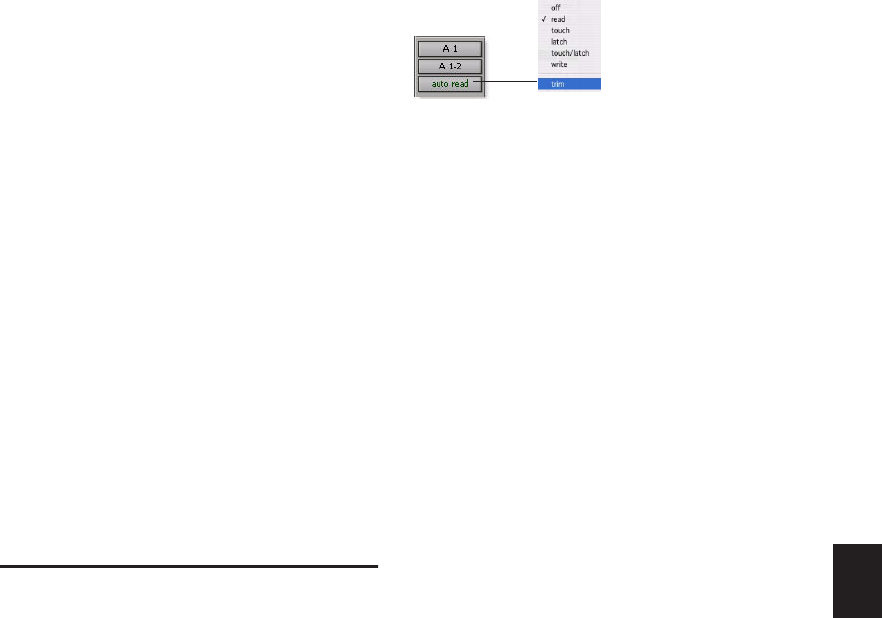
Chapter 37: Automation 811
Glide Automation Considerations
When Glide Automation is applied to automa-
tion data, it behaves as follows:
• When a selection is made, automation break-
points are written at the start and end points
of the Glide Automation. The automation
value at the start of the selection is the start
point of the Glide Automation and the end of
the selection is the end point of the Glide
Automation. The Glide Automation that is
created between the two is based on the
length of the selection and the end value that
is selected.
• If automation breakpoints follow the selec-
tion, they are not changed, but the value se-
lected for the end of the selection is written
from the end point up until the next break-
point.
• If no automation breakpoints follow the selec-
tion, the value selected for the end of the se-
lection is written to the end of the track.
• If no selection is made, a breakpoint is written
to the current location, and the value selected
for the Glide Automation is written to the
next breakpoint.
Trimming Automation
(Pro Tools HD Only)
If you have already written automation, you can
modify automation data for track volume and
send levels in real time by using Trim mode.
When a track is trim-enabled, you are not re-
cording absolute fader positions, but relative
changes in the existing automation. See “Trim
Mode” on page 782 for more information.
To enable Trim mode:
In the Mix or Edit window, click the Auto-
mation Mode selector of the track where you
want to trim automation, and select Trim.
When a track’s Trim mode is enabled, its Vol-
ume and Send Level faders turn yellow, and its
Automation Mode selector is outlined in yellow.
This outline appears solid if the track is trim-en-
abled, and flashes whenever trimming is occur-
ring on the track’s volume or send levels.
Writing Trim Automation
The writing of Trim automation depends on
how it is set to be coalesced. See “Coalescing
Trim Automation” on page 812. If automation
is not set to coalesce after every automation
pass, Trim automation moves are written to a
separate Trim playlist.
To trim track Volume or Send levels:
1 In the Automation window, make sure the au-
tomation type (Volume or Send level) is write-
enabled.
2 Click the Automation Mode selector of the
track where you want to write automation and
choose the automation mode (Touch, Latch,
Touch/Latch, or Write).
3 Click the Automation Mode selector and
choose Trim.
4 Start playback, and adjust the Volume or Send
levels.
5 Stop playback to finish the Trim pass.
Enabling Trim mode

Pro Tools Reference Guide812
Coalescing Trim Automation
You can set Pro Tools to commit, or coalesce,
Trim automation to the main automation play-
list by the following methods:
After Every Pass Trim moves are automatically
applied when the transport is stopped at the end
of an automation pass. Trim automation play-
lists are cleared, and Trim faders are returned to
zero.
On Exiting Trim Mode Trim moves are stored sep-
arately in the Trim automation playlist until
they are coalesced. Trim automation is automat-
ically coalesced on a track only when you take
the track out of Trim mode. You can repeat an
automation pass, edit Trim automation manu-
ally on any of the Trim playlists, or clear Trim
automation before coalescing with this method.
Manually Trim moves are stored separately in
the Trim automation playlist until they are coa-
lesced. With this setting, the only way to coa-
lesce Trim moves is with the Coalesce Trim
Automation command. You can repeat an auto-
mation pass, edit Trim automation manually on
any of the Trim playlists, or clear Trim automa-
tion before coalescing with this method.
To set the method by which Trim Automation is
coalesced:
1 Choose Setup > Preferences and click Mixing.
2 Under Coalesce Trim Automation, select one
of the following:
• After Every Pass
• On Exiting Trim Mode
• Manually
To coalesce Trim automation on a track when
exiting Trim mode:
1 Choose Setup > Preferences and click Mixing.
2 Under Coalesce Trim Automation, select On
Exiting Trim Mode.
3 Click OK to close the Preferences window.
4 Make sure the Pro Tools transport is stopped.
5 On the track where you want to coalesce Trim
automation, click the Automation Mode selec-
tor and deselect Trim.
The Trim automation is applied to the main au-
tomation playlist, Trim automation playlists are
cleared, and Trim faders are returned to zero.
To manually coalesce Trim automation on a track:
1 Select the track where you want to coalesce
the Trim automation.
2 Do one of the following:
• Choose Track > Coalesce Trim Automation.
– or –
• Right-click the track name and choose Co-
alesce Trim Automation from the pop-up
menu.
The Trim automation is applied to the main au-
tomation playlist, Trim automation playlists are
cleared, and Trim faders are returned to zero.
Even when automation is set to coalesce on
exiting Trim mode, you can use the Coa-
lesce Trim Automation command to com-
mit Trim moves at any time. If transport is playing and you are writing
automation, you cannot directly enter or
exit Trim mode. You must AutoMatch be-
fore exiting Trim mode. This prevents any
abrupt jumps in automation values.
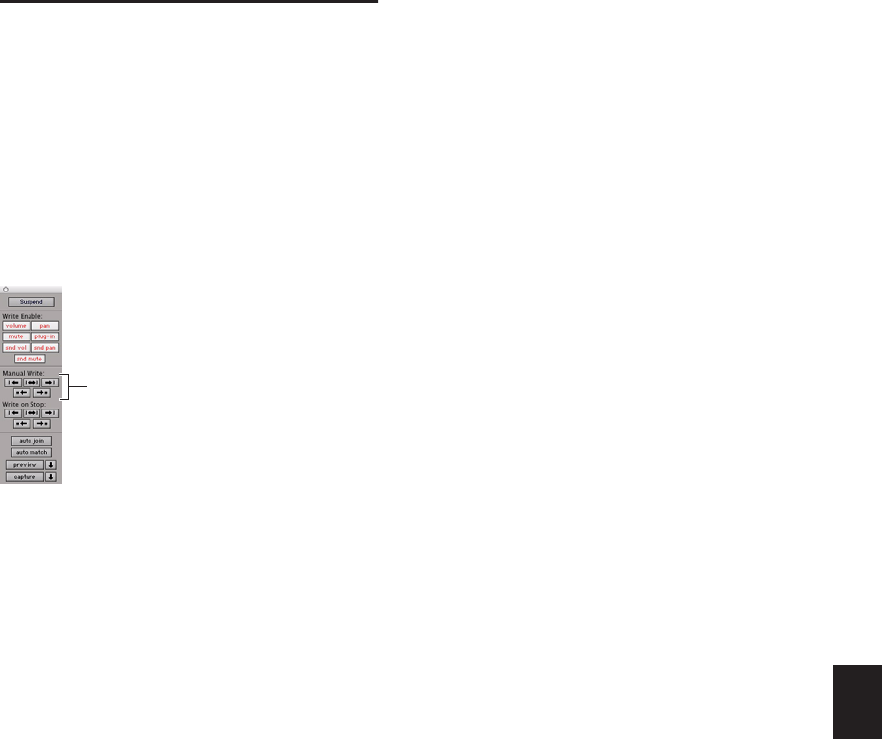
Chapter 37: Automation 813
Writing Automation to the
Start, End, or All of a Track or
Selection
(Pro Tools HD Only)
Pro Tools lets you write current automation val-
ues from any insertion point forward (or back-
ward) to the end (or beginning) of a track or Edit
selection in a track, or to an entire track or Edit
selection, while performing an automation pass.
The standard Write Automation to Start, All, or
End commands do not operate when the
Pro Tools transport is stopped. It only affects au-
tomation for those parameters that are currently
write-enabled and currently writing automation
data.
Optionally, Write Automation to Start, All, and
End can be configured to always be applied au-
tomatically. See “Writing Automation to the
Start, End or All of a Track or Selection on Stop”
on page 814.
Requirements for Standard Write
Automation Commands
For automation data to be written for a specific
parameter, the associated track must be in one
of the following Automation modes and meet
the following conditions:
Latch Mode The control for the parameter must
be changed (touched) during the automation
pass.
Touch Mode The control for the parameter must
be changed (touched).
Write Mode All controls on that track must be in
Write mode.
This command can be undone.
To write current automation values to the start,
end, or all of a track or Edit selection:
1 Choose Window > Automation.
2 Make sure that the automation type is write-
enabled.
3 Do one of the following:
• Click in a track at an insertion point.
– or –
• Drag with the Selector tool to select a portion
of the track.
4 Click Play to begin playback.
5 Make sure you are actively writing on the ap-
propriate track if you are in Latch or Touch
mode.
6 When you reach a point in the track or selec-
tion that contains the automation data you
want to apply, click the Write Automation to
Start, All, or End button in the Automation win-
dow.
Write Automation to Start, End, and All buttons in the
Automation window
Automation Write to Start/End//All buttons

Pro Tools Reference Guide814
7 Stop playback.
The current values of all write-enabled automa-
tion at that point are written to the correspond-
ing area of the track/selection.
Write to Start, End or All and Trim Mode
While in Trim mode, it is also possible to write
trim delta values for track volume and send lev-
els to the start, end or all of a track or Edit selec-
tion.
To write current trim delta values to the start, end,
or all of a track or selection:
1 Choose Window > Automation.
2 Make sure the automation type (track volume
or send level) is write-enabled.
3 In the Mix or Edit window, click the Auto-
mation Mode selector of the track you want to
trim automation, and select Trim. The track Vol-
ume and Send Level faders turn yellow.
4 Do one of the following:
• Click in a track at an insertion point.
– or –
• Drag with the Selector tool to select a por-
tion of the track.
5 Click Play to begin playback.
6 When you reach a point in the track or selec-
tion that contains the trim setting (delta value)
you want to apply, click the Write Automation
to Start, All, or End button in the Automation
window.
7 Stop playback.
The relative changes to the track volume and
send levels at that point are written to the corre-
sponding area of the track/selection.
Writing Automation to the Start,
End or All of a Track or Selection
on Stop
The Automation window provides options for
writing automation on any automation playlist
(including Trim playlists) after a valid automa-
tion pass has been performed.
The Write Automation to Start, End or All
modes can be configured to disable or remain
enabled after a valid automation pass.
See “Requirements for Standard Write Auto-
mation Commands” on page 813.
To configure Write on Stop modes to disable after
an automation pass:
1 Choose Window > Automation.
2 Click to enable one of the Write On Stop
modes (Start, All, End).
The enabled Write on Stop arrow appears in
blue.
To configure Write on Stop modes to remain
enabled after an automation pass:
1 Choose Window > Automation.
2 Alt-click (Windows) or Option-click (Mac) one
of the Write On Stop buttons (Start, All or End)
to enable the Write On Stop mode.
The enabled Write on Stop arrow appears in red.
Write On Stop controls in the Automation window
Automation Write On Stop buttons

Chapter 37: Automation 815
Writing Automation to the
Next Breakpoint or to the
Punch Point
(Pro Tools HD Only)
While performing an automation pass,
Pro Tools lets you write current automation val-
ues from the current insertion point forward to
the next automation breakpoint, or back to the
punch point (the location in the track where au-
tomation writing started).
Write Automation to Next Breakpoint lets you
update automation within a track without over-
writing automation located earlier or later in the
Timeline, and without having to define a selec-
tion before editing automation.
Write Automation to Punch Point lets you fill
back an automation value within a track after
finding the right level or setting during an auto-
mation pass, without having to go back and re-
peat the pass.
Like the standard Write Automation to Start,
End and All commands, the Write Automation
to Next Breakpoint and Write Automation to
Punch Point commands do not operate when
the Pro Tools transport is stopped. They only af-
fect automation for those parameters that are
currently write-enabled and currently writing
automation data.
Optionally, the Write Automation to Next
Breakpoint and Write Automation to Punch
Point commands can be configured to be ap-
plied automatically after a valid automation
pass has been performed. See“Writing Auto-
mation to the Next Breakpoint or to the Punch
Point on Stop” on page 817.
To write current automation values to the next
breakpoint:
1 Choose Window > Automation.
2 Make sure that the automation type is write-
enabled.
3 Click in a track to define an insertion point.
4 Click Play to begin playback.
5 Make sure you are actively writing on the ap-
propriate track if you are in Touch, Latch, or
Touch/Latch mode.
6 When you reach a point in the track where
you want to apply the current settings, click the
Write Automation to Next Breakpoint button.
Write Automation to Next Breakpoint and
Write Automation to Punch Point have the
same requirements as Write Automation to
Start, End and All commands. See “Writing
Automation to the Start, End, or All of a
Track or Selection” on page 813.
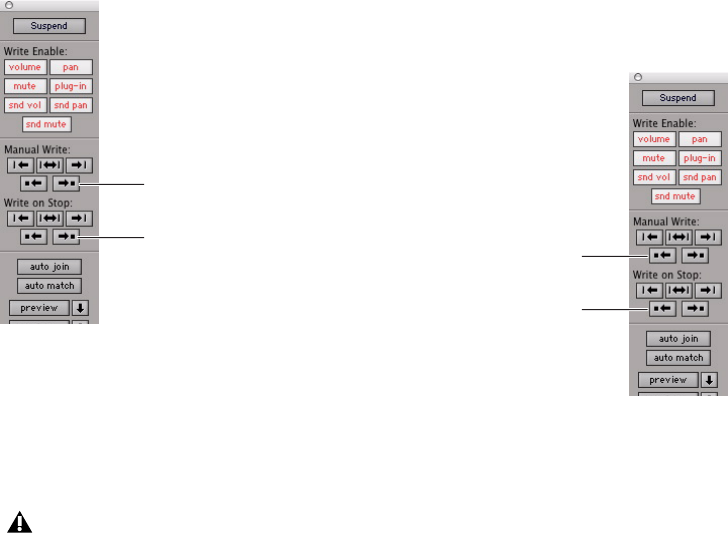
Pro Tools Reference Guide816
7 Stop Playback.
The current values of all controls being written
at that point are written up to the next break-
point.
To write current automation values back to the
automation punch point:
1 Choose Window > Automation.
2 Make sure the automation type is write en-
abled.
3 Click in a track to define an insertion point.
4 Click Play to being playback.
5 Make sure you are actively writing on the ap-
propriate track if you are in Touch, Latch, or
Touch/Latch mode.
6 When you reach a point in the track where
you want to apply the current settings, click the
Write Automation to Punch Point button.
The current values of all write-enabled parame-
ters are written back to the point where the first
control began writing automation.
Write To Next Breakpoint or Punch
Point and Trim Mode
While in Trim mode, it is also possible to write
trim values for track volume and send levels to
the next written breakpoint or back to the auto-
mation punch-in point.
To write current trim values to the next breakpoint
or to the punch point:
1 Choose Window > Automation.
2 Make sure that the automation type (track
volume or send level) is write-enabled.
3 In the Mix or Edit window, click the Auto-
mation Mode selector and select Trim. The track
Volume and Send Level faders turn yellow.
4 Click in a track to define an insertion point.
Write To Next Breakpoint buttons in the Automation
window
Write Automation to Next Breakpoint re-
mains enabled after a valid automation
pass. Unlike standard Write Automation
commands, it cannot be configured to dis-
able after an automation pass.
Write to Next Breakpoint
Write to Next Breakpoint
on Stop
button
button
Write To Punch Point buttons in the Automation window
Write to Punch Point
Write to Punch Point
on Stop
button
button

Chapter 37: Automation 817
5 Click Play to begin playback.
6 When you reach a point in the track where
you want to apply the current trim values, click
the Write Automation to Next Breakpoint but-
ton in the Automation window.
To write current trim values to the punch point:
1 Choose Window > Automation.
2 Make sure that the automation type (track
volume or send level) is write-enabled.
3 In the Mix or Edit window, click the Auto-
mation Mode selector and select Trim. The track
Volume and Send Level faders turn yellow.
4 Click in a track to define an insertion point.
5 Click Play to begin playback.
6 When you reach a point in the track where
you want to apply the current trim values, click
the Write Automation to Punch Point button in
the Automation window.
Writing Automation to the Next
Breakpoint or to the Punch Point
on Stop
The Automation window provides an option for
automatic Write Automation to Next Break-
point on Stop or Write Automation to Punch
Point on Stop.
To configure Write Automation to Next Breakpoint
on Stop:
1 Choose Window > Automation.
2 Click the Write Automation to Next Break-
point on Stop button or the Write Automation
to Punch Point button.
When this option is enabled, automation writ-
ing will be performed automatically forward to
the next breakpoint after a valid automation
pass has been performed.
To configure Write Automation to Punch Point on
Stop:
1 Choose Window > Automation.
2 Click the Write Automation to Punch Point
on Stop button.
When this option is enabled, automation writ-
ing will be performed automatically back to the
automation punch-in point after a valid auto-
mation pass has been performed.
Write Automation to Next Breakpoint re-
mains enabled after a valid automation
pass. Unlike standard Write Automation
commands, it cannot be configured to dis-
able after an automation pass.

Pro Tools Reference Guide818
Guidelines for “Write To”
Commands
(Pro Tools HD Only)
Using “Write To” Commands
During Playback
You can carry out any of the “Write Automation
To” commands without stopping the Pro Tools
transport. On supported control surfaces, the
corresponding “Write To” button flashes until
you stop the transport.
While the Pro Tools transport is moving, issuing
“Write Automation To” commands affects writ-
ing of automation in the following ways:
• Write to Start/Selection Start: Currently
writing controls continue writing automa-
tion
• Write to All/Selection: Currently writing
controls (except controls in Write mode)
punch out of writing automation
• Write to End/Selection End: Currently writ-
ing controls (except controls in Write
mode) punch out of writing automation
• Write to Next Breakpoint: Currently writ-
ing controls (except controls in Write
mode) punch out of writing automation
• Write to Punch point: Currently writing
controls continue writing automation
Applying “Write To” Commands to
Selected Tracks
The “Write Automation To” commands nor-
mally apply to all tracks currently writing auto-
mation. It is possible to apply these commands
to selected tracks only.
To apply any of the “Write Automation To”
commands to currently selected tracks:
1 Select the tracks where you want to apply the
“Write To” commands.
2 Alt-Shift-click (Windows) or Option-Shift-
click the corresponding “Write Automation To”
button.
Supressing Warnings when Using
“Write To” Commands
When you carry out any of the “Write Auto-
mation To” commands (except Write to Next
Breakpoint), Pro Tools posts a dialog warning
that automation values will be changed in the
session. You can suppress these warnings.
To suppress “Write To” warning dialogs:
1 Choose Setup > Preferences and click Mixing.
2 Under Automation, select Suppress Auto-
mation “Write To” Warnings.
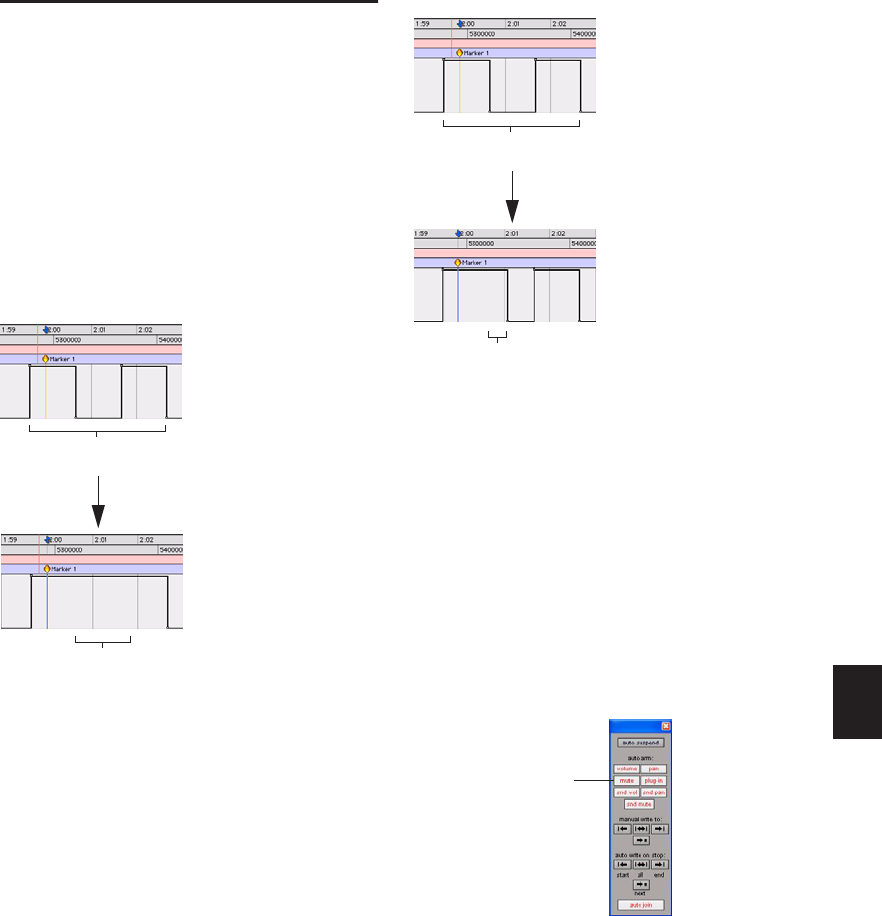
Chapter 37: Automation 819
Overwriting or Extending
Mute Automation
(Pro Tools HD Only)
Pro Tools lets you overwrite or extend an exist-
ing mute event in real time, without changing
the current mute state.
A mute event can be overwritten when the auto-
mation pass begins before the first mute event
and ends after the second event. In this case, the
current on/off state of the mute is maintained.
A mute event can be extended when the auto-
mation pass begins before an on or off event and
stops before the end of the second event.
Mute Overwrite/Extend is supported in Touch
and Latch mode, as follows:
Touch Mode Writes the current state as long as
the Mute button is held.
Latch Mode Writes the current state until you
stop or AutoMatch out.
To overwrite a mute state on one or more tracks:
1 Choose Window > Automation.
2 Make sure Mute is write-enabled.
Overwriting a mute automation event
Mute on event overwritten
Original mute automation
(mute off, mute on, mute off)
Extending a mute automation event
Mute enable button in the Automation window
Mute off event extended (up to automation pass end)
Original mute automation
(mute off, mute on, mute off)
Mute automation
enabled
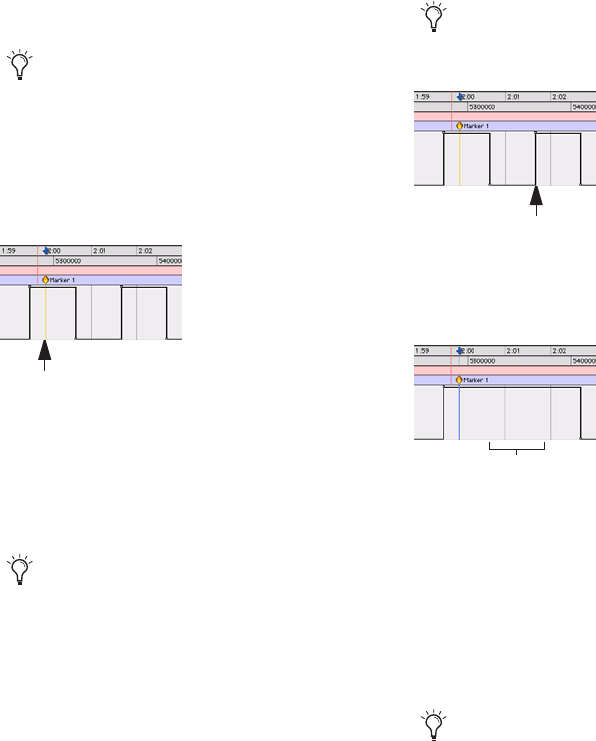
Pro Tools Reference Guide820
3 In the Mix or Edit window, click the Auto-
mation Mode selector of the track where you
want to overwrite the mute state, and set the
Automation mode to Touch or Latch mode.
4 In each track you want to automate, click the
Track View selector and select mute.
5 Place the cursor before the start of the mute
event you want to overwrite.
6 Begin playback.
7 Press Control (Windows) or Command (Mac)
and the track Mute button before the start of the
mute event you want to overwrite.
8 After the end of the second mute event, re-
lease the key and the Mute button.
9 When you have finished the automation pass,
click Stop.
To extend a mute state on a track:
1 Choose Window > Automation.
2 Make sure mute is write-enabled.
3 In the Mix or Edit window, click the Auto-
mation Mode selector of the track you want to
automate, and select Touch or Latch mode.
4 In each track you want to automate, click the
Track View selector and select mute.
To overwrite mute states on multiple tracks,
set all tracks to the same Automation mode.
Placing the cursor before the start of a mute event
To overwrite mute states on multiple tracks,
press Alt+Control (Windows) or Op-
tion+Command (Mac) and the Mute button
on one of the tracks to be automated.
Example: Place cursor here, before start of mute event
With Touch mode, you have to hold the
Mute button for the duration of the write.
Stopping automation after the end of a mute event
Example of mute state overwritten
To extend mute states on multiple tracks,
set all the tracks to the same Automation
mode.
Example: Stop automation pass here, after end of mute event
Mute on state overwritten
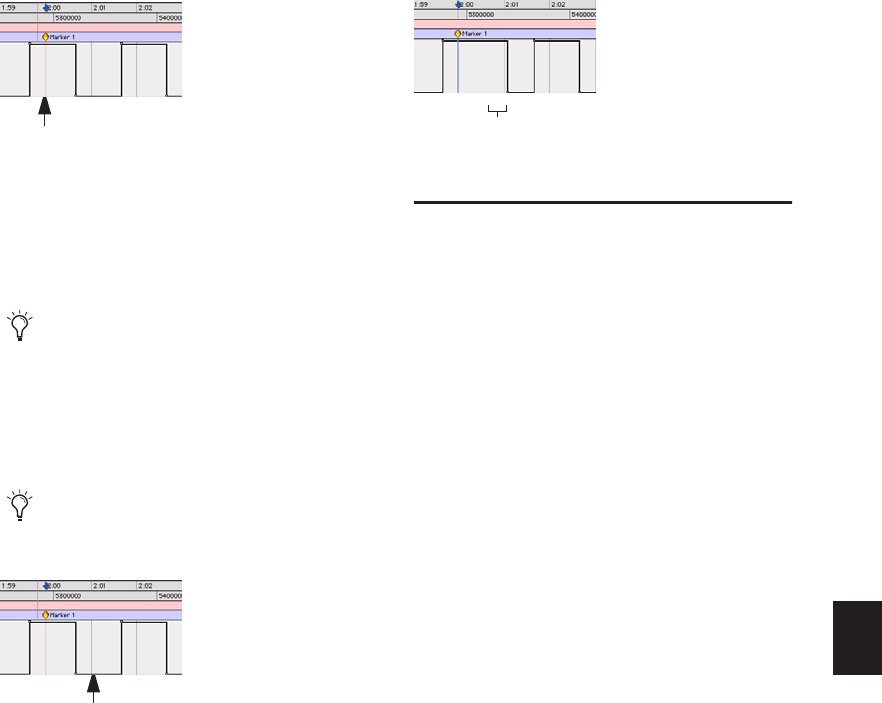
Chapter 37: Automation 821
5 Place the cursor before the start of the mute
event you want to extend.
6 Begin playback.
7 Press Control (Windows) or Command (Mac)
and the track Mute button before the start of the
mute event you want to extend.
8 Before the end of the second mute event, re-
lease the key and the Mute button.
9 When you have finished the automation pass,
click Stop.
Creating Snapshot
Automation
(Pro Tools HD and Pro Tools LE with
DV Toolkit 2 Only)
Pro Tools lets you write automation data values
for multiple parameters in a single step. You can
write snapshot automation in two ways:
To a Selection Automation data is written to the
Timeline selection (as well as the Edit selection
if linked). Anchor breakpoints are placed just be-
fore and after the selection so that data outside
the selection is not affected.
To a Cursor Location Automation data is written
at the insertion point. After the insertion point,
the automation ramps to the next breakpoint
value, or if no breakpoints exist, remains at the
newly written value for the remainder of the ses-
sion.
For more information on cutting, copying, and
pasting automation data within a session, see
“Writing Automation to the Start, End, or All of
a Track or Selection” on page 813.
Placing the cursor before the start of a mute event
To extend mute states on multiple tracks,
press Alt+Control (Windows) or Op-
tion+Command (Mac) and the Mute button
on the track.
If you extend past the subsequent on or off
event, the entire event will be changed.
Stopping automation before the end of a mute event
Example: Place cursor here, before start of mute event
Example: Stop automation pass here, before end of mute event
Example of mute state extended
mute off state extended (up to automation pass end)
Pro Tools Reference Guide822
To write snapshot automation:
1 In the Automation window, make sure that
the parameters you want to edit are write-en-
abled. Deselect any parameters whose automa-
tion you want to preserve.
2 In the Edit window, click the Track View selec-
tor to show the automation you want to edit.
3 Write a breakpoint in the playlist if none cur-
rently exists, as follows:
• Place the cursor in the playlist (or make an
Edit selection), then choose Control+For-
ward Slash (/) (Windows) or Com-
mand+Forward Slash (/) (Mac).
– or –
• Select the Grabber tool and click anywhere
in the playlist.
4 Do one of the following:
• Select an area in the track’s playlist (or
within multiple tracks) where you want to
apply the automation.
– or –
• Place the cursor at an Edit insertion point.
5 Adjust the controls you want to automate.
You can also change a plug-in preset.
6 Choose Edit > Automation and do one of the
following:
• To write the current value to only the cur-
rently displayed automation parameter,
choose Write to Current.
– or –
• To write the current settings for all automa-
tion parameters enabled in the Automation
window, choose Write to All Enabled.
Adding Snapshot Automation to Empty
Automation Playlists
When you use a Write Automation command
on an automation playlist with no previously
written automation data, the selected value is
written to the entire playlist and not just the se-
lected area.
This is because a playlist with no automation
data contains only a single automation break-
point that corresponds to the current position
of the control for the parameter. The position of
the breakpoint is updated whenever the param-
eter value is changed.
If you do not want the Write Automation com-
mand to write the selected automation value to
the entire playlist, you can:
• Anchor the automation data by placing the
cursor at the end of the session (or any other
end point) and choosing Write to Current.
– or –
• Click with any Grabber tool on each side of
the selection.
This lets the Write Automation command write
only to the selected area.
Writing Snapshot Automation over
Existing Automation Data
When you move the playback cursor, the auto-
mated controls in Pro Tools update to reflect the
automation data that is already on the track. To
keep the settings you have made for a snapshot,
you can suspend automation parameters to pre-
vent them from updating.

Chapter 37: Automation 823
To write snapshot automation over existing data:
1 In the Automation window, make sure that
the automation parameters you want to edit are
write-enabled. Deselect any parameters whose
automation you want to preserve.
2 Adjust the controls for the parameters you
want to automate.
3 Click the Automation Mode selector and se-
lect Off mode for the tracks where you want to
apply the automation.
4 With the Selector, select the range where you
want to apply the automation.
5 Choose Edit > Automation and select one of
the following from the submenu:
• To write the current value to only the auto-
mation parameter currently displayed in
the Edit window, choose Write to Current.
– or –
• To write the current settings for all automa-
tion parameters enabled in the Automation
window, choose Write to All Enabled.
6 Click the Automation Mode selector and se-
lect Read mode for the tracks you want to play
back with automation.
Capturing Automation and Applying it
Elsewhere
The Write Automation commands can also be
used to capture automation states at specific lo-
cations in a track and apply them to other loca-
tions in the track.
To capture and apply automation:
1 In the Automation window, make sure that
the automation parameters you want to edit are
write-enabled. Deselect any parameters whose
automation you want to preserve.
2 Click the Automation Mode selector and se-
lect Read mode for the tracks that have automa-
tion you want to capture.
3 Make sure to select Options > Link Timeline
and Edit Selection.
4 With the Selector tool, select the location
where you want to capture automation. All au-
tomated controls update to reflect the automa-
tion at that location. (If you make a selection,
the controls update to reflect the automation at
the beginning of the selection.)
5 In each track you want to apply the captured
automation, click the track’s Automation Mode
selector and set the Automation mode to Off.
6 With the Selector tool, select the location
where you want to apply the automation.
7 Enable the automation parameters previously
suspended.
8 Choose Edit > Automation and select one of
the following from the submenu:
• To write the current value to only the auto-
mation parameter currently displayed in
the Edit window, choose Write To Current.
– or –
• To write the current settings for all automa-
tion parameters enabled in the Automation
Enable window, choose Write To All En-
abled.
9 Click the Automation Mode selector and se-
lect Read mode for the tracks you want to play
back with automation.

Pro Tools Reference Guide824
Snapshot Automation and
Trimming of Automation Data
Pro Tools lets you use trim values as snapshots
and apply the relative changes (delta values) to
the selected automation by using the Trim Auto-
mation command. This works in much the same
way as the Write Automation command, except
that it writes delta values instead of absolute val-
ues to automation data.
You can use trim values in writing snapshot au-
tomation to any automatable parameter.
To create a snapshot of relative changes in
automation data:
1 In the Automation window, make sure that
the automation parameters you want to edit are
write-enabled. Deselect any parameters whose
automation you want to preserve.
2 Select the area of the track you want to edit.
All automated controls update to reflect the au-
tomation at the beginning of the selection.
3 Move the controls for the parameter up or
down by the amount you want to change the
data.
4 Choose Edit > Automation and do one of the
following:
• To write the current delta value to only the
currently displayed automation parameter,
choose Trim to Current.
– or –
• To write the current delta value for all auto-
mation parameters enabled in the Auto-
mation window, choose Trim to All
Enabled.
Previewing Automation
(Pro Tools HD Only)
Automation Preview mode lets you audition
changes to a mix and compare them to existing
automation values without committing them to
the automation playlist.
When you put Pro Tools in Automation Preview
mode, you can preview values for automation-
enabled controls on any track that is in a writ-
able automation mode.
While in Automation Preview mode, when you
touch or move a control, it isolates the control,
disengaging it from its automation playlist. The
control stops reading or writing automation, al-
lowing you to freely audition changes.
When you have found a level or state that you
want to use, you can then commit or punch the
previewed value to the automation playlist for
the isolated controls.
If you punch during playback, the automa-
tion mode is set to Latch and writing begins at
the preview value.
If you punch while the transport is stopped,
the automation mode is set to Latch and the
control is primed at the preview value.
It is not necessary for the Allow Latch Prime
in Stop preference to be enabled for Preview
to put a control into Latch Prime.
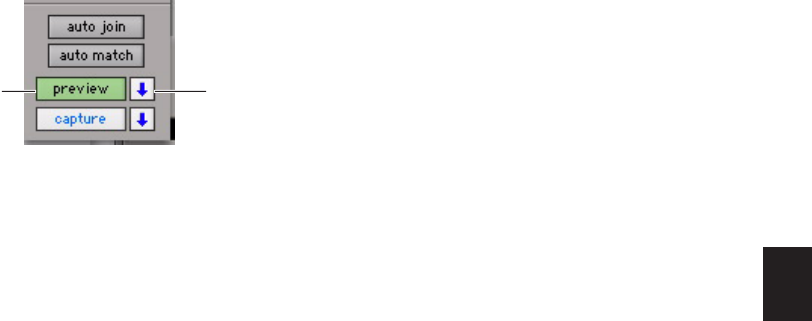
Chapter 37: Automation 825
Previewing New Automation
Values
To preview a new automation value for a control:
1 Make sure the track where you want to pre-
view the value is enabled for automation
(Touch, Latch, Touch/Latch or their corre-
sponding Trim modes).
2 Make sure the automation type you want to
preview is enabled in the Automation window
(Volume, Pan, Mute, Send level, Send pan, Send
mute, or Plug-in).
3 Click the Preview button in the Automation
window. The button lights green to indicate that
Preview mode is active.
4 To isolate a control, touch or move an auto-
mation-enabled control.You can isolate con-
trols during playback or while the transport is
stopped.
The Automation Mode indicator on the track
lights green to indicate that at least one of its
controls is isolated, and the Punch Preview but-
ton in the Automation window lights to indi-
cate a preview value is available to punch.
5 Start playback and adjust the isolated control
to audition the changes.
Taking Controls Out of Isolated
State
You can take controls out of their isolated state
without leaving Preview mode.
To take all controls on a track out of their isolated
state, do one of the following:
Control-click (Windows) or Command-click
(Mac) the automation mode selector on the
track.
– or –
Change the track automation mode to Read
or Off.
To take all controls of an automation type out of
their isolated state:
In the Automation window, disable the auto-
mation type.
Isolating Multiple Controls
In some cases, such as when starting a new mix,
you may want to isolate multiple controls at the
same time.
To isolate all currently write-enabled controls:
Alt-click (Windows) or Option-click (Mac) the
Preview button.
To isolate all write-enabled controls on all selected
tracks:
Alt-Shift-click (Windows) or Option-Shift
click (Mac) the Preview button.
Preview controls in the Automation window
Preview Punch
Preview
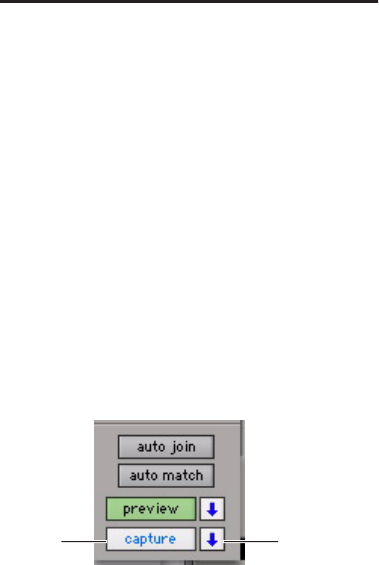
Pro Tools Reference Guide826
Suspending Preview Mode
You can temporarily suspend Preview mode, al-
lowing you to toggle between preview values
and existing automation.
To suspend Preview mode:
Control-click (Windows) or Command-click
(Mac) the Preview button.
Punching Preview Values
After you have isolated a control and auditioned
a new value, you can punch (write) the value to
the automation playlist.
To punch a preview value to the automation
playlist:
Click the lit Punch Preview button.
Preview Mode and “Write To”
Commands
The “Write Automation To” commands work as
follows with Preview mode:
Before punching preview values The “Write
Automation To” commands (except Write to
Next Breakpoint) can be used to extend pre-
viewed values. The “Write Automation To”
command will only apply to isolated controls.
Pro Tools remains in Preview mode.
After punching preview values The “Write Auto-
mation To” commands (except Write to Next
Breakpoint) can be used to extend the punched
value in the same manner as other automation.
Capturing Automation
(Pro Tools HD Only)
You can capture current automation values at
one location in a session and quickly apply
them in another location with the Capture and
Punch Capture commands. The Capture com-
mand temporarily stores the value of all con-
trols currently writing automation, and the
Punch Capture commands writes those stored
values to all enabled automation types.
ICON Systems allow for the capture of up to
48 different values, or snapshots.
All other systems allow for the capture of a
single value.
Capturing Automation Values
You can capture the current automation values
of actively writing controls.
To capture automation values:
1 Make sure all tracks whose automation values
you want to capture are in a write-enabled state
(Write, Touch, Latch, Touch/Latch or Latch).
2 Make sure the automation types you want to
capture are enabled in the Automation window
(Volume, Pan, Mute, Send level, Send pan, Send
mute, or Plug-in).
Capture controls in the Automation window
Capture
Punch
Capture

Chapter 37: Automation 827
3 Start playback. When you reach a location
where you want to capture the current automa-
tion states, click the Capture button in the Auto-
mation window.
The Punch Capture button in the Automation
window lights to indicate a captured value is
available to punch.
Punching Captured Automation
Values
After automation values are captured, they can
be punched (written) to another location in the
track. Any tracks set to Read or Off are unaf-
fected.
If you punch during playback, the automa-
tion mode of any track set to Touch is set to
Latch and writing begins at the captured value.
If you punch while the transport is stopped,
the automation mode of any track set to Touch
is set to Latch and the control is primed at the
captured value.
To punch captured automation values:
1 Move to a location where you want to apply
the captured automation states. You can do this
during playback or while the transport is
stopped.
2 Click the Punch Capture button in the Auto-
mation window to apply the captured automa-
tion states. The captured states are applied to all
automation types that are currently enabled in
the Automation window.
Capturing Automation Values for
All Controls
You can capture the state of all automatable
controls (except on tracks with their Auto-
mation Mode set to Off) in a session, regardless
of whether they are currently writing automa-
tion.
To capture the automation values of all controls:
When you reach a location where you want to
capture the current automation states, Alt-click
(Windows) or Option-click (Mac) the Capture
button.
To capture the automation values of all controls on
selected tracks only:
When you reach a location where you want to
capture the current automation states, Alt-Shift-
click (Windows) or Option-Shift-click (Mac) the
Capture button.
Punching Automation Values for
All Controls
You can punch all captured automation values
to another location on their corresponding
tracks (except those tracks with their Auto-
mation Mode set to Off).
To punch the automation values of all controls:
When you reach a location where you want to
apply the captured automation states, Alt-click
(Windows) or Option-click (Mac) the Punch
Capture button. Any track set to Read or Touch
are set to Latch. Any tracks set to Off are unaf-
fected.
Pro Tools Reference Guide828
To punch the automation values of all controls on
selected tracks only:
When you reach a location where you want to
apply the captured automation states, Alt-Shift-
click (Windows) or Option-Shift-click (Mac) the
Punch Capture button. Any selected tracks set to
Read or Touch are set to Latch. Any selected
tracks set to Off are unaffected.
Capture and Trim Mode
The Capture and Punch Capture commands
work with Trim automation in the same way as
regular automation. Pro Tools saves Trim status
when capturing, so if you attempt to punch cap-
tured Trim values while displaying a non-Trim
automation playlist, Pro Tools will automati-
cally apply the values to the corresponding Trim
playlist.
Punch Capture and “Write To”
Commands
After issuing a Punch Capture command, the af-
fected controls are writing automation (in Latch
mode), so any of the “Write Automation To”
commands can be used to extend the punched
value in the same manner as other automation.
Capture and Preview Mode
Loading Captured Values into Preview
You can preview and modify captured automa-
tion values in Preview mode before punching
the values to the automation playlist.
To capture an automation value and use it to
preview:
1 Make sure the track where you want to pre-
view the value is enabled for automation
(Touch, Latch, Touch/Latch or their corre-
sponding Trim modes).
2 Make sure the automation type you want to
preview is enabled in the Automation window
(Volume, Pan, Mute, Send level, Send pan, Send
mute, or Plug-in).
3 Capture an automation value that you want
to preview in another location on a track. (See
“Capturing Automation Values” on page 826.)
4 Go to a location where you want to preview
the captured automation states, and click the
Preview button in the Automation window.
5 Click the Punch Capture button.
The affected controls are isolated and updated
to the captured values. The Punch Preview but-
ton in the Automation window lights to indi-
cate the preview value is available to punch.
6 Start playback and adjust the isolated control
to audition the changes.
7 When you are ready to punch the preview
value to the automation playlist, click the lit
Punch Preview button.

Chapter 37: Automation 829
Capturing Values While in Preview
Mode
When you are in Preview mode, you can capture
the values of isolated controls and apply them
elsewhere on a track. By capturing preview val-
ues, you can leave the underlying automation
unchanged at the place where you capture.
On ICON systems, you can use preview mode to
capture multiple snapshots without changing
automation.
To capture a preview value:
1 Activate Preview mode and isolate a control.
(See “Previewing New Automation Values” on
page 825).
2 Start playback and adjust the isolated control
to audition the changes.
3 When you are ready to capture preview value,
click the Capture button in the Automation
window.
The Punch Capture button in the Automation
window lights to indicate a captured value is
available to punch.
VCA Master Track Automation
(Pro Tools HD Only)
Displaying Automation on VCA
Master Tracks
The following controls on VCA Master tracks
can be automated and have separate automa-
tion playlists:
• Volume
• Volume trim
• Mute
These automation playlists follow the same be-
havior as automation playlists on other track
types. For more information on Volume trim
automation, see “Trimming Automation” on
page 811.
Displaying the Composite
Automation Playlist on Slave
Tracks
When a track is a VCA slave, you can display a
composite automation playlist that shows the
contribution of the VCA Master to the Volume
or Mute automation data on the slave track.
This composite playlist reflects the actual posi-
tion of the Volume fader on the slave track.The
composite playlist display cannot be directly ed-
ited.
To display the composite playlist on VCA slave
tracks:
Choose View > Automation > Composite
Playlist.
Viewing composite automation on a VCA slave track
Volume
automation
Composite
playlist
playlist
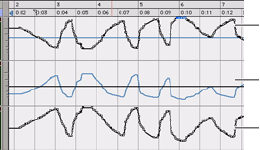
Pro Tools Reference Guide830
Excluding VCA Slave Tracks from
VCA Master Automation
When you are writing automation on a VCA
Master track, the corresponding moves will ap-
pear on the composite automation playlist of
each of its slave tracks. If you want to exclude a
slave track from an automation pass, write-en-
able the slave track for automation.
To exclude a slave track from VCA Master track
automation pass:
1 Write-enable the VCA Master track for auto-
mation (Write, Touch or Latch mode).
2 Write-enable the slave track you want to ex-
clude for automation (Write mode).
3 Make sure other slave tracks that you want to
include in the pass are not write-enabled for au-
tomation.
4 Start playback.
5 Move the fader on the VCA Master track.
6 Stop playback.
Automation is written on the excluded slave
track such that the fader moves on the VCA
Master track are canceled out, and the fader on
the excluded slave track does not move on sub-
sequent playback.
Coalescing VCA Automation
There are several ways to commit, or coalesce,
the contribution of a selected VCA Master
track’s Volume and Mute automation to the au-
tomation playlists of its slave tracks.
Clearing the VCA Master
You can use a VCA Master to write grouped au-
tomation, coalesce the VCA automation to all of
the slave tracks, and clear the automation on
the VCA Master. The coalesced tracks will play
back exactly as they did when they were in the
VCA group.
To coalesce automation from a VCA Master to all
of its slave tracks and retain the VCA Master:
1 Select the VCA Master track whose automa-
tion you want to coalesce.
2 Do one of the following:
• Choose Track > Coalesce VCA Master Auto-
mation.
– or –
• Right-click the VCA Master track name and
choose Coalesce VCA Master Automation
from the pop-up menu.
The composite Volume level and Mute state are
coalesced to each of the slave tracks. The VCA
Master Volume fader is reset to zero, the VCA
Mute is set to unmuted, and any automation on
the VCA Master is cleared.
Automation for excluded VCA slave track, canceling
VCA Master automation
VCA Master
excluded slave
included slave

Chapter 37: Automation 831
Deleting the VCA Master
You can temporarily use a VCA Master to write
grouped automation, then coalesce the VCA au-
tomation to all of the slave tracks by deleting
the VCA Master. The coalesced tracks will play
back exactly as they did when they were in the
VCA group.
To coalesce automation from a VCA Master to all
of its slave tracks and delete the VCA Master
track:
1 Select the VCA Master track whose automa-
tion you want to coalesce.
2 Choose Track > Delete.
The composite Volume level and Mute state are
committed to each of the slave tracks.
Removing a Slave Track from a VCA
Group
You can remove an individual slave track from a
VCA group, which commits the VCA automa-
tion to that track, leaving the VCA Master and
the other slave tracks untouched. The coalesced
slave track plays back exactly as it did when it
was in the VCA group.
To coalesce automation from a VCA Master to an
individual slave track:
1 Do one of the following:
• Choose Modify Groups from the Group
List pop-up menu.
• Click the Group ID indicator on the track
and choose Modify from the pop-up menu.
• Right-click the Group name in the Group
List and choose Modify from the pop-up
menu.
2 In the Groups dialog, select the VCA-con-
trolled group that includes the slave track.
3 In the Groups dialog, click Tracks and remove
the slave track from the group.
4 Click OK.
The slave track is removed from the VCA group,
and the composite Volume level and Mute state
are coalesced to the track.
Duplicating a Slave Track
When you duplicate a slave track without dupli-
cating its group assignments, the VCA automa-
tion is coalesced to the duplicate track. The coa-
lesced duplicate plays back exactly as if it were
in the VCA group.
To coalesce automation from a VCA Master to a
single slave track by duplicating the track:
1 Select the slave track whose automation you
want to coalesce.
2 Choose Track > Duplicate.
3 In the Duplicate Track dialog, deselect Group
Assignments.
4 Click OK.
The composite Volume level and Mute state are
coalesced to the duplicate track. The original
slave track is preserved, and the VCA group is
unchanged.
This action cannot be undone.
Pro Tools Reference Guide832
Coalescing Automation Across an Edit
Selection
You can commit VCA automation across an Edit
selection in a VCA Master track, without com-
mitting the automation on the entire length of
the track.
To coalesce automation in an Edit selection on a
VCA Master track:
1 Select the VCA Master track whose automa-
tion you want to coalesce.
2 Make an Edit selection in the VCA Master
track that includes the range of automation you
want to coalesce.
3 Do one of the following:
• Hold Start (Windows) or Control (Mac) and
choose Track > Coalesce VCA Master Auto-
mation.
– or –
• Hold Start (Windows) or Control (Mac) and
Right-click the VCA Master track name and
choose Coalesce VCA Master Automation
from the pop-up menu.
The composite Volume level and Mute state are
committed to each of the slave tracks over the
Edit selection. The VCA Master Volume is set to
zero, the VCA Mute state is set to unmuted, and
any automation on the VCA Master is cleared
for the selected area only.

Chapter 38: Mixdown 833
Chapter 38: Mixdown
Pro Tools lets you mix down by recording a mix
to new audio tracks or by bouncing a mix to disk.
Recording to Tracks This is the process of sub-
mixing and recording the submix to new audio
tracks, as you would any input signals. This
method requires available tracks, voices, and
bus paths to accommodate the submix and the
new tracks. While recording to tracks, you can
manually adjust mixer or other controls.
Record to new tracks if you want to adjust mixer
controls during the mixdown.
Bouncing to Disk The Bounce to Disk command
lets you write a final mix, create a new loop,
print effects, or consolidate any submix to new
audio files on disk. This method lets you write
all available voices to disk without holding any
in reserve.
Any available output or bus path can be selected
as the bounce source. Sample rate, bit depth,
and other conversion processes can be applied
during or after the bounce. Though you can
hear the bounce being created in real time, you
cannot adjust mixer or other controls during a
Bounce to Disk.
Use Bounce to Disk if you need to convert the
bounced files, or if you do not want to manually
adjust mixer controls during the mixdown.
Selecting Audio for Loops,
Submixes, and Effects
Both Bounce to Disk and recording to tracks op-
erate on the current Timeline or Edit selection, if
one exists. This makes it easy to turn multitrack
selections into mono, stereo, or multichannel
loops. Submixes, stems, and other specialized
types of mixes can also be printed to disk using
either method, or played out to another record-
ing, transfer, or archiving medium.
Printing effects to disk is the technique of per-
manently adding real-time effects, such as EQ or
reverb, to an audio track by bussing and record-
ing it to new tracks with the effects added. The
original audio is preserved, so you can return to
the source track at any time. This can be useful
when you have a limited number of tracks or ef-
fects devices.
AudioSuite plug-ins provide another option
for printing a plug-in effect to disk. See the
DigiRack Plug-ins Guide for details.
Pro Tools Reference Guide834
Dithering
Dither can significantly improve audio quality
when reducing the bit depth of digital audio.
When to Use a Dither Plug-in
You should use a dither plug-in in any situation
where you are reducing bit depth, for example,
when mixing down to a 16-bit file with the
Bounce to Disk command, or when sending
your final mix to an external digital device that
records at 16-bit resolution.
A dither plug-in is necessary even when mixing
down to 16-bit from a 16-bit session. Even
though 16-bit sessions use 16-bit files, they are
still being processed at higher internal bit
depths.
• Pro Tools|HD systems use 24-bit audio input
and output signal paths, and internal 48-bit
mixing and processing
• Pro Tools LE and M-Powered systems use 24-
bit audio input and output signal paths, and
internal 32-bit floating point processing for
mixing and audio processing
For this reason, whether you are working with a
24-bit session or a 16-bit session, the following
are recommended:
• When mixing down to a 16-bit destination,
use a dither plug-in on the main output.
• When mixing down to a 24-bit destination,
do not use a dither plug-in on the main
output.
• When mixing down to an analog destination
with any 24-bit capable interface, do not use a
dither plug-in on the main output.
• During normal recording and playback, by-
pass any dither plug-in on the main output.
Bounce to Disk
The Bounce to Disk process does not apply
dither when reducing bit depth. To apply dither
when bouncing to disk, you should insert a
dither plug-in as the last processor in the signal
path on a Master Fader assigned to the bounce
source path.
Using a dither plug-in on a Master Fader is pref-
erable to an Auxiliary Input because Master
Fader inserts are post-fader. As a post-fader in-
sert, the dither plug-in can process changes in
Master Fader level.
If you do not use a dither plug-in on your
bounce source path, and you choose to convert
to a lower resolution during or after a Bounce to
Disk operation, the resulting file will be con-
verted by truncation.
Using Dither on an Output Mix
Pro Tools includes real-time dither plug-ins that
improve 16-, 18-, or 20-bit performance and re-
duce quantization artifacts when reducing the
bit depth of an output mix.
To use a dither plug-in on an output mix:
1 Choose Track > New create a Master Fader
track.
2 Set the output of the Master Fader to the out-
put or bus path you want to bounce.
3 Assign the outputs of all audio tracks in the
session to the same path you selected in step 2.
The Master Fader now controls the output levels
of all tracks routed to it.
4 On the Master Fader, insert a dither plug-in as
the last processor in the signal chain.
5 In the dither plug-in window, choose an out-
put Bit Resolution and Noise Shaping setting.
Chapter 38: Mixdown 835
6 Do one of the following:
• Play back the session to record (or “lay-
back”) Pro Tools output to lower bit-rate
media (such as a DAT).
– or –
• Bounce to Disk and select the appropriate
bit depth (such as 16-bit for CD audio). Be-
fore being converted by the Bounce to Disk
command, the signal is processed accord-
ing to the resolution and noise shaping set-
tings in the dither plug-in inserted on the
Master Fader.
Sample Rate Conversion and Bit Depth
Reduction
If you want to do both a sample rate conversion
and a bit depth reduction when mixing down,
first convert the sample rate while maintaining
the higher bit depth, and then reduce the sam-
ple rate-converted file to the lower bit depth, us-
ing a dither. By keeping the higher bit depth
when performing the sample rate conversion,
you ensure the highest possible audio quality.
Recording to Tracks
You can create a submix in your Pro Tools ses-
sion and record it to available tracks in the same
session. This technique lets you add live input
to the mix, as well as adjust volume, pan, mute,
and other controls during the recording process.
You can also use this technique instead of
Bounce to Disk to create mixed tracks directly in
your Pro Tools session.
Voice Requirements
Recording a submix to new tracks requires an
available voice for each track that you want to
record. Make sure you have enough voices avail-
able to play back all tracks that you want to
record and enough voices available to record the
destination tracks.
In contrast, the Bounce to Disk command lets
you bounce all available voices to disk without
holding any in reserve, but you cannot manu-
ally change any controls during the bounce. See
“Bounce to Disk” on page 836 for more infor-
mation.
To record a submix to a track:
1 Apply any plug-ins or external processors you
want to add to your audio tracks or Auxiliary In-
puts before you record.
2 Set the main channel output of the tracks you
want to include in the submix to a bus path. If
you are using stereo or multichannel tracks, set
the panning of each track.
3 Make sure Loop Playback is not enabled.
For information about Digidesign dither
plug-ins, refer to the DigiRack Plug-ins
Guide.For information about voice management,
see “Track Priority and Voice Assignment”
on page 161.
With Pro Tools HD, RTAS plug-ins placed
on Auxiliary Input, Master Fader, and In-
strument tracks will use additional voices
and may introduce extra latency based on
the HW Buffer Size. For more information,
see “Voice Usage and Total Latency for
RTAS Plug-ins” on page 753.

Pro Tools Reference Guide836
4 Choose Track > New and create one or more
mono, stereo, or multichannel audio tracks.
5 If you are recording in stereo, pan the new ste-
reo track (or two mono tracks) hard left and
right.
6 Set the input of each destination track to
match the bus path from which you are record-
ing.
7 Set the output of your new tracks to your main
output path.
8 Select Options > Link Timeline and Edit Selec-
tion.
9 Select audio to record. The start, end, and
length of the recording can be based on the cur-
sor location or Timeline and Edit selections.
• Selection-based recording automatically
punches in and out of recording at the se-
lection start and end. Be sure to include
time at the end of a selection for reverb
tails, delays, and other effects.
• If you do not make a selection, recording
will begin from the location of the play-
back cursor. Recording will continue until
you press Stop.
10 Record enable the new tracks and click
Record in the Transport window.
11 Click Play in the Transport window to begin
recording the submix.
12 If recording a selection of audio, recording
will stop automatically. If performing an open-
ended recording, click Stop, or punch out of re-
cording.
Bounce to Disk
The Bounce to Disk command lets you mix
down with all available voices on your system.
Since it records to separate audio files, you do
not have to reserve any tracks for a bounce.
Pro Tools bounces are done in real time, so you
hear audio playback of your mix during the
bounce process (though you cannot adjust it).
You can use the Bounce to Disk command to
create and automatically import loops, sub-
mixes, or any audio into your session. You can
use it to create a final mono, stereo, or multi-
channel master, in any of several audio file for-
mats. Bounce to Disk provides conversion op-
tions for sample rate, bit resolution, and format.
When you bounce a track to disk, the bounced
mix includes the following:
Audible Tracks All audible tracks that are routed
to the output which is selected as the source of
the bounce are included in the bounce. Any
muted tracks are not included in the bounce. If
you solo one or more tracks, only the soloed
tracks are included in the bounced mix.
Automation All read-enabled automation is
played back and incorporated in the bounced
mix.
Inserts and Sends All active inserts, including
real-time plug-ins and hardware inserts, are ap-
plied to the bounced mix.
Selection or Track Length If you make a selec-
tion in a track, the bounced mix will be the
length of the selection. If there is no selection in
any track, the bounce will be the length of the
longest audible track in the session.
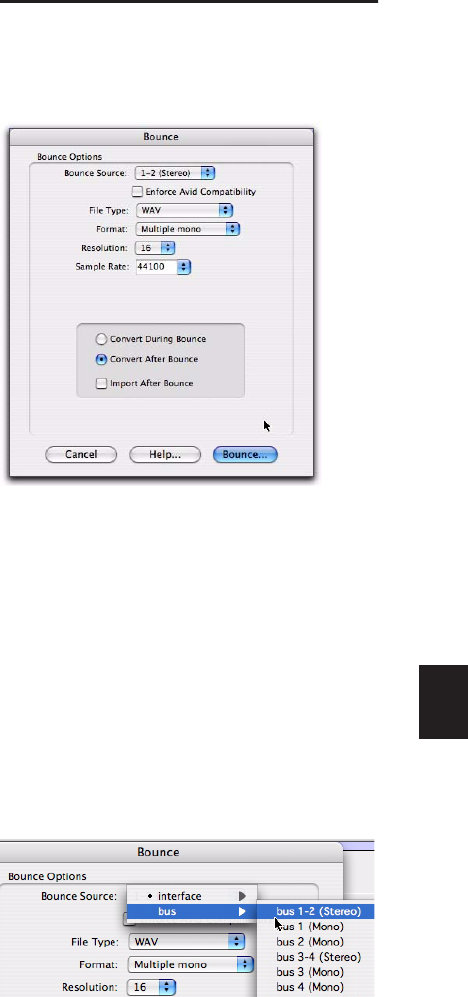
Chapter 38: Mixdown 837
Time Stamp Information Bounced material is au-
tomatically time stamped so that you can drag it
into a track and place it at the same location as
the original material. For more information
about time stamping, see “Time Stamping” on
page 903.
Bounced Files Are Delay-Compensated
Pro Tools compensates for any bus and plug-in
delays due to a bounce. This means that if a
bounced file is imported back into a session, and
placed directly in time against the source mix, it
is time-aligned with the original source mix.
Record-Enabled Tracks and TrackInput-Enabled
Tracks Cannot Be Bounced
Pro Tools does not allow you to bounce tracks
that are either record-enabled or in Input Only
monitoring mode.
To Bounce to Disk:
1 Make a Timeline selection to define the range
to be bounced.
2 Choose File > Bounce to > Disk.
3 Configure the Bounce options (see “Bounce
Options” on page 837).
4 Click Bounce.
Bouncing with Mute Frees Assigned
Voice (Pro Tools HD Only)
When bouncing sessions that include muted
tracks, enabling “Mute Frees Assigned Voice”
can, in some instances, increase the number of
tracks that can be successfully bounced. See
“Mute Frees Assigned Voice” on page 171.
Bounce Options
When you use the Bounce to Disk command,
you can configure several file options.
Bounce Source
Select any mono, stereo, or multichannel out-
put or bus path as the source for the bounce. All
currently active output or bus paths as defined
in the I/O Setup dialog are available as the
Bounce Source.
To set the bounce source:
Select an output or bus path from the Bounce
Source selector.
Bounce to Disk dialog, with conversion and options
enabled
Select a bounce source
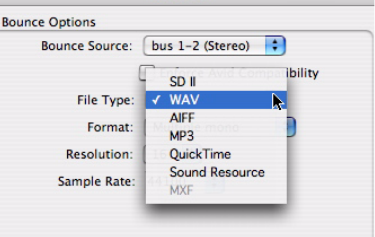
Pro Tools Reference Guide838
Enforce Avid Compatibility
Creates frame-accurate edits, wraps the files as
OMFI (unless File Type is MXF), and limits the
sample rate options to 44.1 kHz or 48 kHz.
Dither without noise shaping will be applied to
files being exported from 24-bit to 16-bit.
File Type
Selects the (creator) type for the bounced files.
Sound Designer II
(Mac Only)
This was the native format for older Mac-based
Pro Tools systems. Select this to use the bounced
audio with any Digidesign application for Mac.
BWF (Broadcast .WAV Format)
This was the native format for older Windows-
based Pro Tools systems, but is now supported
on Windows and Mac. To use a BWF (.WAV) file
in Pro Tools, you can drag and drop from the
DigiBase browser, Windows Explorer or Mac
Finder, or a folder, or you can use the Import
Audio command. Files in this format do not
have to be converted to be used in Pro Tools.
AIFF (Audio Interchange File Format)
To use an AIFF file in Pro Tools, you can drag
and drop from the DigiBase browser, Windows
Explorer or Mac Finder, or you can use the Im-
port Audio command. Files in this format do
not have to be converted to be used in
Pro Tools.
QuickTime
QuickTime is Apple’s multimedia audio file for-
mat. Pro Tools does not directly support this
type of file in its sessions. To use a QuickTime
audio file within Pro Tools, use the Import Au-
dio command. The QuickTime format is popu-
lar for attaching to emails, to simplify long-dis-
tance project review and approval. Many
popular multimedia applications also support
QuickTime.
Sound Resource
(Mac Only)
This file type is supported by some Mac software
applications. Pro Tools does not directly support
this type of file in its sessions. To use a SND file
within Pro Tools, use the Import Audio com-
mand. The SND format is useful if you plan to
use your audio with other Mac applications that
do not support Sound Designer II or AIFF for-
mats.
Windows Media
(Windows Only)
Windows Media formatted files can contain au-
dio, video, or script data stored in Windows Me-
dia Format. A Windows Media Format file may
have an .asf, .wma, or .wmv file name exten-
sion.
Selecting a file type
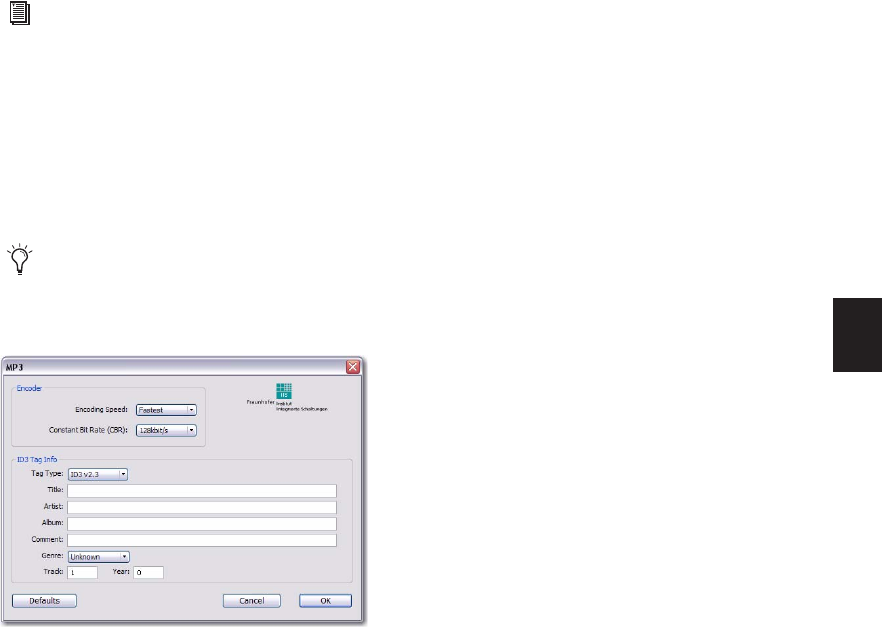
Chapter 38: Mixdown 839
MXF (Material Exchange Format)
(Pro Tools with DigiTranslator 2.0 Only)
MXF is a media file format that includes both
video and audio files, and is designed for the in-
terchange of audio-visual material with associ-
ated data and metadata. It was designed for im-
proving file-based interoperability between
servers, workstations, and other content cre-
ation devices.
AAF and OMF sequence format files can refer to
MXF media files, or have MXF media files em-
bedded within them. Pro Tools with DigiTrans-
lator 2.0 supports AAF embedded sequences.
MPEG-1 Layer 3 (MP3)
The MPEG-1 Layer 3 compression format (MP3)
is used for streaming and downloading audio
over the Internet, and for playback on portable
devices. The MP3 Option is required to use this
file type.
The MP3 encoder provided as an install option
with Pro Tools is a fully functional 30-day demo
version. To purchase the full version of the MP3
encoder, visit Digidesign’s website (www.digide-
sign.com).
When you select this format, the Resolution
pop-up menu in the Pro Tools Output Options
dialog is unavailable. The resolution is set by the
encoder.
The sample rate chosen is given to the codec as
a base sample rate for operations. The actual
sample rate of the resulting file is determined in
the MP3 Encoder Options dialog. For example,
if a base sample rate of 48000 Hz is chosen, the
MP3 Encoder Options dialog will allow output
streams in 48, 24, or 12 kHz, depending on en-
coding quality.
When you export or bounce to MP3 format, you
can set the following options:
Encoder Settings
Encoder Speed Determines the audio quality of
the bounced file. There are two options: Highest
Quality and Fastest Encoding Time.
The Highest Quality setting can take up to five
times longer to process audio than the Fastest
Encoding setting, so you should use it only
when the highest fidelity is essential and you
have a considerable amount of time to devote to
the encoding process.
Constant Bit Rate (CBR) Encodes the file at a
single bit rate that you choose from the CBR
pop-up menu. Because the bit rate is fixed, the
quality of the encoded audio will vary depend-
ing on the nature of the material being com-
pressed. This option is best for streaming over
the Internet, since it has predictable bandwidth
requirements.
See the DigiTranslator Guide for more in-
formation.
The MP3 Export Option is available for pur-
chase from the online DigiStore at the Digi-
design website (www.digidesign.com).
MP3 Export Options

Pro Tools Reference Guide840
ID3 Tag Info Settings
ID3 Tag Type The ID3 tag stores data about the
encoded audio file that is used by MP3 players to
display information about the file. Pro Tools
supports three versions of this tag, in order to
provide backward compatibility with older MP3
players:
• ID3 v1.0: Appears at the end of a streaming
MP3 file, so that tag information is only dis-
played after software streaming is finished.
• ID3 v1.1: Same as version 1.0, but adds track
number information to the tag.
• ID3 v2.3: Appears at the front of a streaming
MP3 file, so that tag information is displayed
when streaming begins.
Title/Artist/Album/Comment Type the title, art-
ist, and other information for the MP3 file. This
information is displayed by many MP3 players.
Genre Choose a genre for the file. This informa-
tion is displayed by many MP3 players, and can
appear in searchable catalogs and databases.
Track Number If you select ID3 tag type v1.1 or
v2.3, you can enter a CD track number for the
file. This information is displayed by many MP3
players.
Year Enter a year for the file. This information is
displayed by many MP3 players.
Mac File Settings
Mac File Type and Creator If you expect your file
to be used on a Mac, you can enter the Mac file
type and creator. This will allow users to double-
click the file to open their MP3 player.
Default Button
To restore all settings in this dialog to their de-
fault values, click Defaults.
Format
This is the format for the bounced result.
Choices are Mono (Summed), Multiple Mono,
and Stereo Interleaved.
To set the format of the bounced file:
Select a file format from the Format selector.
Mono (Summed) Creates a single disk file that is
a summed mono mix of the current sources be-
ing monitored.
Before bouncing to disk, make sure your levels
are below –3 dB to avoid clipping that occurs
when left and right signals exceed –3 dB below
maximum, or full code (0 dBFS).
While ID3 v2.3 is becoming the standard
MP3 format, not all MP3 players currently
support ID3 v2.3. Contact the developer of
your player software for compatibility infor-
mation.
Bounce dialog (file Format type)

Chapter 38: Mixdown 841
Multiple Mono Creates multiple mono files with
the same number of channels as the source
path.
• If the source output or bus path is stereo, two
mono files will be created, and appended with
“.L” and “.R” suffixes on bounce.
• If a multichannel format is used (for example,
six-channel, 5.1), individual mono files will
be created for each member of the path. Files
will be appended with path suffixes according
to the path definition in the I/O Setup dialog.
• If the source output or bus path is mono, the
pop-up menu will switch from multiple mono
to mono, and will create one mono file (no
summing of multiple sources).
Stereo Interleaved Creates a single, interleaved
file that contains all of the bounced streams
from the chosen output path. In an interleaved
stereo bounce, tracks assigned to odd-numbered
outputs are sent to the left channel, and tracks
assigned to even-numbered outputs are sent to
the right channel.
Pro Tools also lets you bounce multichannel in-
terleaved files of any supported file type. This
can simplify file management of mixes and
projects for backup and archiving.
Pro Tools does not support interleaved files na-
tively. This means that they must be split into
multi-mono files on import (requiring addi-
tional disk space).
Resolution
This option lets you select between three differ-
ent bit resolutions for the bounce conversion.
Bounce to Disk does not apply dither when con-
verting during or after a bounce to a lower reso-
lution (including when bouncing to 16-bit).
When you need to create a lower resolution file,
use a dither plug-in, on a Master Fader assigned
to the bounce source path. This dithers the
bounced file, before the Bounce to Disk conver-
sion truncates down to the final file resolution.
(See “Dithering” on page 834.)
Resolution choices include the following:
8-bit This resolution is often used in multimedia
applications. If the material you are working
with is relatively simple, you can use the
Pro Tools “Squeezer” feature for optimal results.
See “Use Squeezer” on page 842 for details.
16-bit This is the Compact Disc standard bit res-
olution.
24-bit This setting provides the highest resolu-
tion. It is useful when you want to create a final
mix without losing any resolution (for example,
if you are delivering a final mix that will be
ready to master).
To set the resolution of the bounced file:
Select a bit depth from the Resolution selec-
tor.
If your session is 16-bit, you should still use
dither plug-in on the output mix, because
all Pro Tools systems process audio inter-
nally at higher bit depths.
Pro Tools Reference Guide842
Sample Rate
This option lets you save to any of several sam-
ple rates. Choices are dependent on your
Pro Tools system and Digidesign audio inter-
faces.
Sample Rate Conversion Quality
If you choose a sample rate that differs from the
original sample rate of the session, the conver-
sion options become available. You can config-
ure the conversion quality, and schedule con-
version to occur during, or after, the bounce. See
“Sample Rate Conversion Quality Option” on
page 842 for more information.
The following are the more common sample
rates, and their applications. Higher sampling
rates will provide better audio fidelity for record-
ing and playback, and also for processing with
dynamics, dither (with noise shaping), and ana-
log emulation plug-ins.
192000 This is a supported sample rate for some
audio DVDs, and provides the highest quality
audio fidelity with compatible audio interfaces
(such as the 192 I/O).
176400 You may want to work at a sample rate
of 176.4 kHz if the final delivery will be at
44.1 kHz (such as compact disc). This will pro-
vide a slightly faster sample rate conversion to
44.1 kHz than from 192 kHz.
96000 This is a supported sample rate for DVD
audio and provides high-quality audio fidelity
with compatible audio interfaces (such as the
192 I/O, 96 I/O, 96i I/O, 003, and Digi 002).
88200 You may want to work at a sample rate of
88.2 kHz if the final delivery will be at 44.1 kHz
(such as compact disc). This will provide a
slightly faster sample rate conversion to
44.1 kHz than from 96 kHz.
48000 This is a standard sample rate for Profes-
sional and DVD video, as well as some broadcast
and recording label archiving, and is supported
by DA-88/98, DAT, and ADAT decks.
44100 This is the standard sample rate for com-
pact discs (CD), and is supported by DA-88/98,
DAT, and ADAT decks.
Custom For a custom sample rate, click in the
sample rate window and manually enter in a
value.
Pull-Up and Pull-Down Rates All available sample
rates support pull-up and pull-down rates, or
other specialized rates.
Sample Rate Conversion Quality
Option
When you specify a different sample rate for a
bounced file (for example, when mixing a ses-
sion recorded at 96 kHz to 44.1 kHz for release
on an audio CD), Pro Tools uses the Conversion
Quality option to determine the quality of sam-
ple rate conversion used.
There are five possible settings, ranging from
Low (lowest quality) to Tweak Head (highest
quality). The higher the quality of sample rate
conversion, the longer it takes to convert the
bounced file.
Use Squeezer
(8-Bit Resolution Only)
The Use Squeezer option uses a proprietary DSP
algorithm specifically designed for performing
8-bit conversion of simple source files such as
voice-overs. It optimizes the dynamics of the au-
dio by preprocessing it using compression, lim-
iting, and gating before conversion to 8-bit res-
olution. This results in greater apparent

Chapter 38: Mixdown 843
loudness in the signal, and improved intelligi-
bility. If you are converting a more complex 16-
bit audio file to 8-bit resolution, test this option
before converting all of your material.
Convert During or After Bounce
The Bounce to Disk dialog can perform any con-
version options, including sample rate and bit
depth conversion, during a bounce or post-
bounce.
The following options are only available when
bouncing to a different file type, format, resolu-
tion, or sample rate.
Convert During Bounce This option may take less
time than Convert After Bounce, but does so at
the expense of plug-in automation playback ac-
curacy.
Convert After Bounce The Convert After Bounce
option, though it takes more time, offers the
highest level of plug-in automation accuracy
possible.
Import Into Session After Bounce
The Import After Bounce option automatically
imports the newly bounced files into the Region
List so you can place them in tracks. If your
newly bounced files are split stereo files (Multi-
ple Mono), they are listed together in the Region
List.
Help
The Help button opens a display-only dialog
that describes the Bounce to Disk features.
Recording a Submix (with
Bounce to Disk)
You can create a submix with the Bounce to Disk
command by muting tracks or bypassing inserts
that are not part of the submix, and selecting
the part of the session you want to bounce. Or,
you could solo only the audio you want to
bounce.
You can also create a submix by recording to
new tracks. For details, see “Sample Rate Con-
version and Bit Depth Reduction” on page 835.
To bounce a submix to disk and bring it into the
session:
1 Configure your submix using sends, Auxiliary
Inputs, and Master Faders. (See “Signal Routing
for Monitoring and Submixing” on page 735.)
2 Do one of the following:
• To bounce the entire session, click Return
to Zero in the Transport window to go to
the beginning of the session.
– or –
• To bounce a portion of the session, enable
Options > Link Timeline and Edit Selec-
tion, and make a selection in the Edit win-
dow.
3 Choose File > Bounce to > Disk.
4 Configure bounce options and settings.
5 Verify the bit resolution for the bounced file
matches the bit resolution of the session.
The Import After Bounce option is only
available if the target file type and sample
rate for the bounce is the same as the file
type and sample rate of the current session,
and the target resolution (bit rate) is the
same or lower than the resolution of the ses-
sion. In addition, tracks bounced to a Stereo
Interleaved file cannot be automatically im-
ported after a bounce.

Pro Tools Reference Guide844
6 Verify the sample rate for the bounced file is
supported by the session and the audio inter-
face.
7 If required, verify the file type and format for
the bounced file matches the file type and for-
mat of the session.
8 Select the Import After Bounce option.
9 Click Bounce.
10 Select a destination for the new audio file,
enter a name, and click Save.
Pro Tools bounces are done in real time, so you
hear audio playback of your mix during the
bounce process. You cannot adjust controls dur-
ing a Bounce to Disk.
To bring bounced files back into tracks:
1 Do one of the following:
• If the newly bounced audio was automati-
cally imported into the session, drag the
new files from the Region List to existing
tracks in your session.
• If the bounced files are not available in the
Region List, import them into the session
with the Import Audio command, or drag
and drop the bounced files from a DigiBase
browser.
• If you are placing multiple files, keep chan-
nels time-aligned with each other by Shift-
selecting them in the Region List, and drag-
ging them simultaneously into existing
tracks of the right format.
2 When working with stereo tracks, set the Pan
controls hard left and hard right.
3 Solo the track with the bounce on it.
4 Click Play in the Transport window to hear
the results of the bounce.
Final Mixdown
In final mixdown, you create a mix that in-
cludes all your edits, automation, and effects
processing.
To bounce a final mix to disk:
1 Adjust track output levels, and finalize any
mix automation for each track in the session.
2 Adjust any real-time plug-in and effects set-
tings and their automation for each track in the
session.
3 Make sure that all of the tracks you want to in-
clude in the bounce are audible (not muted or
inactive).
4 Assign the output of each of the tracks you
want to include in your bounce to the same out-
put or bus path.
5 Add dither. See “Dithering” on page 834.
If you bounced from a selection point, you
can snap the file to the bounce point: Start-
drag (Windows) or Control-drag (Mac) the
region from the Region List to the destina-
tion track.

Chapter 38: Mixdown 845
6 Do one of the following:
• To bounce the entire session, click Return
to Zero in the Transport window to go to
the beginning of the session.
– or –
• To bounce a portion of the session, enable
Options > Link Timeline and Edit Selec-
tion, and make a selection in the Edit win-
dow.
7 Choose File > Bounce to > Disk.
8 Choose the source path you want to bounce.
9 Configure other Bounce to Disk settings as ap-
propriate. See “Bounce Options” on page 837.
10 Click Bounce.
11 Select a destination for the new audio file,
enter a name, and click Save.
Mastering
In the final mastering process, you might record
directly to disk, DAT, DVD, CD, stereo master-
ing recorder, or a multitrack recorder (for sur-
round mixes).
Once you have created a master of your session,
you can transfer it to a portable medium for du-
plication. You can transfer the master file to CD
or DAT to be used as a master for pressing com-
pact discs.
Mastering to a Digital Recorder
Although it is usually best to master sessions di-
rectly to hard disk, Pro Tools also lets you mas-
ter digitally, direct to any AES/EBU-equipped or
S/PDIF-equipped digital recorder such as a DAT
deck.
24-Bit Input and Output
Pro Tools|HD systems support full 24-bit audio
input and output signal paths, with 48-bit inter-
nal mixing and processing, providing an addi-
tional 16 bits of headroom at the top of a chan-
nel’s dynamic range, and 8 bits at the bottom.
You can exchange files with other 24-bit record-
ing systems without any bit-depth conversion
(as long as they are in a compatible file format).
Pro Tools LE systems support 24-bit input and
output, and uses 32-bit floating point mixing
and processing internally. You can exchange
files with other 24-bit recording systems with-
out any bit-depth conversion (as long as they
are in a compatible file format).
By default, the bounce will end at the last
audio waveform or MIDI note. To end the
bounce sooner, make an Edit or Timeline se-
lection to define the end (and start) of the
bounce.
Pro Tools Reference Guide846
Mastering and Audio Compression
Although audio compression is often an indis-
pensable tool in analog recording, it can present
problems in the digital domain. If you compress
an input signal at a very high ratio, you create a
signal that contains a much higher overall
power level compared to its transients. By re-
cording a number of such signals at the highest
possible level on multiple tracks, you create a
scenario that is more likely to clip the mixed
output signal.
High-power compressed signals, when mixed
together, create an extremely high-level output.
This output may rise above the full-code level,
resulting in clipping.
To avoid this problem, watch the overall level of
your program material—use a meter on a Master
Fader, or use an external mastering deck’s
meters to help identify clipping. If you are mas-
tering to hard disk, avoid mixing full-code audio
signals together at unity or “0” level, as this in-
variably causes clipping.
Mastering and Error-Correcting Media
Random access media (such as hard disks, opti-
cal cartridges, Bernoulli cartridges or WORM
drives) can produce a true digital copy of your
data, because every bit value is maintained. Se-
quential media (such as DAT tapes) use error
correction schemes to fix the occasional bad
data that is received in a digital transfer. These
corrections are deviations from the actual data,
and with successive reproductions, represent a
subtle form of generation loss.
You can avoid this loss by creating and main-
taining masters on random-access digital media
(such as a hard drive) and transferring them to
sequential digital media (such as DAT tapes)
only as needed.
To configure Pro Tools for direct digital stereo
mastering:
1 Connect your digital recorder to your system’s
digital outputs. If your system has multiple dig-
ital outputs, use channel 1 and 2 of the audio in-
terface.
2 In Pro Tools, set the appropriate digital format
and output from the Hardware Setup dialog or
I/O Setup dialog. (See “Configuring Pro Tools
Hardware Settings” on page 43.)
3 Set the clock on the master device to slave to
Pro Tools digital clock, or to provide master
clock to Pro Tools. (See “Configuring Pro Tools
Hardware Settings” on page 43.)
4 On your digital recorder, choose the appropri-
ate digital format for the connections.
5 In Pro Tools, set all audio tracks you want to
your master outputs 1–2 path.
6 Click Return to Zero in the Transport window
to go to the beginning of the session.
7 Press Record on your digital recorder.
8 Start playback of your session.
9 When your session has finished playing, stop
the digital recorder.

847
Part VIII: Video, Sync, Surround
848
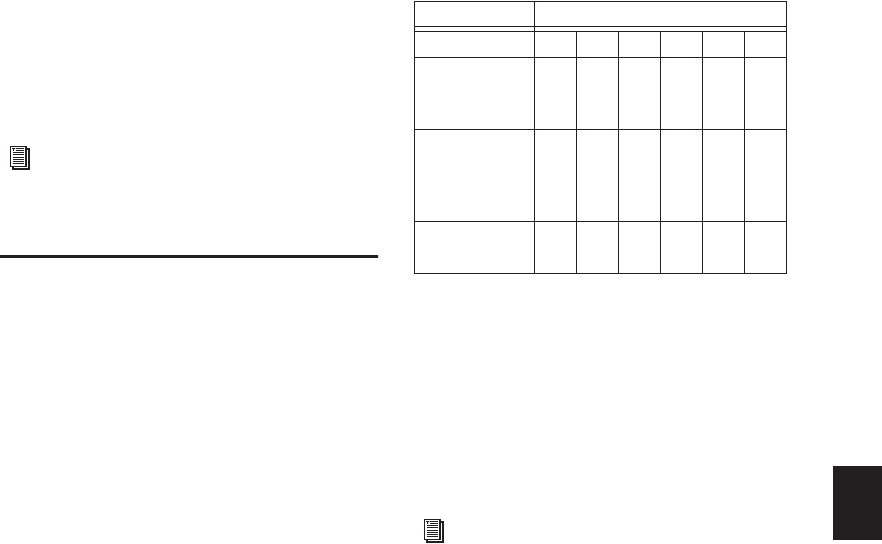
Chapter 39: Pro Tools Setup for Surround (Pro Tools HD Only) 849
Chapter 39: Pro Tools Setup for
Surround (Pro Tools HD Only)
This chapter explains how to set up and config-
ure Pro Tools sessions for multichannel mixing.
Multichannel mixing is supported on
Pro Tools|HD systems only. In this chapter, all
references to Pro Tools refer to Pro Tools|HD
systems.
Pro Tools Audio Connections
for 5.1 Mixing
While all 5.1 mixing formats provide the same
speaker arrangement, there are three primary
standards in use for the track layout of the indi-
vidual channels that comprise the 5.1-format
multichannel mix.
In the following table, it is assumed that sur-
round channels are mapped to outputs 1–6 of a
Pro Tools audio interface. Use channels 7–8 to
monitor a stereo mix for a stereo version, or for
cue mixes and monitoring.
To connect your audio interfaces for 5.1 format
mixing and monitoring:
1 Determine the 5.1 format and track layout
you want to use.
2 Connect the output channels of your audio
interface to the corresponding input channels
of your monitoring system according to the as-
signments listed in Table 40 on page 849.
For information on fundamental surround
concepts, see the Pro Tools Sync & Surround
Concepts Guide.
Table 40. Track Layouts for 5.1 Formats
Formats Track Layout
123456
Film
(Pro Tools
default)
L C R Ls Rs LFE
SMPTE/ITU
for Dolby
Digital (AC3)
and Control|24
L R C LFE Ls Rs
DTS
with ProControl
L R Ls Rs C LFE
If you use a Digidesign control surface, see
its guide for more information.
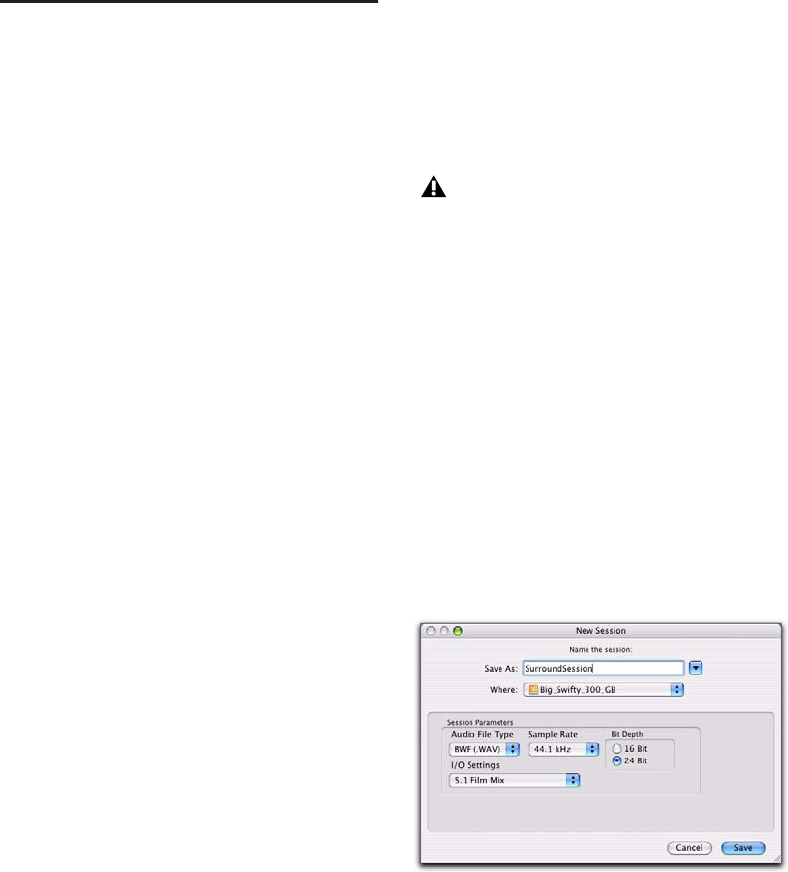
Pro Tools Reference Guide850
Configuring Pro Tools for
Multichannel Sessions
Configuring Pro Tools and sessions for multi-
channel mixing can be done in any (or all) of
the ways described in this section.
New Sessions
You can create a new session and choose a sur-
round mix I/O Settings file as the default
I/O Setup. See “New Sessions and I/O Settings”
on page 850.
Remixing Sessions in Surround (Importing
Multichannel I/O Setups)
By creating or importing a surround mix I/O Set-
tings file in the I/O Setup dialog, multichannel
paths can be made available in any stereo (or
other format) session. You can then reassign
track routing from the original stereo paths to
multichannel paths. Inactive and active paths
simplify reassignment. See “Importing Multi-
channel I/O Setups” on page 851.
Custom Multichannel Paths
You can customize and redefine existing paths
in the I/O Setup dialog. For more information,
see “Custom Multichannel Paths” on page 852.
Importing Session Data
By using the Import Session Data command
(File > Import > Session Data), you can import
tracks and media from other sessions plus their
associated paths and track assignments. After
importing session data, you can use the
I/O Setup dialog to configure main and sub-
paths for the requirements of the session. For
more information, see Chapter 6, “I/O Setup.”
New Sessions and I/O Settings
When you create a new session, you can specify
a surround format that you want to use as your
I/O Setup. Default path configurations are pro-
vided as I/O Settings files, for stereo and sur-
round mixing.
Once you create the new session, you can create
and import tracks, import audio, and assign sig-
nal routing to set up your mix.
To create a new session for multichannel mixing:
1 Choose File > New Session.
2 Select one of the available 5.1 settings from
the I/O Settings menu (Film, SMPTE/ITU, or
DTS/ProControl Monitoring).
3 If needed, change other parameters in the Ses-
sion Parameters section.
4 Name the session.
5 Click Save.
In order to see multichannel options in
Pro Tools, the Surround Mixer plug-in must
be installed in the Plug-ins folder. This
plug-in can be installed with Pro Tools (see
the Getting Started Guide). If it is not in-
stalled, you can move it from the Plug-ins
(Unused) folder to the Plug-ins folder.
Configuring a new session for a 5.1 mix
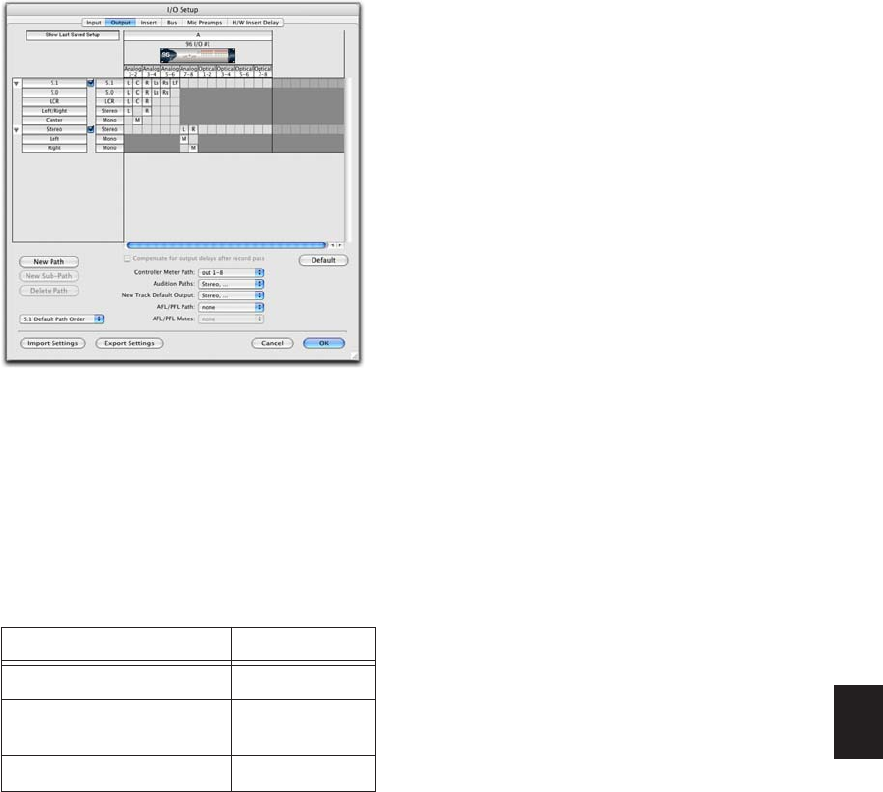
Chapter 39: Pro Tools Setup for Surround (Pro Tools HD Only) 851
The surround presets preconfigure the I/O Setup
dialog for the new session with default 5.1 for-
mat main and sub-paths for outputs and busses.
Surround Mix Settings Files
The surround mix I/O Settings provide output
and bus paths for three specific track layout
standards in the new session. (For information
on inputs and insert paths, see “Default Input
and Insert Paths with 5.1 Settings” on
page 851.)
All three 5.1 format I/O Settings (Film,
SMPTE/ITU, or DTS/ProControl Monitoring)
provide the following default output and bus
paths for the new session:
Default 5.1 Output Paths
• One 5.1 main output path, with sub-paths
for 5.0 (no LFR), LCR, Left/Right (stereo),
and Center (mono).
– and –
• One stereo main path with two mono sub-
paths.
Default 5.1 Bus Paths
• One 5.1 main bus path, with sub-paths for
5.0 (no LFE), left/right (stereo), LCR, and
center (mono).
– and –
• One stereo main path with two mono sub-
paths.
Default Input and Insert Paths with 5.1 Settings
The 5.1 Mix settings files provide default stereo
main paths and mono sub-paths for inputs and
inserts. If you need multichannel input paths or
inserts, you can create them in the I/O Setup di-
alog (see “Custom Multichannel Paths” on
page 852).
Importing Multichannel
I/O Setups
The I/O Setup dialog can import and export set-
tings files. Importing I/O Setup settings files is
useful when you want to remix a stereo session
in surround. You can also use this feature to pre-
pare a session for transfer to a different Pro Tools
system, or to simply save and exchange
I/O Settings.
Standard 5.1 format (film) output paths
Settings Files and Track Layouts
5.1 Settings Track Layout
Film (Pro Tools Standard) L C R Ls Rs LFE
SMPTE/ITU
(Control|24 Monitoring)
L R C LFE Ls Rs
DTS (ProControl Monitoring) L R Ls Rs C LFE
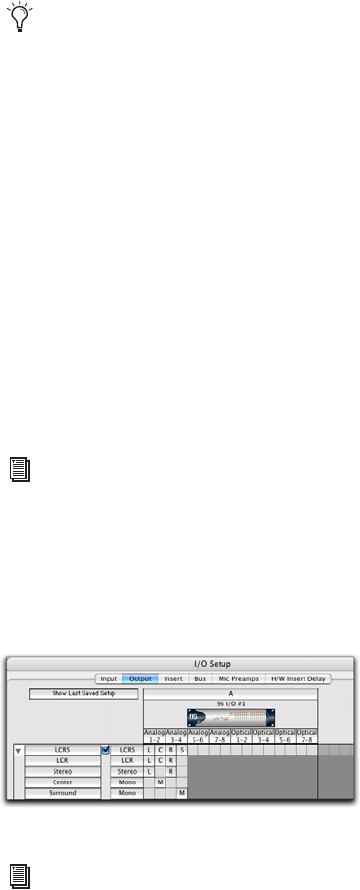
Pro Tools Reference Guide852
To import a multichannel I/O Setup settings file:
1 Choose Setup > I/O.
2 Click Import Settings.
3 Select the settings file to import and click
Open.
4 If the current session has existing path defini-
tions that do not match those in the imported
settings file, Pro Tools asks whether you want to
delete the existing paths or retain them and add
the imported settings to your session.
• Click No to add new paths to your current I/O
Setup configuration.
• Click Yes to replace your current I/O Setup
configuration with the imported settings.
5 Click OK to close the I/O Setup.
Exporting I/O Settings
Exporting I/O Setup settings files lets you build a
library of multichannel setups for different
projects.
To export an I/O Setup settings file:
1 Choose Setup > I/O.
2 Click Export Settings.
3 Name and Save your current I/O Settings.
Custom Multichannel Paths
The I/O Setup dialog lets you create and custom-
ize signal paths for any supported multichannel
mixing format.
Multichannel paths and sub-paths are mapped
to inputs, outputs or internal busses in the
Channel Grid. When you select a preset 5.1
I/O Settings file, default layout for the corre-
sponding multichannel format paths you create
will match the selected format’s track layout.
In addition, the I/O Setup dialog, like the Main
page of the Hardware Setup dialog, provides
controls for routing the physical inputs and out-
puts on your audio interface to available inputs
and outputs in Pro Tools.
Remapping Channels
The I/O Setup dialog and its Channel Grid also
let you remap channels. This is especially useful
to route channels within a multichannel path,
without having to repatch your audio inter-
faces.
You can remap paths to any required configura-
tion, limited only by your systems resources,
and the I/O Setup dialog requirements for chan-
nel overlapping and naming (see “Valid Paths
and Requirements” on page 63 for more infor-
mation).
Example LCRS Setup
The following example shows one possible way
to configure the I/O Setup dialog to mix in 4-
channel LCRS format, with a 96 I/O.
When creating 5.1 format paths, you can
specify the default track layout. See “De-
fault Path Order for 5.1 Tracks” on
page 854.
See also “Example Paths and Signal Rout-
ing for a Surround Mix” on page 863.
Example LCRS output main and sub-paths
For additional I/O Setup information, see
“Creating New Paths” on page 57.
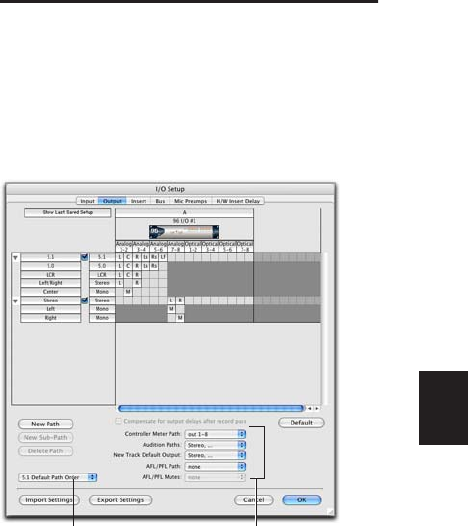
Chapter 39: Pro Tools Setup for Surround (Pro Tools HD Only) 853
To define an LCRS path:
1 Choose Setup > I/O, and click the Output tab.
2 Click New Path.
3 Select LCRS from the Path Format selector.
4 Name the path LCRS.
5 In the Channel Grid, click in the box below
the first (left-most) audio interface channel for
the path. Pro Tools automatically fills up the ad-
jacent units to the right. If you click in the LCRS
row under channel 1, the LCRS path will be
mapped across channels 1–4.
6 Select the new LCRS path and click New Sub-
Path.
7 Name the new sub-path LCR and select LCR as
the Path format. Click in channel 1 in the LCR
row to map the path.
8 Select the LCRS path, click New Sub-Path, and
create a stereo sub-path for front Left and front
Right.
9 Select the LCRS path, click New Sub-Path, and
create a mono sub-path for the Center channel.
10 Select the LCRS path, click New Sub-Path,
and create a mono sub-path for the Surround
channel.
11 Click OK to close the I/O Setup.
5.1 Tracks, Formats, Mapping, and
Metering
Path definitions in I/O Setup determine how au-
dio is routed through, and metered on, your au-
dio interfaces.
Pro Tools internal (on-screen) metering of 5.1
format paths always follows the Film track lay-
out:
L C R Ls Rs LFE
Pro Tools track layout of 5.1 format audio tracks
in the Edit window also conforms to the Film
layout (arranged top to bottom). See the illustra-
tion “5.1 Track Layouts, Routing, and Metering”
on page 854.
In the I/O Setup dialog, you can route these sig-
nals out of your audio interfaces according to
any track layout (such as DTS or SMPTE/ITU).
To re-map channels in a path:
Click and drag a channel to a new valid loca-
tion in the Grid. Other channel assignments
will move (shuffle) to accommodate dragged
channels.
Default I/O Selectors in I/O
Setup
The Output tab of the I/O Setup dialog provides
selectors for setting I/O defaults in your multi-
channel sessions.
Default selectors in the I/O Setup dialog
Default Path Order I/O Setup Options
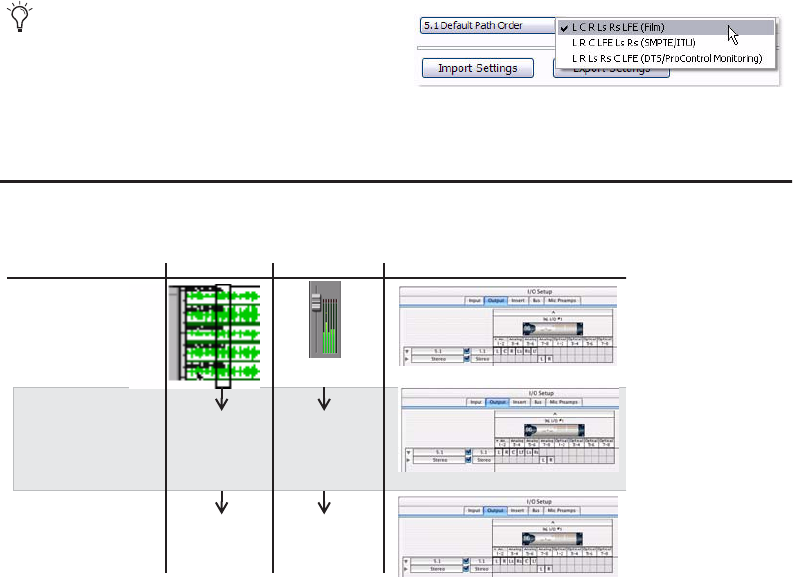
Pro Tools Reference Guide854
Default Path Order Selects the default track lay-
out (or, path order) for new 5.1 format (six-
channel) paths.
Controller Meter Path Selects the path that will
be shown in Digidesign control surface output
meters. See “5.1 Tracks, Formats, Mapping, and
Metering” on page 853 for more information.
Audition Paths Selects the monitoring path for
previewing audio in the Region List, Import Au-
dio dialogs, and DigiBase. Only outputs on your
primary interface can be used as your Audition
path.
New Track Default Output Selects the default
output path for all new tracks, for each sup-
ported track format.
AFL/PFL Path Selects where tracks are routed to
when they are soloed in AFL (After Fader Listen)
or PFL (Pre Fader Listen) Solo mode.
AFL/PFL Mutes (Output Path) Selects which out-
put is muted when AFL (After Fader Listen) or
PFL (Pre Fader Listen) Solo mode is enabled, and
a track is soloed.
Default Path Order for 5.1 Tracks
You can specify the default track layout for all
new 5.1 format paths you create.
To choose a new default 5.1-format path order
(track layout):
1 Choose Setup > I/O.
2 Click the Output tab.
3 Use the Default Path Order menu and sub-
menus to choose the track layout you want.
5.1 Track Layouts, Routing, and Metering
The New Track Default Output can be set to
bus paths, as well as output paths.
Default Path Order selector in I/O Setup
Figure 23. Track layout of different 5.1 formats
Channel Map in I/O Setup5.1 Format
Film
SMPTE/ITU
DTS
L C R Ls Rs LFE
(Control|24 Monitoring)
L R Ls Rs C LFE
L C R Ls Rs LFE
Track Meters Tracks
L C R Ls Rs LFE
(top to bottom)
same
L C R Ls Rs LFE
same
same
same
L C R Ls Rs LFE
(left to right)
L C R Ls Rs LFE
(Pro
Tools Standard)
(ProControl Monitoring)
L C R Ls Rs LFE
L R C LFE Ls Rs
L R Ls Rs C LFE
L R C LFE Ls Rs
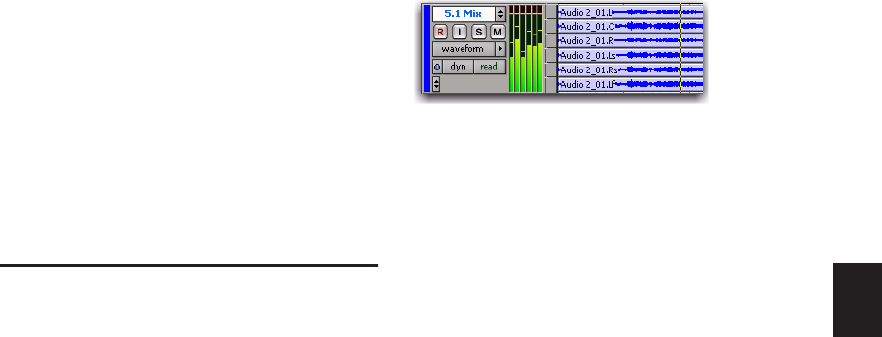
Chapter 40: Multichannel Tracks and Signal Routing (Pro Tools HD Only)
855
Chapter 40: Multichannel Tracks and
Signal Routing (Pro Tools HD Only)
Surround sessions typically include a combina-
tion of mono, stereo, and multichannel audio,
Auxiliary Input, Master Fader, and Instrument
tracks, and inserts and busses.
Once the appropriate I/O Setup has been im-
ported or configured, audio, Auxiliary Input,
Master Fader, and Instrument tracks can be
mixed in multichannel for surround using
Pro Tools mixing features.
Multichannel I/O and signal routing is deter-
mined by the paths defined in the I/O Setup di-
alog.
Multichannel mixing is supported on
Pro Tools|HD systems only, and only when the
Surround Mixer plug-in is installed in your plug-
ins folder. In this chapter, all references to
Pro Tools refer to Pro Tools|HD systems.
Multichannel Audio Tracks
Multichannel audio tracks contain an individ-
ual channel for each signal in the track (for ex-
ample, a 5.1 track would have six channels for
left, center, right, left surround, right surround,
and LFE).
Multichannel audio tracks can be:
• Recorded directly into Pro Tools, using multi-
ple microphones or microphone arrays, or
routed to appropriate multichannel Pro Tools
Input paths
• Imported from other Pro Tools sessions
• Edited, processed, and mixed in combination
with mono and stereo tracks
5.1 format audio files and tracks conform to the
Film track layout standard. Regardless of path
mapping in the I/O Setup dialog, all 5.1 format
audio tracks and meters follow the Film stan-
dard track layout:
L C R Ls Rs LFE
Multichannel audio tracks are not required to
mix in multichannel formats. Mono, stereo, and
all supported track formats can be mixed using
Pro Tools track outputs and sends. See “Multi-
channel Signal Routing” on page 858.
5.1 format multichannel audio track
Pro Tools Reference Guide
856
Placing Audio in Multichannel
Tracks
You can drag audio files and regions from Digi-
Base browsers, the Region List, Windows Ex-
plorer, or Mac Finder, or from other tracks, to
place them in multichannel audio tracks.
To do so, the number of channels being dragged
must match the destination track format. For
example, you can only drag a stereo pair or two
mono regions onto a stereo audio track. Simi-
larly, you can only place audio into an LCR track
when you have selected three regions. With 5.1
tracks, you must select six mono files or regions.
Solo, Mute, and Gain in Multichannel
Tracks and Paths
Stereo and multichannel tracks consist of multi-
ple audio signals, linked together. By default,
multichannel tracks are linked and are con-
trolled by a single channel fader, and solo and
mute switches.
For discrete control of signals, multichannel
tracks can be converted into individual mono
tracks. For discrete level and phase adjustment,
you can insert and unlink a multi-mono Trim
plug-in. Both of these techniques are explained
below.
To convert a multichannel track into discrete
mono tracks:
1
Select the multichannel track.
2
Choose Track > Split Into Mono.
To have discrete control of gain on individual
channels of a multichannel track:
1
Insert a multi-mono Trim plug-in on the
multichannel track.
2
Unlink the Trim plug-in by clicking the Link
icon so that it is unlit.
3
Use the Channel selector to display the con-
trols for a channel, and adjust the gain.
When dragged into a multichannel track,
audio files are placed from top to bottom in
the exact order that they appear in the Re-
gion List or playlist from which they came.
For this reason, you may want to rename
audio files before dragging them, so that
they are in a preferred order. Rename them
so that sorting them By Region Name in the
Region List results in the preferred order.
(For example, with a 5.1-format track, you
can rename the audio tracks, so that the ar-
rangement of the tracks corresponds to L, C,
R, Ls, Rs, and LFE.)
Once converted to mono, multichannel
tracks cannot be relinked into their original
multichannel format. However, a multi-
channel track can be reassembled by drag-
ging the corresponding number of mono
files (with the appropriate file suffixes) into
a multichannel track, although some auto-
mation data may be lost. As an alternative,
record the submix of the mono tracks to disk
on a multichannel track.
See “Linking and Unlinking Controls on
Multi-Mono Plug-ins” on page 860 for
more information.

Chapter 40: Multichannel Tracks and Signal Routing (Pro Tools HD Only)
857
Track and Output Formats
When you create new tracks, you specify mono,
stereo, or a supported multichannel format for
the new tracks.
In the Mix and Edit windows, the track format
of a track’s output is always visible by the num-
ber of track meters contained in its fader strip
(for example, a single meter for mono tracks, a
pair of meters for stereo tracks, and six meters
for 5.1 tracks).
Assigning track output determines the format of
that output. For example, a mono track always
has a single track meter, even when assigned to
a stereo output path. If that same mono track is
assigned to a 5.1 output path, it's output will be
split among those six output channels, depend-
ing on the position of its panner.
Changing Format
Changing the output format for a given track
has several effects:
• The panner that appears in the track will
change to reflect the new output format.
• It may be necessary for one or more pan re-
lated automation playlists to be created or de-
leted.
Because changing the output format has these
effects, a warning dialog appears whenever you
change the output format of a track to a format
of fewer channels. Specifically, this will occur
whenever automation playlists will have to be
deleted.
Multiple Output Assignments and Track Format
When a track is assigned to more than one path
of differing formats, the main output for that
track will match the format of the assigned path
with the greatest number of channels.
Multiple Outputs and Automation Playlists
When a track has multiple output assignments,
Pro Tools sorts panning data appropriately for
each assigned path. For example, if you assign a
mono track to a stereo path and a 5.1 path si-
multaneously, that track will have a 5.1 panner
in the Mix or Edit window. When you pan the
track, Pro Tools interprets the 5.1 panning
moves into stereo panning moves.
This provides a type of parallel mixing. You can
create a variety of mixes of differing formats all
at the same time by routing your elements to
multiple paths.
Control-Start-click (Windows) or Com-
mand-Control-click (Mac) any control in an
Output window to show its automation
playlist in the Edit window and view any
pan automation.
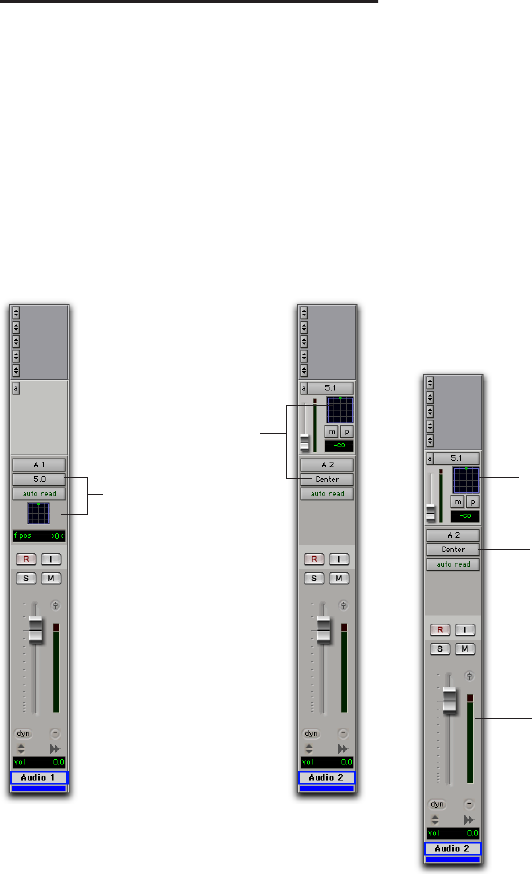
Pro Tools Reference Guide
858
Multichannel Signal Routing
To mix in a multichannel format, tracks are as-
signed to multichannel paths.
Tracks can be mixed in surround using the fol-
lowing two methods:
• By setting a track main output to a multi-
channel path.
• By assigning a multichannel send to route au-
dio to a multichannel path.
Multichannel Track Outputs
Tracks can be routed to multichannel output or
bus paths using the track’s Output Path selector.
This provides a multichannel panner and meter
in the Mix and Edit window I/O View.
Additional output assignments can be added by
Start-clicking (Windows) or Control-clicking
(Mac) the Selector tool and assigning another
path.
Multichannel Sends
All track formats, including mono and stereo, let
you assign one or more multichannel sends.
This provides a multichannel panner in the
Sends View. Sends are also useful to bus tracks
for multichannel plug-in processing.
Figure 24 shows a mono audio track with a 5.1
(6-channel) send (View > Sends A–E > Send A).
Two different ways to configure tracks for multichannel
mixing
This channel’s output path
is multichannel, so the
track provides a multichan-
nel panner
This channel’s main out-
put path is mono (“Center
music”). It has a multi-
channel send providing a
multichannel panner
Figure 24. A mono audio track with a mono output
format and a multichannel send
Multichannel send panner
Mono meter
Mono output format
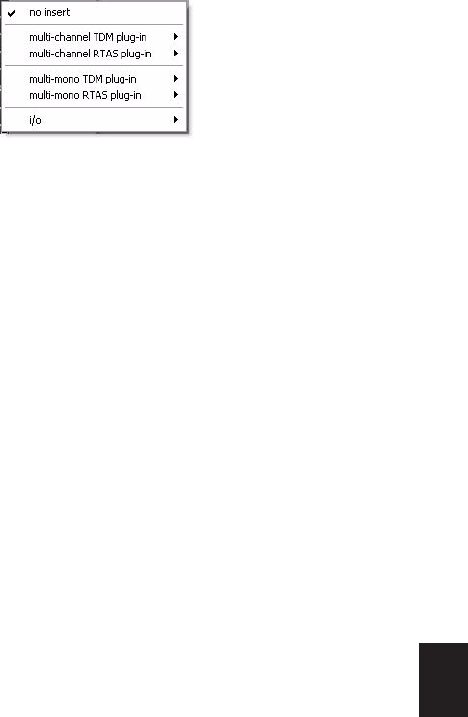
Chapter 40: Multichannel Tracks and Signal Routing (Pro Tools HD Only)
859
Pro Tools bussing and submixing features are
available for all channel formats, from
mono/stereo through 8-channel. For examples
of multichannel monitoring, effects processing,
and bussing, see “Mixing with Paths and Sub-
Paths” on page 861. For mono and stereo mix
examples, see Chapter 35, “Basic Mixing.”
Multichannel Auxiliary Inputs and
Master Faders
A multichannel Auxiliary Input or Master Fader
is used as a return for the multichannel bus.
Sends are useful when you need to create an ad-
ditional, independent mix simultaneously (per-
haps of a distinct format), requiring dedicated
fader, mute, solo, and automation controls.
You can assign Master Faders to main and sub-
paths. Main paths must match the format of the
Master Fader, and only one Master Fader can be
active and assigned to any single (active) main
or sub-path. A Master Fader cannot be assigned
to a sub-path if its associated main path is al-
ready assigned on another Master Fader. See
“Master Fader Tracks” on page 712.
Multichannel Instrument Tracks
Multichannel tracks can be used to monitor and
route multichannel instrument plug-ins or
multichannel external MIDI instruments.
Mono, Multi-Mono and
Multichannel Plug-ins
Plug-ins can be used in mono, multi-mono, or
multichannel formats.
For information about mono, stereo, and mono-
in/stereo-out plug-ins, see Chapter 36, “Plug-in
and Hardware Inserts.”
Multi-Mono Plug-ins
Are designed for use on ste-
reo or greater-than-stereo multichannel tracks.
Multi-mono plug-ins are useful, or required, in
the following situations:
• When a plug-in does not involve multi-
channel correlated processing (for example,
when applying EQ to select sides of a multi-
channel signal)
• When you need to adjust signals within the
multichannel track independently
• When a plug-in does not support multi-
channel formats
When a multi-mono plug-in is first inserted on a
multichannel track, the plug-in controls are
linked. You can unlink them for independent
adjustment. See “Linking and Unlinking Con-
trols on Multi-Mono Plug-ins” on page 860 for
more information.
Multi-mono plugs-ins can also be inserted on
stereo tracks, to apply unlinked plug-ins on the
left and right channels.
Plug-in formats

Pro Tools Reference Guide
860
Multichannel Plug-ins
Are designed for use on
stereo and multichannel tracks that require cor-
related processing, including stereo and multi-
channel limiting, compression, and similar ef-
fects.
Linking and Unlinking Controls on Multi-
Mono Plug-ins
When a multi-mono plug-in is used on a multi-
channel track of more than two channels, the
controls are normally linked. Adjusting the
Gain control on one channel, for example, will
adjust it for all channels.
If necessary, you can unlink plug-in controls on
specific channels of a track and edit them inde-
pendently. You can also selectively link the con-
trols of specific channels.
For example, to apply equal filter cutoffs to the
Ls and Rs (surround) channels in a 5.1 mix, you
could link enable just those channels in an un-
linked, multi-mono EQ plug-in. Adjusting the
controls in the plug-in window for either chan-
nel (Ls or Rs) adjusts the other, linked channel
as well.
Channel Selector
Accesses a specific channel
within a multichannel track for plug-in parame-
ter editing. This menu appears only on multi-
mono plug-ins inserted on tracks with more
than two channels.
Master Link Button
When enabled, links the
controls on all channels of a multi-mono plug-
in so that they can be adjusted in tandem.
Link Enable Buttons
Let you selectively link the
controls of specific channels of a multi-mono
plug-in. Each square represents a speaker chan-
nel. The Master Link button must be disabled to
use the Link Enable buttons.
To unlink controls on a multi-mono plug-in:
Deselect the Master Link button. It is lit when
linked, unlit when unlinked.
To access controls for a specific channel:
Select the channel from the Channel selector.
To open a plug-in window for all channels of a
multi-mono plug-in:
Alt-click (Windows) or Option-click (Mac) the
Channel selector.
To link the controls of specific channels:
1
Deselect the Master Link button if it is not al-
ready deselected.
2
Click the Link Enable buttons for the chan-
nels whose controls you want to link.
Channel selector and Link controls
Channel selector
Link Enable buttons
Master Link button
For more information on using plug-ins, see
the DigiRack Plug-ins Guide.

Chapter 40: Multichannel Tracks and Signal Routing (Pro Tools HD Only)
861
Paths in Surround Mixes
Because Pro Tools provides a flexible routing
and submixing environment, you can maximize
your system’s available resources by first identi-
fying the elements that you want to pan dynam-
ically and those that can be placed in certain
channels only (see “Mixing with Paths and Sub-
Paths” on page 861).
Once you have identified these elements in your
session, you can use a combination of main and
sub-path assignments, and multichannel pan-
ning.
Mixing with Paths and Sub-Paths
It is rare that every track needs to be “flown” (ac-
tively panned in between more than a pair of
speakers). In most situations, certain elements
are placed in certain speakers and remain there,
providing the foundation for a mix.
Figure 25 on page 862 illustrates an example of
how panning and signal routing can be com-
bined in a multichannel mix. The following sec-
tions describe how to organize your session and
signal routing to maximize the available re-
sources.
When to Assign Multichannel Outputs
Assign 5.1 paths only to those tracks that need
to be panned to all six channels.
For example, a sound effects track with a jet fly-
over should be assigned a 5.1 path to be able to
fly the sound from front-to-back. In a music
mix, you can fly a solo instrument or make a
synth pad swirl around the room as a special ef-
fect.
Elements that need to be heard in all speakers si-
multaneously can also be assigned to the multi-
channel output, whether or not they need ac-
tive panning in the sound field.
When to Use Sub-Paths
To help simplify large sessions, use sub-paths
to route
static
(or, stationary) elements directly
to the output channel or channels.
For example, film dialog is often mixed to the
center channel to anchor this essential sound el-
ement to the picture. Instead of assigning a six-
channel panner to dialog tracks and panning
the tracks to the center speaker only, you can
route the dialog track’s main output to a mono
(Center) sub-path.
See “Extending Stereo Mixing Conventions
to Surround Mixing” on page 862 for re-
lated information.
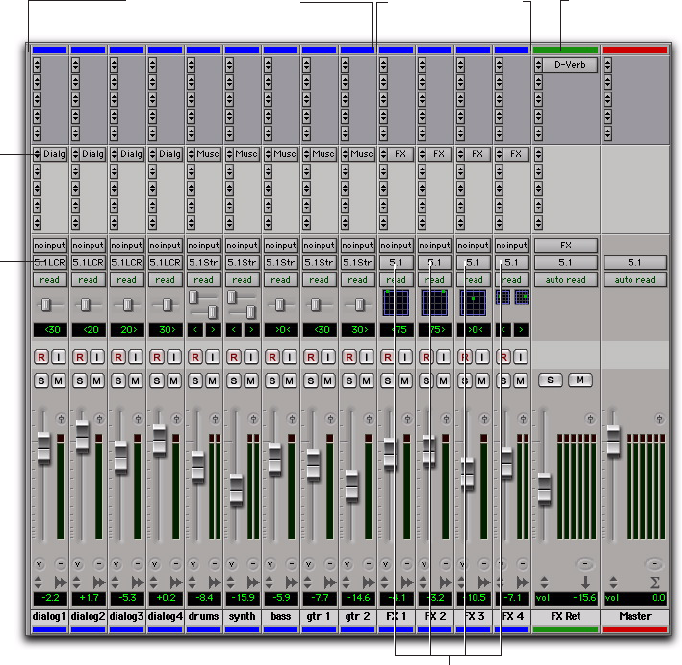
Pro Tools Reference Guide
862
Extending Stereo Mixing Conventions to
Surround Mixing
Stereo mixing sets the precedent for active and
static panning, and surround mixing can bene-
fit from the same basic principles.
Panning a sound back-and-forth between the
left and right speakers is best used as a special ef-
fect. In a typical music mix, the basic tracks are
placed in the stereo sound field and remain
there.
Surround mixes can become incoherent if too
many elements are continuously moving, For
special effects, some tracks can be panned
dy-
namically,
bouncing between speakers or sweep-
ing from one side to the other.
Figure 25. Using signal routing and sub-paths to mix in surround
Effect bus
routing
Outputs to
sub-paths
Outputs to main 5.1 path for surround panning
Tracks routed to main
5.1 surround path
Tracks routed to subpaths Auxiliary Input
routed to main
5.1 surround path
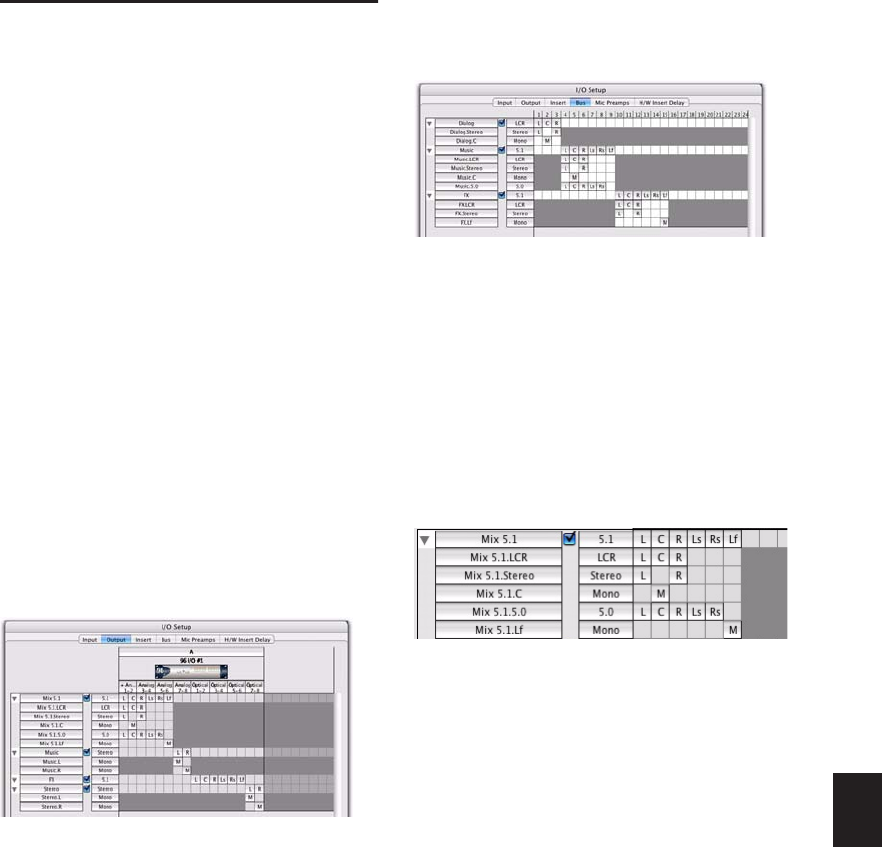
Chapter 40: Multichannel Tracks and Signal Routing (Pro Tools HD Only)
863
Example Paths and Signal
Routing for a Surround Mix
The examples that follow show how Auxiliary
Inputs, Master Faders, and other Pro Tools sig-
nal routing features can be used for stem mixes,
submixes, and similar project needs.
In these examples, music and effects are being
mixed for a trailer, in 5.1 surround. Separate
stem mixes (for music and for effects) are to be
mastered to 8-track MDM.
Example Multichannel Paths
Signal routing is the key element in any
Pro Tools surround session. Signal routing is
configured and defined in the I/O Setup dialog.
Example Output Paths
Figure 26 shows output paths defined in the I/O
Setup dialog of an example session that was cre-
ated on a Pro Tools|HD system with one 96 I/O
audio interface.
Sub-paths have been defined for Mix, Music,
and FX main output paths.
Additional stereo output paths, with mono sub-
paths, have also been defined for the remaining
channels.
Example Bus Paths
Figure 27 shows example bus paths.
An LCR format path (“Dialog”) and two 5.1 for-
mat paths (“Music” and “FX”) have been de-
fined, each with several sub-paths.
Example Sub-Paths
Sub-paths let you route to selective channels
within the multichannel surround output. In
Figure 28, the Mix 5.1 bus has several sub-paths
that show this.
5.0 Sub-Path
The 5.0 path is a 5-channel sub-
path. Use this type of sub-path routing to con-
serve mixing resources with tracks you want to
keep out of the LFE channel.
LFE Path
A custom LFE sub-path (“Lf”) has been
added to provide a discrete mono path for the
LFE channel.
Figure 26. I/O Setup, example output paths
Figure 27. I/O Setup, example bus paths
Figure 28. I/O Setup, example sub-paths
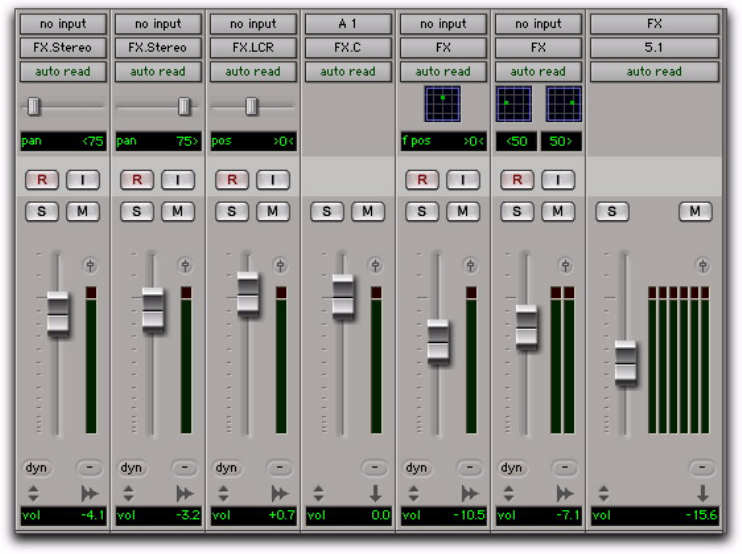
Pro Tools Reference Guide
864
Signal Routing Examples
The following examples show how main and
sub-paths can be used, using an example session
consisting of a 5.1 main mix, with music and ef-
fects stems (or submixes).
Submix Stem Examples
Figure 29 shows a routing configuration for an
effects submix. Two tracks are routed to stereo
bus sub-paths, while others are assigned to an
LCR and a mono bus sub-path. Two tracks (one
mono, one stereo) are assigned to multichannel
busses for surround panning. A 5.1 Auxiliary In-
put assigned to the FX main bus path serves as a
submixer.
Figure 29. FX stem
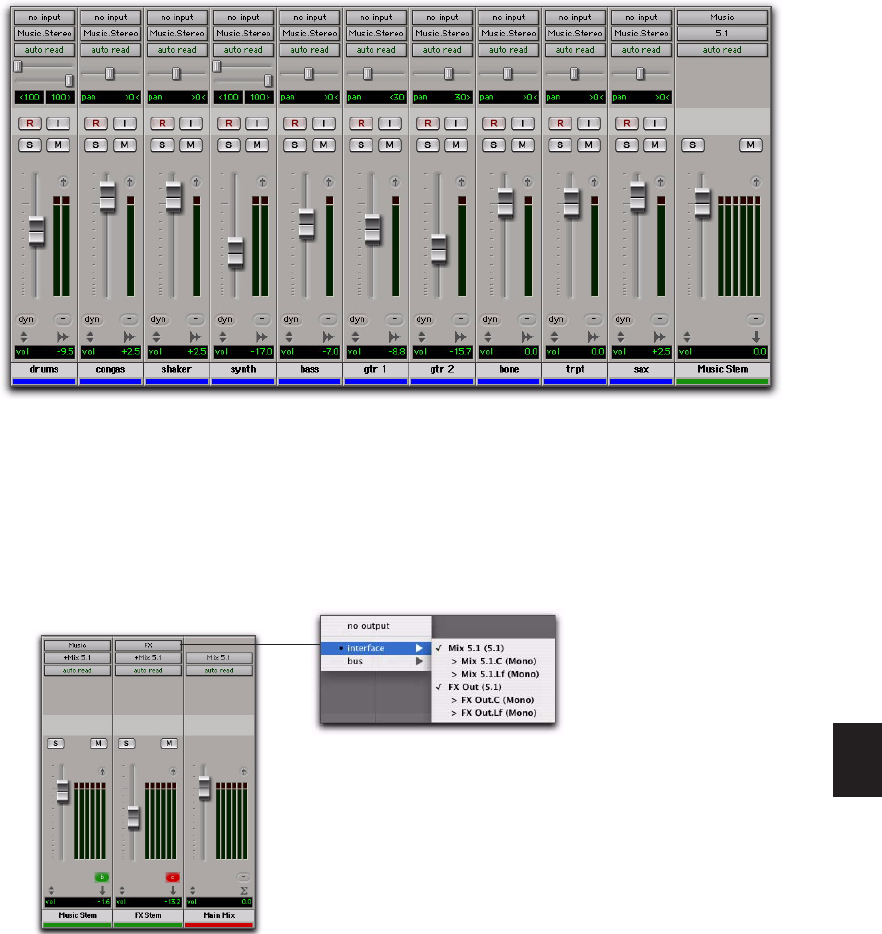
Chapter 40: Multichannel Tracks and Signal Routing (Pro Tools HD Only)
865
Figure 30 shows a routing configuration for music tracks.
Most of the music tracks in this example are routed to the front left/right channels, using a stereo sub-
path. A 5.1 Auxiliary Input controls the bus and stem output.
Main Stems Example
Figure 31 shows two Auxiliary Input channels assigned to additional 5.1 format paths for a main mix.
Figure 30. Music stem
Figure 31. Main stems
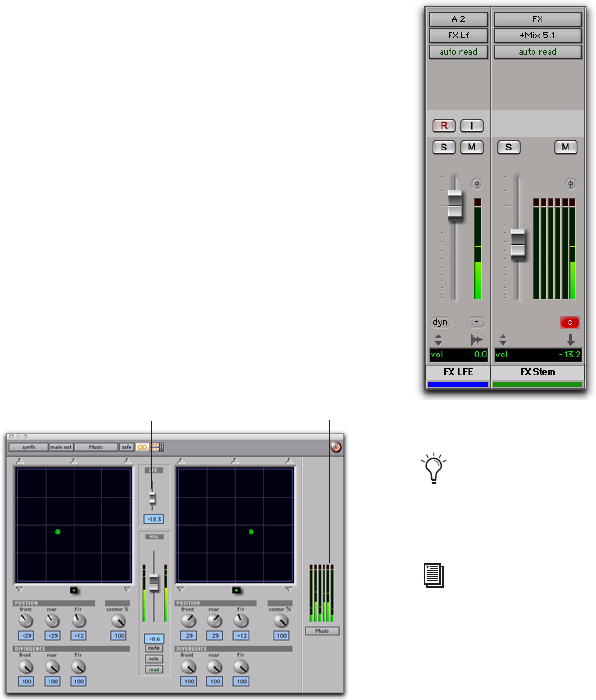
Pro Tools Reference Guide
866
Multiple output assignments make it possible to
configure a number of multi-format mixes. For
example, you can assign an additional stereo
output to tracks and create a stereo mix at the
same time as a 5.1 mix. For more information,
see “Multiple Output Assignments” on
page 722.
LFE Examples
LFE tracks and other audio can contribute to the
LFE output in two ways:
• Using the LFE fader in Output windows. This
LFE signal is post-fader.
– or –
• Using a custom sub-path to route channels
discretely.
Figure 32 shows a channel Output window,
sending and metering to the LFE channel.
Using the LFE fader, you can add any amount of
any multichannel path to the overall LFE out-
put. In the above example, the track’s Center
percentage has been turned off, and the LFE
fader has been raised to route it to the LFE chan-
nel.
Figure 33 shows how a “traditional” LFE track
can be routed to only the LFE channel. This ex-
ample uses a custom-defined LFE sub-path to
the FX main bus path.
LFE and Filtering
Pro Tools applies no filtering to LFE signals.
Some delivery requirements may require filter-
ing for the LFE track. See the
Pro Tools Sync & Sur-
round Concepts Guide
for more information.
Figure 32. LFE contribution from a stereo output
LFE fader LFE meter
Figure 33. Discrete LFE routing
LFE faders can follow Mix and Edit Groups.
For information, see “Selecting Group At-
tributes” on page 186.
For instructions on how to create a sub-
path, see “Custom Multichannel Paths” on
page 852.

Chapter 41: Surround Panning and Mixing (Pro Tools HD Only)
867
Chapter 41: Surround Panning and
Mixing (Pro Tools HD Only)
This chapter explains how to pan and mix in
surround with Pro Tools.
Multichannel mixing is supported on
Pro Tools|HD systems only. In this chapter, all
references to Pro Tools refer to Pro Tools|HD
systems.
Before you can pan a track in surround, it must
be assigned to an appropriate multichannel out-
put or bus path.
The I/O Setup dialog defines the bussing and
output architecture of the Pro Tools multi-
channel surround mixer. If you have not already
done so, it is recommended that you become fa-
miliar with main and sub-paths and the
I/O Setup dialog before starting multichannel
Pro Tools projects.
Introduction to Pro Tools
Surround Panning
There are four different track panning methods
available:
• In the Edit window, using the reduced-height
Panner Grid in the I/O View
• In the Mix window, using the reduced-height
Panner Grid
• In the Output window, using the full-size
Panner Grid
• Through pan automation editing
Control surfaces provide additional panning op-
tions. Refer to the documentation for your con-
trol surface for more information.
See Chapter 39, “Pro Tools Setup for Sur-
round (Pro Tools HD Only)” for more infor-
mation on multichannel configurations
and I/O Setup options. For multichannel
signal routing, see Chapter 40, “Multi-
channel Tracks and Signal Routing
(Pro Tools HD Only).”
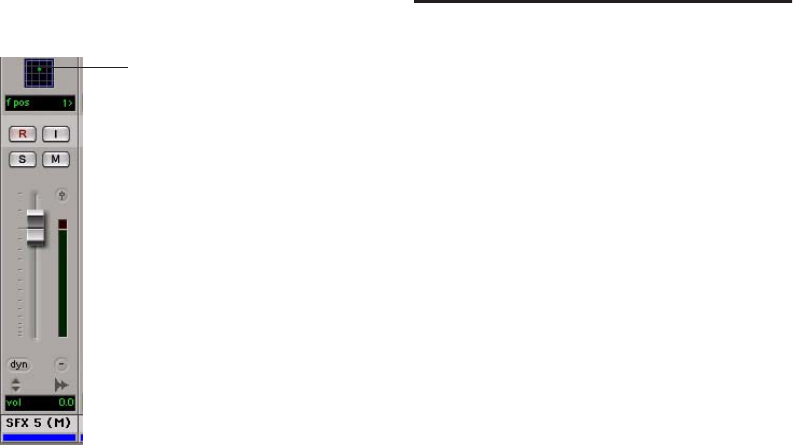
Pro Tools Reference Guide
868
Mix and Edit Window Panner Grids
In the Mix and Edit window, multichannel Pan-
ner Grids are displayed on tracks that have
multichannel track or send output assignments.
To pan from the Mix or Edit window:
1 To pan in the Edit window, make sure I/O
View is being shown (View > Edit Window >
I/O). Panner Grids are always displayed in Mix
window tracks that support panning.
2 Begin playback.
3 Click and drag on the appropriate multi-
channel track’s Panner Grid in the Mix or Edit
windows.
The Pan Location cursor follows your move-
ments as long as you hold down the mouse but-
ton. Movements are scaled so that, once you
click to “grab” the Pan Location cursor, you do
not need to limit your movements to the small
Track Grid area.
Pan Location Cursor Color while Automating
The Pan Location cursor is green when the track
is in Automation Read mode, red in an Auto-
mation Touch, Latch, Touch/Latch, or Write
modes, and yellow in Automation Off (or Auto-
mation Suspend) mode.
In Trim mode, the Volume fader and LFE fader
are yellow.
Output windows provide additional features
and controls (and a much larger Grid). For de-
tails, see “Output Windows” on page 868.
Output Windows
Output windows provide panning controls
(called panners), as well as standard Pro Tools
controls, for tracks of all mix formats (from 3-
channel LCR through 8-channel 7.1).
For information on Output window standard
controls, see “Standard Controls” on page 869.
For information on Output window panning
controls, see “Surround Panner Controls” on
page 870.
Some of the features of Output windows in-
clude:
• X/Y (joystick-style) panning
• 3-Knob panning
• Full Divergence and Center Percentage
control
• AutoGlide
• LFE feed
• Multichannel meters
• Pro Tools target window support
Multiple panners can be opened simulta-
neously, or a single window can display the cur-
rent panner.
Panning in the Track Grid
Click and drag to pan
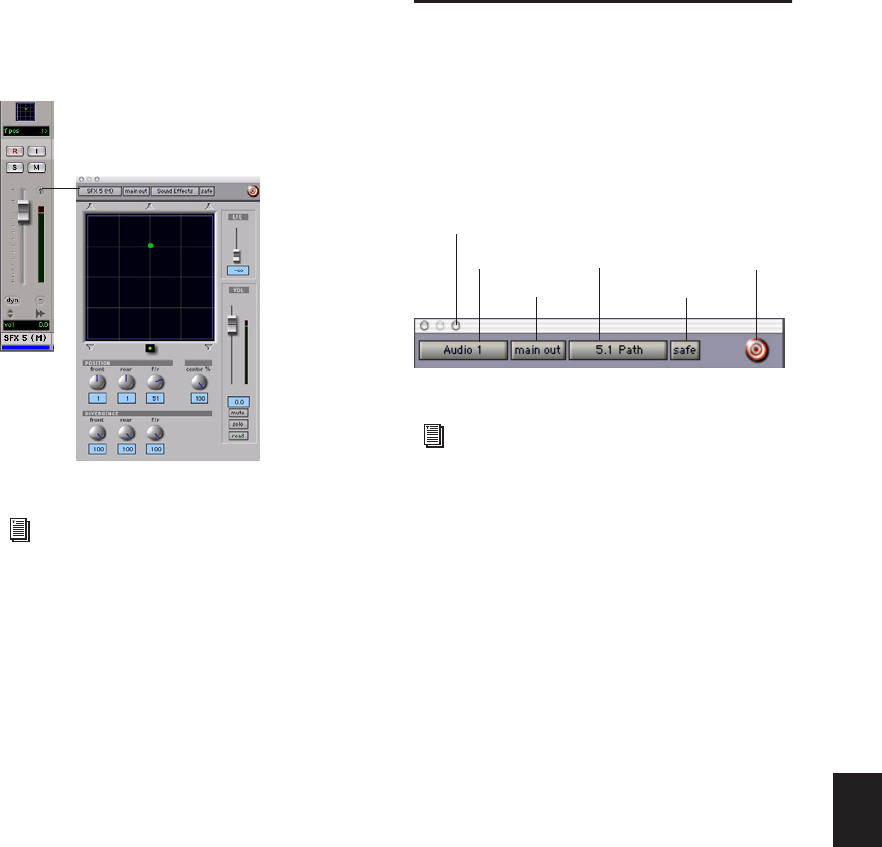
Chapter 41: Surround Panning and Mixing (Pro Tools HD Only) 869
To open an Output window:
Click the Output Window button in the track
in the Mix or Edit window (I/O View).
Standard Controls
All Output windows provide standard Pro Tools
controls for routing, path assignment and other
track features. These controls are located at the
top of all Output, Send, Insert, and Plug-in win-
dows. Some controls are specific to the type of
window.
Track Fader, Solo, Mute, and Auto
All Output windows provide track volume and
mute controls. You can adjust and automate
track volume, or mute, directly using these con-
trols. The larger fader and Mute button are
equivalent to those in the Pro Tools Mix win-
dow.
Opening a multichannel Output window
For instructions on managing multiple Out-
put windows, see “Output Windows for
Tracks and Sends” on page 730.
Panner Control section
For details on these standard features, see
“Standard Selector Controls in Output
Windows” on page 732.
Track selector
Output selector
Path selector Target icon
Show meters
Automation Safe
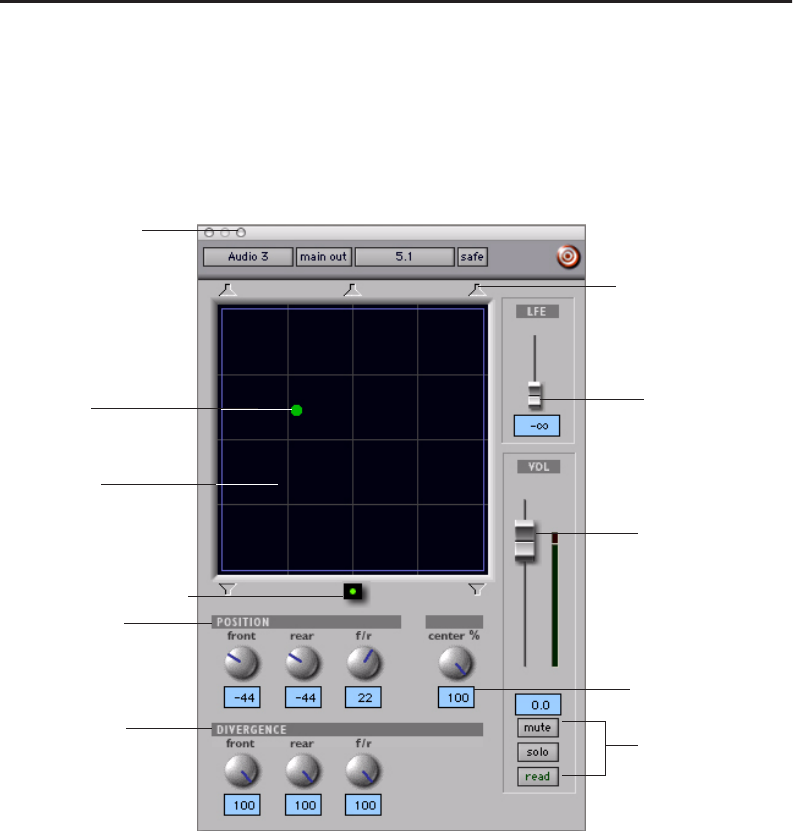
Pro Tools Reference Guide870
Surround Panner Controls
When assigned to tracks or paths with four or more channels, the Output window provides an X/Y
Grid for surround panning. The speakers associated with the panner’s multichannel format are dis-
played in their relative positions outside the Panner Grid. These speakers are also used as Snap Pan to
Speaker controls.
This section identifies all the controls and features found in Pro Tools multichannel panners.
Figure 34. Output window with a 5.1-format multichannel panner
X/Y Grid
LFE fader
Track fader and meter
Position
(knob panners)
Divergence
Pan Location
cursor
Panning Mode button
Track Automation.
Solo, and Mute
Center %
Click to show meters
Snap Pan to Speaker icons
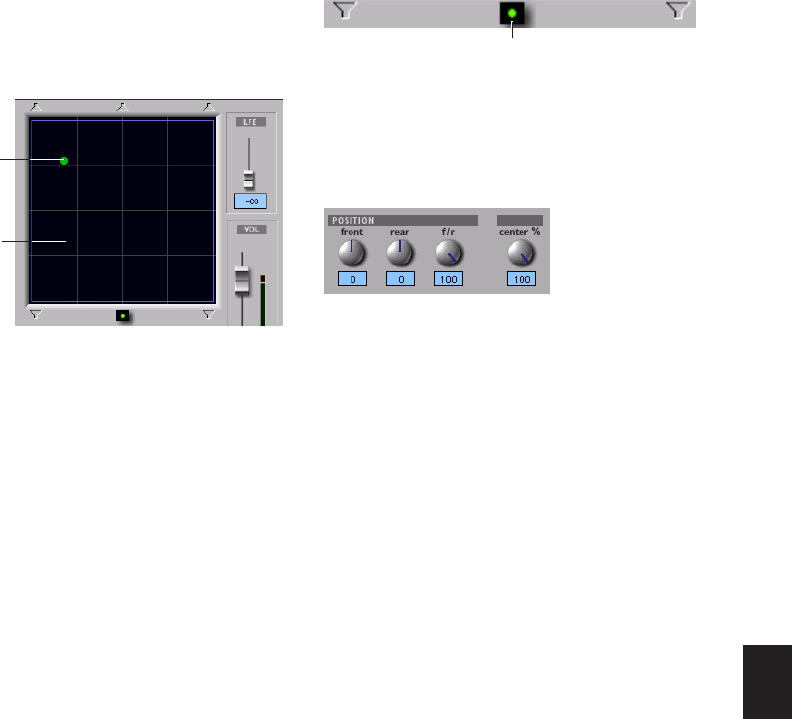
Chapter 41: Surround Panning and Mixing (Pro Tools HD Only) 871
The X/Y Grid and Pan Location
Cursor
The X/Y Grid is where multichannel panning
information is input and displayed. You can in-
put pan information using X/Y mode, 3-Knob
mode, or by entering numeric values in the Po-
sition data fields. You can also edit pan automa-
tion graphically in the Edit window.
Multichannel panners default to X/Y mode. In
X/Y mode, the track’s current pan position is
represented by a green dot. This dot is the Pan
Location cursor, and its color indicates track au-
tomation status using standard Pro Tools colors:
Green The track is in automation Read mode.
Red The track is in automation Write, Touch,
Latch, or Touch/Latch mode.
Yellow The track is in automation Off mode (or
Automation Suspend) mode.
Panning Mode Button
This button, located below the X/Y Grid, pro-
vides access to Surround panning modes (see
“Panning Modes” on page 873).
Position Controls
The Position controls let you set the positions of
the panner.
Front Displays and controls the current front X-
axis (left/right) position of the panner.
Rear Displays and controls the current rear X-
axis (left/right) position of the panner. In de-
fault X/Y Panning mode, Rear is linked to Front
position and cannot be controlled indepen-
dently.
F/R (Front/Rear) Displays and controls the cur-
rent Y-axis position of the panner.
Center % Control
Center % controls how much of the signal is
routed to the center speaker. This lets you mix a
track to the front with a phantom center (0%
Center value) or to three-channel (LCR) when
panning front.
X/Y Grid and Pan Location cursor
X/Y grid
Pan Location
cursor
Panner Mode button set to X/Y mode
Position and Center % controls
X/Y mode icon
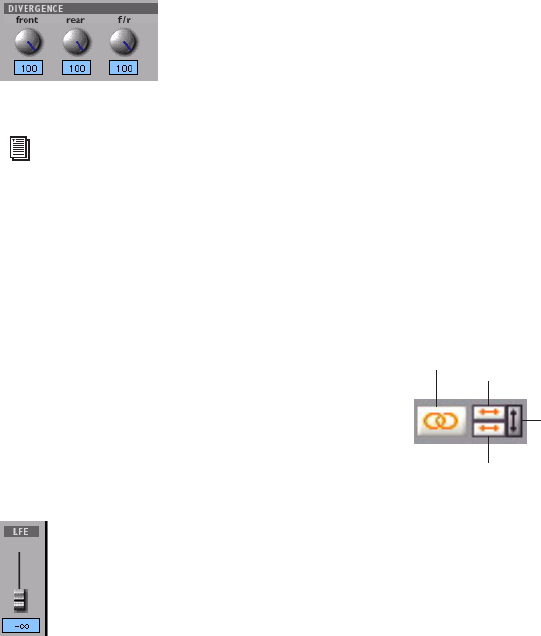
Pro Tools Reference Guide872
Divergence Controls
Divergence determines the width of the panned
signal with respect to neighboring speakers. (For
more information, see the Pro Tools Sync & Sur-
round Concepts Guide). There are three Diver-
gence controls:
Front, Rear, and F/R Divergence Provide sepa-
rate, automatable divergence control over front
speakers, rear speakers, and between front/rear,
respectively.
Snap Pan to Speaker Icons
The Snap Pan to Speaker icons let you force the
panner to the speaker’s location. For example,
clicking on the upper left speaker moves the Pan
Location cursor to the upper left corner of the
X/Y Grid.
LFE Fader
The LFE fader is only available in “.1” surround
formats (5.1, 6.1, and 7.1).
The LFE fader determines how much of the cur-
rent track’s signal will be routed to the LFE
channel. LFE faders in Track and Send windows
can follow groups. The Pro Tools LFE channel is
always full-bandwidth. For more information
on how to use the LFE fader, see “LFE Faders in
Multichannel Panners” on page 878.
Multichannel Panner Linking
Stereo tracks with multichannel outputs provide
left and right multichannel panners. The Out-
put window provides controls to link the left
and right channels for precise panning.
When you create a stereo track that is routed to
a multichannel output, the following pan link-
age controls are active by default:
• Link (links Left and Right pan controls)
• Front Inverse (inverts Left and Right pan
control linkage across front)
• Rear Inverse (inverts Left and Right pan
control linkage across rear)
The Front/Rear Inverse pan control is unlinked
by default.
Divergence controls
For examples of how divergence settings af-
fect output panning, see “Divergence and
Center Percentage” on page 876.
LFE fader
Stereo multichannel panner controls showing default
linking
Link
Front/Rear Inverse
Front Inverse
Rear Inverse
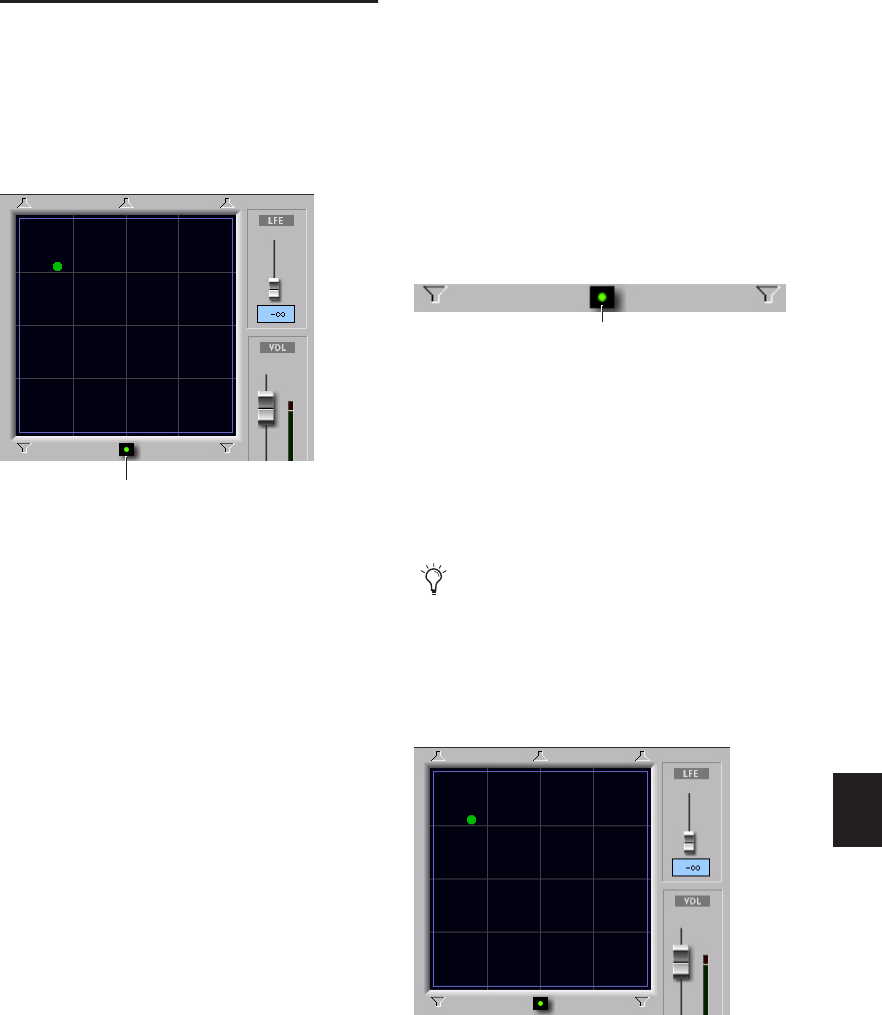
Chapter 41: Surround Panning and Mixing (Pro Tools HD Only) 873
Panning Modes
The Panning Mode button provides access to
four panning modes: X/Y mode, Divergence Ed-
iting, 3-Knob mode, and AutoGlide mode. Pan-
ning controls can be automated in all four
modes.
Panning Modes
X/Y Mode Joystick-style panning by dragging
the Pan Location cursor within the X/Y Speaker
Grid. See “X/Y Panning” on page 873 for more
information.
3-Knob Mode Point-to-point panning, between
pairs of speakers. See “3-Knob Panning” on
page 874 for more information.
Divergence Editing The divergence X/Y Grid can
be dragged to resize the divergence boundaries.
See “Divergence Editing Mode” on page 877.
AutoGlide Mode Point-to-point panning from
the Pan Location cursor to a new destination
over a specified AutoGlide Time. See “AutoGlide
Mode” on page 875 for more information.
To enable a Panning Mode:
Click on the Panning Mode button in the Sur-
round Panner until the desired mode icon is dis-
played.
X/Y Panning
To pan in X/Y mode:
1 Click on the Panning Mode button until the
X/Y mode icon is displayed.
2 Drag the Pan Location cursor, or click any-
where in the Grid and drag to pan the track. The
location of the Pan Location cursor determines
the pan position of the signal. For example, to
pan something to the left rear speaker, move the
Pan Location cursor to the lower-left corner of
the Grid.
Panning Mode button (X/Y mode shown)
Panning Mode button
Panner Mode button set to X/Y mode
It is not necessary to click exactly on the Pan
Location cursor. Clicking anywhere in the
Grid will move the Pan Location cursor rel-
ative to where you click or take over with a
hardware panner. Panning does not jump to
the click position.
X/Y Panning
X/Y mode icon
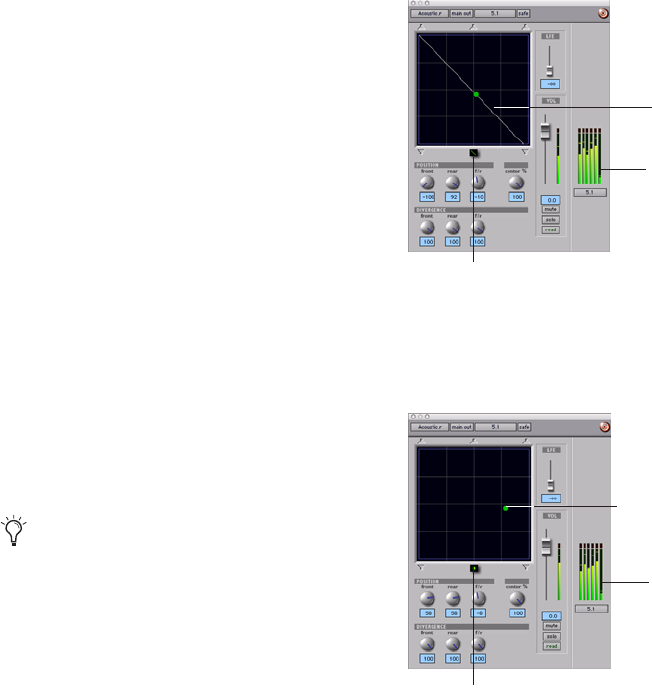
Pro Tools Reference Guide874
To snap the Pan Location cursor to a location in
the Grid:
Hold down the Control key and click any-
where in the X/Y Grid.
Grid Options and Shortcuts
Fine-Adjust Mode Hold down the Control key
(Windows) or Command key (Mac) for fine ad-
justment of all Panner controls.
Constraining to X or Y Movement Shift-drag the
Pan Location cursor to constrain its movement
to the X or Y direction.
Reset to Default Alt-click (Windows) or Option-
click (Mac) in the Panner Grid to reset all con-
trols to their default position.
Snap Pan to Speaker Click one of the Snap Pan
to Speaker icons to force the panner to that
speaker location.
Display Automation in Edit Window Control-
Start-click (Windows) or Command-Control-
click (Mac) a control to display that control’s
playlist in the Edit window.
3-Knob Panning
Pro Tools provides 3-Knob mode as an addi-
tional way to input pan moves.
3-Knob mode lets you:
• Pan in straight lines, moving the Pan Location
cursor using the Position rotary knobs with
full movement of front, rear, and front-rear
position.
– and –
• Pan discretely between pairs of speakers.
For example, when panning front-left to rear-
right in 3-Knob mode, audio will be heard from
just those two speakers (assuming full diver-
gence is in effect).
By comparison, in X/Y mode a diagonal pan
may result in audio being heard in some or all
channels.
The difference is that 3-Knob mode pans dis-
cretely between the front and rear position of
the panning trajectory, while X/Y mode panning
takes place in the full 360° Panning Grid. Diver-
gence and Center Percentage are variable in
both Panning modes.
All Pan controls can be automated, includ-
ing pan position and divergence. See
Chapter 37, “Automation” for details.
Panning and metering in 3-Knob mode
Panning and metering in X/Y mode
3-Knob trajectory
3-Knob mode
meters
X/Y pan position
meters
X/Y mode
Chapter 41: Surround Panning and Mixing (Pro Tools HD Only) 875
To enable 3-Knob Panning mode:
Click on the Panning Mode button until the
3-Knob mode icon is displayed.
The panner trajectory line appears across the
Grid, extending from the front (X-axis) to the
rear (Y-axis).
To pan in 3-Knob mode:
1 Adjust the Front and Rear Position knobs to
set the trajectory line.
2 Rotate the Front/Rear Position knob to pan
along the trajectory. The Pan Location cursor is
constrained to the white trajectory line.
To change the 3-Knob trajectory angles, do one of
the following:
Drag either end point (Front or Rear) of the
trajectory line.
– or –
Adjust the Front or Rear Position controls.
To change the current trajectory position (left-to-
right) and retain its current angles:
Drag the trajectory line (not its end points) to
a new position.
AutoGlide Mode
AutoGlide mode lets you quickly write Surround
Panner automation by clicking new locations in
the Surround Panner window, instead of manu-
ally moving the Surround Panner controls.
The time it takes to glide from point to point
(from the Pan Location cursor to the new desti-
nation) is called the AutoGlide Time. This time
is set in the Mixing Preferences page and has a
range of 10 msec to 10000 msec (10 seconds).
To set the AutoGlide Time
1 Choose Setup > Preferences and click the Mix-
ing tab.
2 Set the AutoGlide Time in the Automation
section.
To do an AutoGlide automation pass:
1 Click the Panning Mode button until the
AutoGlide mode icon is displayed.
The Panning Mode button displays a slanted
dotted line that ends with a filled in dot (repre-
senting a cursor) at its top right corner.
2 In the Mix or Edit window, click the Auto-
mation Mode selector and select an Automation
mode for the track you want to automate.
3 Press Play to begin playback.
Panner Mode button set to 3-Knob mode
3-Knob mode icon
When writing automation in AutoGlide
mode, the Pan Location cursor cannot be
dragged from its location.
Panner Mode button set to AutoGlide mode
AutoGlide mode icon
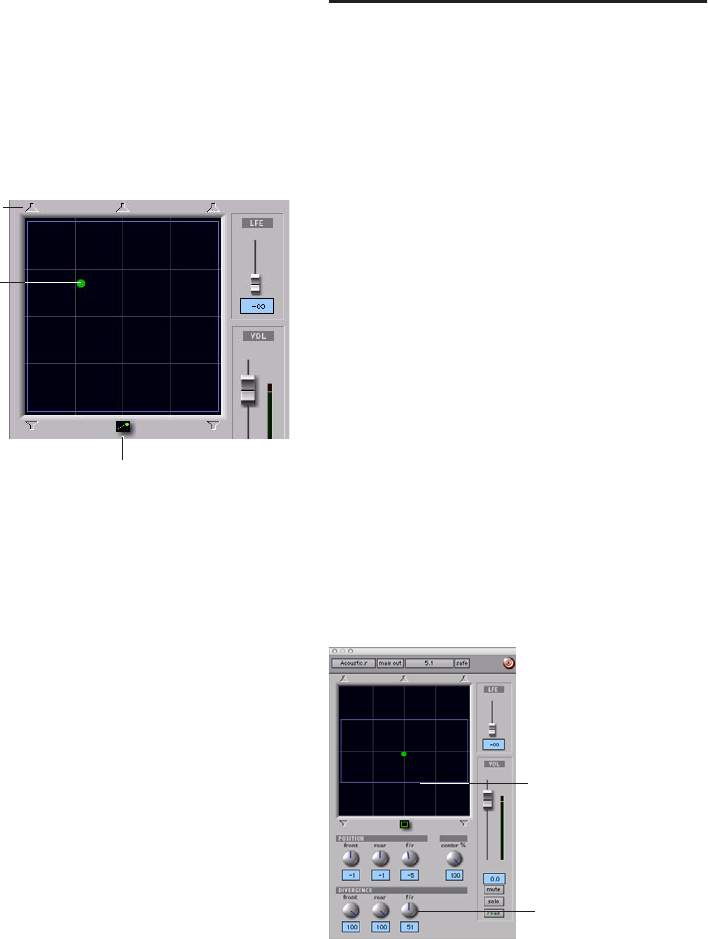
Pro Tools Reference Guide876
4 Set a new destination for the cursor by doing
one of the following:
• Click a Snap Pan to Speaker icon to glide to
its speaker location.
– or –
• Click in the pan window to glide to a spe-
cific location in the X/Y Grid.
The Pan Location cursor will begin to move to-
wards the new destination in the time it takes to
travel the AutoGlide Time. When the new desti-
nation point is reached, a new breakpoint will
be written at the new location.
5 Repeat the previous step if you want to write
additional panning moves.
6 Stop the transport when finished.
Divergence and Center
Percentage
The Divergence and Center Percentage controls
range from 0 to 100, and can be automated.
They are especially useful for ensuring audibility
and coverage in large venues, and to increase
clarity of voices.
Front Divergence Controls divergence between
front speakers (X-axis only).
Rear Divergence Controls divergence between
the rear speakers (X-axis only).
Front/Rear Divergence Controls divergence be-
tween front and rear (the Y-axis).
Center % (Percentage) Determines whether
there is a discrete center image, a completely
phantom center image, or a variable amount in
between.
Divergence
In the Panner Grid, the current divergence val-
ues are displayed using a purple outline.
Panning Mode button (AutoGlide mode shown)
AutoGlide mode
Snap Pan to
Speaker icons
Pan Location
cursor
Divergence display and controls
Divergence display
Divergence controls
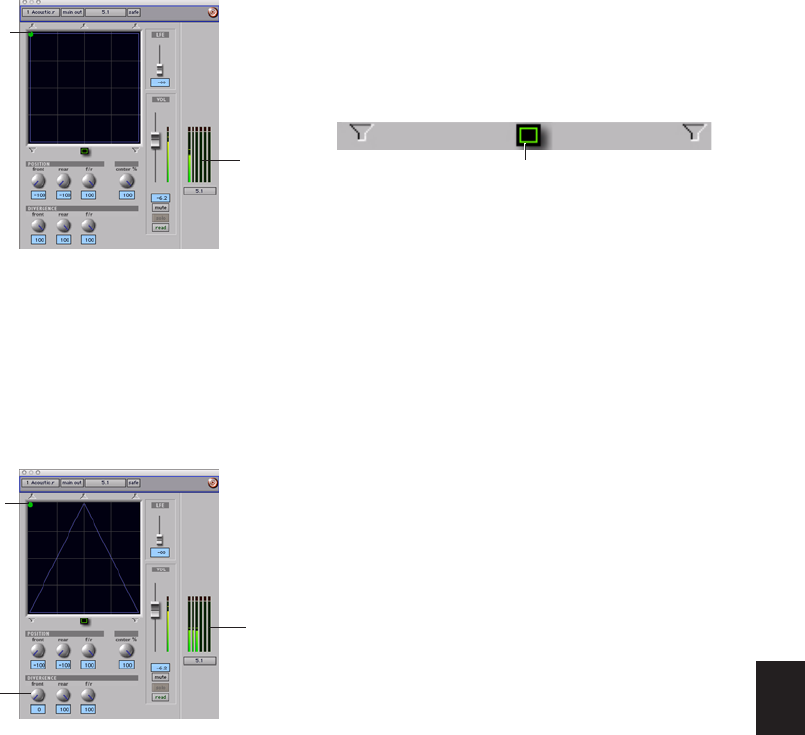
Chapter 41: Surround Panning and Mixing (Pro Tools HD Only) 877
By default, Pro Tools surround panners are
100% or fully divergent, meaning that a signal
that is panned completely to one speaker will
only be audible in that speaker.
Lower divergence settings result in a progres-
sively wider source signal. When Divergence is
less than 100%, tracks will be routed to neigh-
boring speakers to some degree, even when the
Pan Location cursor is positioned next to a sin-
gle speaker.
To adjust divergence:
Adjust the Front, Rear, and Front/Rear Diver-
gence controls as necessary.
Divergence Editing Mode
In Divergence Editing mode, you can adjust the
divergence boundaries by dragging directly in
the Divergence Grid.
To adjust divergence graphically:
1 Click on the Panning Mode button until the
Divergence Editing icon is displayed.
2 Drag in the Grid to resize the divergence
boundaries.
Full divergence for discrete panning to front, left
(meters show signal only in front, left)
Front Divergence at 0% for widest panning (note meters
showing signal in all three front speakers)
meters
Pan Location
cursor
meters
Front
Divergence
Pan Location
cursor
Panner Mode button set to Divergence Editing
Divergence Editing icon
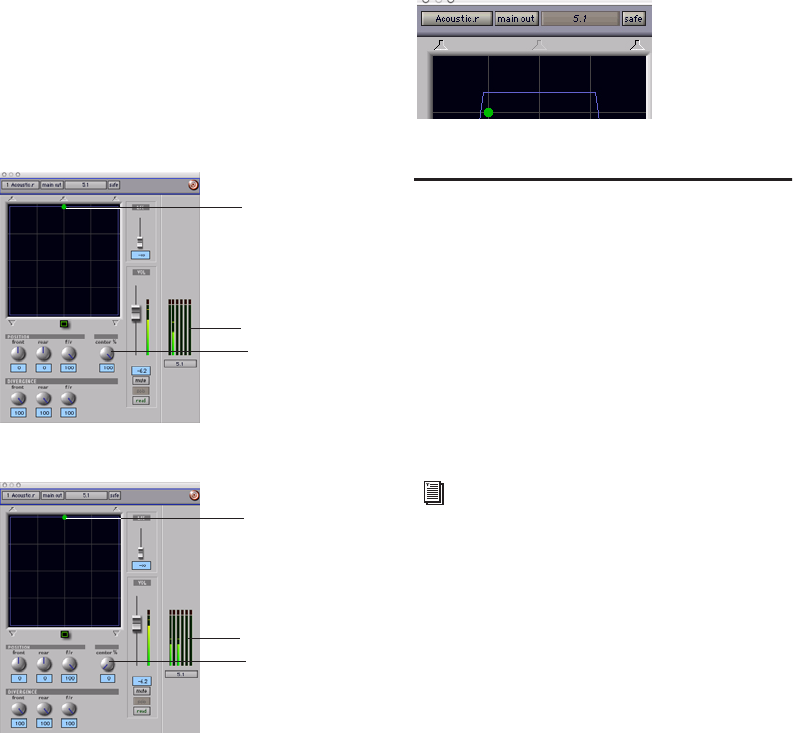
Pro Tools Reference Guide878
Center % (Percentage)
Center Percentage controls whether there is a
discrete center channel for the track or a phan-
tom center channel.
Center Percentage Example
In film and video production, the center chan-
nel often contains dialog. To enhance the clarity
of dialog, it is often beneficial to keep elements
such as music out of the center speaker. By re-
ducing the Center Percentage on music tracks,
music panned to the front of the soundfield can
be panned to only the left and right speakers,
forcing them to have a variable phantom center
image.
To adjust Center Percentage:
Adjust the Center Percentage knob as appro-
priate.
As you reduce the Center Percentage value, the
center speaker at the top of the Grid becomes
less visible. At 0, the center speaker is com-
pletely invisible, reflecting the setting for fully
phantom center.
LFE Faders in Multichannel
Panners
The LFE fader controls how much of the track is
sent to LFE. LFE faders are only available when a
track is assigned to a path whose format sup-
ports LFE (5.1, 6.1, or 7.1).
To mix to the LFE channel:
Adjust the LFE fader in any “.1” surround for-
mat Output window.
LFE Faders and Groups
Track and send LFE faders can follow Mix and
Edit Groups by being enabled in the Group At-
tributes page in either the Create Groups or
Modify Groups dialog. LFE faders can be as-
signed to follow groups as a global attribute or
on a group by group basis. See “Selecting Group
Attributes” on page 186.
Discrete center (Center Percentage at 100)
Phantom center (Center Percentage at 0)
Pan Location cursor
meters
Center %
meters
Center %
Pan Location cursor
Center speaker less visible
For general information about LFE, sub
channels, and related topics, see the
Pro Tools Sync & Surround Concepts Guide.
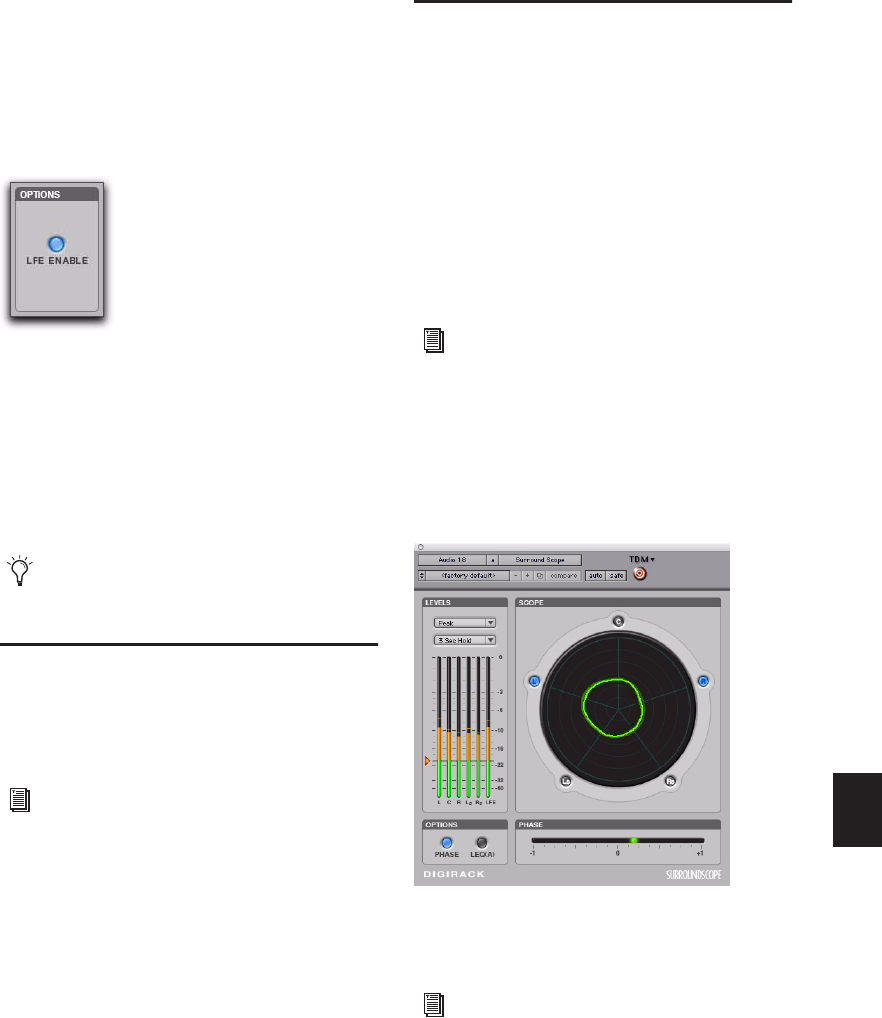
Chapter 41: Surround Panning and Mixing (Pro Tools HD Only) 879
LFE Enable
Some multichannel plug-ins, including the
multichannel DigiRack Dynamics III Compres-
sor/Limiter, provide LFE Enable. This lets you
enable or bypass processing of the LFE channel
if present.
To process the LFE channel in a multichannel plug-
in:
Click to enable LFE Enable in supporting
multichannel plug-ins. LFE Enable is high-
lighted when LFE processing is enabled, and un-
highlighted when LFE processing is bypassed.
Pan Playlists
Multichannel panners have an automation
playlist for each position and divergence con-
trol.
Surround Scope Plug-in
The Surround Scope plug-in provides a 360°
meter for metering multichannel paths during
mixing.
5.1 Format Track Layouts
All 5.1-format meters (including those displayed
in the Surround Scope meter, on tracks, and in
Output windows and their Path Meter Views)
are always arranged in the following order:
L C R Ls Rs LFE
To use the Surround Scope Plug-in:
On a multichannel Master Fader, click an In-
sert button and select Multichannel TDM plug-
in > Sound Field > Surround Scope.
Surround Scope displays output levels in both a
360° Grid, and in traditional LED meters.
LFE Enable in the multichannel DigiRack Dynamics III
Compressor/Limiter
When LFE Enable is unavailable, try using
the multi-mono version of the plug-in.
Pan automation can be drawn, edited, cut,
copied, and pasted from the Edit window.
For more information, see Chapter 37,
“Automation.”
For more information on Pro Tools meter-
ing, see “5.1 Tracks, Formats, Mapping,
and Metering” on page 853.
Surround Scope plug-in
For details on Surround Scope, refer to the
Digidesign Plug-ins Guide.
Pro Tools Reference Guide880
Chapter 42: Working with Synchronization 881
Chapter 42: Working with
Synchronization
Synchronization allows one system to output
time code and the other device to follow that
time code. Pro Tools is synchronized to other
devices using SMPTE/EBU time code or MIDI
Time Code.
Pro Tools Synchronization
Options
There are several options for synchronizing
Pro Tools to an external source or using
Pro Tools as the master device. Not all options
are available on all Pro Tools systems, as noted.
SMPTE Trigger Only
This solution is useful for short projects if both
systems are extremely close in speed, but even
the best systems will rarely stay perfectly syn-
chronized for longer than a couple of minutes.
SMPTE Trigger Resolved with a SYNC
Peripheral
(Pro Tools HD Only)
You can use an optional Digidesign SYNC pe-
ripheral to resolve Pro Tools recording and play-
back speed with any of the following clock ref-
erence sources while slaving Pro Tools to time
code:
• LTC
• Video source
• House video reference (SD or HD)
• VITC
• 1x Word Clock
• AES/EBU “null” clock
• Pilot Tone
• Bi-Phase
This enables long-term, high-fidelity synchroni-
zation when all transports within the system are
resolved to this common synchronization
source, or by resolving to any variations in in-
coming time code while slaving to time code.
For more information on different
SMPTE/EBU formats, and other concepts
related to time code, refer to the Pro Tools
Sync & Surround Concepts Guide.
Pro Tools Reference Guide882
SMPTE Trigger while Locking to an Unresolved
Source
SMPTE Trigger can be used with an optional
SYNC peripheral or equivalent device to resolve
Pro Tools recording and playback speed while
slaving to LTC. This enables long-term, accurate
synchronization by resolving to any variations
in incoming time code. SYNC peripherals also
support VITC and Bi-phase/Tach positional ref-
erence.
SYNC Peripheral Synchronization
Options
By adding a Digidesign SYNC peripheral to your
Pro Tools|HD system, you can use Pro Tools as
the master device in your synchronization
setup. All other devices are then slaved to
Pro Tools.
You can use Pro Tools in conjunction with a
SYNC peripheral to generate LTC, MIDI Time
Code, or MMC commands. When the SYNC pe-
ripheral is reading incoming SMPTE time code,
it regenerates the time code through the LTC or
MTC output connector. This signal can be
passed along to other slave devices.
MachineControl™
Digidesign SYNC peripherals also support Digi-
design MachineControl software, which pro-
vides many specialized features for post produc-
tion synchronization tasks including remote
track arming, VTR emulation, serial time code,
and other capabilities. (See the MachineControl
Guide for more information, or contact your
Digidesign dealer.)
Ext. Clock Output
Pro Tools can be used as the master device in
your synchronization setup, where all other de-
vices are then slaved to Pro Tools Word Clock
output.
With Pro Tools|HD systems, clock output can be
configured for 1x Word Clock, or 256x Slave
Clock for Digidesign Legacy audio interfaces
(such as the 888|24 I/O).
To set Ext. Clock Output:
1 Choose Setup > Hardware in Pro Tools.
2 Click the Ext. Clock Output pop-up menu and
select an available signal.
3 Click OK to close the Hardware Setup dialog
when you have finished.
For instructions on connecting an external
synchronization peripheral to your Pro Tools
system, refer to your Getting Started Guide.
If you are using a SYNC peripheral, refer to
its documentation.
For more information on configuring
Legacy audio interfaces, see the
Pro Tools|HD Getting Started Guide.
If the Legacy Port is enabled (as opposed to
the Expansion Port) then the Ext. Clock
Output automatically switches to
Slave Clock.
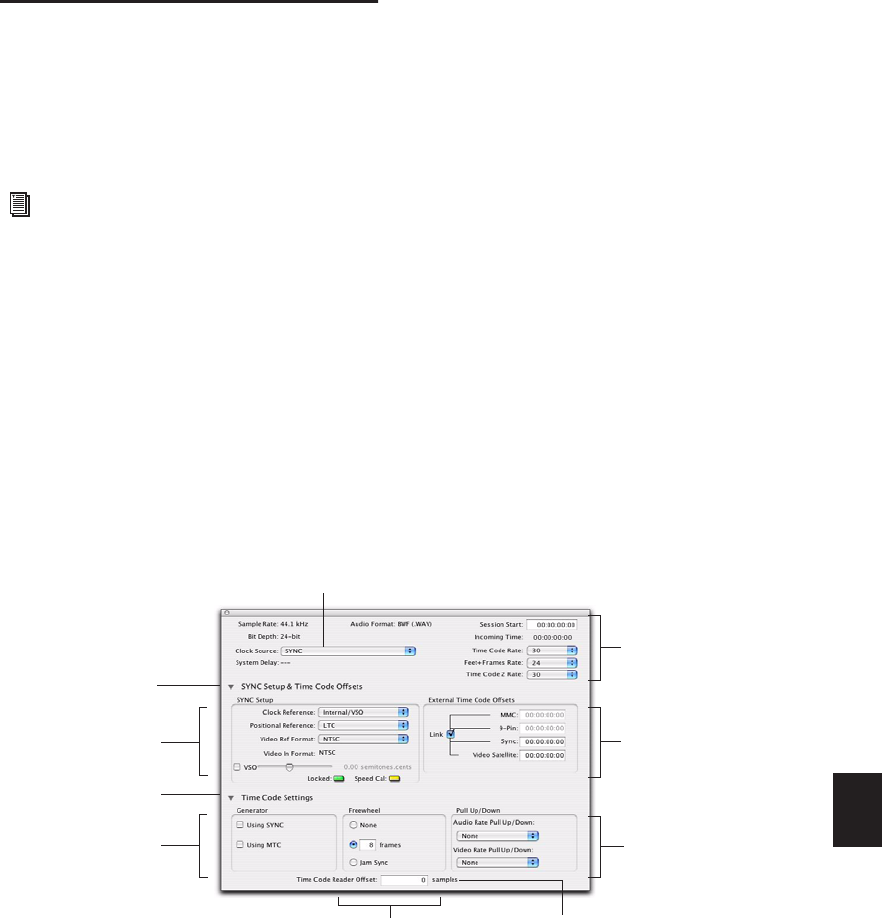
Chapter 42: Working with Synchronization 883
Session Setup Window
The Session Setup window lets you configure
various time code-related settings on your sys-
tem. The window also includes display-only ar-
eas for session sample rate, file format, and bit
depth.
The Session Setup window is organized into
three sections. Session displays and settings are
displayed at the top of the window. The SYNC
Setup & Session Offsets section, and the Time
Code Settings section, can be shown or hidden
using their dedicated expand/collapse triangles.
See Figure 35 on page 883.
To show the Session Setup window:
From a Pro Tools session, choose Setup > Ses-
sion.
To expand SYNC Setup & Session Offset section:
Click the SYNC Setup & Time Code Offsets ex-
pand/collapse triangle.
The controls in this section configure settings of
Digidesign SYNC Peripherals. Settings are pro-
vided for Clock and Positional Reference, Video
Ref Format, Video In Format, and Variable
Speed Override.
To show Time Code Settings section:
Click the Time Code Settings expand/collapse
triangle.
The controls in this section provide time code
generation and freewheel options, and separate
pull up and down selectors for audio and video
rates.
Pro Tools LE systems with DV Toolkit 2
support various time code-related settings
(such as Time Code and Feet+Frame Time-
base rulers). For a complete list, refer to the
DV Toolkit 2 Guide.
Figure 35. Session Setup window with a SYNC Peripheral
SYNC & Time Code
Offsets section
SYNC Setup settings
Time Code Settings
section
Generator settings Pull Up/Pull Down
settings
External Time Code
Offset settings
Session displays
and settings
Time Code Reader offset
Freewheel settings
Clock Source

Pro Tools Reference Guide884
Session Displays and Settings
Sample Rate
This display indicates the sample rate for the
current session.
Bit Depth
This display indicates the bit depth for the cur-
rent session.
Audio Format
This display indicates the file format for files re-
corded in the session.
Clock Source
Use this menu to configure the system Clock
Source. You can choose between a SYNC periph-
eral, an internal clock source from a Digidesign
peripheral, or an external clock source con-
nected to a Pro Tools|HD audio interface.
Clock Source Options
SYNC When using a SYNC Peripheral, Pro Tools
receives its clock source from the SYNC periph-
eral. The SYNC Peripheral can in turn reference
an external clock source, selected in the SYNC
Setup section of the Session Setup window.
Internal In Internal mode, your system refer-
ences your Digidesign peripheral’s internal
clock and plays back at the session’s sample rate.
External Clock Sources Depending on your
Pro Tools|HD audio interface, external Clock
Source options can include AES/EBU, S/PDIF,
S/PDIF Optical, ADAT Optical, TDIF, and Word
Clock (optional word clock rates are available at
higher session sample rates). External sources
can be any multiple of the “base” rate. The base
rate is 44.1 kHz for 88.2 and 176.4 kHz sources.
The base rate is 48 kHz for 96 and 192 kHz
sources. If an external source is chosen and no
valid sync clock is detected at the External Clock
In, the I/O will return to Internal mode.
System Delay
When Delay Compensation is enabled, this dis-
play indicates the total amount of delay (in sam-
ples) applied by the system to compensate for
plug-ins and mixer routing delays.
Session Start
Use this field to specify a SMPTE start frame lo-
cation for your session. See “Setting a SMPTE
Session Start Time (Start Frame)” on page 888.
Incoming Time (Current Time)
This display indicates incoming time code.
Time Code Rate
This pop-up menu lets you set the SMPTE time
code rate for the current session.
Changes made to Clock Source in the Hard-
ware Setup dialog will be reflected in the
Session Setup window and vice versa.
If a SYNC Peripheral is enabled in the
Peripherals dialog, and is correctly con-
nected in the Loop Sync chain, the SYNC
peripheral can be the Loop Master, and
Pro Tools|HD audio interfaces will clock
as Loop Sync slaves.
For more information on external clock
sources, refer to your SYNC peripheral
documentation.
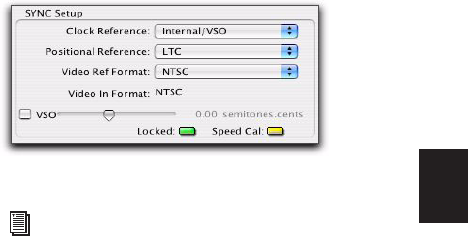
Chapter 42: Working with Synchronization 885
Feet+Frame Rate
Feet+Frame rates for sessions can be set with the
Feet+Frame Rate selector. Supported rates are
23.976, 24, and 25 fps.
Set this rate to match the rate of the film projec-
tor, or the video if the film projector speed is
taken into account. For example, doing a Tele-
cine transfer from a 24 fps film projector to
NTSC video would necessitate the projector run-
ning at 23.976 fps. This is regardless of whether
the session is using pull down audio or not.
Time Code 2 Rate
This pop-up menu lets you set a secondary
frame rate that can be displayed in the ruler
alongside the main Timecode ruler. This lets
you reference frame rates in the Timeline that
are different from the session time code rate
(also see “Timebase Rulers” on page 595).
SYNC Setup and Time Code
Offsets
(Pro Tools HD Only)
Sync Setup
The controls in the SYNC Setup section let you
configure SYNC peripheral settings, including
clock reference, positional reference, video ref-
erence format, video input format, and Variable
Speed Override (VSO).
Clock Reference This menu lets you set the
Pro Tools clock reference.
When using a Digidesign SYNC peripheral,
the Clock Reference selector lists all supported
clock types for the SYNC peripheral.
When using Pro Tools|HD systems without a
SYNC peripheral, choices include any currently-
enabled digital format or source available from
your Pro Tools|HD I/O (such as AES, S/PDIF, or
1x Word arriving at the Pro Tools|HD interface’s
Word Clock In port).
Positional Reference Use this menu to set the
time code source for Pro Tools to use for posi-
tional reference.
Video Ref Format Use this menu to set the video
reference format for a SYNC peripheral.
Video In Format This item indicates the expected
format at the Video In connector on a SYNC pe-
ripheral. At certain HD rates, a pop-up menu is
provided for selecting a format.
\Variable Speed Override (VSO) Variable Speed
Override (VSO) requires a Digidesign SYNC pe-
ripheral.
When a SYNC peripheral is connected to a
Pro Tools|HD system, the VSO controls are lo-
cated in the SYNC Setup section of the Session
Setup window.
VSO controls in the Session Setup window
Refer to your SYNC peripheral documenta-
tion for instructions on using VSO to
varispeed Pro Tools playback.
Pro Tools Reference Guide886
Locked Indicator The Locked indicator lights
solid green when the SYNC peripheral is locked
to the selected clock reference. The Locked indi-
cator flashes yellow if the selected clock refer-
ence source is missing or out of lockable fre-
quency range.
Speed Cal Indicator This indicator shows the sta-
tus of the incoming clock reference:, depending
on the type of SYNC peripheral you are using:
• SYNC I/O
• Lit: SYNC I/O is locked and the clock refer-
ence is within 0.025% of the expected rate
• Flashing fast: SYNC I/O is locked but the
clock reference is more than 0.025% faster
than the expected rate
• Flashing slow: SYNC I/O is locked but the
clock reference is more than 0.025% slower
than the expected rate
• Unlit: Clock reference is not within 0.025%
of the expected rate
• SYNC HD
• Yellow Solid: SYNC HD is locked and the
clock reference is within 0.025% of the ex-
pected rate
• Yellow Flashing Fast: SYNC HD is locked
but the clock reference is between 0.025%
and 4% faster than the expected rate
• Yellow Flashing Slow: SYNC HD is locked
but the clock reference is between 0.025%
and 4% slower than the expected rate
• Red Flashing Fast: SYNC HD is locked but
the clock reference is more than 4% faster
than the expected rate
• Red Flashing Slow: SYNC HD is locked but
the clock reference is more than 4% slower
than the expected rate
• Unlit: SYNC HD is not locked to the cho-
sen clock reference
External Time Code Offsets
In the External Time Code Offsets section,
Pro Tools lets you compensate for devices that
are consistently offset by a fixed number of
frames (such as some color–corrected video mas-
ters), or for material that starts at a different
time than the session.
Pro Tools provides four different types of Exter-
nal Time Code Offset settings. These offsets in-
clude:
• MMC (MIDI Machine Control)
• 9-Pin (Deck Control)
• Synchronization peripherals such as the
SYNC HD, SYNC I/O, or other peripherals
(such as MIDI interfaces that provide MIDI
Time Code).
• Video Satellite (Pro Tools with Avid
Media Station|PT)
Unique values can be defined for each of these
types of offsets, or you can link all to adjust in
unison.
Positive and negative offset values can be en-
tered to offset Pro Tools time code display later
or earlier, respectively.
If you are using Digidesign’s MachineControl
option, additional options for External Time
Code Offsets are available. See the Machine-
Control Guide for more information.

Chapter 42: Working with Synchronization 887
Time Code Settings
Generator
The Generator lets you enable Pro Tools genera-
tion and output of LTC and MTC. For more in-
formation, see “Generating Time Code” on
page 895.
Using SYNC This option outputs time code from
the device selected in the Synchronization page
of the Peripherals dialog.
Using MTC This option outputs time code to the
destination selected in the Synchronization
page of the Peripherals dialog.
Freewheel
The choices in the Freewheel section let you
configure how Pro Tools will freewheel, or con-
tinue playback if time code is interrupted or cor-
rupted. Use these options to protect against er-
rors that can occur if your SMPTE time code
source has “drop outs” or temporary lost signals.
None No freewheel is applied.
Frames Sets a number of frames to freewheel,
from 1 to 120 frames. This value defaults to 8
frames, which is the recommended setting for
most applications.
Jam Sync Lets Pro Tools trigger synchronization
to incoming time code, and continue to play
back even if time code input is completely inter-
rupted. It can be useful if time code is damaged,
or has been accidentally erased from your source
tape.
Pull Up/Down
When Pro Tools is used in conjunction with a
SYNC peripheral, or a third-party peripheral
that supports pulled sample rates, this option al-
lows you to “pull up” or “pull down” the current
sample rate.
For general information, see the Pro Tools Sync &
Surround Concepts Guide. For more information
on applying pull factors in Pro Tools, see “Pull
Up and Pull Down” on page 890.
Time Code Reader Offset (Sync Offset)
This field lets you set a trigger offset for incoming
MIDI Time Code (anywhere from –100000 to
+100000 samples). This allows you to create a
permanent offset to fine-tune the point at
which Pro Tools synchronizes relative to incom-
ing time code. For example, a value of –50
makes an event in Pro Tools occur 50 samples
before the same event in the incoming MIDI
Time Code. Use this to compensate for timing
differences between various SMPTE-to-MIDI
Time Code converters or analog-to-digital/digi-
tal-to-analog converters.
Remember, pull up and pull down are ap-
plied differently in different workflows.
Make sure you check each project’s specific
workflow before you begin your work.
Pro Tools Reference Guide888
Preparing to Work with SMPTE
The first step when preparing to work with
SMPTE is to choose an appropriate SMPTE frame
rate. Pro Tools supports all standard SMPTE
frame rates. If you are working with SMPTE
striped tape, it is important to know the frame
rate. In some cases, a SYNC peripheral can be
used to do this.
Configuring Pro Tools for
SMPTE
Synchronization and MachineControl system
settings are enabled in the Pro Tools Peripherals
dialog. These settings are system settings, and re-
main constant regardless of the particular ses-
sion you are working on. Configure these set-
tings before opening a session.
Other settings are configured in the Session
Setup window, such as the session Time Code
rate, the Feet+Frames rate, the session start
frame, and time display format. These settings
are session-specific settings. These settings can
only be configured when a session is open.
Selecting a SMPTE Format
To choose a SMPTE format:
1 In Pro Tools, choose Setup > Session.
2 Choose a frame rate (SMPTE format) from the
Time Code Rate selector.
3 Enter the Time Code Freewheel frames (if any)
in the designated box (see “Freewheel” on
page 887).
Setting a SMPTE Session Start
Time (Start Frame)
The Session Setup window also allows you to set
a SMPTE Start Frame for your session. Video
work tapes are rarely striped beginning at a
SMPTE frame address of 00:00:00:00. You can
quickly enter a start time for your session based
on an appropriate frame number from your
project tape. The Pro Tools SMPTE-related func-
tions (such as Spot mode) will then use this
value as their reference for the session’s start
point.
Start Time When Striping Tape
If you are generating time code, it is a good prac-
tice to stripe your time code beginning at
01:00:00:00 (subtracting time for initial black,
bars and tone, or logos). This prevents problems
that can occur with some synchronizers when
the striped time code crosses from 23:59:59:29
to 00:00:00:00 (commonly referred to as the
“midnight” boundary).
To set a SMPTE Start Time for your session:
1 Choose Setup > Session.
2 Enter a SMPTE frame number in the Session
Start field.
For a full explanation of SMPTE frame
rates, see the Pro Tools Sync & Surround
Concepts Guide.
MachineControl is supported on
Pro Tools|HD systems only.

Chapter 42: Working with Synchronization 889
To capture an incoming SMPTE address as the
session start time:
1 Click in the Session Start field.
2 Begin playback of the time code source.
3 At the location where you want to capture the
incoming value, press Equal (=) in the numeric
keypad.
4 Press Enter to accept the value. You can then
edit the captured address. The session uses the
frame number you enter as its SMPTE start frame
when online.
• If there are existing regions on the tracks and
you are changing the original SMPTE start
frame to a later time (from 00:00:00:00 to
01:00:00:00, for example), all existing regions
on tracks will remain in their relative posi-
tions, but will start later by the time value
added to the start frame.
• If you are changing the session start time in
an open session in which tracks already exist,
a warning dialog appears when you press En-
ter. Choose from one of two options:
Maintain Time Code Places the additional ses-
sion time at the start of the session, and keeps
existing regions in their original time code loca-
tions.
Maintain Relative Position Places the additional
session time at the start of the session, and
maintains the relative position of existing re-
gions to the new start frame. For example, if you
change the session start frame from 01:00:00:00
to 00:59:00:00, Pro Tools adds one minute of
session time to accommodate the new start
frame, and moves all existing regions earlier in
time to maintain their relative position to the
start frame.
Redefining a Time Code Position
(Pro Tools HD and Pro Tools LE with
DV Toolkit 2 Only)
Use the Current Time Code Position command
to redefine the current time code position and
session start time. By creating an insertion point
(or selection), and then entering the new time
code position for that location, the session start
time will be recalculated based on the new, rela-
tive Time Code location.
To redefine a current Time Code code position:
1 With the Selector tool, click in a track (or
make a selection) where you want to redefine
the position.
2 Choose Setup > Current Time Code Position.
3 Enter a new SMPTE frame number in the dia-
log to correspond to the time code shown in the
dialog.
4 Click OK.
Redefining a Feet+Frames
Position
(Pro Tools HD and Pro Tools LE with
DV Toolkit 2 Only)
Use the Current Feet+Frames command to rede-
fine the Feet+Frames position at the current in-
sertion point. The session start time is recalcu-
lated based on the new, relative Feet+Frames
location.
If your insertion or selection is not on a grid
boundary, it will round to the closest
boundary.
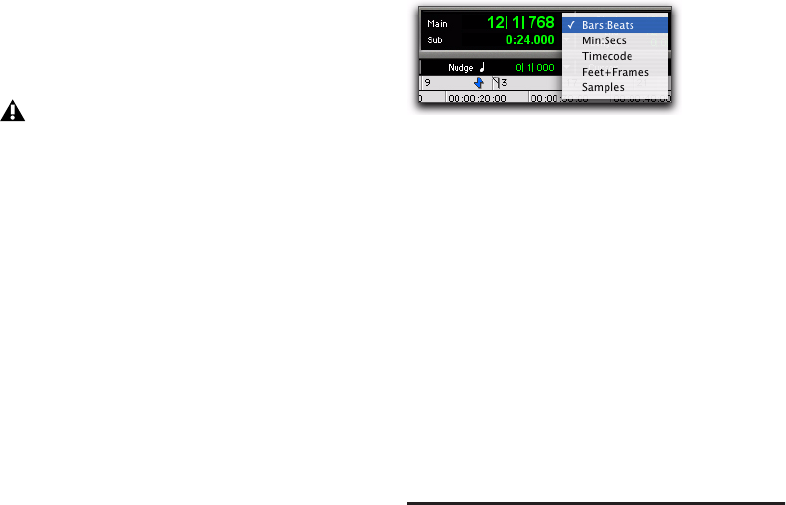
Pro Tools Reference Guide890
Typically, this command is used for integrating
test tones, pre-roll, Academy leader, and similar
pre-program material into Pro Tools sessions.
Redefining Feet+Frames does not redefine the
session start time.
To set a relative frame position for a session
(Feet+Frames):
1 With the Selector tool, click in a track (or
make a selection) where you want to redefine
the position.
2 Choose Setup > Current Feet+Frames Position.
3 Enter a Feet+Frame position to correspond to
the time code shown in the dialog.
4 Click OK.
Displaying Time in SMPTE Frames
(Pro Tools HD and Pro Tools LE with
DV Toolkit 2 Only)
In Pro Tools, you can set the Main Time Scale to
Time Code (SMPTE) and this will be displayed in
the Main Counter. Though Pro Tools will still
synchronize to incoming SMPTE time code if
the Time Scale is displayed in Bars:Beats, Min-
utes:Seconds, or Feet.Frames, it is usually more
useful to use SMPTE time code as your reference.
To set the Main Time Scale to SMPTE Time Code,
do one of the following:
Choose View > Rulers > Time Code.
– or –
Click the Main Counter selector in the Edit
window and select Time Code.
Pro Tools displays time code values in the cur-
rently selected SMPTE frame rate.
Sub Counter and Sub Time Scale
Display
You can display a Sub Time Scale in the Sub
Counter. For example, if the Main Time Scale is
set to Time Code, and you want to compare
SMPTE time to “wall clock,” when you are using
29.97 Non-Drop frame rate, click the Sub
Counter selector and select Min:Secs as the Sub
Time Scale.
Pull Up and Pull Down
Pro Tools supports up to 4% pull up and pull
down, with support for an additional 0.1% up or
down. Separate rates can be set for session audio
and video (when video has been imported or
captured into the session).
When referring to 4% pull up and pull down,
the precise percentages used in pull ups is
4.167%. See Table 43 on page 893.
If your insertion or selection is not on a grid
boundary, it will round to the closest
boundary.
Selecting Main Time Scale with Main Counter selector
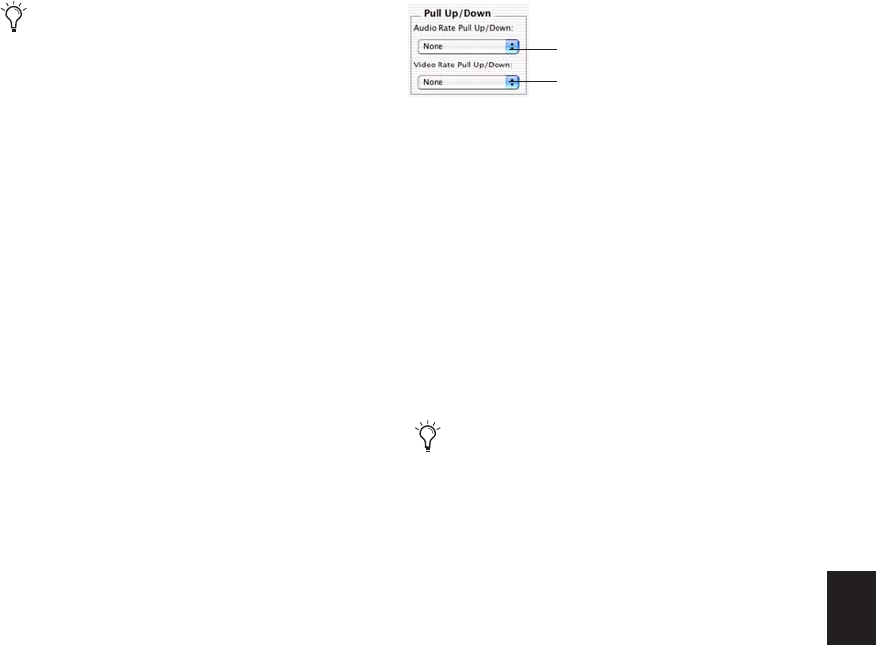
Chapter 42: Working with Synchronization 891
While a Digidesign SYNC peripheral is not re-
quired in order to use the extended pull up and
down options provided in Pro Tools, a SYNC pe-
ripheral is the only device that can be controlled
from within Pro Tools, and that recalls and re-
stores pull factors automatically when a session
opens. Other synchronization peripherals must
be configured manually.
Configuring Pull Up and Pull Down
To pull up or pull down audio or video:
1 Choose Setup > Session.
2 From the Time Code Settings section of the
Session Setup window, select a Pull Up/Down
Rate.
Audio Rate Pull Up/Down Controls audio sample
rate. See “Audio Sample Rate Pull Up and
Down” on page 892.
Video Rate Pull Up/Down Controls video rate.
See “Video Frame Rate Pull Up and Down” on
page 894.
The choices available in these menus are deter-
mined by the session frame rate. Combinations
can be applied by choosing from both menus.
The choices available in these menus are also de-
termined by the Preferences and Auto Match
Pull Factors settings in the Time Code Rate
menu. See “Extended Pull Up and Pull Down”
on page 892 and “Auto Match Pull Factors” on
page 892.
Pull up and down settings do not affect time
code generated by a SYNC peripheral.
Session Setup window
4% pull factors are not available in 176.4
and 192 kHz sessions.
Video Rate Pull Up
and Down
Audio Rate Pull Up
and Down
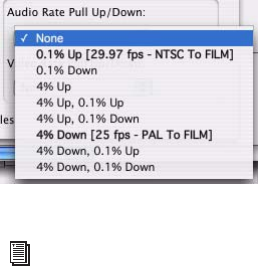
Pro Tools Reference Guide892
Extended Pull Up and Pull Down
Preference and Session Setup Controls The Au-
dio Rate Pull Up and Down menu offers all pos-
sible combinations of pull ups and pull downs
for the audio sample rate, regardless of the ses-
sion frame rate.
In addition, if there is a QuickTime movie in the
Timeline, the video rate can be pulled up or
down by 0.1%, regardless of the session frame
rate. Though not an approved workflow, earlier
versions of Pro Tools also enabled pull down of
QuickTime video clips when audio was pulled
down, so this option is included in Pro Tools
5.3.1 and higher to maintain compatibility with
earlier sessions.
Auto Match Pull Factors
Auto Match Pull Factors is available from the
session Time Code Rate menu in the Session
Setup window. When Auto Match Pull Factors is
enabled, Pro Tools adjusts audio and video play-
back rates as needed to match any changes to
the current session Time Code Rate.
Auto Match Pull is applied relative to the cur-
rent pull up setting. While enabled, if the ses-
sion frame rate is changed in such a way that the
video would have to be pulled by an unsup-
ported amount, the video remains unaffected.
This setting is latching, is not enabled by de-
fault, and its state is stored with the session.
Example of Auto Match Pull Factors
Auto Match Pull Factors links audio and video
pull factors when changing session frame rate.
For example, assume a Pro Tools session is set to
a frame rate of 25 fps, the audio and video are
both playing with no pull ups, and Auto Match
Pull Factors is enabled.
If you then change the session Frame Rate to
24 fps, both the Audio and Video Rate Pull set-
tings would change by –4.0% (the appropriate
pull setting required by the change in frame
rate).
Auto Match-enabled pull factors are applied to
any existing Audio Rate Pull Up/Down or Video
Rate Pull Up/Down settings. For example, if au-
dio was already being pulled –0.1% when you
changed the session Frame Rate from 29.97 to
24 fps, then the Audio Rate Pull Up/Down
menu would switch to None.
Audio Sample Rate Pull Up and
Down
The Audio Rate Pull Up/Down menu applies
pull up or down factors to session audio record
and playback. All pull rates are available, regard-
less of session frame rate.
Audio Rate Pull Up/Down menu in Session Setup
See also “Auto Match Pull Factors” on
page 892.
Chapter 42: Working with Synchronization 893
Audio Rates and Pull Up/Down Options
Table 43 lists actual sample rates of each pull up
and pull down option and combination
(rounded to the nearest whole Hz):
Table 43. Sample Rates at Pull Up and Pull Down Settings
Pull Up/Down
Sample Rate
44100 48000 88200 96000 176400 192000
+4.1667%
and +0.1%
45983 50050 91967 100100 n/a n/a
+4.1667% 45938 50000 91875 100000 n/a n/a
+4.1667%
and –0.1%
45892 49950 91783 99900 n/a n/a
+0.1% 44144 48048 88288 96096 176576 192192
–0.1% 44056 47952 88112 95904 176224 191808
–4.0% and
+0.1%
42378 46126 84757 92252 n/a n/a
–4.0% 42336 46080 84672 92160 n/a n/a
–4.0% and
–0.1%
42294 46034 84587 92068 n/a n/a
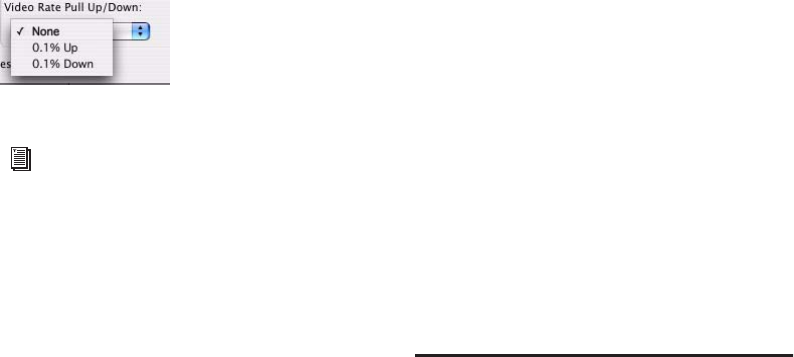
Pro Tools Reference Guide894
Video Frame Rate Pull Up and
Down
The Video Pull Up/Down selector lets you
change the frame rate of QuickTime movie play-
back independently from the audio pull-
up/down rate. The selector is located below the
Audio Rate Pull Up/Down menu in the Session
Setup window.
The choices available in the Video Rate Pull
Up/Down menu depend on the file format and
frame rate of the QuickTime movie. Video pull
rates are saved with the session.
Effect of Using Pull Up or Pull Down
The following sections describe how related
Pro Tools features are affected by pull up and
down rates.
Time Code Ruler
Video pull up and down does not affect the Time
Code ruler. Be sure to set the session Frame Rate
to the correct frame rate for your project. For ex-
ample, if working with 24 fps video and you pull
the video up by 4%, switch the session Frame
Rate to 25 fps to keep the Time Code ruler
aligned. Similarly, if working with 24 fps video
that is pulled down by 0.1%, switch the frame
rate of the session to 29.97.
When working with 25 fps Avid media and the
video is set to pull down by 4%, set the session
Frame Rate to 24 fps.
Plug-ins
For proper operation at larger (4%) pull rates,
plug-ins must utilize sample clock instead of an
absolute time clock. All Digidesign plug-ins are
based on sample clock.
Higher Sample Rates and Pull Factors
4% audio pull rates are not available in 176.4
and 192 kHz sample rate sessions.
No Video Recording with Pull Ups
(Avid Video Peripheral Required)
Video may not be recorded to the Timeline if a
video pull up is selected. If the video track is
record-enabled while video pull ups are enabled,
or if you attempt to set a video pull up rate while
the video track is record-enabled, Pro Tools will
post a dialog and disallow video recording. To
proceed with digitization, reset the Video Rate
Pull Up menu to None.
Putting Pro Tools Online
To trigger playback or recording from an exter-
nal source, the Pro Tools Transport must be
placed online. This tells Pro Tools to listen for in-
coming time code.
To put the Pro Tools Transport online, do one of the
following:
Choose Options > Transport Online.
Click the Online button at the far left of the
Transport.
Press Control+J (Windows) or Command+J
(Mac).
Video Rate Pull Up/Down menu in Session Setup
See also “Auto Match Pull Factors” on
page 892.

Chapter 42: Working with Synchronization 895
The Online button flashes while Pro Tools waits
for a SMPTE frame to trigger playback. When
time code is received, playback begins and the
Online button becomes highlighted. The Edit
Selection indicators in the Edit window, and the
Incoming Time field in the Session Setup win-
dow display the incoming time code.
To take Pro Tools offline, do one of the following:
Deselect Options > Transport Online.
– or –
Deselect the Online button in the Transport
window.
Recording Online
The Operation Preferences page contains two
options that affect how Pro Tools initiates re-
cording when online.
Record Online at Time Code (or ADAT)
Lock Makes online recording begin as soon as
Pro Tools receives and locks to time code or
ADAT sync. In this case, you do not need to
make an insertion or selection in a track to des-
ignate a start point.
Record Online at Insertion/Selection Makes on-
line recording begin wherever you have placed
the insertion point in a track. Recording then
continues until Pro Tools stops receiving time
code. If you make a selection in a track,
Pro Tools will record online only for the length
of the selection.
Generating Time Code
Using a SYNC peripheral, Pro Tools can generate
SMPTE and MIDI Time Code (MTC). You can
then make Pro Tools a master synchronization
source with other devices slaved to it.
A SYNC peripheral cannot generate 30 fps,
24 fps, or 23.976 fps time code while locked to
video input or video reference
A SYNC peripheral cannot generate 30 fps,
24 fps, or 23.976 fps time code while it is locked
to a video clock signal. If you set Pro Tools to
generate 30 fps time code while the SYNC pe-
ripheral is locked to a video clock signal, the
SYNC peripheral will actually generate at the
NTSC color standard 29.97 fps. Pro Tools can
generate time code at non-NTSC frame rates if
you use the internal clock or external word
clock on the SYNC peripheral as a synchroniza-
tion source.
To generate time code using a SYNC peripheral:
1 Connect the SYNC peripheral LTC Out to the
SMPTE in connector on the devices you are slav-
ing. If you are slaving a device that recognizes
MTC, connect the MTC OUT connector of the
SYNC peripheral to the MIDI IN connector of
the slaved device.
2 Make sure your SYNC peripheral is powered
on.
3 In Pro Tools, choose Setup > Peripherals and
click Synchronization.
4 In the Digidesign Synchronization Device sec-
tion of the Synchronization page, select Enable
SYNC Peripheral.
5 Click OK to close the Peripherals dialog.
Pro Tools Reference Guide896
6 Choose Setup > Session, and choose the ap-
propriate frame rate from the Time Code Rate
pop-up menu.
7 In the SYNC Setup section of the Session Setup
window, choose a clock reference from the
Clock Reference selector. Not all clock choices
are available at all sample rates. See “External
Clock Sources” on page 884.)
8 Click the Online button on the Transport,
then click Play. Pro Tools generates and outputs
time code from the SYNC peripheral.
Using MIDI Machine Control
Pro Tools provides the capability to transmit lo-
cation information to external devices and to
control their transports using MIDI Machine
Control (MMC).
Controlling External Devices
Using MMC
Any device that supports MMC can be con-
trolled directly from within Pro Tools, with ei-
ther the device or Pro Tools acting as clock mas-
ter.
The external devices supported by Pro Tools im-
plement “open loop” communications only. Be-
cause of this, while Pro Tools is the Transport
Master, any direct operation of the receiving de-
vice’s transport will not be communicated back
to Pro Tools. Instead, you can use the Transport
pop-up to select the external device (MMC in
the pop-up) and use the Pro Tools on-screen
transport controls to drive the device.
Pro Tools does not support remote track arming
of MMC-controlled external devices. You need
to manually arm tracks for recording on the ex-
ternal device.
Enabling MIDI Machine Control in
Pro Tools
Pro Tools as MMC Master
When Pro Tools is the Master, it sends MMC
commands to the slave device and receives MTC
information back from the slave device.
To slave an external device to Pro Tools using
MIDI Machine Control:
1 Connect a MIDI Out port on your Pro Tools
MIDI interface to an appropriate port on the
slave device.
2 Connect the MTC out from the slave device to
a MIDI In port on your Pro Tools MIDI Interface.
3 In Pro Tools, choose Setup > Peripherals and
click the Synchronization tab.
4 Deselect Enable SYNC Peripheral if it is se-
lected.
5 From the MTC Reader Port pop-up menu, se-
lect the MIDI In port to which the slave device is
connected (the source of MTC information from
the slave device).
6 Click the Machine Control tab in the Periph-
erals dialog.
If you change time code rates in the middle
of a session, many SMPTE-to-MIDI Time
Code converters need to be turned off and
turned on again to be able to recognize the
new frame rate.
Digidesign’s MachineControl option sup-
ports remote track arming for Sony 9-pin
and V-LAN enabled devices. See “Remote
Track Arming” on page 900.
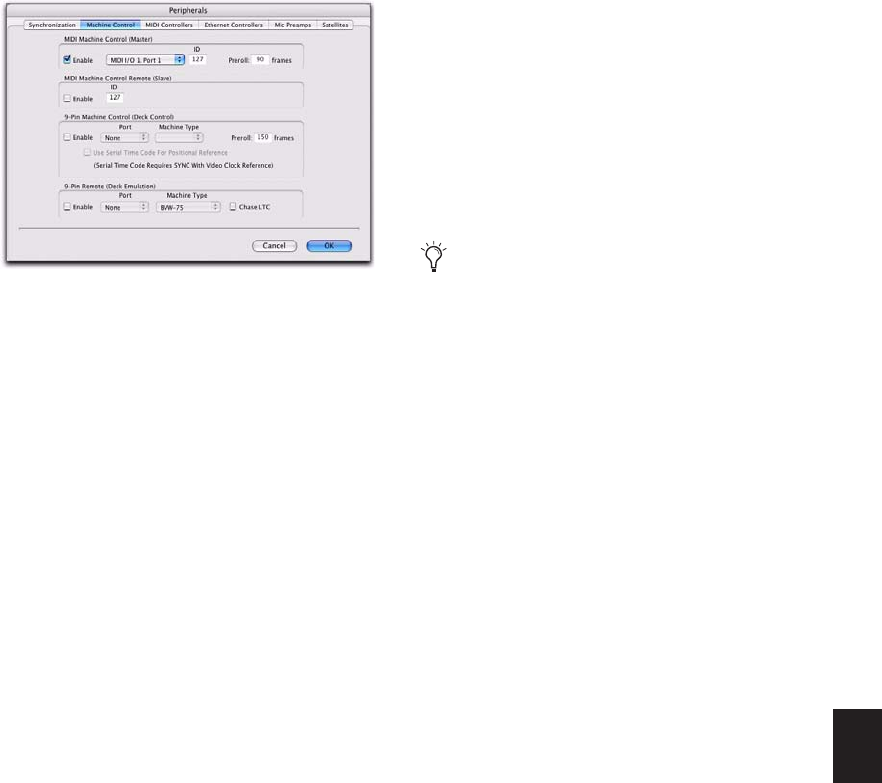
Chapter 42: Working with Synchronization 897
7 In the MIDI Machine Control (Master) sec-
tion, select Enable.
8 In the MIDI Machine Control (Master) sec-
tion, select the MIDI Out port to which the slave
device is connected from the pop-up menu.
9 Set the MMC ID number for which this infor-
mation will be sent in the “ID” field.
MMC commands contain an ID number to
identify which machine should respond to the
MMC command. There are 128 MMC ID num-
bers, from 0–127. The default of ID #127 is a spe-
cial setting that transmits to all 128 MMC IDs.
With a setting of 127, Pro Tools will transmit
MMC commands to all MMC IDs.
10 Set a pre-roll time for your MMC slave de-
vice. Pre-roll is needed to provide the device
with sufficient time to lock to the time code
transmitted by Pro Tools. This value will vary
depending on the external device. If the pre-roll
time is insufficient, the device may not be ready
to lock until after the current time code position
has passed.
11 Click OK to close the Peripherals dialog.
12 In the Pro Tools Transport window, choose
Transport = MMC.
Pro Tools will now be able to control the se-
lected device’s transport and act as the clock
master.
13 To have the Pro Tools transport chase the
playback location of the slave device, click the
Online button in the Transport window.
Pro Tools as MMC Slave
When Pro Tools is the slave, it receives MMC
commands from the master device and sends
MTC information back to the slave device.
To slave Pro Tools to an external device using MIDI
Machine Control:
1 Connect a MIDI In port on your Pro Tools
MIDI interface to an appropriate port on the
master device.
2 Connect a MIDI Out port on your Pro Tools
MIDI Interface to the MTC in port on the master
device.
3 In Pro Tools, choose Setup > Session.
4 In the Time Code Settings section of the Ses-
sion Setup window, select Using MTC.
5 Choose Setup > Peripherals and click the Syn-
chronization tab.
6 Deselect Enable SYNC Peripheral if it is se-
lected.
7 From the MTC Generator Port pop-up menu,
select the MIDI Out port to which the master de-
vice is connected (this the destination of MTC
information from Pro Tools).
8 Click the Machine Control tab in the Periph-
erals dialog.
Machine Control page of the Peripherals dialog
In order for Pro Tools to receive MMC com-
mands, the MMC source must be enabled in
the Input Devices dialog. For more informa-
tion, see “Enabling Input Devices” on
page 362
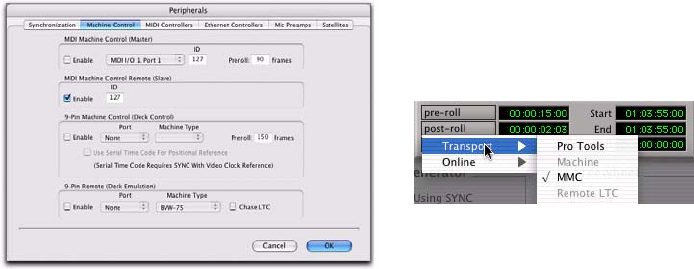
Pro Tools Reference Guide898
9 In the MIDI Machine Control (Slave) section,
select Enable.
10 Set the MMC ID number (channel) on which
this information will be received in the “ID”
field.
11 Click OK to close the Peripherals dialog.
Pro Tools will now respond to MMC commands
from the external device.
Operating MMC Devices with the
Pro Tools Transport
You can use the Pro Tools Transport window as
the remote controller for all your enabled de-
vices (such as a nonlinear video deck). To do so,
set the enabled devices to listen to the address
you enter for MMC. The Transport window will
then drive the Pro Tools transport and any
slaved devices.
To control external devices from the Pro Tools
Transport:
Select either Pro Tools or MMC from the
Transport pop-up in the Pro Tools Transport
window. The selected item will act as Transport
Master.
• When the Transport Master is set to
Pro Tools, the playback position is gov-
erned by the on-screen cursor in Pro Tools.
• When the Transport Master is set to MMC,
the playback position is governed by the
external device’s play position.
MMC Transport Settings
When using MMC, you can set the following
options for machine transport behavior in the
Synchronization Preferences page.
Machine Chases Memory Location When se-
lected, navigating to a specific location in a ses-
sion with a Memory Location causes a con-
nected transport to chase to that location.
Machine Follows Edit Insertion/Scrub When se-
lected, navigating to a specific location in a ses-
sion by moving the selection point or by scrub-
bing a track causes a connected transport to
chase to that location.
Machine Control page of the Peripherals dialog
Selecting the Transport Master
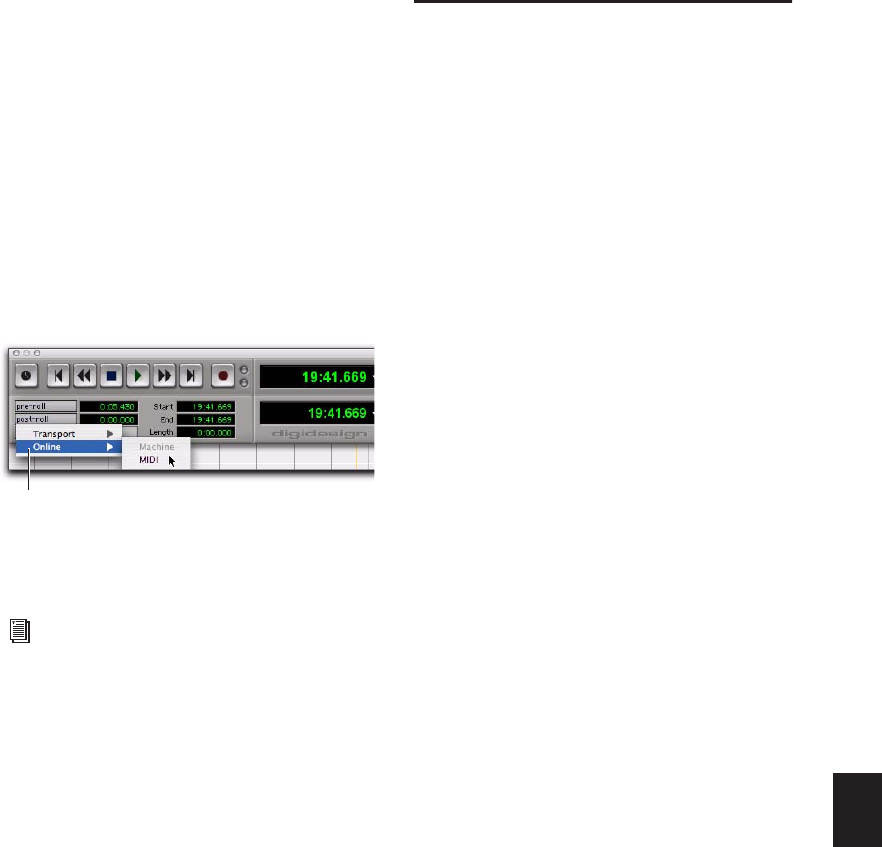
Chapter 42: Working with Synchronization 899
Taking a Device Offline
Use the Online pop-up menu in the Transport
Master selector to take a MIDI (or Machine) de-
vice offline.
To take a device offline:
1 Click the Transport Master selector.
2 Click on the Online pop-up menu and dese-
lect the device (Machine or MIDI) by clicking on
it. Device choices depend on the current Trans-
port Master and which devices have been set up
in Pro Tools.
To bring a device back online, click and reselect
it in the Online pop-up menu.
Setting Minimum Sync Delay
Lock-up time delay is the initial amount of
prime time your system’s devices need to
achieve synchronization “lock.” This amount
varies for each device. Pro Tools lock up delay is
set by entering a value for Minimum Sync Delay
in the Synchronization window of the Peripher-
als dialog. The lowest value available is 15
frames. Find the shortest possible lock-up time
that your equipment can operate at consis-
tently, and set this as the Minimum Sync Delay.
On systems utilizing Digidesign Machine-
Control, enabling the Use Serial Time Code set-
ting will make machines lock up much faster.
(Serial time code requires both the SYNC periph-
eral and external devices to be locked to house
video reference.)
To set a Minimum Sync Delay:
1 Choose Setup > Preferences, and click Syn-
chronization.
2 Enter a number of frames in the Minimum
Sync Delay field.
3 Click OK to close the Preferences dialog.
Deselecting a device to take it offline
The Online pop-up menu will only display
devices that have been properly set up in
Pro Tools.
To set up MIDI devices, see “Enabling MIDI
Machine Control in Pro Tools” on
page 896.
To set up machine devices, see the Machine-
Control Guide.
Online pop-up menu
Pro Tools Reference Guide900
Configuring Minimum Sync Delay for External
MMC Devices Locked to House Sync
When controlling a house-synced device from
Pro Tools through MMC, the device will first
lock to the MMC location and then align the
color framing. Within house sync code are 4
frames for ensuring color frame lock. If the min-
imum synchronization setup time is less than
the time required to achieve both location and
color frame lock, playback will begin before the
device has aligned the color frames. In this sce-
nario, you should set the Minimum Sync Delay
to be more than the time required for color
frame lock. This is not a problem with a SYNC
peripheral, which will drop out of lock until the
color frame is locked.
Setting Pro Tools LTC Source
When locking Pro Tools to a stable time code
source, enable the Stable LTC Source preference.
When selected, this option suppresses the nor-
mal 1-second wait time before Pro Tools at-
tempts to lock to incoming LTC.
To set the Pro Tools LTC Source option:
1 Choose Setup > Preferences, and click Syn-
chronization.
2 Do one of the following:
• For stable time code sources (such as an
LTC generator), select the Stable LTC
Source option.
• For time code sources such as tape decks,
deselect the Stable LTC Source option.
3 Click OK.
Remote Track Arming
Digidesign’s MachineControl™ option for
Pro Tools allows you to remotely arm tracks on
supported 9-pin (or V-LAN for transport only)
decks. Without MachineControl, Pro Tools does
not support remote track arming of external de-
vices. MachineControl lets Pro Tools act as the
master or slave to external Sony 9-pin (or V-LAN
for transport only) machines, in addition to pro-
viding remote track arming from within
Pro Tools.
Choose Setup > Machine Track Arming Pro-
files to configure your system, and choose
Window > Machine Track Arming to dis-
play the Machine Track Arming window.
For information on remote track arming
with MachineControl, see the Machine-
Control Guide.
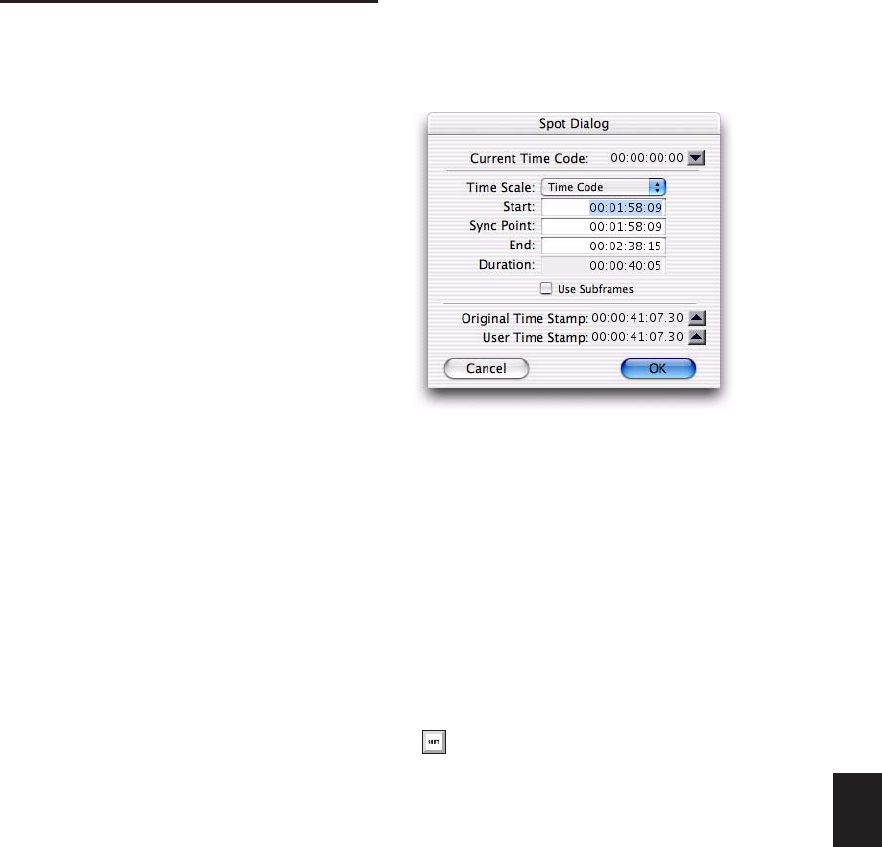
Chapter 42: Working with Synchronization 901
Spotting Regions to SMPTE
Frame Locations
(Pro Tools HD and Pro Tools LE with
DV Toolkit 2 Only)
Spotting is the process of assigning music and
sound cues to specific SMPTE frame locations in
a film or video. This function can be used to
spot:
Entire regions, selected with the Time Grabber
tool. Multiple regions can also be selected, and
Pro Tools will reference the first region in your
selection.
A specific location within a region, by clicking
with the Selector tool at that location, and
choosing Region > Identify Sync Point.
Sessions or tracks, dragged from a browser to
the session Timeline or Region List.
Spot Mode
In Spot mode, a region in a track can be quickly
spotted by simply clicking it with the Time
Grabber tool.
You can also drag a region from a DigiBase
browser, or from the Region List, to a track while
in Spot mode.
The Spot Dialog
The Spot dialog appears when you drag a region
to a track or click a region with the Time Grab-
ber tool in Spot mode. The numeric fields func-
tion as both data displays and editing controls
for the currently selected regions.
Information in these fields is displayed in
SMPTE Time Code, Minutes:Seconds,
Feet.Frames, Samples, or Bars & Beats, depend-
ing on which Time Scale format is selected.
A highlighted numeric field indicates the cur-
rent active field for numeric entry editing. En-
tering a value in a field allows you to move a se-
lected element to the time location that you
enter. The Start, Sync Point, and End fields are
accessible when the Time Grabber tool is active.
Only the Start or End (depending on where you
click the mouse) and Duration fields are active
when one of the Trimmer tools is active (see
“Using the Trimmer Tools in Spot Mode” on
page 903).
Use Subframes Option
A subframe is 1/100th of a frame. The Use Sub-
frames option enables you to use these smaller
units for greater accuracy. This command adds
an additional time field in the SMPTE
Spot dialog
To increase or decrease SMPTE values in
the Spot dialog by a specific number of
frames, press Plus (+) or Minus (–) on the
numeric keypad, enter a number, and press
the Enter key.
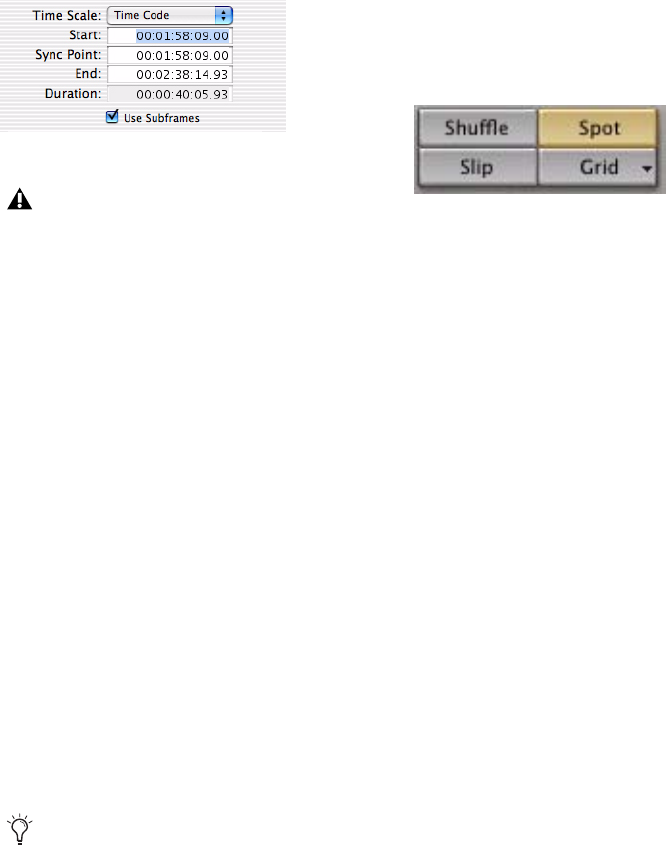
Pro Tools Reference Guide902
hours:minutes:seconds:frames box, which ap-
pears as the far right time field when enabled.
Use a Period (.) to separate subframe values from
whole frames.
Capturing Time Code
Pro Tools also allows you to easily capture frame
locations on-the-fly in the Spot dialog by press-
ing the Equal key, or by clicking the Current
Time button while valid time code is being re-
ceived by Pro Tools. With VITC, you can accu-
rately capture a paused or “crawling” VTR’s
SMPTE location.
When Time Code is selected for the Time Scale,
pressing the Equal key captures the incoming
time code. When Bars:Beats is selected for the
Time Scale, pressing the Equal key will capture
to the nearest measure.
Although the Capture Time Code button works
with free-running Linear Time Code (LTC) or
VITC, frame numbers of a paused frame can
only be captured with VITC.
SYNC peripherals can read VITC. With
MachineControl and a SYNC peripheral, you
can also read serial time code.
To spot a region to a specific SMPTE frame:
1 Choose Window > Edit.
2 Set the Main Time Scale to Time Code. (See
“Setting a SMPTE Session Start Time (Start
Frame)” on page 888.)
3 Click the Spot button at the top left of the Edit
window to put Pro Tools into Spot mode.
4 Identify the SMPTE frame location where you
want to trigger playback of your region by paus-
ing your video deck on that frame.
5 With the Time Grabber tool, click a region in
a track, or in the Region List, and drag it into a
track. The Spot dialog appears.
6 Enter the SMPTE frame location by doing one
of the following:
• If you are using VITC, you can press the
Equal (=) key on the numeric keypad, or
click Current Time Code to enter a paused
VTR’s current SMPTE location.
– or –
• If you are using LTC, when Time Code is se-
lected for the Time Scale, press the Equal
(=) key on the numeric keypad to capture
the incoming time code. When Bars:Beats
is selected for the Time Scale, press the
Equal key to capture the nearest measure.
7 If you recorded the region while online, you
can use the Original Time Stamp button to recall
and enter the SMPTE frame location at which
the region was originally recorded. You can also
access a user-defined Time Stamp in the same
fashion. See “Time Stamping” on page 903 for
more information.
Additional time field with “Use Subframes” enabled
Subframe measurements are not available
in the Current Time field.
To use Remote mode with MachineControl,
you will need an approved serial port. For a
complete list of currently approved ports, see
www.digidesign.com.
Spot mode enabled
Chapter 42: Working with Synchronization 903
8 Click OK to close this dialog. The region spots
to the chosen SMPTE frame location. When the
session is online, this frame number will trigger
playback of the region.
Auto-Spotting Regions
The Pro Tools Auto-Spot Regions option simpli-
fies the task of spotting regions even further. If
you are using VITC with this option enabled, or
MachineControl software, you can pause your
video at an appropriate SMPTE frame location,
click a region with the Time Grabber tool, and
the region will be automatically spotted to the
current time code location.
You can also use MachineControl’s serial time
code ability to auto-spot by enabling Machine-
Control and enabling serial time code in the pe-
ripheral.
To Auto-Spot a region:
1 Choose Options > Auto-Spot Regions.
2 If you are using VITC, identify the SMPTE
frame location where you want to trigger play-
back of your region by pausing your video deck
on that frame.
3 Click the region with the Time Grabber tool.
The region will be automatically spotted to the
current time code location (or machine loca-
tion).
Using the Trimmer Tools in Spot
Mode
You can use the Spot dialog to trim your regions,
including start/end/duration times and refer-
encing incoming time code addresses. If you
click a region with any of the Trimmer tools in
Spot mode, the Spot dialog will appear, allowing
you to enter a value in the Start or End and Du-
ration fields to specify exactly where you want
to trim the region’s beginning or end. Use this
to edit the length of a region to correspond to a
particular visual “hit point.”
Trimming a region that contains a sync point
(see “Identifying a Synchronization Point” on
page 905) does not affect the SMPTE location of
the sync point, unless the region is trimmed
past the sync point.
Time Stamping
Pro Tools time stamps every region recorded on-
line with the original SMPTE time at which au-
dio was recorded. You can recall this original
SMPTE time for a region by clicking the Original
Time Stamp button in the Spot dialog.
You can also spot a region to a separate user-de-
fined SMPTE time stamp, defined using the
Time Stamp command in the Region List pop-
up menu. Once the region is time stamped using
this command, you can click the User Time
Stamp button to re-spot a region to its user-de-
fined SMPTE location.
Clicking a region with any of the Trimmer
tools will allow you to trim the region to the
current time code location.
Auto-spotted regions are spotted by their
start times, unless you have identified a
Sync Point (see “Identifying a Synchroniza-
tion Point” on page 905). If the region con-
tains a Sync Point, the region is spotted to it.
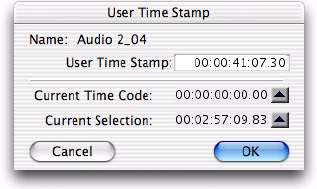
Pro Tools Reference Guide904
Show Original Time Code in
Regions
This command displays the original “time
stamped” SMPTE times in all regions currently
placed in tracks. This SMPTE frame number rep-
resents the time at which the region was origi-
nally recorded online with Pro Tools, and does
not necessarily reflect the region’s current
SMPTE location in a track.
To display Original Time Stamps in regions:
Select View > Region > Original Time Stamp.
To hide Original Time Stamps:
Select View > Region > No Time.
Creating a User Time Stamp
If you want to create a separate user-defined
SMPTE time stamp, you can use the Time Stamp
command in the Region List pop-up menu. This
command lets you select a region (or regions)
and redefine its SMPTE time stamp. The Original
Time Stamp and the User-Time Stamp are then
stored with your session.
When audio is first recorded, the User Time
Stamp will match the Original Time Stamp, but
you can change the User Time Stamp at any
time using the Time Stamp command. This fea-
ture is particularly useful in post production sit-
uations where the SMPTE time code on video
“work prints” often changes from one edit revi-
sion to another.
To time stamp a region (or regions) with a new
SMPTE frame number:
1 In a track, select the region that you want to
time stamp.
2 From the Region List pop-up menu, choose
the Time Stamp command.
3 Enter a new SMPTE time by doing one of the
following:
• Enter the numbers manually (with the help
of the arrow keys).
• Click the Current Time Code button (or
press the Equal key), if you want to capture
the incoming time code address.
• Click the Current Selection button, if you
want to enter the start time of the current
on-screen selection.
4 Click OK to close this dialog.
This command can be used in “batch mode” to
set new time stamps for several regions at a time.
To do this, simply select several regions and
choose the Time Stamp Selected command. One
after another, a dialog will open for each region,
allowing you to quickly enter new values.
Once entered, the user time stamps can be dis-
played in all regions currently placed in tracks.
To display User Time Stamps in regions:
Choose View > Region > User Time Stamp.
To hide User Time Stamps:
Choose View > Region > No Time.
User Time Stamp dialog
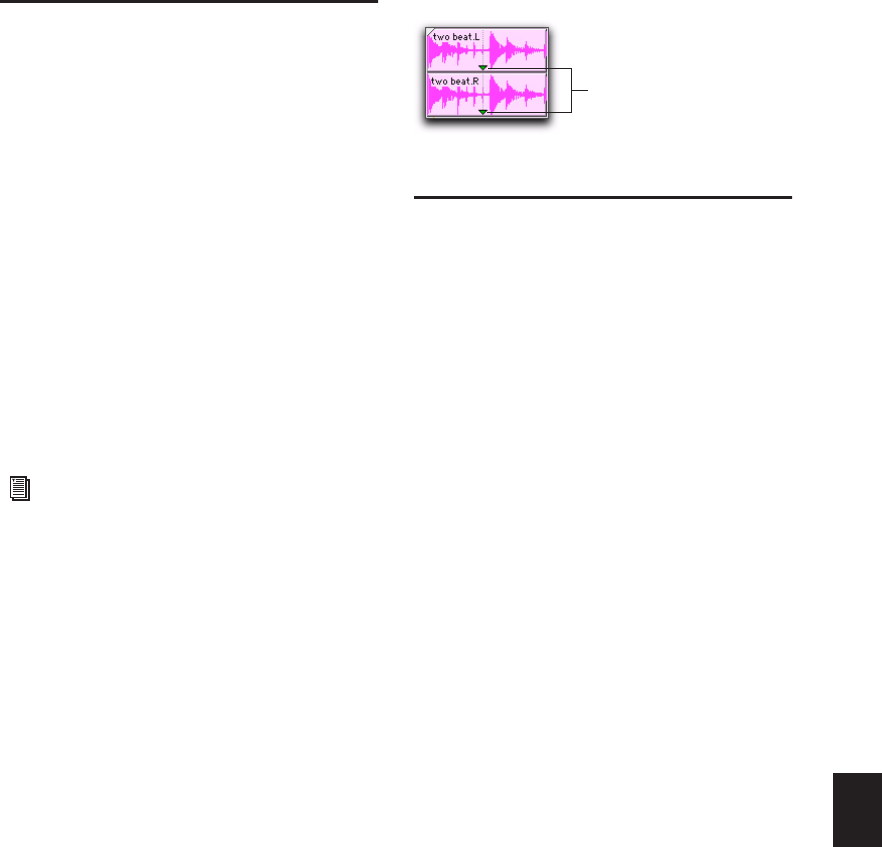
Chapter 42: Working with Synchronization 905
Identifying a Synchronization
Point
The Pro Tools Identify Sync Point command lets
you identify a specific point within a region for
audio spotting purposes.
Imagine the following sound effects spotting
scenario: You have a single sound effect that
consists of a creaky door slamming shut, fol-
lowed by a few seconds of ambient reverbera-
tion. The slam portion of the effect—which you
must precisely match to picture—occurs neither
at the very beginning of the audio file nor at the
very end. It is somewhere in the middle, making
it tough to spot. In this scenario, use the Iden-
tify Sync Point command to create a point in
the region and synchronize that point to a
SMPTE frame.
To create a sync point in a region:
1 Do one of the following:
• Click with the Selector tool at the point in
the region that you want to synchronize to
a SMPTE frame location.
– or –
• Press the Down Arrow key while playing
back.
2 Choose Region > Identify Sync Point. The cur-
rent SMPTE time is automatically entered as the
SMPTE location for the sync point. A small
down arrow appears at the bottom of the region,
with a vertical, light gray line indicating the lo-
cation of the sync point.
Troubleshooting SMPTE
Synchronization
If you are having problems getting SMPTE syn-
chronization to work properly, the following
suggestions may help you troubleshoot and
solve common problems.
Stripe SMPTE Before You Record
All tapes in your setup (both audio and video)
must be striped with SMPTE Time Code before
any audio is recorded onto them or to Pro Tools.
If tapes aren’t striped, your system may seem to
work, but synchronization will never properly
occur. The machines and Pro Tools will drift far-
ther and farther apart the longer they run.
The same problem occurs when audio is re-
corded into Pro Tools without a resolved SMPTE
source (for example, if it was recorded before the
current session). The audio cannot be accurately
synchronized with an analog tape recorder or
video tape deck, since the Pro Tools audio was
not recorded referenced to the SMPTE time code
from the analog tape deck or video tape deck.
Resolve All Components of Your System
When striping time code, make sure that the
time code generator and the video record deck
are resolved to the same crystal reference. For
example, when striping 29.97 Drop Frame time
code onto a VTR, both the SMPTE generator and
For more information on Sync Points, see
“Sync Points” on page 662.
Sync Points
Sync points
Pro Tools Reference Guide906
the VTR should be resolved to the same “black
burst” or house sync generator. During play-
back, the master deck should be resolved to
“black burst” or house sync.
This convention provides compatibility for your
tape between the record and playback passes,
and when it’s played back in other facilities on
different equipment. This also means that when
playing back a tape striped with time code, the
playback deck should be resolved to the same
synchronization rate as the record deck was re-
solved to at the time of the striping. When you
stripe time code using an audio transport, it
should be “free-running” and unresolved, but
should be resolved with a house sync-referenced
synchronizer during playback.
Know the True Frame Rate on Your Media
If you get your media from a production com-
pany instead of recording them yourself, be ab-
solutely sure that they indicate the SMPTE
frame rate used on the tape correctly. Several
time code formats use the same frame count
(such as 23.976 fps and 24 fps) yet they run at
slightly different frame rates per second.
A Digidesign SYNC peripheral (and some third-
party products) can be used to help determine
frame rate.
29.97 fps Non-Drop Rate Not Recognized
29.97 fps Non-Drop is a slightly slower version
of 30 fps Non-Drop time code. When 29.97 fps
Non-Drop is used with color video, each video
frame matches up with each SMPTE frame with-
out having to use a drop-frame coding. This
makes any frame number mathematics much
simpler, since no frame numbers are dropped.
Some hardware and software devices do not rec-
ognize 29.97 Non-Drop as a separate frame rate.
For example, any standard SMPTE-to MTC-con-
verter does not explicitly recognize it. You must
set the convertor to expect 30 fps Non-Drop in-
stead. In fact, many devices that read SMPTE
work acceptably by reading 29.97 Non-Drop if
they are set to expect 30 fps Non-Drop.
Any SMPTE reader that uses the time code num-
bers to make real-time calculations (as Pro Tools
does when it tries to trigger and synchronize to
SMPTE) also needs to know that the frame for-
mat is 29.97 and not 30 fps. Since Pro Tools al-
lows this choice of frame rate this does not re-
ally pose a problem. The problem exists because
many users cannot readily distinguish 29.97
from 30 fps.
Even though NTSC tapes only use 29.97, some
production companies will distribute video
work prints striped with 29.97 fps but mark
them as “30 fps NTSC,” by which they actually
mean 29.97 fps Non-Drop.
By the time you get the tape, you may have no
idea what’s actually on it. Feeding 29.97 Non-
Drop to Pro Tools when it’s set for 30 fps Non-
Drop will result in timing errors of about 1.8
frames per minute, causing audio playback to
trigger out of sync.
Use a Consistent Clock Source
When possible, media files should be played
back using the same sync reference signal they
were recorded with. This assures the closest
match between record and playback sample
rates.
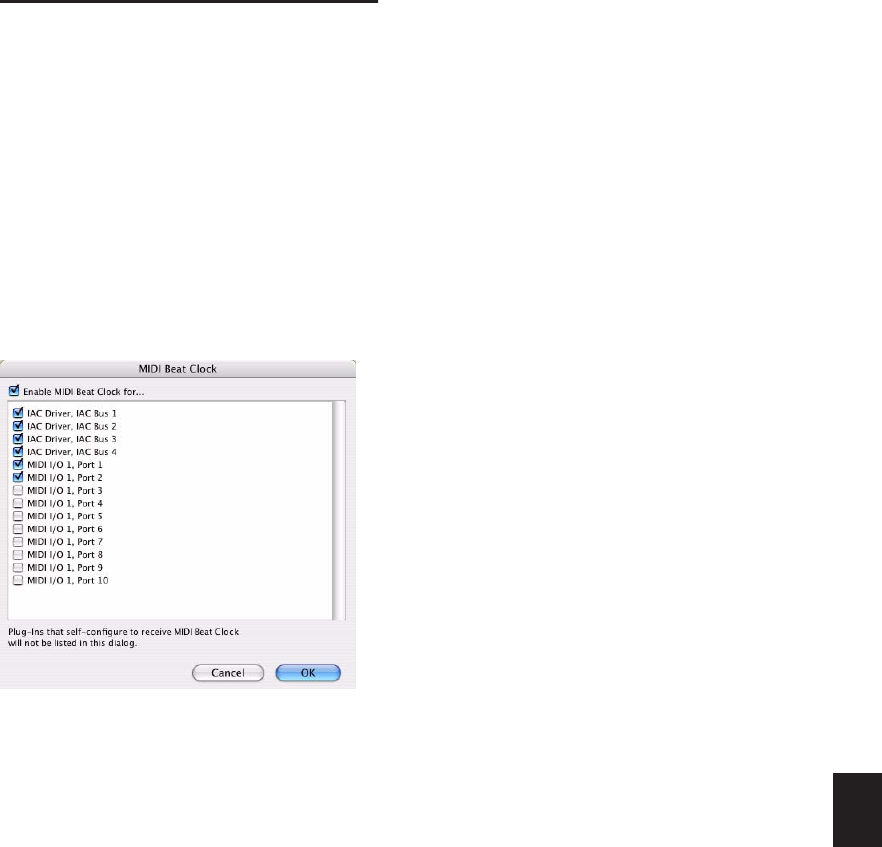
Chapter 42: Working with Synchronization 907
MIDI Beat Clock
Some MIDI devices such as drum machines,
hardware sequencers, and arpeggiators can only
synchronize to MIDI Beat Clock. To synchronize
these devices to Pro Tools, you can transmit
MIDI Beat Clock to them. Many plug-ins also
support MIDI Beat Clock.
To transmit MIDI Beat Clock:
1 Choose Setup > MIDI > MIDI Beat Clock.
2 In the MIDI Beat Clock dialog, select the En-
able MIDI Beat Clock option.
3 Select the devices you want to receive MIDI
Beat Clock. If your MIDI interface does not sup-
port transmitting MIDI Beat Clock to separate
ports, only the interface appears as a destina-
tion.
4 Click OK.
5 Enable the Conductor in the Pro Tools Trans-
port window to enable transmission of MID
Beat Clock during Pro Tools playback.
Sending MIDI Beat Clock Over IAC
(Mac Only)
You can synchronize other MIDI applications
that use the Apple Inter-Application Communi-
cation (IAC) driver to Pro Tools by transmitting
MIDI Beat Clock on the IAC bus.
To transmit MIDI Beat Clock on the IAC bus:
1 Choose Setup > MIDI > MIDI Studio.
2 In the MIDI Devices window of Audio MIDI
Setup, double-click the IAC Driver icon.
3 Configure the IAC Driver ports and confirm
that it is online.
4 Choose Setup > MIDI > MIDI Beat Clock.
5 In the MIDI Beat Clock dialog, select the En-
able MIDI Beat Clock option.
6 Select the IAC Driver ports you want to enable
to send MIDI Beat Clock.
7 Click OK.
8 Enable the Conductor in the Pro Tools Trans-
port window to enable transmission of MID
Beat Clock during Pro Tools playback.
MIDI Beat Clock dialog
Pro Tools Reference Guide908

Chapter 43: Working with Video in Pro Tools 909
Chapter 43: Working with Video in
Pro Tools
This chapter covers video features in Pro Tools.
Differences between support for QuickTime,
Windows Media, and Avid video are noted
throughout.
Introduction
Pro Tools lets you do the following with video:
• Create video tracks and import QuickTime
and Windows Media video to the Timeline
using menu commands or drag and drop
• Lock video tracks
• Extract audio from QuickTime or Windows
Media video
• Scrub audio in tandem with video
• View video in the Video window or output
it through a FireWire peripheral to an ex-
ternal monitor
• Bounce the video track to QuickTime or
Windows Media video
Pro Tools LE with DV Toolkit 2, Pro Tools LE
with an Avid video peripheral, and
Pro Tools HD let you do the following with
video:
• Import multiple video files into the Time-
line
• Select from multiple video playlists on each
video track
• Mix multiple codecs in video tracks
• Organize, group, and edit video regions in
the Timeline much like audio regions
• Organize, group, and edit video regions
with audio regions
• Manage video regions
• Undo multiple video operations
• Create multiple video tracks with Quick-
Time, Windows Media, and Avid video in
the Timeline
For detailed information on features that
apply specifically to working with Avid
video in Pro Tools, see the Avid Video Pe-
ripherals Guide.
Pro Tools Reference Guide910
QuickTime Movies Support in
Pro Tools
Pro Tools supports the import, playback, and
editing of QuickTime movies.
QuickTime Required
Quicktime must be installed if you plan to in-
clude movie files, or import MP3 or MP4 (AAC)
files in your Pro Tools sessions. QuickTime for
Windows is available as a free download from
the Apple website (www.apple.com).
QuickTime Movie Playback
Performance Options
The Operation Preferences page provides three
options for QuickTime Playback Priority:
Normal This setting gives no extra priority to
movie playback over other screen update tasks
such as metering, moving faders, and so on. In
most cases you should use this setting.
Medium This setting gives QuickTime movie
playback a higher priority relative to other
Pro Tools screen update tasks. Use this setting if
you experience inconsistent QuickTime movie
playback with the Normal setting.
Highest This setting gives QuickTime movie
playback highest priority. In this mode,
Pro Tools disables screen activity and requires
you to use the Spacebar to stop playback. Use
this setting if you require uninterrupted Quick-
Time movie playback.
High Quality QuickTime Image
When enabled, Pro Tools decompresses both
fields of each interlaced frame of QuickTime
video. When viewing a QuickTime movie in the
Pro Tools Video window, select this option to
display the movie at the highest possible resolu-
tion. Deselecting this option can help improve
performance if your system experiences prob-
lems playing back a session with QuickTime
video.
Supported QuickTime Movies
When working with someone who is preparing
QuickTime movies for use with Pro Tools, en-
sure that you communicate the following:
Consolidated and Referenced Media QuickTime
DV movies can be either complete (consoli-
dated) Quicktime files (where media is copied
into a Quicktime file) or Quicktime reference
files (where just a small composition is in the
Quicktime file which references the original DV
files).
Codec Requirements When exporting from
Avid, always use the Apple DV codec. Do not en-
able “Use Avid Codec” in the export dialog. If an
Avid-codec DV movie is imported into
Pro Tools, you cannot play it unless you have
installed an Avid video peripheral.
For information on which version of Quick-
Time is compatible with your version of
Pro Tools, visit the compatibility pages of
the Digidesign website
(www.digidesign.com).
See also “Playing QuickTime DV Video to
an External Monitor Via FireWire” on
page 929.

Chapter 43: Working with Video in Pro Tools
911
DV Stream Movies
Pro Tools does not support
audio from a DV Stream file. DV Stream files
contain the entire data stream that has been
transferred or recorded over the FireWire cable
from a camera. In this type of file, the audio and
video data are stored in an interleaved fashion,
as opposed to a QuickTime file where audio and
video are stored separately.
Limitations for Applying Pull-Ups
to QuickTime Movies in Sessions
Containing Avid Video
Applying a pull-up to QuickTime movies in a
session may have unpredictable effects on the
playback of any Avid video in that session. Only
use video pull-up for sessions that do not con-
tain Avid video.
Windows Media Video (VC-1
AP Codec) Support in
Pro Tools
(Windows Vista Only)
Pro Tools natively supports the import and play-
back of Windows Media video files created using
the VC-1 Advanced Profile codec. See your Win-
dows documentation for detailed information
about Windows Media video.
Windows Media Video File Caveats
The following limitations apply to Windows
Media video in Pro Tools.
• Pro Tools cannot open Windows Media video
files that require Windows Media File Digital
Rights Management (DRM) passwords to
view.
• High-resolution Windows Media video files
play back accurately at normal speed on the
Windows desktop or an external monitor
with a qualified DirectShow output device.
However, due to processing requirements for
VC-1 decompression, Digidesign cannot guar-
antee accurate playback of video frames when
performing other transport commands (such
as scrubbing, looping, and off-speed play).
• Pro Tools does not support Windows Media
playback via Avid video peripherals.
Before Starting Your Project
Before you start any project that requires work-
ing with video, consider the following:
Frame Rate
Before receiving video, find out the
frame rate. Use this frame rate when setting the
frame rate of your Pro Tools sessions and when
capturing video.
Creator Application and Codec
Before receiving
video as media files, find out the application
and codec used to create those files. Then con-
firm that you can play those files in Pro Tools. It
is always a good idea to get a sample file in ad-
vance.
QuickTime Movie Time Code Burn-in
Before re-
ceiving QuickTime movies, request the time
code display to be “burned in” (superimposed) if
possible. This ensures that Pro Tools places the
file at the correct time code location in the
Timeline.
See also “Exporting QuickTime DV from
Avid” on page 930.
Though not prohibited, editing Windows
Media video or adding multiple clips to the
timeline can lead to irregular video output
performance.
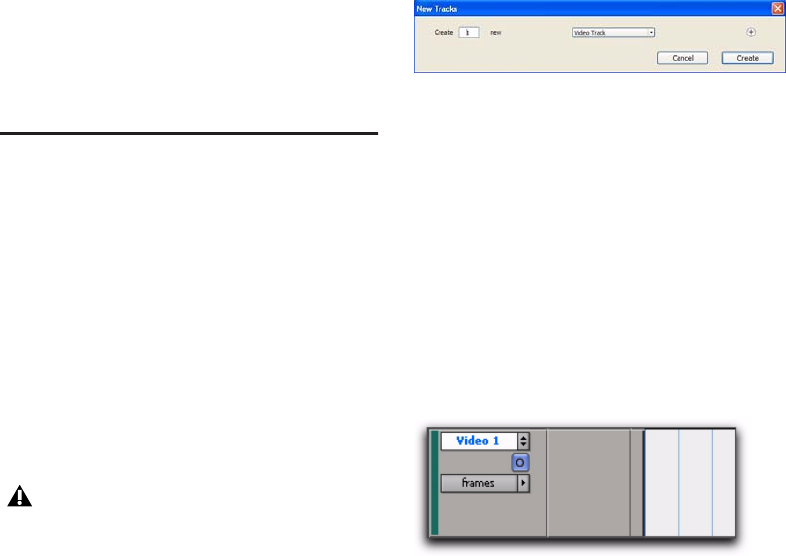
Pro Tools Reference Guide912
Sufficient Space on Video Drives Ensure suffi-
cient space is available on separate dedicated
video-only drives. Video files take up signifi-
cantly more space and bandwidth than audio,
and must be kept on separate drives from audio
files to prevent performance problems.
Separate video-only and audio-only drives For
best results, always use separate video-only and
audio-only drives. For complete information on
hard drive requirements, visit the Digidesign
website (www.digidesign.com).
Video Tracks
Video tracks let you add or import video to the
Timeline, as follows:
• Pro Tools LE lets you add or import one video
track per session, with a limit of one video
playlist and one QuickTime or Windows Me-
dia video file on that track.
• Pro Tools HD, Pro Tools LE with DV Toolkit 2,
and Pro Tools LE with an Avid video periph-
eral let you add multiple video tracks to the
Timeline, with multiple video playlists and
multiple video files per track.
• Pro Tools with an Avid video peripheral lets
you mix QuickTime and Avid video tracks in
the Timeline (but not on the same video
track).
To create a video track in Pro Tools LE, do one of
the following:
Use File > Import to import a video file.
Drag a video file to the Timeline.
Use File > Import > Session Data to import a
session containing a video track.
See “Importing Video into Pro Tools” on
page 917 for more information.
To create a new video track with Pro Tools HD and
Pro Tools LE with DV Toolkit 2 or an Avid video
peripheral:
1 Choose Track > New.
2 In the New Tracks dialog, do the following:
• Select Video Track from the Track Type
pop-up menu.
– and –
• Enter the number of new video tracks.
3 Click Create.
A new empty video track appears. Video tracks
may appear slightly different depending on
your system configuration or the type of video
added to a video track.
Multiple Video Tracks in the
Timeline
(Pro Tools HD, and Pro Tools LE with
DV Toolkit 2 or an Avid Video Peripheral Only)
You can add multiple video tracks to the Time-
line, but only one video track can be played
back at a time. This track is known as the main
video track.
An Avid video peripheral is required to im-
port, play back, and edit Avid video.
New Tracks dialog
Empty video track
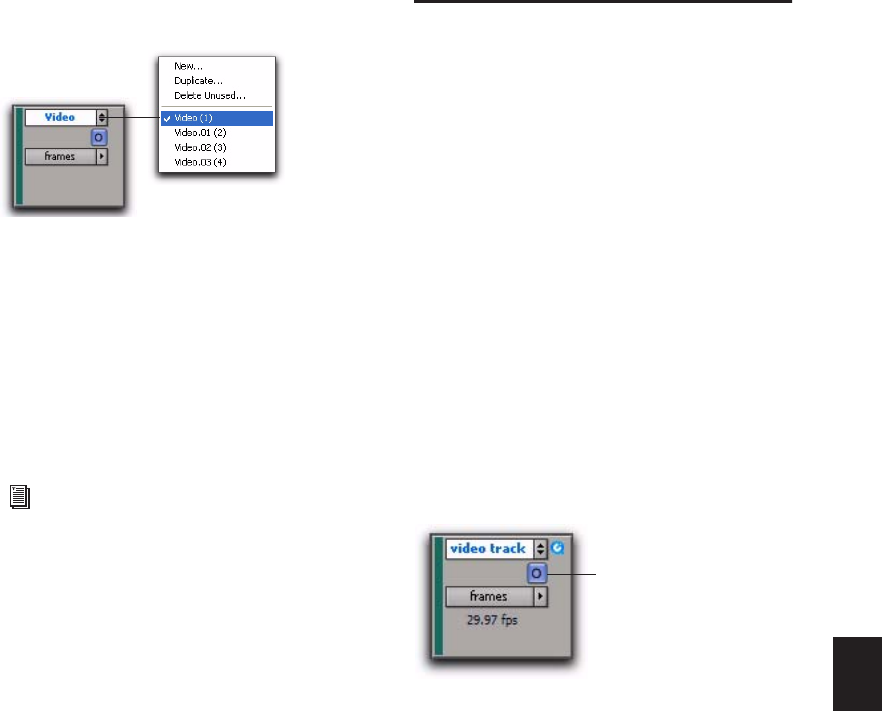
Chapter 43: Working with Video in Pro Tools 913
Multiple Video Track Playlists
(Pro Tools HD, and Pro Tools LE with
DV Toolkit 2 or an Avid Video Peripheral Only)
Playlists provide an easy way of changing back
and forth between alternate versions of a video
track.
You can perform all of the same operations with
video playlists as you can with audio playlists,
including:
• Duplicating a playlist
• Creating a playlist
• Assigning a playlist to another video track
• Renaming a playlist
• Deleting a playlist
Multiple Codecs on an Individual
Video Track
(Pro Tools HD, and Pro Tools LE with
DV Toolkit 2 or an Avid Video Peripheral Only)
A single video track can contain video regions
compressed with different video codecs of the
same type of video. For example, you can add
QuickTime files that were compressed using
multiple codecs to the same video track.
However, once the first video file has been
added to a session, all additional video files
added to the Timeline must have the same video
engine rate as the first video file.
Main Video Track
The main video track is the video track that is
currently online, and will be played back with
any audio in the session.
When the main video track is offline, you can
play back the audio in your session without
playing back the video. When the video is off-
line, the Video Online button changes to gray so
you can tell at a glance whether your video is
offline or simply playing black fill.
If no video track is currently online, the main
video track is the video track that was last on-
line.
To select the main video track:
Click the Video Online button of any track
that is offline (gray) to put it online (blue), mak-
ing that track the main video track.
Playlist selector
For more information, see “Playlists” on
page 410.
Video Online button (offline and online, respectively)
Main video track
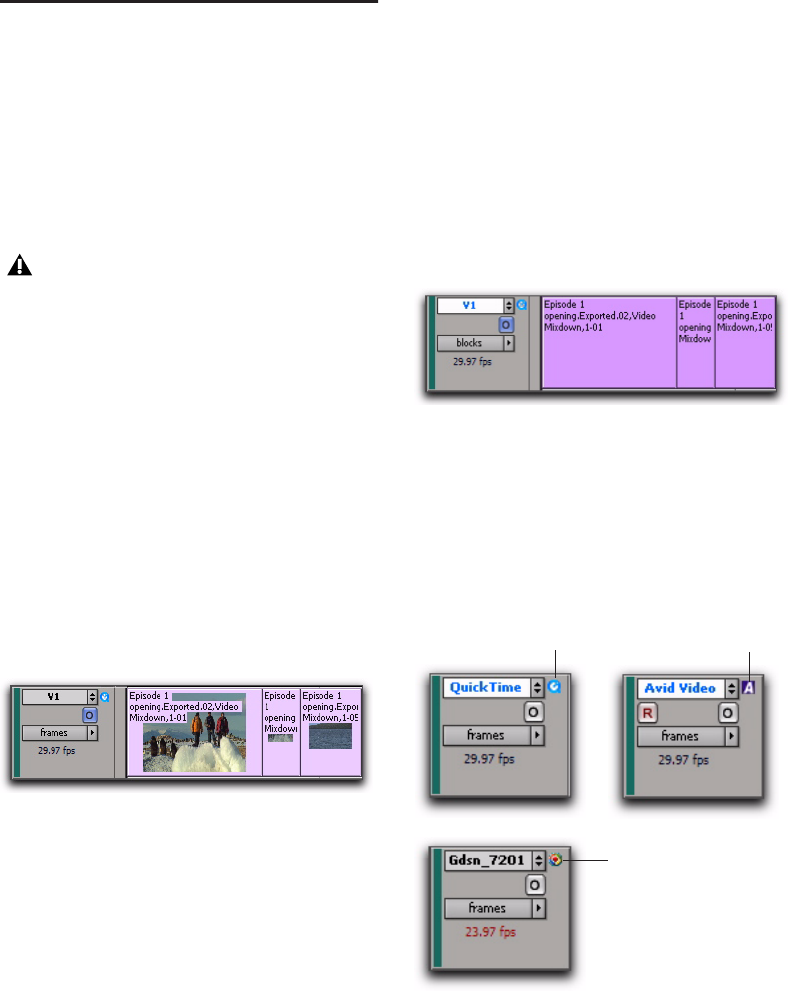
Pro Tools Reference Guide914
Video Track Controls and
Indicators
Video Track View
The video track can be viewed in Frames View or
in Blocks View, both of which display all video
region boundaries and metadata. Video frame
images are displayed only in Frames View.
To set the view for the video track:
On the video track, select Frames or Blocks
from the View Options pop-up menu.
Frames View
In Frames View, video data is displayed as pic-
tures in the video track. These pictures are com-
puted based on the video image, and scale ac-
cording to your track zoom and height settings.
They allow you to easily find a scene or se-
quence in the video track.
Frames do not display properly if you change
zoom settings during playback. Black frames are
drawn until playback is stopped. You should
stop playback before changing zoom settings if
you want to view frames.
If video pull-up or pull-down is enabled, frames
do not change position.
Frames View Performance
When using Frames View to view video content
in the video track, your computer may exhibit
reduced or sluggish performance. If this hap-
pens on your computer, hide the video track or
switch to Blocks View.
Blocks View
In Blocks View, video frames are replaced by col-
ored blocks.
Video Track Type Icons
A video track displays a QuickTime icon, Win-
dows Media icon, or an Avid icon depending on
the type of video added to it. No icon displays
when the video track is empty.
When switching from Blocks mode to
Frames mode during playback, the video
track will not update to displaying frames
until playback is stopped.
Video track in Frames View
Video track in Blocks View
Video tracks displaying QuickTime, Windows Media,
and Avid icons
Avid
icon
QuickTime
icon
Windows Media icon
(Windows Vista only)
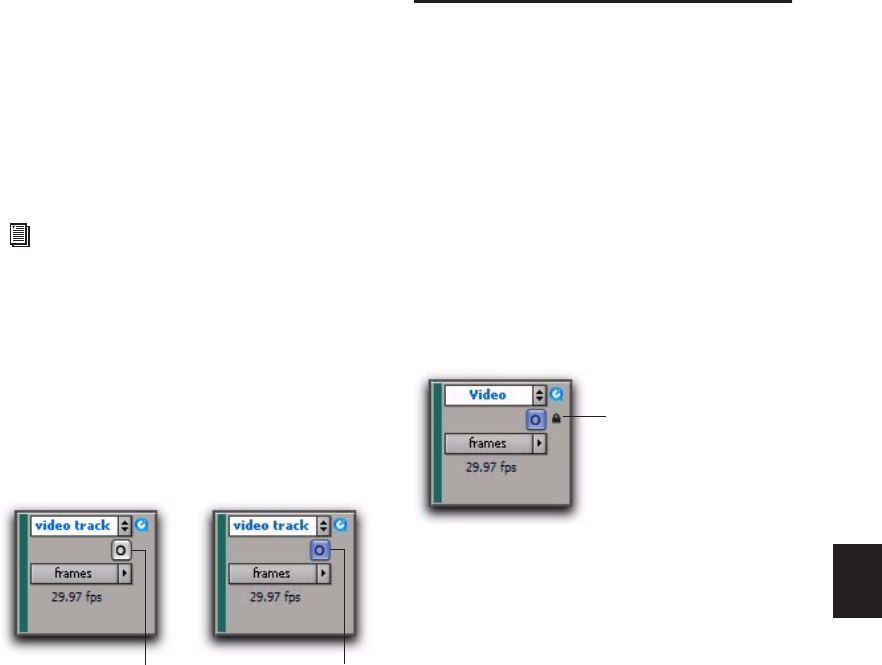
Chapter 43: Working with Video in Pro Tools 915
You can add any supported video to an empty
video track, in which case the icon will update
and the video track will play back only that type
of video.
Differences in Video Tracks with Avid
Video
When an Avid video peripheral (such as an
Avid Mojo SDI) is connected to your system and
powered on, the following conditions apply:
• All video tracks display a Video Output se-
lector, but only tracks containing Avid
video display a Video Input selector.
• You can add Avid video to an empty video
track.
• Only Avid video tracks contain a Record
Enable button.
Video Online Button
The Video Online button lets you select the
main video track, switch that track online or off-
line, and see at a glance by color whether a video
track is offline (gray) or online (blue).
To switch a video track online or offline:
Click the Video Online button of any track
that is offline (gray) to put it online (blue), mak-
ing that track the main video track.
Click the Video Online button of the main
video track to take it offline, and Pro Tools will
not output video.
Locking Video Tracks
You can lock one or more video tracks to pre-
vent any video regions on those tracks from be-
ing edited.
When a video track is locked, Pro Tools restricts
all editing operations involving the track (ex-
cept for locking and unlocking video regions).
A locked video track displays a small lock to in-
dicate that the video track has been locked and
cannot be edited. (The lock does not appear if
the Track Height of the video track is set to
Mini.)
Locking or unlocking a video track does not al-
ter the lock status of individual regions. If a re-
gion was locked before you lock the track, the
region will still be locked when you unlock the
track. However, unlocking a region in a locked
track will not allow you to edit that region. It
will behave as if the region were locked until
you unlock the track.
See the Avid Video Peripherals Guide for de-
tailed information on using the Record En-
able button and the controls in the I/O
View.
Video Online button (offline and online, respectively)
Video track
offline
Video track
online
Locked video track
Lock icon
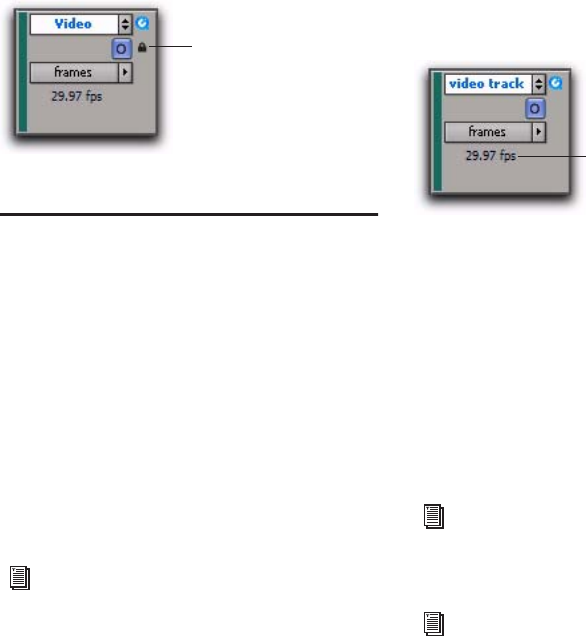
Pro Tools Reference Guide916
To lock a video track:
1 Select the video track or tracks you want to
lock.
2 Do one of the following:
• Start-click (Windows) or Control-click
(Mac) the name of any selected video track,
and select Locked.
– or –
• Right-click the name of any selected video
track, and select Locked.
Video Engine Rate
The video engine rate represents the number of
video frames output by Pro Tools per second,
and is determined automatically by the frame
rate of the first video file added to a session.
Video files subsequently added to the session
must have the same video frame rate as the
video engine rate.
The video frame rate is displayed for each video
file in the DigiBase browsers, and the current
video engine rate is displayed in the I/O View of
the main video track.
The video engine rate is independent of the ses-
sion's time code rate, which determines the
number of frames displayed per second in grids,
rulers, and counters. You can set the session
time code rate manually with the Time Code
Rate pop-up menu in the Session Setup window.
In order for the grids and rulers to align with the
actual frames of the video files in the Timeline,
the session's Time Code Rate setting should be
set to match the video engine rate.
Video Engine Rate Indicator
The Video Engine Rate indicator displays only
in the main video track (whether it is online or
offline) and shows the video engine rate, which
is the number of video frames per second output
by Pro Tools.
The Video Engine Rate indicator is normally
black, but turns red if one of the following con-
ditions are present:
• The video engine rate does not match the
session’s current Time Code Rate setting.
– or –
• A pull-up has been applied to the video,
causing the video engine rate to differ from
the session Time Code Rate.
Locked video track
See “Video Engine Rate Indicator” on
page 916 for information on the Video En-
gine Rate indicator in the I/O View.
Lock icon
Video Frame Rate
The Time Code Rate is set in the Session
Setup window. For more information, see
“Session Setup Window” on page 883.
See “Pull Up and Pull Down” on page 890
for detailed information on using video
pull up and pull down.
Video Engine Rate
Chapter 43: Working with Video in Pro Tools 917
Importing Video into Pro Tools
Pro Tools provides the following methods of im-
porting video files into the Timeline, Region
List, and new or existing video tracks:
• Using the Import Video menu command
• Dragging from the Region List to the Time-
line (Pro Tools HD, Pro Tools LE with DV
Toolkit 2, or Pro Tools LE with an Avid
video peripheral only)
• Dragging from a DigiBase browser or from
Windows Explorer or Mac Finder
• Using the Import Session Data command
Importing Video into Pro Tools Using
the Import Video Command
The Import Video menu command lets you
choose one or more video files to import into
Pro Tools.
When you use this method to import video into
Pro Tools, the Video Import Options dialog ap-
pears. This dialog contains multiple options for
customizing how files are imported.
To import video into Pro Tools using the Import
Video command:
1 Do one of the following:
• Choose File > Import > Video.
– or –
• Press Alt+Control+Shift+I (Windows) or
Command+Control+Shift+I (Mac).
2 In the Select Video File to Import dialog, select
one or more video files.
3 Click Open.
4 Configure the Video Import Options dialog as
desired, and click OK to import video into
Pro Tools.
The video frame rate of the first video file
added to a session determines the session’s
video engine rate. Video files subsequently
added to the session must have the same
video frame rate as the video engine rate.
In general, audio and video media should
be stored on separate dedicated drives.
When importing audio and video at the
same time by linking to media, however,
Pro Tools may copy both to the same drive.
To avoid performance problems, move the
video to the desired video playback drive be-
fore importing the audio and video into
your session.
When you import MPEG-2 video into
Pro Tools, only the video portion of the file
is imported and the resulting video regions
cannot be edited.
In a DigiBase browser, you can designate
your audio drives to play or record audio but
only transfer video, or vice versa. You may
use these settings to ensure that your audio
and video are on the correct volumes. For de-
tailed instructions, see “Audio and Video
Volume Designators” on page 239.
See “Configuring Video Import Options” on
page 918 for detailed instructions.
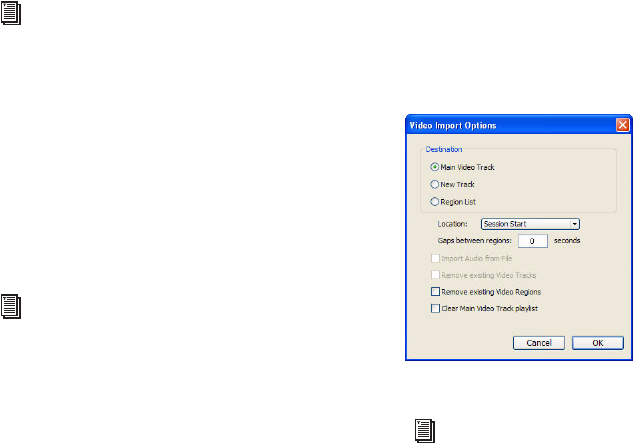
Pro Tools Reference Guide918
Importing Video into Pro Tools with
Drag and Drop
You can drag and drop video files from a
DigiBase browser or from Windows Explorer or
Mac Finder to the Timeline, a track, a Track List,
or the Region List.
When you use this method to import video into
Pro Tools, the Video Import Options dialog ap-
pears. This dialog contains multiple options for
customizing how files are imported.
To import video into Pro Tools using drag and drop:
1 Drag and drop one or more video files from a
DigiBase browser or from Windows Explorer or
Mac Finder to the Track List, Timeline, or an ex-
isting video track.
2 Configure the Video Import Options dialog as
desired, and click OK to import video into
Pro Tools.
Importing Video into Pro Tools Using
Import Session Data
You can use the Import Session Data command
to import video from other Pro Tools sessions or
(with DigiTranslator 2.0) from an AAF or OMF
sequence. Any video files you import must have
the same video frame rate as any video file al-
ready present in the session.
Dragging Video Files from the
Region List to the Timeline
(Pro Tools HD, and Pro Tools LE with
DV Toolkit 2 or an Avid Video Peripheral Only)
You can add video files to the Timeline by drag-
ging and dropping directly from the Region List
to a video track.
To add video files to a video track by dragging
them from the Region List:
1 Select one or more video files in the Region
List.
2 In any Edit mode, drag the selected video files
to a blank area in the Timeline (to create a new
video track) or an existing video track (to place
it within that track).
Configuring Video Import Options
The Video Import Options dialog appears when
you import video into Pro Tools by using the
Import Video command or dragging video files
from a DigiBase browser or from Windows Ex-
plorer or Mac Finder.
See “Configuring Video Import Options” on
page 918 for detailed instructions.
For information on importing session data,
see “Importing Session Data” on page 266.
For detailed information on importing AAF
or OMF sequences into Pro Tools, see the
DigiTranslator Guide.
Video Import Options dialog
See “Bypassing the Video Import Options
Dialog” on page 920 for details on bypass-
ing the Video Import Options dialog when
dragging and dropping video files.

Chapter 43: Working with Video in Pro Tools 919
Destination Section
The Destination section of the Video Import
Options dialog lets you choose a general desti-
nation for imported video in Pro Tools.
Main Video Track The video file is imported di-
rectly to the track that is currently online
(known as the main video track) and into the
Region List. If no track is currently online, the
video file will be imported to the last existing
video track that was online.
New Track Each video file is imported into its
own individual track and into the Region List.
Region List (Pro Tools HD and Pro Tools LE with
DV Toolkit 2 or an Avid Video Peripheral Only)
Each video file is imported directly into the Re-
gion List, where it will be available to drag and
drop into the Timeline.
Location Pop-Up Menu
If you do not select the Region List as a destina-
tion in the Destination section, the Location
pop-up menu lets you choose precisely where in
the Timeline Pro Tools places imported video.
Session Start Places the video file at the start of
the session.
Song Start Places the video file at the Song Start
position.
Selection Places the video file at the edit cursor
position or within the selection (if one was
made).
Spot Displays the Spot dialog, which lets you
spot video to precise locations based on any of
the Time Scales.
Original Time Stamp (Avid Video Only) Places
Avid video in the Timeline at a time code loca-
tion that corresponds to the timestamps from
the original source tape. With multiple video
files, this places all video files in the Timeline at
their respective original timestamps.
Additional Video Import Options
Gaps Between Regions (Pro Tools HD and
Pro Tools LE with DV Toolkit 2 or an Avid Video Pe-
ripheral Only) When you import more than one
video file into a track, they will be shuffled to-
gether by default. This option lets you indicate
the number of seconds by which each video clip
will be separated when imported into the video
track.
Import Audio from File (QuickTime and Windows
Media Video Only)
When selected, the audio from the QuickTime
or Windows Media video file you are importing
will be extracted and placed into new mono or
stereo audio tracks in the Timeline. (Mono or
stereo audio with a sampling rate of 48 kHz or
lower are supported.) When unselected, only
the video portion of the video file will be im-
ported into Pro Tools.
Remove Existing Video Tracks When selected,
all existing video tracks will be deleted before
Pro Tools imports video into the session.
Remove Existing Video Regions When selected,
all existing video regions will be removed from
the Timeline and the Region List before
Pro Tools imports video into the session (but
left on disk). This option is useful if you want to
import a video file into the session with a video
frame rate that does not match the current
video engine rate.
See “Video Engine Rate” on page 916 for
more information.

Pro Tools Reference Guide920
Clear Main Video Track Playlist When selected,
all existing video regions in the currently-se-
lected playlist on the main video track will be re-
moved from the track before Pro Tools imports
video into the session. No other playlists, video
tracks, or video regions will be affected. (This
option is only enabled if the main video track is
selected as the Destination option.)
Bypassing the Video Import Options Dialog
You can bypass the Video Import Options dialog
when dragging video files into Pro Tools. The
video files are added exactly where you drop
them in the Timeline following the current
Pro Tools editing mode.
To bypass the Video Import Options dialog when
importing video into Pro Tools:
Alt-drag (Windows) or Option-drag (Mac) one
or more video files from a DigiBase browser,
Windows Explorer, or Mac Finder into the Re-
gion List or the Timeline.
Extracting Audio from
QuickTime and Windows
Media Video
(QuickTime and Windows Media Video Only)
You can extract many audio file formats from
QuickTime and Windows Media video files
without importing the video.
The audio is converted to the session’s sample
rate and bit resolution, and a new region ap-
pears in the Region List for each imported file.
The regions are listed in the Region List with the
region name, the number of the originating
track, and the number of the region from the
track.
To import audio from a QuickTime or Windows
Media video file without importing the video, do
the following:
1 Choose File > Import > Audio.
2 In the Import Audio dialog, navigate to the
video file from which you want to import audio,
and select it.
3 Under the Region section, click the name of
the audio region you want to extract from the
video file, and click Convert Region or Add Re-
gion.
4 Select other audio files as desired, and click
Done to import the audio.
5 In the Audio Import Options dialog, choose
whether to import the audio into a new track
(and the Region List) or the Region List only.
Sample Rate Conversion Quality
If you import QuickTime audio that was not
originally recorded at the session’s sample rate,
the sample rate is converted to match the audio
to your session. Pro Tools allows you to choose
the quality of the sample rate conversion by
means of the Conversion Quality setting in the
Editing Preferences page.
There are five possible settings, ranging from
Low (lowest quality) to Tweak Head (highest
quality). The higher the quality of sample rate
conversion, the longer it takes to convert the
bounced file.
Pro Tools cannot extract audio from Win-
dows Media video files that require Win-
dows Media File Digital Rights Manage-
ment (DRM) passwords.
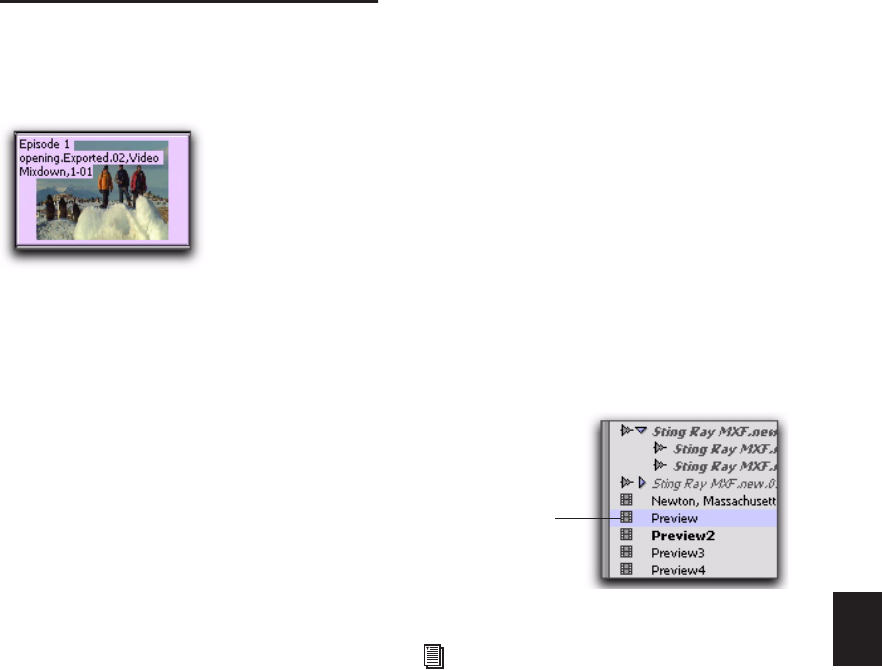
Chapter 43: Working with Video in Pro Tools 921
To set the sample rate conversion quality:
1 Choose Setup > Preferences and click the
Processing tab.
2 Click the Conversion Quality pop-up menu
and select a conversion setting.
Video Regions
You can create video regions that function in
much the same way as audio regions.
A video region is a segment of video data, and
can be a portion of video or an entire video file.
In Pro Tools, video regions are created from
QuickTime, Windows Media, or Avid video files,
and can be arranged in corresponding video
track playlists. Video regions can also be
grouped, looped, and color coded.
When using Pro Tools HD, Pro Tools LE with
DV Toolkit 2, or Pro Tools LE with an Avid
video peripheral, you can add, edit, and change
viewing options for video regions in the same
ways as audio regions. All edits to video regions
are nondestructive. (See “General Video Edit-
ing” on page 922 for more information.)
Just like audio regions, video regions display in
Pro Tools in the Region List or the Timeline.
When using Pro Tools LE, the following limita-
tions apply to video regions:
• You can add only one video region to a ses-
sion. It can be played back, but cannot be ed-
ited and will not be listed in the Region List.
• When you import video or open a session cre-
ated by Pro Tools HD, Pro Tools LE with
DV Toolkit 2, or Pro Tools LE with an Avid
video peripheral, only the main or first avail-
able video track containing QuickTime re-
gions will be imported. You can play back and
view multiple regions, and tab through region
boundaries. However, you cannot edit them.
(See “Using Pro Tools LE to Import Video
from Other Versions of Pro Tools” on
page 933 for more information.)
Video Regions in the Region List
(Pro Tools HD, and Pro Tools LE with
DV Toolkit 2 or an Avid Video Peripheral Only)
A video region displays in the Region List with a
small video icon next to its name.
Video region as displayed in Frames View in the
Timeline
Video region as displayed in the Region List
For information on working with regions in
the Region List, see Chapter 12, “The Re-
gion List.”
Video region icon

Pro Tools Reference Guide922
Showing or Hiding Video Regions in the
Region List
The Region List pop-up menu provides com-
mands that let you show or hide video regions
in the Region List.
To show or hide video regions in the Region List:
1 In the Edit window, click the Region List pop-
up menu, and choose Show.
2 Select the Video option to show or hide video
regions.
General Video Editing
(Pro Tools HD, and Pro Tools LE with
DV Toolkit 2 or an Avid Video Peripheral Only)
Most editing operations that are available for
audio regions can also be applied to video re-
gions. This section describes all available video
editing operations. Unless noted, the procedure
for each video editing operation is the same as
its audio editing counterpart.
Basic Video Editing Features
• Nondestructive editing
• Display of region names, region times, and
other data in playlists
• Multiple video playlists
• Multiple Undo
• Video regions and video region groups in
Region List
• All Edit modes
• All Edit Tools (except for Time Compres-
sion Expansion and Pencil tools)
Playing and Selecting Video Track Material
• Selecting within video frame boundaries (see
“Selecting within Video Frame Boundaries”
on page 923)
• Selecting and editing across multiple Video
and audio tracks (see “Selecting and Editing
Across Multiple Audio and Video Tracks” on
page 923)
• Link or unlink track and Edit selections
• Auto-scroll video tracks
• Loop playback
• Universe window (Pro Tools HD only—see
“Browsing Video in the Video Universe Win-
dow” on page 927)
Working with Regions and Selections
• Capture regions
• Separate regions and Separate Grabber Tool
• Region overlap and underlap
• All trimming commands except for TCE
• Heal separated regions
• Place, align, slide, shuffle, and spot regions
• Sync points
• Nudging (quantized to frame boundaries)
• Shift command (moving track material back
or forward in time by a specified amount)
• Quantize region to Grid (rounds to nearest
video frame)
• Replace Region command
• Cut, Copy, Paste, and Clear commands
• Special Cut, Copy, Paste, and Clear com-
mands
• Repeat to fill selection
• Editing across multiple tracks
• Duplicate command
• Repeat command
See the appropriate section in this guide for
detailed information on performing editing
operations.
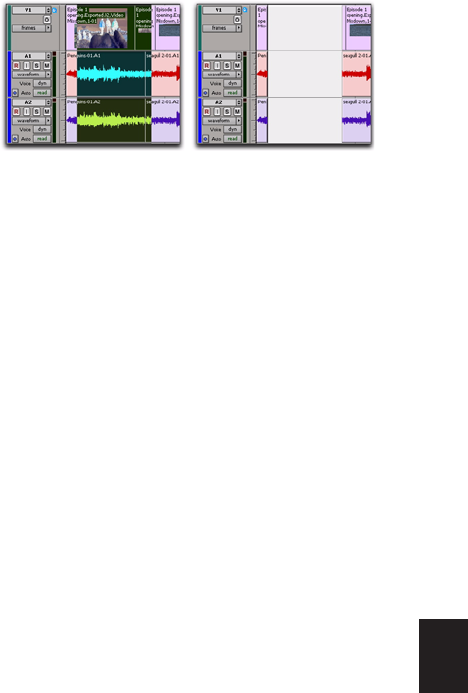
Chapter 43: Working with Video in Pro Tools 923
• Region groups (see “Video Region Groups” on
page 924)
• Region looping
Managing Regions
• Insert space (see “Using the Insert Silence
Command to Insert Space in Video Tracks”
on page 924)
• Compact Selected (nothing happens to the
video, and at least one audio track must be
selected)
• All naming and displaying of region com-
mands
Editing Caveats
The following caveats apply to video editing in
Pro Tools:
• MPEG-2 video in the Timeline cannot be
edited.
• If you create and enable a track group con-
taining audio and video tracks—and any
audio track has region boundaries that do
not line up with video frame boundaries—
you cannot tab through those region
boundaries.
General Editing Operations Not
Applicable to Video Regions
The following editing operations are applicable
to audio regions, but are not applicable to video
regions:
• Fades
• Mute/unmute regions
• AudioSuite plug-ins
• Waveform Repair with the Pencil tool
• Strip silence
• Consolidate regions
Selecting and Editing Across
Multiple Audio and Video Tracks
You can create a selection across multiple audio
and video tracks, and cut, copy, or paste audio
and video simultaneously.
Audio and video that is selected and cut, copied,
or pasted follow the current Edit mode.
Selecting within Video Frame
Boundaries
Pro Tools does not let you select, play back, or
edit a partial video frame. The following rules
apply when selecting or editing video:
• When you make a selection in a video track,
the selection boundaries follow the current
Grid setting but round to the nearest video
frame boundary, as follows:
• If the selection includes more than half of a
video frame, the video frame is included
within the selection.
• If the selection includes less than half of a
video frame, it is not included in a video se-
lection.
Selecting and editing across multiple tracks (Slip mode
shown)
before after
Pro Tools Reference Guide924
• When you paste a selection containing video
to a video track, the insertion point automat-
ically aligns with the closest video frame
boundary.
Using the Insert Silence Command
to Insert Space in Video Tracks
The Insert Silence command lets you make a se-
lection on a track (or tracks) and insert precisely
that amount of space. You can also select across
video and audio tracks, and use the Insert Si-
lence command to insert audio silence and
space simultaneously.
In Shuffle mode, all video data on the track is
shuffled later in the track by an amount equal to
the selection. In Slip, Grid, or Spot mode, the In-
sert Silence command works just like the Edit >
Clear command.
To insert space into a video track:
1 Make a selection in a track or tracks. The
length of the selection determines the duration
of the space inserted.
2 Choose Edit > Insert Silence.
Renaming Video Disk Files
When renaming audio regions in either the
Timeline or the Region List, you have the option
of also renaming the audio files on disk. How-
ever, this does not apply to video files on disk.
To rename video files on disk, you must rename
them in a DigiBase browser or in Windows Ex-
plorer or Mac Finder.
Video Region Groups
(Pro Tools HD, and Pro Tools LE with
DV Toolkit 2 or an Avid Video Peripheral Only)
You can include video regions within region
groups for the following operations:
• Creating region groups
• Creating multitrack region groups (includ-
ing audio tracks)
• Editing region groups
• Creating fades and crossfades for audio files
in region groups
• Importing and exporting region group files
When you paste audio and video simulta-
neously, this video frame re-alignment may
result in the audio not being positioned ex-
actly where you placed it. A warning dialog
displays when this occurs.
Changes made in the operating system will
not automatically update the information
displayed in the DigiBase browser.
See “Region Groups” on page 675 for de-
tailed information on working with region
groups.
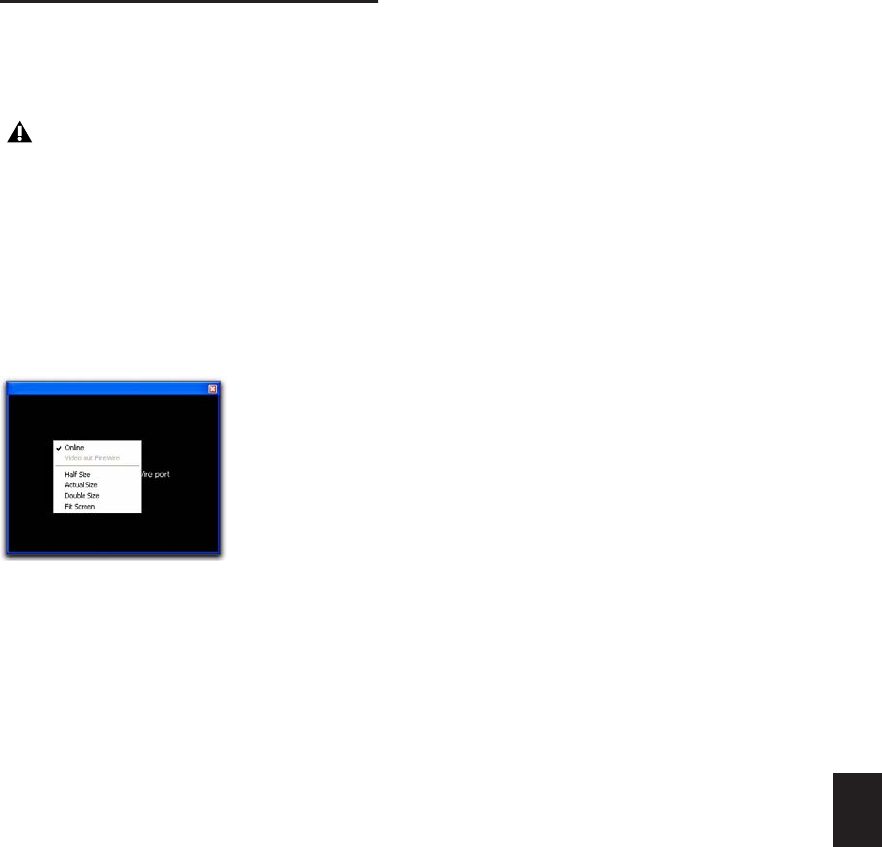
Chapter 43: Working with Video in Pro Tools 925
Using the Video Window
Pro Tools provides a Video window that lets you
view, display, or scrub video.
To display the Video window, do one of the
following:
Select Window > Video.
– or –
Press Control+9 (Windows) or Command+9
(Mac).
Changing Video Window Options
The Video window pop-up menu lets you do the
following:
• Toggle online status of the main video track.
• Toggle output of QuickTime video between
the Video window and an external monitor
via the FireWire port (Mac OS X only).
• Resize the Video window.
To toggle the online status of the main video
track:
Right-click (Windows or Mac) or Control-click
(Mac) the Video window, and select Online.
To toggle output of QuickTime video between the
Video window and FireWire, do one of the
following (Mac OS X only):
Choose Options > Video Out FireWire.
– or –
Right-click, or Control-click, the Video win-
dow, and select Video Out FireWire.
Resizing the Video Window
You can resize the Video window by dragging or
using the Video window pop-up menu.
To resize the Video window by dragging:
Place the cursor at the bottom left or bottom
right of the Video window, and drag the window
to the size you want.
To resize the Video window by using the Video
window pop-up menu:
Right-click (Windows or Mac) or Control-click
(Mac) the Video window, and choose from the
following resize options:
• Half Size
• Actual Size
• Double Size
• Fit Screen
Scrubbing the Video Track
Due to the latency introduced by all FireWire-
based video peripherals, the video on an exter-
nal monitor will not be in sync with the Scrub-
ber tool. To scrub video without latency, you
can scrub in the Video window.
If you scrub directly on the video track, only the
video will scrub (no audio will play). If you scrub
on an audio track, audio and video will scrub si-
multaneously.
Avid video displays in the Video window
only when scrubbed or shuttled.
Video window (with pop-up menu shown)
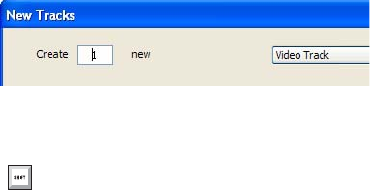
Pro Tools Reference Guide926
To scrub a video track:
1 Ensure that scrubbing in the Video window is
enabled by selecting Options > Scrub in Video
Window.
2 Select the Scrubber tool.
3 Click in the video track and drag the Scrubber.
Shuttling the Video Track
Shuttle Lock mode lets you use the numeric key-
pad to shuttle a video track and one or two au-
dio tracks forward or backwards at specific
speeds. Numbers 0 through 9 provide progres-
sively faster speeds, as follows:
• To stop shuttling, press 0.
• To increase the speed progressively towards
normal speed, press numbers 1 through 4.
• To shuttle at normal speed, press 5.
• To increase the speed progressively faster than
normal speed, press numbers 6 through 9.
Only the main video track is shuttled. When
multiple audio tracks are selected, only the first
two tracks are shuttled.
To play the video track with the shuttle lock:
1 With Pro Tools HD, make sure the Operation
preference for Numeric Keypad mode is not set
to Shuttle (see “Operation Preferences” on
page 76).
2 Make sure the Video Online button in the
video track you want to scrub is set to an online
(blue) status.
3 With the Selector tool, click in the audio track
where you want playback to begin. To shuttle on
two tracks, Shift-click in a second audio track.
4 Press the Start key (Windows) or Control
(Mac) and a number on the numeric keypad:
0–9 (9 is fastest, 5 is normal speed, and 0 stops
shuttling).
Once Shuttle Lock mode is initiated, Fast For-
ward and Rewind become highlighted in the
Transport window.
5 Press additional keys to change the playback
speed, or press Plus (+) or Minus (–) to switch the
playback direction (plus for forward, minus for
backward).
6 To stop playback, press Start+0 (Windows) or
Control+0 (Mac).
To exit Shuttle Lock mode, do one of the following:
Click Stop in the Transport window.
– or –
Press the Spacebar.
Scrubber tool
To scrub with finer precision, press the
Command key while scrubbing.
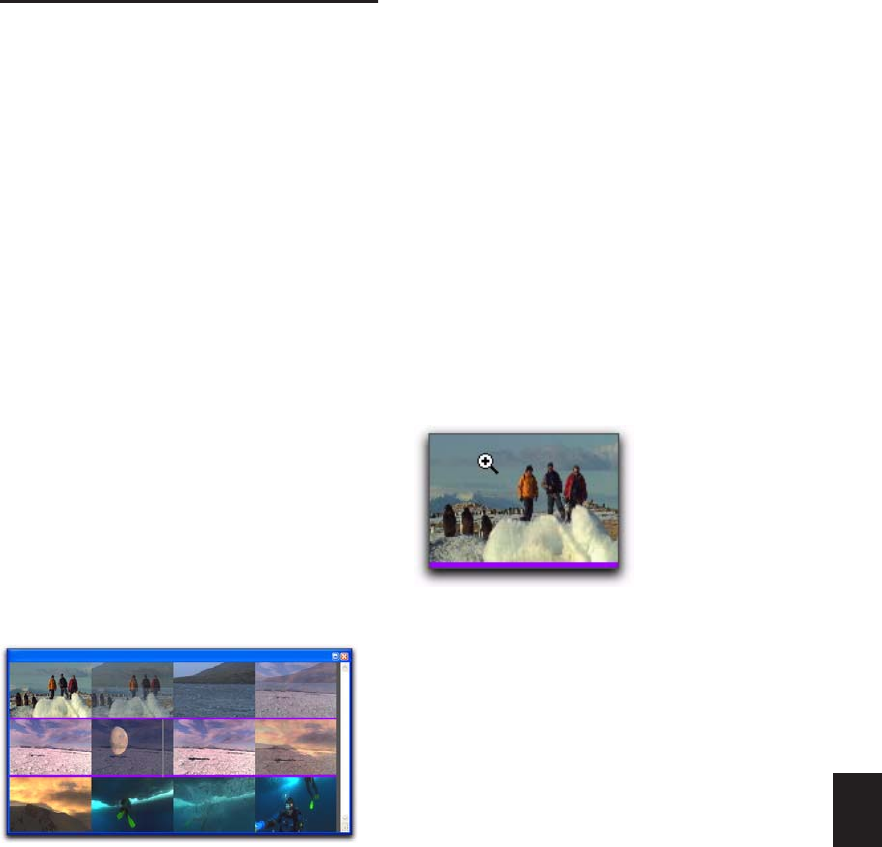
Chapter 43: Working with Video in Pro Tools 927
Browsing Video in the Video
Universe Window
(Pro Tools HD Only)
The Video Universe, which is accessible from
the Universe window, lets you view, navigate,
zoom, and select video regions on the main
video track.
The Video Universe window displays the center
video frame of each video region in the main
video track. Video frames are ordered sequen-
tially according to their order in the Timeline,
and the colored strip under each frame repre-
sents the color coding for that region.
To display the Video Universe window:
1 Make sure the Video Online button in the
main video track is set to an online (blue) status.
2 Choose Window > Universe to display the
Universe window.
3 Right-click (Windows or Mac) or Control-click
(Mac) anywhere in the Universe window, and
choose Video Universe.
Increasing or Decreasing the Size of
Video Frames
To increase or decrease the size of video frames in
the Video Universe window:
Right-click (Windows or Mac) or Control-click
(Mac) anywhere in the Universe, and select In-
crease or Decrease.
Selecting Zoom Resolutions in the
Video Universe
When you move the cursor over the top half of
a video frame in the Video Universe, it displays
and behaves as a zoom tool. This tool lets you
zoom in on one or more video regions to fill the
entire Edit window display.
To use the Video Universe window to zoom video
regions in the Edit window:
1 Move the cursor over the top half of any video
frame until it becomes a zoom tool.
2 Do one of the following:
• To move the beginning of a video region to
the far left of the Timeline while maintain-
ing the current zoom resolution in the Edit
window, click the video frame representing
the region once.
• To zoom in on a video region so that it fills
the entire Edit window, double-click the
video frame representing the region.
• To zoom a range of selected regions so that
they fill the Edit window, click and drag on
the video frames that represent the regions.
Video Universe with video frames representing video
regions on the main video track
Video frame with zoom tool
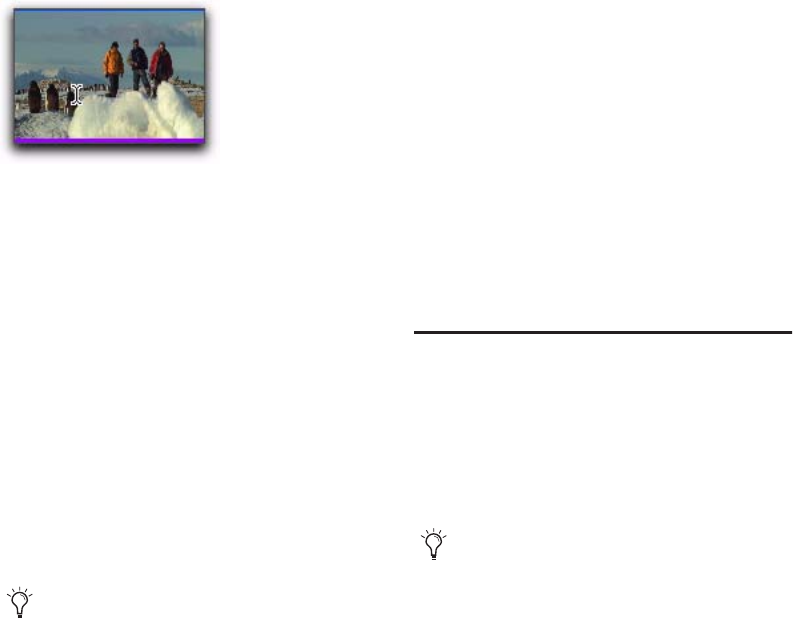
Pro Tools Reference Guide928
Selecting Ranges in the Video Universe
When you move the cursor over the bottom half
of a video frame in the Video Universe, it dis-
plays and behaves as a selector tool. This tool
lets you select ranges within one or more video
regions in the Edit window.
To use the Video Universe window to select ranges
in video regions in the Edit window:
1 Move the cursor over the bottom half of any
video frame until it becomes a selector tool.
2 Do one of the following:
• To place the cursor at the beginning of a
video region, click the video frame repre-
senting the video region.
• To select an entire video region from start
to end, double-click the video frame repre-
senting that region.
• To select one or more entire regions from
start to end, drag the video frames repre-
senting the video regions.
Selecting Zoom Resolutions and
Ranges Simultaneously in the Video
Universe
When you move the cursor over a video frame
in the Video Universe while pressing Alt (Win-
dows) or Option (Mac), the cursor appears as a
selector tool. This tool lets you zoom and select
ranges simultaneously.
To use the Video Universe window to select and
zoom simultaneously in the Edit window:
1 Move the cursor over any area of any video
frame in the Video Universe window until it be-
comes a selector or zoom tool.
2 To select a range of video regions while simul-
taneously zooming to fill the Edit window, Alt-
drag (Windows) or Option-drag (Mac) multiple
video frames.
Playback of High-Definition
QuickTime and Windows
Media Video
Pro Tools lets you import and play back High-
Definition QuickTime and Windows Media
video files.
Video frame with selector tool
If the Edit window does not display the se-
lected video regions, it will automatically
scroll to show the beginning of the selection.
When playing HD video through an Avid
video peripheral (QuickTime only) or other
device locked to a standard-definition video
reference (such as a black burst generator),
the display updates at the frame rate of the
video reference.

Chapter 43: Working with Video in Pro Tools 929
Setting Session Time Code Rate
for HD QuickTime and HD Windows
Media Video Import
When playing back QuickTime and Windows
Media video with frame rates higher than 30 fps,
Pro Tools syncs properly only if the Time Code
Rate in the Session Setup window is set to half of
the video frame rate of the video files.
For example, to properly play back QuickTime
or Windows Media HD video at 59.94 fps,
change the session’s Time Code Rate to 29.97
frames per second.
To set the session’s Time Code Rate:
1 Choose Setup > Session.
2 In the Session Setup window, select the appro-
priate time code rate in the Time Code Rate pop-
up menu.
Playing QuickTime DV Video
to an External Monitor Via
FireWire
(Mac OS X Only)
When using a DV decoder, you can output
QuickTime DV25 video (including QuickTime
movies exported as QuickTime DV from Avid)
through your computer’s FireWire port.
For the latest compatibility information on
Firewire transcoders, visit the Digidesign web-
site (www.digidesign.com).
Performance may vary, depending on the specif-
ics of your system and projects.
Playing QuickTime DV Video Through
the FireWire Port
(Mac OS X Only)
To Play QuickTime DV video through the FireWire
Port:
1 Import a QuickTime video file into a Pro Tools
session. (See “Importing Video into Pro Tools”
on page 917 for detailed information.)
2 Choose Options > Video Out Firewire.
When this option is enabled, Pro Tools will play
the video (NTSC or PAL) out the FireWire port to
an external DV decoder.
If the Video window is open while video plays
out the FireWire port, it displays text indicating
that video is playing out the FireWire port.
When using an Avid video peripheral (such
as an Avid Mojo SDI, Avid Mojo, or AVop-
tion|V10), you can output QuickTime video
formats to an external display via the
FireWire port on Windows XP and
Mac OS X. See the Avid Video Peripherals
Guide for detailed information.

Pro Tools Reference Guide930
Exporting QuickTime DV from Avid
The following instructions describe export set-
tings for Media Composer, Media Station|PT, or
Avid Xpress Pro. These settings are required to
create QuickTime DV movies that can be played
back in Pro Tools through the Firewire port.
To export a QuickTime DV reference movie for
Pro Tools Firewire playback, set the following:
1 Enable the following export options:
• Flatten video tracks
• Fill in spaces with black
• Render all video effects
• Use Apple DV Codec
• Enable the Apple DV codec
2 Make sure Use Avid Codec is not enabled.
Tips for Optimizing Video Playback
When using Pro Tools to play video files, the
quality of the playback is dependent on the fol-
lowing:
• Speed of your computer and hard drive
• Size (in pixels) of the video file
• Quality of the video hardware used to capture
and play back the digitized video
• Codec and level of compression used
For more consistently smooth video playback,
here are some suggestions:
• Use an Avid video peripheral.
• Use the fastest computer possible.
• Set Scrolling option to None (Options >
Scrolling > None).
• Recompress the video at a reduced pixel di-
mension, for example 320 x 240 pixels to
640 x 480 pixels.
• Use a video clip with less compression
(heavily compressed files require more proces-
sor speed to decompress for display).
• Hide the video track when not needed (or
change from Frames to Blocks view).
• Ensure that any unnecessary software is not
running.
• Resize the Video window to a small desktop
size, for example by using half size instead of
whole or full screen.
These export settings can be saved in
Avid Xpress Pro as a default, simplifying
future media exchange. Refer to your Avid
XPress documentation for more informa-
tion on export settings and defaults.
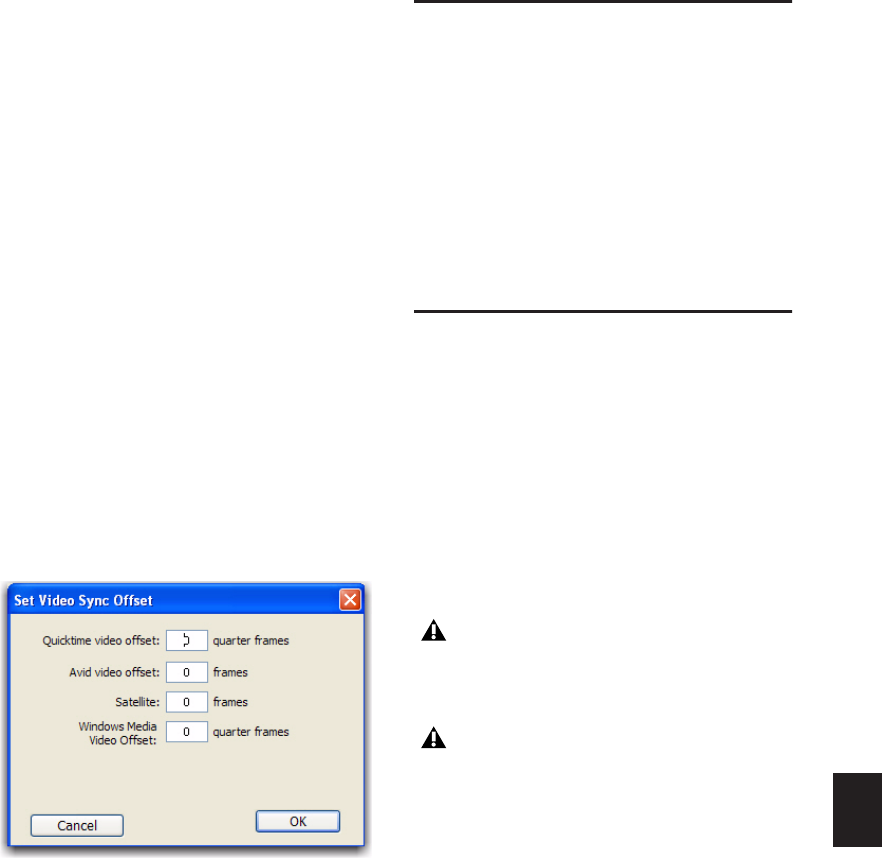
Chapter 43: Working with Video in Pro Tools 931
Compensating for Video
Monitoring Delays
You can compensate for delays in the video out-
put that may be introduced by external decod-
ers and certain types of displays (such as projec-
tors or plasma screens).
To compensate for delays caused by video
monitoring devices:
1 Choose Setup > Video Sync Offset.
2 In the Set Video Sync Offset dialog, enter a
value in the QuickTime Video Offset field or
Windows Media Video Offset field that is appro-
priate to compensate for the delay caused by
your video monitor chain. The amount of delay
introduced varies based on your system and the
type of video peripheral you are using. When us-
ing an Avid peripheral with QuickTime, 18 quar-
ter-frames is a good starting point, but you will
need to verify the precise setting for your sys-
tem. (Third-party devices are available to help
you measure this delay.)
Once this value is set, it should not need to be
updated unless you change components in your
video monitoring chain (such as projectors or
plasma screens).
Playing Video to an External
Monitor Via a Video Card
Pro Tools lets you output Windows Media (VC-1
AP) video to NTSC or PAL monitors via any de-
vice that is compatible with standard Direct-
Show output.
For a list of devices explicitly tested for Win-
dows Media (VC-1 AP) output from Pro Tools,
see http://www.digidesign.com/support.
Bouncing the Video Track to a
QuickTime Movie
When you have finished your final mix and syn-
chronized your audio events to the movie, you
can bounce the main video track (QuickTime or
Avid video) and a mono or stereo mixdown of
your session to a new QuickTime movie.
You can choose from a variety of standard
QuickTime codecs, which are fully compatible
with other QuickTime applications.
Video Sync Offset dialog
Because all formats and codecs have not
been tested, you should verify the Quick-
Time movie bounced successfully.
Pro Tools cannot bounce audio or video to
an MPEG-2 video file.
Pro Tools Reference Guide932
To bounce video and audio in the video track to a
QuickTime movie:
1 Finalize your mix.
2 Make sure the video track you want to bounce
is currently the main video track. (The track’s
Video Online button must be highlighted blue.)
3 Make sure that all of the audio tracks you want
to include in the bounce are audible (not muted
or inactive).
4 Assign the output of each of the tracks you
want to include in your bounce to the same ste-
reo output or bus path.
5 Do one of the following:
• To bounce the entire session, click Return
to Zero in the Transport window to go to
the beginning of the session.
– or –
• To bounce a portion of the session, enable
Options > Link Timeline and Edit Selec-
tion, and make a selection in the Edit win-
dow or the Timeline.
6 Choose File > Bounce to > QuickTime Movie.
The Bounce dialog appears (if you are bouncing
QuickTime movies) or the Bounce to QuickTime
dialog appears (if you are bouncing Avid video
to QuickTime movies).
7 Select your mix’s output or bus path from the
Bounce Source selector.
8 If you are bouncing Avid to QuickTime and
you want to configure QuickTime video set-
tings, click Options.
9 Configure other settings as appropriate.
10 Click Bounce.
11 Select a destination for the new QuickTime
movie, enter a new name, and click Save.
Bouncing video may take quite a bit longer than
real-time, depending on the format of the
source video, the format of the bounced video,
and processing speed.
Bouncing a Video Track with
Windows Media Video to a
WIndows Media Movie
You can bounce the main video track and a
mono or stereo mixdown of your session to a
new Windows Media movie.
To bounce video and audio in the video track to a
Windows Media movie:
1 Finalize your mix.
2 Make sure the video track you want to bounce
is currently the main video track. (The track’s
Video Online button must be highlighted blue.)
Pro Tools is qualified to bounce to Quick-
Time DV25. Bouncing to other formats
may work but has not been tested.
See Apple documentation for detailed infor-
mation on configuring QuickTime movie
settings.
QuickTime and Avid video cannot be
bounced to Windows Media video, and vice
versa.
Because all formats and codecs have not
been tested, you should verify the Windows
Media movie file bounced successfully.

Chapter 43: Working with Video in Pro Tools 933
3 Make sure that all of the audio tracks you want
to include in the bounce are audible (not muted
or inactive).
4 Assign the output of each of the tracks you
want to include in your bounce to the same ste-
reo output or bus path.
5 Do one of the following:
• To bounce the entire session, click Return
to Zero in the Transport window to go to
the beginning of the session.
– or –
• To bounce a portion of the session, enable
Options > Link Timeline and Edit Selec-
tion, and make a selection in the Edit win-
dow or the Timeline.
6 Choose File > Bounce to > Windows Media
Movie.
The Bounce dialog appears.
7 Select your mix’s output or bus path from the
Bounce Source selector.
8 Click Bounce.
9 In the Windows Media dialog, do the follow-
ing:
• In the Profile pop-up menu, select the pro-
file matching the desired size and data rate
of the exported video—the larger the reso-
lution, the larger the resulting video file.
• To include uncompressed audio in the
video file that will be exported, select Loss-
less Audio Compression.
10 Select a destination for the new video file, en-
ter a new name, and click Save.
Bouncing video may take quite a bit longer than
real-time, depending on the format of the
source video, the format of the bounced video,
and processing speed.
Using Pro Tools LE to Import
Video from Other Versions of
Pro Tools
When you use Pro Tools LE to import video or
open a session created by Pro Tools HD or
Pro Tools LE with DV Toolkit 2 or an Avid video
peripheral, some components of the session
may open differently or not open at all, as fol-
lows:
• Only the main video track is displayed. If no
video track was selected as the main video
track when the session was saved, the first
video track containing QuickTime or Win-
dows Media video in that session is displayed.
• Only the playlist that was chosen when the
session was saved will be displayed.
• All QuickTime or Windows Media video on
the main video track will be displayed, but the
video track will be locked and cannot be ed-
ited.
• All additional video tracks, playlists, and
video regions will not be shown. However,
they will continue to be saved with the ses-
sion, and will be available if the session is
opened on a system that supports them.
When using Pro Tools LE to work with video in
such a session, you can do the following:
• Use the Tab key to move the Location Cursor
to video region boundaries.
• Add and edit audio tracks.
• Bounce the video track to disk as a QuickTime
or Windows Media video file.
• Export the session, including the full video
track.
See “Bouncing the Video Track to a Quick-
Time Movie” on page 931.
Pro Tools Reference Guide934
Index 935
Index
Numerics
003 29
punching with footswitch 379
003 Rack 29
1622 I/O 26
16-bit
Bounce to Disk 841
176.4 kHz
and pull factors 894
192 Digital I/O 26
192 I/O 26
Hardware Setup 46
Soft Limit 46
192 kHz
and pull factors 894
24-bit
Bounce to Disk 841
24-bit ADAT Bridge I/O 26
29.97 FPS Non-Drop 906
3 Second Clip Hold option 74, 143
3 Second Peak Hold option 74, 142
3-knob panning 874
5.0 paths in 5.1 mixes 863
5.1 formats in Pro Tools 853
882|20 I/O 26
888|24 I/O 26
8-bit 841
96 I/O 26
Hardware Setup 46
96i I/O 26
Hardware Setup 46
A
AAF file format 274
Absolute Grid mode 422, 657
Accel Core card 26
ACID file format 253
ACID files
importing 261
active
making inserts 755
making items 17
making plug-ins 18
tracks 171
Add Key Change command 633
Add Marker/Memory Location button 639
Add Meter Change button 624
Add Tempo Change button 603, 620
Add Unique Triggers 704
adding
a new playlist 411
sends 724
AES/EBU
Hardware Setup 45
AFL (After Fader Listen) 168
AFL/PFL Mutes (Output Path) selector 69
AFL/PFL Path
selecting 68
selector 68
setting a level 68
After Fader Listen mode 168
After Playback Scrolling option 310
After Write Pass, Switch To option 86, 780
AIFF file format 838
All MIDI Notes Off command 549
all tracks
hiding 156
selecting all regions in 450
selecting in Timebase rulers 455
showing 156
Allow Latch Prime in Stop option 85
Allow Track Arm Commands in Local Mode option 91
alternate channels
expand to new tracks 661
replacing a region 660
Alternate Takes pop-up menu 352
Always Display Market Colors option 75
Always Fill Channel Strips When Banking option 84
Analog In 46
Analog Out 46
Analysis view 504, 518
Apply Real-Time Properties option 280
archiving
preparing with Compact Selected 476
Pro Tools Reference Guide936
Assignments View (Sends View option) 726
Attributes Group command 178
attributes, for groups 185
audio
playing back 303
Audio Designator 239
Audio During Fast Forward/Rewind option 76, 307
audio files
compacting 476
concepts 11
default names 330
formats 838
importing 252
mixed file types 102
Audio Files Conform to Session Tempo button 227
Audio Files folder 96
audio format, for session 884
audio interfaces 28
input channels 13
Audio Media options 268
Audio Pull Up and Pull Down 891
audio regions 404
and automation 406
fitting to an Edit selection 477
stripping silence from 665
whole-file 403
Audio Track RecordLock option 78, 386
audio tracks 10
5.1 format 849
and Output format 857
and surround sessions 855
bouncing to disk 836
channel strips 135
creating a tempo map for 620
disabling Elastic Audio 503
enabling Elastic Audio 502
loop recording 350
placing audio in multichannel tracks 856
punch recording 349
recording multiple 345
signal flow 710
track controls 138
Waveform View 404
Audio Zoom In button 425
Audio Zoom Out button 425
AudioSuite
Dither 747
plug-ins 747
processing 477
AudioSuite Buffer Size preference 86
AudioSuite menu 130
Audition Paths selector 67
auditioning
a region in the Region List 195
fades 481
in browsers 226
MIDI notes 532
pre/post-roll 312
programs 545
selection start and end points 312
takes 351
Auto Backup option 78
Auto button 761
Auto Input Monitoring mode 338, 339
Auto Match Pull Factors 892
Auto Region Fade In/Out Length preference 80, 491
Auto Rename Region List command 197
auto-created regions 403
hiding 197
renaming 196
auto-fades 490
AutoGlide mode 875
AutoGlide Time preference 85, 875
AutoJoin
command 781
indicator 781
AutoMatch
all controls 793
button 793
indicators 787
individual automation types 794
individual controls 794
individual controls with ICON 794
AutoMatch Time preference 85, 785
automatic delay compensation 40
Automatically Copy Files on Import option 87, 254, 274
Automatically Create Click Track in New Sessions option 89
Automatically Find and Relink 286
automating
plug-ins 791, 792
sends 790
switched controls 789
tracks 788
VCA Masters 829
automation 777
and audio regions 406
and multichannel pan 879
and multiple output assignments 857
breakpoints 804
capturing and applying elsewhere 823, 826
coalescing Trim automation 812
coalescing VCA automation 830
copying 806
creating 792
cutting 806
deleting 799
delta 782
display of fade boundaries and shapes 496
drawing with Pencil 801
editing 803
editing with Smart Tool 441
enabling 797
for grouped tracks 806
for hidden tracks 157
on multichannel tracks 805
On Stop 814
pass-through point 780
pasting 806
playlists 410, 778, 786
plug-in accuracy in bounce 843
relative and absolute 782
Safe button 761
safing 786
smoothing 785
snapshot 821
Special Paste mode 809
stepped 804
suspending 797, 798
thinning 785, 800
to next breakpoint 815
Index 937
Track View 416
Trim mode 782
trimming 811
writing 788
writing to selection, selection start, or selection end 813
Automation Enable window 788
Automation Follows Edit option 785
Automation Mode selector 780
Automation modes
Latch 781
Latch Trim 783
Off 780
Read 780
Read Trim 783
Touch 780
Touch Trim 783
Touch/Latch Trim 784
Trim Off 783
Write 780
Write Trim 784
Automation Preferences
AutoMatch Time preference 785
Smooth and Thin Data After Pass option 800
Automation Preview mode 824
Punch Preview button 826
suspending 826
Write Automation To commands 826
Auto-Name Memory Locations While Playing option 81, 640
Auto-Name Separated Regions option 81, 467
auto-naming
and Strip Silence 666
audio files and regions 330
playlists 410
QuickPunch regions 382
separated regions 467
takes 330
Auto-Spot Regions command 903
Auxiliary Inputs 14, 133
channel strips 135
monitoring and mixing 735
signal flow 711
track controls 138
Avid
playback in Pro Tools 929
Avid Video Errors Stop Playback option 78
Avid Video NTSC Has Setup option 78
Avid Xpress DV
codec requirements for export 910
B
Back and Play command 308
Back command 308
Back/Forward Amount 308
Back/Forward Amount preference 76
Back/Forward commands 307
extending selections 309
repeating 308
backing up sessions automatically 78, 97
bank select 8, 541
Bar|Beat Markers
and tempo events 622
audio with varying tempos 623
editing 622
from Identify Beat command 621
generated with Beat Detective 693
moving 622
Bars:Beats Time Scale 595
Batch Fades dialog 492
Beat Detective 683, 684
beat triggers
deleting 691
generating 688
inserting 692
moving 692
promoting 692
Collection Mode 702
conforming regions 698
defining the selection 686
detecting transients 688
DigiGroove templates 694
edit smoothing 701
extrapolation 696
generating Bar|Beat Markers 693
groove templates
extracting 695
Scroll Next 693
separating regions 696
system requirements 684
templates 694
Trigger Pad 697
window 685
with multiple tracks 697
Beat Detective command 685
Big Counter window 305
bit depth, for session 96, 884
black burst 906
Blocks View 149
video track 914
Bounce to Disk command 833, 836
and dither 834
and time stamps 837
Bounce options 837
Convert After Bounce 843
Convert During Bounce 843
File Type 838
Format 840
Help 843
recording a submix 843
Resolution 841
sample rate conversion options 842
sample rate conversion quality 842
source path 837
Use Squeezer option 842
Bounce to QuickTime Movie command 931
bouncing
to a stereo mix 844
to a submix 843
breakpoints 804
Avid keyframes 803
Bring to Front command 469
Pro Tools Reference Guide938
browsers
display options 214
foreground 208
general information 121, 202, 206
navigating 207
opening 207
sorting 215
Buffer Size
Hardware 341
bussing
multichannel sends 859
sends 724
signal paths 51
submixing and effects processing 735
surround examples 863
BWF (.WAV) file format 838
Bypass button
for real-time plug-ins 760
C
Cache Size 41
Calculator Entry mode (for numeric entry) 454
Calibration Mode command 321
Calibration Reference Level preference 80
cancelling record takes 345, 370
Capture Region command 466
capturing automation values 826
capturing time code 902
catalog.ddb 205
Catalogs
Clip Name 244
creating folders in 209
deleting folders 220
Center % (Percentage) 876
Center % in Output window 878
Center Playhead Scrolling option 311
centered crossfade 480
Change Duration command 557, 574
Change Edit to Match Timeline command 460
Change Meter command 624, 626, 627
Change Tempo command 603
Change Timeline to Match Edit command 460
Change Velocity command 557, 572
Channel Delay indicator 141
channel mapping
default path order 69
editing 62
re-mapping 62
Channel selector 762
for multi-mono plug-ins 860
channel strips 13
audio tracks 135
Auxiliary Inputs 135
Instrument tracks 137
Master Fader tracks 136
MIDI tracks 137
VCA Master tracks 136
channels 13
chasing
controller events 546
MIDI notes 546
program changes 547
Classic Numeric Keypad mode 21, 77
Clear All Clip Indicators command 143, 727
Clear command (Edit menu) 418
Clear command (Region List) 198, 199
Clear Special commands 809
All Automation 809
Pan Automation 809
Plug-in Automation 809
Clear Trim Automation Track command 157, 800
clearing Elastic Audio analysis 225
click 323
configuring 323
enabling 324
Click plug-in 322
click track 323
clicks and pops, avoiding 360, 405
Clip Hold options 74
3 Second 143
Infinite 143
None 143
Clip LED 761
clipping 320, 761
Clock Source 44
clock source 776
Clock Source pop-up menu 45
Close Session command 107
closing multiple plug-in windows 762
Coalesce Trim Automation options 86
Coalesce Trim Automation Track command 157
Coalesce VCA Master Automation Track command 157
Coalesce when Removing Slaves from VCA Group option 85
coalescing
Trim automation 812
VCA automation 830
Collection Mode, Beat Detective 702
Color Coding options 75, 172
Color Palette window 174
Command|8 749
Commands Keyboard Focus 20
Comments 145
Comments Fields (DigiBase) 218
Comments View 145, 719
Committing Elastic Audio 503
Compact Selected command 199, 476
Compare button 761
compatibility
information 4
compressed QuickTime audio formats 920
Conductor button 120
Conductor rulers 596
including in selections 455
configuring
click options 323
MMC 896, 897
SMPTE 888
Conform to Tempo command 607
connecting
effects units digitally 775
external audio devices 774
Consolidate command 475
consolidating media 245
Constant command (Tempo Operations) 615
continuous controller events 8
Continuous Scroll with Playhead option
and half-screen 311
Continuous Scrolling During Playback option 310
and half-screen 311
Index 939
continuous zoom 425
control surfaces
Command|8 749
Control|24 748
D-Command 748
D-Control 748
ProControl 748
controller events 8, 539
and MIDI regions 409
chasing 546
editing 539
editing with Smart Tool 441
inserting 539
Controller Meter Path selector 67
Controllers folder in DAE Folder 749
Conversion Quality option 253, 842, 920
Tweak Head setting 842, 920
Convert Plug-in selector 761
Convert WAV files to AES31/BroadcastWave option 87, 254,
288
converting session
audio file format 101
bit depth 101
sample rate 101
Copy command 417
Copy Settings command 764
Copy Special commands 809
All Automation 809
Pan Automation 809
Plug-in Automation 809
Copy to Send command 791
copying
a plug-in setting 766
MIDI notes with the Split command 578
selections and regions 417
track automation to sends 790
track control settings to sends 729
countoff 324
Countoff button 120
CPU (Elastic Audio) processing activity 49
CPU (RTAS) processing activity 49
CPU Usage Limit 36, 37
Create Click Track command 323
Create Fades command 489, 490
creating
crossfades 489
fade-ins/outs 487
Mac and PC compatible sessions 290
Markers and Memory Locations 639
region groups 676
regions 465
sessions 95
settings subfolders 765
Crossfade Preference for Pre/Post-Roll option 82, 486
crossfades 479
and dither 747
creating with Smart Tool 440
equal gain 484
equal power 484, 486
Fades dialog 481
in batches 491
linear 486
overlap 486
pre/post 490
removing 489
trimming 490
types 479
with dither 485
Current Feet+Frames command 889
current meter 120, 623
Current Meter button 325
Current Meter indicator 120
current tempo 120, 603
Current Time Code Position command 889
Current Time display 884
Cursor
location 113
value 113
custom session templates 105
Custom Shuttle Lock Speed 443
Custom Shuttle Lock Speed preference 76
Cut command 417
Cut Special commands 808
All Automation 808
Pan Automation 808
Plug-in Automation 808
Cut Time command 626, 630
cutting
automation 806
MIDI notes with the Split command 578
selections and regions 417
D
DAE 6
DAE errors, avoiding 360
DAE Playback Buffer Size 40
DAT recorder, recording from 359
database
files and sharing 205
D-Command 748
D-Control 748
default
audition path 67
meter 325
metering path 67
output path 68
path order 69
paths 58
program change 541
tempo 325
Default Automatic Naming to English option 74
Default Dynamics preference 83, 759
Default EQ preference 83, 759
Default Fade Settings 82
Default Input Gain preference 88
Default Note On Velocity preference 89, 531
Default Path Order selector 69
Default Plug-in preference 88
Default Region Color Coding options 75
Default Settings, for TC/E plug-in 88
Default Thru Instrument 363
preference 89
Default Track Color Coding options 75
Degree of Thinning preference 84
delay
Channel Delay indicator 141
MIDI Track Offsets 548
Delay (dly) indicator 743
Delay After Play Command preference 91
Pro Tools Reference Guide940
Delay Before Locking to Time Code option 91
Delay Compensation 40, 741
applying to automatically bypassed tracks 393, 745
bypassing 744
changing track delay 743
configuring Delay Compensation Engine 742
dedicating DSP resources 40
Delay (dly) indicator 743
disabling during recording 342
enabling 741
engine 40
exceeding compensation limit 744
H/W Insert 70
information 743
MIDI Beat Clock 90
MIDI Time Code 90
mode 742
settings 742
Time Mode option 80
User Offset (+/–) field 743
viewing 144, 721
Delay Compensation Engine
configuring 742
Delay Compensation limit 742
Delay Compensation option 741
Delay Compensation Status indicator 115
Delay Compensation Time Mode option 80, 742
Delay Compensation View 144, 721
Delay Compensation View option 743
Delay for External Devices options 90
Delay plug-ins 751
Delay setting (Real-Time Properties) 552
Delete Active Groups (Group List) command 178, 184
Delete Current Settings File command 764
Delete Fades command 489
Delete Group command 178, 184
Delete Path 61
Delete Track command 147, 158
deleting
automation 799, 806
existing I/O paths 61
folders in Catalogs 220
groups 184
in MIDI Event List 591
Memory Locations 643
MIDI notes 536
playlists 412
program changes 544
sysex events 546
tracks 147
unused regions 198
delta
trimming automation 782
designating volumes 239
destination folder for plug-in settings 765
destructive editing
compacting audio files 476
Destructive Record mode 328, 347
destructive recording 347
DestructivePunch 392
Prepare DPE Tracks 397
preparing for 396
recording 397
DestructivePunch File Length preference 80, 397
Digi 002 29
punching with footswitch 379
Digi 002 Rack 29
DigiBase 225
A (audio volumes) 216
Active Tasks 248
Advanced Search mode 223
Audio Files Conform to Session Tempo 213
auditioning 226
Automatically Find and Relink 233
Auto-Preview mode 212, 229
Bit Depth 216
browser display options 214
browser menu 211
browser tools 206
browser windows 206
browsers 202
Calculate Elastic Analysis 211
Calculate Waveform 211, 224
calculating Elastic Audio analysis 225
candidates for relinking 234
Capacity 216
Channel Names 217
Circled 217
Clear Elastic Analysis 212
Clip Name 217
Comments
Database 218
File 218
Copy and Relink 212, 231
copying items 219
Create Catalog from Selection 211
Database Comment 216
Date Created 216
Date Indexed 216
Date Modified 216
Delete Selected 212
deleting folders from Catalogs 220
deleting items 219
Duplicate Selected 212
Duration 216
region groups 216
Elastic Audio analysis 224
Elastic Audio Plug-in selector 228
Failed Tasks 250
File Comment 216
File Name 216
Find Links 236
Format 216
Frame Rate 217
Free 216
indexing 210
Invert Selection 212
Kind 216
Link Path 217
Linking Options 236
links 230
Lock Selected 212
Loop Audition mode 228
Loop Preview mode 213
managing tasks 250
Manually Find and Relink 232
Missing files 230, 232
modifiers (browser search) 222
moving items 219
Index 941
Name (file name) 216
New Catalog 211
New Folder 211
Number of Channels 216
Original Timestamp 217
Path 217
Paused Tasks 249
Performance Volume 204
Plug-in Manufacturer Name 217
Plug-in Name 217
Plus (+) and Minus (–) buttons 222
preview at session tempo 229
preview controls 227
previewing 226
Project 217
Project browser 203, 241
Quick Search 220
Quick Search mode 223
Read/Write volumes 205
read-only volumes 205
Regenerate Missing Fades 233
Regenerate Missing Rendered Files 233
Relink Offline 212
Relink Selected 212
Relink window 204, 234
relinking 230
Reveal in Browser 212
Reveal in Finder 212
Sample Rate 216
Scene 217
Search Criteria
AND 222
OR 222
search modes 223
search modifiers 222
searching 220
Wildcard Characters 222
Select Offline Files 212
Select Online Files 212
Select Transfer Files 212
shared network volumes 205
sharing database files 205
Shoot Date 217
Size 216
Skip All 232
sorting columns 215
Sound Roll 217
Sound Roll TC 217
Sound Roll TC Rate 217
Spacebar Toggles File Preview 213
Status column 215
suitable volumes (see Transfer files) 231
Take 217
Tape 217
Tape ID 217
Task window 204, 247
TC Rate 217
Tempo 216
Transfer files 230, 231
Transfer Volume 204
Unique ID 217
Unlock Selected 212
Unmount 212
Update Database for Selected 211
User Bits 217
User Timestamp 217
V (video volumes) 216
Video Compression 217
Volume browsers 203
volume database file 205
WaveCache 205
Waveform 216
Waveform (in browsers) 224
Waveform display 224
calculating 224
Workspace
searching 240
Workspace browser 203, 238
DigiBase and DigiBase Pro
preferences 250
DigiBase Pro
catalog database file 205
Catalogs 204, 243
consolidating with 245
creating 244
opening 244
Clip Name 244
Copy Database Comments to Clip Names 213
Copy File Comments to Clip Names 213
saving a search as a Catalog 223
search features 221
sharing catalog database files 206
DigiDelivery 276
Digidesign Audio Engine 6
DigiGroove templates 694
digital clipping 320
Digital Format 45
digital mastering 845
DigiTest 34
DigiTranslator 2.0 option 274
Direct Outputs mode 66
Disable “Input” When Disarming Track (In “Stop”) option 79
discrete signal control 856
Disk Allocation 336
and cross-platform sessions 337
and system volume 338
resizing the window 335
window 335
Disk Processing Activity 49
Disk Space window 322
options 322
Display (Group List) command 178
Display Events as Modified by Real-Time Properties option 89,
555
display in browsers 214
Display Preferences
Clip Hold options 74
Draw Grids in Edit Window option 423
Draw Waveforms Rectified option 404
Language options 74
Peak Hold options 74
Show Meters in Sends View option 727
Display Preferences page 73
Pro Tools Reference Guide942
displaying
all rulers 597
file info for audio regions 190
Meter Ruler 623
Original Time Stamps 904
region names 413
region times 413
Tempo ruler 603
User Time Stamps 904
dither
and Bounce to Disk 834
and fades 485, 747
AudioSuite 747
on Master Faders 834
preferences 747
resolution and Bounce to Disk 841
Dither Mixer Plug-ins 748
Dither Plug-in preference 86
divergence
drawing 877
using 876
drag and drop
from the Region List to tracks 648
importing audio files 256
importing MIDI files 279
importing via 256
Drag and Drop From Desktop Conforms to Session Tempo
options 87, 255
Draw Grids in Edit Window option 73, 423
Draw Waveforms Rectified option 73, 404
DSP
active and inactive items 17
and inactive inputs and outputs 160
and inactive outputs 723
and inactive sends 728
and no output 723
and overall resources 16
and Send meters 727
DSP delays
automatic compensation 40
DSP usage meters 49
dubber
preference to emulate 79, 385
Duplicate command 669
Duplicate Group command 178
Duplicate Track command 148, 158, 779
duplicating
inserts 760
MIDI note selections 669
playlists 410
selections and regions 669
sends 729
Duration
Real-Time Properties 551
durations, for MIDI notes
editing with Change Duration command 574
making more legato 576
making more staccato 576
randomizing 575
DV
and sync offset 931
DV Stream 911
DV Toolkit 2 software option 31
DV25 Movies
playback through FireWire 929
Dynamic Transport mode 315
Dynamically Allocated Voicing 162
Dynamics plug-ins 751
E
Edit commands 416
and Edit mode 417
copy 417
cut 417
paste 418
edit cursor 305
and scrubbing 441
moving to region boundaries 456
placing with the Selector tool 438
Edit Groups 180
and selections 449
Edit Insertion Follows Scrub/Shuttle option 76, 441
Edit insertion point
placing regions at 649
trimming regions to 470
Edit Markers 448
and selection length 452
Edit menu 130
Change Edit to Match Timeline command 460
Change Timeline to Match Edit command 460
Clear command 418
Clear Special commands 809
Consolidate command 475
Copy command 417
Copy Special commands 809
Copy to Send command 791
Create Fades command 489, 490
Cut command 417
Cut Special commands 808
Delete Fades command 489
Duplicate command 669
Fade To End command 489
Fade To Start command 488
Fades command 481
Heal Separation command 469
Identify Sync Point command 662
Insert Silence command 668
Paste command 418
Play Edit Selection command 313
Play Timeline Selection command 313
Redo command 414
Repeat command 669
Repeat to Fill Selection command 419
Select All command 450
Separate Region commands 466
Shift command 664
Strip Silence command 665, 666
TCE Edit to Timeline Selection command 477
Thin Automation command 801
Trim Automation to All Enabled command 824
Trim Automation to Current command 824
Trim Region End to Fill Selection command 471
Trim Region End to Insertion command 470
Trim Region Start to Fill Selection command 470
Trim Region Start to Insertion command 470
Trim Region to Fill Selection command 471
Trim Region to Selection command 470
Undo command 414
Write Automation commands 822, 823
Index 943
Edit mode buttons 421
Edit modes 421
and edit commands 417
and placing regions 647
Grid 422
Relative Grid 422
Shuffle 421
Shuffle Lock 421
Slip 422
Spot 422, 901
edit playlists 410
Edit Selection Follows Region List Selection option 81, 450
Edit Selection indicators 114, 454
Edit selections
auditioning with Playhead enabled 313
copied from Timeline selection 460
copied to Timeline selection 460
making with the Selector tool 438
sliding in the Ruler 457
edit smoothing, with Beat Detective 701
Edit tools 113, 424
Grabber 424, 451
Pencil 424, 444
Scrubber 424, 441
Selector 306, 424
Smart Tool 424
Trimmer 424, 433
Zoomer 424
Edit window 110, 112
All View option 719
half-screen 311
None Views option 719
scrolling from the Ruler 461
Transport view 721
View options 110
Edit Window Default Length 115
Edit Window Default Length preference 73
Edit Window Follows Bank Selection option 84
Edit Window option 110
Edit Window View options 719
Edit Window View selector 718
editing
across multiple tracks 420
and Edit modes 421
and Grid modes 657
and hidden tracks 157
and Track View 416
automation 803
Bar|Beat Markers 622
breakpoints 804
controller events 539
during playback 401
Grid mode 422, 423
in MIDI Event List 590
Markers 642
Memory Locations 642
meter events 625
MIDI notes 532
MIDI regions 408
nondestructive 401
nondestructively for audio 406
nondestructively for MIDI 408
note attributes 536
note durations 574
note velocities 535, 572
program changes 544
regions as grid 423
Shuffle Lock mode 421
Shuffle mode 421
Slip mode 422
Spot mode 422
tempo events 603
waveforms 405
Editing Preferences
Auto-Name Memory Locations While Playing option 640
Auto-Name Separated Regions option 467
Conversion Quality option 253
Crossfade Preference for Pre/Post-Roll option 82, 486
Edit Selection Follows Region List Selection option 450
Includes Take Region Lengths That Match option 353
Includes Take Region Names That Match Track Names
option 353
QuickPunch Crossfade Length preference 380, 385
Region List Selection Follows Edit Selection option 190,
450
Separate Region Operates On All Related Takes option
353, 467
Editing Preferences page 81
Effect Bypass button 760
effects, printing to disk 833
Elastic Audio 497
Accordion Warp 515
adding Event markers 519
analysis 505
analysis in DigiBase 224
Analysis view 504, 518
and AudioSuite processing 524
and Edit Groups 518
batch analysis 225
calculating analysis in DigiBase 225
clearing analysis in DigiBase 225
Clip indicator (Rendered) 507
committing 503
common workflows 497
Conform to Tempo 607
CPU processing activity 49
creating new tracks 503
deleting Event markers 520
disabling 503
enabling on tracks 502
event confidence 505
Event markers 512
example workflow 498
Individual Range Warp 517
microfades 525
Monophonic plug-in 510
moving Event markers 519
moving regions between tracks 521
out of range processing 517
Plug-in selector in browsers 228
plug-ins 507
Polyphonic plug-in 509
preview at session tempo in browsers 229
properties 522
quantizing 569
Range Warp 516
Real-Time processing 506
Region Clip indicator 507
removing region warping 518
Pro Tools Reference Guide944
Rendered Files
regenerating 233
Rendered files 507
regenerating 287
Rendered processing 506
Rhythmic plug-in 509
setting to Real-Time or Rendered 506
TCE algorithms 507
Telescoping Warp 514
tempo detection 505
Tempo Event–generated Warp markers 513
tempo-based warping 606
track controls 504
track views 504
tracks 502
Varispeed plug-in 510
Warp indicator 517
Warp markers 512
Warp view 511
warp view 504
warped regions 517
X-Form plug-in 510
Elastic Audio Plug-in Selector 504
Elastic Audio preferences 88
Elastic Audio–enabled tracks 502
Elastic Properties window 522
Enable Elastic Audio on New Tracks preference 88
Enable Session File Auto Backup option 78
enabling
Auto Backup option 78
automation 797
groups 187
MIDI input devices 362
plug-in automation 772
End To Insertion command 470
Enforce Mac/PC Compatibility option 103, 290
EQ plug-ins 751
equal gain crossfades 484
equal power crossfades 484, 486
Event Edit Area 114
note attributes 536
Event menu 130
All MIDI Notes Off command 549
Beat Detective command 685
Change Meter command 624
Event commands 557
Identify Beat command 620
MIDI commands 557
MIDI Event List 585
MIDI Track Offsets command 548
Remove Duplicate Notes command 549
Renumber Bars command 632
Tempo commands 614
Time commands 626
Event Operations commands 557
Change Duration command 574
Change Velocity command 572
Flatten Performance command 572
Input Quantize command 580
Quantize command 558
Restore Performance command 571
Select/Split Notes command 579
Step Input command 581
Transpose command 576
Event Operations window 557
using 558
Exit command (Windows) 107
expand to new tracks 661
Expand to New Tracks command 158
Expanded Track Display 153, 805
Expanded Transport View 125, 355
explicit voice allocation 163
Export MIDI command 279
Export MIDI Settings dialog
Apply Real-Time Properties option 280
MIDI File Format pop-up menu 279
Export Region Definitions command 199, 265
Export Region Groups command 284
Export Regions as Files command 199, 263
Export Selected dialog 264
Export Selected Tracks as OMF/AAF command 274
Export Session Info as Text command 275
Export Settings button (I/O Setup) 64
exporting 252
a session as text 275
AAF files 274
audio 263
audio from regions 263
markers 280
MIDI tracks 279
OMFI files 274
region definitions 265
region groups 284
stereo interleaved files 265
Ext. Clock Output 45, 882
extending selections 453, 611
to adjacent tracks 455, 456
to include adjacent regions 453
to Markers and Memory Locations 454
to region boundaries 453, 611
external clock source 776
External MIDI instrument
recording audio from 378
external side-chain processing 772
External Time Code Offsets 886
extrapolation 696
F
factory I/O settings 65
Fade Files folder 96
Fade To End command 489
Fade To Start command 488
fade-in shapes 485
fade-out shapes 483
fades 487
and dither options 747
auto-fades 490
creating 487
creating with Smart Tool 440
in batches 491
moving 492
nudging 492
regenerating 233, 286
with dither 485
Fades command 481
Index 945
Fades dialog 481
In Shape 485
Link option 484
Out Shape 483
Use Dither option 485
Fast Forward
incrementally 307
locating with 307
Fast Forward button 117
Feet+Frames
redefining position 889
Feet.Frames Time Scale 596
field recorder
alternate channels 660
expanding alternate channels to new tracks 661
importing monophonic audio files 263
importing polyphonic audio files 263
file formats (audio) 838
AIFF 838
BWF (.WAV) 838
MP3 839
MXF 839
QuickTime 838
SND resource 838
Sound Designer II 838
File menu 130
Bounce to Disk command 836
Close Session command 107
Exit command (Windows) 107
Export MIDI command 279
Export Selected Tracks as OMF/AAF command 274
Export Session Info as Text command 275
Import Audio to Track command 259
Import Region Groups command 283
New Session command 95
Open Session command 97
Revert to Saved command 100
Save As command 100
Save command 100
Save Copy In command 101, 291
Send via DigiDelivery 277
files
Clip Name 244
missing fades 232
final mixdown 844
Find All Candidates 235
Find History 193
Find Matching Tracks option 270
Find Region List command 192
Find Regions
By Name 192
Include Subsequently Added Regions 192
finding regions 192
Find History 192
FireWire
QuickTime DV25 playback 929
First Selected MIDI Track preference 89
Flatten Performance command 557, 572
folders
creating and opening 209
deleting from Catalogs 220
foreground 208
Forward and Play command 308
Forward command 308
frame rate
pull up and pull down 891
Frames 914
Frames View
video track 914
freewheeling time code 887
Front Divergence 876
Front/Rear Divergence 876
G
generating time code 887, 895
Get Info command 106
Glide Automation commands 810
global (system-wide) preferences 72
Global MIDI Playback Offset preference 89, 547
Go to End button 117
Grabber tool 451
editing breakpoints with 610, 803
Object Grabber 451
selecting MIDI notes with 532
Separation Grabber tool 468
Grabber tools 424, 438
Object Grabber tool 439
Separation Grabber tool 439
Time Grabber tool 439
Grid
setting for MIDI editing 530
Grid mode 422, 657
Absolute 422, 657
configuring 423
Draw Grids in Edit Window option 423
Regions/Markers option 423
Relative 422, 657
setting the Grid value 656
suspending 657
grid panners in Mix and Edit 868
Grid value 530, 656
Grid Value selector 423
Groove Quantize 564
groove templates 564, 694, 695
applying 566
mapping 567
Group 178
Group Assignment selector 714
Group ID indicator
pop-up menu 178
Group List 177
hiding 177
Keyboard Focus 20
pop-up menu 178
showing 177
Group Name
pop-up menu 178
Group Track command 180, 181
Pro Tools Reference Guide946
groups
and automation editing 806
and hidden tracks 157
attributes 185
control offsets 188
creating 180
deleting 184
duplicating 184
Edit Groups 180
enabling 187
keyboard selection 187
linking Mix and Edit Groups 176
Mix Groups 180
modifying 182
renaming 183
unlinking Mix and Edit Groups 176
Groups dialog 179
H
H/W Buffer Size 341
H/W Insert Delay 70
half-screen 311
half-speed playback 314
half-speed recording 360
hard drives
and Compacting Audio 476
recording to system volume 338
Round Robin Allocation 336
hardware
insert delays 70
routing to Pro Tools 56
Hardware Buffer Size 6, 34, 35
hardware I/O inserts 751
hardware I/O sends 725
Hardware Setup
Analog In 46
Analog Out 46
Buffer Size 341
Clock Source 45
Digital Format 45
Ext. Clock Output 45
initializing Legacy I/Os 47
Input Channel Selector 46
Meters pop-up menu for 96 I/O 45
Output Channel Selector 46
selecting multiple outputs 48
HD Accel 26
HD Core card 26
HD Process card 26
Heal Separation command 469
help
Bounce to Disk 843
Tool Tips 73, 132
Help menu 19, 131
HFS+ Disk Support option 288
HFS+ drives
and Windows systems 289
hidden tracks
and group edits 157
and groups 157
and selections 449
Hide All Floating Windows command 130
Hide and Make Inactive Track command 157
Hide/Show Track command 157
hiding
all tracks 156
auto-created regions 197
tracks 155
High Quality QuickTime Image option 78
Highest QuickTime Playback Priority setting 77, 910
history (Find regions) 192
Horizontal Zoom In button 424
Horizontal Zoom Out button 424
I
I/O Labels (see I/O Setup)
I/O Settings 65
I/O Settings files
import and export 64
I/O Setup 51
and surround sessions 850
displaying unavailable I/O 66
factory settings files 65
import and export settings 64
importing for surround 851
last used 64
settings files 63
Stereo Mix preset 65
surround mix examples 863
surround mix settings file 65
I/O Setup dialog 52
resizing the window 52
I/O View 141, 720
Identify Beat command 620, 621
Identify Sync Point command 662, 905
Ignore Errors During Playback/Record option 38
Ignore Track Arming option 91
illegal characters 98, 287
Import Audio dialog 259
Import Audio to Track command 259
Import Key Signature Map option 272
Import Marker/Memory Locations 272
Import MIDI 278
Import Region Groups command 283
Import REX Files as Region Groups option 87, 254
Import Session Data
Text Encoding 268
Import Session Data command 266
Import Session Data dialog 267
Import Settings button (I/O Setup) 64
Import Settings command (plug-ins) 764
Import Video command 917
Import Window Configurations 272
importing 251
and converting audio 252
audio 252
audio and Conversion Quality 253
copying during 274
key signature map 272
Marker/Memory Locations 272
Markers 278
MIDI tracks 277
multichannel audio files from a field recorder 263
multichannel I/O Settings 851
offline items from Catalogs 246
plug-in settings 766
Pre settings 272
QuickTime audio 920
Index 947
reference or copy 274
region groups 283
tempo and meter map 272
tracks for other sessions 266
using drag and drop 256
Window Configurations 272
inactive
inputs 160
making inserts 755
making items 17
making plug-ins 18
Master Faders and assignments 713
outputs 160
paths 61
paths, global 61
sends 728
track path assignments 160
tracks 171
Include Control Changes in Undo Queue option 85
Include Sends in Trim Mode option 85
Includes Take Region Lengths That Match option 81, 353
Includes Take Region Names That Match Track Names option
81, 353
Incoming Time display 884
Infinite Clip Hold option 74, 143
Infinite Peak Hold option 74, 142
in-place auditioning 67
Input Channel Selector 46
input connections 13, 320
Input Devices command 362
Input Filter command 364
MIDI Event List View Filter dialog 587
MIDI Input Filter dialog 364
input levels 320
Input Only Monitoring mode 339
Input Path selector 141, 159
Input Quantize command 557, 580
Input selectors 159
Insert Position selector 760
Insert Silence command 668
and Shuffle mode 668
and Slip mode 668
Insert Time command 626, 628
inserting
controller events 539
in MIDI Event List 588
meter events 624
MIDI notes 530
plug-ins on tracks 756
program changes 544
tempo events 603
inserts 718, 751
as a shared bus 752
duplicating 760
for hardware I/O 751
for plug-ins 751
labeling 774
making inactive (and active) 755
mono 752
moving 760
on single tracks 752
post-fader on Master Faders 712, 752
shared within a submix 738
stereo 752
Inserts View 719
Instrument plug-in
recording audio from 377
Instrument tracks 134
and surround mixing 859
channel strips 137
configuring for recording 366
MIDI Input selector 167
MIDI Output selector 167
monitoring and mixing 735
Notes View 149
Regions View 149
signal flow 713
track controls 139
Instruments View 719
Internal mode (Clock Source option) 884
internal side-chain processing 772
Inverse linked panning 732
Items
selecting 218
Items to Copy 103
J
Jam Sync 887
Join command 781
K
key input 772
Key Input selector 761
key signature map
importing 272
Keyboard Focus 19
Commands 20
Group List 20
Region List 20, 194
keyboard shortcuts 771
global key commands 19
numeric entry 454
recording 346
L
labeling
inserts and sends 774
paths 57
Language options 74
Last Used 64
Latch Mode
AutoJoin 781
Join 781
Latch option 170
Latch Record Enable Buttons option 78
Latching Behavior for Switch Controls in “Touch” option 84
latency
Hardware Buffer Size 35
LCRS path examples 853
LE systems 29
Legacy I/Os 26, 47
length, for selections 452
level faders
sends 724
Level meters
for audio tracks 142
for Aux Input, Master Fader, and Instrument tracks 142
Levels of Undo preference 82, 415
Pro Tools Reference Guide948
LFE
enable in plug-ins 879
example sub-path 863
examples of discrete versus contribution 866
faders 879
LFE Enable button 762
Librarian menu 761
Limit Character Set option 103
Limit To preference 80
Linear command (Tempo Operations) 615
linear crossfades 486
Linear Sample Display 613
Linear Tick Display 613
Linearity Display Mode 613
Link Enable buttons 762
in multi-mono plug-ins 860
Link Mix and Edit Group Enables option 83
Link Record and Play Faders option 78, 340
Link Selection button 447, 448
Link Timeline and Edit Selection option 447
Link Track and Edit Selection option 147, 448
linking
inverse panning 732
multi-mono plug-ins 860
plug-in controls 770
stereo panners 731, 872
local (current session) preferences 72
Local Control 363
local control 8
locating
the playback cursor 306
with Fast Forward/Rewind 307
with Location indicators 460
Location indicators 460
locating with 460
locations, for MIDI notes
dragging 534
quantizing 562
randomizing 561, 563
Lock Region command 664
Lock Settings File command 764
Locked indicator 886
Locked Track command 158
locking regions 664
Loop Playback option 314
and Touch mode 788
loop points 354
Timeline Selection Markers 354
Loop Record mode 328, 351
loop recording
and pre/post-roll 350
audio 350
MIDI 372
multiple takes 374
Loop Trimmer tool 436
creating loops 436
looped regions 671
copying and pasting automation 675
creating 672
editing 673
renaming 673
selecting 674
trimming with Loop Trim tool 437
unlooping 673
looping
playback 314
regions 671
selections 314
loops
creating with the Loop Trimmer tool 436
recording with reverb or delay 836
low latency monitoring
Bounce to Disk 342
Low Latency Monitoring option 342
M
Mac sessions
compatibility with Windows 290
Machine Chases Memory Location option 90, 898
Machine Cues Intelligently option 91
Machine Follows Edit Insertion/Scrub option 90, 898
Machine Track Arming window 900
Main Counter selectors 598
Main Counters 598
main paths 52
Main Time Scale 597, 598, 890
Main Timebase ruler 597
Make Active command 171
Make Active/Inactive Track command 157
Make Inactive command 171
making an Edit selection 438
managing regions 196
Manual Tempo mode 120, 326
Manually Find and Relink 286
mapping paths in I/O Setup 62
Marker/Memory Locations
importing 272
Markers 638
creating 639
creating on the fly 640
deleting 643
editing 642
exporting 280
extending selections to 454
importing 278
moving 643
sorting 646
tick-based and sample-based 638
viewing options 644
Markers ruler 597, 638
Master Faders
as master send level control 740
channel strips 136
inactive 713
inserts 752
meters pre/post fader 713
multichannel 859
post-fader inserts 712
signal flow 712
track controls 138
Master Link button 761
in multi-mono plug-ins 860
Master View for tracks 152, 807
mastering
digitally 845
to disk 844
Matches pop-up menu 352
Matching Start Time Takes List preferences 81, 353
Index 949
Mbox 29
Mbox 2 29
Mbox 2 Mini 29
Mbox 2 Pro 29
measures
renumbering 632
Medium QuickTime Playback Priority setting 77, 910
Memory Locations 637, 638
creating 639
creating on the fly 640
deleting 643
deleting all 643
editing 642
extending selections to 454
Markers 638
recalling 641
recalling Edit selections 357
renaming 642
Selection Memory Locations 638
storing Edit selections 356
Memory Locations window 637, 641
View Filter 646
viewing options for Markers 644
Merge mode (see MIDI Merge mode)
meter
current 623
default 325
display 120
meter events 623
editing 625
inserting 624
meter map
importing 272
Meter Path selector 67
Meter Ruler
displaying 623
extending an Edit selection to 625
meters
and control surfaces 67
for MIDI tracks 142
pre/post fader levels 142
Sends View 727
SurroundScope plug-in 879
Meters options 74
Metronome Click button 120, 324
Mic Preamps View 719
MIDI 7
assigning channels 166
channels 8
common misconceptions 8
control surfaces 7
controller devices 7
controller events 539
Default Thru Instrument 363
devices 7
import by drag and drop 279
importing 278
interface 7
local control 8
loop recording 372
offsets 547
patch name files (.midnam) 542
patch names 542
playing back 304
ports 8
select and split notes 578
setting the Grid value for editing 530
signal paths 9
MIDI clips and Region List 189
MIDI controller devices 361
Local Control 363
MIDI Event List 585
deleting events 591
editing events 590
inserting events 588
navigating in 587
Options menu 592
selecting events 591
View Filter 586
MIDI File Format pop-up menu 279
MIDI files (see Standard MIDI Files)
MIDI Input selector 141, 165
Instrument track 167
MIDI Machine Control 896
MIDI Machine Control (MMC) 896
configuring in Pro Tools 896, 897
controlling external devices with 896
remote track arming 900
MIDI Merge 120, 330, 365
MIDI Merge mode 330
MIDI meter 142
MIDI Note Display options 89
MIDI notes
attributes for 536
auditioning with the mini-keyboard 532
chasing 546
deleting 536
duplicating selected 669
editing 532
durations 574
pitch 533
velocities 535, 572
inserting 530
lengths in ticks 599
moving 534
quantizing 564
scrolling 407
selecting 532
selecting with the mini-keyboard 532
splitting 578
transposing 533, 576
trimming start/end points 534
MIDI Operations window 557
MIDI Output selector 141, 166
Instrument track 167
MIDI Preferences
Default Note On Velocity preference 531
Global MIDI Playback Offset preference 547
Pencil Tool Resolution When Drawing Controller Data
option 540
Pencil Tool Resolution When Drawing Controller Data
preference 89, 802
MIDI Preferences page 89
MIDI Real-Time Properties 549
on tracks and regions 553
settings 551
Pro Tools Reference Guide950
MIDI recording 361
cancelling takes 370
enabling input devices 362
Input Filter 364
Merge/Replace mode 365
monitoring with MIDI Thru 363
quantizing on input 364, 580
System Exclusive data 375
undoing a take 370
Wait for Note 364
MIDI regions 406
and controller events 409
and punch recording 372
created on barlines 369
guidelines for editing 408
MIDI Replace mode 120, 330, 365
MIDI Setup commands
Input Devices command 362
Input Filter command 364
MIDI Beat Clock command 907
MIDI Studio Setup window 542
MIDI Thru command 363
MIDI Track Offsets command 548
MIDI tracks
and MIDI offsets 547
assigning to multiple channels 367
channel strips 137
configuring for recording 366
default program change 541
input 165
loop recording 372
note chasing 546
Notes View 149, 406
output 166
punch recording 370
punching on the fly 371
recording 361
Regions View 149, 407
selecting a pitch range in 579
Sysex View 545
track controls 139
Velocity View 535
MIDI Volume fader 142
MIDI Zoom In button 425
MIDI Zoom Out button 425
mini-keyboard 532
Minimize Additional I/O Latency option 38
Minimum Sync Delay option 92
Minimum Sync Delay preference 899
Minutes:Seconds Time Scale 596
Mirror MIDI Editing 527
missing files 286
fades and regenerating 232
skipping 232
mix busses 292, 725
resetting 59
Mix Groups 180
Mix window 110, 111
All View option 110, 719
None Views option 719
track controls 110
track width 143
Mix Window Follows Bank Selection option 84
Mix Window option 110
Mix Window View options 719
Mix Window View selector 718
mixed file types 102
mixing down to stereo 844
Mixing Preferences
AutoMatch Time preference 85
Mixing Preferences page 83
Touch Timeout option 84
MMC (see MIDI Machine Control)
Modify Group command 178
Modify Groups (Group List) command 178
Momentary Solo Latch option 170
monitoring
during punch recording 350
MIDI recording with MIDI Thru 363
monitoring modes 338
Auto Input 338
Input Only 339
mono
Bounce to Disk 840
inserts 752
paths 59
mono in/stereo out 752
Move Song Start command 626, 631
moving
Bar|Beat Markers 622
fades 492
inserts 760
Markers 643
MIDI notes 534
program changes 544
regions with fades 493
sysex events 545
MP3 file format 839
MP3 Option 253, 839
MPEG-1 Layer 3 839
MTC (MIDI Time Code)
outputting 887
multichannel plug-ins 752, 860
multichannel regions 403
multichannel tracks 343
and automation 805
dragging regions to 475
names for 331
replacing regions in 659
splitting 475
multilingual application support 299
multi-mono
plug-in Channel selector 860
plug-ins 752, 859
Multiple mono 841
multiple outputs
Hardware Setup 48
multiple tracks
and Beat Detective 697
audition takes 353
editing across 420
extending selections to 455, 456
fitting audio regions to Edit selection 478
nudging regions in 473
pasting to 420
selecting 455
separating regions on 467
shuffling regions on 652
multitimbral 7
Music Production Toolkit software option 31
Index 951
Mute Audio Inputs in Auto Input option 392
Mute automation 804
Mute button 170
Mute Frees Assigned Voice option 170, 171
Mute Overwrite/Extend 819
Mute Record-Armed Tracks While Stopped option 79, 392
Mute/Unmute Region command 665
muting
regions 665
tracks 170
MXF format 253, 839
N
Narrow Mix View option 143
navigating 207
New Group (Group List) command 178
New Memory Location dialog 356
New Session command 95
and last used 64
New Track command 144
New Track Default Output selector 68
New Tracks Default To Tick Timebase option 81, 256
New Tracks dialog 144
Next Setting button 761
No Clip Hold option 74, 143
No Output
by deleting paths 61
No Output option 723
No Peak Hold option 74, 142
no scrolling during playback 310
noncontiguous selections 451
nondestructive editing 401
for audio 406
for MIDI 408
Nondestructive Record mode 328
nondestructive recording 347
recording to a new playlist 348
with QuickPunch 379
nonlinear 5
Non-Linear Transport Error Suppression option 91
Normal QuickTime Playback Priority setting 77, 910
Normal Zoom mode 426
Note Chasing option 546
notes (see MIDI notes)
Notes report 98
Notes View 149, 406
MIDI and Instrument tracks 406
mini-keyboard 407
scrolling up or down 407
Nudge value 472
trimming regions by 471
nudging 472
by next Nudge value 473
fades 492
multiple regions 473
region contents 474
regions with fades 493
selection range 453
selection start/end points 453
selections and regions 472
setting the Nudge value 472
Number of Voices setting 38
numeric entry
shortcuts 454
Numeric Keypad modes 21, 77
Classic 21, 77
Shuttle 22, 77, 444
Transport 22, 77
Use Separate Play and Stop Keys 77
O
Object Grabber 451
and Edit Groups 451
Object Grabber tool 439
Object Select in Edit Window command 199
Object selections 451
offline
files, relinking 212
files, selecting in DigiBase 212
regions 403
OMF file format 274
OMFI file format 274
On Stop 814
Online button 116
Online options 79
online recording 895
on-the-fly punch recording
MIDI tracks 371
QuickPunch 329, 379
Open Ended Record Allocation preference 80, 321
Open Session command 97
opening multiple plug-in windows 762
Operation Preferences
Audio During Fast Forward/Rewind option 307
Auto Region Fade In/Out Length preference 491
Edit Insertion Follows Scrub/Shuttle option 441
Link Record and Play Faders option 340
Machine Chases Memory Location option 898
Machine Follows Edit Insertion/Scrub option 898
Open Ended Record Allocation preference 321
Record Online option 895
Use F11 for Wait for Note 365
Operation Preferences page 76
Operation/Destination Track pop-up menus 270
Operations menu
Calibration Mode command 321
Link Timeline and Edit Selection option 447
Link Track and Edit Selection 147, 448
Low Latency Monitoring option 342
Optical
ADAT I/O 45
Optical (S/PDIF)
Hardware Setup 45
Pro Tools Reference Guide952
Options menu 130
Auto-Spot Regions command 903
Delay Compensation option 741
Destructive Record mode 347
Link Track and Edit Selection option 147, 448
Loop Playback option 314
Loop Record mode 351
MIDI Thru command 363
Mirror MIDI Editing command 527
Mute Frees Assigned Voice option 170, 171
Pre/Post Roll option 358
Pre-Fader Metering option 142
Scrolling options 310
Solo Latch options 169
Transport Online command 894
Video Out FireWire Port command
929
OR
search modifier 222
Organize Plug-in Menus By option 73, 757
Original Time Stamp 655, 904
Other Playlists menu 411
Output Channel Selector 46
Output Options
Conversion Quality option 842
Sample Rate 842
Output Path selector 141, 159
Output selectors 159
Output Window button 869
Output windows 722
outputs
default 5.1 paths and sub-paths 851
format and tracks 857
to multichannel paths 858
overlap crossfades 486
overlapping paths 63
P
P (browsers) 239
Page Scrolling option 310
Pan automation 804
Pan indicator 141
Pan slider 142
panning
3-knob 874
automation and groups 806
fine-adjust mode 874
grids 868
guidelines 862
linked stereo 731, 872
multichannel automation playlists 879
take over in grid 873
trajectory 875
Use Absolute Pan Linking option 83
X/Y mode 873
Parabolic command (Tempo Operations) 616
parallel mixing 857
pass-through point 780
Paste command 418
Paste Settings command 764
Paste Special commands
Merge 809
Overwrite 809
Repeat to Fill 809
To Current Automation Type 809
pasting
automation 809
multiple data types 420
plug-in settings 766
selections and regions 418
to multiple tracks 420
with Repeat to Fill Selection command 419
Patch Select button 541
Patch Select dialog 541
paths
active and inactive 61
audition 67
creating 57
creating multichannel 852
customizing 58
default mono and stereo 58
default order 69
default output 68
deleting 61
editing 58
for surround 861
last used 64
main 52
mapping 62
mono versus stereo 59
multichannel example 62
naming 57
overlapping 63
reordering 60
selecting 60
Stereo Mix preset 65
sub-path surround examples 863
PCI bus activity 49
Peak Hold options 74
3 Second 142
Infinite 142
None 142
Peak indicator 141
PEC/Direct Style Input Monitoring option 79
Pencil tool 424, 444, 528
as Eraser 537
drawing automation with 801
editing breakpoints with 803
Free Hand 528
inserting MIDI notes with 530
Line 528
Tempo editing 608
Random 529
repairing waveforms with 444
resolution for inserted controller events 540
selecting the Pencil tool shape 528
shapes 528, 801
Square 529
Triangle 528
Pencil Tool Resolution When Drawing Controller Data option
540
Pencil Tool Resolution When Drawing Controller Data
preference 89, 802
pending tasks 249
Performance Volume
defined 204
Playback 204
Record 204
Peripherals dialog 361
Index 953
Peripherals list 45, 47, 66
personalities 749
PFL (Pre Fader Listen) 168
Phase Invert button 762
pitch, for MIDI notes
transposing 533
transposing with Transpose command 576
Play button 117
Play Edit Selection command 312, 313
Play MIDI Notes When Editing option 89
Play Pause mode 314
Play Start Follows Timeline Selection option 76
Play Start Marker Follows Timeline Selection option 316
Play Timeline Selection command 312, 313
playback
audio 303
MIDI 304
no scrolling 310
starting 303
stopping 303
playback cursor 305
Playback Cursor locator 306
Playback Engine 882
RTAS Processors setting 36
Playhead 311
and Edit selections 313
and Timeline selections 313
moving to region boundaries 313
playing
and on-the-fly selections 450
at half-speed 314
Edit selections with Playhead enabled 313
from a track point 306
selections 311
Timeline selections with Playhead enabled 313
tracks 303, 344
playing back
audio 303
MIDI 304
Playlist selector 12, 410
playlists 12, 410
adding new 411
and groups 412
and multichannel tracks 805
and nondestructive MIDI editing 409
assigning 411
automation playlists 410, 778, 786
auto-naming 410
changing timebase of 601
deleting 412
duplicating 410
edit playlists 410
Playlist selector 410
recalling 411
recording to new 348
renaming 411
setting pre/post-roll in 357
plug-in controls
adjusting 771
linking 770
Plug-in Controls Default to Auto-Enabled option 84
plug-in inserts 751
Plug-in selector
for real-time plug-ins 760
plug-in settings librarian 763
Plug-in Settings menu 761
Plug-in Streaming Buffer 43
Plug-in Streaming Buffer Size 42
plug-in window
closing multiple windows 762
opening multiple windows 762
plug-ins
“Organize Plug-in Menus By” 758
and pull rates 894
and surround mixing 859
automating 791
automation accuracy in bounce 843
bypassing from window 770
Category 758
Category and Manufacturer 758
Channel selector for multi-mono 860
creating a default setting 766
enabling automation 772
enabling for automation 792
favorites 759
Flat List 758
for surround 860
inserting on tracks 756
linking 860
linking and unlinking 770
making inactive (and active) 18
Manufacturer 758
mono-to-stereo 752
multichannel 752
multi-mono 752, 859
multiprocessors 36
Next Setting button 761
Plug-ins Settings Select button 761
Previous Setting button 761
removing from tracks 756
RTAS Processors setting 36
Plug-ins Settings Select button 761
pops, avoiding 360
post crossfades 480, 490
Post-Roll button 118
pre crossfades 480, 490
Pre Fader Listen mode 168
PRE settings
importing 272
Pre/Post Fader button 733
Pre/Post Roll option 358
pre/post-fader inserts 752
pre/post-roll
and loop recording 350
and punch recording 349
auditioning 312
setting 357
Pre/Post-Roll Flags 358, 448
Pre-Fader Metering option 142
Preferences
Automatically Copy Files on Import option 274
DestructivePunch File Length 397
Mute Audio Inputs in Auto Input 392
Mute Record-Armed Tracks While Stopped 392
Pause during Playback 250
Tool Tips Display 132
TrackInput 340
TrackPunch 385
Zoom Toggle 82
Pro Tools Reference Guide954
preferences
changing 71
global 72
local 72
Preferences dialog 71
opening 71
Prepare DPE Tracks 397
Pre-Process using Standard Conform 700
Pre-Roll button 118
Preserve Fades when Editing option 82
Preserve Folder Hierarchy command
Items To Copy
Preserve Folder Hierarchy 104
preview
in context 229
reserving voices 230
voice requirements 230
previewing
a region in the Region List 195
in browsers 226
Previous Setting button 761
Prime for Playback 314
Prime for Record 346
Pro Tools
guides 3
main menus 130
session file icon 10
systems 25
Pro Tools LE systems 29
capabilities 30
file management 285
QuickPunch 381
Pro Tools menu
Quit command (Mac) 107
Pro Tools M-Powered systems 31
Pro Tools|HD Accel systems 26
Pro Tools|HD systems 26
audio capabilities 27
audio interfaces 28
file management 285
I/O capabilities 28
MIDI capabilities 27
QuickPunch 380, 381
TrackPunch 383
Pro Tools
video track
Frames View 914
processing bandwidth 49
Processing Preferences page 86
ProControl 748
Program Change dialog 542, 543
program changes 8, 541
and bank select 541
auditioning 545
chasing 547
default, for MIDI tracks 541
deleting 544
editing 544
inserting 544
moving 544
Project browser 242, 286
pull up and pull down
and plug-ins 894
and rulers 894
audio 891
video 891
Punch Capture button 827
Punch In Frame Offset preference 91
Punch Out Frame Offset preference 91
punch points 354
Timeline Selection Markers 354
Punch Preview button 826
punch recording
and monitoring 350
and pre/post-roll 349
audio 349
MIDI 370
MIDI on-the-fly 371
Q
Quantize
audio regions 560, 570
Elastic Audio Events 569
Elastic Audio events 560
quantizing regions to grid 474
Real-Time Properties 551
Quantize command 557, 558
experimenting with 564
Quantize Regions command
and Grid value 656
Quantize to Grid command 474
Quantize window 561
quantizing
MIDI notes 564
attacks vs. releases 560
MIDI on input 364, 580
QuickPunch 329, 379
crossfades 380, 385
LE systems 381
Pro Tools|HD systems 380
region/take numbering 382
QuickPunch Crossfade Length preference 82, 380, 385
QuickTime
and Avid 929
QuickTime file formats 838
QuickTime movies
optimizing for playback 930
playback quality 910
requirements 910
sync 931
QuickTime Playback Priority options
Highest setting 77, 910
Medium setting 77, 910
Normal setting 77, 910
Quit command (Mac) 107
R
R (browsers) 239
randomizing
note durations 575
note locations 561
real-time editing 401
real-time plug-ins 751
Real-Time Properties
clearing 554
Delay 552
Display Events as Modified by Real-Time Properties
option 89
Index 955
displayed in the Edit window 555
displayed in the MIDI Event List 554
Duration 551
enabling 550
on tracks and regions 553
Quantize 551
region-based 553
settings 551
track-based 553
Transpose 553
Velocity 552
View 549
viewing 549
writing to regions 554
writing to tracks 554
Real-Time Properties View 549, 720
Real-Time Properties window 550
Rear Divergence 876
Recalculate Waveform Overviews command 199
Recall Memory Location Selection at Original Track option 81
Recompute Invalid Overviews option 73
Record button 118
Record Enable button 333, 387
record modes 327
and MIDI 330
Destructive Record mode 328
Loop Record mode 328
Nondestructive Record mode 328
QuickPunch 329
Record Online at Insertion/Selection option 79
Record Online at Time Code (or ADAT) Lock option 79
Record Online option 895
Record Pause mode 346
Record Safe mode 335
recording 343
a mono audio track 343
a stereo audio track 343
a submix to disk 835
additional takes 346
at half-speed 360
bouncing to disk 836
cancelling takes 345
configuring Instrument tracks 366
configuring MIDI tracks 366
destructively 347
DestructivePunch mode 397
from a digital source 358
from Record Pause mode 346
keyboard shortcuts 346
Loop Record 351
MIDI regions 369
multichannel tracks 343
multiple audio tracks 345
nondestructive 5
nondestructively 347
nonlinear 5
online 895
QuickPunch mode 379
record enabling tracks 333
status LED 387
System Exclusive data 375
to a new playlist 348
to the system volume 338
TrackPunch mode 383
undoing a take 345
with a countoff 324
with Round Robin Allocation 336
with the click 322
ReCycle 253
redefining
Feet+Frames position 889
time code position 889
Redo command 414
reference or copy when importing 274
Regenerate Missing Fades 286
Regenerate Missing Rendered Files 287
region boundaries
extending selections to 453, 611
moving edit cursor to 456
moving Playhead to 313
region definitions 265
region group file format (.rgrp) 282, 682
region groups 403, 675
changing timebase format 679
creating 676
editing 680
exporting to different hard drives 284
fades and crossfades 681
importing 283
importing and exporting 282
mixed 677
multitrack 677
regrouping 677
separated 678
tick-based 679
timebase format 676
trimming 681
ungrouping 676
Region Groups folder 96
Region List 189
and MIDI clips 189
auditioning regions 195
displaying file info for audio regions 190
dragging from 647
Export Regions as Files command 263
Find History 193
finding regions 192
Keyboard Focus 20
pop-up menu 189
previewing regions 195
repeating a previous search 192
selecting regions 193
sorting 191
Region List Keyboard Focus 194
Region List menu 904
Auto Rename command 197
Clear command 198
Compact Selected command 476
Export Region Definitions command 265
Find command 192
Rename command 196
Select options 194
Selected Unused command 198
Show Auto-Created option 197
Sort By option 191
Sort By options 191
Time Stamp Selected command 655
Timeline Drop Order option 647
Region List Selection Follows Edit Selection option 81, 190,
450
Pro Tools Reference Guide956
Region menu 130
Bring to Front command 469
Capture command 466
Identify Sync Point 905
Lock command 664
Mute/Unmute command 665
Quantize to Grid command 474
Remove Sync Point command 663
Send to Back command 469
Ungroup All Regions command 677
Ungroup Regions command 676
Unlock command 664
Unloop Regions command 673
Region Name
Right-click pop-up menu 131, 199
View option 413
Region Time View option 413
regions 12
aligning to region start points 650
auto-created 403
auto-naming options 197
auto-spotting 903
bringing to front 469
capturing 466
clearing 418
clearing Real-Time Properties 554
Conform to Tempo 607
conforming with Beat Detective 698
consolidating 476
copying 417
creating 465
crossfading between 489
cutting 417
default names 330
displaying names 413
displaying times 413
dragging from Region List 647
dragging to multichannel tracks 475
duplicating 669
exporting as audio files 263
extending selections to include 453
finding 192
healing separations 469
hiding auto-created 197
inserting silence into 668
locking 664
looping 671
managing 196
MIDI 369
moving in Grid mode 657
moving regions with fades 493
multichannel 403
muting 665
nudging 472
nudging regions with fades 493
offline 403
Original Time Stamp 655
pasting 418
placing at Edit insertion point 649
placing in tracks 647
quantizing 474, 570
removing silence from 666
removing unused 198
removing warping 518
renaming in the Region List 196
renaming on a track 409
repeating 670
replacing 657
Select options 194
selecting 449
selecting all in a track 450
selecting with the Selector tool 438
sending to back 469
separating 466
separating with Beat Detective 696
separating with Separation Grabber 468
shifting 664
shuffling 651
on multiple tracks 652
sliding 651
slipping 654
snapping to 653
snapping to next 653
sorting 191
spotting 654, 902
sync points 662, 905
time stamping 903
trimming by Nudge value 471
trimming start/end points 433
trimming to Edit insertion point 470
trimming unwanted data from 470
unlocking 664
User Time Stamp 655
user-defined 196, 197, 403
warped 403
warping (Elastic Audio) 517
whole-file audio regions 403
Regions View 149, 407
Regroup Region command 677
related takes 352
and Separate Region command 353
preferences for 353
Relative Grid mode 422, 657
relinking
Find Links 236
Linking Options 236
Remote Mode options 91
remote track arming 900
Remove Duplicate Notes command 549
Remove Sync Point command 663
removing
crossfades 489
plug-ins from tracks 756
sends 725
Rename command (Region List) 196, 199
Rename Track command 158
Renamed Audio Files
save copy in 287
renaming
auto-created regions 196
Memory Locations 642
playlists 411
renaming regions in the Region List 196
renaming regions on tracks 409
Render Sources 242, 246
Rendered Files folder 96, 507
Renumber Bars command 632
Repeat command 669
Repeat to Fill Selection command 419
repeating selections and regions 670
Index 957
Replace mode
Replace Region command 199, 657
and multichannel tracks 659
Replace Region dialog 658
Reserve Voices For Preview In Context option 76, 230
Restore Performance command 557, 571
Return to Zero button 116
Revert to Saved command 100
Rewind
incrementally 307
locating with 307
Rewind button 116
REX 1 and 2 file formats 253
REX files
importing 261
Root Settings folder 764
specifying 765
Round Robin Allocation 336
RTAS Engine 37
RTAS error suppression 38
RTAS plug-ins 753
additional latency 753
voice usage 753
RTAS Processors setting 36
Ruler View options 597
Bars:Beats Time Scale 595
Feet.Frames Time Scale 596
Minutes:Seconds Time Scale 596
Samples Time Scale 596
Time Code Time Scale 596
Ruler View selector 597
rulers
changing display order 597
Conductor rulers 596
displaying all 597
pull up and pull down 894
scrolling in 460
Timebase rulers 595
zooming in 427
S
S/PDIF
Hardware Setup 45
safing automation 786
Sample Rate
Hardware Setup dialog 43
Playback Engine dialog 39
Sample Rate Conversion options 269
sample rate conversion quality 253, 842, 920
Sample Rate Conversion Quality preference 87, 255
Sample Rate setting 842
sample-based timing 599, 638
Samples Time Scale 596
Save As command 100
Save command 100
Save Copy In command 101, 291
saving a copy of a session 101
saving a session 100
saving plug-in settings 766
Save Plug-in Settings To command 764
Save Settings As command 764
Save Settings command 764
saving the session file with a new name 100
Scale command (Tempo Operations) 618
scaling note velocities 535, 574
Scroll into View command 147
Scroll Into View Track command 157
Scroll to Track Banks Controllers option 84
Scroll To Track command 146, 462
scroll wheel
and MIDI track’s Note display 407, 432
scrolling a Pro Tools window 461
zooming in the Edit window 432
zooming in the Edit windows 432
scrolling
a track into view 147
in the ruler 460
Mix and Edit to tracks 461
Notes View up or down 407, 432
Pro Tools window vertically or horizontally 461
Scrolling options 310
After Playback 310
Center Playhead 311
Continuous Scrolling During Playback 310
None 310
Page 310
Scrub in Video Window command 926
Scrub Trim tool 435
Scrubber tool 424, 441
in Shuttle mode 442
selecting with 456
scrubbing 441
a single audio track 442
and edit cursor 441
on two audio tracks 442
playback speed and direction 442
resolution 442
video tracks 926
with Scrub Trim tool 436
with the Selector 442
S-Curve command (Tempo Operations) 617
Secondary Time Code Ruler 596
Select All command 450
Select Parent in Project browser 242
Select Parent in Workspace command 199
Select Region List options 194
Select Tracks in Group command 178
Select Unused Regions command 198
Select/Split Notes command 557, 578, 579
Split notes action 578
selecting
a pitch range of notes 579
across all tracks 455
across multiple tracks 455
all regions in a track 450
all regions in all tracks 450
during playback 450
in MIDI Event List 591
MIDI notes 532
noncontiguous regions 451
notes in a chord 580
regions 449
track material 449
with Edit Selection indicators 454
with Scrubber 456
Selection Changes Alternate Playlists 601
Selection commands
Play Edit Selection 312
Play Timeline 312
Pro Tools Reference Guide958
Selection Memory Location 638
moving stored selection 642
selections
across multiple tracks 449, 455
and Bounce to Disk 836
and Edit Groups 449
and hidden tracks 449
and Timeline Selection Markers 449
auditioning start and end points 312
changing length of 452
clearing 418
consolidating 476
copying 417
cutting 417
duplicating 669
extending 453, 611
extending to the Meter Ruler 625
extending to the Tempo ruler 604, 644
including Conductor rulers 455
looping 314
moving to adjacent tracks 455
moving to the next/previous region 457
non-contiguous 451
nudging 453, 472
nudging start/end points 453
Object 451
on-the-fly 450
pasting 418
playing 311
removing a track from 456
repeating 670
shifting 664
storing with Memory Locations 638
Selector tool 306, 424, 438
making a Timeline selection 438
making an Edit selection 438
placing the edit cursor 438
scrubbing with 442
selecting an entire region 438
selecting an entire track 438
selecting MIDI notes with 532
Send 281
Send controls 724
Send mute 724
Send pan 724
Send Pans Default to Follow Main Pan option 83
Send to Back command (Region menu) 469
Send To Sibelius 281
Send via DigiDelivery command 277
sends 724
adding 724
and multichannel mixing 858
Assignments View 726
automating 790
changing default setting 725
copying track automation to 790
default level 725
displaying controls for 727
for hardware I/O 725
for mix busses 725
labeling 774
mono or stereo 725
multichannel 858
removing 725
Sends A–E View options 725
Sends Default to -INF option 83
Sends F–J View options 725
Sends View 720
Separate Region commands 466
and multiple tracks 467
and related takes 353
At Selection 466
At Transients 466
On Grid 466
Separate Region Operates On All Related Takes option 353,
467
Separate Region Operates On All Related Takes preference 81
Separation Grabber 468
Separation Grabber tool 439
session data
importing 266
Session Data Online Status indicator 115
Session Data to Import menu 270
Session File Backups folder 97
session parameters 102
Session Setup window 883
sessions 10
audio format 884
backups 78, 97
bit depth 96, 884
closing 107
creating 95
creating for surround mixing 850
files
concepts 10
frame rate 884
mixed audio formats 102
opening 97
opening from a Transfer volume 98
sample rate 96, 884
saving 100
start frame 884
templates 105
Set As User Default command 764
Set Plug-in Default To command 764
Set Record Tracks to Auto Input command 340
Set Record Tracks to Input Only command 340
Set Root Settings Folder command 764
Set Servo Lock Bit at Play (Tamura Support) option 91
setting punch/loop points 354
settings
choosing a destination for 765
copying 766
creating subfolders 765
creating User Default 766
importing 766
pasting 766
saving 766
Settings Preferences command 764
Setup menu 130
Click/Countoff Options dialog 323
Disk Allocation 336
I/O Setup 52
MIDI windows 542
Preferences command 71
Session Setup 883
Video Sync Offset command 931
Shift command 664
Shift dialog 664
shortcuts for keyboard input 771
Index 959
Show All Tracks Group command 178
Show Auto-Created option 197
Show Meters in Sends View option 74, 727
Show Only Tracks in Group command 178
Show Original Setup button 66
Show/Hide Region List button 189
Show/Hide Track List/Group List View button 154, 177
Show/Hide Tracks in Group command 178
Shuffle Lock mode 421
Shuffle mode 421
and locked regions 664
and moving regions 651
shuttle
fixed mode option 443
Shuttle Numeric Keypad mode 22, 77, 444
side-chain
definition 772
filters 772
processing 761
signal flow
audio tracks 710
Auxiliary Inputs 711
Instrument tracks 713
Master Faders 712
signal routing
and default path order 69
basics for surround 858
example 14
surround examples 864
Single Zoom mode 427
SIP (Solo In Place) 168
Skip All 286
slices 684
sliding regions 651
Slip mode 422
and moving regions 654
Smart Tool 424, 439
and audio tracks 439
and Elastic Audio tracks 440
and MIDI tracks 440
and multichannel tracks 441
creating crossfades with 440
creating fades with 440
editing automation with 441
editing controller events with 441
Smooth and Thin Data After Pass option 84, 800
smoothing automation 785
SMPTE
configuration 888
start frame for session 884
Snap Pan to Speaker icons 872
Snap To Bar option 624
Snap To commands 653
snapping to the following or preceding region 653
snapshot automation 821
adding to empty automation playlists 822
and trim values 824
writing over existing automation 822
SND resource file format 838
Soft Limit 46
Solo button 168
Solo in Place mode 168
Solo Latch options 169
Solo modes 168
selecting 169
Solo Safe mode 170
soloing
tracks 168
tracks in a submix 741
Song Start Marker 602
editing tempo 602
moving 602
Sort By option 191
Sort By options 191
sorting
data in browsers 215
Markers 646
regions 191
secondary sorts 215
Sound Designer II file format 838
Source Path 837
Special Paste 809
Speed Cal indicator 886
split (MIDI) 578
Split Into Mono Track command 158, 475, 856
Split notes action 578
splitting stereo and multichannel tracks 475
Spot dialog 654, 901
Use Subframes option 901
User Time Stamp button 903
Spot mode 422, 901
and moving regions 654
trimming regions in 903
spotting
auto-spotting 903
regions 654, 901, 902
SRC options 269
Stable LTC Source option 92, 900
Standard MIDI Files 277
exporting 279
importing 277
Type 0 277
Type 1 277
Standard VCA Logic for Group Attributes option 85
start frame, for sessions 884
Start To Insertion command 470
Start, End, and Length display 114, 355
stems
surround examples 865
Step Input command 557, 581
stepped control automation 804
Stereo 841
stereo inserts 752
stereo interleaved files, exporting 265
Stereo Mix
I/O Setup factory preset 65
stereo tracks
dragging regions to 475
names for 331
replacing regions in 659
splitting 475
Stop at Shuttle Speed Zero option 91
Stop button 117
Stretch command (Tempo Operations) 619
Strip Silence command 665, 666
and region naming 666
Strip Silence window 665
stuck notes 549
Sub Counter selectors 599
Sub Time Scale 599, 890
Pro Tools Reference Guide960
subfolders, creating for settings 765
subframes 901
submixes
applying an insert to 738
bouncing to 843
bouncing to disk 835
soloing tracks in 741
sub-paths 52
examples for surround 861
Suppress Automation “Write To” Warnings option 84
surround
and sends 858
basic signal routing 858
center percentage (%) 878
configuring Pro Tools and sessions 850
discrete level, solo, mute 856
example 5.1 format paths 853
importing I/O Settings 851
pan playlists and automation 879
panning grids 868
settings files 850
using paths 861
using sub-paths, examples 861
SurroundScope 879
Suspend All Groups (Group List) command 178
suspending
automation 797, 798
writing automation 797
swing 561, 563
SYNC I/O
and VSO
generating time code with 895
resolving with 881
sync options 882
Sync Mode field 884
Sync Offset 887
Sync Point View option 663
sync points 905
for regions 662
from Beat Detective 702
identifying 662, 905
synchronization
black burst 906
MIDI Beat Clock 907
MMC 896
options 881
resolving 905
troubleshooting 905
Synchronization Preferences page 90
Sysex View 545
system
shutting down 33
starting up 33
System Exclusive data 8, 545
deleting 546
moving 545
recording 375
System Memory Allocation 42
system resources 16
system settings
Cache Size 41
Clock Source system setting 44
CPU Usage Limit 37
Hardware Buffer Size 6, 34, 35
Hardware Setup 43
Number of Voices 38
Plug-in Streaming Buffer 43
Plug-in Streaming Buffer Size 42
RTAS Engine 37
Sample Rate 39
System Memory Allocation 42
System Usage window 49
View options 50
T
T (browsers) 239
Tab to Transients button 309, 457
take over (surround pan) 873
Takes
multiple tracks 353
takes
auditioning 351
default names 330
MIDI 375
numbering for QuickPunch 382
recording additional 346
selecting an alternate take 352
tapping in the tempo 327
Target button 761
Tascam DA30 45
Task Manager 261
tasks
active 248
failed 250
grouped 250
pausing during playback 250
pending 249
suspended 249
TC/E Plug-in preference 88, 434
TCE Edit to Timeline command 477
TCE Trimmer tool 434
using in Grid mode 435
using in Slip mode 435
using in Spot mode 435
TDM plug-ins 753
TDM Time Slot usage 49
TDM Voices Allocated 49
templates
Beat Detective 694
DigiGroove 694
Pro Tools session 105
tempo
current 603
default 325
display 120
effects on Markers and Memory Locations 638
Manual Tempo mode 326
tapping in 327
Tempo Edit Density pop-up menu 610
Tempo Event Warp markers 606
Tempo Event–generated Warp markers 513
tempo events 603
and Bar|Beat Markers 622
editing 603
inserting 603
tempo map
from Identify Beat command 620
importing 272
Index 961
Tempo Operations commands
Constant command 615
Linear command 615
Parabolic command 616
Scale command 618
S-Curve command 617
Stretch command 619
Tempo Operations window 614
Tempo Resolution selector 609
Tempo ruler
displaying 603
extending an Edit selection to 604, 644
Tempo Ruler Enable button 120
Tempo slider 120
Tempo Sync 762
test 843
Text Encoding
Import Session Data 268
Thin Automation command 801
thinning automation 785, 800
tick-based timing 599, 638
time code
and Jam Sync 887
capturing 902
freewheeling 887
generating 887, 895
redefining position 889
Time Code 2 ruler 596
Time Code Mapping options 269
Time Code Rate pop-up menu 884
Time Code Time Scale 596
Time Compression/Expansion plug-in 477
Time Compression/Expansion Trim tool 88, 537
Time Compression/Expansion Trimmer tool 434
Time Grabber tool 439, 451
Time Operations commands 626
Change Meter command 627
Cut Time command 630
Insert Time command 628
Move Song Start command 631
Time Operations window 623, 626
Time Scale 597
Bars:Beats 595
Feet.Frames 596
Main 598, 890
Minutes:Seconds 596
Samples 596
Sub 599, 890
Time Code 596
Time Stamp command 199, 352, 904
Time Stamp Selected command 655
time stamps 903
and Bounce to Disk 837
Timebase rulers 595
and selecting on all tracks 455
and Timeline selections 459
Edit Markers 448
Pre/Post-Roll Flags 448
sliding Edit selections 457
sliding Timeline selections 459
Time Code 2 596
Timeline Selection Markers 448
Timeline and Edit selection, unlinked 447
Timeline Data Online Status indicator 115
Timeline Drop Order option 647
Timeline Insertion/Play Start Marker Follows Playback option
76, 317
Timeline selection
making with the Selector tool 438
Timeline Selection Markers 354, 448
and Edit selections 449
selection length 452
Timeline selections 459
Timeline selections 458
auditioning with Playhead enabled 313
copied from Edit selection 460
copied to Edit selection 460
in Timebase rulers 459
sliding in the Ruler 459
start, end, and length fields 118
Timeline Selection Markers 459
toggling
track height 152
Track View 151
Tool Tips 73, 132
Touch Timeout option 84
Track Color View 721
Track Compensation (cmp) indicator 744
track controls
audio tracks 138
Auxiliary Input tracks 138
Edit window 113, 138, 139, 140
Elastic Audio 504
Instrument tracks 139
Master Fader tracks 138
MIDI tracks 139
Mix window 113
VCA Master tracks 139
video tracks 140
track data 402
Track Height 152
resizing 154
track layout
default path order 69
track level meters 142
Track List 154
hiding 154
pop-up menu 155
showing 154
Track menu 130
Auto Input Monitoring mode 339
Clear All Clip Indicators command 143, 727
Delete command 147
Duplicate command 148, 779
Group command 180, 181
Input Only Monitoring mode 339
Make Active command 171
Make Inactive command 171
New Track command 144
Scroll to Track 146
Scroll to Track command 462
Set Record Tracks to Auto Input 340
Set Record Tracks to Input Only 340
Split Into Mono command 475, 856
Write MIDI Real-Time Properties command 554
Track Name
Right-click pop-up menus 157
Track Name/Comments dialog 145
Track Number command 146, 462
Track Offset options 269
Pro Tools Reference Guide962
Track Position Numbers Stay with Hidden Tracks option 73
Track Record Enable indicator 118
Track selector 760
Track View 149
and edit content 416
Blocks 149
changing 151
Expanded Track Display 153, 805
Master View 807
Notes 149, 406
Regions 149, 407
Sysex 545
toggling 151
Velocity 535
Waveform 404
Track View selector 150
Track View Toggle 151
track width 143
TrackInput Monitor button 339
TrackInput Monitor indicator 118
TrackPunch 383
TrackPunch mode 383
TrackPunch preferences 385
tracks
5.1 format track layout 855
adding comments 145
adding to selection 455, 456
and surround 855
appending new material to end of 348
Color Coding options 172
concepts 10
configuring MIDI recording 366
converting multichannel tracks into mono tracks 856
creating a click track 323
creating new Elastic Audio tracks 503
deleting 147
duplicating 148, 779
Elastic Audio 502
formats 134
grouping 175
hiding 155
locating with Fast Forward/Rewind 307
making inactive/active 171
Master View 152, 807
metering 142
moving selections between 455
muting 170
names 144, 145
placing regions in 647
playback priority 162
playing 303, 344
record enabling 333
removing from a selection 456
scrolling shortcut 461
selecting across multiple 455
selecting all regions in 450
selecting material in 449
soloing 168
Track Height 152
Track View 149, 151
transposing 576
trimming unwanted data from 470
types 133
Tracks Group command 178
trajectory panning 875
Transfer files 286
selecting in DigiBase 212
Transfer volume
defined 204
transients 404
detecting with Beat Detective 688
tabbing to 309, 457
Transport 116
Edit window 721
Transport Master 898
Transport Master button 119
Transport Numeric Keypad mode 22, 77
Transport Online option 894
Transport RecordLock option 79, 385, 390
Transport View 721
Transport View options 119, 305, 355, 357
Transport window 116
MIDI controls 119
pre/post-roll 118, 357
record status display 387
start, end, and length fields 118, 355
transport controls 116
Transpose
Real-Time Properties 553
Transpose command 557, 576
transposing 576
by octave 577
key 577
MIDI notes 533
tracks 576
Trim automation
coalescing 812
Trim Automation commands 824
Trim to All Enabled 824
Trim to Current 824
Trim Region commands
End to Fill Selection 471
End to Insertion 470
Start to Fill Selection 470
Start to Insertion 470
To Fill Selection 471
To Selection 470
Trim to All Enabled Automation command 824
Trim to Current Automation command 824
Trim tools 611, 803
Scrub Trim tool 435
Time Compression/Expansion Trim tool 88, 537
Trimmer tools 424, 433
Loop Trimmer tool 436
Time Compression/Expansion Trimmer tool 434
trimming
automation breakpoints 611, 803, 811
crossfades 490
note start/end points 534
region start/end points 433
regions by Nudge value 471
regions to Edit insertion point 470
regions with Scrub Trim tool 436
unwanted region and track data 470
Tweak Head setting 842, 920
Index 963
U
unavailable I/O
showing 66
unavailable resources 98
Undo and audio recording 345
Undo command 414
Undo History window 414
Undo Queue 415
Ungroup All Regions command 677
Ungroup Region command 676
Ungroup Regions command 676
Universe window 462
unlinked Timeline and Edit selection 447
unlinking plug-in controls 770, 860
Unlock Region command 664
Unloop Regions command 673
Use Absolute Pan Linking option 83
Use All Available Space preference 80
Use AudioSuite Dither option 86, 747
Use F11 for Wait for Note option 89, 365
Use MIDI to Tap Tempo option 89
Use Separate Play and Stop Keys option 77
Use Squeezer option 842
Use Subframes option 901
User Default setting, creating 766
User Offset (+/–) field 743
User Time Stamp 655, 904
user-defined regions 196, 197, 403
V
Variable Speed Override 885
VCA Masters
assigning groups 717
channel strips 136
clearing 830
controls 715
deleting 831
displaying automation 829
mixing 714
track controls 139
track type 134, 714
velocities, for MIDI notes
default for inserted 531
drawing with Pencil 535
editing 535, 572
editing velocity 535
fading 573
Real-Time Properties 552
scaling 574
scaling with Trim tool 535
Velocity View 535
video
recording limits with pull 894
Video Designator 239
Video Media options 269
Video Online button 913, 915
Video Out FireWire Port command 929
Video Pull Up/Down 891
Video Sync Offset command 931
video track
scrubbing 926
viewing as blocks 914
video tracks
track controls 140
Video Window command 925
View Filter
Memory Locations window 646
View Filter command 586
View menu 130
Edit Window View options 110, 719
Edit Window view options 719
Mix Window option 110
Mix Window View options 719
Narrow Mix View option 143
Region Name View option 413
Region Sync Point View option 663
Region Time View options 413
System Usage View options 50
Track Number command 146, 462
Transport View options 119, 305, 355, 357
viewing blocks in the video track 914
views
Delay Compensation 144
I/O View 141
Inserts View 719
Sends View 720
Wide Meters View 143
voice allocation
dynamic 162
explicit 163
RTAS 753
Voice selector 163
voices
and RTAS 753
and track priority 162
auto-assignment of ascending 164
for TrackPunch 383
volume
Performance 204
Transfer 204
Volume automation 803
Volume fader 142
Volume indicator 141
volume.ddb 205
volumes
Volume browsers 121, 202, 206
VSO (see Variable Speed Override)
W
Wait for Note 120, 364
Warp indicator 517
Warp marker
adding 513
deleting 513
relocating (without applying warping) 513
Warp markers 512
Warp view 504, 511
warped regions 403
warping audio (Elastic Audio) 514
WAV file format 288, 838
AES31/Broadcast compliant 288
WaveCache 224
WaveCache.wfm file 96, 205
Waveform
DigiBase display 224
WaveCache 224
Waveform View 404
Pro Tools Reference Guide964
waveforms 404
and zero-crossing 405
avoiding clicks and pops 405
drawn rectified 404
guidelines for editing 405
repairing with Pencil tool 444
website 4
whole-file audio regions 403
Wide Meters View 143
Window Configuration List 124
Window Configurations 123
importing 272
Window menu 130
Automation Enable command 788
Big Counter command 305
Color Palette 174
Disk Space command 322
Edit command 110
Machine Track Arming command 900
Memory Locations command 641
Mix command 110
Project command 286
System Usage command 49
Task Manager command 261
Transport command 116
Undo History command 414
Universe command 462
Workspace command 337
Windows sessions
compatibility with Mac 290
Word Clock 45
workflows 390
Workspace browser 337, 338
Write 823
Write Automation commands 822, 823
Write Automation To commands
Automation Preview mode 826
Write Automation to Next Breakpoint command 815
Write Automation to Next Breakpoint on Stop command 817
Write Automation to Selection/Selection Start/Selection End
buttons 813
Write MIDI Real-Time Properties command 554
writing
automation 788
automation on stop 814
automation to next breakpoint 815
automation to selection, selection start, or selection end
813
snapshot automation 822
X
XML (Extensible Markup Language) 542
X–OR (Cancels Previous Solos) Solo Latch option 170
Z
zero-crossing 405
Zoom buttons 424
Zoom Presets 429
Zoom Toggle 429
Zoom Toggle preferences 82, 429
Zoomer tool 424, 426
zooming 424
a track area 426
all the way out 426
around a track point 426
continuously 425
horizontally for all tracks 425
in the ruler 427
on a selection 426
recalling zoom levels 429
return to the previous zoom level 426
storing zoom levels 429
to make all regions visible 426
vertically for all audio tracks 425
vertically for all MIDI tracks 425
with a scroll wheel 432
Zoom Toggle 429

DIGIDESIGN
2001 Junipero Serra Boulevard
Daly City, CA 94014-3886 USA
Tel: 650.731.6300
Fax: 650.731.6399
TECHNICAL SUPPORT (USA)
Tel: 650.731.6100
Fax: 650.731.6384
PRODUCT INFORMATION (USA)
Tel: 800.333.2137
INTERNATIONAL OFFICES
Visit the Digidesign website
for contact information
www.digidesign.com