Qlik Sense P&LSmart Pivot Extension Manualx Manual
User Manual:
Open the PDF directly: View PDF ![]() .
.
Page Count: 24
User guide
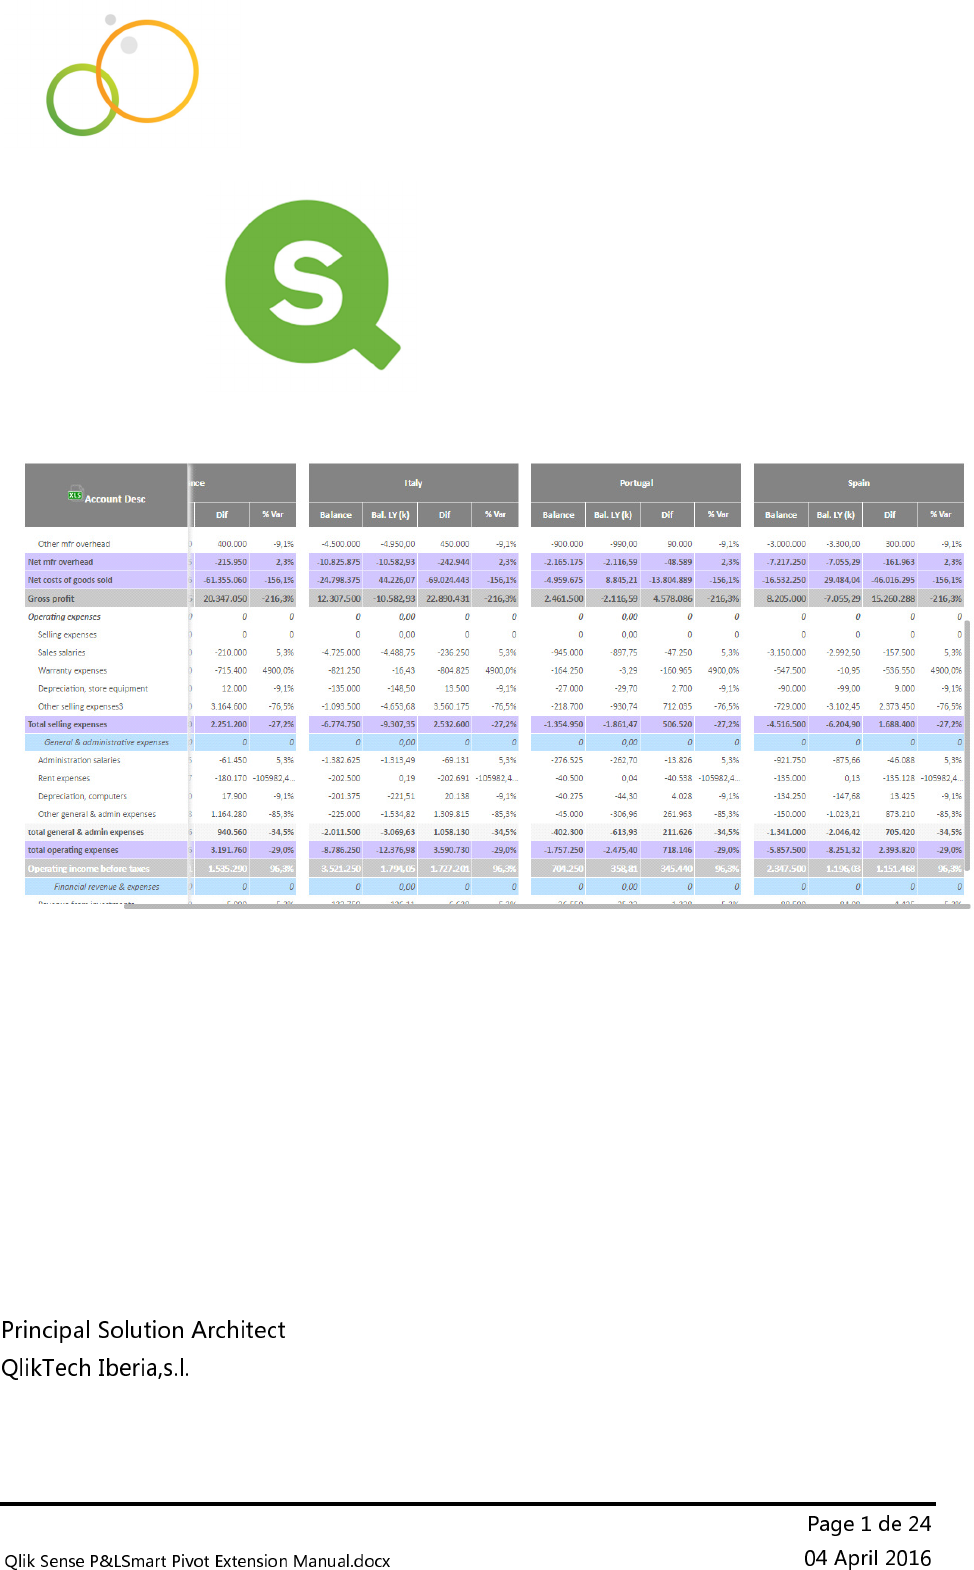
Smart Reporting with Qlik Sense
User Guide
Author: Ivan Felipe Asensio

User guide
Dear Colleagues
User guide
•
The basics:
o
You can include a maximum of:
2 dimensions and 8 measures
or 1 dimension and 9 measures
o
If you work with 2 dimensions then the second one will be pivot
automatically.
User guide
•
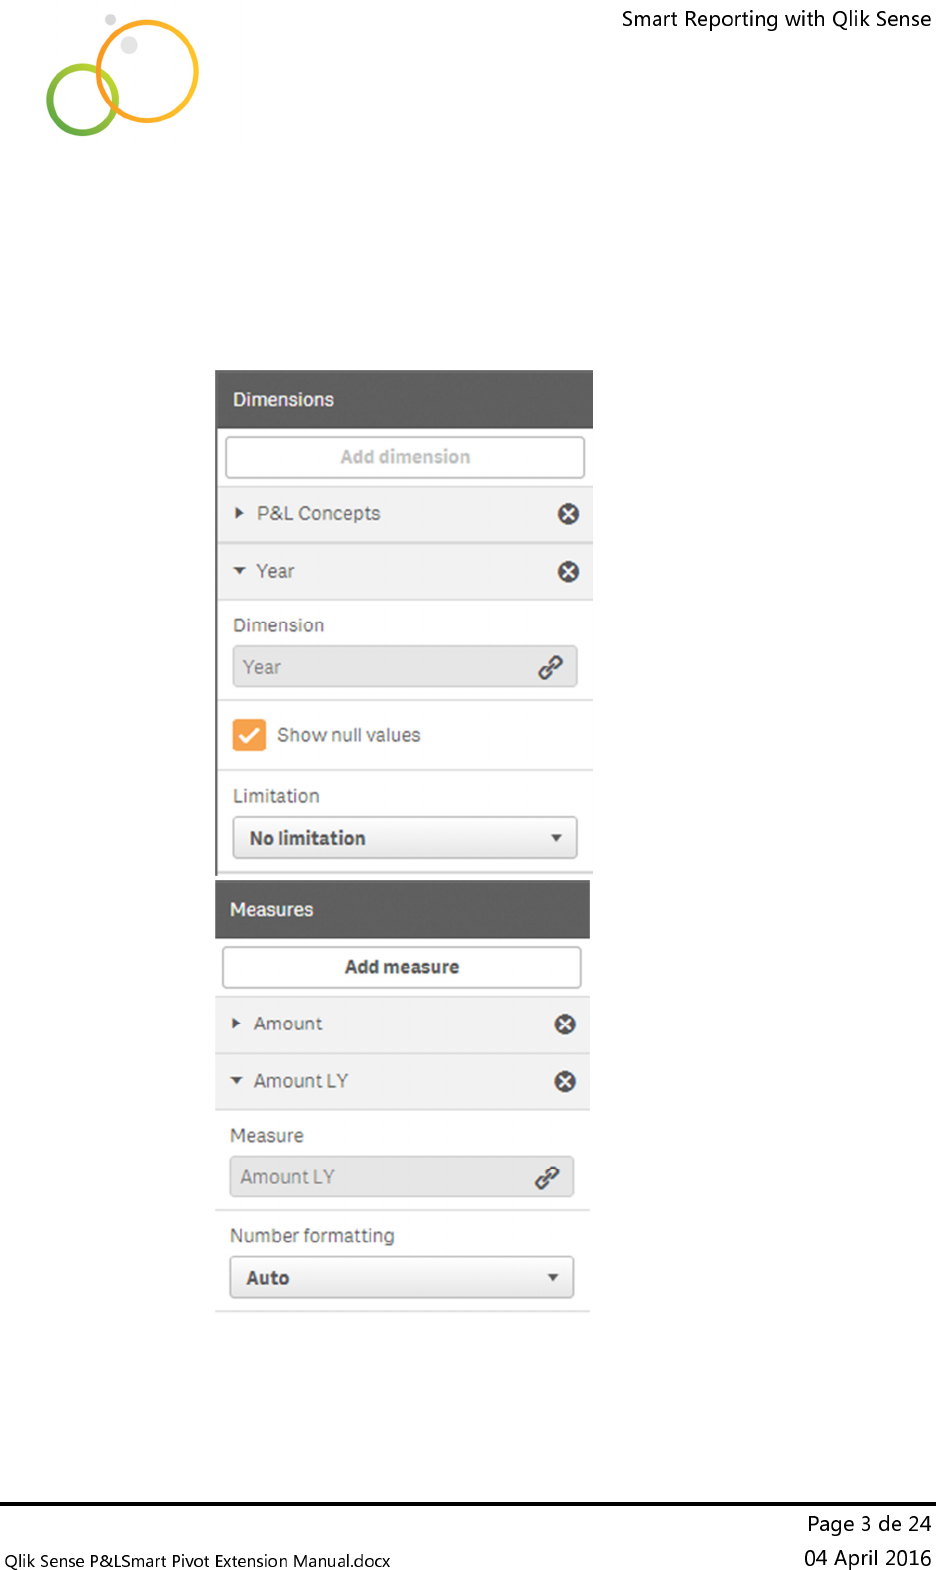
Dimensions
o
You’ll have a basic report if you work with one single dimension.
o
If you work with 2 dimensions then the second one will pivot
automatically.
Both dimensions are selectable inside the grid, header and first col.
User guide
•
Measures
o The expressions works as usual in Qlik Sense, but there are some
tricks.
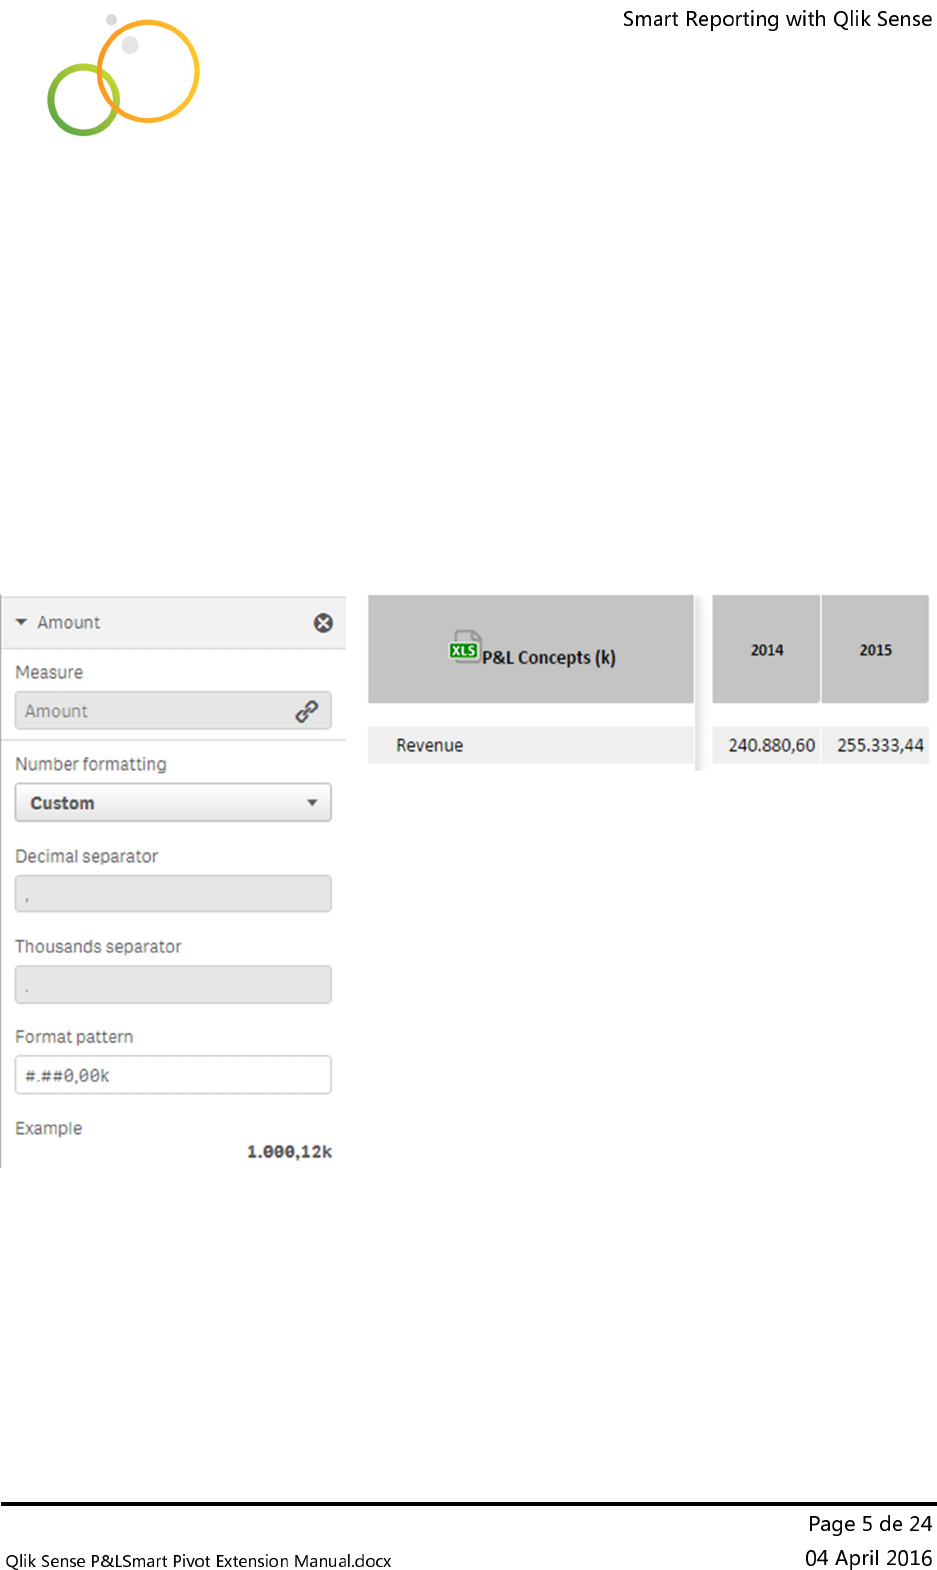
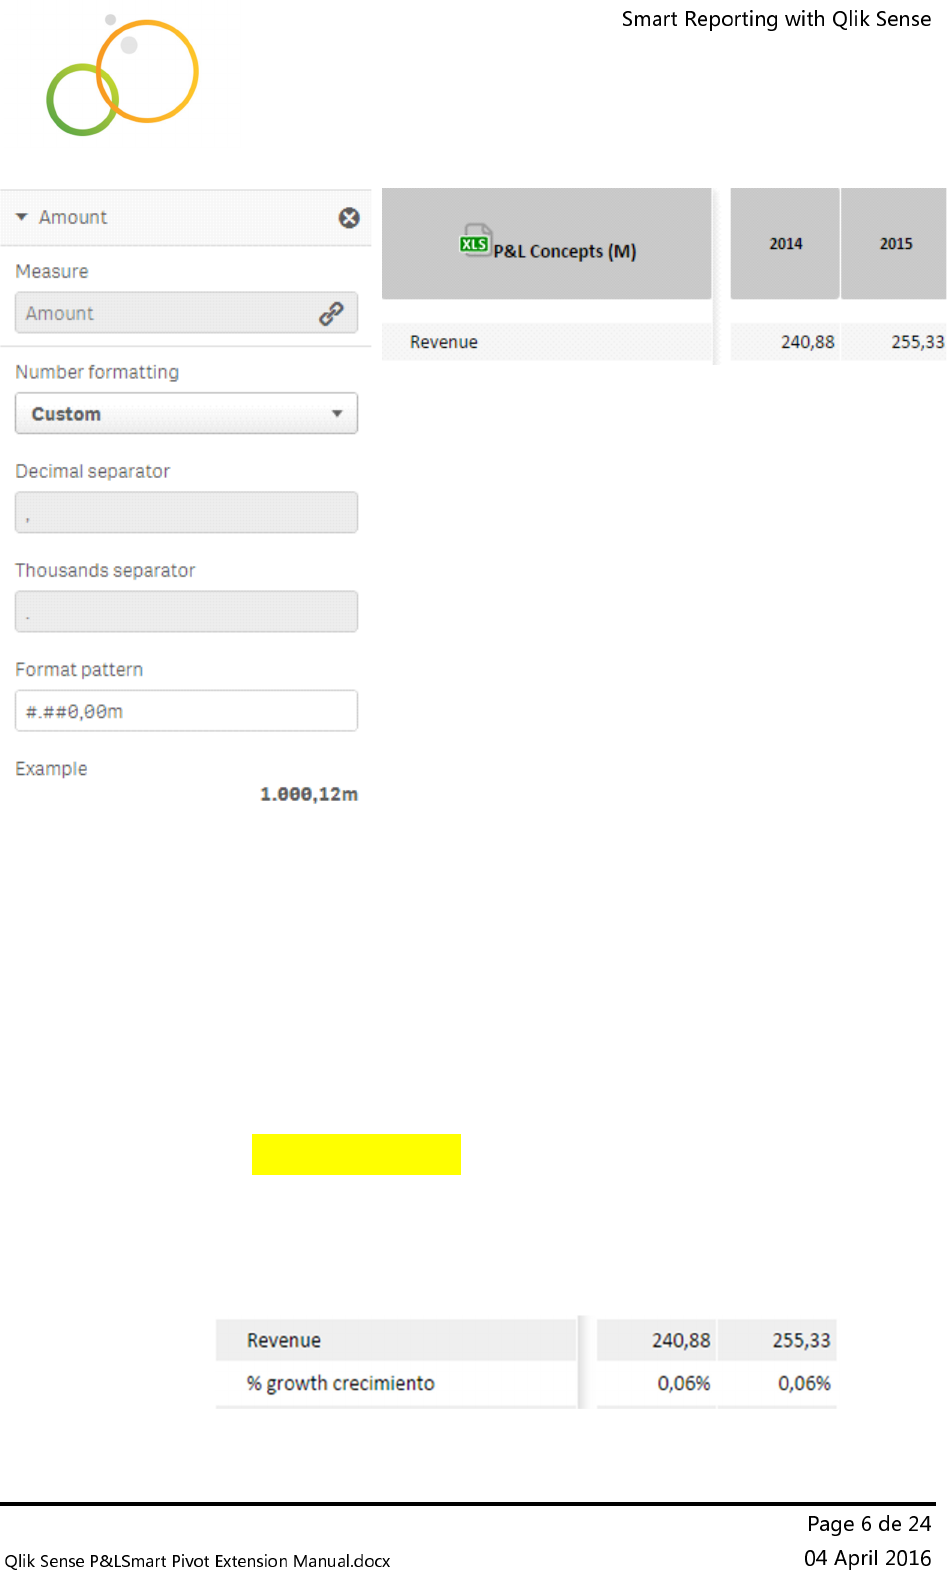
o Trick 1:
You can work with ‘k’ (amount in thousands)
and also you can work with ‘m’ (amount in millions)
For that you can use the number format ‘Custom’and
include one of those characters k/K/m/M at the end of the
custom format
User guide
o Trick 2:
If you work with ‘%’ number format the width of the cells
will be reduced.
If there are some Accounts that contain info in percentage
format, i.e. :
• Revenues 2.000.000 €
• % Cost 6%
• …
The number format of your measure will be automatically
adapted and change the amount format into %.
User guide
•
Sorting
o
Works as usual.
o
It’s highly recommended that you maintain a field for sorting use
when you need to create P&L reports.
•
Appearance
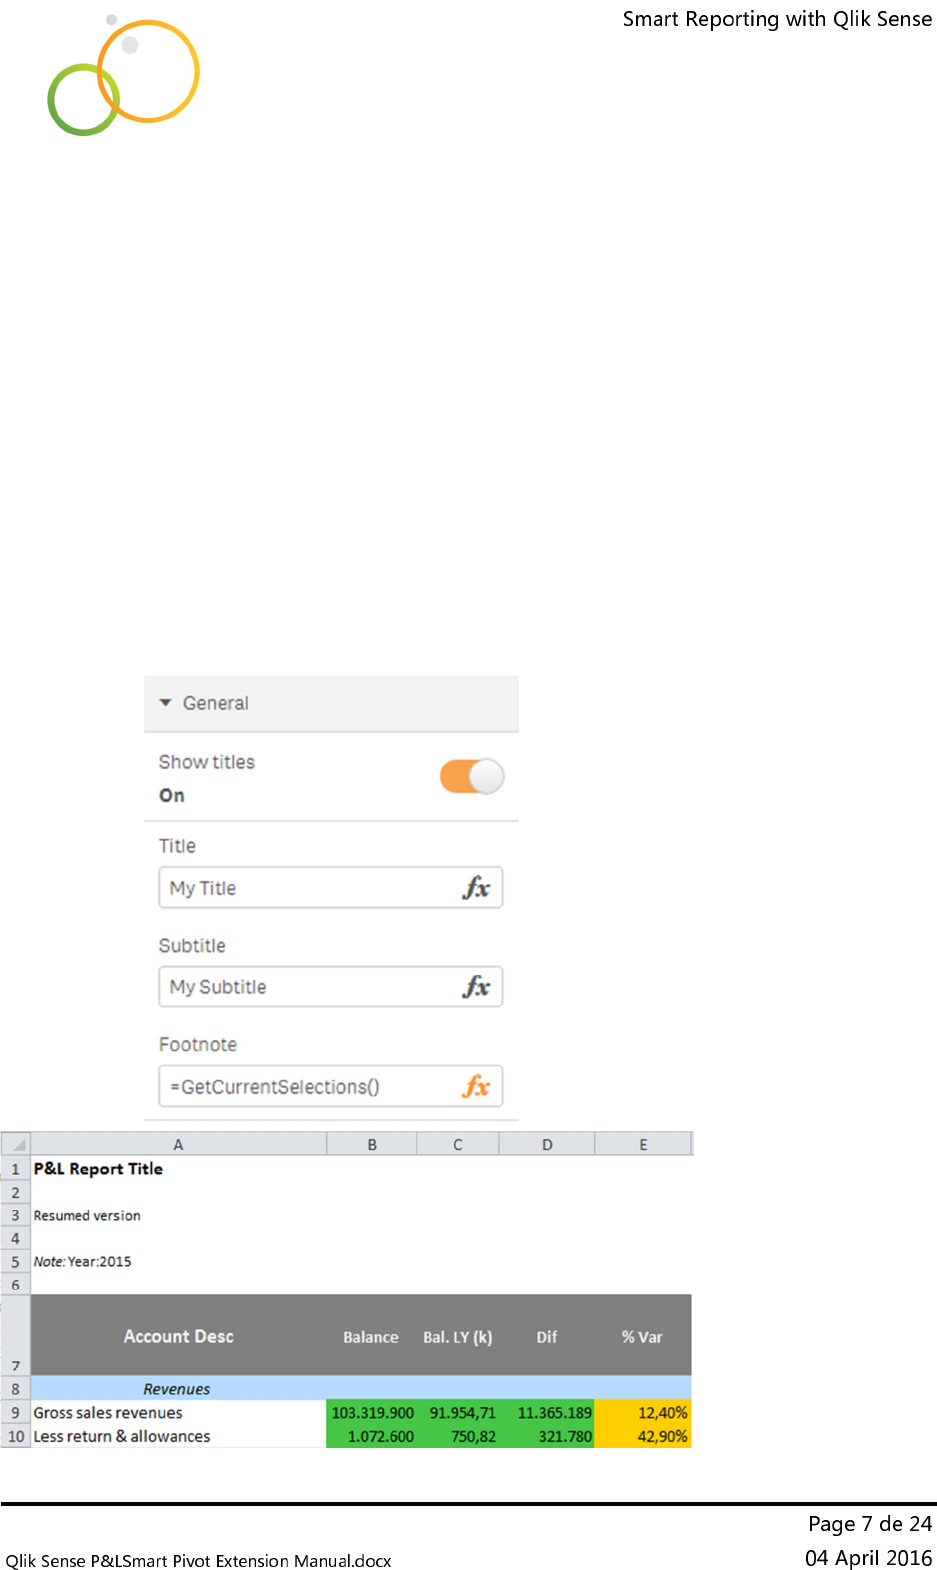
General
o
Works as usual.
o
It’s recommended that you fill the titles, as they will be exported
when you click on ‘export to xls’ button.
o
Suggestion: use the expression =GetCurrentSelections() to fill the
foot note.
User guide
•
Appearance
Pagination
o
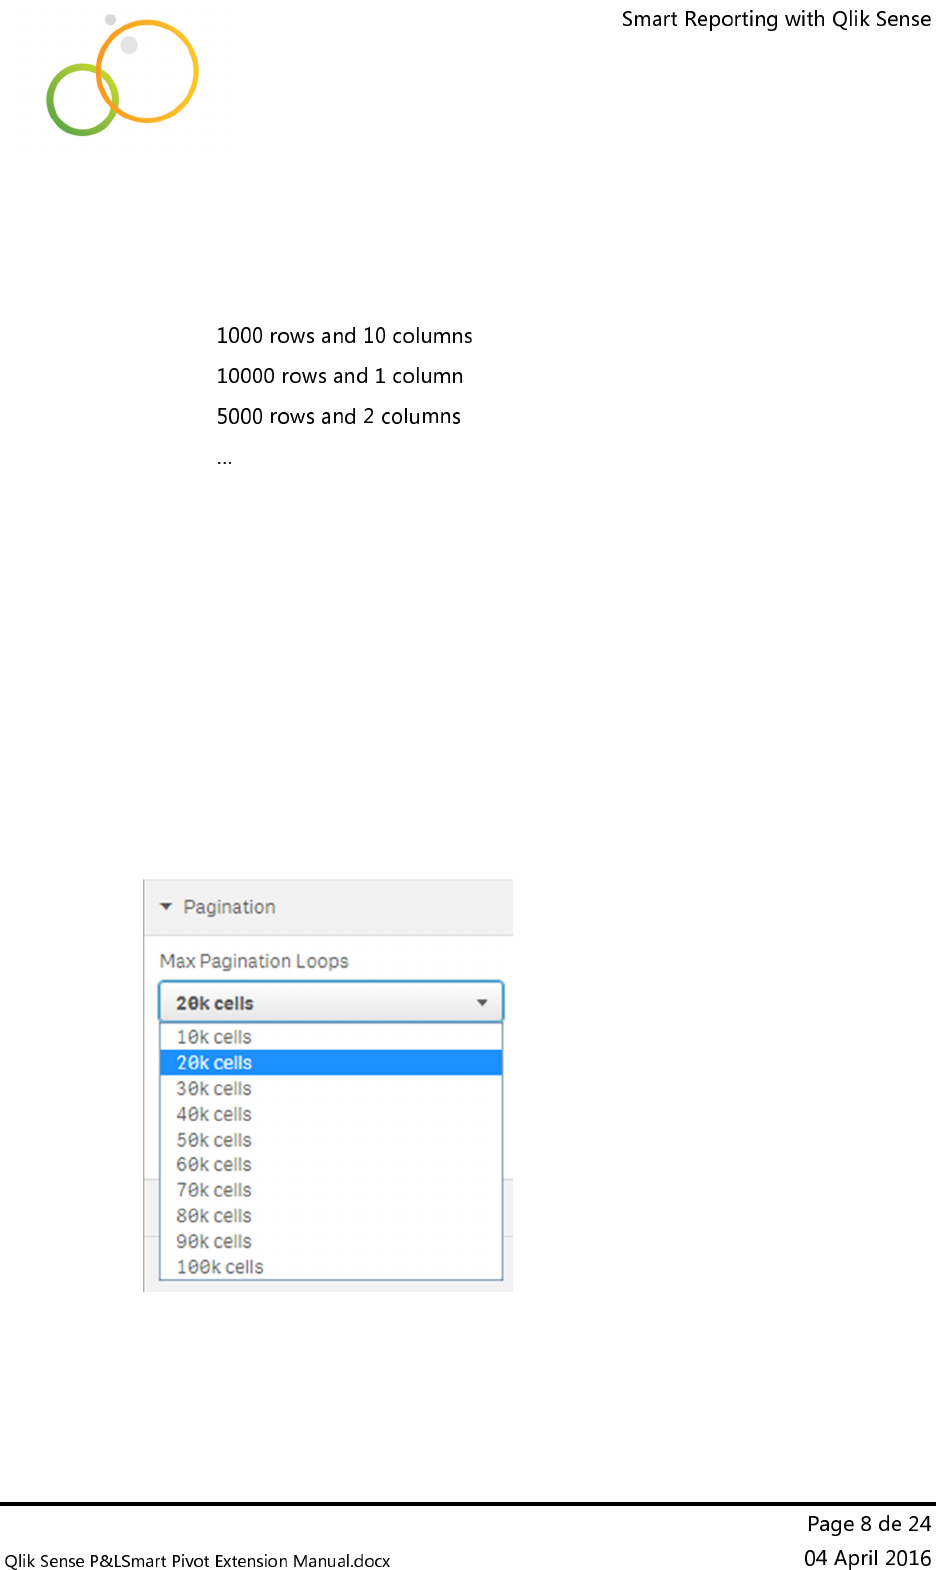
You must know… each data transfer between QIX engine and an
extension can contain a maximum of 10.000 elements, i.e:
o
It’s set to 10 columns and 1000 rows each loop.
o
Sometimes you may need to include more data into your report, in
that case the extension will make an automatic request for more
info. That’s what I mean for ‘Pagination’.
o
There is a real limit of 100.000 elements, it’s not possible to make
any request over this 100k cells.
o
In our case we pass 20k cells by default in each request for info (2
data request loops).
o
But if you want you can modify this limit, up to 100k cells.

User guide
o The user will get an error message when the data limit applied is
exceeded. You can modify the error message if needed.
User guide
•
Appearance
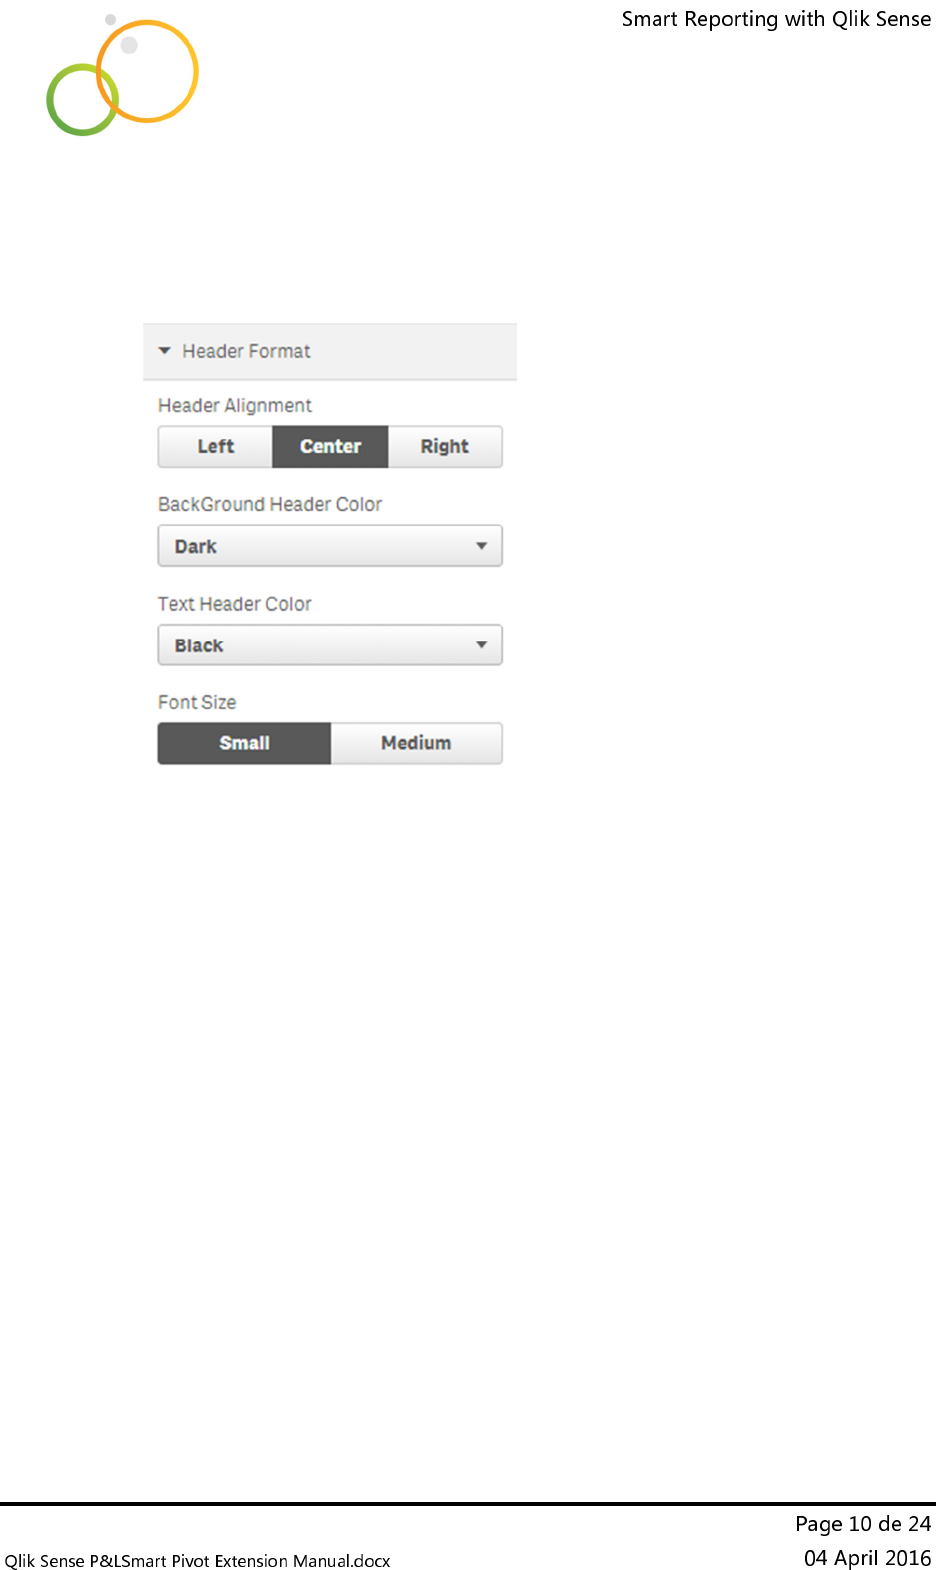
Header Format
o You can modify many features of the report header:
Alignment
• Left
• Center
• Right
Background color
• Clean
• Soft
• Dark
• Night
• Blue
• Orange
• Red

User guide
• Green
• Violete
• Custom
** All this color descriptions are associated to an hexadecimal color
code that you can modify through the menu ‘Primary Colors Library’
Text color
• Black
• DimGray
• ForestGreen
• Gainsboro
• Indigo
• Navy
• Purple
• WhiteSmoke
• Whie
• YellowGreen
** This text color descriptions are more than a simple description, this
names are valid html colors and cannot be modified.
FontSize
• Small (useful when using large measure descriptions)
• Medium
User guide
•
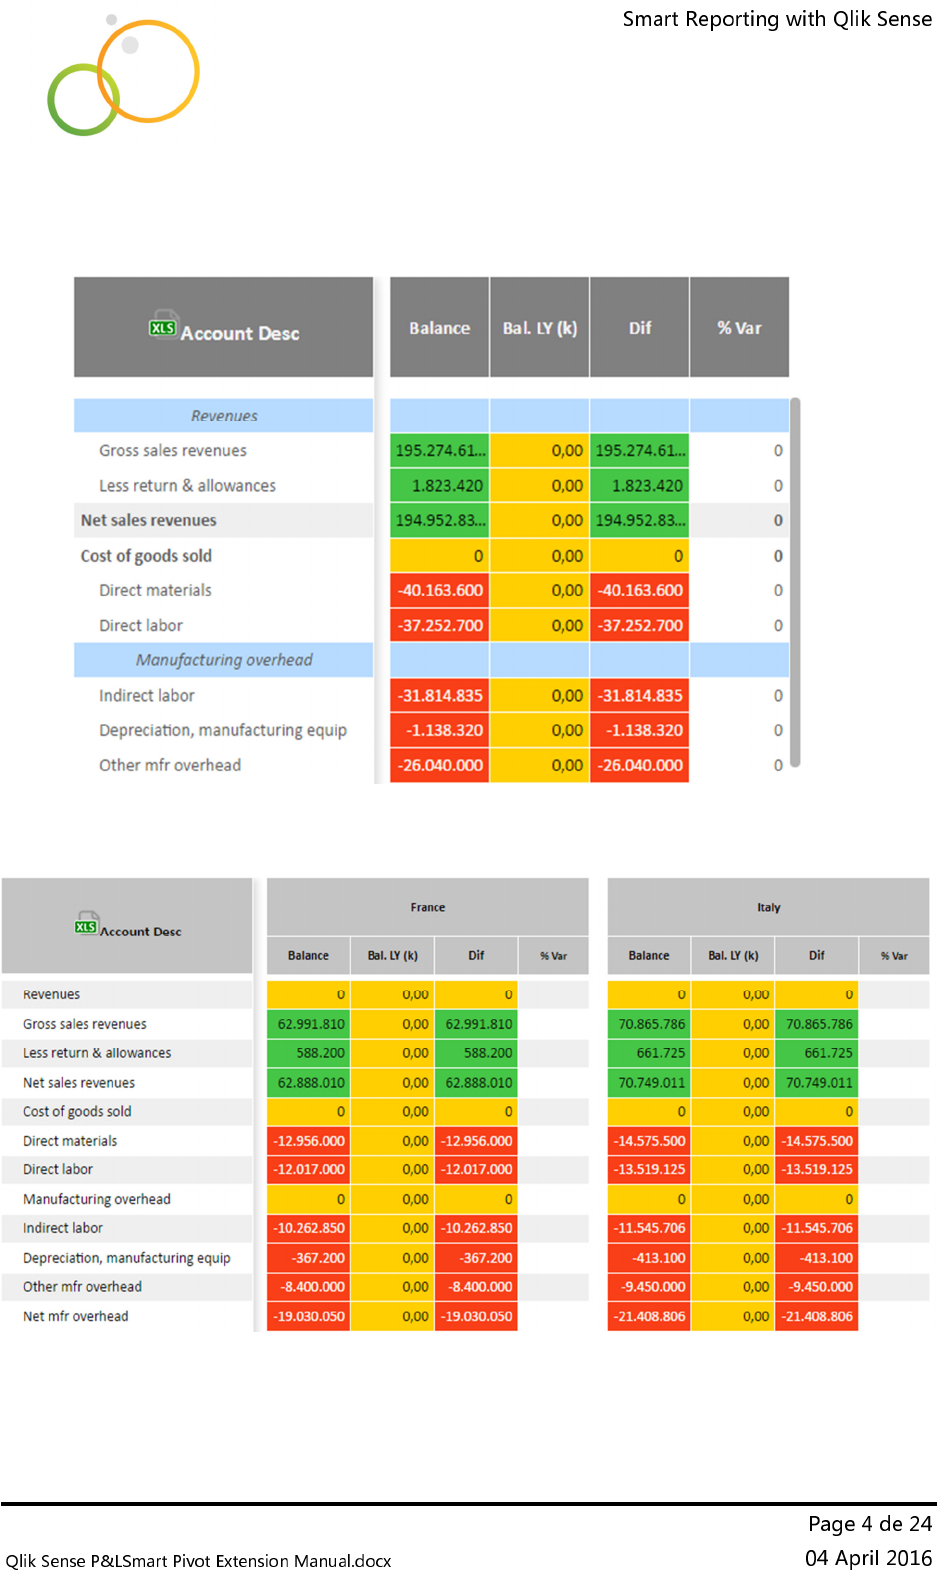
Appearance
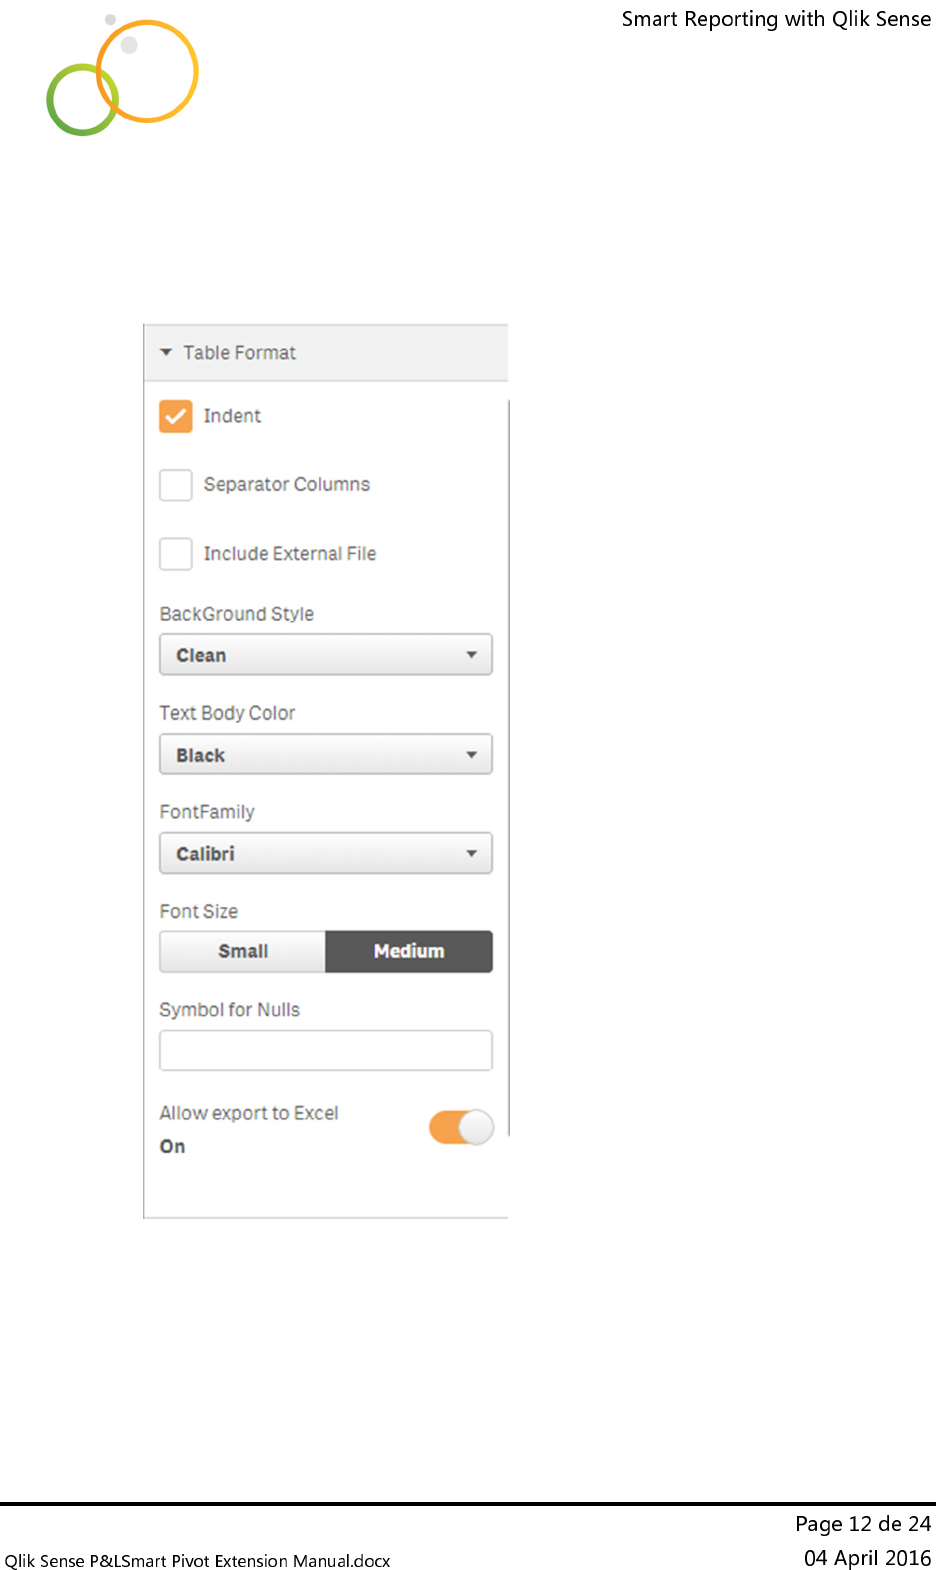
Table format
o These are main characteristics of your report.
o By default it’s set like:
User guide
o Features description:
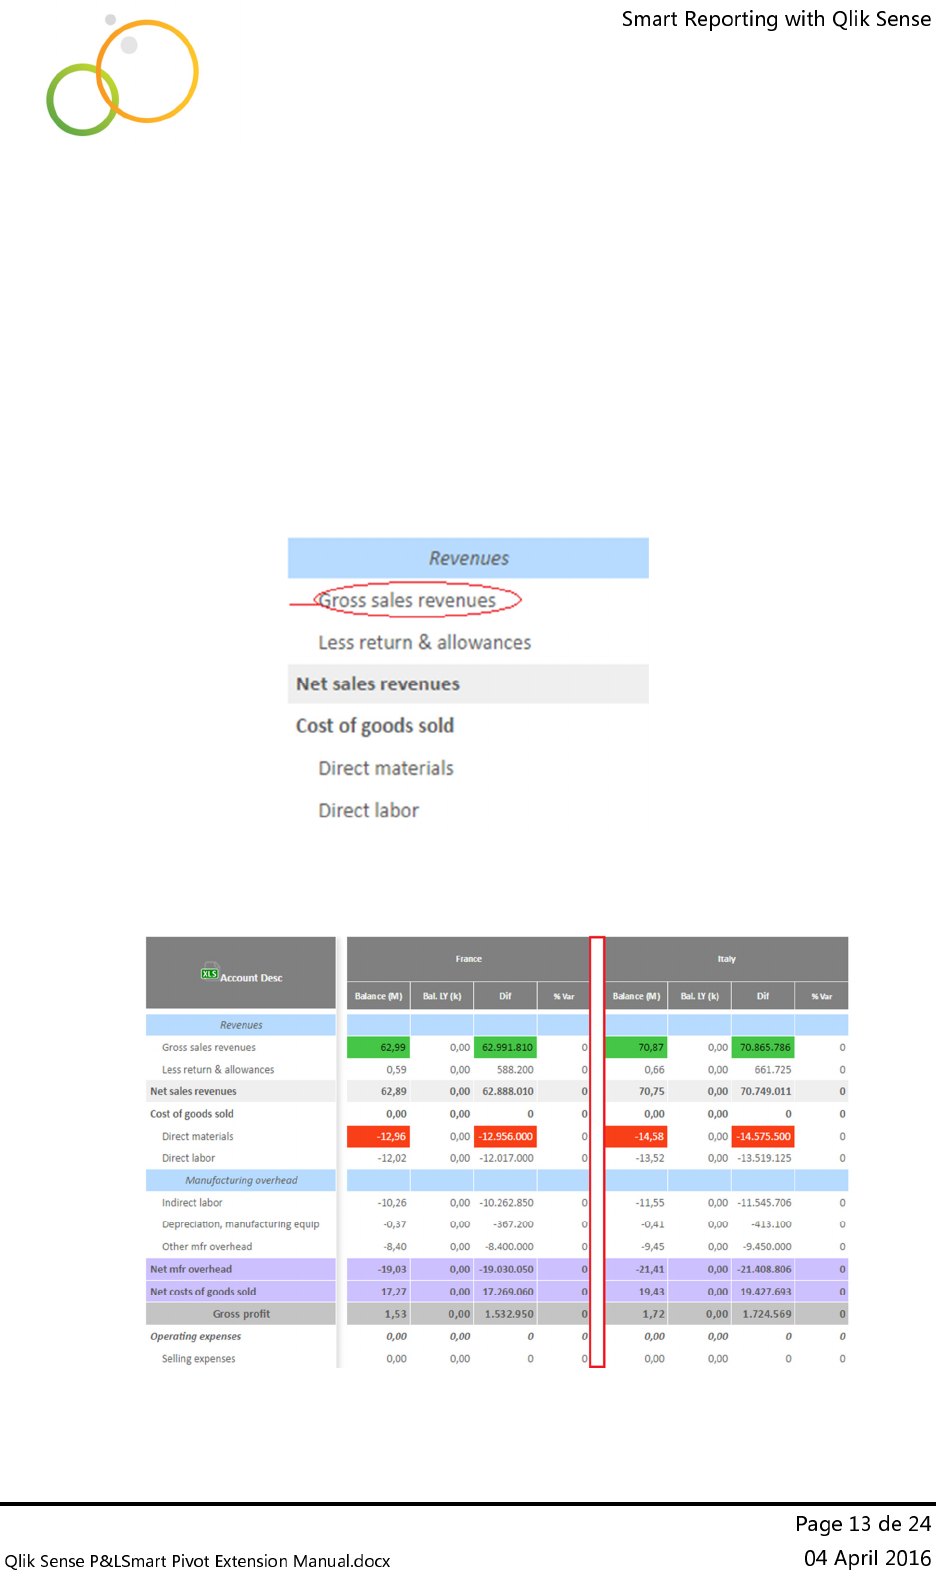
Indent
• When it’s active the elements of the first dimension
will be indented 15 pixels left.
• Note that the indent will affect only to the basic
accounts. I mean those elements from the first
dimension that does not contain any special format (not
bold, background color, italic,…). i.e:
Separator Columns
• It’s useful when you work with 2 dimensions. i.e.:
User guide
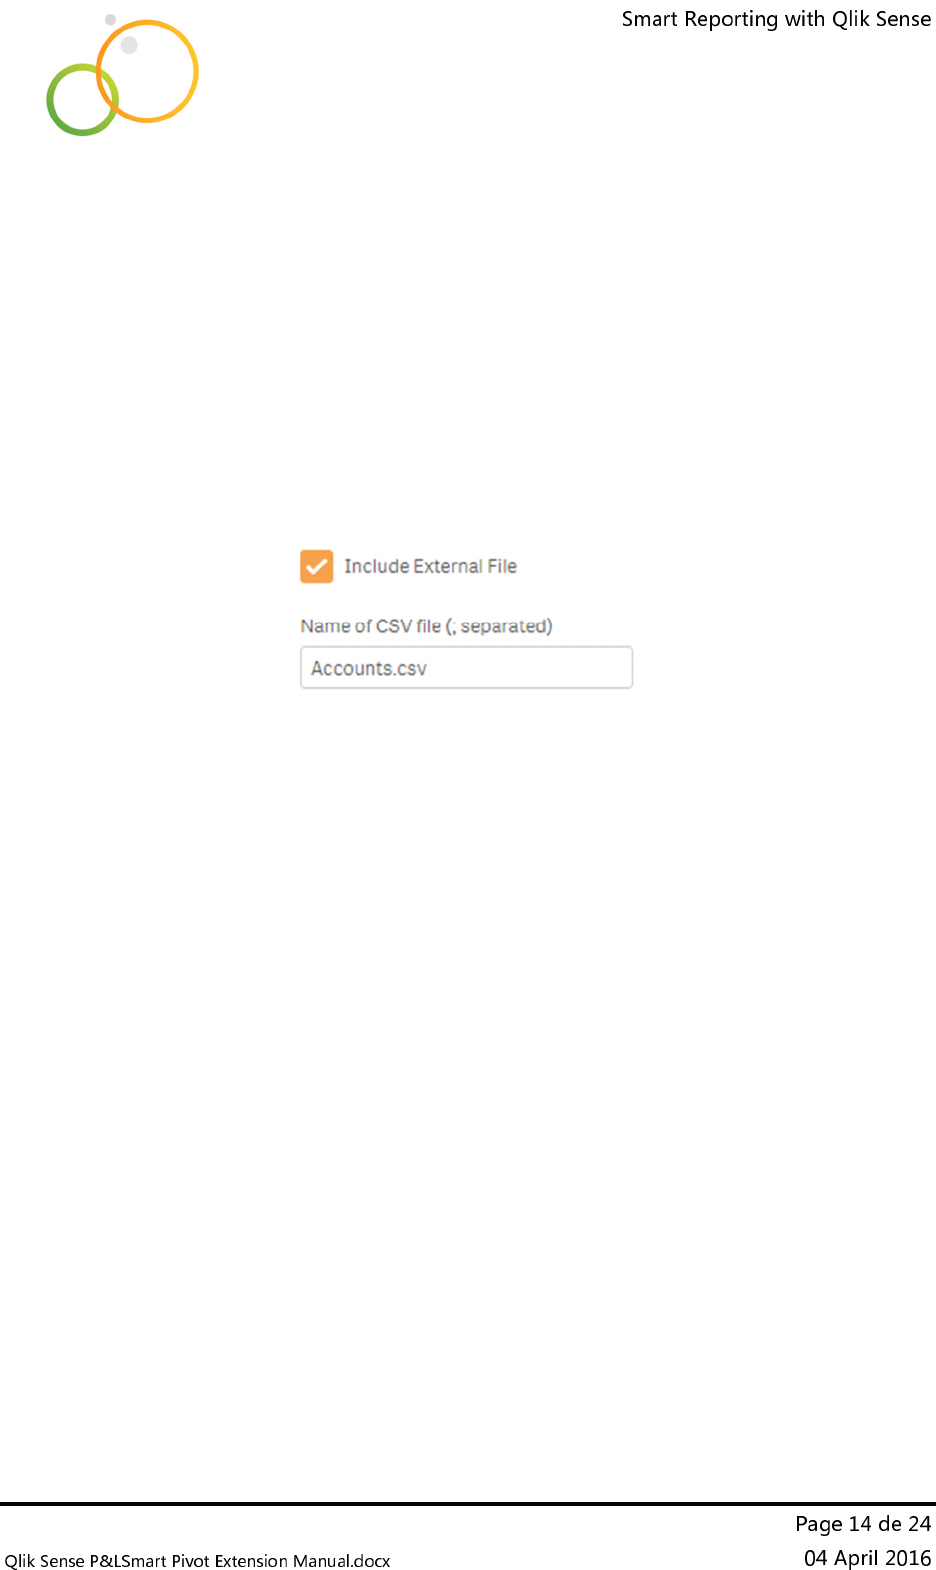
Include External File
• Check it if you want to apply a look&feel template.
• It will allow you to perform a report with high fidelity to
the corporate standards.
• When checked you’ll be prompted to include the
name of the template, which is an external file, and the
background color combo box will disappear, as they are
not compatible.
• About the external template:
- There are several instructions that you may know,
you’ll find them in the paragraph ‘External
Template’at the end of this manual.
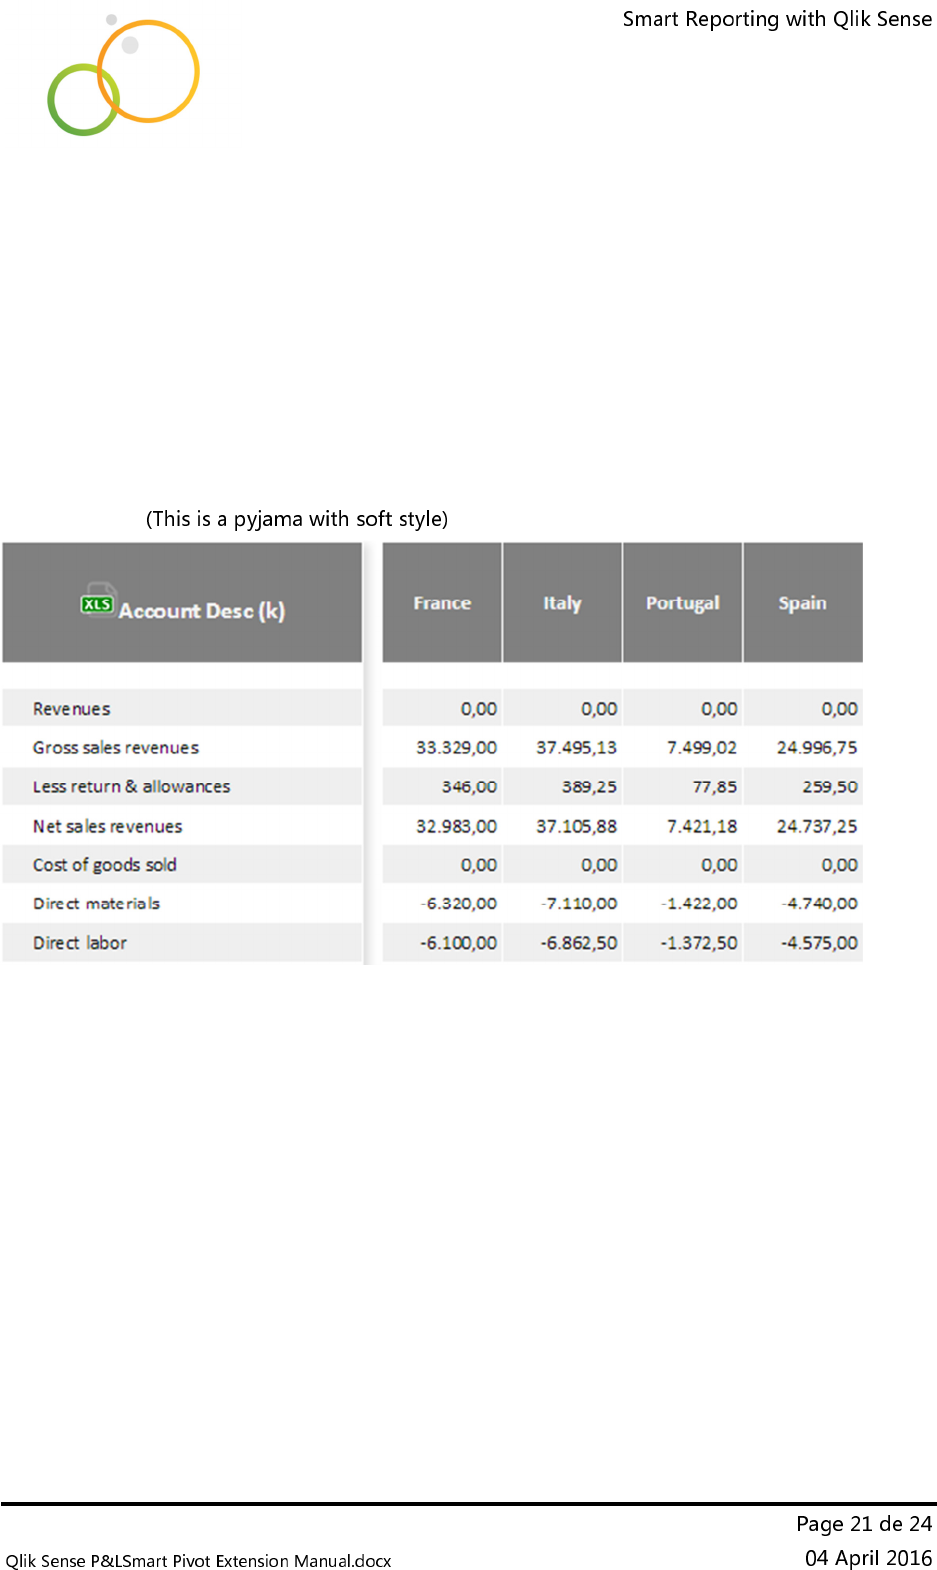
Background Style
• If you are not using an external template this option will
be available.
• There are some pyjamas predefined, with the same
options offered in the header color options:
- Clean, Soft, Dark, Night,…
- You can modify the color codes for the primary
color and the second pyjama color in the color
library options.
User guide
Text Body Color
• If you are not using an external template this option will
be available.
• There are some text color predefined, with the same
options offered in the header color options:
- Black, DimGray, ForestGreen,…
- You cannot modify this color code becasue the
description are valid html color codes.
Font Family
• There are some font family available, the font will affect
the body grid and the header:
- Arial
- Calibri (this is the one by default)
- Comic Sans MS
- MS Sans Serif
- Tahoma
- Verdana
Font Size
• It refers to the size font in the grid
• There are 2 options: small and medium
Column Width
• Use this option to modify the width of the KPI columns.
• It won’t affect the First dimension column
• You’ll find 3 options: small, medium and large
Symbol for Nulls
• You can chose any symbol or string to include in those
KPI cells with null values
User guide
Allow Export to Excel
• This is a general option, affects to everyone who use the
P&L.
• When active, you’ll be able to export to Excel
preserving the original format.
User guide
•
Appearance
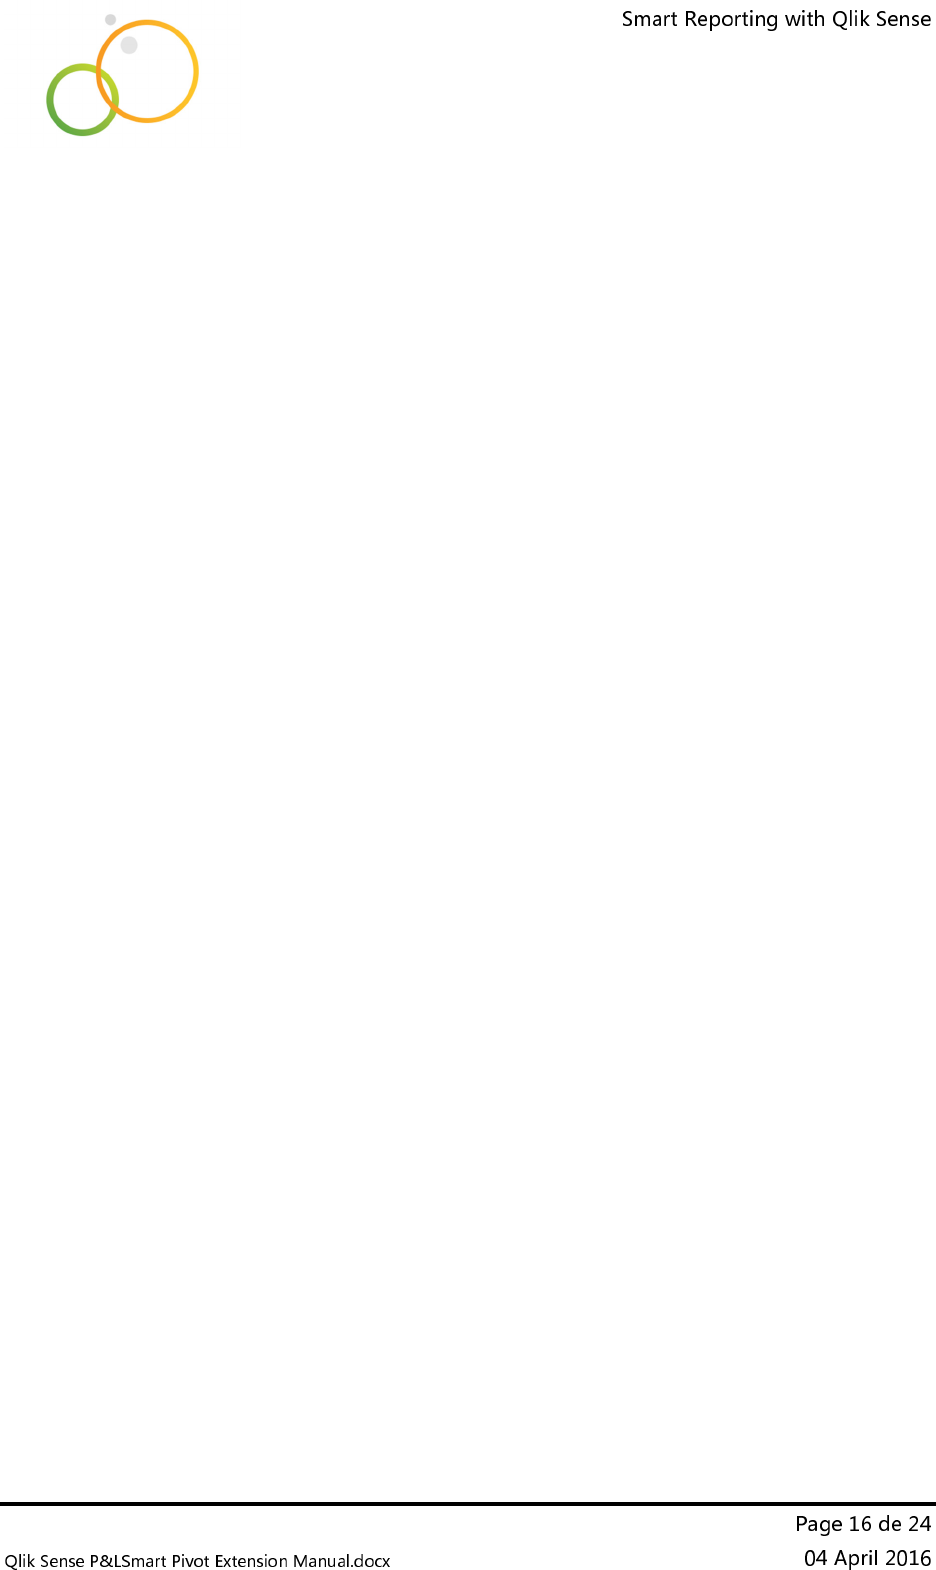
Concept Semaphores
o
By default it’s checked to allow alerts in all your concepts.
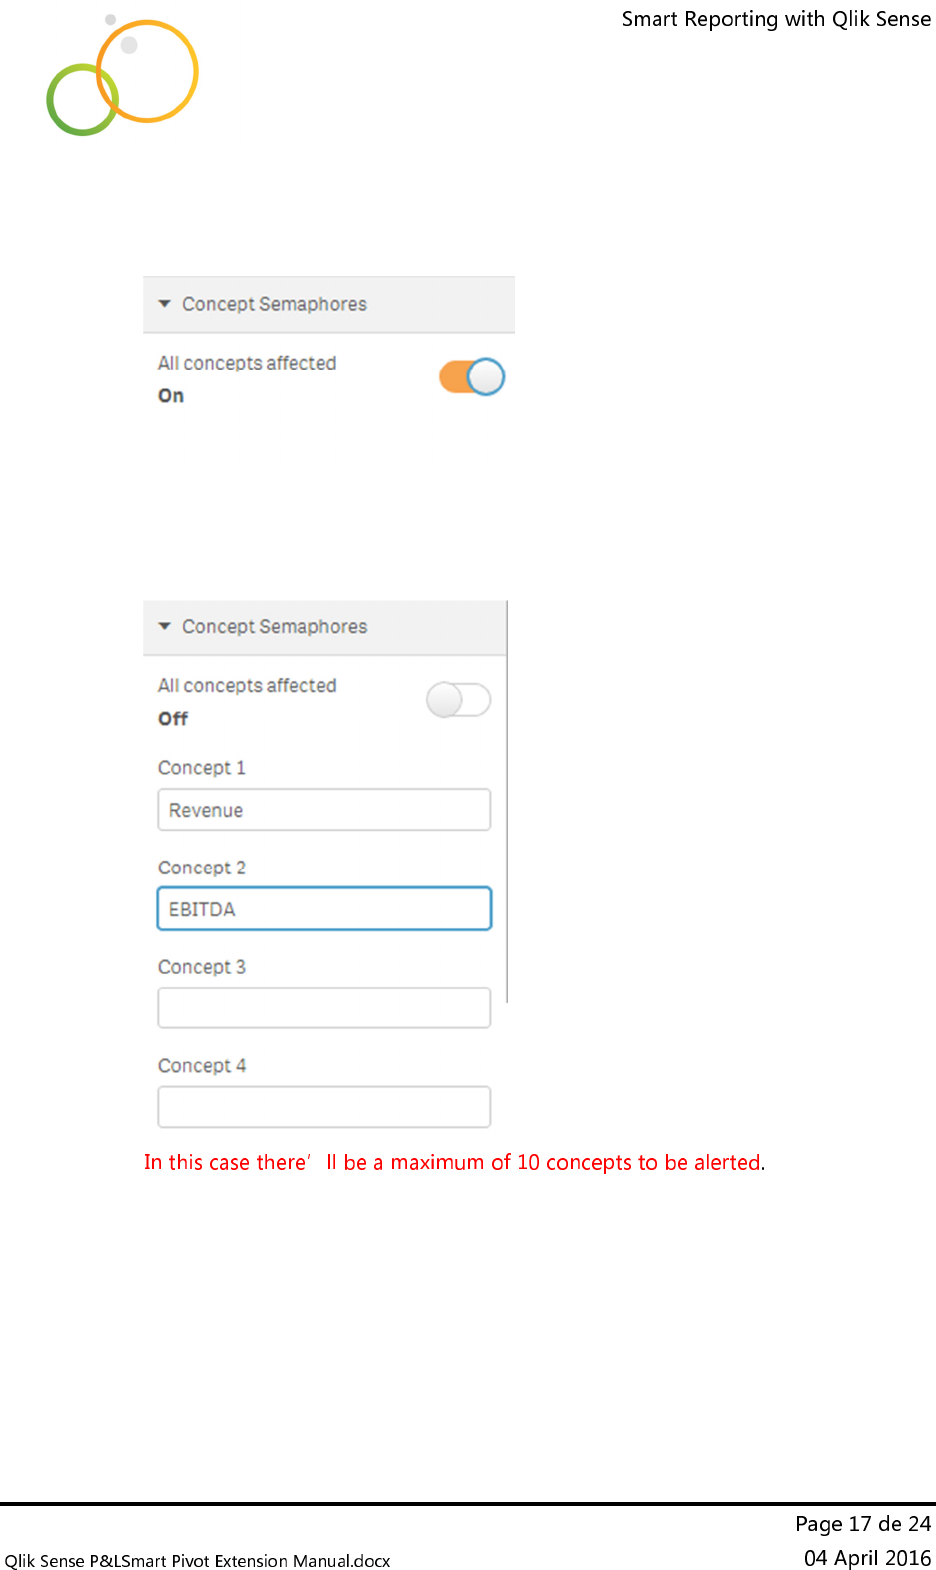
o
But you can allow to generate alerts only for some P&L Concepts,
uncheck the switch and write the name of the P&L Concepts that
you want to alert. i.e:
User guide
•
Appearance
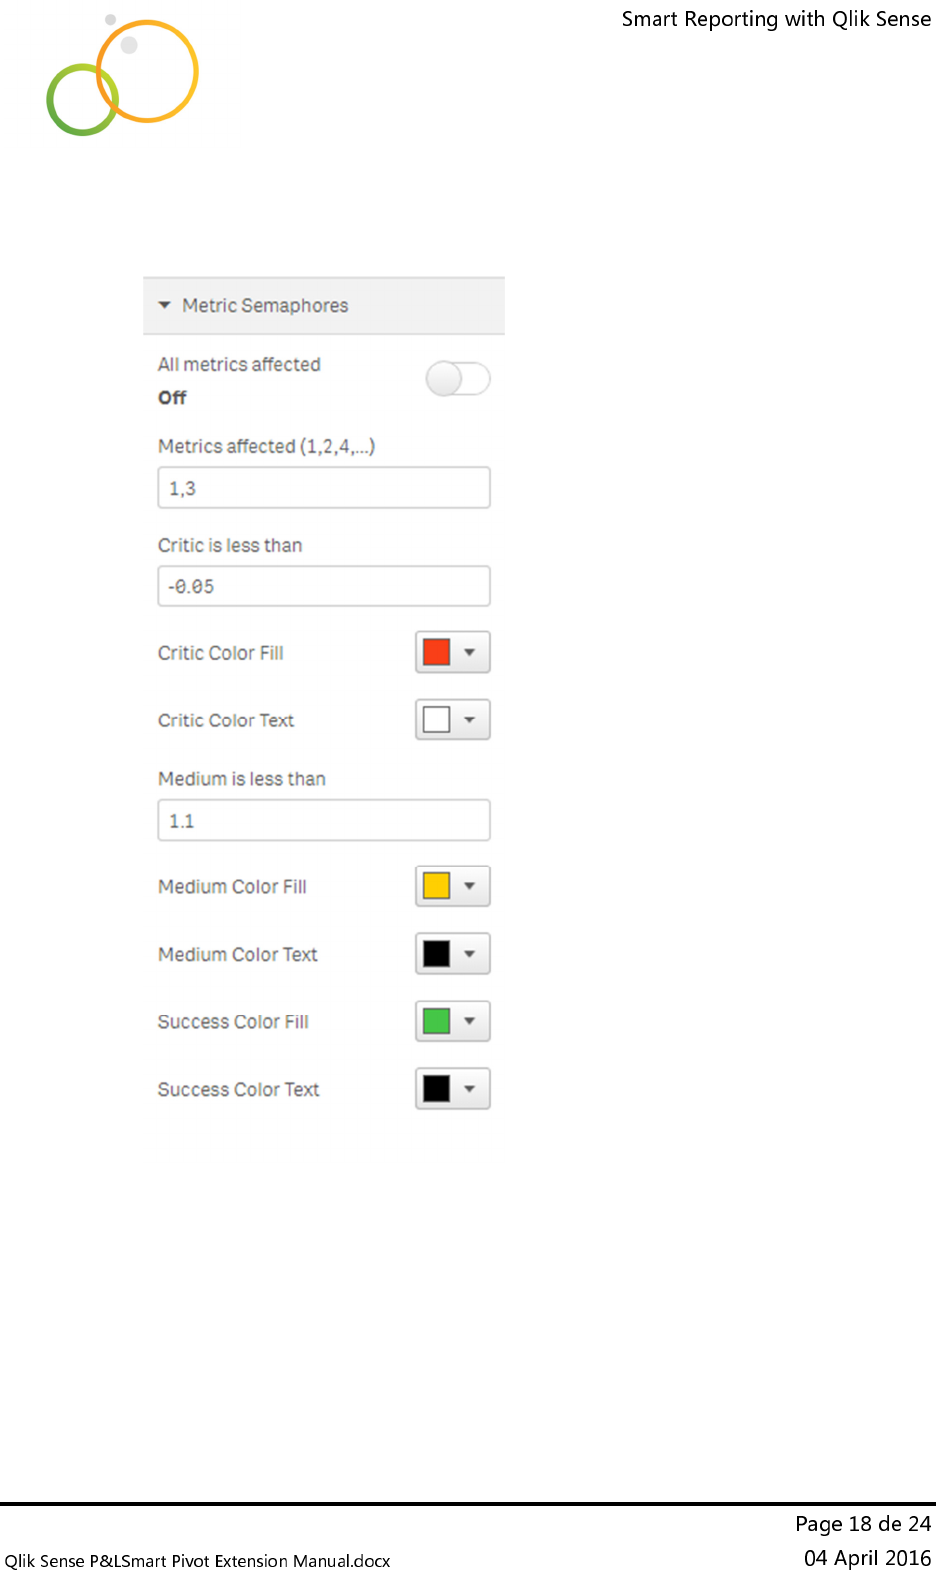
Metric Semaphores
o
By default it’s checked to avoid alerts in all your metrics.
o In this case it’s needed to indicate which metrics are being alerted,
in this case 1,3 (first and third metric)
User guide
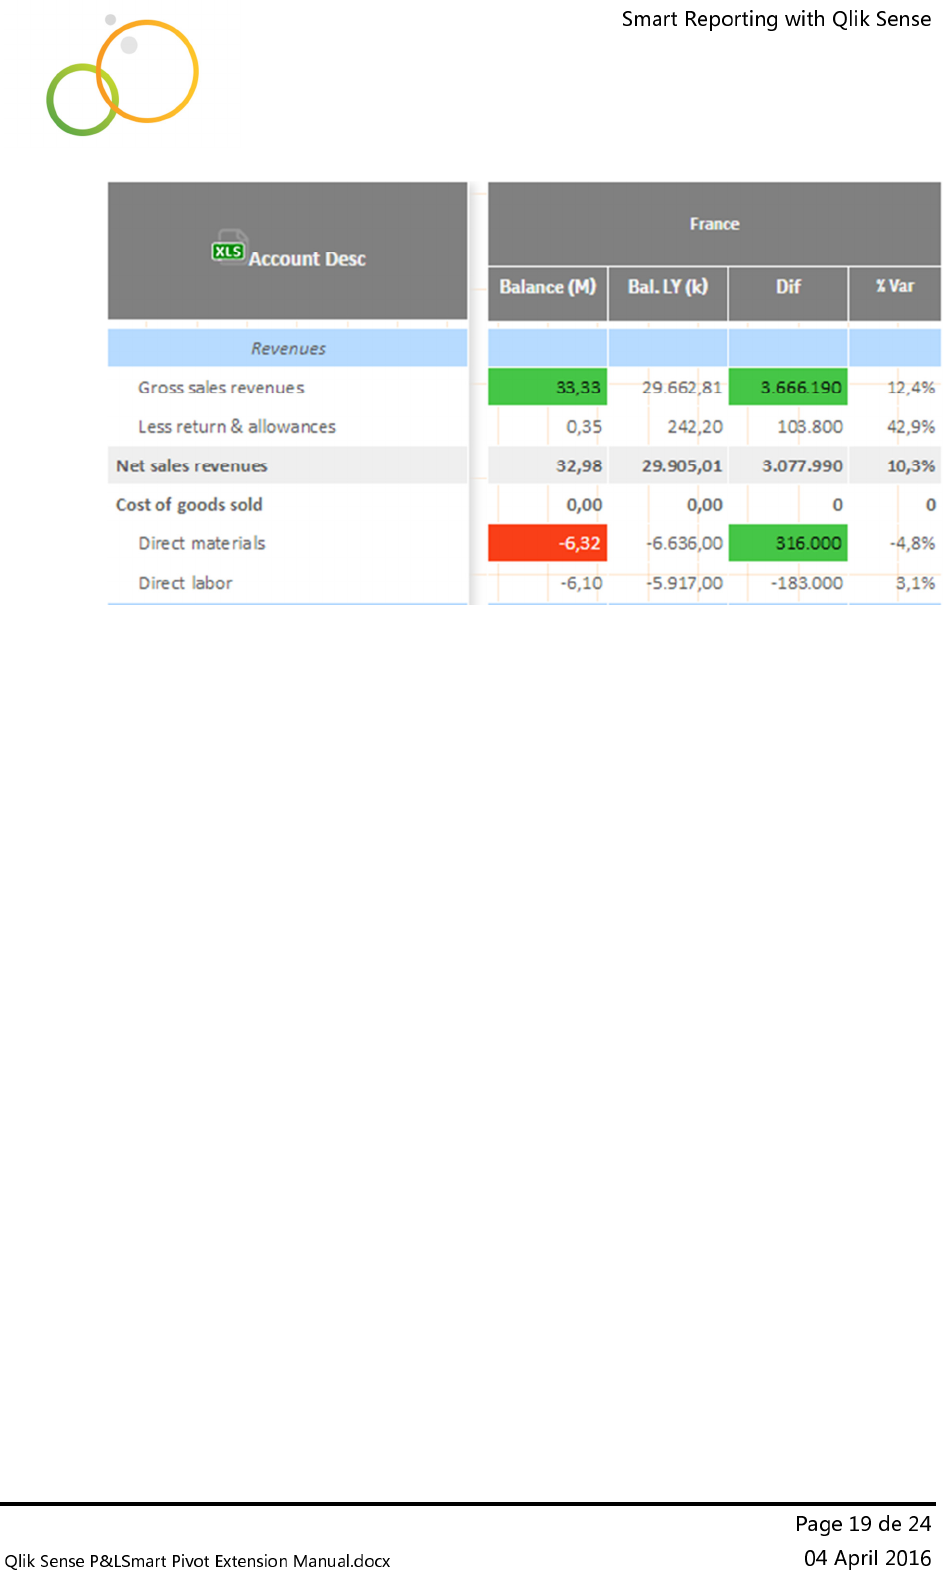
o You can choose the background color and text color inside the
color-picker object, and define 3 possible alert status, i.e.:
Critic is less than -0.1 (red)
Medium achievement is less than 0 (yellow)
And Success is over 0 (green)
User guide
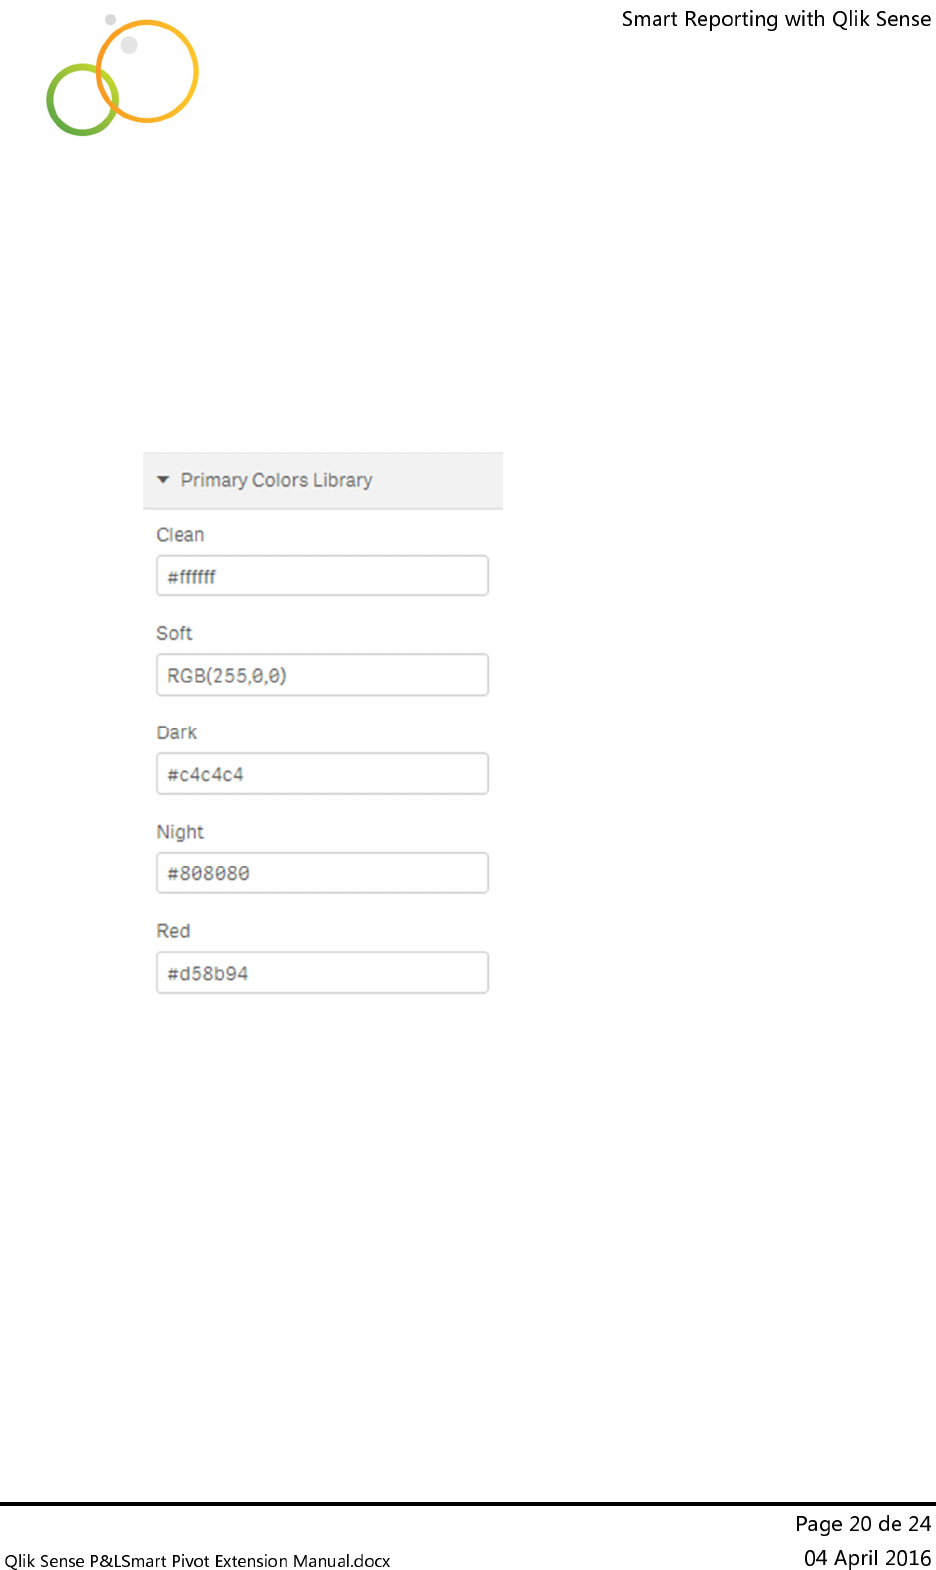
•
Appearance
Primary Color Library
o
Here you can modify the color codes you found previously in the
combo boxes.
o
And also this will affect the color names you may include in your
external look&feel template.
o
The new color codes must be defined in hexadecimal or RGB, i.e.:
User guide
•
Appearance
Pyjama Color Library
o
Here you can modify the color codes for the pyjamas.
o
By default the pyjamas styles join two colors, the second is the one
you can modify here.
o
Works the same way the primary colors library, you can modify the
color code with hexadecimal or RGB styles.
User guide
• External Template Use
o As mentioned previously, now you can work with an external
template to define your corporate look & feel.
o This will prevent the use of dimensions to define your special tags
(bold, italic, center,…)
o There are few considerations you may follow when creating the
template:
Allocate it in
C:\Users\user\Documents\Qlik\Sense\Extensions\PLSmartPivot
when working with Desktop
Allocate it in
C:\ProgramData\Qlik\Sense\Repository\Extensions\PLSmartPivot
when working with Server
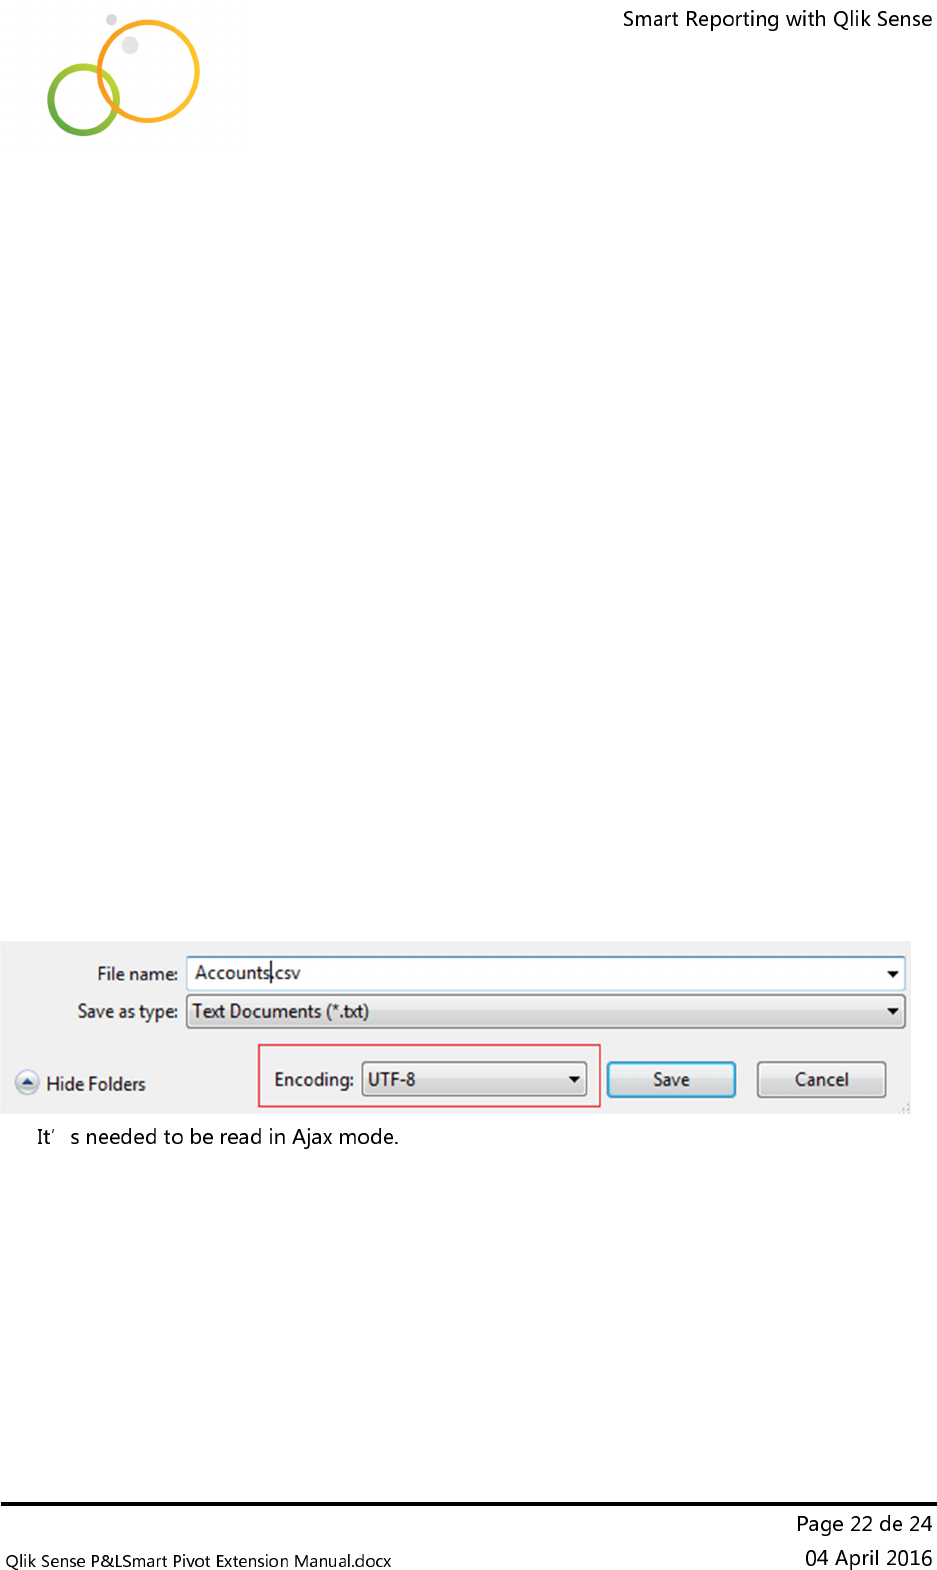
The template must be a .csv (; separated) file and must be
saved in UTF8 mode, i.e.:
•
open it with the notepad, fill it, when click on save as
choose Encoding = UTF-8:
User guide
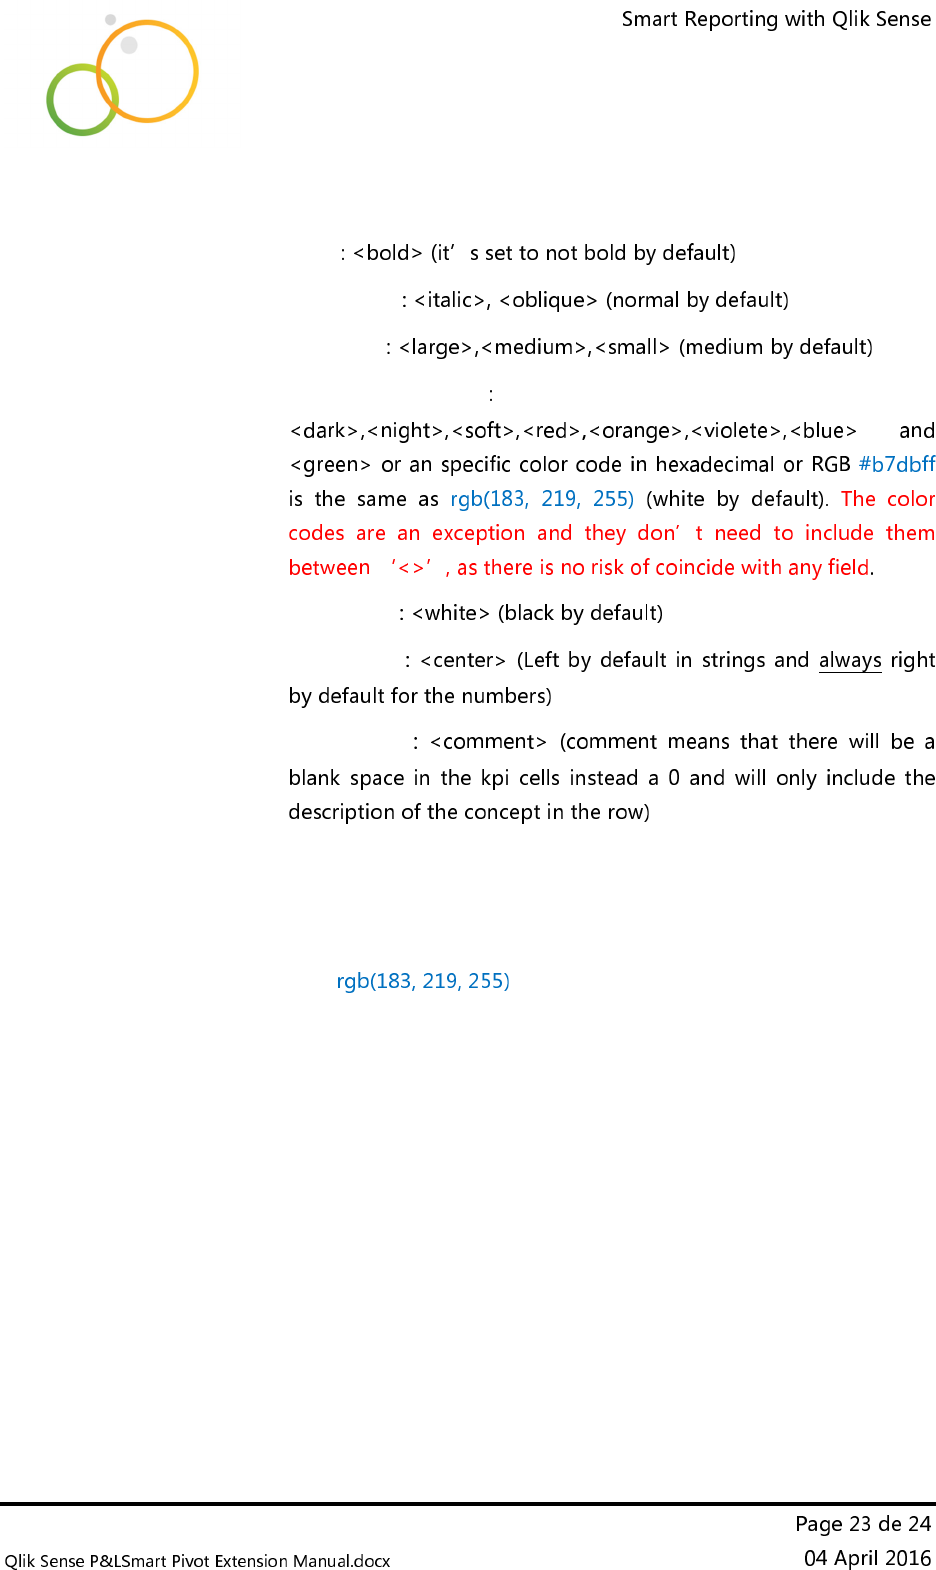
You can include different kind of tags between ‘<>’:
•
Bold
•
FontStyle
•
FontSize
•
BackgroundColor
•
TextColor
•
TextAlign
•
Comments
You don’t need to fill everything, only the concepts affected
and the special tags desired,i.e:
Revenues;; ;<italic>;;<center>;;<comment>
Net sales revenues;<bold>;<soft>;;;;;
Cost of goods sold;<bold>;;;;;;
Manufacturing Costs;;;;;;; no need to include this
Net Incomes;;#b7dbff;<italic>;;<center>;;<comment>
You’ll find two examples called Accounts.csv and
Accounts2.csv in the extension zip.
User guide
Field headers are not necessary in the csv template. So you
can include the custom tags wherever you want, i.e.:
• Revenues;<white>;<bold>;<night> is the same as
• Revenues;<bold>;<night>;<white>
You can have many CSV templates in the same extensions, no
limit detected.
It’s necessary to import the extension again in the server
each time you include a new CSV template file, but once it’s
imported you’ll be able to modify the CSV content on the fly
and then get the new look in your report immediately.
