Quick Apps For SharePoint Start Guide Version 6.5 Appsfor Share Point_6.9_Quick Point 6.9
User Manual: QuickAppsforSharePoint_6.9_QuickStartGuide
Open the PDF directly: View PDF ![]() .
.
Page Count: 18

QuickApps for SharePoint® 6.9
Quick Start Guide

© 2017 AgreeYa Solutions, Inc.
ALL RIGHTS RESERVED.
This guide contains proprietary information protected by copyright. The software described in this guide is furnished under a
software license or nondisclosure agreement. This software may be used or copied only in accordance with the terms of the
applicable agreement. No part of this guide may be reproduced or transmitted in any form or by any means, electronic or
mechanical, including photocopying and recording for any purpose other than the purchaser’s personal use without the written
permission of AgreeYa Solutions, Inc.
The information in this document is provided in connection with AgreeYa products. No license, express or implied, by estoppel
or
otherwise,
to any
intellectual
property right is
granted
by this
document
or in
connection
with the sale of AgreeYa
products.
EXCEPT AS SET FORTH IN THE TERMS AND CONDITIONS AS SPECIFIED IN THE LICENSE AGREEMENT FOR THIS PRODUCT, AGREEYA
ASSUMES NO LIABILITY WHATSOEVER AND DISCLAIMS ANY EXPRESS, IMPLIED OR STATUTORY WARRANTY RELATING TO ITS
PRODUCTS INCLUDING, BUT NOT LIMITED TO, THE IMPLIED WARRANTY OF MERCHANTABILITY, FITNESS FOR A PARTICULAR
PURPOSE, OR NON-INFRINGEMENT. IN NO EVENT SHALL AGREEYA BE LIABLE FOR ANY DIRECT, INDIRECT, CONSEQUENTIAL,
PUNITIVE, SPECIAL OR INCIDENTAL DAMAGES (INCLUDING, WITHOUT LIMITATION, DAMAGES FOR LOSS OF PROFITS, BUSINESS
INTERRUPTION OR LOSS OF INFORMATION) ARISING OUT OF THE USE OR INABILITY TO USE THIS DOCUMENT, EVEN IF AGREEYA
HAS BEEN ADVISED OF THE POSSIBILITY OF SUCH DAMAGES. AgreeYa makes no representations or warranties with respect to the
accuracy or completeness of the contents of this document and reserves the right to make changes to specifications and product
descriptions at any time without notice. AgreeYa does not make any commitment to update the information contained in this
document.
If you have any questions regarding your potential use of this material, contact:
AgreeYa Solutions, Inc.
605 Coolidge Dr.
Folsom, CA 95630
USA
Refer to our web site (www.agreeya.com.) for regional and international office information.
Trademarks
AgreeYa, the AgreeYa logo are trademarks of AgreeYa Solutions, Inc. and/or its affiliates. Microsoft, Internet Explorer,
SharePoint, Windows, Windows Server, SQL Server are either registered trademarks or trademarks of Microsoft Corporation in
the United States and/or other countries. Salesforce and Salesforce.com are trademarks of Salesforce.com. K2, K2BlackPearl
are registered trademarks of Sourcecode Technology Holdings Inc. in the United States and/or other countries. Domino is a
registered trademark of International Business Machines Corporation. Telerik is a registered trademark of Telerik AD in the
United States and either a registered trademark or trademark of Telerik AD in other countries. Oracle and Java are registered
trademarks of Oracle and/or its affiliates. Nintex and its product logos are registered trademarks owned by Nintex USA LLC and
Nintex Pty Ltd. SAP is the trademark(s) or registered trademark(s) of SAP AG in Germany and in several other countries. Google
and Google Chrome is a trademark or registered trademark of Google Inc. Netscape Navigator is a registered trademark of AOL
Inc. Other trademarks and trade names may be used in this document to refer to either the entities claiming the marks and names
or their products. AgreeYa disclaims any proprietary interest in the marks and names of others.
QuickApps for SharePoint Quick Start Guide
Updated - October 2017
Software Version - 6.9
Legend
CAUTION: A CAUTION icon indicates potential damage to hardware or loss of data if instructions are not followed.
WARNING: A WARNING icon indicates a potential for property damage, personal injury, or death.
IMPORTANT NOTE, NOTE, TIP, MOBILE, or VIDEO: An information icon indicates supporting information.

Contents
QuickApps for SharePoint® 6.9
Quick Start Guide 3
About this Guide . . . . . . . . . . . . . . . . . . . . . . . . . . . . . . . . . . . . . . . . . . . . . . . . 4
Introducing QuickApps for SharePoint . . . . . . . . . . . . . . . . . . . . . . . . . . . . . . . . . . . 4
Setting Up QuickApps for SharePoint . . . . . . . . . . . . . . . . . . . . . . . . . . . . . . . . . . . . 5
Downloading QuickApps for SharePoint . . . . . . . . . . . . . . . . . . . . . . . . . . . . . . . 5
Meeting System Requirements . . . . . . . . . . . . . . . . . . . . . . . . . . . . . . . . . . . . . 5
Installing QuickApps for SharePoint . . . . . . . . . . . . . . . . . . . . . . . . . . . . . . . . . . 6
Licensing QuickApps for SharePoint . . . . . . . . . . . . . . . . . . . . . . . . . . . . . . . . . . 7
Deploying QuickApps for SharePoint . . . . . . . . . . . . . . . . . . . . . . . . . . . . . . . . . 8
Managing Web Parts . . . . . . . . . . . . . . . . . . . . . . . . . . . . . . . . . . . . . . . . . . . . 9
Editing Web Configuration File . . . . . . . . . . . . . . . . . . . . . . . . . . . . . . . . . . . . .10
Uninstalling QuickApps for SharePoint . . . . . . . . . . . . . . . . . . . . . . . . . . . . . . . .11
Optional Tasks . . . . . . . . . . . . . . . . . . . . . . . . . . . . . . . . . . . . . . . . . . . . . . . . . .11
Upgrading from a Previous Version . . . . . . . . . . . . . . . . . . . . . . . . . . . . . . . . . .11
Upgrading Custom Skins . . . . . . . . . . . . . . . . . . . . . . . . . . . . . . . . . . . . . . . . .12
Deploying QuickApps for SharePoint on SharePoint 2013 using SharePoint 2010 Experience
13
Viewing Log Files . . . . . . . . . . . . . . . . . . . . . . . . . . . . . . . . . . . . . . . . . . . . . .13
Step-by-Step Walkthroughs . . . . . . . . . . . . . . . . . . . . . . . . . . . . . . . . . . . . . . . . . .13
Creating your first SharePoint application . . . . . . . . . . . . . . . . . . . . . . . . . . . . .14
Configuring Multi-List Rollup in qListView . . . . . . . . . . . . . . . . . . . . . . . . . . . . . .14
Configuring Multi-List Rollup in qChartView . . . . . . . . . . . . . . . . . . . . . . . . . . . .15
Aggregating Sales Data in qListView . . . . . . . . . . . . . . . . . . . . . . . . . . . . . . . . .15
About AgreeYa . . . . . . . . . . . . . . . . . . . . . . . . . . . . . . . . . . . . . . . . . . . . . . . . . 17
Contacting AgreeYa . . . . . . . . . . . . . . . . . . . . . . . . . . . . . . . . . . . . . . . . . . . . . . .17
Technical support resources . . . . . . . . . . . . . . . . . . . . . . . . . . . . . . . . . . . . . . . . .17
Third-party contributions . . . . . . . . . . . . . . . . . . . . . . . . . . . . . . . . . . . . . . . . . . .18

QuickApps for SharePoint® 6.9
Quick Start Guide
1
4
www.agreeya.com
About this Guide
This Quick Start Guide allows you to install and configure QuickApps for SharePoint® for basic operation. For
detailed information required to use QuickApps for SharePoint in a commercial environment, see QuickApps for
SharePoint User Guide.
The Quick Start Guide is intended for network administrators, consultants, analysts, and any other IT
professionals who use the product.
Introducing QuickApps for SharePoint
QuickApps for SharePoint is deployed as a SharePoint Solution. The benefit of the solution package deployment
is the ability to deploy QuickApps for SharePoint in selected Web Applications using the SharePoint Central
Administration site. When a new site collection is created, the Admin or Site Designer can activate the
QuickApps for SharePoint - Web Parts Feature Library to enable the web parts for newly added site collections.
This product allows you to:
•use point-and-click configuration instead of custom code to customize SharePoint solutions up to 80
percent faster
•meet your most complex business requirements, from interface enhancements to complete solutions,
without needing custom development training or experience
•use My First App to configure compelling SharePoint list views and charts in a few simple mouse clicks
•quickly build better SharePoint solutions with easy-to-use web parts featuring built-in video training and
tutorials. Discover best practices and tips and tricks from SharePoint peers and AgreeYa experts in the
collaborative QuickApps community at http://www.quickapps.agreeya/support.
•maximize your SharePoint investment by accelerating SharePoint development cycles in order to save
resources, time and money on costly enhancements
•empower end users to make their own customizations without risk to the environment, freeing expensive
development resources for more value-added projects
•accelerate SharePoint application development cycles using ready-made templates to deliver help desk,
project management and CRM applications that are easily supported, maintained, and extended
•build applications that you can easily maintain and support with no custom coding
•exceed user expectations and extend applications beyond what’s natively possible with features that
deliver tabular forms to save screen space, dynamically show and hide parts of a form, and establish
parent-child relationships to ensure reliable data entry
•deliver sophisticated custom solutions that can be upgraded with ease from SharePoint version to version
•bring data together from all of your enterprise application systems, such as Oracle®, SAP®, SQL Server®
and Salesforce.com®, without the hassle of copying the data manually into SharePoint
•build dashboards and charts that provide full visibility of your K2® workflows (including real-time
workflow) status. Then build rich SharePoint forms that drive business processes, so users can take
action on K2 workflows from directly within the SharePoint form (for SharePoint 2010 only)
•create custom actions with out-of-the-box and Nintex® workflows
QuickApps for SharePoint® 6.9
Quick Start Guide 5
www.agreeya.com
Setting Up QuickApps for SharePoint
To set up QuickApps for SharePoint, you must do the following:
1Downloading QuickApps for SharePoint
2Meeting System Requirements
3Installing QuickApps for SharePoint
4Licensing QuickApps for SharePoint
5Deploying QuickApps for SharePoint
6Managing Web Parts
7Editing Web Configuration File
8Uninstalling QuickApps for SharePoint.
You can also perform other tasks such as the following:
•Upgrading from a Previous Version
•Upgrading Custom Skins
•Deploying QuickApps for SharePoint on SharePoint 2013 using SharePoint 2010 Experience
•Viewing Log Files
Downloading QuickApps for SharePoint
To download QuickApps for SharePoint
1Go to http://quickapps.agreeya.com/support.
2 You can buy online or download a free trial.
Meeting System Requirements
To install QuickApps for SharePoint, you must meet the following minimum system requirements:
Table 1. Minimum System Requirements
Feature Requirement
Rights and
permissions
Administrator rights on the SharePoint server during installation.
NOTE: Ensure that you log in as a domain user that has permissions to write to the SharePoint
configuration and content databases in the SQL Server
Software and
Hardware
The same requirements as those needed to run SharePoint.
NOTE: For hardware and software requirements for SharePoint 2010, see
http://technet.microsoft.com/en-us/library/cc262485(v=office.14).aspx. For hardware and
software requirements for SharePoint 2013, see http://technet.microsoft.com/en-
us/library/cc262485(office.15).aspx. For hardware and software requirements for SharePoint
2016, see http://technet.microsoft.com/en-us/library/cc262485(office.16).aspx.
Browser Although administrative tasks on SharePoint sites are optimized for Internet Explorer 8 or
later, Office SharePoint Server also provides rendering support for other browsers that are
commonly used. To ensure that you have complete access to all the functionality, we
recommend that you use Internet Explorer 8 or later for administrative tasks.
QuickApps for SharePoint® 6.9
Quick Start Guide 6
www.agreeya.com
Installing QuickApps for SharePoint
Install QuickApps for SharePoint on one web front end server. Do not install the product on more than one server
in the farm.If you want to run the Configuration Editor on multiple servers, you must manually copy and paste
the ConfigurationEditor.exe and its related files from the server on which it was installed to your other servers.
The installer adds the QuickApps for SharePoint solution package file to the SharePoint store.
In some Operating Systems, the User Account Control (UAC) prevents the downloading of the install package. If
this is the case, run Setup.exe instead of launching the .MSI directly. In the case that the Setup.exe does not
work, run Setup.msi instead.
To install QuickApps for SharePoint
1 Double-click QuickApps for SharePoint.exe file, and extract the files.
The Autorun opens.
2 Select the Install button next to the version of QuickApps for SharePoint you are installing.
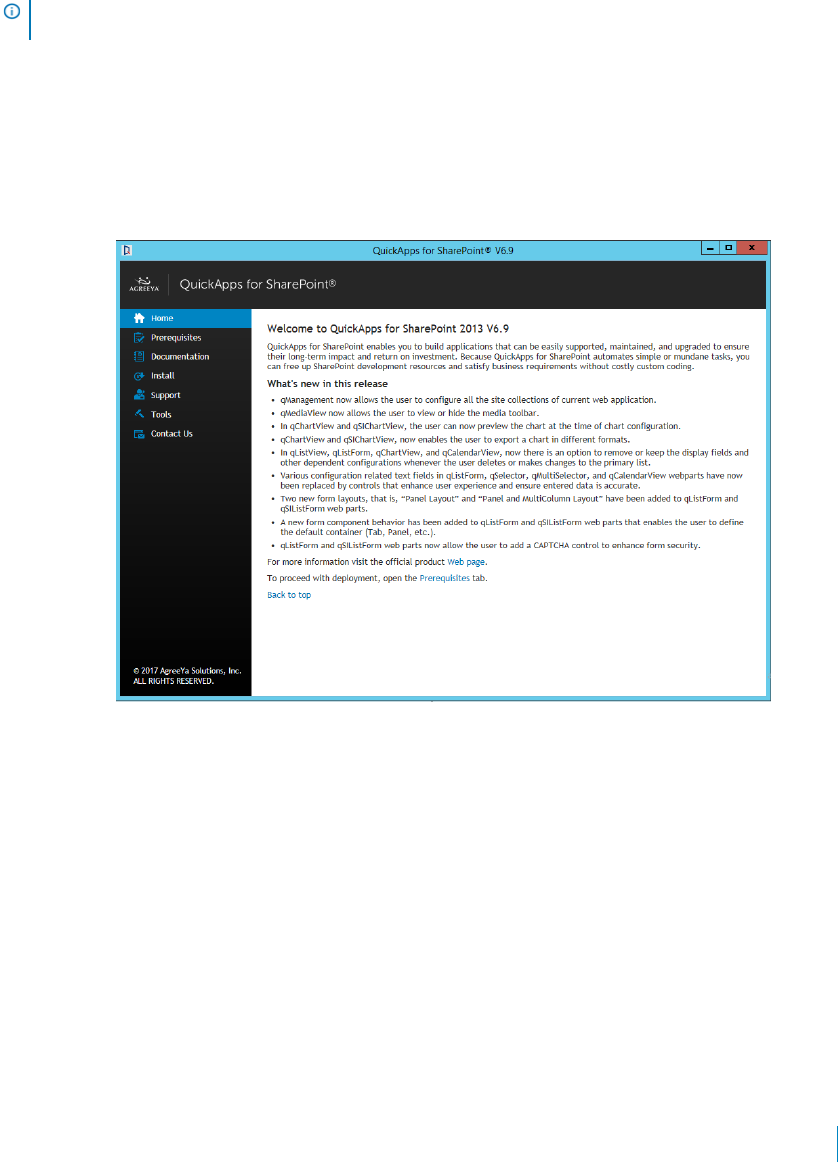
Figure 1. QuickApps for SharePoint Autorun
3Click Next.
4 Read and accept the license agreement. Click Next.
5 Select a destination folder to install QuickApps, and click Next.
6Click Install.
7 If you do not have a valid license, upload one. For more information, see Licensing QuickApps for
SharePoint on page 7. Select Next.
8 Select an option:
• Restore the status of the QuickApps for SharePoint - Web Parts Library Feature in your farm.
Choose this option if you are upgrading this product from a previous version and have backed up
and saved your feature status when you uninstalled the previous version.
• I do NOT want to deploy the solution package. I will use SharePoint Central Administration to
do so later. Choose this option if you want to schedule the deployment for a specific time or you
want to choose a subset of servers on which to install. If you choose this option, you must use
NOTE: If you are upgrading QuickApps for SharePoint from a previous version, see Step-by-Step
Walkthroughs on page 13.

QuickApps for SharePoint® 6.9
Quick Start Guide 7
www.agreeya.com
SharePoint Central Administration to deploy the solution package. See Deploying QuickApps for
SharePoint on page 8 for more information.
• Install on every Virtual Server on the local server or server farm.
• Install ONLY to the specified URL of the virtual server on the local server or server farm. If
you select this option, you must add a SharePoint Web Application.
9Click Next.
The deployment will take a while. The solution package that is used by the installer contains all the
files that will be deployed in the SharePoint 14 (for SharePoint 2010), 15 (for SharePoint 2013) or 16 (for
SharePoint 2016) hive folder. These files will be transmitted from the configuration database to your
server over the wire.
10 Click Next.
11 Optionally, you can click Launch Configuration Editor button. You can configure your system now or
after installation is complete. See Editing Web Configuration File on page 10 for instructions.
12 Click Next.
13 Check to perform an IIS reset, and click Next.
14 Click Finish, then click Close.
All QuickApps for SharePoint site collection features and site features are activated. If not, see
Activating Site Collection Features on page 8 and Activating Site Features on page 9 respectively.
Licensing QuickApps for SharePoint
You can import multiple license files or single license file to a farm and apply licenses to your servers within
that farm
NOTE: If no license is provided, you will automatically have a 30-day trial license. QuickApps for SharePoint will
work for 30 days from the installation date as a fully bundled package. After 30 days, QuickApps for SharePoint
will display a "License Expired" message on the SharePoint Central Administration Page under the Manage
QuickApps License Section.
When removing a license, you can either revoke the license from a server and reapply it later, or remove the
license file from the farm.
To import a valid license file
1 If you are using SharePoint 2010, from the SharePoint 2010 Central Administration page, go to General
Application Settings | QuickApps for SharePoint | Manage QuickApps License.
OR
If you are using SharePoint 2013, open the SharePoint 2013 Central Administration page, go to General
Application Settings | QuickApps for SharePoint | Manage QuickApps License.
OR
If you are using SharePoint 2016, open the SharePoint 2016 Central Administration page, go to General
Application Settings | QuickApps for SharePoint | Manage QuickApps License
The License page opens and contains two tabs:
•the License View tab which allows you to import a multi-license file or a single license file to a
farm, and then select which servers are licenses with the license file.
•Server View tab which allows you to view the licenses applied to a server. You can remove or
revoke licenses from either tab.
2 Search for and select a license file (*.dlv), then click Import.
3 Select the license file from the drop-down list.
QuickApps for SharePoint® 6.9
Quick Start Guide 8
www.agreeya.com
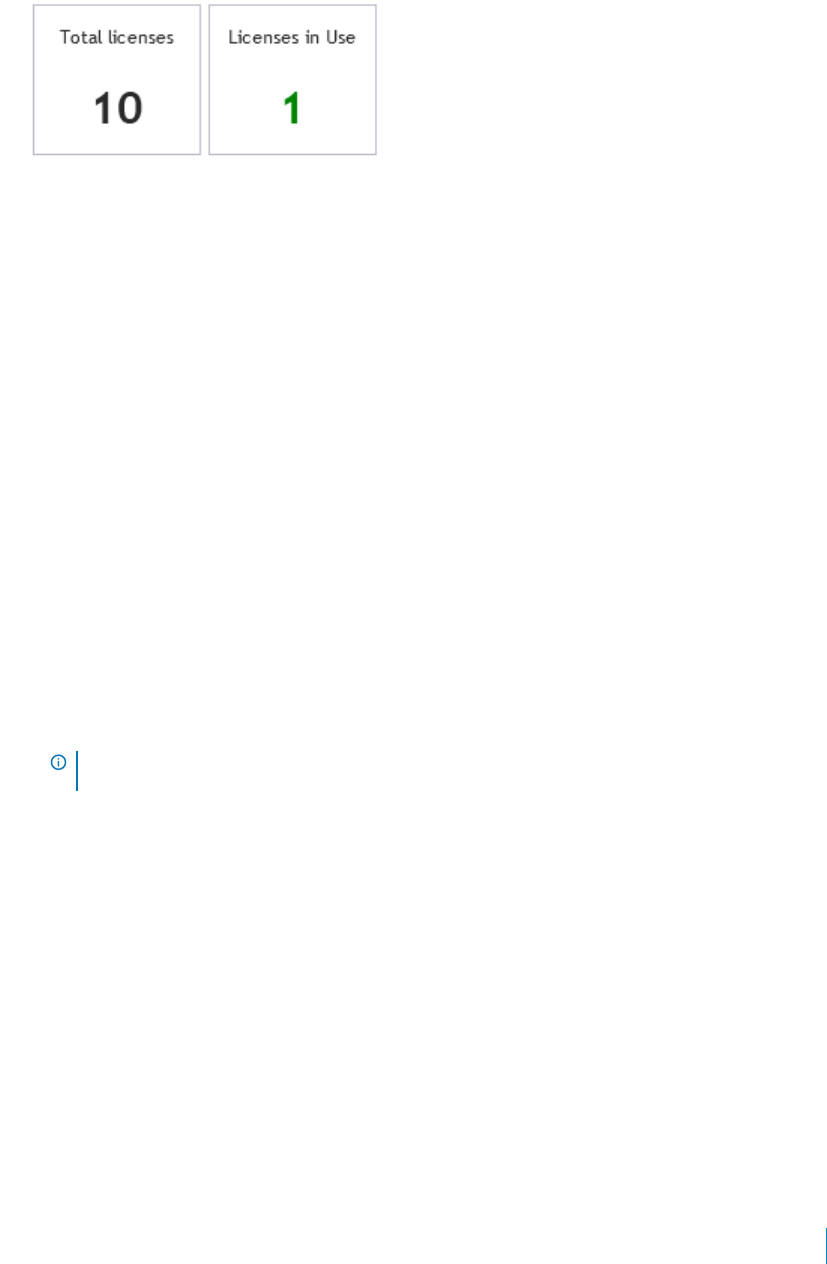
4 Select which servers you want to license or select the Servers available to be licensed check box to
select all servers listed. Click Apply licenses.
You can see the total number of licenses within the selected license file and the number of servers that
have a license (from the selected license file) applied.
Figure 2. Total Number of Licenses vs Licenses in Use
5 Perform an iisreset on every server you are licensing.
To revoke a license from a server
1 From the License View tab, select the server whose license you want to remove, or select the Servers
licensed with this file check box to select all servers which currently use the license file.
2Click Revoke licenses.
3Reset IIS.
OR
1 From the Server View tab, select a server.
2Click Revoke from the license details section.
3Reset IIS.
If you have multiple licenses, you will see all the licenses in the farm. Click Revoke on any or all of the
licenses.
To remove a license file
1 From the License View tab, select a license file from the drop-down list.
2Click Remove license file.
3Reset IIS.
The license file and associated licenses within that file are removed from all servers in the farm.
Deploying QuickApps for SharePoint
To deploy QuickApps for SharePoint
1 From SharePoint Central Administration, go to Manage farm solutions.
2Select quick.apps.wsp and click Deploy Solution.
3 Select a time and location to deploy QuickApps for SharePoint, and click OK.
Once deployed all QuickApps features are automatically activated. If not, you must manually activate
them. See Activating Site Collection Features and Activating Site Features for more information.
Activating Site Collection Features
The Web Parts Library and My First App features must be activated at the site collection level.
NOTE: If the license has not been applied to a server, you do not need to reset IIS after removing
the license.

QuickApps for SharePoint® 6.9
Quick Start Guide 9
www.agreeya.com
To activate a site collection feature
1 Open the SharePoint site where QuickApps for SharePoint is deployed.
2Go to Site collection features.
3 Activate QuickApps for SharePoint for SharePoint - Web Parts Library or QuickApps for SharePoint for
SharePoint - My First App.
Activating Site Features
After installing QuickApps for SharePoint, you must activate the site feature.
To activate a site feature
1 Select the SharePoint site where QuickApps for SharePoint is deployed.
2Go to Manage site features.
3 Activate QuickApps for SharePoint - List Templates.
Managing Web Parts
By default, when you install QuickApps for SharePoint and activate the QuickApps for SharePoint - Web Parts
Library, Web Parts are added to the web part gallery making it available for site designers to use.
As the Farm Administrator, you can further refine which web parts will be available by using the SharePoint
Central Administration pages.
You can manage web parts by:
•Web Application
•Single Site Collection/Multiple Site Collections
If you make a change by any of these links, the change is made essentially to the site collection (for Web
Application, all site collections within the web are affected). The last change made will overwrite the previous
settings.
Web Application
This allows you to control what web parts become available to the selected SharePoint Web Application. If you
clear all the web parts check boxes, no web parts will be available to the specified SharePoint Web Application
and all its site collections and subsites. Even though the feature will still be displayed in the Site Feature list,
activating it will not bring these web parts available to the site designer.
To manage web parts by Web Application
•From SharePoint Central Administration, go to Manage Web Parts by Web application.
Single Site Collection/Multiple Site Collections
These allow you to manage web parts at the Web Application/Site Collection level. You will need to pick the
SharePoint Web Application first, and then pick a site collection. The display will show you what the current
available web parts are based on your license type and bundle. The checked web parts are the ones available to
the site designer.
To manage Web Parts by Single Site Collection or Multiple Site Collections
NOTE: Managing Web Parts by single site collection will display currently available web parts when you
display the page. This is because at the Web Application level or multiple site collections level, each site
collection may have different available and active web parts.

QuickApps for SharePoint® 6.9
Quick Start Guide 10
www.agreeya.com
•From SharePoint Central Administration, go to Manage Web Parts by Site application.
OR
From SharePoint Central Administration, go to Manage Web Parts by multiple Site application.
Editing Web Configuration File
You must edit the Web.Config file so QuickApps for SharePoint can operate properly.You must ensure an entry
for HTTP handlers is added to the web.config file for the ASP.NET AJAX to function properly. The Configuration
Editor can help you make modifications easily and to prevent errors while doing so.
To edit the Web Configuration File
1Click Start | All Programs | AgreeYa | QuickApps for SharePoint for SharePoint | Configuration
Editor.
The Configuration Editor opens.
2 Open the web configuration file by following either of the following paths:
aClick File | Open | File.
b Browse to the SharePoint site web.config file.
OR
cClick File | Open | Web.
d Select the SharePoint site which automatically locates the web.config file.
3 if you see any or all of the following messages, select the message, click Fix, then click Yes.
•"You must enable session state in your web.config"
•"You must insert <add name="Session" type="System.Web.SessionState.SessionStateModule" />
element in your web.config"
•"Your web.config file has no QuestSoftware section group defined in <configSections>"
•"Your web.config file has no <QuestSoftware> section defined"
•"You must add missing httpHandler elements in your web.config"
4 Save the file.
The following is an excerpt if you want to use a StateServer:
<configuration>
<system.web>
<!-- You must change the trust level to Full in order to use
out of state session management -->
NOTE: If you are working from a server where QuickApps for SharePoint is not installed, the Configuration
Editor will not be available. You can copy the ConfigurationEditor.exe and its related files from the server
on which it was installed to your server to run the Configuration Editor.
NOTE: Many of the required modifications can be done automatically through the “QuickApps for
SharePoint - Configuration” feature accessible from the SharePoint Central Administration page. The
required web.config changes happen automatically during feature activation and the changes are
removed upon feature de-activation. This method does not support System Integration metadata
configuration and other advanced features available in the Configuration Editor tool. For more
information on the Configuration Editor, see the Configuration Editor User Guide.
NOTE: If the product is going to be installed in a server farm or web without using sticky session,
out-of-process state management will be needed. You must modify the <sessionState> element in
the Web.Config file to use either a StateServer or Microsoft® SQL Server.

QuickApps for SharePoint® 6.9
Quick Start Guide 11
www.agreeya.com
<trust level="Full" originnUrl="" />
<sessionState
mode="StateServer"
cookieless="false"
timeout="60"
stateConnectionString="tcpip=192.168.0.110:42424" />
</system.web>
</configuration>
Uninstalling QuickApps for SharePoint
To uninstall QuickApps for SharePoint
1 Use the Control Panel to uninstall QuickApps for SharePoint.
2 If you are upgrading and want to backup your skins and features, enter or browse to a folder location,
and click Next. If you do not want to backup your skins and features, just click Next.
3 Make sure uninstall on every virtual server on the local server or server farm radio button and the
Perform iisreset after uninstall check box are selected., and click Next.
4Click Finish.
Optional Tasks
You can perform the following tasks to use QuickApps for SharePoint:
•Upgrading from a Previous Version
•Upgrading Custom Skins
•Deploying QuickApps for SharePoint on SharePoint 2013 using SharePoint 2010 Experience
•Viewing Log Files
Upgrading from a Previous Version
To upgrade your existing license, go to http://quickapps.agreeya.com/support.
If you encounter an issue upgrading your license using this page, contact your sales representative to get a new
license file or send an email to quickapps@agreeya.com.
When upgrading to the full version from the Shared version, you need to clear HTML/CSS cache in IE. Otherwise,
the Shared version online help opens when you click the "question mark" icon in the ezEdit.
To upgrade to version 6.9
1 Clear your browser’s cache.
2 Uninstall any previous versions of Web Parts for SharePoint or QuickApps for SharePoint. See Uninstalling
QuickApps for SharePoint on page 11.
3 Install QuickApps for SharePoint version 6.9. See Setting Up QuickApps for SharePoint on page 5.
4Select Restore the status of the QuickApps for SharePoint - Web Parts Feature Library in your farm.
5 Launch the Configuration Editor and address any issues shown in the message window of the Web.Config
tab. Select the message and click Fix. See Editing Web Configuration File on page 10.
NOTE: For more information regarding all of the features of the Configuration Editor and SI
Configuration File, see the Configuration Editor User Guide.

QuickApps for SharePoint® 6.9
Quick Start Guide 12
www.agreeya.com
6 Save the file.
Upgrading Custom Skins
This product uses web controls, which support the capability of "skinning". SharePoint 2010 uses the .NET
Framework version 3.5 of the DLL. SharePoint 2013 uses the .NET Framework version 4.0 of the DLL. SharePoint
2016 uses the .NET Framework version 4.5 of the DLL. If you are creating custom skins, you can add them to the
following folders:
•For SharePoint 2010:
•Telerik skins are located at %ProgramFiles%\Common Files\Microsoft Shared\Web Server
Extensions\14\TEMPLATE\LAYOUTS\QuestSoftware\Telerik\Q32013SP1\Skins
•DevExpress skins are located at %ProgramFiles%\Common Files\Microsoft Shared\Web Server
Extensions\14\TEMPLATE\LAYOUTS\QuestSoftware\DevExpress\9.3\Themes
•For SharePoint 2013:
•Telerik skins are located at %ProgramFiles%\Common Files\Microsoft Shared\Web Server
Extensions\15\TEMPLATE\LAYOUTS\QuestSoftware\Telerik\Q32013SP1\Skins
•DevExpress skins are located at %ProgramFiles%\Common Files\Microsoft Shared\Web Server
Extensions\15\TEMPLATE\LAYOUTS\QuestSoftware\DevExpress\9.3\Themes
•For SharePoint 2016:
•Telerik skins are located at %ProgramFiles%\Common Files\Microsoft Shared\Web Server
Extensions\16\TEMPLATE\LAYOUTS\QuestSoftware\Telerik\Q32013SP1\Skins
•DevExpress skins are located at %ProgramFiles%\Common Files\Microsoft Shared\Web Server
Extensions\16\TEMPLATE\LAYOUTS\QuestSoftware\DevExpress\9.3\Themes
With these skin files, you can change the appearance of the Web Controls used by the QuickApps for SharePoint
product.
If your custom skin files are not compatible with the skin files for the Telerik® ASP.NET AJAX Controls version Q3
2013SP1, you must do the following before upgrading.
To upgrade custom skins
1 Backup your custom skin files manually. Your custom skins can be under one of the following folders:
•$TELERIK_FOLDER\Q22007SP1\NET2\RadControls
•$TELERIK_FOLDER\Q22009\Skins
•$TELERIK_FOLDER\Q22010\Skins
2 After installing QuickApps for SharePoint 6.9, add your custom skins manually to
$TELERIK_FOLDER\Q32013SP1\Skins.
3 Test your custom skins. If they are not applied properly, you must recreate your custom skin files and
make them compatible with the Telerik controls installed in this version.
NOTE: For SharePoint 2010, your folders are located here: C:\Program Files\Common
Files\Microsoft Shared\web server extensions\14\TEMPLATE\LAYOUTS\QuestSoftware\Telerik. For
SharePoint 2013, your folders are located here: C:\Program Files\Common Files\Microsoft
Shared\web server extensions\15\TEMPLATE\LAYOUTS\QuestSoftware\Telerik. For SharePoint 2016,
your folders are located here: C:\Program Files\Common Files\Microsoft Shared\web server
extensions\16\TEMPLATE\LAYOUTS\QuestSoftware\Telerik.
NOTE: To create a new custom skin for Telerik RadControls, see
http://www.telerik.com/help/aspnet-ajax/introduction-create-custom-skin.html. You can also
use the Sample Skin folder in the install directory as an example. For examples on creating custom
skin for RadEditor, see http://www.telerik.com/help/aspnet-ajax/editor-css-classes-and-their-
use.html. For changes and backward compatibility reference from Telerik, see
http://www.telerik.com/help/aspnet-ajax/button-changes-and-back-compatibility.htm.
QuickApps for SharePoint® 6.9
Quick Start Guide 13
www.agreeya.com
Deploying QuickApps for SharePoint on SharePoint
2013 using SharePoint 2010 Experience
If you are using SharePoint 2010 Experience on SharePoint 2013, the QuickApps for SharePoint features are not
visible. To make the features visible, you must manually deploy the QuickApps solution on SharePoint 2013.
To deploy QuickApps solution
1 Open the SharePoint 2013 Management Shell, and enter the following cmdlet:
Install-SPSolution -Identity Quick.Apps.wsp -GACDeployment -CompatibilityLevel
{14,15} -AllWebApplications -confirm:$false –force
This deploys the solution package to the SharePoint 14 hive and redeploys the package to the SharePoint
15 hive and any common folders.
2 If a SharePoint 2010 Experience site collection already exists, use SharePoint 2013 Central Administration
to activate all QuickApps features. For more information, see Activating Site Collection Features on page
8 and Activating Site Features on page 9 respectively.
If a SharePoint 2010 Experience site collection does not exist, create one. All QuickApps features are
activated automatically. If not, see Activating Site Collection Features on page 8 and Activating Site
Features on page 9.
Viewing Log Files
If errors occur when using QuickApps for SharePoint, the details are logged to the SharePoint ULS log. The
easiest way to view these details is with a ULS log viewer.
To view log files
1 If not already done so, start SharePoint Tracing Service.
2 From SharePoint Central Administration, select Monitoring | Configure diagnostic logging.
3 In the Trace Log Levels section, select High.
4 Open your log viewer and filter your view by product (that is QuickApps for SharePoint).
You can view any error messages from QuickApps for SharePoint only.
Step-by-Step Walkthroughs
This section gives some step-by-step scenarios to help you use QuickApps for SharePoint effectively. You can
refer to our Knowledge Base at http://quickapps.agreeya.com/support.
NOTE: The Install-SPSolution cmdlet begins a timer job. Allow the timer job to finish before
executing any other steps. To see the status of the timer job, use the following cmdlet: Get-
SPTimerJob | ?{ $_.Name -like "*solution-deployment*Quick.Apps*" }
CAUTION: If you want to use the Microsoft ULS Log Viewer tool, it is available here. The ULSViewer
tool is an unsupported application, and Microsoft does not provide support for this tool. Use this
tool at your own risk. Microsoft Product Support Services (PSS) cannot answer questions about the
ULSViewer tool.
NOTE: For more information on Diagnostic Logging in SharePoint 2010, see
http://technet.microsoft.com/en-us/library/ee748619(v=office.14).aspx. For more information on
Diagnostic Logging in SharePoint 2013, see http://technet.microsoft.com/en-
us/library/ee748656.aspx. For more information on Diagnostic Logging in SharePoint 2016, see
http://technet.microsoft.com/en-us/library/ee748656.aspx.
QuickApps for SharePoint® 6.9
Quick Start Guide 14
www.agreeya.com
Creating your first SharePoint application
My First App is a tool that walks you through three quick and easy steps to creating your first SharePoint
application. For more information, see My First App in the QuickApps for SharePoint User Guide.
To create your first SharePoint application using My First App
1 After you have installed QuickApps for SharePoint, launch SharePoint Central Administration.
2 Ensure the My First App feature is activated under Site Collection Features. For more information, see
Activating Site Collection Features on page 8.
3Select Site Settings, and select My First App.
Figure 3. My First App
The My First App app opens.
4Click Start.
5 Pick a SharePoint list, and click Next.
6 Select a chart type, enter a chart name, and select fields for X-axis and Y-axis, and a function to compile
the Y-axis data. Click Next.
7 Select a document library as a target location and enter a page name for your app.
8Click Build.
9 When the app is completed, select Go to app now.
Configuring Multi-List Rollup in qListView
The qListView web part allows you to rollup list data from multiple sites into a single list. You are able to group
on as many fields as you wish. Out-of-the-box SharePoint limits you to only two groupings. The only requirement
to rolling up multiple lists is that they have to have the same structure/schema.
Using the app created above, you will aggregate two lists into one view.
To configure a multi-list rollup in qListView
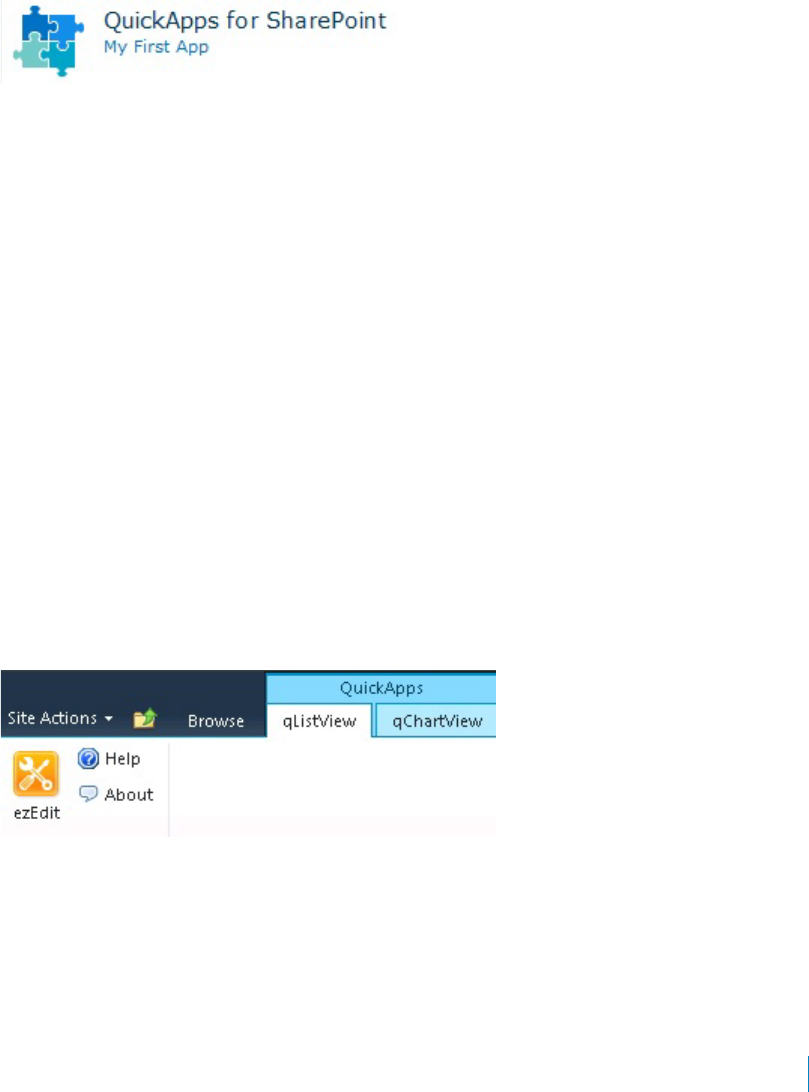
1 From the app created in My First App, select qListView from the Ribbon and select ezEdit.
Figure 4. Selecting ezEdit from QuickApps ribbon
The Primary Content page opens by default.
2 From Viewed Lists, select Edit.
3 Select some lists and click OK. Click Save.
Ensure the lists have the same schema/structure.
4 From Display Fields, select Edit.
QuickApps for SharePoint® 6.9
Quick Start Guide 15
www.agreeya.com
5 Select the field names you want to include.
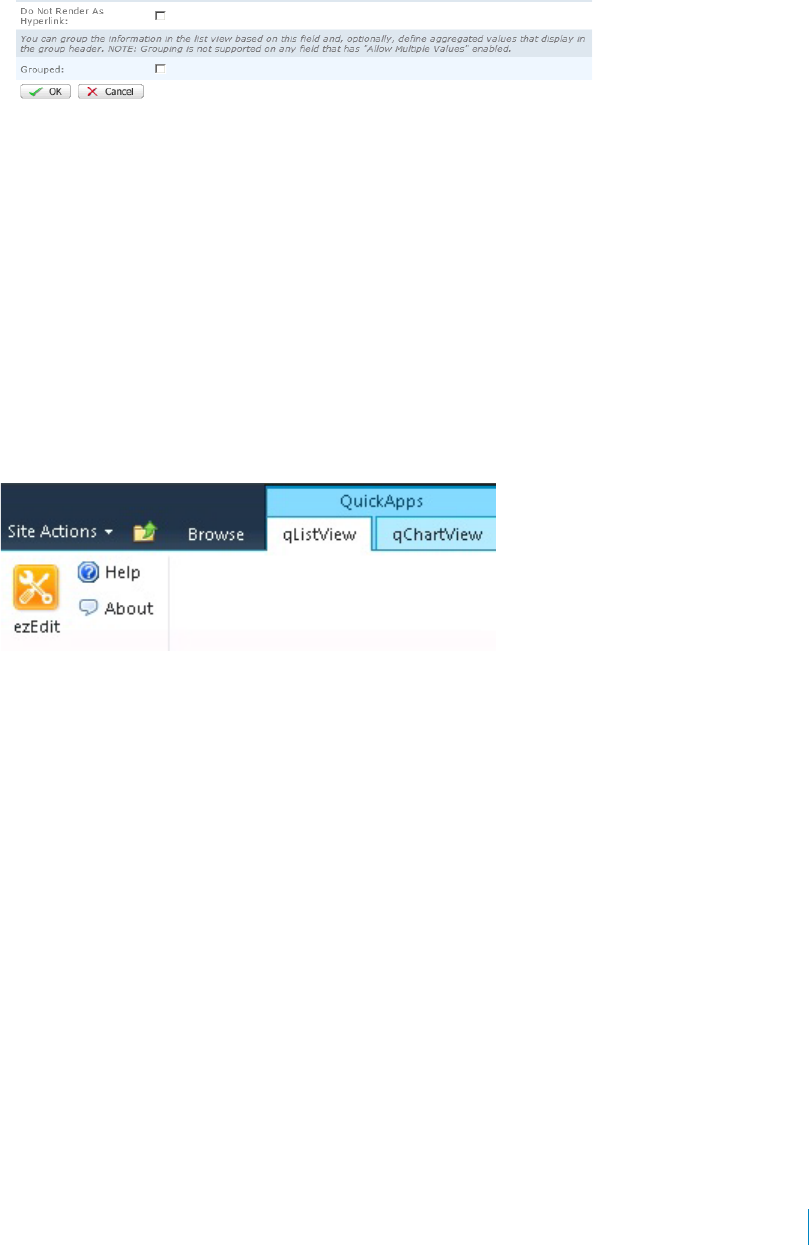
6 Change the qListView to group by one of the available fields. For example, if you have chosen ID as a
field name, click Edit next to field name.
7Click the Grouped check box (at the bottom of the page).
Figure 5. Grouped check box
8Click OK, then click Save.
9 Expand the Sorting/Paging category, change the default of the page size to view more rows.
10 Click OK.
Configuring Multi-List Rollup in qChartView
You can configure the qChartView web part to visually represent the rollup list data from multiple sites into a
single list.
To configure multi-list rollup in qChartView
1 From the app created in My First App, select qChartView from the Ribbon and select ezEdit.
Figure 6. Selecting ezEdit from QuickApps ribbon
The Primary Content page opens by default.
2 From Viewed Lists, select Edit.
3 Select some lists.
4 Select Add List, then Get Lists.
5 Select another list, then click OK.
6Click Save.
7Click OK.
Aggregating Sales Data in qListView
You can configure qListView to aggregate the sales data and present it in the web part.
To aggregate sales data in qListView
1 From the app created in My First App, select qListView from the Ribbon and select ezEdit.
QuickApps for SharePoint® 6.9
Quick Start Guide 16
www.agreeya.com
Figure 7. Selecting ezEdit from QuickApps ribbon
The Primary Content page opens by default.
2 From Display Fields, select Edit.
3 Select Edit next to a Field Name.
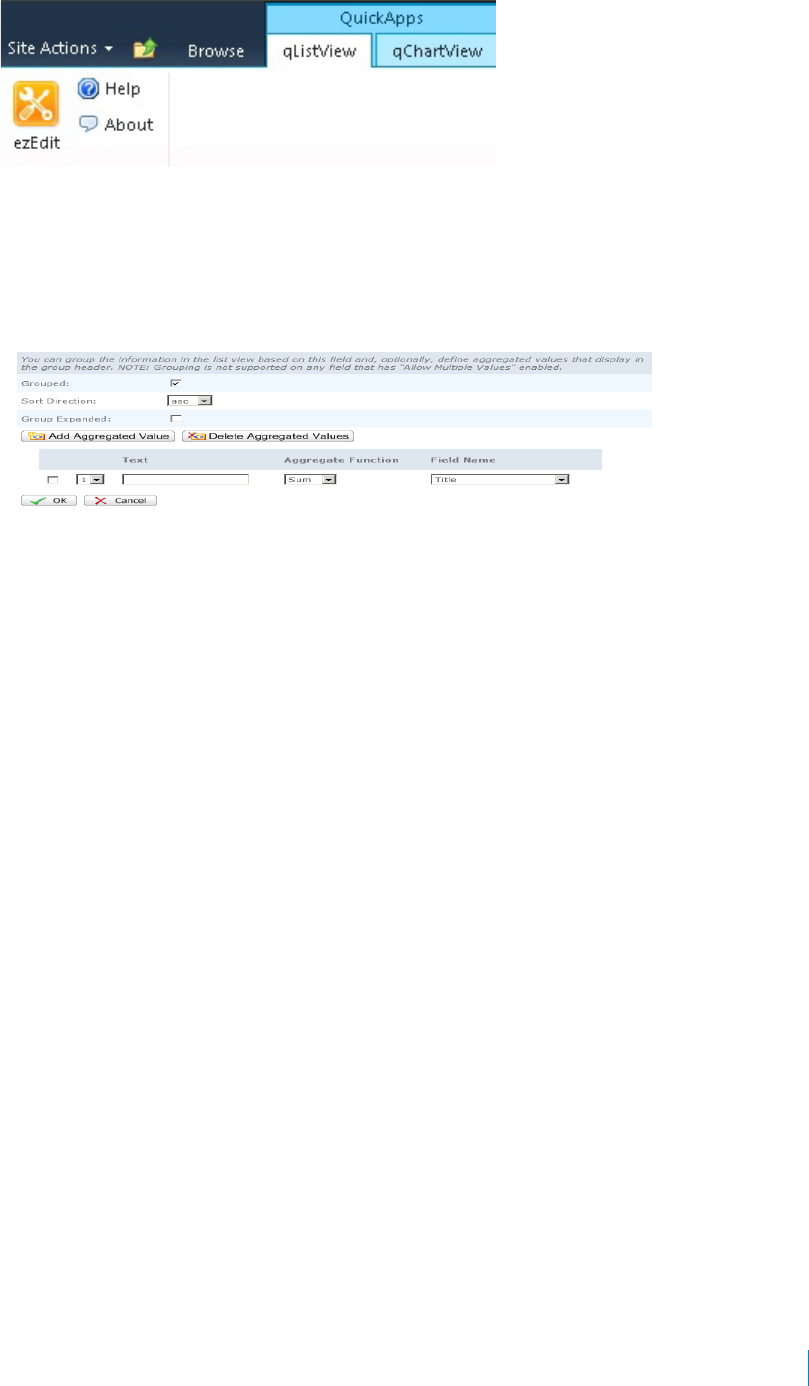
4 Ensure the Grouped check box is selected and click Add Aggregated Value.
Figure 8. Adding Aggregate Values
5 In the Text field, enter a name for the new field type.
6 Select an aggregate function and a Field Name.
7Click OK, then click Save, then click OK.

QuickApps for SharePoint® 6.9
Quick Start Guide 17
www.agreeya.com
About AgreeYa
AgreeYa Solutions is a global provider of software, solutions, and services focused on deploying business-driven,
technology-enabled solutions that create next-generation competitive advantages for customers.
Headquartered in Folsom, California, AgreeYa is a growing and dynamic organization with 15 offices in 8
countries employing more than 1,300 professionals. Over the last 15 years, AgreeYa has worked with 200+
companies ranging from Fortune 100 firms to small and large businesses, delivering solutions for variety of
industries including telecommunications, BFSI, healthcare, high-tech, manufacturing, utility and government.
AgreeYa’s software portfolio includes SocialXtend (intranet and enterprise social collaboration), VDIXtend
(Desktop-on-Cloud), Onvelop (enterprise mobility productivity suite), Edvelop (single window collaboration and
communication solution for 21st century learning) and Cogent (comprehensive end-to-end case management
solution for collections agencies and law firms). As part of its solutions and services offerings, AgreeYa provides
intranet and enterprise collaboration on SharePoint, cloud and infrastructure, enterprise mobility, product
engineering, application development and management, independent software testing, and staffing (IT and
risk/compliance) solutions. For more information visit www.agreeya.com
Contacting AgreeYa
Technical support:
Online support
Product questions and sales:
1-800-AGREEYA
Email:
quickapps@agreeya.com
Technical support resources
Technical support is available to customers who have purchased AgreeYa software with a valid maintenance
contract and to customers who have trial versions. To access the Support Portal, go to
http://www.quickapps.agreeya/support.
The Support Portal provides self-help tools you can use to solve problems quickly and independently, 24 hours a
day, 365 days a year. In addition, the portal provides direct access to product support engineers through an
online Service Request system.
The site enables you to:
•Create, update, and manage Service Requests (cases)
•View Knowledge Base articles
•Obtain product notifications
•Download software. For trial software, go to Trial Downl oads.
•View how-to videos
•Engage in community discussions
•Chat with a support engineer
QuickApps for SharePoint® 6.9
Quick Start Guide 18
www.agreeya.com
Third-party contributions
This product contains the third-party components listed below. For third-party license information, go to
http://quickapps.agreeya.com/support.
Table 2. List of third-party contributions
Component License or acknowledgement
async.js n/a Copyright 2010 Caolan McMahon
DevArt dotConnect for
Oracle 7.6
DevArt dotConnect for Oracle 7.6
Exclusively licensed for QuickApps for SharePoint, this component may not be used
for any other purpose.
JQuery 1.8.2 MIT
spin.js 1.3.2 MIT
