RSA Archer Platform 6.4 Security Configuration Guide
User Manual:
Open the PDF directly: View PDF ![]() .
.
Page Count: 114 [warning: Documents this large are best viewed by clicking the View PDF Link!]
- Preface
- Chapter 1: Security Configuration Settings
- User Access Control
- Configuring an Instance for Single Sign-On
- Configuring the Instance Database Connection String and Pooling Options
- Changing SysAdmin and Services Account Passwords
- Configuring the Login Page
- Authentication Methods
- Message Logging
- Port Usage
- Network Encryption
- Encrypting Data
- Configuring the Hardware Security Module
- Additional Security Considerations
- JavaScript Transporter Security Considerations
- Java Runtime Environment Deployment
- Privilege Levels for Archer Services
- Least Privileges Requirement for RSA Archer Database Objects
- RSA Archer Supported Environments
- Support Categories
- File Repository Path
- Restrict Permissions on Repository Files
- Keyword Index Files
- Company Files Path
- Building Global iViews
- Formatting iView Videos
- Adding Objects to the Layout
- Offline Access
- Installing Offline Access
- Disabling ASMX Web Services
- Chapter 2: Secure Deployment and Usage Settings
- Chapter 3: Maintaining Security
- Chapter 4: FIPS Compliant Mode
- Appendix A: Authentication Methods
Security Configuration Guide
6.4
Copyright © 2010-2018 Dell Inc. or its subsidiaries. All Rights Reserved.
April 2018
Contact Information
Go to the RSA corporate web site for regional Customer Support telephone and fax numbers:
https://community.rsa.com/community/rsa-customer-support.
Trademarks
RSA, the RSA Logo, RSA Archer, RSA Archer Logo, and Dell are either registered trademarks or trademarks of Dell
Corporation ("Dell") in the United States and/or other countries. All other trademarks used herein are the property of their
respective owners. For a list of RSA trademarks, go to www.emc.com/legal/emc-corporation-trademarks.htm.
License agreement
This software and the associated documentation are proprietary and confidential to Dell, are furnished under license, and may
be used and copied only in accordance with the terms of such license and with the inclusion of the copyright notice below. This
software and the documentation, and any copies thereof, may not be provided or otherwise made available to any other person.
No title to or ownership of the software or documentation or any intellectual property rights thereto is hereby transferred. Any
unauthorized use or reproduction of this software and the documentation may be subject to civil and/or criminal liability.
This software is subject to change without notice and should not be construed as a commitment by Dell.
Third-party licenses
This product may include software developed by parties other than RSA. The text of the license agreements applicable to third-
party software in this product may be viewed on RSA.com. By using this product, a user of this product agrees to be fully
bound by terms of the license agreements.
Note on encryption technologies
This product may contain encryption technology. Many countries prohibit or restrict the use, import, or export of encryption
technologies, and current use, import, and export regulations should be followed when using, importing or exporting this
product.
For secure sites, Dell recommends that the software be installed onto encrypted storage for secure operations.
For customers in high security zones, Dell recommends that a full application sanitization and reinstallation from backup occur
when sensitive or classified information is spilled.
Note on Section 508 Compliance
The RSA Archer® Suite is built on web technologies which can be used with assistive technologies, such as screen readers,
magnifiers, and contrast tools. While these tools are not yet fully supported, RSA is committed to improving the experience of
users of these technologies as part of our ongoing product road map for RSA Archer.
The RSA Archer Mobile App can be used with assistive technologies built into iOS. While there remain some gaps in support,
RSA is committed to improving the experience of users of these technologies as part of our ongoing product road map for the
RSA Archer Mobile App.
Distribution
Use, copying, and distribution of any Dell software described in this publication requires an applicable software license.
Dell believes the information in this publication is accurate as of its publication date. The information is subject to change
without notice. Use of the software described herein does not ensure compliance with any laws, rules, or regulations, including
privacy laws that apply to RSA’s customer’s businesses. Use of this software should not be a substitute for consultation with
professional advisors, including legal advisors. No contractual obligations are formed by publication of these documents.
THE INFORMATION IN THIS PUBLICATION IS PROVIDED "AS IS." DELL INC. MAKES NO REPRESENTATIONS OR
WARRANTIES OF ANY KIND WITH RESPECT TO THE INFORMATION IN THIS PUBLICATION, AND SPECIFICALLY
DISCLAIMS IMPLIED WARRANTIES OF MERCHANTABILITY OR FITNESS FOR A PARTICULAR PURPOSE.

Security Configuration Guide
Contents
Preface 6
About this Guide 6
RSA Archer Documentation 6
Support and Service 7
Other Resources 8
Chapter 1: Security Configuration Settings 9
User Access Control 9
Default User Accounts 12
Adding User Accounts 13
Access Roles 18
Adding Access Roles 19
Assigning Access Roles to Users or Groups 20
Configuring LDAP for Managing User Accounts and Groups 23
Configuring an Instance for Single Sign-On 31
Configuring the Instance Database Connection String and Pooling Options 37
Changing SysAdmin and Services Account Passwords 38
Configuring the Login Page 39
Authentication Methods 40
Message Logging 41
Log Description 42
Security Events Report 42
RSAArcher Error Logs 43
Log Directory Permissions 44
Windows Event Logs 44
Port Usage 44
Network Encryption 50
Data Feeds 50
HTTP Transporter 59
FTP Transporter 60
3

Security Configuration Guide
File Transporter 60
Web Server Communication 63
SSL Certificate Guidance 64
SQLServer Communication 65
RSA Archer Web Services API 66
RSA Archer Web Services 66
Encrypting Data 66
Configuring the Hardware Security Module 69
Additional Security Considerations 69
JavaScript Transporter Security Considerations 70
Java Runtime Environment Deployment 70
Privilege Levels for Archer Services 70
Least PrivilegesRequirement for RSAArcher Database Objects 71
RSA Archer Supported Environments 71
Support Categories 73
File Repository Path 74
Restrict Permissions on Repository Files 74
Keyword Index Files 74
Company Files Path 74
Building Global iViews 75
Formatting iView Videos 80
Adding Objects to the Layout 81
Offline Access 88
Installing Offline Access 89
Disabling ASMXWebServices 91
Chapter 2: Secure Deployment and Usage Settings 93
Secure Deployment and Usage Settings 93
Web Server Security Configuration 100
Disallow Arbitrary File Uploads 100
Remove IISand ASP.NET Version Information from HTTP Headers 101
AspNet-Version HTTP Header 101
Remove X-Powered-By HTTP Header 102
IP Whitelist 102
4

Security Configuration Guide
Physical Security Controls Recommendations 102
Chapter 3: Maintaining Security 103
Security Patch Management 103
Malware Detection 103
Virus Scanning 103
Ongoing Monitoring and Auditing 104
Chapter 4: FIPS Compliant Mode 105
Platform Release Supporting FIPS 105
FIPS-Compliant Operation Requirements 105
FIPS Certificates 105
SQL Server FIPS Setup 106
LDAP Configuration for FIPS Mode 107
Platform FIPS Certification 107
Secure Hash Algorithm (SHA) Standard (FIPS 180-3) 107
Advanced Encryption Standard (AES) Algorithm (FIPS 197) 107
Appendix A: Authentication Methods 109
5
Security Configuration Guide
Preface
About this Guide
This guide provides an overview of security configuration settings available in the RSA Archer
Platform and security best practices for using those settings to help ensure secure operation of
RSAArcher® Suite.
RSA Archer Documentation
You can access RSAArcher documentation on the Archer Customer/Partner Community on RSA
Link at: https://community.rsa.com/community/products/archer-grc/archer-customer-partner-
community/platform/64
Document Description
Release Notes A list of issues fixed in the release and a list of issues known at the time of the
release. Available in PDF format.
What's New
Guide
Overview of the new and updated features in the current release. Overview of the
differences between RSAArcher version 5.x and version 6.x. Suggestions on
planning for moving from 5.x to 6.x are included. This information is available in
the RSA Archer Online Documentation and in PDF format.
Installation
and Upgrade
Guide
Instructions for installing the latest RSAArcher release, and upgrading from 5.x
and 6.x to the latest release. Available in PDF format.
Preface 6

Security Configuration Guide
Document Description
Online
Documentation
Information for using RSAArcher including how to set up and maintain the
Platform, how to use the Platform features, how to use the RESTful and Web
APIs, security configuration information, and how to install and use the solution
use cases. Available from within the product in HTML5 format using context-
sensitive links, as well as in a Zip format for local installation. The Online
Documentation is also available in full on the RSAArcher Community on RSA
Link at: https://community.rsa.com/community/products/archer-grc/archer-
customer-partner-community/platform/64. Content from the Online Documentation
system is also available in PDF format, divided in to the following guides:
lAdministrator's Guide
lUser's Guide
lRESTful API Guide
lWeb APIGuide
lGRCAPIGuide
lSecurity Configuration Guide
lUse Case Guides (one guide for each of the available solution use cases)
Archer Control
Panel (ACP)
Help
Information for using the RSAArcher Control Panel module to manage the
internal settings of the Platform, such as license keys, global paths and settings.
Available from within the ACP module, in a ZIPformat for local installation, and
in PDF format.
Planning
Guide
Information about how to plan for your new RSAArcher installation. This
document is intended for system administrators who are responsible for installing
and managing RSAArcher. Available in PDFformat.
Support and Service
Customer Support Information https://community.rsa.com/community/rsa-customer-support
Customer Support E-mail archersupport@rsa.com
Preface 7
Security Configuration Guide
Other Resources
Resource Description
RSA Archer
Community
on
RSALink
Our public forum, on the RSA Link Community platform, brings together customers,
prospects, consultants, RSAArcher thought leaders, partners and analysts to talk
about GRC as a practice, and includes product demos, GRC videos, white papers,
blogs and more.
https://community.rsa.com/community/products/archer-grc
RSAArcher
Customer /
Partner
Community
on
RSALink
Our private community, is a powerful governance, risk and compliance online
network that promotes collaboration among RSAArcher customers, partners,
industry analysts, and product experts. Engaging with the RSAArcher Community
on RSA Link enables you to collaborate to solve problems, build best practices,
establish peer connections and engage with RSAArcher thought leaders.
https://community.rsa.com/community/products/archer-grc/archer-customer-partner-
community
RSA Ready RSA's Technology Partner Program is where third parties gain access to RSA
Software in order to develop an interoperability and have it documented and
certified. RSA Ready certifications are posted to an online community and
supported by RSA Support.
https://community.rsa.com/community/products/rsa-ready
RSA
Exchange
for
RSAArcher
The RSA Exchange for RSAArcher offerings help you rapidly deploy adjacent or
supporting risk business processes, quickly integrate new risk data sources, and
implement administrative utilities to make the most out of their risk and compliance
investment.
https://community.rsa.com/community/products/archer-grc/exchange
Preface 8

Security Configuration Guide
Chapter 1: Security Configuration Settings
User Access Control 9
Configuring an Instance for Single Sign-On 31
Configuring the Instance Database Connection String and Pooling Options 37
Changing SysAdmin and Services Account Passwords 38
Configuring the Login Page 39
Authentication Methods 40
Message Logging 41
Port Usage 44
Network Encryption 50
Encrypting Data 66
Configuring the Hardware Security Module 69
Additional Security Considerations 69
User Access Control
Access control provides a framework for maintaining users, roles, and security parameters, and for
assigning access rights at the system, application, record, and field levels.
lUser accounts allow users to log on to RSA Archer.
lUser groups provide a means of grouping users based on organizational structure or geographic
locations.
lAccess roles are collections of application-level and page-level rights that an administrator can
create and assign to any number of users and groups to control user privileges (create, read,
update, and delete).
lSecurity parameters are rules for controlling user access to RSA Archer and its individual pages.
lLDAP synchronization streamlines the administration of users and groups by allowing updates
and changes that were made in the LDAP server to be reflected automatically in RSA Archer.
Chapter 1: Security Configuration Settings 9
Security Configuration Guide
It is important to have well-defined policies around Help Desk procedures for your RSAArcher
installation. RSA strongly recommends that your Help Desk administrators understand the
importance of password strength and the sensitivity of data, such as user logon names and
passwords. Creating an environment where an end user is frequently asked for this kind of sensitive
data increases the opportunity for social engineering attacks. Train end users to provide, and Help
Desk administrators to request, the least amount of information needed in each situation.
Preventing Social Engineering Attacks
Fraudsters frequently use social engineering attacks to trick unsuspecting employees or individuals
into divulging sensitive data that they can then use to gain access to protected systems. RSA
recommends that you use the following guidelines to help reduce the likelihood of a successful social
engineering attack:
lIf Help Desk administrators need to initiate contact with a user, they should not request any user
information. Instead, users should be instructed to call the Help Desk back at a well-known Help
Desk telephone number to ensure that the original request is legitimate.
lThe Help Desk telephone number should be well known to all users.
lHelp Desk administrators should only ask for user name of the user over the phone when they call
the Help Desk. Help Desk administrators should never ask for user passwords.
lHelp Desk administrators should authenticate the user's identity before performing any
administrative action on a user's behalf. RSA recommends that you verify user identity using the
following methods:
oCall the user back on a phone owned by the organization and on a number that is already stored
in the system.
Important: Be careful when using mobile phones for identity confirmation, even if they are
owned by the company because mobile phone numbers are often stored in locations that are
vulnerable to tampering or social engineering.
oSend an email to the user at a company email address. If possible, use encrypted email.
oWork with the manager of the employee to verify the user identity.
oVerify the identity in person.
oUse multiple open-ended questions from employee records. For example: "Name one person in
your group." or "What is your badge number?" Avoid yes or no questions.
Advice for Your Users
RSA recommends that you instruct your users to do the following:
Chapter 1: Security Configuration Settings 10
Security Configuration Guide
lNever give their passwords to anyone, not even to Help Desk administrators.
lChange their passwords at regular intervals.
lBe aware of what information requests to expect from Help Desk administrators.
lAlways log off from the RSAArcher web interface when finished.
lAlways lock their desktops when they step away from their computers.
lRegularly close their browser and clear their cache of data.
lDo not upload any files to RSAArcher from sources other than themselves.
Note: RSA recommends that you conduct regular training to communicate this guidance to users.
Entity permissions
RSAArcher supports user permissions on multiple system components. RSA recommends that you
grant permissions only to users who need to access these components. When granting permissions to
these components, RSA recommends that you do not select the Everyone group because that group
grants rights for all users. Additionally, RSA recommends that you review the granted permissions
on a routine basis to ensure that the correct access is granted to the users.
The following table explains how user permission is configured on the supported components.
Component Permissions Explanation
Workspaces,
Dashboards,
Global iViews
Configured from the Access tab in a workspace or dashboard. RSA recommends
that you configure these components to be private.
Global Reports Configured when you save a report. RSA recommends that you set the
Permissions field to Global Report.
Record
Permissions
Configured in a Record Permissions field in an application or questionnaire.
Field
Permissions
Configured in the Access tab in a field in an application or questionnaire. RSA
recommends that you configure fields to be private.
Application
Owners,
Questionnaire
Owners,
Sub-Form
Owners
Configured in Application Builder for the assigned applications, questionnaires,
or sub-forms owners.
Chapter 1: Security Configuration Settings 11
Security Configuration Guide
Component Permissions Explanation
Global Report
Administrators
Configured in Application Builder for the assigned report owners in a specific
application or questionnaire.
Discussion
Forum Roles
Configured in Discussion Forums. Discussion forum roles provide administration
and forum creation rights for specific discussion communities.
Default User Accounts
The following table describes the default RSAArcher user accounts of a System Administration
(sysadmin) account and several RSA Archer services accounts. When creating a new instance, the
installer requires the user to enter a password for the sysadmin and service accounts.
It is important to remember the following:
lStandard users cannot log on to any of the default user accounts. Only the System Administrator
can log on to the sysadmin account.
lYou cannot delete or rename any of the default user accounts.
User Account Description
sysadmin The system administrator account for RSAArcher. This account
can be disabled, but cannot be deleted or renamed.
userArcherAssetServer A service account for the Asset service. This account can only
be used by RSAArcher services.
userArcherAsyncService A service account for job management. This account can only be
used by RSAArcher services.
userArcherCalculationAccount A service account for calculations. This account can only be
used by RSAArcher services.
userArcherDataFeedService A service account for data feeds. This account can only be used
by RSAArcher services.
userArcherLdapService A service account for LDAP synchronization. This account can
only be used by RSAArcherservices.
userArcherNotificationService A service account for notifications. This account can only be
used by RSAArcher services.
userMigrationUser A service account for migration. This account can only be used
by the installer.
Chapter 1: Security Configuration Settings 12

Security Configuration Guide
User Account Description
userOfflineService A service account for Offline Access. This account can only be
used by RSAArcher services.
Adding User Accounts
You must create a user account for each user who needs access to RSAArcher. Mobile users log in
to mobile devices using the user name and password that is established in their user accounts.
Configuring new accounts
Each RSAArcher user must have an account to log on to the system.
New User Accounts
All new user accounts are created with a unique password assigned manually by an administrator or
generated automatically by RSAArcher. RSA strongly recommends that you enable the Force
Password Change with the Next Sign-In option in RSAArcher for all new user accounts.
Configuring this option requires the user to change the password after the first successful logon
attempt into RSAArcher.
Effective Permissions Investigation Console (EPIC) provides a more efficient and less complicated
way for system administrators to determine user access for an individual record. Instead of
navigating the Access Control settings, application-level permissions and permission field rules and
assignees, system administrators, module owners, and users with permission to use EPIC can launch
EPIC from any record and view the access rights and permissions for selected users. System
administrators can also access EPIC from the Administration menu. EPIC enables system
administrators and users with EPIC permission to implement a consistent access control design
across RSA Archer and to troubleshoot access control and permissions issues.
For more information, see "Effective Permissions Investigation Console" in the RSAArcher Online
Documentation.
Important: RSA strongly recommends that you ensure users are approved for logging on to the
system before creating an account for them. Even when users are approved, RSA recommends that
you only assign the minimum set of access permissions for users to perform their job.
New User Account with System Administrator Privileges
RSA recommends that you create a new user account and assign the System Administrator access
role to it. This access role grants the account all rights within RSAArcher.
Important: RSA recommends that before issuing this account, you ensure that the user is approved
for full access to the system.
Chapter 1: Security Configuration Settings 13
Security Configuration Guide
Platform User Accounts
RSAArcher enforces the password strength, logon, and session time-out policies specified by the
security parameters defined in the Administration workspace.
Note: These security parameters are enforced by RSAArcher across all user accounts except the
sysadmin and service accounts. RSA strongly recommends that you instruct your administrators on
your corporate IT policy and security best practices for generating and managing passwords for all
accounts.
The following table shows the default security parameters settings for password strength.
Parameter Setting
Minimum password length 9 characters
Alpha characters required 2 characters
Numeric characters required 1 character
Special characters required 1 character
Uppercase characters required 1 character
Lowercase characters required 1 character
Password change interval 90 days
Previous passwords disallowed 20 passwords
Grace logons 0 logon
Maximum failed logon attempts 3 attempts
Session time-out 10 minutes (sysadmin account)
10 minutes (user account)
30 minutes (service account)
Account lockout period 999 days
RSA recommends that you treat these settings as the minimum requirement for enforcing strong
passwords and secure sessions in RSAArcher.
Add a user account
1. Go to the Manage Users page.
Chapter 1: Security Configuration Settings 14
Security Configuration Guide
a. From the menu bar, click .
b. Under Access Control, click Users.
2. Click Add New.
3. In the General Information section, enter the name of the user, the user name for log on, and the
domain.
Property Description
First
Name,Middle
Name, and
Last Name
The valid name of the user. First and last names are required.
User Name A seven character system-defined name in all lowercase. The user name
contains the first six characters of the Last Name followed by the first
character of the First Name. If the Last Name is fewer than six characters,
the system uses additional characters from the First Name to make a seven-
character user name. If the user name is not unique in the domain, the system
appends a number (up to 999) to the end of the name to make the name unique.
User Domain If your RSAArcher instance has one or more Lightweight Directory Access
Protocol (LDAP) configurations defined, select the domain to which the user
is a member. To use the RSAArcher domain, select No Domain.
4. (Optional) In the Contact Information section, enter the default email address and any other
pertinent information for contacting the user.
Property Description
Address The complete address of the user.
Company The company name.
Title The title of the user.
Chapter 1: Security Configuration Settings 15
Security Configuration Guide
Property Description
Email The following user email types are available:
lBusiness
lBusiness 2
lHome
lHome 2
lMobile
lMobile 2
lOther
lOther 2
lPager
Phone The following user telephone number types are available:
lAssistant
lBusiness
lBusiness 2
lBusiness Fax
lHome
lHome 2
lHome Fax
lISDN
lMobile
lMobile 2
lOther
lOther 2
lOther Fax
lPager
5. (Optional) In the Localization section, enter the time zone, locale, and language if the location
and language of the user is different from the system.
Option Description
Time Zone The time zone for the location of the user. Time is based on Coordinated
Universal Time (UTC).All time is stored as UTC and converted based on the
time zone of the user.
Locale The physical location of the user.
Manually
select a
language
Overrides the default language set for the instance. When you select this option,
you must specify the language.
6. In the Account Maintenance section, enter the user password and assign the security parameter
for this user.
Chapter 1: Security Configuration Settings 16
Security Configuration Guide
Property Description
Status The current status of the user account. The options are Active, Inactive, or
Locked.
Password For new user accounts, the password must be entered and confirmed. These
entries must match exactly. The password must conform to the default security
parameter password rules.
For existing user accounts, use the Change Password link to change the
password manually.
The Send user a notification with password information option enables
RSAArcher administrators to notify new users that the user account has been
setup with a temporary password and may require a password change.
Force
Password
Change
Determines whether the user is forced to change the password the next time
the user logs in.
Security
Parameter
The security parameter assigned to the user. A user can only have one security
parameter assigned at a time.
Notifications,
Subscriptions
Enables users to select the records and applications for which they want to
receive notifications when an update occurs.
Default
Home Page
Sets a user’s default home page to use either a task-driven landing page or a
dashboard based on group, role, or user profile. If the user belongs to multiple
roles or groups, the home page is based on the most recently assigned role or
group. Once the user logs in, the selected home page becomes default and any
changes to the home page of the role or the group do not affect the user's
default home page.
Note: If the user's permission to access the dashboard assigned to the home
page is revoked, a message appears upon log in allowing them to select a new
home page.
Important: If the administrator sets the default home page while the user is
logged in, the user must click the Home button to refresh the home page
setting. If the user changes the default home page selection, the change is
applied upon clicking Save.
Chapter 1: Security Configuration Settings 17

Security Configuration Guide
Property Description
Default
Home
Dashboard
Sets which dashboard displays on the default home page.
7. (Optional) Select the Send user a notification with password information checkbox if you want to
send the user an email notification of the password change.
Note: If you do not select this checkbox, you must inform the user of the new password. The
Default Email address is used for the notification email.
8. (Optional) In the Notes section, record any additional information about the user account.
For example, listing hours of availability or preferences for how the user should be contacted.
Account notes appear when users click a linked user name in RSAArcher to view the user
profile.
9. Click Save or Apply.
lClick Save to save and exit.
lClick Apply to apply the changes and continue working.
Access Roles
An access role is a collection of application-level and page-level rights that an administrator can
create and assign to any number of users and groups to control user privileges (create, read, update,
and delete). For example, the access role of a General User can allow access only to applications,
and the access role of an Administrative User can allow access only to RSAArcher features. RSA
recommends that you assign permissions through group membership, and not assign permissions
directly to user accounts.
RSAArcher includes an access role called System Administrator that you cannot delete or modify.
The System Administrator role grants users unrestricted access to all RSAArcher features and to all
records stored in applications, including records enrolled in content review. Only System
Administrators can assign the System Administrator access role.
RSAArcher solutions include pre-defined access roles for use with the solution.
For instructions on assigning permissions through group membership, see Assigning Access Roles to
Users and Groups.
Chapter 1: Security Configuration Settings 18
Security Configuration Guide
As the number of users, groups, and applications increases, keeping track of who has access to what
becomes more complex. RSA recommends simplifying the process. If you create granular access
roles for each of your applications, for example, Policy Administrator, Policy Author, and Policy
Reader, you can grant access to new or existing users and groups by selecting from a list of
predefined access roles.
Importing access roles
Although access roles are supported objects in the packaging process, when you import access roles
with groups during the packaging process, you must manually associate each access role to the
respective group. After the package is installed, you must manually add users to each group in the
target instance.
Adding Access Roles
RSAArcher supports role-based access control. RSAArcher allows you to create access roles that
you can assign to users. Each access role is mapped to a list of user authorization settings. User
authorization settings control rights or permissions that are granted to a user for accessing a resource
managed by RSAArcher.
Creating an access role defines the application and page-level rights for all users assigned the role.
Page-level rights
Rights Description
Create Create new page content, such as records, fields, notification templates, and content
review stages.
Read Read page content.
Update Modify existing page content.
Delete Delete page content.
Add an access role
1. Go to the Manage Access Role page.
a. From the menu bar, click .
b. Under Access Control, click Access Roles.
2. Click Add New.
Chapter 1: Security Configuration Settings 19
Security Configuration Guide
3. Do one of the following:
lIf you want to create a new access role, click Create a new Access Role from scratch, and
then click OK.
lIf you want to create a new access role from an existing access role, click Copy an existing
Access Role. Select the access role from the Access Role list, and then click OK.
4. In the General Information section, enter a name and description for the access role.
5. (Optional)To enter an Alias, click Apply, and then enter an Alias name.
6. (Optional) To set access role as the default for all users and groups, in the Default Access Role
field of the Default Access Role section, click Assign as Default.
7. (Optional) In the Group Assignments section, assign groups to the access role.
8. Click Apply.
9. On the Rights tab, and select the (Create, Read, Update, and Delete) checkboxes that
correspond to the appropriate rights for each page type.
lUser or group access to the Manage Global Values Lists page provides access to all global
values lists in RSAArcher. If you want a user to have access to specific global values lists
and not all lists, select the appropriate CRUD access for the individual global values list.
lIf you grant access rights to import data, you must also grant rights to the content record that
data will be imported into. For example, users can import data into the Policies application
only if they have access to Integration: Data Imports; Create, Read, and Update rights to
Policies:ContentRecord; and Policies: Data Import.
10. Click Save or Apply.
lClick Save to save and exit.
lClick Apply to apply the changes and continue working.
Assigning Access Roles to Users or Groups
RSAArcher allows creating one or more access roles. Each access role is mapped to a list of
permissions that grant the user rights to perform certain tasks and create, read, update, and/or delete
RSAArcher entities. RSA recommends that you limit privilege abuse and conflict of interests by
configuring access roles that provide separation of duties.
Chapter 1: Security Configuration Settings 20

Security Configuration Guide
Immediately after installation, RSA recommends you configure access roles as follows:
lCreate a new access role with no rights and make it the default role. Grant additional roles to
users as needed for appropriate access in RSAArcher.
lCreate read-only roles that can be used by an auditor. RSA recommends that these roles only
have permissions to view reports, configurations, and logs.
lCreate a new Security Administrator role that has full rights to Access Control. Grant the
Security Administrator role access rights to managing roles.
lConfigure access roles to grant non-administrative users only the rights they need for each task
based on their role in the organization. You can grant multiple access roles to each user. RSA
recommends that these roles do not have permission to view or modify security configuration.
RSArecommends that you review users’ task permissions on a routine basis to ensure that each user
is granted the correct task permissions.
Access roles are cumulative and can be assigned to users, groups, and users with more than one
access role.
Example
One access role grants create, read, and update privileges in the Policies applications and another
access role grants only delete privileges. A user who is assigned both access roles has create, read,
update, and delete privileges in the Policies applications.
Role Assignment by Group or User
RSAArcher allows access roles to be assigned to users through group membership or directly to
user accounts. RSA recommends that you assign permissions through group membership and not
directly through user accounts.
You can assign access roles to users in either of the following ways.
Assign an access role to a user
1. Open the user account to which you want to assign an access role.
a. From the menu bar, click .
b. Under Access Control, click Users.
c. Select the user account.
2. Click the Roles tab.
3. Click Lookup.
Chapter 1: Security Configuration Settings 21
Security Configuration Guide
4. In the Available list, expand the Roles tree, and click the access role to assign.
Note: To search for a specific role, enter the role name in the Find field and, if applicable,
select the type from the adjacent list. Click . The results of your search appear in the
Available list in the Search Results node.
5. Click OK.
6. Click Save or Apply.
lClick Save to save and exit.
lClick Apply to apply the changes and continue working.
Assign an access role to a user group
The group that you are assigning to the access role must exist.
If you associate a user group with an access role and the group contains subgroups, the subgroups
are not automatically associated with the access role. To associate subgroups with an access role,
you must also select the subgroups.
1. Open the access role to which you want to assign a user group.
a. From the menu bar, click .
b. Under Access Control, click Access Roles.
c. Select the access role.
2. In the Group Assignments section, click Assign.
3. From the Available list, expand Groups, and select the group or groups to which you want to
assign the access role. You can also use the Find field to search for a specific group.
4. Click Save or Apply.
lClick Save to save and exit.
lClick Apply to apply the changes and continue working.
Unassign an access role from a user account
You only can remove roles in which the Assignment Method is set to Manual.
1. Open the user account from which you want to unassign an access role.
a. From the menu bar, click
Chapter 1: Security Configuration Settings 22
Security Configuration Guide
.
b. Under Access Control, click Users.
c. Select the user account.
2. Click the Roles tab.
3. From the Selected list, click to unassign the applicable access roles.
4. Click OK.
5. Click Save or Apply.
lClick Save to save and exit.
lClick Apply to apply the changes and continue working.
Configuring LDAP for Managing User Accounts and Groups
Before you can update your user accounts and groups through a Lightweight Directory Access
Protocol (LDAP) server, you must:
lConfigure your LDAP server.
lMap attributes from your LDAP directory to your user accounts in RSAArcher.
lSet the rules for creating, updating, activating, and reactivating the user accounts and groups.
You can also set a schedule to automate the synchronization process between your LDAPserver and
the RSAArcher database. RSA recommends that you select LDAP servers that communicate using
LDAP over HTTPS, and that you set the LDAP Connection attribute to secure.
Note: RSA recommends requiring a domain for LDAP synchronizations and SSO. If domains are
not used, RSA recommends disabling the display of the Domain field in the RSAArcher Control
Panel.
Chapter 1: Security Configuration Settings 23

Security Configuration Guide
The following fields change during mapping:
lA user profile field that is mapped to an LDAP attribute is populated for new accounts. The value
is retained for existing accounts.
lA user profile field that is mapped to an LDAP attribute that does not have a value is not
populated for new accounts. The value is retained for accounts that were previously created.
lWhen the Email Address or Phone field in the user profile is mapped to an LDAP value, the
LDAP value is inserted in the first email or phone number field in the user profile for new user
accounts. For existing accounts, the LDAP value replaces the value in the first email or phone
number field in the user profile. If a user has modified the email address or phone number through
the Platform, the modification is overwritten by LDAP synchronization unless the LDAP value is
null.
lThe Time Zone field in the user profile cannot be mapped to an LDAP attribute.
Step 1: Set up your LDAP server
1. Go to the Manage LDAP Configurations page.
a. From the menu bar, click .
b. Under Access Control, click LDAPConfigurations.
2. Click Add New.
3. In the General Information section, enter the name and description.
4. Click the Configuration tab.
5. In the LDAP/Active Directory Server section, enter the user domain, IP address, and connection
or binding preferences.
Field Description
User
Domain
Specifies the domain to which user accounts from this LDAP server belong. The
name must be unique for all LDAP configurations.
If you are using Windows Authentication, ensure that the User Domain field
matches the Windows domain name. If these values do not match, single sign-on
(SSO) fails. These domain names are not case sensitive.
Connection Specifies whether a secure connection is required.
Chapter 1: Security Configuration Settings 24
Security Configuration Guide
Field Description
Name/IP
Address
Specifies the fully qualified name or IP address of your LDAP or Active
Directory server. Selecting this option ensures that your server assumes
responsibility for directing RSAArcher to the appropriate domain controller.
If the previously contacted domain controller is unavailable, a secondary domain
controller is identified and used instead. For example, if your primary LDAP
server is down for maintenance, RSAArcher is directed to the secondary server
to execute LDAP synchronization.
Binding Enables you to bind the LDAP connection to a default domain controller without
specifying the name of a default server. Microsoft recommends the use of
serverless binding for fault tolerance.
If you are using an Active Directory server, select whether to use serverless
binding. If you select Use Serverless Binding, you do not need to enter a value in
the Name/IPAddress field.
6. In the LDAP/Active Directory Server Configuration section, enter the configuration options for
your LDAPserver.
Field Description
User
Name
Specifies the user name of the user identified to access the LDAP or Active
Directory server when additional authentication is required.
Password Specifies the password of the user identified to access the LDAP or Active
Directory server when additional authentication is required.
Active
Directory
Domain
Specifies the domain of the active directory when additional authentication is
required.
User
Identifier
Identifies the object as a user object:
lFor new LDAP configurations, the default value is user.
lFor Active Directory servers, the default value is user.
lFor other LDAPservers, the default value is inetOrgPerson.
To obtain the actual default values for your organization, see your LDAP
administrator.
Chapter 1: Security Configuration Settings 25
Security Configuration Guide
Field Description
Group
Identifier
Identifies the object as a group object:
lFor new LDAP configurations, the default value is group.
lFor Active Directory servers, the default value is group.
lFor other LDAPservers, the default value is groupOfUniqueNames.
To obtain the actual default values for your organization, see your LDAP
administrator.
Additional
Attributes
Provides additional attributes that must be retrieved from the LDAP source during
search. For example, if you are using filters, enter the filters in this field.
User
Group
Identifier
Identifies the groups to which the user belongs:
lFor new LDAP configurations, the default value is memberOf.
lFor Active Directory servers, the default value is memberOf.
lFor other LDAPservers, the default value is uniqueMember.
To obtain the actual default values for your organization, see your LDAP
administrator.
Users and
Groups
Sets the User/Group association:
lUsers contain groups: Specifies that the user-group association is defined in
the user object of the active directory server.
lGroups contain users: Specifies that the user-group association is defined in
the group object of the LDAP server.
Connection
Time-out
Inputs the time-out value in seconds for the LDAP query. This value must be a
whole number greater than 0.
For new LDAP configurations, the default value is 60.
Chapter 1: Security Configuration Settings 26
Security Configuration Guide
Field Description
Binding Sets the Binding for an LDAPconfiguration from the following options:
lUse Simple LDAPBinding: Use when your server does not allow connection
using the Simple Authentication and Security Layer (SASL) protocol, or if you
experience errors.
lDisable page searching: Use when your server does not support paged
searching.
lRemove the whitespace from the DNs: Use to remove unnecessary white
space in the Distinguished Name (DN) before the names are compared when
you are using an LDAP server other than Active Directory.
7. (Optional)Click Test Connection to test your configuration settings.
8. Click Save or Apply.
lClick Save to save and exit.
lClick Apply to apply the changes and continue working.
Step 2: Map LDAP attributes to your user profiles
1. Go to the Configuration tab of the LDAP Configuration.
a. From the menu bar, click .
b. Under Access Control, click LDAPConfigurations.
c. Click the Configuration tab.
2. Go to the User Field Mapping section.
3. In the Base DN field, enter the domain name.
4. (Optional) In the Filter field, enter the criteria for filtering the LDAP directory.
5. In the Attributes field, click Get Attributes to populate the field mapping.
6. In the Field Mapping field, select the attributes for each field in the user profile that you are
synchronizing with the LDAP directory.
Field Description
Base DN Specifies the Base Distinguished Name (DN) for the location of user account
information in your LDAP directory.
Chapter 1: Security Configuration Settings 27
Security Configuration Guide
Field Description
Filter Filters the LDAP information available for mapping to user profile fields. Filters
are entered using the following format: objectClass=class name.
Example
You want to map only LDAP values associated with the “user” class. You would
enter objectClass=user as the filter. This entry results in the values associated
with this class being available for mapping.
Attributes Populates the Attribute lists in the Field Mapping section.
Field
Mapping
Maps the attributes from the LDAP directory to the fields in the user profile. You
must map all required fields in the user profile to an attribute.
Synch
Connector
Test
Tests the connection of an LDAPConfiguration between the RSAArcher
database and the LDAP server or active directory server.
If an error message is displayed when the number of records returned exceeds the
configured size limit for the active directory, contact your LDAP administrator to
request a configuration change.
7. Click Save or Apply.
lClick Save to save and exit.
lClick Apply to apply the changes and continue working.
Step 3: Set rules for managing user accounts and groups
1. Go to the Data Sync tab of the LDAP Configuration.
a. From the menu bar, click .
b. Under Access Control, click LDAPConfigurations.
c. Click the Data Sync tab.
2. In the User Account Management section, define the rules for updating, creating, deactivating,
and reactivating accounts.
Chapter 1: Security Configuration Settings 28
Security Configuration Guide
Field Description
Updating Specifies the rules for updating the user profile.
lUpdate all user accounts on each sync: Updates all user accounts based on
the information contained in your LDAP server
lUpdate only user accounts where the LDAP attribute meets the following
criteria: Updates user accounts based on a specific LDAP attribute and the
specified criteria.
Example:
You want to update only user accounts from your New York office. You
would select Office from the Attribute list, select Equals as the operator, and
enter New York in the Value field from the Operator list.
Create/Update Creates or updates a user account if the account does not exist in
RSAArcher. The name for the new user account is assigned the value of the
LDAP attribute mapped to the User Name (Login) field.
Deactivation Deactivates user accounts.
lDeactivate all user accounts that do not have a matching LDAP user.
Deactivates user accounts for which no matching LDAP account is found
during data synchronization.
lDeactivate those user accounts where LDAP attribute meets the following
criteria and then enter the LDAP criteria. Deactivate user accounts based
on a specific LDAP attribute.
Example:
You want to deactivate user accounts where the employment status for the
matching LDAP user account is set to inactive. You would select
Employment Status from the Attribute list, select Equals as the operator, and
enter Inactive in the Value field from the Operator list.
Chapter 1: Security Configuration Settings 29

Security Configuration Guide
Field Description
Reactivation Reactivates user accounts based on specific LDAP attribute criteria.
Example:
You want to reactivate inactive user accounts where the employment status in
the matching LDAP user account is set to active. You would select
Employment Status from the Attribute list, select Equals and enter Active in
the Values field from the Operator list.
Send
Notification
Sends a notification to each user that is created to alert the user of a new
password. The Default Email Address in the user account must be present to
send notifications. When you select this option, a notification message is sent
to all users that are being created.
RSArecommends disabling this option when synchronizing a large number of
records because uploading a large number of users can cause the email server
to exceed its capacity for sending email messages.
3. (Optional) In the Group Management section, enter the criteria for synchronizing the
LDAPgroup structure with RSAArcher.
Field Description
Group
Sync
Replicates your LDAPgroup structure in RSAArcher when synchronized.
The common name (CN) of the group on your LDAP server is used as the group name
in RSAArcher. If a group in RSAArcher is created before synchronizing with your
LDAP server, and there is a group with a matching name in your LDAP directory, the
group in RSAArcher is not synchronized with the LDAP group. Instead, a new group
with the same name is created and is flagged with the Synchronization icon.
Selecting the Group Synch option makes your LDAP server the authoritative system
for RSAArcher group management.
lAny groups that you delete from your LDAP server also are deleted from
RSAArcher
lAny changes made to your groups in the LDAP directory are reflected in
RSAArcher.
You cannot edit or delete groups in RSAArcher that were created through LDAP
synchronization. You can create additional groups in RSAArcher that are not included
in your LDAP group structure, and can fully manage these groups in RSAArcher.
Chapter 1: Security Configuration Settings 30

Security Configuration Guide
Field Description
Group
Base
DN
Specifies the Base Distinguished Name (DN) for your LDAP group structure.
If you selected Group Sync and you do not specify a DN for your group structure, the
group sync query defaults to the Base DN specified in the LDAP configuration.
4. Click Save or Apply.
lClick Save to save and exit.
lClick Apply to apply the changes and continue working.
Configuring an Instance for Single Sign-On
Single Sign-On (SSO) reduces administrative overhead related to user accounts. When you enable
SSO authentication, you can retrieve user profile information at the time of initial account creation
from an LDAP directory server. This optional step automates the configuration of basic user profile
data. You can configure Secure Sockets Layer (SSL) for SSO or as a stand-alone method. For SSO,
you can set up the authentication for Windows Integrated or for Windows Integrated and SSL.
Setting up the authentication requires you to modify the web.config file.
RSAArcher supports two basic authentication mechanisms:
lUsername/password login scheme (the default).
lSingle sign-on (SSO) configuration, which facilitates seamless user login in corporate computing
environments and supports most popular web authentication products.
The RSA Archer Control Panel provides controls for enabling SSO and selecting an SSO method.
When configuring SSO, you must set up LDAP integration from the Manage LDAP Data
Configuration page on the Access Control feature.
Chapter 1: Security Configuration Settings 31

Security Configuration Guide
SSO properties
Option Description
Single
Sign-On
Mode
Specifies the user log on method. By default, the method is Disabled. When you have
enabled this option, the system grants the user access if the user exists in
RSAArcher. If the user does not exist, an LDAP query retrieves the user profile
information and creates an account.
The other options are:
lHTTPHeader. This method requires an HTTP header parameter that identifies the
user attempting to access the application.
lRequest Parameter. This method requires a request form or query string parameter
that identifies the user attempting to access the application.
lWindows Integrated. This method uses the “Integrated Windows Authentication”
built into Internet Information Services (IIS) that uses the user credentials via
NTLM/Active Directory.
lFederation. This is the name of the protocol on which the Security Assertion
Markup Language (SAML) v2.0 in RSAArcher functions. The purpose of this
option is to delegate authentication to your own authentication system.
Note: You must use Active Directory Federation Services (ADFS) as the service
provider for the Federation option.
Username
Parameter
Specifies the user name of the user logging on to RSAArcher. This option is required
when you have selected the Request Parameter or HTTP Header methods as the
Single Sign-On Mode.
Domain
Parameter
Specifies the domain to which the user can log on. This option is required when you
have selected the Request Parameter or HTTP Header methods as the Single Sign-On
Mode.
Allow
Manual
Bypass
Activates manual log on. When selected, users can log on to the system manually by
adding the parameter manuallogin with a value of true to the query string passed to
default.aspx (for example, https://egrc.archer.rsa.com/default.aspx?manuallogin=true).
When this parameter is in the query string, users see the Login dialog box rather than
passing the user credentials into the application. This option is particularly beneficial
to a system administrator who needs to log in to the application with the System
Administrator user account instead of having the SSO send the credentials of the
personal user account.
Chapter 1: Security Configuration Settings 32
Security Configuration Guide
Authentication options
lWindows Integrated SSO only
lWindows Integrated SSO with SSL
lSSL only
Configuration Procedure
Step 1: Enable authentication for Single Sign-on
1. Go to Internet Information Services (IIS) Manager.
2. Enable authentication for the following SSO modes for the current server desktop connection:
lFor HTTP Header, enable Anonymous Authentication
lFor Request Parameter, enable Anonymous Authentication
lFor Windows Integrated, enable Windows Authentication
lFor Federation, enable Anonymous Authentication.
Note: RSA Archer requires that only one authentication type be enabled at a time.
3. In the RSA Archer Control Panel, specify and then enable the instance for which you are
configuring SSO.
Step 2: Configure Single Sign-on
Note: You must have system administrator rights on the server running the RSAArcher web
application.
1. Click the Single Sign-On tab of the instance you want to configure.
a. Open the RSAArcher Control Panel.
b. From the Instance Management list, double-click the instance.
2. In the Single Sign-On Mode field, select one of the following options:
lHTTP Header
lRequest Parameter
lWindows Integrated
lFederation
Chapter 1: Security Configuration Settings 33
Security Configuration Guide
3. Do one of the following:
lIf you selected Request Parameter or HTTP Header methods, go to the next step.
lIf you selected Windows Integrated method, go to step 6.
lIf you selected Federation, go to step 7.
4. In the Username Parameter field, enter the name of the user log on.
5. In the Domain Parameter field, enter the domain to which the user can log on.
6. Do one of the following:
lTo enable manual log on, click Allow Manual bypass, and then go to step 14.
lTo force single sign-on regardless of the user, go to step 14.
7. Configure the following options in the Single Sign-on section:
a. Select Override federation metadata to ignore Federation metadata at the installation level.
This enables instances to use a different ADFS service provider.
Note: Any change of the entity name or change of any certificates in ADFS requires that you
re-import metadata into RSA Archer.
b. If you selected Override federation metadata, you can click Select to navigate to a different
metadata XML file, and then select the file.
Note: For instructions about how to get FederationMetadata.xml, see your service provider's
documentation. For example, in ADFS, the URL to obtain the XML file will look like
https://server/FederationMetadata/2007-06/FederationMetadata.xml, where server is the
name of your service provider.
c. In the Relying Party Identifier field, enter the replying party identifier, which is provided in
ADFS for this instance.
d. In the Home Realm Parameter field, enter the name you created to identify your realm. This
is the identifier used in the vanity URL. The syntax for this string is:
https://servername/../Default.aspx?<HomeRealmIdentifier>=<IdpRealmName>
For example, to skip the identity provider prompt, you can pass the home realm as a
parameter:
https://servername/../Default.aspx?Realm=ADFS-IDP
8. Configure the following options in the Identity Providers section:
a. In the Decision Page Header field, enter the text you want to appear as the heading at the top
of the decision page.
b. In the Dropdown Label field, enter the text you want to appear on the decision page as the
label for the drop-down that lists all identity providers.
Chapter 1: Security Configuration Settings 34

Security Configuration Guide
c. In the Identity Provider field, select an existing identity provider. Alternatively, you can
complete the following three fields to add a new identity provider (refer to the Claim Names
for the Federation table at the end of this procedure for RSA Archer supported claim names):
lIn the Realm field, enter the realm name for the new identity provider.
You can link to the following Web site to learn how to set up the claim provider and
relying party in ADFS:
https://technet.microsoft.com/en-us/library/adfs2-step-by-step-guides(v=ws.10).aspx
lIn the Identifier field, enter the appropriate claim provider identifier which is provided in
ADFS for a given identity provider. For a complete list of the claims that RSA Archer
supports, see the table below.
lIn the Display Name field, enter the display name for the new identifier, which then
displays in the drop down list of decision page.
To add more providers, click , and then complete the same three fields for each provider.
9. (Optional) In the On Login Error field, enter the URL for the page you have created to which the
user is redirected in case of a login failure.
10. (Optional) In the On User Not Found field, enter the URL for the page you have created to
which the user is redirected in case the user name cannot be found in RSA Archer.
11. (Optional) In the On Provisioning Failure field, enter the URL for the page you have created to
which the user is redirected in the case of a provisioning failure, for example if you have
exceeded the maximum number of users for your instance.
12. Select the Provisioning Settings for the selected Identity Provider as appropriate.
13. Enter the default First Name, Last Name, and User Role that RSAArcher uses if no name and
user roles were specified at the time of provisioning. You can, at a later time, edit these values
for the new user.
14. On the toolbar, click Save.
Claim Names for the Federation Option
The following table contains claims mapping information. Items marked with an asterisk (*) are
mandatory.
Note: ADFS expects claims to be in URL format, for example
http://schemas.xmlsoap.org/claims/Group.
Chapter 1: Security Configuration Settings 35
Security Configuration Guide
RSAArcher Field Name RSA Archer Supported Claim Name /
Namespace
User Identity Information
User Name* UPN*
Domain UserDomain
First Name FirstName
Last Name LastName
Middle Name MiddleName
Title Title
Contact Details
Email Address EmailAddress
Phone Number PhoneNumber
Company Name CompanyName
Address FullAddress
Street
City
State
Zipcode
Localization
Time Zone ID TimeZoneId
Account Maintenance
Security Parameter ID SecurityParameterId
Access Control Roles / Groups
Group Group
Role Role
Chapter 1: Security Configuration Settings 36
Security Configuration Guide
Step 3: Set authentication for Single Sign-on
1. Enable LDAP synchronization enabled in Microsoft Internet Information System (IIS).
2. Specify and enable the instance for which you are configuring SSO.
3. Configure single sign-on for the instance.
4. Modify the web.config file for your authentication method.
Configuring the Instance Database Connection String and Pooling
Options
You can configure the database connection string for either Windows Integrated Security or SQL
Server encryption 2012 or 2014. RSA recommends that you configure authentication with this
database based on Microsoft’s recommended best practices for secure authentication to a database.
RSAArcher supports using Integrated Security for connecting to the database.
lIf using Windows Integrated Security, this option uses the current Windows identity established
on the operating system thread to access the instance database. Selecting this option disables
Login name and Password. Do not select this option if you are using SQL Server Authentication.
lIf using SQL Server encryption, you must install separate certificates on each server (web
application, services, and database) and you must enable encryption on the SQL server.
Otherwise the connection will fail.
lIf your application connects to an AlwaysOn availability group (AG) on different subnets,
selecting the Multi-Subnet Failover option provides faster detection of and connection to the
active server
Connection pooling is enabled for all instances and maintains a cache of database connections that
you can reuse when requesting information from the database. Pooling reduces the number of new
database connections that you must make.
Configure the instance database connection string
Complete this task for all configurations to set the database connection string for the instance.
1. On the instance you are configuring, go to the Connection Properties section.
a. Open the RSAArcher Control Panel.
b. From the Instance Management list, double-click the instance.
c. Go to the Database tab, and then go to the Connection Properties section.
2. In the SQLServer field, select the database server for the instance.
Chapter 1: Security Configuration Settings 37
Security Configuration Guide
3. Select the authentication method for connecting to the database server.
Do one of the following:
lIf using Windows Integrated Security, select Use integrated security and skip to step 6.
lIf using SQL Server encryption, select Use encryption and continue at the next step.
lIf your application connects to an AlwaysOn availability group (AG) on different subnets,
select the Multi-Subnet Failover option, and then continue at the next step. Enabling this
option adds the following expression to the SQL connection string for the Instance database:
MultiSubnetFailover=True
4. In the Login name field, enter the name of the SQL Server Authentication account.
5. In the Password field, enter the login password for the SQL Server Authentication account.
6. In the Database field, enter the instance database name.
7. Click Test Connection to test the connection string.
8. (Optional) In the Connection Timeout field, change the default duration of time for the
connection timeout.
9. Designate the file repository path.
Override the pooling options for the instance database
By default, database pooling is enabled with a minimum of 0 connections and a maximum of 100.
1. Click the Database tab, and then go to the Pooling section.
a. Open the RSAArcher Control Panel.
b. From the Instance Management list, double-click to expand the Instances list.
c. Double-click the instance in the list that you want to configure.
2. In the Pooling field, click Override connection pool size.
3. In the Min pool size field, enter the minimum pool size.
4. In the Max pool size field, enter the maximum pool size.
5. On the toolbar, click Save.
Changing SysAdmin and Services Account Passwords
RSA recommends that you instruct your administrators on your corporate IT policy and security best
practices for generating and managing passwords for default System Administrator (sysadmin) and
default services accounts.
Chapter 1: Security Configuration Settings 38
Security Configuration Guide
After installing RSAArcher, you must change the passwords of the SysAdmin Account and
Services Account. You should change both passwords at least every 90 days using the RSA Archer
Control Panel. The new passwords must be strong, meeting the security parameter configuration for
the accounts. You can disable the sysadmin account, but cannot delete or rename it.
Important: Do not use a semicolon (; ) as the special character in a password. RSAArcher does
not recognize this character.
Change the SysAdmin password
1. On the Accounts tab, go to the SysAdmin Account section of the instance you want to update.
a. Open the RSAArcher Control Panel.
b. From the Instance Management list, double-click the instance.
2. In the New Password field, enter the password for the SysAdmin account.
3. (Optional) Select Show Password to show the password as you enter it. If this option is not
selected, the password is masked with substituted characters for the actual text.
Change the Services Account password
1. On the Accounts tab, go to the Services Account section of the instance you want to update.
a. Open the RSAArcher Control Panel.
b. From the Instance Management list, double-click the instance.
2. In the New Password field, enter the password for the Services account.
3. (Optional) Select Show Password to show the password as you enter it. If this option is not
selected, the password is masked with substituted characters for the actual text.
4. Complete the Default Instance Creation.
For additional information on other options, see the RSAArcher Control Panel Help.
Configuring the Login Page
RSA recommends that you require a domain for LDAP synchronization and SSO. If you do not use a
domain, RSA recommends that you disable the Domain field in the RSA Archer Control Panel.
If you are using SSO, the RSAArcher does not display a logon banner. In this case, RSA
recommends that you ensure that the SSO provider displays the government or corporate-approved
login banner.
Chapter 1: Security Configuration Settings 39
Security Configuration Guide
Disable the domain field
1. Open the RSAArcher Control Panel, and then go to the Installation Settings tab.
2. On the General tab, go to the Login Page section.
3. In the Default field, select Hide Domain field on Login Page.
4. On the toolbar, click Save.
Display the login banner
1. Open the RSAArcher Control Panel, and then go to the Installation Settings tab.
2. On the General tab, go to the Login Page section.
3. In the Banner field, enter the banner that you want to appear at the bottom of the Login page. By
default, the Hide Domain field on Login Page checkbox is blank, indicating that the Domain field
appears.
4. On the toolbar, click Save.
Authentication Methods
Authentication methods authorize users to perform computer functions and determine the
connectivity to the databases. The method you use is entirely up to your business operations. The
authentication methods include:
lSQL Server Authentication. RSAArcher connects to each database using a SQL account created
on the SQL Server instance. You provide the account information during the installation process.
lSQL Server Data bases. RSAArcher SQL Server 2014 or SQL Server 2016 databases for data
storage. Restrict authorization to these databases to only the accounts that need access to the
database.
During installation and upgrade, the account connecting to the databases from RSAArcher
requires db_owner permission. Post-installation, the account connecting to both Instance and
Configuration databases from RSAArcher requires the following permissions on the database:
oData Read rights (member of db_datareader)
oData Writer rights (member of db_datawriter)
oExecute permissions on all stored procedures and scalar functions
oSelect permissions on all views, table-valued functions, and in-line functions
oExecute permissions on the system-stored procedure sp_procedure_params_100_managed
Chapter 1: Security Configuration Settings 40
Security Configuration Guide
Important: Grant the same privileges to the user for both the Instance database and the
Configuration database.
lIntegrated Security. RSAArcher connects through a Windows identity established on the
operating system thread using an Active Directory domain user account. You must configure the
Application Pool Identity in IIS as the domain user account before installing RSAArcher. This
domain user account has DB Owner (DBO) access to the instance database that serves as the
process identity for applications assigned to the application pool. DBOaccess is only required
during the installation.
RSA recommends creating a custom domain services account dedicated to RSAArcher for the
IIS Application Pool Identity, and then providing it access to the necessary resources. In addition,
be prepared to provide the same account credentials for the RSA Archer Services account during
the installation process.
Note: The term Integrated Security may also be referred to as Trusted Connections. The
Application Pool is a means of isolating Web Applications where there are multiple IISworker
processes that share the same Web Server.
Message Logging
A log is a chronological record of system activities that enables the reconstruction and examination
of the sequence of environments and activities surrounding or leading to an operation, procedure, or
event in a security-relevant transaction from inception to final results.
RSAArcher logs Event Tracing for Windows (ETW) trace events and writes log messages to a
specified database. ETW is a kernel-level API that enables high-performance data collection and
tracing in Windows. It enables you to start and stop event tracing at a granular level, log to a very
efficient buffering system, and consume events across a system.
You can monitor the log messages with any tool that consumes ETW trace events. Message logging
provides an easier way to troubleshoot processing jobs when errors occur. For example, you can use
this log to troubleshoot errors that might occur in a data feed job. Messages are grouped by each data
feed with a Start and Stop event so that you can easily identify where the data feed failed.
Third-party tools request either the Provider Name or the Provider ID in order to consume the trace
events generated in RSAArcher:
lProvider ID: 472DD2D1-1B28-5523-9DDD-B4DEB8924408
lProvider Name: RSA-Archer-GRC-Platform
If you are using message logging, you must create a database dedicated to the RSAArcher
Instrumentation service. Do not use the same database that stores instance or configuration data.
Chapter 1: Security Configuration Settings 41
Security Configuration Guide
Note: If you are specifying an account other than the Local System account to run the services and
you are using the RSAArcher Instrumentation service, you must add this user to the Performance
Log Users group to grant permission to write to ETW.
Log Description
The following table shows the security-relevant logs provided by RSAArcher.
Component Location
Security Events Report The instance database
RSAArcher Error Logs File system in the configured logging directory
Windows Event Logs Event Viewer
Security Events Report
The Security Events report contains a list of all of the security-related events that have occurred in
RSAArcher. RSA recommends that administrators define and enforce a retention policy for the
RSAArcher Error logs, as well as the Windows Event logs, in accordance with your corporate IT
policy and security best practices. This report includes the following security events:
lAccess Role Created
lAccess Role Deleted
lAccess Role Modified
lAccount Status Modified
lApplication Owner Added
lApplication Owner Deleted
lFailed User Login
lFull Application Content Delete
lGlobal Report Permission Granted
lGlobal Report Permission Removed
lLDAP Configuration Delete Started
lLDAP Configuration Delete Completed
lMaximum Login Retries Exceeded
lOffline Access Sync Requested - Download
lOffline Access Sync Requested - Upload
Chapter 1: Security Configuration Settings 42
Security Configuration Guide
lPassword Changed by Administrator
lPassword Changed by User
lReset Password Requested
lRole Assigned to User
lRole Removed from User
lSecurity Events Started
lSecurity Events Stopped
lSecurity Parameter Assignment Modified
lSecurity Parameter Created
lSecurity Parameter Deleted
lSecurity Parameter Modified
lSub-Form Owner Added
lSub-Form Owner Deleted
lUser Account Added
lUser Account Deleted
lUser Account Modified
lUser Added to Group
lUser Full Name Modified
lUser Login
lUser Login Name Modified
lUser Logout
lUser Removed from Group
RSAArcher Error Logs
You can configure the location of the RSAArcher error log in the RSAArcher Control Panel at both
the installation and the instance level. The default log location for the instance is
C:\ArcherFiles\logging.
RSA recommends that you configure the setting at the installation level and allow the location for
the instance level to default based on the installation setting.
For more information, see "Logging Settings" and "Verify the Logging Properties" in the
RSAArcher Control Panel Help.
Chapter 1: Security Configuration Settings 43

Security Configuration Guide
Log Directory Permissions
RSA recommends that you restrict the permissions on the log files folder to the same read, write,
and modify permissions of the account that the IIS processes and the RSAArcher-installed services
are running.
For More information, see "Task 5: Grant Permissions to RSAArcher Directories" in the
"Configuring the Web Server" section of the RSAArcher Platform Installation and Upgrade Guide.
Windows Event Logs
The following items are logged in the Windows Event logs by the RSAArcher services and Web
Application:
lService Start (Application and System logs)
lService Stop (Application and System logs)
l.NET Runtime Errors
Port Usage
RSA recommends that you configure your firewall rules and access control lists to expose only the
ports and protocols necessary for operation of RSAArcher.
The Job Engine and Configuration Service can run on multiple servers simultaneously. You should
account for each server running those services when planning firewall rules. For a given item, you
can omit the rule if the source and destination components run on the same server.
RSA Archer services and supporting services on the web server use specific ports to communicate
with each other and with interfaces and applications external to RSAArcher.
You can modify the following ports:
lConfigure the port used for SQL in SQLServer.
lConfigure the port used for HTTPS in Microsoft IIS.
The following table lists ports used by RSAArcher. Rows in bold text identify the minimum set of
ports that must be open for the application to work. Brackets around items in the Destination column
indicate supporting hosts and servers that communicate with RSAArcher.
Purpose Source Destination Protocol Port
(Default)
Mandatory or
Optional
Client Web
Connectivity
Platform Web
UI
Web Server
(IIS) or Load
Balancer
HTTP(S) 80/TCP,
443/TCP
Mandatory
Chapter 1: Security Configuration Settings 44
Security Configuration Guide
Purpose Source Destination Protocol Port
(Default)
Mandatory or
Optional
See Web Server Communication. The destination is a Load Balancer if the
Platform is deployed with a web server cluster or farm. RSA recommends that
you rely only on HTTPS.
Platform Web
API
Web Server
(IIS) or Load
Balancer
HTTP(S) 80/TCP,
443/TCP
Optional
See Web Server Communication. The destination is a Load Balancer if the
Platform is deployed with a web server cluster or farm. RSA recommends that
you rely only on HTTPS. You can change the default port for use by your
application.
Archer-to-
Archer Data
Feed
Web Server
(IIS) or Load
Balancer
HTTP(S) 80/TCP,
443/TCP
Optional
See Web Server Communication. The destination is a Load Balancer if the
Platform is deployed with a web server cluster or farm. You can change the
default port for use by your application.
Offline Access Web Server
(IIS) or Load
Balancer
HTTP(S) 80/TCP,
443/TCP
Optional
Only required if using offline access.
RSS Feeds Web Server
(IIS) or Load
Balancer
[Remote Host] HTTP(S) 80/TCP,
443/TCP
Optional
See Web Server Communication. The destination is a Load Balancer if the
Platform is deployed with a web server cluster or farm. You can change the
default port for use by your application.
Threat Feeds Job Engine
Service
[Remote Host] HTTPS 443/TCP Optional
See Web Server Communication. Only required if using Threat Management to
pull in a threat intelligence feed from Symantec DeepSight, Verisign iDefense, or
other supported feeds..
Chapter 1: Security Configuration Settings 45
Security Configuration Guide
Purpose Source Destination Protocol Port
(Default)
Mandatory or
Optional
SQL Queries Configuration
Service, Job
Engine Service,
Queuing
Service, Web
Server (IIS)
[Database
Server (SQL
Server) running
RSA Archer
database]
SQL 1433/TCP Mandatory
See SQL Server Communication. You can change the default port for use by your
application.
LDAP
Synchronization
Service
[Database
Server (SQL
Server) running
RSA Archer
database]
SQL 1433/TCP Optional
See SQL Server Communication. Only required if using LDAP synchronization.
Configuration
Service, LDAP
Synchronization
Service, Job
Engine Service,
Queuing
Service, Web
Server (IIS)
[Database
Server (SQL
Server) running
RSA Archer
database]
SQL 1434/UDP Optional
If using a named instance, SQL Browser is also required.
Microsoft File
Sharing
Job Engine
Service, Web
Server (IIS)
[File Server for
document
repository]
SMB/CIFS 445/TCP Optional
Only required if the document repository is not contained on a single web server.
Web Server
(IIS)
[File Server for
company_files]
SMB/CIFS 445/TCP Optional
Only required if the appearance files are not all contained in a single web server.
Queuing
Service
[File Server for
keyword
indexes]
SMB/CIFS 445/TCP Optional
Chapter 1: Security Configuration Settings 46
Security Configuration Guide
Purpose Source Destination Protocol Port
(Default)
Mandatory or
Optional
Only required if the keyword search indexes are not all contained on a single web
server.
LDAP
Queries
LDAP
Synchronization
Service
[LDAP Server] LDAP(S) 389/TCP
(LDAP),
636/TCP
(LDAPS)
Optional
Only required if performing LDAP synchronization. You can change the default
port for use by your application.
Audit Logging Web Server
(IIS)
[Remote Host] TCP/UDP Varies Optional
Only required if Audit Logging is enabled.
Cache
Locator
Java [Cache Service
Server]
TCP 13402 Optional
Only required if using the RSA Archer Cache as your Caching Option.
Cache Server Java [Cache Service
Server]
TCP 13401 Optional
Only required if using the RSA Archer Cache as your Caching Option.
Local Cache Local cache
client (Web
Server (IIS),
Job Engine
Service, LDAP
Synchronization
Service)
[Cache Service
Server]
TCP 40404 Optional
Only required if using the RSA Archer Cache as your Caching Option.
Email
Notifications
Job Engine
Service
[SMTP Server] SMTP(S) 25/TCP
(SMTP),
465
(SMTPS)
Optional
Only required if using email notifications. You can change the default port for
use by your application.
Chapter 1: Security Configuration Settings 47
Security Configuration Guide
Purpose Source Destination Protocol Port
(Default)
Mandatory or
Optional
Mail Monitor Job Engine
Service
[POP3 or
IMAP Server]
POP3(S),
IMAP(S)
110/TCP
(POP3),
995/TCP
(POP3S),
143
(IMAP),
993/TCP
(IMAPS)
Optional
Only required if leveraging Mail Monitor functionality.
Read Receipts Job Engine
Service
[POP3 or
IMAP Server]
POP3,
IMAP
110/TCP
(POP3),
143
(IMAP)
Optional
Only required if leveraging Read Receipt functionality.
Configuration
Data
Retrieval
Job Engine
Service,
Queuing
Service, Web
Server (IIS)
Configuration
Service
WCF 13201/TCP Mandatory
Required for RSA Archer service to obtain Platform configuration data.
Caching
Service
Configuration
Service
WCF 13201/TCP Optional
Only required if using the RSA Archer Cache as your Caching Option.
LDAP
Synchronization
Service
Configuration
Service
WCF 13201/TCP Optional
Only required if using LDAP synchronization.
Configuration
Data Updates
Configuration
Service
Web Server
(IIS)
WCF 13300-
13304/TCP
Mandatory
Required to push configuration data updates to the web servers.
Chapter 1: Security Configuration Settings 48
Security Configuration Guide
Purpose Source Destination Protocol Port
(Default)
Mandatory or
Optional
Configuration
Service
Job Engine
Service,
Queuing
Service
WCF 13305-
13350/TCP
Mandatory
Required to push configuration data updates to RSAArcher services.
Configuration
Service
Caching
Service
WCF 13305-
13350/TCP
Optional
Only required if using the RSA Archer Cache as your caching option.
Configuration
Service
LDAP
Synchronization
Service
WCF 13305-
13350/TCP
Optional
Only required if using LDAP synchronization.
SSO
Authentication
Web Server
(IIS)
[Remote Host] Varies Varies Optional
Only required if using SSO, in which case additional traffic may need to be
allowed. The destinations, ports, and protocols would vary based on the SSO
provider and your specific implementation. You can change the default port for
use by your application.
Data
Publication
Job Engine
Service
[Remote Host] Varies Varies Optional
Only required if using the Data Publication feature, in which data can be
extracted and written to a relational database system. The destinations, ports, and
protocols vary based on the destination system. You can change the default port
for use by your application.
Other Data
Feeds
Job Engine
Service
[Remote Host
(s)]
Varies Varies Optional
Only required if using RSAArcher to pull data from other systems using transfer
protocols, for example, FTP, SMB, and SQL. The destinations, ports, and
protocols vary based on your implementation. You can change the default port for
use by your application.
Chapter 1: Security Configuration Settings 49
Security Configuration Guide
Network Encryption
The following sections provide information on how to secure communication protocols used by
RSAArcher:
lData Feeds
lWeb Server Communication
lSSL Certificate Guidance
lSQLServer Communication
lRSA® Archer® Web Services API
Data Feeds
Data Feed Manager is a flexible, code-free tool for aggregating data in RSAArcher. Use the tool to:
lConfigure multiple, dynamic data feeds, and manage those feeds without relying on programming
resources.
lBuild and configure dynamic integrations with external enterprise systems and files. From Data
Feed Manager, you can build a transport path between RSAArcher and an external source and
then map the data from that source to an existing target application or questionnaire in
RSAArcher.
lConfigure the data feed to run on a schedule. After the initial configuration, the data feed
executes automatically with no need for you to intervene.
You can integrate data using Data Feed Manager for:
lNetwork and asset discovery data
lVulnerability scan results
lPerformance scorecards
lIncident reports
lAudit results and recommendations
Because RSAArcher is vendor neutral and content independent, you can use RSAArcher as a point
of consolidation for enterprise data of any type for supporting analysis and process management.
With a centralized view of data from point solutions, databases, spreadsheets, and other sources, you
can access content more easily that is relevant to your job functions. Re-purpose data to support a
variety of business processes.
Chapter 1: Security Configuration Settings 50

Security Configuration Guide
A data feed must be both active and valid to run. As you configure your data feed, Data Feed
Manager validates the information for you. If it is not valid, an error message appears. You can save
the data feed and correct the errors later. However, the data feed does not process until you have
corrected the errors and the data feed validates.
Data feed types
Important: To avoid potential conflicts with other data feeds, RSA suggests that you use a different
user account for each data feed. Additionally, if you plan to run multiple data feeds simultaneously,
create a unique name to prevent termination of session tokens.
Data Feed Manager supports standard and transport data feeds.
Feed
Type Description
Standard Brings data from an external source into an application or questionnaire. This data feed
type requires that you:
lDefine the fields and data format
lMap the fields in the source file to the target
lPerform a report-based search for an application or questionnaire that contains the
source data that you want to import into another application or questionnaire.
lSet up a user account as a Service account, which means this user account has all
necessary permissions to execute the data feed.
You can specify the following:
lWhether to send subscription notifications to specified users or groups when records
are modified.
lWhether to send a notification to specified users or groups when a data feed job
completes, identifying a successful or failed completion.
lThe locale format of your source data. For example, different characters might be
used to indicate a decimal place.
Transport
Only
Locates a separate data file that contains additional instructions for launching
subsequent, standard data feeds.
lEnsure that a user account for the data feed and a target path for the separate data
file exist, but no additional data configuration.
lCreate a unique name when running multiple data feeds simultaneously to prevent
termination of session tokens.
Chapter 1: Security Configuration Settings 51
Security Configuration Guide
Data feed transporter types
The Data Feed Service (DFS) architecture accommodates the definition of various data retrieval
mechanisms. The following table describes the out-of-the-box transporters.
Transporter Description
Archer Web
Services
Accesses the Web Services API and retrieves data from an instance of
RSAArcher. This transporter is used in Archer-to Archer data feeds.
Database
Query
Returns results using an SQL query.
DeepSight
2.0
Uses the v2 Symantec web service to retrieve vulnerabilities threat feed data.
This transporter will soon become unusable because of deprecation by Symantec.
For DeepSight v4 data feeds that are available on the RSA Archer Community on
RSA Link, use the DeepSight 4.0 transporter.
DeepSight
4.0
Uses the v4 Symantec web service to retrieve security risk and vulnerability
SCAP data feeds.
File Retrieves delimited data files, including support for multi-file manifests.
FTP Retrieves data files using the FTP protocol.
HTTP Executes a GET or POST to retrieve data from an HTTP or HTTPS site.
iDefense Retrieves vulnerabilities and geopolitical threat feed data.
JavaScript Executes a user-provided JavaScript file. If the result of that execution is a data
set, it is transformed and processed into the platform as normal.
Mail Monitor Retrieves content from monitored email accounts.
RSS Retrieves records from a configured RSS feed.
Supported and unsupported field types for data mapping
Supported Field Types
lAttachment
lCAST Detail
lCross-Reference
lDate
Chapter 1: Security Configuration Settings 52
Security Configuration Guide
lExternal Links
lImage
lInternal Reference
lIP Address
lMatrix
lNumeric
lRecord Permissions
lRelated Records
lSub-Form
lText
lUser/Groups List
lValues List
Unsupported Field Types
lAccess History
lCAST Score Card
lDiscussion
lFirst Published Date
lHistory Log
lLast Updated Date
lMRDC (Must be populated through reference fields.)
lRecord Status
lSystem-generated Related Record that points to a Questionnaire
lVoting
Schema sources
The source for the schema of your data feed depends on which transporter you are using. The
following list identifies and describes the schema sources that are available for each of the out-of-
the-box transporters.
Important: The process of loading a source definition for a data feed times out at five minutes. You
may want to consider using a smaller set of source data when you set up the feed.
Chapter 1: Security Configuration Settings 53

Security Configuration Guide
Source Description
Execute
Search
Executes the search in RSAArcher and detects the source schema from the results.
Recommended approach for an Archer-to-Archer data feed. Loads the source fields
directly from the report. When using this scheme, complete all required information on
the Transport and Navigation tabs.
Execute
Query
Executes the query specified on the Transport tab and detects the source schema from
the resulting record set.
Using this option may trigger actions in the database associated with this query.
Sample
File
Uses a skeleton of your actual source data file. For example, if you are importing data
from a .csv file, the source data file is a .csv file that includes the column names from
your source data. If you are importing data from an .XML file, the source data file
includes the structure of your .XML without the actual field values.
When you select the sample file, the Source Fields section populates with the fields
specified in the sample data file.
For the Archer Web Services Transporter, select a file from an external location that
contains the data in a same format as the report format.
Load
URL
Loads the contents at the target URL and detects the source schema from the contents.
Using this option may trigger actions associated with accessing the target URL.
Standard
Schema
Uses the standard mail schema.
Updating locked records
RSAArcher has an important feature that prevents the updating or altering of a locked record. A
record becomes locked when a user has opened it in Edit mode for the purpose of modifying it.
However, it is important to note that records can be updated through the RESTful and Web APIs, as
well as through data feeds, even when a user has locked them. The following are examples of
typical APIs that can update user-locked records:
lPUT content (RESTful )
lUpdateRecord (Web Services)
lUpdateRecords (Web Services)
Unique identifiers
A unique identifier is a field, or a combination of fields, whose values in individual records are
Chapter 1: Security Configuration Settings 54
Security Configuration Guide
different from all other records, thereby uniquely identifying the record. A compound unique
identifier means that all fields in the key must match the fields in the target application in order for a
match to occur.
By establishing a unique identifier, you instruct the Data Feed Manager on how to update existing
data in the application or questionnaire from the matching source data. After setting the order of the
key fields, the Data Feed Manager scans the data source for matches to each unique key in the
specified order. If any key is found to match the field in the target application than the record is
considered matched. If no match is found, the Data Feed Manager creates a new target application
or questionnaire record.
For example, you can select an IP Address field in a record to be your unique identifier. If a data
source record has a matching value for the target application field, the source record data updates
the target application record data. If no match is found, the data feed creates a new application
record.
Note: Matching logic includes text formatting when matching the key fields in the data feed source
to a record in the RSAArcher database. When a data feed has two records with the same text, but
with different formatting tags, the records are distinguished as separate records.
Fields that act as unique identifiers for your data feed do not have to be the same as the key fields
for your target applications or questionnaires. The following table lists the field types from a target
application or questionnaire that can be selected as unique identifiers.
Text-Based Field Types List-Based Field Types
Text Values Lists
Numeric Record Permission
Date User Groups
IP Address Sub-form Fields
Tracking ID ("System ID" only)
Note: You can only use the Tracking ID field as a key field if it is configured as System ID. If
configured as Application ID, it is not available for use as a key field.
When selecting cross-reference or related records fields as unique identifiers, you must select a
field from the related application matching one of the above field types. For example, if you select
the Vulnerabilities cross-reference field, which cross-references the Vulnerabilities application, in
an Assets application, you also select a qualifying field from the Vulnerabilities application to serve
as a unique identifier.
Chapter 1: Security Configuration Settings 55
Security Configuration Guide
Matching criteria for unique identifiers
Option Description
MatchExact Specifies that data source field must match the unique identifier value exactly for
the target record to be updated. If the match is not exact, a new record is created.
For example, if a data source field has a value of "Renee Jones" and a mapped
application field that is specified as a unique identifier has a value of "Renee Ellen
Jones," the target application record is not updated because it is not an exact match.
MatchAny Specifies that the source data must match at least one condition in the list-based
field for the target record to be updated.
For example, if a target application record has the values Blue and Green selected
in the field specified as the unique identifier, and the mapped field in the source data
includes only the value Blue, the record is updated because at least one of the
values matches.
MatchAll Specifies that the source data must match all of the conditions in the list-based field
for the target record to be updated.
For example, if the target application record has the values Blue and Green selected
in the field specified as the unique identifier, and the mapped field in the source data
includes the values Blue and Green, the record is updated. However, if the source
data includes only the value Blue, the record is not updated. A new target
application record is created instead because there is not a complete match.
Data feed communication
The Data Feed Manager can be configured to retrieve or receive data from various external data
sources using a variety of transport protocols. When given the option, RSA recommends that you
select secured versions over unsecured versions.
To strengthen data feed security, RSA recommends that the Data Feed Manager require data feed
paths to be specified as relative paths.
Note: Relative path entry is set up as the default starting with RSAArcher 6.0. Because the setting
is not updated automatically on systems upgraded to version 6.0, RSA recommends manually setting
the requirement on upgraded systems.
BatchContentSave data feed token
Data feeds leveraging the BatchContentSave token should be used with caution. RSA recommends
using this token for high-volume ingestion of enrichment content. It is not recommended for content
Chapter 1: Security Configuration Settings 56
Security Configuration Guide
progressing through workflows. Content changes made by a BatchContentSave enabled feed are not
tracked within the system History Log fields (though field audit information is retained).
Archer-to-Archer Data Feeds
An Archer-to-Archer data feed provides the ability to pull data from one instance to another through
a report-based search. The source data is inserted in its raw or formatted state back into the same
application, a different application in the same instance, or an application in a different instance.
An Archer-to-Archer data feed uses the Archer Web Services Transporter. The Archer Web
Services Transporter accesses the RSAArcher Web Services API and retrieves data from the
specified instance or another instance of RSAArcher. The user account running the search in the
API must have at least Read access to the report being used and the application. Record permissions
are evaluated as well, and could limit the source data retrieved from the application. Report-based
data feeds can use either the report ID or the report GUID during configuration.
For report-based data feeds, create a Global Report and click Apply in the source application.
Ensure that content exists for every field in the source application from which you want to import
data. If a field in the source application is empty, it will not be available for you to select in the data
feed. Use the report GUID when working with the data feed before closing the report.
Important: Do not run the Archer-to-Archer data feed using the same account with which you have
logged in to RSAArcher. Using the same credentials logs you out of your session. In addition, do not
run multiple data feeds using the same account credentials. Each Archer-to-Archer data feed must
have its own separate and unique account for logging in and retrieving data.
Archer Web Services Transporter
The Archer Web Services Transporter must be configured with the same authentication method as
configured in Microsoft Internet Information Services (IIS) on the web server. If you do not know
the Microsoft IIS configurations, contact your system administrator before continuing.
Guidelines for designating the security credentials
lIf IIS is configured for Anonymous authentication, use the Anonymous/Service Account User
option. When IIS is set to Anonymous authentication, the user account credentials are not sent
with the data feed request.
lIf IIS is configured for Windows Integrated authentication, use either Anonymous/Service
Account User or Specific.
oIf credentials are set to Anonymous/Service Account User, the service account running the
asynchronous job is sent with the data feed request.
oIf credentials are set to Specific, the specified Windows account credentials are sent with the
data feed request.
Chapter 1: Security Configuration Settings 57
Security Configuration Guide
You must also define the transport configuration for this transporter. The Web API uses the
following search types for processing data of a data feed.
Search
Type Description
Report ID Retrieves data using the search report GUID or ID, which is provided in the search
results for the report.
Search
XML
Retrieves data using the module ID and a configuration string. This information is
obtained by running an XML search using an API call.
Statistic
ReportID
Retrieves data using the search statistical report GUID or ID, which is provided in
the search results for the statistical report.
Additionally, a data feed can access the source data through a proxy server and can handle post-
processing of the local copy of the source data.
Use the following tasks to add an Archer-to-Archer data feed:
lAdding Archer-to-Archer Standard Data Feeds
lAdding Archer-to-Archer Transport Only Data Feeds
For more information, see "Data Feeds" in the RSA Archer Online Documentation.
RSS Data Feeds
The RSS data feed provides the ability to retrieve records from a configured RSS feed into an
RSAArcher instance.
Note: RSA recommends that you rely on HTTPS for secure communications between the web
server and the RSS transporter. RSA also recommends that you set the RSS iView Content Handling
option in the RSA Archer Control Panel to Scrub or Encode to address this issue.
Important: For the data feed to execute successfully, the server responsible for running the data
feed must have a service account with valid logon credentials.
Use the following tasks to add an RSS data feed:
lAdding Standard RSS data feeds
lAdding Transport Only RSS data feeds
For more information, see "Data Feeds" in the RSA Archer Online Documentation.
Chapter 1: Security Configuration Settings 58
Security Configuration Guide
HTTP Data Feeds
The HTTP Transporter data feed enables you to execute a GET or POST to retrieve data from an
HTTP or HTTPS site. The data is inserted in its raw or manipulated state into the RSAArcher
instance.
The source files must be text delimited files or XML files. You can use an XSLT to transform your
XML data into a consumable format.
HTTP Transporter
The HTTP Transporter allows a file from an external source with unknown contents and integrity to
be brought onto RSAArcher servers. This flexibility introduces a potential attack vector where the
associated risk must be accepted by the customer.
RSA recommends that you disable the HTTP Transporter if a business need does not require its use.
If you must use the HTTP Transporter, RSA recommends using HTTPS, selecting Zip File as the
File Type, and using encryption by selecting an Encryption Type.
An HTTP Transporter data feed can be configured as a standard or transport data feed type.
Disabling weak ciphers
Web server communication over HTTP relies on the SSL/TLS ciphers and key lengths provided by
the version of IIS on which RSAArcher is installed. Ensure that IIS is configured for cryptographic
support, which cannot be easily defeated. RSA recommends that you configure Microsoft IIS to only
allow ciphers with key lengths of 128 bits or greater.
Important: If data is from an external HTTP or HTTPS site, you must be able to access that
external site from the server running the services for the data feed to execute successfully.
Use the following tasks to add an HTTP data feed:
lAdding Standard HTTP data feeds
lAdding Transport Only HTTP data feeds
For more information, see "Data Feeds" in the RSA Archer Online Documentation.
FTP Data Feeds
The FTP data feed enables you to pull data files using the FTP protocol, and insert that data in its
raw or manipulated state into the RSAArcher instance.
The source files can be delimited text files or XML files. You can use an XSLT to transform your
XML data into a consumable format.
Chapter 1: Security Configuration Settings 59
Security Configuration Guide
FTP Transporter
The FTP Transporter allows a file from an external source with unknown contents and integrity to be
brought onto RSAArcher servers. This flexibility introduces a potential attack vector where the
associated risk must be accepted by the customer.
RSA recommends that you disable the FTP Transporter if a business need does not require its use. If
you must use the FTP Transporter, RSA recommends selecting Zip File as the File Type and using
encryption by selecting an Encryption Type.
An FTP Transporter data feed can be configured as a standard or transport data feed type.
Use the following tasks to add an FTP data feed:
lAdding Standard FTP data feeds
lAdding Transport Only FTP data feeds
For more information, see "Data Feeds" in the RSA Archer Online Documentation.
File Data Feeds
The File data feed enables you to pull data directly from a flat file and insert that data in its raw or
manipulated state into the RSAArcher instance.
The source files must delimited text files or XML files. You can use an XSLT to transform your
XML data into a consumable format. The Data Feed Manager can access files located on a network
server that is accessible to the Data Feed Manger. For example, a delimited file must reside on the
network server rather than your personal computer.
Important: For the data feed to execute successfully, the server responsible for running the data
feed must have the required access to the files.
File Transporter
The File Transporter allows a file from an external source with unknown contents and integrity to be
brought onto RSAArcher servers. This flexibility introduces a potential attack vector where the
associated risk must be accepted by the customer.
RSArecommends that you disable the File Transporter if a business need does not require its use. If
the File Transporter must be used, RSA recommends selecting Zip File as the File Type and using
encryption by selecting an Encryption Type.
For more information, see "Transporter Availability" in the RSA Archer Control Panel Help. For
information on configuring the File Transporter, see the "Data Feed Manager" section of "Define a
File Transporter" in the RSA Archer Online Documentation.
Chapter 1: Security Configuration Settings 60
Security Configuration Guide
A File Transporter data feed can be configured as a standard or transport data feed type.
Use the following tasks to add a file data feed:
lAdding Standard File data feeds
lAdding Transport Only File data feeds
For more information, see "Data Feeds" in the RSA Archer Online Documentation.
Threat Data Feeds
Threat data feeds aggregate data from external data feed sources into RSAArcher on a dynamic and
scheduled basis. The Data Feed Manager supports iDefense and DeepSight threat feeds.
RSA recommends that you rely on HTTPS for secure communications between the web server and
the threat feed. For information on enabling HTTPS, see Web Server Communication.
Supported DeepSight feed types
Transporter Supported Feeds
DeepSight Transporter 2.0 Vulnerabilities
DeepSight Transporter 4.0 Security Risk
Vulnerabilities SCAP
Note: Data feeds using the DeepSight 2.0 transporter will soon become unusable because of
deprecation by Symantec. From the RSA Archer Community on RSA Link, download a copy of the
data feeds that use the DeepSight 4.0 transporters and import them.
Supported iDefense threat feed types
lVulnerabilities
lGeopolitical Threat
RSAArcher provides a configuration file to establish a connection between an iDefense or
DeepSight threat feed and your instance of RSAArcher. Each of the threat feeds can be quickly
integrated with your instance of RSAArcher by importing the configuration file.
For a new threat feed, the first run is the baseload run, which should take place before regular threat
feeds run.
lFor DeepSight threat feeds, the baseload runs as one job.
lFor iDefense, the baseload runs in a series of jobs that pull up to 1,000 alerts at a time. Baseload
runs may take a long time to complete—typically under 14 days.
Chapter 1: Security Configuration Settings 61
Security Configuration Guide
Before you begin:Visit the Integration Exchange
Before you begin a new integration project with Data Feed Manager, visit the RSA Archer
Community on RSA Link. In the Integrations category, you can review prebuilt integration packages
from RSAArcher and third-party providers such as Qualys, nCircle, and Sendmail.
New integration packages are available regularly, and each package includes the following items:
lData feed configuration file
lTarget application(s)
lAny supporting files (such as an .xslt file)
When you download an integration package from the RSA Archer Community on RSA Link, you can
import the configuration file directly into the Data Feed Manager and, if necessary, modify the
configuration. You can also import the target applications into the RSAArcher environment and
modify the applications through Application Builder.
Use the following tasks to manage threat data feeds:
lAdding DeepSight Threat data feeds
lAdding iDefense Threat data feeds
lImporting Threat data feeds
For more information, see "Data Feeds" in the RSA Archer Online Documentation.
Mail Monitor Data Feeds
The Mail Monitor Transporter data feed enables you to monitor email accounts using mail fields or
plain text body XML to specific fields in an application. By pulling email content into RSAArcher,
you can assess and process disparate email information, then create and document clear action plans
based on the information.
When integrating an application or questionnaire with a Mail Monitor data feed, you can do the
following:
lInsert email content into an application or questionnaire.
lRetrieve email messages, such as vulnerability alerts and open source monitoring alerts.
lDefine field mapping from email content to content records.
lConfigure mail protocols, mail servers, email accounts, and scheduling intervals.
Note: RSA recommends that you configure an SSL connection to connect with the email server.
Important: For the data feed to execute successfully, the server responsible for running the data
feed must have a service account with valid logon credentials.
Chapter 1: Security Configuration Settings 62
Security Configuration Guide
Use the following tasks to add a mail monitor data feed:
lAdding Standard Mail Monitor data feeds
lAdding Transport Only Mail Monitor data feeds
For more information, see "Data Feeds" in the RSA Archer Online Documentation.
Database Query Data Feeds
The Database Query Transporter data feed enables you to pull data directly from a database by
query and insert the data in its raw or manipulated state into a RSAArcher instance.
The numerous types of supported database connections are Odbc, OleDb, Oracle, SQL, and many
others. As long as the connection string is configured successfully and the client driver is installed
on the system, RSAArcher can integrate regardless of the database type.
A Database Query Transporter data feed can be configured as a standard or transport data feed type.
RSA recommends that the external database from which you are capturing data is located within
your corporate network and that data transmission occurs over an encrypted communications
channel. RSA also recommends that the credentials you use to retrieve the data have read-only
permissions. For more information, see "Define a Database Query Transporter" in "Data Feed
Manager" in the RSA Archer Online Documentation.
Use the following tasks to add a database query data feed:
lAdding Standard Database Query data feeds
lAdding Transport Only Database Query data feeds
For more information, see "Data Feeds" in the RSA Archer Online Documentation.
Web Server Communication
By default, RSAArcher web clients communicate with the RSAArcher Web Server (IIS) over one
of two ports:
lHTTP using default port 80
lHTTPS using default port 443
These web clients include:
lRSAArcher web user interface
lThird-party web applications, which are applications provided by the customer that use
RSAArcher web APIs (SOAP and REST)
lCertain data feeds, for example, RSS and Threat Intelligence
Chapter 1: Security Configuration Settings 63
Security Configuration Guide
RSA recommends that you enable web server communication using HTTPS and disable the HTTP
service. In addition to providing encryption of data in transit, HTTPS allows the identification of
servers and, optionally, of clients, by means of digital certificates. To enable HTTPS, update the
following three components:
lIIS
lRSAArcher web.config
lRSAArcher Control Panel
For more information, see Appendix A: Authentication Configuration.
While HTTPS is recommended and helps prevent man-in-the-middle attacks, consider the following
when enabling HTTPS and disabling HTTP:
lRedirecting connections from an unsecured HTTP port to a secured HTTPS port can cause your
application to be vulnerable to these types of attack. Redirecting connections is not a complete
disablement of the HTTP port.
lDisabling HTTP without ensuring that the SSL certificate is in the trusted certificate store
displays an error message.
lDisabling HTTP causes the SOAP API forms to become non-functional. These forms only accept
HTTP Post.
RSA recommends that you use TLS 1.1 or TLS 1.2 to secure the HTTP communication between
RSAArcher web clients and the RSAArcher Web Server. Secure this communication by
configuring HTTPS connections between the client and the IIS web server.
For information on Microsoft recommendations, see the Microsoft Knowledge Base.
SSL Certificate Guidance
To enable Field Encryption in RSAArcher, it is advised that the certificate should be obtained from
a trusted Certificate Authority (CA). However, you may choose to generate a self-signed certificate.
RSA recommends using a hardware security module (HSM) for field encryption over a certificate in
a local store.
Field Encryption certificate requirements
Certificates must meet the following requirements:
Chapter 1: Security Configuration Settings 64
Security Configuration Guide
lThe certificate is present in the local machine store as a personal certificate.
lThe certificate is exportable.
lThe certificate is not expired.
lThe certificate has a key size of 2048 bits.
lThe certificate has a private key.
How to secure a Field Encryption certificate
The certificate being used for encryption should have very limited access. Here are some of the
security measures that should be taken to protect the certificate:
lGive Full Control and Read access to the certificate only to the Administrator account. All other
accounts should have only Read access.
lGive the certificate read-only access to the following accounts:
oIn a server hosting the archer web application, only the AppPool account used by the web
application should be given access (Read-Only) to the certificate.
oIn a server hosting archer services, for example, Configuration Service and Job Framework,
only accounts used by the services should be given access (Read-Only) to the certificate.
lRevoke access for all accounts that are not required.
lBack up the encryption certificate regularly. The backup should be password protected and stored
safely.
For recommendations on generating/installing an SSL Certificate using IIS, see the Microsoft
TechNet Library.
For information about industry best practices, see the following:
lNIST SP 800-52
lPCI-DSS v1.2, point 4.1
SQLServer Communication
RSA recommends that you use a secured database connection to secure the communications
between the instance database server and the RSAArcher web and services servers. For
recommendations on configuring a secure database connection, see the Microsoft MSDN Library.
The Configuration database cannot accept secure or encrypted connections. RSA recommends that
you follow the guidance in SSL Certificate Guidance when issuing an SSL certificate to
communicate with SQL Server.
Chapter 1: Security Configuration Settings 65
Security Configuration Guide
RSA Archer Web Services API
The RSAArcher® Suite Web Services API is a collection of web services that provide a
programmatic interface for interacting with the RSAArcher. Each web service supports multiple
methods that can be used together to automate the exchange of information between the Platform and
an external application.
RSA Archer Web Services
RSA recommends that you rely on HTTPS for secure communications between the RSAArcher
web server and the following:
lThird-party web applications, which are applications provided by the customer that use the
Platform web APIs
lArcher-to-Archer data feeds
For information on configuring the RSA Archer Archer Web Services transporter, see the
RSAArcher Online Documentation.
The following web services are available with the RSAArcher.
Available Web Services
Access
Control
The Access Control class provides programmatic access to the Access Control feature,
such as creating users and managing security parameters.
Access
Role
The Access Role class provides programmatic access to options relating to managing
access roles.
Field The Field class allows you to manage and configure the values lists used in the
applications, questionnaires, and sub-forms.
General The General class allows you to create and terminate Web Services API user sessions.
Module The Module class provides programmatic access to module information.
Record The Record class allows you to create and manipulate content records in content
applications.
Search The Search class allows programmatic access to the Platform’s search features.
Encrypting Data
RSAArcher allows you to encrypt the following field types in an application:
Chapter 1: Security Configuration Settings 66
Security Configuration Guide
lDate
lIP Address
lNumeric
lText
The purpose of encryption is to protect sensitive data in the database. When you encrypt a field, all
data that is written to that field - whether in the record UI or through a data feed or import - stores as
encrypted in the database. Encrypted fields display data in the record UI as normal text. You can
encrypt new and existing fields.
The following table shows how encrypted fields affect other functionality in the application or
RSAArcher.
Related Area Impact
Calculations You cannot reference encrypted fields in a calculated field.
You can calculate encrypted fields.
Data
feeds/imports
If the incoming data targets an encrypted field, the data will be stored in the
database in an encrypted format.
History log History logs are kept for encrypted fields.
Search (global
search)
Encrypted fields are not supported.
Advanced search
filters
Encrypted fields support only Equals and Does Not Equal filters. They cannot
perform statistical search operations, for example Group By and Count.
Layout rule filters Encrypted fields are supported for all standard field filter options in a layout
rule.
Record Lookup
Configuration
Only the filter options Equals, Does Not Equal, Field Value Match, and Field
Value Does Not Match are available for encrypted fields.
RSA Archer
Mobile application
Encrypted fields are not supported.
RSA Archer BCM
mobile application
Encrypted fields are not supported.
Offline sync You cannot sync an application with encrypted fields offline.
Subscription
Notification filters
Only the filter options Equals, Does Not Equal, Field Value Match, and Field
Value Does Not Match are available for encrypted fields.
Chapter 1: Security Configuration Settings 67
Security Configuration Guide
Enable field encryption at the instance level
You must enable field encryption at the instance level. For instructions, see "Enable Field
Encryption for an Instance" in the RSA Archer Control Panel Help.
If you do not first enable field encryption at the instance level, users receive the following message
when they try to encrypt a field:
Field encryption needs to be enabled in Archer Control Panel.
Troubleshooting field encryption
Issue Cause Resolution
Encrypted fields do not display the
data.
The Key Encryption
Key (KEK) for one
or more of your
instances is missing.
Verify whether the KEK is present
on each of your Web Servers and
Services Servers and add the KEK
wherever it is missing. For
instructions, see "Enable Field
Encryption for an Instance" in the
RSA Archer Control Panel Help.
When a user logs in, the following
message appears: Configuration
error, some of the data may be
blank. Please contact your
administrator.
When the system administrator logs
in, the following message appears:
The encryption key is missing.
Please provide a new key in the
system. Dismiss?
The following message appears in
the error logs: Either Key
Encryption Key is missing or
inaccessible.
When editing an encrypted field,
you receive an unexpected error.
When the Configuration Service is
starting, the following message
appears: Key Encryption Key for
the following instances were either
missing or could not be accessed:
Instance1,Instance2.
Chapter 1: Security Configuration Settings 68
Security Configuration Guide
Configuring the Hardware Security Module
You can configure the settings for the Hardware Security Module (HSM) in connection with field
encryption.
Note: You must complete this task before you can enable field encryption for an instance.
1. Locate and copy the module token for the key store and security pin (or pass phrase) as
configured with the HSM hardware.
2. On the General tab, go to the Hardware Security Module section.
a. Open the RSAArcher Control Panel.
b. Go to Installation Settings.
c. Click the General tab.
3. In the Hardware Security Module section, select a module from the drop-down list.
4. In Module Token, enter the module value.
5. In Security Pin, enter the security pin value.
6. On the toolbar, click Save.
Additional Security Considerations
lJavaScript Transporter Security Considerations
lJava Runtime Environment Deployment
lPrivilege Levels for Archer Services
lLeast Privileges Requirements for RSAArcher Database Objects
lFile Repository Path
lRSA Archer Supported Environments
lRestrict Permissions on Repository Files
lKeyword Index Files
lCompany Files Path
lBuilding Global iViews
lAdding Objects to the Layout
lOffline Access
Chapter 1: Security Configuration Settings 69
Security Configuration Guide
JavaScript Transporter Security Considerations
The JavaScript Transporter allows you to integrate RSAArcher with external systems without a
middleware. You can use the JavaScript Transporter to upload and execute a NodeJS program. The
NodeJS program can consume APIs exposed by external systems to process and feed data into
RSAArcher. Here are a few security recommendations to consider when using this feature:
lCommunicate with external systems using APIs protected by SSL\TLS protocol.
lCommunicate with external systems using APIs that involve a strong authentication mechanism.
lMark sensitive parameters as "Protected" in the Custom Parameters section of the Transport tab
in the JavaScript Transporter Settings in the RSAArcher Control Panel.
Java Runtime Environment Deployment
The optional RSA Archer Cache service requires the Java Runtime Environment (JRE) with the
Java HotSpot Server Virtual Machine (VM) in a bit version that matches the Platform bit version.
For example, a 64-bit Platform version requires a 64-bit JRE.
As part of the JRE install, a Java certificate is installed that is used for secure authentication, which
requires the existence of Java. RSA strongly recommends installing Java Runtime Environment
(JRE) 8 (64-bit).
Privilege Levels for Archer Services
RSA strongly recommends that you set Archer services to run with Domain User account privileges.
In general, RSAArcher services should run with the lowest privilege level that allows them to work.
For instructions on setting Archer service privileges, see "Task 14: Configure the service
credentials" in the "Installing the Web Application and Services Components" section of the
RSAArcher Platform Installation and Upgrade Guide.
Local System privileges give Archer services unrestricted access to local system resources. While
this level of privilege allows the services to access all system resources easily, giving unrestricted
access to many services and accounts increases the security vulnerability of a system. Organizations
concerned with system security should avoid giving Local System privileges to services and
accounts without serious justification.
To improve system security, set services and accounts to run with Domain User account privileges
that limit their access to only the system resources they need for normal business operations. This
approach to setting privilege levels keeps the number of services and accounts with unrestricted
system access to a minimum, which reduces the number of entities that can unintentionally or
intentionally violate system security.
Chapter 1: Security Configuration Settings 70
Security Configuration Guide
Least PrivilegesRequirement for RSAArcher Database Objects
The principle of least privileges grants the minimum permissions required for day-to-day operations
of RSAArcher. To operate on a day-to-day basis using least privileges, the database user account
connecting to both the Instance and Configuration databases requires the following privileges:
lData Reader Rights (member of the db_datareader).
lData Writer Rights (member of the db_datawriter).
lExecute permissions on all stored procedures and scalar functions.
lSelect permissions on all views, table-valued functions, and in-line functions.
lExecute permissions on the system stored procedure sp_procedure_params_100_managed of the
master database.
lExecute permissions on the user-defined table type content_date_Table_Type of the Platform
Instance database.
lReference permissions on the user-defined table type content_date_Table_Type of the Platform
Instance database.
lExecute permissions on the _BulkType user-defined table types of the Platform Instance
database, if provisioned for Offline Access.
lReference permissions on the _BulkType user-defined table types of the Platform Instance
database, if provisioned for Offline Access.
Within the Instance and Configuration databases, the user must have access to objects belonging to
both the dbo and mswf4 schemas.
When installing or upgrading RSAArcher, use an account with a membership to the db_owner.
RSA Archer Supported Environments
The following table indicates the level of support of various RSAArcher server systems, databases,
browsers, and other third-party platform versions. For detailed definitions of each level of support,
see Support Categories.
Environment Platform Version Support Category
Servers Windows 2016
2012 R2
2012
Qualified
Qualified
Unsupported
Chapter 1: Security Configuration Settings 71
Security Configuration Guide
Environment Platform Version Support Category
Database Microsoft
SQLServer
2016
2014
2012
Qualified
Qualified
Unsupported
Web Server Microsoft IIS 10
8.5
8
Qualified
Qualified
Unsupported
Browsers Microsoft IE Edge1
11
Qualified
Qualified
Mozilla Firefox 52 (ESR)1
581
55
Qualified
Qualified
Unsupported
Chrome1N/A Future2
Safari110 - 11 Qualified
Cloud Amazon Web
Services
Windows VM Qualified
Microsoft Azure Windows VM Qualified
Miscellaneous Silverlight 5.1 Qualified
iOS110 - 11 Qualified
Offline Access Windows 10
Windows 7
Qualified
Extended Support
.NET Framework 4.6.2
4.6.1
Qualified
Qualified
Microsoft Office 2013
2010
Qualified
Qualified
JRE (64-bit)38 Qualified
Virtualization4VMWare
Other
Qualified
Unsupported
1These browsers do not support RSAArcher Administrator pages that require Silverlight.
Chapter 1: Security Configuration Settings 72
Security Configuration Guide
2Chrome is classified as Future due to the accelerated rate at which Google releases versions.
3RSAdoes not certify individual patches of Java Runtime Environment (JRE) 8 (64-bit).
4Virtualization is supported on all versions of Windows that are indicated as Qualified or Extended
Support on both physical and virtual hardware. There are no explicit compatibility dependencies on
specific VMWare products or versions for the RSA Archer Platform provided that the underlying
Windows Operating System version is supported.
Support Categories
The following table defines the different categories that indicate the level of support of various
RSAArcher server systems, databases, browsers, and other third-party platform versions.
Category Description
Qualified Platform versions listed as Qualified have been extensively tested in
the RSAArcher lab environment. RSAArcher expects the Platform to
operate and perform within normal parameters in these environments
for most users, unless otherwise noted in the RSAArcher Release
Notes.
Extended Support Platform versions listed as Extended Support are not tested in any way
by RSAbefore release, but are still considered viable Platforms. Most
of the Platform features have been validated in previous releases on
those these versions and are considered stable, unless otherwise noted
in the RSAArcher Release Notes. The Platform should function
reasonably well, but certain functional areas might not be fully
compatible with newer technologies.
Note: Issues logged against Extended Support environments are
triaged. RSAmakes every effort to resolve these issues. If the issue is
a result of legacy technology, customers might need to upgrade their
environment to the newer releases.
Unsupported Platform versions listed as Unsupported are not tested in any way by
RSA before release. RSAmakes no assumptions surrounding the
behavior of the Platform on these versions, and might not provide
support to customers who are still running on legacy systems.
Customers that require support in these situations might be charged for
the service.
Future Platform versions listed as Future provide insight into RSA plans for
supporting upcoming vendor releases. RSA does not provide actual
Platform release numbers for these releases due to changing vendor
schedules.
Chapter 1: Security Configuration Settings 73
Security Configuration Guide
File Repository Path
RSAArcher uses a folder on the file system for storing files. The default location is
C:\ArcherFiles\Repository.
RSA recommends that you define the location of the repository folder in RSAArcher to be a share
that uses a UNC path outside of any web and services servers. Doing so eliminates the possibility of
denial of service attacks and large file creation.
For instructions on setting the repository path, see "Designate the File Repository Path" in the RSA
Archer Online Documentation. For configuration and permission details for the repository folder, see
the RSAArcher Platform Installation and Upgrade Guide.
Restrict Permissions on Repository Files
RSA recommends that you restrict permissions on the repository folder (default location
C:\ArcherFiles\Repository) to read, write, and modify for the account that the IIS processes are
running as and for the account that the Job Engine service is running as.
1. Log on to Windows servers.
2. Click Start > Administrative Tools > Services.
For the Job Engine, the Log On As column identifies the account the service runs as.
3. Change each account as needed.
Note: The Microsoft IIS process account is configured in Microsoft IIS.
Keyword Index Files
RSAArcher uses a folder on the file system for storing keyword index files. The default location is
C:\ArcherFiles\Indexes.
RSA recommends that you do the following:
lRestrict the permissions on the keyword index files folder to read, write, and modify for the
account that the Queuing service is running as.
lDefine the location of the indexes folder in RSAArcher to be a path set to off of any web server
(avoid using a UNCpath if possible to avoid performance impacts). The path can be a local path
if the RSAArcher installation includes a dedicated Services server.
Company Files Path
RSAArcher uses the company_files folder to store company images and icons for the web
application. The location of the folder is set during the initial installation and defaults to
C:\Inetpub\wwwroot\RSAArcher\company_files.
Chapter 1: Security Configuration Settings 74

Security Configuration Guide
RSA recommends that you define the location of the company_files folder in RSAArcher to use a
UNC path outside of any web servers, which eliminates the possibility of denial of service attacks
and large file creation.
For configuration and permission details for the company_files folder, see the RSAArcher Platform
Installation and Upgrade Guide.
Building Global iViews
iViews are configurable according to the specific iView type.
For example, for a Report iView, you can include one or many reports, determine the selection order
of the reports in the iView and identify the report that is initially displayed to the user. Additionally,
you can allow horizontal scrolling for any of the selected reports to extend the report contents
beyond the width of the iView.
iView types
iView
Type Description
Canvas Displays predefined templates with various presentations for content and graphics.
Custom Displays custom text, HTML, or Flash presentations or to execute custom scripts,
such as JavaScript.
RSA recommends that only trusted Administrators have permission to create and edit
custom iViews.
Embedded
URL
Embeds entire web pages directly in an iView.
Global
Search
Displays search criteria options in an iView for the user to search records across
applications.
Links List Displays links to websites, intranet sites, and frequently used internal application
pages in a single iView.
Report Displays global reports in a single iView. In addition, you can display charts
generated through a statistics search.
RSS Feed Displays data from an RSS feed. RSS feeds contain headlines and summary
information from articles on websites supporting RSS.
Video Embeds video directly in an iView using HTML.
Before you begin
Chapter 1: Security Configuration Settings 75
Security Configuration Guide
1. Build a workspace.
2. Build a dashboard.
Build a global iView
1. Go to the Manage Global iViews page.
a. From the menu bar, click .
b. Under Workspaces and Dashboards, click Global iViews.
2. Click Add New and do one of the following:
lTo create a new iView, select Create a new Global iView from scratch.
a. Select the type of global iView you wish to create.
b. Click OK.
lTo create a global iView from an existing iView, click Copy an existing Global iView, and
then select the Global iView you want to copy.
3. Click OK.
4. Complete the setup for your iView.
Build a canvas iView
a. In the General Information section, enter the name and a description.
b. In the Folder field, select or create a folder.
c. In the Options section, in the Canvas Style field, click to select a layout in the Selected
Layout Template dialog box.
d. Select the layout you want, and click OK.
e. Enter a name in the Title field.
f. Enter the content in the Content field.
g. (Optional) In the Documentation section, click Add New to add documentation to your
iView.
Build a custom iView
a. In the General Information section, enter the name and a description.
b. In the Folder field, select or create a folder.
c. In the Options section, in the Custom Content field, enter the content.
Chapter 1: Security Configuration Settings 76
Security Configuration Guide
d. (Optional) In the Documentation section, click Add New to add documentation to your
iView.
Build an embedded URL
a. In the General Information section, enter the name and a description.
b. In the Folder field, select or create a folder.
c. In the Options section, in the URL filed, enter the URL you wish to embed.
d. (Optional) Select an option from the Refresh Rate list.
e. (Optional) In the Documentation section, click Add New to add documentation to your
iView.
Build a global search iView
a. In the General Information section, enter the name and a description.
b. In the Folder field, select or create a folder.
c. In the Options section, in the column Display field, chose One Column or Two Columns.
d. (Optional) In the Description field, select Embed the iView description in the iView to
display the description in the iView.
e. (Optional)In the Search Button field click Add to add a search button.
i. In the Files to Upload section, Click Add New.
ii. Select the file you wish to add and click OK.
iii. In the Available Graphics section, Click Add New.
iv. Click OK again.
f. (Optional) In the Applications section. click Add New to define the applications for the
search.
i. From the Application Name list, select the application that you want to associate the
iView to.
ii. Make selections from the Visibility field and Defaulted Behavior field.
g. (Optional) In the Documentation section, click Add New to add documentation to your
iView.
Build a links list iView
a. In the General Information section, enter the name and a description.
b. In the Folder field, select or create a folder.
Chapter 1: Security Configuration Settings 77

Security Configuration Guide
c. In the Options section, in the Layout field, select one of the following:
lSimple List: In the Configuration section that appears, do one of the following.
oSelect a link from the Available Links field by double clicking it.
oType in your own link and click Add.
lDescriptive list: In the Configuration section that appears, do the following:
i. In the General Information section, enter the name and a description.
ii. Insert a link in one of two ways:
oSelect a link from the Available Links field by double clicking a link.
oType in your own link and click Add.
iii. (Optional) In the Primary Graphic field, Add a graphic:
1. Click Add.
2. In the Available Graphics section, Click Add New.
3. In the Files to Upload section, Click Add New.
4. Select the file you wish to add and click OK.
5. Click OK again.
iv. Click OK.
d. In the Options section, in the Column Display field, select One Column or Two Columns.
e. (Optional) In the Documentation section, click Add New to add documentation to your
iView.
Build a report iView
a. In the General Information section, enter the name and a description.
b. In the Folder field, select or create a folder.
c. In the Options section, in the Reports field, select the report or reports that you want
displayed in the iView from the Available Reports list.
d. To determine the selection order of the reports in the iView, highlight the report title and use
to arrange the reports in the preferred order.
Note: The first report listed is the report that is initially displayed to the user.
e. Select Enable Scrolling for each report that you want to allow horizontal scrolling.
f. (Optional) In the Documentation section, click Add New to add documentation to your
iView.
Chapter 1: Security Configuration Settings 78

Security Configuration Guide
Build an RSSfeed iView
a. In the General Information section, enter the name and a description.
b. In the Folder field, select or create a folder.
c. In the Options section, in the URL field, select an address from the URL list and enter the
URL address.
d. In the Feed Elements field, select the display options that you want.
e. In the Articles Displayed field, select the number of articles that you want displayed.
f. In the Refresh Rate field, select how often you want the feed refreshed.
g. In the Authentication field, select your authentication preferences.
h. In the Days Displayed field, select the number of days to display the feed.
i. (Optional) In the Documentation section, click Add New to add documentation to your
iView.
Build a video iView
a. In the General Information section, enter the name and a description.
b. In the Folder field, select or create a folder.
c. In the Embedded Video HTML field, enter the embedded HTML or the URL.
Important: For proper formatting guidelines, see Formatting iView Videos.
d. (Optional) In the Documentation section, click Add New to add documentation to your
iView.
5. Click Save or Apply.
lClick Save to save and exit.
lClick Apply to apply the changes and continue working.
Create a new folder for a Global iView
1. Go to the General Tab of the iView that you want to modify.
a. From the menu bar, click .
b. Under Workspaces and Dashboards, click Global iViews.
c. Select the global iView.
Chapter 1: Security Configuration Settings 79
Security Configuration Guide
2. In the General Information Section, in the Folder field, click Edit.
3. In the Manage Folders window, click Add New.
4. Enter the name of the folder, and click OK.
5. In the Folder list, ensure the correct folder is selected.
6. Click Save or Apply.
lClick Save to save and exit.
lClick Apply to apply the changes and continue working.
Update an iView display
1. In the iView title bar, click and select Edit Properties.
2. In the Options section, edit the iView display as needed, and click OK.
Note: The list of available menu options depends on the type of iView that you are viewing and
the access rights assigned to you by your administrator.
3. (Optional) To resize the iView, click, hold and drag the arrow in the bottom right corner of the
iView, and click Save Changes.
4. (Optional) To move the iView, click and hold the title bar of the iView and drag and drop the
iView to the new location, and click Save Changes.
Delete a global iView
This permanently purges the dashboard from the database. Only administrators can delete global
iViews.
Important: If you delete an iView, it cannot be recovered.
1. Go to the Manage Global iViews page.
a. From the menu bar, click .
b. Under Workspaces and Dashboards, click Global iViews.
2. In the Actions column of the iView you want to delete, click .
3. Click OK.
Formatting iView Videos
You can embed videos into an RSAArcher iView from both external or internal sources.
Chapter 1: Security Configuration Settings 80
Security Configuration Guide
Embedding From an External Source
If you are embedding a video from an external source, such as YouTube, you must take the embed
code provided by YouTube and add ?wmode=transparent to the end of the URL. For example:
Sample YouTube source embed code:
<iframe width="560" height="315" src="https://www.youtube.com/embed/xyz" frameborder="0"
allowfullscreen></iframe>
Add ?wmode=transparent to the end of the URL:
<iframe width="560" height="315" src="https://www.youtube.com/embed/xyz?wmode=transparent"
frameborder="0" allowfullscreen></iframe>
Important: If you do not add ?mode=transparent to the end of the URL, the video displays
improperly.
Embedding From an Internal Source
If you are embedding a video that is being hosted locally, use the <video> tag to ensure proper
functionality. For example:
Sample internal source embed code:
<video width=”320” height=”240” controls>
<source src=”/ACME_Company/video.mp4” type=”video/mp4”>
</video>
Adding Objects to the Layout
You can drag-and-drop objects, such as fields, tab sets, sections, text boxes, placeholders, custom
objects, and trending charts on the layouts of applications, questionnaires, and sub-forms. After
adding an object to the layout area, you can move the object up or down, from column to column, or
from tab to tab. You can also configure some objects to span across multiple columns in the layout.
Key guidelines for adding objects to the layout
lTo move a single object, click the object and drag it to the location you want.
lIf you are working in a multi-tab layout and you want to move an object from one tab to another,
click and drag the object to the tab you want.
lIf you are working in a two-column layout and want a custom object, placeholder, text box, or
trending chart to span across columns, do the following:
Chapter 1: Security Configuration Settings 81
Security Configuration Guide
1. Click the drop down arrow on the layout object.
2. Select Edit Span Properties and select one of the following options from the Column Span
section.
Option Description
Do not span columns The element consumes only one column of space.
Span two columns The element always spans across the two columns.
3. Select one of the following options from the Row Span section.
Option Description
Do not span
rows
The element consumes only one row of space.
Span The element consumes the number of rows you select from the Rows
span box.
Add tab sets to the layout
Tab sets provide a means for grouping related tabs and fields, especially when there is a large
number of fields, to help users quickly find the fields they need to add or edit in a record.
For more information on adding tab sets, see "Adding Tab Sets to the Layout" in the RSA Archer
Online Documentation.
Add sections to the layout
Add sections as headings to group related fields together. For example, create a section called
“Contact Information” to group together a contact's phone, fax, and email information.
1. Open the layout that you want to update.
a. From the menu bar, click .
b. Under Application Builder, click Applications, Questionnaires, or Sub-Forms.
c. Select the application, questionnaire, or sub-form.
d. Click the Layout tab.
e. If you have Advanced Workflow enabled, open the layout that you want to update, and click
the Designer tab.
Chapter 1: Security Configuration Settings 82

Security Configuration Guide
2. In the left pane, expand the Add New Layout Object list.
3. Click and drag the Add Section option to the layout area.
4. In the Section Name field, enter the heading that you want to display in the layout.
5. In the Default Visibility field, select the Expanded or Collapsed option depending on whether you
want the section to be expanded or collapsed by default.
6. (Optional) Do one or both of the following to add panel text or help text to the section:
lTo add an information panel to provide your users with additional details about the section,
select Panel Text and enter the text that you want to display.
lTo add Help text to provide your users with detailed instructions and background information
about the section, select Help Text and enter the text that you want to display.
7. (Optional) Customize your text and add dynamic elements, such as images and Flash animation,
using the options available in the Rich Text Editor toolbar.
8. Click OK to close the Section Description dialog box.
9. Click Save or Apply.
lClick Save to save and exit.
lClick Apply to apply the changes and continue working.
Add text boxes to the layout
Text boxes provide guidance or additional information that users need to successfully interact with
fields.
1. Open the layout that you want to update.
a. From the menu bar, click .
b. Under Application Builder, click Applications, Questionnaires, or Sub-Forms.
c. Select the application, questionnaire, or sub-form.
d. Click the Layout tab.
e. If you have Advanced Workflow enabled, open the layout that you want to update, and click
the Designer tab.
2. (Optional) For a leveled application, select the data level from the Level list in the left pane for
the layout you want to update.
3. In the left pane, expand the Add New Layout Object list.
4. Click and drag the Add Text Box option to the layout area.
Chapter 1: Security Configuration Settings 83
Security Configuration Guide
5. In the Text Box Name field, enter a name for the text box.
6. In the Text field, enter the text that you want to display in the text box when it is displayed for
users as they add, edit, or view records.
7. Select one of the following options.
Field Description
Edit Mode Displays the custom object when editing a record.
View Mode Displays the custom object when viewing ta record.
Both Displays the custom object when viewing or editing a record.
8. Click OK.
9. Click Save or Apply.
lClick Save to save and exit.
lClick Apply to apply the changes and continue working.
Add placeholders to the layout
Placeholders create space between other layout objects, such as fields, sections, text boxes, and
custom objects.
1. Open the layout that you want to update.
a. From the menu bar, click .
b. Under Application Builder, click Applications, Questionnaires, or Sub-Forms.
c. Select the application, questionnaire, or sub-form.
d. Click the Layout tab.
e. If you have Advanced Workflow enabled, open the layout that you want to update, and click
the Designer tab.
2. (Optional) For a leveled application, select the data level from the Level list in the left pane for
the layout you want to update.
3. In the left pane, expand the Add New Layout Object list.
4. Click and drag the Add Placeholder option to the layout area.
5. Click Save or Apply.
Chapter 1: Security Configuration Settings 84

Security Configuration Guide
lClick Save to save and exit.
lClick Apply to apply the changes and continue working.
Add custom objects to the layout
Custom objects enable you to enter code you have written to create buttons or other objects. For
example, you can create Next and Previous buttons using JavaScript code so that your user can click
to move from tab to tab when adding or editing records.
Note: RSArecommends that only trusted administrators create and edit custom layout objects, as
this flexibility introduces a potential attack vector.
1. Open the layout that you want to update.
a. From the menu bar, click .
b. Under Application Builder, click Applications, Questionnaires, or Sub-Forms.
c. Select the application, questionnaire, or sub-form.
d. Click the Layout tab.
e. If you have Advanced Workflow enabled, open the layout that you want to update, and click
the Designer tab.
2. If you are working in a leveled application, from the Level list in the left pane, select the data
level that contains the layout you want to manage.
The fields and other page elements for that level are displayed in the layout area and in the
Available Fields list.
3. In the left pane, expand the Add New Layout Object list.
4. Click and drag the Add Custom Object option to the layout area.
5. In the Name field, enter a name for the custom object.
This name is displayed on the Layout tab of the Manage Applications or Manage Questionnaires
page, but it is not displayed for users when they add, edit, or view records in the application.
6. In the Description field, enter a description for the object.
7. In the Code field, enter or paste the HTML or JavaScript code for the object.
8. In the Display section, select one of the following modes for the object to be displayed as users
add and edit records in the application.
Chapter 1: Security Configuration Settings 85

Security Configuration Guide
Field Description
Edit Mode Displays the custom object when editing a record.
View Mode Displays the custom object when viewing ta record.
Both Displays the custom object when viewing or editing a record.
9. Click OK.
10. Click Save or Apply.
lClick Save to save and exit.
lClick Apply to apply the changes and continue working.
Add trending charts to the layout
On a trending chart, you can view historical data for a Numeric or Values List field that has trending
enabled, in order to identify patterns in the data for a specified period of time. Trending charts must
be added to another container object, such as a section.
1. Open the layout that you want to update.
a. From the menu bar, click .
b. Under Application Builder, click Applications, Questionnaires, or Sub-Forms.
c. Select the application, questionnaire, or sub-form.
d. Click the Layout tab.
e. If you have Advanced Workflow enabled, open the layout that you want to update, and click
the Designer tab.
2. In the left pane, expand the Add New Layout Object list.
3. Click and drag the Add Trending Chart option to the layout area.
4. In the Name field, enter the heading that you want to display in the layout.
5. From the Trending Field list, select the trending-enabled field for which to display chart data.
6. (Optional) In the Show Title field, click the Display the chart name as the title when users open
the application or questionnaire.
7. Click OK.
8. Click Save or Apply.
Chapter 1: Security Configuration Settings 86

Security Configuration Guide
lClick Save to save and exit.
lClick Apply to apply the changes and continue working.
Add report objects to the layout
Report Objects allows you to embed reports directly within records. The system applies default
filters based on the filters used to create the base report. However, administrators can override
default filters, as well as the advanced operator logic. When viewing a report object record, users
can click on the report, which opens a new search results page with the filters already applied.
Based on user permissions, users can modify the report.
1. Open the layout that you want to update.
a. From the menu bar, click .
b. Under Application Builder, click Applications or Questionnaires.
c. Select the application or questionnaire.
d. Click the Layout tab.
e. If you have Advanced Workflow enabled, open the layout that you want to update, and click
the Designer tab.
2. In the left pane, expand the Add New Layout Object list.
3. Click and drag the Add Report Object option to the layout area.
4. In the Name field, enter a name for the report object.
Note: This name displays on the Layout tab of the Manage Applications or Manage
Questionnaires page, but does not display for users when they add, edit, or view records in the
application.
5. In the Description field, enter a description for the record object.
6. Under Report Selection, select the report from the Available Reports column.
Note: Only one report can be selected.
Note: Only global and search based reports are available for selection.
7. (Optional) Add or update filter options for how you want to view the report.
Note: If the selected report has default filters, they are automatically populated as existing
filters.
Chapter 1: Security Configuration Settings 87
Security Configuration Guide
a. In the Field to Evaluate field, select the field to evaluate for one or more specific values.
b. In the Operator column, select the filter operator. For more information, see "Report
Operator Field Types" in the RSA Archer Online Documentation.
c. In the Value(s) column, select the values for the condition. Depending on the operator type,
the selection can be a value or a field.
d. (Optional) To create additional conditions, click Add New and repeat steps a-c.
e. (Optional) If you create more than one condition, apply logic to your filter criteria in the
Advanced Operator Logic section. For more information, see "Advanced Operator Logic" in
the RSA Archer Online Documentation.
8. In the Load Report section, select one of the following modes for the report object to be
displayed as users add and edit records in the application.
Field Description
Immediately Displays the report object when the page loads.
On Demand Displays the report object on user click.
9. In the Display section, select one of the following modes for the record object to be displayed as
users add and edit records in the application.
Field Description
Edit Mode Displays the report object when editing a record.
View Mode Displays the report object when viewing a record.
Both Displays the report object when viewing or editing a record.
10. Click OK.
11. Click Save or Apply.
lClick Save to save and exit.
lClick Apply to apply the changes and continue working.
Offline Access
Offline access enables Audit Engagements & Workpapers users to conduct audits offline on a
laptop. Offline access is available with an active Audit Engagements & Workpapers license and is
configurable for each instance. You must enable offline access in the RSAArcher Control Panel.
For a complete list of requirements, see Installing Offline Access.
Chapter 1: Security Configuration Settings 88
Security Configuration Guide
As an administrator, you select the application or questionnaire that is eligible for offline access.
What you select determines which records an offline access user can select for offline use. All data,
including cross-referenced and related records, for the specified records download to the offline
access database and are available for offline use on a laptop.
RSArecommends that only trusted users with secure laptops with strict firewall rules restricting
remote access to Offline Access have permission to Offline Access.
RSAArcher features not supported for offline access
The following are features not supported for offline access:
lApplication Builder
lData Feeds
lData Publications
lData Imports
lDiscussion Forums
lLDAP Synchronization
lNotifications
lPackaging
lTraining and Awareness
lUser Preferences
Note: Records from a retired application are not supported in offline access. You can view User
Preferences, but you cannot edit them in offline access.
Use the Offline Access Gateway to select the application or questionnaire that will have offline
access for RSAArcher. After you determine which application or questionnaire you want for offline
access, you can then manage the records in the offline access library.
Installing Offline Access
The installation process for Offline Access is separate from the RSAArcher installation. To install
Offline Access, use the installation wizard to guide you through the process.
Note: Currently, only the RSAArcher Audit Engagements & Workpapers use case supports Offline
Access.
Preparing for Offline Access Installation
Before installing offline access, your system must meet the following requirements.
Chapter 1: Security Configuration Settings 89
Security Configuration Guide
Component Requirement
Operating System Windows 7 64-bit
Memory 8GBRAM
Disk Space 100 GBHard Drive
Additional Software Microsoft .NET Framework 4.6.1 or 4.6.2
Important: Microsoft Sync Framework 2.1 is required and must be installed on the Services Server.
For more information, see "Preparing the Services Servers" in the RSA Archer Installation and
Upgrade Guide.
By default, the offline access data is stored on the local computer at C:\Users\
[username]\AppData\Roaming\RSAArcher\Offline Access\. Isolating the offline access data
ensures that each offline access user has their own environment for working offline. For example,
when a user purges offline access data, only the offline access data of that user is purged.
Anti-virus and firewall applications may interfere with Offline Access run-time activities. You must
add the Offline Access installation file as a trusted file/process/installer/updater for any anti-virus
and firewall applications that may interfere with the installation.
Before running offline access, start the Distributed Transaction Coordinator service on the laptop
using offline access, and synchronize offline access with RSAArcher.
Install Offline Access
The offline access version must always match the RSAArcher version.
Important: You must have administrator rights to install offline access. If you are upgrading offline
access, close the Offline Access utility before starting the installation.
1. Contact your IT Administrator to obtain the Offline Access installation file.
The IT Administrator downloads the Offline Access installation file from the RSAsite and can
provide it to you or auto-deploy the file through a software management system.
2. Double-click the Offline Access installation file.
3. On the RSAArcher Offline - InstallShield Wizard page, click Next.
4. Read the license agreement. Select I accept the terms in the license agreement. Click Next.
5. Do one of the following:
lTo accept the default installation folder, click Next.
lTo designate a different installation folder, click Change and specify the path to the folder
where you want to install offline access.
Chapter 1: Security Configuration Settings 90
Security Configuration Guide
6. Click Install. This process takes several minutes to complete.
7. Click Finish to complete the installation.
8. Add the following Offline Access files as trusted processes for any anti-virus and firewall
applications.
File or Process Default Location
Archer.Offline.Tools.Controller.exe C:\Program Files\RSA Archer\Offline Access
Archer.Services.Queuing.exe C:\Program Files\RSA Archer\Offline
Access\services
ArcherTech.JobFramework.Cache.exe C:\Program Files\RSA Archer\Offline
Access\services
ArcherTech.JobFramework.Host.exe C:\Program Files\RSA Archer\Offline
Access\services
ArcherTech.JobFramework.Job.exe C:\Program Files\RSA Archer\Offline
Access\services
iisexpress.exe C:\Program Files\IIS Express
sqlservr.exe C:\Program Files\Microsoft SQL
Server\110\LocalDB\Binn\sqlservr.exe
SqlLocalDB.exe C:\Program Files\Microsoft SQL
Server\110\Tools\Binn\SqlLocalDB.exe
Disabling ASMXWebServices
ASMX web services have metadata publishing enabled, which allows WSDL and DISCO metatdata
to be retrieved. In order to protect this data from attackers, turn off ASMX web services on any
production RSAArcher.
Disable ASMX metadata publishing
Configure the RSA Analytics WarehousePlatform web.config file to remove the documentation
protocol publishing on ASMX Web Services.
1. In the web.config file, locate <system.web>.
2. In the child expression <webServices>, add the following:
<protocols>
<remove name="Documentation"/>
Chapter 1: Security Configuration Settings 91
Security Configuration Guide
</protocols>
3. Click Save.
4. Perform an IIS reset.
Chapter 1: Security Configuration Settings 92

Security Configuration Guide
Chapter 2: Secure Deployment and Usage Settings
Secure Deployment and Usage Settings 93
Physical Security Controls Recommendations 102
Secure Deployment and Usage Settings
It is important to secure the deployment and usage settings in RSAArcher. Doing this helps protect
the RSAArcher environment.
Protect all physical, local, and remote access to the servers hosting RSAArcher. Restrict all access
methods to the absolute minimum required to maintain RSAArcher.
RSA recommends that you do not set up RSAArcher test environments to contain exact copies of
the full production environment's data or to use the same system or authentication secrets. If the test
environment contains any sensitive information from the production environment, take the same
precautions to protect the test environment as you do in the production environment.
Security Controls Map
An RSAArcher deployment consists of three physical tiers: a web tier, a services tier, and a
database tier. An organization can deploy RSAArcher in a single host configuration or a multi-host
configuration. For more information, see the RSA Archer Platform Installation and Upgrade Guide.
When deploying RSAArcher on-premise within a corporate network, RSA recommends that you do
the following:
lDeploy RSAArcher hosts within the corporate network. The DMZ-to-Corporate-Network
Firewall intercepts all communication between the single host and the other components in the
network.
lEnsure that users are accessing RSAArcher from within the corporate network. If users must
access RSAArcher from the internet, RSA recommends that they connect to the corporate
network through a secure VPN connection.
lAllow only remote access to RSAArcher hosts for secure maintenance using the Remote
Desktop Protocol (RDP) through a secure VPN connection.
lConfigure firewall rules to ensure secure communication between RSAArcher and other
components in the network.
Important: RSA recommends that you deploy RSAArcher services in a secure location, where
physical access to the servers is restricted to the personnel who manage the servers.
Chapter 2: Secure Deployment and Usage Settings 93

Security Configuration Guide
The following figure shows an example of a multi-host configuration.
Chapter 2: Secure Deployment and Usage Settings 94
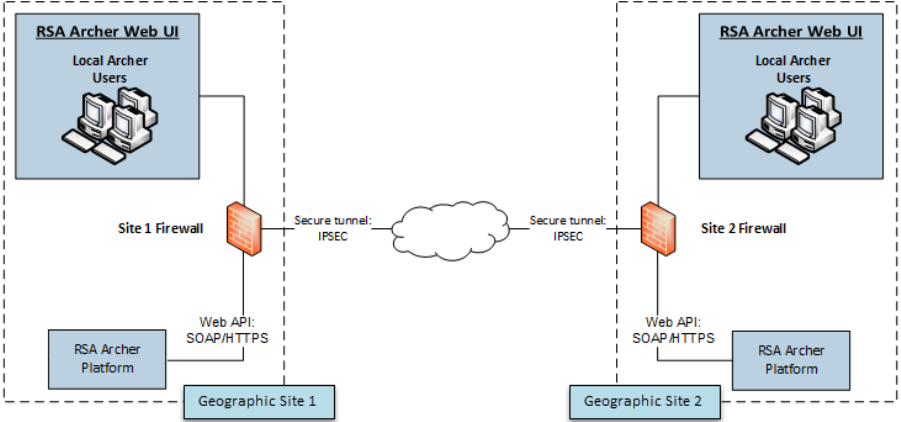
Security Configuration Guide
For multi-host configurations, RSAArcher recommends that you do the following:
lDeploy RSAArcher web, services, and database servers in the corporate network.
lDeploy data feed servers in the corporate network, except those that provide information using
HTTPS, such as, RSS and Threat Intelligence services.
lEnsure that all RSAArcher servers in a site are connected to the same sub-network.
lDeploy firewalls at each site to ensure secure transfer of data from an instance of RSAArcher at
one site to another instance of the RSAArcher located at a different site.
lConfigure firewall rules to intercept all communication between RSAArcher components in the
network, as shown in the preceding figure. For more information, see Firewall Rules.
While the previous figure shows multiple types of data feeds, the following figure expands on the
Archer-to-Archer data feed type using the example of one geographic site to another.
When deploying RSAArcher in multiple geographically dispersed sites and configuring one instance
of RSAArcher at one site to feed data to another instance of RSAArcher at another site, RSA
recommends that you do the following:
lConfigure firewall rules to intercept all communication between the RSAArcher components in
the network and between different sites, as depicted by the firewalls in the preceding figure. For
more information, see Firewall Rules.
lImplement data transfer between sites using a secure tunnel as shown in the preceding figure.
Firewall Rules
Use firewalls to restrict network traffic between RSAArcher and external systems. For graphical
depictions of restricting network traffic, see Security Controls Map.
Chapter 2: Secure Deployment and Usage Settings 95
Security Configuration Guide
RSA strongly recommends that you configure firewall rules as described in the following sections.
These recommendations are based on the following assumptions:
lYou have a stateful firewall, indicating that only the establishment of TCPports is considered.
lYou specify the direction of communication for the UDP ports because the connections are
sessionless.
lThe firewall processes the rules top to bottom, finishing with a generic drop of all packets.
lYou deploy RSAArcher as shown in one of the figures in Security Controls Map.
RSA recommends that you configure firewall rules to ensure secure communication for the
following connections:
lDMZ to Corporate Network
lCorporate Network to Site Sub-Network
lArcher-to-Archer Data Feeds
DMZ to Corporate Network
RSA recommends that you do the following:
lConfigure whitelist communication from the VPNserver in the DMZ to the client machines on
which the RSAArcher web user interface runs.
lCreate firewall rules for all machines from which you intend to remotely access the corporate
network through RDP.
Corporate Network to Site Sub-Network
For corporate network to site sub-network configurations, RSA recommends the following:
lAllow firewall access at each site only from designated RSAArcher client machines through a
whitelisted IPaddress and port.
lSet firewall rules to drop all unless explicitly allowed.
Single-Host Configuration
RSA recommends that you secure the following default ports to ensure a secure communication
between client machines running the RSAArcher web user interface and the RSAArcher web
server:
lTCP 80
lTCP 443
Chapter 2: Secure Deployment and Usage Settings 96
Security Configuration Guide
The following table shows the firewall rules for a single host configuration.
Purpose RULE |
DIRECTION
Source IP Address –>
Destination IP Address Protocol Port
Client Web
Connectivity
ALLOW |
INBOUND
ArcherWebUI_IPAddr –>
ArcherWebServer_IPaddr
TCP 443
ALLOW |
OUTBOUND
ArcherWebServer_IPaddr –>
ArcherWebUI_IPAddr
TCP 443
<Default> BLOCK |
INBOUND
All_* –> All_* * *
BLOCK |
OUTBOUND
All_* –> All_* * *
Multi-Host Configuration
RSA recommends that you secure the following default ports to ensure a secure communication
between client machines running the RSAArcher web user interface and the RSAArcher web
server:
lTCP 80
lTCP 443
The following table shows the firewall rules for a multi-host configuration that includes a reverse
proxy/load balancer.
Purpose RULE |
DIRECTION
Source IP Address –>
Destination IP Address Protocol Port
Client Web
Connectivity
ALLOW |
INBOUND
ArcherWebUI_IPAddr –>
ArcherWebServer_IPaddr
TCP 443
ALLOW |
OUTBOUND
ArcherWebServer_IPaddr
–> ArcherWebUI_IPAddr
TCP 443
RSS Feeds ALLOW |
INBOUND
RSSServer_IPAddr –>
ArcherWebServer_IPaddr
TCP 443
ALLOW |
OUTBOUND
ArcherWebServer_IPaddr
–> RSSServer_IPAddr
TCP 443
Chapter 2: Secure Deployment and Usage Settings 97
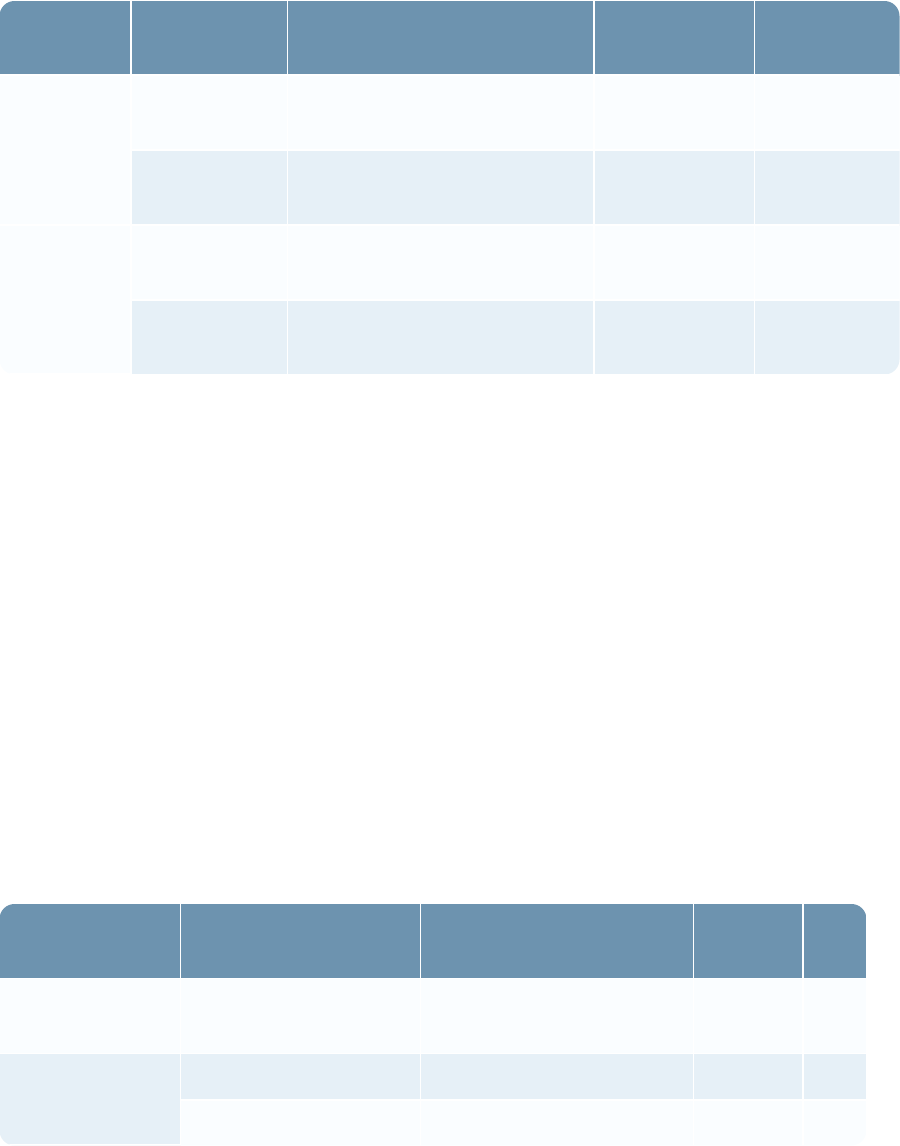
Security Configuration Guide
Purpose RULE |
DIRECTION
Source IP Address –>
Destination IP Address Protocol Port
Threat
Feeds
ALLOW |
INBOUND
ThreatFeedServer_IPAddr
–> ArcherWebServer_IPaddr
TCP 443
ALLOW |
OUTBOUND
ArcherWebServer_IPaddr
–> ThreatFeedServer_IPAddr
TCP 443
<Default> BLOCK
|INBOUND
All_* –> All_* * *
BLOCK |
OUTBOUND
All_* –> All_* * *
Archer-to-Archer Data Feeds
RSAArcher might run in multiple sub-networks within your corporate network, where each sub-
network is called a site. You can configure RSAArcher to allow the RSAArcher located in one site
to feed data to the RSAArcher in another site. For more information, see Archer-to-Archer Data
Feeds.
For this scenario, RSA recommends that you do the following:
lEnsure that the firewall at each end of the data transfer allows communication only through a
whitelisted IPaddress and port.
lSecure the following default ports to ensure a secure communication between two RSAArcher
instances located in different sites:
oTCP 80
oTCP 443
Configure the site's firewall rules as shown in the following table.
Purpose RULE | DIRECTION Source IP Address –>
Destination IP Address Protocol Port
Archer Data Feed ALLOW | INBOUND ArcherDataFeed_IPAddr –>
ArcherWebServer_IPaddr
TCP 443
<Default> BLOCK | INBOUND All_* –> All_* * *
BLOCK | OUTBOUND All_* –> All_* * *
Chapter 2: Secure Deployment and Usage Settings 98

Security Configuration Guide
Secure Deployment Settings
The following table shows the security controls that RSA recommends to be in place for securing the
deployment of RSAArcher.
Deployment
Settings
Secure
Deployment
Setting
Pros of
Secure
Deployment
Setting
Cons of
Secure
Deployment
Setting
Instructions on How
to Configure Secure
Deployment Setting
HTTPS is
enabled on a
new 6.x
installation, by
default,
between client
and server.
Remove any
existing HTTP
bindings (port
80) via IIS
Manager.
For best
possible
security
between client
and server,
enable HTTPS
and disable
HTTP in
Microsoft IIS.
Provides a high
level of
protection for
the
communication
between client
and server by
avoiding
tampering,
spoofing, and
man-in-the-
middle type of
attacks.
Could impact
performance.
See "Web Server
Communication" in the
RSAArcherOnline
Documentation.
Database
Encrypted
Communication
Encrypting the
communication
between the
RSAArcher
Web Server
and the
Instance
Database
increases
security.
Provides
increased
security by
implementing
secure
communication
between the
Web Server
and Instance
Database.
Could impact
performance.
See "Maintaining
Security" in the
RSAArcherOnline
Documentation.
Windows
Server
Security
Configuration
Hardening the
web server
based on
industry best
practices
reduces the
likelihood of
vulnerabilities.
Provides
improved
security and
reduced risk
for the servers
deployed for
RSAArcher.
Could cause
some
unsecured
Windows
Server
features to
become
unavailable.
Follow Microsoft
security configuration
recommendations for the
applicable IIS version.
Chapter 2: Secure Deployment and Usage Settings 99

Security Configuration Guide
Deployment
Settings
Secure
Deployment
Setting
Pros of
Secure
Deployment
Setting
Cons of
Secure
Deployment
Setting
Instructions on How
to Configure Secure
Deployment Setting
SQL Server
Security
Configuration
Hardening the
SQL Server
installation
hosted on the
database
server based
on industry
best practices
reduces the
likelihood of
vulnerabilities
on the servers.
Provides
improved
security and
reduced risk
for the
database
server
deployed for
the Platform
installation.
Could cause
some
unsecured
SQL Server
features to
become
unavailable.
Follow Microsoft
security configuration
recommendations for the
applicable SQL server
version.
Web Server Security Configuration
For recommendations on IIS security configuration, see the Microsoft Knowledge Base.
In addition to Microsoft's recommendation, RSA recommends that you configure Microsoft IIS to do
the following:
lEnable SSL communications. See See "Web Server Communication" in the RSAArcherOnline
Documentation.
lDisallow arbitrary file extensions.
lRemove IIS and ASP.NET Version Information from HTTP Headers.
Disallow Arbitrary File Uploads
The RSAArcher allows users to upload files with any type of extension. RSArecommends training
your users on good security practices including not uploading any file from sources other than
themselves to prevent introducing potentially malicious files to the RSAArcher Platform. To tighten
security, you can prevent users from uploading files with specific extensions. For more information,
see "File Creation Restriction" in the RSA Archer Online Documentation.
Prevent certain file types, depending on what your users do with RSAArcher, For example, prevent
the upload of executable .exe files to RSAArcher. However, if your users investigate security
incidents, you want to allow the upload of executable files containing viruses and other potential
malware for use in investigations.
Chapter 2: Secure Deployment and Usage Settings 100
Security Configuration Guide
Do not prevent uploads of files with extensions used by normal RSAArcher operations, including
the following:
l.AI
l.BMP
l.CSS
l.CSV
l.DOC
l.DOCM
l.DOCX
l.DOT
l.DOTM
l.EMF
l.EPS
l.EXIF
l.GIF
l.ICO
l.JPEG
l.JPG
l.PDF
l.PNG
l.POT
l.POTM
l.POTX
l.PPA
l.PPAM
l.PPS
l.PPSM
l.PPSX
l.PPT
l.PPTM
l.PPTX
l.PS
l.RTF
l.TIF
l.TIFF
l.TXT
l.WMF
l.XLA
l.XLAM
l.XLS
l.XLSB
l.XLSM
l.XLSX
l.XLT
l.XLTM
l.XLTX
l.XML
Remove IISand ASP.NET Version Information from HTTP Headers
To make it more difficult for attackers to identify vulnerabilities in the software that is powering the
Web Server, do not disclose the types of applications and their respective version numbers in HTTP
headers. While certain HTTP headers are necessary, the HTTP headers that identify the Web
Server are not necessary, including the following:
lServer: Microsoft-IIS/<version_ number>
lX-Powered-By: ASP.NET
lX-AspNet-Version: <version_ number>
AspNet-Version HTTP Header
RSA recommends that you do the following:
lRemove the HTTP headers that identify the web server.
lEnsure that <httpRuntime enableVersionHeader="false"/> is set in the RSAArcher web.config
file, located at:
oIIS\DefaultWebSite\RSAArcher\web.config
oIIS\DefaultWebSite\RSAArcher\api\web.config
Chapter 2: Secure Deployment and Usage Settings 101
Security Configuration Guide
Remove X-Powered-By HTTP Header
1. Launch the Microsoft IIS Manager.
2. Expand the Sites folder.
3. In the IIS grouping, select the website that you want to modify, and double-click the HTTP
Response Headers section.
4. If "X-Powered-By: ASP.NET" is displayed in the Custom Header listbox, click the Remove link
in the right-hand column.
Note: To ensure that the server header is not automatically added to the outgoing HTTP response by
Microsoft IIS, use Microsoft's free UrlScan utility.
IP Whitelist
The IP Whitelist allows for the ability to define a range of IP addresses that can access
RSAArcher. The IP Whitelist restricts incoming connections only, and should include the following
items:
lWeb Application servers
lServices servers
lClient machines accessing the Web Application
Optionally, the following items can also be included:
lData Feed source servers
lLDAP servers
RSA recommends implementing the IP Whitelist to limit the availability of the Platform as a
potential attack vector.
Physical Security Controls Recommendations
Physical security controls are designed to protect resources against unauthorized physical access and
physical tampering. RSA recommends that the physical servers for RSAArcher be deployed in a
secure data center leveraging the organization’s best practices for physically securing a data center,
server rack, and server.
Chapter 2: Secure Deployment and Usage Settings 102
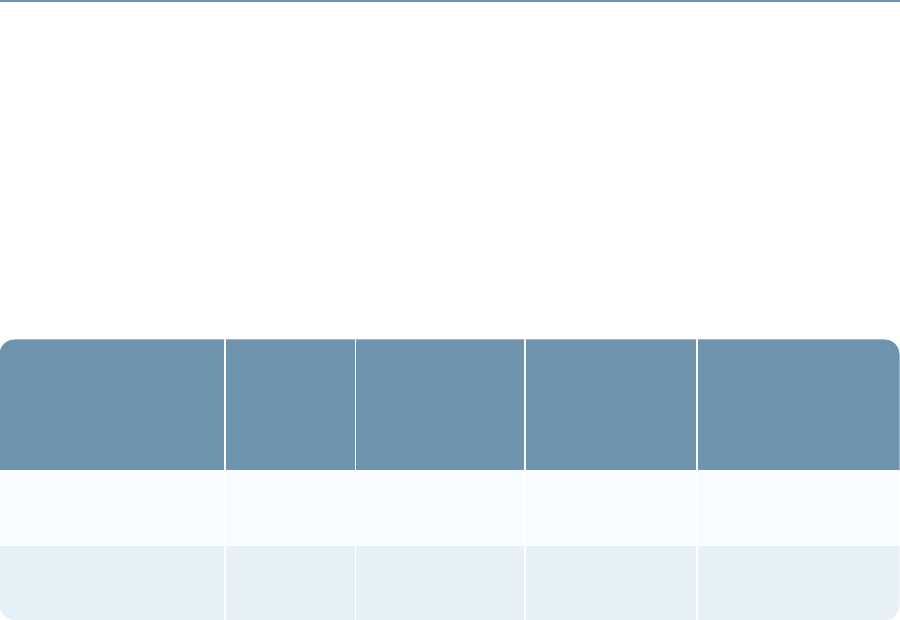
Security Configuration Guide
Chapter 3: Maintaining Security
Security Patch Management
Security patches are released on an as-needed basis.
All security patches for RSAArcher originate as RSA and are available for download as an update,
as long as you have a current maintenance agreement in place with RSA. Updates are available
from RSA SecurCare Online. Product documentation is posted on the RSA Archer Community on
RSALink. RSA recommends you register your product and sign up for the RSA Archer Community
on RSALink.
The following table lists the third-party components for which patches are needed.
Third-Party
Component for
which Patch Is
Needed
Frequency
of Patch
EMC
Responsibility
(Yes or No)
Customer
Responsibility
(Yes or No)
Reference to
Instructions for
Applying Patch
Windows Server 2012
R2 & 2016
Determined
by vendor.
No Yes Based on vendor
recommendations.
SQL Server 2014
&2016
Determined
by vendor.
No Yes Based on vendor
recommendations.
Malware Detection
RSA recommends that you deploy a malware detection solution on the web and database servers.
The malware detection solution should be based on your standard tools and best practices. It is your
responsibility to deploy patches and updates for the malware detection tools.
Virus Scanning
RSA recommends that you run virus scanning software on the deployed servers on a routine basis. If
you are running Threat or Vulnerability feeds, RSA strongly recommends that you disable virus
scanning for the folder in which the Threat or Vulnerability data files are temporarily stored. A virus
scanning engine could interpret the data as a virus or malware.
For information on configuring the folder, see Threat Data Feeds.
Chapter 3: Maintaining Security 103
Security Configuration Guide
Ongoing Monitoring and Auditing
As with any critical infrastructure component, RSA recommends that you constantly monitor your
system and perform periodic and random audits, for example, configuration, permissions, and
security logs. Ensure that the configurations and user access settings match your company policies
and needs.
Chapter 3: Maintaining Security 104

Security Configuration Guide
Chapter 4: FIPS Compliant Mode
The Federal Information Processing Standard (FIPS) is a United States and Canadian government
standard that is intended to ensure secure data communications among compliant systems. FIPS 140-
2 specifies the Security Requirements for Cryptographic Modules, including the approved encryption
algorithms and hashing algorithms and the methods for generation and management of encryption
keys. To qualify as FIPS compliant, RSAArcher must be configured and operated in accordance
with FIPS 140-2 requirements, using FIPS-certified components and algorithms in all required
instances.
Platform Release Supporting FIPS
RSAArcher 6.0 and later can be configured for FIPS compliance.
FIPS-Compliant Operation Requirements
You can configure FIPS compliance on any Windows system that supports RSAArcher, including
Windows Server 2012 R2 and 2016.
Note: This requirement applies to all RSAArcher components.
You must configure web browsers for FIPS operation. See Configure Browser for FIPS Compliance.
FIPS Certificates
Cryptographic modules that are FIPS 140-2 certified have undergone testing and verification by a
government-approved evaluation laboratory. You can obtain the required FIPS certificates from the
National Institute of Standards and Technology (NIST) website at:
http://csrc.nist.gov/groups/STM/cmvp/documents/140-1/140val-all.htm
For a list of certificates applicable to RSAArcher, see Platform FIPS Certification.
Set Up FIPS for Windows
Use the Local Security Policy tool to perform the FIPS setup for Microsoft Windows.
Procedure
1. Log on to Windows as a Windows system administrator.
2. Click Start > Control Panel.
3. In the Control Panel window, click Administrative Tools.
Chapter 4: FIPS Compliant Mode 105
Security Configuration Guide
4. In the Administrative Tools window, click Local Security Policy.
5. In the Local Security Policy window, in the navigation pane, click Local Policies > Security
Options.
6. In the Policy pane, double-click System cryptography: Use FIPS compliant algorithms for
encryption, hashing, and signing.
7. On the Local Security Setting tab, click Enabled.
8. Click Apply.
9. ClickOK.
10. Close the Local Security Policy window.
SQL Server FIPS Setup
All versions of SQL Server that support RSAArcher are configurable for FIPS compliance. For
instructions on setting up FIPS on SQL Server, see the Microsoft SQL Server documentation.
Note: SQL Server 2014 or SQL Server 2016 must be installed on a Windows Server 2012 R2-based
server. The Windows server must be FIPS enabled prior to starting SQL Server.
For dialog security between services, the encryption uses the FIPS-certified instance of AES if the
FIPS mode is enabled. If the FIPS mode is disabled, the encryption uses RC4. When a Service
Broker endpoint in the FIPS mode is configured, the administrator must specify AES for the Service
Broker. If the endpoint is configured to RC4, the SQL Server generates an error, and the transport
layer does not start.
Messages in two logs verify that the SQL Server is running in FIPS mode:
lWhen the SQL Server service detects that FIPS mode is enabled at startup, it logs this message in
the SQL Server error log:
Service Broker transport is running in FIPS compliance mode.
lThis message is logged in the Windows Event log:
Database Mirroring transport is running in FIPS compliance mode.
Configure Browser for FIPS Compliance
In addition to FIPS enablement on the host system, you must configure any web browser used to
connect to the RSAArcher for FIPS compliance. For more information, see Set up FIPS for
Windows
Chapter 4: FIPS Compliant Mode 106
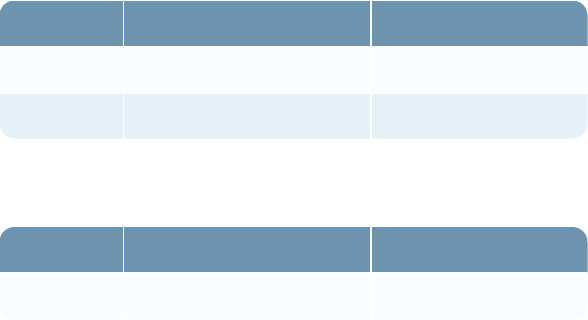
Security Configuration Guide
When using supported versions of Microsoft Internet Explorer with the Platform in FIPS mode,
enable TLS 1.1/1.2 or higher in the browser. For more information, see the "RSA Archer Qualified
and Supported Environments" on RSALink at https://community.emc.com/community/connect/grc_
ecosystem/rsa_archer.
1. Open Internet Explorer.
2. Click Tools, and then click Internet Options.
3. On the Advanced tools tab, select Use TLS 1.1/2.2.
4. Verify that both Use SSL 2.0 and Use SSL 3.0 options are cleared.
LDAP Configuration for FIPS Mode
Note: RSA assumes that you use Microsoft Active Directory as the LDAP server. For other types of
LDAP servers, see their product-specific documentation.
Connections to Active Directory from RSAArcher can be unencrypted or encrypted. If you intend to
encrypt connections, you must configure Active Directory with a server certificate. You can achieve
this with a server certificate on the Windows server, which installs the server certificate, using auto
enrollment on Active Directory.
To configure Active Directory in FIPS mode, the Windows server hosting Active Directory must be
FIPS enabled. For more information, see Set Up FIPS for Windows.
Platform FIPS Certification
The following tables list the FIPS certificates for the cryptographic components that RSAArcher
uses.
Secure Hash Algorithm (SHA) Standard (FIPS 180-3)
Algorithm Operating System Certificate Number
SHA-108-3 Windows Server 2012 R2 2373
Windows Server 2016 3347
Advanced Encryption Standard (AES) Algorithm (FIPS 197)
Algorithm Operating System Certificate Number
AES-197 Windows Server 2012 R2 2832
Chapter 4: FIPS Compliant Mode 107

Security Configuration Guide
Algorithm Operating System Certificate Number
Windows Server 2016 4064
Enable FIPS Window Server Configuration for 140-2 on the Web and Services Server
1. Enable FIPS mode on the web server.
a. Go to Administrative Tools.
b. In Administrative Tools, select Local Security Policy.
c. Expand Local Policies, and select Security Options.
d. Double-click System cryptography: Use FIPS compliant algorithms for encryption, hashing,
and signing.
e. Select Enable.
2. Download and install the JCE Unlimited Jurisdiction Policy files.
a. Go to http://www.oracle.com/technetwork/java/javase/downloads/jce8-download-
2133166.html and follow the steps provided to download the JCEUnlimited Jurisdiction
Policy files.
b. Extract and open the ZIP file.
c. Edit the jar file names by adding the extension .org to the end of the files so that they are not
overwritten later.
d. Paste the renamed files in %SystemDrive%\Program Files\Java\<java_version_
directory>\lib\security.
3. In the %SystemDrive%\Program Files\Java\java_version_directory\lib\security directory, edit the
java.security file by doing one of the following:
lAdd the line com.rsa.cryptoj.fips140initialmode=FIPS140_MODE..
lChange the line com.rsa.cryptoj.fips140initialmode=NON_FIPS140_MODE to
com.rsa.cryptoj.fips140initialmode=FIPS140_MODE.
Chapter 4: FIPS Compliant Mode 108

Security Configuration Guide
Appendix A: Authentication Methods
User authentication settings control the process of verifying an identity claimed by a user for
accessing RSAArcher.
RSAArcher has a default anonymous HTTP authentication configuration that simplifies the
installation process and prevents problems during installation. Anonymous HTTP authentication is
sufficient for most environments. For those environments where it is not sufficient, more
sophisticated authentication methods are necessary. Configuring authentication methods requires
changes to multiple server-side components, some of which are outside the scope of RSAArcher.
A new installation of RSA Archer is secure by Default (HTTPS/SSL protocol enabled) with
anonymous authentication. Anonymous Authentication is not sufficient in most environment and a
sophisticated authentication method is necessary. Configuration of sophisticated authentication
requires changes to multiple server side components, some of which are outside the scope of RSA
Archer.
Important: Before making any of the authentication configuration changes below, be sure to back
up the RSAArcher web.config file, the Configuration database, and the IIS settings.
Note: An incorrectly configured authentication method can prevent the entire RSAArcher from
being accessible.
The following are supported protocol methods.
HTTPS/SSLprotocol
The certificate for SSL must be available in the Server Certificates component (Machine Name >
Server Certificates) within IIS. When the certificate is available, an https Binding which uses the
SSL certificate must be added for the RSA web site.
Use the following tasks to configure IIS, the web.config files, and the RSA Archer Control Panel for
HTTPS/SSL.
Note: If you need to restore HTTP after configuring for HTTPS/SSL protocol, implement the
process by undoing all the HTTPS/SSL steps.
Configure IIS for HTTPS/SSL protocol
1. Select the Platform web site in the Connections pane.
2. In the Actions pane, click Bindings.
3. Click Add.
4. In the Type list, select the https option.
Appendix A: Authentication Methods 109
Security Configuration Guide
5. In the SSL certification list, select the applicable certificate.
6. Click OK.
7. Do one of the following:
lTo continue without removing the HTTP Site Binding, go to the next step.
lTo remove the HTTP Site Binding, do the following:
a. Select the HTTP Site Binding.
b. Click Remove.
c. Click Yes.
8. Click Close.
9. Perform an IIS reset.
Configure Platform web.config file for HTTPS/SSL protocol
RSAArcher must be configured to run either in HTTP or HTTPS, not both. Edit the RSAArcher
web.config in the base RSAArcher web site directory.
1. Find the expression <!-- for HTTPS, and then do each of the following:
lReplace httpGetEnabled with httpsGetEnabled="false".
lUncomment the line <security mode="Transport" />.
lReplace the httpTransport attribute with httpsTransport.
2. Find the expression <customHeaders>, and then add each of the following configurations in a
separate new line within the custom headers section:
l<add name="Strict-Transport-Security" value="max-age=31536000; includeSubDomains" />
l<add name="X-Content-Security-Policy" value="default-src 'self';" />
l<add name="X-XSS-Protection" value="1; mode=block"/>
3. Click Save.
4. Perform an IIS reset.
Configure REST API web.config file for HTTPS/SSL protocol
The REST API child API IIS application inherits properties from the parent RSAArcher
application. Similar to the Platform web.config, RSAArcher must be configured to run either in
HTTP or HTTPS, not both. Edit the REST API web.config in the api directory within the base
RSAArcher web site directory.
Appendix A: Authentication Methods 110
Security Configuration Guide
1. Find the expression <!-- for HTTPS.
2. Replace httpGetEnabled with httpsGetEnabled="false".
3. Uncomment the line <security mode="Transport" />.
4. Replace the httpTransport attribute with httpsTransport.
5. Click Save.
6. Perfor's m an IIS reset.
Configure RSA Archer Control Panel for HTTPS/SSL
All URLs in the RSA Archer Control Panel must include HTTPS.
1. Open the RSA Archer Control Panel.
2. In Instance Management, double-click the instance you want to configure.
3. Click the Web tab.
4. Change all applicable Platform Web site URLs to include HTTPS.
5. Repeat steps 2 – 4 for all other instances.
6. Click Save All.
Windows Authentication
The authentication mode must be set to Windows Authentication in IIS. All other authentication
modes must be disabled.
Note: If Windows Authentication is not available for selection, it must be installed. Do not enable
Extended Protection because Microsoft Silverlight does not support it.
Important: The REST API does not support Windows Authentication. Windows Authentication
must be disabled for the child API IIS application, and Anonymous Authentication enabled again.
Use the following tasks to configure IIS and the web.config file for Windows HTTP or HTTPS
protocols.
Configure IIS for Windows Authentication
1. Select the Platform Web site in the Connections pane.
2. Select the Authentication feature.
3. Set Windows Authentication to Enabled.
4. Disable all other authentication modes, for example, Anonymous.
Appendix A: Authentication Methods 111
Security Configuration Guide
5. Perform an IIS reset.
Configure Platform web.config file for Windows Authentication - HTTP
Edit the RSAArcher web.config file in the base RSAArcher web site directory.
1. Find the expression <!-- For Windows Authentication, change mode to 'Windows'.
2. Replace <authentication mode="None" /> with <authentication mode="Windows" />.
3. Find the expression <!-- For Windows Authentication, and uncomment the lines.
4. Uncomment the lines related to <authorization><allow users="*" /></authorization>.
5. Find the expression <!-- For Basic Authentication (without SSL), and uncomment the lines.
6. Uncomment the lines related to security mode.
7. Find the expression <!-- for Windows Integrated Authentication, and add
authenticationScheme="Negotiate".
8. As instructed, add authenticationScheme="Negotiate" /> to httpTransport or httpsTransport.
9. Click Save.
10. Perform an IIS reset.
Configure Platform web.config file for Windows Authentication - HTTPS
Edit the RSAArcher web.config in the base RSAArcher web site directory.
1. Open the web.config file in a text editor.
2. Locate the <authentication mode> tag and change the authentication mode from None to
Windows.
3. Locate the <authorization> and <allow users> tags and remove the comments.
4. Locate the <serviceMetaData> tab and change the HTTP identifier to HTTPS.
5. Locate the <webHttpBinding> section.
6. Remove the comments in the <security mode> and <transport> tabs identified for Windows
Authentication and change the security mode as follows:
<security mode="Transport">
<transport clientCredentialType="Windows" />
</security>
7. Locate the <httpTransport> tag for the binaryHttpBinding.
8. Add the authenticationScheme="Negotiate" attribute to the tag and the HTTPS identifier.
Appendix A: Authentication Methods 112
Security Configuration Guide
<httpTransport maxReceivedMessageSize="1024000000" maxBufferSize="1024000000"
authenticationScheme="Negotiate" />
9. Locate the <httpTransport> tag for the binaryHttpBindingStreaming binding.
10. Add the authenticationScheme="Negotiate" attribute to the tag and the HTTPS identifier.
<httpsTransport transferMode="StreamedRequest"
maxReceivedMessageSize="1024000000" maxbufferSize="1024000000"
authenticationScheme="Negotiate" />
11. Locate the <location> tag and remove the comments.
12. Save the web.config file
13. Perform an IISreset.
Single Sign-on for Windows integrated authentication
Use the following tasks to configure Single Sign-On for Windows integrated authentication.
Configure Platform web.config file for Single Sign-On
Edit the RSAArcher web.config file in the base RSAArcher web site directory.
1. Find the expression </configuration>.
2. On a preceding blank line, insert <location
path="default.aspx"><system.web><authorization><deny
users="?"/></authorization></system.web></location>.
3. Click Save.
4. Perform an IIS reset.
Configure RSA Archer Control Panel for Single Sign-On - Single Instance
1. Open the RSA Archer Control Panel.
2. In Instance Management, double-click the instance you want to configure.
3. Click the Single Sign-On tab.
4. Select Windows Integrated as the single sign-on mode.
5. Click the Installation Settings tab.
6. Select the Default Instance box.
7. Click the arrow in the Instance list, and then select the instance.
8. Click Save All.
Appendix A: Authentication Methods 113
Security Configuration Guide
Configure RSA Archer Control Panel for Single Sign-On - Multiple Instances
1. Open the RSA Archer Control Panel.
2. In Instance Management, double-click the instance you want to configure.
3. Click the Single Sign-On tab.
4. Select Windows Integrated as the single sign-on mode.
5. Click the Web tab.
6. Enter a unique Instance URL.
Note: If a matching DNS entry does not exist for the Instance URL, it does not resolve.
7. Click Save.
Appendix A: Authentication Methods 114
