Raspberry Pi Tips, Tricks & Hacks Volume 1 Second Revised Edition Tips
User Manual: Raspberry Pi Tips Tricks Hacks Volume 1 Second Revised Edition
Open the PDF directly: View PDF ![]() .
.
Page Count: 164 [warning: Documents this large are best viewed by clicking the View PDF Link!]
SD CARD
40 PINS: 28x GPIO, I2C, SPI, UART
Raspberry Pi
Practical projects Essential upgrades Python tips
NEW
40
Over
Raspberry
Pi projects
Pi Zero
tricks
inside
FREE
DISTROS
10

The Raspberry Pi is powering a computing revolution that is sweeping the world.
It’s changed the face of the classroom forever, it’s used in amazingly creative
projects at Raspberry Jam events everywhere from Yorkshire villages to the capital
of Australia, and every weekend families get together to code, create and craft
new gadgets. Whether you’re six or sixty, there’s a Pi project for you. And that’s
where we come in. In this new edition of Raspberry Pi Tips, Tricks & Hacks we’re
giving you everything you need to not only get up and running with a brand
new Raspberry Pi, but also fire up your imagination and unleash your creativity.
From programming-based projects like tethering your Pi to an Android, through
hardware projects including digital photo frames, arcade machines and touch-
screen video players, all the way to advanced robotics projects that will see
you building your own Raspberry Pi-powered, remote control vehicles and car
computers, we’ve got plenty here to keep you busy. All you need is your favourite
$35 computer – and a passion for making things!
Welcome to
Raspberry Pi


Imagine Publishing Ltd
Richmond House
33 Richmond Hill
Bournemouth
Dorset BH2 6EZ
+44 (0) 1202 586200
Website: www.imagine-publishing.co.uk
Twitter: @Books_Imagine
Facebook: www.facebook.com/ImagineBookazines
Publishing Director
Aaron Asadi
Head of Design
Ross Andrews
Production Editor
Alex Hoskins
Senior Art Editor
Greg Whitaker
Designer
Perry Wardell-Wicks
Photographer
James Sheppard
Printed by
William Gibbons, 26 Planetary Road, Willenhall, West Midlands, WV13 3XT
Distributed in the UK, Eire & the Rest of the World by
Marketforce, 5 Churchill Place, Canary Wharf, London, E14 5HU
Tel 0203 787 9060 www.marketforce.co.uk
Distributed in Australia by
Network Services (a division of Bauer Media Group), Level 21 Civic Tower, 66-68 Goulburn Street,
Sydney, New South Wales 2000, Australia, Tel +61 2 8667 5288
Disclaimer
The publisher cannot accept responsibility for any unsolicited material lost or damaged in the
post. All text and layout is the copyright of Imagine Publishing Ltd. Nothing in this bookazine may
be reproduced in whole or part without the written permission of the publisher. All copyrights are
recognised and used specifically for the purpose of criticism and review. Although the bookazine has
endeavoured to ensure all information is correct at time of print, prices and availability may change.
This bookazine is fully independent and not affiliated in any way with the companies mentioned herein.
Raspberry Pi is a trademark of The Raspberry Pi Foundation
Raspberry Pi Tips, Tricks & Hacks Volume 1 Second Revised Edition © 2015 Imagine Publishing Ltd
bookazine series
Part of the
Raspberry Pi
Contents
12 Set up your
Raspberry Pi
“Use a motion-sensing Raspberry Pi
to automatically take pictures”
6 Raspberry Pi Tips, Tricks & Hacks
08 Master Raspberry
Pi in 7 days
• Make music with the
Raspberry Pi
• Raspberry Pi voice synthesiser
• Program Minecraft-Pi
• Get interactive with Scratch
• Build a Raspberry Pi web server
40 50 ways to master
Raspberry Pi
48 Use an Android device as a
Pi screen
52 Host a website on your Pi
54 Secure your Raspberry Pi
58 Build a file server with the
Raspberry Pi
62 Network and share your
keyboard and mouse
64 Add a reset switch to your
Raspberry Pi
66 Remotely control your
Raspberry Pi
68 Install Android on Pi
76 Add a battery pack to Pi
• Create your first simple game
with Scratch
• Learn to code with Sonic Pi
• Take photos with Raspberry Pi
• Use the GPIO pins
• Build a Twitter-powered lamp
with Python
• Make a tweeting bird watcher
Tips
68
52
32
2 8 5 Practical
Raspberry Pi
Projects
Tricks
• Retro arcade cabinet
• Audiobook reader
• Web radio
• Media caster
• Portable Wi-Fi signal repeater
• Secure Tor web station
• Private cloud storage
• AirPi
• Dusklights
• Outdoor time-lapse camera
96 Set up the PiTFT touch screen
98 Calibrate a touch screen interface
100 Portable Pi video player
102 Make a Raspberry Pi sampler
106 Build a radio transmitter
110 Tether your Pi to Android
112 Build a network of Raspberry Pis
116 Add gesture control to your Pi
120 Make a digital photo frame out of
your Raspberry Pi
124 Pygame Zero
132 Build a Raspberry
Pi-controlled car
138 Make a Raspberry Pi
car computer
146 Build a Minecraft power
move glove
150 Build a Super Raspberry Pi
Hacks
“It has powered quadcopters, coffee
makers, self-sailing boats and even
touched the edge of space”
80 10 Inspiring
Pi Projects
80
120
106

Master
Raspberry Pi
in 7 days
It’s amazing what can be accomplished with the
Raspberry Pi if you set your mind to it. They’ve been
sent higher into orbit than Felix Baumgartner, they
power cutting-edge Bitcoin farms and someone’s even
using one to try and translate dog thoughts into speech
with a Pi-infused collar. No prizes for guessing where
the inspiration for www.nomorewoof.com came from.
No one really knows if it’s ever going to work, but does
it matter? The mere fact that someone’s even trying to
bring a piece of Disney fantasy to life using the same
technology as your Raspberry Pi is inspiring stuff!
While we won’t be taking pictures at four times the
altitude of a cruising jumbo jet or translating the musings
of a canine companion, the seven projects you’ll fi nd over
the next 16 pages will certainly get you off on the right
From setup to internet
sensation in a week…
foot. Our fi nal big project will be to use a motion-sensing
Raspberry Pi to automatically take pictures of local
wildlife and tweet them to the world.
Not bad, especially since we’re assuming you have no
prior experience with the Raspberry Pi. Yes, we expect
you to know where to stick the other end of the HDMI
cable, but we don’t assume that you can program with
Python or navigate the command line interface. We’ll
gradually learn as we go, fi rst by setting up the Pi and
learning key programming logic with Scratch and Sonic
Pi. We’ll then move on to writing simple Python scripts,
getting to grips with the Camera module and using the
GPIO port among other things. By the end of it you should
have all the skills and equipment needed to complete the
fi nal project – and much more besides…
8 Raspberry Pi Tips, Tricks & Hacks
Master Raspberry Pi in 7 days
Raspberry Pi Tips, Tricks & Hacks 9
Master Raspberry Pi in 7 days
10 Raspberry Pi Tips, Tricks & Hacks
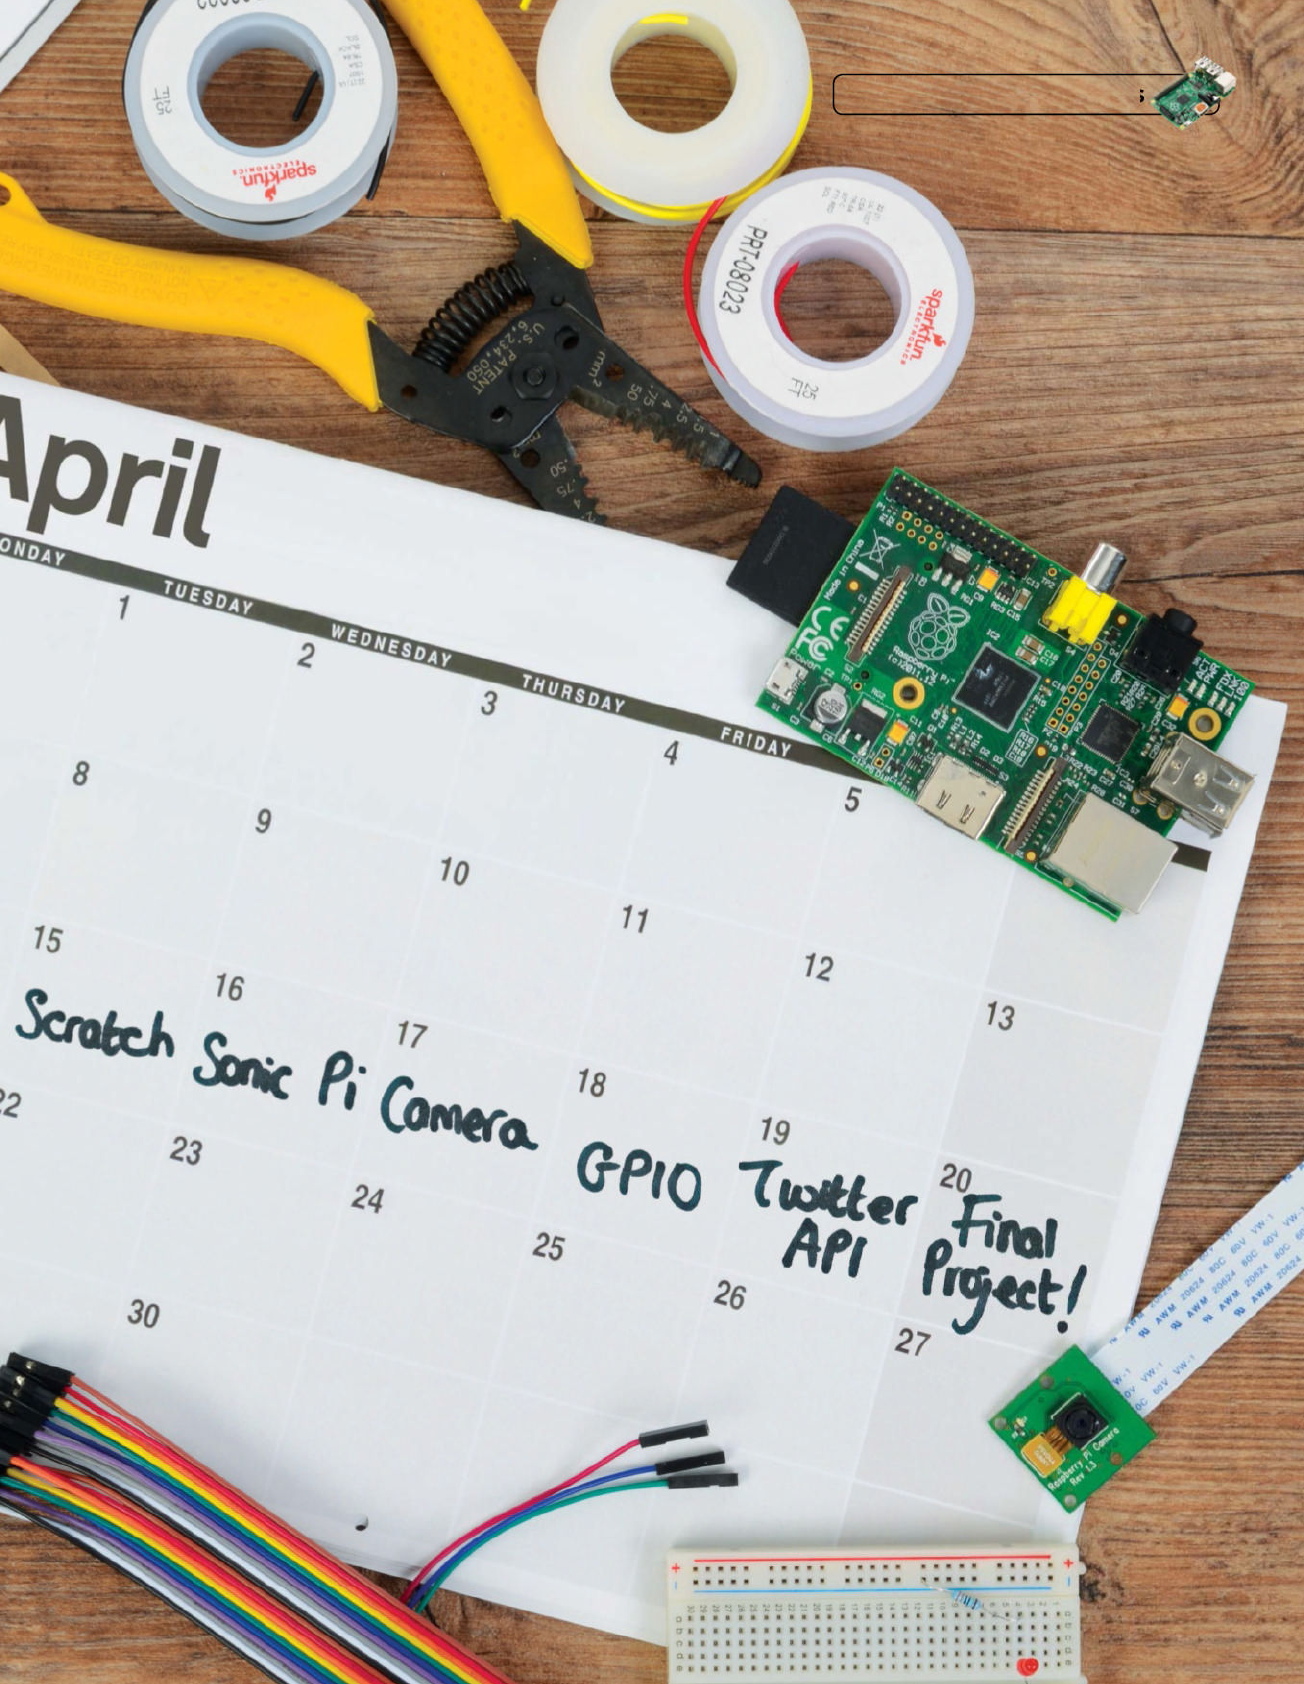
Day 1 Set up your Raspberry Pi
Day 3 Learn code with Sonic Pi
Day 5 Get to grips with GPIO
Day 6 Use the Twitter API Day 7 Put it all together!
Day 2 Make a game from Scratch
Day 4 Take photos with your Pi
It’s not rocket science, but we’ll get you started
Write functional code while making beautiful music
Create a simple but elegant candlelight project
Create an Internet of Things Twitter lamp
Automagically share wildlife shots with this motion-
sensing, picture-taking, Twitter-posting project
Learn the basics of coding with graphical feedback
Use Python to take great snaps with your camera
Plan your week
Master Raspberry Pi in 7 days
Raspberry Pi Tips, Tricks & Hacks 11
Master Raspberry Pi in 7 days
Pi projects
shopping list
Grab these extra components before
taking part in our week of Raspberry Pi…
We’ll be covering a variety of different project types over the course of
these tutorials, so you may want to stock up on some components and
accessories to help you get through the week. This is just the tip of the
iceberg, though - each supplier offers plenty of kit for new projects…
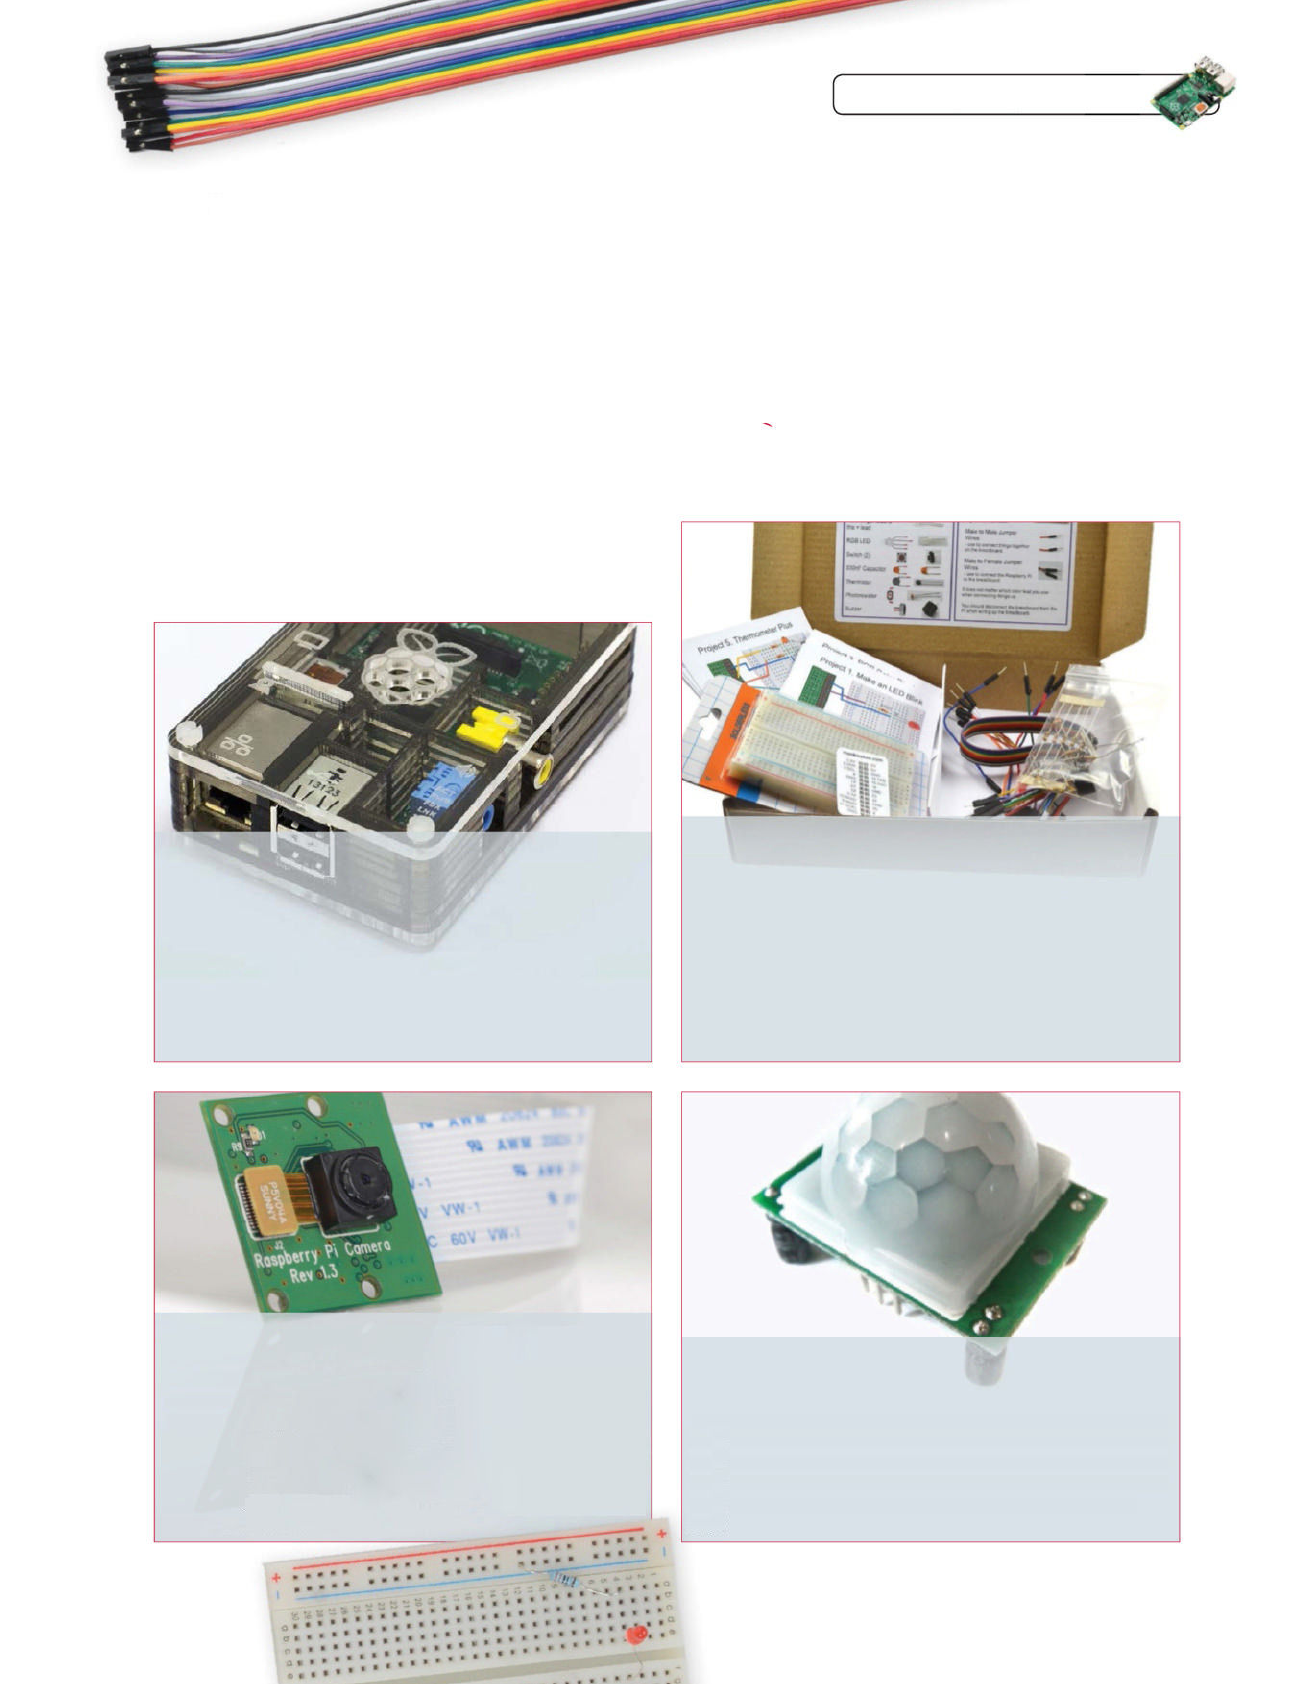
Pibow case Electronics starter kit
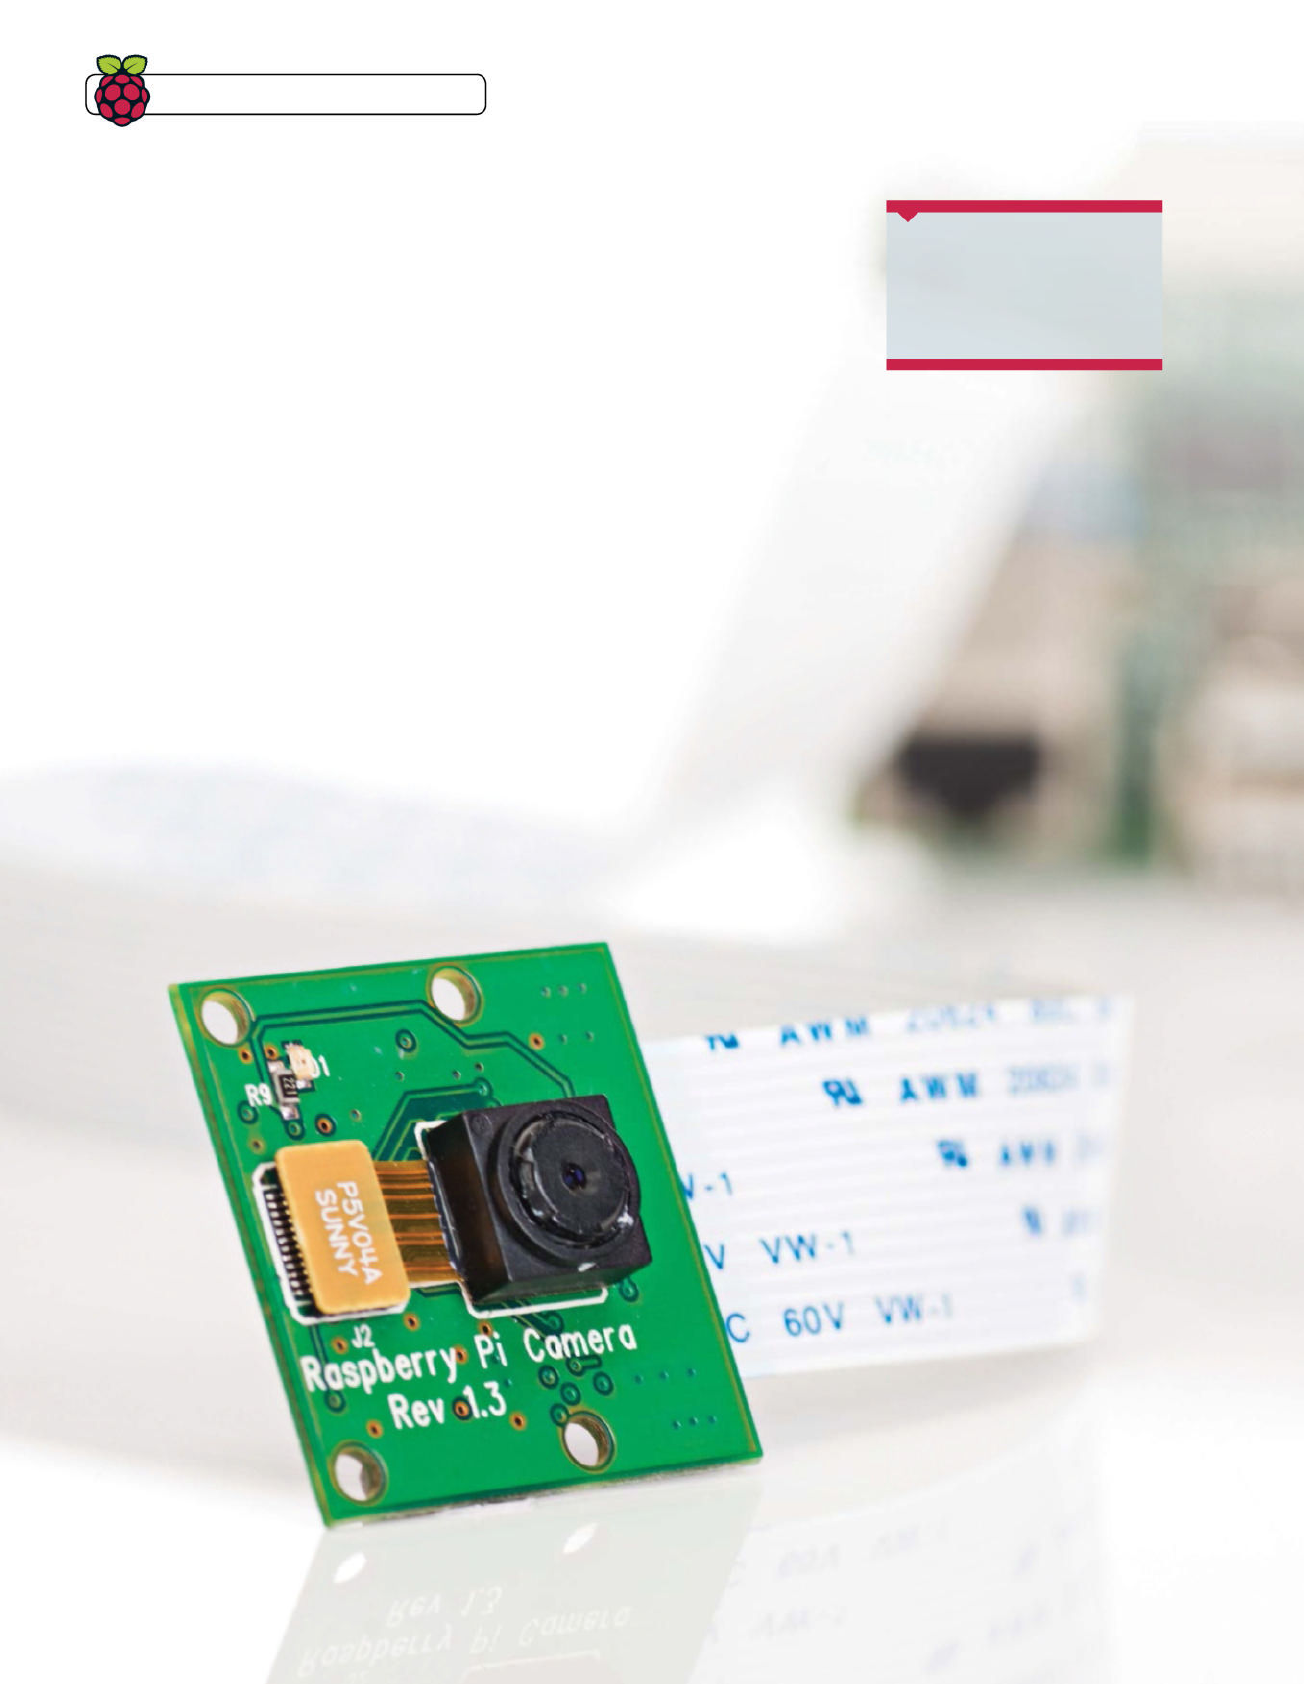
Raspberry Pi camera board PIR sensor
A beautiful and functional case for your Raspberry Pi, with all the
necessary openings that will allow you to access the camera module
ribbon and the GPIO port on the board itself. The Pibows come in a
variety of different colours, and there’s even a special version for the
Model A, with even greater access to the technical ports. It can also
be modifi ed with an extra platter to attach to a TV if you plan on using
the Pi in your home theatre setup.
£12.95 | shop.pimoroni.com
Hobbyists have been creating simple circuits for their projects for
years now using simple components all hooked up to a prototyping
breadboard. While you can hunt around and get all the parts you
need for this, there are a handful of electronic starter kits that include
everything you need for our projects this issue (and much more besides).
Simon Monk has created one of these kits, which includes a breadboard,
pre-cut cables, switches, resistors and a whole host of other little
components and sensors for any electronics project.
£15 | bit.ly/1oE9BYC
The Pi-specifi c camera board has been created in such a way that it
connects to one of the video in ports for the Raspberry Pi on the actual
board itself. This means it won’t use up any of the limited USB ports or
other inputs, so that you don’t need to get a USB hub to have everything
working. The camera isn’t the highest resolution offering in the world, but
it’s a respectable 5MP that can take images at 2592 x 1944 and record
video at 1080p at 30 fps, which is more than enough for most projects.
£19.99 | thepihut.com
An infrared motion sensor that hooks up to the Raspberry Pi via the
GPIO port. It sends a constant signal depending on the level of infrared
radiation that it detects, which can be used to determine when to activate
a piece of code. For example, IR sensors are classically used in alarm
systems, however they can also be used to take pictures or video on
demand, which is how we’re planning to use it at the end of the week.
£2.99 | modmypi.com
12 Raspberry Pi Tips, Tricks & Hacks
Tips | Tricks | Hacks
Set up your Raspberry Pi
Turn your Raspberry Pi into a fully functional PC
and get to know the basics of setting it up
What you’ll need
Q 1A micro USB
Q Internet connection
Q USB mouse and keyboard
Q HDMI cable and
compatible monitor
Q 4GB SD card
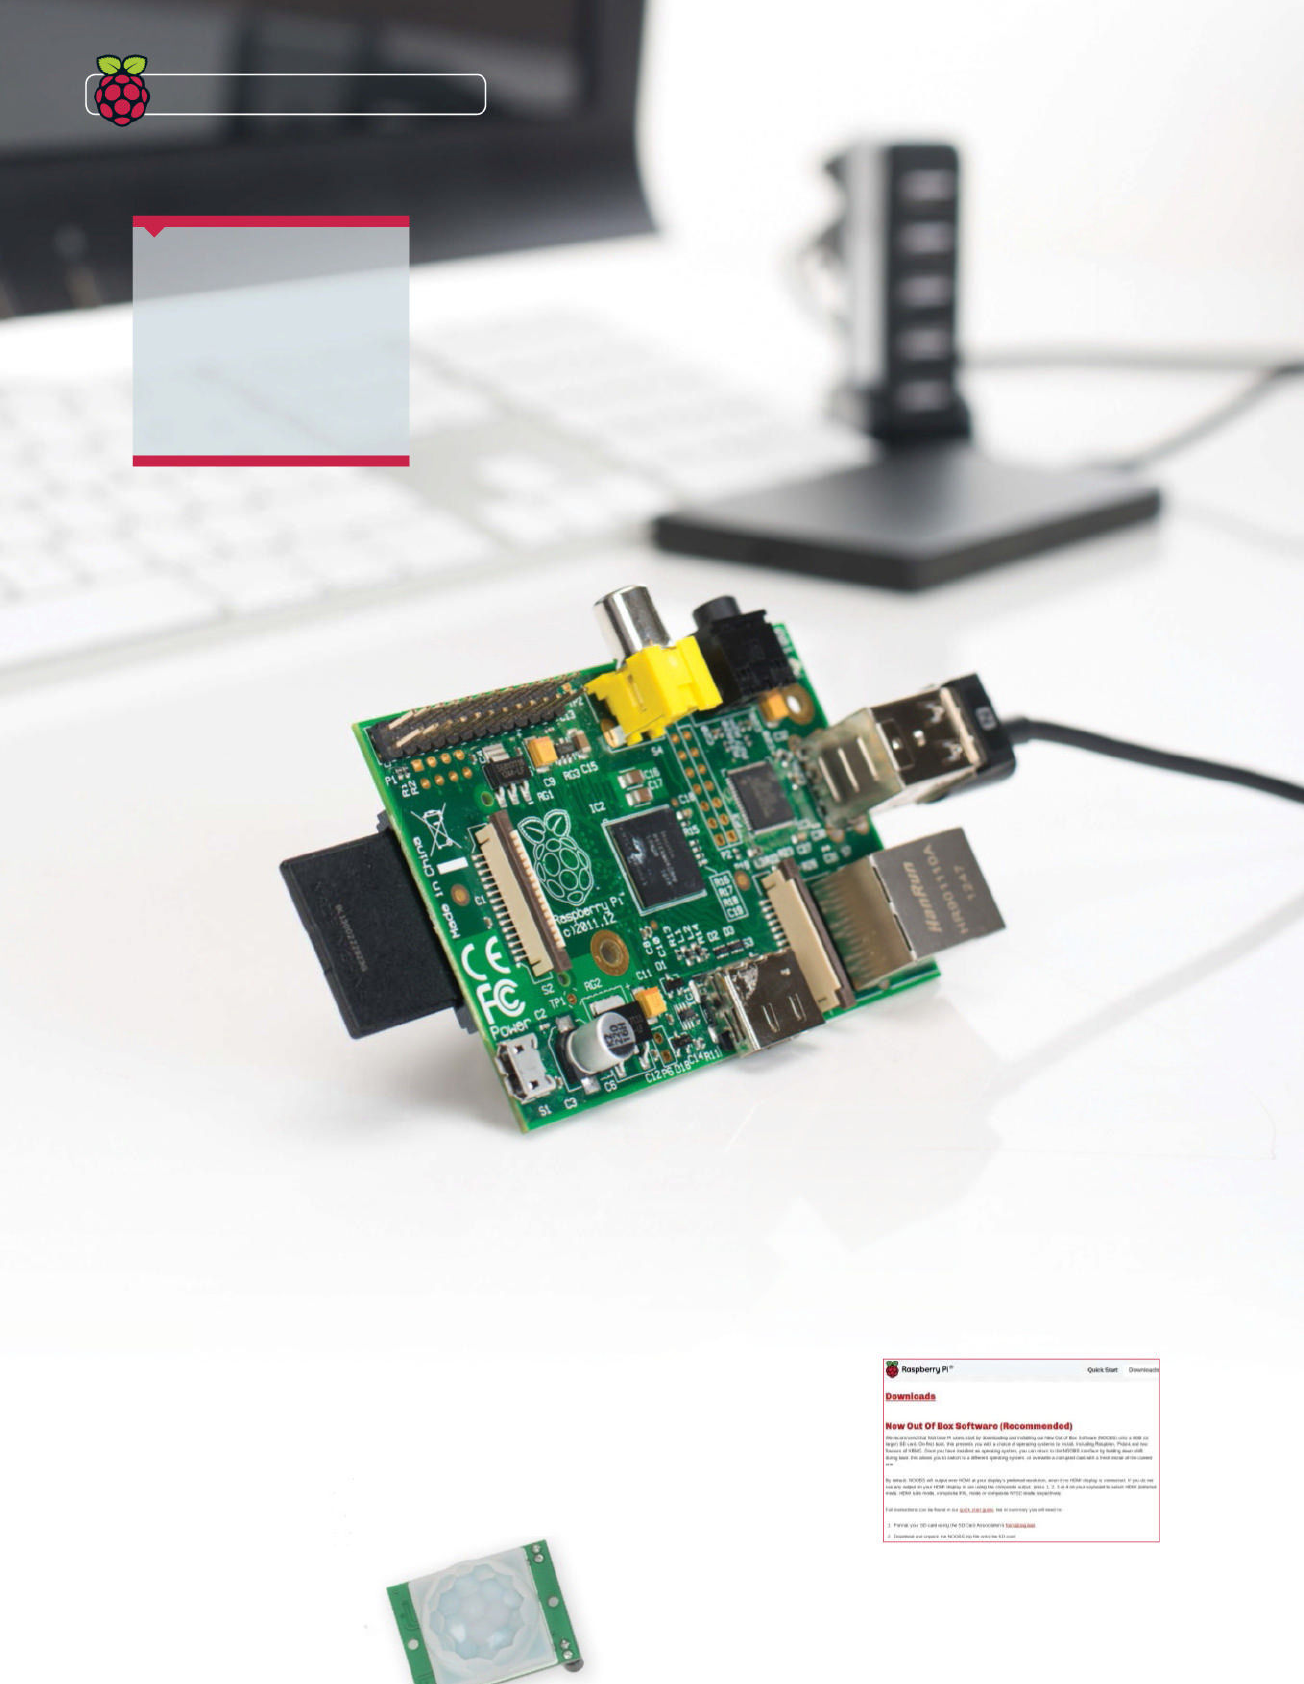
So you’ve just got your Raspberry Pi – you’re probably
wondering how exactly you’re going to get started with it.
If you’re used to more traditional PCs, you might be expecting
a CD drive or a USB installer to set up your Raspberry Pi. The
Pi requires a little more than sticking in a CD though, so we’ll
show you how to get everything working properly.
In this tutorial we’ll also give you some quick tips on how to
improve your Raspberry Pi experience, including extra software
packages and ways you can use your brand new Pi.
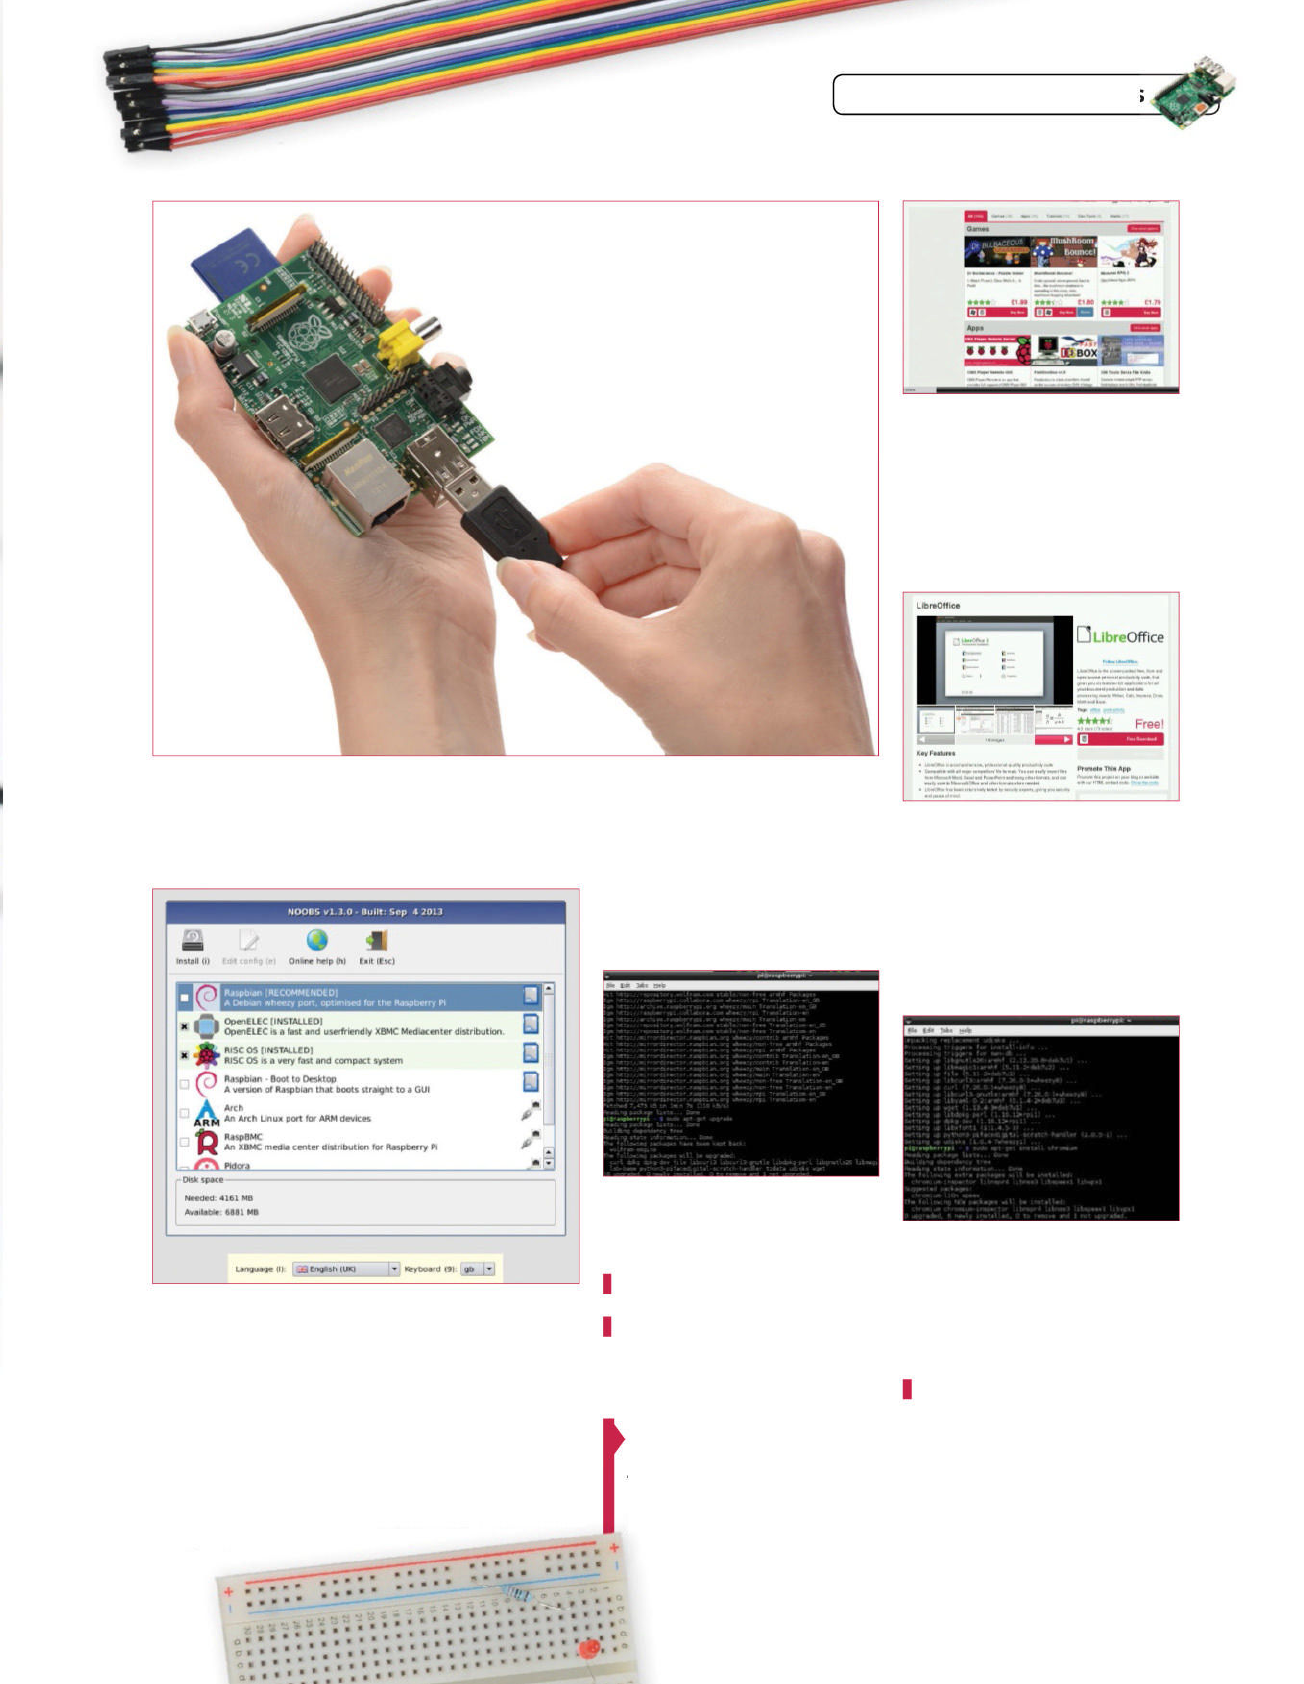
01 Get your operating system
Head over to the Raspberry Pi
website (www.raspberrypi.org) and
download NOOBS, the New Out Of Box
Software. This will come in a zip fi le;
download it onto the SD card for your
Raspberry Pi and extract the fi les from
it here. Do not extract the fi les elsewhere
and copy them over.
Master Raspberry Pi in 7 days
Raspberry Pi Tips, Tricks & Hacks 13
The other distros each have
their uses and you may want to
use them at a later date
04 Install Raspbian
Select Raspbian by clicking the check box to the left
of it, and then click Install at the top of the Window. Confi rm
that you want to install, and it will go through the process of
adding Raspbian to the SD card.
02 Connect your Pi
Without inserting the power cable, hook up everything to
your Pi. You’ll need a wired ethernet connection or a compatible
wireless dongle, a USB mouse, a USB keyboard and a monitor or
other form of display connected via HDMI.
05 Set up Raspbian
There are a few things you
need to do before Raspbian is ready.
On the confi g screen, select Expand
Filesystem to make sure the SD is
being used properly. Then, go to Enable
Boot to Desktop and select Desktop
from the list. Go to Finish, and it will
reboot Raspbian.
03 Choose your distro
Plug in your SD card and fi nally connect the power.
The Raspberry Pi will boot into NOOBS’ distro selection menu.
For all of our tutorials we will be using Raspbian, however
the other distros each have their uses and you may want to
consider using them at a later date.
06 Update Raspbian
Make sure all the software on
Raspbian is now up to date. To do this,
open the LXTerminal and type:
$ sudo apt-get update
Once that’s fi nished, follow it up with:
$ sudo apt-get upgrade
This may end up taking a few minutes,
but it will update the software
throughout Raspbian.
07 Get new software
There are two ways to get more
packages for Raspbian – either through
the Pi Store link, or via the package
manager in the terminal. You’ll get a
different selection of apps on the two
services, with a greater focus on general
software tools in the package manager
08 Get an offi ce suite
Raspbian does not have any
form of offi ce functionality by default,
only a basic text editor. You can add
LibreOffi ce though, which can be done
via the Pi Store. Open up the Store and go
to Apps; here you’ll fi nd LibreOffi ce as a
free download. Once you’ve created an
account, it will download and install it.
09 Get a better browser
Midori is an excellent browser,
however you can also get Chromium
to work on Raspbian. This is the open
source version of Google’s Chrome
browser, which you can get by opening
the terminal and typing:
$ sudo apt-get install chromium
Master Raspberry Pi in 7 days
14 Raspberry Pi Tips, Tricks & Hacks
Create a simple
game with Scratch
Learn the basics of coding logic by creating a squash-like
Pong clone in Scratch that you can play at the end of the day
While Scratch may seem like a very simplistic programming
language that’s just for kids, you’d be wrong to overlook it as
an excellent first step into coding for all age levels. One aspect
of learning to code is understanding the underlying logic that
makes up all programs; comparing two systems, learning to work
with loops and general decision-making within the code.
Scratch strips away the actual code bit and leaves you with
just the logic to deal with. This makes it a great starting point
for beginners, separating the terminology so you can learn that
later on when you choose to make a proper program. It’s also
included on every copy of Raspbian.
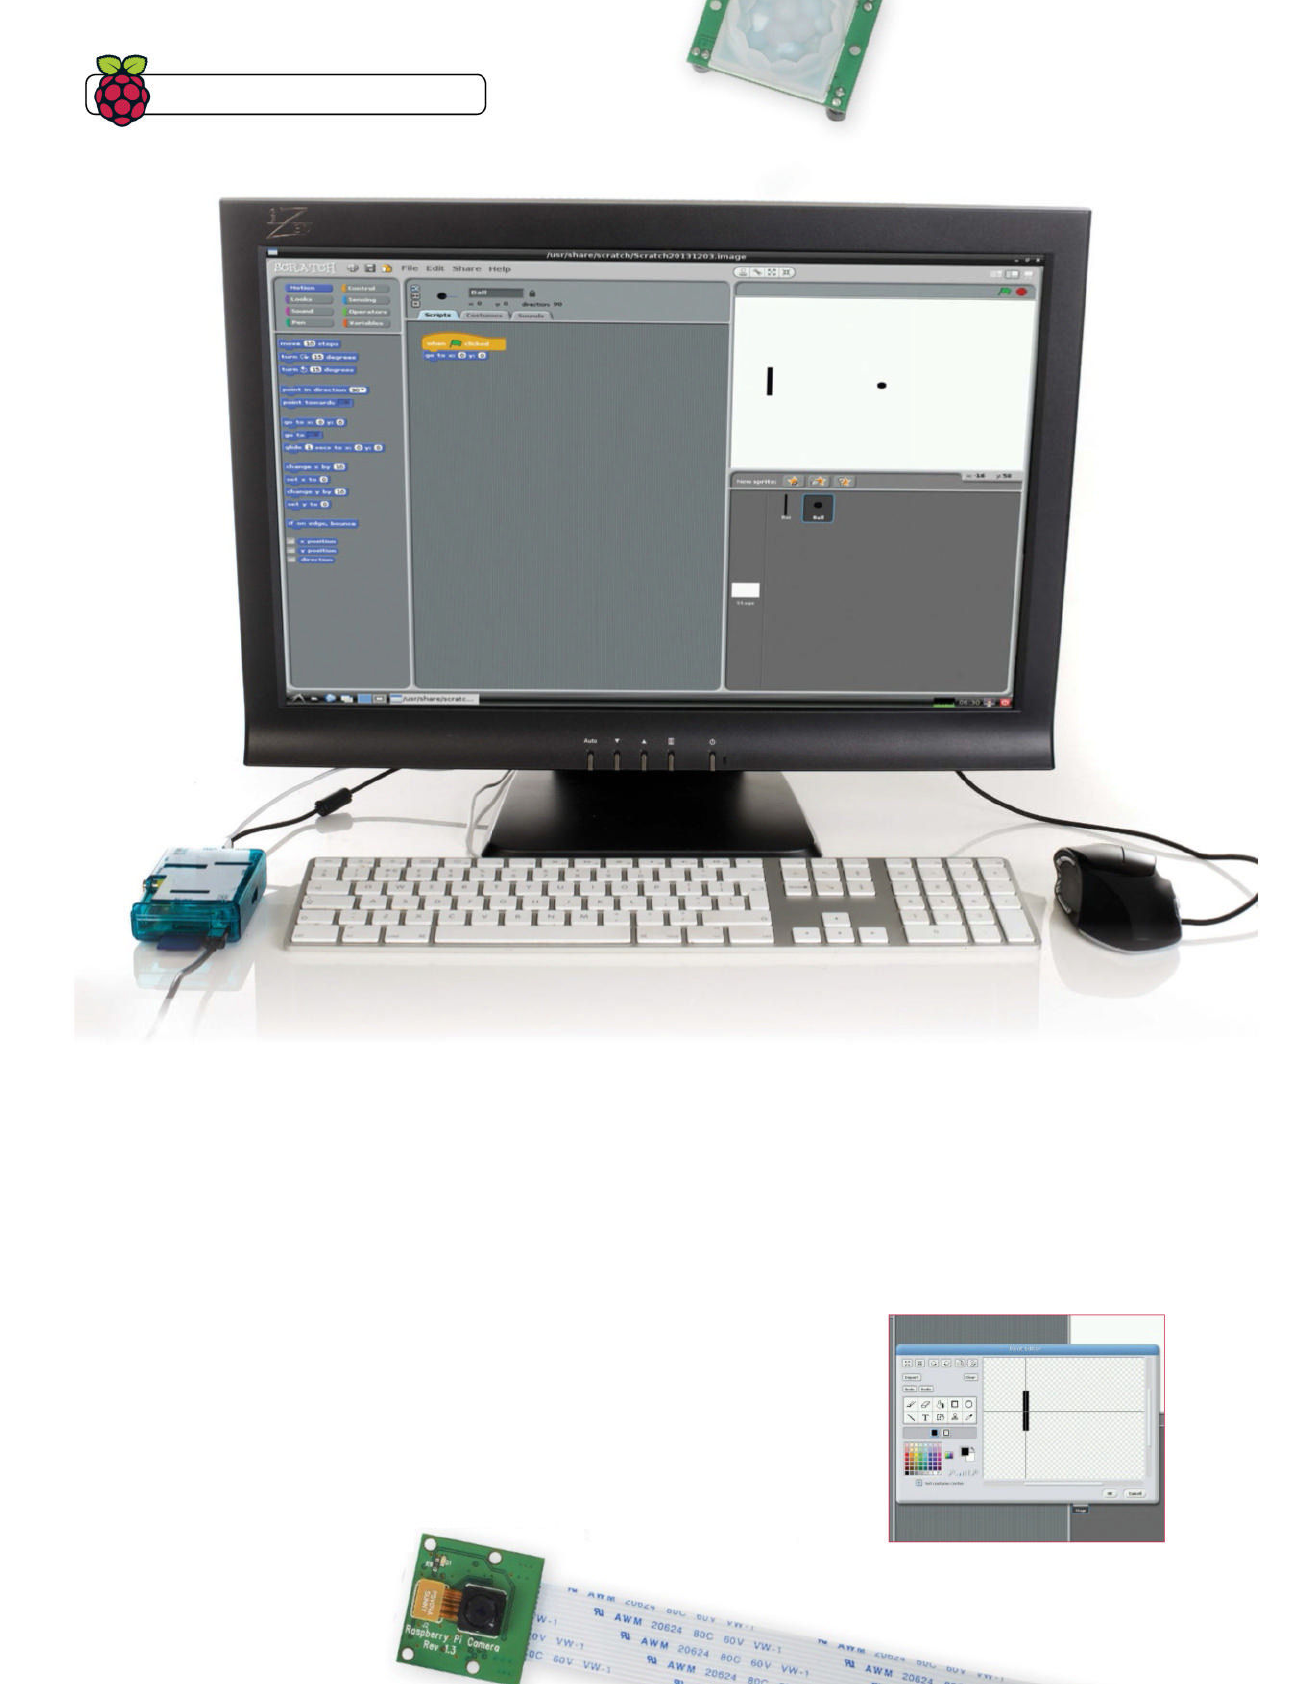
01 The fi rst sprite
Opening up Scratch will display
a blank game with the Scratch cat;
right-click on it and delete to remove it.
Click the Paint New Sprite button
below the game window and draw a
slim rectangle as the bat using the
square drawing tool. Click Set Costume
Center so that Scratch knows the basic
dimensions of your bat; drag it to the
centre of the sprite if needs be.
Master Raspberry Pi in 7 days

Raspberry Pi Tips, Tricks & Hacks 15
04 Create the ball
Create a sphere from the new
sprite menu like we did with the bat,
including setting the Costume Center.
Name it ball, and bring the When Green
Flag Clicked block from the Control
menu into the scripts pane. Add the go
to x:0 y:0 block underneath it so that
whenever you click the green fl ag it
resets to the ball.
02 Move the bat
Click OK, and name the new
sprite ‘Bat’. Select the Control block
from the top-left menu, and drag the
When Space Key Pressed block into
the script area. Change Space to Up
arrow from the drop-down menu, then
select the Motion options and drag the
Change Y By 10 block to connect to the
key pressed block.
05 Move the ball
Find the Forever block in the
control menu, and attach it under our
existing block on Ball. Then, go back
to the Motion menu and add Move 10
Steps so that the ball moves around
the screen. Add the If On Edge, Bounce
block from Motion below that so that it
will stay within the playing fi eld.
03 Reverse the direction
Whenever we press up, the bat
will move up by ten pixels, as set. By
repeating the process using the down
arrow and setting Change Y To -10, we
can also make it move down as well.
Move the rectangle to the left side of the
screen. This will be our starting position.
06 Hit the ball
Drag the If block from Control to
below If On Edge, and then add touching
from Sensing to the empty space on the
If block. From the drop-down menu,
select Bat so that it will interact with
our bat sprite. Add one of the Turn 15
degrees blocks from Motion to the If
block, and change it to 180.
07 Simple bouncing
Pressing the green fl ag now, the ball will bounce
between the left and right edges of the screen, or off the bat
if it comes into contact with it. We can make it slightly more
interactive to make use of the moving bat, and more like Pong.
08 Random bouncing
Go the Operators menu and select the fi rst value, blank
+ blank. Drag it to where we have 180 degrees in the turn block,
and add 180 to the fi rst blank space. Place the Pick Random 1
to 10 block in the second space and change the values to -10
and 10 so that whenever the ball hits the bat, it bounces off at a
random angle between 170 and 190 degrees.
09 Further developments
While you now have a functional game of sorts, you
can also add in a second player to make it truly Pong-like, and
add a scoring system by having a number increase when the
ball hits one of the sides.
Preview Test your
code straight away to
make sure it does what
you expect it to do
Building blocks
Use blocks that represent
coding to build your game
or animation
Build project
Export to the Scratch
website to show off your
work to the world
Code logic
Slot the blocks together
in a straightforward
manner to create loops
and comparisons
Master Raspberry Pi in 7 days
16 Raspberry Pi Tips, Tricks & Hacks
Learn to code
with Sonic Pi
Take the next step in programming and create your own
melodies with Sonic Pi, the musical programming language
What you’ll need
Q Speakers or headphones
Q Sonic Pi
With Scratch we’ve learned how
to operate under the logic of
programming. The next step is to
then use that within a programming
language – the problem is that many
of the available languages can look a
little intimidating. This is where Sonic
Pi comes in, offering a very simple
language style that can ease you in to
the basics of working with code.
It’s quite straightforward to use as
well – Sonic Pi allows you to choose
from a small selection of instruments
and select a tone to play with it. These
can be turned into complex melodies
using loops and threads and even
some form of user input.
01 Install Raspbian
If you’ve installed the latest version of Raspbian, Sonic
Pi will be included by default. If you’re still using a slightly older
version, then you’ll need to install it via the repos. Do this with:
$ sudo apt-get install sonic-pi
Master Raspberry Pi in 7 days
Raspberry Pi Tips, Tricks & Hacks 17
Sonic Pi offers you a very
simple language style that
can ease you into the basics
of working with code
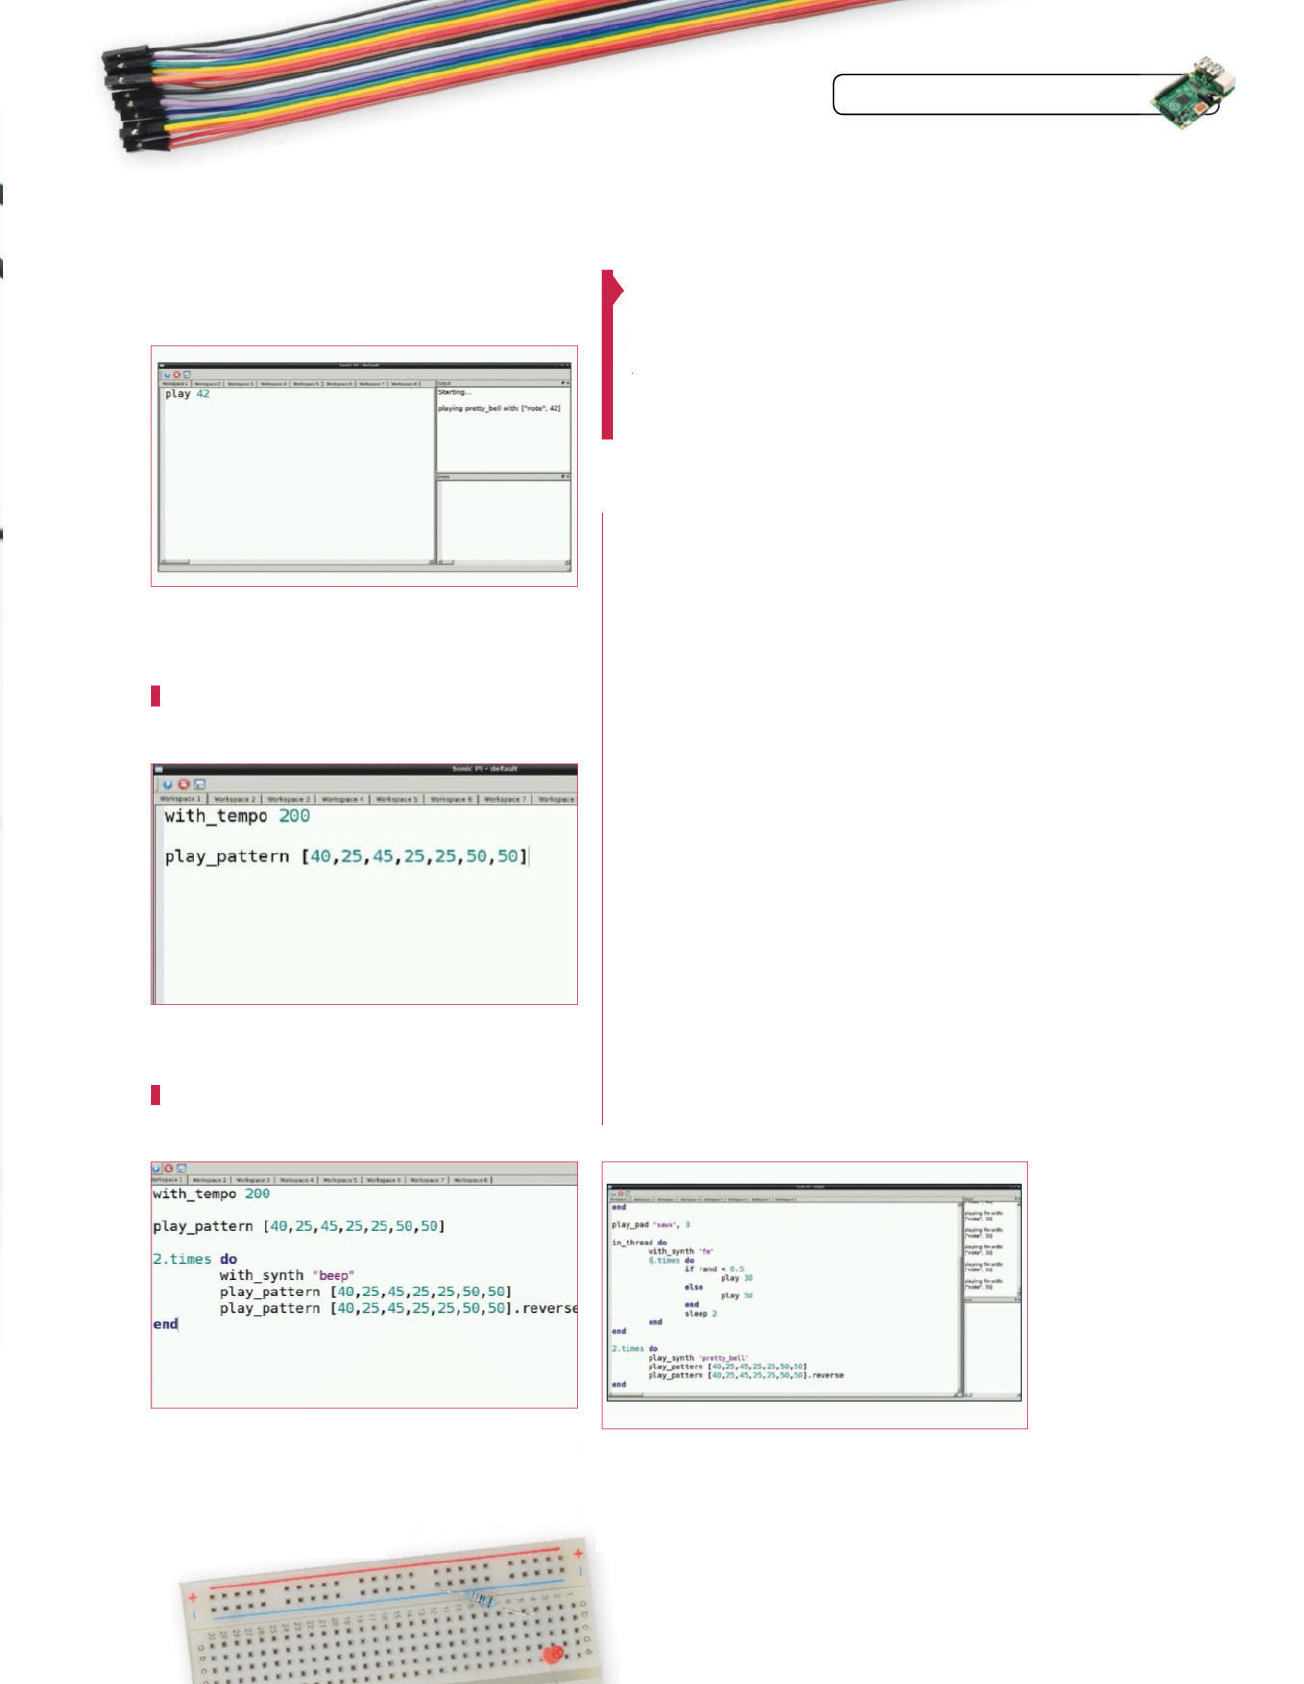
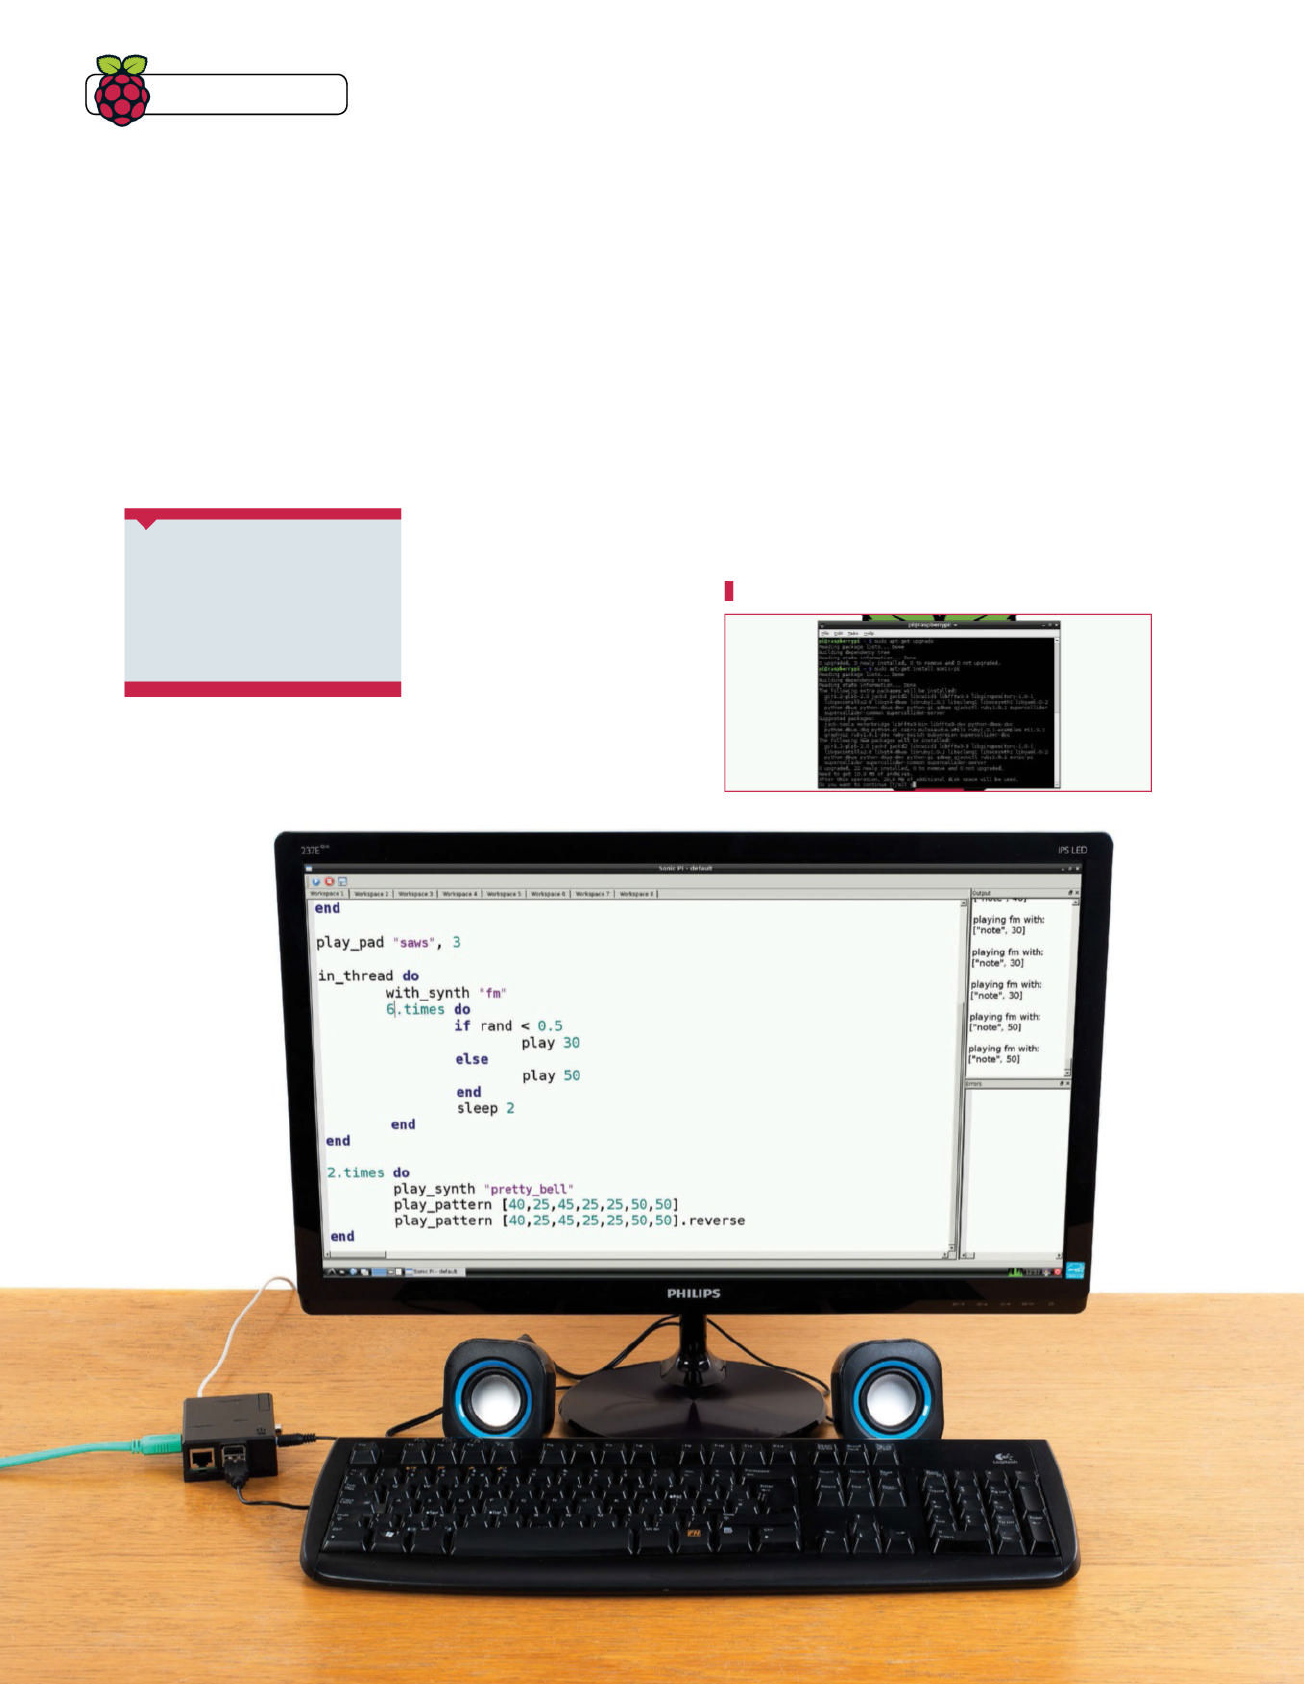
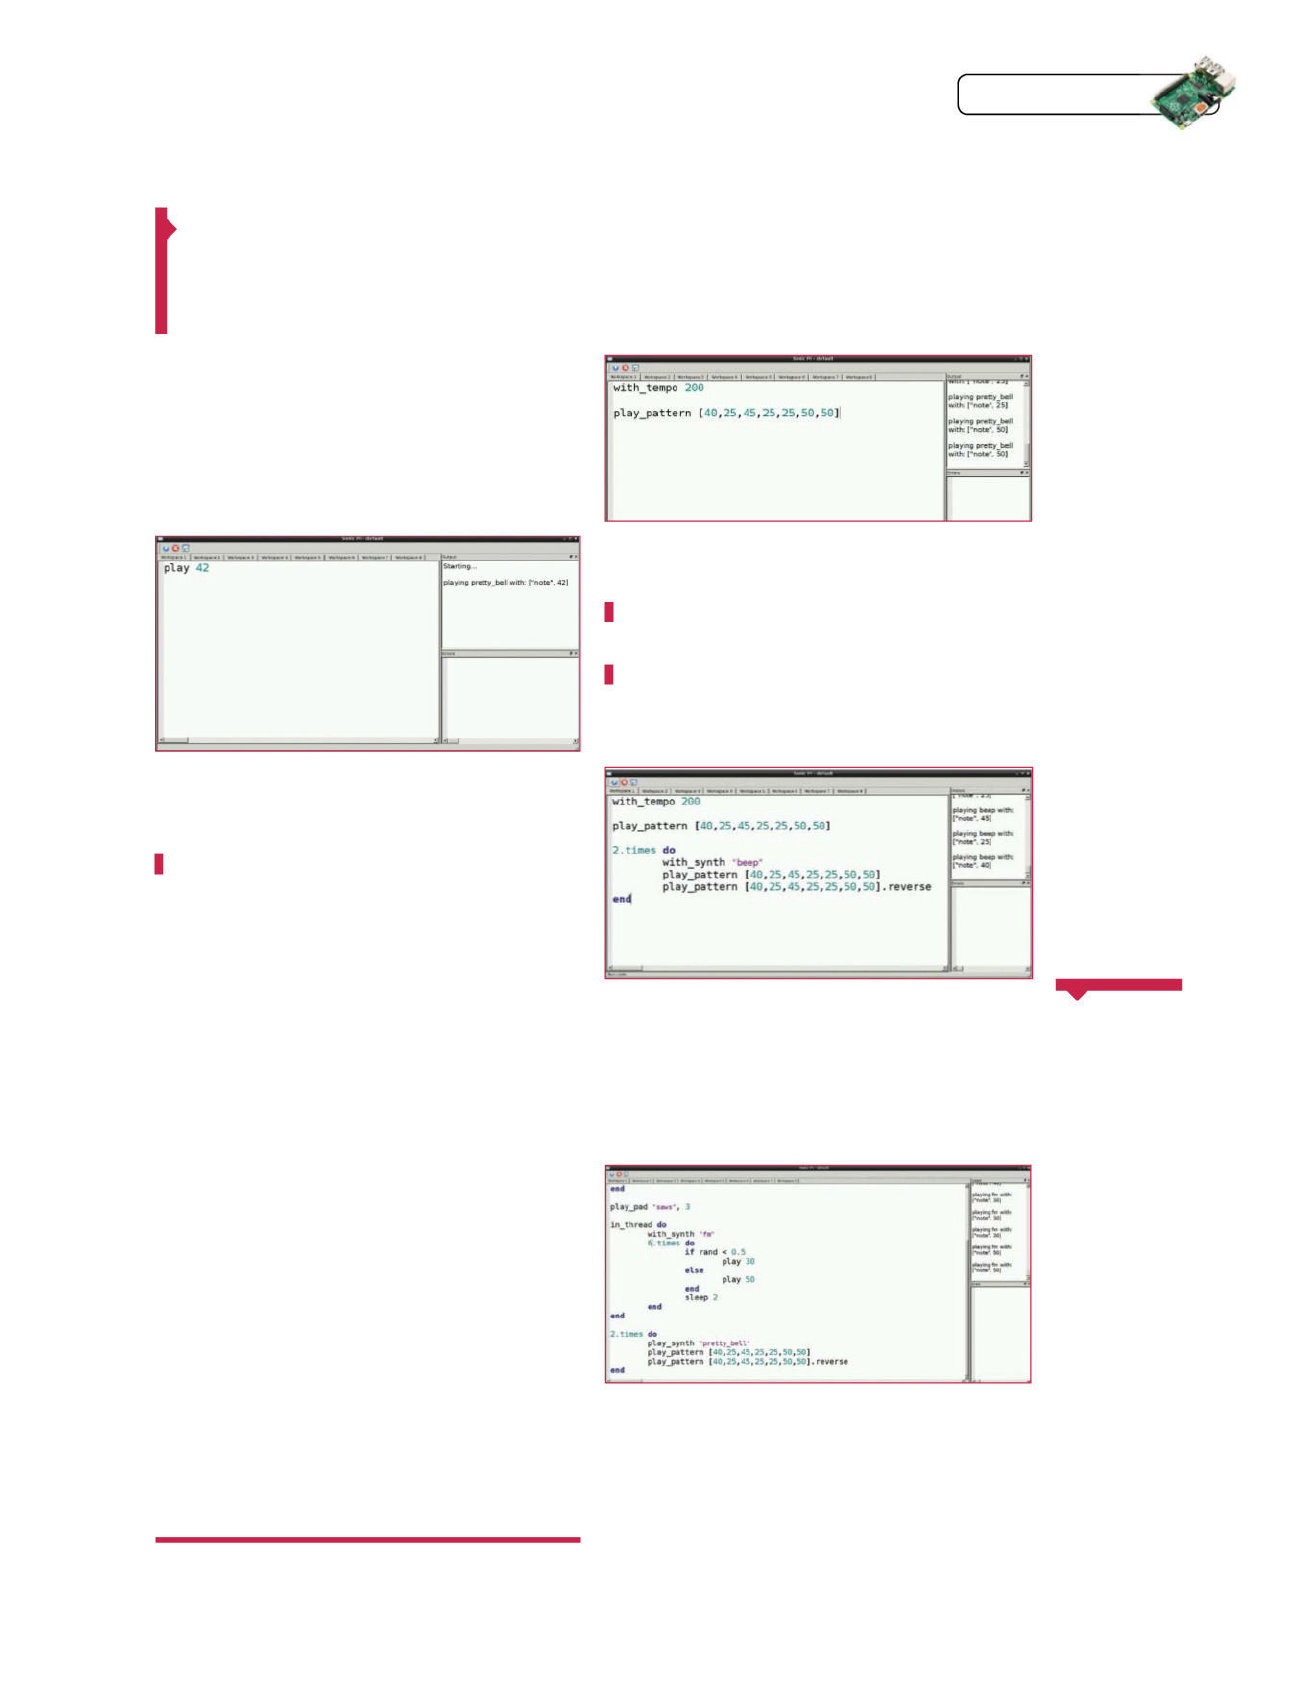
04 Set the beat
For any piece of music, you’ll probably want to set the
beat. We can start by putting:
with_tempo 200
At the start of our code. We can then test this out by creating a
string of midi notes using play_pattern.
02 Get started with Sonic Pi
Sonic Pi is located in the Education category in the
menus. Open it up and you’ll be presented with something
that looks like an IDE. The pane on the left allows you to enter
code, and then you can save and preview it as well. Any errors
are displayed separately from the output.
05 Advance your melody
We can start making more complex melodies by
using more of Sonic Pi’s functions. You can change the note
type by using with_synth, reverse a pattern, and even create
a fi nite loop with the x.times function. ‘Do’ and ‘end’ signify
the start and end of the loop.
03 Your fi rst note
Our fi rst thing to try out with Sonic Pi is simply being
able to play a note. Sonic Pi has a few defaults already pre-set,
so we can get started with:
play 50
Press run and the output window should show you exactly
what is happening.
06 Play a concert
Using the in_thread function, we can create another
thread for the Sonic Pi instance and have several lines of
musical code play at once instead of in sequence. Here we’ve
made it create a series of notes in a random sequence.
with_tempo 200
play_pattern [40,25,45,25,25,50,50]
2.tim es do
with_synth “beep”
play_pattern [40,25,45,25,25,50,50]
play_pattern [40,25,45,25,25,50,50].reverse
end
play_pad “saws”, 3
in_thread do
with_synth “fm”
6.tim es do
if rand < 0.5
play 30
else
play 50
end
sleep 2
end
end
2.tim es do
play_synth “pretty_bell”
play_pattern [40,25,45,25,25,50,50]
play_pattern [40,25,45,25,25,50,50].reverse
end
Full code listing
Master Raspberry Pi in 7 days
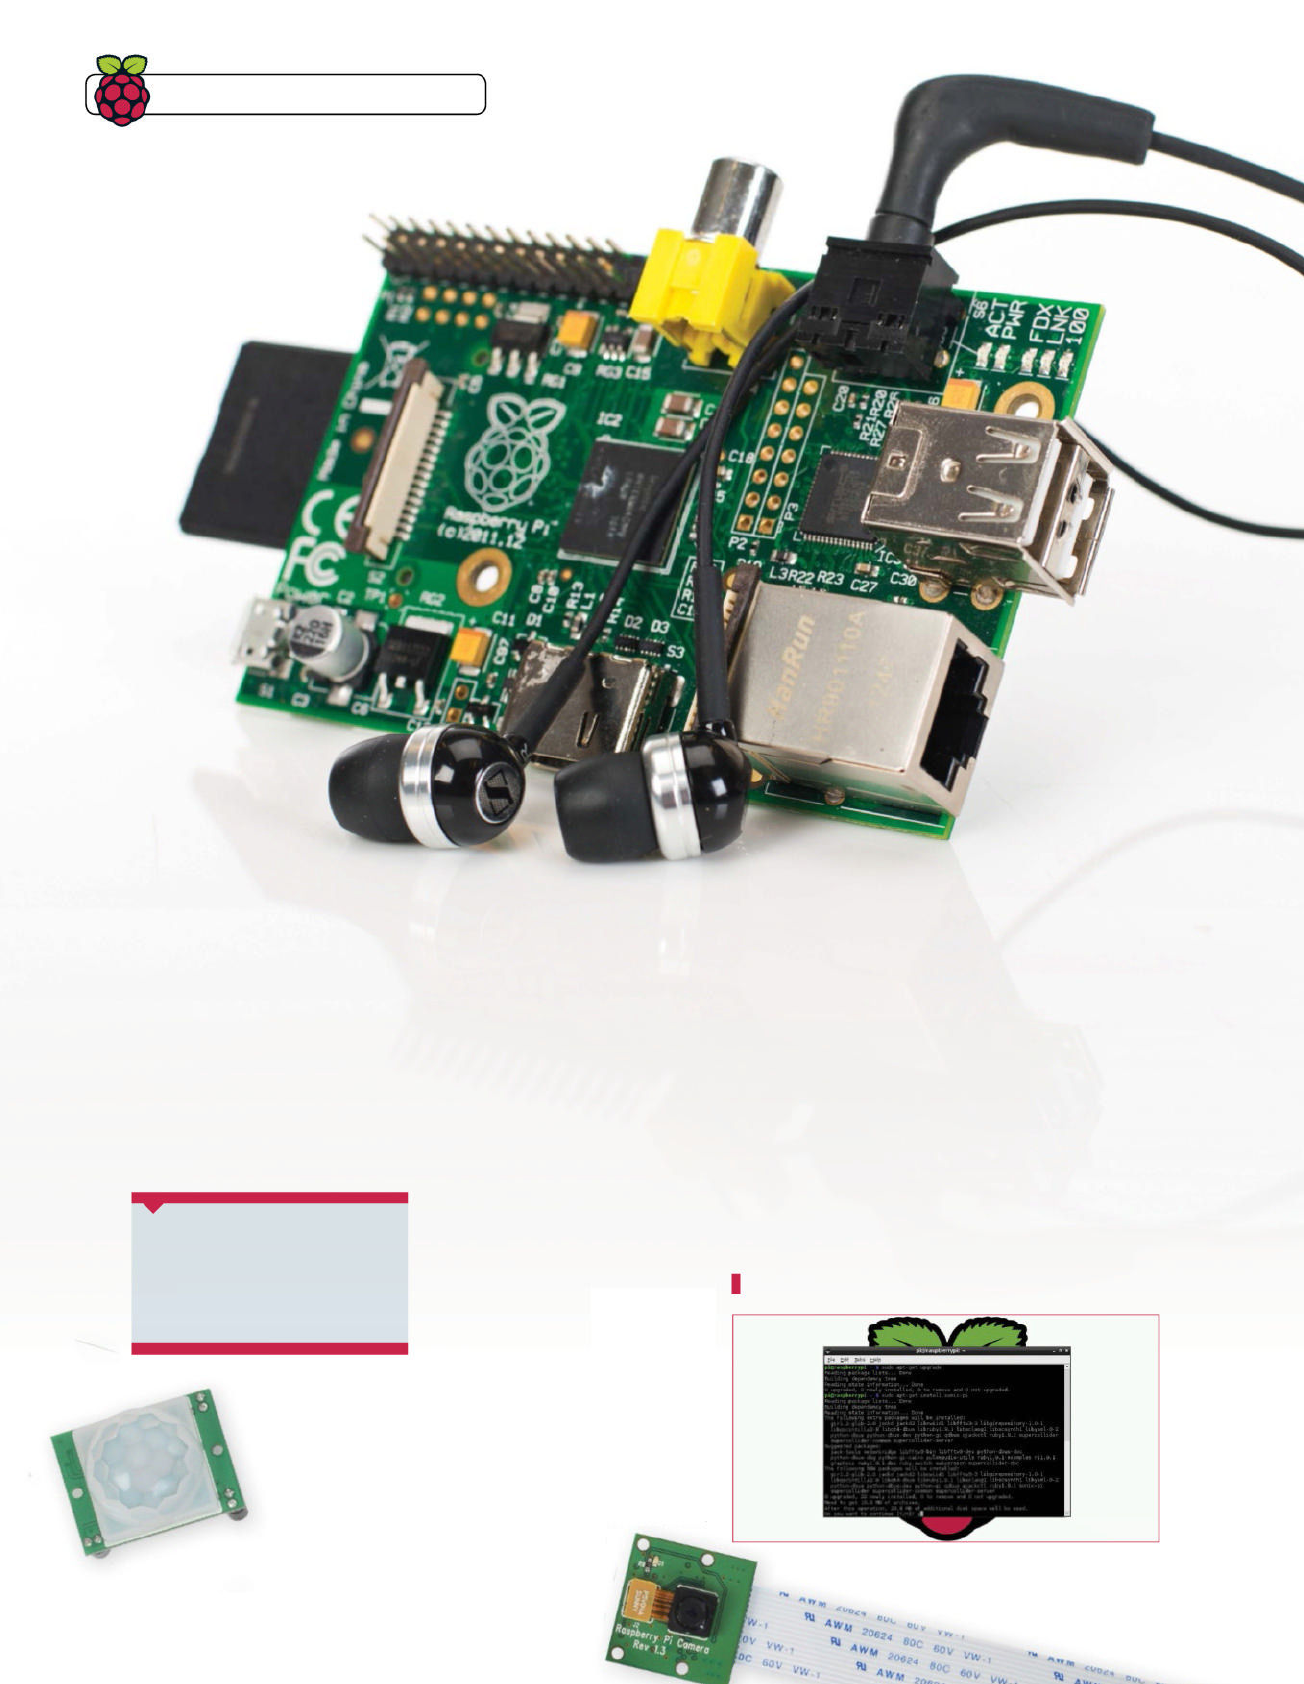
Take photos with
Raspberry Pi
Use the Raspberry Pi camera module to
capture photos and video, so you have a
portable camera for any situation
What you’ll need
Q Raspberry Pi camera board
Q picamera
github.com/waveform80/picamera
As we mentioned earlier, the Raspberry Pi camera module
is an excellent addition to the Raspberry Pi. Not only does
it slot into one of the non-traditional ports on the board itself,
but it’s also easily programmable within Raspbian. This gives
it a few benefi ts over a USB webcam by not taking up any
USB slots and being easier to control with code. It’s also tiny,
making it as portable as the Raspberry Pi itself.
By the end of today, you’ll be able to use the camera like a
pro to create time delays and specifi c image formatting.
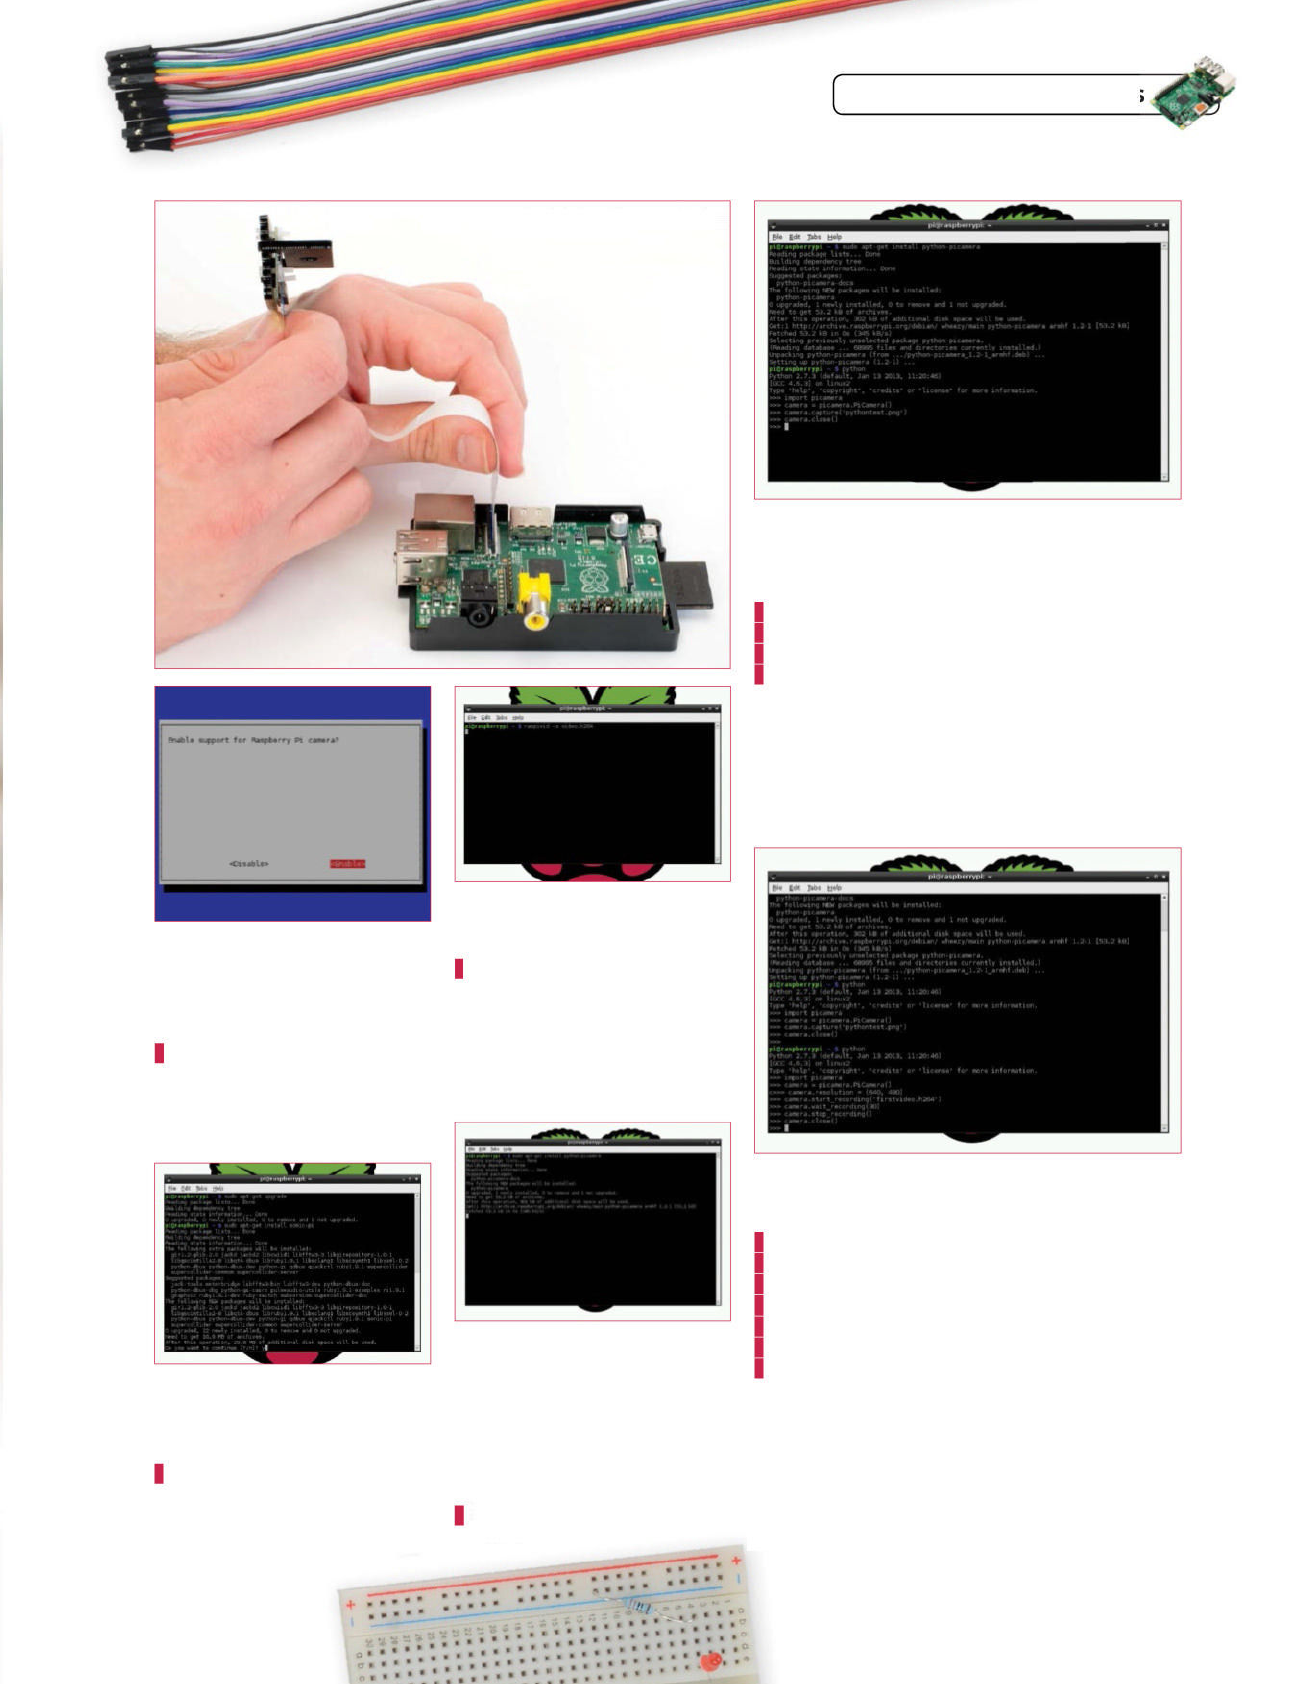
01 Plug in your camera
To attach the camera to the Raspberry Pi, locate the
connectors between the ethernet and HDMI port and gently lift
up the fastener. Insert the camera board ribbon, with the metal
connectors facing away from the ethernet port.
18 Raspberry Pi Tips, Tricks & Hacks
Master Raspberry Pi in 7 days
Raspberry Pi Tips, Tricks & Hacks 19
04 Record some video
To record a video, we use a
similar command, raspivid, like so:
$ raspivid -o video.h264
Just like with the image-capturing that
we did in the previous step, this will
display a preview of what the camera
is seeing. However, the video actually
records the fi ve seconds that make up
the preview as well.
02 Enable the camera
First you’ll need to make sure
the camera modules are enabled.
To start the standard confi guration
screen, open a terminal and type:
$ sudo raspi-config
Navigate down to Enable Camera,
press Enter, and then simply key over to
enable and confi rm with another press
of Enter. Select Finish and then reboot.
05 Advanced Pi camera uses
If you want to be able to do a
little more with the camera, there’s
a simple Python wrapper currently
available called picamera. You’ll need
to install it fi rst though, and you can
do so from the terminal, using the
following command:
$ sudo apt-get install python-
picamera
07 Test explained
Press Ctrl+D to exit the Python shell. We just used
code similar to the command line tools to take a simple
image called ‘pythontest.png’. The most important thing
we did after that was ‘camera.close’, to make sure that the
camera was turned off after use.
09 More code
The above works a lot better in a Python script –
the wait is only really required if you can’t manually stop the
recording. Picamera allows you to create time lapses, modify
the frame rate of recordings and much more. For more ways
to use it, check out issue 137 of Linux User & Developer (bit.
ly/11lxQ7n) or the docs on the picamera GitHub page.
08 Python video
To record video with picamera, you need to fi rst set
the resolution and then set a recording time.
import picamera
camera = picamera.PiCamera()
camera.resolution = (640, 480)
camera.start_recording(‘firstvideo.h264’)
camera.wait_recording(60)
camera.stop_recording()
camera.close()
03 Take your fi rst picture
Capturing pictures with the
Raspberry Pi Camera is straightforward,
all you have to do is enter:
$ raspistill -o image.png
This will show a fi ve-second preview of
the input of the camera and then capture
the last frame of the video.
06 Python test
Let’s make sure that everything we’ve done still works.
Enter a Python shell by typing ‘python’ into the terminal, and
then type the following three lines:
import picamera
camera = picamera.PiCamera()
camera.capture(‘pythontest.png’)
camera.close()
Carefully insert the connector for
the camera board, making sure
it’s the right way round
Master Raspberry Pi in 7 days
20 Raspberry Pi Tips, Tricks & Hacks
Use the GPIO pins
Learn to use the GPIO pins to interact with the outside world
– this is where Raspberry Pi projects get really interesting…
What you’ll need
Q Small breadboard
Q Small LED (any colour)
Q 330ohm resistor
Q 2x male-to-female
prototyping cables
The General Purpose Input/Output pins
(GPIO) give you power to interact with
the real world using your Raspberry Pi.
This project will get you comfortable with
using the GPIO pins, which will form the
backbone of the fi nal project.
Traditionally the ‘Hello World’ program
for electronics prototyping is simply
turning a light on and off. We’re going to
go one better than that here though, by
simulating candlelight.
To do this we’re going to use the
Random and Time modules from
Python’s standard library to continually
change the brightness of the light while
using the RPi-GPIO library to control the
LED with Pulse Width Modulation (PWM).
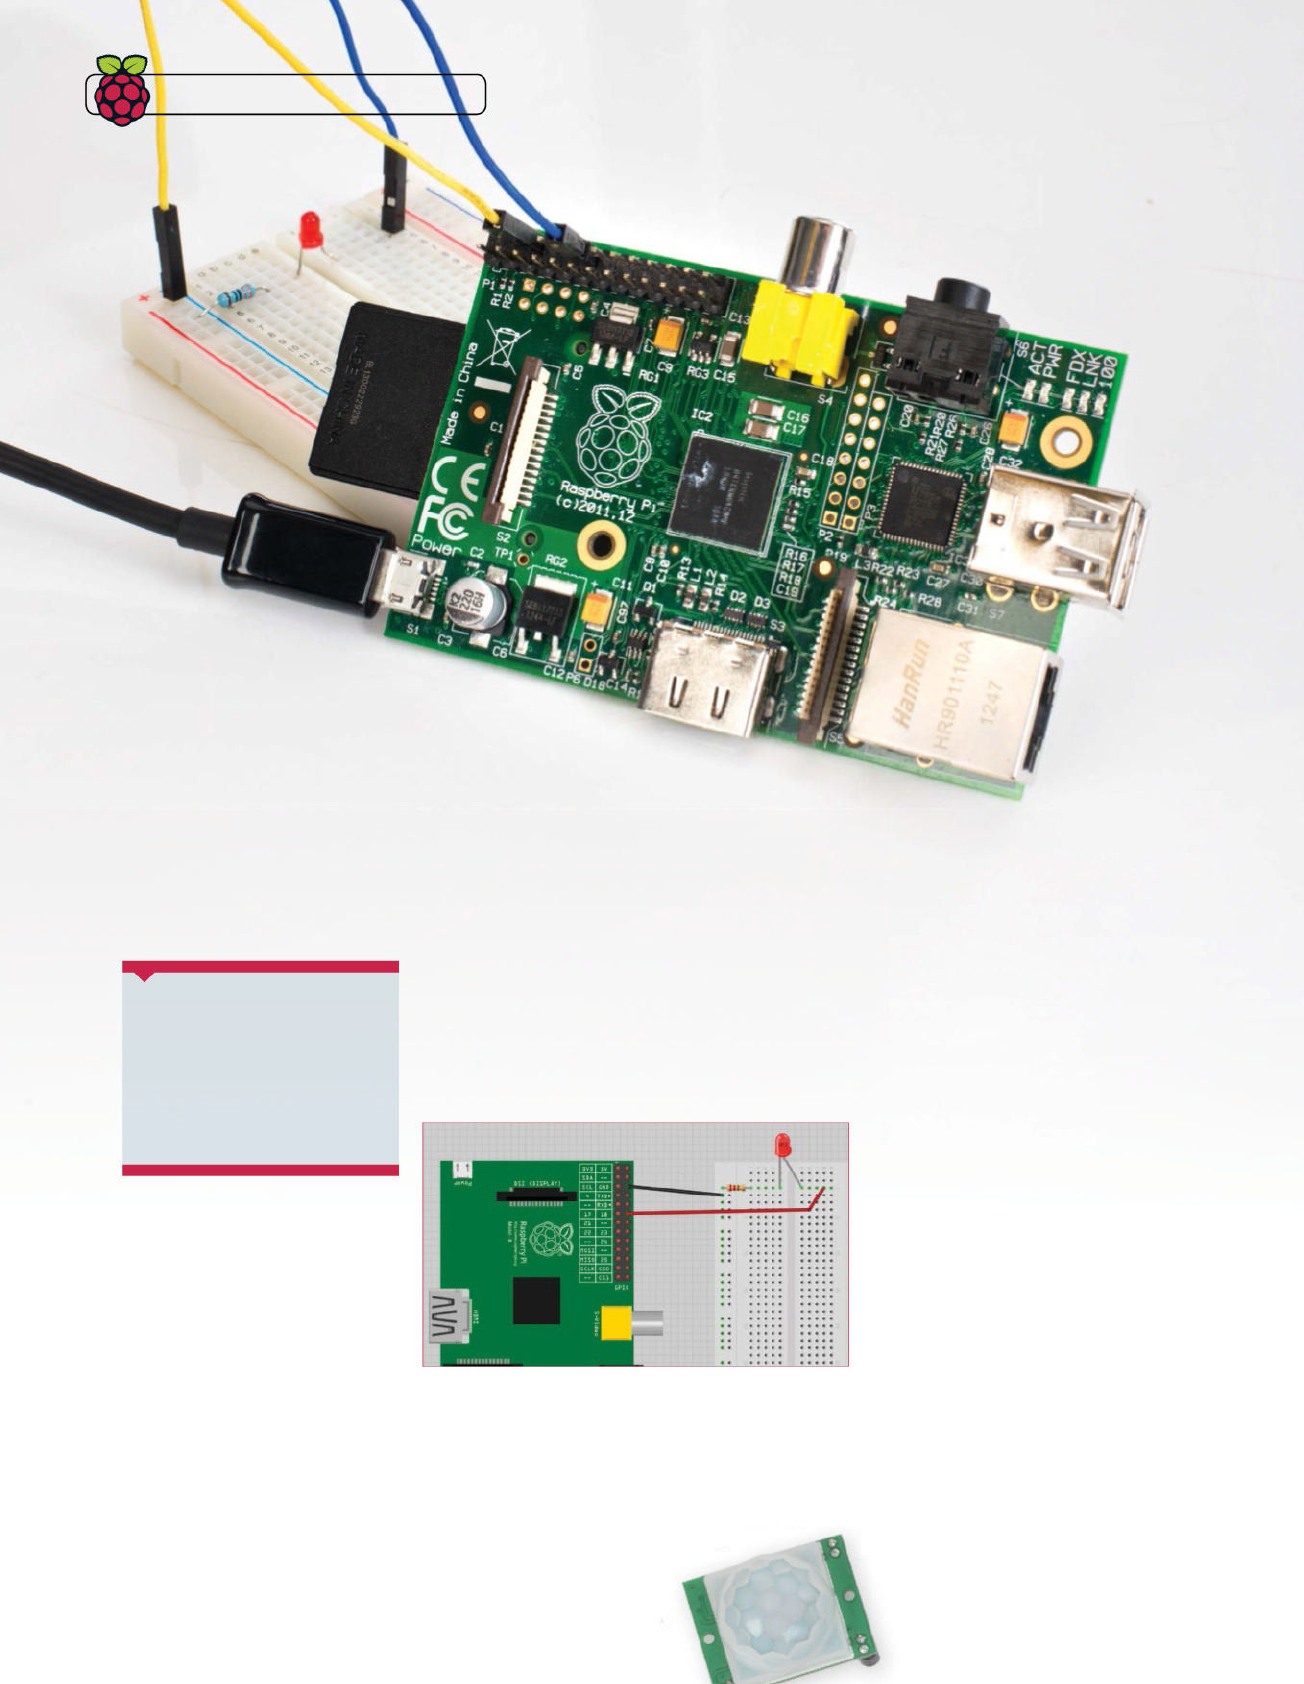
01 Prepare your circuit
Before we turn on our Raspberry Pi we’ll make all the
physical cable connections to it. This requires us to place a
male-to-female cable on the fi rst ground pin on the GPIO port
and another male-to-female cable on the PWM pin (pin 18).
Connect it to the breadboard along with the LED and resistor as
shown, ensuring the short leg of the LED goes to ground.
02 Power up the Pi
With the circuit complete we can power up the Pi.
Open Leafpad and we’ll start creating the script (found to the
right) we need to control the LED light. The fi rst thing we do is
import the modules we need. The RPi.GPIO library is key to our
project – we use it to read and write to pins and control their
functionality. We’re also using Random and Time modules in
order to help simulate the effect of candlelight.
03 Confi gure the GPIO module
Next we assign a name to the
LED pin and set up the GPIO module
for our project. Notice we’re using
‘setmode’ and calling it BCM. This
means we’re using the Broadcom
naming scheme. We then assign the
LED pin to OUTPUT, which means we’ll
be outputting to that pin (as opposed
to reading from it). If we simply wanted
to turn the light on and off, at this point
we could use GPIO.output(led,GPIO.
HIGH) and GPIO.output(led,GPIO.LOW).
Instead we’re using PWM, so we assign
a variable PWM to control it.
04 Basic functions
Next we create two very basic
functions that we can call in our main
program loop to randomly control the
physical brightness of the LED and the
amount of time that the light pauses
on a set brightness. To do this we fi rst
use the random.randint method. The
numbers 5 and 100 represent the lowest
and highest brightness (in per cent) –
the function will then pick a number
between these percentages during each
Master Raspberry Pi in 7 days
Raspberry Pi Tips, Tricks & Hacks 21
The General Purpose Input/
Output pins give you the power
to interact with the real world
using your Raspberry Pi
loop through the program. random.random picks a fl oating
point number between 0 and 1 – we divide this by WIND to help
achieve our fl icker effect.
05 The main loop
Finally, we use a while loop to activate the light
with PWM and then change the brightness of the light
with the ChangeDutyCycle method, which calls our brightness
function. We do similar with time.sleep next to get the
brightness to maintain for a short, random, amount of time
by calling the fl icker function. When we want to quit this
otherwise infi nite loop, we can raise a KeyboardInterrupt
by pressing Ctrl+C. When we do, we need to free up the pins
so that they can be used again, by calling pwm.stop and
GPIO.cleanup respectively.
06 Test your project
Once your script has been written, save it as candle_
light.py. The ‘.py’ informs your Pi that this is a Python script.
To run it, simply open the Terminal and type the following:
sudo python candle_light.py
You need to call sudo here since you need to have admin
privileges to access the GPIO port on your Raspberry Pi.
Assuming you’ve set up the breadboard and copied the script
correctly, your LED light should start fl ickering as if it’s a
candle in a light breeze. Take some time to experiment with
the variables in the brightness and fl icker functions to achieve
a more desirable effect.
#!/usr/bin/env python
# Import the modules used in the script
import random, time
import RPi.GPIO as GPIO
# Assign the hardware PWM pin and name it
led = 18
# Configure the GPIO to BCM and set it to output mode
GPIO.setmode(GPIO.BCM)
GPIO.setup(led, GPIO.OUT)
# Set PWM and create some constants we'll be using
pwm = GPIO.PWM(led, 100)
RUNNING = Tr u e
WIND = 9
def brightness():
"""Function to randomly set the brightness of
the LED between 5 per cent and 100 per cent power"""
return random.randint(5, 100)
def flicker():
"""Function to randomly set the regularity of the'flicker
effect'"""
return random.random() / WIND
print "Candle Light. Press CTRL + C to quit"
# The main program loop follows.
# Use 'try', 'except' and 'finally' to ensure the program
# quits cleanly when CTRL+C is pressed to stop it.
try:
while RUNNING:
# Start PWM with the LED off
pwm.start(0)
# Randomly change the brightness of the LED
pwm.ChangeDutyCycle(brightness())
# Randomly pause on a brightness to simulate flickering
time.sleep(flicker())
# If CTRL+C is pressed the main loop is broken
except KeyboardInterrupt:
running
= False
print "\nQuitting Candle Light"
# Actions under 'finally' will always be called, regardless of
# what stopped the program (be it an error or an interrupt)
finally:
# Stop and cleanup to finish cleanly so the pins
# are available to be used again
pwm.stop()
GPIO.cleanup()
Full code listing
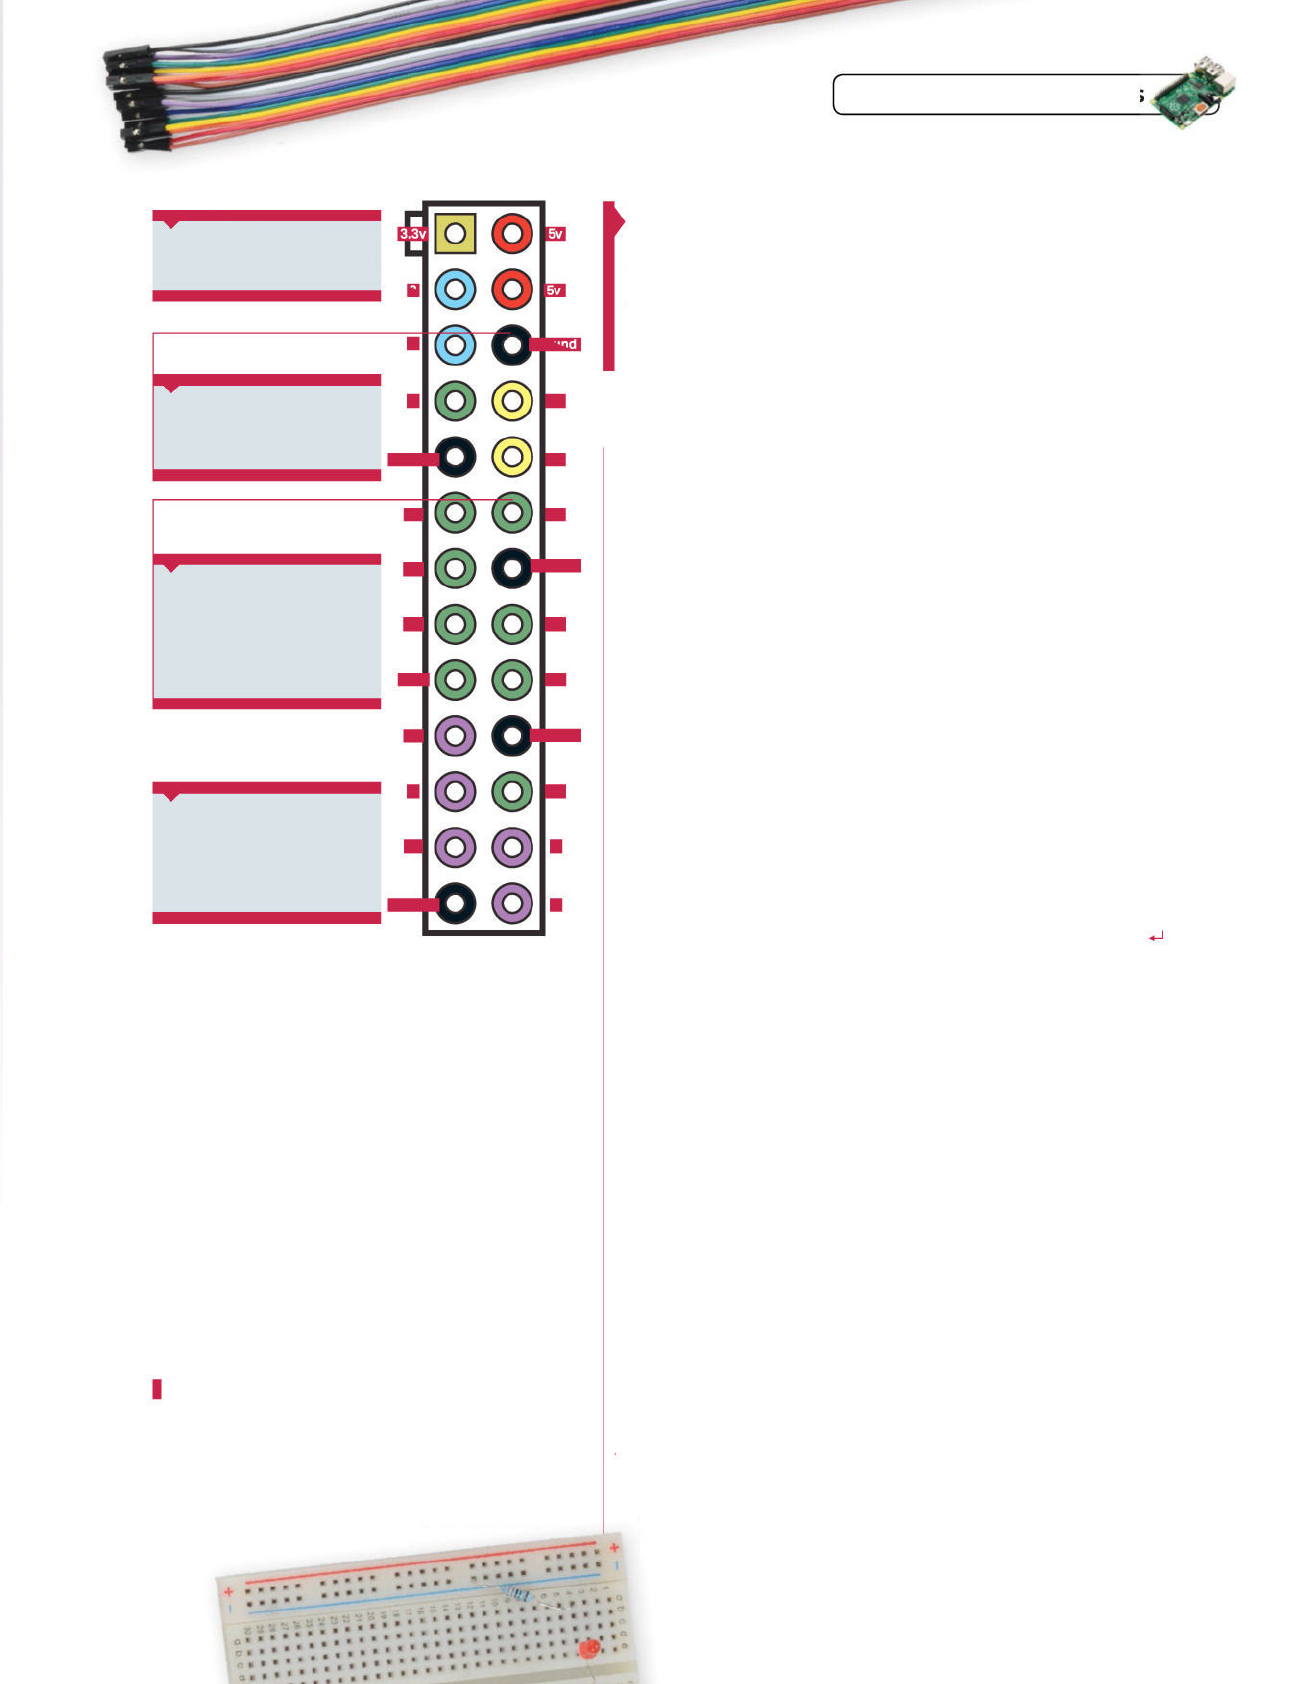
Ground
Ground
Ground
Ground 15
3.3v 5v
25v
3
414
17 18
27
22 23
3.3v 24
10
925
11 8
Ground 7
This is the top! The top of
the image represents the end of the
GPIO pins nearest your SD card
Grounded The pins are
counted from left to right and top
to bottom. This is one of the few
Ground pins, which we’ll be using
Special pins While most
pins can be manually set to be
outputs or inputs for any use, some
pins are pre-assigned other roles
too. This is the PWM pin, capable of
controlling motors and LEDs with
amazing precision
BCM for Broadcom
We’re using the BCM pin naming
scheme for our projects. It doesn’t
use the physical pin locations, so
BCM pin 17 is actually pin 11 when
counted from left to right
Master Raspberry Pi in 7 days

Build a Twitter-powered
lamp with Python
Now we know how to use the GPIO port, let’s see if we can
make our LED light work in response to the Twitter API…
What you’ll need
Q tweepy
Q Internet connection
Q Breadboard
Q Male-to-female cables
Q 300ohm resistor
Q LED
Over the last eight years Twitter has become one of the
most prominent social media networks in the world.
Twitter is built on excellent open source technology and code,
meaning it’s very easy to work with. With all the focus on the
tiny 140-character limit, you’d probably be surprised to hear
that behind each tweet is over 3,000 characters of raw data!
While we’re not going to harness the full power of Twitter’s
API today, we are going to do enough to allow us to make
a Twitter lamp – a light that fl ashes whenever our chosen
phrase or word is mentioned on Twitter. It’s actually a lot
easier than you might think, so let’s get started…
01 Set up an app
Before you can do anything else,
you need to make sure that you’ve got a
Twitter account and that you’re signed
in. In order to be able to use the API, you
need to create a Twitter app, so head
over to https://apps.twitter.com and
click ‘Create New App’. Fill out the form,
but don’t worry about the URL sections
– just put any website for now, since we
won’t be using this functionality.
02 Configure the app
Once the app has been created
you can alter the access to Twitter by
modifying app permissions. While we
don’t need the ability to ‘write’ to Twitter
for this project, we will do in the next
one, so click ‘Modify App Permissions’
and change it to ‘Read and write’. Once
this changed, you can click the ‘Create
my access token’ button at the bottom
of the page. When this has refreshed,
you’ll have access to the info you need in
the ‘API Keys’ tab. Copy the API key along
with its secret and the access token and
its secret into a new document called
‘twitter_lamp.py’ in the format shown in
our code listing on the right.
22 Raspberry Pi Tips, Tricks & Hacks
Master Raspberry Pi in 7 days
Raspberry Pi Tips, Tricks & Hacks 23
It’s amazing what you
can achieve in just 50
lines of Python
04 Connect the LED
We’re going to use exactly the
same simple breadboard circuit we used
in the candlelight project on the previous
two pages – we’re even using the same
GPIO pins. With the circuit connected,
we can turn our attention to the code
listing on the right. The GPIO aspect
of the code is very similar to the last
project, other than the fact we’re using
the GPIO.HIGH and GPIO.LOW commands
to fl ash the light, as opposed to PWM.
After our required imports at the top of
the code listing, we’ve laid out the api_key
and access_token phrases that point to
our Twitter app attached to our Twitter
account. Obviously we’ve masked over
ours, since they’re meant to be a secret.
Don’t share yours (even on GitHub)!
05 Using tweepy
After setting the keys and
secrets as variables, we need to get
tweepy to use them to authorise us.
Create the auth variable and use the
OAuthHandler to call them and then set
the access token details as shown.
03 Install tweepy
The next step in creating our
Twitter-powered lamp is installing and
setting up tweepy. In the terminal, type:
git clone https://tweepy/tweepy.git
Once it’s downloaded, move into the
directory (cd tweepy) and install it like so:
sudo python setup.py install
Once tweepy is installed we don’t need the
contents of the folder anymore. Go back to
your home folder (cd ~) and delete it with:
rm -rf tweepy
You can test that the library is installed
correctly by typing python in the terminal
to open the Python Interpreter. Now type
import tweepy – if you don’t get an error
when you hit Enter, you’re all set!
06 Test and tweak
Next we put our search terms into a list called terms.
As you can see, we’ve elected for our lamp to fl ash whenever
one of the Raspberry Pi terms we’ve set is mentioned. You don’t
need to include ‘@’ or ‘#’ tags – the API takes care of that for us.
Now all that’s left to do is create an instance of the
StreamListener() class, start the Twitter live stream and then
use the fi lter method to set it to only track the search terms
we’re interested in. It’s amazing what you can achieve in just
50 lines of Python! To test your new Twitter-powered lamp
prototype, at the terminal type:
sudo python twitter_lamp.py
We then use auth to allow us access to the Twitter API on our
account and test the connection by printing our Twitter handle
using the api.me() method. We want to use the real-time Twitter
stream for our project, though, so we need to override the
StreamListener class in tweepy to make our lamp work. The
on_status method in that class is where the magic happens;
whenever there’s a status update that’s relevant to us, it pings
on_status and we trigger our GPIO pins to make the light fl ash.
#!/usr/bin/env python
#import the required libraries
import tweepy
import time
import RPi.GPIO as GPIO
# Set your access keys as configured
# at https://apps.twitter.com
api_key = 'your_api_key'
api_secret = 'your_api_secret'
access_token = 'your_access_token'
token_secret = 'your_token_secret'
# Initiate the OAuth process
auth = tweepy.OAuthHandler(api_key, api_secret)
auth.set_access_token(access_token, token_secret)
# Assuming the keys are good, you'll be
# able to test your Twitter app
api = tweepy.API(auth)
my = api.me()
print my.name, "is connected! Press CTRL + C to quit."
# Configure the GPIO port as we did in the last project
led = 18
GPIO.setmode(GPIO.BCM)
GPIO.setup(led, GPIO.OUT)
# Set the led light to be 'on'
GPIO.output(led, GPIO.HIGH)
# We've tweaked the class that monitors Twitter's stream
class StreamListener(tweepy.StreamListener):
# Whenever a status occurs that we're interested
# in we flash the LED
def on_status(self, data):
print "Flash the light"
# We're using a simple for loop that turns the light
# off and on three times using an interval of a
# quarter of a second
for i in xrange(3):
GPIO.output(led, GPIO.LOW)
time.sleep(0.25)
GPIO.output(led, GPIO.HIGH)
time.sleep(0.25)
def on_error(self, error_code):
print "Error:", error_code
return False
# These are the words we're looking out for on Twitter
terms = ['ra sp berr y pi', 'raspberrypi', 'ra spi']
# Configure the stream and filter only our chosen terms
try:
listener = StreamListener()
stream = tweepy.Stream(auth, listener)
stream.filter(track = terms)
except KeyboardInterrupt:
print "\nQuitting"
# Don't forget to clean up after so we
# can use the GPIO next time
finally:
GPIO.cleanup()
Full code listing
Master Raspberry Pi in 7 days
24 Raspberry Pi Tips, Tricks & Hacks
The tweeting bird watcher
Our fi nal project! Create an Internet of Things device able to
takes pictures of wildlife before tweeting them to the web
What you’ll need
Q tweepy
Q Internet connection
Q HC-SR501 PIR Infrared
sensor
Q Camera board & picamera
library
We’ve reached the end of the week and
we’re now ready to take on our biggest
project yet. Our fi nal project uses all of
the skills and technology we’ve covered
so far and raises the bar to include
things like automated Twitter updates
and event detection. We’re going to
create our own little Internet of Things
device that incorporates a simple PIR
sensor (just £2.99/$5 from modmypi.
com), the Raspberry Pi Camera board
and the power of the internet to let us
automagically capture images of birds
(and other wildlife) before tweeting to a
Twitter account of our choice whenever
activity occurs.
01 Confi gure the
infrared sensor
Since this an automated device, we
need a way to trigger the camera when
movement is sensed in our camera’s
target area. One affordable and easy-
to-confi gure solution is the HC-SR501
Infrared Motion Sensor. The device itself
has three pins – VCC (5V), Ground and a
signal pin that sits in the middle. We’ve
confi gured our script for the pir pin to
trigger GPIO pin 17 (it sits opposite the
PWM pin). The VCC pin is connected
directly to the 5V power pin and the
Ground to the same Ground pin we’ve
used throughout the tutorials.
Master Raspberry Pi in 7 days
Raspberry Pi Tips, Tricks & Hacks 25
04 The callback function
One of the big changes in this project compared to
our previous ones is that we’re using the GPIO as an input,
instead of an output. Since we want the PIR sensor to alert
us to movement, we really want the PIR to interrupt our
script to let us know – that’s where our callback function
motion_sense() comes in. Looking further down the script to
the main program loop you’ll see a GPIO.add_event_detect.
Whenever the assigned GPIO pin gets pinged, the script will
stop what it is doing and jump to the named callback function
(in this case motion_sense). This simple function then calls the
take_picture function below it.
02 Test the PIR
We don’t want to send millions of accidental tweets to
Twitter, so we should do some pretty extensive testing with the
PIR fi rst, using simple print statements to show when motion
has been detected. Visit github.com/russb78/tweety-pi and
explore the project to fi nd the pir_testing.py script. Copy it
onto your Pi and run it with your PIR connected. You’ll probably
fi nd that it’s over-sensitive for your needs by default. You’ll
fi nd two tiny adjustable screws on the PIR. Gently adjust them
to the left to lower the sensitivity and test thoroughly until you
get the desired result.
05 Simple chain
The entire chain of main functions that make up
the meat of the project are laid out in trigger order and all
initiated from that initial callback function. Once motion
is detected the take_picture function is called. As soon
as the image has been saved to the /pics folder we call the
update_twitter function. Here, we’re loading our previously
saved image and using the Twitter API’s update_with_media
method to allow us to tweet our picture to the outside world.
We can set our status from within this line, but instead of
repeating the same phrase we use the random module’s
choice method to pick from a list of three we’d assigned to the
variable tweet_text earlier in the script.
03 Set up the project
With the camera connected as per our previous
camera project earlier in the week, we need to tie the camera,
motion sensor and Twitter code together to make a tangible
project that can be left to do its job. We’ll walk through the
script, but it’s worth looking around our project by cloning it
from GitHub. In the terminal type:
git clone https://github.com/russb78/tweety-pi.git
Enter the project with cd tweety-pi to take a look around.
It’s been set up as a full (if a little basic) project with a readme,
licence and even a folder for our pictures to sit in.
06 Main program loop
As we’ve done before, we’re placing our main program
loop in try, except, fi nally blocks to ensure we can cleanly quit
the program or clean up should it crash for any reason. After
we call our GPIO event detect line, we create a simple infi nite
loop to ensure the script keeps running. Pressing Ctrl+C will
break this loop, causing the program to end, but not before
fi nally calling the methods that close the camera and shut-
off the GPIO pins. If you don’t do this, all kinds of issues can
arise the next time you run the script. And that’s all there is to
it! Be sure to use your knowledge on experimenting with other
Raspberry Pi projects – and have fun!
#!/usr/bin/env python
import RPi.GPIO as GPIO
import random, time, os
import tweepy
import picamera
pir = 17
GPIO.setmode(GPIO.BCM)
GPIO.setup(pir, GPIO.IN)
### TWITTER SETTINGS ###
# Set your access keys via https://apps.twitter.com
api_key = 'your_api_key_number'
api_secret = 'your_api_secret_number'
access_token = 'your_access_token_number'
token_secret = 'your_token_secret_number'
auth = tweepy.OAuthHandler(api_key, api_secret)
auth.set_access_token(access_token, token_secret)
api = tweepy.API(auth)
my_twitter = api.me()
print my_twitter.name, "is connected! Press CTRL + C to quit."
# Three statuses. We'll pick one at random to go with our pic
tweet_text = ['Another shot taken with tweety-pi!',
'Just spotted with my Raspberry Pi',
'Snapped automagically with my Raspberry Pi camera!']
### CAMERA SETTINGS ###
camera = PiCamera()
cam_res = (1024, 768)
camera.led = False # Turn off LED so we don't scare the birds!
pics_taken = 0
time.sleep(1)
### MAIN FUNCTIONS ###
def motion_sense(pir):
print "Motion detected... Taking picture!"
take_picture(cam_res)
def take_picture(resolution):
global pics_taken
camera.resolution = resolution
# Capture a sequence of frames
camera.capture(os.path.join(
'pics', 'im a ge_' + str(pics_taken) + '.j p g ' ))
pics_taken += 1
print "Picture taken! Tweeting it..."""
update_twitter()
def update_twitter():
api.update_with_media(os.path.join(
'pics', 'im a ge_' + str(pics_take n -1) + '.j p g ' ),
status = random.choice(tweet_text))
print "Status updated!"
#We don't want to tweet more than once per minute!
time.sleep(60)
### MAIN PROGRAM LOOP ###
try:
GPIO.add_event_detect(pir, GPIO.RISING, callback=motion_sense)
while True:
time.sleep(60)
except KeyboardInterrupt:
print "\nQuitting"
finally:
camera.close()
GPIO.cleanup()
Full code listing
Master Raspberry Pi in 7 days
Tips
64 Add a reset switch
62 Network and share your
keyboard and mouse
58 Build a file server with the
Raspberry Pi
54 Secure your Raspberry Pi
48 Use an Android device as a
Raspberry Pi screen
• Build a Raspberry Pi web server
• Get interactive with Scratch
• Program Minecraft-Pi
• Raspberry Pi voice synthesiser
• Make music with the Raspberry Pi
40 Why You Need Python 3
52 Host a website on your
Raspberry Pi 32
30
38
26 Raspberry Pi Tips, Tricks & Hacks
66 Remotely control Pi
28 5 Practical
Raspberry Pi Projects
76 Add a battery pack to
Raspberry Pi
68 Install Android
“This isn’t a random
selection. These are
practical ideas designed to
help kick-start bigger and
better things”
76
48
64
Raspberry Pi Tips, Tricks & Hacks 27
Tips | Tricks | Hacks
28 Raspberry Pi Tips, Tricks & Hacks

Still haven’t done anything with your Raspberry Pi?
Follow along with our expert advice and kick-start
your own amazing Raspberry Pi projects
5 PRACTICAL
RASPBERRY PI
PROJECTS
From our time experimenting with this incredible credit
card-sized computer, it’s become clear there are two types
of Raspberry Pi owners: those that use theirs and those
that don’t. Whether it’s fear of the unknown, a lack of time
or inspiration, when we ask people what they do with their
Pi we’ll often hear that it’s still in the box. If that’s you, then
you’re in the right place. In this feature we’ve handcrafted ten
Raspberry Pi projects practically anyone can enjoy.
These aren’t just a random selection of side-projects, though.
These are practical ideas designed to help kick-start bigger
and better things. Knowledge gained from one project can also
be applied to another to create something completely new.
For example, you could take what you’ll learn with the Sonic Pi
tutorial and go on to create a text-to-morse code translator.
You could go on to make Pong in Minecraft-Pi or use a button
attached to Scratch to take photos with your Raspberry Pi
camera module. The list goes on.
All these projects are open source, so you’re encouraged to
tweak and develop them into something entirely new. If you
share your tweaks and changes with the community, you’re sure
to start benefi tting from doing things the open source way…
Raspberry Pi Tips, Tricks & Hacks 29
Tips | Tricks | Hacks
Tips | Tricks | Hacks
Program your own melodies using Sonic Pi and create
musical cues or robot beeps
What you’ll need
Q Portable speakers
Q Sonic Pi
www.cl.cam.ac.uk/projects/
raspberrypi/sonicpi/teaching.html
Make music with
the Raspberry Pi
One of the major features of Scratch is
its ability to teach the fundamentals
of coding to kids and people with no
computing background. For kids, its
especially appealing due to the way it
allows them to create videogames to
interact with as part of their learning. In
this kind of vein then, Sonic Pi teaches
people to code using music. With a
simple language that utilises basic logic
steps but in a more advanced way than
Scratch, it can either be used as a next
step for avid coders, or as a way to create
music for an Internet of Things or a robot.
01 Getting Sonic Pi
If you’ve installed the latest version of Raspbian, Sonic
Pi will be included by default. If you’re still using a slightly older
version, then you’ll need to install it via the repos. Do this with:
$ sudo apt-get install sonic-pi
QSonic Pi is a great way
to learn basic coding
principles and have fun
30 Raspberry Pi Tips, Tricks & Hacks
Raspberry Pi Tips, Tricks & Hacks 31
Tips | Tricks | Hacks
1 How to code
The coding
style of Sonic Pi
uses concepts
from standard
programming
languages – if
statements,
loops, threads etc.
Whereas Scratch
teaches this logic,
Sonic Pi teaches
their structure.
2 Robotic
voice
Employ Sonic Pi
to create context-
sensitive chips,
chirps and beeps
and use it to give a
familiar voice while it
tootles around.
3 MIDI
The Musical
Instrument Digital
Interface is a
standard for digital
music, and the
numbers and tones
used in Sonic Pi make
use of this.
You’ll
learn...
02 Starting with Sonic Pi
Sonic Pi is located in the Education category in the
menus. Open it up and you’ll be presented with something that
looks like an IDE. The pane on the left allows you to enter the code
for your project, with proper syntax highlighting for its own style
of language. When running, an info pane details exactly what’s
being played via Sonic Pi – and any errors are listed in their own
pane as well, for reference.
03 Your fi rst note
Our fi rst thing to try on Sonic Pi is simply being able
to play a note. Sonic Pi has a few defaults preset, so we can get
started with:
play 50
Press the Play button and the output window will show you what’s
being played. The pretty_bell sound is the default tone for Sonic
Pi’s output, and 50 determines the pitch and tone of the sound.
04 Set the beat
For any piece of music, you’ll want to set the tempo. We
can start by putting:
with_tempo 200
…at the start of our code. We can test it out by creating a string of
midi notes using play_pattern:
play_pattern [40,25,45,25,25,50,50]
This will play pretty_bell notes at these tones at the tempo we’ve
set. You can create longer and shorter strings, and also change
the way they play.
05 Advance your melody
We can start making more complex melodies by using
more of Sonic Pi’s functions. You can change the note type by
using with_synth, reverse a pattern, and even create a fi nite loop
with the x.times function; do and end signify the start and end
of the loop. Everything is played in sequence before repeating,
much like an if or while loop in normal code.
06 Playing a concert
Using the in_thread function, we can create another
thread for the Sonic Pi instance and have several lines of musical
code play at once instead of in sequence. We’ve made it create
a series of notes in a random sequence, and have them play
alongside extra notes created by the position and velocity of the
mouse using the play_pad function.
with_tempo 200
play_pattern [40,25,45,25,25,50,50]
2.times do
with_synth “beep”
play_pattern [40,25,45,25,25,50,50]
play_pattern [40,25,45,25,25,50,50].reverse
end
play_pad “saws”, 3
in_thread do
with_synth “fm”
6.tim es do
if rand < 0.5
play 30
else
play 50
end
sleep 2
end
end
2.times do
play_synth “pretty_bell”
play_pattern [40,25,45,25,25,50,50]
play_pattern [40,25,45,25,25,50,50].reverse
end
Full code listing
“We can start making more
complex melodies by using
more of Sonic Pi’s functions”
Tips | Tricks | Hacks
32 Raspberry Pi Tips, Tricks & Hacks
Add the power of speech to your Raspberry Pi
projects with the versatile eSpeak Python library
QIt’s easier to make your Raspberry Pi talk
than you might think, thanks to eSpeak
Raspberry Pi
voice synthesiser
We’ve already mentioned how the
Raspberry Pi can be used to power
robots, and as a tiny computer it
can also be the centre of an Internet
of Things in your house or offi ce.
For these reasons and more, using
the Raspberry Pi for text-to-voice
commands could be just what you’re
looking for. Due to the Debian base
of Raspbian, the powerful eSpeak
library is easily available for anyone
looking to make use of it. There’s also a
module that allows you to use eSpeak
in Python, going beyond the standard
command-line prompts so you can
perform automation tasks.
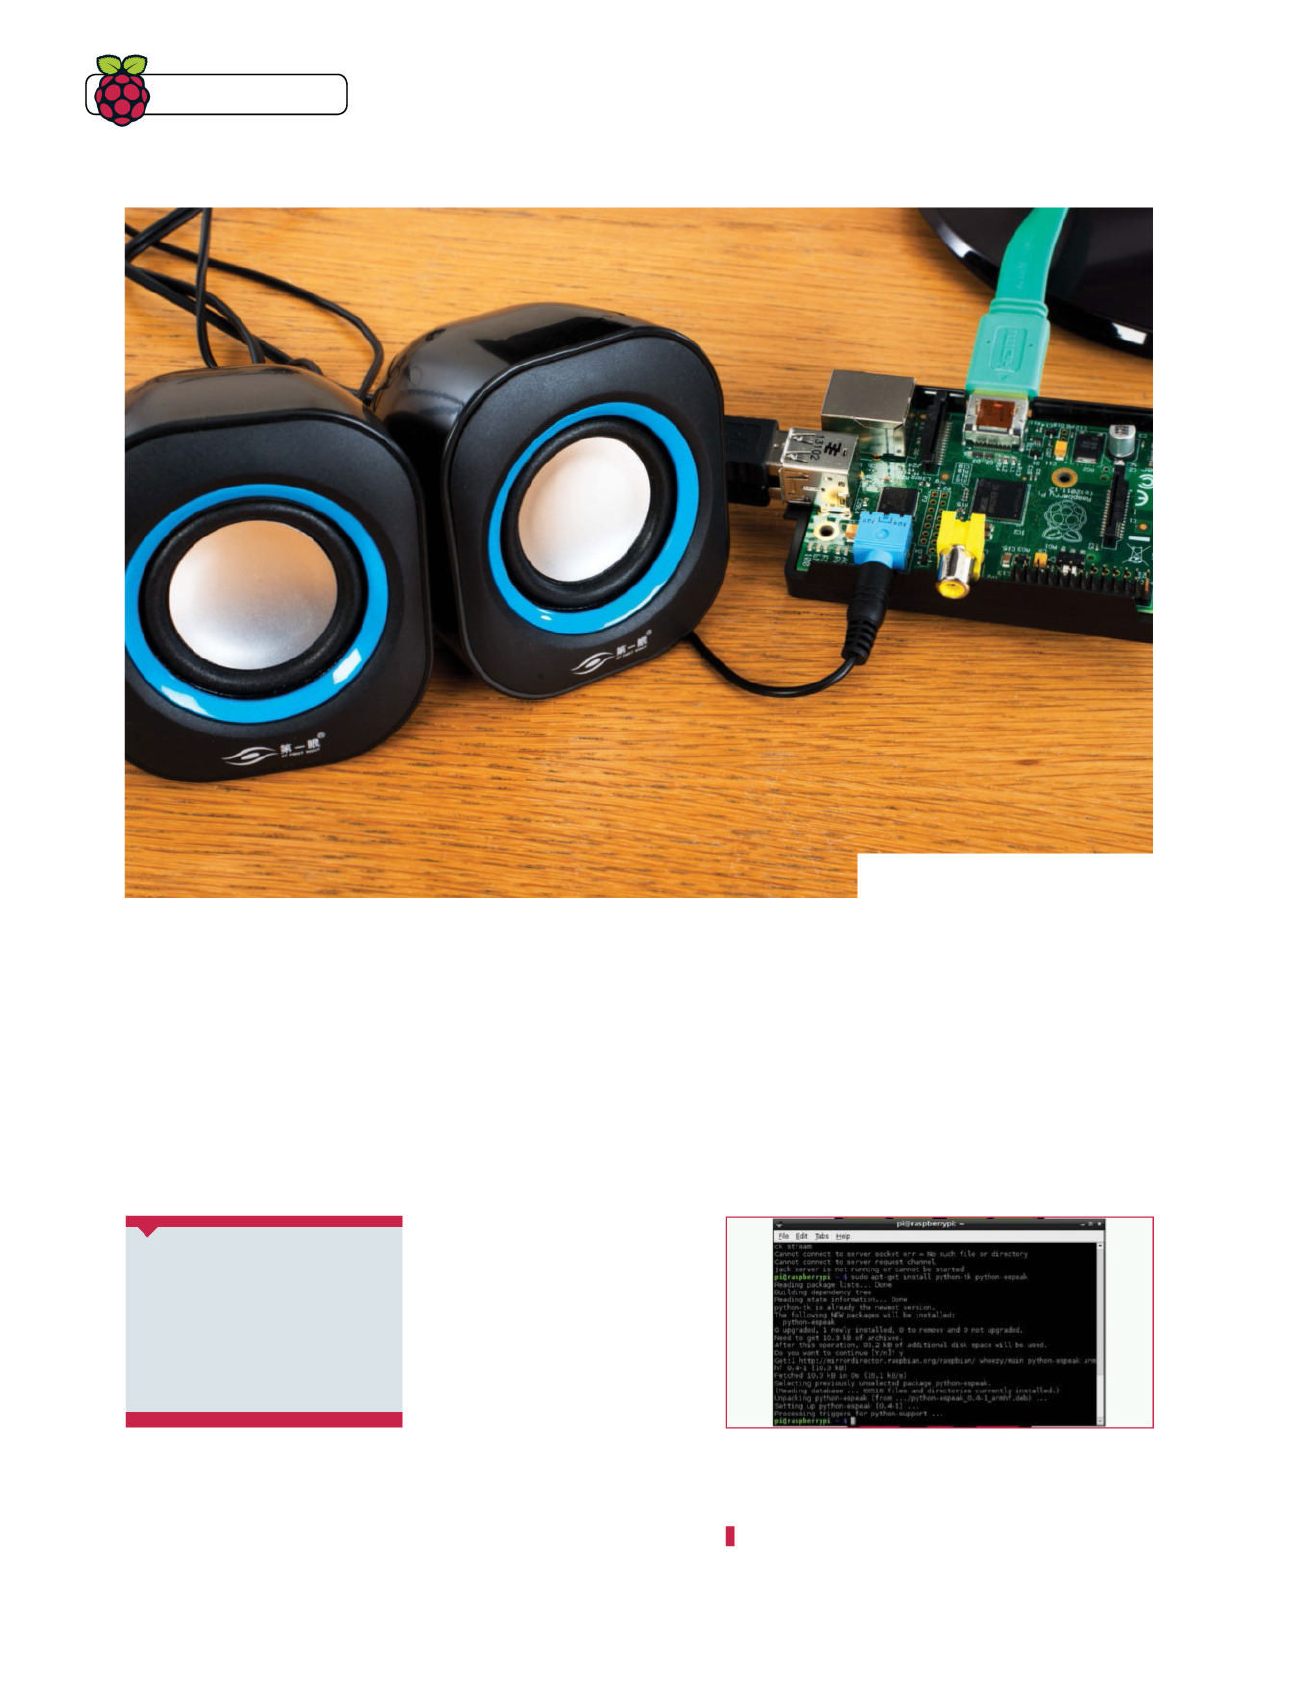
01 Everything you’ll need
We’ll install everything we plan to use in this tutorial at
once. This includes the eSpeak library and the Python modules
we need to show it off. Open the terminal and install with:
$ sudo apt-get install espeak python-espeak python-tk
What you’ll need
Q Portable USB speakers
Q python-espeak module
QeSpeak
QRaspbian (latest image)
Raspberry Pi Tips, Tricks & Hacks 33
Tips | Tricks | Hacks
from espeak import espeak
from Tkinter import *
from datetime import datetime
def hello_world():
espeak.synth(“Hello World”)
def time_now():
t = datetime.now().strftime(“%k %M”)
espeak.synth(“The time is %s”%t)
def read_text():
text_to_read = input_text.get()
espeak.synth(text_to_read)
root = Tk()
root.title(“Voice box”)
input_text = StringVar()
box = Frame(root, height = 200, width = 500)
box.pack_propagate(0)
box.pack(padx = 5, pady = 5)
Label(box, text=”Enter text”).p a c k()
entry_text = Entry(box, exportselection = 0,
textvariable = input_text)
entry_text.pack()
entry_ready = Button(box, text = “Read this”,
command = read_text)
entry_ready.pack()
hello_button = Button(box, text = “Hello World”,
command = hello_world)
hello_button.pack()
time_button = Button(box, text = “What’s the
time?”, command = time_now)
time_button.pack()
root.mainloop()
Full code listing
02 Pi’s fi rst words
The eSpeak library is pretty simple to use – to get it to
just say something, type in the terminal:
$ espeak “[message]”
This will use the library’s defaults to read whatever is written in
the message, with decent clarity.
03 Say some more
You can change the way eSpeak will read text with a
number of different options, such as gender, read speed and
even the way it pronounces syllables. For example, writing the
command like so:
$ espeak -ven+f3 -k5 -s150 “[message]”
…will turn the voice female, emphasise capital letters and make
the reading slower.
04 Taking command with Python
The most basic way to use eSpeak in Python is to use
subprocess to directly call a command-line function. Import
subprocess in a Python script, then use:
subprocess.call([“espeak”, “[options 1]”, “[option
2]”,...”[option n]”, “[message]”)
The message can be taken from a variable.
06 A voice synthesiser
Using the code listing, we’re creating a simple interface
with Tkinter with some predetermined voice buttons and a
custom entry method. We’re showing how the eSpeak module
can be manipulated to change its output. This can be used for
reading tweets or automated messages. Have fun!
05 The native tongue
The Python eSpeak module is quite simple to use to just
convert some text to speech. Try this sample code:
from espeak import espeak
espeak.synth(“[message]”)
You can then incorporate this into Python, like you would any
other module, for automation.
Import the
necessary eSspeak
and GUI modules, as
well as the module
to fi nd out the time
Defi ne the different
functions that the
interface will use,
including a simple
fi xed message,
telling the time, and
a custom message
Create the basic
window with Tkinter
for your interface,
as well as creating
the variable for
text entry
The text entry
appends to the
variable we
created, and each
button calls a
specifi c function
that we defi ned
above in the code
“You can change the way eSpeak
will read text with a number of
different options”
Get
the code:
bit.ly/
14XbLOC
Tips | Tricks | Hacks
Learn to program while playing one of the
greatest games ever made!
Program
Minecraft-Pi
Minecraft
is probably the biggest game
on the planet right now. It’s available on
just about any format you can imagine,
from PCs to gaming consoles to mobile
phones. It should probably come as
no surprise that it’s also available on
the Raspberry Pi. While at fi rst glance
Minecraft-Pi is a simplifi ed version of the
Pocket Edition (designed for tablets and
smartphones), the Raspberry Pi edition
is very special, in that it’s the only version
of
Minecraft
to gives users access to its
API (application programming interface).
In this project we’re going to show you
how to set up Minecraft-Pi and confi gure
it so you can interact with
Minecraft
in a
way you’ve never done before. This small
project is just the tip of the iceberg…
01 Requirements
Minecraft-Pi requires you to be running Raspbian on
your Raspberry Pi, so if you’re not already running that, take a
trip to raspberrypi.org and get it setup. It also requires you have
X Window loaded too. Assuming you’re at the command prompt,
you just need to type startx to reach the desktop.
What you’ll need
Q Raspbian (latest release)
Q Minecraft-Pi tarball
Q Keyboard & mouse
Q Internet connection
QUnlike all
other versions of
Minecraft
, the Pi
version encourages
you to hack it

Raspberry Pi Tips, Tricks & Hacks 35
Tips | Tricks | Hacks
02 Installation
Make sure you’re already in your
home folder and download the Minecraft-
Pi package with the following commands
in a terminal window:
cd ~
wget https://s3.amazonaws.com/
assets.minecraft.net/
pi/minecraft-pi-0.1.1.tar.gz
To use it we need to decompress it. Copy
the following into the terminal window:
tar -zxvf minecraft-pi-0.1.1.tar.gz
Now you can move into the newly
decompressed Minecraft-Pi directory
and try running the game for the fi rst time:
cd mcpi
./minecraft-pi
03 Playing Minecraft-Pi
Have a look around the game.
If you’re not familiar with
Minecraft
, you
control movement with the mouse and
the WASD keys. Numbers 1-8 select items
in your quickbar, the space bar makes you
jump and Shift makes you walk slowly (so
you don’t fall off edges). ‘E’ will open your
inventory and double-tapping the space
bar will also toggle your ability to fl y.
04 Confi guring the Python API
To take control of
Minecraft
with
the Python API, you next need to copy the
Python API folder from within the /mcpi
folder to a new location. In the terminal,
type the following:
cp -r ~/mcpi/api/python/mcpi
~/ minecraft
In this folder, we want to create a
‘boilerplate’ Python document that
connects the API to the game. Write the
following into the terminal:
cd ~/minecraft
nano minecraft.py
With nano open, copy the following and
then save and exit with Ctrl+X, pressing
Y (for yes), then Enter to return to the
command prompt:
from mcpi.minecraft import
Minecraft
from mcpi import block
from mcpi.vec3 import Vec3
mc = Minecraft.create()
mc.postToChat(“Minecraft API
Connected”)
05 Testing your Python script
The short script you created
contains everything you need to get
started with hacking Minecraft-Pi in the
Python language. For it to work, you need
to have the game already running (and
be playing). To grab control of the mouse
06 Hide & Seek
As you can see from the code above, we’ve created a
game of Hide & Seek adapted from Martin O’Hanlon’s original
creation (which you can fi nd on www.stuffaboutcode.com).
When you launch the script, you’ll be challenged to fi nd a
hidden diamond in the fastest time possible. We’ve used it to
demonstrate some of the more accessible methods available in
the API. But there’s much more to it than this demonstrates. If
you’re up for another Minecraft-Pi tutorial, see: bit.ly/1v4DR2F.
# !/usr/bin/env python
from mcpi.minecraft import Minecraft
from mcpi import block
from mcpi.vec3 import Vec3
from time import sleep, time
import random, math
mc = Minecraft.create() # make a connection to the game
playerPos = mc.player.getPos()
# function to round players float position to integer position
def roundVec3(vec3):
return Vec3(int(vec3.x), int(vec3.y), int(vec3.z))
# function to quickly calc distance between points
def distanceBetweenPoints(point1, point2):
xd = point2.x - point1.x
yd = point2.y - point1.y
zd = point2.z - point1.z
return math.sqrt((xd*xd) + (yd*yd) + (zd*zd))
def random_block(): # create a block in a random position
randomBlockPos = roundVec3(playerPos)
randomBlockPos.x = random.randrange(randomBlockPos.x - 50, randomBlockPos.x + 50)
randomBlockPos.y = random.randrange(randomBlockPos.y - 5, randomBlockPos.y + 5)
randomBlockPos.z = random.randrange(randomBlockPos.z - 50, randomBlockPos.z + 50)
return randomBlockPos
def main(): # the main loop of hide & seek
global lastPlayerPos, playerPos
seeking = True
lastPlayerPos = playerPos
randomBlockPos = random_block()
mc.setBlock(randomBlockPos, block.DIAMOND_BLOCK)
mc.postToChat(“A diamond has been hidden somewhere nearby!”)
lastDistanceFromBlock = distanceBetweenPoints(randomBlockPos, lastPlayerPos)
timeStarted = time()
while seeking:
# Get players position
playerPos = mc.player.getPos()
# Has the player moved
if lastPlayerPos != playerPos:
distanceFromBlock = distanceBetweenPoints(randomBlockPos, playerPos)
if distanceFromBlock < 2:
#found it!
seeking = False
else:
if distanceFromBlock < lastDistanceFromBlock:
mc.postToChat(“Warmer “ + str(int(distanceFromBlock)) + “ blocks away”)
if distanceFromBlock > lastDistanceFromBlock:
mc.postToChat(“Colder “ + str(int(distanceFromBlock)) + “ blocks away”)
lastDistanceFromBlock = distanceFromBlock
sleep(2)
timeTaken = time() - timeStarted
mc.postToChat(“Well done - “ + str(int(timeTaken)) + “ seconds to find the diamond”)
if __name__ == “__main__”:
main()
while in-game, you can press Tab. Open a
fresh terminal window, navigate into your
minecraft folder and start the script with
the following commands:
cd ~/minecraft
python minecraft.py
You’ll see a message appear on screen to
let you know the API connected properly.
Now we know it works, let’s get coding!
Functional, &
fun coding
There’s nothing too
taxing about our
code. We’ve created
a couple of simple
functions (starting
with def) and used
if, else and while to
create the logic.
You’ll
learn...
Full code listing

Tips | Tricks | Hacks
36 Raspberry Pi Tips, Tricks & Hacks
Experiment with physical computing by using Scratch
to interact with buttons and lights on your Pi
Get interactive
with Scratch
Scratch is a very simple visual
programming language, commonly
used to teach basic programming
concepts to learners of any age. In
this project we’ll learn how to light up
an LED when a button is pressed in
Scratch, and then change a character’s
colour when a physical button is
pressed. With these techniques
you can make all manner of fun and
engaging projects, from musical
keyboards to controllers for your
Scratch games and animations.
01 Installing the required software
Log into the Raspbian system with the username Pi and
the password raspberry. Start the LXDE desktop environment
using the command startx. Then open LXTerminal and type the
following commands:
wget http://liamfraser.co.uk/lud/install_scratchgpio3.sh
chmod +x install_scratchgpio3.sh
sudo bash install_scratchgpio3.sh
This will create a special version of Scratch on your desktop
called ScratchGPIO3. This is a normal version of Scratch
with a Python script that handles communications between
Scratch and the GPIO. ScratchGPIO was created by simplesi
(cymplecy.wordpress.com).
What you’ll need
Q Breadboard
Q LEDs
Q Buttons
Q Resistors
Q Jumper wires
Q ScratchGPIO3
QScratch can be used to do Internet Of
Things projects with a few tweaks
Raspberry Pi Tips, Tricks & Hacks 37
Tips | Tricks | Hacks
1 Simple
circuits
While these are very
simple circuits, you’ll
get a great feel of
how the Raspberry
Pi interfaces with
basic prototyping
kit. If you need to buy
the bits and pieces,
we recommend you
check out:
shop.pimoroni.com
2 Coding
principles
If you’re new to
programming,
Scratch is the
perfect place to
learn the same
programming
principles employed
by all programming
languages out there.
3 Physical
computing
There’s nothing more
magical than taking
code from your
computer screen
and turning it into a
real-life effect. Your
fi rst project might
just turn a light on
and off, but with that
skill banked, the sky
is the limit.
You’ll
learn...
02 Connecting the breadboard
Power off your Pi and disconnect the power cable. Get
your breadboard, an LED, a 330-ohm resistor and two GPIO
cables ready. You’ll want to connect the 3.3V pin (top-right pin,
closest to the SD card) to one end of the 330-ohm resistor, and
then connect the positive terminal of the LED (the longer leg is
positive) to the other end. The resistor is used to limit the amount
of current that can fl ow to the LED.
Then put the negative terminal of the LED into the negative
rail of the breadboard. Connect one of the GROUND pins (for
example, the third pin from the right on the bottom row of pins)
to the negative lane. Now connect the power to your Pi. The LED
should light up. If it doesn’t, then it’s likely that you’ve got it the
wrong way round, so disconnect the power, swap the legs around
and then try again.
03 Switching the LED on and off
At the moment, the LED is connected to a pin that
constantly provides 3.3V. This isn’t very useful if we want to be able
to turn it on and off, so let’s connect it to GPIO 17, which we can turn
on and off. GPIO 17 is the sixth pin from the right, on the top row of
pins. Power the Pi back on. We can turn the LED on by exporting
the GPIO pin, setting it to an output pin and then setting its value
to 1. Setting the value to 0 turns the LED back off:
echo 17 > /sys/class/gpio/export
echo out > /sys/class/gpio/gpio17/direction
echo 1 > /sys/class/gpio/gpio17/value
echo 0 > /sys/class/gpio/gpio17/value
uses pin numbers rather than GPIO numbers to identify pins.
The top-right pin (the 3.3V we first connected our LED to) is pin
number 1, the pin underneath that is pin number 2, and so on.
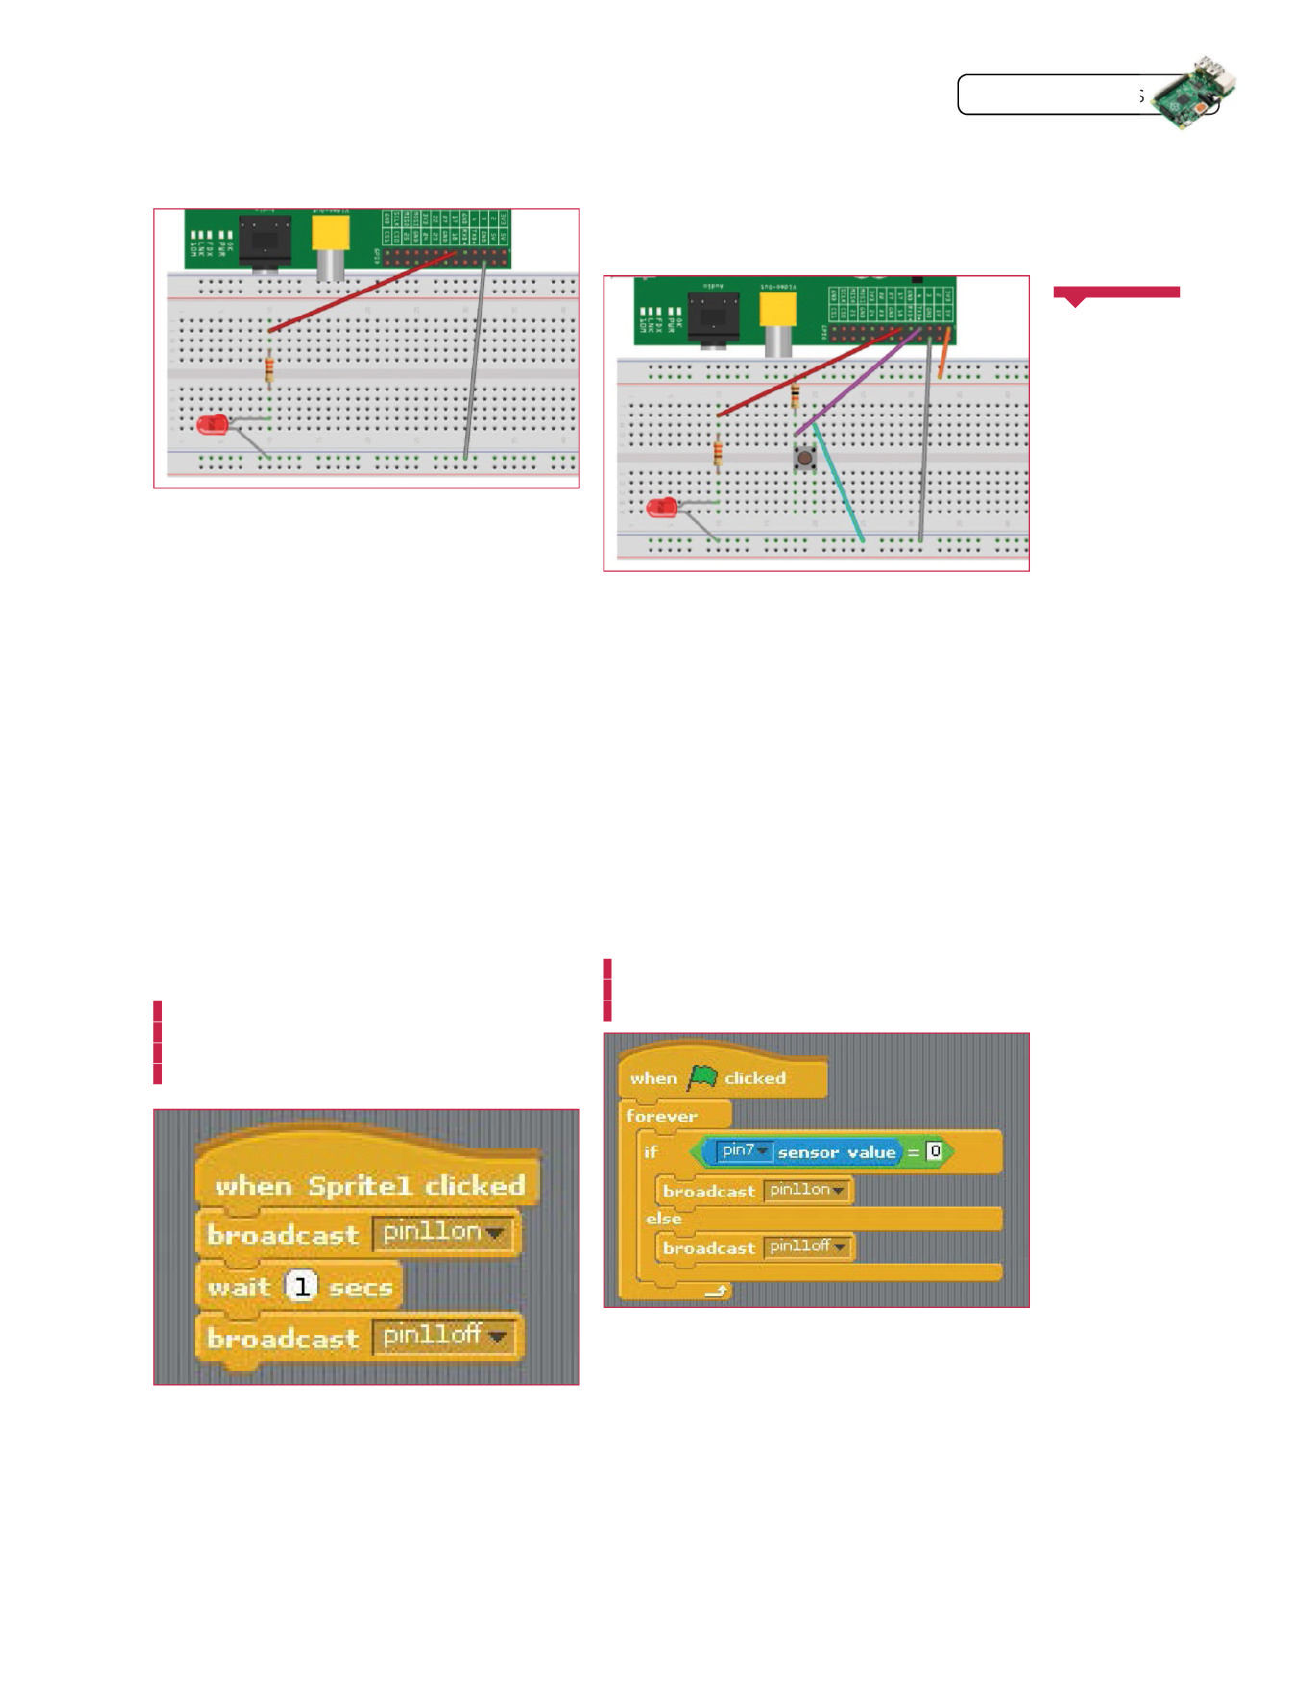
04 Controlling the LED from Scratch
Start the LXDE desktop environment and open
ScratchGPIO3. Go to the control section and create a simple script
that broadcasts pin11on when Sprite1 is clicked. Then click the
sprite. The LED should light up. Then add to the script to wait 1
second and then broadcast pin11off. If you click the sprite again,
the LED will come on for a second and then go off. ScratchGPIO3
05 Wiring up our push button
Power off the Pi again. This circuit is a little bit more
complicated than the LED one we created previously. The first
thing we need to do is connect 3.3V (the top-right pin we used to
test our LED) to the positive rail of the breadboard. Then we need
to connect a 10Kohm resistor to the positive rail, and the other end
to an empty track on the breadboard. Then on the same track, add
a wire that has one end connected to GPIO 4. This is two pins to the
right of GPIO 17. Then, on the same track again, connect one pin of
the push button. Finally, connect the other pin of the push button
to ground by adding a wire that is connected to the same negative
rails that ground is connected to.
When the button is not pressed, GPIO 4 will be receiving 3.3V.
However, when the button is pressed, the circuit to ground will be
completed and GPIO 4 will be receiving 0V (and have a value of 0),
because there is much less resistance on the path to ground.
We can see this in action by watching the pin’s value and then
pressing the button to make it change:
echo 4 > /sys/class/gpio/export
echo in > /sys/class/gpio/gpio4/direction
watch -n 0.5 cat /sys/class/gpio/gpio4/value
06 Let there be light!
Boot up the Pi and start ScratchGPIO3 as before. Go
to the control section and add when green fl ag clicked, then
attach a forever loop, and inside that an if else statement. Go
to the operators section and add an if [] = [] operator to the
if statement. Then go to the sensing section and add a value
sensor to the left side of the equality statement, and set the
value to pin7. On the right side of the equality statement, enter
0. Broadcast pin11on if the sensor value is 0, and broadcast
pin11off otherwise. Click the green fl ag. If you push the button,
the LED will light up!

Tips | Tricks | Hacks
38 Raspberry Pi Tips, Tricks & Hacks
Use Google Coder to turn your Raspberry Pi into a
tiny, low-powered web server and web host
Build a Raspberry Pi
web server
We’re teaching you how to code in many
different ways on the Raspberry Pi this
issue, so it only seems fi tting that we
look at the web too.
There’s a new way to use the web on
the Raspberry Pi as well: internet giant
Google has recently released Coder
specifi cally for the tiny computer. It’s a
Raspbian-based image that turns your Pi
into a web server and web development
kit. Accessible easily over a local network
and with support for jQuery out of the
box, it’s an easy and great way to further
your web development skills.
01 Get Google Coder
Head to the Google Coder website, and download the
compressed version of the image. Unpack it wherever you wish,
and install it using dd, like any other Raspberry Pi image:
$ dd if=[path to]/raspi.img of=/dev/[path to SD
card] bs=1M
What you’ll need
Q Internet connectivity
Q Web browser
Q Google Coder
googlecreativelab.github.io/coder/
raspberrypi/sonicpi/teaching.html
QGoogle Coder is a brilliant way to
introduce yourself to web development
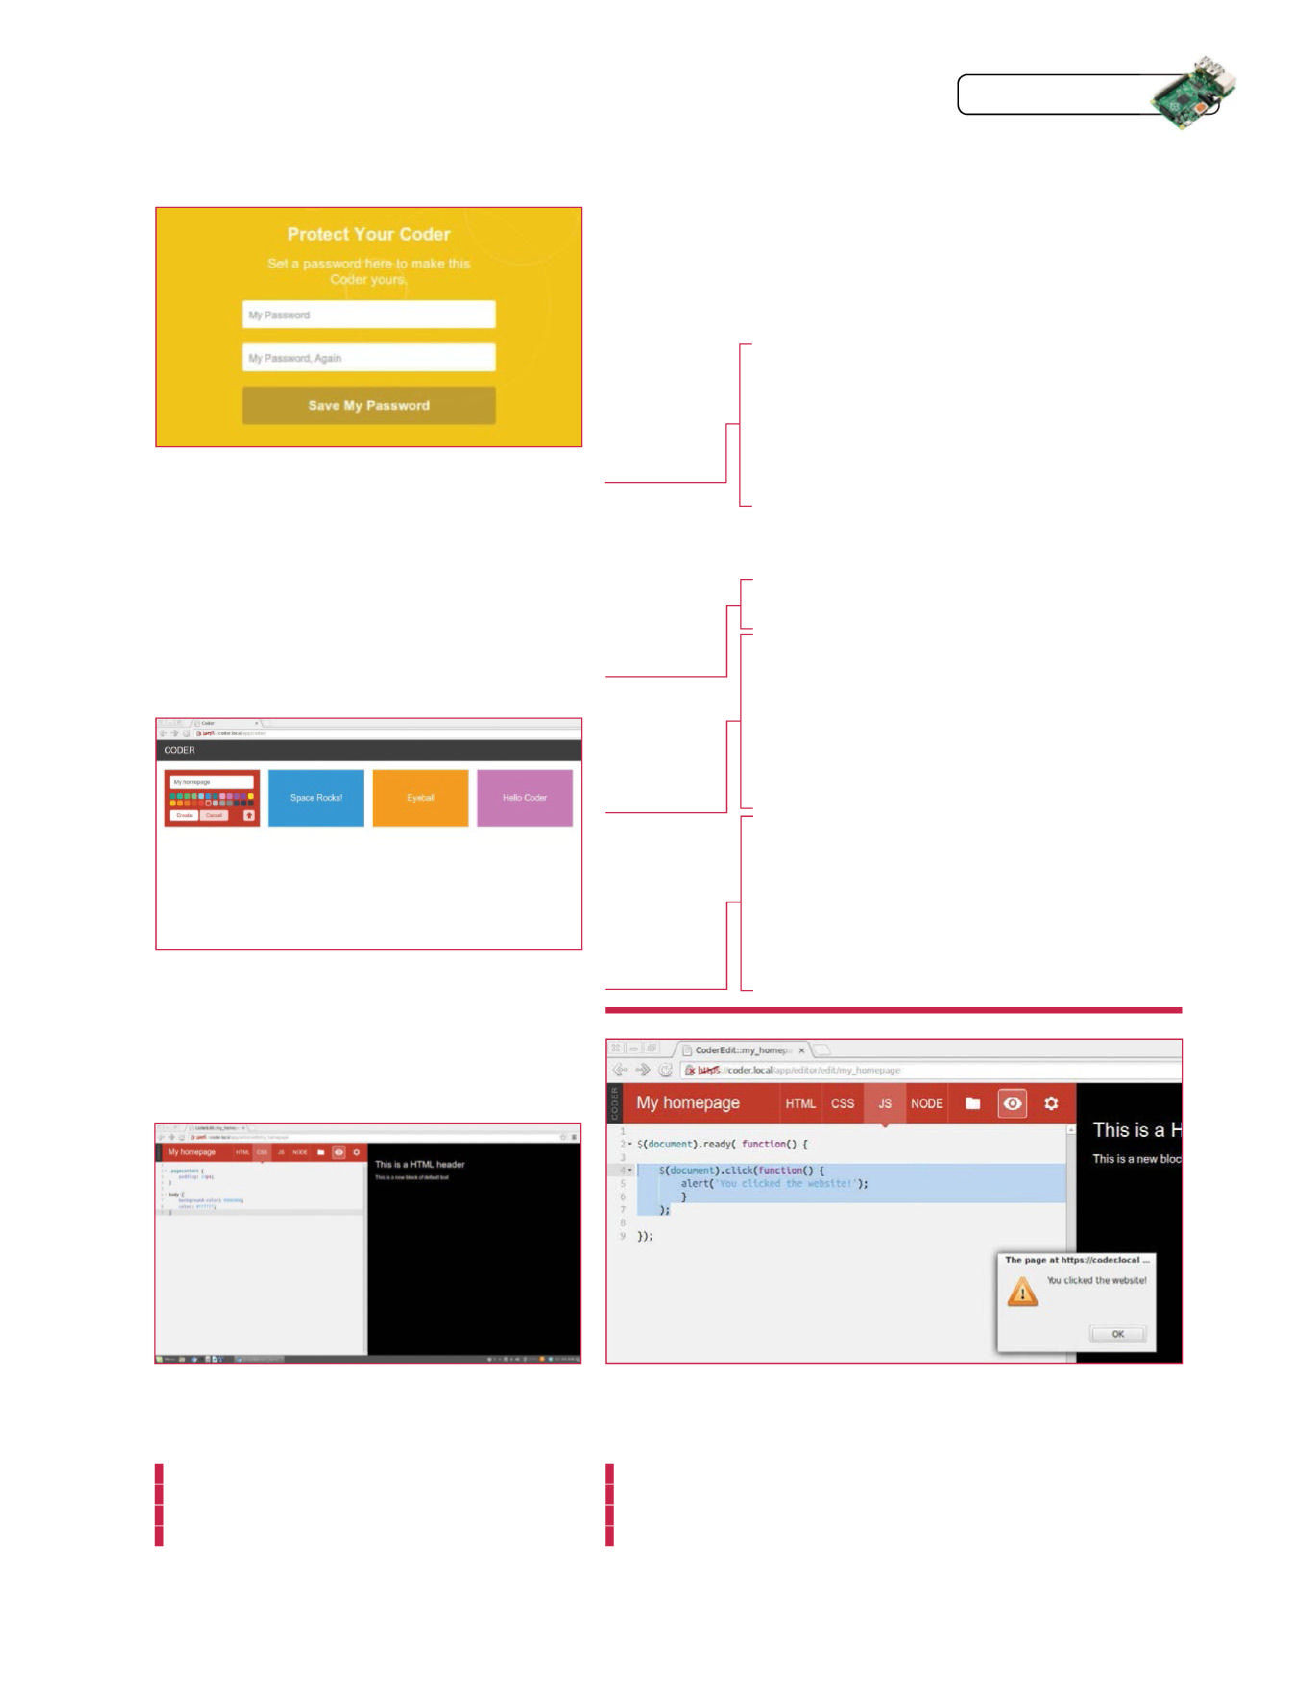
Raspberry Pi Tips, Tricks & Hacks 39
Tips | Tricks | Hacks
02 Plug in your Pi
For this tutorial, you’ll only need to connect a network
cable into the Pi. Pop in your newly written SD card, plug in the
power and wait a few moments. If you’ve got a display plugged in
anyway, you’ll notice a Raspbian startup sequence leading to the
command-line login screen.
03 Connect to Coder
Open up the browser on your main system, and go to
http://coder.local. You may have to manually accept the licence.
It will ask you to set up your password, and then you’ll be in and
ready to code.
04 Language of the web
Now it’s time to create your own app or website. Click
on the ‘+’ box next to the examples, give your app a name and
then click Create. You’ll be taken to the HTML section of the app.
Change the Hello World lines to:
<h1>This is a HTML header</h1>
<p>This is a new block of default text</p>
05 Styled to impress
Click on the CSS tab. This changes the look and style of
the webpage without having to make the changes each time in the
main code. You can change the background colour and font with:
body {
background-color: #000000;
color: #ffffff;
}
06 Querying your Java
The third tab allows you to edit the jQuery, making
the site more interactive. We can make it create a message on
click with:
$(document).click(function() {
alert(‘You clicked the website!’);
}
);
HTML
<h1>Welcome to the internet...</h1>
<h2></h2>
<p><a href=”http://www.linuxuser.co.uk”>Linux User &
Developer</p>
<p><a href=”http://www.reddit.com/”>Reddit</p>
<p><a href=”http://www.linuxfoundation.org/”>The
Linux Foundation</p>
<p><a href=”http://www.fsf.org/”>Free Software
Foundation</p>
Java
var d = new Date;
var hours = d.getHours();
var mins = d.getMinutes();
if (hours > 12) {
var hour = (hours - 12);
var ampm = “PM”;
}
else {
var hour = hours;
var ampm = “AM”;
}
if (hours == 12) {
var ampm = “PM”;
}
if (mins > 9){
var min = mins;
}
else {
var min = “0” + mins;
}
var time = “The time is “ + hour + “:” + min
+ “ “ + ampm;
$(“h2”).h t m l(t i m e);
Full code listing
Some simple HTML
code that can
point us to some
important websites.
The h2 tag is used
to display the time
thanks to Java
We’re calling the
current time using
jQuery in the JS
tab so that we can
ultimately display it
on the webpage
We’re going to
display the time as a
12-hour clock in the
fi rst if statement,
and use AM and PM
to differentiate
the time
We make the
minutes readable
by adding a 0 if
it’s below 10, then
concatenate all
the variables and
assign to the tag h2

Whether you’ve just got your lucky hands
on a powerful, petite Raspberry Pi Zero or
you’re looking to maximise the effi ciency of
the faithful Raspberry Pi you already own,
this is everything you need to get started
on boosting not only your Raspberry Pi but
your own knowledge. The Raspberry Pi is
a versatile little piece of hardware, with a
wonderfully creative amount of potential, and
though most of you will be familiar with its
more day-to-day functions, there are always
tweaks and adjustments to be explored that
can tailor the Raspberry Pi to your own desired
user experience.
From soldering to useful Python features,
GPIO interrupts to remote access, and a whole
lot more, this masterclass in technical and
practical skills covers fi fty useful ways to get
the most out of your Raspberry Pi. If you’re
anything like us, you’ll have been tinkering
around with your Raspberry Pi Zero, but
whatever your skill level there’s still something
here for you to get your teeth into.
Every single tip here will work on your Pi
Zero; just keep an eye out for the ‘Zero’ fl ash,
indicating which are relevant to the Pi Zero
only. Those of you using an earlier model won’t
be missing out, though – how could we ever
neglect our favourite single-board computer?
– the majority of tips, tricks and tweaks are
still suitable for any other offi cial Raspberry Pi
as well. Have fun tinkering!
MASTER
RAS PI
WAYS TO
Get the most out of your
Pi with these expert tips and tricks
40 Raspberry Pi Tips, Tricks & Hacks
Tips | Tricks | Hacks
The newest member of the Raspberry Pi family, this tiny
board is the result of the Raspberry Pi Foundation’s efforts
to reduce the cost of the computer even further. Not content
with reducing its $35 computer to $25, which can still be a little
pricy for some people, it has cut it right down to $5 by making a
few adjustments. Here’s what you need to know.
03 Find your Pi on a network
If you can’t log into your router to view DHCP leases, you can use
nmap (available for Linux, Windows and Mac) to scan the local network
to fi nd a Raspberry Pi. You need to know the address range of your local
network (common networks are 192.168.1.0/24, and 192.168.2.0/24).
nmap -sn 172.17.173.0/24 will run a ping scan and output a list of devices.
An example output is:
Nmap scan report for raspberrypi.home.org (172.17.173.21)
Host is up (0.0011s latency).
06 Enable max current draw
If you have a good power supply (ie
2 amps or more) and want to be able to
connect a current-heavy device to your Pi
2 or B+, such as a USB hard disk, then you
can add the line max_usb_current=1 to
/boot/config.txt, which will set the max
current over USB to 1.2 amps instead of the
default 600mA.
04 Experiencing stability issues?
By far the biggest cause of stability issues is the power supply
you are using, especially now the Raspberry Pi 2 has more CPU cores
and so uses more energy. The recommended current supply for a
Raspberry Pi 2 or B+ is 1.8 amps. If you are still having issues, your SD
card may be worn out.
05 Forgot to type sudo?
Sudo is used to get root privileges for a specifi c command (for example,
editing a fi le in /boot or /etc). The variable !! in bash is the previous command that
you typed. So if you need root privileges for something but forgot to type sudo
then you can simply type sudo !!, provided you haven’t typed anything else since.
Essential tricks to improve
day-to-day use
Vital knowledge
Micro-USB One of these ports
is for your micro-USB power
supply. To use peripherals and
a Wi-Fi dongle, you’ll need a
micro-USB to USB adaptor so
you can attach a powered
USB hub.
Pinless port The GPIO header is the same
as in the newer models but comes without the
pins. You’ll need to solder on a 40-pin male
header block.
Mini-HDMI You’ll
need a mini-HDMI to
HDMI cable to use your
monitor as a display.
You can use your TV with
the RCA video-out if you
solder the pin.
BCM2835 This is the same processor used
in the original Raspberry Pi models, although
it’s been overclocked to run at 900MHz and is
about 40% faster.
01 Raspberry Pi Zero
Ensure
you have the latest
packages on Raspbian
by running sudo apt-get
update; sudo apt-get
upgrade from a
terminal
02
Zero
07 Control options
sudo raspi-config can be
used to change several options.
For example, to enable the
camera, overclock the Pi, change
boot options, and expand the
filesystem to use the full space on
the SD card.
Tips | Tricks | Hacks
Handy hints and vital info to get the most out of
any Raspberry Pi model
Transferable tips
Raspberry Pi B+
08 Remote access with SSH
SSH stands for Secure Shell. You can use SSH to
connect to a terminal session on your Raspberry Pi over your
local network. This means that you can use the Pi with only a
network cable and power cable connected, which is much more
convenient than needing a screen and keyboard. Once you have
found your Pi on the network you can log into it using the default
username of ‘pi’ and the default password of ‘raspberry’. Both
Linux and Mac will have built-in SSH clients, so simply open the
terminal and type ssh pi@192.168.1.5, assuming that 192.168.1.5
is the address of your Pi. On Windows, you can use an SSH client
called PuTTY, which is free to download, doesn’t need installing
and is easy to fi nd with a search engine.
09 Copy fi les using SCP
SCP stands for Secure Copy Protocol, and is a way for
you to copy fi les (and directories) to and from your Raspberry Pi
over the network. A good use of this would be if you have art for a
PyGame project and you need to copy it over. FileZilla is a decent
graphical SCP client to use (connect to your Pi on port 22 with the
username ‘pi’ and password ‘raspberry’). If you are using SCP
from the terminal then the syntax is as follows:
scp -r testdir/pi@172.17.173.21:~/
The -r switch is for recursive, which means entire directories
are copied in addition to fi les. This will place your test directory
in /home/pi/ (because ~ points at the logged-in user’s home
directory on Linux). Simply swap the syntax for copying from the
Raspberry Pi instead:
scp -r pi@172.17.173.21:~/testdir .
The dot refers to the current directory in Linux, so the testdir
directory would be copied to the current directory.
10 USB controller The USB controller on
the Pi is theoretically capable of 480Mbit/s.
On earlier Pi models the performance is limited
by the single core ARM chip, but it is possible to
get close to that limit on a Pi 2.
12 SD cards SD cards aren’t really
designed for running an operating system.
Higher class SD cards don’t necessarily mean
better performance for lots of small fi les. The
Raspberry Pi foundation recommend its SD
card, which is an 8GB class 6 microSD card.
13 Ethernet LEDs There are two LEDs
below the Ethernet port of a B+ onwards.
The orange light means there is a link, and the
fl ashing green light means there is activity.
14 Wi-Fi module To get your
Pi online without an Ethernet
connection, you’ll need a Wi-Fi module.
We advise on an official one, but look for
802.11 b/g/n modules if going third-party.
11 Power / Act LEDs
The remaining LEDs
are for power and SD card
activity. The power LED is
red, and the activity LED
fl ashes green when there is
SD card activity. The activity
LED also fl ashes when
powering down to indicate
when it is safe to disconnect.
Above Get a terminal
on your Raspberry
Pi from the
convenience of your
main computer
42 Raspberry Pi Tips, Tricks & Hacks
Raspberry Pi Tips, Tricks & Hacks 43
Using an Ethernet adapter with your Pi Zero Navigate your way around
the command line with ease
Five terminal
tricks
15 Get your Pi Zero online
16 Set up a VNC server
VNC stands for Virtual Network Computing. Using
VNC, you can access the Raspbian desktop over the
network (meaning you only need power and Ethernet
connected). There is no audio support but for any other
tasks (including the use of Pygame), VNC should provide
acceptable performance. You can install a VNC server
with the following commands…
sudo apt-get update
sudo apt-get install tightvncserver
There are several free VNC clients available, so a search engine
will help fi nd a suitable one. To start a VNC session on your Pi, log
in over SSH and then run tightvncserver. You will be prompted
to enter a password the fi rst time you run it. You can specify
a screen resolution with the -geometry option, for example
-geometry 1024x768. You can kill an existing VNC session with
tightvncserver -kill :1, where 1 is the session number. To connect
to that session on a Linux machine, you could use the command:
vncviewer 172.17.173.21:1, substituting for the IP address of your
Raspberry Pi.
18 Listing open ports
Lsof stands for List Open Files, and you can install
it with sudo apt-get install lsof. If you run sudo lsof -i
you will see a list of all open network connections on the
machine, including applications that are listening for new
connections (for example, the SSH daemon).
19 Using wget to download fi les
Wget can be used to download fi les from the
Internet from the terminal. This is convenient if you need
to download a zip fi le containing source code and then
extract it. For example:
wget http://liamfraser.co.uk/test.zip
unzip test.zip
20 Using htop to monitor load
Htop is an improvement on the original top utility.
It lets you see the CPU and memory load on your machine
in real time, which is useful to know how intensive your
application is being on a Raspberry Pi. You can install it
with sudo apt-get install htop.
21 Reboot from the terminal
It seems like a simple tip but not everyone knows
that you can reboot your Pi with the command sudo
reboot, and similarly power it off with sudo poweroff.
You need to disconnect and reconnect the power after
powering off the Pi, though, as there is no on/off switch.
22 Using screen
Screen (available via apt-get) is great if you have
something you want to run that takes a long time. You can
run it in a screen session, detach from it and reconnect
later on. Example usage:
screen -S test (Ctrl + A, d to disconnect)
screen -ls to list sessions.
screen -r test to reconnect
exit will kill bash and therefore end the screen session.
Step One: The parts
You’ll need an adapter to connect
the micro-USB port to a full size USB
port. This adapter, along with a mini-
HDMI to HDMI adapter and GPIO pin
headers can be found here: http://
swag.raspberrypi.org/products/pi-
zero-cables. You’ll also need a USB to
Ethernet adapter that works with Linux
(most will work out of the box), These
can easily be found on Amazon for
around £10.
Step Three: Testing it out
If the activity lights on your USB to
Ethernet adapter are lit, then it should
be working fi ne. You can now use the
remote access tips from other sections
of the article with your Pi Zero!
Step Two: Confi guration
As the Pi Zero uses the normal
Raspbian image, and eth0 (ie the built-
in Ethernet card) is missing, there is no
confi guration necessary because the
USB Ethernet card will take the missing
LAN chip’s place as eth0.
Left Access the
Raspbian desktop
from your main
computer over your
local network
The sync
command ensures that
everything has been
fl ushed to permanent
storage from the cache. It
can be useful to run after
updating packages,
for example.
17
Zero
23 split fi les
If your program is large, you can split it up into
multiple fi les. If you have a fi le called MyClass.py
containing a class MyClass, you can use it from another
script with from MyClass import MyClass
Raspberry Pi Tips, Tricks & Hacks 43
Tips | Tricks | Hacks

You can use
negative indexes on
Python lists to get the
most recently added
item(s). mylist[-1] will get
the latest thing that
was added to
the list.
Here are some handy Python features that will make
your code really stand out
Become a Python Pro
24 The main function
Having a main function (if __name__ ==
__main__) in Python is useful. It makes it easier to
see the difference between where your functions/
classes are defined and where your entry point is.
More importantly, it allows you to only run code
from that Python script in the case that it is the
main script being run. This means that you can
create a class and have code that tests that class
to make sure it works. However, if you were to
include your file in another program, the code in
the main method would not be run and you can
just use the class that you require.
class MyClass:
def __init__(self):
self.x = 1
def print_increment(self):
print “x = {0}”.format(self.x)
self.x += 1
if __name__ == “__main__”:
# Test MyClass
m = MyClass()
m.print_increment()
m.print_increment()
25 Command line arguments
Command line arguments enable your
program to run in various modes depending on
the options that the user passes to the program
when running it. Command line arguments in
Python are given in sys.argv, which is a list of
arguments. The first argument is always the
name of the script that has been executed. For
example, some code that prints the argv array
produces the following outputs:
$ python args.py
[‘a r g s.p y’]
$ python args.py --foo
[‘a rg s.py’, ‘-- fo o’]
You can check for command line arguments in
this list. If the length of the list is 1 and you require
arguments, print a help message with instructions.
import sys
help_msg = “My help message”
debug_mode = False
if __name__ == “__main__”:
if len(sys.argv) == 1:
print help_msg
sys.exit()
if “--debug” in sys.argv:
debug_mode = True
print “Using debug mode”
26 Using properties and setters
Properties in Python are a way to write
getters and setters for variables. You need new-
style classes (you need to inherit from object). We
PYCON US 2016
28 May - 5 June
us.pycon.org/2016
The largest gathering
of the global Python
community takes place
in Portland, Oregon
in 2016, featuring two
tutorial days, three talk
days and four sprint days
OSCON USA 2016
16 - 19 May
oreil.ly/1QKVTTB
The Open Source Convention,
held in Austin, Texas this year, is
a place of innovation for sharing
new ideas and technologies
OSCON Europe 2016
17 - 20 October
oreil.ly/1VqRWnE
Europe’s OSCON event mirrors
the US format, with training
sessions, keynotes and
tutorials through its four days
FOSDEM 2016
30-31 January
fosdem.org/2016
This free, non-commercial
event organised by volunteers
takes place in Belgium and has
grown wildly over the years
27 Python conferences 28
44 Raspberry Pi Tips, Tricks & Hacks
Tips | Tricks | Hacks
Raspberry Pi Tips, Tricks & Hacks 45
Uncover the secrets to be
found in Python
Five hidden
features
30 List comprehension
List comprehension is a way of generating a list on a
single line. You can use list comprehension to extract values
from other list-type data structures. For example, if you
have a collection of distance classes, you could get just the
distance in miles into a list: miles = [x.miles for x in
distances]. Here is a sample output:
>>> [x/2.0 for x in range(0, 10)]
[0.0, 0.5, 1.0, 1.5, 2.0, 2.5, 3.0, 3.5, 4.0, 4.5]
31 Assertions
Assertions are useful when writing algorithms.
They are used to check the data is valid before and after
your algorithm. So, for example, if you are expecting your
results in a certain range you can check them. The syntax is
assert(boolean expression). For example:
>>> assert(0 < 1)
>>> assert(1 < 0)
Traceback (most recent call last):
File “<stdin>”, line 1, in <module>
AssertionError
32 Throwing exceptions
It’s useful to throw exceptions in your code if it’s
possible that it can go wrong. That way the person calling
your code can put it in a try-catch block and handle the
exception if it is raised. If the caller does not handle it then
their application will crash.
>>> raise ValueError(“Supplied value out of range”)
Traceback (most recent call last):
File “<stdin>”, line 1, in <module>
ValueError: Supplied value out of range
33 Running your script from a terminal
If you begin your Python script with #!/usr/bin/env
python and then mark it as executable, you can execute it
from bash just like a normal script without having to type
Python before it:
$ echo ‘#!/usr/bin/env python’ > test.py
$ echo ‘print “Hello World from Python!”’ >> test.py
$ chmod +x test.py
$ ./test.py
Hello World from Python!
34 Using the interpreter
Did you know you can start a Python interpreter to test
things are working without having to write a Python script?
Just type python into the terminal and then simply start
writing Python.
Above Not sure whether to pick Python 2 or 3? There’s a guide to help in the docs: bit.ly/1jyd799
have created a class called distance where
the distance in miles is a variable, and
the distance in kilometres is a property.
Getting from that variable multiplies the
distance in miles to be kilometres and
setting the variable sets the value in miles.
class Distance(object):
KM_PER_MILE = 1.60934
def __init__(self, mi):
self.miles = mi
@property
def km(self):
return self.miles * Distance.
KM_PER_MILE
@km.setter
def km(self, value):
self.miles = value / Distance.
KM_PER_MILE
if __name__ == “__main__”:
d = Distance(3.1)
print d.km
d.km = 10
print d.miles
print d.km
Get to grips with the GPIO library
29 Using the GPIO
Step One: Import library
Start by importing Rpi.GPIO:
import RPi.GPIO as GPIO
Then, you want to set the pin numbering
convention to the Broadcom mode (as
in GPIO17 will be pin 17, rather than
being pin 11 on the Pi):
GPIO.setmode(GPIO.BCM)
Step Three: Get values
Once the pins are set up, getting
values from them is easy. To get the
value of a pin (0 for low, and 1 for high),
use the following syntax:
value = GPIO.input(6)
…and to set the value of a pin (with
either 0 or 1, or True or False) use the
following syntax:
GPIO.output(5, True)
Please note that if you are starting
with Raspbian Jessie, you shouldn’t
need sudo to access the GPIO pins,
but in previous versions of Raspbian
you will need to use sudo to run
your code.
Step Two: Pin setup
Now you need to set up your pins
as either inputs or outputs with the
following syntax:
GPIO.setup(5, GPIO.OUT)
GPIO.setup(6, GPIO.IN)
If you have several pins to set up, it
makes sense to put them in a list and
then do something like:
for p in pins:
GPIO.setup(p, GPIO.OUT)
35 remove static
Make sure you haven’t built up any static charge when
working with electronics. Touching a grounded radiator in
your house can be a good way of getting rid of static charge.
Raspberry Pi Tips, Tricks & Hacks 45
Tips | Tricks | Hacks
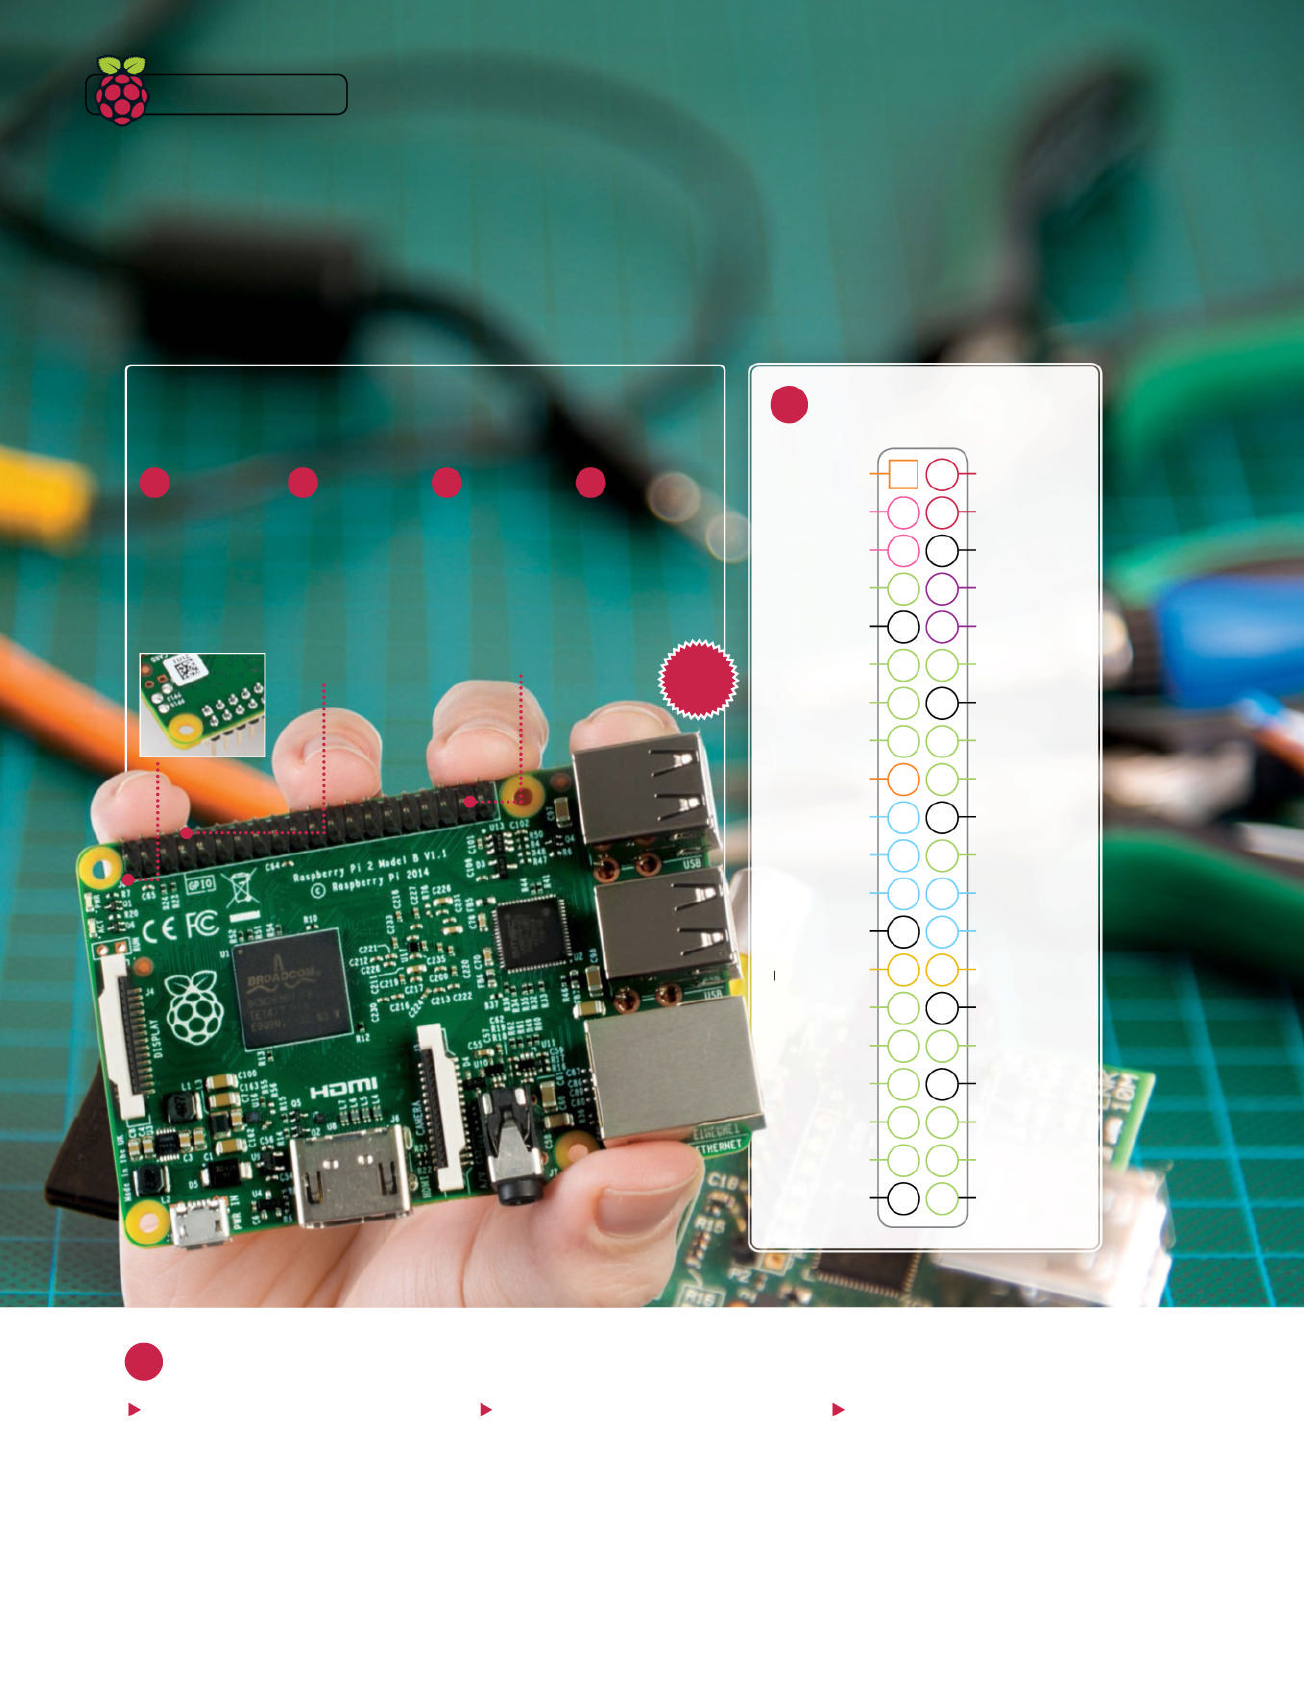
40 Pin layout
0201
0403
0605
0807
1009
1211
1413
1615
1817
2019
2221
2423
2625
2827
3029
3231
3433
3635
3837
4039
3V3
Power
Ground
GPIO14
UART0_TXD
3V3
Power
GPIO23
Ground
GPIO8
SPIO_C E0_N
GPIO13
GPIO12
GPIO3
SCL1 I2C
5V
Power
GPIO27
GPIO18
PCM_CLK
GPIO9
SPIO_MISO
Ground
GPIO5
ID_SC
I2C ID EEPROM
GPIO26
GPIO16
GPIO21
GPIO2
SDA1 I2C
5V
Power
GPIO17
GPIO15
UART0_RXD
GPIO10
SPIO_MOSI
GPIO24
ID_SD
I2C ID EEPROM
GPIO7
SPIO_C E1_N
GPIO19
Ground
GPIO4
Ground
GPIO22
Ground
GPIO11
SPIO_SCLK
GPIO25
GPIO6
Ground
Ground
GPIO20
GPIO interrupts, pulse width modulation, soldering and more
Solder with ease in just a few steps
Hardware how-to
41 How to solder
Step One: The tools
You need a soldering iron (30-40 watts, or ideally
a temperature-controlled one), a stand to put it
in, a damp sponge to clean the tip, and some thin
solder. Lead solder is easier to work with than
lead-free, and an iron with a square tip conducts
heat better than a pointy one.
Step Three: If you make a mistake
You probably won’t need as much solder as you
think you will, so be sparing. Still, accidents can
happen, and the best way to remove excess solder
is to get some de-soldering braid. This is copper
that you put over solder, before putting the iron
over the top. The solder is sucked onto the braid.
Step Two: Soldering
Once the iron is hot, apply some solder to the tip
of the iron and wipe off any excess on the sponge.
When pressing the iron to the joint, the tip should
be touching both the joint and the wire you are
soldering. Do not apply solder directly to the iron;
apply it to the joint/wire.
37 Serial
console
If you connect the
UART0_TXD pin to
the receiver pin of
a USB-to-serial
converter, and the
UART0_RXD pin to
the transmitter pin
of that converter,
you can set up a
serial console.
GPIO explained
36 GPIO
orientation
The best way to
verify you have the Pi
oriented the right way
is to fl ip it over. The
underneath of pin 1
has a square hole for
the solder instead of
a circular hole.
39 Soldering
headers
With the Pi Zero, you
will need to solder
GPIO headers onto
the board. Using a
reusable adhesive
like Blu-Tack to hold
the headers in place
will make the job
much easier.
38 Unused
GPIO pins
The green coloured
GPIO pins are unused
by default and
are therefore the
best pins to use in
your own personal
hardware projects.
The other pins may
have more than one
available purpose.
Zero
46 Raspberry Pi Tips, Tricks & Hacks
Tips | Tricks | Hacks
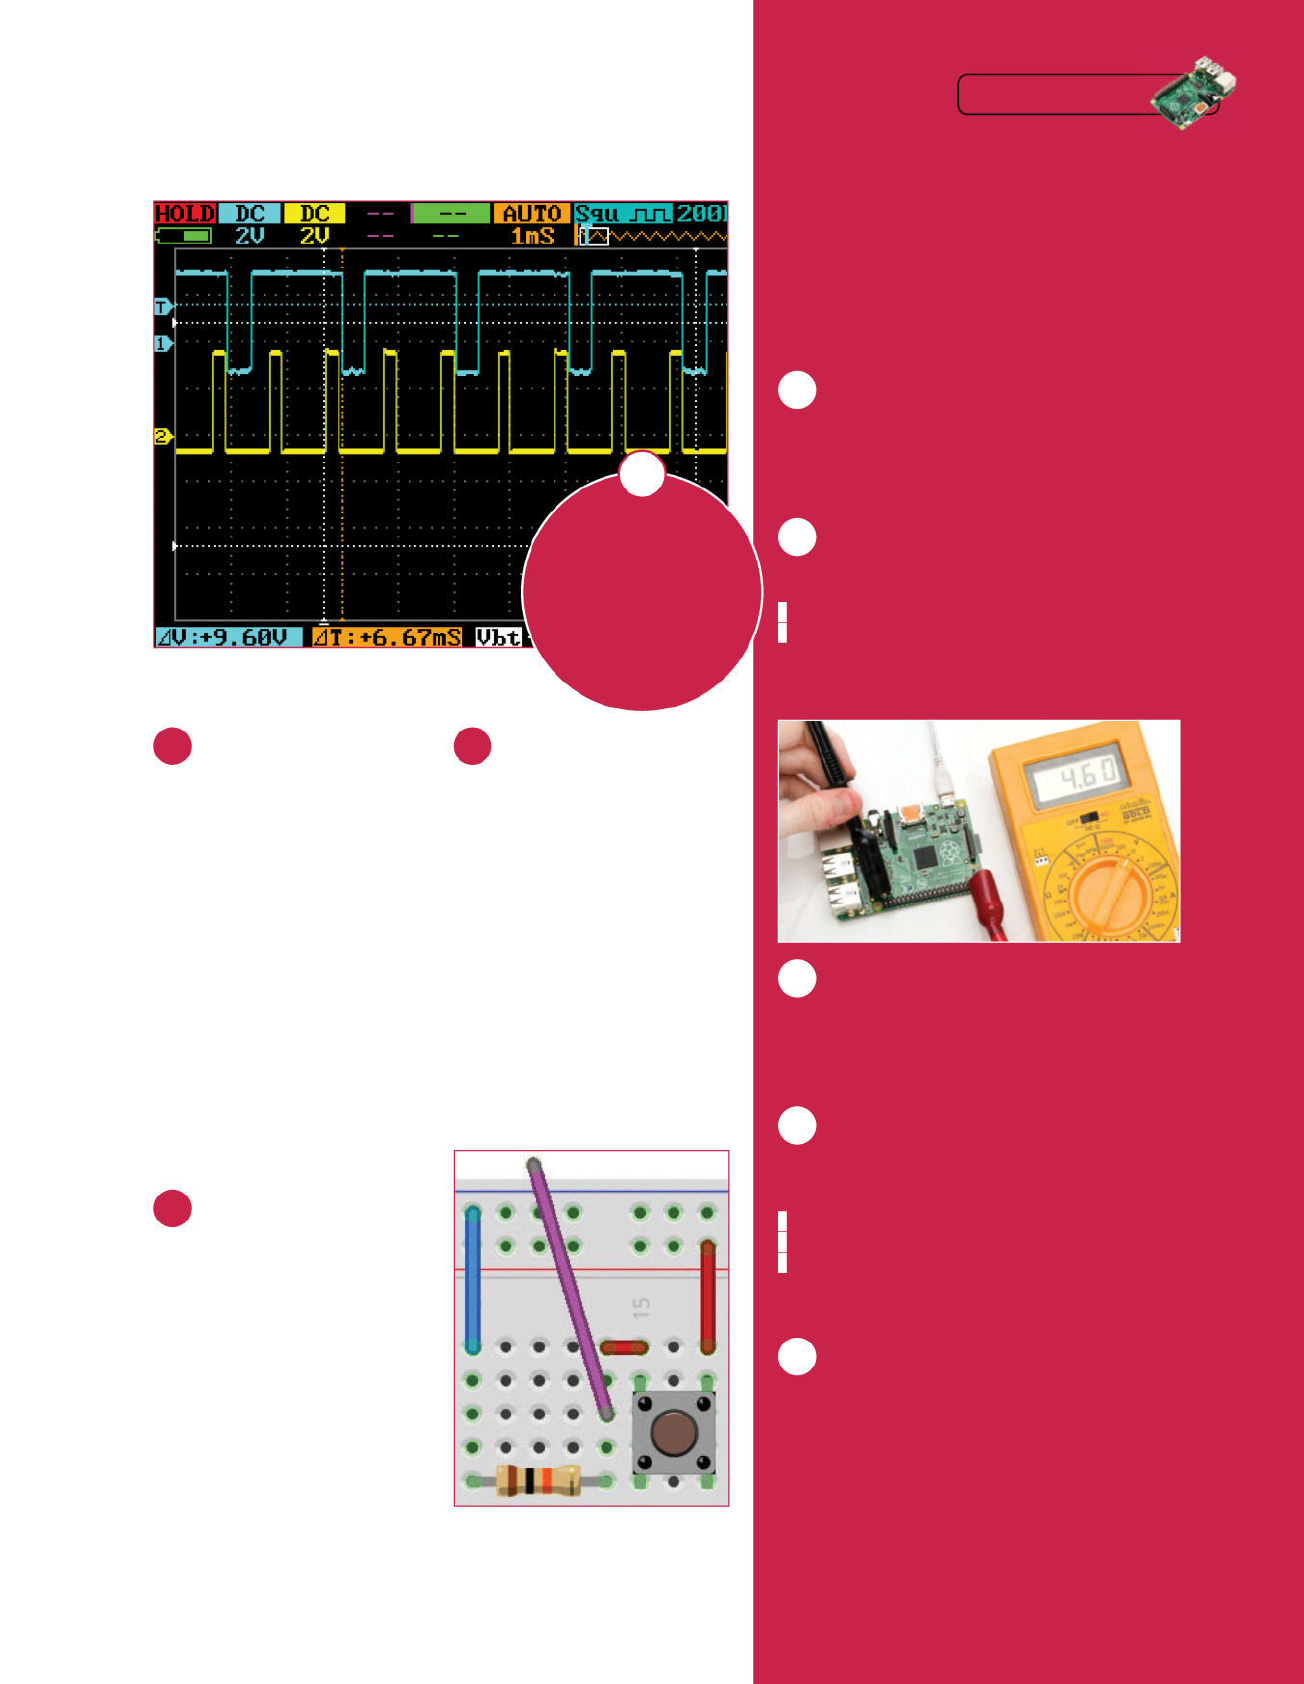
Raspberry Pi Tips, Tricks & Hacks 47
Quick and easy things you
can try in a few minutes
Five-minute
practical fixes
43 Pulse width modulation
Pulse width modulation is
where the output of a GPIO pin is high
for a percentage of time and low for
the remaining percentage of time. The
percentage where the pin is high is called
a duty cycle. Pulse width modulation
is very useful in electronics, especially
when it comes to tasks like controlling the
brightness of LEDs. To do this in Python:
GPIO.setup(5, GPIO.OUT)
# Frequency of 50 hz
p = GPIO.PWM(5, 50)
# 50 percent duty cycle
p.start(50)
# Do work or wait here so
# program doesn’t exit
# 70 percent duty cycle
p.ChangeDutyCycle(70)
p.stop()
44 GPIO interrupts
An interrupt is when a hardware
event triggers an interrupt on the CPU,
causing it to stop what it is dealing with
and run an interrupt request handler. The
Raspberry Pi can trigger inputs when a
GPIO pin goes high (ie from 0V to 3.3V) or
low (from 3.3V to 0V). This can be more
effi cient than polling for the state of a
GPIO pin, as you only have to deal with the
pin changing when it happens. Plus, it can
actually simplify the fl ow of your code.
The use of interrupts requires root
privileges so you will have to execute
your code with sudo. The code provided
demonstrates how to set up a callback
function to deal with a rising edge.
45 Using a push button
Refer to the circuit diagram
below. When the push button is
pressed, the left pins are connected
to the right pins. By using a 10K pull
down resistor connected to ground, the
purple output wire (connected to a GPIO
pin confi gured as an input) defaults
to 0V when the button is not pressed.
The right-hand side of the button is
connected to 3.3V, so when the button
is pressed, the left-hand side of the
button will also be connected to 3.3V.
The left-hand side is connected in
parallel with the purple signal wire,
and also the 10K resistor to ground.
Because electricity takes the path of
least resistance, the purple signal wire
will output 3.3V.
46 Need more current?
You should only draw a few milliamps of current
from the GPIO pins of the Raspberry Pi. If you need more
current than that (or you need to switch a higher voltage),
then you can use the GPIO pin to switch a transistor
connected to a stronger voltage source.
47 Disable built-in sound card
If you are using a USB sound card then it can be
easier to disable the built-in sound card completely:
sudo rm /etc/modprobe.d/alsa*
sudo editor /etc/modules
Change snd-bcm2835 to #snd-bcm2835 and save, then
sudo reboot.
48 Use a multimeter to verify orientation
You can use a multimeter to verify the orientation
of the GPIO pins. Looking vertically, with the USB ports at
the bottom, the bottom-left pin (39) is ground and the top-
right pin (2) is 5V. Using the negative terminal on ground
and the positive terminal on 5V should show ~5V.
49 Set up serial console
You can use raspi-confi g to set up a serial console so
you can get a login shell using the UART0_TX and UART0_RX
pins by connecting them to a USB to serial adapter:
sudo raspi-config
8 (Advanced Options)
A8 (Serial)
Select Yes to enable serial console. Finish, then reboot.
50 LED resistor calculations
To calculate an LED’s resistance value, use Ohm’s law:
Resistance = voltage / current. The voltage of a GPIO pin is
3.3V. You need to know the voltage drop of the LED and its
suggested current, so R = (3.3V – voltage_drop) / led_current.
Using 2V as the voltage drop and 20mA as the current: (3.3 –
2.0) / 0.02 = 65 ohms. Round up to the next available resistor.
Above Here are two waves with duty cycles of
roughly 80% (top) and 20% (bottom)
Above The blue wire is the ground, the red one
is 3.3V and purple is for the output
Ensure you are
only using 3.3V voltage
levels when working with
the GPIO pins. Connecting
anything higher than 3.3V
to a GPIO pin will likely
damage your Pi.
42
Raspberry Pi Tips, Tricks & Hacks 47
Tips
| Tricks | Hacks

48 Raspberry Pi Tips, Tricks & Hacks
Tips | Tricks | Hacks
What you’ll need
Q TightVNC tightvnc.com
Q VNC Viewer bit.ly/1jCzBRJ
Connect to a Pi with your phone or tablet
using VNC as a secondary or actual display
Use an Android device
as a Raspberry Pi screen
There are a few ways to attach a display to a Raspberry Pi.
The ones that everyone is most familiar with are the HDMI
port, which can go straight into your monitor or TV, or via
the GPIO ports with a portable screen. One avenue that is
rarely pursued is using VNC software to remotely view the
Raspberry Pi desktop using another computer entirely.
It’s actually fairly simple and we are going to concentrate on
viewing your Pi screen via Android for maximum portability.
With further tweaks you will be able to use this on the go if
you fi nd yourself commuting and wanting to catch up on your
favourite program, for example.
There are a few things that you should be aware of when
doing this project – it can be quite taxing on the Pi and is
likely to drain a bit of battery from your phone too. We will talk
about some options to help take the strain off the Pi if the
connection seems a little laggy and how this method can be
used on normal PCs as well, so you can use a range of devices
and get the most from your Raspberry Pi.
01 Update your Raspberry Pi
Before starting, you should absolutely make sure that
your Raspberry Pi is up to date. With the limited resources on the
Pi, any optimisations can make the experience better. You’ll fi rst
want to update the software by opening the terminal and using:
$ sudo apt-get update && sudo apt-get upgrade
… and then follow it up with a fi rmware upgrade by running:
$ sudo rpi-update
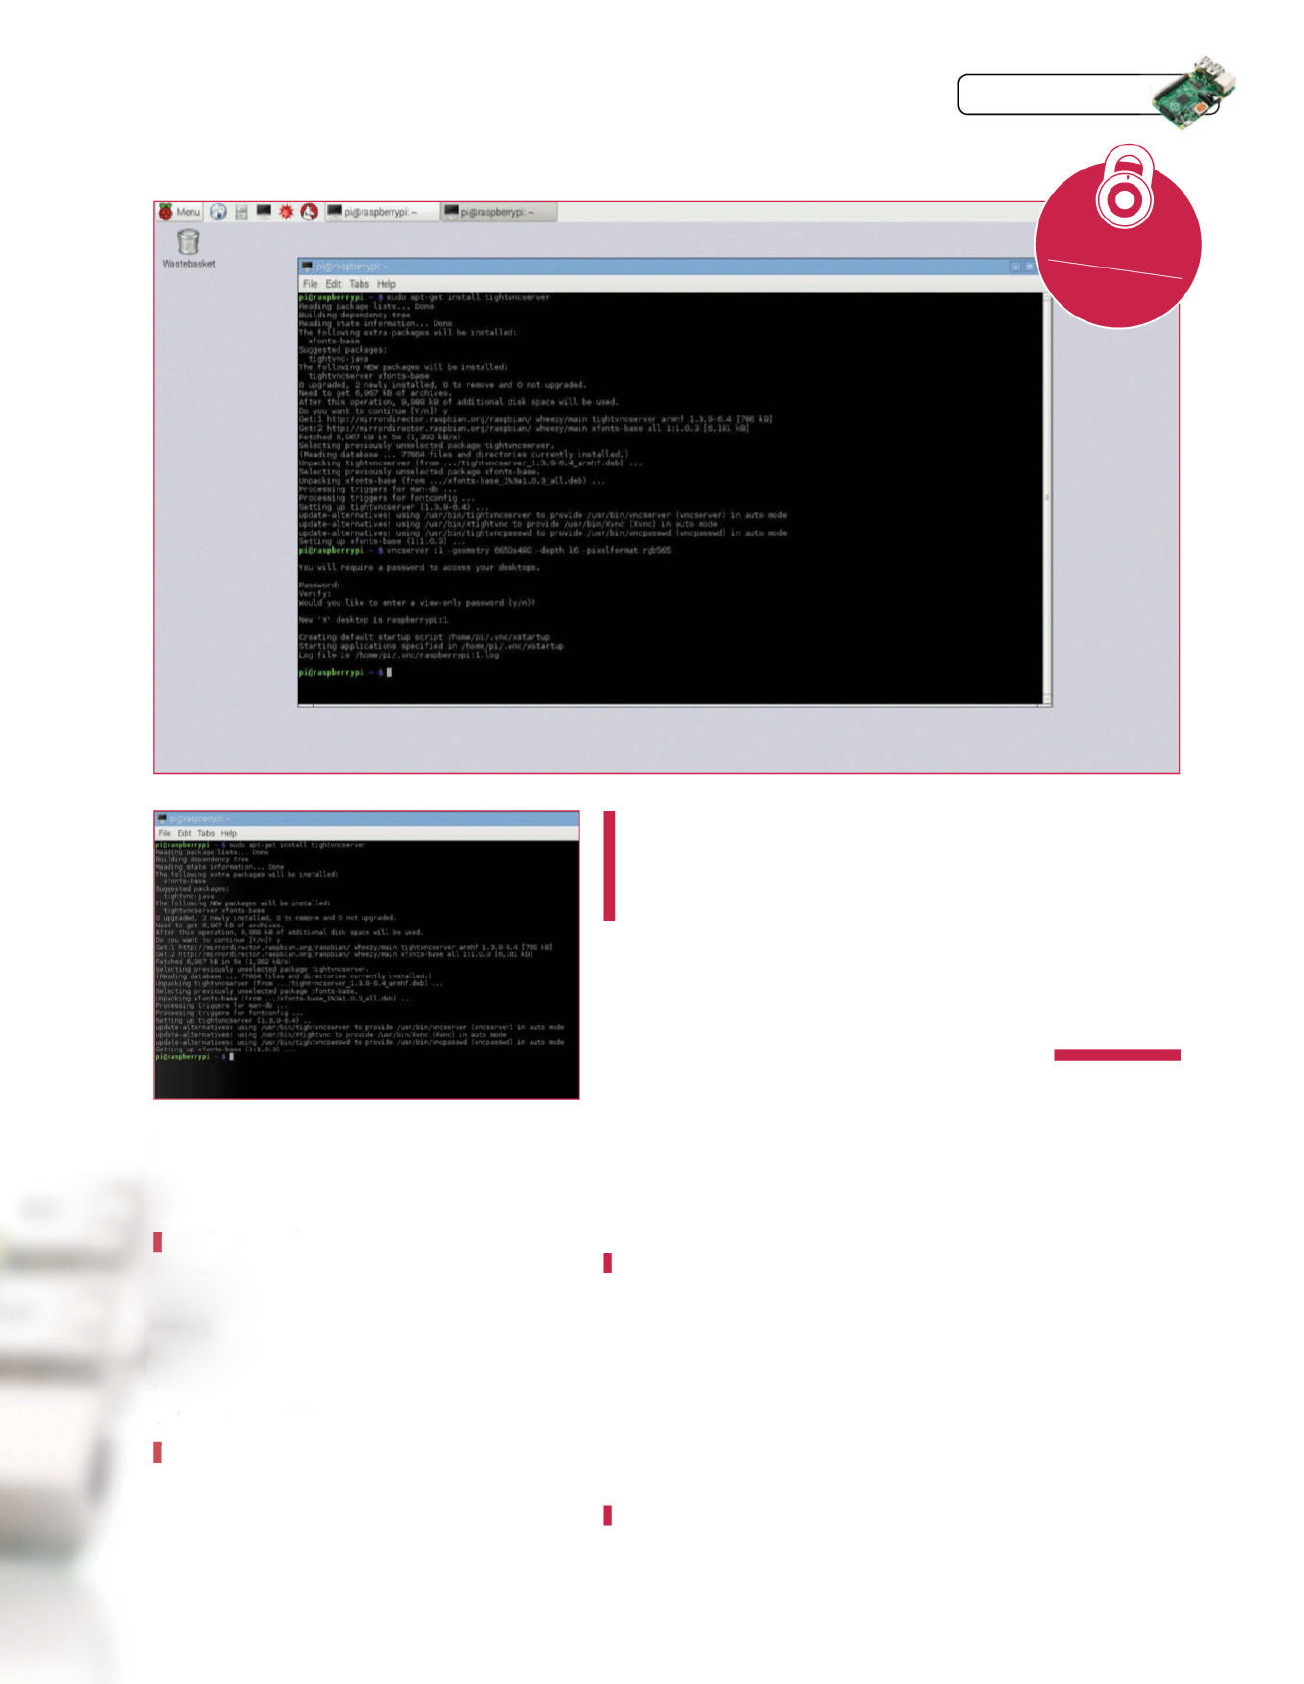
02 Install the software
We’re going to be using TightVNC for our VNC needs here
– specifi cally, the server side of the software. We’ll need to install
it fi rst though, so head back to the terminal and type:
$ sudo apt-get install tightvncserver
You may have to run through a setting or two as it installs, hit ‘yes’
(or ‘y’) to them to continue.
06 Correct resolution
We created our test server with a resolution of 640 x 480,
just to get it running. However, this is unlikely to be the resolution
of your phone. Luckily, this resolution is not fi xed every time, so
the best thing to do is to look up the resolution of your Android
device and then modify the line used to start up the server. For
example, if you have a 1080p tablet, you would use:
$ vncserver :1 -geometry 1920x1080 -depth 16
-pixelformat rgb565
03 Start up VNC
Once everything’s installed we can actually start up the
VNC server – it’s probably a good idea to do so now and check to
make sure it’s all working. We’ll do a test run with the following:
$ vncserver :1 -geometry 640x480 -depth 16
-pixelformat rgb565
As long as everything is installed correctly, it should start without
any problems at all.
04 First time setup
The fi rst time you turn it on, you will have to set a
password. You’ll need to pick a password you can remember as it
will also be used by the client as it connects via VNC. You can only
use a maximum of eight characters for the password though, so
think carefully about how you want to make it secure.
Look up the resolution of your
Android device and then modify the
line used to start up the server
If you fi nd the
server is running
a bit too slow for
your liking, our best
tip is to reduce
the resolution to
something your Pi
can more easily
create a server for.
If that’s not helping,
your network
connection may well
be the issue.
Running
slow
05 Stop and restart
As TightVNC doesn’t quite work like a normal service,
you can’t do a usual service X restart (or equivalent) to turn it off
or whatever you wish to do with it. Instead, if you want to restart
it, you’ll have to manually turn it off and then restart it with the
original command. To kill it, use:
$ vncserver -kill :1
… replacing 1 with the display number that you originally create.
Raspberry Pi Tips, Tricks & Hacks 49
Tips | Tricks | Hacks
Full code
FileSilo.co.uk
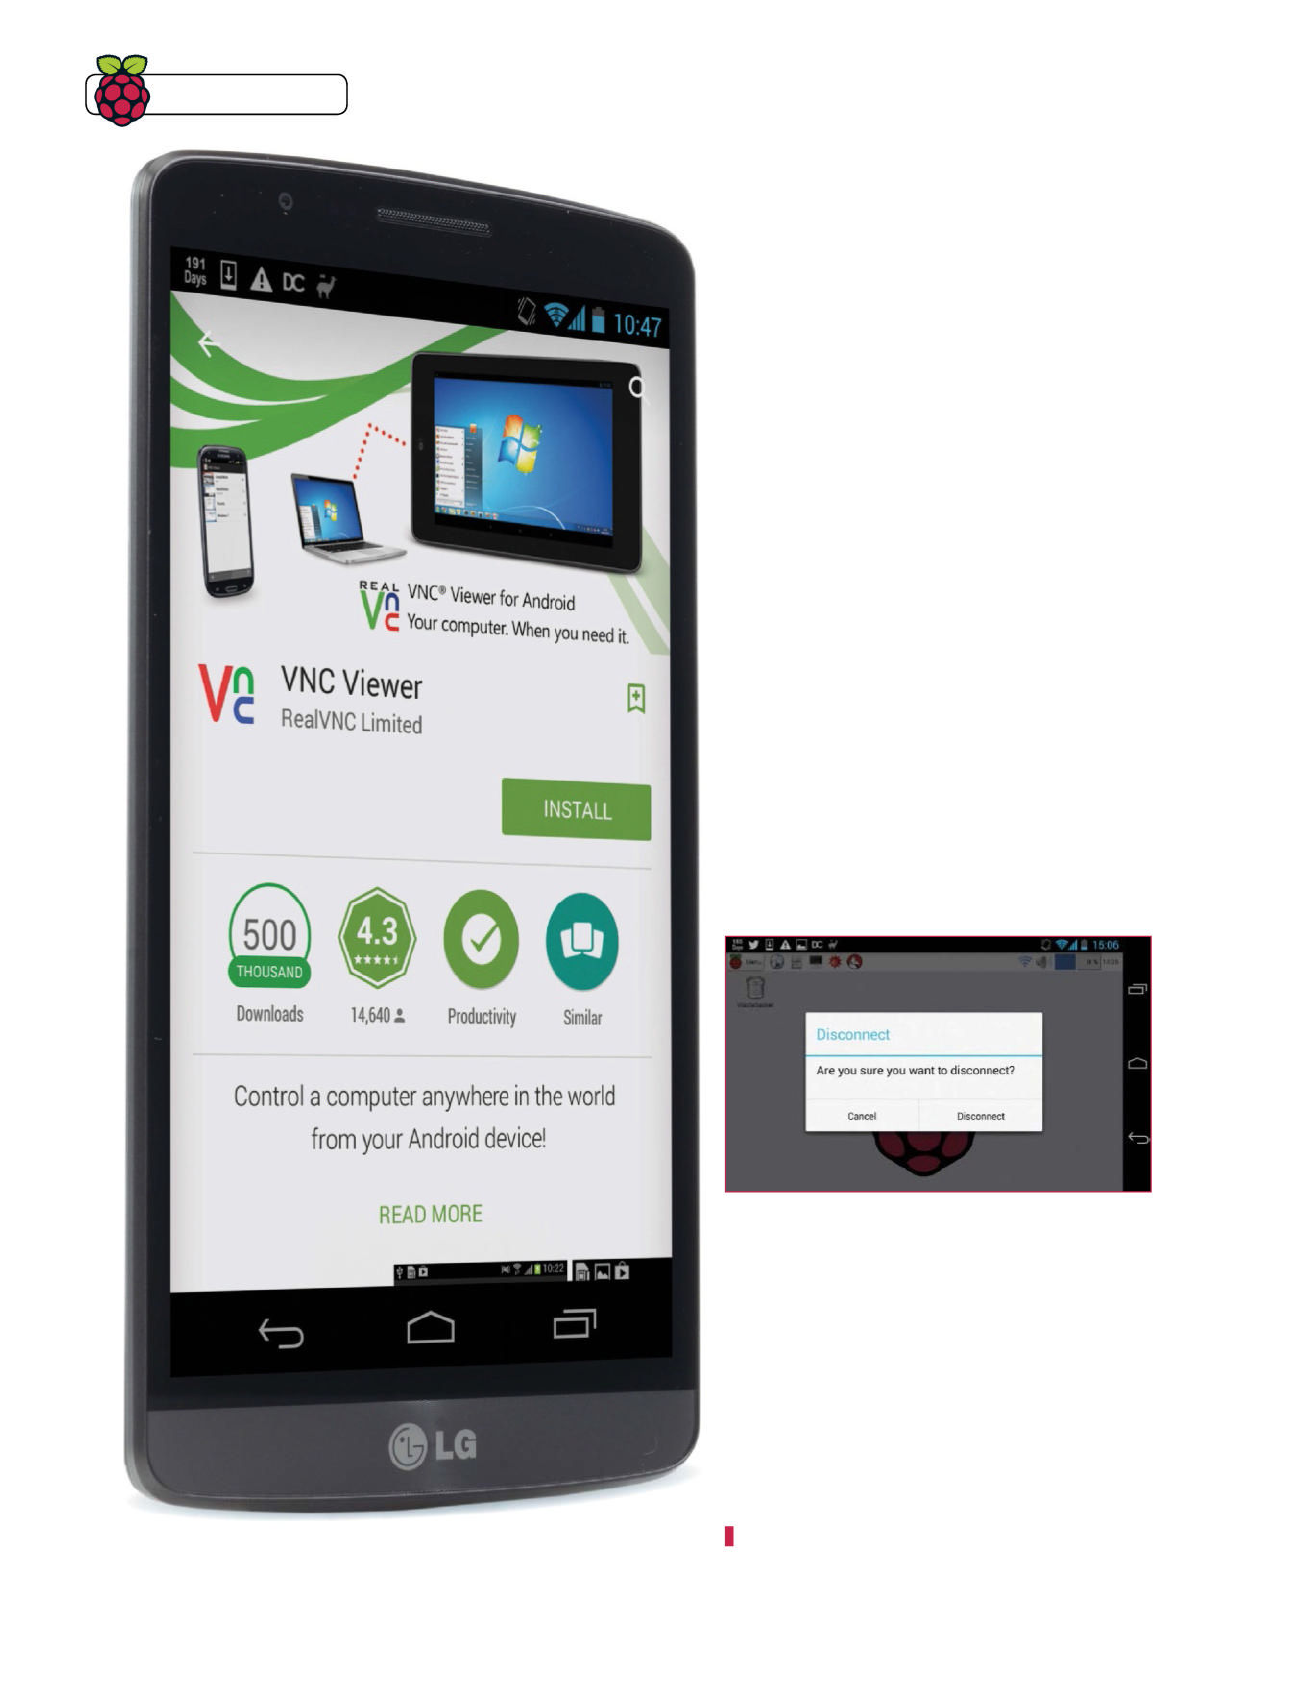
50 Raspberry Pi Tips, Tricks & Hacks
Tips | Tricks | Hacks
08 Raspberry Pi IP
We need the IP address of your Raspberry Pi so that we
can connect to it. You can get it via two methods – our preferred
method is to open the terminal and use ifconfi g to list the status
of the Pi’s network interfaces; this will include the IP address of
whatever is connected. If you’re using wireless to connect, you
can also access the wireless confi g interface (iwconfi g) and see
what the wireless has been assigned as an IP.
09 Connect to the Pi
Now that we have the IP address, we can look at
connecting to the Raspberry Pi. Open VNC Viewer and click the
‘+’ sign to set up a new connection. Leave the name blank for the
moment, enter an IP address and choose ‘Save password’. It will
ask for the password when you attempt to connect, after which it
will then save it and not require it in the future.
10 Use VNC
If this is the fi rst time that you are using VNC software,
you will notice that there can be a little lag between what you
do and what happens on-screen. Luckily, you can use your
fi nger on the screen to move the mouse and tap to click, and
the Android keyboard can be used as the keyboard. It can take
a bit of getting used to and is not good for anything that you
need to do fast, but it’s still very useful.
11 Turn it all off
Killing the VNC server, as we talked about in Step 5, can
still be done when connected – your Android device will just
disconnect. The same occurs if you just turn off the Pi. If you
disconnect the VNC client from the Pi though, the server on the Pi
will still be turned on; this means that you can at least reconnect
at any time.
12 Turn server on at startup
Currently, every time you turn on the Pi you’ll have to turn
on the VNC server. There’s no confi g setting or service setting
that we can set to have it turn on by default, so to actually do this
we need to write a script. Create a fi le using nano in the terminal
at the following location:
$ sudo nano /etc/init.d/vncserver
Above VNC Viewer is made by RealVNC, the original developers of VNC technology
07 Get the app
On your Android device, go to the Play Store and look
for VNC Viewer (you can also install it from the web store via this
link: bit.ly/1jCzBRJ). Install it to your device and run it to make
sure it works fi ne. We can now begin to try and connect it to
the Raspberry Pi.
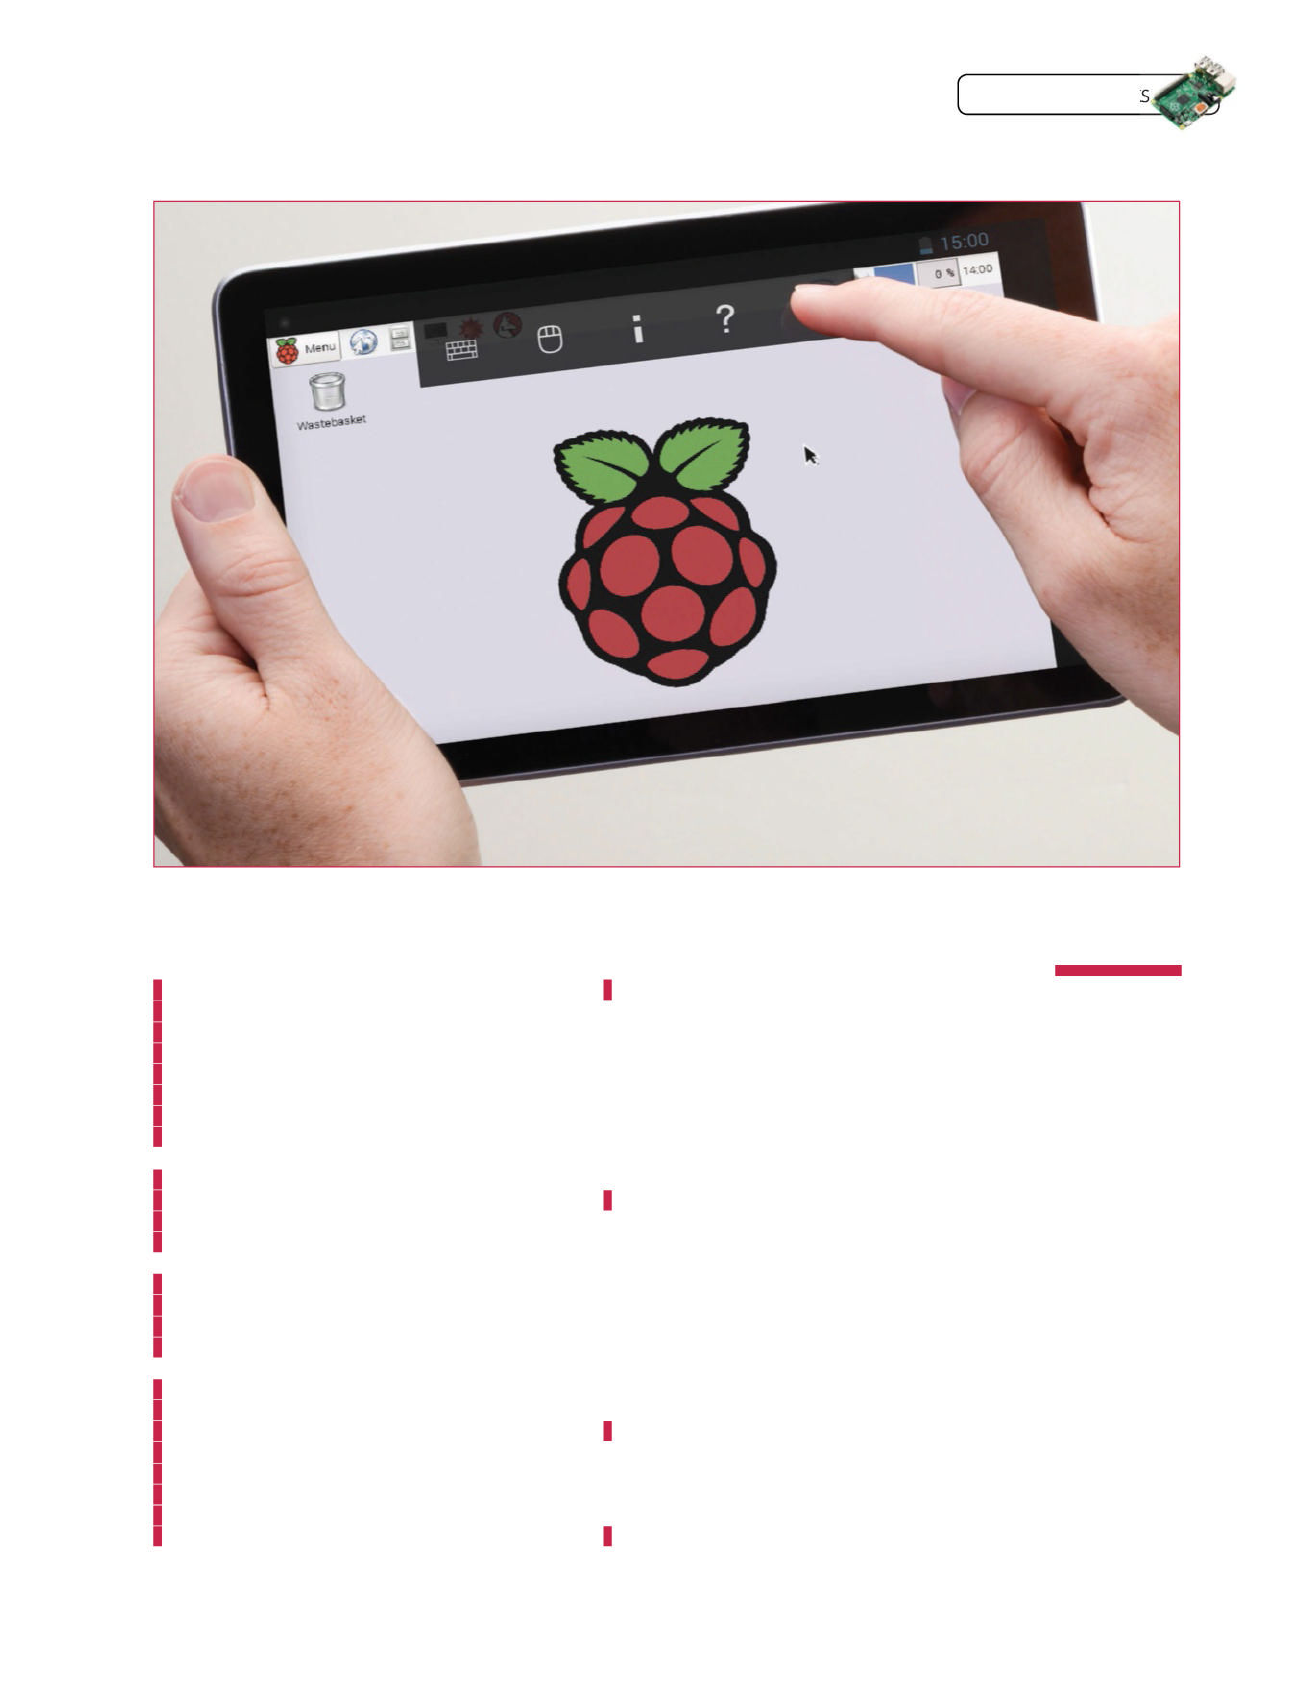
Raspberry Pi Tips, Tricks & Hacks 51
Tips | Tricks | Hacks
13 Write the script
This script will do everything we need it to do, but be sure
to edit the resolution for your specifi c use case:
#!/bin/sh -e
export USER=“pi”
# parameters for tightvncserver
DISPLAY=“1”
DEPTH=“16”
GEOMETRY=“1920x1080”
NAME=“VNCserver”
OPTIONS=“-name ${NAME} -depth ${DEPTH} -geometry
${GEOMETRY} :${DISPLAY}”
. /lib/lsb/init-functions
case “$1” in
start)
log_action_begin_msg “Starting vncserver for user
‘${USER}’ on localhost:{$DISPLAY}”
su ${USER} -c “/usr/bin/vncserver ${OPTIONS}”
;;
stop)
log_action_begin_msg “Stopping vncserver for user
‘${USER}’ on localhost:{$DISPLAY}”
su ${USER} -c “/usr/bin/vncserver -kill :${DISPLAY}”
;;
restart)
$0 stop
$0 start
;;
esac
exit 0
14 Or download it
We’ve also got this ready for you to download and put
right into the /etc/init.d directory. You can download it using:
$ wget http://www.linuxuser.co.uk/wp-content/
uploads/2015/06/vncserver.zip
Unzip it and move it into the correct folder, then make any
modifi cations that you want before heading to the next step.
15 Make the fi le executable
Once the script is written, customised to your liking and
saved, we now need to make it executable. To do this, use:
$ sudo chmod +x /etc/init.d/vncserver
As long as it is in the right place and named properly, this will
make it executable. This command is also good to remember in
general as it enables you to make any script executable.
16 Update and test
The fi nal step is to update the fi le rc.d (which handles
startup scripts and such) so that it knows our new script is
there. Do this with the following:
$ sudo update-rc.d vncserver defaults
You can then also test it by using the following to make sure it
works and also to turn it on for this session:
$ sudo /etc/init.d/vncserver start
You can use this
setup with other
systems as the
client – your PC, a
laptop, anything that
you can put VNC on.
It will use the same
settings for each
device though (such
as resolution and
colour depth), and
you can’t each have
a separate screen
to work from. This
can be a good way
to connect to a fi le
server Pi or similar.
Other
VNC clients
Above It‘s simple enough to get around the GUI
using your phone, but for extended bouts of
typing, consider a portable Android keyboard

52 Raspberry Pi Tips, Tricks & Hacks
Tips | Tricks | Hacks
Don’t pay for web hosting. Confi gure your Raspberry Pi to
act as a web server and host modest websites
Host your own website
on Raspberry Pi
Need a lightweight, low-cost web server? Your Raspberry
Pi is all you need! Whether you’re planning on hosting a static
homepage (or one with minimal database use) or need an easy
home for development websites, setting up your Raspberry Pi as
a web server is surprisingly easy.
Ideal as an always-on device thanks to its low-power
requirements, the Raspberry Pi can sit beside your router and
serve a basic website to visitors, allowing you to put hosting fees
to better use. You might wish to serve pages for some of your Pi
projects, or even a personal page to host photos or your CV.
If you’re planning on using it as a web-facing device, your Pi
will need to be set up with a static IP address. You’ll also need to
ensure your internet provider offers static IP addresses for their
users. Often a price is charged for leasing a static IP, but there are
services you can use (such as noip.com).
01Connect your Ethernet cable
For this project it makes more sense to use an Ethernet
cable. You may need your existing USB ports to attach fl ash
drives or an external HDD to serve your web page. With Ethernet
you will need to rule out any wireless issues that are causing
interruptions for your visitors.
02Get Raspbian updates and Apache
As ever, begin by checking for Raspbian updates:
sudo apt-get update
You’ll then need to install Apache and PHP:
sudo apt-get install apache2 php5 libapache2-mod-php5
Finally, restart Apache:
sudo service apache2 restart
Your Raspberry Pi is now ready to be used as a web server.
What you’ll need
Q Latest Raspbian image
raspberrypi.org/downloads
Q Internet connection
Q External hard drive
(optional)
Q USB fl ash (optional)
Q Ethernet cable for reliability
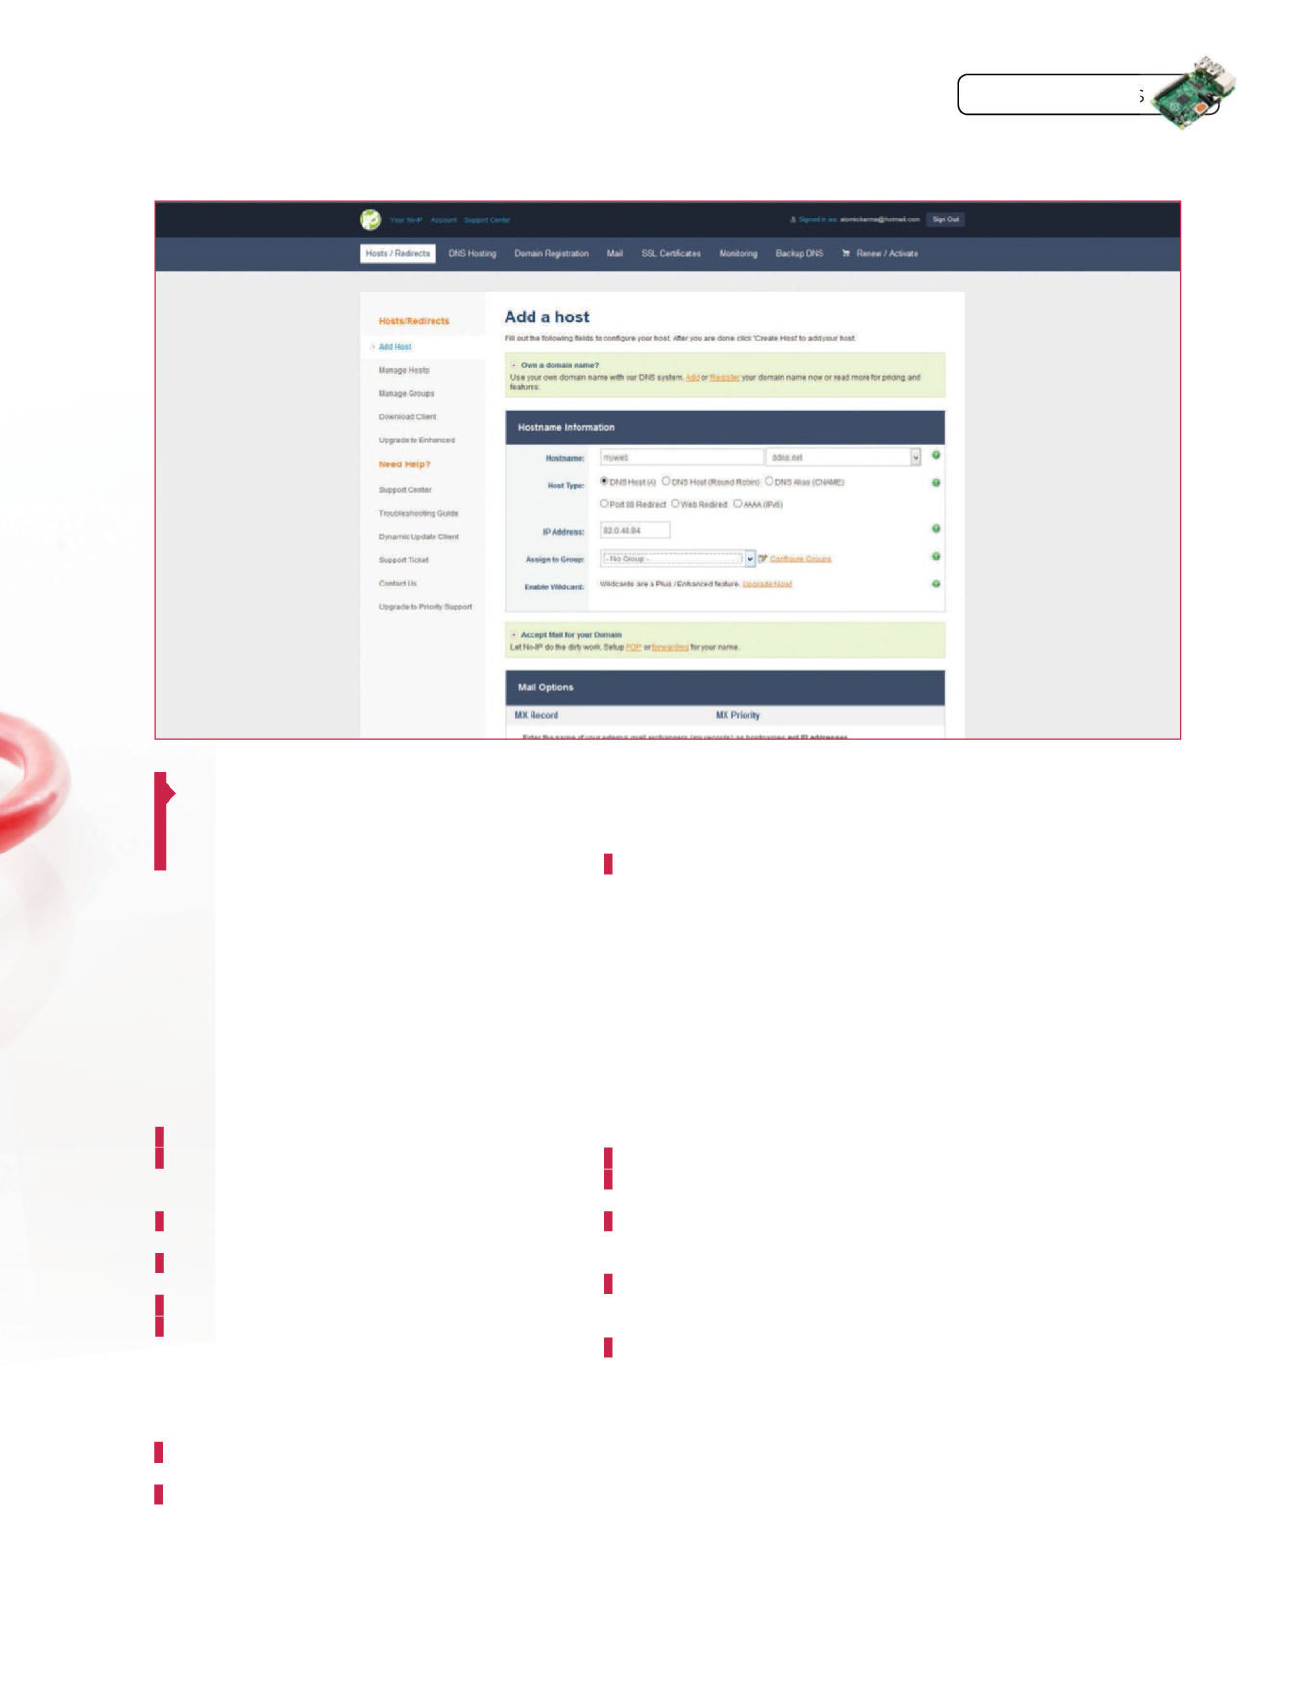
Raspberry Pi Tips, Tricks & Hacks 53
Tips | Tricks | Hacks
03 Check your Pi web server
With Apache installed, open the browser on another
computer on your network and enter your Pi’s IP address to
view the Apache confi rmation page.
As things stand right now, all you will be able to view is the
Apache index.php page. To add your own HTML and PHP pages,
you will need FTP.
04 Install FTP for uploading fi les
Create a www folder, then install the following vsftpd
FTP server software:
sudo chown -R pi /var/www
sudo apt-get install vsftpd
You’ll need to make some changes to Very Secure FTP Daemon,
so open it in nano. First, switch:
anonymous_enable=YES
…to…
anonymous_enable=No
Next, uncomment the following by removing the # symbols:
#local_enable=YES
#write_enable=YES
05 Restart the FTP Server
Complete confi guration of the FTP software by
adding a command to the end of the fi le which will display
server fi les starting with “.” such as .htaccess:
force_dot_files=YES
Save and exit nano (Ctrl+X) and restart FTP:
sudo service vsftpd restart
Using the default Raspbian credentials you can upload fi les to
/var/www.
06 Make Pi a LAMP server
By adding MySQL into the mix you can use the Pi to host
a database-driven website or even WordPress (although this is
best limited to using the device as a development server).
sudo apt-get install mysql-server mysql-client
php5-mysql
The LAMP bundle is useful of course, but for the best results your
site should remain streamlined.
07 Get your site online
Can’t afford a static IP for your router? A great solution
is available with the free service from www.noip.com.
This enables you to point a hostname at your computer
by using a client application that will remain in contact with
the No-IP servers.
08 Install No-IP
Make a new directory and switch it to:
mkdir /home/pi/noip
cd /home/pi/noip
Download No-IP on your Pi with:
wget http://www.no-ip.com/client/linux/noip-duc-
linux.tar.gz
Extract:
tar vzxf noip-duc-linux.tar.gz
Next, navigate to the directory and use sudo make and sudo
make install, following any instructions. Finish by running:
sudo /usr/local/bin/noip2
09 Change your password for security
Before using your Pi as a live web server, it’s a good
idea to change the default password to something more
imaginative than ‘raspberry’.
In the command line, enter passwd and then follow the
prompts to add your new, secure password. You’re doing this
step because you obviously would not want your Pi web server
to get hacked!
You can upload files
to /vav/www
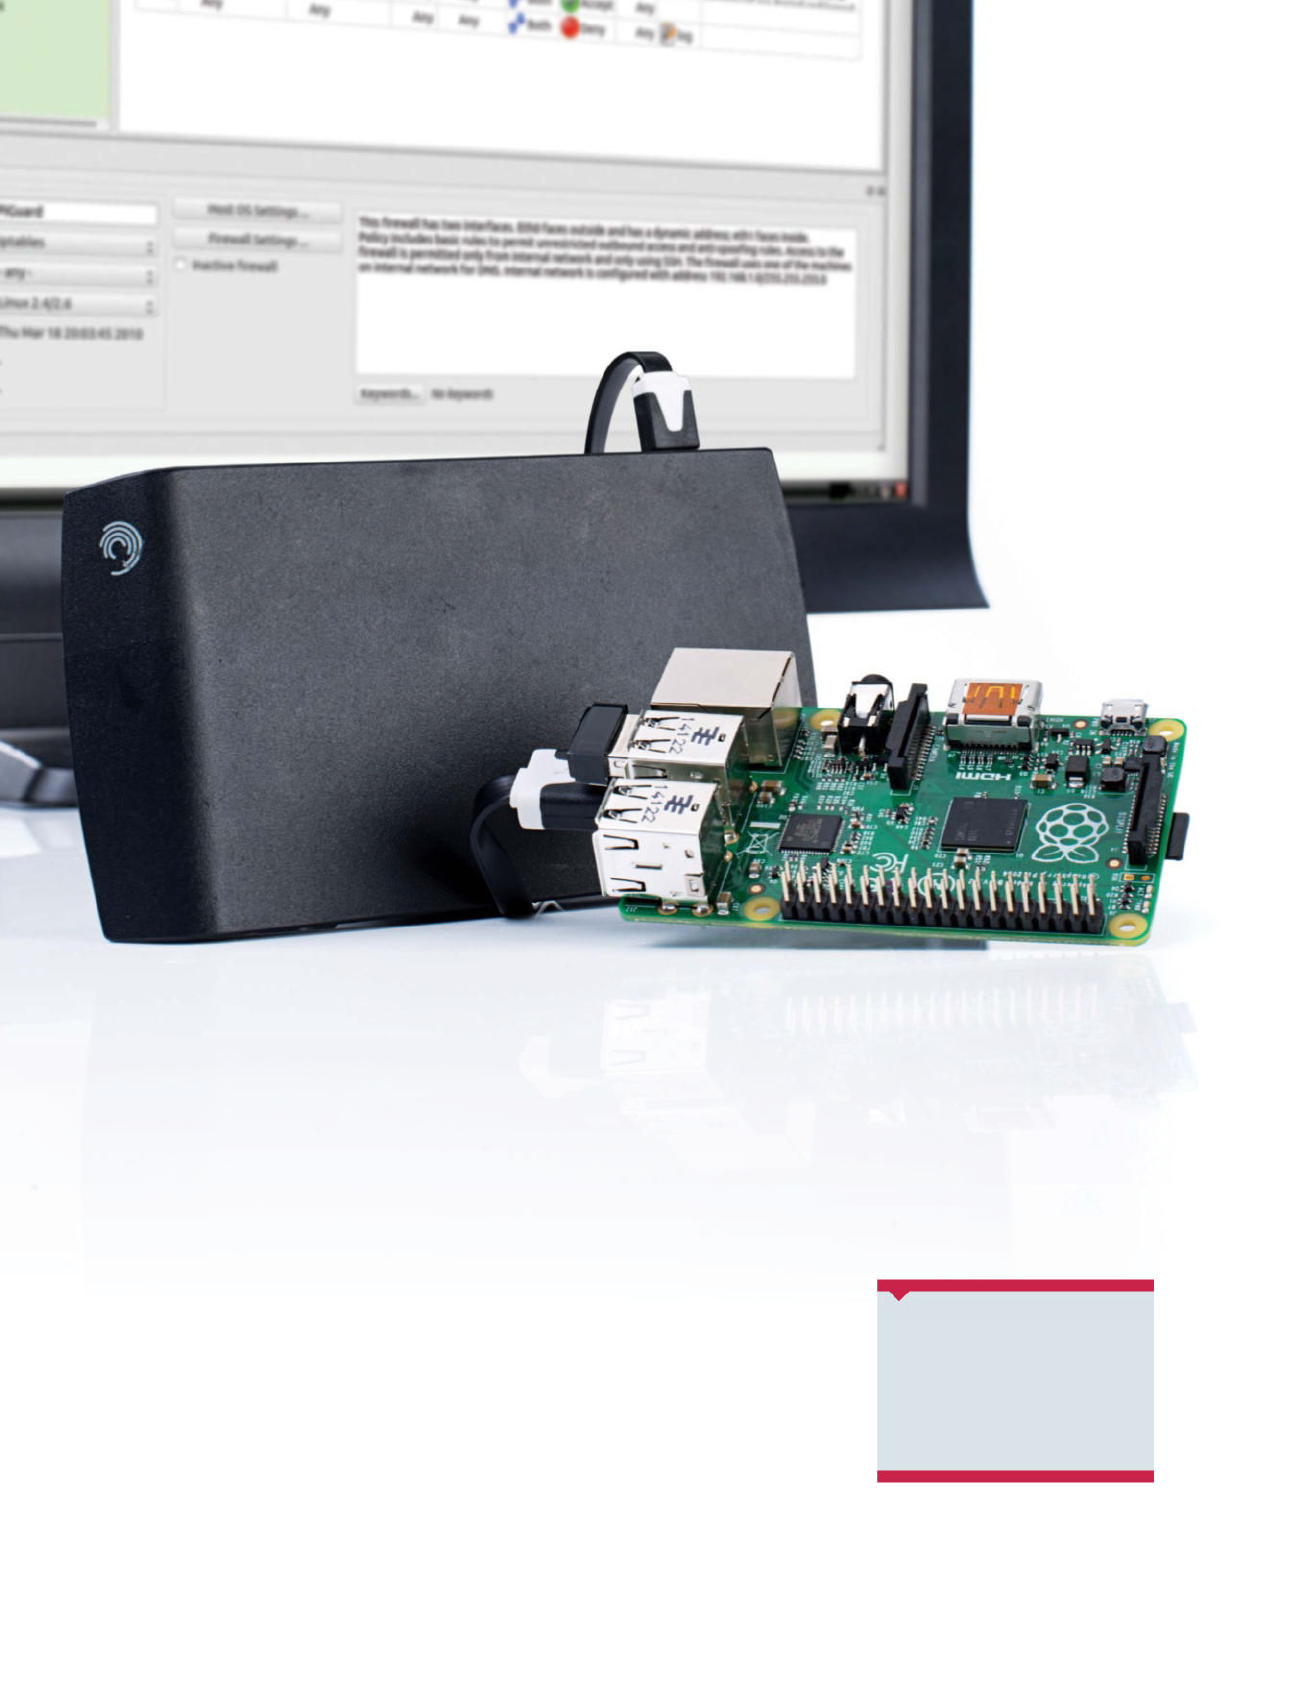
54 Raspberry Pi Tips, Tricks & Hacks
Concerned about the security of data stored on
your Raspberry Pi? Protect yourself with passwords,
fi rewalls and some physical security
Secure your Raspberry Pi
There is a distinct security risk around
your Raspberry Pi. Storing anything
from passwords to fi rewalls, this
important saved data can be stolen
or pocketed with minimal effort if
someone knows how.
Therefore it’s a relief to learn that
several tools, tricks and methods
can be applied to keep your device
and data away from prying eyes. You
might, for example, be running a home
security cam with images uploaded to
a cloud account. These images would
What you’ll need
Q Velcro
Q Adhesive putty
Q Lockable cupboard,
strongbox, etc.
Left Running a
private cloud? Make
sure no one can
break into it…
be visible to anyone who possesses
your Raspberry Pi’s login details if
you haven’t bothered to change the
defaults. Such a project (and many
others) also demands that a fi rewall is
installed for further improved security
on a network.
Whether you’re simply changing
passwords, keeping your Pi under lock
and key or installing a fi rewall, you’ll
be surprised at how easy it is to secure
your Raspberry Pi and protect all of your
important information and fi les.
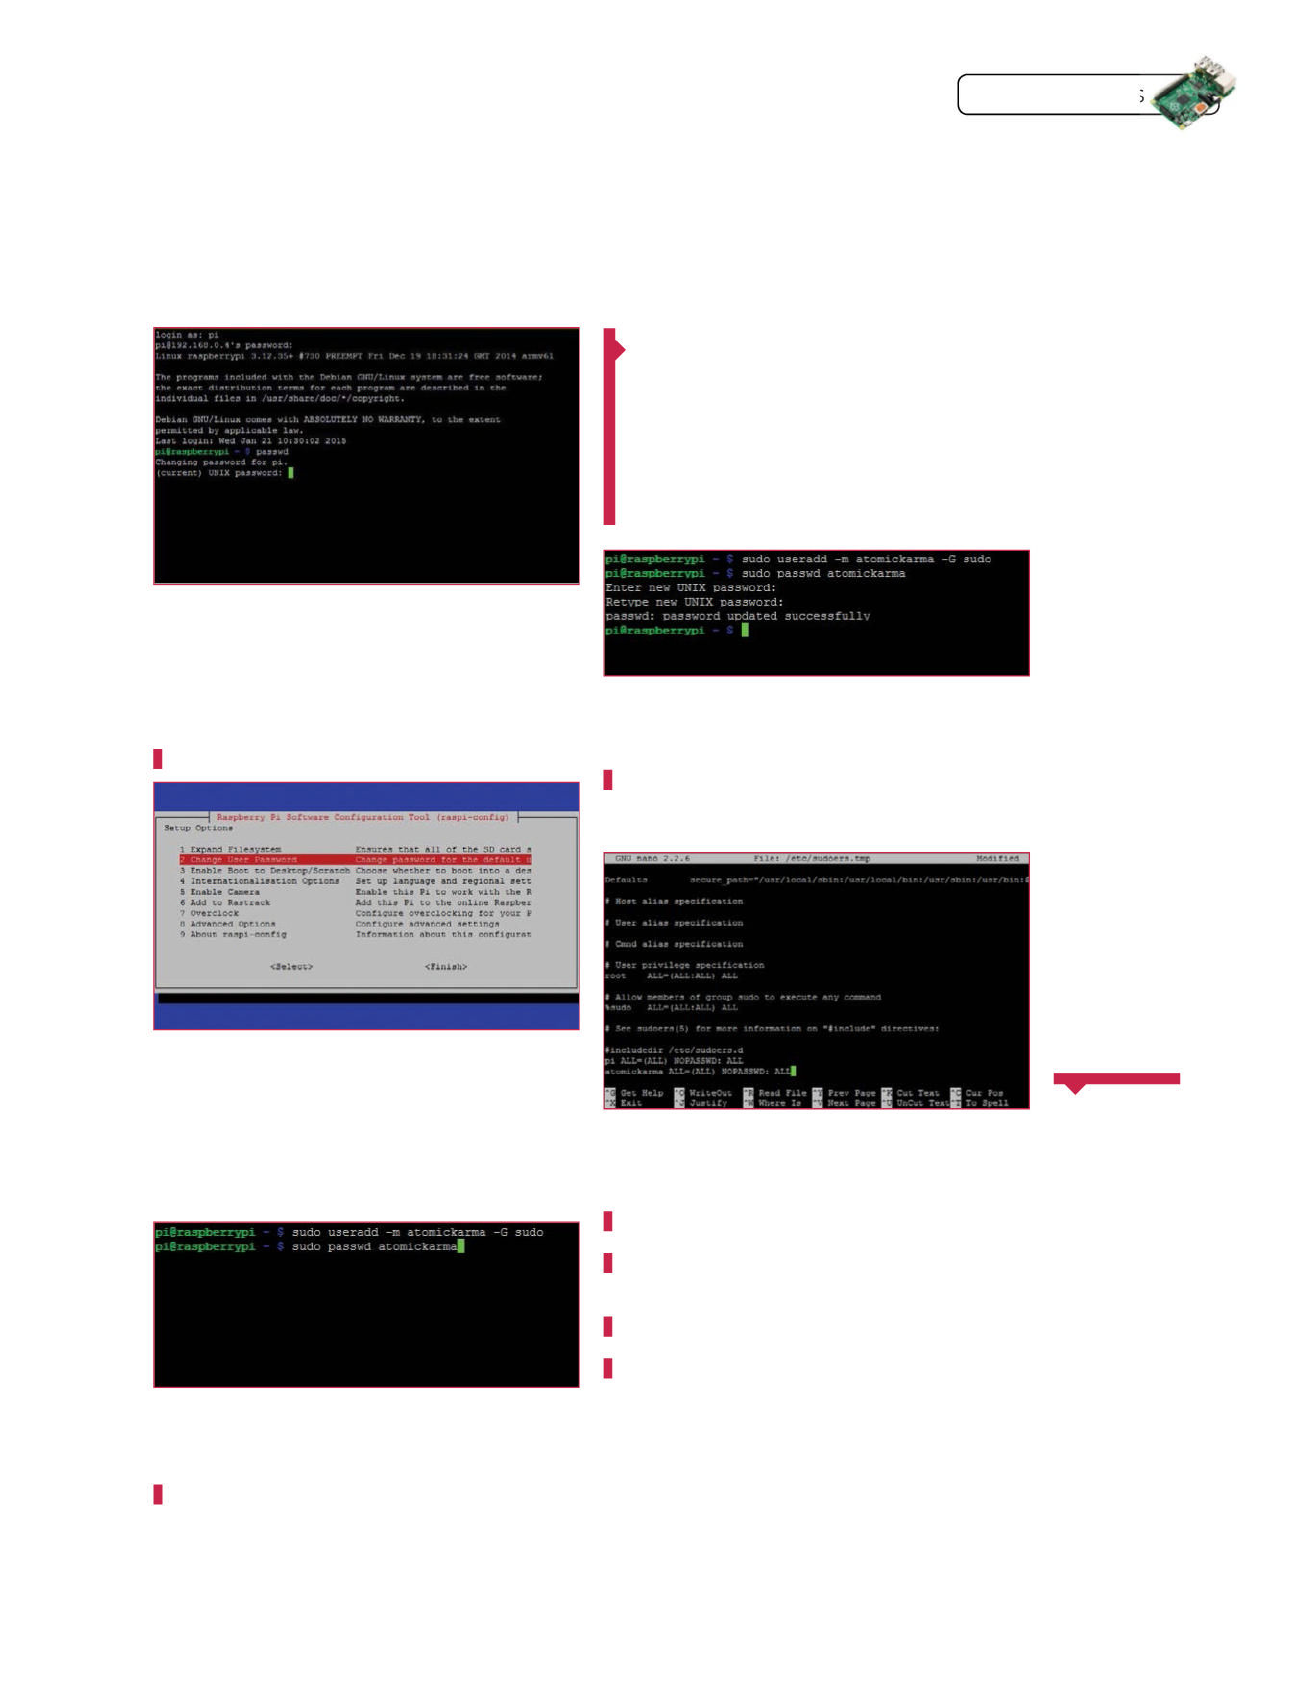
Raspberry Pi Tips, Tricks & Hacks 55
Tips | Tricks | Hacks
01 Stop using the default password
Everyone who uses a Raspberry Pi knows that the
default Raspbian credentials are ‘pi’ and ‘raspberry’. Naturally,
this means that anyone can sign into your computer if you
haven’t changed these defaults – something you’ll need to do as
a matter of urgency. After signing in, open the terminal and set a
new password with:
passwd
04 Give the new account a password
With the new account set up, the next step is to set a
password. As you’re not signed into the account at this stage,
you won’t be using the passwd command. Instead, enter:
sudo passwd username
With the new account ready to use, you should be ready to
remove the default pi account from Raspbian altogether.
03 Create a new user account
To completely baffle anyone attempting to gain access
using default credentials, take the most secure option and create
a new user account. In the command line, enter:
sudo useradd -m username -G sudo
The –m switch creates a new home directory, while the second
sudo adds the new account to the superuser group.
02 Change password with raspi-confi g
If you’re setting up a new installation of Raspbian,
changing the password is one of the fi rst things that you should
do. With a new install, the fi rst boot will automatically run the
raspi-confi g screen.
Here, use the arrow keys to fi nd the second option, change
User Password and then follow the on-screen prompts to set
yourself a new passcode.
With a desktop computer
and SD card reader, there
is a way that you can
recover your password
If you’re genuinely
concerned about
your Raspberry Pi’s
physical security,
you may consider
employing some
additional hardware
to make it less of
a target.
Your best option
here is probably a
proximity sensor
confi gured to detect
an unauthorised
presence. When
coupled with a
buzzer, this can
detect the presence
of an intruder and
alert you. It’s even
possible to confi gure
such an alert as an
email message if
you’re likely to be
elsewhere, and it
makes for a great
side project.
Use a
proximity
sensor
05 Delete the default Raspbian account
You no longer need the default user account, pi. Sign
out and login to your new account, and confi rm it is correctly
set up by opening:
sudo visudo
…and adding…
username ALL=(ALL) NOPASSWD: ALL
…to the fi nal line. Save and exit with Ctrl+X. Now that’s done,
simply delete the old account with:
sudo deluser pi
Then remove the home directory:
sudo deluser -remove-home pi
06 Recover a lost password
If you’ve somehow forgotten your Raspberry Pi user
account password or suspect that someone has changed it,
what can you do?
With a desktop computer and SD card reader, there is a way
that you can recover your password. Begin by inserting the
Pi’s SD card into your PC’s card reader.
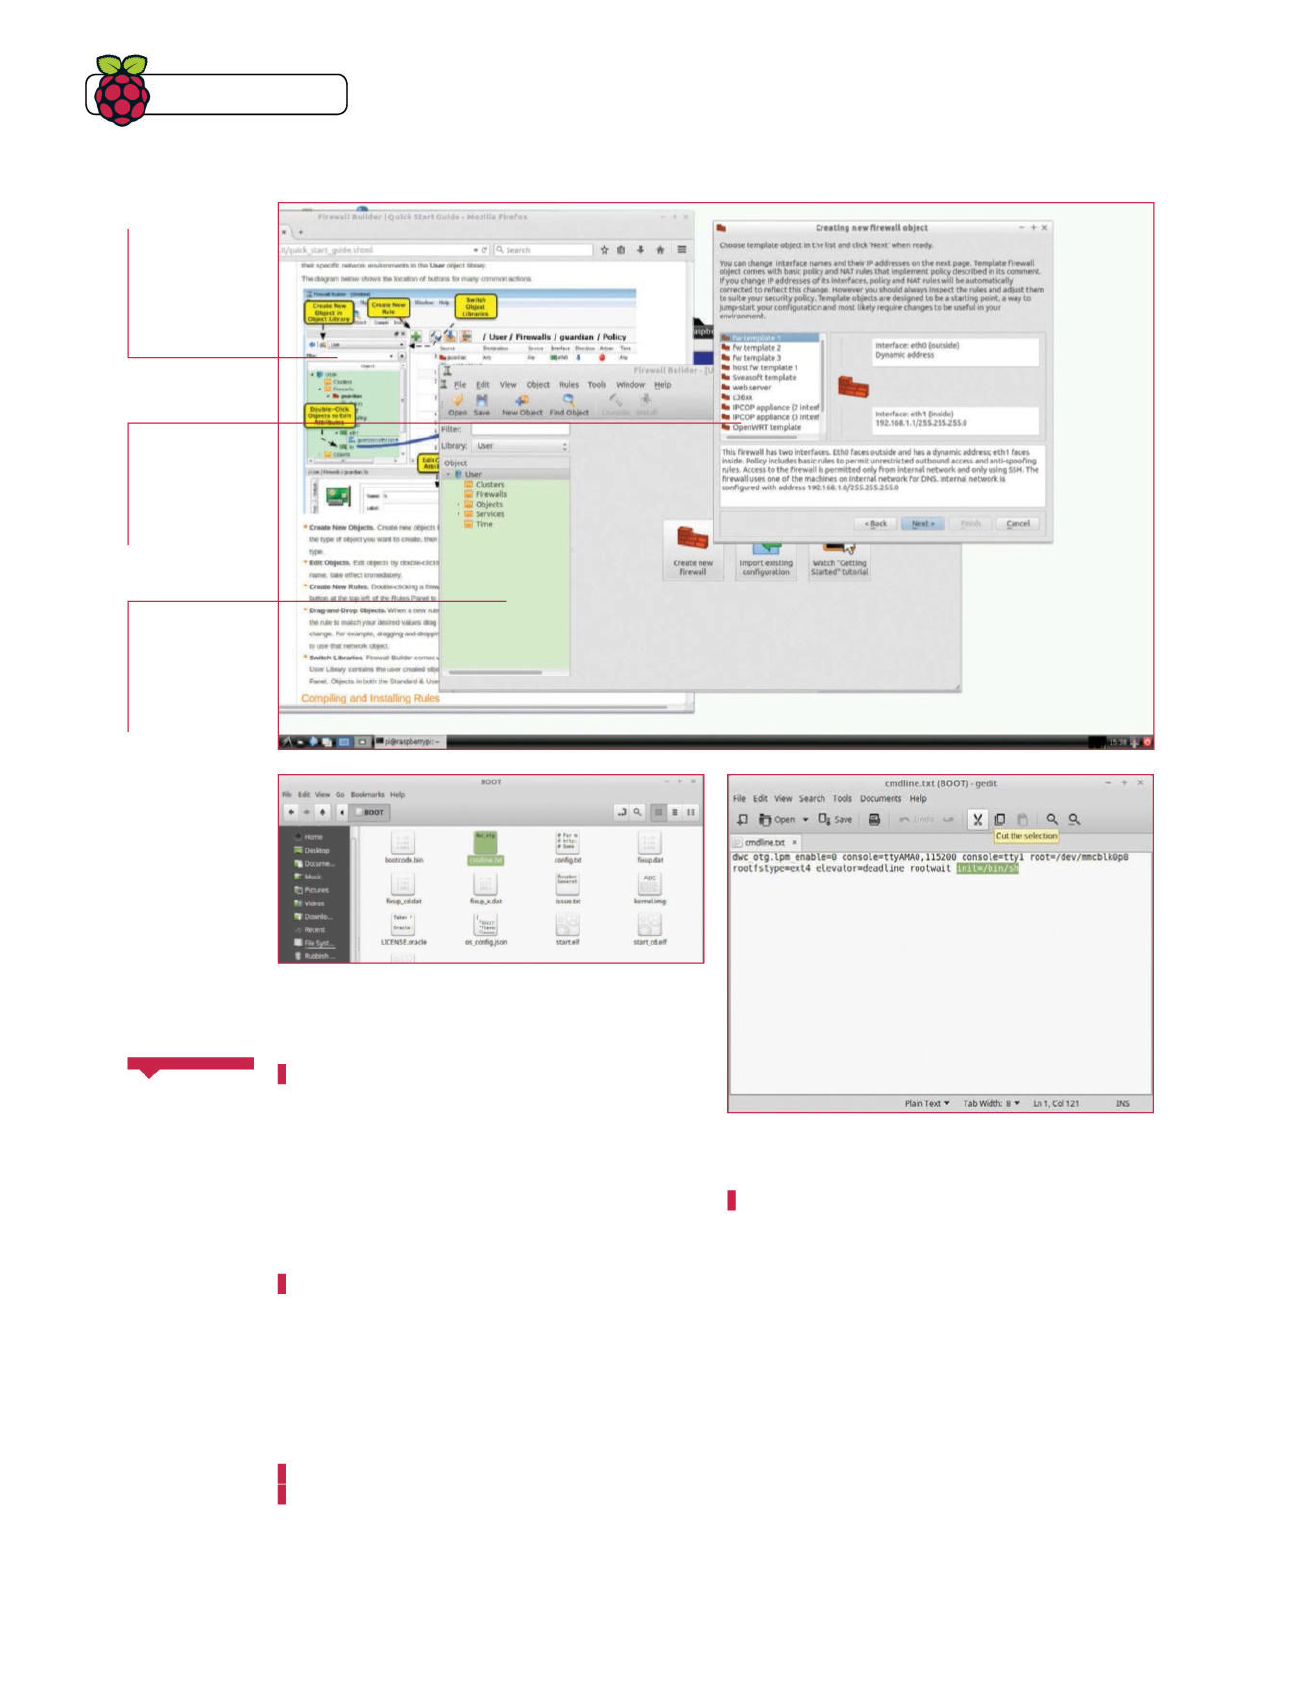
Tips | Tricks | Hacks
56 Raspberry Pi Tips, Tricks & Hacks
08 Change the lost password
Unfortunately you won’t be able to use SSH to recover
the password, so instead connect a monitor and keyboard to
your Raspberry Pi. Boot the Pi and wait for the prompt, at which
point you should enter:
passwd username
Type the password, hit Enter and type it again to confi rm.
09 Initialise the Raspbian boot
Thanks to the added code, we have changed the
standard Raspbian boot to display a new prompt that will let us
change the password.
When this is done, enter the following command to put things
back in order:
sync
exec /sbin/init
The Pi will now boot Raspbian normally, enabling you to sign in
with the new password.
10 Revert cmdline.txt
We are not done yet though. Safely shutdown your
Raspberry Pi with:
sudo shutdown -h now
With the Pi powered down, remove the SD card and insert it into
the card reader again. Open cmdline.txt in your text editor once
again and remove init=/bin/sh, then save and exit. This stops
anyone else from resetting your password.
11 Physically secure your Raspberry Pi
Keeping digital intruders out of your Raspberry Pi with
fi rewalls and secure account passwords is only part of the story.
To fully protect your Pi you need to think outside of the box.
Barely larger than a credit card, the Raspberry Pi computer
can easily be picked up and palmed. Physical security is
paramount, but a genuinely secure Raspberry Pi case – for
example, one compatible with Kensington locks – has yet to be
released. However the ProtoArmour aluminium case from www.
mobileappsystems.com can be screwed to a secure surface,
which is great for more permanent project setups.
Putting your
hardware out of
sight and/or out
of reach is a good
option for security,
and for something
as small as the
Raspberry Pi and
an SD card you have
quite a few options.
For instance, using
Velcro or some
adhesive putty you
might attach the
computer to the
back of a cupboard
or unit, kitchen
kickboards or even
under a car seat. The
SD card, meanwhile,
is so compact that
you could easily
place it under a
carpet or even make
a home for it in a
cushion or shelf –
just don’t forget
where you put it!
Hiding
hardware 07 Edit cmdline.txt
Find the fi le cmdline.txt and open it in your Linux
desktop text editor. Add the following to the end of the last line
of the fi le:
init=/bin/sh
As the Raspberry Pi boots, this command will be read,
enabling us to access a screen to reset the password. Save
and eject the card.
Fwbuilder has a
great quick-start
guide that handily
annotates the
entire interface
The objects in
this panel can be
dragged out into
the rules panel on
the right-hand side
Several fi rewall
templates are
available for the
most common
types of setup

Raspberry Pi Tips, Tricks & Hacks 57
Tips | Tricks | Hacks
12 Lock it in a drawer
Probably the best way to keep your Raspberry Pi secure
is to make sure you keep it locked in a drawer or cabinet –
particularly useful if you use the device as part of a security
cam system or as a cloud server storing valuable documents.
If no lockable storage is available and you’re taking some
time away from home where it isn’t practical to take the Pi with
you, another solution is needed. This might be to travel with
your Pi’s SD card in your wallet, perhaps leaving the computer
attached to the back of a wardrobe with Velcro.
13 Add a fi rewall
Regardless of which operating system you’re using,
adding a fi rewall is a guaranteed way to improve your
computer’s security. While the Raspberry Pi has a built-in
fi rewall, it is tricky to confi gure.
Thankfully, some other people have noticed this too and
released fwbuilder, an interface to the otherwise complex
iptables fi rewall that comes with Raspbian.
14 Install fwbuilder in Raspbian
Because iptables is a bit fi ddly and errors can
leave you with no network connection, fwbuilder has been
developed to make fi rewall confi guration quick and painless.
We’ll use the apt-get command to fi rst check for updates
and then install fwbuilder:
sudo apt-get update
sudo apt-get install fwbuilder
Follow the prompts to install and, once complete, switch to
the Raspberry Pi GUI by entering:
startx
In the Pi’s mouse-driven desktop, launch fwbuilder from
the Internet menu. Upon launching fwbuilder, follow the
given steps to set up your Raspeberry Pi fi rewall and save
the resulting script.
We’re nearly done but some adjustments are still required
before your Pi fully connects to the network.
15 Complete fi rewall confi guration
Launch the /etc/network/interfaces script in your text
editor and complete confi guration by adding
pre-up /home/pi/fwbuilder/firewall.fw
Next, fi nd the section labelled “Epilog” and add
route add default gw [YOUR.ROUTER.IP.HERE] eth0
If you’re using a wireless card, add the same line but switch
the last characters to wlan0:
route add default gw [YOUR.ROUTER.IP.HERE] wlan0
16 Consider Raspberry Pi theft
While losing your Raspberry Pi or the data on it, might
initially seem like a disaster, don’t be disheartened. As long as
you have taken steps to backup data or clone your SD card,
you at least have continuity when you resume the project.
You can also check our boxouts for methods to help you deal
with physical theft.
If you’re still
concerned with
your Pi’s safety, put
yourself in the place
of a potential thief.
Where would you
stash it? Probably
in your pocket. The
Raspberry Pi is small
enough to take with
you, so why leave it
lying around? Any
security questions
relating to your
Raspberry Pi can
be addressed by
keeping it close
whenever you think
it’s necessary.
Pocket
your Pi
Below If you tend to access your Pi
remotely via Wi-Fi, consider keeping
it locked away
A fi rewall is guaranteed to
improve your security
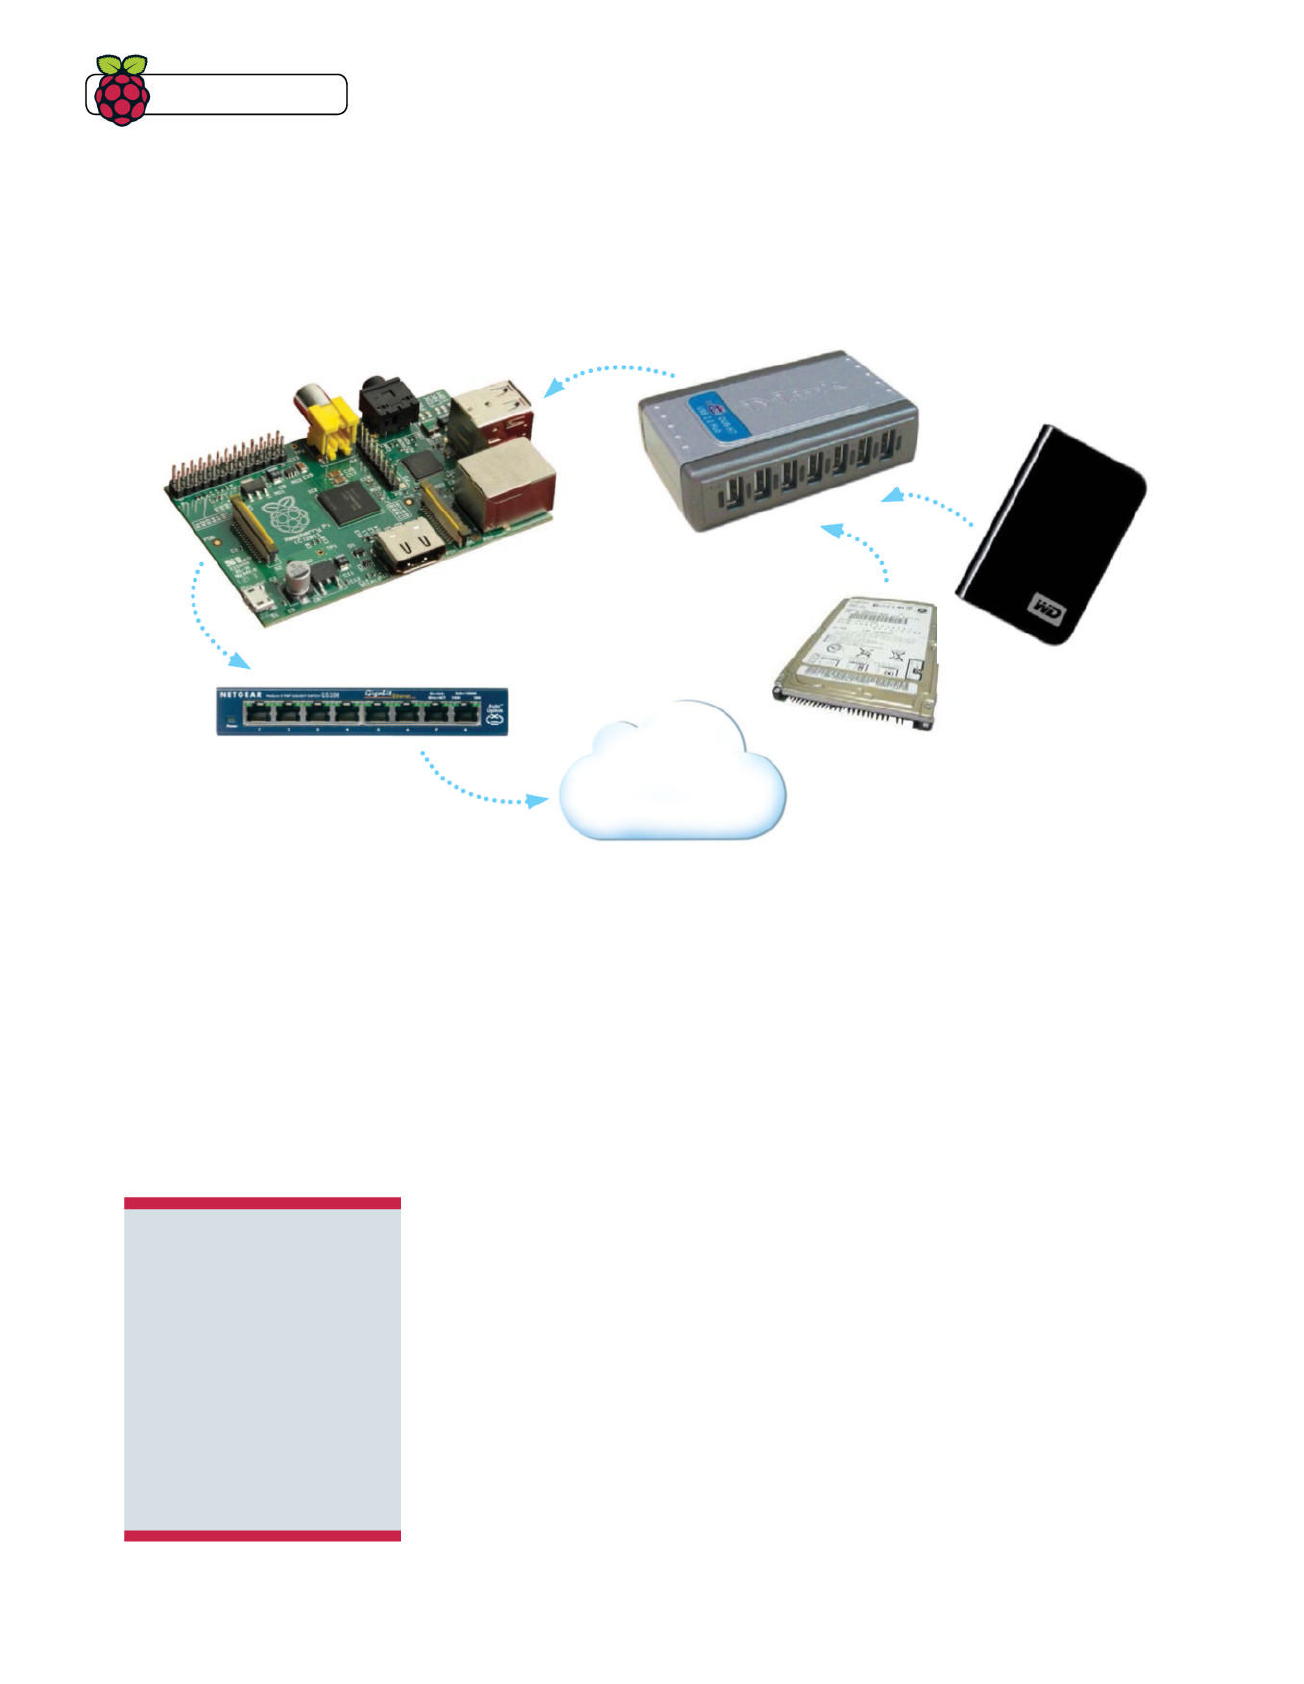
Tips | Tricks | Hacks
58 Raspberry Pi Tips, Tricks & Hacks
The Raspberry Pi is small, silent and energy efficient,
so let’s turn it into the ultimate file server!
Build a file server
with the Raspberry Pi
router’s IP address, meaning that you can access
your Raspberry Pi from anywhere using an easy-to-
remember web address
• Transmission daemon – a torrent client that runs
in the background and can be accessed through a
web browser
This tutorial assumes that you have fl ashed
the latest Arch Linux ARM image to an SD card. If
you haven’t done this, the instructions for fl ashing
an image can be found at www.linuxuser.co.uk/
tutorials/how-to-set-up-raspberry-pi/.
You’ll only need to go up to the step that involves
writing the image to the SD card – or if you plan to
use the SD card to store fi les, then you should follow
the GParted steps also. Not that you’ll also have to
adapt the instructions slightly for using the Arch
Linux image rather than the Debian one.
We’ll be using Arch Linux as the operating system for
our file server, because it is small, and has only the
minimum packages required for a working system.
This means that we can set up the file server without
wasting resources on a graphical user interface and
other unnecessary packages. Arch Linux comes with
hardly any RAM allocated to the GPU by default, which
is exactly how we want it for use as a headless server.
Our fi le server will be made up of the following
software components:
• Base Arch Linux system
• SSH – will provide secure remote access to the
Raspberry Pi and the fi les on it
• Samba – provides access to fi les on the server to a
Windows, Mac or Linux client
• A dynamic DNS daemon (noip) – software that runs
in the background and points a domain name to your
Raspberry Pi
A powered USB hub which
provides power and USB
connectivity to two
2.5-inch hard drives
Two 2.5-inch hard drives.
Your advisor has a 320GB
Western Digital USB drive;
the second drive is an 80GB
from an old laptop which he’s
converted to a USB drive using
an IDE-to-USB converter
An 8-port Netgear switch
which the Raspberry Pi is
connected to, along with our
other computers and devices
www
What you’ll need
Q Raspberry Pi with all necessary
peripherals
Q SD card containing the latest
Arch Linux image for RasPi: www.
raspberrypi.org/downloads
Q Powered USB hub
Q External hard drive or pen
drive
Q A computer running Linux – it
can be another Raspberry Pi
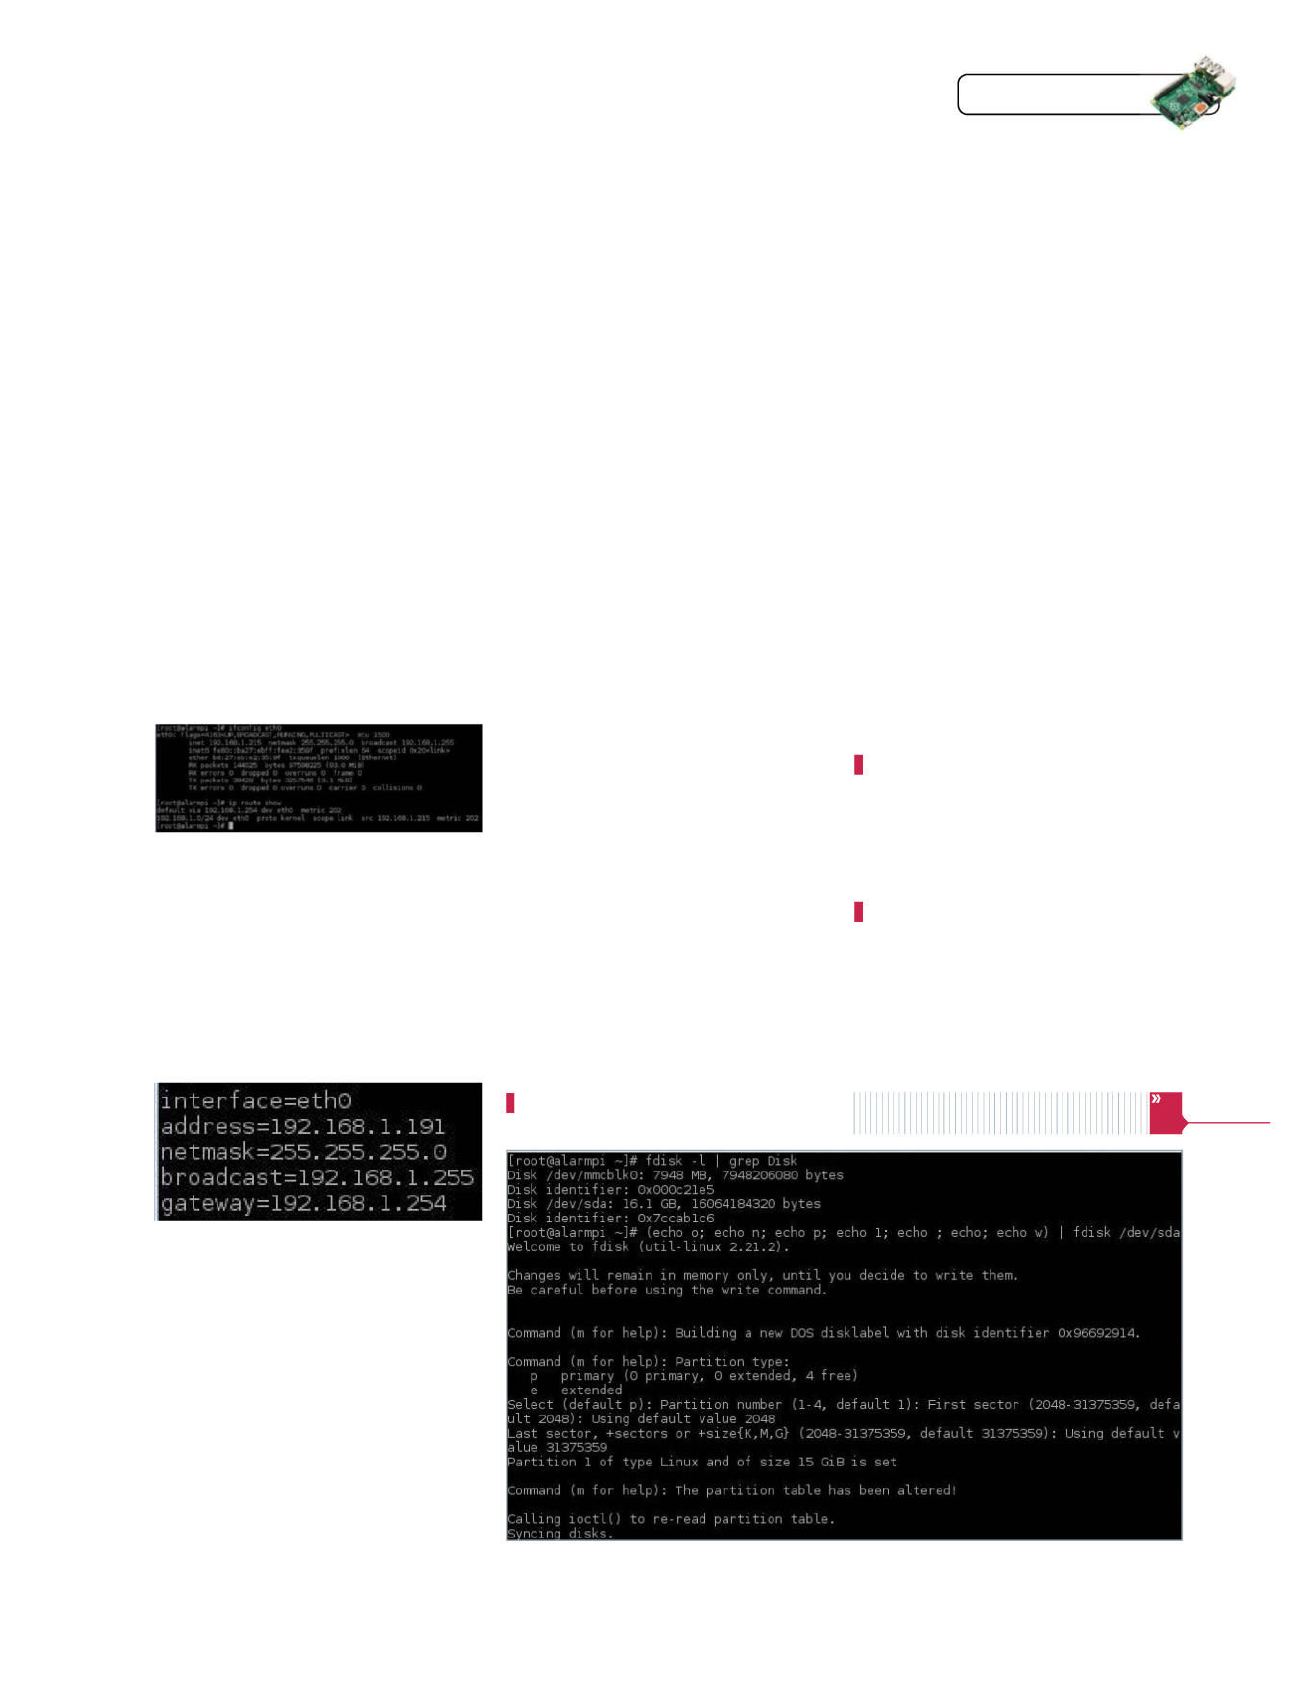
Raspberry Pi Tips, Tricks & Hacks 59
Tips | Tricks | Hacks
01 Log into Arch Linux
Connect the necessary cables to the
Pi and wait for the Arch Linux login prompt.
The login is root, and the password is also
‘root’. We’ll change the root password from the
default later on.
02 Run a full system update
Arch Linux runs on a rolling release
schedule, meaning that there are no version
numbers and software is continually updated. Use
the command ‘pacman -Syu’ to start a full system
update. You’ll be shown a prompt explaining that
pacman needs to be updated first. Answer ‘Y’ to
the prompt. You can now run ‘pacman -Syu’ again
to start a full system update. There will be a lot of
packages to update so it will probably take a while,
especially because the Pi runs from an SD card.
03 Investigate your network
We highly recommend assigning a static
IP to your Raspberry Pi rather than being handed
one by your router because you’ll always know
where to fi nd it on the network, which will be
useful for accessing it remotely. You’ll also need
a static IP if you want to access the Raspberry Pi
from the internet. We’ll need to fi nd out a couple
of things about your current network setup before
setting a static IP. You can use the commands
‘ifconfi g eth0’ and ‘ip route show’ to do this.
04 Set up a static IP address
Now that we have found out things
about your network, such as your current IP
address, the network mask and so on, we
can set up a static IP address. The majority
of the Arch Linux confi guration is done from
a fi le called rc.conf, which is located in the
/etc directory. You can open this fi le in the nano
editor with the command ‘nano /etc/rc.conf’.
Scroll down using the arrow keys until you come
to the networking section.
Begin to fi ll in the blank eth0 section. Our IP
address was 192.168.1.215. When assigning an
IP address, you’ll only want to change the last
number. We’re going to change our address
05 Log in with SSH
We’ll now log into the Pi using SSH – but
before that, we’ll restart so that the static IP
and any updates take place. Use the command
‘init 6’ to do this. Once the Pi has booted back
up, open a terminal on your Linux computer
and type ‘ssh root@[ip of your pi]’. Answer yes,
to say that you want to connect, and type in the
root password, which will still be root. You are
now logged in over SSH.
07 Change the root password
Since we might be exposing an SSH login
to the internet, we need to change the password to
a more secure one. Type ‘passwd’, then follow the
on-screen instructions to change your password.
Your SSH session will stay logged in, but you’ll need
to use the new password next time you log in.
06 Set the default gateway
This step is really part of step 4 (set up a
static IP address). The reason for doing this step
after restarting, is that we found the changes
were lost when we did it before a restart. This is
probably due to DHCP cleaning up any settings it
changes during shutdown. We will now set the IP
of the DNS server, which will be used to resolve
addresses such as google.co.uk to an IP address
that your computer can connect to. Your DNS
server will be provided by the same IP as your
default gateway. You can set the DNS server
using the following command:
echo ‘nameserver [ip of default
gateway]’ > /etc/resolv.conf.
09 Formatting your hard drive
Before continuing, note that formatting
a disk will remove all the data on it. It’s now
time to connect your hard drive to the Pi. (We’re
using a pen drive, but the steps are exactly the
same.) Use the command
fdisk -l | grep Disk
to get a list of disks attached to the system.
You should be able to tell which disk is the one
you intend to use to store fi les on by the size of
the disk. For example, our pen drive is 16GB, so
we know that the 16.1GB disk is ours. Run the
following command:
(echo o; echo n; echo p; echo 1;
echo ; echo; echo w) | fdisk [path
to your disk]
to create a partition that will be whole size of
the disk. Fdisk is an interactive program, so this
command simply inputs the keys that you would
press in a specifi c order to create a partition that
will take up the whole size of the disk.
08 Install the required packages
Use the command ‘pacman -S samba
noip transmission-cli’ to install the required
packages mentioned at the start of the article.
Answer ‘Y’ to any prompts you may encounter.
to 192.168.1.191. You’ll probably want to use a
number between 100 and 200. Set the netmask
and broadcast to the values from ‘ifconfi g eth0’
so that the interface is confi gured correctly
for your home network. Set the gateway to
the address in the line similar to default via
‘192.168.1.254 dev eth0 metric 202’ from the
output of ‘ip route show’. Once you have done
this, use the key combination Ctrl+O followed by
the Enter key to save the changes. You can then
use Ctrl+X to exit nano.
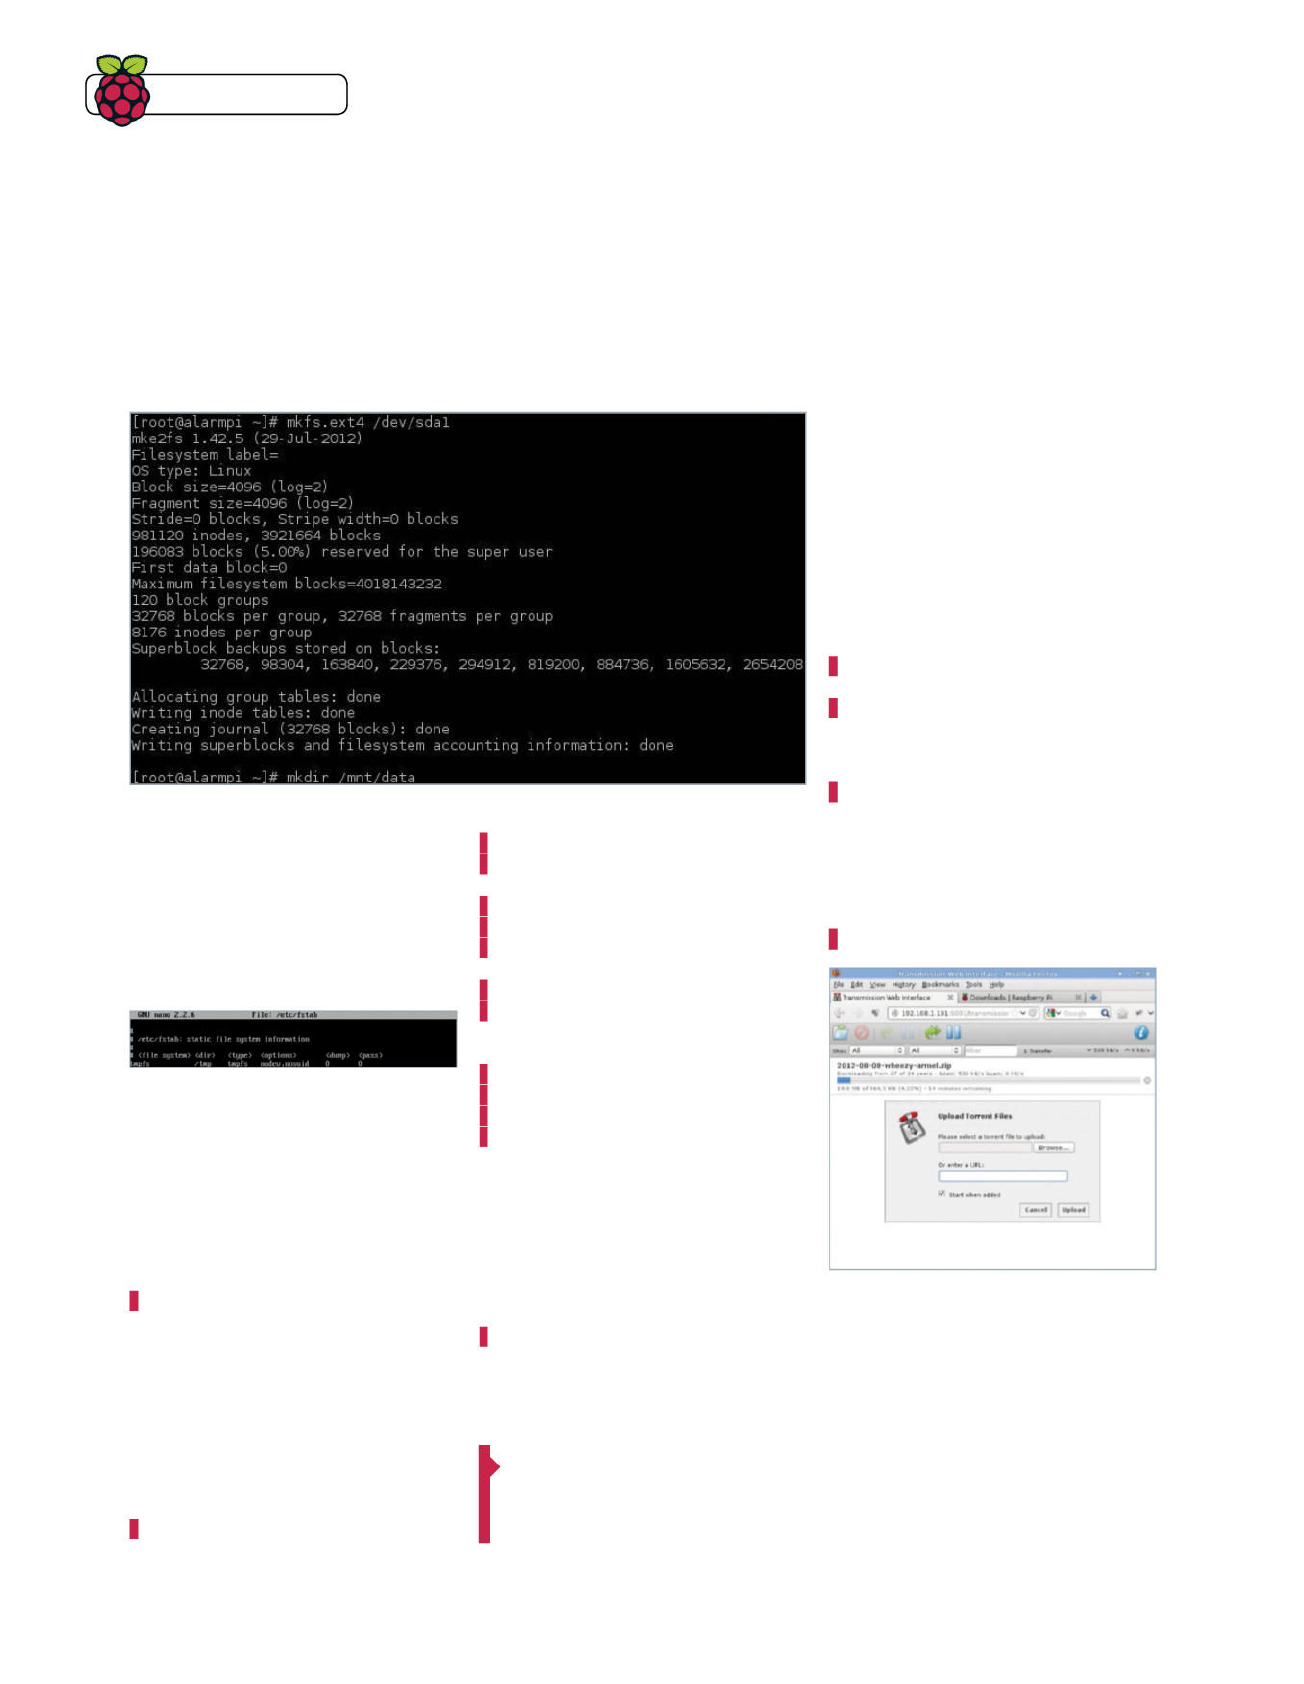
60 Raspberry Pi Tips, Trick & Hacks
Tips | Tricks | Hacks
11 Make the drive accessible to Linux
The fstab fi le on Linux system contains
a list of storage devices on the system, and
where to mount them. The fi le is read on boot,
so any devices in the fstab fi le will be mounted
automatically as long as it is connected
during boot.
We’ll edit the fstab in nano using the
command ‘nano /etc/fstab’. You want to add a
line like the following:
[path to disk]1 /mnt/data ext4
defaults 0 1
Save the changes in the same way we did
earlier. Once you have done this, you can use
the command ‘mount -a’ to reread the fstab fi le
and mount the new entry we just added.
14 Confi gure the Transmission
torrent daemon
We’ll need to start the Transmission daemon
because we’ll need to edit some confi guration
fi les that it will only make on fi rst execution.
Start it using the command:
/etc/rc.d/transmissiond start
You’ll then want to stop it using the command:
/etc/rc.d/transmissiond stop
so that we can edit the confi guration fi le
without Transmission interfering. Open the
confi guration fi le using the command:
nano /root/.config/transmission-
daemon/settings.json
You need to set rpc-whitelist-enabled from
true to false, and also change the download-
dir to /mnt/data/Downloads. You can then
save the changes and make that directory
using the command:
mkdir /mnt/data/Downloads
15 The Transmission web interface
We can now start the Transmission
daemon using the same start command
from the previous step. Transmission can
sometimes be a bit picky with the syntax of its
confi guration fi les, so now that you’ve started
13 Permit access to the shared drive
Set a password for your Samba user
using the command ‘smbpasswd -a’ and then
enter the password you want to use twice. Now
that we’ve done that, we can start the Samba
daemon using the command
/etc/rc.d/samba start
Note that the method of accessing a Samba
share from each operating system will be
different, so you may have to look it up. It
Input the following information:
[global]
# workgroup = NT-Domain-Name or
Workgroup-Name, eg: MIDEARTH
workgroup = WORKGROUP
security = user
load printers = no
# Some performance tuning
socket_options = TCP_NODELAY SO_
RCVBUF=65536 SO_SNDBUF=65536
[data]
path = /mnt/data
public = no
writable = yes
Save the changes in the same way we did earlier.
12 Share the drive with
network clients
We need to open an empty Samba confi guration
fi le in nano using the command
nano /etc/samba/smb.conf
10 Create a fi le system & mount point
Once we have a partition on the disk,
we need to create a fi le system and a place to
mount it. You can create an ext4 fi lesystem on the
partition using the command
mkfs.ext4 [path to disk]1
You can make a directory to mount the drive in
using the command
mkdir /mnt/data
should show up as ‘ALARMPI’ in the Network
browser on most operating systems and user-
friendly Linux distributions. Use the username
‘root’ and the password that you set with the
smbpasswd command.
Fig 1 Testing out Transmission
The Transmission web interface
is straightforward to use

Raspberry Pi Tips, Tricks & Hacks 61
Tips | Tricks | Hacks
18 NAT port forwarding
It is likely that there are multiple devices
behind your router that all use the same external
IP address. This is because of the shortage of IPv4
addresses, and also because it is more secure to
segregate the internet from your internal home
network. NAT (network address translation)
forwards a port from the router’s external IP
address to a computer on the LAN (local area
network). In this case, we’ll want to forward any
traffi c for port 22 that comes to your router’s
external IP address to the IP address of your
Raspberry Pi. Port 22 is the port used for SSH,
which is the only port we’d recommend that you
forward. SSH will provide access to your fi les,
and also port forwarding, so you can access the
Transmission web interface should you want to.
The confi guration of port forwarding really
depends on the router that you are using, so
you may have to look up that information. The
chances are that it will be hidden away in the
‘advanced’ section of your wireless router. You
should be able to access your router by typing
your No-IP hostname into your web browser. If
not, it should be at the address of your default
gateway that we used earlier on.
On his router, your advisor had to go to
Advanced>NAT>Port Mapping and add a mapping
that looks like that in Fig 2.
20 Use SSH to port forward
Use the SSH command with the
following option to forward any traffi c from
127.0.0.1:9091 to 126.0.0.1:9091 on the Pi:
ssh -L 9091:127.0.0.1:9091
root@192.168.1.191
(You can replace the IP address of the Pi with
your No-IP hostname if you are outside of your
LAN.) 127.0.0.1 is a loopback address, which
points back to ‘this computer’.
Once you have run that command, you
can then go to the web browser on your
computer, type in 127.0.0.1:9091 and access the
Transmission web interface as if it was on the
LAN. Now, you are ready to enjoy your brand
new fi le server!
package manager, to access fi les via SSH. Set
the host to the IP address of your Pi (or your No-
Ip hostname if outside your LAN), the username
to ‘root’, and the password to your password. Set
the port to 22 and click ‘Quickconnect’. Click OK to
trust the host and connect to it. To access fi les on
your external drive, change remote site from /root
to /mnt/data.
it, you’ll want to check that your confi guration
changes are still there. If not, stop the
Transmission daemon and try again.
You can go to the Transmission web interface
by opening up a web browser and going to
the IP address of your Pi, followed by :9091.
This is needed because the web interface is
served from port 9091. In our case, we used
192.168.1.191:9091. Click on the icon in the
top-left corner of the interface to add a torrent
fi le. You can either upload a fi le from your
computer, or copy and paste a URL. As you can
see from Fig 1 (on preceding page), we have just
added a Raspberry Pi image to test it out.
The Transmission web interface is really
straightforward and easy to use, so you
should be able to fi gure out anything else you
want to do. There is also more documentation
on the settings.json confi guration fi le here:
https://trac.transmissionbt.com/wiki/
EditConfi gFiles
16 Set up dynamic DNS
Head over to www.no-ip.com/personal/
and sign up for the No-IP Free option. Once
you have done that, don’t bother downloading
No-IP’s client because we’ve already installed
it. Go to your email Inbox and follow the
activation link that was just sent to you by No-
IP. You can now sign in to your account. Once
you have logged in, select the ‘Add a host’
option. Choose a hostname and a domain to be
part of from the drop-down list. Leave the Host
Type as ‘DNS Host’ and then click the ‘Create
Host’ button.
Your advisor used the hostname liam-ludtest
with the domain no-ip.org, so would access
that using liam-ludtest.no-ip.org.
17 Confi gure No-IP
Run the command:
noip2 -C -Y
…to be taken through interactive confi guration
of the No-IP client. We left the update interval
to the default of 30 minutes, meaning the client
will check every 30 minutes for an IP address
change. Once you’ve fi nished, start the daemon
with the command ‘/etc/rc.d/noip start’. 19 Use FileZilla for accessing fi les
We recommend that you use FileZilla,
which you should be able to install with your
After a minute or two, your IP address will be
accessible via your No-IP hostname. However,
it’s likely that trying it from inside your house
will simply take you to your router’s homepage.
Fig 2 Port mapping example
Tips | Tricks | Hacks
62 Raspberry Pi Tips, Tricks & Hacks
Borrow a mouse and keyboard from another PC, using
only your Raspberry Pi and Synergy
Network and share your
keyboard and mouse
One issue we sometimes find with the Raspberry Pi is the lack
of USB ports. We don’t always have the luxury of using a powered
USB hub, and it can become a bit of a hassle to juggle a mouse
and keyboard with other devices. Instead of using a hardware
solution for this, you can always try a software solution – one
that opens up the uses of the Raspberry Pi as well. The Synergy
program lets you share the mouse and keyboard of one system
with other systems on the same network, acting as a virtual
KVM. In this tutorial we'll learn how to use your main computer's
input devices on your Raspberry Pi, as well as how you can look
into making it a server.
01 Install Synergy
Synergy is available from the
Raspbian repositories. We can install it
by using the following:
$ sudo apt-get update
$ sudo apt-get install synergy
This will go through the basic installation
process as normal and Synergy will be
put in the Accessories folder.
What you’ll need
Q Latest Raspbian Image
raspberrypi.org/downloads
Q Synergy
Q Host computer
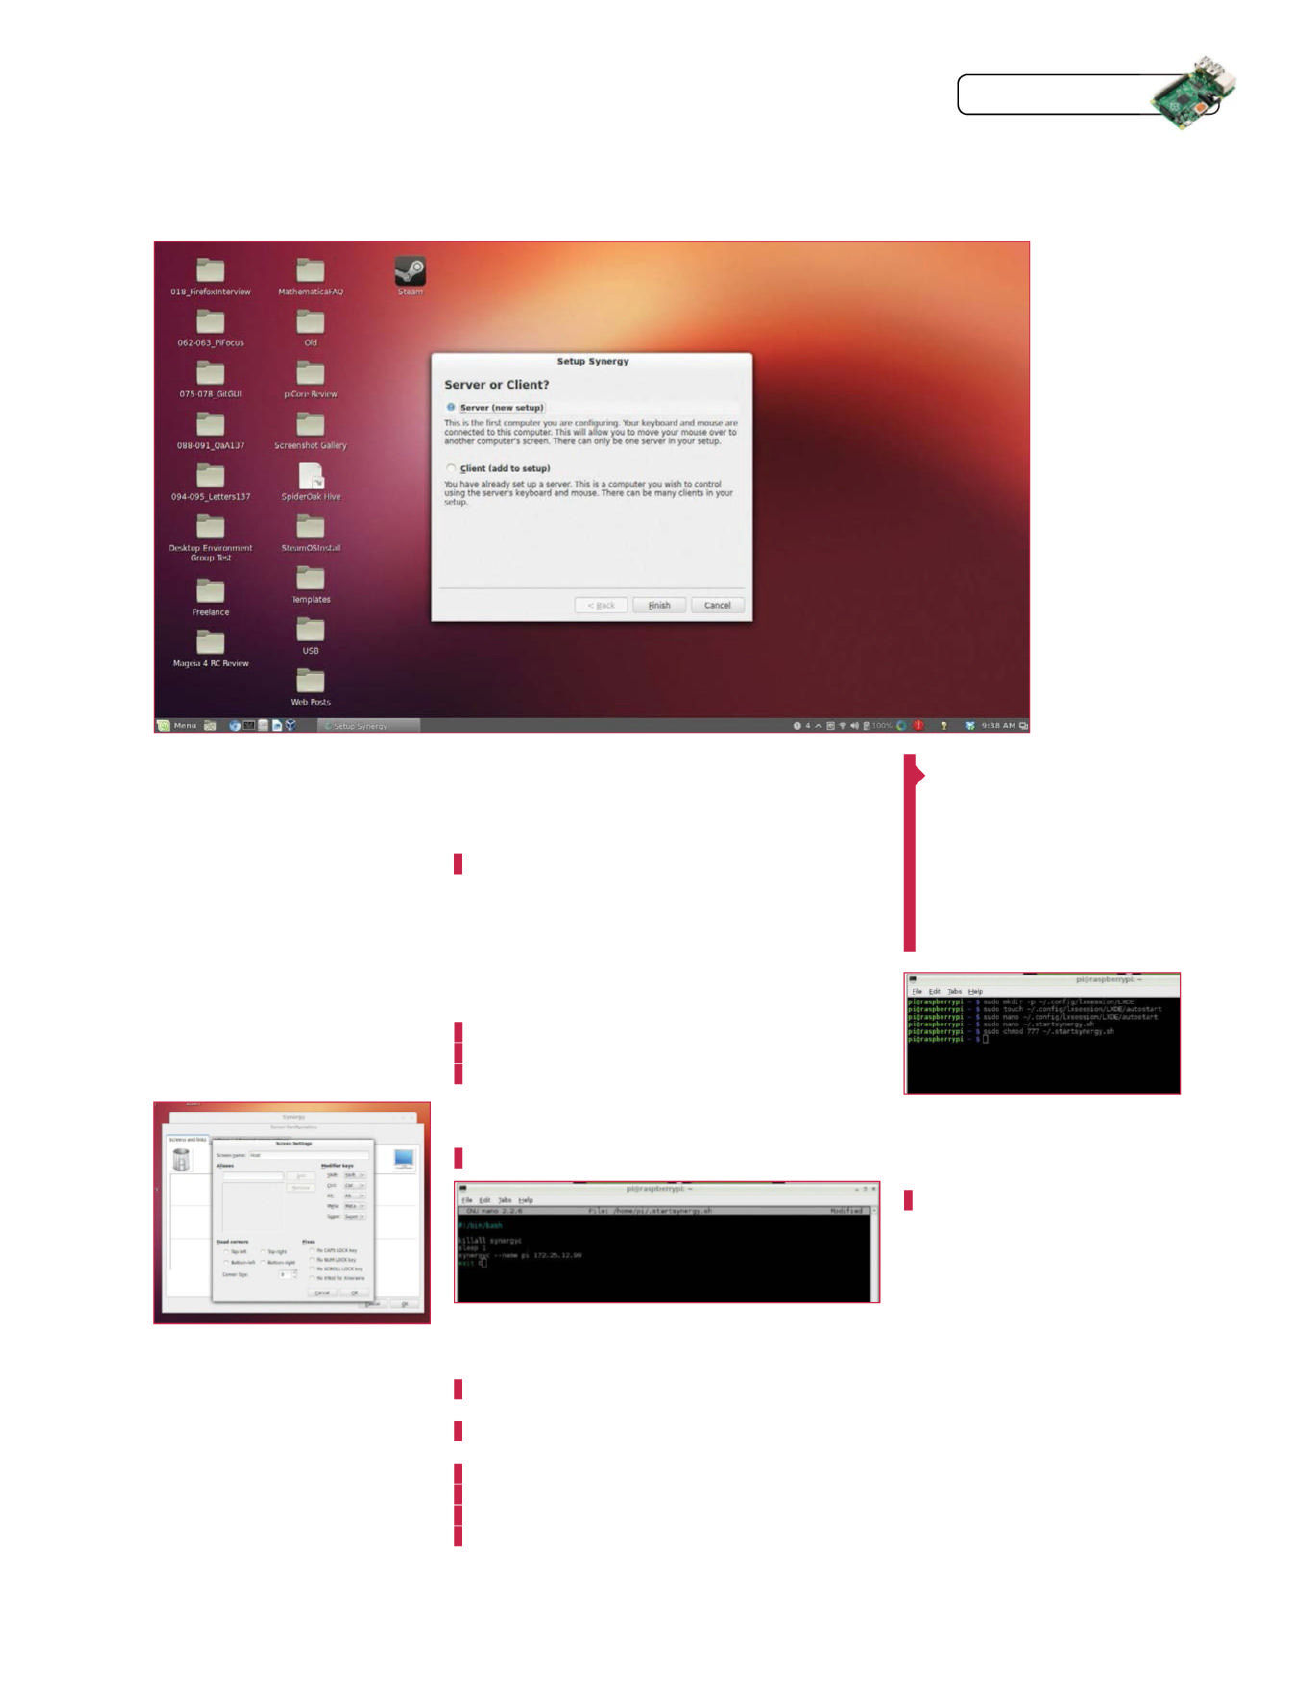
Raspberry Pi Tips, Tricks & Hacks 63
Tips | Tricks | Hacks
02 Start up Synergy
Start up Synergy on the host
computer and choose the ‘Server’ option
for the moment. We’ll cover how to use
it as a client later, and how to use the
Raspberry Pi as a server for the mouse
and keyboard.
03 Encryption and passwords
Here, you can set up whether
or not the connection is encrypted. This
is useful for stopping key loggers from
being able to snoop on your information,
or random clients from connecting
and hijacking your mouse. Provide a
password and then click Finish.
04 Server naming
Once the process has fi nished,
go to Confi gure Server. Your host
computer will be put virtually in the
centre of your array of displays and you
can drag and drop it around, along with
any connected screens. Double-click on
the server to change its name, making it
easier to remember and fi nd. Add a new
screen and call it pi.
05 Starting and connecting
Once you’re happy with the setup, click Start to
be able to accept client connections. To connect from a
Raspberry Pi, enter the following:
$ synergyc --name pi [IP Address of host]
It will be recognised as ‘pi’ on the host system.
06 Autostart Synergy
To make sure it starts every time you turn on the Pi, we
need to create an LXDE autostart fi le by using the following:
$ sudo mkdir -p ~/.config/lxsession/LXDE
$ sudo touch ~/.config/lxsession/LXDE/autostart
$ sudo nano ~/.config/lxsession/LXDE/autostart
And then add the following to autostart:
~/.startsynergy.sh
07 Start fi le
Open and populate the startsynergy fi le with:
$ sudo nano ~/.startsynergy.sh
#!/bin/bash
killall synergyc
sleep 1
synergyc --name pi [IP address of host]
exit 0
08 Permissions
Finally, to fi nish it off you’ll need
to run:
sudo chmod 777 ~/.startsynergy.sh
This will autostart, and hopefully
autoconnect, Synergy whenever you turn
it on. The Raspbian client is a little old,
so if you get a problem you may need to
compile the latest version from source.
09 Pi server
Setting up the Raspberry Pi as
a server is a little more involved and uses
the synergys command. It allows you to
listen for clients on specifi c addresses.
You then need to create a separate
confi guration fi le to arrange the displays
– however, you can load one from a
different computer and edit it.
Synergy lets
you share a
mouse and
keyboard
Left Select the Server
option to use this
machine’s mouse and
keyboard for the Pi
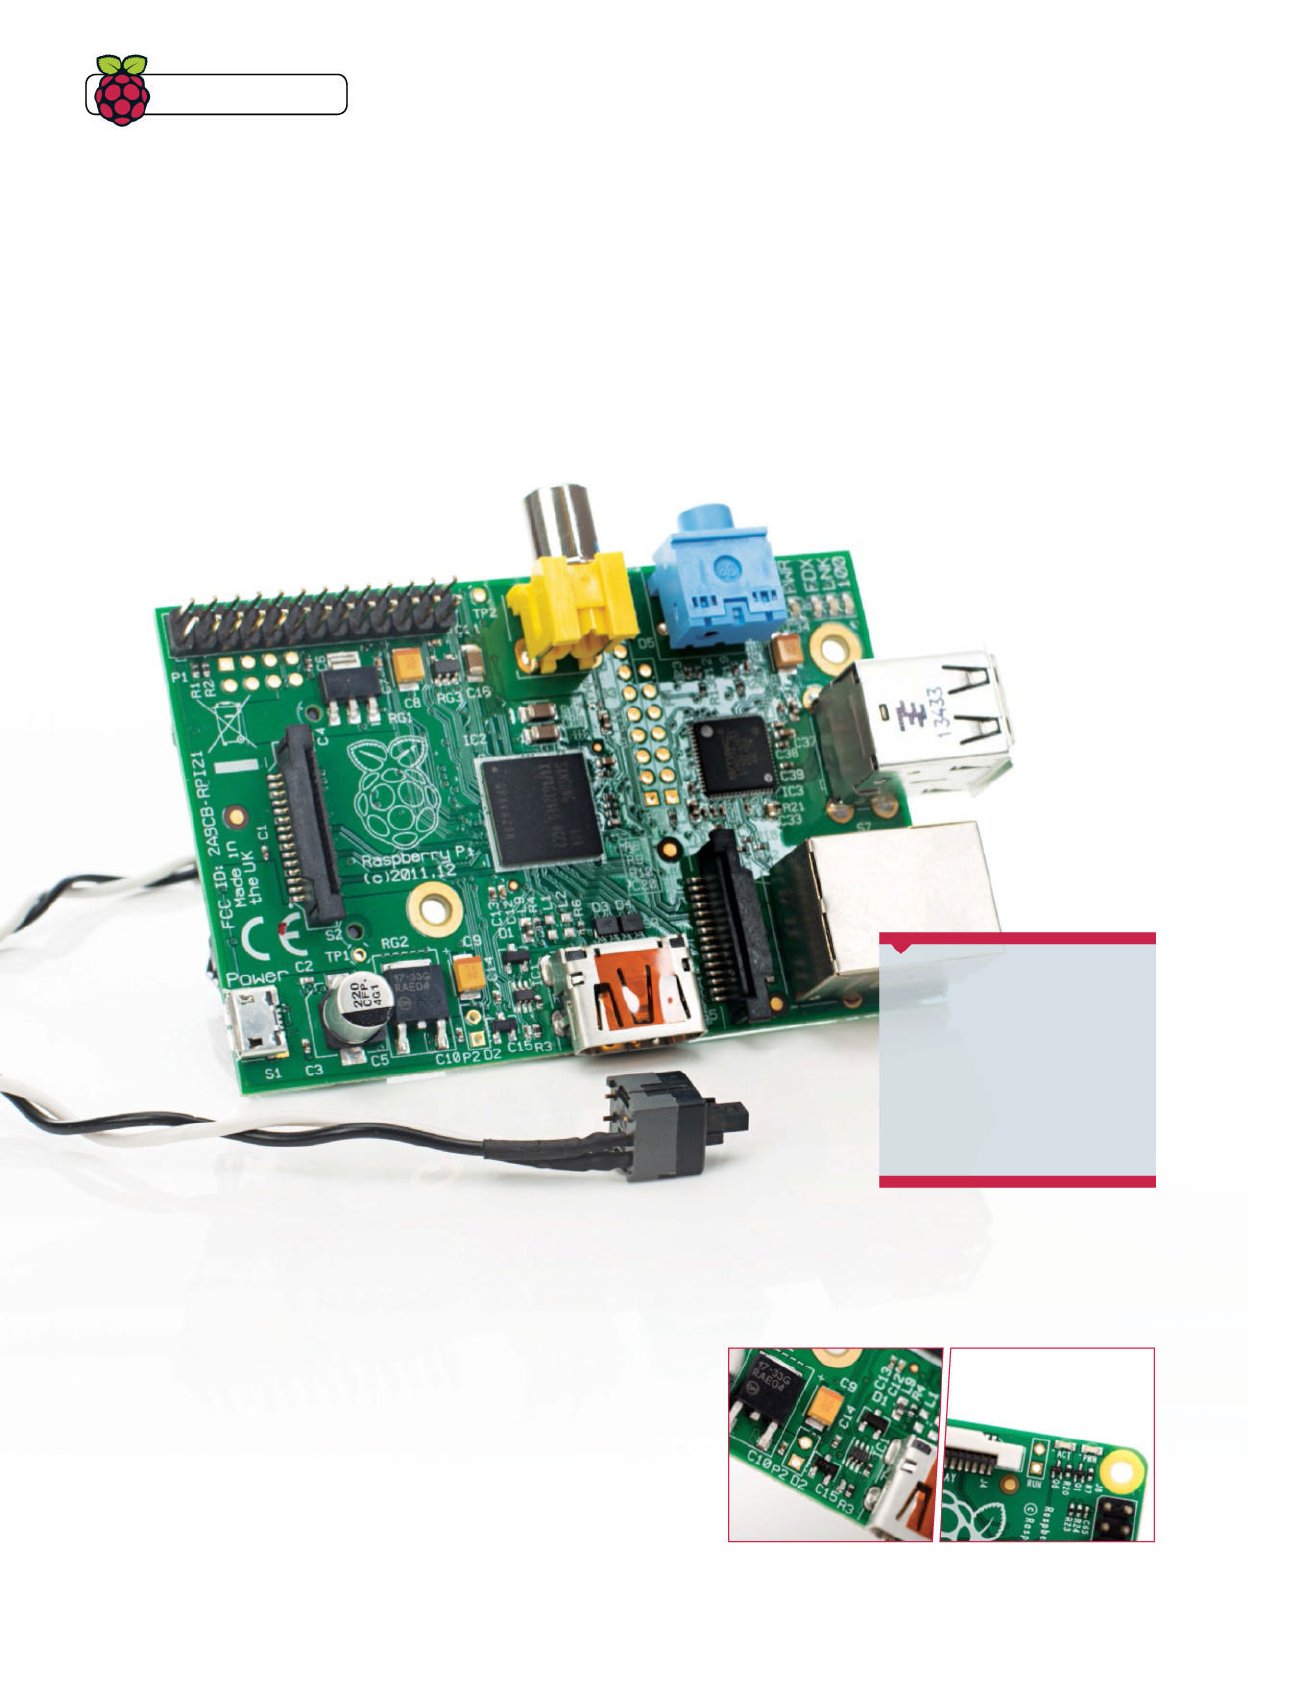
Tips | Tricks | Hacks
64 Raspberry Pi Tips, Tricks & Hacks
Need to restart your Pi after a system lock-up? Ease
strain on the mains connector – install a reset switch!
Add a reset switch
to your Raspberry Pi
We all know that shutting down a Raspberry Pi by removing
the power cable is risky. Data may be writing to the SD card,
leading to corruption, while repeated removal of the power cable
can cause problems with the connector port.
Clearly this can cause problems when faults cause the
Raspberry Pi to hang, so the simple fi x here is to add a simple
reset function to the device. There are three ways this can be
done: with a USB reset button, a motherboard jumper on the
GPIO bus or with a momentary button connected to newly-
soldered pins on the P6 header on the Model B Rev 2 and B+ (this
is the most complicated option).
If you have an old PC lying around, retrieving the reset button
and cable from this and even the connecting motherboard pins
is achievable if you’re handy with a soldering iron. Otherwise, we
recommend purchasing the parts online, although be aware that
you'll probably need to buy more pins than you'll need.
01Check your Raspberry Pi model
Only two models feature the P6 header: the Raspberry
Pi Model B Rev 2 (which you can fi nd next to the HDMI port)
and the B+ (to the left of the ‘© Raspberry Pi 2014’ label). You
will need to install the pins manually, however, as they are not
preinstalled for this function.
What you’ll need
Q Momentary switch
Q Suitable wire for PCB
projects
Q Soldering iron and solder
Q Single pin pair header
Q HDD/motherboard jumper
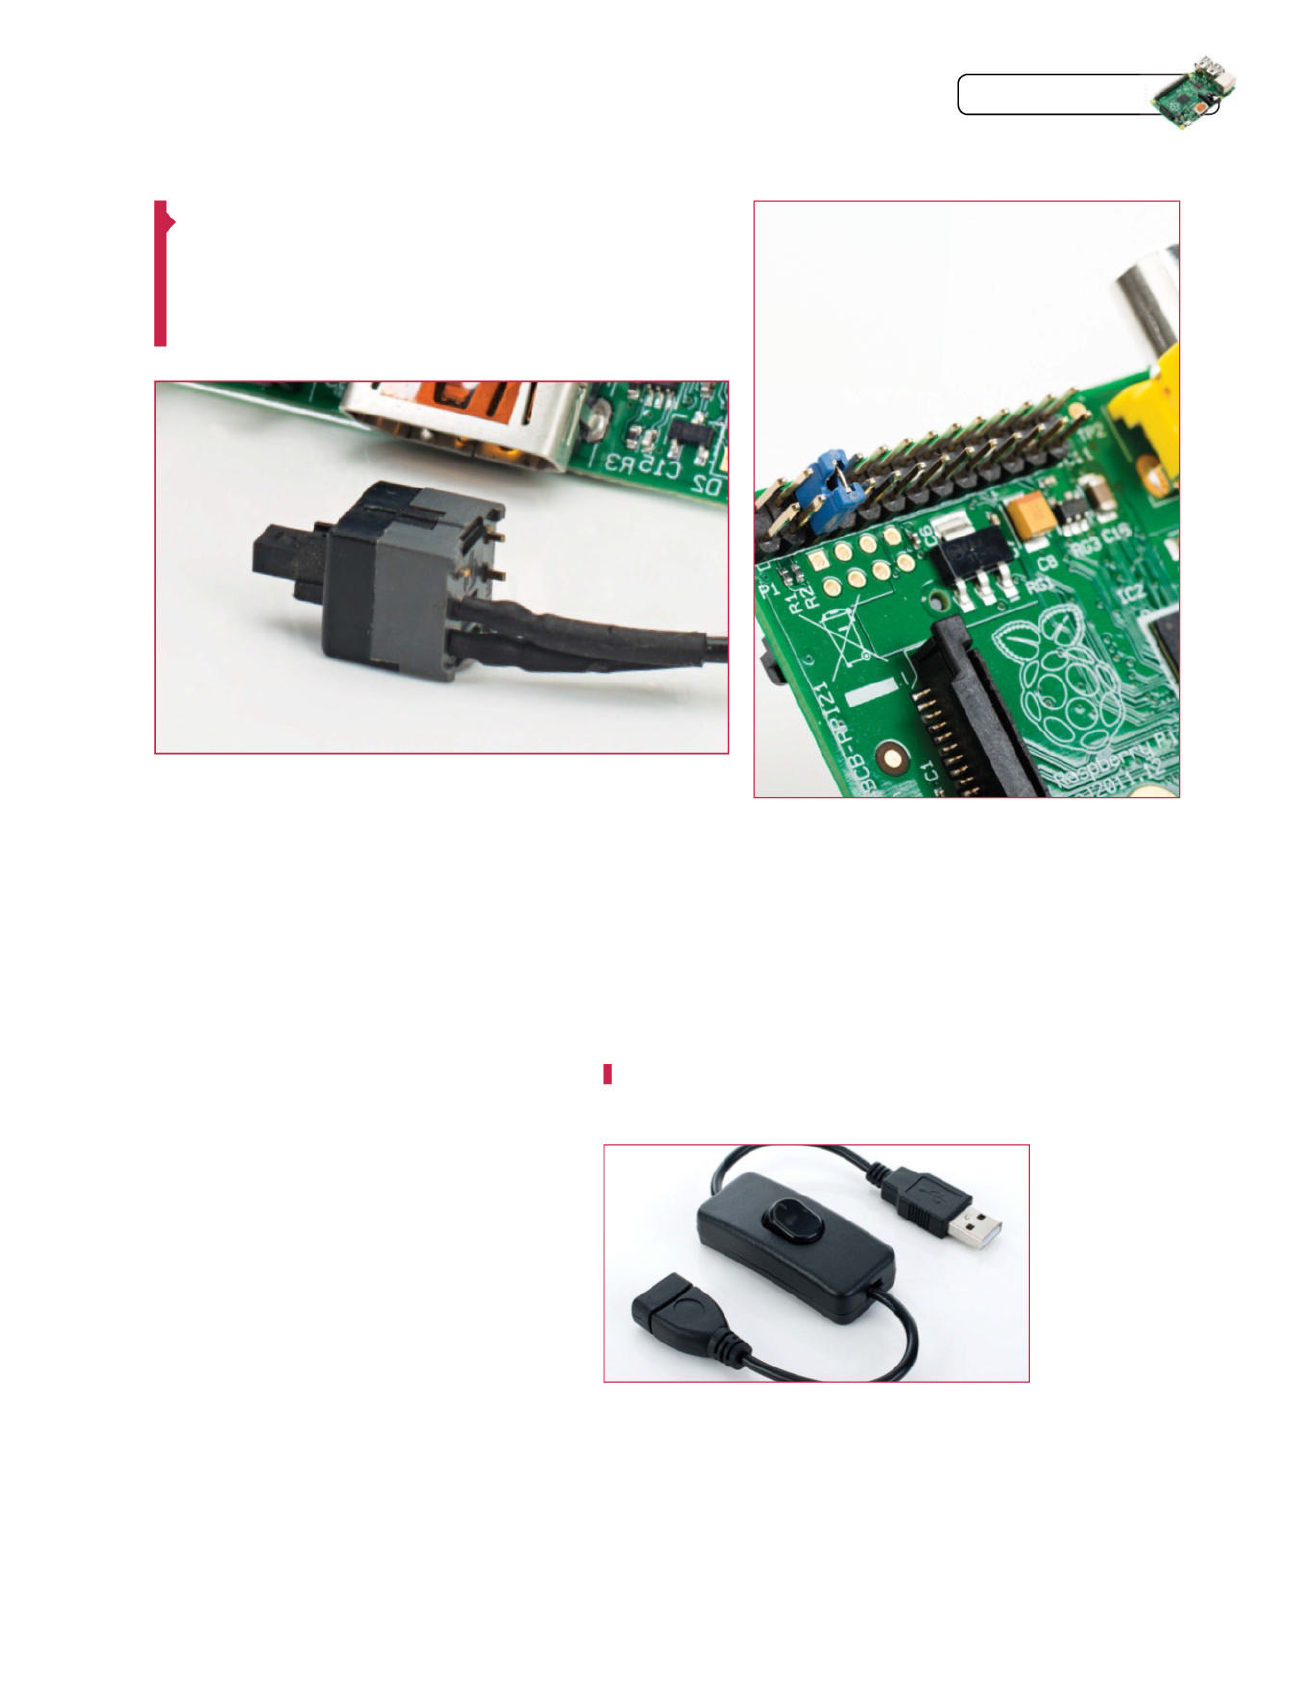
Raspberry Pi Tips, Tricks & Hacks 65
Tips | Tricks | Hacks
QYou should
know your Pi
inside and out,
and learn how to
identify GPIO pins
02Find your components
Header pins can be purchased online, although this will
invariably result in having to order more than you need.
Alternatively, if you have an old motherboard, remove a pair
of pins with a soldering iron. Similarly, you might buy a new reset
button, or use one from an old PC.
03 Solder pins to your Pi
To gain stability when soldering, place the Pi upside
down on a layer of packaging foam, with the header slotted into
the holes.
Using fi ne solder, secure the pins to the mainboard with
your soldering iron. This will require a very steady hand, so get
assistance if required.
04 Connect your reset switch
Leave the solder to cool for a few minutes before
attaching the reset switch connector.
Some cases don't have space for the pins and/or the
connector, however, so take the time to plan ahead and
make sure everything fi ts. If not, you may need to make some
adjustments to your case.
05 Reset Raspberry Pi following crashes
With the switch installed, you’ll be able to reset the
Raspberry Pi when required. Note, however, that this isn’t an
option to be used for whenever you feel like restarting. Rather,
it should be done only when the system fails to respond within
a reasonable time frame.
06 Reset with a HDD jumper
Not keen on soldering new pins to your Raspberry Pi?
That is perfectly understandable, but it doesn’t mean you cannot
reset the computer. We have another solution for you.
Using a motherboard jumper, two GPIO pins and a script to
initiate an ordered shutdown is a simple alternative that doesn't
involve solder and potential PCB damage.
07 Identify the GPIO pins
This method works on most models. Each has a GPIO
array, 26 pins on the A and B (Rev 2) and 40 on the A+ and B+.
The jumper should be placed on GPIO3, pins 5 and 6 counting
from the left with the board the right way around.
08 Detect jumper with a script
Use the script at bit.ly/1Ge5n0O to detect the jumper,
making it executable (sudo chmod 755) before running. Within
a minute your Pi will shut down. Add this line to /etc/crontab to
run the script whenever you boot up.
@reboot root /home/user/scripts/gpio_actions.sh
Remember to remove the jumper before booting up!
09 Try a USB reset button
Specialist online stores offer USB reset buttons that
can be connected to your Pi for scenarios when the device
needs to be rebooted.
If the idea of using the HDD jumper or doing some minor
soldering doesn’t suit you, then a USB reset switch might be
your best option.
Shutting down a Raspberry
Pi by removing the power
cable is risky
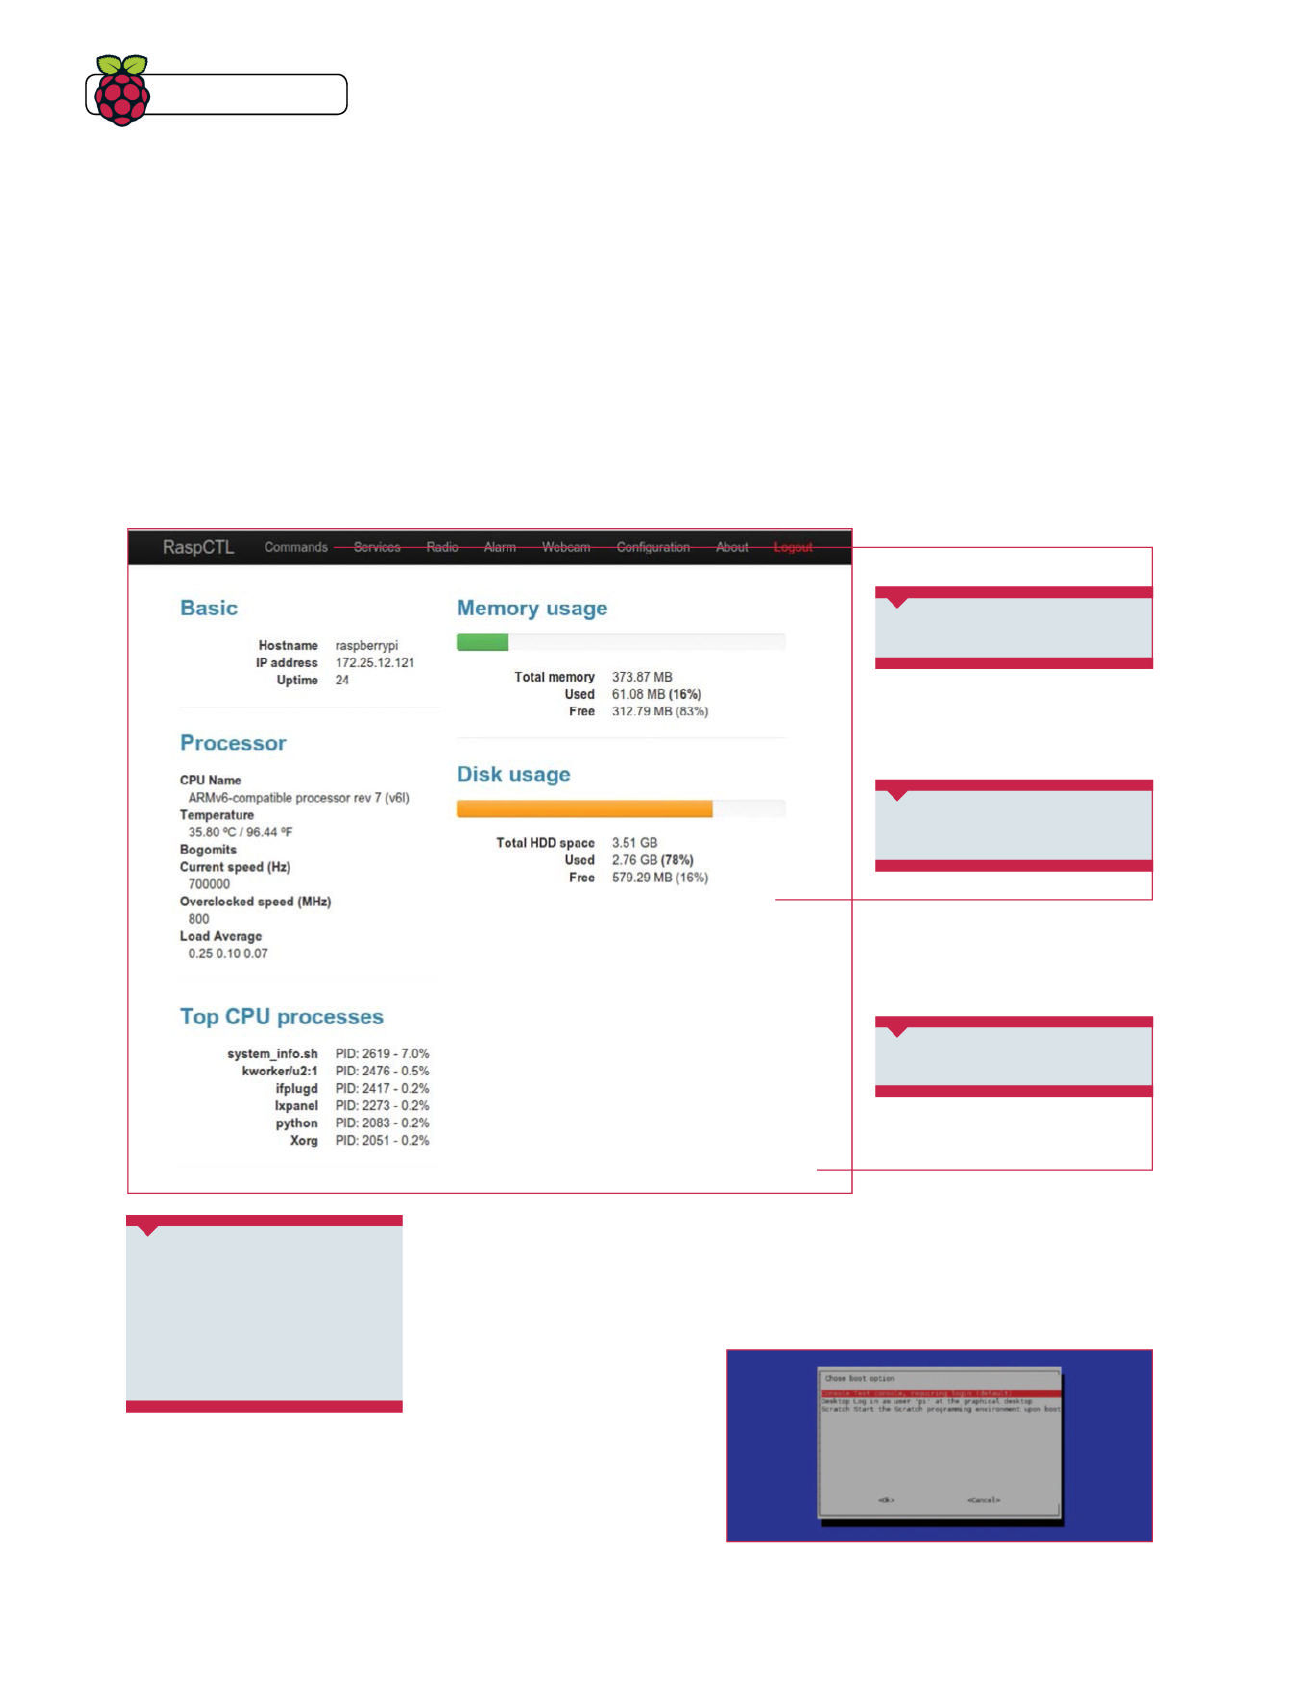
Tips | Tricks | Hacks
66 Raspberry Pi Tips, Tricks & Hacks
Use a web interface to control your Pi and employ
it as a fi leserver or media centre from a remote
location using any web-connected device
Remotely control
your Raspberry Pi
Not everyone uses the Raspberry Pi
while it’s hooked up to a monitor like a
normal PC. Due to its size and portability,
it can be located almost anywhere
that it can be powered and it’s widely
used as a fi le server, media centre and
for other nontraditional applications.
Some of these uses won’t easily allow
access to a monitor for easy updates and
maintenance. While you can always SSH
in, it’s a bit slower than a full web interface
that allows for custom commands and a
view of the Pi’s performance. We’re using
software called RaspCTL, which is still in
development, but works just fi ne for now.
01Update your Pi!
To make sure the Raspberry Pi works as best it can, you’ll
need to update Raspbian. Do this with a sudo apt-get update
&& apt-get upgrade, followed by a fi rmware update with sudo
rpi-update. Finally, if you’re booting to LXDE, enter raspi-
config and change it to boot to command line to save power.
What you’ll need
Q Raspbian set to
command line
Q RaspCTL
Q Internet connection
Main window Get the full details of
the currently running system from the web
Commands Create custom
commands for running your Raspberry Pi
Other utilities Seeing through your
webcam and setting an alarm are just two
additional things you can do with your Pi
Tips | Tricks | Hacks
Raspberry Pi Tips, Tricks & Hacks 67
02Edit the IP
For everything to work more easily, you should set the
Raspberry Pi to have a static IP of your choice. To do this, edit the
networking confi g by using:
$ sudo nano /etc/network/interfaces
…and change iface eth0 inet dhcp to iface eth0 inet static.
03 Set up a static IP
Add the following lines under the iface line with your
relevant details:
address 192.168.1.[IP]
netmask 255.255.255.0
network 192.168.1.0
broadcast 192.168.1.255
gateway 192.168.1.[Router IP]
04 Ready to install
You’ll need to grab the public keys for the software
we’re going to install by using the following commands. The fi rst
will take just a moment to download the software, while the
other quickly installs it:
$ wget debrepo.krenel.org/raspctl.asc
$ cat raspctl.asc | sudo apt-key add -
05 Add the repository and install
Add the repository to the source’s fi le with the
following command:
$ echo “deb http://debrepo.krenel.org/ raspctl
main” | sudo tee /etc/apt/sources.list.d/raspctl.
list
…and fi nally install the software with:
$ sudo apt-get update
$ sudo apt-get install raspctl
06 Access your Raspberry Pi
Now the software is installed you can start to access
your Raspberry Pi from anywhere on your network. To do this
type the following into your address bar, with the IP being the one
we set up earlier:
http://[IP]:8086
07 Change your password
The default username and password is admin for both
fi elds, and you should make sure to change that before doing
anything else. Go to Confi guration along the top bar and fi nd
the Authentication fi eld at the bottom of the page. Input the
original password (admin), followed by your new passwords.
The username will remain as admin.
08 First command
Go to Commands on the top bar to begin creating
commands to run. Here you’ll need to add a class – a user-
defi ned way to fi lter your commands that won’t affect the way
it’s run – a name for the command and the actual command
itself. The commands won’t necessarily run from the pi user
unless you tweak the confi g fi les.
09 More functions
The web interface has a few extra functions apart from
running commands, such as the ability to view the webcam and
connect to radio services. Updating the software every so often
will also allow you to make sure it keeps working. Play around
with it and see what best suits you.
Android ports are
now available for
Raspberry Pi, opening
up a whole new world of
possibilities. Here’s how
to get started…
Raspberry Pi
on your
Android
Install
68 Raspberry Pi Tips, Tricks & Hacks
Tips | Tricks | Hacks

While one of the main reasons for the creation of the
Raspberry Pi was to offer a cheap way for people to get
into programming and using Linux, there are plenty of
people who see it being used as a replacement for other
forms of computing tasks. With the Pi being so small, the
concept of using it for purposes where space is a premium
is defi nitely not too far-fetched. Its form factor, weight and
low power requirements make it ideal for use in a number
of situations; however, the software may not always be
the best for the task. Where Linux may be lacking, though,
Android is there to cover it.
Android ports to Raspberry Pi have been in the works for
a little while now, but they’ve only just been made a usable
reality thanks to the recent open-sourcing of the VideoCore
GPU driver code. This allows for full hardware acceleration
of Android, something that was previously having to be done
purely by the CPU.
Android can offer a very different experience and
interface than a standard Linux distribution, without having
to obtain custom distros so it’s optimised for a particular
use. This means you can experiment with the sort of
applications you’d want to use Android for without carrying
around multiple SD cards in lieu of wiping them every time.
Thanks to an ever growing development community,
Google recently announced that there had been 25 billion
Android app downloads by the end of September, fi ve
billion up from the number at the end of July, from its
675,000-strong selection. With this rate of expansion, there
are always a number of apps for pretty much anything you’d
want an Android device to do. With access to this range of
possibilities on the Raspberry Pi, you can create a system
that has the advantages of using a mobile, user-friendly
OS, with the price of the Pi. And the addition of more I/O
ports from the Pi can make it fi t in better than your standard
Android smartphone.
There are three types of projects we’re going to cover over
the next few pages: a smart TV, a home automation remote
and an in-car computer. While such distros like XBian and
OpenELEC exist for media centres and home theatre PCs
using the Raspberry Pi, the XBMC apps do not have the
same kind of range as Android. With apps going outside the
concept of plain media watching, and even the inclusion
of Android games, there’s a lot more you can do with an
Android-run smart TV.
For home automation, there are very mature X10 and
Z-Wave remote control apps available on Android that are
optimised for the kind of interface you’d want to use for a
remote control, unlike the mainly mouse-focused tweaking
tools used on Linux distros. Finally, with in-car computers,
the touch-screen optimisations and grid array for apps
allow for easy navigation to music, podcast and other
media apps, as well as plenty of fantastic GPS and satellite
navigation applications native to Android.
Q All you need
is a Raspberry
Pi set up and
ready to go!
Meet Razdroid
The team makes the fi rst project to
get Android on your Pi
Before the release of the VideoCore
drivers, some community members
decided they wanted to have a go
at porting Android to Raspberry Pi,
creating Razdroid. Based mainly on
CyanogenMod, the project got far enough to have a couple
of working ports, only limited by the lack of hardware
acceleration. Since then, the Raspberry Pi Foundation
has created its own ports, and eventually released the
VideoCore driver to make ports of Android and other
software a lot smoother.
Raspberry Pi Tips, Tricks & Hacks 69
Tips | Tricks | Hacks
You can put Android on your Raspberry Pi
right now by visiting the Razdroid site at
www.razdroid.net. There are currently a couple
of images, based around both CyanogenMod 7.2
and 9, with different performance capabilities
and app compatibility. The images can be put on
an SD card using the same method as you would
a Linux distro image, and will run from boot
without any extra setup needed.
If you’re feeling a little more adventurous, you
can compile the images from source instead.
You’ll be able to make changes, updates and
additions as well, if you want to improve the
build. The steps on this page will guide you
through a basic build of CyanogenMod 7.2,
based on Android 2.3, for the Raspberry Pi, using
the same fi les as the Razdroid image to get
it working.
Q Using a standard dd operation, you can get your Raspberry Pi running Android
01 Install libraries
You’ll need to get the necessary
libraries for the build to work:
$ sudo apt-get install git-core
gnupg flex bison gperf build-
essential zip curl libc6-dev
libncurses5-dev:i386 x11proto-
core-dev libx11-dev:i386
libreadline6-dev:i386 libgl1-
mesa-glx:i386 libgl1-mesa-dev
g++-multilib mingw32 openjdk-6-jdk
tofrodos python-markdown libxml2-
utils xsltproc zlib1g-dev:i386
$ sudo ln -s /usr/lib/i386-linux-
gnu/mesa/libGL.so.1 /usr/lib/i386-
linux-gnu/libGL.so
CC: Jim Killock
It’s easy to install Android…
When the Raspberry Pi was fi rst created, there were some
very specifi c goals in mind for the fi nished product. Thanks
to the way it met these goals, it has blown up as the darling
of hobbyists and other tech enthusiasts for all manner of
projects. To further understand the relationship between
the original goals and this new concept of putting Android
on the Raspberry Pi, we spoke to the co-creator of the
Raspberry Pi himself, Eben Upton.
Upton told us that there had never really been any plans
originally for Android to be supported by the Raspberry
Pi. However, developments in recent times had changed
the view of the Foundation: “A signifi cant minority of our
customers want to see it, so that makes it important to us.”
When the Foundation originally announced it was
working on Android compatibility, it already had a working
prototype. “This implementation uses a different kernel
and VideoCore binary image from the one available on
GitHub,” explained Upton, “which is why we’ve been
keeping quiet about it so far.” This was in late July, and it
took the Foundation a further three months to fi nally get
the VideoCore drivers open-sourced. Upton told us shortly
before its release why it had been delayed so long: “The
issue around releasing the Broadcom Android version is
that we’d need a separate microcode image for the GPU,
and we really don’t want to fork the community.”
Eben Upton
speaks
Follow our step-by-step guide to get up and running
Without Eben Upton, the Raspberry Pi
would not have been possible. Coming
from a background of computing and
teaching, Upton is currently a technical
director at Broadcom and is responsible
for the overall software and hardware
architecture on the Raspberry Pi.
The co-founder of the
Raspberry Pi Foundation
70 Raspberry Pi Tips, Tricks & Hacks
Tips | Tricks | Hacks
Raspberry Pi Tips, Tricks, & Hacks 71
www.linuxuser.co.uk
71
Q The Play Store will
initially be missing
from any ports
03 Build environment
Now we’ll make a directory for the
build environment and initialise it for the repo
sync. First:
$ mkdir ~/android_pi
Then move to it and initialise:
$ cd ~/android_pi
$ repo init -u git://github.
com/CyanogenMod/android.git -b
gingerbread
And fi nally sync:
$ repo sync -j16
04 Device tree
After the sync has fi nished, create a
new directory and download the device tree for
your build:
$ mkdir -p ~/android_pi/device/rpi
$ cd ~/android_pi/device/rpi/
$ git clone https://github.com/
Mathijsz/device_rpi.git
$ mv device_rpi rpi
06 The build
We’re now ready to build our Razdroid
image. Make sure to do following to start
the build:
$ source build/envsetup.sh
$ lunch
$ make -j4
Be aware that this may take a while.
02 Working directory
We need to download the source to
a folder that we can make executable. First
create the directory:
$ mkdir ~/bin
Then add it to your path:
$ PATH=~/bin:$PATH
And fi nally, download and chmod:
$ curl https://dl-ssl.google.com/
dl/googlesource/git-repo/repo > ~/
bin/repo
$ chmod a+x ~/bin/repo
05 Initial setup
Before we do the actual build, we need
to run a little script to properly prepare the
source code:
$ cd ~/gingerbread_pi/device/rpi/
rpi
$ ./initial_setup.sh
$ cd ~/gingerbread_pi
This will automatically make the changes.
Now the source code has been released, via the ARM
Userland on GitHub, and marks the fi rst time a full ARM-
based, multimedia SoC has received vendor-provided open-
sourced drivers, and Broadcom is the fi rst company to open
up its mobile GPU drivers in this way. With it, people can get
down to fi nishing Android ports and starting new ones.
Android is well known as being used on touch-screen
interfaces, but earlier devices included keyboards
and trackballs. While this has gone out of vogue for
smartphones and other handheld devices, for testing out
your Android-powered Pi it would be useful to have this
option. Is it available now, though?
“I’m not aware of any signifi cant challenges in this area.”
Upton told us when we asked about traditional inputs. “We
expect most people would use Android with a mouse and
keyboard, and this seems to be a well-supported option
from ICS (Android 4.0) onward.”
So with this native mouse and keyboard support,
you’re going to be able to fi nd a lot more applications for a
Raspberry Pi running Android than you could do with even
an Android smartphone. On top of that, you will likely get
the same kind of performance as a Linux distro according
to Upton: “I would expect them to be very close in terms
of performance. There may be more UI acceleration in
Android, though, which we hope to bring into Linux.”
Finally, one of the main reasons to use Android would be
to access the huge array of apps. We asked Upton about the
issue with Google Play – those into the Android scene
might know that CyanogenMod had to remove this
from the standard build for legal reasons. Upton
told us there were currently no plans to obtain
a licence for the store; however, Android
allows you install the APK fi les
without the store, and these are
usually very easy to obtain.
Q The concept
of the Raspberry
Pi is a spiritual
successor to the
BBC Micro
Tips | Tricks | Hacks
Smart TV
Use your Raspberry Pi to
make any TV ‘smart’
Q The Raspberry
SAFE VESA
Mount add-on
attaches the
Pi to most
flat-screen TVs
Game on!
Why not turn your smart TV into a
games console?
Q The MOGA
can also
cradle Android
phones, hence
the square
shape
If the buzz around the Ouya is anything to go by, a lot of
people are interested in how to turn Android into a games
console. With a Raspberry Pi running Android, you’re
already part way there. While you could use a mouse and
keyboard for some games, others will probably work better
with a joypad, and this is where the MOGA controller comes
in. It connects via Bluetooth to Android and is able to
control a number of Android games.
Get OnLive
If Android games don’t really do it for you, how about full-
blown PC games? The OnLive streaming service allows you
Smart TV is a very recent and popular buzzword
for a more advanced media PC running inside
your TV, which add a whole host of different apps
as well as being able to stream your content
from around a network. Android itself does not
need any specifi c apps or skinning to turn it into
a functional smart TV – the display is already
confi gured for easy access to all the installed
software, and using home replacement apps
such as Launcher Pro will allow you to increase
the number of on-screen apps if the stock
launcher displays too few for you.
This usage for Android has not gone
unnoticed by other people, with a few
companies already on board. Recently, a high-
profi le Kickstarter project was successfully
funded, called Pocket TV by Infi nitec, which
while defi nitely not the fi rst Android-powered
smart TV device, is notable for running off a USB
stick. Like the Pocket TV, the Raspberry Pi is
capable of running 1080p video without an issue.
The benefi ts of Android even go beyond the TV,
as Ahmad Zahran, founder of Infi nitec, explains:
“[You] get access to all your information,
games, TV streaming channels, work
documents and your entire digital life. You’ll
have all the benefi ts that you get from carrying
your smartphone but with the ability to display
it on a much bigger screen. Imagine walking
into a meeting and doing a presentation
without a laptop.”
As well as having access to simple
information apps such as the Weather and
Stocks, you can also use Android widgets to
add a news feed or social network streams, and
you can even connect to streaming websites
like Netfl ix or the BBC iPlayer, as well as
browsing the web.
Once you’ve got your Raspberry Pi set up as an
Android smart TV, you may be wondering where
to put it. Well luckily, there are a few cases out
there that support VESA mounts, the standard
used to attach fl at-screen TVs to brackets and
walls. The Raspberry SAFE case by Solarbotics
is just the tool to tuck it out the way.
to buy and rent games and play them anywhere, thanks to
all the legwork being done in the cloud. Using the OnLive
Android app, you can access these games from your
Android-powered Raspberry Pi and play them directly
on your television without the need for a bulky PC in your
living room. And it also works out much cheaper than the
offi cial OnLive console.
72 Raspberry Pi Tips, Tricks & Hacks
Tips | Tricks | Hacks

Raspberry Pi Tips, Tricks, & Hacks 73
Home
automation
In-car computer
Fit a Raspberry Pi in your car
There’s no need for costly
offi cial controllers
Q Conrad Vassallo has tried a few solutions for
home automation, including some using the Pi
looking up information, such as recipes via the
Epicurious app, or using it to stream music from
your fi le server while you cook.
Home automation controller
Using your Android-powered Pi to control the
house is fairly simple once you have it up and
running. However, you can make it completely
customisable using software like Open Z-Wave
to set up timed events and remote access using
your Raspberry Pi as the controller.
“When I got my fi rst Raspberry Pi, I thought
it would make the project more interesting
to have a dedicated appliance to control my
lights,” explained Conrad Vassallo, who already
had a fully working solution. “So the next step
was to install SSH, Apache, PHP and MySQL
and my code on the Raspberry Pi. Now my
system was consuming very little power and
performed fl awless!”
The system created by Conrad also supports
Android input. “The Raspberry Pi is an excellent
piece of hardware to ‘embed’ systems into. First,
it is very small, silent, green and provides the
services offered by larger, more expensive PCs.”
Using home automation can be fairly simple.
There are a number of different standards used
for achieving it, such as powerline-based X10, or
the RF-controlled Z-Wave products. These are
usually controlled by very expensive remotes and
wall screens, vastly increasing the price over the
hardware you’d need in the fi rst place.
There’s also a problem with running on open
source operating systems. We spoke to an open
source home automator, Conrad Vassallo, about
the problems he faced even getting it started:
“I did some research on systems that provided
home automation and concluded that Z-Wave
was the best option for me… soon I could control
the lights in my living room with the touch of
a button on a remote control. However, this
was not enough: I wanted to have the system
controlled by timed events and so the quest
for a Z-Wave computer interface was on. First I
bought a ControlThink USB stick, which did work
fi ne for my needs; however, my home server runs
on CentOS and the ControlThink USB stick was
only supported under Windows. So I had to run
the system on a virtual machine, which was not
the best option on an Intel Atom PC.”
Luckily he was able to get a setup running using
code from the Open Z-Wave project, creating
his own controller out of it – you can obtain the
source code from here: code.google.com/p/
open-zwave-controller/source/checkout.
The benefi t of running these Z-Wave systems
is that you can control them using Android apps.
A Raspberry Pi and a small screen to connect it to
cost a lot less than the offi cially made products
and generally work better for the purpose, as you
can always use the extra Android apps on the
device anyway, whether it’s mounted on a wall or
a small box on your coffee table.
Kitchen computer
The size of a Raspberry Pi allows it to fi t in a lot of
spaces – add a touch screen and it takes up very
little room. Putting it in a discreet location like
the corner of a kitchen worktop gives you instant
access to the internet and your home network for
The main issues usually associated with carputers are
fi nding a small enough computer with enough power to do
the tasks you’d want it to do, and then making sure you have
a proper way to actually power the system once it’s in place
in your vehicle. On its own, the Raspberry Pi is a solution to
this problem, with the ability to be powered solely from the
cigarette lighter using a USB adaptor that you’d normally
fi nd for phones.
Running Android on top of that makes it the perfect in-car
computer. In the past, even with a touch screen, navigating
around an operating system was tricky, especially
while on the move. While there have been a lot of recent
improvements to the Linux kernel and X for touch and
multi-touch inputs, the desktop environments themselves
are optimised for mouse and keyboard – at least, the
lightweight ones like LXDE that would run on a carputer.
With Android, that is no longer an issue. As well as a
fantastic selection of apps for music and podcast playback,
you also have the fairly advanced satnav apps like Waze and
even the native Navigation software. To top it off, there’s
also a customisable car dock mode that gives you bigger
buttons and default access to car-friendly apps.
Tips | Tricks | Hacks
The making of Razdroid
What caused you guys to start the project in
the fi rst place?
Viktor Warg: Well, I had just gotten my
Raspberry Pi and instead of just loading up
Debian as suggested, I started browsing the
forums for something more, well, fun, to run
on it. Stumbled upon the Android thread and
knew instantly that I wanted Android on my Pi.
Started collaborating with Mathijs and Les and
one thing led to another, and here we are!
Les de Ridder: The only real reason I was
interested in doing it was because it hadn’t
been done before. I thought it would be really
nice to be part of something like this, as I had
never done any porting or even embedded
projects before.
What limitations did you experience with the
Raspberry Pi?
VW: The main limitation was the lack of open
source libraries for the VideoCore IV (the Pi’s
GPU) which had put the project in somewhat
of a slumber for a few months. This led to the
fact that we had a fully functional Android
system but lacked the appropriate graphics
libraries to make it hardware accelerated
and thus the response times for the UI were
sluggish at best.
LdR: Well, mostly Android compatibility issues.
First of all, support for the Pi’s relatively old
CPU was pretty much broken in the then-
available Android sources; Mathijs luckily
managed to fi x this. Other limitations were
obviously the RAM: with 256MB, Gingerbread
works, but Ice Cream Sandwich runs… well…
much slower to say the least. This is not only
caused by the RAM, but also by the lack of
hardware graphics acceleration. Android
requires people to build custom accelerated
drivers for its libraries (eg Bionic). We couldn’t
do this at the time when we fi rst built ICS for the
Pi and still cannot, because the drivers’ sources
are sadly closed source.
How challenging was it to build Android for
the Raspberry Pi?
VW: It was quite a challenge at fi rst, seeing as
none of us (as far as I know) had been involved
in similar projects at all. As we progressed (or
didn’t, in some cases), things fell into place,
though. Eventually, I’d venture as far as to
saying that all three of us knew what most
of the issues we faced stemmed from and
how to solve them. One issue we had quite
early was that the Raspberry Pi kernel wasn’t
compatible with some of the patches Android
needed, mainly the IPC-Binder that it relies on
heavily. If I recall correctly, that was solved by
our main kernel guy (Mathijs) after a few days
of brainstorming.
Mathijs de Jager: Another issue was a strange
problem with executables crashing all the
time (‘segfaulting’). After some help from
the #cyanogenmod-dev channel, it turned
out to be a bug regarding the ageing ARMv6
Q The team want to get Roku-style
streaming on the Raspberry Pi
Q The Raspberry Pi Foundation’s successful
attempt at running Android on a Raspberry Pi
Razdroid was developed by a small team of like-minded
people, eager to test out the Raspberry Pi’s limits. We
spoke to three members of the team, Viktor Warg, Les
de Ridder and Mathijs de Jager, about their involvement
74 Raspberry Pi Tips, Tricks & Hacks
Tips | Tricks | Hacks

architecture in the CyanogenMod sources we
used. Additional build fl ags, almost specifi c to
the Pi, were needed too. This had us stuck for
quite a while.
What project ideas do you guys have for a
fi nished product?
LdR: I personally would like to make a build
that anyone who owns a Pi can use, whether
it’s a Model A with limited peripheral support
or a new fancy Model B with 512MB RAM. This
might mean that we would have to remove some
features, but I think that we will be able to fi nd
a good confi guration that works for the largest
part of the people who are interested in running
Android on their Pi, suiting as many people
as possible. For people who are interested in
making their own builds, we will supply patches
so they can make their own confi guration but
still use our patches for the Pi. I don’t really have
any personal projects, but using it as a Google
TV-like internet player would be nice.
What had you been using the Raspberry Pi for
before Razdroid?
MdJ: Mine had been running as a local web
server for testing.
VW: Nothing at all. I had just gotten my Pi when
I started helping the Razdroid project.
LdR: Not much to be honest. I only had just
received my Pi when I started working on
Razdroid. I was still waiting for my Pi electronics
starter kit to arrive back then, which I later used
for learning some basic electronics, like using
resistors, LEDs, transistors etc.
Any future plans for ports or development on
the Pi?
MdJ: Netfl ix on Android on the Pi seems
attractive and I can imagine a lot of people
would want that, but I heard some DRM module
Contribute to Razdroid
Here’s some ways you can help port Android
As Eben Upton said, the Raspberry Pi is about content
creation, and what better way to do this than by getting
in on a project and helping out with the Android port?
Razdroid’s Viktor Warg tells us that the drivers are a
good start, but they need a little more: “We’ve analysed
the libraries and fi gured out that we need to implement
our own userland gralloc-module, and none of us have
even the slightest idea on where to start on that.”
The best place to start is to visit the Razdroid wiki,
www.razdroid.net, and check on the current progress.
There’s also an IRC channel, #razdroid on Freenode,
where the developers regularly talk about their current
work, and the entire project is maintained on GitHub.
Of course you can always start your own project,
either by using the offi cial Android source from the
AOSP, modding CyanogenMod, or forking Razdroid.
Happy hacking!
is needed. The Broadcom CPU seems to have
it (for example the Roku 2 has Netfl ix and
has the same Broadcom CPU), but needs to
have it enabled. Maybe the Pi Foundation can
eventually get a licensing thing going, just like
the MPEG2-decoding licence.
Q Razdroid is
based mainly on
the CyanogenMod
Android firmware
“The Pi kernel wasn’t compatible
with some patches Android needed”
Raspberry Pi Tips, Tricks & Hacks 75
Tips | Tricks | Hacks

76 Raspberry Pi Tips, Tricks & Hacks
Don’t leave your Raspberry Pi behind – incorporate it
into mobile projects by powering it with AA batteries
Add a battery pack
to your Raspberry Pi
Your Raspberry Pi’s mobility is usually restricted by the
length of the power lead. Rather than limiting it to your desk
or living room, however, you can use it for mobile projects as
diverse as launching it into near-Earth orbit or monitoring and
automating your garden.
Of course, to do this you will need batteries, but adding
battery power to your Raspberry Pi is simpler than you might
have imagined. All that is required are six rechargeable AA
batteries (or single-charge alkaline), a battery box with space
for the batteries and a UBEC. The latter is a Universal Battery
Elimination Circuit, a voltage regulator that will regulate the
power supply and prevent damage to the Raspberry Pi, and can
be bought for under £10.
What you’ll need
Q AA battery box
bit.ly/1FDiJGa
Q 3-Amp UBEC
bit.ly/1HLKih7
Q 3-Amp terminal strip
Q 6x AA rechargeable
batteries
Tips | Tricks | Hacks
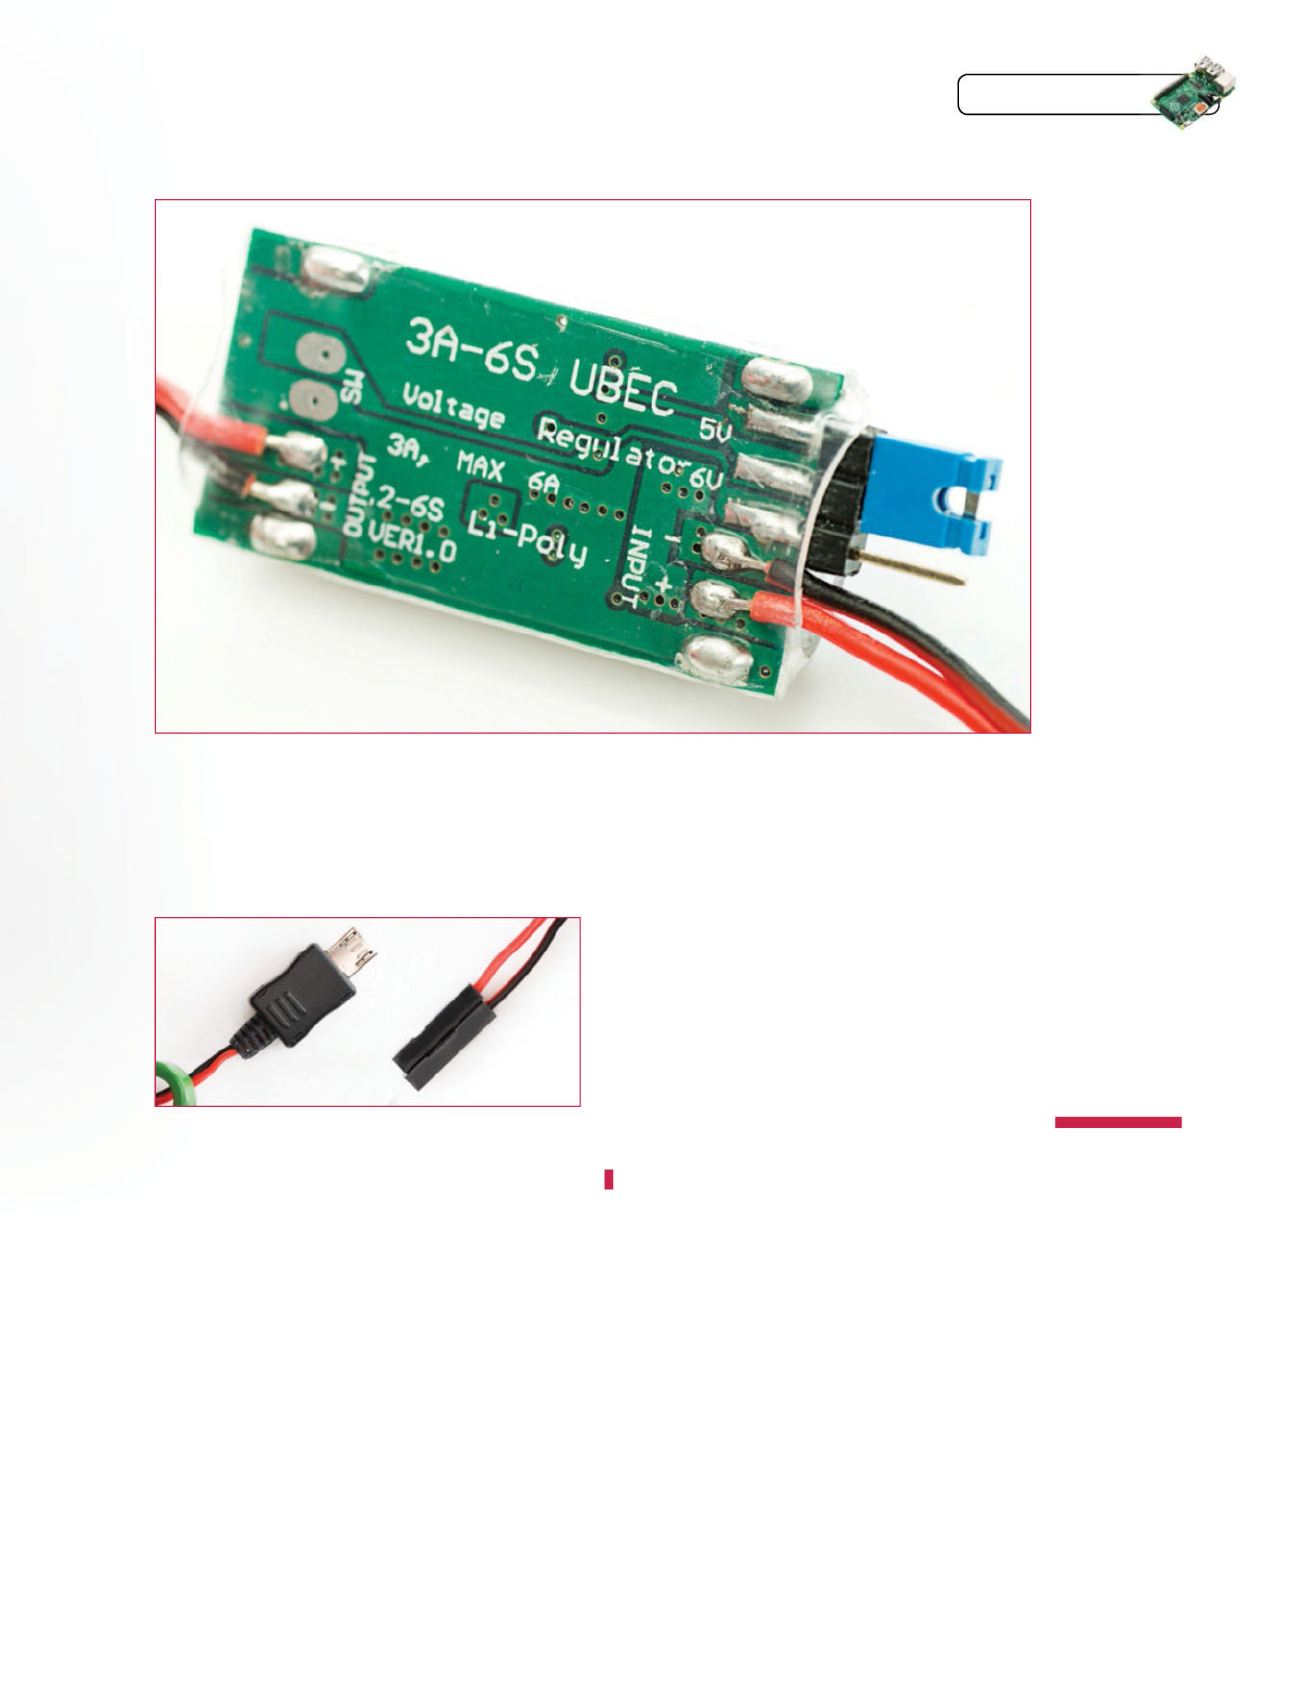
Raspberry Pi Tips, Tricks & Hacks 77
Tips | Tricks | Hacks
01 Order your components
If you’re buying your components online, you should be
able to get them all within fi ve days. However, if you’re ordering
offl ine (specifi cally the UBEC), you should avoid traditional
electronics stores and instead visit a model enthusiast store, as
these circuits are regularly used in RC devices.
02 Check your UBEC
Two types of UBEC are available. If you used the store
that we suggest in the resources box to the left, you’ll receive one
with a micro USB power connector for easy connection to your
Raspberry Pi. However, if you bought one from eBay then there is
a strong chance that you will receive one with a 3-pin connector.
05 Add a battery to boot
With your Pi ready to use and your Wi-Fi dongle plugged
in, connect the UBEC to the micro USB port and insert the sixth
battery into the battery box. The Pi’s power and status lights
should indicate that the computer is booting up, which gives you
a fully portable computer.
06 Connect the 3-pin UBEC
If you purchased the UBEC with the now-modifi ed 3-pin
connector, you’ll need to connect this to the Raspberry Pi’s GPIO
header. Specifi cally, connect the positive +5V (red) connector to
Pin 2 and the negative 0V connector to Pin 6. Once again, check
the status lights to ensure the Pi is booting.
03 Change the UBEC connector pins
To use the UBEC with a 3-pin connector, alter the
position of the pins so that they occupy the two outer slots.
Use a small jeweller’s screwdriver to lever up the small plastic
catch and remove the red wire from the central slot, before
sliding into the unoccupied outer slot.
04 Connect the UBEC to the battery box
With fi ve batteries in the battery box, connect it to the
UBEC: red-to-red, black-to-black. You might do this by twisting
the wires or soldering, or employ a 3-amp terminal strip, cut
down to two pairs. The terminal strip can be cut to size using
a modelling knife.
Left You can also use
a UBEC to charge
your smartphone
from a battery pack
It is possible
to power your
Raspberry Pi
directly from four
or more batteries,
but without the
safety that the
UBEC provides
you’re likely to burn
out the computer.
Unregulated
power can cause
considerable
damage to your
Raspberry Pi, and
as you increase the
current with more
batteries, the risk
also increases.
Unless you are
planning to learn the
hard way and you
have plenty of cash
to burn, always use
a UBEC!
Use a
UBEC
07 Measure uptime
You should have already set up your Pi for SSH use, so
connect to the device via Putty after giving it time to boot fully (at
least 60 seconds). In the terminal, enter:
watch -n 60 uptime
This command will display the system uptime and also keep the
Wi-Fi connection active.
08 Judge your uptime results
Uptime results depend upon the type of battery you use
and the Raspberry Pi model. Single-charge batteries will last a
little bit longer, but this is a more expensive option. Meanwhile,
newer models have greater power requirements but run for less
time. For more power, add more batteries!
09 Power extreme!
More batteries added in parallel should result in almost
double the uptime (at least 16 hours on a 256MB Raspberry Pi
Model A), but instead of alkaline or rechargeable batteries you
might consider a modern lithium-based AA cell, which will last
considerably longer than alkaline batteries.

Tricks
80 10 Inspiring
Pi Projects
96 Set up the PiTFT touch screen
120 Make a digital photo frame
116 Add gesture control to your Pi
112 Build a network of Raspberry Pi’s
110 Tether your Pi to Android
106 Build a radio transmitter
102 Make a Raspberry Pi sampler
100 Portable Pi video player
98 Calibrate a touch screen interface
78 Raspberry Pi Tips, Tricks & Hacks
• Retro arcade cabinet
• Audiobook reader
• Web radio
• Media caster
• Portable Wi-Fi signal repeater
• Secure Tor web station
• Private cloud storage
• AirPi
• Dusklights
• Outdoor time-lapse camera
82
106
124 Pygame Zero
120
116
120
“Fire up your imagination
and test your Python skills”
Raspberry Pi Tips, Tricks & Hacks 79
110

80 Raspberry Pi Tips, Tricks & Hacks
Tips | Tricks | Hacks
The Raspberry Pi has come a long way over
the last couple of years, and it’s all down to
the creativity and imagination of a burgeoning
community that’s bought over three million of
these single-board computers. They’ve powered
quadcopters and coffee makers, self-sailing boats
and even touched the edge of space, but the one
thing that’s still as much in demand as it was on
launch day is an idea.
Our Raspberry Pi community works so well
because we all share our work with each other. We
can all see what everyone else is up to and, if we see
something that we like, we can have a go at making
it ourselves – and then changing it, so we can share
a different version. It’s all about inspiration.
So for this feature we made ten inspiring
projects for you to try – and we encourage you
to deviate from the steps when a new idea takes
hold and let us know where your project leads
you! There’s a range of different projects here for
you to try, covering media and entertainment,
networks, security and more. All the components
you’ll need for each one are listed on the page –
we’ve tried to keep the cost down as much as
possible by using widely and cheaply available
parts – and each project is simple enough for you
to work through in a single sitting.
One more thing to mention – some of our
Raspberry Pi creations are designed to be
combined, to give you a great starting point when
you begin adapting these projects to the way you
want them. If you come up with any combinations
we’ve missed, be sure to tweet us a photo (we are
@Books_Imagine) – and have fun making them!
Fire up your
imagination
and test your
Python skills
projects
10
Inspiring Pi

Tips | Tricks | Hacks
86
90
94
92
95
88 89
Wi-Fi repeater
Private cloud
Dusklights
AirPi
Time-lapse
camera
Audiobook reader
Secure web station
Web radio
84 85
82

We are very big fans of retro gaming, and when the Raspberry
Pi was released a couple of years ago we immediately
recognised its potential as an excellent device to power a
homemade, MAME-using arcade machine. Maybe one day we
could use a Raspberry Pi or another Linux-powered machine to
run a cabinet in the future.
We weren’t the only ones that realised how well a Pi would
fi t in an arcade machine; many projects have been completed
since then with impressive results. If you don’t fancy carving out
custom pieces of wood just yet then you can always start small
with the Cupcade kit from Adafruit. The kit is composed of laser-
cut plastic panels, a PiTFT screen and a selection of buttons,
custom boards and a special joystick that can be assembled into
a miniature MAME arcade cabinet.
Unfortunately, for the moment, the Cupcade only supports
the original Model B. However, we like to think of it as a great
excuse to test out whether or not your Model B is up to the task
of powering an arcade machine in case you want to expand. If
not, that means you’ll need another Raspberry Pi to replace the
arcade one, in which case you can always upgrade to a Model B+
or the more recently released Model A+.
When you get the kit in, you’ll need to assemble the
components step-by-step. It’s a long process which we don’t
quite have room for in this issue, so instead we’re going to point
you towards the excellent Adafruit instructions for constructing
your Cupcade: https://learn.adafruit.com/cupcade-raspberry-
pi-micro-mini-arcade-game-cabinet/.
A brief word of warning: it will take you a few hours to
complete, so make sure you have some time clear to do
so. It’s quite fi ddly in places as well, so it might be worth
getting a second pair of hands to help you. When
attaching the side panel to the screen, speaker and
What you’ll need
Q Raspberry Pi Model B
Q Adafruit Cupcade
adafruit.com/product/1783
Q 1.5 A power supply
Q Soldering iron
Q Wire strippers
Q A short length of audio wire
Left It’s a bit tricky to get across the size
of the Cupcade in this picture. Imagine
the joystick is the same size as the
analogue stick on a console controller
Create a tiny arcade machine
and learn how to expand it into
a fully-stocked games cabinet
Retro arcade cabinet
82 Raspberry Pi Tips, Tricks & Hacks
Tips | Tricks | Hacks
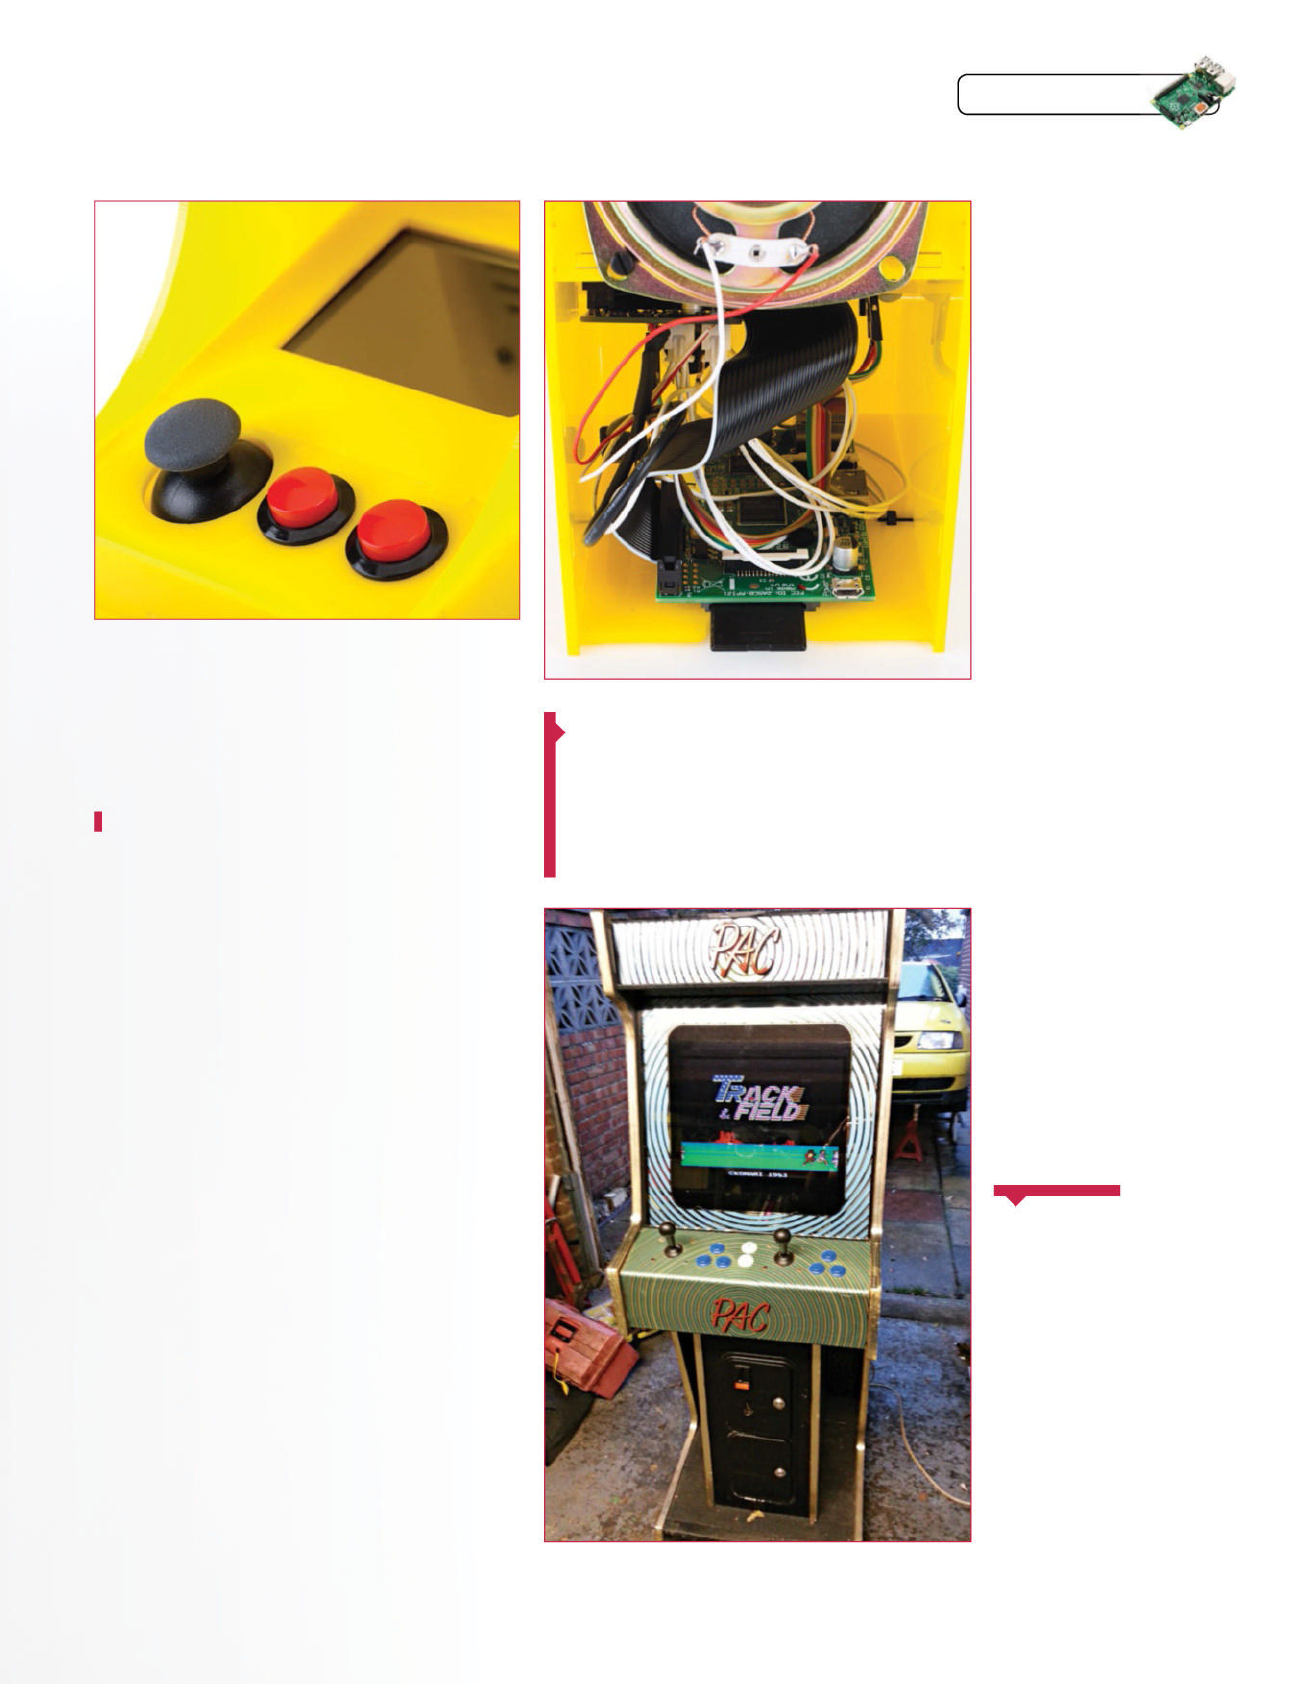
Raspberry Pi Tips, Tricks & Hacks 83
Tips | Tricks | Hacks
The emulators will still
work when you use the
HDMI port to hook it up
to a normal TV
Top lef t You can
always reverse the
button mapping for
traditional NES-
style control
Top right The
Raspberry Pi sits
snugly below a great
bale of wires
Bottom Upgrading
to a full-size
arcade cabinet is
easily done, as the
principles are the
same as with the
Cupcade build
buttons, we suggest ignoring the instruction to carefully lift
the panel off your work desk. Instead, try sliding it slightly off
the desk itself so that you can access each screw one at a time
without having to precariously balance the sections at an angle.
Once completed, it’s time to test it out. Adafruit has a
pre-rolled image you can write to an SD card which can be
downloaded with:
$ wget http://adafruit-download.s3.amazonaws.com/
cupcade-5-13-2014.img.zip
Write it to a 4 GB card (your Cupcade comes with one),
download the free, non-commercial ROMs they provide to
test the setup and power it up with a proper plug adapter. The
components are running directly off the Pi and can be quite
power-hungry, so it’s imperative that you properly power it.
The image we’ve written has a full MAME arcade emulator
in it, and a NES emulator. They’re both confi gured to use the
buttons you’ve installed on the case by default; this means that
because the NES emulator directly maps the cabinet’s A and B
buttons to its own A and B, the layout is the reverse of the NES
controller, which had A on the right and B on the left. Depending
on what you plan to use the cabinet for, you can either
swap over the buttons or just get used to a slightly altered
control scheme.
How can we expand the Raspberry Pi from here to create a
full-sized cabinet? The good news is that the emulators will still
work when you use the HDMI port for output instead, allowing
you to hook it up to a normal TV. The buttons and speakers
will still work as well and they can be plugged straight into the
Raspberry Pi’s GPIO port via a connecting ribbon, like we used
with the board to the screen.
However, this does leave you with only four buttons and the
small joystick; luckily there are plenty of USB arcade sticks
and components out there that can be connected via USB,
and with the right confi guring you can get them working on the
emulators just fi ne.
There’s a lot more you can do with the Pi once you’ve got it
set up in a cabinet, such as letting it connect to the network
so you can remotely maintain it without having to disassemble
the entire thing to retrieve an SD card. Make sure you do your
research on specifi c parts and look out for any community
forums that will defi nitely have helpful advice on what to buy.
One of the best
arcade cabinet
projects we’ve seen
has been featured on
the Raspberry Pi blog:
bit.ly/1pWjQWE
Using an old arcade
cabinet for parts,
the maker managed
to modify the inputs
to be read by the Pi
and got the coin slot
to work. You don’t
need to go this far
by getting a CRT
monitor or even an old
busted cabinet, but it
certainly adds a fl air
of authenticity to a
project like this.
Be
inspired
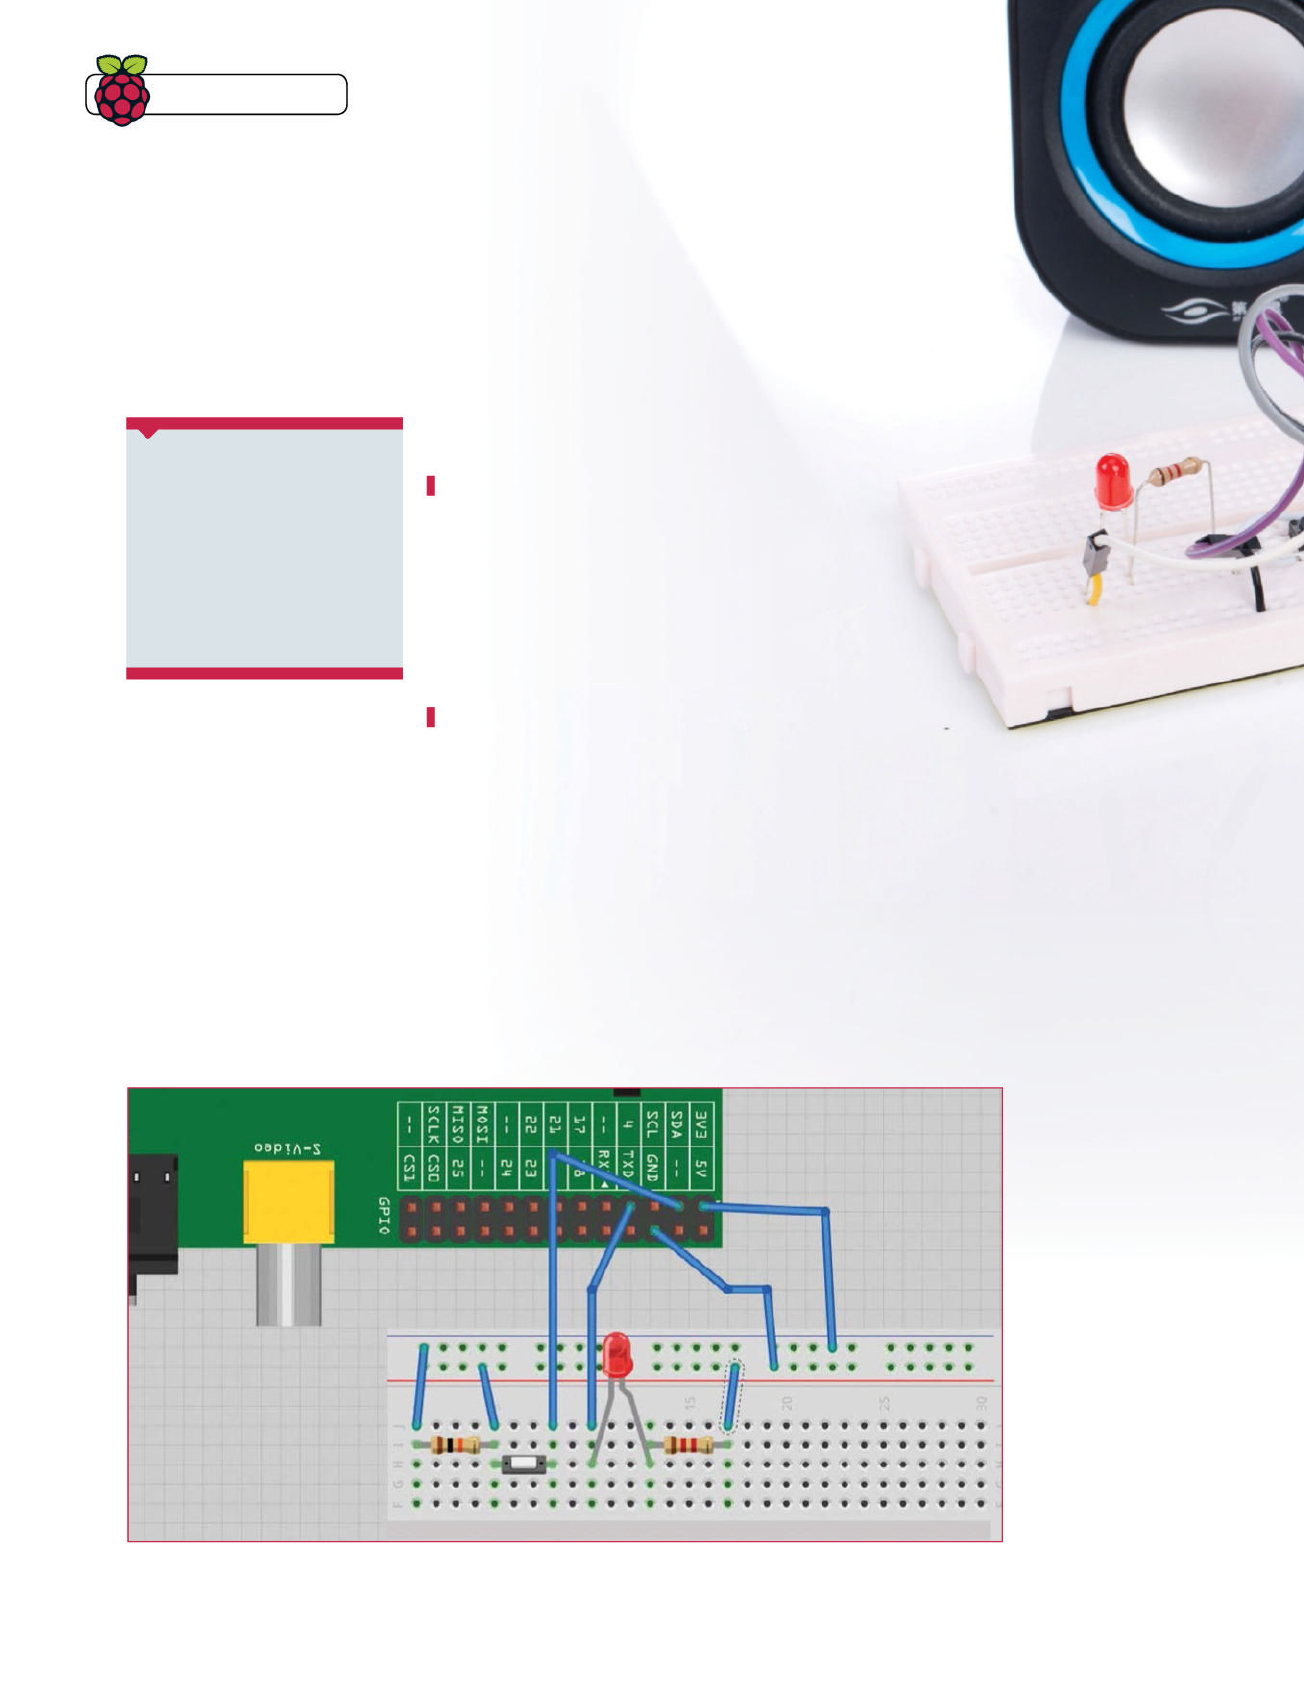
84 Raspberry Pi Tips, Tricks & Hacks
Tips | Tricks | Hacks
Create an audiobook player that works at
the touch of a button
Audiobook reader
Audiobooks and podcasts are
becoming more and more prevalent in
a society where we’ve learned to multi-
task thanks to all our modern devices.
Whether out and about or doing some
chores, it can be nice to have some extra
sensory input when you’re not using your
full concentration. Enter, like always, the
Raspberry Pi. With only a small selection
of components and a pair of earphones
or portable speakers, you can take your
Raspberry Pi with you and have it play
audio books.
First, you need to get the Raspberry Pi
ready. Do your usual apt-get update and
apt-get upgrade in the terminal before
you start, although there isn’t really much
What you’ll need
Q Speakers
Q LED
Q 1.2 k resistor
Q 10 k resistor
Q Push-button switch
Q Breadboard and wires
Right The synergy
between these two
projects means you
can use the same
setup for both
Below This circuit
will work on both the
Model B and Model
B+ – the pins begin
at the same end of
each board
preparation involved. Once that’s done, all we need to do is install
VLC, which is done with:
$ sudo apt-get install vlc
Once that’s done, turn off your Pi, disconnect the power and
begin hooking up your circuit as according to the Fritzing
diagram below. It’s a fairly simple setup – we’re going to use
the button to activate the playing of the audiobook and the
LED will turn on while this is happening.
Once you’re confi dent with the circuit, turn your Raspberry
Pi back on and open up the terminal. Type in the following to
download the Python code for this project:
$ wget http://www.linuxuser.co.uk/wp-
content/uploads/2014/08/audiobook.zip
There are a couple things we need to note about the code:
it fi rst of all assumes you have your audiobook located in a
directory known as audiobook within your home folder. It also
looks for a fi le called audiobook.mp3 to play; you can easily
change this by editing the path but you’ll need to be consistent
with the name of the fi le you have on your Pi. You could always
have it point to a specifi c location on a USB stick, swapping
out the fi les on another computer and renaming them
appropriately once you’ve fi nished with previous book.
Test it out by running the code – one press of the button
will start the process while another press will stop playing the
book. If you fi nd the button press too sensitive or not sensitive
enough, edit the delay in time.sleep which is currently set at a
default of 0.2 seconds.
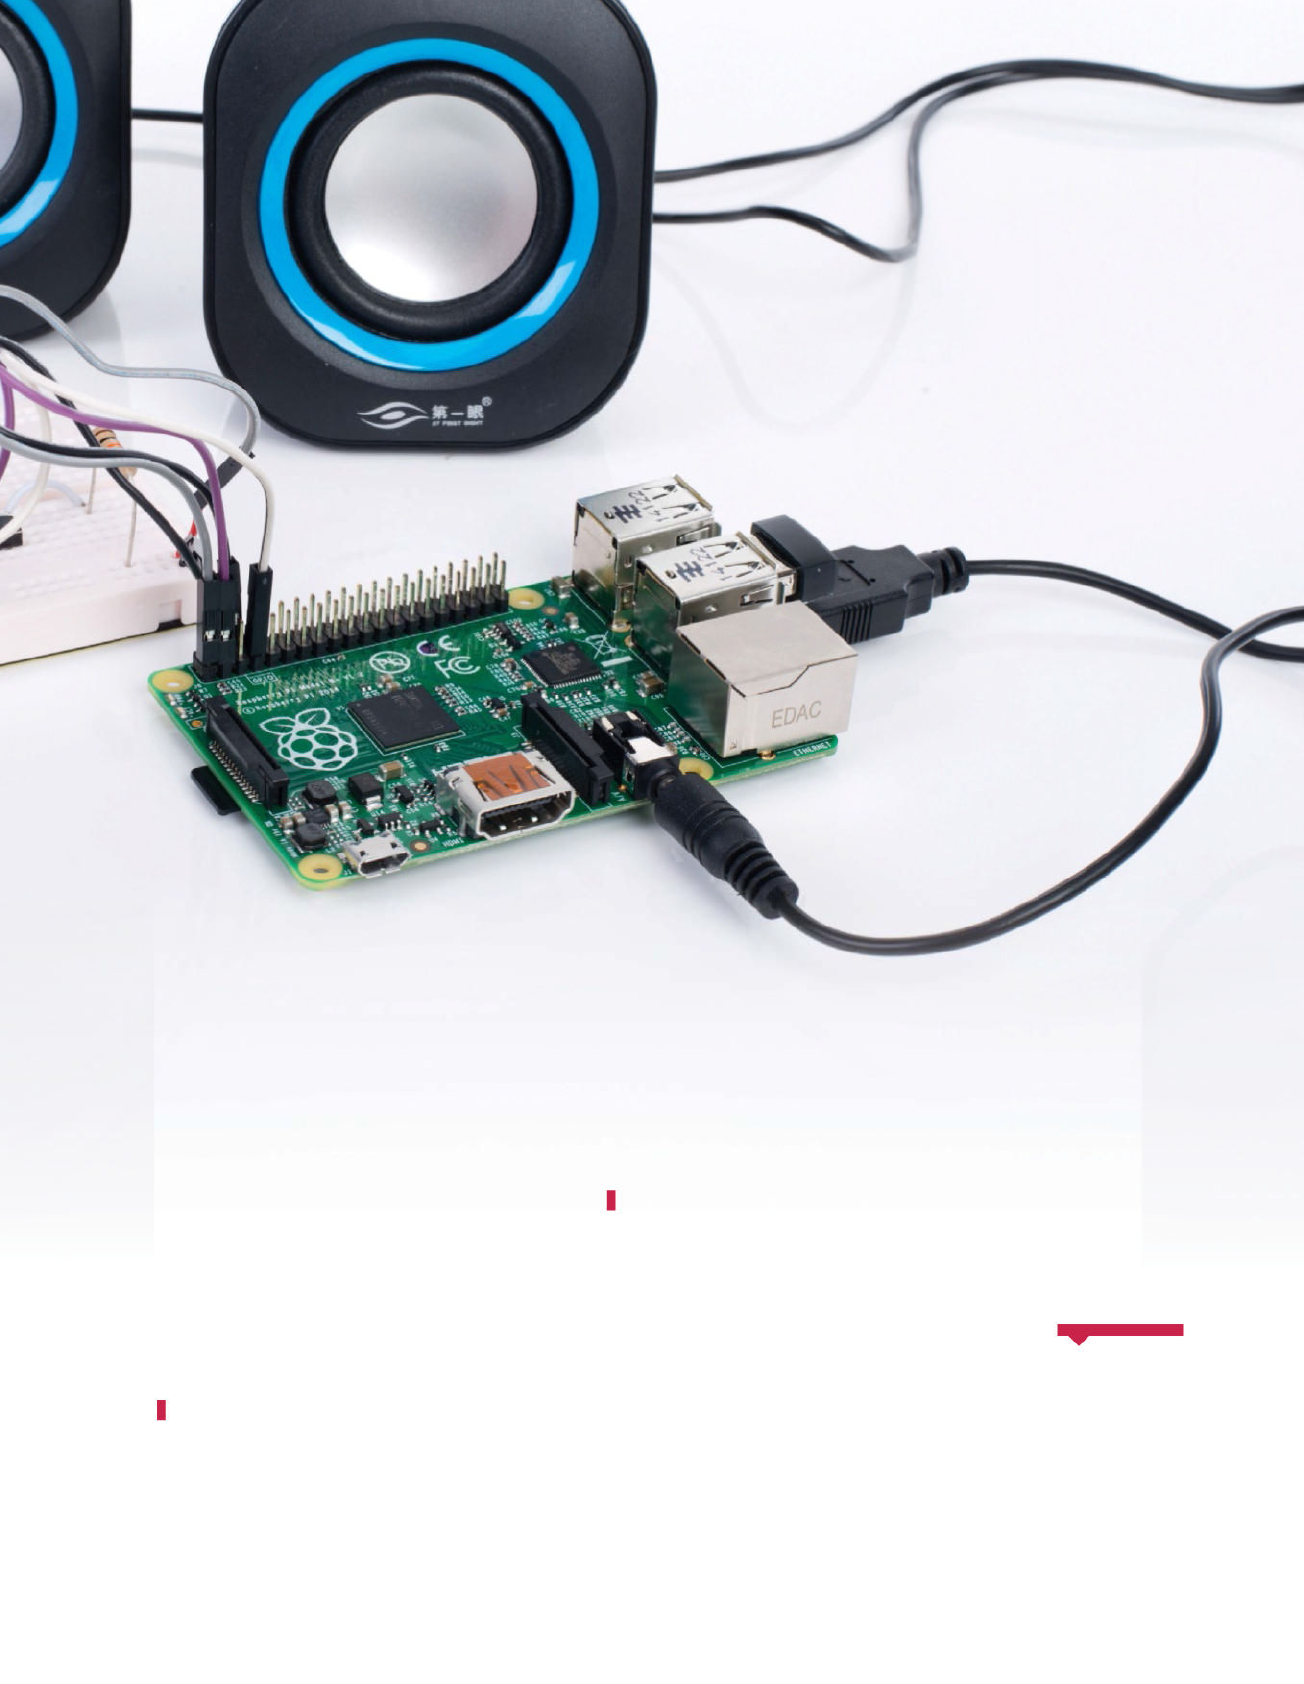
Raspberry Pi Tips, Tricks & Hacks 85
You can easily
put both projects
together and have
an all-in-one radio
and audiobook. Wire
up a second button
that will play the
audio book instead
and maybe even
add extra buttons if
you like for different
radio stations.
Put ’em
together
on command. Double check all your connections on the
breadboard and then plug your Pi back in.
Open the terminal and use it to download our Python script
for playing internet radio:
$ wget http://www.linuxuser.co.uk/wp-content/
uploads/2014/08/webradio.zip
Unzip the fi le and put it wherever you want; it doesn’t require
any special placement in your Pi’s fi le structure. You will likely
want to change the radio station that the code is currently
tuned to, and this can be found in the subprocess.Popen line
in the code. Find an m3u URL for your favourite radio station
and replace the URL already in that code to get it to play.
There may be a short delay between pressing the button
and the music starting as VLC launches and gets the stream
buffered. We’ve made it so the light comes on straight away,
though, so at least you’ll know the process has started.
Pressing the button again will kill VLC and stop the radio
stream. If you feel the button is too sensitive or not sensitive
enough, look for the time.delay setting and change the
amount of time it requires the button to be pressed.
Our Raspberry Pi web radio is a true companion piece to
the audiobook over the page, and we’ll get into why as we
go through this tutorial. Like the audiobook, we’re taking full
advantage of the Raspberry Pi to help aid you in a real-life
situation. As standard radio methods begin to die out, the
established web-streaming platforms will become more and
more popular, and you can get in on those straight away using
this project. The circuit for this is also the exact same one as
the audiobook, so if you’ve already had a crack at that, then
you’ll just need to grab the code for this tutorial.
Before you wire it up, it’s time to prepare your Raspberry
Pi. Open the terminal and do an apt-get update and apt-get
upgrade to make sure everything is up to date, followed up by
installing VLC using:
$ sudo apt-get install vlc
When it’s fi nished installing, you will need to turn off
your Raspberry Pi. Disconnect the USB cable, break out
the breadboard and components and follow the wiring
diagram. It’s not a complicated circuit at all, and revolves
around sensing a button being pressed and lighting an LED
A portable radio that streams web content wherever you are
Web radio
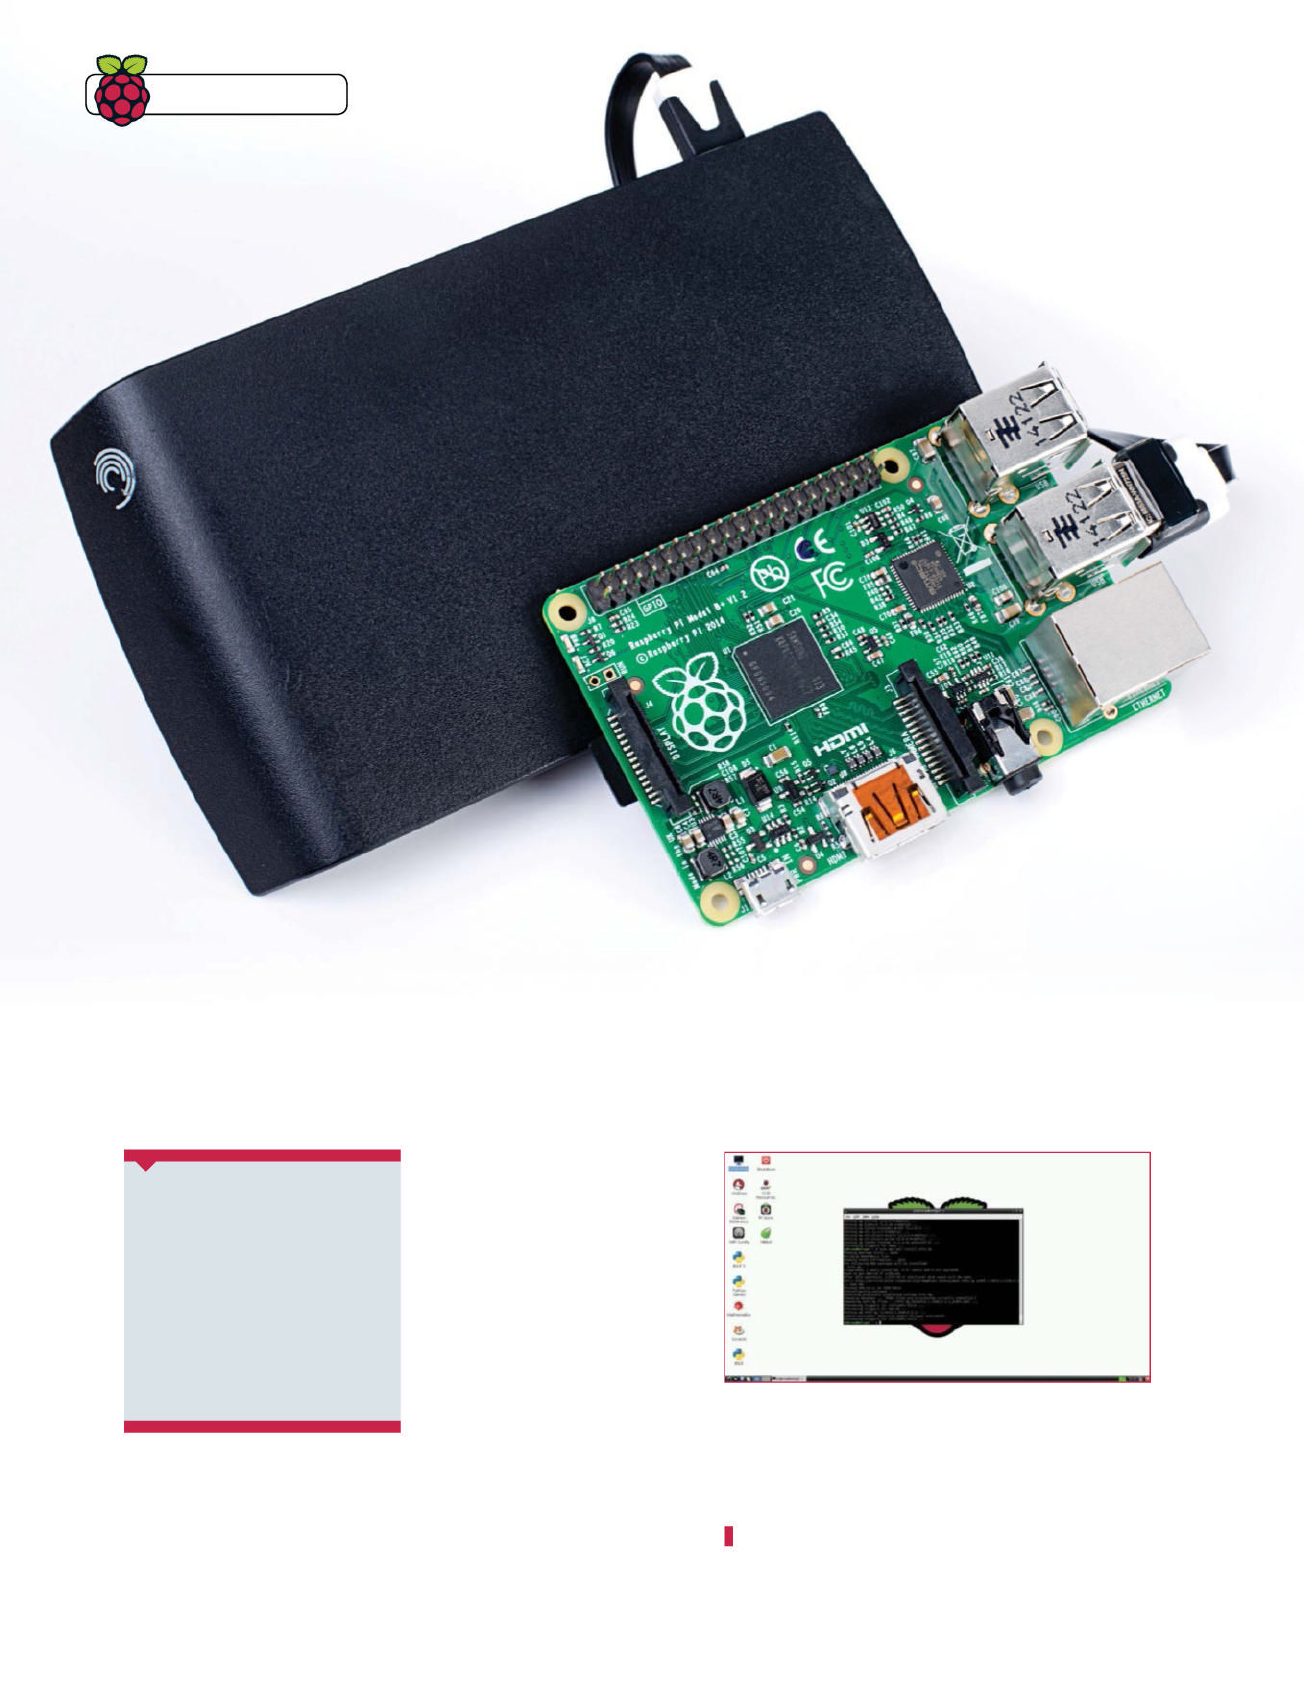
86 Raspberry Pi Tips, Tricks & Hacks
Have you ever wanted to move between
rooms while watching or listening to
the same film or song? We often fi nd
ourselves switching from a phone or
tablet to the desktop. There are some
complicated setups you can use for this
involving MythTV and various custom-
built servers and receivers, but you can
also do it with just one Raspberry Pi
server and then many XBMC receivers
with a lot less hassle.
Broadcasting your media over your
network so that the clients can pick up
the stream means that you can easily
pick up where you left off in your track
or fi lm wherever you move to, without
having to make a note of the track
position and fi nd the fi le again. Here’s
how to get set up.
What you’ll need
Q Raspberry Pi Model B
Q XBMC
http://xbmc.org
Q Portable hard drive
Cast your content over the local network to receive it
from multiple clients so you don’t lose your place
Media caster
01Install storage drivers
You’ll likely be using a portable NTFS hard drive if you
want to store a lot of media on your Raspberry Pi caster. This
means you need to install the NTFS libraries on the Pi, which
requires you to open the terminal and type:
$ sudo apt-get install ntfs-3g
Tips | Tricks | Hacks
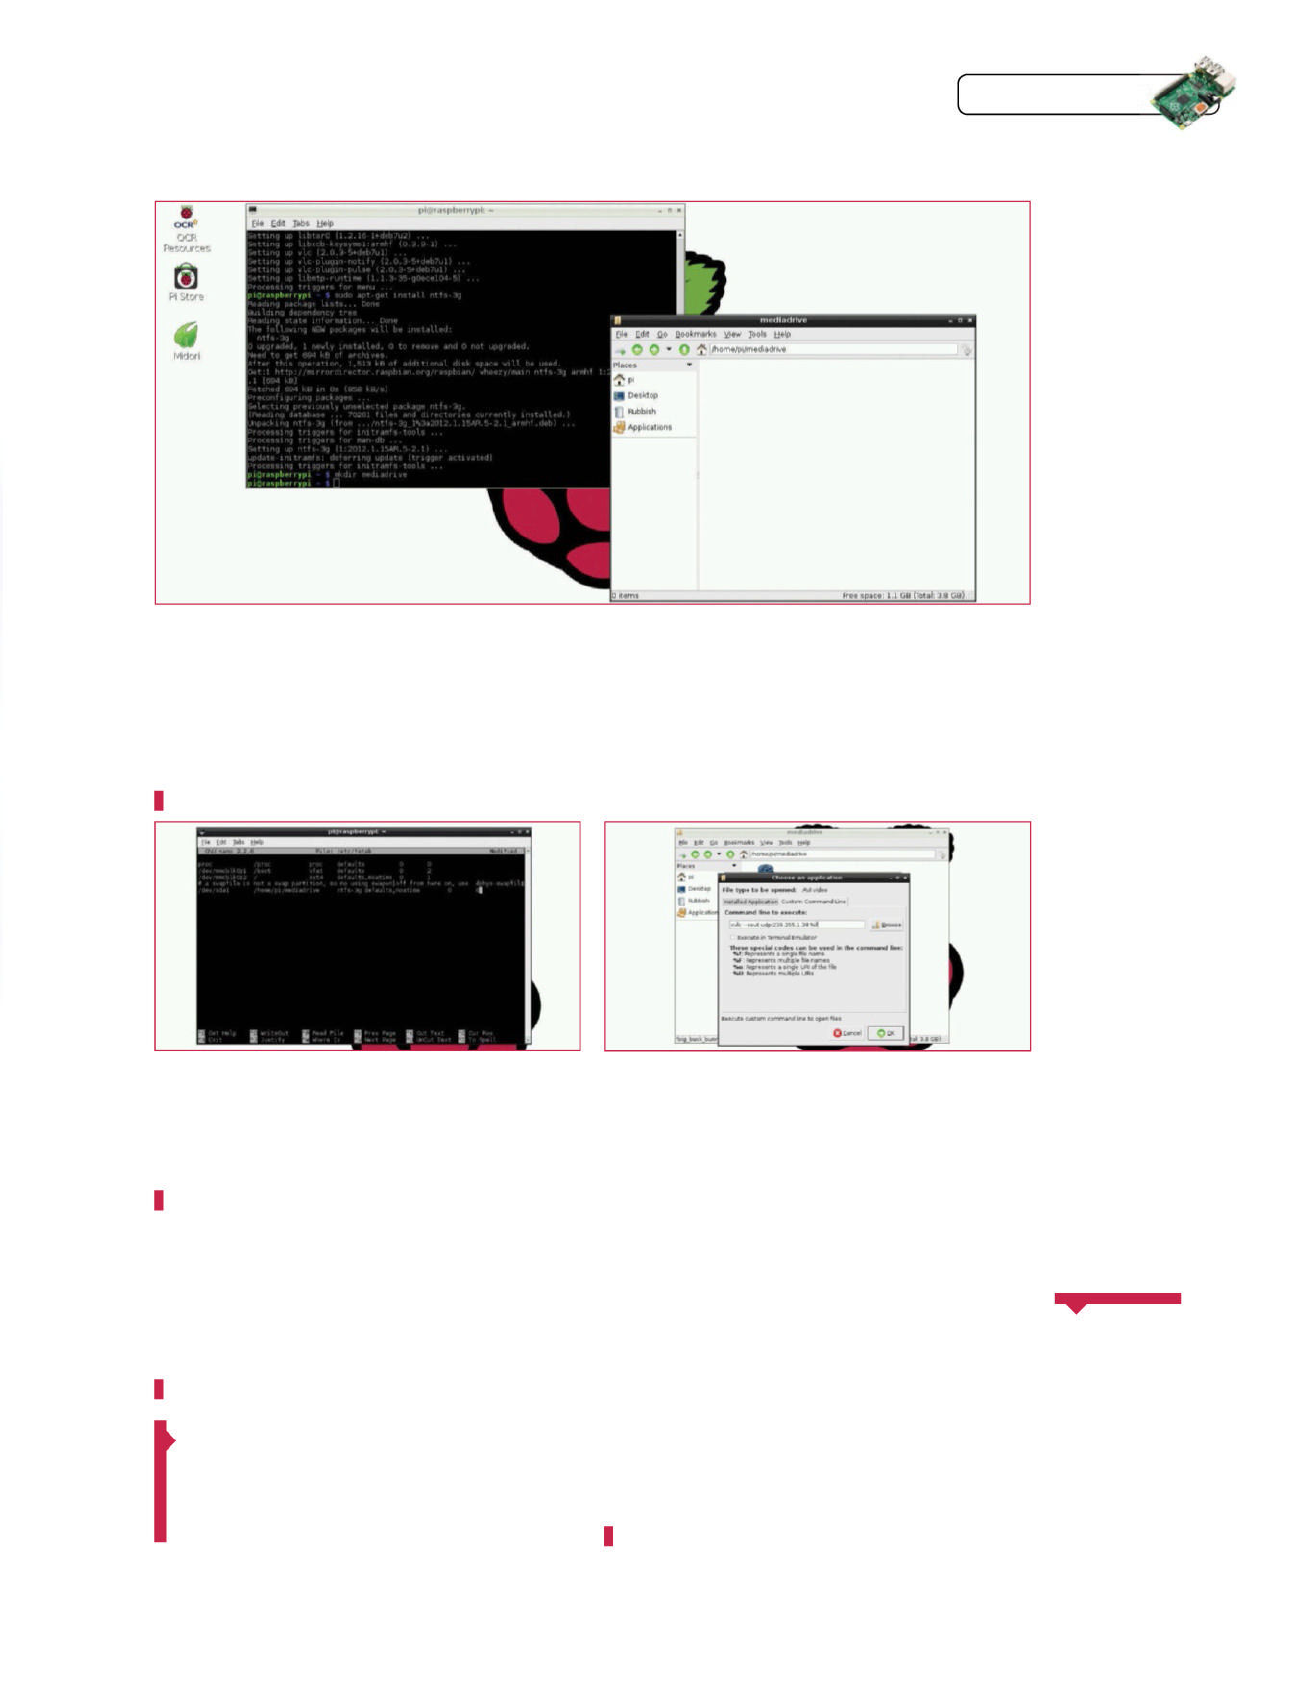
Raspberry Pi Tips, Tricks & Hacks 87
Tips | Tricks | Hacks
SSH into your Pi from
another computer or an
Android device
Left Media stored on
your portable hard
drive will show up in
a dedicated folder
Why not add a web
interface to your Pi so
that you can browse
from your laptop or
smartphone? Have
it run the multicast
code when clicking
on fi les it’s scraped
from the media drive
to make the process
much easier. You can
also fuse the project
with our cloud server
in a few pages time.
Be
inspired
02 Create mounting folder
We’re going to have the Raspberry Pi automatically
mount the hard drive for us whenever it boots up, and in order
to do this it fi rst needs to have a place where the fi les will be
accessible. Let’s create a directory called mediadrive inside
the Home folder. Keep the directory name to just one word to
make your life easier later.
$ mkdir mediadrive
03 Boot-time mount parameters
Your hard drive will likely be mounted as /dev/sda1, but
do a fdisk -l if you want to double check. To make sure it mounts
at boot, go to fstab with sudo nano /etc/fstab and write the
following line below, with a tab between each bit of information:
/dev/sda1 /home/pi/mediadrive ntfs-3g
defaults,noatime 0 0
04 Install VLC on Pi
So all our media is now accessible, and now we need
a way to broadcast it. For this we’ll use multi-functional media
player VLC, which was originally designed to be the client for a
casting server. You can install it with:
$ sudo apt-get install vlc
05 XBMC stream receiver
This bit is dead simple – on any computer you can
easily get fi les off of, create a fi le called Stream.strm, and add
this line to it, with IP as the last two sets of Pi’s IP address:
udp://239.255.[IP].[IP]:1234
Save it and move it to your XBMC clients that you want to
receive the cast from.
06 Custom VLC command
Here’s the really fun part. Go back to your Pi and right
click on one of the fi les you’d like to play, go to Properties and
click the down arrow next to Open with. Go to Customise and
then Custom Command Line and type in the following, with IP
as the last two sets on your IP address:
cvlc --sout udp:239.255.[IP].[IP] %f
07 Test out casting
Here’s the big test: boot up XBMC, open your media on
the Raspberry Pi and use the Stream fi le on XBMC to receive
the cast. It might take a moment to load but it will start
playing via XBMC in short time.
08 Command line alternative
Your setup may not always be convenient for you to go
to the Pi and start launching fi les from the desktop. You can
always SSH into your Pi from another computer or an Android
device and run the fi le using a similar custom command to the
one we used earlier:
$ cvlc --sout udp:239.255.[IP].[IP] [file location]
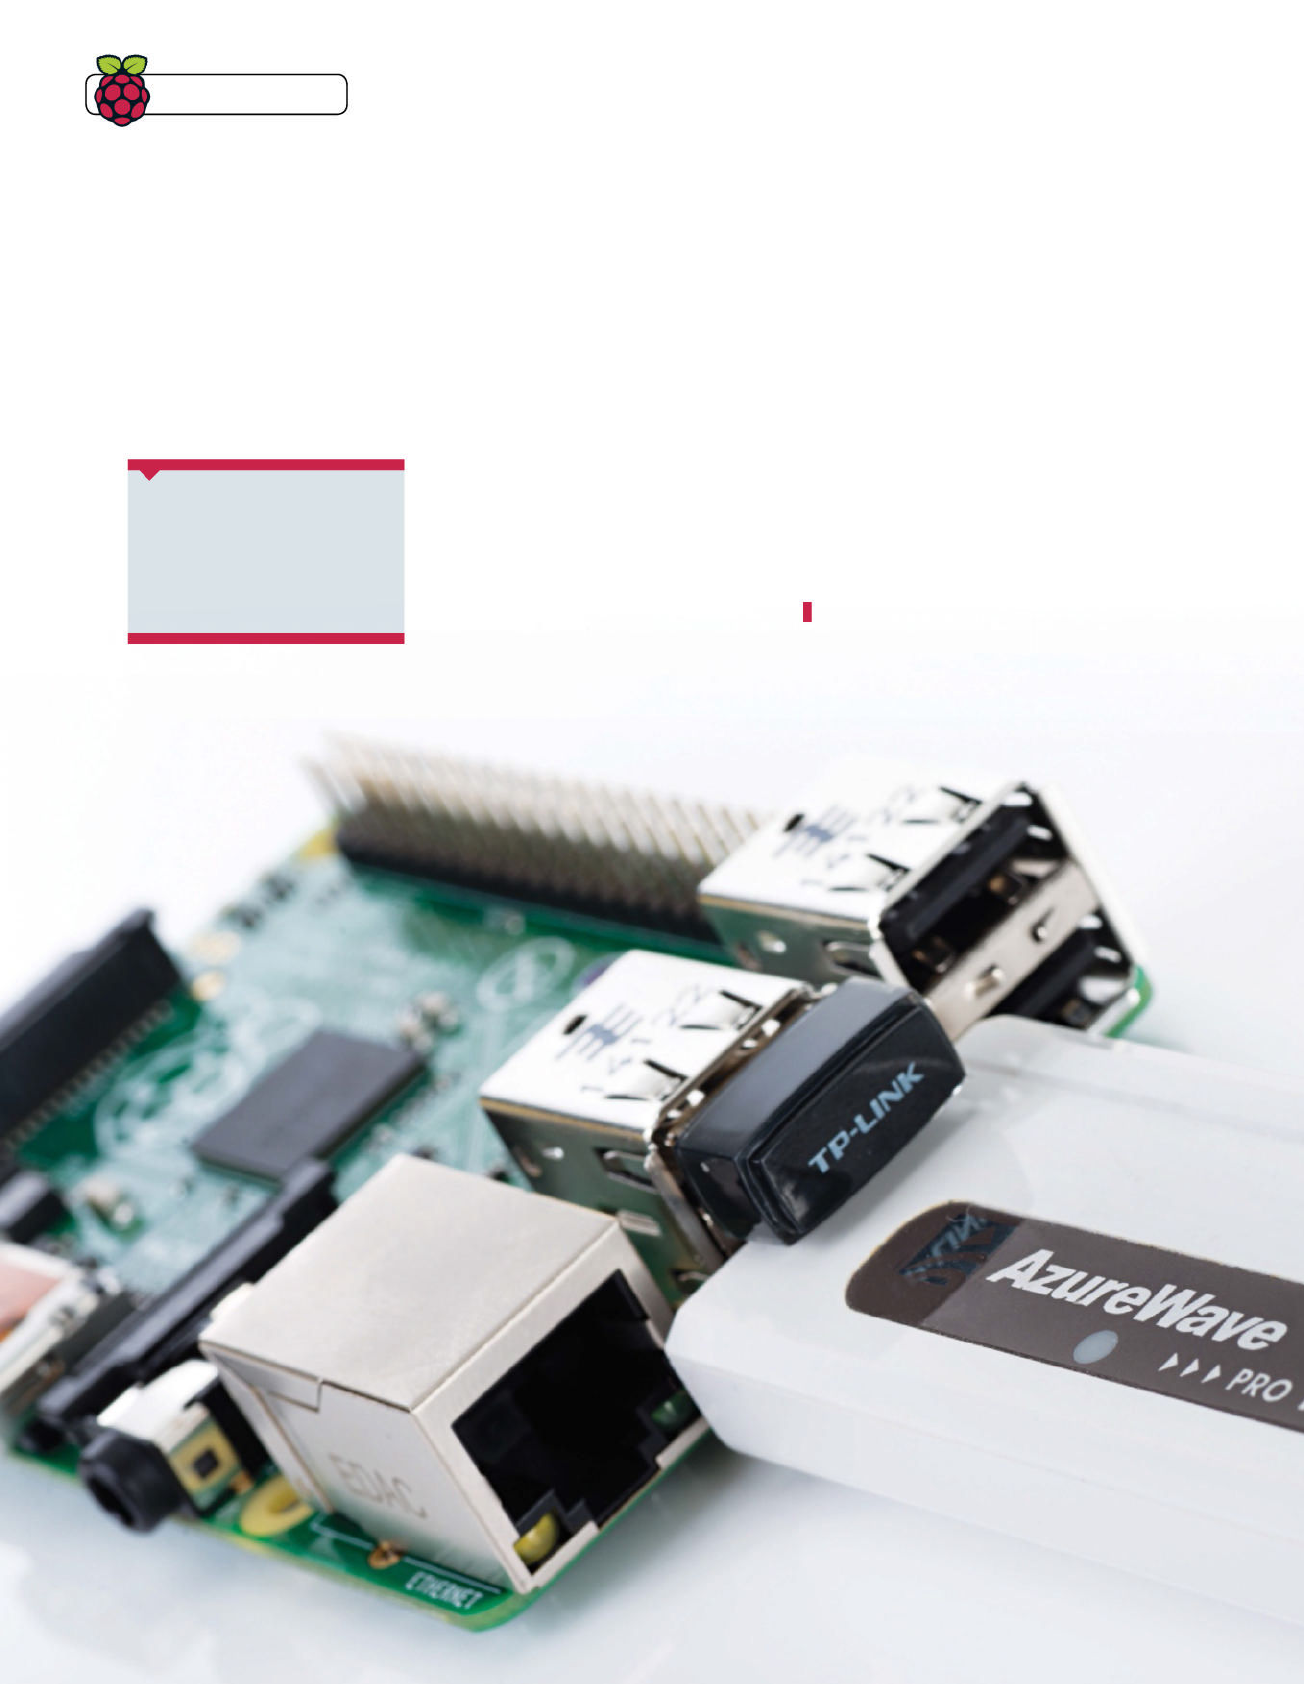
Tips | Tricks | Hacks
Boost your signal using a Raspberry Pi and two USB Wi-Fi dongles
Portable Wi-Fi
signal repeater
What we like about the Raspberry Pi for this
project is that it’s very low maintenance and
extremely easy to put in an appropriate location.
All you need for this project are two USB wireless
adaptors, a nice little case and a way to power it.
Once you’ve set it up, you can basically leave it to its
own devices, checking in over SSH every now and
then to do some updates.
Set this up on a monitor with a keyboard, using
a fresh image of Raspbian and with your Wi-Fi
dongles plugged in. On fi rst boot keep it as CLI and
after doing the usual apt-get updates and upgrades,
type startx to get to the desktop. Confi gure the
wireless for wlan0 to connect to your home network
and make sure it has a fi xed IP address, then reboot
to make sure it all works from the command line by
using ping www.google.com. Now you need to install
your fi rst bit of software using:
$ sudo apt-get install hostapd iw
After it’s installed, you’ll want to download and save
the fi le we’ve created directly to confi g by entering
the following two commands:
What you’ll need
Q 2 USB Wi-Fi adaptors
Q Raspberry Pi case
Q Portable power pack
Right One Wi-Fi adaptor picks up
your main Wi-Fi network, while the
other one broadcasts a new signal
88 Raspberry Pi Tips, Tricks & Hacks

Raspberry Pi Tips, Tricks & Hacks 89
Tips | Tricks | Hacks
Stay private online by routing all
your web traffi c through Tor on
your Raspberry Pi
Secure Tor
web station
Right Adafruit’s Onion Pi Pack
contains all the components you
need to set up a secure connection
Above As well as from the main Tor website, you can also download Tor
from this issue’s DVD
A secure wireless
connection can be
created using the
Raspberry Pi by
looking at the Onion Pi
project from Adafruit:
learn.adafruit.com/
onion-pi/overview
This creates a
wireless access
point connected
to the internet that
anonymises all web
traffi c by directing it
through the
Tor network.
This means all your
home computers and
smart devices can be
connected to Tor and
not just the Raspberry
Pi itself. You can
also apply some of
the lessons learnt in
the Wi-Fi repeater
tutorial to unshackle
it from the ethernet
cable, although that
will reduce slightly its
overall security.
Put ’em
together
In a much more privacy-focused world, being able to
browse securely online is an important freedom for many
people. With the use of Tor and a few tweaks to the Raspberry
Pi, you can make sure all your internet traffi c is kept private.
First of all, you’ll need to make sure to install Tor from the
repos. Open up the LXTerminal and simply type:
$ sudo apt-get install tor
Once that’s done, edit the torrc fi le by using sudo nano /etc/
tor/torrc and add this to the top of the fi le:
VirtualAddrNetworkIPv4 10.192.0.0/10
AutomapHostsOnResolve 1
TransPort 9040
DNSPort 53
Save this and then open the next fi le with sudo nano /etc/
resolv.conf fi le and modify it:
na meserver 127.0.0.1
Finally, you need to change the iptables ruleset, but before
you do this, use top to confi rm the uid of Tor and make a note
of it. Now open up a new fi le with nano /etc/init.d/iptables and
enter the code found at: http://www.linuxuser.co.uk/wp-
content/uploads/2014/08/tor.zip. Now save it and enter:
$ chmod 755 /etc/init.d/iptables
$ update-rc.d iptables defaults 12
$ wget http://www.linuxuser.co.uk/wp-
content/uploads/2014/08/repeater.zip
$ cp LUDRepeater.conf /etc/hostapd/hostapd.conf
Do a reboot and test the confi guration fi le with:
$ hostapd -dd /etc/hostapd/hostapd.conf
If there are no errors, open the fi le using nano /etc/hostapd/
hostapd.conf and then add the following to the fi le:
DAEMON_CONF=“/etc/hostapd/hostapd.conf”
RUN_DAEMON=yes
Also change the SSID to be the same one for your network in
the ssid fi eld. Once that’s done, you’ll need to install the bridge
utilities with apt-get install bridge-utils. Then confi gure it with
the following four commands:
brctl addbr bridge0
brctl addif bridge0 wlan0
brctl addif bridge0 wlan1
ifconfig bridge0 up
Test it out to make sure it works and then place it around
the house to extend your wireless signal!
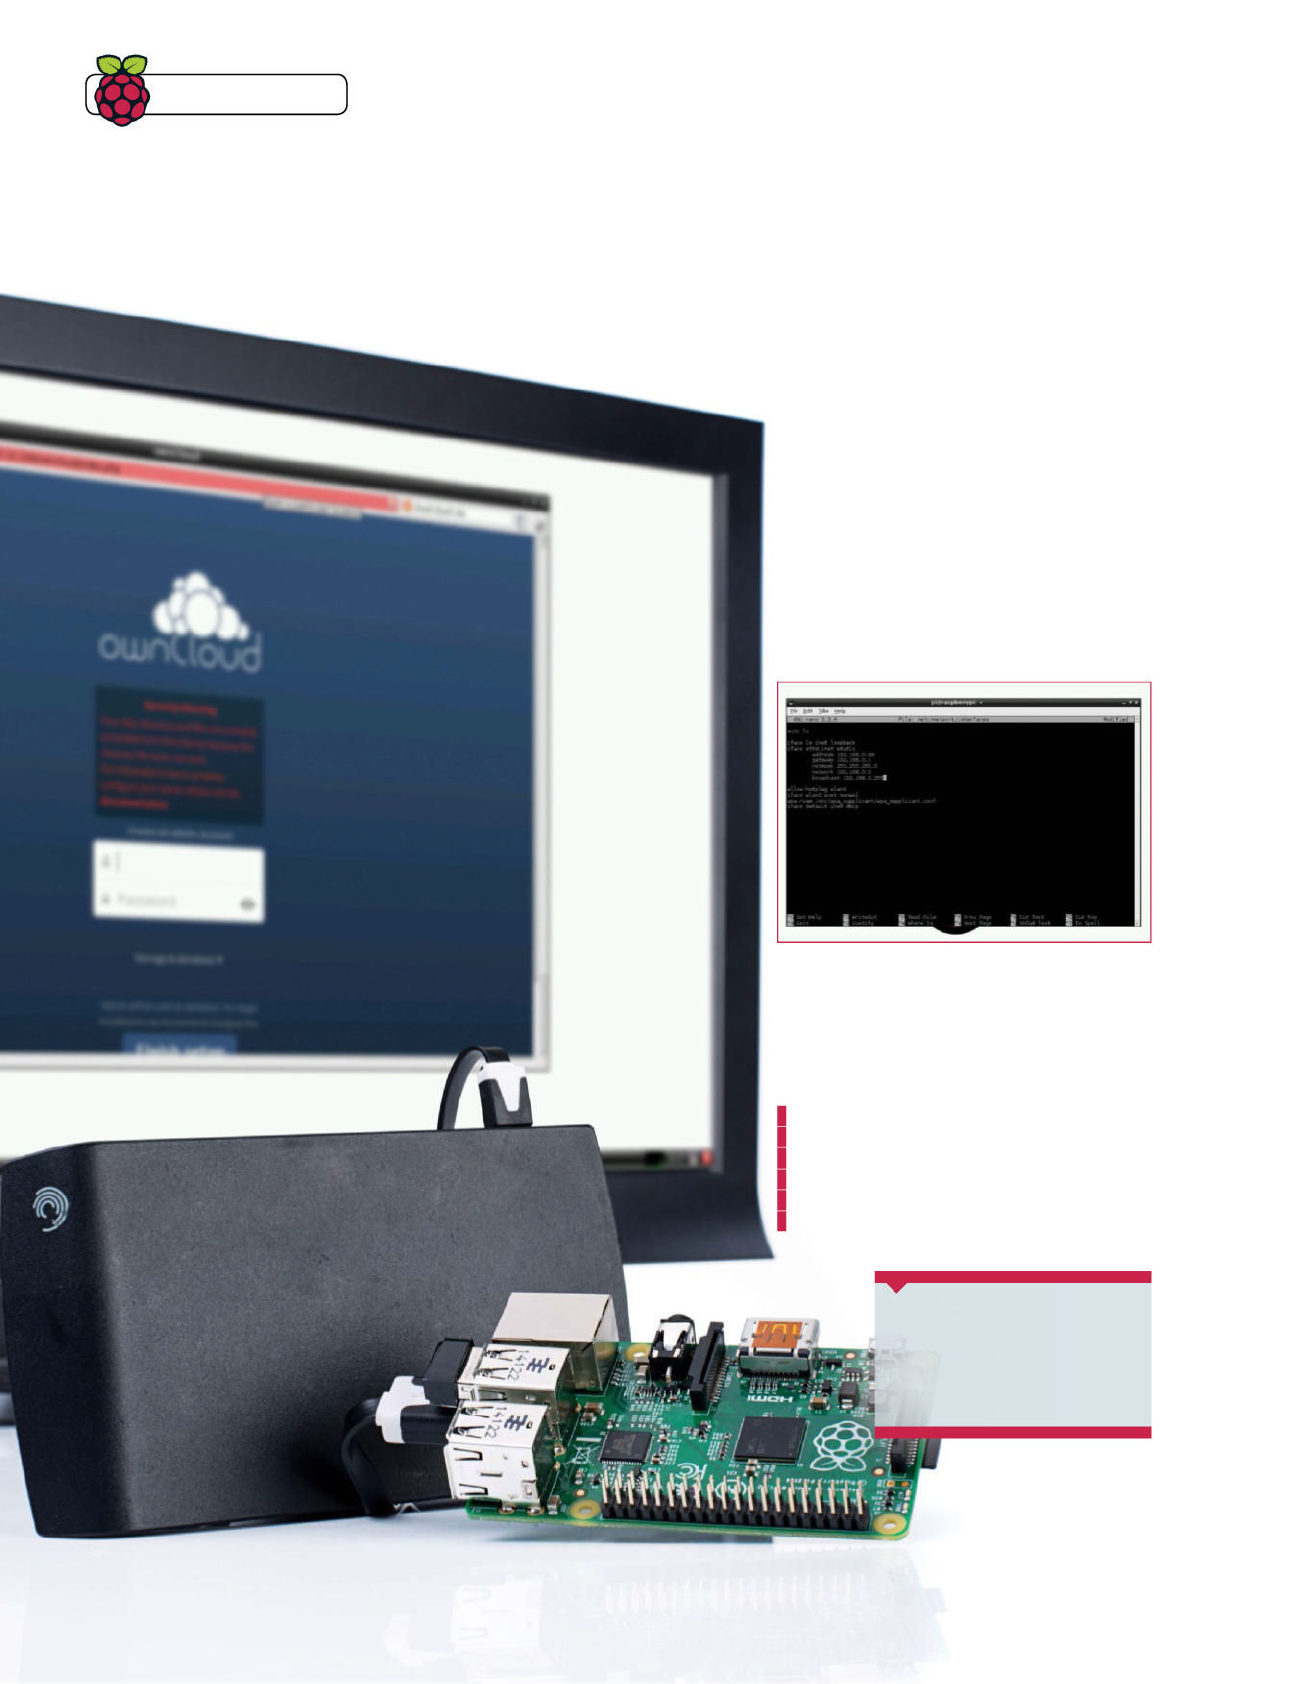
Tips | Tricks | Hacks
The themes of a lot of our Raspberry Pi guides revolve
around the size and portability of the Pi itself, lending
it to tasks you may have used a full-sized or small
computer for in the past that the Pi can now take over.
Having your own private cloud is another excellent use of
the Raspberry Pi’s capabilities, because you can store it
hidden away somewhere and it will require very little day-
to-day maintenance.
Make sure you invest in some decent, portable USB
storage such as an external HDD, and also get a case for
your Pi in the process.
What you’ll need
Q External storage
Q Constant internet
connection
Left Rather than store all your
media and fi les on a cloud server
in an unknown location, you can
keep a cloud in your own home
Turn the Pi into your own personal
Dropbox using ownCloud and an
internet connection
Private cloud storage
01Set a static IP
After setting up your wired or wireless internet
connection, you need to make it static. Use sudo
nano /etc/network/interfaces to open up the network
settings fi le. Fine the iface eth0 line so you can change
and add to it:
iface eth0 inet static
address 192.168.0.50
gateway 192.168.0.1
netmask 255.255.255.0
network 192.168.0.0
broadcast 192.168.0.255
90 Raspberry Pi Tips, Tricks & Hacks
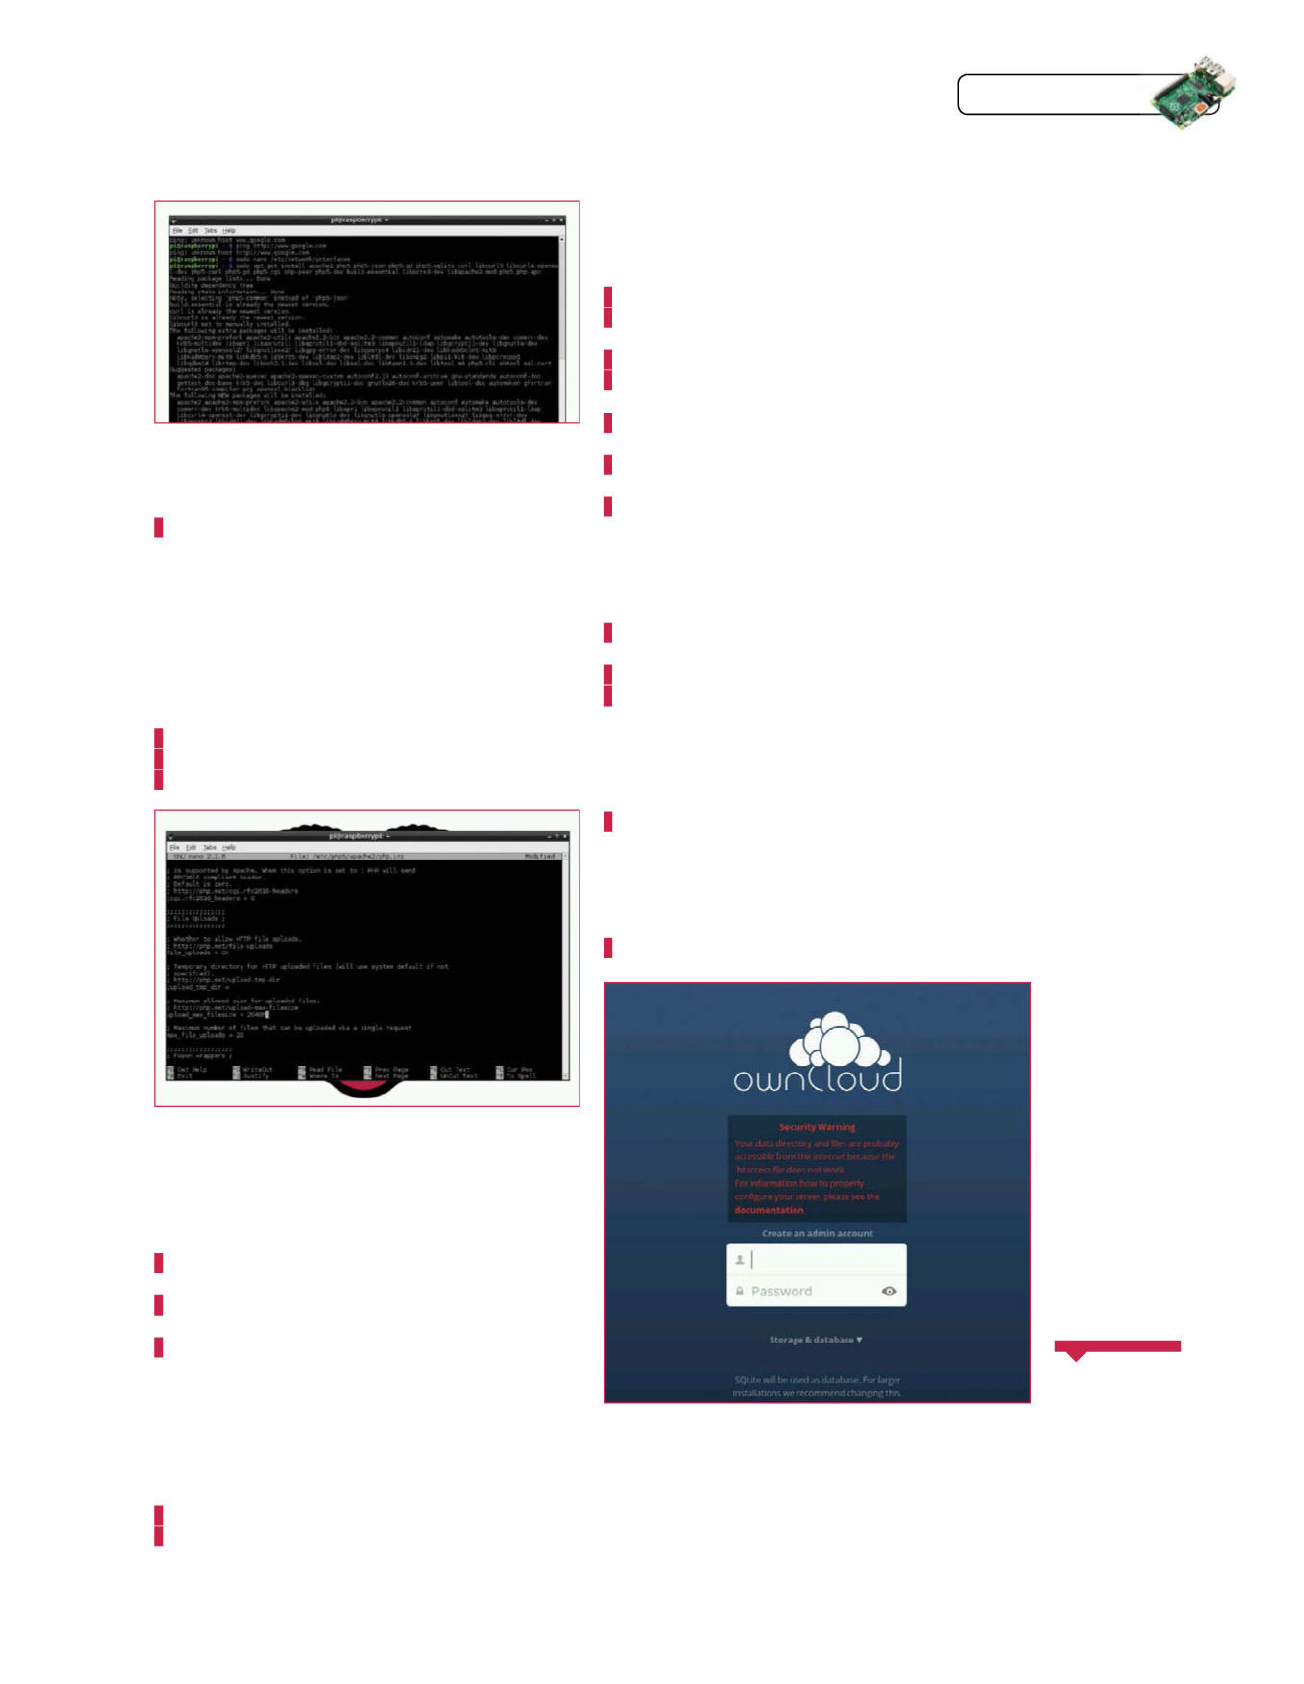
Raspberry Pi Tips, Tricks & Hacks 91
Tips | Tricks | Hacks
Need an idea of
what your next step
could be? Check out
our media caster
tutorial and maybe
you can fuse the two
concepts together.
Upload videos to
your cloud and get
them to play over
your network.
Be
inspired
02 Install a lot of software
You’ll want Apache software and PHP for this. Install
everything you need with:
$ sudo apt-get install apache2 php5 php5-json php5-gd
php5-sqlite curl libcurl3 libcurl4-openssl-dev php5-
curl php5-gd php5-cgi php-pear php5-dev build-
essential libpcre3-dev libapache2-mod-php5 php-apc
03 Set up PHP accelerator
Install your accelerator with sudo pecl install apc and
create an ini fi le for it. To do this, use sudo nano /etc/php5/cgi/
conf.d/apc.ini and then add this to the fi le:
extension=apc.so
apc.enabled=1
apc.shm_size=30
04 Confi gure fi le limits
Go into the Apache confi g fi le with sudo nano /etc/
php5/apache2/php.ini. It’s a big fi le, but there are two fi lesize
options you need to fi nd, and a third extension option you
need to add as below:
upload_max_filesize = 2048M
post_max_size = 2200M
extension = apc.so
05 Set up SSL
First of all, you need to enable SSL in Apache; do this
by using sudo nano /etc/apache2/sites-enabled/000-default
and change ‘None’ to ‘All’ in the AllowOverride option. Follow
this up with the following two commands:
$ sudo a2enmod rewrite
$ sudo a2enmod headers
06 Finish up with Apache
You now need to do two sets of commands: a big one
which requires some info and then a restart:
$ sudo openssl genrsa -des3 -out server.key 1024
$ sudo openssl rsa -in server.key -out server.key.
insecure
$ sudo openssl req -new -key server.key -out server.csr
$ sudo openssl x509 -req -days 365 -in server.csr
-signkey server.key -out server.crt
$ sudo cp server.crt /etc/ssl/certs;sudo cp server.key
/etc/ssl/private;sudo a2enmod ssl
$ sudo a2ensite default-ssl
$ sudo service apache2 restart
07 Download and install ownCloud
Here you have a series of commands to run that will
download, unzip and install ownCloud to the right place:
$ wget https://download.owncloud.org/community/
owncloud-7.0.0.tar.bz2
$ sudo tar -xjf owncloud-7.0.0.tar.bz2
$ sudo cp -r owncloud /var/www
08 ownCloud permissions
Make sure your hard drive is connected and mounted as
you want it. First, give webserver permission to use ownCloud:
$ sudo chown -R www-data:www-data /var/www/owncloud/
Next, use sudo nano /var/www/owncloud/.htaccess and make
the same changes you did in the php.ini fi le above. Finally, give
permissions to the location you mounted the hard drive to with:
$ sudo chown -R www-data:www-data [mount]
09 Set up ownCloud
Open Midori and navigate to https://[ipaddress]/
owncloud to begin the ownCloud setup process. The fi rst thing
you’ll need to do is change the data location to the mount point of
your external drive, which can be found in the advanced options.
And you’re done!
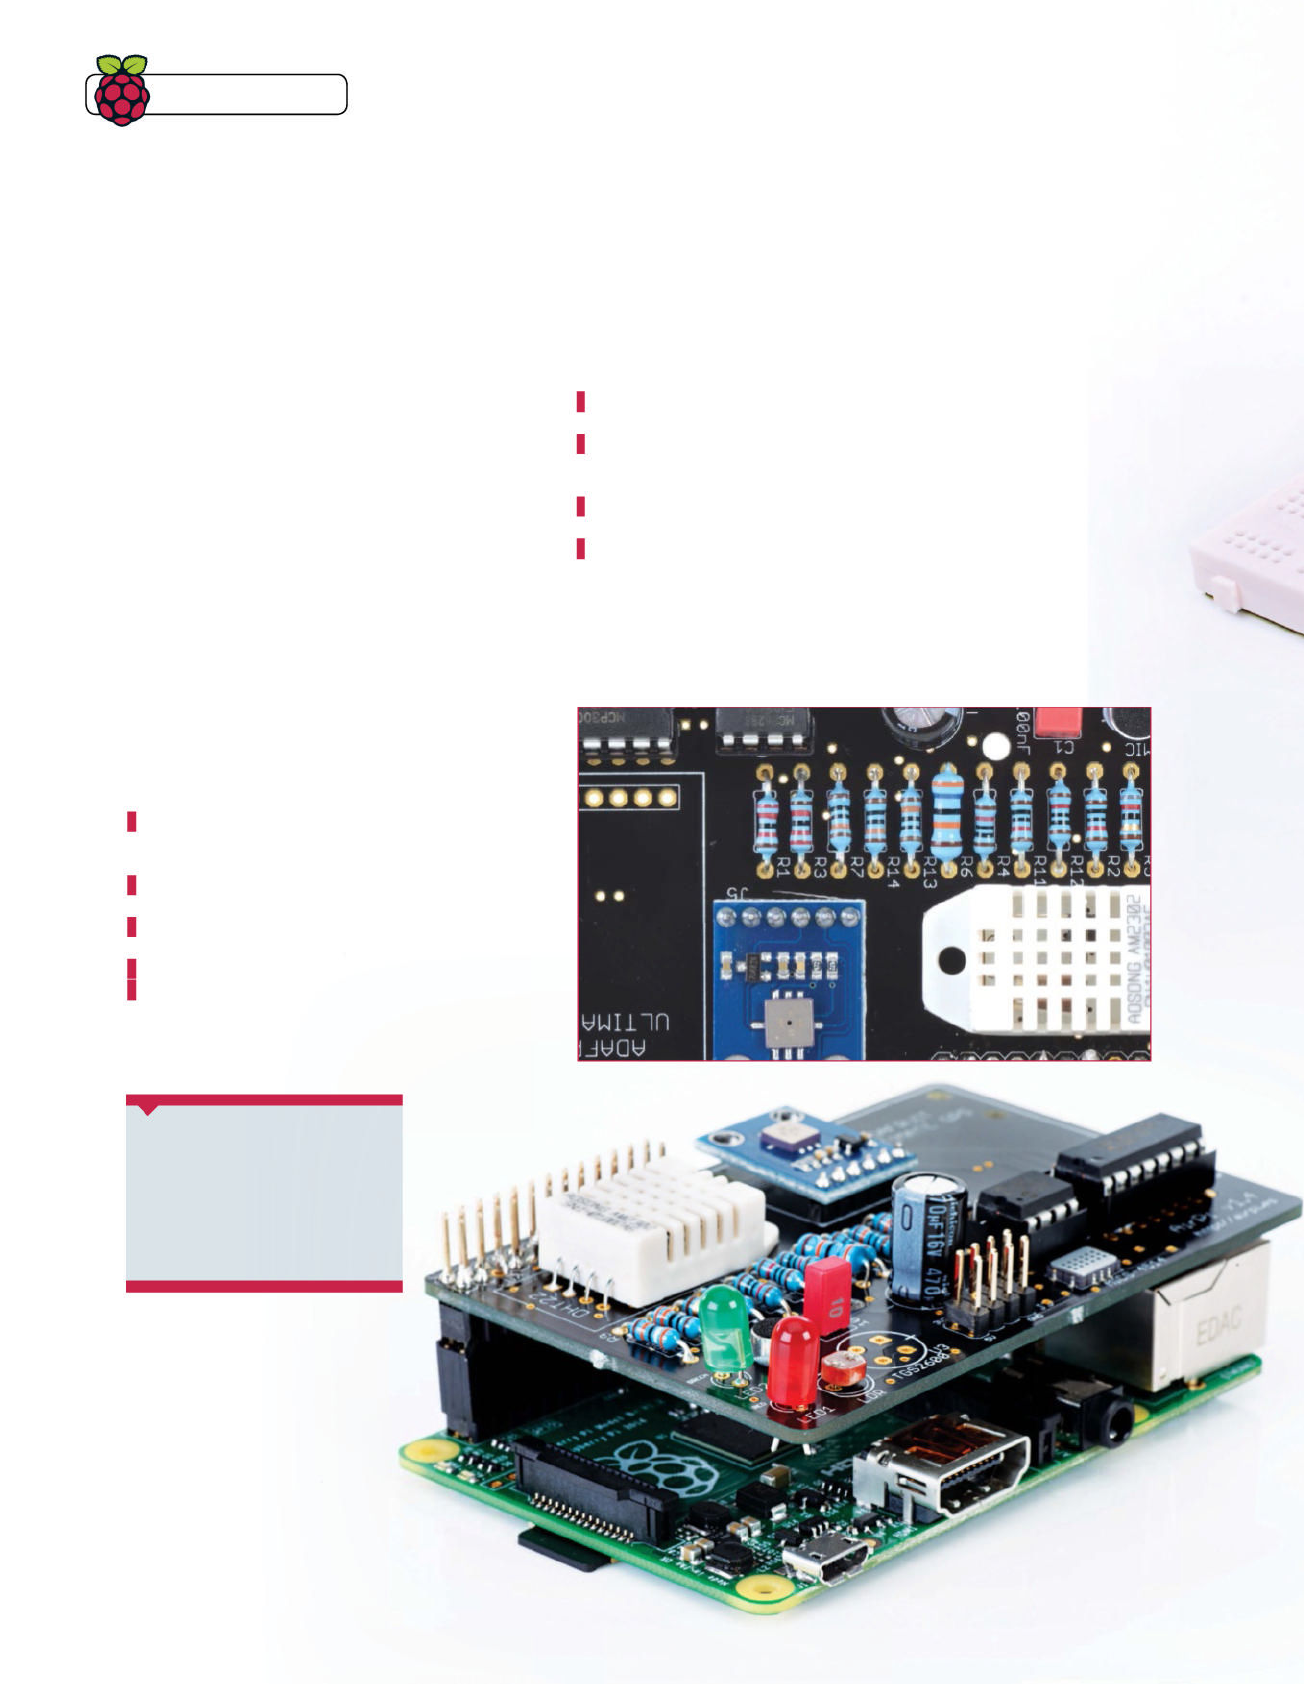
Tips | Tricks | Hacks
Predict the weather using your own sensor station
AirPi
The AirPi has a pedigree that aligns perfectly with the
mission of the Raspberry Pi Foundation. Created by two
teens in sixth form to measure various forms of pollution, the
project’s popularity exploded with thanks to some highlighting
by the Raspberry Pi Foundation and it’s now the premier way to
create a weather station on the Raspberry Pi.
The AirPi kit comes with a small selection of sensors by
default that can be upgraded and improved upon with extra
breakout boards and modules. Included with the kit is a
barometric pressure sensor, a humidity and temperature
sensor, an ultraviolet radiation sensor and a microphone for
noise pollution.
The fi rst thing you’ll need to do is assemble the kit, for which
you’ll require a soldering iron and a steady hand. There are
some basic instructions that come with the kit you can follow
but it doesn’t hurt to have a look at some of the online images
to fi gure out exactly where everything goes. Be careful when
soldering all the resistors to make sure you don’t melt the 26-
pin connector on the underside otherwise it won’t go on your Pi.
Once that’s done you need to start setting up your Raspberry
Pi. Open up a terminal and get some of the Python tools you’ll
need to use:
$ sudo apt-get install git-core python-dev
python-pip python-smbus
Download and install the python-eeml package:
$ sudo apt-get install libxml2-dev libxslt1-dev
python-lxml
$ git clone https://github.com/petervizi/
python-eeml.git
$ cd python-eeml
$ sudo python setup.py install
You need to install i2c support for the pressure sensor, so fi rst
use sudo nano /etc/modprobe.d/raspi-blacklist.conf and
remove the comment from the blacklist i2c-bcm2708 line.
What you’ll need
Q AirPi
tindie.com/products/tmhrtly/airpi-kit/
Q Soldering iron
Q Solder
Top right Measure your surroundings
with AirPi and share your data with the
scientifi c community
Bottom right The AirPi perfectly fi ts the
Raspberry Pi, so you can easily enclose
your device in a small weatherproof box
Next, open up the modules fi le with sudo nano /etc/modules
and add i2c-dev to the bottom of the fi le. Save that and install:
$ sudo apt-get install i2c-tools
Add your Pi to the i2c user group with:
$ sudo adduser pi i2c
Now reboot your Raspberry Pi before continuing. Finally, install
the fi nal Python module with:
$ sudo apt-get install python-smbus
Now we can install the AirPi code. Still in the terminal, use:
$ git clone -b non-modular https://github.com/
tomhartley/AirPi.git
If you’re using a revision 2 Model B or a B+, use sudo nano AirPi/
AirPi.cfg to edit the confi g fi le. Change I2CBus = 0 to I2CBus
= 1 and alter the next line to read LCD = False. Create a Xively
account, add the API and ID keys to the confi g fi le and save it.
You can now start taking measurements by running Upload.py.
92 Raspberry Pi Tips, Tricks & Hacks
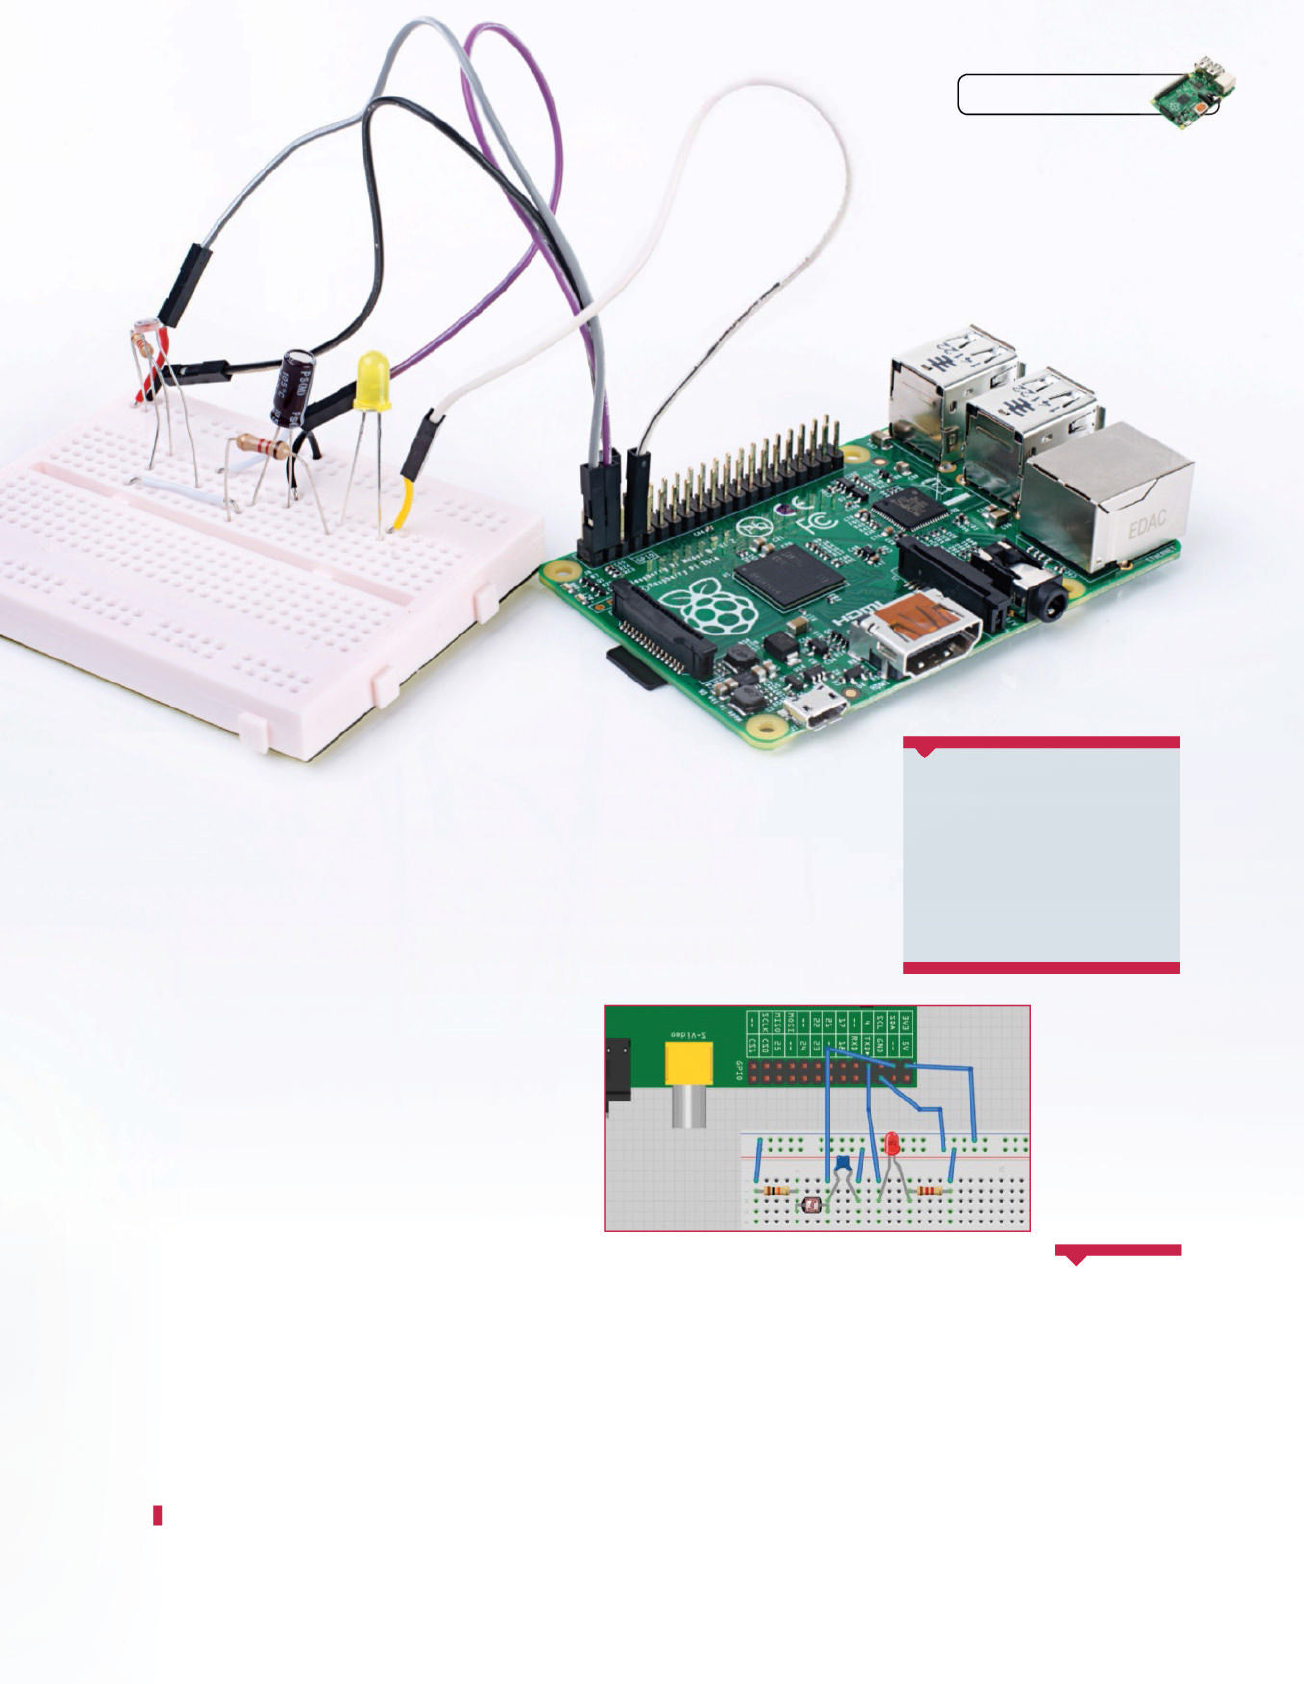
Use your Raspberry Pi to control outdoor lights
that automatically come on when it’s dark
Dusklights
You’ve probably all seen those cheap, solar-powered lamps
that you can stick into your garden to try and give it a classy
bit of illumination during the night. If you’ve actually got
one then you may have found out that they don’t shine very
brightly and the plastic stakes can be very fl imsy. So why not
make your own version? What we’ll show you on this page is
the beginning of an array of light-sensitive LEDs using a single
LED, so that you can understand how the system works. We’ll
use a special resistor called a light dependant resistor (LDR)
or photoresistor that changes its resistance based on the
levels of light it’s receiving.
There’s no extra software you’ll need for this, so just make
sure your Pi is up to date with an apt-get update and apt-get
upgrade. Turn it off, unplug it from the power source and get
to work wiring up the circuit as shown in the Fritzing diagram.
Take special note of the placement of the components,
especially the LDR and the capacitor. What you’ll need to do
is measure the time it takes for the capacitor to fully charge
between pin three of the GPIO ports and ground. Also, make
sure the negative end of the capacitor is hooked to the ground
side of the circuit.
Once that’s done, turn your Raspberry Pi back on and
download the code we’ve created for this project using:
$ wget http://www.linuxuser.co.uk/wp-content/
uploads/2014/08/dusklight.zip
What you’ll need
Q 1.2 k resistor
Q 2.2 k resistor
Q Light dependent resistor
Q 1 µF capacitor
Q Breadboard and wires
Linking up the AirPi
with your dusklights
allows you to have
the ultimate outdoor
Raspberry Pi device,
allowing you to
predict the weather
and control your
outdoor lighting
with more precision.
The humidity and
pressure sensors will
be able to tell if it’s
foggy or not, giving
you more control
over when your lights
turn on.
Put ’em
together
Unzip it and run it. We’ve made it so the Python shell will print
out the values that the circuit returns, with a higher number
meaning it’s darker and the capacitor takes longer to charge.
See how the circuits react to you covering the LDR with a
fi nger or shining a torch on it in order to get an idea of how your
version will work.
To get this working for outdoor use it will require a bit of trial
and error. The easiest way is to set it up when it’s getting to
about the level of darkness you’d want the light to turn on and
record the output from the sensor. Change the if statement so
that it activates the LED over a certain number and you’ll be
set. With some external power and more LEDs you can have
a Raspberry Pi power an entire array of shining lights around
your garden.
Tips | Tricks | Hacks
Raspberry Pi Tips, Trick & Hacks 93
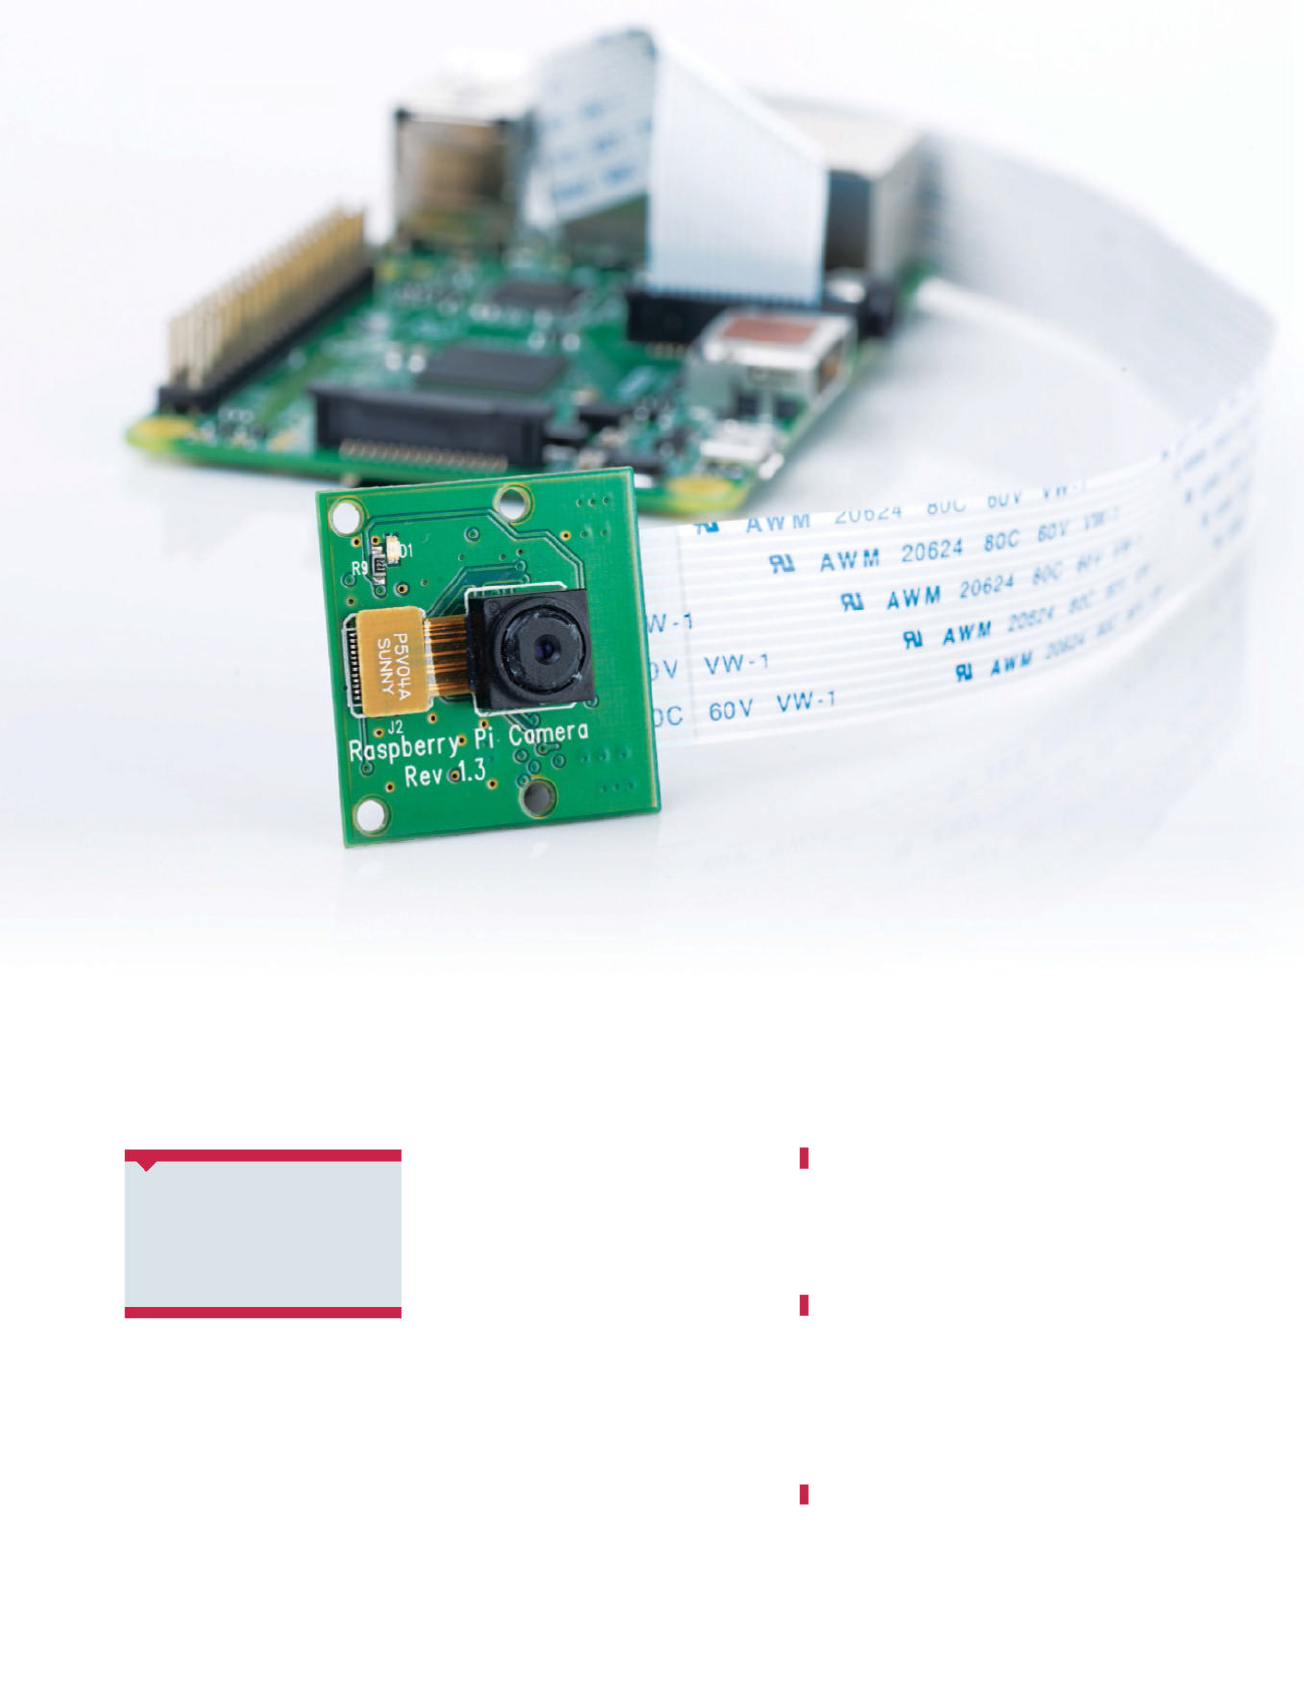
94 Raspberry Pi Tips, Tricks & Hacks
We love the Raspberry Pi camera. It’s a lovely
little piece of kit that is as versatile as the Pi and
it doesn’t even take up any of the USB slots. We’ve
done a bit of time-lapse photography in the past but
that was using a proper camera attached to the Pi –
now we’re doing it with just the Pi camera and a lot
less code thanks to the picamera Python module.
We need to set up our Pi with a few things before
we start with the code, though. We’ll start off with
assuming you’ve got a freshly installed Raspbian
SD card, so the fi rst thing to do is an apt-get update
followed by an apt-get upgrade to make sure your
fi les are up to date. Follow this with an rpi-update to
make sure your fi rmware is also up to date – this step
is very important because if you’re using an outdated
fi rmware then the camera won’t work.
The next step is to get the camera enabled. Open
up the terminal if you’re on the desktop, or simply
write into the command line:
$ sudo raspi-config
Find the Enable Camera option. Press Enter and key
over to Enable. Go to Finish but don’t restart straight
away as you have some more commands to get
through. Install your picamera module using this:
$ sudo apt-get install python-picamera
You also need to install the software that you’re
going to use for compiling your images into the
fi nished time-lapse video. We’re using gstreamer
to compile the video as it works well with the
Raspberry Pi GPU. To get it installed, fi rst add the
repo to the sources list with:
$ sudo sh -c ‘echo deb http://vontaene.
de/raspbian-updates/ . main >> /etc/apt/
sources.list’
What you’ll need
Q Pi camera module
Q A weatherproof case, such
as a PICE+
Get beautiful views of the sunset using your
Raspberry Pi, a Pi camera and a small Python script
Outdoor
time-lapse camera
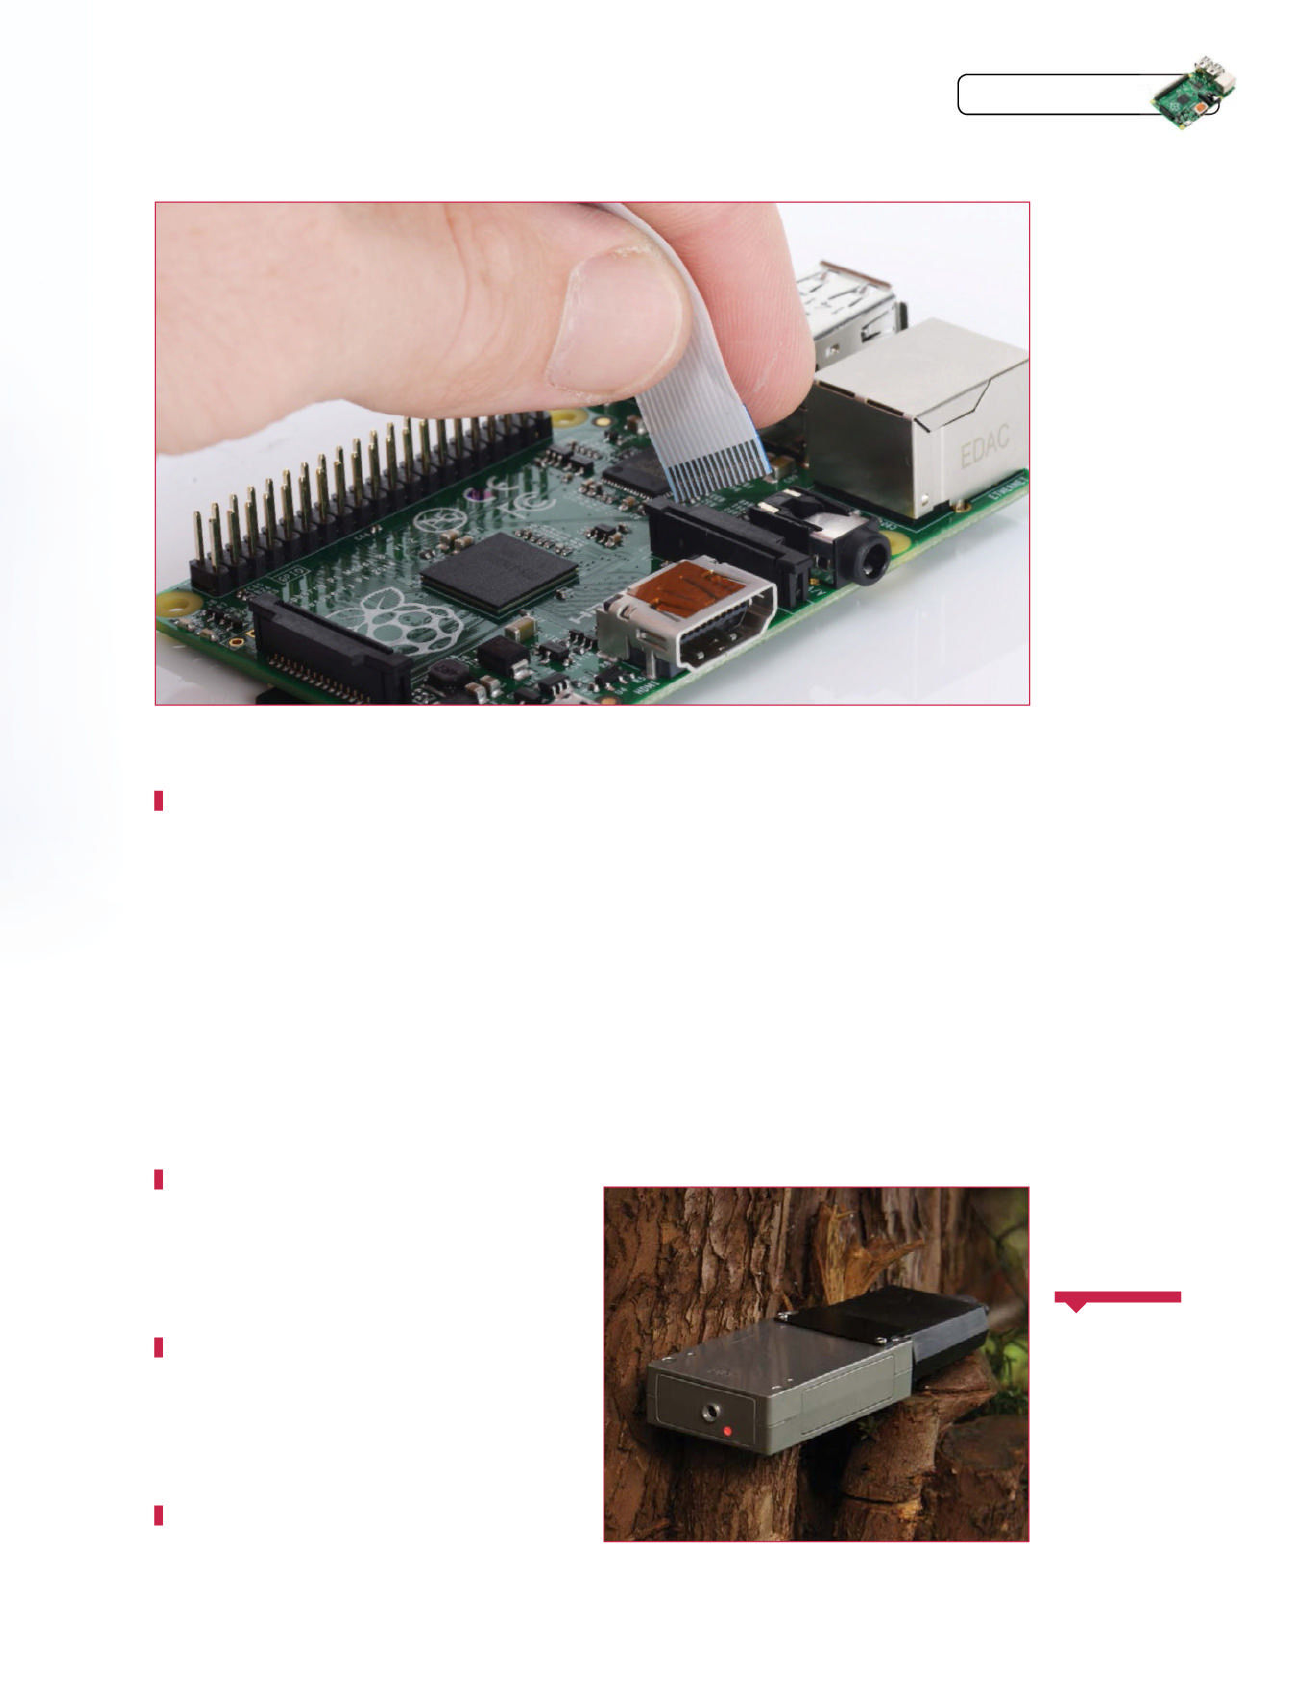
Raspberry Pi Tips, Tricks & Hacks 95
Tips | Tricks | Hacks
Left Ground yourself
and carefully insert
your Pi camera while
the Raspberry Pi
is unplugged
Below The PICE+
case is currently
being Kickstarted,
so it wasn’t available
at the time of
writing, but look out
for it by the end of
the year
With some
modifi cations to
the code and the Pi,
you can make it a lot
more automated,
running the Python
script after boot and
uploading it to the
cloud storage we set
up earlier. You can
also use it as a CCTV
camera thanks to an
additional hood that
comes with the PICE
Be
inspired
Do an apt-get update and then install a huge selection of
packages with the following:
$ sudo apt-get install libgstreamer1.0-0 liborc-0.4-0
gir1.2-gst-plugins-base-1.0 gir1.2-gstreamer-1.0
gstreamer1.0-alsa gstreamer1.0-omx gstreamer1.0-
plugins-bad gstreamer1.0-plugins-base gstreamer1.0-
plugins-base-apps gstreamer1.0-plugins-good
gstreamer1.0-plugins-ugly gstreamer1.0-pulseaudio
gstreamer1.0-tools gstreamer1.0-x libgstreamer-
plugins-bad1.0-0 libgstreamer-plugins-base1.0-0.
Once that’s done, shut down the Raspberry Pi. Unplug the USB
cable and locate the special DSI port for the camera, next to
the HDMI port. Gently pull on the edges to lift the fastener and
slot in your Raspberry Pi camera ribbon – make sure the silver
connectors are facing the HDMI port. Turn your Raspberry Pi
back on and get back into Raspbian. Everything should be about
ready now, so give the camera a test by opening up the terminal
and using:
$ raspistill -o test.jpeg
It will show the preview screen and then take a photo after fi ve
seconds; if it does so, you’re ready to get set up with our code.
Our preferred method for doing this is to fi rst create a folder
called timelapse in your home directory; you can do this simply
by opening the terminal and typing:
$ mkdir timelapse
If you haven’t made any changes to your username and such,
this should create the directory with the full path /home/pi/
timelapse. Keep this in mind and we’ll explain its importance in
a bit. Now in the terminal we’ll download the Python code we’ve
created for this project:
$ wget http://www.linuxuser.co.uk/wp-content/
uploads/2014/08/timelapse.zip
Unzip it and have a quick look through it using IDLE. There are a
couple of things to note in the code in case you wish to modify
it. The photos variable is set to 500 and that’s the number of
shots it will take before compiling the video. In reality it will
actually do one more due to the mathematical quirks of Python
but that shouldn’t matter. The delay parameter is in seconds
and using a bit of Google Fu you can fi gure out that 500 shots
at 30-second intervals will take about four hours to complete.
The large subprocess.call line is used to compile the images
into an AVI fi le at 24 frames per second. It uses the full path
to the directory that we mentioned previously, so if yours is
slightly different make sure you change it now.
There are a number of ways you can use it to get a time-
lapse of the outdoors; the easiest and safest way is to locate
a window with the view you wish to use. This may not always
be easy, though, in which case we suggest trying out the
PICE or PICE+ case. It’s a durable and waterproof case that is
designed to house the Pi and a Pi camera. Once it’s in place,
all you’ll need to do is hook it up to power, preferably with a
long cable, and run the code. Once it’s fi nished, retrieve the Pi
and the AVI fi le.
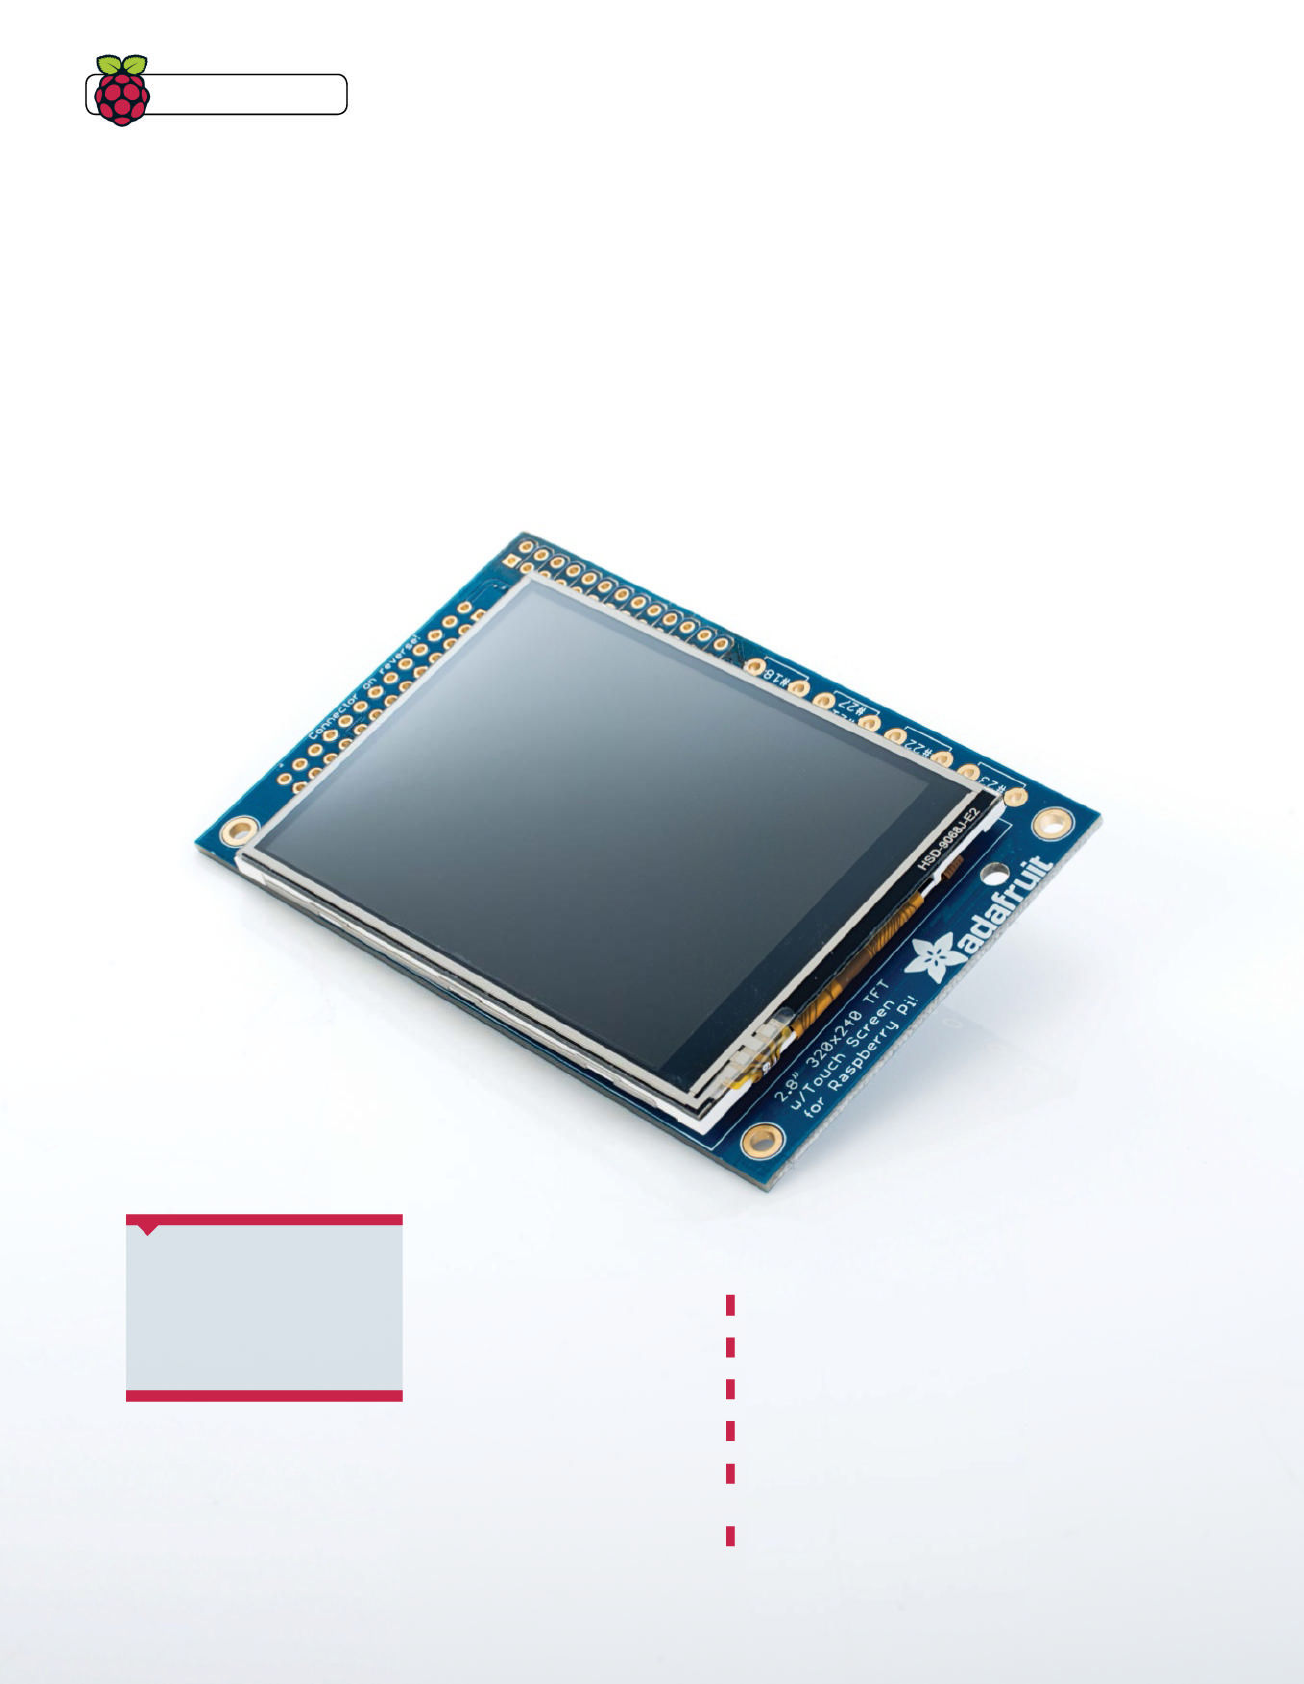
Tips | Tricks | Hacks
This simple little touch screen takes a bit more
than just plugging it in, as we show in the fi rst of
our hand-held Raspberry Pi video player tutorials
Set up the PiTFT
touch screen
We’ve spoken a lot about about how
portable the Raspberry Pi is, but one
of the minor issues associated with
this portability is the lack of a display.
Carrying around a monitor is hardly
practical and connecting via a phone with
SSH takes some interesting trickery to get
right. The PiTFT screen removes all these
issues by requiring no extra power and
being the size of the Raspberry Pi itself.
While Adafruit does supply a
preconfi gured Raspbian image for the
screen, you’ll need to add some extras
to get it working on your current install,
which is exactly what we’re going to cover
in this tutorial.
01Adafruit kernel fi les
The fi rst thing we need to do is download and install the
necessary kernel fi les. Open up a terminal or SSH in and do
the following:
$ wget http://adafruit-download.s3.amazonaws.com/
libraspberrypi-bin-adafruit.deb
$ wget http://adafruit-download.s3.amazonaws.com/
libraspberrypi-dev-adafruit.deb
$ wget http://adafruit-download.s3.amazonaws.com/
libraspberrypi-doc-adafruit.deb
$ wget http://adafruit-download.s3.amazonaws.com/
libraspberrypi0-adafruit.deb
$ wget http://adafruit-download.s3.amazonaws.com/
raspberrypi-bootloader-adafruit-112613.deb
$ sudo dpkg -i -B *.deb
What you’ll need
Q SD card with up-to-date
version of Raspbian
Q PiTFT, fully assembled
bit.ly/1jHEJT4
96 Raspberry Pi Tips, Tricks, & Hacks
Raspberry Pi Tips, Tricks, & Hacks 97
Tips | Tricks | Hacks
02Attach the screen
If you’re using Raspbian from an image after
September 2013, turn off the accelerated framebuffer using:
$ sudo mv /usr/share/X11/xorg.conf.d/99-fbturbo.conf ~
After that’s done, shut down the Raspberry Pi completely
and plug the screen into the GPIO pins if you haven’t already
done so.
03 Install the screen driver
We can do a test to make sure that the screen works
at this point. This will turn on the screen but it won’t work
after reboot:
$sudo modprobe spi-bcm2708
$sudo modprobe fbtft_device name=adafruitts rotate=90
$export FRAMEBUFFER=/dev/fb1
$startx
04 Add the modules
There are two modules we need to get to auto-load
at boot time, including the actual PiTFT driver. Open up the
modules fi le with the fi rst command and add the second two
lines to the list:
$ sudo nano /etc/modules
spi-bcm2708
fbtft_device
05 Edit confi guration fi les
We need to create/modify the necessary
confi guration fi le so that the screen can turn on properly.
The fi rst line opens the fi le, while the second line needs to be
added to this fi le:
$ sudo nano /etc/modprobe.d/adafruit.conf
options fbtft_device name=adafruitts rotate=90
frequency=32000000
06 The options
You may have noticed the specifi c wording on these
options: rotate allows you to have it at 0, 90, 180 or 270 degrees.
A frequency of 32MHz gives you about 20fps on screen; but if the
screen is playing up, take it down to 16MHz. Now reboot the Pi.
07 Install touch screen
Once back in, we need to create a new confi g fi le and
populate it as shown below:
$ sudo mkdir /etc/X11/xorg.conf.d
$ sudo nano /etc/X11/xorg.conf.d/99-calibration.conf
Section "InputClass"
Identifier "calibration"
MatchProduct "stmpe-ts"
Option "Calibration" "3800 200 200 3800"
Option "SwapAxes" "1"
EndSection
08 Testing touch
Once that's all done you can restart X with:
$ FRAMEBUFFER=/dev/fb1 startx
You can make it so you just need to type startx by adding the
following to ~/.profi le:
export FRAMEBUFFER=/dev/fb1
You can also go into raspi-confi g to have the desktop load by
default. That’s it – you’re now ready to start calibrating the
display for your portable video player.
Left Get the
neccessary fi les
from the Adafruit
website and
download them to
your Pi
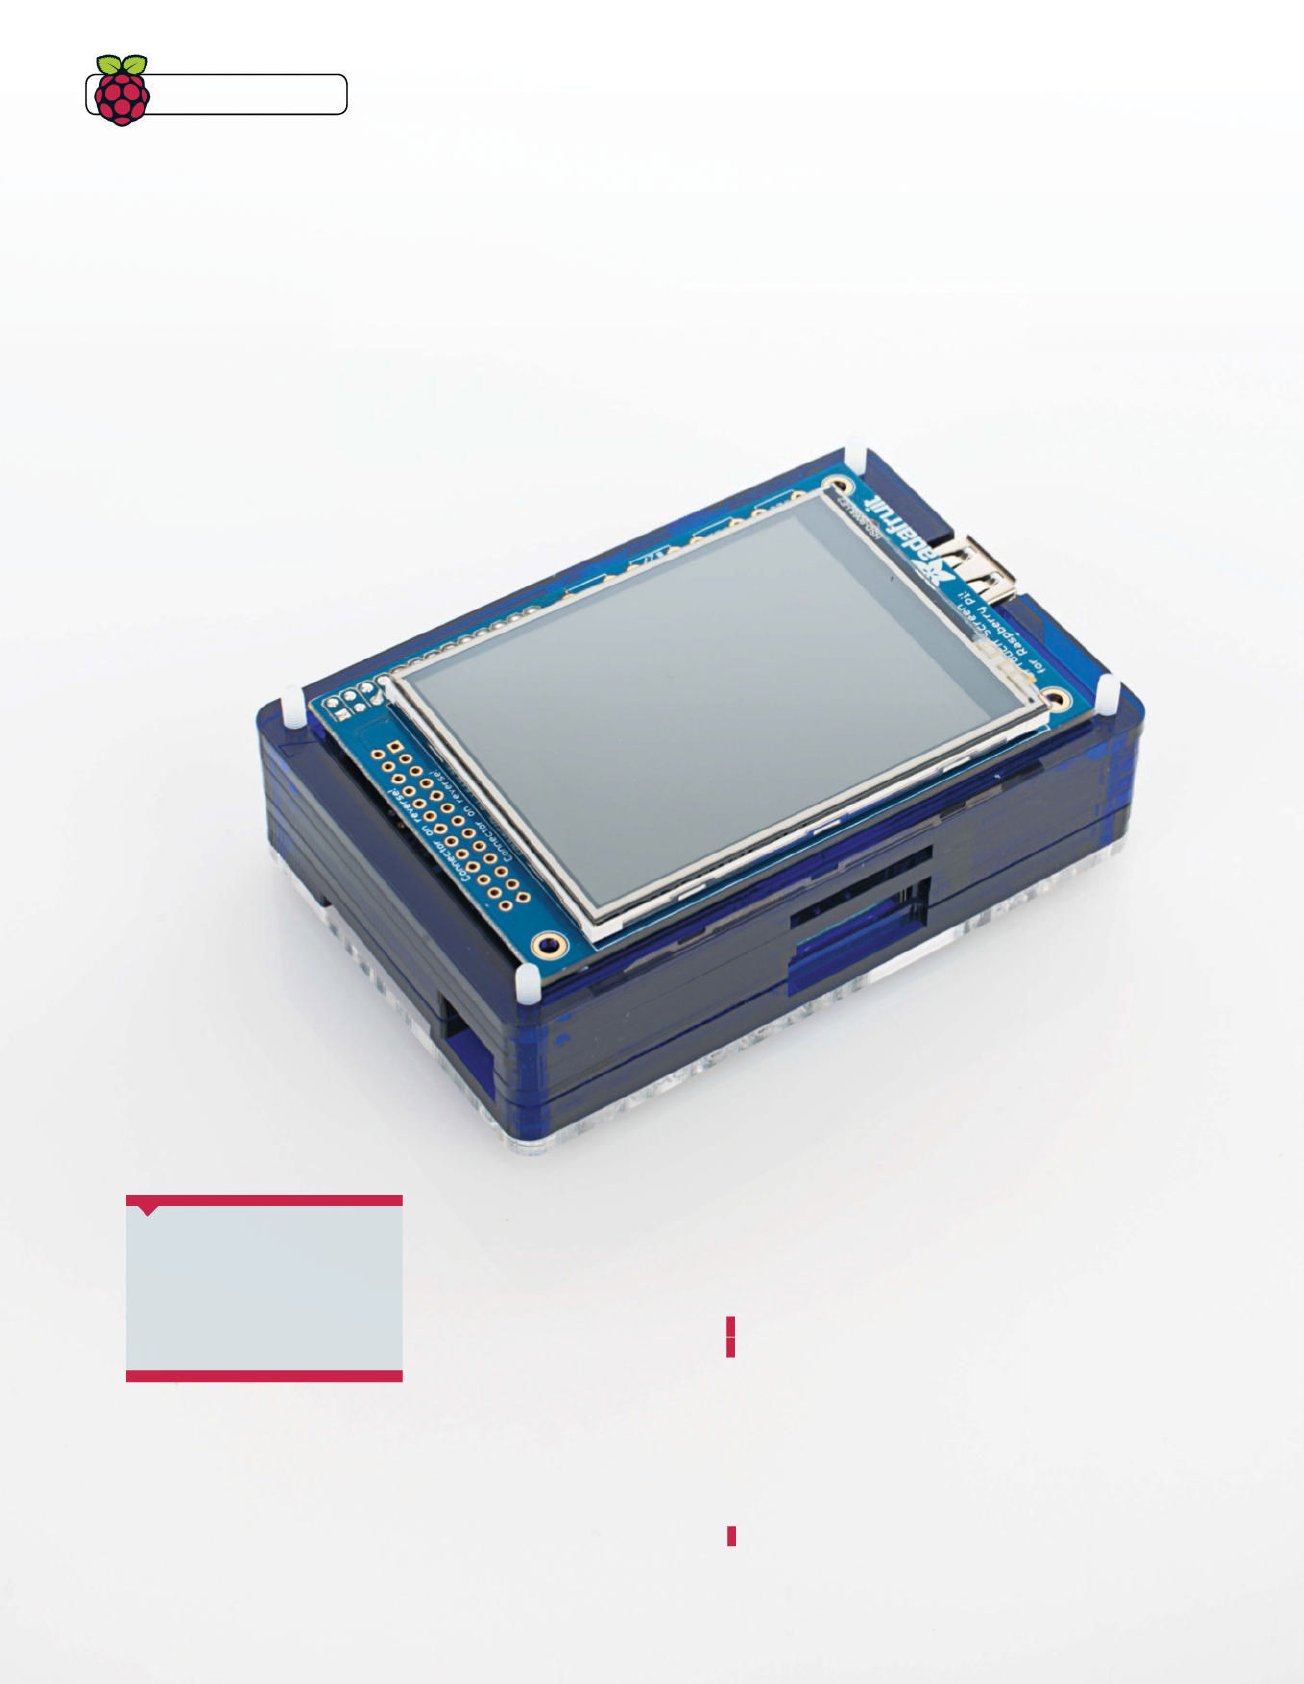
Calibrate your new touch screen and
add a small interface using some
simple Python code
Calibrate a touch
screen interface
We’ve got a screen with basic touch
functionality but where do we go from
there? Our fi rst step is to actually make
the touch screen usable; it’s resistant-
style touch, so you can use your fi nger
or a stylus with it, and this will affect the
calibration of the screen once we get to
it. Don’t worry – if you calibrate with one
method, you can always go back and
recalibrate with another.
Once you’ve completed the tutorial on
the previous two pages, be sure to give
this one a try. Here we’re going to properly
set up the touch screen so you can
continue to use the Raspberry Pi on the go
without any other devices or within range
of a decent power socket.
01New rules
To make things easier for ourselves we’re going to
create a little rule so that we don’t lose track of what the
touch screen is called in the command line. SSH in, run the
next command and copy the following text into it:
$ sudo nano /etc/udev/rules.d/95-stmpe.rules
SUBSYSTEM=="input", ATTRS{name}=="stmpe-
ts", ENV{DEVNAME}=="*event*", SYMLINK+="input/
touchscreen"
02Reinstall the touch screen
We’ll need to undo what we did at the end of the last
tutorial to make sure we can get the touch part working
properly, by removing and then reinstalling the support for it:
sudo rmmod stmpe_ts; sudo modprobe stmpe_ts
What you’ll need
Q SD card with up-to-date
version of Raspbian
Q PiTFT, fully assembled
bit.ly/1jHEJT4
98 Raspberry Pi Tips, Tricks & Hacks
Tips | Tricks | Hacks
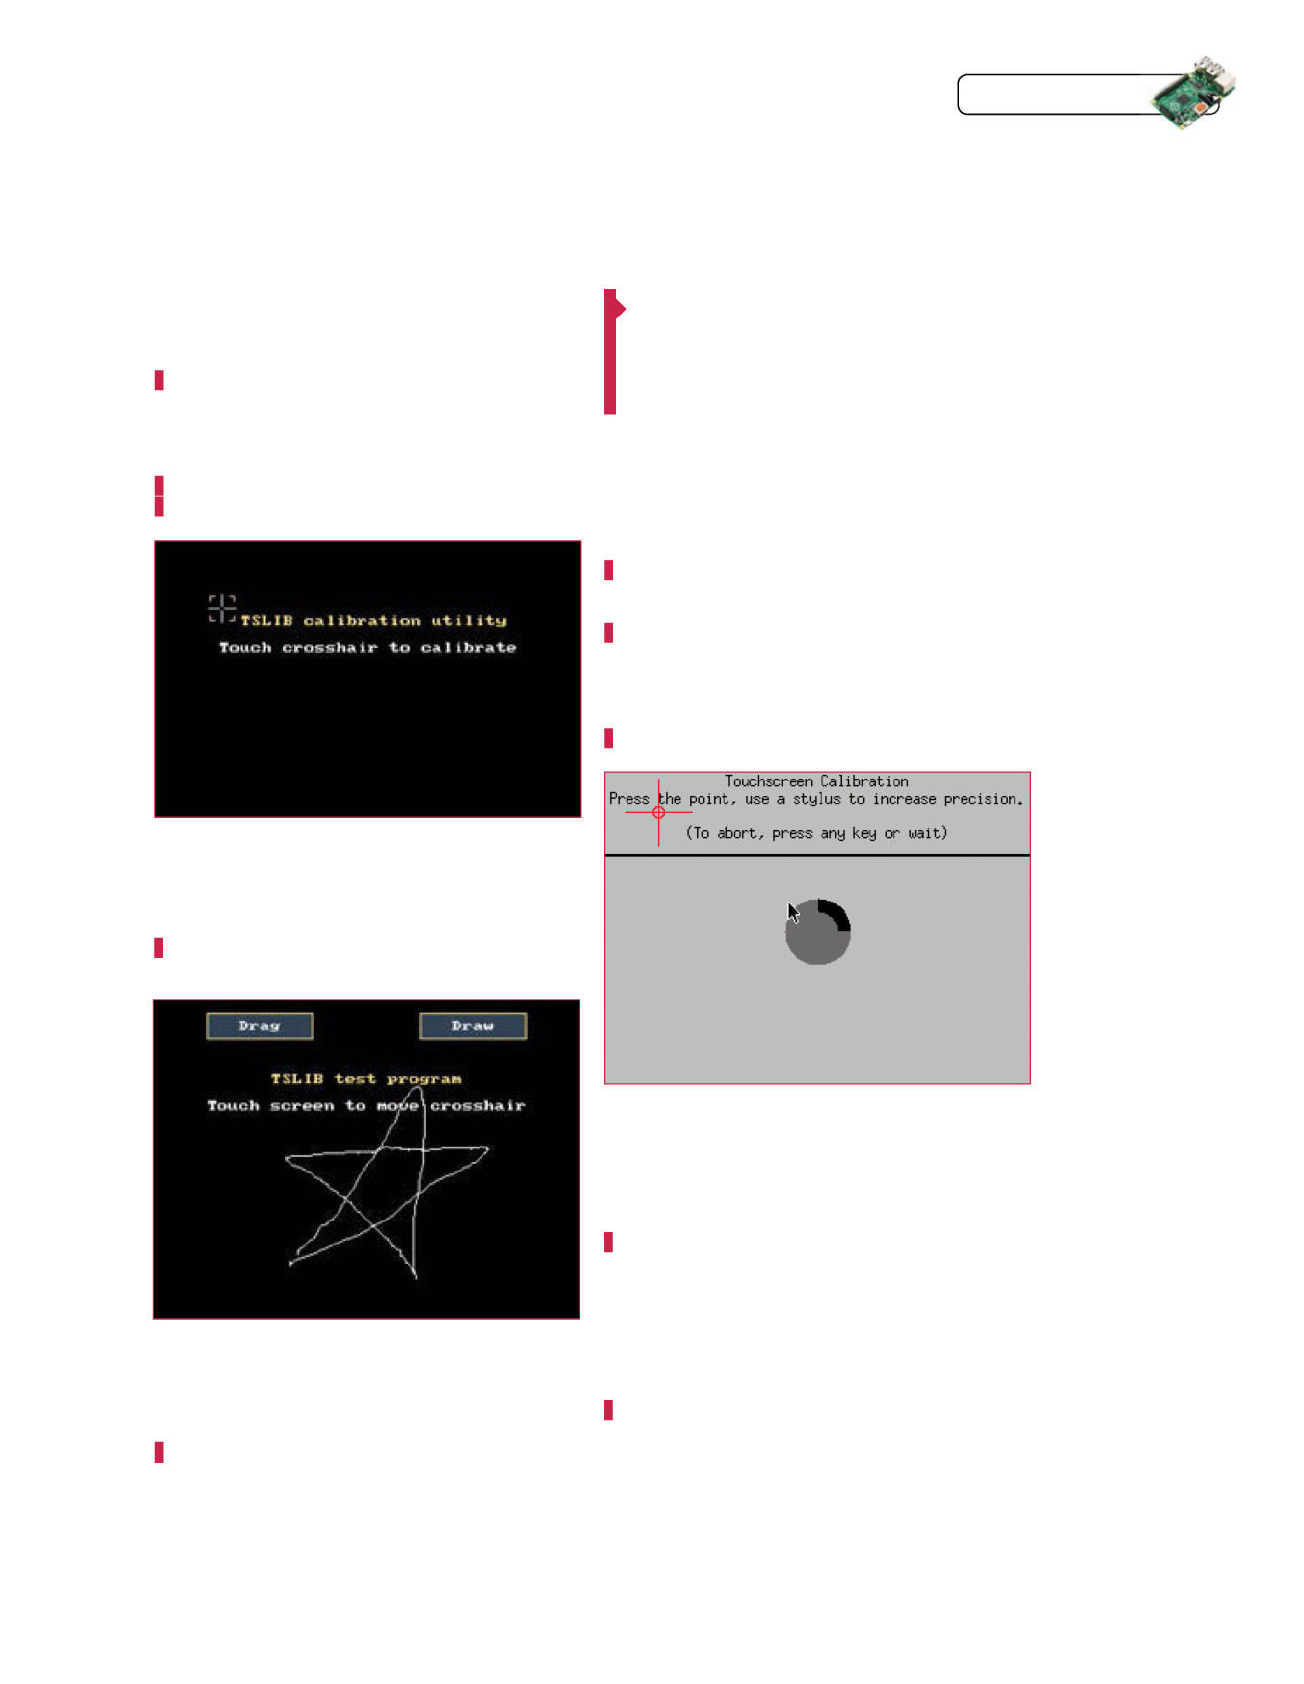
Raspberry Pi Tips, Trick & Hacks 99
03 Main event
Find out what event the touch screen is known by
with the following:
$ ls -l /dev/input/touchscreen
We can install tools now to calibrate and debug the touch
screen. Install and test them with:
$ sudo apt-get install evtest tslib libts-bin
$ sudo evtest /dev/input/touchscreen
04 Touch calibration
Now we can fi nally begin the calibration process.
Enter the following so that the Pi can learn roughly where the
positions are on the screen:
$ sudo TSLIB_FBDEVICE=/dev/fb1 TSLIB_TSDEVICE=/dev/
input/touchscreen ts_calibrate
05 Draw calibration
Once you’ve done the previous calibration, you can try
out a drawing test to see how the screen reacts. Do this with
the following:
$ sudo TSLIB_FBDEVICE=/dev/fb1 TSLIB_TSDEVICE=/
dev/input/touchscreen ts_test
If it’s not working quite to your liking, you can try the previous
step again.
06 Install X calibrator
Now we need to calibrate the touch screen in X, which
fi rst means installing the correct tools. Use the following two
commands to download and install the tool:
$ wget http://adafruit-download.s3.amazonaws.com/
xinput-calibrator_0.7.5-1_armhf.deb
$ sudo dpkg -i -B xinput-calibrator_0.7.5-1_armhf.deb
Follow this up quickly by deleting irrelevant calibration data with
the following:
$ sudo rm /etc/X11/xorg.conf.d/99-calibration.conf
07 X-calibrate
From your SSH shell, run startx for the screen to turn
on. From here you can either try to get xinput_calibrator typed
into the terminal or type the following from the SSH session if
it’s easier:
FRAMEBUFFER=/dev/fb1 startx & DISPLAY=:0.0 xinput_
calibrator
08 Save calibration
Having completed calibration, you’ll get an output
starting with Section “InputClass”. Open up the following fi le
and copy the output from Section to EndSection into there:
$ sudo nano /etc/X11/xorg.conf.d/99-calibration.conf
09 Play around
Your new touch screen is now properly set up! We’ll go
over more ways to make it easier to use in the following tutorial,
but it’s basically portable now and ready to have other projects,
such as the PiPhone or PiCam, loaded onto it.
Once you’ve done the calibration,
you can try out a drawing test to
see how the screen reacts
Tips | Tricks | Hacks
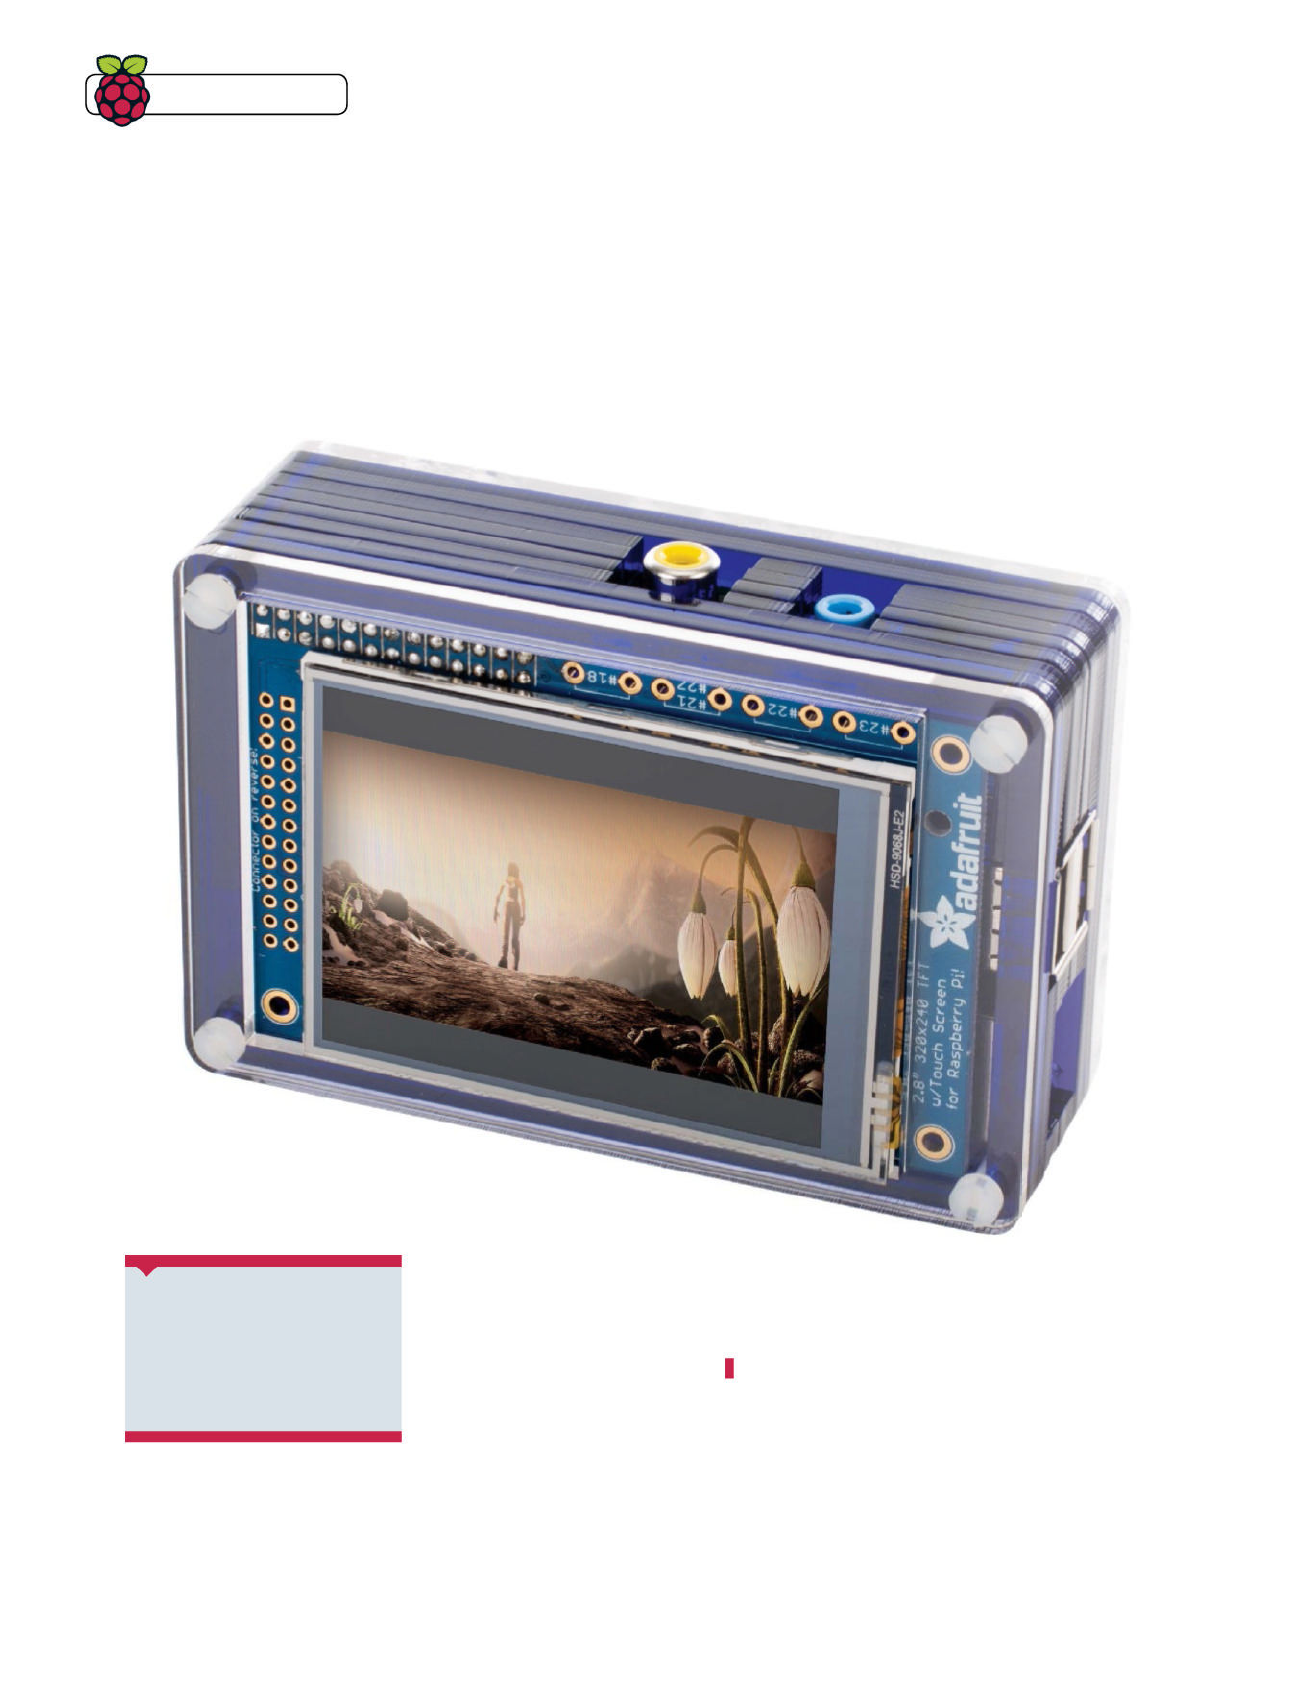
Need a better way to watch video on the go? Let
your newly powered-up touch-screen Pi play
your favourite fi lms and shows
Portable Pi video player
We’ve got a Raspberry Pi that we can
make portable now – but how can you
use it? The easiest thing to do with it is
use it as a portable video player. It has a
far superior battery to your phone and has
the added bonus of being easily plugged
into a TV once you reach your destination.
Before we can use it to play the
videos, though, we need to make it a
bit more friendly to transport and get
it to play videos in a particular way. So
we’ve recommended some excellent
accessories and extras you can take
advantage of to achieve this.
01Install VLC
Go to your SSH terminal and install VLC media player.
It’s a lightweight, highly customisable media player that is
able to play just about anything you throw at it. Do this with:
$ sudo apt-get install vlc
02Default settings
Here’s where it gets a bit tricky, as you’ll need to
perform this step via the screen. Hook the Pi up to a display,
mouse and keyboard or just use the mouse and keyboard on
the small screen. Go to an AVI or MP4 fi le and right-click on it,
go to Properties>Open with… and choose Customise for the
next step.
What you’ll need
Q SD card with up-to-date
version of Raspbian
Q PiTFT, fully assembled
bit.ly/1jHEJT4
100 Raspberry Pi Tips, Tricks & Hacks
Tips | Tricks | Hacks
03 Set the default
Go to Sound & Video to select VLC from the menu.
Click the checkbox to set it as the default app and then press
Enter to save the changes. Now when you double-click or
tap on the video, it will automatically play in VLC.
04 VLC options
Open up VLC from the menu and right-click anywhere
in the player space to open the Context menu. From here, go
to Tools and then Preferences. Scroll down to click on ‘Allow
only one instance’ and then go to the Video tab and click on the
Fullscreen checkbox. Press Enter to save.
05 Play videos
You’re done! It will play videos at the size of your
Raspberry Pi screen and only one player will exist at a time.
You may have better luck if you convert videos to 320x240, but
it should play much larger videos just fi ne.
06 USB storage
A lot of Raspberry Pi SD cards have limited space, so it
makes sense to keep your videos separate. Make sure to use
storage that does not require any extra power, like a USB stick or
portable hard drive. Access the storage from the File Manager,
as no other mounting is required.
07 Get some protection
The PiTFT PiBow case from Pimoroni is one of the few
cases – if not the only case – that houses the Raspberry Pi with
the PiTFT screen. It’s assembled in layers and only works with
the revision 2 Raspberry Pi (the newer one with 512MB of RAM);
this one won’t have the pins between the yellow video port and
headphone port.
08 Independently powered
To have it working on the go, you’ll need to have it set
up so that you can remove it from a tethered power source.
Portable, USB batteries are quite common these days, but
there are certain things you need to look out for, such as high
capacity and higher amp output.
09 Next time…
Now we have our portable Raspberry Pi video player!
Use it as you wish and learn the ins and outs of the touch
screen in the process. Next month we’ll demonstrate how you
can change the setup from watching video to capturing video
with our RasPi Camera.
Raspberry Pi Tips, Tricks & Hacks 101
Tips | Tricks | Hacks
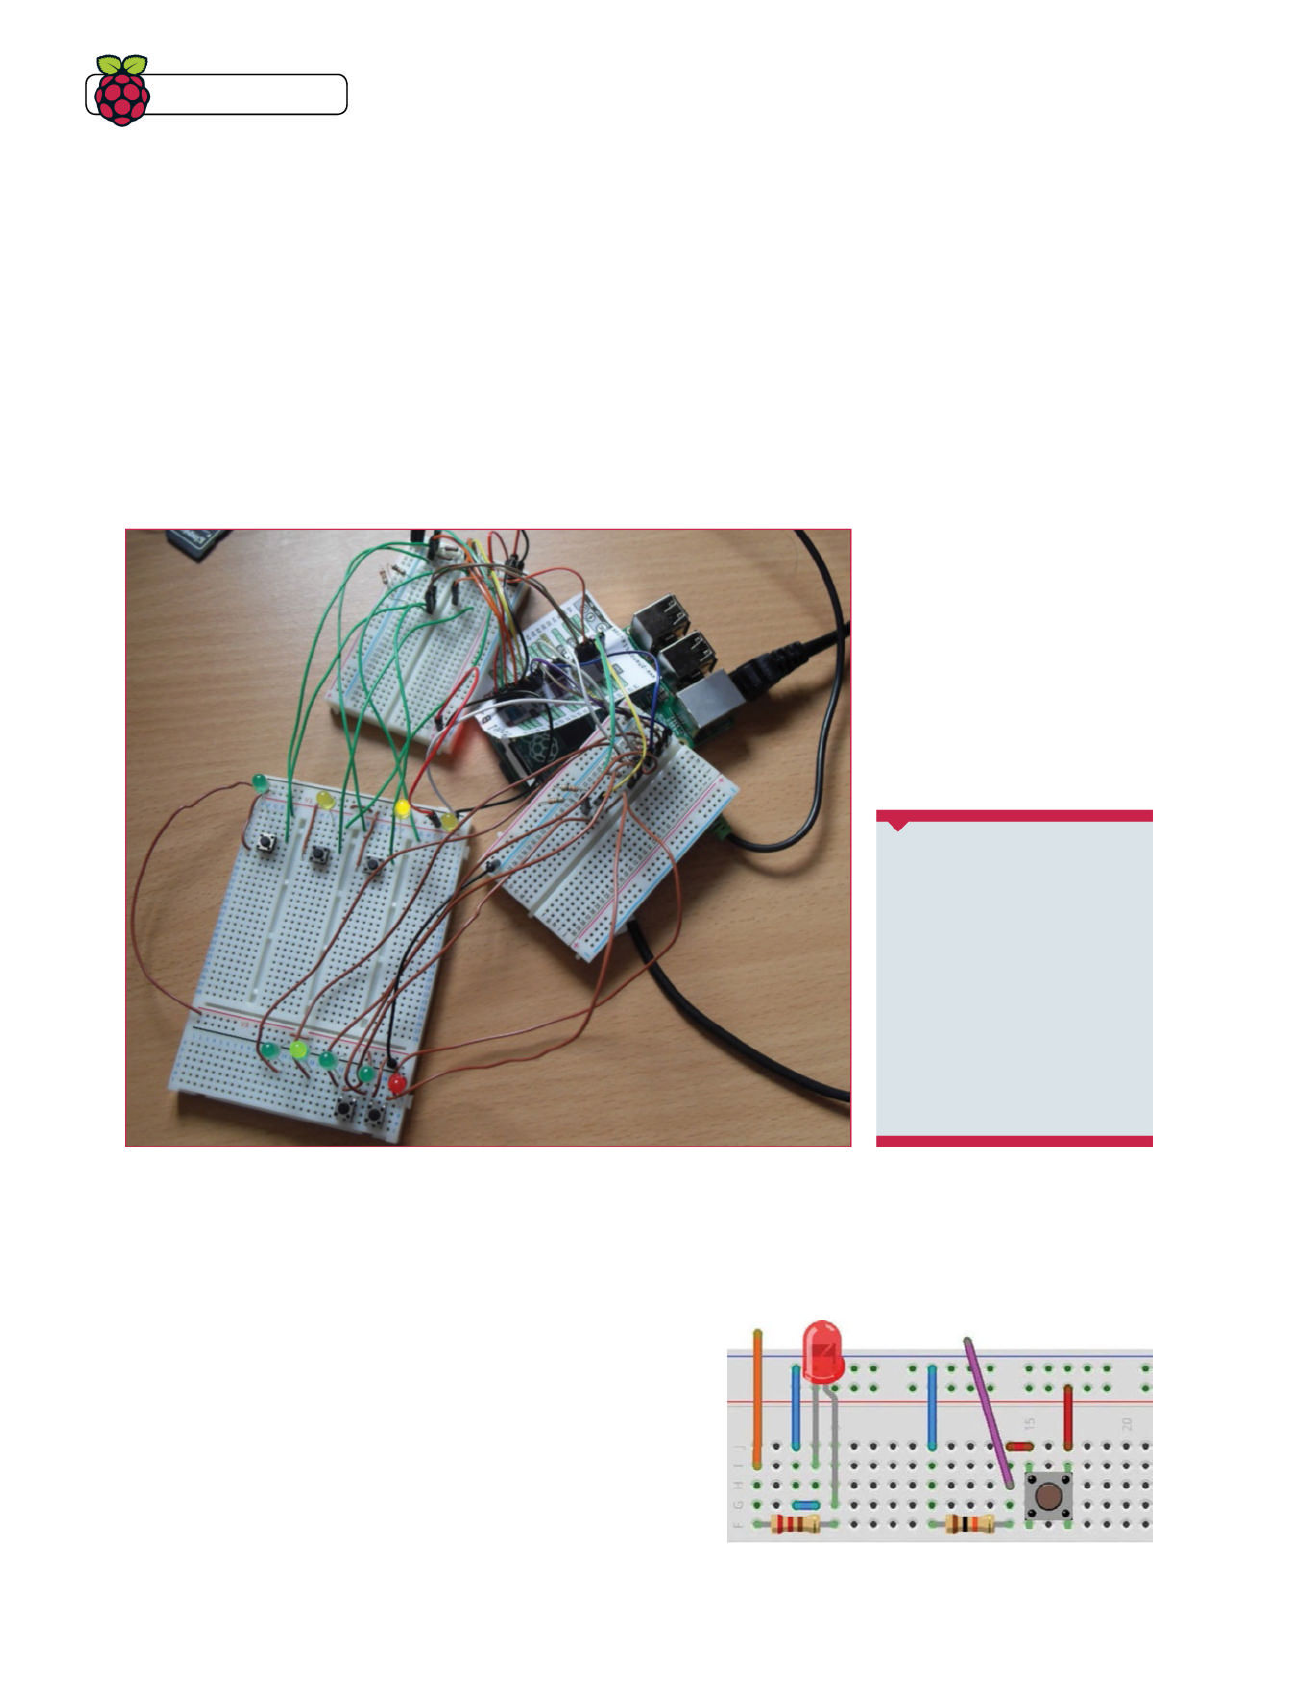
Tips | Tricks | Hacks
102 Raspberry Pi Tips, Tricks & Hacks
Build your own looping drum machine
with only 200 lines of code!
Make a Raspberry
Pi sampler
In this tutorial we combine electronics, music and
programming knowledge to create a simple sampler with
looping capabilities. The implementation used in this article has
three drum sounds as the samples, but it is trivial to add more
until you run out of GPIO pins.
Before we start, let’s cover some basic musical terms. Music is
split into bars. There are a certain number of beats in a bar. This
sampler uses the 4/4 time signature, which means there are 4
beats in each bar. Tempo is the speed at which music is played,
and it is measured in beats per minute (bpm). A metronome is an
audible tone that is heard at the start of every beat.
Quantization is the process of aligning notes to beats, or exact
fractions of a beat, and a quantization value is usually given in the
form 1/8. This means that there are eight possible places in a bar
where a note can be played. When the sampler is recording and
a sample button is pressed, we store the sample at the current
position in the bar with the accuracy of the quantize value.
There’s a lot to cover, so let’s get started.
01Connect LEDs
The circuit diagram is an LED that can be turned on and
off with a GPIO output. The orange wire is the connection from
the GPIO output. This then goes through a 220û resistor to limit
the current draw to a safe level. This current fl ows through the
positive leg of the LED and then back to ground. We need nine
LEDs for this project.
What you’ll need
Q Latest Raspbian image
raspberrypi.org/downloads
Q At least one breadboard
Q Push buttons
Q LEDs
Q Female-to-male GPIO
jumper cables
Q Male-to-male GPIO
jumper cables
Left Extra breadboards are
used here to keep the main
breadboard as free from
wires as possible

Raspberry Pi Tips, Tricks & Hacks 103
Tips | Tricks | Hacks
02Wire up buttons
The second circuit we need is a
push button. The purple wire goes to a
GPIO input. There is a 10Kû pull down
resistor to ground, which represents
a logical 0. When the push button is
pressed, the 3.3V supply representing a
logical 1 is connected to the purple wire.
The electricity takes this path because it
has less resistance than the path to
ground. We need two buttons for record
and undo, and then as many buttons as
you like for samples (three drum samples
are provided).
03 Download samples
Create a few folder for the
project called pisampler. Then download
and unzip the sounds:
mkdir pisampler
cd pisampler
wget http://liamfraser.co.uk/lud/
pisampler/sounds.zip
unzip sounds.zip
There will now be a folder called sounds
with some samples in. The fi le format for
samples is .wav audio, Microsoft PCM,
16 bit, stereo 44100 Hz. Mono will work
too. Any samples can be converted to this
format with Audacity by exporting them as
a .wav fi le.
04 Import required libraries
Create a fi le called pisampler.
py in your favourite editor. The fi rst thing
we need to do is import the required
libraries and set some confi guration
values. A key option is debounce: the time
to wait before a button can be pressed
again to stop accidental presses from
contact bounce.
05 Create a sample class
We’re going to use a class to
represent each sample. It's going to need
a few things: the pin that the sample
button is connected to, the name of the
sound fi le, and a reference to the instance
of the sampler class. We haven’t created
the sampler class yet, but the sample
will need to be able to tell if the sampler is
recording or not, and have access to the
data structure that recordings are stored in
to add itself to it if necessary.
The other thing that we need to do
is set the GPIO pin to an input, and add
an event listener for when the button is
pressed. We set callback (the function to
be executed when the button is pressed)
to a function called self.play_btn, which
import RPi.GPIO as GPIO
import time
import pygame
import os
beat_leds = [2, 3, 4, 17]
bar_leds = [27, 22, 10, 9]
record_led = 11
record = 19
undo = 26
debounce = 200 # ms
class Sample(object):
def __init__(self, pin, sound, sampler):
self.sampler = sampler
self.name = sound
self.sound = pygame.mixer.Sound(os.path.join('sounds', sound))
self.pin = pin
GPIO.setup(pin, GPIO.IN)
GPIO.add_event_detect(self.pin, GPIO.RISING, callback=self.play_btn,
bouncetime=debounce)
def play_btn(self, channel):
self.sound.play()
s = self.sampler
if s.recording:
s.recording_data[s.bar_n][s.quantize_n].append({'loop' : s.loop_count,
'sample' : self})
class PiSampler(object):
def __init__(self, tempo=80, quantize=64):
pygame.mixer.pre_init(44100, -16, 1, 512)
pygame.init()
self.quantize = quantize
self.tempo = tempo
self.recording = False
self.record_next = False
self.metronome = False
self.met_low = pygame.mixer.Sound(os.path.join('sounds', 'met_low.wav'))
self.met_high = pygame.mixer.Sound(os.path.join('sounds', 'met_high.wav'))
self.met_low.set_volume(0.4)
self.met_high.set_volume(0.4)
self.samples = []
self.recording_data = []
for i in range(0, 4):
bar_arr = []
for i in range(0, quantize):
bar_arr.append([])
self.recording_data.append(bar_arr)
GPIO.setmode(GPIO.BCM)
for pin in beat_leds + bar_leds + [record_led]:
GPIO.setup(pin, GPIO.OUT)
GPIO.setup(record, GPIO.IN)
GPIO.add_event_detect(record, GPIO.RISING,
callback=self.record_next_loop,
bouncetime=debounce)
Full code listing (Cont. on next page)
Step 04
Step 05
Step 06

104 Raspberry Pi Tips, Tricks & Hacks
06 The sampler init method
Here’s the start of the sampler class. The
last value in the Pygame mixer init is the buffer size.
You might need to increase this to 1024 or higher if
you have audio dropouts. We create some variables
to store recording state. Metronome sounds are then
added and their volume lowered. We also create a list
to hold our samples in.
We create nested arrays to represent recorded
sample presses. There is an array for each bar. Each
bar has an array for each possible quantize value.
The default value of 64 gives us 64 possible places to
store a sample hit per bar.
Finally, we set up the LED pins, and the pins for the
record and undo buttons.
07 The tempo property
The tempo variable is actually a property
with a custom setter. This means when a value is
assigned, it does a custom action. In our case, we need
to calculate how often we need to check for recorded
notes to play in the main loop that we’ll write later.
08 Helper functions
There are a few helper functions in the
class. One of them simply adds a sample to the list of
samples. Another sets a variable to trigger recording at
the start of the next loop. There is also a function which
turns the red LED on when the recording variable is set
to true. Now we'll jump forward and take care of the
main loop towards the end of the full code listing.
09 Start the main loop
The main loop doesn’t actually have to do
any work at all to play sounds, as that’s done by the
GPIO event handlers. The main loop is used to play the
metronome, update the state about which bar/beat/
quantize we are currently on, update the LEDs and deal
with recording if necessary.
Before the loop, we create variables to track the
state. The last recorded loop is a list that we will use
as a stack. A stack is a last in/first out data structure,
allowing us to undo recordings multiple times by
removing each sample that was recorded when the
loop count was the value on the top of the stack.
If we’re at the start of a new beat then we use a
function called do_leds that we haven’t created yet.
As the LEDs work in the same way (a block of four LEDs
where only one is turned on), we can use the same
function twice and just pass a different set of pins,
and the index of the LED we want to turn on. We then
call the do_metronome function which will play the
appropriate metronome sound.
We then do some recording logic which starts
recording if we should be recording, and stops
recording if we have just been recording, adding the
GPIO.setup(undo, GPIO.IN)
GPIO.add_event_detect(undo, GPIO.RISING,
callback=self.undo_previous_loop,
bouncetime=debounce)
@property
def tempo(self):
return self._tempo
@tempo.setter
def tempo(self, tempo):
self._tempo = tempo
self.seconds_per_beat = 60.0 / tempo
self.quantize_per_beat = self.quantize / 4
self.quantize_seconds = self.seconds_per_beat / self.quantize_
per_beat
def add(self, sample):
self.samples.append(sample)
@property
def recording(self):
return self._recording
@recording.setter
def recording(self, value):
self._recording = value
GPIO.output(record_led, value)
def record_next_loop(self, channel):
self.record_next = True
def play_recording(self):
for sample_dict in self.recording_data[self.bar_n][self.
quantize_n]:
if sample_dict['loop'] != self.loop_count:
sample_dict['sample'].sound.play()
def undo_previous_loop(self, channel):
if len(self.last_recorded_loop) == 0:
print "No previous loop to undo"
return
print "Undoing previous loop"
loop = self.last_recorded_loop.pop()
for bar in self.recording_data:
for quantize in bar:
removes = []
for sample in quantize:
if sample['loop'] == loop:
removes.append(sample)
for sample in removes:
quantize.remove(sample)
def do_leds(self, leds, n):
count = 0
for led in leds:
if count == n:
GPIO.output(led, True)
else:
Full code listing (Cont.) will play a sound and add it to the recording data if we
are recording. It will become clear how this works once
we’ve written the sampler class. Note that the GPIO
event handler passes the pin that the event handler was
triggered on, hence the channel variable that is present
but never used.
Step 06
Step 07
Step 08
Step 13
Step 11
Tips | Tricks | Hacks

Raspberry Pi Tips, Tricks & Hacks 105
11 Lighting LEDs
The LED code is simple. It simply goes through
each pin in the list you provide it with and lights up the
appropriate LED, ensuring that all of the others are
turned off.
12 The metronome
The metronome simply plays a high tone on the
fi rst beat or a lower tone on the remaining beats if the
metronome variable is set to true.
13 The recording code
Looking back at the sample class we created at
the start, you can see that if recording is enabled, and
a note is pressed, then we add a dictionary to the list
of samples for the current bar at the current quantize
point. The dictionary contains a reference to the
sample so that it can be played, and also the loop that
it was added on so that it can be removed if necessary.
The code for playing and undoing recordings can be
seen below.
Note that we directly play the sound rather than
using the btn_play function so that we don’t trigger the
recording logic when playing recorded sounds.
The pop function in undo_previous_loop removes
the last thing that was added to the stack, which will
be the loop count. We then go through every possible
recording data point and remove anything recorded on
the loop we want to remove.
14 Finishing it off
To fi nish it off, we need to add a main function
where we load some samples in and then start the
main loop. Remember that you need to run the code
with sudo python2 pisampler.py because we need sudo
to access the GPIO. Happy jamming!
15 Possible improvements
There are a number of improvements that
could be made to the sampler. Here are a few to get
you started:
• A button to turn the metronome on and off
• The ability to time stretch samples (such as chords)
to fi t with the tempo
• The ability to pitch shift samples on the fl y
• Using a shift register to use less pins when lighting
the LEDs, allowing more inputs
• The ability to save recorded beats so that they can
be loaded and played back
GPIO.output(led, False)
count += 1
def do_metronome(self):
if not self.metronome:
return
if self.beat_n == 0:
self.met_high.play()
else:
self.met_low.play()
def run(self):
self.loop_count = 0
self.last_recorded_loop = []
self.bar_n = 0
self.beat_n = 0
self.quantize_beat_n = 0
self.quantize_n = 0
while True:
if self.quantize_beat_n == 0:
self.do_leds(beat_leds, self.beat_n)
self.do_leds(bar_leds, self.bar_n)
self.do_metronome()
if self.quantize_n == 0 and self.bar_n == 0:
if self.record_next:
self.recording = True
self.record_next = False
elif self.recording:
self.recording = False
self.last_recorded_loop.append(self.loop_count)
self.loop_count += 1
self.play_recording()
time.sleep(self.quantize_seconds)
if self.quantize_beat_n == self.quantize_per_beat - 1:
self.quantize_beat_n = 0
self.beat_n += 1
else:
self.quantize_beat_n += 1
if self.quantize_n == self.quantize - 1:
self.quantize_n = 0
else:
self.quantize_n += 1
if self.beat_n == 4:
self.beat_n = 0
self.bar_n += 1
if self.bar_n == 4:
self.bar_n = 0
if __name__ == "__main__":
sampler = PiSampler(tempo=140)
sampler.add(Sample(05, 'kick01.wav', sampler))
sampler.add(Sample(06, 'snare01.wav', sampler))
sampler.add(Sample(13, 'clhat01.wav', sampler))
sampler.metronome = True
sampler.run()
Full code listing (Cont.)
10 Main loop continued
This code is at the indentation level after
the “while True:” statement. After dealing with the
recording logic, we need to play any notes that have
been previously recorded. We’ll work out how to do
that later on. After that, we can sleep until the next
quantize change is due. Once this happens, we have to
do logic that deals with the quantize and any related
variables such as the beat or bar if necessary, either
incrementing them or resetting them if necessary.
Step 09
Step 10
Step 14
Step 12
Step 11
loop number to the last_recorded_loop stack. We
increment the loop count after doing this.
Tips | Tricks | Hacks
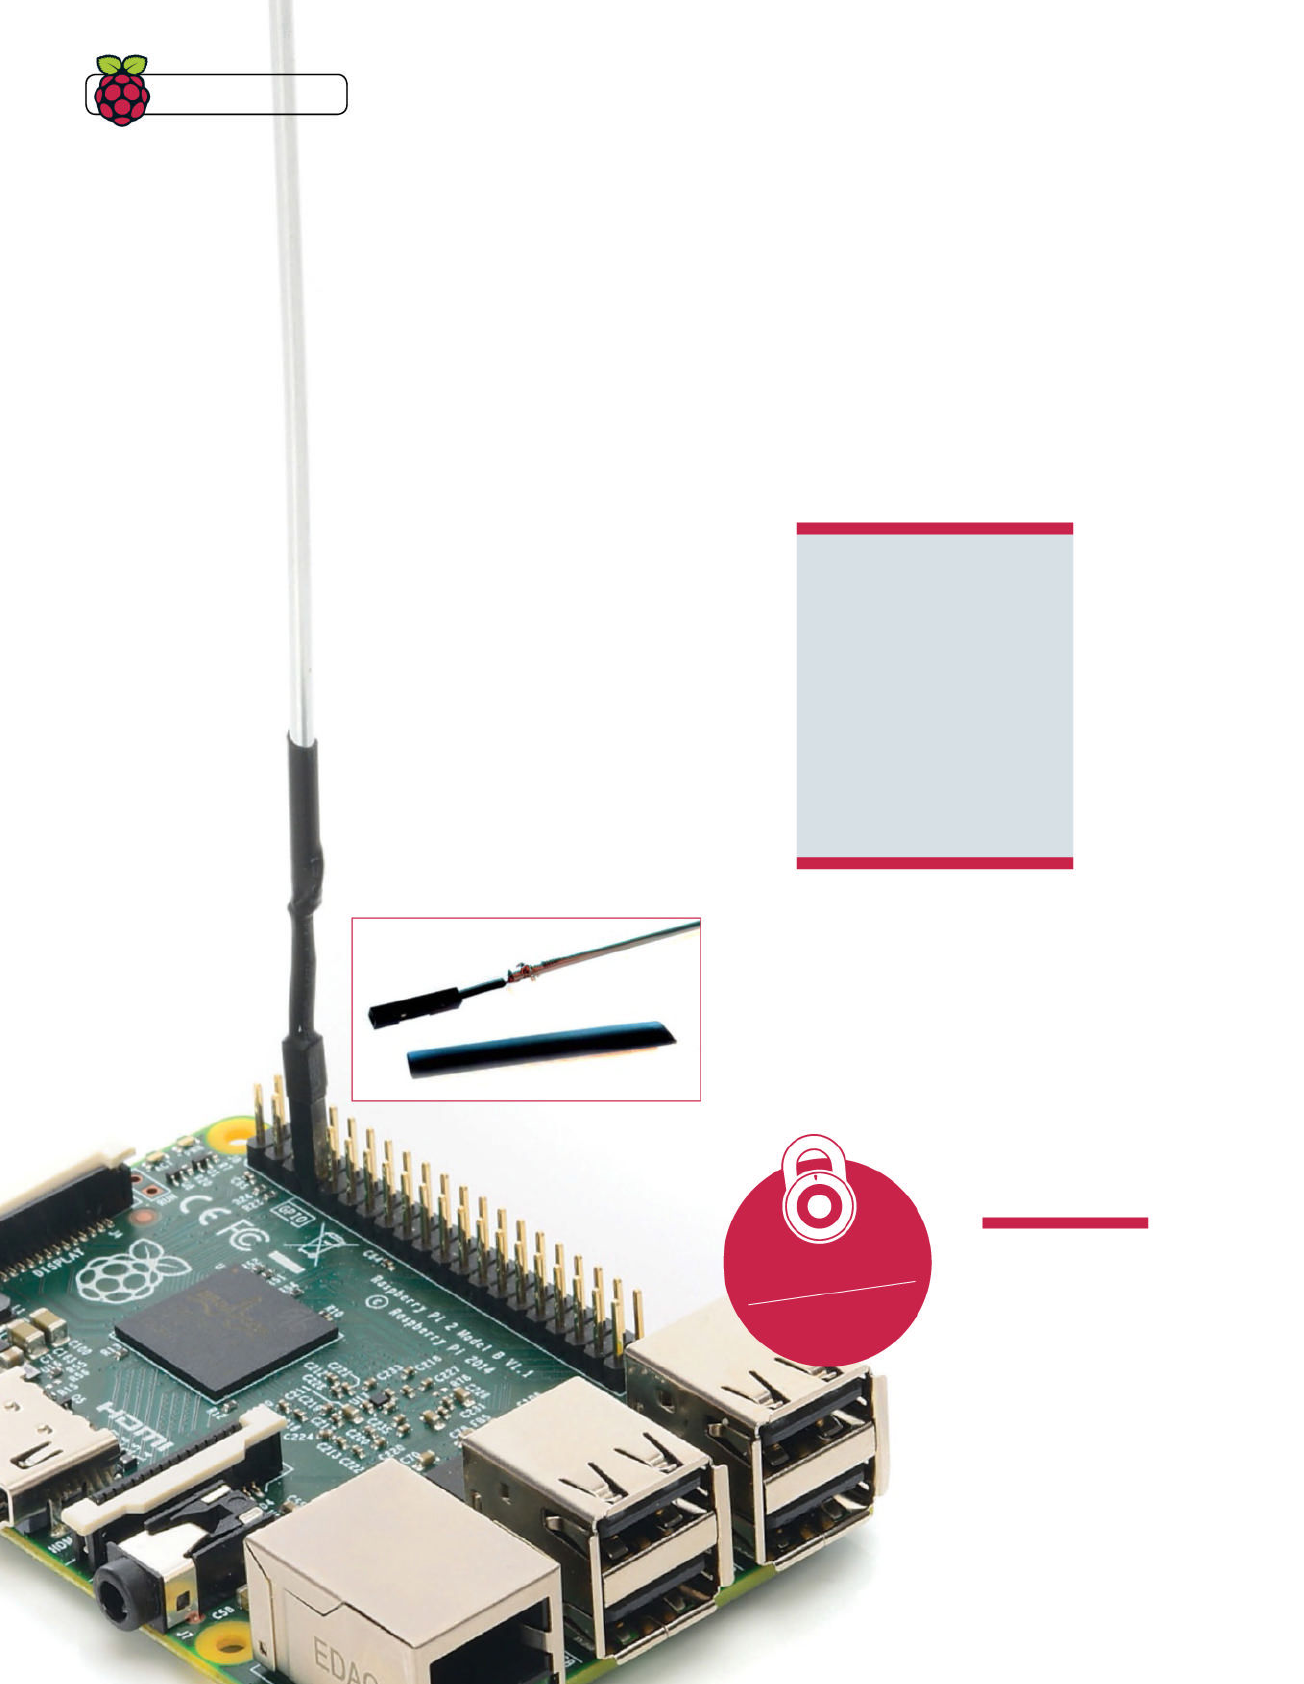
What you’ll need
Q Jumper wire
Q 2mm wire
Q Heat shrink tubing
Q Soldering iron
Q Wire cutters/strippers
Q Hair dryer/heat gun
Q PiRadio bit.ly/1MWkxwp
Q PirateRadio.py script
bit.ly/1SkkeCh
Take advantage of the interference-blocking
feature and make your mark on the airwaves
Build a radio
transmitter
Back in the 1960s, offshore boats were used to broadcast
what was then known as ‘pirate’ radio: unlicensed broadcasts
that provided an alternative to the BBC’s light program (as the
most populist radio station was then known). Pirate radio was a
revolution that inspired Radio 1 and commercial broadcasting, but
these days you don’t need a boat to pursue your radio DJ dream –
just a Raspberry Pi.
Add a basic DIY antenna, an SD card with some MP3 tunes
saved to it, plus a script to automate playback, and you can follow
in the footsteps of John Peel and Tony Blackburn.
This is a 50-50 project, one that has a chunk of DIY as well as
the usual SD card fl ashing. You’ll also need a battery pack, so we
would recommend trying the project on p.76 to make sure you’re
always powered up on the go.
One word of warning: unlicensed broadcasting on the FM
band is an offense. This tutorial is merely a proof of concept –
one that might be used for a school radio project, for instance.
01 Gather your equipment
Begin by downloading the PiFM image. This is over
2.3GB, so if you’re on a slower connection then you’ll need to
get it downloaded in advance.
Meanwhile, source an antenna. This might be a wire coat
hanger or 2mm wire from your local electronic component
store. While you’re there, grab some heat shrink tubing and
some jumper cables, ensuring that you’re well prepared to
start the project.
Below Our home-
made antenna may
look a little rough
around the edges,
but it works great!
Full code
FileSilo.co.uk
Okay, so you’ve already
got a suitable case for
your Raspberry Pi, but
why not go all-out and put
together a new case for
this project? One idea is to
take inspiration from the
broadcast motif and design
an old-style antenna case,
with the Pi and the genuine
antenna cleverly hidden
inside it. Alternatively, a
Mason jar (or other suitably
wide-necked jar) will also
make a great home for the
PiFM – just drill a hole in the
lid for the antenna!
Build a case
Tips | Tricks | Hacks
Raspberry Pi Tips, Tricks & Hacks 107
Tips | Tricks | Hacks
02 Prepare MP3 fi les in advance
There’s no facility for live broadcast. Instead, you will
need to arrange your MP3 fi les in advance. These will be played
using a script and transmitted to the nearest radio.
Planning on some DJ-ing? All is not lost, as you can produce
your own MP3 fi les using Audacity or similar open source audio
production tools. To get the fi les to play in a particular order,
number them, or the folders, sequentially.
03 Power your Raspberry Pi radio
Planning to try this out in a remote area? You’ll need
a battery pack to power your Raspberry Pi, or else run it from
your car’s cigarette lighter. For fl exibility, you may also need a
mobile device with SSH software to wirelessly connect to your
Raspberry Pi pirate radio in headless mode.
Of course, the project doesn’t have to be portable and you
can power your Raspberry Pi as usual.
bulk. As you only need a single 200-250mm length, the best
option is to use a handheld rotary blade (or hacksaw) to cut
the length from a wire coat hanger.
Unlicensed broadcasting on the
FM band is an offence. This tutorial
is merely a proof of concept – one
that might be used for a school radio
project, for instance
05 Connect the jumper
Strip the wire from a female jumper, leaving enough to
solder the 2mm wire to.
Once cooled, add a 50mm length of heat shrink tubing to
the top of the jumper and the lower portion of the antenna to
insulate the connection. This will tighten as you apply heat from
a hairdryer or heat gun. Be careful when heating, as the antenna
will warm up and can burn your fi ngers.
04 Prepare your broadcast antenna
To broadcast from your Raspberry Pi, you’ll need a
suitable antenna. Electronic retailers stock copper wire that’s
around 2mm in diameter, but this is usually only available in
Left Prepare MP3
fi les in advance or
make your own using
Audacity, or a similar
open source audio
production tool
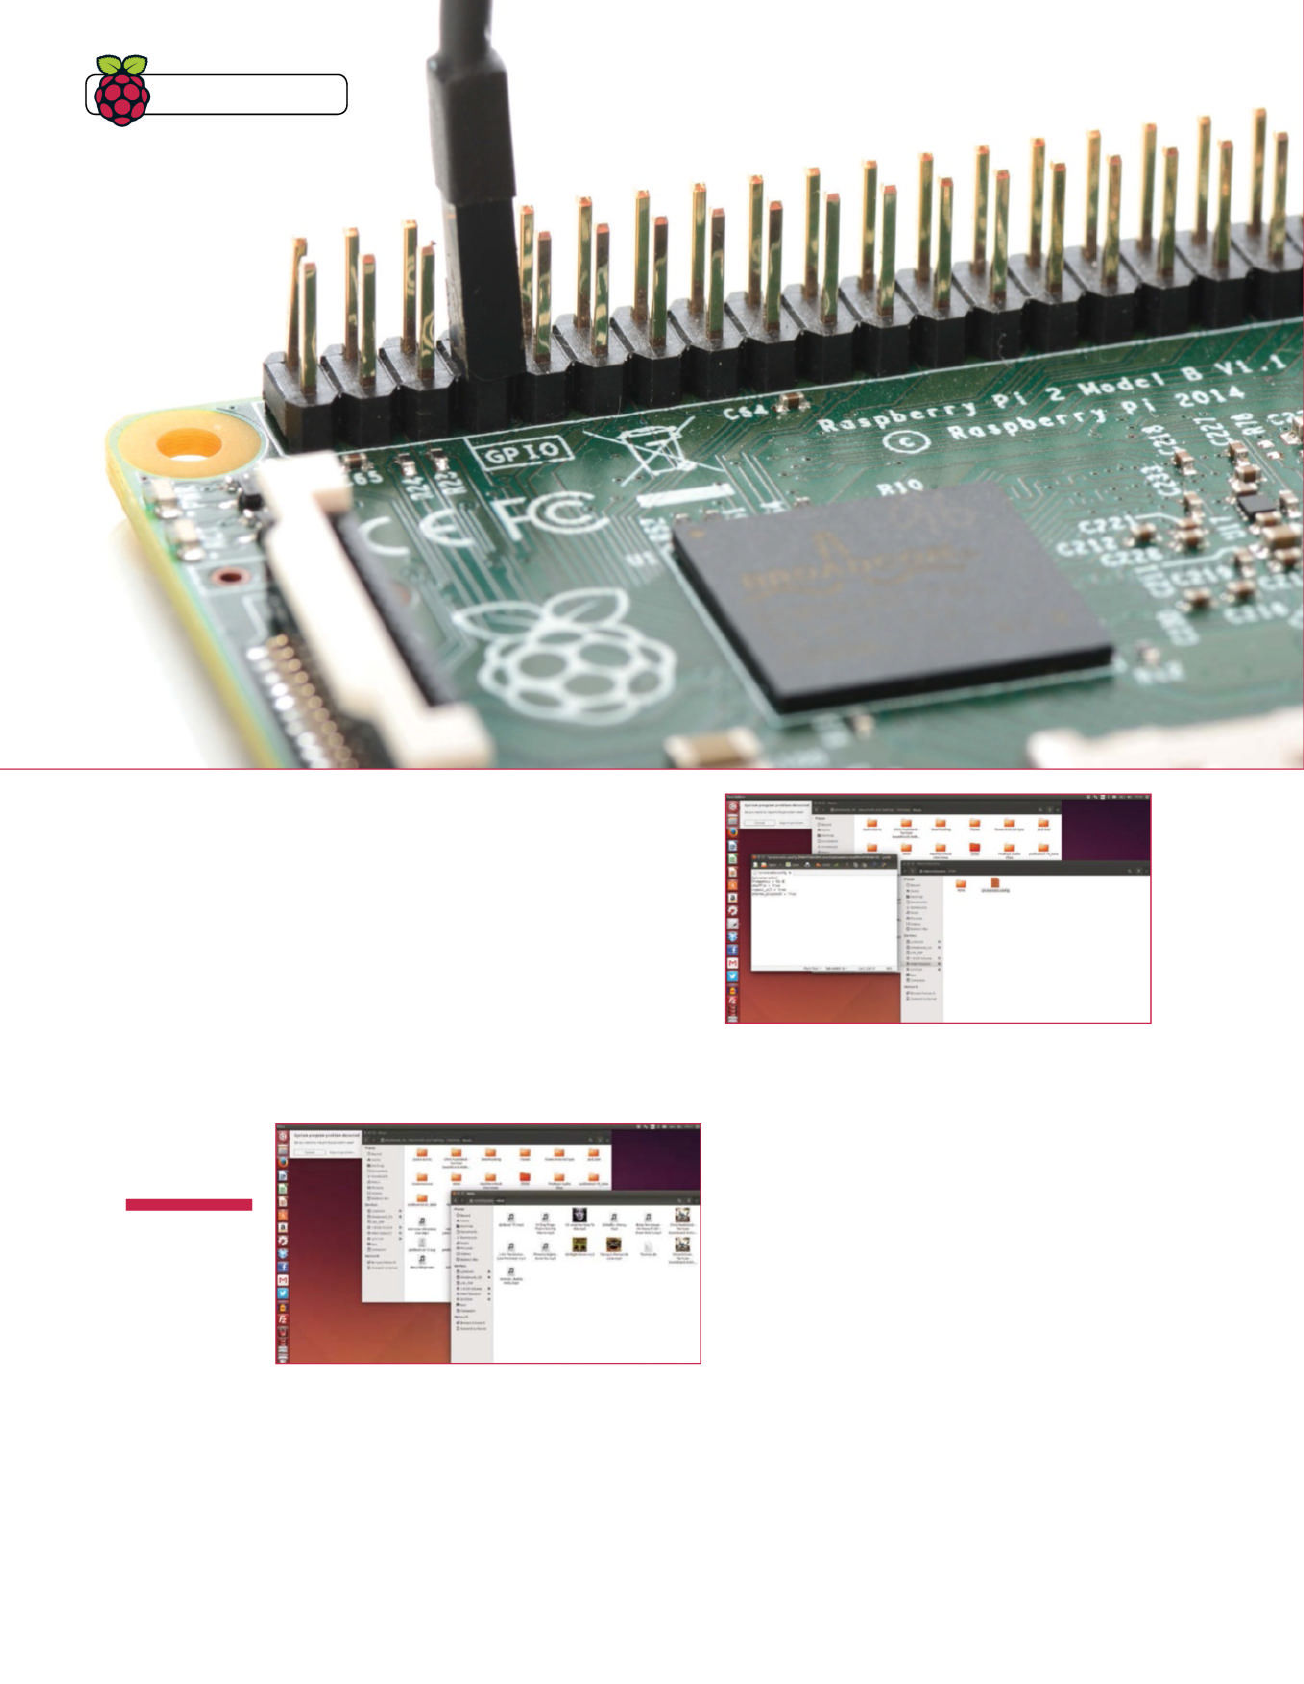
108 Raspberry Pi Tips, Tricks & Hacks
08 Copy your MP3 fi les to SD
You cannot simply dump your MP3 fi les on the SD card.
With your fl ashed SD card still inserted into your PC card reader,
browse to the /Pirate Radio partition of the card and paste your
copied fi les.
Beyond simply pasting in numbered MP3s, you can also drop
in named folders from your music collection containing entire
albums or artist catalogues.
09 Confi gure the Pirate Radio
With the SD card still inserted into your PC, open the
pirateradio.confi g fi le in a text editor. Look for the frequency
setting and adjust this as necessary. You’ll need to set this to a
frequency that is currently unoccupied, so switch on your FM
radio, fi nd some free space and change the pirateradio.confi g fi le
as necessary. Save and exit the fi le when you’re done.
10 Random and continuous music
Should you plan to add a lot of music to your SD card
for playback on your pirate radio project, you may want to use
the shuffl e and repeat_all settings in the pirateradio.confi g
fi le. By default these are set to true, but to disable, you simply
need to change true to false.
Save when you’re done, and remember to unmount the SD
card before removing it from your computer.
11 Stereo or mono?
The pirateradio.confi g fi le offers you the choice of setting
a true or false value to the stereo_playback value. You should
consider this carefully, as it will determine quality and range for
your broadcast.
Set to true, the broadcast will be of superior audio quality.
However, the range will be reduced as additional power is
Throughout the
tutorial, we’ve talked
about audio fi les as
MP3s, but one of
the many beauties
of the PiFM project
is that it supports
other formats. These
are re-encoded as
required in time for
broadcast, based
on a playlist created
when the Python
code scans the SD
card for audio fi les.
In addition to MP3s,
you can cue up and
broadcast fi les in
FLAC, WAV, M4A,
AAC and WMA.
Multiple
audio
formats
07 Prepare your SD card
As with all Raspberry Pi projects, it’s good to start with
a freshly fl ashed SD card. To get started quickly, use the disk
image linked in the kit list, extract the ISO fi le and fl ash. However,
if you would rather spend some time tweaking the script, fl ash
Raspbian Wheezy and install PirateRadio.py from GitHub.
06 Connect the antenna
The antenna is connected to pin 4 on your Raspberry
Pi’s GPIO. Before you do this, check that your Raspberry Pi case
is suitable for high profi le GPIO connections. If not, consider
connecting it to a short length of wire and mounting it on top of
your case with an adhesive like Sugru, or perhaps just tape it to
the side of your case. As long as the antenna has a connection to
pin 4, you’re good to go.
Above The original
GPIO 4 hack was
discovered by two
students at Imperial
College London
Tips | Tricks | Hacks
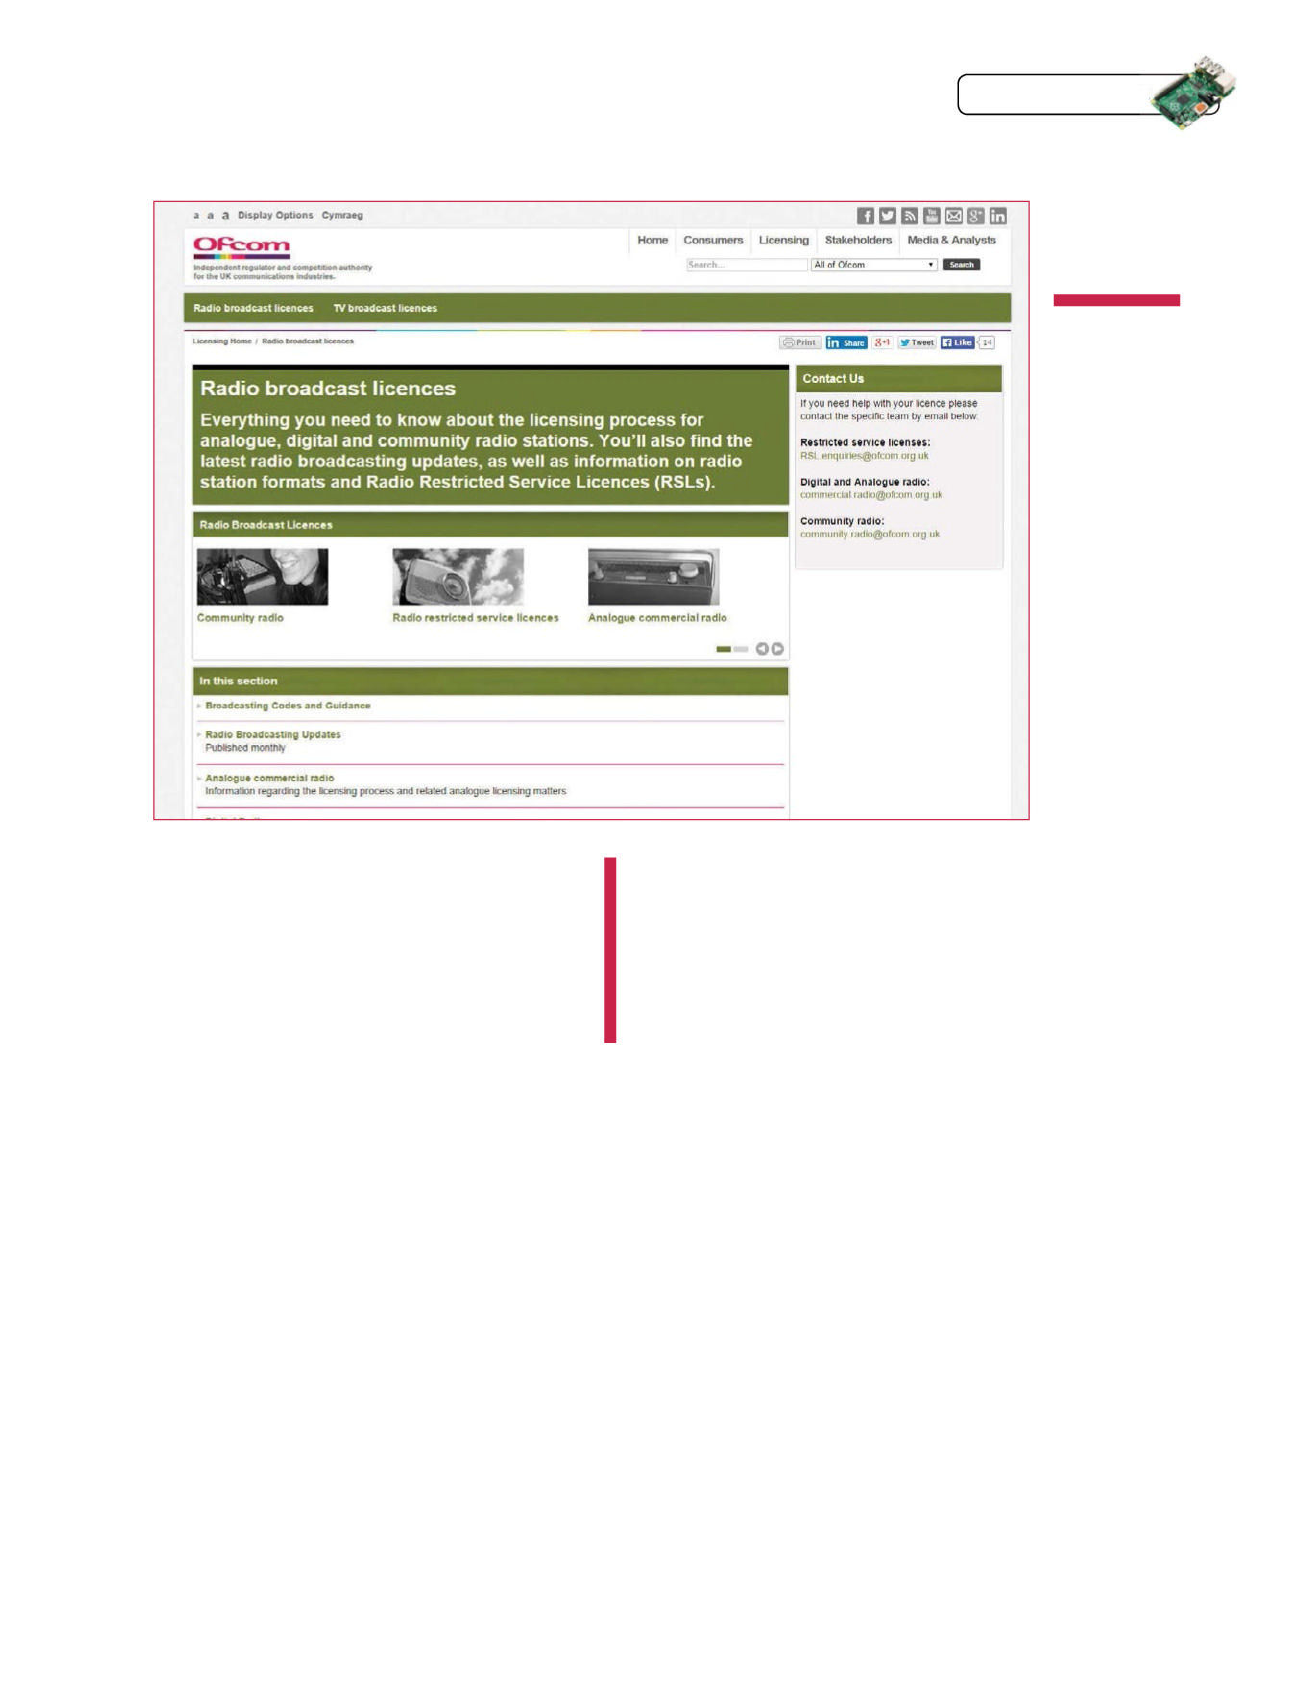
Raspberry Pi Tips, Tricks & Hacks 109
Tips | Tricks | Hacks
12 Appreciate the law
It’s all too easy to get into trouble with this project, so
before you start broadcasting make sure you’re familiar with
the law and licensing requirement for broadcasting on the FM
band. This project is perfect for short range use, such as playing
your MP3s on an old car radio, although you’ll have to modify the
length of the antenna for this. Schools may also benefi t from a
Raspberry Pi radio station.
13 Take to the airwaves!
Insert your SD card into the Raspberry Pi and plug the
device in. Meanwhile, step away from the device and head into
the next room with your FM radio and tune into the specifi ed
frequency. Once the Raspberry Pi has booted you should fi nd
that the MP3 fi les are being broadcast!
14 Troubleshooting bad broadcasts
Problems with your broadcast? Check the FM radio is
capable of picking up other stations. If you’re in the UK, look for
Radio 2 on 88-91 FM, which can be received virtually anywhere.
You should also check the frequency setting in the pirateradio.
confi g fi le. Remember that the band is accessible in the UK from
87.5-108 FM. As such, you cannot access frequencies beyond
these points on an FM radio.
Raspberry Pi, but equally it won’t result in audio being broadcast
to your FM radio!
Interference in the broadcast may be due to wireless routers
and microwave ovens. Your Raspberry Pi’s power source may
also cause problems.
16 Elevate your broadcast
You can improve the range by positioning your
Raspberry Pi and the PiFM antenna in an elevated position. You
might, for instance, place it by an upstairs window.
Even better results can be achieved by broadcasting from
up a tree or on a hillside – but keep in mind that an unlicensed
project really needs to maintain a short range.
17 Curb your piracy
You’ve built a compact, potentially portable radio
transmitter, but remember that it isn’t the 1960s and you’re not
a revolutionary. Consider the approved uses for the project and
stick to these, rather than using it to cause mischief and get a
criminal record. You could make an FM repeater, for example,
or create a wireless mic. If you really want to get on the radio,
consider volunteering with your local community station.
Spread-spectrum
clock signals on the
GPIO pins are the
secret power behind
the Raspberry Pi’s
surprising hidden
ability to broadcast
on the FM band. By
utilising this energy
with an antenna on
pin 4, you can turn a
method employed
to reduce electrical
interference with
other devices
connected to and
situated near your
Raspberry Pi into
a tool for radio
communication.
How does
the Pi
broadcast?
This project is perfect for short
range use, such as playing your
MP3s on an old car radio, although
you’ll have to modify the length of
the antenna for this
Left Check out
Ofcom’s radio
broadcasting
licenses for more
details on the
law regarding
broadcasting music
required. So setting stereo_playback to false will increase your
broadcast’s range. However, due to the scale of the transmitter,
this is only a matter of 20 feet!
15 Check your antenna for problems
Reception issues may be traced back to the antenna.
Double-check the soldering is secure and confi rm that the wire
is connected to GPIO 4. Using the wrong pin won’t harm your
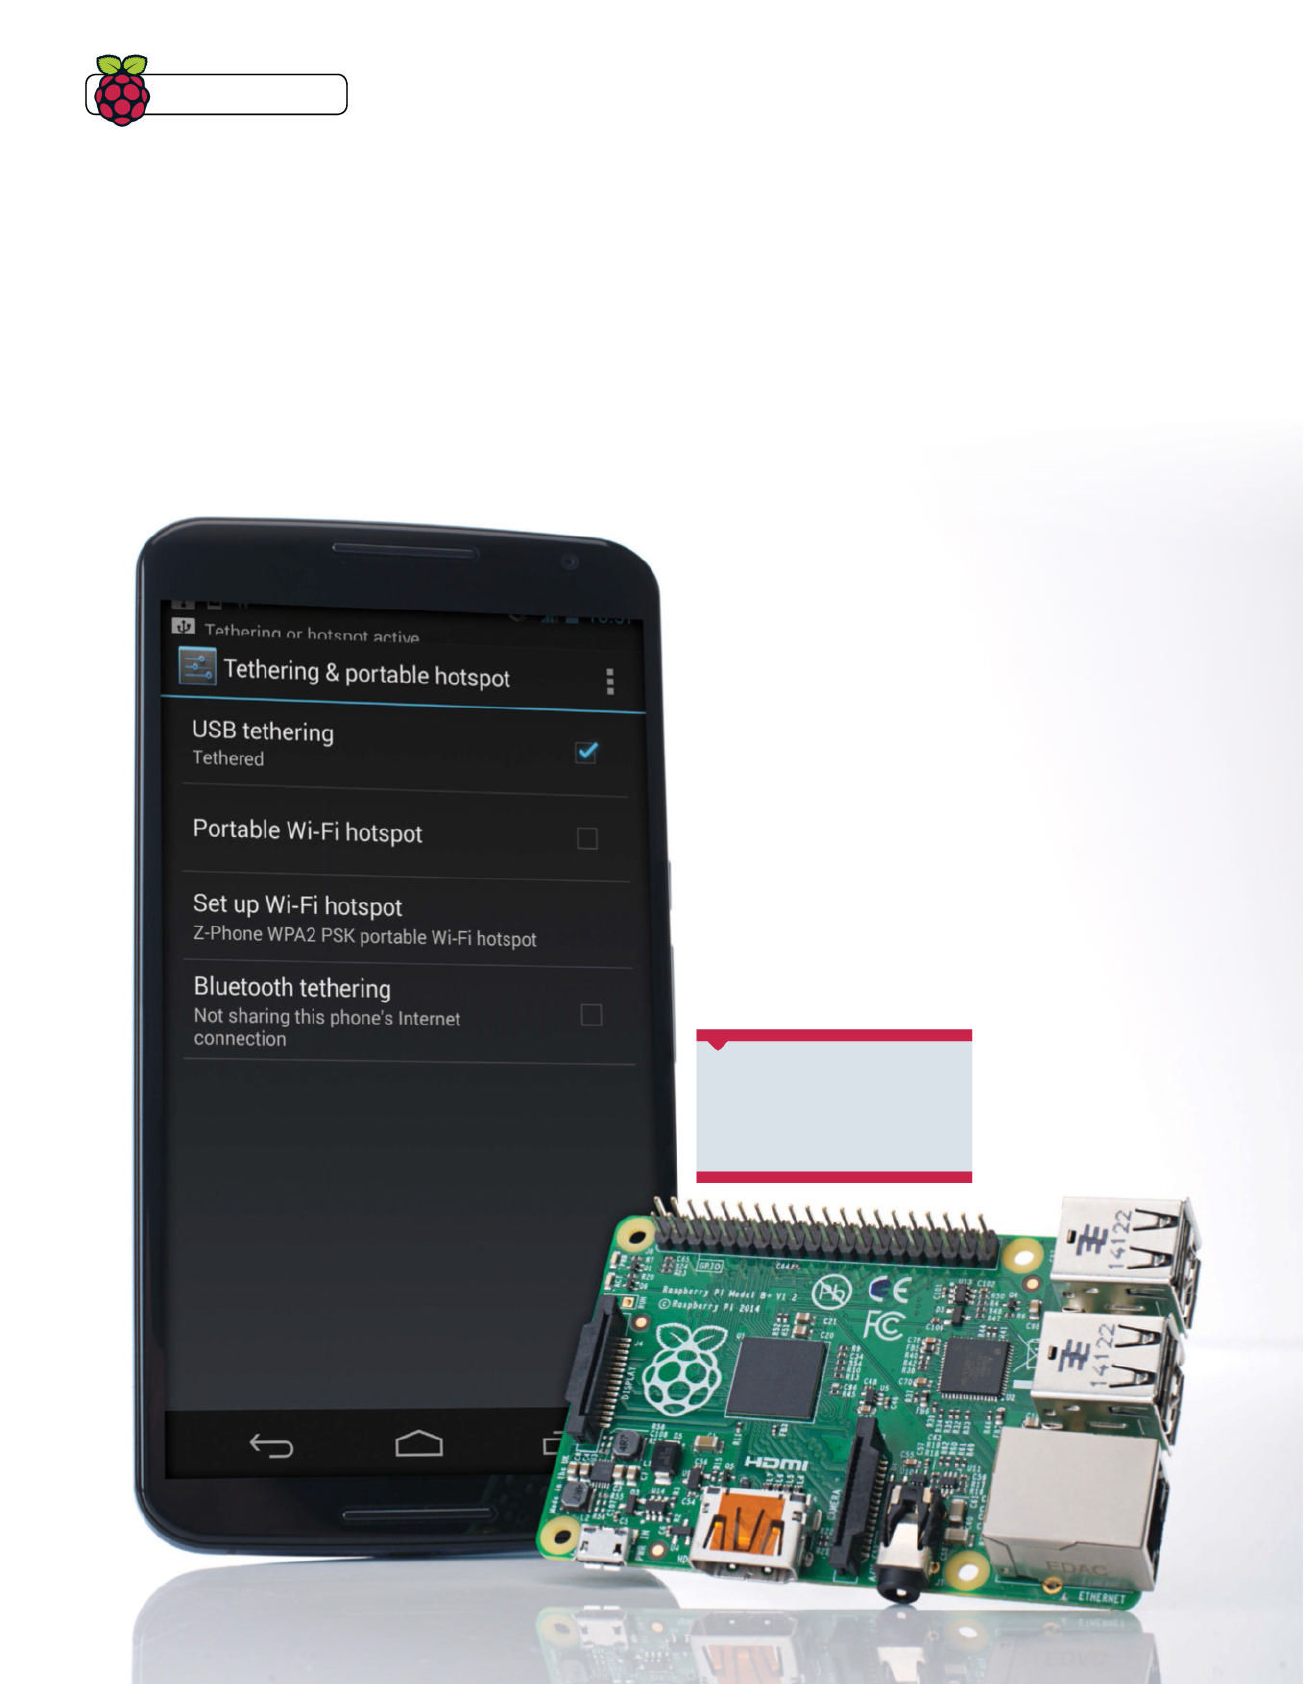
Tips | Tricks | Hacks
Need the internet on your Pi on the go? Try out a physical
tether to your Android device for instant online access
Tether your Raspberr y
Pi to an Android device
The portability of the Raspberry Pi is one of its most lauded
features and you can get many different accessories to help
aid this portability. Mini screens, mini wireless keyboard and
mouse combos, portable batteries and more can get you out
and about, but the Internet is a stumbling block that you can’t
easily fi x with an accessory. What you do also usually have
with you is an Internet-connected magic pocket box called a
smartphone that, with a bit of know-how, you can connect the
Pi to and steal some Internet from. Over the next two pages
we will impart this know-how to get you using your Raspberry
Pi on the Internet when you’re on the go.
01 The easy way
A lot of smartphones now have a Wi-Fi hotspot feature,
which the Raspberry Pi can easily attach to. First of all, turn the
hotspot on and then boot into the Pi. Connect a wireless dongle
and open up the wpa_gui in Preferences>Wi-Fi Confi guration.
02 Scan for device
Click Scan to open up the scan window and then select
Scan again from inside there. It should pick up your device –
connect it as you would to any Wi-Fi network and the Pi will
remember it for when it needs it next.
What you’ll need
Q Android device
Q USB cable
110 Raspberry Pi Tips, Tricks, & Hacks

Raspberry Pi Tips, Tricks, & Hacks 111
Tips | Tricks | Hacks
03 Set up tether
First connect your phone to your Raspberry Pi via a USB
cable – depending on the amount of power your Pi has, it might
have trouble charging your phone but it will still let you tether. In
the tethering menu you can now activate USB tethering.
04 Check connection
Your Android device will create an interface known
as eth0 on the Raspberry Pi. You can check to make sure this
is happening, and that it will let you tether, by opening up a
terminal and typing the following:
$ ifconfig
05 Quick connect
You can connect from the terminal right now to
access the Internet. You should be able to do this by typing the
following into the terminal:
$ sudo dhclient usb0
This will automatically grab any available IP address that your
phone will give to it.
06 Test connection
There’s a few ways to test your connection. We’d usually
stay in the terminal and ping www.google.com, which you can
do, or you can click on the browser and see if it loads the page.
07 Save the settings
Once you reboot your Pi, it won’t remember to
automatically connect to the phone’s tether. However, we can
add an entry to its confi g so that it will try and do this in the
future. From the terminal use:
$ sudo nano /etc/network/interfaces
08 Interface settings
Here you’ll fi nd all the current network settings – yours
might look different from ours depending on if you have added
any fi xed wireless settings or passthroughs. Using the same
syntax as the eth0 line, add:
iface usb0 inet dhcp
09 Tether on the go
After a save and reboot, your Pi should now
automatically connect to your phone, whether it’s via Wi-Fi
hotspot or a physical connection. It may draw a little more
charge than usual while tethering, so be sure to keep an eye on
your battery level.
Above It’s usually
easy to fi gure out
which device is your
phone – set it right
next to the Pi and it
will be the one with
the best signal!
Using your Pi on
your mobile phone
will eat up data
much faster than
browsing on your
phone normally
is. We suggest not
doing a full software,
distribution or
fi rmware update
if you don’t want
to spend a fortune
on data. You can
also set limits on
the amount of data
used on your phone
to save yourself any
problems, and a
physical tether will
allow you to connect
via the phone’s Wi-Fi
if that’s an option.
Mobile
data
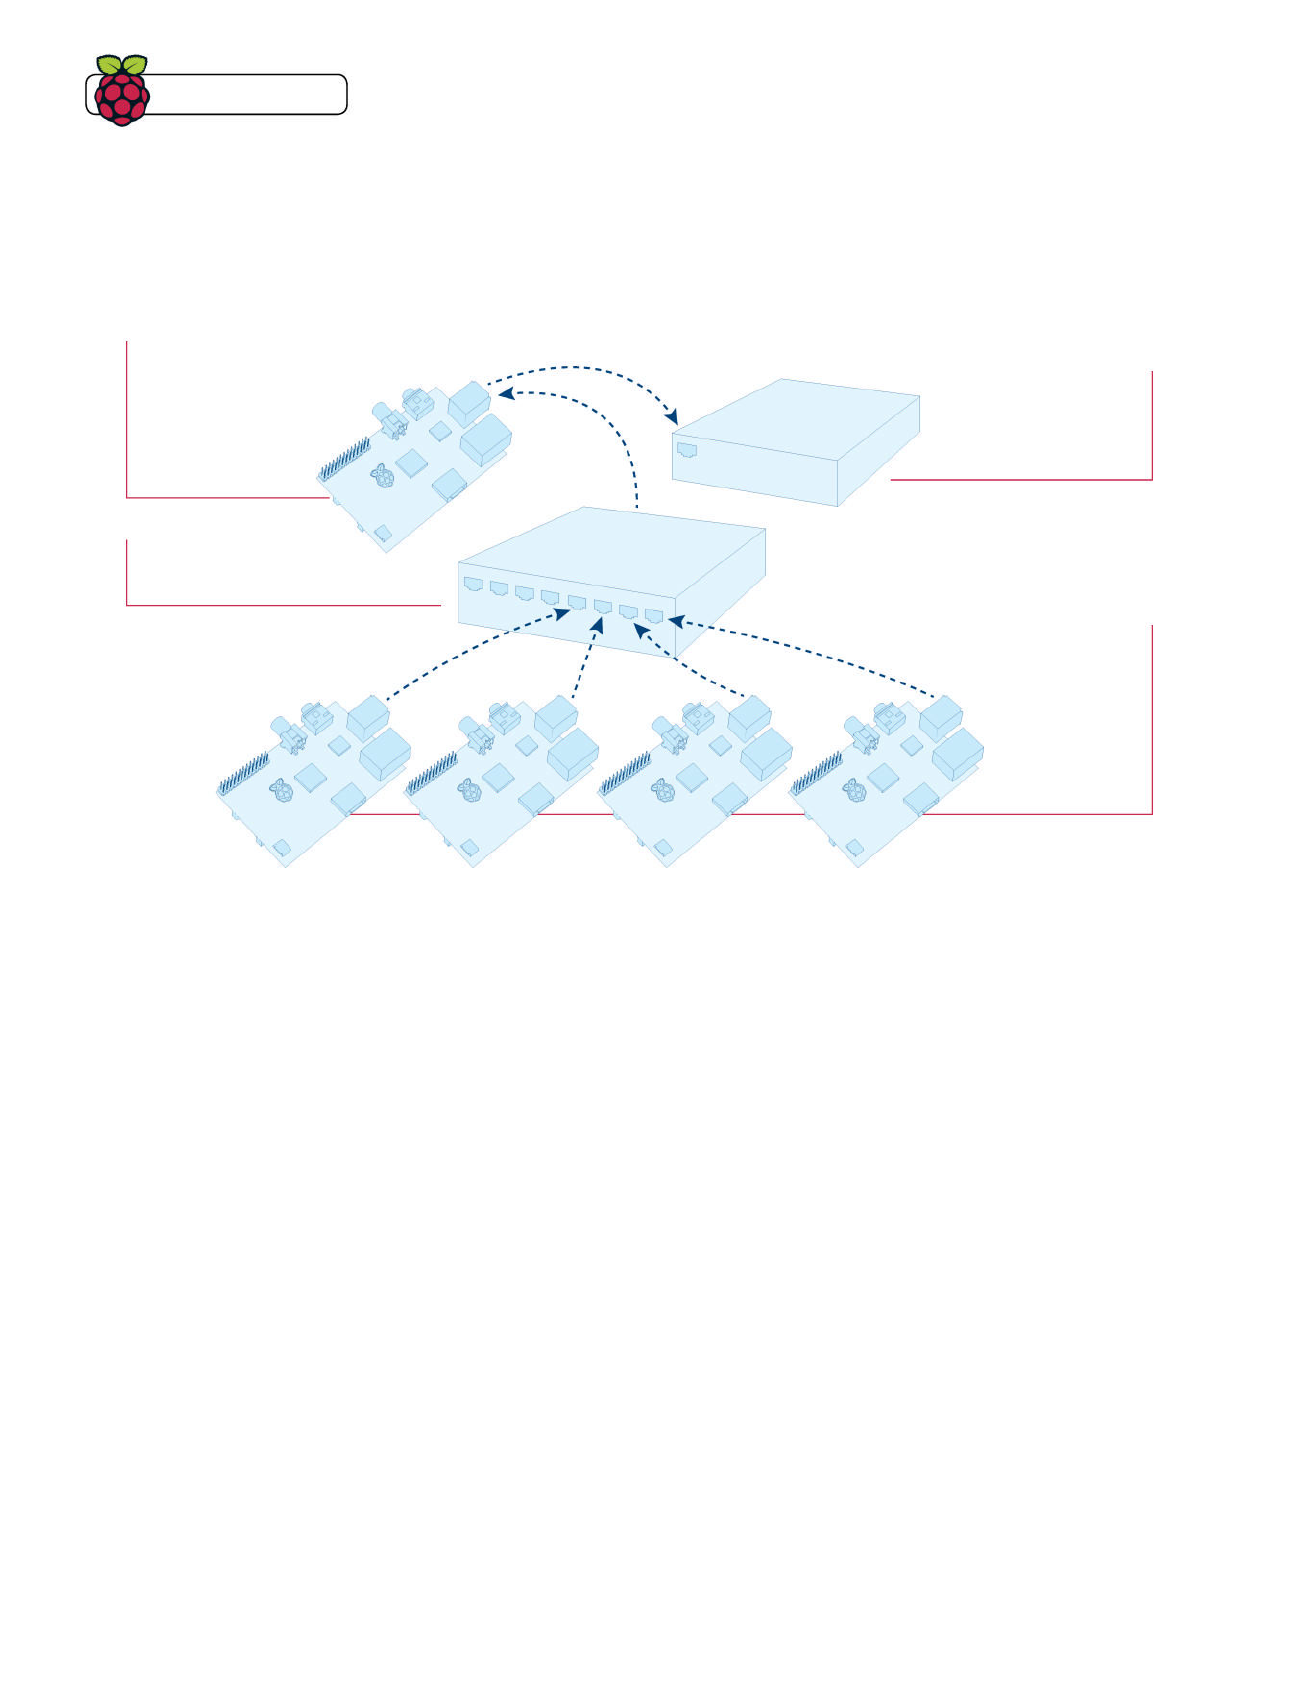
Tips | Tricks | Hacks
112 Raspberry Pi Tips, Tricks & Hacks
Learn how to set up a network of Raspberry Pis
with centralised authentication and file storage
Build a network of
Raspberry Pis
In this tutorial, we’ll learn to set up a Network
Information Services server on a Raspberry Pi
that centralises some of the configuration of
Linux systems. This includes user accounts. This
means that we can set up users on the Raspberry
Pi server and have them available on each
client Raspberry Pi. This arrangement would
be useful in a classroom situation where there
were a number of Raspberry Pis shared between
classes. Each child would have a username and
password, and they would have access to all
of their files from any Raspberry Pi once they
have logged in. One big advantage of this is that
each user’s files can be backed up from a single
place. We’ll also be giving some examples of
software that could be used in a classroom on the
Raspberry Pi.
We’ll be using the latest Raspbian image as the
operating system for both our Raspberry Pi server
and Raspberry Pi clients, so we’ll need to start by
writing that to two SD cards. Note that we’ll be
making a master SD card for the clients which can
then be written to the rest of the SD cards, so only
write the image to two of them.
The instructions for flashing an image to an
SD card can be found at www.linuxuser.co.uk/
tutorials/how-to-set-up-raspberry-pi/. You will
only need to go up to the step where you write
the image to the SD card. Note that you will have
to adapt the instructions slightly for using the
latest Raspbian image rather than the Debian
one. The image that we used was 2012-09-18-
wheezy-raspbian.zip.
We are going to assume that you are plugging
the Raspberry Pis into an existing network
with DHCP, a protocol for handing out network
settings to devices that connect to said network.
This way, they can get access to the internet for
installing packages and other useful things such
as teaching resources.
Resources
At least 2 Raspberry Pis
with appropriate peripherals
(Note that the server Raspberry Pi will
only need a power and Ethernet cable
connected once configured)
SD card
Computer
Network switch
Ethernet cable
Storage device
The Network
Information Services
and Network File
System server
providing centralised
authentication and file
storage to the clients
A network switch
connecting each
device to the network
An external storage
device connected
to the server to
periodically back
up each user’s files
The client Raspberry
Pis that all use the
same master image
and pull the rest of
the data from the
server, making it very
easy to add more or
replace an SD card
should it get broken
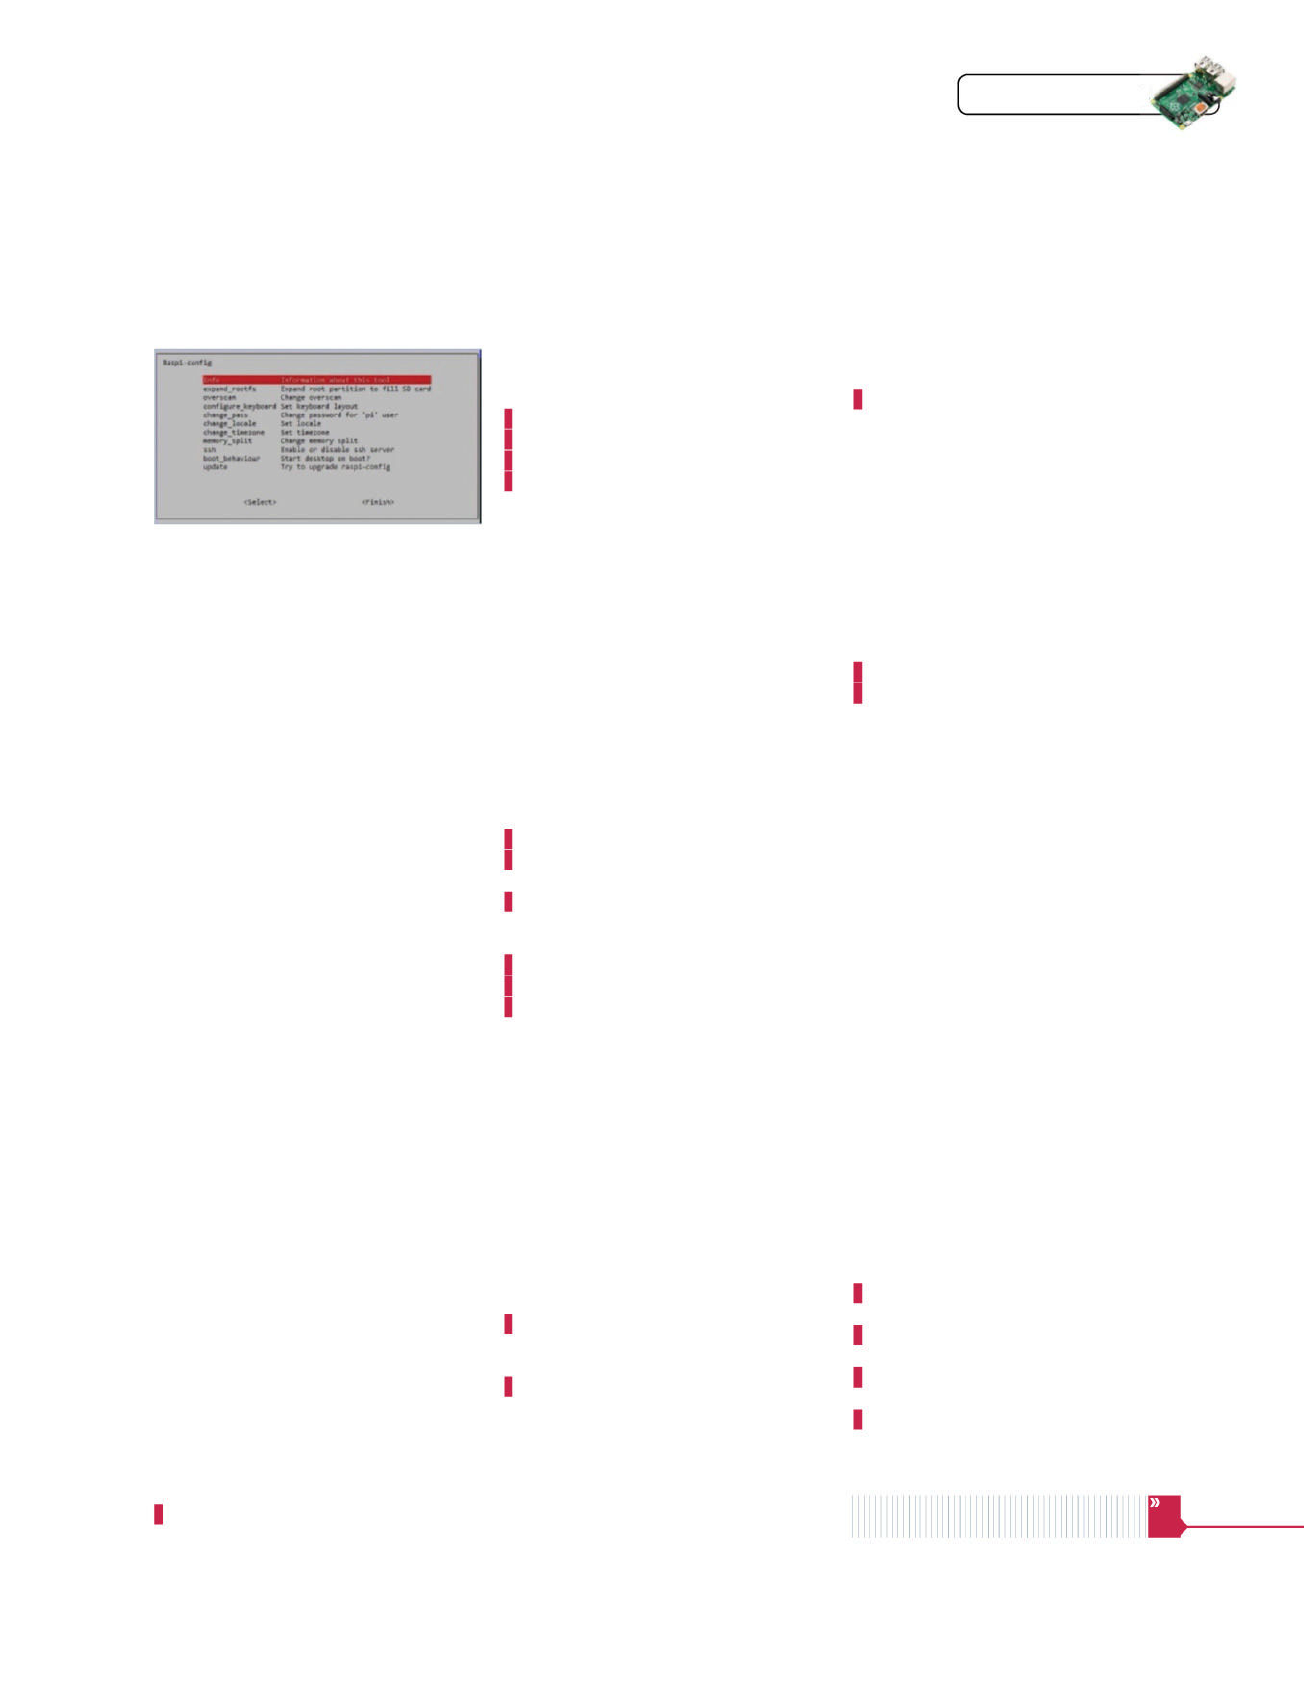
Raspberry Pi Tips, Tricks & Hacks 113
Tips | Tricks | Hacks
01 Initial confi guration of the server
Raspberry Pi
Connect a keyboard, mouse, Ethernet cable,
monitor and, lastly, power to your server
Raspberry Pi. Raspbian will boot and a
confi guration menu will be displayed. You
need to select the option to expand_rootfs to
make sure that you’re using the entire space of
the SD card. You should defi nitely change the
password for the pi user so that no one can log
into your server with the standard credentials
of Username: pi and Password: raspberry. Then
change the memory split to 240MiB for ARM and
16MiB for the VideoCore. Finally, enable SSH,
then select ‘Finish’. Select ‘Yes’ to reboot now.
02 Fire up your Linux computer
Now that we have enabled SSH on the
server Raspberry Pi, we can configure it remotely
using SSH as long as your Linux computer is on the
same network (if not, connect it now). We might
as well make sure that SSH works now for when
a monitor is no longer needed. During the boot
process of Raspbian, a message will be displayed
with the current IP address of the Pi. Open up a
terminal on your Linux computer and type ‘ssh pi@
[your Pi’s IP address]’. Type ‘yes’ when asked if you
want to connect and then enter the new password
that you set. You are now logged into your server Pi.
03 Setting up a static IP address
We highly recommend assigning a
static IP to your server Raspberry Pi because
you, and more importantly the client Raspberry
Pis, will always know where to fi nd it on the
network. We’ll need to fi nd out a couple of
things about your current network setup before
setting a static IP. You can use the commands
‘ifconfi g eth0’ and ‘ip route show’ to do this.
We’ve included the important output from our
commands below so that you can see what to
do with each value. Now that we have found out
things about your network, such as your current
IP address, the network mask and so on, we can
set up a static IP address.
Use the command:
sudo nano /etc/network/interfaces
…to edit the networking confi guration fi le. Use
04 Restart the server Pi
Restart the server Pi so that the
networking changes we just made can take
place. Log back in using SSH and the new IP
address that you chose.
05 Installing the required packages
for an NFS server
NFS stands for Network File System, and is what
we’ll use to share each user’s home directory.
Run the command:
sudo apt-get update
……to update the package lists on the device,
followed by :
sudo apt-get install nfs-kernel-
server nfs-common rpcbind
…to install the packages required for an NFS
server. You’ll probably get a message like ‘[warn]
Not starting NFS kernel daemon: no exports....
(warning)’. This is just telling us that the NFS
server hasn’t started because we haven’t set it
up to share (export) any directories yet.
07 Installing NIS
NIS stands for Network Information
Services and used to be called Yellow Pages,
or yp for short. Many of the services and
directories still have ‘yp’ in the name. Use the
command ‘sudo apt-get install nis’ to install
Network Information Services. Accept any
extra packages that may be required. You will
now be taken to the package confi guration
screen for NIS. It will start by asking you to
enter an NIS domain. This can be anything you
like, but we’re calling ours raspberrypi. Once
you have set that, NIS will continue to install
and then the NIS services will attempt to start.
This will take a few minutes and fail, so don’t
worry when that happens. We need to do more
confi guration before it will work.
the arrows to navigate and start by deleting the
line ‘iface eth0 inet dhcp’. Then replace it with
lines similar to the following:
iface eth0 inet static
address 172.17.173.249
netmask 255.255.255.0
gateway 172.17.173.1
Make sure that the IP address you assign to
your Raspberry Pi server isn’t taken. You’ll want
to discuss this with your network administrator
if you have one, but it’s usually safe to assume
that the address the device had already won’t
be taken. You’ll also want to note down that IP
address for future usage.
Save the changes in nano using the key
combination Ctrl+O followed by Enter. You can
exit nano using Ctrl+X.
You might notice that we haven’t done
anything about the DNS server. DNS is used to
resolve hostnames such as google.co.uk to an
IP address. The IP address of the DNS server is
stored in /etc/resolv.conf and will not change
value after changing to a static IP address.
pi@raspberrypi ~ $ ifconfig eth0
eth0 Link encap:Ethernet
HWaddr xx:xx:xx:xx:xx:xx
inet addr:172.17.173.249
Bcast:172.17.173.255
Mask:255.255.255.0
pi@raspberrypi ~ $ ip route show
default via 172.17.173.1 dev eth0
172.17.173.0/24 dev eth0
proto kernel scope link src
172.17.173.249
06 Exporting directories
Add the line:
/home *(rw,sync)
…to the end of /etc/exports using nano. The line
means share the /home directory with everyone,
permitting read and write access. Although
this sounds insecure, other users will only get
read access to directories that aren’t their own
and therefore won’t be able to delete or change
fi les. NFS requires rpcbind, so you need to start
that before NFS. Rpcbind doesn’t start on boot
by default on Raspbian, but we want it to. You
can do this using the command ‘sudo update-
rc.d rpcbind enable’. You can start them both
immediately using the following commands:
sudo /etc/init.d/rpcbind start
sudo /etc/init.d/nfs-kernel-server
start
08 Confi guring NIS
We need to do a few things before our
NIS server will work. The fi rst thing we need to
do is open up /etc/default/nis with nano as we
do in the usual way. Make sure you prefi x the
nano command with sudo because we need root
privileges to edit each of these fi les. You need to
change the line:
NISSERVER=false
…to…
NISSERVER=master
…and also change the line…
NISCLIENT=true
…to…
NISCLIENT=false
Save the changes and then exit nano. We then
need to edit:
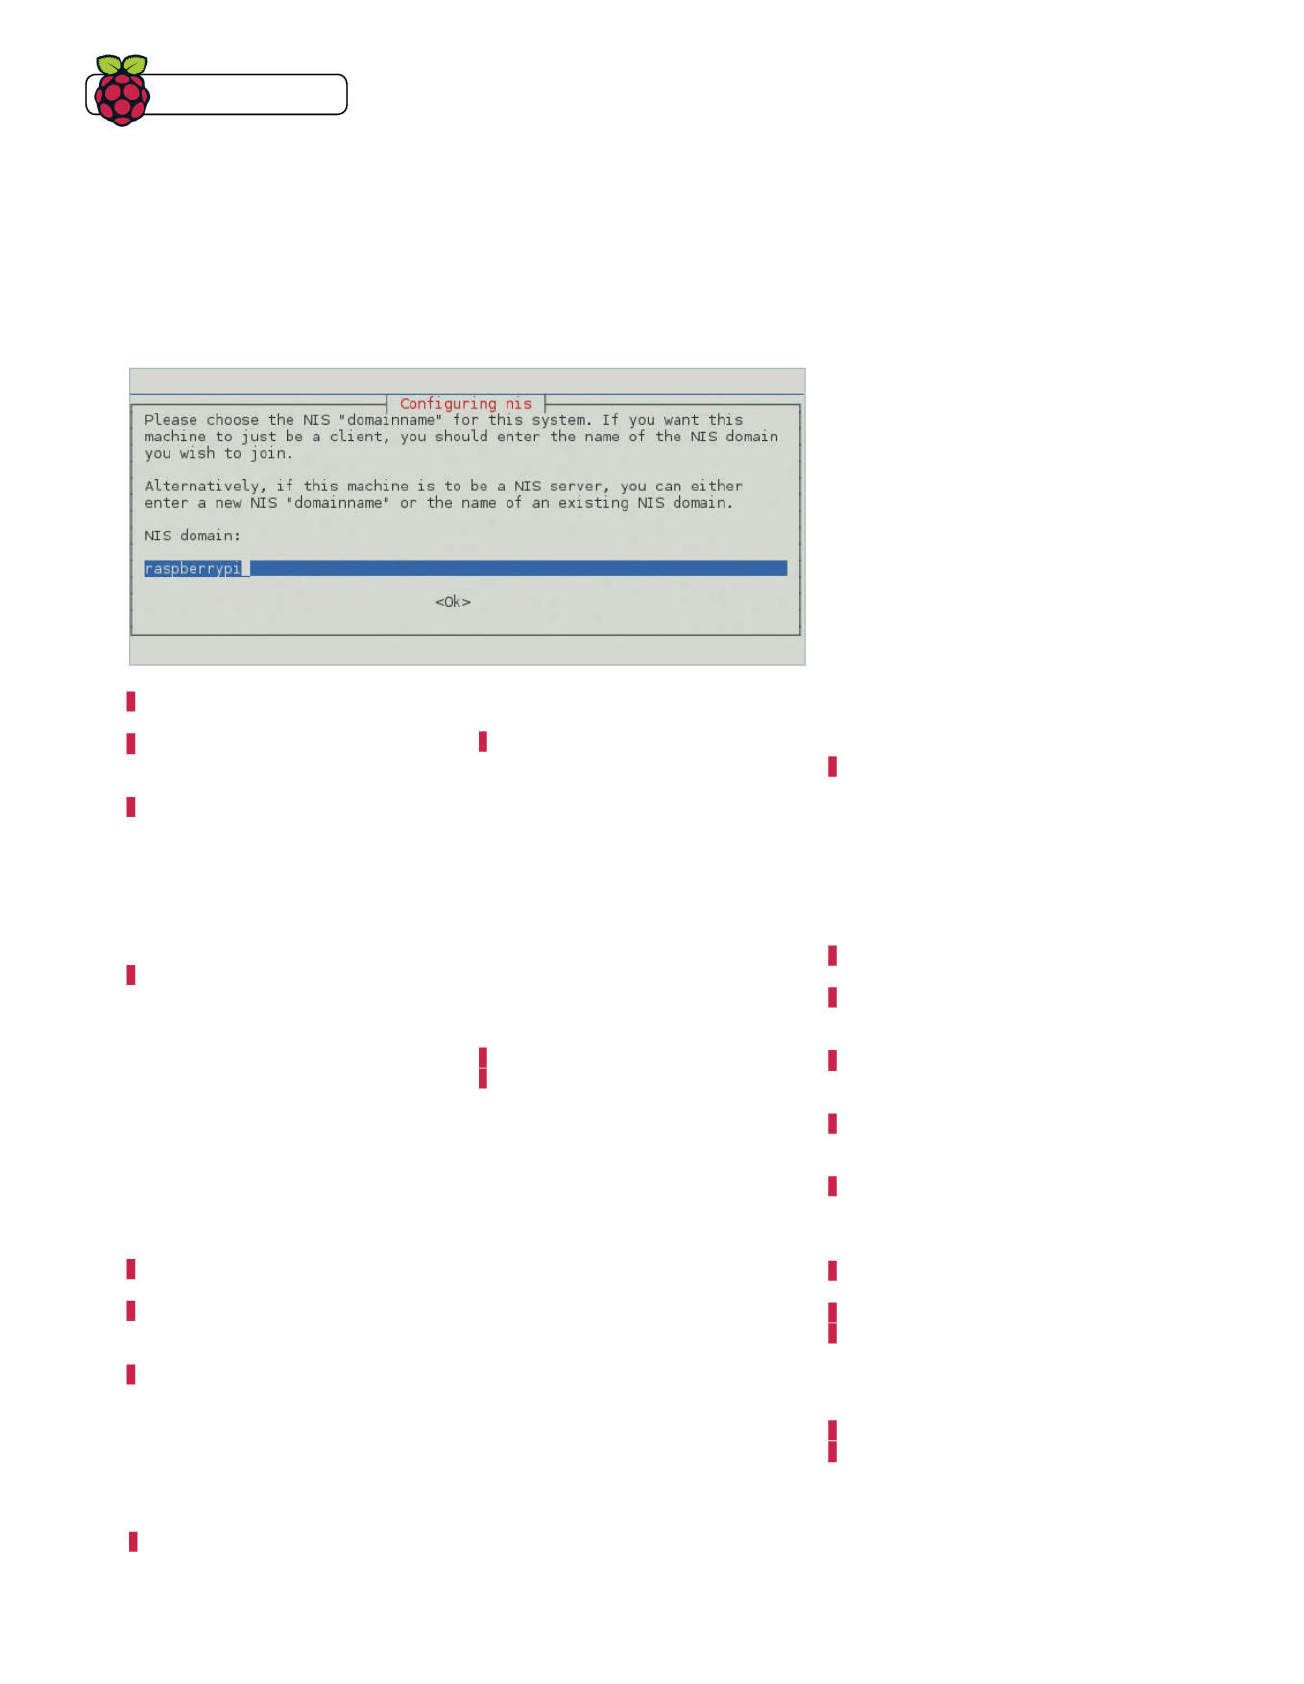
114 Raspberry Pi Tips, Tricks & Hacks
Tips | Tricks | Hacks
11 Preparing the client
We’re pretty much done with the NIS
server for now, so it’s time to start working
on a client image. Connect up the second
Raspberry Pi and insert the SD card with the
fresh Raspbian image on. Raspi-config will
show as it did when we configured the server.
The only option you need to use is the one to
expand_rootfs and then select ‘Finish’. Select
‘Yes’ to reboot now.
13 Mounting the server’s home
directory
It’s now time to mount the server’s home
directory as our own. We want to do this at every
boot, so we’ll put an entry in /etc/fstab to make
it permanent. Open /etc/fstab in nano and add a
line in the following format to the end of the file:
[server ip]:/home /home nfs
defaults 0 0
You can now save the changes and use the
command ‘sudo mount -a’ to mount each entry
in the /etc/fstab file, therefore mounting the
servers home directory as the clients. If you run
‘ls /home’ you’ll see the home directory of the test
user we created before and also the pi user on
the server.
pi@raspberrypi /home $ cat /etc/
fstab
proc /proc
proc defaults 0
0
/dev/mmcblk0p1 /boot
vfat defaults 0
2
/dev/mmcblk0p2 /
ext4 defaults,noatime 0
1
# a swapfile is not a swap
partition, so no using swapon|off
from here on, use dphys-swapfile
swap[on|off] for that
172.17.173.249:/home /home nfs
defaults 0 0
pi@raspberrypi /home $ ls /home
pi testuser1
14 Becoming an NIS client
You need to open up /etc/yp.conf in nano
(remember to use sudo) and add the lines:
ypserver [server ip address]
domain [nis domain] server [server
hostname]
You also need to edit the /etc/nsswitch.conf file
to look like ours. Once you’ve done that, you can
reboot the client using the command ‘sudo init 6’.
10 Adding a new user
All users are added on the NIS server. You
can use the command ‘sudo adduser [username]’
to do this, and then fill in the extra information
required interactively. The NIS databases are
updated automatically after adding a new user.
We now need to add the new user to some groups
so they can do things like play audio and so on.
You can do this with the command ‘sudo usermod
-a -G audio,video,plugdev,games,users,netdev,
input [username]’. We have now made more
changes to the user and will have to rebuild the
NIS database manually using:
cd /var/yp
sudo make
You can use the command ‘sudo passwd
[username]’ on the NIS server as the pi user to
change the password of a user. You will have to
rebuild the database again after doing this.
12 Logging in and installing required
packages
Log in with the standard credentials of
Username: pi and Password: raspberry and
then run the command ‘sudo apt-get update’ to
update the package list on the device. Install the
required packages for NFS and NIS clients using
the command ‘sudo apt-get install nis rpcbind
nfs-common’. The NIS domain configuration
screen will show as before, so just set this to
whatever you set it to the first time. As before,
the system will fail to start the NIS because we
need to do extra configuration, including setting
rpcbind to start at boot using the command
‘sudo update-rc.d rpcbind enable’. We’re going to
need rpcbind shortly so we might as well start it
now using ‘sudo /etc/init.d/rpcbind start’.
09 Initialising the NIS master
database
Before anything else, restart the Pi using sudo init 6
to let the hostname change take place. Reconnect
once the Pi has booted back up. Run the command:
sudo /usr/lib/yp/ypinit -m
/var/yp/Makefile
…and change the line…
ALL = passwd group hosts rpc
services netid protocols netgrp
…to…
ALL = passwd shadow group hosts
rpc services netid protocols
netgrp
The password file on Linux contains a list of
users and information like their home directory
and the User & Group IDs. We need to add the
shadow file as that file stores password hashes
for users. We also need to change the line:
MINGID=1000 to MINGID=0
…because we’ll be adding our NIS users to
system groups such as audio so that they can
play sound. The next step is to change the
server’s hostname by editing the /etc/hostname
file. We’re going to change our hostname from
raspberrypi to nismaster. We then need to
change /etc/hosts to complete the hostname
change, as well as add an extra line. We need
to do this because servers running NIS are
added by name rather than their IP address.
You’ll see this shortly. Plus, we should be able to
differentiate the NIS server from all of the other
Raspberry Pis anyway. Change the line:
127.0.1.1 raspberrypi
…to…
127.0.1.1 [your new hostname]
You’ll also need to add a new line for the IP
address of the NIS server in the form:
[IP address] [hostname].[NIS
domain] [hostname]
and then press Ctrl + D followed by Enter. We can
now start the NIS server using the command:
sudo /etc/init.d/nis start
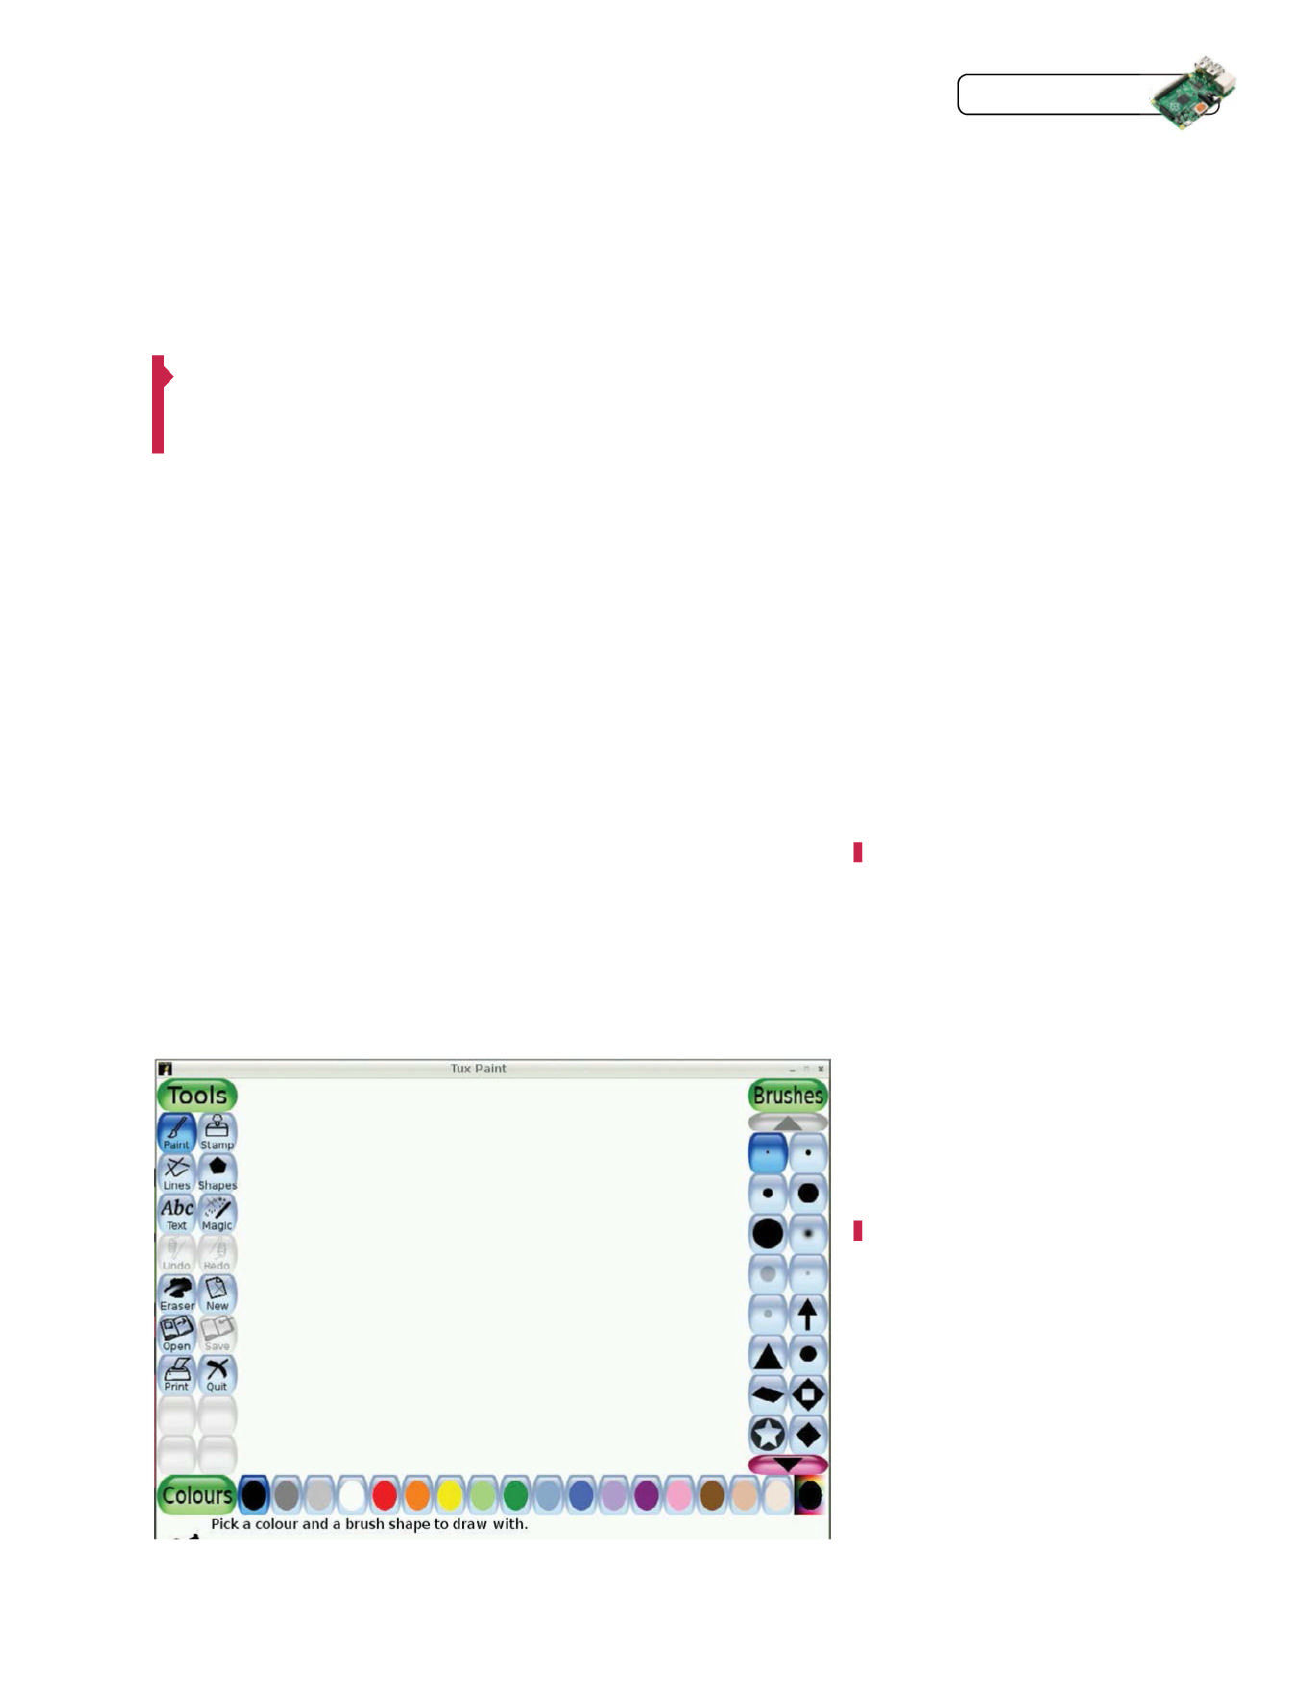
Raspberry Pi Tips, Tricks & Hacks 115
Tips | Tricks | Hacks
19 Backing up the server
One of the main advantages to having
central fi le storage is that everything can be
backed up from one place. More importantly,
fi les that are deleted can be restored. We’ll be
using rsync to perform the backups, so you’ll
need to install that using the command ‘sudo
apt-get install rsync’. We’re going to assume that
you’ve set up your backup area in /mnt/data.
We’ll be using the command
sudo rsync -avP /home /mnt/data
to perform the backups. The switches mean
the following:
a – preserve the permissions and other
properties of the fi le
v – show verbose output
P – show progress
This command syncs any changes from /home
to /mnt/data, but will not get rid of any fi les that
are deleted from the /home directory. Rsync is
very effi cient: only the changes made to a fi le are
copied over, rather than a new fi le. We want to run
this command regularly, say once an hour or so,
so we’ll add it to cron. Cron is a daemon that runs
commands at specifi c intervals according to each
user’s crontab. You can edit the pi user’s crontab
using the command ‘crontab -e’. Add the following
line to the end of the crontab fi le:
0 * * * * ‘sudo rsync -avP /home /
mnt/data’
The crontab fi le takes lines in the format:
minutes hours day-of-month month day-of-
week. The above line tells the cron daemon to
run the command in at the start of each hour.
Save the changes as you usually would in nano.
20 That’s it!
With the project complete, you now
have a central authentication and fi le storage
area that gets backed up, as well as a master
image for the client Raspberry Pis that is
fi lled with useful software. Now you can start
enjoying your network of Raspberry Pis!!
18 Preparing a disk to be used as a
backup area
The instructions for preparing an external disk
to be used as a backup area can be found here:
www.linuxuser.co.uk/features/build-a-file-
server-with-the-raspberry-pi. Use steps 09 to
11 to do this.
15 Log in with a user from the NIS server
Wait for the client to boot up and then
try to log in with the pi user. Remember we
didn’t change the password of the pi user
when we set up the client? We are now going to
be logging in with the pi user from the server,
so the password will be different.
The nice thing about this is that the Pi is still
operable with the standard credentials when
there is no network cable connected or the
server is down. However, it will complain a lot
during the boot process and still won’t be able
to access the home directory on the server.
17 Duplicating the card
Before continuing, shut down the client
Pi by switching to the pi user using ‘su pi’ and
then typing ‘sudo init 0’. Everything on Linux is
seen as a fi le. Because of this, we can simply use
a combination of the cat command and pipes to
duplicate the SD card. Switch to the root user
on your Linux computer using the command
‘su root’. Use the output of ‘fdisk -l | grep Disk’
to fi nd the path of the SD card. Ours is /dev/
16 Installing packages on the client
Linux has a bunch of fantastic
educational software that would be ideal for
use in a classroom. We’re going to recommend
a few programs that would be good to include
on the master client image. There is already a
pretty good collection that comes with the base
Raspbian image, but we can defi nitely add more.
We’re going to install the following software:
AbiWord – A basic word processor
Gnumeric – A basic spreadsheet program
GCompris – Bundle of children’s educational
software packages
mmcblk0. You can back up the card using the
command ‘cat /dev/mmcblk0 > nisclient.img’
and restore the backup to a different card using
‘cat nisclient.img > /dev/mmcblk0’ once you have
taken the original card out.
Galculator – Scientifi c calculator
TuxMath – Maths tutor for kids
Tux Paint – Children’s drawing program
You can install all of this software at once
using ‘sudo apt-get install abiword gnumeric
gcompris galculator tuxmath tuxpaint’. This may
take a while. Once it’s fi nished, you can type
‘startx’ to load the LXDE desktop environment
and have a play around everything on there.
Have a go at logging in as the test user also.
One problem will be that there are no desktop
icons because they are only set for the pi user.
The programs will still be there in the start menu
anyway. When logging out, the users need to log
out of LXDE so that they go back to the console
and then type ‘logout’.
Linux has lots of educational
software, ideal for the classroom
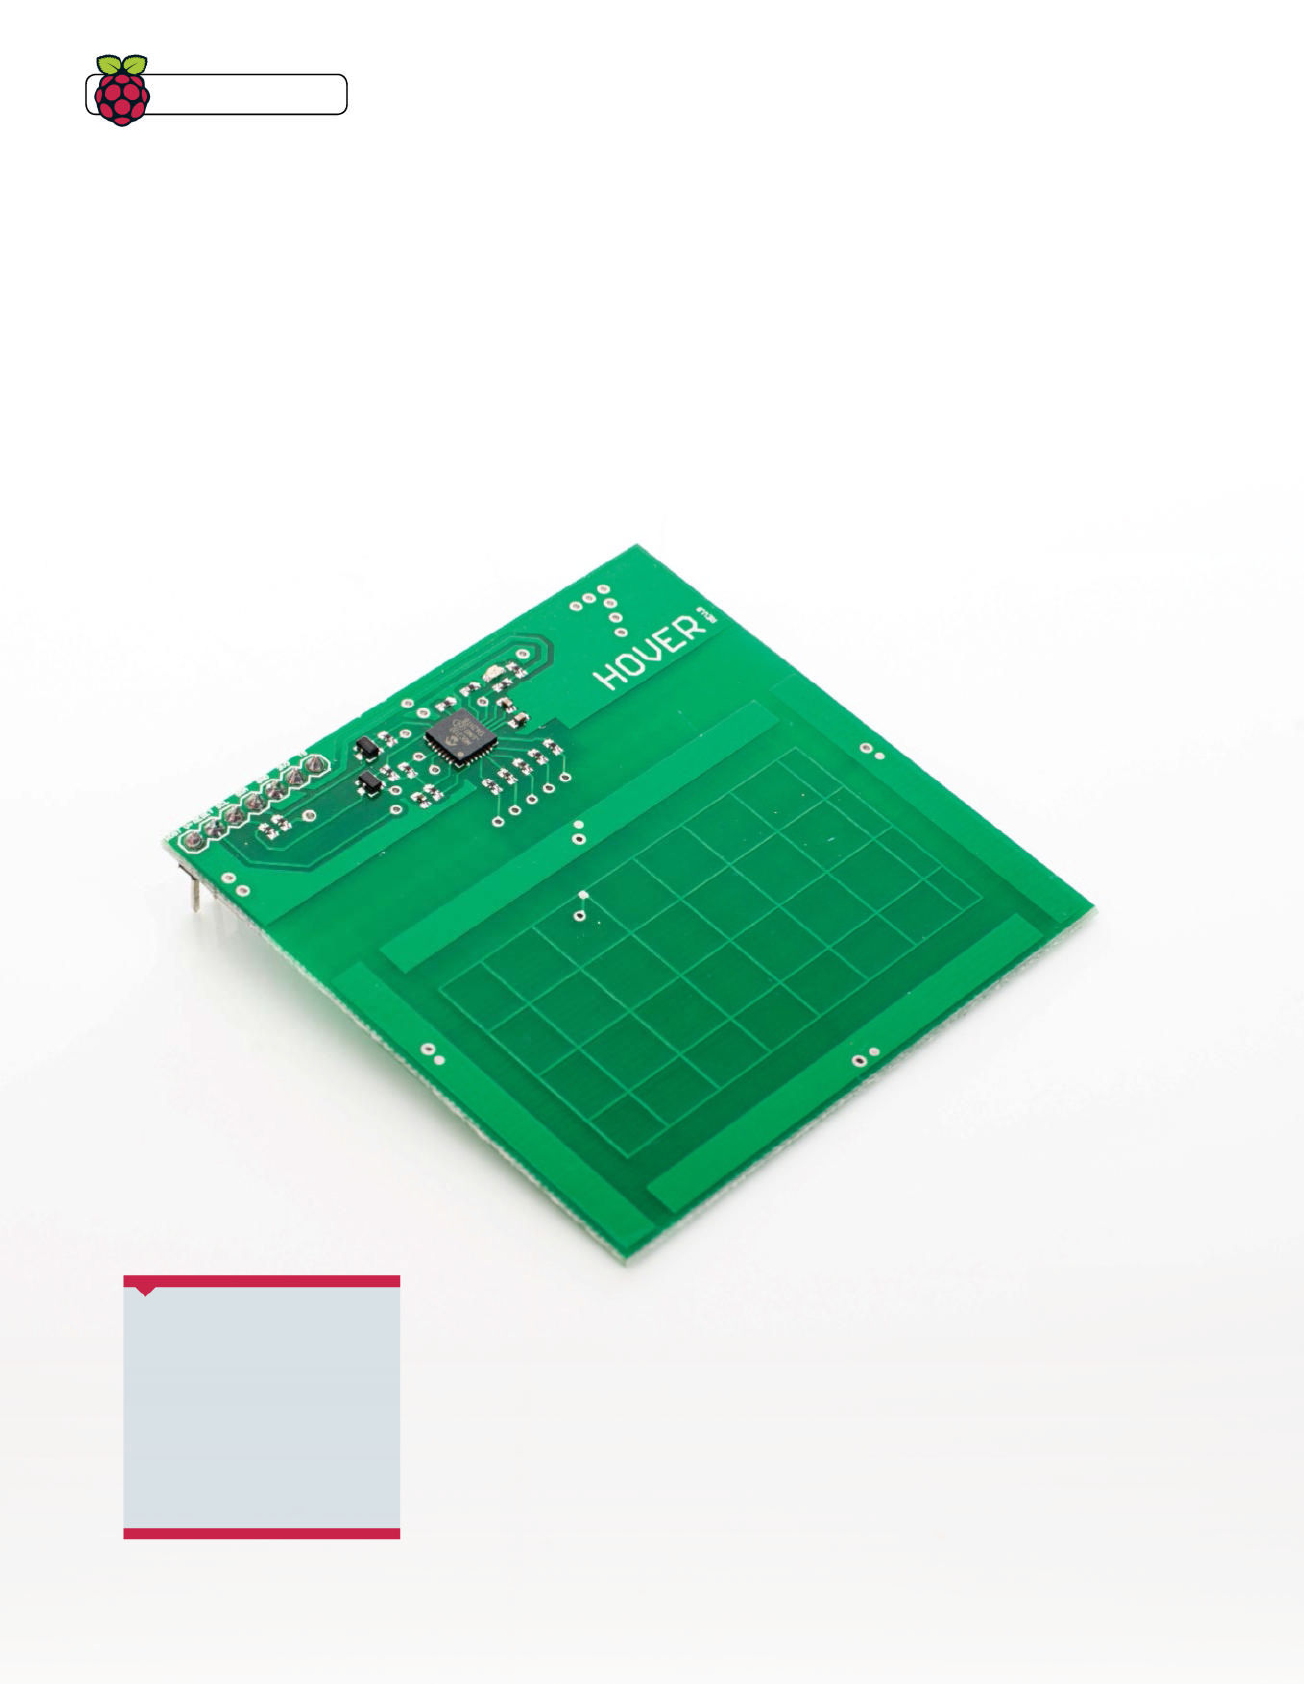
Tips | Tricks | Hacks
Hover is an impressive add-on board for your
Raspberry Pi that allows you to easily add
touch and gesture control to any project
Add gesture control
to your Raspberry Pi
People often ask what the best way is for them to
get started with Raspberry Pi. Obviously this does
depend on the individual user and what they want
to achieve and get out of any project, but in a more
general sense it’s often the hardware projects
that win out for getting to grips with it. They teach
a variety of skills (including programming, circuit
building, soldering, hardware design and much
more) and are also varied enough to both keep
beginners interested and allow them to work out
for themselves exactly what aspect they love
best. Even a seasoned professional will get a
serious kick out of a bit of physical computing and
automation! This is one of the unique features of the
Pi compared to traditional “black box” computers;
you can break out of the usual boundaries and
interface with everyday objects like never before.
One of the most important aspects of a hardware
project is often the user input mechanism, and
as technology is refi ned we see new and more
intuitive ways to accomplish this task. Gesture
and touch control is now present in a large
number of consumer devices and even the biggest
technophobes are starting to embrace the ease of
this technology. It is time to bring your Raspberry Pi
projects into the 21st century with Hover!
What you’ll need
Q Raspberry Pi
Q Hover
Q Breadboard
Q Male to female
jumper cables
Q Speaker or headphones
116 Raspberry Pi Tips, Tricks, & Hacks
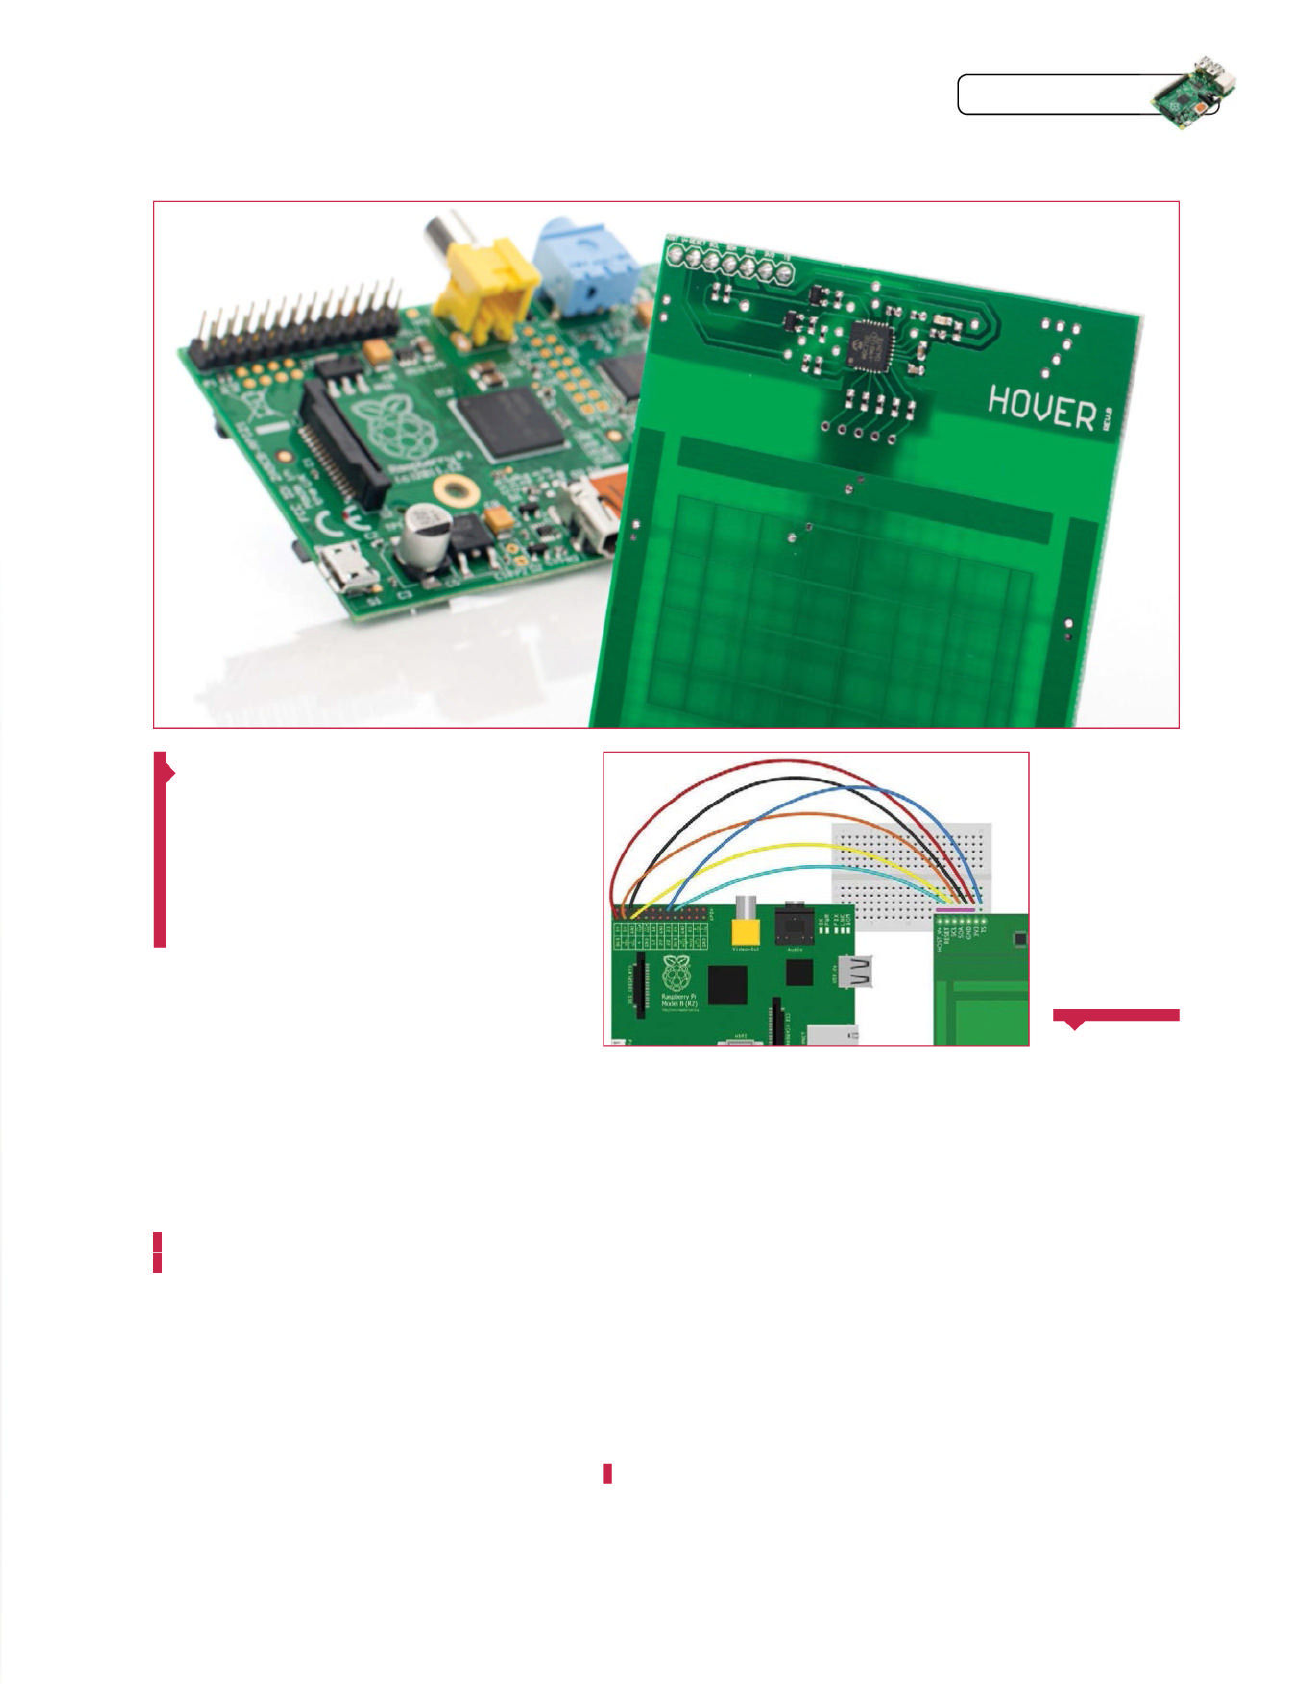
Raspberry Pi Tips, Tricks, & Hacks 117
Tips | Tricks | Hacks
01 Get the gear!
The Hover add on board is available to purchase direct
from Hover (http://www.hoverlabs.co/#shop) for $39 (£25),
however this will ship from Northern America and therefore if you
are based in the UK or Europe it will likely be quicker and cheaper
to order from one of the other retailers listed via the above link.
The added benefi t of ordering from a retailer is that if you need
any of the other items you can likely get those at the same time!
Hover will work perfectly with any Raspberry Pi, including both
the new plus versions and the older models – just make sure
your system is fully up to date with:
sudo apt-get update
sudo apt-get upgrade
04 Check the connection
Hover connects to the Raspberry Pi through the
I2C interface located on the main 26 or 40 pin GPIO bank
(depending on which version of the Raspberry Pi you are
using). There is a very easy way to check if your Raspberry Pi is
correctly connected to Hover using the simple command line
I2C tools. Issue the following command:
sudo i2cdetect -y 1
If you see 42 in the response then you are successfully
connected to Hover!
03 Set up the hardware
Make sure your Raspberry Pi is powered down and
not connected to power before starting this step, to avoid any
unnecessary damage to your Raspberry Pi. Pick up your Hover,
breadboard and wires and connect the as shown in the Fritzing
diagram. The physical pins you should be using on the Raspberry
Pi are 1, 3, 5, 6, 16 and 18. Whilst a Model B Pi is shown, this will
be the same connection on a Model A, B, A+ or B+ of any revision.
Once completely set up like the image, reconnect the power cord
and open an LXTerminal session.
02 Update GPIO and I2C
When making use of GPIO and I2C (or any other
interfacing technique on the Raspberry Pi) it is always good
practice to update to the very latest software versions possible.
Newer versions typically have bug fi xes and additional futures
which can come in very handy. GPIO and the RPi.GPIO Python
library are installed by default on Raspbian, but you may need to
enable I2C if you haven’t already. This is a fairly standard process
and has been covered many times so we won’t go into it here. We
would, however, highly recommend the brilliant I2C setup tutorial
from Adafruit (https://learn.adafruit.com/adafruits-raspberry-
pi-lesson-4-gpio-setup/confi guring-i2c).
Above You can tap
the Hover or swipe
in four directions
just above it
The physical pins you
should be using on
the Raspberry Pi are
1, 3, 5, 6, 16 and 18
The Hover board
has intelligent on-
board level shifting,
meaning that it can
be used with either
3.3V or 5V logic
levels which means
it can be used with
pretty much any
microcontroller your
heart desires. There
are connection
examples and
code snippets
available for
Arduino, Sparkcore
and PCduino on
the Hover website
(hoverlabs.com) and
these can also be
adapted to suit other
devices fairly easily.
If you decide to
create your own
example with
another device then
why not submit a pull
request to the Hover
GitHub (github.com/
jonco91) if you are
happy to share!
Plenty of
platforms
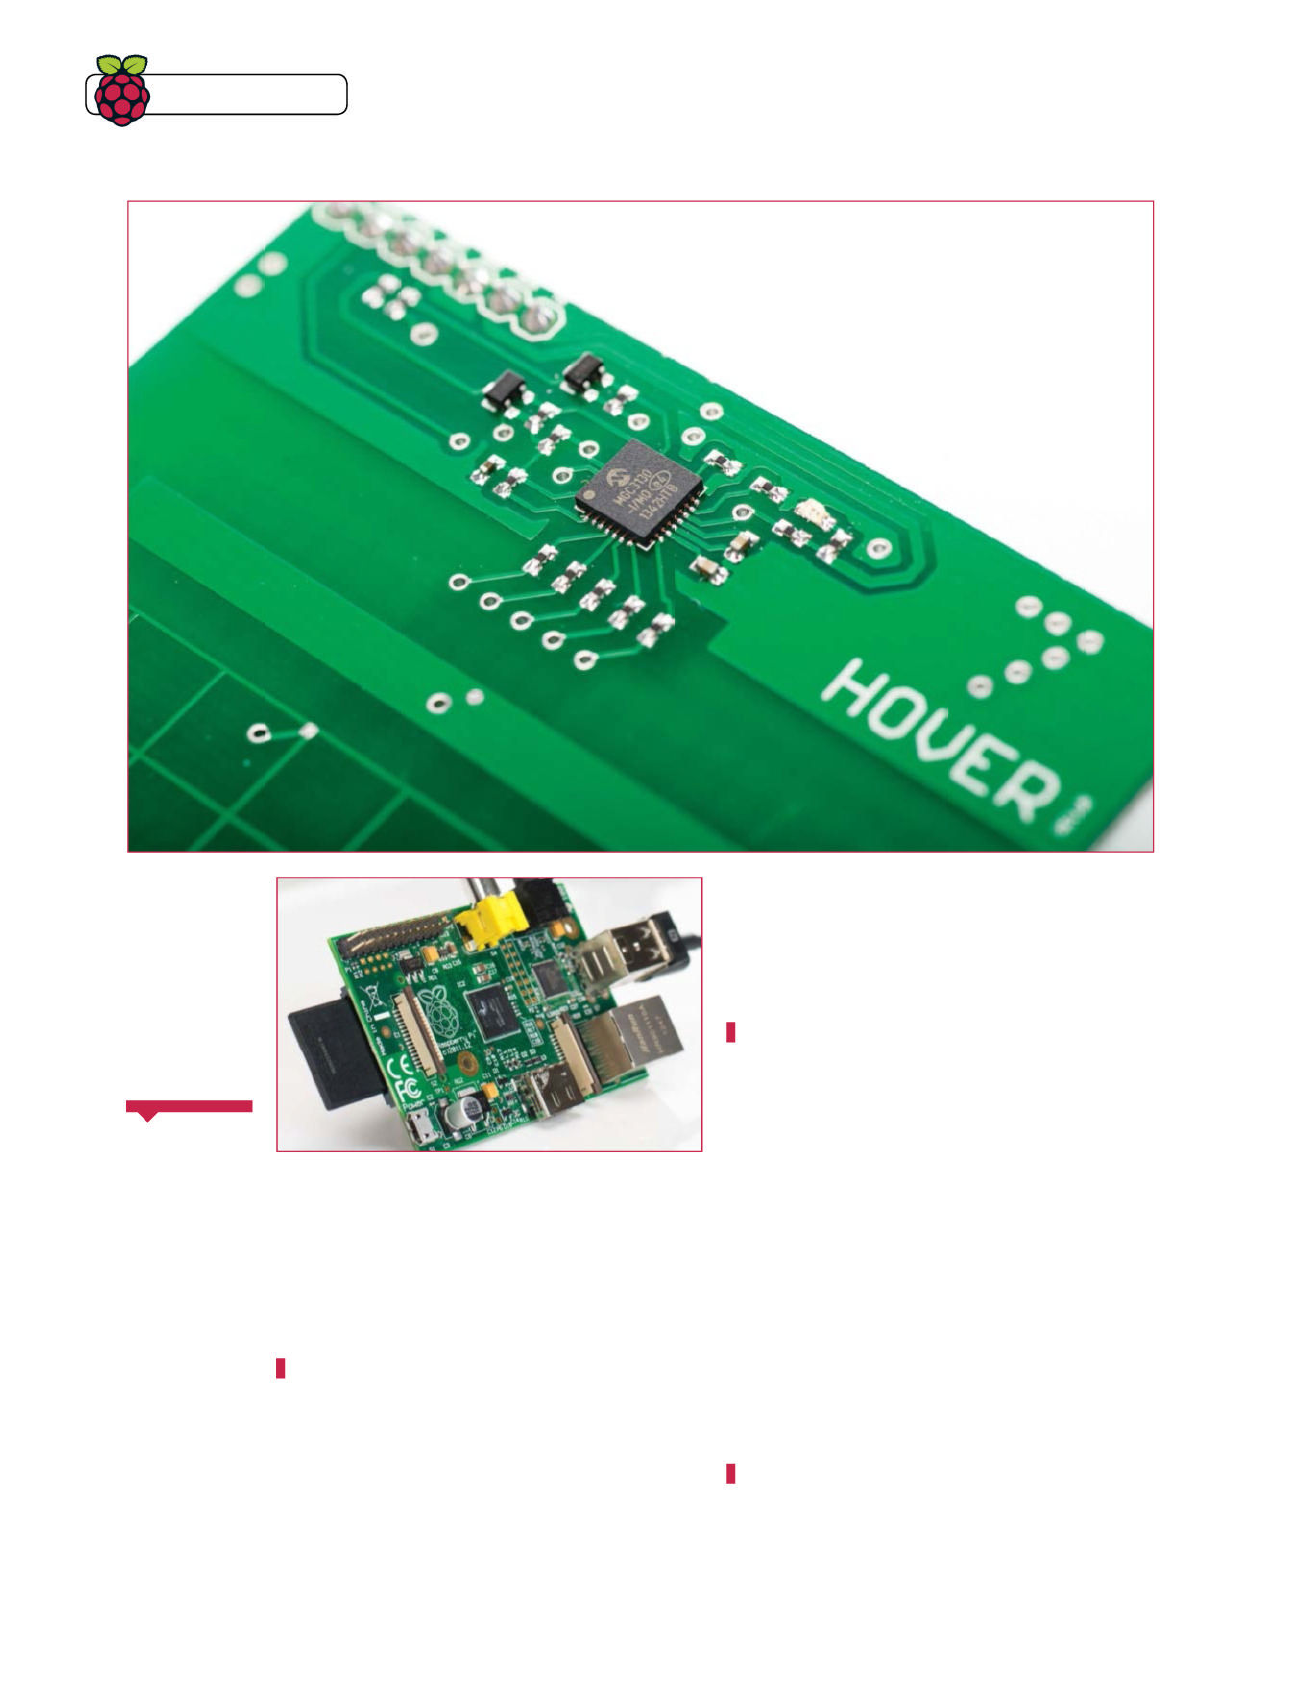
Tips | Tricks | Hacks
118 Raspberry Pi Tips, Tricks, & Hacks
Above This MGC3130
chip works as the 3D
tracking and gesture
controller
07 Run the example file
The current Hover library is simply a Python fi le
with all of the necessary functions included within it, rather
than an installable package (however, this may change in
the future). In order to use the functions contained within
the Hover_library.py script discussed above, it is therefore
necessary to make sure that the Hover_library.py script is
located in the same folder as any script you have written that
makes use of any of the Hover functions. In a terminal session,
navigate to the folder containing the Hover_example.py fi le
and run it using:
sudo python Hover_example.py
The Hover board will initialise and you will then see a message
“Hover is ready”, meaning you are good to go.
05 Using a Rev 1 Pi?
In the code, we have passed an option “-y 1” which tells
the operating system which I2C bus to look at (there are two on
the BCM2835 processor on the Pi). The fi rst revision Raspberry
Pi (the one that initially launched in February 2012 with 256MB
of RAM) made use of I2C bus 0, whereas all other versions of
the Raspberry Pi since have used I2C bus 1. So the above code
would change to:
sudo i2cdetect -y 0
And you should expect the same output (42) as in step 7.
Additionally you will need to edit line 27 of the Hover_library.
py fi le, changing bus = smbus.SMBus(1) to bus = smbus.
SMBus(0). A patch that automatically detects the Raspberry
Pi version and makes this change for you has been submitted,
but not yet accepted into the master branch so this may not be
necessary in future versions.
06 Download the sample code
Now you have everything hooked up correctly and
your Raspberry Pi is fully up to date, it is time to get the
Hover Python library, which makes using the board from
Python scripts extremely easy. You can get this using the
following command:
git clone https://github.com/jonco91/hover_
raspberrypi.git
This should download a folder called hover_raspberrypi to
your /home/pi directory containing all of the fi les needed for
this article. Alternatively you can download the zip fi le from
https://github.com/jonco91/hover_raspberrypi/archive/
master.zip.
Python is extremely
useful for beginners
due to its easy-to-
understand syntax,
fairly prose-like
formation and the
fl exibility and ease
of acquiring existing
software libraries to
help your projects.
It is also the offi cial
programming
language of the
Raspberry Pi and is
therefore very well
supported within the
community. That is
not to say that Hover
will not work with
other programming
languages; simply
that the creators of
Hover have not yet
released any code
libraries in other
languages.
Why
Python?
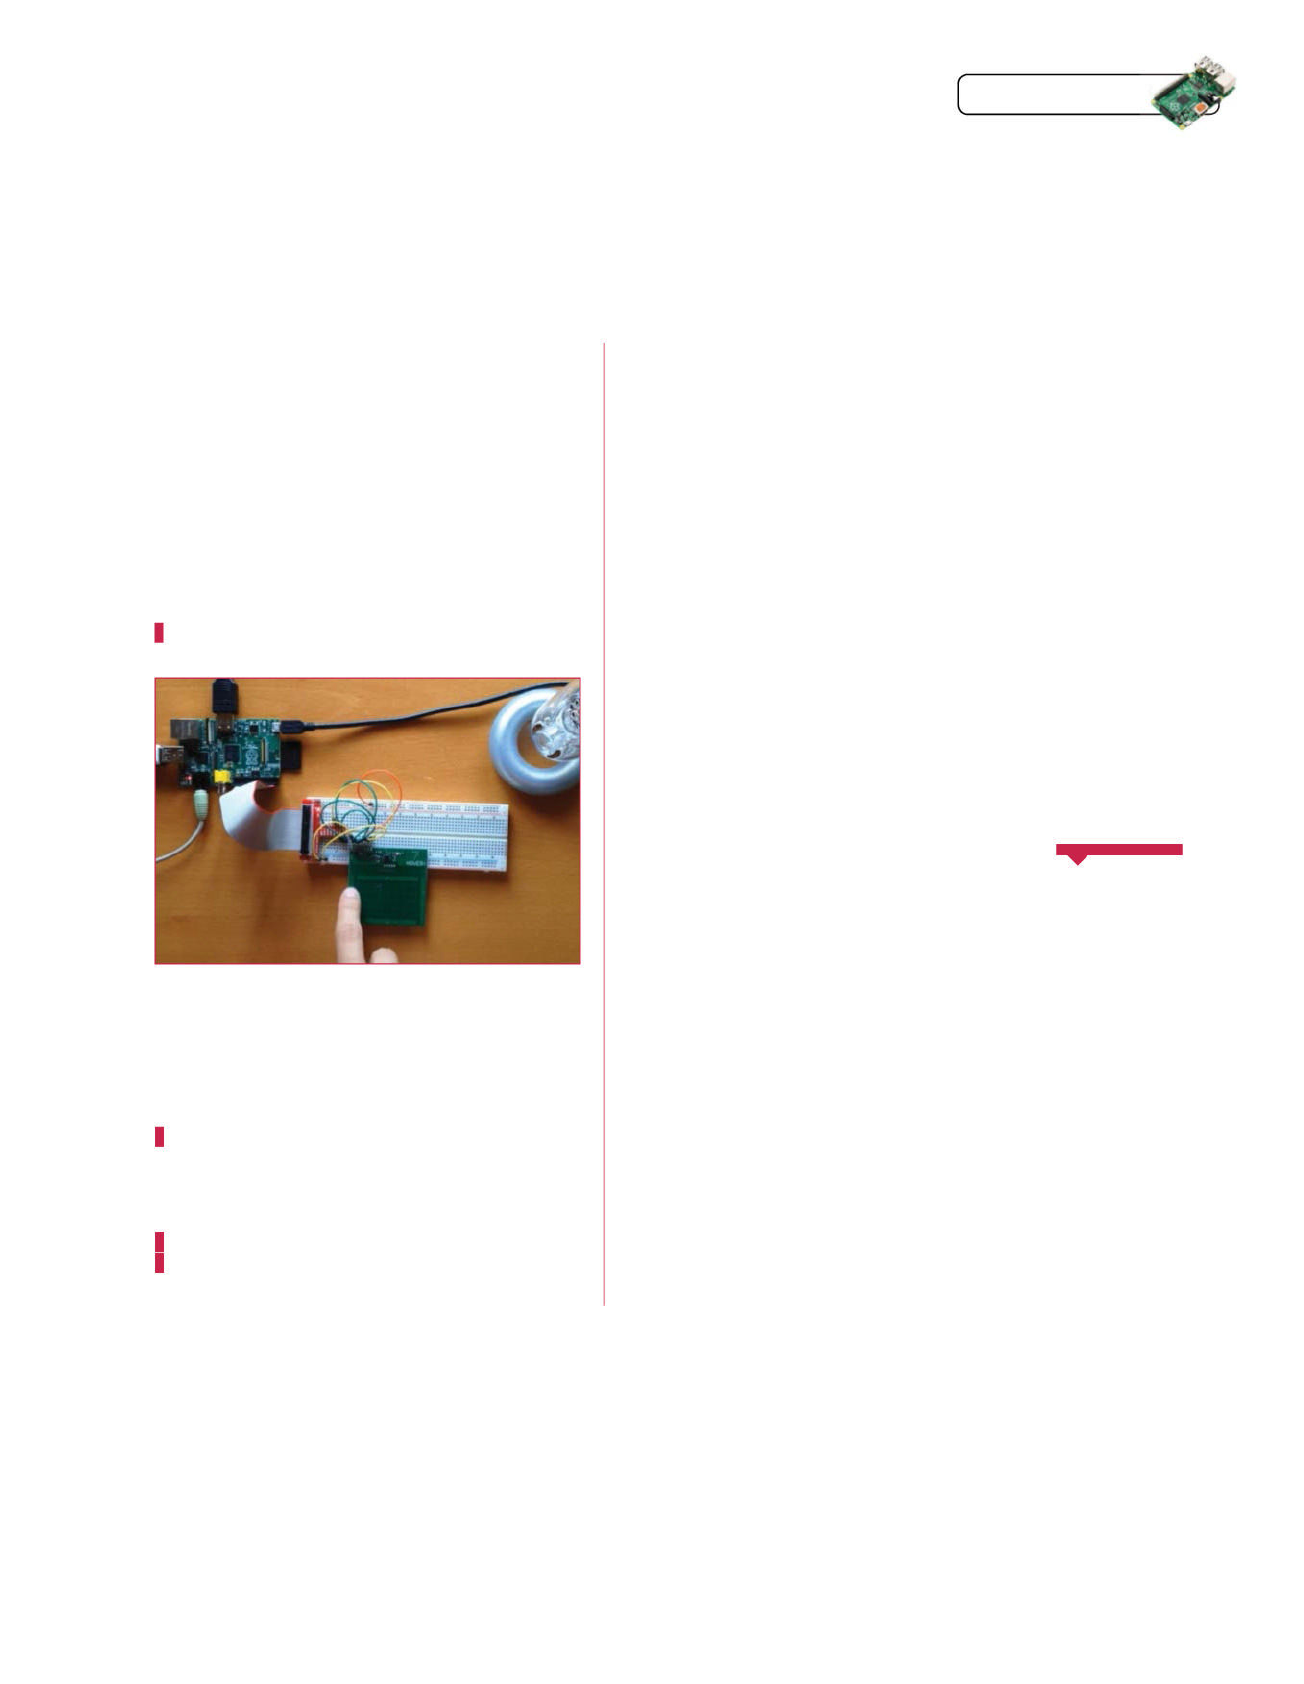
Raspberry Pi Tips, Tricks, & Hacks 119
Tips | Tricks | Hacks
08 Investigate the output
Once you have completed step 7, if you touch the
Hover board or make gestures above it you will begin to see
output in the terminal which is a bunch of 0s and 1s and then
a description of what it has seen – right swipe, north tap,
etc. The way the Hover works is that it can sense any one of
nine different actions and these are sent to the Raspberry Pi
over I2C as an 8-bit binary value. The fi rst three bits describe
whether it was a touch or gesture event and the remaining fi ve
bits describe the specifi c type or direction of the event. The
exact breakdown can be seen in the code listing to the right.
09 Enable 3.5mm audio
Grab your speakers and plug them in to the 3.5mm jack
plug on the Raspberry Pi. You will then need to route audio to
the 3.5mm jack using the following command (you can skip this
step if you are using an HDMI display, which has in-built audio):
sudo amixer cset numid=3 1
10 Make a drum machine
In the hover_raspberrypi folder is another folder called
examples that contains code and sounds to turn Hover into a
drum machine! Navigate to the hover_raspberrypi directory
and then copy the Hover_library.py fi le into the examples folder
by using:
c p Ho ver_lib rar y.py exa m ples
You can then move into the examples folder and run the Hover_
drum.py fi le using:
cd examples
sudo python Hover_drum.py
Make some gestures and taps on and around Hover and you
will have your own basic drum machine!
11 Create your own responses
The great thing about having a Python library available is
that it is easy to integrate this device into any of your existing or
future projects. The code shown is all you need to get started
with Hover. You will see that on line 15 and onwards there are
comments saying “code for … goes here”. Essentially all you need
to do is insert the actions you want to occur on the particular
event mentioned in the comment and you will be up and
running… it really is that easy!
12 Other project ideas
Most of you are probably now wracking your brains for
projects you could use Hover in, but let’s face it – pretty much
any project that requires physical interaction would be made
better with touch and gesture control. If you think it is cool but
are lacking inspiration, we recommend looking at the projects
section of the Hover website at http://www.hoverlabs.
co/projects, where there are projects by the creators and
community alike. If you make something cool, be sure to send
us the pictures!
Did you come
here looking for
information on how
to build your space
age transportation
device? We can’t
help you with
that, but we don’t
want to leave you
disappointed!
Hoverboards were
fi rst popularised as
a fi ctional personal
transportation
method in the 1989
fi lm
Back To The
Future Part II
and
took the appearance
of a levitating
skateboard with no
wheels. 25 years
later and it seems
we might be getting
close to turning this
dream into a reality.
Hendo Hoverboards
have created a
$10,000 hoverboard
which uses a
principle similar
to that of maglev
trains to generate lift
(kck.st/ZMd9AA),
and more recently
Ryan Craven has
created a much
cheaper alternative
using four leaf
blowers and some
other cheap parts
(mrhoverboard.
com/about).
Where are the
hoverboards?
import time
from Hover_library import Hover
hover = Hover(address=0x42, ts=23, reset=24)
try:
while True:
# Check if hover is ready to send gesture
# or touch events
if (hover.getStatus() == 0):
# Read i2c data and print the type of
# gesture or touch event
message = hover.getEvent()
type(message)
if (message == “01000010”):
# code for west touch goes here
elif (message == “01010000”):
# code for centre touch goes here
elif (message == “01001000”):
# code for east touch goes here
elif (message == “01000001”):
# code for south touch goes here
elif (message == “01000100”):
# code for north touch goes here
elif (message == “00100010”):
# code for swipe right goes here
elif (message == “00100100”):
# code for swipe left goes here
elif (message == “00110000”):
# code for swipe down goes here
elif (message == “00101000”):
# code for swipe up goes here
# Release the ts pin until Hover is
# ready to send the next event
hover.setRelease()
time.sleep(0.0008) #sleep for 1ms
except KeyboardInterrupt:
print “Exiting...”
hover.end()
except:
print “Something has gone wrong...”
hover.end()
Full code listing
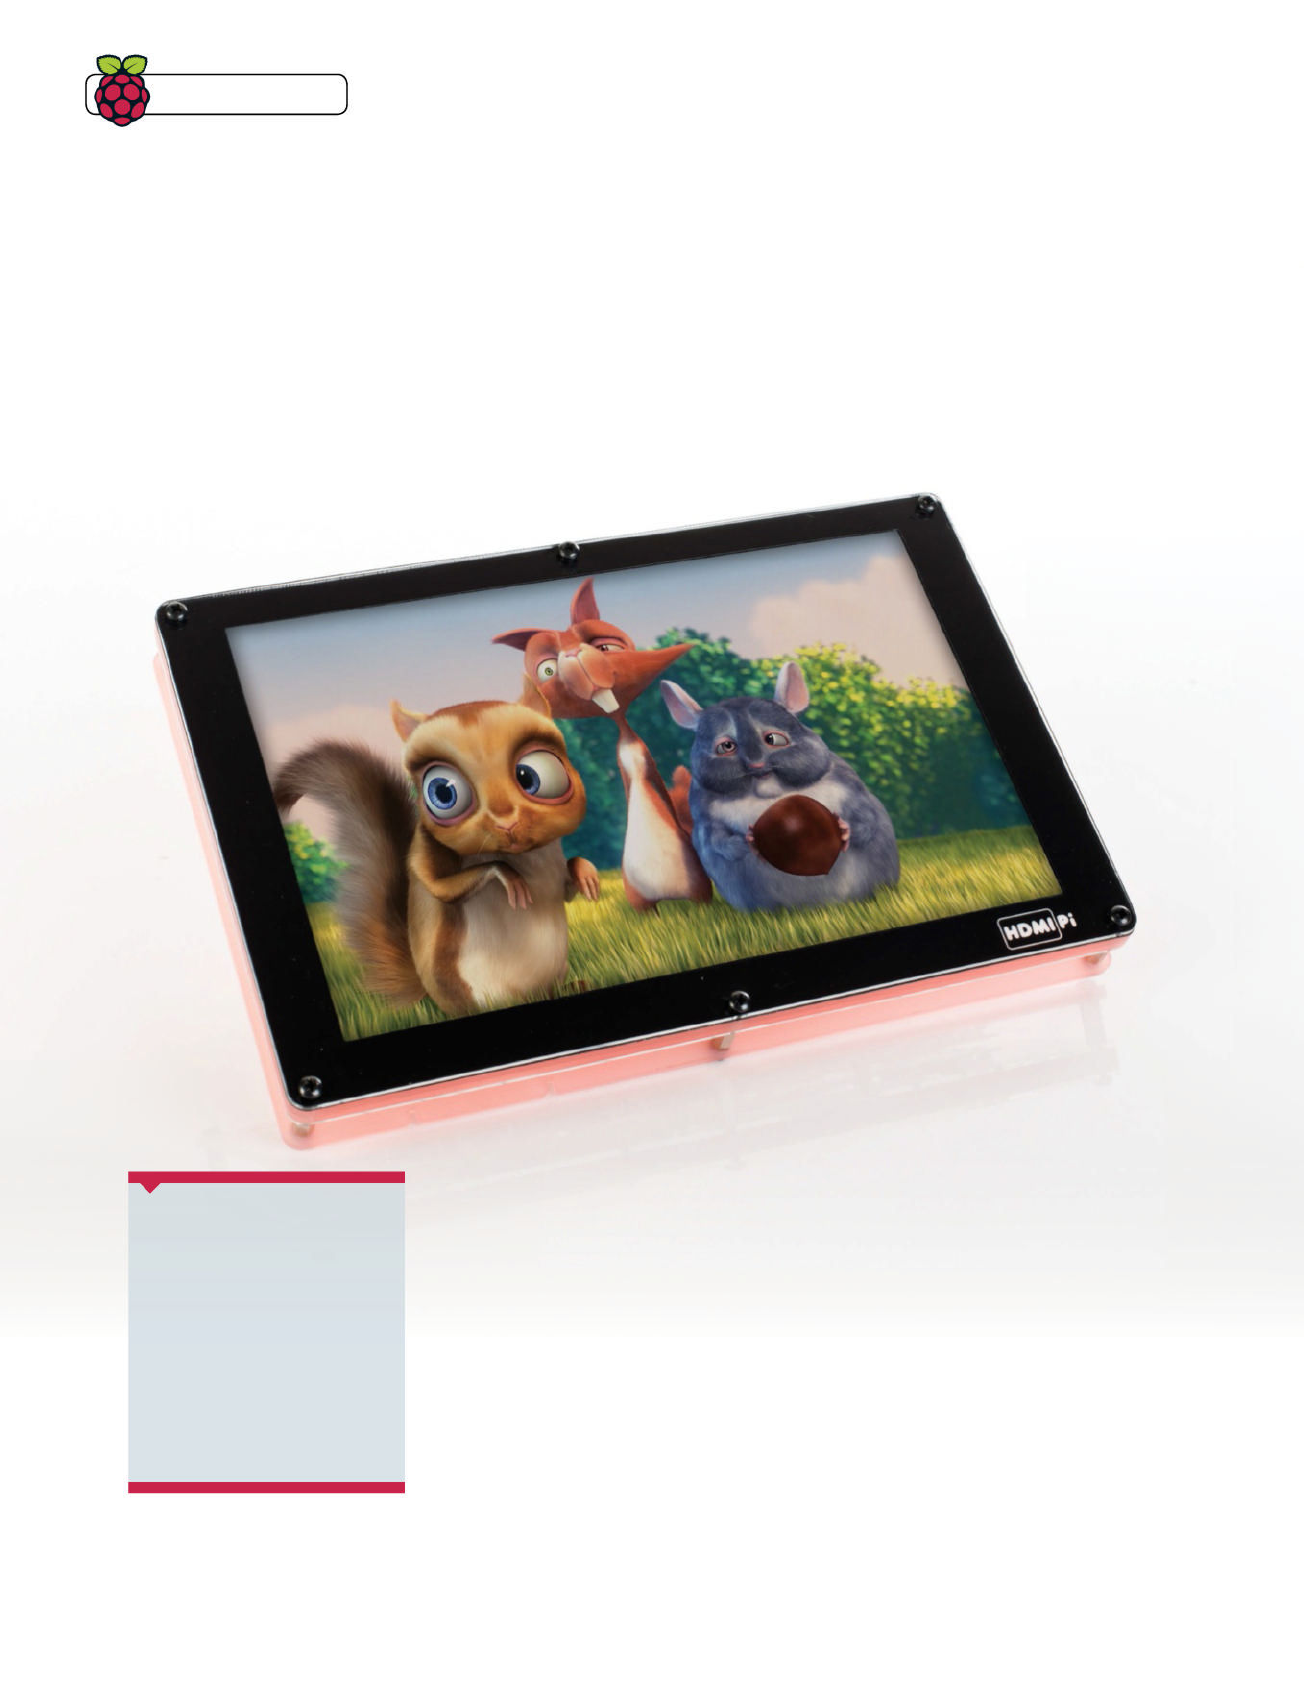
120 Raspberry Pi Tips, Tricks & Hacks
Tips | Tricks | Hacks
Take your Raspberry Pi, HDMIPi and Screenly and
turn them into a beautiful digital photo frame
Make a digital
photo frame
Digital signage is a huge market in modern times, and
increasingly we are seeing digital advertising in the public
space – be it on street billboards, shopping centres and even
in some city taxis. Screenly is an exciting piece of software
from Wireload Inc that has set out to reduce the barriers to
entry of the digital signage market by employing a Raspberry
Pi as its main hardware component for the individual signage
nodes. With the powerful VideoCore IV graphics processor at
the heart of the Pi and its low electrical power consumption,
using it as a digital signage platform is a no-brainer.
Our expert has been using Screenly a lot recently for some
projects and it truly is a really great piece of software. He was
also one of the fi rst backers of HDMIPi on Kickstarter, and when
his reward arrived recently it occurred to him that, together
with Screenly, it would make the perfect home-brew digital
photo frame and another great Raspberry Pi-based hardware
project. In this tutorial, we will show you how to assemble this
powerful hardware/software combination for yourself.
01 Order your items
If you haven’t already got them
in your Raspberry Pi collection, you will
need to order all of the items from the
“What you’ll need” list. The HDMIPi is
currently only compatible with Model B
of the Raspberry Pi, although a Model
B+ version is in the works (the B+
does actually work with HDMIPi, but
unfortunately cannot fi t into the case).
Pretty much any USB keyboard will
work with Screenly, including wireless
ones, so you do not need to worry about
a mouse for this tutorial as it will all be
done from the command line.
Finally, a speaker is only necessary
if you intend to play videos from the
display with sound as well.
What you’ll need
Q Raspberry Pi Model B
Q HDMIPi kit
Q Class 10 SD Card
Q 5.25V Micro USB power
supply
Q USB keyboard
Q Wi-Fi dongle
Q Internet connection
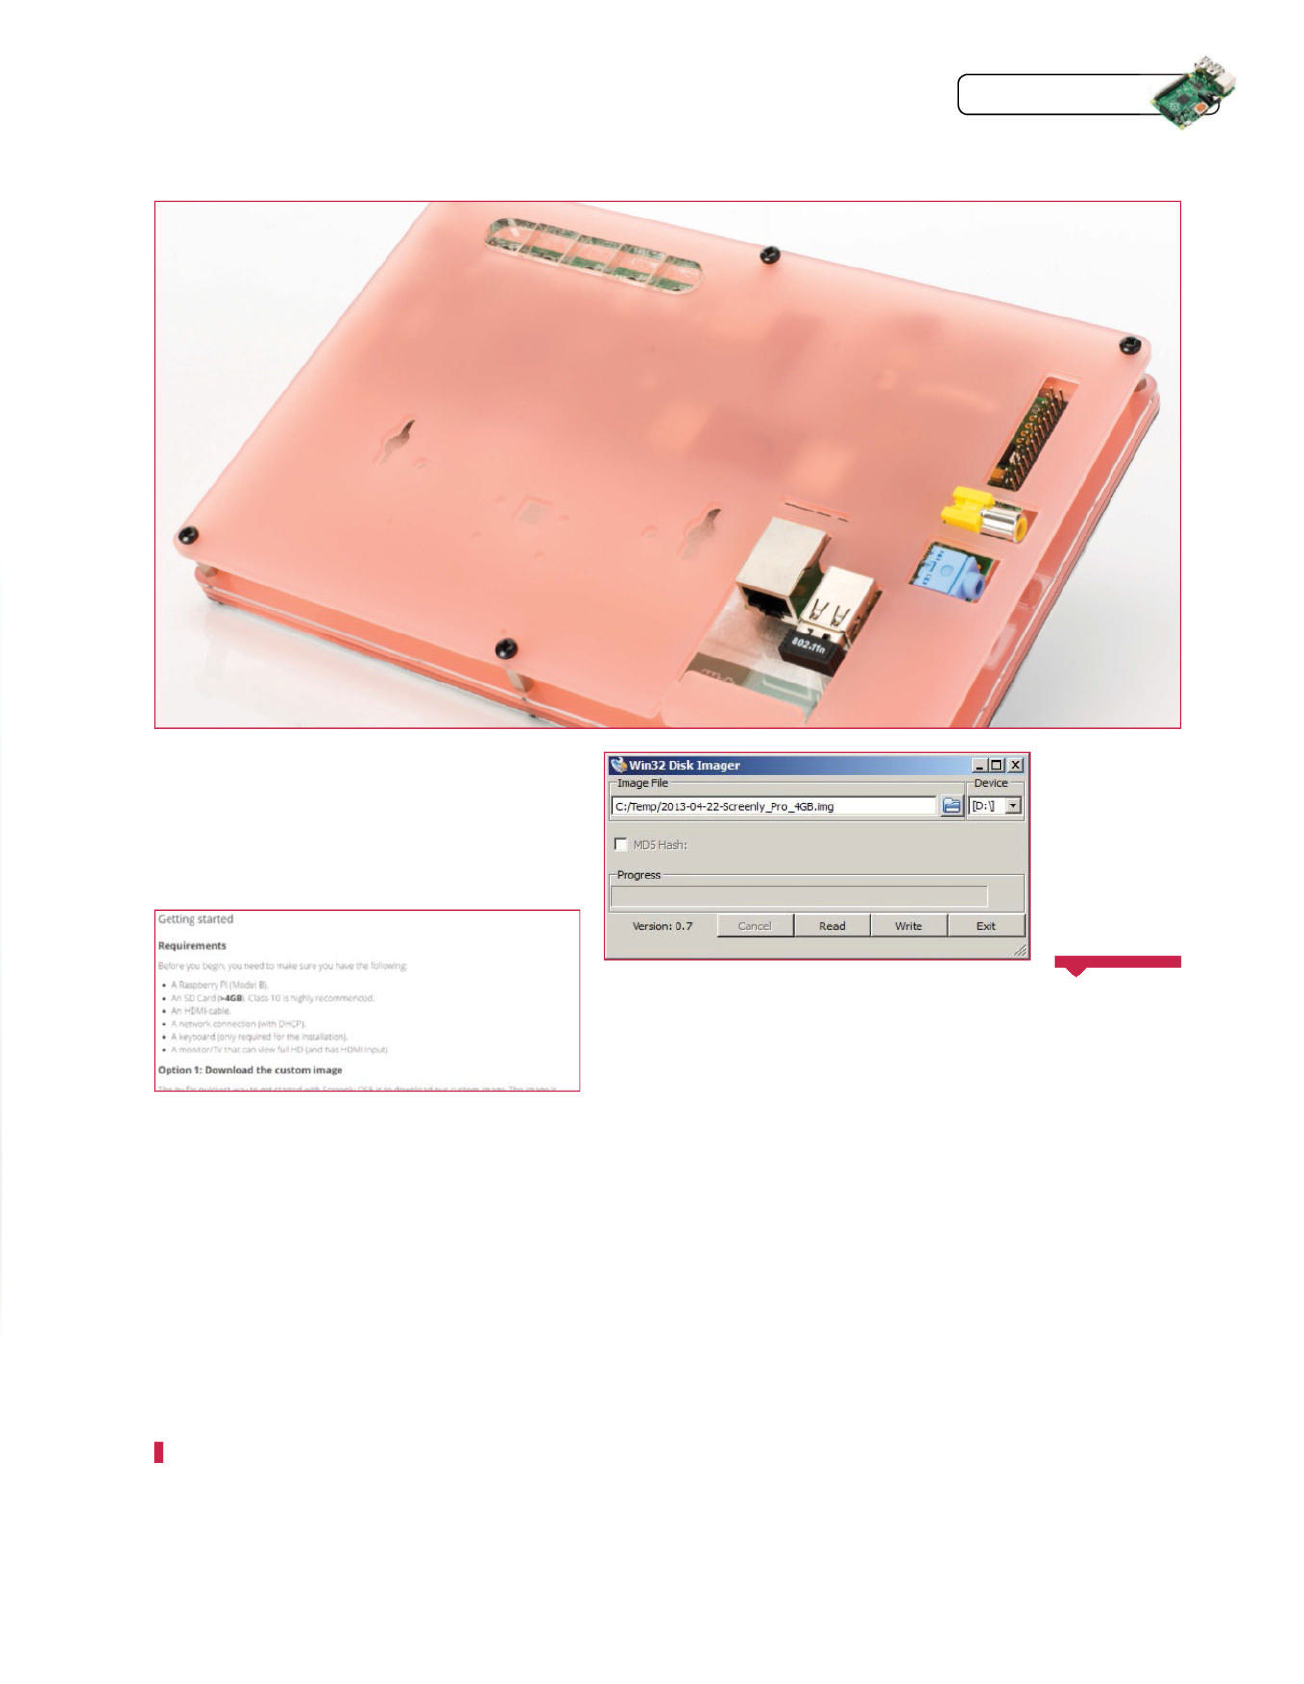
Raspberry Pi Tips, Tricks & Hacks 121
Tips | Tricks | Hacks
04 Flash image to SD Card (Linux)
It’s worth noting the value of having a Linux machine
at your disposal (or a spare Raspberry Pi and SD card reader)
to download the ZIP fi le in Step 03. This is typically the easiest
way to unzip the fi le and copy the image across to your SD
card. Assuming the disk isn’t mounted, open a terminal
session and type:
unzip -p /path/to/screenly_image.zip | sudo dd
bs=1M of=/dev/sdX
Make sure that you replace /path/to/screenly_image.zip with
the actual path.
05 Flash image to SD Card (Other OS)
If you do not have another Linux machine handy, or
a card reader for your Raspberry Pi, you can still do this from
other popular operating systems. On Windows you should use
Win32 Disk Imager and follow the easy to use GUI. From Mac
OS X you have the options of using the GUI-based software
packages PiWriter and Pi Filler, or running some code from the
command line. Visit www.screenlyapp.com/setup.html for
more info.
06 Insert SD card and peripherals
Once the Screenly image has been successfully
transferred to your SD card, you will need to insert it into the
Raspberry Pi within your HDMIPi casing.
It is a good idea to connect your Wi-Fi dongle and keyboard
at this point. Take a look at the image at the top of this
page to see where the slots are in relation to the casing. A
wired network is also required for the initial setup and for
confi guring the Wi-Fi connection.
07 Boot up your Raspberry Pi
The HDMIPi driver board has a power output for the
Raspberry Pi which means you only need one power supply for
this setup. Plug it in and wait for it to boot into the Screenly splash
screen. An IP address (of format http://aaa.bbb.ccc.ddd:8080)
should be displayed here, which will allow you to gain access to the
management dashboard.
03 Download Screenly OSE
Now that you have the hardware all ready to go we need
to download the Screenly OSE SD card image. This is only a 3.7GB
image file, however it may not fit on some 4GB SD cards so we
would recommend a minimum of 8GB, for extra space for all your
pictures and videos. Visit bit.ly/1wLKIRQ and download the ZIP file
from one of the mirrors under the “Getting started” heading.
02 Assemble your HDMIPi
The HDMIPi comes as a do-it-yourself kit rather than
a polished product. Not only does this make it cheaper for you
to buy, but it also gives it a more hack-like feel in its Pibow-
esque acrylic layer case. It is not hard to assemble, but in
case you get stuck there is a fantastic assembly video here:
http://hdmipi.com/instructions.
HDMIPi is a
collaboration
between Cyntech
and Alex Eames
from RasPi.TV. They
wanted to bring a
cheap HD resolution
HDMI screen to the
market that will
reduce the cost of
having a dedicated
monitor for your
Raspberry Pi. They
took to Kickstarter
to launch their idea
(kck.st/17zyaQg)
and there was a huge
response to this
project from both
within and outside
the Raspberry Pi
community. Over
2,500 people from
all over the world
enabled them to
smash their £55,000
target, and the
campaign fi nished
with over £260,000.
UNICEF even
thought they were
good enough to use
in their educational
projects in Lebanon
(bit.ly/ZDpO8Z).
History of
HDMIPi
Above The reverse
view of HDMIPi,
showing GPIO and
connector cutouts
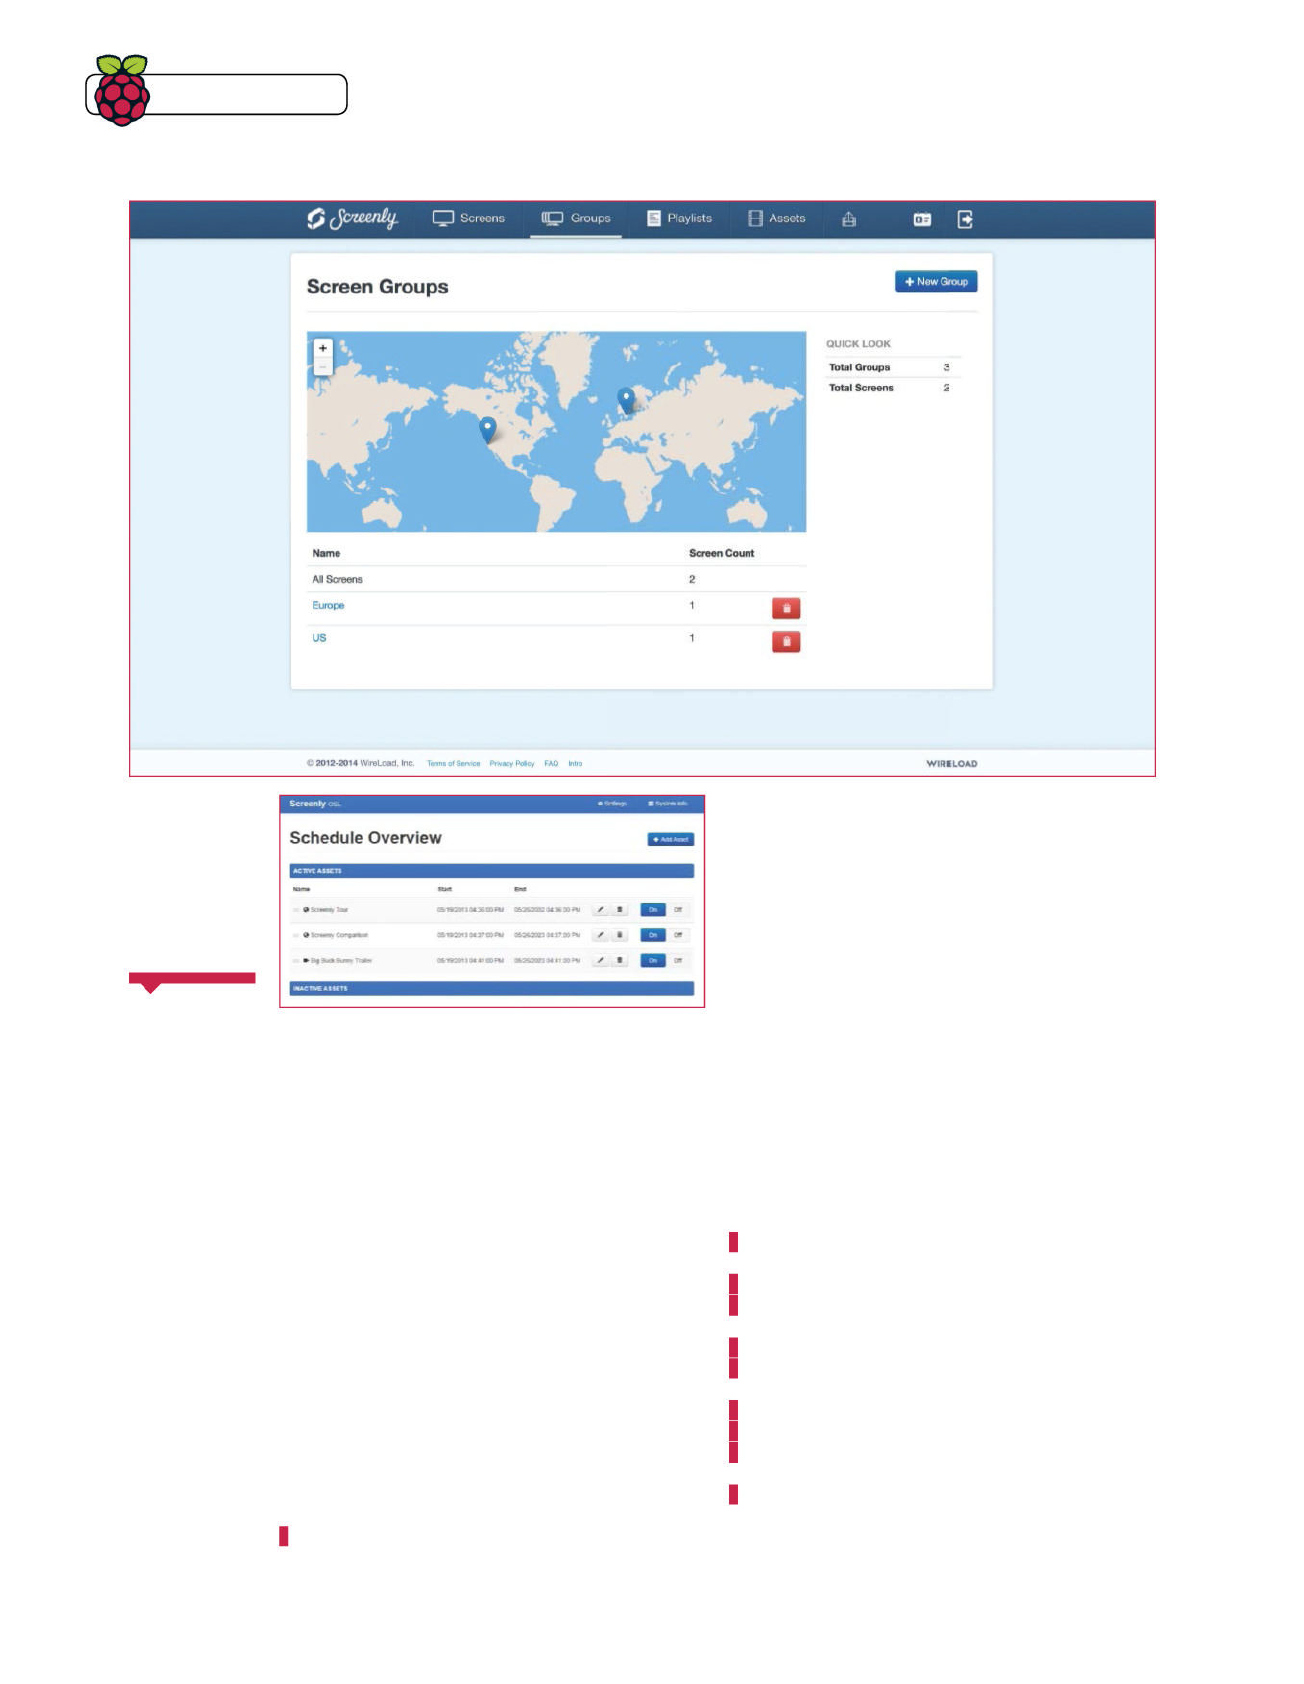
122 Raspberry Pi Tips, Tricks & Hacks
Tips | Tricks | Hacks
08 Disable Screenly video output
Load the IP displayed on the splash screen on the
browser of a different computer (you won’t be able to do it
directly from the same Pi). The Screenly OSE dashboard should
now load. Once inside the dashboard, move the slider for Big
Buck Bunny to the OFF position or delete the asset entirely.
09 Enter the command line
Once you have disabled the Big Buck Bunny
trailer from the web interface, you should now be able
to enter the command line easily and you can do this by
pressing Ctrl+Alt+F1 on the attached keyboard at any
time. Alternatively, you can access the command line
over SSH using the same IP address as shown previously
on the splash screen.
10 Run the update script
The image fi le we downloaded from the website is
actually just a snapshot release and does not necessarily
include the latest Screenly OSE code, as the code updates
are made more regularly than the image. It is therefore
good practice to run an upgrade to the latest version using the
built-in script. You can run the following command:
~/screenly/misc/run_upgrade.sh
11 Confi gure Raspberry Pi
Once you are successfully at the command line, you need
to type sudo raspi-config to enter the settings and then select
‘1 Expand root fi le system’ to make sure you have access to all of
the space on the SD card. Then, change the time zone (option 4
and then 12) so that it is correct for your location. If your screen
has black borders around the edge you may also need to disable
overscan (option 8 and then A1). We would also recommend
changing the default password to something other than
raspberry to stop any would-be hackers from easily accessing
the Raspberry Pi via SSH (option 2). Once complete, exit without
restarting by selecting Finish and then No.
Above Screenly Pro
can manage multiple
screens and has
cloud storage too
12 Enable and set up Wi-Fi
As Screenly runs on top of Raspbian, the Wi-Fi setup
is essentially the same as the standard command line
setup within the OS. In order to do this you need to edit the
interfaces fi le using sudo nano /etc/network/interfaces
and then type in the following code, replacing ssid and
password with the actual values:
auto lo
iface lo inet loopback
iface eth0 inet dhcp
allow-hotplug wlan0
auto wlan0
iface wlan0 inet dhcp
wpa-ssid “ssid”
wpa-psk “password”
iface default inet dhcp
Then exit and save by hitting Ctrl+X, then Y and then Return.
In this tutorial we
have used the open
source version
of Screenly –
Screenly OSE. This
is a fantastic bit
of software and a
great addition to
the open source
ecosystem. At this
point, some of you
may be dreaming
of huge remote-
managed display
screen networks
and the good news
is that this is entirely
possible with
Screenly Pro. This
is completely free
for a single display
screen and 2GB of
storage, and it has
larger packages for
purchase starting
at two screens right
up to 130+ screens.
It also adds a lot of
additional features
not seen in Screenly
OSE – fi nd out more
about those on the
Screenly website
(bit.ly/1EXl92p).
Screenly
Pro Edition

Raspberry Pi Tips, Tricks & Hacks 123
16 Place in situ and enjoy!
Once you have got Screenly all set up and loaded all of
your favourite pictures and videos onto it via the web interface,
it is now time to enjoy the fruits of your labour! Mould the spider
stand (if you have one) into shape by taking the middle two legs
at the top and bending them downwards and backwards. Then
spread the front-middle legs a bit wider to give a good base and
shape the outer legs at the top and bottom to support the screen.
You are then ready to give it its permanent home – our expert’s is
on the mantelpiece over the fi replace!
17 Other project ideas
In this tutorial we have looked at just one fairly basic
application of Screenly and the HDMIPi. You could use this
powerful open source software to run your digital signage empire,
share screens in schools and clubs, or as a personal dashboard
using a suitable web page. Whatever you make, please don’t forget
to take pictures and send them to us!
14 Upload pictures to Screenly
Once again, you will need to visit the Screenly OSE web
interface by entering the IP address into another computer.
Since you are now using a wireless connection, the IP address
may be different to the previous one. You need to select the
‘Add Asset’ option at the top right-hand side, which should
launch a pop-up options screen. Select Image from the drop-
down box and you then have the option of either uploading the
image or grabbing it from a URL using the corresponding tabs.
Enter the start date and end date of when this image should
appear, and how long it should appear on screen for, then press
Save. Repeat this step for each of the pictures.
15 Test with video and more
Pictures are great, but Screenly also allows you to display
videos (with audio if you wish) and web pages, which really is a
huge benefi t. This is perfect if you want to enhance your digital
photo frame even further or perhaps display the local weather
and news to keep yourself informed. Plug in your speaker – we
would recommend The Pi Hut portable mini speaker (available
from bit.ly/1xEpBNZ) or anything similar.
Above Once fully confi gured, load
your pictures and video to complete your
digital photo frame!
13 Test the connection
The easiest way to test the Wi-Fi connection is to shut
down the Raspberry Pi using sudo shutdown -h now and then
remove the wired network connection and reboot the Raspberry
Pi by removing and reattaching the microUSB power connector. If
the Wi-Fi connection has worked, you should now see the splash
screen with IP address again.
The default Screenly
image is essentially
some additional
software running
on top of Raspbian
OS. This means that
SSH is enabled by
default (it’s why we
changed the default
password in Step 11)
so it’s now possible
to access the
command line, as
well as the Screenly
dashboard, from
outside of your LAN.
We recommend
setting a static IP
for your Screenly-
powered Raspi
from your router
settings and then
setting up SSH with
keys on your Pi, and
port forwarding
on your router
for ports 22 and
8080. The Screenly
dashboard has no
login so anyone
can access it, but
an authentication
feature is imminent.
Access
Screenly
from afar
Tips | Tricks | Hacks

124 Raspberry Pi Tips, Tricks & Hacks
Tips | Tricks | Hacks
Games are a great way of understanding a
language: you have a goal to work towards, and
each feature you add brings more fun. However,
games need libraries and modules for graphics and
other essential games features. While the Pygame
library made it relatively easy to make games in
Python, it still brings in boilerplate code that you need
before you get started – barriers to you or your kids
getting started in coding.
Pygame Zero deals with all of this boilerplate code
for you, aiming to get you coding games instantly. Pg0
(as we’ll abbreviate it) makes sensible assumptions
about what you’ll need for a game – from the size of
the window to importing the game library – so that
you can get straight down to coding your ideas.
Pg0’s creator, Daniel Pope, told us that the
library “grew out of talking to teachers at Pycon
UK’s education track, and trying to understand
that they need to get immediate results and break
lessons into bite-size fragments, in order to keep a
whole class up to speed.”
To give you an idea of what’s involved, we’ll
build up a simple game from a
Pong
-type bat and
ball through to smashing blocks
Breakout
-style.
The project will illustrate what can be done with
very little effort. Pg0 is in early development but
still offers a great start – and is now included on
the Pi in the Raspbian Jessie image. We’ll look at
installation on other platforms, but fi rst let’s see
what magic it can perform.
Pygame Zero cuts out the boilerplate to turn your ideas
into games instantly, and we’ll show you how
Pygame Zero cuts out the boilerplate to turn your ideas Pygame Zero cuts out the boilerplate to turn your ideas
What you’ll need
Q Pygame Zero
pygame-zero.readthedocs.org
Q Pygame
pygame.org
Q Pip
pip-installer.org
Q Python 3.2 or later
python.org
SCORE
0001200
LIVES BREAKOUT

Raspberry Pi Tips, Tricks & Hacks 125
Tips | Tricks | Hacks
01 Zero effort
Although game writing is not easy, getting started
certainly is. If you’ve got Raspbian Jessie installed on your Pi,
you’re ready to go. Open a terminal and type:
touch example.py
pgzrun example.py
And you’ll see an empty game window open (Ctrl+Q will close the
window). Yes, it’s that easy to get started!
04 No Pi?
You don’t even need a Raspberry Pi to install Pygame
Zero – just install the Pygame library, then use pip to install
Pygame Zero. Instructions vary by distro, but a good place to
start is the documentation: bit.ly/1GYznUB.
03 Older Raspbian
If you’re still running Raspbian Wheezy, you’ll need to run
the following steps to install Pygame Zero:
sudo apt-get update
sudo apt-get install python3-setuptools python3-pip
sudo pip-3.2 install pgzero
05 Intro.py
That default black square of 800 by 600 pixels we saw
in Step 1 can be overridden manually. For example, we can
replace it with an oversized gold brick, in a nod to
Breakout
:
WIDTH = 1000
HEIGHT = 100
def draw():
screen.fill((205, 130, 0))
That colour tuple takes RGB values, so you can quickly
get colours off a cheatsheet; screen is built into Pg0 for
the window display, with methods available for all sorts of
different sprites…
02 Python 3
If you haven’t got Raspbian Jessie, chances are you’ll
have neither Pg0 nor Pygame installed. The Python’s pip package
installer will take care of grabbing Pg0 for you, but the preceding
steps vary by distro. One thing you will need is Python 3.2 (or
newer). If you’ve been sticking with Python 2.x in your coding
(perhaps because it’s used in a tutorial you’re following), make
Pg0 your chance for a gentle upgrade to Python 3.
Pygame Zero deals with
all of this boilerplate code
for you, aiming to get you
coding games instantly
Right
Breakout
is
a classic arcade
game that can
be reimagined in
Pygame Zero
In situations where
Pygame is used
boilerplate and all
with young people,
great results can
also be achieved
(see Bryson Payne’s
book), but Pygame
and Pg0, despite
their use as powerful
educational tools,
are also good for
creating games for
coders no matter
what stage of
learning they are at.
Great games are all
about the gameplay,
driven by powerful
imaginations
generating images,
animations, sounds
and journeys
through game
worlds. Good
frameworks open
up this creative
activity to people
who are not
traditional learners
of programming,
which is an area
where Python has
long excelled.
Young
and old
Full code
FileSilo.co.uk
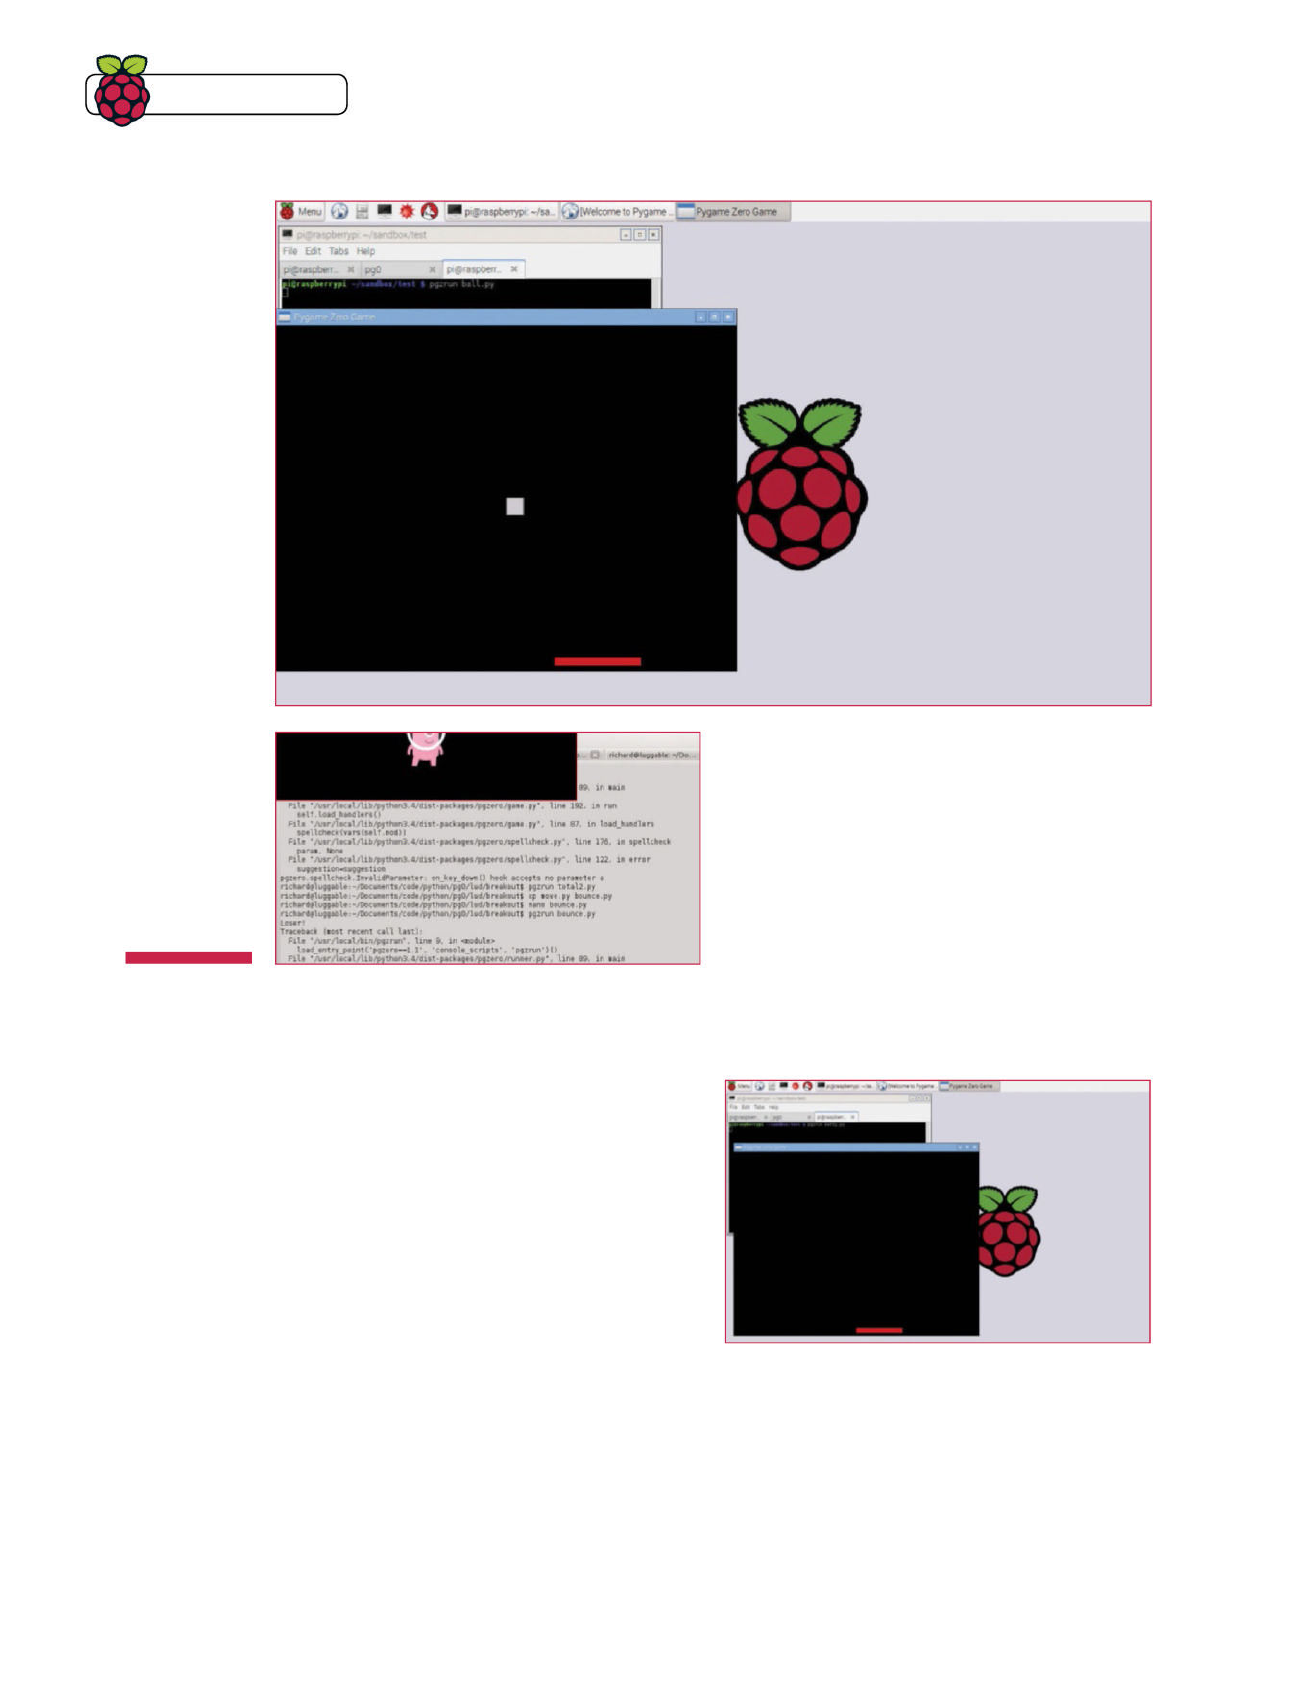
126 Raspberry Pi Tips, Tricks & Hacks
Tips | Tricks | Hacks
09 Mouse move
We want to move the bat, and the mouse is closer to an
arcade paddle than the arrow keys. Add the following:
def on_mouse_move(pos):
x, y = pos
bat.center = (x, bat.center[1])
Use pgzrun to test that you have a screen, bat and movement.
08 Batty
You can think of
Breakout
as essentially being a moving
bat – that is, you’re hitting a moving ball in order to knock out
blocks. The bat is a rectangle, and Pygame’s Rect objects store
and manipulate rectangular areas – we use Rect((left, top),
(width, height)), before which we define the bat colour and then
call upon the draw function to put the bat on the screen, using
the screen function.
W = 800
H = 600
RED = 200, 0, 0
bat = Rect((W/2, 0.96 * H), (150, 15))
def draw():
screen.clear()
screen.draw.filled_rect(bat, RED)
07 Breakout via Pong
While the Pi is something of a tribute to 1980s 8-bit
computers,
Breakout
comes from the 1970s and is a direct
descendant of the early arcade classic
Pong
. We’ll follow the
route from
Pong
to
Breakout
(which historically involved Apple
founders Steve Wozniak and Steve Jobs) in the steps to creating
our code, leaving you with the option of developing the
Pong
elements into a proper game, as well as refining the finished
Breakout
clone.
06 Sprite
The intro example from the Pg0 docs expands on that
with the Actor class, which will automatically load the named
sprite (Pg0 will hunt around for a .jpg or .png in a subdirectory
called images).
alien = Actor(‘alien’)
alien.pos = 100, 56
WIDTH = 500
HEIGHT = alien.height + 20
def draw():
screen.clear()
alien.draw()
You can download the alien from the Pg0 documentation (bit.
ly/1Sm5lM7) and try out the animation shown there, but we’re
taking a different approach in our game.
Right The bat
and ball come
first – they’re the
cornerstones of
Pong
and
Breakout
David Ames, who
uses Pg0 to teach
younger children
to code at events
across the UK, told
us: “One thing to
avoid when it comes
to teaching kids is
Object Orientation.”
OOP (object-oriented
programming) is
partly abstracted
away by Pg0, but it
can’t be ignored.
Perhaps the best
approach is using
Pg0 and some
simple code to start,
then dropping in a
piece of OO when it’s
needed to solve a
particular problem.
With the Code Club
age group – about
eight to eleven –
feeding information
to solve practical
problems works
well. It can work
with adults, too –
but there’s always
someone who’s read
ahead and has a few
tricky questions.
Object
orientation
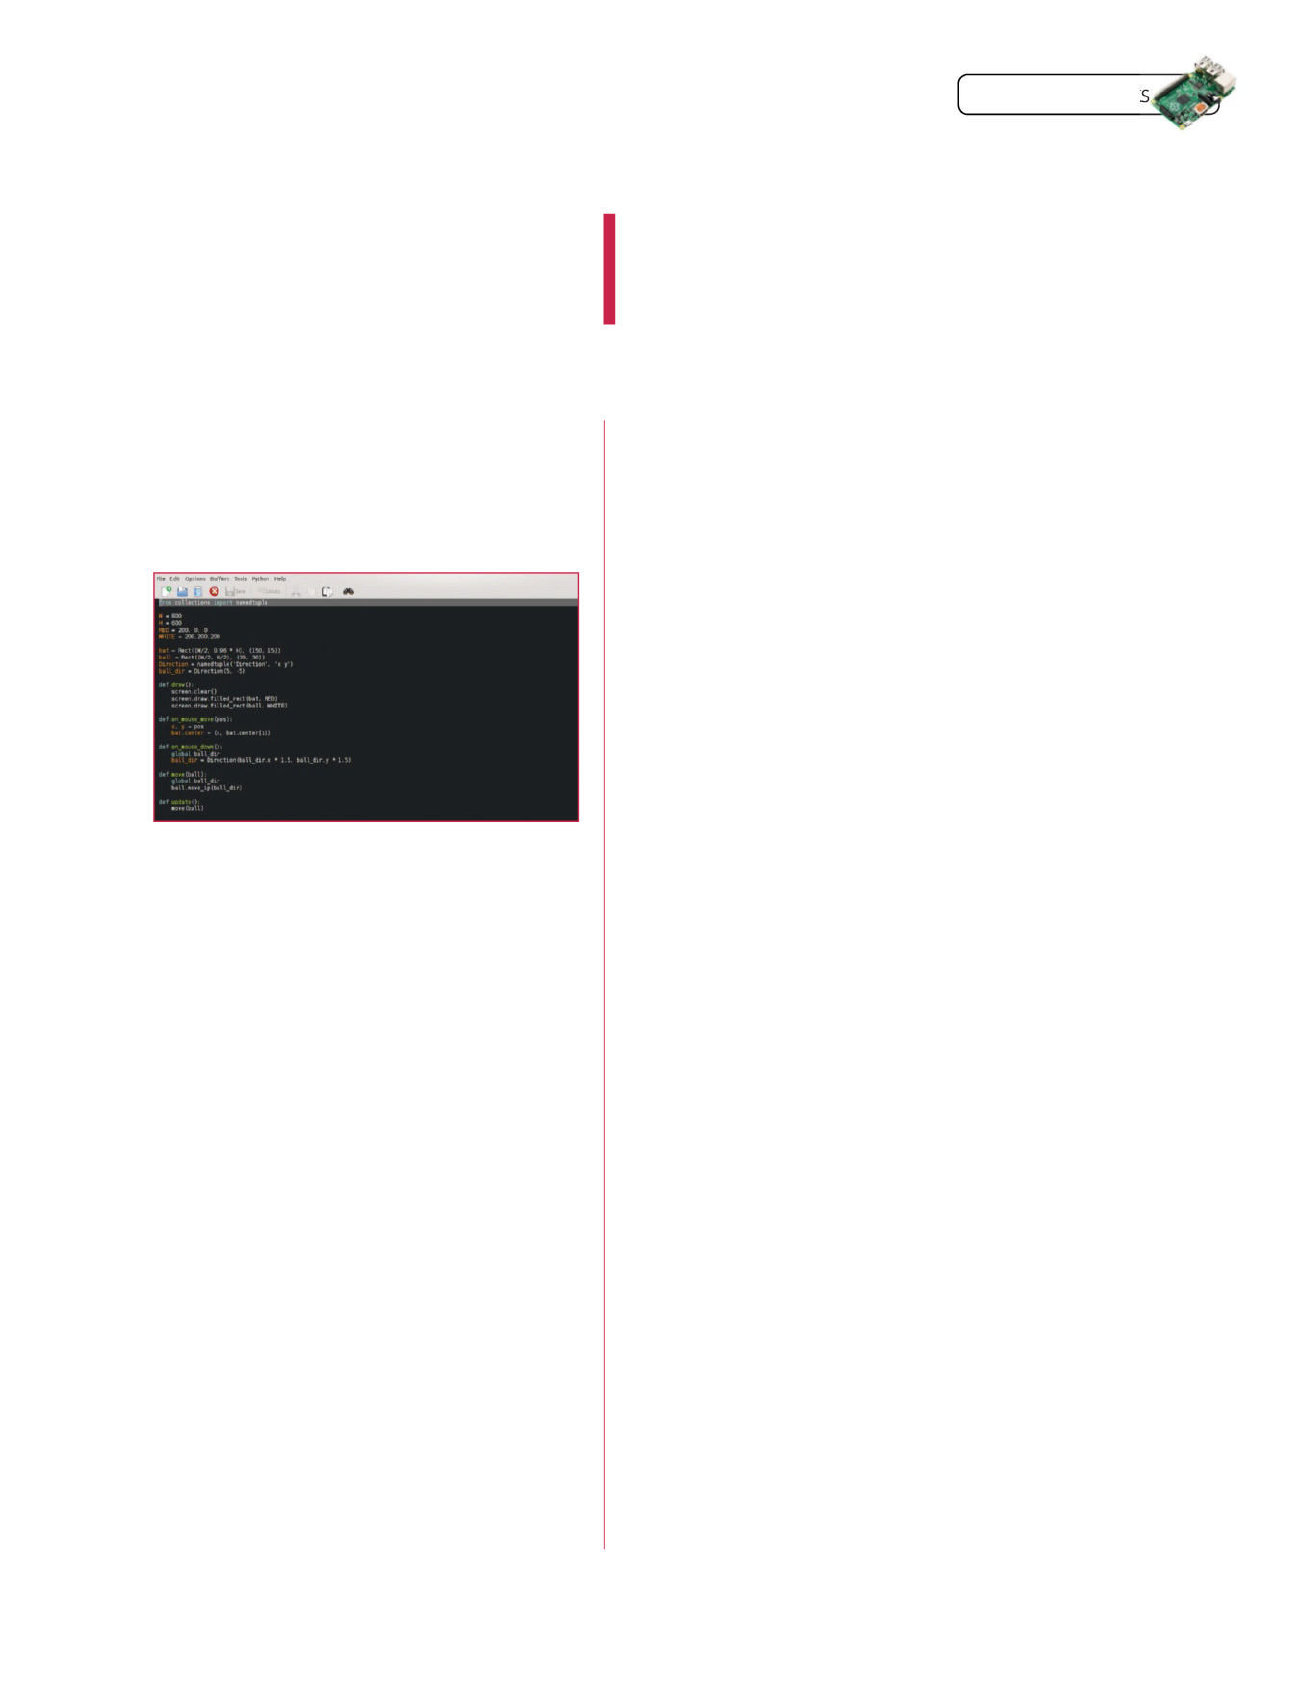
Raspberry Pi Tips, Tricks & Hacks 127
Tips | Tricks | Hacks
10 Square ball
In properly retro graphics-style, we defi ne a square
ball too – another rectangle, essentially, with the (30, 30) size
making it that subset of rectangles that we call a square.
We’re doing this because Rect is another built-in in Pg0. If we
wanted a circular ball, we’d have to defi ne a class and then use
Pygame’s draw.fi lled_circle(pos, radius, (r, g, b)) - but Rect we
can call directly. Simply add:
WHITE = 200,200,200
ball = Rect((W/2, H/2), (30, 30))
… to the initial variable assignments, and:
screen.draw.filled_rect(ball, WHITE)
… to the def draw() block.
12 def move(ball)
To get the ball to move within the screen we need to
defi ne move(ball) for each case where the ball meets a wall. For
this we use if statements to reverse the ball’s direction at each
of the boundaries. Refer to the full code listing on page 67.
Note the hardcoded value of 781 for the width of screen,
minus the width of ball – it’s okay to hardcode values in
early versions of code, but it’s the kind of thing that will need
changing if your project expands. For example, a resizable
screen would need a value of W - 30.
13 Absolute values
You might expect multiplying y by minus one to work for
reversing the direction of the ball when it hits the bat:
ball_dir = Direction(ball_dir.x, -1 * ball_dir.y)
… but you actually need to use abs, which removes any minus
signs, then minus:
ball_dir = Direction(ball_dir.x, - abs(ball_dir.y))
Try it without in the fi nished code and see if you get some
strange behaviour. Your homework is to work out why.
11 Action!
Now let’s make the ball move. Download the tutorial
resources in FileSilo.co.uk and then add the code inside the
‘move.py’ fi le to assign movement and velocity. Change the 5 in
ball_dir = Direction(5, -5) if you want the ball slower or faster,
as your processor (and dexterity) demands – but it’s hard to
tell now because the ball goes straight off the screen! Pg0 will
call the update() function you defi ne once per frame, giving the
illusion of smooth(ish) scrolling if you’re not running much else.
## Breakout type game to demonstrate Pygame Zero library
## Based originally upon Tim Viner’s London Python Dojo
## demonstration
## Licensed under MIT License - see file COPYING
from collections import namedtuple
import pygame
import sys
import time
W = 804
H = 600
RED = 200, 0, 0
WHITE = 200,200,200
GOLD = 205,145,0
ball = Rect((W/2, H/2), (30, 30))
Direction = namedtuple(‘Direction’, ‘x y’)
ball_dir = Direction(5, -5)
bat = Rect((W/2, 0.96 * H), (120, 15))
class Block(Rect):
def __init__(self, colour, rect):
Rect.__init__(self, rect)
self.colour = colour
blocks = []
for n_block in range(24):
block = Block(GOLD, ((((n_block % 8)* 100) + 2, ((n_block //
8) * 25) + 2), (96, 23)))
blocks.append(block)
def draw_blocks():
for block in blocks:
screen.draw.filled_rect(block, block.colour)
def draw():
screen.clear()
screen.draw.filled_rect(ball, WHITE)
screen.draw.filled_rect(bat, RED)
draw_blocks()
def on_mouse_move(pos):
x, y = pos
bat.center = (x, bat.center[1])
def on_mouse_down():
global ball_dir
ball_dir = Direction(ball_dir.x * 1.5, ball_dir.y * 1.5)
Full code listing
To get the ball to move we need to
defi ne move(ball) for each case where
the ball meets a wall
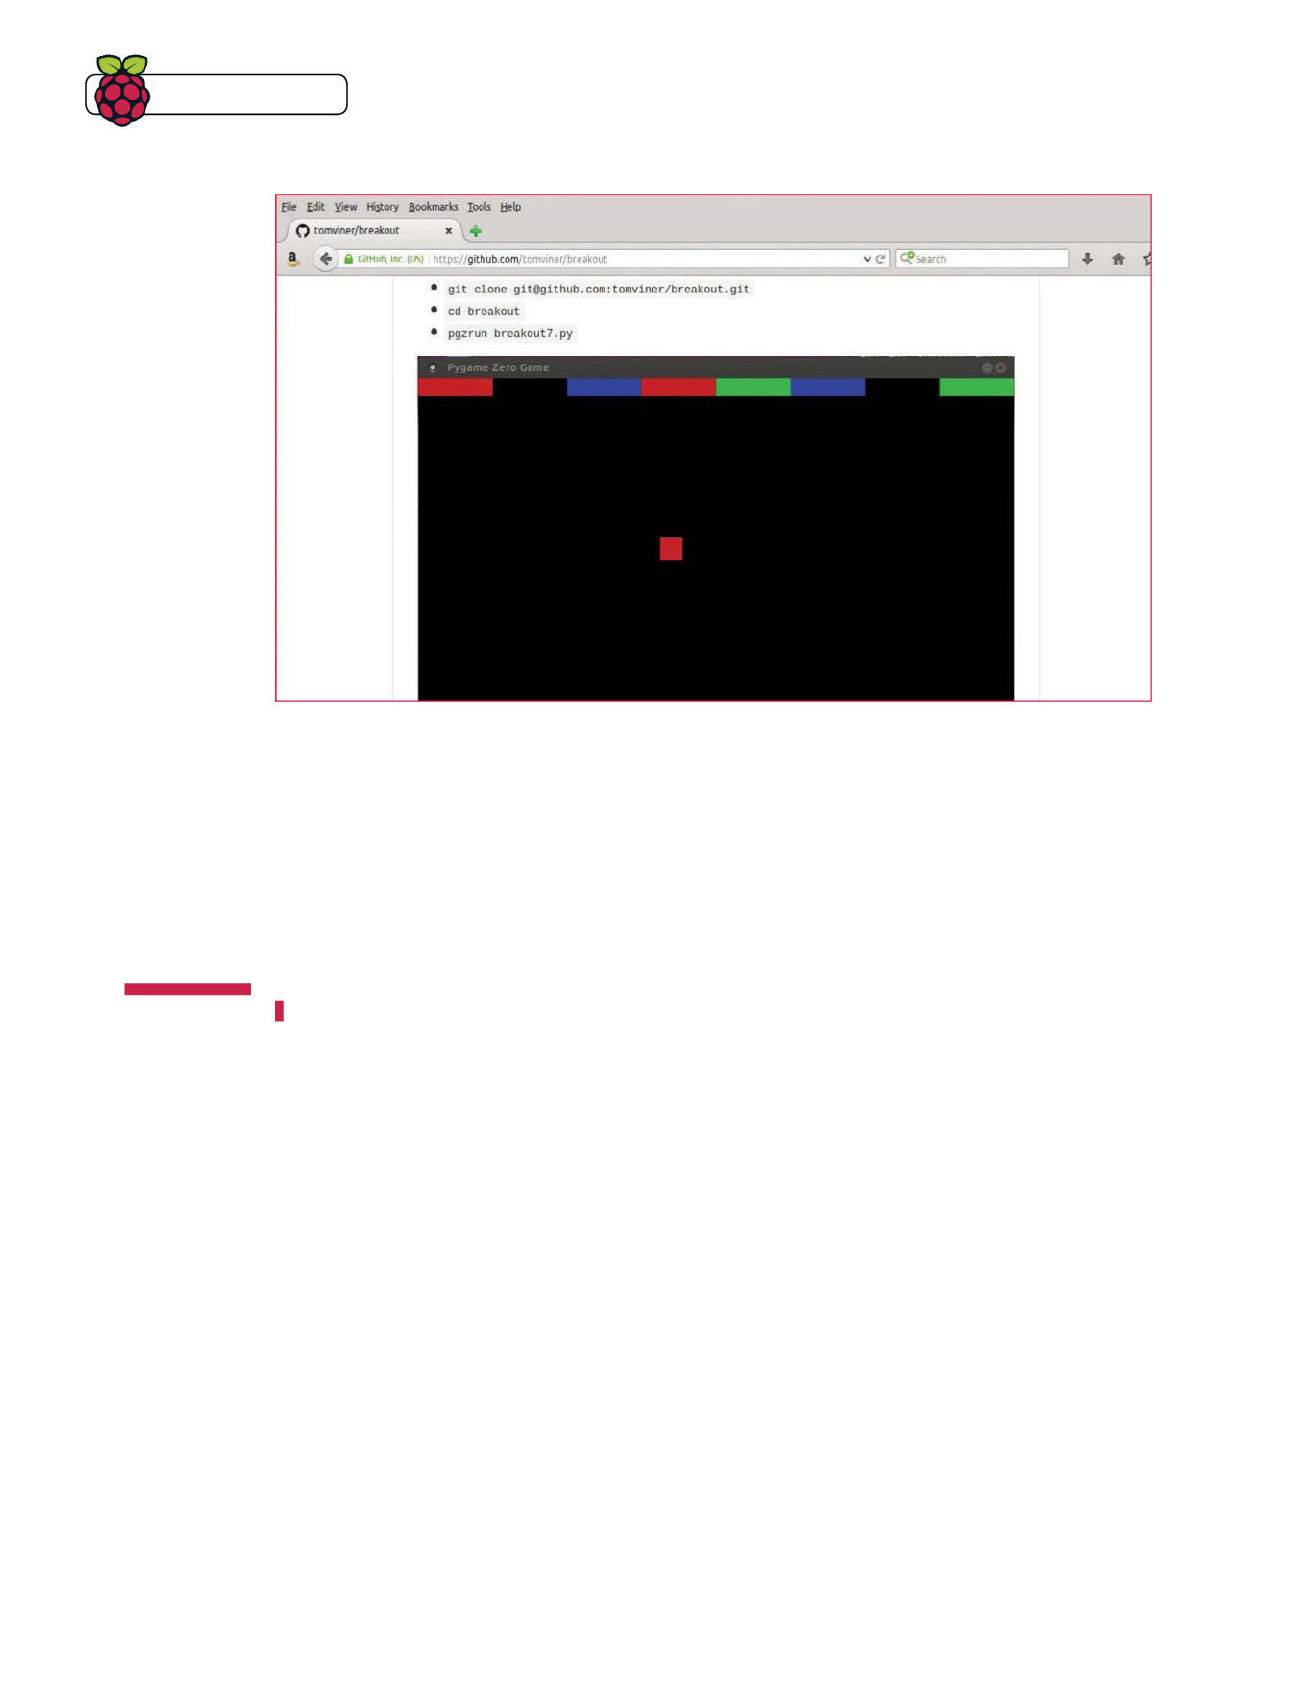
128 Raspberry Pi Tips, Tricks & Hacks
Tips | Tricks | Hacks
19 Drawing blocks
Draw_blocks() is added to def draw() after defining:
def draw_blocks():
for block in blocks:
screen.draw.filled_rect(block, block.colour)
20 Block bashing
All that remains with the blocks is to expand def
move(ball) – to destroy a block when the ball hits it.
to_kill = ball.collidelist(blocks)
if to_kill >= 0:
sounds.block.play()
ball_dir = Direction(ball_dir.x, abs(ball_dir.y))
blocks.pop(to_kill)
17 Going for gold
Create a Block class:
class Block(Rect):
def __init__(self, colour, rect):
Rect.__init__(self, rect)
self.colour = colour
… and pick a nice colour for your blocks:
GOLD = 205,145,0
18 Line up the blocks
This builds an array of 24 blocks, three rows of eight:
blocks = []
for n_block in range(24):
block = Bl o ck(G O LD, ((((n _ bl o c k % 8)* 100) + 2,
((n_block // 8) * 25) + 2), (96, 23)))
blocks.append(block)
16 Building blocks
There are many ways of defining blocks and distributing
them onto the screen. In Tom Viner’s team’s version, from
the London Python Dojo – which was the code that originally
inspired this author to give this a go – the blocks are sized in
relation to number across the screen, thus:
N_BLOCKS = 8
BLOCK_W = W / N_BLOCKS
BLOCK_H = BLOCK_W / 4
BLOCK_COLOURS = RED, GREEN, BLUE
Using multicoloured blocks which are then built into an
array means that blocks can join without needing a border.
With its defining variables in terms of screen width, it’s good
sustainable code, which will be easy to amend for different
screen sizes – see github.com/tomviner/breakout.
However, the array of colour bricks in a single row is not
enough for a full game screen, so we’re going to build our array
from hard-coded values…
15 Blockhead!
If you’re not very familiar with the ancient computer
game
Breakout
, then:
apt-get install lbreakout2
… and have a play. Now, we haven’t set our sights on building
something quite so ambitious in just these six pages, but we
do need blocks.
14 Sounds
Also upon bat collision, sounds.blip.play() looks in
the sounds subdirectory for a sound file called blip. You can
download the sounds (and finished code) from FileSilo.co.uk.
Actually, now we think about it, ignore the previous
comment about homework – your real homework is to turn
what we’ve written so far into a proper game of
Pong
! But first
let’s finish turning it into
Breakout
!
Right Tom Viner’s
array of blocks
negates the need for
bordered rectangles
There’s a new
version of Pg0 in
development – it
may even be out
as you read this.
Pg0 creator Daniel
Pope tells us “a tone
generation API is in
the works,” and that
at the Pg0 PyConUK
sprint, “we finished
Actor rotation.”
Contributions are
welcome – not only
to the Pg0 code, but
more examples are
needed not just to
show what can be
done, but to give
teachers tools to
enthuse children
about the creative
act of programming.
Pg0 has also inspired
GPIO Zero, to make
GPIO programming
easier on the
Raspberry Pi, with
rapid development
occurring on this
new library as we go
to press.
Pg0 +1
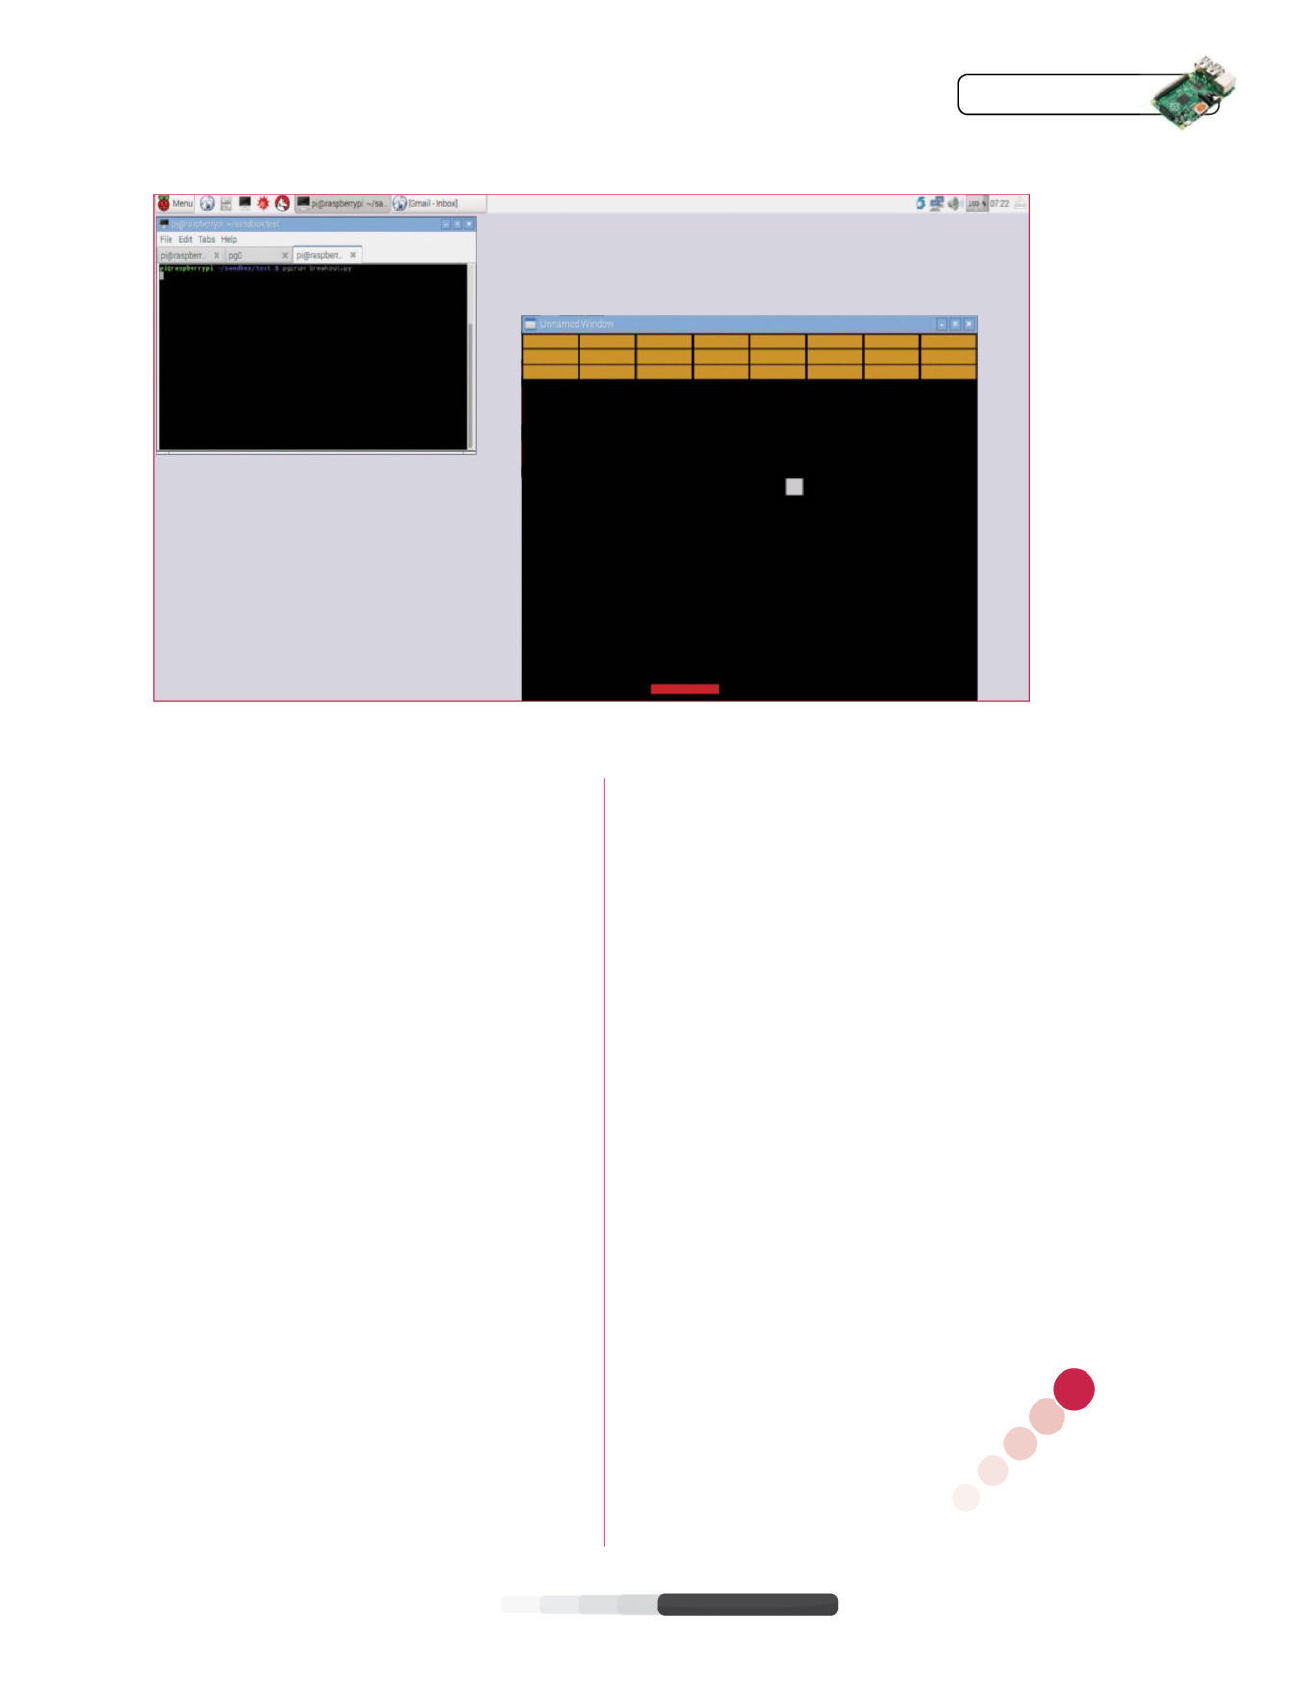
Raspberry Pi Tips, Tricks & Hacks 129
Tips | Tricks | Hacks
22 Score draw
Taking advantage of some of Pygame Zero’s quickstart
features, we’ve a working game in around 60 lines of code.
From here, there’s more Pg0 to explore, but a look into Pygame
unmediated by the Pg0 wrapper is your next step but one.
First refactor the code; there’s plenty of room for
improvement – see the example ‘breakout-refactored.
py’ in your tutorial resources. Try adding scoring, the most
signifi cant absence in the game. You could try using a global
variable and writing the score to the terminal with print(), or
instead use screen.blit to put it on the game screen. Future
versions of Pg0 might do more for easy score keeping.
23 Class of nine lives
For adding lives, more layers, and an easier life-
keeping score, you may be better defi ning the class
GameClass and enclosing much of the changes you wish to
persist within it, such as self.score and self.level. You’ll fi nd a
lot of Pygame code online doing this, but you can also fi nd Pg0
examples, such as the excellent pi_lander example by Tim
Martin: github.com/timboe/pi_lander.
21 Game over
Lastly, we need to allow for the possibility of
successfully destroying all blocks.
if not blocks:
sounds.win.play()
sounds.win.play()
print(“Winner!”)
time.sleep(1)
sys.exit()
24 Don’t stop here
This piece is aimed at beginners, so don’t expect to
understand everything! Change the code and see what works,
borrow code from elsewhere to add in, and read even more
code. Keep doing that, then try a project of your own – and let
us know how you get on.
def move(ball):
global ball_dir
ball.move_ip(ball_dir)
if ball.x > 781 or ball.x <= 0:
ball_dir = Direction(-1 * ball_dir.x, ball_dir.y)
if ball.y <= 0:
ball_dir = Direction(ball_dir.x, abs(ball_dir.y))
if ball.colliderect(bat):
sounds.blip.play()
ball_dir = Direction(ball_dir.x, - abs(ball_dir.y))
to_kill = ball.collidelist(blocks)
if to_kill >= 0:
sounds.block.play()
ball_dir = Direction(ball_dir.x, abs(ball_dir.y))
blocks.pop(to_kill)
if not blocks:
sounds.win.play()
sounds.win.play()
print(“Winner!”)
time.sleep(1)
sys.exit()
if ball.y > H:
sounds.die.play()
print(“Loser!”)
time.sleep(1)
sys.exit()
def update():
move(ball)
Full code listing (co nt.)
Left Test your game
once it’s fi nished
– then test other
people’s
Breakout
games to see how
the code differs
132 Build a Raspberry
Pi-controlled car
138 Raspberry Pi car computer 144
138
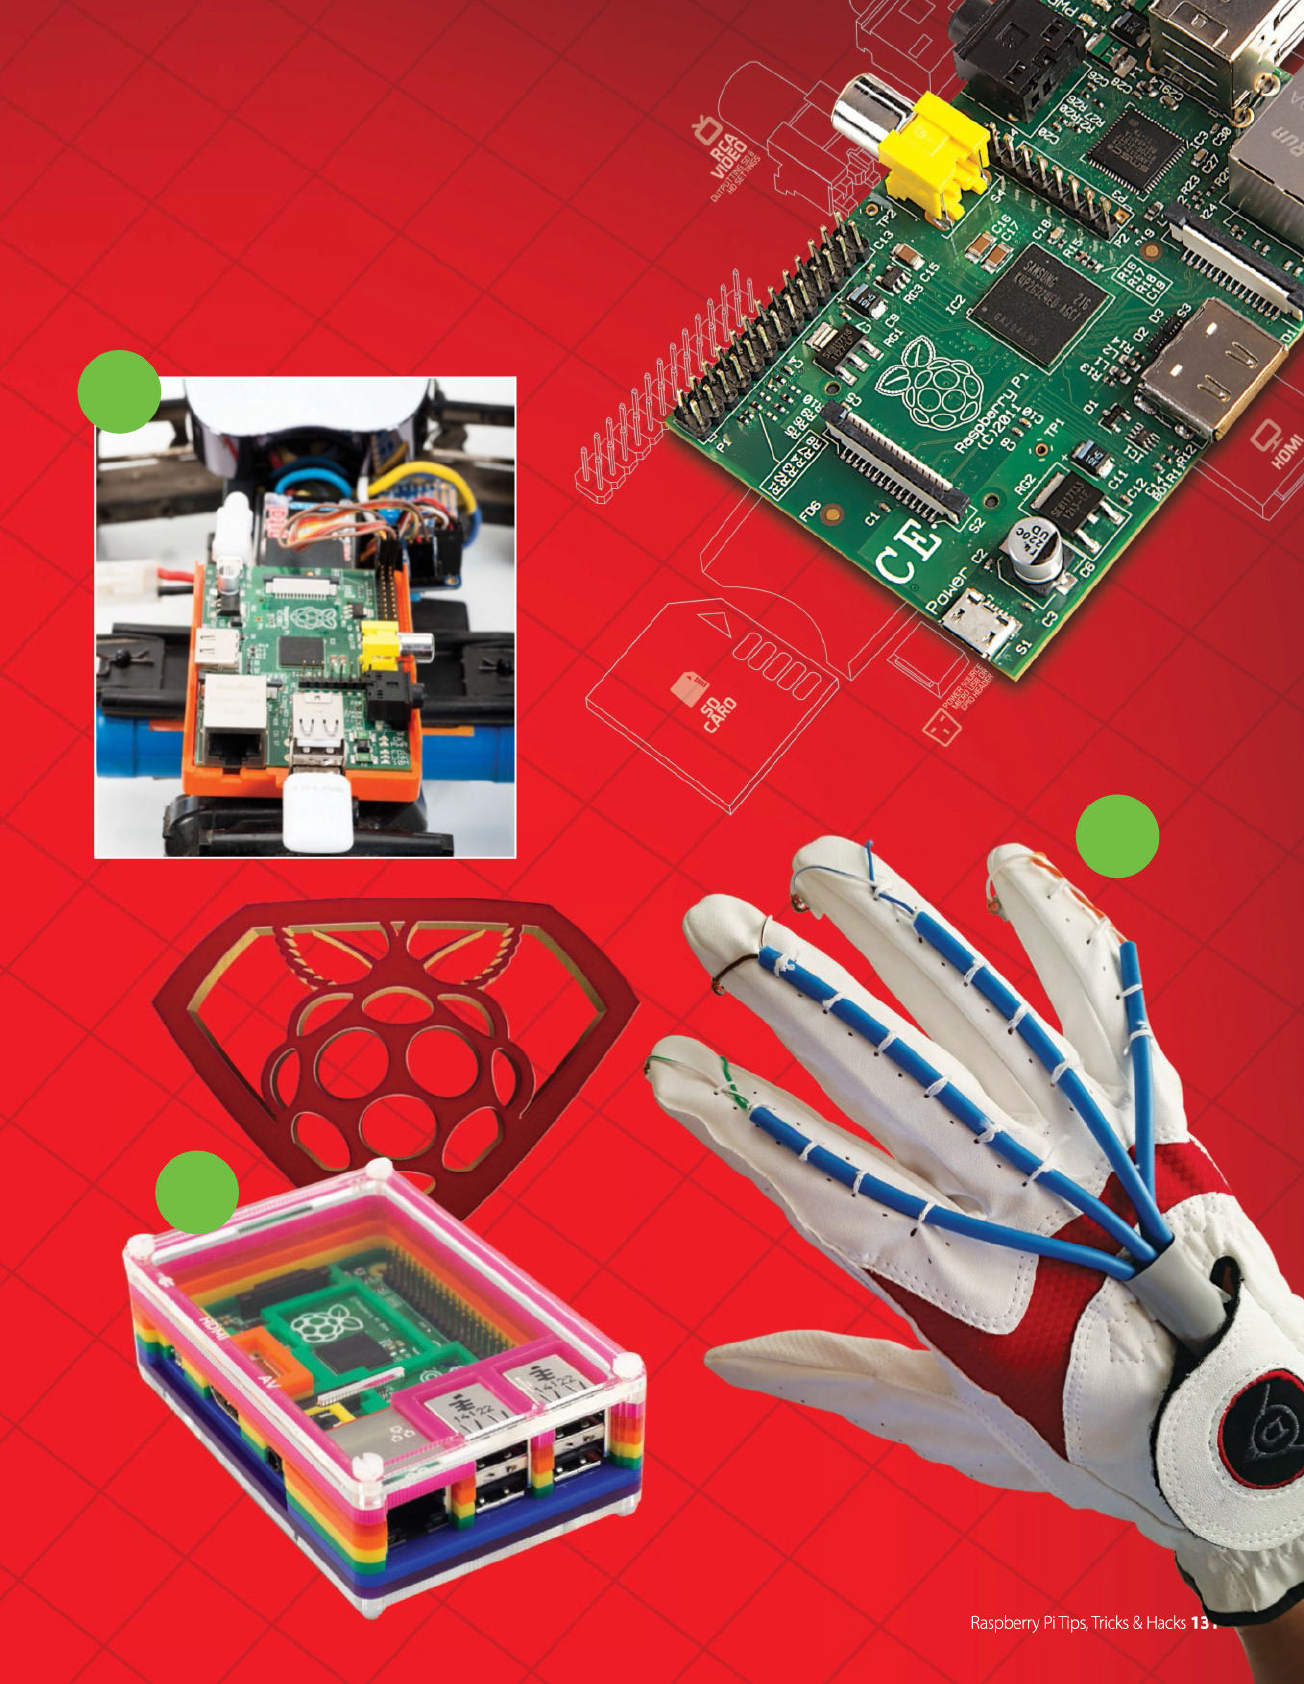
“Learn about the
technologies that are
starting to power the
world’s newest and
biggest economy”
150
132
146
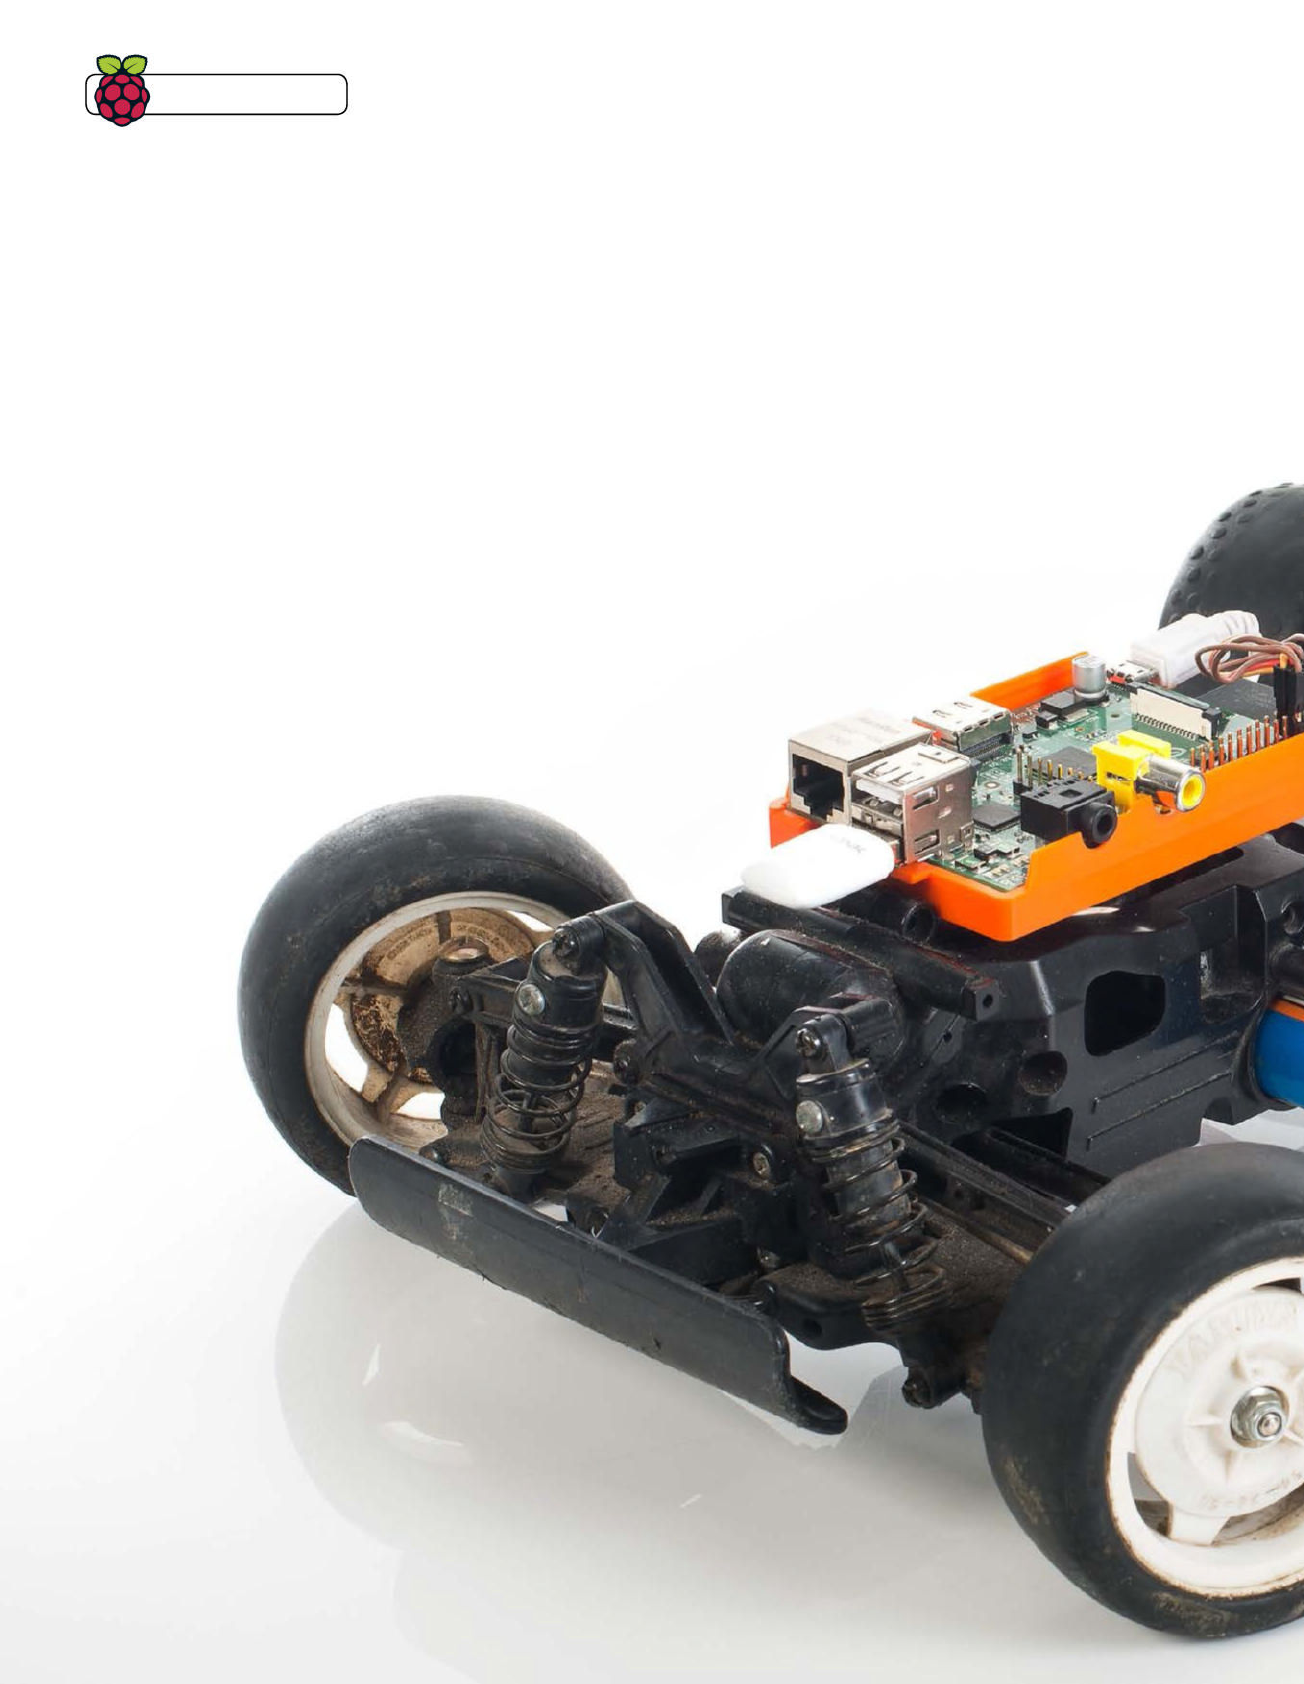
Build a Raspberry
Pi-controlled car
Make use of cutting-edge web technologies to take control of a
remote controlled car with a smartphone or tablet…
Tips | Tricks | Hacks
132 Raspberry Pi Tips, Tricks & Hacks

Web technologies are moving forward at a huge pace, cloud
technologies are bringing mass computing to individuals,
and hardware has reached a perfect moment in time where
sensors, displays and wireless technology have all evolved
into effi cient and affordable devices. We truly are at a point
where nearly anyone can take an idea from nothing to a working
product in a week and at very little cost. Just like this project,
which is fun, quick and easy to build on and a fantastic way to
learn. We’re going to grab an old remote-control car, rip off its
radio receiver and replace it with the Raspberry Pi, hook it up on
the network, fi re up a bleeding-edge web server and then get
your smartphone or tablet to control it by tilting the device. By
the end of this, not only will you have a fun toy – you will have
learnt about the basic technologies that are starting to power
the world’s newest and biggest economy for the foreseeable
future. Welcome to tomorrow!
Tips | Tricks | Hacks
Raspberry Pi Tips, Tricks & Hacks 133
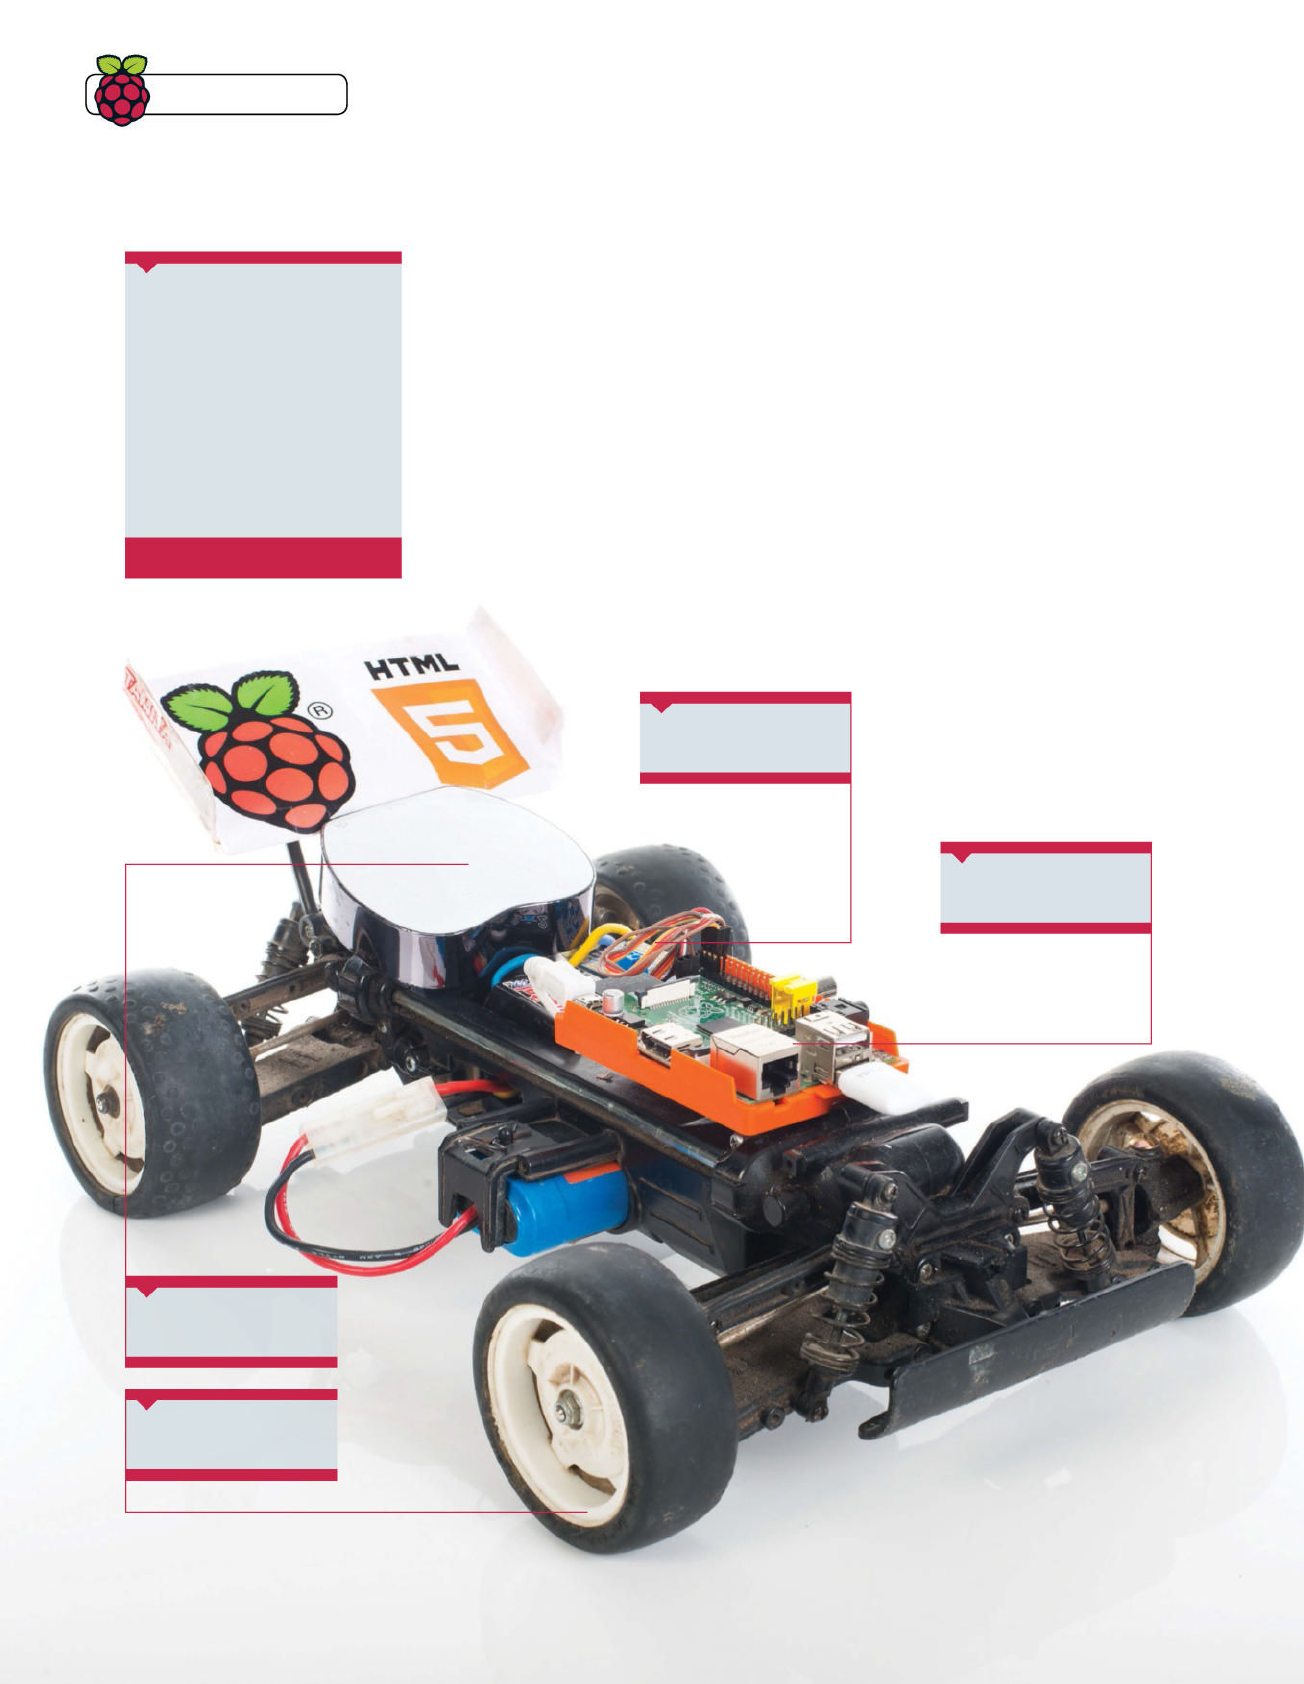
Tips | Tricks | Hacks
Components list
Q A toy RC car with two
channels (steering and drive)
Q Adafruit PWM I2C servo
driver
Q Female-to-female jumper
cables
Q 5V battery power bank
Components from
www.modmypi.com
Estimated cost: £60 / $100
Before you can take control of your car with a smartphone,
you’ll need to make some signifi cant changes to the chassis
Raspberry Pi-controlled car build process
To help our toy car come to life using
the latest web technologies and our
credit card-sized computer, we’re
going to need to make some pretty
signifi cant changes to its workings.
Fortunately, the most complex aspects
of the build can be accomplished with a
couple of affordable purchases, namely
a servo controller board to take care
of the steering and throttle, and a 5V
battery pack to keep the Raspberry Pi
running smoothly.
01 Identify and remove old radio
This project is effectively replacing the car’s normal
transmitter and receiver. Notice the three sockets on the original
receiver: one goes to the motor controller and one to the steering
servo. Some remote-control cars also have separate battery for
the electronics, but those (especially with an electronic speed
controller with BEC) get their 5V power supply directly from
the speed controller, saving on components. If you don’t have
a speed controller with 5V BEC, you’ll need to get a 5V supply
elsewhere. Many shops sell 5V battery power supplies – often as
mobile phone emergency top-ups. www.modmypi.com sells a
suitable 5V battery power bank for under £20.
Servo control We’ve used
the Adafruit PWM I2C servo driver
board from www.modmypi.com
Pi-powered The Raspberry
Pi sits front and centre to keep it
as safe as possible
Power up This 5V battery
pack keeps our Raspberry Pi
running for a good few hours
Pick a car You can use
pretty much any affordable
car for this project
134 Raspberry Pi Tips, Tricks & Hacks
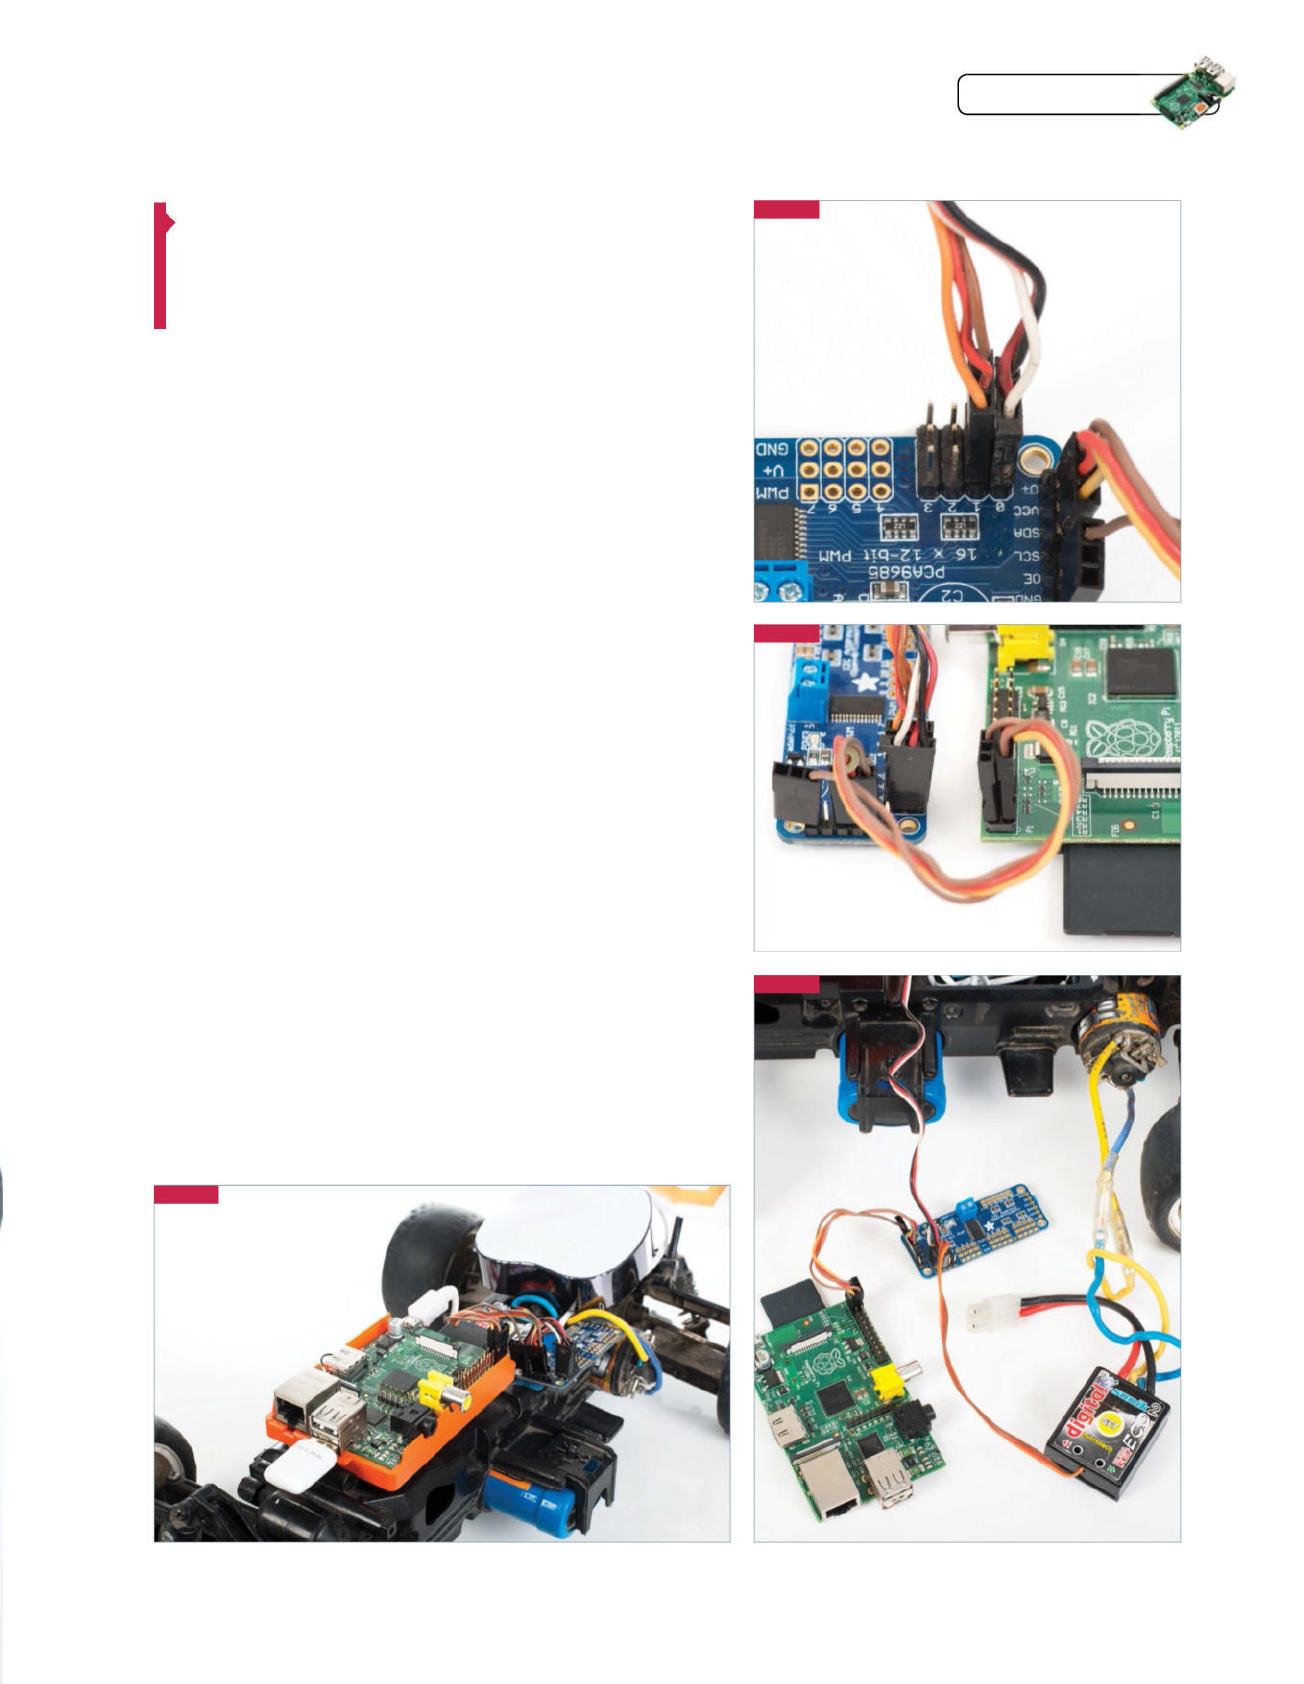
Raspberry Pi Tips, Tricks & Hacks 135
Tips | Tricks | Hacks
We’re using the Raspberry Pi’s
I2C bus to control the servo
interface board
02 Attach the servo cables to
the new controller
We soldered our 16-channel I2C servo
controller board from www.modmypi.com
as per its instructions and simply plugged
channel 0 (steering) and channel 1 (motor)
headers onto it. There are six cables in
total: the bottom two are ground, the
middle two are the power and the top two
are the PWM (pulse-width modulation)
signals. This is a good time to think of
places to mount the extra components
and the best fi xing method seems to be
sticky-back Velcro.
03 Connect the I2C bus to the
Raspberry Pi
We’re using the Raspberry Pi’s I2C bus
to control the servo interface board,
which only needs four cables – they all go
between the Raspberry Pi and the servo
controller board as pictured. This month’s
accelerometer tutorial explains how to set
up I2C on the Raspberry Pi.
From top to bottom we need to use the
1. GND, 2. SCL, 3. SDA and 4. VCC, which
map directly to the same ports on the
Raspberry Pi. Essentially this is power,
ground and two communication channels
– it’s all pretty straightforward so far…
04 Hooking it up to the
Raspberry Pi
On a Rev 1 Raspberry Pi, the cables look
the same. Though the Rev boards have
different labelling, the physical pins are
in the same place. Bottom left (closest
to the RasPi power connector) is the 3.3V
power; next to that is the SDA header,
05 Overview of the main
components
You should now have the servo board in
the middle with the steering servo and
speed controller on one side and the
Raspberry Pi on the other. The motor is
connected to the other end of the speed
controller (that end should have much
thicker wires); the speed controller
also has two thick wires going to the
main car’s battery – in this case a 7.2V
NiCad. We now have two very separate
power systems with the high current
motors on one side and the low current
electronics on the other. Let’s make
sure it stays that way!
06 Find everything a home
Now it’s time to fi nd a home
for the new components. Use plenty of
sticky-back Velcro, tie wraps or elastic
bands to keep everything secure and
fi nd spaces in the car’s body to hide the
wires where possible. While it is possible
to stick or screw the Raspberry Pi directly
to the car, we recommend to use at least
the bottom half of a case for added
protection and ease of access. Insert your
SD card, network cable or Wi-Fi dongle (if
programming from another machine) and
power supply. Sit back and admire your
hacking. Next we’ll tackle the software
side of the project…
which is the data channel. Next to that
in the bottom right is the SCL channel,
which controls the clock of the I2C
devices. And fi nally – on the top-right port
– is the Ground.
Step 02
Step 03
Step 05
Step 06
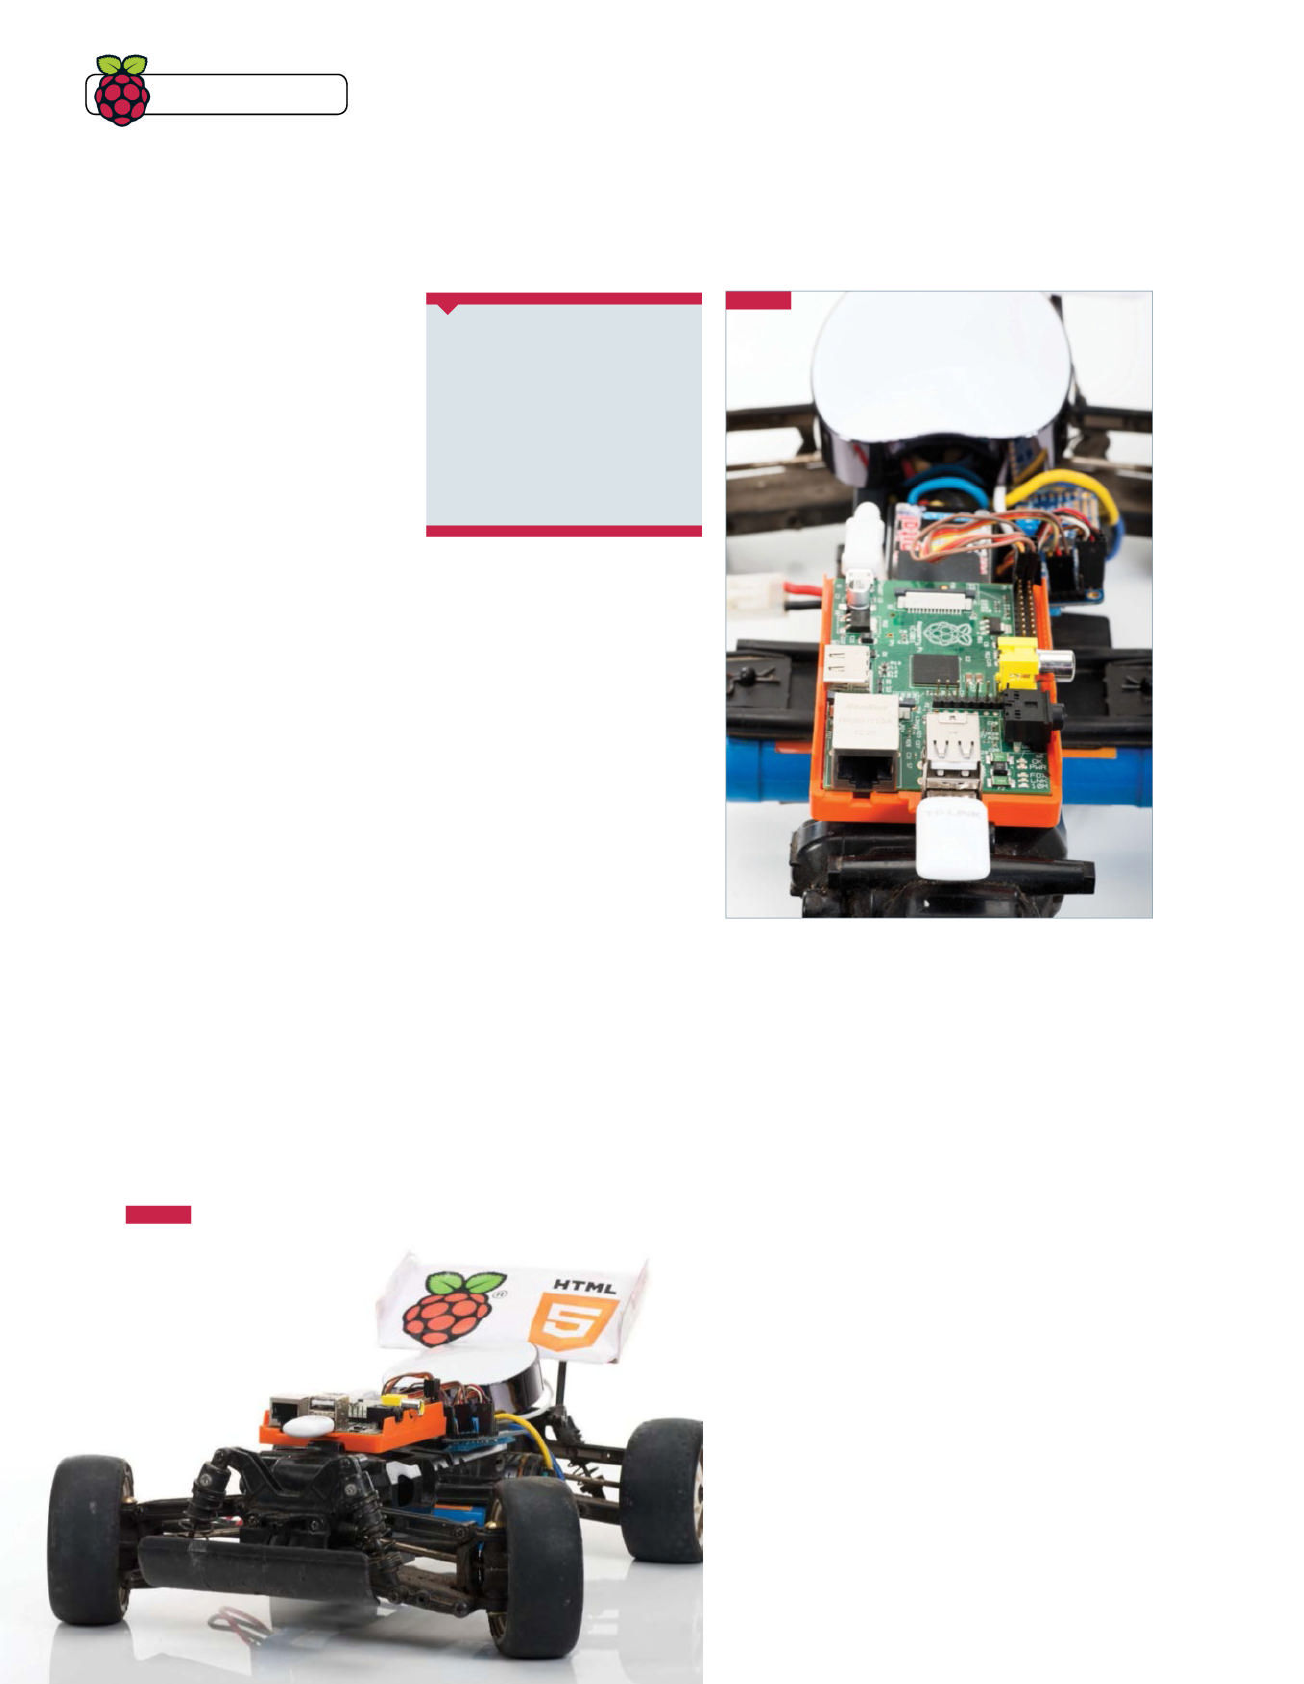
Tips | Tricks | Hacks
What you’ll need
Q A RasPi car, ready to go
Q An internet connection
Q A reasonably modern
smartphone/tablet
Q Pi car source code
github.com/shaunuk/picar
Control a toy car with a smartphone and the latest web technologies
Controlling your Raspberry Pi-powered car
Now we have our fantastic Raspberry
Pi-powered car all wired and charged,
it’s time to make it come alive. We’re
using the best web technologies
that the JavaScript programming
language offers, to harness the natural
movement of your hand and wirelessly
drive the vehicle. Each little movement
will trigger an event that calculates
what the car should do and then sends
it over a socket connection up to 20
times a second.
01 Download and install
the software
To get the I2C connectivity working,
you can follow the steps from pages
64-65. Next we’ll need to fi nd a home
for our new project code – how about /
var/www/picar? Type sudo mkdir /
var/www/picar in the terminal to make
the directory and then change into that
directory: cd /var/www/picar.
Now, to download the project using
Git, type sudo git clone http://
github.com/shaunuk/picar
. If you
haven’t got Git, install it with sudo apt-
get install git.
This will download the custom
software for driving the car, but we still
need the web server and some other bits
before we can start burning rubber…
02 Download and install
Node.js
We now need to get the awesome Node.
js and its package tool, the Node package
manager (npm). Type sudo wget http://
nodejs.org/dist/v0.10.21/node-
v0.10.21-linux-arm-pi.tar.gz. This
will download a fairly recent version of
Node.js – the version Raspbian has in
its repositories is way too old and just
03 Confi gure Node.js
To make it easy to run from
everywhere, we will create symbolic
links for Node and npm binaries. In the
terminal, type sudo ln -s /var/www/
node-v0.10.21-linux-arm-pi/bin/
node /bin/node and then sudo ln
-s /var/www/node-v0.10.21-linux-
arm-pi/bin/npm /bin/npm. Then,
to get the extra modules, type npm
install socket.io node-static
socket.io adafruit-i2c-pwm-driver
sleep optimist
04 Get to know the project
Now we have everything, you
should see three fi les: the server (app.js),
the client (socket.html) and the jQuery
JavaScript library for the client. The
server not only drives the servos, but it
is a web server and sends the socket.
html fi le and jQuery to the browser when
requested – it’s a really neat and simple
setup and just right for what we’re trying
to achieve.
05 Test the servos
Our handy little program (app.js) has a special mode
just for testing. We use two keywords here: beta for servo 0
(steering) and gamma for servo 1 (motor control). Type node
app.js beta=300. You should see the front wheels turn. Now the
numbers need experimenting with. On our example, 340 was left,
400 was centre and 470 was right. Do the same for the motor by
typing node app.js gamma=400 and take note of the various
limits of your car.
06 Confi gure sensible defaults
Now you know what your car is capable of, we
can set the defaults in app.js and socket.html. Edit app.js
and fi nd the section that says ‘function emergencyStop’.
Adjust the two numbers to your car’s rest values. Then open
socket.html and adjust the predefi ned values under ‘Defi ne
your variables here’.
07 Going for a spin
We’re almost ready to try it out, but you need to know the
IP address of your Pi car, so type ifconfig at the terminal. Then
fi re up the app by typing node app.js. Now grab the nearest
smartphone or tablet, making sure it’s on the same network
as your Pi. Open the web browser and go to http://[your IP
address]:8080/socket.html. You should get an alert message
saying ‘ready’ and as soon as you hit OK, the gyro data from your
phone will be sent to the car and you’re off!
Above You need to adjust some of the variables to control your
particular remote controlled car set-up
doesn’t work with the new technologies
we’re about to use. Extract the node
package by typing sudo tar -xvzf
node-v0.10.21-linux-arm-pi.tar.gz.
Step 05
Step 07 Below All you need to fi nish off your project is
access to a smartphone or tablet

Raspberry Pi Tips, Tricks & Hacks 137
Tips | Tricks | Hacks
socket.html
<html>
<head>
<script src=”jquery-2.0.3.min.js” language=”javascript”></
script>
<script src=”/socket.io/socket.io.js”></script>
<meta name=”viewport” content=”user-scalable=no, initial-
scale=1.0, maximum-scale=1.0;” />
<script>
//------ Define your variables here
var socket = io.connect(window.location.hostname+’:8080’);
var centerbeta = 400; //where is the middle?
var minbeta = ‘34 0’; //right limit
var maxbeta = ‘470’; //l e ft lim it
var multbeta = 3; //factor to multiply the raw gyro figure
by to get the desired range of steering
var centergamma = 330;
var ajustmentgamma = 70; //what do we do to the angle to get
to 0?
var mingamma = 250; //backwards limit
var maxgamma = 400; //forward limit
var multgamma = 1; //factor to multiply the raw gyro figure
by to get the desired rate of acceleration
window.la stbeta =’0’;
window.la stg a m m a =’0’;
$(function(){
window.gyro = ‘rea d y’;
alert(‘Ready -- Lets race !’);
});
window.ondeviceorientation = function(event) {
beta = centerbeta+(Math.round(event.beta*-1)*multbeta);
if (beta >= maxbeta) {
beta=maxbeta;
}
if (beta <= minbeta) {
beta=minbeta;
}
gamma = event.gamma;
gamma = ((Math.round(event.gamma)+ajustmentgamma)*
multgamma)+ centergamma;
//stop sending the same command more than once
send = ‘N’;
if (window.lastbeta != beta) { send = ‘Y’ }
if (window.lastgamma != gamma) { send = ‘Y’ }
window.la stbeta = beta;
window.lastgamma=gamma;
if (window.gyro == ‘ready’ && send==’Y’) { //don’t send
another command until ready...
window.gyro = ‘notready’;
socket.emit(‘fro mclient’, { beta: beta, gamma: gamma } );
window.gyro = ‘rea d y’; }}
app.js
//declare required modules
var app = require(‘http’).createServer(handler)
, io = require(‘s o c ket.io’).l i s t e n (a p p)
, fs = require(‘fs’)
, static = require(‘node-static’)
, sys = require(‘sys’)
, PwmDriver = require(
‘a dafr uit-i2c-p w m -d river’)
, sleep = require(‘sleep’)
, argv = require(‘o ptimist’).a r g v;
app.listen(8080);
//set the address and device name of the
breakout board
pwm = new PwmDriver(0x40,’/ d e v / i 2 c - 0 ’ );
//set pulse widths
setServoPulse = function(channel, pulse) {
var pulseLength;
pulseLength = 1000000;
pulseLength /= 60;
print(“%d us per period” % pulseLength);
pulseLength /= 4096;
print(“%d us per bit” % pulseLength);
pulse *= 1000;
pulse /= pulseLength;
return pwm.setPWM(channel, 0, pulse);
};
//set pulse frequency
pwm.setPWMFreq(60);
//Make a web server on port 8080
var file = new(static.Server)();
function handler(request, response) {
console.log(‘ser ving file’,re q u est.url)
file.serve(request, response);
};
console.log(‘Pi Car we server listening on port 8080 visit
http://ipaddress:8080/socket.html’);
lastAction = “”;
function emergencyStop(){
pwm.setPWM(0, 0, 400); //center front wheels
pwm.setPWM(1, 0, 330); //s t o p m o to r
console.log(‘###EMERGENCY STOP - signal lost or shutting
down’);
}
if (argv.beta) {
console.log(“\nPerforming one off servo position move
to: “+argv.beta);
pwm.setPWM(0, 0, argv.beta); //using direct i2c pwm module
pwm.stop();
return process.exit();
}
if (argv.gamma) {
console.log(“\nPerforming one off servo position move
to: “+argv.gamma);
pwm.setPWM(1, 0, argv.gamma); //using direct i2c pwm module
pwm.stop();
return process.exit();
}
//fire up a web socket server
io.sockets.on(‘co nnectio n’, function (socket) {
socket.on(‘fromclient’, function (data) {
console.log(“Beta: “+data.beta+” Gamma: “+data.gamma);
//exec(“echo ‘sa “+data+”’ > /dev/ttyAMA0”, puts); //using
http://electronics.chroma.se/rpisb.php
//exec(“picar.py 0 “+data.beta, puts); //using python
adafruit module
pwm.setPWM(0, 0, data.beta); //using direct i2c pwm module
pwm.setPWM(1, 0, data.gamma); //using direct i2c pwm module
clearInterval(lastAction); //stop emergency stop timer
lastAction = setInterval(emergencyStop,1000); //s e t
emergency stop timer for 1 second
});
});
process.on(‘SIGINT’, function() {
emergencyStop();
console.log(“\nGracefully shutting down from SIGINT
(Ctrl-C)”);
pwm.stop();
return process.exit();
});
We’ll harness the natural movement of your
hand and wirelessly drive the vehicle
Full code listing

138 Raspberry Pi Tips, Tricks, & Hacks
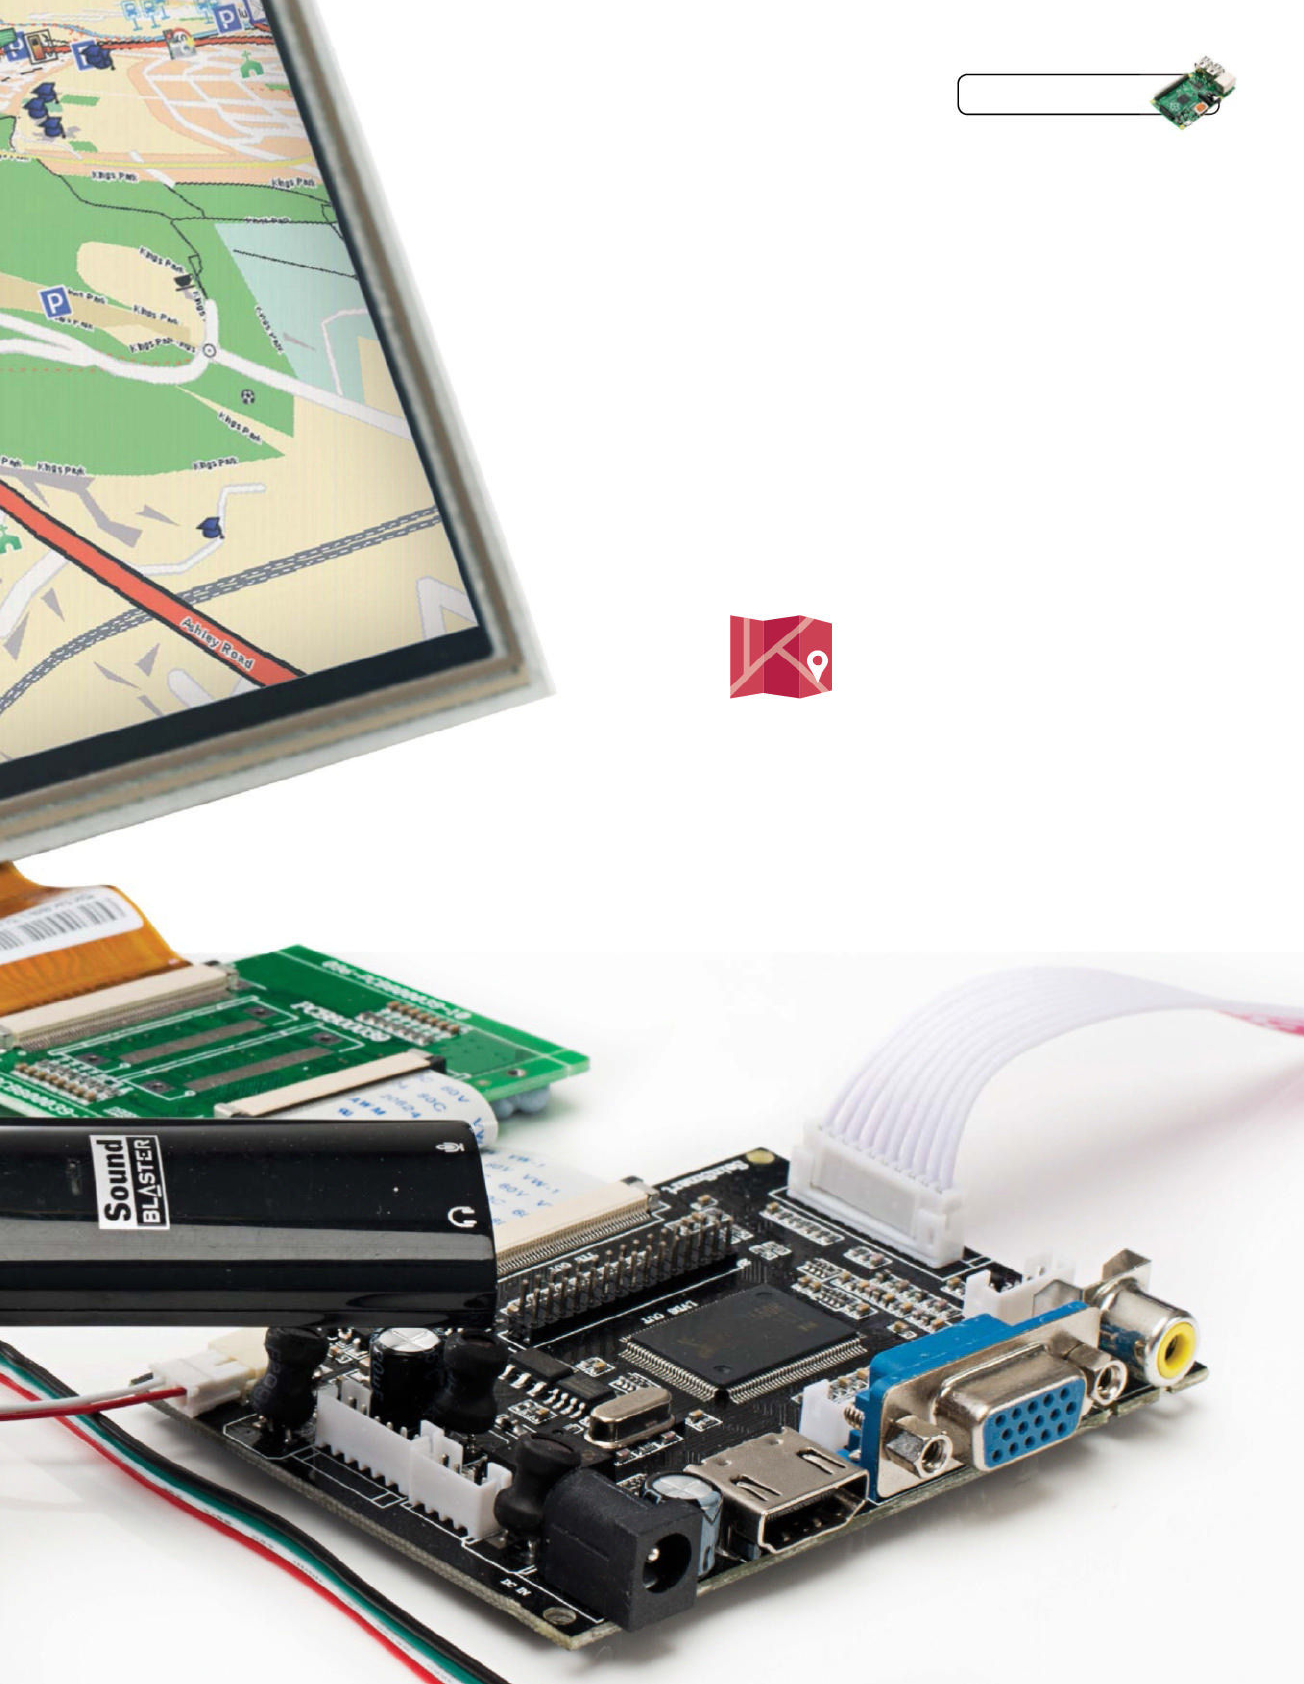
Cars are getting clever. These days, with smart
navigation interfaces built into new cars, you
don’t need to go out and buy yourself a TomTom
to get help with directions. But if you’ve got a
Raspberry Pi then you don’t even need to buy that – let alone a
new car!
In this project we will show you how to build your own car
computer with your Pi, a quality touchscreen like the 9-inch model
from SainSmart that we’re using here, and a few other bits like a
GPS module and USB 3G modem. Your CarPi will be able to use
open source navigation software Navit to show your route map
on screen, plus speech synthesis to read out directions, and it will
also be able to check your location and give you weather reports.
It’ll work as a music player too, of course.
It’s an ambitious project, but you will gain a solid understanding
of custom-made interfaces, navigation software and geolocation
data, touchscreen calibration, speech synthesis and more.
While you don’t have to use the same SainSmart screen as us,
we do recommend it for this project as it is one of the few large
touchscreens out there for the Pi. There are more improvements
at the end too, so check the components list, make sure you’ve got
everything and let’s get started!
Raspberry Pi
Car Computer
Make your own touchscreen navigation
system that gives directions, local
weather reports and plays music
Raspberry Pi Tips, Tricks & Hacks 139
Tips | Tricks | Hacks
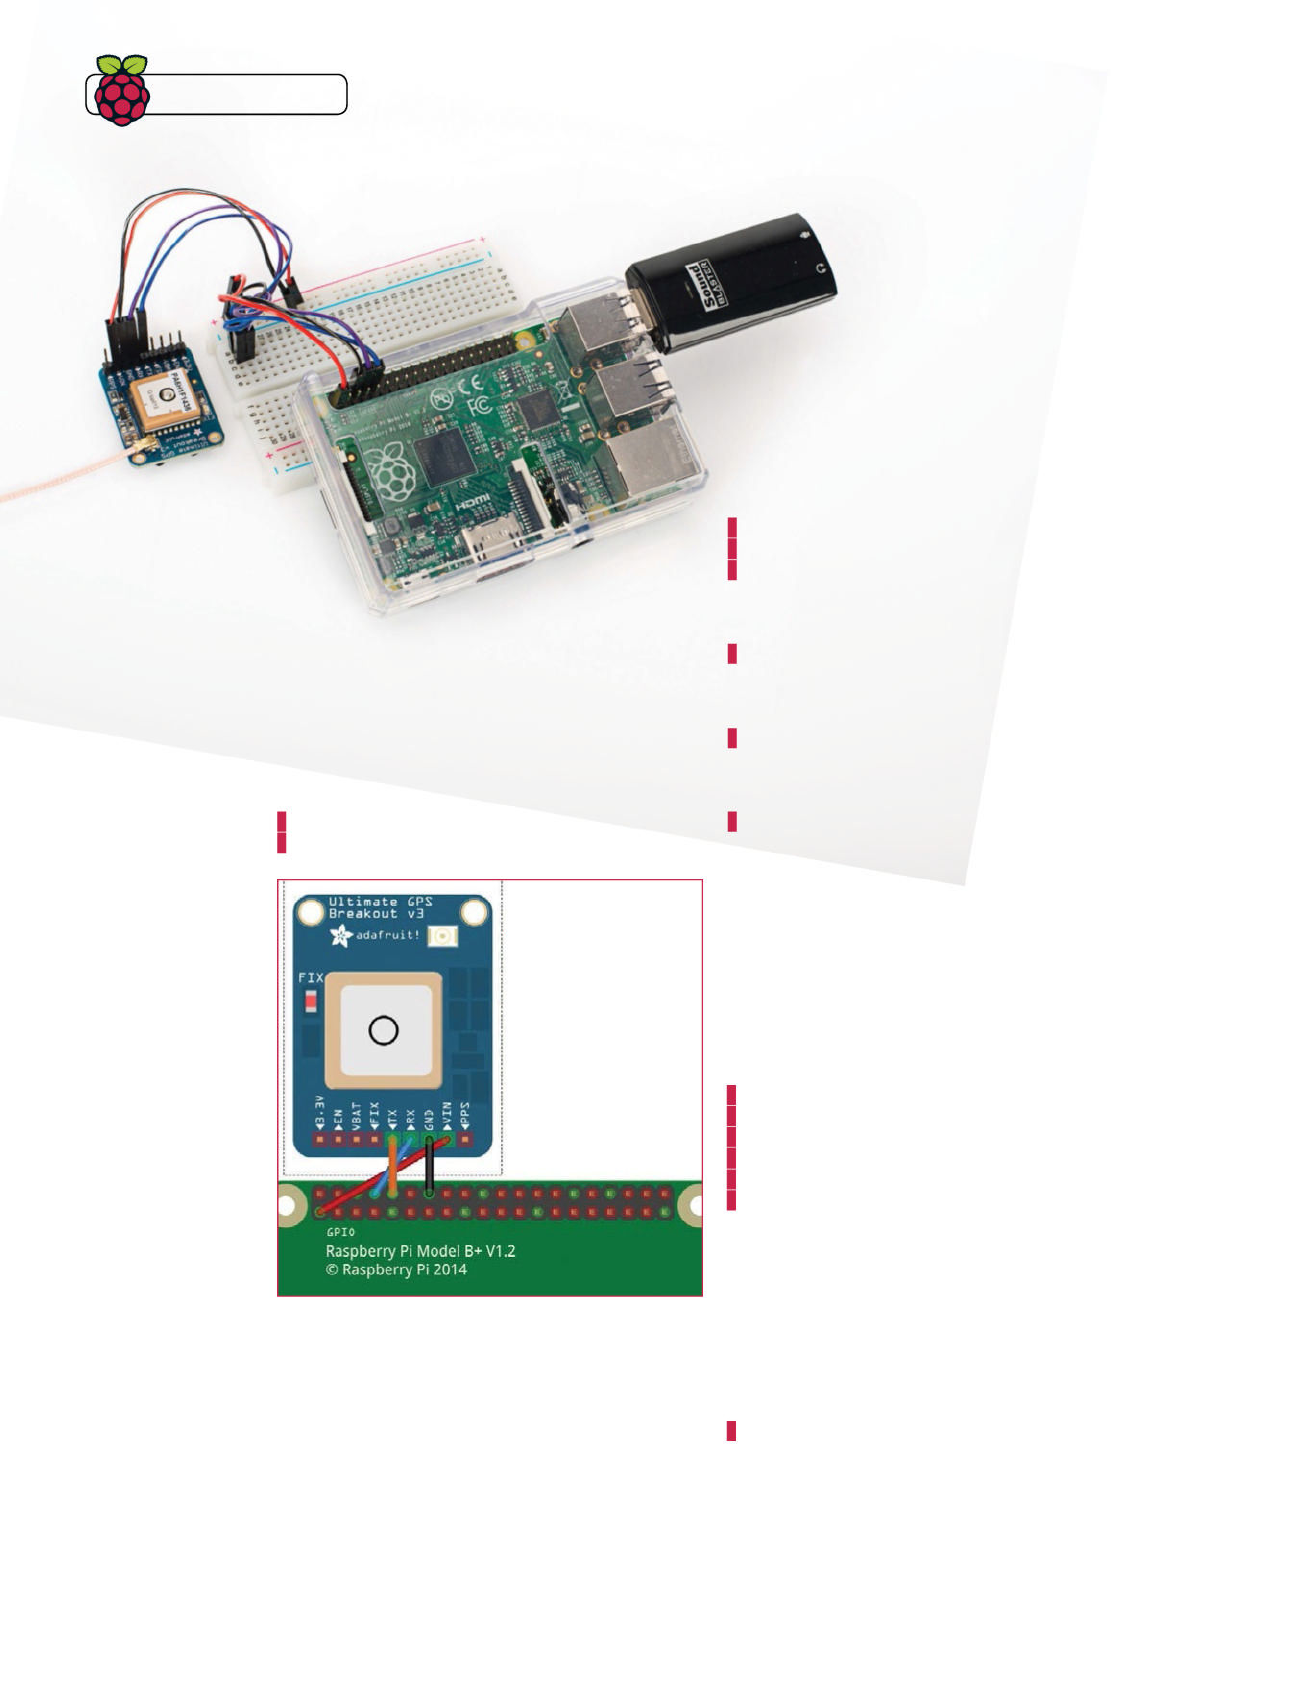
140 Raspberry Pi Tips, Tricks, & Hacks
01 Basic confi guration
Boot up your Raspberry Pi and expand the fi lesystem
using raspi-confi g. Go to Advanced Options and disable the
Serial connection – you’ll need this to talk to the GPS module
later. In raspi-confi g, enable X at boot as the pi user. Say Yes to
reboot. Once rebooted, ensure your packages are up to date with:
sudo apt-get update
sudo apt-get upgrade
04 Connect the screen
The SainSmart screen doesn’t come with any written
instructions. Instead there is a YouTube video on their website
with details about how to put it together: bit.ly/1DF6eJJ. The
important part is that the DC power supply should be 12V.
03 Install navigation software
Begin to install the Navit navigation software by entering:
sudo apt-get install navit gpsd gpsd-clients espeak
sudo nano /etc/default/gpsd
set START_DAEMON=“true”
…and set:
DEVICES=”/dev/ttyAMA0”
Start the GPS daemon with:
sudo /etc/init.d/gpsd start
You can check it’s working by looking at the GPS data with:
cgps -s
02 Connect GPS module
Solder the pin headers onto the Adafruit GPS module.
You can also solder the battery connector which is used to keep
the device partially active, giving a faster fi x. You only need to use
4 pins: 3.3V, ground, serial transmit and serial receive. Power the
Pi off again before connecting anything.
As we are using GPS, the antenna will have to go outside or
under a window to gain signal. Connect the antenna to the board
and power everything back on. The light on the GPS module will
fl ash frequently while fi nding a fi x. Once it has one, it will blink
every 15 seconds.
05 Set the screen resolution
We will have to force the correct resolution (1024x600)
for the screen by editing /boot/confi g.txt with sudo. To do so,
add the following options:
framebuffer_width=1024
framebuffer_height=600
hdmi_force_hotplug=1
hdmi_cvt=1024 600 60 3 0 0 0
hdmi_group=2
hdmi_mode=87
For the changes to properly take effect you will need to reboot
with sudo reboot.
06 Download kernel source
To start the touchscreen, you need to compile an
extra kernel module to support it. The program rpi-source
(github.com/notro/rpi-source/wiki) will fi nd the source of
your kernel. Install rpi-source with:
sudo wget https://raw.githubusercontent.com/notro/
rpi-source/master/rpi-source -O usr/bin/rpi-source
&& sudo chmod +x /usr/bin/rpi-source && /usr/bin/
rpi-source -q -tag-update
Then run rpi-source to get the source of the running kernel.
Above We’re using
Adafruit’s excellent
GPS Breakout kit
here: bit.ly/1G8X2gw
Tips | Tricks | Hacks

Tips | Tricks | Hacks
Raspberry Pi Tips, Tricks & Hacks 141
#!/usr/bin/env python2
import os, sys, requests, pygame
from gps import *
from pygame.locals import *
class WeatherClient:
apikey = “7232a1f6857090f33b9d1c7a74721”
@staticmethod
def latlon():
gpsd = gps(mode=WATCH_ENABLE)
# Needs better error handling
try:
while True:
report = gpsd.next()
if report[‘class’] == ‘TPV’:
gpsd.close()
return report[‘lat’], report[‘lon’]
except:
return None, None
@staticmethod
def usefuldata(j):
# Returns a string of useful weather data from a LOT of json
d = j[‘data’][‘current_condition’][0]
out = “Now - Temp: {0}C, Feels Like: {1}C, Description: {2}\n”\
.format(d[‘temp_C’],
d[‘FeelsLikeC’],
d[‘weatherDesc’][0][‘value’])
hourly = j[‘data’][‘weather’][0][‘hourly’]
hour_count = 1
for h in hourly:
out += (“+{0}hr - Temp: {1}C, Feels Like: {2}C, Chance of Rain:”
“ {3}%, Description: {4}\n”)\
.format(hour_count,
h[‘tempC’],
h[‘FeelsLikeC’],
h[‘chanceofrain’],
h[‘weatherDesc’][0][‘value’])
hour_count += 1
# Rstrip removes trailing newline
return out.rstrip()
@staticmethod
def update():
errstr = “Error getting weather data”
lat, lon = WeatherClient.latlon()
if lat == None or lon == None:
return errstr
api_req = (“http://api.worldweatheronline.com/free/v2/weather.ashx”
“?q={0}%2C{1}&format=json&key={2}”).format(lat, lon,
WeatherClient.apikey)
r = None
Full code listing
07 Update GCC
Recent Raspberry Pi kernels are
compiled with GCC 4.8. Raspbian only
comes with 4.6 so you will have to install
4.8 to continue with the following steps.
Do this by entering:
sudo apt-get install -y gcc-4.8
g++-4.8 ncurses-dev
Then you have to set GCC 4.8 as
the default:
sudo update-alternatives
--install /usr/bin/gcc gcc /usr/
bin/gcc-4.6 20
sudo update-alternatives
--install /usr/bin/gcc gcc /usr/
bin/gcc-4.8 50
sudo update-alternatives
--install /usr/bin/g++ g++ /usr/
bin/g++-4.6 20
sudo update-alternatives
--install /usr/bin/g++ g++ /usr/
bin/g++-4.8 50
08 Pick the module to compile
Rpi-source puts the kernel
source in a folder called ‘linux’. To
choose the USB Touchscreen Driver,
enter the following:
cd linux
make menuconfig
Device Drivers -> Input device
support -> Generic input layer
(needed for keyboard, mouse,
…) -> Touchscreens (press space
to include) -> USB Touchscreen
Driver (press M to make module)
Once you’ve done that, you then need
to make sure you save your changes as
‘.confi g’ and run scripts/diffconfi g to see
the differences.
09 Compile and install
the module
Now you need to compile and install the
module. Do so by entering:
make prepare
make SUBDIRS=drivers/input/
touchscreen modules
sudo make SUBDIRS=drivers/input/
touchscreen modules_install
sudo depmod
If you unplug and reconnect the
touchscreen, it should work fi ne but it
will probably need calibrating.
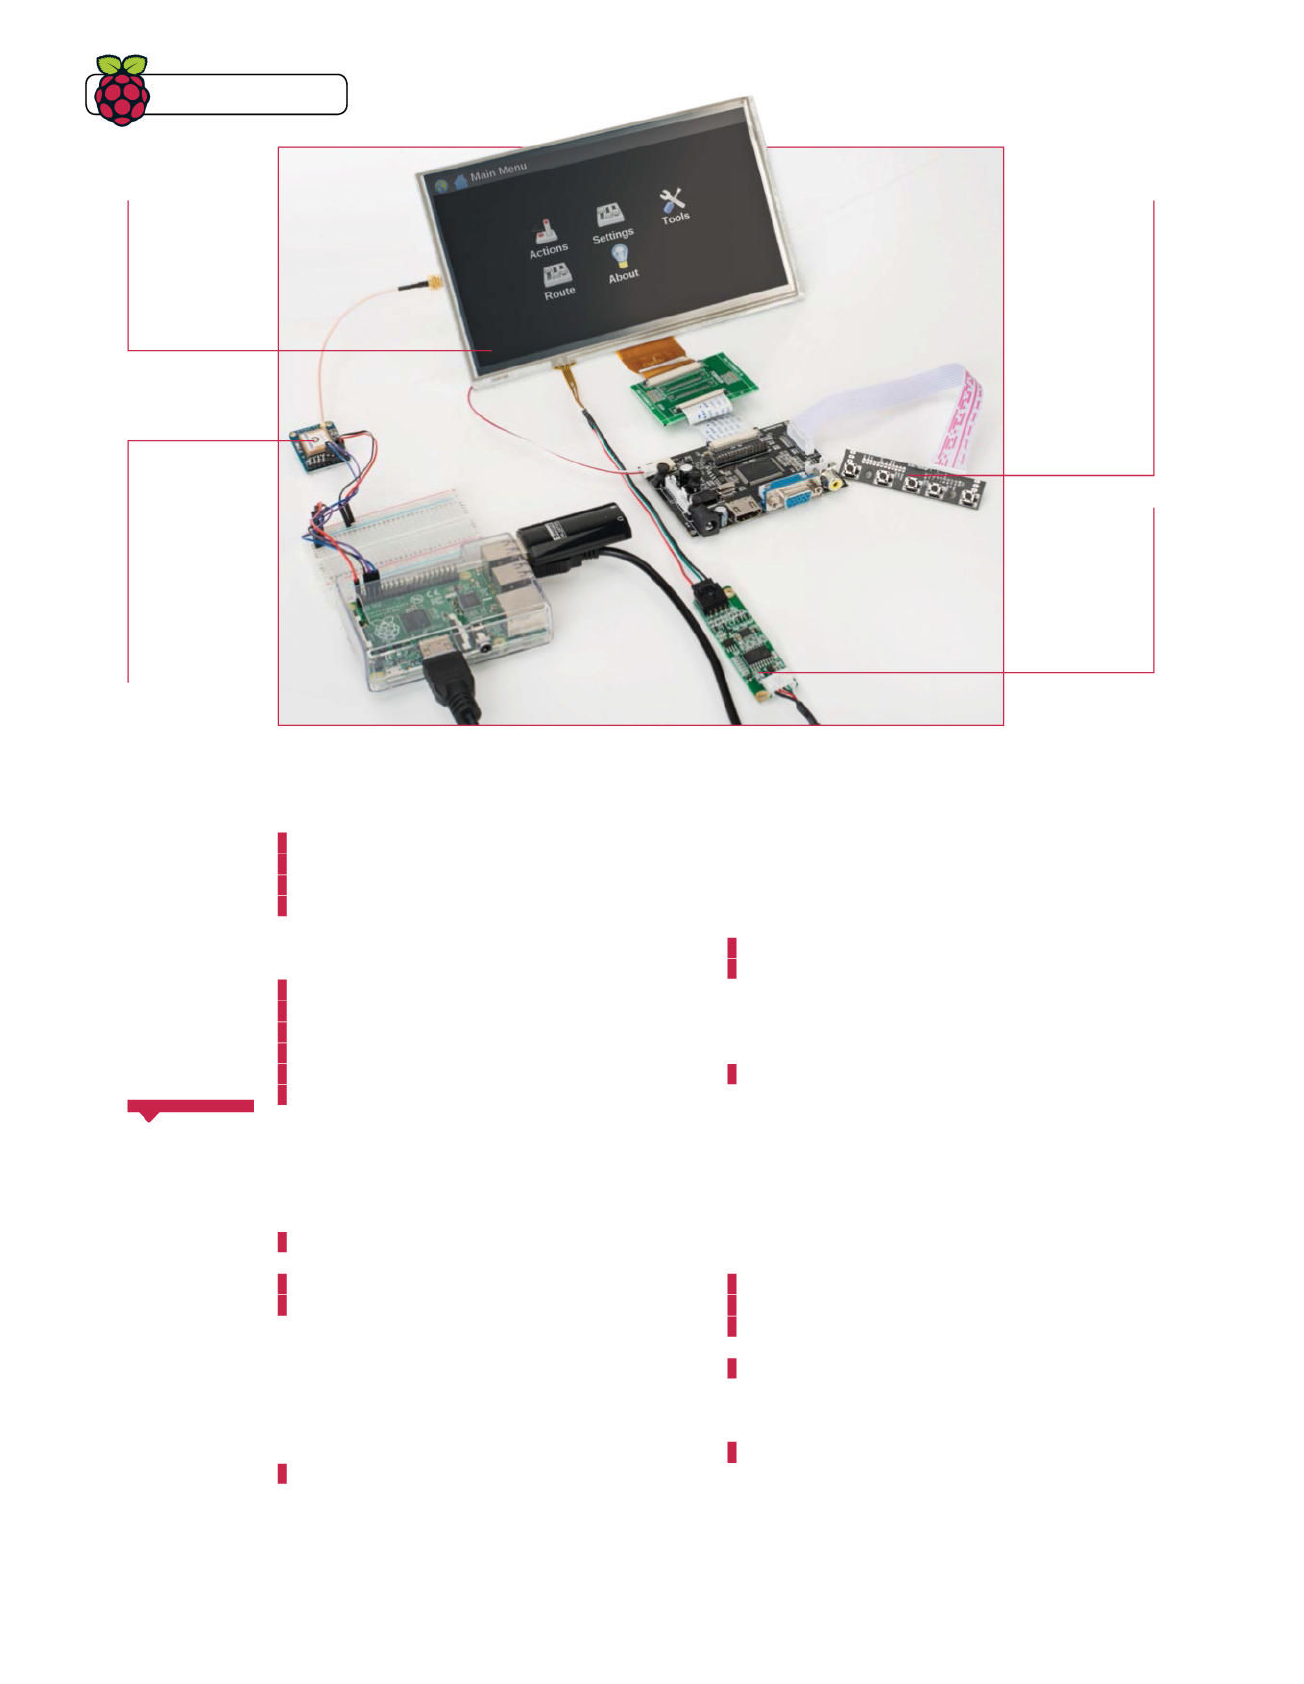
Tips | Tricks | Hacks
142 Raspberry Pi Tips, Tricks & Hacks
10 Calibrate the touchscreen
At this point, you can easily calibrate the touchscreen by
entering the following:
cd /etc/X11
sudo mkdir xorg.conf.d
cd xorg.conf.d
sudo nano 99-calibration.conf
…with the following content:
Section “InputClass”
Identifier “calibration”
MatchProduct “eGalax Inc. USB TouchController”
Option “SwapAxes” “1”
Option “InvertX” “1”
EndSection
Invert X actually inverts Y because the axes have been swapped
around. Reboot again for these changes to occur. Now the
calibration is roughly correct, download an input calibrator that
Adafruit have packaged already.
wget http://adafruit-download.s3.amazonaws.com/
xinput-calibrator_0.7.5-1_armhf.deb
sudo dpkg -i xinput-calibrator_0.7.5-1_armhf.deb
DISPLAY=:0.0 xinput_calibrator
DISPLAY=:0.0 is useful because you can run the program from
any terminal (including an SSH session) and have it appear on
the touchscreen. Touch the points on the screen as prompted.
Once the program is fi nished, you should get an output that is
similar to the following:
Option “Calibration” “84 1957 270 1830”
Add it to the ‘99-calibration.conf’ fi le that we created earlier
just below the other Option entries.
11 Download maps
Navit needs maps; download them from maps.navit-
project.org. You can either use the web browser on the Pi or
download the map from another machine and copy it using
scp. Use the predefi ned area option to select where you live.
The smaller the area that you pick, the less data you will have to
process. Here the UK has a map size of 608 MB. Now move the
map to the navit folder:
mkdir -p /home/pi/.navit/maps
mv /home/pi/Downloads/$your_map /home/pi/.
navit/$country.bin
For example:
mv /home/pi/Downloads/osm_bbox_-9.7,49.6,2.2,61.2.bin
/home/pi/.navit/maps/UK.bin
12 Navit confi guration
Sudo-edit /etc/navit/navit.xml with your favourite
editor. Search for openstreetmaps. Now disable the sample
map above, enable the openstreetmap mapset and set the
data variable to where you just moved your map. In this case
it looks like this:
<!-- Mapset template for openstreetmaps -->
<mapset enabled=“yes”>
<map type=“binfile” enabled=“yes” data=“/home/
pi/.navit/maps/UK.bin”/>
</mapset>
Then search for osd entries similar to:
<osd enabled=“yes” type=“compass”/>
…and enable the ones you want – we recommend enabling
them all. You may want to zoom in closer than the default map
layout. A zoom value of 64 is useful.
We’ve looked at
the PiTFT and the
HDMIPi before,
but the SainSmart
touchscreen
we’re using here is
uniquely suited to
many embedded
projects. It’s larger
than the PiTFT but
also without the
large bezels of the
HDMIPi – and it’s
incredibly thin –so
it’s the kind of thing
that is really useful
for installation
projects, whether
that’s something as
simple as a photo
slideshow in a real
picture frame or a
home automation
control interface
embedded into a
cupboard door.
Embed
the screen
SainSmart’s
9-inch HDMI/VGA
touchscreen (bit.
ly/1Ciu4H9) has a
fantastic display
and is perfect
for all sorts of
Pi projects
The screen
control panel that
comes with the
SainSmart screen
enables you to
easily change the
display settings
(i.e. brightness,
contrast, etc) as
well as the input
(i.e. HDMI, VGA,
AV1, etc)
As well as the main
controller board,
the touch screen
is connected to
a four-line USB
controller which
then plugs into the
Pi’s USB port
Adafruit’s Ultimate
GPS Breakout kit
provides Navit
and the weather
function with the
location data that
they require

Tips | Tricks | Hacks
Raspberry Pi Tips, Tricks & Hacks 143
13 Sound confi guration
Before confi guring speech
support for Navit, confi gure the external
sound card. You have to stop the
Broadcom module from loading and
remove some Raspberry Pi-specifi c ALSA
(Advanced Linux Sound Architecture).
To do this, sudo-edit /etc/modprobe and
comment out (i.e. prefi x with a #):
snd-bcm2835
Then run:
sudo rm /etc/modprobe.d/alsa*
Reboot for the changes to take effect.
Use alsamixer to set the volume on the
if it’s too quiet.
15 Create speech script
Navit supports speech by
running an external script and passing
the text to speak as an argument.
Create one using:
cd /home/pi/.navit
wget http://liamfraser.co.uk/
lud/carpi/chime.wav
touch speech.sh
chmod +x speech.sh
Now edit speech.sh:
#!/bin/bash
aplay -r 44100 /home/pi/.navit/
chime.wav
espeak -vmb-en1 -s 110 -a 150
-p 50 “$1”
Finally, test it with:
./speech.sh “Hello World”
14 Download a voice
The speech synthesis software
needs a voice and a proprietary
binary. You can get both by completing
the following steps:
sudo mkdir -p /usr/share/
mbrola/voices/
wget http://www.tcts.fpms.ac.be/
synthesis/m brola/dba/en1/en1-
980910.zip
unzip en1-980910.zip
sudo cp en1/en1 /usr/share/
mbrola/voices
wget http://www.tcts.fpms.ac.be/
synthesis/mbrola/bin/raspberri_
pi/mbrola.tgz
tar zxvf mbrola.tgz
sudo mv mbrola /usr/local/bin/
try:
r = requests.get(api_req)
except requests.exceptions.RequestException as e:
return errstr
return WeatherClient.usefuldata(r.json())
class CarLauncher:
def __init__(self):
pygame.init()
pygame.mixer.quit() # Don’t need sound
screen_info = pygame.display.Info()
self.screen = pygame.display.set_mode((screen_info.current_w,
screen_info.current_h))
pygame.display.set_caption(‘Car Launcher’)
self.titlefont = pygame.font.Font(None, 100)
self.wfont = pygame.font.Font(None, 30)
self.w_text = None # Weather text
def clean_background(self):
background = pygame.Surface(self.screen.get_size())
self.background = background.convert()
self.background.fill((0, 0, 0))
# Render title centered
text = self.titlefont.render(“CarPi Launcher”, 1, (255, 255, 255))
textpos = text.get_rect()
textpos.centerx = self.background.get_rect().centerx
self.background.blit(text, textpos)
self.screen.blit(self.background, (0,0))
pygame.display.flip()
def main_menu(self):
# btns maps Text -> Rectangles we can do collision detection on
self.btns = {‘Music’ : None, ‘NAV’ : None, ‘Weather’ : None}
item_num = 1
for key in self.btns:
text = self.titlefont.render(key, 1, (255,255,255))
textpos = text.get_rect()
max_width = self.background.get_rect().width / len(self.btns)
center_offset = max_width * 0.5
# This y pos puts buttons just below title
textpos.centery = self.background.get_rect().centery / 2
textpos.centerx = (max_width * item_num) - center_offset
self.btns[key] = textpos
self.screen.blit(text, textpos)
item_num += 1
pygame.display.flip()
def select_rect(self, rect, text):
# Colour a rect the user has clicked in green
surface = pygame.Surface((rect.w, rect.h))
surface.fill((0, 255, 0))
# Now we have to draw the text over it again
t = self.titlefont.render(text, 1, (255,255,255))
surface.blit(t, (0,0))
self.screen.blit(surface, rect)
pygame.display.flip()
Full code listing

Tips | Tricks | Hacks
144 Raspberry Pi Tips, Tricks & Hacks
You will need to write your
own launcher for CarPi
17 Install the music player
MPD is the music player back-end and pympdtouchgui
is the front-end that needs installing manually:
sudo apt-get install mpd ncmpcpp
wget http://www.spida.net/projects/software/
pym pdtouchg ui/py mp dto uchgui-0.320.tgz
tar zxvf pympdtouchgui-0.320.tgz
cd pym pdtouch g ui-0.320/
sudo python setup.py install
# Fix hard coded path in software
sudo ln -s /usr/local/share/pympdtouchgui/ /usr/
share/pympdtouchgui
run sudo passwd to set a password for root. From a computer
with music on, run:
scp -r music_folder root@pi_ip_address:/var/lib/
mpd/music/
Then on the Pi, change the ownership of the music that
you just copied:
sudo chown -R mpd:audio /var/lib/mpd/music
20 Install awesome window manager
Now you will need to write your own launcher for
CarPi, which will run full-screen. To ensure every application
is forced to full-screen, use awesome window manager in full-
screen mode.
sudo apt-get install awesome
sudo rm /etc/alternatives/x-session-manager
sudo ln -s /usr/bin/awesome /etc/alternatives/x-
session-manager
When changing the default x-session-manager, awesome will
be auto-started at boot instead of LXDE. If you reboot the Pi,
awesome should then load up automatically.
19 Update mpd music library
Ncmpcpp is a command line client for mpd. Type
ncmpcpp and press U to update the library. Press 3 to
browse the library and check the music is there, and press
Q to quit. Pressing 1 will select the help screen if you want
to do more.
16 Confi gure Navit for speech
The last part is simple. Edit the Navit confi g fi le again (/
etc/navit/navit.xml) and replace the following line:
<speech type=“cmdline” data=“echo ‘Fix the speech
tag in navit.xml to let navit say:’ ‘%s’” cps=“15”/>
…with:
<speech type=“cmdline” data=“/home/pi/.navit/
speech.sh %s” cps=“10” />
Now you can run Navit with DISPLAY=:0.0 navit and have
fun experimenting.
18 Copy music
Scp (secure copy protocol) was used here to copy
music. First get the Pi’s IP address by running ip addr. Then
It is defi nitely best
to put this project
together in a clean
workspace so that
you can clearly
see what you’re
working with and
ensure everything is
correctly wired and
soldered, but the
point of the project
is to make this setup
portable so that you
can put it in your
car and use it on
the road. You could
install everything
into a single, hand-
made enclosure or
customise a large
bought one, or you
could secure the
various parts inside,
for example, your
glovebox or car
doors. You’ll also
need to power both
the screen and your
Pi with a power pack
and ensure that
the GPS antenna is
fastened into a good
spot for signal.
Make it
mobile
Above The pympdtouchgui front-end for the
music player is surprisingly featureful
Above The Navit software comes with a host
of options built into its menu hierarchy
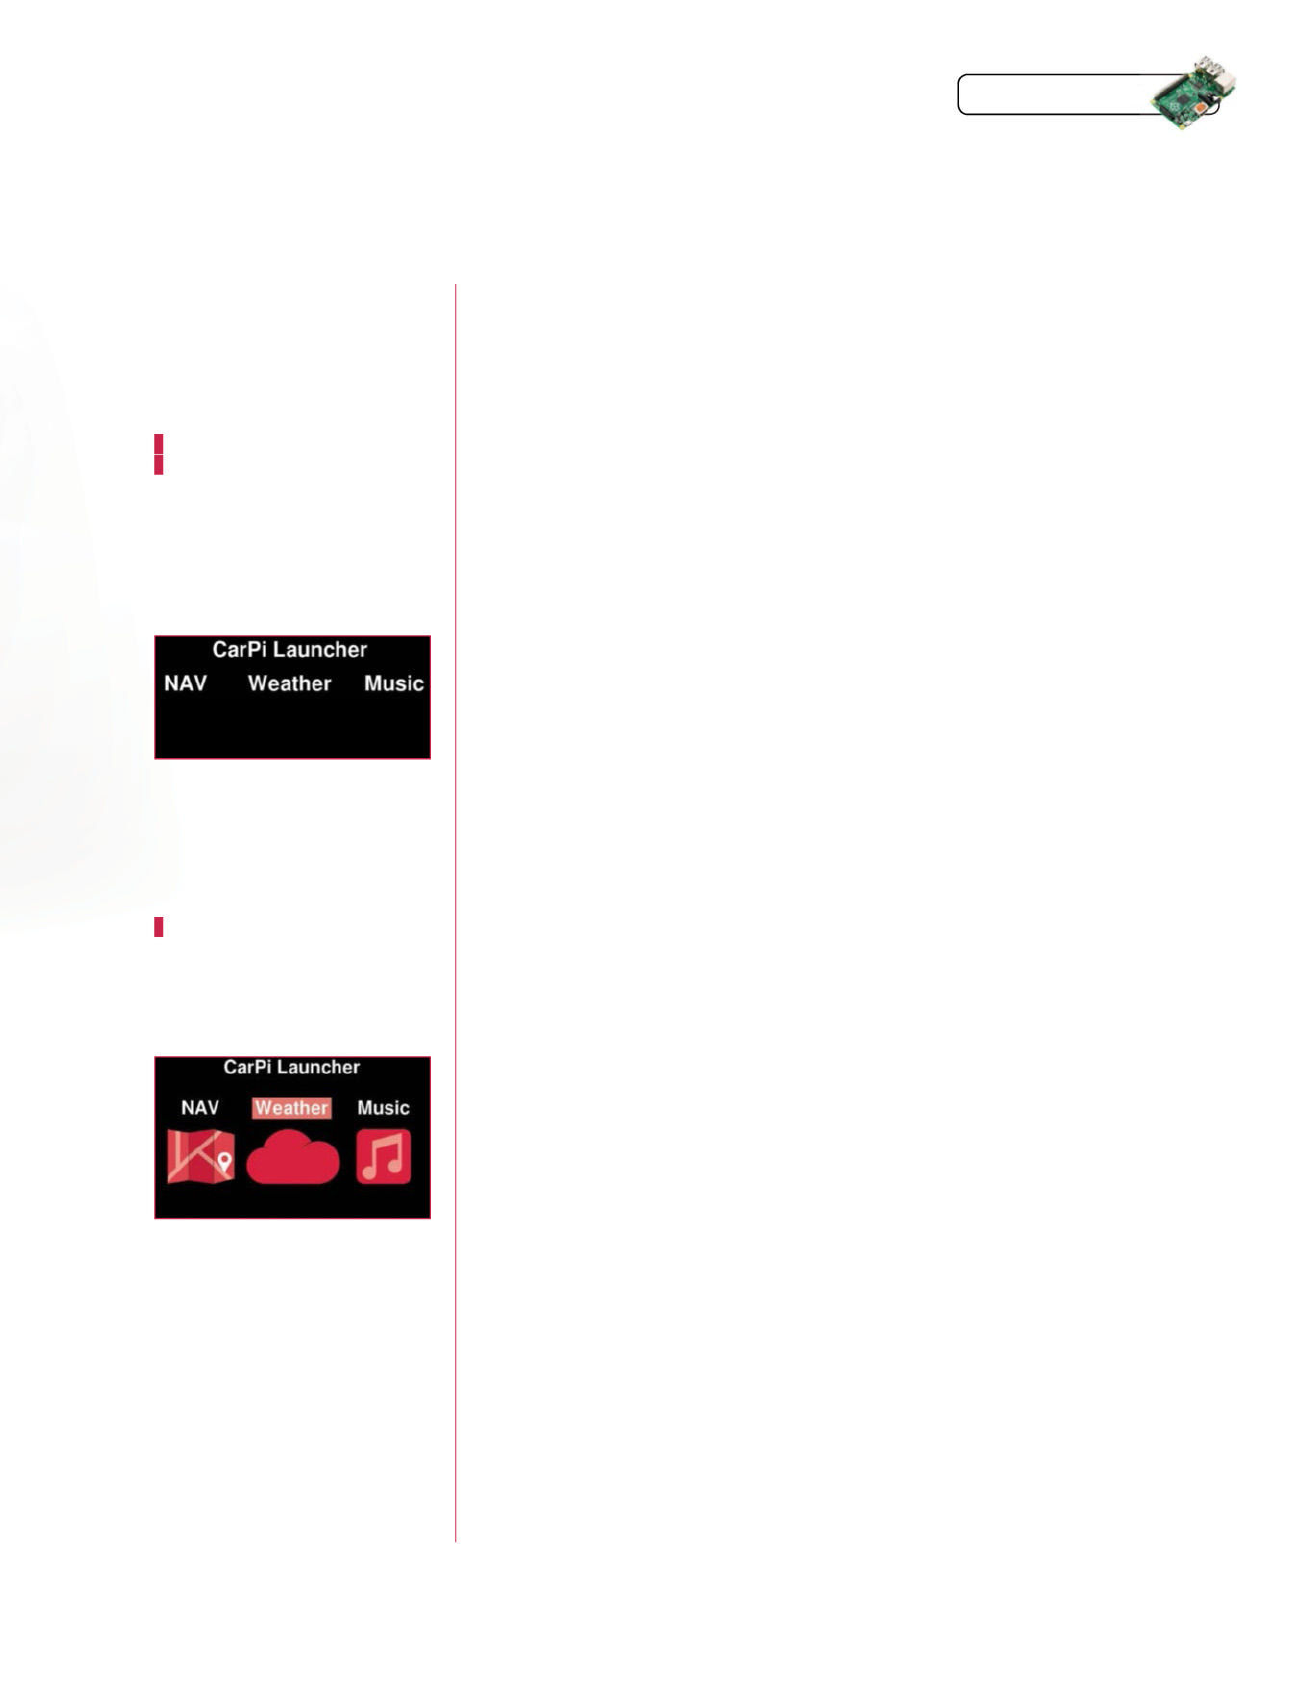
Tips | Tricks | Hacks
Raspberry Pi Tips, Tricks & Hacks 145
def reset(self):
self.clean_background()
self.main_menu()
self.render_weather()
def execute(self, path):
os.system(path)
# os.system blocks so by the time we get here application
# has finished
self.reset()
def render_weather(self):
if self.w_text == None:
return
# Get y starting at the bottom of the nav button
margin = 10
y = self.btns[‘NAV’].bottomleft[1] + margin
for t in self.w_text.split(“\n”):
line = self.wfont.render(t.rstrip(), 1, (255,255,255))
line_rect = line.get_rect()
line_rect.centerx = self.background.get_rect().centerx
line_rect.y = y
self.screen.blit(line, line_rect)
y += margin + line_rect.height
pygame.display.flip()
def handle_events(self, events):
for e in events:
if e.type == QUIT:
sys.exit()
elif e.type == MOUSEBUTTONDOWN:
pos = pygame.mouse.get_pos()
# Check if it collides with any of the buttons
for btn_text, rect in self.btns.iteritems():
if rect.collidepoint(pos):
self.select_rect(rect, btn_text)
if btn_text == “NAV”:
self.execute(“/usr/bin/navit”)
elif btn_text == “Music”:
self.execute(“/usr/local/bin/pympdtouchgui”)
elif btn_text == “Weather”:
self.w_text = WeatherClient.update()
# Reset will render weather if string is populated
self.reset()
def loop(self):
clock = pygame.time.Clock()
self.reset()
while 1:
self.handle_events(pygame.event.get())
# 5 fps is plenty
clock.tick(5)
if __name__ == “__main__”:
cl = CarLauncher()
cl.loop()
Full code listing
21 Install the requirements
for your launcher
The launcher is going to use a weather
API combined with location data
from the GPS receiver to give weather
updates when requested. The nicest
HTTP API for Python is requests, which
you can install by doing the following:
sudo apt-get install python-pip
sudo pip install requests
23 Start the launcher
automatically
Sudo-edit /etc/xdg/awesome/rc.lua and
move awful.layout.suit.max.fullscreen
to the top of the layouts list. Add the
following to the bottom of the fi le:
awful.util.spawn_with_shell(“/
home/pi/carlauncher/carlauncher.
py”)
Now reboot again and the launcher
should come up automatically.
24 Future improvements
There are a number of
improvements that could be made
to the base project at this point:
• Make the launcher switch between
applications rather than start them
again each time
• Make the launcher look better
aesthetically with icons
• Use Mopidy instead of MPD so you
can use Spotify
• Further Navit confi guration to make
it more featureful
• An SSD or USB fl ash drive for storage
to make things quicker
22 Write the launcher code
Creating the code itself is pretty
self explanatory, but you can use our
ready-made version by downloading the
CarPi package from FileSilo.co.uk and
extracting carlauncher/carlauncher.py.

Tips | Tricks | Hacks
Create a piece of wearable tech with power moves
assigned to each button to enhance your Minecraft game
Build a Minecraft
power move glove
Many of you will be avid fans of the game
Minecraft
. In
schools it is fast becoming a motivational teaching and
learning tool, useful in areas such as programming, creating
logic gates and setting up a network.
This project is framed around creating a simple networked
Minecraft
game where one player chases the other and
tries to hit the block they are standing on. The real hack is
programming a ‘power glove’ that enables you to assign power
moves to each button. These powers can then be deployed
and used to slow down the other player and get yourself out
of sticky situations – check out the video at bit.ly/1CQSmHS!
The real beauty of this hack is that you can then create and
customise your own power moves. The possibilities are
endless, limited only by your imagination. If you’re confi dent
with GPIO pins and setting up buttons, jump straight to Step 8.
01 Update the Raspberry Pi
This project is designed for the Raspberry Pi 2 which
requires the updated operating system, although it is compatible
with the Raspberry Pi B+ too. First ensure that the software is up
to date – open the LX Terminal type:
sudo apt-get update
sudo apt-get dist-upgrade
sudo apt-get install raspberrypi-ui-mods
02 Connect a button to the Raspberry Pi
Take one of the buttons and connect a wire to each
contact, then take the other two ends and connect to the Pi. You
may fi nd this easier using a female-to-female connector. To set
up a test button, use GPIO pin 17 – this is physical pin number 11
on the board. The other wire connects to a ground pin, shown by a
minus sign (the pin above GPIO pin 17 is a ground pin).
What you’ll need
Q Raspberry Pi 2
Q 4 x 6mm tactile buttons
Q Female-to-female jerky
Q Terminal blocks
Q A glove
Q Router
Q 2x CAT5 cables

Raspberry Pi Tips, Tricks & Hacks 147
Tips | Tricks | Hacks
05 Open Minecraft
The updated version of the Raspbian OS comes with
Minecraft
pre-installed, it can be found under Menu>Games
– so load it up. If you have used the
Minecraft: Pi Edition
before
you will be aware that it runs better in a smaller-sized window,
so don’t make it full screen. You may prefer to adjust and arrange
each window side-by-side to enable you to view both the Python
code and the
Minecraft
game at the same time.
03 Test that the button works
Use this test code to ensure the button is functioning
correctly. Once it is, the same setup method can be used
throughout this project. To ensure the buttons are responsive,
use the pull-up resistor with the code GPIO.PUD_UP – this will
ensure that multiple touches aren’t registered on each button.
Using Python 2.8, type in the code below, then save and run. If
working correctly, it will return the message ‘Button works’.
import RPi.GPIO as GPIO
GPIO.setmode(GPIO.BCM)
GPIO.cleanup()
GPIO.setup(17, GPIO.IN, GPIO.PUD_UP)
while True:
if GPIO.input(17) == 0:
print “Button works”
04 Create a power move
Now to create your fi rst power move. The glove and code
are structured in such a way that once the basic code template is
set up, you can create your own power moves and assign them to
each button, keeping both your ideas and your gameplay fresh.
The fi rst power move you will program enables you to place a wall
of TNT between you and the player trying to catch you. They have
a choice to go around the wall or blow it up, but it will slow them
down. In a new Python window, type the code below and save the
program into the home folder:
import time
def Firewall():
mc.postToChat(“Firewall Placed”)
TNT = 46,1
x, y, z = mc.player.getPos()
mc.setBlocks(x-6, y, z+2, x+6, y+10, z+3, TNT)
time.sleep(10)
while True:
Firewall()
import time
from mcpi import minecraft
mc = minecraft.Minecraft.create(“192.168.1.211”)
#Replace with the other players IP address
import RPi.GPIO as GPIO
#Set up the GPIO Pins
GPIO.setmode(GPIO.BCM)
#Sets the pin to high
GPIO.cleanup()
GPIO.setup(17, GPIO.IN, GPIO.PUD_UP)
#11 on the BOARD GREEN Firewall
GPIO.setup(18, GPIO.IN, GPIO.PUD_UP)
#12 on the BOARD BROWN Lava
GPIO.setup(9, GPIO.IN, GPIO.PUD_UP)
#21 on the BOARD BLUE Mega Jump
GPIO.setup(4, GPIO.IN, GPIO.PUD_UP)
#7 on the BOARD ORANGE Puddle
GPIO.setwarnings(False) #switch off other ports
#Builds a wall of TNT which if the player hits will explode
def Firewall():
mc.postToChat(“Firewall Placed”)
TNT = 46,1
x, y, z = mc.player.getPos()
mc.setBlocks(x-6, y, z+2, x+6, y+10, z+3, TNT)
time.sleep(1)
#Lays Lava to slow down the other player
def Lay_Lava():
Lava = 10
check = 1
mc.postToChat(“Lava Deployed”)
while check == 1:
time.sleep(0.2 )
x, y, z = mc.player.getPos()
mc.setBlock(x-1, y, z, Lava)
check = 0
#Peforms a Mega Jump to lose players
def Mega_Jump():
time.sleep(0.1)
mc.postToChat(“Mega-Jump”)
x, y, z = mc.player.getPos()
mc.player.setPos(x, y+15, z)
time.sleep(1)
#Creates a Puddle to slow down your player
def Mega_Water_Puddle():
mc.postToChat(“Mega Water Puddle”)
time.sleep(0.2)
WATER = 9
x, y, z = mc.player.getPos()
mc.setBlocks(x-5, y, z-4, x-1, y, z+4, WATER)
time.sleep(1)
PiGlovePowerMoves.py
GPIO pins are a
physical interface
between the Pi and
the outside world.
At the simplest
level, you can
think of them as
switches that you
can turn on or off
(input) or that the
Pi can turn on or off
(output). The GPIO.
BCM option means
that you are referring
to the pins by the
“Broadcom SOC
channel” number.
GPIO.BOARD
specifi es that you
are referring to the
pins by the number
of the pin and the
plug – the numbers
printed on the board.
GPIO pins
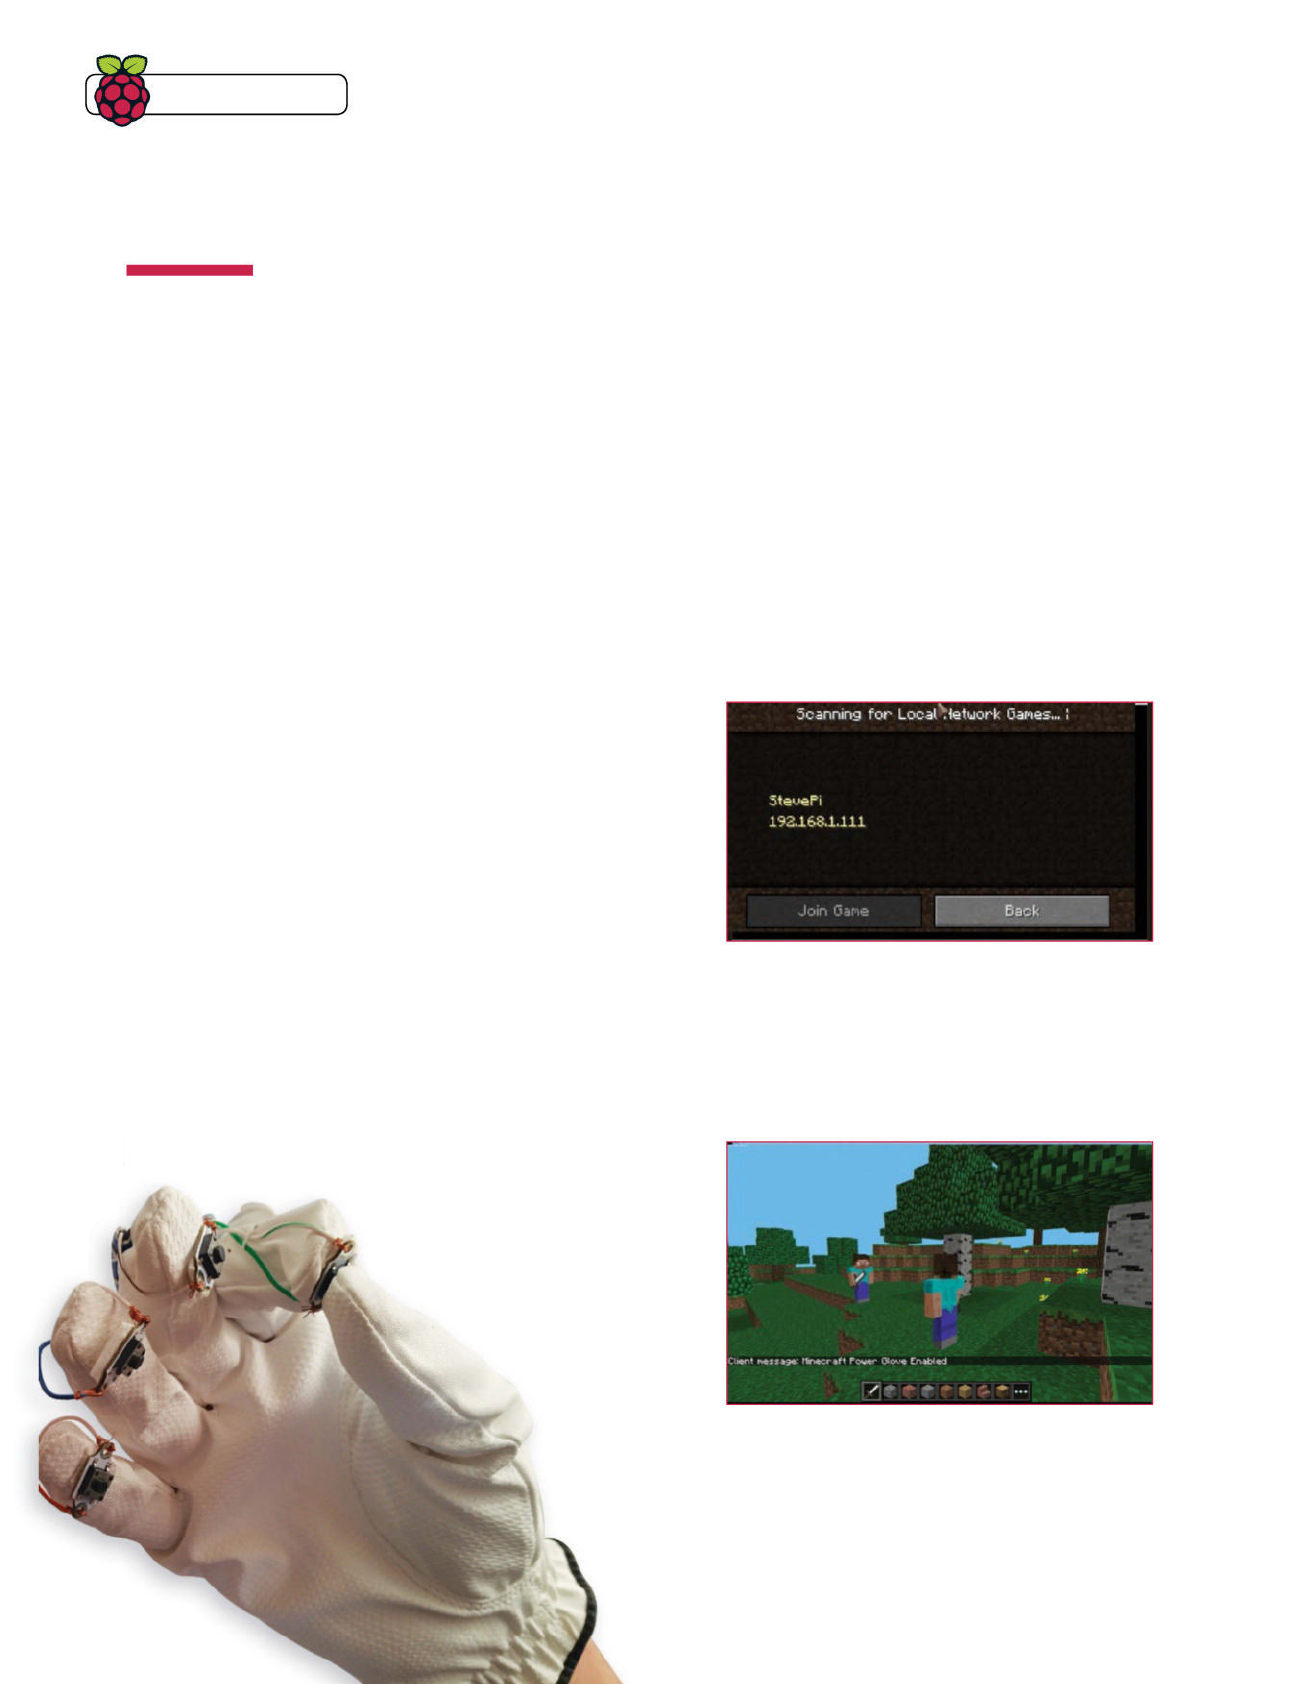
Tips | Tricks | Hacks
Most home
networks will use
IP addresses that
start with 192.168.1
and then a number
up to 255. An old
router will assign
these IP addresses
automatically. If
the router has Wi-Fi
then players can
also connect to
multiplayer using a
USB Wi-Fi dongle;
you are setting up
a LAN (Local Area
Network).
IP address
Below If you want to
get fancy, try using
the popper buttons
that Dan added to
his Pi Glove 2 project
07 Assign the power move to the button
Now you have a working button and a power move, you
can combine these two together. Basically, when you press the
button the power move will deploy. Once this is working you can
then set up the other three buttons with the same method. Open
a new Python window and type in the code below – save the fi le
in the home folder. Start a
Minecraft
game as shown in Step 6
and then run the new program. Every time you press the button
you will place a TNT fi rewall.
import time
from mcpi import minecraft
mc = minecraft.Minecraft.create()
import RPi.GPIO as GPIO
GPIO.setmode(GPIO.BCM)
GPIO.setup(17, GPIO.IN, GPIO.PUD_UP)
#11 on the BOARD
def Firewall():
mc.postToChat(“Firewall Placed”)
TNT = 46,1
x, y, z = mc.player.getPos()
mc.setBlocks(x-6, y, z-2, x+6, y+10, z-1, TNT)
while True:
if GPIO.input(17) == 0:
Firewall()
10 Connect the wires
Now you are ready to connect the wires to the Raspberry
Pi to enable all four power moves to be used. Take one end of
each wire and connect them to the respective pins, as shown
below. The other end of the wire is placed into a ground pin. Note
that the RPi.GPIO pin numbering system is used here rather
than the physical pin number on the board – for example, GPIO
pin 17 is physical pin number 11. The following pins are used:
GPIO 17, pin 11 on the board
GPIO 18, pin 12 on the board
GPIO 9, pin 21 on the board
GPIO 4, pin 7 on the board
11 Set the network up
To interact with other players in the
Minecraft
world
you will need to set up a networked multiplayer game. This is
simple and can be achieved using an old router. Connect each
Raspberry Pi via an ethernet cable to the router and then back
to the ethernet port on each Raspberry Pi. Turn on the router and
wait about 30 seconds for the IP addresses to be assigned. Now
load up
Minecraft
and one of the players will start a new game.
12 Run the game!
After the game has loaded, the other connected player
will see an option to “connect to a multiplayer game”, usually
called Steve. The player selects this option and the networked
game will begin. You will be able to see two ‘Steves’ and the
Minecraft
chat will inform you that ‘Steve has joined the game’.
Open Python and the glove code, press F5 to run and you will be
able to see the power moves being deployed.
13 Interact in another player’s world
You’ll notice under the current setup that if the Pi Glove
is connected to the game and you use one of your power moves,
it will only appear in your
Minecraft
world and not in the other
players. This isn’t great, as the power move is supposed to stop
the other player! To resolve this, fi nd the IP address of the other
06 Engage the fi rewall
Start a new
Minecraft
game, then go to the Python
program and press F5 to run it. You may need to press the
Tab key to release the mouse from the
Minecraft
window. The
program will place a 12 x 10 wall of TNT behind the player every
ten seconds – you can blow them up but the Pi might lag.
09 Create the glove
Take your glove and attach the four
buttons to the fingers on the glove. There are a
number of ways to do this: glue the button
on, sew them in, stick them with double-
sided tape – the choice is up to
you. Wires can be hidden or on
display, depending on your
preferences and how you
want the glove to look.
08 Set up further buttons
Once you have one button working the next step is
to set up the other three using the same method from Step 2.
Take the button and connect the two wires to either side. At this
point you can add all three buttons and test them individually
for connectivity. Connect each set of button wires to the GPIO 17
and run the fi rewall program. If the fi rewall power move builds
on each click of the button, the connections and buttons are
working and you’re ready to attach the buttons to the glove.
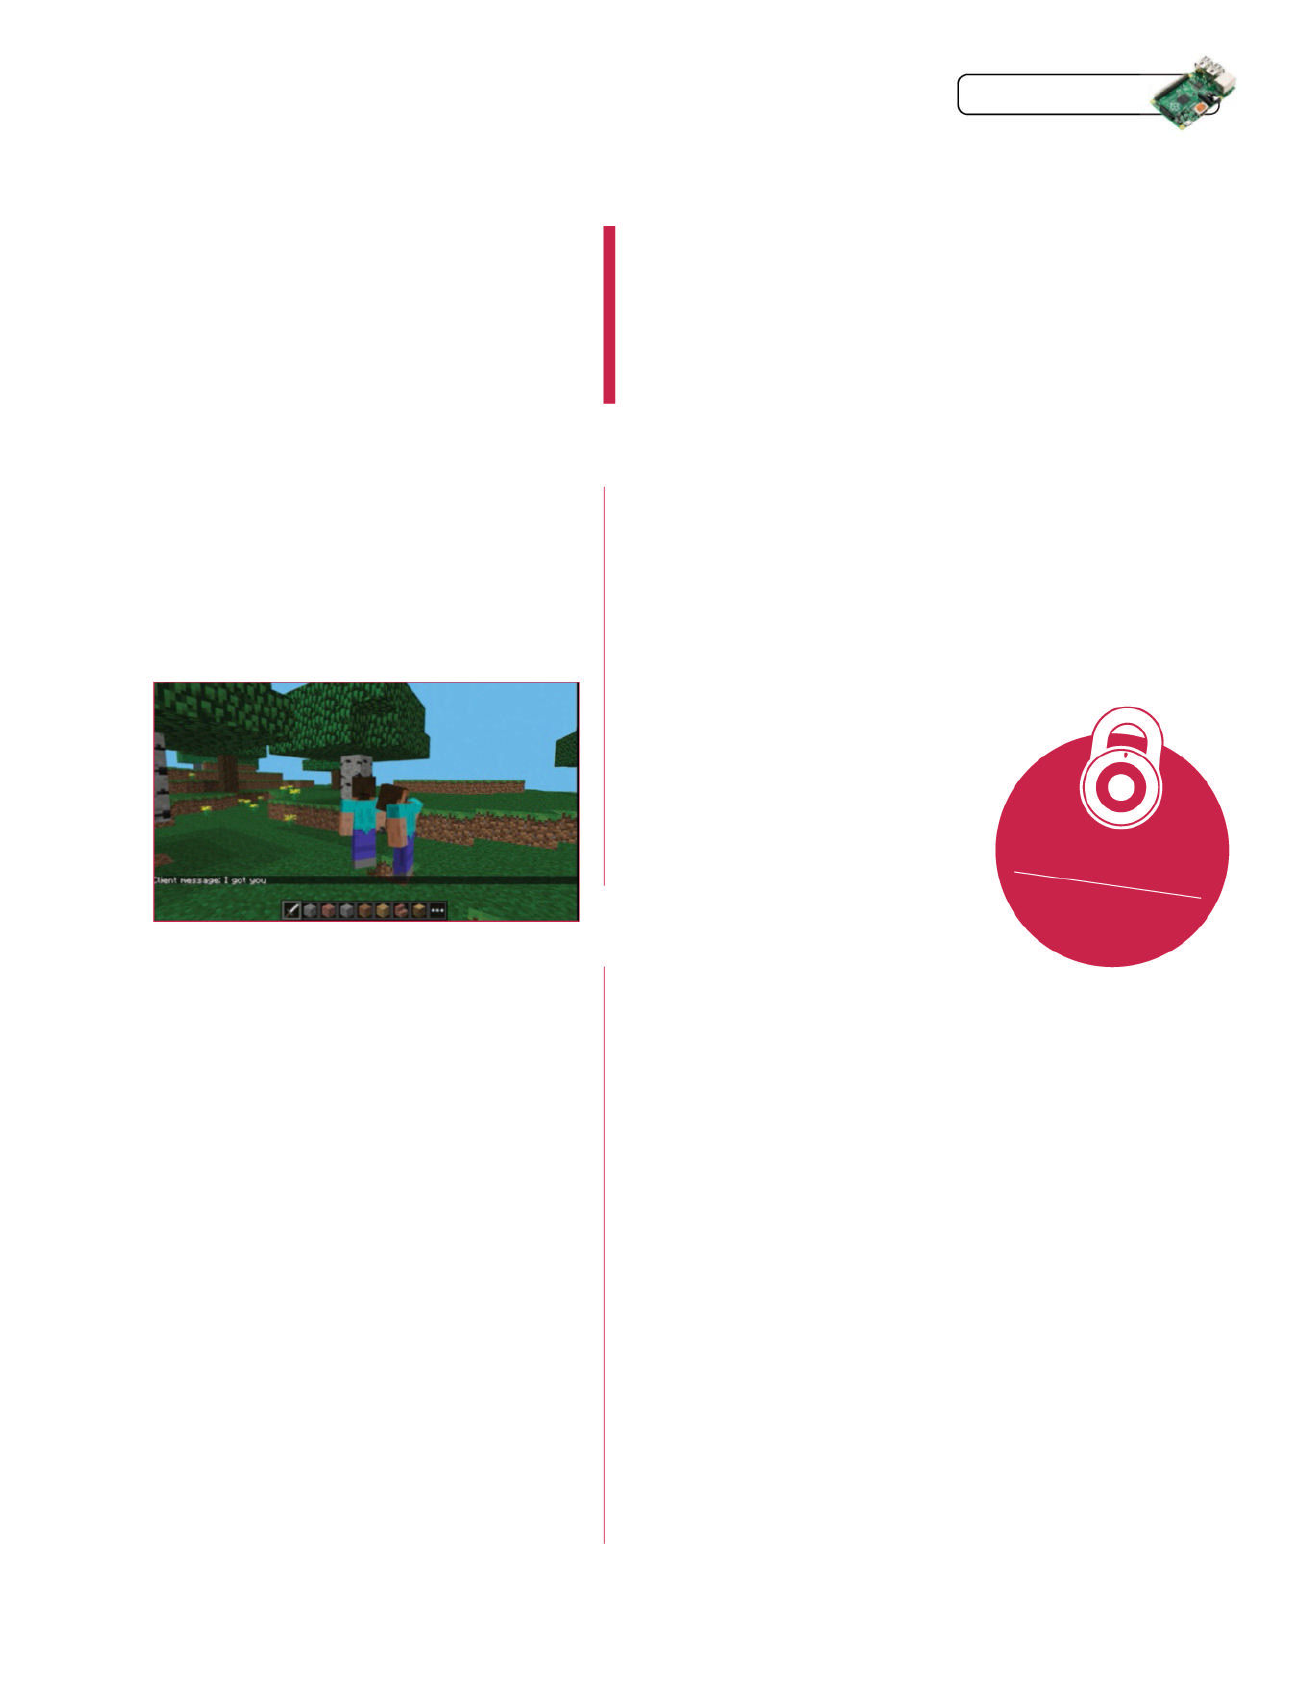
Raspberry Pi Tips, Tricks & Hacks 149
Tips | Tricks | Hacks
14 Find your IP addresses
To find the IP address of a Raspberry Pi, load the LX
terminal, type ipconfig and press Enter – the address will
be displayed on the line that begins int addr:. This is the
number that you enter into the mc = minecraft.Minecraft.
create(“192.168.2.234”). Remember on the Glove Raspberry Pi to
enter the IP address of the other player’s Raspberry Pi, not yours.
15 Run both programs
No game would be complete without some healthy
competition and strategy. A second program is deployed by the
other player on the network which tracks and registers if they
catch or hit you. The program checks the block that they have hit
and compares it to the player’s location.
16 Test for hits
To check if the other player has hit you, run the second
program on the Raspberry Pi of the player who is doing the
chasing. The program basically fi nds the other ‘glove’ players
current position and stores it in a variable. It then compares
the position that you hit with your sword, recording and storing
this too. The program then compares the values, if they match
then you have hit the other player and have won the game. If
not, get ready for a tirade of power moves. Note that in order to
monitor where the other player is, you must set the code line
mc1 = minecraft.Minecraft.create( ) to the IP address of the
Glove Raspberry Pi; for example, mc1 = minecraft.Minecraft.
create(“192.168.1.251”).
17 Game on
Now you are ready to play, check again that the IP
addresses are set for the other Raspberry Pi and not your
own. Build a new
Minecraft
world and start a new game on the
Raspberry Pi with the player who is chasing. When loaded, the
glove player joins the multiplayer game – this will be called Steve
(see Step 11). When loaded, you should see both players in the
world. Then run the ‘Pi Glove power moves’ program, and on the
other Pi run the ‘You hit me program’. Don’t forget to set the IP
addresses to each other Raspberry Pi.
Once set up, you can modify the power moves, use different
blocks and add new moves. You could create a timer and a
scoring system to track which player can survive the longest. If
you are feeling adventurous, you may want to make another
Power Glove, one for each player.
The program compares the values,
if they match then you have hit
the other player and have won the
game. If not, then get ready for a
tirade of power moves
#Main code to run
try:
lava_check = 0
mc.postToChat(“Minecraft Power Glove Enabled”)
while True:
if GPIO.input(17) == 0:
Firewall()
if GPIO.input(18) == 0: #needs to stop
Lay_Lava()
#GPIO.output(18, GPIO.LOW)
if GPIO.input(9) == 0:
Mega_Jump()
if GPIO.input(4) == 0:
Mega_Water_Puddle()
except:
print “Error”
import time
from mcpi import minecraft
mc1 = minecraft.Minecraft.create(“192.168.1.245”)
#The other players IP address goes here
mc = minecraft.Minecraft.create()
mc.postToChat(“###Here I come”)
Hit = 1
while Hit == 1:
#Find the block stood on
stood_x, stood_y, stood_z = mc1.player.getTilePos()
time.sleep(3)
blockHits = mc.events.pollBlockHits()
if blockHits:
for blockHit in blockHits:
if stood_z == blockHit.pos.z and stood_y == blockHit.pos.y+1:
mc.postToChat(“I got you”)
time.sleep(2)
mc.postToChat(“###GAME OVER###”)
time.sleep(1)
Hit = 0
mc.postToChat(“###Restart Hit Code”)
PiGlovePowerMoves.py (Cont.)
YouWereHit.py
Raspberry Pi, then enter this IP address into this line of code: mc
= minecraft.Minecraft.create( ). For example, mc=minecraft.
Minecraft.create(“192.168.2.234”), fi lling the empty brackets
with the IP address of the other Raspberry Pi within your game.
Remember that this is the IP address of the other player’s
Raspberry Pi and not your IP address.
Full code
FileSilo.co.uk

The Raspberry Pi is actually quite powerful for
its price. On its own, though, you won’t be doing
any extraordinary calculations – or compiling
or anything strenuous at all, for that matter.
However, as it’s readily available and fairly cheap,
you can get twenty of them for the price of a new
computer. Each of them on their own will be no
different, but link them together over a network
and you can have them share their power and vastly
increase the amount they can process.
This kind of setup is generally known as a
Beowulf cluster, so named for the eponymous hero
of the epic poem in which Beowulf is described
as having “thirty men’s heft of grasp in the gripe
of his hand”. It’s not ridiculously hard to achieve,
either – all you need is a lot of Raspberry Pis, a bit
of Python know-how and a reason to use it. This
makes it a good project for things like classrooms,
after-school Pi clubs and the like – really, anywhere
there’s a collection of Pis available for general use.
The more Raspberry Pi nodes you add into the
setup, the more powerful it will become, which
means you can start with just two or three at home
and then gradually add more and more to your
cluster, if you want to. And because of the way it all
works, you can hook in and control your SuperPi
cluster from your main computer as well, making
this as accessible at it is scalable.
Over the next few pages we’ll show you how to
get your Pis set up ready for use, including all the
tools you’ll need, how to get them all connected and
then fi nally what you can do with all that processing
power. We’d love to see your SuperPi once it’s
fi nished – drop us a tweet (@Books_Imagine)!
Pool the resources of multiple
Pis to create your own scalable
Pi supercomputer
150 Raspberry Pi Tips, Tricks & Hacks
Tips | Tricks | Hacks

Raspberry Pi Tips, Tricks & Hacks 151
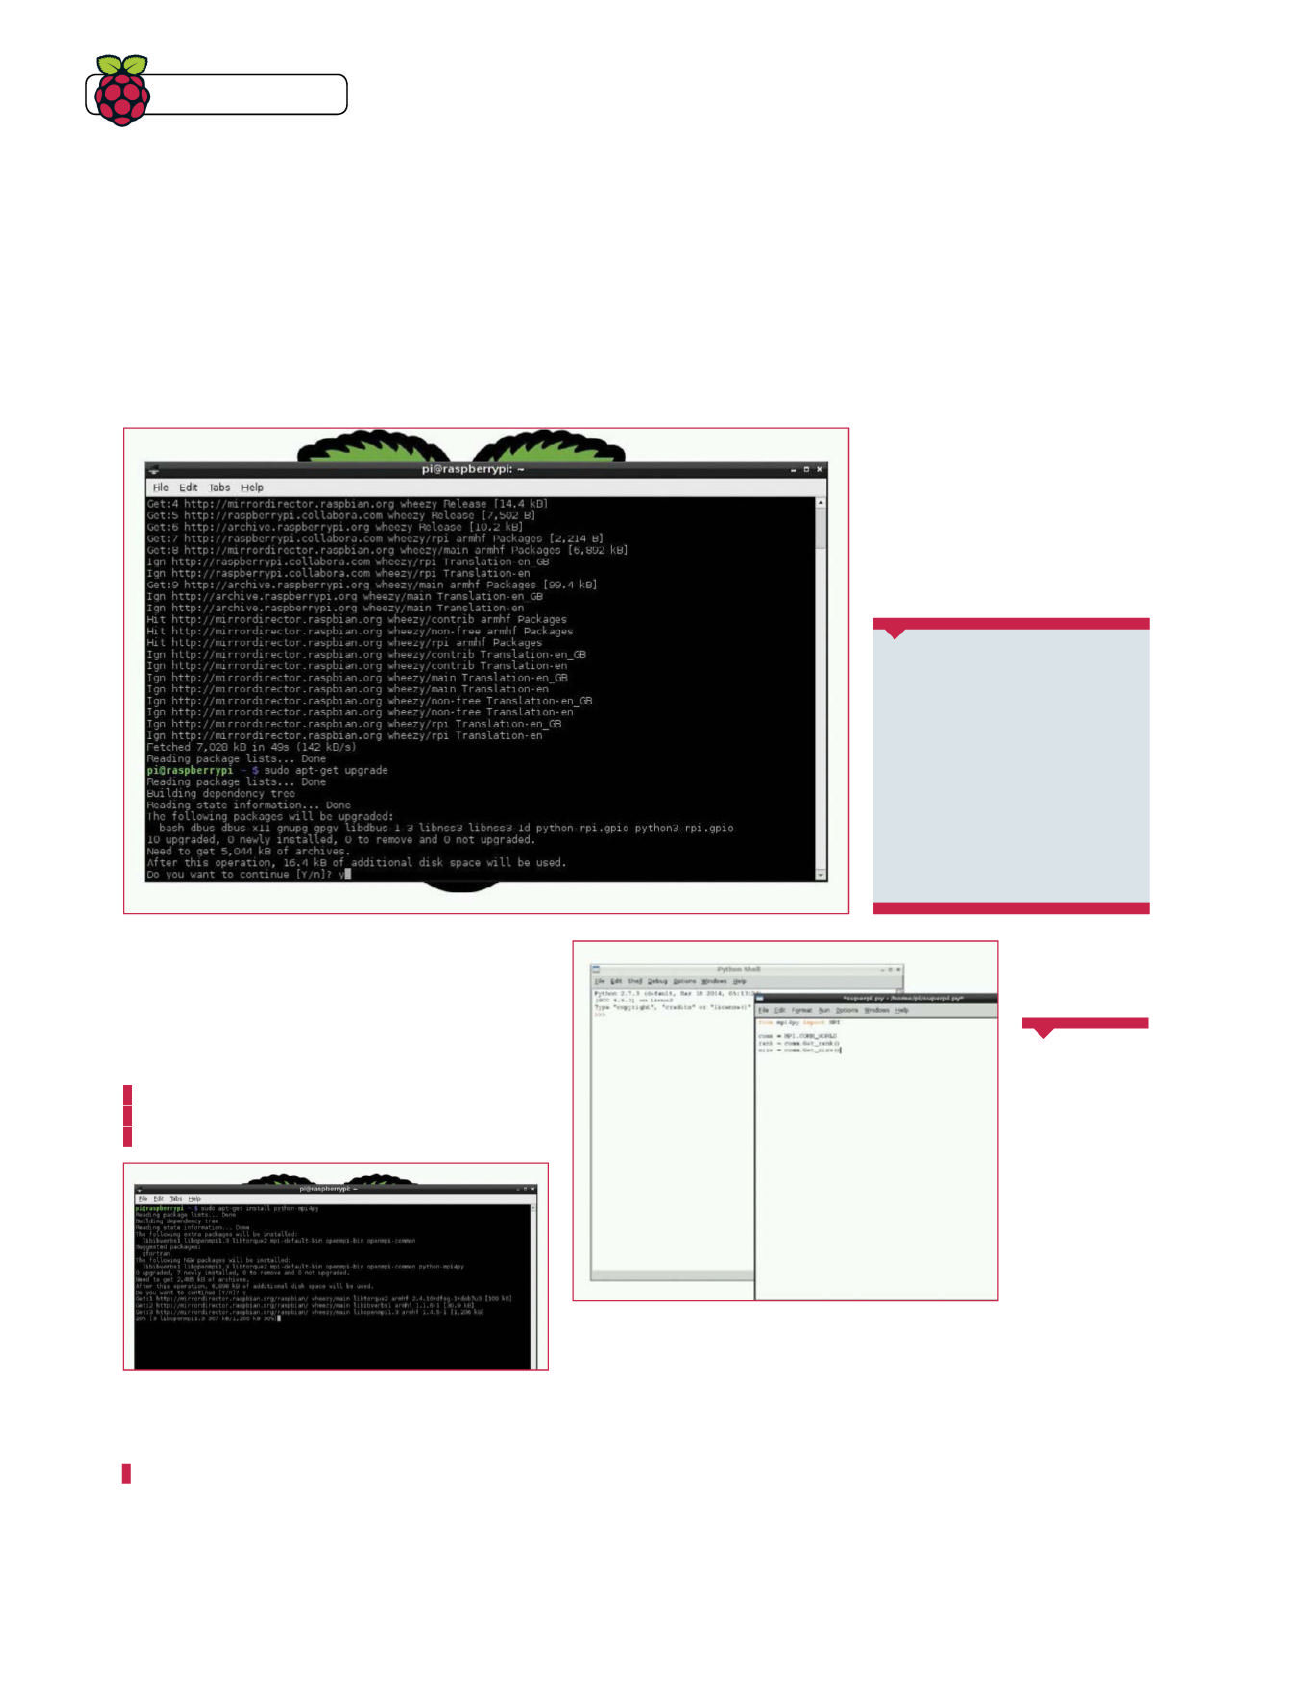
Tips | Tricks | Hacks
152 Raspberry Pi Tips, Tricks & Hacks
Get your Pis set up to talk to one other
and share their processing power
Programming your Pis
01Fully updated Pi
It’s very important that your Raspberry Pi computers
are fully updated for this, so make sure everything is
compatible, including the fi rmware. This can be done
with three commands in succession, and make sure you do it
on every Pi in turn:
$ sudo apt-get update
$ sudo apt-get upgrade
$ sudo rpi-update
02Get the MPI module
Install the mpi4py Python module in the terminal by
using the following command (again, on every Pi):
$ sudo apt-get install python-mpi4py
The module will also work on Arch or other Raspberry Pi distros,
although you’ll need to add it manually or install it via pip.
03 Create your threads
To use MPI in Python, fi rst import it with:
from mpi4py import MPI
The most important part of the code is telling MPI how to
rank the threads and recognise their size. Do this with:
comm = MPI.COMM_WORLD
rank = comm.Get_rank()
size = comm.Get_size()
What you’ll need
Q As many Raspberry Pi
computers as you want
Q SD card with up-to-date
version of Raspbian
Q mpi4py MPI python module
pypi.python.org/pypi/mpi4py
Q Updated fi rmware on
Raspberry Pi
Left If you want the SuperPi to
become a reality then updating
everything is crucial
The mpi4py library
can also be used
with Numpy, the
numerical and
mathematics
module for Python.
This can be installed
using sudo apt-get
install python-
numpy, and is very
useful for doing
the kind of large
calculations that
a cluster would
be making. We’ll
be using it in our
example over on
the next page, so
install it now.
Other
libraries
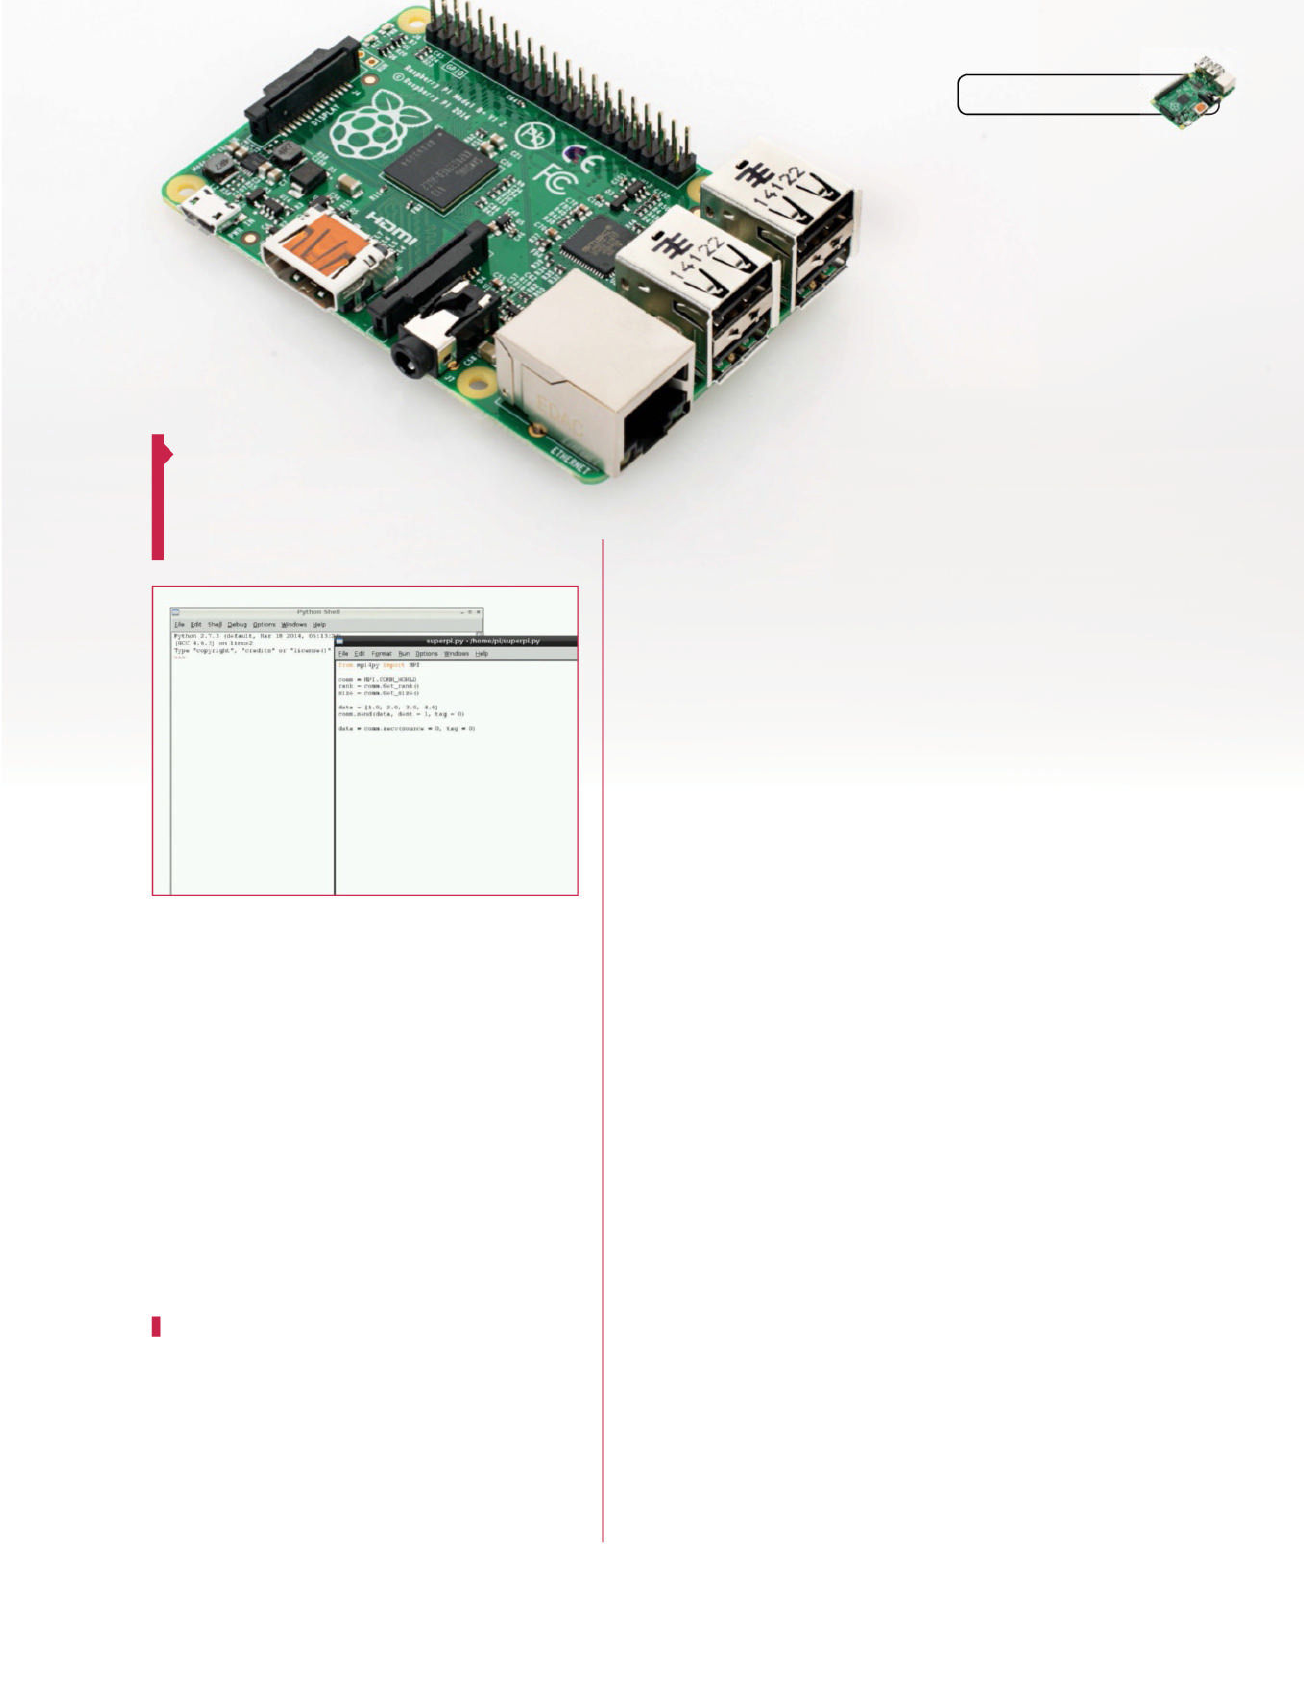
Raspberry Pi Tips, Tricks & Hacks 153
04 Send and receive data
Sending data is quite easy: you need to give it a
destination thread so MPI knows what it is when it returns,
halting the original thread until it does:
data = [1.0, 2.0, 3.0, 4.0]
comm.send(data, dest=1, tag=0)
data = comm.recv(source=0, tag=0)
The tags allow you to parse what to do with some specifi c
types of data.
05 Run the code
So that’s the basics of how your code can be
sent throughout a cluster. To actually activate the code
and choose the Raspberry Pi recipients, you will need to write
this in a terminal:
$ mpirun -host 192.168.1.20,192.168.1.21,192.168.1.22
python superpi.py
…with the IP addresses being the ones that are on the
other Raspberry Pis.
06 Will it work?
What we’ve done above won’t really do anything, but it
at least illustrates how you can send code around the network.
You can do it for any type of calculating but, due to some of the
network lag, it’s only worth it for large numbers and bigger data.
from __future__ import division
import numpy as np
from mpi4py import MPI
# Grab parutils from FileSilo.co.uk and put it in the same folder
as this. Use it to then print the number of cores used
from parutils import pprint
comm = MPI.COMM_WORLD
pprint("-"*78)
pprint(" Running on %d cores" % comm.size)
pprint("-"*78)
# Set up a ranking structure for the different nodes
my_N = 4
N = my_N * comm.size
if comm.rank == 0:
A = np.arange(N, dtype=np.float64)
else:
A = np.empty(N, dtype=np.float64)
my_A = np.empty(my_N, dtype=np.float64)
# Scatter data into my_A arrays
comm.Scatter( [A, MPI.DOUBLE], [my_A, MPI.DOUBLE] )
pprint("After Scatter:")
for r in xrange(comm.size):
if comm.rank == r:
print "[%d] %s" % (comm.rank, my_A)
comm.Barrier()
# Everybody is multiplying by 2
my_A *= 2
# Allgather data into A again and print results
comm.Allgather( [my_A, MPI.DOUBLE], [A, MPI.DOUBLE] )
pprint("After Allgather:")
for r in xrange(comm.size):
if comm.rank == r:
print "[%d] %s" % (comm.rank, A)
comm.Barrier()
Full code listing
Mpi4py will also
work on Arch or other
Raspberry Pi distros
Right You’ll need to know the IP
addresses of each Raspberry Pi, so
be sure to note those all down now
Tips | Tricks | Hacks
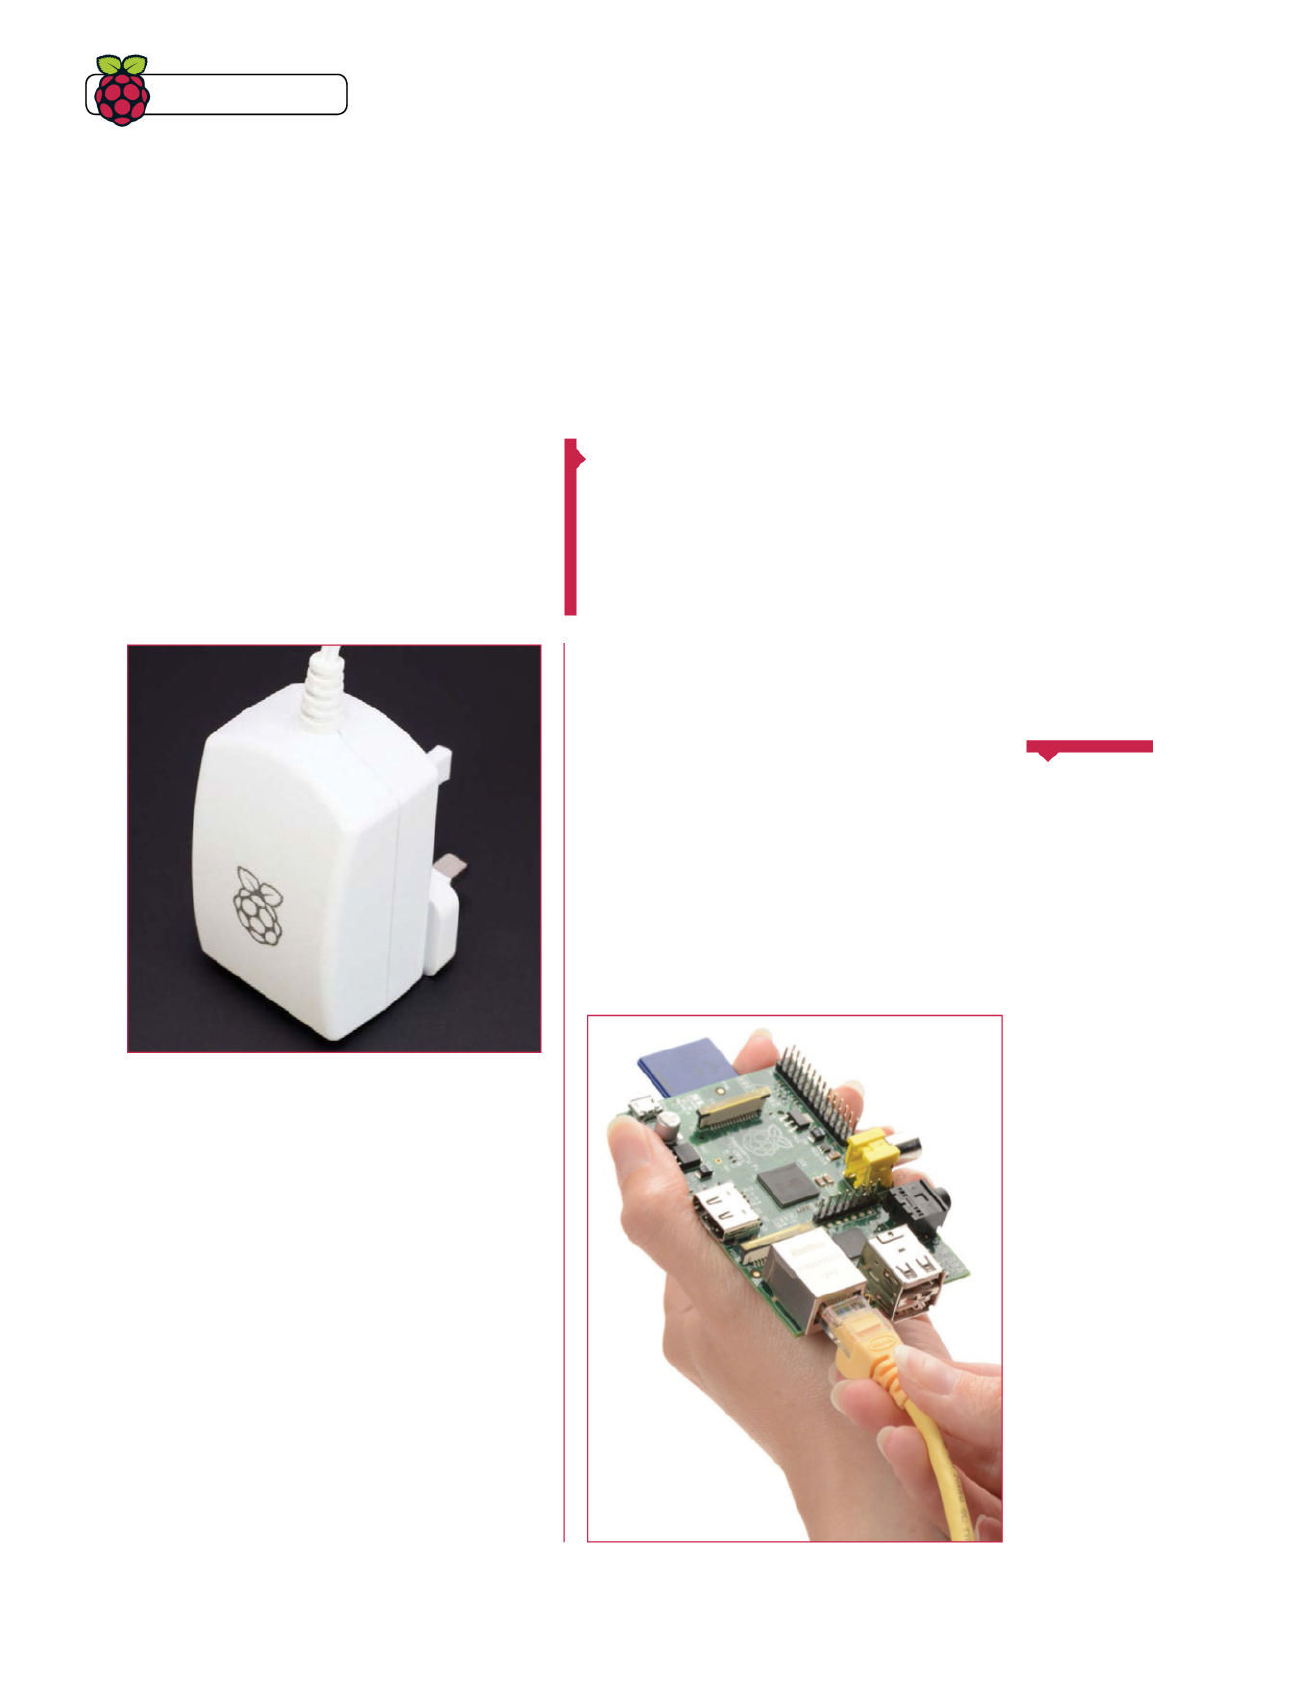
Tips | Tricks | Hacks
154 Raspberry Pi Tips, Tricks & Hacks
Now you’ve programmed your Raspberry Pi
units, it’s time to link them together
Construct your SuperPi
Programming the Raspberry Pis is one part of constructing
your supercomputer – properly housing them together
is another problem. The very basic things you require to
get them to work is power and a local network via a router
and/or switches. This then extends to cases, SD cards and even
Raspberry Pis themselves.
To make sure you get the most out of the system,
you’ll have to get the right selection of components to power
and connect them.
Power supply
A good power supply is extremely important when
powering a Raspberry Pi, otherwise it will power on and
run but you won’t be able to get the most out of it. If you’re
using the Model B+ and notice a rainbow square in the
corner, that’s an indication you’re not giving it enough power.
You won’t need the maximum amount of power in your
cluster, as you won’t be powering a display or a camera or
possibly anything off the GPIO ports, so the recommended
two amps may be a little overpowered for your needs, even if
you do push the processor to its limits. However, if you plan
to do any overclocking then the two-amp power supply will
become more and more necessary, and it’s a lot better to be
on the safe side.
As your cluster grows you’ll also need to make sure you
have plenty of surge protection as the Raspberry Pis can be
extremely sensitive.
We recommend:
Raspberry Pi Universal Power Supply
pimoroni.com
Networking
The more Raspberry Pis you plan to connect up, the more
networking you will need to hook them together. The best
method to do this is via cable, as it will carry any messages
faster and with less latency than wireless – but creating
the cluster isn’t as easy as plugging it into a router, though.
With more Pis you’ll need more ports, and this can be
accomplished by getting network switches. These are dumb
connectors that contain no routing or address system, but
allow you to connect more devices up to a central router.
Even though we recommend cabling, you can still use
wireless to connect extra Pis. This also has the effect
of cutting down on the amount of cabling and network
switches you can use, but in general it’s better to have a
homogenous setup.
You won’t need the maximum
amount of power in a cluster, as
you won’t be powering a display
or a camera off the GPIO ports
If you fi nd you
still want a little
extra power from
your cluster, you
could always try
overclocking your
Raspberry Pis.
In Raspbian, you
can do this from
the confi g menu,
accessible via sudo
raspi-confi g. In the
menu you will fi nd an
option to overclock
with a few levels to
select from. You can
do this on separate
Raspberry Pis or
all of them, but be
aware that doing
so can shorten the
lifespan of a Pi CPU,
especially when set
to the highest level.
Overclock
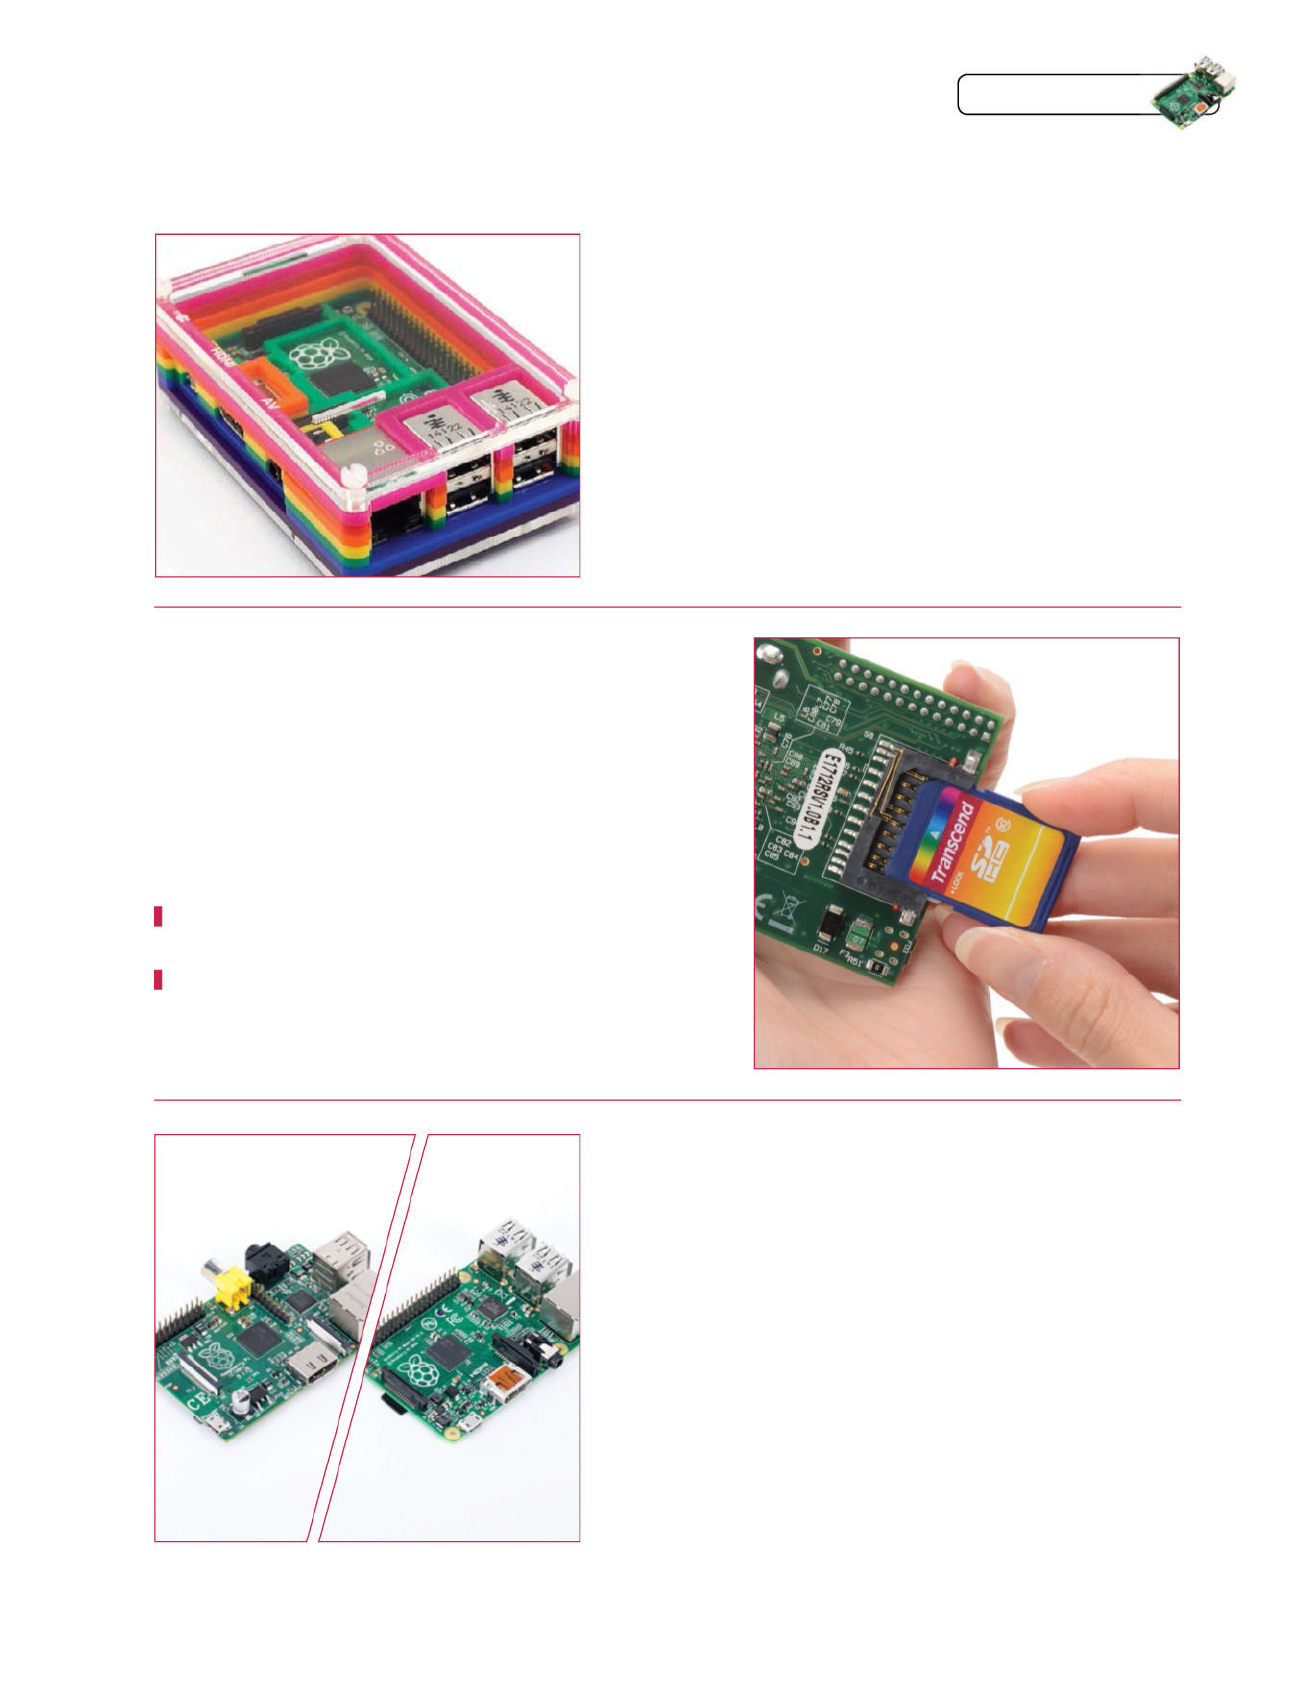
Tips | Tricks | Hacks
Raspberry Pi Tips, Tricks & Hacks 155
Cases
There are many types of cases for a lot of Raspberry Pi uses: from simplistic
plastic cases to protect the Pi from dust, to fully water- and weather-proof metal
shells. One of the most versatile cases is the Pimoroni Pibow, which comes in a
variety of sizes and confi gurations for all versions of the Raspberry Pi. The cases are
all held together by screws that can easily be repurposed to help mount the Pis in
a tower or other confi guration so that they don’t take up as much horizontal space.
They can be a little slower to get your Raspberry Pi into than some cases, but
they’re quite durable and easily customisable if you want to move them, or add a
small touchscreen or scrolling LCD screen to the main Raspberry Pi to keep an eye
on things without needing to SSH in.
We recommend:
Pimoroni PiBow
pimoroni.com
SD cards
SD card selection is a minor but still important factor when creating your cluster.
Some Raspberry Pis come with an SD card which should be suitable enough, but
others you’ll need to buy some cards for. We recommend getting 4GB cards; while
a 2GB card will do the job, 4GB allows you to use NOOBS if you have to and is also
future-proof for larger distros and operating systems. As the Model B+ requires a
micro SD card, make sure you have the right ratio of SD and micro SD cards.
When it comes to getting the SD cards all set up and homogenous, the easiest
and quickest method is to fi rst do all the installing and updating on one Raspberry
Pi, minus the fi rmware update with rpi-update. Then create a copy of the disk by
putting it into a Linux system, open up the terminal and use:
sudo dd bs=1M if=/dev/[SD card location] of=superpi.img
Once it’s copied, you can write this to all the other cards using:
sudo dd bs=1M if=superpi.img of=/dev/[SD card location]
We recommend:
4GB
pimoroni.com
Raspberry Pis
It actually doesn’t really matter what type of Raspberry Pi you use in your
cluster – you could use a homogenous selection of the latest Model B+ or even have
a mixture of the B+, B and Model As connected to each other. As long as you have
them running the same software and possessing the relevant scripts, the system will
work. The main differences you might encounter are the differing power draws between
devices and that the Model As might be slightly slower for some calculations.
The Model A types do have a disadvantage in that they do not have an ethernet
port built-in. However, they can still make use of a wireless dongle to connect to the
overall network of Raspberry Pis.
Make sure you set a static IP address for each Raspberry Pi with a specifi c range
covering their location on the network. This is helpful for two main reasons, the fi rst
one being the ability to always be able to call the correct address when running MPI,
and the second being that you can then SSH in and maintain your Pis from afar.
We recommend:
Model B+
element14.com
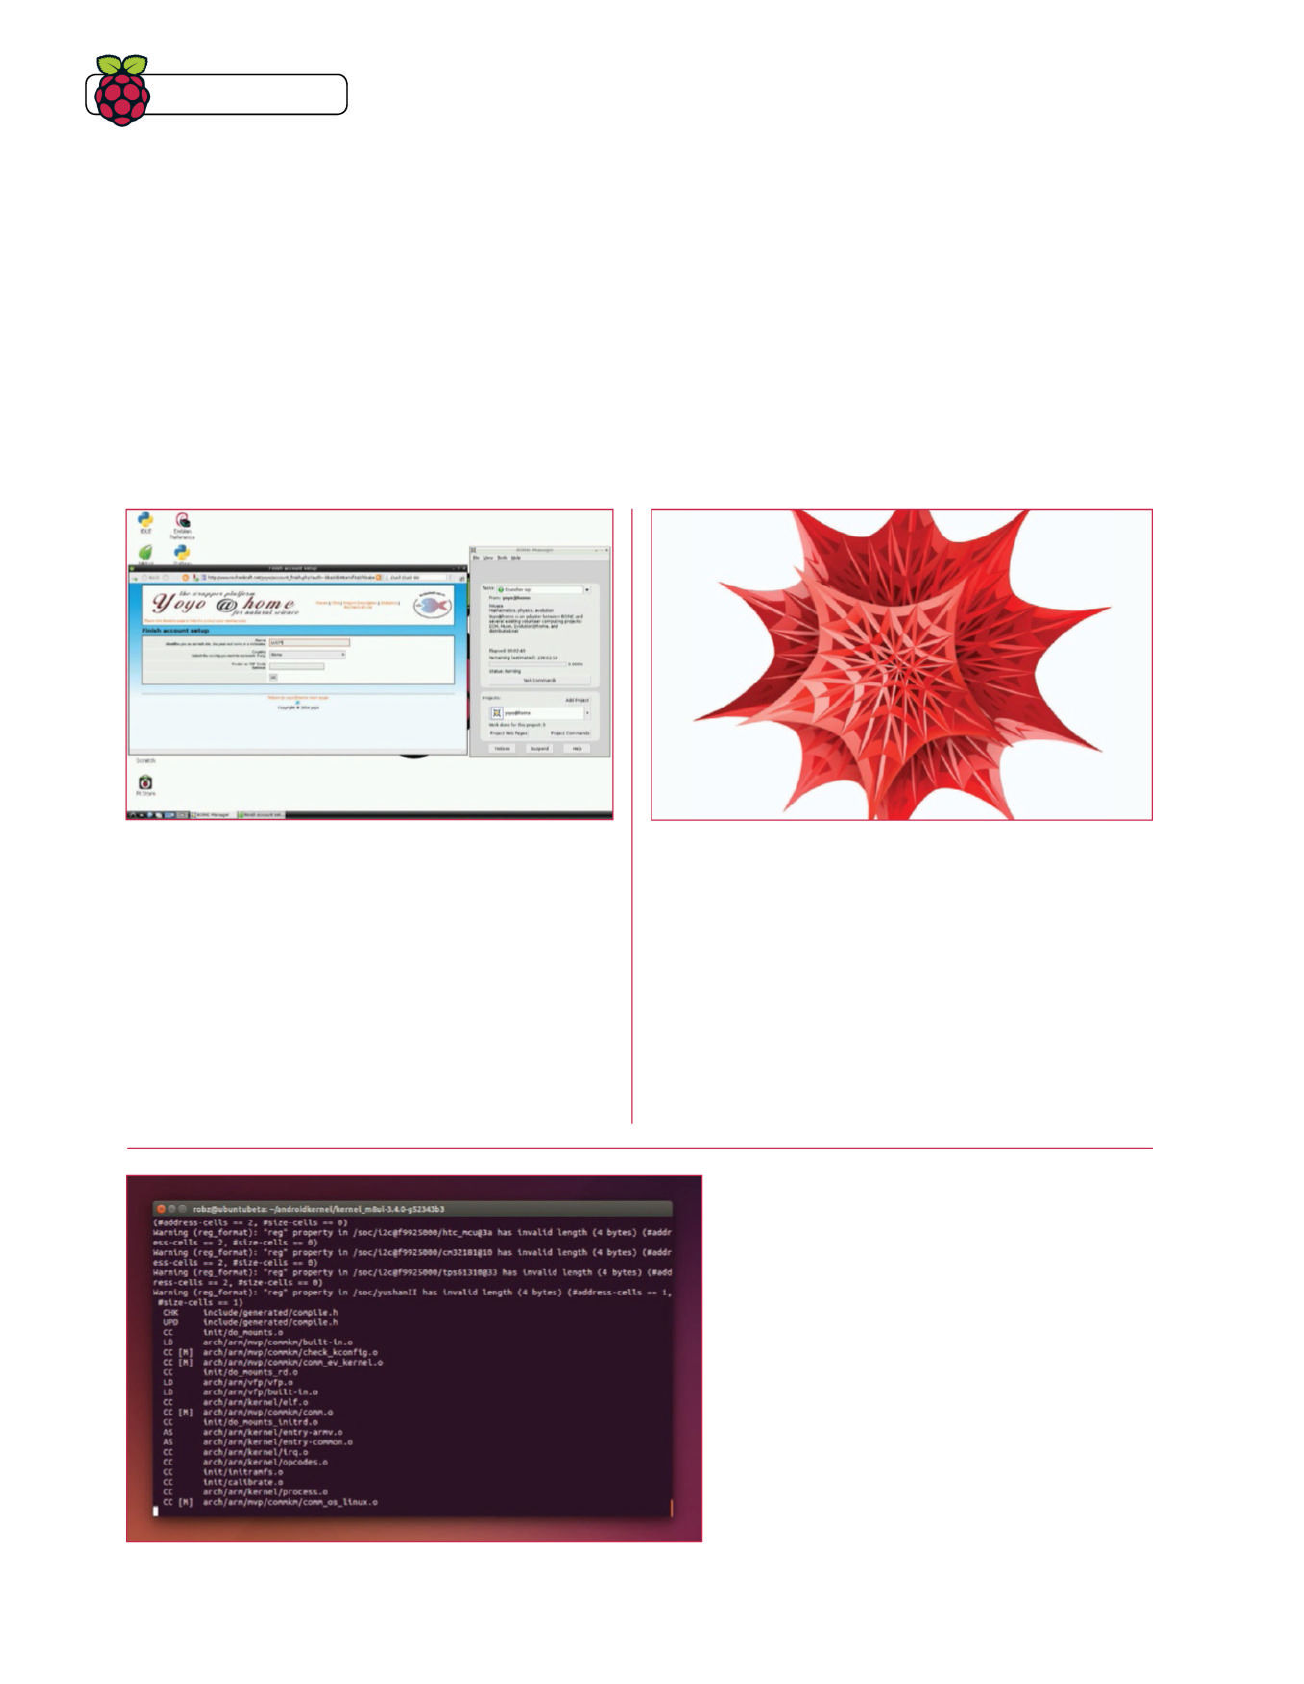
Tips | Tricks | Hacks
156 Raspberry Pi Tips, Tricks & Hacks
Your supercomputer is ready to crunch
some code. What will you have it do?
How to use your
Super Raspberry Pi
Donate power with BOINC
BOINC is the computer network system that allows you to donate
idle CPU power to crunch big data, such as folding proteins or
analysing signals from the cosmos to look for alien life. There’s
a specifi c app add-on for BOINC that lets you spread the workload
across the MPI network and treat them all as extra CPU threads rather
than extra units. The app details can be found here: bit.ly/1BBTS0W.
The Ras Pi on its own won’t be able to add much to the pool, but
linking several together can really boost the performance and create a
powerful little node to help out with some projects. There are several
you can donate processing power to involving science, medicine and
maths. You can tweak BOINC to use more than just idling Pi power.
Quick compiling
Now you have a lot more processing power at your disposal,
you can try compiling Raspberry Pi programs on the cluster
rather than just on the single Raspberry Pi. These will only
really work on another Raspberry Pi, though, and compiling
on a single Raspberry Pi can be extremely time-consuming
compared to compiling on a proper PC or laptop.
There is, however, also a selection of MPI-only applications
that can be built using your cluster to increase the
functionality of cluster without relying on Python code. These
must include specifi c MPI commands in the source code
to make sure they run properly, which can be done a little
differently than in our Python example. Look up the best
practices for your programming language and if there are any
extra modules or plugins you’ll need for it. You can test the
code in a similar way to how we tested the Python code.
Modelling and simulations
Python and other languages can be used to create models of complex
systems. Such models can include planetary orbits and objects
interacting with them, huge mathematical equations and any resulting
graphs for tides, the weather and much more. Many of these use a lot of
calculations and can be slow even on a normal PC. Give them a lot more
cores and you can get much faster, and sometimes more accurate, results.
Mathematica also contains some level of cluster support that works
via Open MPI, the software we’re using to link the Raspberry Pi network
together. Wolfram has information on how it works and how to use it on
their website (bit.ly/1oEYVb8), and it can really help with crunching the
amount of data you can access and use in Mathematica.
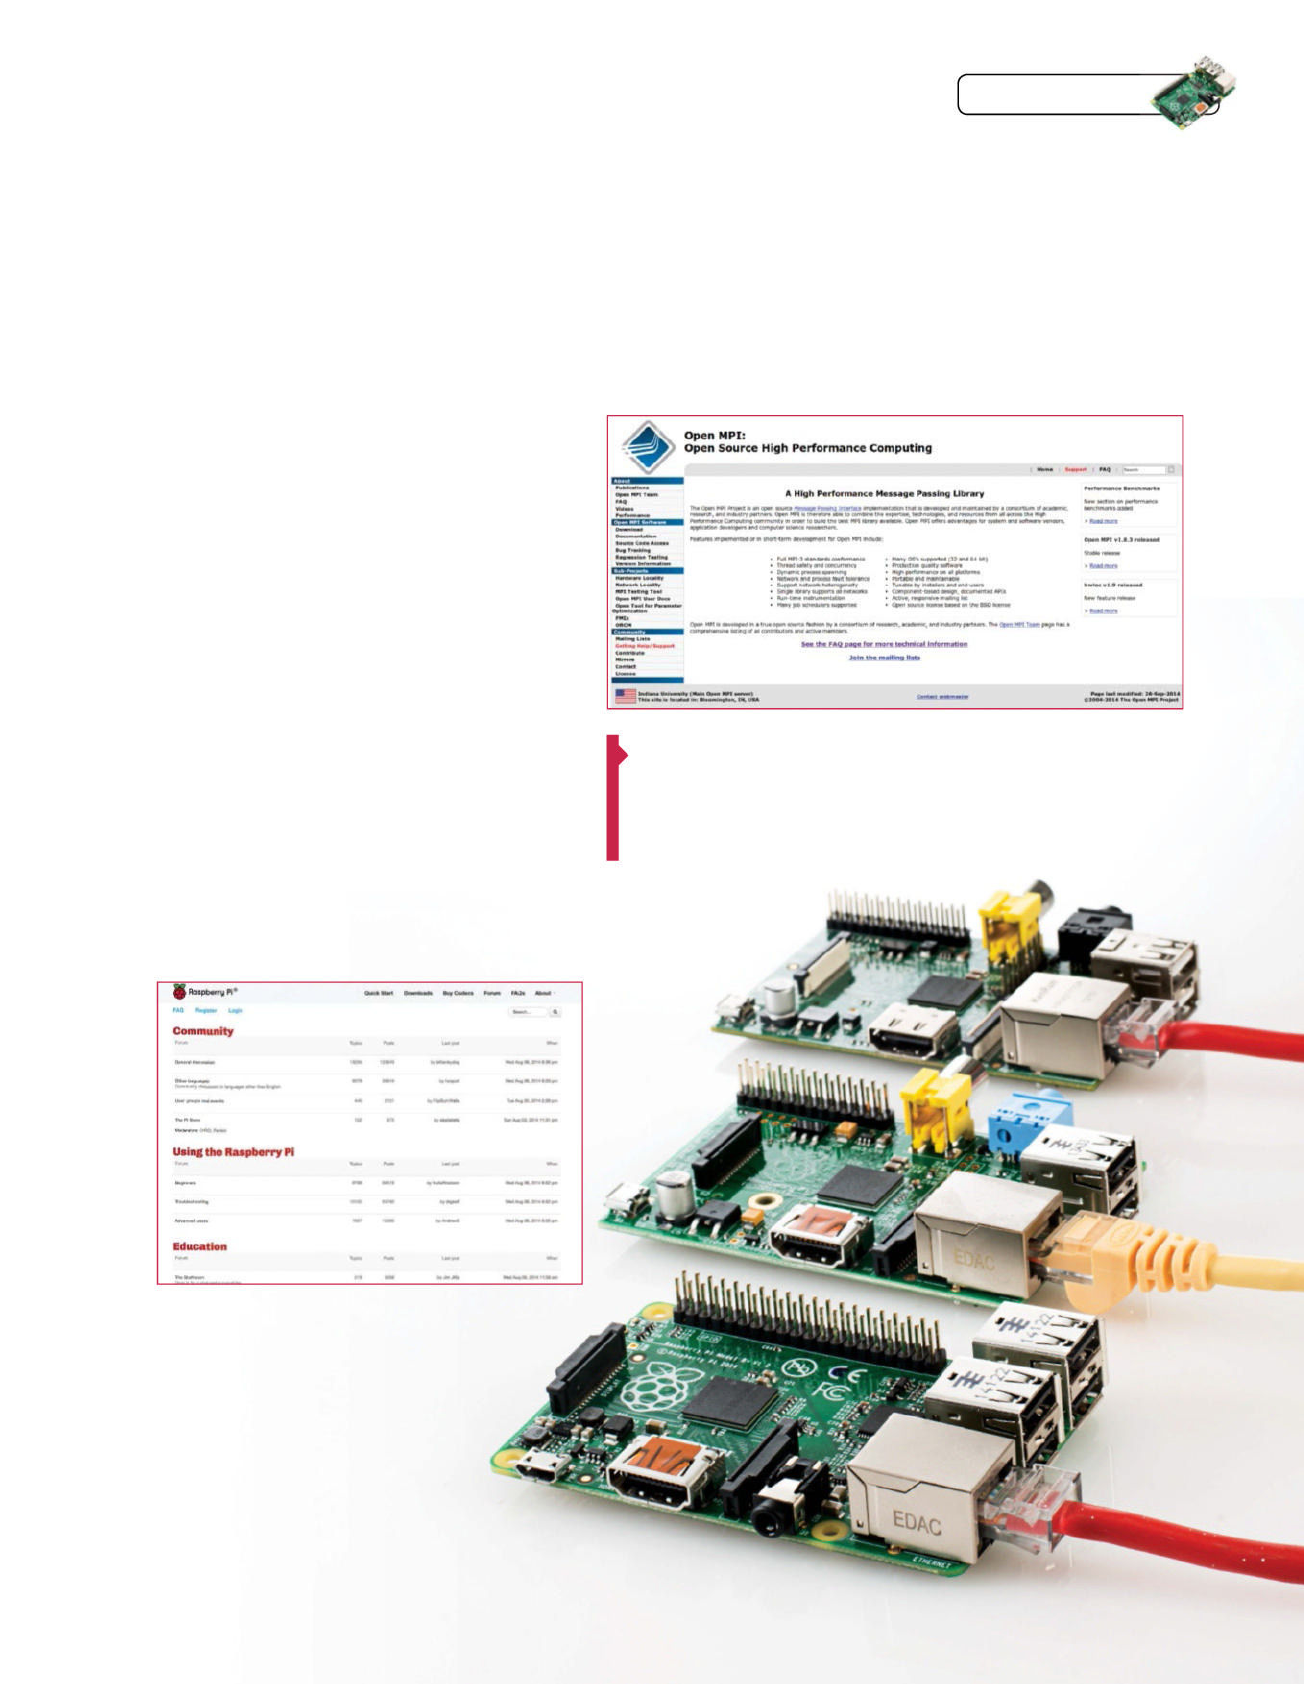
Tips | Tricks | Hacks
Find out more about MPI, Python and other
ways to make use of your Super Pi
Resources
You can learn how to do
much more than just
multiply numbers
Open MPI
open-mpi.org
Open MPI (right) is the implementation of MPI that our
Python module uses to send and receive data over the
Raspberry Pi network. It supports all three major versions of
MPI and, importantly, provides it in an open source format for
everyone to use. There’s full documentation for the extended
library on the forums (www.mpi-forum.org) if you need to
extend it past Python programs and take a little more control
of what you’re calculating and how.
mpi4py documentation
pythonhosted.org//mpi4py/usrman/index.html
The Python module we’re using has many more functions
than the one we’re using, and they’re all contained in the
documentation available on their website. You can learn
how to do much more than just multiply numbers, as we
showed you in our example, including the use of wrappers for
other code, matrices of data and a couple other functions. It’s
very fl exible and still in development so it’s worth checking
in on it and the change logs every now and then for new or
different functions.
Raspberry Pi forums
raspberrypi.org/forums
For anything going wrong with your Pi beyond
MPI, your fi rst port of call should always be
the Raspberry Pi forums. The users are well
experienced in using the Raspberry Pi and
Linux, and will usually be able to help out. If you can
give precise details and log fi les along with your post, they
might be able to help you quicker.
Raspberry Pi Tips, Tricks & Hacks 157

* This o er entitles new UK Direct Debit subscribers to receive their rst three issues for £5. After these issues, subscribers will then pay £25.15 every
six issues. Subscribers can cancel this subscription at any time. New subscriptions will start from the next available issue. O er code ‘ZGGZINE‘ must
be quoted to receive this special subscriptions price. Direct Debit guarantee available on request. This o er will expire 31 December 2016.
** This is a US subscription o er. The USA issue rate is based on an annual subscription price of £65 for 13 issues, which is equivalent to $102 at the
time of writing compared with the newsstand price of $16.99 for 13 issues, being $220.87. Your subscription will start from the next available issue.
This o er expires 31 December 2016
Special
trial offer
SD CARD
HDMI
LAN
USB
USB
40 PINS: 28x GPIO, I2C, SPI, UART
Raspberry Pi
Practical projects Essential upgrades P ython tips
NEW
40
Over
Raspberry
Pi projects
Pi Zero
tricks
inside
FREE
DISTROS
10
Exclusive offer for new
Enjoyed
this book?
Tr y
3 issues
for just
£ 5*

For amazing offers please visit
www.imaginesubs.co.uk/lud
Quote code ZGGZINE
Try three issues for £5 in the UK*
or just $7.85 per issue in the USA**
(saving 54% off the newsstand price)
The magazine for
the GNU generation
Written for you
Linux User is the only magazine dedicated to
advanced users, developers & IT professionals
In-depth guides & features
Written by grass-roots developers & industry experts
Jam-packed with Ras Pi
A Practical Raspberry Pi section brings you clever
tutorials, inspirational interviews and more
About
the
mag
Or telephone UK 0844 249 0282 overseas +44 (0) 1795 418 661
subscribers to…
+
+ Calls will cost 7p per minute plus your telephone company’s access charge
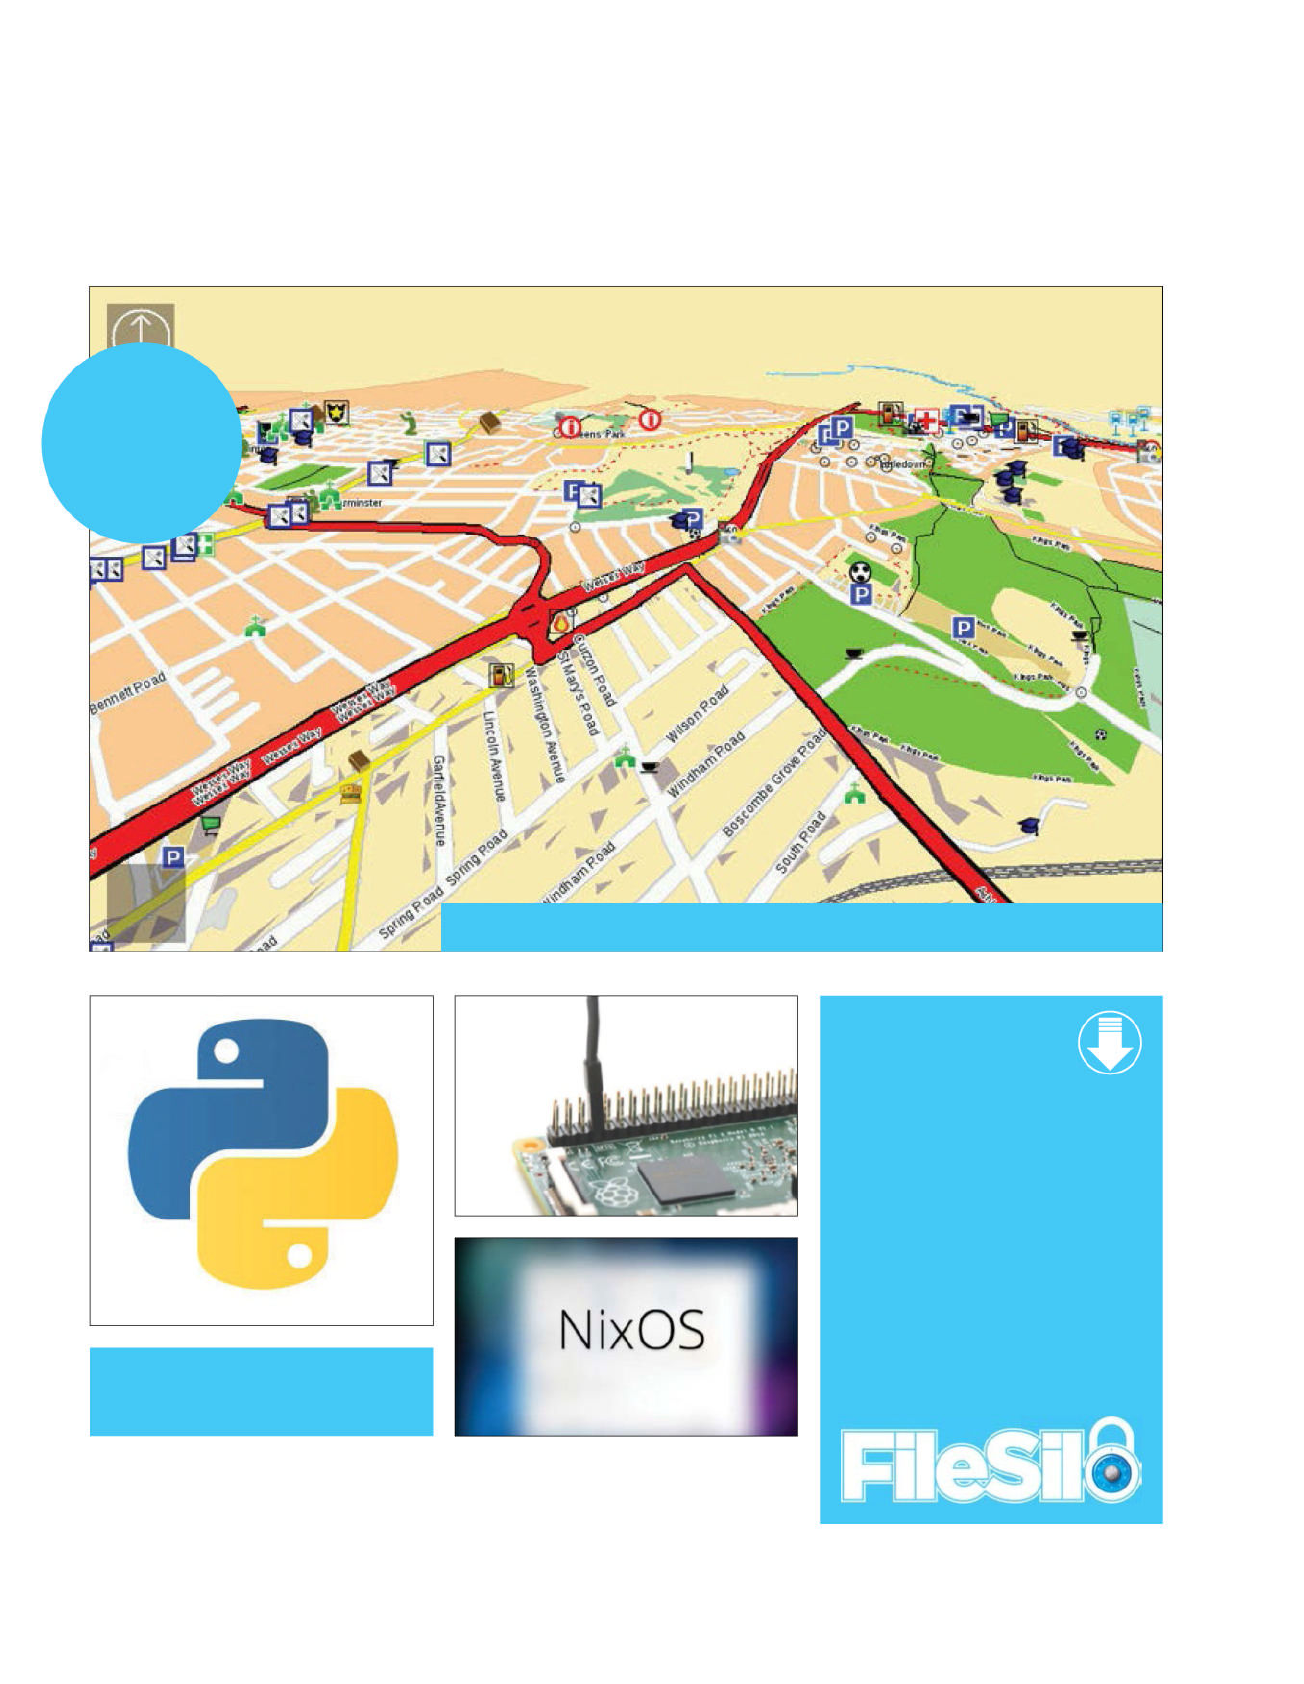
YOUR FREE RESOURCES
Log in to filesilo.co.uk/bks-848/ and download your tutorial resources NOW!
YOUR BONUS
RESOURCES
ON FILESILO WE’VE PROVIDED
FREE, EXCLUSIVE CONTENT FOR
RASPBERRY PI TIPS, TRICKS &
HACKS READERS, INCLUDING…
• Distros to use in your projects including
Ubuntu, BackBox 4.4, Raspbian,
Peppermint OS 6, NixOS, Qubes 3.0 and
many more
• All software you need to download to
complete your Raspberry Pi projects
including code and scripts
• Hours of video tutorials across 20 videos
covering everything from how to write
good Raspberry Pi code and an insight
into Debian Linux
Python: the ultimate
Raspberry Pi coding language
Download distros
Complete the tutorials
PACKED WITH FREE
PREMIUM CONTENT
Go to: http://www.filesilo.co.uk/bks-848/
EVERYTHING
YOU NEED
TO FOLLOW THE
TUTORIALS AND
PROJECTS IN
THIS BOOK
GET THE SOFTWARE USED IN THE TUTORIALS
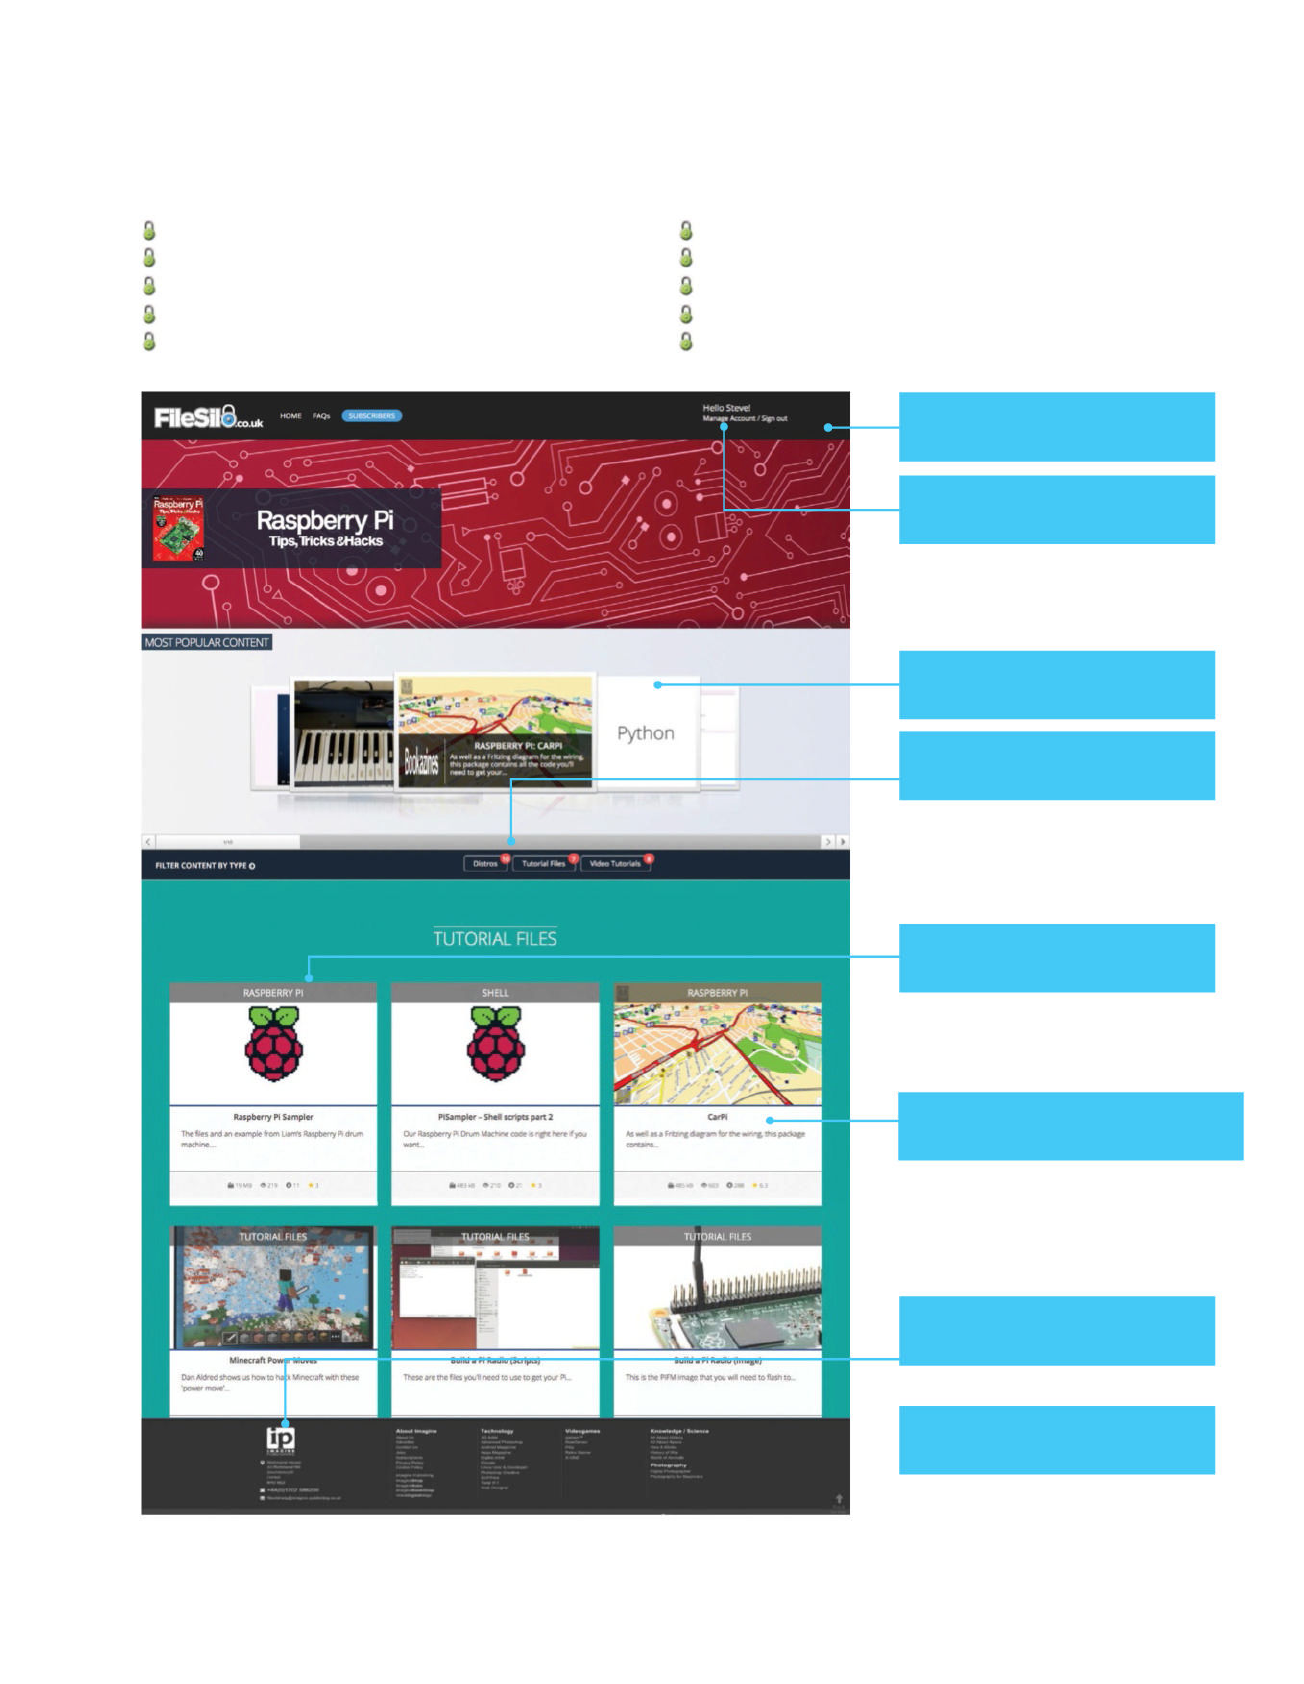
FILESILO – THE HOME OF PRO RESOURCES
A rapidly growing library
Updated continually with cool resources
Lets you keep your downloads organised
Browse and access your content from anywhere
No more torn disc pages to ruin your magazines
No more broken discs
Print subscribers get all the content
Digital magazine owners get all the content too!
Each issue’s content is free with your magazine
Secure online access to your free resources
Discover your free online assets
The most popular downloads are shown in
the carousel here, so check out what your
fellow readers are enjoying.
Whether it’s Python tutorials or software
resources, categories make it easy to
identify the content you’re looking for
Find out more about our online stores, and
useful FAQs, such as our cookie and
privacy policies and contact details.
If you’re looking for a particular type of
content, like software or video tutorials, use
the filters here to refine your search
See key details for each resource including
number of views and downloads, and the
community rating
Discover our fantastic sister magazines
and the wealth of content and information
that they provide.
The first time you use FileSilo, you’ll need to
register. After that, you can use your email
address and password to log in.
This is the new FileSilo site that replaces
your disc. You’ll find it by visiting the link on
the following page.
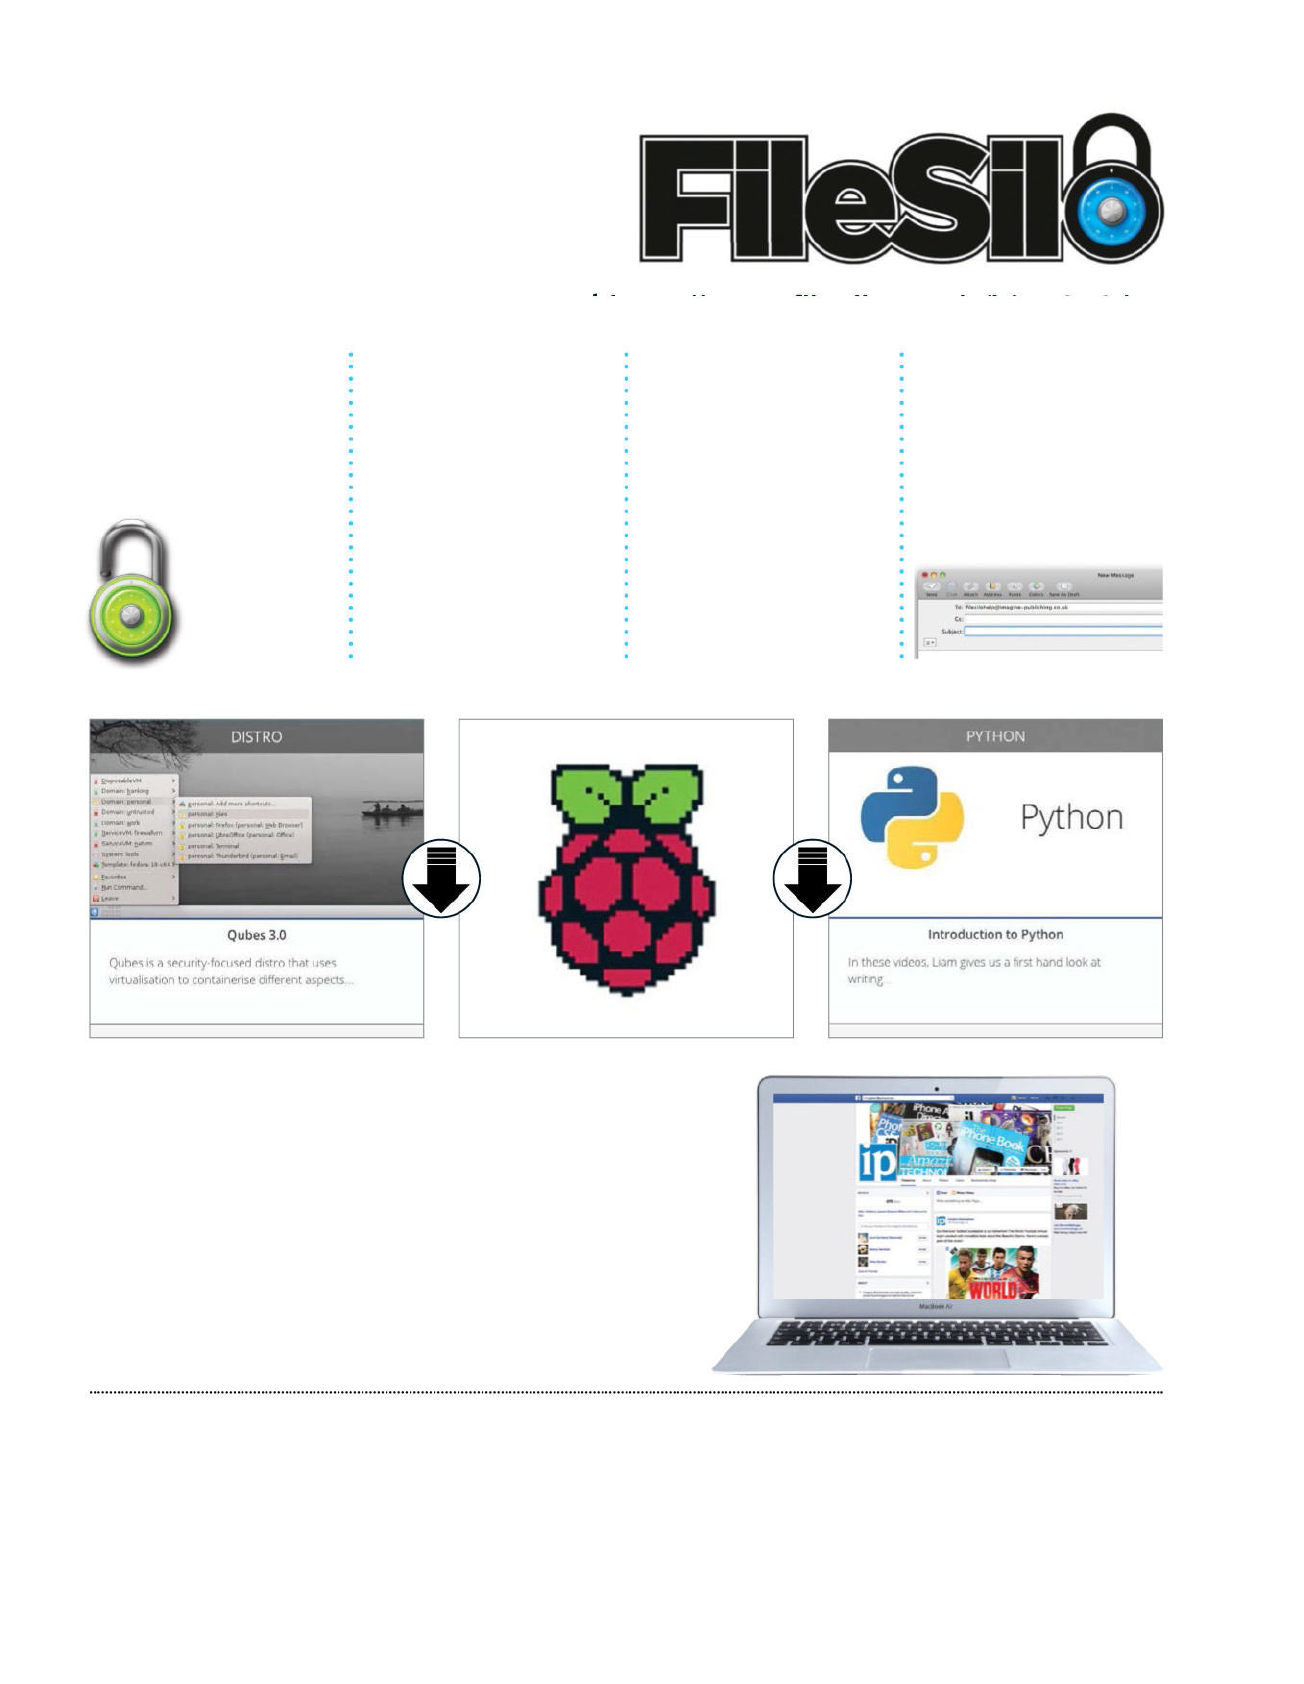
HOW TO USE
EVERYTHING YOU NEED TO KNOW ABOUT
ACCESSING YOUR NEW DIGITAL REPOSITORY
Having trouble with any of the techniques in this issue’s tutorials? Don’t know how to make the best
use of your free resources? Want to have your work critiqued by those in the know? Then why not
visit the Bookazines or Linux User & Developer Facebook page for all your questions, concerns and
qualms. There is a friendly community of experts to help you out, as well as regular posts and
updates from the bookazine team. Like us today and start chatting!
facebook.com/ImagineBookazines
facebook.com/LinuxUserUK
NEED HELP WITH
THE TUTORIALS?
To access FileSilo, please visit http://www.filesilo.co.uk/bks-848/
01 Follow the on-screen
instructions to create
an account with our secure
FileSilo system, or log in and
unlock the issue by
answering a simple question
about the edition
you’ve just read.
You can access
the content for
free with each
edition released.
02Once you have logged
in, you are free to
explore the wealth of content
made available for free on
FileSilo, from great video
tutorials and online guides to
superb downloadable
resources. And the more
bookazines you purchase,
the more your instantly
accessible collection of digital
content will grow.
03
You can access
FileSilo on any
desktop, tablet or
smartphone device using
any popular browser (such
as Safari, Firefox or Google
Chrome). However, we
recommend that you use a
desktop to download
content, as you may not be
able to download files to your
phone or tablet.
04
If you have any
problems with
accessing content on FileSilo,
or with the registration
process, take a look at the
FAQs online or email
filesilohelp@
imagine-publishing.co.uk.

Get inventive
Take your Pi to the next level by
customising it to make new devices
Create with Pi
Your Pi becomes autonomous when you
use our Hacks to build robots and cars
Raspberry Pi
Master the basics
Discover how the Raspberry Pi really
works with a selection of fun projects
Over 200
essential
hints &
tips
Practical projects Essential upgrades Python tips
