SAP User Guide V2.2
User Manual:
Open the PDF directly: View PDF ![]() .
.
Page Count: 15

Snap and Plug - v2.2 - User Guide
Docs from version in Asset Store: 2.2.9 (Last updated: January 2018)
Good choice! Snap and Plug will make you a better designer, get your game finished quicker, and
better manage your complex level-designs. Well, two out of three, anyway.
This doc starts with a Quick Start - this should get you up and running.
If you get stuck, scroll down - there's a bunch of YouTube videos with comments/details based on
the experiences of my beta-testers.
Below that you'll find some info on the Example Projects that are included with SaP. They range
from ultra simple (Simplest Demo) to the full in-game car-builder using play-mode snapping
(CarBuilder Demo). There are some details below on how these work that you might find useful
when poking through the included Scenes.
Table of Contents
Snap and Plug - v2.2 - User Guide..................................................................................................... 1
Ultra Quick Start............................................................................................................................. 2
Upgrading your objects.............................................................................................................. 2
Configure the Socket(s)............................................................................................................. 2
Start snapping!...........................................................................................................................3
Tutorial Videos................................................................................................................................5
Intro/Beginners...........................................................................................................................5
Advanced: Cars Demo...............................................................................................................5
Example Projects / Tutorial Scenes............................................................................................... 6
Example: Simplest Demo...........................................................................................................6
Example: PhysicsJoints Demo...................................................................................................7
PhysicsJoints: Changing the defaults........................................................................................8
Example: Wiggle Meshes (3D level creation using snapping).................................................. 9
Example: Cars Demo...............................................................................................................10
Cars: Play-mode / Runtime Snapping using SnappableSpawner...........................................10
Cars: 3D transparent preview of snap......................................................................................11
Cars: Unity Wheel Physics.......................................................................................................11
Detailed instructions..................................................................................................................... 11
Snapping.................................................................................................................................. 11
Custom Joints and Joint-types.................................................................................................12
Support.....................................................................................................................................13
Major changes
2.2.9: Added “Preview” modes to API
Before snapping, you can now get a “preview” of the snap without actually moving the snapping
objects. The core API calls have been updated to support this, with extra classes coming in v2.3.x
that will make it easier to use in your own scripts
2.2.9: Code clean-up
Many outdated, legacy methods have been marked as Obsolete – if you are using these in your
project, you will get an automatic warning from your code-editor, with an explanation of which
newer, better, method to use instead.
2.2.9: Groups in Hierarchy
Changed behaviour of Groups: up until v2.2.9, if you only had two Groups, and you snapped them
together, the parent object of one group got converted into a Group too. This was useful in a very
small number of cases – but in most cases, it caused problems, and it wasn't how I designed it. It's
now been fixed, but if you've written custom scripts dealing with groups, you might need to modify
them.
2.2.9: Moving sockets
If you move a socket in Play mode, it will pull the mesh/gameobject with it. This is what most
games want (until v2.2.9, the socket would move, but the object would remain still, which isn't
useful).
Ultra Quick Start
Like most level-editing, SaP is designed to work easiest with prefabs, but it can work with any
GameObjects. You need to upgrade your objects (by adding the special SaP component),
configure the SaP sockets, and then you can immediately start using them.
Upgrading your objects
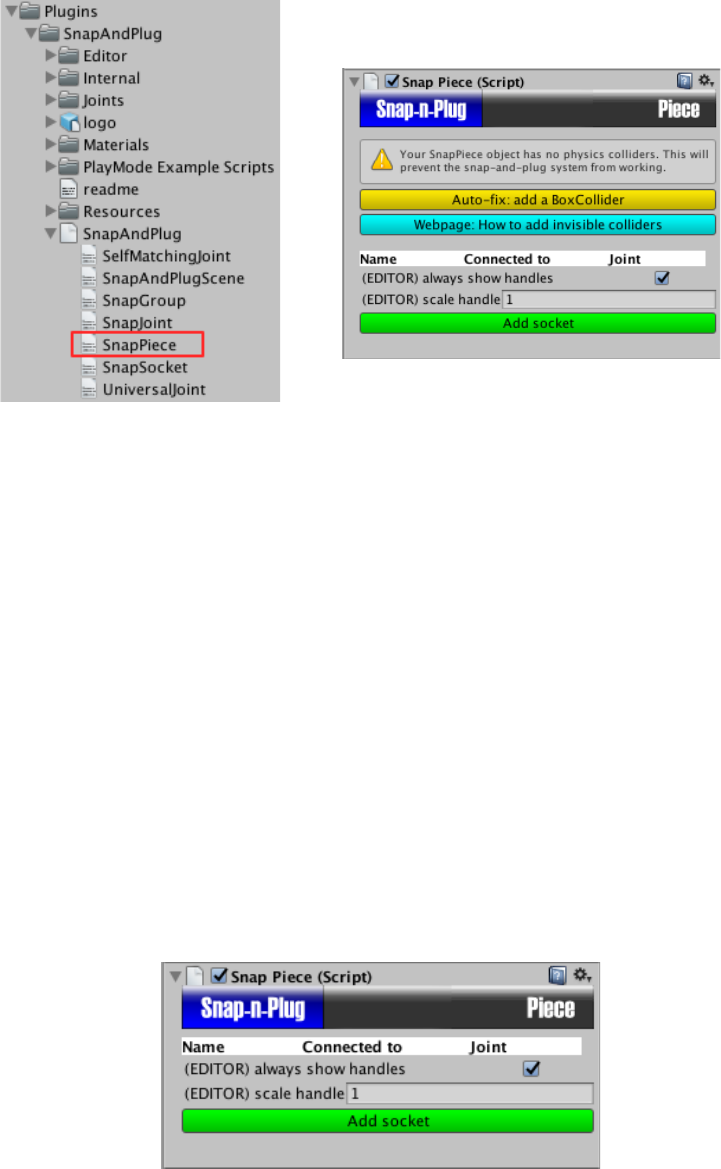
Grab an object, and drag/drop the “SnapPiece” Component onto it.
Configure the Socket(s)
SaP is smart, but you're smarter. SaP leaves you to decide how and where things can connect
together - so, the next step is to tell it this info.
For simple cases, you'll make all Sockets use a “Universal” joint.
Important: check your Socket has a “Joint-type”; this should be set to Universal by default,
but if it's blank, you'll see an error and be prompted to choose a joint from your Project
window
For bigger / advanced projects, you can create your own joint-types, and you can choose which
joints connect to which other joints (e.g. a weapon-socket can connect to a hand-socket OR to a
shoulder-harness socket ... but it cannot connect to a head-socket nor to another weapon-socket).
Select any object with a SnapPiece, and click the “Add Socket” button:
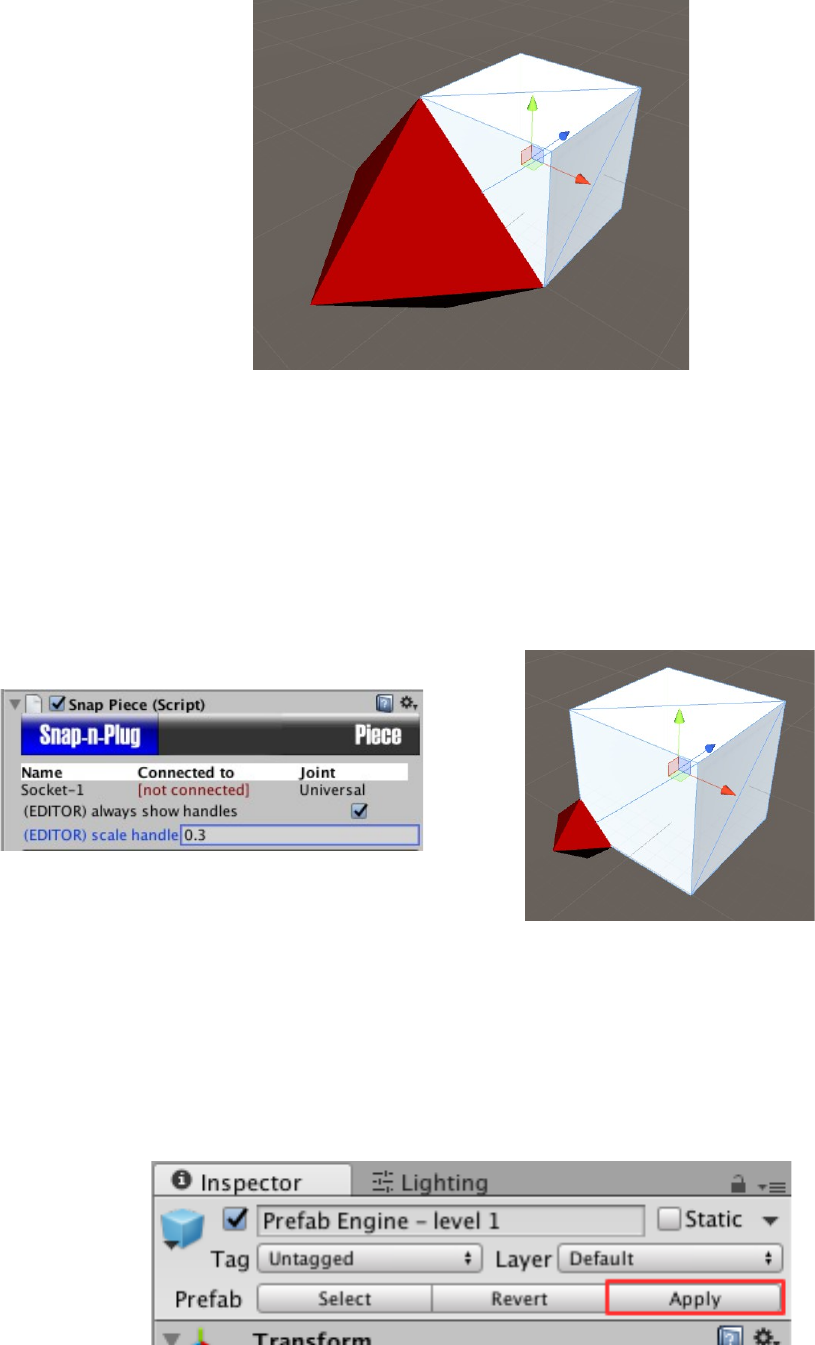
This Socket is now automatically selected and drawn in the SceneView. Move it around until you
can see the 3D graphic for it (currently a red pyramid):
Make sure the pyramid (and/or Unity's Blue Arrow) points outwards from the socket - this is
important! Use the standard Unity transform and keyboard shortcuts to rotate/move the Socket
until it's right.
The pyramid is only to help YOU see where your sockets are, and to move objects around. If it's
too small / too big, click on the parent SnapPiece, and use the “(Editor) scale handle” to change
the visual size of the pyramids for that object:
...repeat this process for as many sockets as your object needs.
Start snapping!
If your objects were prefabs, make sure to save the changes into each prefab, using the Unity
menu (GameObject > Apply changes to prefab) or Unity's “Apply” button in the Inspector.
Then you can create objects, drop them into the scene as usual. Move them around if you like -
but when you're ready to snap, the positions won't matter. SaP will automatically move them where
needed.
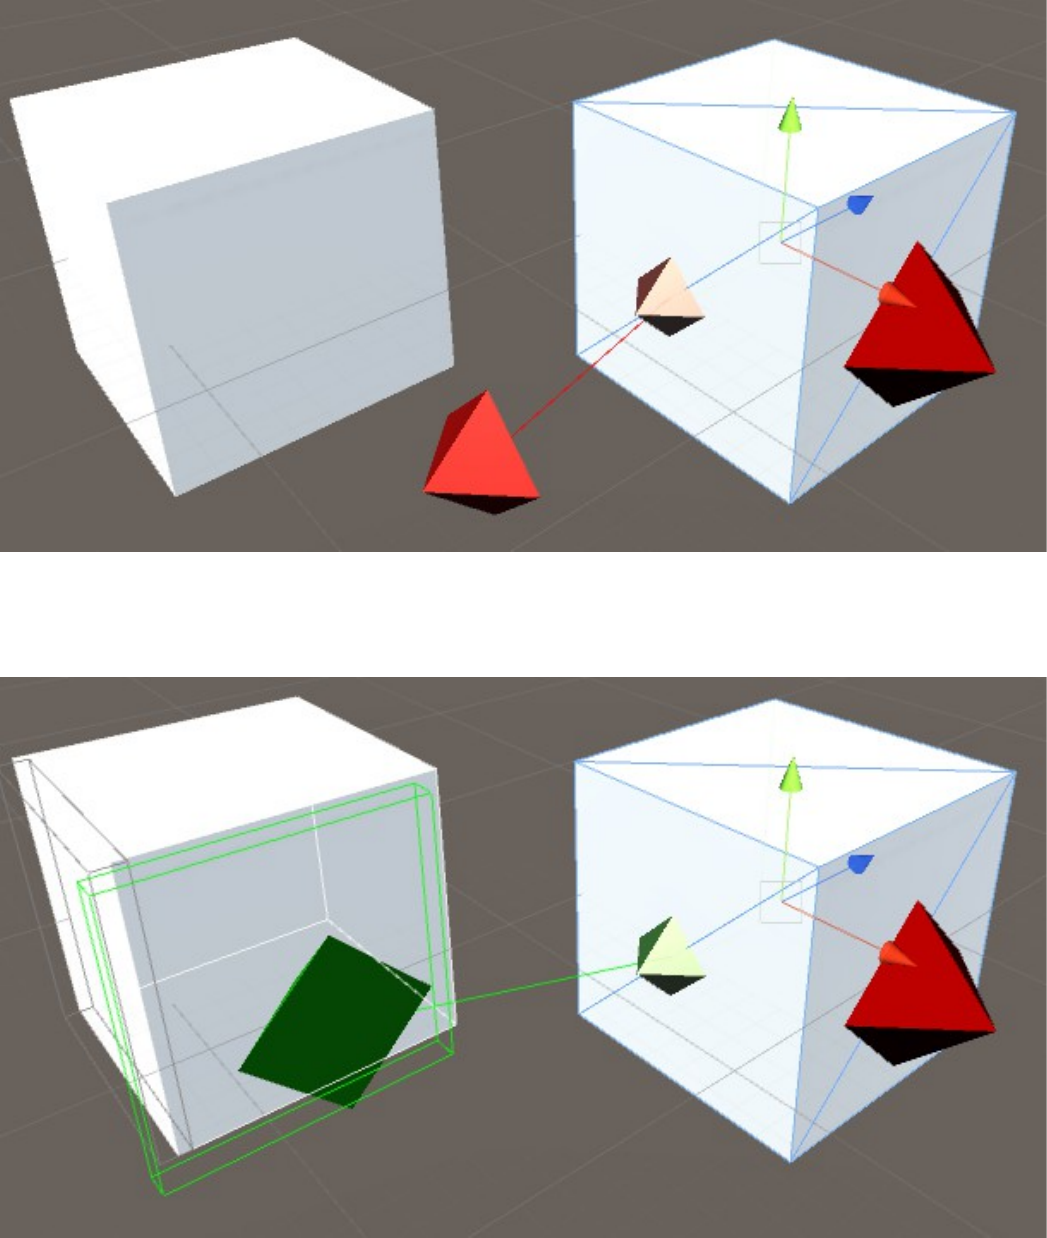
To snap, select an object that has some Sockets, and rotate until you can see a Socket you want
to snap with.
Click + hold the mouse button on the red pyramid, and then drag it around your scene view. You'll
see a line connecting it to the object it comes from:
When your mouse moves over any other Socketed object, SaP will hilight which sockets the
current one can connect to. Move the mouse over a specific socket, it will light up (in green), and
let go to snap the objects together:
If you're not sure what's going on, watch some of the demo videos (links below) which have lots of
notes and info.
Tutorial Videos
Intro/Beginners
3D tutorial: https://youtu.be/bqB8U7HGh_8
2D tutorial: https://youtu.be/UtStFZ1ZrK4 (with thanks to Dominik (Antimation) for the scene)
Advanced: Cars Demo
In-game DEMO: https://youtu.be/UyHPrc3rKBI
Example Projects / Tutorial Scenes
In the main package, there's a subfolder “Examples”. You should delete this once you're confident
with using SaP - you don't want to include it in your game by accident!
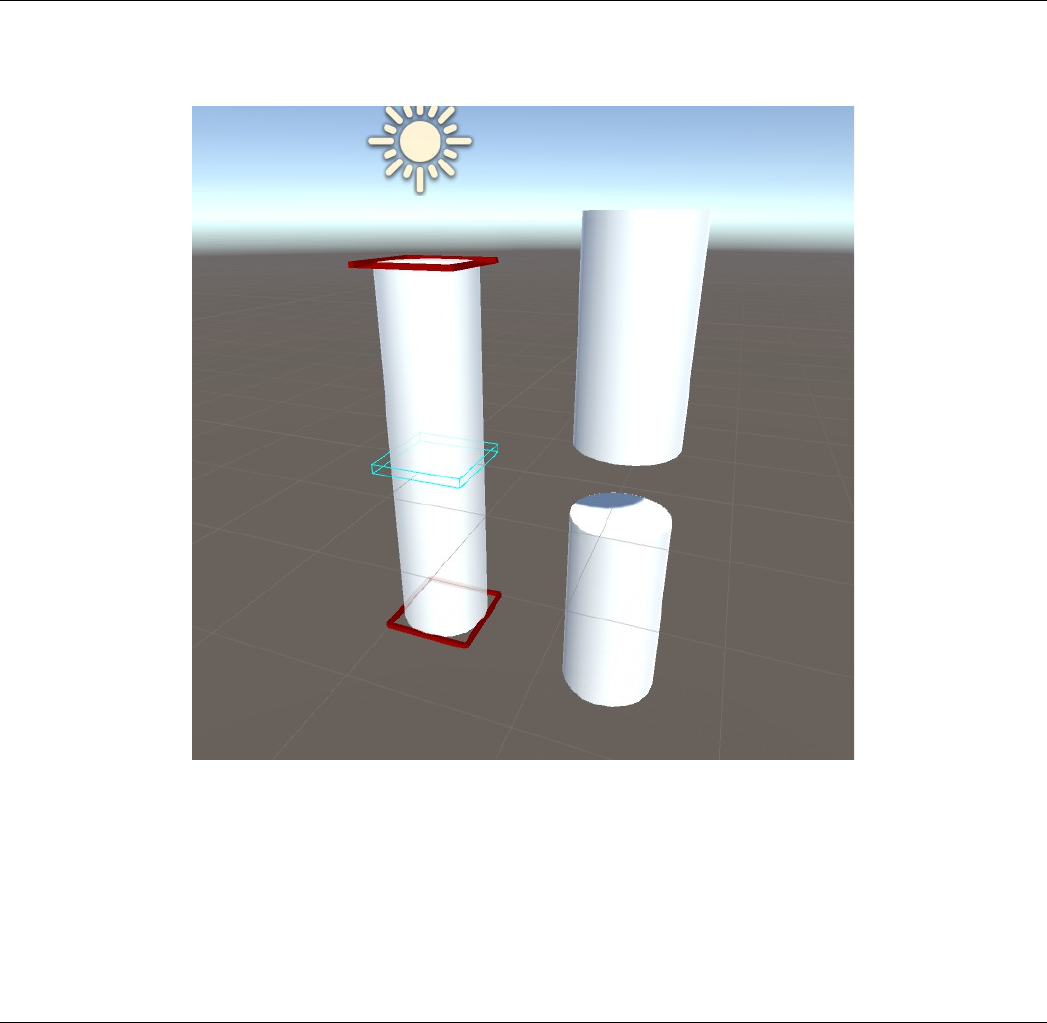
Example: Simplest Demo
Video: https://youtu.be/9CXdksnjc1o
This demo has two Cylinders snapped together, and two cylinders that aren't yet joined. Try
grabbing one of the cylinders on the right, and look for the Socket connections (currently they are
drawn as dark red pyramids on the top and bottom).
Drag a pyramid onto one of the other cylinders, and see how they snap together.

Example: PhysicsJoints Demo
Video: https://youtu.be/1EmAfGd61yM
Here we see how to use SnapAndPlug to automatically make and break Unity-Physics joints when
snapping things together.
The key point is to select a SnapSocket and use a different kind of SnapJoint.
SaP comes with one pre-created for each of the different types of Joint in Unity (Fixed, Hinge,
Spring, etc). If you use one of these, SaP will automatically create a physics joint, and correctly
attach your SnapPieces together using it.
SaP will also automatically create any RigidBody components and attach them where needed.
PhysicsJoints: Changing the defaults
However, usually you want to change the defaults. e.g. you want to make a SnapJoint where all
SnapPieces with that joint are “Hinge joints with a spring, using damping = 0.5” or similar. In the
second half of the video, you can see how this is done.
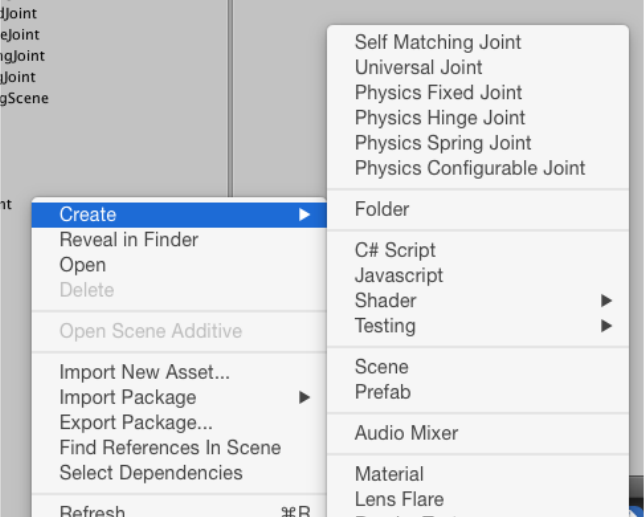
1. Create a new PhysicsHingeJoint asset (in Unity: right-click in your Project Window, and
select the Create menu, then select “Physics Hinge Joint”)
2. Rename this something memorable, e.g. “Hinge with damping”
3. Drag/drop it onto the Joint field of the SnapSockets that you want to use it.
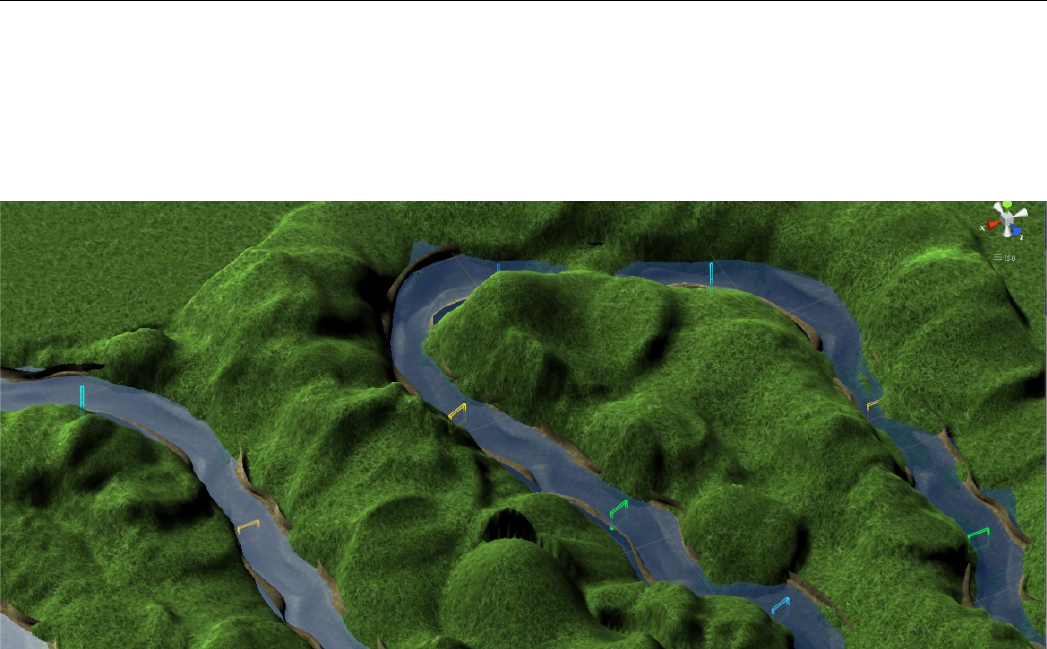
Example: Wiggle Meshes (3D level creation using snapping)
Video 1: Making objects snappable: https://youtu.be/bqB8U7HGh_8
Video 2: (same as above, but repeated for the other meshes) – https://youtu.be/0bKBG8__YLY
Video 3: Snapping pieces together to build a river: https://youtu.be/HbAtR7vWPRA
This shows building a river out of irregular, wiggling pieces.
How did I make the meshes? Blender's NURBS patch is great for this. If you look in the first
video, you'll see that all you have to do is make the first TWO control-points at each end
identical in all meshes, and then they are guaranteed to line-up precisely. This is one of the
reasons we use NURBS so much in games!
The rest of the project is almost identical to the Simplest Demo, except we're using more exciting
pieces. The river-pieces are all prefabs, so drag/drop some prefabs from the project into the
scene, and try snapping them together.
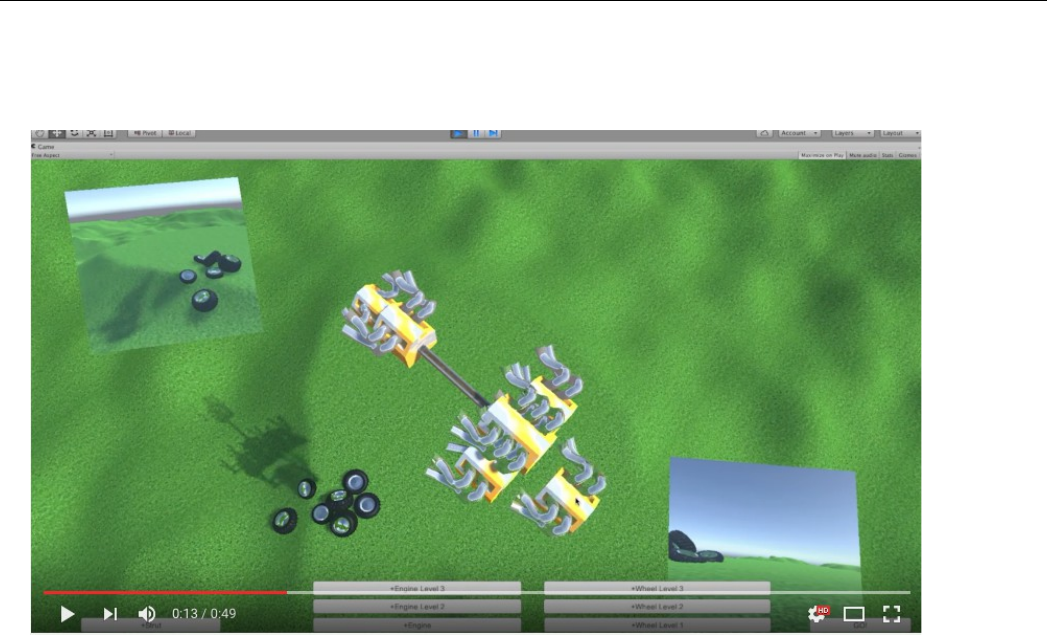
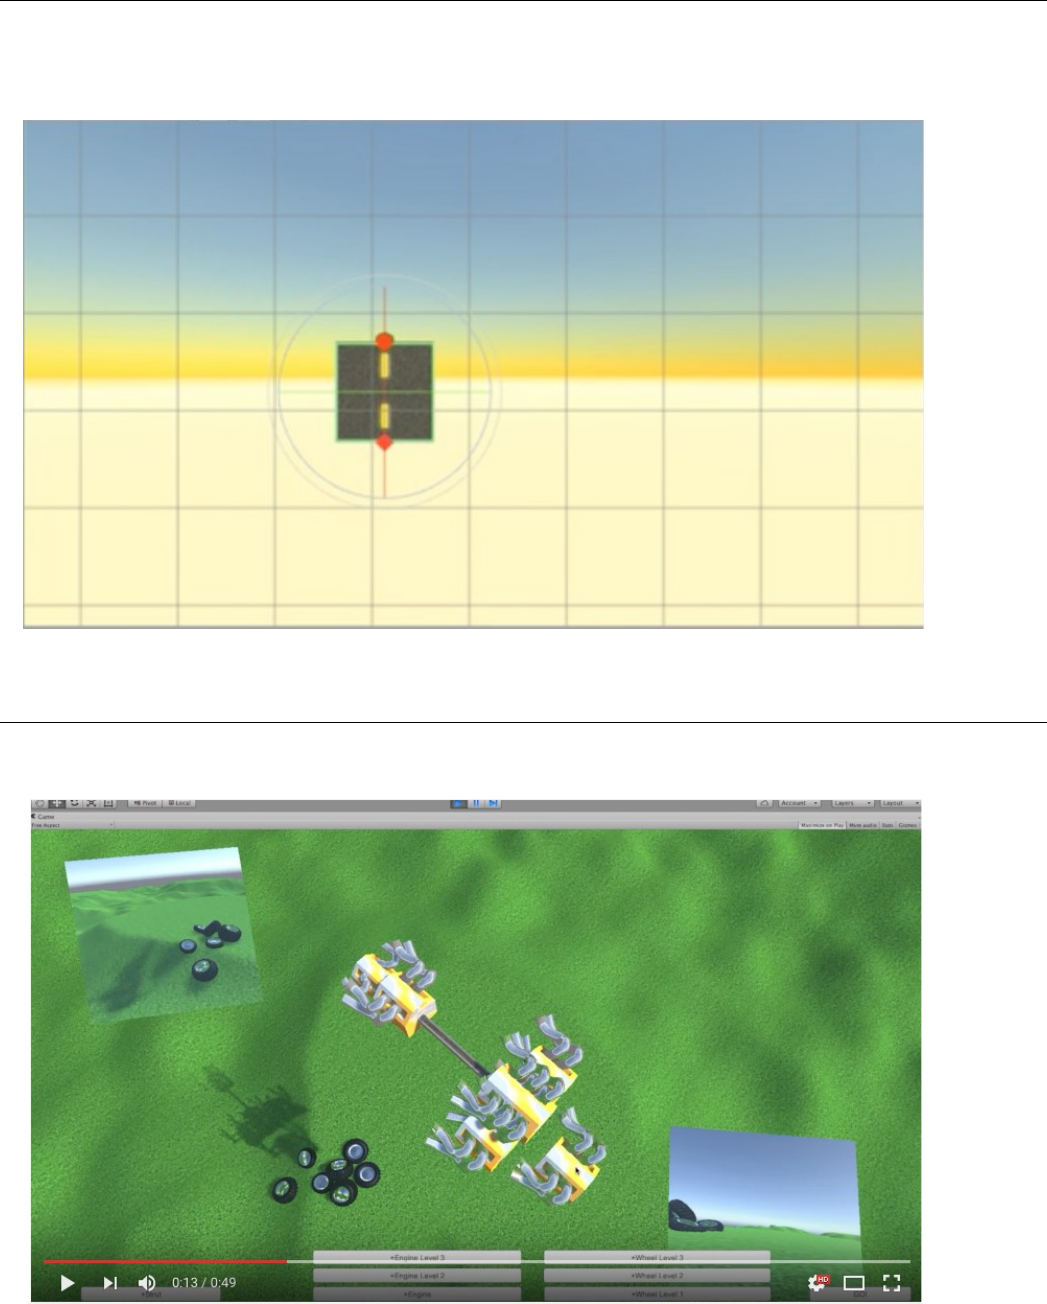
Example: Cars Demo
Video: https://www.youtube.com/watch?v=UyHPrc3rKBI
Try running the project first. How to play:
1. Click a button to create a piece of your car
2. Move the piece in 3D until you're happy
3. Click to confirm / position it
4. Click a new button to create a new piece
5. Move it around - but this time it will SNAP to the existing piece when it's close
6. If the sockets are too close, and SaP guesses wrong, use the mousewheel to change which
socket it snaps to which
7. Click to confirm / position
8. Keep adding until you're happy. NOTE: Unity5 has a bug with wheels: they must all
point in same direction (hopefully this will be fixed in Unity6)
9. Click the “GO!” button in bottom right to turn-on physics, and the whole vehicle will start
driving
How does it work?
There's a couple of things happening in this project.
Firstly, we are using the RUNTIME version of SaP. This was added in SaP version 2.0, and lets
you put snapping into your game for your players (either as gameplay, or for making their own
levels, creatures, vehicles etc in-game).
Cars: Play-mode / Runtime Snapping using SnappableSpawner
This class can be used directly in your games (MIT license) - it provides a simple in-game
snapping using SaP's API.
Or ... you can write your own (I suggest copying SnappableSpawner to get started, and then
modify and improve it with your own design and features).
Read through the source-code comments in the class to see what it's doing and how. The most
important part is that it's using the SaP API to do the hard work - SnappableSpawner is simply
wrapping the SaP API calls with a few bits of interaction with the mouse, the mousewheel, etc.
Cars: 3D transparent preview of snap
The SnapGhostable class (MIT licensed, feel free to use in your own projects) shows a simple
“preview” effect where we swap each GameObject's Renderer object(s) for “preview” Renderers
(which are transparent and green).
Cars: Unity Wheel Physics
Unity 5.0 had full wheel physics with the new WheelCollider. Unfortunately, Unity 5.1/5.2 broke the
WheelCollider - it's easier to use, but now it only works if pointing in one exact direction.
Once your vehicle starts moving, the direction can change to anything you want, but Unity5 has a
major bug: the vehicle MUST MOVE for AT LEAST ONE FRAME facing in the precise “forwards”
direction (hard-coded by Unity) before you can steer or move it.
In the demo, everything is carefully setup so that the wheels will end up facing in Unity's “required”
direction - if you're not sure, look at the YouTube video to see this.
If you stick a wheel at a funny angle, it will break the car-physics; this is a Unity bug. I spent a
few months trying to find a workaround, but since Unity 5.2 nothing works any more. If you find a
better solution, please share in the SaP forums or the support email address, and I'll upgrade this
for the next version.
Detailed instructions
Snapping
What's going on?
When you try to snap, SaP goes through a lot of steps. Briefly:
1. Look at the joint-type, read the script for that joint, and decide what it can connect to
2. Look at the other SnapPiece, find all the sockets
3. For each socket, look at its joint-type, and its status, and decide if it's connectable
4. Decide which socket the user wants to connect to, using some heuristics
5. Run some heuristics and decide if the two pieces are already joined together as part of a
larger piece; if so, do some special stuff
6. Look at the “out direction” of each socket (Unity always draws a blue “z” arrow in the out-
direction; “out” is actually a special feature of Unity that happens to use the same colour as
Z axis)
7. Look at the position of each socket and decide how much they need to rotate and how
much they need to move in order to come together perfectly
8. Run some heuristics and decide if connecting these ALSO requires connecting other; if so,
do some magic stuff (e.g. when you add the last room to a maze, it needs to connect
multiple sockets simultaneously; SaP handles this automatically inside the API)
9. Handle all the Unity “Undo” logic (surprisingly complex)
...there's more to it than that, but that gives you an idea of the key parts. This has three main
effects:
1. Always make sure your Sockets are in the right position when you add them
2. Always make sure the “out” (blue/z) direction for the Socket is what you intended
3. Make sure the “up” (green/y) direction for the Socket is what you intended
A common mistake:
You created your sockets, you positioned them, and made sure the blue arrows were
correct. But when you snap objects together, some of them flip upside-down, or rotate 180
degrees in a circle. What happened? You didn't configure the “up”/green arrow for one of
your sockets, and so SaP is doing what you told it. You insisted that the GameObject should
always be upside-down compared to the others, when connected through that socket!
Custom Joints and Joint-types
SaP comes with two basic joints that work for most people: UniversalJoint and SelfMatchingJoint.
Since version 2.2.0: also now included are PhysicsJoints for each type of joint in Unity's physics
engine.
Universal connects to “anything, always”, and SelfMatching only connects to itself (useful for
special sockets that you want to ignore all the other sockets in your scene). There are examples of
using these in some of the Tutorial / YouTube videos.
But you can make your own, and use whatever rules you want for deciding how they connect - or
add your own features (in script).
Briefly: you need to sub-class the SnapJoint class (see below), and override the methods to
provide the behaviour you desire.
Class: SnapJoint (extend this class to make your own SnapJoints)
namespace SnapAndPlug
{
/**
* You can subclass this and add your own custom logic for deciding whether a specific
Joint is allowed
* to connect to other joints
*
* c.f. the default provided implementations, e.g. UniversalJoint and SelfMatchingJoint
*/
public class SnapJoint : ScriptableObject
{
public virtual string description

{
get
{
return "Default joint: Only connects to itself";
}
}
/**
* Base implementation ignores the two pieces being connected, but
* your custom implementations may need this data...
*/
public virtual bool CanConnectTo( SnapJoint other, SnapSocket movingPieceSocket,
SnapSocket stationaryPieceSocket )
{
return other.GetType() == GetType();
}
/**
* Since v2.2.0:
*
* This callback is used to implement complex joints, e.g. the new Physics joints.
*
* In simple cases, you won't need it. But if you're making a joint-type that has
to execute additional code every time a joint is connected or disconnected, use these two
methods.
*/
public virtual void DidConnectTo( SnapJoint other, SnapSocket movingPieceSocket,
SnapSocket stationaryPieceSocket )
{
}
/**
* Since v2.2.0:
*
* This callback is used to implement complex joints, e.g. the new Physics joints.
*
* In simple cases, you won't need it. But if you're making a joint-type that has
to execute additional code every time a joint is connected or disconnected, use these two
methods.
*/
public virtual void DidDisconnectFrom( SnapJoint other, SnapSocket
movingPieceSocket, SnapSocket stationaryPieceSocket )
{
}
}
}
Support
The website is the best starting-point for anything not covered here:
http://SnapAndPlug.com
You can also find me on twitter:
@t_machine_org
For version 2.0.5, I've also created a Reddit/Digg style support page where you can ask help from
other users and up/downvote the best ones:
http://snapandplug.com/questions
