Microline Reference Manual SIDMref
User Manual: Microline Reference Manual La Biblioteca de los 8 bits
Open the PDF directly: View PDF ![]() .
.
Page Count: 180 [warning: Documents this large are best viewed by clicking the View PDF Link!]

Models
ML320 Epson/IBM
ML320 MICROLINE Standard
ML321 Epson/IBM
ML321 MICROLINE Standard
ML320 Turbo & ML321 Turbo
ML390 Turbo & ML391 Turbo
ML520 & ML521
ML590 & ML591
MICROLINE® Reference Manual
OKIDATA®
Every effort has been made to ensure that the information in this document is complete,
accurate and up-to-date. Okidata assumes no responsibility for the results of errors beyond its
control. Okidata also cannot guarantee that changes in software and equipment made by other
manufacturers, and referred to in this handbook, will not affect the applicability of the
information in this manual. Mention of software products manufactured by other companies
does not necessarily constitute endorsement by Okidata.
© 1994, 1995, 1996, 1997 by OKIDATA.
Revised edition June 1997.
Written and produced by the OKIDATA Publications Department. Please address any
comments on this publication
• by mail to:
Publications Services Department
OKIDATA
532 Fellowship Road
Mount Laurel, NJ 08054-3405
• or by eMail to:
pubs@okidata.com
We welcome you to visit our web site:
http://www.okidata.com
OKIDATA and MICROLINE are registered trademarks of Oki Electric Industry Company, Ltd.;
marques déposées de Oki Electric Industry Company, Ltd. OKIDATA—Marca Registrada, Oki
Electric Industry Company, Ltd.
Epson is a registered trademark of Epson America, Inc.
IBM and PC are registered trademarks of International Business Machines Corporation.
Microsoft, MS-DOS and Windows are registered trademarks or trademarks of Microsoft Corporation
in the United States and other countries.
Contents i
Contents
How To Use This Manual.........................................................................................................vii
How the Manual is Organized.....................................................................................vii
Conventions Used in this Manual...............................................................................viii
Abbreviations & Acronyms...........................................................................................ix
Command Summary .................................................................................................................xi
IBM Proprinter Commands...........................................................................................xi
Epson FX Commands .................................................................................................xix
Epson LQ Commands................................................................................................xxv
Okidata MICROLINE Standard Commands..............................................................xxxii
Chapter 1: Printer Drivers......................................................................................................... 1
Usable Drivers..............................................................................................................1
Okidata Software Drivers ..............................................................................................2
Software Driver Selection..............................................................................................4
Embedded Commands..................................................................................................4
Chapter 2: Character Set Commands ........................................................................................ 5
IBM Character Set Commands.......................................................................................5
Select IBM Set I Command (IBM) ...............................................................................5
Select IBM Set II Command (IBM) ..............................................................................5
Select All Character Set [IBM Set III] Command (Epson LQ)........................................6
Print Data from IBM All Characters Set [IBM Set III] Command (IBM)..........................6
Print One Character from IBM All Characters Set [IBM Set III] Command (IBM)...........7
Epson Character Set Commands....................................................................................7
Select Epson Set 1 [Slanted Characters] Command (Epson) .........................................7
Select Epson Set 2 [Graphics Characters] Command (Epson).......................................7
MICROLINE Character Set Commands ..........................................................................8
Select MICROLINE Standard Character Set Command (ML)........................................8
Select MICROLINE Block Graphics Symbol Set Command (ML)..................................8
Select MICROLINE Line Character Set Command (ML)...............................................8
International Character Set Commands..........................................................................9
Select International Character Set Command (IBM/ML)...............................................9
Select International Character Set Command (Epson)................................................10
Print from Code Page Command (IBM/ML) ..................................................................11
Assign Code Page Command (Epson)...........................................................................12
Upper Range Control Code Commands (Epson)...........................................................13
Select Code Page Set Command (Epson)......................................................................13
Chapter 3: Character Size & Spacing Commands.................................................................... 15
Pitch Setting Commands..............................................................................................15
Pitch Setting Commands for Non-compressed Printing (IBM/E/ML)............................15
Pitch Setting Commands for Compressed Printing (IBM)............................................16
Pitch Setting Commands for Compressed Printing (Epson).........................................16
Pitch Setting Commands for Compressed Printing (ML).............................................17
Select Character Pitch/Point Size Command (Epson) ....................................................17
Select Character Pitch/Point Size Command (IBM-Oki unique).....................................19
Superscript/Subscript Commands (IBM/E/ML)...............................................................20
Double Width Commands (IBM/E/ML).........................................................................21
Double Height Commands (E/ML)...............................................................................21
Double Width & Height Printing Commands...............................................................22
Double Width & Height Printing Command, 9-Pin Printers (IBM)..............................22
Double Width & Height Printing Command, 24-Pin Printers (IBM)............................23
Combined Print Features Command (ML) ....................................................................24
Character Spacing Commands.....................................................................................25
Contentsii
Proportional Spacing Commands (IBM/E/ML) ...........................................................25
Intercharacter Spacing Commands (IBM/E/ML).........................................................26
Set Horizontal Motion Index [HMI] Command (Epson LQ)...........................................27
Chapter 4: Character Style Commands ................................................................................... 29
Print Mode & Fonts Commands...................................................................................29
Individual Print Mode & Font Commands for 9-Pin Printers (IBM/E/ML) ....................29
Individual Print Mode & Font Commands for 24-Pin Printers (IBM/E) ........................30
Combined Select Font Command (IBM)....................................................................31
Select Font Command (IBM) ....................................................................................32
Combined Print Mode Command (Epson).................................................................34
Italics Print Commands (IBM/E/ML)..............................................................................35
Emphasized & Enhanced Print Commands (IBM/E/ML).................................................36
Underline/Overscore/Strike-Through Commands.........................................................36
Underline Commands (IBM/E/ML)............................................................................36
Overscore Commands (IBM)....................................................................................37
Score Style Command (Epson)..................................................................................37
Outline/Shadow Commands (IBM/E) ........................................................................38
Chapter 5: Custom Character Commands.............................................................................. 39
Custom Character Commands: 9-Pin Printers...............................................................39
Designing a Custom Character for 9-Pin Printers.......................................................39
IBM Custom Character Commands for 9-Pin Printers................................................40
Copy ROM to RAM Command for 9-Pin Printers (IBM)..........................................40
Down Line Load Characters Command for 9-Pin Printers (IBM).............................41
Epson Custom Character Commands for 9-Pin Printers.............................................43
Copy ROM to RAM Command for 9-Pin Printers (Epson).......................................43
Down Line Load Characters Command for 9-Pin Printers (Epson)..........................43
Custom Character Set On/Off Commands for 9-Pin Printers (Epson).......................44
Okidata MICROLINE Standard Custom Character Commands for 9-Pin Printers........45
Copy ROM to RAM Command for 9-Pin Printers (ML)...........................................45
Down Line Load Characters Commands for 9-Pin Printers (ML).............................45
Select DLL Font Commands for 9-Pin Printers (ML) ...............................................45
Custom Character Commands: 24-Pin Printers.............................................................46
Designing a Custom Character for 24-Pin Printers.....................................................46
IBM Custom Character Commands for 24-Pin Printers..............................................47
Down Line Load Characters Command for 24-Pin Printers (IBM)...........................47
Epson Custom Character Commands for 24-Pin Printers...........................................49
Copy ROM to RAM Command for 24-Pin Printers (Epson).....................................49
Down Line Load Characters Command for 24-Pin Printers (Epson) ........................50
Custom Character Set On/Off Commands for 24-Pin Printers (Epson).....................51
Load Custom Character Set into Upper ASCII Command for 24-Pin Printers (Epson)..51
Chapter 6: Graphics Commands for 9-Pin Printers................................................................. 53
Overview....................................................................................................................53
Programming Graphics in BASIC.................................................................................54
Graphics Density Selection Commands (IBM/E) ...........................................................54
Graphics Density Selection Commands (ML) ...............................................................55
Graphics Select/Print Command (Epson)......................................................................55
Reassign Graphics Codes Command (Epson)................................................................57
Select Graphics Command (Epson)..............................................................................57
Select Graphics Mode Command (ML) ........................................................................57
Graphics Print Mode Commands (ML).........................................................................59
Special Purpose Line Feed Commands (ML).................................................................60
Chapter 7: Graphics Commands for 24-Pin Printers............................................................... 61
Overview....................................................................................................................61
Programming Graphics in BASIC.................................................................................62
Contents iii
Graphics Density Selection Commands (IBM/E) ...........................................................62
Graphics Select/Print Command (IBM AGM/E).............................................................63
Reassign Graphics Codes Command (IBM AGM/E) ......................................................64
Graphics Resolution Command (IBM)..........................................................................64
Select Graphics Aspect Ratio Command (IBM).............................................................65
Select Graphics Mode Command (Epson)....................................................................65
Set/Reset Graphics Mode Command (Epson)................................................................66
Print Raster Graphics Command (Epson)......................................................................66
Chapter 8: Horizontal Control Commands ............................................................................. 69
Backspace & Carriage Return Commands (IBM/E/ML) ..................................................69
Margin Setting Commands ..........................................................................................69
Set Left & Right Margins Command (IBM).................................................................69
Left and Right Margin Commands (Epson) ................................................................70
Left and Right Margin Commands (ML) ....................................................................72
Horizontal Tab Commands .........................................................................................73
Execute Horizontal Tab Command (IBM/E/ML).........................................................73
Set Horizontal Tab Command (IBM/E)......................................................................73
Set Tabs by Character Space Command (ML)............................................................74
Set Tabs by Dot Columns Command (ML)................................................................74
Clear Horizontal Tab Settings Commands (IBM/E).....................................................76
Clear Horizontal Tab Settings Commands (ML).........................................................76
Horizontal Print Position Commands...........................................................................76
Indent from Left Margin Command (IBM/ML) ...........................................................76
Set Multiple Print Positions Command (IBM/E/ML)....................................................77
Set Relative Dot Position Command (IBM)................................................................79
Set Relative Dot Position Command (IBM)................................................................80
Set Relative Dot Position Command (Epson).............................................................80
Set Absolute Dot Position Command (Epson)............................................................80
Move to the Right & Left Commands (ML)................................................................81
Uni-Directional Printing Commands (IBM/E/ML)..........................................................82
Incremental Printing Commands (IBM/E/ML)................................................................82
Justification Commands (Epson)...................................................................................83
Contentsiv
Chapter 9: Vertical Control Commands.................................................................................. 85
Set Page Length Commands ........................................................................................85
Set Page Length in Inches Command (IBM/E/ML)......................................................85
Set Page Length in Lines Command (IBM/E/ML)........................................................85
Set Page Length in Defined Unit Comand (Epson).....................................................86
Form Feed Command (IBM/E/ML)................................................................................87
Line Feed Commands..................................................................................................87
Line Feed with Carriage Return Command (IBM/E/ML)..............................................87
Line Feed without Carriage Return Command (ML)...................................................87
Line Feed & Carriage Return Selection Command (ML).............................................87
Fine Line Feed Commands (IBM/E/ML).....................................................................88
Perform Line Feed Command (IBM)..........................................................................89
Auto Line Feed On/Off Commands (IBM).................................................................89
Reverse Line Feed Commands (IBM/E/ML)................................................................89
Line Spacing Commands (IBM/E/ML)...........................................................................90
General Line Spacing Commands (IBM/E/ML)...........................................................90
Fine-Increment Line Spacing Commands for 9-Pin Printers (IBM/E/ML) .....................90
ESC A N Line Spacing Command for 24-Pin Printers (IBM/E).....................................91
ESC 3 n Line Spacing Command for 24-Pin Printers (IBM/E)......................................92
n/360-Inch Line Spacing Commands for 24-Pin Printers (IBM/E)................................92
Set Vertical Units (IBM)............................................................................................93
Vertical Tab Commands..............................................................................................93
Execute Vertical Tab Command (IBM/E/ML) .............................................................94
Set Vertical Tabs Command (IBM/E).........................................................................94
Clear Vertical Tabs Command (IBM/E)......................................................................94
Vertical Format Unit [VFU] Commands (Epson)........................................................95
Vertical Format Unit [VFU] Commands (ML)............................................................96
Vertical Position Commands .......................................................................................96
Skip Down Command (ML)......................................................................................96
Set Relative Vertical Position Command (Epson).......................................................97
Set Absolute Vertical Position Command (Epson)......................................................97
Top of Form Commands (IBM/ML) ...........................................................................98
Set Page Format Command (Epson)..........................................................................98
Skip Over Perforation Commands................................................................................99
Skip Over Perforation On/Off Commands (IBM/E).....................................................99
Skip Over Perforation ON/Off Commands (ML)......................................................100
Chapter 10: Bar Code Commands for 9-Pin Printers............................................................. 101
Bar Code Commands................................................................................................101
Code 39 Bar Code Commands ..................................................................................101
Select Code 39 Bar Code Command ......................................................................102
Print Code 39 Bar Code Command........................................................................104
Code 128 Bar Code Commands ................................................................................104
Select Code 128 Bar Code Command ....................................................................104
Print Code 128 Bar Codes Command.....................................................................105
Interleaved 2 of 5 Bar Code Commands.....................................................................106
Select Interleaved 2 of 5 Bar Code Command.........................................................106
Print Interleaved 2 of 5 Bar Code Command...........................................................107
Contents v
UPC A Bar Code Commands.....................................................................................107
Select UPC A Bar Code Command.........................................................................107
Print UPC A Bar Code Command...........................................................................108
UPC E Bar Code Commands .....................................................................................109
Select UPC E Bar Code Command .........................................................................109
Print UPC E Bar Code Command ...........................................................................110
EAN 8 Bar Code Commands .....................................................................................110
Select EAN 8 Bar Code Command .........................................................................110
Print EAN 8 Bar Code Command ...........................................................................111
EAN 13 Bar Code Commands....................................................................................111
Select EAN 13 Bar Code Command........................................................................111
Print EAN 13 Bar Code Command .........................................................................112
Bar Code Command..................................................................................................112
Select/Print Postnet Bar Code Data Command ...........................................................112
Chapter 11: Bar Code Commands for 24-Pin Printers........................................................... 113
Bar Code Commands................................................................................................113
Code 39 Bar Code Commands ..................................................................................113
Select Code 39 Bar Code Command ......................................................................113
Print Code 39 Bar Code Command........................................................................115
Code 128 Bar Code Commands ................................................................................116
Select Code 128 Bar Code Command ....................................................................116
Print Code 128 Bar Code Command......................................................................117
Interleaved 2 of 5 Bar Code Commands.....................................................................117
Select Interleaved 2 of 5 Bar Code Command.........................................................118
Print Interleaved 2 of 5 Bar Code Command...........................................................119
UPC A Bar Code Commands.....................................................................................119
Select UPC A Bar Code Command.........................................................................119
Print UPC A Bar Code Command...........................................................................120
UPC E Bar Code Commands .....................................................................................120
Select UPC E Bar Code Command .........................................................................120
Print UPC E Bar Code Command ...........................................................................121
EAN 8 Bar Code Commands .....................................................................................121
Select EAN 8 Bar Code Command .........................................................................121
Print EAN 8 Bar Code Command ...........................................................................122
EAN 13 Bar Code Commands....................................................................................122
Select EAN 13 Bar Code Command........................................................................123
Print EAN 13 Bar Code Command .........................................................................123
Postnet Bar Code Command......................................................................................124
Select/Print Postnet Bar Code Data Command ...........................................................124
Chapter 12: Miscellaneous Commands ................................................................................. 125
Cancel Command (IBM/E/ML) ...................................................................................125
Change Emulation Command (IBM/E/ML)..................................................................125
Cut Sheet Feeder (CSF) Commands............................................................................126
CSF Commands (IBM/E).........................................................................................126
Bin Select Command for Dual Bin CSF (IBM/E).......................................................126
CSF Commands (ML).............................................................................................126
Delete Command (Epson)..........................................................................................127
Contentsvi
Half-Speed Printing Commands (E/ML)......................................................................127
Initialize Printer Commands (E/ML)............................................................................127
Most Significant Bit Commands (Epson).....................................................................128
Paper-Out Sensor Commands (IBM/E/ML)..................................................................128
Print Suppress Mode Commands...............................................................................129
Print Suppress Mode On/Off Commands (IBM).......................................................129
Print Suppress Mode On/Off Commands (E/ML) .....................................................129
Select Color Command (IBM/E) .................................................................................130
Set Unit Command (Epson)........................................................................................130
Software I-Prime Command (IBM/E/ML).....................................................................131
Stop Printing Command (IBM)...................................................................................131
Appendix A: Interfacing......................................................................................................... 133
Parallel Interface.......................................................................................................133
Serial Interface..........................................................................................................134
Commonly Used Serial Cable Configurations.............................................................135
Appendix B: Listing of Tables ................................................................................................ 137
Index...................................................................................................................................... 141
How to Use this Manual vii
How To Use this Manual
This Programmer’s Guide/Reference Manual is a supplement to the manuals for the various
model printers. It contains additional information on selecting printer drivers and on the printer
commands, as well as interfacing specifications.
How the Manual is Organized
Command Summary
Tabular listings of the commands for each emulation, with references to the page in the manual
on which the description for the command appears.
Chapter 1: Printer Drivers
Selecting printer drivers.
Chapters 2 through 12 — Commands
• Chapter 2: Character Set Commands
• Chapter 3: Character Size & Spacing Commands
• Chapter 4: Character Style Commands
• Chapter 5: Custom Character Commands
• Chapter 6: Graphics Commands for 9-Pin Printers
• Chapter 7: Graphics Commands for 24-Pin Printers
• Chapter 8: Horizontal Control Commands
• Chapter 9: Vertical Control Commands
• Chapter 10: Bar Code Commands for 9-Pin Printers
• Chapter 11: Bar Code Commands for 24-Pin Printers
• Chapter 12: Miscellaneous Commands
Appendix A: Interfacing
Pin-out diagrams for the parallel and serial interfaces. It also includes wiring diagrams for
commonly used serial cable configurations.
Appendix B: Listing of Tables
Includes a complete listing of the tables in this manual.
How to Use this Manualviii
Conventions Used in this Manual
The following conventions are used in the command chapters of this manual:
• The emulation(s) to which each command applies is given in parentheses at the end of the
heading for the command. The emulations (IBM = IBM Proprinter, E = Epson FX, and ML =
OKIDATA MICROLINE Standard) are described in Chapter 1.
For example:
Proportional Spacing Commands (IBM/E/ML)
• The printer models to which each command applies are given immediately below the
command heading, preceded by a check mark (⻬).
ML320 E/I, ML321 E/I = Models ML320 & ML321, Epson/IBM-Compatible
ML320 Std., ML321 Std. = Models ML320 & ML321, MICROLINE Standard Emulation
ML320T, ML321T = Models ML320 Turbo & ML321 Turbo
ML390T, ML391T = Models ML320 Turbo & ML321 Turbo
ML520, ML521 = Models ML520 & ML521
ML590, ML591 = Models ML590 and ML591
For example:
Proportional Spacing Commands (IBM/E/ML)
⻬ ML320 E/I, ML321 E/I ⻬ ML320T, ML321T ⻬ ML520, ML521
⻬ ML320 Std., ML321 Std. ⻬ ML390T, ML391T ⻬ ML590, ML591
• Text denoting lines of BASIC programming is set in the Courier font.
For example:
LPRINT CHR$(27);"[@";CHR$(4);CHR$(0);CHR$(0);CHR$(0);
CHR$(34);CHR$(0)
• Notes, which contain important information that you should read, are set in italics.
For example:
Note: If you send a location value outside the set left or right margin, this command
will be ignored.
How to Use this Manual ix
Abbreviations & Acronyms
The following abbreviations and acronyms are used in this manual:
ASCII American Standard Codes for Information Interchange
Cpi Characters per inch
Cpl Characters per line
CSF Cut Sheet Feeder
Dec Decimal
DLL Down Line Loading
Dpi Dots per inch
EEpson FX Emulation
E/I Epson/IBM Compatible Model
Hex Hexadecimal
HSD High Speed Draft
IBM IBM Proprinter Emulation
ML OKIDATA MICROLINE Standard Emulation
NLQ Near Letter Quality
ROM Read Only Memory
RAM Random Access Memory
Std. OKIDATA MICROLINE Standard Model
TOF Top of Form
UTL Utility
IBM Command Summary xi
Command Summary
This summary is in four sections:
• IBM Commands
• Epson FX Commands
• Epson LQ Commands
• Okidata MICROLINE Standard Commands
Each is section arranged numerically by the decimal value for the ASCII command. The page
number given in the last column refers you to the explanation of the command in this manual.
The printer models which include that particular command are listed in the third column:
䊳 Models ML320 and ML321 incorporate either the Epson FX and IBM Proprinter
emulations (designated as “E/I” in the table) or the OKIDATA MICROLINE Standard
emulation (designated as “Std.” in the table).
Note: If you’re not sure which version of the ML320 or ML321 printer you have, run the
Self Test (hold LF button while turning on the printer), then look at the first line
that prints: if you see EI, you have the Epson/IBM version; if you see OKI, you
have the OKIDATA MICROLINE Standard version.
䊳 Models ML 320 Turbo, ML321 Turbo, ML520 and ML521 incorporate the IBM Proprinter,
Epson FX and OKIDATA MICROLINE Standard emulations.
Models ML 390 Turbo, ML391 Turbo, ML590 and ML591 incorporate the IBM Proprinter, IBM
Proprinter AGM, and Epson LQ emulations.
IBM Proprinter Commands
IBM Command: ASCII
Decimal Function Applies to Model(s) Page
BS
8Backspace ML320/321 E/I,
ML320T/321T, ML390T/391T,
ML520/521, ML590/591
69
HT
9Execute horizontal tab ML320/321 E/I,
ML320T/321T, ML390T/391T,
ML520/521, ML590/591
73
LF
10 Line feed (with carriage
return) ML320/321 E/I,
ML320T/321T, ML390T/391T,
ML520/521, ML590/591
87
VT
11 Vertical tab ML320/321 E/I,
ML320T/321T, ML390T/391T,
ML520/521, ML590/591
94
FF
12 Form feed ML320/321 E/I,
ML320T/321T, ML390T/391T,
ML520/521, ML590/591
87
CR
13 Carriage return ML320/321 E/I,
ML320T/321T, ML390T/391T,
ML520/521, ML590/591
69
SO
14 Begin double width
printing line by line ML320/321 E/I,
ML320T/321T, ML390T/391T,
ML520/521, ML590/591
21

IBM Command Summaryxii
IBM Command: ASCII
Decimal Function Applies to Model(s) Page
SI
15 Select compressed pitch ML320/321 E/I,
ML320T/321T, ML390T/391T,
ML520/521, ML590/591
16
DC1
17 Print suppress mode off ML320/321 E/I,
ML320T/321T, ML390T/391T,
ML520/521, ML590/591
129
DC2
18 Select 10 cpi ML320/321 E/I,
ML320T/321T, ML390T/391T,
ML520/521, ML590/591
15
DC4
20 End double width printing
line by line ML320/321 E/I,
ML320T/321T, ML390T/391T,
ML520/521, ML590/591
21
CAN
24 Cancel ML320/321 E/I,
ML320T/321T, ML390T/391T,
ML520/521, ML590/591
125
ESC SI
27 15 Select 20 cpi ML320/321 E/I,
ML320T/321T, ML390T/391T,
ML520/521, ML590/591
16
ESC DLE @ Pn A1 A2 P1 P2 P3 P4
27 16 64 Pn A1 A2 P1 P2 P3 P4
Set multiple print positions ML320T/321T, ML390T/391T,
ML520/521, ML590/591 77
ESC DLE A m n1 ... n8
27 16 65 m n1 ... n8
Select bar code type and
size ML320T/321T,
ML520/521 101-
112
ESC DLE A m n1 ... n8
27 16 65 m n1 ... n8
Select bar code type and
size ML390T/391T,
ML590/591 113-
122
ESC DLE B m n [data]
27 16 66 m n [data] Print bar code data ML320T/321T,
ML520/521 101-
112
ESC DLE B m n [data]
27 16 66 m n [data] Print bar code data ML390T/391T,
ML590/591 113-
122
ESC DLE C P1 [data]
27 16 67 P1 [data] Print Postnet bar code
data ML320T/321T,
ML520/521 101,
112
ESC DLE C P1 [data]
27 16 67 P1 [data] Print Postnet bar code
data ML390T/391T,
ML590/591 113,
124
ESC DLE F Pno Pn L
p
H
p
27 16 70 Pno Pn Lp Hp
Select character
pitch/point size ML320T/321T, ML390T/391T,
ML590/591 19
ESC EM 1
27 25 49 Select Bin 1 of Dual-Bin
CSF ML390T/391T, ML590/591 126
ESC EM 2
27 25 50 Select Bin 2 of Dual-Bin
CSF ML390T/391T, ML590/591 126
ESC EM I
27 25 73 Insert Sheet
(Cut Sheet Feeder) ML320/321 E/I,
ML320T/321T, ML390T/391T,
ML520/521, ML590/591
126
ESC EM R
27 25 82 Eject sheet
(Cut Sheet Feeder) ML320/321,
ML390T/391T,
ML520/521, ML590/591
126
ESC SP n
27 32 n Set intercharacter spacing ML390T/391T,
ML590/591 26

IBM Command Summary xiii
IBM Command: ASCII
Decimal Function Applies to Model(s) Page
ESC ! n
27 33 n Select international
character set ML320/321 E/I,
ML320T/321T, ML390T/391T,
ML520/521, ML590/591
9
ESC # 0
27 35 48 Select HSD print mode ML320/321 E/I,
ML320T/321T,
ML520/521
29
ESC $
27 36 Copy ROM character set
to RAM character set ML320/321 E/I,
ML320T/321T,
ML520/521
40
ESC % 4 n
27 37 52 n Perform n/360" line feed ML390T/391T,
ML590/591 88
ESC % 5 n
27 37 53 n Perform n/144" line feed ML320/321 E/I,
ML320T/321T,
ML520/521, ML590/591
88
ESC % 8 n
27 37 56 n Set line spacing to n/360" ML390T/391T,
ML590/591 92
ESC % 9 n
27 37 57 n Set line spacing to n/144" ML320/321 E/I,
ML320T/321T,
ML520/521
90
ESC % B n1 n2 n3 n4
27 37 66 n1 n2 n3 n4
Indent from left margin ML320/321 E/I,
ML320T/321T,
ML520/521
76
ESC % G
27 37 71 Italic printing on ML320/321 E/I,
ML320T/321T, ML390T/391T,
ML520/521, ML590/591
35
ESC % H
27 37 72 Italic printing off ML320/321 E/I,
ML320T/321T, ML390T/391T,
ML520/521, ML590/591
35
ESC * m n1 n2 [data]
27 42 n1 n2[data] Graphics select/print:
AGM only ML390T/391T,
ML590/591 63
ESC - 0
27 45 48 Underline printing off ML320/321 E/I,
ML320T/321T,
ML520/521, ML590/591
36
ESC - 1
27 45 49 Underline printing on ML320/321 E/I,
ML320T/321T,
ML520/521, ML590/591
36
ESC 0
27 48 Set line spacing to 1/8" ML320/321 E/I,
ML320T/321T,
ML390T/ML391T,
ML520/521, ML590/591
90
ESC 1
27 49 Set line spacing to 7/72" ML320/321 E/I,
ML320T/321T,
ML390T/ML391T,
ML520/521, ML590/591
90
ESC 2
27 50 Set line feed stored by ESC
A n ML320/321 E/I,
ML320T/321T,
ML390T/ML391T,
ML520/521, ML590/591
89

IBM Command Summaryxiv
IBM Command: ASCII
Decimal Function Applies to Model(s) Page
ESC 3 n
27 51 n Set line spacing to n/216” ML320/321 E/I,
ML320T/321T,
ML520/521, ML590/591
90
ESC 3 n
27 51 n Set line spacing to n/216”
in PPR, or to n/180" in
AGM
ML390T/ML391T 92
ESC 4
27 52 Set top of form ML320/321 E/I,
ML320T/321T, ML390T/391T,
ML520/521, ML590/591
98
ESC 5 0
27 53 48 Auto line feed off ML320/321 E/I,
ML320T/321T, ML390T/391T,
ML520/521, ML590/591
89
ESC 5 1
27 53 49 Auto line feed on ML320/321 E/I,
ML320T/321T, ML390T/391T,
ML520/521, ML590/591
89
ESC 6
27 54 Select IBM Set II ML320/321 E/I,
ML320T/321T, ML390T/391T,
ML520/521, ML590/591
5
ESC 7
27 55 Select IBM Set I ML320/321 E/I,
ML320T/321T, ML390T/391T,
ML520/521, ML590/591
5
ESC 8
27 56 Paper-out sensor off ML320/321 E/I,
ML320T/321T, ML390T/391T,
ML520/521, ML590/591
128
ESC 9
27 57 Paper-out sensor on ML320/321 E/I,
ML320T/321T, ML390T/391T,
ML520/521, ML590/591
128
ESC :
27 58 Select 12 cpi ML320/321 E/I,
ML320T/321T, ML390T/391T,
ML520/521, ML590/591
15
ESC = n1 n2 # a1 a2 a3 m ad1 ad2 id1
id2 d1 d2 d3 d4 d5 [data]
26 61 n1 n2 35 a1 a2 a3 m ad1 ad2 id1
id2 d1 d2 d3 d4 d5 [data]
Down line load custome
characters ML590/591 47
ESC = c1 c2 m n a1 a2 [data]
27 61 c1 c2 m n a1 a2 [data] Down line load characters ML320/321 E/I,
ML320T/321T,
ML520/521, ML590/591
41
ESC ? m n
27 63 m n Reassign graphics codes:
Applies to IBM AGM only ML390/391T,
ML590/591 64
ESC A n
27 65 n Set line spacing of n/72" ML320/321 E/I,
ML320T/321T,
ML520/521, ML590/591
90
ESC A n
27 65 n Set line spacing of n/72" in
PPR, or to n/60" in AGM ML390T/ML391T 91
ESC B NUL
27 66 0 Clear vertical tabs ML320/321 E/I,
ML320T/321T,
ML520/521, ML590/591
94

IBM Command Summary xv
IBM Command: ASCII
Decimal Function Applies to Model(s) Page
ESC B n1 n2 ... n
k
NUL
27 66 n1 n2 ... nk 0 Set vertical tabs ML320/321 E/I,
ML320T/321T, ML390T/391T,
ML520/521, ML590/591
94
ESC C n
27 67 n Set page length in lines. ML320/321 E/I,
ML320T/321T, ML390T/391T,
ML520/521, ML590/591
85
ESC C NUL n
27 67 0 n Set page length in inches. ML320/321 E/I,
ML320T/321T, ML390T/391T,
ML520/521, ML590/591
85
ESC D NUL NUL
27 68 0 0 Clear horizontal tab
settings ML320/321 E/I,
ML320T/321T,
ML520/521, ML590/591
76
ESC D n1 n2 ... n
k
NUL
27 68 n1 n2 ... nk 0 Set horizontal tab ML320/321 E/I,
ML320T/321T, ML390T/391T,
ML520/521
73
ESC E
27 69 Emphasized printing on ML320/321 E/I,
ML320T/321T, ML390T/391T,
ML520/521, ML590/591
36
ESC F
27 70 Emphasized printing off ML320/321 E/I,
ML320T/321T, ML390T/391T,
ML520/521, ML590/591
36
ESC G
27 71 Enhanced printing on ML320/321 E/I,
ML320T/321T, ML390T/391T,
ML520/521, ML590/591
36
ESC H
27 72 Enhanced printing off ML320/321 E/I,
ML320T/321T, ML390T/391T.
ML520/521, ML590/591
36
ESC I n
27 73 n Combined select font ML320/321 E/I,
ML320T/321T, ML390T/391T,
ML520/521, ML590/591
31
ESC J n
27 74 n Perform n/216" line feed ML320/321 E/I,
ML320T/321T,
ML520/521, ML590/591
88
ESC J n
27 74 n Perform n/216" (PPR) or
n/180" (AGM) line feed ML390T/391T 88
ESC K Ln Hn [data]
27 75 Ln Hn [data] Begin single density
graphics ML320/321 E/I,
ML320T/321T, ML390T/391T,
ML520/521, ML590/591
54
ESC L Ln Hn [data]
27 76 Ln Hn [data] Double density graphics ML320/321 E/I,
ML320T/321T, ML390T/391T,
ML520/521, ML590/591
54
ESC N n
27 78 n Skip over perforation on ML320/321 E/I,
ML320T/321T, ML390T/391T,
ML520/521, ML590/591
99
ESC O
27 79 Skip over perforation off ML320/321 E/I,
ML320T/321T, ML390T/391T,
ML520/521, ML590/591
99

IBM Command Summaryxvi
IBM Command: ASCII
Decimal Function Applies to Model(s) Page
ESC P 0
27 80 48 Proportional spacing off ML320/321 E/I,
ML320T/321T, ML390T/391T,
ML520/521, ML590/591
25
ESC P 1
27 80 49 Proportional spacing on ML320/321 E/I,
ML320T/321T, ML390T/391T,
ML520/521, ML590/591
25
ESC Q ETX
27 81 3 Print suppress mode on ML320 E/I,
ML320T,
ML520
129
ESC Q SYN
27 81 16 Print suppress mode on ML321 E/I,
ML321T,
ML521
129
ESC Q #
27 81 23 Print suppress mode on ML391T,
ML591 129
ESC Q $
27 81 24 Print suppress mode on ML390T,
ML590 129
ESC R
27 82 Clear vertical tabs (resets
to default horizontal tabs) ML320/321 E/I,
ML320T/321T, ML390T/391T,
ML520/521, ML590/591
94
ESC S 0
27 83 48 Start superscript printing ML320/321 E/I,
ML320T/321T, ML390T/391T,
ML520/521, ML590/591
20
ESC S 1
27 83 48 Start subscript printing ML320/321 E/I,
ML320T/321T, ML390T/391T,
ML520/521, ML590/591
20
ESC T
27 84 Stop superscript/subscript
printing ML320/321 E/I,
ML320T/321T, ML390T/391T,
ML520/521, ML590/591
20
ESC U 0
27 85 48 Uni-directional printing
off ML320/321 E/I,
ML320T/321T, ML390T/391T,
ML520/521, ML590/591
82
ESC U 1
27 85 49 Uni-directional printing
on ML320/321 E/I,
ML320T/321T, ML390T/391T,
ML520/521, ML590/591
82
ESC V n
27 86 n Set intercharacter spacing ML320/321 E/I,
ML320T/321T,
ML520/521
26
ESC W 0
27 87 48 End double width printing ML320/321 E/I,
ML320T/321T, ML390T/391T,
ML520/521, ML590/591
21
ESC W 1
27 87 49 Begin double width
printing ML320/321 E/I,
ML320T/321T, ML390T/391T,
ML520/521, ML590/591
21
ESC X n m
27 88 n m Set left & right margins ML320/321 E/I,
ML320T/321T, ML390T/391T,
ML520/521, ML590/591
69
ESC Y Ln Hn [data]
27 89 Ln Hn [data] Double speed/ double
density graphics ML320/321 E/I,
ML320T/321T, ML390T/391T,
ML520/521, ML590/591
54
IBM Command Summary xvii
IBM Command: ASCII
Decimal Function Applies to Model(s) Page
ESC Z Ln Hn [data]
27 90 Ln Hn [data] Quadruple density
graphics ML320/321 E/I,
ML320T/321T, ML390T/391T,
ML520/521, ML590/591
54
ESC [ @ Ln Hn NUL NUL n1 n2
27 91 64 Ln Hn 0 0 n1 n2
Set character width, line
spacing and character
height .
ML320/321 E/I,
ML320T/321T,
ML520/521, ML590/591
22
ESC [ @ n1 n2 m1 m2 m3 m4
27 91 64 n1 n2 m1 m2 m3 m4
Begin/end double height
printing. ML390T/391T 23
ESC [ T Ln Hn NUL NUL Hc
p
Lc
p
NUL
27 91 84 Ln Hn 0 0 Hcp Lcp 0 Print from code page ML320T/321T, ML390T/391T,
ML520/521, ML590/591 11
ESC [ \ 4 0 0 0 n1 n2
27 91 92 52 48 48 48 n1 n2
Set vertical units for the
line spacing command. ML390T/391T 93
ESC [ g n1 n2 m [data]
27 91 103 n1 n2 m [data] Set graphics resolution ML390T/391T,
ML590/591 64
ESC [ I Ln Hn H
f
i
d
L
f
i
d
H
f
w
d
L
f
w
d
fa
27 91 108 Ln Hn Hfid Lfid Hfwd Lfwd fa
Select font ML390T/391T 32
ESC \ Ln Hn
27 92 Ln Hn
Print data from the All
Characters Set ML320/321 E/I,
ML320T/321T, ML390T/391T,
ML520/521, ML590/591
6
ESC ]
27 93 Reverse line feed ML320/321 E/I,
ML320T/321T,
ML520/521,
89
ESC ^ n
27 94 n Print one character from
the All Characters Set ML320/321 E/I,
ML320T/321T, ML390T/391T,
ML520/521, ML590/591
7
ESC _ 0
27 95 48 End overscore printing ML320/321 E/I,
ML320T/321T, ML390T/391T,
ML520/521, ML590/591
37
ESC _ 1
27 95 49 Begin overscore printing ML320/321 E/I,
ML320T/321T, ML390T/391T,
ML520/521, ML590/591
37
ESC d n1 n2
27 100 n1 n2
Set right relative position ML390T/391T,
ML590/591 80
ESC e n1 n2
27 101 n1 n2
Set left relative position ML390T/391T,
ML590/591 80
ESC g
27 103 Select 15 cpi ML390T/391T,
ML520/521, ML590/591 15
ESC i 0
27 105 48 Incremental printing off ML390T/391T, ML320T/321T 82
ESC i 1
27 105 49 Incremental printing on ML390T/391T, ML320T/321T 82
ESC j
27 106 Stop printing (deselect) ML390T/391T, ML590/591 131
ESC k n
27 107 Specify typeface ML390T/391T, ML590/591 30
ESC | Ln Hn
27 108 Ln Hn
Set relative dot position ML320T/321T,
ML520/521 79
IBM Command Summaryxviii
IBM Command: ASCII
Decimal Function Applies to Model(s) Page
ESC n Pn
27 110 Pn
Select Graphics Aspect
Ratio: PPR only ML390T/391T,
ML590/591 65
ESC q n
27 113 n Specify outline/shadow ML390T/391T, ML590/591 38
ESC r n
27 114 n Select color ML590/591 130
ESC x 0
27 120 48 Select Utility print mode ML390/391T 30
ESC x 1
27 120 49 Select LQ print mode ML390/391T 30
ESC { n
27 123 n Change emulation ML320/321 E/I,
ML320T/321T,
ML520/521
125
ESC } NUL
27 125 0 Software I-Prime ML320/321T,ML390/391T,
ML520/521, ML590/591 131
Epson FX Command Summaryxx
Epson FX Commands
Epson FX Command: ASCII
Decimal Function Applies to Model(s) Page
BS
8Backspace ML320/321 E/I,
ML320T/321T,
ML520/521
69
HT
9Execute horizontal tab ML320/321 E/I,
ML320T/321T, ML520/521 73
LF
10 Line feed (with carriage return) ML320/321 E/I,
ML320T/321T, ML520/521 87
VT
11 Vertical tab ML320/321 E/I,
ML320T/321T, ML520/521 94
FF
12 Form feed ML320/321 E/I,
ML320T/321T, ML520/521 87
CR
13 Carriage return ML320/321 E/I,
ML320T/321T,
ML520/521
69
SO
14 Begin double width printing
line by line ML320/321 E/I,
ML320T/321T, ML520/521 21
SI
15 Select compressed pitch ML320/321 E/I,
ML320T/321T, ML520/521 16
DC1
17 Print suppress mode off ML320/321 E/I,
ML320T/321T,
ML520/521
129
DC2
18 Cancel 20 cpi ML320/321 E/I,
ML320T/321T,
ML520/521
16
DC3
19 Print suppress mode on ML320/321 E/I,
ML320T/321T,
ML520/521
129
DC4
20 End double width printing line
by line ML320/321 E/I,
ML320T/321T,
ML520/521
21
CAN
24 Cancel ML320/321 E/I,
ML320T/321T,
ML520/521
125
ESC SO
27 14 Begin double width printing
line by line ML320/321 E/I,
ML320T/321T, ML520/521 21
ESC SI
27 15 Select 20 cpi ML320/321 E/I,
ML320T/321T, ML520/521 16
ESC DLE @ Pn A1 A2 P1 P2 P3 P4
27 16 64 Pn A1 A2 P1 P2 P3 P4
Set multiple print positions ML320T/321T, ML520/521 77
ESC DLE A m n1 ... n8
27 16 65 m n1 ... n8
Select bar code type and size ML320T/321T, ML520/521 101-
112
ESC DLE B m n [data]
27 16 66 m n [data] Print bar code data ML320T/321T, ML520/521 101-
112
ESC DLE C P1 [data]
27 16 67 P1 [data] Print Postnet bar code data ML320T/321T, ML520/521 113,
124
Epson FX Command Summary xxi
Epson FX Command: ASCII
Decimal Function Applies to Model(s) Page
ESC EM I
27 25 73 Insert sheet (Cut Sheet Feeder) ML320/321 E/I,
ML320T/321T, ML520/521 126
ESC EM R
27 25 82 Eject sheet (Cut Sheet Feeder) ML320/321 E/I,
ML320T/321T, ML520/521 126
ESC SP n
27 32 n Set intercharacter spacing ML320/321 E/I,
ML320T/321T, ML520/521 26
ESC ! n
27 33 n Combined print mode ML320/321 E/I,
ML320T/321T,
ML520/521
34
ESC #
27 35 Cancel MSB control ML320/321 E/I,
ML320T/321T,
ML520/521
128
ESC $ Ln Hn
27 36 Set absolute dot position ML320/321 E/I,
ML320T/321T,
ML520/521
80
ESC % 0
27 37 48 Select standard character set ML320/321 E/I,
ML320T/321T,
ML520/521
44
ESC % 1
27 37 49 Select custom character set ML320/321 E/I,
ML320T/321T,
ML520/521
44
ESC % 5 n
27 37 53 Perform n/144" line feed ML320/321 E/I,
ML320T/321T,
ML520/521
88
ESC % 9 n
27 37 57 n Set line spacing to n/144" ML320/321 E/I,
ML320T/321T,
ML520/521
90
ESC & NUL n1 n2 a [data]
27 38 0 n1 n2 a [data] Down line load characters ML320/321 E/I,
ML320T/321T,
ML520/521
43
ESC ( 0
27 40 48 Select HSD print mode ML320/321 E/I,
ML320T/321T,
ML520/521
29
ESC ( t 3 0 Pn1 Pn2 Pn3
27 40 116 51 48 Pn1 Pn2 Pn3
Assign code page ML320/321T 12
ESC * m Ln Hn [data]
27 42 m Ln Hn [data] Graphics select/print ML320/321 E/I,
ML320T/321T, ML520/521 55
ESC - 0
27 45 48 Underline printing off ML320/321 E/I,
ML320T/321T, ML390T/391T,
ML520/521
36
ESC - 1
27 45 49 Underline printing on ML320/321 E/I,
ML320T/321T, ML390T/391T,
ML520/521
36
ESC / n
27 47 n Select vertical tab channel ML320/321 E/I,
ML320T/321T,
ML520/521
95
ESC 0
27 48 Set line spacing to 1/8" ML320/321 E/I,
ML320T/321T,
ML520/521
90

Epson FX Command Summaryxxii
Epson FX Command: ASCII
Decimal Function Applies to Model(s) Page
ESC 1
27 49 Set line spacing to 7/72" ML320/321 E/I,
ML320T/321T,
ML520/521
90
ESC 2
27 50 Set line spacing to 1/6" ML320/321 E/I,
ML320T/321T,
ML520/521
90
ESC 3 n
27 51 n Set line spacing to n/216" ML320/321 E/I,
ML320T/321T,
ML520/521
90
ESC 4
27 52 Italic printing on ML320/321 E/I,
ML320T/321T,
ML520/521
35
ESC 5
27 53 Italic printing off ML320/321 E/I,
ML320T/321T,
ML520/521
35
ESC 6
27 54 Permit printing upper range
control codes ML320/321 E/I,
ML320T/321T,
ML520/521
13
ESC 7
27 55 Cancel printing upper range
control codes ML320/321 E/I,
ML320T/321T,
ML520/521
13
ESC 8
27 56 Paper-out sensor off ML320/321 E/I,
ML320T/321T,
ML520/521
128
ESC 9
27 57 Paper-out sensor on ML320/321 E/I,
ML320T/321T,
ML520/521
128
ESC : NUL NUL NUL
27 58 0 0 0 Copy ROM character set to
RAM character set ML320/321 E/I, ML320T/321T 43
ESC : NUL n NUL
27 58 0 n 0 Copy ROM character set to
RAM character set ML520/521 43
ESC <
27 60 Print uni-directional for one
line only ML320/321 E/I,
ML320T/321T,
ML520/521
82
ESC =
27 61 Set Most Significant Bit (MSB)
to zero ML320/321 E/I,
ML320T/321T,
ML520/521
128
ESC >
27 62 Set MSB to 1 ML320/321 E/I,
ML320T/321T,
ML520/521
128
ESC ? m n
27 63 m n Reassign graphics ML320/321 E/I,
ML320T/321T,
ML520/521
57
ESC @
27 64 Initialize printer ML320/321 E/I,
ML320T/321T,
ML520/521
127
ESC A n
27 65 n Set line spacing to n/72" ML320/321 E/I,
ML320T/321T, ML520/521 90
Epson FX Command Summary xxiii
Epson FX Command: ASCII
Decimal Function Applies to Model(s) Page
ESC B NUL
27 66 0 Clear vertical tabs ML320/321 E/I,
ML320T/321T, ML520/521 94
ESC B n1 n2 ... n
k
NUL
27 66 n1 n2 ... nk 0 Set vertical tabs ML320/321 E/I,
ML320T/321T, ML520/521 94
ESC C n
27 67 n Set page length in lines. ML320/321 E/I,
ML320T/321T, ML520/521 85
ESC C NUL n
27 67 0 n Set page length in inches. ML320/321 E/I,
ML320T/321T, ML520/521 85
ESC D NUL NUL
27 68 0 0 Clear horizontal tab settings ML320/321 E/I,
ML320T/321T, ML520/521 76
ESC D n1 n2 ... n
k
NUL
27 68 n1 n2 ... nk 0 Set horizontal tab ML320/321 E/I,
ML320T/321T, ML520/521 73
ESC E
27 69 Emphasized printing on ML320/321 E/I,
ML320T/321T, ML520/521 36
ESC F
27 70 Emphasized printing off ML320/321 E/I,
ML320T/321T, ML520/521 36
ESC G
27 71 Enhanced printing on ML320/321 E/I,
ML320T/321T, ML520/521 36
ESC H
27 72 Enhanced printing off ML320/321 E/I,
ML320T/321T, ML520/521 36
ESC I 0
27 73 48 Cancel printing upper range
control codes ML320/321 E/I,
ML320T/321T, ML520/521 13
ESC I 1
27 73 49 Permit printing upper range
control codes ML320/321 E/I,
ML320T/321T, ML520/521 13
ESC K Ln Hn [data]
27 75 Ln Hn [data] Begin single density graphics ML320/321 E/I,
ML320T/321T, ML520/521 54
ESC L Ln Hn [data]
27 76 Ln Hn [data] Double density graphics ML320/321 E/I,
ML320T/321T, ML520/521 54
ESC M
27 77 Select 12 cpi ML320/321 E/I,
ML320T/321T, ML520/521 15
ESC N n
27 78 n Skip over perforation on ML320/321 E/I,
ML320T/321T, ML520/521 99
ESC O
27 79 Skip over perforation off ML320/321 E/I,
ML320T/321T, ML520/521 99
ESC P
27 80 Select 10 cpi ML320/321 E/I,
ML320T/321T, ML520/521 15
ESC Q n
27 81 n Set right margin ML320/321 E/I,
ML320T/321T, ML520/521 70
ESC R n
27 82 n Select international character
set ML320/321 E/I,
ML320T/321T, ML520/521 10
ESC S 0
27 83 48 Start superscript printing ML320/321 E/I,
ML320T/321T, ML520/521 20
ESC S 1
27 83 49 Start subscript printing ML320/321 E/I,
ML320T/321T, ML520/521 20
ESC T
27 84 Stop superscript/ subscript
printing ML320/321 E/I,
ML320T/321T, ML520/521 20
Epson FX Command Summaryxxiv
Epson FX Command: ASCII
Decimal Function Applies to Model(s) Page
ESC U 0
27 85 48 Uni-directional printing off ML320/321 E/I,
ML320T/321T, ML520/521 82
ESC U 1
27 85 49 Uni-directional printing on ML320/321 E/I,
ML320T/321T, ML520/521 82
ESC W 0
27 88 48 End double width printing ML320/321 E/I,
ML320T/321T, ML520/521 21
ESC W 1
27 88 49 Begin double width printing ML320/321 E/I,
ML320T/321T, ML520/521 21
ESC Y Ln Hn [data]
27 89 Ln Hn [data] Double speed/double density
graphics ML320/321 E/I,
ML320T/321T, ML520/521 54
ESC Z Ln Hn [data]
27 90 Ln Hn [data] Quadruple density graphics ML320/321 E/I,
ML320T/321T, ML520/521 54
ESC \ Ln Hn
27 92 Ln Hn
Set relative dot position ML320/321 E/I,
ML320T/321T,
ML520/521
80
ESC ^ m Ln Hn [data]
27 94 m Ln Hn [data] Select 9-pin graphics printing ML320/321 E/I,
ML320T/321T,
ML520/521
57
ESC a 0
27 97 48 Left justification ML320/321 E/I,
ML320T/321T,
ML520/521
83
ESC a 1
27 97 49 Center justification ML320/321 E/I,
ML320T/321T, ML520/521 83
ESC a 2
27 97 50 Right justification ML320/321 E/I,
ML320T/321T, ML520/521 83
ESC a 3
27 97 51 Full (left and right) justification ML320/321 E/I,
ML320T/321T, ML520/521 83
ESC b m n1 n2 ... n
k
NUL
27 98 m n1 n2 ... n 0 Set vertical format unit (VFU) ML320/321 E/I,
ML320T/321T, ML520/521 95
ESC g
27 103 Select 15 cpi ML520/521 15
ESC i 0
27 105 48 Incremental printing off ML320T/321T 82
ESC i 1
27 105 49 Incrementatl printing on ML320T/321T 82
ESC k n
27 107 n Select NLQ print mode ML320/321 E/I,
ML320T/321T, ML520/521 29
ESC l n
27 108 n Set left margin ML320/321 E/I,
ML320T/321T, ML520/521 70
ESC p 0
27 112 48 Proportional spacing off ML320/321 E/I,
ML320T/321T, ML520/521 25
ESC p 1
27 112 49 Proportional spacing on ML320/321 E/I,
ML320T/321T, ML520/521 25
ESC s 0
27 115 48 Half-speed printing off ML320/321 E/I,
ML320T/321T, ML520/521 127
ESC s 1
27 115 49 Half-speed printing on ML320/321 E/I,
ML320T/321T, ML520/521 127

Epson FX Command Summary xxv
Epson FX Command: ASCII
Decimal Function Applies to Model(s) Page
ESC t 0
27 116 48 Select Epson Set 1 ML320/321 E/I,
ML320T/321T, ML520/521 7
ESC t 1
27 116 49 Select Epson Set 2 ML320/321 E/I,
ML320T/321T, ML520/521 7
ESC w 0
27 119 48 End double height printing ML320/321 E/I,
ML320T/321T, ML390T/391T,
ML520/521
21
ESC w 1
27 119 49 Begin double height printing ML320/321 E/I,
ML320T/321T, ML390T/391T,
ML520/521
21
ESC x 0
27 120 48 Select Utility print mode ML320/321 E/I,
ML320T/321T, ML520/521 29
ESC x 1
27 120 49 Select NLQ print mode ML320/321 E/I,
ML320T/321T, ML520/521 29
ESC { n
27 123 n Change emulation ML320/321 E/I,
ML320T/321T,
ML520/521
125
ESC } NUL
27 125 0 Software I-Prime ML520/521 131
DEL
127 Delete one character ML320/321 E/I,
ML320T/321T,
ML520/521
127

Epson LQ Command Summary xxvii
Epson LQ Commands
Epson LQ Command: ASCII
Decimal Function Applies to Model(s) Page
BS
8Backspace ML390T/ML391T,
ML590/591 69
HT
9Execute horizontal tab ML390T/391T,
ML590/591 73
LF
10 Line feed (with carriage return) ML390T/391T,
ML590/591 87
VT
11 Vertical tab ML390T/391T,
ML590/591 94
FF
12 Form feed ML590/591 87
CR
13 Carriage return ML390T/391T,
ML590/591 69
SO
14 Begin double width printing line by line ML390T/391T,
ML590/591 21
SI
15 Select compressed pitch ML390T/391T,
ML590/591 16
DC1
17 Print suppress mode off ML390T/391T,
ML590/591 129
DC2
18 Cancel 20 cpi ML390T/391T,
ML590/591 16
DC3
19 Print suppress mode on ML390T/391T,
ML590/591 129
DC4
20 End double width printing line by line ML390T/391T,
ML590/591 21
CAN
24 Cancel ML390T/391T,
ML590/591 125
ESC SO
27 14 Begin double width printing line by line ML390T/391T,
ML590/591 21
ESC SI
27 15 Select 20 cpi ML390T/391T,
ML590/591 16
ESC DLE @ Pn A1 A2 P1 P2 P3 P4
27 16 64 Pn A1 A2 P1 P2 P3 P4
Set multiple print positions ML390T/391T,
ML590/591 77
ESC DLE A m n1 ... n8
27 16 65 m n1 ... n8
Select bar code type and size ML390T/391T,
ML590/591 113-
122
ESC DLE B m n [data]
27 16 66 m n [data] Print bar code data ML390T/391T,
ML590/591 113-
122
ESC DLE C P1 [data]
27 16 67 P1 [data] Print Postnet bar code data ML390T/391T,
ML590/591 113,
124
ESC DLE G n 1
27 16 71 n 49 Set/reset raster graphics ML390/391T 66
ESC EM 1
27 25 49 Select Bin 1 of Dual-Bin CSF ML590/591 126
ESC EM 2
27 25 50 Select Bin 2 of Dual-Bin CSF ML590/591 126

Epson LQ Command Summaryxxviii
Epson LQ Command: ASCII
Decimal Function Applies to Model(s) Page
ESC EM I
27 25 73 Insert sheet (Cut Sheet Feeder) ML390T/391T 126
ESC EM R
27 25 82 Eject sheet (Cut Sheet Feeder) ML390T/391T 126
ESC US 0
27 31 48 End double height printing ML390T/391T,
ML590/591 21
ESC US 1
27 31 49 Begin double height printing ML390T/391T,
ML590/591 21
ESC SP n
27 32 n Set character spacing. ML390T/391T,
ML590/591 26
ESC ! n
27 33 n Combined print mode ML390T/391T,
ML590/591 34
ESC #
27 35 Cancel MSB control ML390T/391T,
ML590/591 128
ESC $ Ln Hn
27 36 Ln Hn
Set absolute dot position ML390T/391T,
ML590/591 80
ESC % 0
27 37 48 Select standard character set ML390T/391T ,
ML590/591 51
ESC % 1
27 37 49 Select custom character set ML390T/391T ,
ML590/591 51
ESC % 5 n
27 37 53 n Perform n/144" line feed ML590/591 88
ESC & m n1 n2 d0 d1 d2 [data]
27 38 m n1 n2 d0 d1 d2 [data] Down line load characters ML390T/391T 50
ESC & NUL m n1 n2 d0 d1 d2 [data]
27 38 0 m n1 n2 d0 d1 d2 [data] Down line load characters ML590/591 50
ESC ( - Ln Hn Pn D1 D2
27 40 45 Ln Hn Pn D1 D2
Select score style: underline, overscore, or
strike through ML390T/391T 37
ESC ( C 2 0 L
p
H
p
27 40 67 40 48 Lp Hp
Set Page Length ML390T/391T 86
ESC ( G Ln Hn Pn
27 40 71 Ln Hn Pn
Select graphics mode ML390T/391T,
ML590/591 65
ESC ( U Ln Hn Pn
27 40 85 Ln Hn Pn
Set increment of movement ML390T/391T 130
ESC ( V Ln Hn L
p
H
p
27 40 86 Ln Hn Lp Hp
Absolute position line feed ML390T/391T 98
ESC ( ^ Ln Hn [data]
27 40 94 Ln Hn [data] Select All Character Set ML390T/391T,
ML590/591 6
ESC ( c 2 0 Lt Ht L
b
H
b
27 40 99 50 48 Hn Lt Ht Lb Hb
Set Page Format ML390T/391T 98
ESC ( t L
n
H
n
P
n1
P
n
2 P
n3
27 40 116 Ln Hn Pn1 Pn2 Pn3
Select character table ML390T/391T,
ML590/591 13
ESC ( v Ln Hn L
p
H
p
27 40 118 Ln Hn Lp Hp
Relative position line feed ML390T/391T 97
ESC * m n1 n2 [data]
27 42 n1 n2 [data] Graphics select/print ML390T/391T,
ML590/591 63

Epson LQ Command Summary xxix
Epson LQ Command: ASCII
Decimal Function Applies to Model(s) Page
ESC + n
27 43 n Set line spacing to n/360" ML390T/391T,
ML590/591 92
ESC - 0
27 45 48 Underline printing off ML390T/391T,
ML590/591 36
ESC - 1
27 45 49 Underline printing on ML390T/391T,
ML590/591 36
ESC . Pc Pv P
h
Pm Ln Hn [data]
27 46 Pc Pv Ph Pm Ln Hn [data] Print Raster Graphics ML390T/391T,
ML590/591 66
ESC / n
27 47 n Select vertical tab channel. ML390T/391T.
ml590/591 95
ESC 0
27 48 Set line spacing to 1/8" ML390T/ML391T 90
ESC 2
27 50 Set line spacing to 1/6" ML390T/ML391T,
ML590/591 90
ESC 3 n
27 51 n Set line spacing to n/180" ML390T/ML391T 92
ESC 3 n
27 51 n Set line spacing to n/216" ML590/591 92
ESC 4
27 52 Italic printing on ML390T/391T 35
ESC 5
27 53 Italic printing off ML390T/391T 35
ESC 6
27 54 Permit printing upper range control codes ML390T/391T,
ML590/591 13
ESC 7
27 55 Cancel printing upper range control codes ML390T/391T ,
ML590/591 13
ESC 8
27 56 Paper-out sensor off ML390T/391T,
ML590/591 128
ESC 9
27 57 Paper-out sensor on ML390T/391T,
ML590/591 128
ESC : NUL n NUL
27 58 0 n 0 Copy ROM character set to RAM
character set ML390T, ML391T,
ML590/591 49
ESC <
27 60 Print uni-directional for one line only ML390T, ML391T,
ML590/591 82
ESC =
27 61 Set Most Significant Bit (MSB) to zero ML390T/391T,
ML590/591 128
ESC >
27 62 Set MSB to 1 ML390T/391T,
ML590/591 128
ESC ? m n
27 63 m n Reassign graphics ML390T, ML391T,
ML590/591 64
ESC @
27 64 Initialize printer ML390T/391T,
ML590/591 127
ESC A n
27 65 n Set line spacing to n/60" ML390T/ML391T,
ML590/591 91
ESC B NUL
27 66 0 Clear vertical tabs ML590/591 94

Epson LQ Command Summaryxxx
Epson LQ Command: ASCII
Decimal Function Applies to Model(s) Page
ESC B n1 n2 ... n
k
NUL
27 66 n1 n2 ... nk 0 Set vertical tabs ML390T/391T,
ML590/591 94
ESC C n
26 67 n Set page length in lines. ML390T/391T,
ML590/591 85
ESC C NUL n
27 67 0 n Set page length in inches. ML390T/391T,
ML590/591 85
ESC D NUL NUL
27 68 0 0 Clear horizontal tab settings. ML390T/391T,
ML590/591 76
ESC D n1 n2 ... n
k
NUL
27 68 n1 n2 ... nk 0 Set horizontal tab ML590/591 73
ESC E
27 69 Emphasized printing on ML390T/391T,
ML590/591 36
ESC F
27 70 Emphasized printing off ML390T/391T,
ML590/591 36
ESC G
27 71 Enhanced printing on ML390T/391T,
ML590/591 36
ESC H
27 72 Enhanced printing off ML390T/391T,
ML590/591 36
ESC J n
27 74 n Execute n/180" line feed. ML390T/391T 88
ESC K Ln Hn [data]
27 75 Ln Hn [data] Begin single density graphics ML390T/391T,
ML590/591 62
ESC L Ln Hn [data]
27 76 Ln Hn [data] Double density graphics ML390T/391T,
ML590/591 62
ESC M
27 77 Select 12 cpi ML390T/391T,
ML590/591 15
ESC N n
27 78 n Skip over perforation on ML390T/391T,
ML590/591 99
ESC O
27 79 Skip over perforation off ML390T/391T,
ML590/591 99
ESC P
27 80 Select 10 cpi ML390T/391T,
ML590/591 15
ESC Q n
27 81 n Set right margin ML390T/391T,
ML590/591 70
ESC R n
27 82 n Select international character/Code Page
set ML390T/391T,
ML590/591 10
ESC S 0
27 83 48 Start superscript printing ML390T/391T,
ML590/591 20
ESC S 1
27 83 49 Start subscript printing ML390T/391T,
ML590/591 20
ESC T
27 84 Stop superscript/ subscript printing ML390T/391T,
ML590/591 20
ESC U 0
27 85 48 Uni-directional printing off ML390T/391T,
ML590/591 82
ESC U 1
27 85 49 Uni-directional printing on ML390T/391T,
ML590/591 82

Epson LQ Command Summary xxxi
Epson LQ Command: ASCII
Decimal Function Applies to Model(s) Page
ESC W 0
27 87 48 End double width printing ML390T/391T,
ML590/591 21
ESC W 1
27 87 49 Begin double width printing ML390T/391T,
ML590/591 21
ESC X p Pn L
p
H
p
27 88 70 Pn Lp Hp
Select character pitch/point size ML390T/391T,
ML590/591 17
ESC Y Ln Hn [data]
27 89 Ln Hn [data] Double speed/double density graphics ML390T/391T 62
ESC Z Ln Hn [data]
27 90 Ln Hn [data] Quadruple density graphics ML390T/391T 62
ESC [ n
27 91 n Set line spacing to n/360" ML390T/391T,
ML590/591 92
ESC \ Ln Hn
27 92 Ln Hn
Set relative dot position ML390T/391T,
ML590/591 80
ESC ] n
27 93 n Perform n/360" line feed ML390T/391T,
ML590/591 88
ESC a 0
27 97 48 Left justification ML390T/391T,
ML590/591 83
ESC a 1
27 97 49 Center justification ML390T/391T,
ML590/591 83
ESC a 2
27 97 50 Right justification ML390T/391T,
ML590/591 83
ESC a 3
27 97 51 Full (left and right) justification ML390T/391T,
ML590/591 83
ESC b m n1 n2 ... n
k
NUL
27 98 m n1 n2 ... nk 0 Set vertical format unit (VFU) ML390T/391T,
ML590/591 95
ESC c L
p
H
p
27 99 Lp Hp
Set Horizontal Motion Index ML390T/391T,
ML590/591 27
ESC g
27 103 Select 15 cpi ML390T/391T,
ML590/591 15
ESC i 0
27 105 48 Incremental printing off ML390T/391T 82
ESC i 1
27 105 49 Incremental printing on ML390T/391T 82
ESC j n
27 106 n n/180" reverse line feed ML390T/391T,
ML590/591 89
ESC k n
27 107 n Specify typeface ML390T/391T 30
ESC l n
27 108 n Set left margin ML390T/391T,
ML590/591 70
ESC I 0
27 73 48 Cancel printing upper range control codes ML390/391T,
ML590/591 13
ESC I 1
27 73 49 Permit printing upper range control codes ML390/391T,
ML590/591 13
ESC n Pn
27 110 Pn
Select Graphics Aspect Ratio ML390/391T,
ML590/591 65
Epson LQ Command Summaryxxxii
Epson LQ Command: ASCII
Decimal Function Applies to Model(s) Page
ESC p 0
27 112 48 Proportional spacing off ML390T/391T,
ML590/591 25
ESC p 1
27 112 49 Proportional spacing on ML390T/391T,
ML590/591 25
ESC q n
27 113 n Specify outline/shadow ML390T/391T,
ML590/591 38
ESC r n
27 114 n Select color ML590/591 130
ESC s 0
27 115 48 Half-speed printing off ML390T/ML391T,
ML590/591 127
ESC s 1
27 115 49 Half-speed printing on ML390T/ML391T,
ML590/591 127
ESC t 0
27 116 48 Select Epson Set 1 ML390T/391T ,
ML590/591 7
ESC t 1
27 116 49 Select Epson Set 2 ML390T/391T ,
ML590/591 7
ESC t 2
27 116 50 Select Custom Character Set ML390T/391T ,
ML590/591 51
ESC x n
27 120 n Specify print quality ML390T/391T,
ML590/591 29
ESC } NUL
27 125 0 Software I-Prime ML390/391T,
ML590/591 131
DEL
127 Delete one character ML390T/ML391T,
ML590/591 127

Okidata MICROLINE Standard Command Summary
xxxiv
Okidata MICROLINE Standard Commands
ML Standard Command: ASCII
Decimal Function Applies to Model(s) Page
ETX
3Select graphics print mode ML320/321 Std.,
ML320T/321T, ML520/521 59
ETX STX
3 2 End graphics print mode ML320/321 Std.,
ML320T/321T, ML520/521 59
ETX ETX
3 3 Store graphics data in one dot
column buffer ML320/321 Std.,
ML320T/321T, ML520/521 60
ETX LF
3 10 Graphics line feed with
carriage return, text setting ML320/321 Std.,
ML320T/321T, ML520/521 60
ETX SO
3 14 Graphics line feed with
carriage return, graphics
setting
ML320/321 Std.,
ML320T/321T, ML520/521 60
ETX DC2
3 18 Graphics line feed without
carriage return, text setting ML320/321 Std.,
ML320T/321T, ML520/521 60
ETX DC4
3 20 Graphics line feed without
carriage return, graphics
setting
ML320/321 Std.,
ML320T/321T, ML520/521 60
BS
8Backspace ML320/321 Std.,
ML320T/321T, ML520/521 69
HT
9Execute horizontal tab ML320/321 Std.,
ML320T/321T, ML520/521 73
LF
10 Line feed (with carriage
return) ML320/321 Std.,
ML320T/321T, ML520/521 87
VT
11 Vertical tab ML320/321 Std.,
ML320T/321T, ML520/521 94
VT n
11 n Execute VFU vertical tab ML320/321 Std.,
ML320T/321T, ML520/521 96
FF
12 Form feed ML320/321 Std.,
ML320T/321T, ML520/521 87
CR
13 Carriage return ML320/321 Std.,
ML320T/321T, ML520/521 69
DC1
17 Print suppress mode off ML320/321 Std.,
ML320T/321T, ML520/521 129
DC3
19 Print suppress mode on ML320/321 Std.,
ML320T/321T, ML520/521 129
DC4 SP1...SP1 n ... SP...SP ?
20 32...32 n ... 32...32 63 Set vertical format unit (VFU) ML320/321 Std.,
ML320T/321T, ML520/521 96
CAN
24 Cancel ML320/321 Std.,
ML320T/321T, ML520/521 125
ESC ETX x1y1z1w1 ... x16y16z16w16 CR
27 3 x1y1z1w1 ... x16y16z16w16 13 Set horizontal tab by dot
columns ML320/321 Std.,
ML320T/321T, ML520/521 74
ESC ETX 0 CR
27 3 48 13 Clear horizontal tabs set by
dot columns ML320/321 Std.,
ML320T/321T, ML520/521 76
ESC HT CR
27 9 13 Clear horizontal tab settings ML320/321 Std.,
ML320T/321T, ML520/521 76

Okidata MICROLINE Standard Command Summary xxxv
ML Standard Command: ASCII
Decimal Function Applies to Model(s) Page
ESC HT x1y1z1 ... x16y16z16 CR
27 9 x1y1z1 ... x16y16z16 13 Set horizontal tab by
characters ML320/321 Std.,
ML320T/321T, ML520/521 74
ESC LF
27 10 Reverse feed ML320/321 Std.,
ML320T/321T, ML520/521 89
ESC VT Hn Ln
27 11 Hn Ln
Skip down selected number
of lines ML320/321 Std.,
ML320T/321T, ML520/521 96
ESC DLE @ Pn a1 a2 P1 P2 P3 P4
27 16 64 Pn a1 a2 P1 P2 P3 P4
Set multiple print positions ML320T/321T, ML520/521 77
ESC DLE A m n1 ... n8
27 16 65 m n1 ... n8
Select bar code type and size ML320T/321T, ML520/521 101-
112
ESC DLE B m n [data]
27 16 66 m n [data] Print bar code data ML320T/321T, ML520/521 101-
112
ESC DLE C P1 [data]
27 16 67 P1 [data] Print Postnet bar code data ML320T/321T, ML520/521 101,
112
ESC DC2
27 18 Graphics line feed without
carriage return) ML320/321 Std.,
ML320T/321T, ML520/521 87
ESC CAN
27 24 Initialize printer ML320/321 Std.,
ML320T/321T, ML520/521 127
ESC US 0
27 31 48 End double height printing ML320/321 Std.,
ML320T/321T, ML520/521 21
ESC US 1
27 31 49 Begin double height printing ML320/321 Std.,
ML320T/321T, ML520/521 21
ESC ! n
27 33 n Select international character
set ML320/321 Std.,
ML320T/321T, ML520/521 9
ESC ! *
27 33 42 Italics printing off ML320/321 Std.,
ML320T/321T, ML520/521 35
ESC ! /
27 33 47 Italics printing on ML320/321 Std.,
ML320T/321T, ML520/521 35
ESC ! 0
27 33 48 Select standard character set ML320/321 Std.,
ML320T/321T, ML520/521 8
ESC ! 1
27 33 49 Select block graphics
character set ML320/321 Std.,
ML320T/321T 8
ESC ! 2
27 33 50 Select line character set ML320/321 Std.,
ML320T/321T, ML520/521 8
ESC # 0
27 35 48 Select HSD print mode ML320/321 Std.,
ML320T/321T, ML520/521 29
ESC # 3
27 35 51 Select 20 cpi ML320/321 Std.,
ML320T/321T, ML520/521 17
ESC # Q
27 35 81 Double speed/ quadruple
density graphics ML320/321 Std.,
ML320T/321T, ML520/521 55
ESC $
27 36 Copy ROM character set to
RAM character set ML320/321 Std.,
ML320T/321T, ML520/521 45
ESC % 5 n
27 37 53 n Perform n/144" feed ML320/321 Std.,
ML320T/321T, ML520/521 88
ESC % 9 n
27 37 57 n Set spacing to n/144" ML320/321 Std.,
ML320T/321T, ML520/521 90

Okidata MICROLINE Standard Command Summary
xxxvi
ML Standard Command: ASCII
Decimal Function Applies to Model(s) Page
ESC % A m n1 ... n11
27 37 65 m n1 ... n11
Down load ascender
characters ML320/321 Std.,
ML320T/321T, ML520/521 45
ESC % B n1 n2 n3 n4
27 37 66 n1 n2 n3 n4
Indent from left margin ML320/321 Std.,
ML320T/321T, ML520/521 76
ESC % C n1 n2 n3
27 37 67 n1 n2 n3
Set left margin ML320/321 Std.,
ML320T/321T, ML520/521 72
ESC % D m n1 ... n11
27 37 68 m n1 ... n11
Down load descender
characters ML320/321 Std.,
ML320T/321T, ML520/521 45
ESC % E n1 n2 n3 n4
27 37 69 n1 n2 n3 n4
Move to right ML320/321 Std.,
ML320T/321T, ML520/521 81
ESC % F n1 n2 n3 n4
27 37 70 n1 n2 n3 n4
Move to left ML320/321 Std.,
ML320T/321T, ML520/521 81
ESC % R n1 n2 n3 n4
27 37 82 n1 n2 n3 n4
Set right margin ML320/321 Std.,
ML320T/321T, ML520/521 72
ESC % S 0
27 37 83 48 Skip over perforation off ML320/321 Std.,
ML320T/321T, ML520/521 100
ESC % S 1
27 37 83 49 Skip over perforation on ML320/321 Std.,
ML320T/321T, ML520/521 100
ESC & n1 n2 n3 n4 :
27 38 n1 n2 n3 n4 58 Select print features ML320/321 Std.,
ML320T/321T, ML520/521 24
ESC * n1 n2 :
27 42 n1 n2 58 Select graphics mode ML320/321 Std.,
ML320T/321T, ML520/521 57
ESC -
27 45 Uni-directional printing on ML320/321 Std.,
ML320T/321T, ML520/521 82
ESC 0
27 48 Select Utility print mode ML320/321 Std.,
ML320T/321T, ML520/521 29
ESC 1
27 49 Select NLQ print mode ML320/321 Std.,
ML320T/321T, ML520/521 29
ESC 2
27 50 Select DLL in Utility mode ML320/321 Std.,
ML320T/321T, ML520/521 45
ESC 3
27 51 Select NLQ Gothic font ML320/321 Std.,
ML320T/321T, ML520/521 29
ESC 5
27 53 Set top of form ML320/321 Std.,
ML320T/321T, ML520/521 98
ESC 6
27 54 Set spacing to 1/6" ML320/321 Std.,
ML320T/321T, ML520/521 90
ESC 7
27 55 Select DLL NLQ mode ML320/321 Std.,
ML320T/321T, ML520/521 45
ESC 8
27 56 Set spacing to 1/8" ML320/321 Std.,
ML320T/321T, ML520/521 90
ESC <
27 60 Half-speed printing on ML320/321 Std.,
ML320T/321T, ML520/521 127
ESC =
27 61 Uni-directional printing off ML320/321 Std.,
ML320T/321T, ML520/521 82
ESC >
27 62 Half-speed printing off ML320/321 Std.,
ML320T/321T, ML520/521 127

Okidata MICROLINE Standard Command Summary xxxvii
ML Standard Command: ASCII
Decimal Function Applies to Model(s) Page
ESC ? n :
27 63 n 58 Carriage return/feed selection ML320/321 Std.,
ML320T/321T, ML520/521 87
ESC C
27 67 Underline printing on ML320/321 Std.,
ML320T/321T, ML520/521 36
ESC D
27 68 Underline printing off ML320/321 Std.,
ML320T/321T, ML520/521 36
ESC E 0
27 69 48 Paper-out sensor on ML320/321 Std.,
ML320T/321T, ML520/521 128
ESC E 1
27 69 49 Paper-out sensor off ML320/321 Std.,
ML320T/321T, ML520/521 128
ESC F Hn Ln
27 70 Hn Ln
Page length set in lines ML320/321 Std.,
ML320T/321T, ML520/521 85
ESC G Hn Ln
26 71 Hn Ln
Page length set in inches ML320/321 Std.,
ML320T/321T, ML520/521 85
ESC H
27 72 Enhanced printing on ML320/321 Std.,
ML320T/321T, ML520/521 36
ESC J
27 74 Start superscript printing ML320/321 Std.,
ML320T/321T, ML520/521 20
ESC K
27 75 Stop superscript printing ML320/321 Std.,
ML320T/321T, ML520/521 20
ESC L
27 76 Start subscript printing ML320/321 Std.,
ML320T/321T, ML520/521 20
ESC M
27 77 Stop subscript printing ML320/321 Std.,
ML320T/321T, ML520/521 20
ESC N n
27 78 n Set intercharacter spacing ML320/321 Std.,
ML320T/321T, ML520/521 26
ESC P
27 80 Single density graphics ML320/321 Std.,
ML320T/321T, ML520/521 55
ESC Q
27 81 Single density graphics ML320/321 Std.,
ML320T/321T, ML520/521 55
ESC R
27 82 Double density graphics ML320/321 Std.,
ML320T/321T, ML520/521 55
ESC S
27 83 Insert sheet (Cut Sheet Feeder) ML320/321 Std.,
ML320T/321T, ML520/521 126
ESC T
27 84 Emphasized printing on ML320/321 Std.,
ML320T/321T, ML520/521 36
ESC V
27 86 Eject sheet (Cut Sheet Feeder) ML320/321 Std.,
ML320T/321T, ML520/521 126
ESC Y
27 89 Proportional spacing on ML320/321 Std.,
ML320T/321T, ML520/521 25
ESC Z
27 90 Proportional spacing off ML320/321 Std.,
ML320T/321T, ML520/521 25
ESC [ T Ln Hn NUL NUL Hc
p
Lc
p
NUL
27 91 84 Ln Hn 0 0 Hcp Lcp 0 Print from code page ML320T/321T, ML520/521 11
ESC g
27 103 Select 15 cpi ML520/521 15
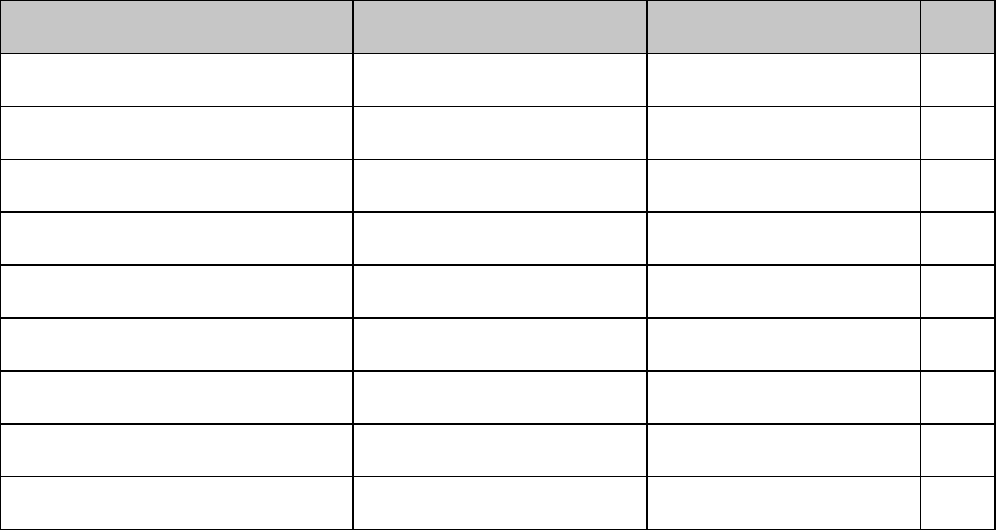
Okidata MICROLINE Standard Command Summary
xxxviii
ML Standard Command: ASCII
Decimal Function Applies to Model(s) Page
ESC I 0
27 105 48 Incremental printing on ML320/321T 82
ESC I 1
27 105 49 Incremental printing off ML320/321T 82
ESC I
27 108 Emphasized/enhanced
printing off ML320/321 Std.,
ML320T/321T, ML520/521 36
ESC { n
27 123 n Change emulation ML320/321 Std.,
ML320T/321T, ML520/521 125
ESC } NUL
27 125 0 Software I-Prime ML320/321T,
ML520/521 131
FS
28 Select 12 cpi ML320/321 Std.,
ML320T/321T, ML520/521 15
GS
29 Select 17.1 cpi ML320/321 Std.,
ML320T/321T, ML520/521 15
RS
30 Select 10 cpi ML320/321 Std.,
ML320T/321T, ML520/521 15
US
31 Begin double width printing ML320/321 Std.,
ML320T/321T, ML520/521 21
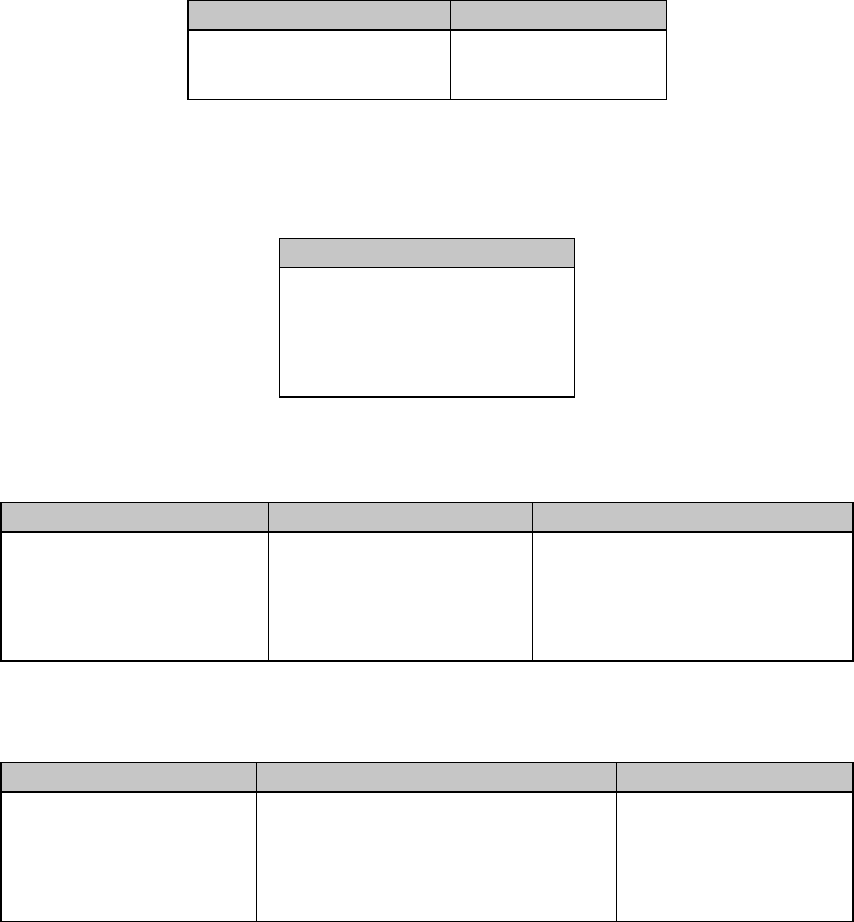
Chapter 1: Working with Commercial Software 1
Chapter 1: Printer Drivers
Usable Drivers
The tables below summarize usable drivers for each printer emulation. They are listed in order
by decreasing compatibility as you go down the list: select one from as high up on the list as
possible, based on what is available from among the drivers supplied with your software. If you
don’t see one from near the top of the list, give the software manufacturer a call to see if they
have added any drivers to those supplied when you purchased your software.
Table 1: Printer Drivers for ML320 Epson/IBM & ML321 Epson/IBM
IBM Proprinter Emulation Epson FX Emulation
IBM Proprinter II
IBM Proprinter
IBM Graphics Printer
Epson FX86/286
Epson FX
Epson EX800/1000
Table 2: Printer Drivers for ML320 MICROLINE Standard
& ML321 MICROLINE Standard
Okidata ML Emulation
Okidata Microline 320/321
Okidata Microline 292/293
Okidata Microline 192+/193+
Okidata Microline 192/193
Okidata Microline 182/183
Okidata Microline 92/93
Table 3: Printer Drivers for Models ML320 Turbo & ML321 Turbo
IBM Proprinter Emulation Epson FX Emulation Okidata ML Standard Emulation
Okidata ML 320/1T IBM
IBM Proprinter III
IBM Proprinter II
IBM Proprinter
IBM Graphics Printer
Okidata ML 320/1T Epson
Epson FX286e
Epson FX850/1050
Epson FX86/286
Epson FX
Epson FX800/1000
Okidata Microline 320/321T
Okidata Microline 520/521
Okidata Microline 320/321
Okidata Microline 292/293
Okidata Microline 192/193
Okidata Microline 182/183
Table 4: Printer Drivers for Models ML390 Turbo & ML391 Turbo
IBM Proprinter Emulation IBM X24e AGM/XLe AGM Emulation Epson LQ Emulation
Okidata ML390/1T IBM
IBM Proprinter X24e/XL24e
IBM Proprinter X24/XL24
IBM Proprinter XL
Use this emulation only when you have
selected an IBM Proprinter X24e/XL24e
driver and you need to use Epson LQ
high-density graphics.
O
k
i
d
ata ML390
/
1T E
p
son
Epson LQ 870/1170
Epson LQ 80/1000
Epson LQ 2500
Epson LQ 1500
Epson LQ 1050
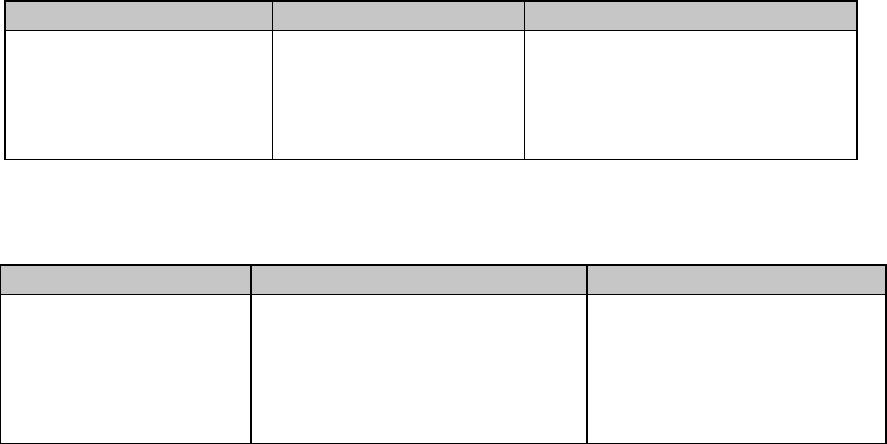
Chapter 1: Working with Commercial Software2
Table 5: Printer Drivers for Models ML520 & ML521
IBM Proprinter Emulation Epson FX Emulation Okidata ML Standard Emulation
Okidata ML 520/1 IBM
IBM Proprinter III
IBM Proprinter II
IBM Proprinter
IBM Graphics Printer
Okidata ML 520/1 Epson
Epson FX850/1050
Epson FX86/286
Epson FX
Epson EX800/1000
Okidata Microline 520/521
Okidata Microline 320/321
Okidata Microline 292/293
Okidata Microline 192/193
Okidata Microline 182/183
Okidata Microline 92/93
Table 6: Printer Drivers for Models ML590 & ML591
IBM Proprinter Emulation IBM X24e AGM/XLe AGM Emulation Epson LQ Emulation
Okidata ML590/1 IBM
IBM Pro
p
rinter X24e
/
XL24e
IBM Proprinter X24/XL24
IBM Proprinter XL
Use this emulation only when you
have selected an IBM Proprinter
X24e/XL24e driver and you need to
use Epson LQ high-density graphics.
Okidata ML590/1 Epson
Epson LQ 850/1050
E
p
son L
Q
860
/
2250
(
use
f
or co
l
or
printing)
Epson LQ 2500
Epson LQ 1500
Epson LQ
Because there are some differences in characteristics such as speed or access to various
features, you may wish to experiment with different drivers.
If you must select a driver that is not listed in the table, be sure to check it thoroughly for print
features such as boldface, underline and changes in pitch. Don’t be surprised if boldfaced
items are printed twice, underlines are misplaced, wide spaces are left between lines or the
printer behaves chaotically (turn off the printer if the latter occurs). These are all characteristics
of an incompatible driver selection.
OKIDATA Software Drivers
Software Drivers Online
For fastest service, you can download the latest drivers for your printer directly through
• the Okidata WorldWide Web site: http://www.okidata.com
• the Okidata OKILINK® BBS: (609) 234-5344
• CompuServe®:
1. GO PCHW
2. In Library #2, select “Printer Utilities.”
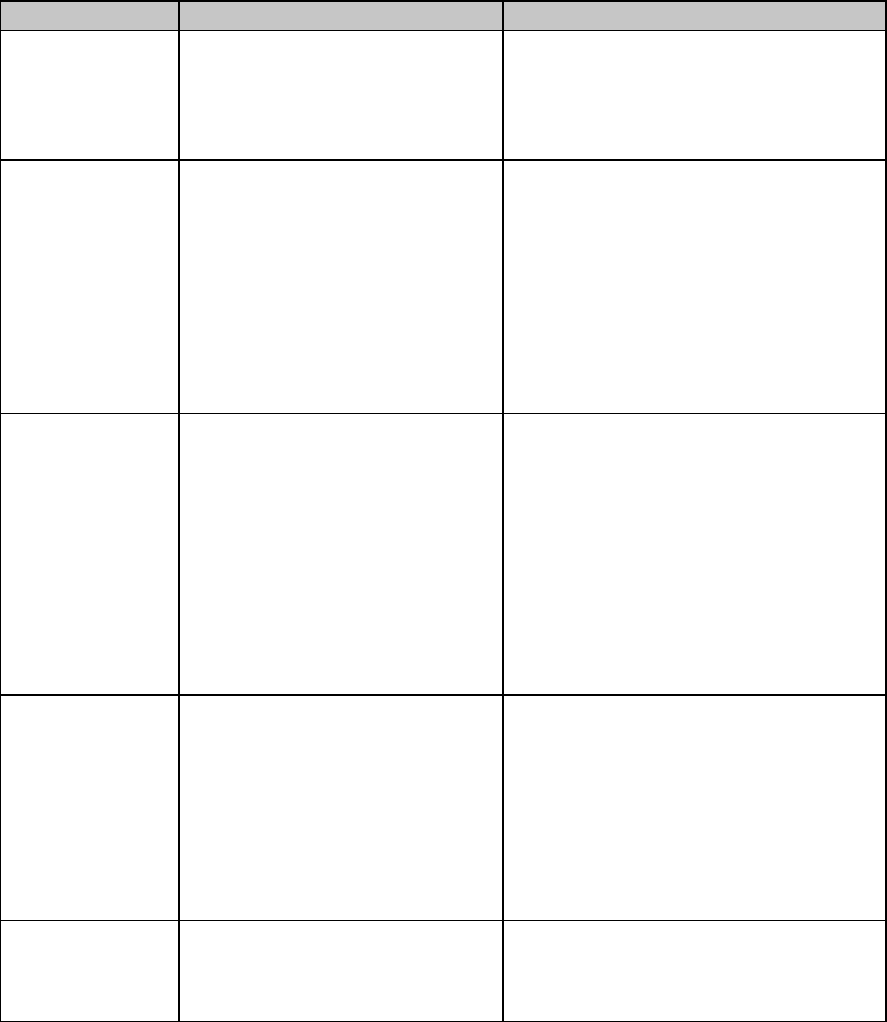
Chapter 1: Working with Commercial Software 3
Table 7: Available Drivers
Printer Models Available Drivers If you can not download the driver:
ML320 Epson/IBM
ML320 Std.
ML321 Epson/IBM
ML321 Std.
Microsoft Windows: 3.0, 3.1, 95
Microsoft Word (DOS): 5.0, 5.5, 6.0
WordPerfect (DOS): 5.1, 5.2, 6.0
To obtain a 3½" HD diskette containing these
drivers, call 1-800-OKIDATA.
ML320 Turbo
ML321 Turbo
Microsoft Windows 3.1x, 95,
NT 3.51 To obtain a3½" HD diskette containing the
driver you need, send a written request to
OKIDATA
PO Box 4603
Trenton, NJ 08650-9852
Select one:
#MS-9267 for Windows 3.1x
#MS-9299 for Windows 95
#MS-9300 for Windows NT
ML390 Turbo
ML391 Turbo
Microsoft Windows 3.1x, 95,
NT 3.51, NT 4.0 To obtain a3½" HD diskette containing the
driver you need, send a written request to
OKIDATA
PO Box 4603
Trenton, NJ 08650-9852
Select one:
#MS-9351 for Windows 3.1x
#MS-9352 for Windows 95
#MS-9353 for Windows NT 3.51
#MS-9354 for Windows NT 4.0
ML520
ML521 Microsoft Windows: 3.0, 3.1, 95
Microsoft Word (DOS): 5.0, 5.5, 6.0
WordPerfect (DOS): 5.1, 5.2, 6.0
To obtain a diskette containing all these
drivers, send a written request to
OKIDATA
PO Box 4603
Trenton, NJ 08650-9852
Select one:
#MS-8838 for 3½" HD diskette
#MS-8839 for 5¼" HD diskette
ML590
ML591 Microsoft Windows: 3.0, 3.1, 95
Microsoft Word (DOS): 5.0, 5.5, 6.0
WordPerfect (DOS): 5.1, 5.2, 6.0
Drivers are shipped with the printer
Chapter 1: Working with Commercial Software4
Software Driver Selection
Selecting a software printer driver is usually a part of the software application installation
process. Changing printers may require use of an external routine, or may be possible from
within the application through menu selection.
Note: Refer to your software documentation for information on installing printer drivers.
Embedded Commands
In some cases, commercial software packages will permit you to create and/or modify the
printer driver. Even if a driver specifically designed for the printer is available, this option can
provide additional room for customization.
Typically, the driver modification routine will present a list of operations with some method for
entering printer commands, permitting substitution, such as entering the italic command in
place of the underline command. It also permits modification of an existing driver to better fit
your printer. Driver modification does require a basic familiarity with your printer’s command
set, so you should study the control codes in the chapters which follow thoroughly before
attempting it.
Some programs also permit you to control your printer directly through embedded commands.
Usage of these commands in programs can provide access to a wide range of printer
capabilities that are not ordinarily supported, or, in programs like older versions of Lotus 1-2-3,
printer commands can be entered as an initialization string to set the basic format for a
document.
Chapter 2: Character Set Commands 5
Chapter 2: Character Set Commands
This chapter describes the character set commands for your printer, including
• IBM Character Sets I, II, and III
• Epson Character Sets
• Microline Character Sets
• International Character Sets
• Code Page Character Sets
• Upper Range Control Codes
• Character Table Selection
Special character sets can be substituted for the standard ASCII characters to provide foreign
characters, line draw characters, non-printable characters such as back space (BS), form feed
(FF), vertical tab (VT), etc. One of the Epson Character Sets provides italics characters.
IBM Character Set Commands
Select IBM Set I Command (IBM)
⻬ ML320 E/I, ML321 E/I ⻬ ML320 Turbo, ML321 Turbo ⻬ ML520, ML521
⻬ ML390 Turbo, ML391 Turbo ⻬ ML590, ML591
Function ASCII Dec Hex
Select IBM Set I ESC 7 27 55 1B 37
This command selects IBM Character Set I in the IBM Proprinter emulation.
Select IBM Set II Command (IBM)
⻬ ML320 E/I, ML321 E/I ⻬ ML320 Turbo, ML321 Turbo ⻬ ML520, ML521
⻬ ML390 Turbo, ML391 Turbo ⻬ ML590, ML591
Function ASCII Dec Hex
Select IBM Set II ESC 6 27 54 1B 36
This command selects IBM Character Set II in the IBM Proprinter emulation.
Chapter 2: Character Set Commands6
Select All Character Set [IBM Set III] Command (Epson LQ)
⻬ ML390 Turbo, ML391 Turbo ⻬ ML590, ML591
Function ASCII Dec Hex
Select All Character Set ESC ( ^ Ln Hn [data] 27 40 94 Ln Hn[data] 1B 28 5E Ln Hn[data]
Use this command to engage the All Character Set (IBM Set III) and apply it to the data which
follows the command. This allows normally non-printable characters to print.
Parameters Ln and Hn
Parameters Ln and Hn are used to designate how many characters you wish to print using the All
Character set:
Number of characters = Ln + (Hn x 256)
For fewer than 256 characters, substitute the number of characters for Ln and set Hn = 0. For
more than 256 characters, divide the number of characters by 256 and assign the whole
number result to Hn, then assign the remainder to Ln.
Ln and Hn can have any value from 0 to 255 decimal.
Print Data from IBM All Characters Set [IBM Set III] Command (IBM)
⻬ ML320 E/I, ML321 E/I ⻬ ML320 Turbo, ML321 Turbo ⻬ ML520, ML521
⻬ ML390 Turbo, ML391 Turbo ⻬ ML590, ML591
Function ASCII Dec Hex
Print Specified Data from
IBM All Characters Set ESC \ Ln Hn27 92 Ln Hn1B 5C Ln Hn
This command will print the amount of data you specify within the command, using the IBM
All Characters set (also known as Character Set III).
The IBM All Characters set contains only printable characters with the exception of decimal
codes 0 and 255, and gives you a broad range of graphics characters and other special
symbols. This set is also a handy debugging tool for programmers, since you can print out and
examine files that contain control codes and escape sequences.
In the above command, you must use parameters Ln and Hn to specify the total count of
characters to be printed. The total count is calculated as
Ln + (Hn x 256)
If you are printing fewer than 256 characters, substitute the number of characters for the value
of Ln and replace Hn with 0.
If you are printing 256 or more characters, divide the total number of characters you wish to
print by 256. Replace Hn with the whole number result and assign the remainder to Ln.
Chapter 2: Character Set Commands 7
Print One Character from IBM All Character Set [IBM Set III] Command (IBM)
⻬ ML320 E/I, ML321 E/I ⻬ ML320 Turbo, ML321 Turbo ⻬ ML520, ML521
⻬ ML390 Turbo, ML391 Turbo ⻬ ML590, ML591
Function ASCII Dec Hex
Print Specified Character from IBM Set III ESC ^ n 27 94 n 1B 5E n
This command will print only the one character you specify within the command, using IBM
Character Set III (also known as the All Characters set).
When the printer receives this command, it will print the character “n” from IBM Character Set
III. The value of n can be from 0 to 255 decimal (00 to FF hexadecimal).
Epson Character Set Commands
Select Epson Set 1 [Slanted Characters] Command (Epson)
⻬ ML320 E/I, ML321 E/I ⻬ ML320 Turbo, ML321 Turbo ⻬ ML520, ML521
⻬ ML390 Turbo, ML391 Turbo ⻬ ML590, ML591
Function ASCII Dec Hex
Select Epson Set 1 ESC t 0 27 116 48 1B 74 30
In the Epson emulation, this command specifies Epson Character Set 1 for the upper ASCII
range (decimal 128 to 256). Epson Character Set 1 contains slanted characters, equivalent to
italics.
Select Epson Set 2 [Graphics Characters] Command (Epson)
⻬ ML320 E/I, ML321 E/I ⻬ ML320 Turbo, ML321 Turbo ⻬ ML520, ML521
⻬ ML390 Turbo, ML391 Turbo ⻬ ML590, ML591
Function ASCII Dec Hex
Select Epson Set 2 ESC t 1 27 116 49 1B 74 31
In the Epson emulation, this command specifies Epson Character Set 2 for the upper ASCII
range (decimal 128 to 256). Epson Character Set 2 contains graphics characters.
Chapter 2: Character Set Commands8
MICROLINE Character Set Commands
Select MICROLINE Standard Character Set Command (ML)
⻬ ML320 Std., ML321 Std. ⻬ ML320 Turbo, ML321 Turbo ⻬ ML520, ML521
Function ASCII Dec Hex
Select Standard Character Set ESC ! 0 27 33 48 1B 21 30
In the Microline emulation, use this command to specify the standard Microline symbol set.
Select MICROLINE Block Graphics Symbol Set Command (ML)
⻬ ML320 Std., ML321 Std. ⻬ ML320 Turbo, ML321 Turbo
Function ASCII Dec Hex
Select Block Graphics Symbol Set ESC ! 1 27 33
49 1B 21 31
In the Microline emulation, use this command to specify a set of block graphics characters that
can be used for drawing simple images and bar graphs. This set of characters has the standard
ASCII characters decimal 32 through 127 and the block graphics in the upper ASCII range,
decimal 128 through 255.
Select MICROLINE Line Character Set Command (ML)
⻬ ML320 Std., ML321 Std. ⻬ ML320 Turbo, ML321 Turbo ⻬ ML520, ML521
Function ASCII Dec Hex
Select Line Character Set ESC ! 2 27 33 50 1B 21 32
In the Microline emulation, use this command to specify the IBM (line graphics) symbol set
which is comparable to IBM Set II. This set of characters has the standard ASCII characters
decimal 32 through 127 and the line graphics in the upper ASCII characters, decimal 128
through 255.
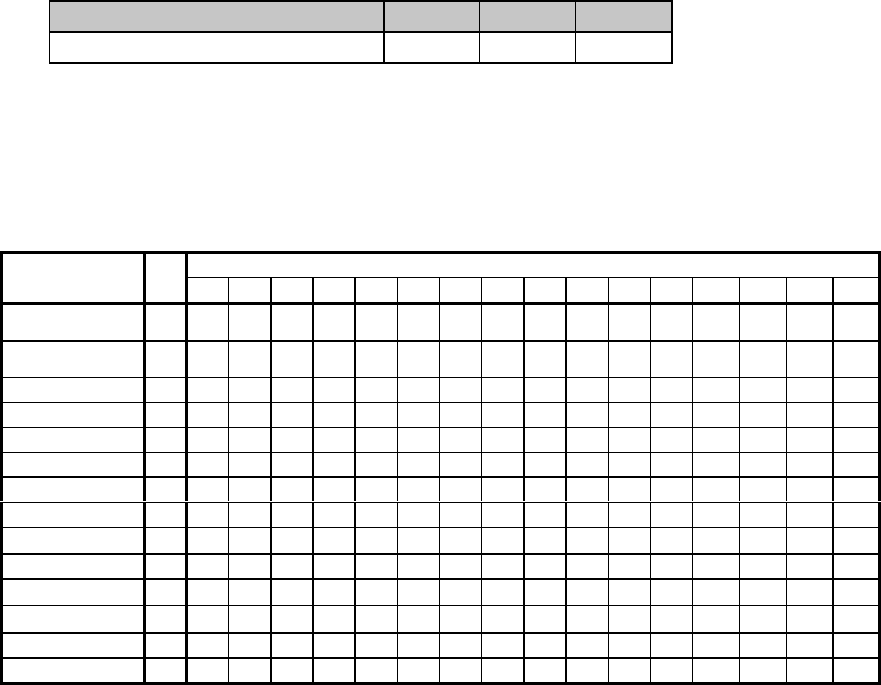
Chapter 2: Character Set Commands 9
International Character Set Commands
These commands allow you to select special international character sets which replace
less-frequently used characters with symbols used in a variety of European languages or in the
publishing industry.
Select International Character Set Command (IBM/ML)
⻬ ML320 E/I, ML321 E/I ⻬ ML320 Turbo, ML321 Turbo ⻬ ML520, ML521
⻬ ML320 Std., ML321 Std. ⻬ ML390 Turbo, ML391 Turbo ⻬ ML590, ML591
Function ASCII Dec Hex
Select International Character Set ESC ! n 27 33 n 1B 21 n
To access these characters, replace the n in the command with the appropriate value taken
from column two in the table below.
Table 8: IBM/ML ESC ! Command —
International Character Substitutions
Character Corresponding to Decimal Value
Language n353638486479919293949596123124125126
American
(slashed zero) 64 # $ & Ø @ O [ \ ] ^ - ‘ { | } ~
American
(unslashed zero) 65 # $ & 0 @ O [ \ ] ^ - ‘ { | } ~
British 66 £ $ & 0 @ O [ \ ] ^ _ ‘ { | } ~
Danish 70# $&0@OÆØÅÜ _ ` æ Ø å ü
Dutch 72 £ $ & 0 @ O [ IJ ] ^ _ ‘ { IJ } ~
French 68 £ $ & 0 à O · ç § ^ _ ‘ é ù è û
French Canadian 74 ü $ ë Ø à Ø â ç ê î ï ô é ù è û
German 67#$&0§OÄÖÜ^_‘äöüß
Italian 73 £ $ & Ø § O °çé^_ùà ò è ì
Latin American 76 # $ & 0 à O ¡ Ñ ¿ é _ ü ì ñ ó ú
Norwegian 71# $&0@OÆØÅ^ _ •æØå ~
Publisher 90 # $ & 0 § O °‘“¶
±*`©® †™
Spanish 75 ! $ & 0 ¡ O Ñ ñ ¿ ü _ á é í ó ú
Swedish 69 § ¤ & 0 É O Ä Ö Å ^ _ é ä ö å ü
* For Models ML520 and ML521, character position number 95 in the Publisher Character Set is _ (underscore).

Chapter 2: Character Set Commands10
Select International Character Set Command (Epson)
⻬ ML320 E/I, ML321 E/I ⻬ ML320 Turbo, ML321 Turbo ⻬ ML520, ML521
⻬ ML390 Turbo, ML391 Turbo ⻬ ML590, ML591
Function ASCII Dec Hex
Select International Character Set ESC R n 27 82 n 1B 52 n
This command is used to use characters from the specified international character set to replace
the standard characters. To access these characters, replace m in the command with the
appropriate value taken from column two in the table below. For the ML390 Turbo and ML391
Turbo printers, substitute the value of n given in Table 3 to engage characters from the Code
Page indicated. Table 9: Epson ESC R Command —
International Character Substitutions
Decimal Value of Character
Language n 35 36 38 64 79 91 92 93 94 95 96 123 124 125 126
American 0#$&@O[\]^-‘{|}~
British 3 £ $ & @ O [ \ ] ^ _ ` { | } ~
Danish I 4 # $ & @ O Æ Ø Å ^ _ ` æ Ø å ~
Danish II 10 # $ & É O Æ Ø Å Ü _ é æ Ø å ü
Dutch 14 £ $ & @ O [ IJ ] ^ _ ` { ij } ~
French 1 # $ & à O •ç§^_` é ù è Ѡ
French Canadian 13 ü $ ë à Ø â ç ê î ï ô é ù è û
German 2#$&§OÄÖÜ^_‘äöüß
Italian 6 # $ & @ O •\é^_ùà ò è ì
Japanese 8 # $ & @ O [ ¥ ] ^ _ ` { | } ~
Latin American 12 # $ & à O ¡ Ñ ¿ é _ ü í ñ ó û
Norwegian 9 # ¤ & É O Æ Ø Å Ü _ é æ Ø å ü
Publisher 64 # $ & § O °‘¨¶
±*`©® †
Spanish I 7 Pt $ & @ O ¡ Ñ ¿ ^ _ ` ¨ ñ } ~
Spanish II 11 # $ & à O ¡ Ñ ¿ é _ ` í ñ ó ú
Swedish 5 # ¤ & É O Ä Ö Å Ü _ é ä ö å ü
* For Models ML520 and ML521, character position number 95 in the Publisher Character Set is _ (underscore).
Table 10: Epson ESC R Command —
Code Page Selections for ML390/391 Turbo
Code Page Value of n
Abicomp 81
BRASCII 80
Canada French 43
Multilingual 850 26
Norway 865 27
Portugual 28
Print from Code Page Command (IBM/ML)
⻬ ML320 Turbo, ML321 Turbo ⻬ ML520, ML521
⻬ ML390 Turbo, ML391 Turbo ⻬ ML590, ML591
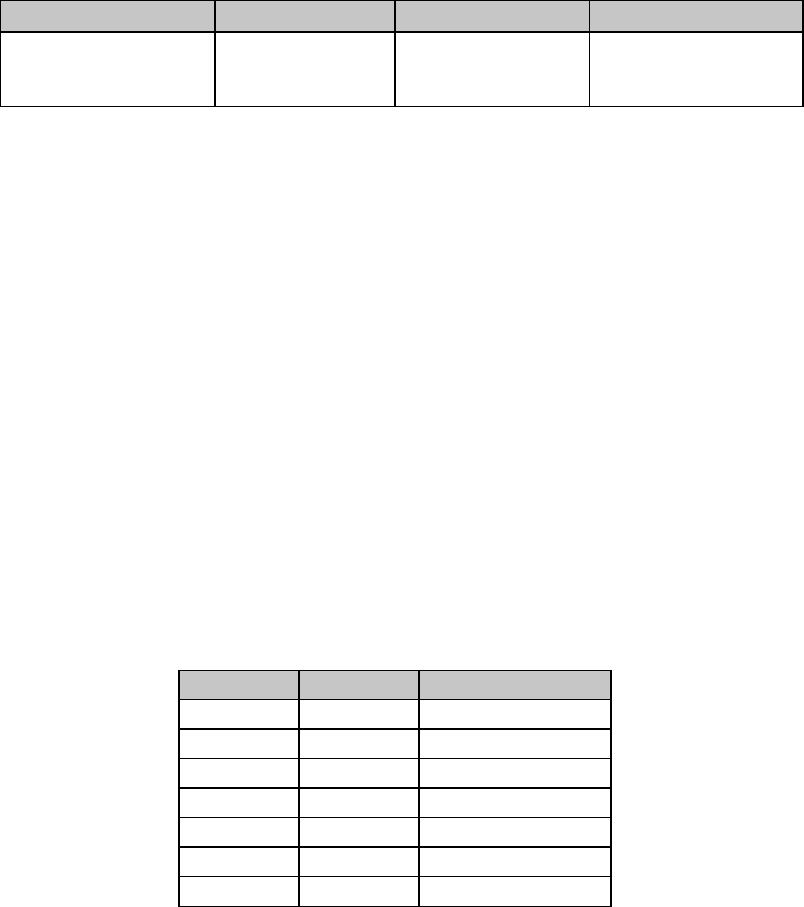
Chapter 2: Character Set Commands 11
Function ASCII Dec Hex
Print from Code Page ESC [ T Ln Hn 0 0
Hcp Lcp 0 27 91 84 Ln Hn 0 0
Hcp Lcp 0 1B 5B 54 Ln Hn 00
00
Hcp Lcp 00
This command permits you to select a Code Page character set and to print the amount of data
you specify within the command from that Code Page set. It applies to both the IBM emulation
(all models listed) and the Okidata Microline emulation (Models ML320/321 Turbo and
ML520/521 only).
Parameters Ln and Hn
These parameters specify the total count of characters to be printed. The total count is
calculated as Ln + (Hn x 256)
If you are printing less than 256 characters, substitute the number of characters for the value of
Ln and replace Hn with 0.
If you are printing 256 or more characters, divide the total number of characters you wish to
print by 256. Replace Ln with the whole number result and assign the remainder to Hn.
Parameters Hcp and Lcp
These parameters specify the Code Page set to be used when printing the characters as given in
the table below.
Table 11: IBM/ML ESC [ T Command —
Code Page Parameters
Hcp value Lcp value Code Page Set
1 181 USA
3 82 Multilingual
3 92 Canadian French
3 95 Portugal
397Norway
4 16 BRASCII*
417Abicomp*
*ML320/321 Turbo and ML390/391 Turbo only.
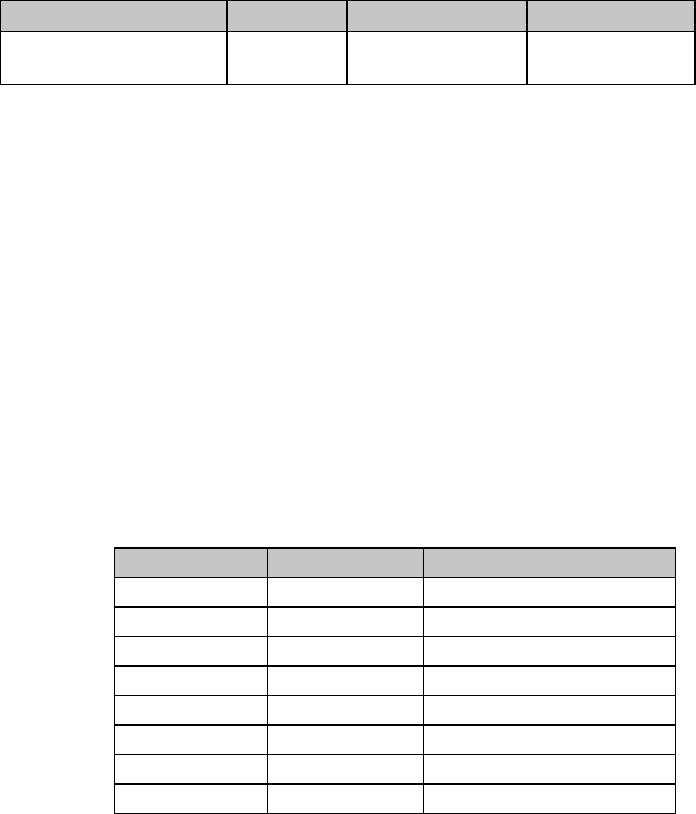
Chapter 2: Character Set Commands12
Assign Code Page Command (Epson)
⻬ ML320 Turbo, ML321 Turbo
Function ASCII Dec Hex
Assign Code Page to
Character Set ESC ( t 3 0
P n1 Pn2 Pn3
27 40 116 51 48
P n1 Pn2 Pn3
1B 28 74 33 30
Pn1 Pn2 Pn3
This command allows you to assign a Code Page character set (see Apendix C) to Epson
Character Set 1 or Set 2, which you can then select using ESC t 0 or ESC t 1, respectively.
Parameter Pn1
This parameter specifies which character set you are replacing with a Code Page set:
Pn1 = 0: replaces Epson Character Set 1
Pn1 = 1: replaces Epson Character Set 2
Parameters Pn2 and Pn3
These parameters specify the Code Page set assigned to the designated Epson Character Set, as
given in the table below.
Table 12: Epson 9-Pin ESC ( t Command —
Code Page Parameters for Pn2 and Pn3 Values
Pn2 Hex Value Pn3 Hex Vvalue Code Page Set
0 0 Italic
1 0 PC437 (USA)
3 0 PC850 (Multilingual)
8 0 PC863 (Canadian French)
7 0 PC860 (Portugal)
9 0 PC865 (Norway)
25 0 BRASCII
26 0 Abicomp
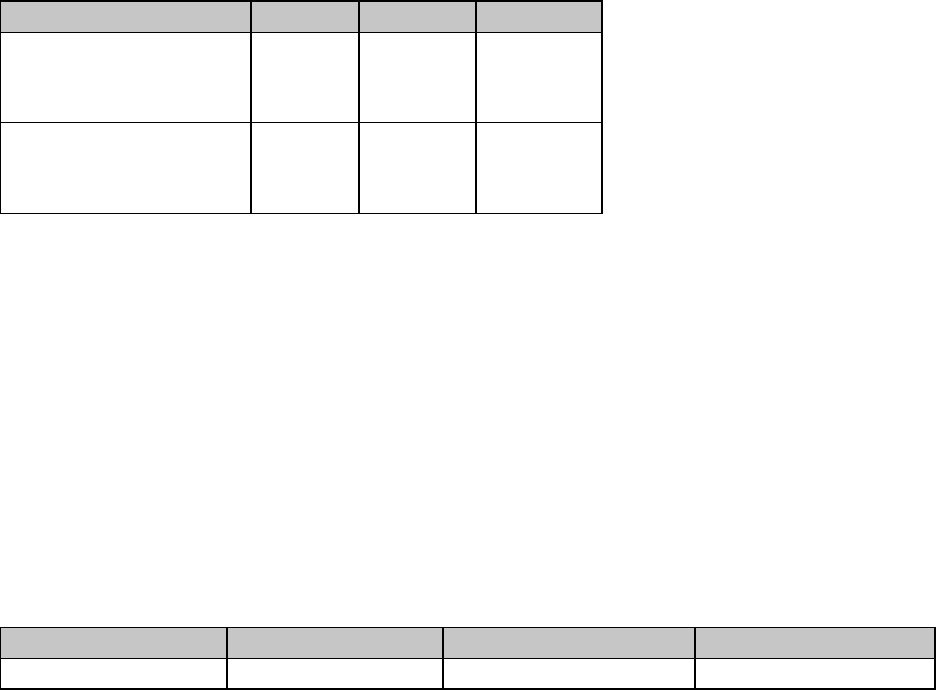
Chapter 2: Character Set Commands 13
Upper Range Control Code Commands (Epson)
⻬ ML320 E/I, ML321 E/I ⻬ ML320 Turbo, ML321 Turbo ⻬ ML520, ML521
⻬ ML390 Turbo, ML391 Turbo ⻬ ML590, ML591
Function ASCII Dec Hex
Permit Printing Upper
Range Control Codes ESC 6
or
ESC I 1*
27 54
or
27 73 49*
1B 36
or
1B 49 31*
Cancel Printing Upper
Range Control Codes ESC 7
or
ESC I 0*
27 55
or
27 73 48*
1B 37
or
1B 49 30*
* Not available for ML390 Turbo or ML391 Turbo.
In the Epson emulation, the ASCII characters from decimal 128 through 159 are normally
interpreted as control codes and cannot be printed. In some cases, you may wish to store
custom characters in these locations.
The ESC 6 and ESC 7 commands allow you to print custom characters stored in these areas and
then return to ”normal” printing. These commands are not necessary in the ML590 and ML591
printers.
The ESC I n command allows you to print custom charters stored in the following ASCII areas:
00H to 06H, 10H, 11H, 15H to 17H, 19H to 1AH, 1CH to 1FH, 80H to 86H, 90H, 91H, 95H
to 97H, 99H, 9AH, or 9CH to 9FH.
Select Code Page Set Command (Epson)
⻬ ML390 Turbo, ML391 Turbo ⻬ ML590, ML591
Function ASCII Dec Hex
Select Code Page Set ESC ( t Ln Hn Pn1 Pn2 Pn3 27 40 116 Ln Hn Pn1 Pn2 Pn3 1B 28 74 Ln Hn Pn1 Pn2 Pn3
Use this command to store any four code page sets from the table below, engaged using the
ESC t n command.
Parameters Ln and Hn
Parameters Ln and Hn are used to designate the number of bytes to follow in the subsequent
parameters, where Number of bytes = Ln + (Hn x 256)
Ln and Hn can have any value from 0 to 255 decimal. Generally, Ln is set to 3 and Hn is set to 0.
Parameter Pn1
Parameter Pn1 selects the table area in which the four code page sets will be stored. You can
assign it to hexadecimal 00, 01, 02, 03, 30, 31, 32, or 33.
Parameters Pn2 and Pn3
Parameters Pn2 and Pn3 determine which code page set will be used, as follows:
Table 13: Epson 24-Pin ESC ( t Command —
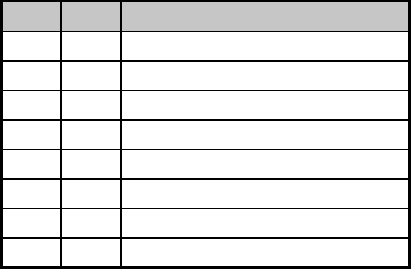
Chapter 2: Character Set Commands14
Code Page Sets for Pn1, Pn2 Values
Pn2 Pn3 Code Page Set
0 0 Italic
1 0 PC-437 (USA)
3 0 PC-850 (Multilingual)
7 0 PC-860 (Portugal)
8 0 PC-863 (Canadian French)
9 0 PC-865 (Norway)
25* 0* BRASCII*
26* 0* Abicomp*
* Applies only to ML390 Turbo and ML391 Turbo
For example, use the commandESC ( t 03H 00H 03H 09H 00H
to store the PC-865 Norwegian code page set in table area 03.
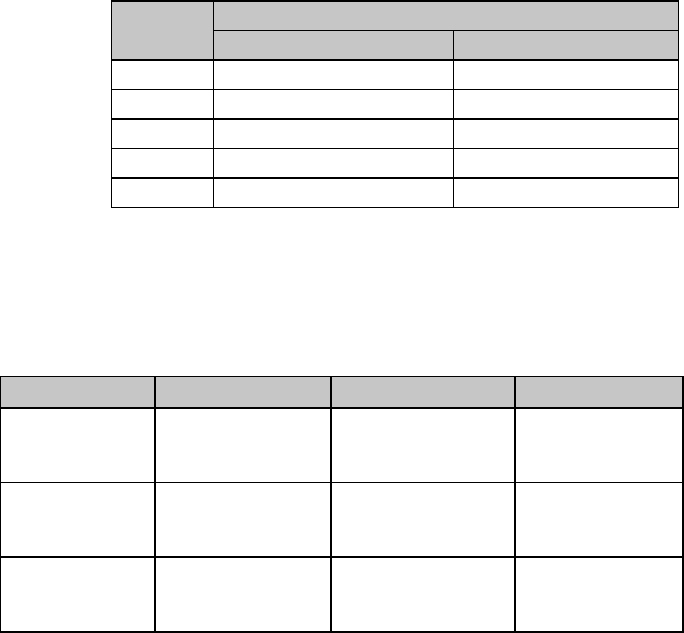
Chapter 3: Character Size & Spacing Commands 15
Chapter 3: Character Size & Spacing Commands
This chapter describes the commands used to set the size and spacing of characters printed:
• Pitch Setting Commands
• Superscript & Subscript Commands
• Double Width & Height Commands
• Combined Print Features Command
• Character Spacing Commands
Pitch Setting Commands
These commands are used to select the pitch in characters per inch (cpi) used. For example, at
10 cpi, each character is 1/10" wide. The number of characters that will fit on a line depends
on the pitch you have selected and on whether you have a narrow carriage or a wide carriage
printer. You can also set pitch using the printer's front panel or the menu (see “Menu Mode” in
your printer manual).
Table 14: Pitch Setting Commands —
Characters Per Line (CPL) for Pitches
Characters per Line
Pitch Narrow Carriage Models Wide Carriage Models
10 cpi 80 cpl 136 cpl
12 cpi 96 cpl 163 cpl
15 cpi* 120 cpl * 204 cpl *
17.1 cpi 137 cpl 233 cpl
20 cpi 160 cpl 272 cpl
* 15 cpi is not available on Models ML320/1 E/I, ML320/1 Std. or ML320/1 Turbo.
Pitch Setting Commands for Non-compressed Printing (IBM/E/ML)
⻬ ML320 E/I, ML321 E/I ⻬ ML320 Turbo, ML321 Turbo ⻬ ML520, ML521
⻬ ML320 Std., ML321 Std. ⻬ ML390 Turbo, ML391 Turbo ⻬ ML590, ML591
Function Command: IBM Command: Epson Command: ML
Select 10 cpi ASCII: DC2
Dec: 18
Hex: 12
ASCII: ESC P
Dec: 27 80
Hex: 1B 50
ASCII: RS
Dec: 30
Hex: 1E
Select 12 cpi ASCII: ESC :
Dec: 27 58
Hex: 1B 3A
ASCII: ESC M
Dec: 27 77
Hex: 1B 4D
ASCII: FS
Dec: 28
Hex: 1C
Select 15 cpi* ASCII: ESC g
Dec: 27 103
Hex: 1B 67
ASCII: ESC g
Dec: 27 103
Hex: 1B 67
ASCII: ESC g
Dec: 27 103
Hex: 1B 67
* 15 cpi is not available on Models ML320/1 E/I, ML320/1 Std. or ML320/1 Turbo.
Pitch Setting Commands for Compressed Printing (IBM)
⻬ ML320 E/I, ML321 E/I ⻬ ML320 Turbo, ML321 Turbo ⻬ ML520, ML521
⻬ ML590, ML591
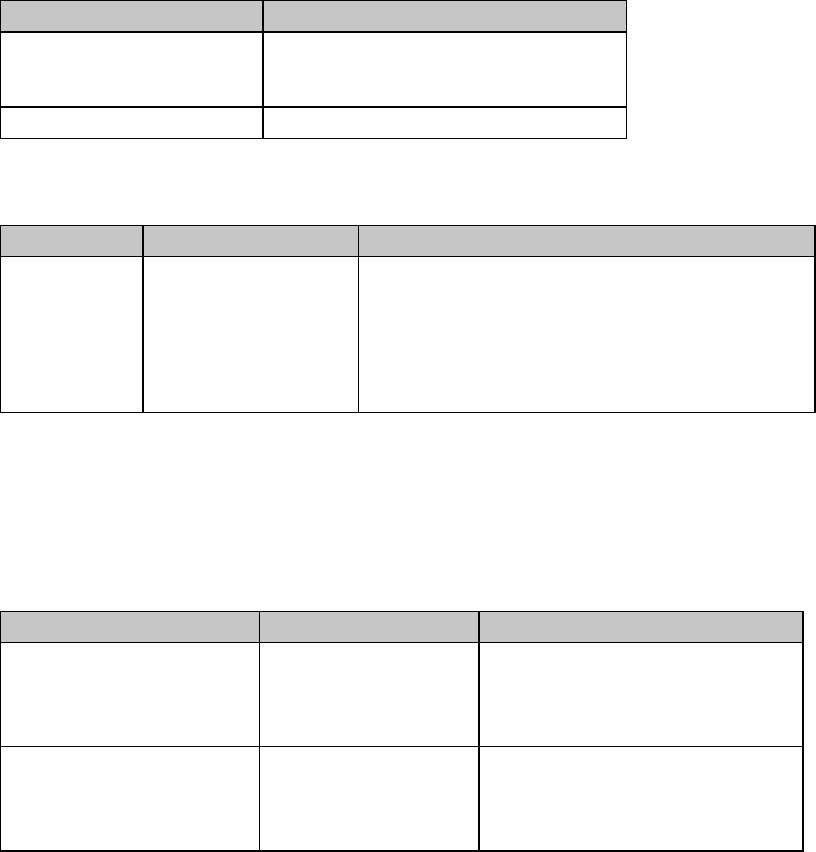
Chapter 3: Character Size & Spacing Commands16
Function Command
Select Compressed Pitch ASCII: SI or ESC SI
Dec: 15 or 27 15
Hex: 0F or 1B 0F
Cancel Compressed Pitch Not applicable
⻬ ML390 Turbo, ML391 Turbo
Function Command Notes
Select
Compressed
Pitch*
ASCII: SI or ESC SI
Dec: 15 or 27 15
Hex: 0F or 1B 0F
SI Select item in the printer Menu must be set to
12 CPI in order to select compressed pitch.
If 10 cpi character pitch is engaged, printer will
go to 17.1 cpi pitch.
If 12 cpi character pitch is engaged, printer will
go to 20 cpi pitch.
* To cancel compressed pitch, enter one of the non-compressed printing pitch setting
commands.
Pitch Setting Commands for Compressed Printing (Epson)
⻬ ML320 E/I, ML321 E/I ⻬ ML320 Turbo, ML321 Turbo ⻬ ML520, ML521
⻬ ML390 Turbo, ML391 Turbo ⻬ ML590, ML591
Function Command Notes
Select Compressed Pitch ASCII: SI or ESC SI
Dec: 15 or 27 15
Hex: 0F or 1B 0f
If 10 cpi is engaged, compressed
pitch will be 17.1 cpi
If 12 cpi is engaged, compressed
pitch will be 20 cpi.
Cancel Compressed Pitch ASCII: DC2
Dec: 18
Hex: 12
If 17.1 cpi is engaged, pitch will
revert to 10 cpi.
If 20 cpi is engaged, pitch will
revert to 12 cpi.
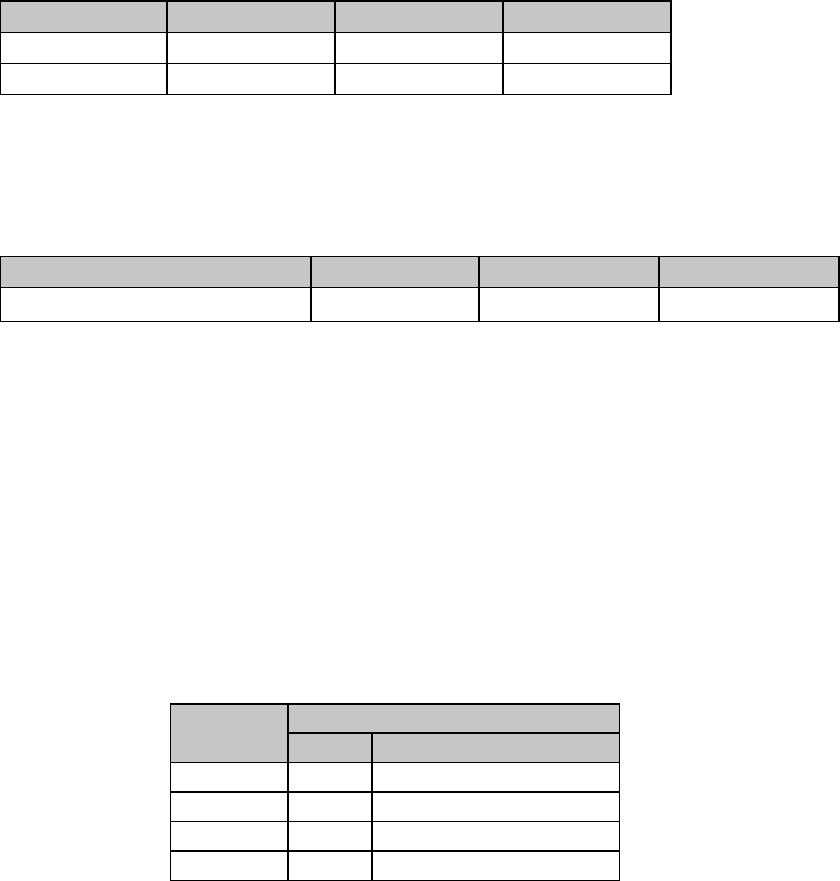
Chapter 3: Character Size & Spacing Commands 17
Pitch Setting Commands for Compressed Printing (ML)
⻬ ML320 Std., ML321 Std. ⻬ ML320 Turbo, ML321 Turbo ⻬ ML520, ML521
Function ASCII Dec. Hex.
Select 17.1 cpi ASCII: GS Dec: 29 Hex: 1D
Select 20 cpi ASCII: ESC # 3 Dec: 27 35 51 Hex: 1B 23 33
Select Character Pitch/Point Size Command (Epson)
⻬ ML320 Turbo, ML321 Turbo
⻬ ML390 Turbo, ML391 Turbo ⻬ ML590, ML591
Function ASCII Dec Hex
Select Character Pitch/Point Size ESC X p Pn Lp Hp27 88 70 Pn Lp Hp1B 58 46 Pn Lp Hp
Use this command to place the printer in the scalable font mode and to select the character
pitch and the point size. Character pitch setting range is 5 to 20 characters per inch (cpi); point
size setting range is 8 to 64 points.
For the ML590 and ML591 printers, you can select any character pitch from 5 to 20 cpi for the
LQ Courier, LQ Roman and LQ Swiss typefaces. The Gothic, Orator, Prestige and Swiss Bold
typefaces will only print in point sizes 10, 10.5 and 21. The table below shows which typeface
will print in other sizes when these typefaces are selected.
Note: If you wish to use this command to print to an ML320/321 Turbo printer in a UNIX
environment, you must reboot the system after the command is entered.
Table 15: Epson ESC X Command —
Font Substitution for Models ML590 & ML591
Typeface that Prints
Typeface 8 Point 12 to 20 & 22 to 64 Point
Gothic Swiss Courier
Orator Swiss Courier
Prestige Roman Courier
Swiss Bold Swiss Courier
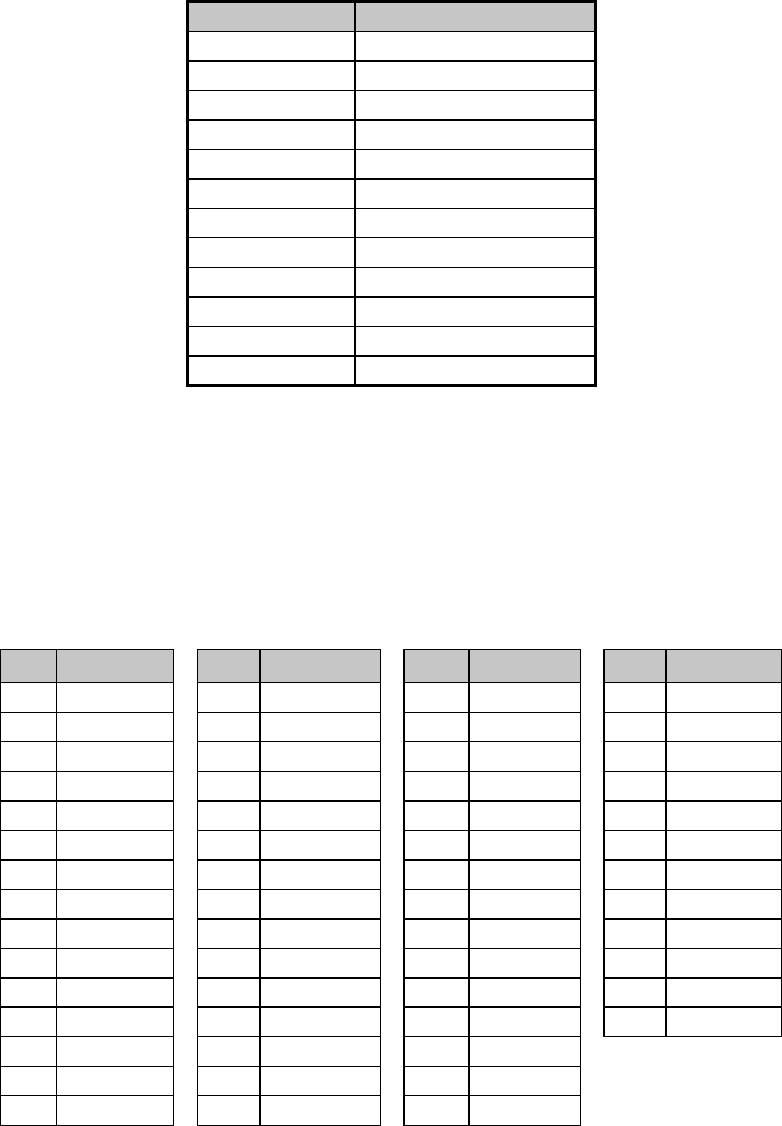
Chapter 3: Character Size & Spacing Commands18
Parameter Pn
Parameter Pn is used to set the character pitch. It can have any value from 0 to 127 decimal for
ML320/321 Turbo and for ML590/591 printers, or from 0 to 255 for ML390/391 Turbo.
Table 16: Epson ESC X Command — Character Pitch Settings for Pn Values
PnCharacter Pitch
0 Remains unchanged
1 Proportional
18 (2 to 19) 20 cpi
20 18 cpi
21 (21 to 23) 17.1 cpi
24 (24 to 29) 15 cpi
30 (30 to 35) 12 cpi
36 (36 to 41) 10 cpi
42 (42 to 47) 8.6 cpi
48 (48 to 59) 7.5 cpi
60 (60 to 71) 6 cpi
72 (72 to 127) 5 cpi
Parameters Lp and Hp
Parameters Lp and Hp are used to set the point size according to the following equation:
Np= [Lp + (Hp x 255] x 0.5
Lp and Hp can have any value from 0 to 255 decimal.
Table 17: Epson ESC X Command —
Point Sizes (1 point = 1/72") for Np
NpPoint Size NpPoint Size NpPoint Size NpPoint Size
0Unchanged 44 22 pt 74 37 pt 106 53 pt
16 8 pt 46 23 pt 76 38 pt 108 54 pt
20 10 pt 48 24 pt 78 39 pt 110 55 pt
21 10.5 pt 50 25 pt 80 50 pt 112 56 pt
22 11 pt 52 26 pt 82 41 pt 114 57 pt
24 12 pt 54 27 pt 84 42 pt 116 58 pt
26 13 pt 56 28 pt 86 43 pt 118 59 pt
28 14 pt 58 29 pt 90 45 pt 120 60 pt
30 15 pt 60 30 pt 92 46 pt 122 61 pt
32 16 pt 62 31 pt 94 47 pt 124 62 pt
34 17 pt 64 32 pt 96 48 pt 126 63 pt
36 18 pt 66 33 pt 98 49 pt 128 64 pt
38 19 pt 68 34 pt 100 50 pt
40 20 pt 70 35 pt 102 51 pt
42 21 pt 72 36 pt 104 52 pt

Chapter 3: Character Size & Spacing Commands 19
Example
To set a point size (Np) of 216:
Np= [Lp + (Hp x 255] x 0.5
1. Assign a value of 1 to Hp.
2. Multiply 216 by 2: 216 x 2 = 432.
3. Subtract 255 from 432: 432 - 255 = 177., then round this value down to the nearest even
number, 176. Assign this value to Lp.
Here is a sample BASIC program to test your calculated values:
ESC$ = CHR$(27)
LPRINT ESC$; "@";
LPRINT "This is a test of the Select Pitch and Point Size Command."
LPRINT "This is the default text mode."
LPRINT "The characters below should be the maximum character height of 216
points."
LPRINT ESC$; "X"; CHR$(1); CHR$ (176); CHR$(1)
LPRINT "Hy"
Select Character Pitch/Point Size Command (IBM–Oki unique)
⻬ ML320 Turbo, ML321 Turbo
⻬ ML390 Turbo, ML391 Turbo ⻬ ML590, ML591
Function ASCII Dec Hex
Select Character
Pitch/ Point Size ESC DLE F Pno Pn Lp Hp27 16 70 Pno Pn Lp Hp1B 10 46 Pno Pn Lp Hp
Use this OKI unique command to select printable fonts by character pitch and point size.
Parameter Pno
This parameter is used to give the number of bytes to follow in the subsequent parameters. It
can have any value from 0 to 255 decimal. Generally, a value of 3 is assigned to Pno.
Parameter Pn
Parameter Pn is used to set the character pitch. It can have the following values:
ML320 Turbo, ML321 Turbo: 0 1o 127
ML390 Turbo, ML391 Turbo: 0 to 255
ML590, ML591: 0 to 127
See "Table 16: Epson ESC X Command — Character Pitch Settings for Pn Values," above.

Chapter 3: Character Size & Spacing Commands20
Parameters Lp and Hp
Parameters Lp and Hp are used to set the point size according to the following equation:
Np= [Lp + (Hp x 255] x 0.5
Lp and Hp can have any value from 0 to 255 decimal.
See "Table 17: Epson ESC X Command — Point Sizes for Np Values," above.
Superscript/Subscript Commands (IBM/E/ML)
⻬ ML320 E/I, ML321 E/I ⻬ ML320 Turbo, ML321 Turbo ⻬ ML520, ML521
⻬ ML320 Std., ML321 Std. ⻬ ML390 Turbo, ML391 Turbo ⻬ ML590, ML591
Function IBM Epson ML
Start Superscript Printing ASCII: ESC S 0
Dec: 27 83 0
Hex: 1B 53 00
ASCII: ESC S 0
Dec: 27 83 0
Hex: 1B 53 00
ASCII: ESC J
Dec: 27 74
Hex: 1B 4A
Stop Superscript Printing ASCII: ESC T
Dec: 27 84
Hex: 1B 54
ASCII: ESC T
Dec: 27 84
Hex: 1B 54
ASCII: ESC K
Dec: 27 75
Hex: 1B 4B
Start Subscript Printing ASCII: ESC S 1
Dec: 27 83 1
Hex: 1B 53 01
ASCII: ESC S 1
Dec: 27 83 1
Hex: 1B 53 01
ASCII: ESC L
Dec: 27 76
Hex: 1B 4C
Stop Subscript Printing ASCII: ESC T
Dec: 27 84
Hex: 1B 54
ASCII: ESC T
Dec: 27 84
Hex: 1B 54
ASCII: ESC M
Dec: 27 77
Hex: 1B 4D
Superscript characters are printed above the normal print line, and are used for exponents and
special typographic effects (x2). Subscripts are handy for chemical formulas (H2O).
Superscripts and subscripts will print as full-width characters. They cannot be used with
double-height printing.
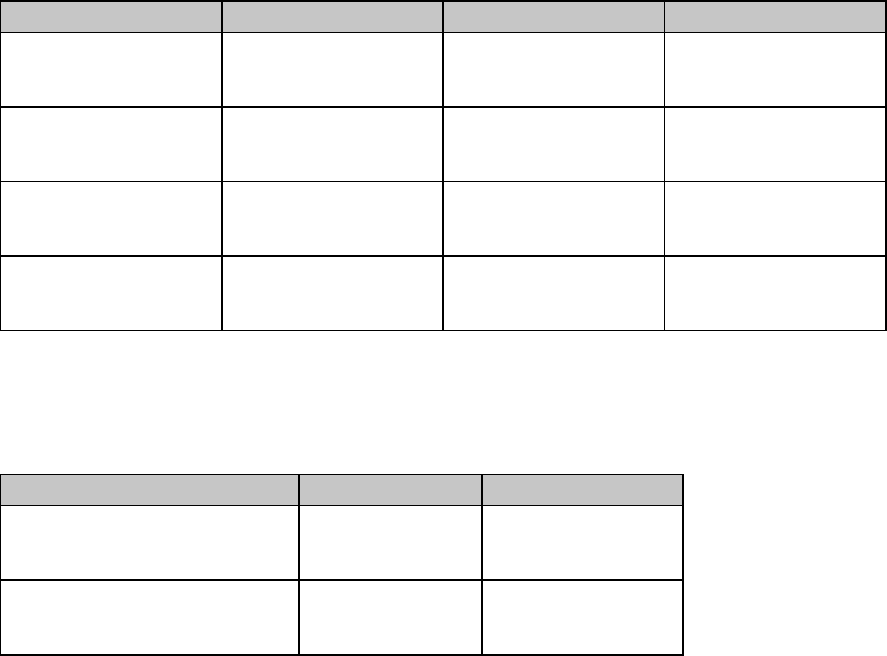
Chapter 3: Character Size & Spacing Commands 21
Double Width Commands (IBM/E/ML)
⻬ ML320 E/I, ML321 E/I ⻬ ML320 Turbo, ML321 Turbo ⻬ ML520, ML521
⻬ ML320 Std., ML321 Std. ⻬ ML390 Turbo, ML391 Turbo ⻬ ML590, ML591
Function IBM Epson ML
Begin Double Width
Printing ASCII: ESC W 1
Dec: 27 87 49
Hex: 1B 57 31
ASCII: ESC W 1
Dec: 27 87 49
Hex: 1B 57 31
ASCII: US
Dec: 31
Hex: 1F
End Double Width
Printing ASCII: ESC W 0
Dec: 27 87 48
Hex: 1B 57 30
ASCII: ESC W 0
Dec: 27 87 48
Hex: 1B 57 30
Use any of the pitch
selection commands.
Begin Double Width
Printing Line by Line ASCII: SO
Dec: 14
Hex: 0E
ASCII: SO or ESC SO
Dec: 14 or 27 14
Hex: 0E or 1B 0E
Not applicable
End Double Width
Printing Line by Line ASCII: DC4
Dec: 20
Hex: 14
ASCII: DC4
Dec: 20
Hex: 14
Not applicable
Double Height Commands (E/ML)
⻬ ML320 E/I, ML321 E/I ⻬ ML320 Turbo, ML321 Turbo ⻬ ML520, ML521
⻬ ML320 Std., ML321 Std. ⻬ ML390 Turbo, ML391 Turbo ⻬ ML590, ML591
Function Epson ML
Begin Double Height Printing ASCII: ESC w 1
Dec: 27 119 1
Hex: 1B 77 01
ASCII: ESC US 1*
Dec: 27 31 49
Hex: 1B 1F 31
End Double Height Printing ASCII: ESC w 0
Dec: 27 119 0
Hex: 1B 77 00
ASCII: ESC US 0*
Dec: 27 31 0
Hex: 1B 1F 00
* This command is also valid for the ML390 Turbo, ML391 Turbo, ML590 and ML591 in Epson
LQ emulation; it duplicates the ESC w command.
Double height printing produces characters that are twice as tall as normal size characters. it
can be combined with double width and emphasized printing for an even more striking effect.
When you use double height printing, you will need to adjust the line spacing to accommodate
the taller characters.
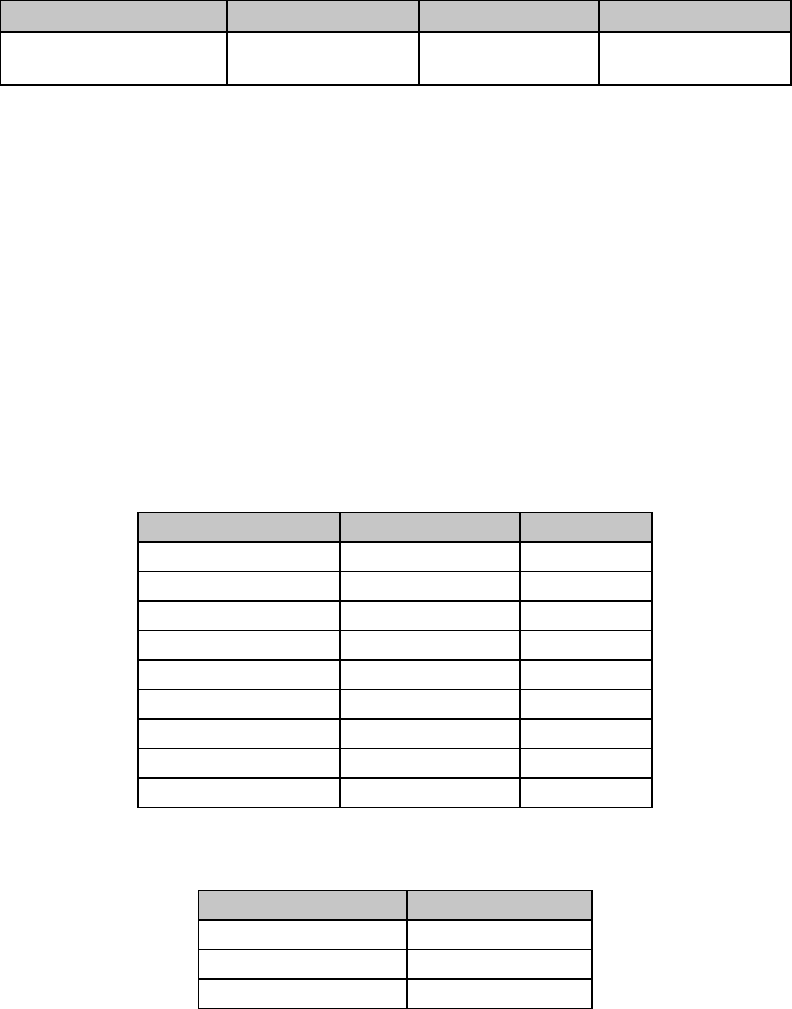
Chapter 3: Character Size & Spacing Commands22
Double Width & Height Printing Commands
The double width & height commands allow you to select double width, double height, or
double width and double height printing in the IBM emulation.
Double Width & Height Printing Command, 9-Pin Printers (IBM)
⻬ ML320 E/I, ML321 E/I ⻬ ML320 Turbo, ML321 Turbo ⻬ ML520, ML521
Function ASCII Decimal Hexadecimal
Double Width and/or
Height Printing ESC [ @ Ln Hn NUL
NUL n1 n2
27 91 64 Ln Hn 0
0 n1 n2
1B 5B 40 Ln Hn 00
00 n1 n2
This command lets you specify character width and line spacing in addition to character
height.
Parameters n1 and n2
Parameters n1 and n2 are used to set the width, line spacing and height used. Variable n1 sets
the character height and line spacing; variable n2 sets the character width.
Parameters Ln Hn
These parameters specify the number of bytes of the modes, calculated as
Ln + (Hn x 256)
Generally, Ln is 4 and Hn is 0.
Table 18: IBM ESC [ @ Command —
Character Height/Line Spacing for n1 Values
Decimal Value of n1Character Height Line Spacing
0 Unchanged Unchanged
1 Standard Unchanged
2 Double Unchanged
16 Unchanged Single
17 Standard Single
18 Double Single
32 Unchanged Double
33 Standard Double
34 Double Double
Table 19: IBM ESC [ @ Command — Character Width for n2 Values
Decimal Value of n2Character Width
0 Unchanged
1Standard
2 Double
For example, to use double height characters with double the normal line spacing, without
changing the width of the characters use this BASIC statement:
LPRINT CHR$(27);"[@ ";CHR$(4);CHR$(0);CHR$(0);CHR$(0);CHR$(34);CHR$(0)
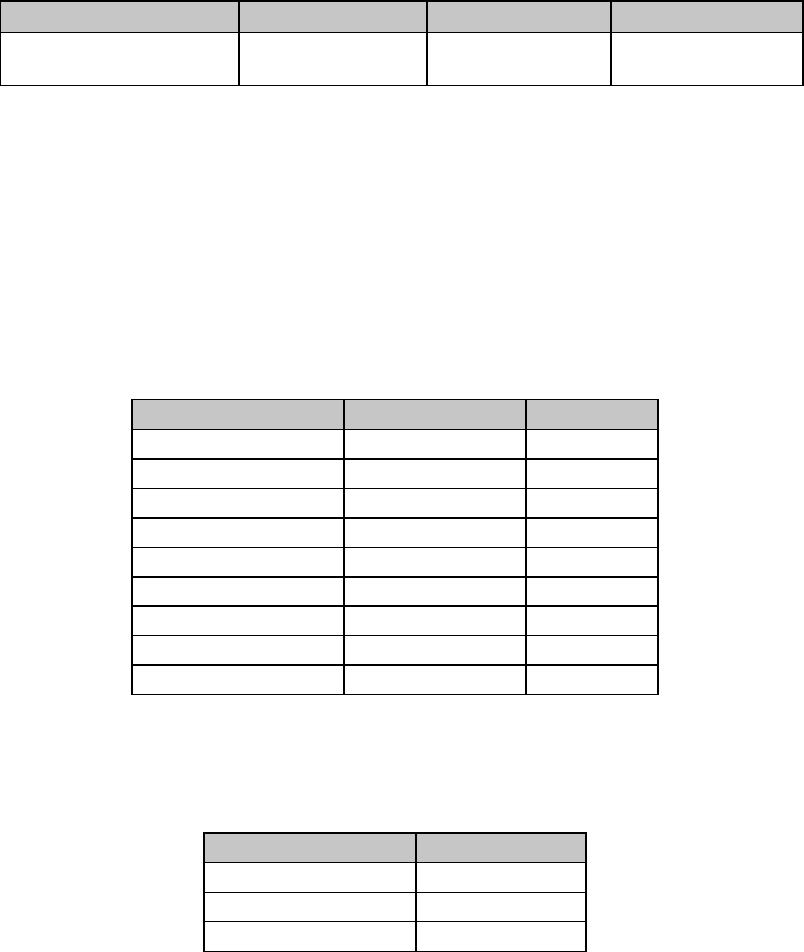
Chapter 3: Character Size & Spacing Commands 23
Double Height & Width Printing Command, 24-Pin Printers (IBM)
⻬ ML390 Turbo, ML391 Turbo
Function ASCII Decimal Hexadecimal
Double Height Printing ESC [ @ n1 n2 m1
m2 m3 m4
27 91 64 n1 n2 m1
m2 m3 m4
1B 5B 40 n1 n2 m1
m2 m3 m4
Parameters n1 and n2
These variables specify the number of mode bytes in the command. Normally, n1 is set to 4 and
n2 is set to 0.
Parameters m1, m2, m3, m4
These variables control the mode. Parameters m1 and m2 are set to 0. Parameter m3 is used to
set the line spacing and character height. Parameter m4 is used to set the width of the character
as shown in the tables below.
Table 20: IBM ESC [ @ Command —
Character Height/Line Spacing for m3 Values
Decimal Value of m3Character Height Line Spacing
0 Unchanged Unchanged
1 Standard Unchanged
2 Double Unchanged
16 Unchanged Single
17 Standard Single
18 Double Single
32 Unchanged Double
33 Standard Double
34 Double Double
Table 20a: IBM ESC [ @ Command —
Character Width for m4 Values
Decimal Value of m4Character Width
0 Unchanged
1Standard
2 Double
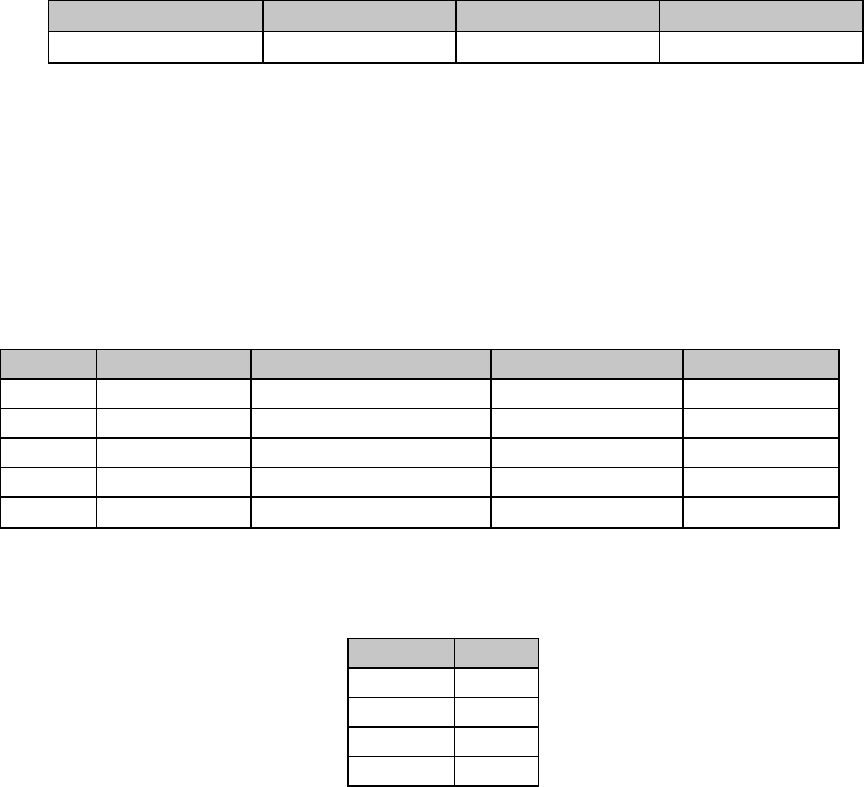
Chapter 3: Character Size & Spacing Commands24
Combined Print Features Command (ML)
⻬ ML320 Std., ML321 Std. ⻬ ML320 Turbo, ML321 Turbo ⻬ ML520, ML521
Function ASCII Dec Hex
Select Print Features ESC & n1 n2 n3 n4 : 27 38 n1 n2 n3 n4 58 1B 26 n1 n2 n3 n4 3A
This command lets you select print quality, character pitch, and several other printing features
with a single command. The values of the four variables (n1 n2 n3 n4) determine which features
are selected.
To calculate the value for each variable, first find the features you want in the Variable Values
table below. Next, add the corresponding values from column one for each variable. Then add
the appropriate factor for each variable taken from Table 22.
Table 21: ML ESC & Command —
Print Features for n1, n2, n3 and n4 Values
Value n1n2n3n4
1 10 cpi Cancel super/subscripts Utility HSD
2 12 cpi Subscripts NLQ N/A
4 17.1 cpi Superscripts Custom characters Underlining
8 20 cpi Emphasized Italics Double height
16 Double width Enhanced N/A N/A
Table 22: ML ESC & Command —
Variable Factors for n1, n2, n3, n4
Variable Factor
n132
n264
n396
n4112
Here are some pointers on using this command:
• You don't have to use all four variables; use only the ones that control the features you want
to change.
• You can enter the variables in any order.
• Be sure to add in the variable factor when calculating the variable values—this number tells
the printer which variable is which.
• You'll get unexpected results if you select incompatible features (e.g., if you pick both 10
and 12 cpi), or if you've added up the values incorrectly.
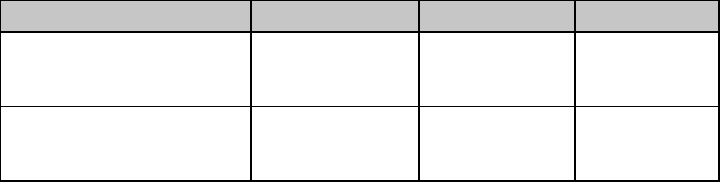
Chapter 3: Character Size & Spacing Commands 25
For example, to set 10 cpi, emphasized, NLQ and underlining using this command, you would
calculate the values for n1, n2, n3, and n4 as follows:
n1 = 1 + 32 = 33
n2 = 8 + 64 = 72
n3 = 2 + 96 = 98
n4 = 4 + 112 = 116
The resulting BASIC statement looks like this:
LPRINT CHR$(27);”&”;CHR$(33);CHR$(72);CHR$(98);CHR$(116);”:”
Character Spacing Commands
The character spacing commands include commands to turn proportional spacing on and off,
as well as commands for increasing the standard spacing between characters at a fixed value.
Proportional Spacing Commands (IBM/E/ML)
⻬ ML320 E/I, ML321 E/I ⻬ ML320 Turbo, ML321 Turbo ⻬ ML520, ML521
⻬ ML320 Std., ML321 Std. ⻬ ML390 Turbo, ML391 Turbo ⻬ ML590, ML591
Function IBM Epson ML
Proportional Spacing On ASCII: ESC P 1
Dec: 27 80 1
Hex: 1B 50 01
ASCII: ESC p 1
Dec: 27 112 1
Hex: 1B 70 01
ASCII: ESC Y
Dec: 27 89
Hex: 1B 59
Proportional Spacing Off ASCII: ESC P 0
Dec: 27 80 0
Hex: 1B 50 00
ASCII: ESC p 0
Dec: 27 112 0
Hex: 1B 70 00
ASCII: ESC Z
Dec: 27 90
Hex: 1B 5A
In the ML320 E/I, ML321 E/I, ML320 Std., ML321 Std., ML320 Turbo, ML321 Turbo, ML520,
and ML521, proportional spacing is available only with Near Letter Quality (NLQ) and Utility
(UTL) printing.
In the ML390 Turbo, ML391 Turbo, ML590 and ML591, proportional spacing is available only
with Letter Quality (LQ) printing.
This command adjusts the space between letters to compensate for the varying widths of
individual characters. Unlike fixed spacing, where all characters are formed within a matrix of
uniform width at a specified pitch, proportional spacing gives more horizontal space to wide
characters, like w or M, and less to narrow characters, like I or f. The resulting print is more
attractive and easier to read than fixed-space printing.
Because the characters have different widths, proportionally spaced fonts have no fixed pitch;
therefore margin settings are only approximate unless your software specifically supports
proportional spacing.
You can also select proportional spacing using the printer menu or the front panel buttons. In
addition, proportional spacing is one of the features available through the composite command
in the Epson mode.
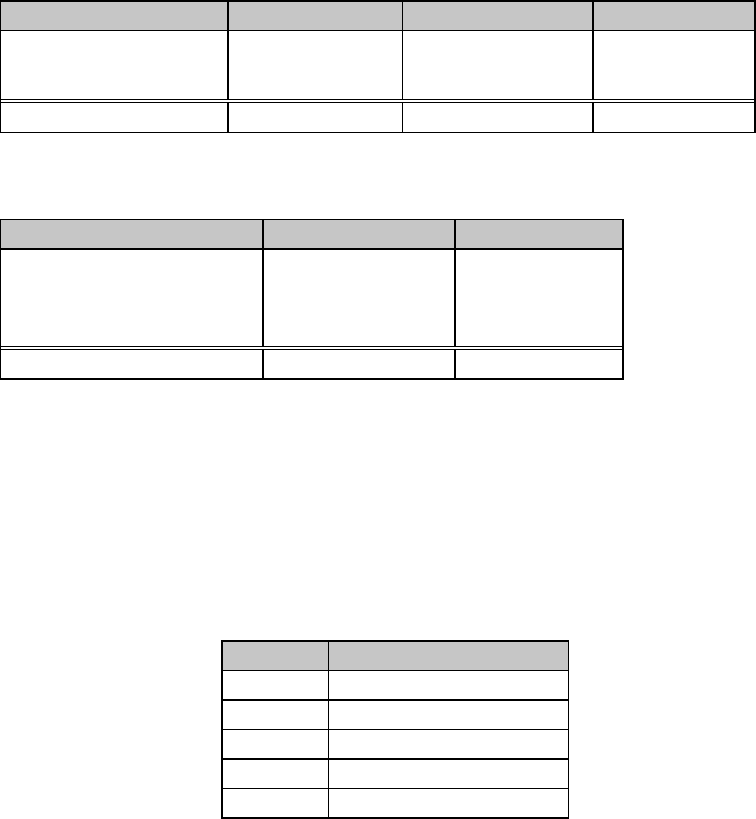
Chapter 3: Character Size & Spacing Commands26
Intercharacter Spacing Commands (IBM/E/ML)
Note: Intercharacter spacing can NOT be set in the HSD and bit image graphics modes.
⻬ ML320 E/I, ML321 E/I ⻬ ML320 Turbo, ML321 Turbo ⻬ ML520, ML521
⻬ ML320 Std., ML321 Std.
Function IBM Epson ML
Set Intercharacter
Spacing ASCII: ESC V n
Dec: 27 86 n
Hex: 1B 56 n
ASCII: ESC SP n
Dec: 27 32 n
Hex: 1B 20 n
ASCII: ESC N n
Dec: 27 78 n
Hex: 1B 4E n
Values for n n = 0 to 11 n = 0 to 255 n = 0 to 11
⻬ ML390 Turbo, ML391 Turbo ⻬ ML590, ML591
Function IBM Epson
Set Intercharacter Spacing ML590/591 Only:
ASCII: ESC SP n
Dec: 27 32 n
Hex: 1B 20 n
ASCII: ESC SP n
Dec: 27 32 n
Hex: 1B 20 n
Values for n n = 0 to 255 n = 0 to 255*
* For the ML390 Turbo and ML391 Turbo, bit 7 is ignored.
The standard spacing between characters is 3 dots columns. These commands are used to add
additional spacing between characters, added to the right of each character. The value is
expressed in dots; the number of dots per inch depends on the current print mode. The table
below shows the amount of space added for each cpi setting.
Table 23: IBM ESC V and ESC SP & Epson ESC SP Commands —
Character Spacing (in Inches)
Setting Amount of space added
10 cpi n/120"
12 cpi n/144"
15 cpi n/180"
17.1 cpi n/206"
20 cpi n/240"
For example, to add 8/120" spacing to your printing at 10 cpi, use this BASIC command:
LPRINT CHR$(27);"N";CHR$(8)
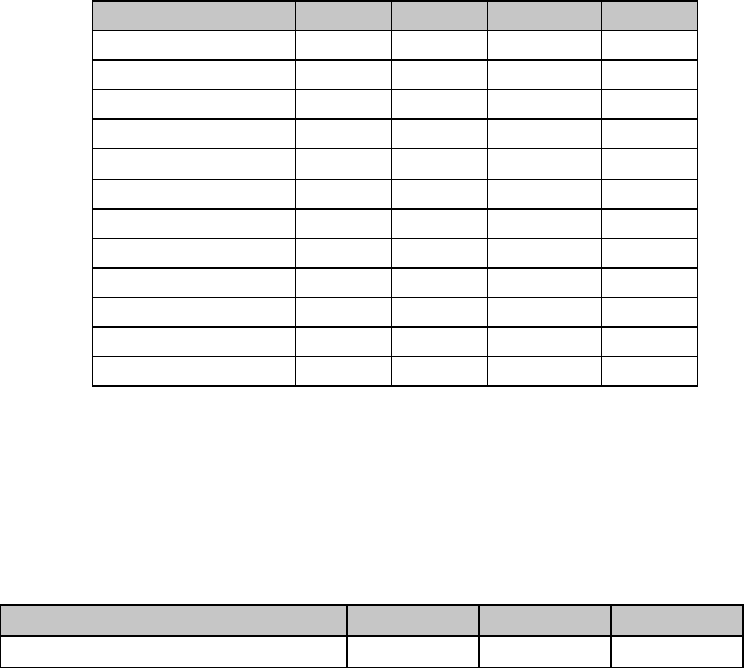
Chapter 3: Character Size & Spacing Commands 27
Table 24: ML ESC N Command —
Character Spacing (in Inches)
Decimal Value of n 10 cpi 12 cpi 17.1 cpi 20 cpi
0 3/120" 3/144" 3/206" 3/240"
1 4/120" 4/144" 4/206" 4/240"
2 5/120" 5/144" 5/206" 5/240"
3 6/120" 6/144" 6/206" 6/240"
4 7/120" 7/144" 7/206" 7/240"
5 8/120" 8/144" 8/206" 8/240"
6 9/120" 9/144" 9/206" 9/240"
7 10/120" 10/144" 10/206" 10/240"
8 11/120" 11/144" 11/206" 11/240"
9 12/120" 12/144" 12/206" 12/240"
10 13/120" 13/144" 13/206" 13/240"
11 14/120" 14/144" 14/206" 14/240"
For example, if you are printing at 10 cpi and want to set the character spacing at 11/120", use
this BASIC command:
LPRINT CHR$(@7);"N";CHR$(8)
Set Horizontal Motion Index [HMI] Command (Epson LQ)
⻬ ML390 Turbo, ML391 Turbo ⻬ ML590, ML591
Function ASCII Dec Hex
Set Horizontal Motion Index (HMI) ESC c Lp Hp 27 99 Lp Hp 1B 63 Lp Hp
Use this command to set the character spacing in LQ and Utility modes to any value from
1/360" up to 3".
Parameters Lp and Hp
Parameters Lp and Hp can have any value from 0 to 255 decimal and are used to designate the
Horizontal Motion Index (HMI) according to the following equation:
HMI (inches) = [Lp + (Hp x 256)] ÷ 360
If the HMI value is set to greater than 3":
• ML390 Turbo and ML391 Turbo printers will ignore the command
• ML590and ML591 printers will use 1/10" spacing.
Chapter 3: Character Size & Spacing Commands28

Chapter 4: Character Style Commands 29
Chapter 4: Character Style Commands
This chapter describes the commands for selecting print style including the following:
• Print Mode & Fonts Commands
• Italics Print Commands
• Emphasized & Enhanced Print Commands
• Underline/Overscore/Strike-Through Commands
• Outline/Shadow Commands
Print Mode & Fonts Commands
Individual Print Mode & Font Commands for 9-Pin Printers (IBM/E/ML)
⻬ ML320 E/I, ML321 E/I ⻬ ML320 Turbo, ML321 Turbo ⻬ ML520, ML521
⻬ ML320 Std., ML321 Std.
Function IBM Epson ML
Select HSD Print Mode ASCII: ESC # 0
Dec: 27 35 48
Hex: 1B 23 30
ASCII: ESC ( 0
Dec: 27 40 48
Hex: 1B 28 30
ASCII: ESC # 0
Dec: 27 35 48
Hex: 1B 23 30
Select Utility Print Mode See Combined
Commands below ASCII: ESC x 0
Dec: 27 120 0
Hex: 1B 78 00
ASCII: ESC 0
Dec: 27 48
Hex: 1B 30
Select NLQ Print Mode See Combined
Commands below ASCII: ESC x 1
Dec: 27 120 49
Hex: 1B 77 31
and
ASCII: ESC k n
Dec: 27 107 n
Hex: 1B 6B n
ASCII: ESC 1
Dec: 27 49
Hex: 1B 31
Select NLQ Gothic Font See Combined
Commands below Not applicable ASCII: ESC 3
Dec: 27 51
Hex: 1B 33
Use High Speed Draft (HSD) or Utility (UTL) printing for drafts and other documents that you
want to print quickly. HSD is faster and its characters somewhat rougher than utility.
Near Letter Quality (NLQ) printing is slower than HSD and UTL, but the characters are crisper
and more like the characters produced by a typewriter. Use NLQ for final drafts and important
documents where appearance matters.
You can also use your printer’s front panel or the menu to set the print quality, but settings
made using the front panel are likely to be overridden by software applications.
To select the NLQ print mode in the Epson emulation, you must send two commands: ESC x 1
and ESC k n. The ESC x 1 command must be sent to the printer first, followed by the ESC k n
command. Parameter n designates which font will be used as follows:
n=0: Courier NLQ
n=1: Sans Serif NLQ
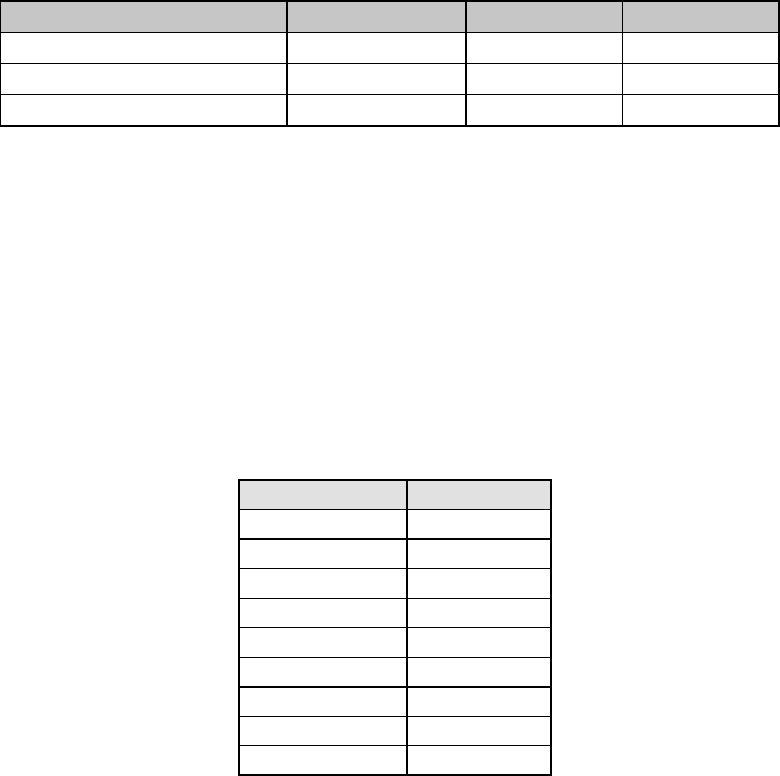
Chapter 4: Character Style Commands30
Individual Print Mode & Font Commands for 24-Pin Printers (IBM/E)
⻬ ML390 Turbo, ML391 Turbo
Function ASCII Dec. Hex.
Select Utility Print Mode ESC x 0 27 120 48 1B 78 30
Select LQ Print Mode ESC x 1 27 120 49 1B 78 31
Select LQ Print Mode & Font ESC k n 27 107 n 1B 6B n
Use Utility printing for drafts and other documents that you want to print quickly.
Letter Quality (LQ) printing is slower than utility printing, but the characters are much crisper
and sharper. Use LQ for top-quality printing of final drafts and important documents, where
appearance matters.
You can also use your printer’s front panel or the menu to set the print quality, but settings
made using the front panel are likely to be overridden by software applications.
The ESC k n command allows you to select a specific font for the LQ mode. Substitute a value
for n from the table below.
Table 25: IBM/Epson ESC k Command —
Fonts for n Values
Hex. Value of n Font
00 Roman
01 Swiss
02 Courier
03 Prestige
04 Script
07 Orator
7A Swiss Bold
7C Gothic
7E Menu Setting
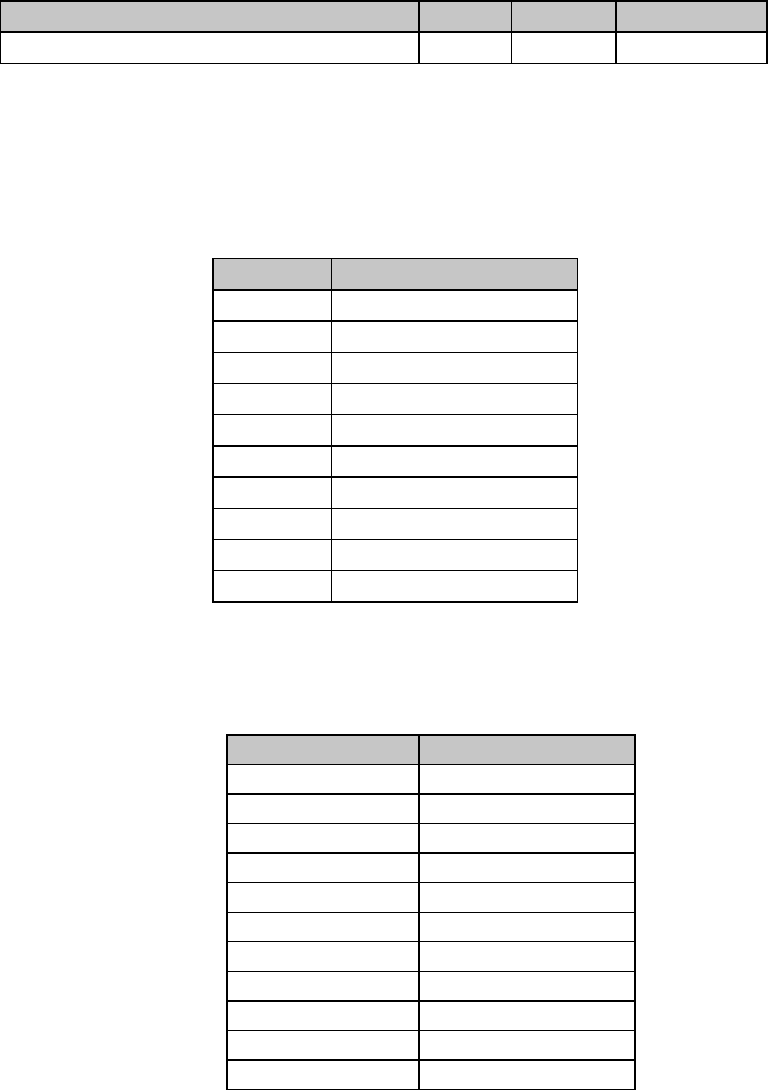
Chapter 4: Character Style Commands 31
Combined Select Font Command (IBM)
⻬ ML320 E/I, ML321 E/I ⻬ ML320 Turbo, ML321 Turbo ⻬ ML520, ML521
⻬ ML390 Turbo, ML391 Turbo ⻬ ML590, ML591
Function ASCII Decimal Hexadecimal
Select Print Quality and Character Spacing ESC I n 27 73 n 1B 49 n
This command allows you to select print quality and character spacing for resident fonts for all
models listed. It also allows you to select print quality and character spacing for downline
loadable (DLL) fonts for all but Models ML390 Turbo and ML391 Turbo. Substitute a value for
n from the table below. Table 26: IBM ESC I Command —
Print Modes Coresponding to n Values for All 9-Pin Models
Value of n Print mode
0 10 cpi utility
1 12 cpi HSD
2 NLQ Sans Serif
3 NLQ Courier
4 10 cpi DLL utility
5 12 cpi DLL utility
6 NLQ Sans Serif DLL
7 NLQ Courier DLL
11 NLQ Courier Italic*
15 NLQ Courier DLL Italic*
* ML320T, ML321T, ML520, ML521 only
Table 27: IBM IBM ESC I Command—
Print Modes for n Values for 24-Pin Models ML390T & ML391T
Dec. Value of n Print Mode
0 10 cpi Utility
2 10 cpi LQ
3 Proportional LQ
8 12 cpi Utility
10 12 cpi LQ
16 17.1 cpi Utility
18 17.1 cpi LQ
24 15 cpi Utility
26 15 cpi LQ
32 20 cpi Utility
34 20 cpi LQ
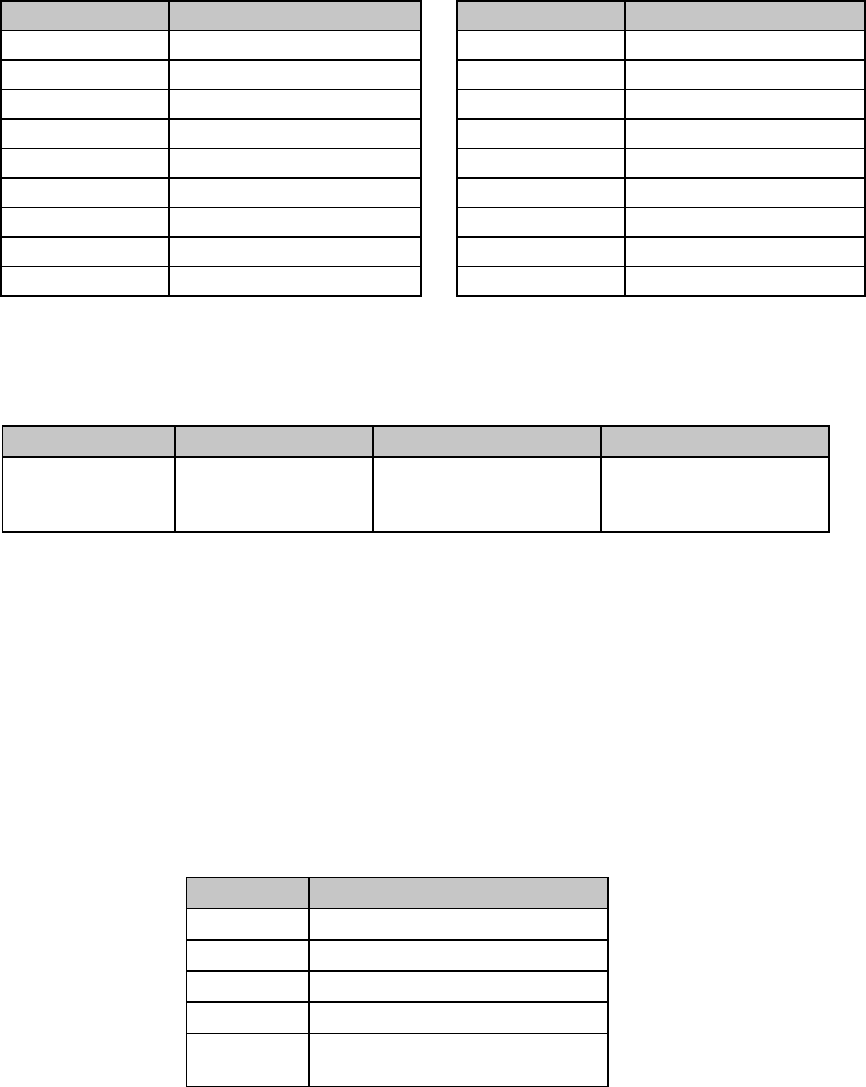
Chapter 4: Character Style Commands32
Table 28: IBM ESC I Command —
Print Modes Coresponding to n Values for 24-Pin Models ML590 & ML591
Dec. Value of n Print mode Dec. Value of n Print mode
0 10 cpi Utility Resident 14 12 cpi LQ DLL
2 10 cpi LQ Resident 16 17.1 cpi Utility Resident
3 Proportional LQ Resident 18 17.1 cpi LQ Resident
4 10 cpi Utility DLL 20 17.1 cpi Utility DLL
6 10 cpi LQ DLL 22 17.1 cpi LQ DLL
7 Proportional LQ DLL 24 15 cpi Utility Resident
8 12 cpi Utility Resident 26 15 cpi LQ Resident
10 12 cpi LQ Resident 32 20 cpi Utility
12 12 cpi Utility DLL 24 20 cpi Utility
Select Font Command (IBM)
⻬ ML390 Turbo, ML391 Turbo
Function ASCII Decimal Hexadecimal
Select Typeface,
Character Pitch
and Spacing
ESC [ l Ln Hn H
f
i
d
L
f
i
d
Hfwd Lfwd fa
27 91 108 Ln Hn Hfid
Lfid
Hfwd Lfwd fa
1B 5B 6C Ln Hn H
f
i
d
L
f
i
d
Hfwd Lfwd fa
This command can be used to select a typeface, plus a character pitch or proportional spacing.
Parameters Ln and Hn
Parameters Ln and Hn are used to set which of the following parameters will be activated. The
value calculated by the equation Ln + (Hn x 256)
is used to determine how the various parameters will be treated:
Table 29: IBM ESC [ l Command —
Parameter Activated for Calculated Ln, Hn Values
Value Parameters Activated
0 or 1 Command invalid
2 or 3 Fid valid; Fwd and fa unchanged
4F
id and Fwd valid; fa unchanged
5F
id, Fwd and fa valid
6 or more Fid, Fwd and fa valid; parameter
data dumped after 6 bytes
Parameters Hfid and Lfid
Parameters Hfid and Lfid are used to select the font to be used. The value determined from the
equation (Hfid x 256) + Lfid
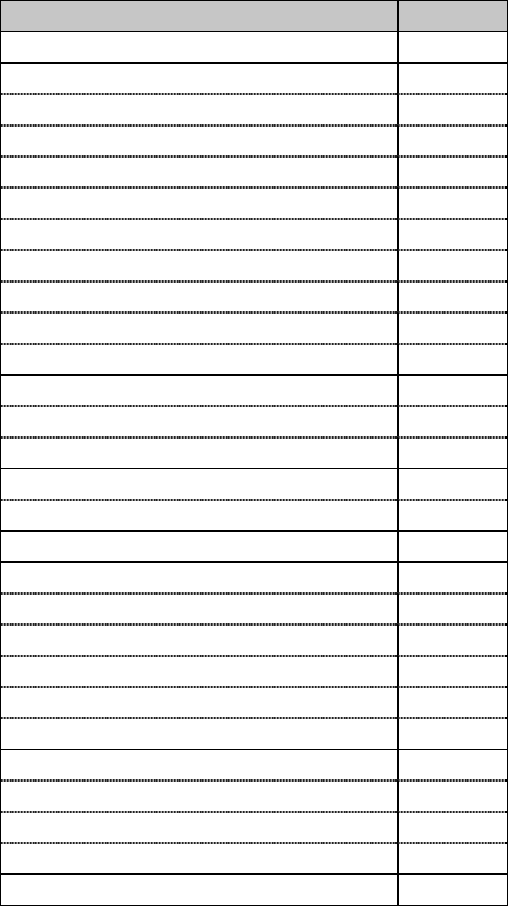
Chapter 4: Character Style Commands 33
is used to select the font as follows:
Table 30: IBM ESC [ l Command —
Fonts Selected for Calcualted Hfid, Lfid Values
Font Selected Value
Invalid 0
Courier 10 011
Courier 10 Italic 018
Courier 10 Symbol 008
Courier 10/10 Shalom 049
Courier 12 085
Courier 12 Italic 092
Courier 12/12 Shalom 098
Courier 15 223
Courier 15/15 Shalom 226
Courier Proportional 171
Letter Gothic 12 087
Letter Gothic 15 222
Letter Gothic 17 255
OCR-A 10 019
OCR-B 10 003
Orator 10 005
Prestige Pica 10 012
Prestige Elite 12 086
Prestige Elite Symbol 12 080
Prestige Elite 12/12 Yasmin 100
Prestige 15 221
Prestige Proportional 164
Roman Bold Proportional 159
Roman Bold Italic Proportional 155
Roman Proportional/Proportional Barak 167
Roman Proportional/Proportional Yasmin 166
Script 12 084
Parameters Hfwd and Lfwd
Parameters Hfwd and Lfwd are used to select a character pitch. The value determined from the
equation [(Hfwd x 256) + Lfwd] x 1/1440"
is used to select the character pitch as follows:
Table 31: IBM ESC [ l Command —
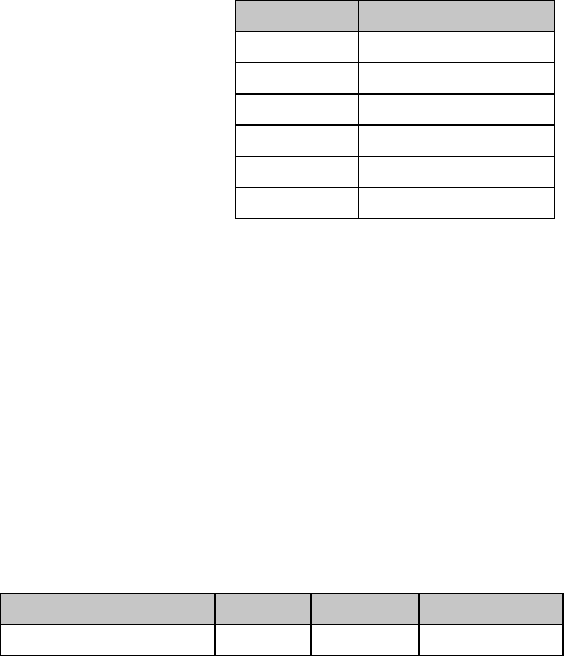
Chapter 4: Character Style Commands34
Character Pitch Settings for Calculated Hfwd, Lfwd Values
Hex Value Character Pitch
00 Command invalid
90 10 cpi
78 12 cpi
60 15 cpi
54 17 cpi
48 20 cpi
The setting made using the Hfwd and Lfwd parameters will automatically be overridden if the fa
parameter is set to 02 hexadecimal.
Parameter fa
Parameter fa is used to engage proportional spacing.
fa = 02 hexadecimal (2 decimal): engage proportional spacing
fa = 00 hexadecimal (0 decimal):use character pitch set by parameters Hfwd and Lfwd.
Combined Print Mode Command (Epson)
⻬ ML320 E/I, ML321 E/I ⻬ ML320 Turbo, ML321 Turbo ⻬ ML520, ML521
⻬ ML390 Turbo, ML391 Turbo ⻬ ML590, ML591
Function ASCII Decimal Hexadecimal
Select Print Features ESC ! n 27 33 n 1B 21 n
This command lets you use any combination of the features listed in the table below. The value
of n can range from 0 to 255. To determine the value of n, add up the values for all the features
you wish to use. To turn off all these features and return to 10 cpi printing, substitute 0 for n.
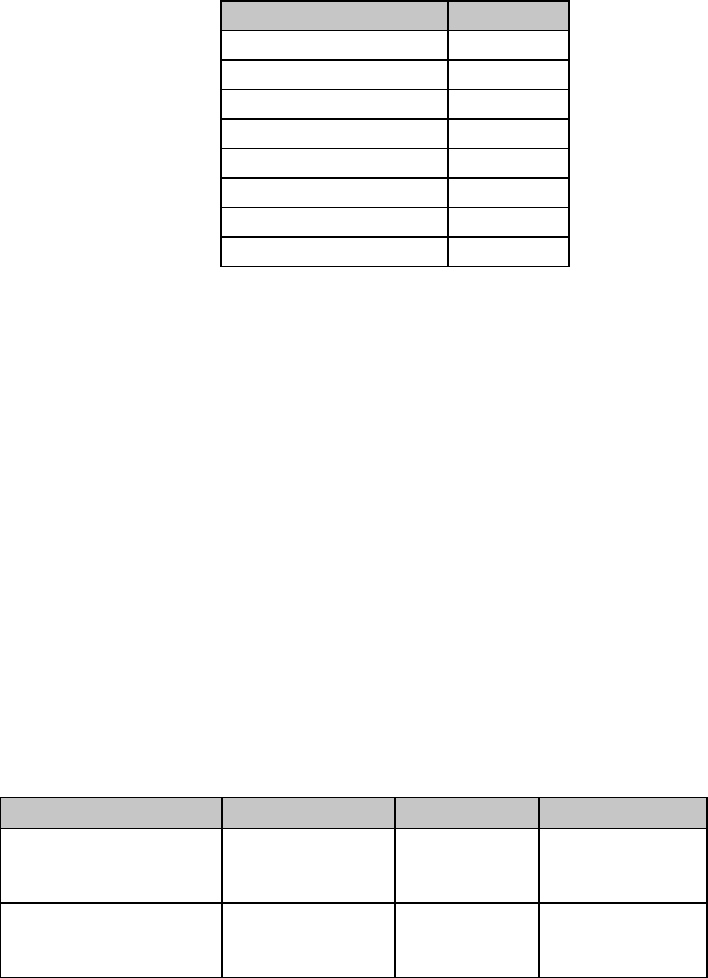
Chapter 4: Character Style Commands 35
Table 32: Epson ESC ! Command —
Print Features for n Values
Feature Value
Compressed printing 4
Double width printing 32
12 cpi (Elite) printing 1
Emphasized printing 8
Enhanced printing 16
Italics printing 64
Proportional printing 2
Underline printing 128
For example, to print underlined italics at 12 cpi, assign n the value of 193 (128 + 64 + 1).
Each time you send this command, it sets or cancels the values for all nine of the features it
controls (the eight features listed in the table, plus 10 cpi). This means that if you've requested
12 cpi underline italics, and then want to add emphasized printing to these features, you must
add 8 to 193 and resend the command as ESC ! 210. If you send the command ESC ! 8, it will
turn off all the other features as it turns on emphasized print.
To see the range of print styles you can produce with the ESC ! n command, run the following
BASIC program which prints a sample of each possible combination. Please note that since the
program prints all 256 combinations, it will take a few minutes and about 12 pages for the
entire sample to print.
10FORI=0TO255
20 LPRINT:LPRINT
30 LPRINT CHR$(27);"!";CHR$(I);"ESC !";I;" selects this combination."
40 NEXT I
Italics Print Commands (IBM/E/ML)
⻬ ML320 E/I, ML321 E/I ⻬ ML320 Turbo, ML321 Turbo ⻬ ML520, ML521
⻬ ML320 Std., ML321 Std. ⻬ ML390 Turbo, ML391 Turbo ⻬ ML590, ML591
Function IBM Epson ML
Italics Printing On ASCII: ESC % G
Dec: 27 37 71
Hex: 1B 25 47
ASCII: ESC 4
Dec: 27 52
Hex: 1B 34
ASCII: ESC ! /
Dec: 27 33 47
Hex: 1B 21 2F
Italics Printing Off ASCII: ESC % H
Dec: 27 37 72
Hex: 1B 25 48
ASCII: ESC 5
Dec: 27 53
Hex: 1B 35
ASCII: ESC ! *
Dec: 27 33 42
Hex: 1B 21 2A
Italics printing is slanted, like this, and is used to lend emphasis to phrases, sentences, or entire
paragraphs.
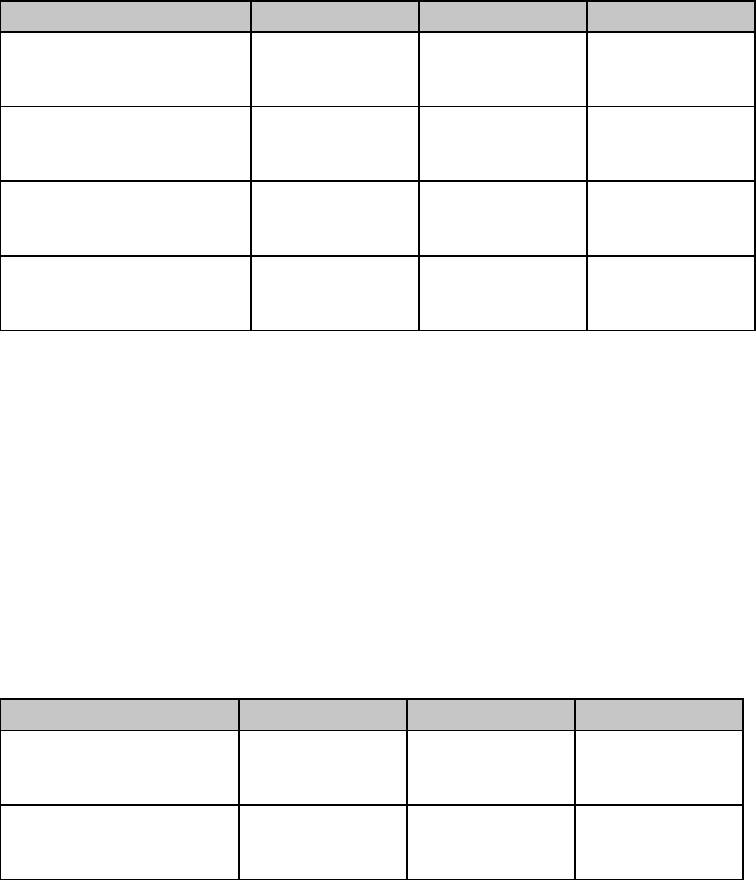
Chapter 4: Character Style Commands36
If you intend to print an entire document in italics, you can use the printer menu to select
italics. You will find italics in the menu under the group “Font” and the setting “Style.” See
“Menu Mode” in your printer manual for more information on making changes in the menu
settings.
Emphasized & Enhanced Print Commands (IBM/E/ML)
⻬ ML320 E/I, ML321 E/I ⻬ ML320 Turbo, ML321 Turbo ⻬ ML520, ML521
⻬ ML320 Std., ML321 Std. ⻬ ML390 Turbo, ML391 Turbo ⻬ ML590, ML591
Function IBM Epson ML
Emphasized Printing On ASCII: ESC E
Dec: 27 69
Hex: 1B 45
ASCII: ESC E
Dec: 27 69
Hex: 1B 45
ASCII: ESC T
Dec: 27 84
Hex: 1B 54
Emphasized Printing Off ASCII: ESC F
Dec: 27 70
Hex: 1B 46
ASCII: ESC F
Dec: 27 70
Hex: 1B 46
ASCII: ESC I
Dec: 27 73
Hex: 1B 49
Enhanced Printing On ASCII: ESC G
Dec: 27 71
Hex: 1B 47
ASCII: ESC G
Dec: 27 71
Hex: 1B 47
ASCII: ESC H
Dec: 27 72
Hex: 1B 48
Enhanced Printing Off ASCII: ESC H
Dec: 27 72
Hex: 1B 48
ASCII: ESC H
Dec: 27 72
Hex: 1B 48
ASCII: ESC I
Dec: 27 73
Hex: 1B 49
Your printer produces bold type by printing each dot of a character twice instead of once. In
emphasized printing, the pairs of dots are offset horizontally. In enhances printing, the pairs of
dots are offset vertically.
You can combine emphasized and enhanced printing for an especially bold effect. For
headlines, try using them in combination with double width characters; you can also combine
emphasized printing with double height characters.
Underline/Overscore/Strike-Through Commands
Underline Commands (IBM/E/ML)
⻬ ML320 E/I, ML321 E/I ⻬ ML320 Turbo, ML321 Turbo ⻬ ML520, ML521
⻬ ML320 Std., ML321 Std. ⻬ ML390 Turbo, ML391 Turbo ⻬ ML590, ML591
Function IBM Epson ML
Underline Printing On ASCII: ESC - 1
Dec: 27 45 49
Hex: 1B 2D 31
ASCII: ESC - 1
Dec: 27 45 49
Hex: 1B 2D 31
ASCII: ESC C
Dec: 27 67
Hex: 1B 43
Underline Printing Off ASCII: ESC - 0
Dec: 27 45 48
Hex: 1B 2D 30
ASCII: ESC - 0
Dec: 27 45 48
Hex: 1B 2D 30
ASCII: ESC D
Dec: 27 68
Hex: 1B 44
The underline feature underscores all characters, including the space character, but does not
underscore graphics or the space produced by any horizontal positioning command such as
horizontal tab.
In the Epson emulation, you can also use the Combined Print Mode (ESC ! n) command to
engage underlining.
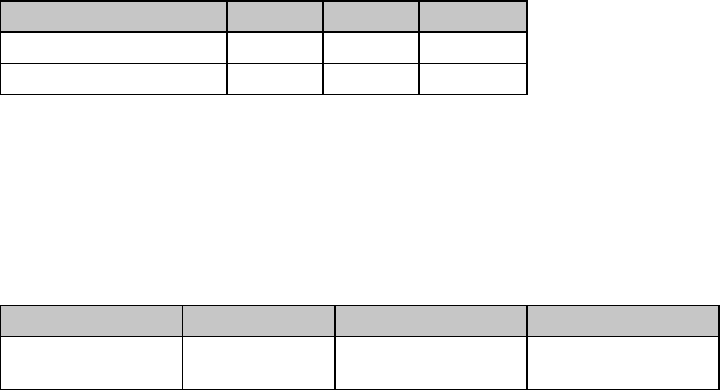
Chapter 4: Character Style Commands 37
Overscore Commands (IBM)
⻬ ML320 E/I, ML321 E/I ⻬ ML320 Turbo, ML321 Turbo ⻬ ML520, ML521
⻬ ML390 Turbo, ML391 Turbo ⻬ ML590, ML591
Function ASCII Dec Hex
Overscore Printing On ESC _ 1 27 95 1 1B 5F 01
Overscore Printing Off ESC _ 0 27 95 0 1B 5F 00
The overscore feature prints a continuous line over all characters, including the space
character, but does not overscore the space produced by a horizontal tab command. This
feature is available only in the IBM emulation.
Score Style Command (Epson)
⻬ ML390 Turbo, ML391 Turbo
Function ASCII Decimal Hexadecimal
Select Score Style ESC ( - Ln Hn
Pn D1 D2
27 40 45 Ln Hn
Pn D1 D2
1B 28 2D Ln Hn
Pn D1 D2
This command lets you set underline, strike-through and overscore styles: continuous, dashed,
single or double lines.
Parameter Pn
Parameter Pn is set to 01 hex (1 dec, SOH ASCII).
Parameters Ln and Hn
Parameters Ln and Hn designate the quantity of data to be scored, according to the following
equation: Ln + (Hn x 256)
If Ln and Hn are less than 3, the designated data will be dumped.

Chapter 4: Character Style Commands38
Parameters D1 and D2
Parameter D1 is used to set the type of score and parameter D2 is used to set the attributes, as
indicated in the table.
Table 33: Epson ESC ( - Command —
Score Styles for D1 and D2 Values
D1D2Score Style
1 1 Continuous, single underline
2 1 Continuous, single strike-through
3 1 Continuous, single overscore
1 2 Continuous, double underline
2 2 Continuous, double strike-through
3 2 Continuous, double overscore
1 5 Dashed, single underline
2 5 Dashed, single strike-through
3 5 Dashed, single overscore
1 6 Dashed, double underline
2 6 Dashed, double strike-through
3 6 Dashed, double overscore
Using a value of 0 for D2 will cancel the score mode.
Note: Scores can only be used for printing characters: they can't be used to print line graphics
Outline/Shadow Commands (IBM/E)
⻬ ML390 Turbo, ML391 Turbo ⻬ ML590, ML591
Function ASCII Dec Hex
Outline Printing On ESC q 1 27 113 49 1B 71 31
Shadow Printing On ESC q 2 27 113 50 1B 71 32
Outline and Shadow Printing On ESC q 3 27 113 51 1B 71 33
Outline and/or Shadow Printing Off ESC q 0 27 113 48 1B 71 30
The outline feature prints characters as outlines with hollow center. The shadow feature prints
characters with a shadow behind them. Combining the features produces outline characters
with a shadow behind them. These features can be used to produce more interesting and stylish
headings. They can be combined with emphaiszed and/or enhanced printing, double width,
etc., for an even more striking effect.
Note: Outline and shadow can only be used for printing characters: they can't be used to
print line graphics.
Chapter 5: Custom Character Commands 39
Chapter 5: Custom Character Commands
Your printer's custom (down line loadable) character feature enables you to design your own
characters and symbols, even entire character sets if you choose, and download them from
your computer to the printer. You can design and store multiple characters. The actual
designing of these characters requires some work on your part and can become tedious. We
strongly recommend using a commercial software package to help you create new characters
and download them to your printer. There are also packages that provide character sets that
have already been designed for you.
This chapter describes the custom character commands for your printer, including
• ROM to RAM Copy Commands
• Down Line Loading Commands
• Custom Character Set Commands
• Select DLL Font Commands
The chapter is divided into two sections: one for the 9-pin printers and one for the 24-pin
printers.
Custom Character Commands: 9-Pin Printers
Designing a Custom Character for 9-Pin Printers
The technique of designing your own custom characters is much like that of designing a
graphic image, but on a much smaller scale. You can design characters in either Utility or Near
Letter Quality mode: simply activate the desired mode before you download the characters.
Begin by designing your character on a grid. The height of the grid for a normal character is 7
dots, each corresponding to a pin on the printer's printhead. The width of the grid usable for a
character is a maximum of 11 dots (the twelfth dot in the grid width is reserved as blank).
The 7-dot grid can be adjusted up or down several dot positions by using the attribute byte in
the print command. This byte specifies whether the character is an ascender (top 7 rows) or a
descender (bottom 7 rows). The attribute byte also contains other information about the
character, as explained later.
The character's baseline lies below the seventh dot from the top if it is an ascender, or below
the sixth dot from the top if it is a descender. The columns of the matrix to the left and right of
your character affect where it will appear in relation to the characters on either side of it. There
is one mandatory blank column at the end of the character (column 12). If you don't leave
blank columns, adjacent characters may appear to run right into your character.
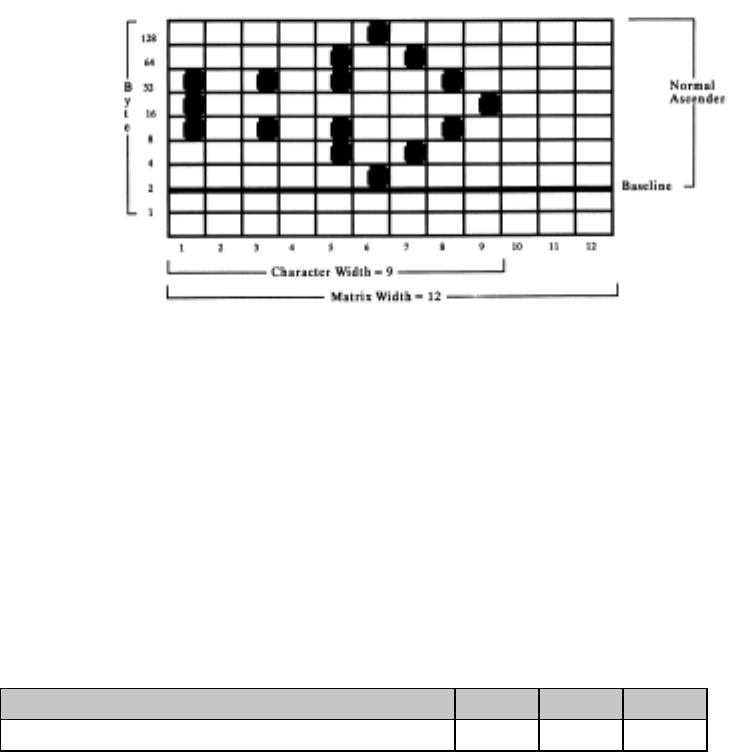
Chapter 5: Custom Character Commands40
Your arrangement of dots is translated into code that tells your printer the exact location of
each dot within each column. The example which follows illustrates how this works.
This character is 9 dots wide and is flush to the left. We'll print it in 10 cpi utility mode. Just
like 8-pin graphics, each byte specifies a dot column, and the value of each byte is determined
by adding up the values of its bits.
Note: In all print modes, you cannot place two dots next to each other horizontally—you
must skip one column.
Now we need to give the commands that download this data to the printer.
IBM Custom Character Commands for 9-Pin Printers
Copy ROM to RAM Command for 9-Pin Printers (IBM)
⻬ ML320 E/I, ML321 E/I ⻬ ML320 Turbo, ML321 Turbo ⻬ ML520, ML521
Function ASCII Dec Hex
Copy ROM Character Set to RAM Character Set ESC $ 27 36 1B 24
This command copies a complete set of the characters resident in the printer to the area of its
memory reserved for custom characters. The new character will become part of this character
set. This makes it possible to mix standard characters with your custom characters when you
print.

Chapter 5: Custom Character Commands 41
Down Line Load Characters Command for 9-Pin Printers (IBM)
⻬ ML320 E/I, ML321 E/I ⻬ ML320 Turbo, ML321 Turbo ⻬ ML520, ML521
Function ASCII Decimal Hexadecimal
Down Line Load Characters ESC = c1 c2 m n
a1 a2 [data] 27 61 c1 c2 m n
a1 a2 [data] 1B 3D c1 c2 m n
a1 a2 [data]
Use this command with the ML520 or the ML521 printer to begin downloading the characters.
Parameters c1 and c2
These parameters specify the total count of characters to be downloaded. How these variables
are calculated depends on which mode is engaged: Utility printing or Near Letter Quality
(NLQ) printing.
For Utility printing: value = (# of characters to be changed x 13) + 2
For NLQ printing: value = (# of characters to be changed x 48) + 2
If the value obtained is less than 256, substitute the value for c1 and replace c2 with 0.
If the value obtained is 256 or more, divide the value by 256. Replace c2 with the whole
number result and assign the remainder to c1.
Parameter m
This parameter selects the print quality:
m = 20: Utility printing
m = 21: NLQ printing
Parameter n
This parameter specifies the ASCII value of the starting character in the set to be redefined
(characters must be redefined in sequence) and can be assigned any value in the range 0 to
255.
Parameters a1 and a2
These parameters designate the attributes of the character.
Parameter a1
Parameter a1 denotes whether the character is an ascender or descender:
a1 = 0: ascender
a1 = 128: descender
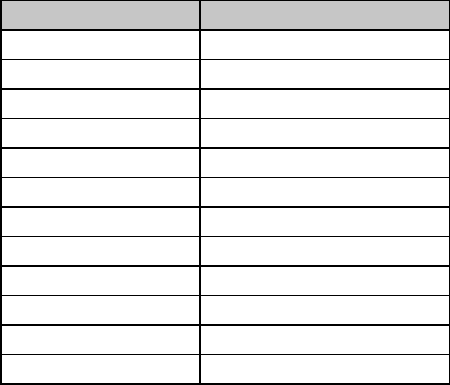
Chapter 5: Custom Character Commands42
Here is a breakdown of the definitions for the various bit values for a1:
Bit b7:
b7 = 0: ascender
b7 = 1: descender
Note: If b0 or b1 is 0, b7 is ignored.
Bits b6, b5, b4, b3, b2: ignored
Bits b1 and b0:
b1, b0 = 0, 0: No expansion to 12 dots high: b7 valid
b1, b0 = 0, 1: Selects line draw characters; data is expanded to a total height of 12
dots in two passes: b7 ignored.
b1, b0 = 1, 0: Shaded character; data is expanded to a total height of 12 dots in two
passes: b7 ignored.
b1, b0 = 1, 1: NUL is expanded to a total height of 12 dots in two passes: b7 ignored.
Parameter a2
Parameter a2 denotes the total width of the character in dots.
Table 34: IBM ESC = Command —
Character Widths for a2Values
a2 (Decimal) Character Width, in Dots
0 Ignored
1 1 column wide
2 2 columns wide
3 3 columns wide
4 4 columns wide
5 5 columns wide
6 6 columns wide
7 7 columns wide
8 8 columns wide
9 9 columns wide
10 10 columns wide
11 11 columns wide
End the command with the data for the character calculated from your grid. If you're
downloading several characters, you only need one ESC & NUL command, and you only need
to include m and n once, but you must include a value for parameter a in each set of character
data.
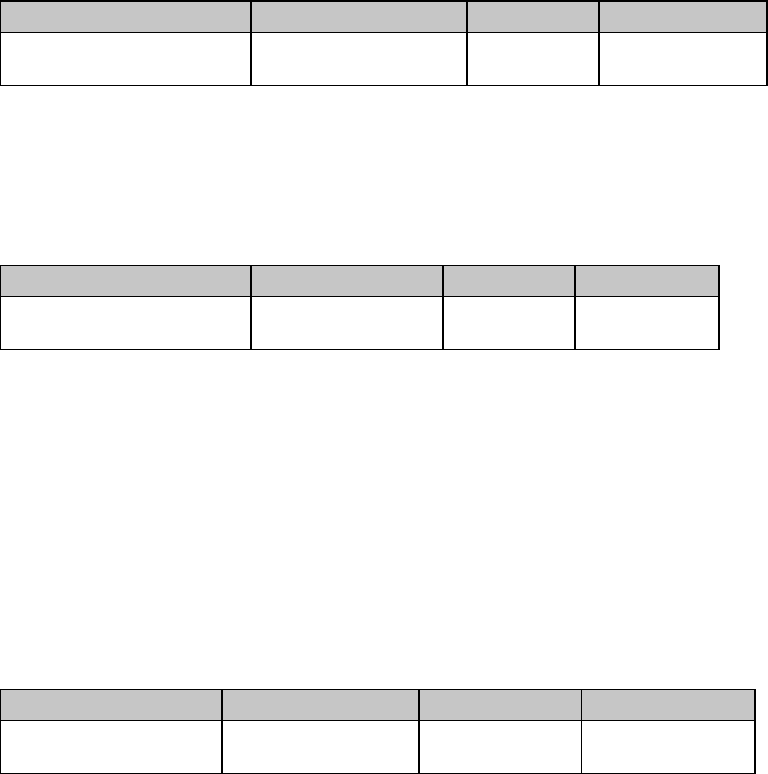
Chapter 5: Custom Character Commands 43
Epson Custom Character Commands for 9-Pin Printers
Copy ROM to RAM Command for 9-Pin Printers (Epson)
⻬ ML320 E/I, ML321 E/I ⻬ ML320 Turbo, ML321 Turbo
Function ASCII Dec Hex
Copy ROM Character Set
to RAM Character Set ESC : NUL NUL NUL 27 58 0 0 0 1B 3A 00 00 00
This command is used with the ML320 E/I, ML321 E/I, ML320T, or ML321T printer to copy a
complete set of the characters resident in the printer to the area of its memory reserved for
custom characters. The new character will become part of this character set.
⻬ ML520, ML521
Function ASCII Dec Hex
Copy ROM Character Set
to RAM Character Set ESC : NUL n NUL 27 58 0 n 0 1B 3A 0 n 0
This command is used with the ML520 or ML521 printer to copy a complete set of the
characters resident in the printer to the area of its memory reserved for custom characters. The
new character will become part of this character set. This makes it possible to mix standard
characters with your custom characters when you print.
Parameter n is used to specify the NLQ font to be used:
n = 0: NLQ Courier
n = 1: NLQ Sans Serif
Down Line Load Characters Command for 9-Pin Printers (Epson)
⻬ ML320 E/I, ML321 E/I ⻬ ML320 Turbo, ML321 Turbo ⻬ ML520, ML521
Function ASCII Dec Hex
Down Line Load
Characters ESC & NUL n1 n2 a
[data] 27 38 0 n1 n2 a
[data] 1B 26 00 n1 n2 a
[data]
Use this command to begin downloading the character(s).
Parameters n1 n2
These parameters specify the range of characters to be replaced with new ones. Multiple
characters must be assigned to adjacent locations. Parameter n1 indicates the first character that
will be replaced; parameter n2 indicates the last character that will be replaced.
Custom characters can normally be assigned to decimal locations 32 to 126 and 160 to 255. If
IBM Character Set II is selected (ESC 6 command), characters can also be assigned to locations
128 to 159.
Parameter a
This parameter indicates how the character will be positioned within its grid as follows:
Ascenders: a is calculated as
last dot column of character + (first dot column x 16) + 128

Chapter 5: Custom Character Commands44
Descenders: a is calculated as
last dot column of character + (first dot column x 16)
Parameter a can be assigned any value in the range 0 to 255.
End the command with the data for the character calculated from your grid.
If you're downloading several characters, you only need one ESC & NUL command, and you
only need to include n1 and n2 once, but you must include a value for parameter a in each set
of character data.
Custom Character Set On/Off Commands for 9-Pin Printers (Epson)
⻬ ML320 E/I, ML321 E/I ⻬ ML320 Turbo, ML321 Turbo ⻬ ML520, ML521
Function ASCII Dec Hex
Select Standard Character Set ESC % 0 27 37 48 1B 25 30
Select Custom Character Set ESC % 1 27 37 49 1B 25 31
To switch from the standard character set to the custom character set, use the ESC % 1
command.
To switch back to the standard character set, use the ESC % 0 command. Otherwise, the
custom character set will remain in the printer's memory until one of the following happens:
you turn off the printer
you reset the printer with the ESC @ command
you overwrite them with new custom characters
you use the ESC : NUL NUL NUL command to overwrite them with the standard character set.
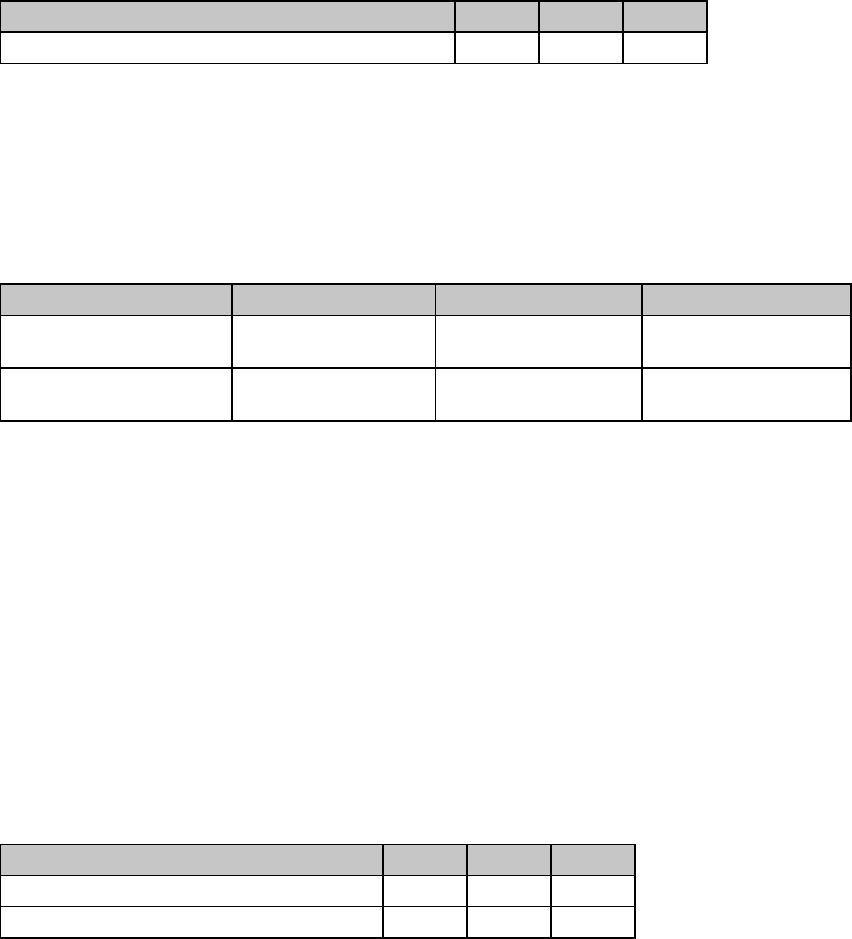
Chapter 5: Custom Character Commands 45
Okidata MICROLINE Standard Custom Character Commands
for 9-Pin Printers
Copy ROM to RAM Command for 9-Pin Printers (ML)
⻬ ML320 Std., ML321 Std. ⻬ ML320 Turbo, ML321 Turbo ⻬ ML520, ML521
Function ASCII Dec Hex
Copy ROM Character Set to RAM Character Set ESC $ 27 36 1B 24
This command copies a complete set of the characters resident in the printer to the area of its
memory reserved for custom characters. The new character will become part of this character
set. This makes it possible to mix standard characters with your custom characters when you go
to print.
Down Line Load Characters Commands for 9-Pin Printers (ML)
⻬ ML320 Std., ML321 Std. ⻬ ML320 Turbo, ML321 Turbo ⻬ ML520, ML521
Function ASCII Dec Hex
Down Line Load
Ascender Characters ESC % A m n1 ... n11 27 37 65 m n1 ... n11 1B 25 41 m n1 ... n11
Down Line Load
Descender Characters ESC % D m n1 ... n11 27 37 68 m n1 ... n11 1B 25 44 m n1 ... n11
To begin downloading an ascender character, use the ESC % A m n1 ... n11 command. This
command specifies that the new character will be an ascender.
To begin downloading a descender character, use the ESC % D m n1 ... n11 command. This
command specifies that the new character will be a descender.
Parameter m
This parameter specifies the character that will be replaced by the custom character. Custom
characters can be assigned to decimal locations 32 to 127 and 160 to 223.
Data n1 through n11
n1 through n11 specify the data for the character, calculated from your grid.
Select DLL Font Commands for 9-Pin Printers (ML)
⻬ ML320 Std., ML321 Std. ⻬ ML320 Turbo, ML321 Turbo ⻬ ML520, ML521
Function ASCII Dec Hex
Select DLL in Utility Mode ESC 2 27 50 1B 32
Select DLL in Near Letter Quality Mode ESC 7 27 55 1B 37
The ESC 2 command switches custom character printing on when the printer is set for the
Utility mode.
The ESC 7 command switches custom character printing on when the printer is set for the Near
Letter Quality (NLQ) print mode. NLQ custom characters are just like Utility custom characters,
except that overprinting is used to make them match the NLQ character set.
Once you have selected the Custom Character Set, it will remain in memory until the printer is
turned off. Any one of the following will also delete the Custom Character Set from the printer's

Chapter 5: Custom Character Commands46
memory:
• you reset the printer with the ESC CAN command
• you overwrite them with new custom characters
• you use the ESC $ command to overwrite them with the Standard Character Set.
Custom Character Commands: 24-Pin Printers
Designing a Custom Character for 24-Pin Printers
The technique for designing your own custom characters is much like that of designing a
graphic image, but on a much smaller scale. You can design characters in either Utility or LQ
mode: simply activate the desired mode before you download the characters.
Begin by designing your character on a grid. The height of the grid is 24 dots, each
corresponding to a pin on the printhead. The width of the grid, as well as the width of the
character itself, depends on the print mode.
Table 35: Custom Character Commands —
Character/Grid Width for Print Modes (24-Pin Printers)
d0 = space to the left of the character
d1 = width of the character itself
d2 = space to the right of the character
Print Mode Max. Character Width (d1)Max. Total Grid Width (d0 + d1 + d2)
Utility 15 dots 18 dots
LQ 37 dots 42 dost
Proportional 37 dots 42 dots
Note: If the printer is in superscript or subscript mode, only the first two or last two bytes are
needed for each column.
Characters are designed on a grid made up of columns of 24 dots. Each column, in turn, is
divided into three 8-dot groups, and each 8-dot group is represented by a byte of data.
When designing a character, keep the intended use for the character in mind. If the character is
to be included with text, leave the top and bottom two rows of the grid blank, in keeping with
general font design standards. The character's baseline occurs at the sixth dot from the bottom.
The columns of the grid to the left and right of your character affect where it will appear in
relation to the characters on either side. If you don't leave blank columns, adjacent characters
may appear to run right into your custom character.
Chapter 5: Custom Character Commands 47
Your arrangement of dots is translated into code that tells the printer the exact locations of each
dot in each column. The example below shows how this works.
•
••
••
••
••
••
••
•••••••• •
••
••
••
••
••
•••••••• •
••
••
••
••
••
••
•
The width of the grid in dots depends on the printing mode in use. This example character is 27
dots wide and has 4 blank columns on either side. We'll print it in 10 cpi Letter Quality. Since
the character is being printed in 24-pin mode, three bytes of data are required to specify a
single column. Just like high resolution 24-pin graphics, the first three bytes specify dot
positions for the second column, and so on up to the last column in which dots will appear.
The value of each byte is determined by adding up the values of its bits.
Note: In all print modes, you can NOT place two dots next ot each other horizontally—you
must skip one column.
The commands below are used to download this data to the printer.
IBM Custom Character Commands for 24-Pin Printers
Down Line Load Characters Command (IBM)
⻬ ML590, ML591
Function ASCII Dec Hex
Download Custom
Character ESC = n1 n2 # a1 a2 a3
m ad1 ad2 id1 id2 d1 d2
d3 d4 d5 [data]
27 61 n1 n2 35 a1 a2 a3
m ad1 ad2 id1 id2 d1 d2
d3 d4 d5 [data]
1B 3D n1 n2 23 a1 a2
a3 m ad1 ad2 id1 id2 d1
d2 d3 d4 d5 [data]
Parameters n1 n2
These parameters specify the number of bytes in the command string. The total number of bytes
is calculated as follows: No. of bytes = n1 + (n2 x 256)
Parameters a1 a2 a3
Parameters a1 and a2 specify the starting address of the custom character data, calculated as
128
64
32
16
8
4
2
1
128
64
32
16
8
4
2
1
128
64
32
16
8
4
2
1
Byte 2
Byte 1
Byte 3
Chapter 5: Custom Character Commands48
follows: starting address = a1 + (a2 x 256)
Parameter a3 indicates the number of characters to be down loaded.
Note: If fewer than 256 characters are loaded, all character codes must be consecutive from
the starting point.
Parameter m
The bits of this parameter determine the character pitch and print mode as follows:
b0: always 0
b1: ignored
b2, b3 = 0, 0: Utility, all pitches
0, 1: LQ, 10 cpi
1, 0: LQ, 12 cpi
1, 1: LQ, proportional
b6 = 0: Last data table
1: Another data table follows
Note: The command up to parameter m need only be included once for each down loading
sequence. The following parameters apply to the specific characters, and must be
included for each individual character in the sequence.
Parameters ad1 ad2
These parameters specify the starting address of the character, as follows:
character address = ad1 + (ad2 x 256)
Parameter id1
Here is a breakdown of the bit values for id1:
b0 to b5 = Number of columns to be loaded (1 to 63)
b6 = 0: Load to RAM
1: Copied from ROM character generator
b7 = 0: Normal character
1: Elongated character
Parameter id2
Here is a breakdown of the bit values for id2:
b0 to b5 = Character width (1 to 63, proportional)
b6, b7 = 0, 0: Data for pins 19 to 24 copied to pins 25 to 30
0, 1: Data for pins 23, 24, duplicated for pins 25, 26, 27, 28, 29, 30
1, 0: Underline
1, 1: No elongation
Parameters d1 d2 d3 d4 d5
Each bit of the parameter bytes indicates whether the data in the specified column is identical
to the previous column or is new.
bit = 0: data is new

Chapter 5: Custom Character Commands 49
bit = 1: data is a repeat of previous column
The parameters specify data repetition as follows:
d1: columns 1 to 8
d2: columns 9 to 16
d3: columns 17 to 24
d4: columns 25 to 32
d5: columns 33 to 40
Epson Custom Character Commands for 24-Pin Printers
First use the Copy ROM to RAM command to copy a complete set of the characters resident in
the printer ot the area of its memory reserved for custom characters. The new character you
designed will become part of this character set.
To begin downloading the custom character, use the Download Custom Characters Command
to specify the range of characters that you will be replacing with new ones, to indicate how
you have positioned the character within its grid, and to supply the data for the character(s),
calculated from your grid(s).
To switch between the standard character set and your custom character set, use the Custom
Character Set On/Off Command.
Copy ROM to RAM Command for 24-Pin Printers (Epson)
⻬ ML390 Turbo, ML391 Turbo ⻬ ML590, ML591
Function ASCII Dec Hex
Copy ROM Character Set
to RAM Character Set ESC : NUL n NUL 27 58 0 n 0 1B 3A 00 n 00
This command is used to copy a complete set of the characters resident in the printer to the
area of its memory reserved for custom characters. The new character will become part of this
character set.
Chapter 5: Custom Character Commands50
Parameter n
Parameter n is used to specify the font to be used.
Table 36: Epson ESC : Command — Fonts for n Values
Value of n Font Value of n Font
0Roman 6OCR-A
1Swiss 7Orator
2 Courier (default) 8 Orator-S
3 Prestige 122 Swiss Bold
4 Script 124 Letter Gothic
5 OCR-B 126 Font set on Menu
Down Line Load Characters Commands for 24-Pin Printers (Epson)
⻬ ML390 Turbo, ML391 Turbo
Function ASCII Dec Hex
Load Custom Characters ESC & m n1 n2
d0 d1 d2 [data] 27 38 m n1 n2
d0 d1 d2 [data] 1B 26 m n1 n2
d0 d1 d2 [data]
⻬ ML590, ML591
Function ASCII Dec Hex
Load Custom Characters ESC & NUL m n1 n2
d0 d1 d2 [data] 27 38 0 m n1 n2
d0 d1 d2 [data] 1B 26 00 m n1 n2
d0 d1 d2 [data]
Use these commands to begin downloading the character(s) to the printer.
Parameter m
This parameter selects the available area in RAM. The only available values/locations are m = 0
or m = 128.
Parameters n1 n2
These parameters specify the range of characters to be replaced with new ones. Multiple
characters must be assigned to adjacent locations.
Parameter n1 indicates the first character that will be replaced: range 0 to 127.
Parameter n2 indicates the last character that will be replaced: range 1 to 127.
Parameters d0 d1 d2
These parameters define the width of the character grid in dots as follows:
d0 = width of space before the character
d1 = width of the character
d2 = width of space after the character
Follow these parameters with the data calculated from your grid as shown above in the section
“Designing a Custom Character for 24-Pin Printers.”
Chapter 5: Custom Character Commands 51
Custom Character Set On/Off Command for 24-Pin Printers (Epson)
⻬ ML390 Turbo, ML391 Turbo ⻬ ML590, ML591
Function ASCII Dec Hex
Select Standard Character Set ESC % 0 27 37 0 1B 25 00
Select Custom Character Set ESC % 1 27 37 1 1B 25 01
To switch from the standard character set to the custom character set, use the ESC % 1
command.
To switch back to the standard character set, use the ESC % 0 command. Otherwise, the
custom character set will remain in the printer's memory until one of the following happens:
• you turn off the printer
• you reset the printer with the ESC @ command
• you overwrite them with new custom characters
• you use the ESC : NUL NUL NUL command to overwrite them with the standard character
set.
Load Custom Character Set into Upper ASCII Command for 24-Pin Printers (Epson)
⻬ ML390 Turbo, ML391 Turbo ⻬ ML590, ML591
Function ASCII Dec Hex
Select Custom Character Set ESC t 2 27 116 2 1B 74 02
This command loads the custom character set (decimal 0 to 127) into the upper ASCII range
(128 to 255).
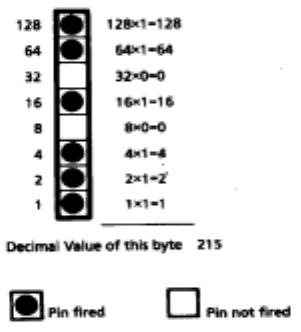
Chapter 6: Graphics Commands for 9-Pin Printers 53
Chapter 6: Graphics Commands for 9-Pin Printers
Overview
Your printhead has one column of pins. Images are created as the pins “fire,” striking the
ribbon against the paper to produce dots. White spaces appear where the pins don't fire. In 8-
pin graphics, each column of dots is represented by a single byte of data. Models ML320,
ML321, ML320 Turbo, ML321 Turbo, ML520, and ML521 use the 9-pin mode in cases where a
slightly higher resolution is required: it uses two bytes to represent each dot column.
When you program a graphic image, your program has to describe the pattern of dots you want
to print. Graphics data, like all other data sent to the printer, consists of a series of bytes. Each
of the eight bits in a byte of graphics data corresponds to one pin on the printhead. A bit's
value can be either 1 or 0. When the printer receives the data, it interprets a bit with a value of
1 as a command to fire the corresponding pin. Bits that are set to 0 don't cause pins to fire.
You can picture the byte as a column of 8 bits. In 8-pin graphics, the body of data is a series of
these columns lined up next to each other. Instead of sending the data to the printer bit by bit,
you'll probably want to convert this binary information into decimal or hexadecimal format for
use with your programming language. In the figure below we show how to determine the
decimal value for a given pattern of pins.
For optimum registration when printing graphics using bi-directional printing, use the Print
Registration item in the printer menu to fine-tune the alignment of the vertical bars which print
as part of the menu. Keep changing the setting until the lines of the vertical bar characters have
the straightest vertical column.
Chapter 6: Graphics Commands for 9-Pin Printers54
Programming Graphics in BASIC
One important thing to remember when you're programming graphics is not to include
extraneous line feeds in your programs. Using a semicolon after the data in an LPRINT
statement will keep the print position on the same line.
However, there is an additional complication: by default, BASIC assigns to all printers a
maximum line length of 80 characters. After the printer has received 80 bytes of data, it will
automatically perform a carriage return and line feed. Since graphics data typically consists of
many bytes, it's quite easy to exceed this limit. The resulting output will be garbled. You can
work around this problem by setting the line length to the maximum allowable value, 255. Put
one of these statements at the beginning of your program:
For parallel printers:
WIDTH “LPT1:”,255
For serial printers that have been opened as #1:
WIDTH #1,255
Graphics Density Selection Commands (IBM/E)
⻬ ML320 E/I, ML321 E/I ⻬ ML320 Turbo, ML321 Turbo ⻬ ML520, ML521
Function ASCII Dec Hex
Begin Single Density
Graphics ESC K Ln Hn [data] 27 75 Ln Hn [data] 1B 4B Ln Hn [data]
Double Density
Graphics Command ESC L Ln Hn [data] 27 76 Ln Hn [data] 1B 4C Ln Hn [data]
Double Speed/
Double Density
Graphics Command
ESC Y Ln Hn [data] 27 89 Ln Hn [data] 1B 59 Ln Hn [data]
Quadruple Density
Graphics Command ESC Z Ln Hn [data] 27 90 Ln Hn [data] 1B 5A Ln Hn [data]
These graphics modes correspond to the 8-pin modes and are supported by most current
DOS-based graphics software.
Parameters Ln and Hn
These parameters tell the printer how many bytes of graphics data to expect. Eight-pin graphics
have one byte of data per column. To calculate the values for Ln and Hn, first determine how
many columns of dots there will be in your graphics image. Divide this number by 256 and
assign the whole number result to Hn; assign the remainder to Ln.
Chapter 6: Graphics Commands for 9-Pin Printers 55
Graphics Density Selection Commands (ML)
⻬ ML320 Std., ML321 Std. ⻬ ML320 Turbo, ML321 Turbo ⻬ ML520, ML521
Function ASCII Dec Hex
Select Single Density Graphics ESC P
or ESC Q 27 80
or 27 81 1B 50
or 1B 51
Select Double Density Graphics ESC R 27 82 1B 52
Select Double Speed &
Quadruple Density Graphics ESC # Q 27 35 81 1B 23 51
Use these commands to select the density of the printing that will be used: single density (60
dpi), double density (120 dpi), or quadruple density (240 dpi). The quadruple density selection
command also engages double speed.
Graphics Select/Print Command (Epson)
⻬ ML320 Std., ML321 Std. ⻬ ML320 Turbo, ML321 Turbo ⻬ ML520, ML521
Function ASCII Dec Hex
Graphics Select/Print ESC * m Ln Hn [data] 27 42 m Ln Hn
[data] 1B 2A m Ln Hn [data]
This command is used to select the density, to designate the number of columns of data you'll
be sending, and to specify the data to be sent.
Parameter m
This parameter specifies which density to use when printing the graphic image. The table
below indicates the type of density for each value of m.
Table 37: Epson ESC * m Command —
8-Pin Graphics Density Codes for m Values (9-Pin Printers)
Value of m Graphics Type Horizontal Density (dots per inch)
0 Single Density 60 dpi
1 Double Density 120 dpi
2 High Speed Double Density 120 dpi
3 Quadruple Density 240 dpi
4 CRT I 80 dpi
5 Plotter (Single Density) 72 dpi
6 CRT II 90 dpi
7 Double Density Plotter 144 dpi
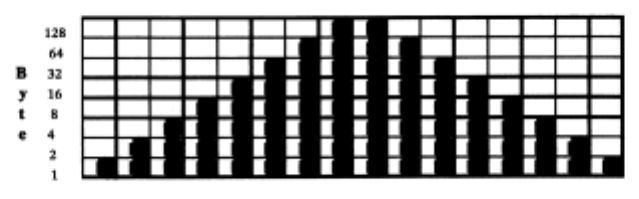
Chapter 6: Graphics Commands for 9-Pin Printers56
Once you've selected the density you want to use, you have to design your graphic image.
Begin by mapping out the pattern you want to print on a piece of graph paper. Here is a sample
pattern for a triangle:
Parameters Ln and Hn
These parameters tell the printer how many columns of data you'll be sending: 8-pin modes
have one byte of data per column. To calculate the values, first determine how many columns
of dots there will be in your graphics image. Divide this number by 256 and assign the whole
number to Hn; assign the remainder to Ln.
In our triangle example, each triangle requires 16 columns. We'll be printing a row of 6
triangles, so the total number of columns in the image is 6 x 16, or 96. Dividing 96 by 256
gives a value of 0 for Hn with a remainder of 96, which we'll assign to Ln.
Next, we can write a BASIC statement that sends the command begin 8-pin graphics:
LPRINT CHR$(27);”*”;CHR$(3);CHR$(96);CHR$(0);
Note: Be sure to include the semicolon(;) at the end of this statement. That way, the printer
won't insert a carriage return and line feed before your graphics data.
The listing below is a BASIC program for the Epson emulation that will generate a row of six of
our triangles in quadruple density. To print the pattern at another density, change the value of
D in line 10 to one of the other density codes.
10 D=3 ‘Density code for quadruple density (Epson)
20 WIDTH “LPT1:”,255 ‘Set printer for maximum line width
30 LPRINT CHR$(27);”*”;CHR$(D);CHR$(96);CHR$(0);
40 REM CHR$(D) is the density; in this case D=3 for quadruple density
50 REM CHR$(96) and CHR$(0) indicate the number of columns
60 FOR I=1 TO 6 ‘Repeat triangle pattern six times
70 FOR J=1 TO 16 ‘Each triangle has 16 columns
80 READ A ‘Read the column
90 LPRINT CHR$(A); ‘Send the byte to the printer
100NEXTJ‘Nowprintthenextcolumn
110 RESTORE ‘Go back to the beginning of the DATA statements
120 NEXT I ‘Now print the next triangle
130 END
140 DATA 1,3,7,15,31,63,127,255,255,127,63,31,15,7,3,1
Your printout will look like this:
䊱䊱䊱䊱䊱䊱
Chapter 6: Graphics Commands for 9-Pin Printers 57
Reassign Graphics Codes Command (Epson)
⻬ ML320 E/I, ML321 E/I ⻬ ML320 Turbo, ML321 Turbo ⻬ ML520, ML521
Function ASCII Dec Hex
Reassign Graphics ESC ? m n 27 63 m n 1B 3F m n
You can use this command to reassign any of the 8-pin graphics modes to one of the graphics
commands (ESC K, ESC L, ESC Y, or ESC Z).
Parameter m
This parameter designates which of the four commands you're redefining. Substitute one of the
four letters (K, L, Y, or Z) for m in the command.
Parameter n
This parameter designates the density of the mode you are reassigning to the redefined code.
Substitute the appropriate value (0 through 7) for the density you wish to select, as taken from
the 8-Pin Graphics Density Codes table earlier in this chapter.
When you are ready to print a graphics pattern, send the redefined command, followed by the
graphics data.
For example, the following BASIC statement reassigns quadruple density to the command ESC
L:
LPRINT CHR$(27);”?”;”L”;CHR$(3)
Select Graphics Command (Epson)
⻬ ML320 E/I, ML321 E/I ⻬ ML320 Turbo, ML321 Turbo ⻬ ML520, ML521
Function ASCII Dec Hex
Select 9-pin Graphics
Printing ESC ^ m Ln Hn
[data] 27 94 m Ln Hn
[data] 1B 5E m Ln Hn
[data]
This command permits use of all nine pins on the printhead. It operates exactly like the ESC *
command, except that dot columns are given two bytes each instead of one. The first byte for
each column represents the top eight pins, just like the ESC * command. The second byte is
128 if the bottom (9th) pin is to be fired, and zero if it's not to be fired.
Select Graphics Mode Command (ML)
⻬ ML320 Std., ML321 Std. ⻬ ML320 Turbo, ML321 Turbo ⻬ ML520, ML521
Function ASCII Dec Hex
Select Graphics Mode ESC * n1 n2 : 27 42 n1 n2 58 1B 2A n1 n2
3A
Use this command to select the density and to define the speed and “word size.”
Parameter n1
This parameter specifies the density. To calculate the value of n1, first select the dpi and density
you want, then determine the n1 values for each from the table below. Add them together, then
add 96 to the total.
Chapter 6: Graphics Commands for 9-Pin Printers58
Table 38: ML ESC * Command —
Densities for n1 Values (9-Pin Printers)
Dots per inch/Density Value of n1
60 dpi 1
72 dpi 2
Single density 4
Double density 8
Quadruple density 16
For example, for 60 dpi printing at quadruple density, the value of n1 would be calculated as
follows: n1 = 1 + 16 + 96 = 113
Parameter n2
This parameter specifies the speed of the printing and a word length of 8 bits. To calculate the
value of n2, first select the speed and determine the value of n2 for that speed from the table
below. Next, select 7 or 8-bit graphics and determine the value of n2 for that word size from the
table. Add each of these two values together, then add 64 to the total.
Table 39: ML ESC * Command —
Speed & Word Sizes for n2 Values (9-Pin Printers)
Speed/Word Size Value n2
Normal speed 0
Double speed 8
7-bit graphics 0
8-bit graphics 16
For example, for double speed, 8-bit graphics, the value of n2 would be calculated as follows:
n2 = 8 + 16 + 64 = 80

Chapter 6: Graphics Commands for 9-Pin Printers 59
Graphics Print Mode Commands (ML)
⻬ ML320 Std., ML321 Std. ⻬ ML320 Turbo, ML321 Turbo ⻬ ML520, ML521
Function ASCII Dec Hex
Select Graphics Print Mode ETX 3 03
End Graphics Print Mode ETX STX 3 2 03 02
To begin printing graphics, you must first send the ETX command. This is followed by graphics
data—bytes representing the individual dot columns you will be printing. The graphics data is
followed by the ETX STX command which ends graphics printing. The listing below is a BASIC
program that generates a row of six triangles in quadruple density.
10 WIDTH “LPT1:,”255 ‘Set printer for maximum line width
20 LPRINT CHR$(27);”*”;CHR$(113);CHR$(80);”:”;CHR$(3);
30 REM CHR$(113) and CHR$(80) are the attribute codes for normal speed,
quadruple density graphics
40 REM CHR$(3) Begins graphics printing
50 FOR I=1 TO 6 ‘Repeat triangle pattern six times
60 FOR J=1 TO 16 ‘Each triangle has 16 columns
70 READ A ‘Read the column
80 LPRINT CHR$(A); ‘Send the byte to the printer
90 NEXT J ‘Now print the next column
100 RESTORE ‘Go back to the beginning of the DATA statements
110 NEXT I ‘Now print the next triangle
120 LPRINT CHR$(3);CHR$(2); ‘End graphics printing
130 END
140 DATA 128,192,224,240,248,252,254,255,255,254,252,248,240,224,192,128
Your printout will look like this:
䊱䊱䊱䊱䊱䊱
Chapter 6: Graphics Commands for 9-Pin Printers60
Special Purpose Line Feed Commands (ML)
⻬ ML320 Std., ML321 Std. ⻬ ML320 Turbo, ML321 Turbo ⻬ ML520, ML521
If you are printing more than one line of graphics, you will need to use line feeds. In the
Okidata MICROLINE Standard emulation, your printer has a variety of special purpose line feed
commands for use in graphics printing:
Function Setting ASCII Dec Hex
Graphics line feed
with carriage return Text ETX LF 3 10 03 0A
Graphics line feed
with carriage return Graphics ETX SO 3 14 03 0E
Graphics line feed
without carriage return Text ETX DC2 3 18 03 12
Graphics line feed
without carriage return Graphics ETX DC4 3 20 03 14
Stores graphics data
in one dot column buffer N/A ETX ETX 3 3 03 03
The graphics setting is determined by whether you are using 7 or 8-bit graphics. In 7-bit
graphics mode, the graphics setting is 14/144”; in 8-bit graphics mode, it is 16/144”.
The text setting is determined by the current text line spacing, as set by the ESC 6 and ESC 8
commands.

Chapter 7: Graphics Commands for 24-Pin Printers 61
Chapter 7: Graphics Commands for 24-Pin Printers
Overview
Your printhead has one column of pins. Images are created as the pins “fire,” striking the
ribbon against the paper to produce dots. White spaces appear where the pins don't fire. In 8-
pin graphics, each column of dots is represented by a single byte of data. In the Epson LQ
mode, Models ML390 Turbo, ML391 Turbo, ML590 and ML591 support 24-pin graphics, in
which each dot column is represented by three bytes of data.
When you program a graphic image, your program has to describe the pattern of dots you want
to print. Graphics data, like all other data sent to the printer, consists of a series of bytes. Each
of the eight bits in a byte of graphics data corresponds to one pin on the printhead. A bit's
value can be either 1 or 0. When the printer receives the data, it interprets a bit with a value of
1 as a command to fire the corresponding pin. Bits that are set to 0 don't cause pins to fire.
You can picture the byte as a column of 8 bits. In 8-pin graphics, the body of data is a series of
these columns lined up next to each other. Instead of sending the data to the printer bit by bit,
you'll probably want to convert this binary information into decimal or hexadecimal format for
use with your programming language. In the figure below we show how to determine the
decimal value for a given pattern of pins. For 24-pin graphics, you must perform this process a
total of three times.
Chapter 7: Graphics Commands for 24-Pin Printers62
For optimum registration when printing graphics using bi-directional printing, use the Print
Registration item in the printer menu to fine-tune the alignment of the vertical bars which print
as part of the menu. Keep changing the setting until the lines of the vertical bar characters have
the straightest vertical column.
Programming Graphics in BASIC
One important thing to remember when you're programming graphics is not to include
extraneous line feeds in your programs. Using a semicolon after the data in an LPRINT
statement will keep the print position on the same line.
However, there is an additional complication: by default, BASIC assigns to all printers a
maximum line length of 80 characters. After the printer has received 80 bytes of data, it will
automatically perform a carriage return and line feed. Since graphics data typically consists of
many bytes, it's quite easy to exceed this limit. The resulting output will be garbled. You can
work around this problem by setting the line length to the maximum allowable value, 255. Put
one of these statements at the beginning of your program:
For parallel printers: WIDTH “LPT1:”,255
For serial printers that have been opened as #1:
WIDTH #1,255
Graphics Density Selection Commands (IBM/E)
⻬ ML390 Turbo, ML391 Turbo ⻬ ML590, ML591
Function ASCII Dec Hex
Begin Single Density
Graphics ESC K Ln Hn [data] 27 75 Ln Hn [data] 1B 4B Ln Hn [data]
Double Density
Graphics Command ESC L Ln Hn [data] 27 76 Ln Hn [data] 1B 4C Ln Hn [data]
Double Speed/
Double Density
Graphics Command
ESC Y Ln Hn [data] 27 89 Ln Hn [data] 1B 59 Ln Hn [data]
Quadruple Density
Graphics Command ESC Z Ln Hn [data] 27 90 Ln Hn [data] 1B 5A Ln Hn [data]
These graphics modes correspond to the 8-pin modes and are supported by most current
DOS-based graphics software.
Parameters Ln and Hn
These parameters tell the printer how many bytes of graphics data to expect. Eight-pin graphics
have one byte of data per column. To calculate the values for Ln and Hn, first determine how
many columns of dots there will be in your graphics image. Divide this number by 256 and
assign the whole number result to Hn; assign the remainder to Ln.
Chapter 7: Graphics Commands for 24-Pin Printers 63
Graphics Select/Print Command (IBM AGM/E)
⻬ ML390 Turbo, ML391 Turbo ⻬ ML590, ML591
Function ASCII Dec Hex
Graphics Select/Print ESC * m n1 n2 [data] 27 42 m n1 n2 [data] 1B 2A m n1 n2 [data]
Note: The IBM AGM emulation combines the IBM Proprinter emulation with Epson LQ
graphics for special graphics applications.
This command is used to select the density, to designate the number of columns of data you'll
be sending, and to specify the data to be sent.
Parameter m
This parameter specifies which density to use when printing the graphic image. The table
below indicates the type of density for each value of m.
Table 40: Epson ESC * m Command —
8-Pin Graphics Density Codes for m Values (24-Pin Printers)
Value of m Graphics Type Pins Horizontal Densit
y
(dots per inch)
0 Single Density 8 60 dpi
1 Double Density 8 120 dpi
2 High Speed Double Density 8 120 dpi*
3 Quadruple Density 8 240 dpi*
4 CRT I 8 80 dpi
6 CRT II 8 90 dpi
32 Single Density 24 60 dpi
33 Double Density 24 120 dpi
38 CRT III 24 90 dpi
39 Triple Density 24 180 dpi
40 Hex Density 24 360 dpi*
* Extrapolated (quasi density)
Parameters Ln and Hn
These parameters tell the printer how many columns of data you'll be sending: 8-pin modes
have one byte of data per column, 24-pin modes have three bytes of data per column. These
parameters can be assigned any value from 0 to 255. To calculate the values, first determine
how many columns of dots there will be in your graphics image. Divide this number by 256
and assign the whole number to Hn; assign the remainder to Ln.
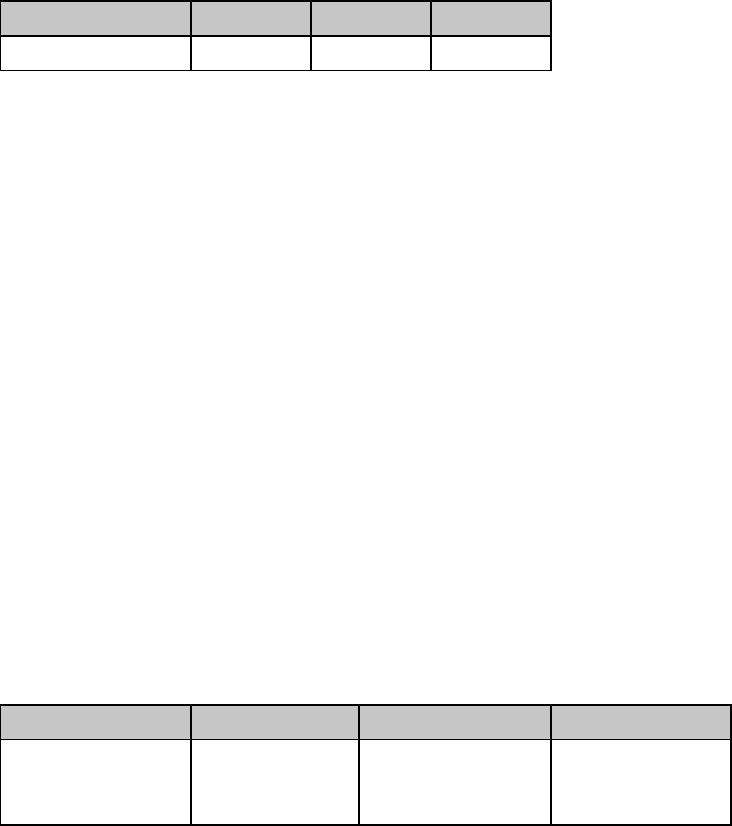
Chapter 7: Graphics Commands for 24-Pin Printers64
Reassign Graphics Codes Command (IBM AGM/E)
⻬ ML390 Turbo, ML391 Turbo ⻬ ML590, ML591
Function ASCII Dec Hex
Reassign Graphics ESC ? m n 27 63 m n 1B 3F m n
Note: The IBM AGM emulation combines the IBM Proprinter emulation with Epson LQ
graphics for special graphics applications.
You can use this command to reassign any of the graphics modes to one of the graphics
commands (ESC K, ESC L, ESC Y, or ESC Z).
Parameter m
This parameter designates which of the four commands you're redefining. Substitute one of the
four letters—K (single density), L (double density), Y (high speed double density), or Z
(quadruple density)—for m in the command.
Parameter n
This parameter designates the density of the mode you are reassigning to the redefined code.
Substitute the appropriate value for the density you wish to select, as taken from the “Epson
ESC * m Command — 8-Pin Graphics Density Codes for m Values (24-Pin Printers)” table in
the previous command description.
When you are ready to print a graphics pattern, send the redefined command, followed by the
graphics data.
Graphics Resolution Command (IBM)
⻬ ML390 Turbo, ML391 Turbo ⻬ ML590, ML591
Function ASCII Dec Hex
Select Graphics
Resolution/ Print ESC [ g n1 n2 m
[data] 27 93 103 n1 n2 m
[data] 1B 5D 67 n1 n2
m
[data]
This command sets the graphics resolution and prints the graphic data.
Parameters n1 n2
Range 0 to 255. These parameters specify the number of dot columns according to the
following formula: dot columns = n1 + (n2 * 256) +1
Parameter m
This parameter specifies the horizontal resolution of the graphics according to the following
table.
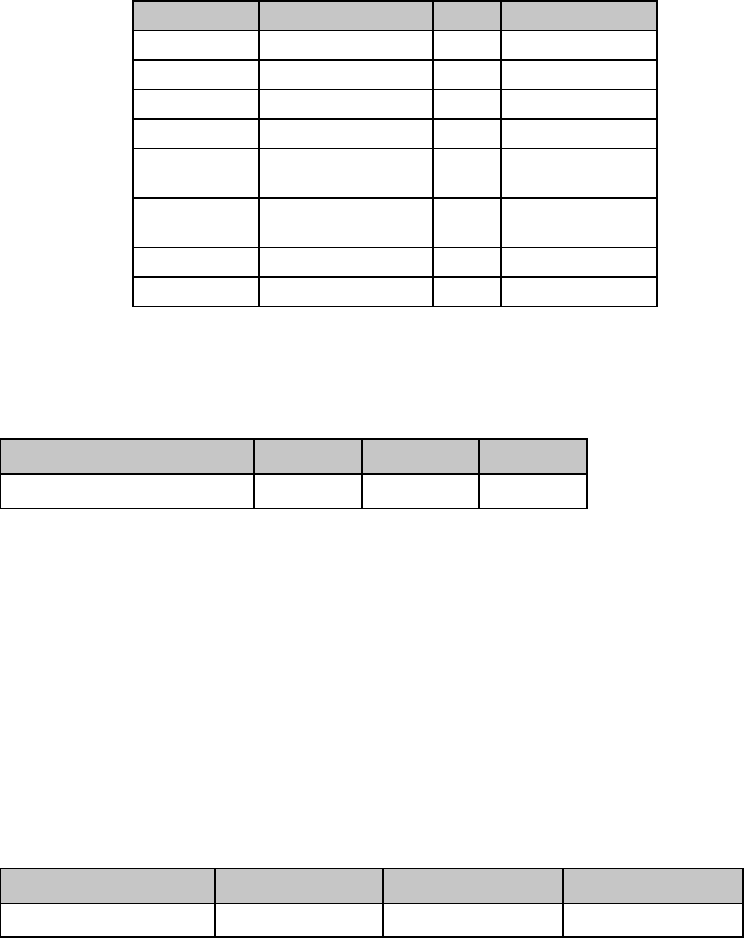
Chapter 7: Graphics Commands for 24-Pin Printers 65
Table 41: IBM ESC [ g Command —
Horizontal Graphics Resolution for m Values (24-Pin Printers)
Value of m Resolution (dpi) Pins Notes
0 60 8 Same as ESC K
1 120 8 Same as ESC L
2 120 8 Same as ESC Y
3 240 8 Same as ESC Z
8 60 24 High resolution
for ESC K
9 120 24 High resolution
for ESC L
11 180 24
12 360 24
Select Graphics Aspect Ratio Command (IBM)
⻬ ML390 Turbo, ML391 Turbo ⻬ ML590, ML591
Function ASCII Dec Hex
Set graphics aspect ratio ESC n Pn27 110 Pn1B 6E Pn
This command sets the vertical-to-horizontal ratio of graphics printed using the ESC K, ESC L,
ESC Y, and ESC Z graphics commands.
The possible values for Pn are:
Pn = 0, 1: Sets aspect ratio of 5:6
Pn = 2: Sets aspect ratio of 1:1
Pn ≥ 3: Dumps data up to receipt of ESC n pn command
Select Graphics Mode Command (Epson)
⻬ ML390 Turbo, ML391 Turbo ⻬ ML590, ML591
Function ASCII Dec Hex
Select Graphics Mode ESC ( G Ln Hn Pn27 40 71 Ln Hn Pn1B 28 47 Ln Hn Pn
Use this command to place the printer in graphics mode.
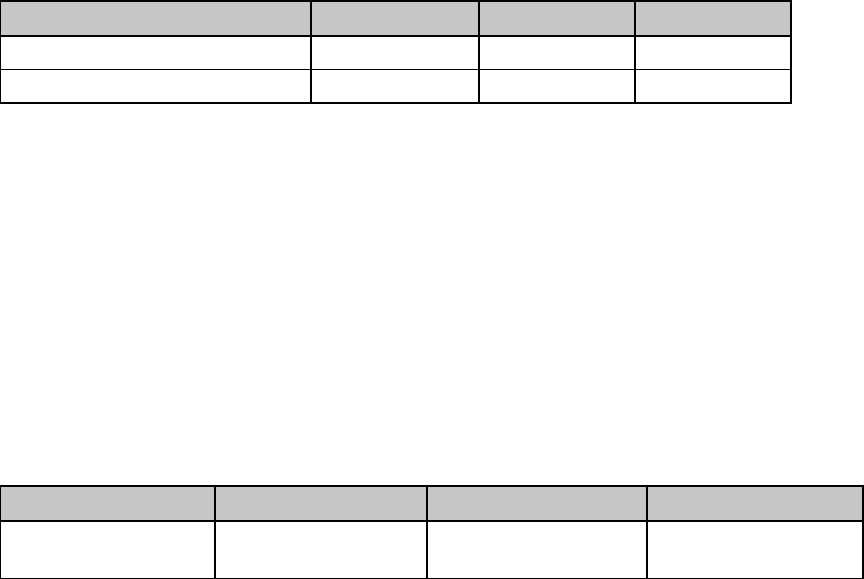
Chapter 7: Graphics Commands for 24-Pin Printers66
Parameters Ln and Hn
Parameters Ln and Hn are used to designate the number of bytes to follow in the subsequent
parameters, where Number of Bytes = Ln + (Hn x 256)
Ln and Hn can have any value from 0 to 255 decimal. Generally, Ln is set to 1 and Hn is set to 0.
Parameter Pn
Parameter Pn sets the graphics mode. It can have a hexadecimal value of 01 or 31.
Note: To cancel the graphics mode, enter the ESC @ command.
Set/Reset Graphics Mode Command (Epson)
⻬ ML390 Turbo, ML391 Turbo
Function ASCII Dec Hex
Engage Raster Graphics Mode ESC DLE G n 1 27 16 71 n 49 1B 10 47 n 31
Disengage Raster Graphics Mode ESC DLE G n 0 27 16 71 n 48 1B 10 47 n 30
Use this command to engage and disengage the graphics mode.
Parameter n
This parameter determines how this command is handled:
n = 0: Command invalid
n = 1: data valid
n > 1: data valid; data that follows is discarded after the command has been executed.
Print Raster Graphics Command (Epson)
⻬ ML390 Turbo, ML391 Turbo ⻬ ML590, ML591
Function ASCII Dec Hex
Print Raster Graphics ESC . Pc Pv Ph Pm Ln Hn
[data] 27 46 Pc Pv Ph Pm Ln Hn
[data] 1B 2E Pc Pv Ph Pm Ln Hn
[data]
Use this command to print bit-image graphics horizontally.
Parameter Pc
Parameter Pc sets the mode:
Pc = 0: Full Graphics Mode
Pc = 1: Compressed Mode
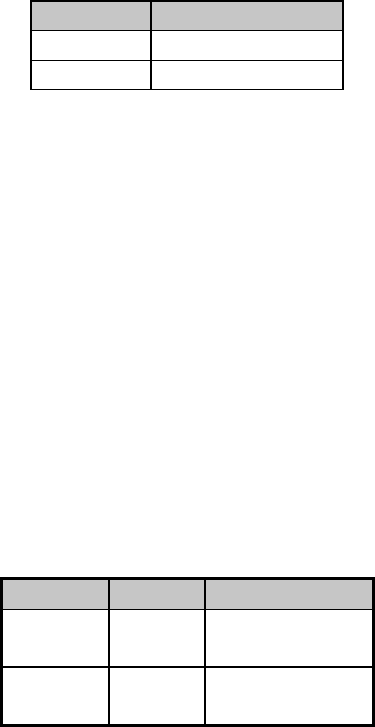
Chapter 7: Graphics Commands for 24-Pin Printers 67
Parameter Pv
Parameter Pv sets the vertical dot density:
Pv = 10: 360 dots per inch (dpi)
Pv = 20: 180 dpi
Parameter Ph
Parameter Ph sets the horizontal dot density:
Ph = 10: 360 (dpi)
Ph = 20: 180 dpi
Parameter Pm
Parameter Pm sets the number of vertical dots.
Table 42: Epson ESC . Command — Valid Range of Pm Values for Pv Values
Pv Value Valid Pm Range
10 0 to 48
20 0 to 24
Note: If Pm value is set to 0, graphics will not print.
Parameters Ln and Hn
Parameters Ln and Hn are used to designate the number of horizontal dots to be printed, where
No. of dots = Ln + (Hn x256)
For fewer than 256 dots, substitute the number of dots for Ln and set Hn = 0. For more than 256
dots, divide the number of dots by 256 and assign the whole number result to Hn, then assign
the remainder to Ln.
Ln and Hn can have any value from 0 to 255 decimal.
The maximum number of dots allowed depends on the value of Ph and the width of the printer
carriage as follows:
Table 43: Epson ESC . Command — Maximum Horizontal Dots for Ph
Values
Ph Value Model Maximum Dots
10 ML590
ML591 2880
4896
20 ML590
ML591 1440
2448
Chapter 7: Graphics Commands for 24-Pin Printers68
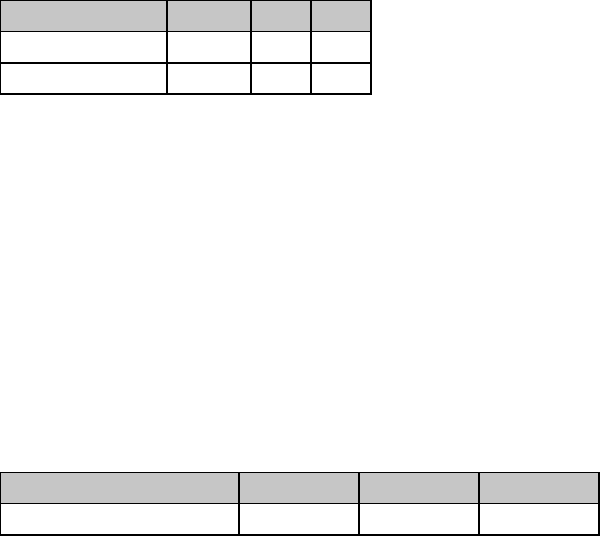
Chapter 8: Horizontal Control Commands 69
Chapter 8: Horizontal Control Commands
This chapter describes the commands for horizontal control including the following:
• Backspace/Carriage Return Commands
• Margin Setting Commands
• Horizontal Tab Commands
• Indent Commands
• Print Position Commands
• Uni-directional Printing Commands
• Incremental Printing Commands
• Justification Commands
Backspace & Carriage Return Commands (IBM/E/ML)
⻬ ML320 E/I, ML321 E/I ⻬ ML320 Turbo, ML321 Turbo ⻬ ML520, ML521
⻬ ML320 Std., ML321 Std. ⻬ ML390 Turbo, ML391 Turbo ⻬ ML590, ML591
Function ASCII Dec Hex
Backspace BS 8 08
Carriage Return CR 13 0D
The backspace command moves the printhead one character to the left. The actual width of the
backspace depends on the current pitch. If you're using proportional spacing, the BS command
moves the printhead 1/10" to the left.
The carriage return command causes the printer to print data from the print buffer and return
the printing position to the beginning of the line. If the printer menu item Auto LF (under Set-
Up group) has been set to YES (factory default is NO), the printer automatically adds a line feed
to each carriage return.
Margin Setting Commands
Set Left & Right Margins Command (IBM)
⻬ ML320 E/I, ML321 E/I ⻬ ML320 Turbo, ML321 Turbo ⻬ ML520, ML521
⻬ ML390 Turbo, ML391 Turbo ⻬ ML590, ML591
Function ASCII Dec Hex
Set Left & Right Margins ESC X n m 27 88 n m 1B 58 n m
In the IBM emulation, the margins set by the Left & Right Margin command are set by character
columns. The actual position of the margin depends on the current pitch: a margin of 10
columns will come out as 1" in 10 cpi and 1/2" in 20 cpi. If the current pitch is proportional,
the margin is set as though it were 10 cpi. However, once you've set a margin, its absolute
position remains the same, even if you change the pitch, until you specifically reset the margin.
This saves you the work of adjusting margins with every pitch change in your document.
Note: You should always send margin commands at the beginning of a line.
Parameter n
Parameter n sets the left margin and can be any value from 0 to 254. Use a value of 0 if you
want to change the right margin only. The default setting for the left margin in the IBM
emulation is 1.
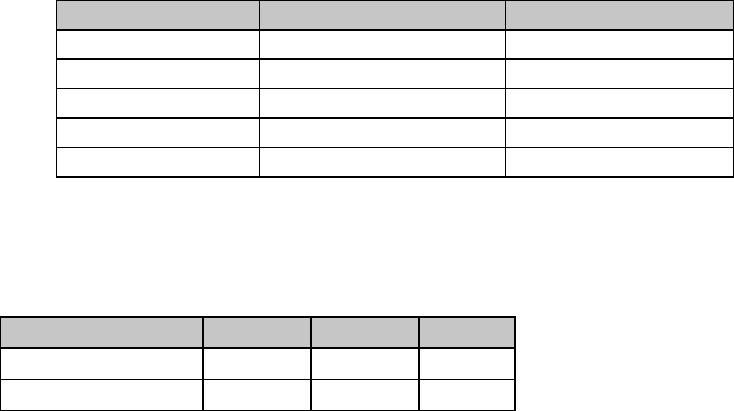
Chapter 8: Horizontal Control Commands70
Parameter m
Parameter m sets the right margin and can be any value from 0 to 255.
Note: Be sure to specify a right margin that is at least one more than the left margin. The only
time you should use a value of 0 for the right margin is if you don't want to change the
value for the right margin when you are changing the value for the left margin.
The default settings for the right margin are specified in the table below.
Table 44: IBM ESC X Command —
Default Settings for Right Margin
Pitch Narrow Carriage Models Wide Carriage Models
10 cpi/proportional 80 136
12 cpi 96 163
15 cpi 120 204
17.1 cpi 137 233
20 cpi 160 255
Left and Right Margin Commands (Epson)
⻬ ML320 E/I, ML321 E/I ⻬ ML320 Turbo, ML321 Turbo ⻬ ML520, ML521
⻬ ML390 Turbo, ML391 Turbo ⻬ ML590, ML591
Function ASCII Dec Hex
Set Left Margin ESC l n 27 108 n 1B 6C n
Set Right Margin ESC Q n 27 81 n 1B 51 n
These commands set the margins by character columns. The actual position of the margin
depends on the current pitch: a margin of 10 columns will come out as one inch in 10 cpi and
one-half inch in 20 cpi. If the current pitch is proportional, the margin is set as though it were
10 cpi. However, once you've set a margin, its absolute position remains the same, even if you
change the pitch, until you specifically reset the margin. This saves you the work of adjusting
margins with every pitch change in your document.
Sending the left margin command will cancel any horizontal tab stops you may have set,
returning the printer to its default setting (tab stops every eight columns).
You should always send margin commands at the beginning of a line.

Chapter 8: Horizontal Control Commands 71
Parameter n
This parameter can range in value from 0 to 254 for the left margin and from 1 to 255 for the
right margin.
Note: You must always specify a right margin that is at least one more than the left margin.
Table 45: Epson ESC L and ESC Q Commands —
Range of Margin Settings, All 9-Pin Printers
ML320 E/I, ML320 Turbo, ML520 ML321 E/I, ML321 Turbo, ML521
Pitch Left Right Left Right
10 cpi 0-79 1-80 0-135 1-136
12 cpi 0-95 1-96 0-162 1-163
17.1 cpi 0-136 1-137 0-232 1-233
20 cpi 0-159 1-160 0-254 1-255
Proportional 0-79 1-80 0-135 1-136
Table 46: Epson ESC L and ESC Q Commands —
Range of Margin Settings, 24-Pin Models ML390/391 Turbo
ML390 Turbo ML391 Turbo
Pitch Left Right Left Right
10 cpi 0-70 4-80 0-126 4-136
12 cpi 0-84 5-96 0-151 5-163
15 cpi 0-105 6-120 0-189 6-204
17.1 cpi 0-119 7-137 0-215 7-233
20 cpi 0-140 8-160 0-252 8-255
Proportional 0-140 8-160 0-252 8-255
Table 47: Epson ESC L and ESC Q Commands —
Range of Margin Settings, 24-Pin Models ML590/591
ML590 ML591
Pitch Left Right Left Right
10 cpi 0-76 4-80 0-132 4-136
12 cpi 0-91 5-96 0-158 5-163
15 cpi 0-114 6-120 0-198 6-204
17.1 cpi 0-130 7-137 0-226 7-233
20 cpi 0-152 8-160 0-255 8-255
Proportional 0-76 4-80 0-132 4-136
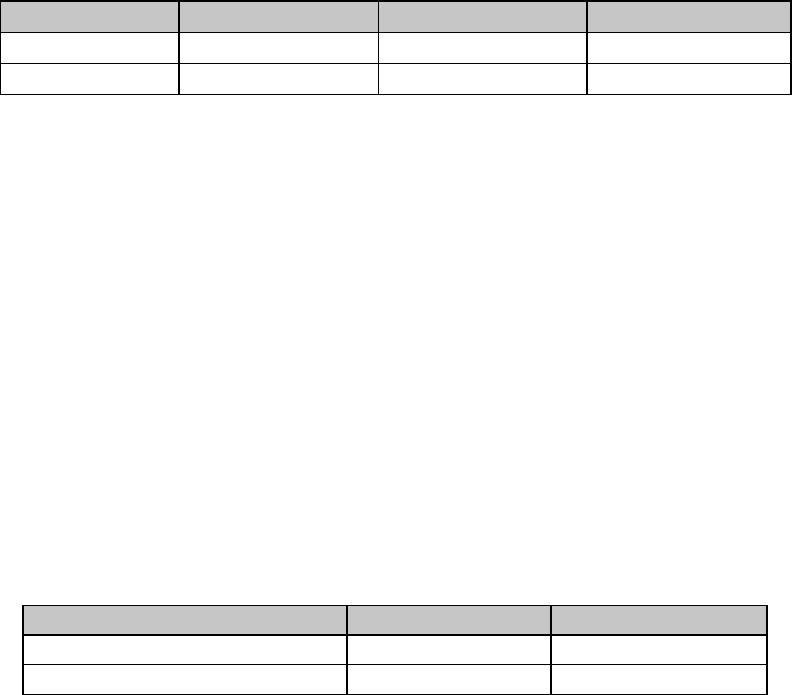
Chapter 8: Horizontal Control Commands72
Left and Right Margin Commands (ML)
⻬ ML320 Std., ML321 Std. ⻬ ML320 Turbo, ML321 Turbo ⻬ ML520, ML521
Function ASCII Dec Hex
Set Left Margin ESC % C n1 n2 n327 37 67 n1 n2 n31B 25 43 n1 n2 n3
Set Right Margin ESC % R n1 n2 n3 n427 37 82 n1 n2 n3 n41B 25 52 n1 n2 n3 n4
In the MICROLINE Standard emulation, margins for these commands are measured in units of
1/120" from the leftmost printing position.
Left Margin Parameters n1 n2 n3
Parameters n1 n2 n3 represent a three-digit ASCII number for the value of the location for the left
margin. If the value you wish to assign to the left margin is 99 or less, use zero for the first digit.
Right Margin Parameters n1 n2 n3 n4
Parameters n1 n2 n3 n4 represent a four-digit ASCII number for the value of the location for the
right margin. If the value you wish to assign is less than four digits, use zeros for the first digit(s).
The right margin must be at least 60 units greater than the left margin. If no left margin has
been set, the minimum value for the right margin is 60 units.
You must set the right margin before sending any data for the line on which it is to take effect.
The Maximum Margin Values table below lists the widest allowable margins.
Table 48: ML ESC % C and ESC % R Commands —
Maximum Margin Values
Model Left Margin n Value Right Margin n Value
ML320 Std., ML320 Turbo, ML520 0899 0960
ML321 Std., ML321 Turbo, ML521 0999 1632
For example, suppose you want to set one-inch margins on a standard 8-1/2" page. The left
margin will be 120/120" from the leftmost position, so the command to set it is:
LPRINT CHR$(27);"%C";"120"
The right margin is 7-1/2", or 900/120" from the leftmost position, so the command to set it is:
LPRINT CHR$(27);"%R";"0900"
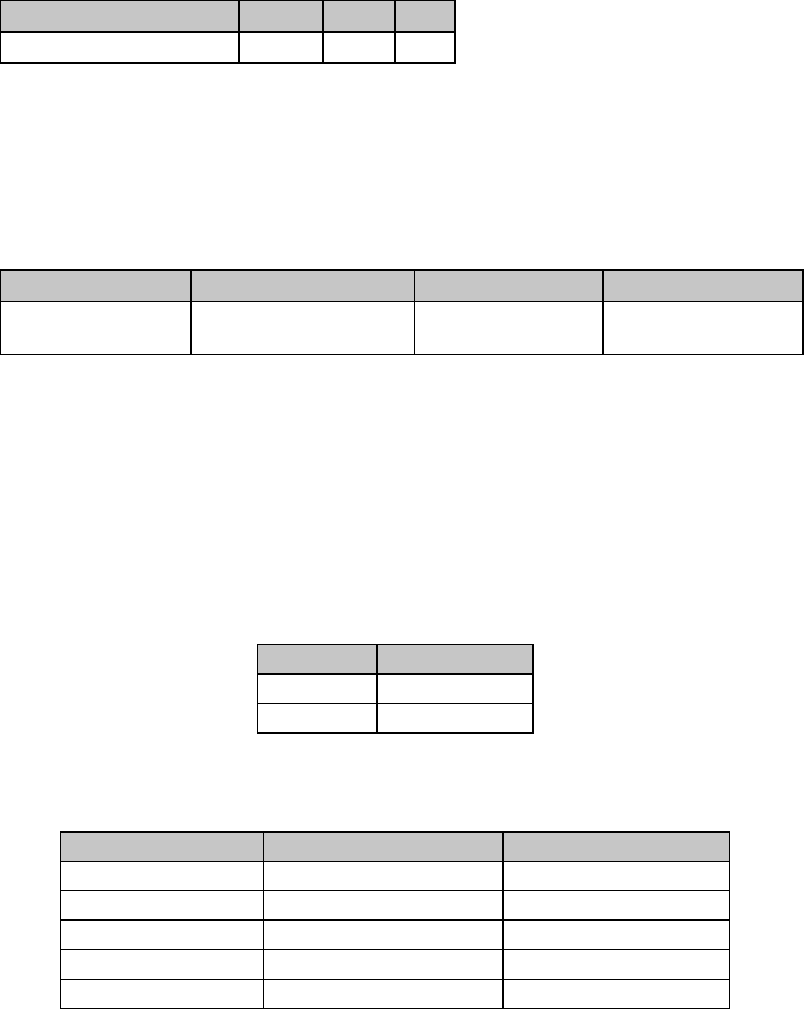
Chapter 8: Horizontal Control Commands 73
Horizontal Tab Commands
Execute Horizontal Tab Command (IBM/E/ML)
⻬ ML320 E/I, ML321 E/I ⻬ ML320 Turbo, ML321 Turbo ⻬ ML520, ML521
⻬ ML320 Std., ML321 Std. ⻬ ML390 Turbo, ML391 Turbo ⻬ ML590, ML591
Function ASCII Dec Hex
Execute Horizontal Tab HT 9 09
When you turn on your printer, its tab stops are automatically set for every eight columns. Each
time you send the tab character (HT), the printhead moves eight columns to the right before
printing the next character.
Set Horizontal Tab Command (IBM/E)
⻬ ML320 E/I, ML321 E/I ⻬ ML320 Turbo, ML321 Turbo ⻬ ML520, ML521
⻬ ML590, ML591
Function ASCII Dec Hex
Set Horizontal
Tab ESC D n1 n2 ... nk NUL 27 68 n1 n2 ... nk 0 1B 44 n1 n2 ... nk 00
This command lets you set horizontal tab stops at specific columns on the page. As with
margins, the actual position of the stops depends on the pitch you’re using, and won’t change if
you switch to a different character width. Be sure to give the stops in ascending order. After you
have specified all the stops, end the sequence with a NUL character (use CHR$(0) in BASIC).
If you send the command as ESC D NUL, with no stops specified, all horizontal tab stops will
be cleared, including the 8-column default stops. Turning the printer off and on again restores
the printer's default tab stops.
Table 49: IBM/Epson ESC D Command —
Maximum Number of Horizontal Tab Stops
Emulation Max. Tab Stops
IBM 28
Epson 32
Table 50: IBM/Epson ESC D Command —
Maximum Values for Horizontal Tab Stops
Pitch Narrow Carriage models Wide Carriage Models
10 cpi/proportional 79 135
12 cpi 95 162
15 cpi* 119 203
17.1 cpi 136 232
20 cpi 159 255
* 15 cpi available only on ML390/391 Turbo, ML520/521 and ML590/591.
Set Tabs by Character Space Command (ML)
⻬ ML320 Std., ML321 Std. ⻬ ML320 Turbo, ML321 Turbo ⻬ ML520, ML521
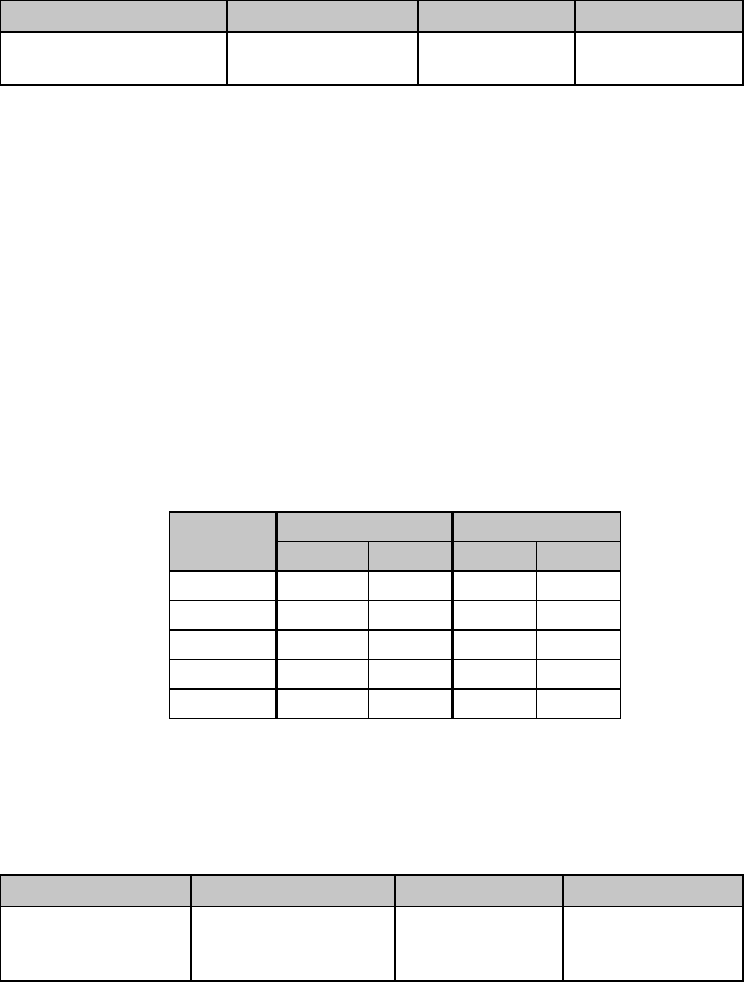
Chapter 8: Horizontal Control Commands74
Function ASCII Dec Hex
Set Horizontal Tab
by Characters ESC HT x1y1z1 ...
x16y16z16 CR 27 9 x1y1z1 ...
x16y16z16 13 1B 09 x1y1z1 ...
x16y16z16 0D
This command can be used to set up to 16 horizontal tab stops at the intervals of your choice.
The actual distance represented by the tab depends on the character pitch in effect when the
printer receives the HT command.
The tab information must be entered as three-digit ASCII numbers (xyz) separated by commas,
and must be in ascending order. For tabs less than 100, enter a zero for the x and/or y digits as
appropriate.
For example, suppose you wish to set tabs at the 5th, 10th, 15th and 20th columns. The value
for x1y1z1 would be 005; the value for x2y2z2 would be 010, etc. So, you would enter the BASIC
statement
LPRINT CHR$(27);CHR$(09);"005,010,015,020";CHR$(13)
Here are the maximum values for xnynzn for each pitch and printer model:
Table 51: ML ESC HT Command —
Maximum Values for xnynzn
Maximum xyzw Maximum xyzw
Pitch ML320 ML520 ML321 ML521
10 cpi 80 080 136 136
12 cpi 96 096 163 163
15 cpi* N/A 120 N/A 204
17.1 cpi 137 137 233 233
20 cpi 160 160 272 272
* 15 cpi applies only to ML520 and ML521.
Set Tabs by Dot Columns Command (ML)
⻬ ML320 Std., ML321 Std. ⻬ ML320 Turbo, ML321 Turbo ⻬ ML520, ML521
Function ASCII Dec Hex
Set Horizontal
Tab
by Dot Columns
ESC ETX x1y1z1w1 ...
x16y16z16w16 CR 27 3 x1y1z1w1 ...
x16y16z16w16 13 1B 03 x1y1z1w1 ...
x16y16z16w16 0D
This command can be used to set up to 16 horizontal tab stops at the intervals of your choice.
Setting tabs by dot columns gives you more precise control than setting tabs by character
space.
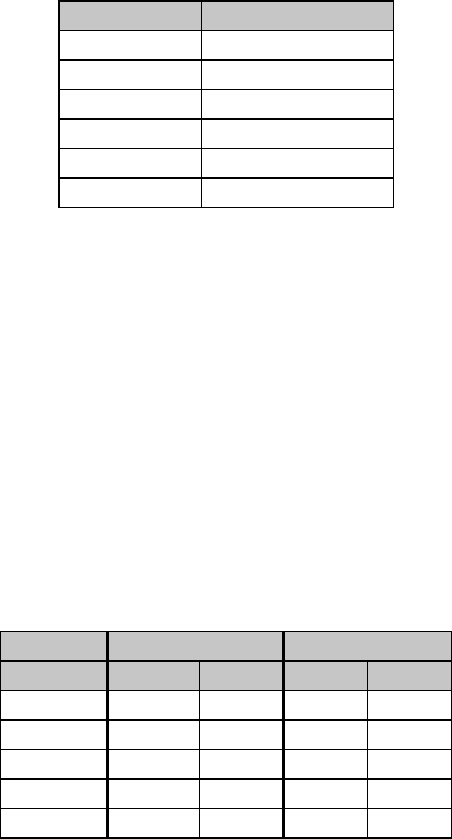
Chapter 8: Horizontal Control Commands 75
The distance represented by the tab (distance from the center of one dot to the center of the
next dot) depends on the character pitch in effect when the printer receives the HT command,
as follows:
Table 52: MML ESC ETX Command —
Shift Increment for Character Pitches
Pitch Increment of Shift
10 cpi 1/120"
12 cpi 1/144"
15 cpi* 1/180"
17.1 cpi 1/206"
20 cpi 1/240"
Proportional 1/120"
* 15 cpi applies only to ML520 and ML521.
The tab information must be entered as four-digit ASCII numbers separated by commas, and
must be in ascending order. For tab values less than 1000, enter a zero for the x, y and/or z
digits as appropriate.
For example, suppose you want to set tabs by dot columns at 1/2", 2", 4", and 6" from the left
margin, using 12 cpi pitch. From the table above, at 12 cpi pitch, each dot produces a shift of
1/144". So, to move over 1/2" from the home position (0001, or 1/144"), the value would be
0071 ([1/2 x 144 dpi] - 1); for 2", the value would be 0287; for 4", 0575; and for 6", 0863. To
set these tabs enter the BASIC statement
LPRINT CHR$(27);CHR$(3);"0071,0287,0575,0863";CHR$(13)
Here are the maximum values for xnynznwn for each pitch and printer model:
Table 53: ML ESC ETX Command —
XYZW Values for Setting Horizontal Tabs
Maximum xyzw Maximum xyzw
Pitch ML320 ML520 ML321 ML521
10 cpi 0959 0960 1631 1632
12 cpi 1151 1152 1956 1956
15 cpi* N/A 1440 N/A 2448
17.1 cpi 1643 1644 2795 2796
20 cpi 1917 1920 3261 3264
* 15 cpi applies only to ML520 and ML521.
Note: Using the maximum value for the xnynznwn tab setting may not leave enough room
between the tab stop and the right margin for a full character to print.
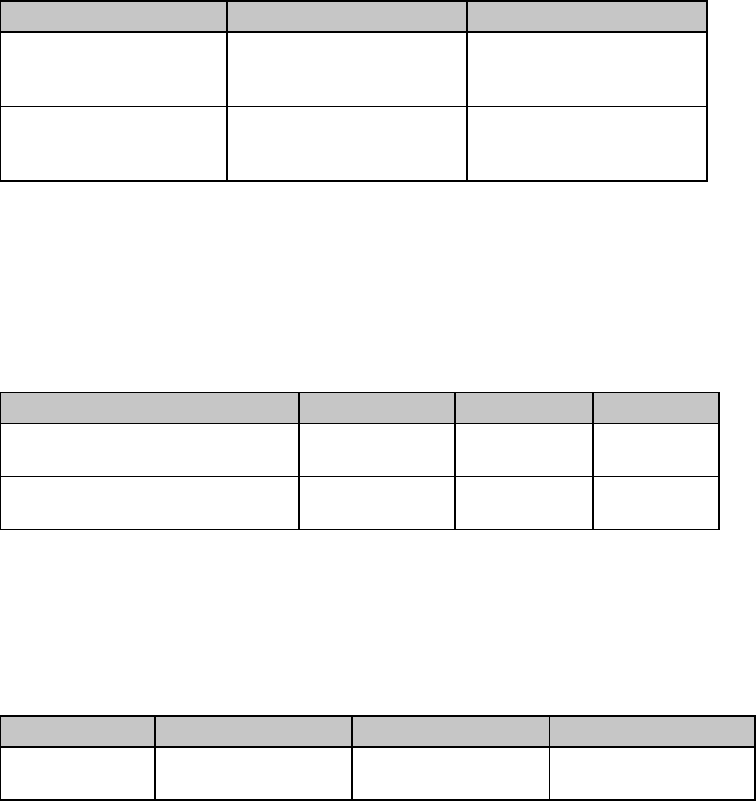
Chapter 8: Horizontal Control Commands76
Clear Horizontal Tab Settings Commands (IBM/E)
⻬ ML320 E/I, ML321 E/I ⻬ ML320 Turbo, ML321 Turbo ⻬ ML520, ML521
⻬ ML390 Turbo, ML391 Turbo ⻬ ML590, ML591
Function IBM Epson
Clear Horizontal Tab ASCII: ESC D NUL NUL
Dec: 27 68 0 0
Hex: 1B 44 00 00
ASCII: ESC D NUL NUL
Dec: 27 68 0 0
Hex: 1B 44 00 00
Reset Horizontal Tabs
to Default ASCII: ESC R
Dec: 27 82
Hex: 1B 52
Not applicable
In the IBM emulation, the ESC D NUL command will clear all horizontal tabs, including the
default tabs. In the Epson and MICROLINE Standard emulations, these commands will clear out
the tab settings and return the printer to the default horizontal tab settings (every eight spaces).
Clear Horizontal Tab Settings Commands (ML)
⻬ ML320 Std., ML321 Std. ⻬ ML320 Turbo, ML321 Turbo ⻬ ML520, ML521
Function ASCII Dec Hex
Clear Horizontal Tabs Set
by Characters ESC HT CR 27 9 13 1B 09 0D
Clear Horizontal Tabs Set
by Dot Columns ESC ETX 0 CR 27 3 48 141 1B 3 30
8D
Horizontal Print Position Commands
Indent from Left Margin Command (IBM/ML)
⻬ ML320 E/I, ML321 E/I ⻬ ML320 Turbo, ML321 Turbo ⻬ ML520, ML521
⻬ ML320 Std., ML321 Std.
Function ASCII Decimal Hexadecimal
Indent from
Left Margin ESC % B n1 n2 n3 n427 37 66 n1 n2 n3
n4
1B 25 42 n1 n2 n3 n4
This command causes the printing to be indented from the left margin by the number of dot
columns you specify (relative to home position, 0001).
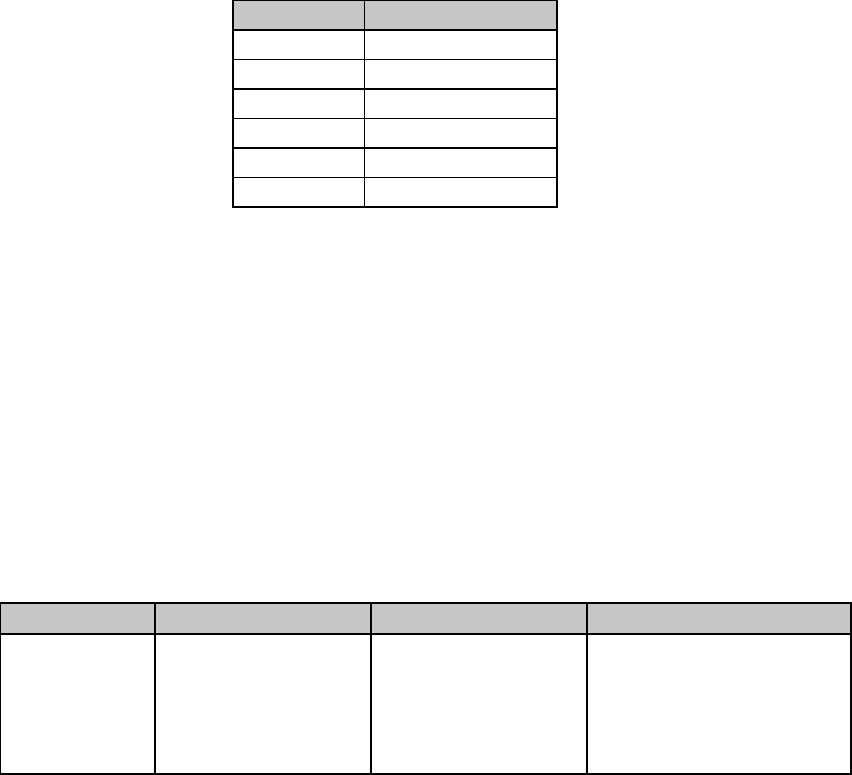
Chapter 8: Horizontal Control Commands 77
The distance of the shift depends on the pitch engaged:
Table 54: IBM/ML ESC % B Command —
Shift Increments for Left Margin Indents
Pitch Increment of Shift
10 cpi 1/120"
12 cpi 1/144"
15 cpi 1/180"
17.1 cpi 1/206"
20 cpi 1/240"
Proportional 1/120"
Parameters n1 through n4
These parameters represent a four-digit ASCII number. If the value you wish to assign is less
than four digits, use zeros for the first digit(s). The value is calculated relative to the home
position which is 0001 in from the left margin.
For example, suppose you wish to indent 1" from the left margin, using 12 cpi pitch. The print
position will be indented 143/144" from the home position (1/144"), so the command to set it
is:
LPRINT CHR$(27);"%B";"0144"
This command will be ignored if you set the print position outside either margin.
Set Multiple Print Positions Command (IBM/E/ML)
⻬ ML320 Turbo, ML321 Turbo ⻬ ML520, ML521
⻬ ML390 Turbo, ML391 Turbo ⻬ ML590, ML591
Function IBM Epson ML
Set Multiple
Print Positions
Command
ASCII: ESC DLE @ Pn
A1 A2 P1 P2 P3 P4
Dec: 27 16 64 Pn
A1 A2 P1 P2 P3 P4
Hex: 1B 10 40 Pn
A1 A2 P1 P2 P3 P4
ASCII: ESC DLE @ Pn
A1 A2 P1 P2 P3 P4
Dec: 27 16 64 Pn
A1 A2 P1 P2 P3 P4
Hex: 1B 10 40 Pn
A1 A2 P1 P2 P3 P4
ASCII: ESC DLE @ Pn a1 a2
P1 P2 P3 P4
Dec: 27 16 64 Pn a1 a2 P1
P2 P3 P4
Hex: 1B 10 40 Pn a1 a2 P1
P2 P3 P4
This command is used to move the print position either to the right or to the left, either as an
absolute print position or a relative print position.
Parameter Pn
This parameter sets the number of parameter bytes to follow:
value = 0 to 127 for ML320/321 Turbo & ML520/521
value = 0 to 255 for ML390/391 Turbo & ML590/591
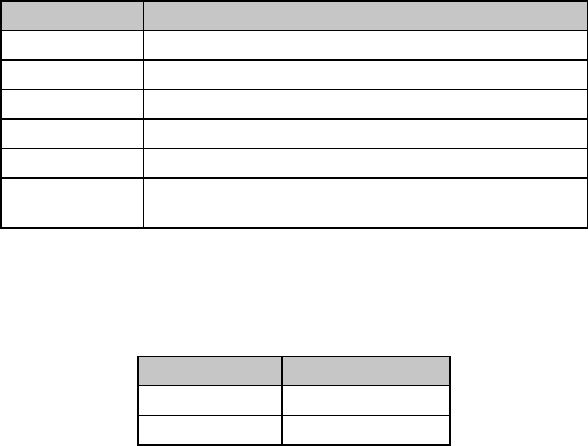
Chapter 8: Horizontal Control Commands78
Parameter a1
This parameter establishes whether the print position is absolute or relative:
a1 = 0: Absolute print position
a1 = 1: Relative print position
Parameter a2
This parameter determines whether the movement will be to the left or right:
a2 = 0: Move to right (forward)
a2 = 1: Move to left (backward)
Parameters P1 P2 P3 P4
These parameters represent a four-digit ASCII number for the value of the amount of movement
to take place. If the value you wish to assign is less than four digits, use zeros for the first
digit(s). The actual amount of movement depends on the pitch engaged:
Table 55: IBM/E/ML ESC DLE @ Command —
Shift Increments for 9-Pin Models
Pitch Shift Increment
10 cpi 1/240"
12 cpi 1/288"
15 cpi 1/360"
17.1 cpi 1/411"
20 cpi 1/480"
Proportional 1/240" for IBM & Epson, same as the
corresponding value for each cpi for ML Std.
Table 56: IBM/E/ML ESC DLE @ Command —
Shift Increments for 24-Pin Models
Print Quality Shift Increment
Letter Quality 1/360"
Utility 1/240"
Suppose you have your pitch set at 20 cpi and want your ML 520 printer to move to a relative
dot position (a1 = 1) 1" backwards (a2 = 1). From the table above, at 20 cpi your shift will be in
increments of 1/480", so the value of P1P2P3P4 would be 0480. Send the BASIC statement
LPRINT CHR$(27);CHR$(16);"@";"1";"1";"0480"
The table below gives the maximum values which can be designated for P1P2P3P4 for each
model printer, for each pitch, with the default margins engaged.
Note: If you send a location value outside the set left or right margin, this command will be
ignored.
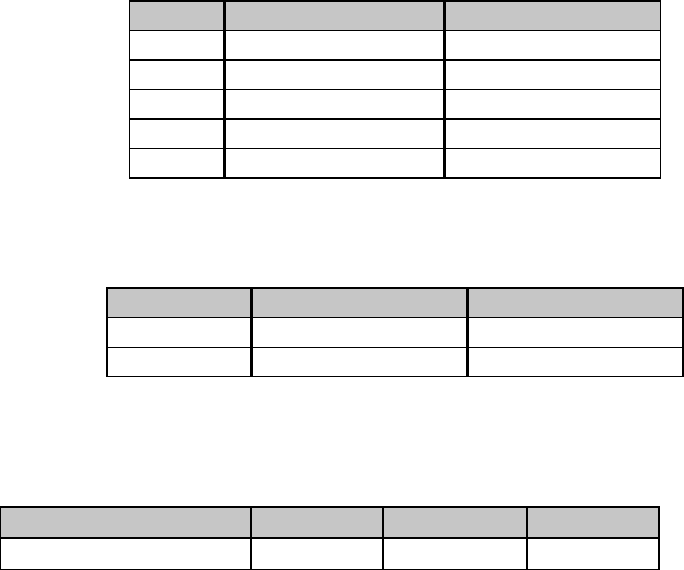
Chapter 8: Horizontal Control Commands 79
Table 57: IBM/E/ML ESC DLE @ Command —
Maximum P1P2P3P4 Values for 9-Pin Models
Pitch ML320 Turbo, ML520 ML321 Turbo, ML521
10 cpi 1920 3264
12 cpi 2304 3916
15 2880 4896
17.1 3291 5595
20 cpi 3840 6528
Table 58: IBM/E/ML ESC DLE @ Command —
Maximum P1P2P3P4 Values for 24-Pin Models
Print Quality ML390 Turbo, ML590 ML391 Turbo, ML591
Letter Quality 2280 4896
Utility 1920 3264
Set Relative Dot Position Command (IBM)
⻬ ML320 Turbo, ML321 Turbo ⻬ ML520, ML521
Function ASCII Dec Hex
Set Relative Dot Position ESC | Ln Hn27 124 Ln Hn1B 7C Ln Hn
This command lets you move the print position very precisely to either the right or the left of
the current print position. Overscore and underline characters don’t print in the space between
the two positions.
Parameters Ln and Hn
These parameters set the amount and direction of the movement. To determine their value, first
decide the distance you want to move the text or graphics, in dots, based on 120 dots per inch.
If you want to move to the right, multiply the distance by 120 dpi, then divide the result by
256. Assign the whole number result to Hn and the remainder to Ln. For example, to move 3" to
the right: (3 x 120)/256 = 1 with a remainder of 104, so Hn = 1 and Ln = 104.
If you want to move to the left, multiply the distance you wish to move by 120 dpi, then
subtract the result from 65536. Take that value and divide it by 256: assign the whole number
result to Hn and the remainder to Ln. For example, to move 3" to the left:
3 x 120 = 360
65536 - 360 = 65176
65176/256 = 254 (Hn), with a remainder of 152 (Ln)
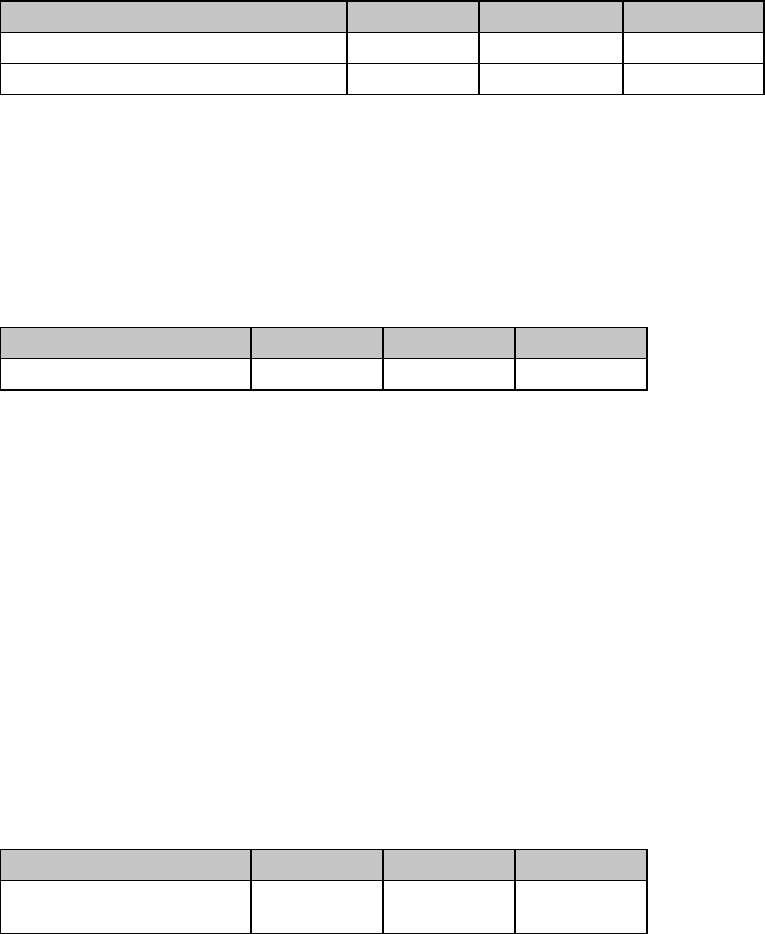
Chapter 8: Horizontal Control Commands80
Set Relative Dot Position Command (IBM)
⻬ ML390 Turbo, ML391 Turbo ⻬ ML590, ML591
Function ASCII Dec Hex
Set Relative Dot Position to Right ESC d n1 n227 100 n1 n21B 101 n1 n2
Set Relative Dot Position to Left ESC e n1 n227 64 n1 n21B 65 n1 n2
These commands move the printhead to the left or right of the current print position in
increments of 1/120". The number of increments equals n1 + (n2 x 255). The maximum value is
1632.
Set Relative Dot Position Command (Epson)
⻬ ML320 E/I, ML321 E/I ⻬ ML520, ML521
⻬ ML390 Turbo, ML391 Turbo ⻬ ML590, ML591
Function ASCII Dec Hex
Set Relative Dot Position ESC \ Ln Hn27 92 Ln Hn1B 5C Ln Hn
This command lets you move the print position very precisely to either the right or the left of
the current print position. Overscore characters don’t print in the space between the two
positions.
For the ML390 Turbo and ML391 Turbo printers, this command will move in increments
established by the Set Unit command (see Chapter 12). The default basic increment of
movement in the LQ mode is 1/80"; in the Utility mode, 1/120".
Parameters Ln and Hn
These parameters set the amount and direction of the movement. To determine their value, first
decide the distance you want to move the text or graphics, in dots, then multiply the distance
by 120 dots per inch. Next, divide the result by 256 Assign the whole number result to Hn and
the remainder to Ln.
Set Absolute Dot Position Command (Epson)
⻬ ML320 E/I, ML321 E/I ⻬ ML320 Turbo, ML321 Turbo ⻬ ML520, ML521
⻬ ML390 Turbo, ML391 Turbo ⻬ ML590, ML591
Function ASCII Dec Hex
Set Absolute Dot
Position ESC $ Ln Hn27 36 Ln Hn1B 24 Ln Hn
This command lets you place text or graphics very precisely on the page. It uses the left margin
as a reference point, and moves the print position in 1/60" increments.
Parameters Ln and Hn
These variables determine the amount of movement. To calculate their values, multiply the
distance you wish to move by 60, then divide the result by 256 and assign the whole number
result to Hn and the remainder to Ln.
For example:
to move the print position over 2":
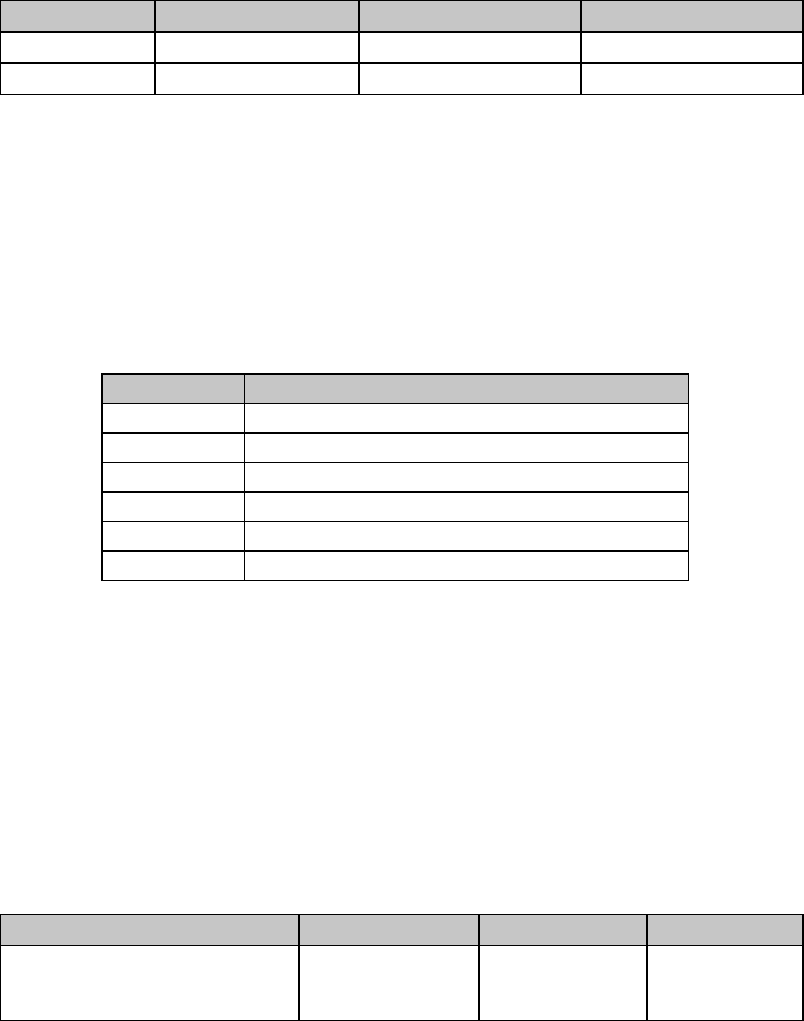
Chapter 8: Horizontal Control Commands 81
2 x 60 = 120
120/256 = 0 (Hn), with a remainder of 120 (Ln)
to move the print position over 5":
5 x 60 = 300
300/256 = 1 (Hn), with a remainder of 44 (Ln)
Move to the Right & Left Commands (ML)
⻬ ML320 Std., ML321 Std. ⻬ ML320 Turbo, ML321 Turbo ⻬ ML520, ML521
Function ASCII Dec Hex
Move to Left ESC % F n1 n2 n3 n427 37 70 F n1 n2 n3 n41B 25 46 F n1 n2 n3 n4
Move to Right ESC % E n1 n2 n3 n427 37 69 n1 n2 n3 n41B 25 45 n1 n2 n3 n4
These commands move the print position to the right or to the left of the current position in the
amount you specify. Underline characters don’t print in the space between the two positions.
Parameters n1 n2 n3 n4
These parameters represent a four-digit ASCII number for the value of the amount of movement
to take place. If the value you wish to assign is less than four digits, use zeros for the first
digit(s). The actual amount of movement depends on the pitch engaged:
Table 59: ML ESC % F and ESC % E Commands —
Movement Increments for Pitch Settings
Pitch Movement Increments
10 cpi 1/120"
12 cpi 1/144"
15 cpi 1/180"
17.1 cpi 1/206"
20 cpi 1/240"
Proportional Same as the corresponding value for each cpi
For example, suppose you have your pitch set at 20 cpi and want your printer to move 1" to the
right. From the table above, at 20 cpi your shift will be in increments of 1/240", so the value of
n1n2n3n4 would be 0240 (1" / 1/240"). Send the BASIC statement
LPRINT CHR$(27);CHR$(37);CHR$(69);"0240"
Note: If you send a location value outside the set left or right margin, this command will be
ignored.
Uni-directional Printing Commands (IBM/E/ML)
⻬ ML320 E/I, ML321 E/I ⻬ ML320 Turbo, ML321 Turbo ⻬ ML520, ML521
⻬ ML320 Std., ML321 Std. ⻬ ML390 Turbo, ML391 Turbo ⻬ ML590, ML591
Function IBM Epson ML*
Uni-directional Printing On ASCII: ESC U 1
Dec: 27 85 1
Hex: 1B 55 01
ASCII: ESC U 1
Dec: 27 85 1
Hex: 1B 55 01
ASCII: ESC -
Dec: 27 45
Hex: 1B 2D
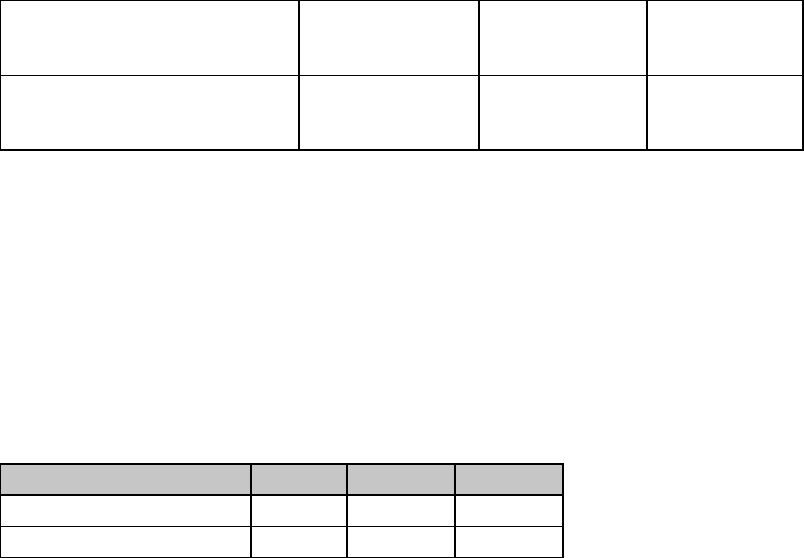
Chapter 8: Horizontal Control Commands82
Uni-directional Printing Off ASCII: ESC U 0
Dec: 27 85 0
Hex: 1B 55 00
ASCII: ESC U 0
Dec: 27 85 0
Hex: 1B 55 00
ASCII: ESC =
Dec: 27 61
Hex: 1B 3D
Print Uni-directional
for One Line Only Not applicable ASCII: ESC <
Dec: 27 60
Hex: 1B 3C
Not applicable
Your printer is designed to maximize speed by printing alternately from the left and right
(bi-directional printing), rather than moving the printhead back to the left margin so that each
line prints from left to right (uni-directional printing). Use uni-directional printing when precise
vertical alignment from line to line is critical.
You can also select uni-directional graphics printing in the printer menu (see "Menu Mode" in
your printer manual).
Incremental Printing Commands (IBM/E/ML)
⻬ ML320 Turbo, ML321 Turbo
⻬ ML390 Turbo, ML391 Turbo
Function ASCII Dec Hex
Incremental Printing On ESC i 1 27 105 1 1B 69 01
Incremental Printing Off ESC i 0 27 105 0 1B 69 00
The Incremental Printing On command causes the printer to print each individual character as
it is received, as opposed to storing information and printing a line at a time. If you have a
software application that passes information to the printer one keystroke at a time, this
command allows your printer to function as a typewriter.
The print location of the next character is indicated by a red “M” to the left of the printhead on
the ribbon shield.
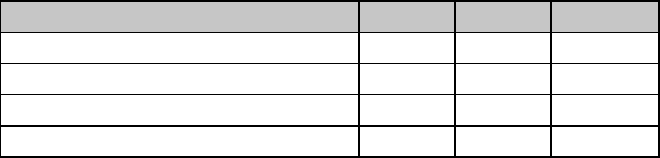
Chapter 8: Horizontal Control Commands 83
Justification Commands (Epson)
⻬ ML320 E/I, ML321 E/I ⻬ ML320 Turbo, ML321 Turbo ⻬ ML520, ML521
⻬ ML390 Turbo, ML391 Turbo ⻬ ML590, ML591
Function ASCII Dec Hex
Select Left Justification ESC a 0 27 97 0 1B 61 00
Select Center Justification ESC a 1 27 97 1 1B 61 01
Select Right Justification ESC a 2 27 97 2 1B 61 02
Select Full (Left & Right) Justification ESC a 3 27 97 3 1B 61 03
These commands let you specify the alignment of text on the page: along the left or right
margin, centered between the margins, or along both the left and right margins. When you are
using center, right or full justification, the backspace character (ASCII BS, decimal 8) and
horizontal tabs won't function. If you're using full justification, use a carriage return only at the
end of a paragraph, not at the end of each line.
Chapter 8: Horizontal Control Commands84
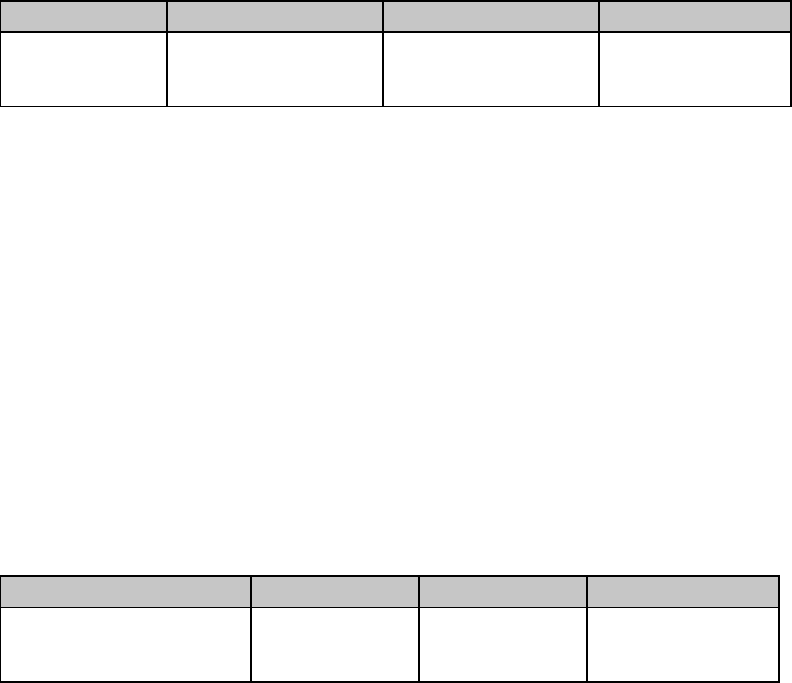
Chapter 9: Vertical Control Commands 85
Chapter 9: Vertical Control Commands
This chapter describes the commands for vertical control including the following:
• Page Length Commands
• Form Feed Command
• Line Feed Commands
• Line Spacing Commands
• Vertical Tab Commands
• Vertical Position Commands
• Top of Form Commands
• Top & Bottom Margin Command
• Skip Over Perforation Commands
Set Page Length Commands
Set Page Length in Inches Command (IBM/E/ML)
⻬ ML320 E/I, ML321 E/I ⻬ ML320 Turbo, ML321 Turbo ⻬ ML520, ML521
⻬ ML320 Std., ML321 Std. ⻬ ML390 Turbo, ML391 Turbo ⻬ ML590, ML591
Function IBM Epson ML
Set Page Length
in Inches ASCII: ESC C NUL n
Dec: 27 67 0 n
Hex: 1B 43 00 n
ASCII: ESC C NUL n
Dec: 27 67 0 n
Hex: 1B 43 00 n
ASCII: ESC G Hn Ln
Dec: 27 71 Hn Ln
Hex: 1B 47 Hn Ln
This command sets the page length in inches. If you will most often be using one of the
standard page lengths available through the printer menu (see "Menu Mode" in your printer
manual), it’s a good idea to use the printer menu to set the default page length and then use the
page length command whenever you wish to change it temporarily.
To set the page length in inches in either the IBM or Epson emulation, use the command ESC C
NUL n. This sets the page length in increments of 1" times the value of the variable "n." The
value of n can be from 1 to 22.
To set the page length in inches in the MICROLINE Standard emulation, use the command ESC
G Hn Ln. This sets the page length in increments of ½" x the value of the variables Hn Ln.
Variables Hn Ln represent a 2-digit ASCII number ranging from 00 to 99. For lengths of less
than 4½", use a zero for Hn. For example, to set a page length of 14 inches, enter the BASIC
statement LPRINT CHR$(27);"G";"28"
Set Page Length in Lines Command (IBM/E/ML)
⻬ ML320 E/I, ML321 E/I ⻬ ML320 Turbo, ML321 Turbo ⻬ ML520, ML521
⻬ ML320 Std., ML321 Std. ⻬ ML390 Turbo, ML391 Turbo ⻬ ML590, ML591
Function IBM Epson ML
Set Page Length in Lines ASCII: ESC C n
Dec: 27 67 n
Hex: 1B 43 n
ASCII: ESC C n
Dec: 27 67 n
Hex: 1B 43 n
ASCII: ESC F Hn Ln
Dec: 27 70 Hn Ln
Hex: 1B 46 Hn Ln
You can set the page length in either inches or lines. If you will most often be using one of the
standard page lengths available through the printer menu (see “Menu Mode” in your printer
manual), it's a good idea to use the printer menu to set the default page length and then use the
page length command whenever you wish to change it temporarily.
To set the page length by lines in either the IBM or Epson emulation, use the command ESC C

Chapter 9: Vertical Control Commands86
n. The page length will be the result of multiplying the line pitch by the value of the variable
“n.” In the IBM emulation, the value of n can be from 1 to 255; in the Epson emulation, it can
be from 1 to 127. The actual page length will depend on the line spacing engaged.
To set the page length by lines in the MICROLINE Standard emulation, use the command ESC F
Hn Ln. The page length will be the result of multiplying the line pitch by the value of the
variables Hn Ln. Variables Hn Ln represent a 2-digit ASCII number ranging from 00 to 99. For
Hn Ln numbers less than 10, use a zero for Hn. For example, to set a page length of nine lines,
enter the BASIC statement
LPRINT CHR$(27);"H";"09"
The actual page length will depend on the line pitch engaged.
Set Page Length in Defined Unit Command (Epson)
⻬ ML390 Turbo, ML391 Turbo
Function ASCII Dec Hex
Set Page Length
in Defined Unit ESC ( C 2 0 Lp Hp27 40 67 50 48 Lp Hp1B 28 43 32 30 Lp Hp
You can use this command to set the page length in multiples of the line spacing established by
the Set Unit command (see Chapter 12).
Parameters Lp and Hp
Parameters Lp and Hp are used to designate the page length, as a mutliple of whatever line
spacing is engaged:
Page length = [Lp + (Hp x 256)] x line spacing increment engaged
Lp and Hp can have any value from 0 to 255 decimal.
You can set the page length over a range of from 0 to 22 inches. If you will most often be using
one of the standard page lengths available through the printer menu (see “Menu Mode” in your
printer manual), it's a good idea to use the printer menu to set the default page length and then
use this command whenever you wish to change it temporarily.
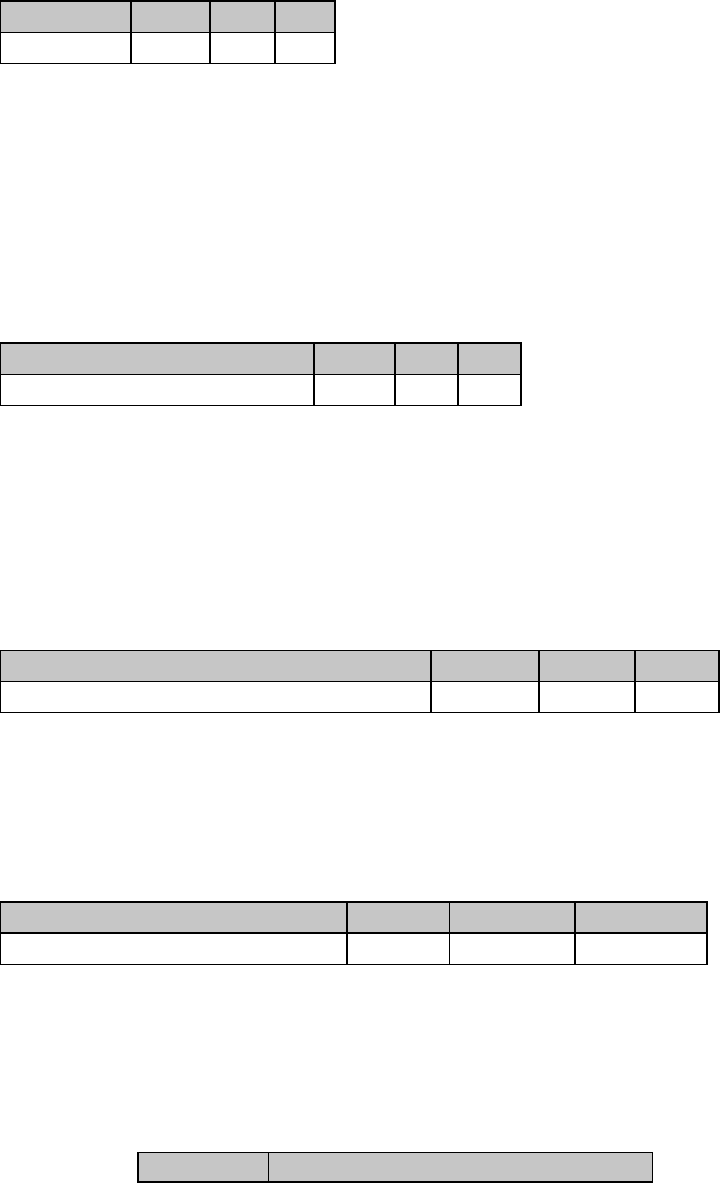
Chapter 9: Vertical Control Commands 87
Form Feed Command (IBM/E/ML)
⻬ ML320 E/I, ML321 E/I ⻬ ML320 Turbo, ML321 Turbo ⻬ ML520, ML521
⻬ ML320 Std., ML321 Std. ⻬ ML390 Turbo, ML391 Turbo ⻬ ML590, ML591
Function ASCII Dec Hex
Form Feed FF 12 0C
When you send a form feed command, the printer prints any data that is in its buffer, and the
print position moves to the top of the next page. You can also use the FORM FEED button on
the control panel to feed a page through the printer.
Line Feed Commands
Line Feed with Carriage Return Command (IBM/E/ML)
⻬ ML320 E/I, ML321 E/I ⻬ ML320 Turbo, ML321 Turbo ⻬ ML520, ML521
⻬ ML320 Std., ML321 Std. ⻬ ML390 Turbo, ML391 Turbo ⻬ ML590, ML591
Function ASCII Dec Hex
Line Feed, with Carriage Return LF 10 0A
This command makes the printer print a line, then moves the print position down one line and
executes a carriage return, putting the print position at the left margin. The amount of vertical
movement depends on the current line spacing. (See “Line Spacing,” below for details.)
In the IBM and Epson emulations, this command cancels one-line double width printing.
Line Feed without Carriage Return Command (ML)
⻬ ML320 Std., ML321 Std. ⻬ ML320 Turbo, ML321 Turbo ⻬ ML520, ML521
Function ASCII DEC Hex
Graphics Line Feed, without Carriage Return ESC DC2 27 18 1B 12
This command drops the printing down a line without returning to the left margin. This makes
it possible to overstrike a line of printing or create special effects such as double underlines.
Line Feed & Carriage Return Selection Command (ML)
⻬ ML320 Std., ML321 Std. ⻬ ML320 Turbo, ML321 Turbo ⻬ ML520, ML521
Function ASCII Dec Hex
Select Line Feed & Carriage Return ESC ? n : 25 63 n 58 1B 3F n 3A
This command performs a number of different carriage return/line feed combinations,
depending on the value of n:
Table 60: ML ESC ? Command —
Carriage Return/Line Feed Codes for n Values
Value of n Operation
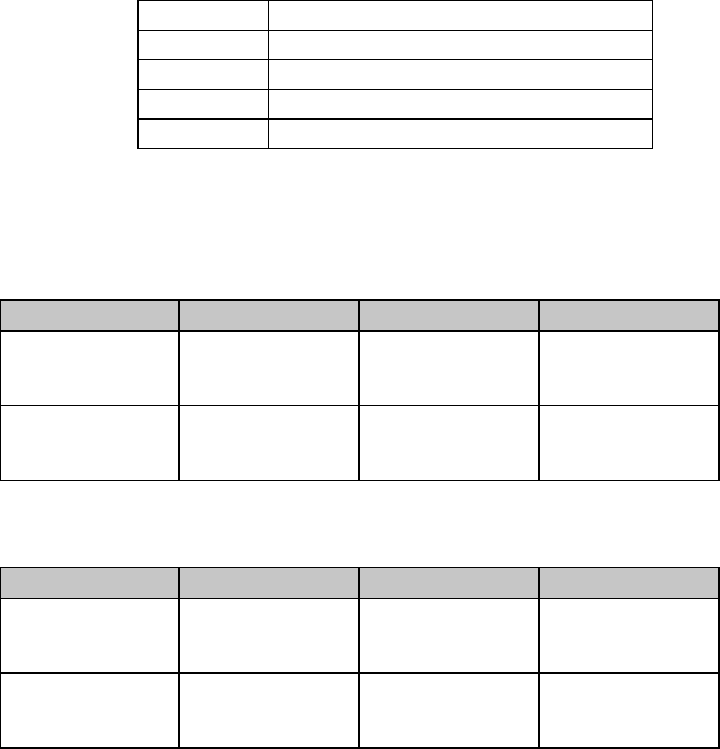
Chapter 9: Vertical Control Commands88
33 Carriage return only
34 Forward line feed, no carriage return
35 Forward line feed with a carriage return
48 Reverse line feed, no carriage return
49 Reverse line feed with a carriage return
Fine Line Feed Commands (IBM/E/ML)
⻬ ML320 E/I, ML321 E/I ⻬ ML320 Turbo, ML321 Turbo ⻬ ML520, ML521
⻬ ML320 Std., ML321 Std.
Function IBM Epson ML
Perform n/216"
Line Feed ASCII: ESC J n
Dec: 27 74 n
Hex: 1B 4A n
ASCII: ESC J n
Dec: 27 74 n
Hex: 1B 4A n
Not applicable
Perform n/144"
Line Feed ASCII: ESC % 5 n
Dec: 27 37 53 n
Hex: 1B 25 35 n
ASCII: ESC % 5 n
Dec: 27 37 53 n
Hex: 1B 25 35 n
ASCII: ESC % 5 n
Dec: 27 37 53 n
Hex: 1B 25 35 n
⻬ ML390 Turbo, ML391 Turbo ⻬ ML590, ML591
Function IBM Epson ML
Perform n/180"
Line Feed ASCII: ESC J n
Dec: 27 74 n
Hex: 1B 4A n
ASCII: ESC J n
Dec: 27 74 n
Hex: 1B 4A n
Not applicable
Perform n/360"
Line Feed ASCII: ESC % 4 n
Dec: 27 37 52 n
Hex: 1B 25 34 n
ASCII: ESC ] n
Dec: 27 93 n
Hex: 1B 5D n
Not applicable
Unlike the ESC % 5 n command, the ESC J n command is not accompanied by a carriage
return, and, in the IBM and Epson emulations, does not cancel one-line double width printing.
In the IBM and Epson emulations, the value of n can be any whole number from 0 to 255.
In the MICROLINE Standard emulation, the value of n can be any whole number from 0 to
127.
If you use n = 0, no line feed will be performed.
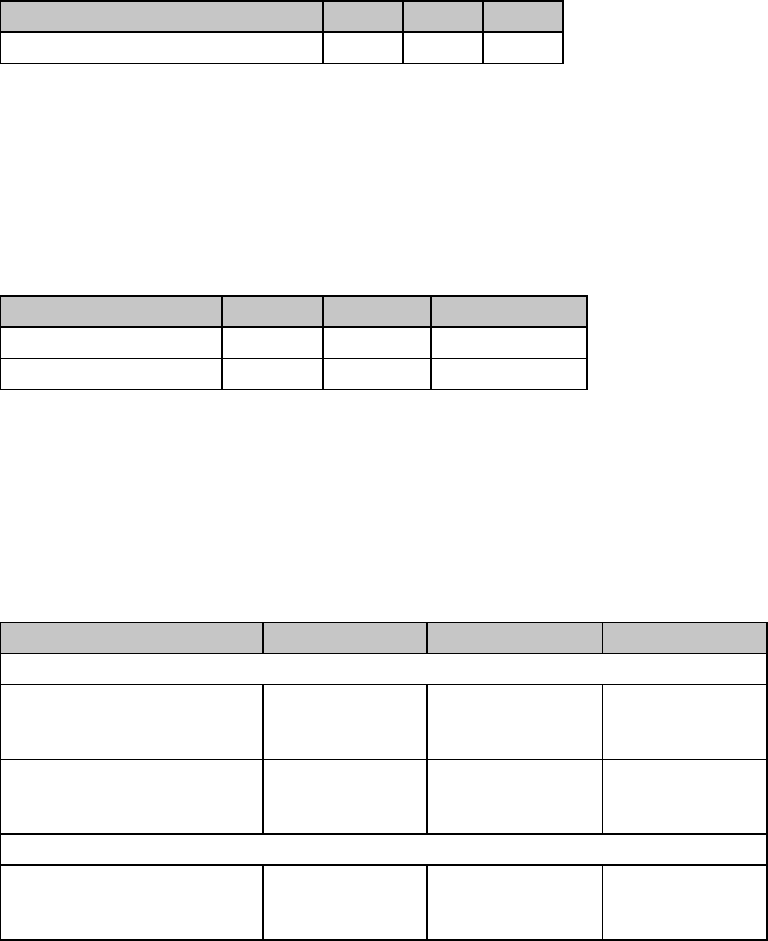
Chapter 9: Vertical Control Commands 89
Perform Line Feed Command (IBM)
⻬ ML320 E/I, ML321 E/I ⻬ ML320 Turbo, ML321 Turbo ⻬ ML520, ML521
⻬ ML390 Turbo, ML391 Turbo ⻬ ML590, ML591
Function ASCII Dec Hex
Set Line Feed Stored by ESC A n ESC 2 27 50 1B 32
The ESC 2 command sets the line feed value stored using the ESC A n command described later
in this chapter under “Line Spacing Commands.” It must follow the ESC A n command—if it
doesn’t, the printer will reset the line spacing to the current menu setting.
Auto Line Feed On/Off Commands (IBM)
⻬ ML320 E/I, ML321 E/I ⻬ ML320 Turbo, ML321 Turbo ⻬ ML520, ML521
⻬ ML390 Turbo, ML391 Turbo ⻬ ML590, ML591
Function ASCII Dec Hex
Auto Line Feed On ESC 5 1 27 53 1 1B 35 01
Auto Line Feed Off ESC 5 0 27 53 0 1B 35 00
When you activate automatic line feed, the printer will add a line feed to each carriage return
code it receives. You can also control this feature through the printer menu (see "Menu Mode"
in your printer manual).
Reverse Line Feed Commands (IBM/E/ML)
⻬ ML320 E/I, ML321 E/I ⻬ ML320 Turbo, ML321 Turbo ⻬ ML520, ML521
⻬ ML320 Std., ML321 Std. ⻬ ML590, ML591
Function IBM Epson ML
9-Pin Models
Reverse Line Feed ASCII: ESC ]
Dec: 27 93
Hex: 1B 5D
Set in multiples
of 1/216": see
command below
ASCII: ESC LF
Dec: 27 10
Hex: 1B 0A
n/216" Reverse Line Feed Not applicable ASCII: ESC j n
Dec: 27 106 n
Hex: 1B 6A n
Not applicable
24-Pin Models
n/180" Reverse Line Feed Not applicable ASCII: ESC j n
Dec: 27 106 n
Hex: 1B 6A n
Not applicable
Use the reverse line feed command to move the print position up instead of down. Be careful
when using reverse line feeds with the optional pull tractor: print registration may be affected.
In the Epson emulation, the reverse line feed command causes the printer to finish printing the
line, then move the print position up an amount equal to n/216": n can be any whole number
from 0 to 255. If you use n = 0, the command will be ignored. No carriage return is executed,
regardless of the setting for Auto CR in the menu (see “Menu Mode” in your printer manual).
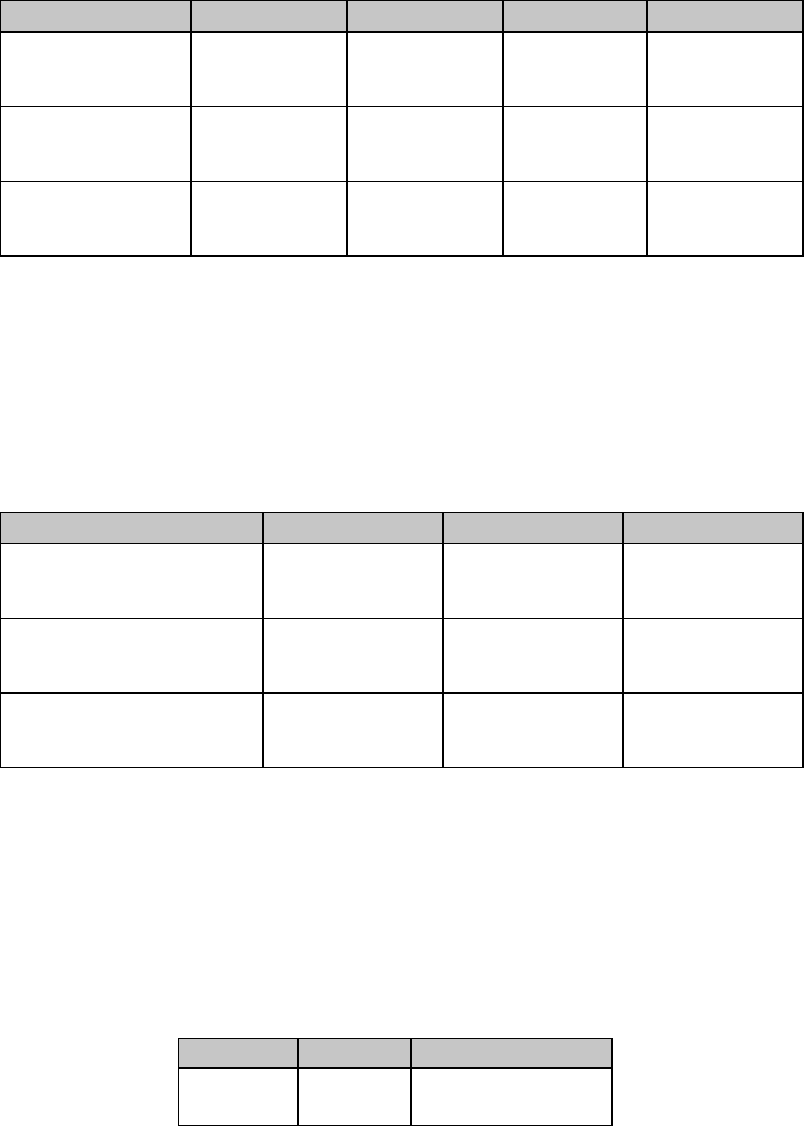
Chapter 9: Vertical Control Commands90
Line Spacing Commands
General Line Spacing Commands (IBM/E/ML)
⻬ ML320 E/I, ML321 E/I ⻬ ML320 Turbo, ML321 Turbo ⻬ ML520, ML521
⻬ ML320 Std., ML321 Std. ⻬ ML390 Turbo, ML391 Turbo ⻬ ML590, ML591
Function IBM PPR IBM AGM Epson ML
Set Line Spacing
to 1/6" Not applicable Not applicable ASCII: ESC 2
Dec: 27 50
Hex: 1B 32
ASCII: ESC 6
Dec: 27 54
Hex: 1B 36
Set Line Spacing
to 1/8" ASCII: ESC 0
Dec: 27 48
Hex: 1B 30
ASCII: ESC 0
Dec: 27 48
Hex: 1B 30
ASCII: ESC 0
Dec: 27 48
Hex: 1B 30
ASCII: ESC 8
Dec: 27 56
Hex: 1B 38
Set Line Spacing
to 7/72" ASCII: ESC 1
Dec: 27 49
Hex: 1B 31
ASCII: ESC 1
Dec: 27 49
Hex: 1B 31
ASCII: ESC 1
Dec: 27 49
Hex: 1B 31
Not applicable
The most common line spacings for text are six and eight lines per inch (lpi). A spacing of 8 lpi
works well with compressed character pitches, and lets you fit more lines on a page. In the IBM
and Epson emulations you can also set a line spacing of 7/72".
Fine-Increment Line Spacing Commands for 9-Pin Printers (IBM/E/ML)
⻬ ML320 E/I, ML321 E/I ⻬ ML320 Turbo, ML321 Turbo ⻬ ML520, ML521
⻬ ML320 Std., ML321 Std.
Function IBM Epson ML
Set Line Spacing to n/72" ASCII: ESC A n*
Dec: 27 65 n
Hex: 1B 41 n
ASCII: ESC A n
Dec: 27 65 n
Hex: 1B 41 n
Not applicable
Set Line Spacing to n/144" ASCII: ESC % 9 n
Dec: 27 37 57 n
Hex: 1B 25 39 n
ASCII: ESC % 9 n
Dec: 27 37 57 n
Hex: 1B 25 39 n
ASCII: ESC % 9 n
Dec: 27 37 57 n
Hex: 1B 25 39 n
Set Line Spacing to n/216" ASCII: ESC 3 n
Dec: 27 51 n
Hex: 1B 33 n
ASCII: ESC 3 n
Dec: 27 51 n
Hex: 1B 33 n
Not applicable
* In the IBM mode, the ESC A n command must be followed by the ESC 2 Perform Line Feed
command (described earlier in this chapter) to set the value of n.
These commands let you control vertical movement in very fine increments, which helps with
the precise placement of graphics. The actual amount of movement is set by the value of
parameter n which can vary, depending on the emulation.
Table 61: IBM/E/ML Fine Increment Line Spacing Commands —
Values of Parameter n
Increment Emulation Values of n
n/72" IBM
Epson 0 to 255
0 to 85, 128 to 213
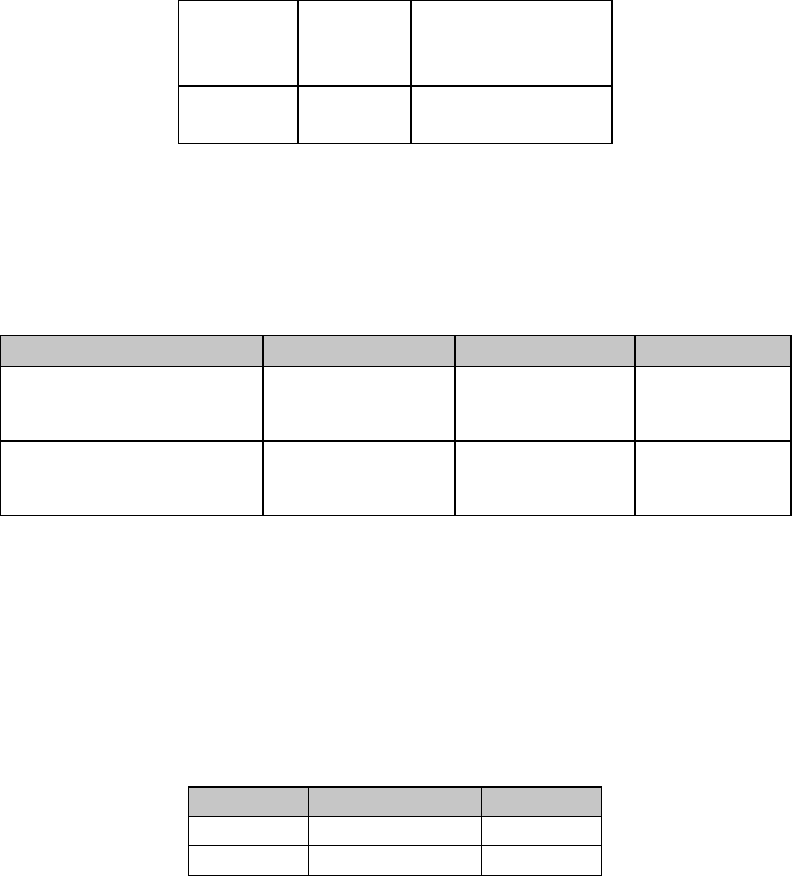
Chapter 9: Vertical Control Commands 91
n/144" IBM
Epson
ML
0 to 127
0 to 127
0 to 127
n/216" IBM
Epson 0 to 255
0 to 255
Whenever a value of zero is assigned to n, the line spacing command will be ignored.
ESC A n Line Spacing Command for 24-Pin Printers (IBM/E)
⻬ ML390 Turbo, ML391 Turbo ⻬ ML590, ML591
Function IBM PPR IBM AGM Epson
Set Line Spacing to n/60 Not applicable ASCII: ESC A n
Dec: 27 65 n
Hex: 1B 41 n
ASCII: ESC A n
Dec: 27 65 n
Hex: 1B 41 n
Set Line Spacing to n/72" ASCII: ESC A n*
Dec: 27 65 n
Hex: 1B 41 n
Not applicable Not applicable
* In the IBM ProPrinter mode, the ESC A n command must be followed by the ESC 2
Perform Line Feed command (described earlier in this chapter) to set the value of n.
This command sets the line spacing to either n/60" or n/72", depending on the emulation
selected. The actual amount of movement is set by the value of parameter n which can vary,
depending on the emulation:
Table 62: IBM/Epson ESC A Command —
Values of Parameter n
Increment Emulation(s) Values of n
n/60 IBM AGM, Epson 0 to 127
n/72 IBM PPR 1 to 255
Whenever a value of zero is assigned to n, the line spacing command will be ignored.
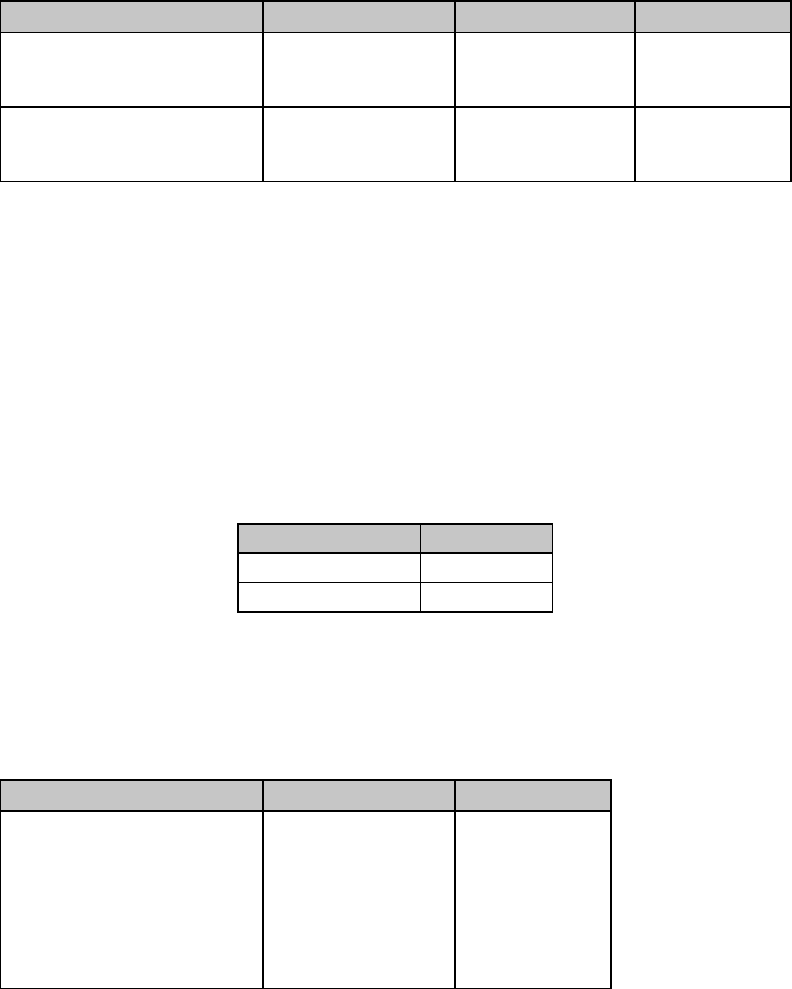
Chapter 9: Vertical Control Commands92
ESC 3 n Line Spacing Command for 24-Pin Printers (IBM/E)
⻬ ML390 Turbo, ML391 Turbo ⻬ ML590, ML591
Function IBM PPR IBM AGM Epson
Set Line Spacing to n/180" Not applicable ASCII: ESC 3 n**
Dec: 27 51 n
Hex: 1B 33 n
ASCII: ESC 3 n
Dec: 27 51 n
Hex: 1B 33 n
Set Line Spacing to n/216" ASCII: ESC 3 n**
Dec: 27 51 n
Hex: 1B 33 n
ASCII: ESC 3 n**
Dec: 27 51 n
Hex: 1B 33 n
Not applicable
** In the IBM mode, the line spacing increment for the ESC 3 n command is controlled by
the Set Vertical Unit commands described below.
This command lets you control vertical movement in fine increments, which helps with the
precise placement of graphics.
In the IBM emulations, the increment of the line spacing set by this command is controlled by
the Set Vertical Unit commands described below.
The actual amount of movement is set by the value of parameter n which can vary, depending
on the emulation:
Table 63: IBM/Epson ESC 3 Command —
Values of Parameter n
Emulation Values of n
IBM PPR 1 to 255
Epson, IBM AGM 0 to 255
Whenever a value of zero is assigned to n, the line spacing command will be ignored.
n/360-Inch Line Spacing Commands for 24-Pin Printers (IBM/E)
⻬ ML390 Turbo, ML391 Turbo ⻬ ML590, ML591
Function IBM PPR Epson
Set Line Spacing to n/360" ASCII: ESC % 8 n
Dec: 27 37 56 n
Hex: 1B 25 38 n
ASCII: ESC [ n
Dec: 27 91 n
Hex 1B 5B n
or
ASCII: ESC + n
Dec: 27 43 n
Hex: 1b 2b n
These commands let you set the line spacing in 1/360" increments for precise placement of
graphics. The actual amount of movement is set by the value of parameter n which can vary,
depending on the emulation:
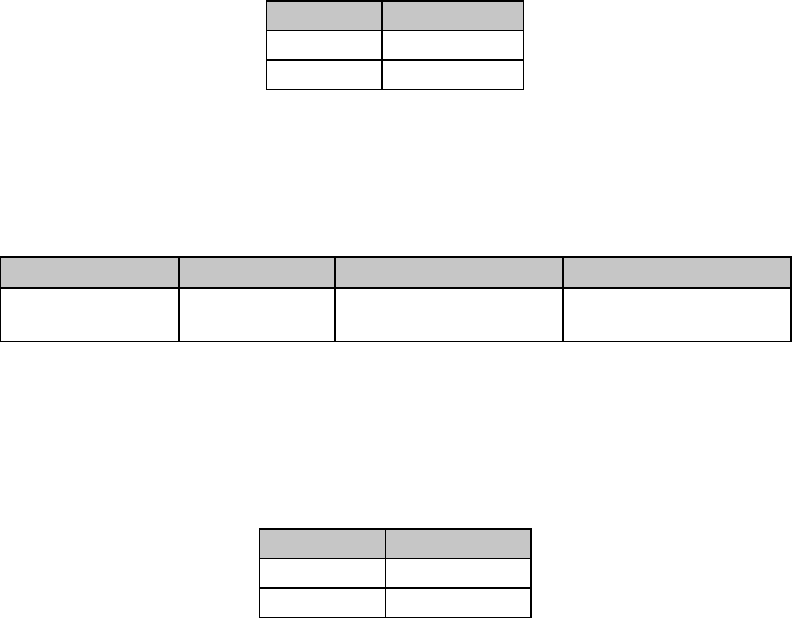
Chapter 9: Vertical Control Commands 93
Table 64: IBM/Epson n/360" Line Spacing Commands —
Values of Parameter n
Emulation Values of n
IBM 1 to 255
Epson 0 to 255
Whenever a value of zero is assigned to n, the line spacing command will be ignored.
Set Vertical Units (IBM)
⻬ ML390 Turbo, ML391 Turbo ⻬ ML590, ML591
Function ASCII Dec Hex
Set Vertical Units ESC [ \ 4 0 0 0
0 0 n 27 91 92 52 48 48 48
48 48 n 1B 5B 5C 34 30 30 30
30 30 n
This command defines the vertical spacing units used by the ESC 3 n command in the IBM
emulation (described above), as follows:
Table 65: IBM ESC [ \ Command —
Values of Parameter n
Values of n Spacing Unit
180 1/180"
216 1/216"
Vertical Tab Commands
When you turn your printer on, it doesn't have any vertical tab stops. Sending a VT command
with no stops set will produce a single line feed.
The commands described below are used to set vertical tab stops. In the Epson and
MICROLINE Standard emulations, you have the option of entering a single set of vertical tab
stops or of using the electronic Vertical Format Unit (VFU) to program multiple sets of vertical
tabs, called channels. The IBM emulation permits you to enter one set of stops, but does not
have the VFU feature.
The actual position of the stops depends on the line spacing in effect when you send the
command. For example, at 6 lines per inch, a tab stop of 24 will appear four inches from the
top of the page, whereas at 8 lines per inch, the stop will be positioned three inches from the
top of the page. However, once you've set the vertical tab stops, their position is absolute, and
won’t move, even if you later change the line spacing.
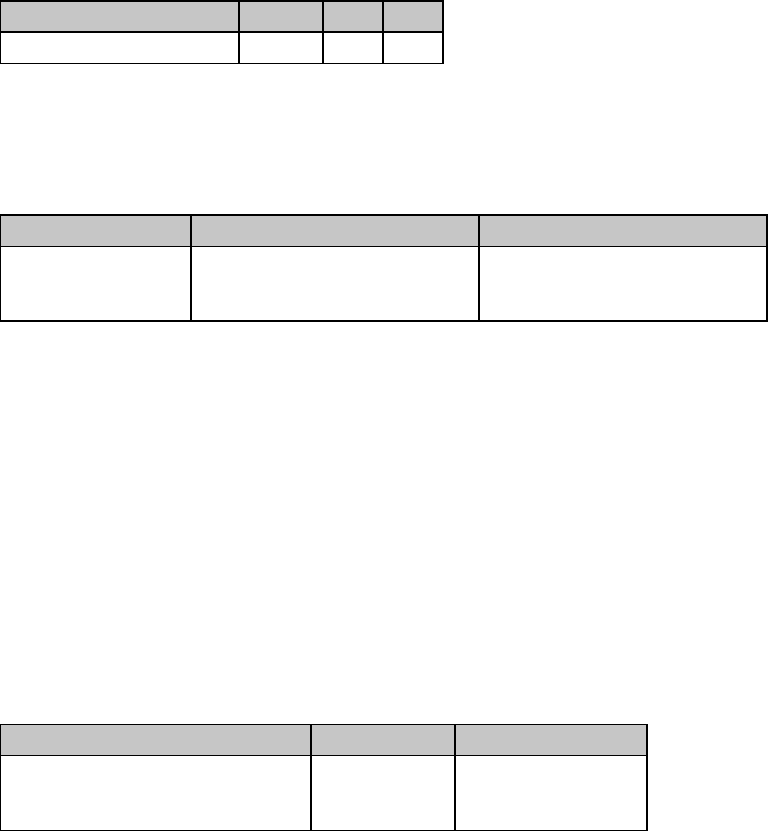
Chapter 9: Vertical Control Commands94
Execute Vertical Tab Command (IBM/E/ML)
⻬ ML320 E/I, ML321 E/I ⻬ ML320 Turbo, ML321 Turbo ⻬ ML520, ML521
⻬ ML320 Std., ML321 Std. ⻬ ML390 Turbo, ML391 Turbo ⻬ ML590, ML591
Function ASCII Dec Hex
Execute Vertical Tab VT 11 1B
Set Vertical Tabs Command (IBM/E)
⻬ ML320 E/I, ML321 E/I ⻬ ML320 Turbo, ML321 Turbo ⻬ ML520, ML521
⻬ ML390 Turbo, ML391 Turbo ⻬ ML590, ML591
Function IBM Epson
Set Vertical Tabs ASCII: ESC B n1 n2 ... nk NUL
Dec: 27 66 n1 n2 ... nk 0
Hex: 1B 42 n1 n2 ... nk 00
ASCII: ESC B n1 n2 ... nk NUL
Dec: 27 66 n1 n2 ... nk 0
Hex: 1B 42 n1 n2 ... nk 00
In the IBM and Epson emulations, you can use the ESC B n1 n2 ... nk NUL command to set
vertical tab stops. Once you've set the stops, each time you issue a VT command, the print
position will move down to the next stop position.
Parameters n1 through nk
These parameters designate the individual stops. In the IBM emulation, you can set up to 64
stops (n1 through n64). In the Epson emulation, you can set up to 16 stops. In both emulations,
the value of each n can be any whole number from 1 to 255 (0 to 255 for Models ML390T and
ML391T), designating how many lines to skip down to that tab stop. You must enter the stops
in increasing order (n1 > n2 > n3, etc.), and end the series with the NUL character.
Clear Vertical Tabs Command (IBM/E)
⻬ ML320 E/I, ML321 E/I ⻬ ML320 Turbo, ML321 Turbo ⻬ ML520, ML521
⻬ ML590, ML591
Function IBM Only IBM & Epson
Clear Vertical Tabs ASCII: ESC R
Dec: 27 82
Hex: 1B 52
ASCII: ESC B NUL
Dec: 27 66 0
Hex: 1B 42 00
These commands will delete all vertical tab stops. In the IBM emulation, the ESC R command
will reset the tabs to the default settings.

Chapter 9: Vertical Control Commands 95
Vertical Format Unit [VFU] Commands (Epson)
⻬ ML320 E/I, ML321 E/I ⻬ ML320 Turbo, ML321 Turbo ⻬ ML520, ML521
⻬ ML390 Turbo, ML391 Turbo ⻬ ML590, ML591
Function ASCII Dec Hex
Set Vertical Format
Unit (VFU) ESC b m n1 n2 ... nk
NUL 27 98 m n1 n2 ... n
k
0 1B 62 m n1 n2 ...
nk
00
Select Vertical Tab
Channel ESC / n 27 47 n 1B 2F n
The Epson emulation gives you the option of setting up to eight separate channels of vertical
tab stops using the command ESC b m n1 n2 ... nk NUL.
Parameter m
Parameter m designates the channel to which the tab stops are being assigned and can have
any whole number value from 0 to 7.
Parameters n1 through nk
Parameters n1 through nk designate the individual stops for each channel. You can set up to 16
stops (n1 through n16). The value of n can be any whole number from 0 to 255, designating how
many lines to skip down to that tab stop. You must enter the stops in increasing order (n1 > n2 >
n3, etc.), and end the series with the NUL character.
Once you've set up the channels you're using, send the ESC / n command to specify which
channel to select (replace n with desired channel number, 0 through 7), followed by the VT
command to advance to the next tab stop in the selected sequence.
For example, the following BASIC program will set stops in three channels, and then perform a
series of vertical tabs in the different channels:
5 REM Stops in channel 0: lines 10, 20, 30, 40, 50
10 LPRINT CHR$(27);"b";CHR$(0);CHR$(10);CHR$(20);CHR$(30);
CHR$(40);CHR$(50);CHR$(0)
20 REM Stops in channel 1: lines 5, 15, 35, 45, 55 30 LPRINT
CHR$(27);"b";CHR$(1);CHR$(5);CHR$(15);CHR$(35);CHR$(45);
CHR$(55);CHR$(0)
40 REM Stops in channel 2: lines 12, 24, 48
50 LPRINT CHR$(27);"b";CHR$(2);CHR$(12);CHR$(24); CHR$(48);CHR$(0)
60 LPRINT CHR$(27);"/";CHR$(1): REM Select channel 1
70 LPRINT CHR$(11);"This prints on line 5"
80 LPRINT CHR$(11);CHR$(11);"This prints on line 35"
90 LPRINT CHR$(27);"/";CHR$(2): REM Select channel 2
100 LPRINT CHR$(11);"This prints on line 48"
110 LPRINT CHR$(27);"/";CHR$(0): REM Select channel 0
120 LPRINT CHR$(11);"This prints on line 50"
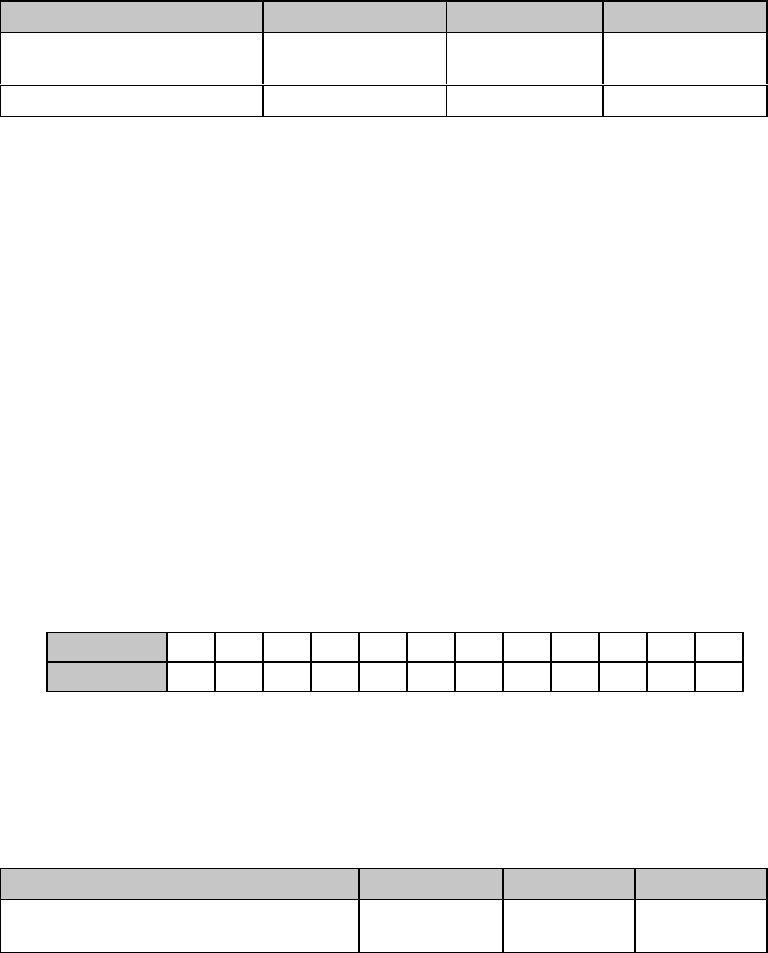
Chapter 9: Vertical Control Commands96
Vertical Format Unit (VFU) Commands (ML)
⻬ ML320 Std., ML321 Std. ⻬ ML320 Turbo, ML321 Turbo ⻬ ML520, ML521
Function ASCII Dec Hex
Set Vertical Format
Unit (VFU) DC4 SP1...SP1 n
... SP...SP ? 20 32...32 n ...
32...32 63 14 20...20 n ...
20...20 3F
Execute VFU Vertical Tab VT n 11 n 1B n
In the MICROLINE Standard emulation, the electronic Vertical Format Unit lets you program up
to 12 different sets of vertical tabs. You can load a maximum of 54 tab stops into one set of
channels. The command DC4 SP...SP n ... SP...SP ? is used to set up the tabs. Then whenever
the printer receives a VT code followed by a channel code, it will skip to the next tab stop in
that channel.
To load in your selected tabs, follow the DC4 code with one SP code (decimal 32) for each line
to be skipped to advance down the point where you want the first tab stop. For example, to
advance down three lines, use DC4 SP SP SP. Then enter the value you wish to assign for the
channel code n, taken from the table below. Next add more SP codes equal to the number of
lines to be skipped down to the next tab stop, followed by the next channel code value.
Continue this process until you've entered all the stops you want (up to a maximum of 12) for
that channel. Add enough spaces at the end of the sequence so that the number of spaces in
the sequence equals the number of lines on your page. Follow this with the ? character
(decimal 63).
Once you've set up the channels, send the VT n command to execute a vertical tab to the next
stop in the channel code sequence specified by n.
Table 66: ML VFU Commands —
Usable Channel Codes for Parameter n
ASCII 123456789: ; <
Dec 49 50 51 52 53 54 55 56 57 58 59 60
Vertical Position Commands
Skip Down Command (ML)
⻬ ML320 Std., ML321 Std. ⻬ ML320 Turbo, ML321 Turbo ⻬ ML520, ML521
Function ASCII Dec Hex
Skip Down Selected Number of
Lines ESC VT Hn Ln27 11 Hn Ln1B 0B Hn Ln
The skip down command makes it easy to move rapidly down a page. This is a useful feature
when you are creating headings or filling in forms. The variables Hn Ln represent a 2-digit ASCII
number from 00 to 99 which allows you to skip up to 99 lines; a value of 00 for Hn Ln in the
command results in no line feed.
Set Relative Vertical Position Command (Epson)
⻬ ML390 Turbo, ML391 Turbo
Chapter 9: Vertical Control Commands 97
Function ASCII Dec Hex
Set Relative Vertical
Print Position ESC ( v Ln Hn Lp Hp27 40 118 Ln Hn Lp
Hp
1B 28 76 Ln Hn Lp Hp
This command lets you move the print position very precisely either upward (up to 0.5-inch) or
downward (up to 46.2 inches) from the current print position, in increments established by the
Set Unit command (see Chapter 12).
Parameters Ln and Hn
Normally Ln is set to 2 and Hn is set to 0.
Parameters Lp and Hp
These parameters can have a value of 0 to 255 and are used to set the actual amount of vertical
movement, using the following equation:
[Lp + (Hp x 256)] x increment set by ESC ( U Ln Hn Pn command
For reverse (upward) movement, set bit 6 of Hp to 1. For forward (downward) movement, set bit
6 of Hp to 0.
Table 67: Epson ESC ( v Command —
Hexadecimal Values for Lp Hp
1/360” 1/180” 1/120” 1/90” 1/72” 1/60”
Forward 0001-3FFF 0001-207F 0001-15AA 0001-103F 0001-0CFF 0001-0AD5
Reverse 7F40-7FFF 7FA7-7FFF 7FC5-7FFF 7FD4-7FFF 7FDD-7FFF 7FE3-7FFF
Notes: If the reverse line feed value exceeds the Top of Form position or the top margin, the
print position will start at the TOF or top margin position.
If the forward line feed value exceeds the bottom margin, the print position will start at
the top margin position on the following page. If Skip Over Perforation is set and the
forward line feed value exceeds the skip over perforation area, the print position will
start athe Top of Form position on the next page.
Chapter 9: Vertical Control Commands98
Set Absolute Vertical Position Command (Epson)
⻬ ML390 Turbo, ML391 Turbo
Function ASCII Dec Hex
Set Absolute
Vertical
Print Position
ESC ( V Ln Hn Lp Hp27 40 86 Ln Hn Lp Hp1B 28 56 Ln Hn Lp Hp
This command lets you place text or graphics very precisely on the page. It uses the top margin
as a reference point, and moves the print position in increments established by the Set Unit
command (see Chapter 12).
Parameters Ln and Hn
Normally Ln is set to 2 and Hn is set to 0.
Parameters Lp and Hp
These parameters are used to set the actual amount of vertical movement, using the following
equation: [Lp + (Hp x 256)] x increment set by ESC ( U Ln Hn Pn command
Top of Form Commands (IBM/ML)
⻬ ML320 E/I, ML321 E/I ⻬ ML320 Turbo, ML321 Turbo ⻬ ML520, ML521
⻬ ML320 Std., ML321 Std. ⻬ ML390 Turbo, ML391 Turbo ⻬ ML590, ML591
Function IBM ML
Set Top of Form ASCII: ESC 4
Dec: 27 52
Hex: 1B 34
ASCII: ESC 5
Dec: 27 53
Hex: 1B 35
When you send these commands, a new top of form is set at the current position of the
printhead. In both emulations, you can also set a new top of form using the front panel (see
"Top of Form" in the index of your printer manual).
Set Page Format Command (Epson)
⻬ ML390 Turbo, ML391 Turbo
Function ASCII Dec Hex
Set Top & Bottom Margins ESC ( c 2 0 Lt Ht Lb
Hb
27 40 99 50 48
Lt Ht Lb Hb
1B 28 63 32 30
Lt Ht Lb Hb
This command is used to set the top and bottom margins as a multiple of the line spacing
increment established by the Set Unit command (see Chapter 12)..
Parameters Lt and Ht
Parameters Lt and Ht are used to set the top margin, as a mutliple of whatever line spacing is
engaged: Top margin = [Lt + (Ht x 256)] x line spacing increment engaged

Chapter 9: Vertical Control Commands 99
Lt and Ht can have any value from 0 to 255 decimal.
Note: The top margin must be set at a value less than the bottom margin.
Parameters Lb and Hb
Parameters Lb and Hb are used to set the top margin, as a mutliple of whatever line spacing is
engaged: Bottom margin = [Lb + (Hb x 256)] x line spacing increment engaged
Lb and Hb can have any value from 0 to 255 decimal.
Note: The bottom margin must be set at a value greater than the top margin and less than the
page length.
Skip Over Perforation Commands
Skip Over Perforation On/Off Commands (IBM/E)
⻬ ML320 E/I, ML321 E/I ⻬ ML320 Turbo, ML321 Turbo ⻬ ML520, ML521
⻬ ML390 Turbo, ML391 Turbo ⻬ ML590, ML591
Function ASCII Dec Hex
Skip Over Perforation On ESC N n 27 78 n 1B 4E n
Skip Over Perforation Off ESC O 27 79 1B 4F
If the skip over perforation is set to Yes (factory default is No) on the menu, the printer will
automatically skip an inch from the bottom of one page to the top of the next.
This command changes the number of lines skipped at the bottom of the page for the IBM and
Epson emulations.
Parameter n
This parameter sets the amount of the skip. “n” is any whole number from 1 to 255 for both
emulations and all models except the ML390 Turbo and ML391 Turbo: for the Epson emulation
in the ML390/391 Turbo printers, “n” is any whole number from 1 to 127.
The amount of skip is calculated by multiplying the current line spacing by the value of n.
Once you've set the amount of skip, it won't increase or decrease if you change the line
spacing.
To return the perforation skip to its default setting, enter the command ESC O.

Chapter 9: Vertical Control Commands100
Skip Over Perforation On/Off Commands (ML)
⻬ ML320 Std., ML321 Std. ⻬ ML320 Turbo, ML321 Turbo ⻬ ML520, ML521
Function ASCII Dec Hex
Skip Over Perforation On ESC % S 1 27 37 83 49 1B 25 53 31
Skip Over Perforation Off ESC % S 0 27 37 83 48 1B 25 53 30
If the skip over perforation is set to Yes (factory default is No) on the menu, the printer will
automatically skip an inch from the bottom of one page to the top of the next.
Chapter 10: Bar Code Commands for 9-Pin Printers 101
Chapter 10: Bar Code Commands for 9-Pin Printers
9-Pin models ML320 Turbo, ML321 Turbo, ML520 and ML521 incorporate eight bar codes in
both the Epson FX and IBM emulations:
• Code 39 • UPC* E
• Code 128 • EAN** 8
• Interleaved 2 of 5 • EAN** 13
• UPC* A • Postnet
*UPC = Universal Product Code
**EAN = European Article Numbering
These commands are the same as those given in Chapter 11 for the 24-pin printers; however,
the values for the various parameters are different for the 24-pin printers.
Note: 9-pin models ML320 Epson/IBM, ML321 Epson/IBM, ML320 Standard and ML321
Standard do NOT have bar code commands
Bar Code Commands
⻬ ML320 Turbo, ML321 Turbo ⻬ ML520, ML521
Function ASCII Dec Hex
Select Bar Code
Type
and Size
ESC DLE A m
n1 ... n8
27 16 65 m
n1 ... n8
1B 10 41 m
n1 ... n8
Print Bar Code Data ESC DLE B m n
[data] 27 16 66 m n
[data] 1B 10 42 m n
[data]
Print Postnet Bar
Code Data ESC DLE C P1 [data] 27 16 67 P1 [data] 1B 10 43 P1 [data]
To print bar codes other than Postnet, you must enter two commands:
• Select Bar Code Type & Size
• Print Bar Code Data (provides data and initiates printing)
To print Postnet bar codes, use the command ESC DLE C P1 [data] discussed at the end of this
chapter.
Code 39 Bar Code Commands
Also known as 3 of 9 Code, Code 39 is used in non-retail applications. Each character has five
bars and four spaces. Code patterns have been developed for 44 different alphabetic, numeric
and graphic characters. The digits can be any ASCII character from SP to Z (32 to 102 Dec, 20
to 66 Hex).
Chapter 10: Bar Code Commands for 9-Pin Printers102
Select Code 39 Bar Code Command
The command for selecting Code 39 is
ESC DLE A m 2 0 n3 n4 n5 n6 n7 n8
Code 39 Parameter m
Parameter m designated the number of parameters to be set. The value of m is normally set to
hexadecimal 08.
Code 39 Parameters n3 and n4
These parameters set the vertical length of the bars in units of 6/72", as calculated by the
equation [(n3 x 10) + n4] x 6/72"
where the total value must be less than or equal to 25.
Code 39 Parameter n5
This parameter sets the width of the narrow bars in 1/144" increments.
Table 68: IBM/Epson Select Code 39 Command —
Narrow Bar Widths for Parameter n5 Values (9-Pin Printers)
Value of n5 Character Width
1
2
3
4
5
6
7
1/144"
2/144"
3/144"
4/144"
5/144"
6/144"
7/144"
Code 39 Parameter n6
This parameter sets the width of the narrow space characters in 1/144" increments.
Table 69: IBM/Epson Select Code 39 Command —
Narrow Space Widths for Parameter n6 Values (9-Pin Printers)
Value of n6 Character Width
1
2
3
4
5
6
7
4/144"
5/144"
6/144"
7/144"
8/144"
9/144"
10/144"

Chapter 10: Bar Code Commands for 9-Pin Printers 103
Code 39 Parameter n7
Parameter n7 is used in combination with parameters n5 and n6 to set the width of the wide bars
and the wide spaces.
Table 70: IBM/Epson Select Code 39 Command —
Wide Bar Widths for Parameter n5, n6, n7 Values (9-Pin Printers)
n5 = 1 n5 = 2 n5 = 3 n5 = 4 n5 = 5 n5 = 6 n5 = 7
n7 = 1
n7 = 2
n7 = 3
n7 = 4
n7 = 5
n7 = 6
n7 = 7
4/144"
5/144"
6/144"
7/144"
9/144"
10/144"
11/144"
6/144"
7/144"
9/144"
11/144"
13/144
14/144
16/144"
8/144"
10/144
12/144"
14/144
17/144"
19/144"
21/144"
10/144"
12/144"
15/144"
18/144"
21/144"
23/144"
26/144"
12/144"
15/144"
18/144"
21/144"
25/144"
28/144"
31/144"
14/144"
17/144"
21/144"
25/144"
29/144"
32/144"
36/144"
16/144"
20/144
24/144"
28/144"
33/144"
37/144"
41/144"
Table 71: IBM/Epson Select Code 39 Command —
Wide Space Widths for Parameter n5, n6, n7 Values (9-Pin Printers)
n6 = 1 n6 = 2 n6 = 3 n6 = 4 n6= 5 n6 = 6 n6 = 7
n7 = 1
n7 = 2
n7 = 3
n7 = 4
n7 = 5
n7 = 6
n7 = 7
7/144"
8/144"
9/144"
10/144"
12/144"
13/144"
14/144"
9/144"
10/144"
12/144"
14/144"
16/144"
18/144"
19/144"
11/144"
13/144"
15/144"
18/144"
20/144"
22/144"
24/144"
13/144"
15/144"
18/144"
21/144"
24/144"
27/144"
29/144"
15/144"
18/144"
21/144"
25/144"
28/144"
31/144"
34/144"
17/144"
20/144"
24/144"
28/144"
32/144"
36/144"
39/144"
19/144"
23/144"
27/144"
31/144"
36/144"
40/144"
44/144"
Code 39 Parameters n5, n6, and n7
Together, parameters n5 through n7 are used to calculate the maximum width of Code 39
characters and the start and stop characters by means of the following equation:
[(n5 x 5) + n6 + 3 + A]/144"
The value of A is determined by n6 and n7:
Code 39 Parameter n8
This parameter sets whether or not the readable characters are printed.
n8 = 0: print readable characters in Utility mode
n8 = 1: print readable characters in NLQ mode
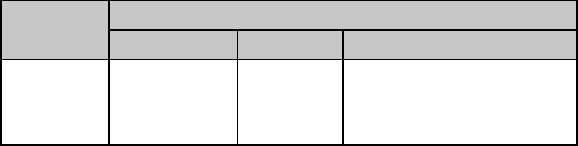
Chapter 10: Bar Code Commands for 9-Pin Printers104
Print Code 39 Bar Code Command
The command for printing Code 39 bar codes is
ESC DLE B m [data]
where parameter m designates the number of characters which will follow in the data. If you
wish to include a check digit, enter the ASCII character @ (64 Dec, 40 Hex) at the end of the
data.
Code 128 Bar Code Commands
Code 128 has 128 different characters, each of which can have any one of three different
meanings, depending on which code set is engaged:
Table 72: IBM/Epson Select Code 128 Command —
Usable Characters for Code Sets (9-Pin Printers)
Characters
Code Set ASCII Dec Hex
A
B
C
NUL to '
DC3 to DLE
0 to 9
0 to 96
25 to 127
48 to 57
00 to 60
19 to 7F
30 to 39, in 2-digit pairs
A special code at the beginning indicates which set is engaged: three shift codes are also
available for use within the bar code to indicate a change in the code set engaged.
Select Code 128 Bar Code Command
The command for selecting Code 128 is
ESC DLE A m 4 0 n3 n4 n5 0 0 n8
Which set will be engaged is entered using the Print Code 128 Bar Code Command described
below.
Code 128 Parameters n3 and n4
These parameters set the vertical length of the bars in 6/72", as calculated by the equation
[(n3 x 10) + n4] x 6/72"
where the total value must be less than or equal to 25.
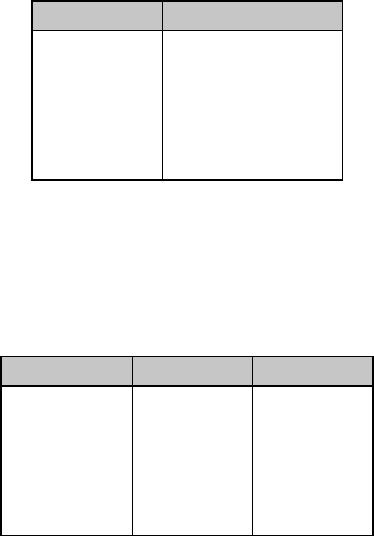
Chapter 10: Bar Code Commands for 9-Pin Printers 105
Code 128 Parameter n5
This parameter sets the maximum width of one character in 1/144" increments as follows:
Table 73: IBM/Epson Select Code 128 Command —
Character Widths for Parameter n5 Values (9-Pin Printers)
Value of n5 Character Width
1
2
3
4
5
6
7
30/144"
45/144"
58/144"
71/144"
84/144"
97/144"
110/144"
When calculating the width of the printout, you must take into consideration the Start and Stop
Code patterns:
Table 74: IBM/Epson Select Code 128 Command —
Start and Stop Codes for Parameter n5 Values (9-Pin Printers)
Value of n5 Start Code Stop Code
1
2
3
4
5
6
7
30/144"
45/144"
58/144"
71/144"
84/144"
97/144"
110/144"
32/144"
45/144"
58/144"
71/144"
84/144"
97/144"
110/144"
Code 128 Parameter n8
This parameter sets whether or not the readable characters are printed.
n8 = 1: print readable characters
n8 = 0: do not print readable characters
Print Code 128 Bar Code Command
The command for printing Code 128 bar codes is
ESC DLE B m [data]
where parameter m designates the number of characters which will follow in the data. To
indicate which code set to use, use the set letter as the first digit of the data within the
command.
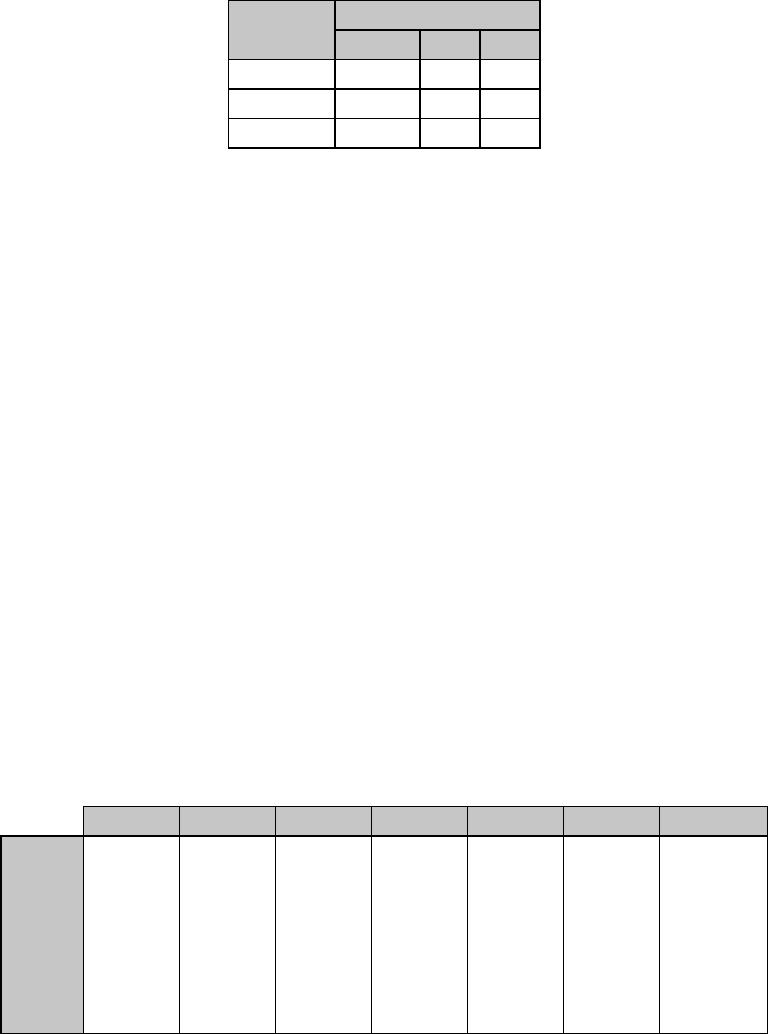
Chapter 10: Bar Code Commands for 9-Pin Printers106
Each set has a different check digit.
Table 75: IBM/Epson Print Code 128 Command —
Check Digits for Code 128 Code Sets (9-Pin Printers)
Check Digit
Code Set ASCII Dec Hex
A g 103 67
B CAN 24 18
C @ 64 40
Interleaved 2 of 5 Bar Code Commands
Interleaved 2 of 5 bar coding is used mainly in the distribution industry. Two digits are
encoded: one in the bars and one in the spaces. Ten characters are encoded, each any ASCII
character from 0 to 9 (48 to 57 Dec, 30 to 39 Hex).
The sum of the black bars and spaces becomes the maximum width of two characters.
Select Interleaved 2 of 5 Bar Code Command
The command for selecting Interleaved 2 of 5 is
ESC DLE A m 3 0 n3 n4 n5 n6 n7 n8
Interleaved 2 of 5 Parameters n3 and n4
These parameters set the vertical length of the bars in 6/72", as calculated by the equation
(n3 x 10) + n4] x 6/72"
where the total value must be less than or equal to 25.
Interleaved 2 of 5 Parameter n5
Parameter n5 is used in combination with parameter n7 to set the width of one character of the
black bars, as follows:
Table 76: IBM/Epson Select Interleaved 2 of 5 Command —
Black Bar Width for Parameter n5, n7 Values (9-Pin Printers)
n5 = 1 n5 = 2 n5 = 3 n5 = 4 n5 = 5 n5 = 6 n5 = 7
n7 = 1
n7 = 2
n7 = 3
n7 = 4
n7 = 5
n7 = 6
n7 = 7
11/144"
13/144"
15/144"
17/144"
21/144"
23/144"
25/144"
18/144"
20/144"
24/144"
28/144"
32/144"
34/144"
38/144"
25/144"
29/144"
33/144"
37/144"
43/144"
47/144"
51/144"
32/144"
36/144"
42/144"
48/144"
54/144"
58/144"
64/144"
39/144"
45/144"
51/144"
57/144"
65/144"
71/144"
77/144"
46/144"
52/144"
60/144"
68/144"
76/144"
82/144"
90/144"
53/144"
61/144"
69/144"
77/144"
87/144"
95/144"
103/144"

Chapter 10: Bar Code Commands for 9-Pin Printers 107
Interleaved 2 of 5 Parameter n6
Parameter n6 is used in combination with parameter n7 to set the width of one character of the
spaces, as follows:
Table 77: IBM/Epson Select Interleaved 2 of 5 Command —
Space Widths for Parameter n6, n7 Values (9-Pin Printers)
n6 = 1 n6 = 2 n6 = 3 n6 = 4 n6 = 5 n6 = 6 n6 = 7
n7 = 1
n7 = 2
n7 = 3
n7 = 4
n7 = 5
n7 = 6
n7 = 7
26/144"
28/144"
30/144"
32/144"
36/144"
38/144"
40/144"
33/144"
35/144"
39/144"
43/144"
47/144"
51/144"
53/144"
40/144"
44/144"
48/144"
52/144"
68/144"
62/144"
66/144"
47/144"
51/144"
57/144"
63/144"
69144"
75/144"
79/144"
54/144"
60/144"
66/144"
72/144"
80/144"
86/144"
92/144"
61/144"
67/144"
75/144"
83/144"
91/144"
99/144"
105/144"
68/144"
76/144"
84/144"
92/144"
102/144"
110/144"
118/144"
Interleaved 2 of 5 Parameter n8
This parameter sets whether or not the readable characters are printed.
n8 = 1: print readable characters
n8 = 0: do not print readable characters
Print Interleaved 2 of 5 Bar Code Command
The command for printing Interleaved 2 of 5 bar codes is
ESC DLE B m [data]
where parameter m designates the number of characters which will follow in the data. If you
wish to include a check digit, enter the ASCII character @ (64 Dec, 40 Hex) at the end of the
data.
UPC A Bar Code Commands
UPC bar coding is used in the supermarket industry. UPC A coding contains twelve digits: the
first six digits represent the manufacturer, the second six digits identify the product. The digits
can be any ASCII character from 0 to 9 (48 to 57 Dec, 30 to 39 Hex).
Select UPC A Bar Code Command
The command for selecting UPC A is
ESC DLE A m 1 0 n3 n4 n5 0 0 n8
UPC A Parameters n3 and n4
These parameters set the vertical length of the bars in units of 6/72", as calculated by the
equation [(n3 x 10) + n4] x 6/72"
where the total value must be less than or equal to 25.
UPC A Parameter n5
This parameter sets the maximum width of one character in 1/144" increments as follows:
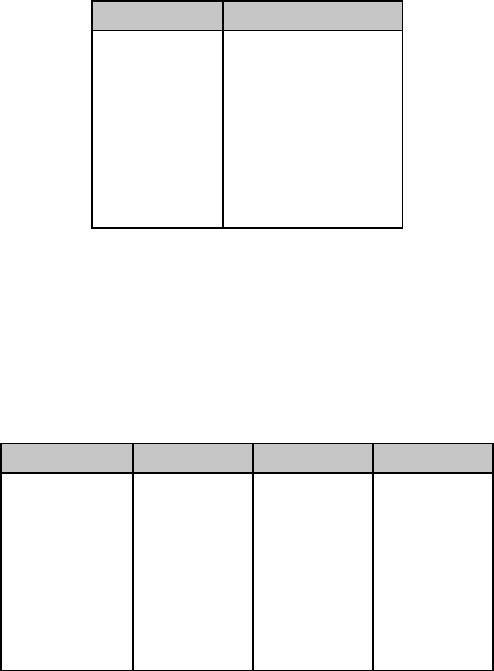
Chapter 10: Bar Code Commands for 9-Pin Printers108
Table 78: IBM/Epson Select UPC A Command —
Character Widths for Parameter n5 Values (9-Pin Printers)
Value of n5 Character Width
1
2
3
4
5
6
7
19/144"
26/144"
33/144"
40/144"
47/144"
54/144"
61/144"
When calculating the width of the printout, you must take into consideration the Start Code
pattern, the Center bar pattern, and the Stop Code pattern as shown in the table which follows.
Table 79: IBM/Epson Select UPC A Command —
Start/Stop Codes and Center Bar Widths for Parameter n5 Values (9-Pin
Printers)
Value of n5 Start Code Center Bar Stop Code
1
2
3
4
5
6
7
6/144"
9/144"
12/144"
15/144"
18/144"
21/144"
24/144"
14/144"
19/144"
24/144"
29/144"
34/144"
39/144"
44/144"
6/144"
9/144"
12/144"
15/144"
18/144"
21/144"
24/144"
UPC A Parameter n8
This parameter sets whether or not the readable characters are printed.
n8 = 1: print readable characters
n8 = 0: do not print readable characters
Print UPC A Bar Code Command
The command for printing a UPC A bar code is
ESC DLE B m [data]
where parameter m designates the number of characters which will follow in the data. If you
wish to include a check digit, enter the ASCII character @ (64 Dec, 40 Hex) at the end of the
data.
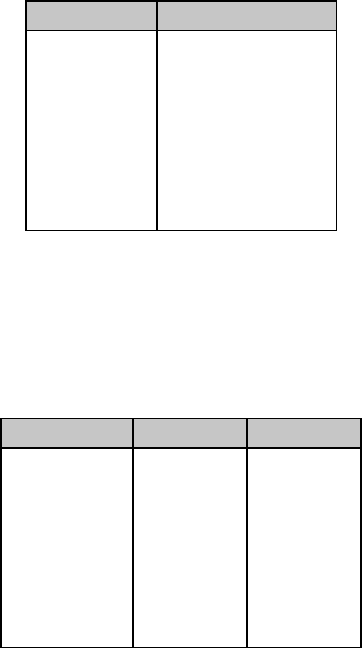
Chapter 10: Bar Code Commands for 9-Pin Printers 109
UPC E Bar Code Commands
UPC E bar coding is a six-digit variation of UPC A, used for labeling small items. The digits can
be any ASCII character from 0 to 9 (48 to 57 Dec, 30 to 39 Hex).
Select UPC E Bar Code Command
The command for selecting UPC E is
ESC DLE A m 1 4 n3 n4 n5 0 0 n8
UPC E Parameters n3 and n4
These parameters set the vertical length of the bars in units of 6/72", as calculated by the
equation [(n3 x 10) + n4] x 6/72"
where the total value must be less than or equal to 25.
UPC E Parameter n5
This parameter sets the maximum width of one character in 1/144" increments as follows:
Table 80: IBM/Epson Select UPC E Command —
Character Widths for Parameter n5 Values (9-Pin Printers)
Value of n5 Character Width
1
2
3
4
5
6
7
19/144"
26/144"
33/144"
40/144"
47/144"
54/144"
61/144"
When calculating the width of the printout, you must take into consideration the Start Code
and Stop Code patterns as shown in the table which follows.
Table 81: IBM/Epson Select UPC E Command —
Start and Stop Codes for Parameter n5 Values (9-Pin Printers)
Value of n5 Start Code Stop Code
1
2
3
4
5
6
7
6/144"
9/144"
12/144"
15/144"
18/144"
21/144"
24/144"
15/144"
21/144"
27/144"
33/144"
39/144"
45/144"
51/144"
UPC E Parameter n8
This parameter sets whether or not the readable characters are printed.
n8 = 1: print readable characters

Chapter 10: Bar Code Commands for 9-Pin Printers110
n8 = 0: do not print readable characters
Print UPC E Bar Code Command
The command for printing a UPC E bar code is
ESC DLE B m [data]
where m designates the number of characters which will follow in the data. A check digit
cannot be used with UPC E bar codes.
EAN 8 Bar Code Command s
EAN bar coding is a variation of UPC coding. EAN 8 encodes eight digits. The digits can be any
ASCII character from 0 to 9 (48 to 57 Dec, 30 to 39 Hex).
Select EAN 8 Bar Code Command
The command for selecting EAN 8 is
ESC DLE A m 0 1 n3 n4 n5 0 0 n8
EAN 8 Parameters n3 and n4
These parameters set the vertical length of the bars in 6/72", as calculated by the equation
[(n3 x 10) + n4] x 6/72"
where the total value must be less than or equal to 25.
EAN 8 Parameter n5
This parameter sets the maximum width of one character in 1/144" increments as follows:
Table 82: IBM/Epson Select EAN 8 Command —
Maximum Character Widths for Parameter n5 Values (9-Pin Printers)
Value of n5 Character Width
1
2
3
4
5
6
7
19/144"
26/144"
33/144"
40/144"
47/144"
54/144"
61/144"
When calculating the width of the printout, you must take into consideration the left hand
guard pattern, the center guard pattern and the right hand guard pattern.
EAN 8 Parameter n8
This parameter sets whether or not the readable characters are printed.
n8 = 1: print readable characters
n8 = 0: do not print readable characters

Chapter 10: Bar Code Commands for 9-Pin Printers 111
Print EAN 8 Bar Code Command
The command for printing an EAN 8 bar code is
ESC DLE B m [data]
where parameter m designates the number of characters which will follow in the data. If you
wish to include a check digit, enter the ASCII character @ (64 Dec, 40 Hex) at the end of the
data.
EAN 13 Bar Code Commands
EAN 13 encodes 13 digits and contains the same number of bars as UPC A. The thirteenth digit
combined with the twelfth digit provides a code representing a country. The digits can be any
ASCII character from 0 to 9 (48 to 57 Dec, 30 to 39 Hex).
Select EAN 13 Bar Code Command
The command for selecting EAN 13 is
ESC DLE A m 0 2 n3 n4 n5 0 0 n8
EAN 13 Parameters n3 and n4
These parameters set the vertical length of the bars in 6/72", as calculated by the equation
[(n3 x 10) + n4] x 6/72"
where the total value must be less than or equal to 25.
EAN 13 Parameter n5
This parameter sets the maximum width of one character in 1/144" increments as follows:
Table 83: IBM/Epson Select EAN 13 Command —
Maximum Character Widths for Parameter n5 Values (9-Pin Printers)
Value of n5 Character Width
1
2
3
4
5
6
7
19/144"
26/144"
33/144"
40/144"
47/144"
54/144"
61/144"
When calculating the width of the printout, you must take into consideration the left hand
guard pattern, the center guard pattern and the right hand guard pattern.
EAN 13 Parameter n8
This parameter sets whether or not the readable characters are printed.
n8 = 1: print readable characters
n8 = 0: do not print readable characters
Print EAN 13 Bar Code Command
The command for printing EAN 13 bar codes is
ESC DLE B m [data]
Chapter 10: Bar Code Commands for 9-Pin Printers112
where parameter m designates the number of characters which will follow in the data. If you
wish to include a check digit, enter the ASCII character @ (64 Dec, 40 Hex) at the end of the
data.
Postnet Bar Code Command
Postnet bar coding is used by the United States Post Office for sorting mail by automated
equipment. It incorporates a coding system using five bars and four spaces for each digit.
Select/Print Postnet Bar Code Data Command
The command ESC DLE C P1 [data]
selects Postnet bar codes and initiates the printing of the zip code + 4 data which you enter as
part of the command. Each digit of data can be any ASCII character from 0 to 9 (48 to 57 Dec,
30 to 39 Hex). The data must be the full ZIP + 4 code.
Postnet Parameter P1
Parameter P1 tells the printer how many bytes of bar code data to expect. Its value can be any
ASCII character from NUL to DC4 (1 to 20 Dec, 01 to 14 Hex): any values for P1 outside this
range will cause the data to be ignored.
The print density for Postnet bar codes will be 240 dpi. Printing is accomplished in two print
passes with a 1/144" line feed. The bar height will be as follows:
High Bar: 16/144" (eight dots in two passes)
Low Bar: 6/144" (three dots in two passes)
To include the check digit, enter the ASCII character @ (64 Dec, 40 Hex) at the end of the data.
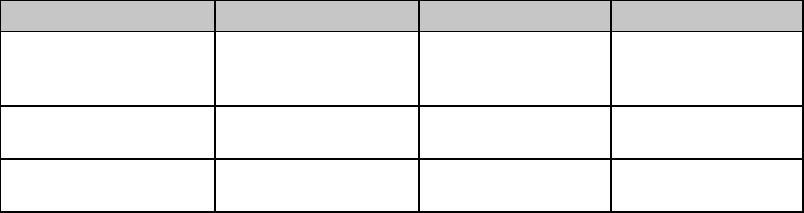
Chapter 11: Bar Code Commands for 24-Pin Printers 113
Chapter 11: Bar Code Commands for 24-Pin Printers
24-pin models ML390 Turbo, ML391 Turbo, ML590 and ML591 incorporate eight bar codes, in
both the Epson LQ and IBM emulations:
• Code 39 • UPC* E
• Code 128 • EAN** 8
• Interleaved 2 of 5 • EAN** 13
• UPC* A • Postnet
*UPC = Universal Product Code
**EAN = European Article Numbering
These commands are the same as those given in Chapter 10 for the 9-pin printers; however, the
values for the various parameters are different for the 9-pin printers.
Bar Code Commands
⻬ ML390 Turbo, ML391 Turbo ⻬ ML590, ML591
Function ASCII Dec Hex
Select Bar Code
Type
and Size
ESC DLE A m
n1 ... n8
27 16 65 m
n1 ... n8
1B 10 41 m
n1 ... n8
Print Bar Code Data ESC DLE B m n
[data] 27 16 66 m n
[data] 1B 10 42 m n
[data]
Print Postnet Bar
Code Data ESC DLE C P1 [data] 27 16 67 P1 [data] 1B 10 43 P1 [data]
To print bar codes other than Postnet, you must enter two commands:
• Select Bar Code Type & Size
• Print Bar Code Data (provides data and initiates printing)
To print Postnet bar codes, use the command ESC DLE C P1 [data] discussed at the end of this
chapter.
Code 39 Bar Code Command s
Also known as 3 of 9 Code, Code 39 is used in non-retail applications. Each character has five
bars and four spaces. Code patterns have been developed for 44 different alphabetic, numeric
and graphic characters. The digits can be any ASCII character from SP to Z (32 to 102 Dec, 20
to 66 Hex).
Select Code 39 Bar Code Command
The command for selecting Code 39 is
ESC DLE A m 2 0 n3 n4 n5 n6 n7 n8
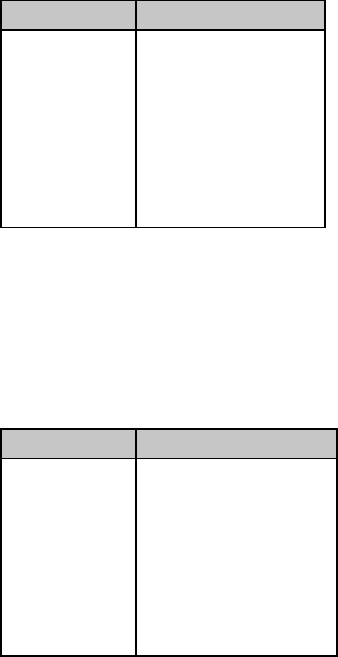
Chapter 11: Bar Code Commands for 24-Pin Printers114
Code 39 Parameters n3 and n4
These parameters set the vertical length of the bars in units of 15/180", as calculated by the
equation [(n3 x 10) + n4] x 15/180"
where the total value must be less than or equal to 25.
Code 39 Parameter n5
This parameter sets the width of the narrow bars in 1/360" increments.
Table 84: IBM/Epson Select Code 39 Command —
Narrow Bar Widths for Parameter n5 Values (24-Pin Printers)
Value of n5Character Width
1
2
3
4
5
6
7
2/360"
4/360"
7/360"
9/360"
12/360"
14/360"
17/360"
Code 39 Parameter n6
This parameter sets the width of the narrow space characters in 1/360" increments.
Table 85: IBM/Epson Select Code 39 Command —
Narrow Space Widths for Parameter n6 Values (24-Pin Printers)
Value of n6Character Width
1
2
3
4
5
6
7
8/360"
10/360"
13/360"
15/360"
18/360"
20/360"
23/360"

Chapter 11: Bar Code Commands for 24-Pin Printers 115
Code 39 Parameter n7
Parameter n7 is used in combination with parameters n5 and n6 to set the width of the wide bars
and the wide spaces.
Table 86: IBM/Epson Select Code 39 Command —
Wide Bar Widths for Parameter n5, n7 Values (24-Pin Printers)
n5 = 1 n5 = 2 n5 = 3 n5 = 4 n5 = 5 n5 = 6 n5 = 7
n7 = 1
n7 = 2
n7 = 3
n7 = 4
n7 = 5
n7 = 6
n7 = 7
7/360"
9/360"
12/360"
14/360"
17/360"
19/360"
22/360"
11/360"
14/360"
18/360"
21/360"
25/360"
28/360"
32/360"
17/360"
22/360"
27/360"
32/360"
36/360"
41/360"
47/360"
21/360"
27/360"
33/360"
39/360"
45/360"
51/360"
57/360"
27/360"
32/360"
42/360"
49/360"
57/360"
64/360"
72/360"
31/360"
39/360"
48/360"
56/360"
65/360"
73/360"
82/360"
37/360"
47/360"
57/360"
67/360"
77/360"
87/360"
97/360"
Table 87: IBM/Epson Select Code 39 Command —
Wide Space Widths for Parameter n6, n7 Values (24-Pin Printers)
n6 = 1 n6 = 2 n6 = 3 n6 = 4 n6 = 5 n6 = 6 n6 = 7
n7 = 1
n7 = 2
n7 = 3
n7 = 4
n7 = 5
n7 = 6
n7 = 7
13/360"
16/360"
18/360"
21/360"
23/360"
26/360"
28/360"
17/360"
21/360"
24/360"
28/360"
31/360"
35/360"
38/360"
23/360"
28/360"
33/360"
38/360"
43/360"
48/360"
53/360"
27/360"
33/360"
39/360"
45/360"
51/360"
57/360"
63/360"
33/360"
41/360"
48/360"
56/360"
63/360"
71/360"
78/360"
37/360"
46/360"
54/360"
63/360"
71/360"
80/360"
88/360"
43/360"
53/360"
63/360"
73/360"
80/360"
93/360"
103/360"
Code 39 Parameter n8
This parameter sets whether or not the readable characters are printed.
n8 = 1: print readable characters
n8 = 0: do not print readable characters
Print Code 39 Bar Code Command
The command for printing Code 39 bar codes is
ESC DLE B m [data]
where parameter m designates the number of characters which will follow in the data. If you
wish to include a check digit, enter the ASCII character @ (64 Dec, 40 Hex) at the end of the
data.
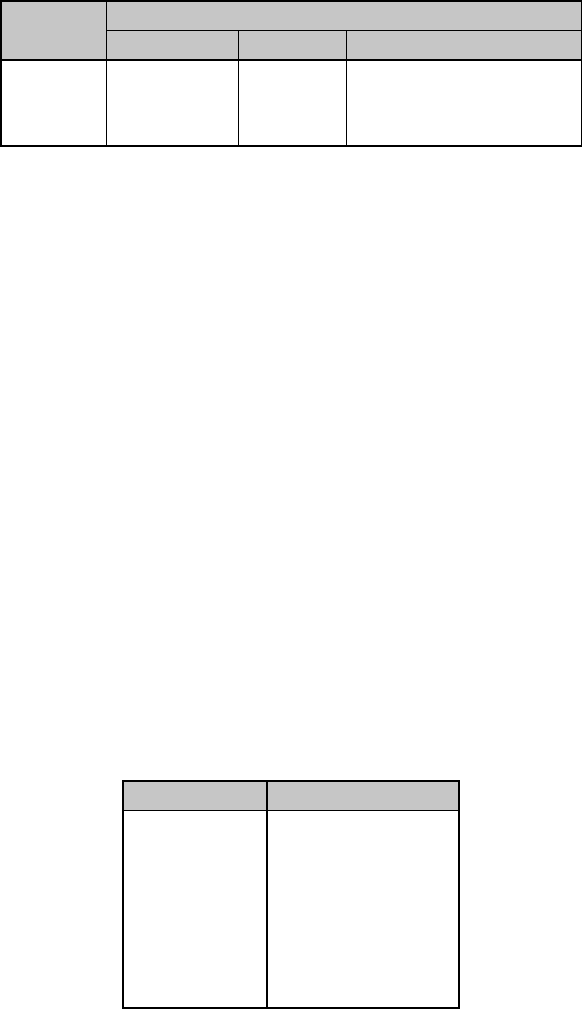
Chapter 11: Bar Code Commands for 24-Pin Printers116
Code 128 Bar Code Commands
Code 128 has 106 different characters, each of which can have any one of three different
meanings depending on which code set is engaged:
Table 88: IBM/Epson Select Code 128 Command —
Characters for Each Code Set (24-Pin Printers)
Characters
Code Set ASCII Dec Hex
A
B
C
NUL to '
DC3 to DLE
0 to 9
0 to 96
25 to 127
48 to 57
00 to 60
19 to 7F
30 to 39, in 2-digit pairs
A special code at the beginning indicates which set is engaged: three shift codes are also
available for use within the bar code to indicate a change in the code set engaged.
Select Code 128 Bar Code Command
The command for selecting Code 128 is
ESC DLE A m 4 0 n3 n4 n5 0 0 n8
Which set will be engaged is entered using the Print Code 128 Bar Code Command described
below.
Code 128 Parameters n3 and n4
These parameters set the vertical length of the bars in units of 15/180", as calculated by the
equation [(n3 x 10) + n4] x 15/180"
where the total value must be less than or equal to 25.
Code 128 Parameter n5
This parameter sets the maximum width of one character in 1/360" increments as follows:
Table 89: IBM/Epson Select Code 128 Command —
Character Widths for Parameter n5 Values (24-Pin Printers)
Value of n5Character Width
1
2
3
4
5
6
7
55/360"
77/360"
110/360"
132/360"
165/360"
187/360"
220/360"
Chapter 11: Bar Code Commands for 24-Pin Printers 117
When calculating the width of the printout, you must take into consideration the Start and Stop
Code patterns:
Table 90: IBM/Epson Select Code 128 Command —
Start and Stop Codes for Parameter n5 Values (24-Pin Printers)
Value of n5Start Code Stop Code
1
2
3
4
5
6
7
55/360"
77/360"
110/360"
132/360"
165/360"
187/360"
220/360"
62/360"
88/360"
127/360"
153/360"
192/360"
218/360"
257/360"
Code 128 Parameter n8
This parameter sets whether or not the readable characters are printed.
n8 = 1: print readable characters
n8 = 0: do not print readable characters
Print Code 128 Bar Code Command
The command for printing Code 128 bar codes is
ESC DLE B m [data]
where parameter m designates the number of characters which will follow in the data. To
indicate which set to use (A, B, or C), use the set letter as the first digit of the data within the
command.
Each set has a different check digit.
Table 91: IBM/Epson Print Code 128 Command — Check Digits (24-Pin
Printers)
Check Digit
Code Set ASCII Dec Hex
A g 103 67
B CAN 24 18
C @ 64 40
Interleaved 2 of 5 Bar Code Commands
Interleaved 2 of 5 bar coding is used mainly in the distribution industry. Two digits are
encoded: one in the bars and one in the spaces. Ten characters are encoded, each any ASCII
character from 0 to 9 (48 to 57 Dec, 30 to 39 Hex).
The sum of the black bars and spaces becomes the maximum width of two characters.

Chapter 11: Bar Code Commands for 24-Pin Printers118
Select Interleaved 2 of 5 Bar Code Command
The command for selecting Interleaved 2 of 5 is
ESC DLE A m 3 0 n3 n4 n5 n6 n7 n8
Interleaved 2 of 5 Parameters n3 and n4
These parameters set the vertical length of the bars in units of 15/180", as calculated by the
equation [(n3 x 10) + n4] x 15/180"
where the total value must be less than or equal to 25.
Interleaved 2 of 5 Parameter n5
Parameter n5 is used in combination with parameter n7 to set the width of one character of the
black bars, as follows:
Table 92: IBM/Epson Select Interleaved 2 of 5 Command —
Black Bar Widths for Parameter n5, n7 Values (24-Pin Printers)
n5 = 1 n5 = 2 n5 = 3 n5 = 4 n5 = 5 n5 = 6 n5 = 7
n7 = 1
n7 = 2
n7 = 3
n7 = 4
n7 = 5
n7 = 6
n7 = 7
20/360"
24/360"
30/360"
34/360"
40/360"
44/360"
50/360"
34/360"
40/360"
48/360"
54/360"
62/360"
68/360"
76/360"
55/360"
65/360"
75/360"
85/360"
93/360"
103/360"
115/360"
69/360"
81/360"
93/360"
105/360"
117/360"
129/360"
141/360"
90/360"
100/360"
120/360"
134/360"
150/360"
164/360"
180/360"
184/360"
120/360"
138/360"
154/360"
172/360"
188/360"
206/360"
125/360"
145/360"
165/360"
185/360"
205/360"
225/360"
245/360"
Interleaved 2 of 5 Parameter n6
Parameter n6 is used in combination with parameter n7 to set the width of one character of the
spaces, as follows:
Table 93: IBM/Epson Select Interleaved 2 of 5 Command —
Space Widths for Parameter n6 n7 Values (24-Pin Printers)
n6 = 1 n6 = 2 n6 = 3 n6 = 4 n6 = 5 n6 = 6 n6 = 7
n7 = 1
n7 = 2
n7 = 3
n7 = 4
n7 = 5
n7 = 6
n7 = 7
50/360"
56/360"
60/360"
66/360"
70/360"
76/360"
80/360"
64/360"
72/360"
78/360"
86/360"
92/360"
100/360"
106/360"
85/360"
95/360"
105/360"
115/360"
125/360"
135/360"
146/360"
99/360"
111/360"
123/360"
135/360"
147/360"
159/360"
171/360"
120/360"
136/360"
150/360"
166/360"
180/360"
196/360"
210/360"
134/360"
152/360"
168/360"
186/360"
202/360"
220/360"
236/360"
155/360"
175/360"
195/360"
215/360"
235/360"
255/360"
275/360"

Chapter 11: Bar Code Commands for 24-Pin Printers 119
Interleaved 2 of 5 Parameter n8
This parameter sets whether or not the readable characters are printed.
n8 = 1: print readable characters
n8 = 0: do not print readable characters
Print Interleaved 2 of 5 Bar Code Command
The command for printing Interleaved 2 of 5 bar codes is
ESC DLE B m [data]
where parameter m designates the number of characters which will follow in the data. If you
wish to include a check digit, enter the ASCII character @ (64 Dec, 40 Hex) at the end of the
data.
UPC A Bar Code Commands
UPC bar coding is used in the supermarket industry. UPC A coding contains twelve digits: the
first six digits represent the manufacturer, the second six digits identify the product. The digits
can be any ASCII character from 0 to 9 (48 to 57 Dec, 30 to 39 Hex).
Select UPC A Bar Code Command
The command for selecting UPC A is
ESC DLE A m 1 0 n3 n4 n5 0 0 n8
UPC A Parameters n3 and n4
These parameters set the vertical length of the bars in units of 15/180", as calculated by the
equation [(n3 x 10) + n4] x 15/180"
where the total value must be less than or equal to 25.
UPC A Parameter n5
This parameter sets the maximum width of one character in 1/360" increments as follows:
Table 94: IBM/Epson Select UPC A Command —
Character Widths for Parameter n5 Values (24-Pin Printers)
Value of n5Character Width
1
2
3
4
5
6
7
35/360"
49/360"
70/360"
84/360"
105/360"
119/360"
140/360"
When calculating the width of the printout, you must take into consideration the Start Code
pattern, the Center bar pattern, and the Stop Code pattern as shown in the table which follows.

Chapter 11: Bar Code Commands for 24-Pin Printers120
Table 95: IBM/Epson Select UPC A Command —
Start/Stop Codes and Center Bars for Parameter n5 Values (24-Pin Printers)
Value of n5Start Code Center Bar Stop Code
1
2
3
4
5
6
7
12/360"
18/360"
27/360"
33/360"
42/360"
48/360"
57/360"
28/360"
38/360"
53/360"
63/360"
78/360"
88/360"
103/360"
12/360"
18/360"
27/360"
33/360"
42/360"
48/360"
57/360"
UPC A Parameter n8
This parameter sets whether or not the readable characters are printed.
n8 = 1: print readable characters
n8 = 0: do not print readable characters
Print UPC A Bar Code Command
The command for printing a UPC A bar code is
ESC DLE B m [data]
where parameter m designates the number of characters which will follow in the data. If you
wish to include a check digit, enter the ASCII character @ (64 Dec, 40 Hex) at the end of the
data.
UPC E Bar Code Commands
UPC E bar coding is a six-digit variation of UPC A, used for labeling small items. The digits can
be any ASCII character from 0 to 9 (48 to 57 Dec, 30 to 39 Hex).
Select UPC E Bar Code Command
The command for selecting UPC E is
ESC DLE A m 1 4 n3 n4 n5 0 0 n8
UPC E Parameters n3 and n4
These parameters set the vertical length of the bars in units of 15/180", as calculated by the
equation [(n3 x 10) + n4] x 15/180"
where the total value must be less than or equal to 25.

Chapter 11: Bar Code Commands for 24-Pin Printers 121
UPC E Parameter n5
This parameter sets the maximum width of one character in 1/360" increments as follows:
Table 96: IBM/Epson Select UPC E Command —
Maximum Character Widths for Parameter n5 Values (24-Pin Printers)
Value of n5Character Width
1
2
3
4
5
6
7
35/360"
49/360"
70/360"
84/360"
105/360"
119/360"
140/360"
When calculating the width of the printout, you must take into consideration the Start Code
and Stop Code patterns as shown in the table which follows.
UPC E Parameter n8
This parameter sets whether or not the readable characters are printed.
n8 = 1: print readable characters
n8 = 0: do not print readable characters
Print UPC E Bar Code Command
The command for printing a UPC E bar code is
ESC DLE B m [data]
where m designates the number of characters which will follow in the data. A check digit
cannot be used with UPC E bar codes.
EAN 8 Bar Code Commands
EAN bar coding is a variation of UPC coding. EAN 8 encodes eight digits. The digits can be any
ASCII character from 0 to 9 (48 to 57 Dec, 30 to 39 Hex).
Select EAN 8 Bar Code Command
The command for selecting EAN 8 is
ESC DLE A m 0 1 n3 n4 n5 0 0 n8
EAN 8 Parameters n3 and n4
These parameters set the vertical length of the bars in units of 15/180", as calculated by the
equation [(n3 x 10) + n4] x 15/180"
where the total value must be less than or equal to 25.
EAN 8 Parameter n5
This parameter sets the maximum width of one character in 1/360" increments as follows:

Chapter 11: Bar Code Commands for 24-Pin Printers122
Table 97: IBM/Epson Select EAN 8 Command —
Maximum Character Widths for Parameter n5 Values (24-Pin Printers)
Value of n5Character Width
1
2
3
4
5
6
7
35/360"
49/360"
70/360"
84/360"
105/360"
119/360"
140/360"
When calculating the width of the printout, you must take into consideration the left hand
guard pattern, the center guard pattern and the right hand guard pattern.
EAN 8 Parameter n8
This parameter sets whether or not the readable characters are printed.
n8 = 1: print readable characters
n8 = 0: do not print readable characters
Print EAN 8 Bar Code Command
The command for printing an EAN 8 bar code is
ESC DLE B m [data]
where parameter m designates the number of characters which will follow in the data. If you
wish to include a check digit, enter the ASCII character @ (64 Dec, 40 Hex) at the end of the
data.
EAN 13 Bar Code Commands
EAN 13 encodes 13 digits and contains the same number of bars as UPC A. The thirteenth digit
combined with the twelfth digit provides a code representing a country. The digits can be any
ASCII character from 0 to 9 (48 to 57 Dec, 30 to 39 Hex).

Chapter 11: Bar Code Commands for 24-Pin Printers 123
Select EAN 13 Bar Code Command
The command for selecting EAN 13 is
ESC DLE A m 0 2 n3 n4 n5 0 0 n8
EAN 13 Parameters n3 and n4
These parameters set the vertical length of the bars in units of 15/180", as calculated by the
equation [(n3 x 10) + n4] x 15/180"
where the total value must be less than or equal to 25.
EAN 13 Parameter n5
This parameter sets the maximum width of one character in 1/360" increments as follows:
Table 98: IBM/Epson Select EAN 13 Command —
Maximum Character Widths for Parameter n5 Values (24-Pin Printers)
Value of n5Character Width
1
2
3
4
5
6
7
35/360"
49/360"
70/360"
84/360"
105/360"
119/360"
140/360"
When calculating the width of the printout, you must take into consideration the left hand
guard pattern, the center guard pattern and the right hand guard pattern.
EAN 13 Parameter n8
This parameter sets whether or not the readable characters are printed.
n8 = 1: print readable characters
n8 = 0: do not print readable characters
Print EAN 13 Bar Code Command
The command for printing EAN 13 bar codes is
ESC DLE B m [data]
where parameter m designates the number of characters which will follow in the data. If you
wish to include a check digit, enter the ASCII character @ (64 Dec, 40 Hex) at the end of the
data.
Chapter 11: Bar Code Commands for 24-Pin Printers124
Postnet Bar Code Command
Postnet bar coding is used by the United States Post Office for sorting mail by automated
equipment. It incorporates a coding system using five bars and four spaces for each digit.
Select/Print Postnet Bar Code Data Command
The command ESC DLE C P1 [data]
selects Postnet bar codes and initiates the printing of the zip code + 4 data which you enter as
part of the command. Each digit of data can be any ASCII character from 0 to 9 (48 to 57 Dec,
30 to 39 Hex). The data must be the full ZIP + 4 code.
Postnet Parameter P1
Parameter P1 tells the printer how many bytes of bar code data to expect. Its value can be any
ASCII character from NUL to DC4 (1 to 20 Dec, 01 to 14 Hex): any values for P1 outside this
range will cause the data to be ignored.
The print density for Postnet bar codes will be 240 dpi. Printing is accomplished in two print
passes with a 1/144" line feed. The bar height will be as follows:
High Bar: 16/144" (eight dots in two passes)
Low Bar: 6/144" (three dots in two passes)
To include the check digit, enter the ASCII character @ (64 Dec, 40 Hex) at the end of the data.

Chapter 12: Miscellaneous Commands 125
Chapter 12: Miscellaneous Commands
This chapter describes the following commands:
• Cancel Command
• Change Emulation Command
• Cut Sheet Feeder Commands
• Delete Command
• Half-Speed Printing Command
• Initialize Printer Commands
• Most Significant Bit Commands
• Paper-Out Sensor Commands
• Print Suppress Mode Commands
• Select Color Command
• Set Unit Command
• Software I-Prime Command
• Stop Printing Command
Cancel Command (IBM/E/ML)
⻬ ML320 E/I, ML321 E/I ⻬ ML320 Turbo, ML321 Turbo ⻬ ML520, ML521
⻬ ML320 Std., ML321 Std. ⻬ ML390 Turbo, ML391 Turbo ⻬ ML590, ML591
Function ASCII Dec Hex
Cancel CAN 24 18
This command clears all the data from the print buffer, but does not reset printing features that
have been set using control codes.
Change Emulation Command (IBM/E/ML)
⻬ ML320 E/I, ML321 E/I ⻬ ML320 Turbo, ML321Turbo ⻬ ML520, ML521
Function ASCII Dec Hex
Change Emulation ESC { n 27 123 n 1B 7B n
This command allows you to change the emulation as follows:
Table 99: IBM/E/ML ESC { Command —
Emulations for n Values
Decimal Value of n Emulation
2 IBM Proprinter III
33 OKIDATA MICROLINE Standard
65 Epson

Appendix A: Interfacing 133
Appendix A: Interfacing
This appendix gives the pin assignments for the parallel and serial interfaces of MICROLINE
printers. It also includes the most common serial cable configurations.
Parallel Interface
Note: The parallel cable should be no longer than 6 ft. (1.8m). The cable must be shielded in
order to comply with FCC requirements.
Table 102: Pin Assignments for Parallel Interface Signals
Pin Signal Return Pin Direction
1 Strobe 19 To Printer
2 Data 1 20 To Printer
3 Data 2 21 To Printer
4 Data 3 22 To Printer
5 Data 4 23 To Printer
6 Data 5 24 To Printer
7 Data 6 25 To Printer
8 Data 7 26 To Printer
9 Data 8 27 To Printer
10 Acknowledge 28 From Printer
11 Busy 29 From Printer
12 Paper end 30 From Printer
13 Select No return From Printer
14† Autofeed – To Printer
15 Not used – –
16 0V No return Signal Ground
17 Chassis Ground No return Frame Ground
18† +5V* – From Printer
19-30 0V – Ground
31† I-Prime – To Printer
32 Fault – From Printer
33 0V – Signal Ground
34-35 Not used – –
† Pins controlled by jumper plugs in the printer.
* 50 mA maximum.

Appendix A: Interfacing134
Serial Interface
See your Printer Handbook for serial menu settings
Note: The serial cable should be no longer than 50 ft. (15.25m). The cable must be shielded in
order to comply with FCC requirements.
Table 103: Pin Assignments for Serial Interface Signals
Pin Signal Symbol Direction
1 Protective Ground PG –
2 Transmitted Data TD From Printer
3 Received Data RD To Printer
4 Request to Send TRS From Printer
5 Not used – –
6 Data Set Ready DSR To Printer
7 Signal Ground SG –
8–10 Not used – –
11 Supervisory Send Data SSD From Printer
12–19 Not used – –
20 Data Terminal Ready DTR From Printer
21–25 Not used – –

Appendix A: Interfacing 135
Commonly Used Serial Cable Configurations
IBM 25-Pin Cable Configuration
Computer Printer
PG 1 1 PG
TD 2 3 RD
RD 3 2 TD
CTS 5 11 SSD
DSR 6 20 DTR
6 DSR
SG 7 7 SG
4 RTS
5 CTS
IBM 9-Pin Cable Configuration
Computer Printer
RD 2 2 TD
TD 3 3 RD
SG 5 7 SG
DSR 6 20 DTR
6 DSR
CTS 8 11 SSD
4 RTS
5 CTS
Appendix A: Interfacing136
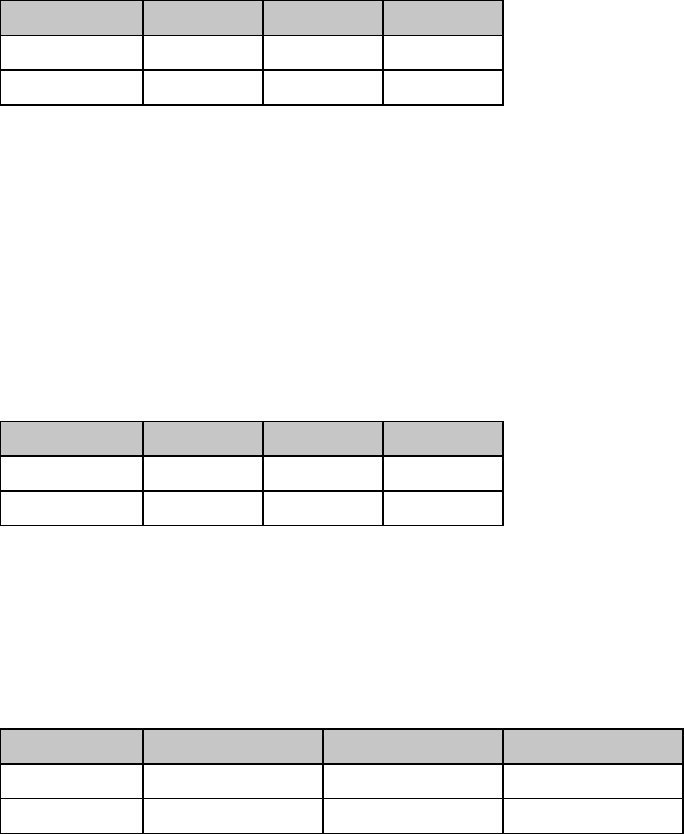
Chapter 12: Miscellaneous Commands126
Cut Sheet Feeder (CSF) Commands
CSF Commands (IBM/E)
⻬ ML320 E/I, ML321 E/I ⻬ ML320 Turbo, ML321Turbo ⻬ ML520, ML521
⻬ ML390 Turbo, ML391 Turbo ⻬ ML590, ML591
Function ASCII Dec Hex
Insert Sheet ESC EM I 27 25 73 1B 19 49
Eject Sheet ESC EM R 27 25 82 1B 19 52
The insert page command feeds a sheet of paper from the cut sheet feeder (CSF) to the top of
form position. If CSF paper is already in the printer, the printer will eject the page and load
another.
The eject page command prints data in the print buffer and ejects the page. A line feed code
(LF) at the end of the page causes the next page to feed into the printer automatically.
Bin Select Command for Dual-Bin CSF (IBM/E)
⻬ ML520, ML521
⻬ ML590, ML591
Function ASCII Dec Hex
Select Bin 1 ESC EM 1 27 25 49 1B 19 31
Select Bin 2 ESC EM 2 27 25 50 1B 19 32
The bin select command chooses the active bin when the optional dual-bin cut sheet feeder is
installed.
CSF Commands (ML)
⻬ ML320 Std., ML321 Std. ⻬ ML320 Turbo, ML321Turbo ⻬ ML520, ML521
Function ASCII Dec Hex
Insert Sheet ESC S 27 83 1B 53
Eject Sheet ESC V 27 86 1B 56
The insert page command feeds a sheet of paper from the cut sheet feeder (CSF) to the top of
form position. If CSF paper is already in the printer, the printer will eject the page and load
another.
The eject page command prints data in the print buffer and ejects the page. A line feed code
(LF) at the end of the page causes the next page to feed into the printer automatically.
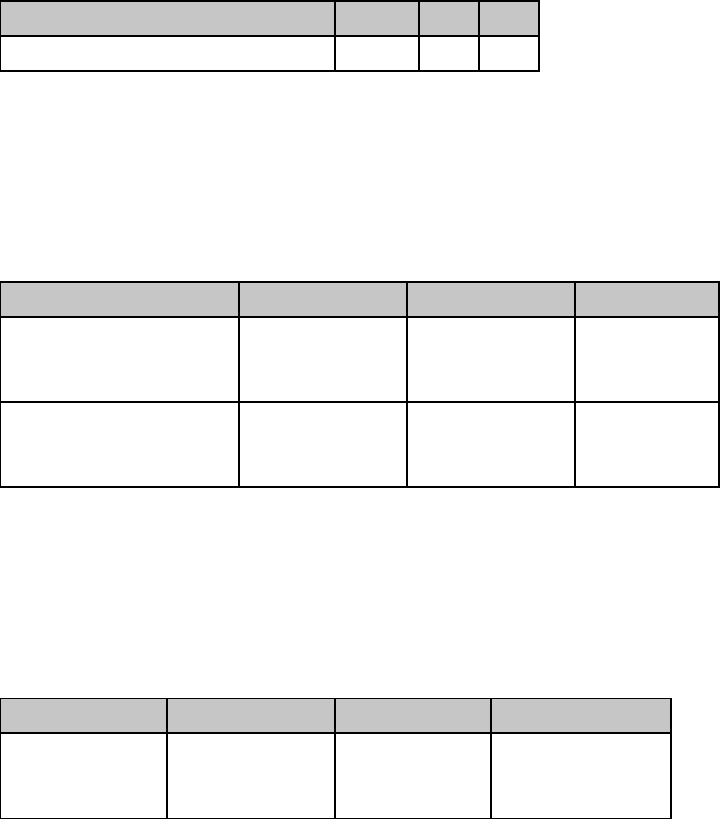
Chapter 12: Miscellaneous Commands 127
Delete Command (Epson)
⻬ ML320 E/I, ML321 E/I ⻬ ML320 Turbo, ML321Turbo ⻬ ML520, ML521
⻬ ML390 Turbo, ML391 Turbo ⻬ ML590, ML591
Function ASCII Dec Hex
Delete One Character Command DEL 127 7F
This command deletes the last character sent to the printer. It will not delete graphics data.
Half-Speed Printing Commands (E/ML)
⻬ ML320 E/I, ML321 E/I ⻬ ML320 Turbo, ML321Turbo ⻬ ML520, ML521
⻬ ML320 Std., ML321 Std. ⻬ ML390 Turbo, ML391 Turbo ⻬ ML590, ML591
Function IBM Epson ML
Half-Speed Printing On Not applicable ASCII: ESC s 1
Dec: 27 115 49
Hex: 1B 73 31
ASCII: ESC <
Dec: 27 60
Hex: 1B 3C
Half-Speed Printing Off Not applicable ASCII: ESC s 0
Dec: 27 115 48
Hex: 1B 73 30
ASCII: ESC >
Dec: 27 62
Hex: 1B 3E
This command controls the speed of printing. Half-speed printing is quieter than full speed.
Initialize Printer Commands (E/ML)
⻬ ML320 E/I, ML321 E/I ⻬ ML320 Turbo, ML321Turbo ⻬ ML520, ML521
⻬ ML320 Std., ML321 Std. ⻬ ML390 Turbo, ML391 Turbo ⻬ ML590, ML591
Function IBM Epson ML
Initialize Printer Not applicable ASCII: ESC @
Dec: 27 64
Hex: 1B 40
ASCII: ESC CAN
Dec: 27 24
Hex: 1B 18
These commands remove any data in the printer's buffer and return the printer to the current
menu settings. They will override any features set on the printer's front panel or through
previous commands. Also known as the initialize printer or reset commands.
Note: In order for this command to be effective, the Reset Inhibit item in the printer Menu
must be set to NO (the factory default). If the setting has been changed to YES, this
command will be ignored.
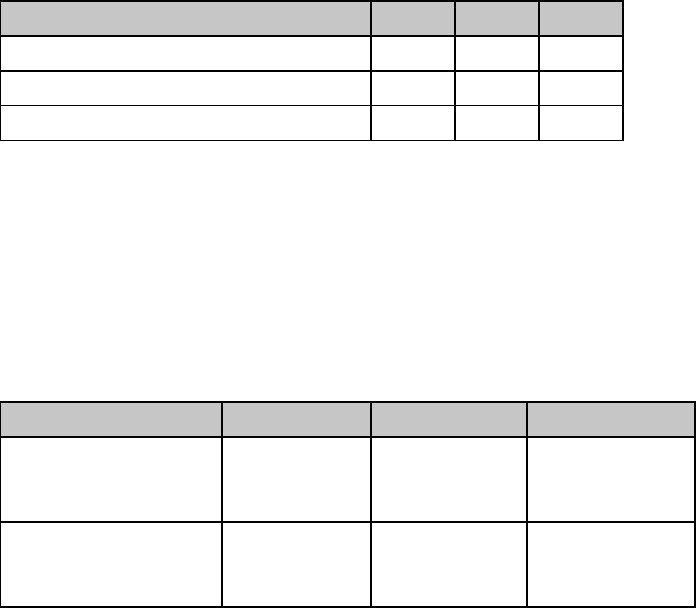
Chapter 12: Miscellaneous Commands128
Most Significant Bit Commands (Epson)
⻬ ML320 E/I, ML321 E/I ⻬ ML320 Turbo, ML321Turbo ⻬ ML520, ML521
⻬ ML390 Turbo, ML391Turbo ⻬ ML590, ML591
Function ASCII Dec Hex
Set Most Significant Bit (MSB) to Zero ESC = 27 61 1B 3D
Set MSB to 1 ESC > 27 62 1B 3E
Cancel MSB Control ESC # 27 35 1B 23
The ESC = command sets the most significant bit (MSB) of an 8-bit data input to zero. The ESC
> command sets the MSB to one. The ESC # command cancels the MSB control established by
either command and all data is interpreted exactly as sent from the computer.
Paper-Out Sensor Commands (IBM/E/ML)
⻬ ML320 E/I, ML321 E/I ⻬ ML320 Turbo, ML321Turbo ⻬ ML520, ML521
⻬ ML320 Std., ML321 Std. ⻬ ML390 Turbo, ML391Turbo ⻬ ML590, ML591
Function IBM Epson ML
Paper-Out Sensor On ASCII: ESC 9
Dec: 27 57
Hex: 1B 39
ASCII: ESC 9
Dec: 27 57
Hex: 1B 39
ASCII: ESC E 0
Dec: 27 69 48
Hex: 1B 45 30
Paper-Out Sensor Off ASCII: ESC 8
Dec: 27 56
Hex: 1B 38
ASCII: ESC 8
Dec: 27 56
Hex: 1B 38
ASCII: ESC E 1
Dec: 27 69 49
Hex: 1B 45 31
The paper-out sensor detects when less than one inch of paper remains (0.5-inch for
ML390/391T printers). When this happens, the alarm light goes on and the printer is
deselected. This command overrides the sensor so that you can print closer to the bottom of the
page. (The feature is also menu selectable.) Be careful if you use this feature, since it lets the
printer continue printing when there's no more paper. This can cause loss of data and may
damage the printhead.

Chapter 12: Miscellaneous Commands 129
Print Suppress Mode Commands
Print Suppress Mode On/Off Commands (IBM)
⻬ ML320 E/I, ML321 E/I ⻬ ML320 Turbo, ML321Turbo ⻬ ML520, ML521
⻬ ML390 Turbo, ML391Turbo ⻬ ML590, ML591
Function ML320 E/I,
ML320T, ML520 ML321 E/I, ML321T,
ML521 ML390T, ML590 ML391T, ML591
Print
Suppress
Mode On
ASCII: ESC Q ETX
Dec: 27 81 3
Hex: 1B 51 03
ASCII: ESC Q SYN
Dec: 27 81 22
Hex: 1B 51 16
ASCII: ESC Q $
Dec: 27 81 36
Hex: 1B 51 24
ASCII: ESC Q #
Dec: 27 81 35
Hex: 1B 51 23
Print
Suppress
Mode Off
ASCII: DC1
Dec: 17
Hex: 11
ASCII: DC1
Dec: 17
Hex: 11
ASCII: DC1
Dec: 17
Hex: 11
ASCII: DC1
Dec: 17
Hex: 11
When the printer receives the command to begin Print Suppress mode, it ignores all data until
it receives the DC1 code. This means that any data will be lost. The SEL light blinks when the
printer is in the Print Suppress mode. These commands will only work if the Print Suppress
Effective item in the printer menu is set to Yes (the factory default).
Print Suppress Mode On/Off Commands (E/ML)
⻬ ML320 E/I, ML321 E/I ⻬ ML320 Turbo, ML321Turbo ⻬ ML590, ML591
⻬ ML320 Std., ML321 Std. ⻬ ML390 Turbo, ML391Turbo ⻬ ML520, ML521
Function ASCII Dec Hex
Print Suppress Mode On DC3 19 13
Print Suppress Mode Off DC1 17 11
When the printer receives the command to begin Print Suppress mode, it ignores all data until
it receives the DC1 code. This means that any data will be lost. The SEL light blinks when the
printer is in the Print Suppress mode. These commands will only work if the Print Suppress
Effective item in the printer menu is set to Yes (the factory default).
Chapter 12: Miscellaneous Commands130
Select Color Command (IBM/E)
⻬ ML590, ML591
Function ASCII Dec Hex
Select Color ESC r n 27 114 n 1B 72 n
This command selects the color that will print when the printer has a color ribbon installed and
the menu is set to any setting other than “Black Ribbon.”
Table 100: IBM/Epson ESC r Command —
Color Selections for n Values
Value of n Color
0 Black
1 Magenta
2 Cyan (blue)
3 Violet
4 Yellow
5Orange
6 Green
Set Unit Command (Epson)
⻬ ML390 Turbo, ML391 Turbo
Function ASCII Dec Hex
Set Increment of
Movement ESC ( U Ln Hn Pn27 40 85 Ln Hn Pn1B 28 55 Ln Hn Pn
This command is used to set the increment of movement used in conjunction with the
following commands:
ESC ( c Ln Hn Lt Ht Lb Hb Set Page Format (see Chapter 9)
ESC ( C 2 0 Lp HpSet Page Length in Defined Unit (see Chapter 9)
ESC \ Ln HnSet Relative Horizontal Dot Position (see Chapter 8)
ESC ( V Ln Hn Lp HpSet Absolute Vertical Position (see Chapter 9)
ESC ( v Ln Hn Lp HpSet Relative Vertical Position (see Chapter 9)

Chapter 12: Miscellaneous Commands 131
Parameters Ln and Hn
Parameters Ln and Hn are used to designate the quantity of data, as follows:
Ln + (Hn x 256)
Parameter Pn
Parameter Pn sets the increment of movement. It can have any value from 0 to 255.
Table 101: Epson ESC ( U Command —
Increments of Movement for Pn Values
PnIncrement
0 to 9 Unchanged
10 to 19 1/360"
20 to 29 11/80"
30 to 39 1/120"
40 to 49 1/90"
50 to 59 1/72"
60 to 69 1/60"
70 to 255 Unchanged
Software I-Prime Command (IBM/E/ML)
⻬ ML320 Turbo, ML321Turbo ⻬ ML520, ML521
⻬ ML390 Turbo, ML391Turbo ⻬ ML590, ML591
Function ASCII Dec Hex
Software I-Prime ESC } NUL 27 125 0 1B 7D 00
This command clears the print buffer and resets the printer to the default settings, regardless of
the setting for the Reset Inhibit item in the printer menu.
If the Cut Sheet Feeder (CSF) is installed, this command will also eject any paper loaded into
the printer from the CSF.
Stop Printing Command (IBM)
⻬ ML390 Turbo, ML391Turbo ⻬ ML590, ML591
Function ASCII Dec Hex
Stop Printing (Deselect) ESC j 27 106 1B 6A
This command deselects the printer so that it will stop printing. To resume printing, press the
SEL switch, or–if “Auto Select” is set to “Yes” in the menu–reload paper.
Chapter 12: Miscellaneous Commands132
Appendix C: Listing of Tables 137
Appendix B: Listing of Tables
Table 1: Printer Drivers for ML320 Epson/IBM & ML321 Epson/IBM......................................... 1
Table 2: Printer Drivers for ML320 MICROLINE Standard & ML321 MICROLINE Standard ...... 1
Table 3: Printer Drivers for Models ML320 Turbo & ML321 Turbo............................................ 1
Table 4: Printer Drivers for Models ML390 Turbo & ML391 Turbo............................................ 1
Table 5: Printer Drivers for Models ML520 & ML521................................................................ 2
Table 6: Printer Drivers for Models ML590 & ML591................................................................ 2
Table 7: Available Drivers.......................................................................................................... 3
Table 8: IBM/ML ESC ! Command — International Character Substitutions............................... 9
Table 9: Epson ESC R Command — International Character Substitutions............................... 10
Table 10: Epson ESC R Command — Code Page Selections for ML390/391Turbo...................10
Table 11: IBM/ML ESC [ T Command — Code Page Parameters.............................................. 11
Table 12: Epson 9-Pin ESC ( t Command — Code Page Set for Pn1, Pn2 Values......................... 12
Table 13: Epson 24-Pin ESC ( t Command — Code Page Set for Pn1, Pn2 Values....................... 14
Table 14: Pitch Setting Commands — Characters per Line (CPL) for Pitches............................ 15
Table 15: Epson ESC X Command — Font Substitution for Models ML590 & ML591.............. 17
Table 16: Epson ESC X Command — Character Pitch Settings for Pn Values............................ 18
Table 17: Epson ESC X Command — Point Sizes for Np Values ............................................... 18
Table 18: IBM ESC [ @ Command — Character Height/Line Spacing for n1 Values................. 22
Table 19: IBM ESC [ @ Command — Character Width for n2 Values....................................... 22
Table 20: IBM ESC { @ Command — Character Height/Line Spacing for m3 Values................23
Table 20a: IBM ESC { @ Command — Character Width for m4 Values.................................... 23
Table 21: ML ESC & Command — Print Features for n1, n2, n3 and n4 Values ..........................24
Table 22: ML ESC & Command — Variable Factors for n1, n2, n3, n4........................................ 24
Table 23: IBM ESC V and ESC SP & Epson ESC SP Commands — Character Spacing
(in Inches)................................................................................................................ 26
Table 24: ML ESC N Command — Character Spacing (in Inches)............................................ 27
Table 25: IBM/Epson ESC k Command — Fonts for n Values................................................... 30
Table 26: IBM ESC I Command — Print Modes Corresponding to n Values for All
9-Pin Models........................................................................................................... 31
Table 27: IBM ESC I Command — Print Modes Corresponding to n Values for 24-Pin Models
ML390T & ML391T................................................................................................. 31
Table 28: IBM ESC I Command — Print Modes Corresponding to n Values for 24-Pin Models
ML590 & ML591..................................................................................................... 32
Table 29: IBM ESC [ I Command — Parameters Activated for Calculated Ln, Hn Values .......... 32
Table 30: IBM ESC [ I Command — Fonts Selected for Calculated Hfid, Lfid Values................... 33
Table 31: IBM ESC [ I Command — Character Pitch Settings for Calculated Hfwd, Lfwd Values.. 34
Table 32: Epson ESC ! Command —Print Features for n Values............................................... 35
Table 33: Epson ESC ( - Command — Score Styles for D1 and D2 Values................................. 38
Table 34: IBM ESC = Command — Character Widths for a2 Values......................................... 42
Table 35: Custom Character Commands — Character/Grid Width for Print Modes (24-Pin
Printers).................................................................................................................. 46
Table 36: Epson ESC : Command — Fonts for n Values........................................................... 50
Table 37: Epson ESC * m Command — 8-Pin Graphics Density Codes for m Values .............. 55
Appendix C: Listing of Tables
138
Table 38: ML ESC * Command — Densities (DPI) for n1 Values............................................... 58
Table 39: ML ESC * Command —Speed & Word Sizes for n2 Values....................................... 59
Table 40: Epson ESC * m Command — 8-Pin Graphics Density Codes ................................... 63
Table 41: IBM ESC [ g Command — Horizontal Graphics Resolution for m Values ................ 65
Table 42: Epson ESC . Command — Valid Range of Pm Values for Pv Values........................... 67
Table 43: Epson ESC . Command — Maximum Horizontal Dots for Ph Values........................ 67
Table 44: IBM ESC X Command — Default Settings for Right Margin...................................... 70
Table 45: Epson ESC L and ESC Q Commands — Range of Margin Settings, All 9-Pin Printers 70
Table 46: Epson ESC L and ESC Q Commands — Range of Margin Settings, 24-Pin Models
ML390/391 Turbo................................................................................................... 70
Table 47: Epson ESC L and ESC Q Commands — Range of Margin Settings, 24-Pin Models
ML590/591.............................................................................................................. 70
Table 48: ML ESC % C and ESC % R Commands — Maximum Margin Values....................... 72
Table 49: IBM/Epson ESC D Command — Maximum Number of Horizontal Tab Stops.......... 73
Table 50: IBM/Epson ESC D Command — Maximum Values for Horizontal Tab Stops........... 73
Table 51: ML ESC HT Command — Maximum Values for xnynzn............................................. 74
Table 52: ML ESC ETX Command — Shift Increment for Character Pitches............................ 75
Table 53: ML ESC ETX Command — XYZW Values for Setting Horizontal Tabs..................... 75
Table 54: IBM/ML ESC % B Command — Shift Increments for Left Margin Indents................. 77
Table 55: IBM/E/ML ESC DLE @ Command — Shift Increments for 9-Pin Models ................... 78
Table 56: IBM/E/ML ESC DLE @ Command — Shift Increments for 24-Pin Models ................. 78
Table 57: IBM/E/ML ESC DLE @ Command — Maximum P1P2P3P4 Values for 9-Pin Models.... 79
Table 58: IBM/E/ML ESC DLE @ Command — Maximum P1P2P3P4 Values for 24-Pin Models.. 79
Table 59: ML ESC % F and ESC % E Commands — Movement Increments for Pitch Settings.. 81
Table 60: ML ESC ? Command — Carriage Return/Line Feed Codes for
n Values .................................................................................................................. 88
Table 61: IBM/E/ML Fine Increment Line Spacing Commands — Values of Parameter n......... 91
Table 62: IBM/Epson ESC A Command — Values of Parameter n............................................ 91
Table 63: IBM/Epson ESC 3 Command — Values of Parameter n ............................................ 92
Table 64: IBM/Epson n/360" Line Spacing Commands — Values of Parameter n..................... 93
Table 65: IBM ESC [ \ Command — Values of Parameter n..................................................... 93
Table 66: ML VFU Commands — Usable Channel Codes for Parameter n..............................96
Table 67: Epson ESC ( v Command — Hexadecimal Values for Lp Hp...................................... 97
Table 68: IBM/Epson Select Code 39 Command — Narrow Bar Widths for Parameter n5
Values (9-Pin Printers) ........................................................................................... 102
Table 69: IBM/Epson Select Code 39 Command — Narrow Space Widths for Parameter n6
Values (9-Pin Printers) ........................................................................................... 102
Table 70: IBM/Epson Select Code 39 Command — Wide Bar Widths for Parameter n5, n6, n7
Values (9-Pin Printers) ........................................................................................... 103
Table 71: IBM/Epson Select Code 39 Command — Wide Space Widths for Parameter n5, n6, n7
Values (9-Pin Printers) ........................................................................................... 103
Table 72: IBM/Epson Select Code 128 Command — Usable Characters for Code 128 Code
Sets (9-Pin Printers)............................................................................................... 104
Table 73: IBM/Epson Select Code 128 Command — Character Widths for Parameter n5
Values (9-Pin Printers) ........................................................................................... 105
Table 74: IBM/Epson Select Code 128 Command — Start and Stop Codes for Parameter n5
Appendix C: Listing of Tables 139
Values (9-Pin Printers) ........................................................................................... 105
Table 75: IBM/Epson Print Code 128 Command — Check Digits for Code Sets (9-Pin Printers)105
Table 76: IBM/Epson Select Interleaved 2 of 5 Command — Black Bar Width for Parameter
n5, n7 Values (9-Pin Printers).................................................................................. 106
Table 77: IBM/Epson Select Interleaved 2 of 5 Command — Space Widths for Parameter
n6, n7 Values (9-Pin Printers).................................................................................. 106
Table 78: IBM/Epson Select UPC A Command — Character Widths for Parameter n5
Values (9-Pin Printers) ........................................................................................... 107
Table 79: IBM/Epson Select UPC A Command — Start/Stop Codes and Center Bar Widths
for Parameter n5 Values (9-Pin Printers)................................................................. 108
Table 80: IBM/Epson Select UPC E Command — Character Widths for Parameter n5 Values
(9-Pin Printers)....................................................................................................... 109
Table 81: IBM/Epson Select UPC E Command — Start and Stop Codes for Parameter n5
Values (9-Pin Printers) ........................................................................................... 109
Table 82: IBM/Epson Select EAN 8 Command — Maximum Character Widths for Parameter
n5 Values (9-Pin Printers).......................................................................................110
Table 83: IBM/Epson Select EAN 13 Command — Maximum Character Widths for Parameter
n5 Values (9-Pin Printers).......................................................................................111
Table 84: IBM/Epson Select Code 39 Command — Narrow Bar Widths for Parameter n5
Values (24-Pin Printers) ......................................................................................... 114
Table 85: IBM/Epson Select Code 39 Command — Narrow Space Widths for Parameter n6
Values (24-Pin Printers) ......................................................................................... 114
Table 86: IBM/Epson Select Code 39 Command — Wide Bar Widths for Parameter n5, n7
Values (24-Pin Printers) ......................................................................................... 115
Table 87: IBM/Epson Select Code 39 Command — Wide Space Widths for Parameter n6, n7
Values (24-Pin Printers) ......................................................................................... 115
Table 88: I BM/Epson Select Code 128 Command — Usable Characters for Code 128 Code
Sets (24-Pin Printers)............................................................................................. 116
Table 89: IBM/Epson Select Code 128 Command — Character Widths for Parameter n5
Values (24-Pin Printers) ......................................................................................... 116
Table 90: IBM/Epson Select Code 128 Command — Start and Stop Codes for Parameter n5
Values (24-Pin Printers) ......................................................................................... 117
Table 91: IBM/Epson Print Code 128 Command — Check Digits (24-Pin Printers)................ 117
Table 92: IBM/Epson Select Interleaved 2 of 3 Command — Black Bar Widths for
Parameter n5 Values (24-Pin Printers) ....................................................................118
Table 93: IBM/Epson Select Interleaved 2 of 3 Command — Space Widths for Parameter
n6 Values (24-Pin Printers).....................................................................................118
Table 94: IBM/Epson Select UPC A Command — Character Widths for Parameter n5 Values
(24-Pin Printers)..................................................................................................... 119
Table 95: IBM/Epson Select UPC A Command — Start/Stop Codes and Center Bars for
Parameter n5 Values (24-Pin Printers) ....................................................................120
Table 96: IBM/Epson Select UPC E Command — Maximum Character Widths for Parameter
n5 Values (24-Pin Printers).....................................................................................121
Table 97: IBM/Epson Select EAN 8 Command — Maximum Character Widths for Parameter
n5 Values (24-Pin Printers).....................................................................................122
Table 98: IBM/Epson Select EAN 13 Command — Maximum Character Widths for
Appendix C: Listing of Tables
140
Parameter n5 Values (24-Pin Printers) ....................................................................123
Table 99: IBM/E/ML ESC { Command — Emulations for n Values.......................................... 125
Table 100: IBM/Epson ESC r Command — Color Selections for n Values..............................130
Table 101: Epson ESC ( U Command — Increments of Movement for Pn Values ................... 131
Table 102: Pin Assignments for Parallel Interface Signals....................................................... 133
Table 103: Pin Assignments for Serial Interface Signals.......................................................... 134

Index 141
Index
9-pin graphics
commands..................... 53-60
24-pin graphics
commands..................... 61-66
A
Abbreviations..........................ix
Abicomp code page
commands..................... 11-13
Absolute dot position
command..........................80
Acronyms................................ix
Ascenders........39, 41-42, 44, 45
Auto line feed commands.......89
B
Backspace command .............69
Bar code commands..... 101-124
Block graphics command.........8
BRASCII code page
commands..................... 11-13
British character set
commands....................... 9-10
C
Canadian French code
page commands............. 11-13
Cancel command.................125
Carriage return
command..........................69
/line feed commands.........87
Center justification
command ............................83
Change emulation
command ..........................125
Character
set commands ............... 5-13
size commands............ 12-23
spacing commands...... 25-26
style commands........... 29-38
Characters per line.................15
Code page commands...... 11-13
Color command...................130
Combined print
features command.............24
mode command................31
Command summary.......xi-xxxvi
Compressed pitch............. 16-19
Control code commands........13
CRT graphics
commands............... 55-57, 63
Custom character
commands...................39-51
design...............39-40, 46-47
Cut sheet feeder commands.126
D
Danish character set
commands........................9-10
Delete command.................127
Descenders................39, 41-42,
44, 45
Designing custom
characters............39-40, 46-47
Dot position commands....79-81
Double
density graphics
commands......54-56, 62-63
height commands.........21-24
width commands..........21-24
Down line load
commands...41, 43, 45, 47, 50
Draft print commands.......29-32
Drivers, printer......................1-4
Dutch character set
commands........................9-10
E
Embedded commands..............4
Emphasized print
commands...............31, 34, 36
Emulations............................1-2
Enhanced print
commands...............31, 34, 36
Epson
command summary
FX ........................xix-xxiv
LQ.......................xxv-xxxi
emulation, drivers............1-2
F
Fine line feed
commands......................88-89
Font commands................29-34
Form feed commands.............87
French Canadian character
set commands ..................9-10
Full justification command.....83
G
German character set
commands .......................9-10
Graphics commands.........53-67
line feed commands..........60
H
Half-speed command ..........127
Height, double,
commands .....................21-24
Horizontal control
commands...................69-83
motion index (HMI)......27
print position...........76-81
tab ..........................73-76
HSD print mode
command.......................29-32
I
I-Prime command................ 131
IBM Proprinter command
summary.......................xi-xviii
emulation, drivers............1-2
Incremental printing
command............................82
Increment of movement
command...................130-131
Indent commands.......69-72, 76
Initialize printer command...127
Intercharacter spacing
commands .....................25-26
Interfacing
parallel ...........................133
serial........................134-135
International character
set commands..................9-10
Italian character set
commands .......................9-10
Italics commands...............7, 35
J
Japanese character set
command............................10
Justification commands..........83

Index
142
L
Latin American character
set commands.................. 9-10
Leftjustification command.......83
margin commands. 69-72, 76
Line
character set command........8
feed commands........... 87-89
feed, graphics....................60
spacing commands...... 90-93
Lotus 1-2-3...............................4
M
Margin setting
commands............... 69-72, 76
MICROLINE Standard
command
summary............xxxii-xxxvi
emulation drivers............. 1-2
Microsoft
Windows.............................3
Word...................................3
Most significant bit
commands.........................128
Move to left/right
commands..................... 76-81
MSB commands...................128
Multilingual code page
command ...................... 11-13
Multiple print positions
command ...................... 77-78
N
NLQ print mode
command ...................... 29-32
Norway code page
command ...................... 10-11
Norwegian character set
commands..................... 11-13
O
Okidata Microline Std command
summary.................xxxii-xxxvi
Okidata software drivers....... 2-3
Overscore commands ............37
P
Page
format command...............98
length commands.........85-86
Paper-out sensor
commands.........................128
Parallel interface..................133
Pitch commands...............15-19
Plotter graphics
commands................55-57, 63
Portugal code page
command.......................11-13
Postnet bar code
commands.................112, 124
Print
quality commands........29-32
suppress mode
commands....................129
Printer drivers .......................1-2
Programming graphics .....54, 62
Proportional spacing
commands...........................25
Publisher character set
commands........................9-10
Q
Quadruple density graphics
commands...........54-56, 62-63
R
Raster graphics command......66
Reassign graphics
command......................57, 64
Relative dot position
commands......................79-80
Reverse line feed
commands...........................89
Right
justification command.......83
margin commands........69-72
ROM to RAM copy
commands.........40, 43, 45, 49
S
Serial interface..............134-135
Single density graphics
commands..........54-56, 62-63
Skip down command.............96
Skip over perforation
commands ...................99-100
Software I-prime command..131
Spanish character set
commands .......................9-10
Stop printing command .......131
Subscript commands........20, 24
Superscript commands.....20, 24
Swedish character set
commands .......................9-10
T
Tab commands
horizontal....................73-76
vertical.........................93-96
Top of form commands..........98
U
Underline commands............36
Uni-directional print
commands ..........................82
Upper range control code
commands ..........................13
USA code page
command.......................11-13
Utility print mode
commands .....................29-32
V
Vertical
control commands.....85-100
format unit commands.95-96
tab commands.............93-96
unit setting command .......93
W
Width, double,
commands...............21, 22-24
Windows.................................3
Word, Microsoft...................... 3
WordPerfect ............................3
